
Bridal manicures this year have pulled back from heavy art toward sheer colour and small, deliberate details. The requests I get most are sheer pinks, milky whites, pearl chrome, micro French tips, fine florals and the odd raised pearl. What I watch for in every consultation is the ring shot, because that close-up shows cuticle work, tip lines and any lifting far more harshly than a mirror does. Below are twenty designs I’d happily put on a bride, with notes on which shapes, lengths and gowns each one actually suits.

Shape, Length and Product Come Before Colour
When a bride sits down with me, I don’t start with the photo she’s saved. I look at her nails first: how long the nail bed is, whether the free edge is thin or bendy, and how the cuticle grows. That decides the shape, and the shape decides which of the designs below will look right.
- Short, wide nail beds look longer with an oval or soft almond. A very square shape makes them look shorter.
- Thin or peeling nails do better with a builder gel overlay than with plain gel polish. It adds strength so a tip doesn’t snap a few days before.
- Extensions give you coffin or long almond shapes, but try them before the wedding; some brides find long nails awkward with buttons, jewellery clasps and a phone.
- Press-ons are fine for a guest or a bride doing her own nails, though they rarely last a full wedding day plus a honeymoon without one popping off.
On timing, I book the final manicure one to three days out. Gel wears well for around two weeks, so that window covers the wedding and most of a honeymoon. If you’re having a spray tan, get it done before your nails, or ask for clear gloss over milky white. Self-tanner can stain light colours and leave a ring at the cuticle.
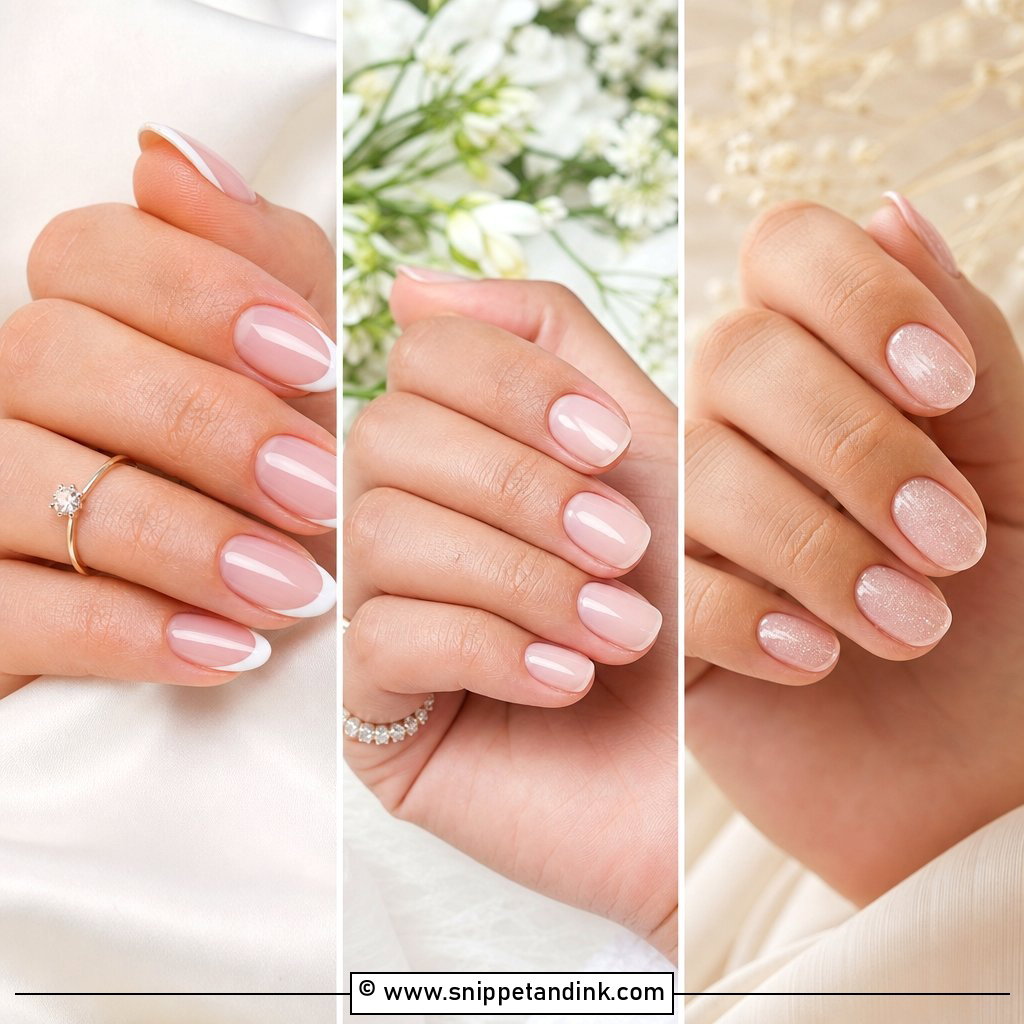
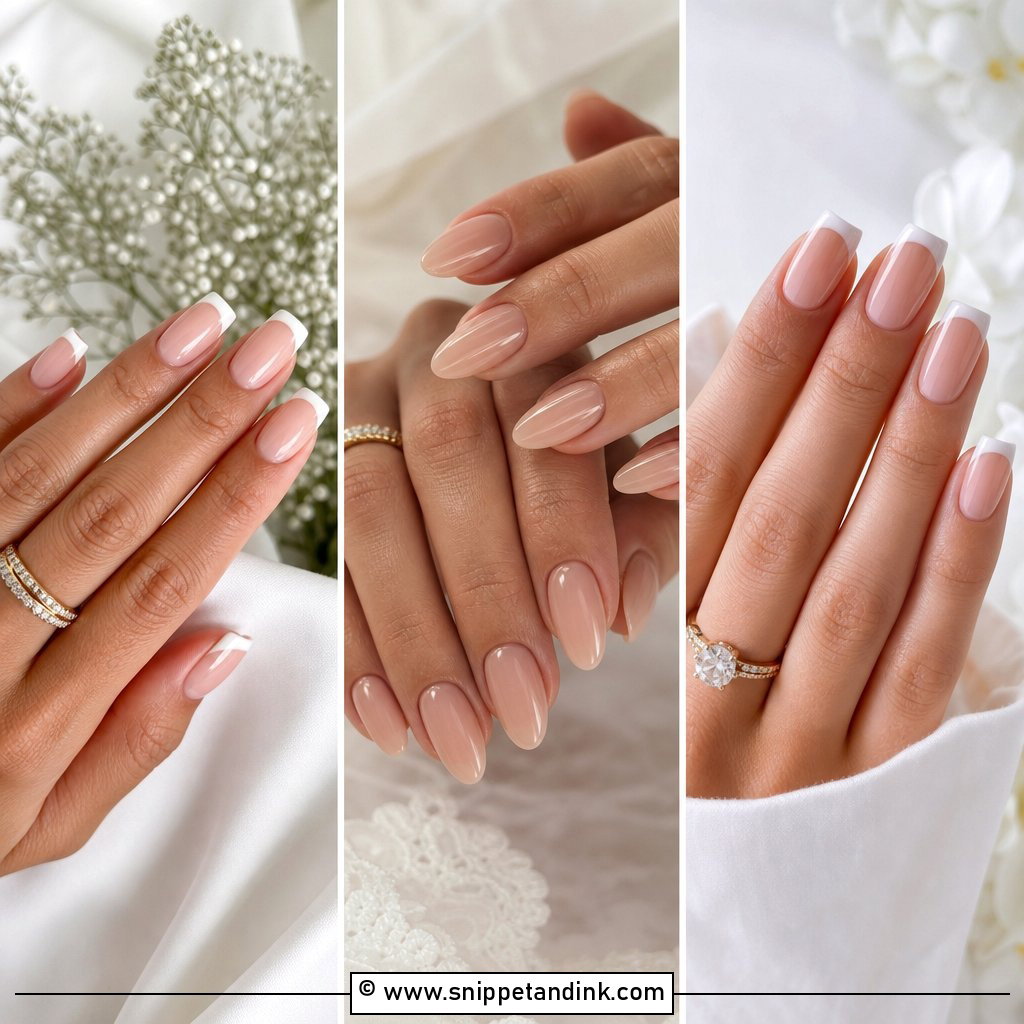
1. Classic French Wedding Nails

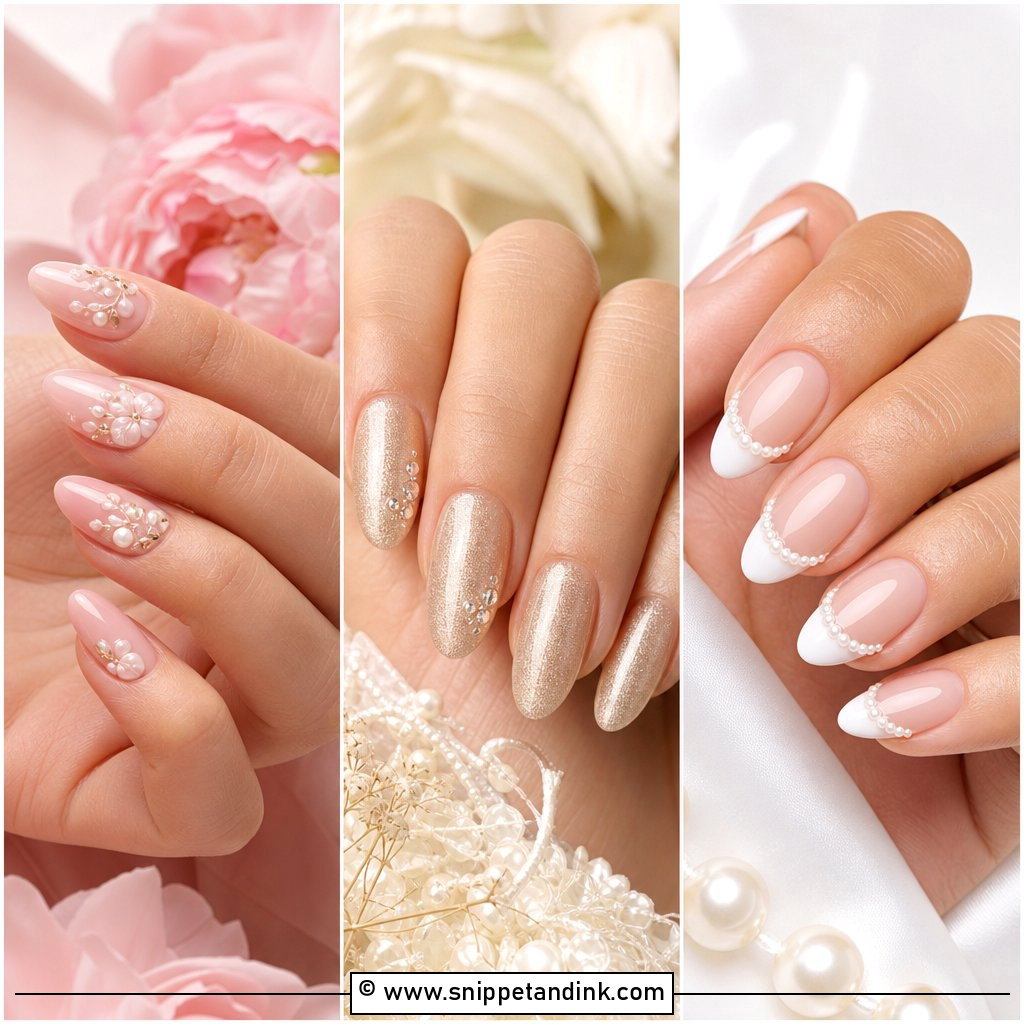
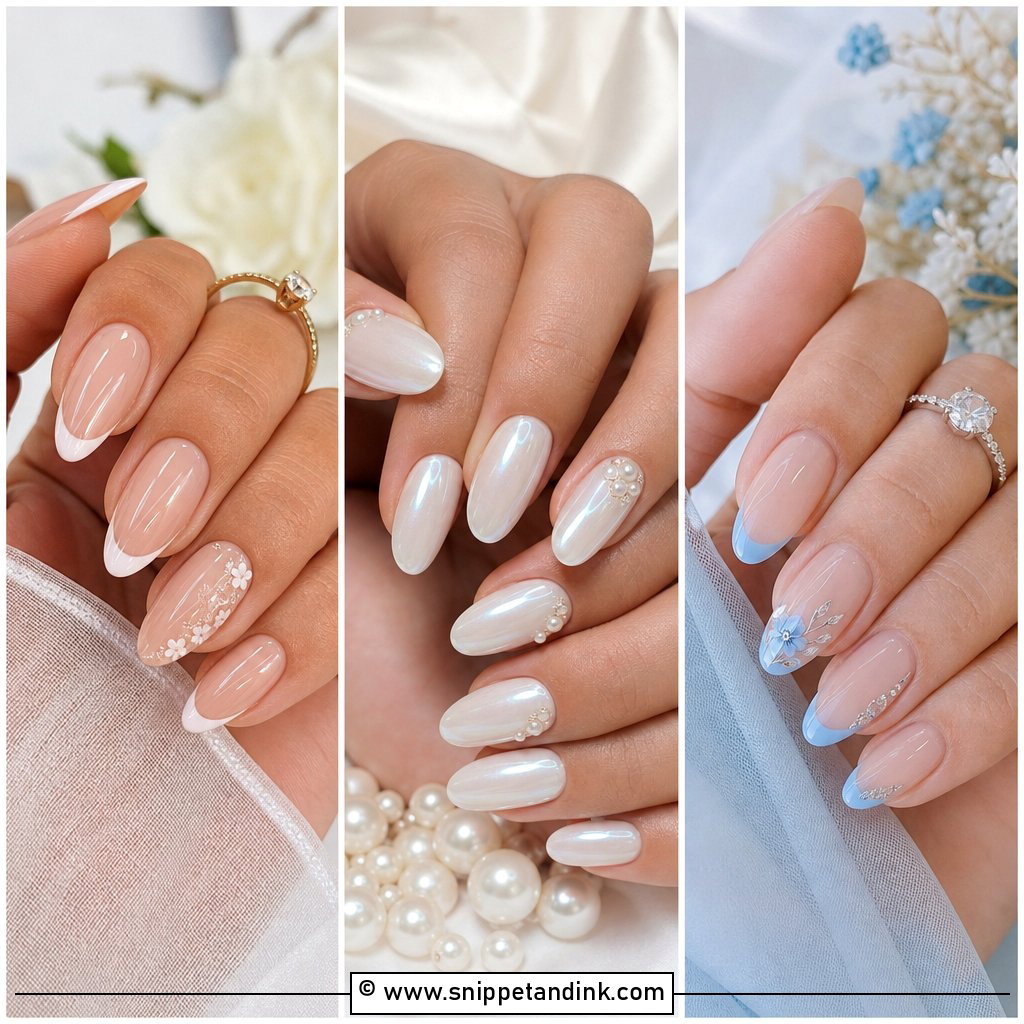
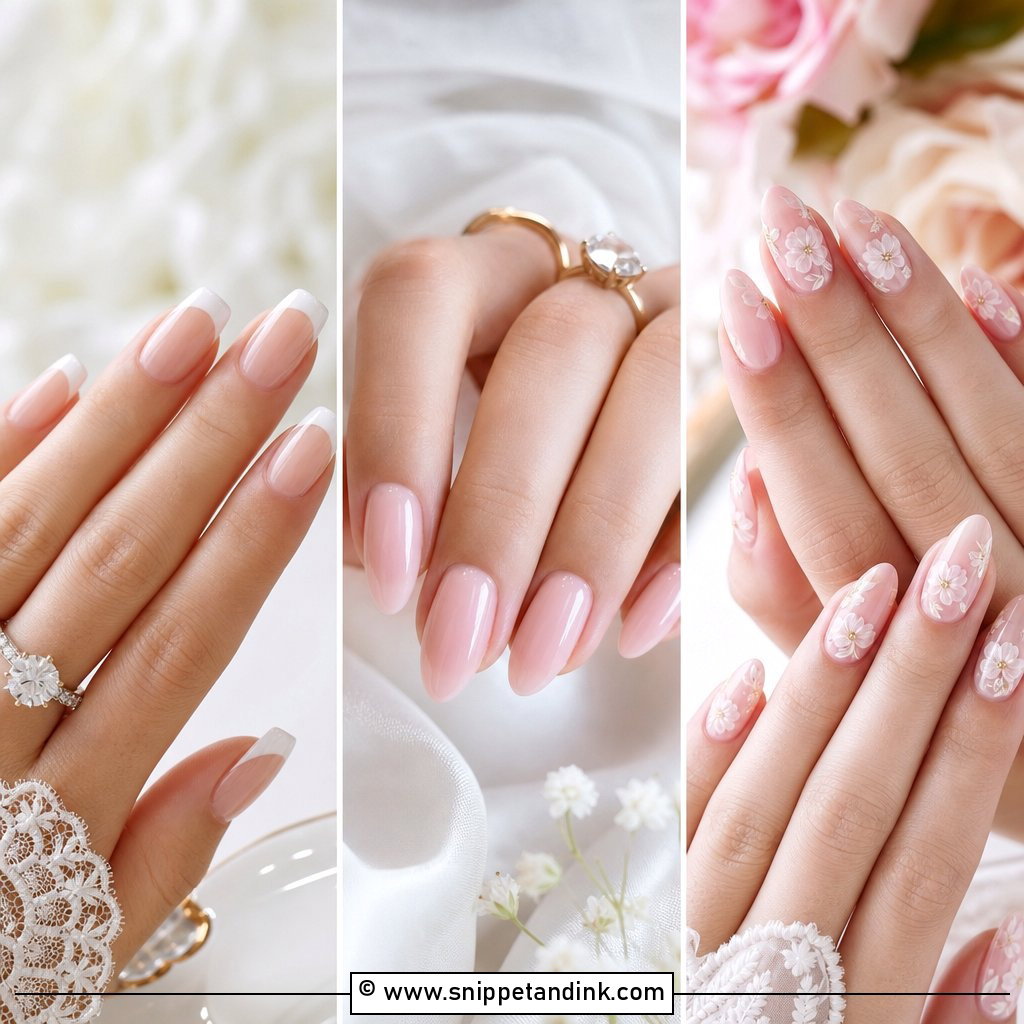
The classic French still earns its place because it reads as clean from three feet away and from three inches. A sheer pink or nude base with a white tip lengthens almond, oval and soft square shapes in close-ups. The detail I change most often is the tip width: a thick, straight smile line looks dated in photos, so I paint it thinner and follow the curve of the nail’s own free edge. Glossy top coat keeps it traditional; a pearl top coat warms it up slightly.
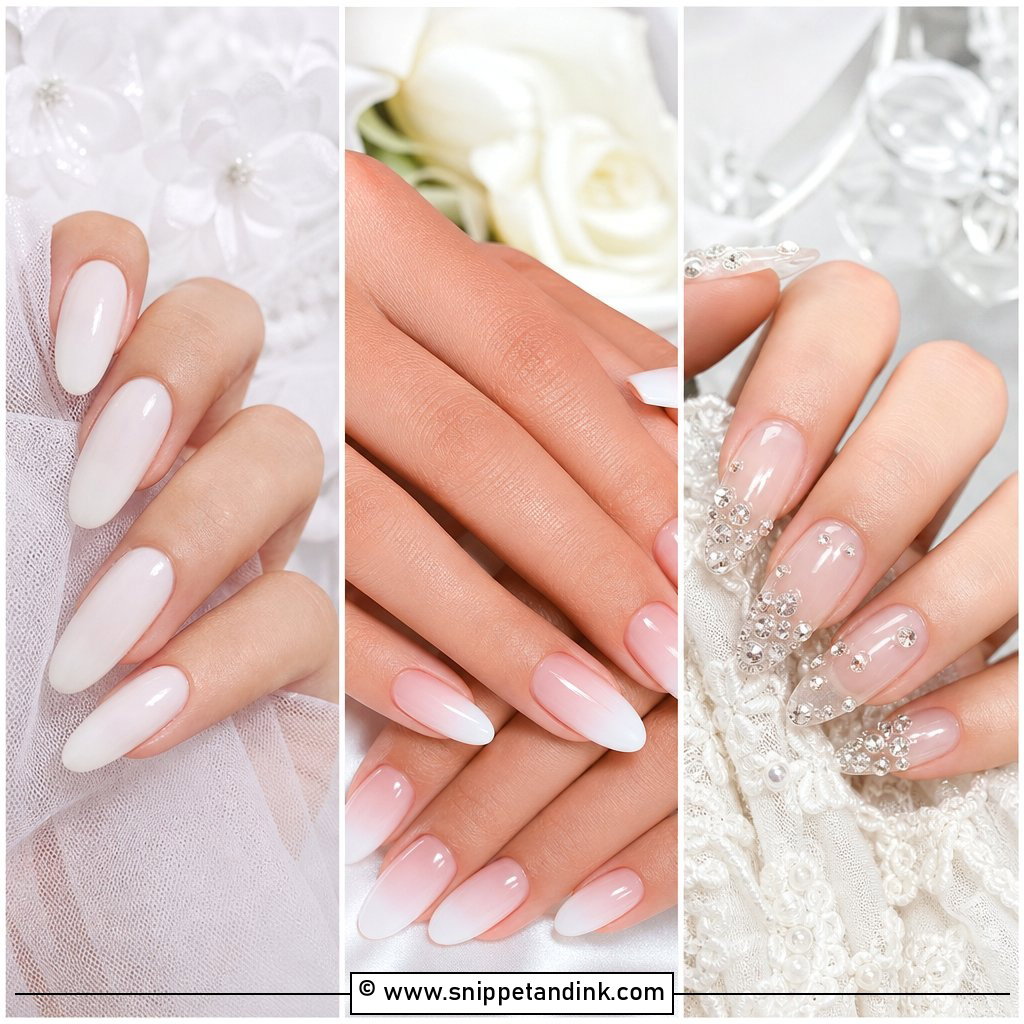
2. Milky White Wedding Nails

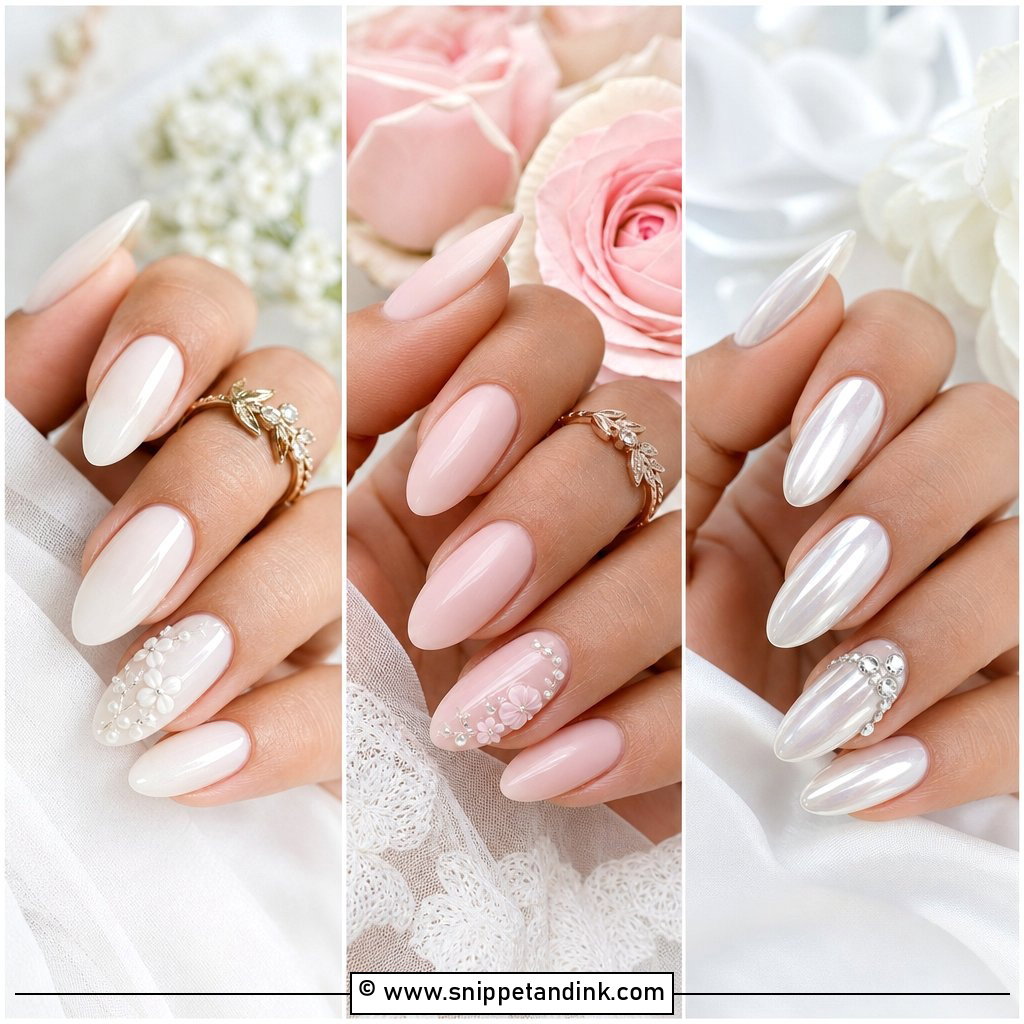
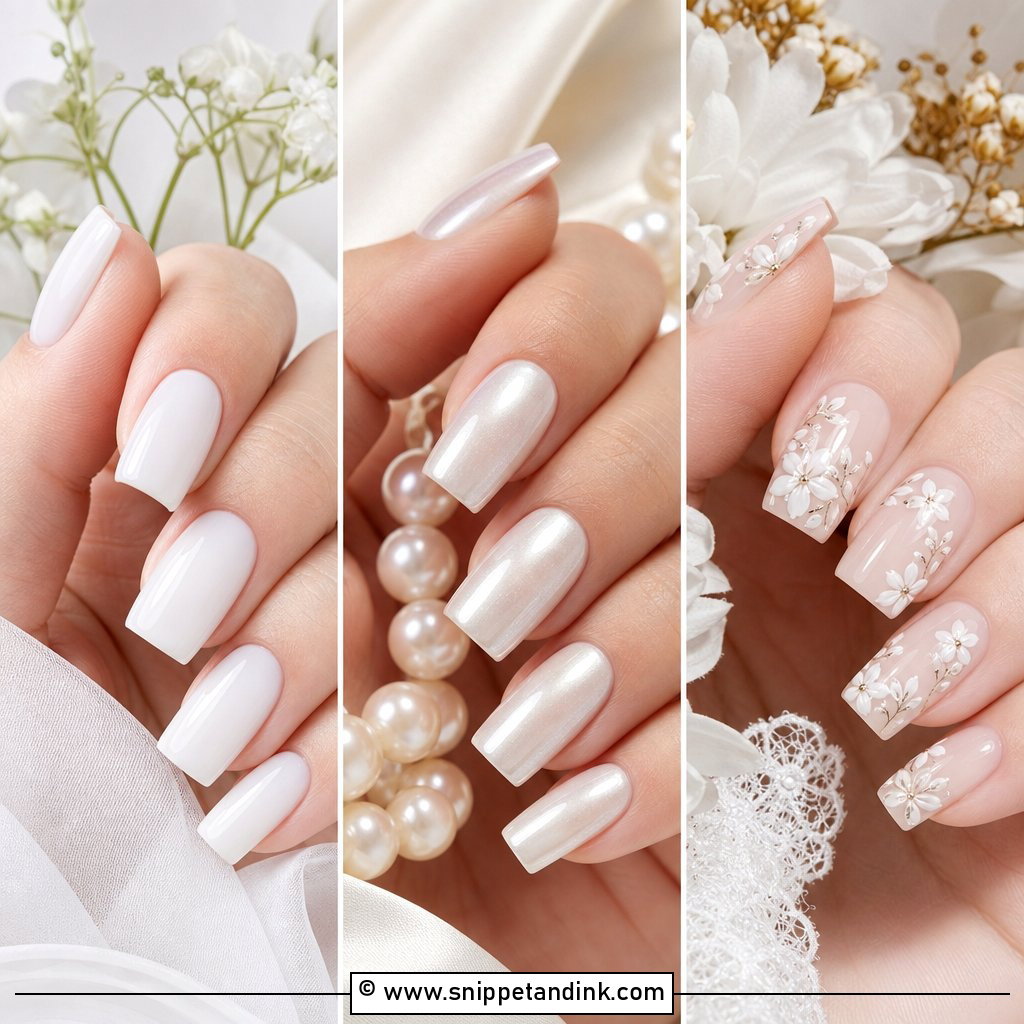
Milky white is softer than an opaque white because a little of the nail bed shows through. That translucency is also why it’s tricky: one coat too many and it turns chalky, one too few and it looks streaky. I build it in two or three thin layers of a milky gel and check it under daylight before curing the last one. It sits well beside lace, satin and pearls, and on short ovals it looks almost like healthy bare nails.
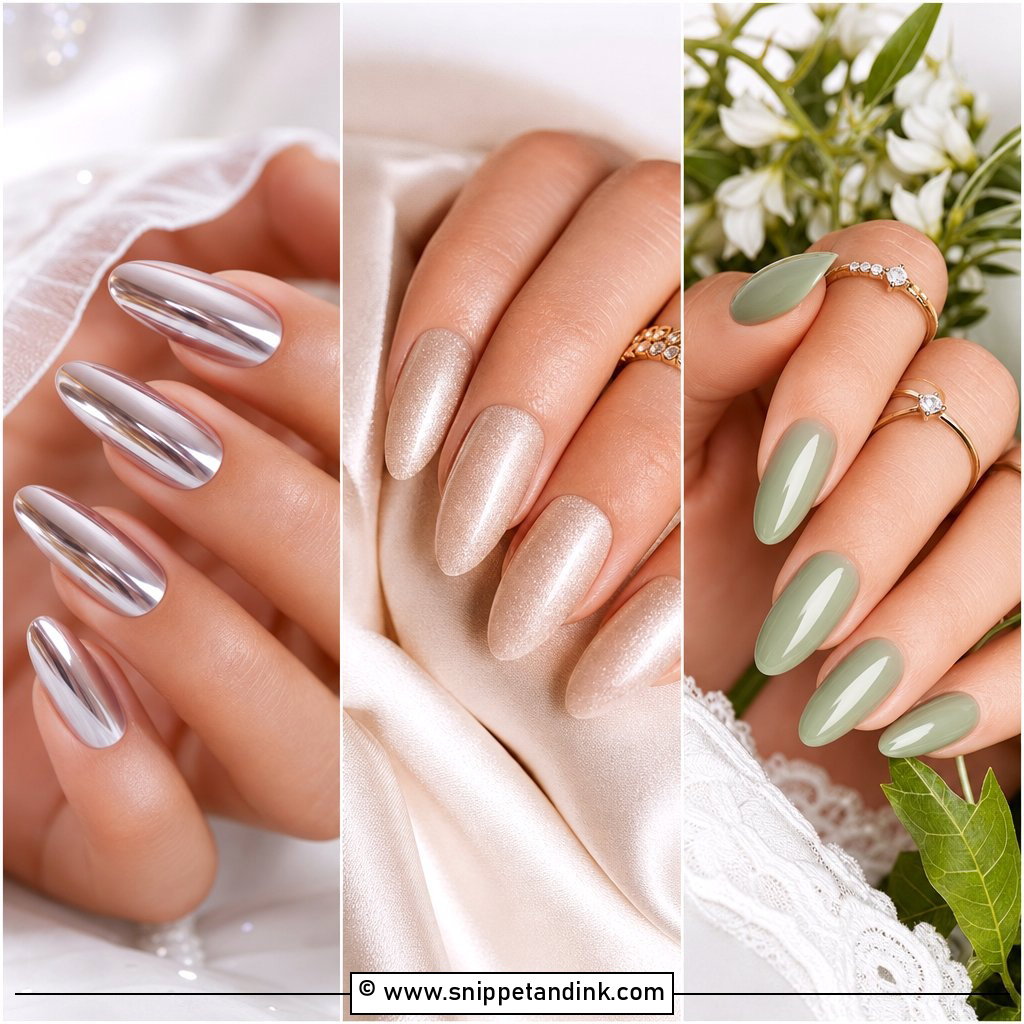
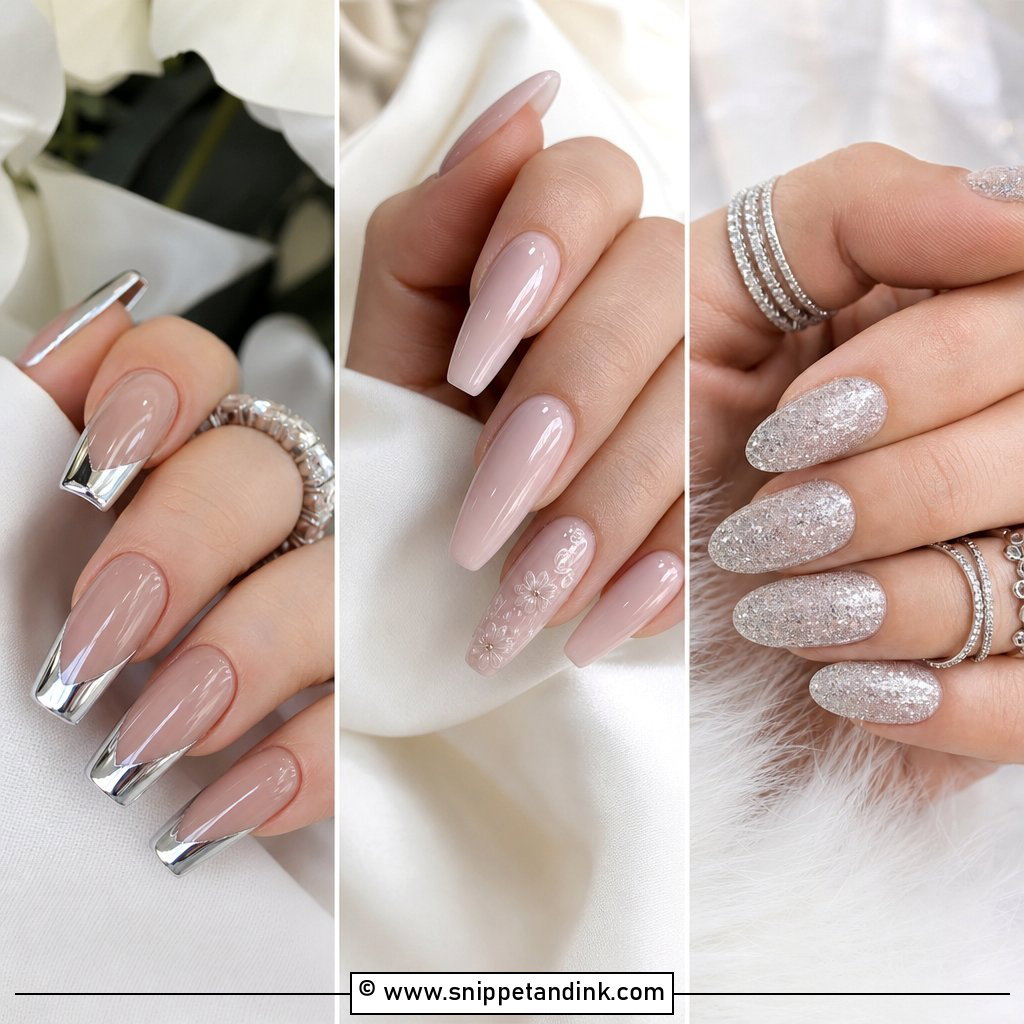
3. Pearl Chrome Wedding Nails

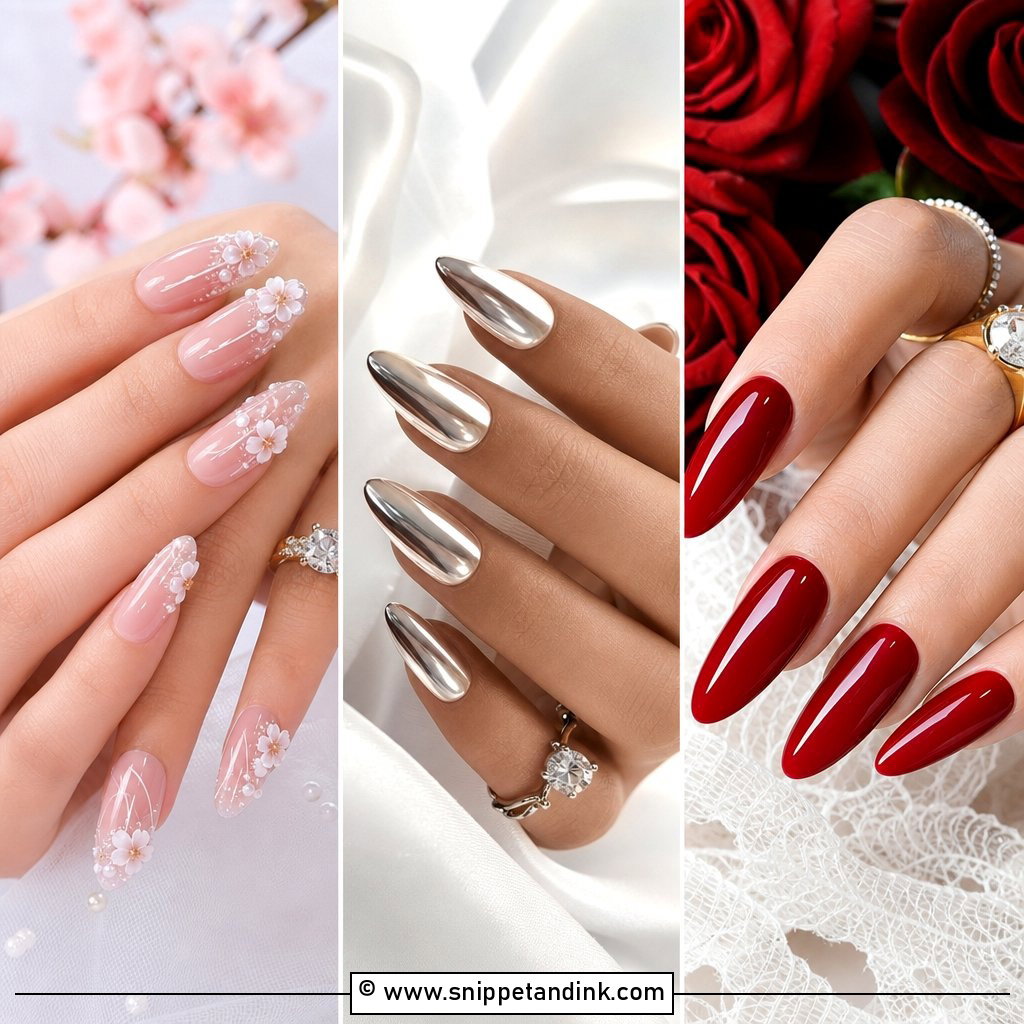
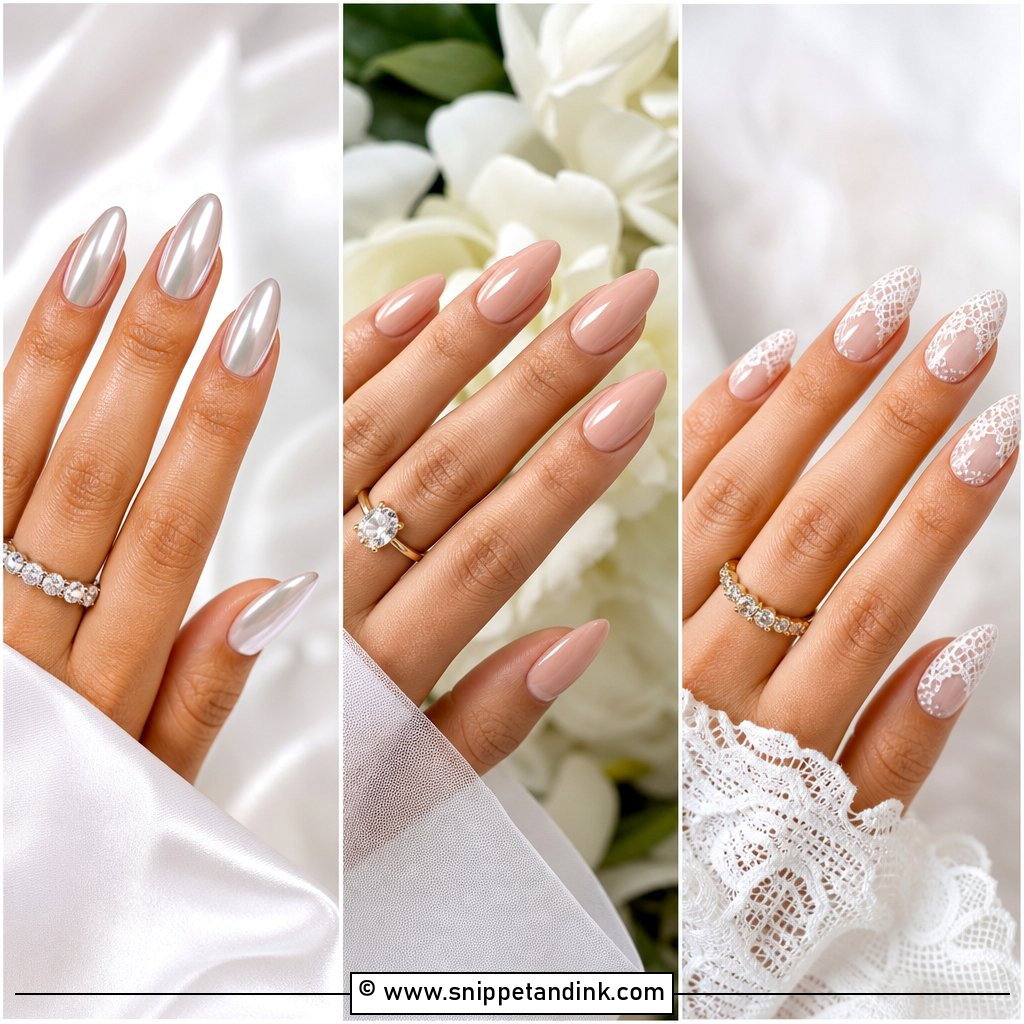
Pearl chrome gives a glow rather than a mirror shine, which is why it suits a wedding. The powder goes over a sheer pink, nude or milky base and is buffed into a no-wipe top coat, then sealed. If the seal doesn’t wrap the free edge, chrome wears off the tips within days, so I cap the edges carefully. Rounded and almond shapes show the sheen best; it pairs naturally with pearl earrings and beaded bodices.
4. Pink French Wedding Nails

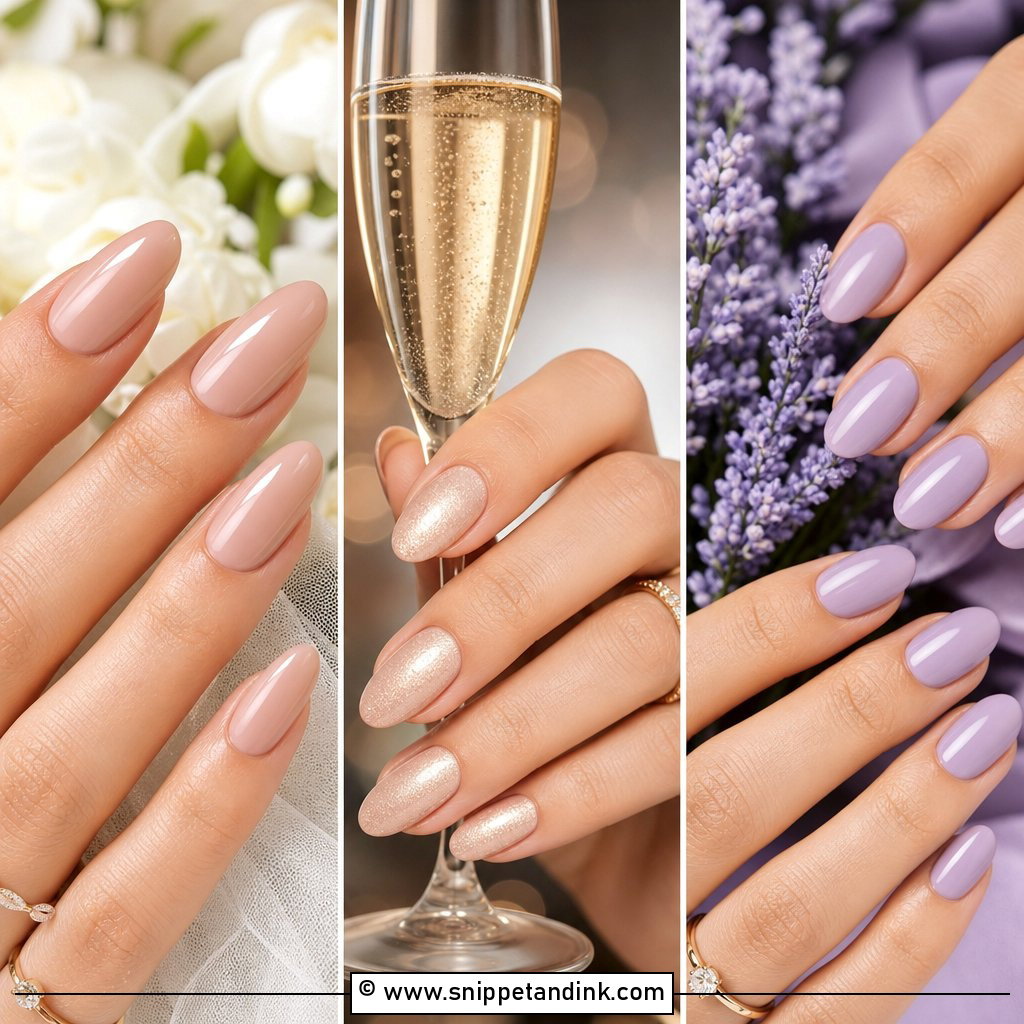
Swap the white tip for blush or rosy pink and the French manicure gets warmer and less graphic. I like this on brides who find a white tip too stark against their skin, especially warmer skin tones where bright white can look grey in photos. Keep the tip thin over a sheer nude-pink base. It ties in easily with a pink bouquet or a champagne gown, and the low contrast hides grow-out better than classic white.
5. Glazed Donut Wedding Nails

Glazed donut wedding nails are a sheer pale base dusted with a very fine iridescent powder. The aim is a wet, lit-from-within shine, not metal. I go lighter on the powder for brides than for everyday clients, because a heavy layer catches flash and starts to look silver. It works on short rounded nails as well as longer almonds, and it complements satin fabric and dewy makeup.
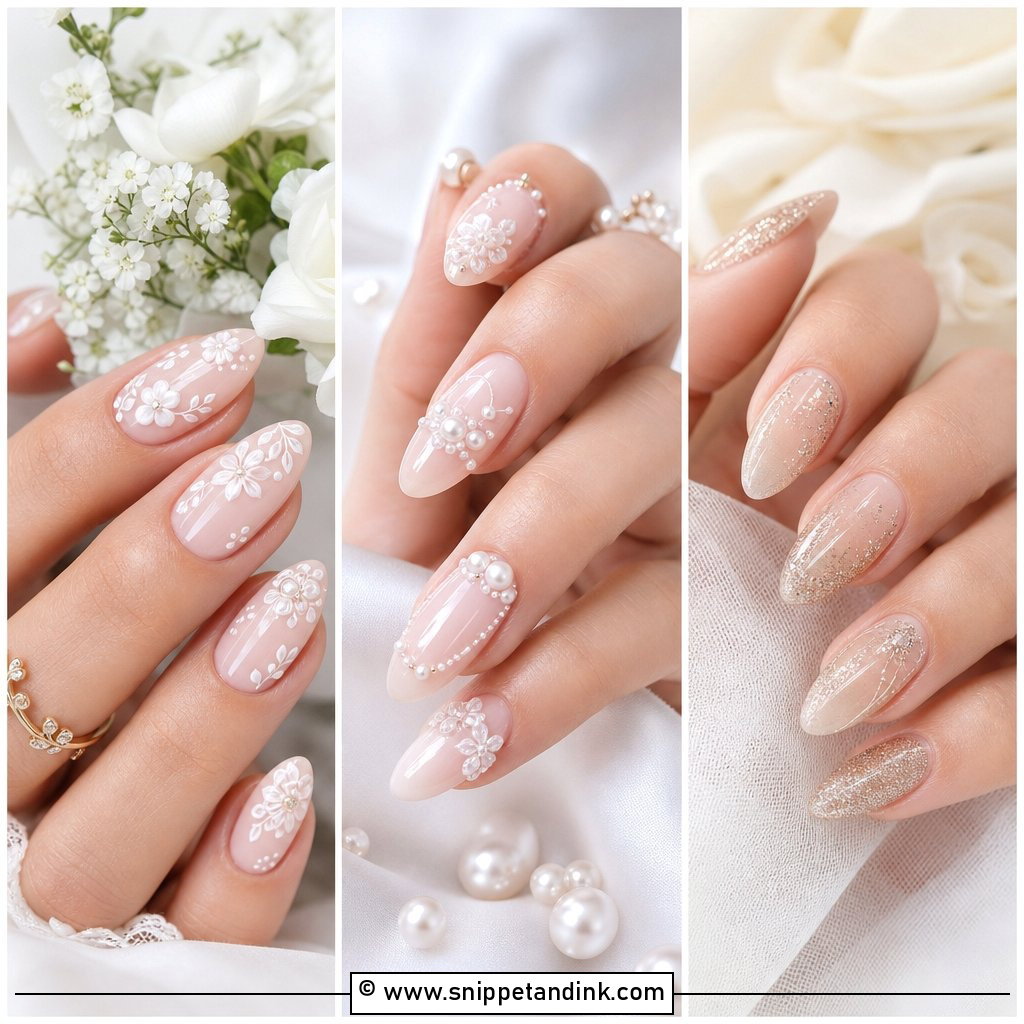
6. Nude Wedding Nails With Pearls

Pearls on a nude base add a wedding detail without colour. Placement is where this succeeds or fails: one small pearl near the cuticle, or a short line along one side of an accent nail, reads as refined, while pearls on every nail start to look heavy. I match the nude to undertone, a peachy nude for warm skin, beige for neutral, rosy for cool. Flat-backed pearls set into builder gel last far longer than ones stuck on with top coat alone.
7. Sheer Pink Wedding Nails

Sheer pink is the design I recommend most to brides who never wear nail art. It makes nails look healthy, and because it’s translucent, the gap at the cuticle barely shows as it grows out on the honeymoon. Avoid shades that lean bubblegum or go fully opaque. Short ovals feel everyday; a medium almond dresses it up. A high-gloss top coat matters more here than anywhere, because there’s no design to hide uneven product.
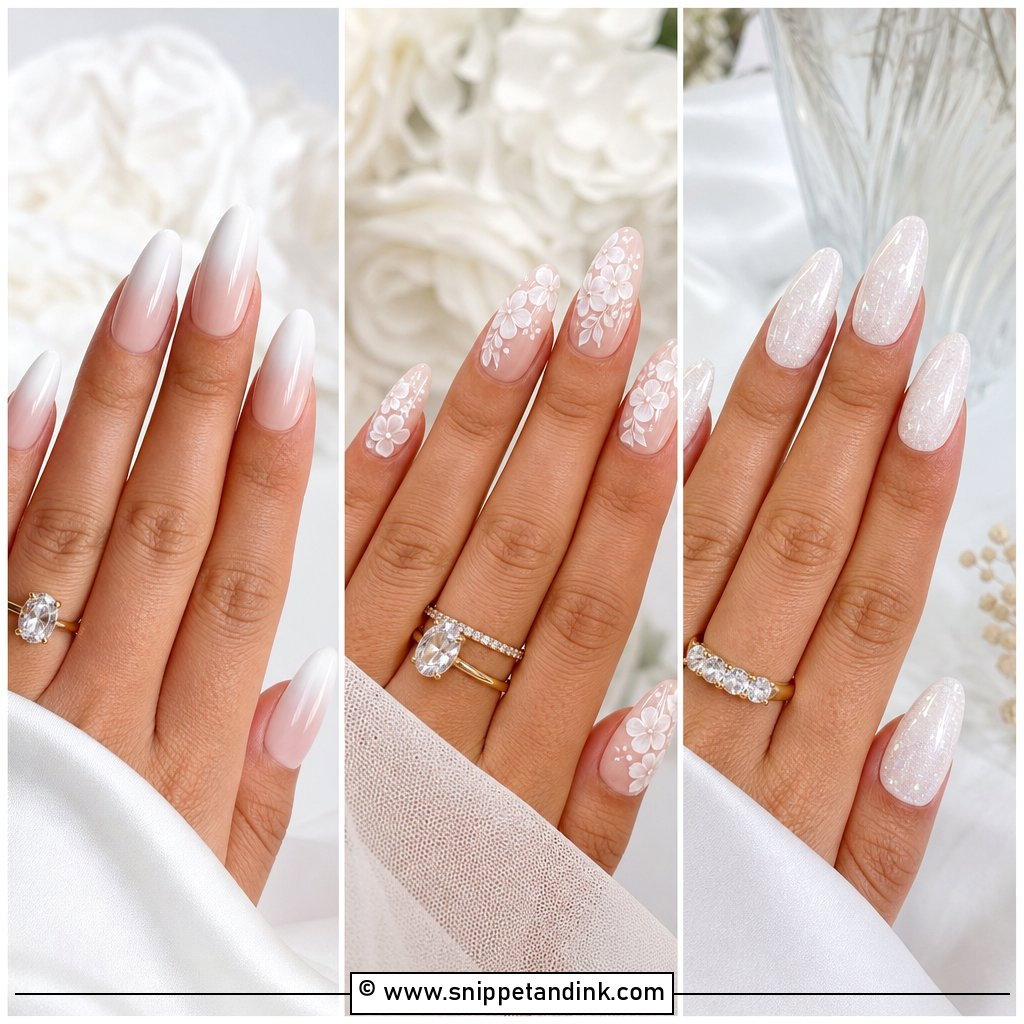
8. White Ombre Wedding Nails

White ombre wedding nails fade from nude or pink at the cuticle into white at the tips, the look often called baby boomer. The softer transition is less sharp than a French line, which suits almond, coffin and oval shapes and makes long nails look gentler. A chalky, heavy fade is the usual mistake. I sponge or blend the white in thin passes so the midpoint stays sheer, then finish with gloss or pearl top coat.
9. Almond Wedding Nails With Lace

Lace art on almond nails is for the bride whose gown or veil already has lace. It only works with fine linework: I use a long, thin liner brush and white gel over a sheer nude or milky pink, and keep the pattern airy enough that the base shows between the lines. Thick white lace looks like a sticker in photos. Two accent nails is usually plenty; ten lace nails takes a long time and can compete with the dress.
10. Short Wedding Nails For Bride

Short wedding nails for bride are what many of my brides actually prefer, because they can hold a bouquet, pin a veil and pack a suitcase without thinking about their hands. Short nails show prep more than long ones, so neat cuticles and a clean sidewall are the whole look. Soft square, round and short oval suit them best. If you want a detail, one small pearl or a whisper of shimmer is enough.
11. Coffin Wedding Nails With Chrome

Coffin nails with chrome are the more glamorous end of this list. The tapered shape needs medium to long length to look balanced, so I wouldn’t force it on nails that are still growing. Keep the base pale pink, nude, ivory or milky and use pearl or champagne chrome rather than silver. Coffin corners are the first place chrome wears and nails catch, so I seal the corners well and slightly soften them. It suits a structured gown and sleek hair.
12. Oval Wedding Nails With Flowers

Small florals on an oval shape fit a garden or spring wedding. The mistake I see most is flowers that are too big and too colourful, which looks more holiday than bridal. I paint white petals with blush centres and a tiny pale green leaf over a sheer nude or milky pink, at the cuticle, along one side or on accent nails only. If your bouquet has loose greenery, echo it in the leaves. Finish with gloss.
13. Square Wedding Nails With Micro French

A micro French on a square shape is crisp and very current. The tip is a thin line, sometimes barely a millimetre, which means the line has to be perfectly even across all ten nails, or the difference jumps out in a ring photo. I keep this to short and medium lengths. White is classic over a sheer pink base, and pearl white, champagne or pale blush tips give a quieter variation.
14. Blush Wedding Nails With Glitter

Blush wedding nails with glitter give sparkle without going over the top, as long as the glitter is micro-fine. Chunky glitter leaves a bumpy surface that needs extra top coat and still feels gritty against tulle. I fade it from the tip or the cuticle instead of covering the nail, which looks far more refined under evening lighting. Stick to pink, champagne, rose gold or soft silver tones.
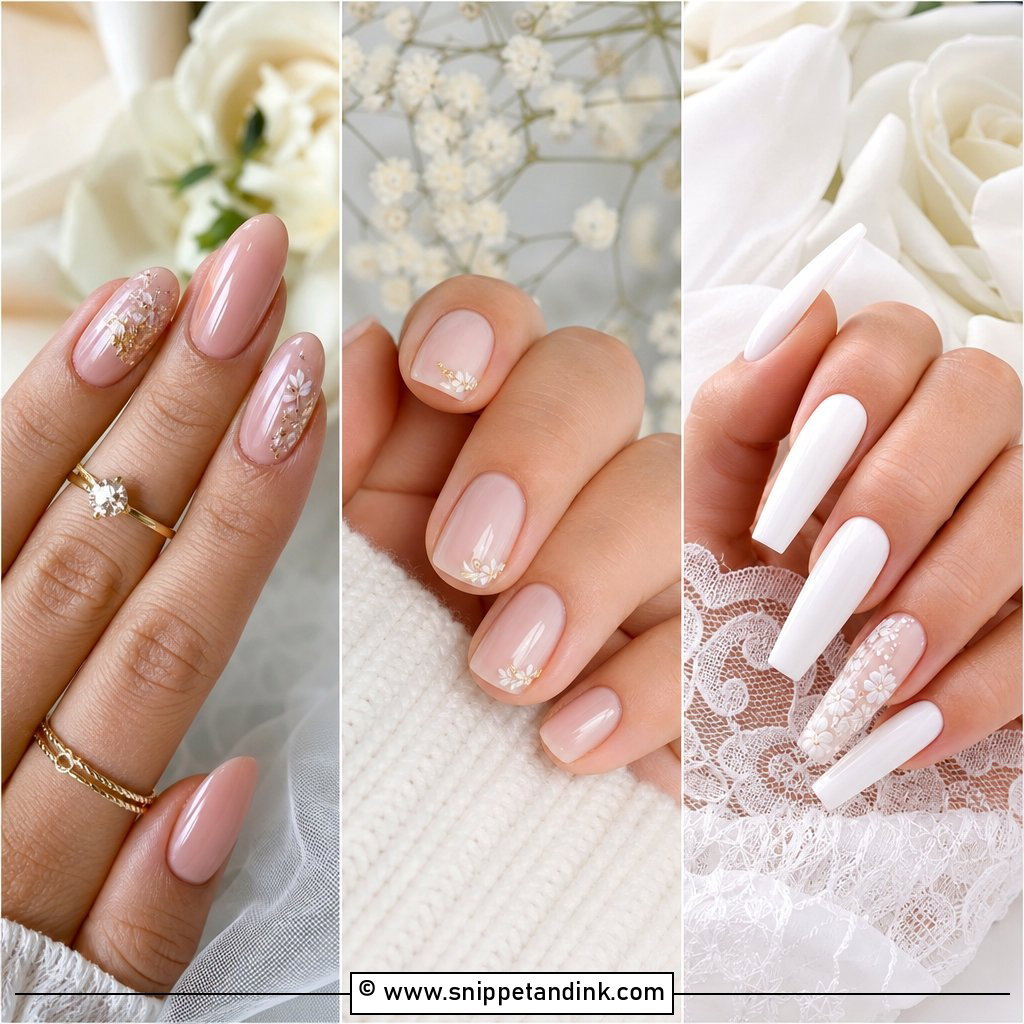

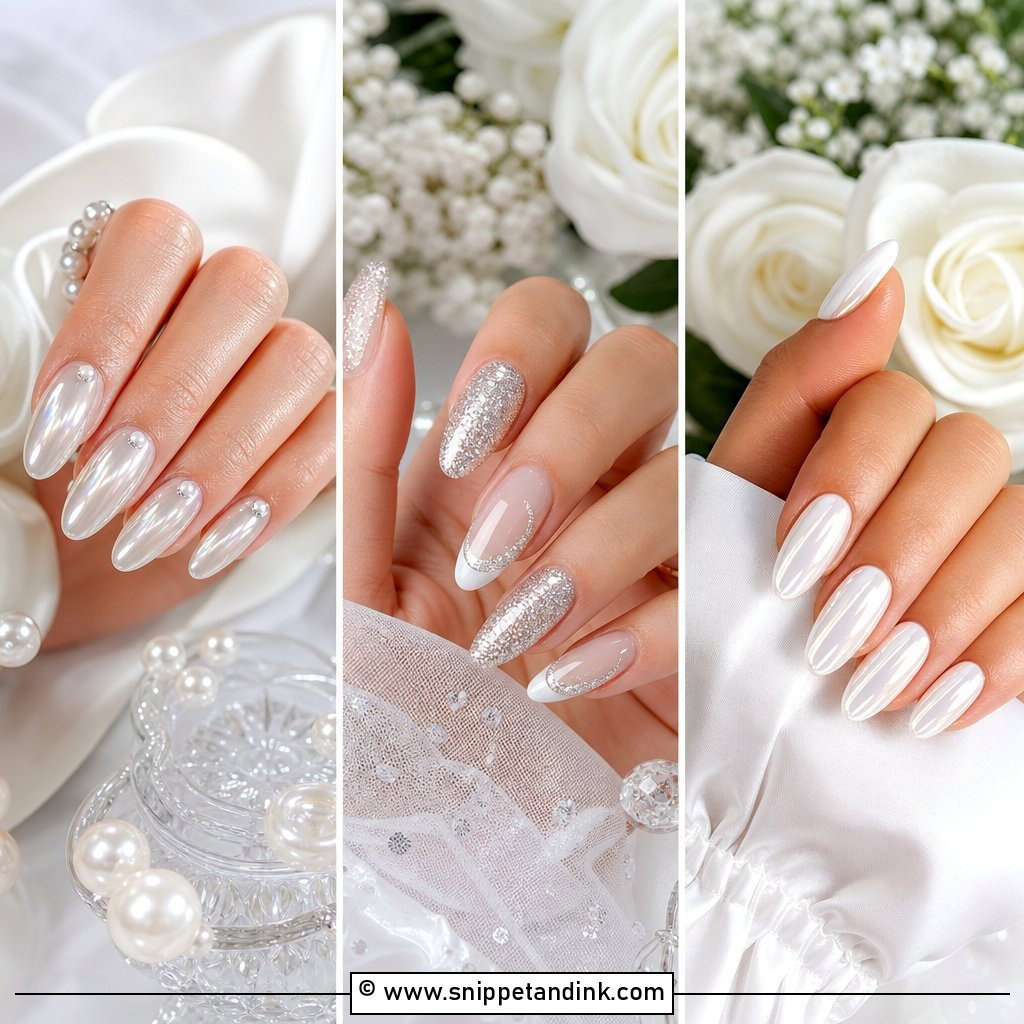
15. Ivory Wedding Nails With Gold

Ivory is softer than bright white, so it suits more skin tones and matches ivory and champagne gowns without looking stark. Gold comes in as thin foil, fine lines, tiny dots or a slim French tip, and less is better. Gold foil can tarnish or lift if it isn’t fully sealed, so I always cap it under a gloss top coat. If your dress has gold beading or embroidery, this design ties it together.
16. Baby Boomer Wedding Nails

Baby boomer nails blend ombre softness with the structure of a French: a natural pink or nude base fading into a soft white tip. The gradient lengthens almond, oval and coffin shapes and is low-contrast enough to go with almost any dress. I’d ask for a sheer, well-blended fade rather than a heavy white tip; a pearl top coat gives it a little glow.
17. Minimal Wedding Nails With Rhinestones

Minimal wedding nails with rhinestones keep the sparkle to one or two points. The base stays sheer pink, nude, milky white or soft beige, and the stones go in a controlled spot, one at the cuticle or a small curve on an accent nail. Clear crystals are classic; champagne stones are warmer. I set each stone in builder gel and run top coat around the base so no edge can catch your veil or lace sleeves.
18. Floral French Wedding Nails

Floral French combines a soft white tip with fine flowers around the smile line, near the cuticle or on accent nails. The flowers need to stay small and pale, white or blush, otherwise the French line gets lost. It sits best on almond and oval shapes, where the curve of the nail echoes the petals, and suits a spring wedding or a garden venue.
19. Champagne Chrome Wedding Nails

Champagne chrome is the warm alternative to pearl. Over a nude, beige or soft peach base, a light layer gives a gold-beige sheen that flatters warm undertones and sits naturally beside gold jewellery and ivory gowns. I keep it silky rather than mirror-like by using less powder. On cool-toned skin it can look a little yellow, so I’d test it against your hand at the trial before committing. Medium almond or oval shapes suit it best.
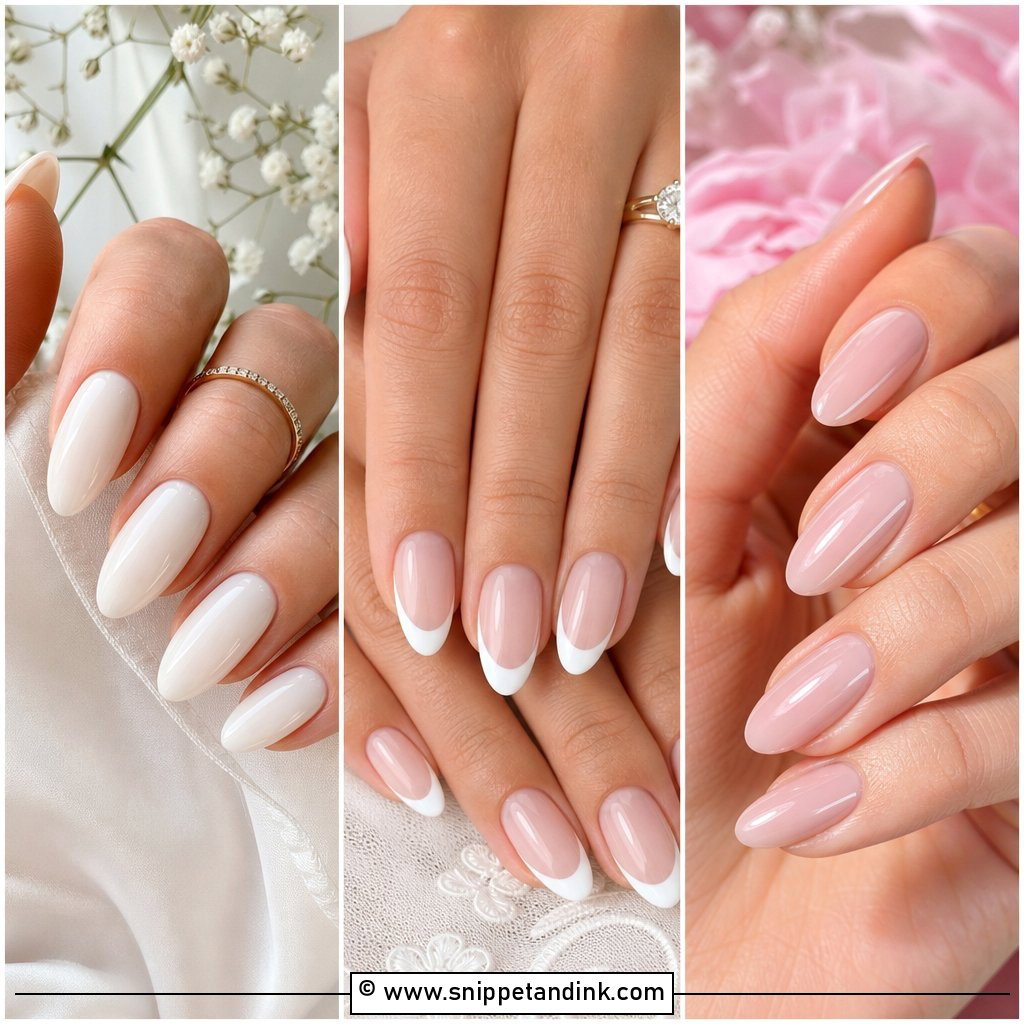
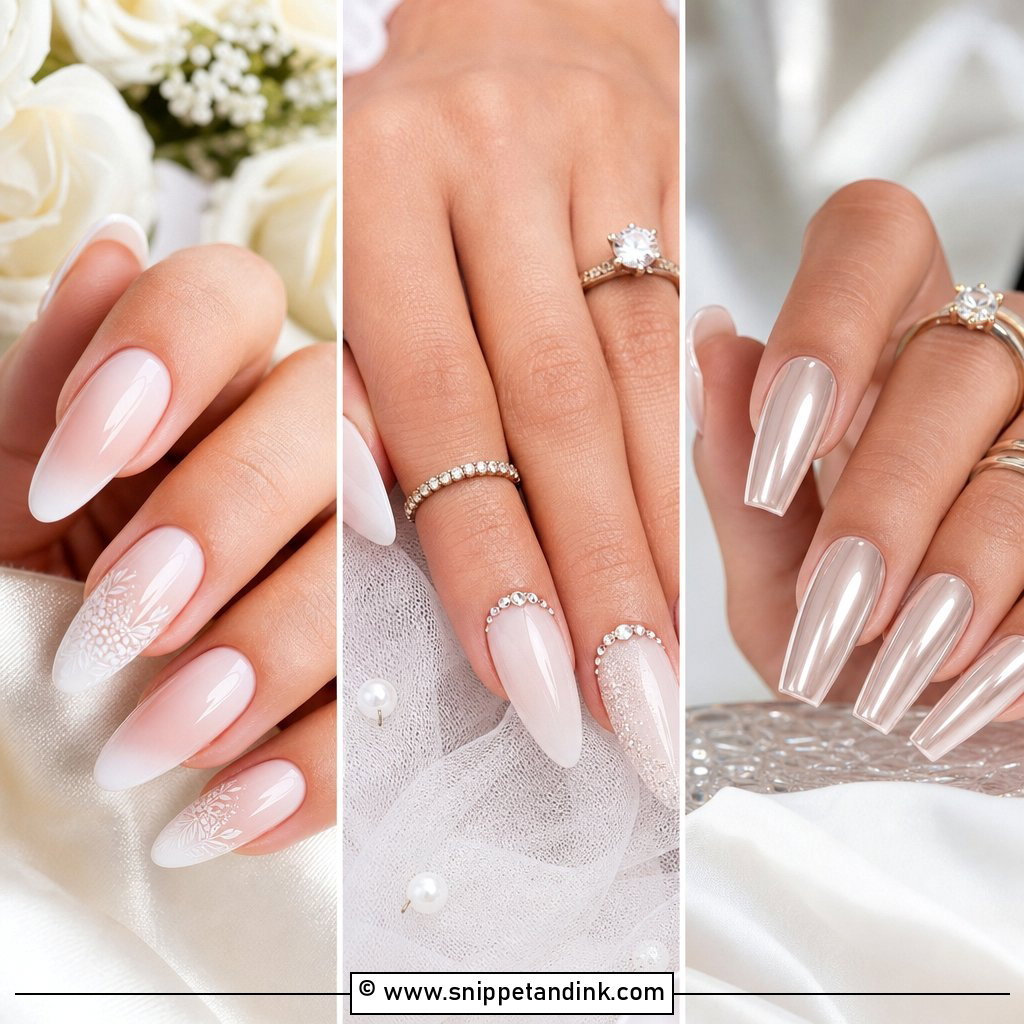
20. 3D Pearl Wedding Nails

Raised pearls are the most textured design here. They start on a sheer nude, milky or blush base, then small 3D pearls or gel pearl dots go on one accent nail or across several in a clean pattern. Keep them small and evenly spaced. The practical concern is snagging: a tall pearl will catch on tulle, lace and knit, so I build them low-profile and smooth the edges before the final cure.
How These Finishes Hold Up on the Day
A wedding day is hard on hands: hours of hugging, holding a bouquet, lifting a dress, opening cards. Some finishes cope better than others.
- Chrome and glazed powders wear first at the tips. If the free edge was sealed, they last; if not, you’ll see dull edges by the reception.
- Raised pearls and stones are the most likely to catch or come off. Low-profile placement and gel encapsulation solve most of that.
- Sheer pinks and milky whites hide small chips well, because there’s no strong colour line to break.
- Gold foil can lift at the edges, especially if your hands get wet often during the day.
If a Nail Breaks on the Morning
It happens more often than brides expect, usually while getting dressed. Don’t try to glue a gel nail back on or file it down on your own; you’ll often make it worse. A small kit helps: a fine glass file, a bottle of matching gel or regular polish in your base colour, a clear top coat and cuticle oil. If the break is small, file the snag smooth and add a thin coat of top coat. If a nail breaks low, file it short and shape the others slightly shorter so they match. Ten even nails look better in a ring photo than nine long ones and one short one.
Cuticle oil is the one thing I insist brides bring. A drop before photos makes the skin around the nail look smooth, which matters more in close-up than the design itself.
Sheer, Shaped and Sealed Before You Walk
Most of the designs that age well have the same base: sheer colour, a shape that suits your natural nail, and small details sealed properly. French, sheer pink and milky white stay quiet in photos for years; pearl chrome, glazed finishes and raised pearls feel more of the moment. Whatever you pick, book a trial a few weeks out, wear it for a few days, and bring your notes to the final appointment.
You'll Like These Ideas:


Leave a Reply