
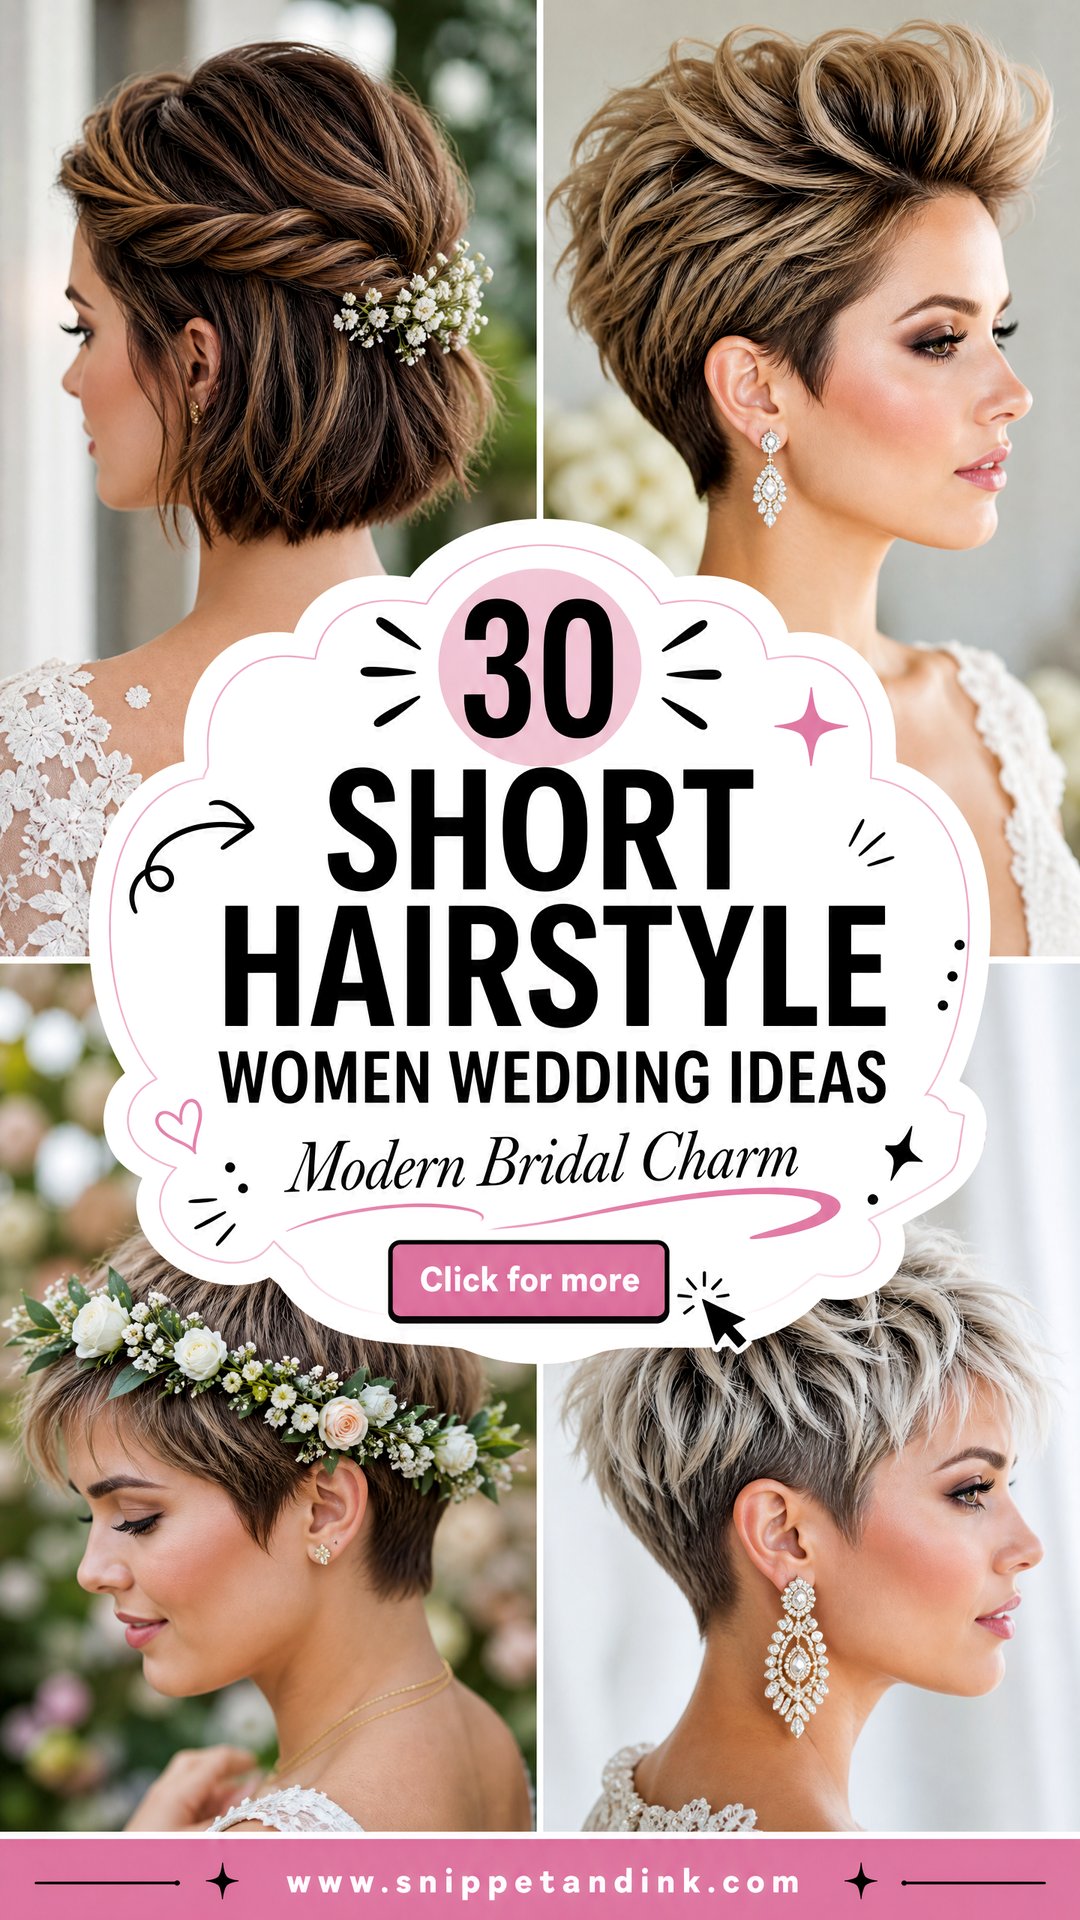
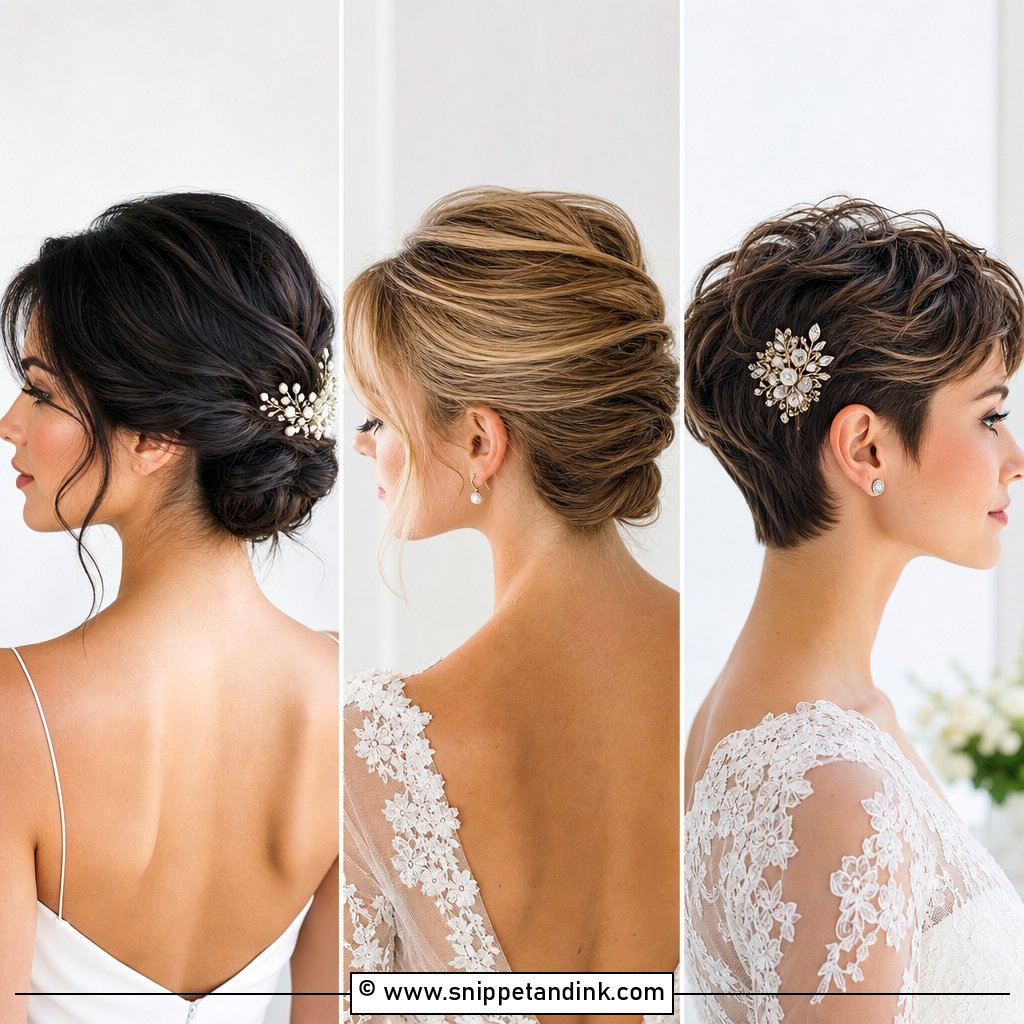
Short hair at a wedding gets underestimated, usually by people who have never pinned a veil into a pixie. In my chair, a short cut means fewer variables on the morning: no hour of curling, no updo slowly sliding south, and a clear view of your neck, jawline and earrings. The work shifts to precision instead. Product choice, pin placement and the timing of your last trim matter far more than they do on long hair. Below are 30 short bridal styles, from sculpted finger waves to a piecey crop, each with what I actually do to make it hold and who I think it suits.
How Close to the Wedding Your Last Trim Should Be
Short hair shows growth faster than any other length. A pixie that looked crisp at the trial can look fuzzy at the nape and over the ears just four weeks later, so the date of your final cut matters as much as the style itself.
- Pixies and crops: trim seven to ten days before. Any closer and the edges can look freshly clipped in photos.
- Bobs: one to two weeks out, so a blunt line has softened slightly but hasn’t started to drop.
- Color and toner: about two weeks before, so regrowth is hidden and the shade has settled.
- No new shape in the final two months. Your trial should be done on the cut you’ll actually wear.
I always ask brides to book the trial after a regular trim, not before it. Short styles behave differently once a centimetre comes off the top, and I want to test pins and products on the length I’ll be working with on the day.
1. Classic Pixie Cut for Brides
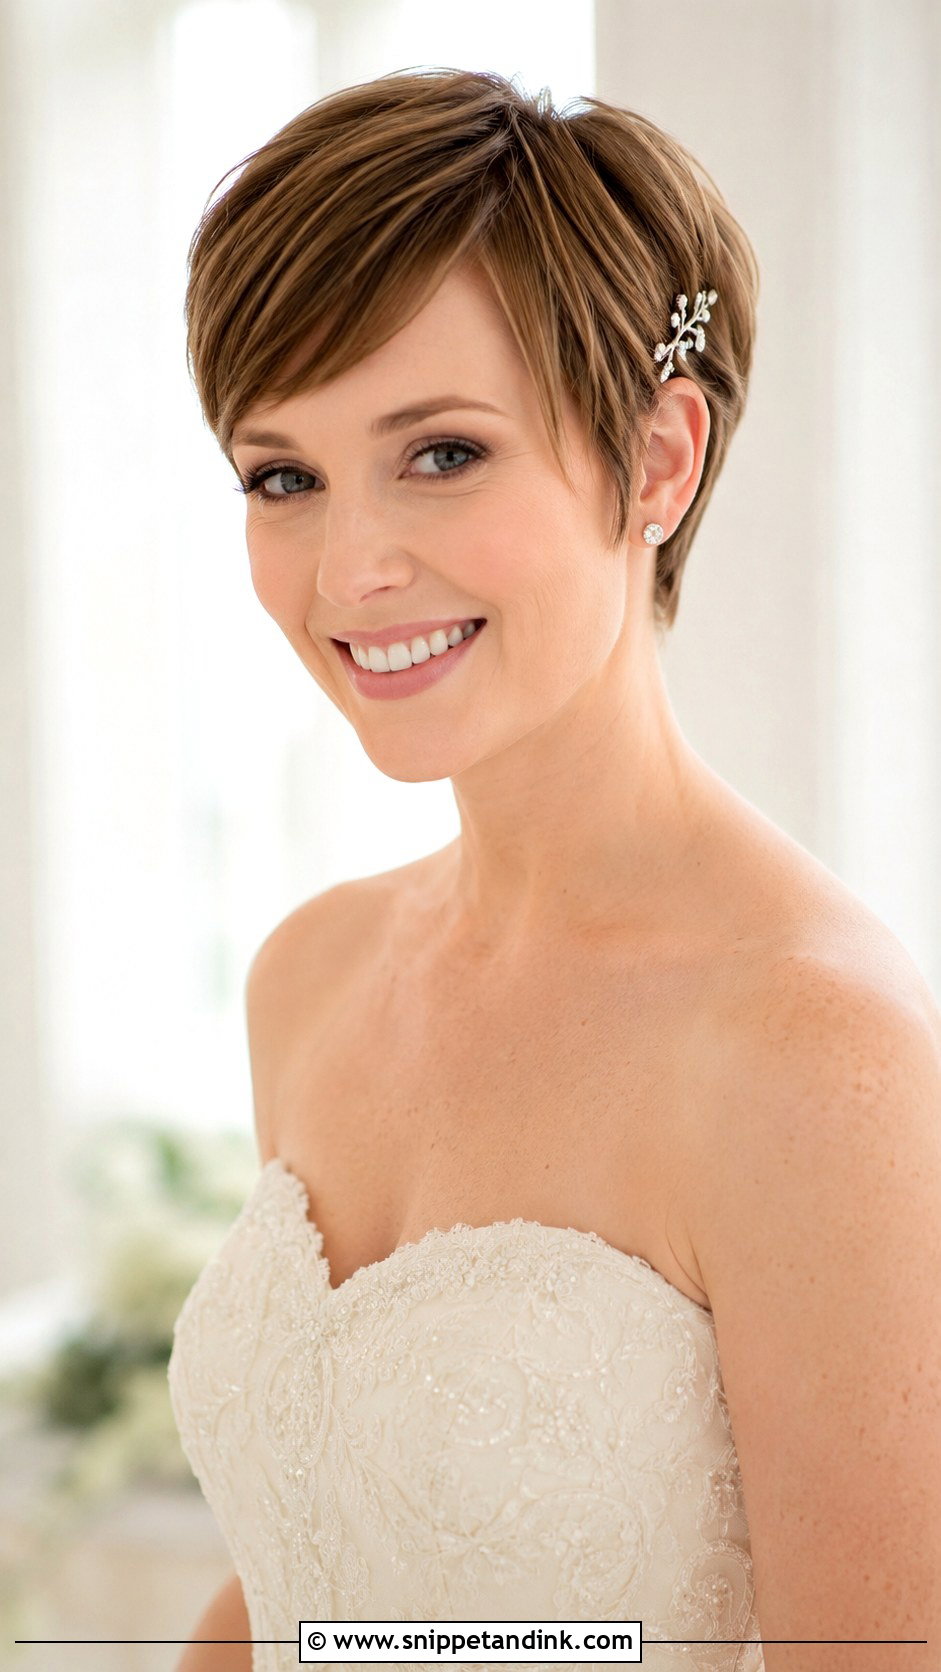
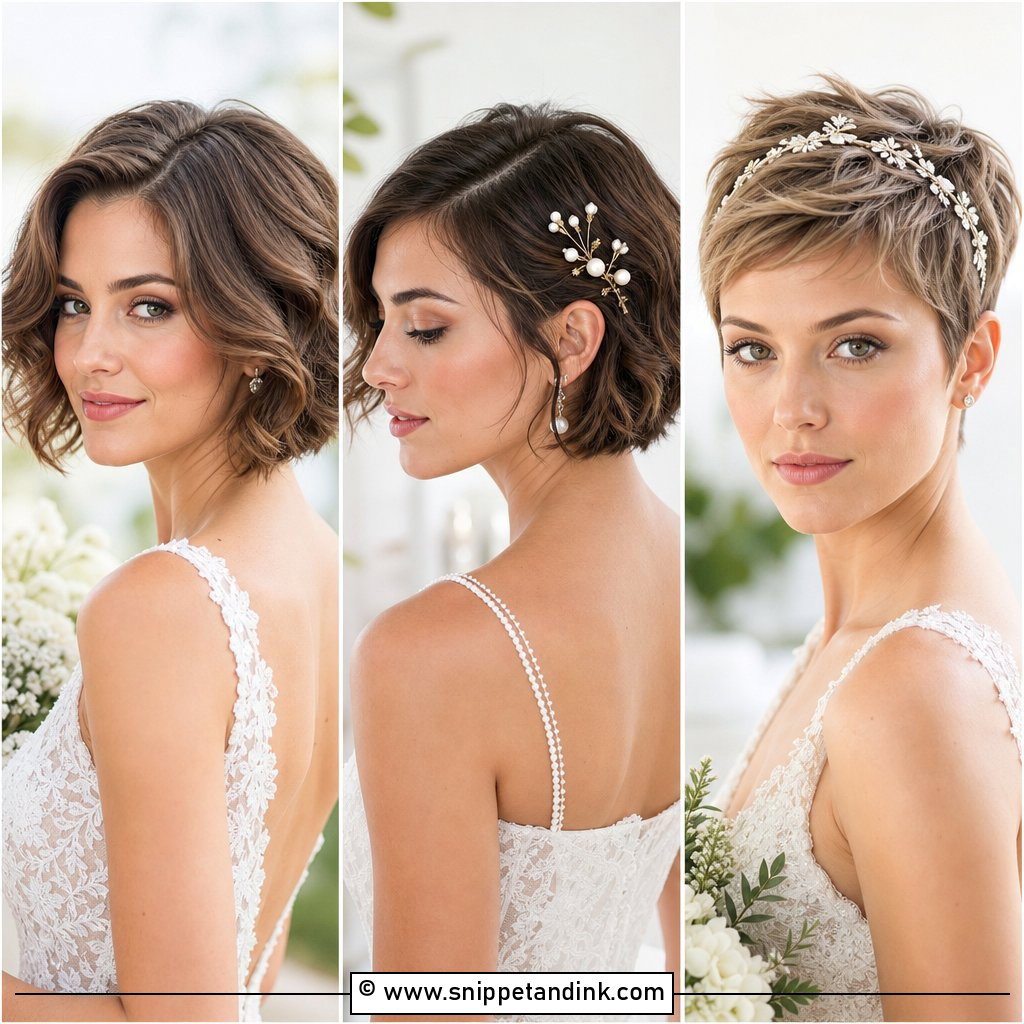
A classic pixie asks the least of you on the morning and the most of your stylist a week earlier. The whole shape depends on clean lines at the nape and around the ears, so I like the trim done seven to ten days out, which gives any blunt edges time to soften. On the day I work a pea-sized amount of light cream through, smooth the sides flat, and keep a little lift on top so the crown doesn’t flatten under flash. A comb tucked behind one ear sits well here because there is no bulk fighting it.
2. Tousled Pixie With Soft Curls
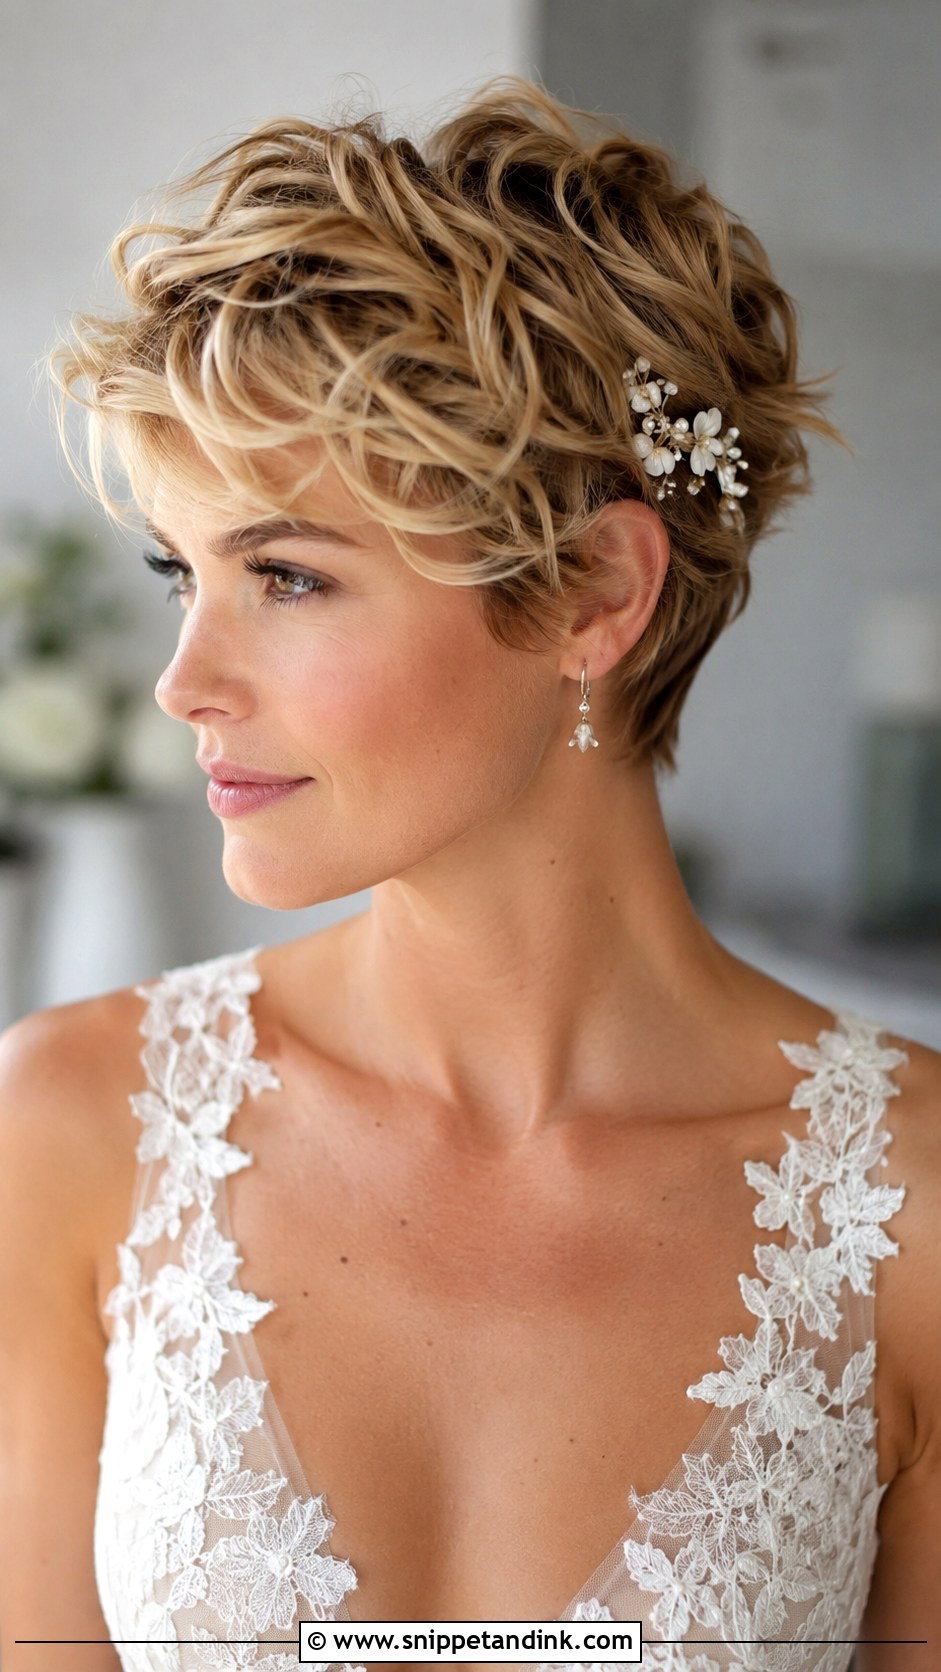
Texture on a pixie lives or dies by the barrel size. I use a small wand, around half an inch, and wrap only the top and front pieces, because curling the short sides just makes them stick out sideways. Once the curls cool, I break them apart with fingertips, never a brush, and mist a flexible spray from arm’s length. In humid weather these will relax by the evening. A jeweled pin or a few tiny flowers gives the style something to hold onto when they do.
3. Side-Swept Pixie With Fringe
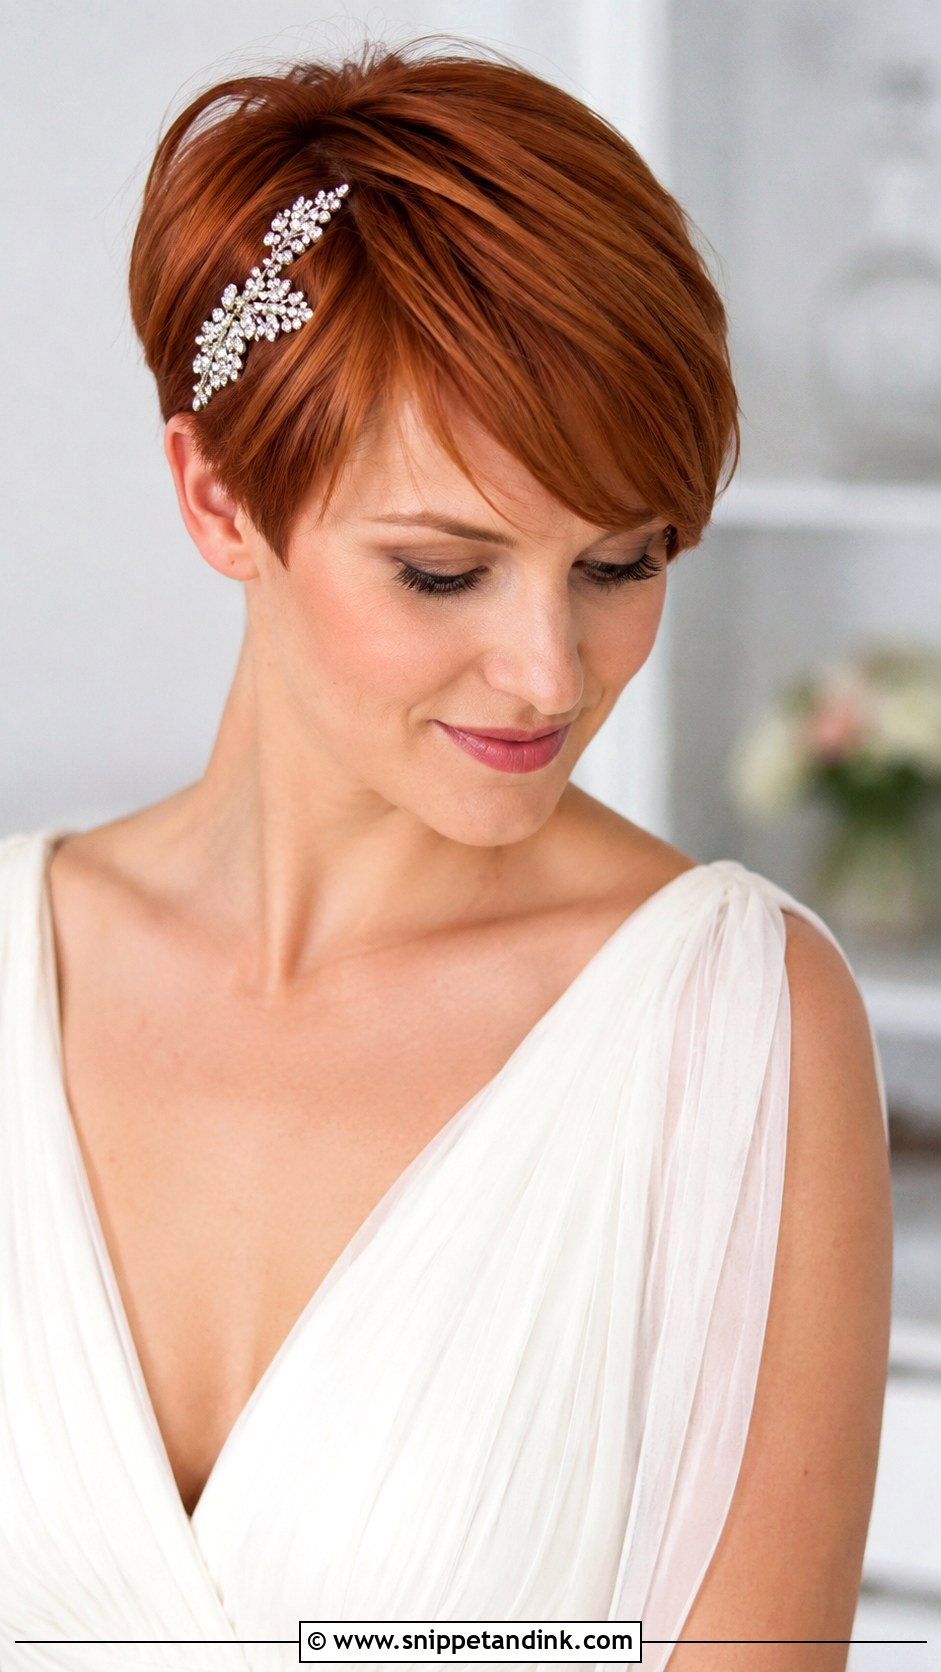
The fringe does all the work here, so it has to be long enough to reach past the outer corner of your eye. Any shorter and it won’t sweep; it just sits. I flat iron it with a slight bend toward the temple and set it with a firm spray before anything else goes in. A jeweled headband placed just behind the fringe line helps hold the sweep, though a single sleek pin on the opposite side does the job too. One honest warning: if you push hair off your face when you’re nervous, practice leaving it alone at your trial.
4. Sleek Blunt Bob for Weddings
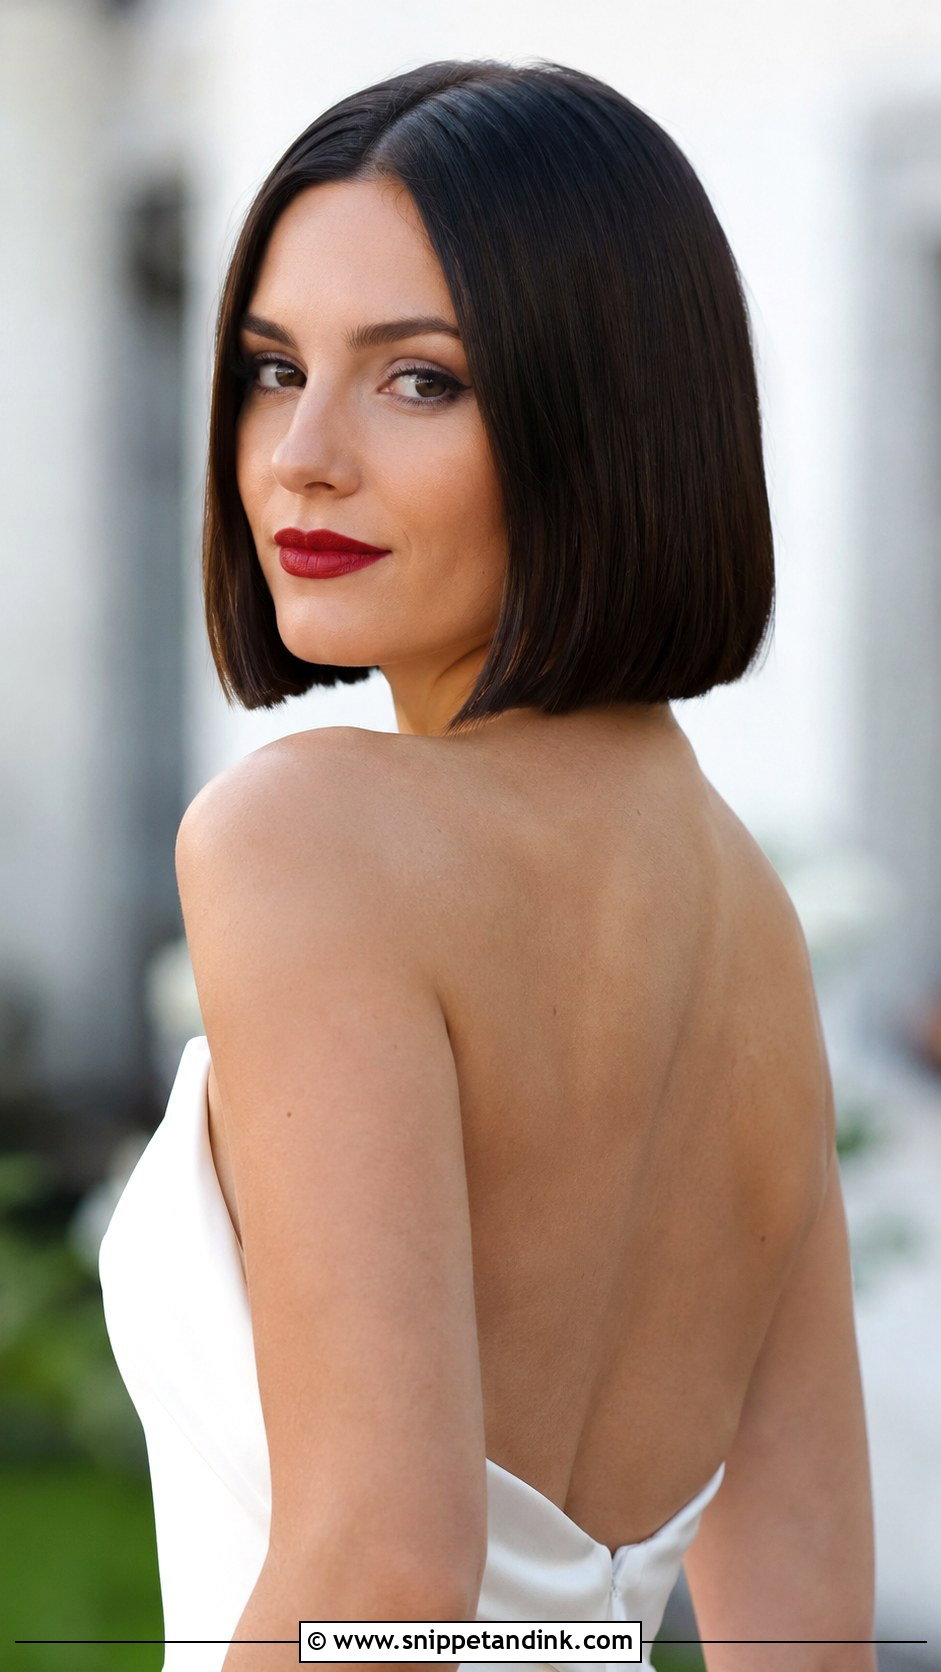
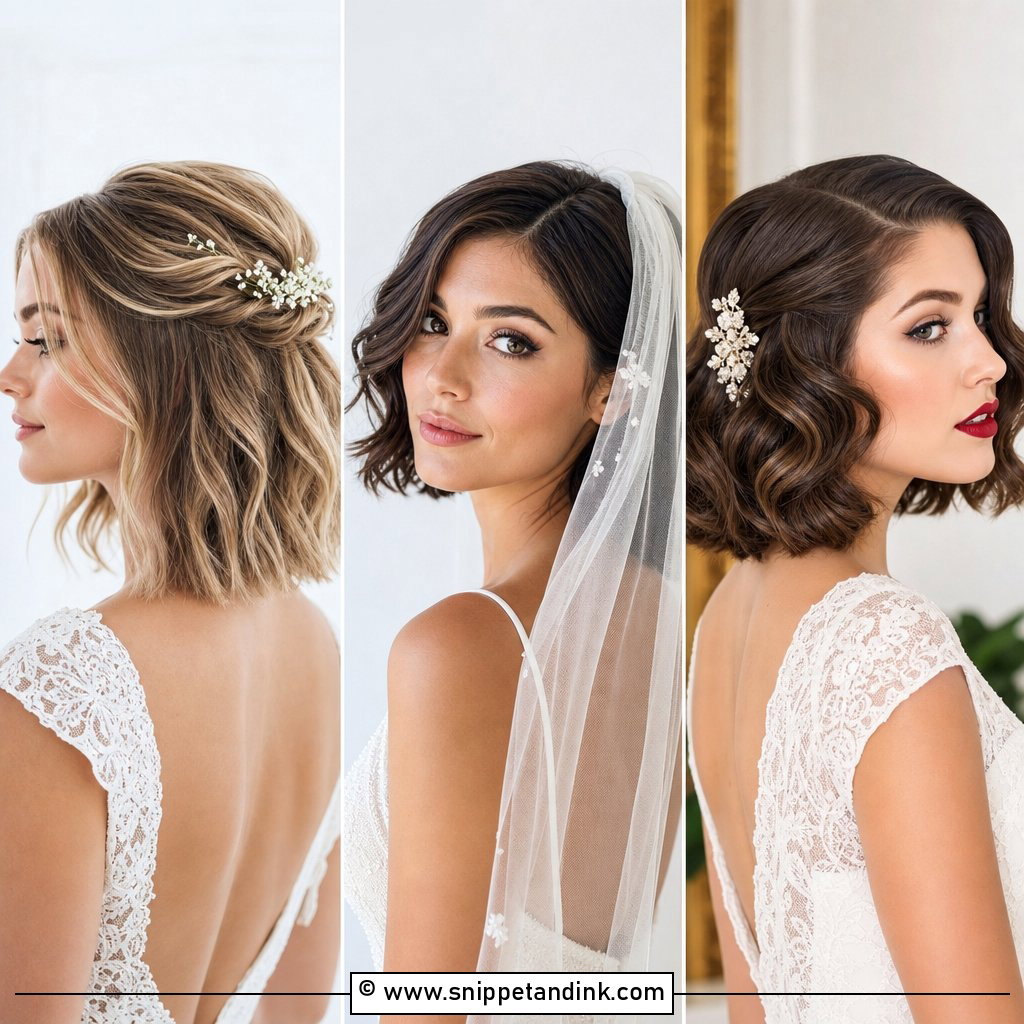
A sleek blunt bob only looks expensive when the line is dead level, which is why I want it cut the week before, never the day before. Freshly cut blunt ends can look harsh in close-ups. On the morning I flat iron in thin sections with a slight inward bend at the ends, then hold the shine spray well back so it doesn’t clump. Fine hair tends to go limp by the evening, and a root-lift spray at the blowout the day before buys you a few hours. Keep the jewelry simple so the line of the cut stays the point.
5. Curly Bob With Romantic Waves
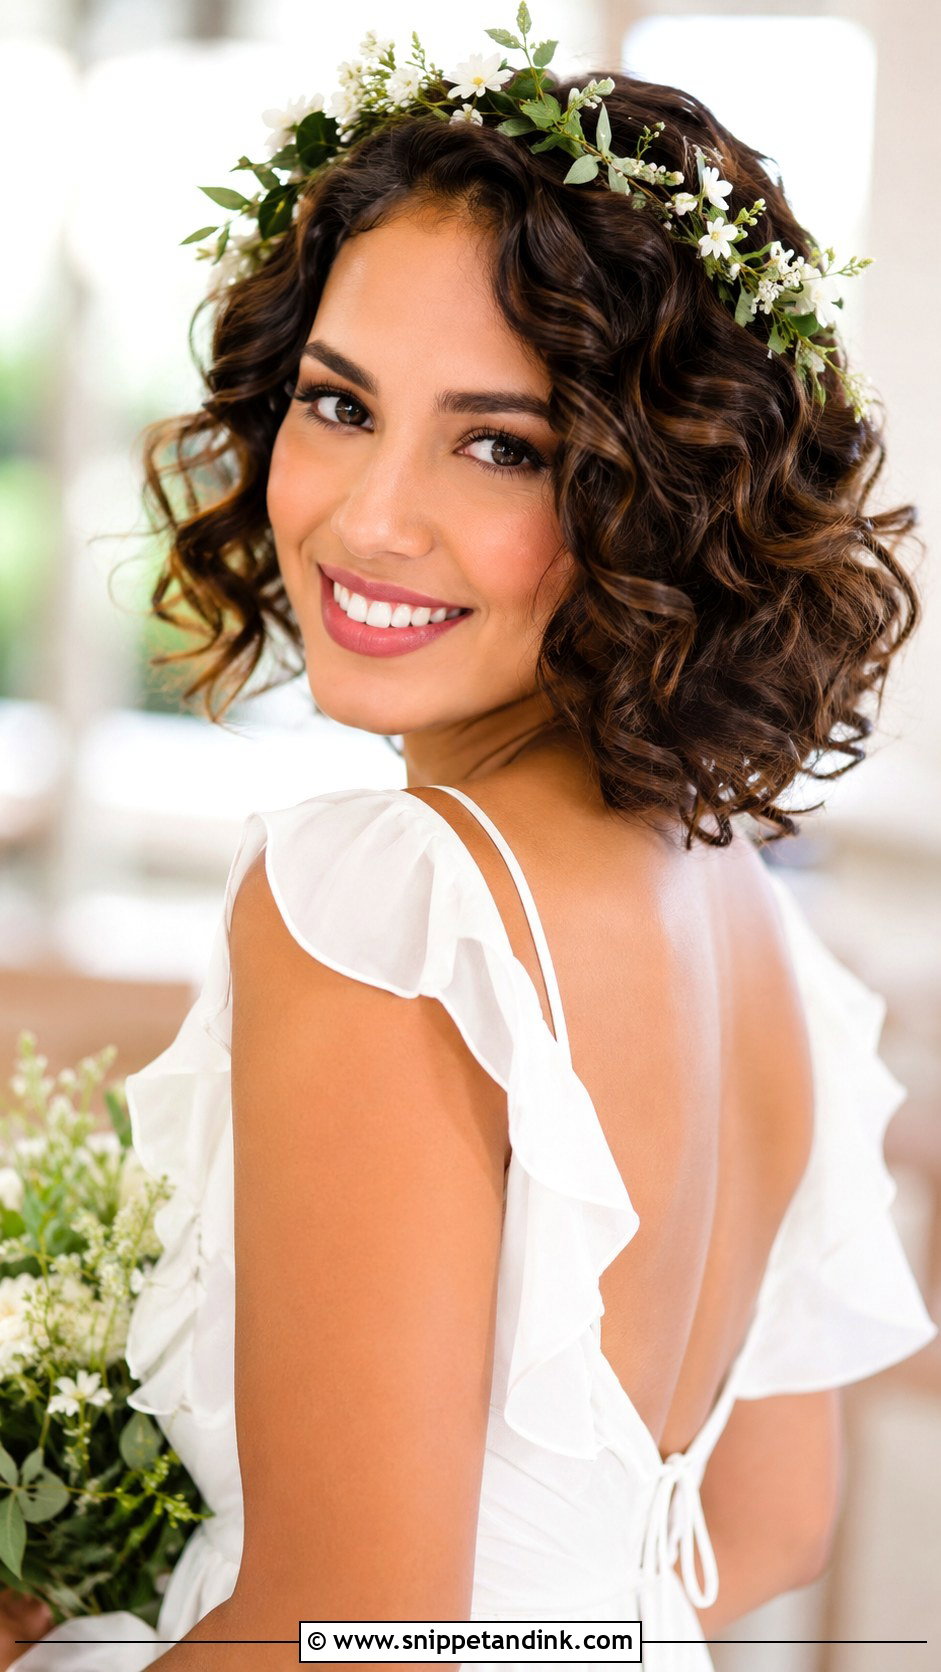
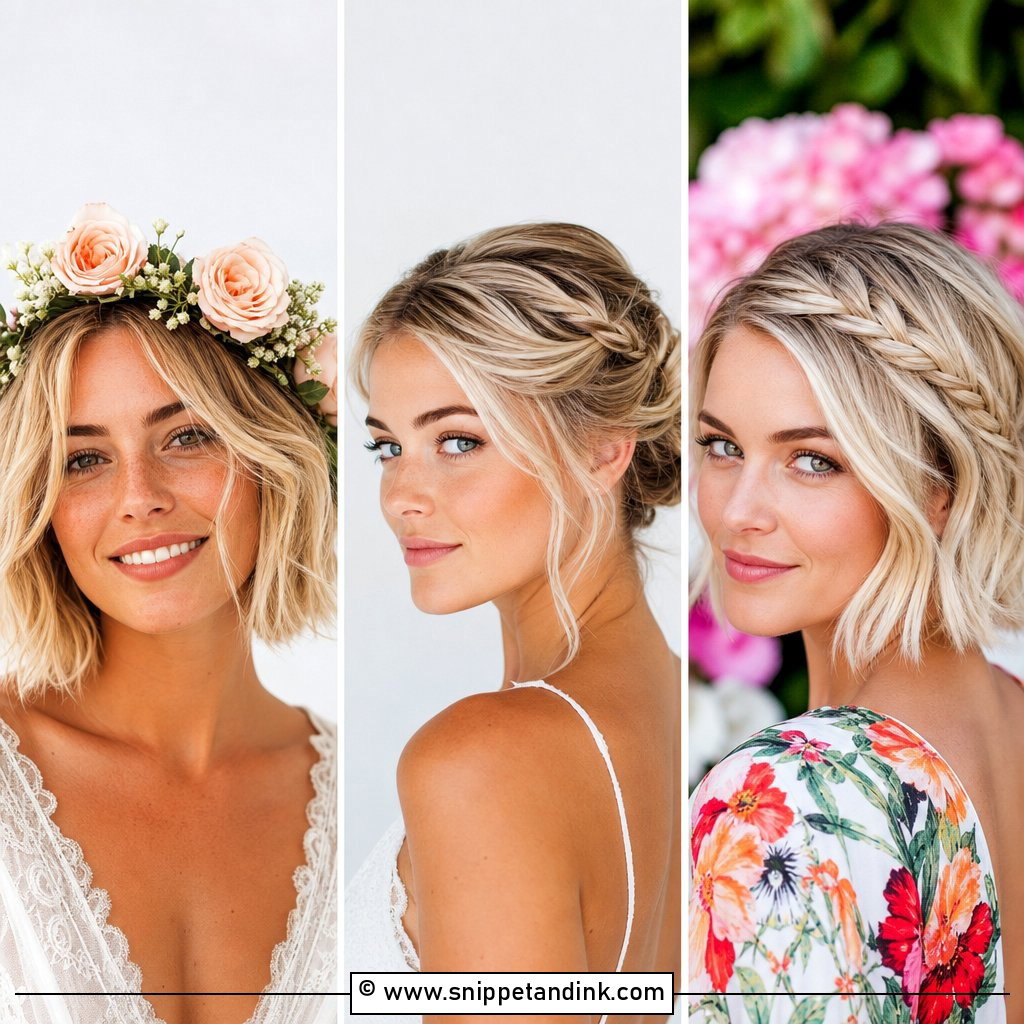
On a curly bob I shape waves rather than create them. If your hair already curls, I’d rather define your own pattern with a curl cream and a diffuser than iron over it, because heat-made curls on naturally curly hair often frizz once the room warms up. On straighter bobs, a one-inch iron and fingers combed through the cooled waves give the bounce you see here. A flower crown or a fine vine woven through stays put since the texture grips it. Pack a small anti-frizz serum for the reception.
6. Twisted-Back Bob With Volume
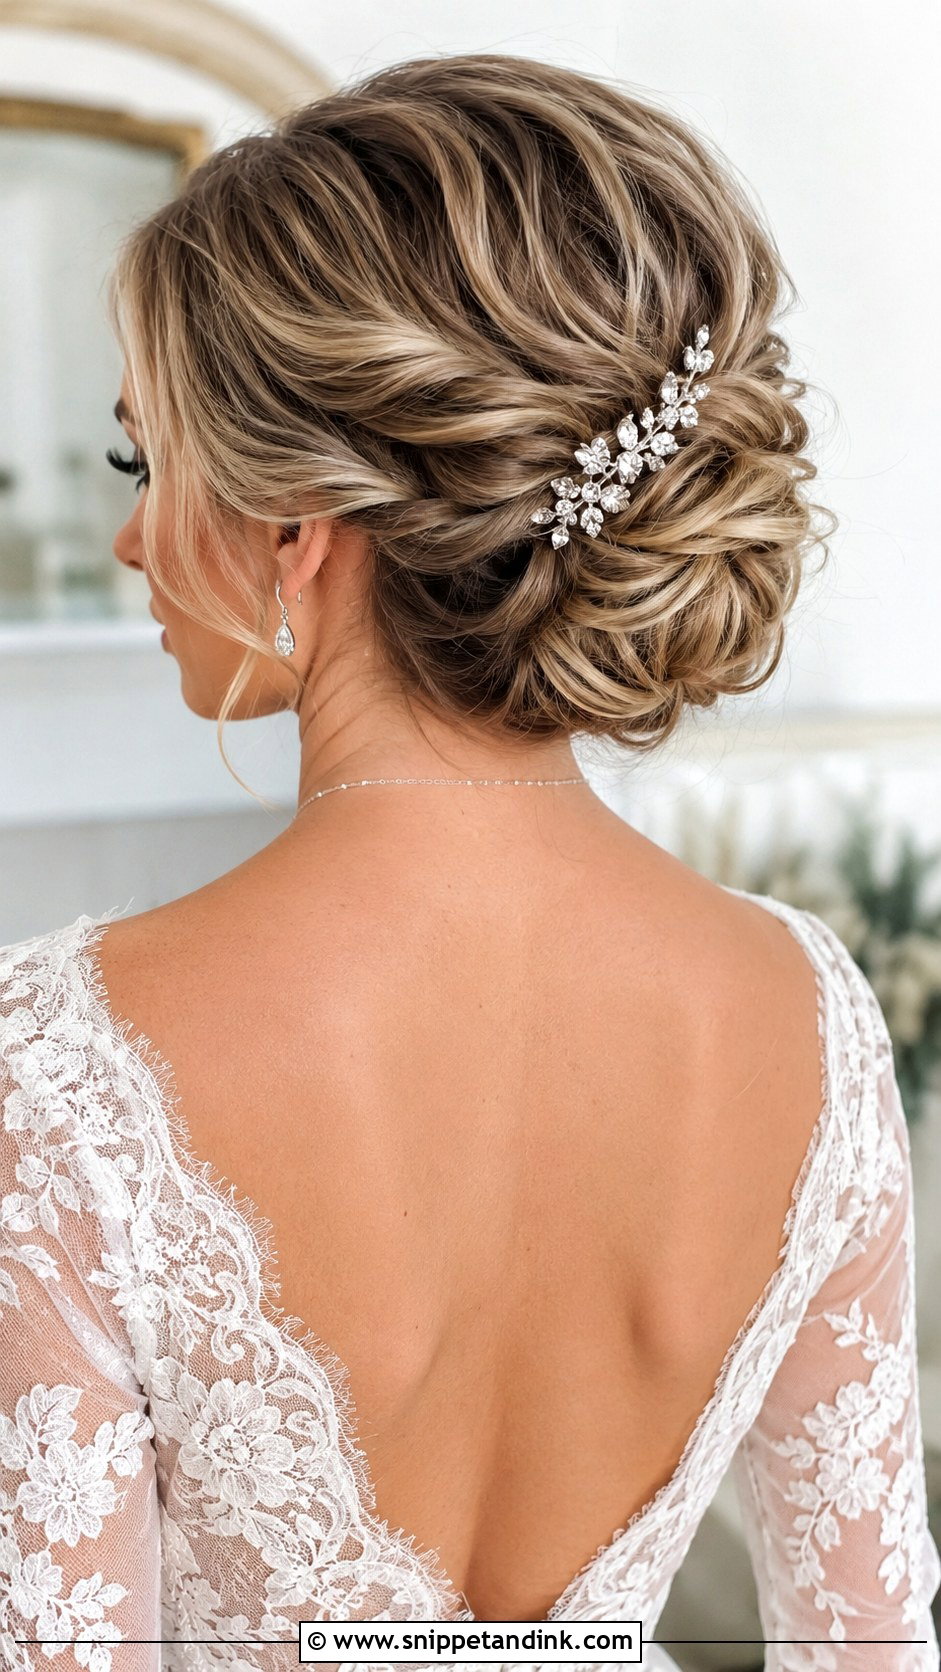
Twisting back the sides is what I reach for when a bob is long enough to look messy worn loose but too short for an updo. I take a two-inch section on each side of the part, twist it away from the face, and cross two bobby pins in an X behind the ear so the twist can’t unwind. A little backcombing at the crown, then a gentle push forward, gives that soft pompadour height. Match the pins to your hair color, not to the accessory. Opening up the neck like this suits high necklines especially well.
7. Pixie With Jeweled Headband
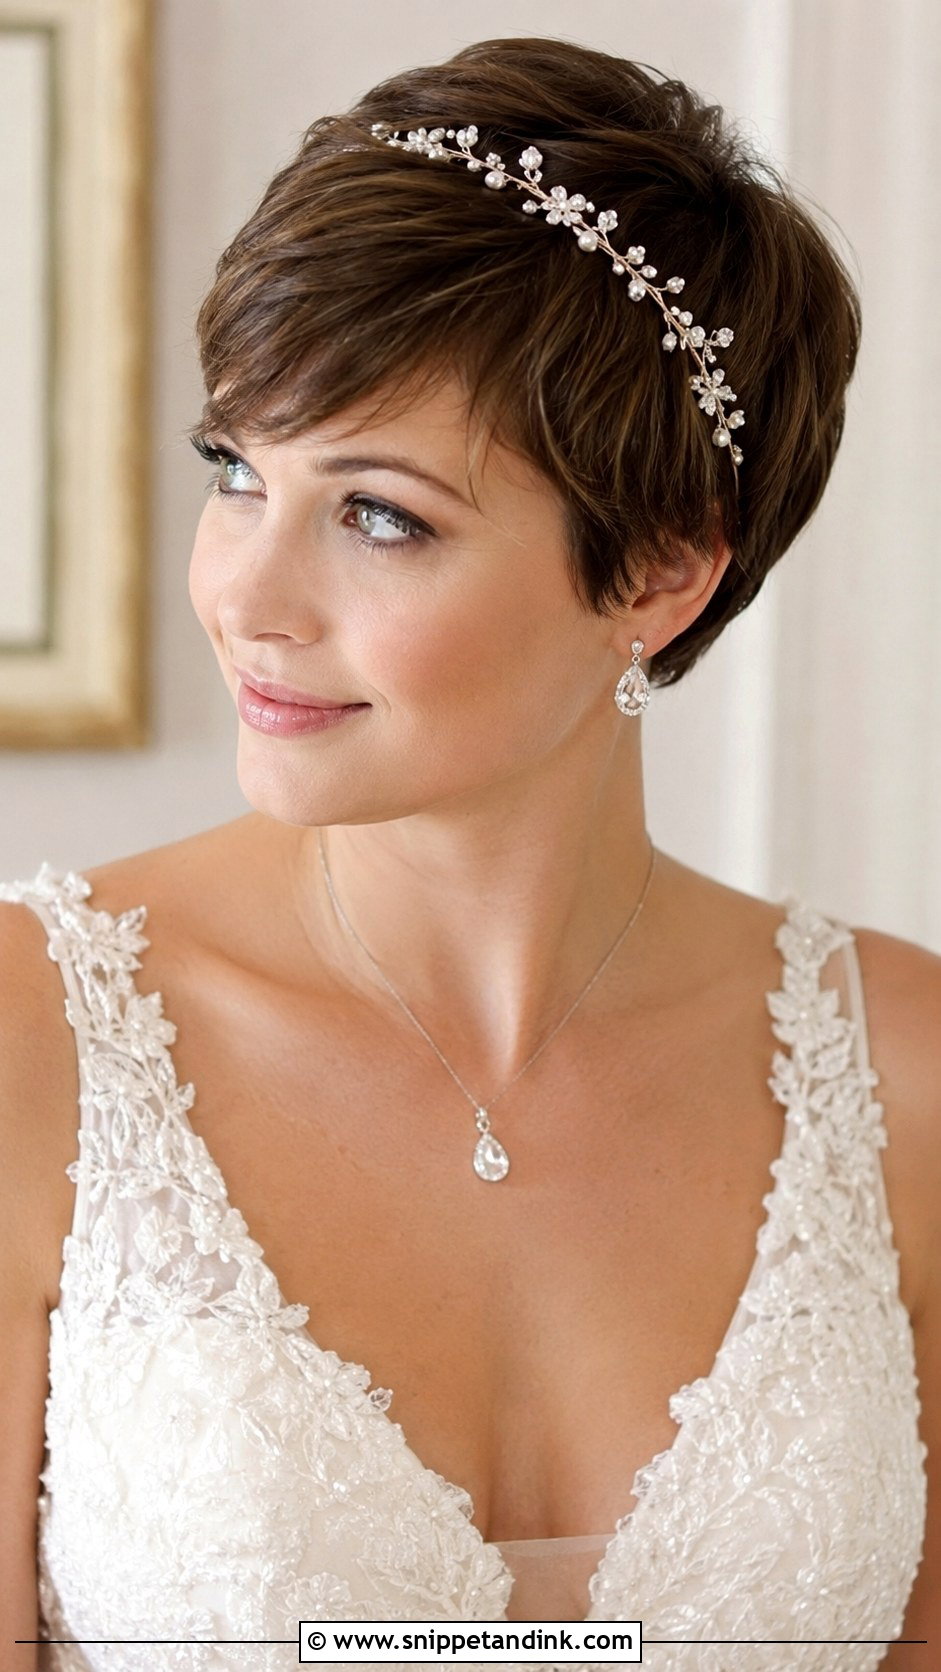
Headbands slip on pixies because there is almost nothing behind them to grip. I fix that by roughing up the hair just behind the hairline with dry texture spray, sliding the band into place, and pinning each end under a layer where the pin disappears. Try the exact band at your trial: metal ones with stiff ends can press behind the ears after a few hours. The sparkle pulls the eye up toward your face, and it sits as well on a sleek pixie as on a tousled one. A short veil can tuck in right behind it.
8. Finger Waves for Vintage Brides
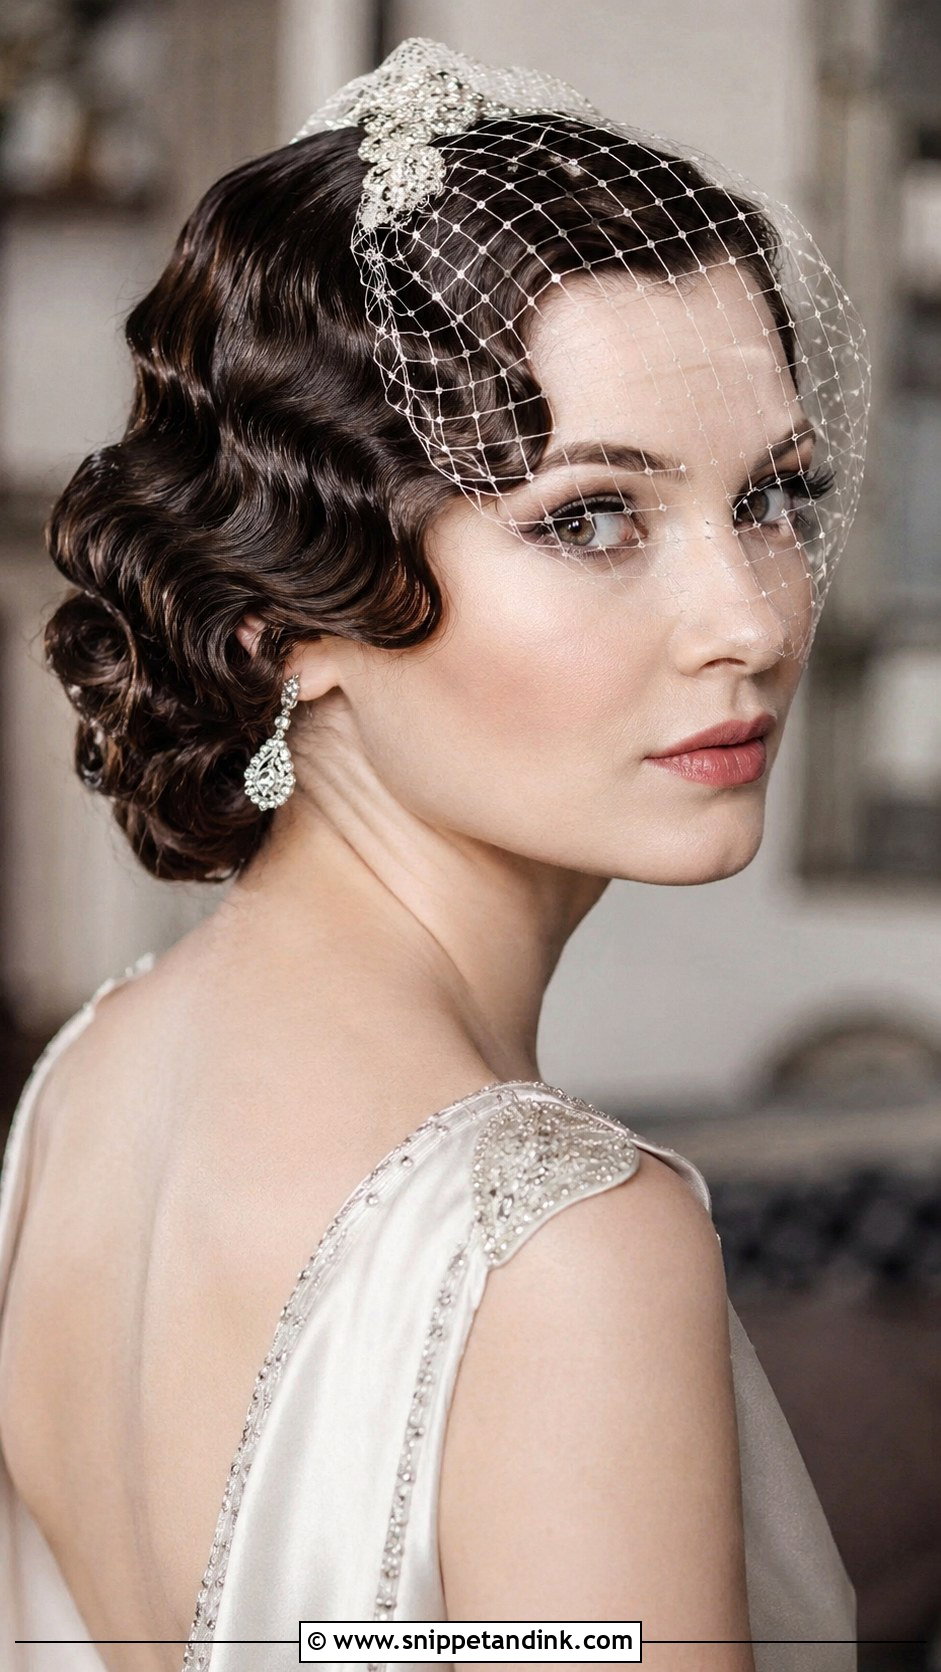
Finger waves bring more structure than anything else on this list, and they take the most time. I comb setting gel through damp hair, push each ridge into an S shape with my fingers and comb, and clip it while it sets. The hair then has to dry completely, ideally under a hooded dryer, before a single clip comes out. Allow at least an hour and a half, and do a full run at the trial, because the pattern depends on how your hair lies at the crown. They come out sharp in black-and-white, and a birdcage veil or one crystal pin is all they need.
9. Short Curly Updo With Flowers
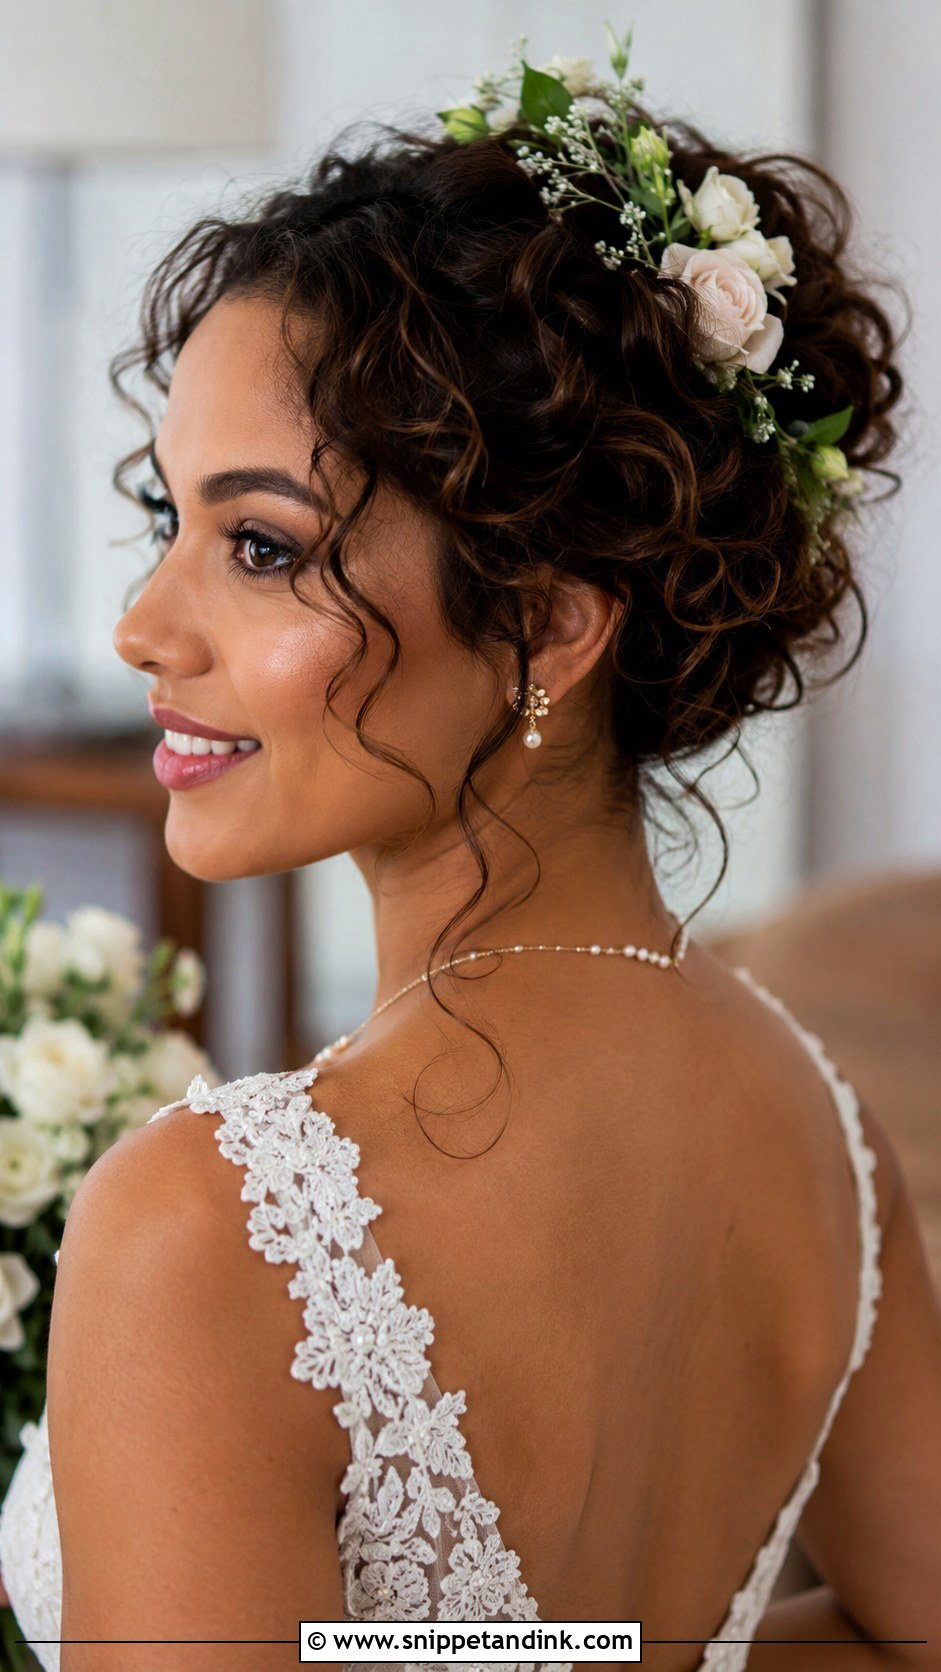
Short curls can go up, but only if the hair at the nape reaches roughly chin length so I have something to tuck. I gather the curls loosely toward the back, pin each section where it naturally falls, and leave tendrils at the temples so nothing looks scraped. For the flowers, I ask the florist for small, sturdy blooms like spray roses or waxflower, wired and taped, because loose stems wilt against warm skin by mid-afternoon. Using blooms from your bouquet ties the two together. On rustic and outdoor days this sits more naturally than a polished chignon.
10. Asymmetrical Pixie for Edgy Brides
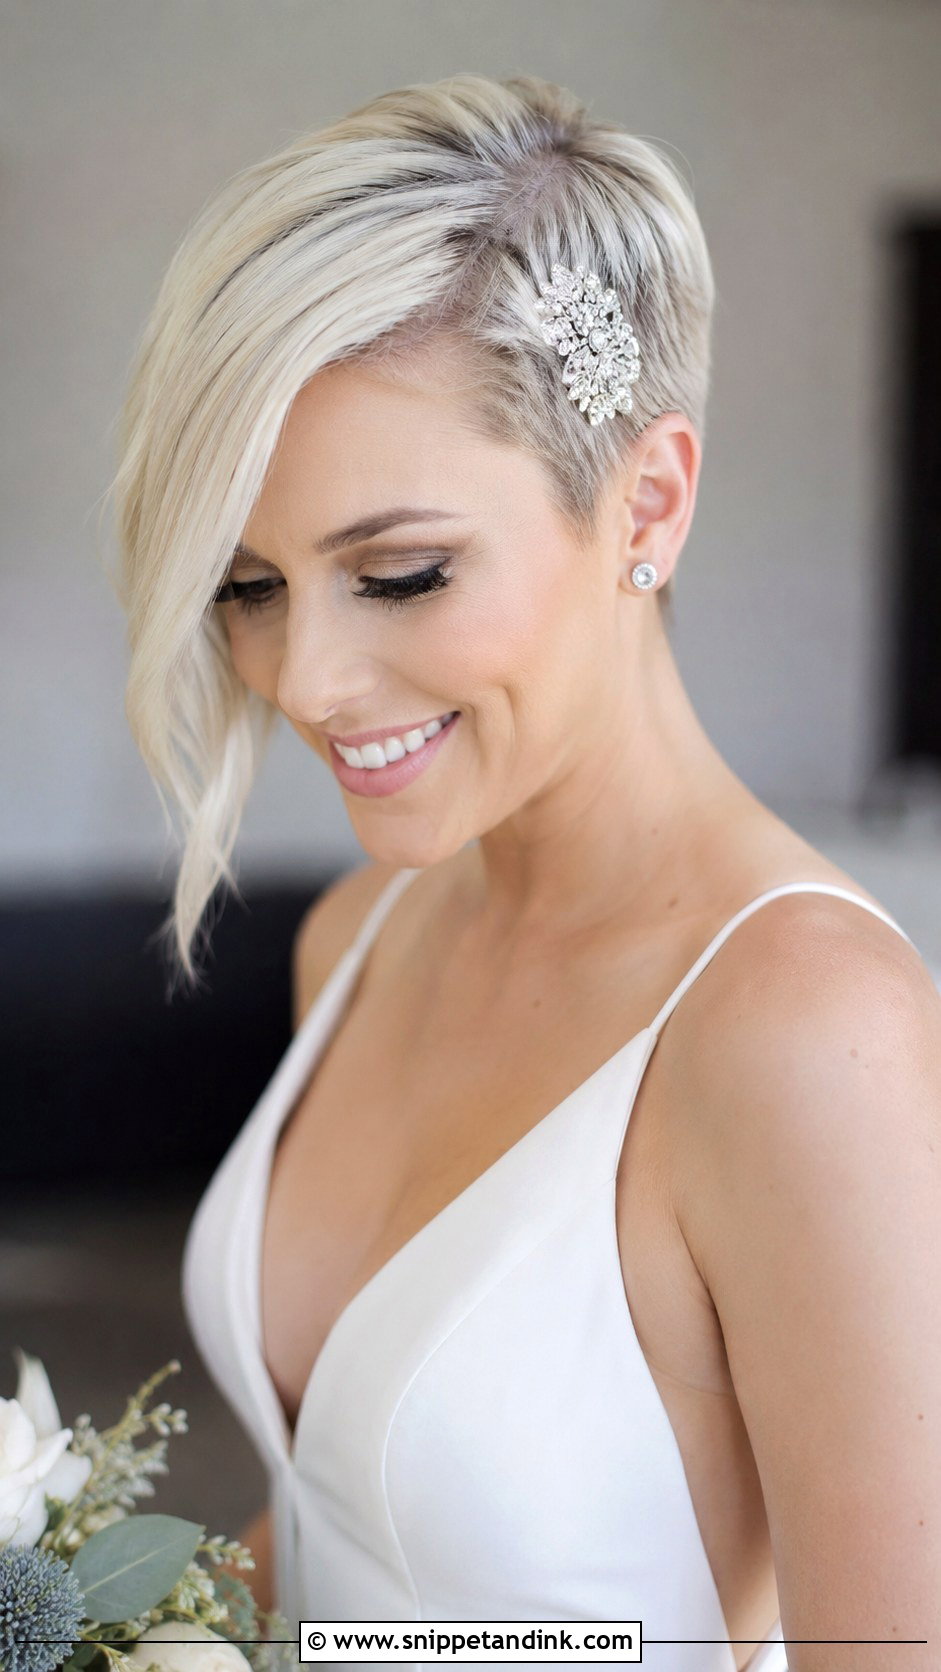
An asymmetrical pixie is all about the contrast between a close side and a long one, so the long side needs real length, at least to the cheekbone. I smooth that section with a flat iron and lay it across the forehead, then press the short side flat with a touch of pomade so the difference reads clearly on camera. Statement earrings belong on the short side. If you want a bridal note, one small jeweled pin on the long side is plenty. I’d steer you away from this cut if you have never worn asymmetry before; a wedding is a hard day to discover you keep flicking hair out of one eye.
11. Pixie With Birdcage Veil
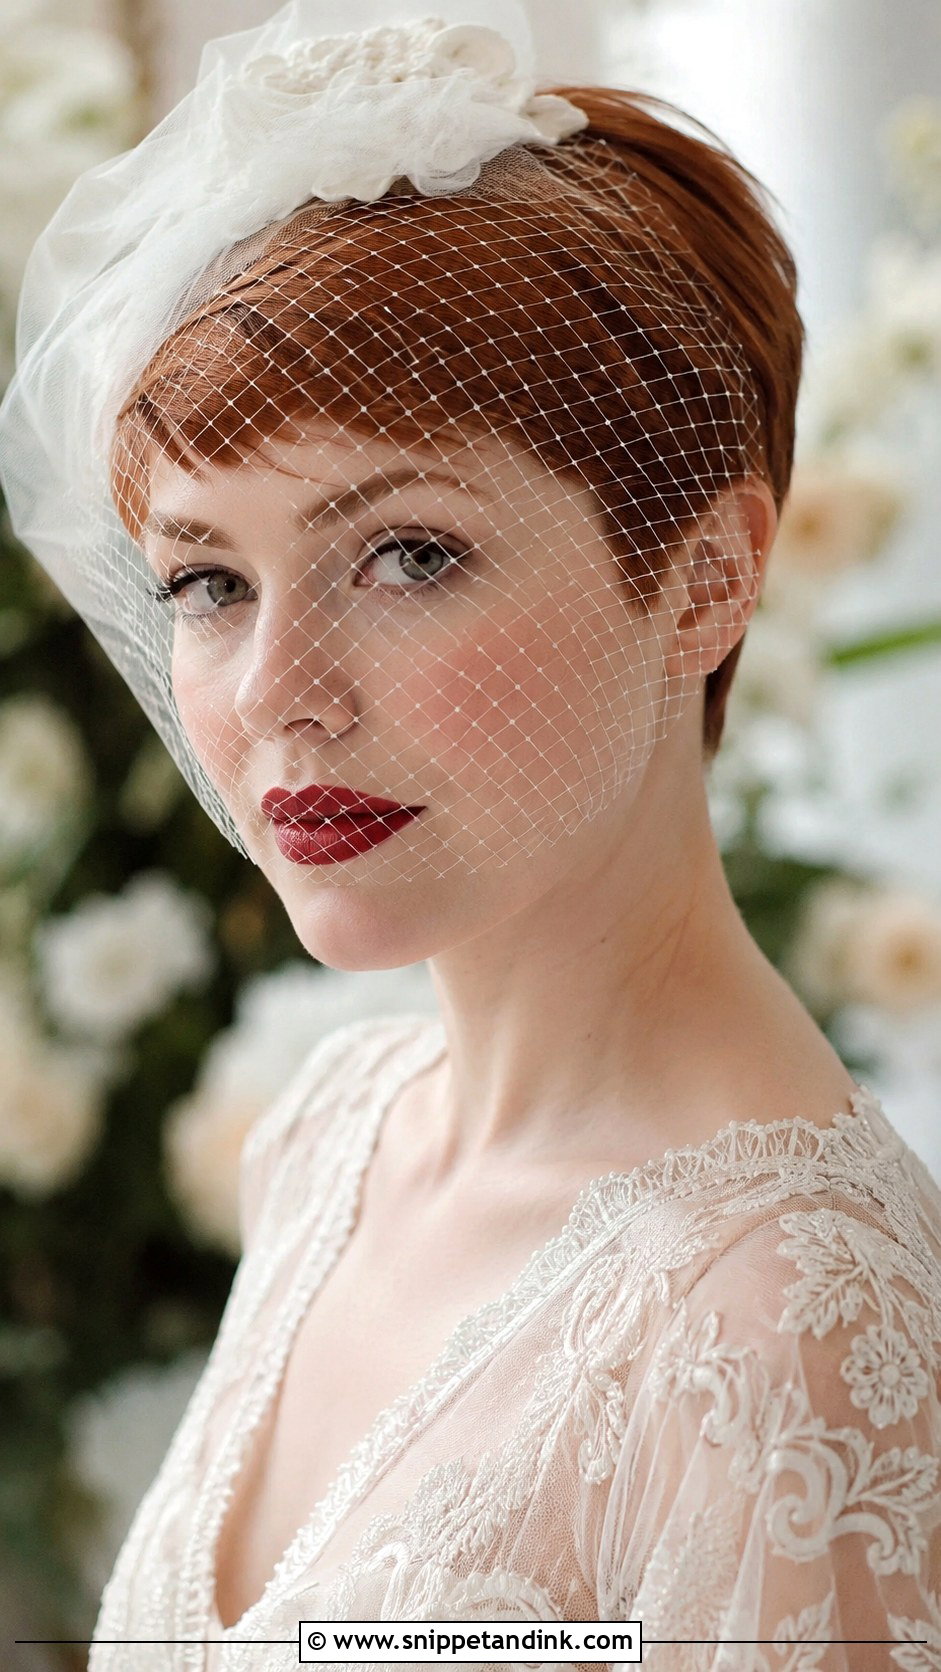
A birdcage veil is short enough that it never fights a pixie for space, which is exactly why I like the pairing. The trick is the anchor. I backcomb a small patch at the crown, spray it, then slide the veil comb in against the direction of the teasing so the teeth lock in. On very fine hair I add a pin through each end of the comb. The netting falls across one eye or both, a red lip shows through it well, and it’s light enough to wear straight through dinner.
12. Slicked-Back Wet Look Bob
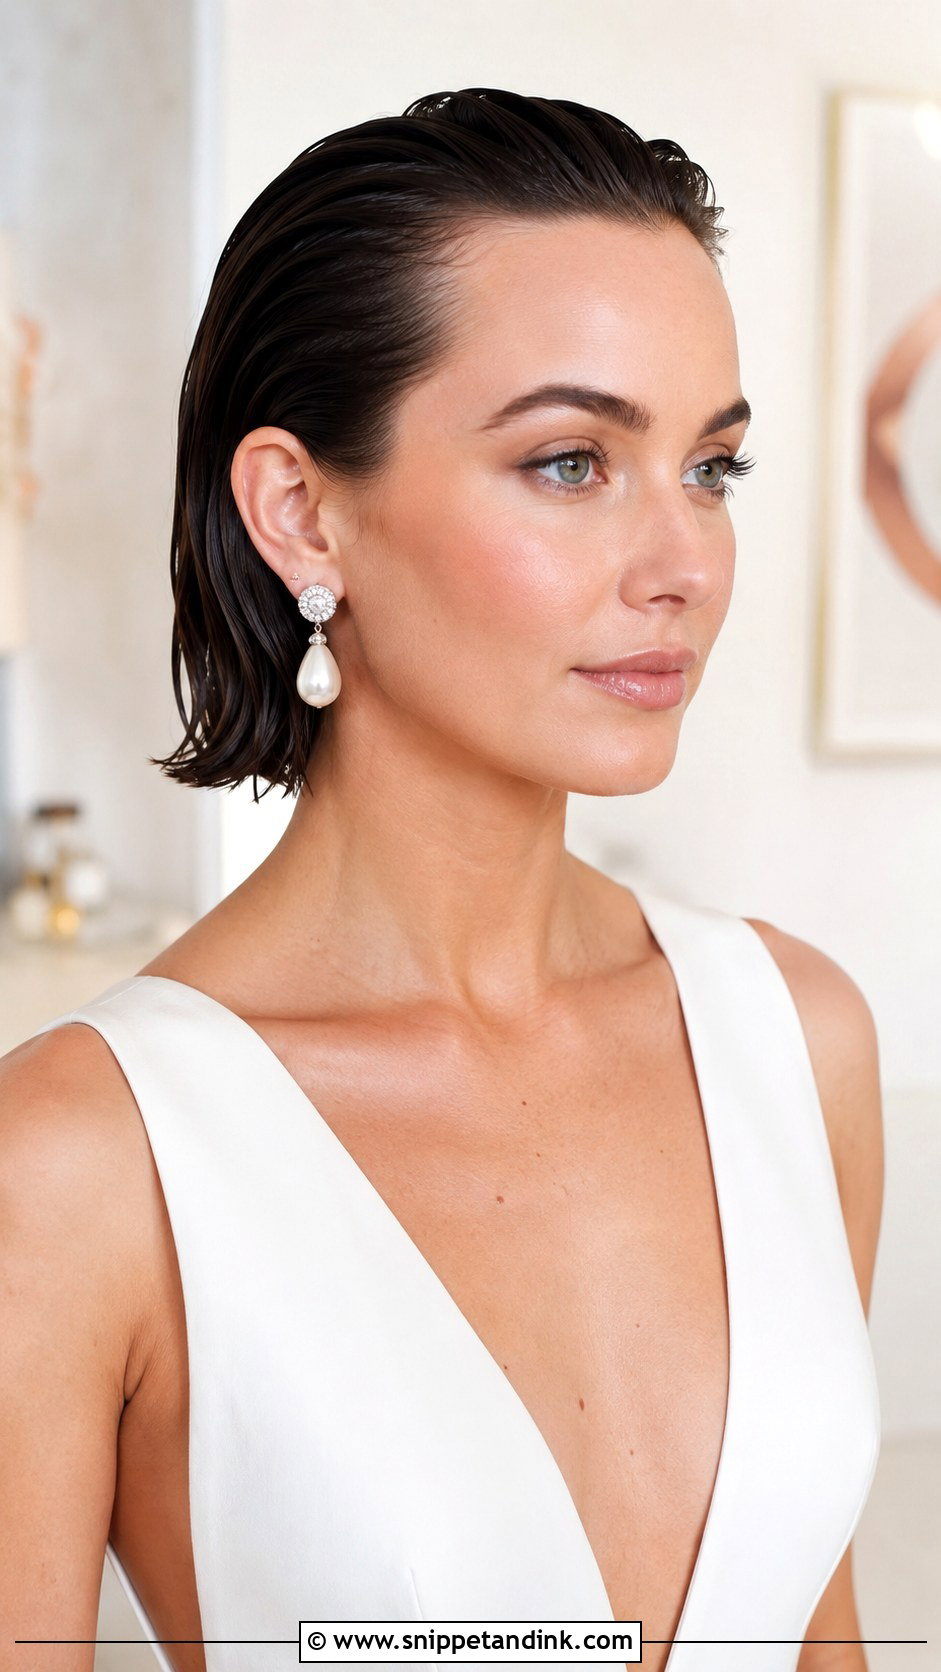
The wet look depends on a gel that dries hard but still reads glossy, so I test two or three at the trial. Some gels flake as they dry, and you don’t see the flakes until the photos come back. I comb the gel through damp hair, slick everything straight back, and finish with a drop of shine oil across the top. Bone structure, earrings and neckline get the full spotlight, and it needs almost no touching up. Be honest with yourself about this one, though: next to a soft, romantic gown it can look like two different weddings.
13. Soft Curly Pixie With Headpiece
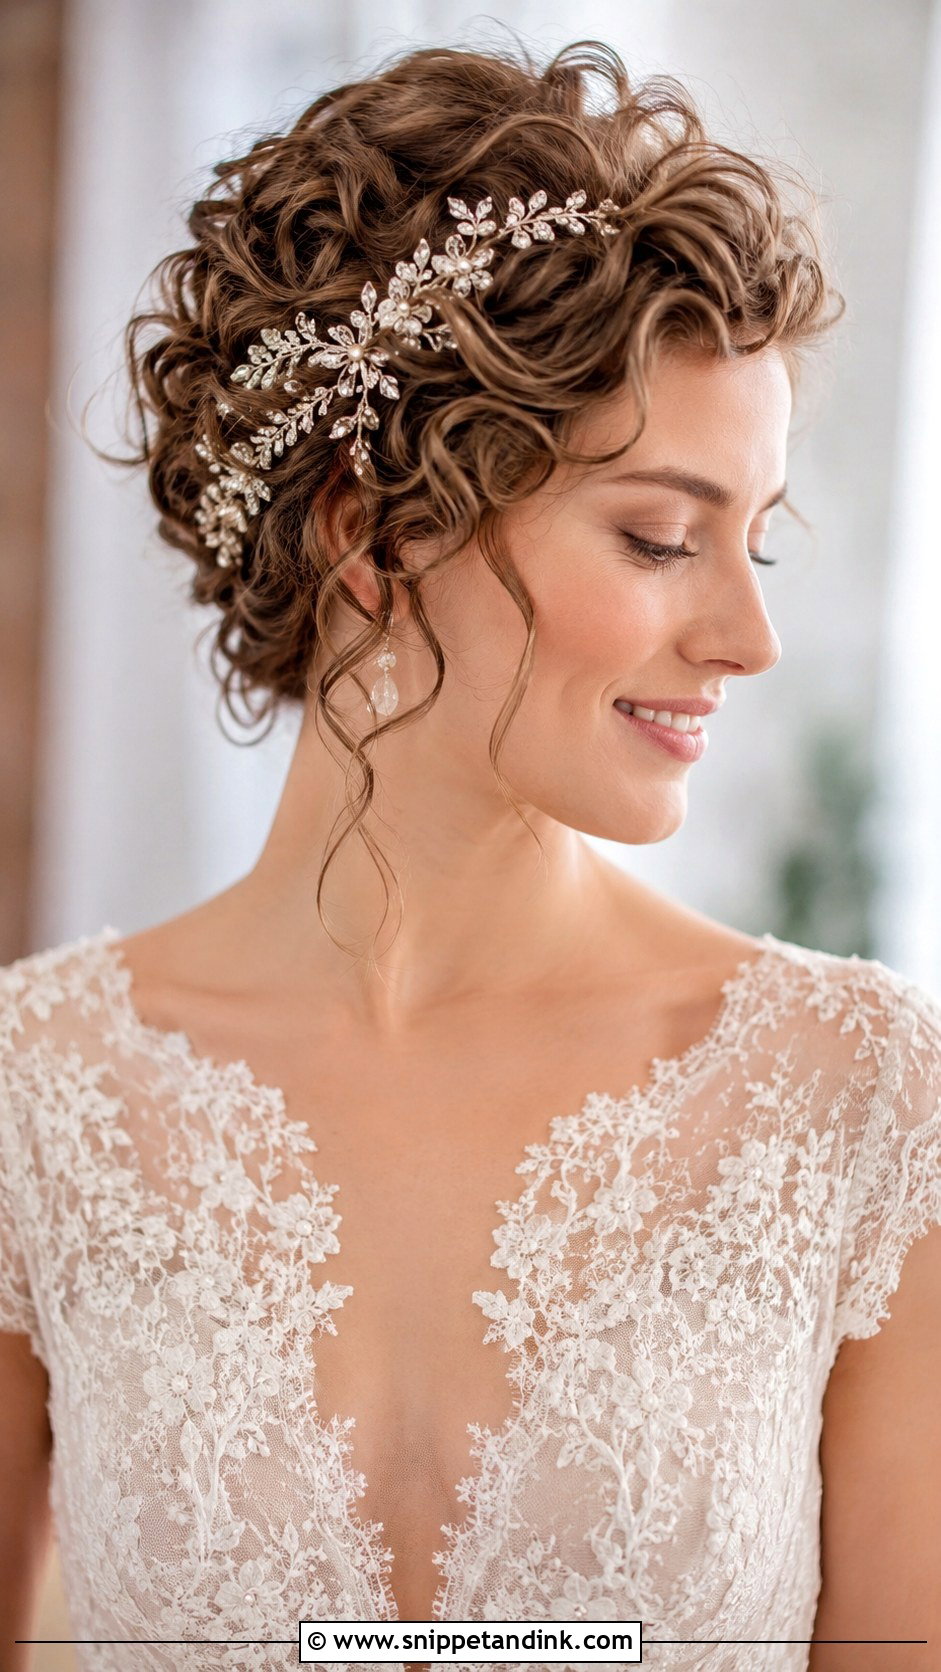
A soft curly pixie carries a headpiece better than a sleek one, because the curls hide every comb and pin. I place the piece slightly off-center, slide it under a curl, and secure it with two crossed pins beneath so nothing shows. The heavier the piece, the more anchoring it needs, so a small tiara gets more pins than a single crystal clip. Leave a few loose curls near the face so the headpiece isn’t sitting on a bare hairline. If the curls flatten by evening, a damp hand and a twist around a finger brings them back.
14. Faux Hawk Pixie for Bold Brides
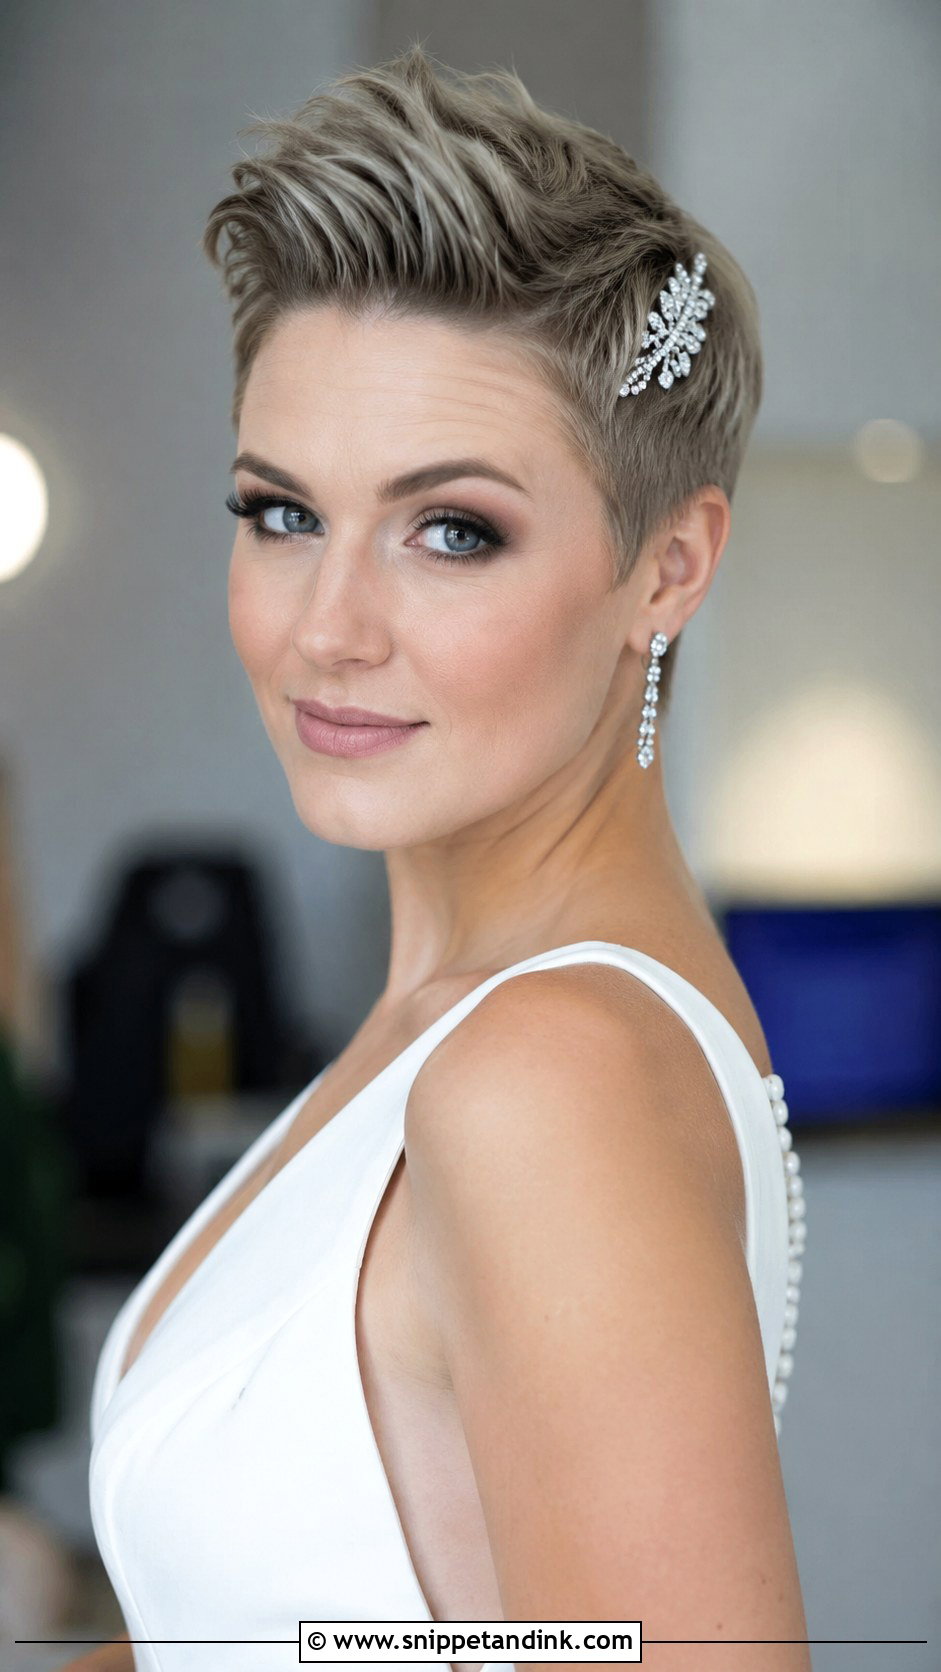
A faux hawk needs height that lasts ten hours, and that height comes from the blow-dry, not the spray. I dry the center section upward with a vent brush and a root-lift product, then shape the ridge with a texturizing paste while keeping the sides smooth and pressed. Because the shape is already bold, I keep the bridal detail small: one jeweled pin along one side. Hugs are what usually flatten it. Keep the paste in your clutch and rework the top with your fingers after the receiving line.
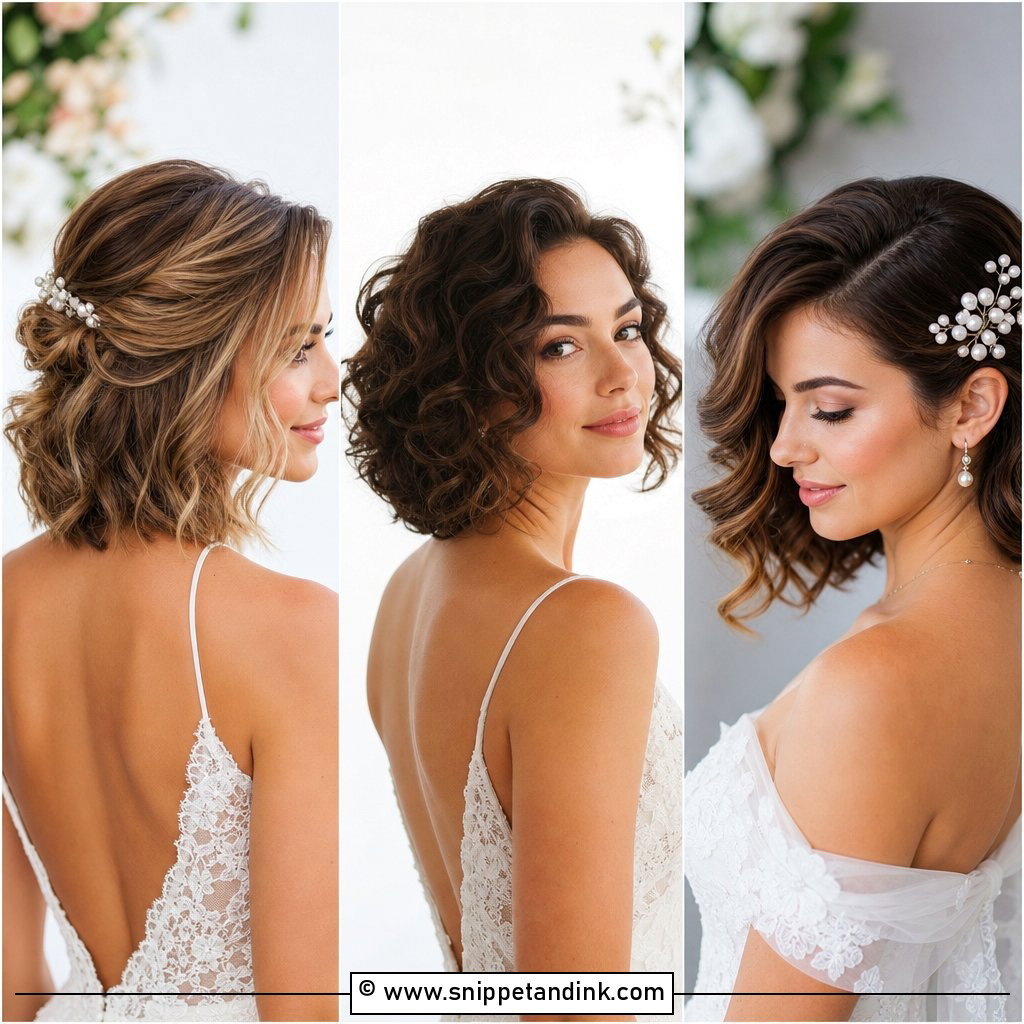
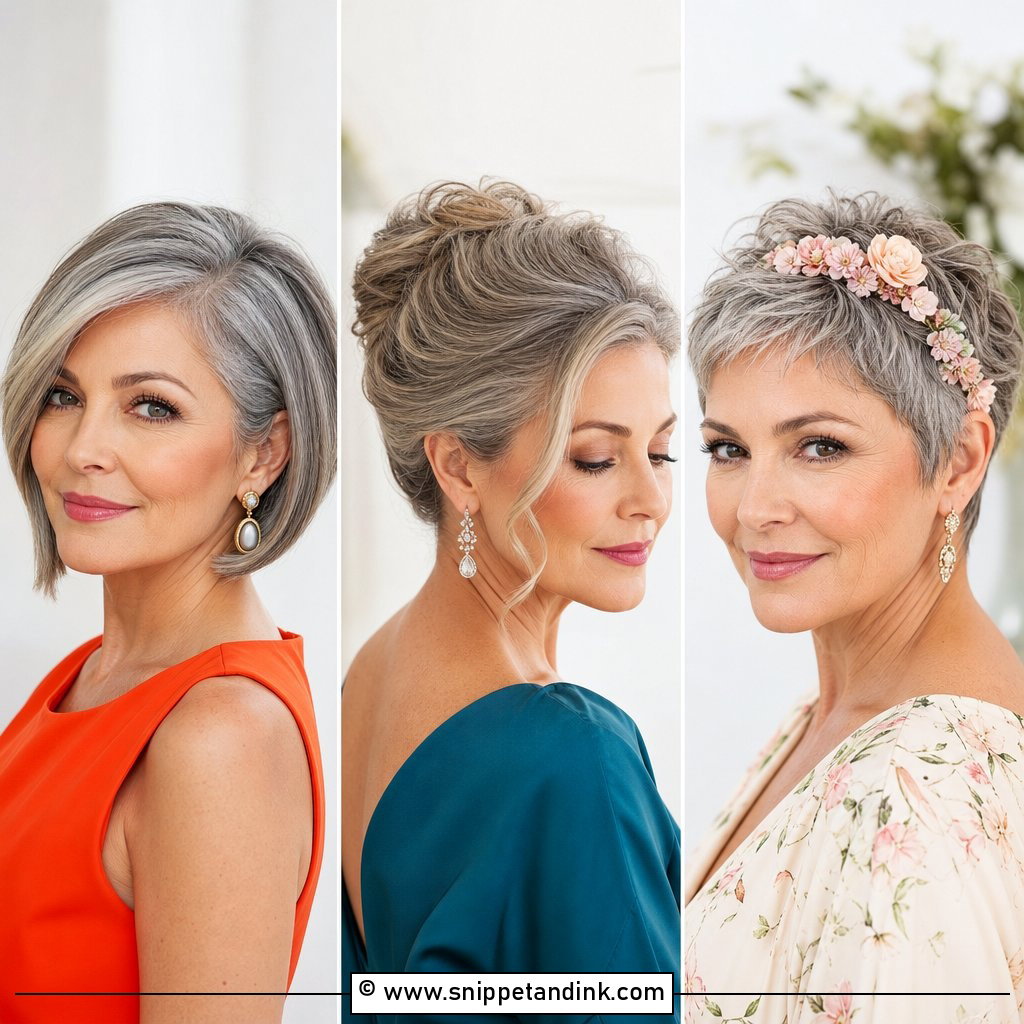
15. Layered Bob With Side Part
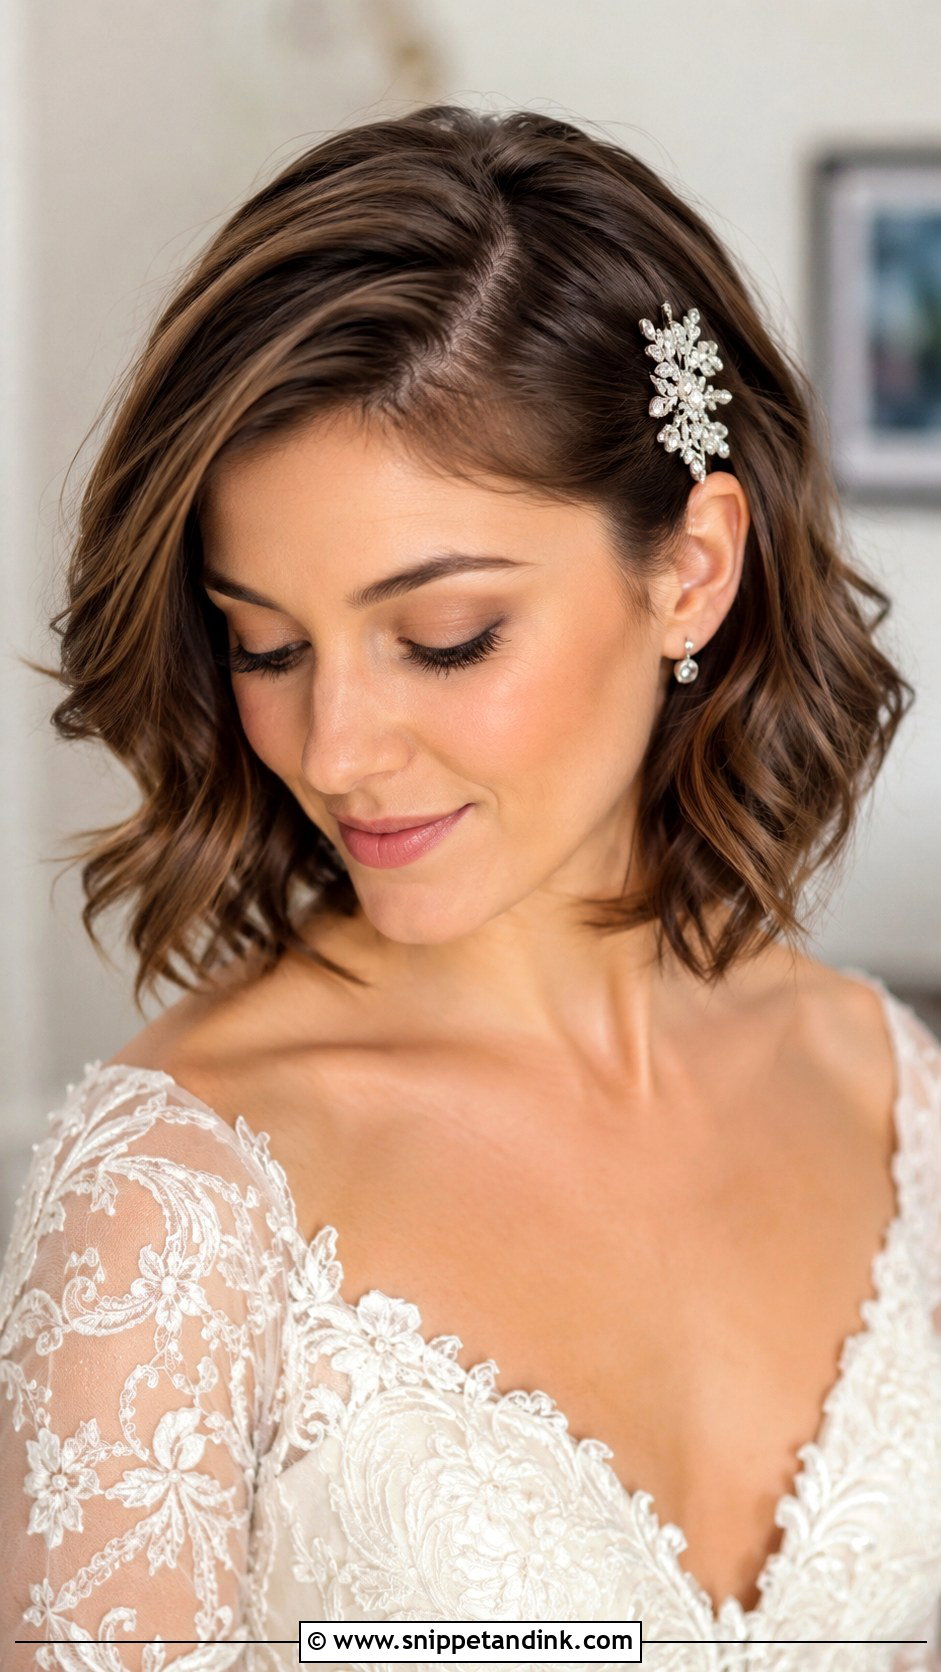
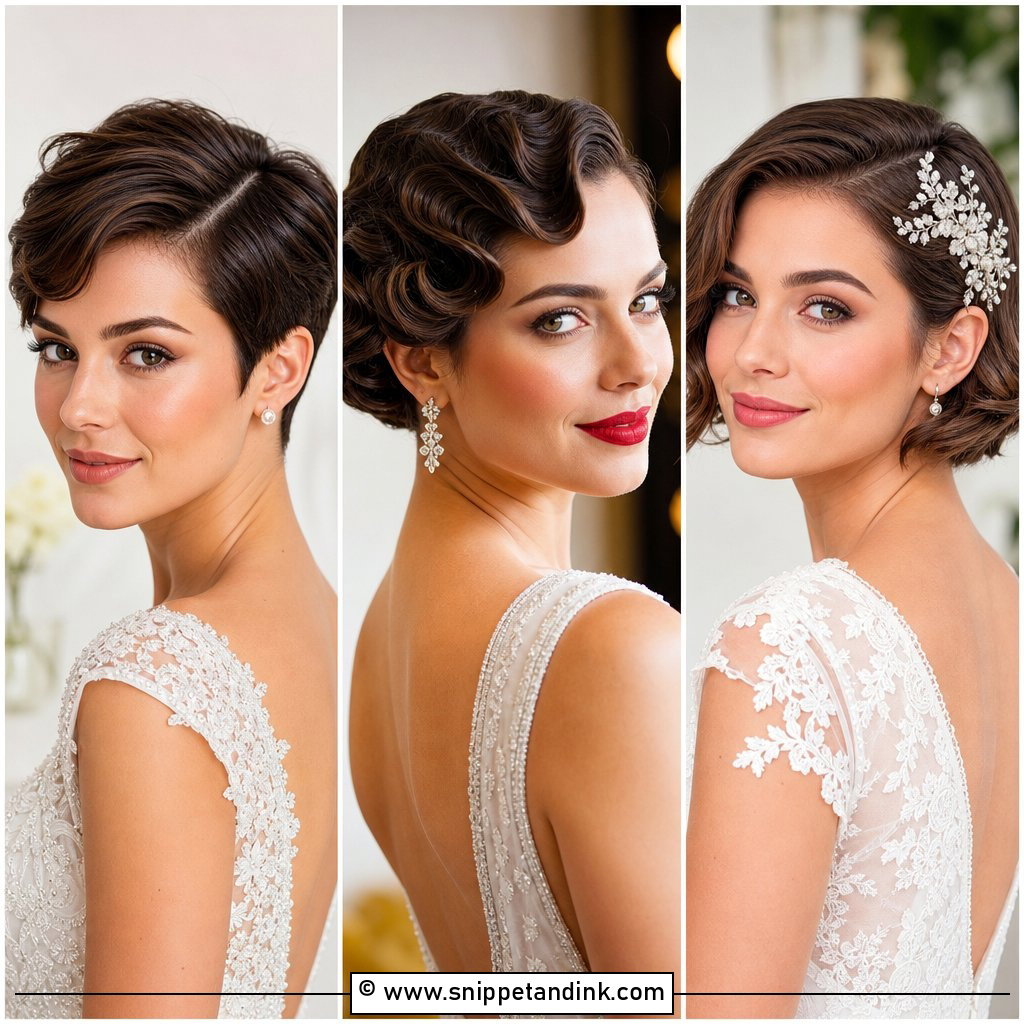
Layers give a bob movement, but too many can make it look shaggy if the ends get thin. I’d ask your stylist to keep the perimeter fairly solid and put the layering through the crown. A deep side part lifts the front on its own, and from there you can wear it smooth or with loose waves. It is one of the most forgiving shapes for round and square faces. A delicate clip above the temple on the heavy side stops it falling forward during the vows.
16. Pixie With Delicate Hair Vine
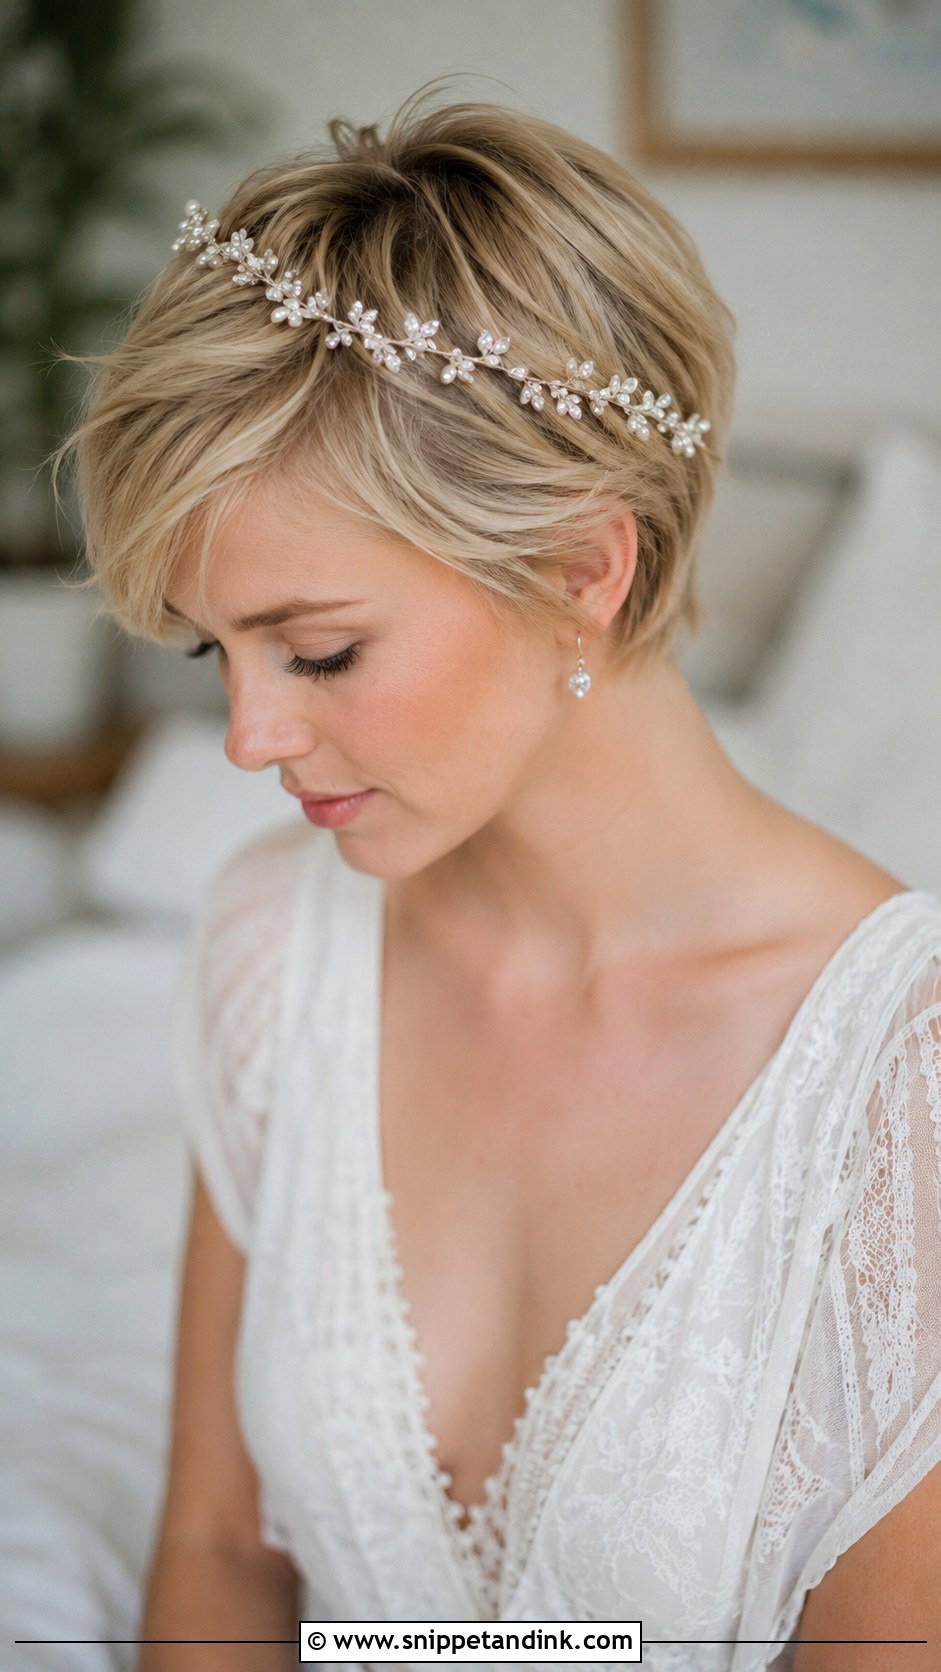
A hair vine is wire, and that’s what makes it workable on a pixie. I bend it to follow the hairline or curve over the crown, then catch it every couple of inches with small U-pins, which lie flatter than bobby pins on short hair. Pearls or crystals that echo your jewelry keep it cohesive, and it sits equally well on sleek and textured cuts. Wear it around the house before the wedding: untucked wire ends can scratch behind the ears, and that is easy to fix in advance but miserable to discover at the ceremony.
17. Glamorous Teased Pixie Updo
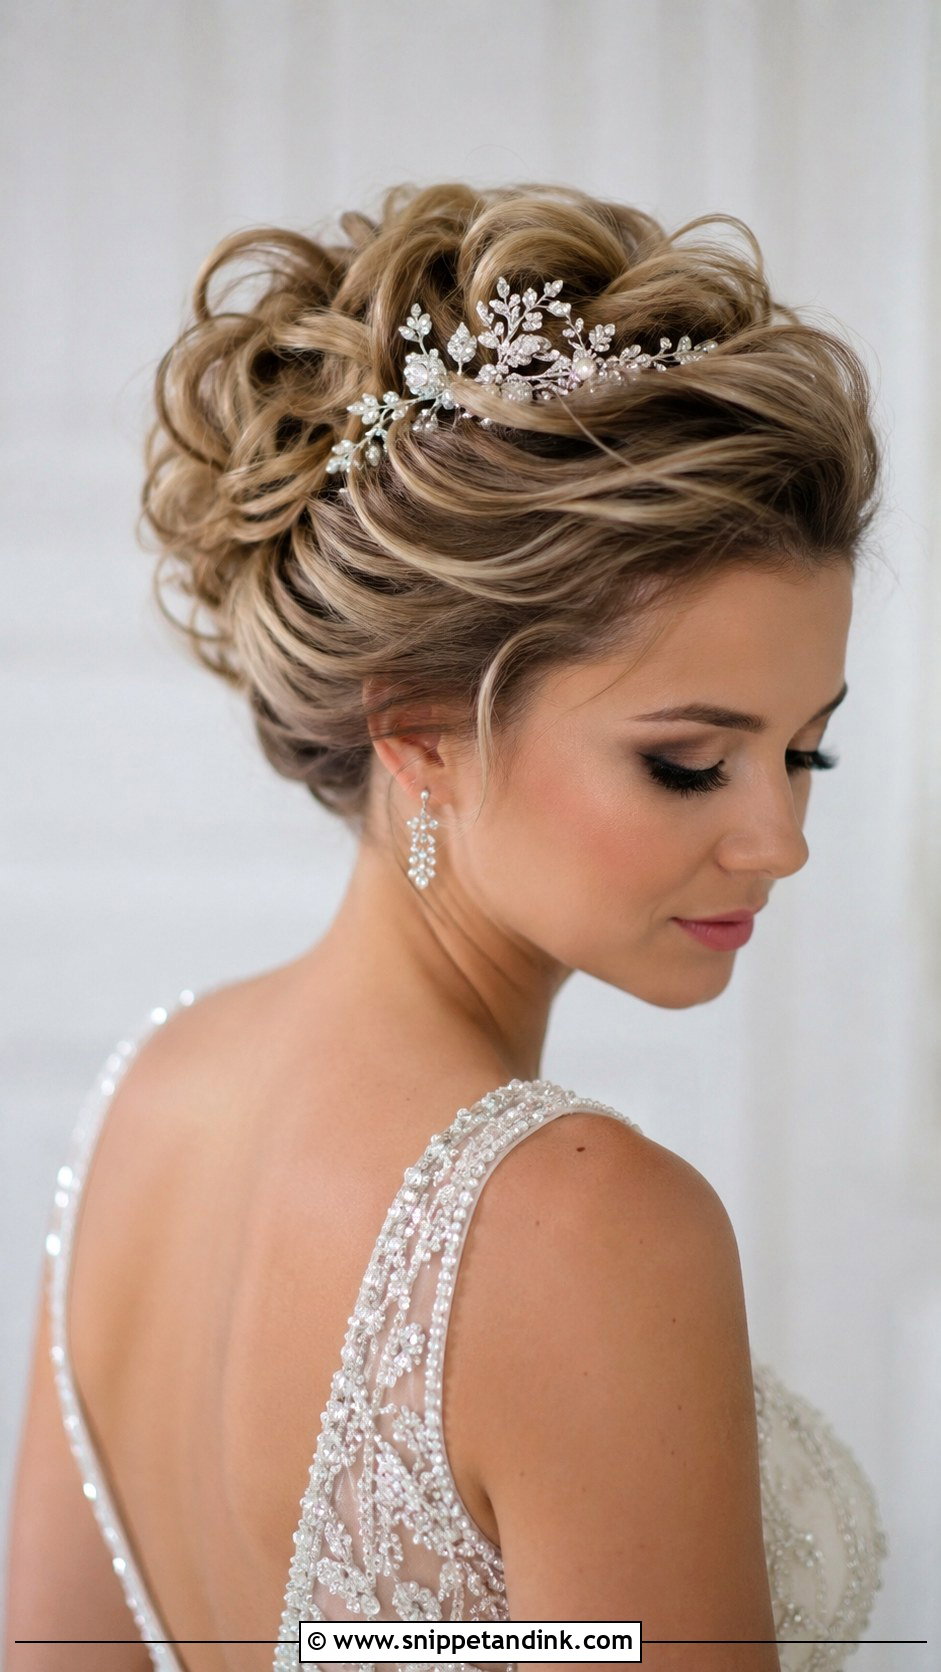
Short hair can still go big. I curl each section first, let it cool, backcomb at the root for height, then smooth only the top layer over it so the teasing stays hidden. A firm spray locks it in. You need at least four inches on top for this; anything shorter just looks puffed. A jeweled headpiece balances the volume, and large earrings stay in proportion with it. I’d tuck a tail comb in your bag to lift the crown again before the evening photos.
18. Sleek Bob With Deep Side Part
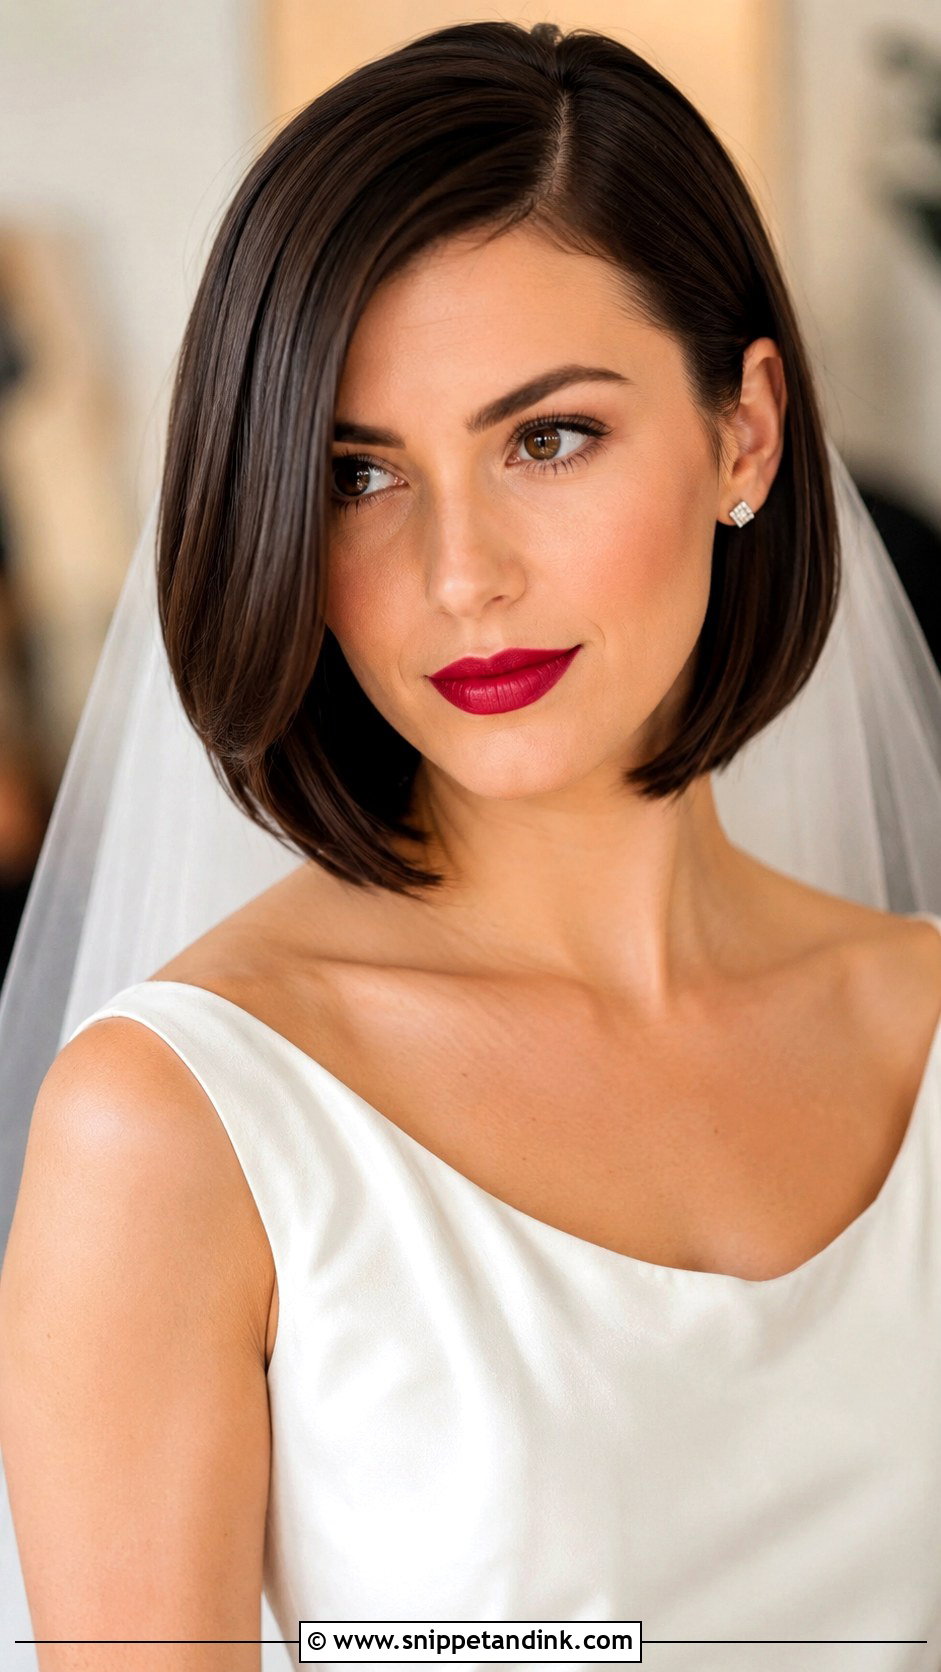
A deep side part creates drama on a sleek bob with nothing more than a comb. I set the part at the outer arch of the eyebrow, flat iron in small sections, and smooth a little anti-frizz over the ends. The heavy side will want to drop into your eyes, so a hidden pin behind the ear holds it without showing. Bold lips suit this shape well. Fine hair loses its shine first, so a quick mist of shine spray before the reception keeps it looking freshly done.
19. Half-Up Half-Down Short Curls
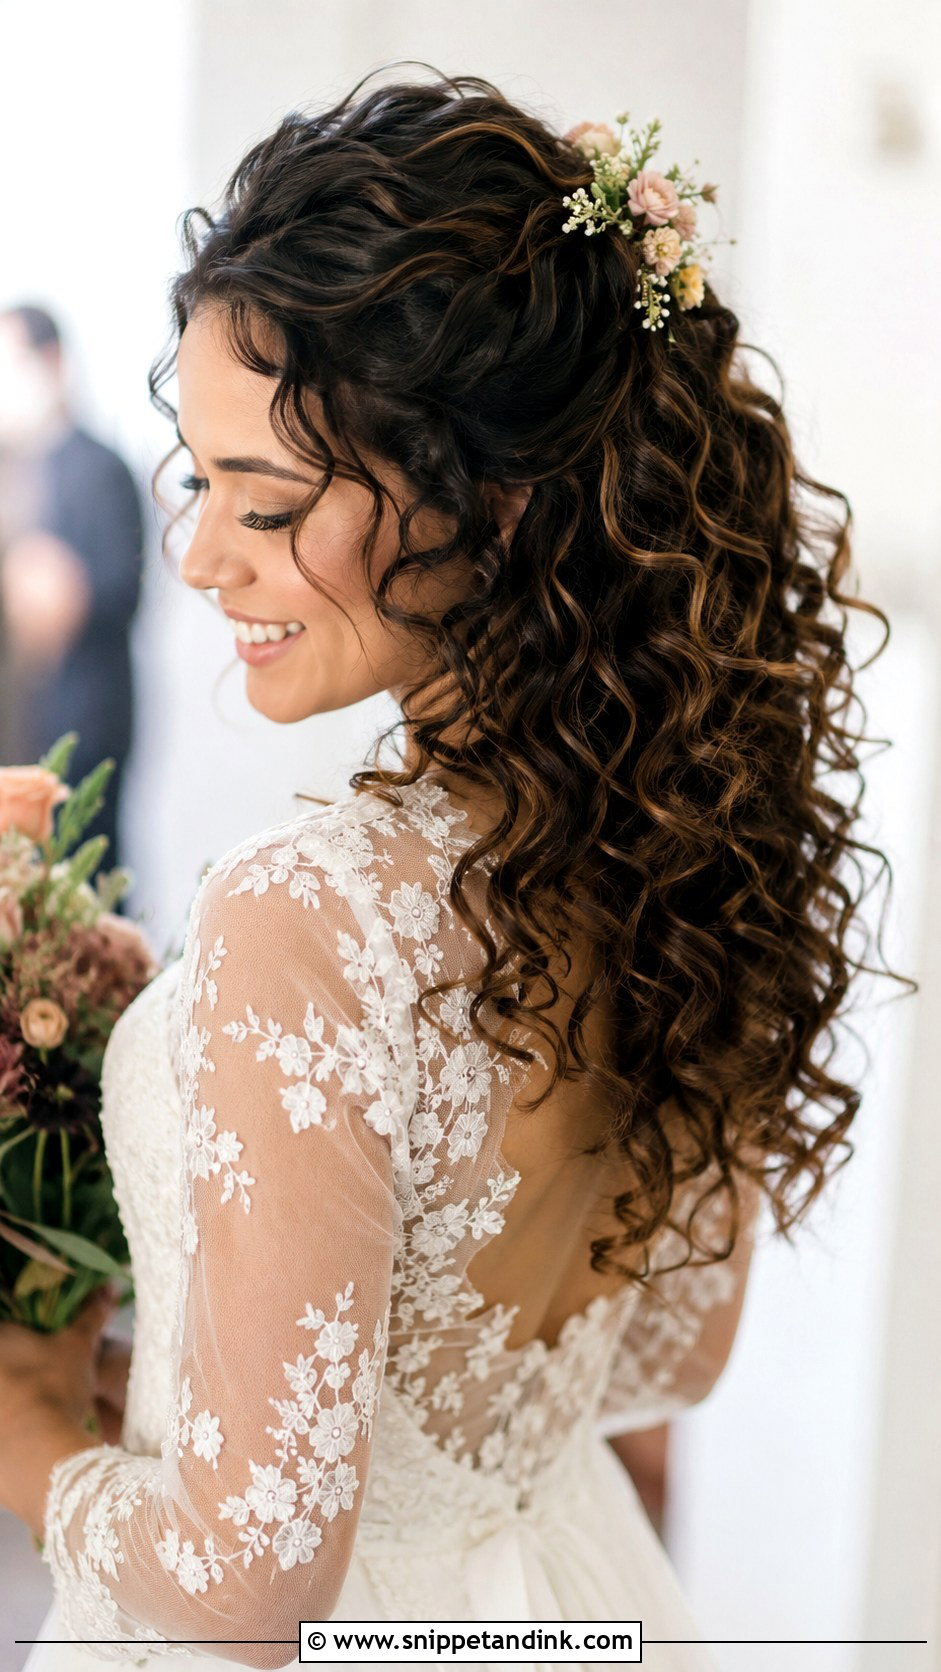
Half-up works on curls from about chin to shoulder length. Any shorter and the top section won’t reach the back of the head. I gather only the front and crown, twist once, and pin where the curls naturally meet so the join hides itself, leaving the rest free to show your texture. A small clip or a couple of flowers covers the anchor point. Nothing pulls on the scalp, which matters more on curly hair over a long day than most people expect.
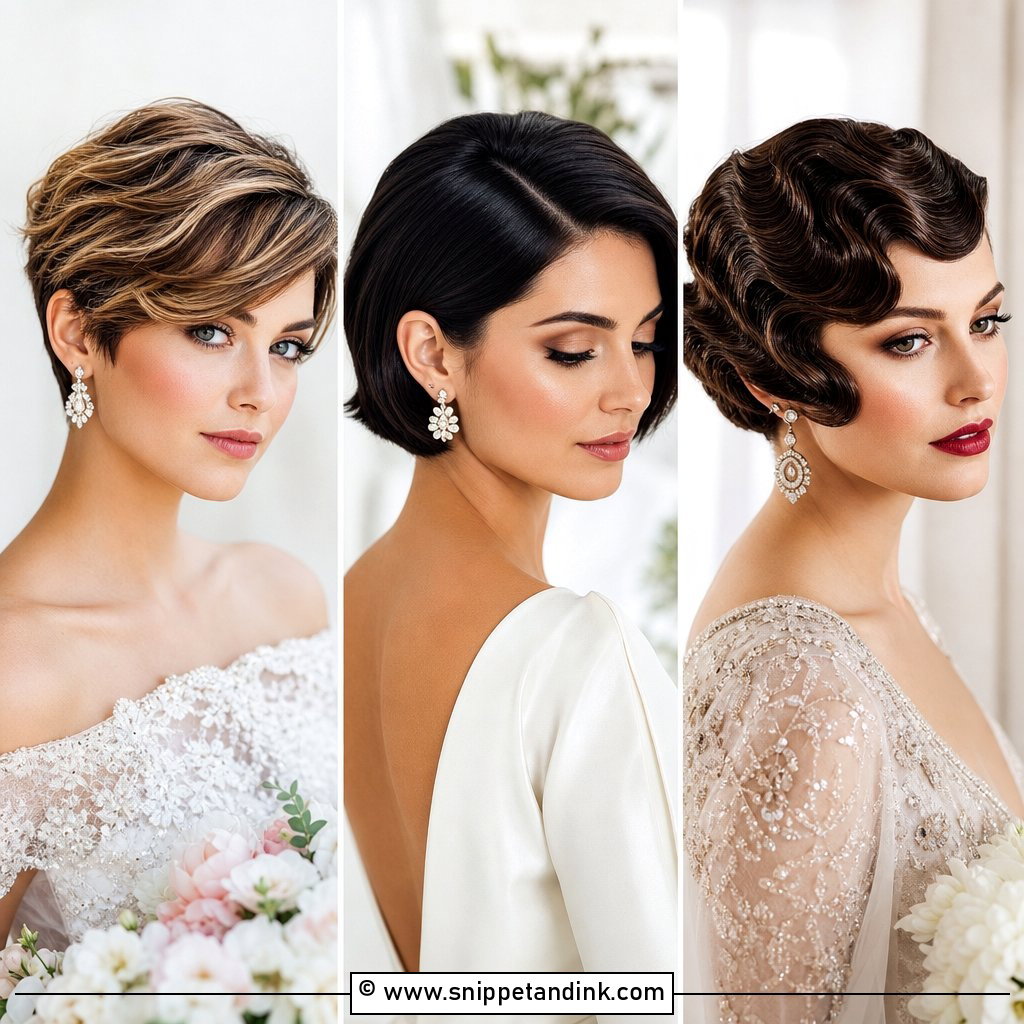
20. Two-Toned Pixie for Modern Brides
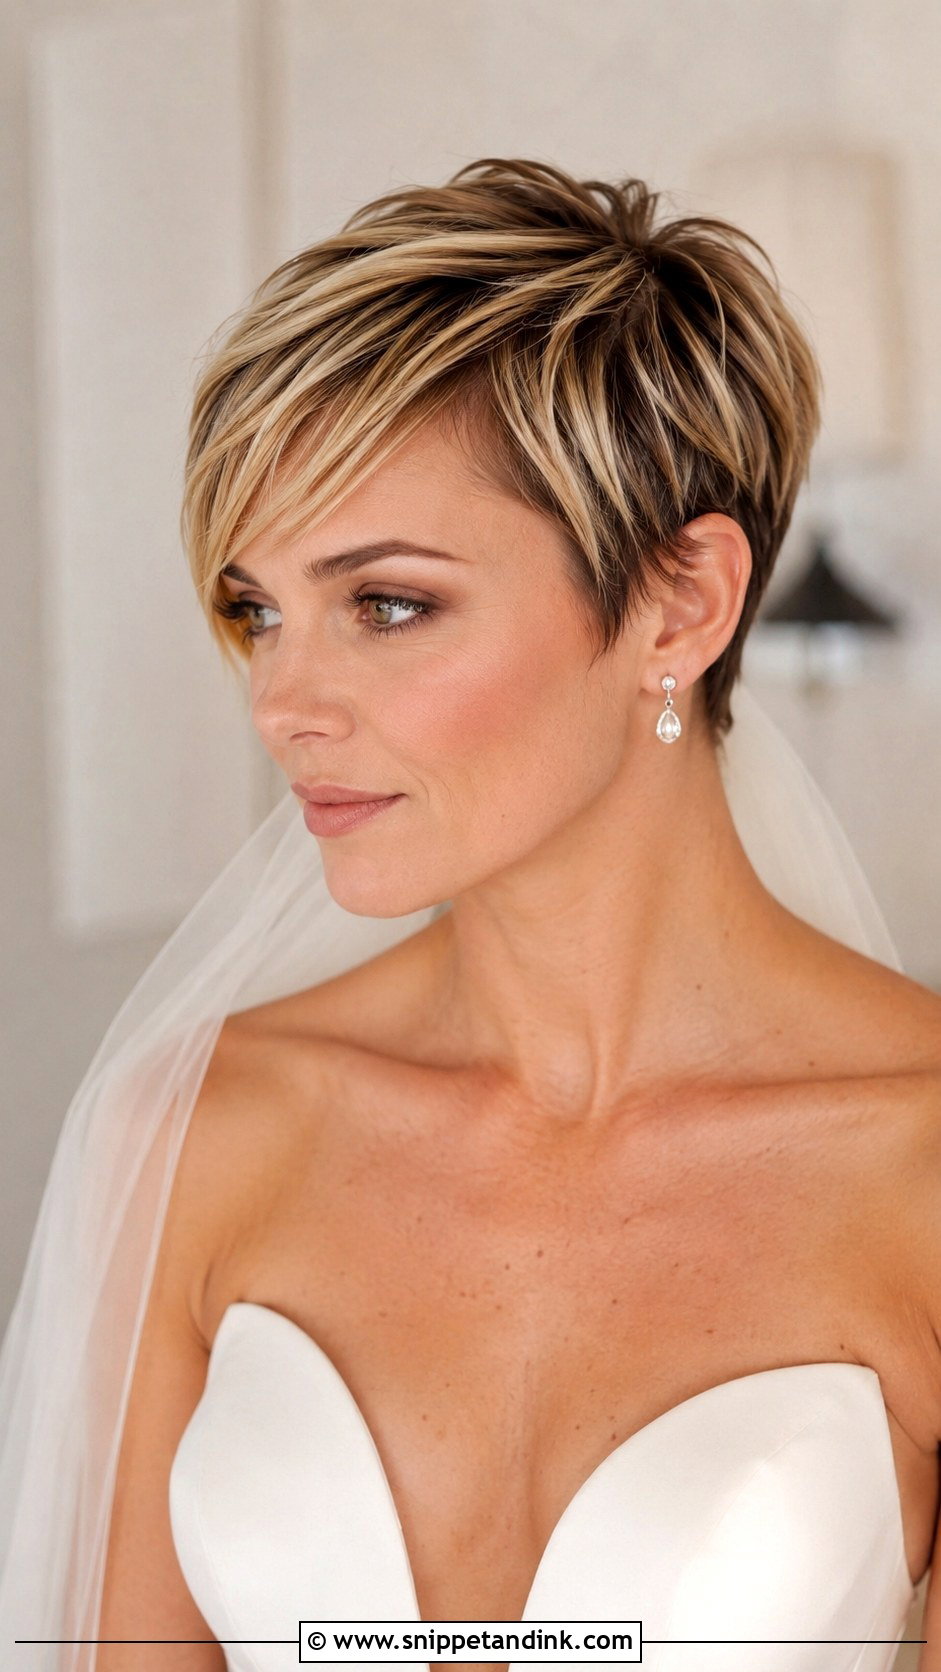
With a two-toned pixie, the color appointment matters as much as the styling. I’d have the color done about two weeks before the wedding, close enough that regrowth doesn’t show but far enough out that any brassiness from fresh toner has settled. Contrasts like soft blonde with darker roots show best when the layers are styled with texture so both shades catch the light. A matte paste does that far better than shine products, which flatten the dimension. Keep accessories minimal and let the color be the feature.
21. Soft Romantic Side Bun
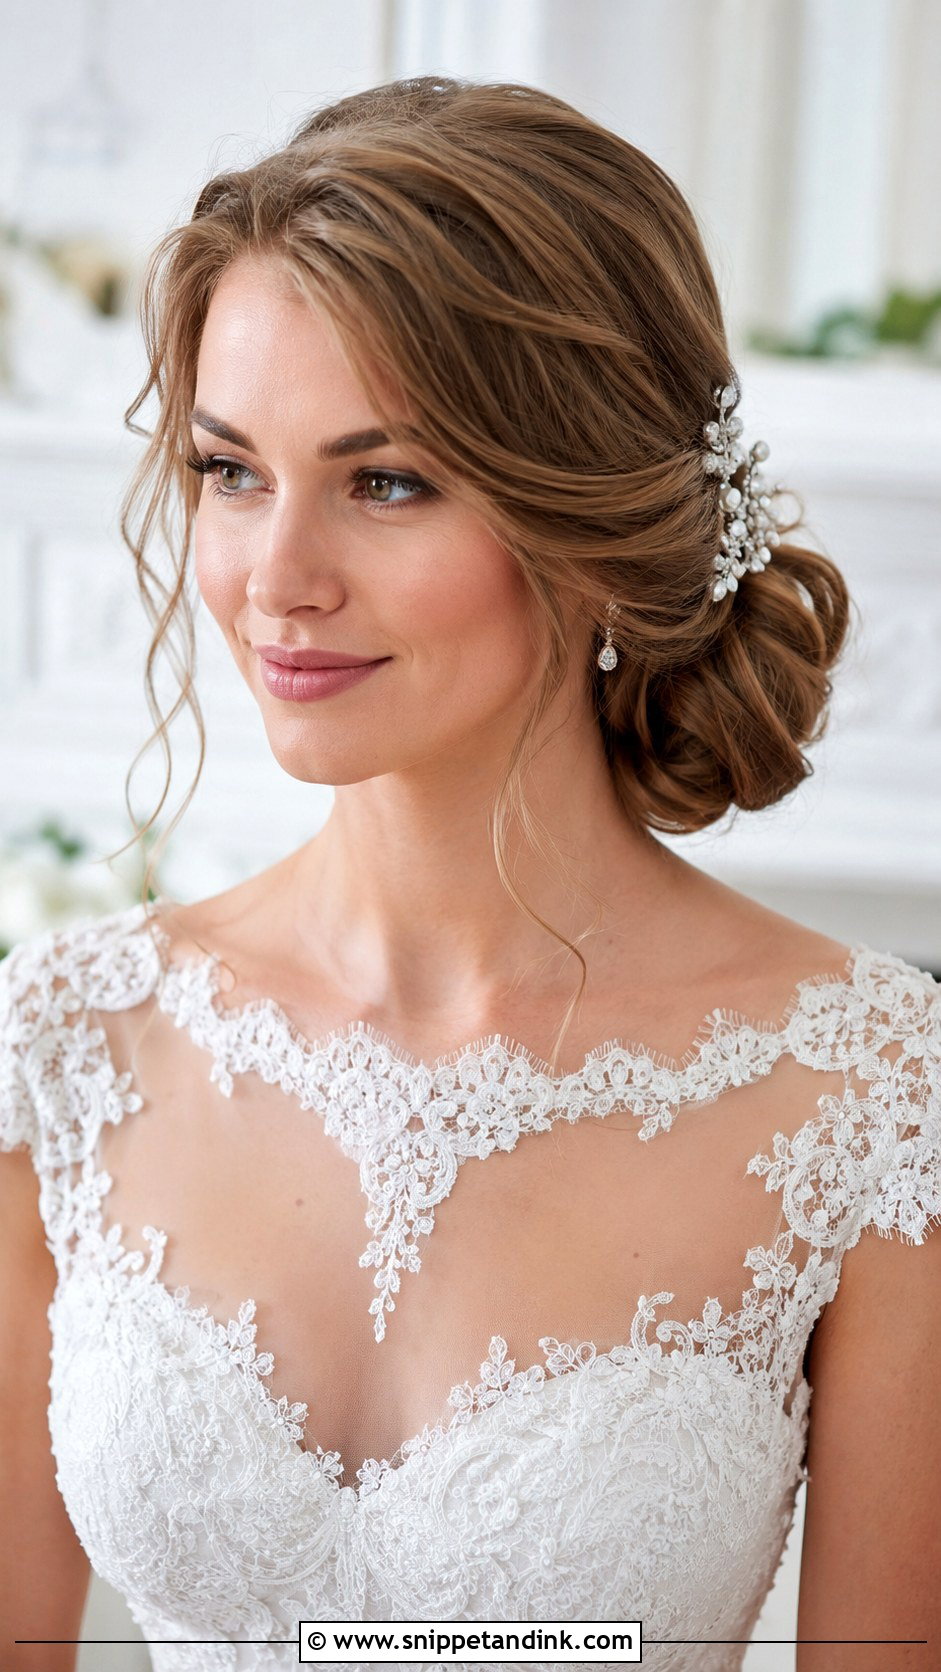
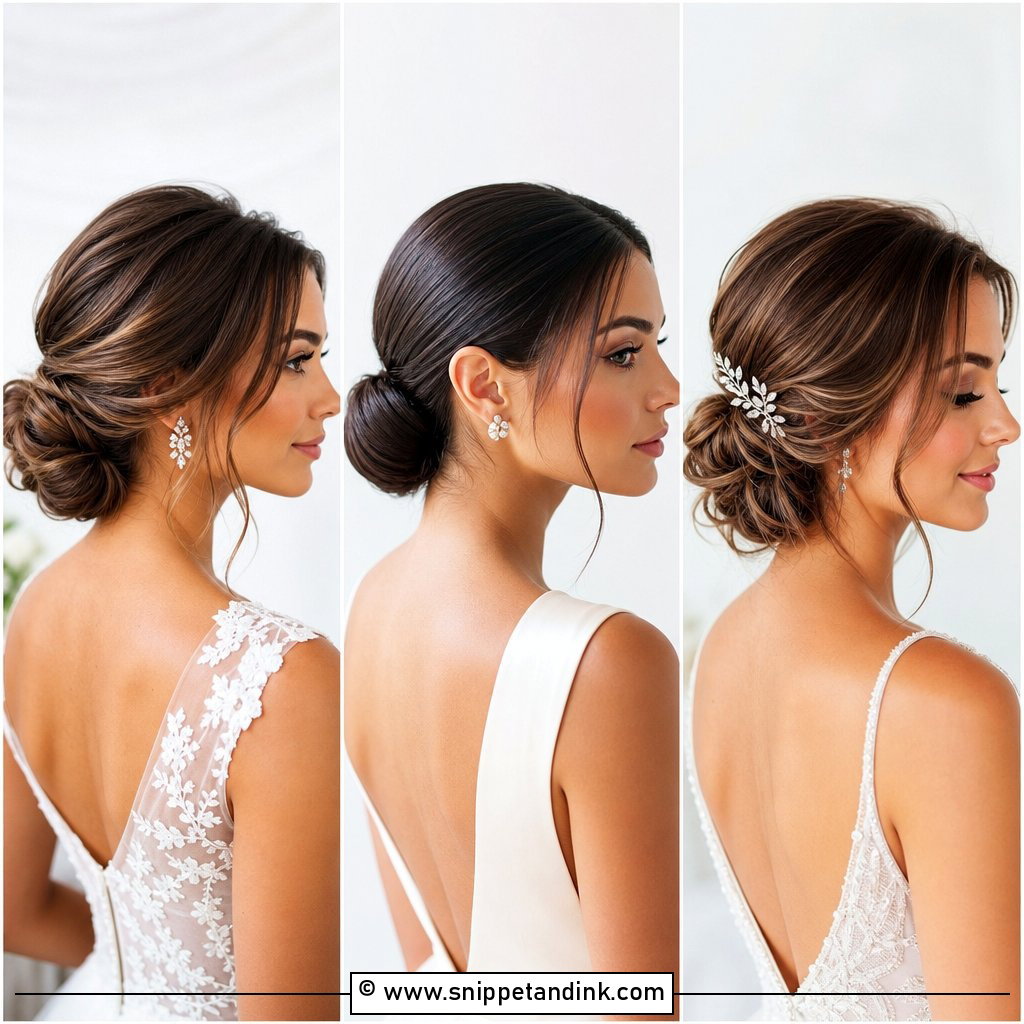
A side bun is possible on a bob or a longer pixie only if the hair reaches the nape on one side. I sweep everything toward that side, twist it into a low knot near the ear, and push a few long pins in at angles. Short layers that won’t reach get pinned flat underneath, and a few tendrils stay out near the face. If you’re wearing a veil, it goes in just above the bun rather than into it, so its weight can’t drag the knot loose.
22. Pixie With Flower Crown
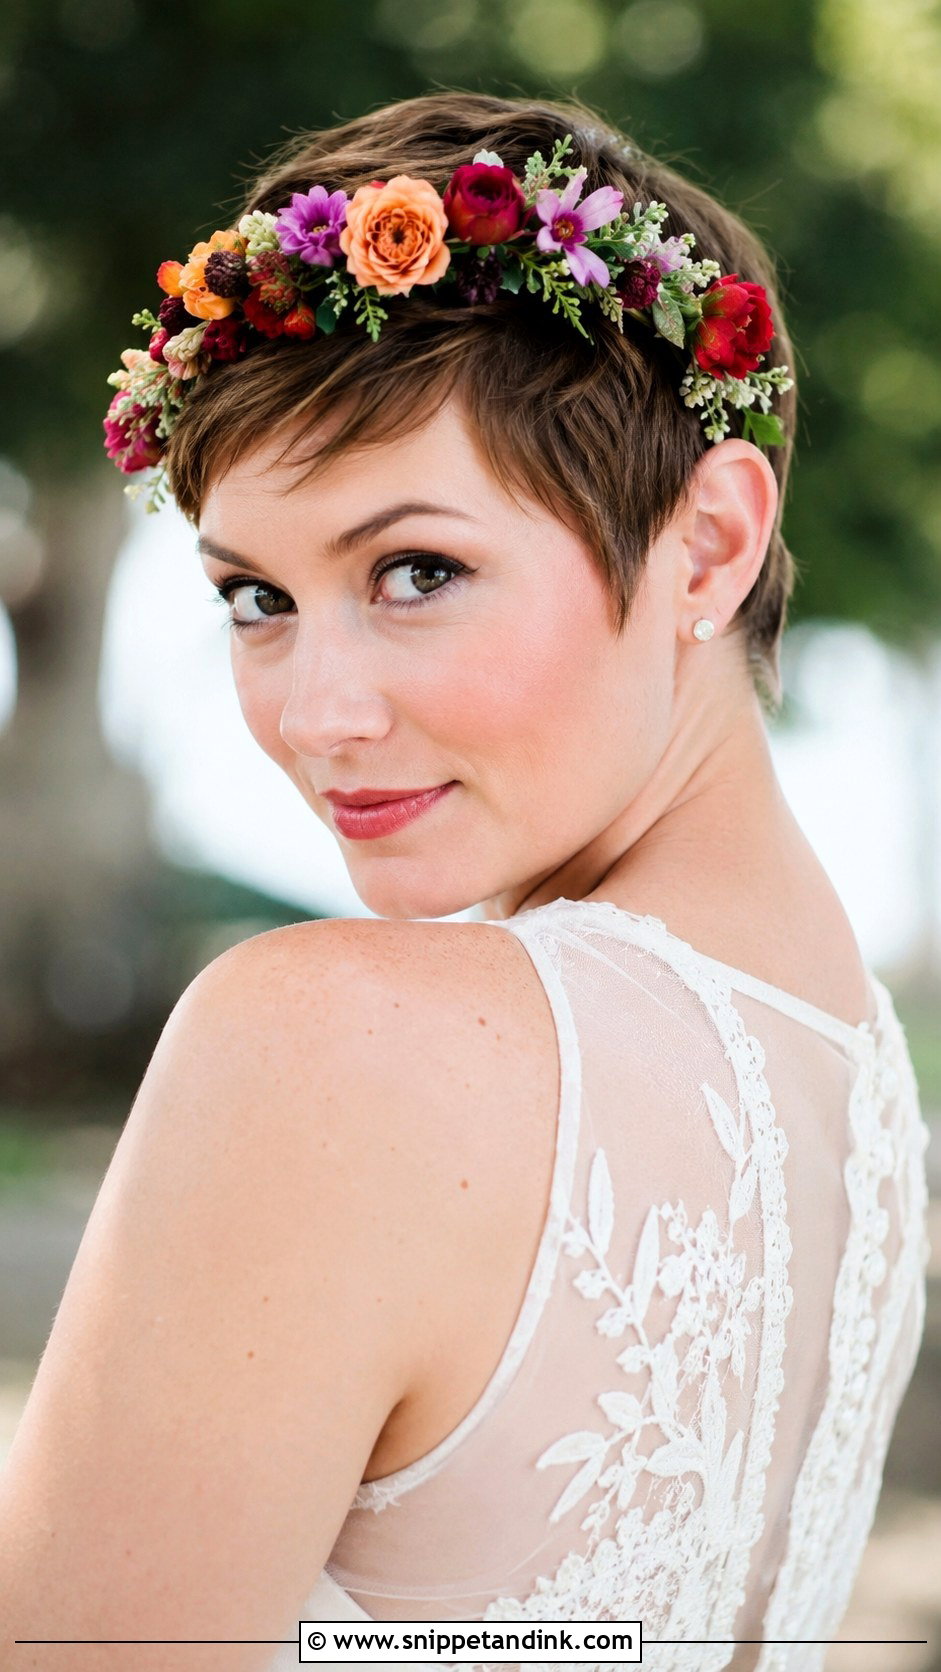
A flower crown on a pixie looks right when it’s slim. Wide crowns overwhelm a small head of short hair and tend to slide forward. I ask florists for a light wire base with small flowers, and I pin it at four points: front, back and both sides. Pulling blooms from your bouquet links the two. Fresh crowns look their best in the first few hours outdoors, so keep it in the fridge until you’re almost ready to walk.
23. Glossy Bob With Tucked Sides
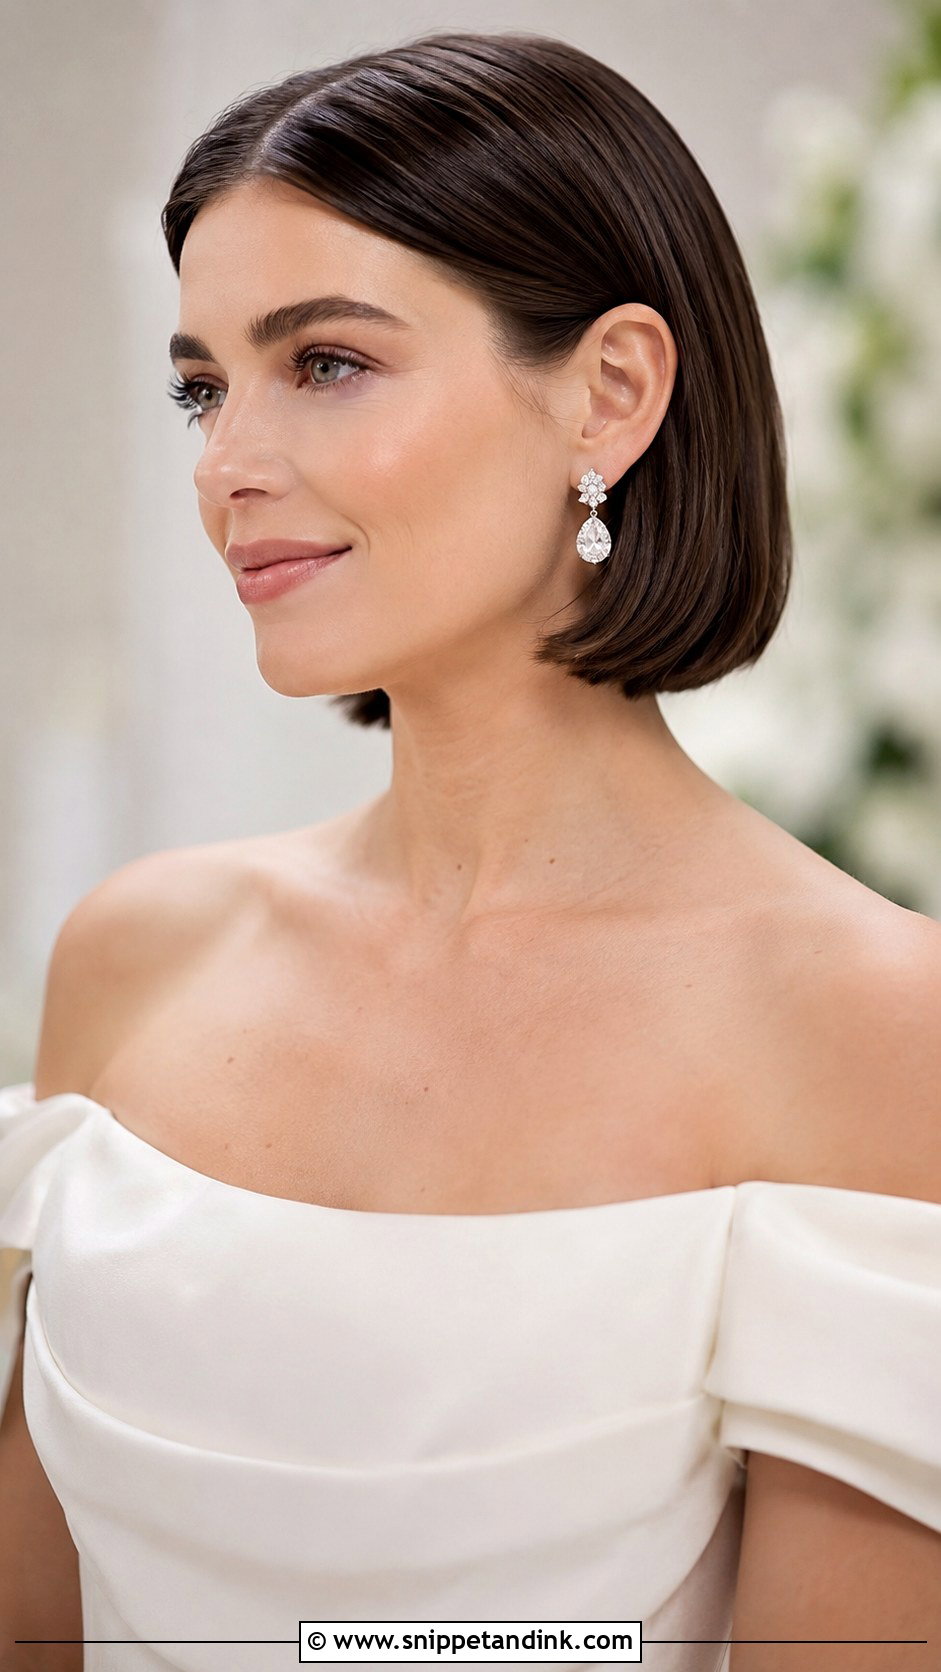
Tucking the sides behind your ears is the smallest change a bob can get, and it makes your earrings the focus. I smooth with a flat iron, then open a bobby pin slightly and slide it in flat behind each ear so it disappears. Shine spray gives the glossy finish. Some ears push hair forward no matter what, so if yours do, I work a little pomade into the tucked sections first. Once that’s done it stays neat all day and never looks overdone.
24. Vintage Pin Curls for Short Hair
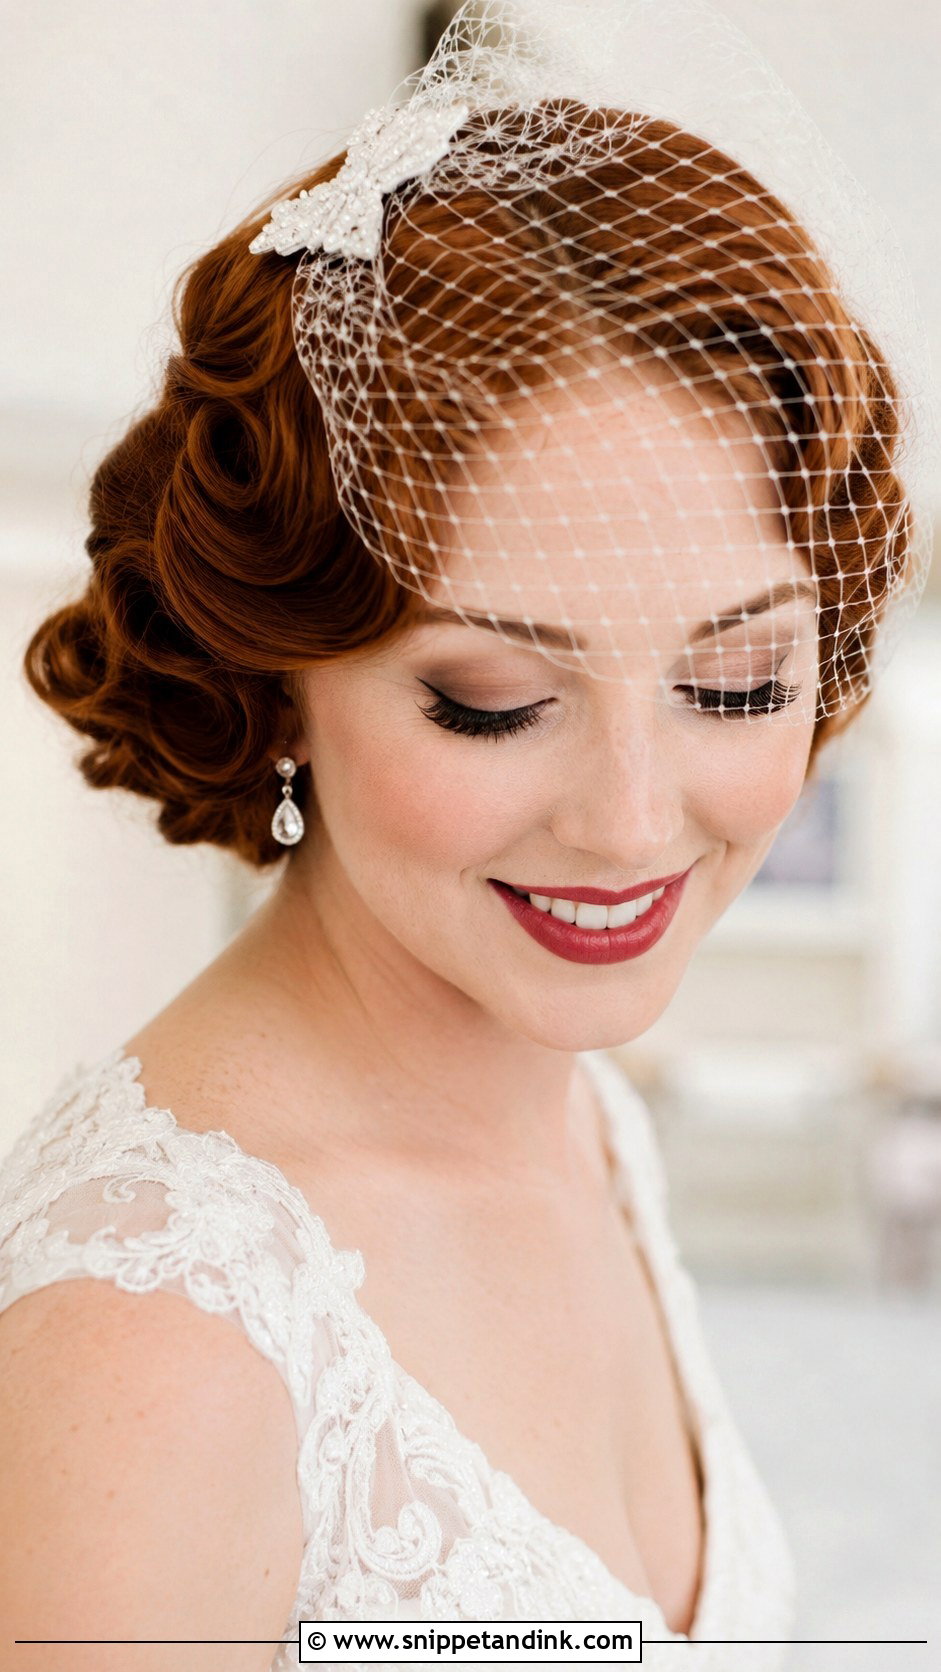
Pin curls take patience, and they’re the one style I’d never rush on a wedding morning. I wind small product-set sections into flat coils, clip each one, and let them dry or cool completely. Brush them out too early and you lose the bounce. Done properly, they turn into soft retro waves with real volume. On very fine hair, setting the curls the night before and brushing out in the morning holds better. A birdcage veil or one sparkly clip finishes it.
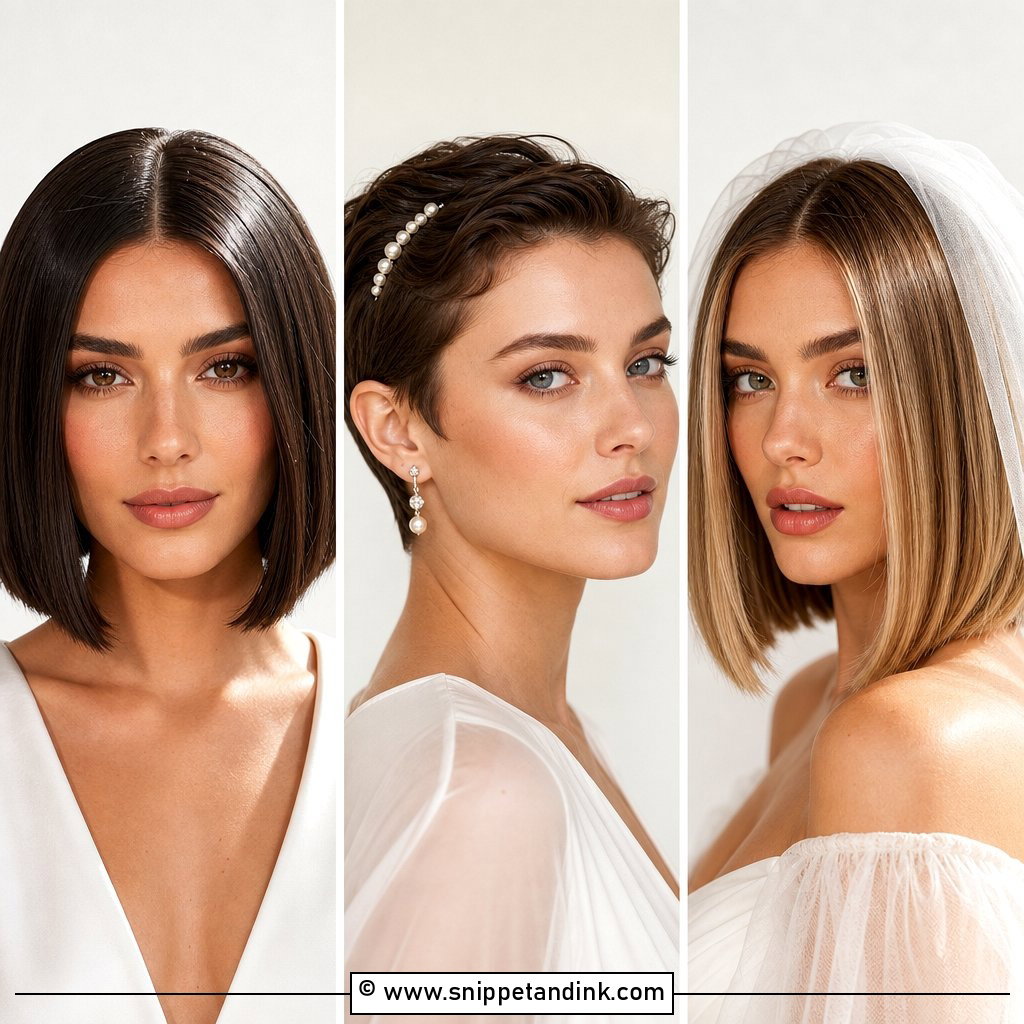
25. Textured Crop With Statement Earrings
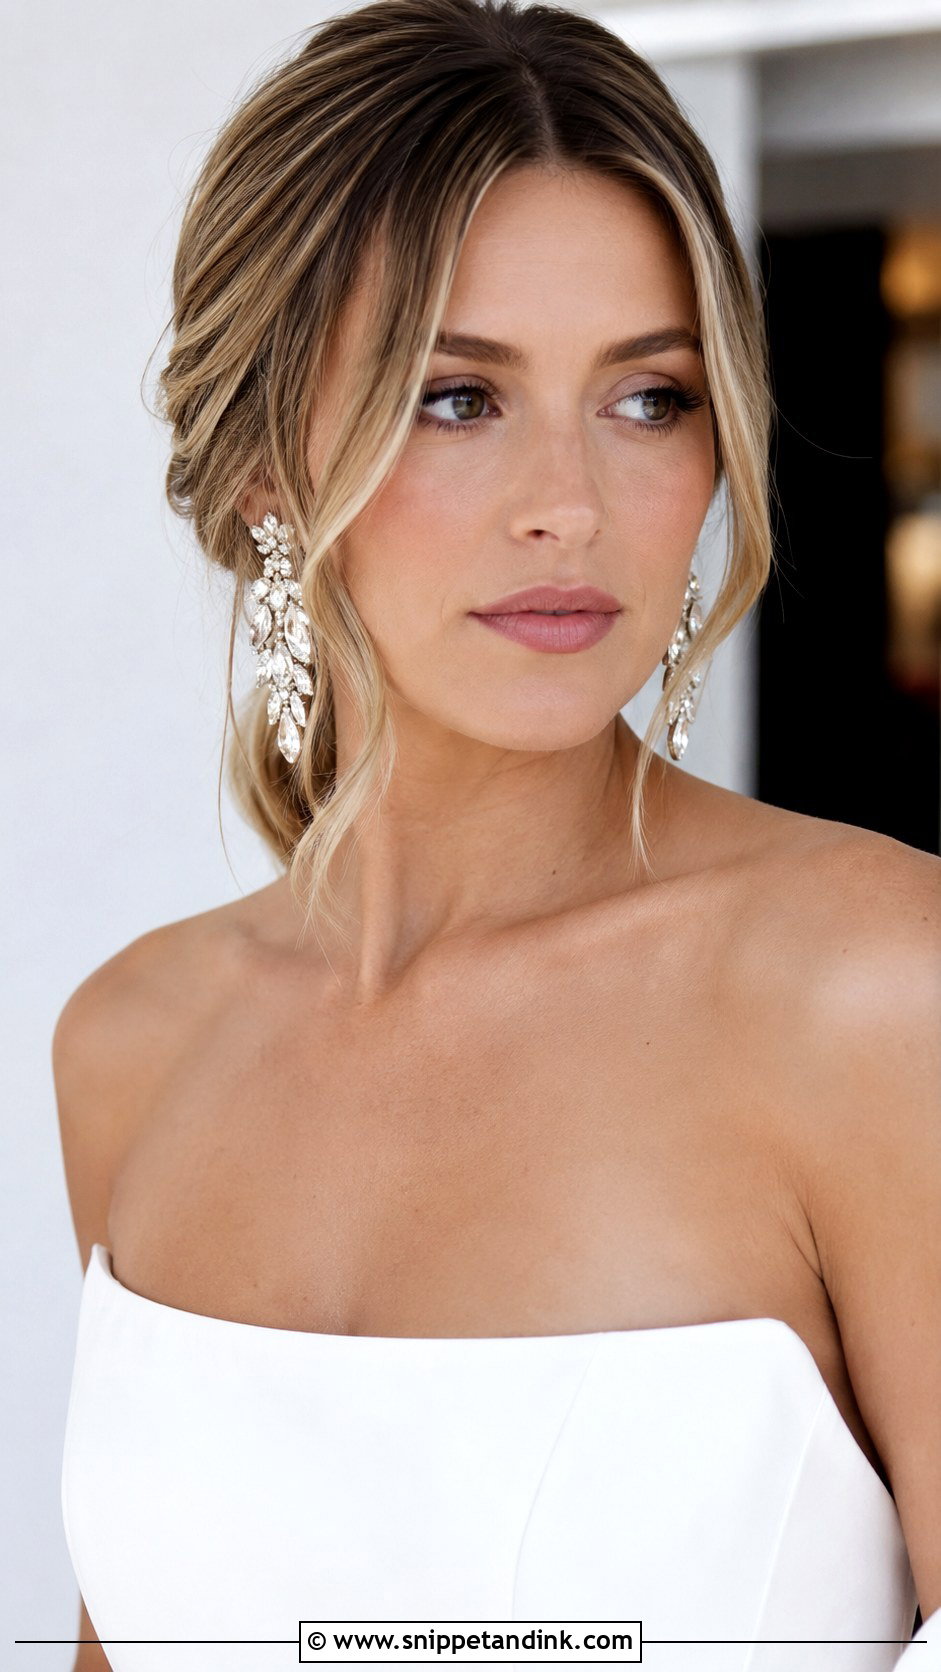
A textured crop is about piecey separation, so I avoid anything glossy. A matte paste or clay worked through dry hair with fingertips gives that lived-in finish. Oversized earrings look in proportion on a crop where they might overwhelm longer hair, so this is the cut to let them take over. A sleek, minimalist gown keeps the whole look modern. Do check earring weight at your trial; heavy drops worn from the morning prep to the last dance can leave your lobes aching.
26. Braided Crown for Short Hair
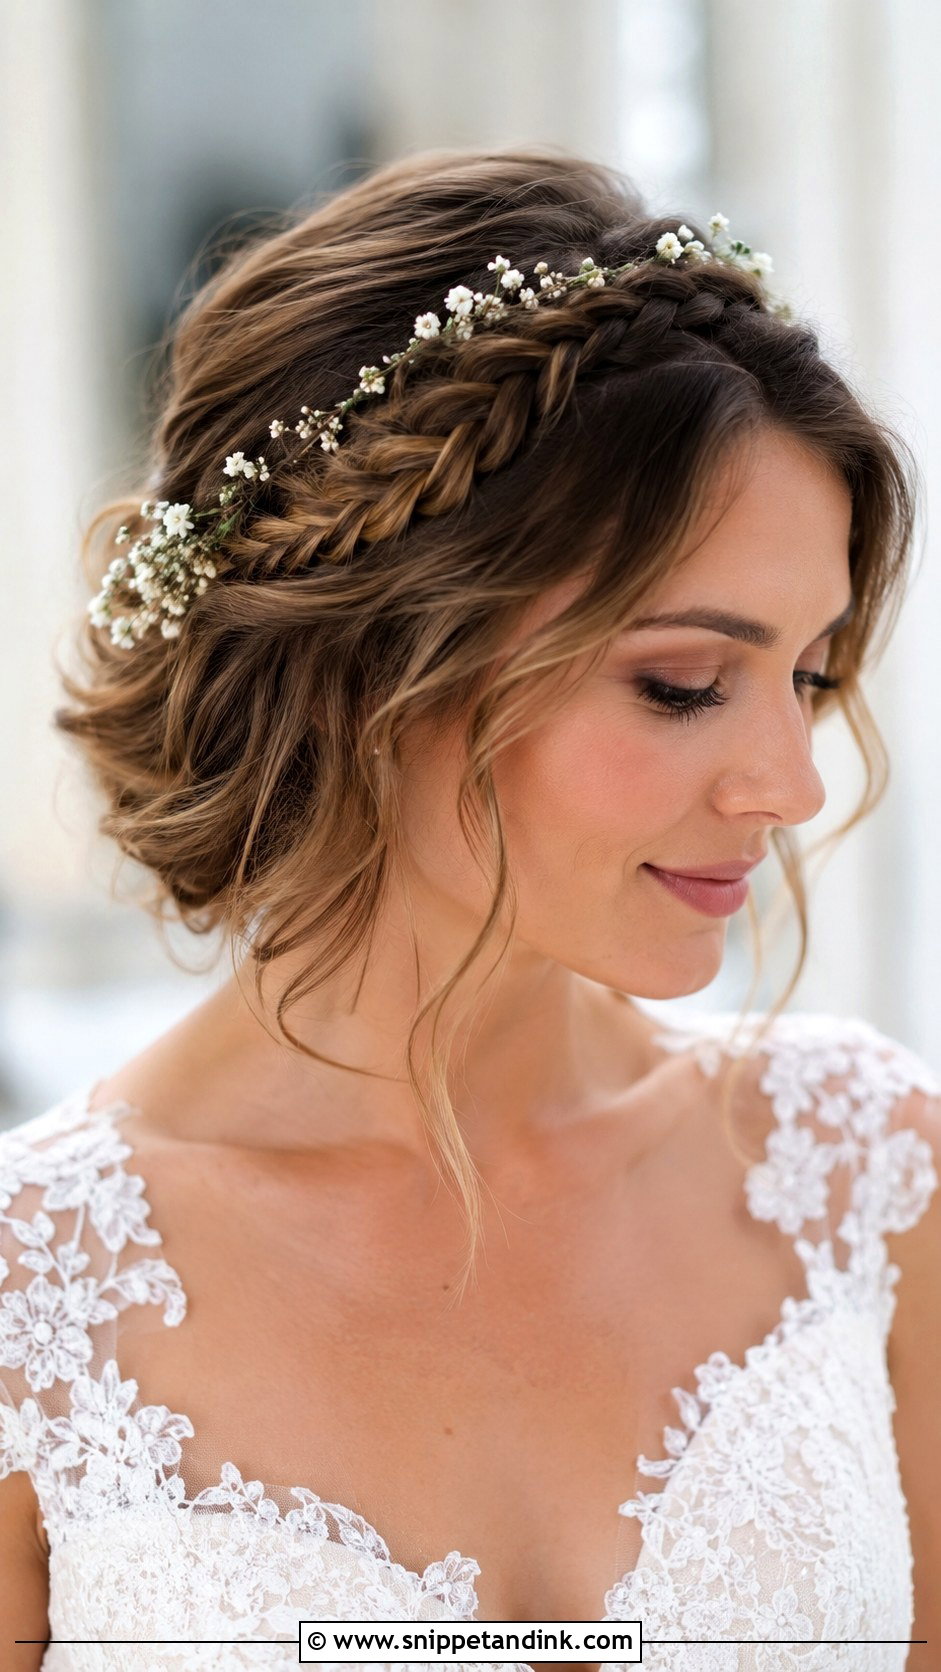
Braiding short hair is fiddly but possible if you have roughly three to four inches at the crown. I use small Dutch or rope braids along the part or across the top, pinning the ends underneath where they disappear. A little pomade on my fingers keeps short ends from poking out of the braid. I leave some face-framing pieces loose so it doesn’t look tight. Tiny flowers along the braid add charm, and because the detail runs around the head, it reads well from the side during the ceremony.
27. Wavy Bob With Center Part
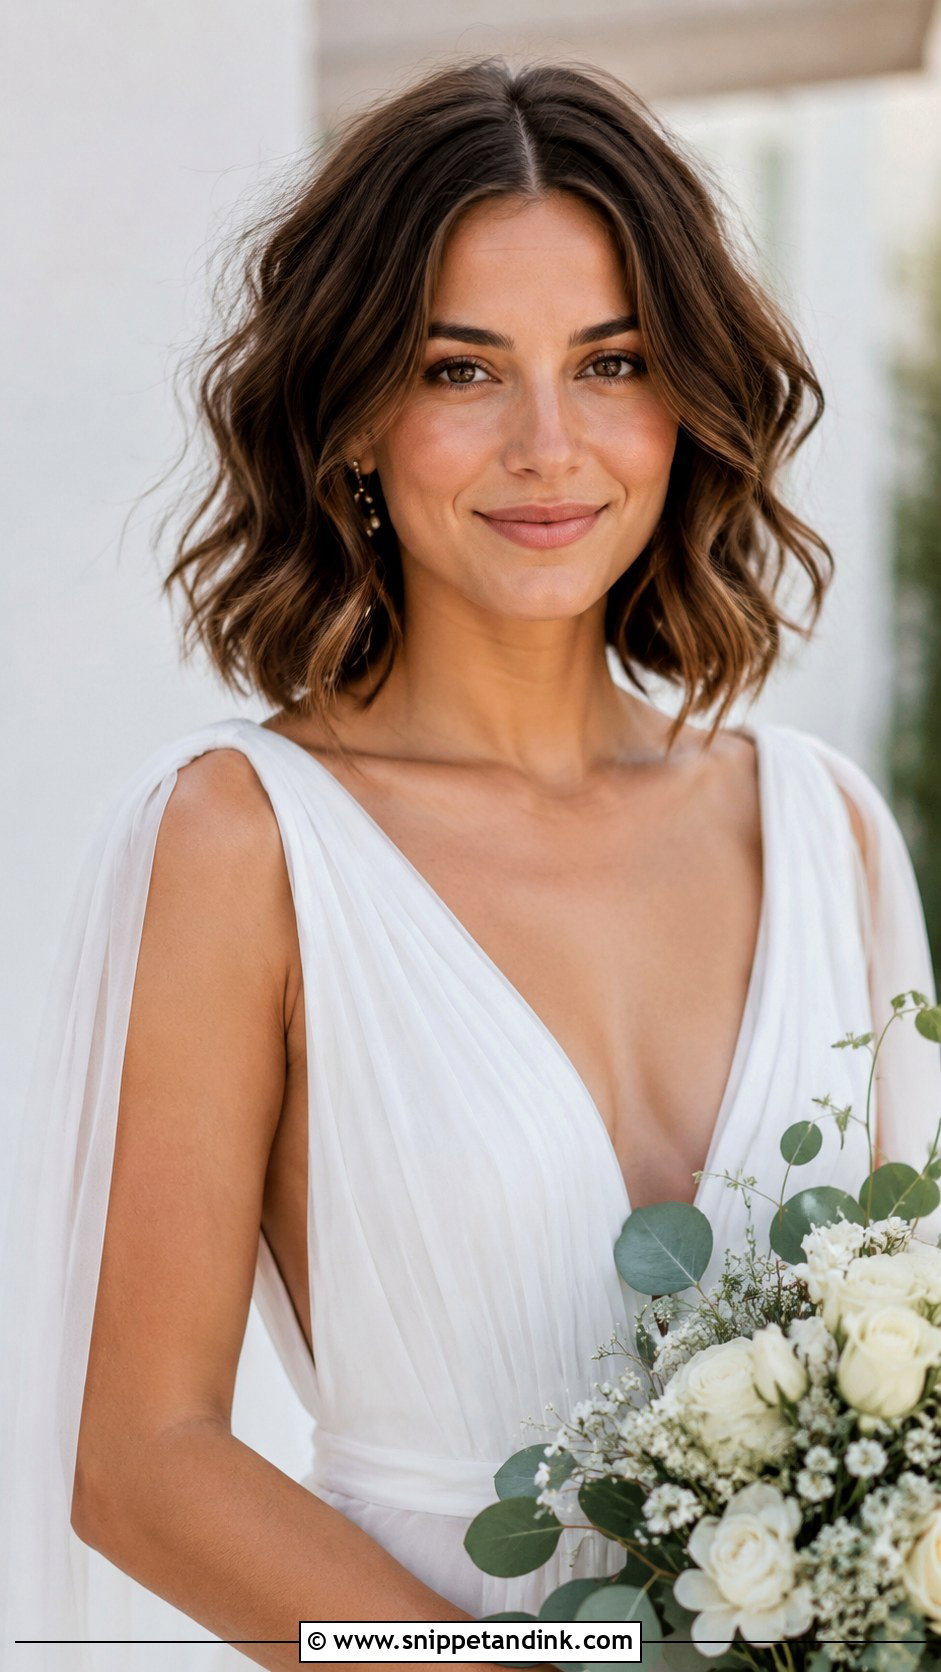
A center part shows every wobble in its line, so I set it with the tail of a comb from forehead to crown before any curling starts. Then a wand for loose waves, and fingers through to break them up. The movement of the waves softens the strict part. It suits fairly symmetrical faces best; if one side of your face is fuller, a slightly off-center part is kinder. Delicate jewelry and a flowing gown match its relaxed mood, and a small clip above one ear adds sparkle.
28. Sleek Pixie With Statement Comb
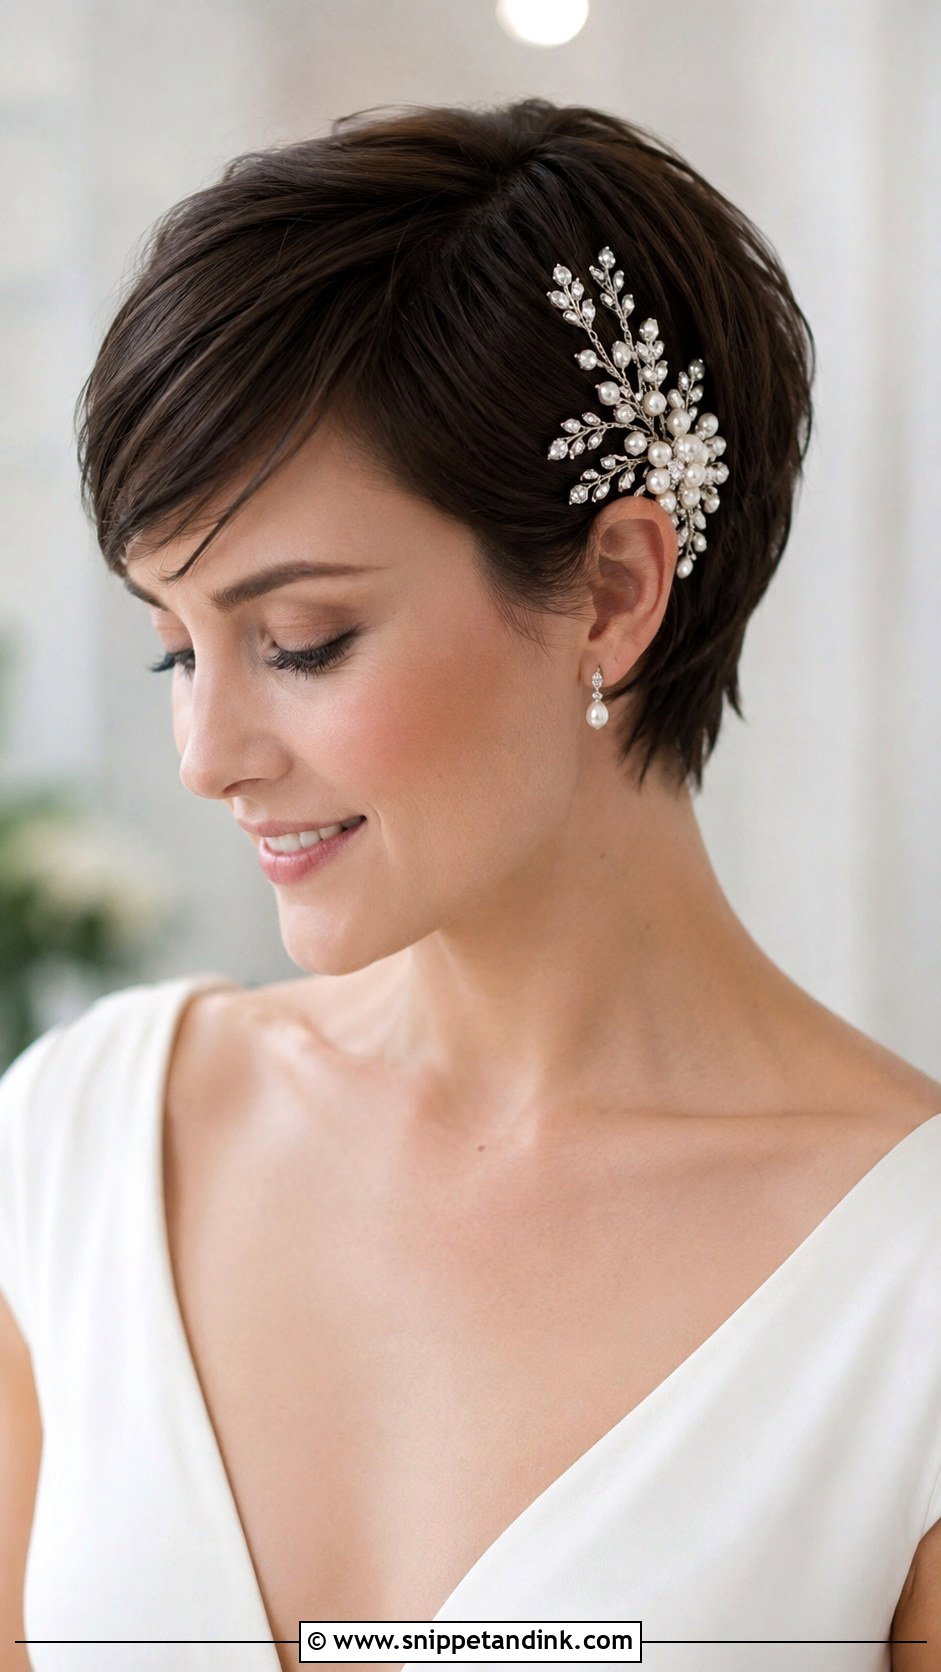
A comb is the quickest way to make a sleek pixie read as bridal. The challenge is grip, since combs need something to bite into. I lightly backcomb a small section, spray it, then slide the comb in with the teeth facing the scalp, pushing it toward the hair rather than across it. A crystal or pearl comb that echoes your dress and jewelry works well, either to one side or behind your ear. Add a short veil or bold earrings, but rarely both.
29. Boho Pixie With Loose Tendrils
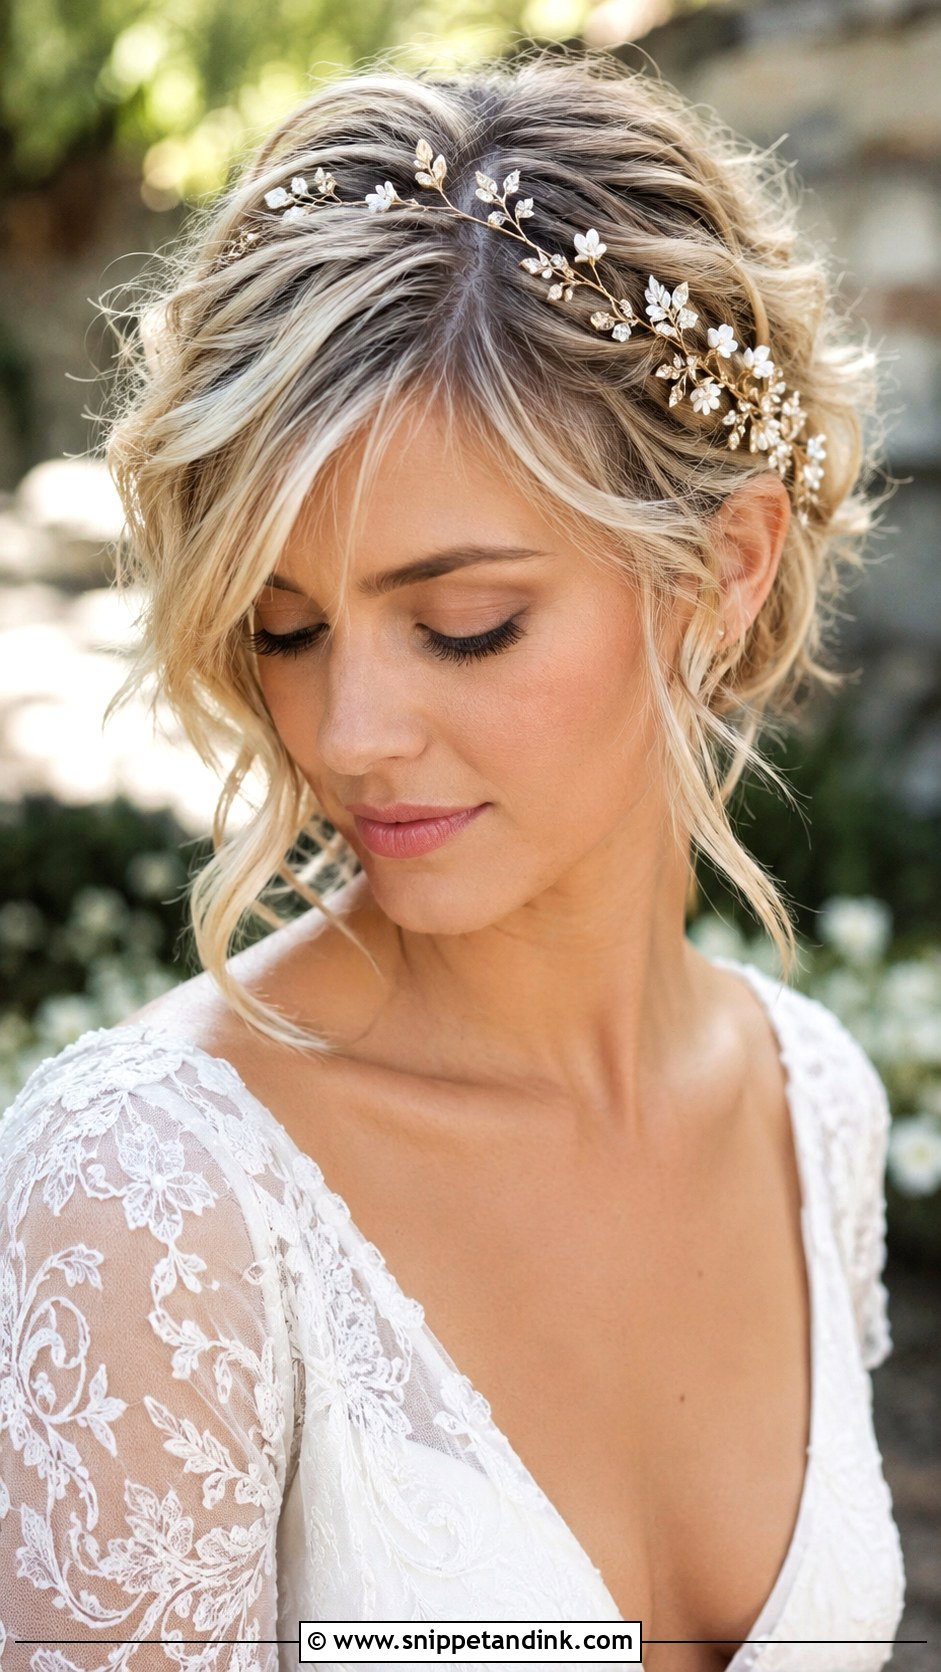
Loose tendrils on a pixie have to be cut in, so mention this look at your last trim: the wispy pieces at the temples should be left longer and softer than the rest. On the day I mist a light texture spray throughout and twist each tendril around a finger so it bends slightly instead of hanging straight. A delicate hair vine or a few small flowers suit the mood. It feels most at home at outdoor weddings, and it glows in golden-hour light.
30. Glamorous Bob With Side Waves
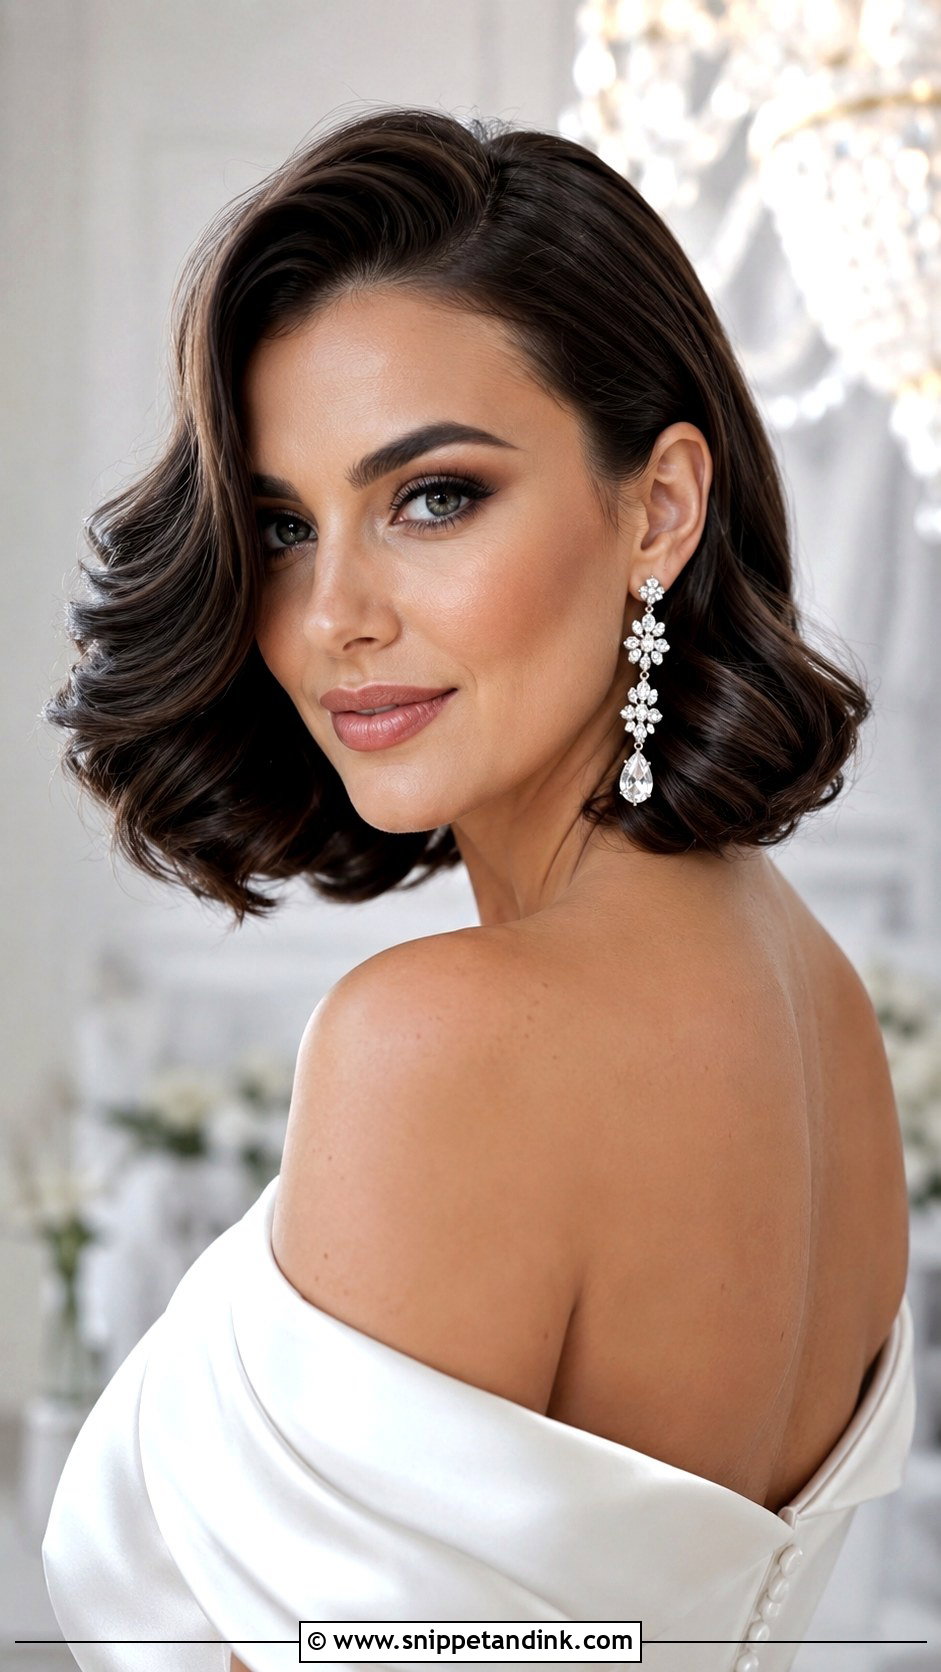
Deep side waves are an old Hollywood technique. I sweep the hair to one side, curl every section in the same direction with a larger barrel, then brush the curls out until they join into continuous waves. While they cool, I clip each ridge into place, which is what sets the shape. Shine spray finishes the gloss. Statement earrings and a sleek gown suit it. Waves drop in humidity, so a small comb and a travel spray in your bag lets you reset them before the first dance.
Giving a Veil Comb Something to Grip in Two Inches of Hair
This is the question I hear most from short-haired brides, and the answer is construction, not luck. A veil comb needs a base to bite into. I build one by backcombing a small patch where the veil will sit, spraying it, and smoothing the top layer over it. The comb then goes in against the teasing, and I cross two bobby pins over its spine so it can’t lift.
Weight matters too. A fingertip or birdcage veil sits happily on a pixie all day. A long cathedral veil pulls backward every time someone steps on it, so on very short hair I usually suggest wearing it for the ceremony only and taking it out before the reception. Some veil makers will swap a heavy comb for a small clip or add a fabric loop for pinning, which is worth asking about when you order.
The Small Kit That Keeps a Short Style Intact Past Midnight
Short styles rarely fall down the way updos do. They flatten instead, from hugs, from humidity and from dancing. A few things in your clutch fix nearly all of it in under a minute:
- A travel pot of the same paste or pomade I used, for lifting the crown with fingertips.
- A tail comb for resetting a side part or a fringe.
- Four or five bobby pins in your hair color.
- A mini flexible hairspray, sprayed onto your palms and pressed in rather than misted over the whole head.
Hand these to a bridesmaid if you don’t carry a bag. Five minutes in the restroom before the first dance usually brings the style back to where it was at the ceremony.
Your Cut Is Already Half the Style
A short cut gives you less to hide behind, and that’s exactly why it works at a wedding. Start from the shape you already wear, then build on it with one accessory, whether that’s a comb, a vine or a birdcage veil. Bring photos of your favorites to your trial, and bring the real accessories too, so your stylist can see how they sit on your length and pin them properly before the morning of.
You'll Like These Ideas:


Leave a Reply