
Most brides who sit in my chair asking for something edgy aren’t after shock value. They want to recognise themselves in the photos, and their everyday hair already has a blunt fringe, a shaved side or a dark streak that a soft side-swept curl would erase. The twenty looks below run from sharp bobs and braided mohawks to deconstructed buns and gold cuffs. Some need a cut weeks ahead, some need nothing more than gel and a good comb, and I’ve noted which is which so you bring the right pictures to your trial.
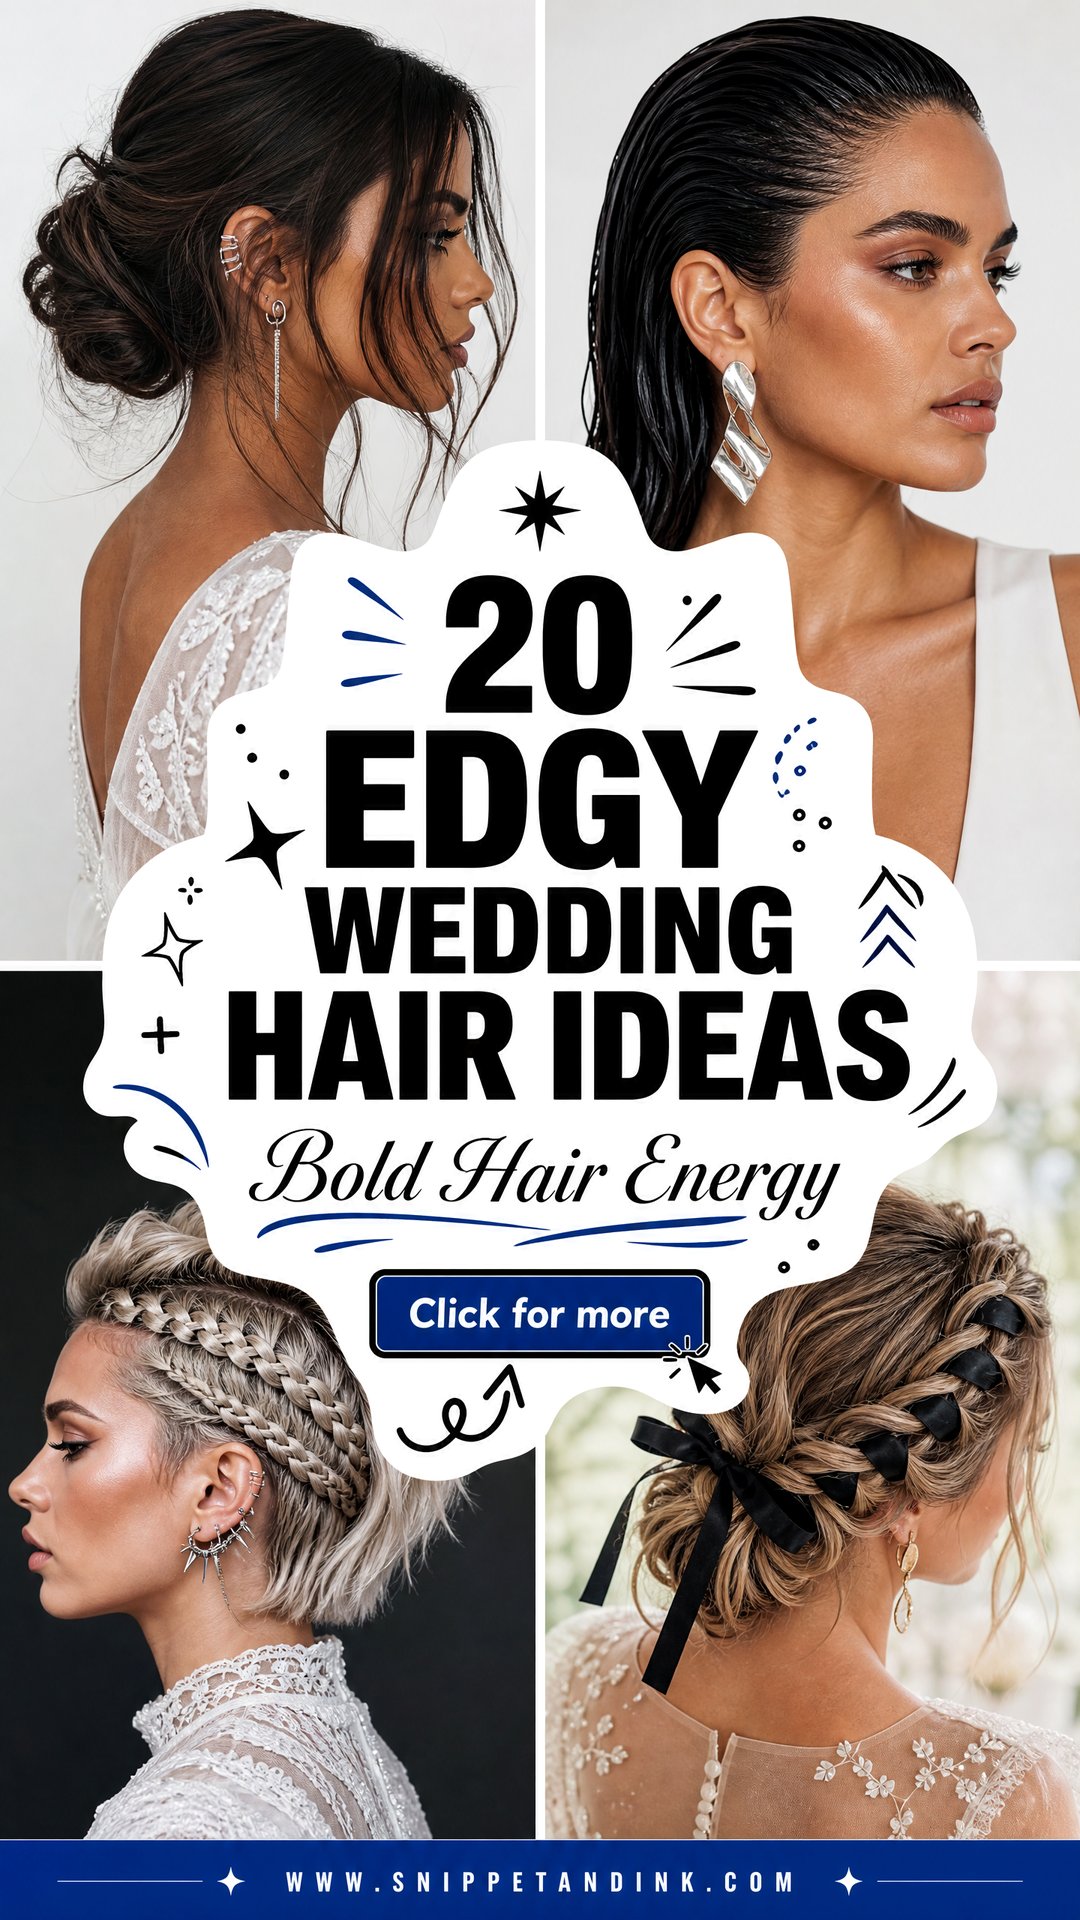
Which Edgy Looks Need a Haircut and Which Only Need a Trial
Edgy styles fall into two groups, and it helps to know which one you’re picking before you book anything. Some are cuts: the undercut, the blunt bob with a fringe, the cropped cut and the pixie. Those are set in advance, and the wedding morning is only styling. The rest are structure, like the mohawk braid, the faux hawk, the wet look and the cuffed updo. They work on the hair you already have, and all the effort happens on the day.
When the look depends on a cut
Book the cut for about a week before the wedding, not the day before. Shaved areas look pink right after the clippers, and blunt edges need a few days to soften. If you’re taking off real length for the first time, do it a month or more ahead, so there’s time to adjust if you hate it. Bring photos from the front, side and back, because an edgy bob means something different to every hairdresser.
When the look depends on structure
Here the trial matters more than the cut. Wash your hair the way you will before the wedding, wear a top with a similar neckline and bring your veil or accessories. I want to see the pins and gel hold for at least a few hours, so plan something for the afternoon and take photos at the end of it, not just in the chair.
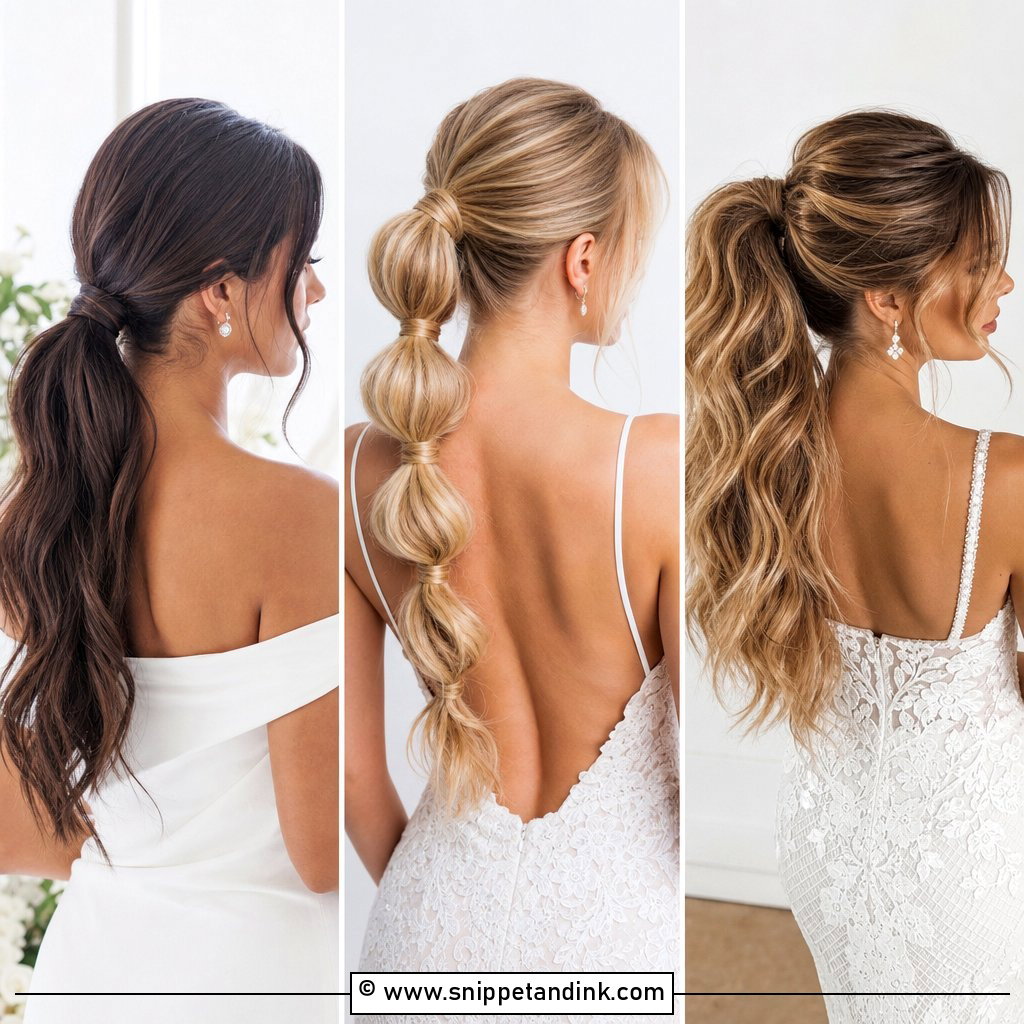
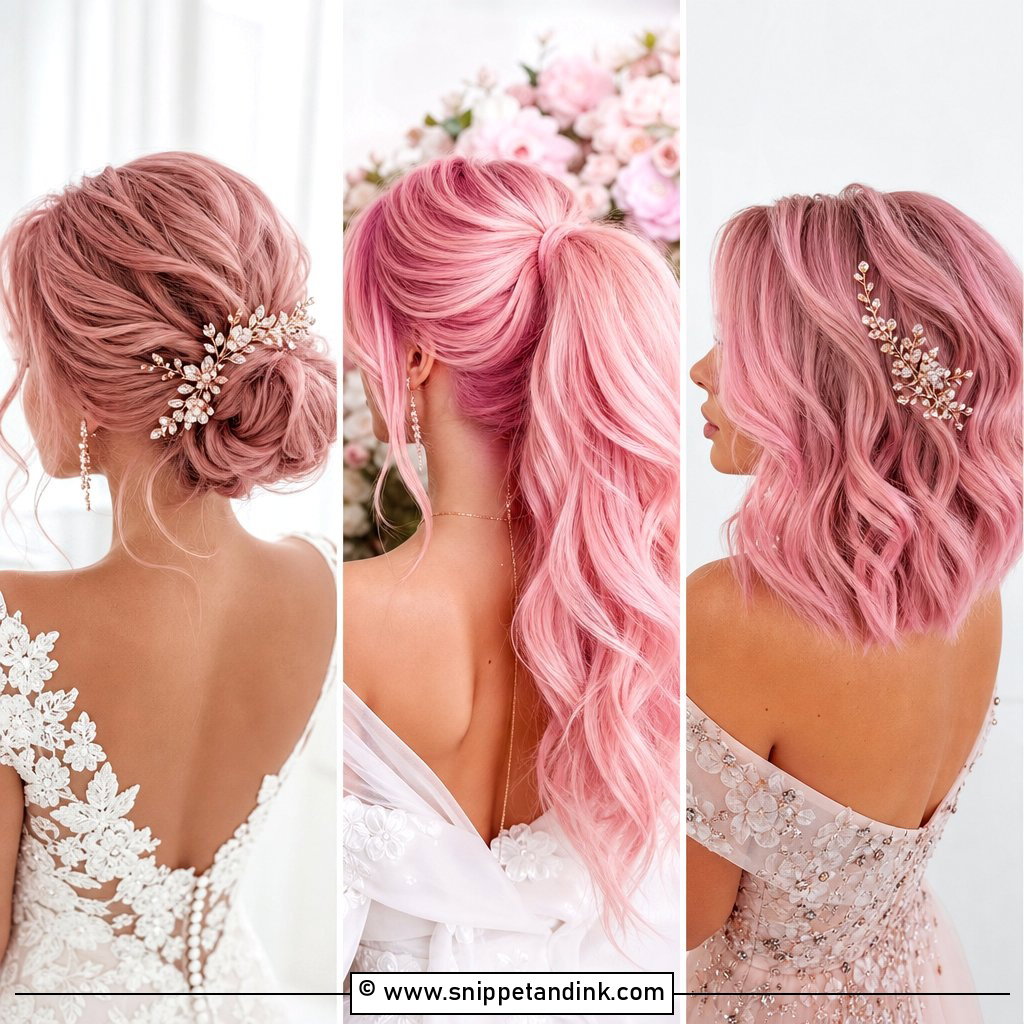
1. High Party Ponytail for Brides
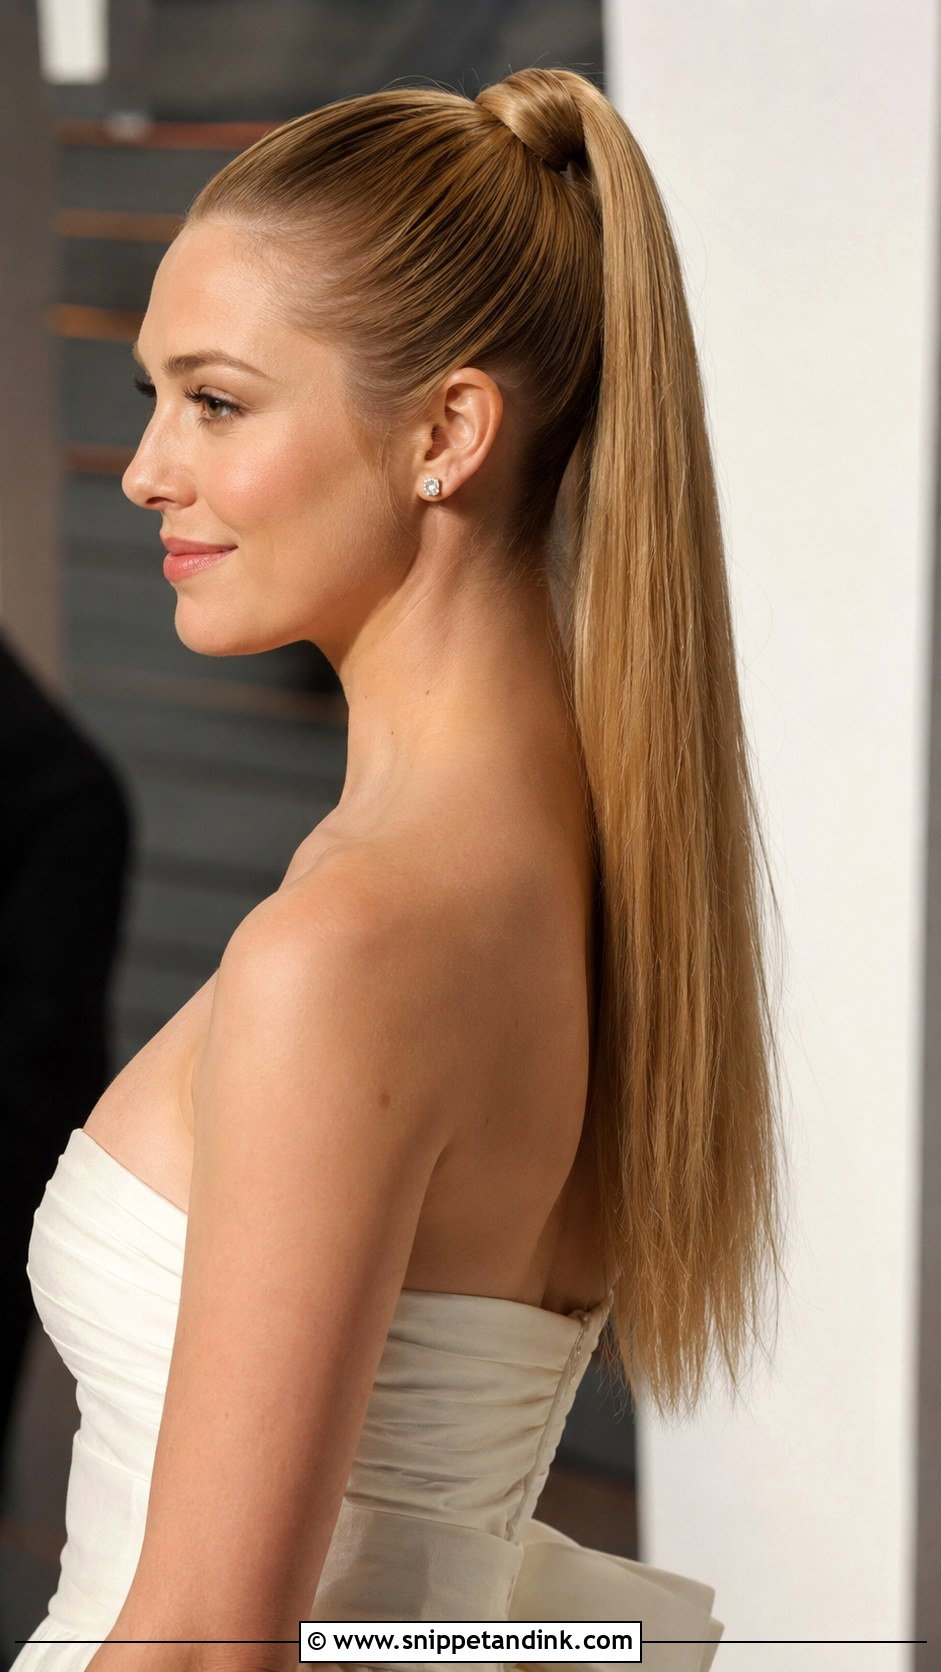
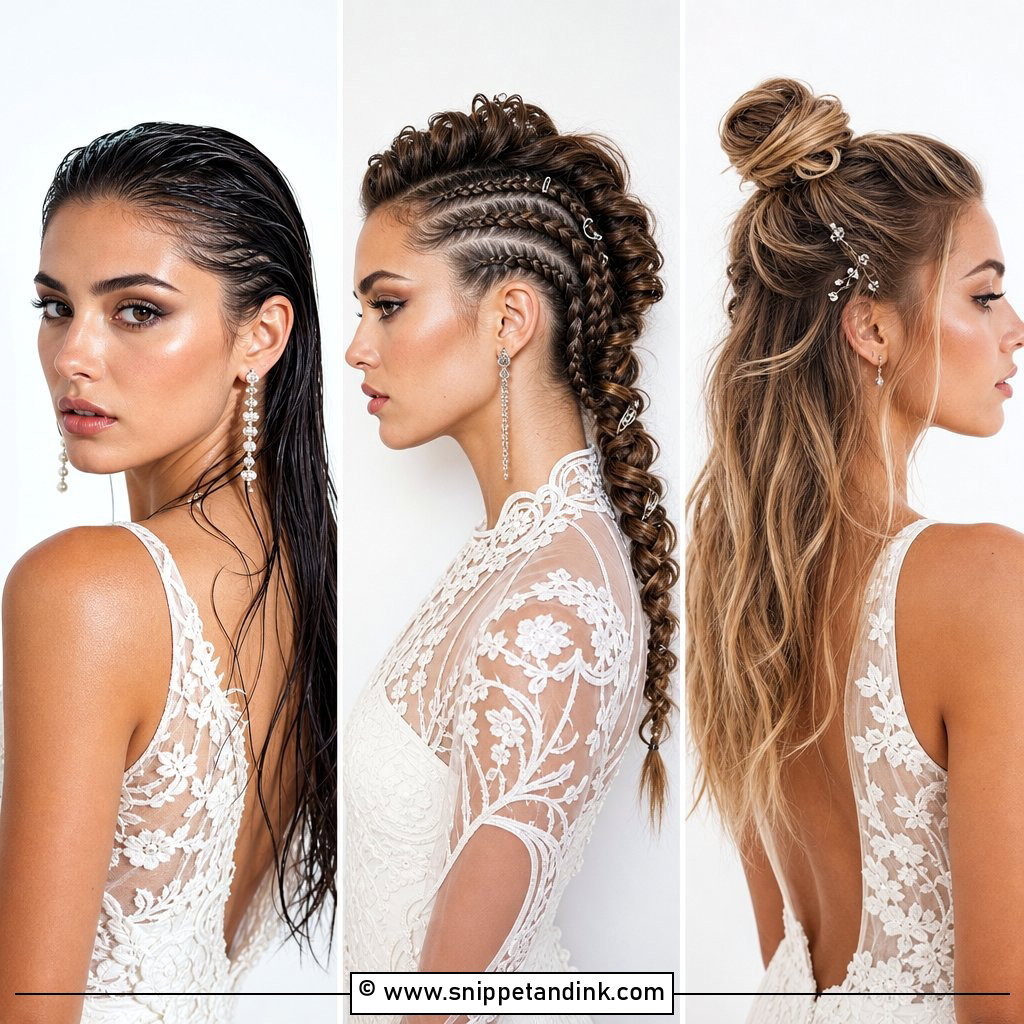
A ponytail set at the crown looks simple and is one of the harder styles to keep straight through the day. I build it on two elastics, one to fix the position and a second just below it for grip, because a single band slides backwards as the weight of the tail pulls on it. A strand wrapped around the base hides both. Long, thick hair gives the tail its swing; on finer hair I add a clip-in pony underneath so it doesn’t look thin from the side. A tight crown pony can bring on a headache by the reception, so at the trial we leave it in for a full hour before deciding.
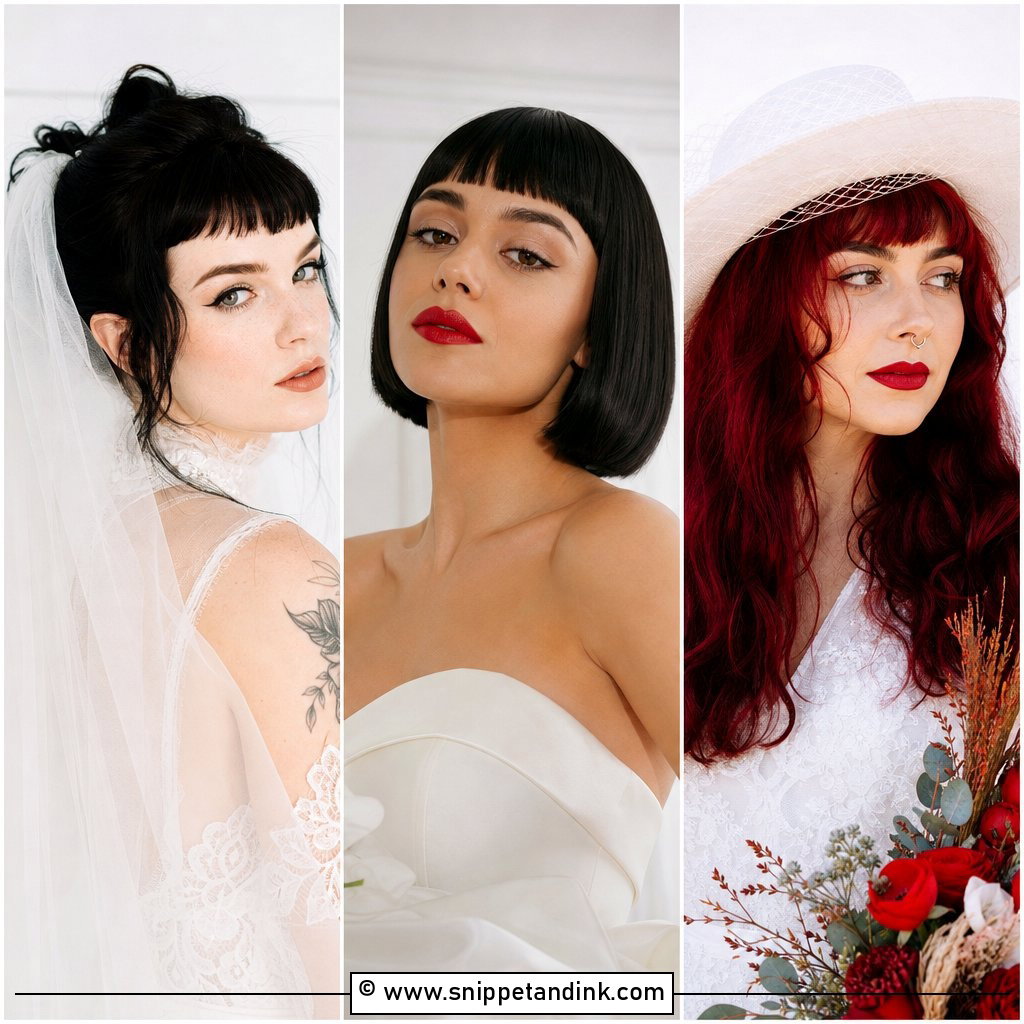
2. Sharp Straightened Bob With Bangs
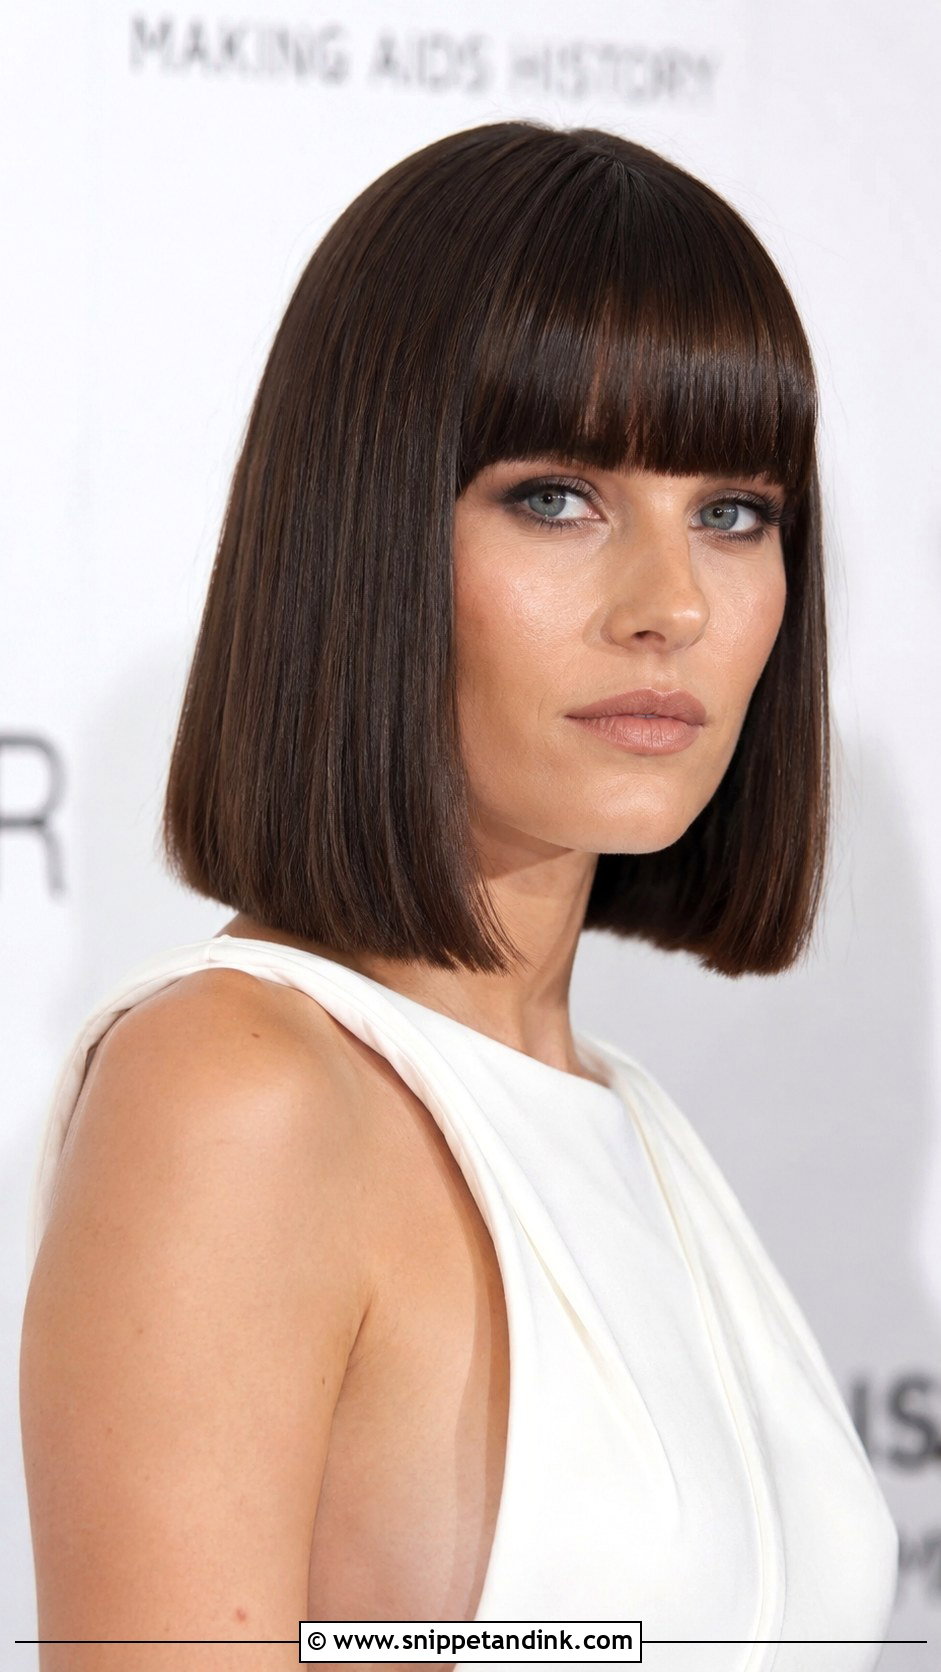
A poker-straight bob with a blunt fringe lives or dies on the cut, not the styling. Ask your hairdresser to trim it about a week before, never the day before: a fresh blunt line looks harsh for a few days, and a fringe cut too short can’t be fixed by the ceremony. On the morning I flat-iron in thin sections and finish with a shine spray rather than oil, because oil separates a fringe into strips by lunch. If you have a strong cowlick at the hairline, the fringe will fight you in humid weather. One pin tucked behind an ear is all the decoration this cut needs.
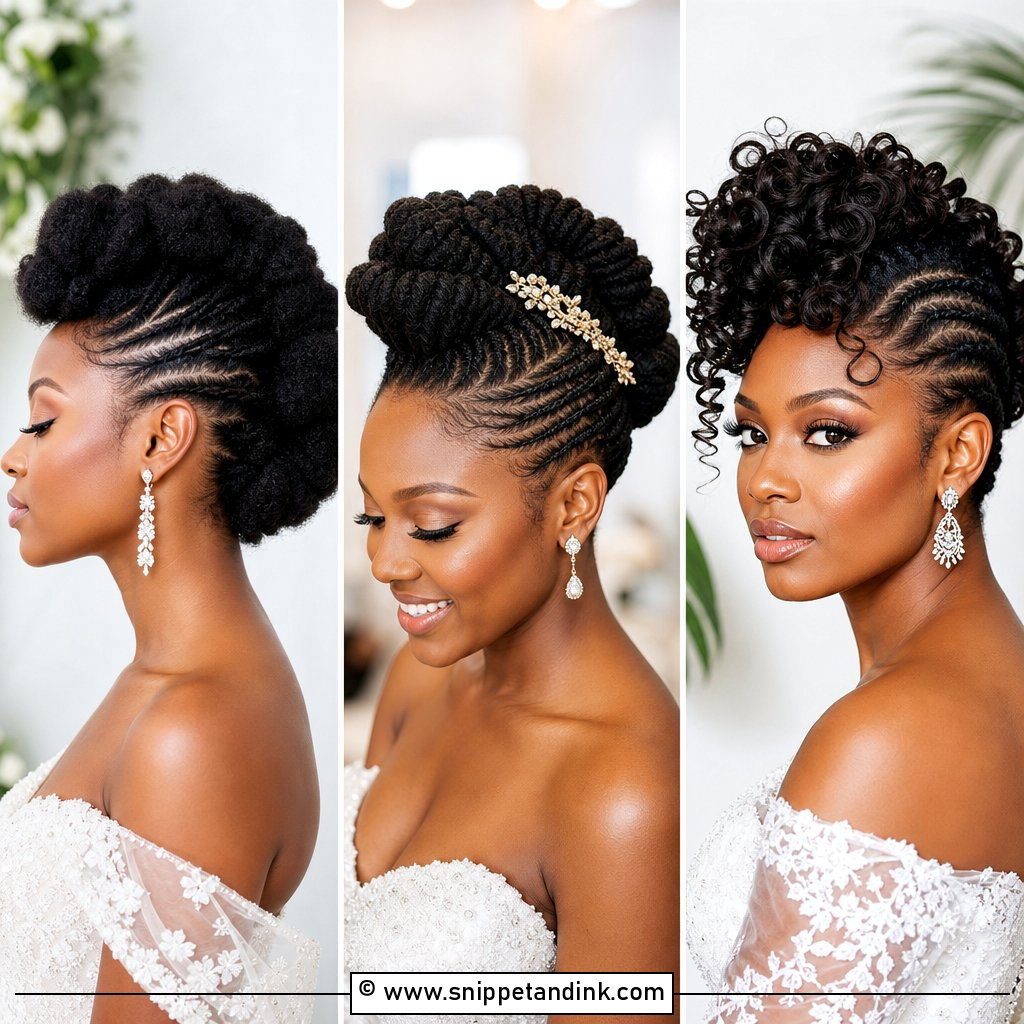
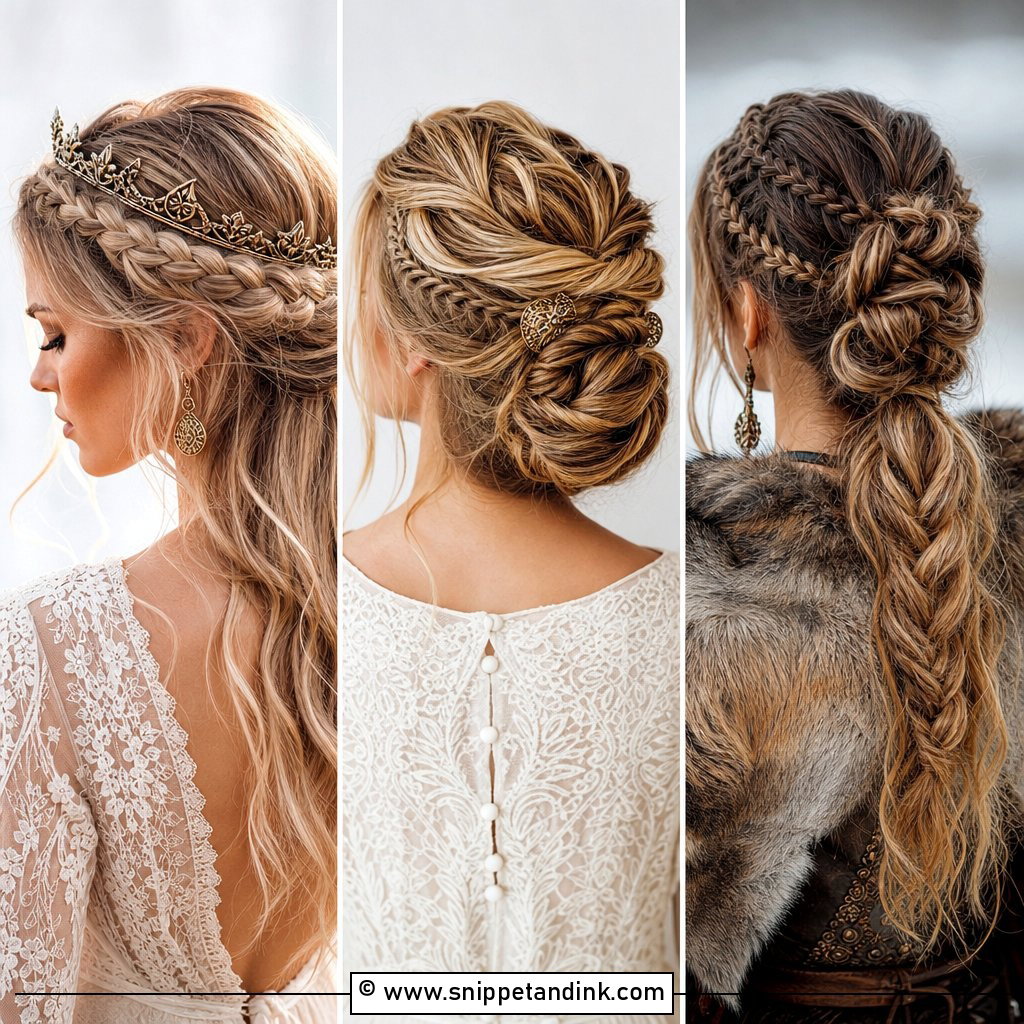
3. Braided Mohawk Wedding Updo
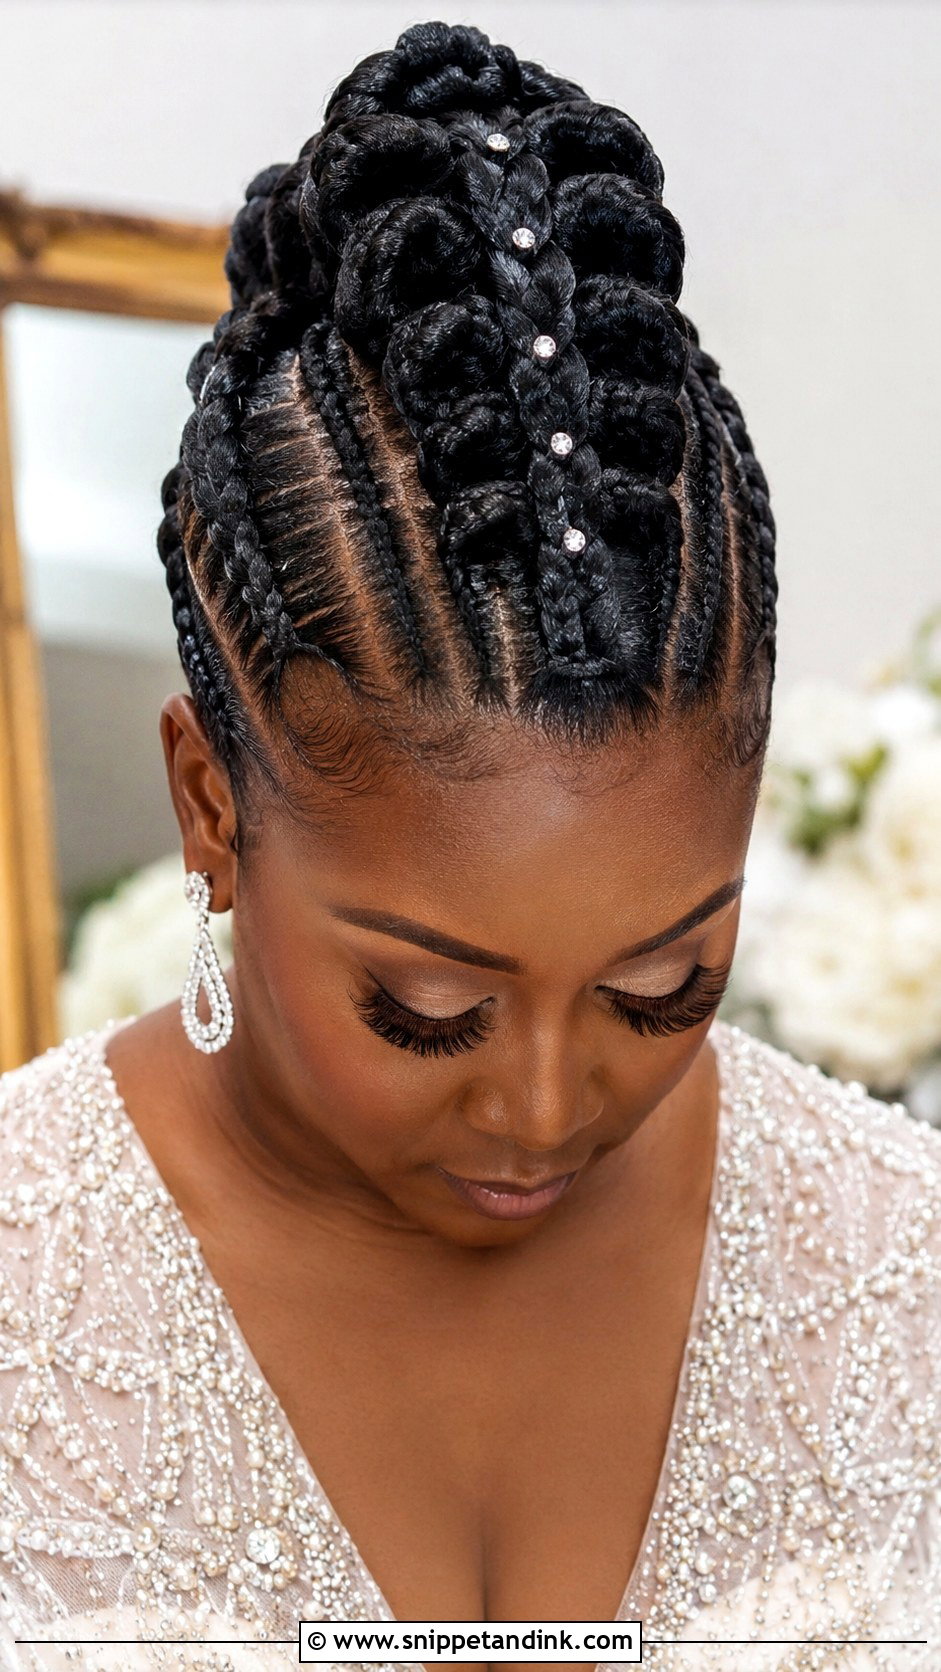
The braided mohawk is mostly engineering. I braid the centre panel first, on hair given some grip with texture spray, because clean, slippery hair won’t stand up as a raised ridge. The sides can be brushed flat and pinned, or cornrowed tight for definition. Cornrows take real time, so budget an extra hour on the morning. Crystals pinned into the braid catch the light without softening the shape. Very short, fine hair struggles here, since the sides need enough length to reach the centre.
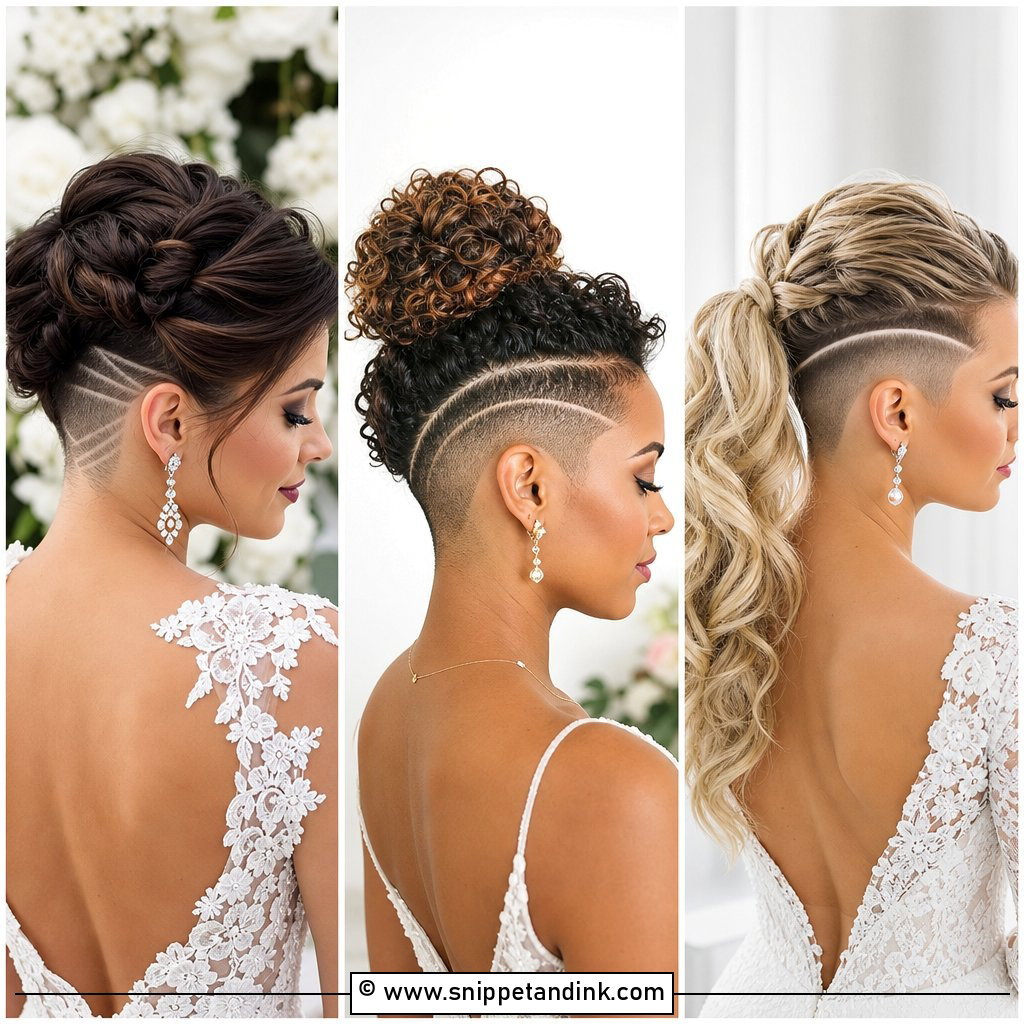
4. Asymmetrical Undercut Bridal Style
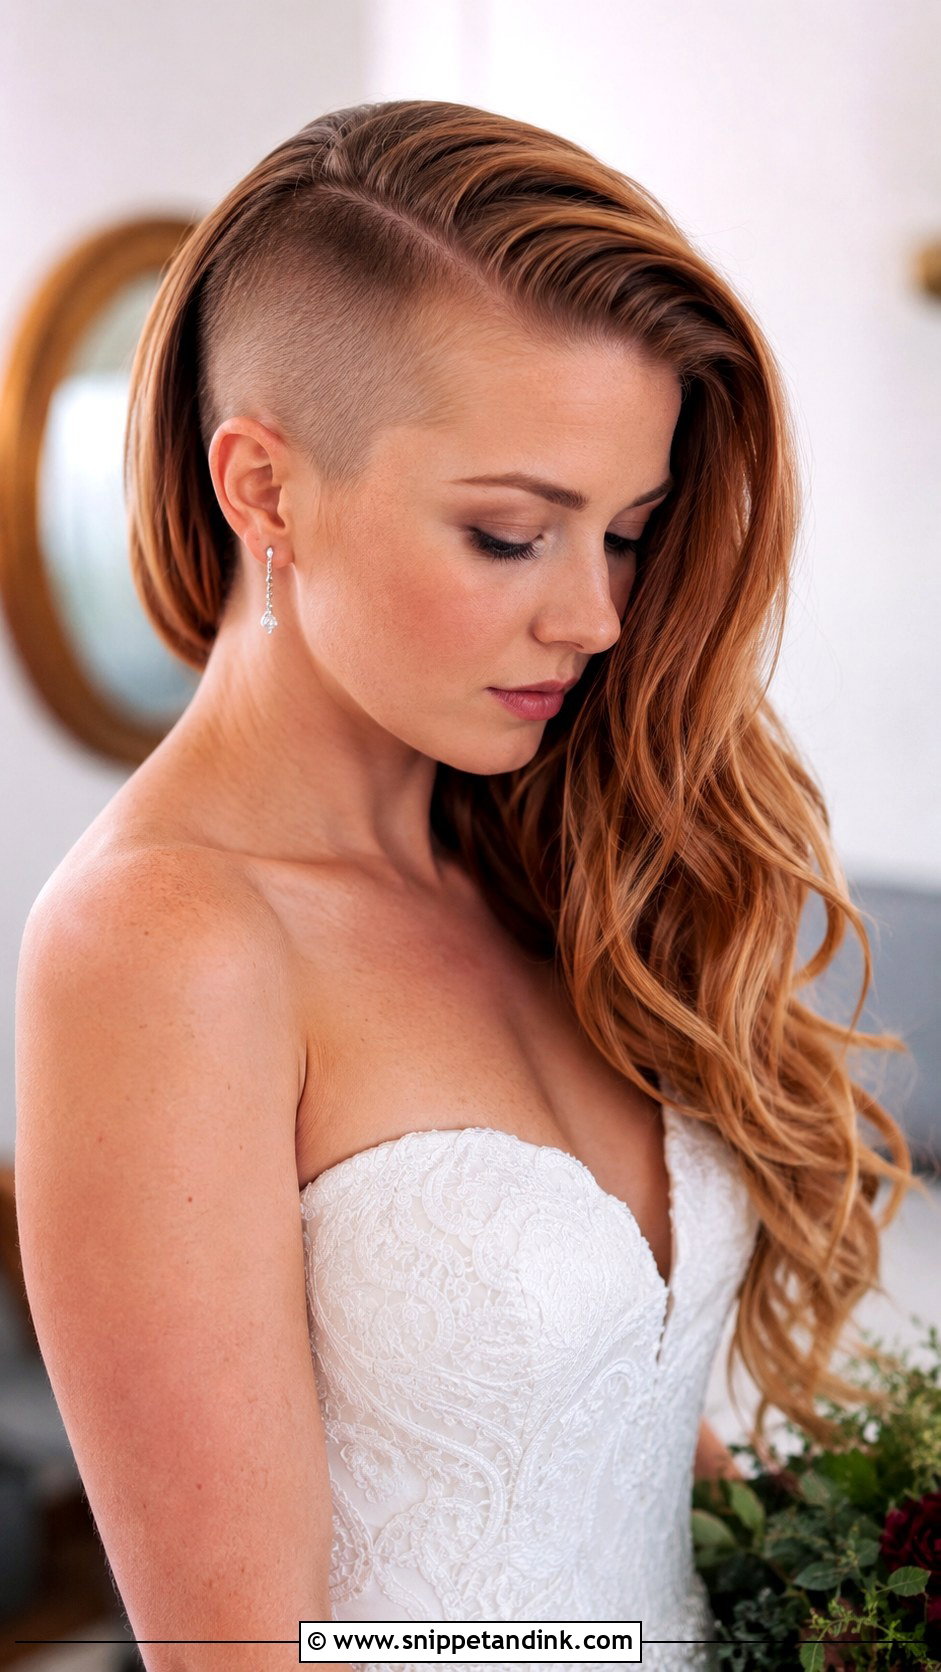
An asymmetrical undercut needs the clippers about a week out, so the shaved side has a few days of growth and doesn’t look pink or nicked in close-ups. The longer side does the styling work. Slick it flat for a hard line, or wave it if you want contrast against the buzz. I place any accessory on the long side, because a pin on the shaved area has nothing to hold. If you’re growing an undercut out, check how a veil comb sits before the day; it has to anchor in the longer hair.
5. Deconstructed Low Bun With Face Frame
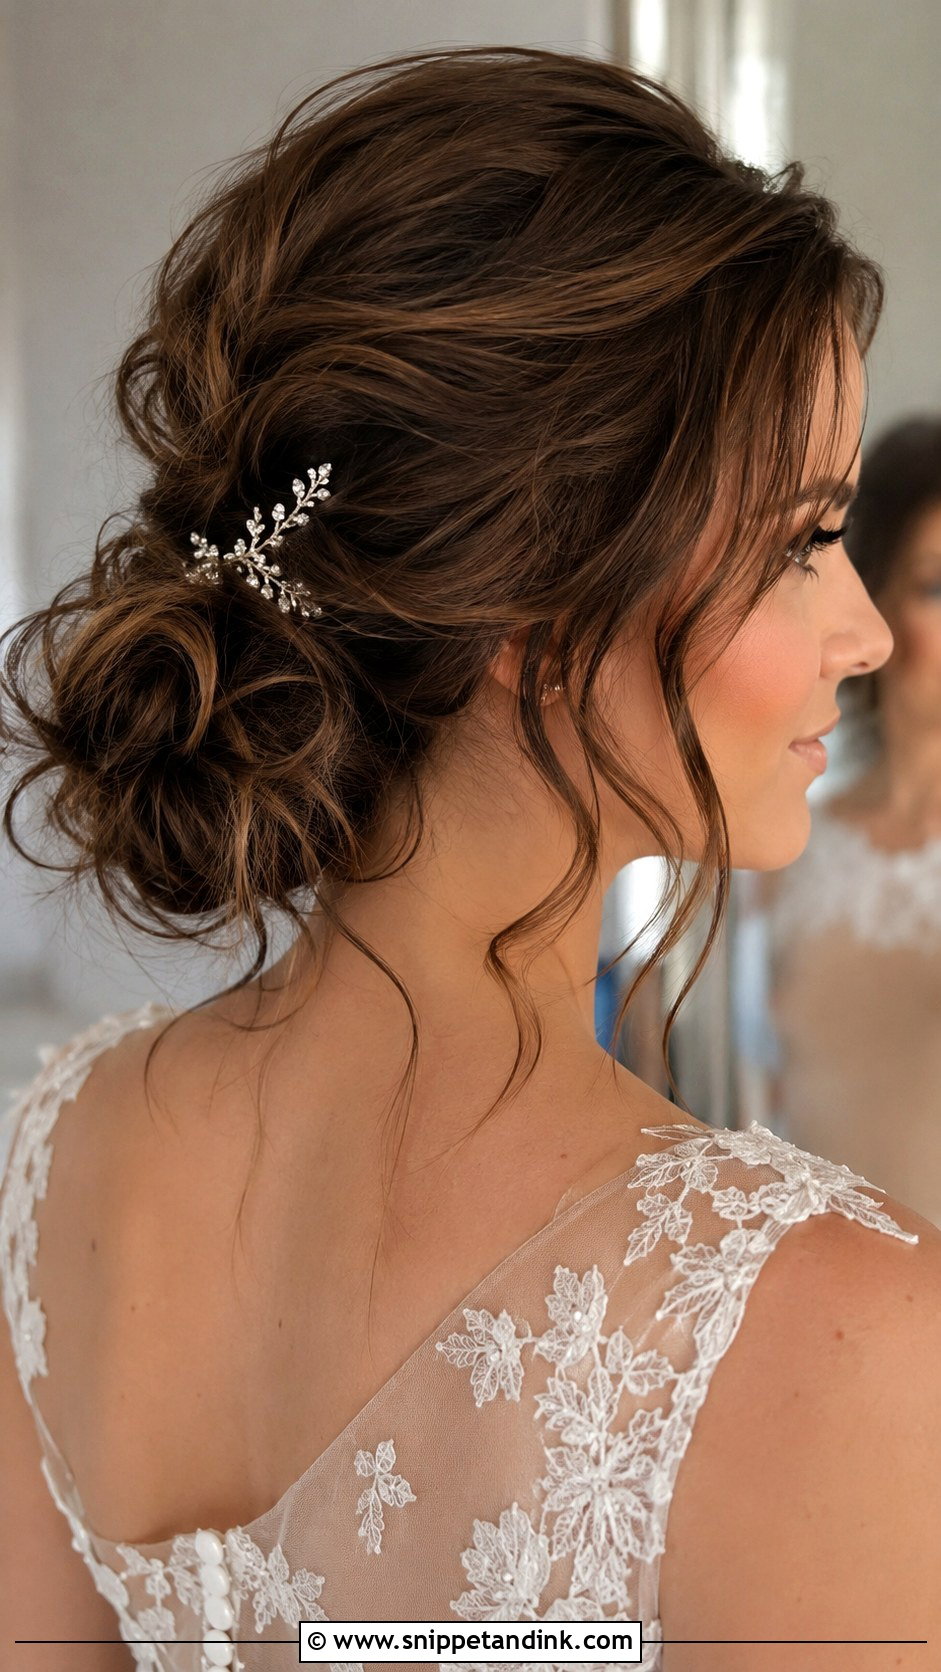
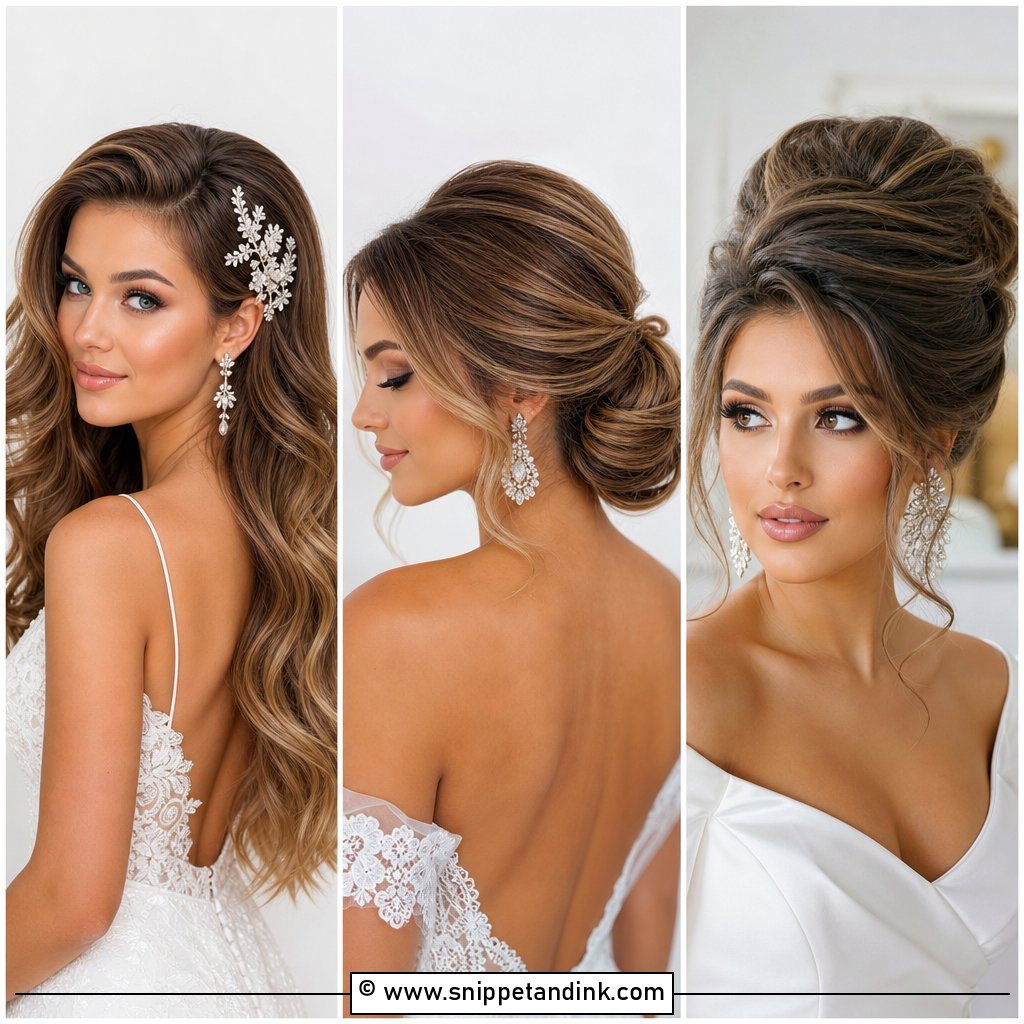
This bun only looks careless. I set the hair with a medium barrel first, brush the curls out, then pin the bun loosely at the nape so it keeps that softened texture instead of looking flat. The face frame does most of the work: thick pieces around the cheekbones, not wispy strands that frizz and vanish by evening. Heavy, very straight hair can drop its texture within a few hours, so I prep the roots with a texture spray before any heat. Add a single statement pin and stop there.
6. Gothic Twisted Updo With Dark Florals
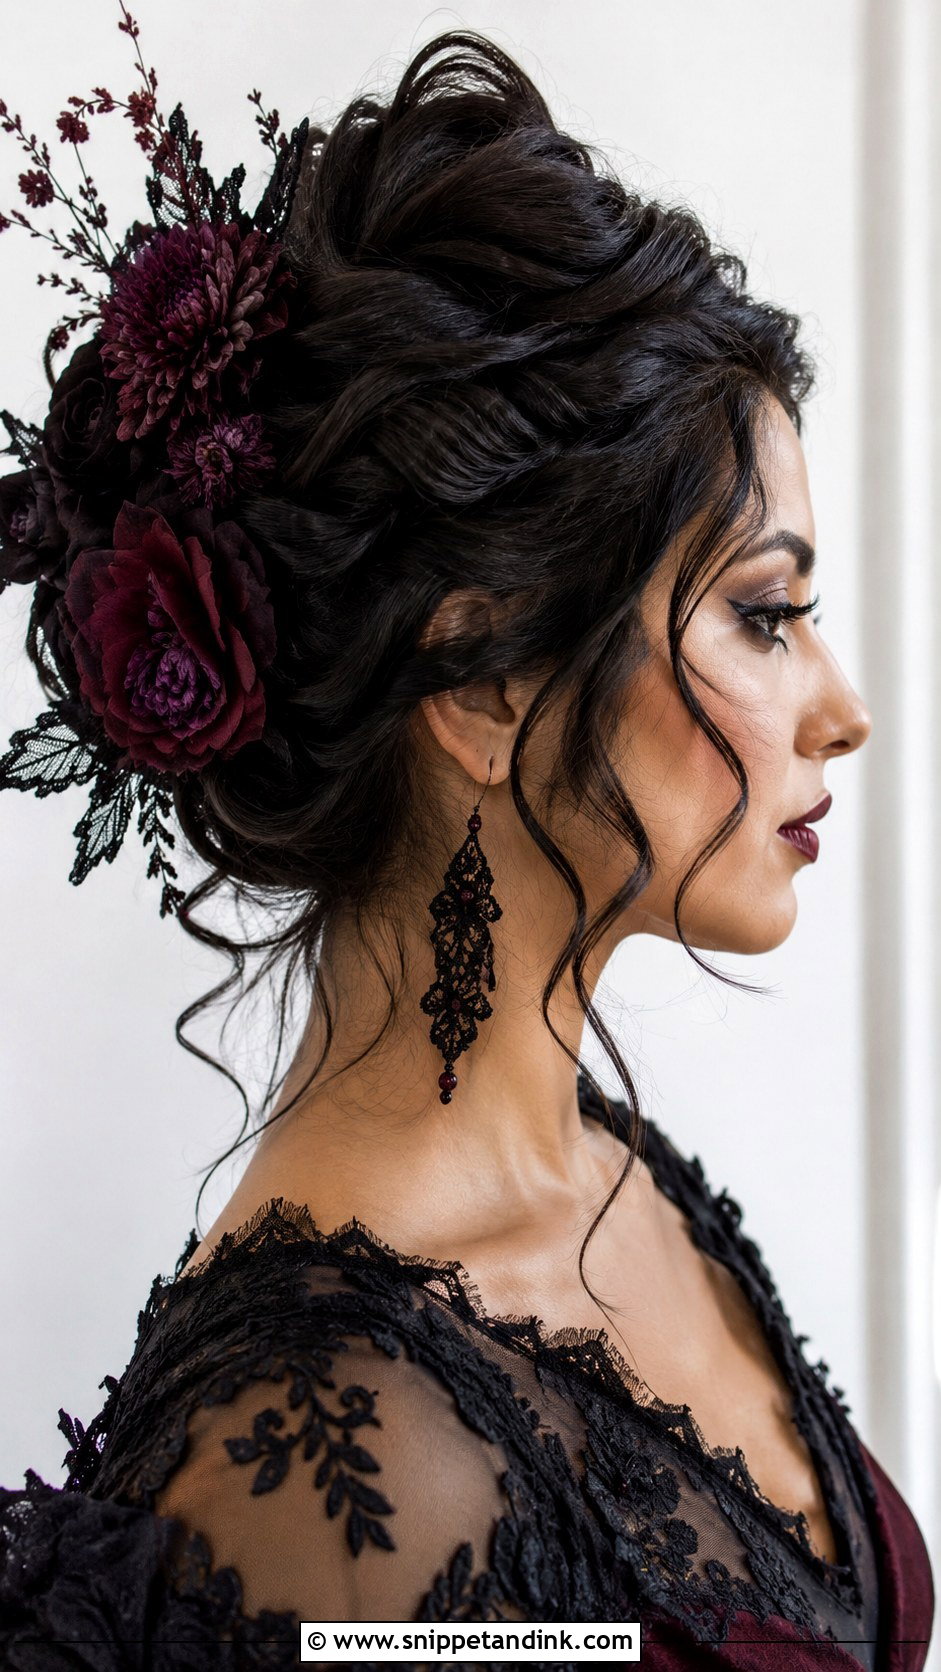
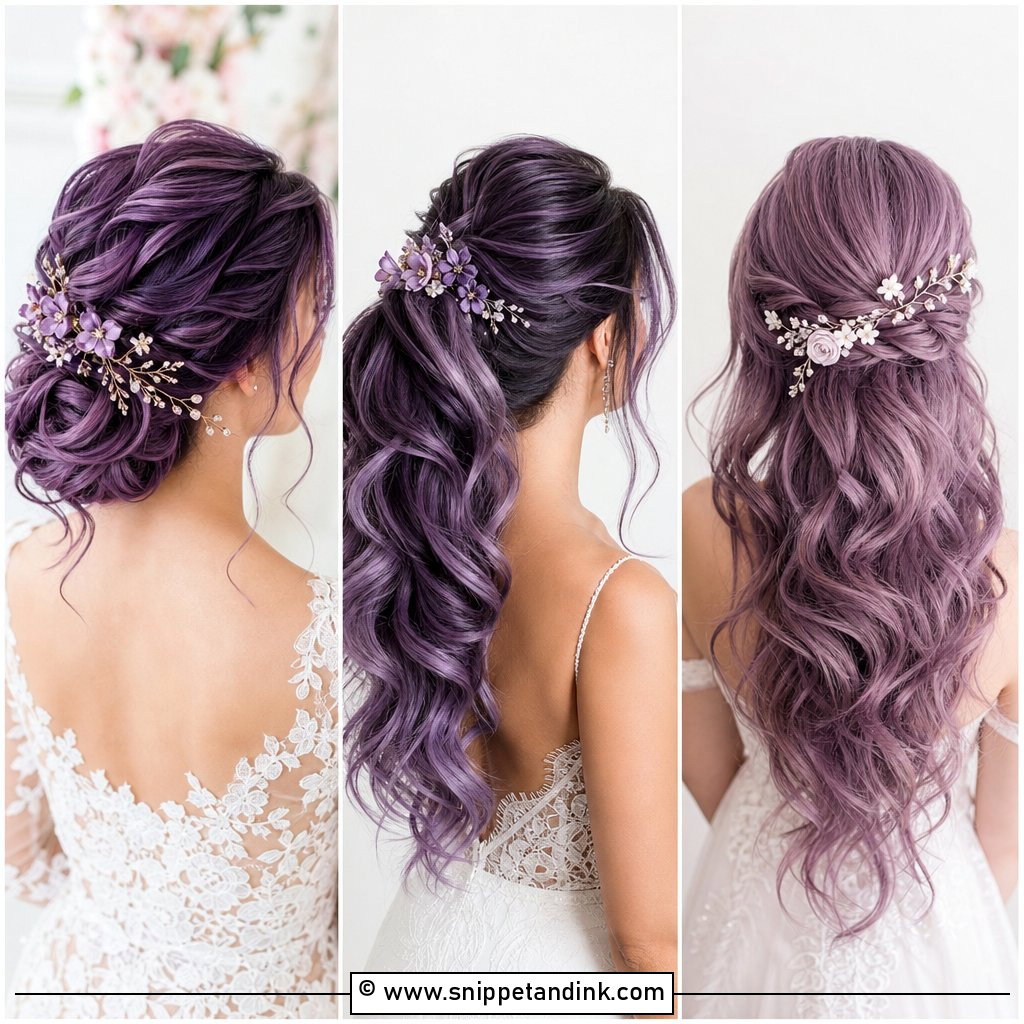
Dark florals are where I take the most care in a gothic-inspired updo. Deep berry and near-black blooms can disappear against dark hair in photos, so I set them against a lighter twist or put a little lace or a metal pin beside them for contrast. Fresh flowers wilt out of water, which is why I ask the florist for wired, conditioned stems, or use silk ones that will last all night. The twisted shape suits evening ceremonies and candlelit rooms, where low light picks out texture. Leave a couple of face-framing pieces loose so it isn’t severe.
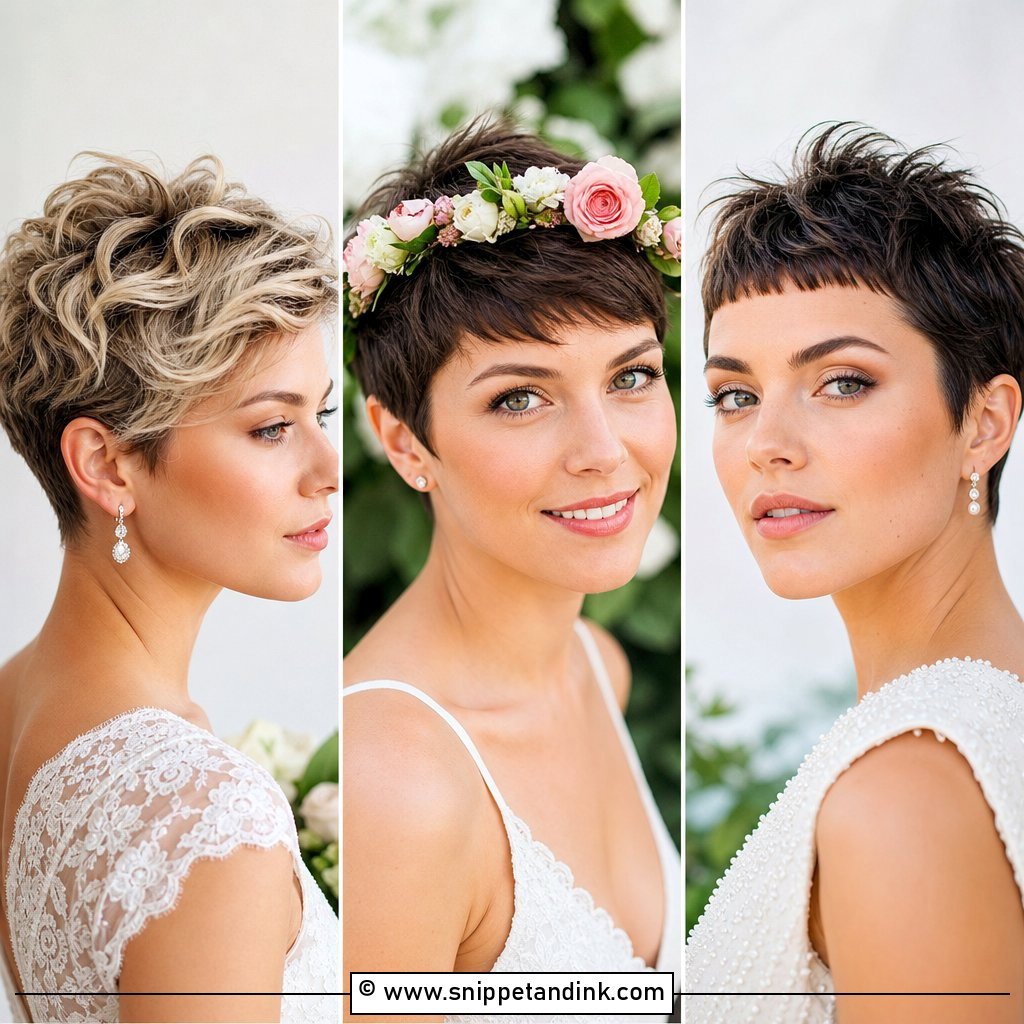
7. Twisted Pixie Cut for the Modern Bride
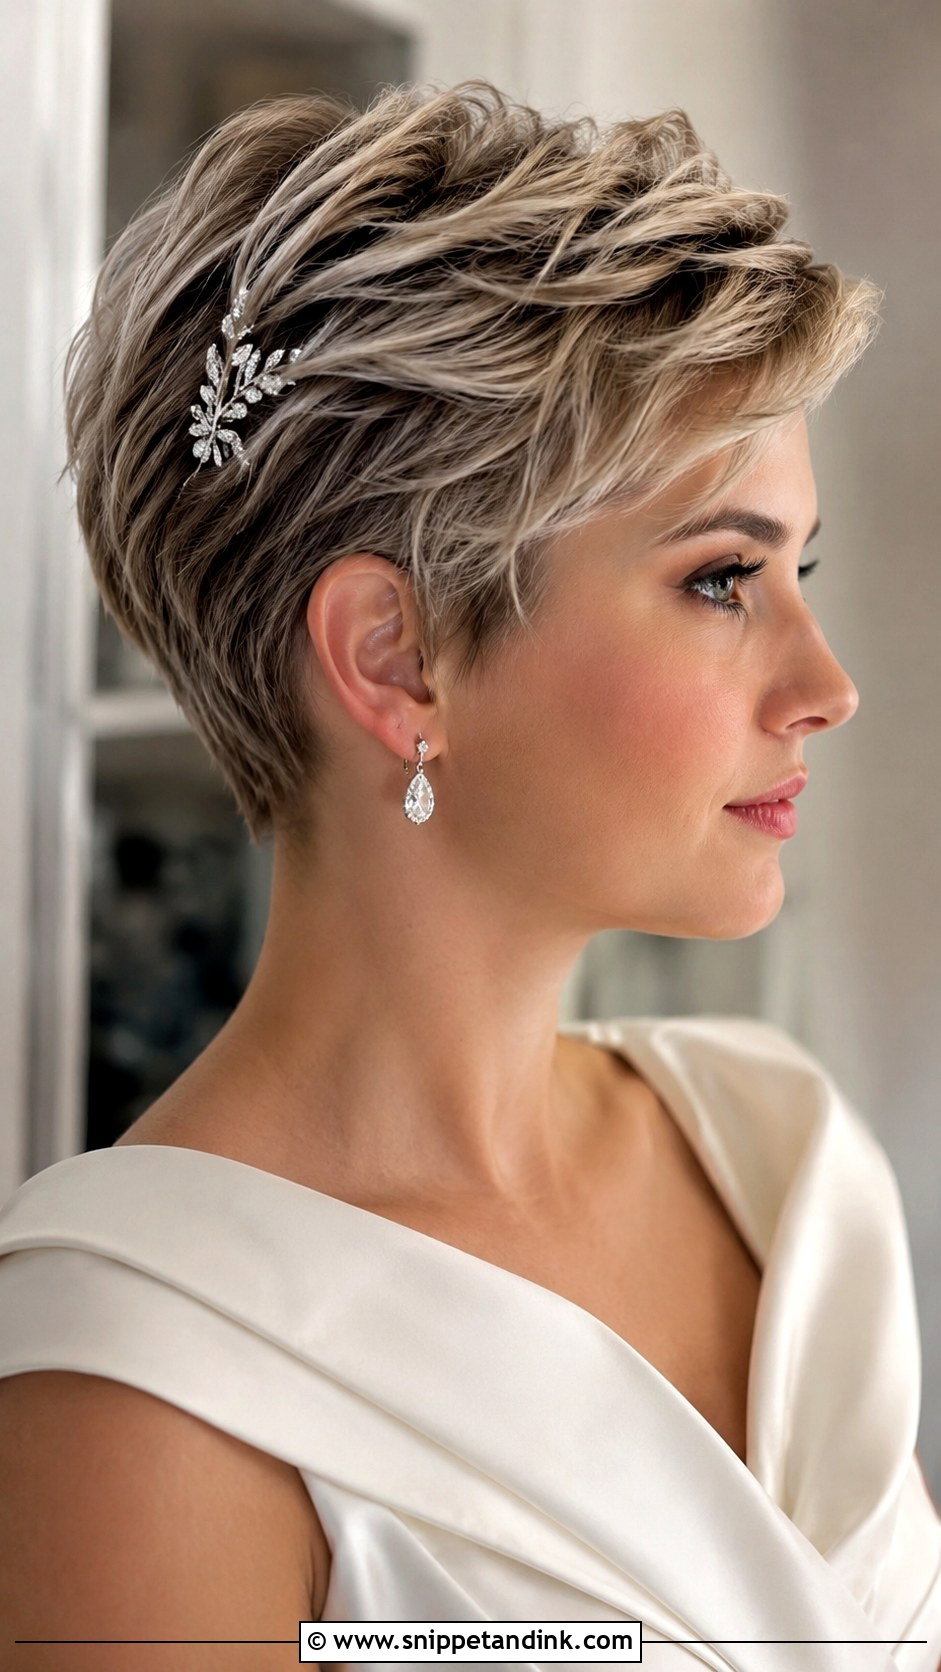
Short hair doesn’t need length to look bridal; it needs detail. On a pixie I twist small sections at the crown or along one side and lock each with a matte bobby pin, which grips short hair far better than a shiny one. Without a little pomade, short twists unwind as the hair dries out during the day. A sparkly pin or a tiny flower near the twists gives the bridal note. It’s one of the quickest styles on this list, which helps if you’d rather spend the morning with your bridesmaids than in my chair.
8. Edgy Half-Bun With Statement Pin
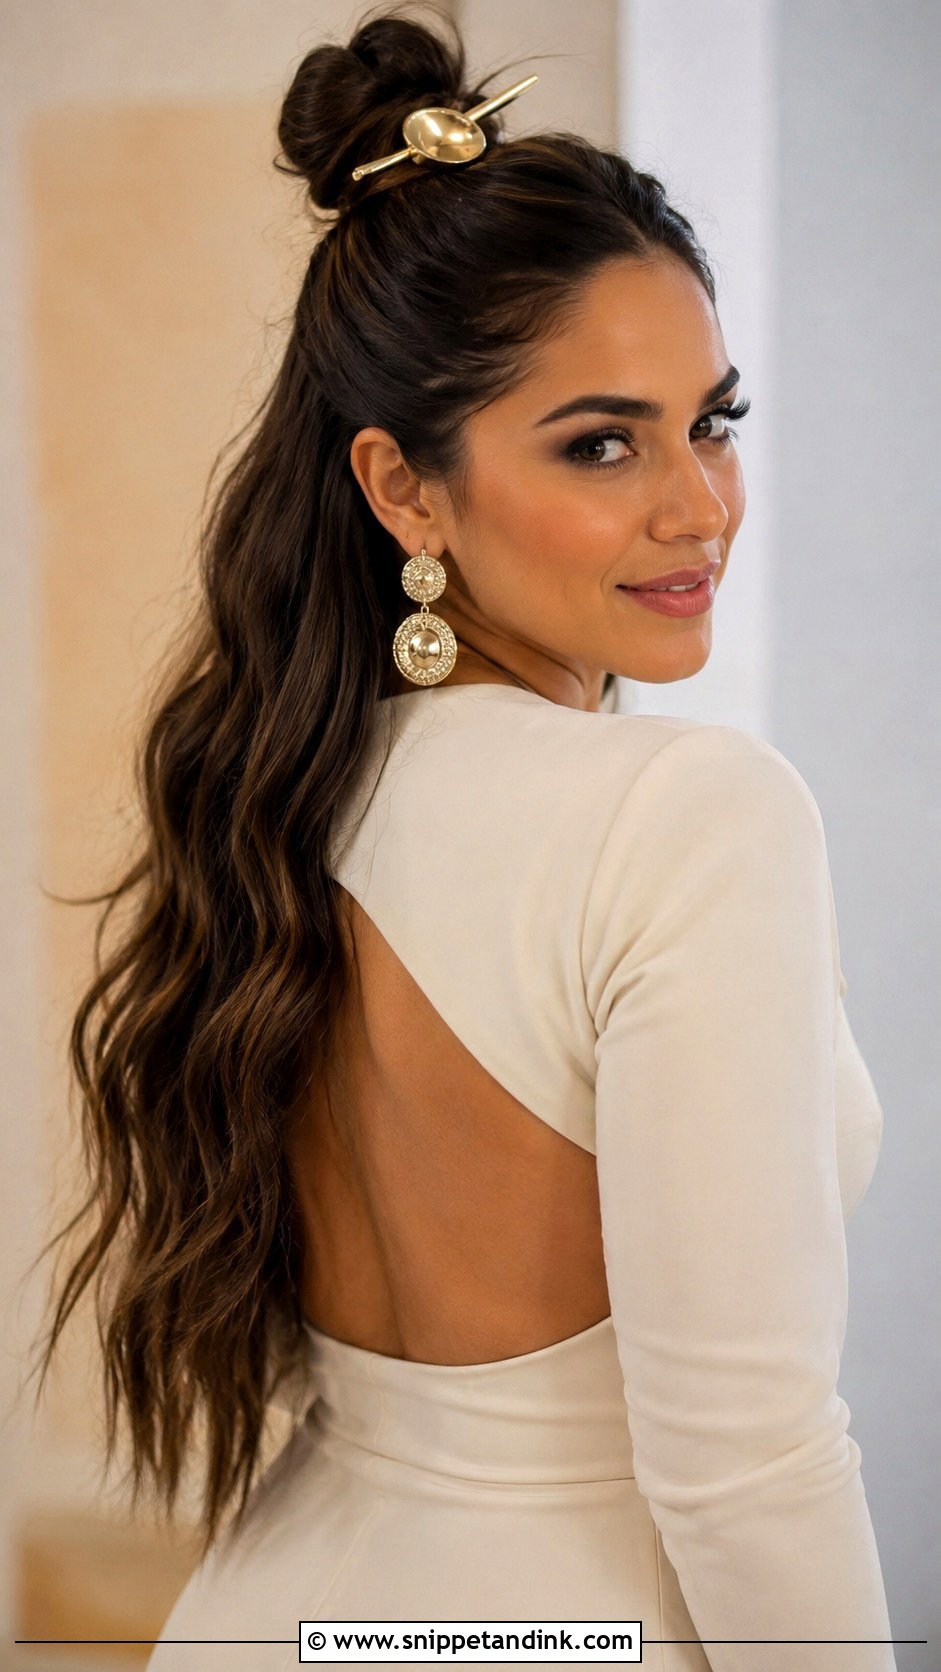
The half-bun keeps most of your hair down but gives you an unconventional silhouette from the side and back. I section from temple to temple across the crown, twist that section into a small bun and lock it with crossed pins, so it can carry a heavy gold cuff without sagging. Leaving the rest straight gives it more attitude; waves make it softer. If you have short layers, some will fall out of the bun. Expect a few wisps at the front and plan for them rather than fighting them with spray.
9. Slicked-Back Wet Look Bridal Hair
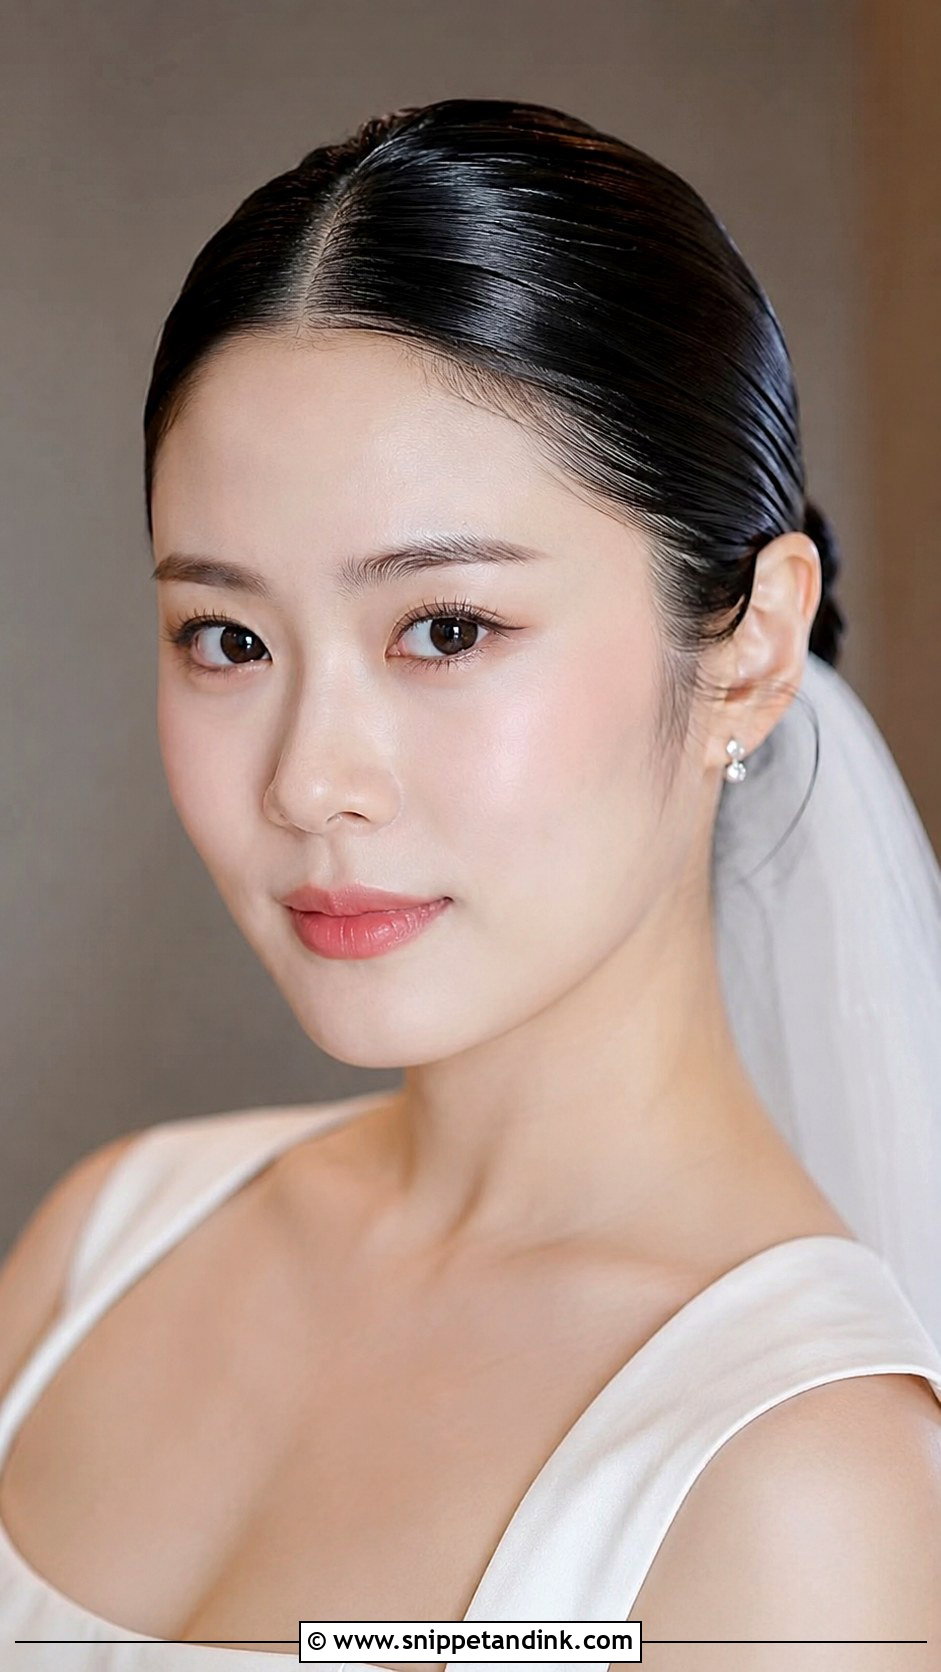
I tell brides up front that the slicked-back wet look is the least forgiving style here. It shows every bump, so I work gel through in small sections and comb it flat with a fine-tooth comb, then lock it with a strong spray. It has to be completely set before the dress goes over your head, or the gel transfers to the fabric. Long or short hair both work, with the ends tucked into a low bun or left straight down the back. On very fair hair I use less product, because heavy gel can make pale hair look greasy rather than glossy in pictures.
10. Brushed-Out Pin Curls With Texture
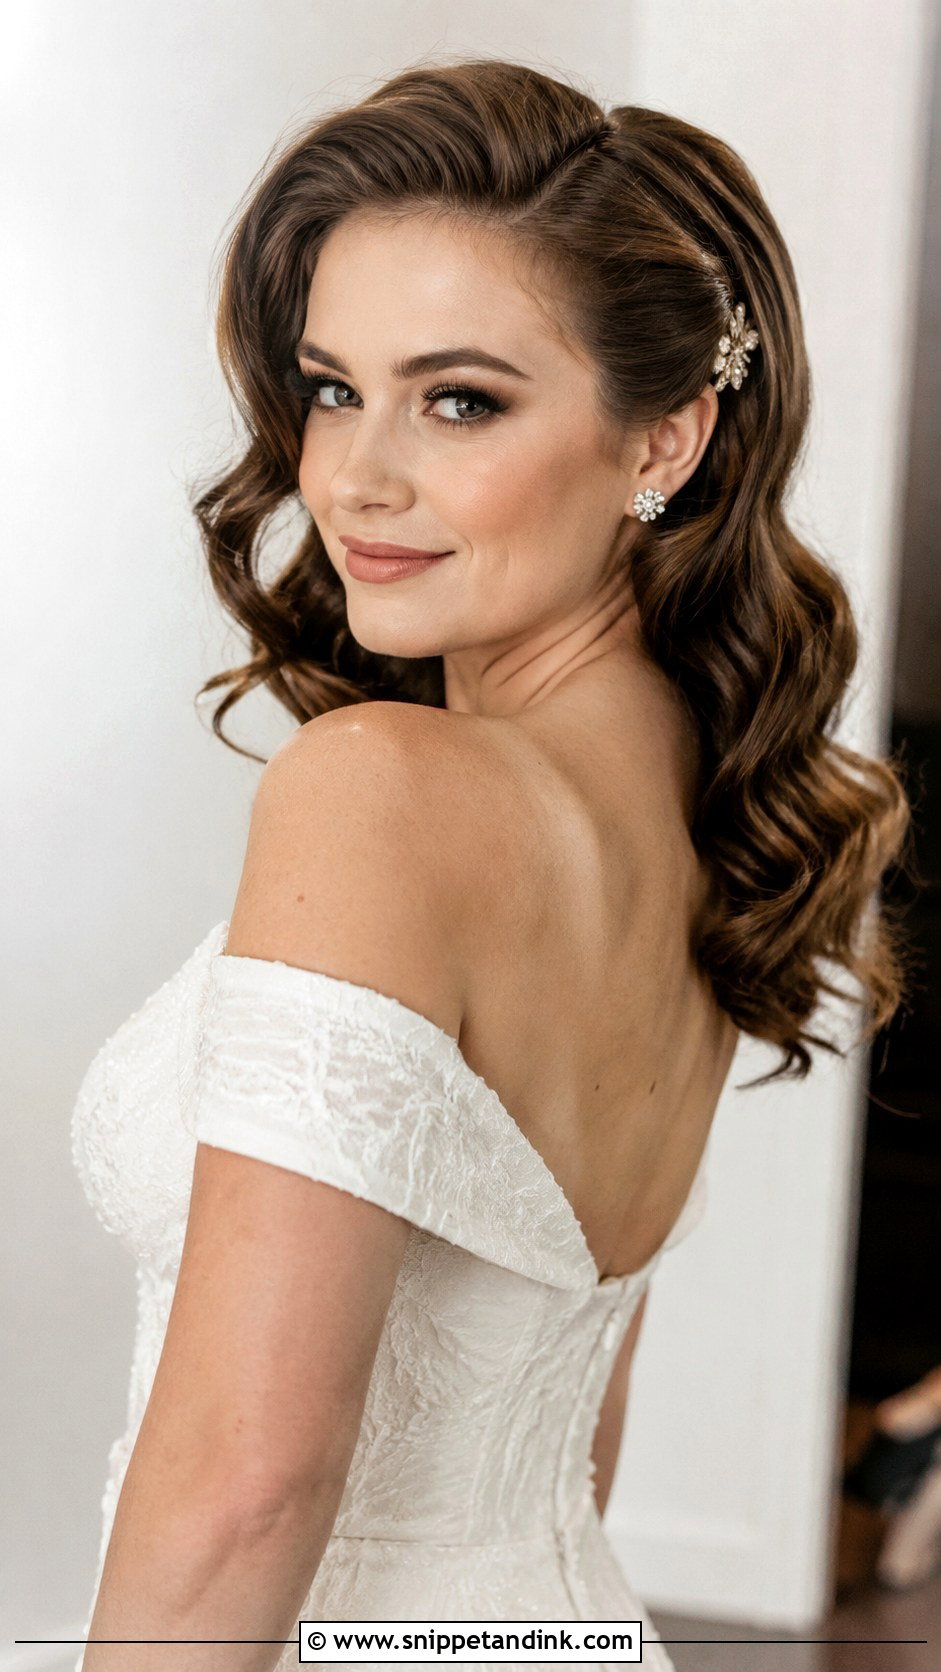
Brushed-out pin curls are an old technique. Small curls are wound flat against the head, left to set, then brushed until they break into waves. The longer they sit, the more texture you get, so I set them while your makeup is being done. Hair that won’t usually hold a curl needs setting lotion and heat, or the waves will be gone by the speeches. Brush too hard and you get frizz; I stop the moment the curls join into soft ridges. Worn loose or half-up, it suits medium to long hair best.
11. Cropped Cut With Dutch Braids
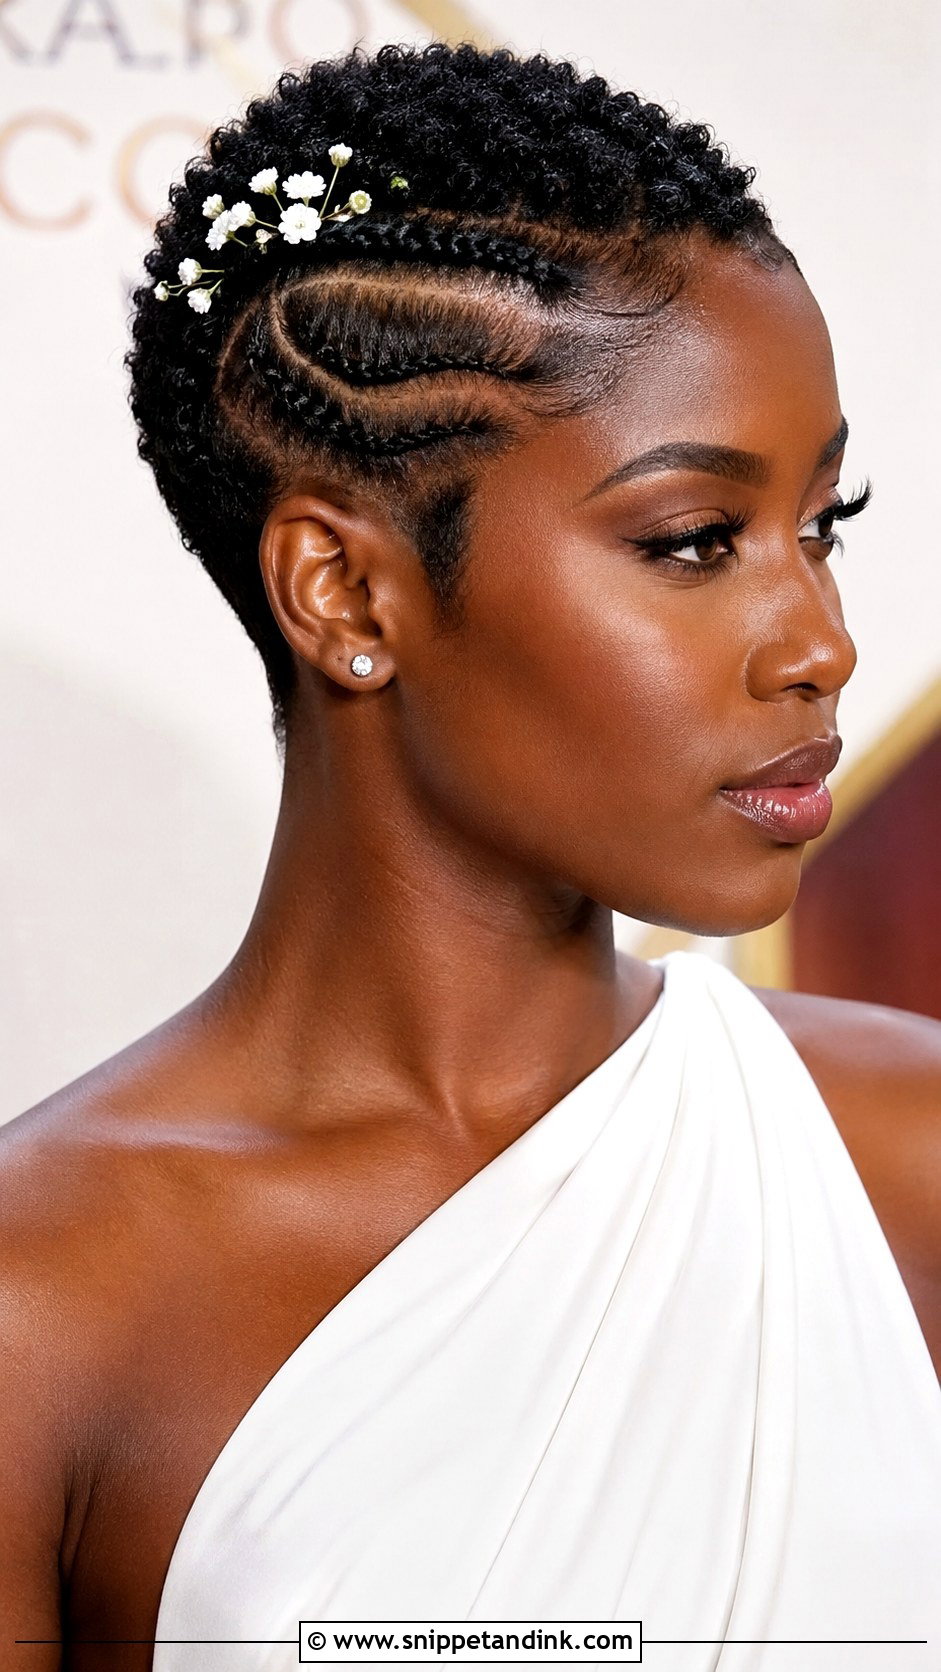
Dutch braids on cropped hair need a few inches of length to grip, so very short sides may only take a single braid near the parting. I braid with a little pomade on my fingers, because short hair springs out of the pattern otherwise. Braids along both sides or across the crown give the strongest pattern, with tiny pins or blooms tucked between the plaits. Tight braids barely move all day. If your scalp is sensitive, though, ask for them a little looser.
12. Low Ponytail With Sleek Center Part
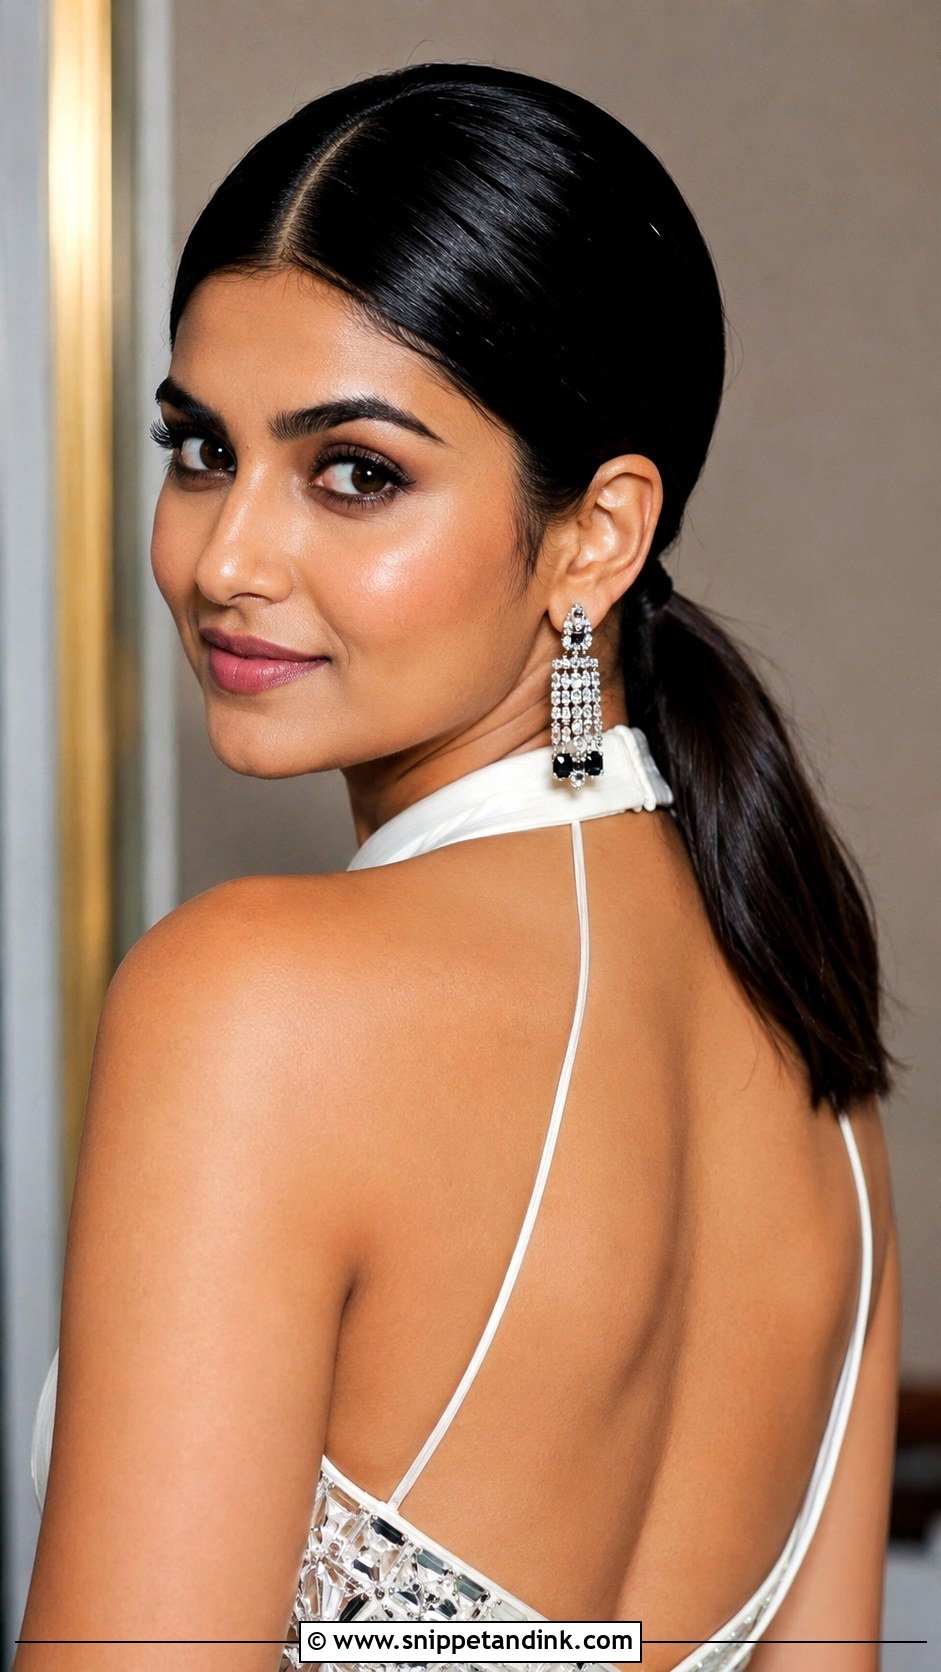
A low pony with a centre part only reads sharp if the part is truly straight, so I draw it with the tail of a comb from forehead to crown instead of eyeballing it. The hair is smoothed into the nape and a strand wraps the base to hide the elastic. Serum goes on the lengths for shine but stays off the roots, where it would make the part look oily under flash. This one is comfortable from morning until the last song, which matters if you’re getting ready at dawn. Bold earrings do the rest.
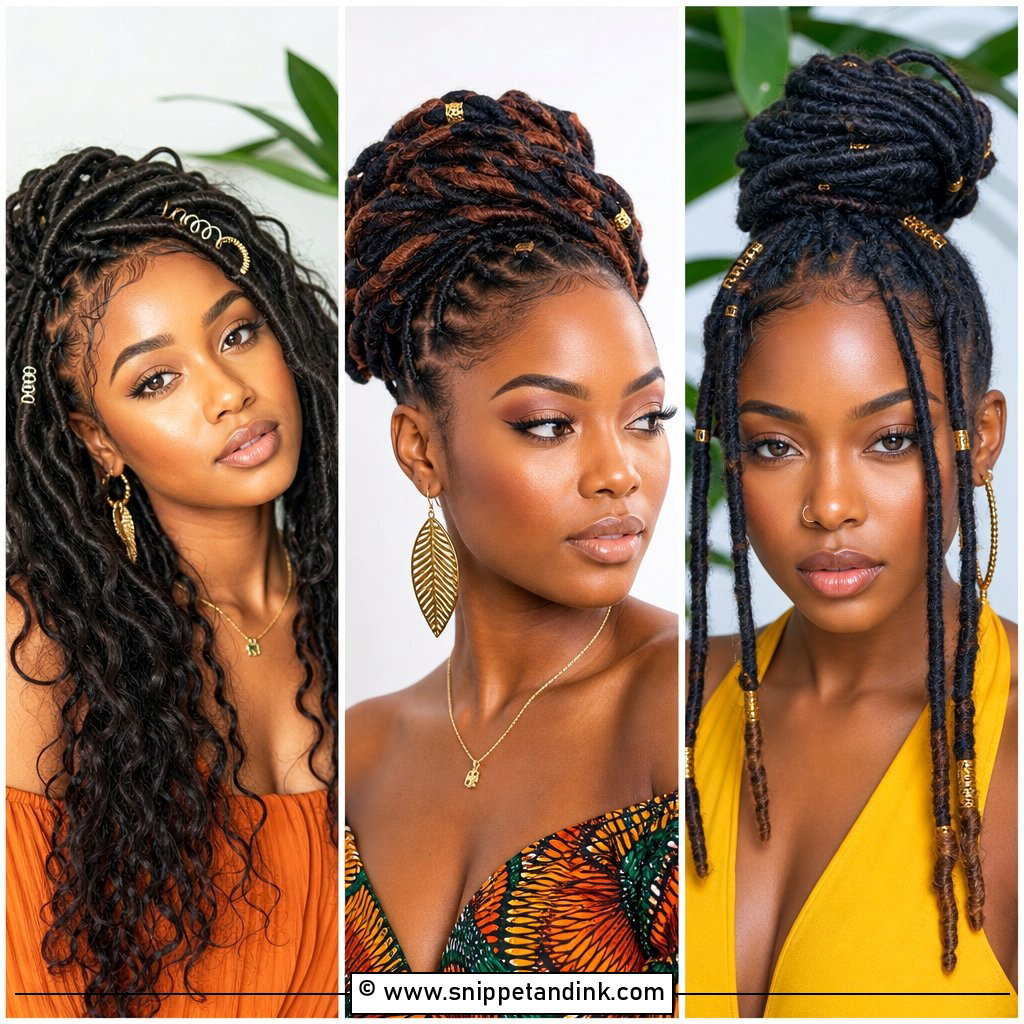
13. Braid and Twist Detail Updo
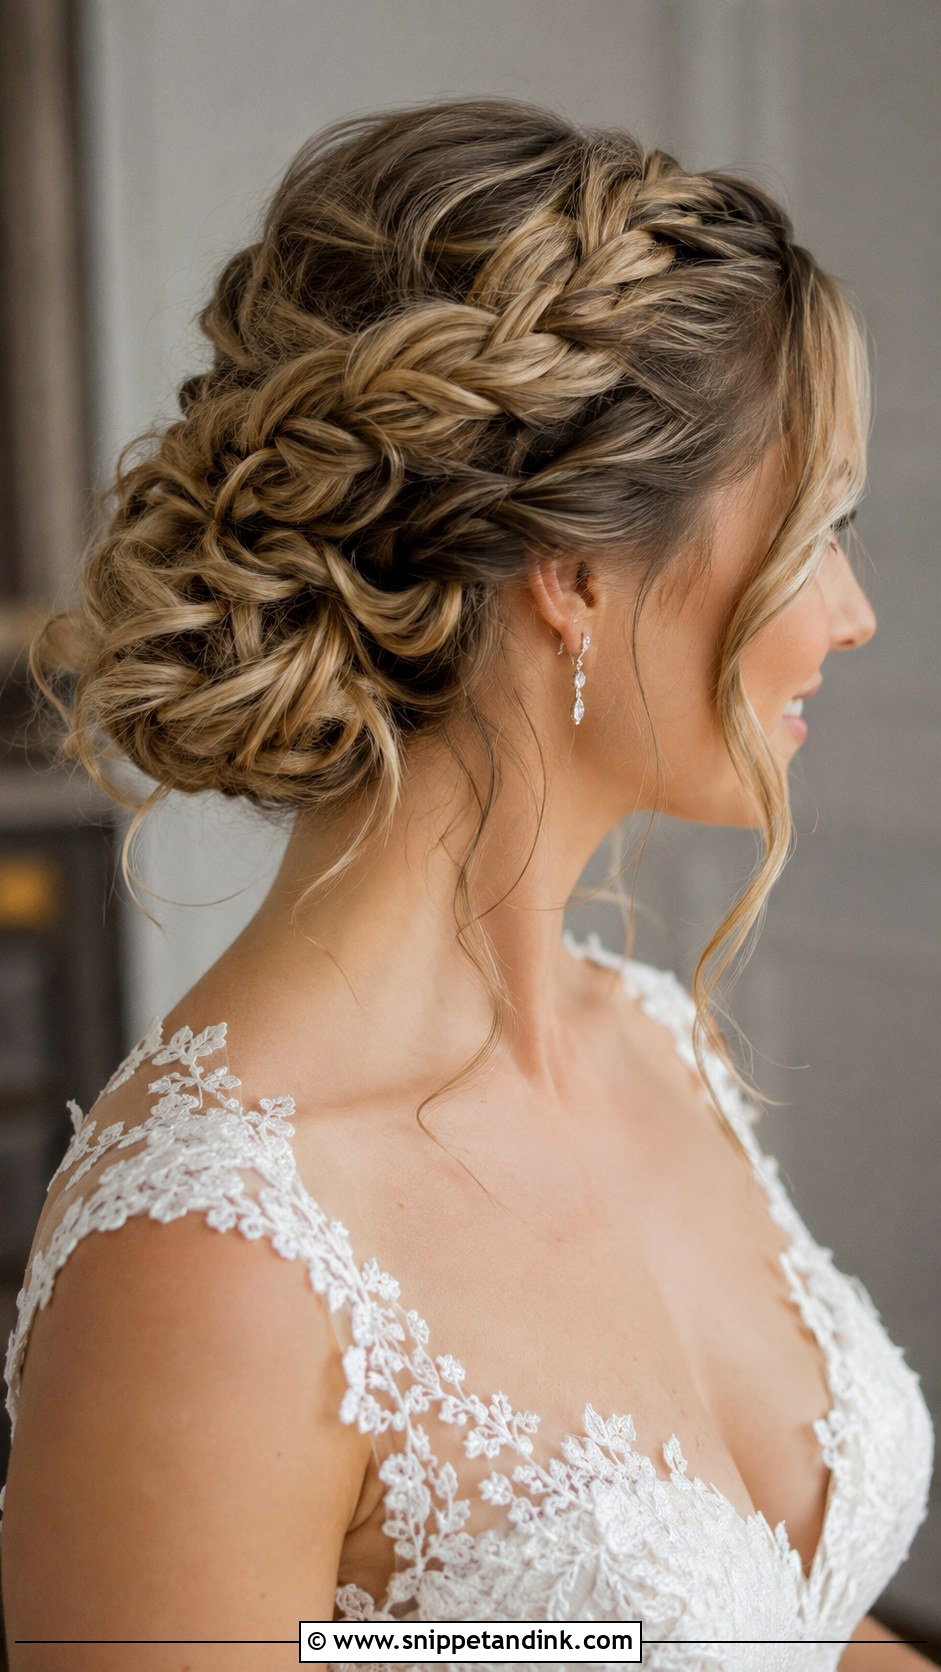
Braid-and-twist updos are slow work, so plan more chair time than for a smooth bun. I start with braids at the sides and twists at the back, then pin everything up in sections, which spreads the weight so nothing drags by evening. Hair washed the day before holds braids better than freshly washed, slippery hair. A few loose pieces at the face soften the outline. I keep pins and flowers sparse in the woven sections, otherwise they hide the braiding you’re paying for.
14. Gold Hair Cuff Accented Updo
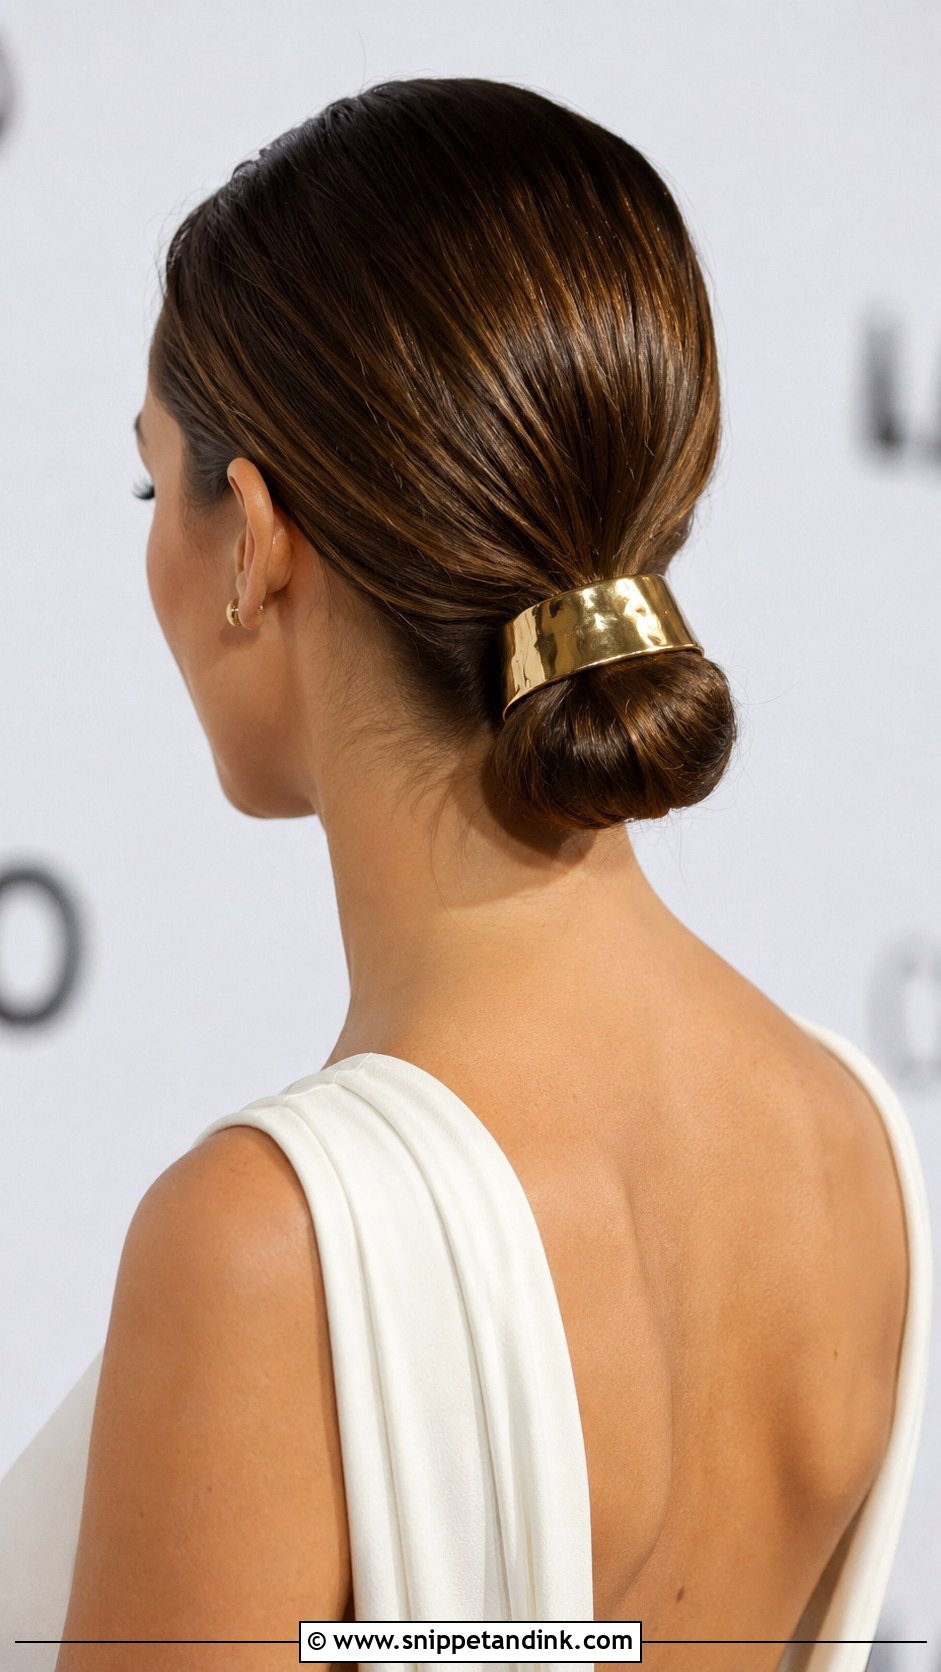
One gold cuff changes a plain bun or ponytail more than a dozen small pins. The cuff needs something firm to sit on, so I slide it over a braid or the base of a tight pony and pin underneath it; on a loose bun it slips. Check the weight before the day, because a heavy metal piece pulls on fine hair for hours. Gold reads warm against brunette and red hair. On platinum hair it can blend in, and silver may give you more contrast. Keep your earrings simpler if you wear more than one cuff.
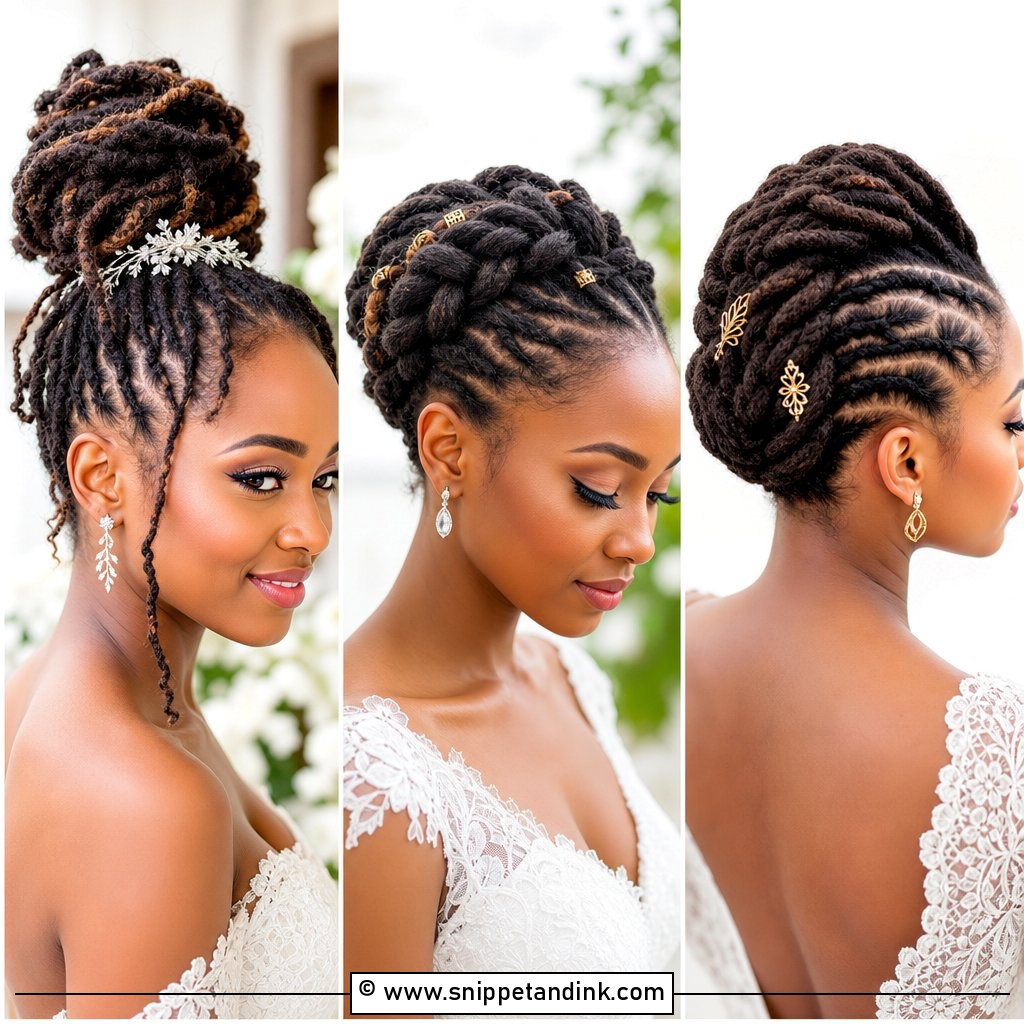
15. Tousled Lob With Beachy Texture
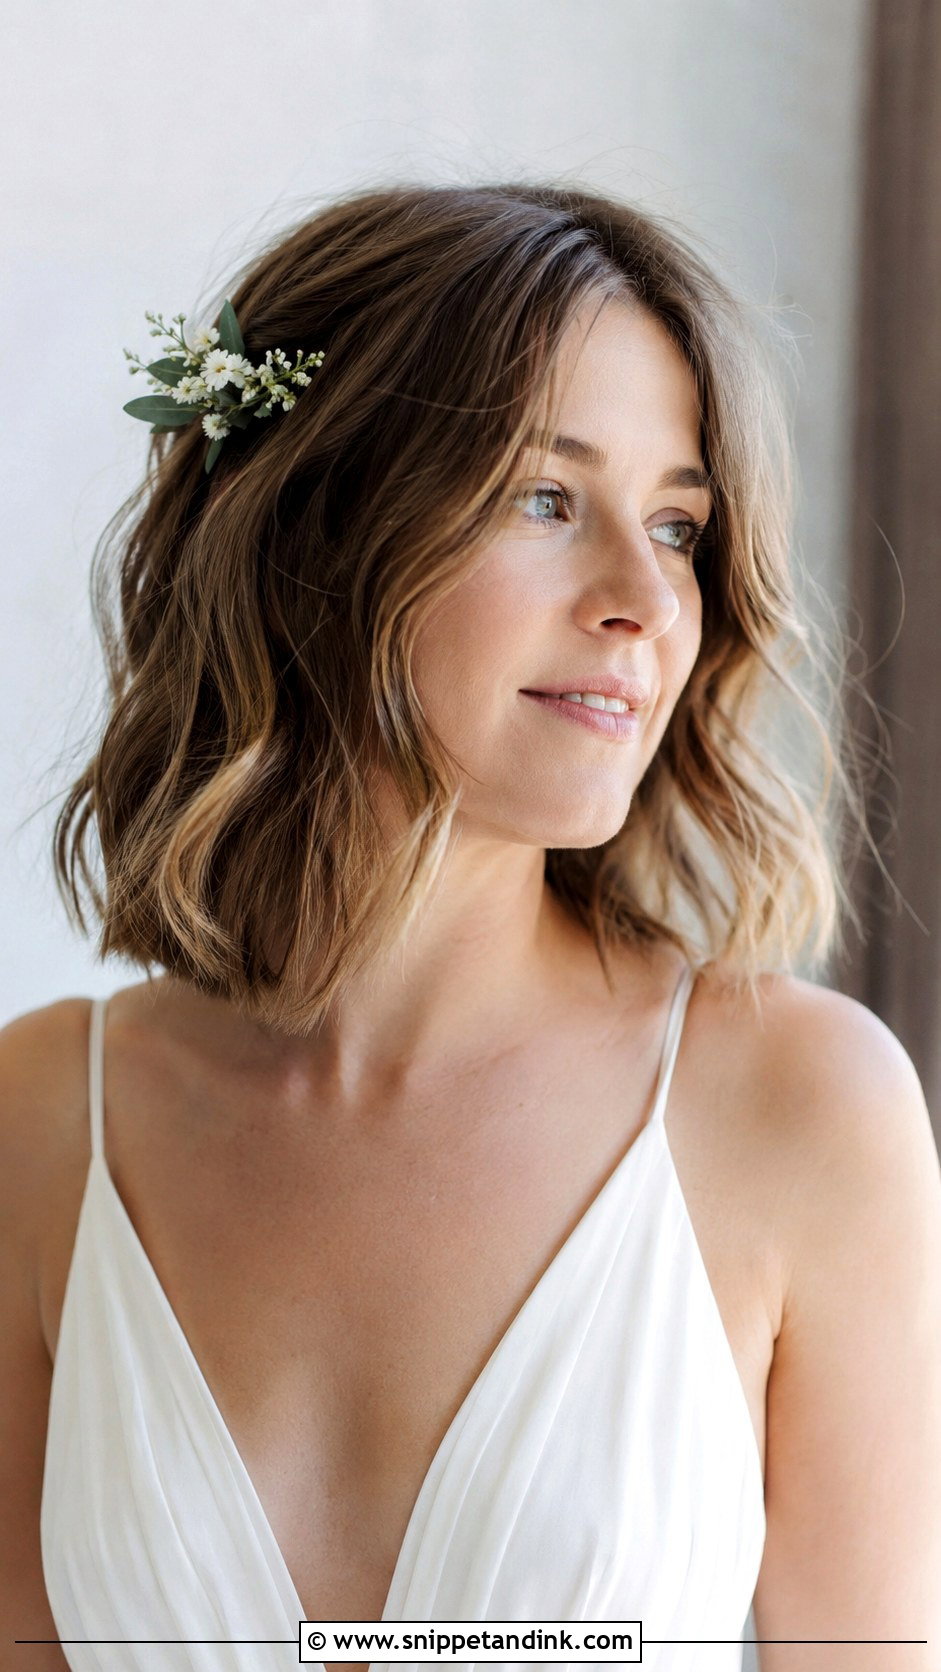
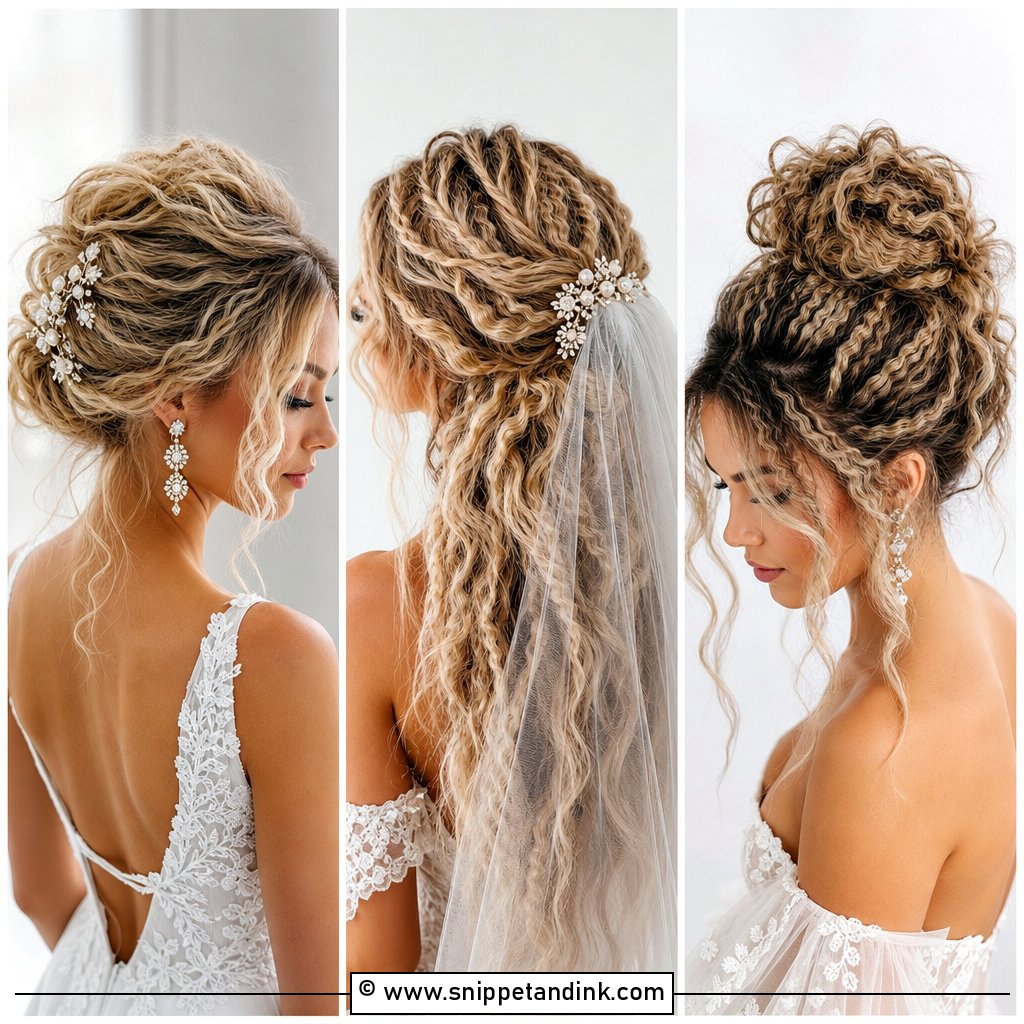
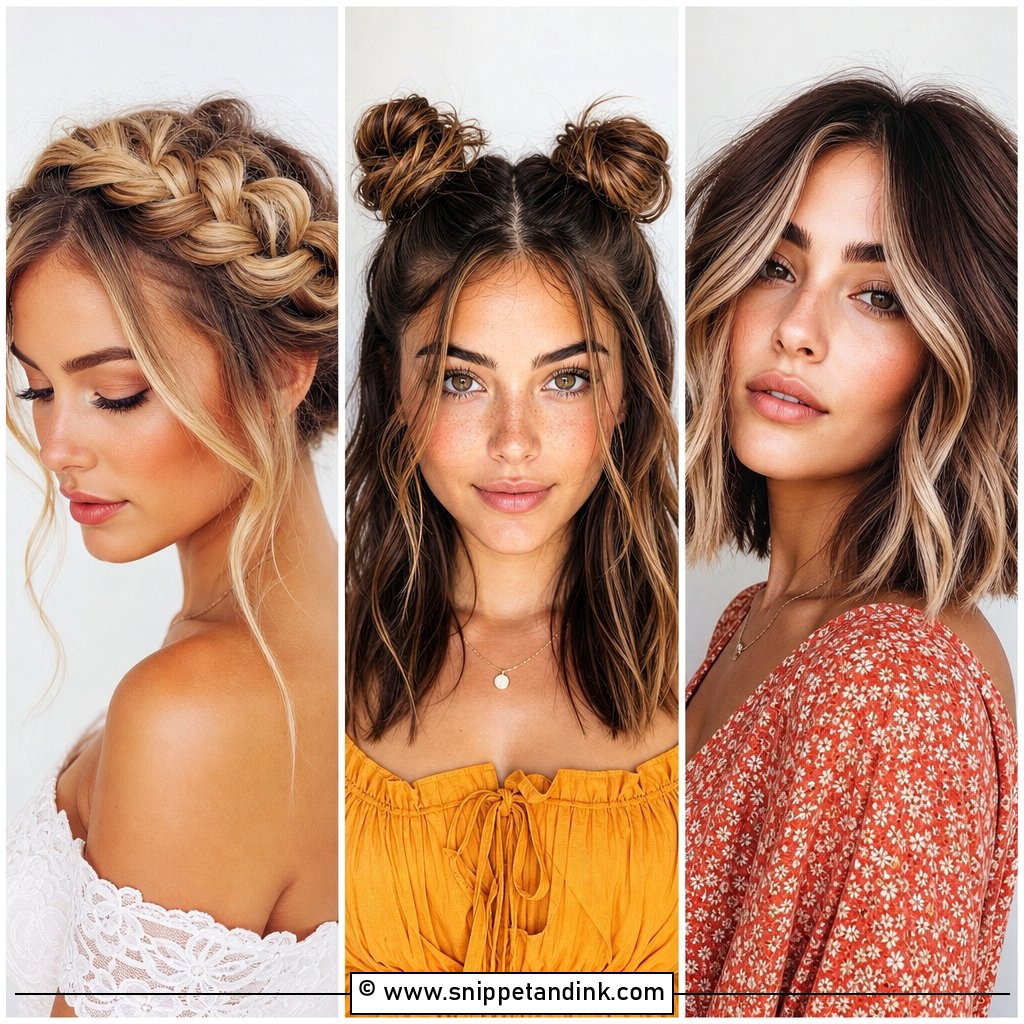
A tousled lob is wavy, not curly. I use a flat iron or a large barrel, leave the last inch straight and break the waves up with my fingers and a dry texture spray. Shoulder-length hair catches on a high collar or a lace back and gets pushed out of shape, so wear the dress, or a top with a similar neckline, at your trial. It’s a good pick for outdoor weddings, as beachy waves look better when the wind moves them. A small pin above one ear is enough.
16. Faux Hawk Bridal Updo
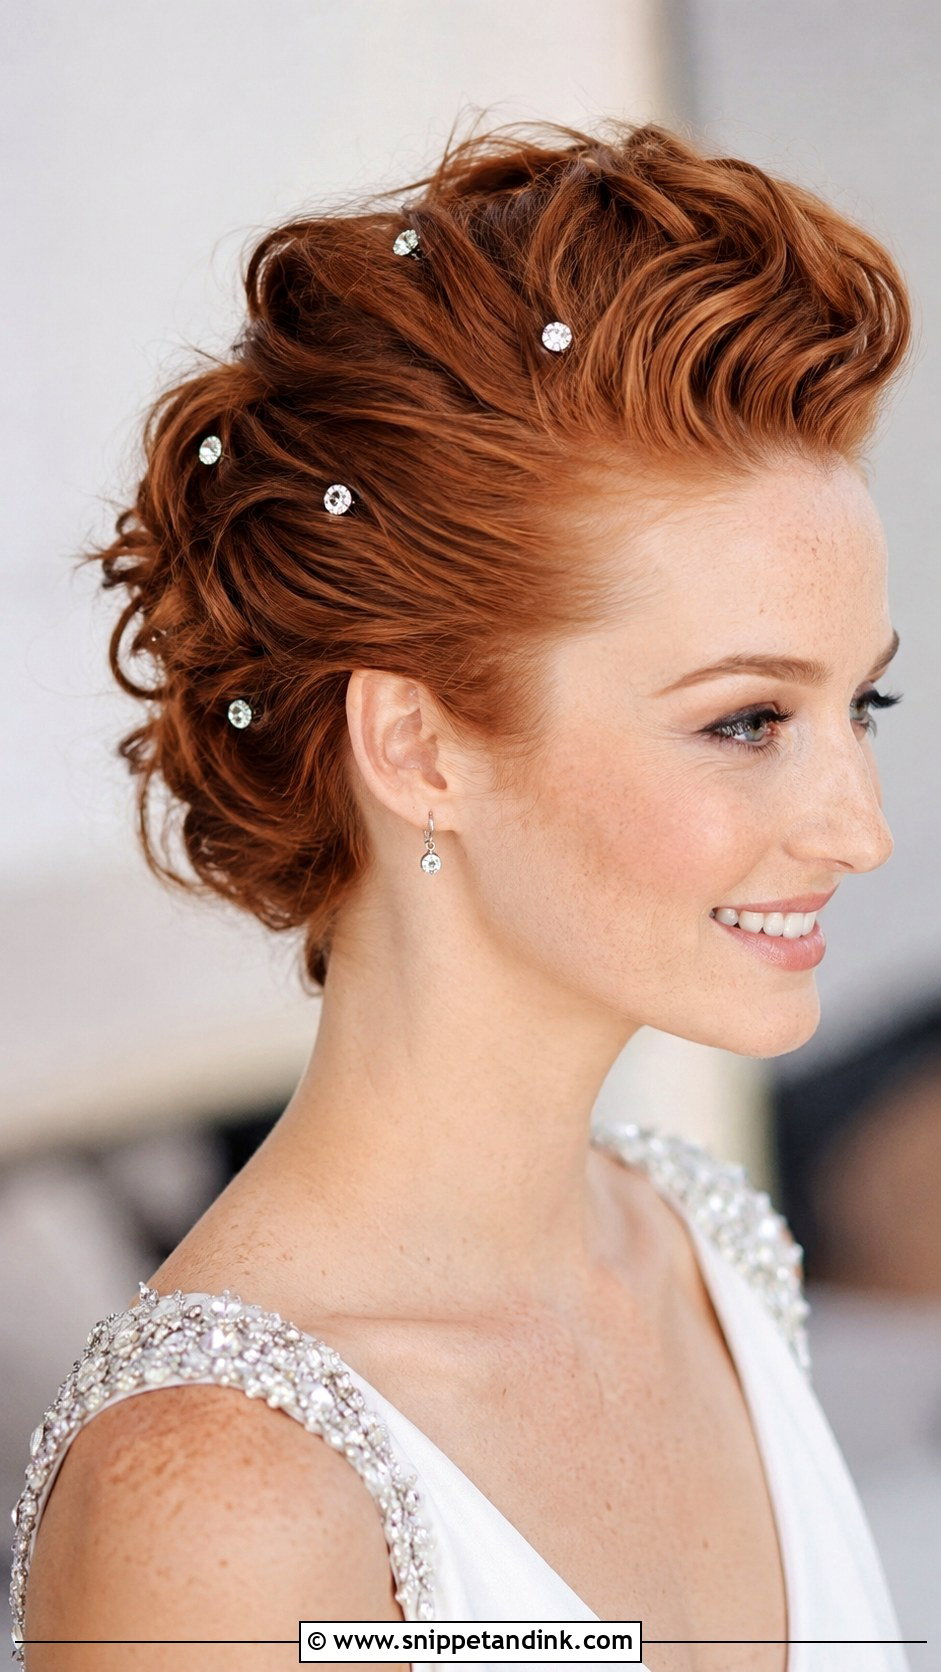
A faux hawk gives you the mohawk outline without clippers. I tease the centre section, roll it into a ridge and pin the sides flat and close to the head, crossing the pins for strength. You need medium to long hair to build real height; shorter hair can carry a smaller version with more pomade. Crystals pinned along the ridge give it a bridal finish. The height fights a long veil, so pair it with a veil set below the ridge, or none.
17. Sleek Bob With Side Part
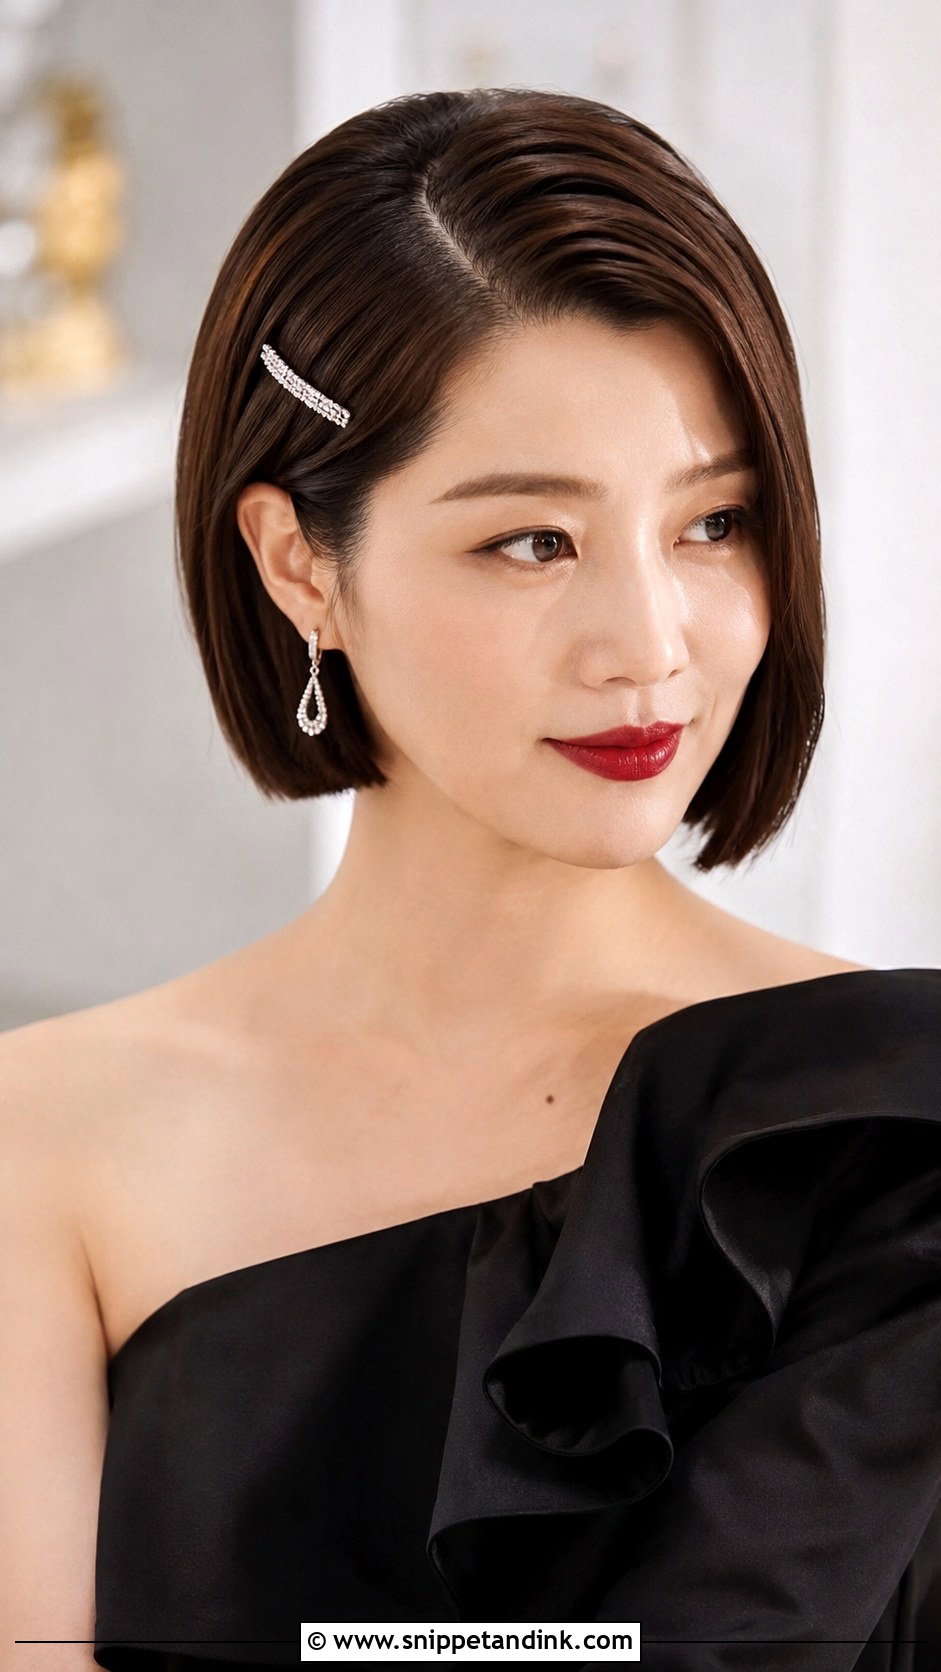
A deep side part sweeps the bob’s length across one side of your face, so you get asymmetry without a new cut. I set the part while blow-drying, because a part flipped at the last minute springs back by afternoon. A sparkly pin behind the ear holds the swept side down. Chin to shoulder length suits it best, and it sits well with structured gowns and a strong lip. If you have a cowlick at the crown, part on the side your hair naturally falls to. Done neatly, the side-parted sleek bob is understated and still has edge.
18. Messy Bun With Loose Tendrils
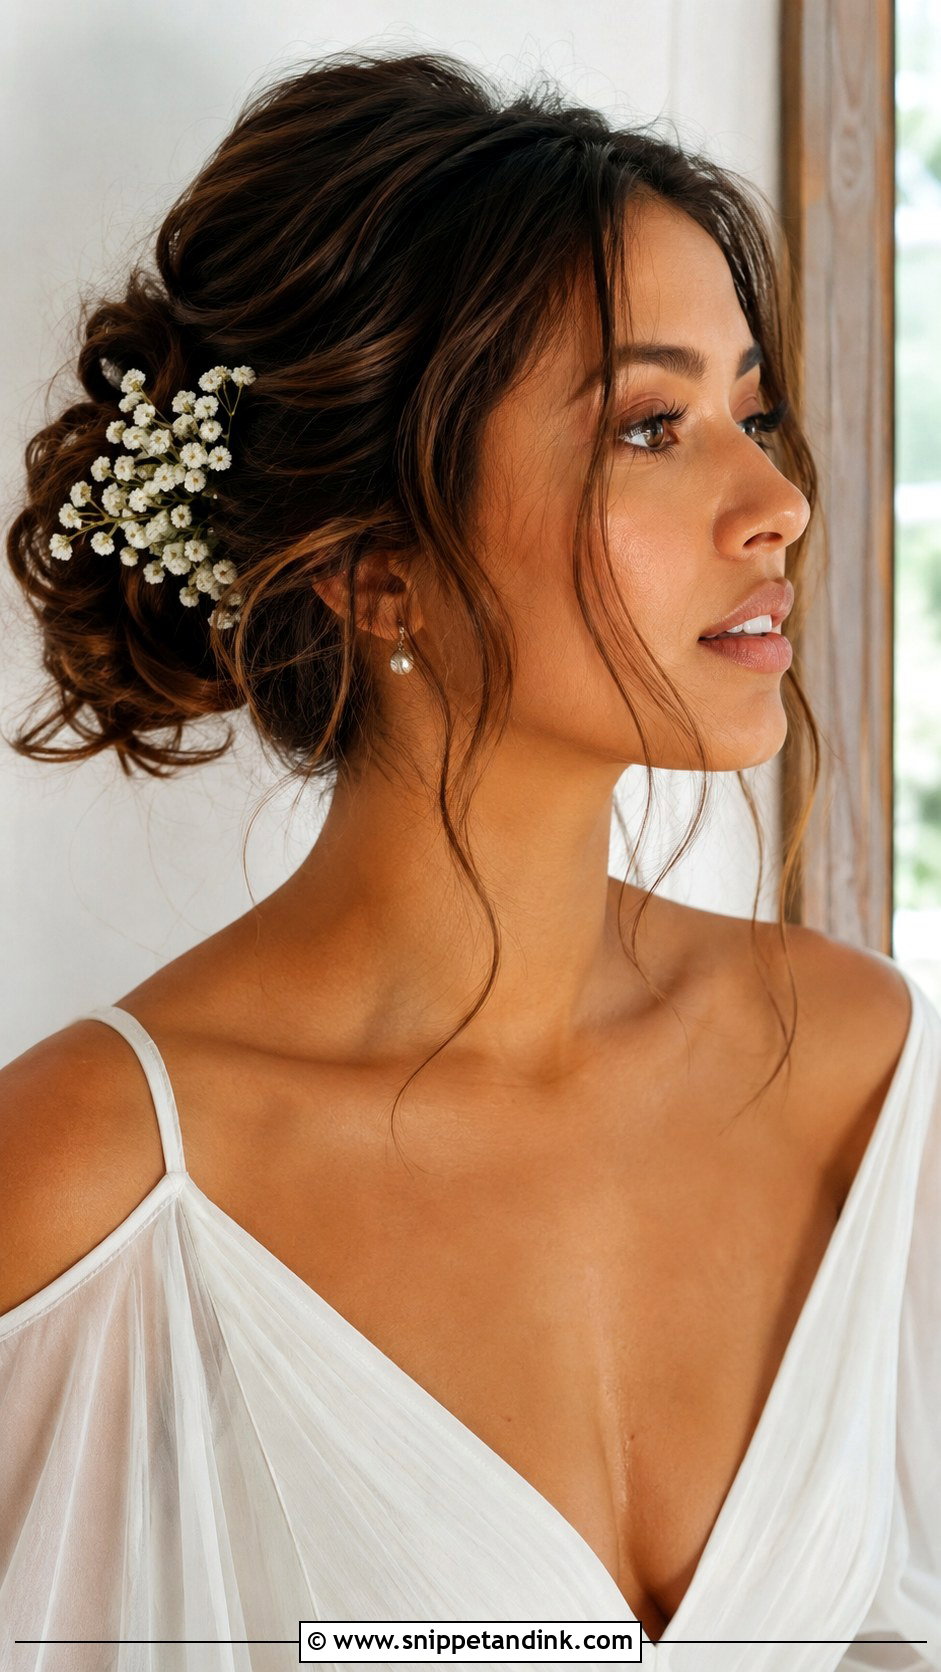
A messy bun needs structure underneath or it collapses before dinner. I pin a firm base first, then pull out loose pieces, so the undone look sits on solid pins. The tendrils around your face and neck should be curled separately; straight, limp pieces look unfinished in photos. A small clip or a few flowers add the bridal touch. You can sit, dance and hug in it without worrying.
19. Ribbon-Woven Bridal Updo
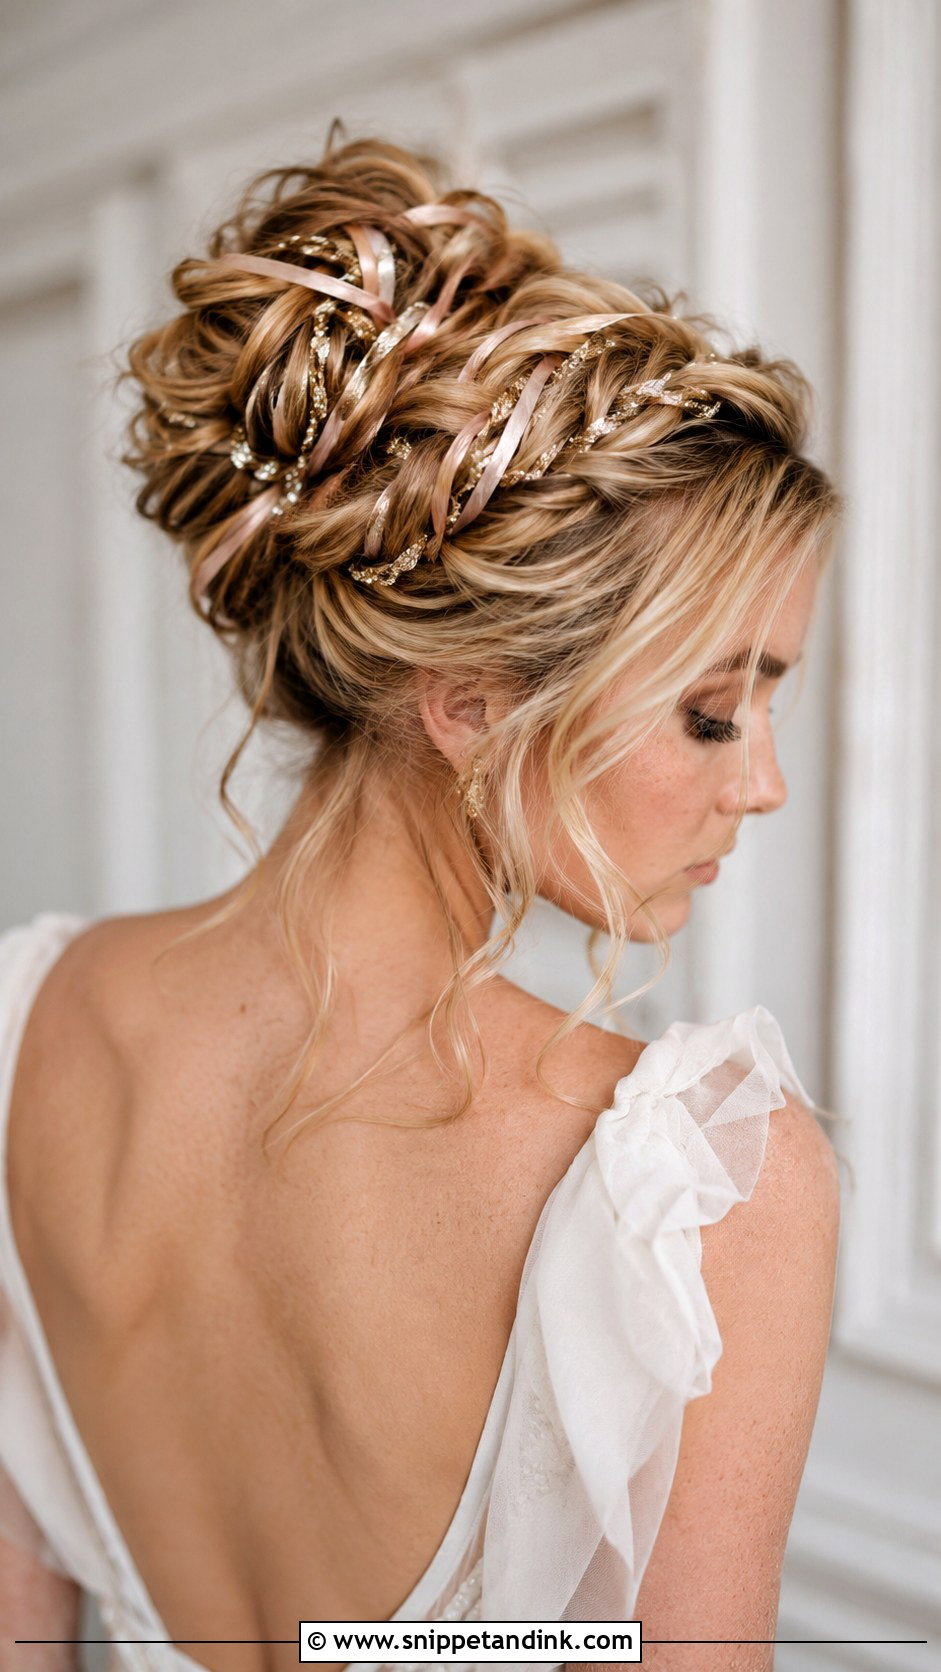
Ribbon gives an updo colour and movement, but the material changes how I work. Satin slides out of braids, so I pin it at both ends; velvet grips better; metallic ribbon is stiff and can poke out at odd angles. I weave it through the braids or twists before pinning them up, because threading it in afterwards pulls hair loose. Taking the colour from your dress or bouquet ties the look together. Cut the tails at an angle so they don’t fray before the evening.
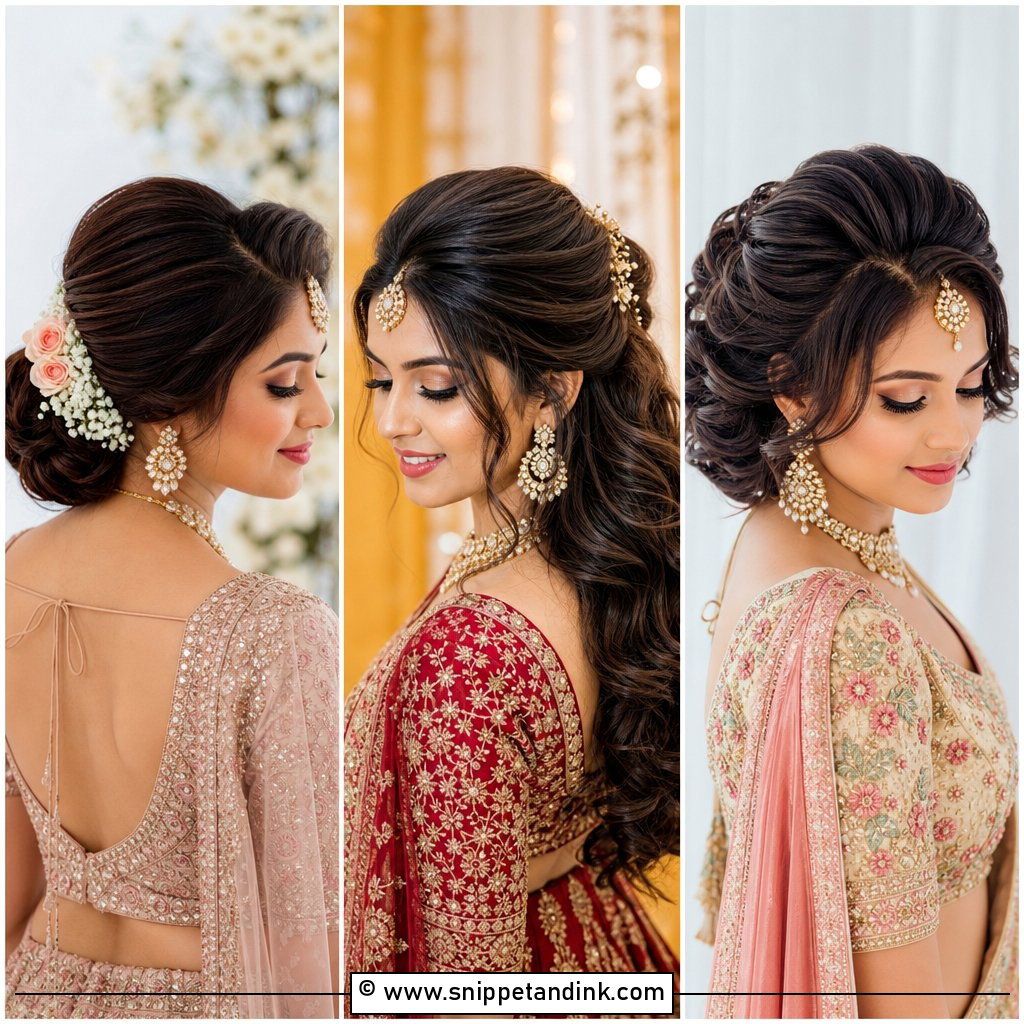
20. Scrunchie and Clip Casual Bridal Look
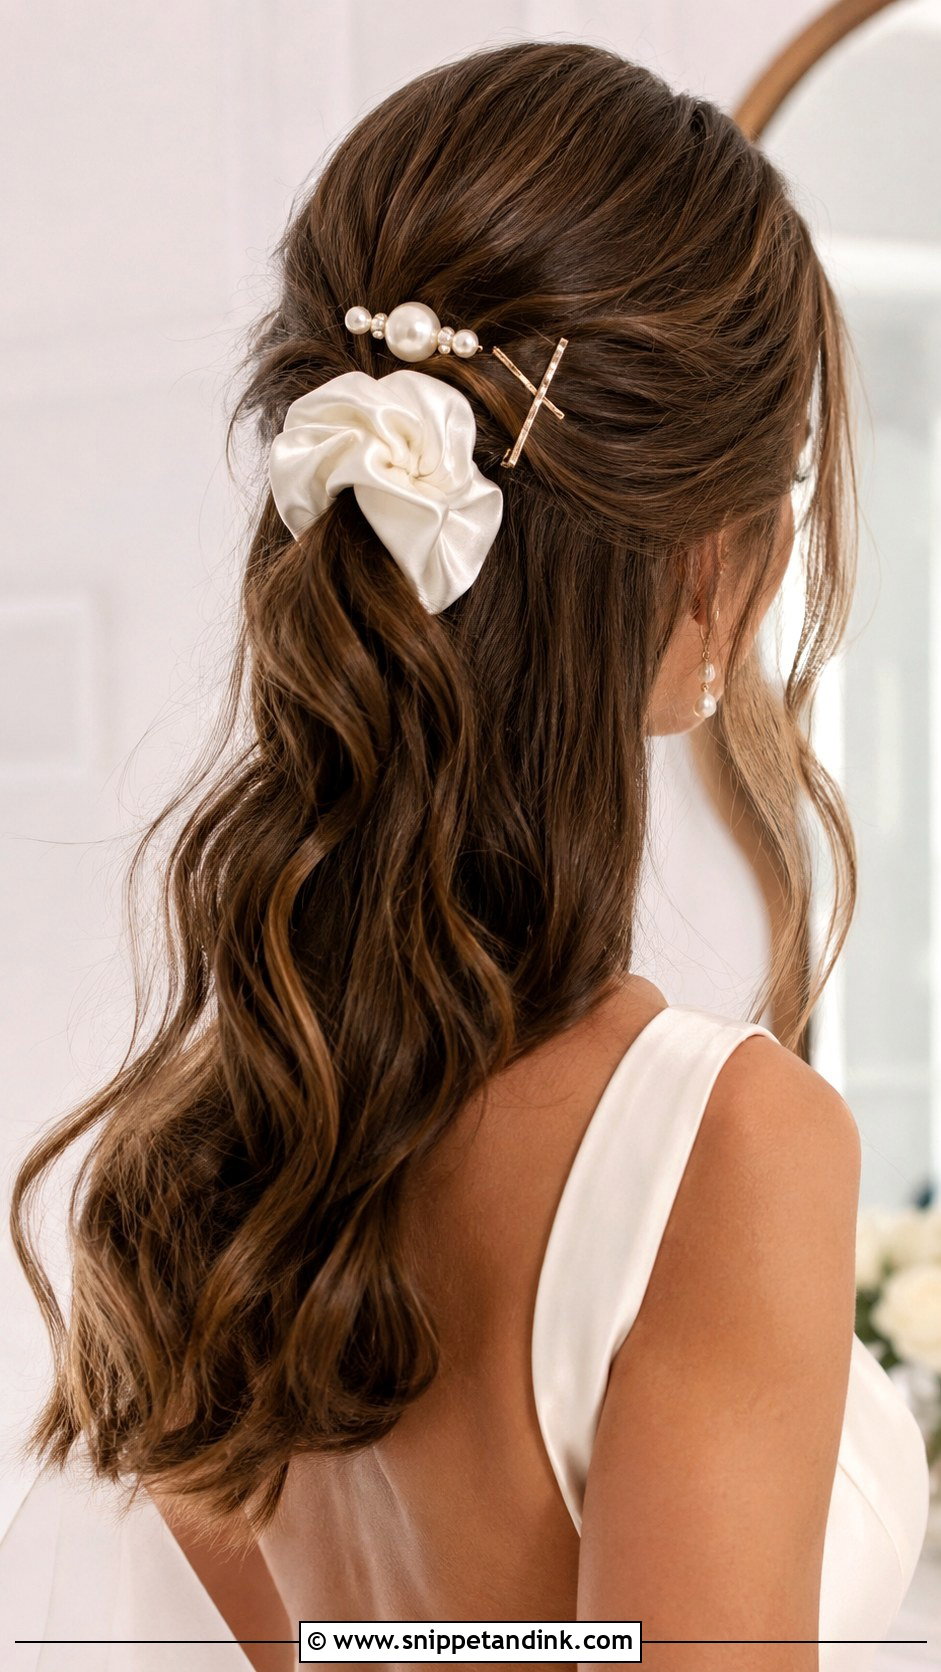
A scrunchie and clips is the most casual idea here, and it suits a small or relaxed wedding far better than a formal ballroom. Go for a satin or silk scrunchie, which won’t snag, and mix pearl and gold clips for a chic, eclectic finish. Gather the hair into a loose half-up or a low pony. It’s comfortable and easy to fix yourself if something slips, a real advantage if no stylist is staying on site.
How Gel, Pins and Braids Wear Over a Long Day
Edgy styles fail differently from soft ones. Curls drop slowly; sharp looks crack, frizz or shift. Once you know the weak point of your style, you know what to pack.
- Wet look and slicked styles: gel flakes if it’s touched over and over. Keep your hands off it and carry a small comb and a travel gel to smooth the hairline after the first dance.
- Crown ponytails and faux hawks: height sags as pins loosen. A few spare pins and a bridesmaid who has watched where they go will fix it in a minute.
- Fringes and bobs: humidity and skin oil separate a fringe faster than anything. A mini flat iron and blotting papers deal with both.
- Braids: they barely move, but they tighten on the scalp. If your head aches a couple of hours into the trial, ask for looser braids on the day.
- Ribbons and cuffs: check them after dancing or a round of hugs, since that’s when they slide.
Putting a Veil on a Mohawk, Ridge or Shaved Side
A veil comb needs dense hair to bite into. On a braided mohawk or faux hawk I place the comb just under the ridge at the back, so the veil falls from behind the height instead of flattening it. On an undercut the comb goes into the long side, never the shaved one. Gelled hair is slippery, so I set a couple of crossed pins under the comb before sliding it in.
If your style is all about shape, consider a short veil, a drop set at the back or taking it off after the ceremony. A heavy cathedral-length veil pulls on a crown pony for the whole service. Ask your stylist to show you how to lift the comb out without dragging pins, so you can remove it yourself before the reception.
Holding a Sharp Line From Ceremony to Last Dance
Edgy hair takes as much planning as a classic updo, sometimes more. A fresh undercut or blunt fringe needs a cut timed a week out, a wet look must set before the dress goes on, and a crown pony needs an hour of wear to check for headaches. Bring two or three of these pictures to your trial, along with a photo of your dress and accessories. Then tell your stylist which detail matters most to you, the sharp line, the height or the texture, because that’s the part we’ll protect all day.
You'll Like These Ideas:


Leave a Reply