
Classic bridal nails have one job: look clean in a ring close-up and stay out of the dress’s way for a very long day. Nearly every set I do for a bride lives in the same small palette of sheer pink, nude, milky white, ivory, champagne and the French tip, and the difference between a set that looks expensive and one that looks cheap is rarely the colour. It’s the shape, the cuticle work and how thin the product sits. Inside that palette there’s still room to play, from a soft chrome glaze to a scatter of pearls or clean almond tips. Below are the twenty I’d genuinely recommend, with what each one needs from your nails to work.
Gel, Regular Polish or Press-Ons for a Two-Day Wedding
The colour matters less than the system it’s built on, so I settle this first with every bride. Most weddings now run from a rehearsal dinner to a morning-after brunch, and the manicure has to last all of it.
Gel polish
It cures hard under a lamp and usually stays glossy for around two weeks, which covers the honeymoon too. It’s also the only way to get chrome. Have it soaked off properly afterwards; peeling gel takes layers of your own nail with it.
Regular polish
Fine if it goes on the day before and you’re gentle with your hands, but expect wear at the tips within two or three days. It’s the easiest to touch up yourself, which is its real advantage.
Builder gel or extensions
Worth it if your nails are short, bitten or split, or you want an almond your own nails can’t support. Have them done a week or two ahead so you’re used to the length before you’re fastening earrings and typing thank-you messages.
Press-ons
A good set sized correctly to each nail looks convincing in photos. The risk is one popping off mid-reception, so carry the glue and a spare in your two most-used sizes.
1. Classic French Wedding Nails
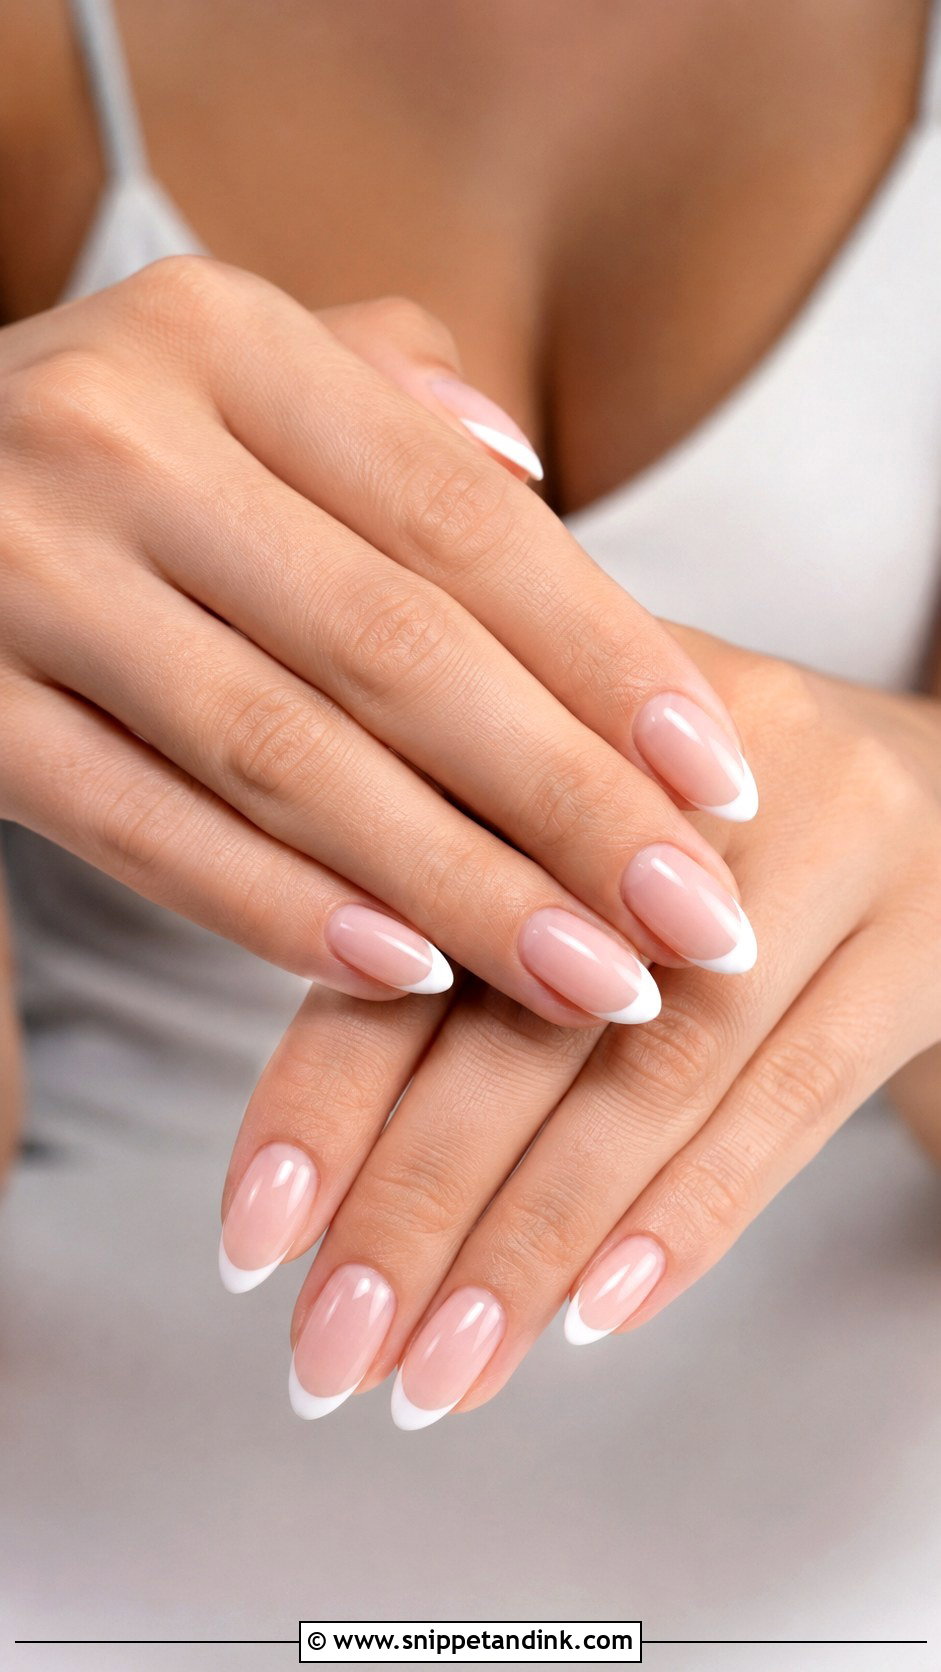
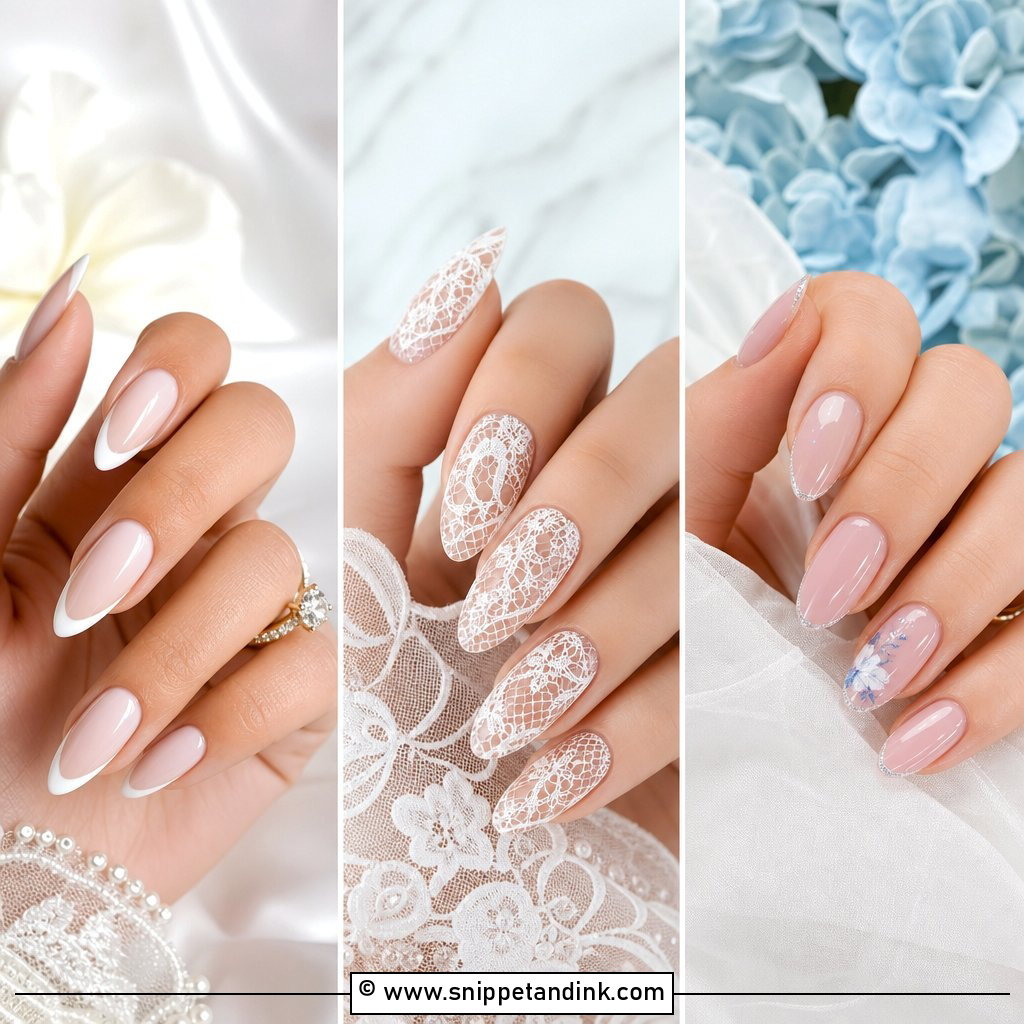
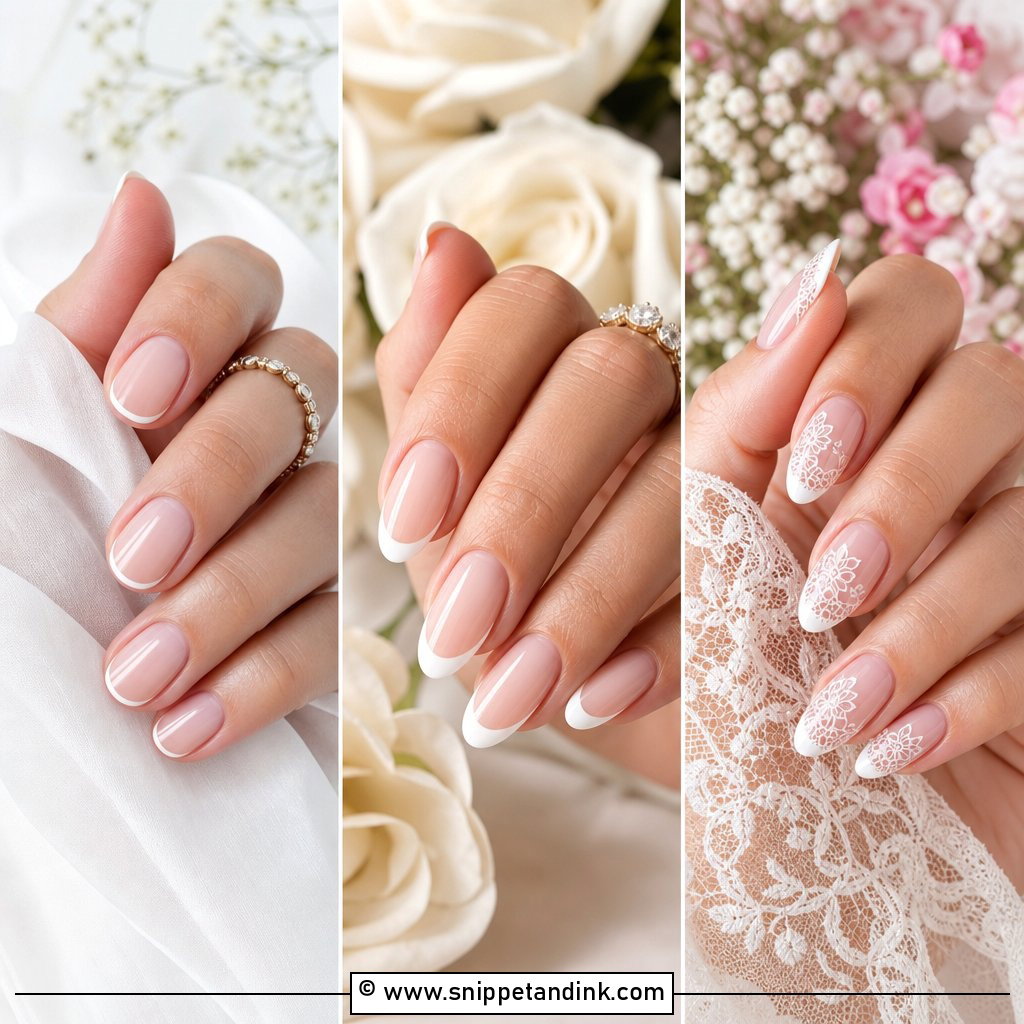
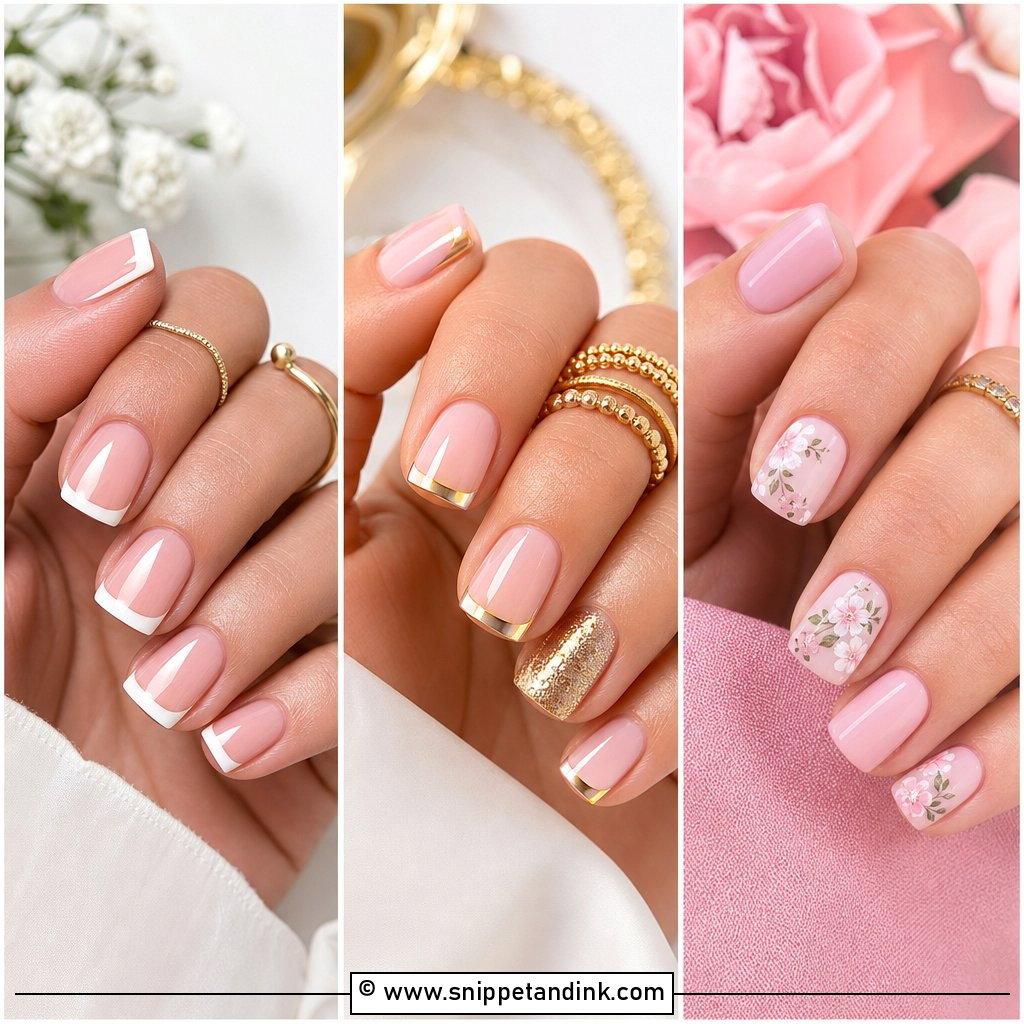
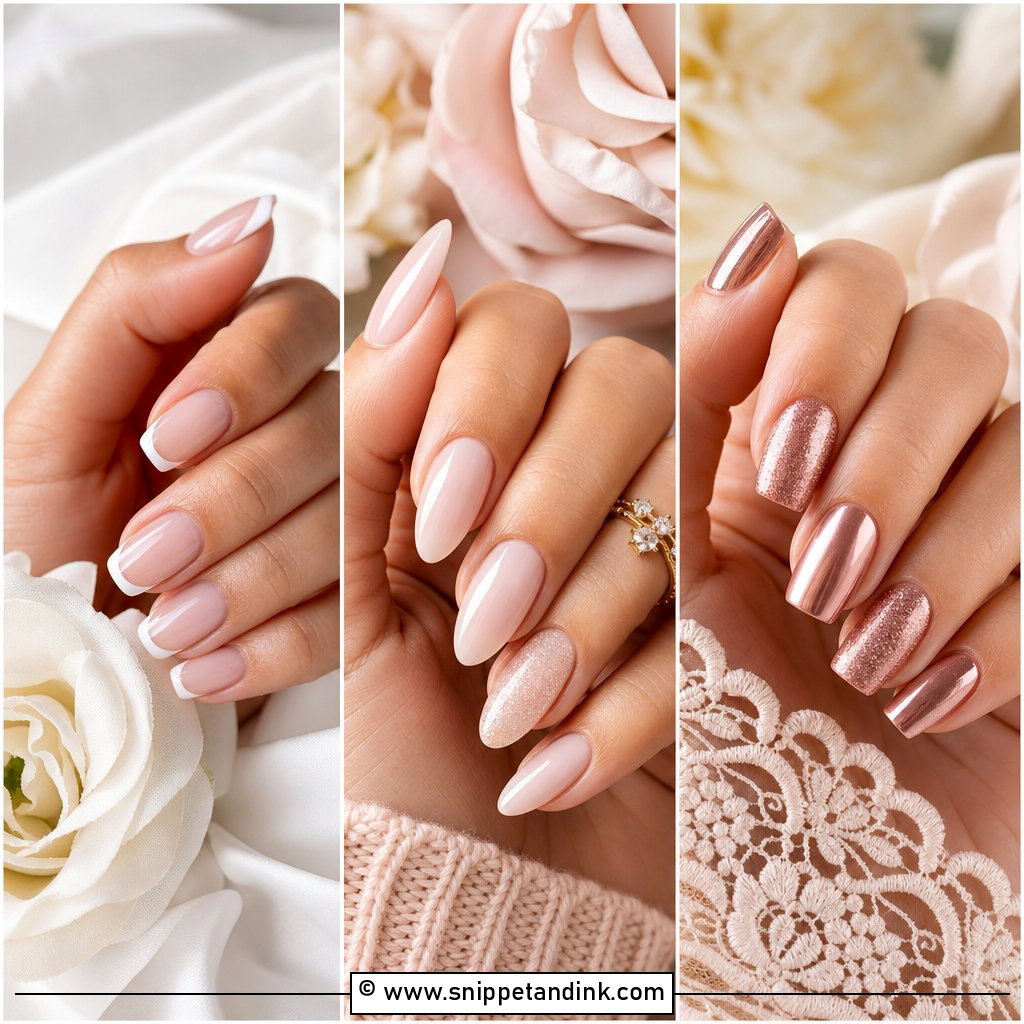
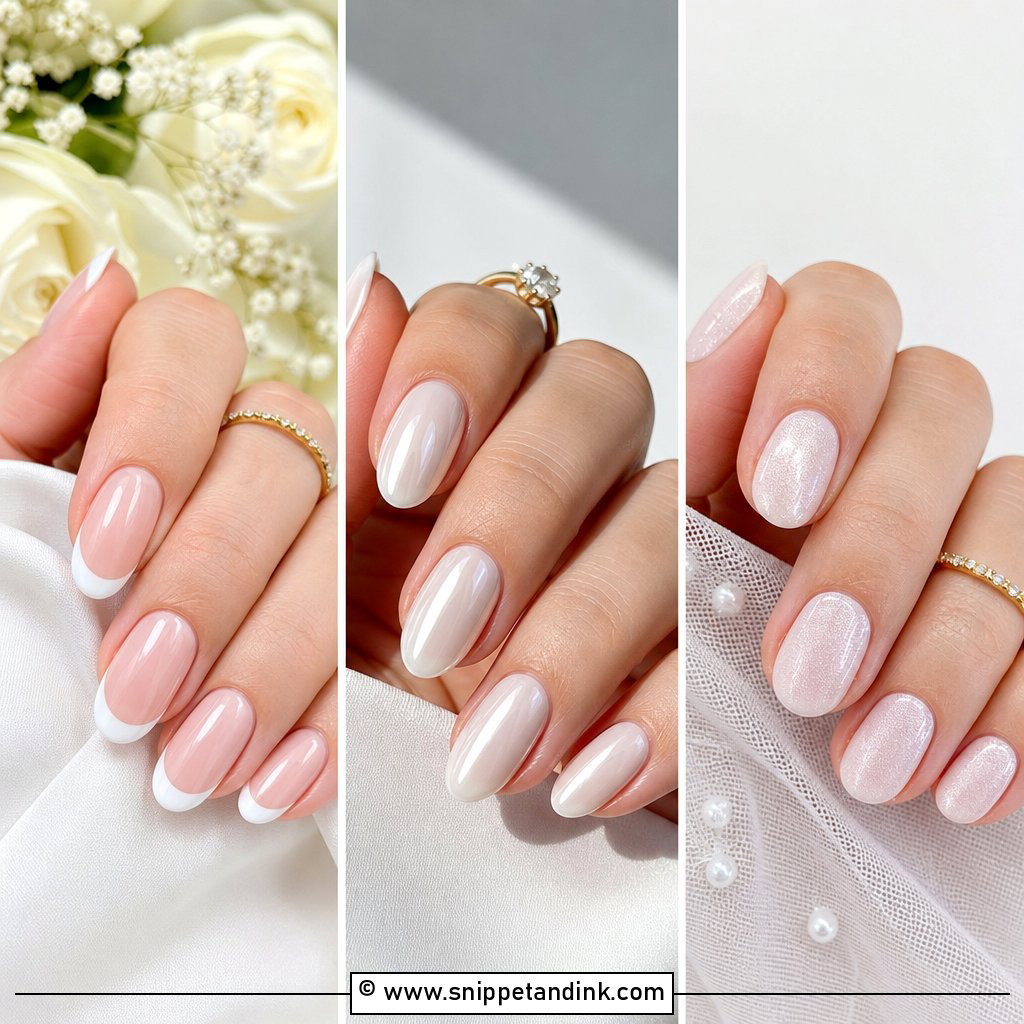
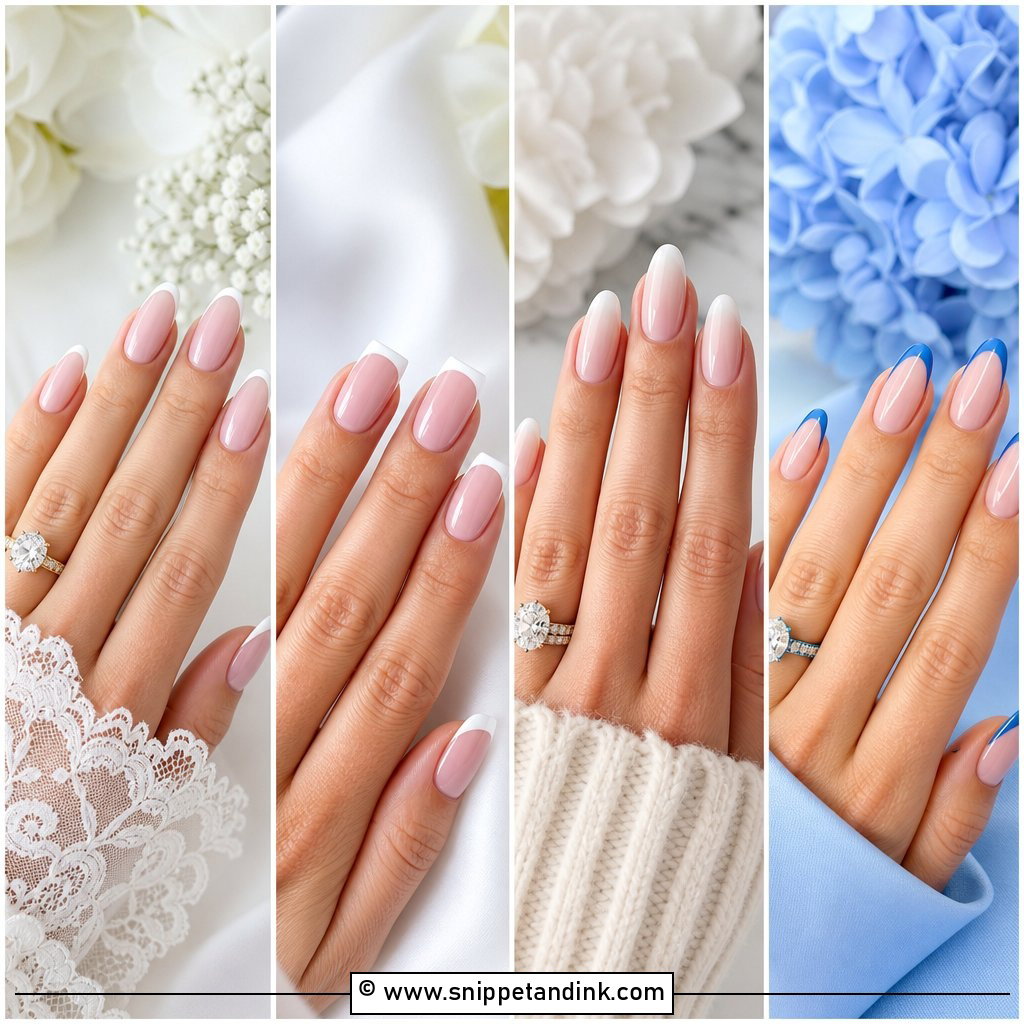
The French is still the set I’m asked for most, and the thing I change for nearly every bride is the tip width. A thick band of white shortens the nail bed visually, while a tip of a millimetre or two that follows your own free edge reads finer in photos and grows out less obviously. On a square shape I curve the smile line slightly, because a dead-straight line looks harsh. Over a sheer pink or nude base it sits happily next to satin or lace, since there’s nothing in it to clash with.
2. Milky White Wedding Nails
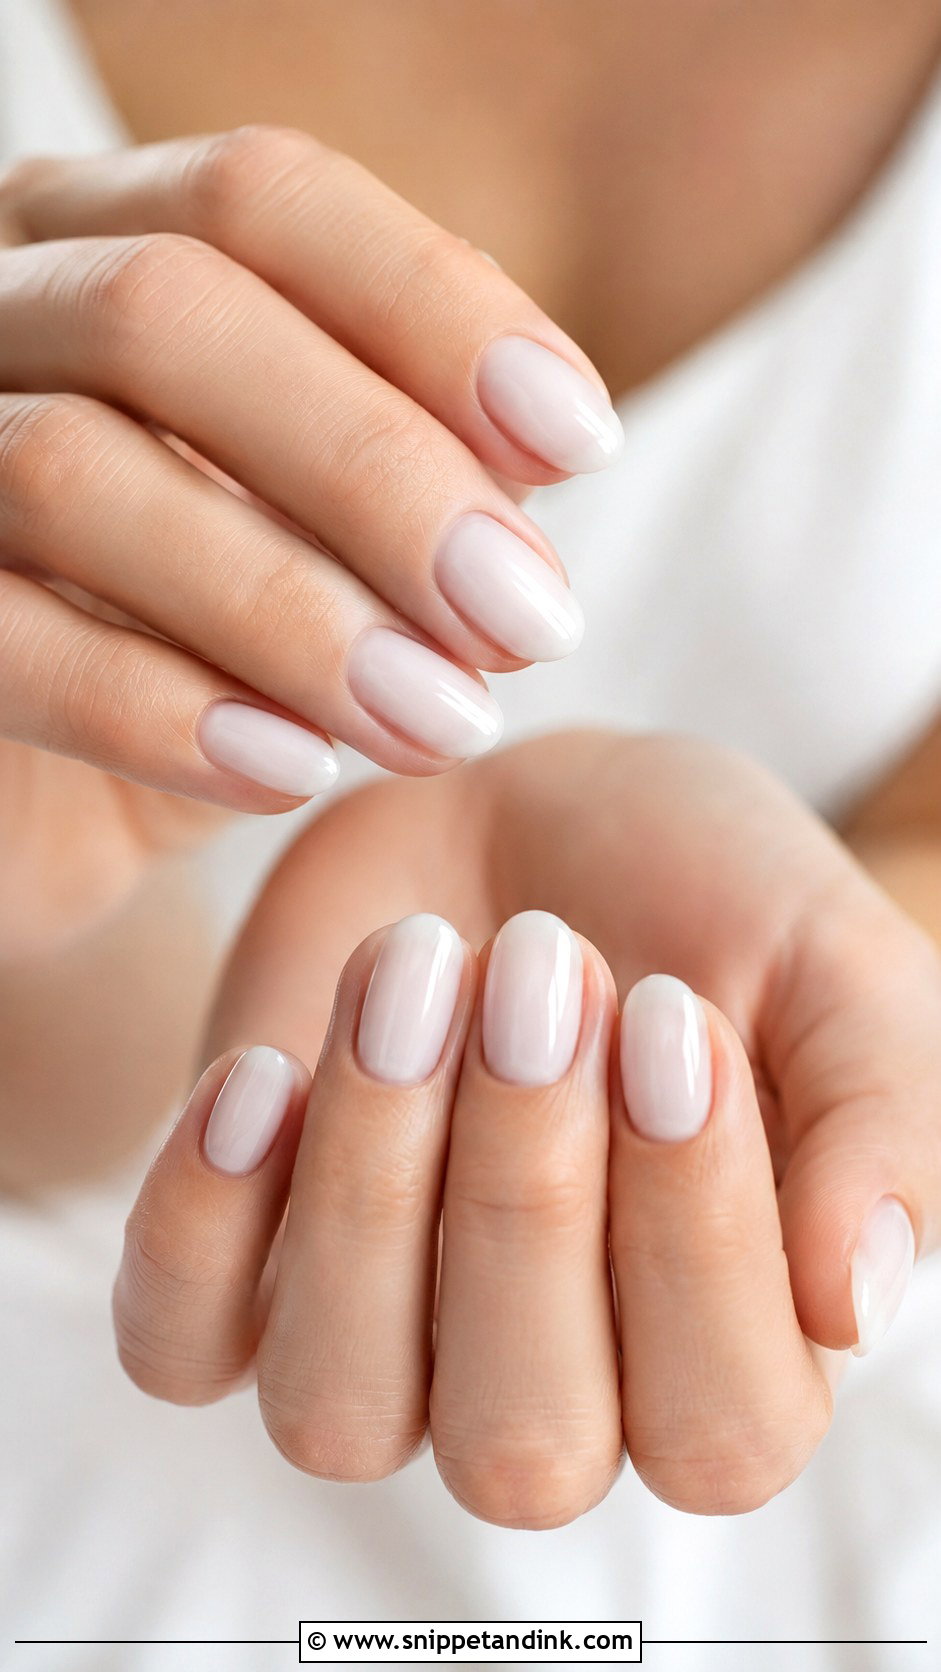
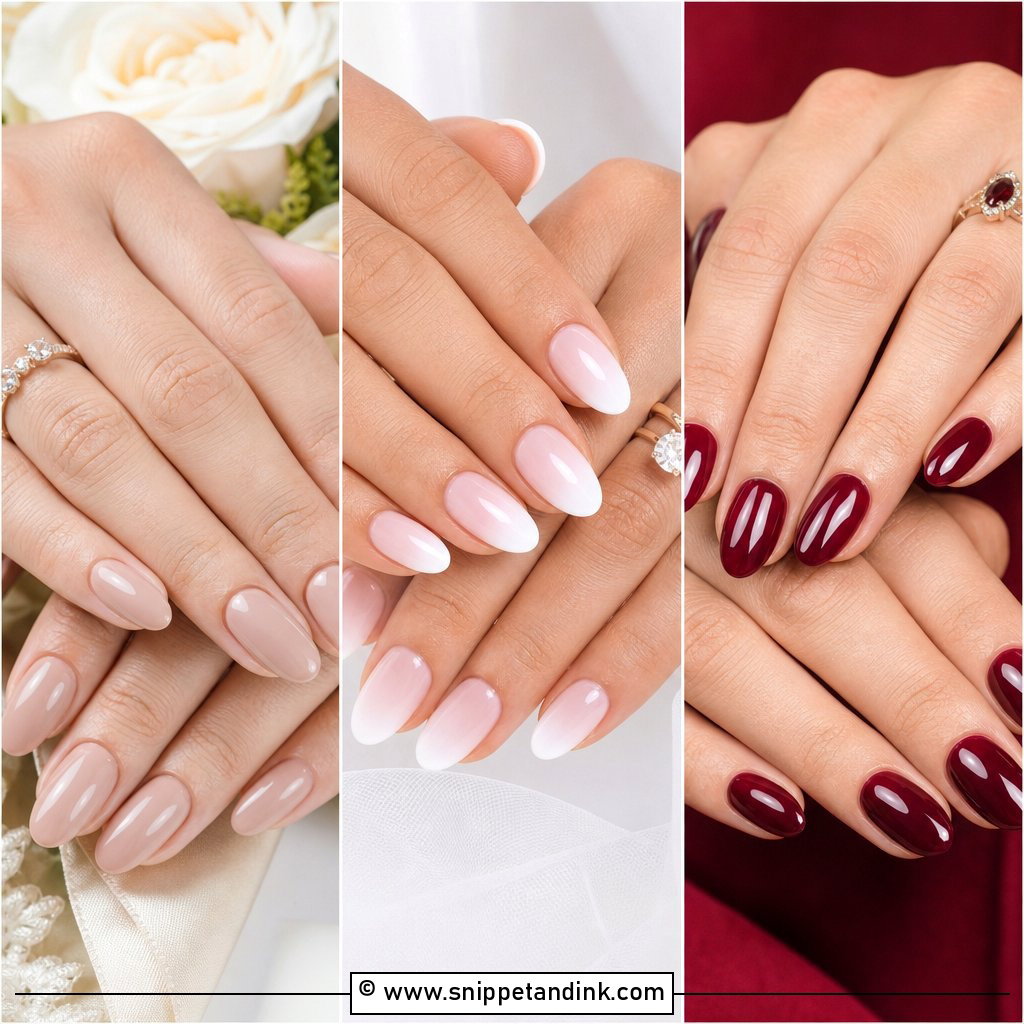
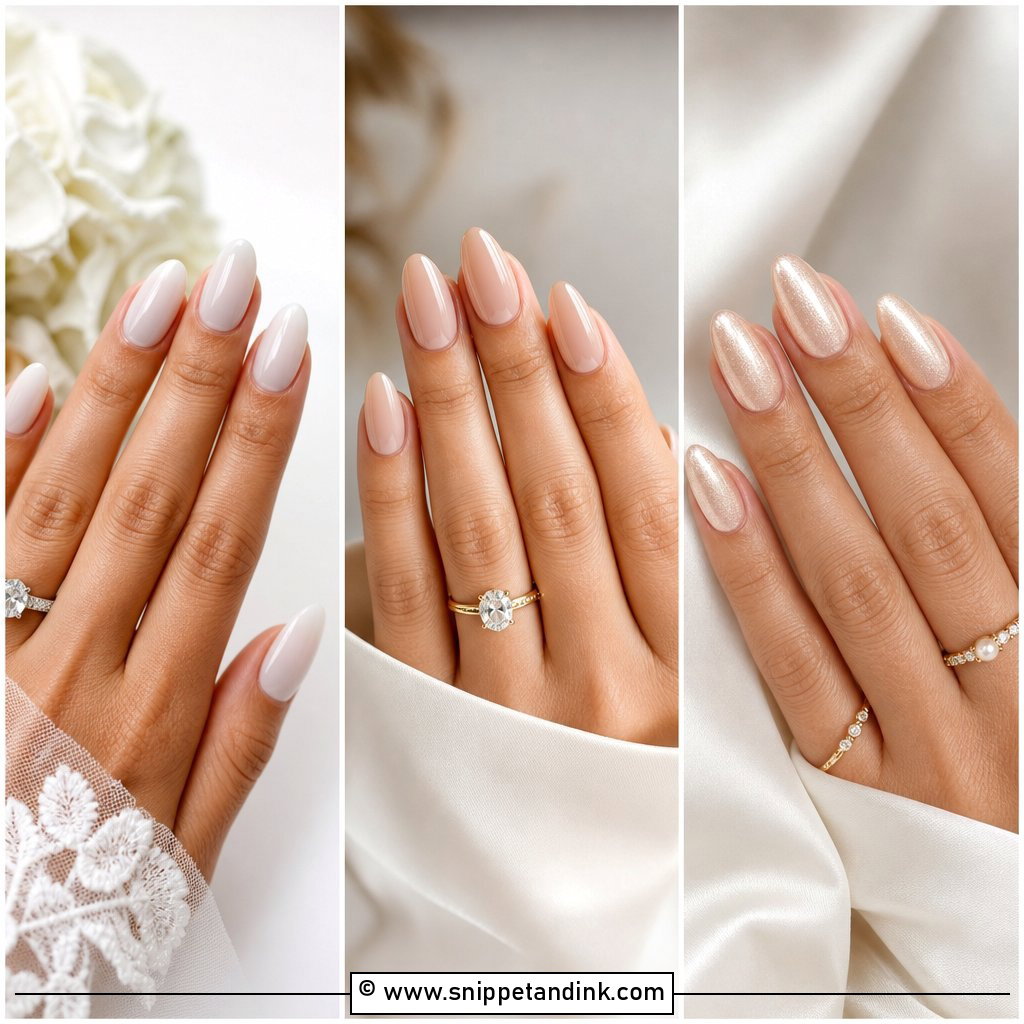
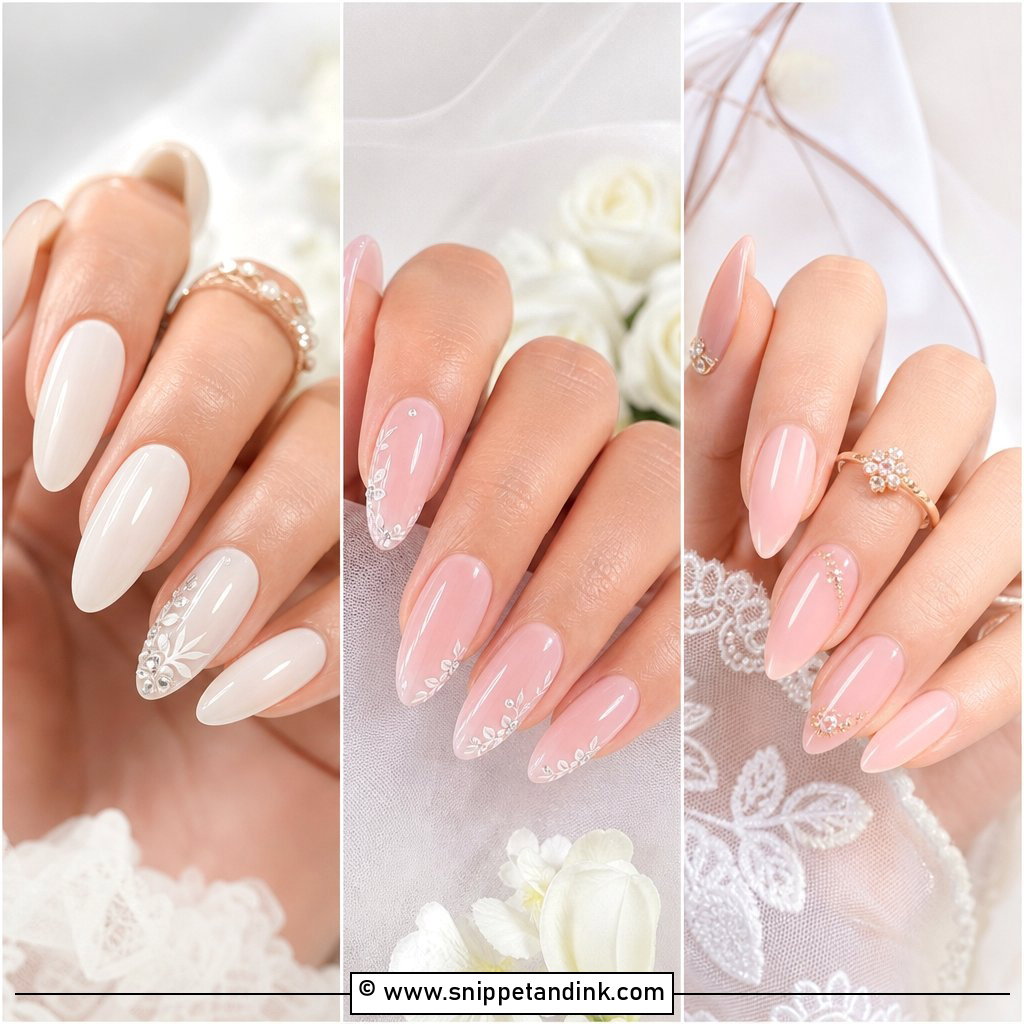
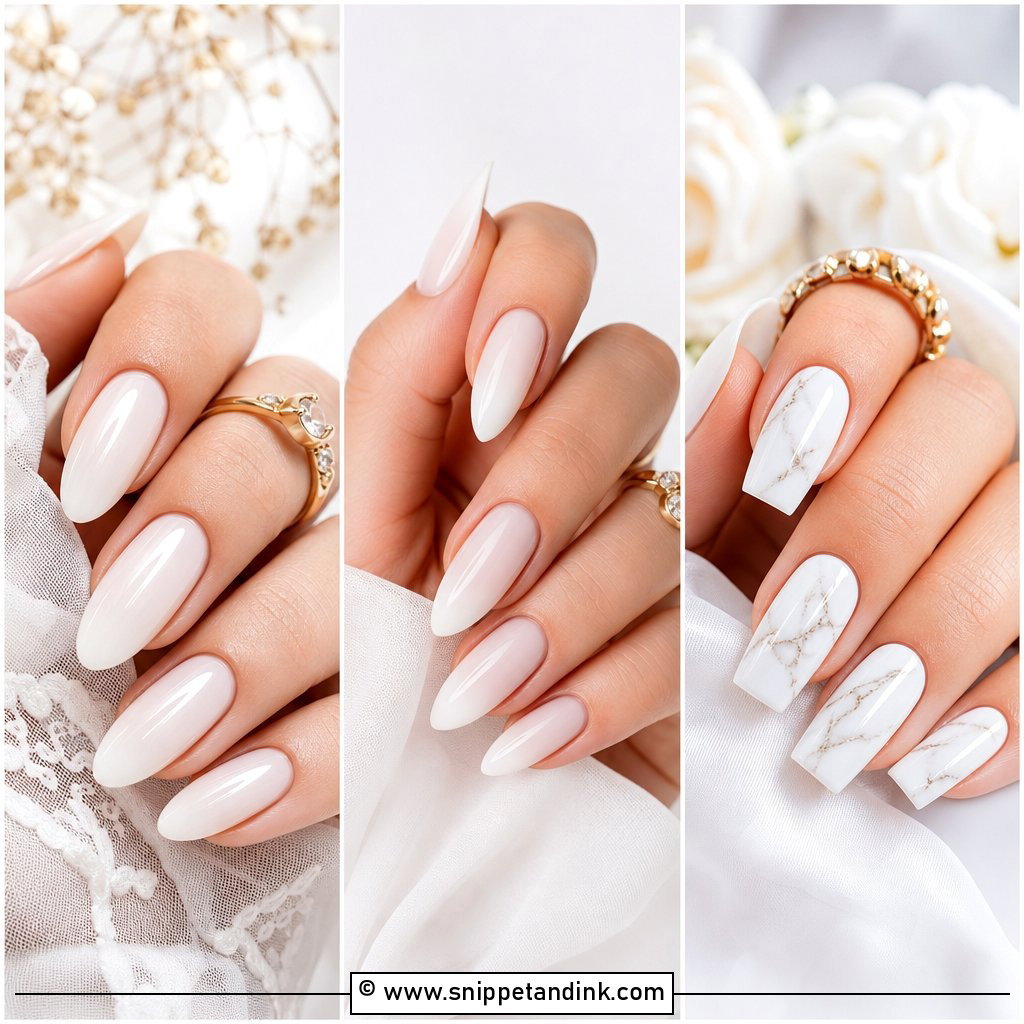
Milky white wedding nails give you white without the chalky, correction-fluid look that solid white can have on short nails. The base is semi-sheer, so I build two thin coats and check it by a window: too thin and your natural free edge shows through as a line, too thick and the cloudy depth disappears. Some of your own nail bed warms it from beneath, which is why it suits most skin tones. Short ovals and medium almonds carry it best, and a faint pearl topcoat adds a little glow next to a diamond.
3. Sheer Pink Wedding Nails
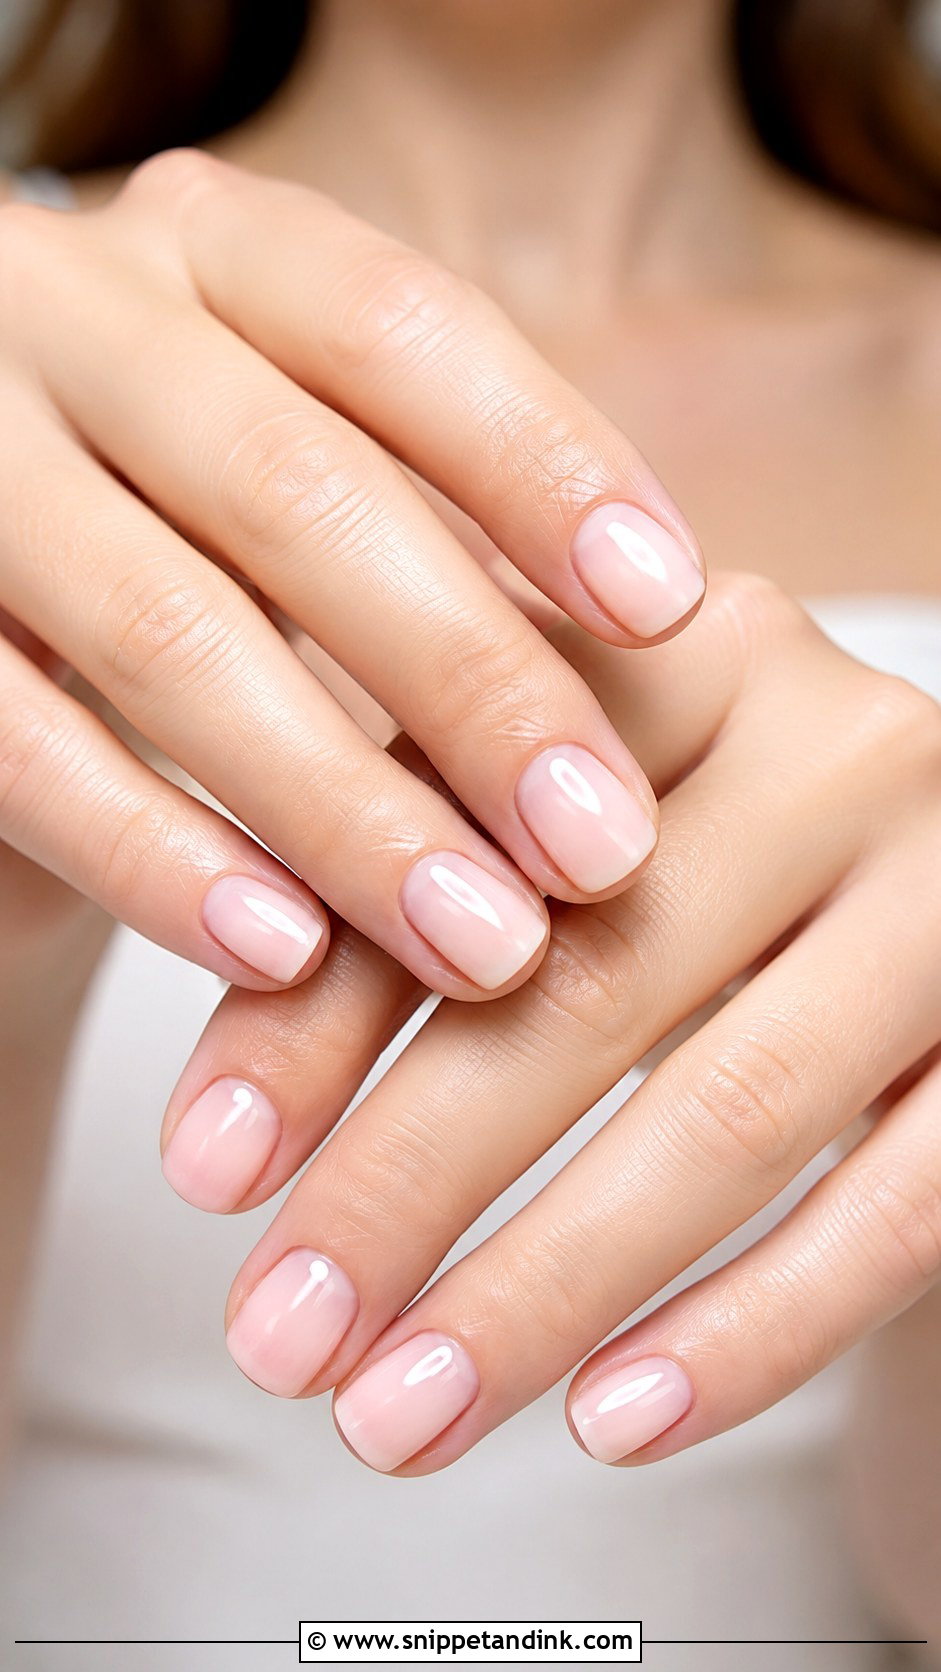
This is the manicure for a bride who never wears polish and doesn’t want her hands to feel like someone else’s. A pale pink tint evens out the nail bed and hides the slight yellowing that’s common on bare nails. The catch is that a sheer shade shows everything underneath, so ridges get a light buff and the cuticles have to be immaculate; I spend more time on prep here than on the colour itself. Pick the pink closest to your natural nail and keep the topcoat high shine.
4. Nude Almond Wedding Nails
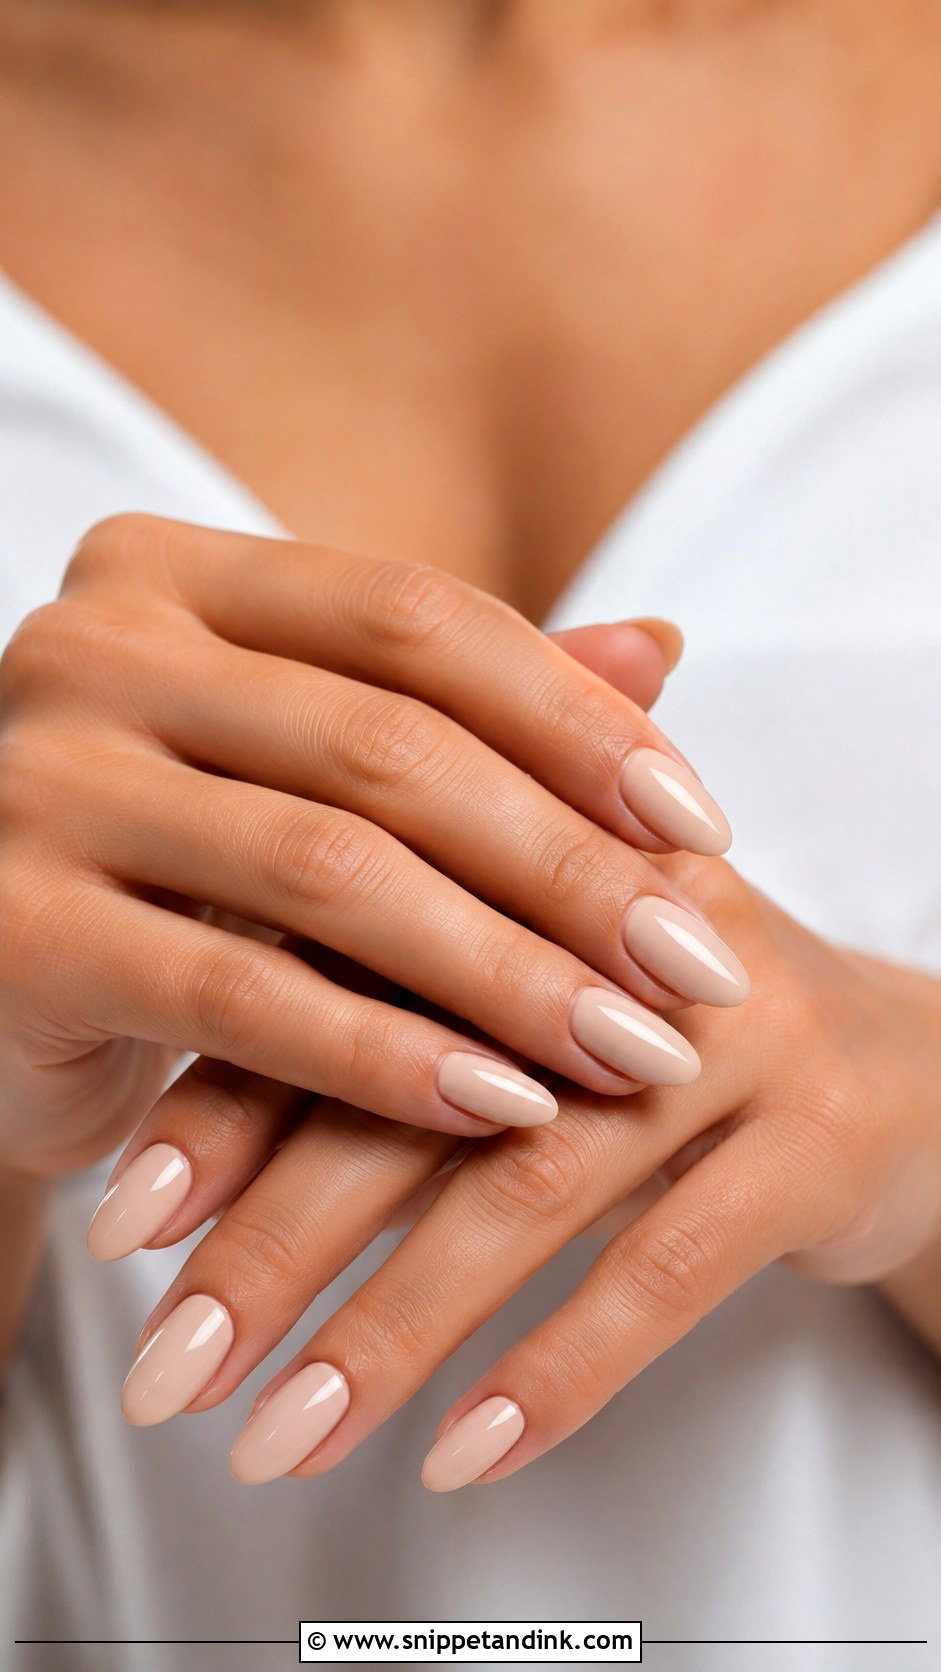
An almond shape lengthens the fingers, and a nude matched to your skin carries the line further, which is why this pairing flatters short or wide nail beds so well. The hard part is the shade. I swatch three or four nudes against the side of the finger, never on paper, because a nude that’s too pink on olive skin turns greyish and one that’s too yellow on fair skin looks sallow. Almond also needs a little free edge to file into. On very short nails I’d file a rounded oval and save the almond for an extension.
5. Baby Boomer Wedding Nails
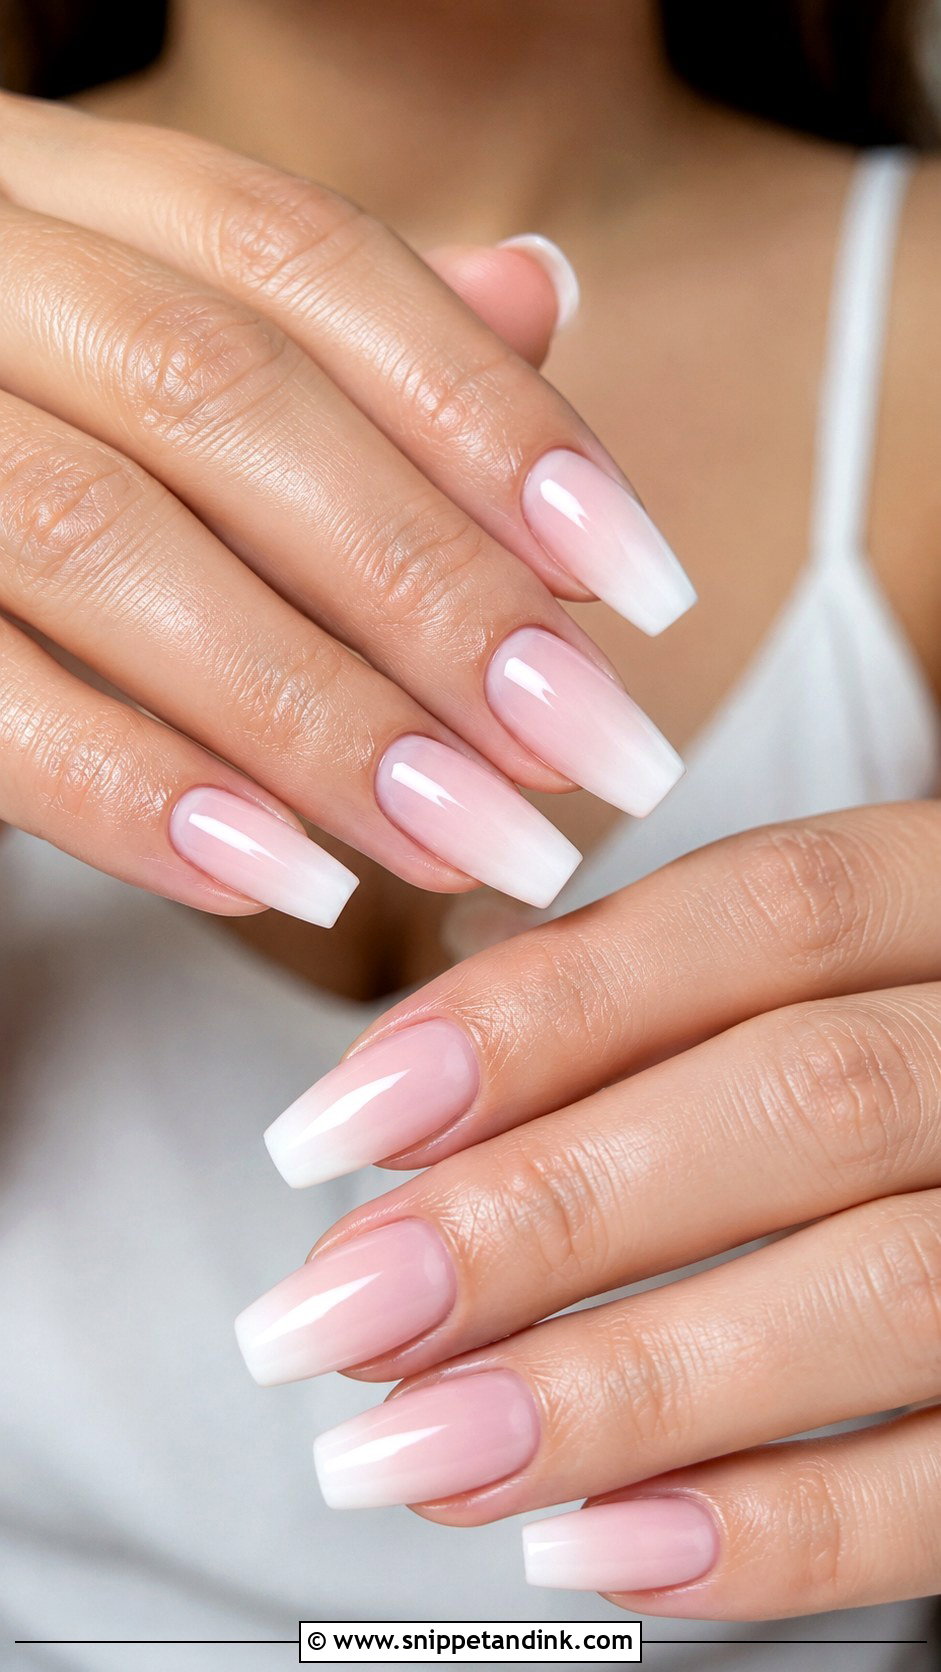
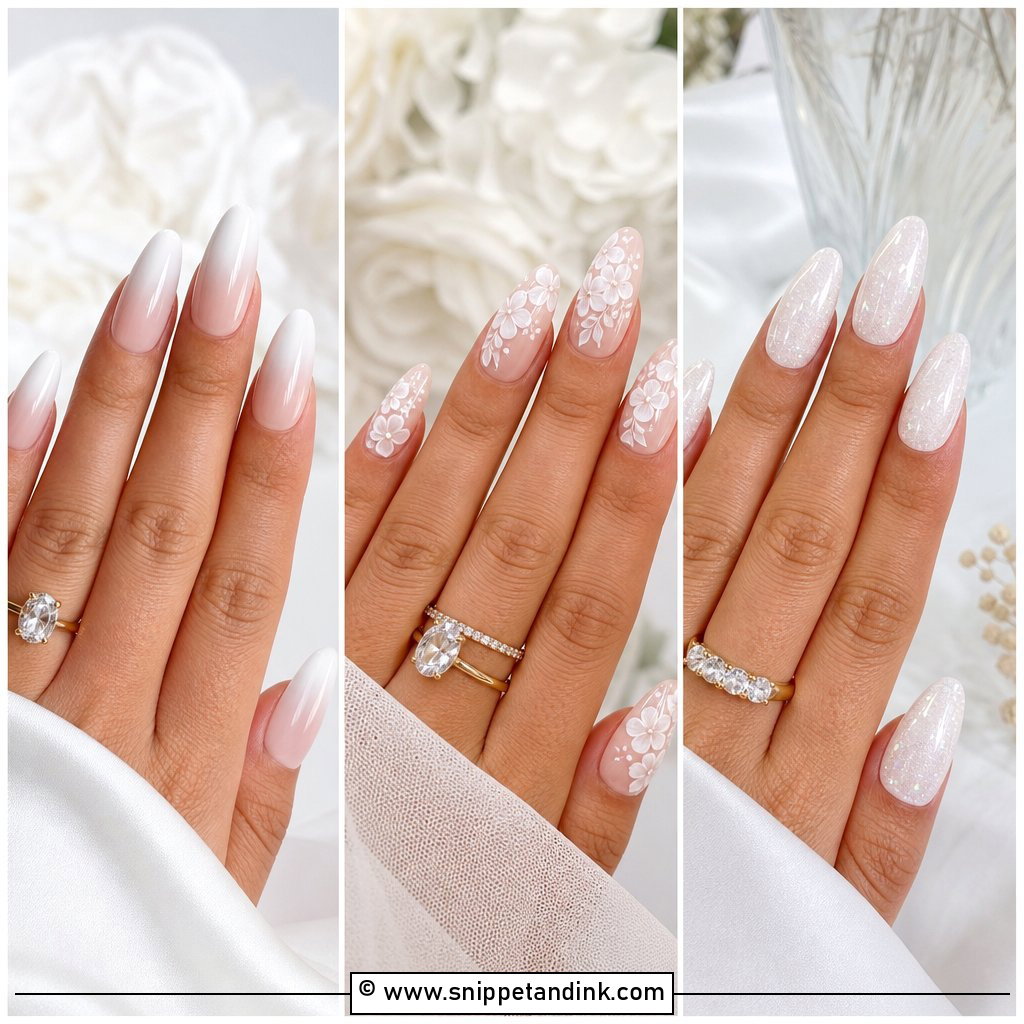
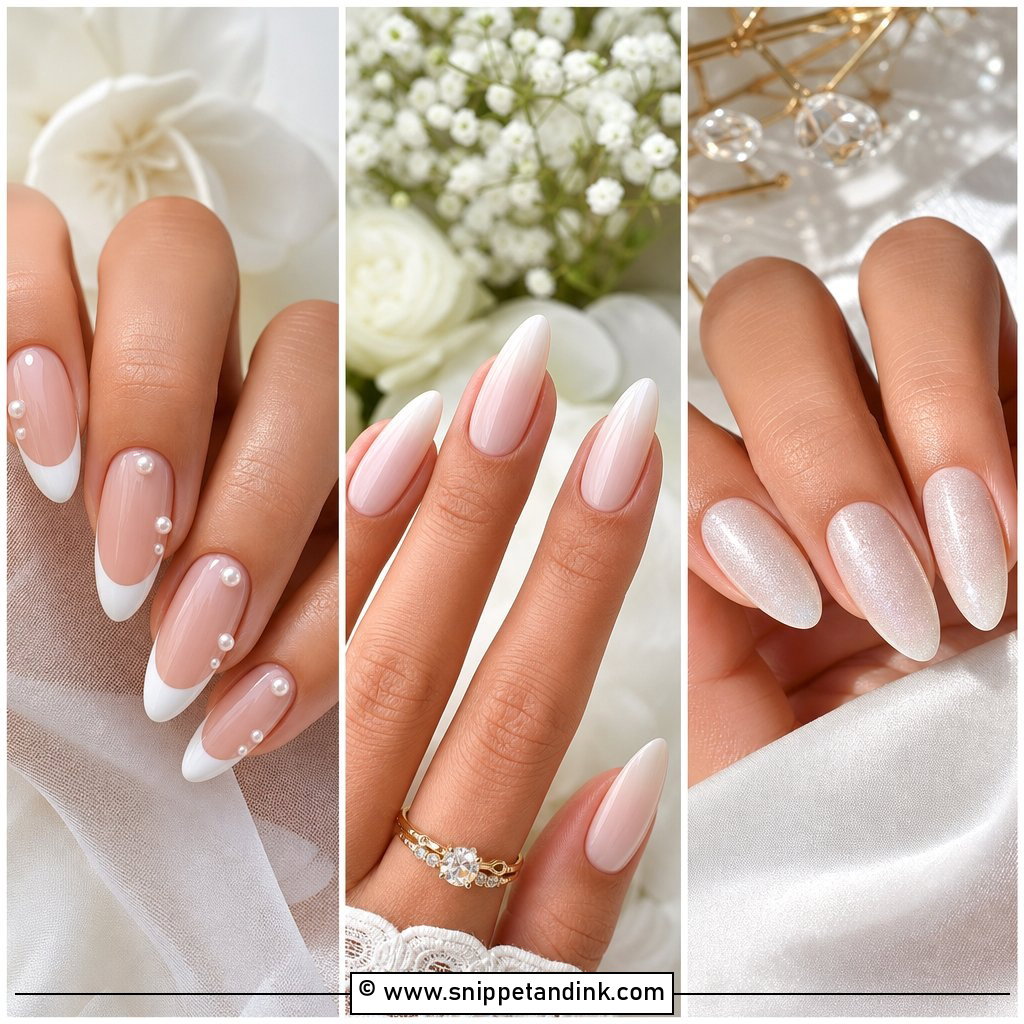
Baby boomer wedding nails are a French with the smile line blurred into a gradient, and they forgive a lot. With no crisp edge, a small chip at the tip barely shows and regrowth stays hidden longer. In gel I build the fade with a sponge in several thin passes; rush it and you get a stripe halfway down the nail that the camera finds immediately. Keep the white at the tip soft and translucent. A bright, opaque white at the end of an ombre looks like an old acrylic set rather than a bridal one.
6. Pearl Chrome Wedding Nails
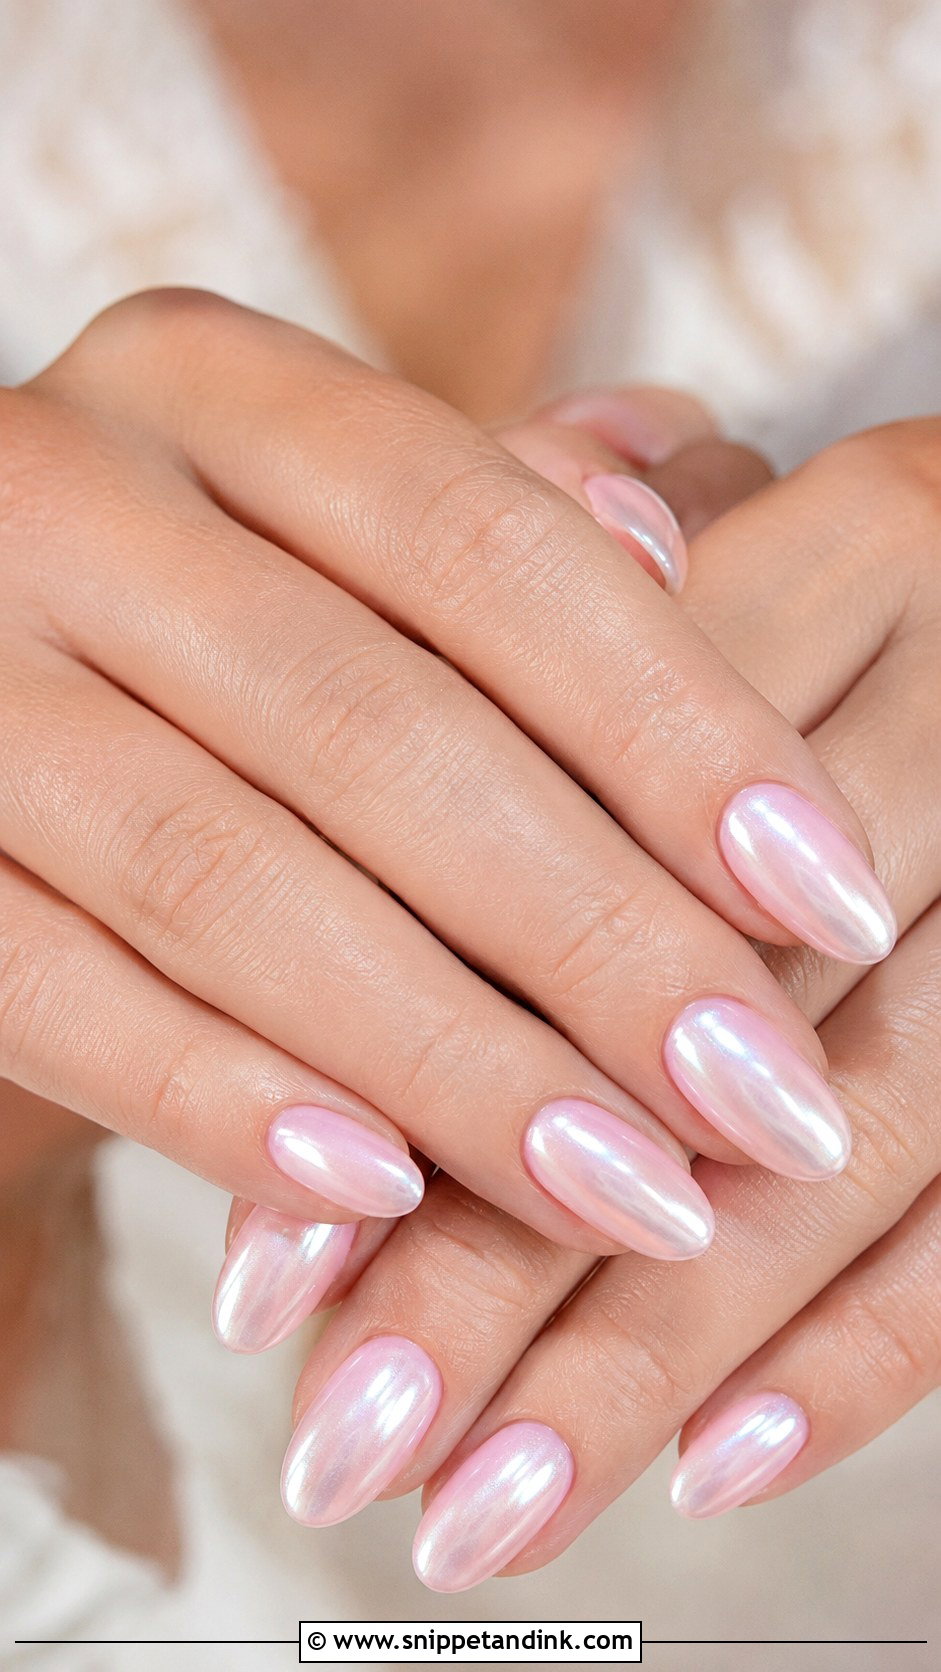
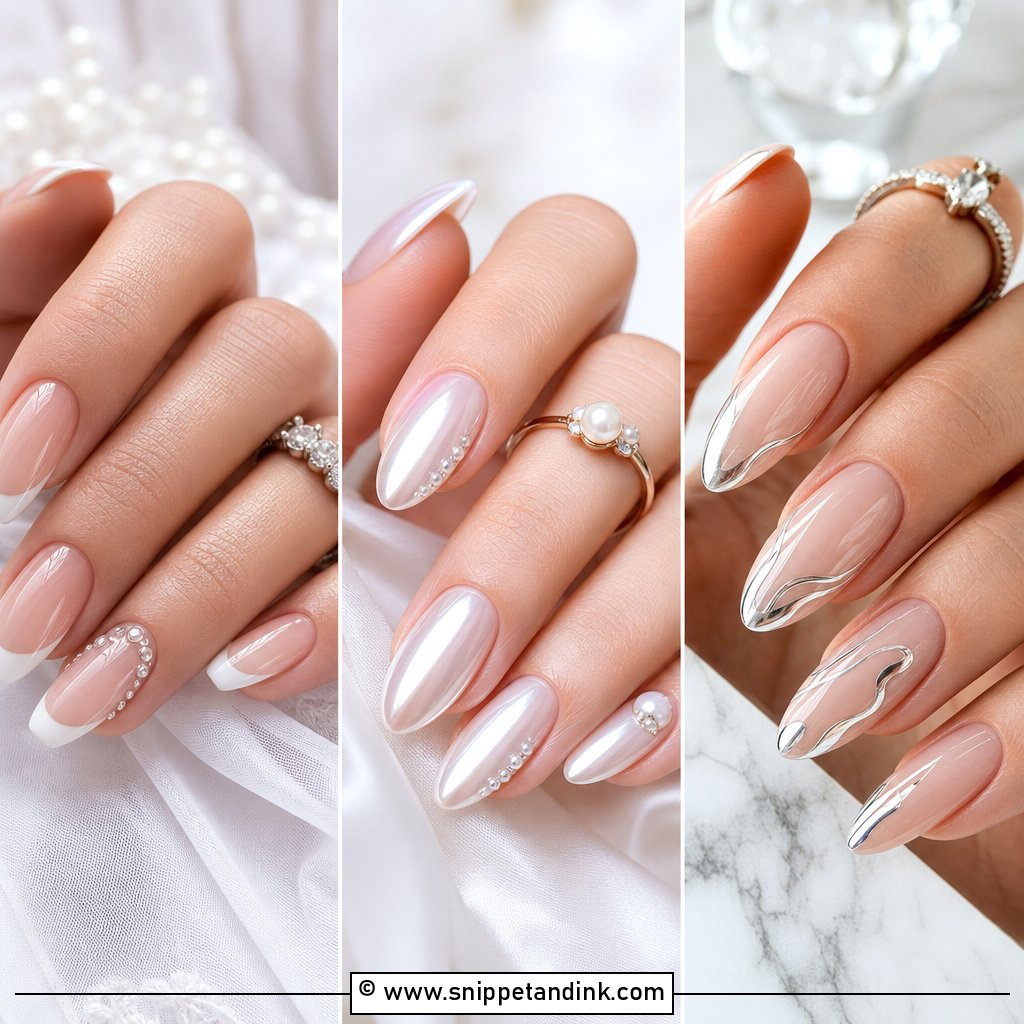
Pearl chrome is a fine powder buffed over cured gel, and it changes completely with whatever sits beneath it. Over milky white it looks glazed; over pale pink it looks like the inside of a shell, so it’s easy to tune to your dress. I use one light pass of powder, because a second pass pushes it toward silver mirror, which reads more party than bridal. One practical note: chrome needs a gel base, so it isn’t possible with regular polish.
7. White Oval Wedding Nails
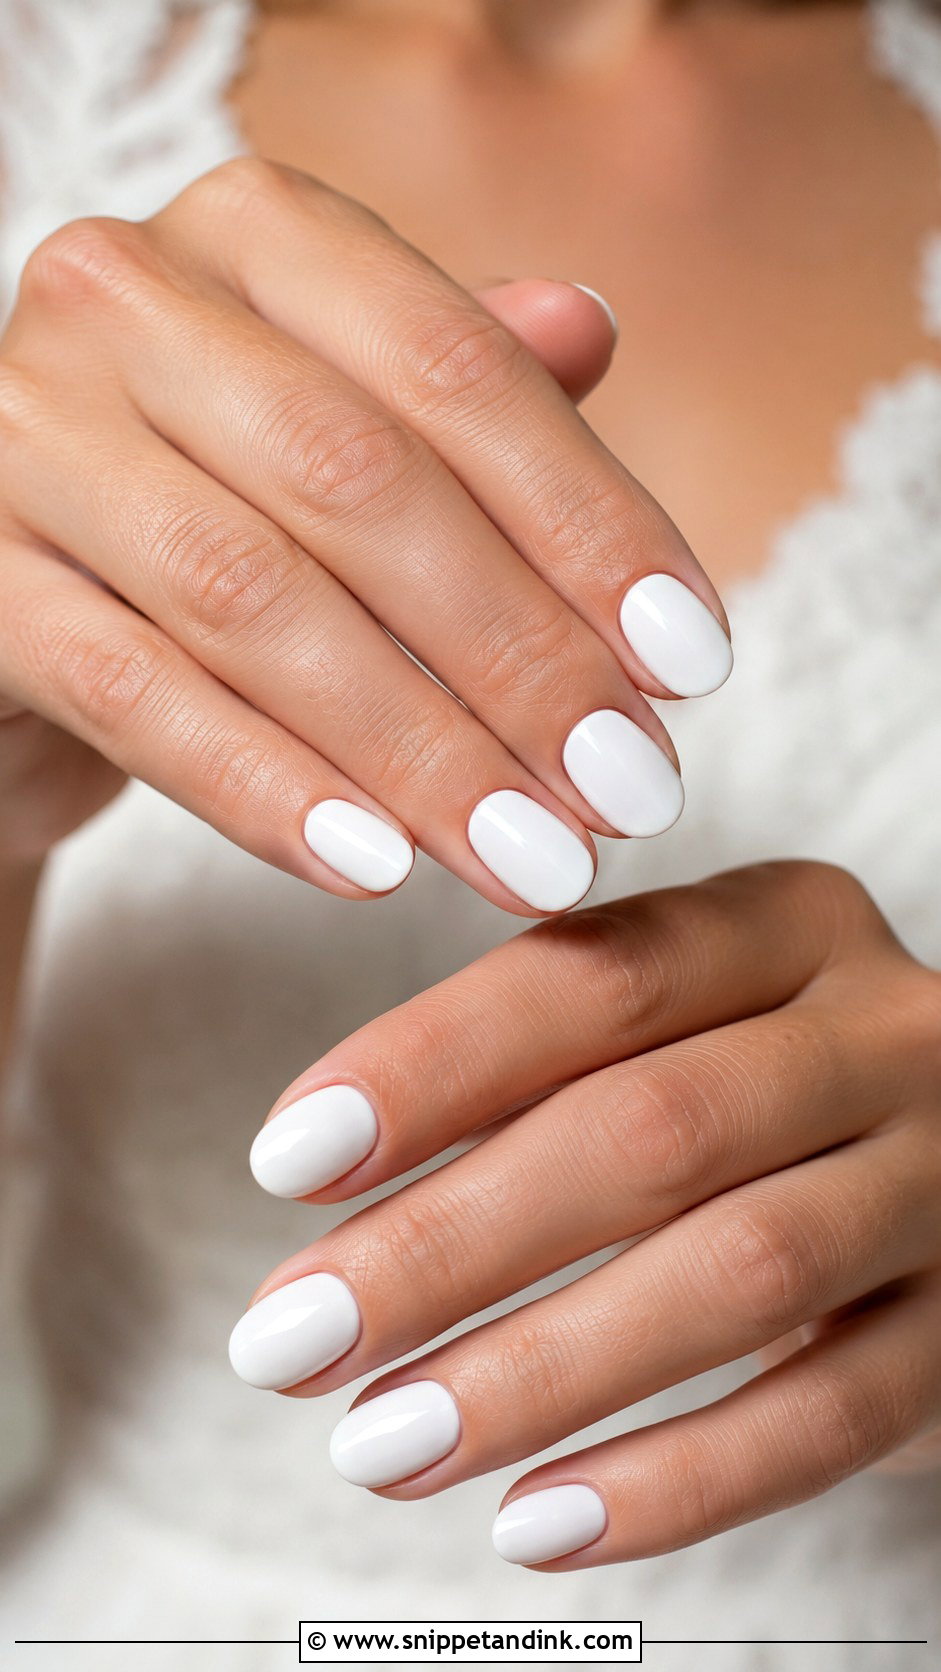
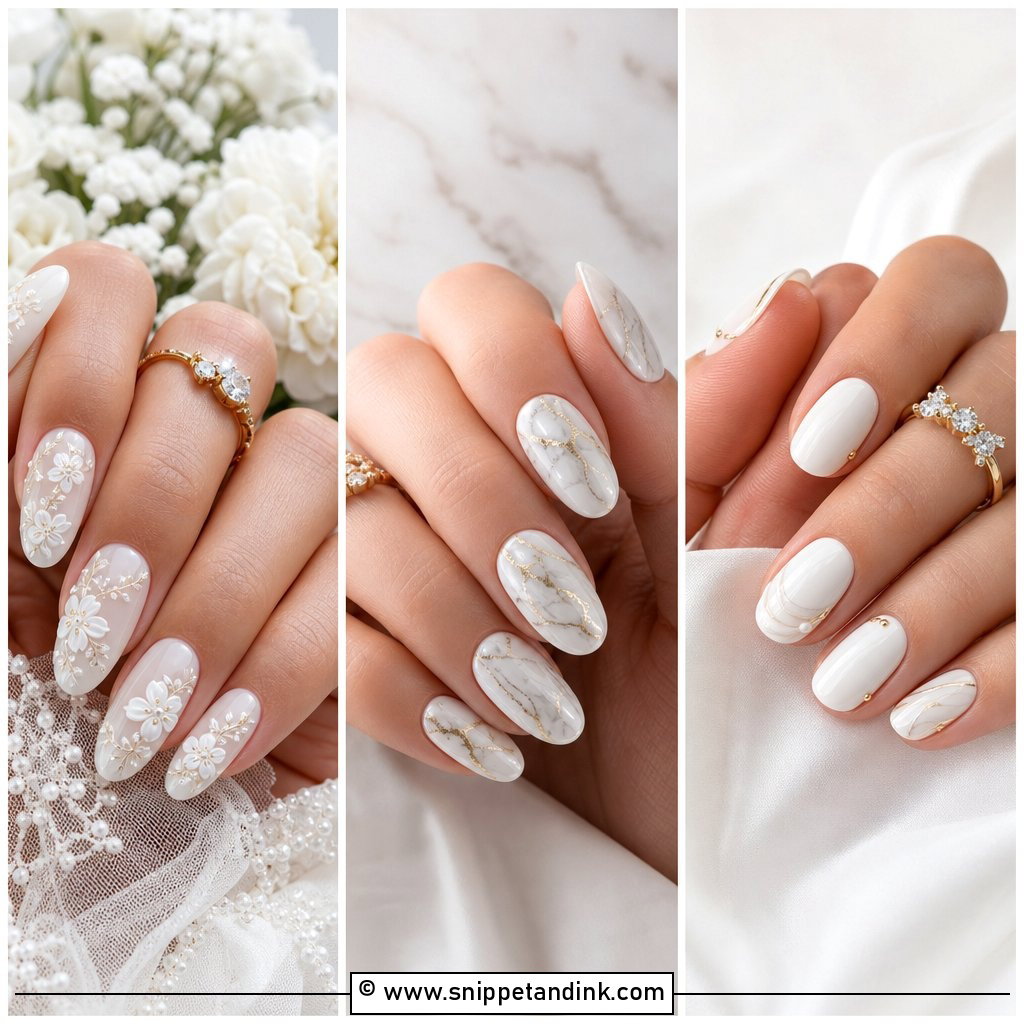
Solid white is the boldest colour on this list, even though it looks plain in the bottle. On a square shape it can look blocky, and the oval softens it. I usually steer brides toward a creamy white rather than optical white, and toward ivory itself if the gown is ivory, because bright white nails beside an ivory dress make the fabric look dingy. Opaque white shows chips more than any other shade, so keep it short.
8. Blush Pink Wedding Nails
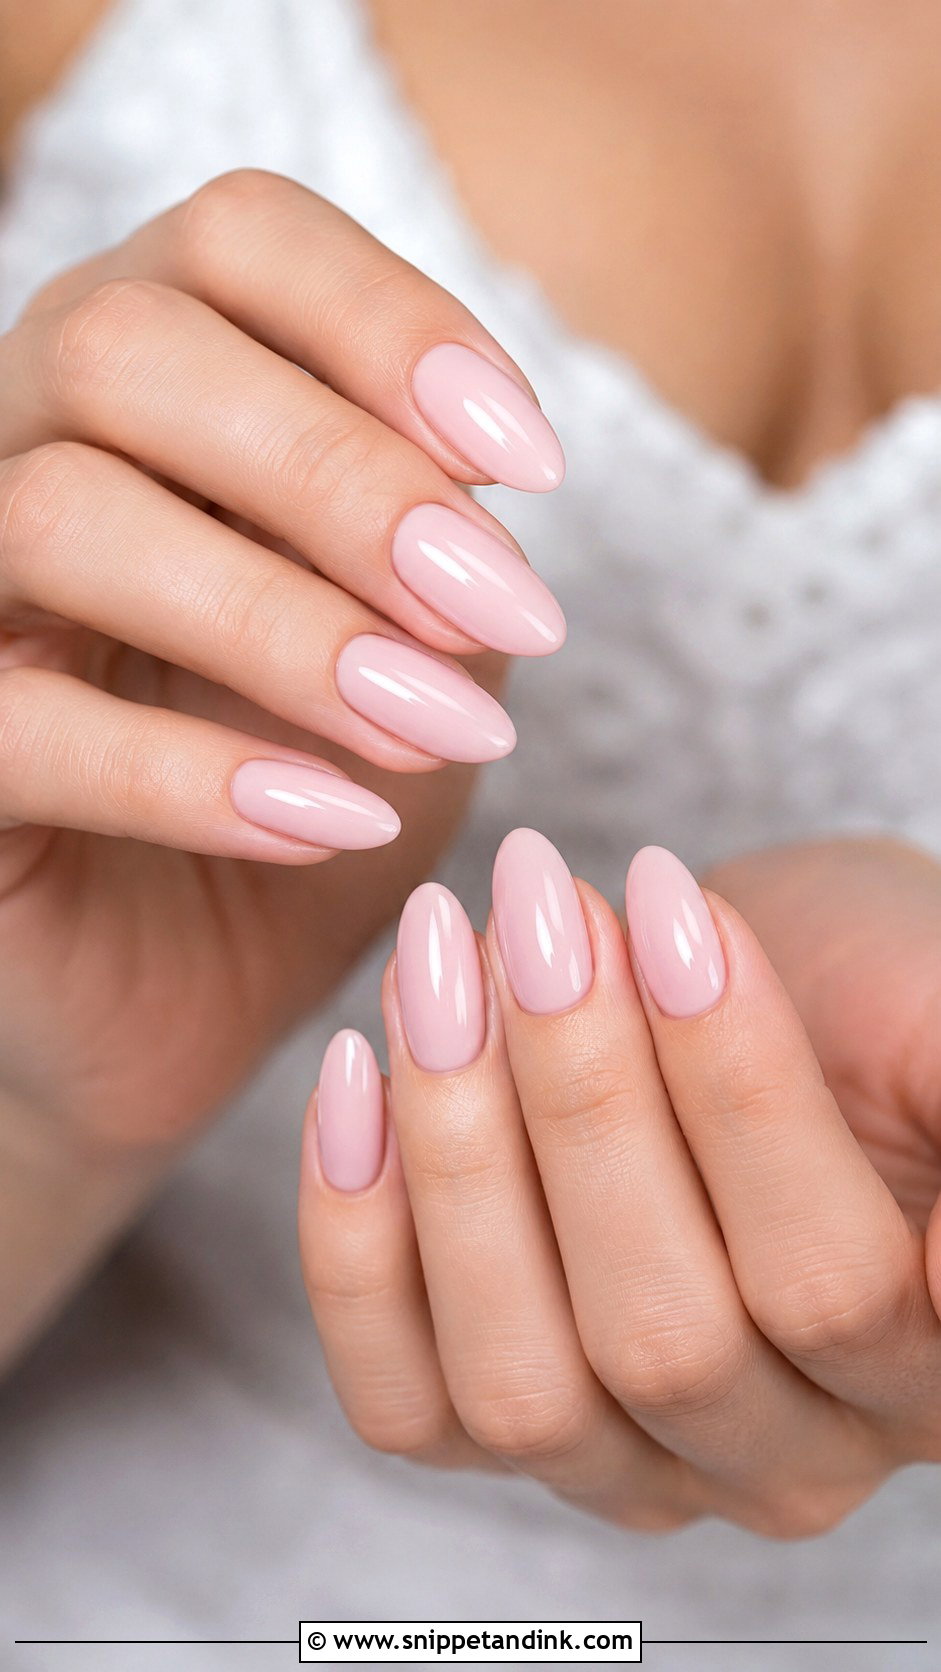
Blush gives the hands a little colour without reading as a colour. It sits comfortably with every metal, which helps if your engagement ring and band are different golds. There are two ways to wear it: a sheer blush that lets the nail bed show, or a creamy, opaque blush that covers stains and uneven nails. If your hands flush red when you’re nervous, the creamier version keeps the contrast down in photos.
9. Soft Square Wedding Nails
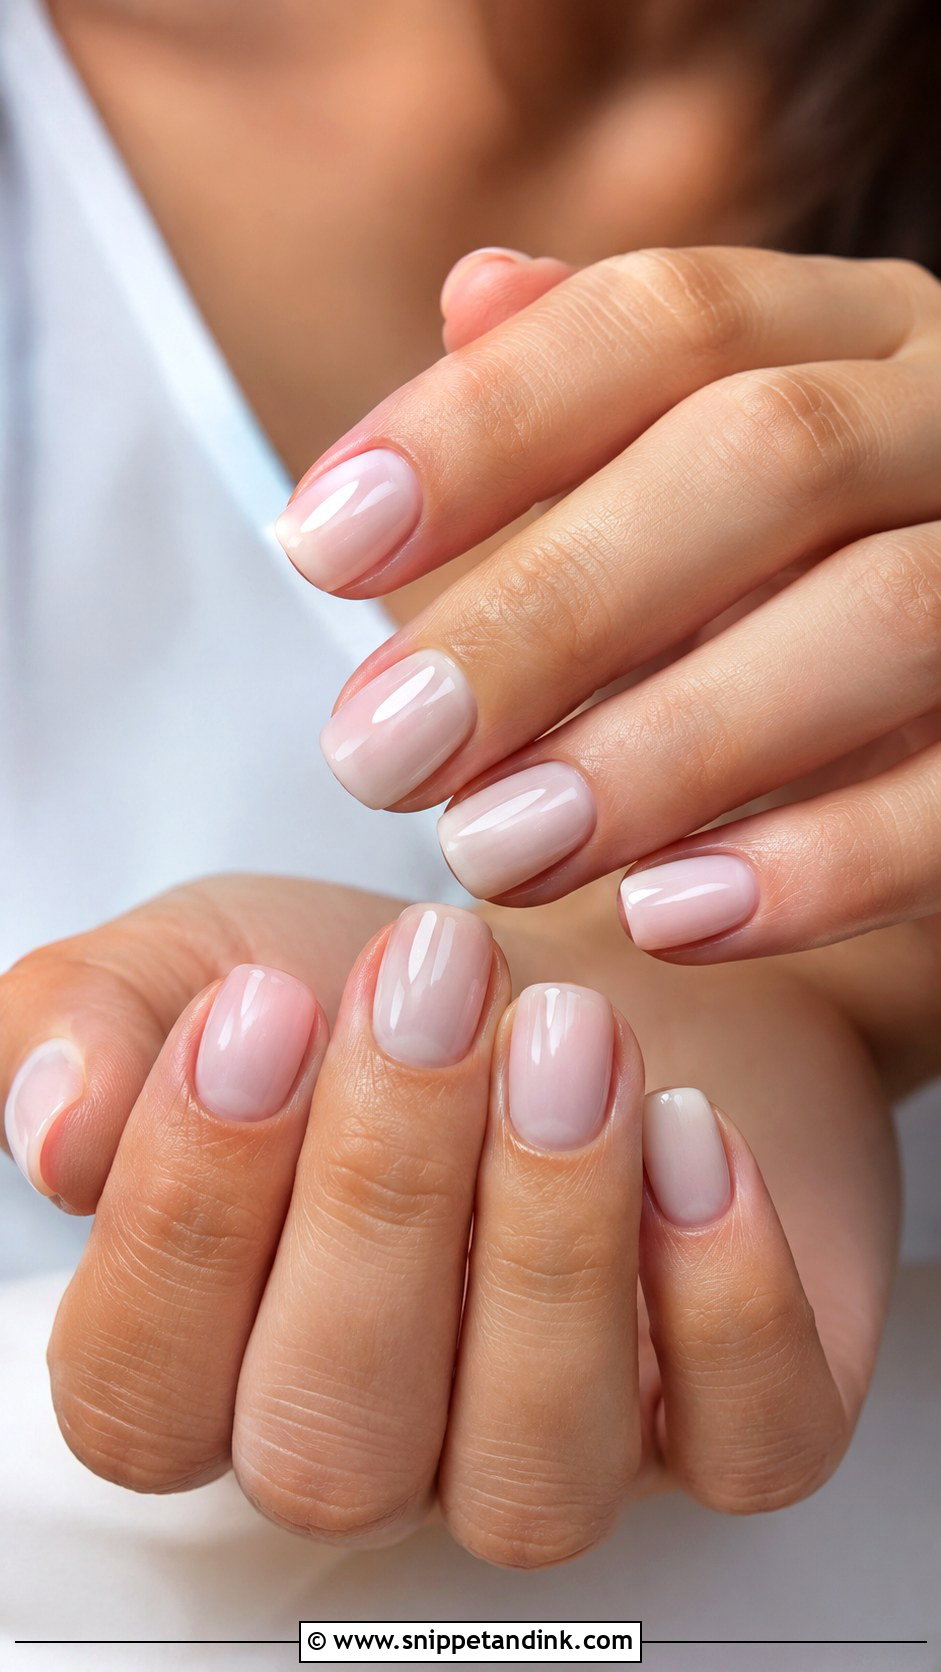
A soft square is the shape I suggest to anyone with short nails or a job that’s hard on them. The straight free edge gives structure, and rounding the corners stops them catching on lace and tulle, which sharp corners absolutely do. It takes sheer pink, milky white or a French equally well. On very wide nail beds it can make fingers look stubby, so I file the sidewalls slightly narrower toward the tip and end up closer to a squoval.
10. Ivory Wedding Nails
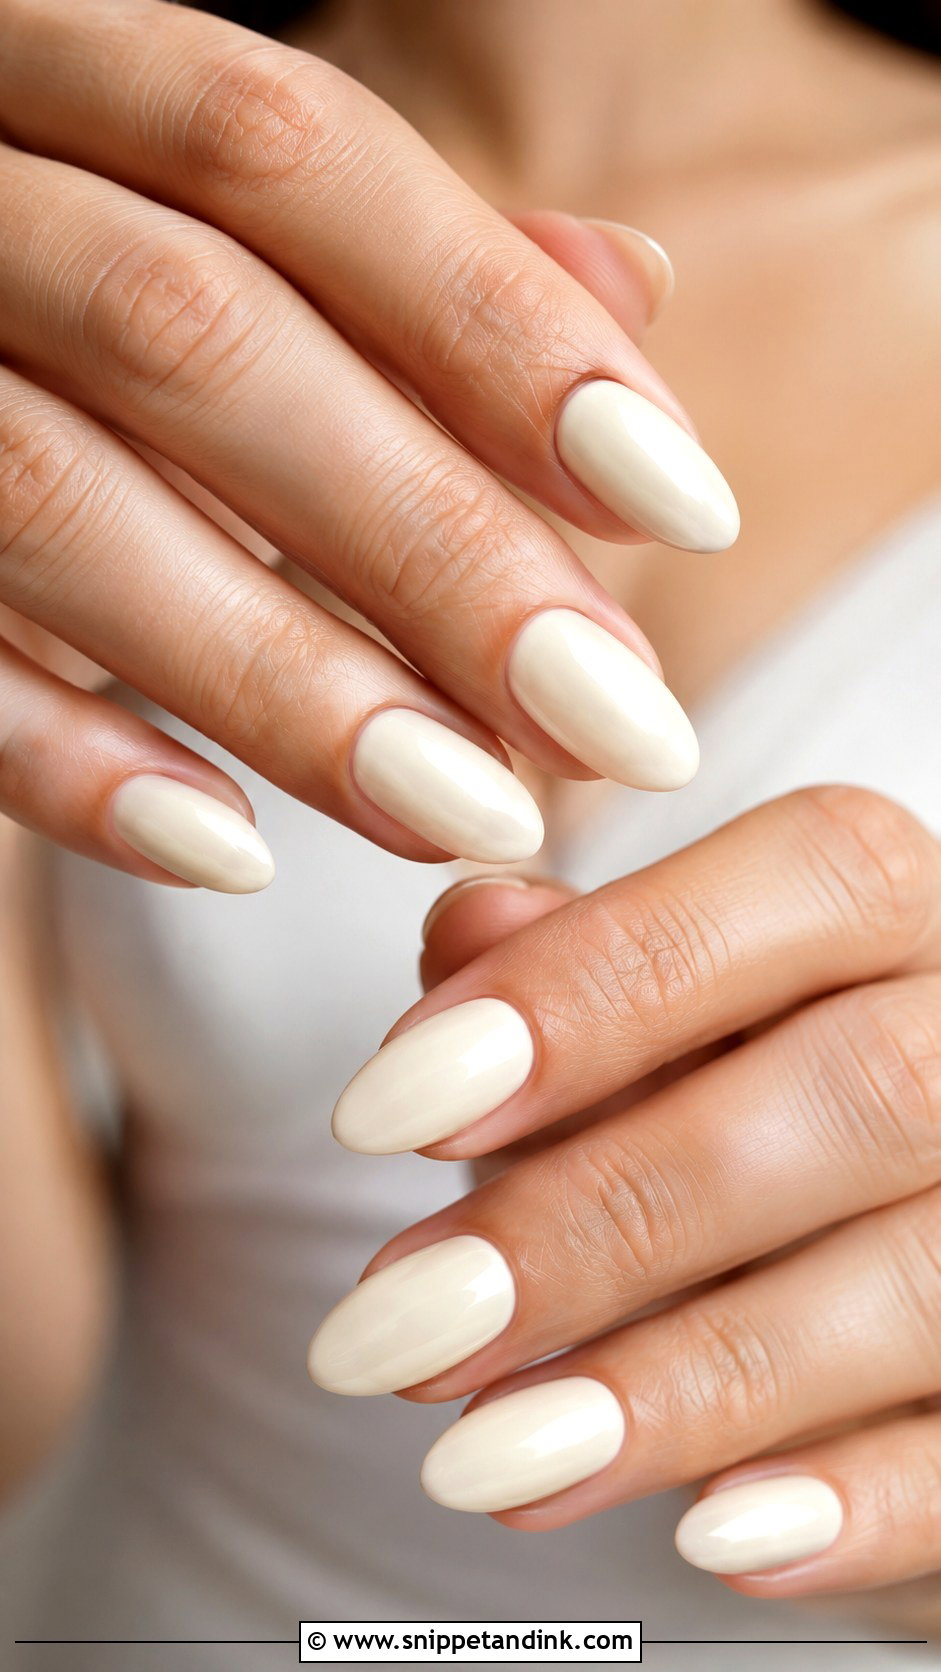
Ivory is my default for a bride in an ivory or champagne gown, because its warm undertone matches the fabric rather than fighting it. Hold your fabric swatch beside a white polish and an ivory one and you’ll see the difference in seconds. It also reads softer than bright white on warm and olive skin. I like it creamy on oval or almond shapes, and on a short squoval it looks neat and grown-up.
11. Lace Wedding Nails
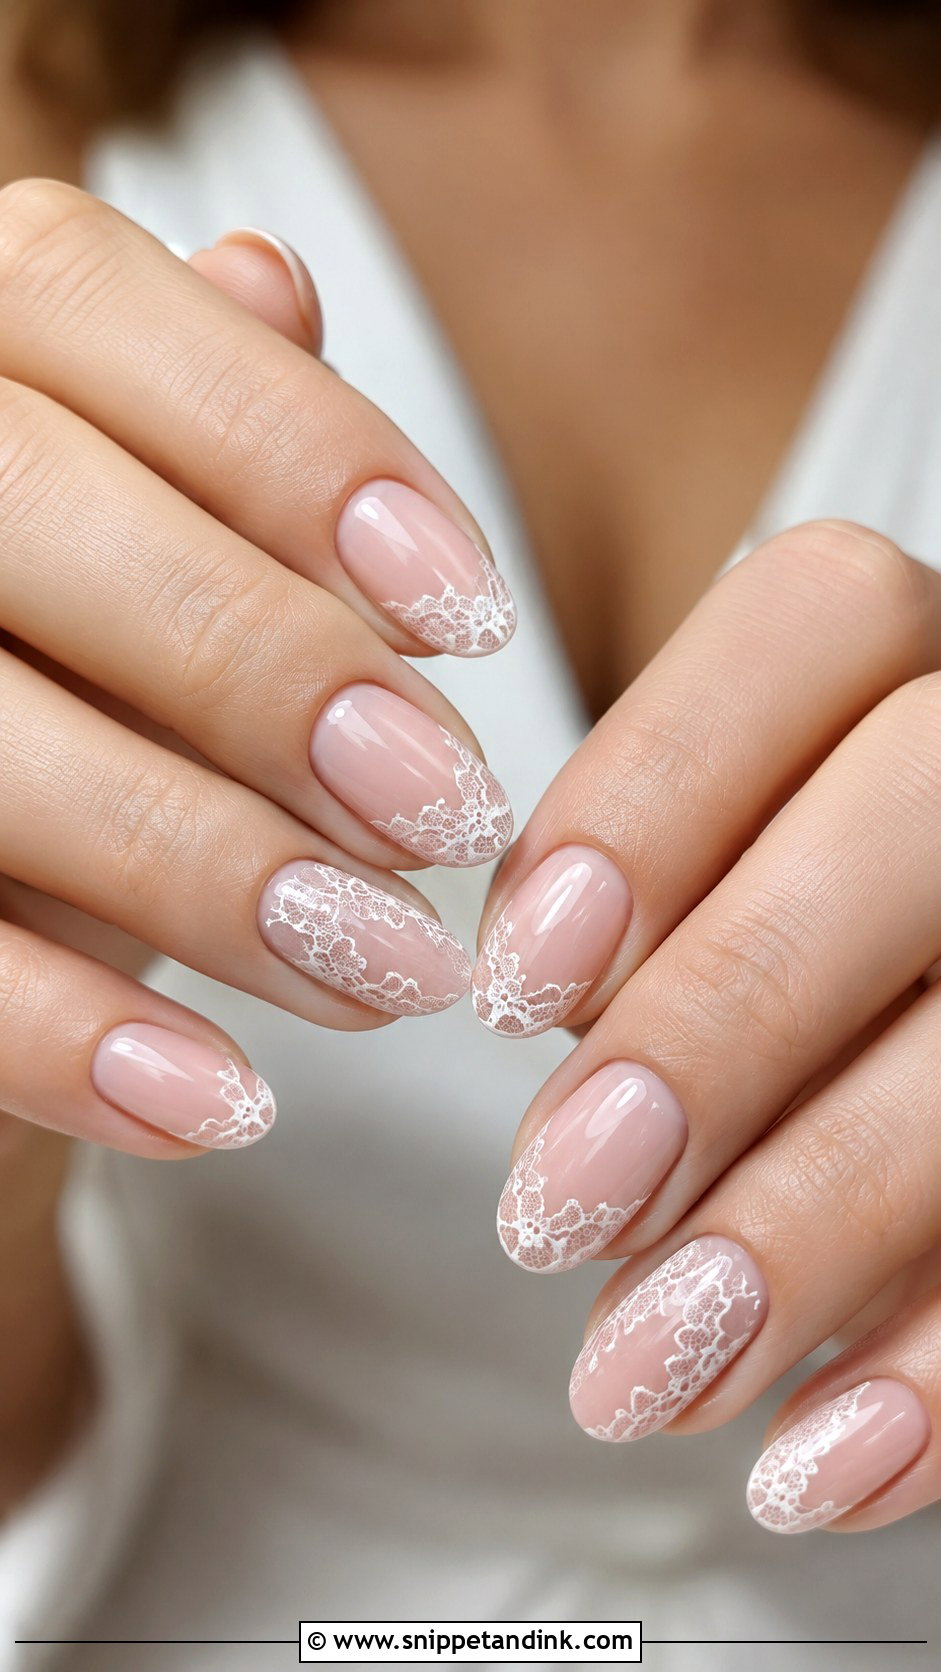
Lace art lives or dies on line weight. I paint it with a long, thin striping brush and keep it to two accent nails at most; ten nails of lace looks busy in a hand shot and is hard to execute cleanly. If your gown has a distinct lace motif, bring a photo and the pattern can echo it loosely. The base can be nude, blush or milky, but the topcoat must cover the art fully so the fine lines don’t wear at the edges.
12. Pearl Accent Wedding Nails
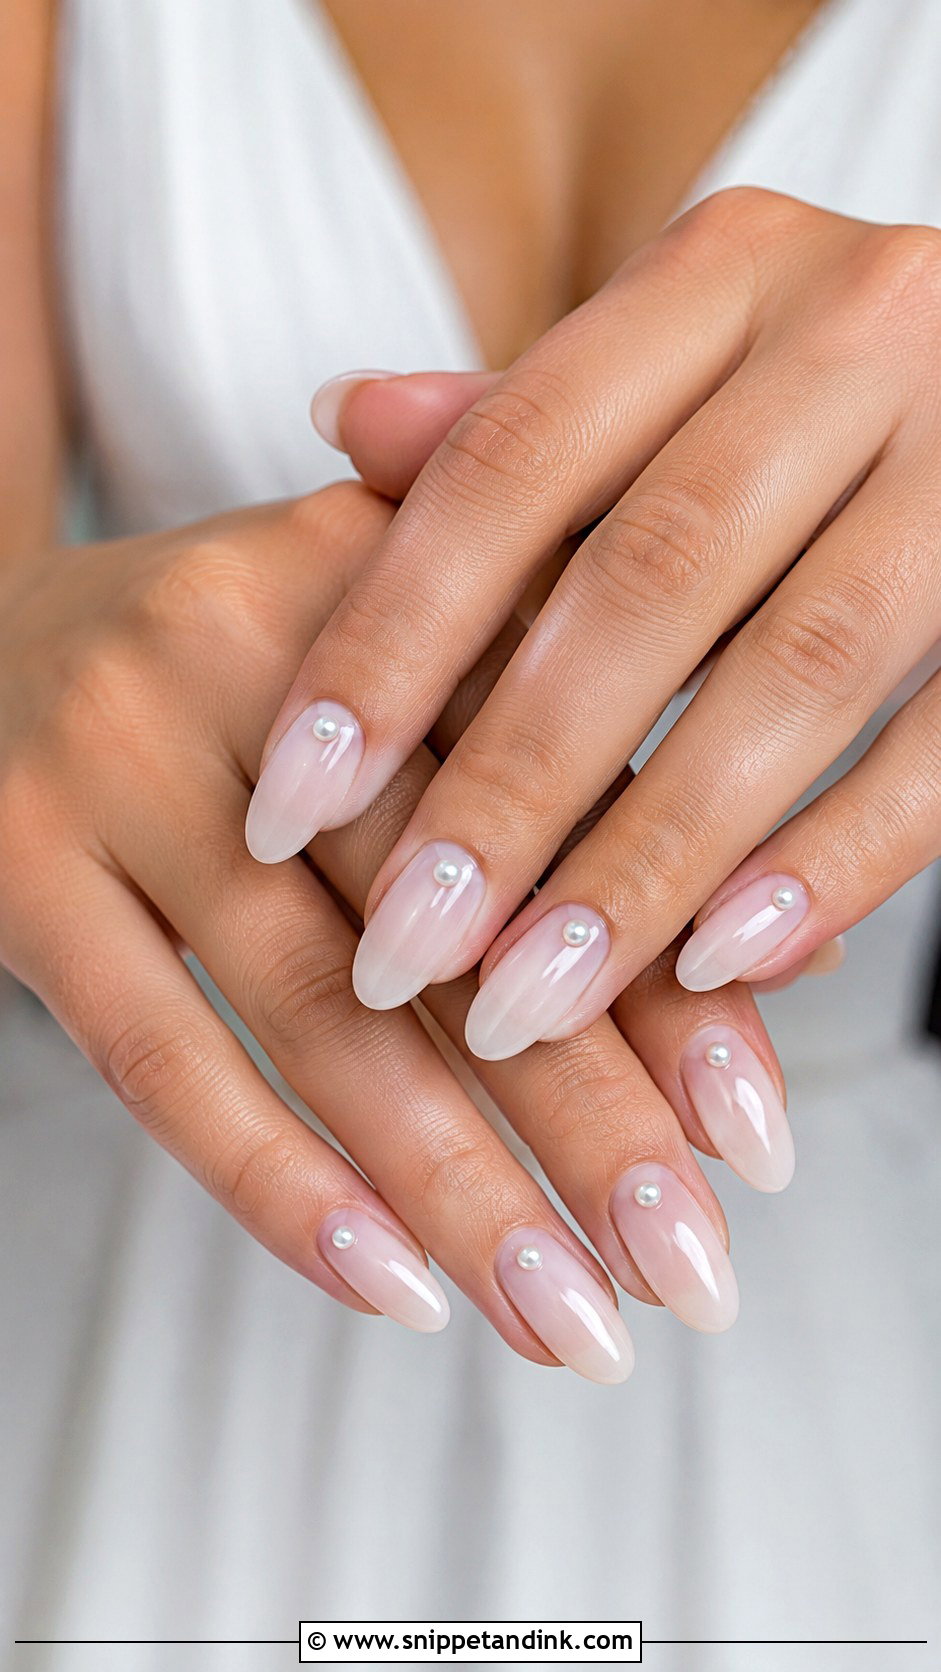
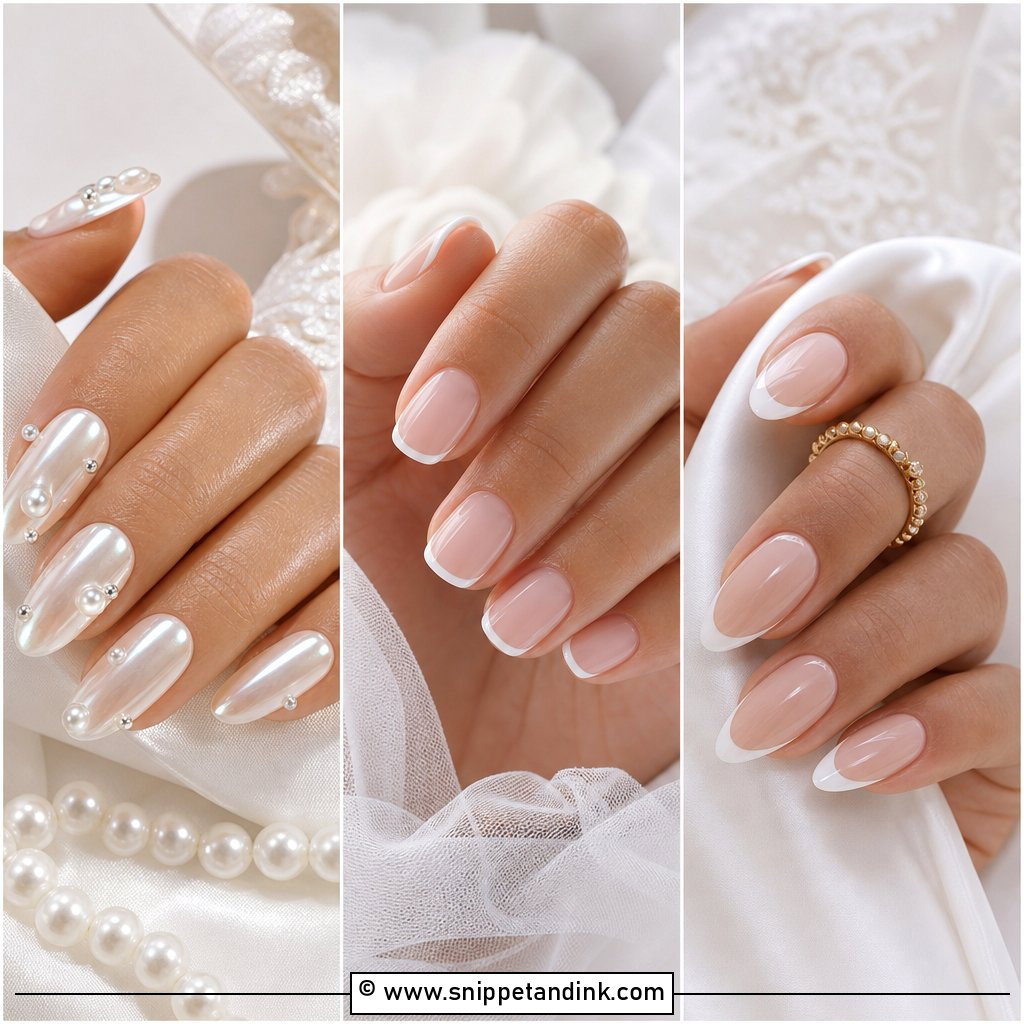
Pearl accent wedding nails look refined when the pearls are small, flat-backed and few. I set them into builder gel near the cuticle or along the smile line, and I avoid anything bigger than a couple of millimetres. Large pearls snag on veils and hair, and they tend to pop off while you’re wriggling into a gown. Short to medium length is the sensible range. With a beaded bodice they feel natural; with a plain satin dress, one pearl per accent nail is plenty.
13. Champagne Wedding Nails
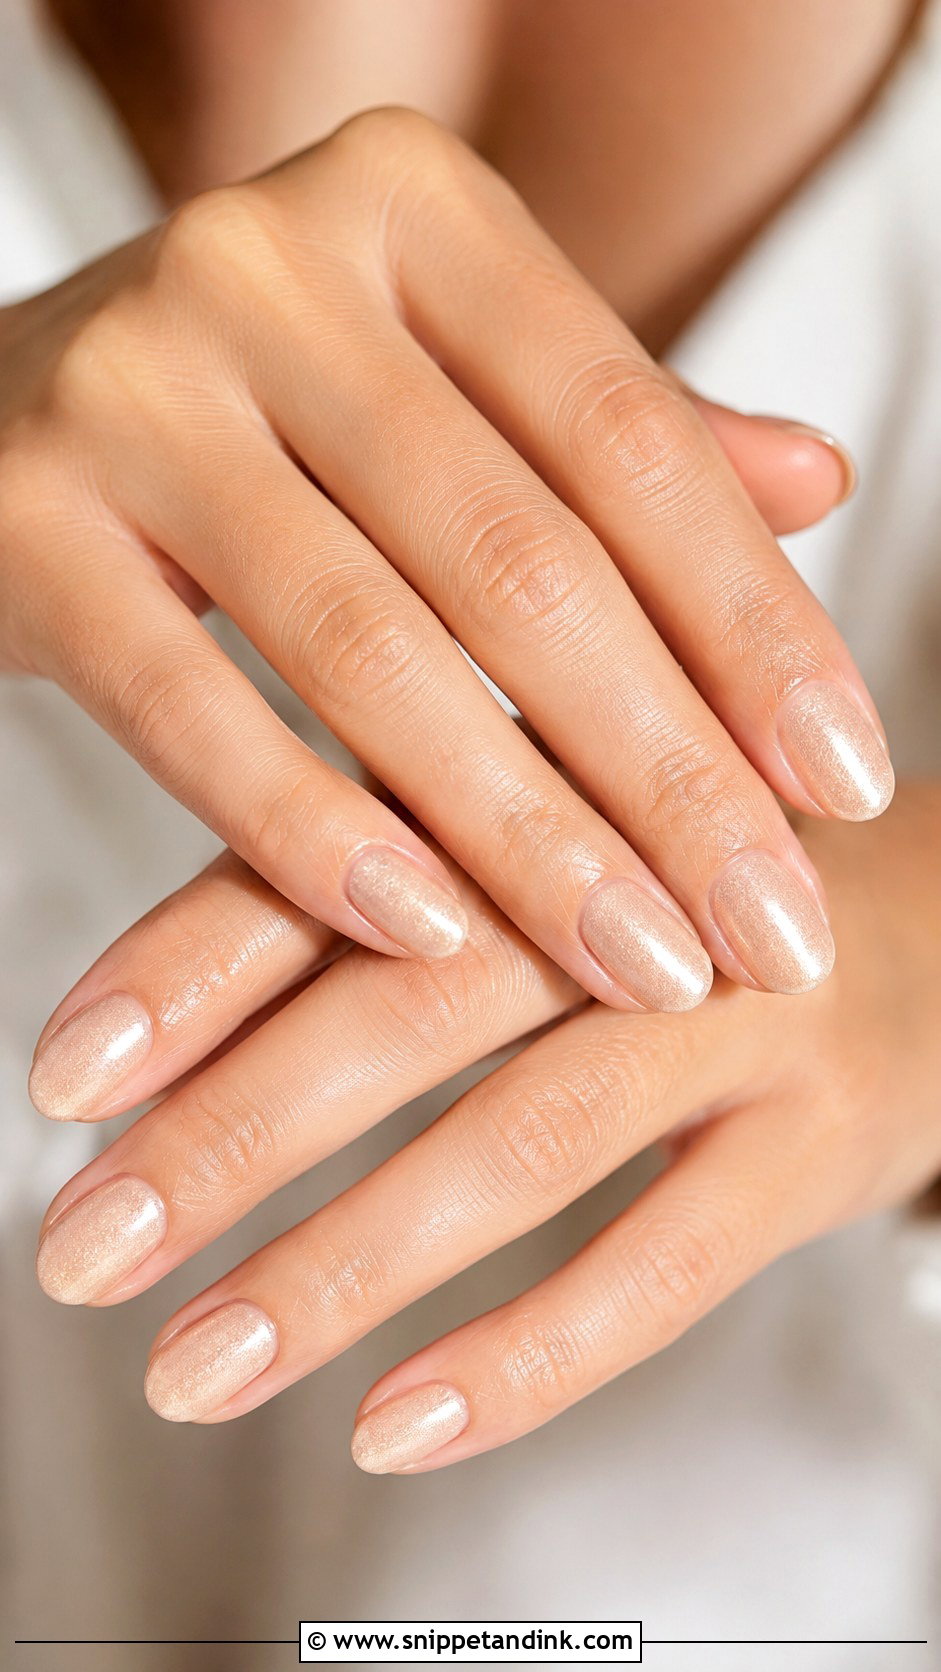
Champagne has a little gold in it, which is why it glows in ring close-ups and sits so easily beside warm white and champagne gowns. I’d take a fine shimmer or satin-sheen finish over glitter every time, since chunky glitter scatters light unevenly and looks textured on camera. It flatters a wide range of skin tones, though very pale, cool skin can look slightly sallow next to it. Test it on your own hand before committing.
14. Pink French Wedding Nails
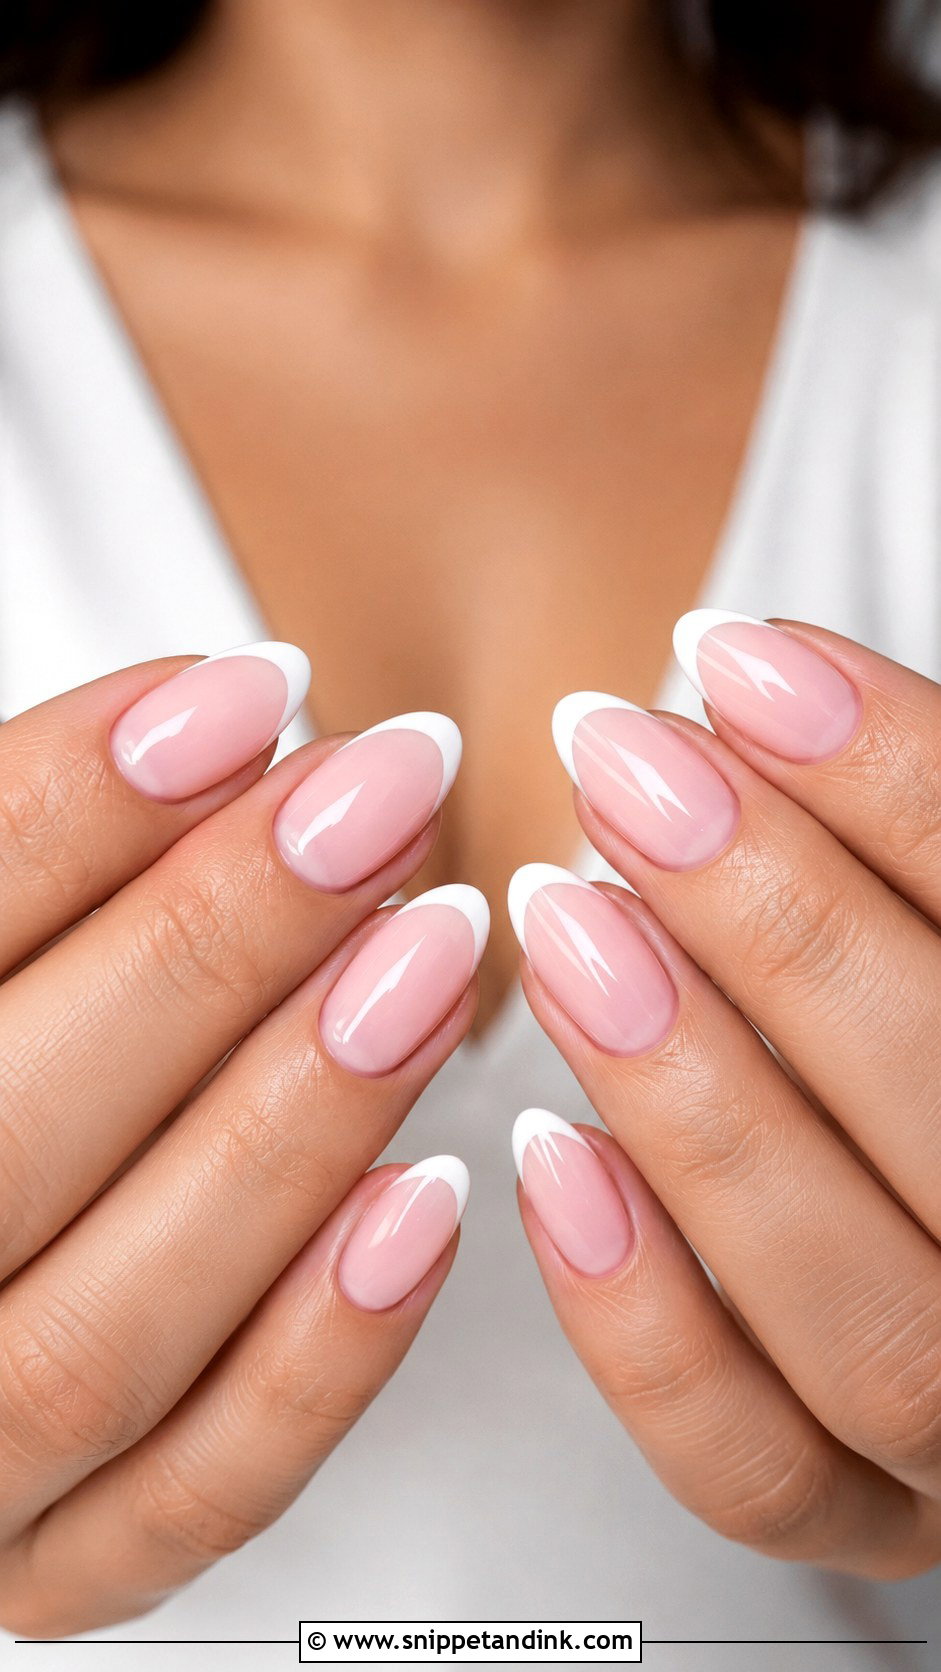
Swapping the clear base for a creamy pink changes the whole feel of a French. The pink hides discolouration, so this is the version I recommend if your nails have white spots or patchy tone. Thin, straight tips look modern, and a deeper curved smile line looks traditional. Almond and oval suit it, and short square nails take it well too as long as the tip stays thin.
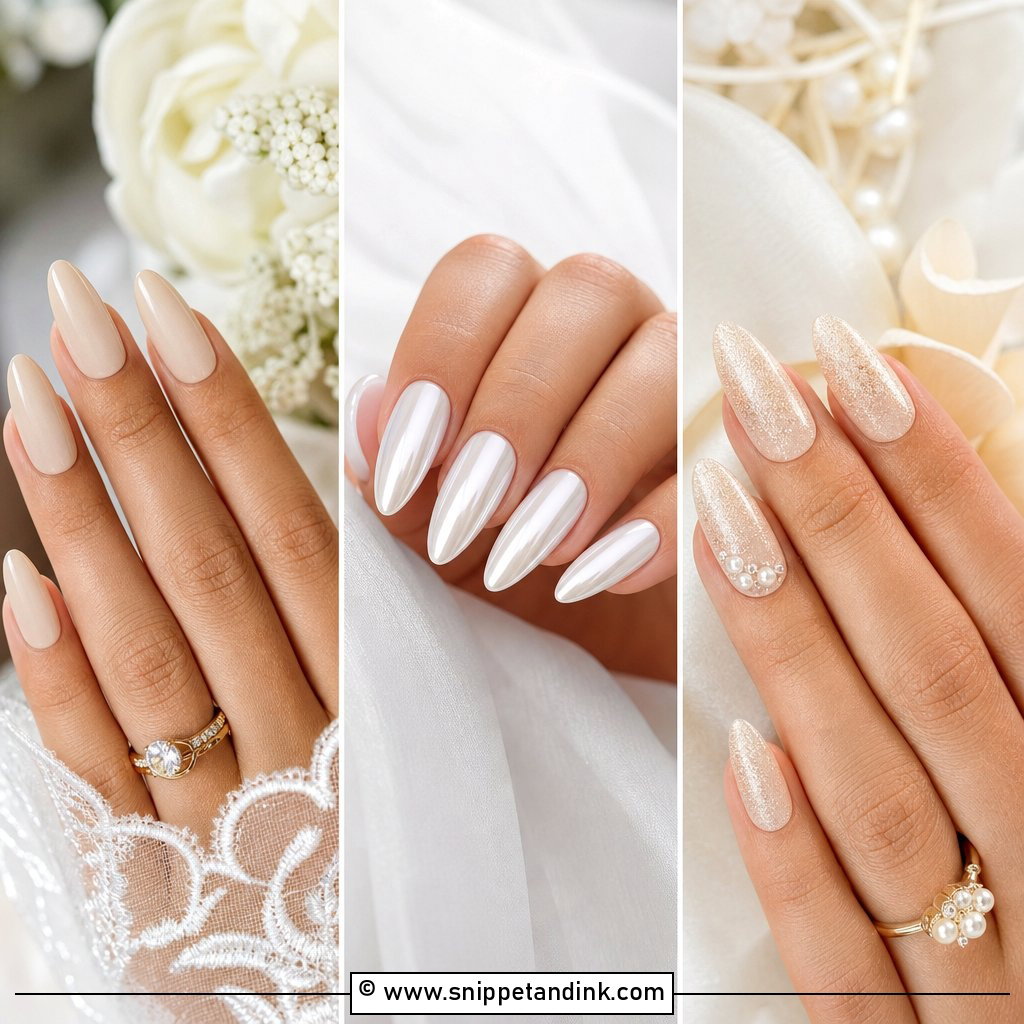
15. Short Wedding Nails
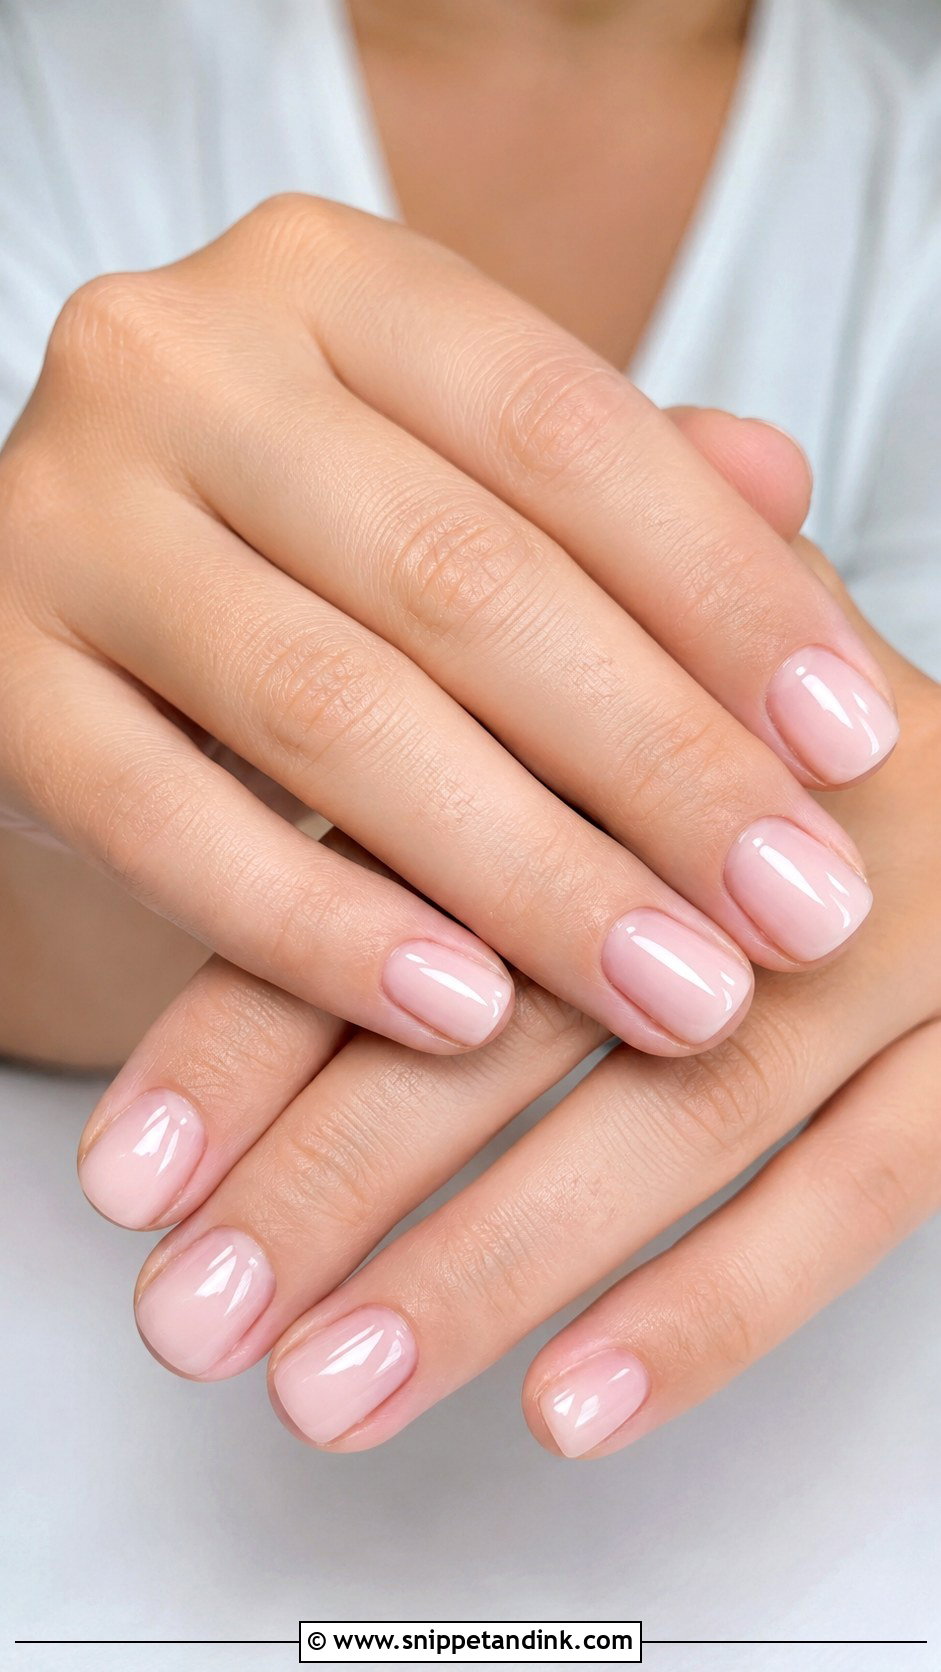
Short nails photograph well when they’re immaculate, and that’s the whole trick: tidy cuticles, the same shape on all ten, and a high-gloss finish. I’d rather see a short, perfect oval than long extensions a bride keeps catching on her buttons. Short is also the practical choice if you’ll be pinning a veil, fastening someone’s cufflinks or tucking stems into a bouquet.
16. Almond French Wedding Nails
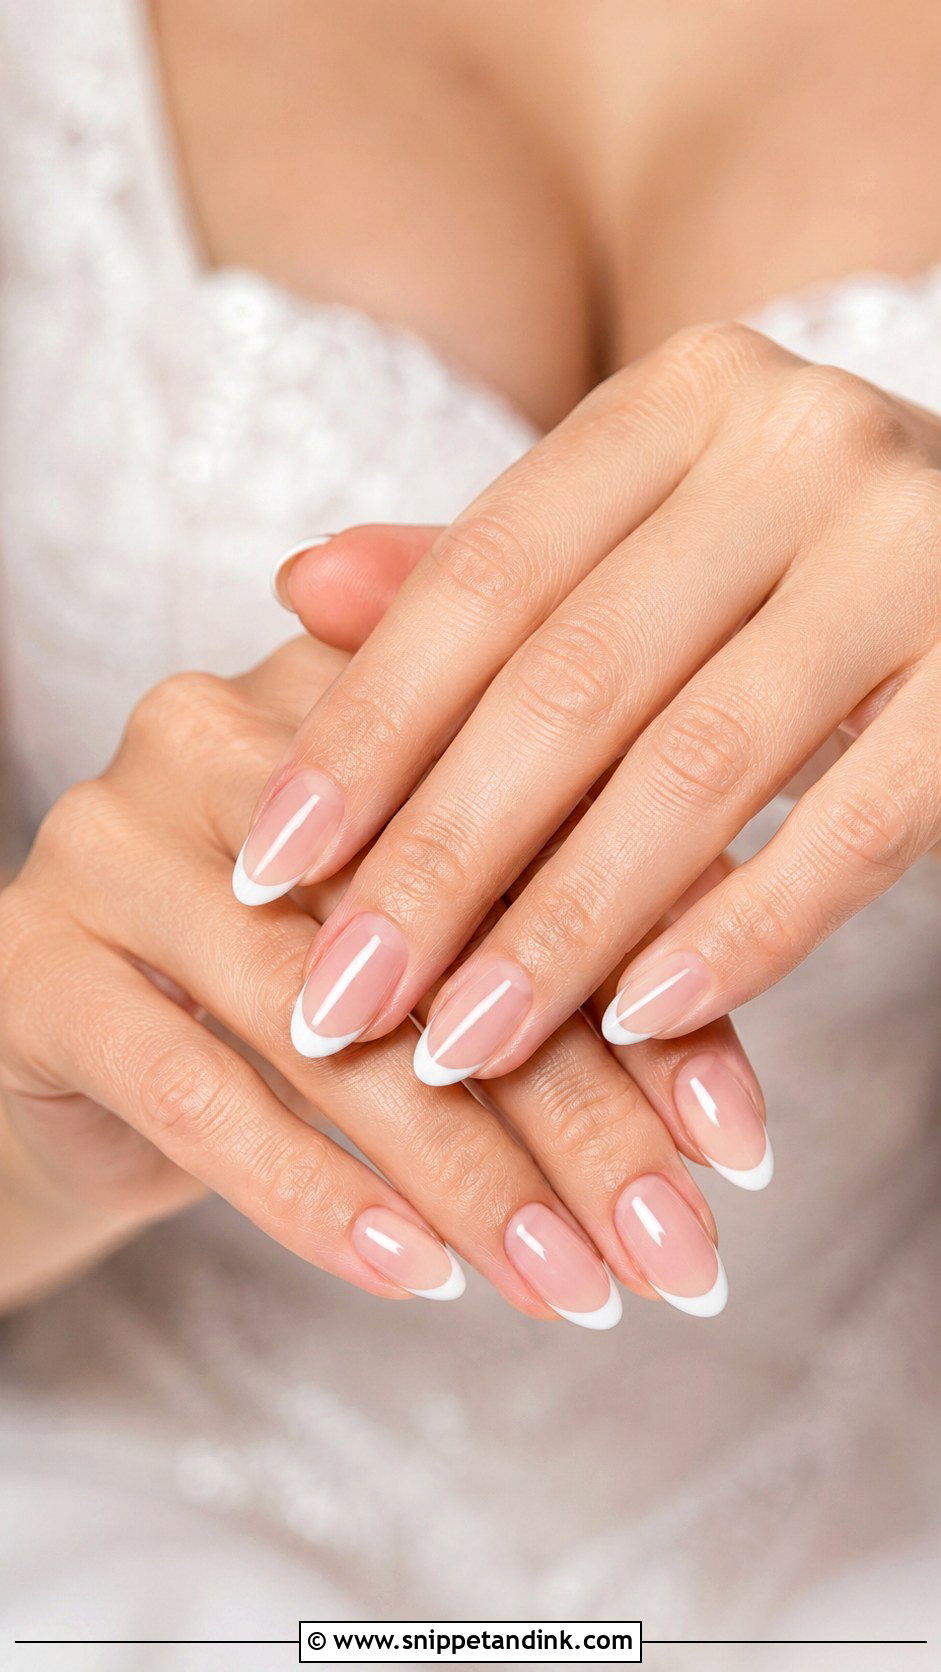
Almond French wedding nails put the most flattering shape together with the most familiar bridal finish. The detail to get right is the smile line, which has to curve and rise toward the point, following the almond, or the tip looks heavier on one side. Medium length is where it looks best; very long almond French starts edging toward stiletto. I keep the white thin over a sheer pink or nude base so the shape does the work.
17. White Chrome Wedding Nails
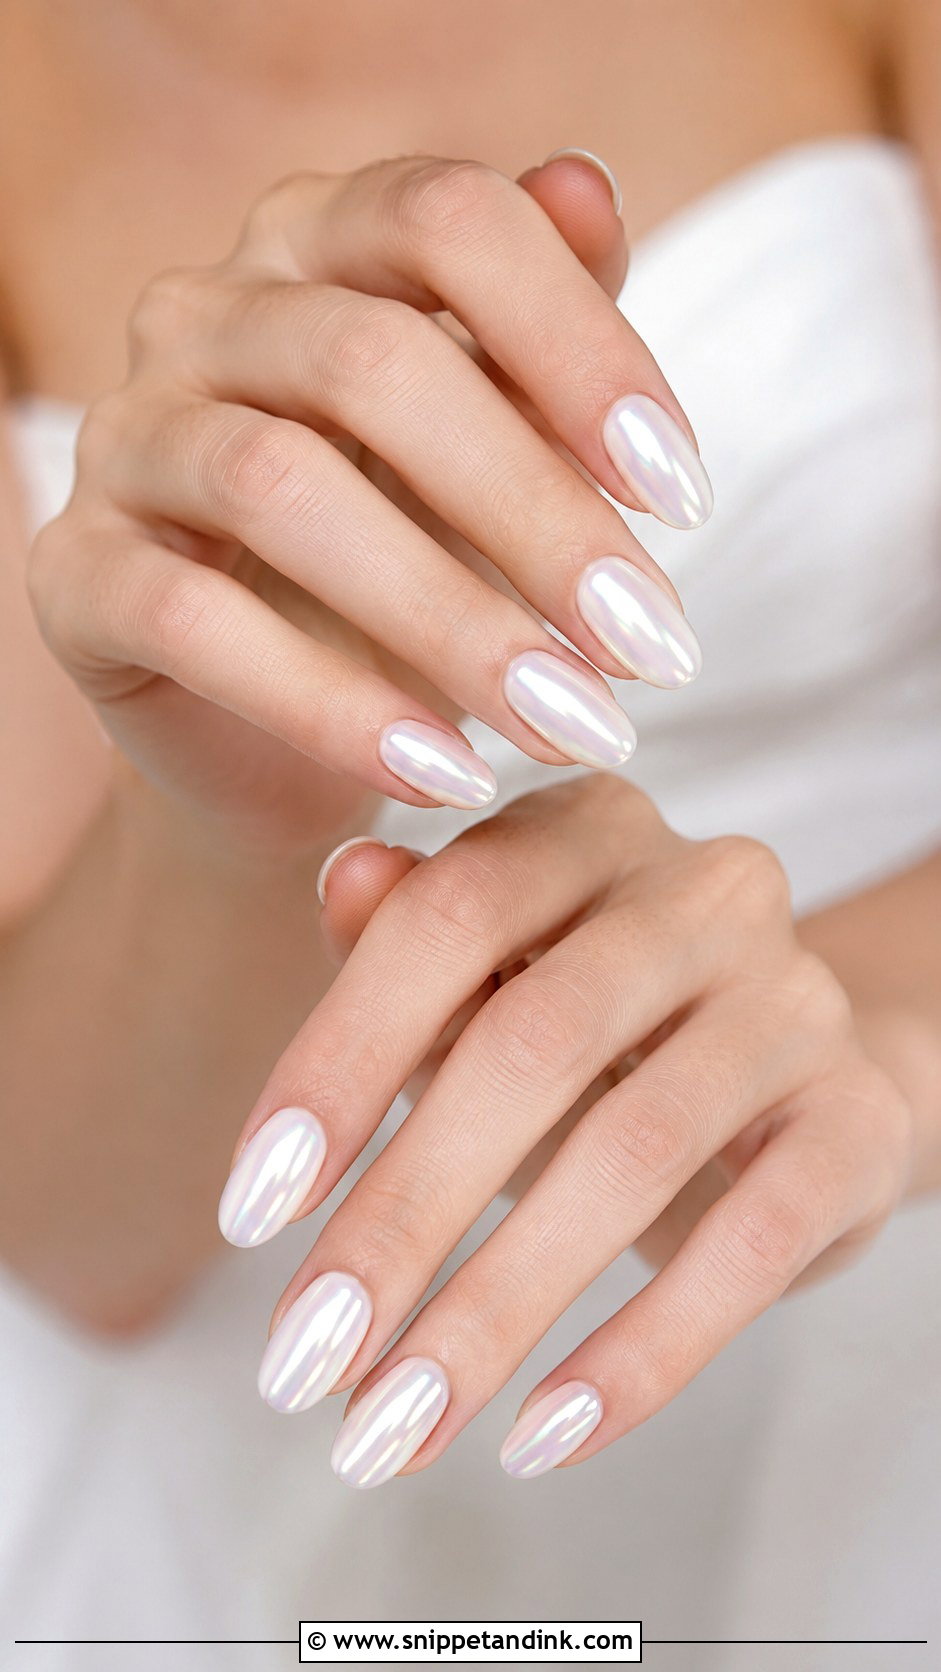
White chrome is milky gel with chrome powder buffed over it, and depending on the base it reads pearly, icy or glazed. It catches more light than plain white, which is the appeal and also the risk, because under strong flash a heavy chrome can bounce glare back into the lens. Almond and oval shapes keep it bridal. To stay clear of a futuristic look, ask for a fine pearl chrome instead of a mirror powder.
18. Nude French Wedding Nails
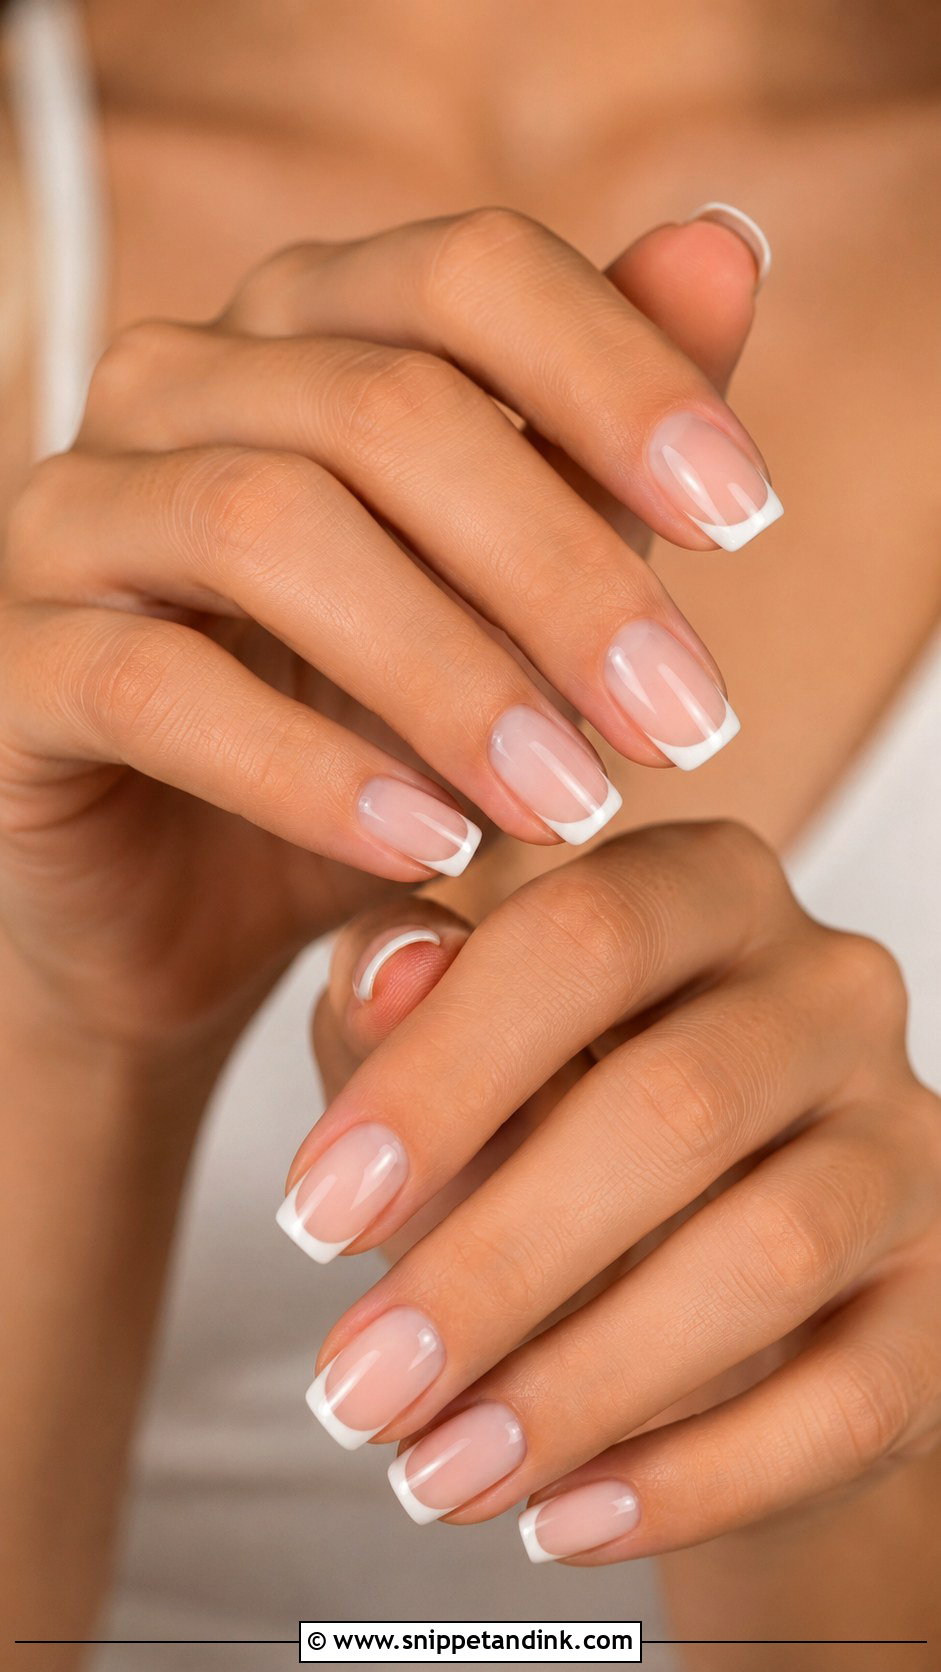
This is the quietest French here: a nude base matched to your skin with a soft white or ivory tip, so the contrast is lower than the classic version. I reach for it on very fair or very deep skin, where a stark white tip can look harsh. The base undertone decides everything, so swatch a few nudes against your hand and choose the one that disappears. It works at any length.
19. Floral Wedding Nails
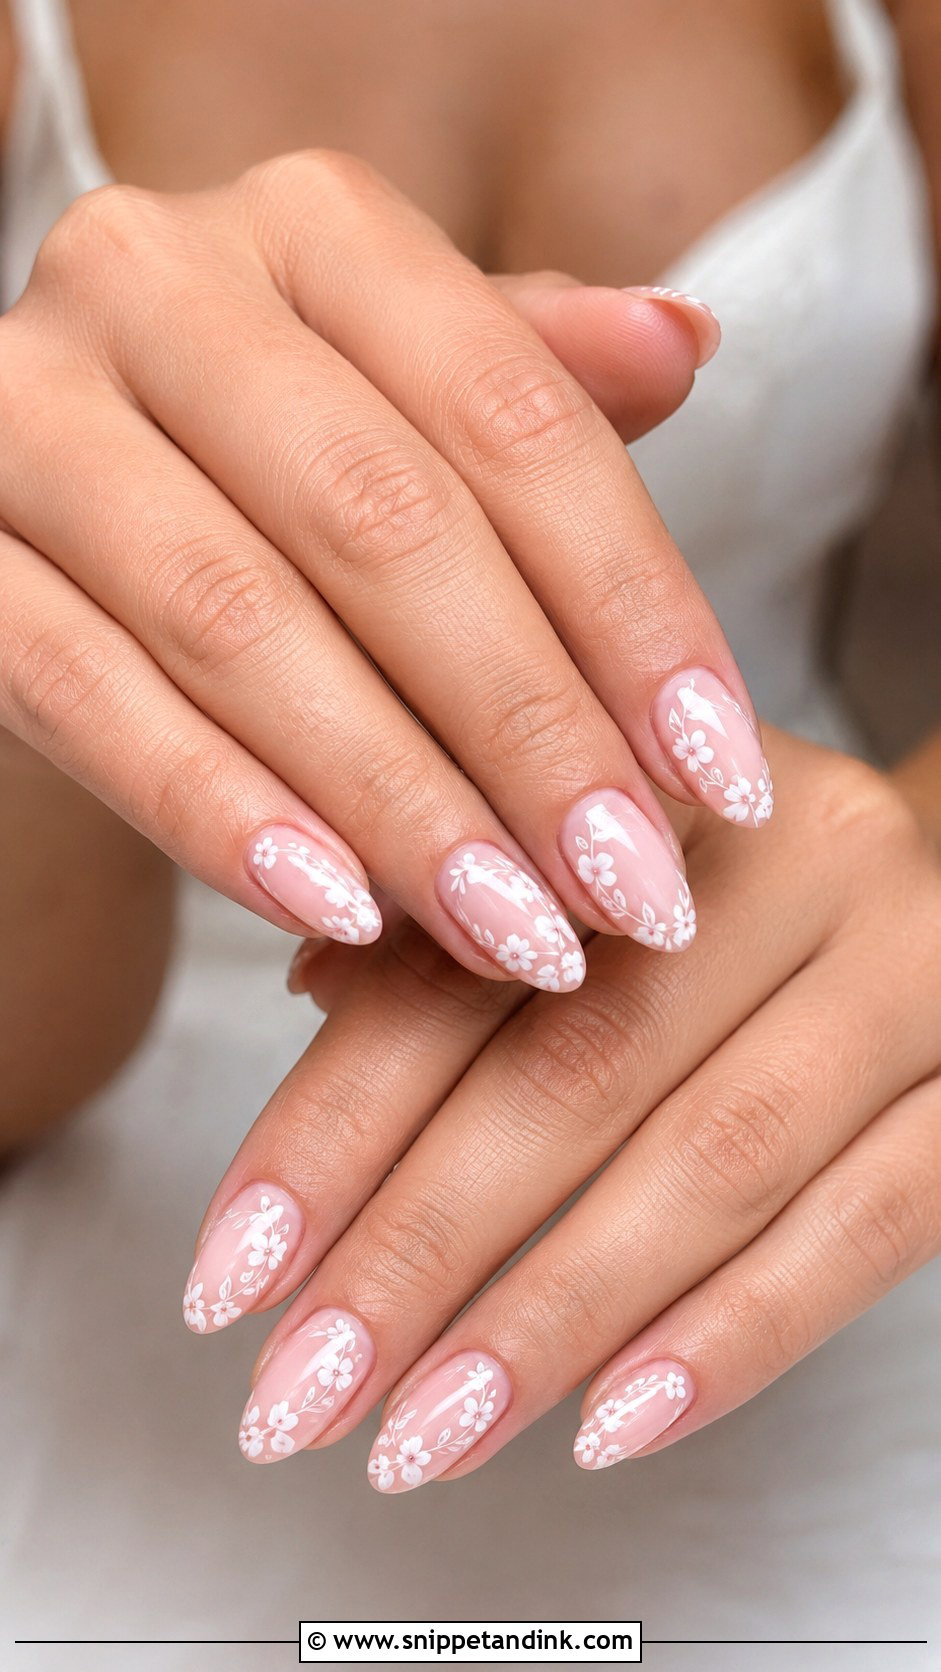
Florals stay classic when the flowers are tiny and pale. I paint five dotted petals around a centre dot with a dotting tool, on one or two accent nails or scattered very lightly across the set. Garden and spring weddings suit it most naturally, though small flowers work any time of year. The petals sit slightly raised, so the topcoat needs enough body to bury them; otherwise the edges catch and lift within a day or two.
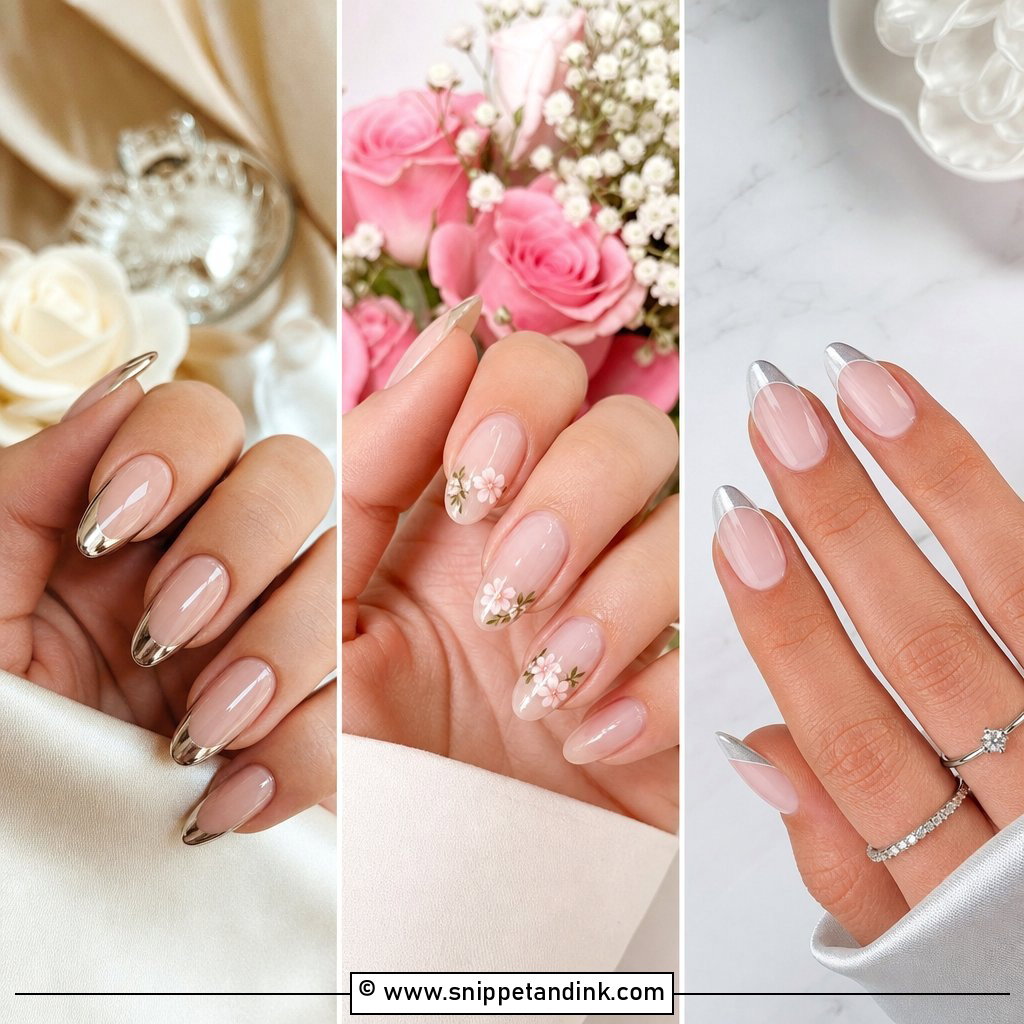
20. Glossy Nude Wedding Nails
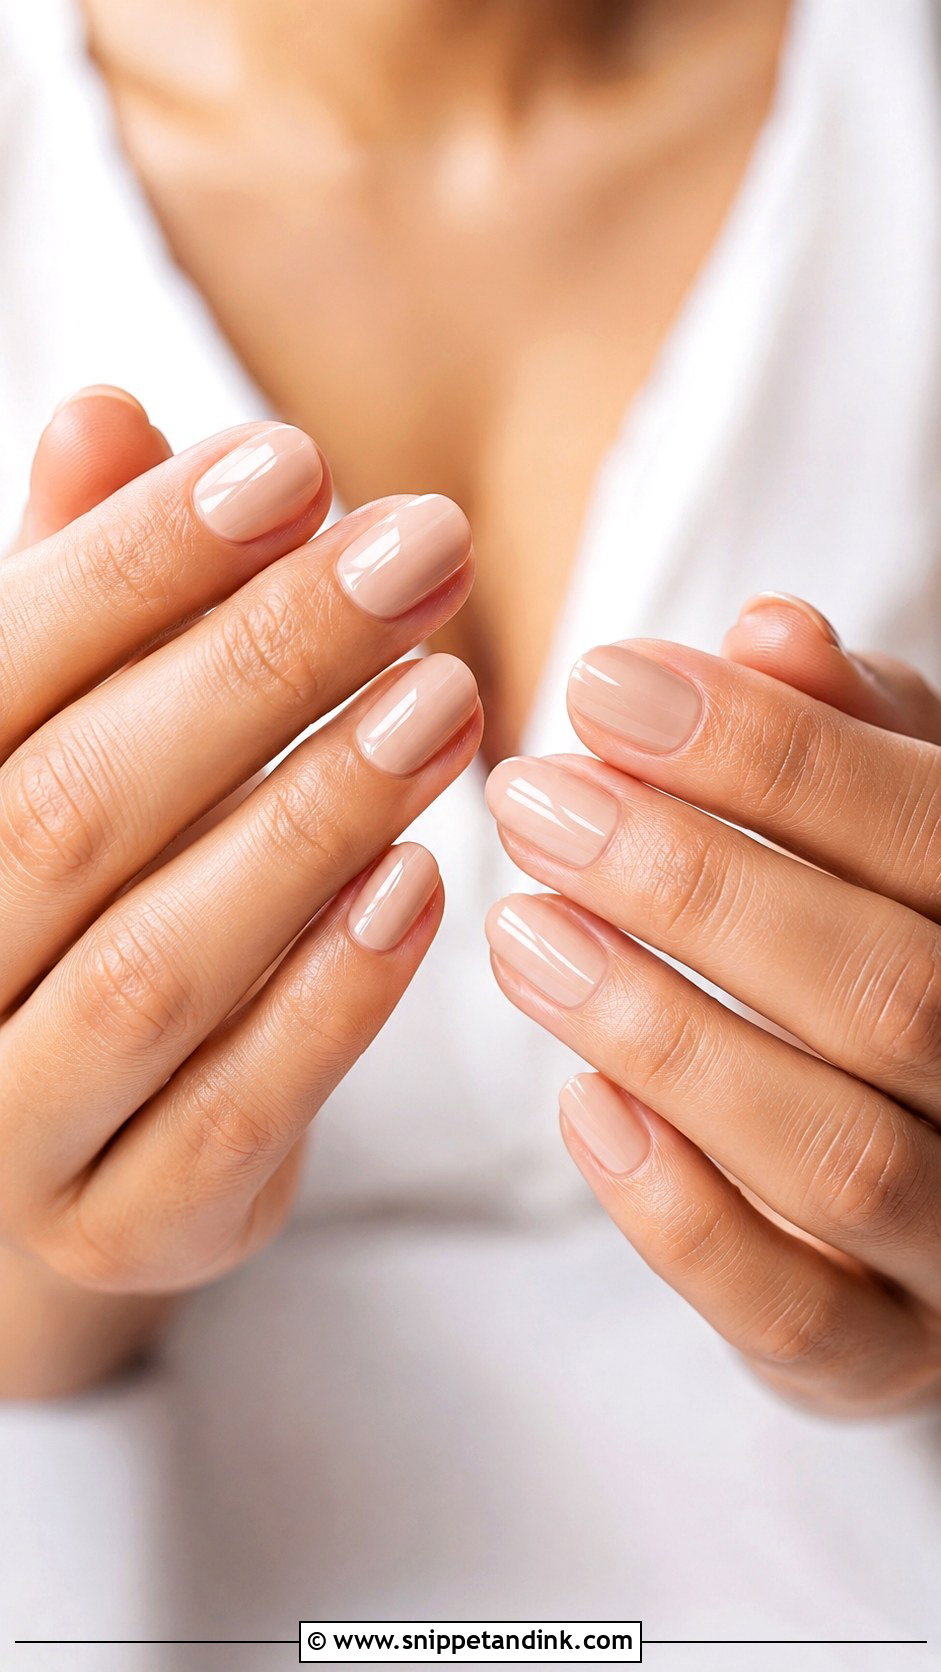
If you want nails you’ll never look back on and wince at, this is the set. Fair skin usually suits a pink-leaning nude, medium skin a beige nude, and deeper skin a caramel, mocha or warm brown nude; the right one makes your fingers look longer, not paler. Shine does much of the work here, so I finish with a high-gloss gel topcoat and wipe it down thoroughly. Oval, almond and soft square look the most bridal.
A Nail Timeline That Leaves Room to Fix Things
Most of the bridal sets I’d call disappointing weren’t the wrong colour. They were done too late to correct, or too early to still look fresh. This is the rhythm I work to:
- Four to six weeks out: a trial with the exact shade and shape, photographed by a window and with flash, holding your ring.
- From the trial onward: cuticle oil every night, and no cutting your own cuticles at home.
- One to two days before: the final gel set, so any lifting shows up while there’s still time to repair it.
- The morning of: oil and hand cream only, both fully absorbed before anyone picks up a camera.
Ring Shots Show the Skin Around the Nail Too
A photographer’s ring close-up is framed tighter than most people expect, so the knuckles, cuticles and sides of the fingers are in it as much as the polish. Dry skin around the nail looks white and ragged at that distance. Regular oil fixes most of it within a few weeks.
Two things catch brides out. Self-tan collects around the nail folds and in the knuckle creases, so apply it a few days before the manicure and wipe your fingers straight after. And a glossy hand cream rubbed in just before the ring shots leaves a greasy sheen, so I’d do hands an hour before and blot. In your bag, keep a fine file, the glue if you’re wearing press-ons, and a small bottle of cuticle oil.
Start With the Dress Swatch, Then the Shape
Work from the dress outward. Hold the fabric next to your hand, decide whether white, ivory or nude sits best, then pick the shape your natural nails can support and a length you can live with through a day of hugs, buttons and ring photos. If you’re still torn, a soft base, a flattering shape and a proper glossy finish will not let you down. Classic bridal nails don’t need to be complicated. They need to be clean.
You'll Like These Ideas:


Leave a Reply