
Watching your child get married is a long, emotional day, and your hair has to hold up through all of it: the early photos, the ceremony tears, the hugging line and a few hours on the dance floor. That is why most of the mothers I style end up in an updo. It keeps hair off the face, it doesn’t flatten against a chair back, and it still looks finished at eleven at night. Below are 25 mother of the bride updos I’d happily put on a client, with notes on which hair each one suits, where it tends to fail, and what I do at the chair to stop that happening.
Silver, Thinning or Layered Hair Changes How I Pin an Updo
Most of the photos you’ll save show young, thick, freshly coloured hair. A mother’s hair is often different, and the updo has to be built around that, not the picture. These are the three situations I plan for most often at trials.
Grey and silver hair
Grey strands are often coarser and more wiry than pigmented hair, and they can resist curling. I use a heat protectant with a bit of hold and give each section a few extra seconds on the iron. Avoid yellow-tinted styling products and very oily serums; they can make silver look dull. A purple shampoo a few days before, not the morning of, keeps the colour bright without staining.
A thinner crown or hairline
Thinning at the crown or temples is very common, and it changes the plan. I avoid scraped-back styles, keep tension soft around the hairline and choose placements that sit below the thinner area. A low chignon, a soft twist or a style with face-framing pieces hides it well. If you use root concealer powder, bring it to the trial so we can see how it looks with the finished style.
Short layers from an everyday cut
If you wear a layered bob or shoulder-length cut, not every style on this list will work. Shorter layers fall out of high buns and French twists. Braided styles, low twisted buns and half-up looks are much more forgiving. If you’d like a specific updo, tell your hairdresser three or four months ahead and skip the next trim of the layers.
For colour, have roots done about a week before. That gives the colour time to settle and the scalp time to calm, and any toner time to soften.
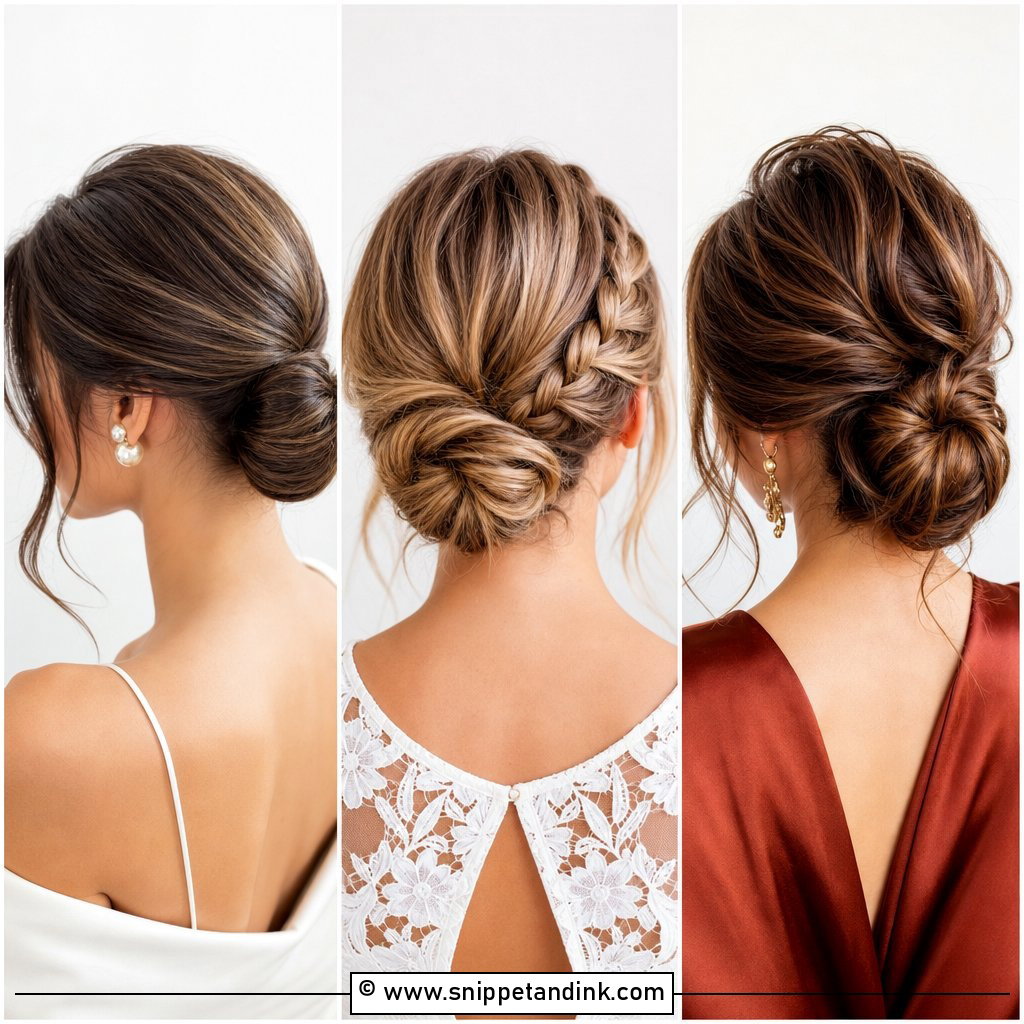
1. Low Chignon Updo
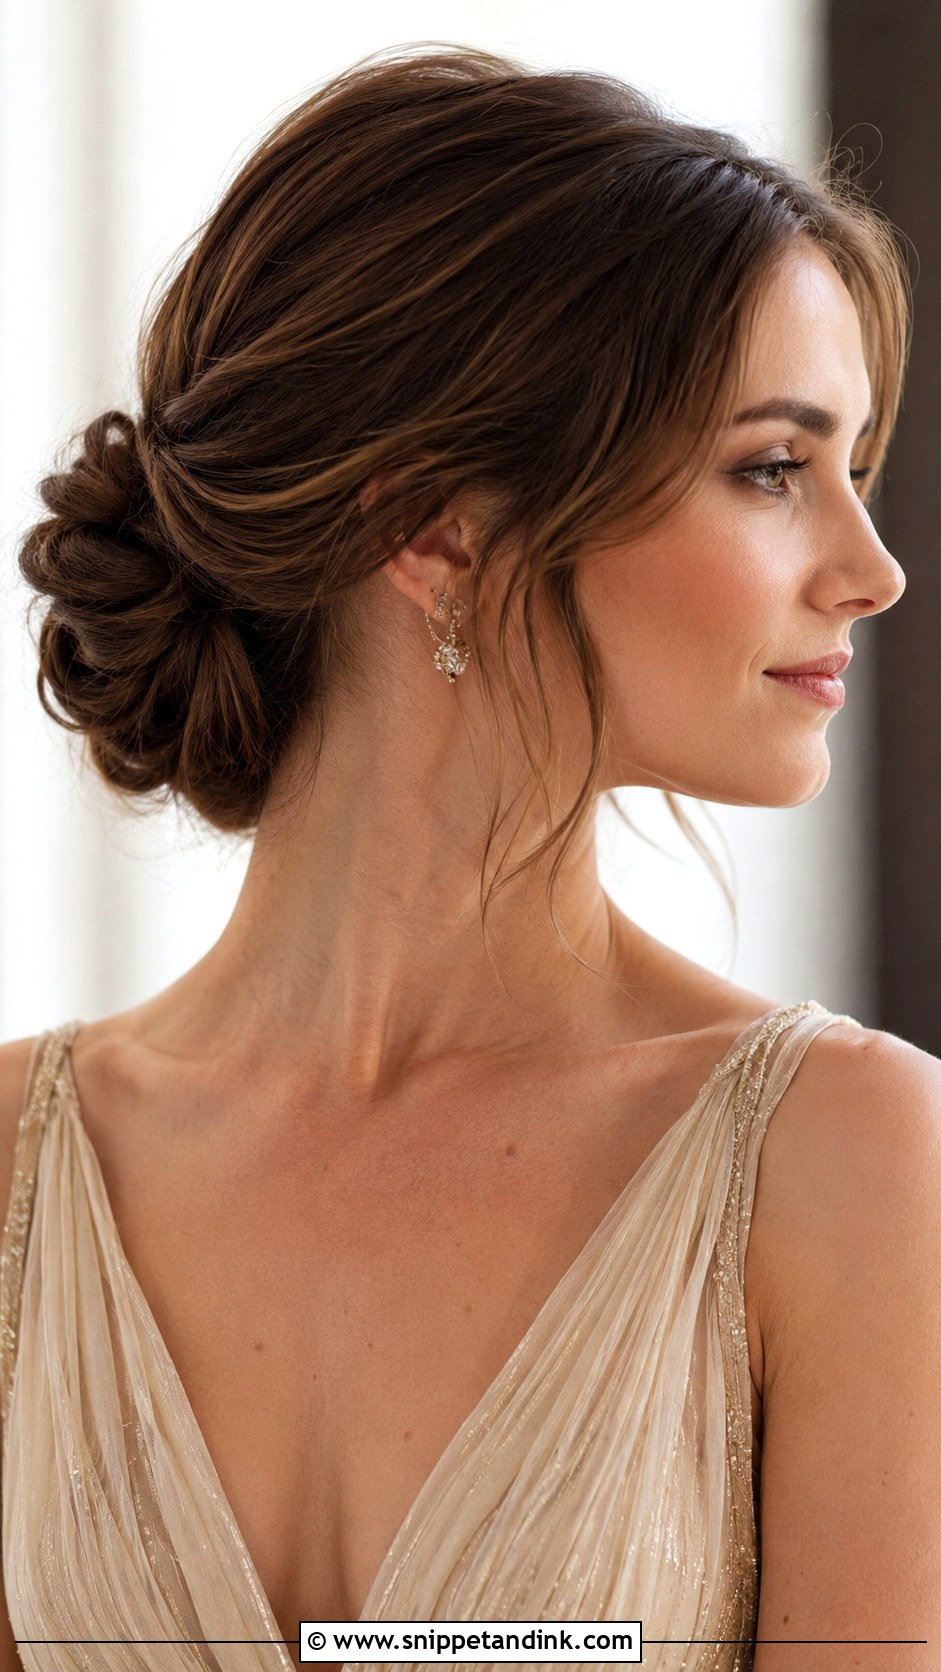
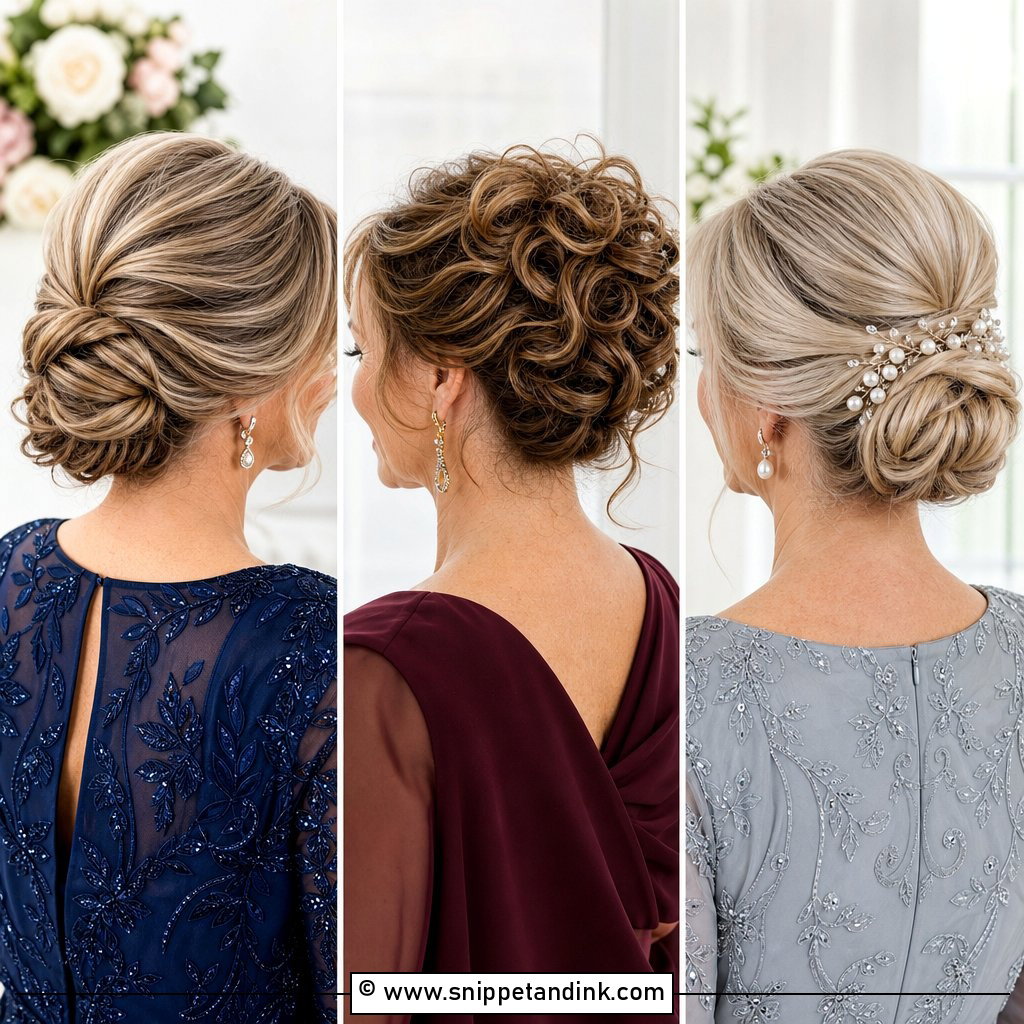
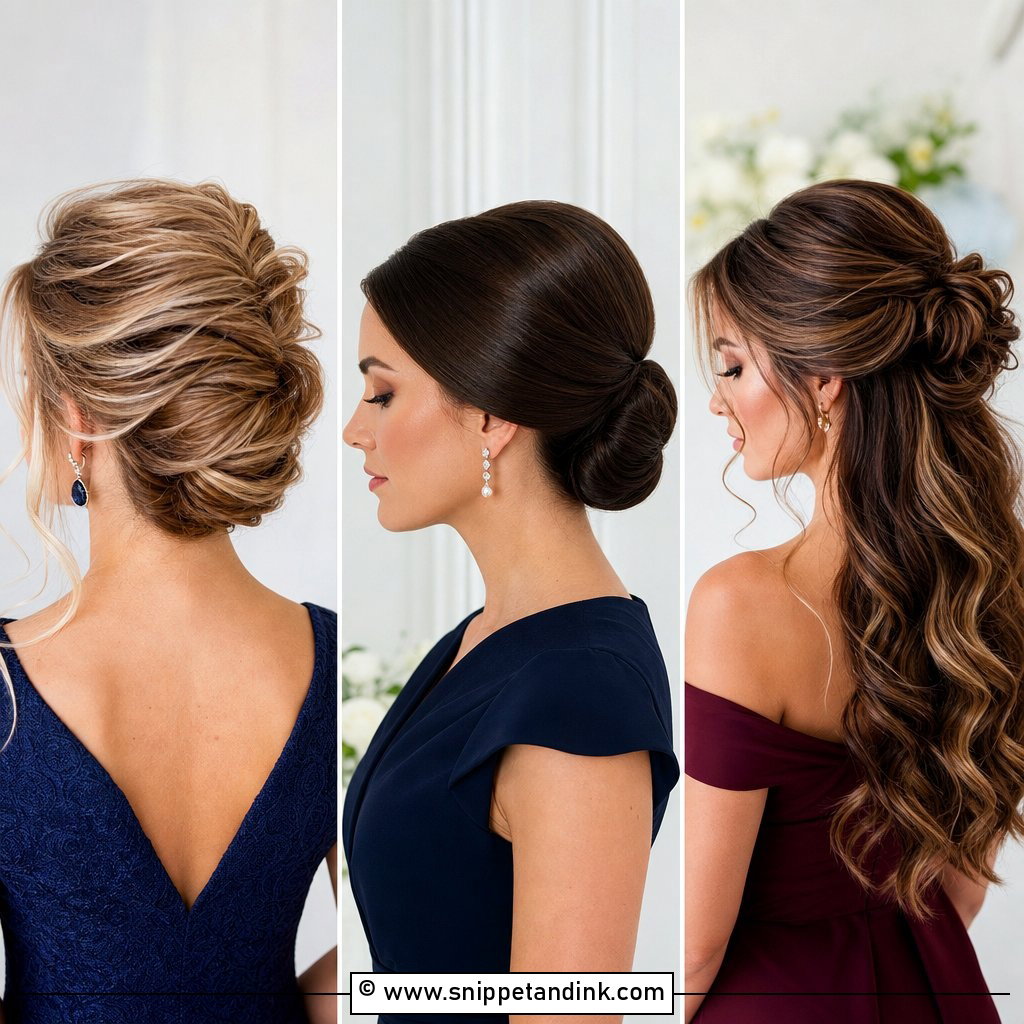
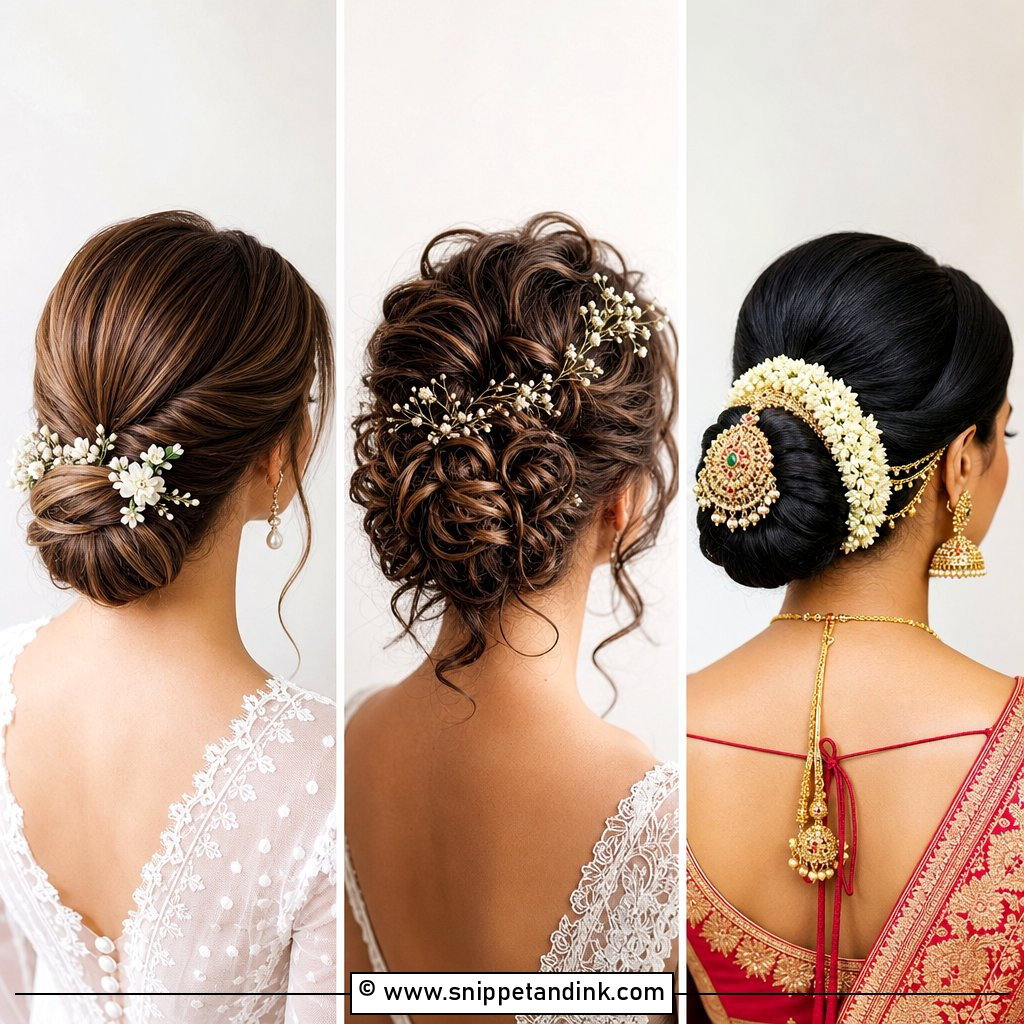
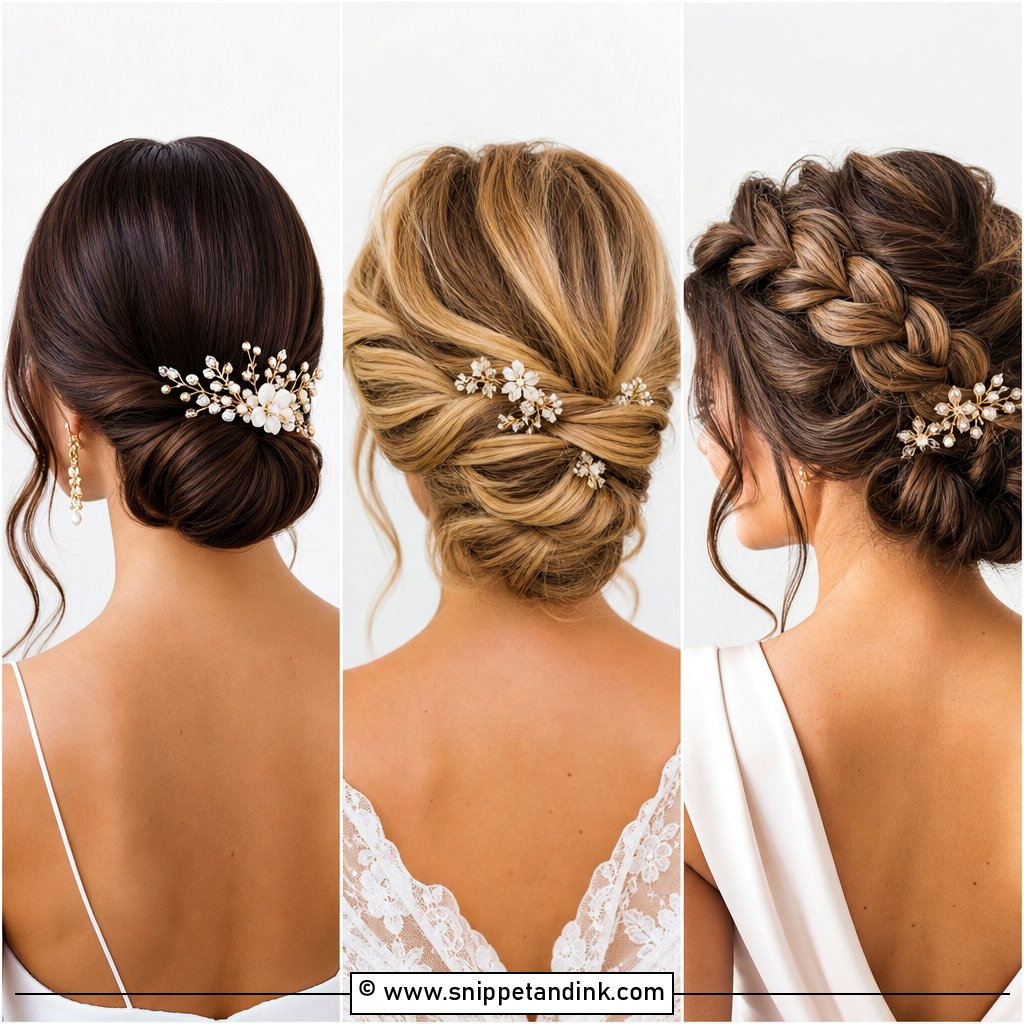
This is the shape I reach for most often with mothers, because it sits low enough to clear a high collar and a wrap, and it never digs into the back of a pew. The roll is only as neat as the base underneath it, so I set a small, tight elastic first and build the chignon over it with U-pins rather than bobby pins, which leaves less visible metal on fine hair. Leave out a couple of soft pieces at the temples if your hairline has receded a little; they hide it far better than a scraped-back finish. Earrings with some length read well next to it.
2. Classic French Twist
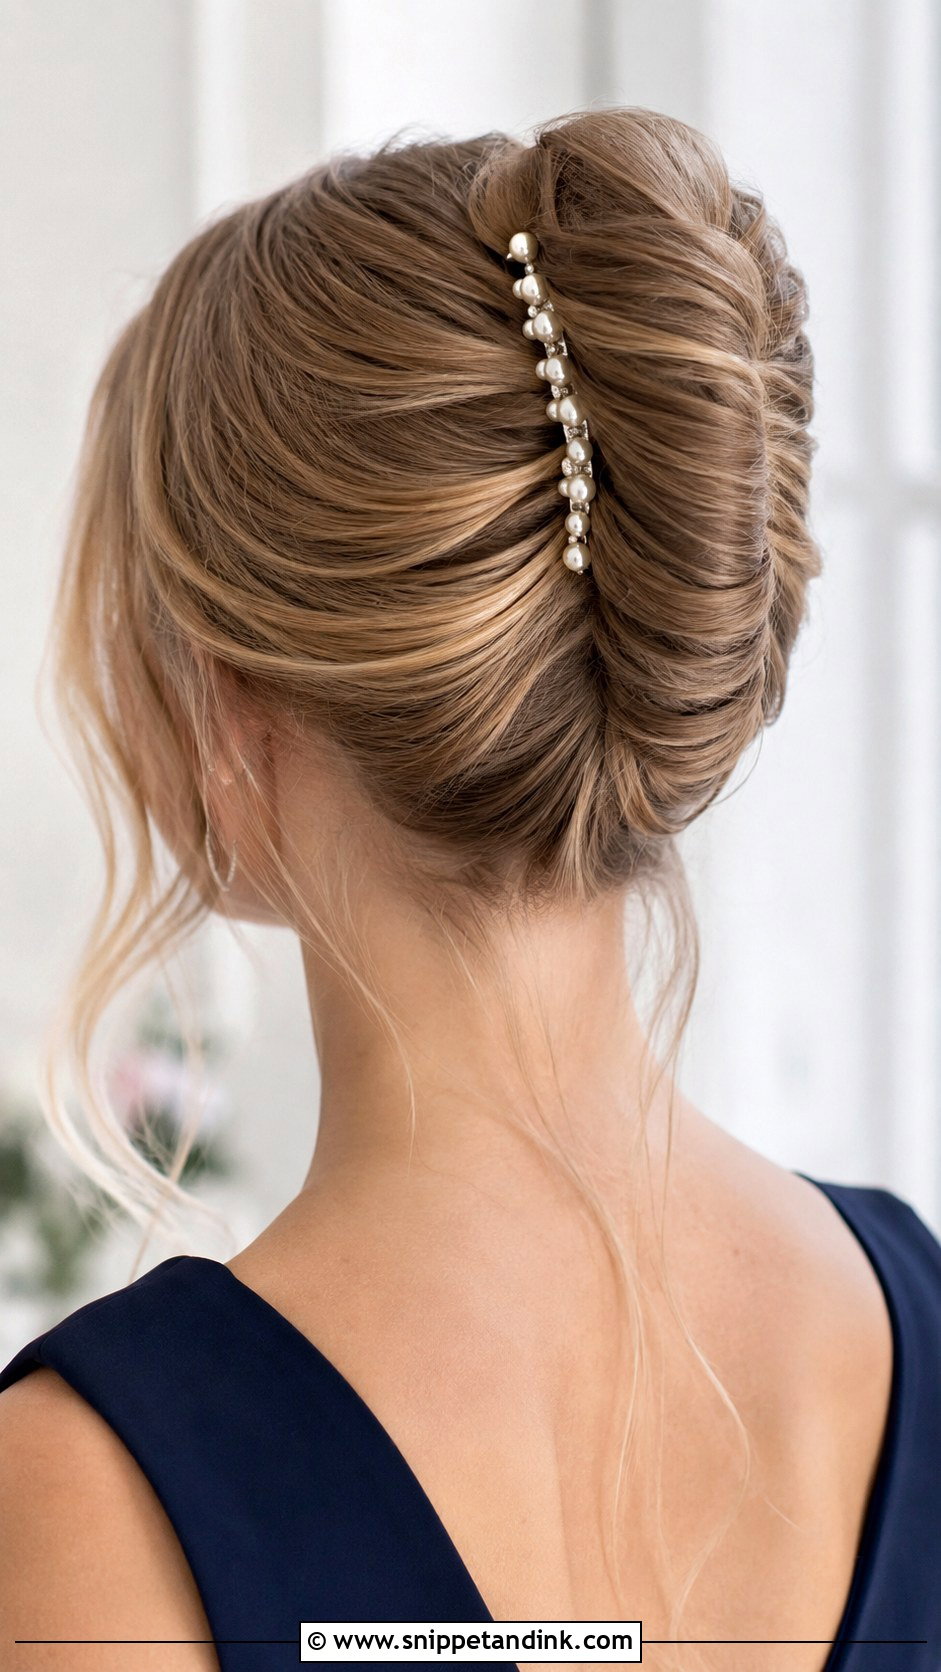
A French twist needs hair at least to the shoulder blades, otherwise the ends poke out of the seam and you spend the day tucking them back in. I backcomb the inside of the twist lightly so it has something to grip, then lock it with a row of crossed bobby pins hidden under the fold. A pearl comb along the seam looks good and also covers the pin line. It is very secure, which matters at an outdoor wedding where a breeze would pull a looser style apart by the speeches.
3. Romantic Curly Updo
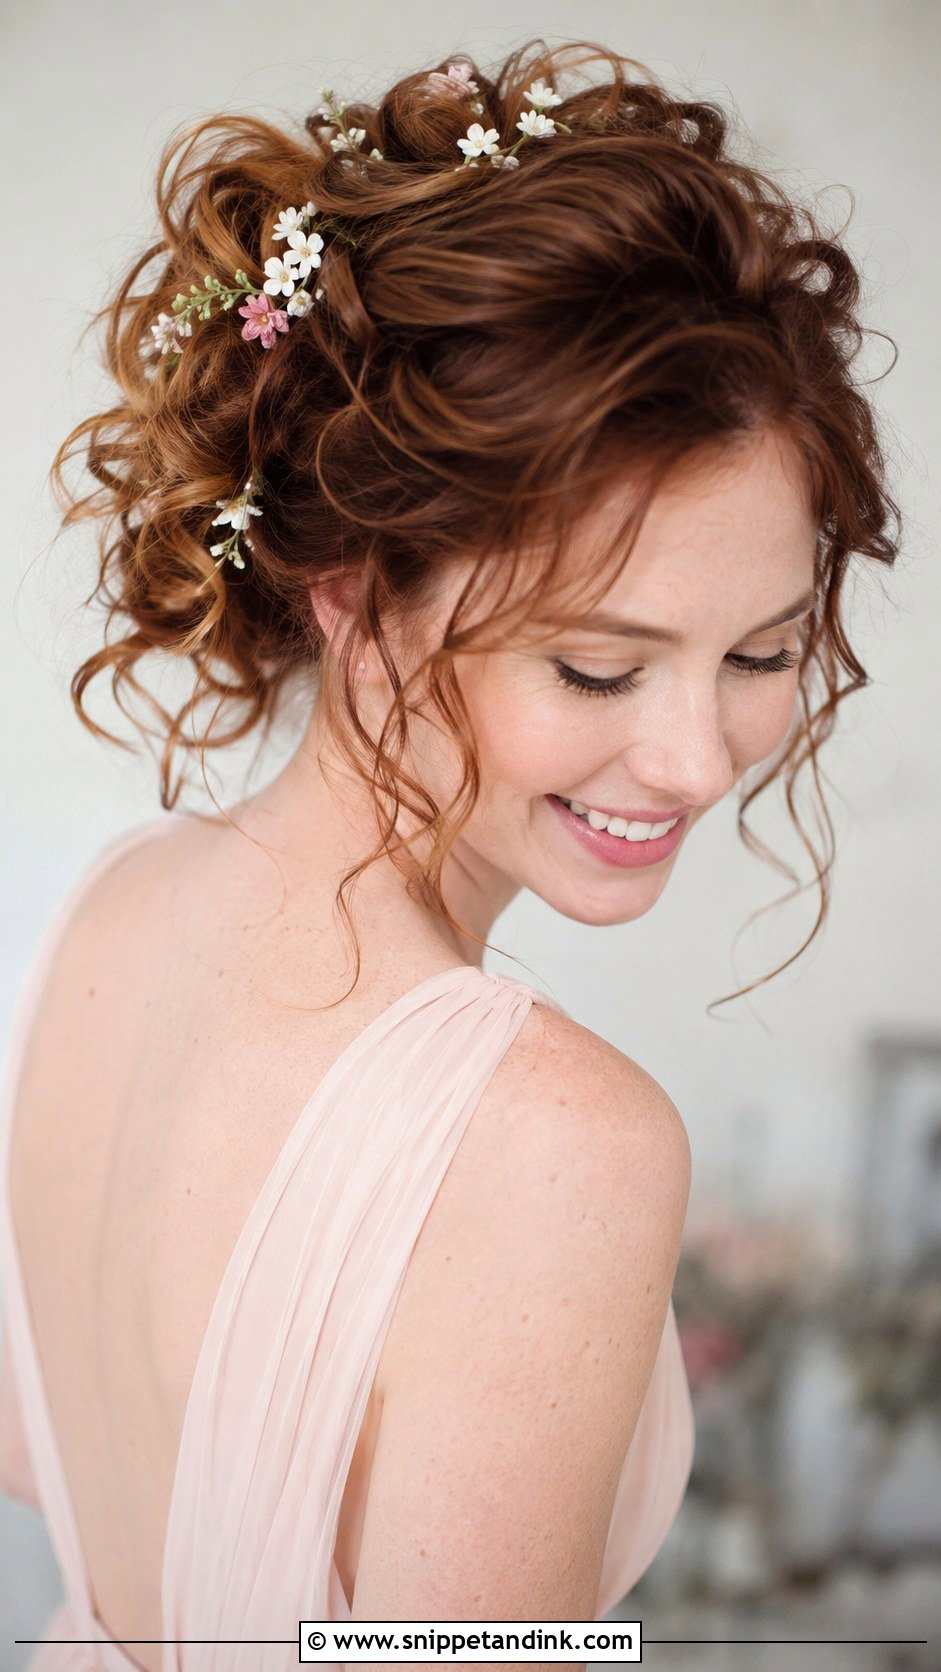
Loose curly arrangements look soft in pictures, but they are the style most likely to drop if the curls weren’t set properly. I curl in small sections, let each one cool in a pin curl before touching it, and only then build the shape, otherwise the curl relaxes into a wave within an hour. Expect a fuller silhouette than a smooth bun. That fullness suits a garden setting and a floaty dress; with a sharply tailored suit it can look a little unfinished.
4. Braided Bun Updo
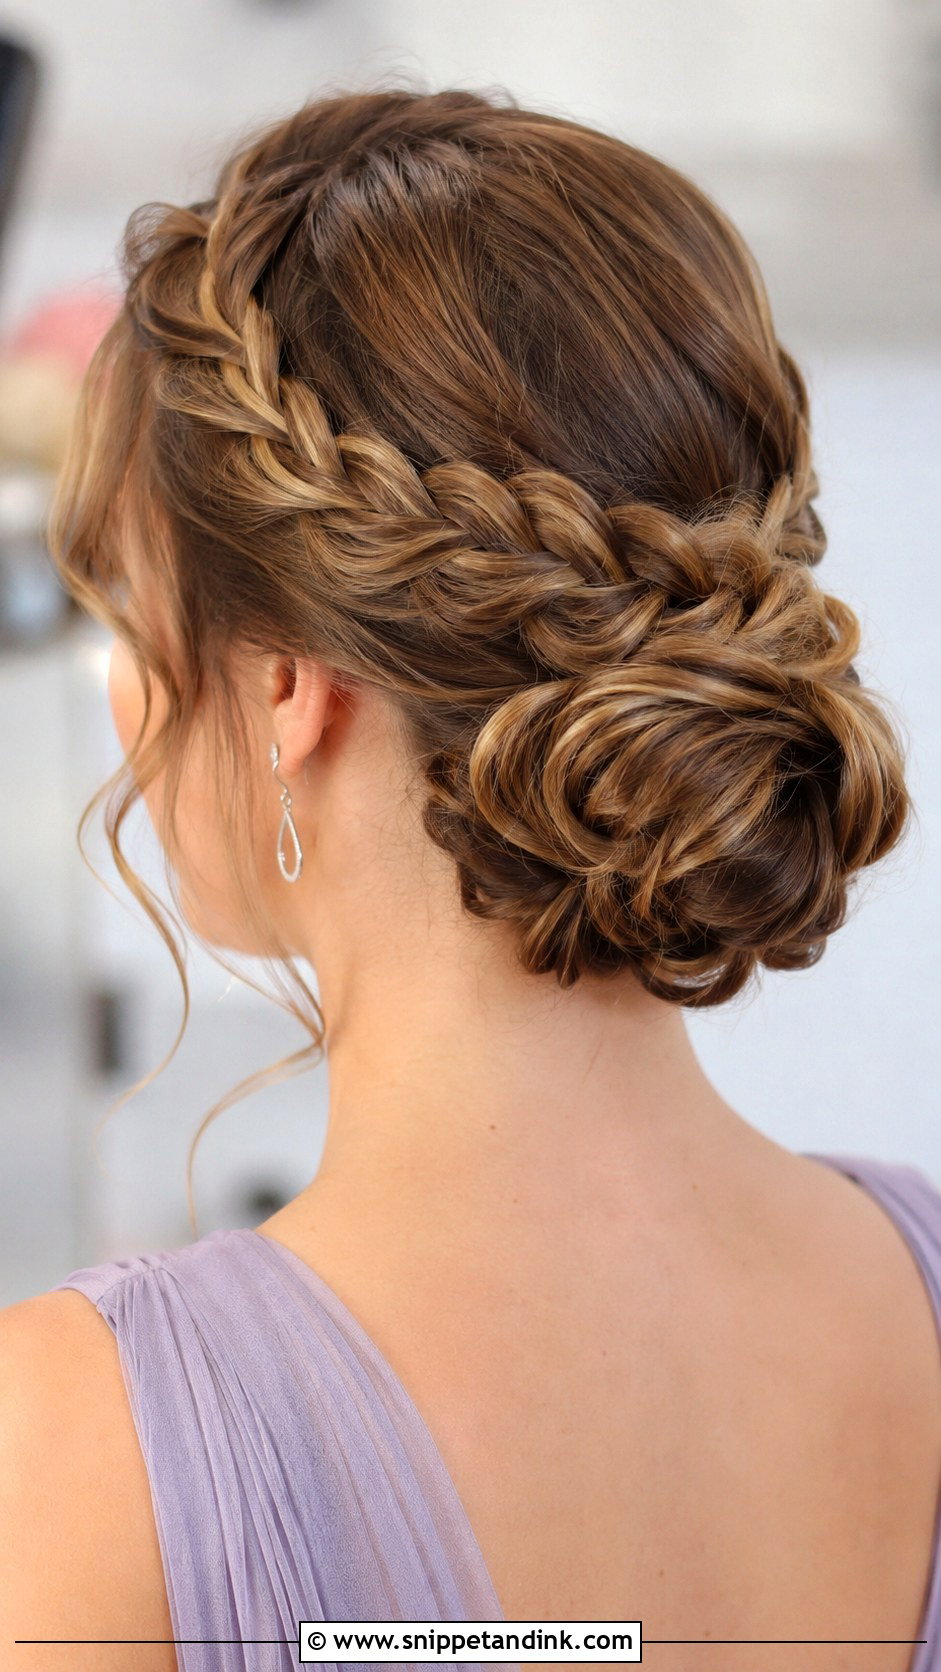
Braids give a bun texture that photographs from the back, which is useful because mothers are often seen from behind during the ceremony. A loose three-strand braid wrapped around the base is quick and kind to shorter layers; a full crown takes longer and needs more length. I pancake the braid gently after pinning so it looks fuller, but I stop before it starts to look fluffy, because a frizzy braid ages a look rather than softening it.
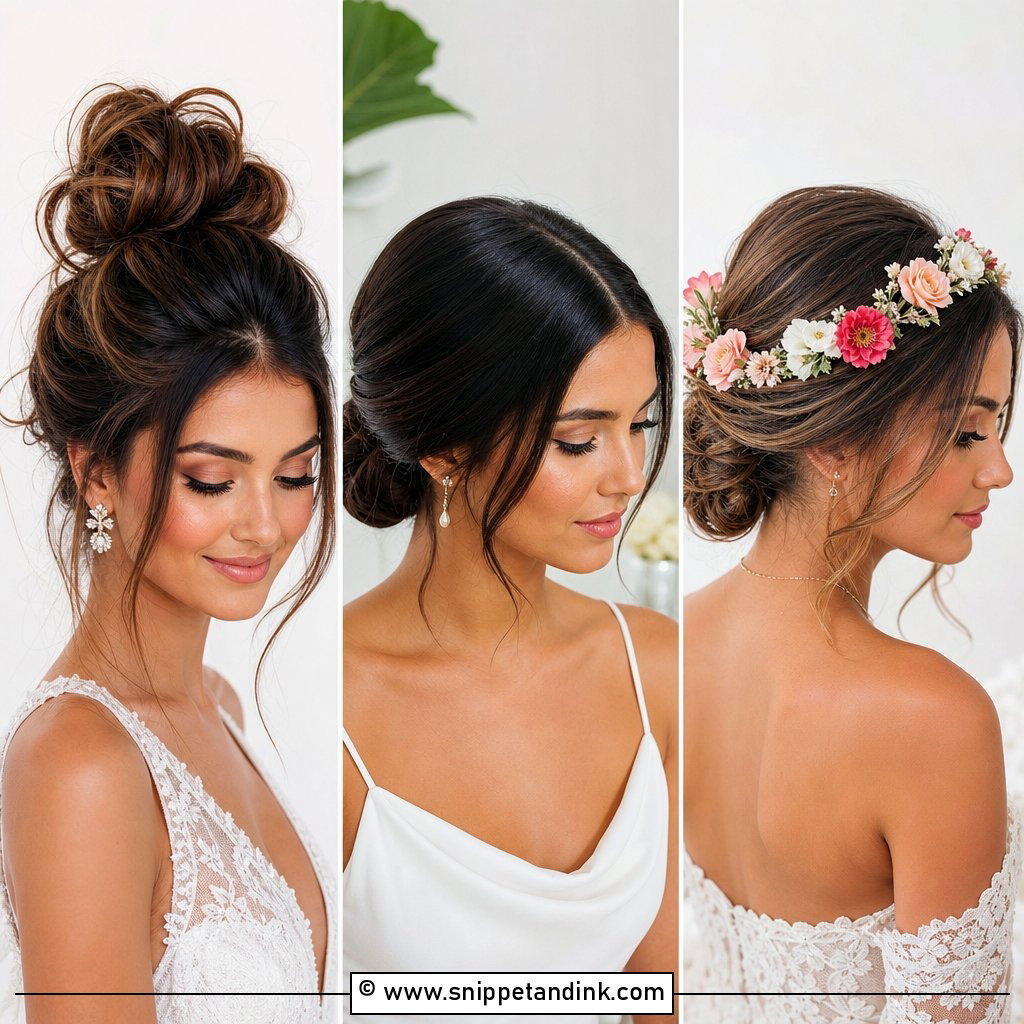
5. Sleek Top Knot
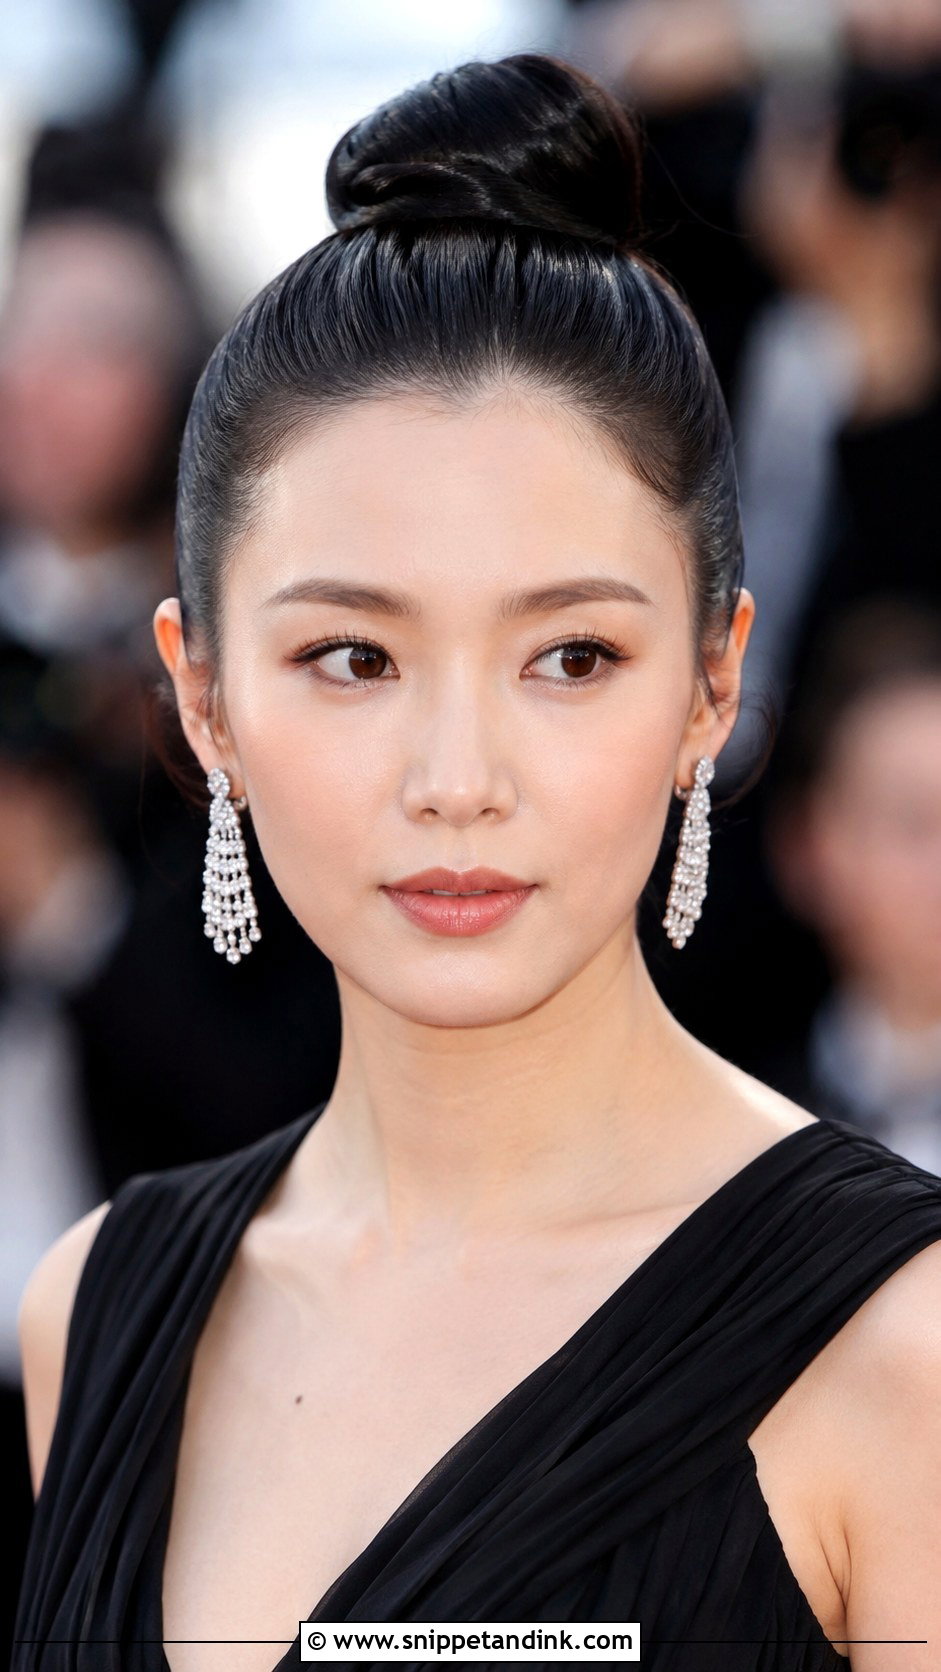
I’ll be honest about this one: a high, sleek knot is a strong look and it isn’t for everyone. It shows every inch of the hairline and the face, so it suits mothers who like a clean, modern finish and are happy with a bold earring and a defined lip. Fine straight hair actually does well here because it smooths flat easily; very layered hair struggles, since short pieces escape at the nape. I use a small amount of shine serum on the brush rather than on the hair so it doesn’t look greasy by evening.
6. Half-Up Twisted Updo
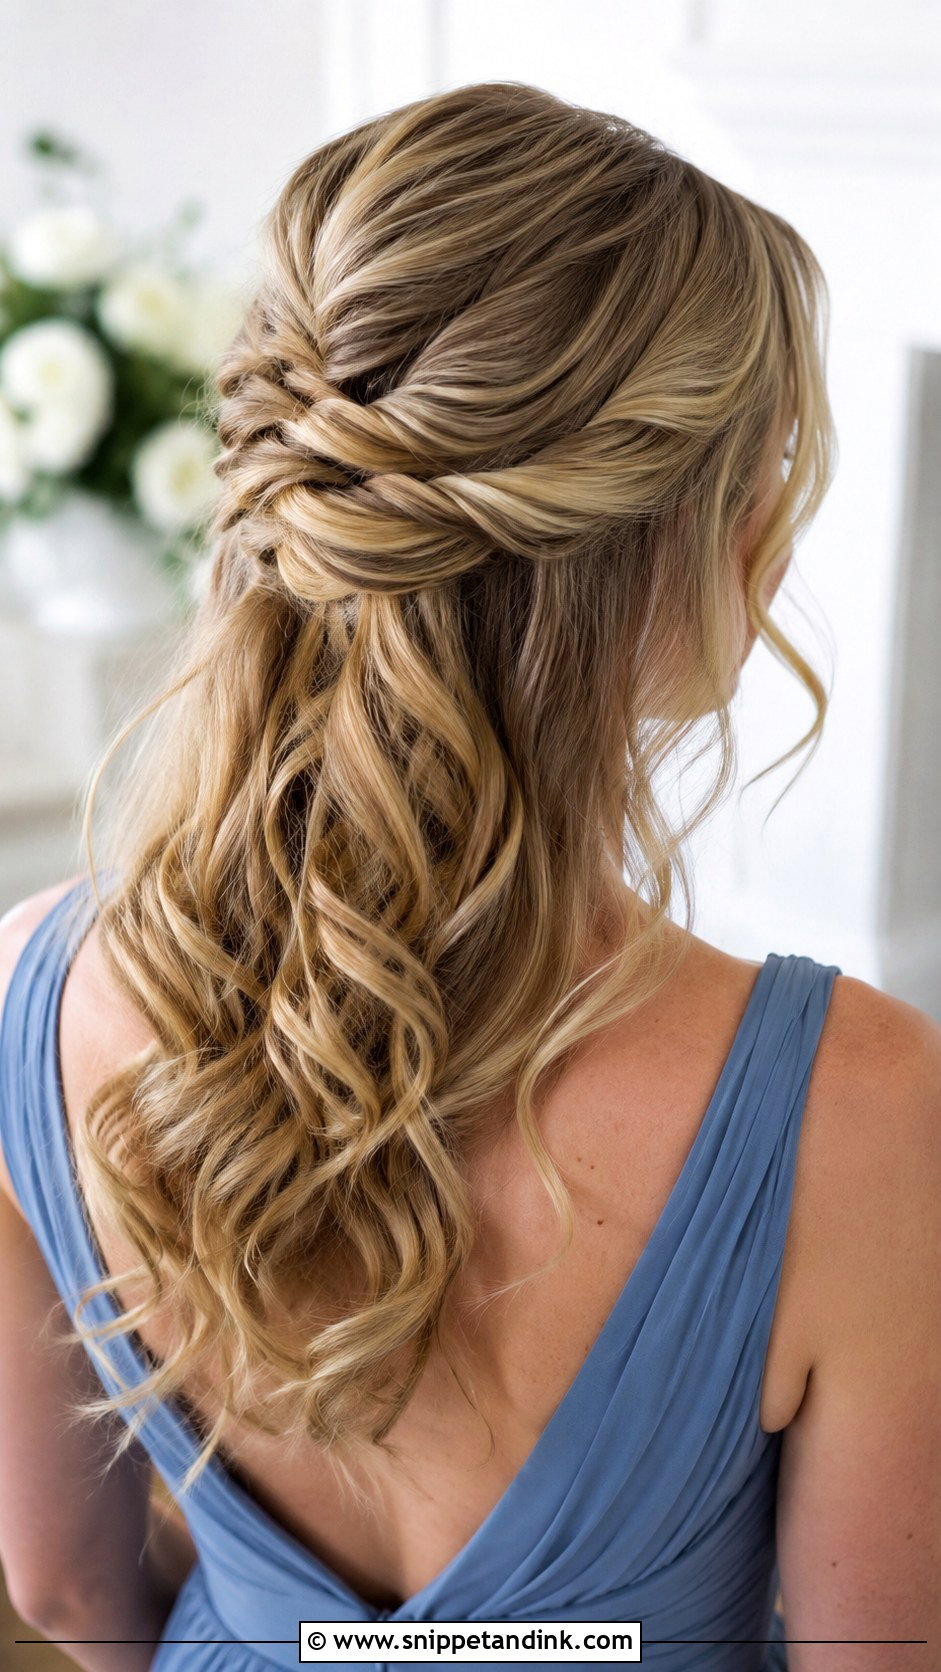
Half-up is the compromise I suggest when a mother misses her hair down but doesn’t want it in her face during the ceremony. The twisted top section takes the weight off the front, and the loose lengths keep the softness. The weak point is the lower half: curls on hair that sits on the shoulders rub against the dress and flatten faster than an updo, so I set them with a stronger hold than I’d use on the bride. It also suits a mother who wants a slim headband instead of a comb.
7. Curly Updo for Natural Hair
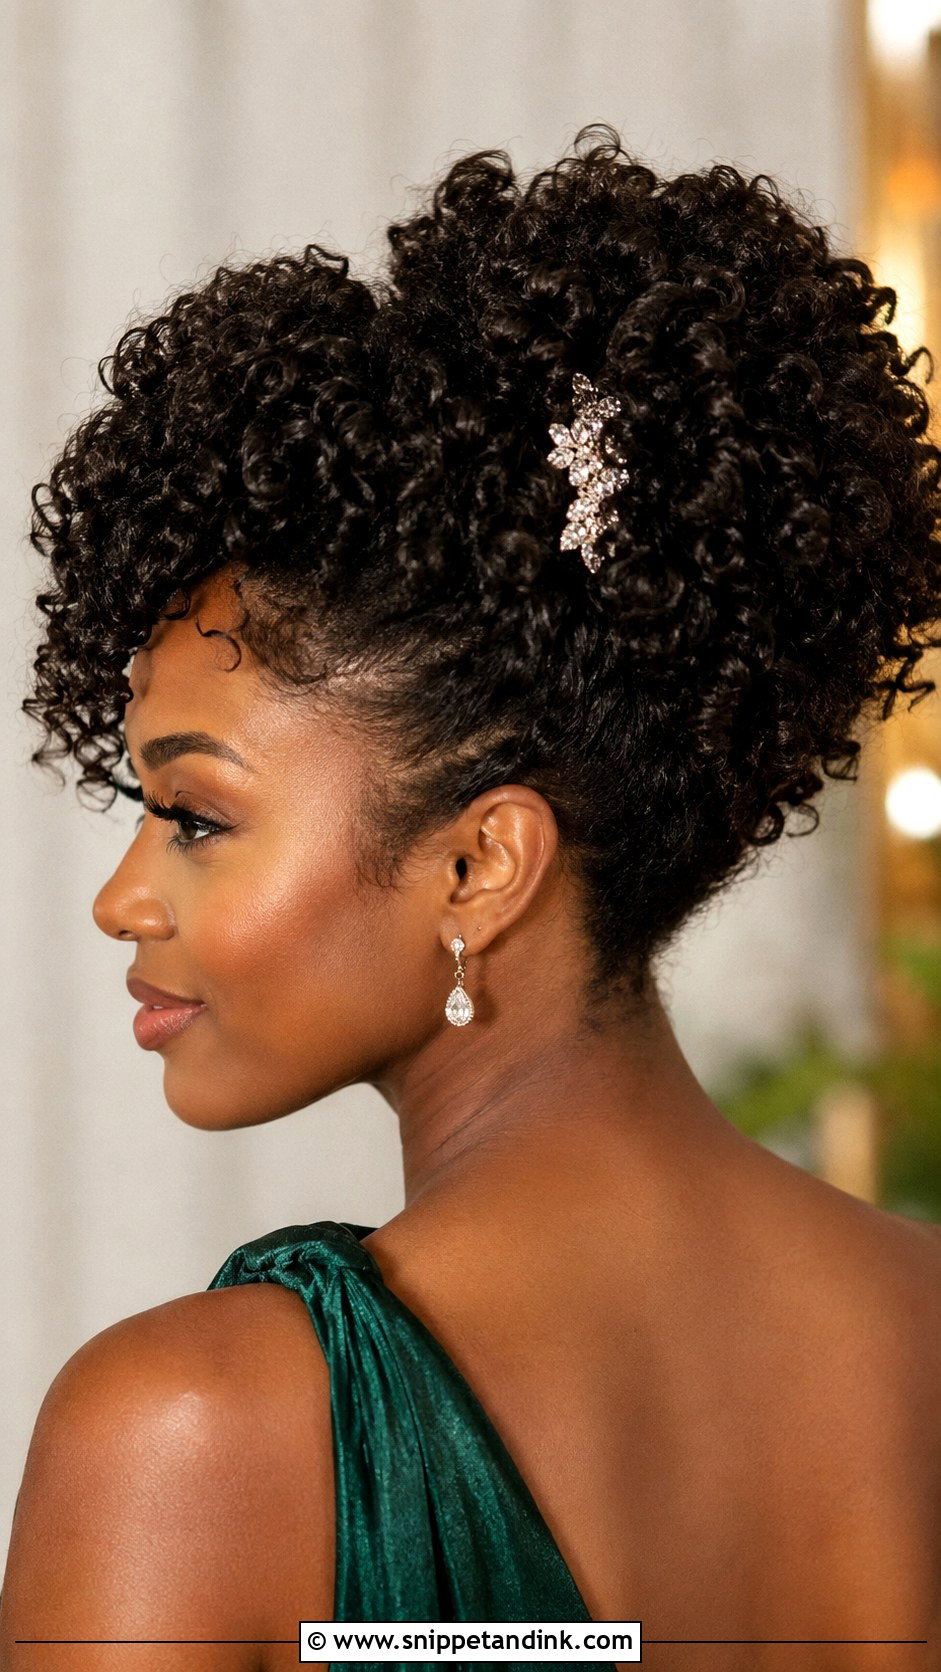
With natural coils I work with the curl pattern instead of fighting it. Stretching the hair the day before with a blowout or a twist-out makes it much easier to shape into a soft, voluminous arrangement without heavy heat on the day. I use a leave-in and a light gel at the edges, then pin the coils in clusters so the definition stays visible. A higher placement gives more height; a low one is calmer and easier to wear under a hat or fascinator.
8. Twisted Low Bun
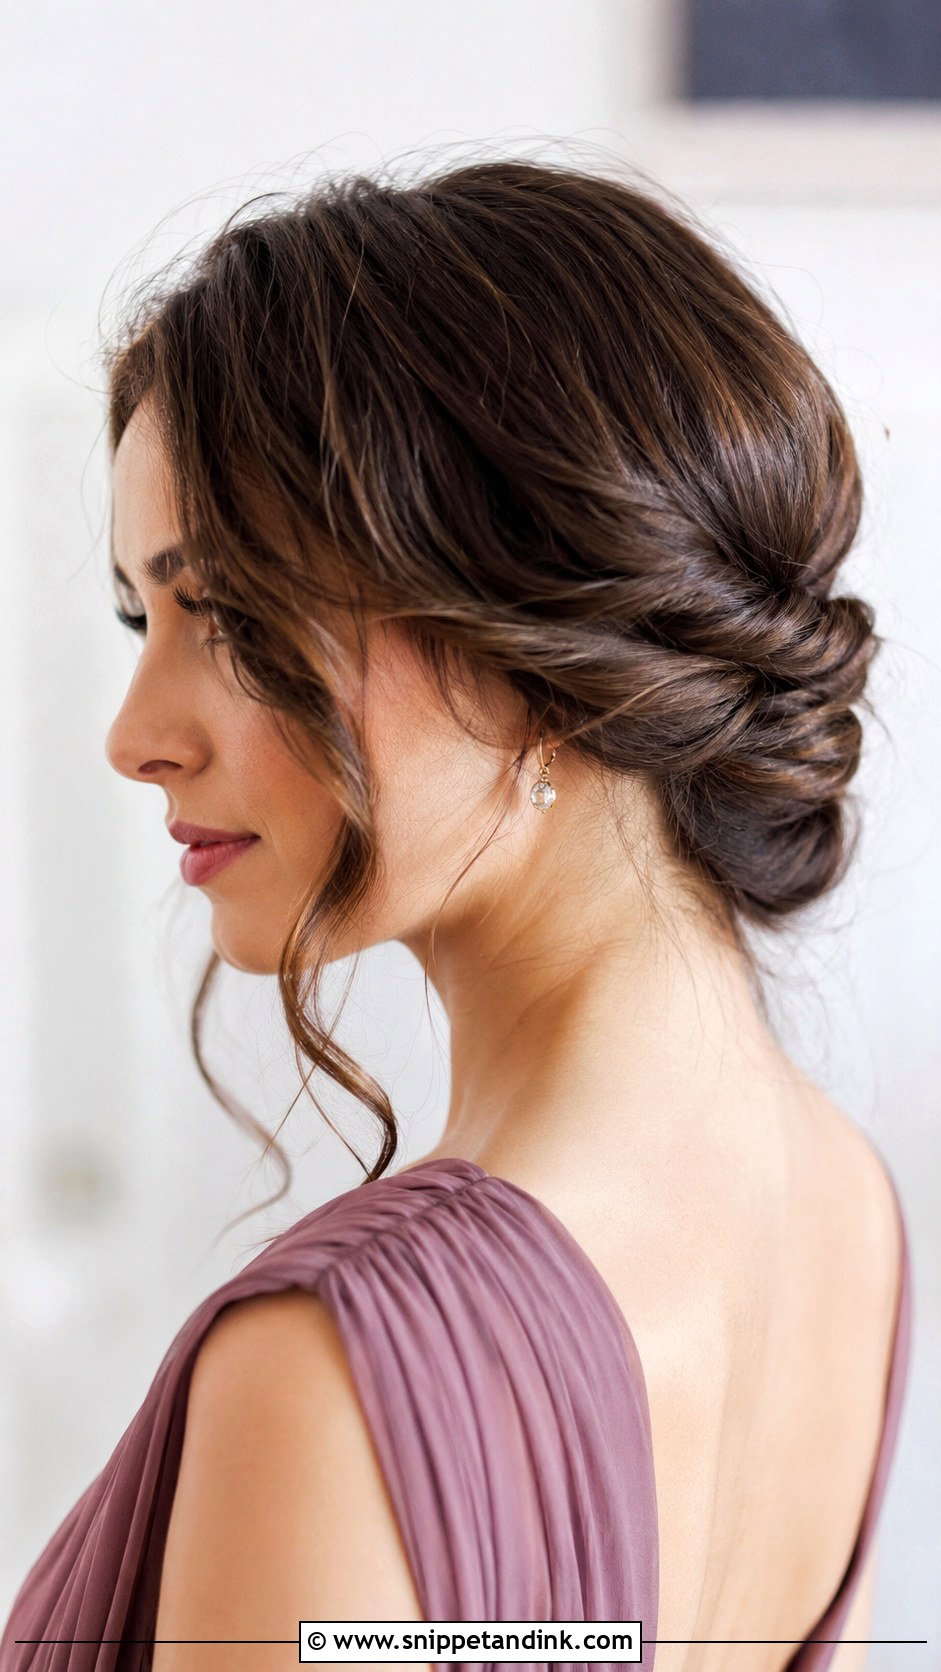
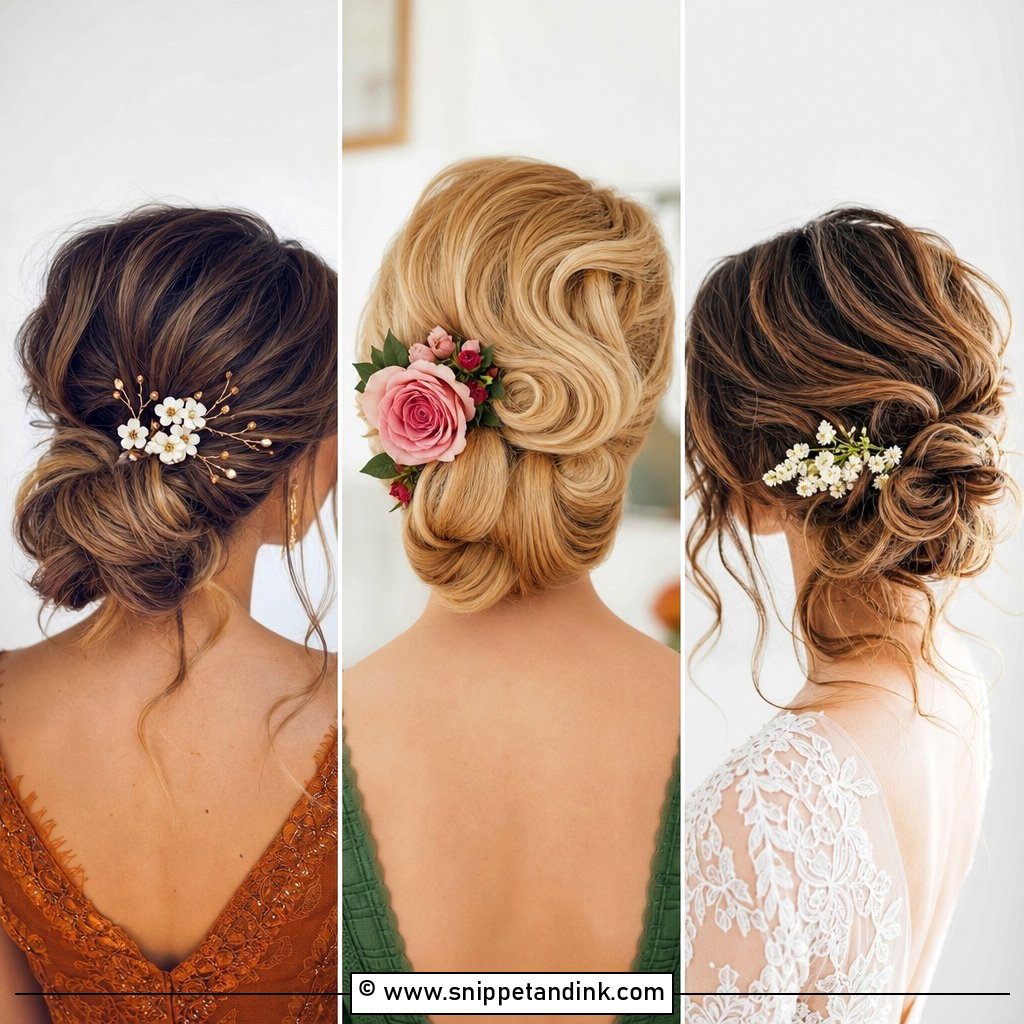
Twisting the sections before wrapping them gives a low bun some dimension without the time a braid takes. It is a good choice for medium-length hair, because twists hide the uneven ends that would show in a smooth roll. I pin each twist where it crosses the next one, so the whole shape is locked together rather than relying on a single anchor. That is what lets it survive a dozen hugs and a cardigan pulled over the head.
9. Vintage Finger Wave Updo
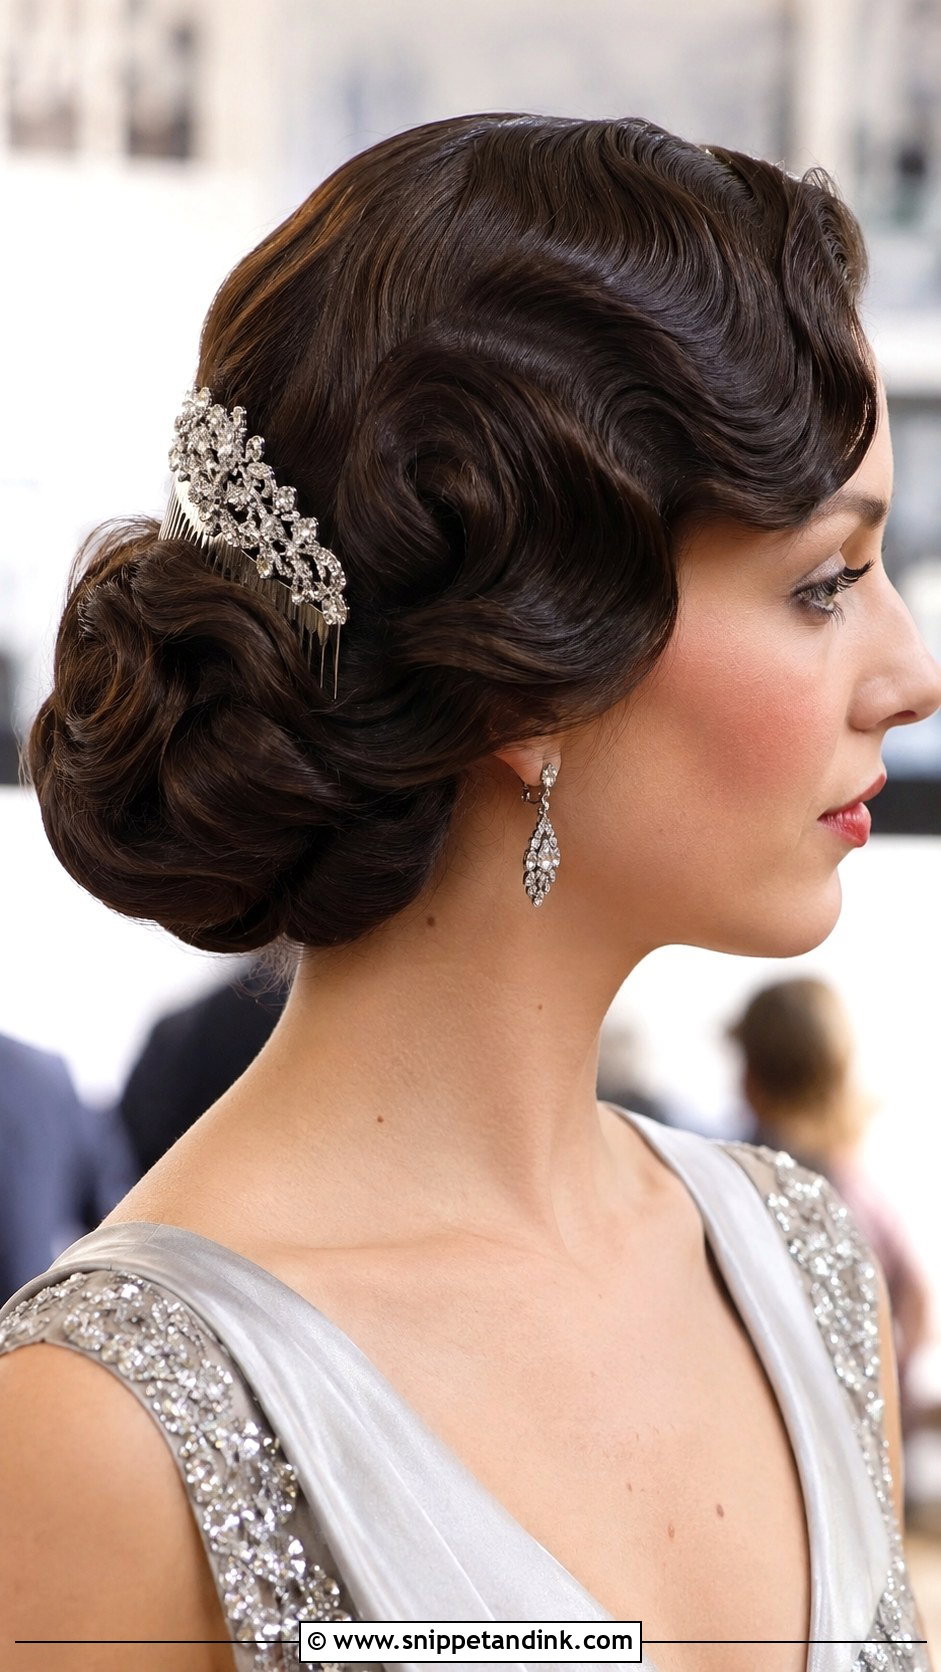
Finger waves are a skill style, and I’d only book this if your stylist can show you finger waves she has actually done. The S-shape is set while the hair is wet with a firm gel and left to dry completely, often under a dryer, then the length is rolled into a low bun. The finish is glossy and very formal, with a strong vintage feel that sits well with pearls and a fitted dress. It won’t suit a relaxed barn wedding, and it is unforgiving if the waves are uneven, which is why a trial matters more here than for almost any other style on this list.
10. Loose Messy Updo
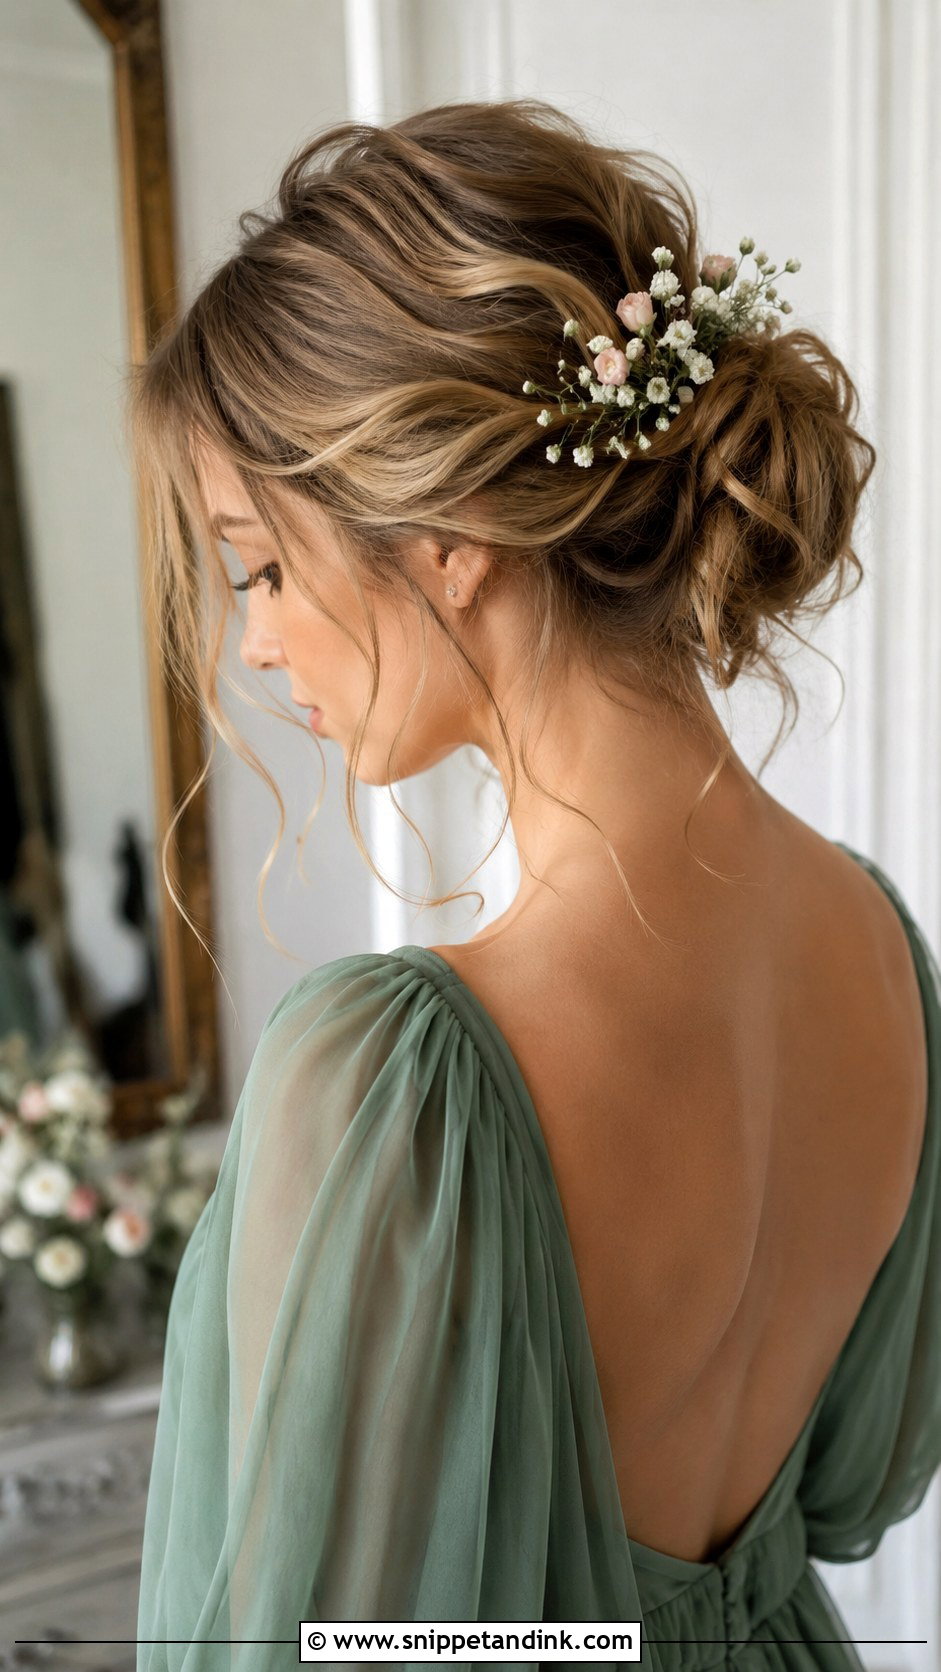
A messy updo is still built carefully; the mess is placed. I set the whole head first, pin it fairly tightly, then pull pieces loose at the end with the tail of a comb so I control where the softness goes. On mature hair I keep it more tousled than tangled, because too much undone texture can read as rushed. It suits an outdoor or rustic wedding and a mother who wants to look relaxed rather than formal.
11. Elegant Side Bun
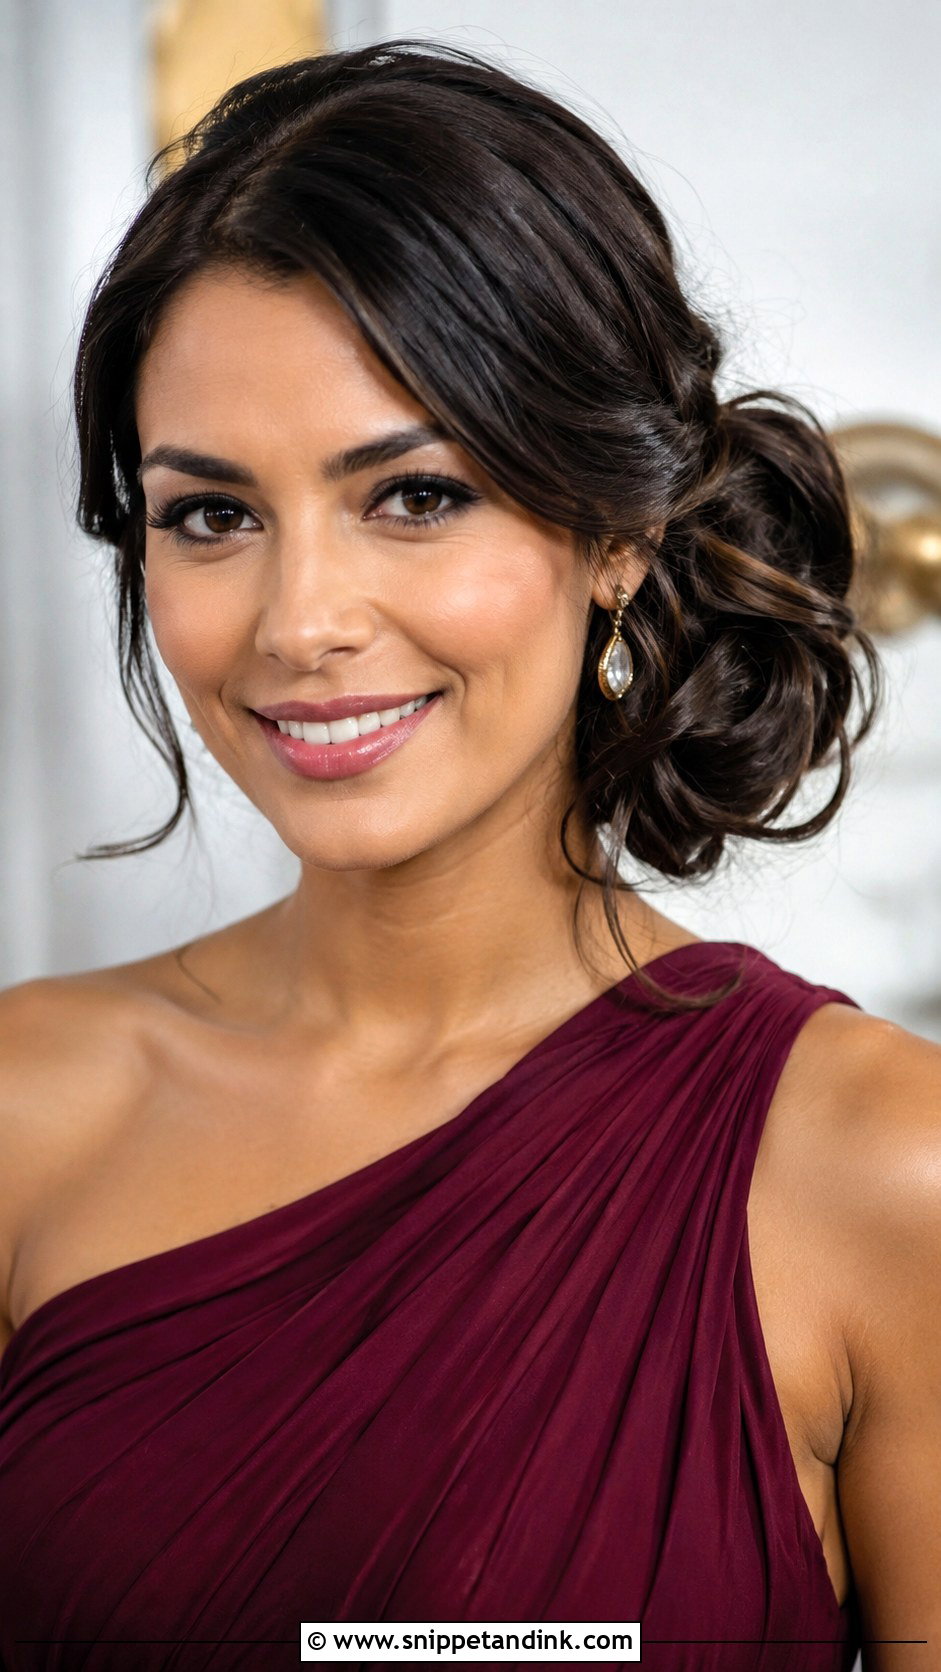
Moving the bun behind one ear shows off the opposite side of the face and neck, so it pairs naturally with a one-shoulder dress or a single statement earring on the open side. Think about which side of you the guests and cameras will mostly see. From the front row, you’ll spend the ceremony in profile, so I ask where you’ll be seated and put the bun on the side facing away from the aisle, leaving your face open to it.
12. Braided Crown Updo
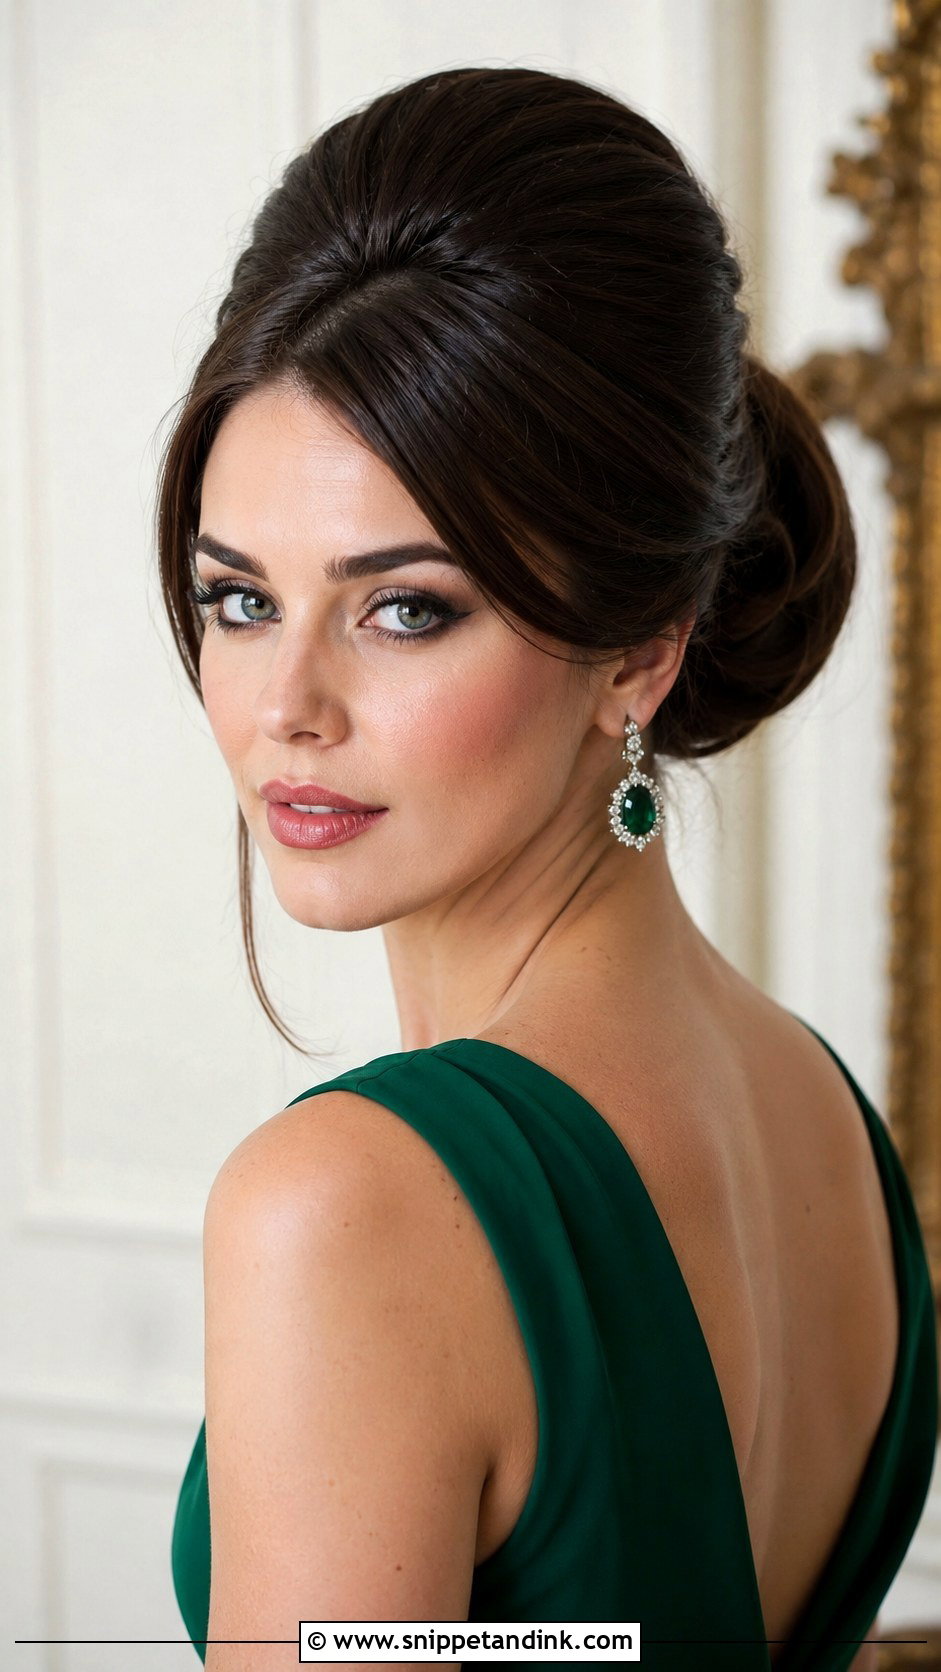
A braided crown is one of the most secure styles I can do, because the braid itself acts as a headband and holds everything below it. It needs reasonable length to circle the head; shorter hair can still fake it with two braids pinned across the back. I’d keep any flowers small and wire them in, since loose stems slide out after an hour. It sits well at garden and boho weddings, and less so with very structured, formal gowns.
13. Sleek Low Ponytail Updo
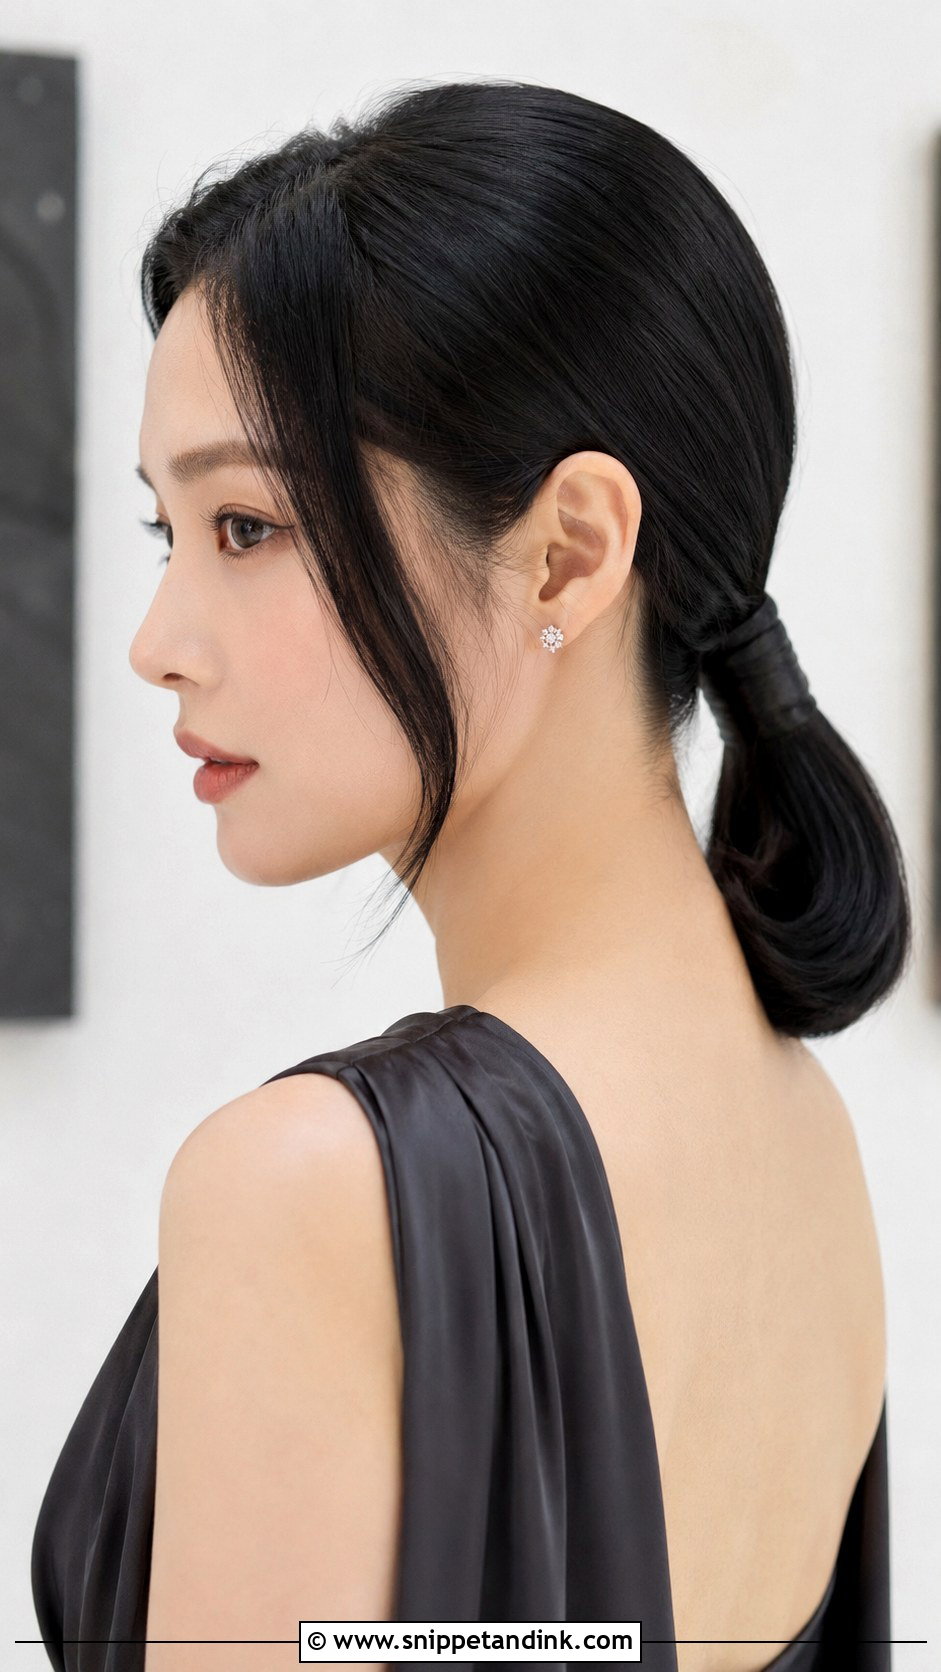
A low ponytail feels more modern than a bun and suits mothers who don’t like the feel of lots of pins. I smooth the hair back, secure it with a strong elastic, and then it gets wrapped with a strand taken from underneath, pinned so no band shows. The length needs some body or it hangs flat by the afternoon; a few large waves through it help. It is also the easiest style on this list to tidy yourself with a quick brush in the bathroom.
14. Curly Half-Up Updo
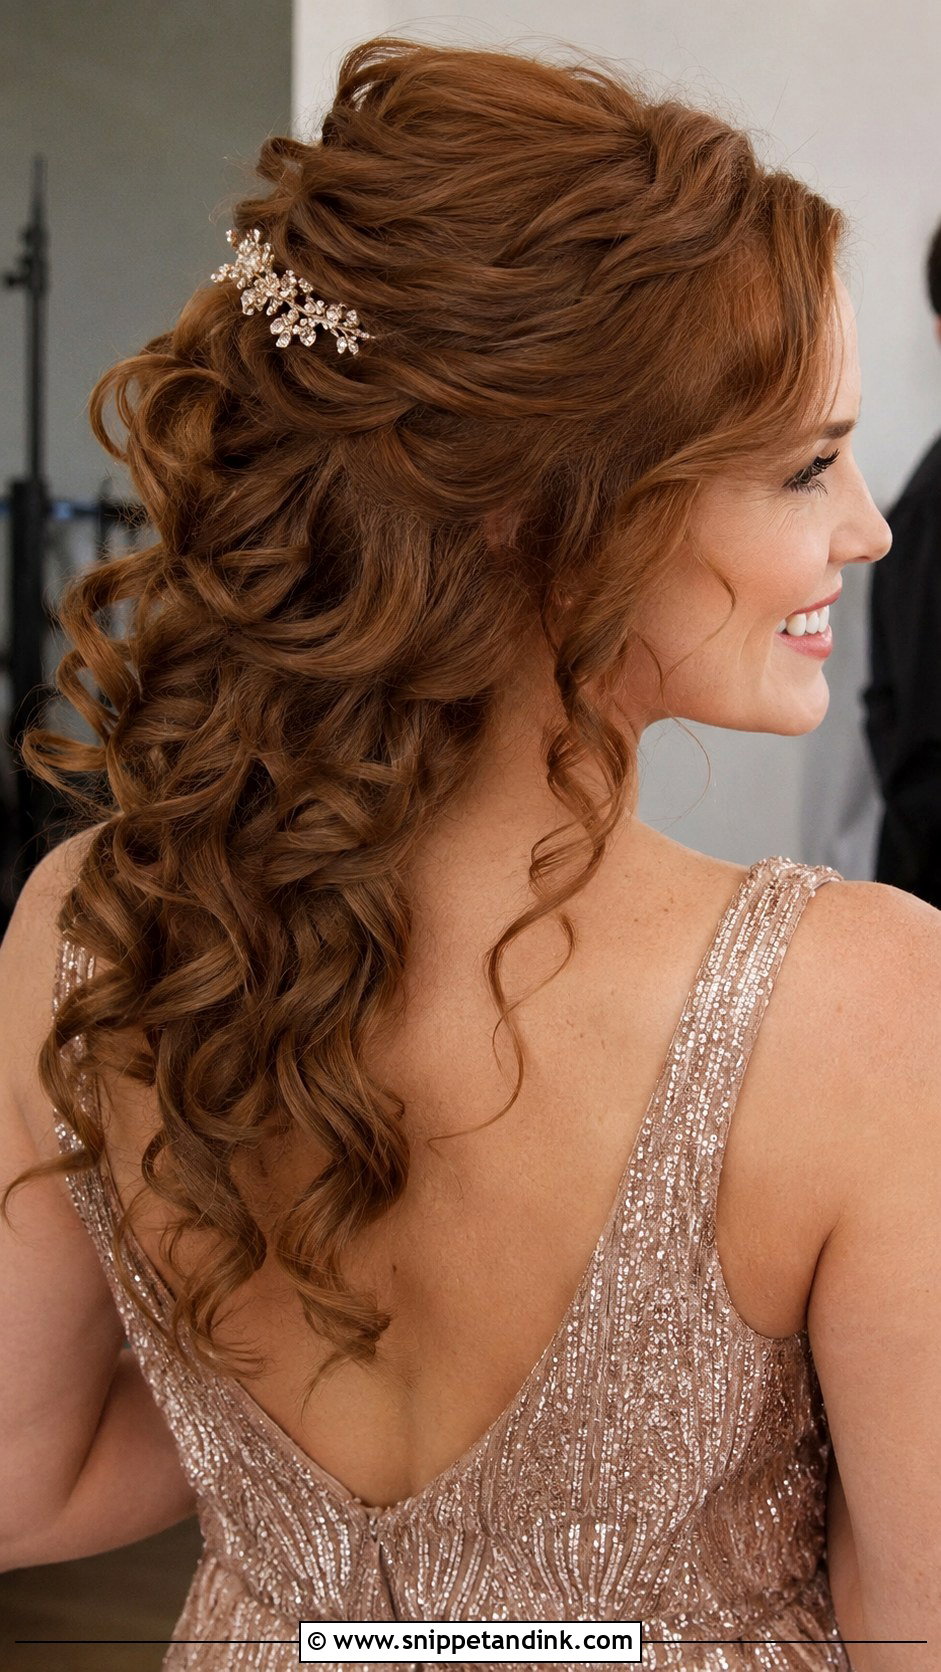
This keeps natural curls on show while lifting the front away from the face. I gather the top section loosely at the crown and pin it with a clip that has a good grip; a flimsy decorative clip will slide down curly hair by the reception. The lower curls should be refreshed, not brushed, so I apply a curl cream and let them dry undisturbed. It works best on curls that already hold well on their own.
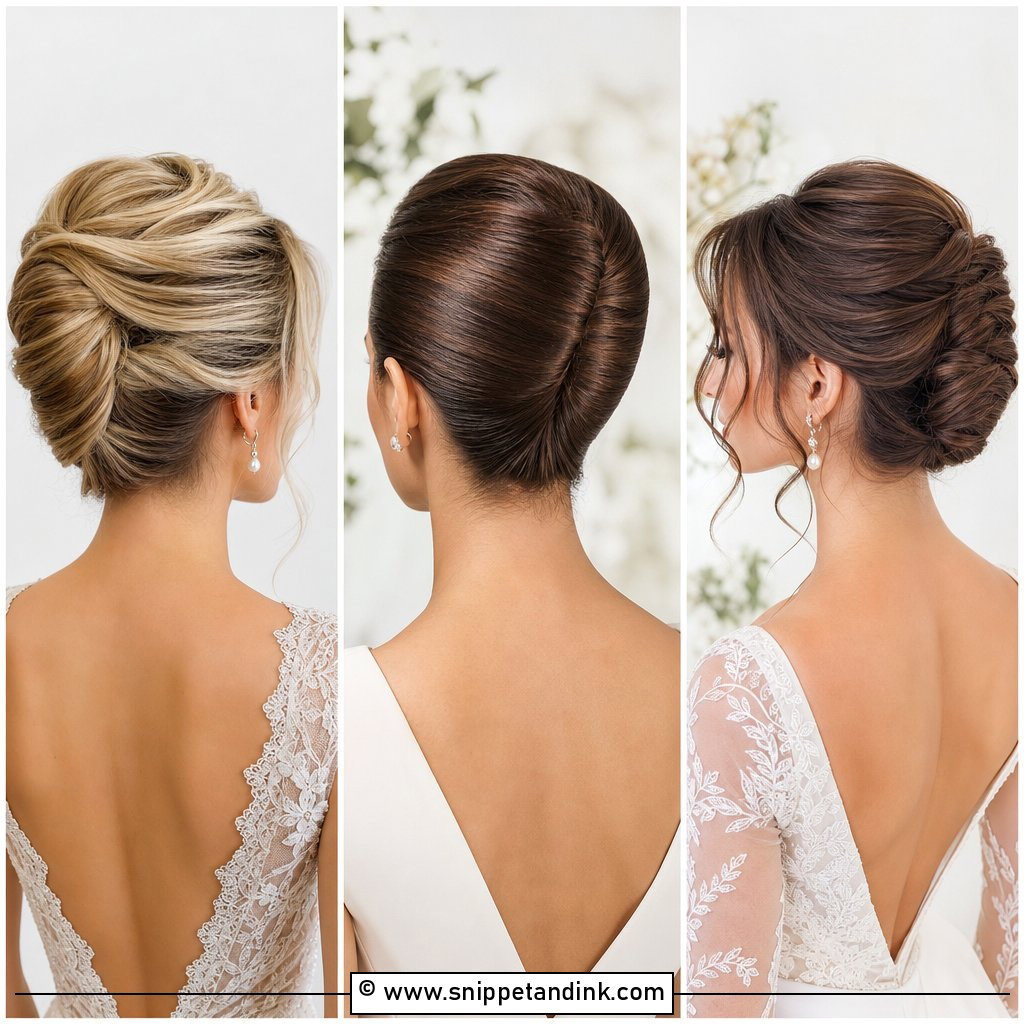
15. Twisted Updo With Tendrils
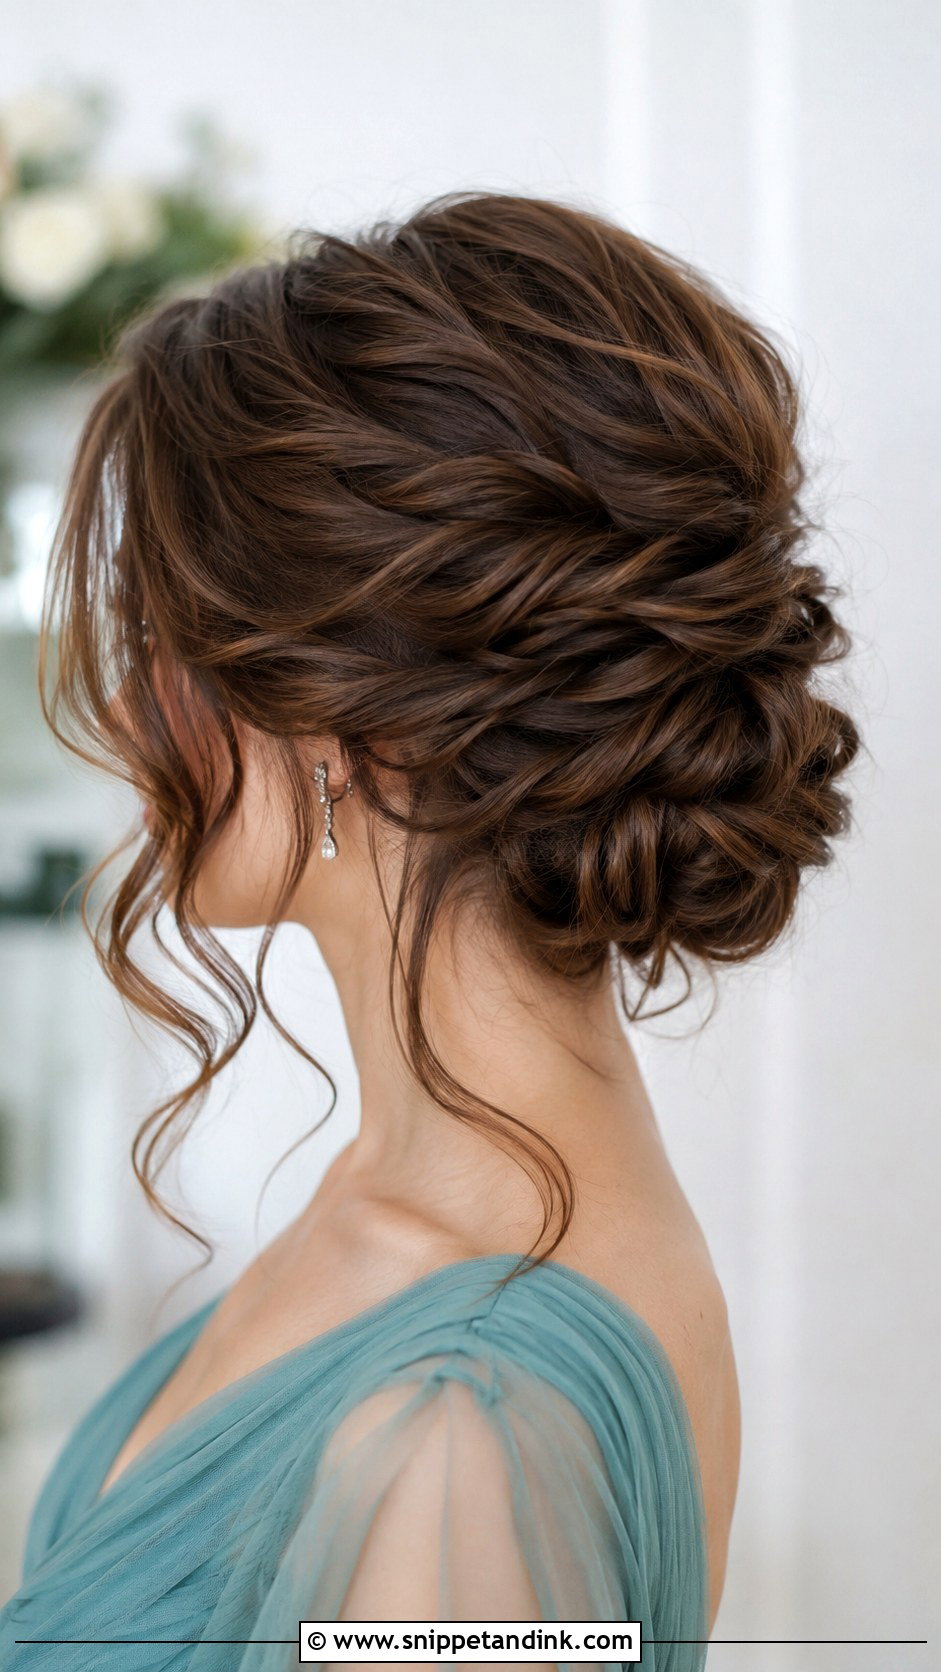
Tendrils are the detail I most often need to adjust at a trial. Too many and the face looks cluttered; one on each side, curled away from the face, usually does the job. The twisted base behind them adds texture so the back doesn’t look plain. I curl the tendrils last and with a smaller iron than the rest, because face-framing pieces get touched constantly and lose their shape first.
16. Pinned Back Waves Updo
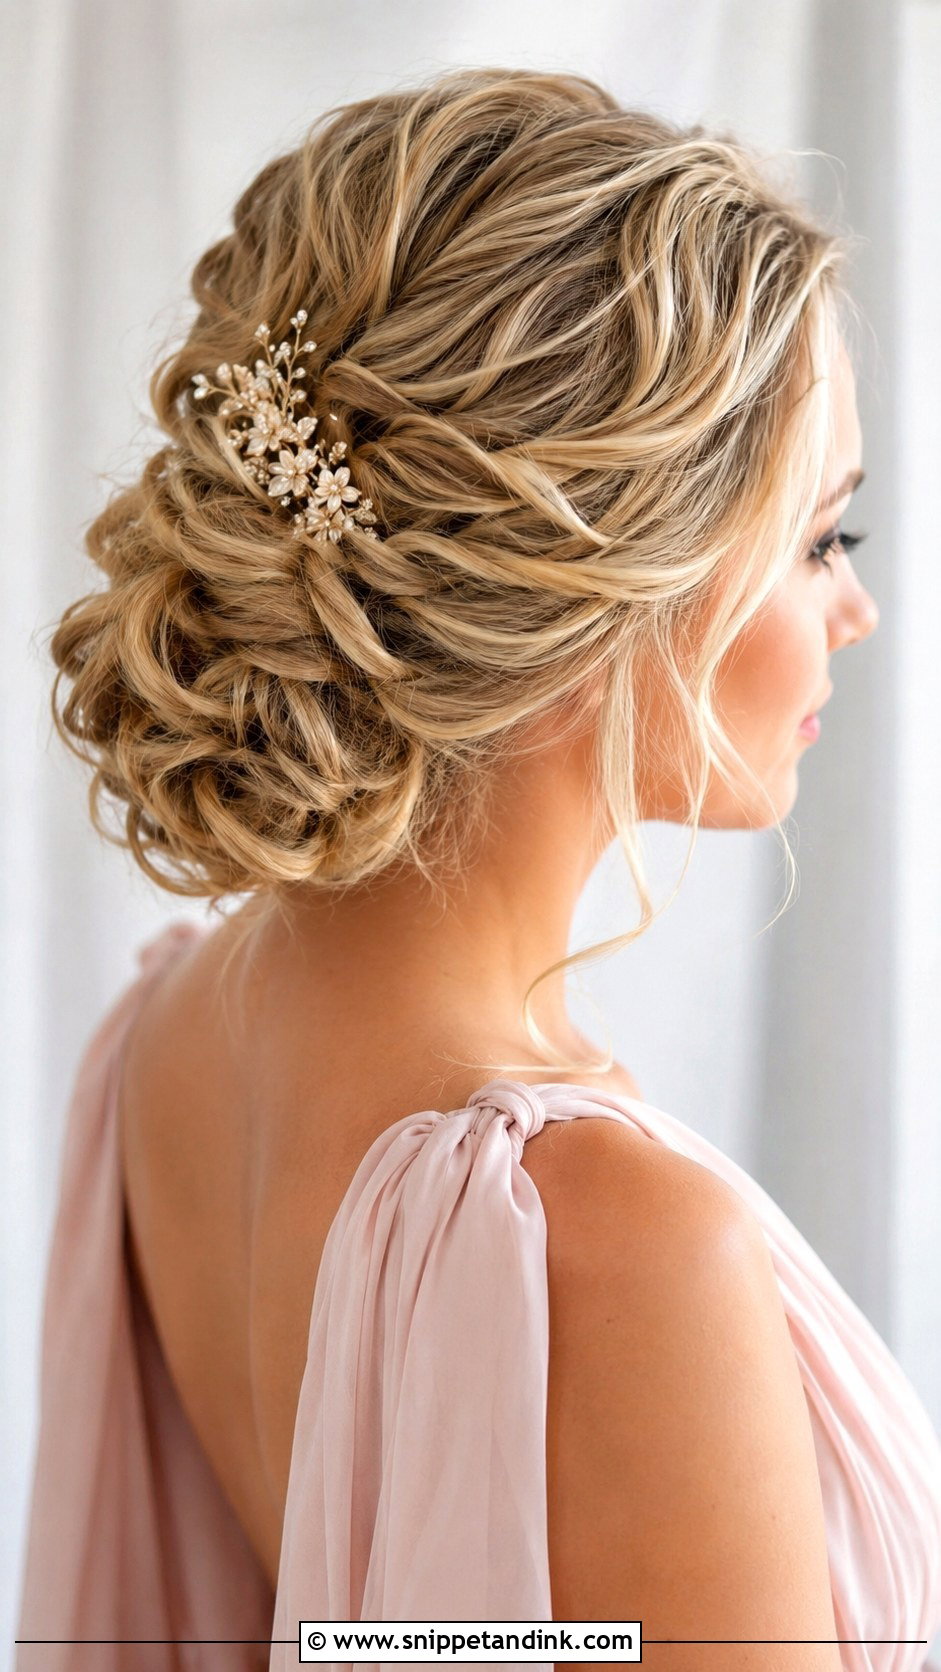
These waves are set loosely and then pinned back in sections, so the hair still shows movement while staying off the face. The look depends on the waves having some grip; very silky, freshly washed hair slips straight out of its pins, so I prefer hair washed the day before. It suits a softer, flowing dress and a summer garden setting, and it photographs as warm and approachable rather than formal.
17. Classic Bun With Hair Accessory
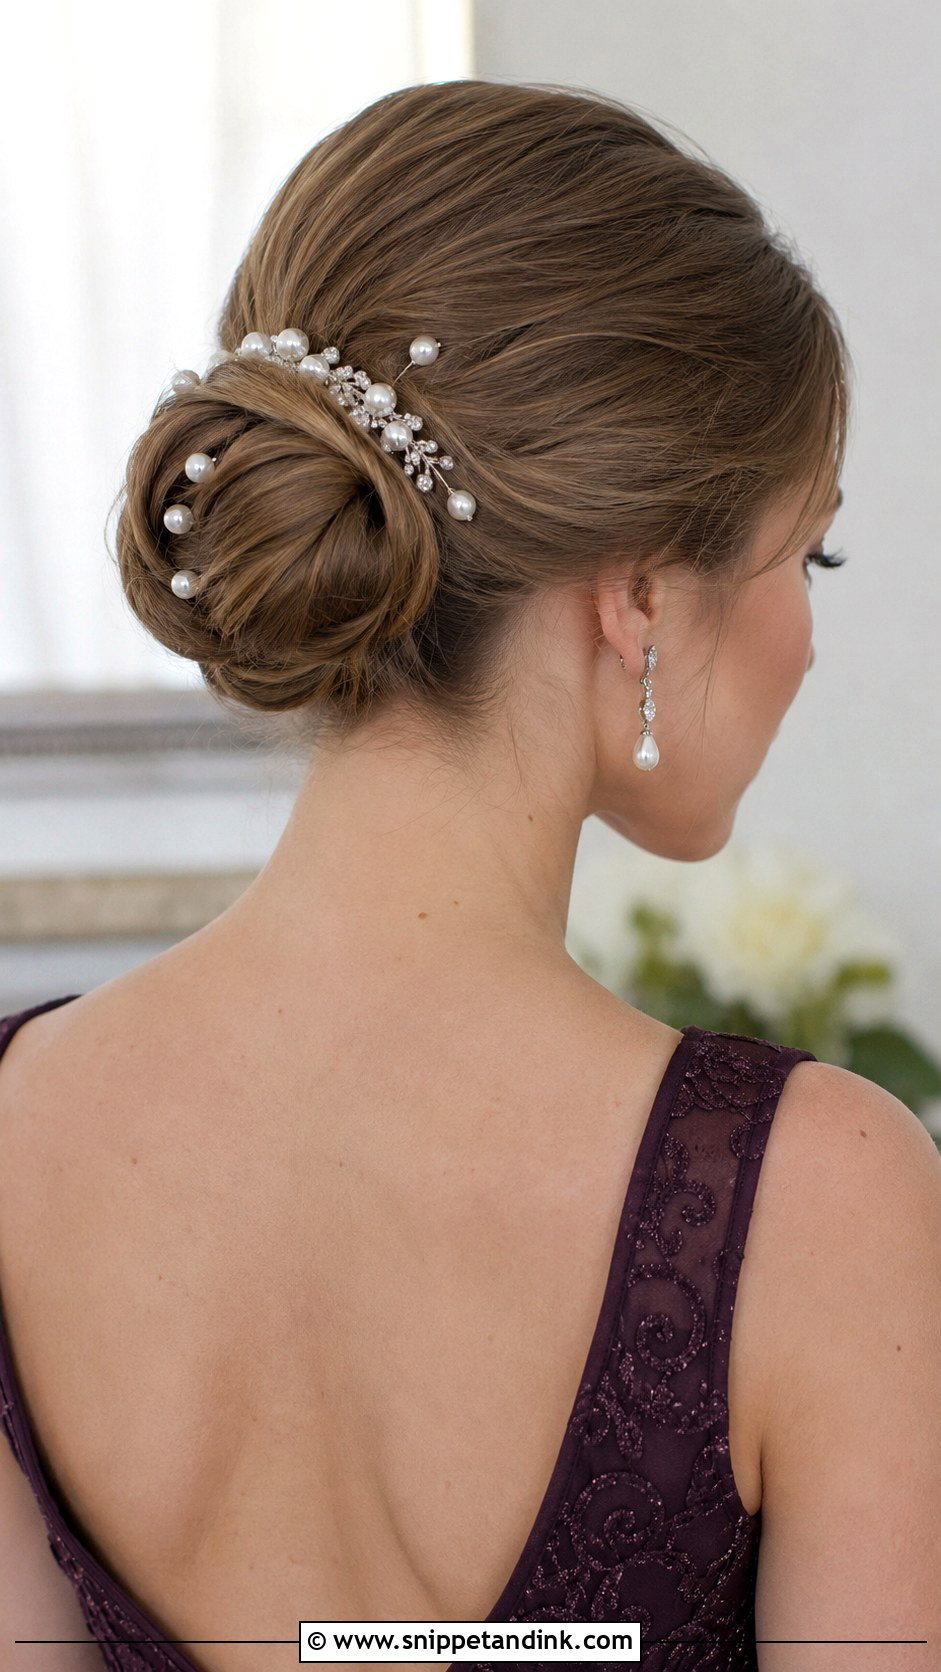
A plain bun is a good choice when the accessory is the point. Decide on the comb, pearl pins or headband before the trial, because the bun’s size and position depend on where the piece sits. Heavy combs need the bun built firmly so they have something to bite into; I hide a pair of crossed pins under the comb’s teeth to stop it rotating. This works at every hair length that can be gathered at all.
18. Voluminous Updo for Fine Hair
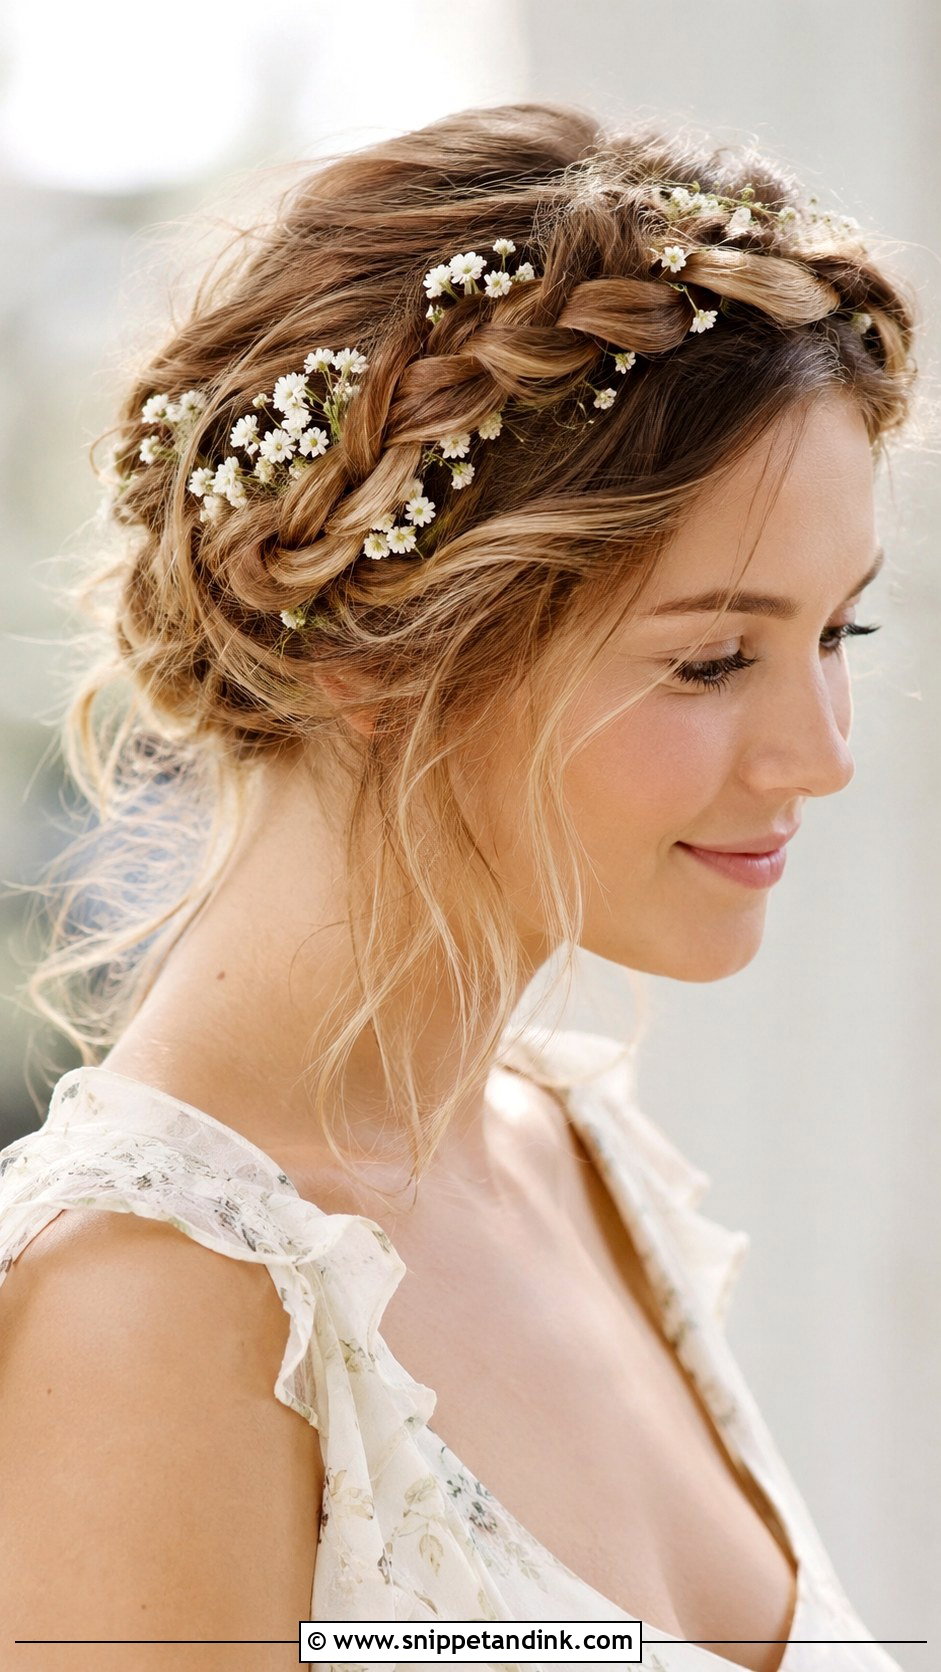
Fine hair can hold an updo well if it has structure underneath. I add grip first with dry texture spray, tease the crown at the root only, and pin loose sections over a small hidden pad or a backcombed base so the shape looks full without pulling the scalp. Pulling too tightly makes a thin crown look thinner, so I keep tension gentle around the hairline. A light flexible hairspray keeps it in place; stiff hold makes fine hair look sparse in close-up photos.
19. Low Knotted Updo
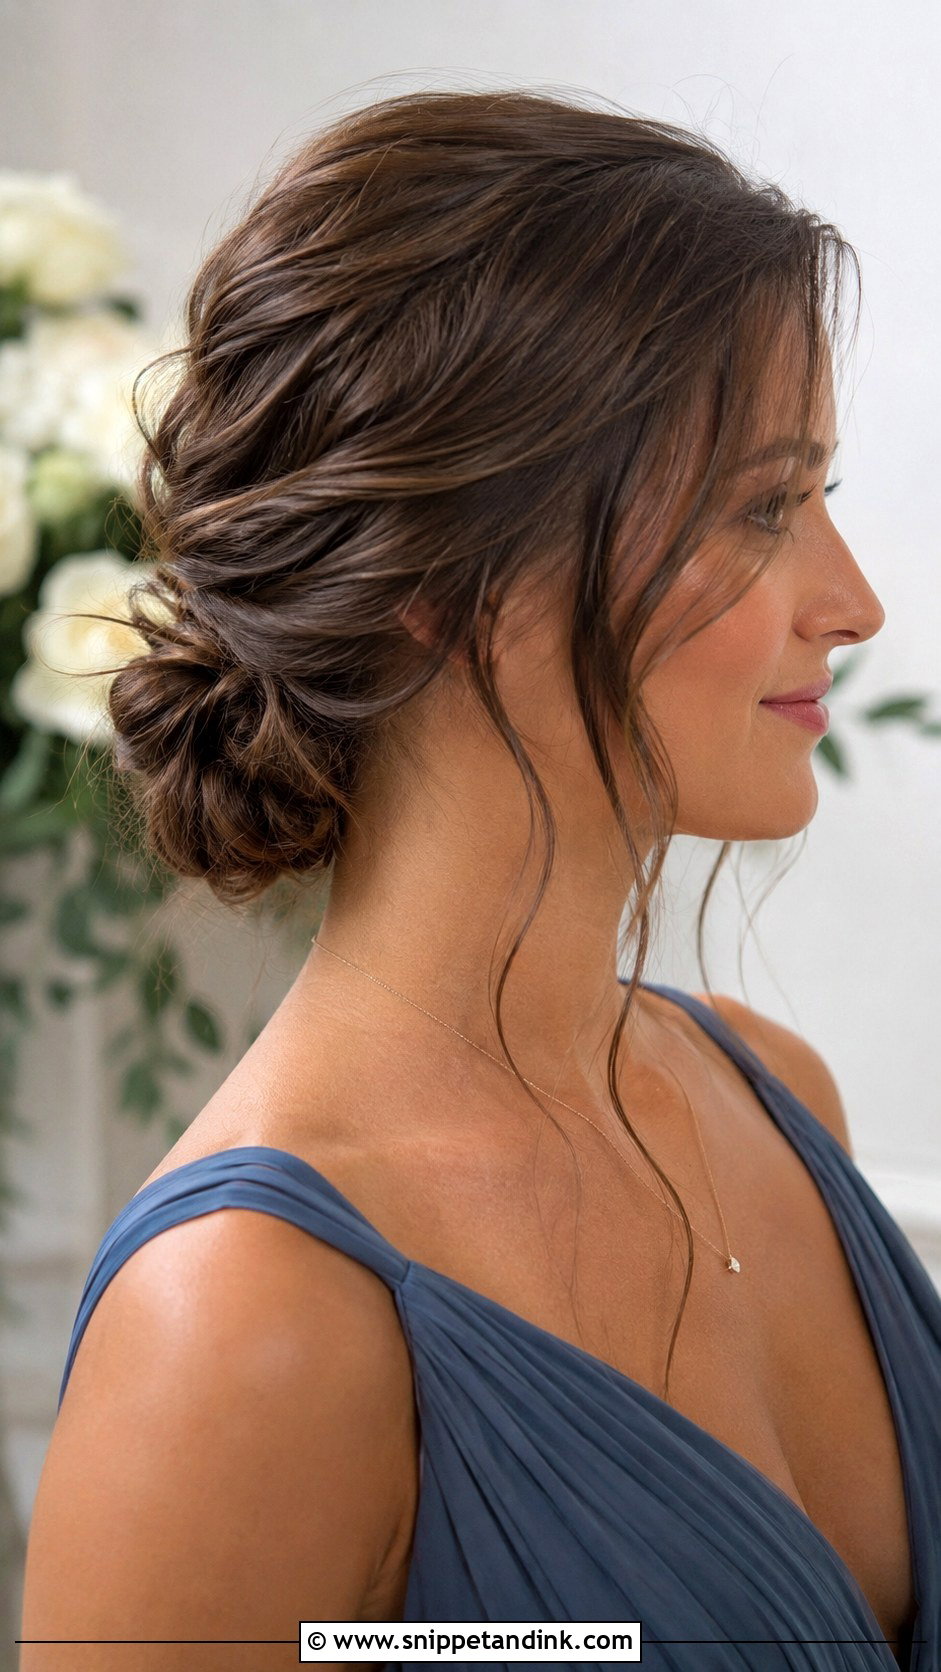
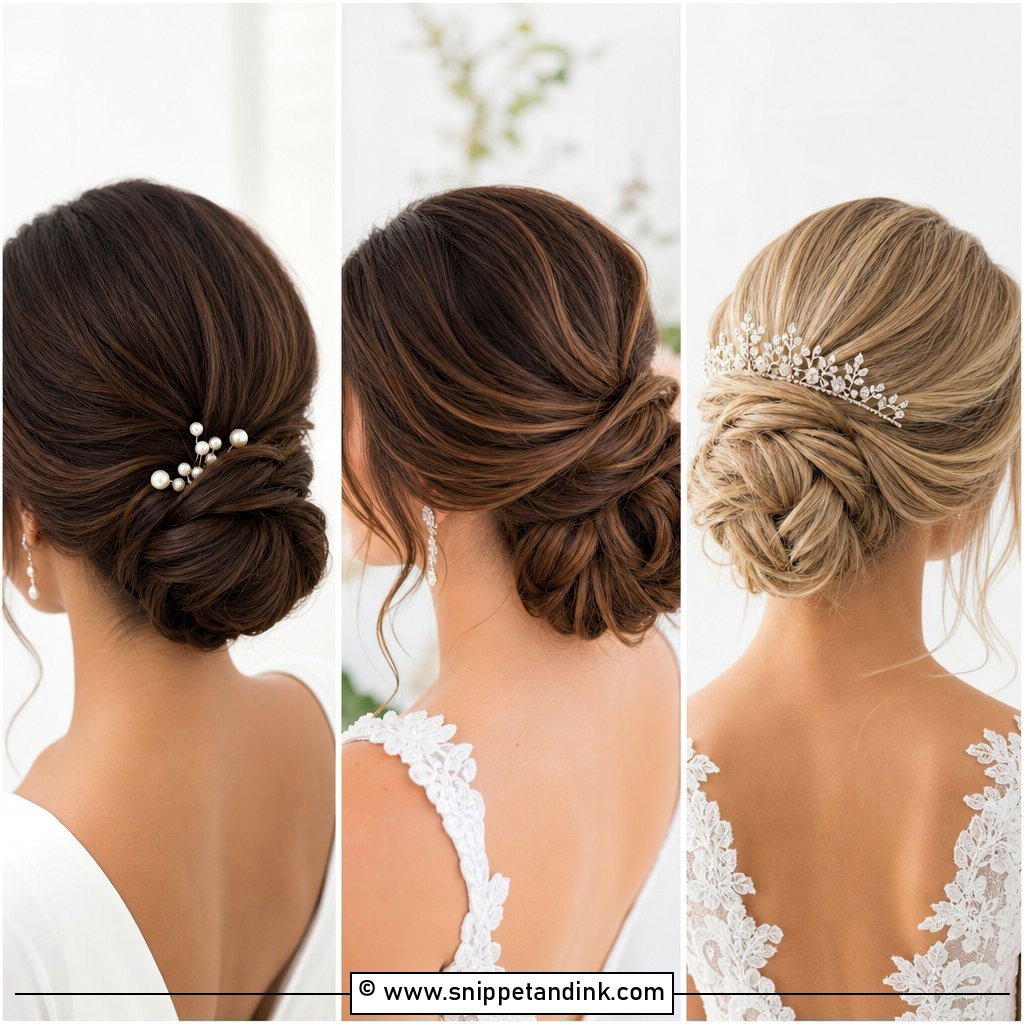
A knot looks a little different from a bun: the hair is tied around itself, so you see a soft twist rather than a smooth roll. It is understated and modern, and suits mothers who don’t like the feel of an obvious ‘done’ hairstyle. It does need enough length to knot, roughly past the shoulders. I secure the knot from underneath with U-pins so nothing shows from the back.
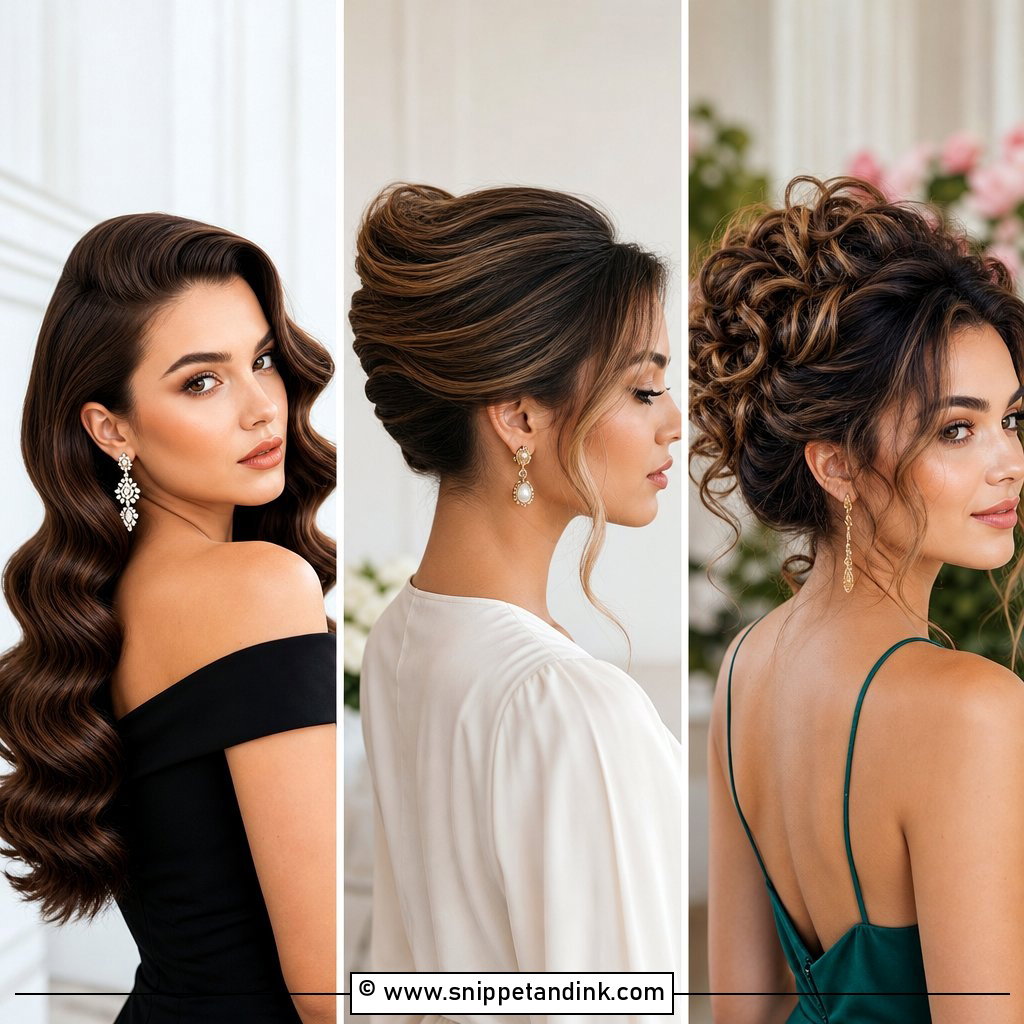
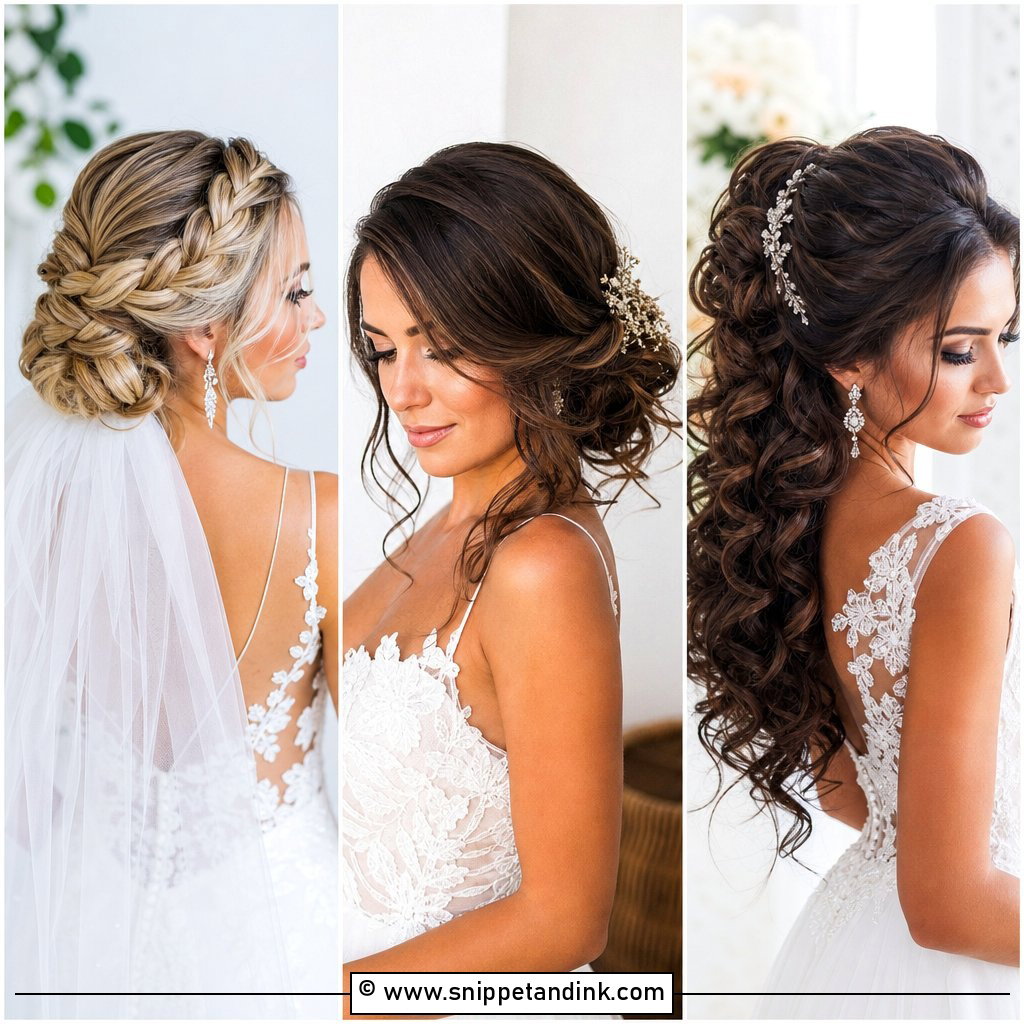
20. Bouffant Updo
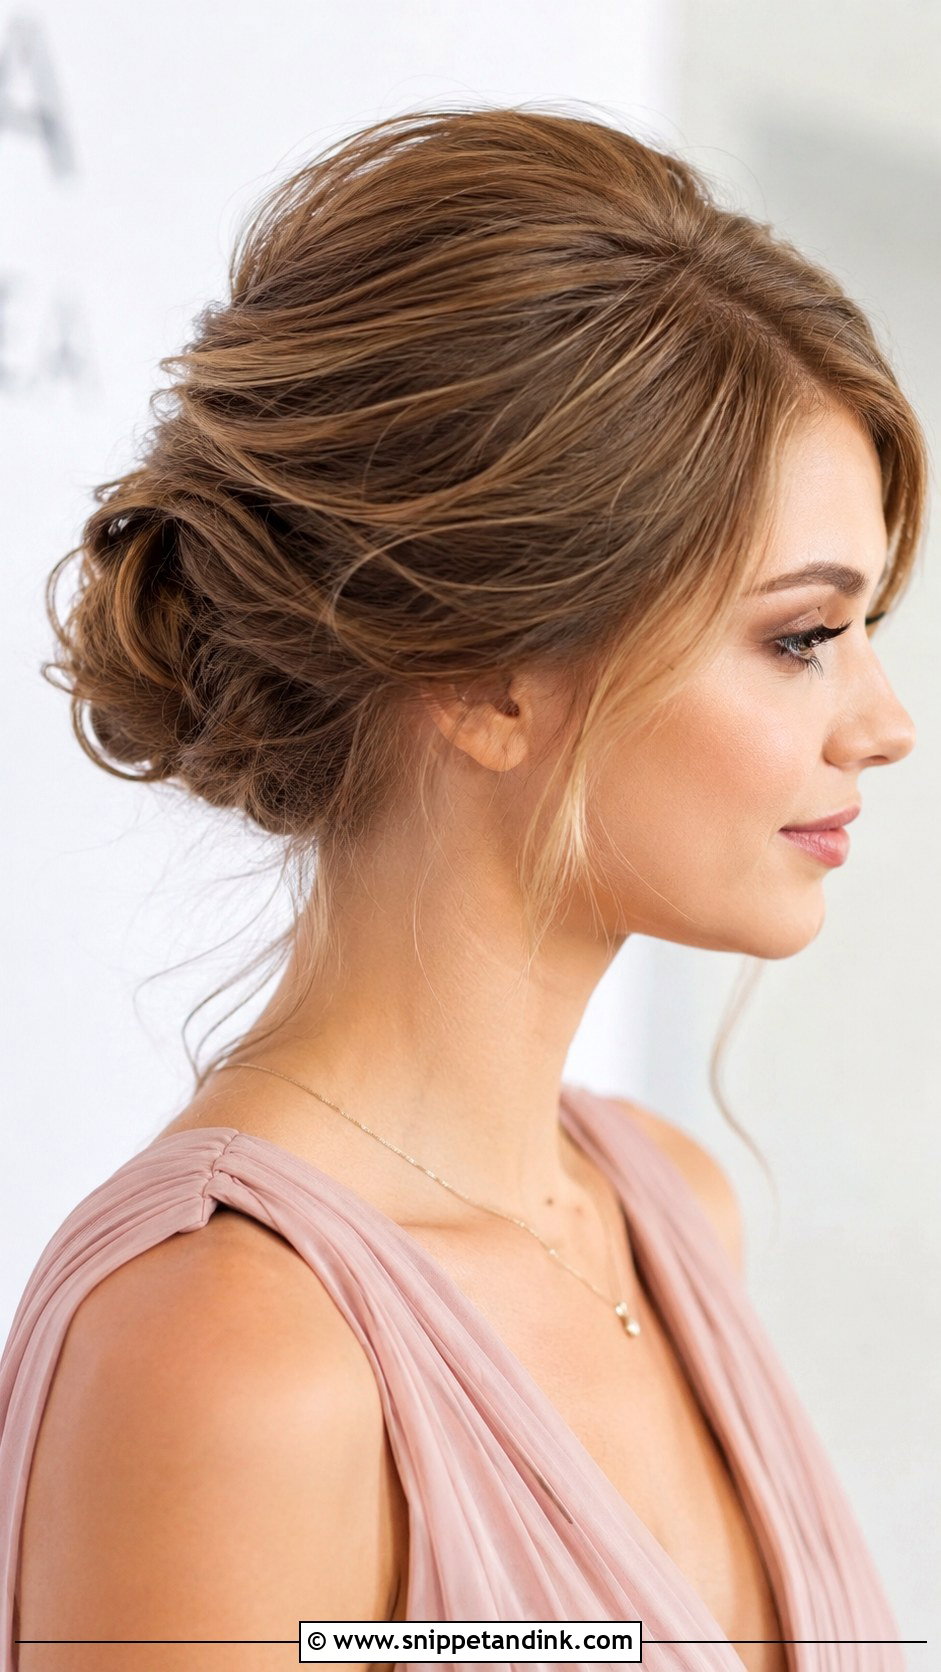
Height at the crown can lift the whole face, and many mothers find it more flattering than a flat style. The crown is backcombed in thin sections close to the root, then smoothed over with a soft brush so the teasing doesn’t show. The mistake I see most often is too much lift for the face shape; a modest bump looks polished, while a tall one quickly reads as dated. Finish with firm hairspray at the root, not the surface.
21. Soft Rolled Updo
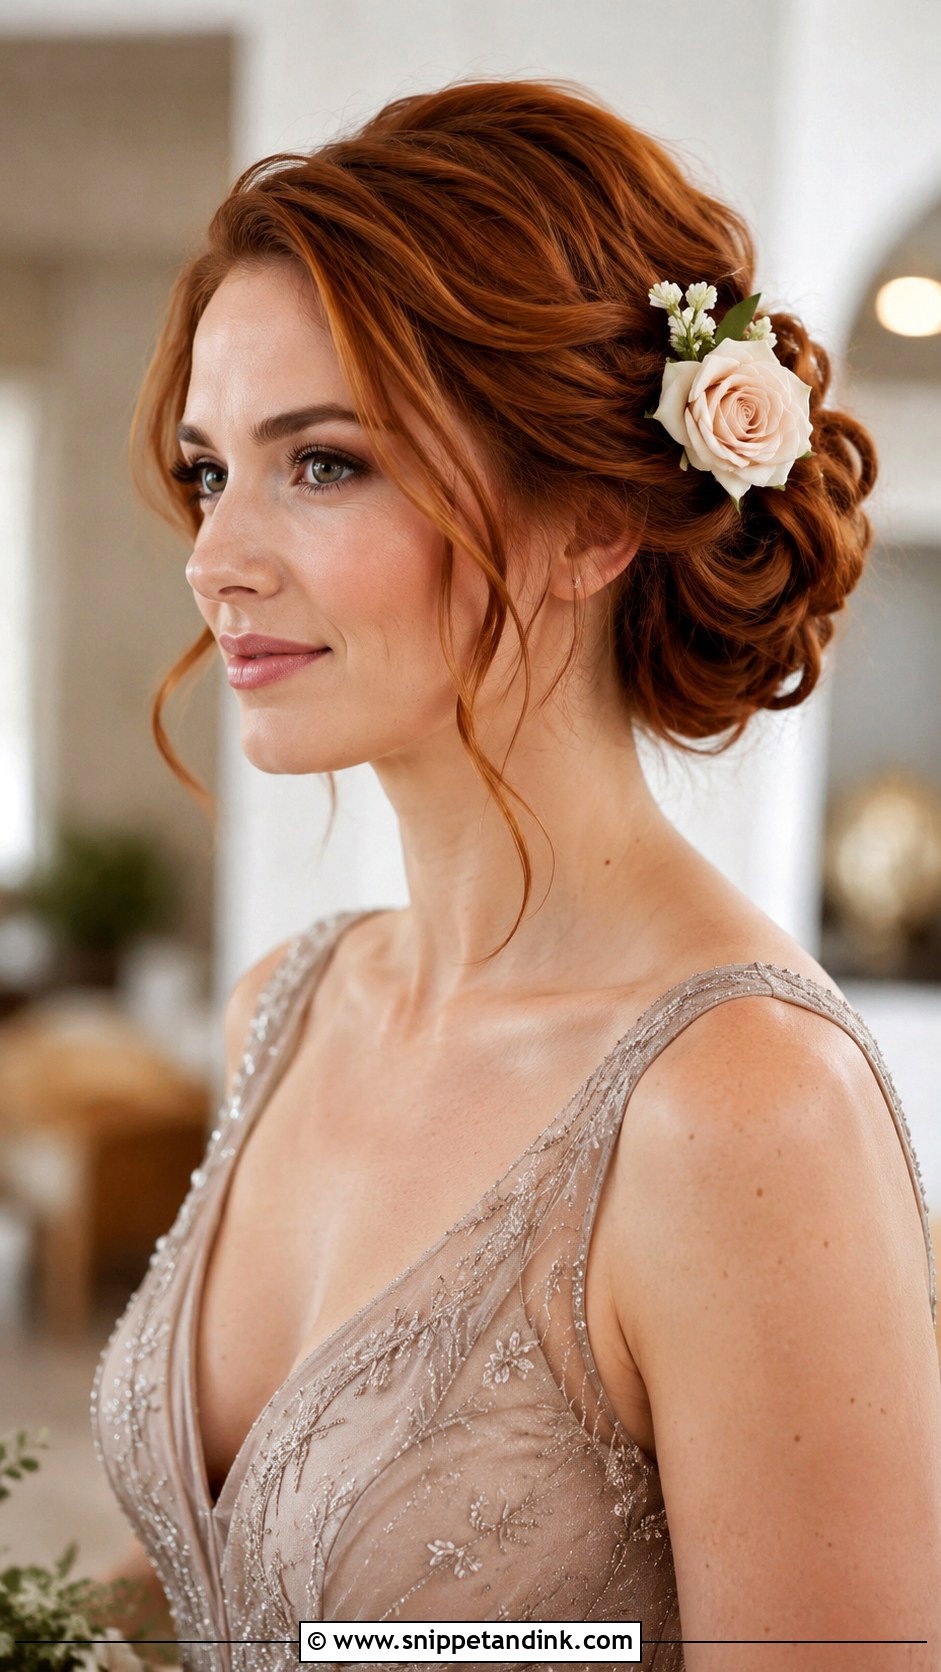
Rolls give a sculpted, rounded shape that sits well with structured fabrics like crepe or mikado. Each roll is formed around the fingers and pinned at its base, so the result depends on fairly even length; heavily layered hair leaves short ends poking out of the rolls. It is a slower style to set, so allow extra chair time, and keep the rolls fairly soft rather than tight if you’d like it to feel less formal.
22. Twisted Side Updo
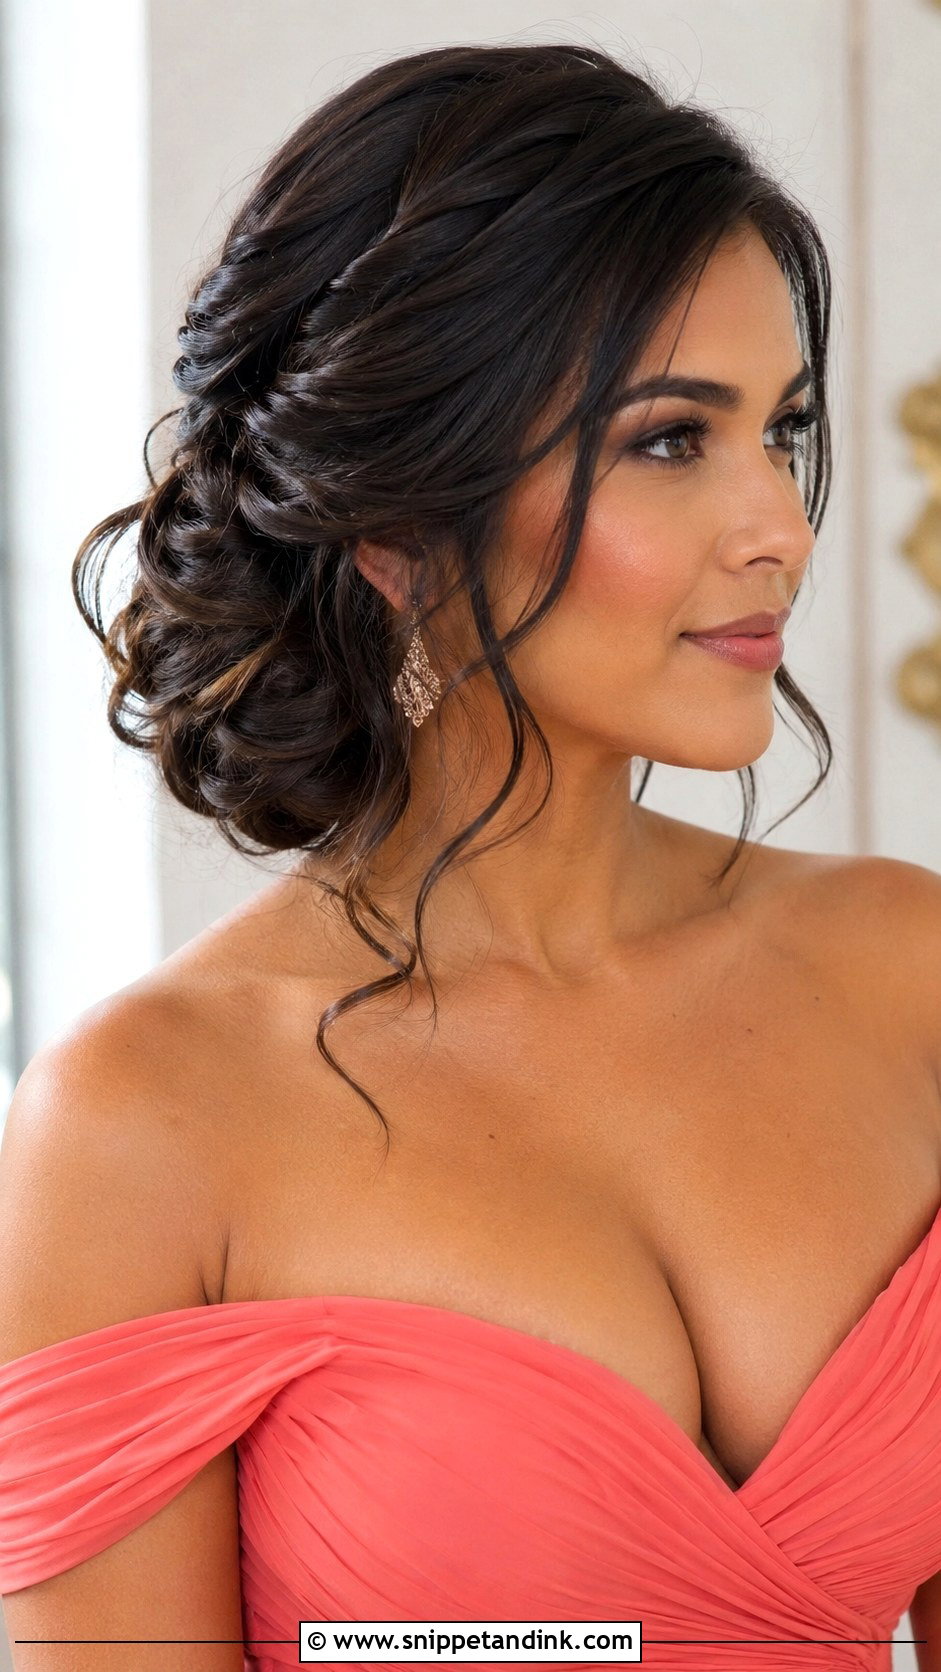
This is the twisted version of the side bun, with the hair rolled toward one ear instead of gathered into a knot. It suits off-shoulder necklines and mothers who want the jawline and neck on show. Because the weight sits to one side, I place extra pins on the heavier side and test it with a few head turns before you leave the chair. A small cluster of flowers or a pin at the twist adds a focal point.
23. Chignon With Braided Detail
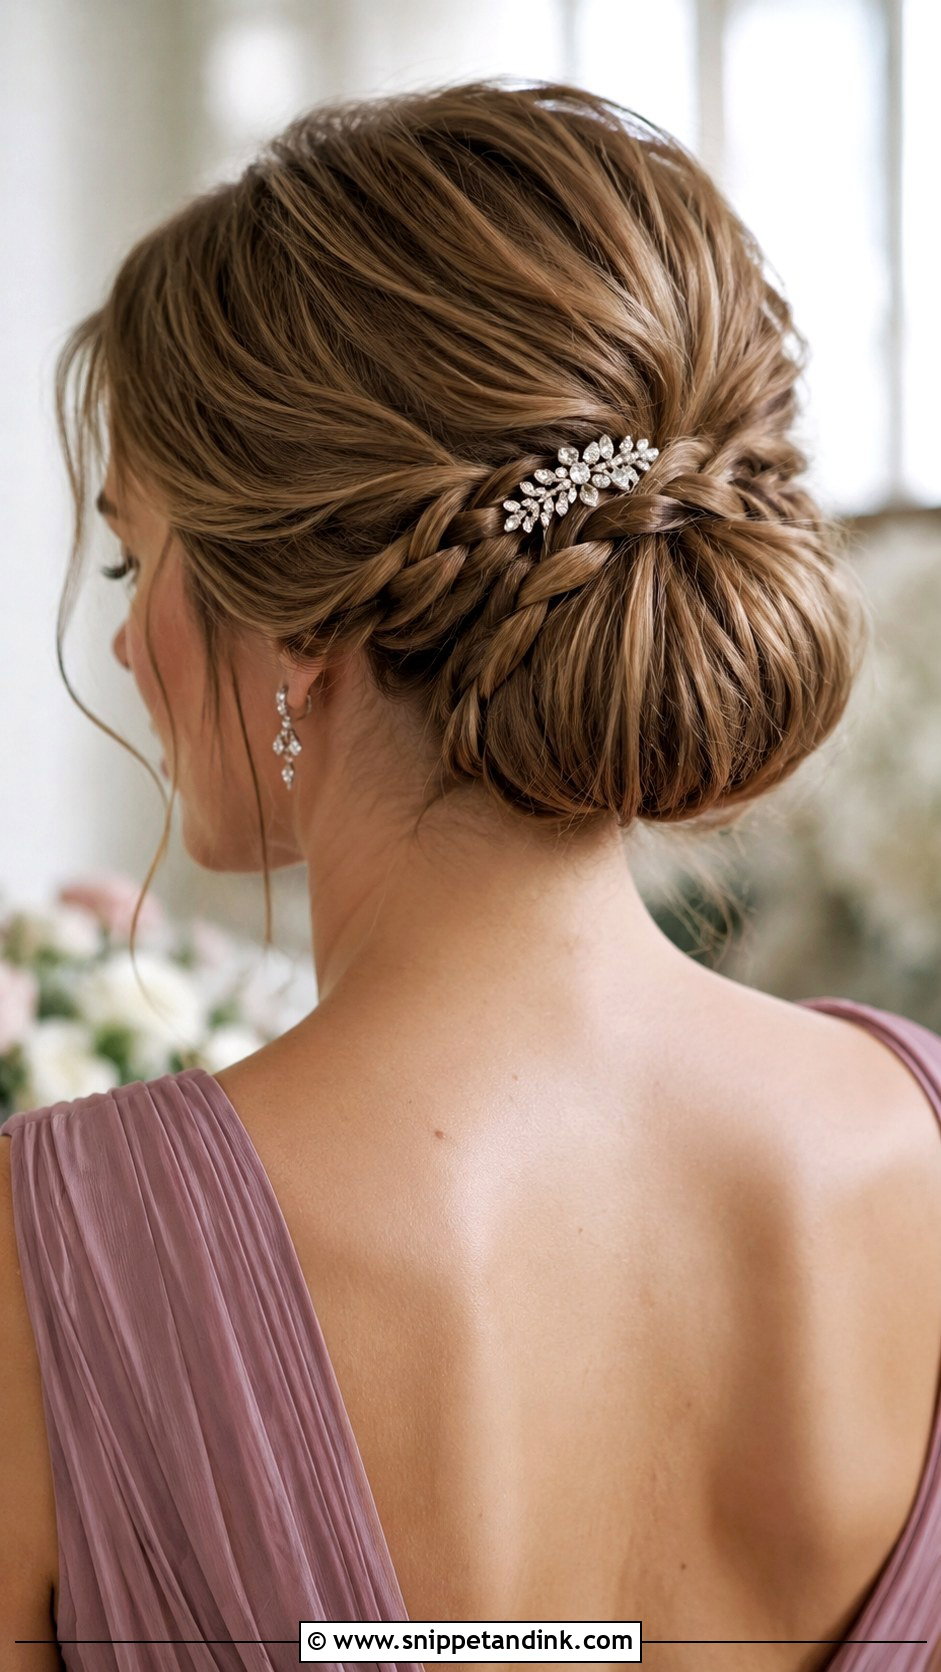
This combines two of the most secure techniques on the list, so it is a good pick for a long day or a windy venue. The braid frames the chignon and also hides the pins that hold it. I usually braid a section from behind one ear and wrap it under the bun, which works even on medium-length hair. Keep the braid small if your hair is fine, so it doesn’t make the chignon itself look thin by comparison.
24. Wavy Low Updo
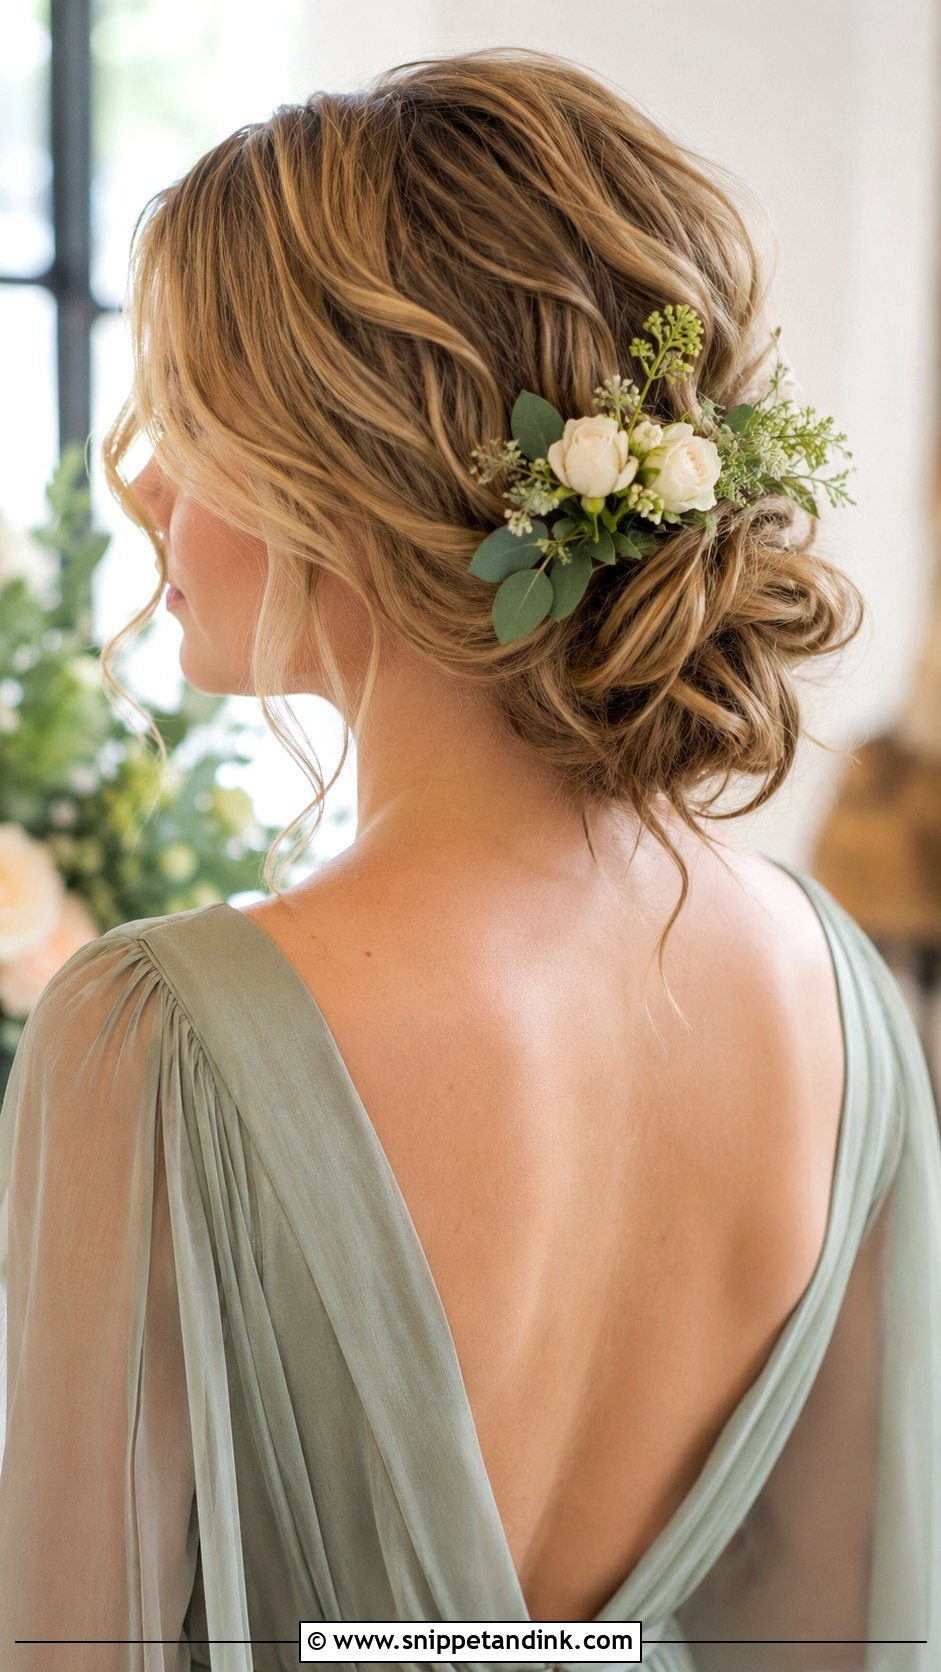
Waves gathered low look relaxed but take some planning, because they need to hold their shape once pinned. I set them with a medium iron and brush them out lightly before gathering, so they read as soft texture rather than separate ringlets. It sits naturally with a flowing dress and a garden or beach setting. If your hair drops curl quickly, ask for a texturizing spray before curling; it gives the wave something to hold onto.
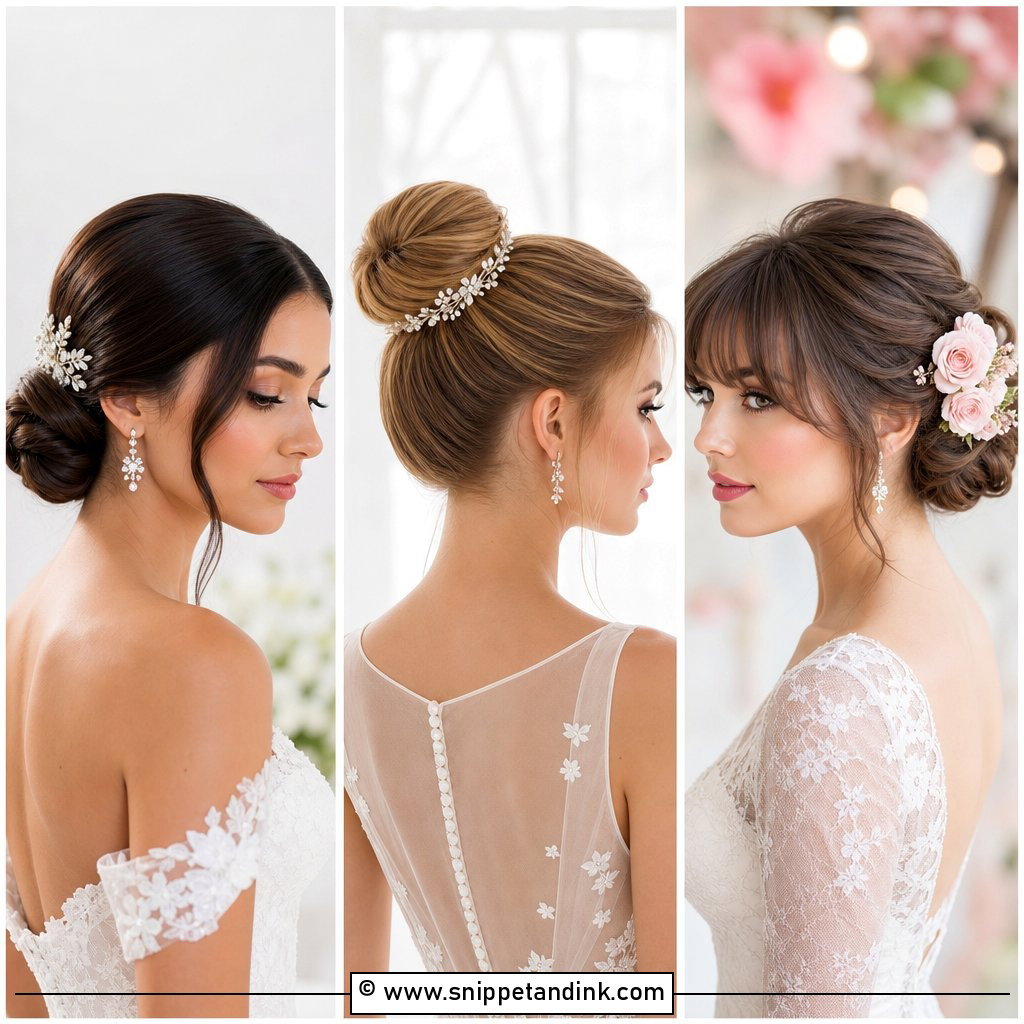
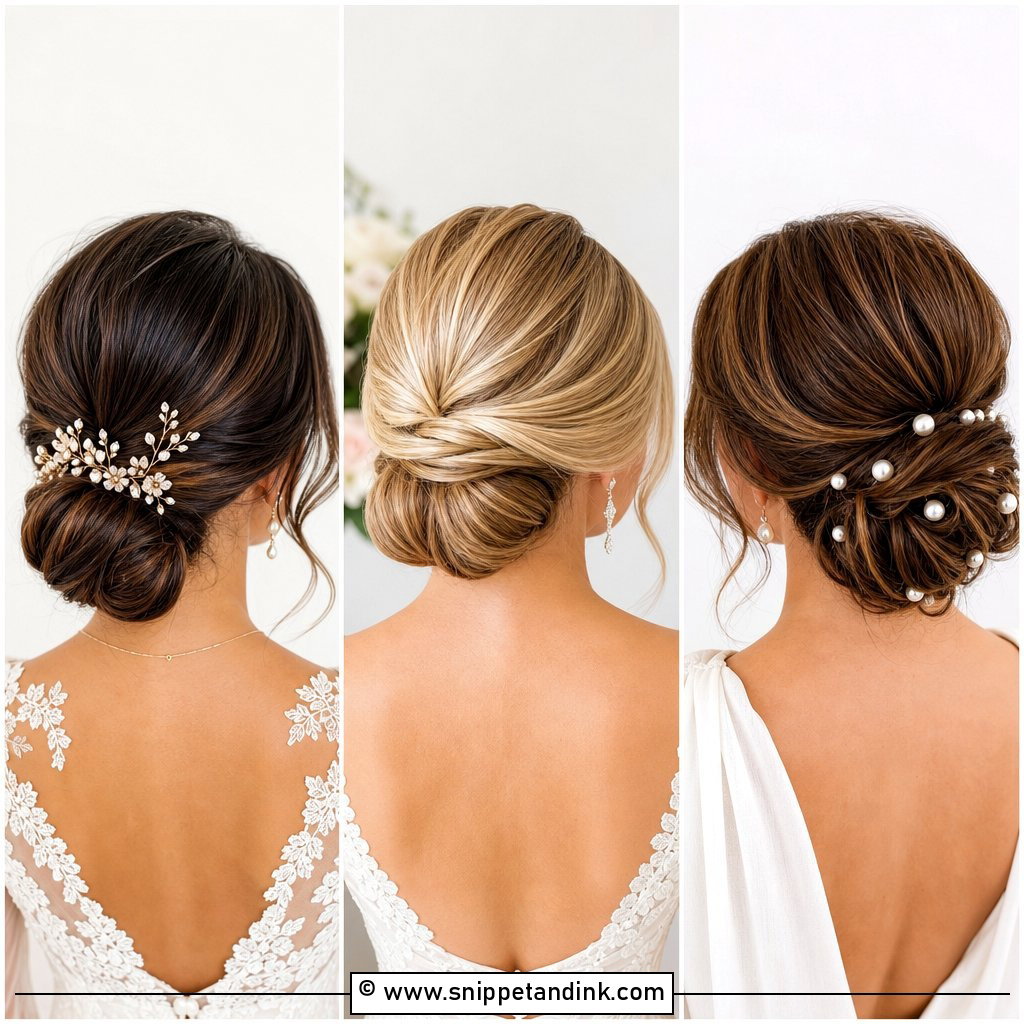
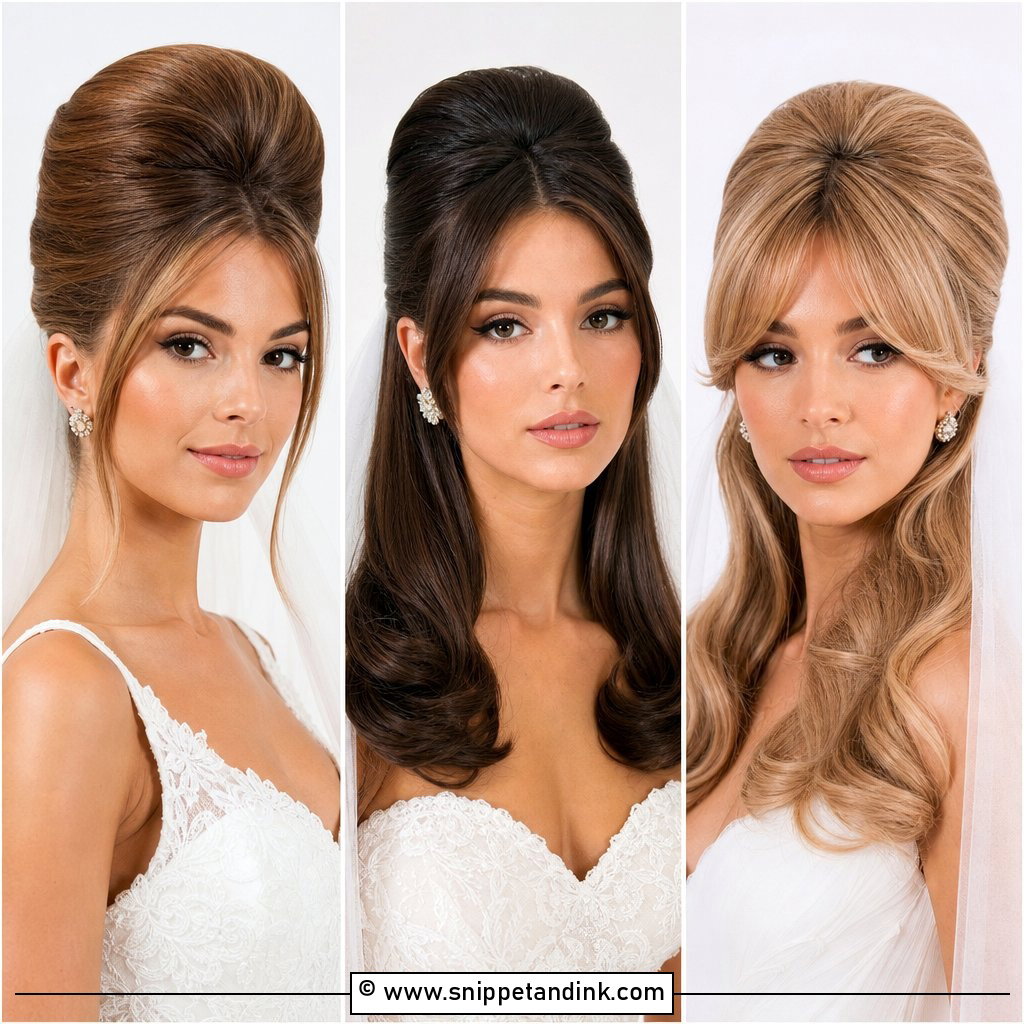
25. Elegant Updo With Side Bangs
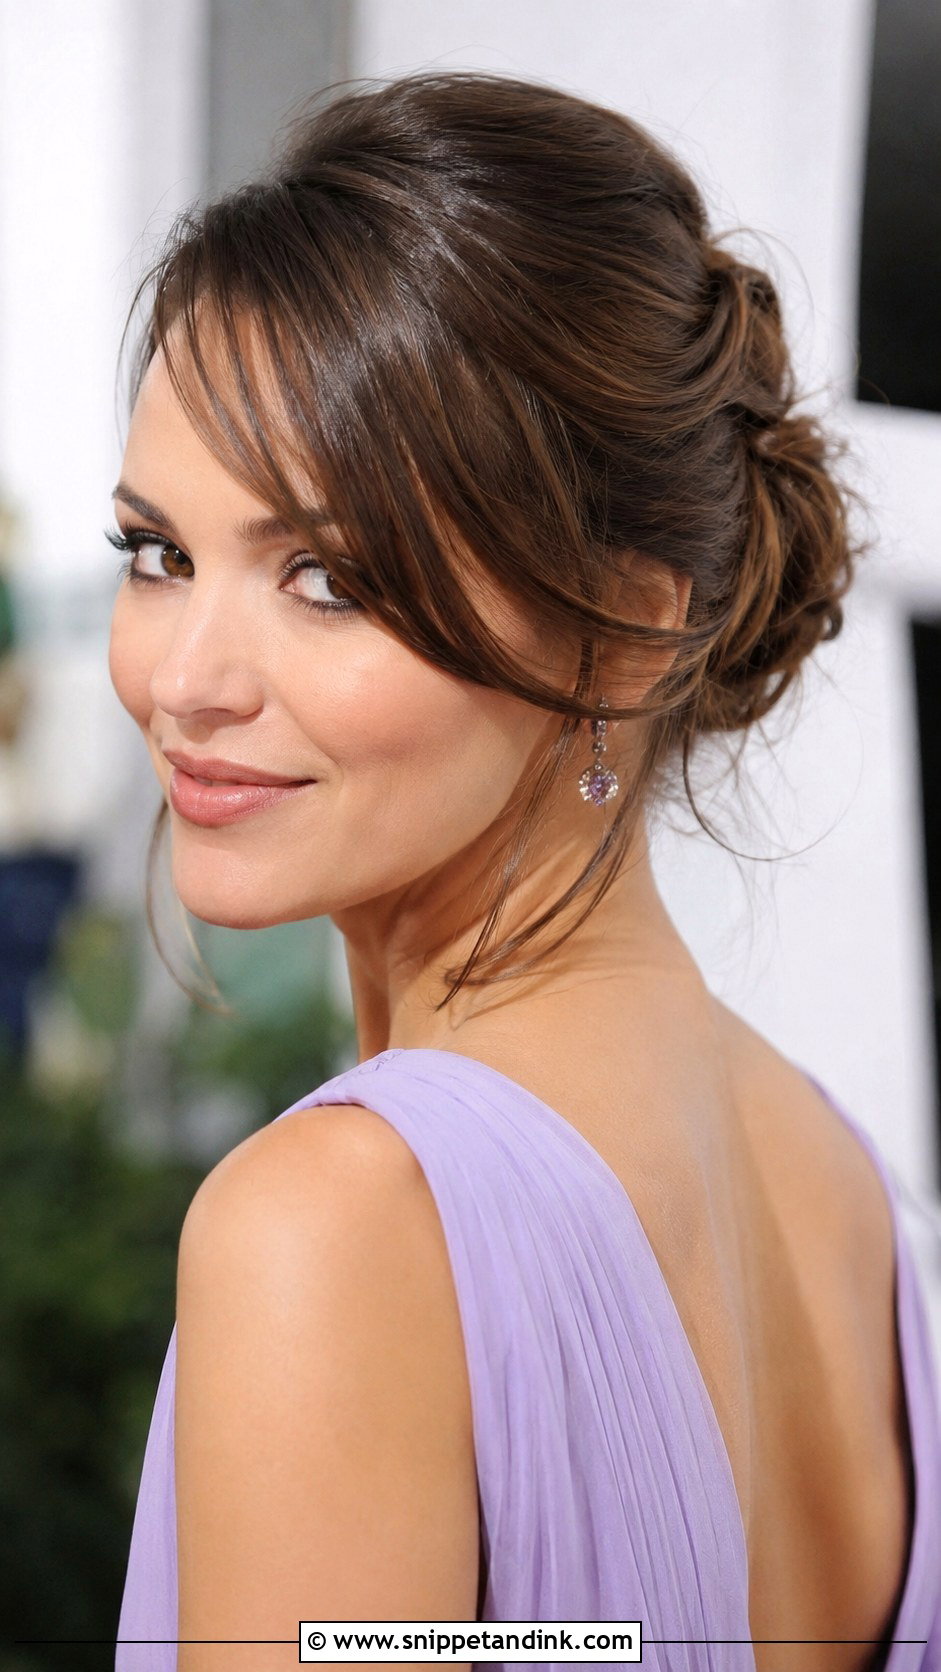
If you already wear a side fringe, keep it. Pinning back a fringe you’ve had for years usually looks unfamiliar in photos, and it rarely stays put. I blow-dry the fringe in the direction it naturally falls, then gather the rest into a bun or twist. It softens the forehead and suits mothers who like some hair near the face. Check how the fringe sits with glasses at your trial, since the arms can push it out of place.
Glasses, Hearing Aids and a Hat on Top
These are the small things that come up at almost every mother’s trial and are rarely in the inspiration photos. Mention them early so the style is designed around them.
- Glasses: wear them to the trial. The arms sit over the ears, so I keep hair either fully behind the ear or loosely over it, never half tucked, because that’s what pushes pins loose by evening.
- Hearing aids: tell your stylist. I leave enough hair over the ears to cover the device if you’d like it hidden, and I keep hairspray well away from it.
- Hats and fascinators: the hat dictates where the updo can sit. A wide brim needs a low bun; a fascinator needs a firm anchor on one side, usually a hidden braid or a cluster of crossed pins to clip into.
- A wrap or jacket: bring it. Low buns can catch on a high collar, and a stand-up collar may need the style a little higher.
On the wedding morning, I’d plan for you to be done fairly early, before the bride if possible. You’ll want time to dress, help her and be in the getting-ready photos without anyone waiting for your hair. Keep a small bag with a few matching bobby pins, a travel hairspray and a fine-tooth comb for the evening.
Your Hair Should Let You Hug Everyone
The updo that works for you will depend more on your hair’s length, texture and condition than on the photo you fell for. Bring your favourite images to a trial, wear something with a neckline similar to your outfit, and sit in it for a couple of hours before deciding. A good stylist will tell you honestly if a shape won’t hold on your hair. Then on the morning itself, you can stop thinking about it and enjoy your child’s wedding.
You'll Like These Ideas:


Leave a Reply