
Ask ten brides for a classic wedding updo and most will describe a chignon without knowing the word. It’s the knot that sits low on the back of the head, and it has stayed in bridal hair for generations because it does practical jobs well: it holds a veil comb, keeps hair off a detailed neckline and doesn’t fall apart when someone hugs you. It also changes completely with technique, from a glassy wrap to a soft, pulled-apart knot. These 20 versions are the ones I’m asked for most, with the notes I’d give you before we start pinning.
What Turns a Bun Into a Chignon
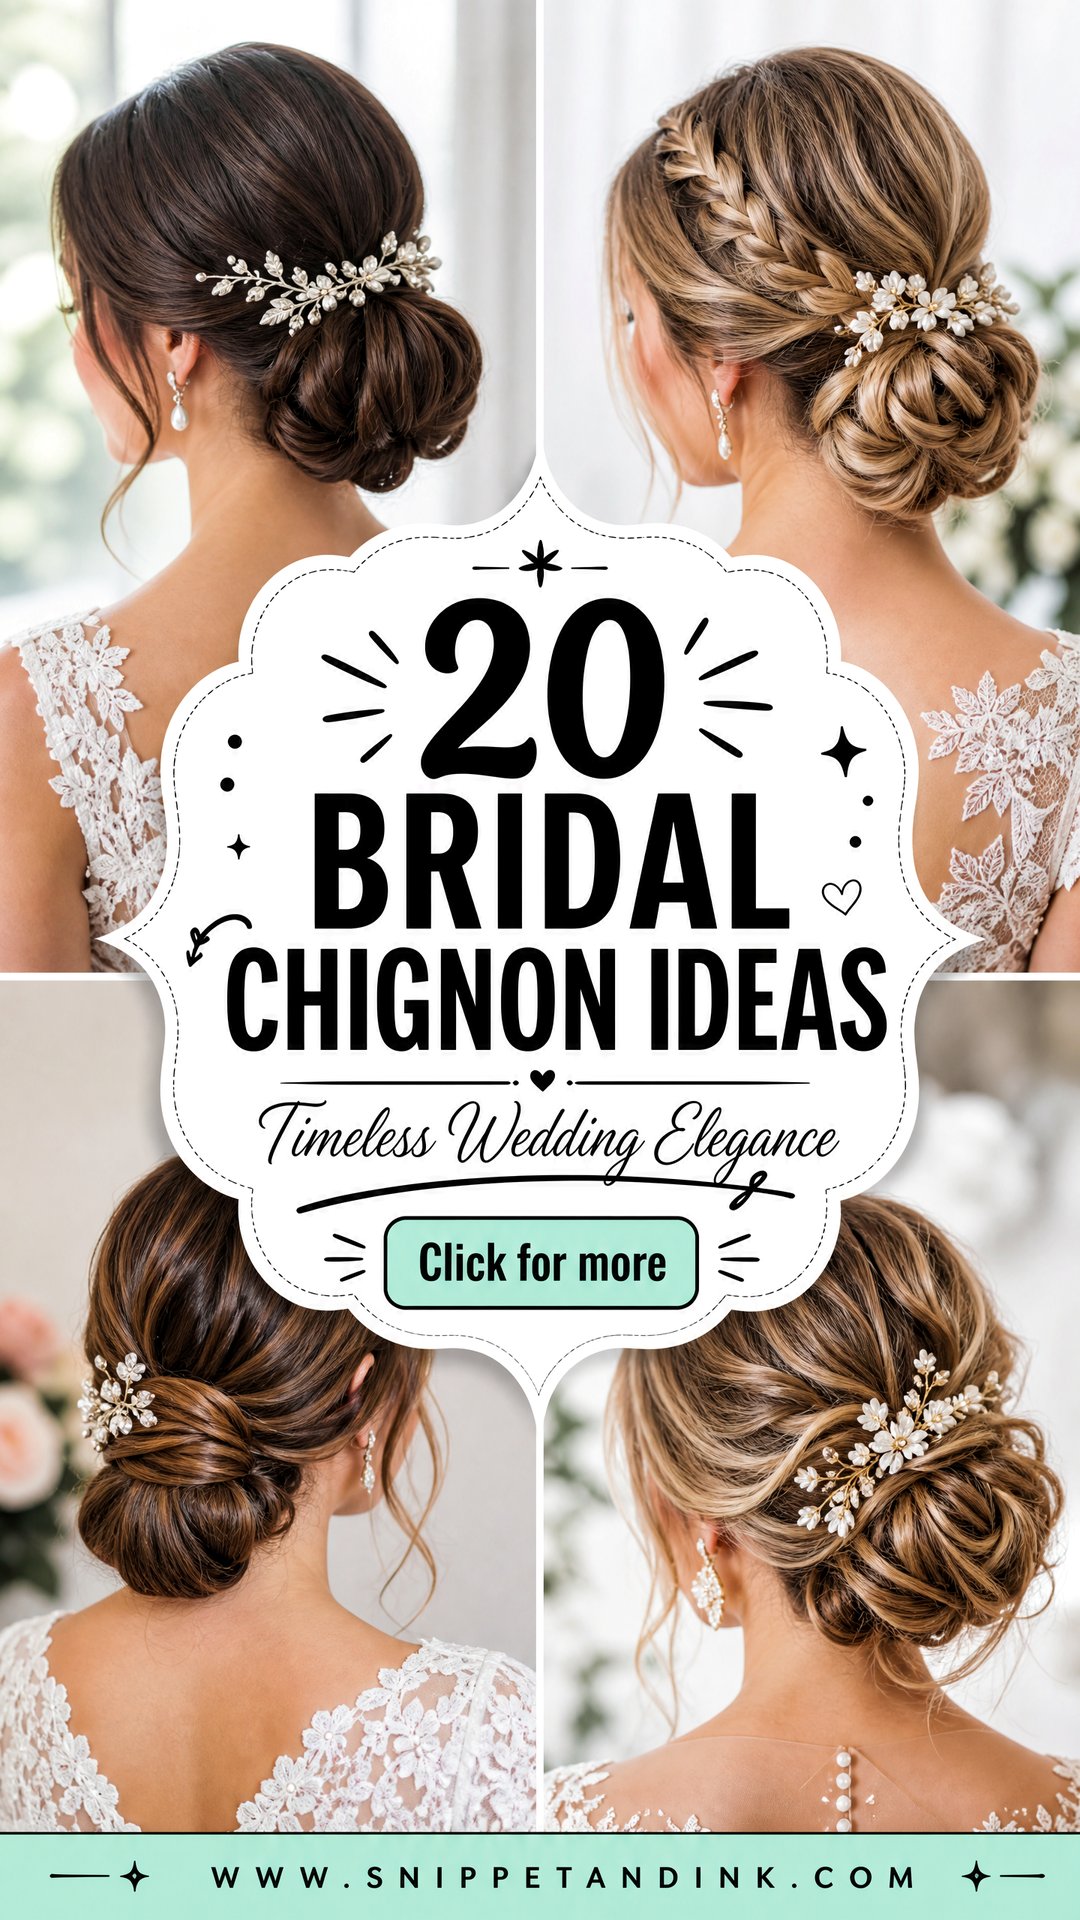
The name comes from the French phrase for the nape of the neck, and that’s the defining feature: a chignon sits low. A high knot at the crown is a bun. That low placement is why chignons work so well with veils, high collars and open backs, and why they feel lighter over a long day than a top knot.
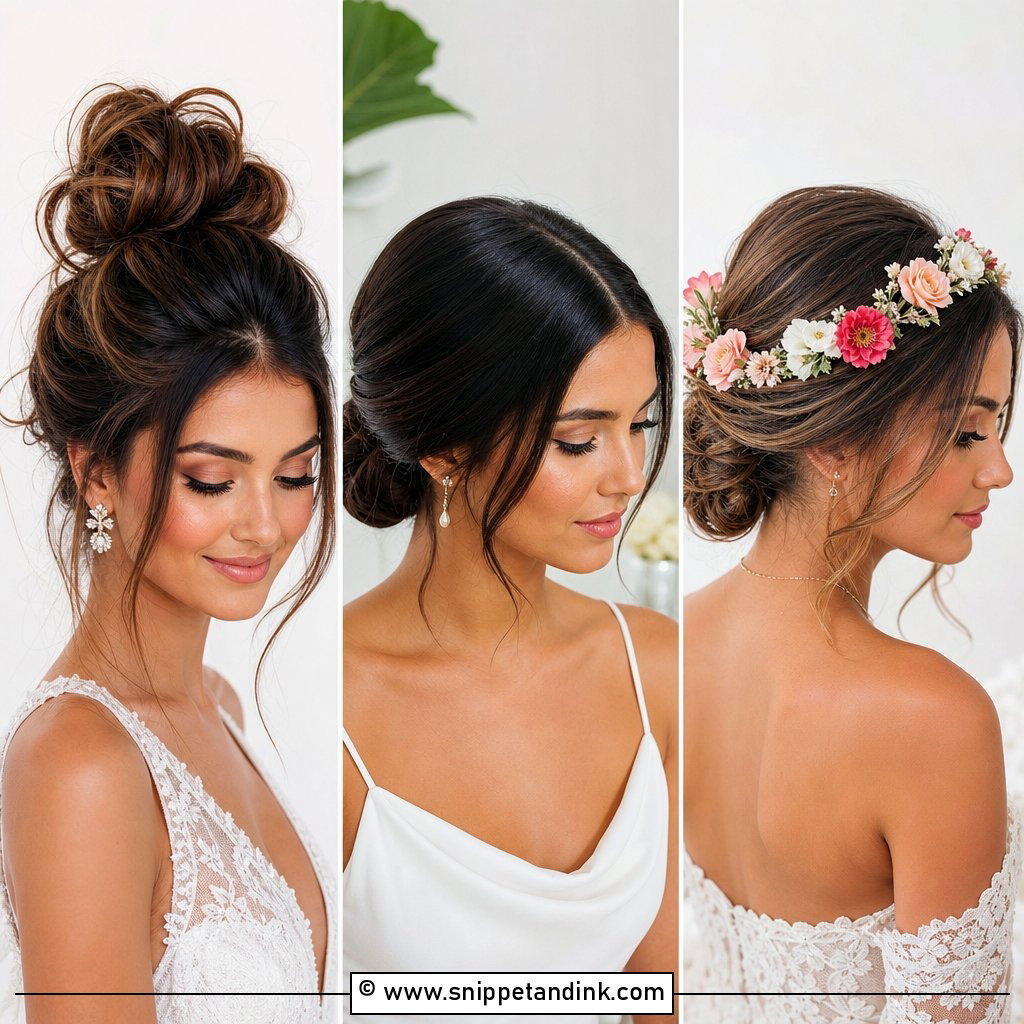
Three methods create most of the looks below. A wrapped chignon twists the hair around its own base. A rolled or folded chignon tucks the length up into a horizontal or crescent roll. A pinned or sectioned chignon builds the knot from several smaller pieces, which is the best approach for thick hair or anything textured. When you show your stylist a photo, it helps to know which one you’re looking at.
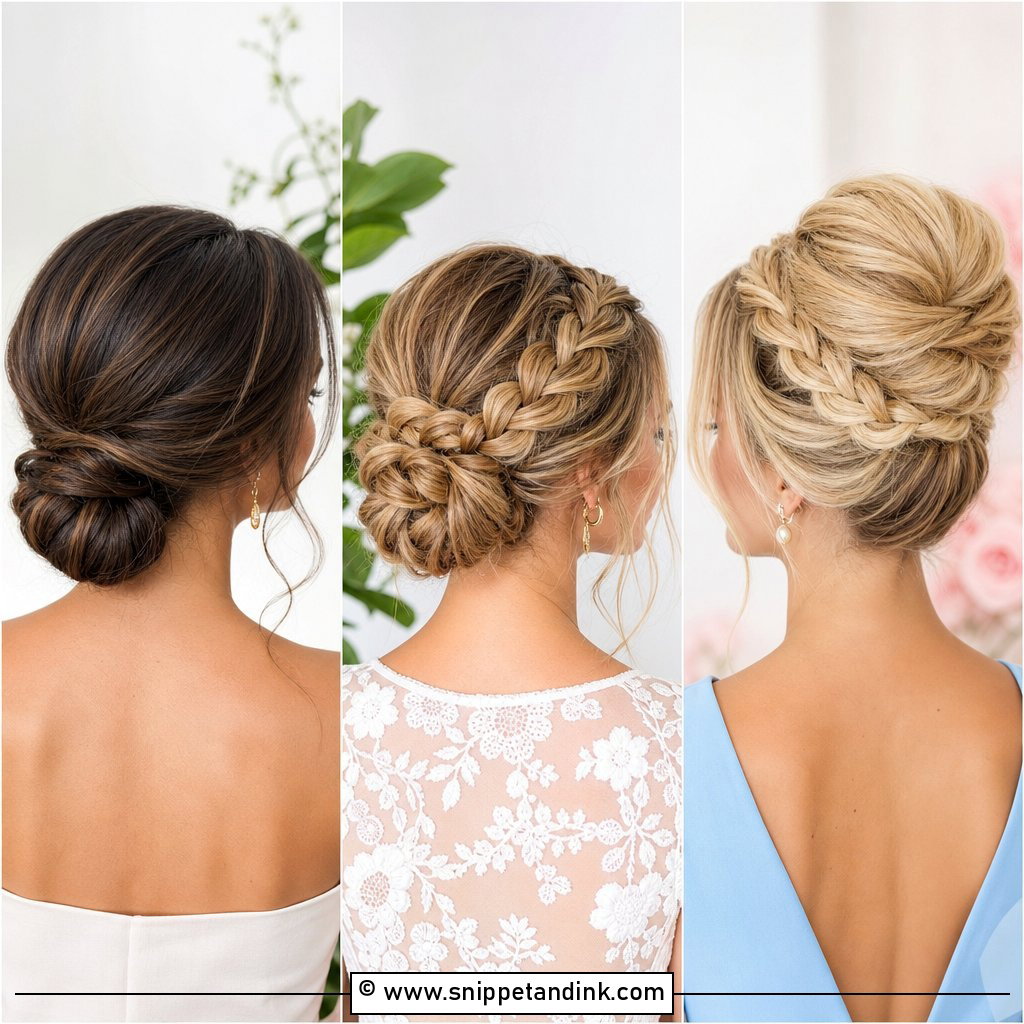
1. Low Chignon Bun
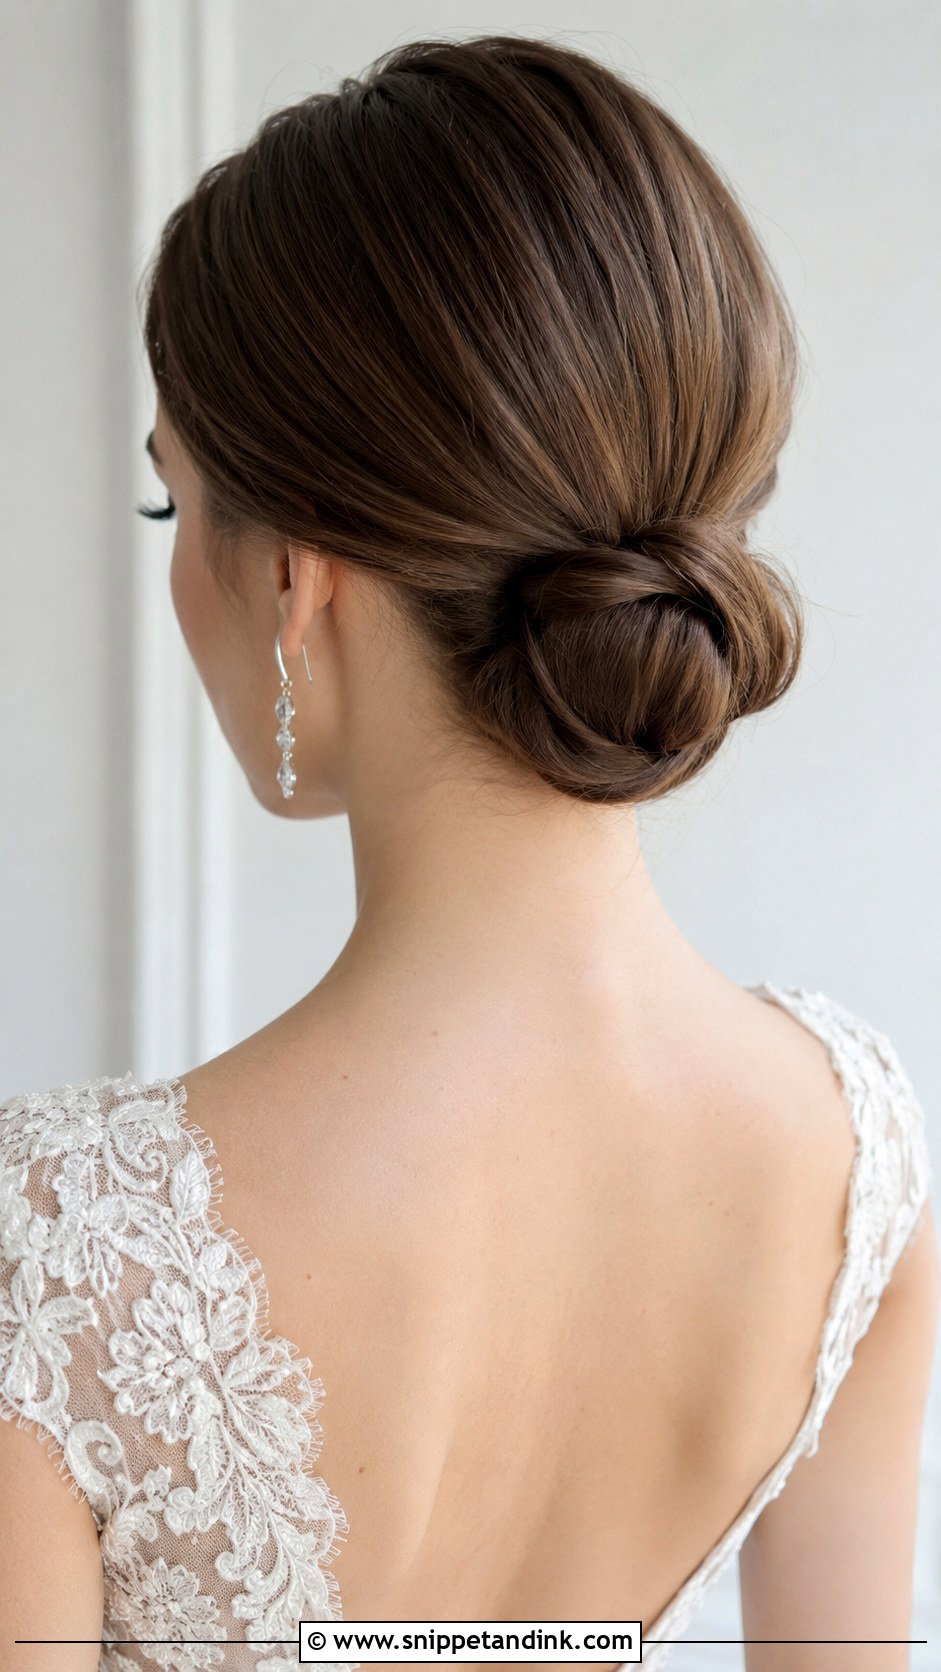
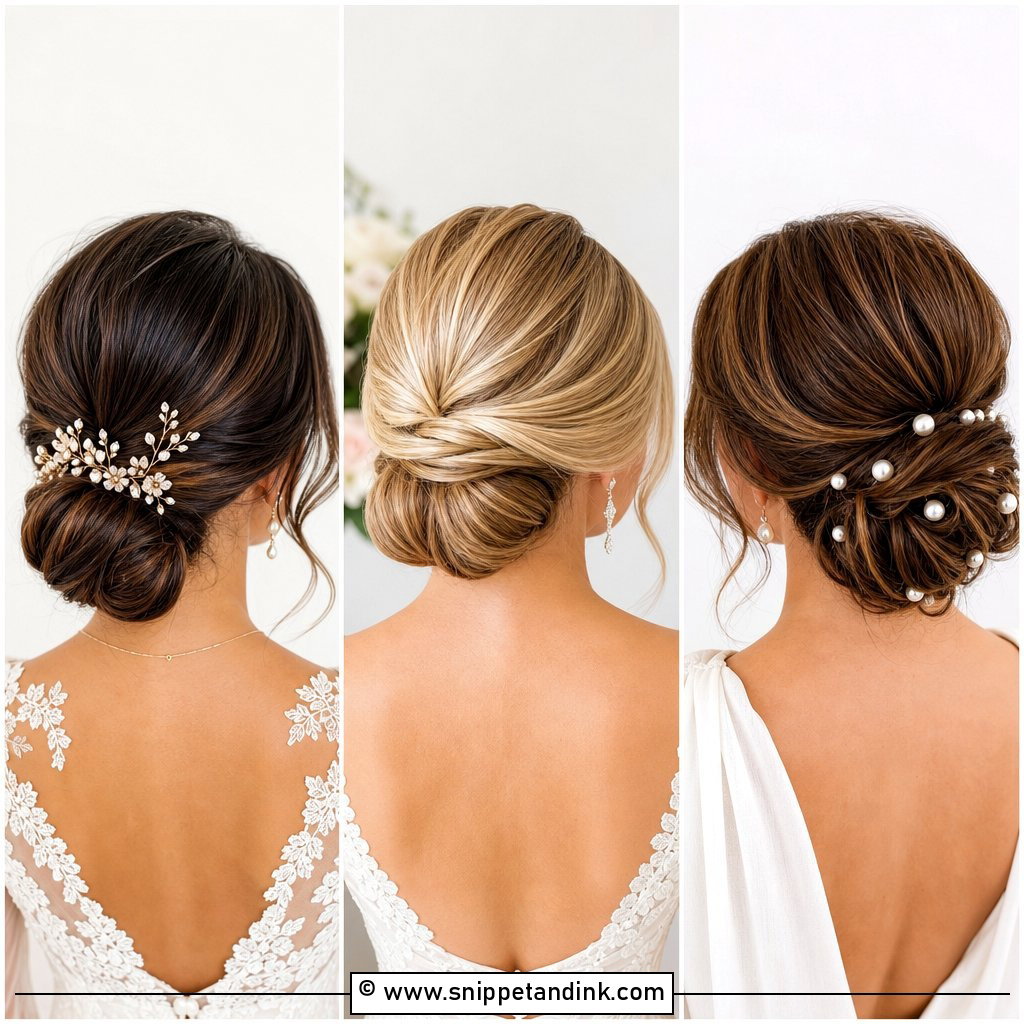
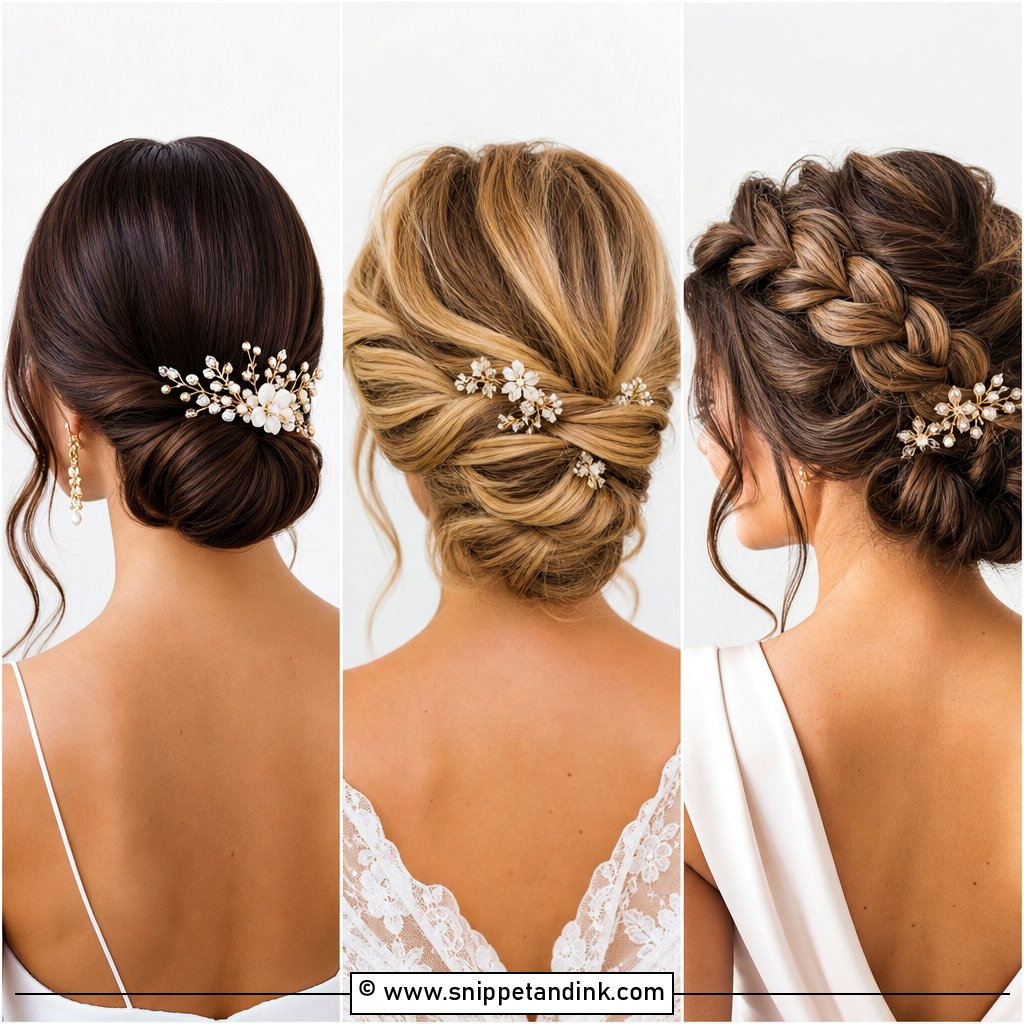
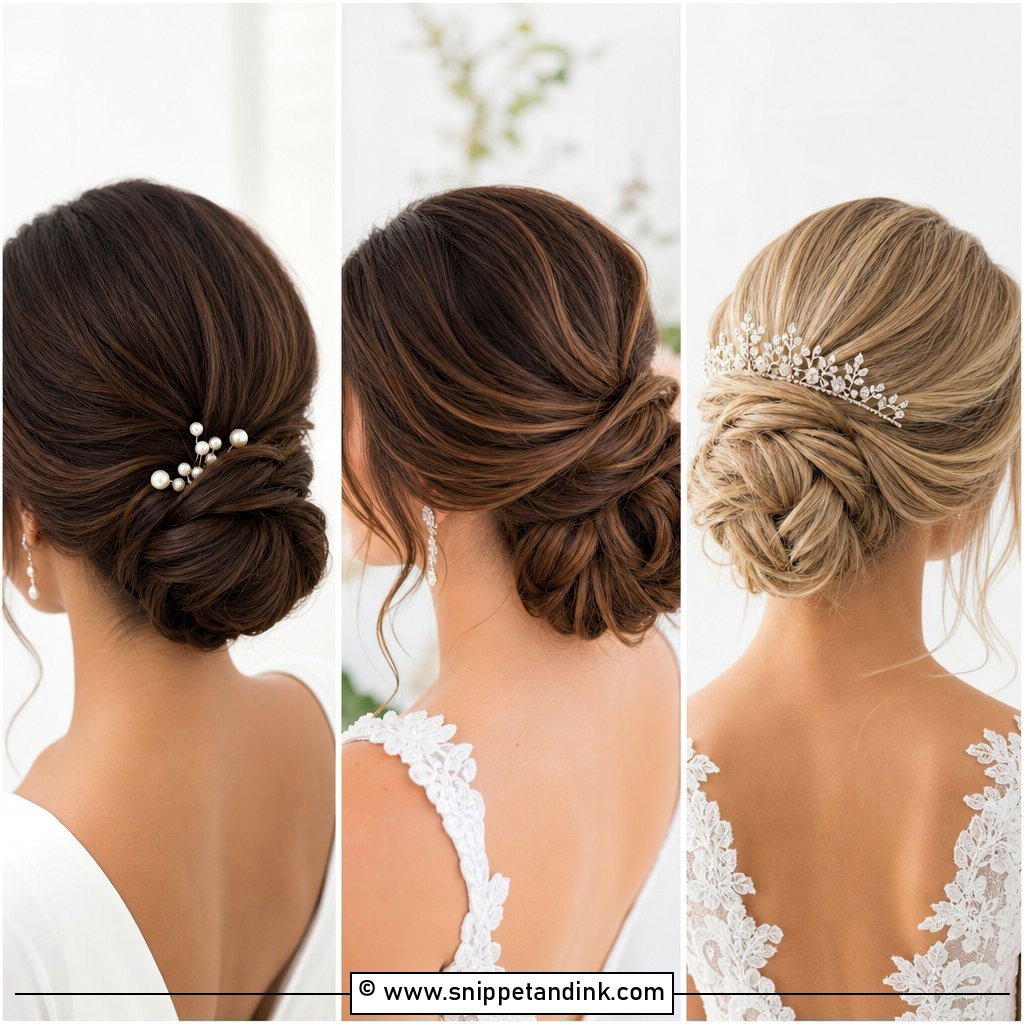
The plain low chignon is the version I’d recommend to a bride who isn’t sure what she wants, because it suits nearly every dress. It sits just above the nape, so a comb veil slides in cleanly above it and lace or beaded backs stay visible. The secret is a firm base: I set a small ponytail or a pair of crossed pins first, then build the knot around it. Kept sleek it’s formal; with a little softness pulled out at the crown, it fits a smaller, relaxed wedding.
2. Sleek Chignon With Middle Part
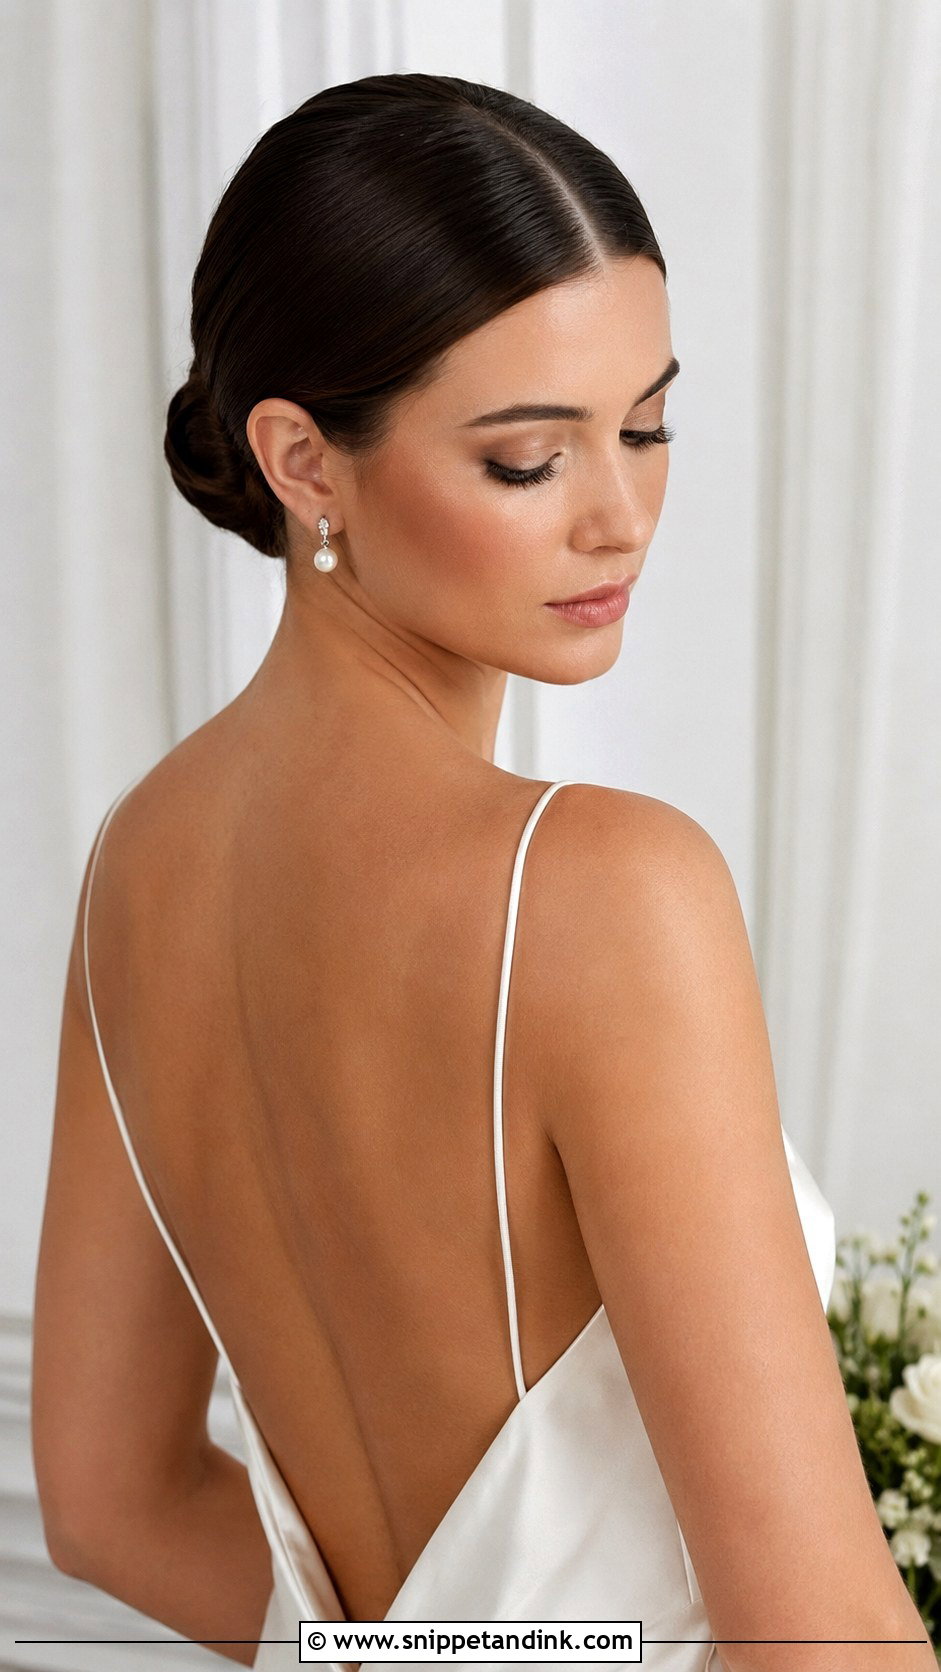
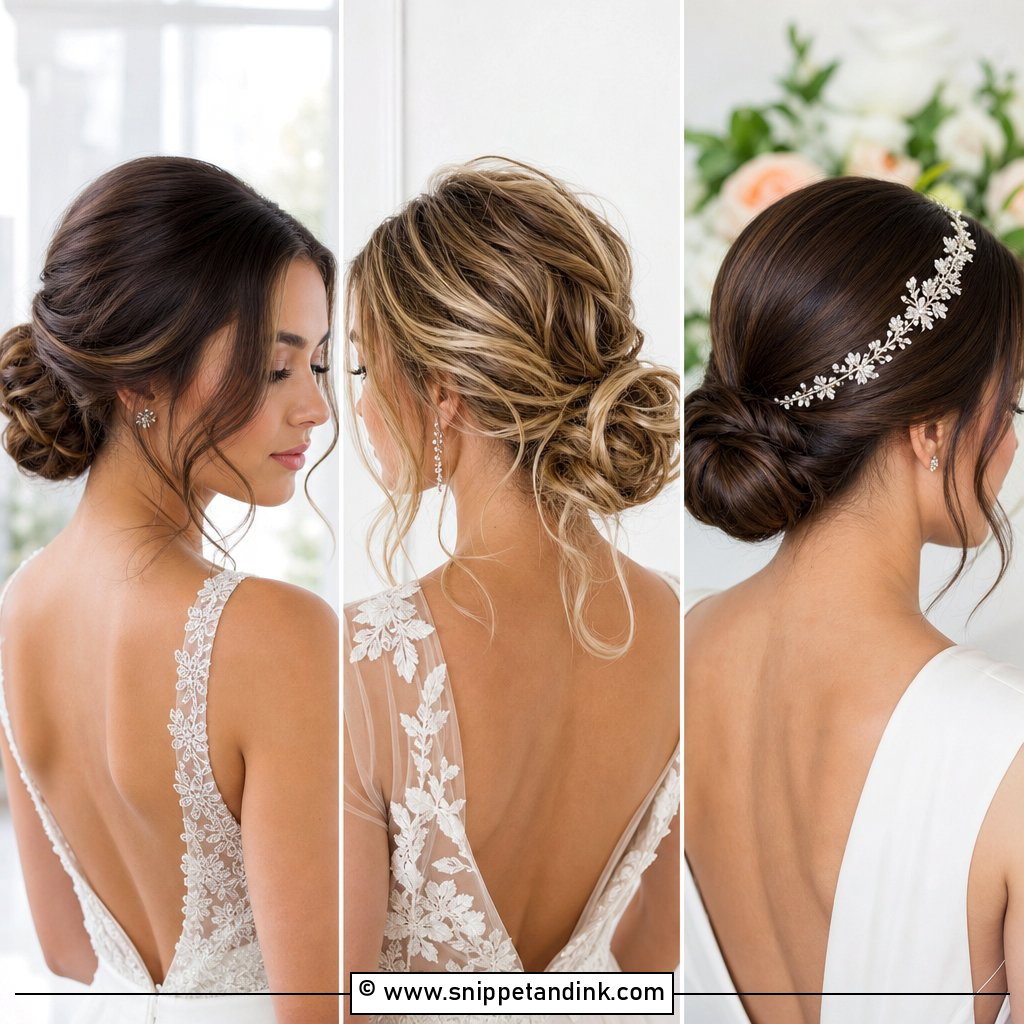
A center part with a sleek knot is all about symmetry and shine. I find the part with a tail comb from the bridge of the nose straight back, then smooth each side with a firm gel and a boar bristle brush before wrapping. Every flyaway shows in close-ups, so a smoothing serum and a fine-tooth comb finish the job. It pairs well with minimalist slip dresses and statement earrings, and suits oval and heart-shaped faces most. If you have a strong cowlick at the front, ask to test it first, as it can pull the part off center by evening.
3. Messy Chignon
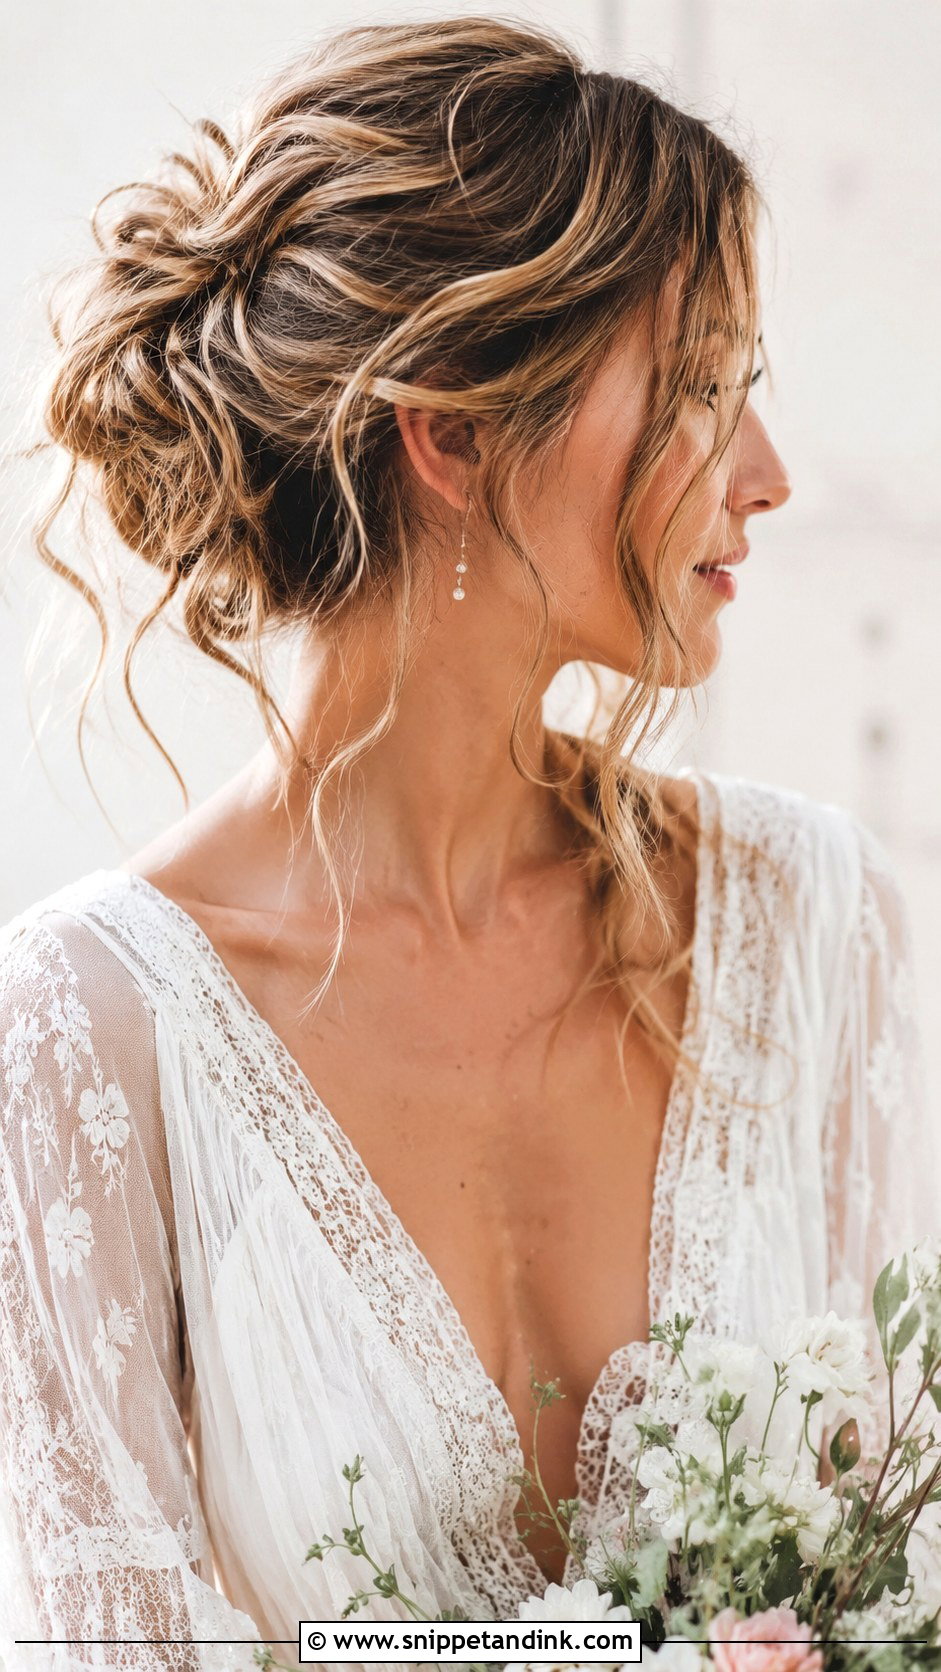
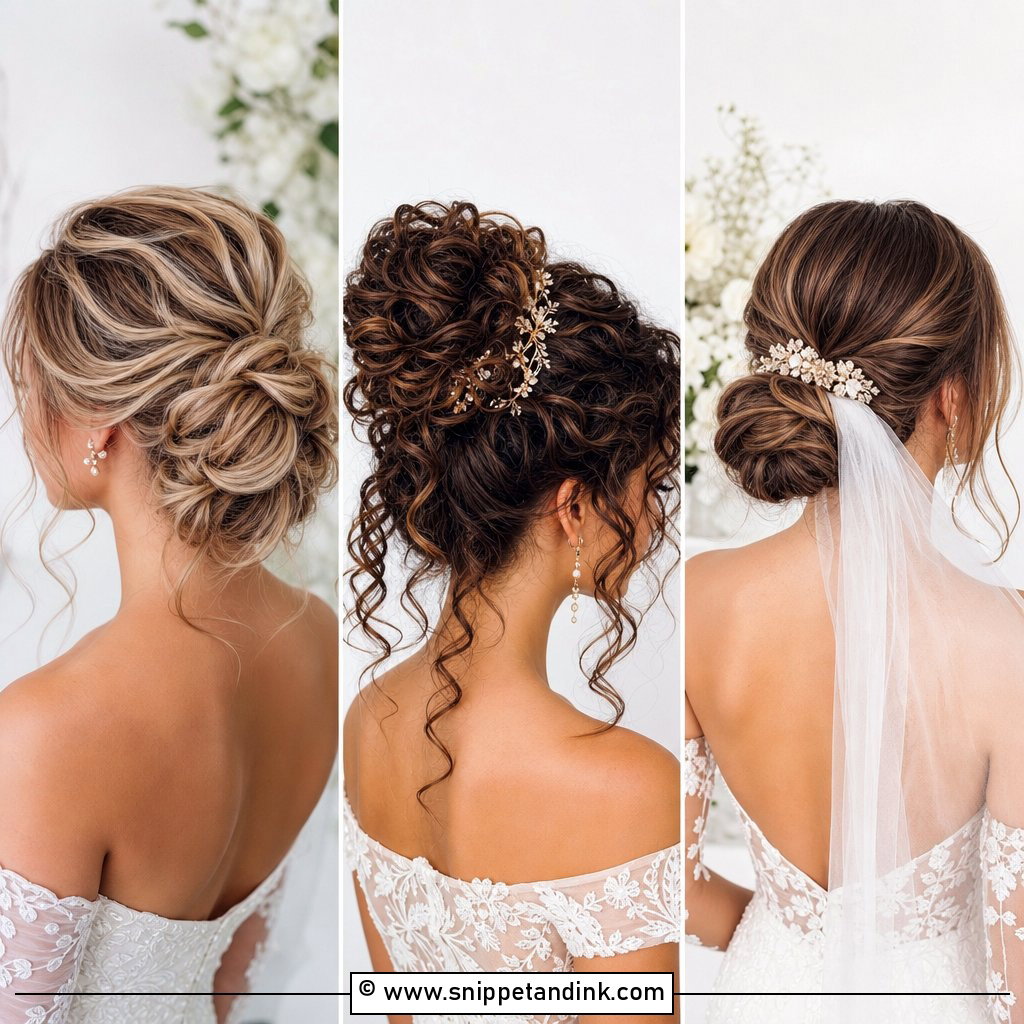
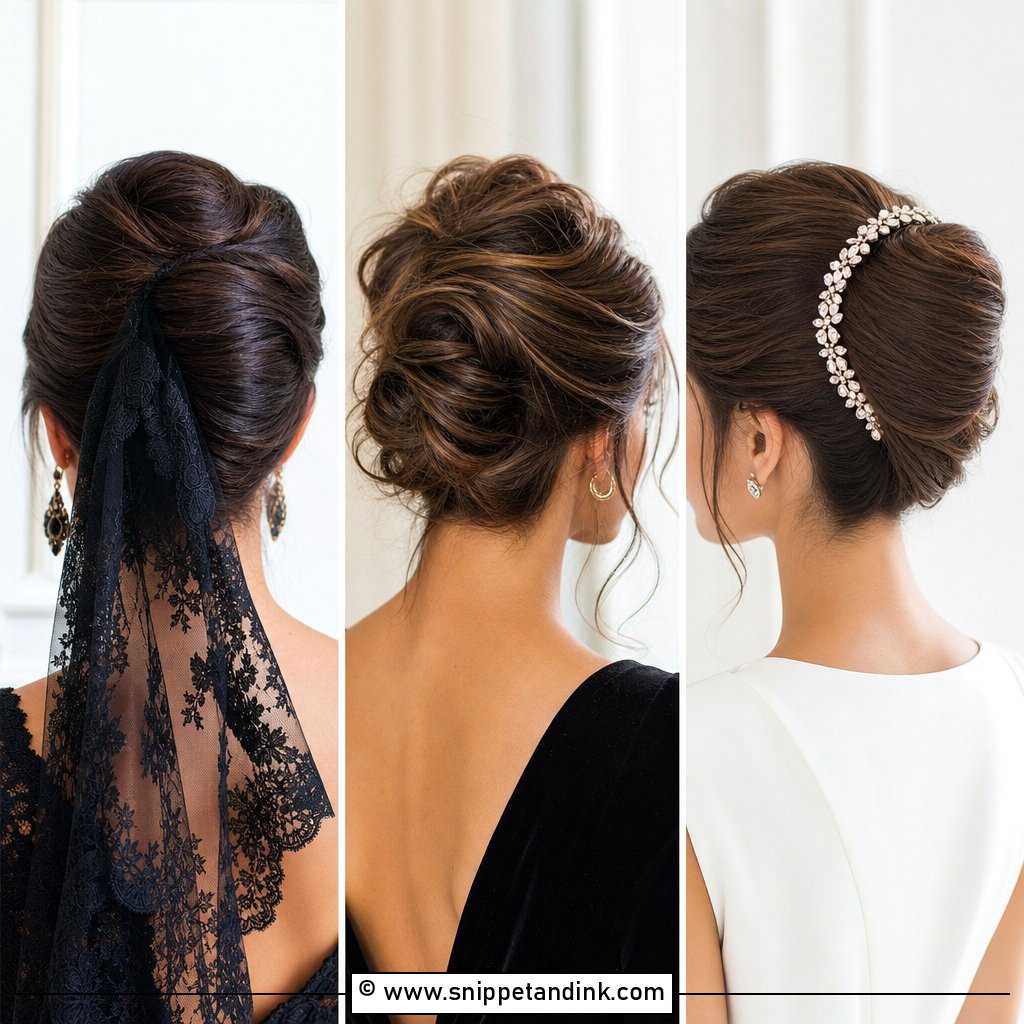
Messy is the hardest chignon to do well, because it has to look accidental without looking neglected. I curl everything first, break the curls up with my fingers, then pin each section loosely and pull pieces out after the shape is set, not before. A texturizing spray gives the piecey finish. It forgives a little movement during the day, which is part of its appeal for outdoor and garden weddings. Small flowers tucked through it suit the mood.
4. Braided Chignon
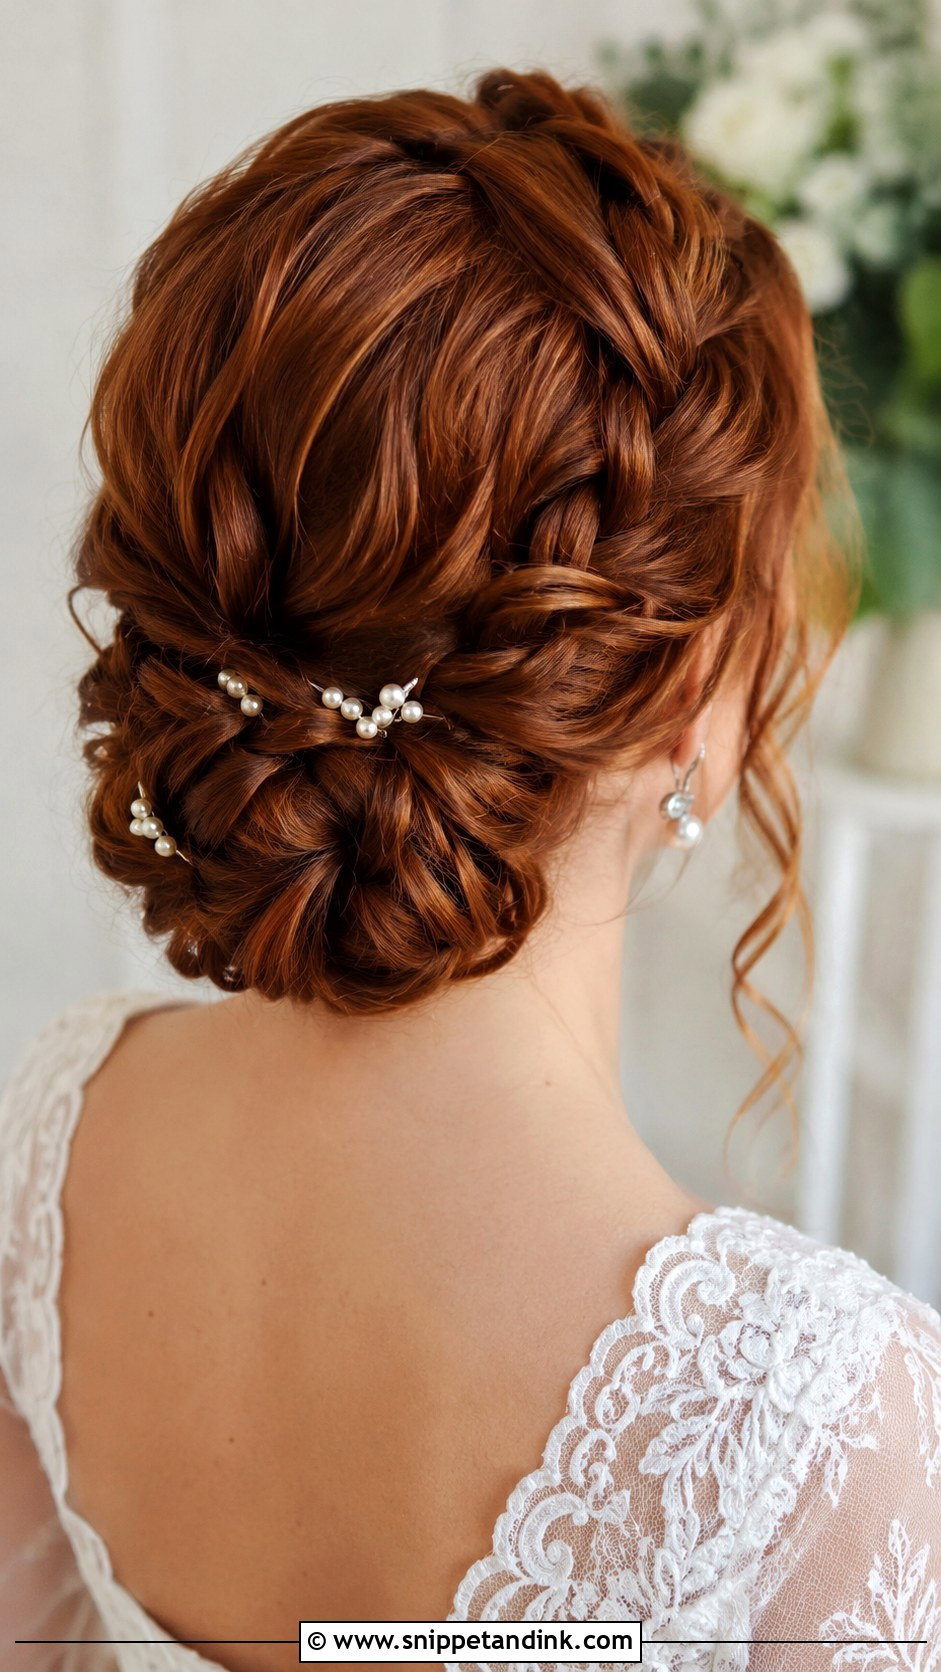
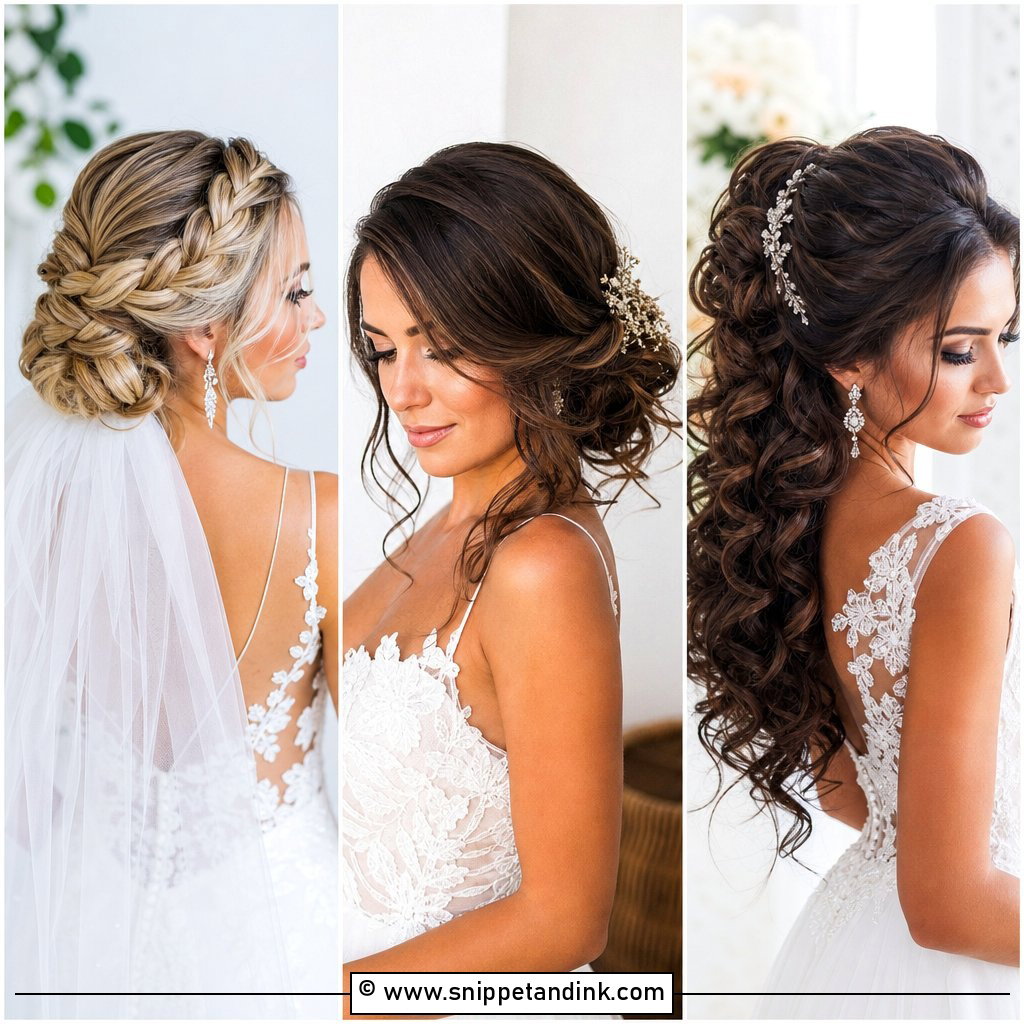
Braids give the knot built-in grip, which is useful on thick or layered hair that tends to push pins out. A French braid adds a structured line, a fishtail looks finer and more detailed, and a rope braid is the quickest. I braid while the hair has some texture product in it, then gently loosen the plaits so they read on camera from a few feet away. Pearl pins or fresh blooms sit neatly in the braid gaps. It can lean boho or classic depending on how tight you keep it.
5. Twisted Chignon
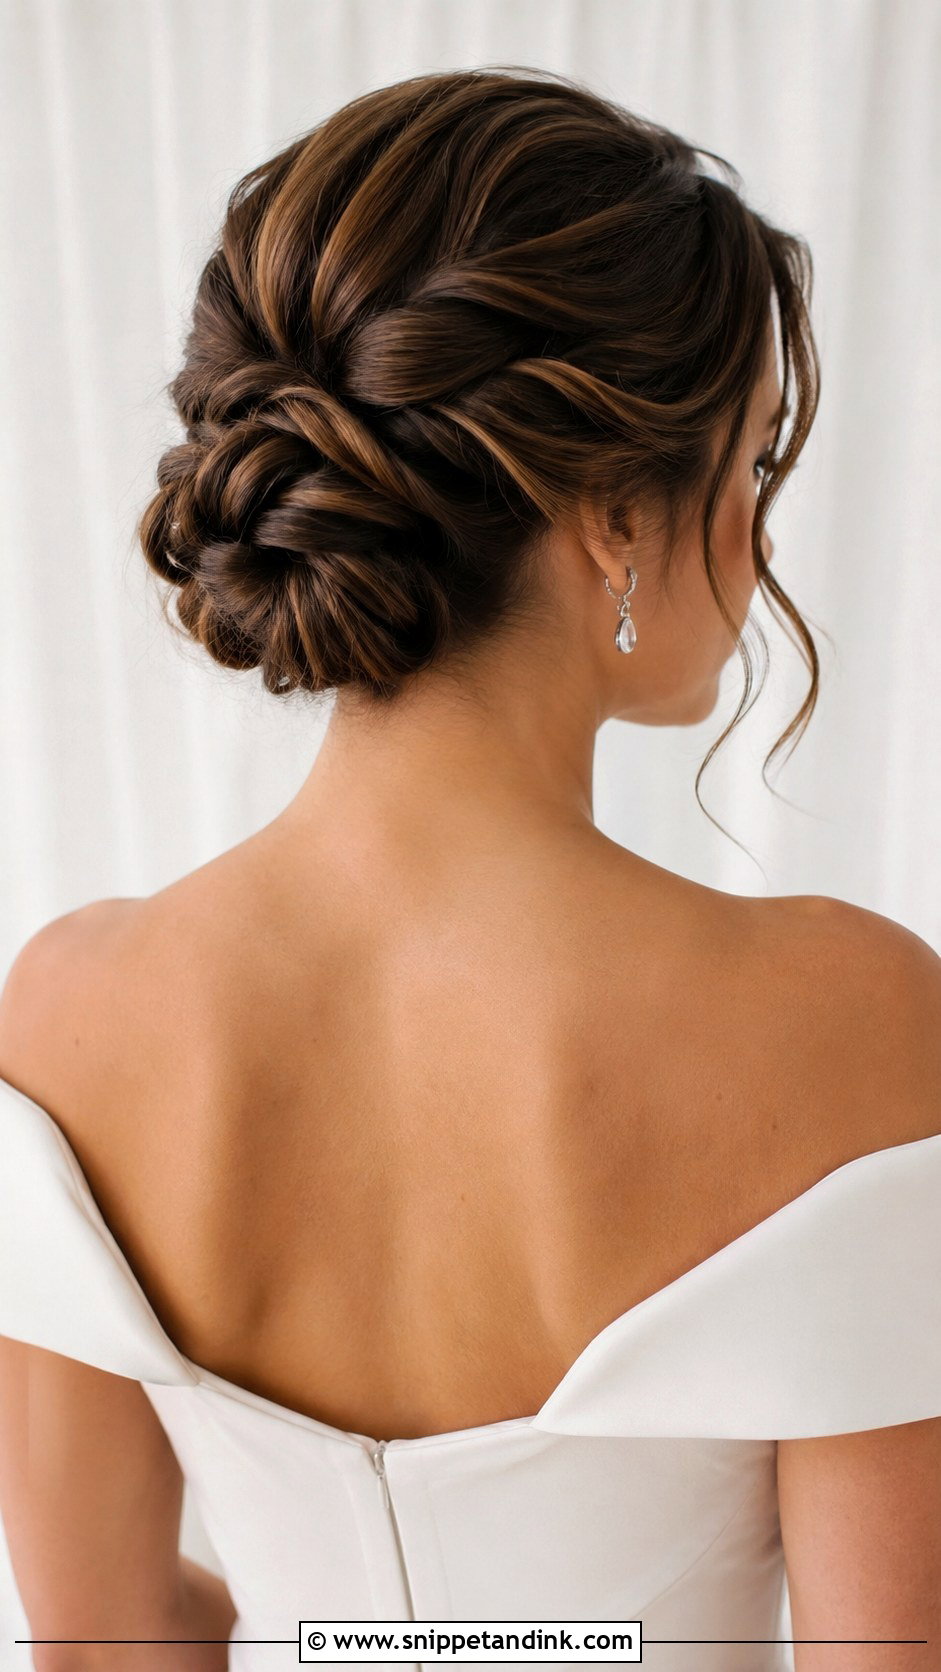
Twisting sections before coiling them gives a sculpted, swirled texture. Medium to long hair is needed for the twists to wrap fully. Each twist has to go in the same direction, or the chignon slowly unwinds as you move, which is the most common reason a twisted style loosens by the reception. Keep it sleek for a contemporary wedding, or pull a couple of face-framing pieces loose to soften it.
6. Bouffant Chignon
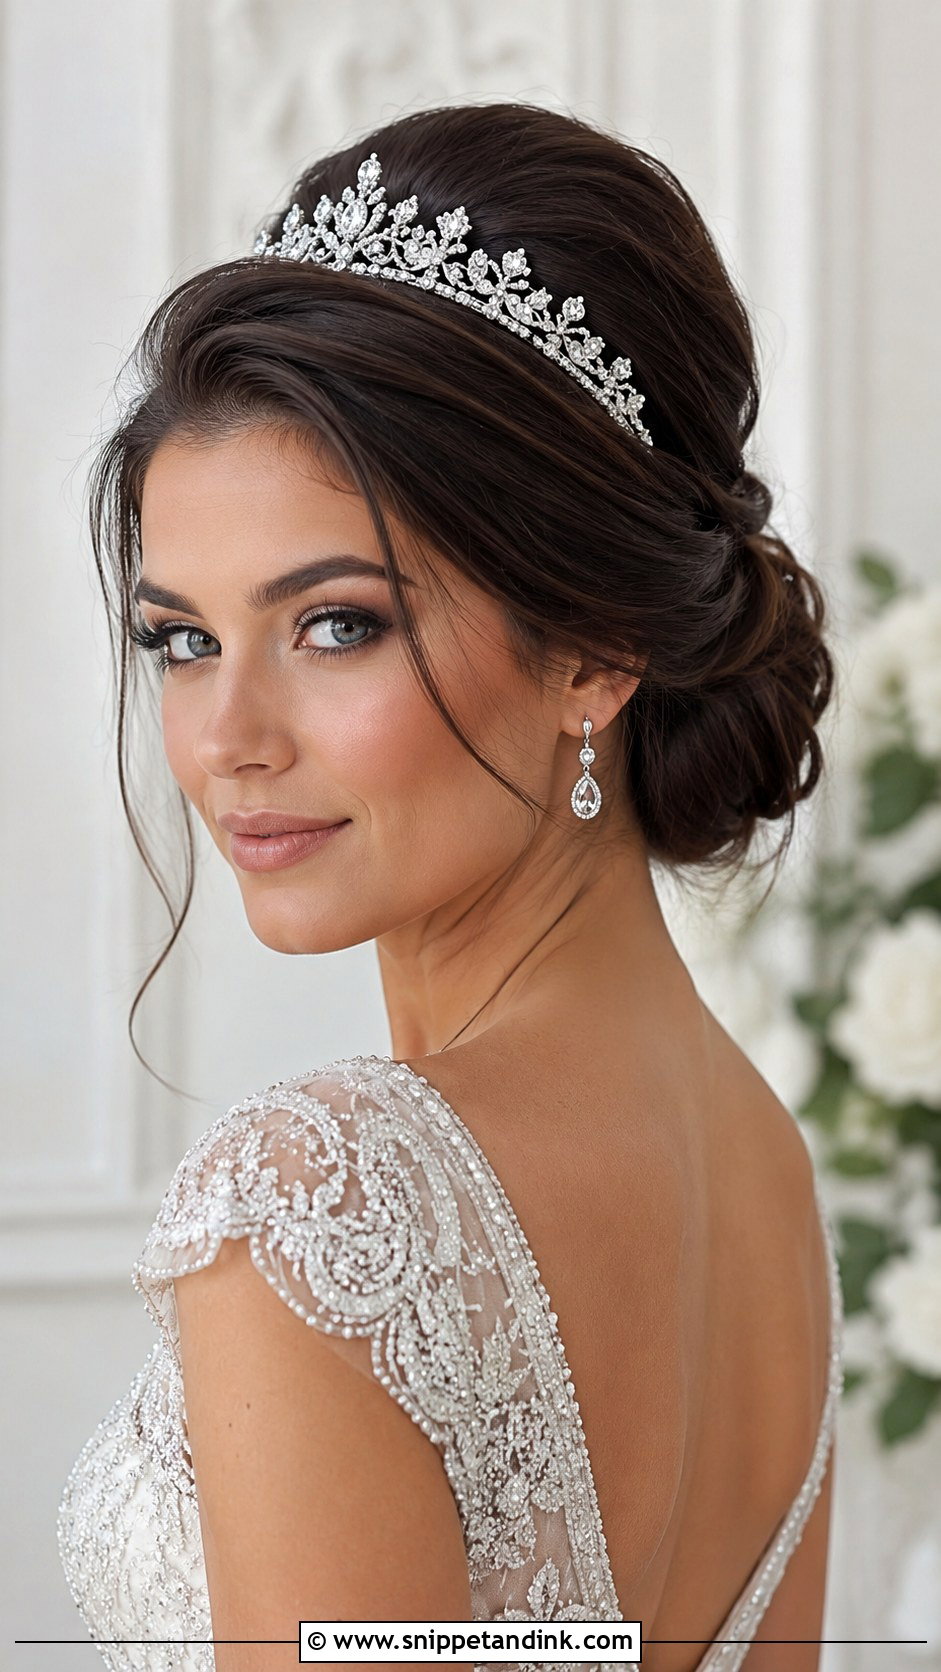
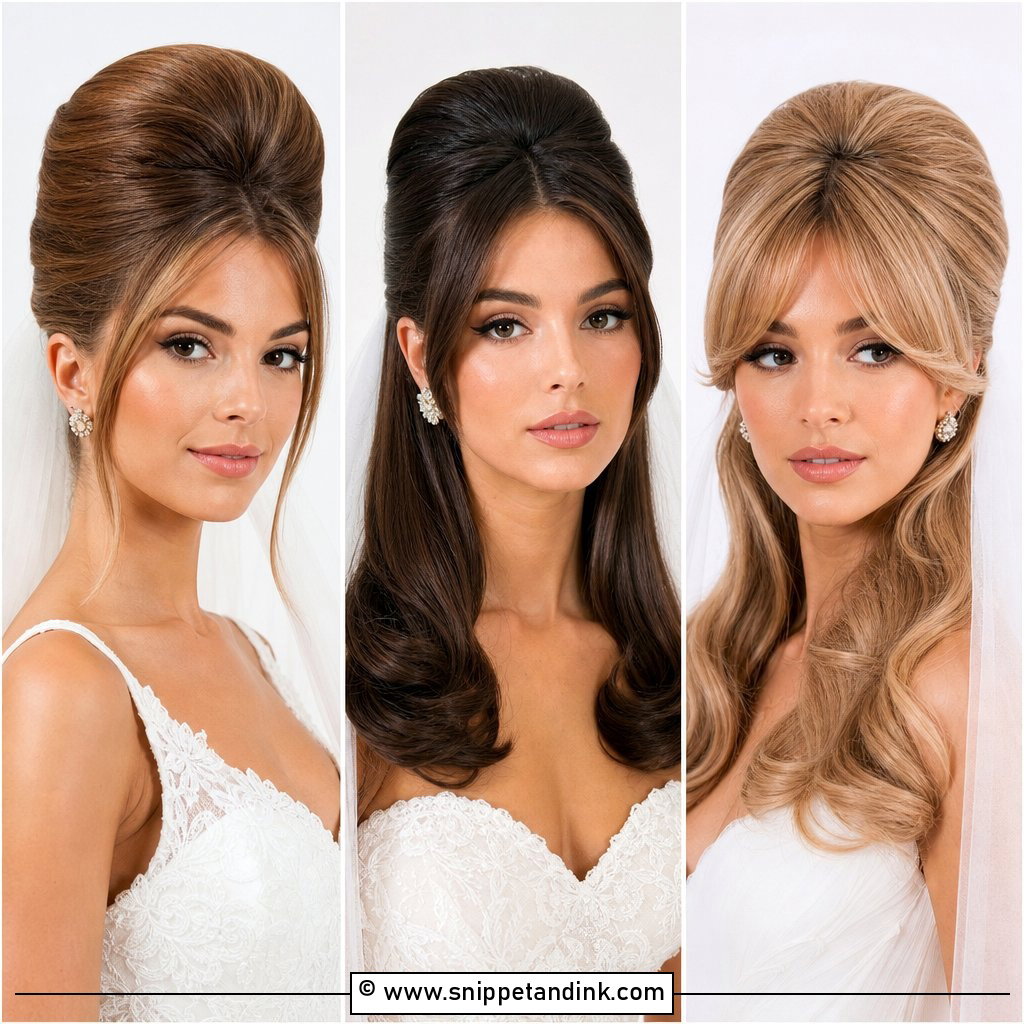
The bouffant chignon builds height at the crown, then sweeps into a low knot, a retro shape that belongs with tiaras and formal ballrooms. I backcomb in thin sections at the root only and smooth the top layer over, so nobody sees the teasing. A small padded insert can do the same job with less backcombing if your hair is fragile. Height lengthens the face, so if your face is already long, I’d keep the lift modest.
7. Croissant Chignon
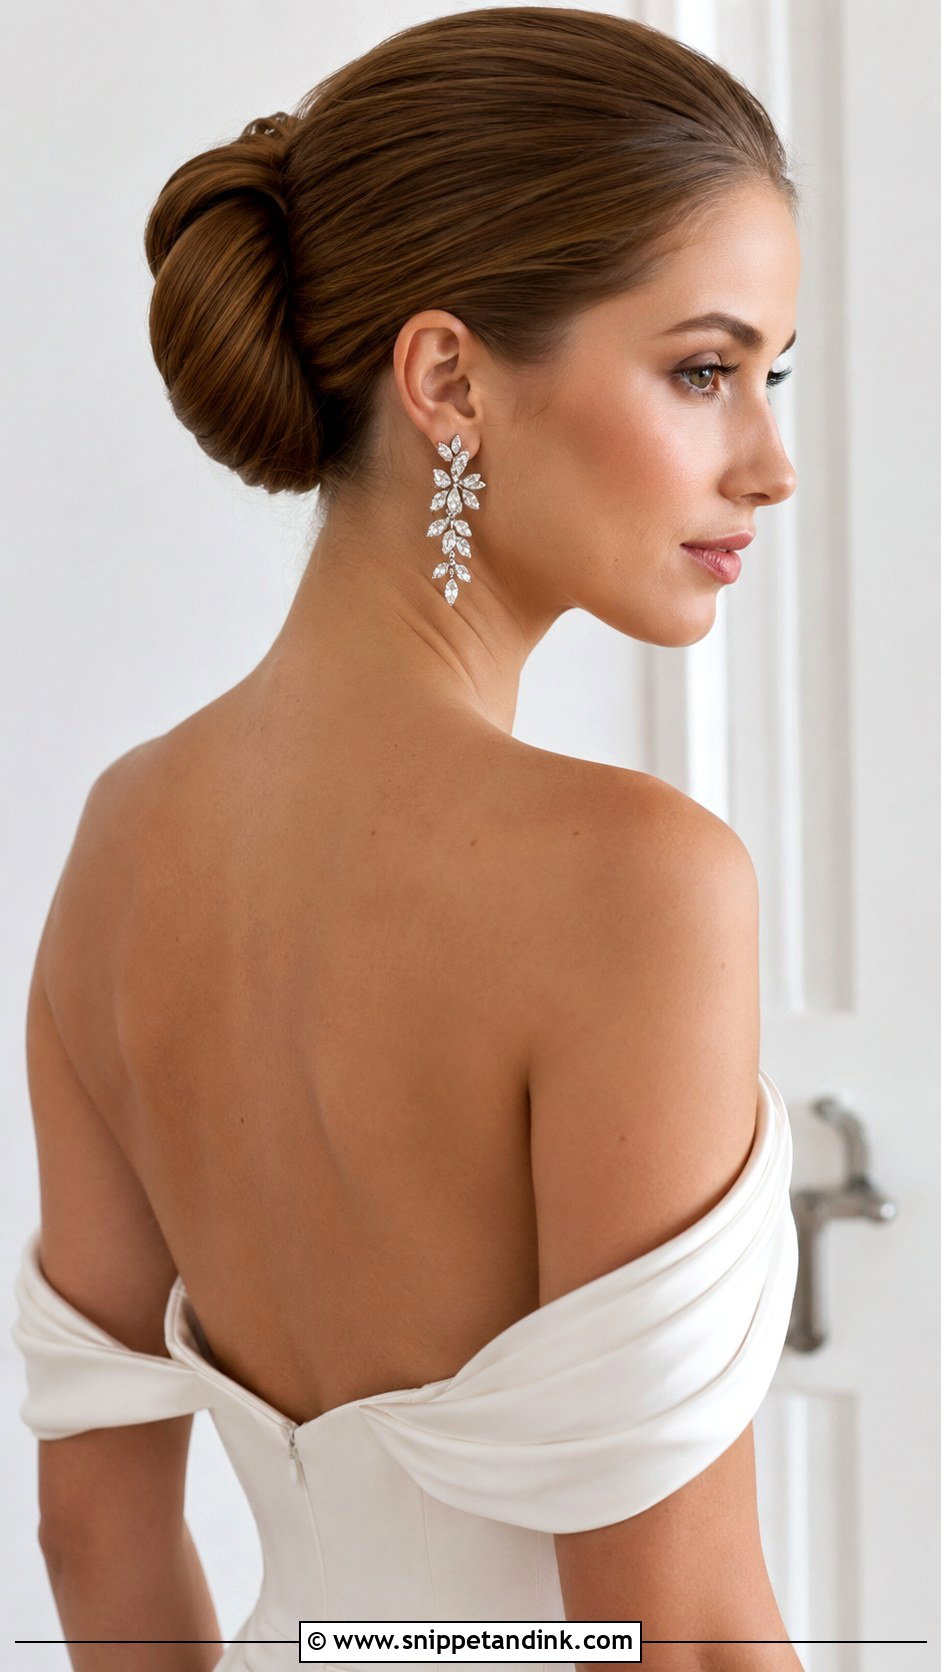
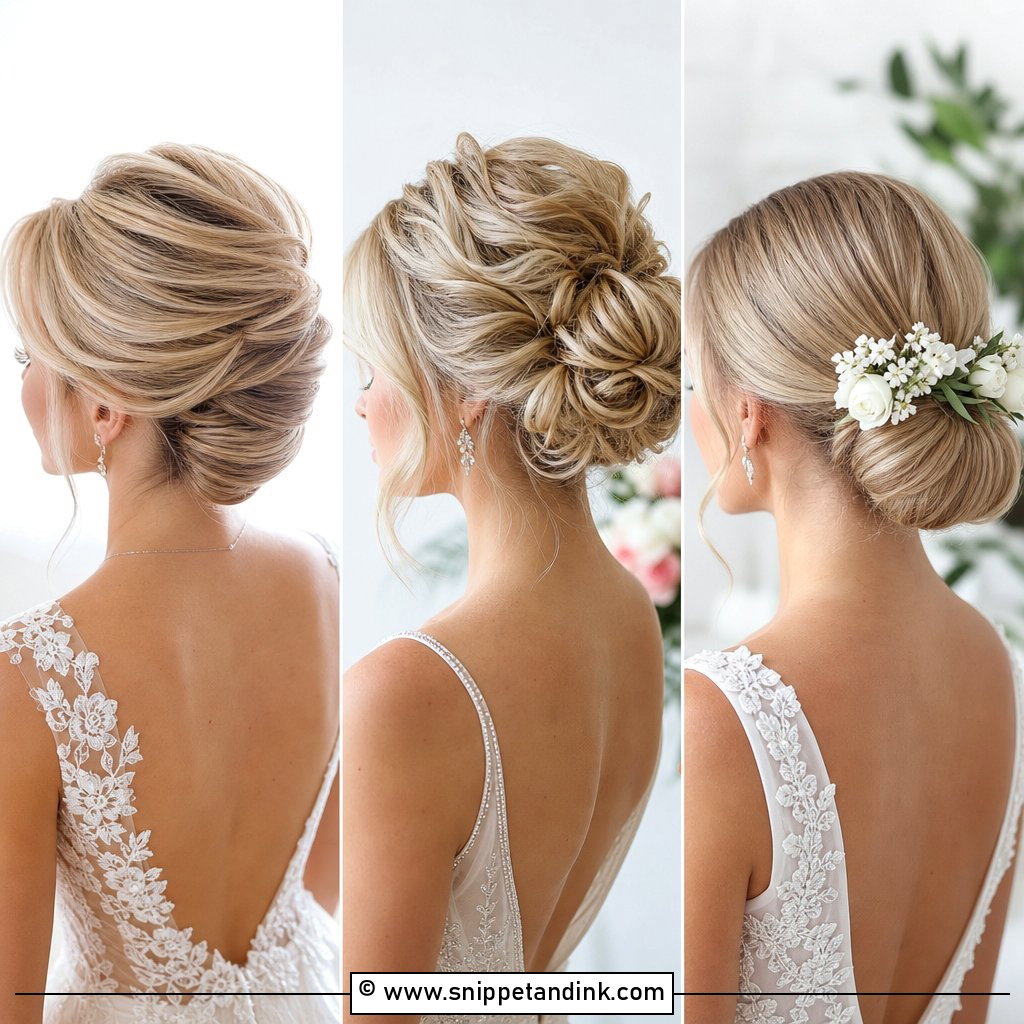
The croissant chignon is folded rather than wrapped. I gather the hair low, fold it up into a curved roll and pin along the seam so it forms a crescent shape. It’s simpler than it looks and doesn’t need much product, which is why I often teach it to brides doing their own hair or a bridesmaid’s. It works with modern and classic gowns, holds a veil and leaves room for statement earrings. Long, straight hair gives the cleanest curve.
8. Chignon With Loose Curls
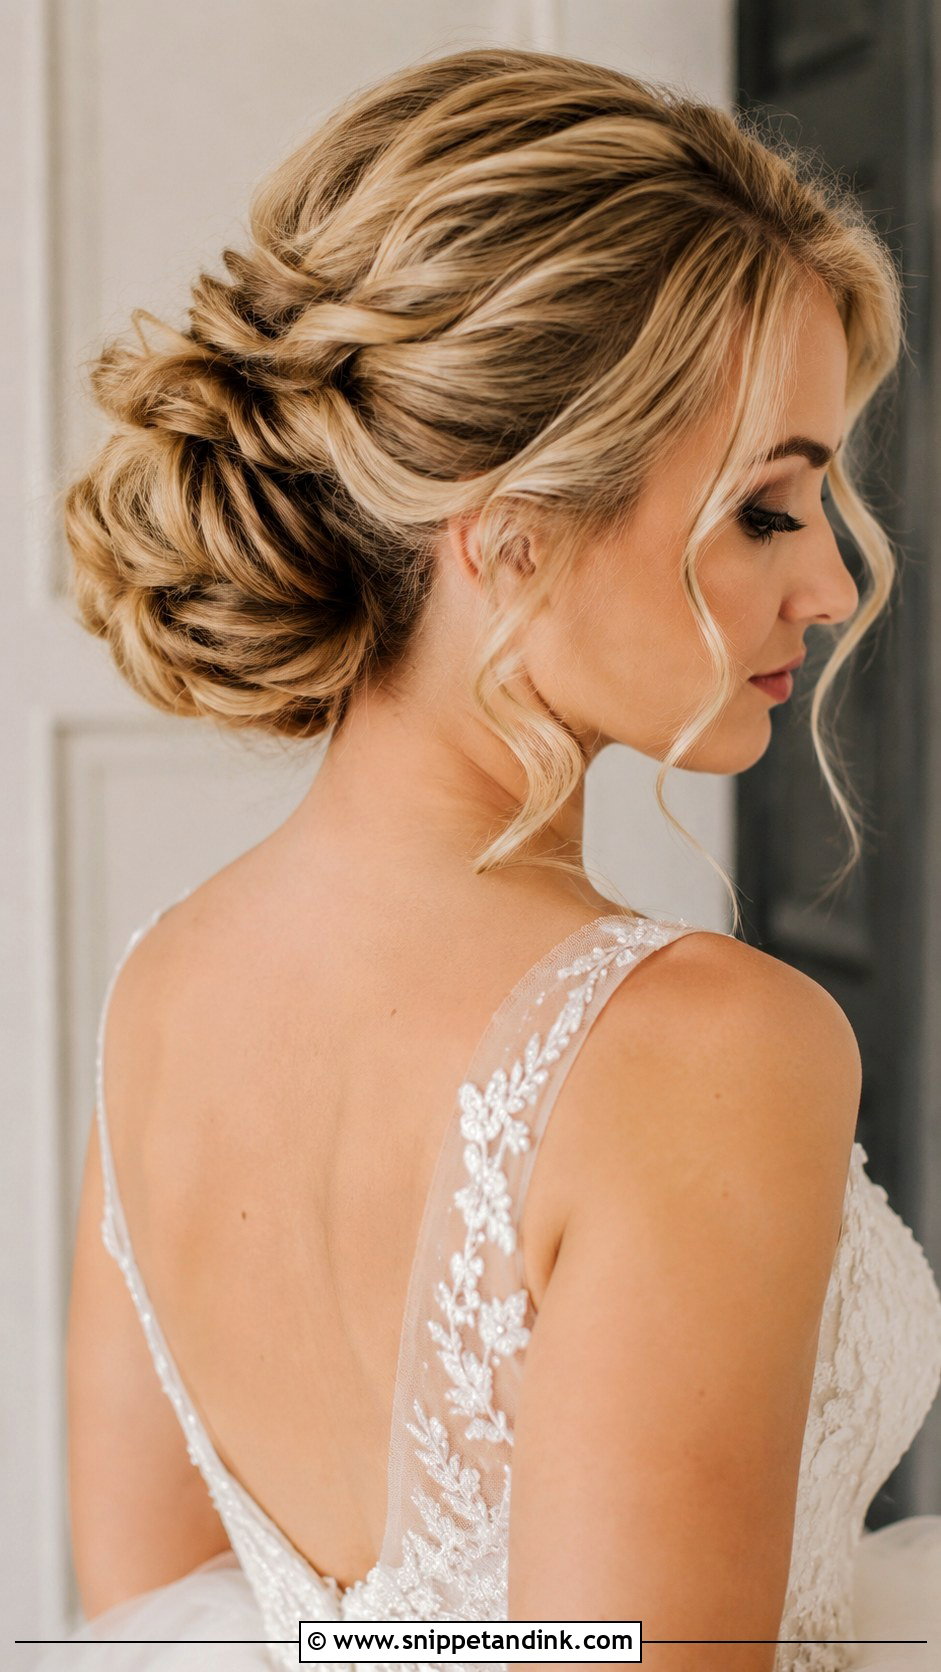
Soft, cascading tendrils around a structured knot soften the whole look. The tendrils are what I watch most, because they’re the first part to drop. I curl them with a small wand, pin each one up to cool, then release them just before the bride leaves the chair. A smooth base with tumbling curls works for most romantic weddings. Keep the tendrils fewer and thicker rather than many thin strands, which look stringy in photos.
9. Chignon With Veil
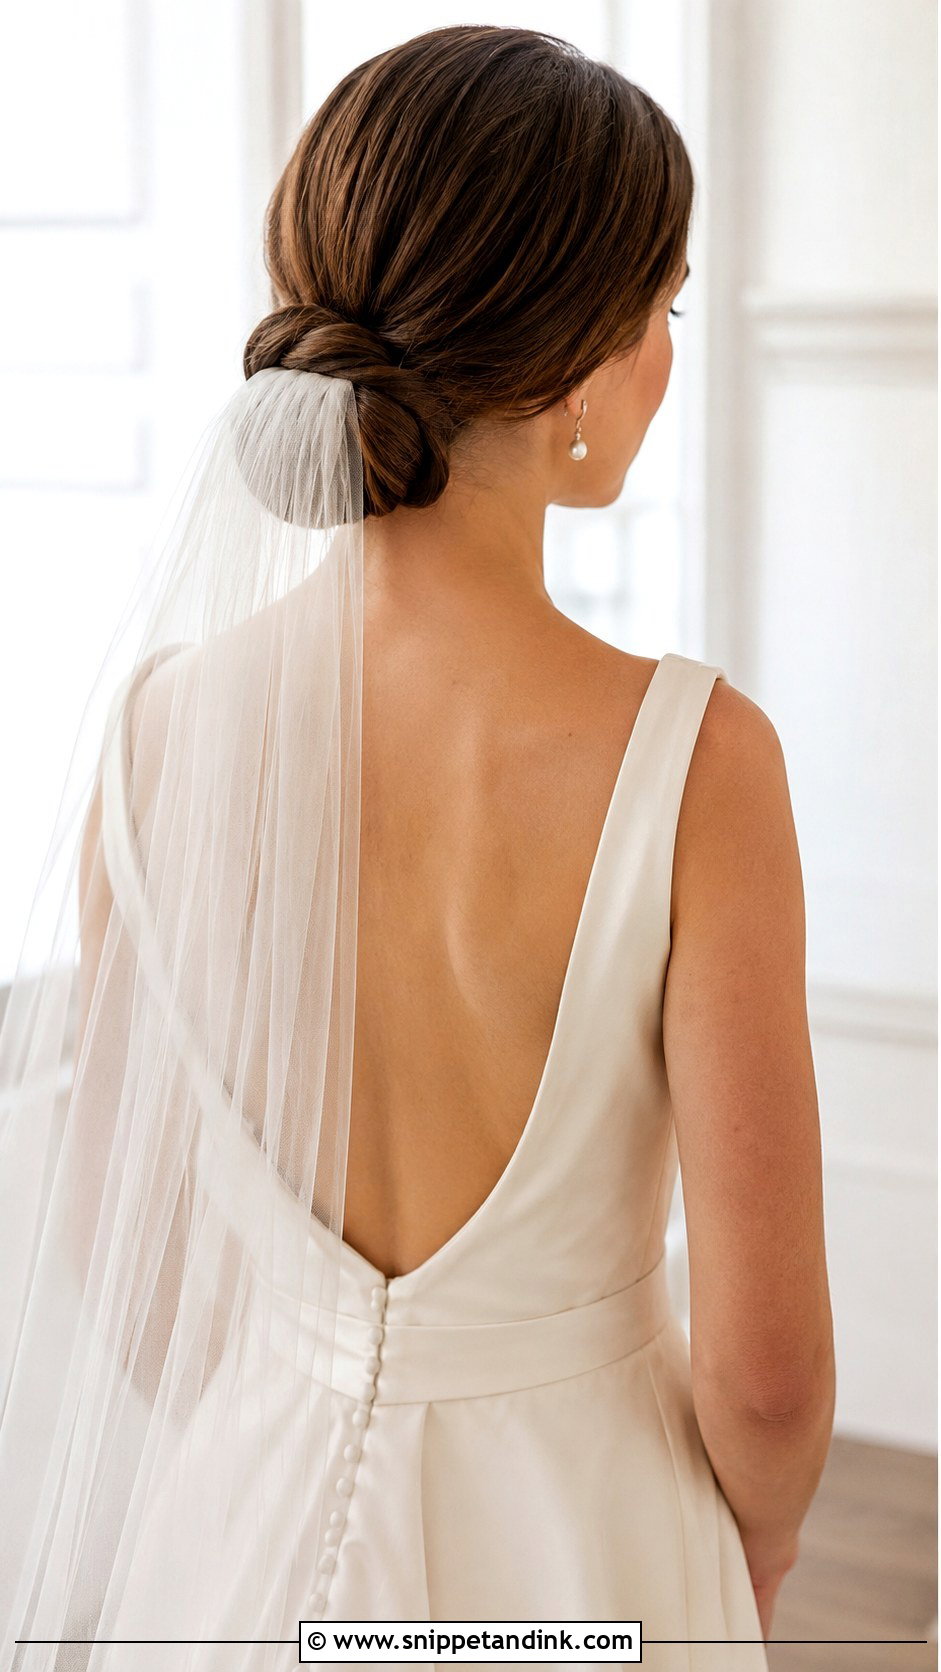
A chignon is the steadiest base I can give a veil. Pinning the comb above the knot is the traditional placement and lets the veil drape over it; tucking it below gives a more modern line and leaves the knot fully visible from behind. In both cases, I slide the comb in against the direction of the hair and lock it with two crossed pins. Once the veil comes off for the reception, the chignon underneath still looks finished. A cathedral or church ceremony suits this combination especially well.
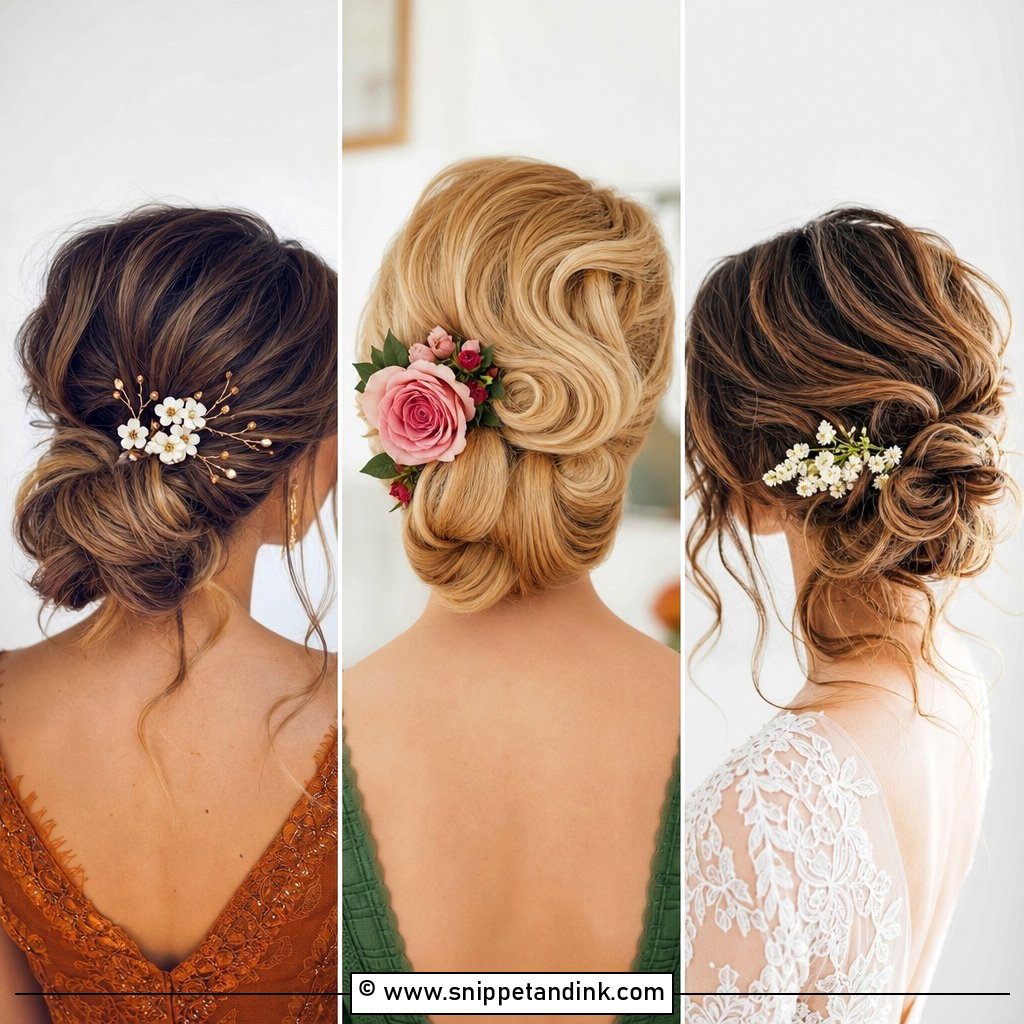
10. Chignon With Flowers
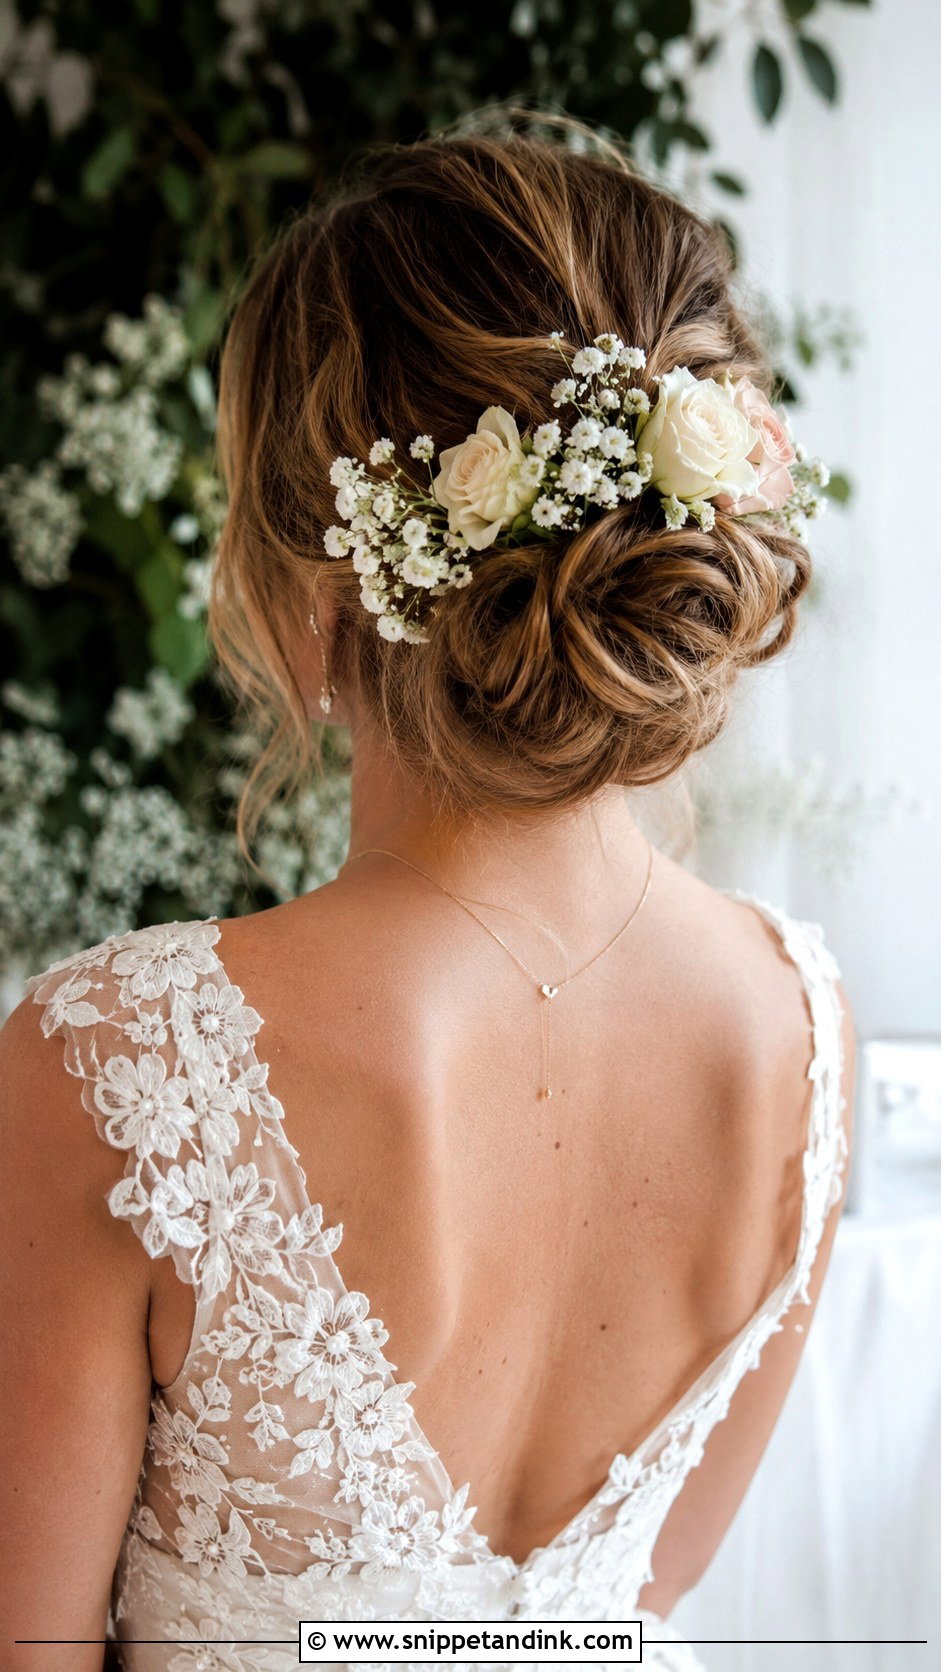
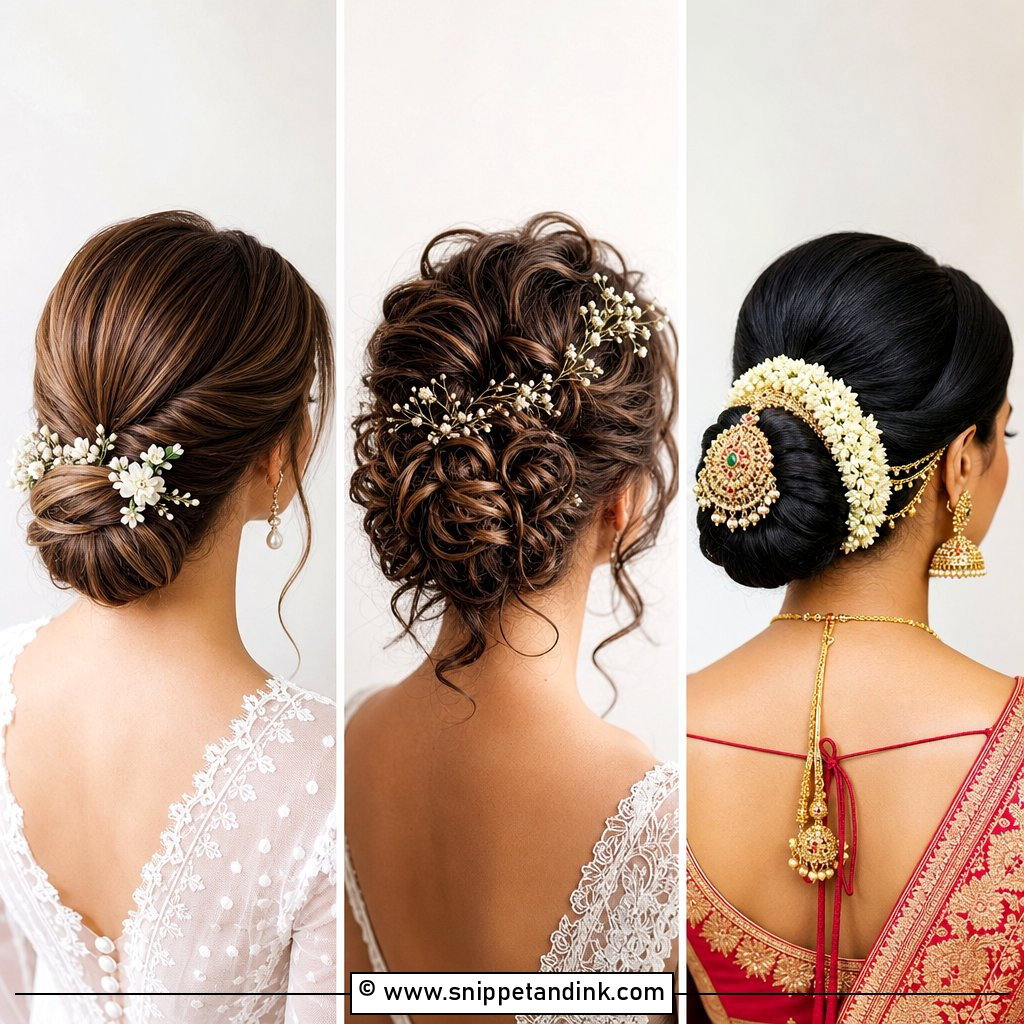
Fresh flowers in a chignon need planning with your florist. Baby’s breath, roses, or wildflowers each give a different mood, but only some survive hours out of water. Spray roses, wax flower and baby’s breath hold up well; delicate petals bruise when pinned. Ask for the stems to be wired and taped, and I’ll place them last. Scatter small blooms through the knot, or cluster a few to one side for an asymmetric finish. Spring and summer weddings suit this best.
11. Vintage Chignon
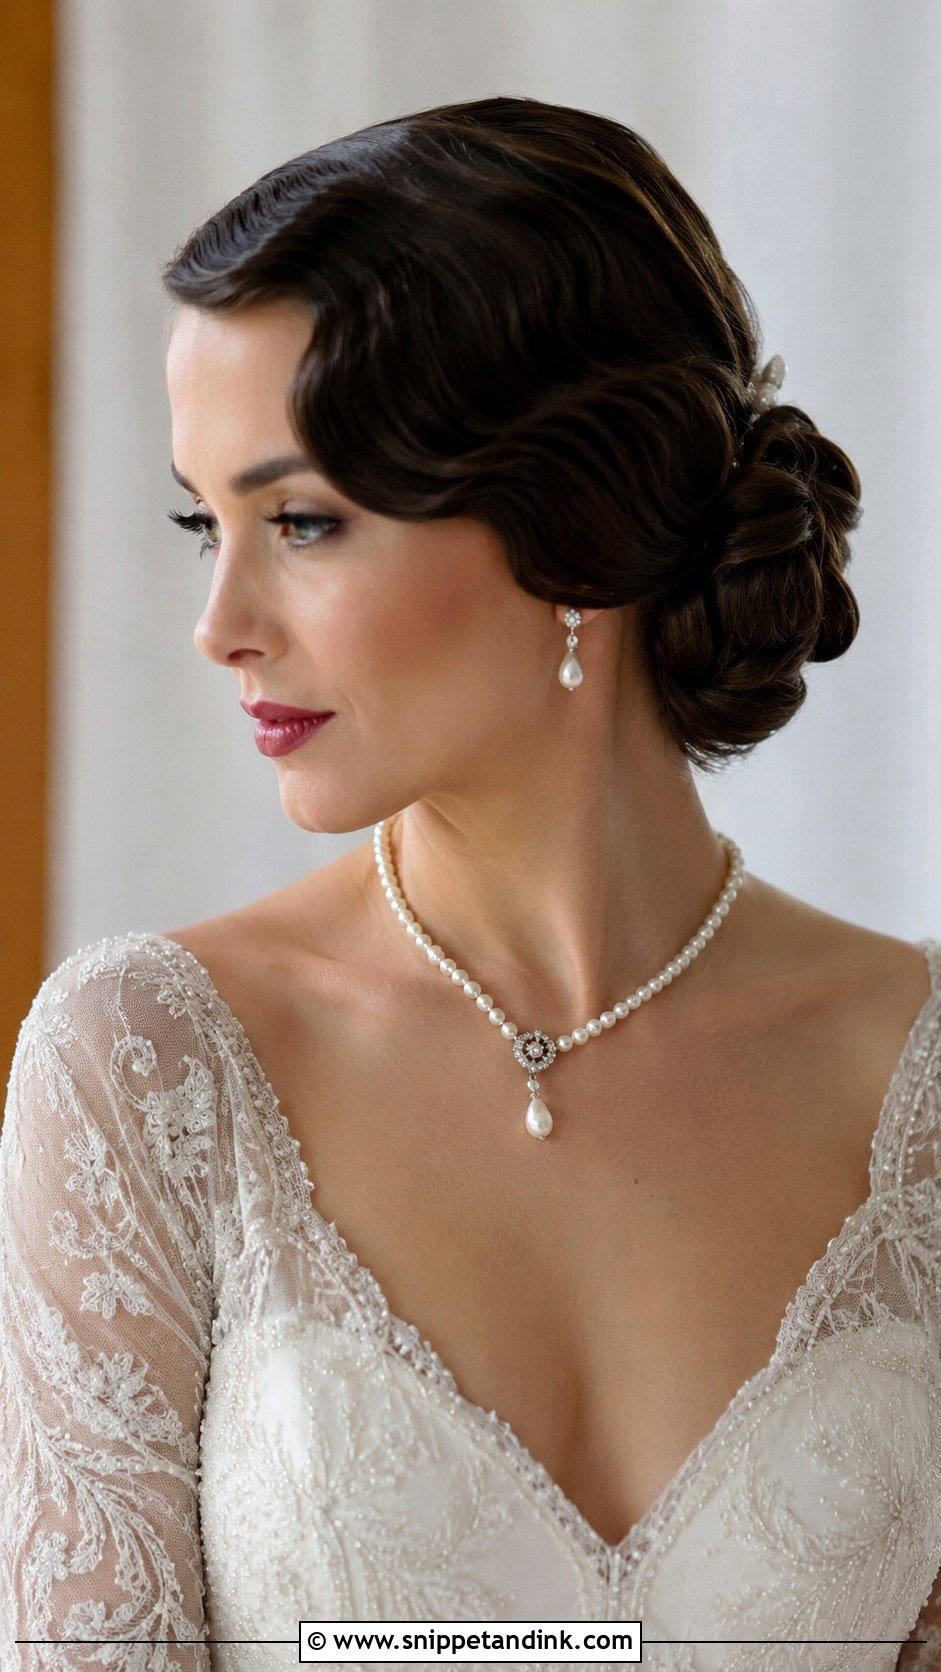
Vintage chignons are built from set curls, not straight hair. I use pin curls or hot rollers, let them cool completely, then brush them into waves before shaping the knot. A deep side part and soft finger waves at the front make it read as a particular era. It pairs naturally with pearls and lace gowns, and fits art deco and classic ballroom weddings. Set curl styles are worth a trial, because humid weather can relax waves faster than expected.
12. Knotted Chignon
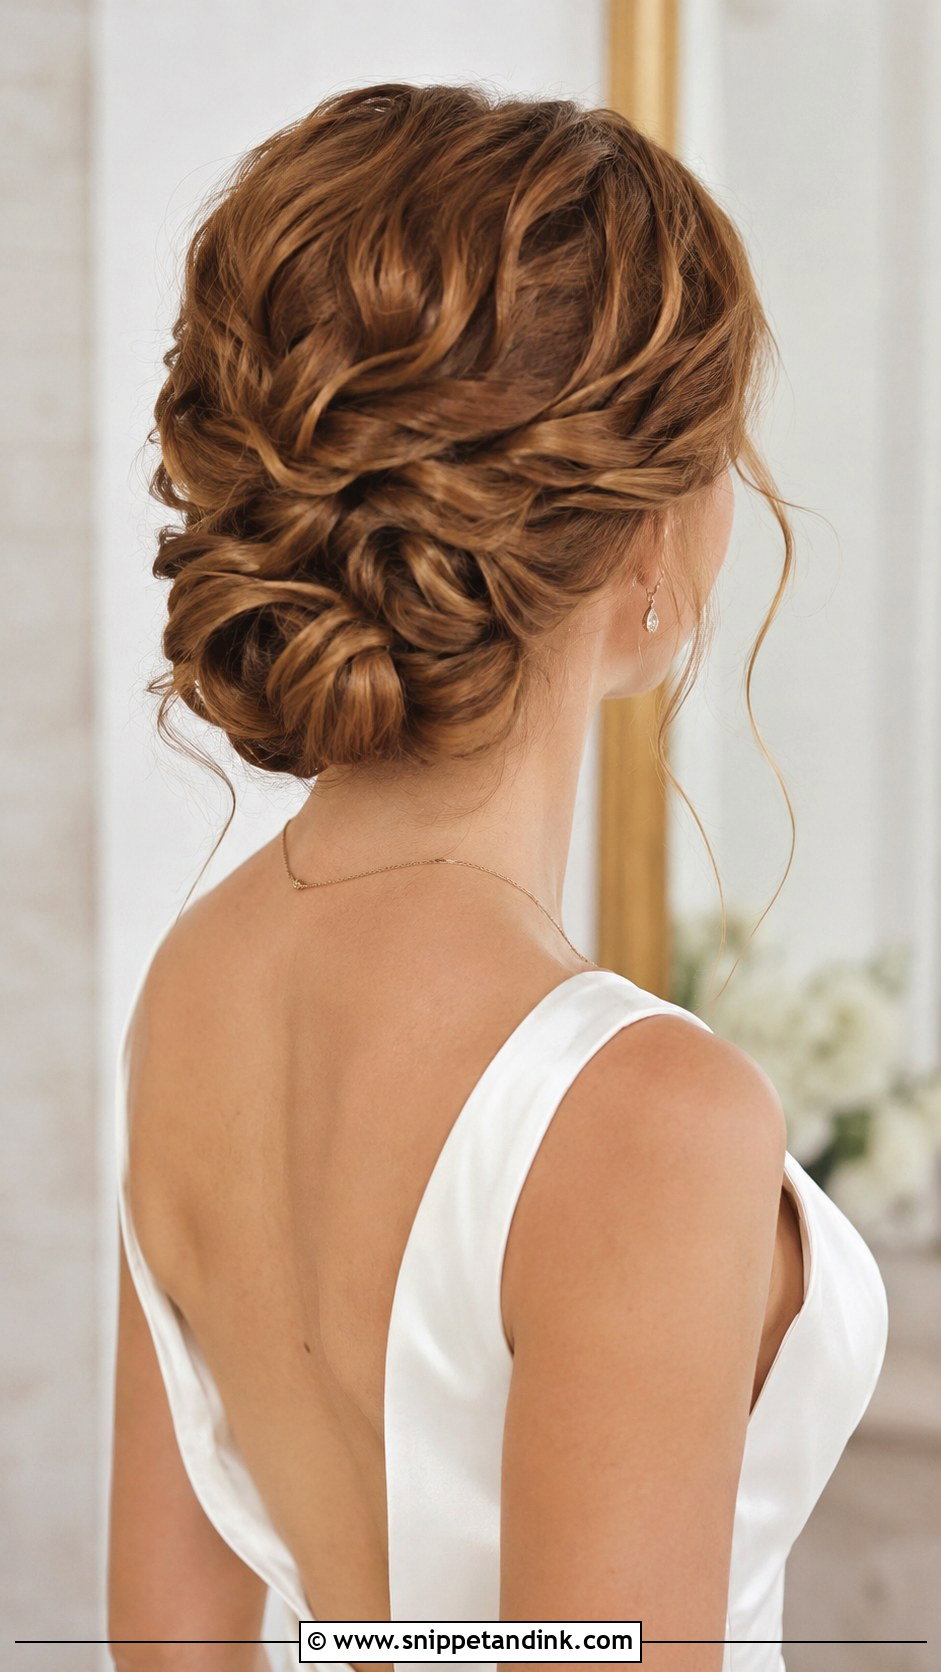
A knotted chignon is made by tying sections of hair into actual knots, then pinning them together into one shape. It looks complex, yet the knots themselves hold the hair, so it tends to need fewer pins than a smooth chignon. Longer, thicker hair works best; shoulder-length hair doesn’t have enough length to tie. Sleek or with loose tendrils, it’s a detailed, sculptural style that rewards close-up photos.
13. Side Chignon
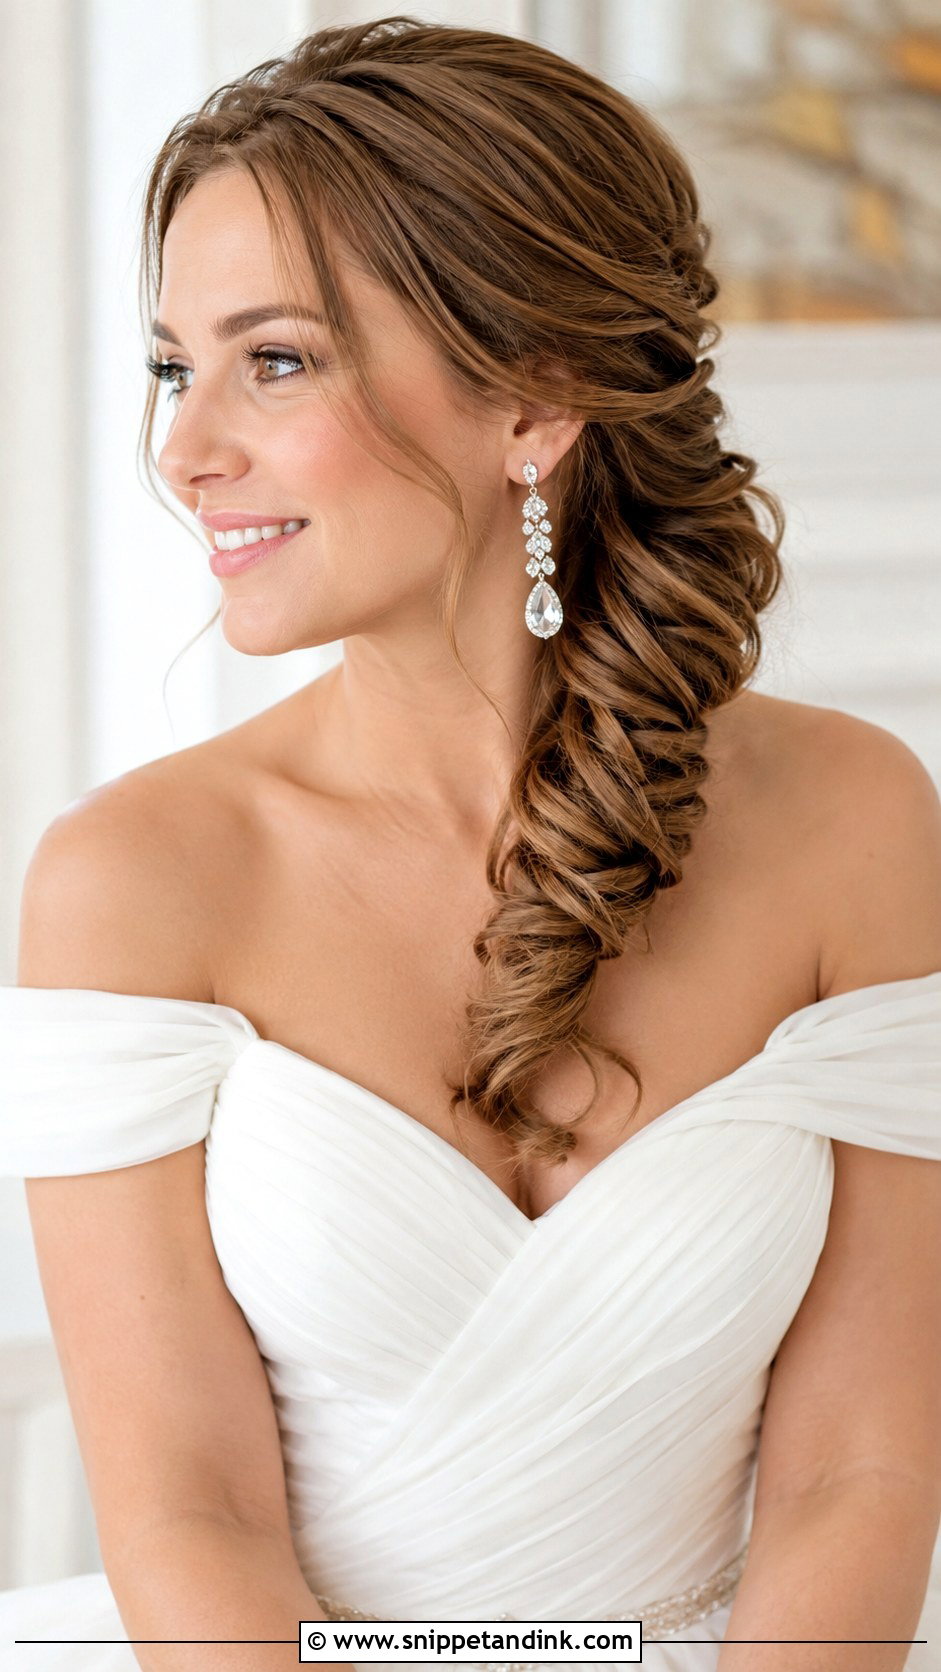
Placing the chignon to one side shows off an off-the-shoulder neckline and a single statement earring. I usually set it slightly lower than the bride first suggests, just behind the ear, because a high side knot can look tilted in photos taken from the other side. Work out which side your photographer will see during the ceremony and put the knot on that side. Loose curls or a sleeker finish both work, and it fits modern and vintage weddings.
14. Chignon With Tiara
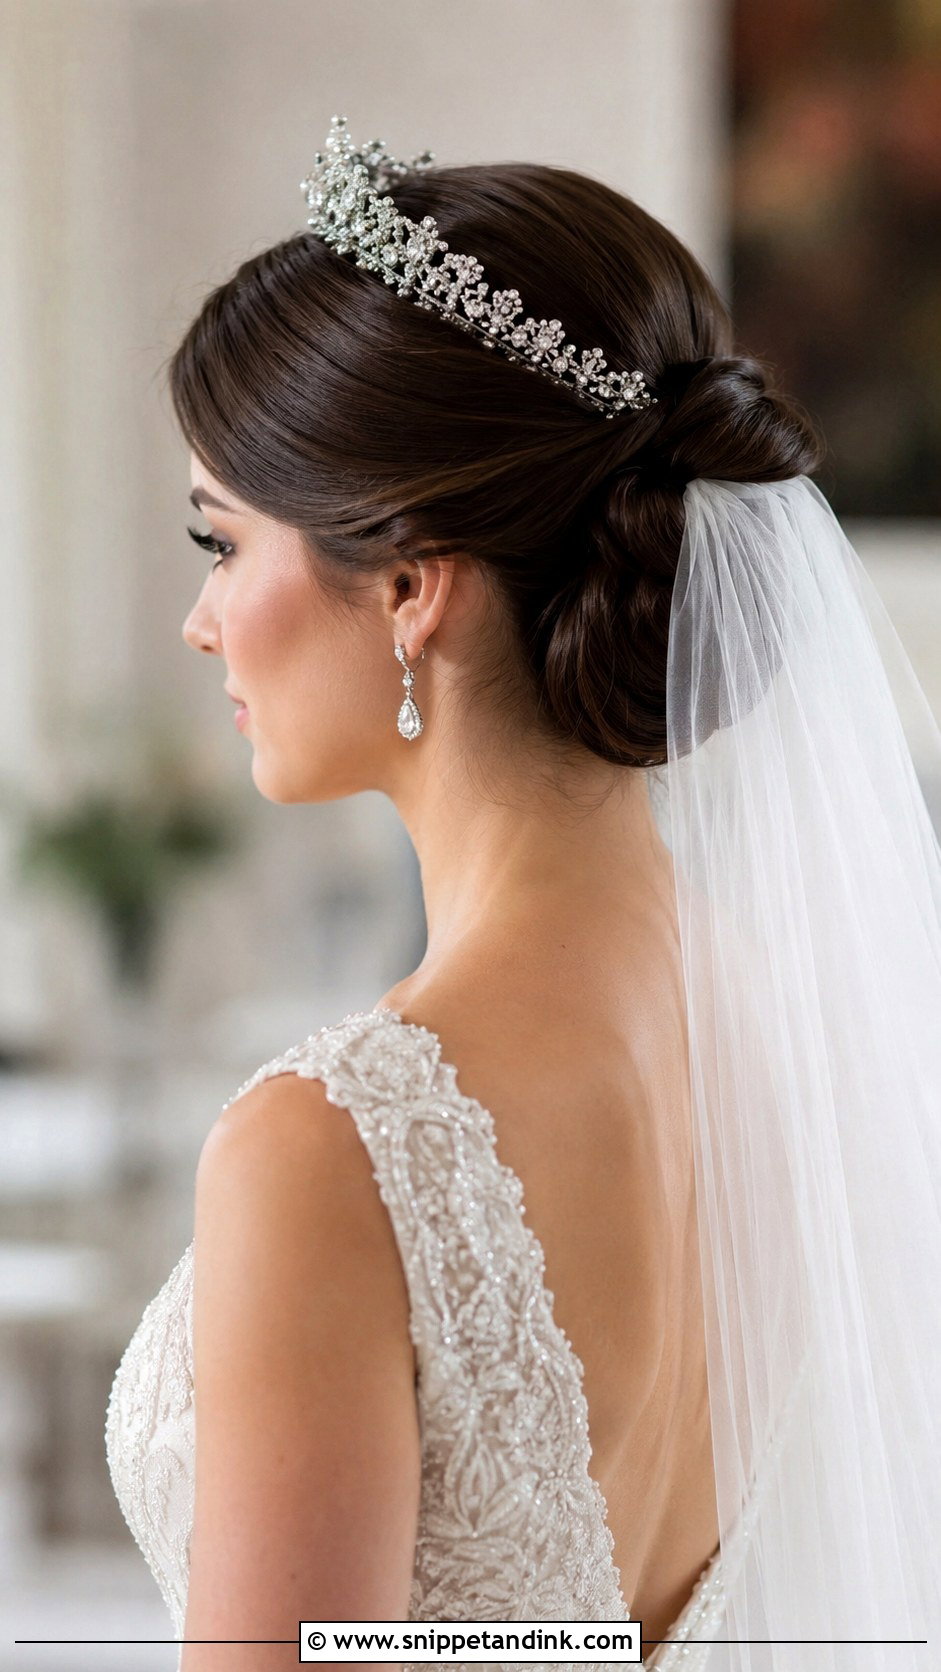
A tiara needs a solid base, and a smooth chignon gives the band something to sit against. The tiara goes on before the final pins so I can anchor its combs or loops into the hair behind the band. Heavy tiaras can press on the scalp after a few hours, so wear yours for a full afternoon at home before the wedding. Add a veil behind it if you like. For a formal, grand wedding, it’s the most regal pairing on this list.
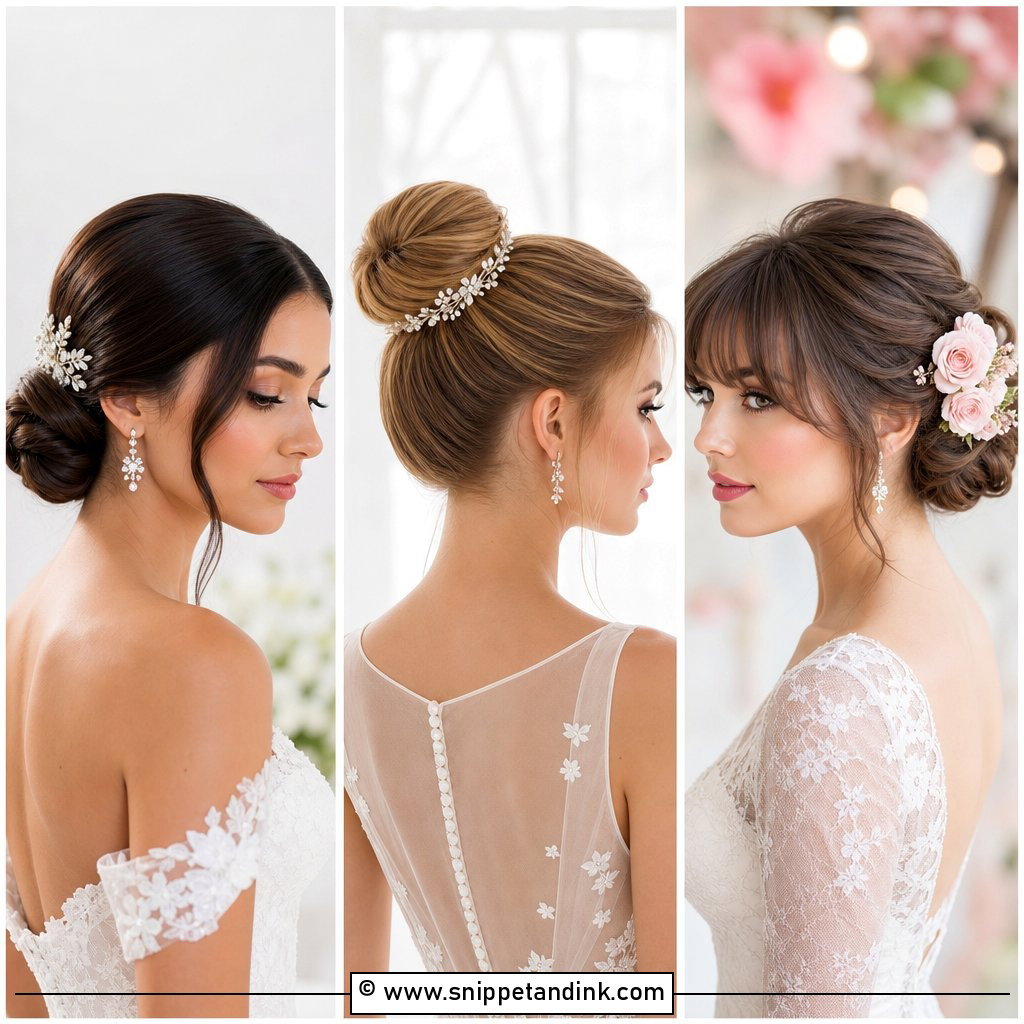
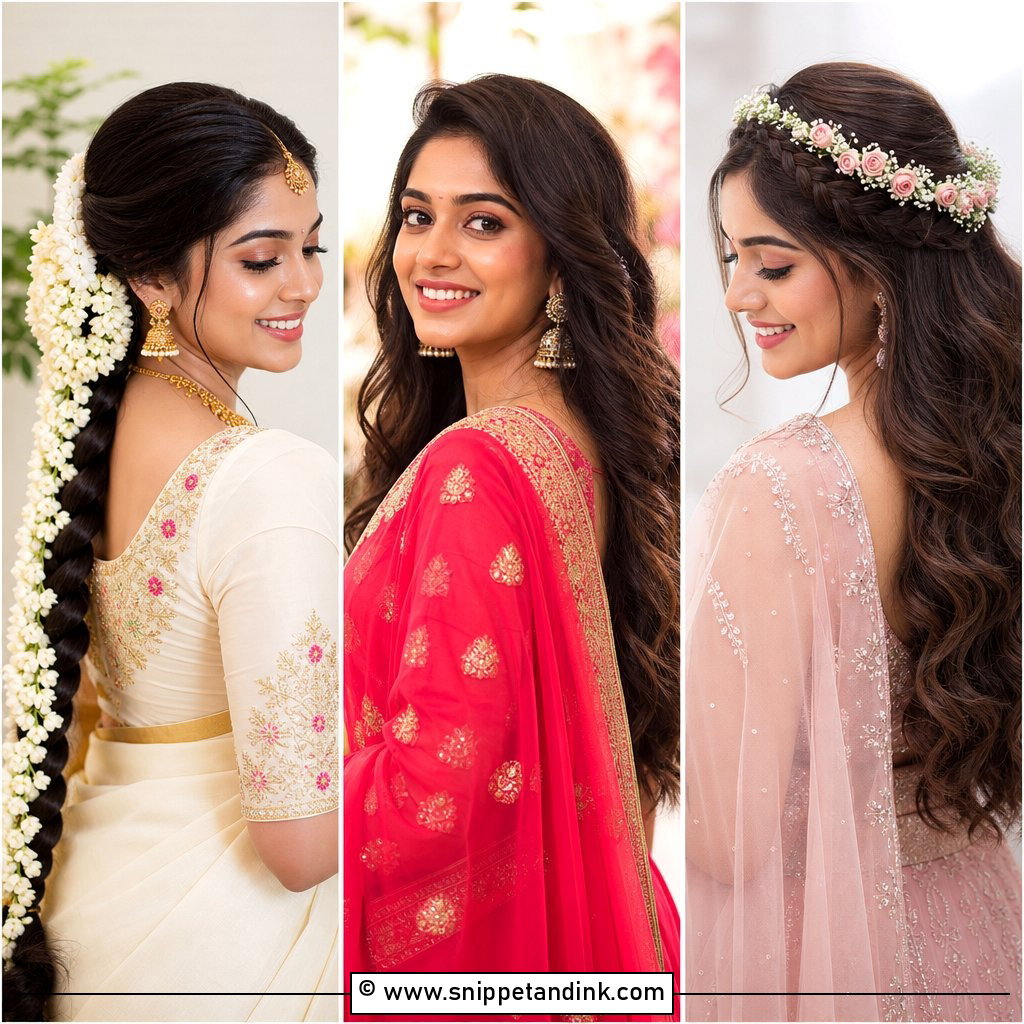
15. Pearl-Embellished Chignon
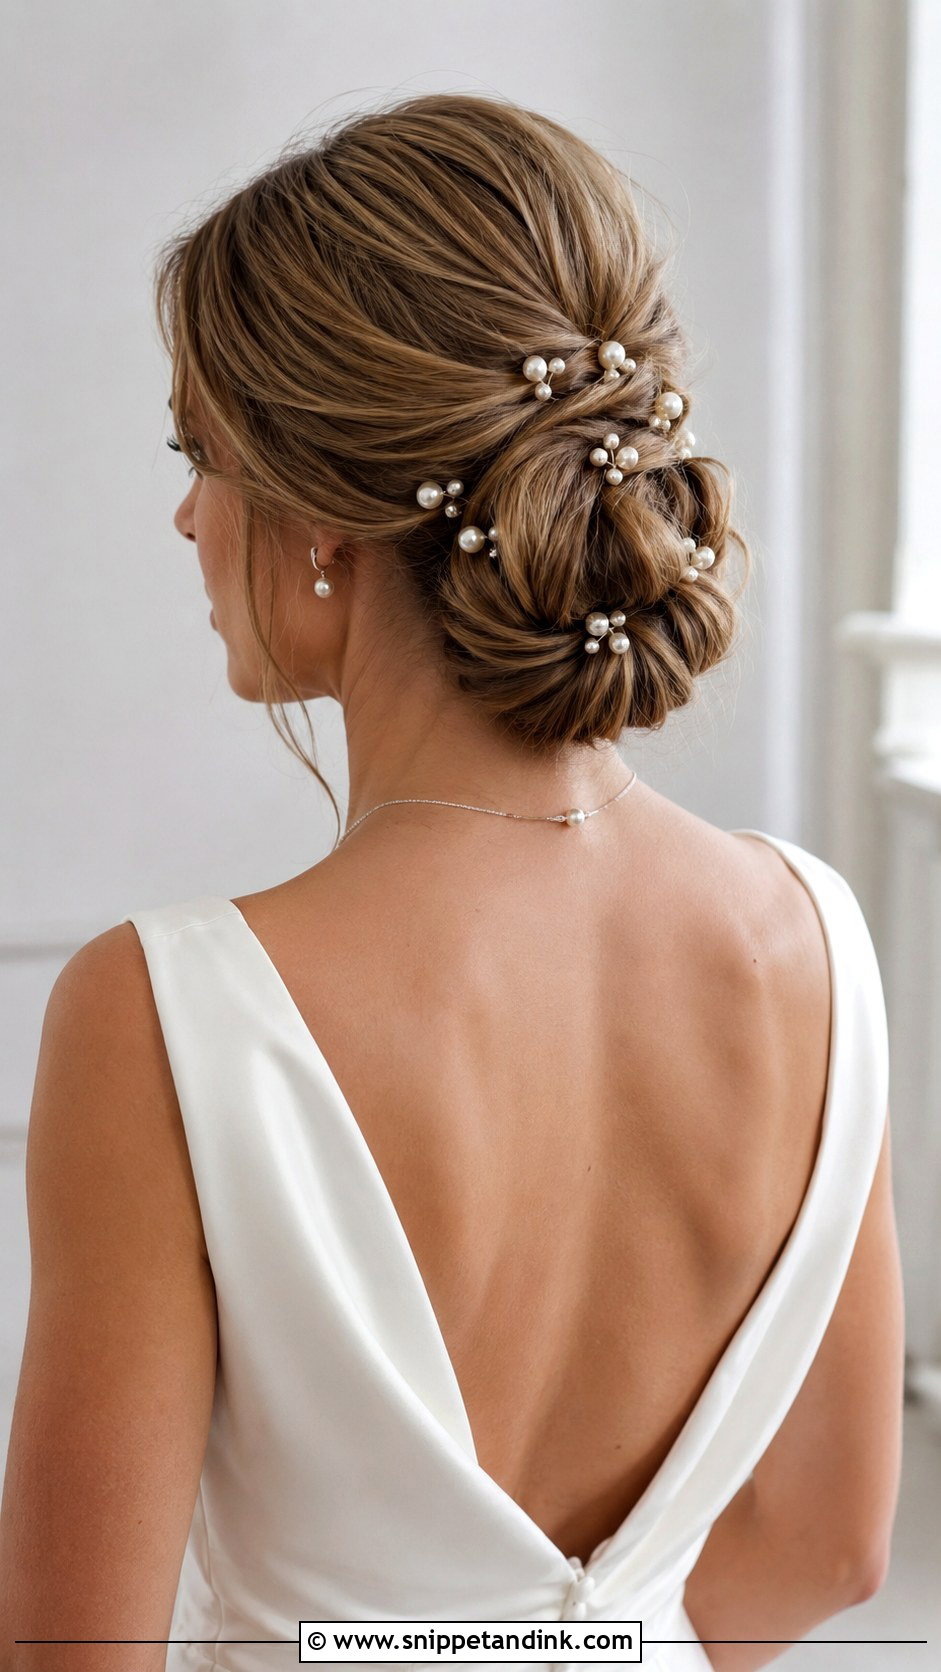
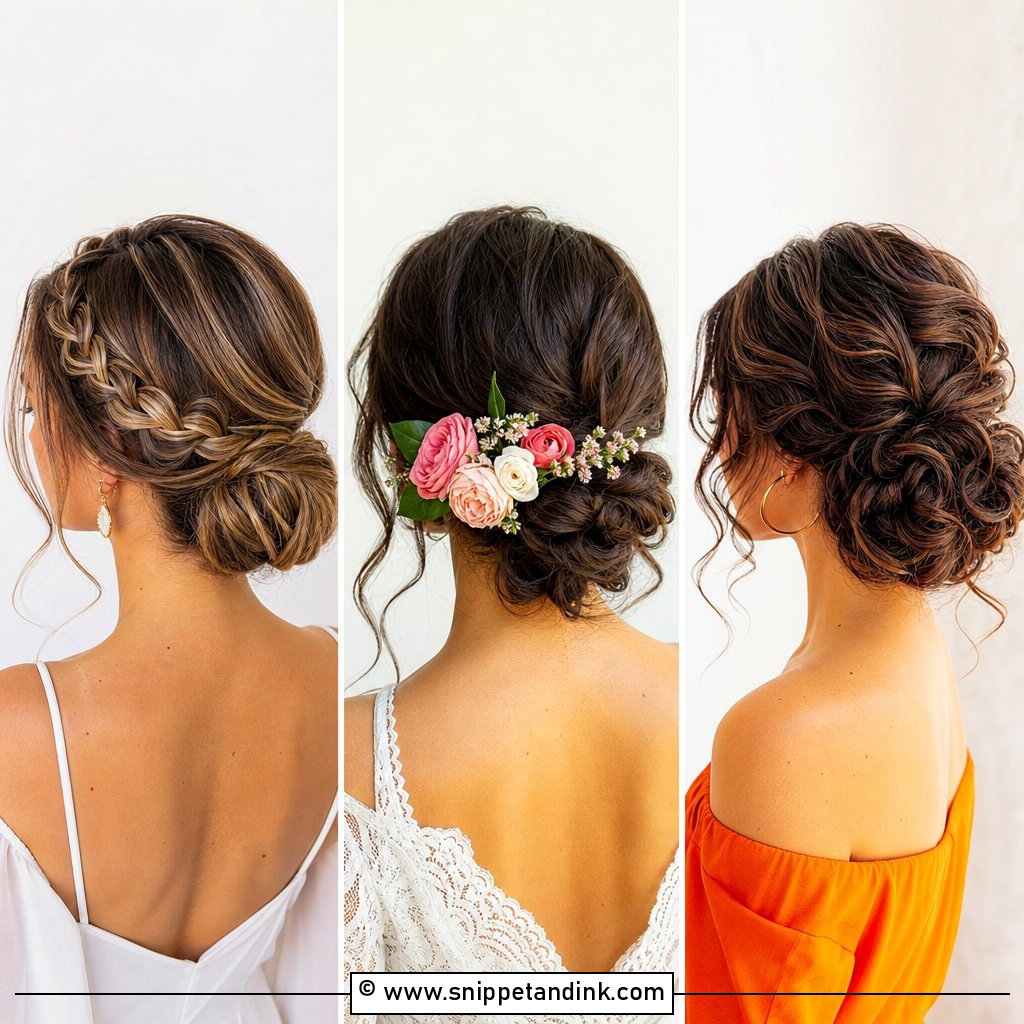
Pearl pins scattered through a knot add quiet luxury. I prefer pins with a slight spring in the wire, since straight pearl pins can slide out of silky hair. Cluster them together for a focal point or space them evenly across the chignon. They suit minimalist gowns and pearl jewelry, and look slightly vintage. If your earrings are already pearl, keep the hair version small so the two don’t compete.
16. Bohemian Chignon
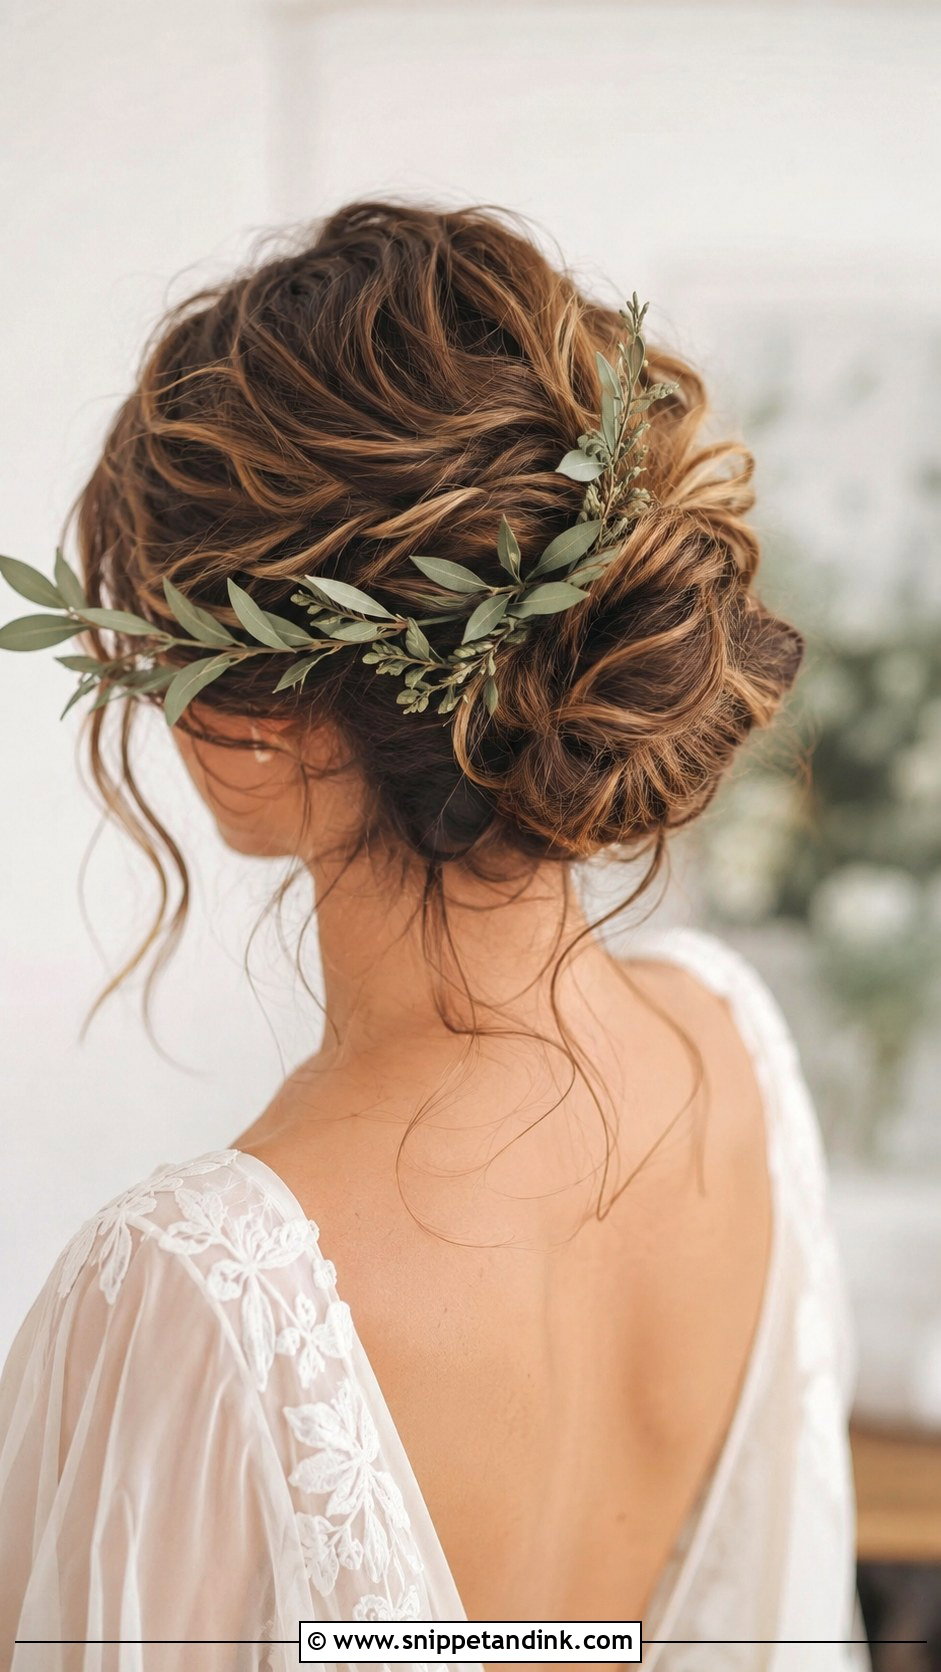
A bohemian chignon is soft, low and textured, with loose pieces left free. Small braids, fresh flowers or trailing greenery fit naturally into it. Texturizing spray creates the piecey, lived-in finish without stiffness. It suits outdoor, garden and beach weddings and pairs well with flowy, ethereal gowns. Wind is the main challenge outdoors, so I anchor the base more firmly than it looks and keep the loose pieces short enough not to blow across your face.
17. Chignon With Curtain Bangs
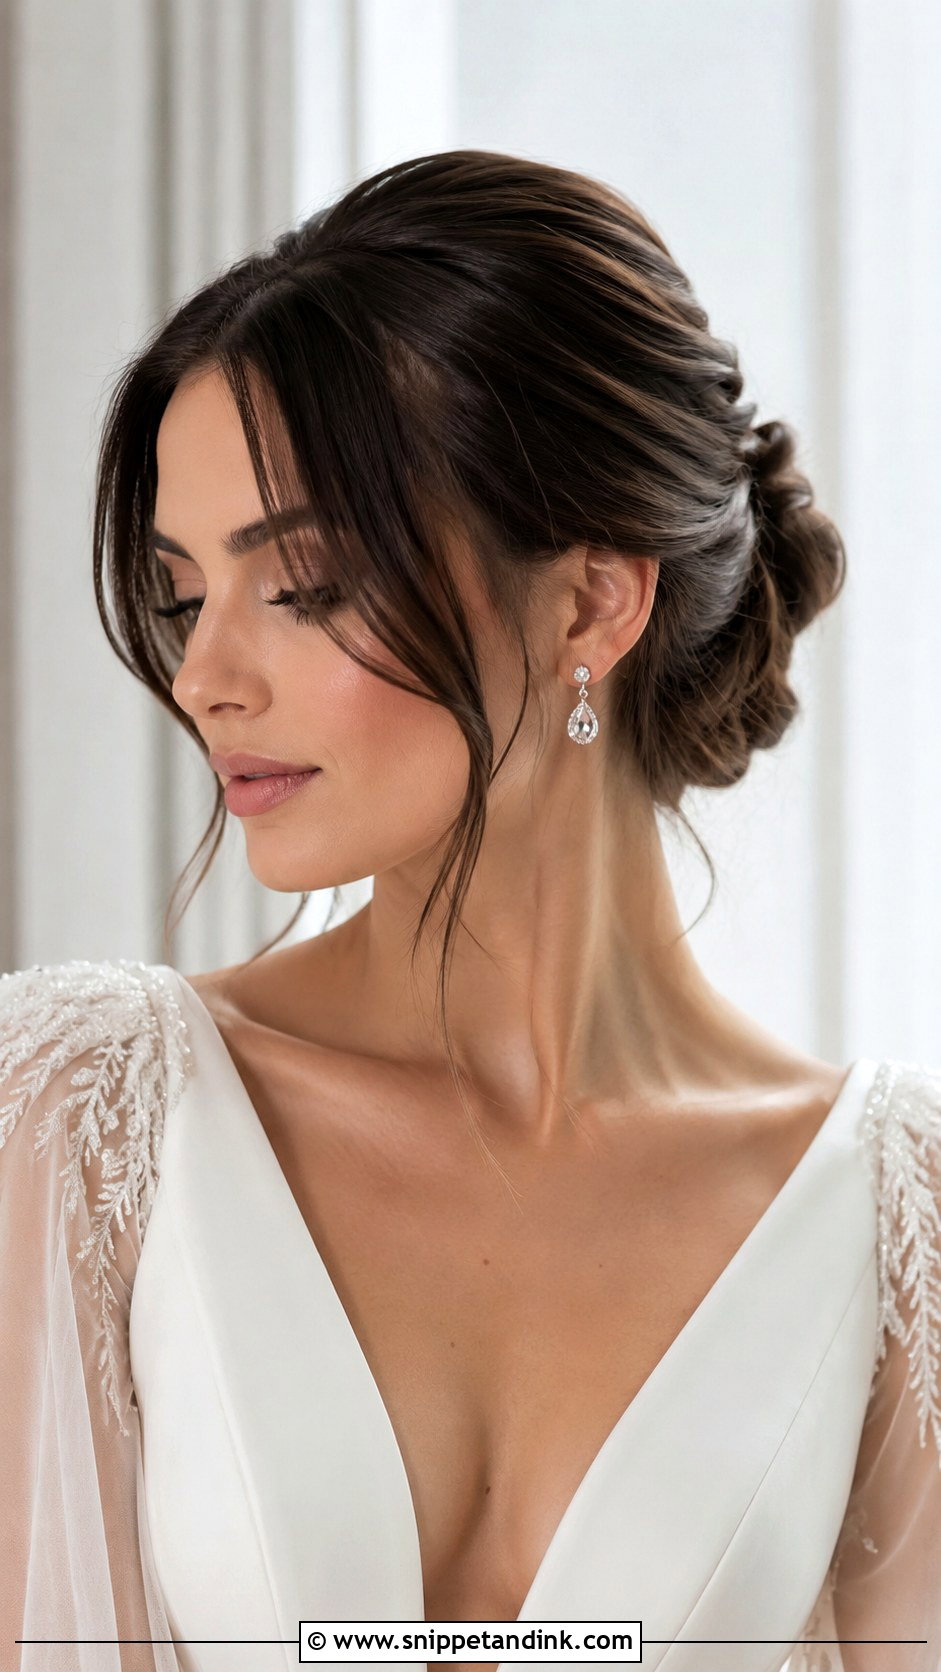
If you already wear a fringe, soft curtain bangs make a classic chignon feel current. Bangs should be cut a few weeks before the wedding so they have time to settle, never the week of. I blow-dry them over a round brush and give them a slight bend away from the face. Sleek or textured chignons both suit them. If you’ve never worn bangs, the wedding isn’t the moment to start.
18. Braided Crown Chignon
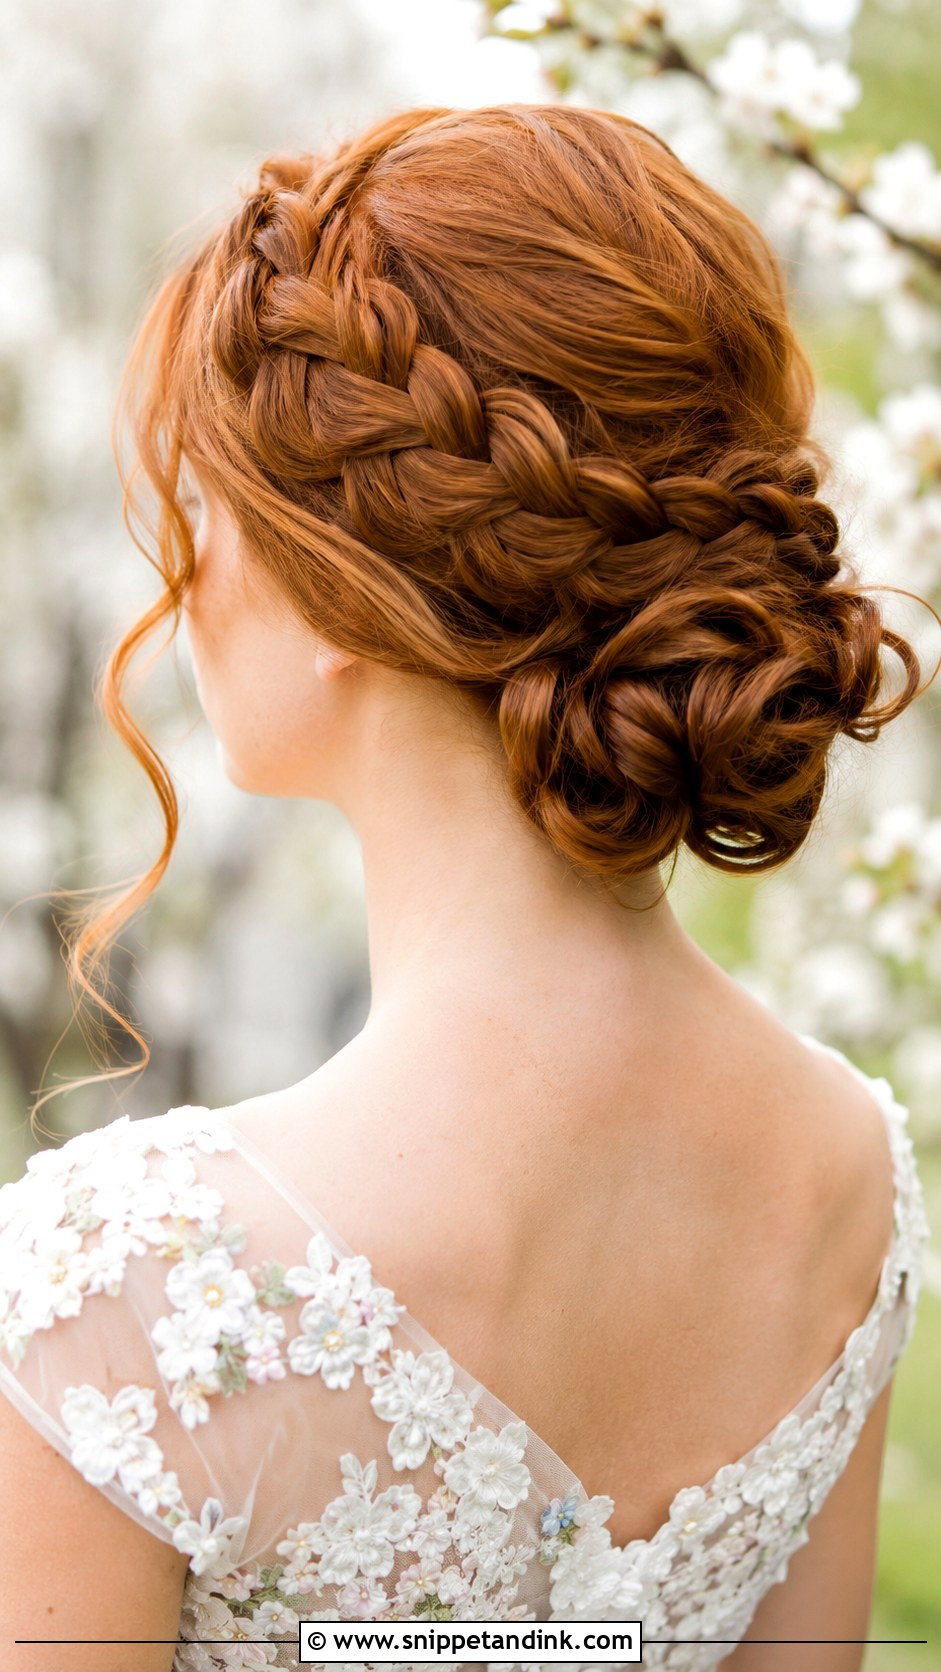
A crown braid wrapped around the head, leading into a soft knot at the back, gives a fairytale look and keeps every strand off the face. I start the braid above one ear and set it slightly back from the hairline, so it doesn’t read as a headband. Thick, long hair is needed to reach all the way around; clip-in extensions can make up the length. Tiny flowers or pearls along the braid suit boho and garden weddings.
19. Textured Chignon
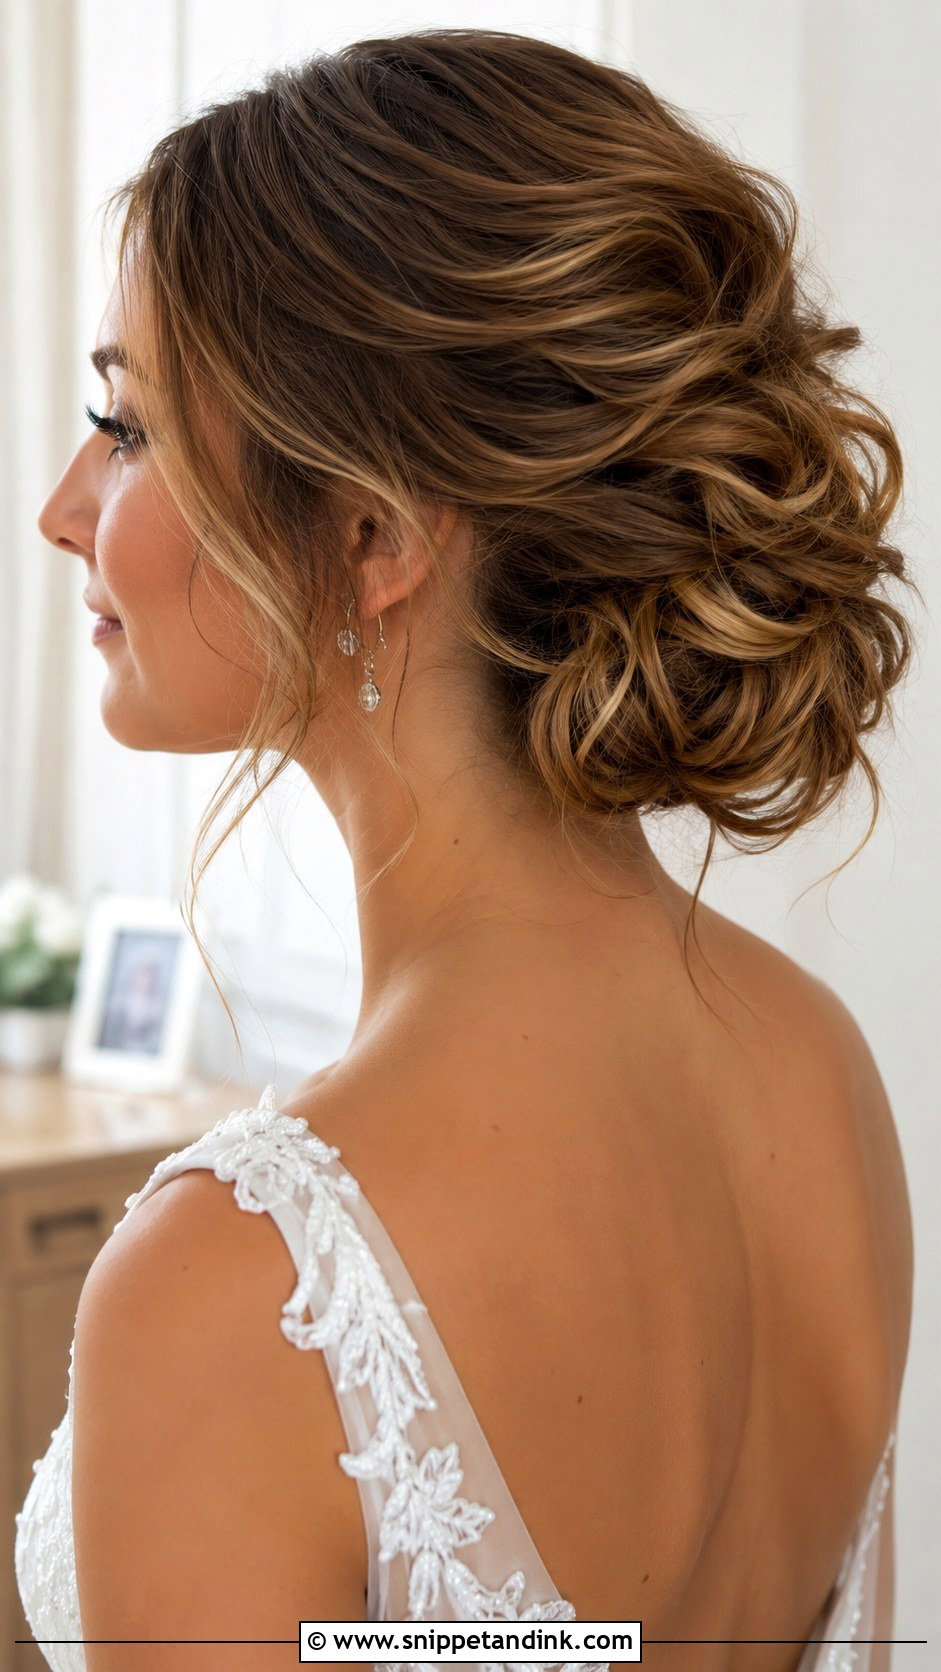
Texture is what stops a simple knot looking flat in photos. I build purposeful waves first, then twist or pinch sections so the light picks up ridges and shadows. Texturizing spray gives grip and dimension. It sits between sleek and messy, which makes it adaptable to formal and relaxed weddings. If your hair is very fine, texture is often more flattering than a smooth chignon, which can show the scalp through the hair.
20. Romantic Chignon With Tendrils
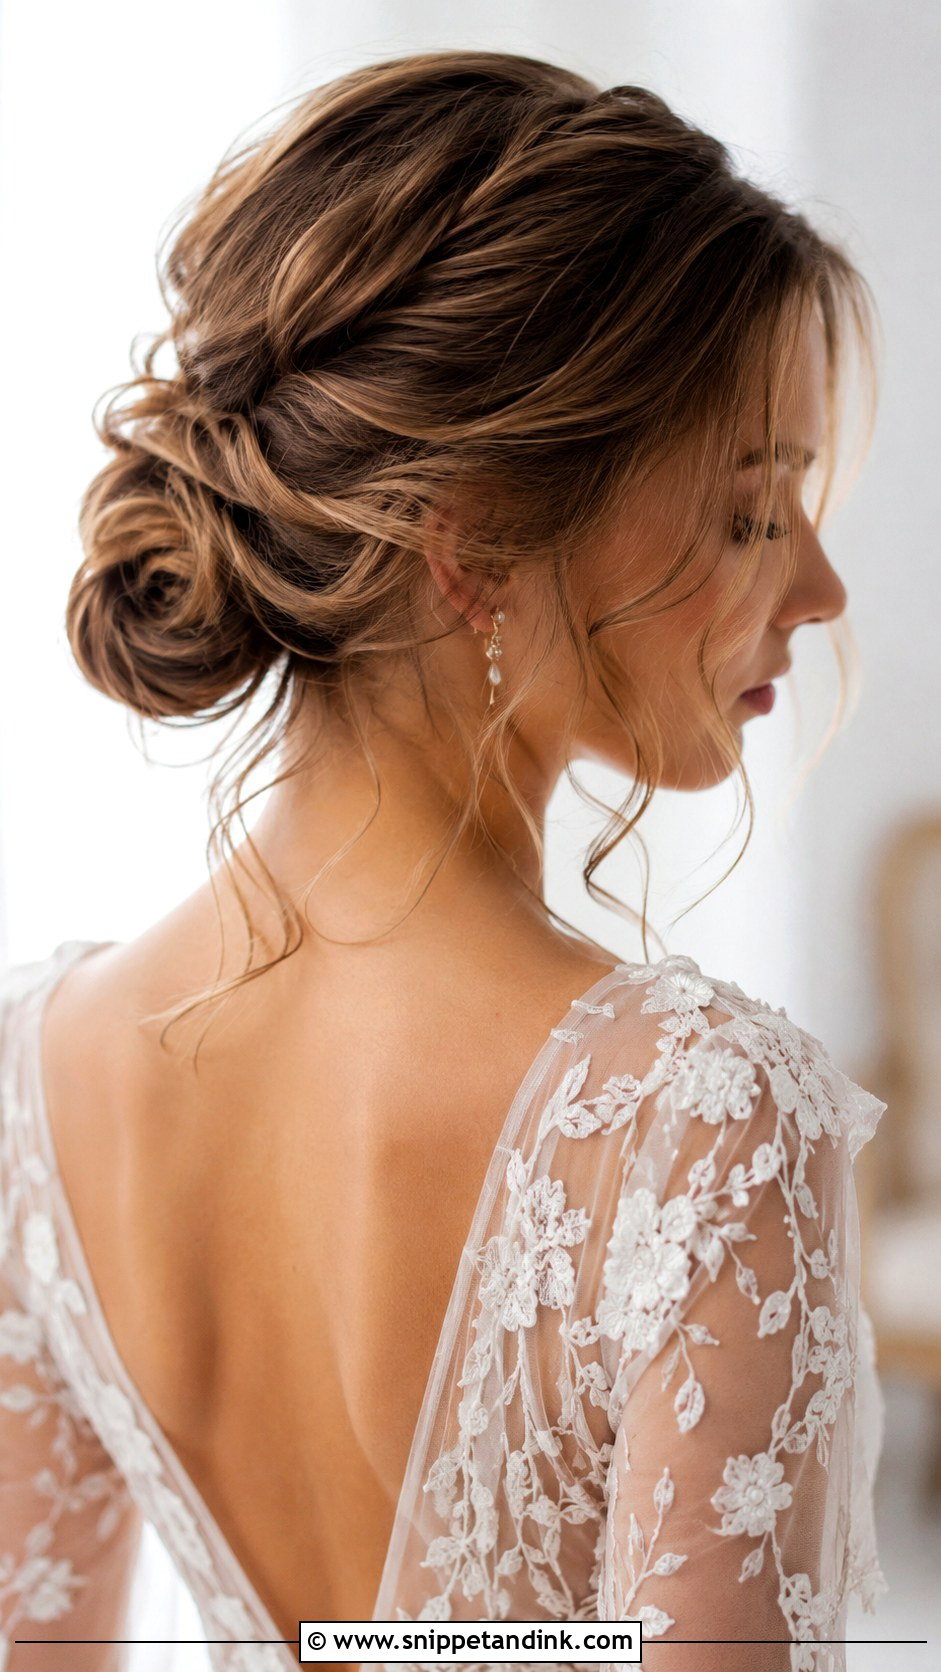
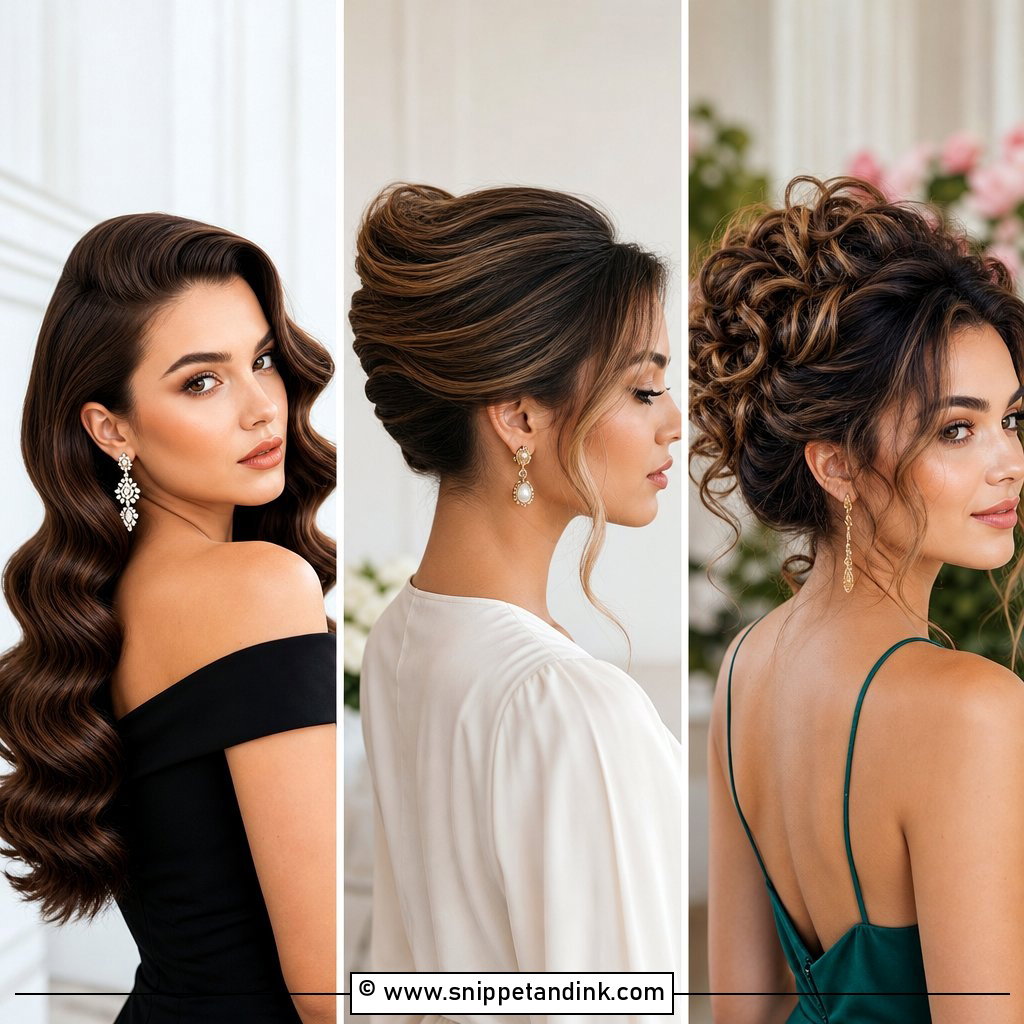
A low knot with a few loose tendrils around the face is the most romantic version here. The tendrils are curled and flow freely around the face, and it has a slight vintage feel. It suits garden ceremonies and smaller weddings. Curl the tendrils for extra bounce. One honest note: if you have very straight hair that drops quickly, ask your stylist to test the tendrils over a few hours at your trial.
Headpiece First, Hair Second
Most brides choose their hairstyle and then try to fit a veil or tiara to it. I’d do it the other way round. The headpiece decides where the knot sits, how much volume you need at the crown and how many anchor pins go in.
- Buy or borrow your veil, tiara, comb or hair vine before your trial, not after.
- Bring it to the trial so your stylist can place it and build the support underneath.
- Photograph the back and both sides in daylight on your phone.
- Ask how the headpiece will be removed for the reception without unpinning the chignon.
A Small Repair Kit for the Reception
Even a well-built chignon can loosen after hours of hugs, dancing and heat. Ask your stylist to give your maid of honor a few bobby pins in your hair color, a travel-size hairspray and a small comb. If a section slips, it can usually be twisted back and pinned with two crossed pins. If tendrils fall flat, a quick twist around a finger and a light mist of spray will revive them. In very humid weather, a stronger hold spray at the base before you leave the chair helps more than respraying later.
Your Dress, Your Headpiece and One Low Knot
One knot at the nape can look formal, relaxed, retro or modern depending on how it’s built and what you add. Pick two or three favorites from this list, along with photos of your dress, headpiece and veil, and bring them to your stylist. Wear the trial style all afternoon so you know how it feels at hour five. With a chignon that suits your hair and your accessories, you can stop thinking about your hair once you leave the chair.
You'll Like These Ideas:


Leave a Reply