
Most brides I style end up in some kind of bun, even the ones who arrive certain they want their hair down. Once they picture a full day of hugs, a veil, wind at the photo location and a warm reception room, hair off the neck starts to make sense. The shape is also very adaptable: sleek or textured, low or high, plain or dressed with pearls. These ideas cover brides as well as bridesmaids, mothers and guests, and I’ve noted where each one needs particular hair or prep.
What a Good Bun Trial Looks Like
A trial is where a bun idea becomes a bun that works on your hair. I treat it as a rehearsal for the wedding morning, and it goes best when you arrive prepared.
- Come with hair washed the day before and fully dry, the way it will be on the morning itself.
- Wear a top with a neckline close to your dress, or at least one that shows your neck and shoulders.
- Bring the veil, comb, pins, earrings and any hair flowers you plan to use, plus photos of the dress from the front, side and back.
- Bring a few reference photos of buns you like and one you dislike. The one you dislike often tells me more.
- Keep it in for the rest of the day. Notice when it starts to feel heavy or tight, and whether anything drops by evening.
I like trials to happen a couple of months ahead and after any color appointment, so your stylist sees your hair as it will be. If you’re planning a cut, have it before the trial or not at all.
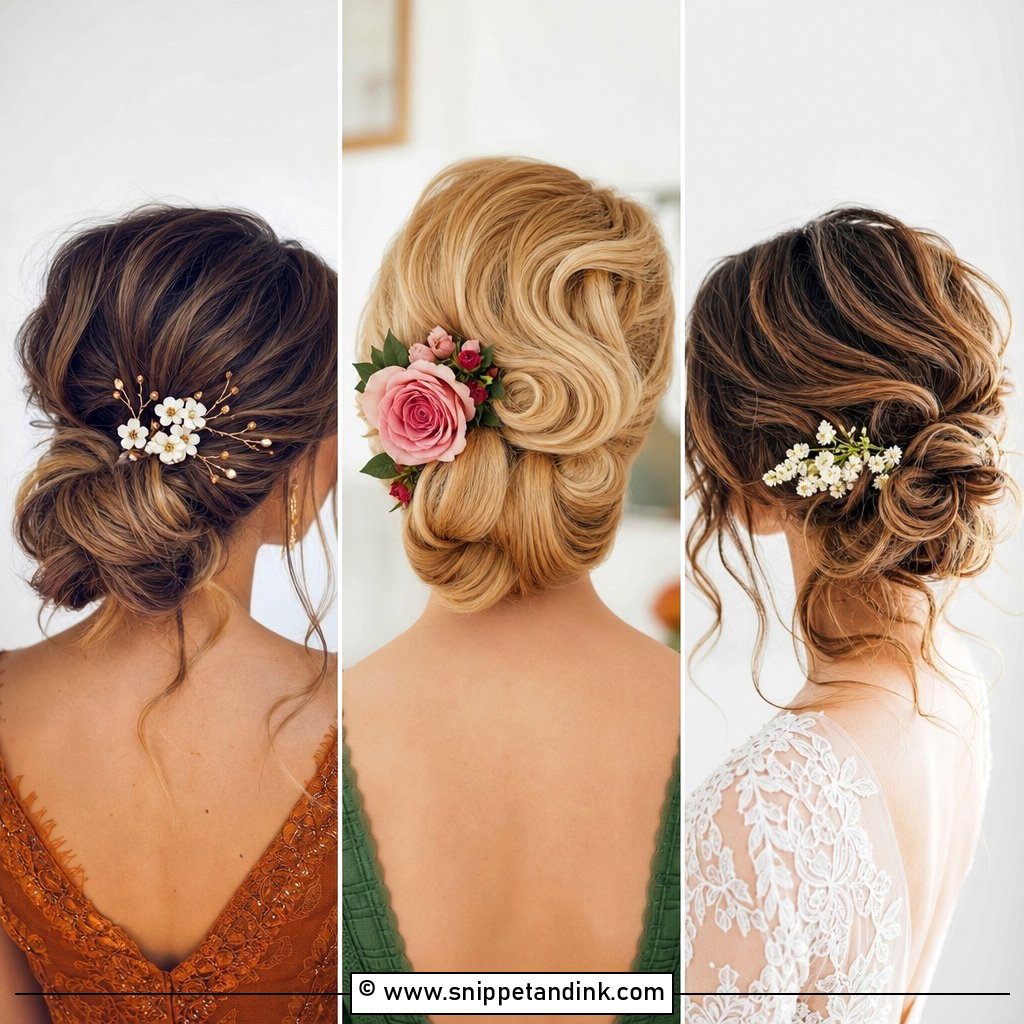
1. Low Wedding Bun
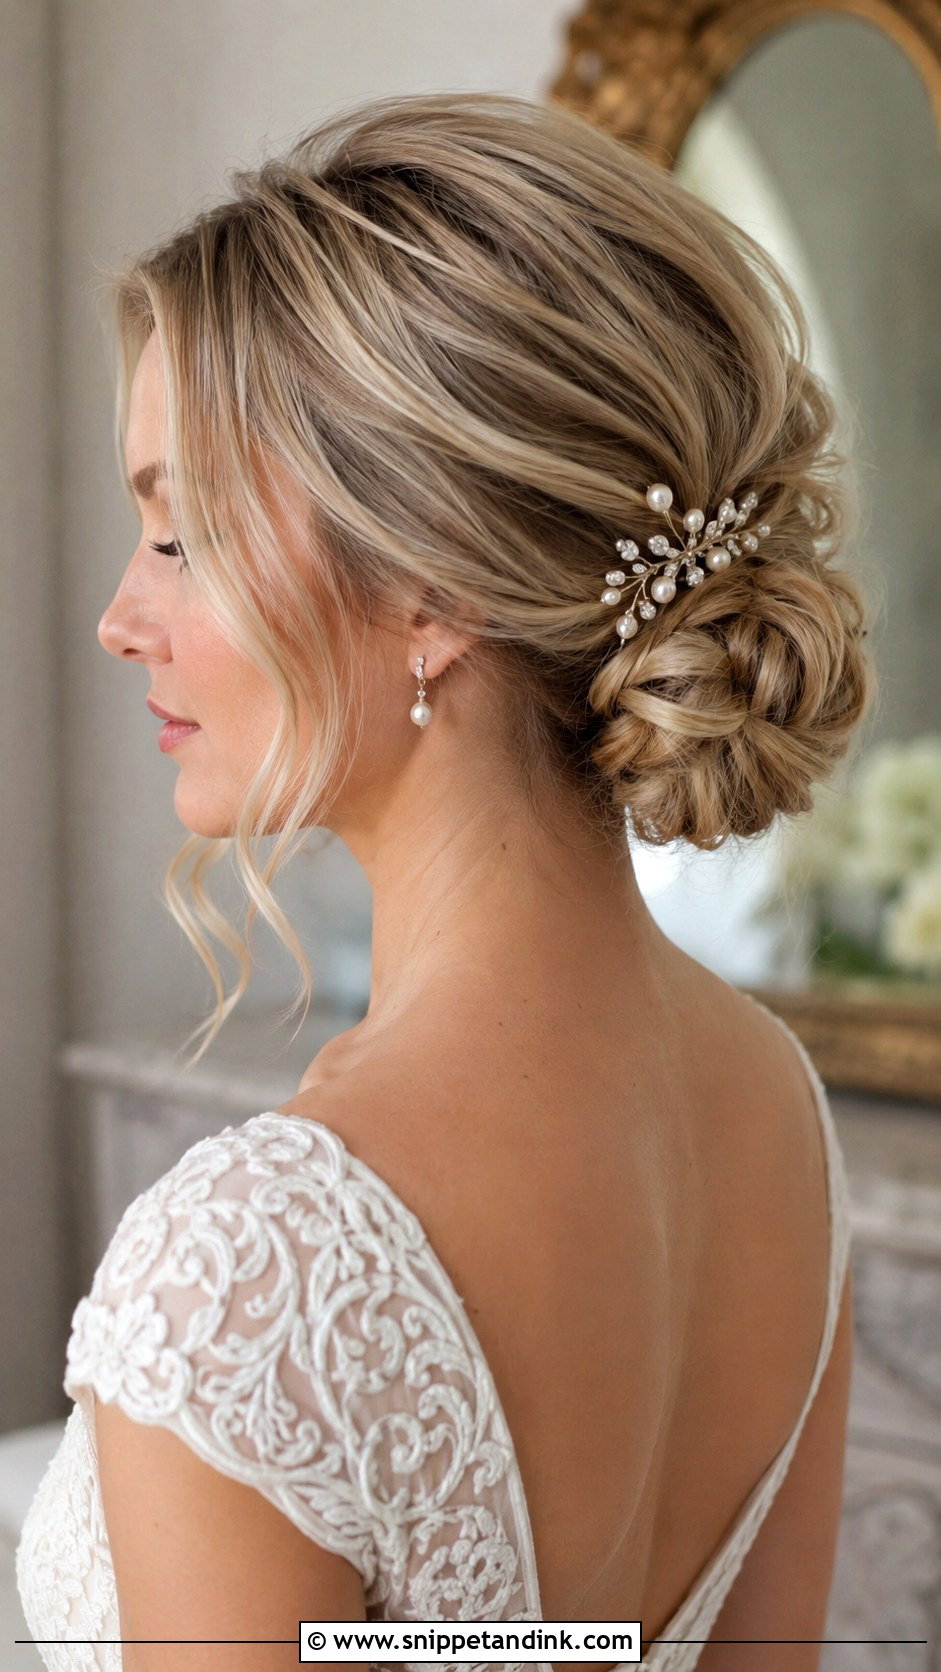
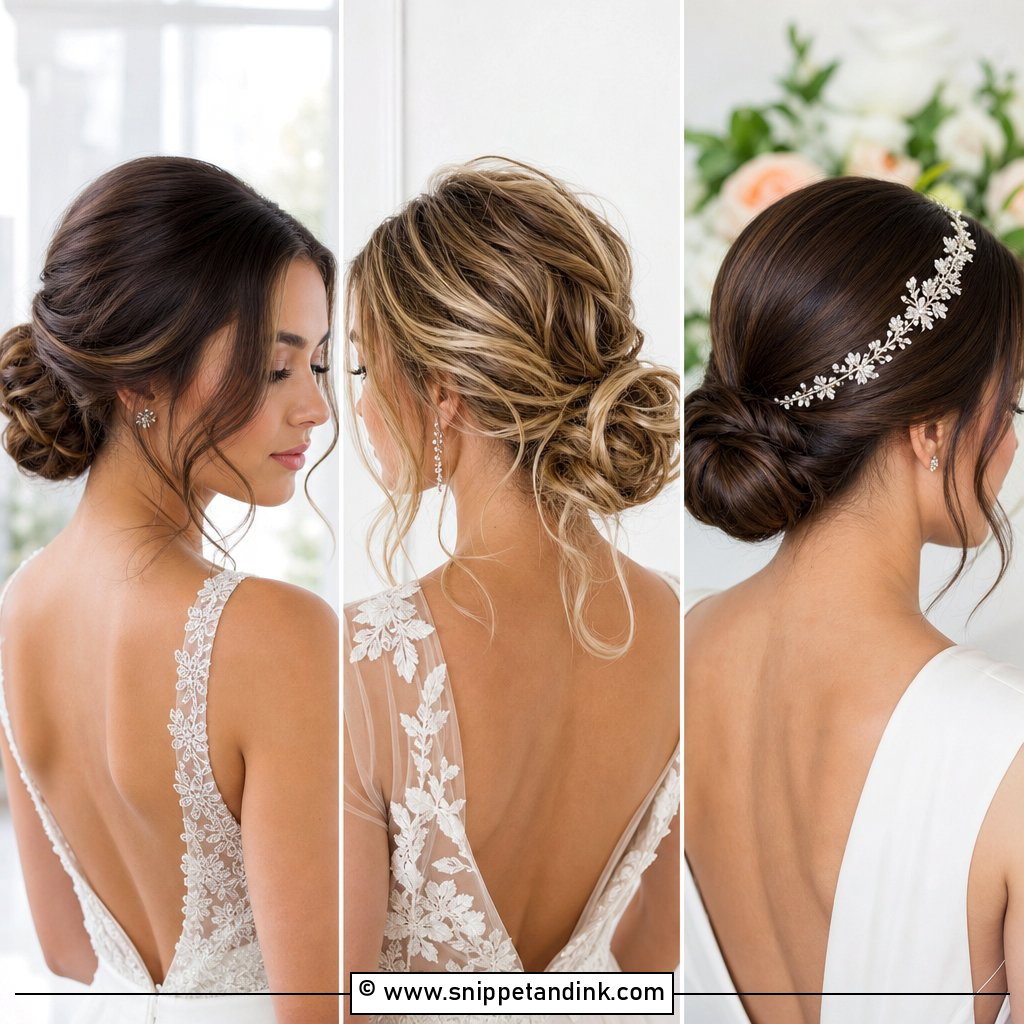
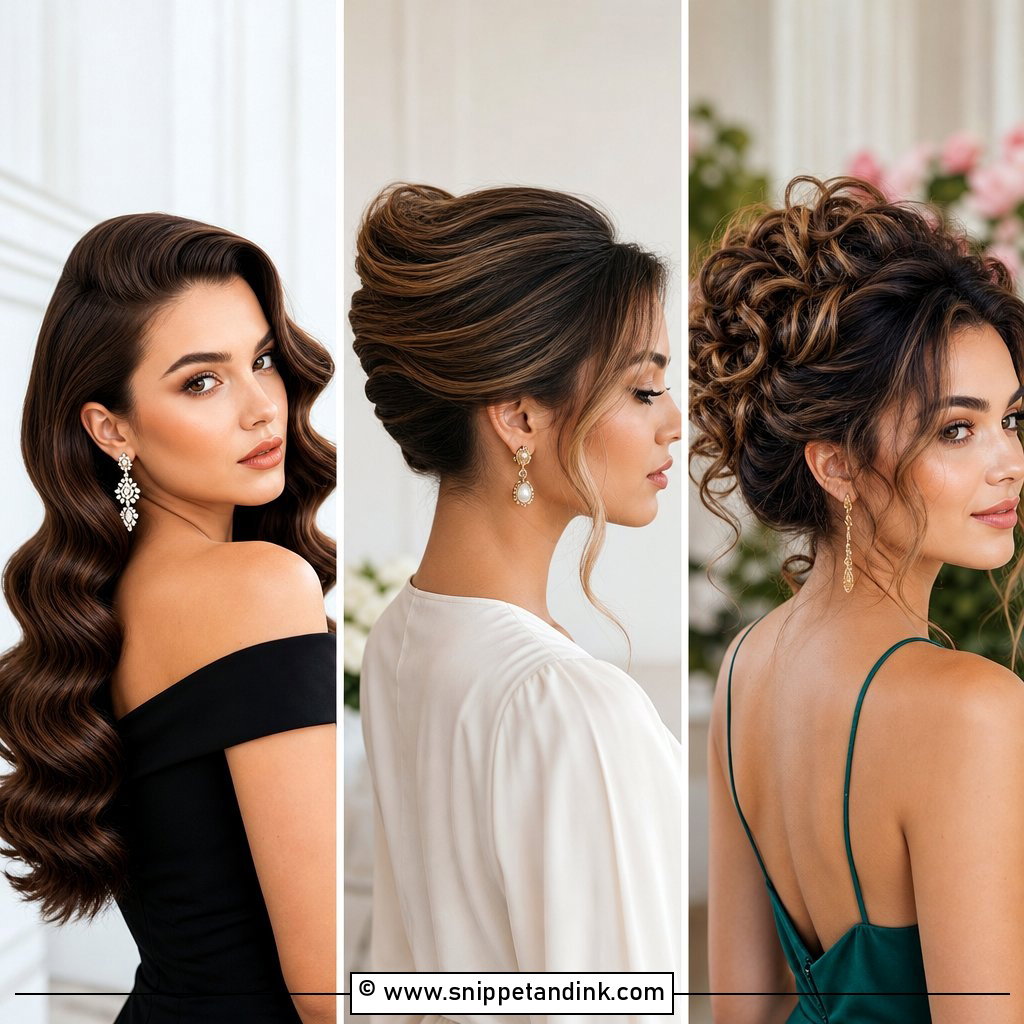
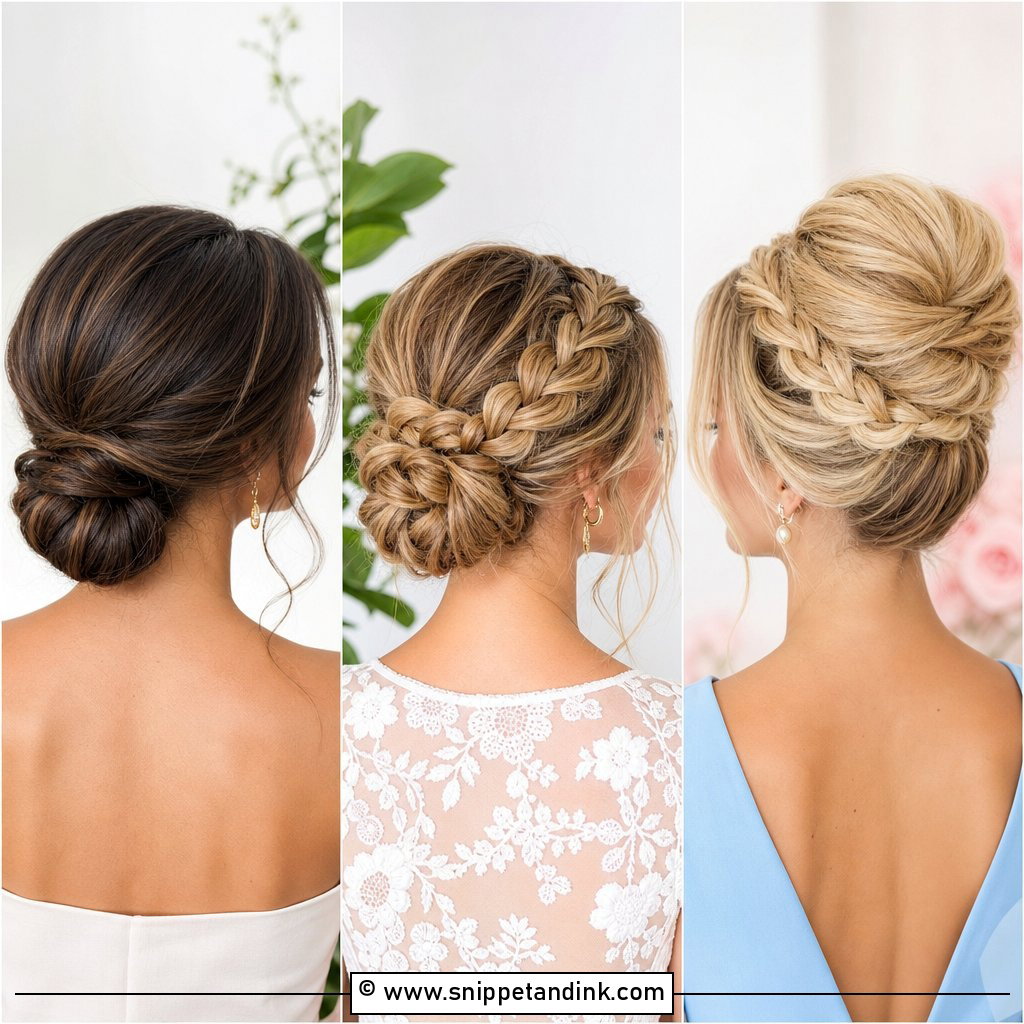
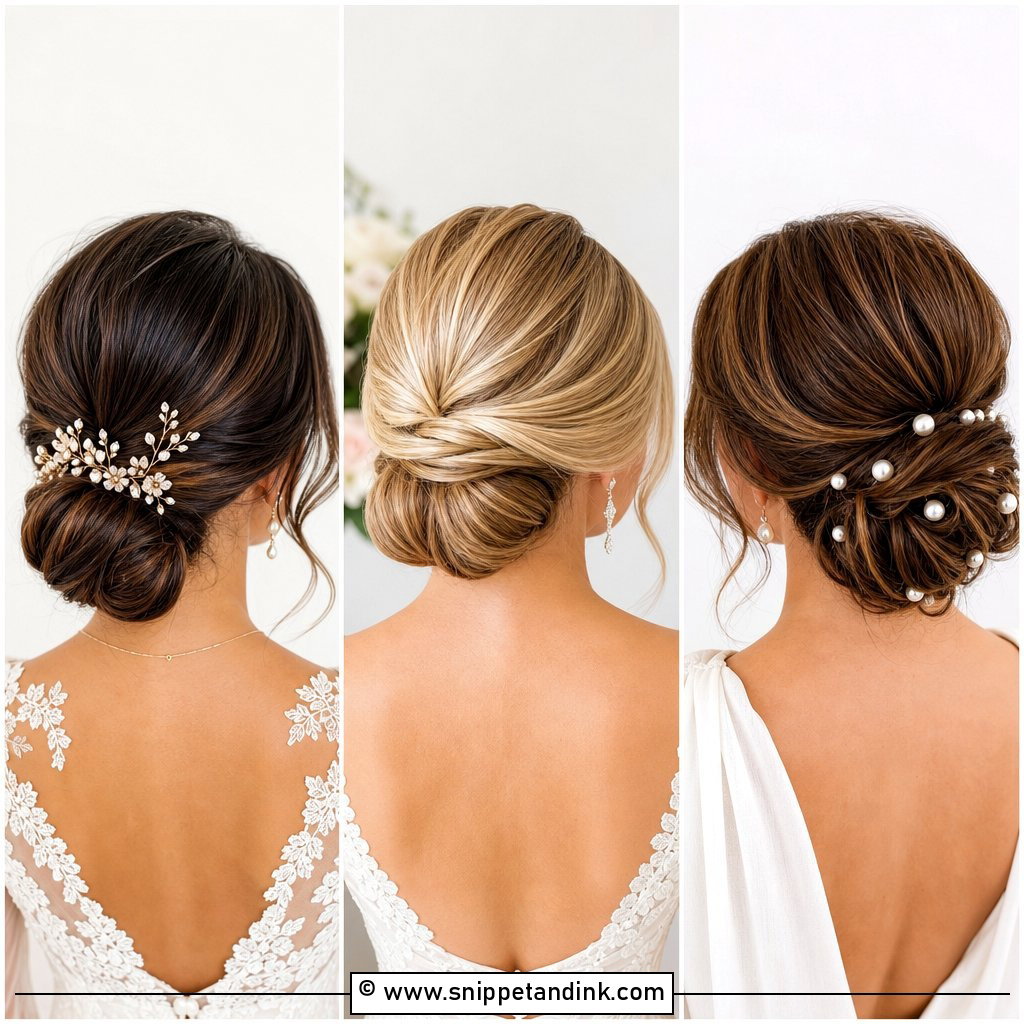
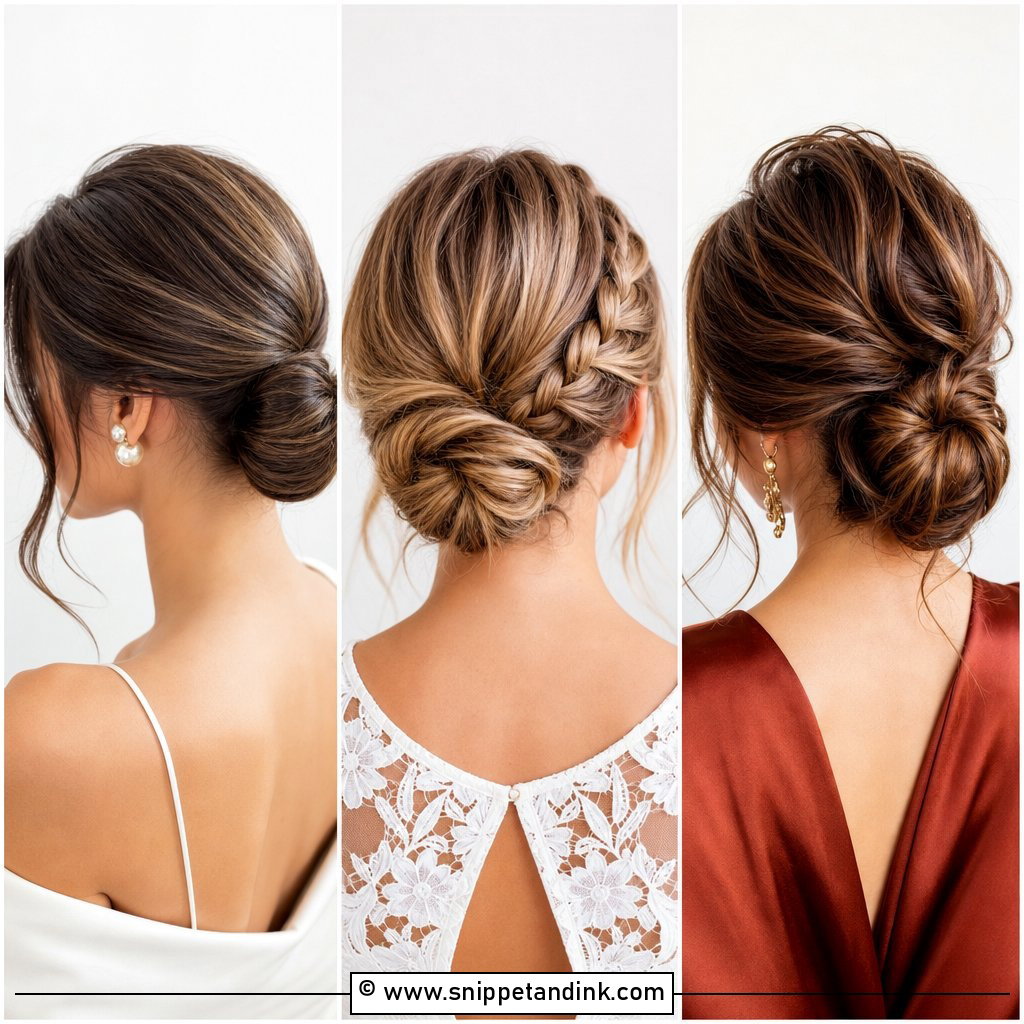
My first question with a low bun is how much lift you want on top. A smooth crown looks clean and modern; a little height there makes the face look softer and longer. The nape placement means nothing presses against the back of a chair during the ceremony or dinner, which brides only appreciate after hours of sitting. It takes a veil easily and suits pearl pins, floral combs placed along one side. Fine hair often needs a small padding piece or a couple of clip-in wefts to give the bun a decent size.
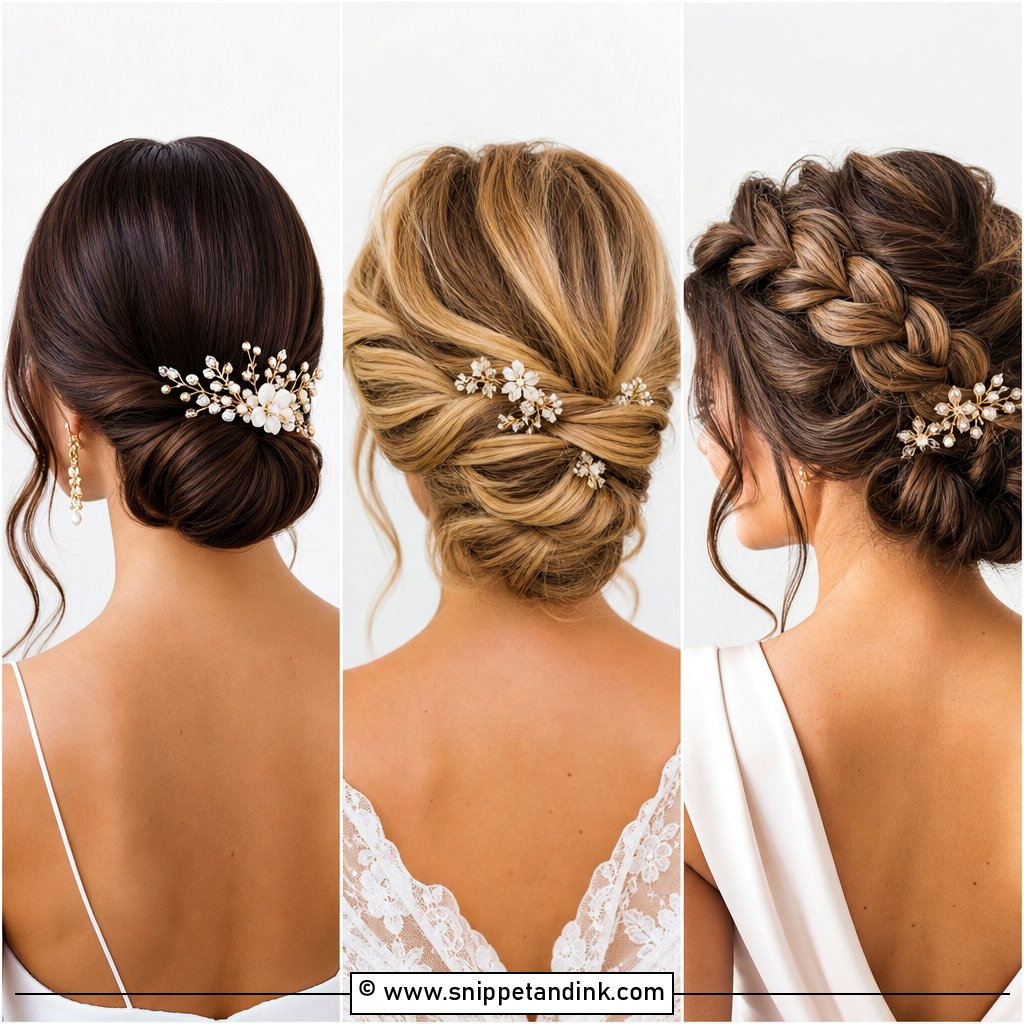
2. Sleek Wedding Bun
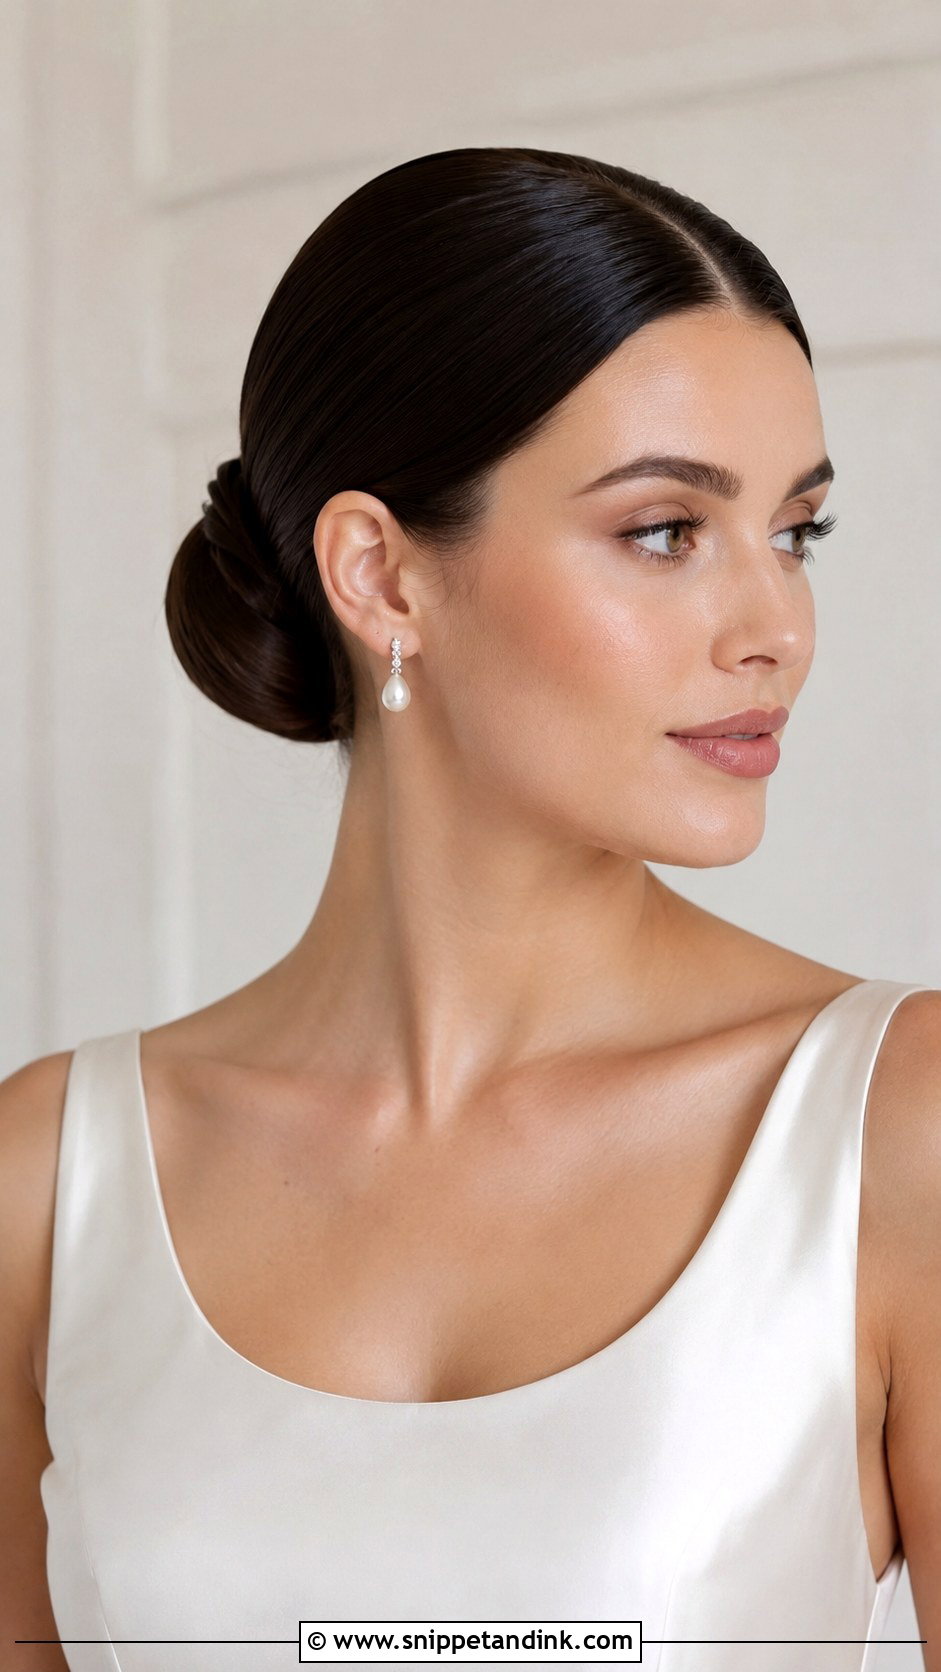
Sleek depends on prep more than pinning. Hair has to be blow-dried completely smooth before I start, because any kink left from air-drying shows straight through gel. I finish by misting strong-hold spray onto a clean toothbrush and laying down flyaways along the hairline. Fitted gowns and minimal jewelry suit it. A side part reads slightly softer than a center part, and the veil should go above the bun so it doesn’t break the line.
3. Messy Wedding Bun
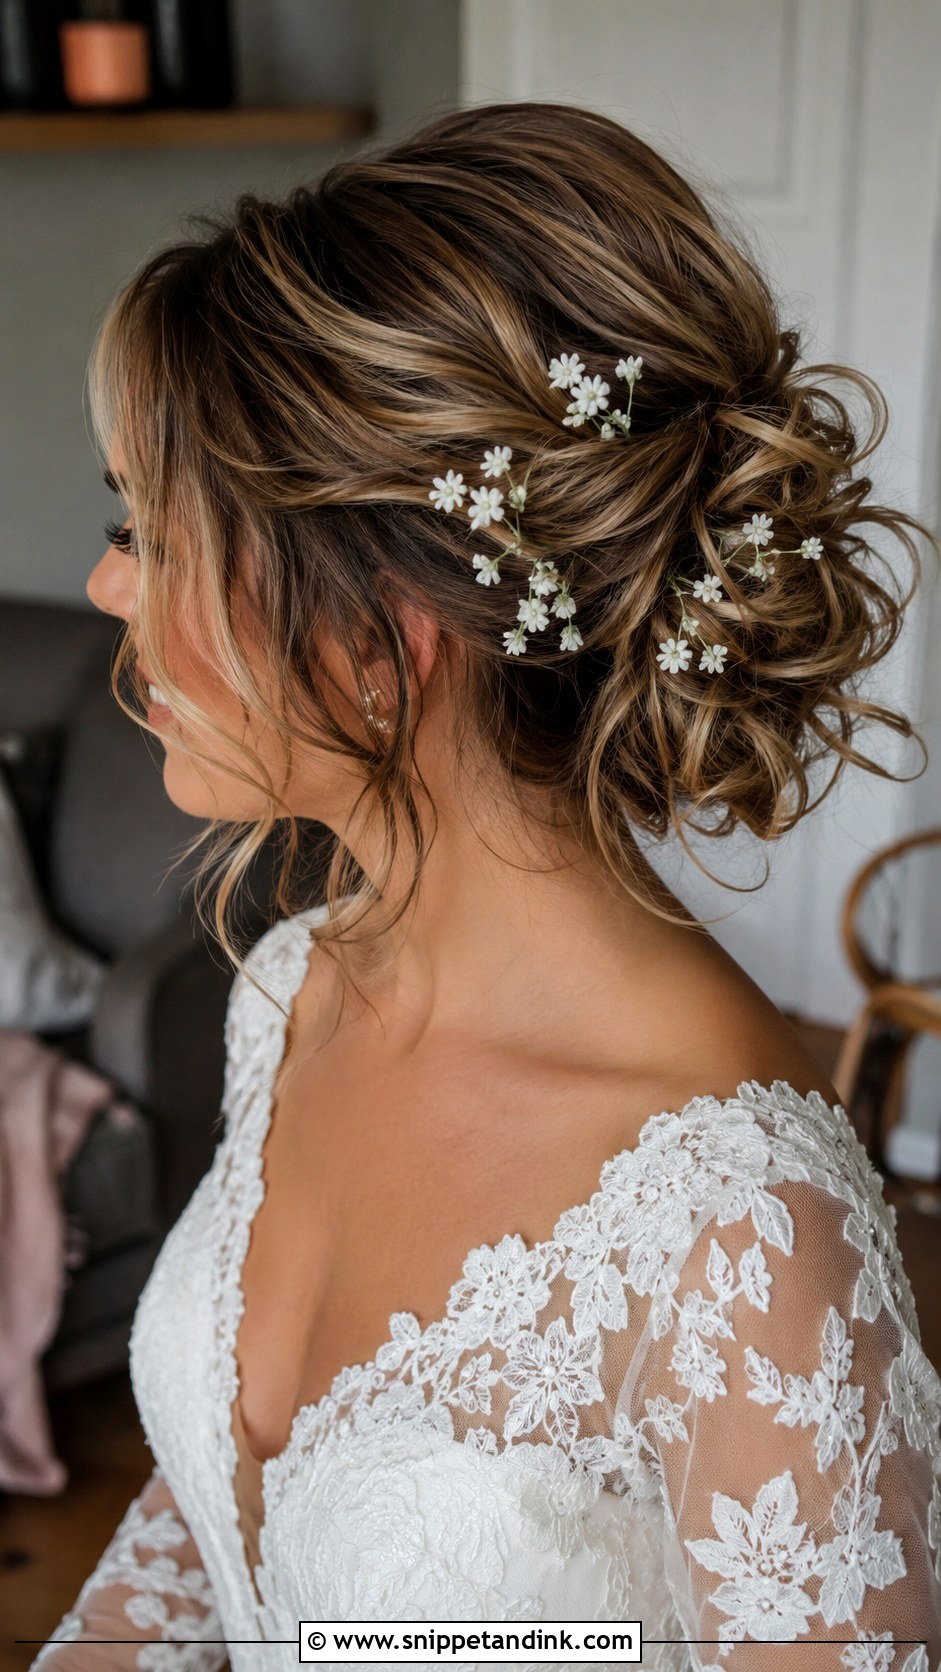
Here’s the trap with messy buns: what looks casual in a photo was usually curled, pinned and sprayed with real care. The loose pieces only stay pretty if they’ve been curled and set first. Otherwise they go limp by the first dance. Highlighted or balayaged hair shows this style off well, since every twist and pulled-out piece reveals a different tone. Barn, beach and garden venues suit it, and baby’s breath is sturdy enough to tuck into the gaps without wilting.
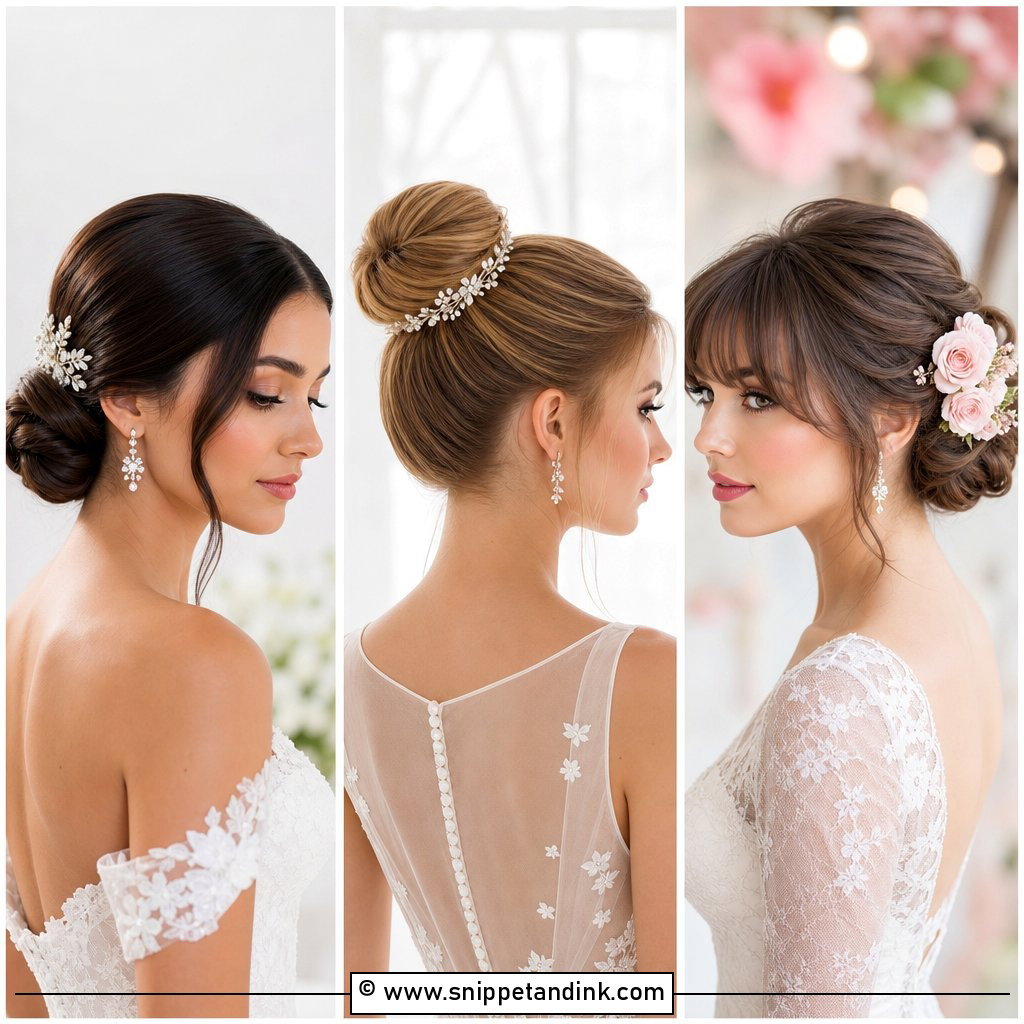
4. High Wedding Bun
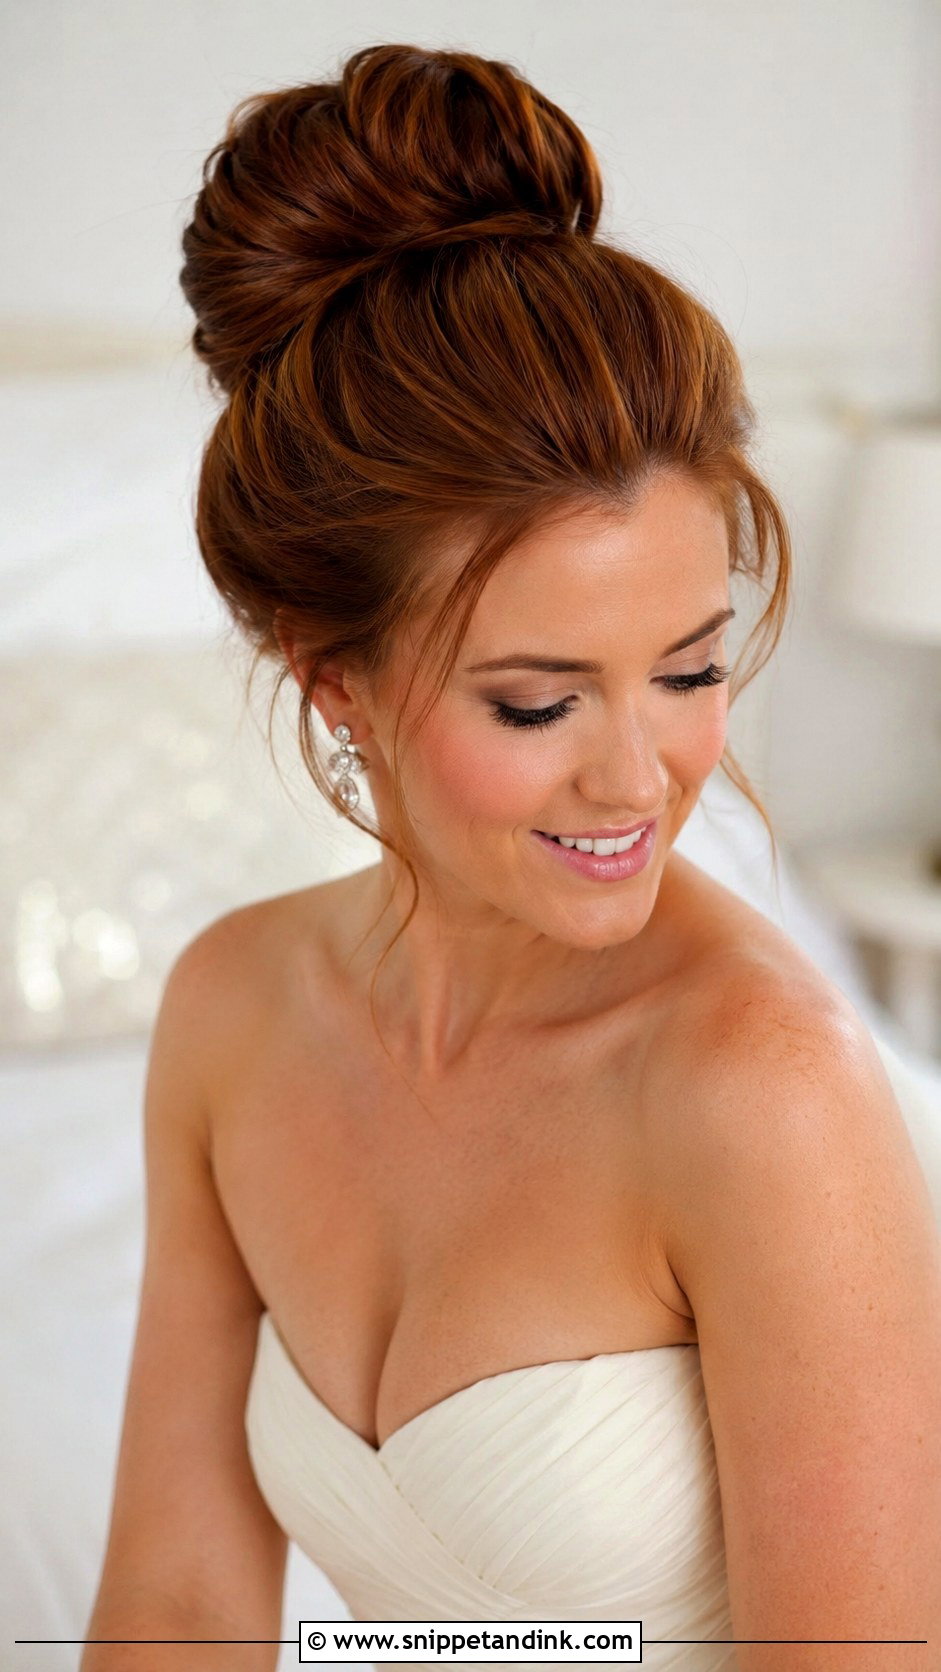
A high bun lifts the face and clears the shoulders, so I suggest it for hot outdoor ceremonies and for dresses with detail at the back or neckline. Proportion is what I watch. Too big and it looks top-heavy on a petite frame; too small and it looks like a gym bun. Long hair gives a full round shape on its own, while shorter or finer hair needs a donut or padding. I set the ponytail first and check it from the side in a hand mirror before wrapping anything.
5. Braided Wedding Bun
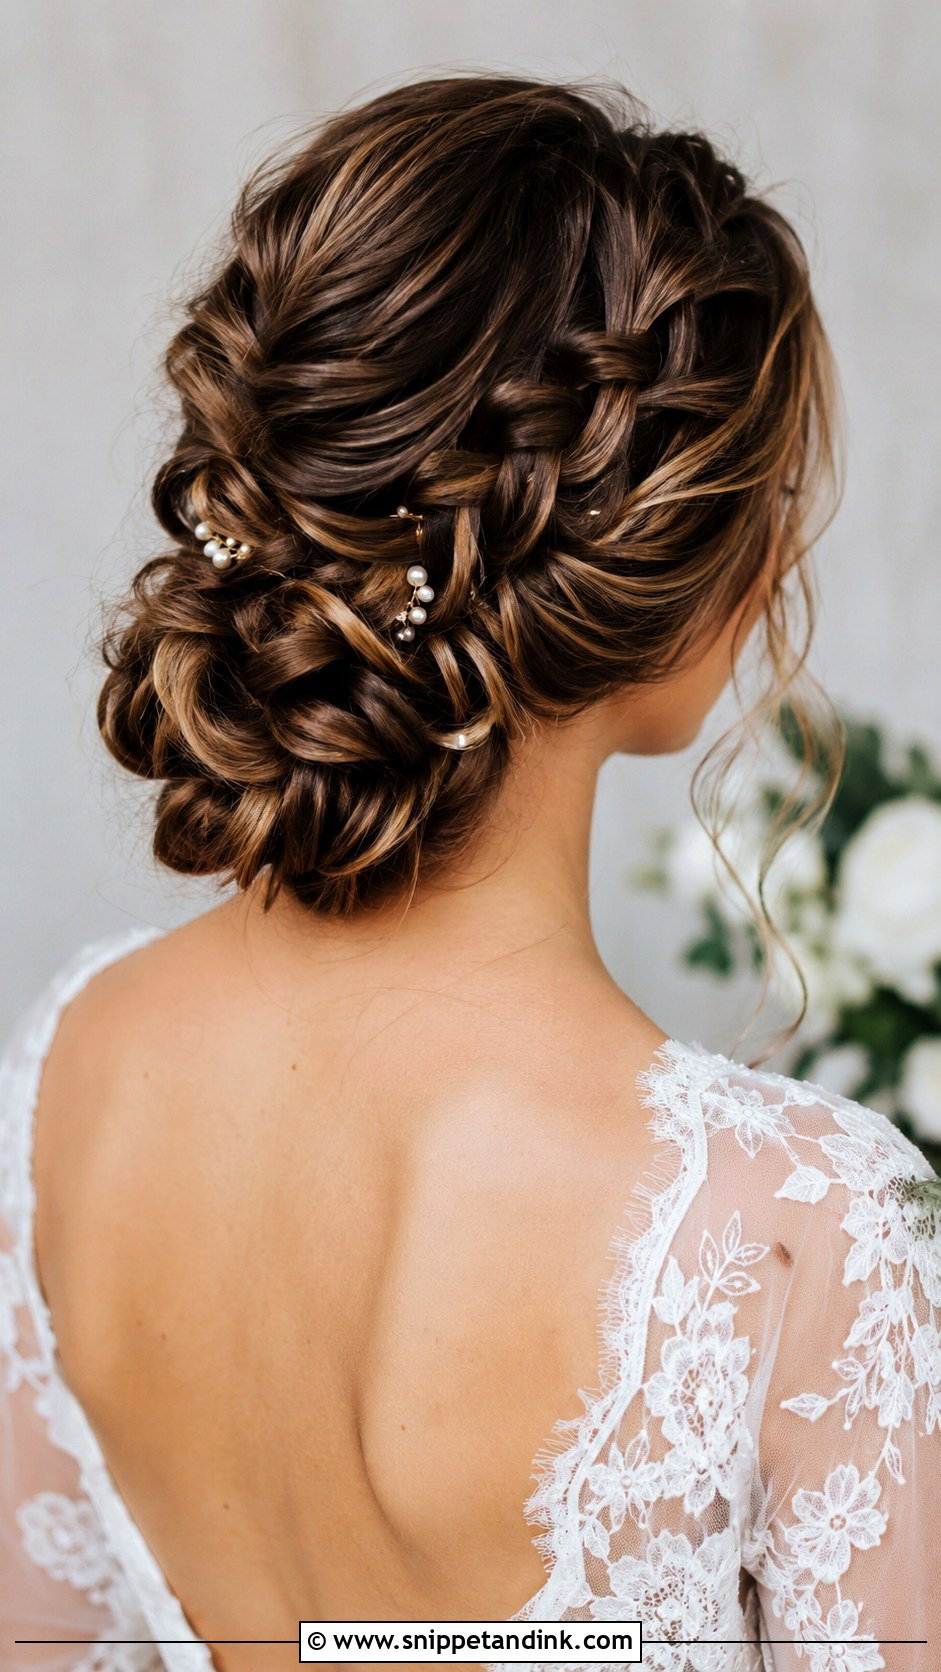
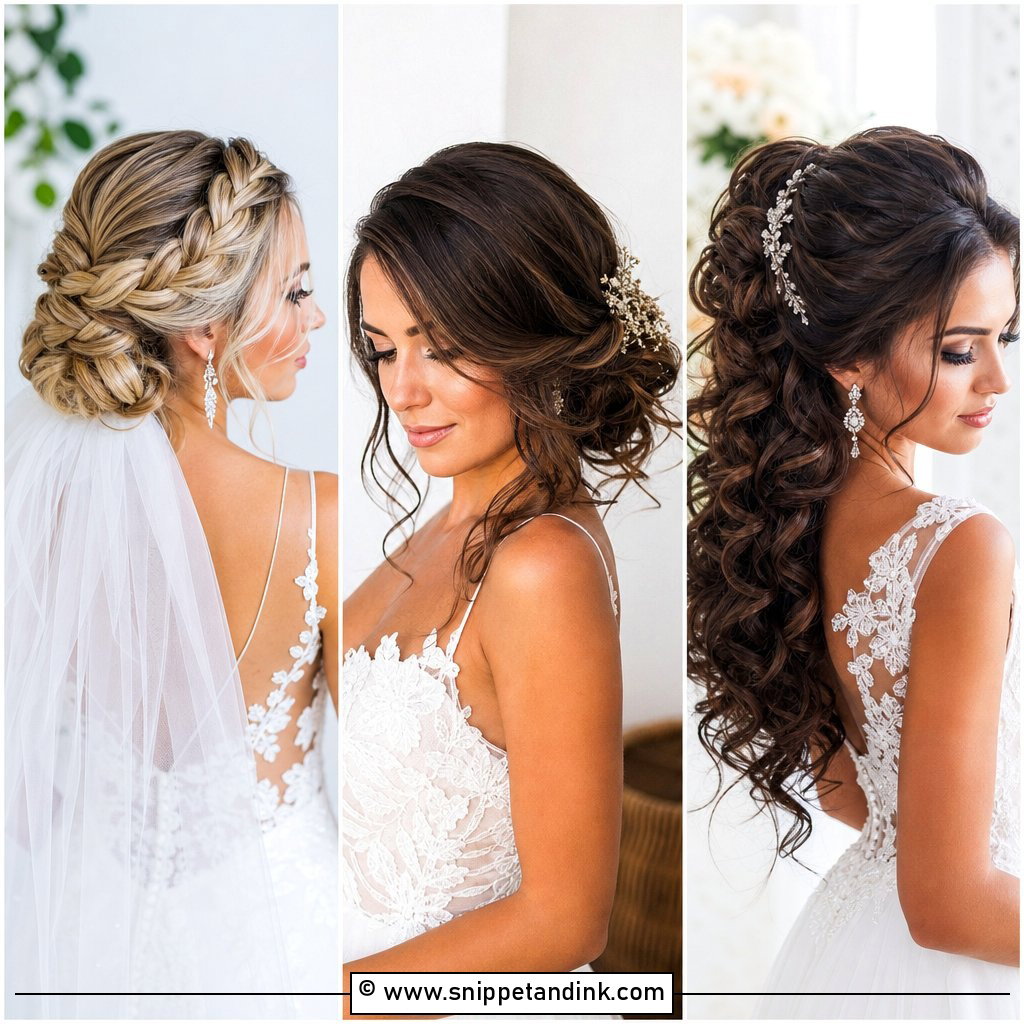
A braid can wrap the bun, feed into it, or run across the crown first, and each version changes how formal the style looks. Thick and textured hair gives the braid real depth. On very fine hair a braid can look thin unless I pancake it out generously. Coarser textures actually braid more securely than silky straight hair, because the strands grip each other. Small pearl or floral pins slide straight into the plait.
6. Textured Wedding Bun
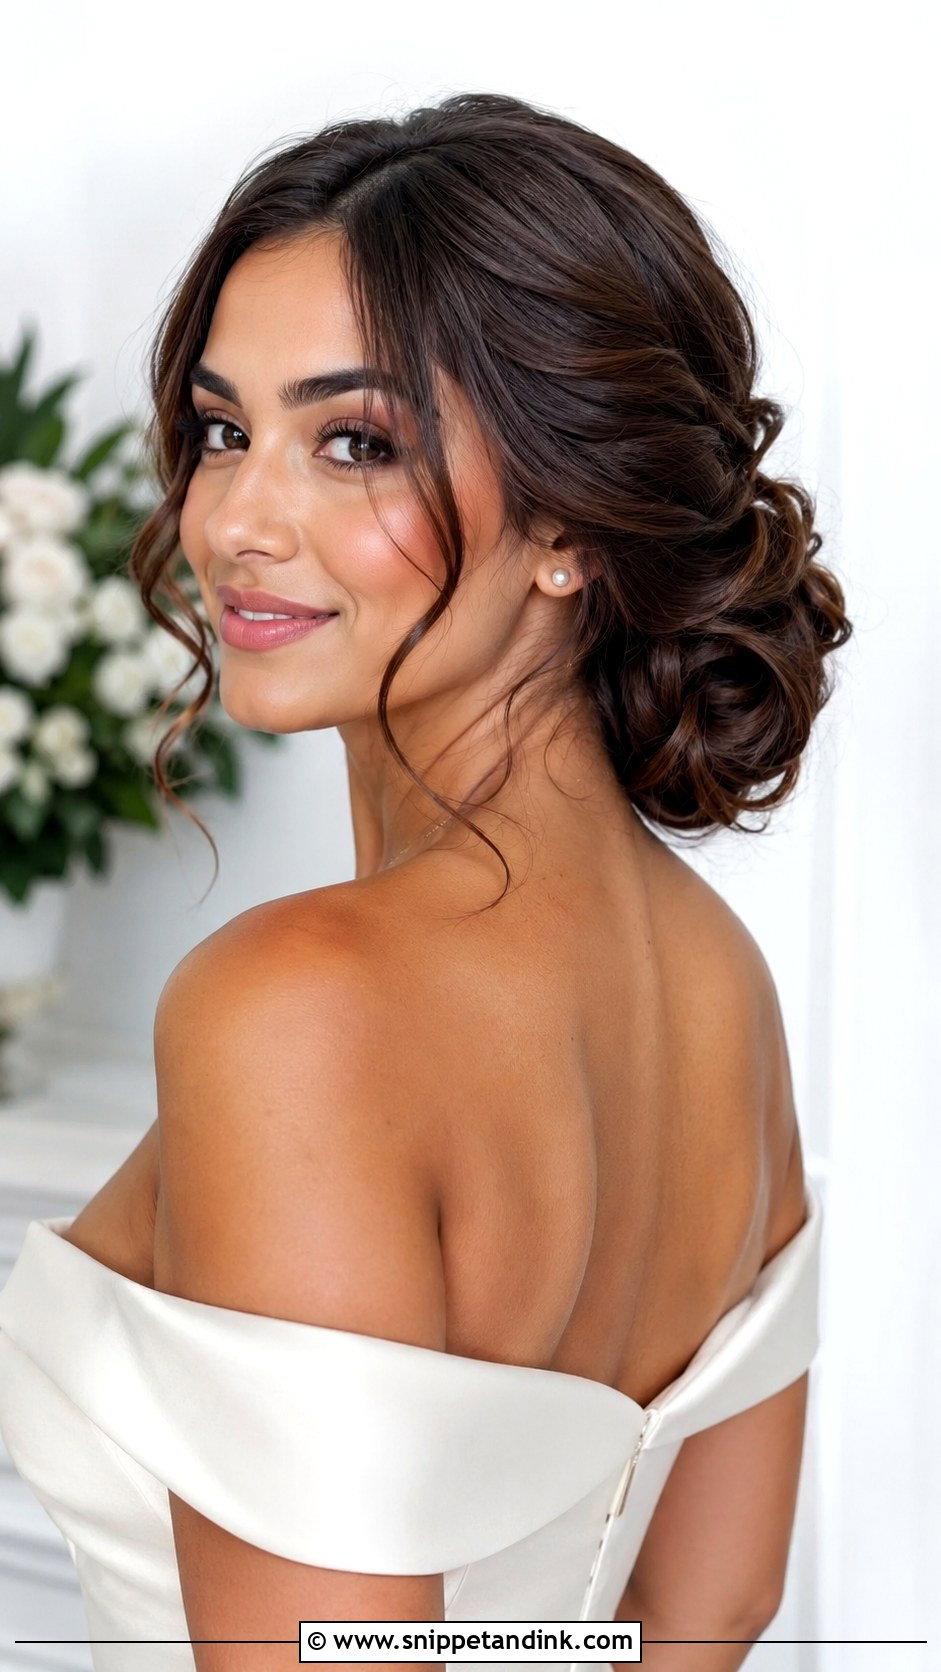
Texture means the surface is built from curls, twists and separated pieces rather than one smooth sheet. I curl everything, let the curls cool, then pin them in loose sections so the bun has depth from every angle. On highlighted hair the lighter strands show up inside each section. It can sit low, mid-height or slightly off-center, depending on your dress. Keep the face-framing pieces controlled: two or three on each side is usually the limit before it starts to look unfinished.
7. Side Wedding Bun
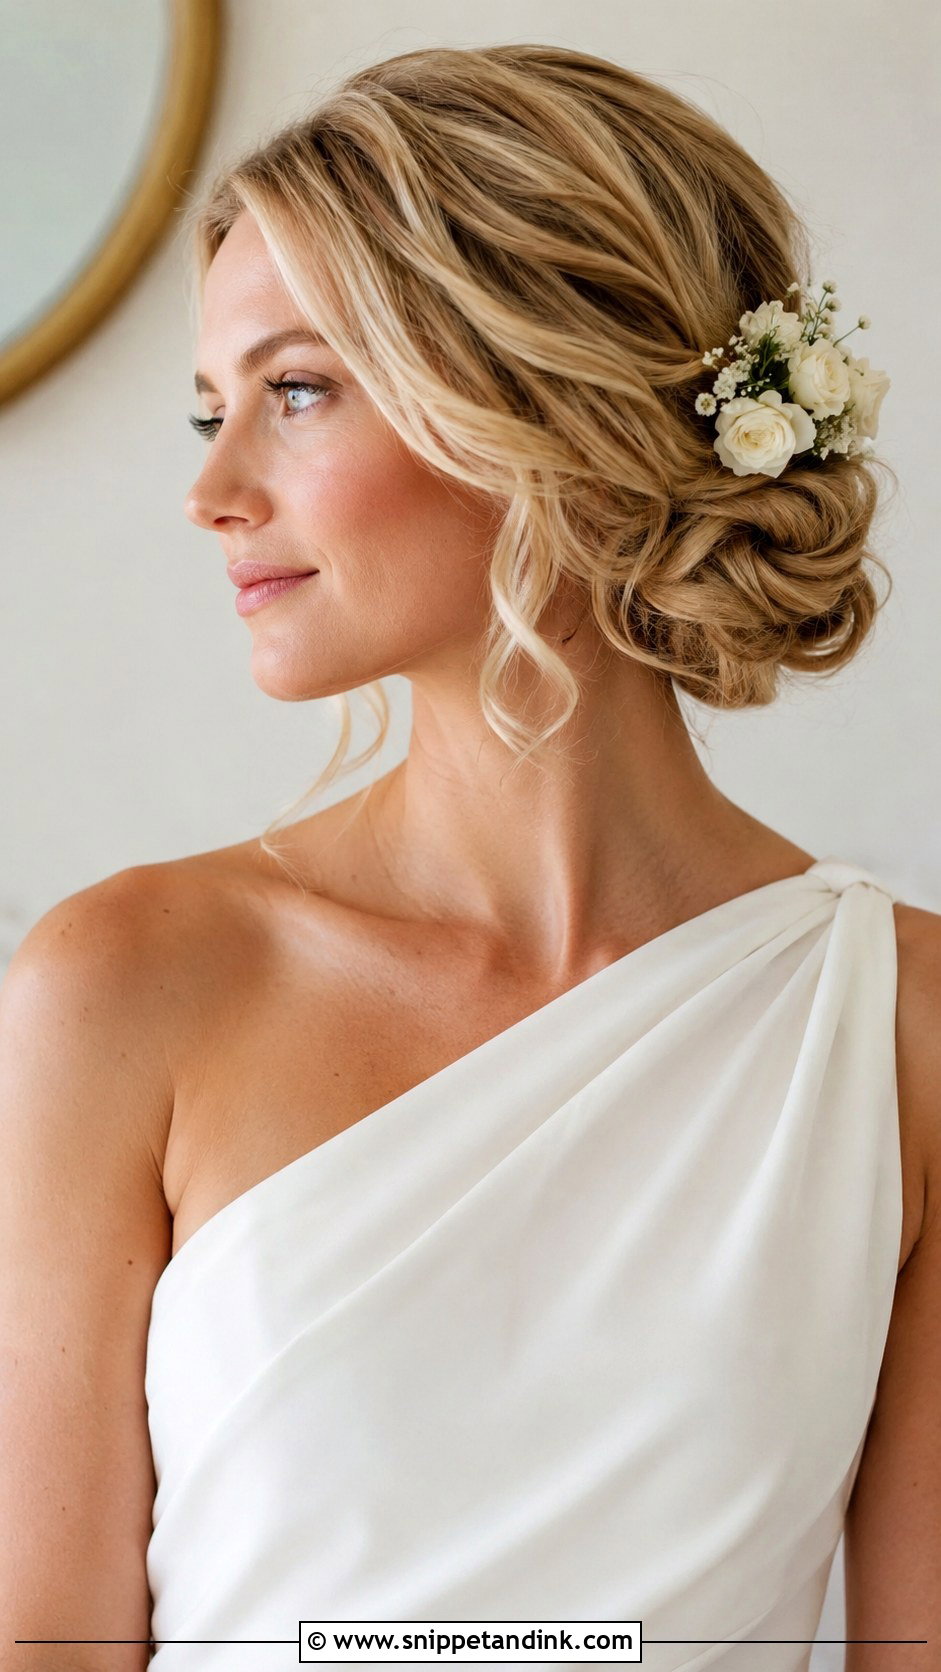
A side bun sits off-center near one side of the nape, and it’s made for profile photos. With a one-shoulder dress, I usually place it on the side opposite the strap so the neckline and hair balance each other. Because the weight is uneven, I anchor it with a second hidden ponytail; without one, it slowly slides toward the center over the day. A few curls on the opposite side of the face even out the shape, and a comb or small floral piece fits just above the bun.
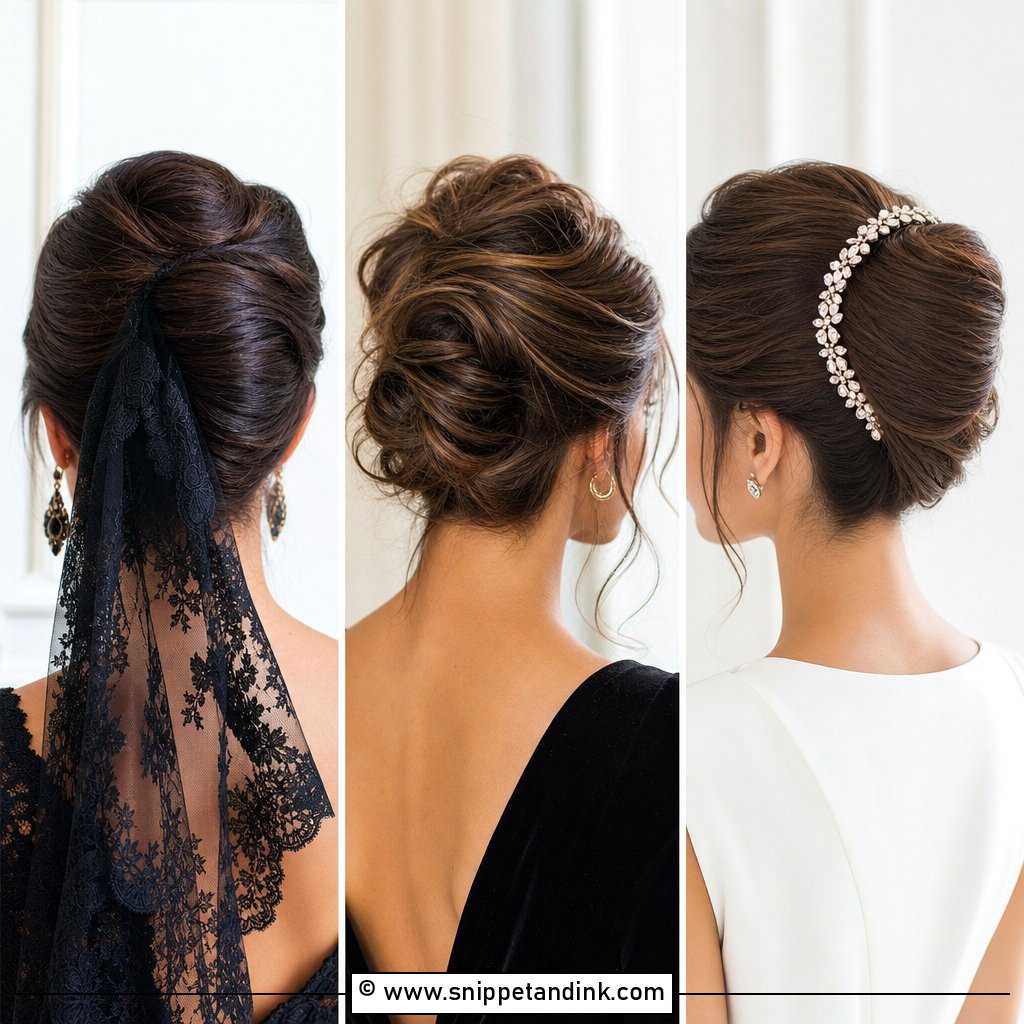
8. Chignon Wedding Bun
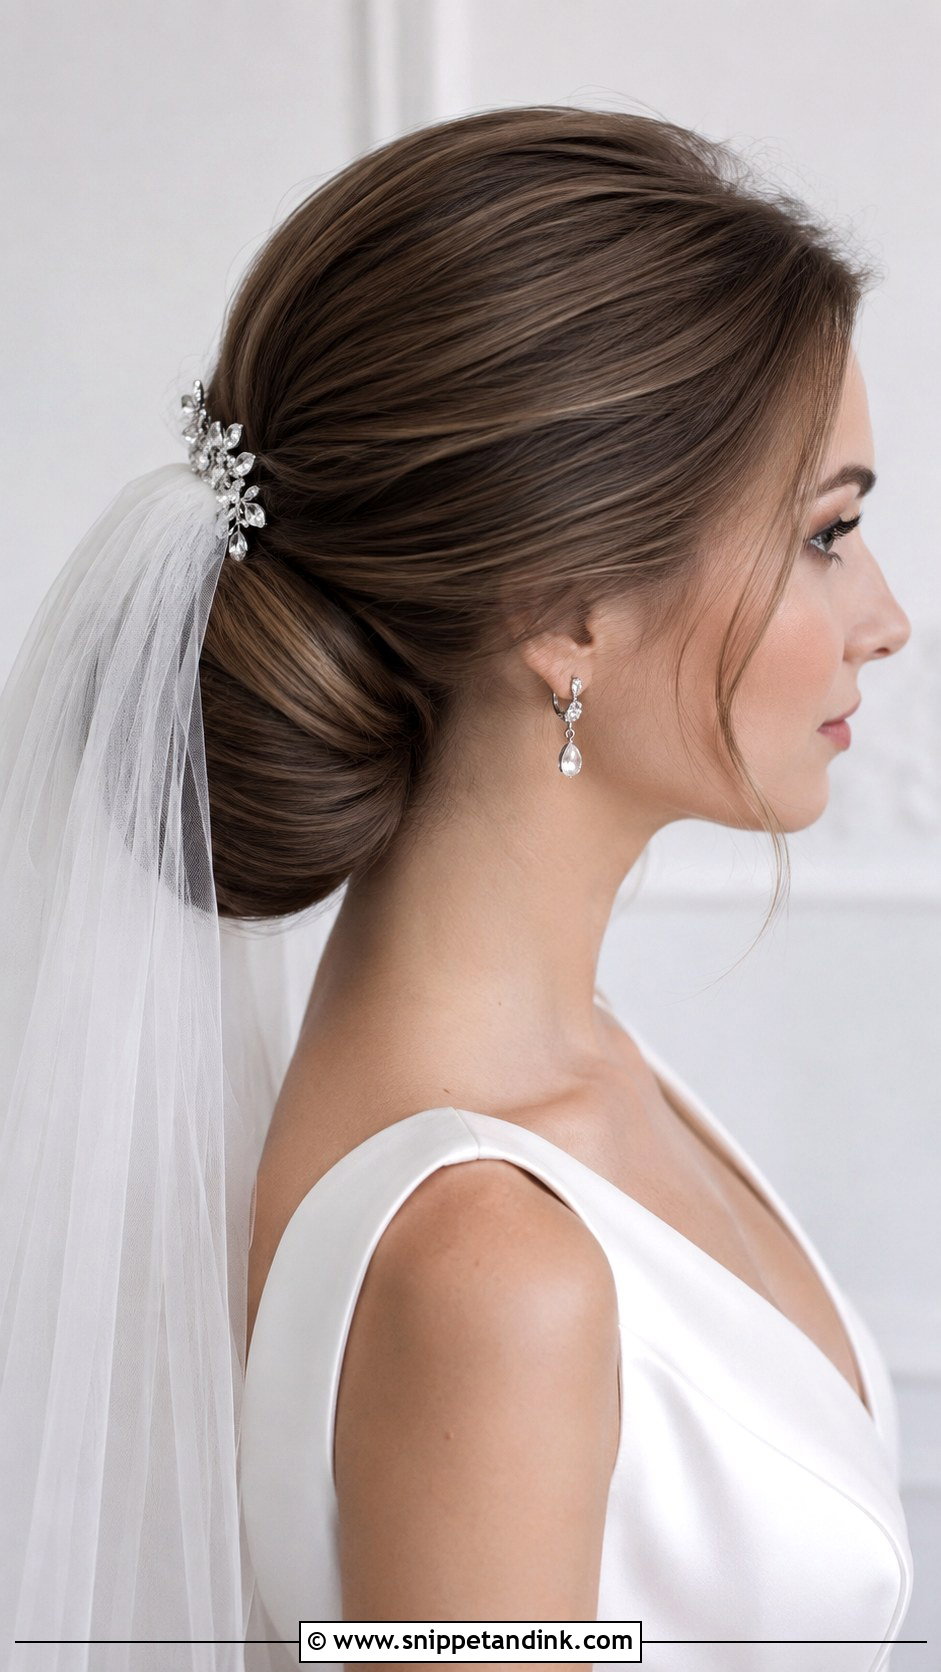
A chignon is lower and flatter than most buns, with the hair folded, rolled, or pinned into a smooth shape at the nape. I recommend it when hair frizzes easily or the venue is humid, because a compact, tightly pinned shape gives moisture little to work on. It sits well under a veil and suits lace and satin. Ask for a finish that still moves when touched. Over-sprayed hair looks hard in close-ups and feels crunchy by evening.
9. Curly Wedding Bun
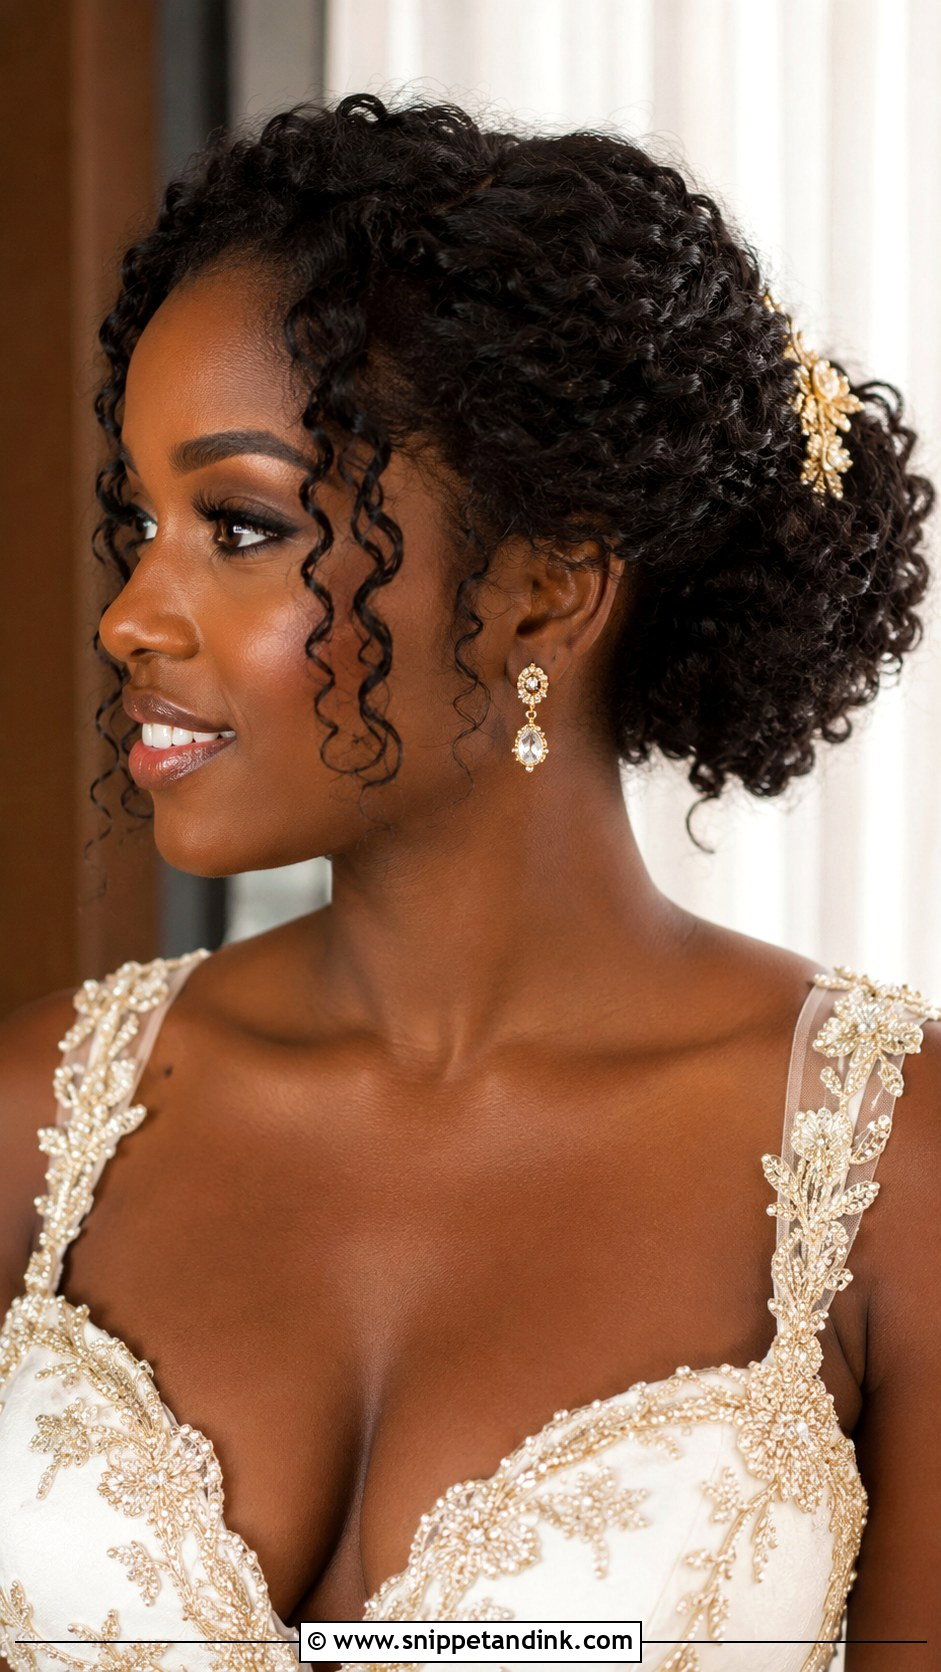
On curls and coils, I want the pattern defined before the day, not created that morning. Moisturized curls hold their shape and resist frizz, while dry curls puff up the moment humidity rises. I gather them gently, often with my fingers rather than a brush, and secure them with large pins or spin pins that grip the volume. A few defined curls left at the temples look natural. Setting the veil behind the bun keeps the texture visible from the front.
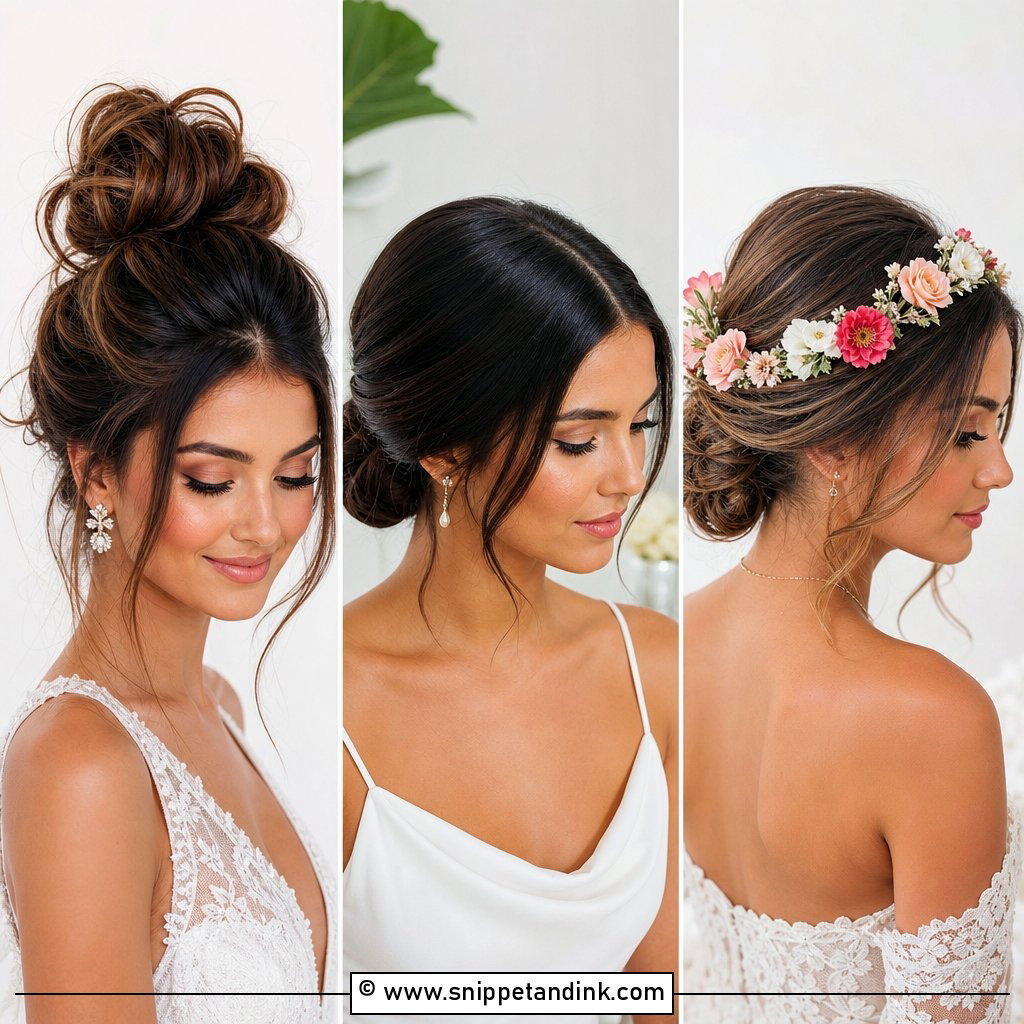
10. Floral Wedding Bun
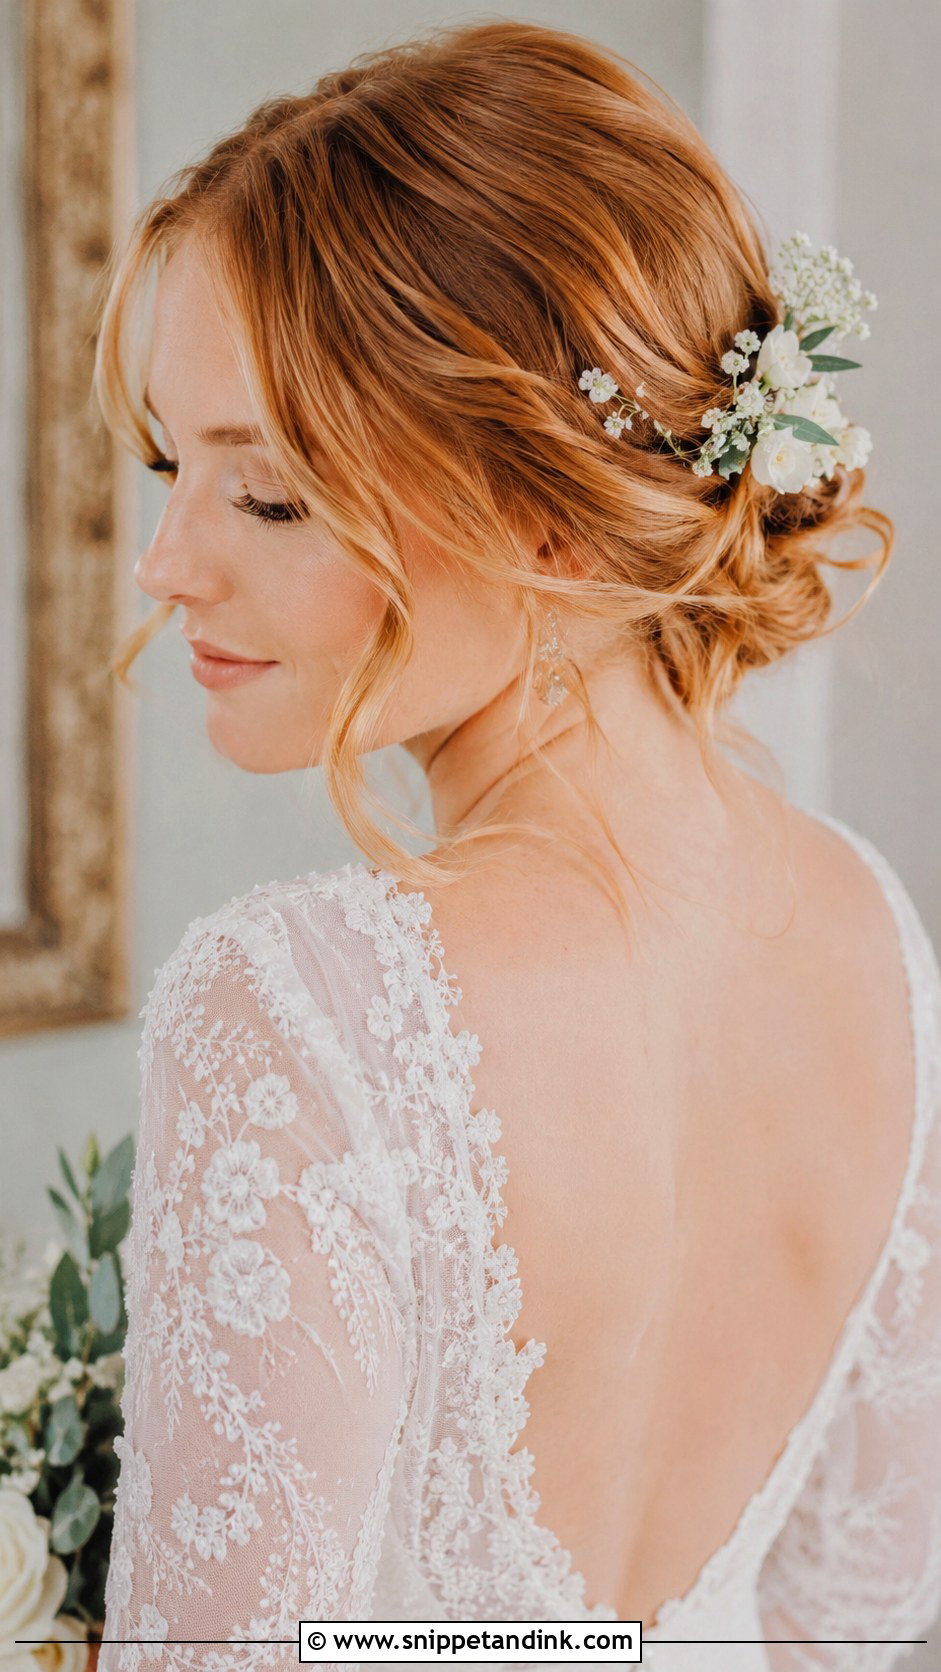
Pick blooms that survive out of water, and arrange them with your florist rather than buying them separately. Smaller flowers look more natural in hair and are easier to anchor than one large head. They can be tucked into a low bun, wrapped around a braided bun, or clustered on one side. I always finish the hairstyle first and add flowers last; blooms pinned into an unfinished shape have to be re-pinned when the bun shifts. Spring and garden weddings suit this best.
11. Pearl Wedding Bun
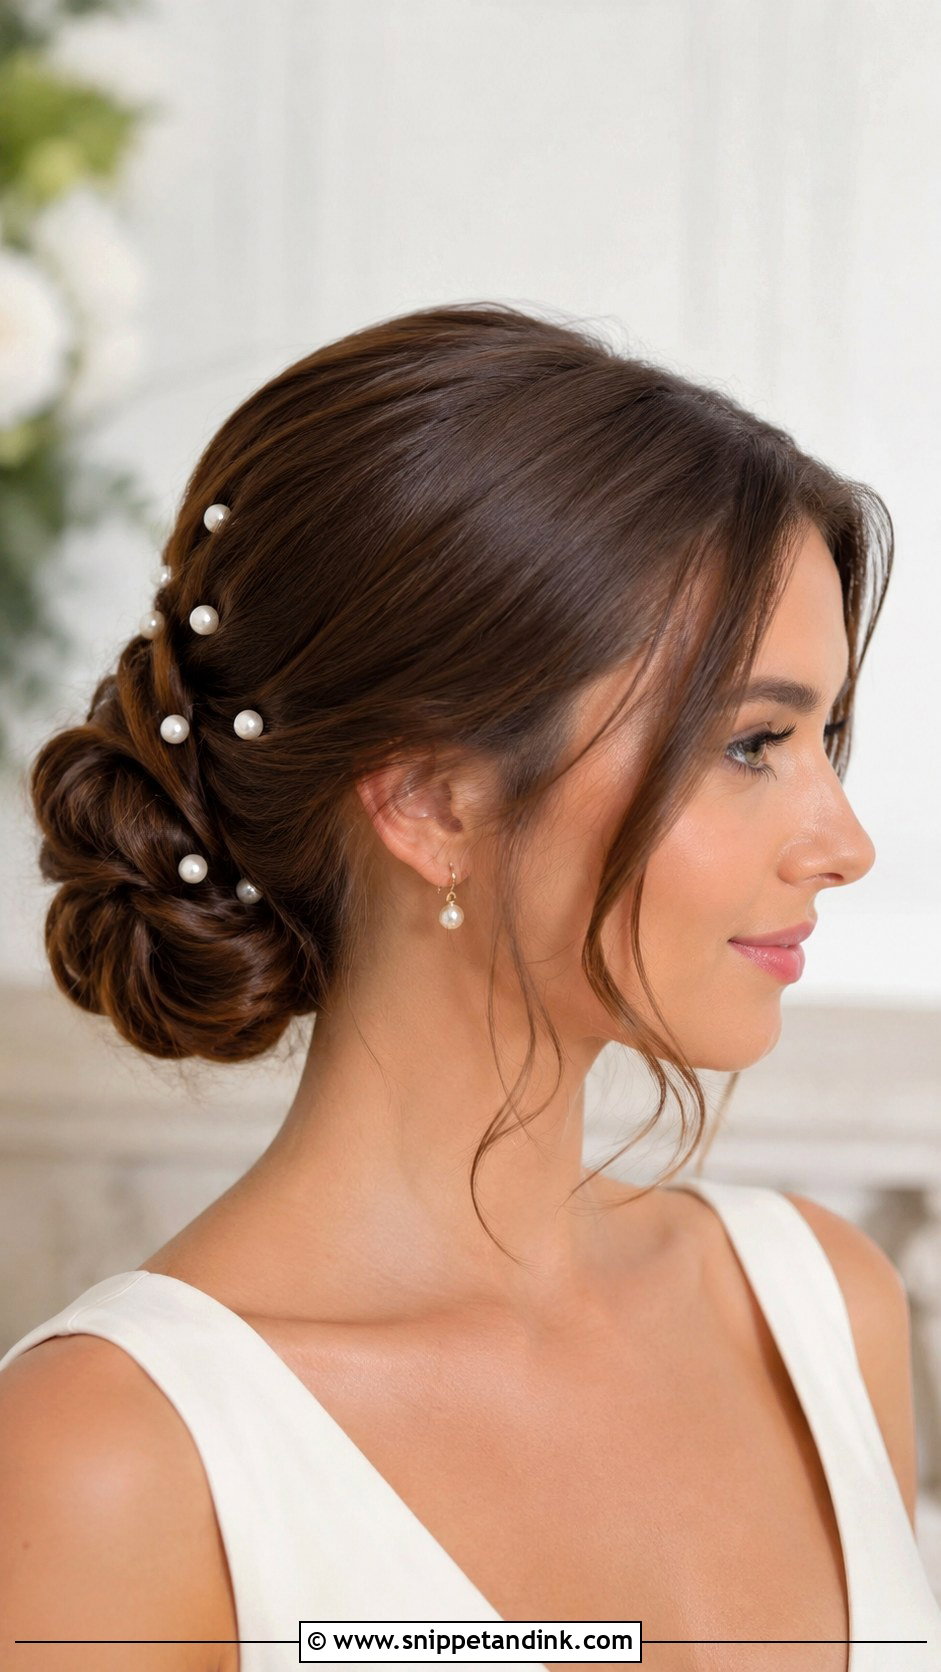
Pearls look their best when they echo something in the dress, such as pearl buttons down the back or beading on a satin bodice. Spacing matters more than quantity. I place a handful of pins in a gentle arc around the bun, step back, and add more only if it looks sparse in a phone photo. A pearl comb or a short vine works too. Piling pins onto fine hair adds weight and starts to pull by evening.
12. Veil Wedding Bun
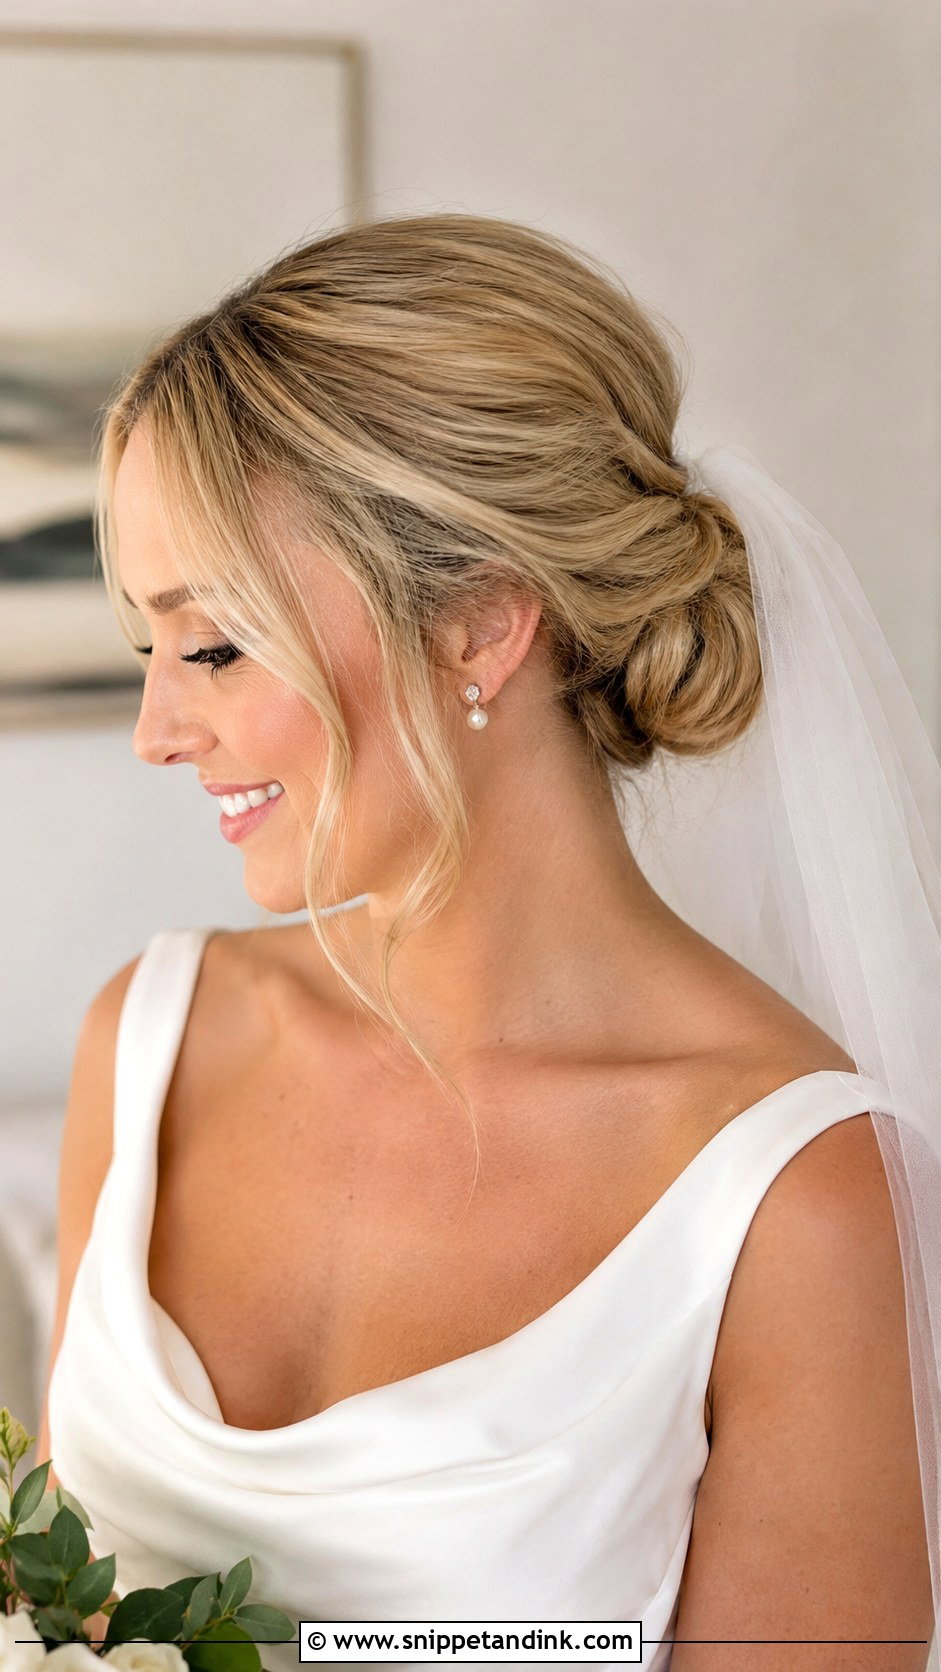
With a veil, everything comes down to how the comb meets the bun. Above the bun gives a traditional look and suits most veil lengths; underneath gives a softer effect and supports heavier tulle. Long veils catch the wind like a sail, so the comb must grip a solidly pinned section, never loose hair. Bring the actual veil to your trial. Comb width and fabric weight vary a lot, and your stylist needs to test placement with the real thing.
13. Twisted Wedding Bun
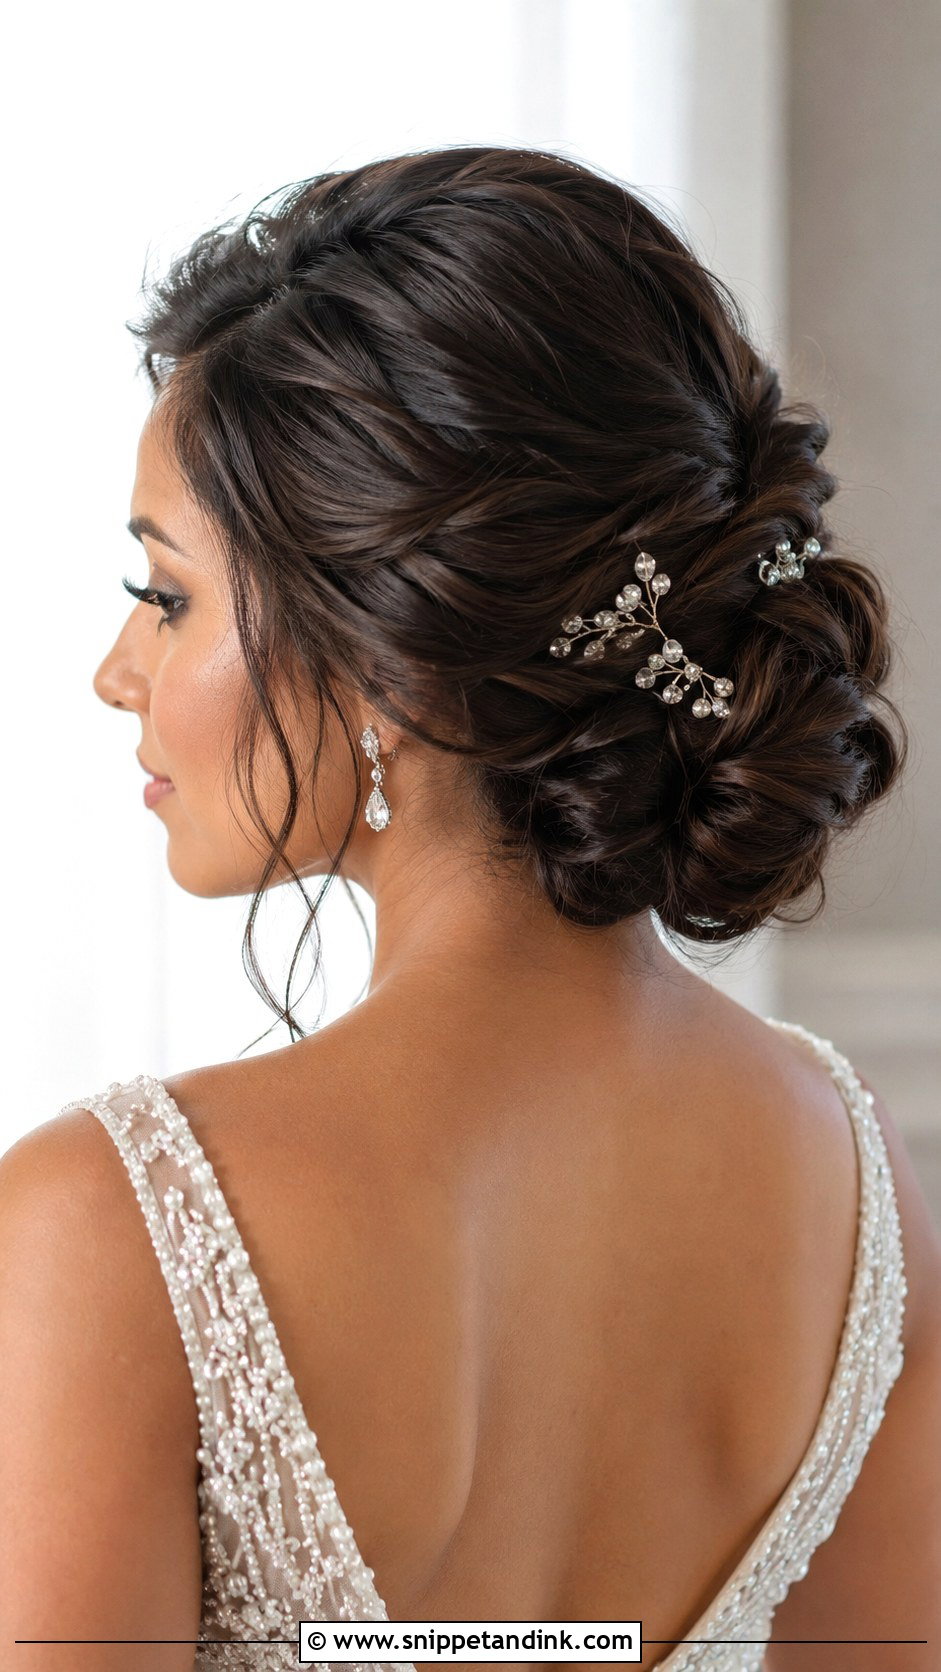
Twists give you detail without the time a full braid takes. I section the hair, twist each piece, and pin it in layers so the bun builds up gradually instead of becoming one heavy knot. On hair with highlights or balayage, each twist shows a slightly different tone. It works low and soft or mid-height and polished. If twists unravel at your trial, ask for a little texture spray on each section before twisting.
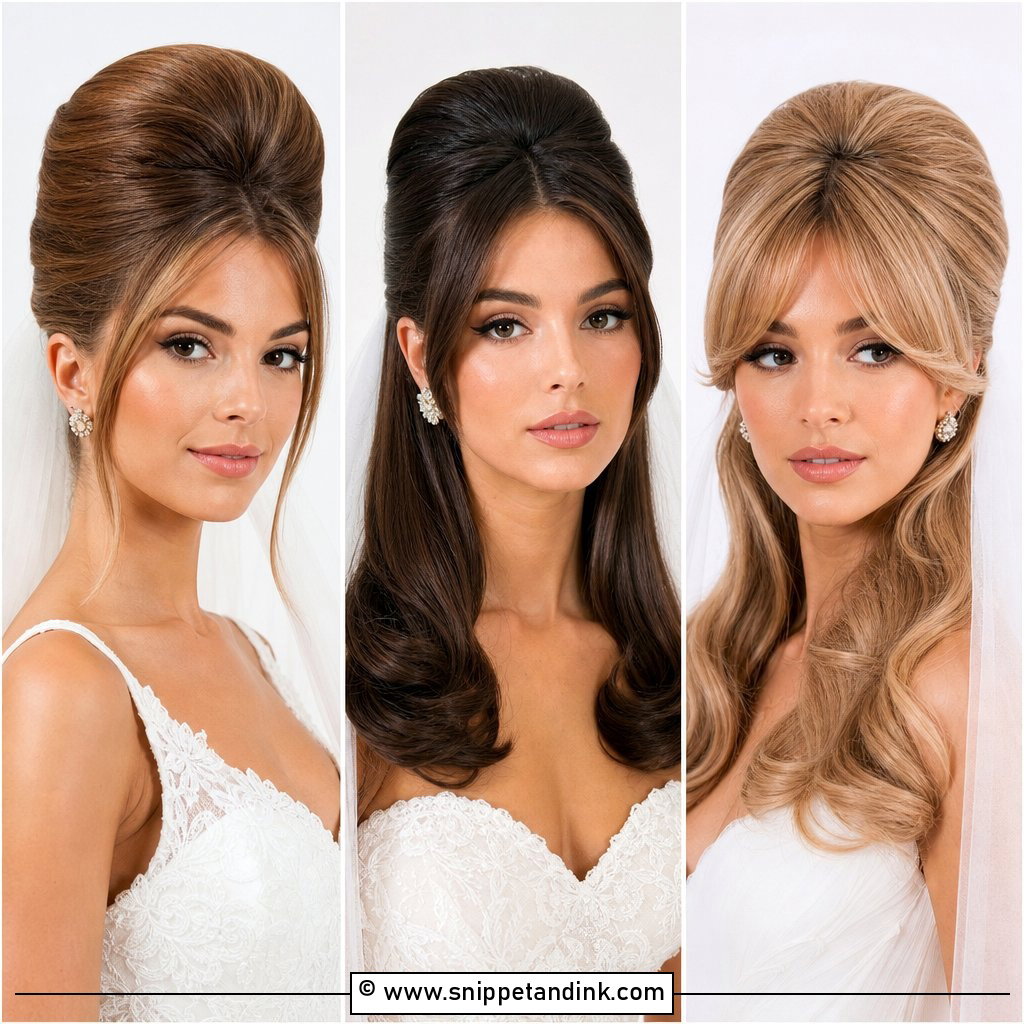
14. Voluminous Wedding Bun
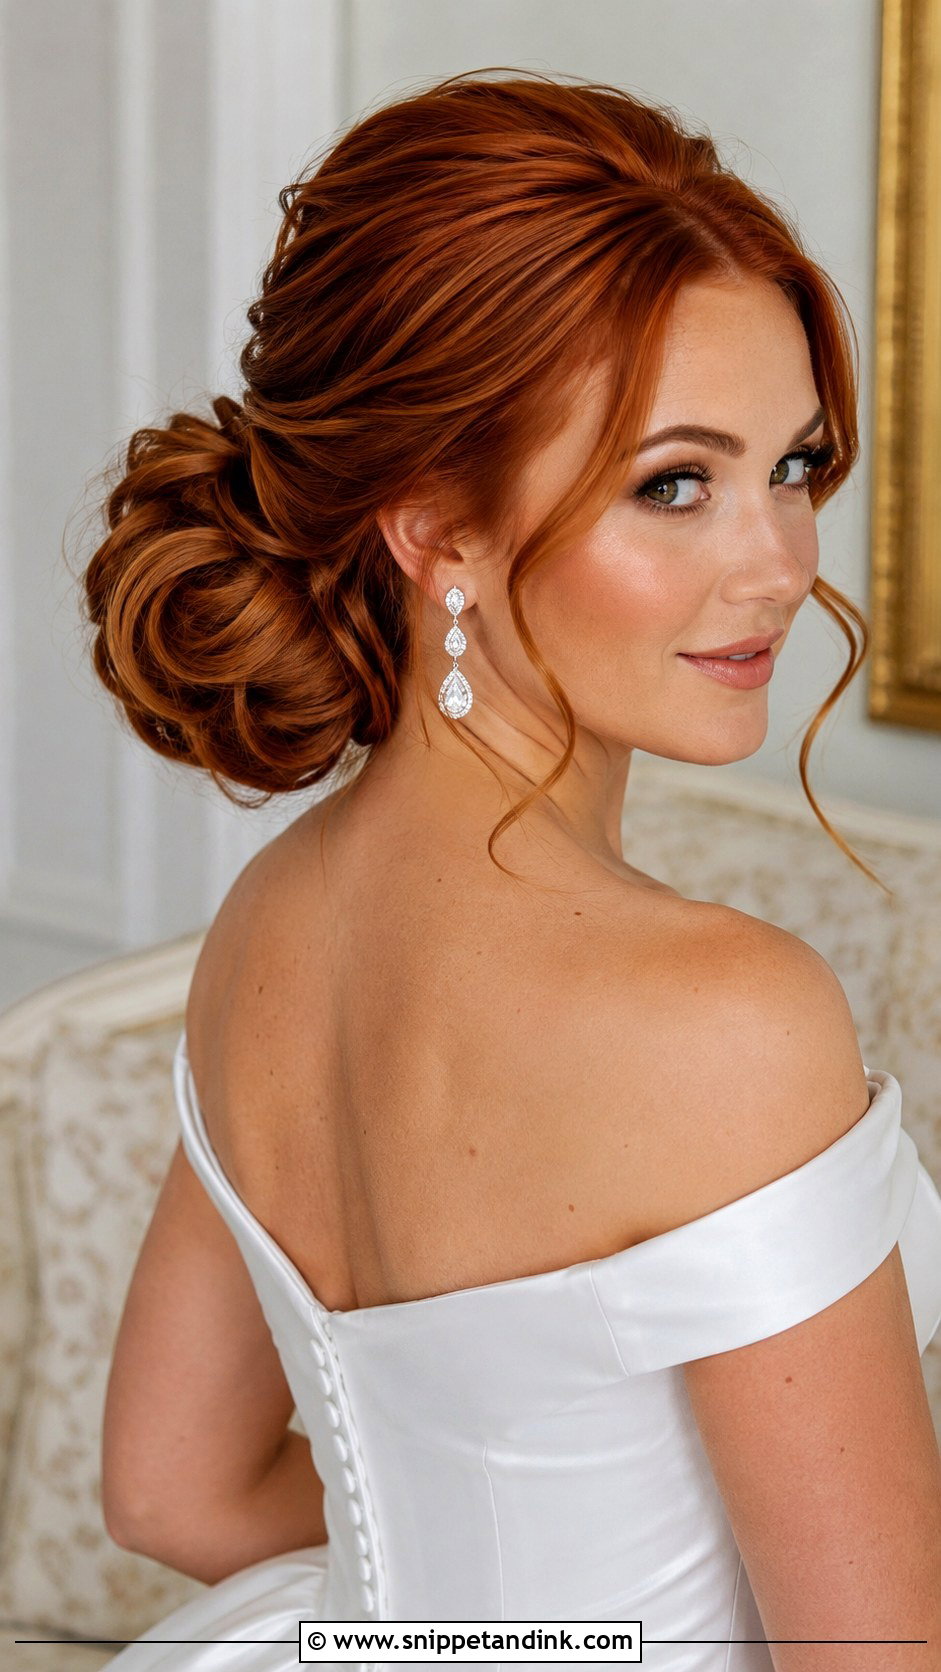
A voluminous wedding bun suits ball gowns, cathedral veils and big formal rooms, where a small bun can disappear. Volume can come from long thick hair, extensions, padding or teasing at the crown, and most fuller buns use a mix. I curl the hair first, pin it into a rounded shape, and smooth only the top layer. Keep it in proportion to your face and shoulders. If it looks wider than your neck from the front, it’s usually too big.
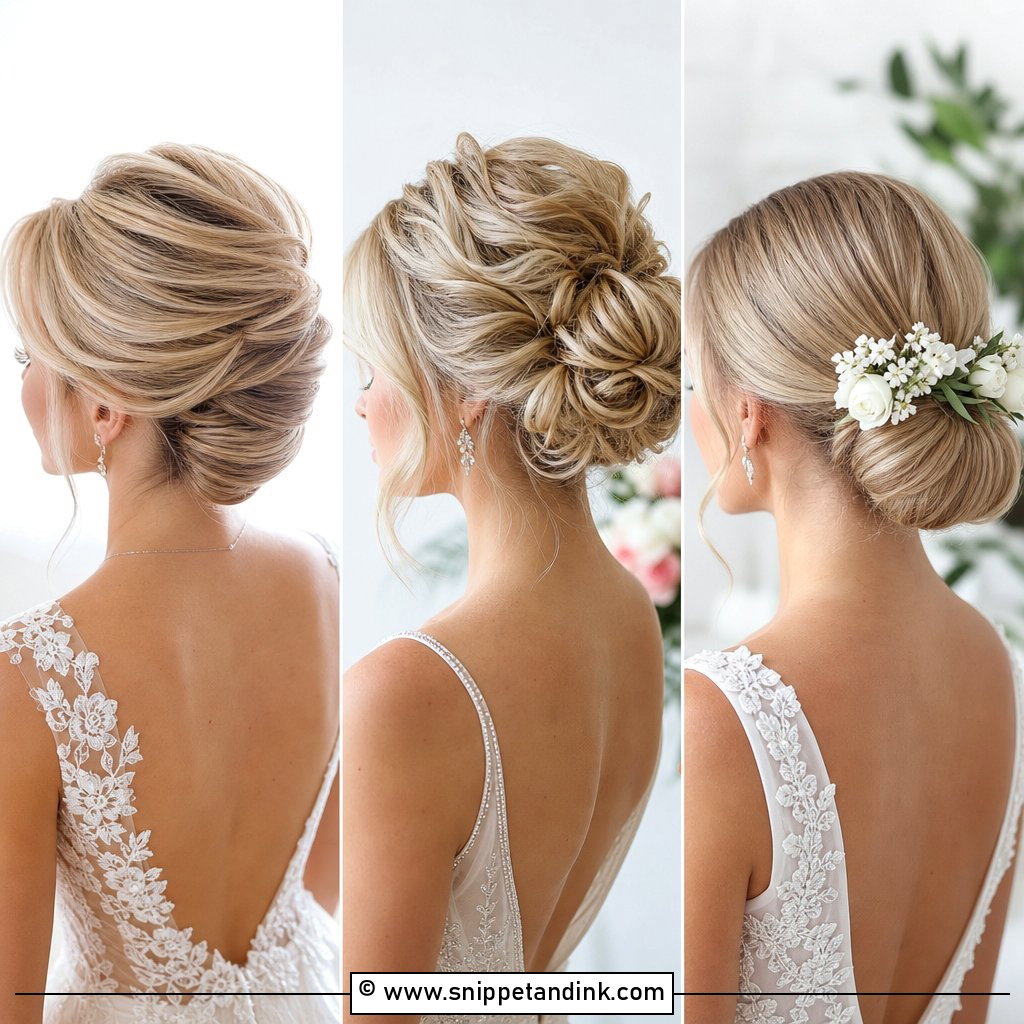
15. Middle Part Wedding Bun
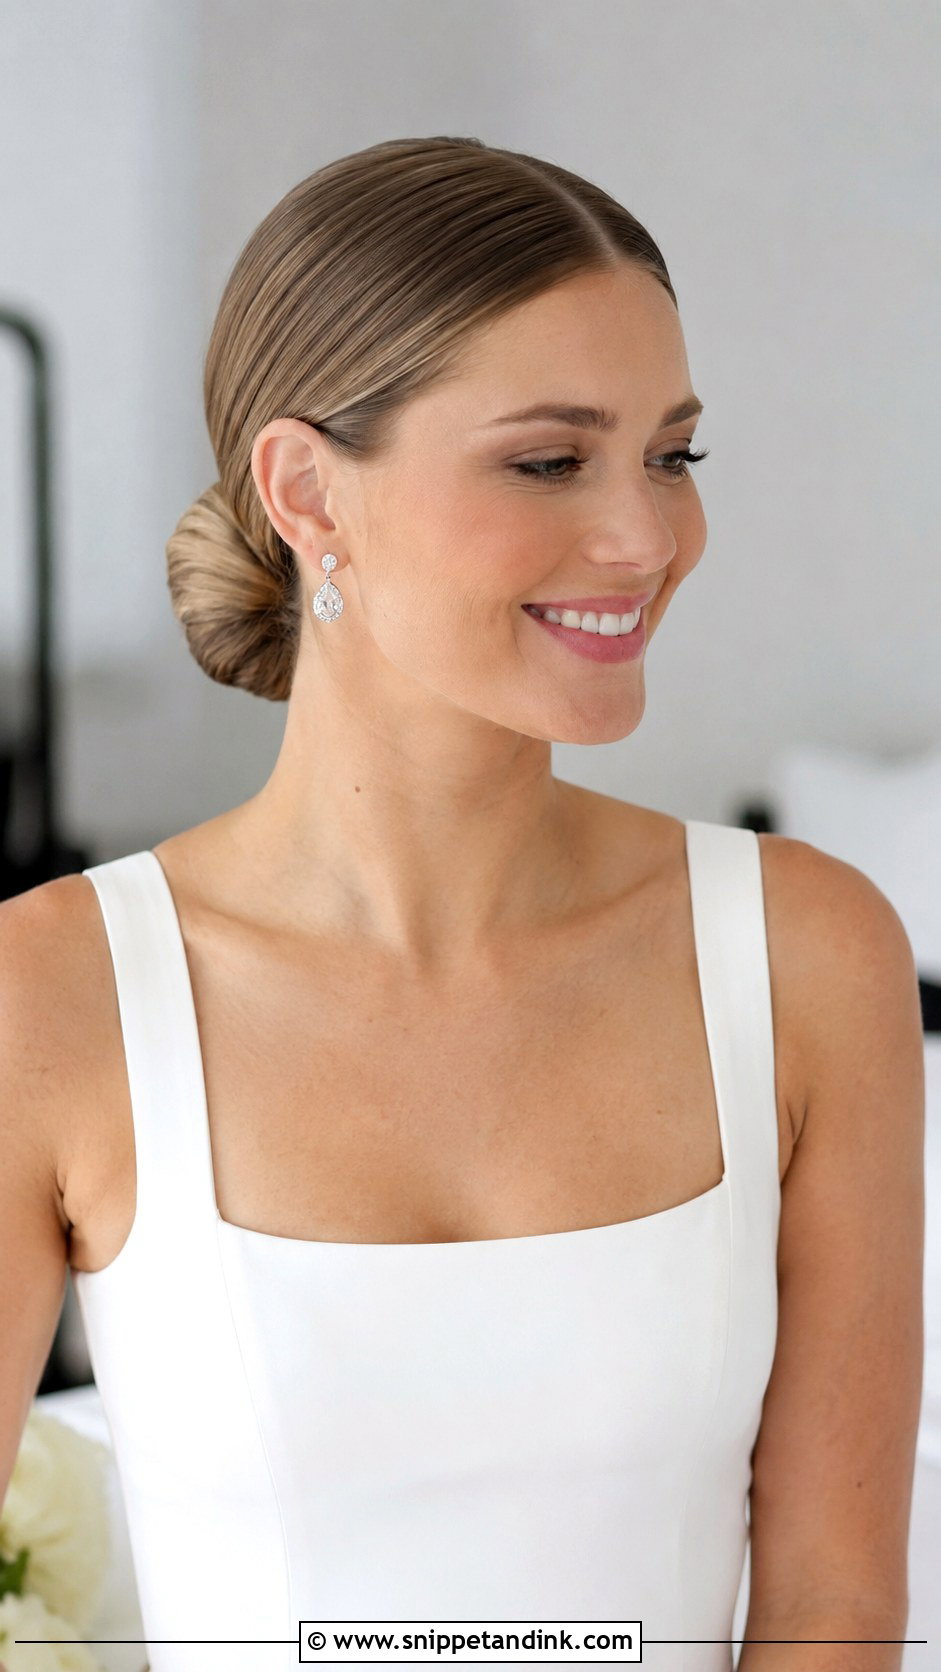
A middle part creates symmetry, which flatters balanced features and is less forgiving on a face that’s noticeably asymmetric. I check this in the mirror at the trial before committing. The bun usually sits low, keeping the look calm and modern. It works with square necklines, strapless dresses and statement earrings. If you want softness, keep any face-framing pieces very fine so they don’t hide your makeup or earrings.
16. Side Part Wedding Bun
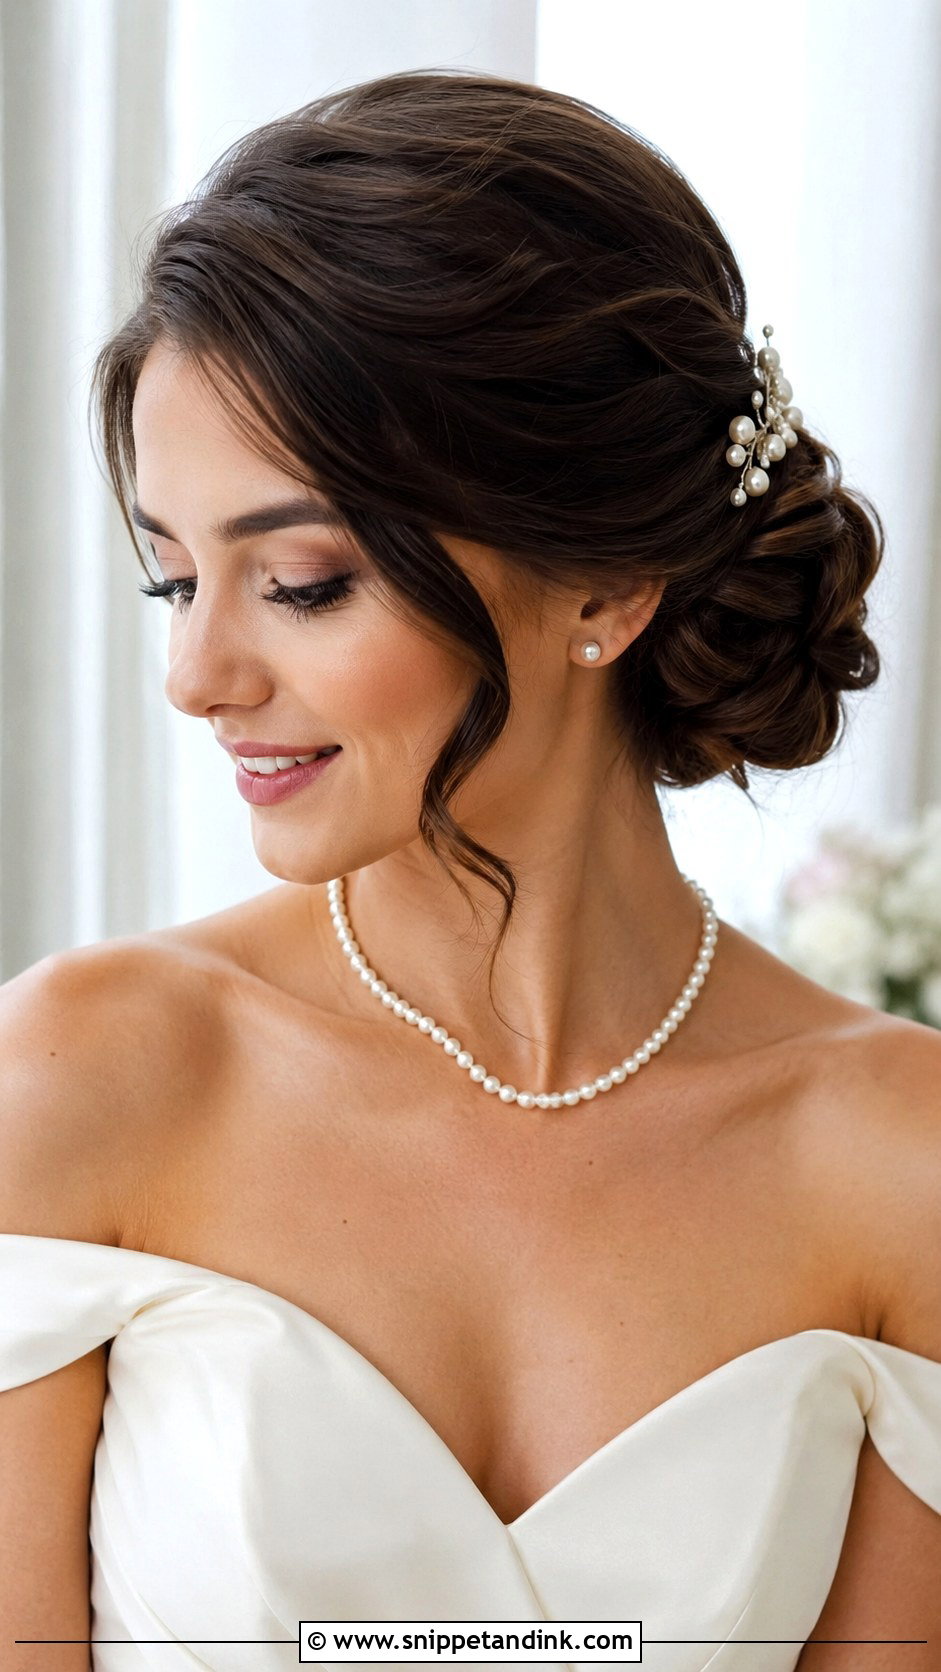
A deep side part gives the front of the hair movement and an old-Hollywood feel without needing a full head of waves. It’s the kinder option if you have a cowlick or a strong natural part that refuses to sit in the center. The front section can be tucked behind one ear or swept across the forehead and pinned near the bun. Put your comb or pins on the lower side of the part, where they balance the extra hair on top.
17. Short Hair Wedding Bun
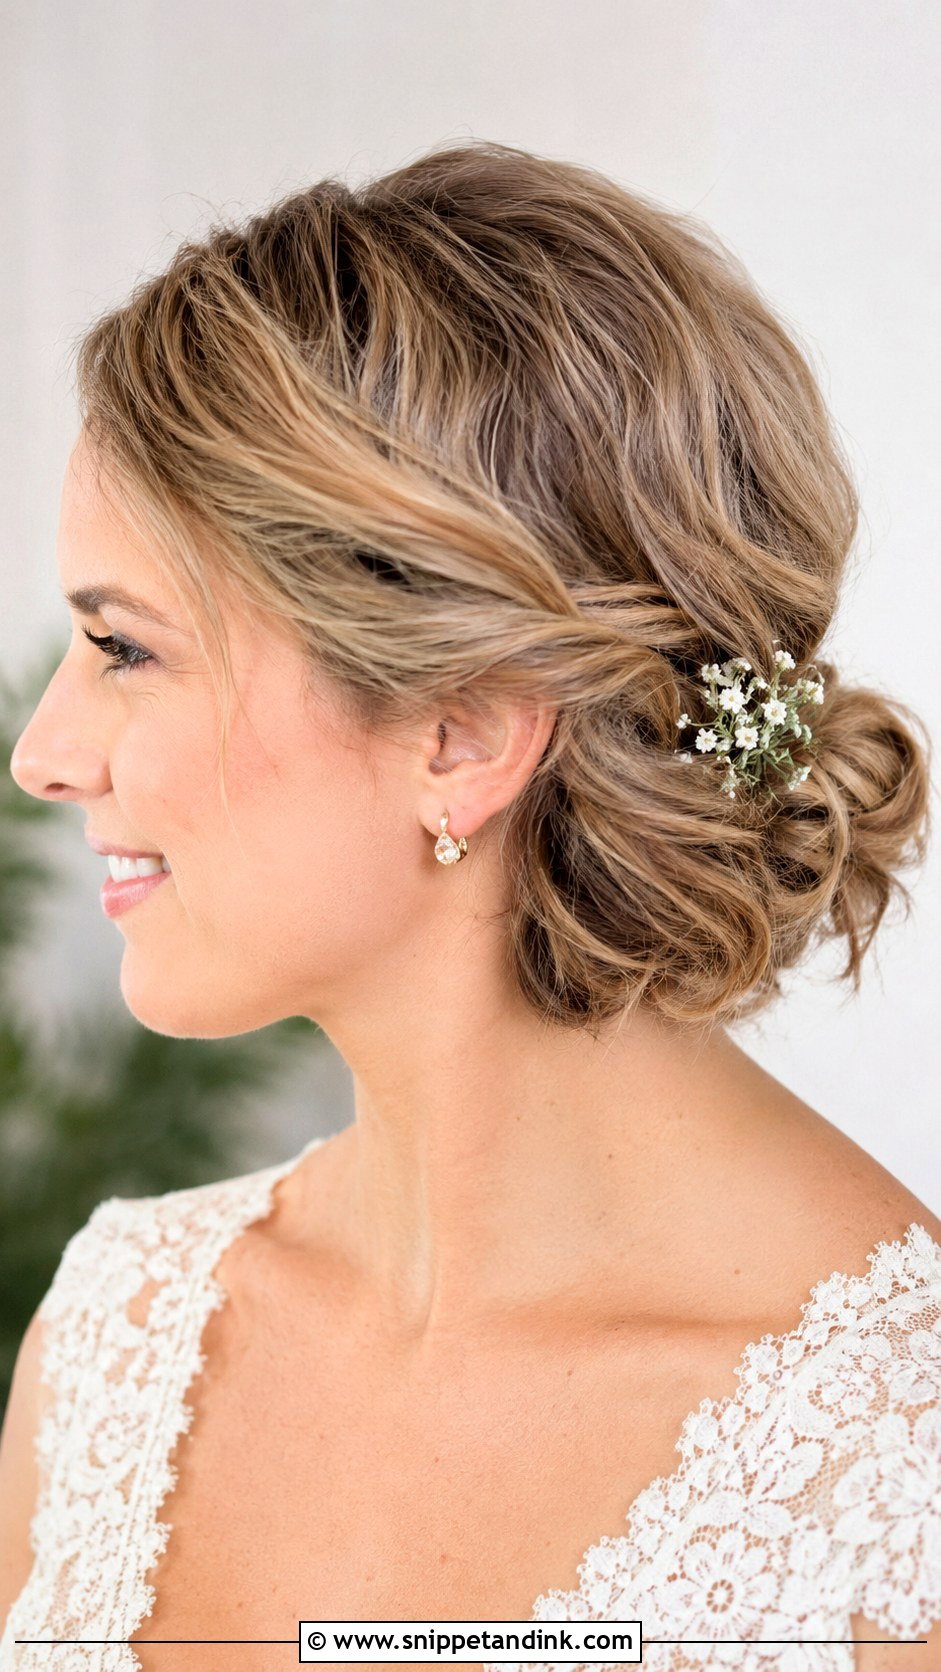
If your hair sits above the shoulders, a bun is still possible, but it will be small and built from tucked sections rather than one ponytail. I curl the hair first for grip, then twist and pin pieces into a low mini bun or tucked chignon. Bobs and lobs suit this well. Shorter layers at the back may need extra pins or a little wax. For a bigger shape, a matching clip-in bun pinned over the base makes a real difference.
18. Long Hair Wedding Bun
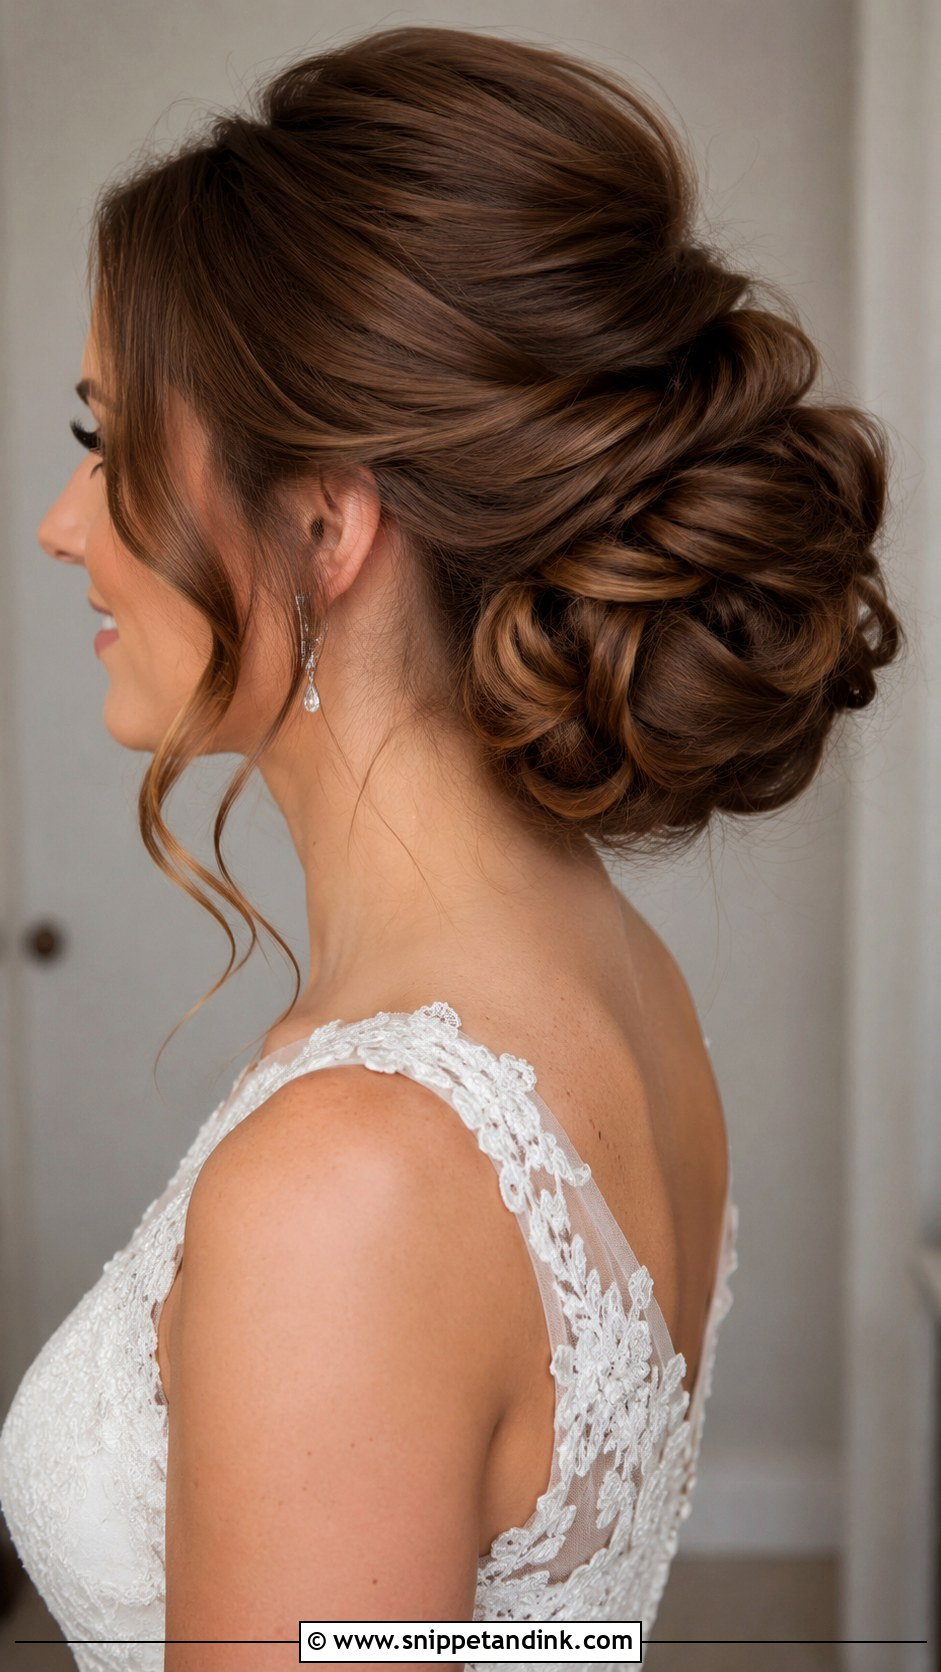
Very long hair gives you every option, but weight is the real challenge. One huge knot pulls on the scalp and can sag by evening, so I split the hair into sections and pin each one separately to spread the load. A low bun is easiest for a long day; a high one looks dramatic but feels heavy after a few hours. Long hair is ideal for wrapped and braided buns too. Ask your stylist how they plan to manage the bulk before the day.
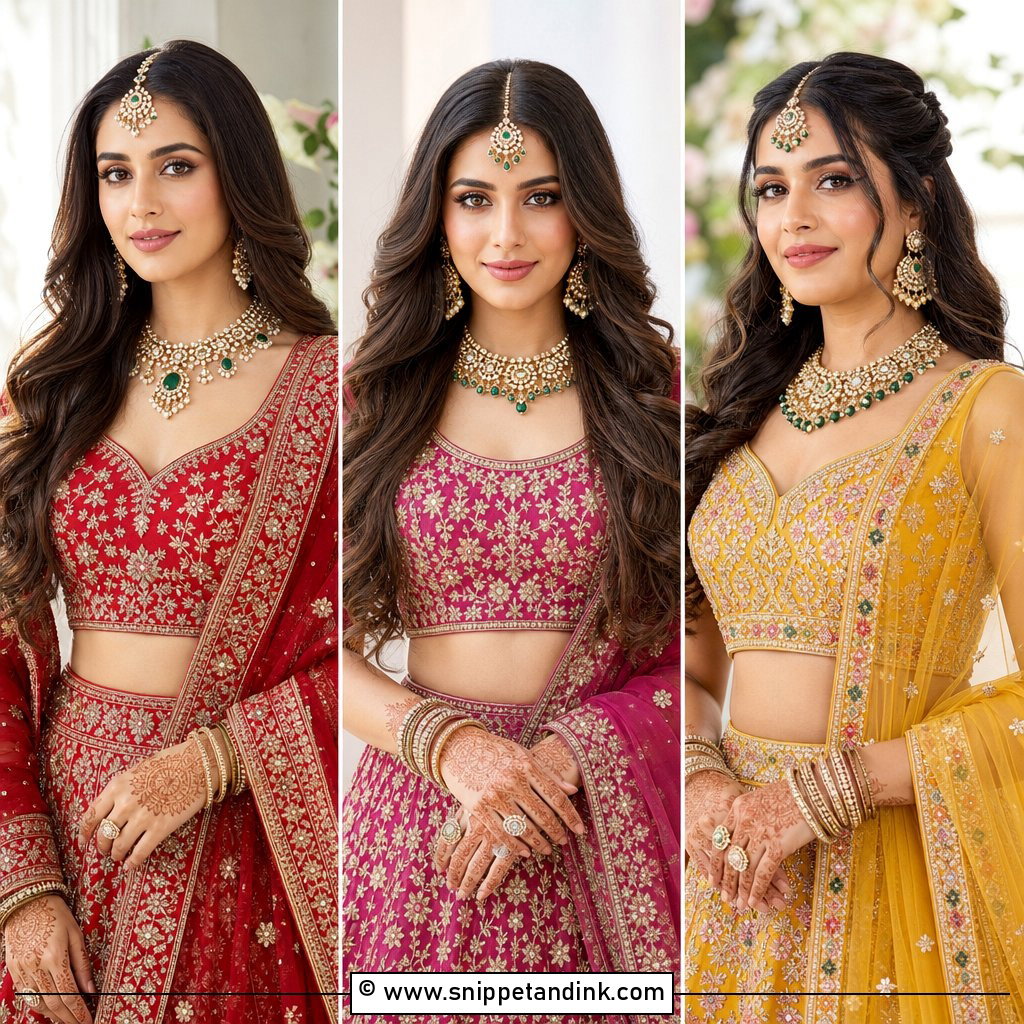
19. Indian Wedding Bun
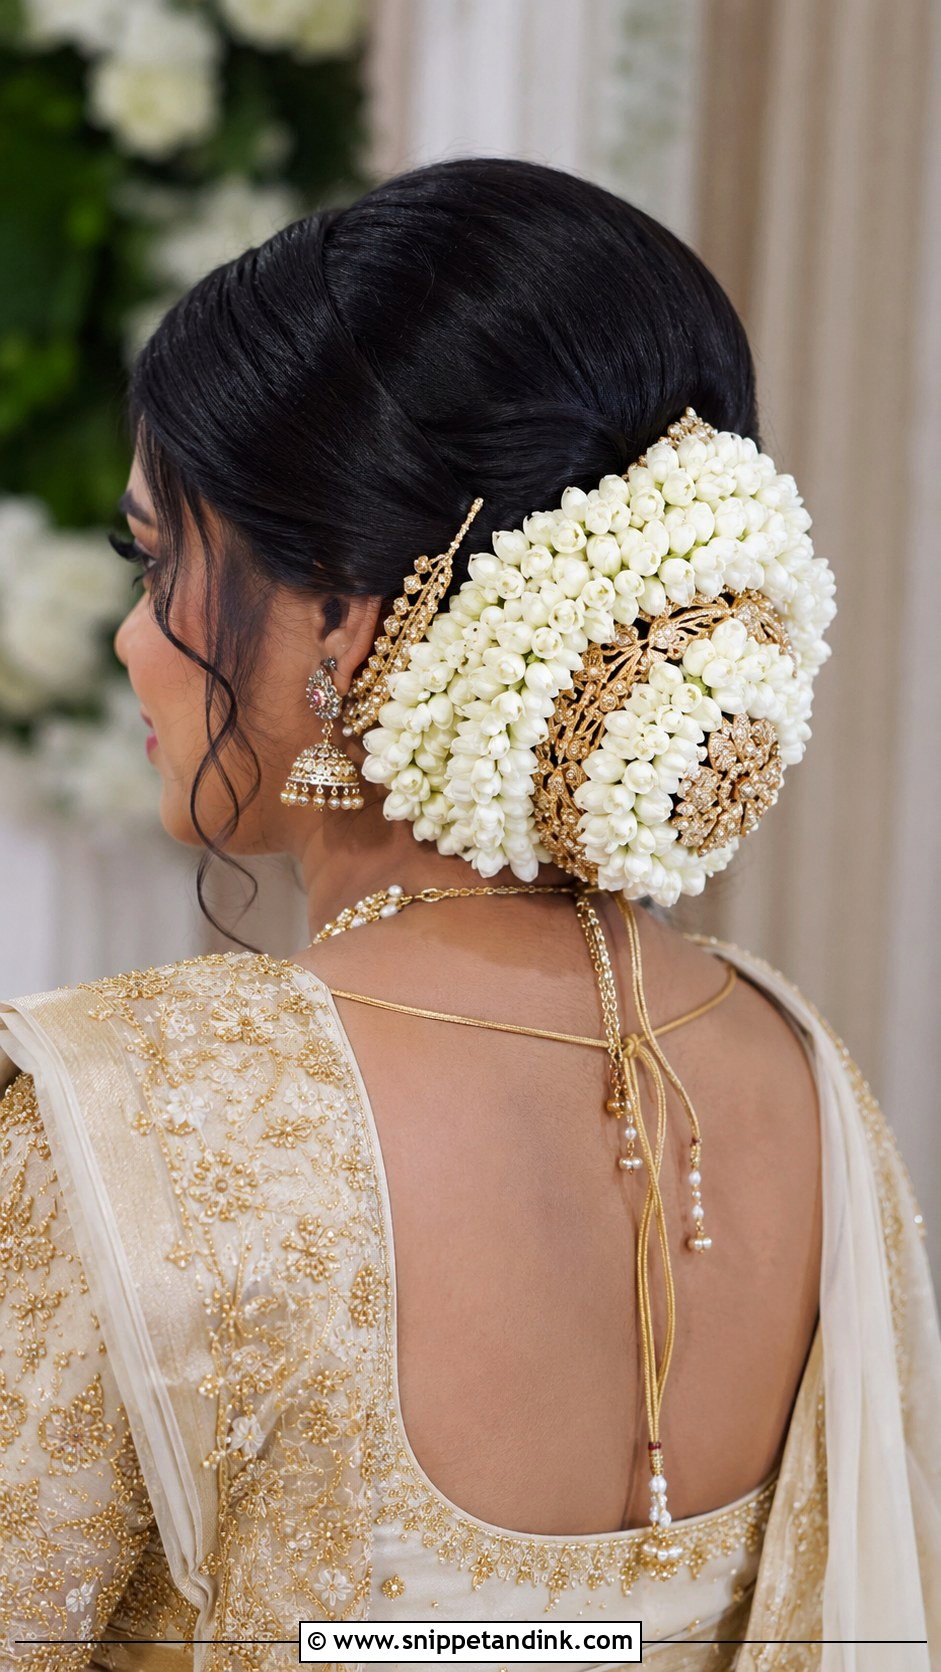
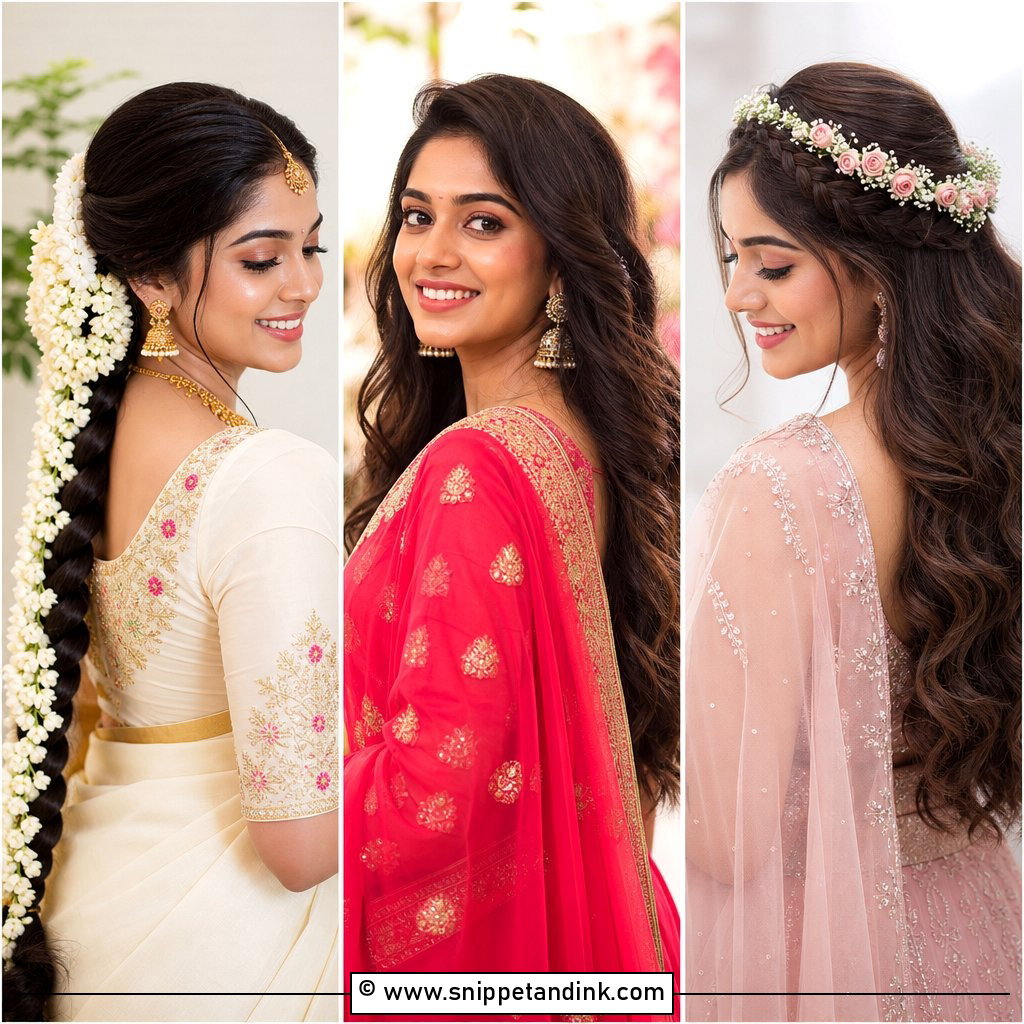
An Indian wedding bun is a working foundation as much as a hairstyle, because it has to carry a dupatta, jewelry such as a maang tikka or jhoomar, and often jasmine gajra through a long ceremony. I build a strong base, usually with a donut or padding, and pin the dupatta into the bun itself rather than into loose hair. A low or mid-height bun lets the dupatta drape comfortably. A center part with smooth sides is traditional, while a braided base or floral wrap adds detail. Plan for outfit changes too, since each look may need the bun adjusted.
20. Black Wedding Bun
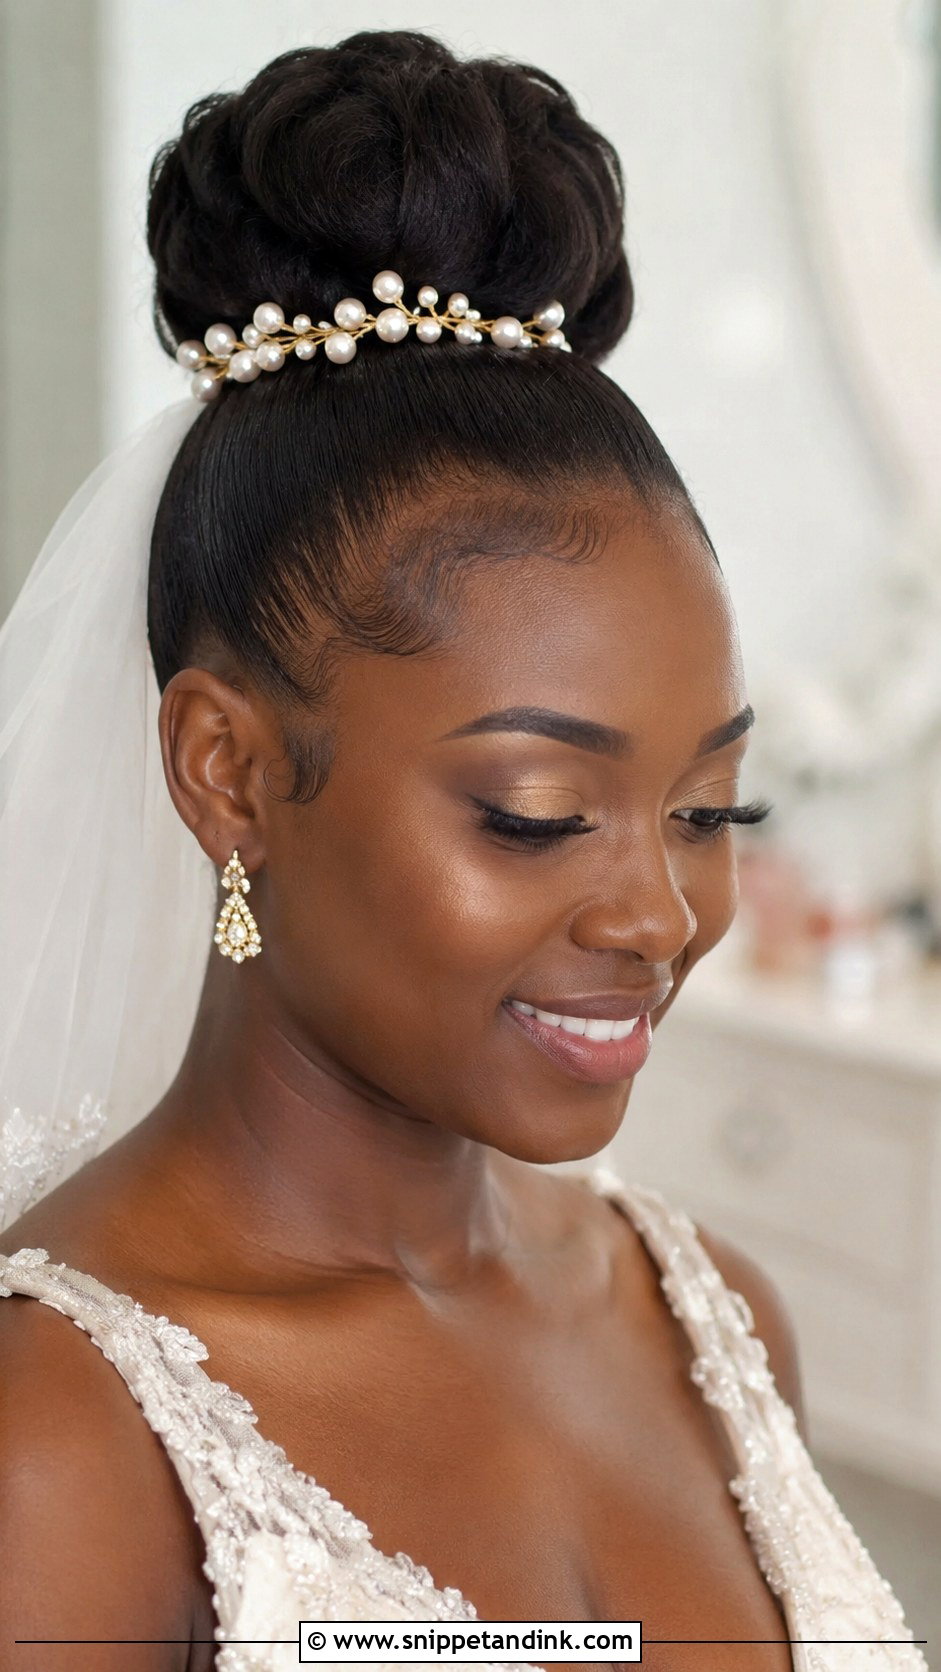
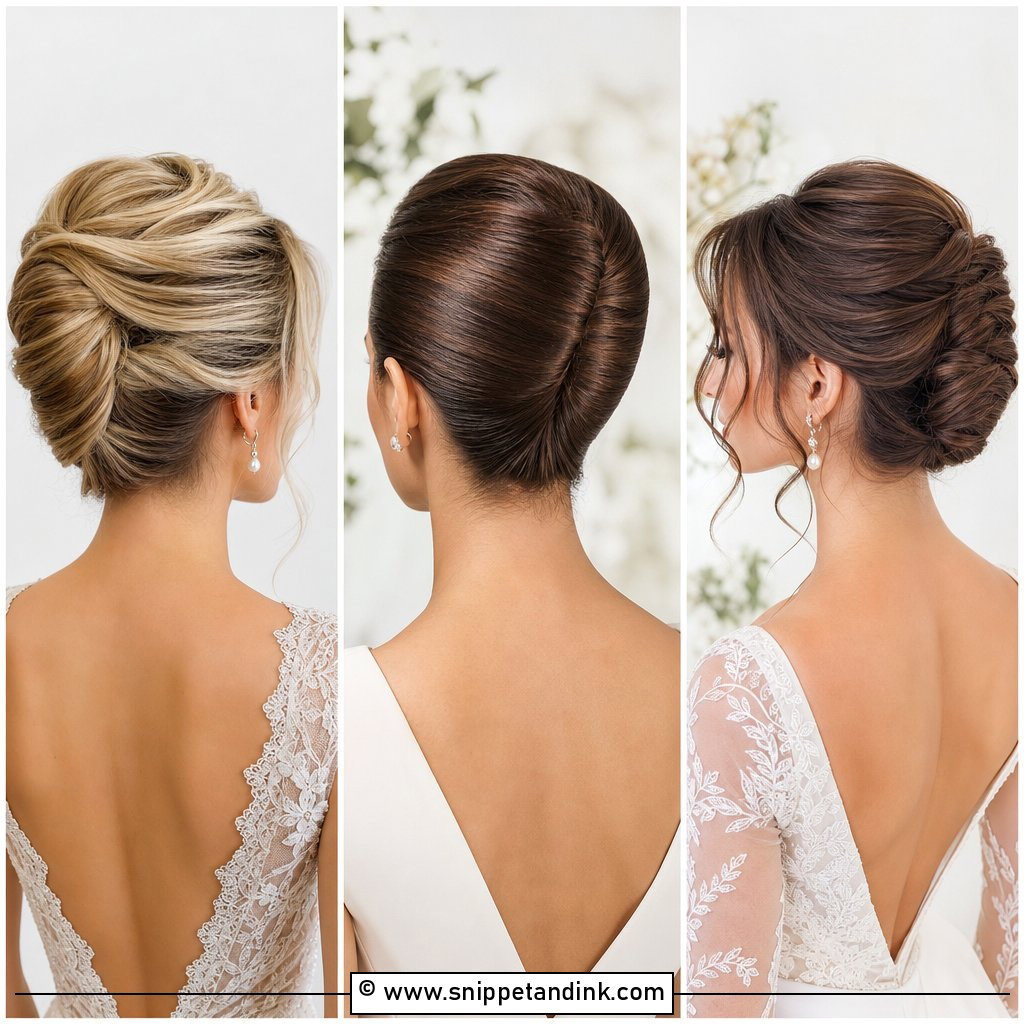
Black hair offers more bun variety than almost any texture: sleek, braided, twisted, coily or sculpted into a bold shape. It works on natural hair, silk presses, locs, twists and protective styles. With a silk press, keep away from steam and humidity on the day, because moisture can make the hair revert. Loc buns are heavy, so I spread the weight across several anchor points. Edges need moisture and a gentle hold product, and the scalp needs care under any tight styling. Pearls, gold pins or a veil all sit well on top.
Fixing a Bun That Slips During the Reception
Even a well-built bun loosens a little after hours of dancing and hugging. The repair is usually quick, as long as someone knows what to do.
Pack a tiny repair kit
Give a bridesmaid a strip of bobby pins in your hair color, two U-pins, a travel spray and a tail comb. That covers nearly any repair.
Re-pin, don’t rebuild
If the bun sags, push it back into place and slide a U-pin through it into the base underneath, catching the anchor. Bobby pins go in with the ridged side facing the scalp. Never pull the bun apart to start over in a bathroom mirror.
Lighten the load before dancing
Take off the veil or any heavy hair jewelry before the dancing starts. A lighter bun lasts longer, and pulling a comb out mid-dance often loosens everything around it.
Bridesmaids, Mothers and Guests in Buns
The same shapes work across the whole wedding party, but a few adjustments keep the bride’s hair distinct.
- Bridesmaids can wear a simpler version of the bride’s bun, with fewer accessories and no flowers, so her hair stays the focus.
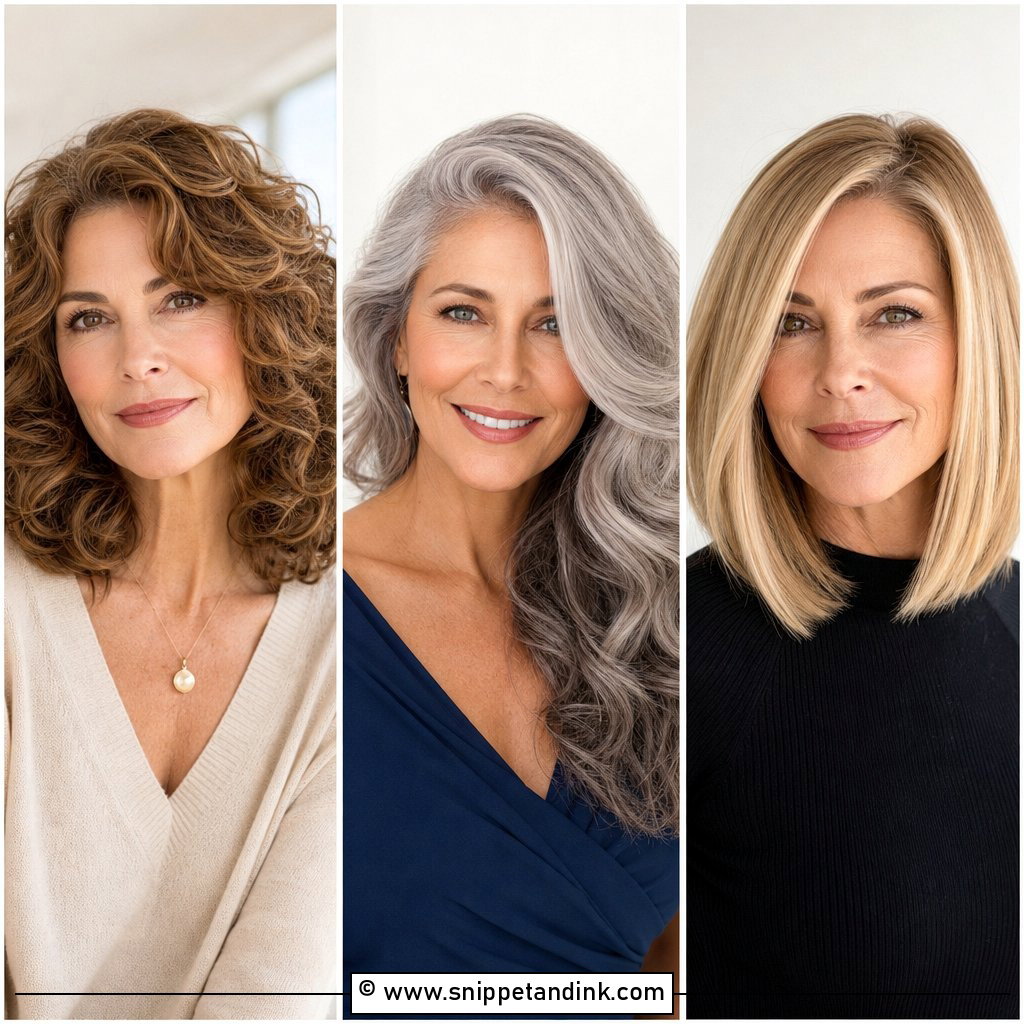
- Mothers of the bride often prefer a low, soft bun with a little volume on top, which flatters thinner hair and doesn’t strain a delicate hairline.
- Guests should steer clear of anything that reads as bridal, such as veil-like accessories or white flowers, and keep the bun polished but plain.
- When several people are styled the same morning, sleek buns and chignons take less chair time than braided or floral ones, so plan the schedule around that.
Is Your Bun Built for the Whole Day?
A bun earns its place by staying comfortable and secure from the first photo to the last dance, whether the ceremony is at a courthouse or in a ballroom. Let your dress, hair length and texture, accessories and venue decide the shape. Sleek feels modern and controlled; textured feels softer. Book a trial, bring your accessories, and take photos from the front, side and back, because the back is what guests watch during the ceremony.
You'll Like These Ideas:


Leave a Reply