
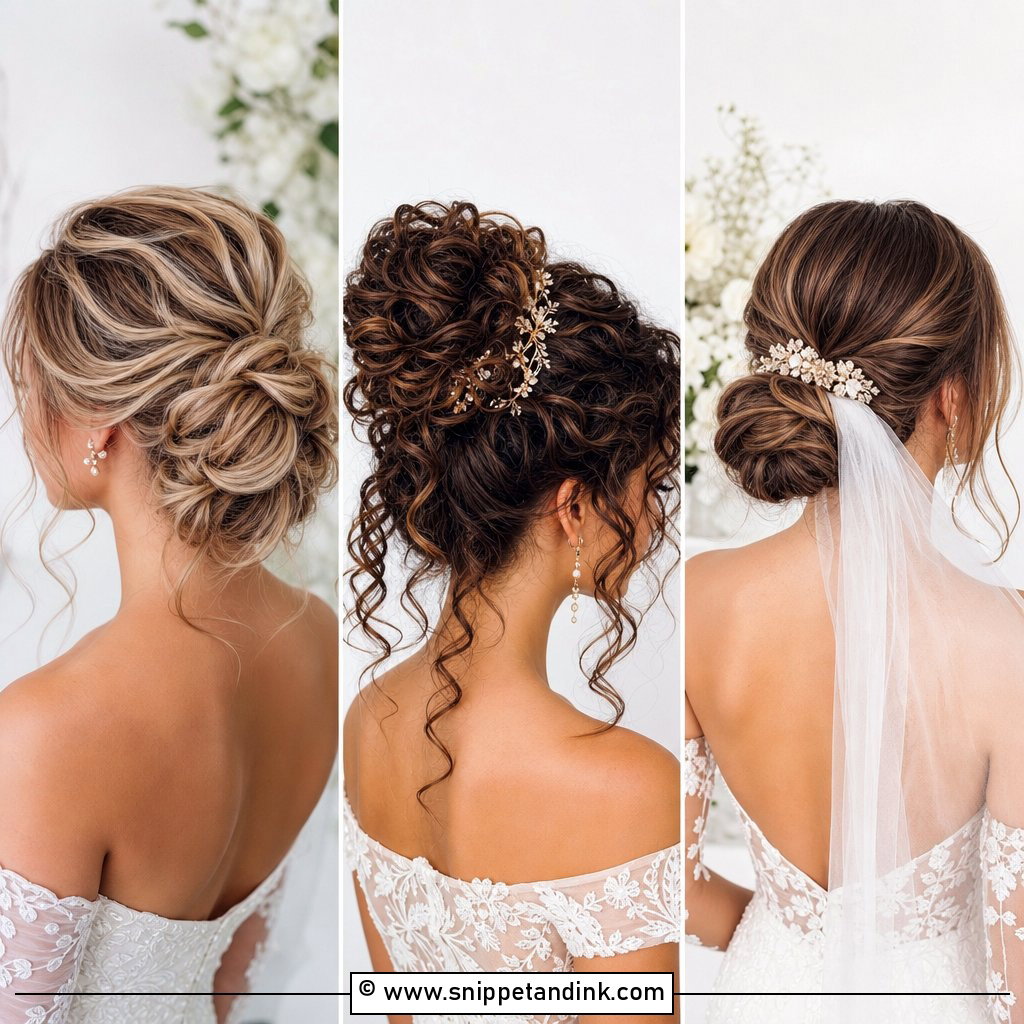
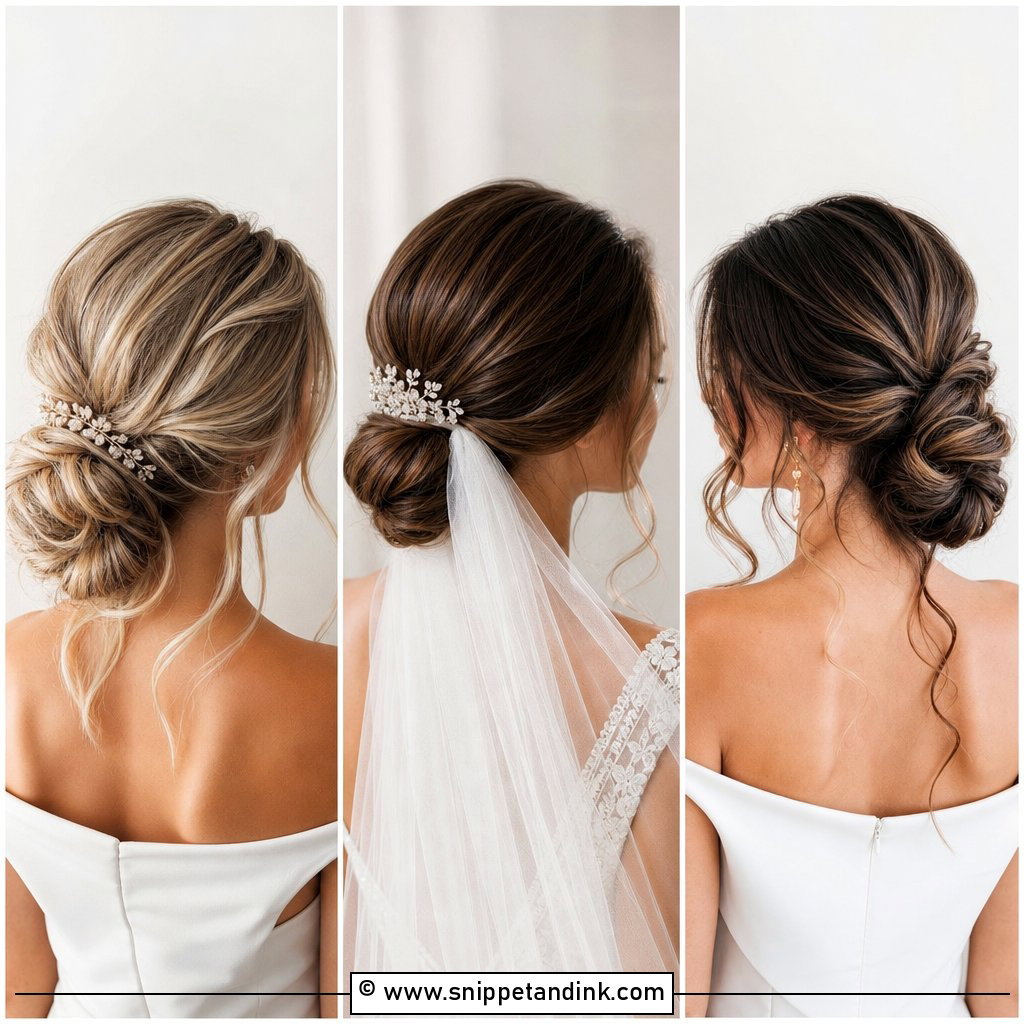
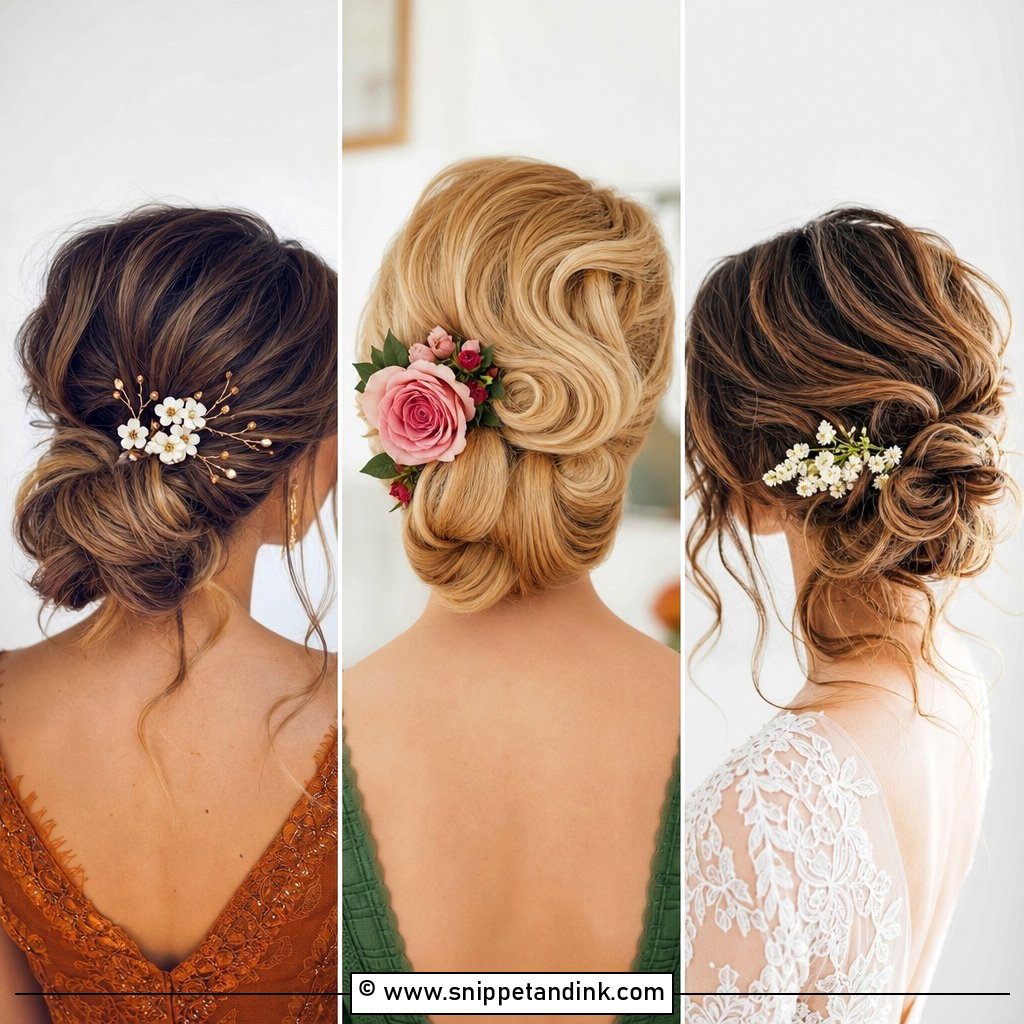
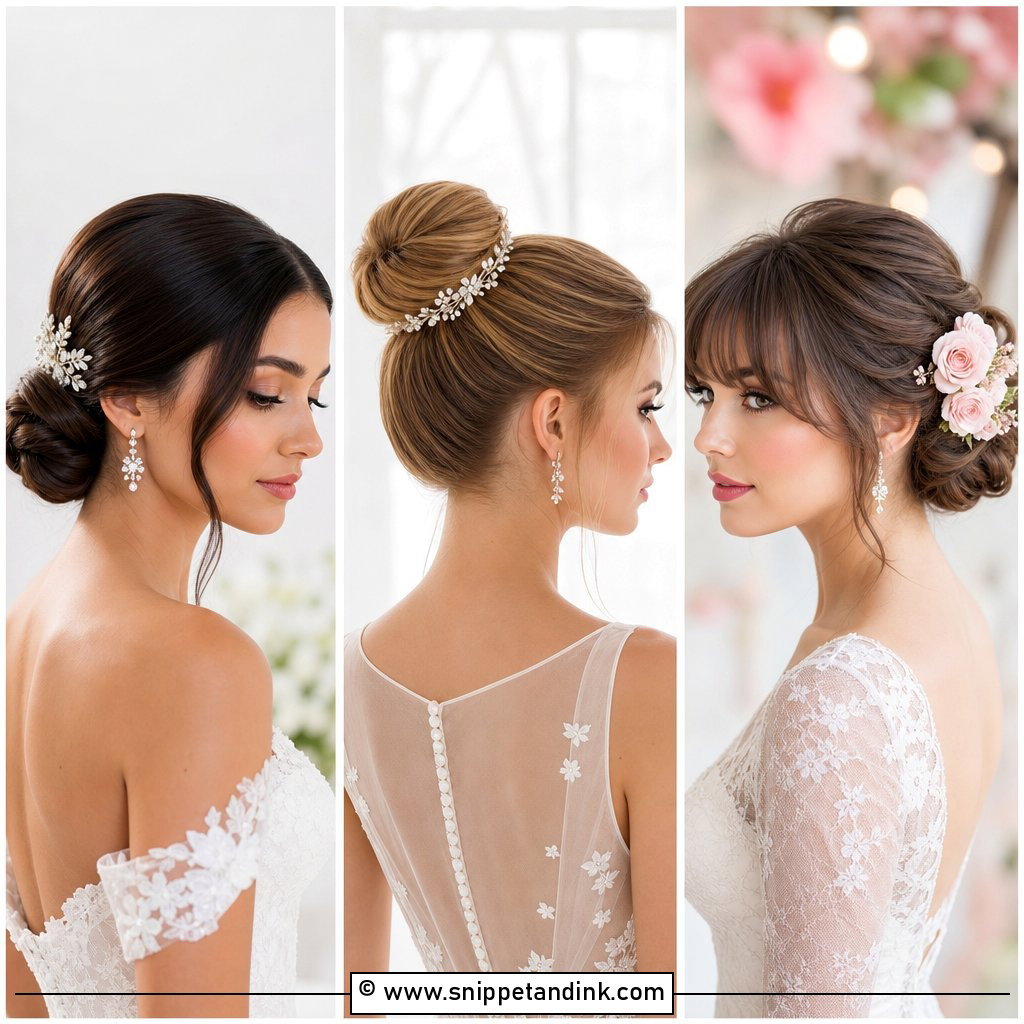
If I had to put every bride I meet in one style, it would be a low bun. It sits at the nape, out of the way of a veil comb above and a collar below, and it’s the updo least likely to give you a headache by the reception because the weight rests close to the neck instead of pulling from the crown. It also takes accessories well, which is why so many of the ideas below are really one bun dressed twenty-five ways. I’ve added notes on how I build each one and who it suits.
How Low Is Low? Placing the Bun for Your Neckline
A low bun can sit anywhere from just below the occipital bone, the bump at the back of your skull, down to the top of your neck. Where I put it depends on what’s happening around it.
- High neck or lace collar: keep the bun on the occipital bone, a finger-width above the collar, so the two don’t rub and flatten each other.
- Strapless or deep V: it can sit lower, at the nape, since there’s nothing behind it.
- Long veil: the comb sits just above the bun. A bun placed too low leaves the comb hanging in loose hair.
- Tall partner or lots of side-profile portraits: a bun slightly higher reads better in profile, while one right at the nape can disappear behind the shoulders.
Sit down in your dress at the trial and turn your head both ways. If the bun touches the collar or back of the dress, move it up. You’ll be seated for dinner and speeches, and a bun pressing against fabric will crush and loosen in a few hours.
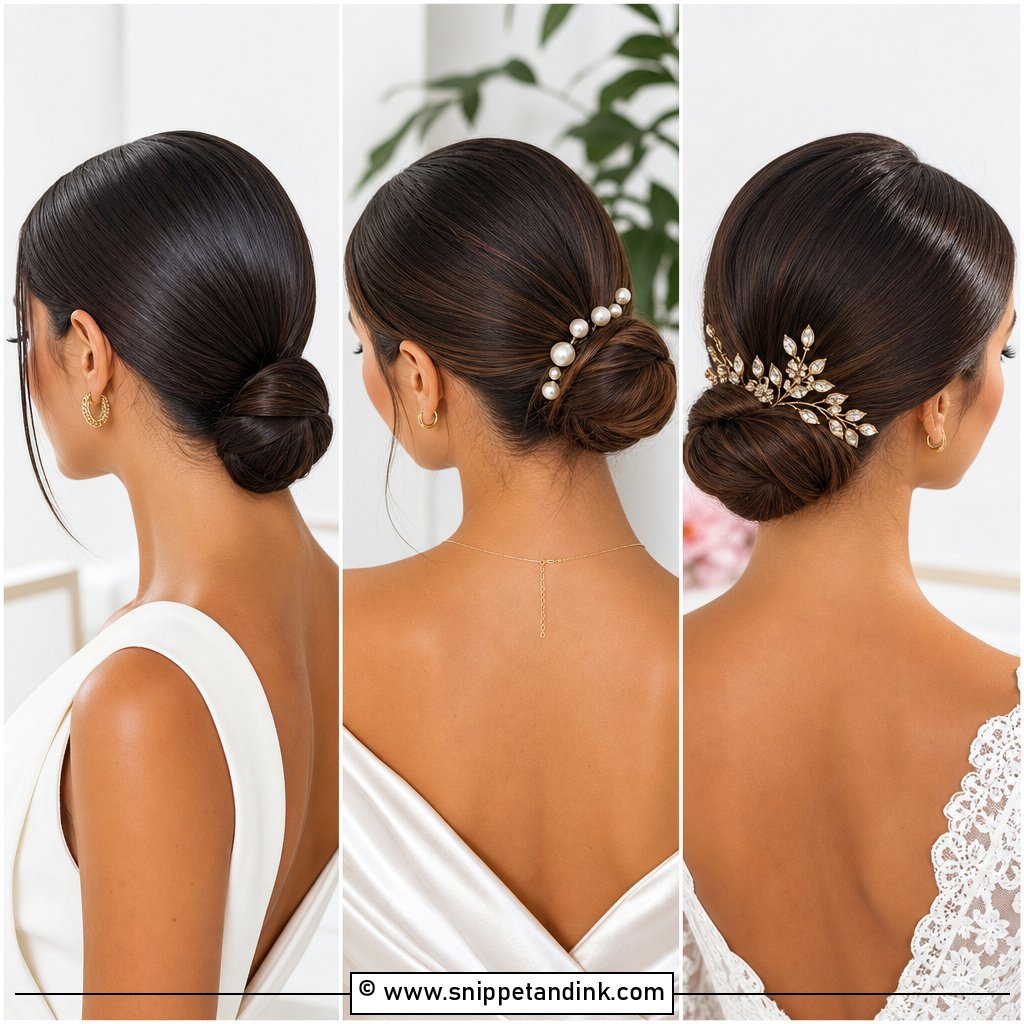
1. Classic Low Chignon Wedding Bun
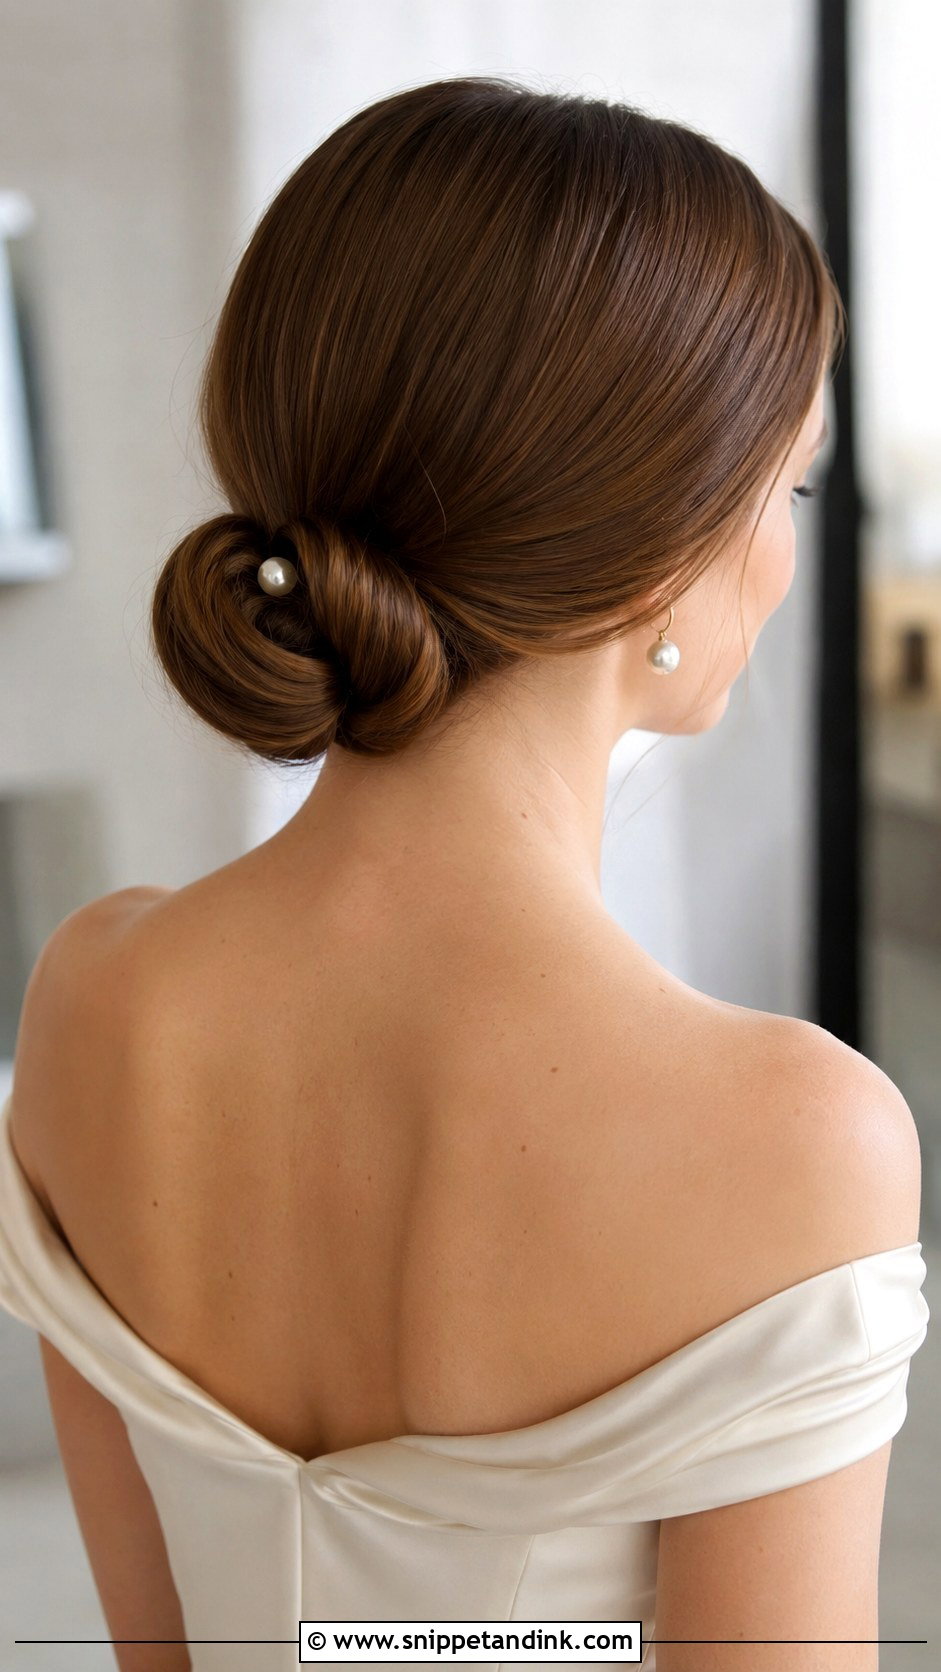
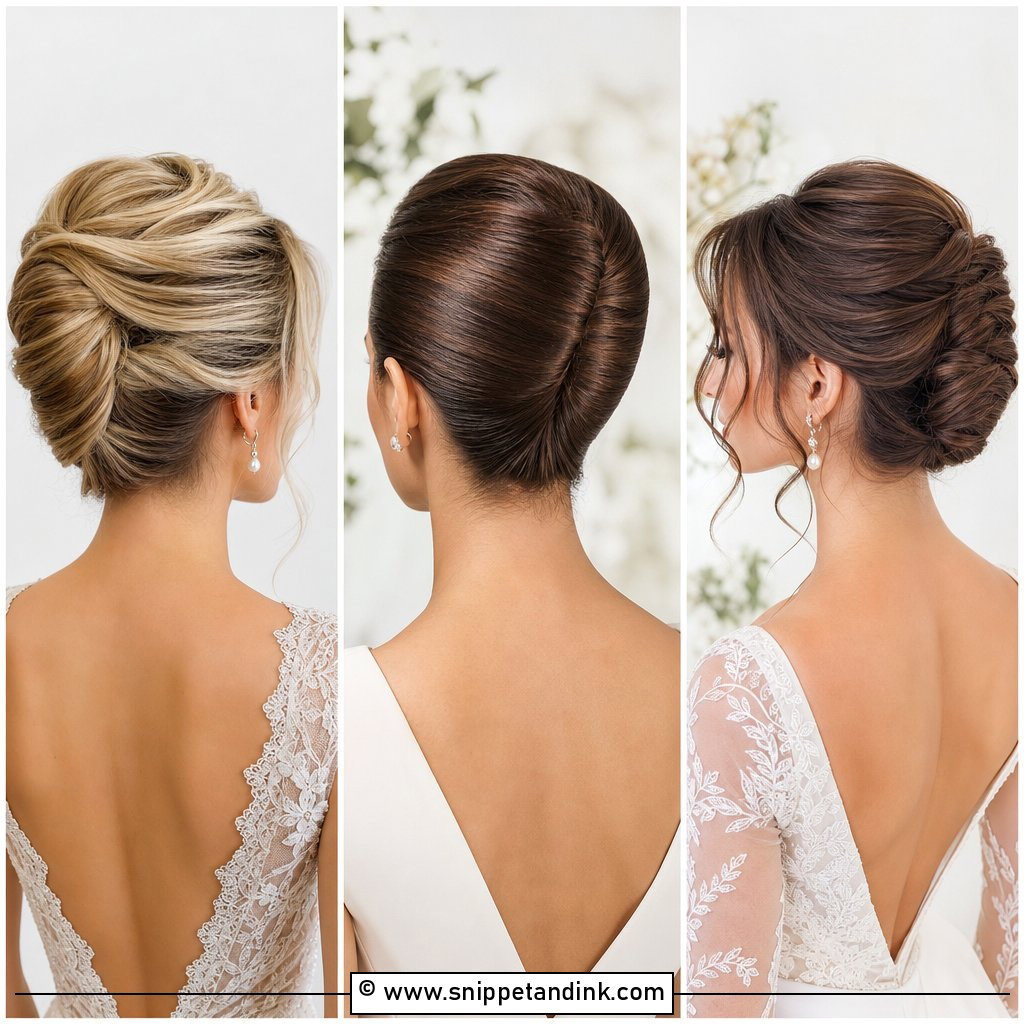
A chignon is a rolled knot, smoother and flatter than a twisted bun, and it’s the version I’d suggest to anyone wearing a long veil. The comb slides in just above the roll and the roll carries it. I set the hair with a large barrel first, even when the finish is sleek, because a little bend helps the length roll without kinks. Leave it bare or add one pearl pin; a chignon gets cluttered fast.
2. Sleek Low Bun With Center Part
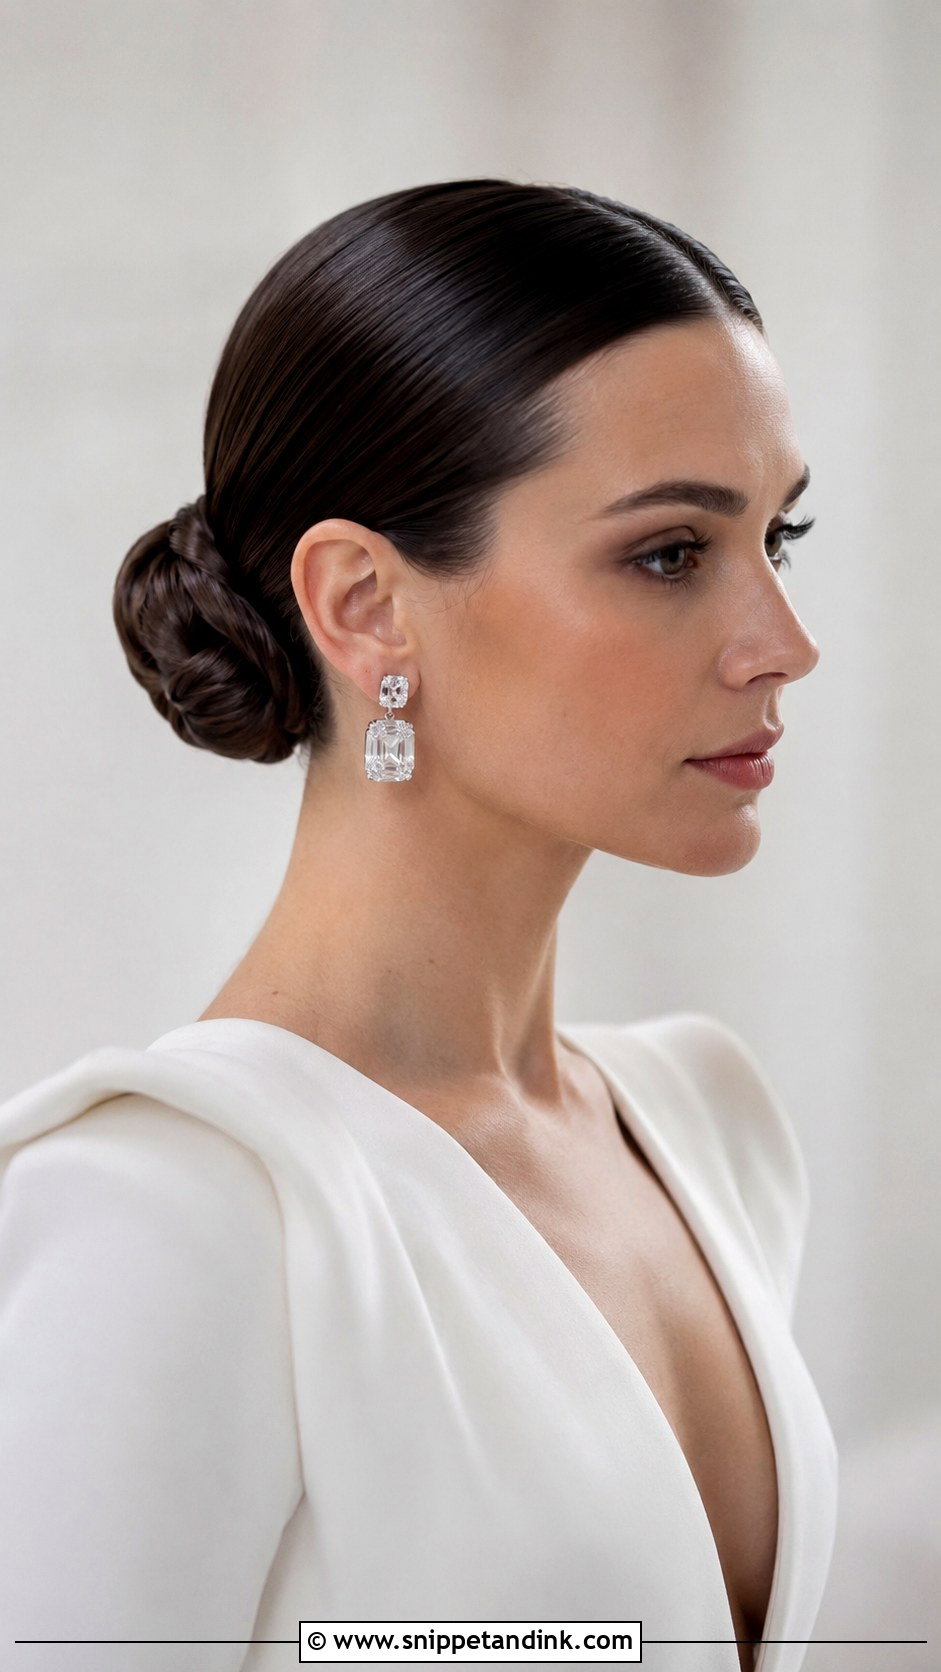
A center part is the least forgiving line you can put in hair. It has to be straight from forehead to crown, and any cowlick at the front shows straight away, so I check the hairline growth before agreeing to it. The bun itself is tied tight over a ponytail base and smoothed with a fine comb and a cream rather than heavy gel, which can flake in close-up photos. It suits structured gowns and bold earrings. On a very rounded face I’d usually soften it with a slightly off-center part.
3. Soft Romantic Low Bun With Face-Framing Pieces
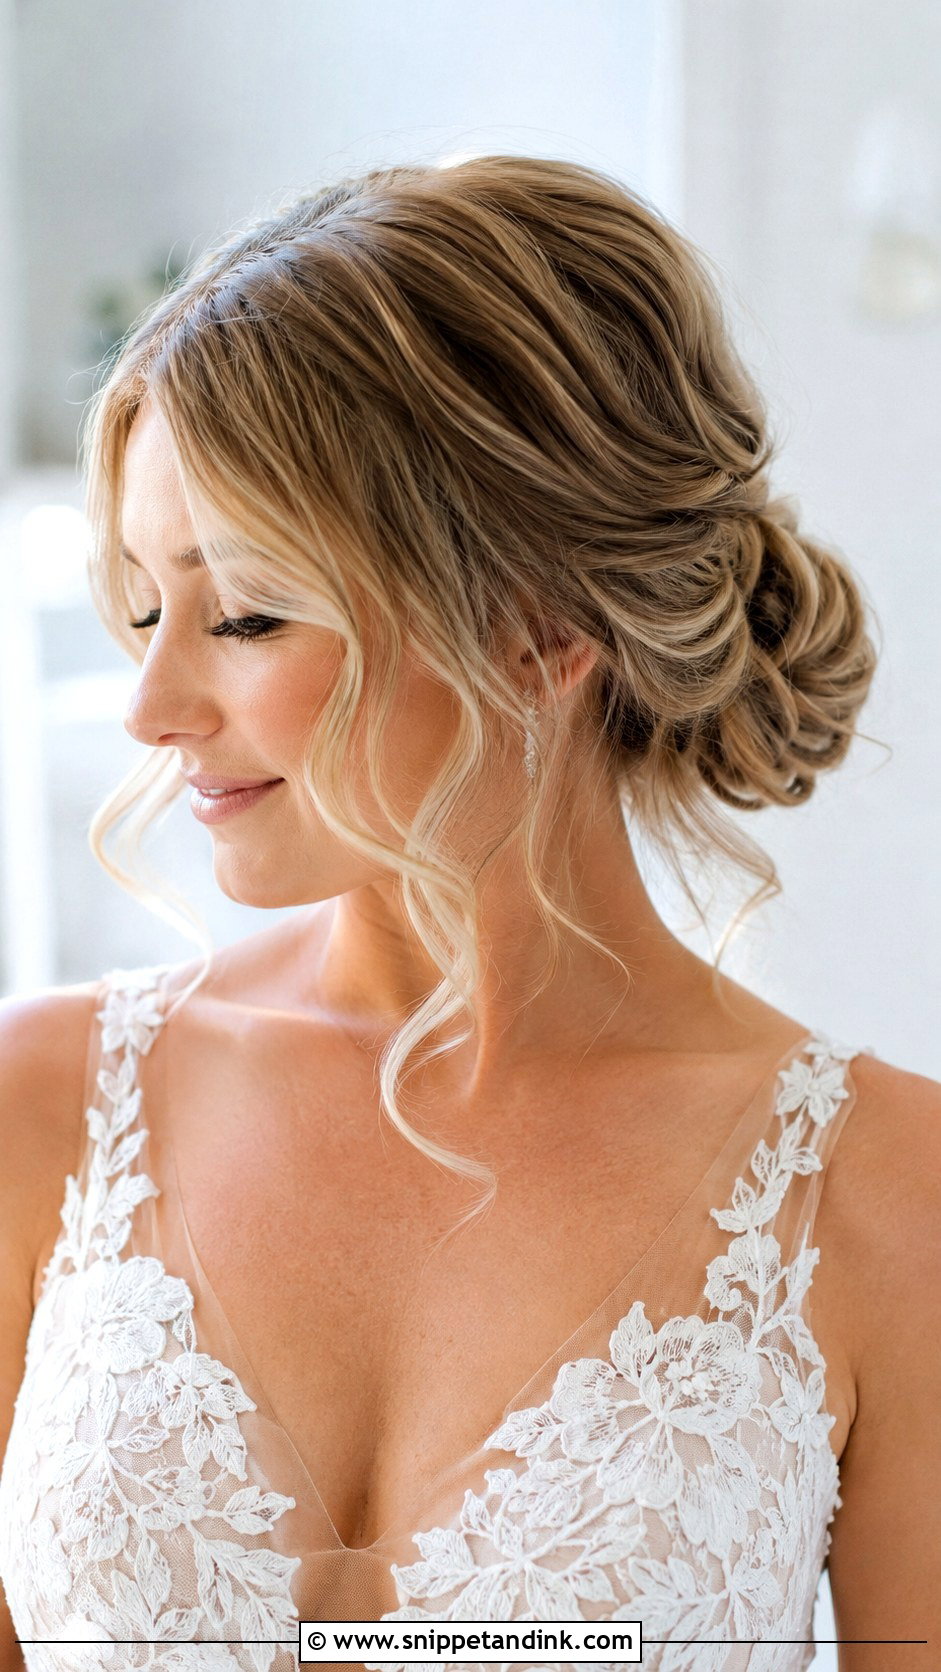
This is the low bun I’d choose for brides who find a sleek style too severe. The bun stays loose, and two or three curled pieces fall at the temples and cheeks. Separate those pieces before you build the bun, not after; pulling them out later loosens the shape. Curl them away from the face so they don’t stick to lip gloss. It sits well at outdoor and boho weddings and on most face shapes, especially round and heart-shaped faces where a little softness at the cheek helps.
4. Braided Low Bun for Brides
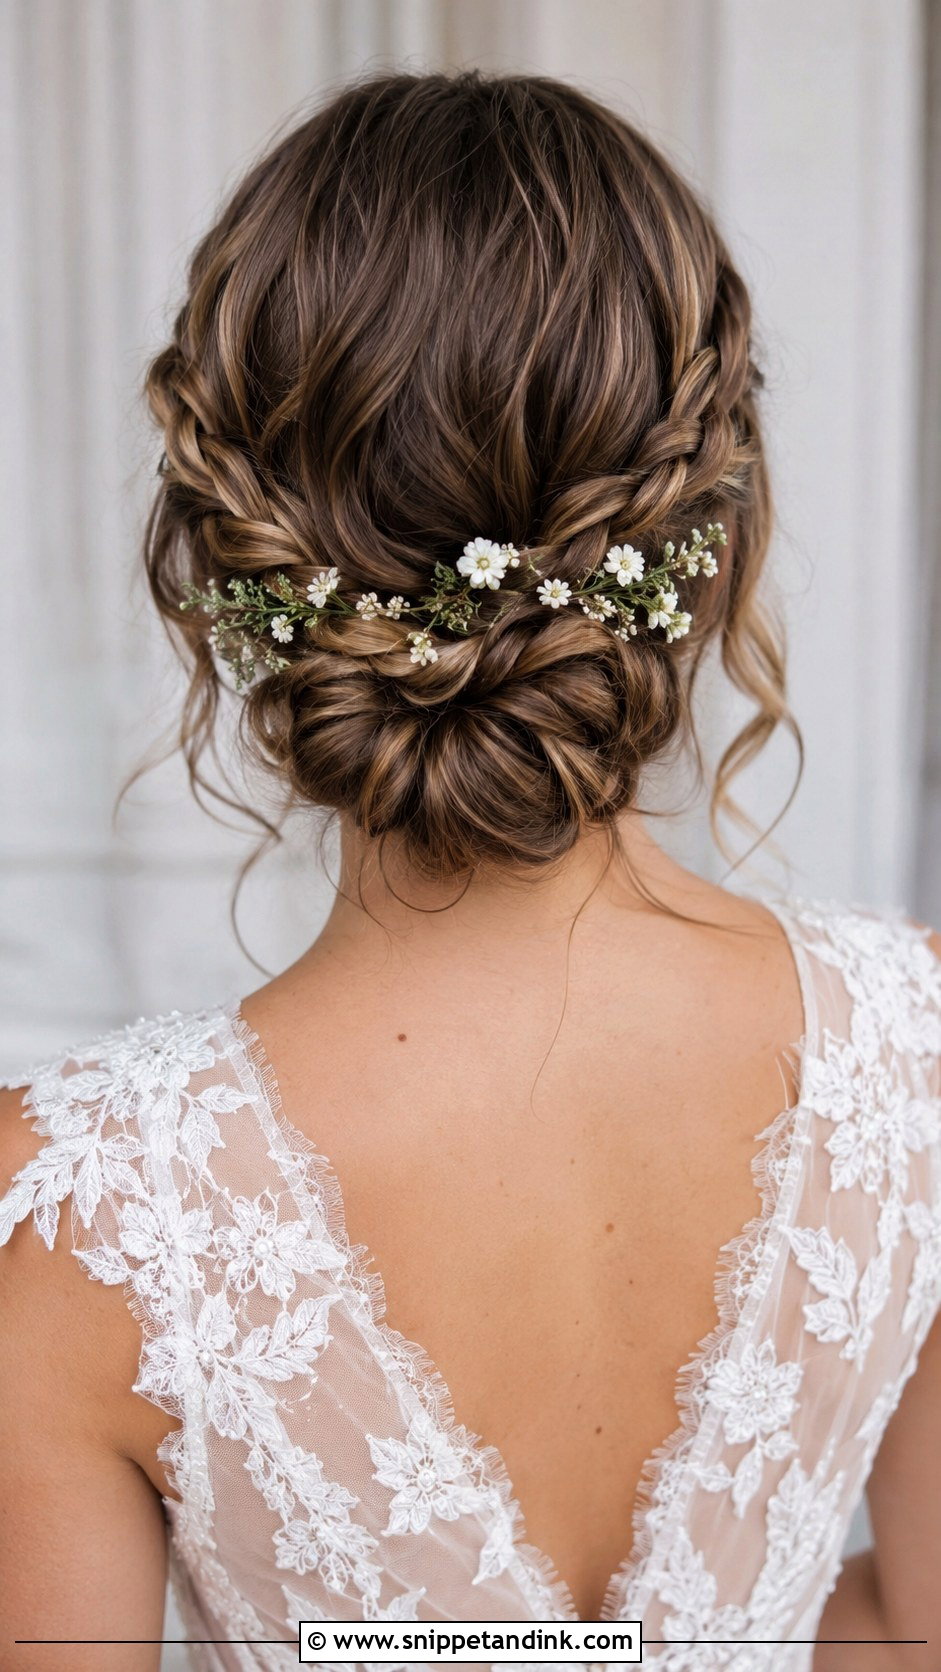
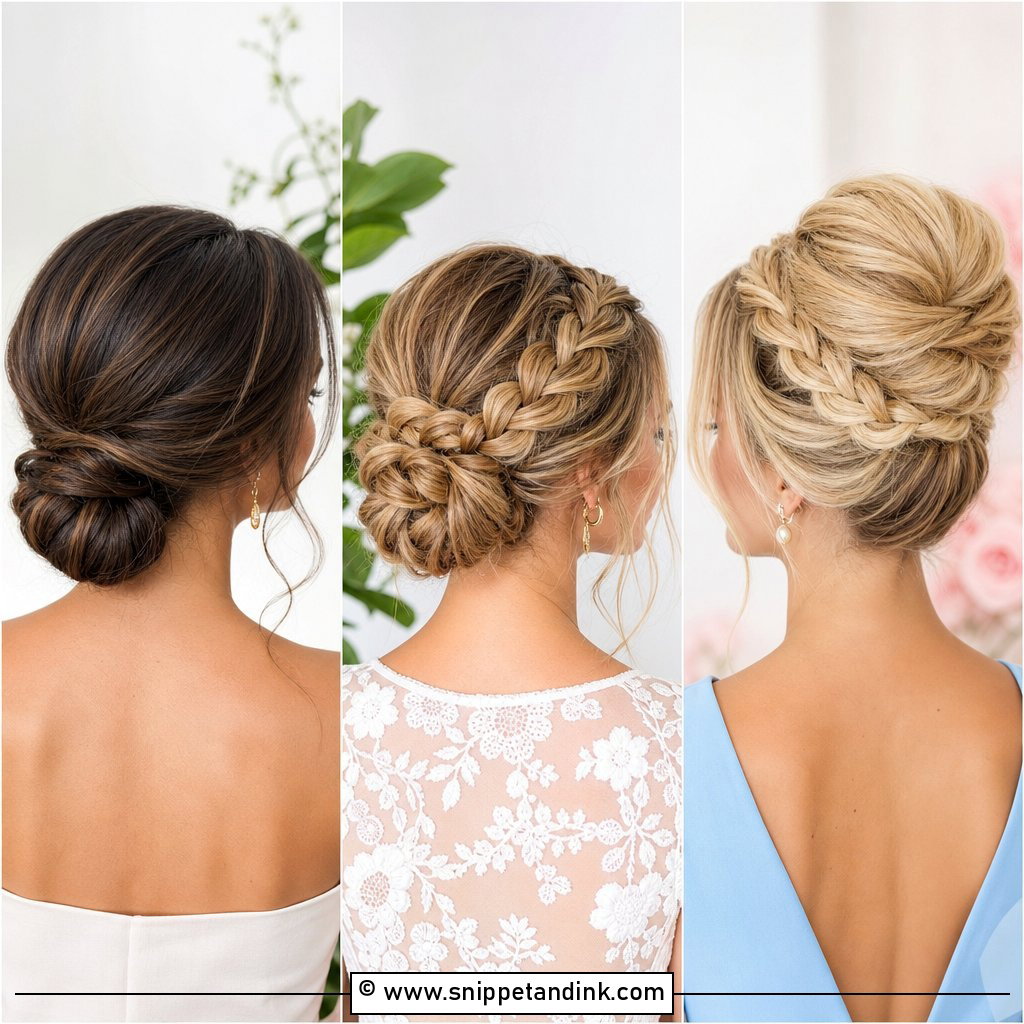
A braided low bun is my go-to for thick or very long hair, because the braid compresses the length and stops the bun from becoming enormous. One accent braid from the temple, or two or three plaits coiled into the knot, both work. Braids hold flowers well, so small stems can be tucked into the weave. Loose braids look relaxed and suit boho weddings; tight braids look neat enough for a formal one.
5. Low Bun With a Wedding Veil
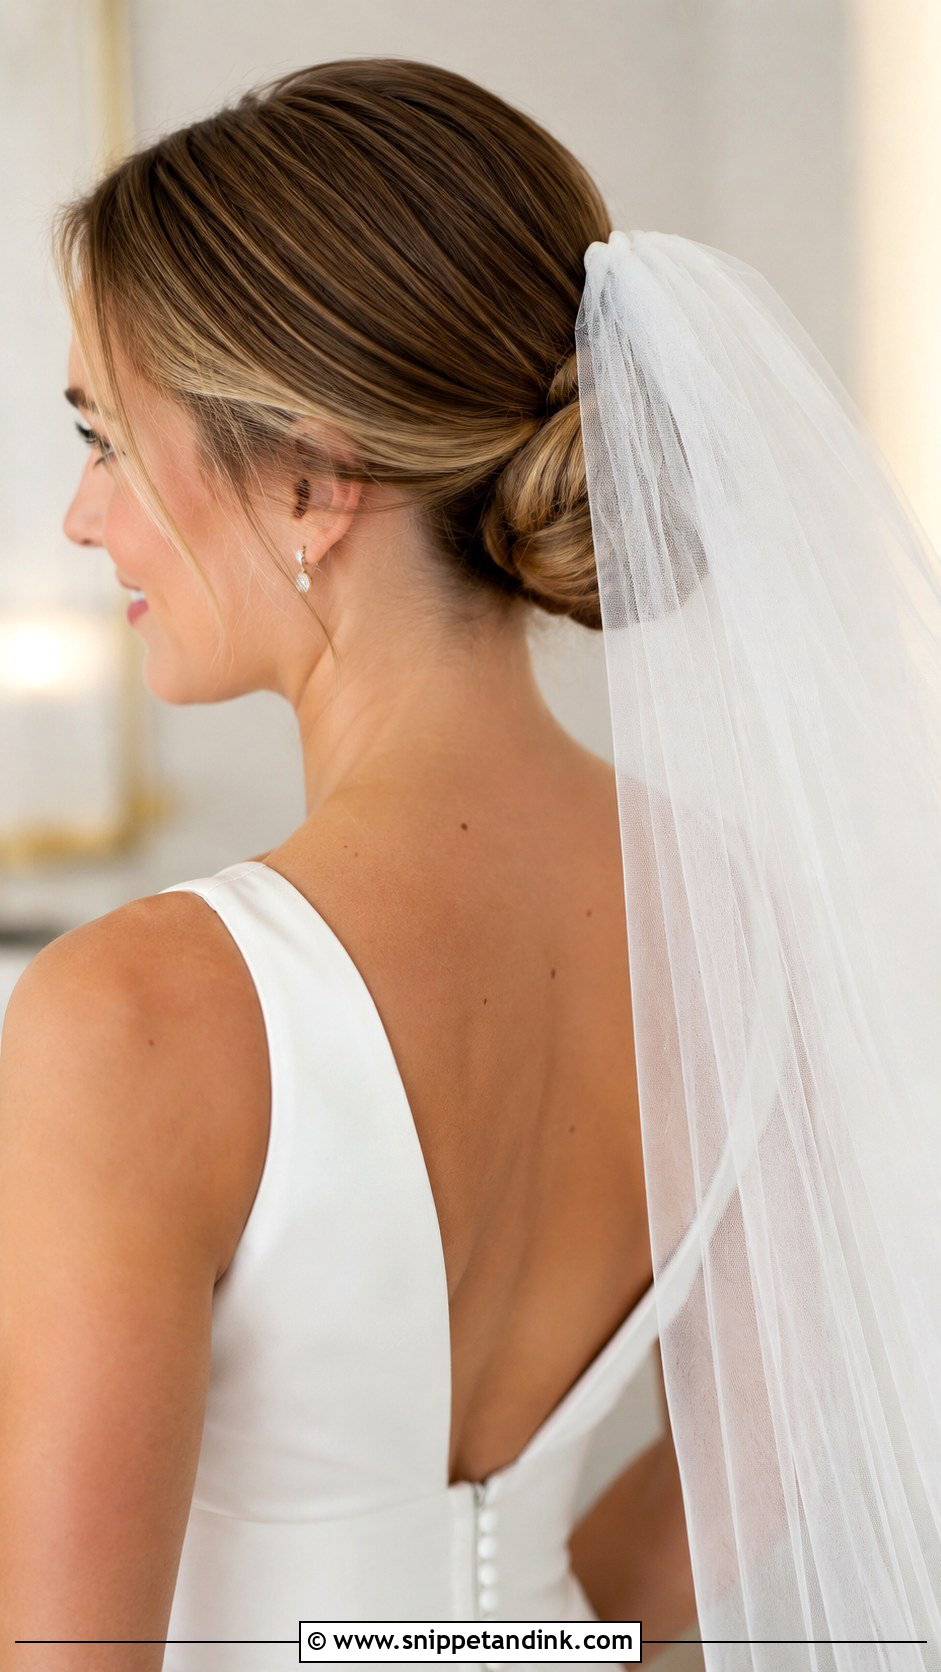
The low bun and veil belong together for a practical reason: the bun gives the comb something solid to grip. I usually place the comb just above the bun for long veils, so the weight sits on the knot rather than pulling on loose hair. A birdcage or short veil can sit to one side. The veil comes out after the ceremony and the bun stays, so you don’t need a second hairstyle. It works with cathedral, fingertip, or birdcage veils, though a heavy cathedral veil needs two crossed pins through the comb to stop it dragging the bun down.
6. Twisted Low Bun With Loose Tendrils
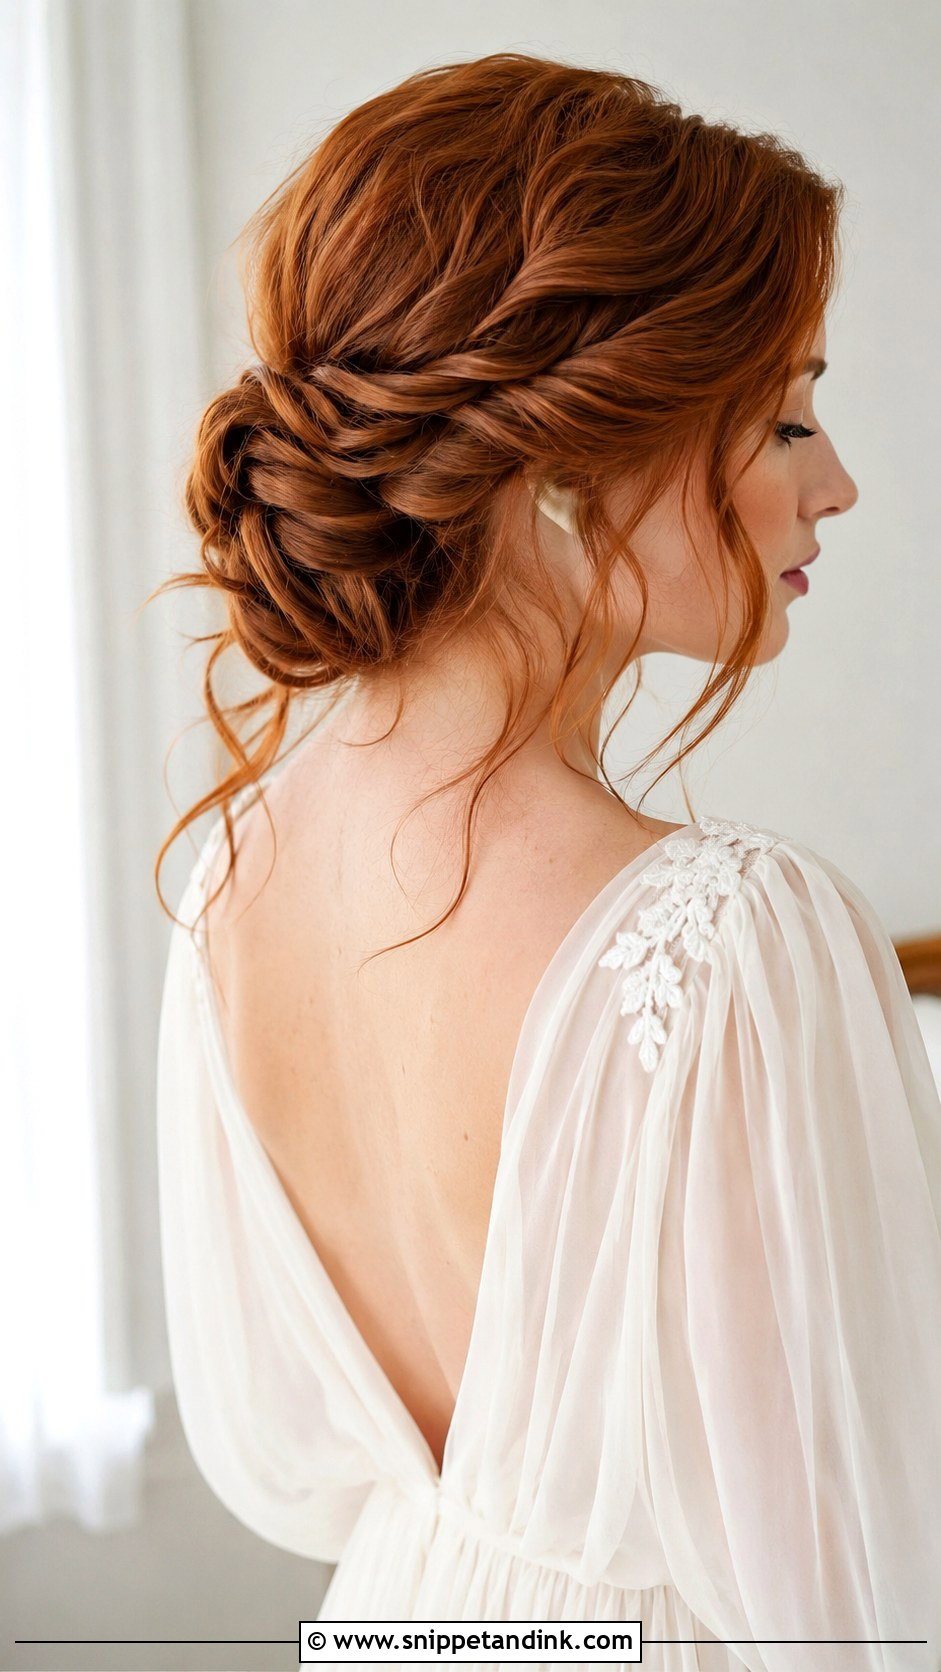
Twisting the sections before pinning gives this bun its ridges. I divide the hair into three or four sections, twist each one, and coil them around a ponytail base, pinning each as I go. The tendrils come out last. It holds up well for medium to long hair, and twists cope with humidity better than smooth curls do. A light hairspray keeps the loose pieces from frizzing.
7. Sculpted Low Bun for Minimalist Brides
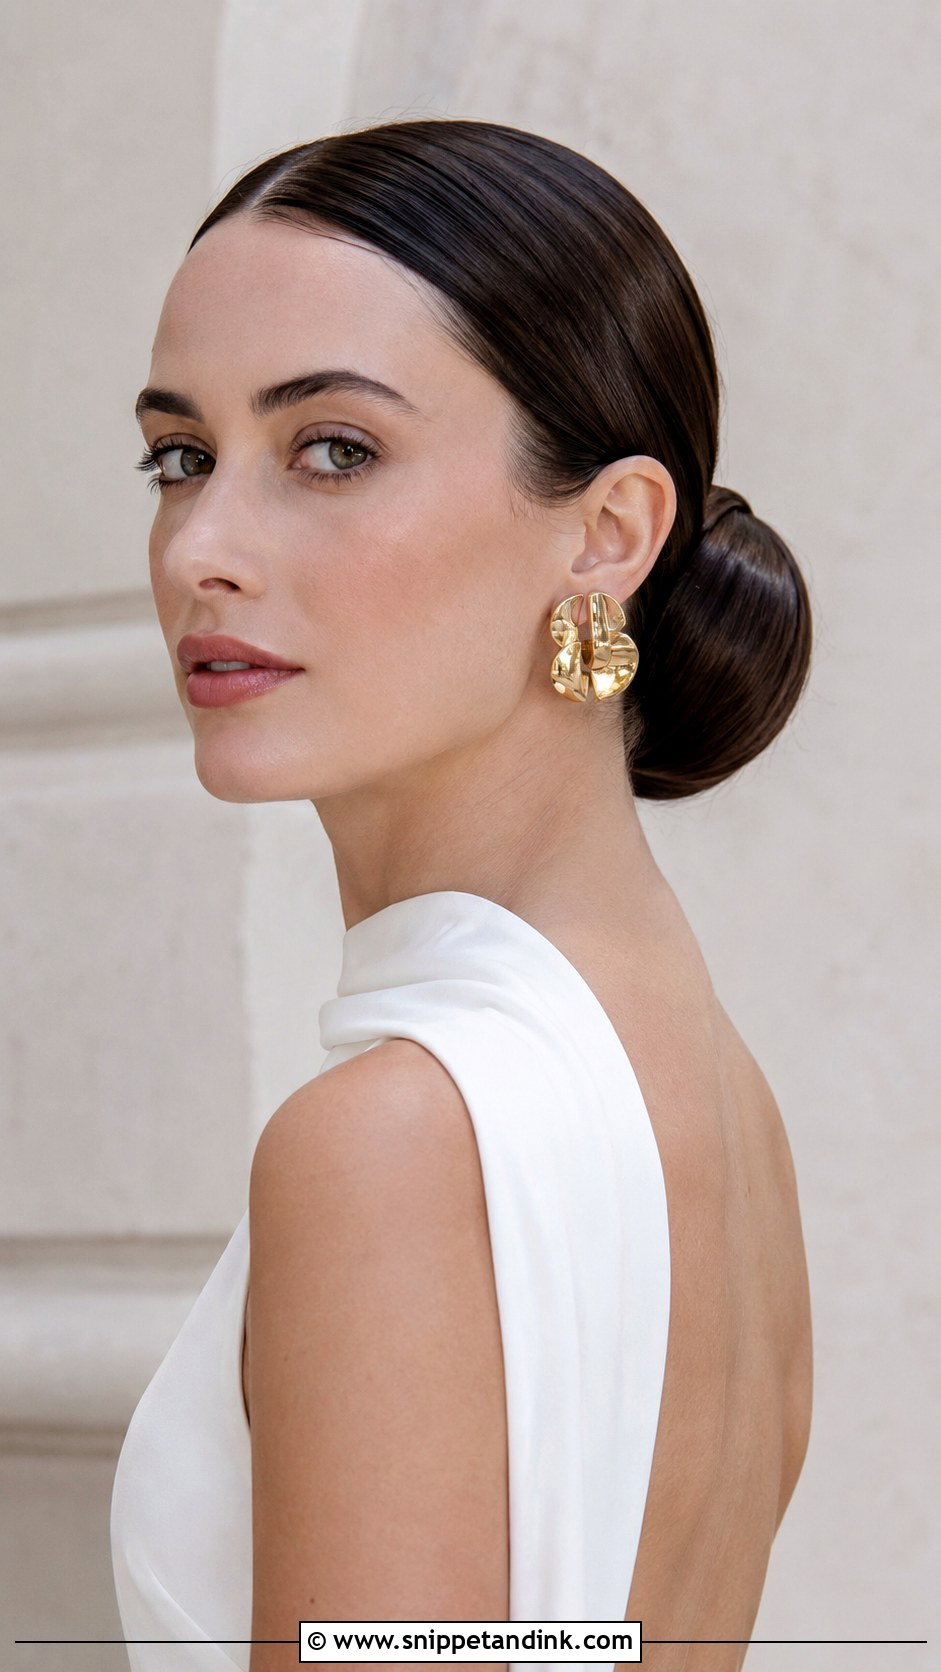
A sculpted bun relies on product and a fine comb. Gel at the hairline, smoothed in passes, then a tight ponytail and a precise coil. The shape looks almost architectural, which suits a minimal gown and a city venue. The catch is that every flaw shows, including a cowlick or a tired part line, so it needs a trial. I’d avoid it if your hair breaks easily, since strong gel and a tight elastic stress the hairline over a long day.
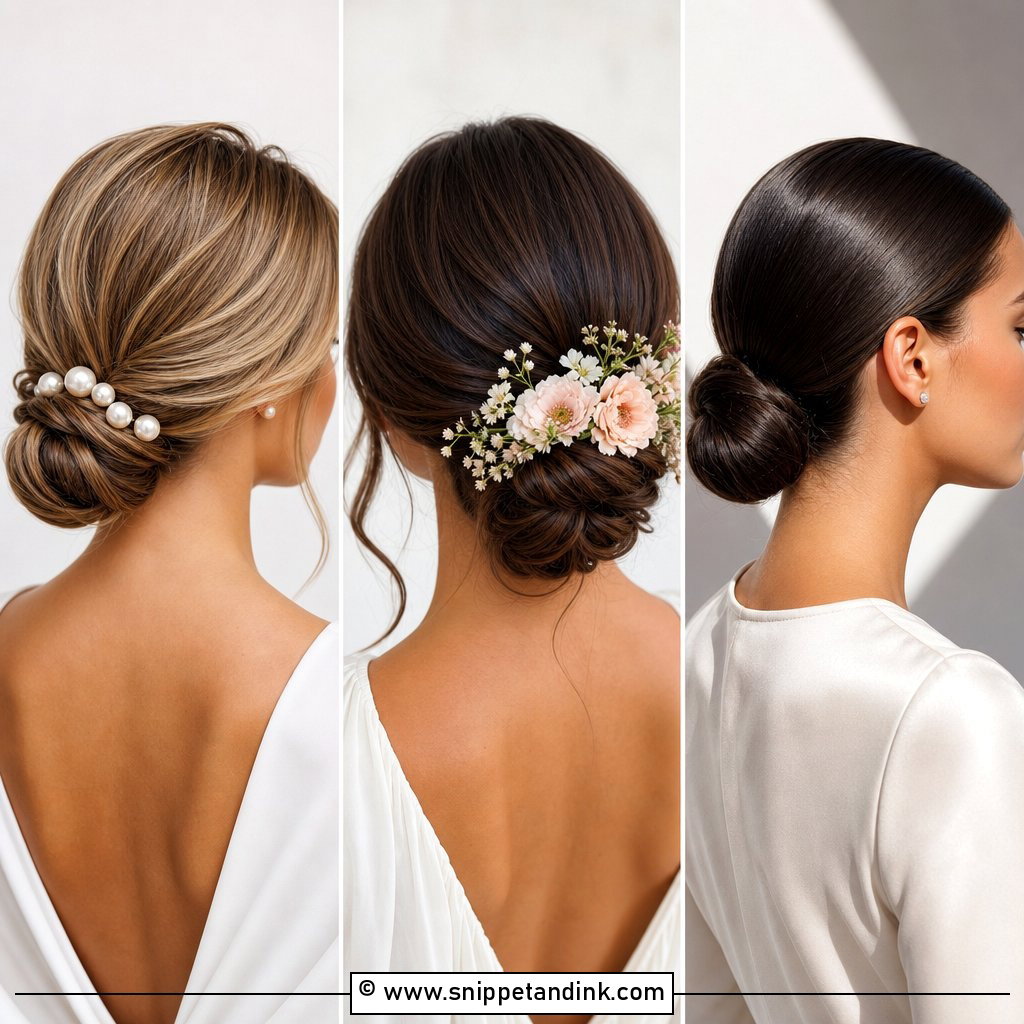
8. Low Bun With Pearl Hair Pins
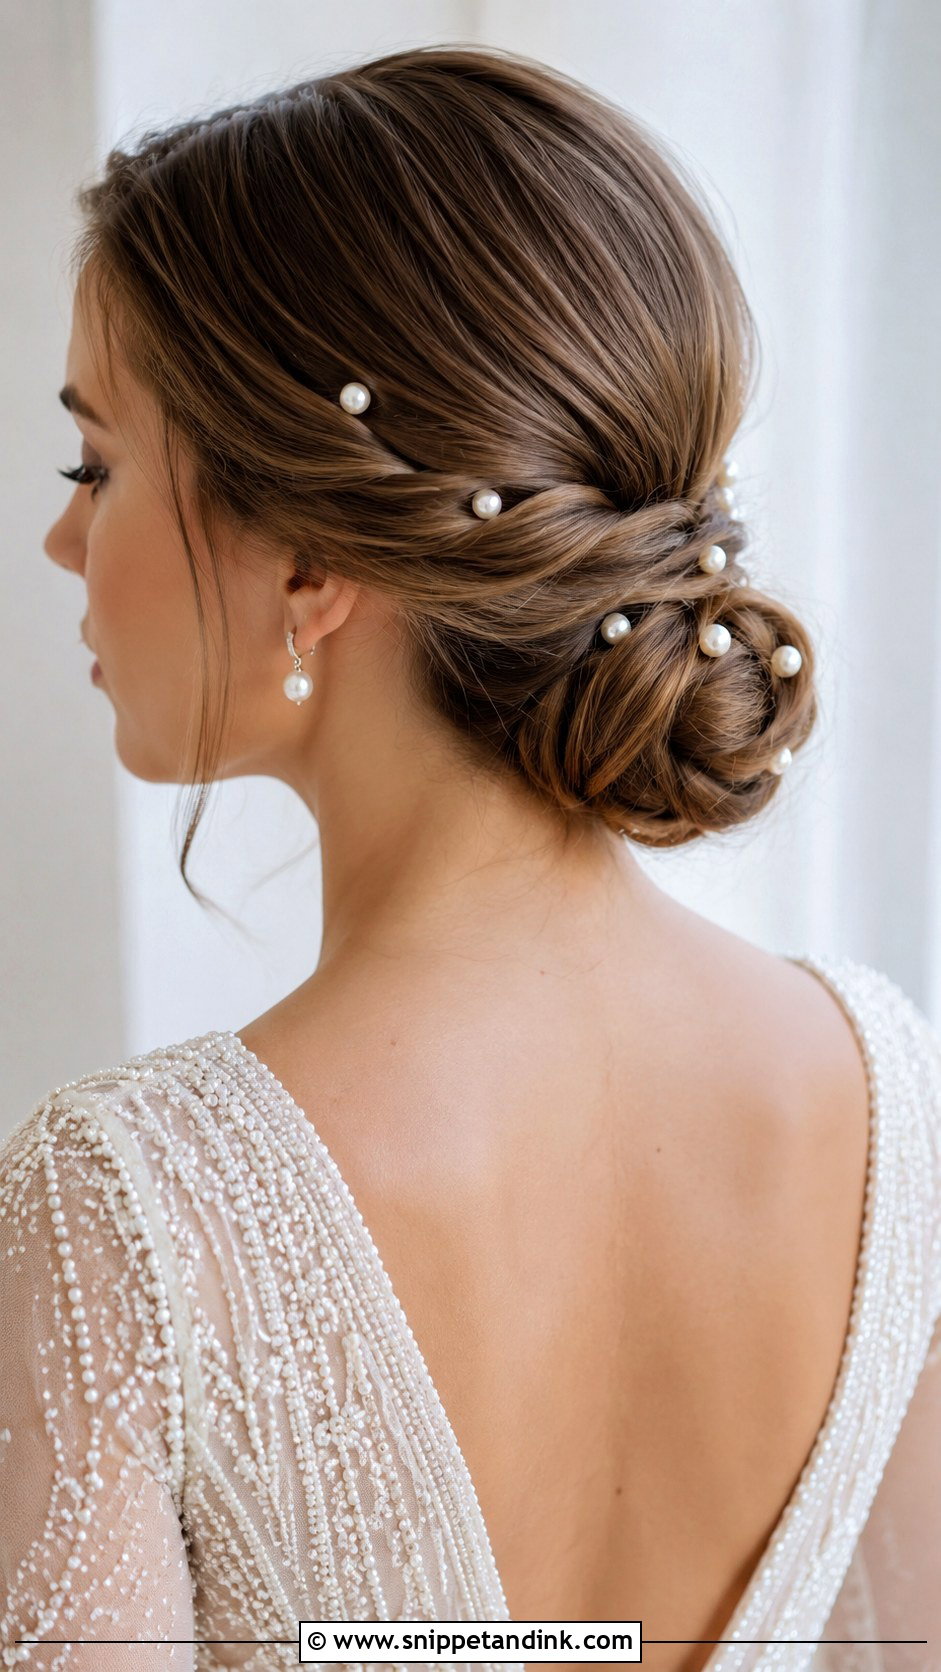
Pearl pins look luxurious against a low bun because the knot gives them a smooth surface to sit on. I scatter them along the edges of the bun or cluster them on one side, slipping each pin in at an angle so it catches hair underneath. Pins pushed straight in tend to slide out by evening. Pearls suit most skin tones and both classic and modern dresses, and they look best with pearl earrings or nothing else.
9. Side-Swept Low Bun Wedding Style
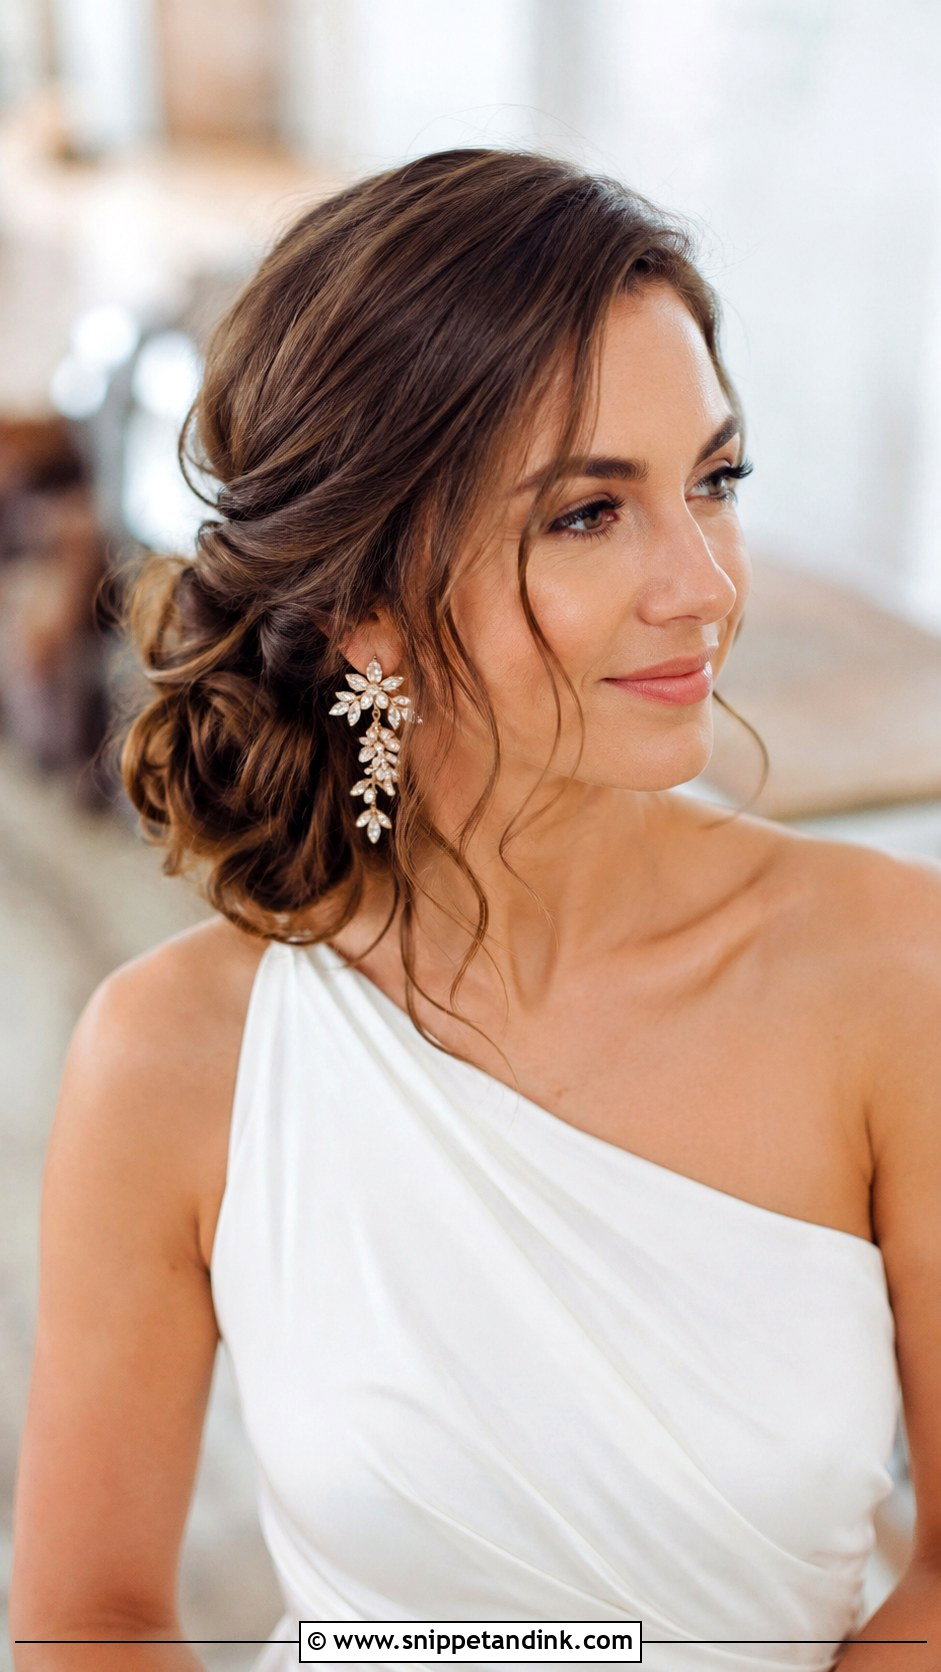
Moving the bun off center toward one side changes the whole silhouette. It shows off the earring on the open side and suits off-shoulder and one-shoulder dresses, as long as the bun sits on the side away from the strap. Place it behind the ear, not under it, or it presses against your neck whenever you turn your head. Curled tendrils on the open side give it a vintage feel.
10. Messy Low Bun for a Boho Wedding
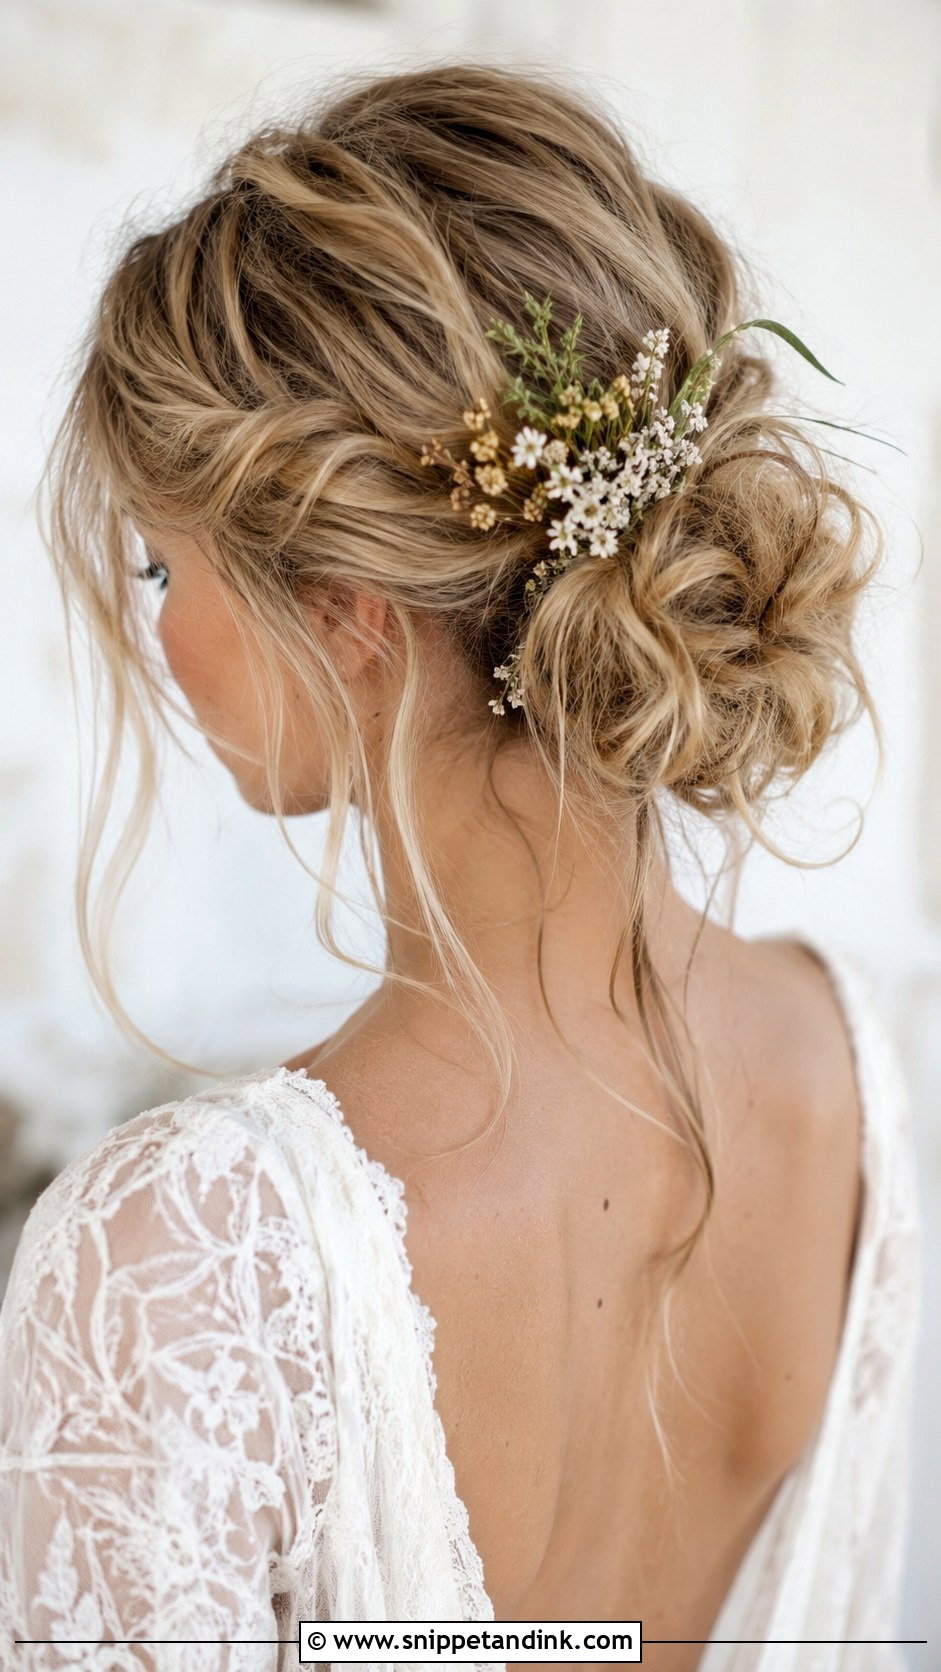
A messy low bun looks unplanned, but I build it as carefully as a sleek one. I curl the whole head first, let it cool, then gather it, twist and pin loosely before pulling out texture from the bun itself. The crown stays intact so the base holds. It suits wavy or textured hair and outdoor weddings. Wildflowers and greenery look natural in it, but ask your florist for hardy stems that can last out of water.
11. Low Bun With Fresh Flowers
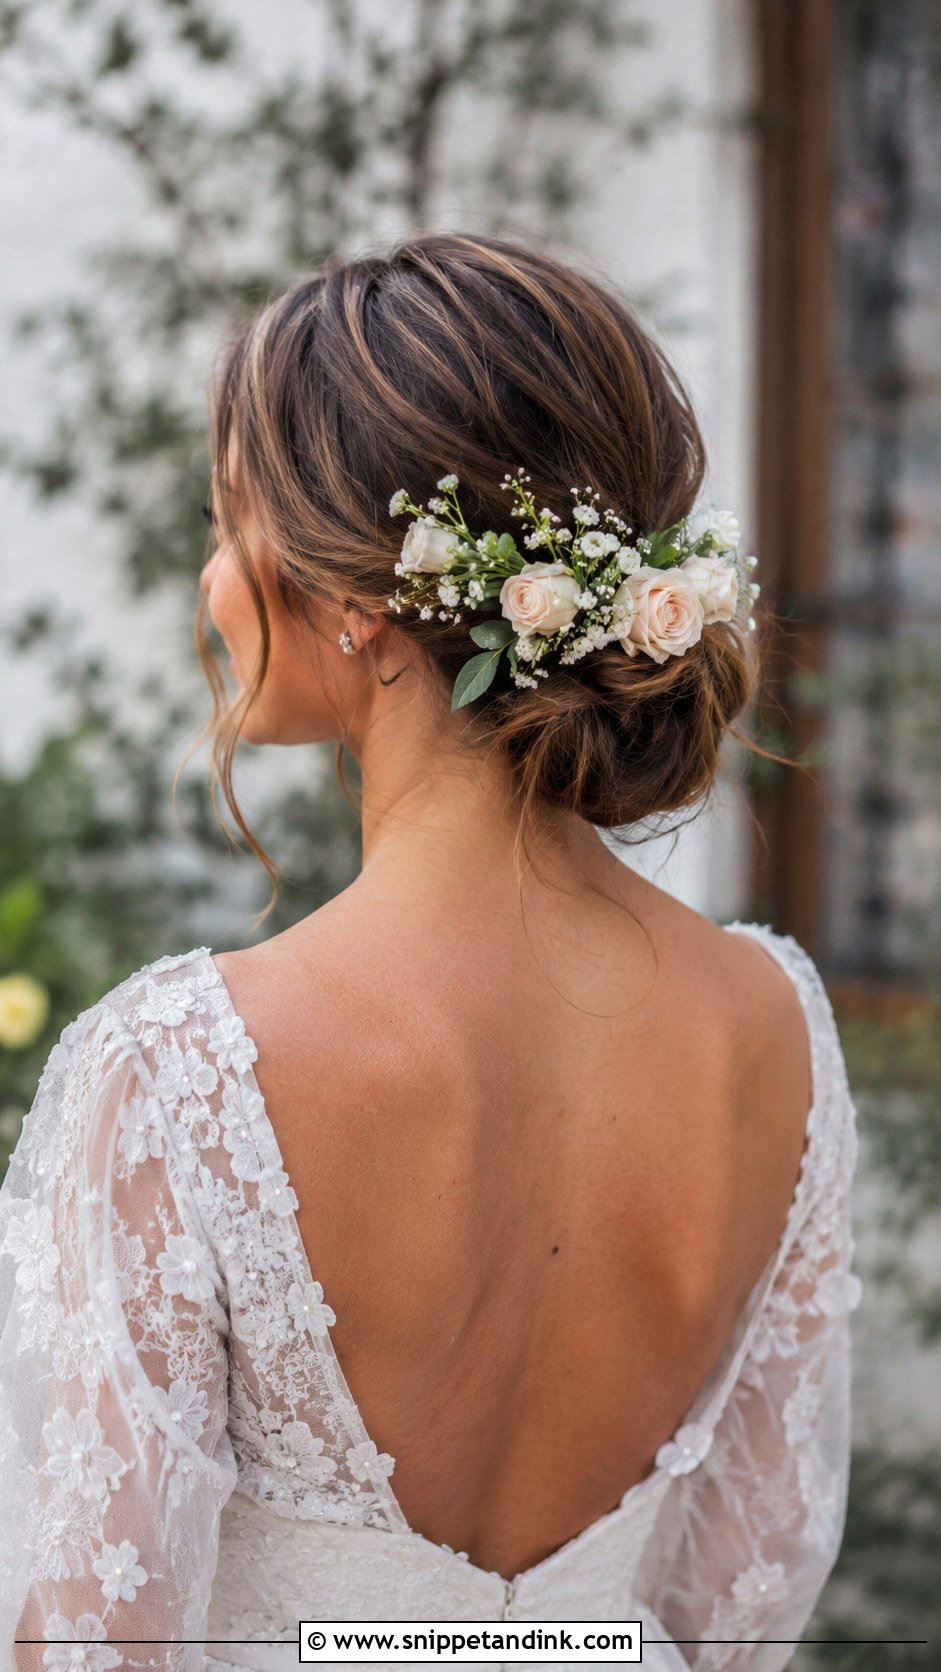
Flowers in a low bun are partly a florist’s job. I ask for small, sturdy blooms that match the bouquet, with stems wired or taped so I can pin them securely. Baby’s breath, spray roses and small wildflowers hold up better than soft petals that bruise. I add flowers once the bun is finished and pinned. One bloom suits a sleek bun; a cluster suits a looser one. In midsummer heat, fresh flowers can wilt by evening, so a spare stem or two is a good idea.
12. Elegant Low Bun With a Hair Vine
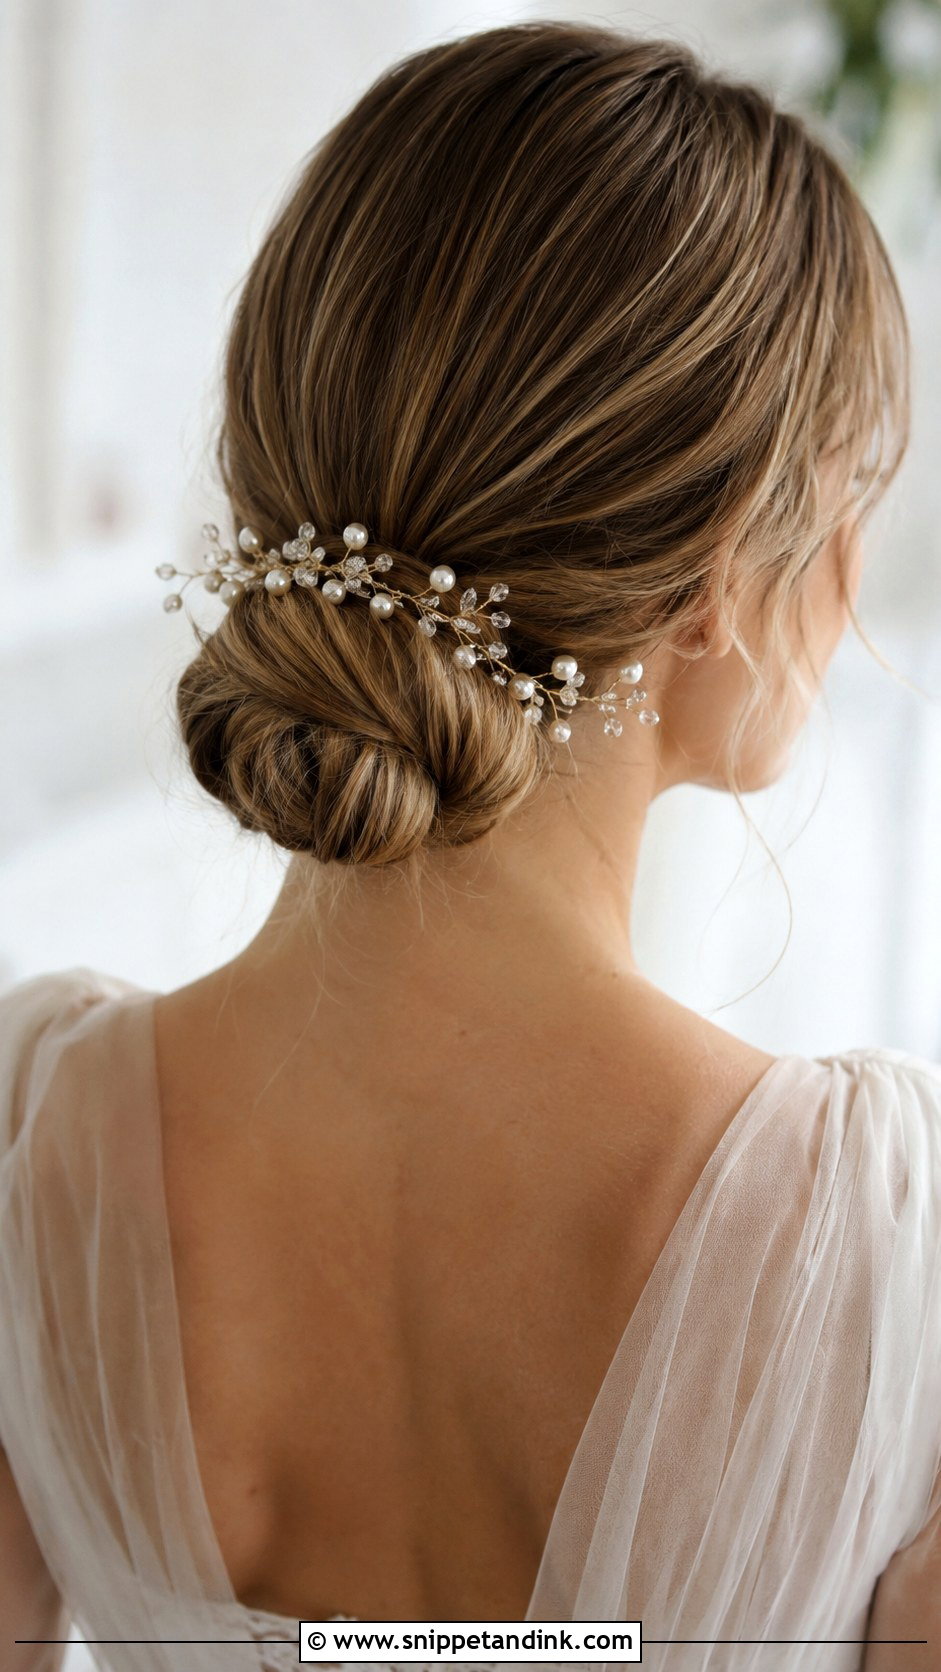
A hair vine is a flexible wire of crystals, pearls or leaves that traces the edge of the bun. I weave it in after the bun is pinned, hooking the wire through the hair with small pins every few centimetres. It gives shimmer without the weight of a tiara, which is why I suggest it to brides who don’t like heavy accessories. Match the metal to your jewellery, silver, gold or rose gold. A vine that is too long for the bun looks messy, so measure it at the trial.
13. Vintage-Inspired Low Bun With Finger Waves
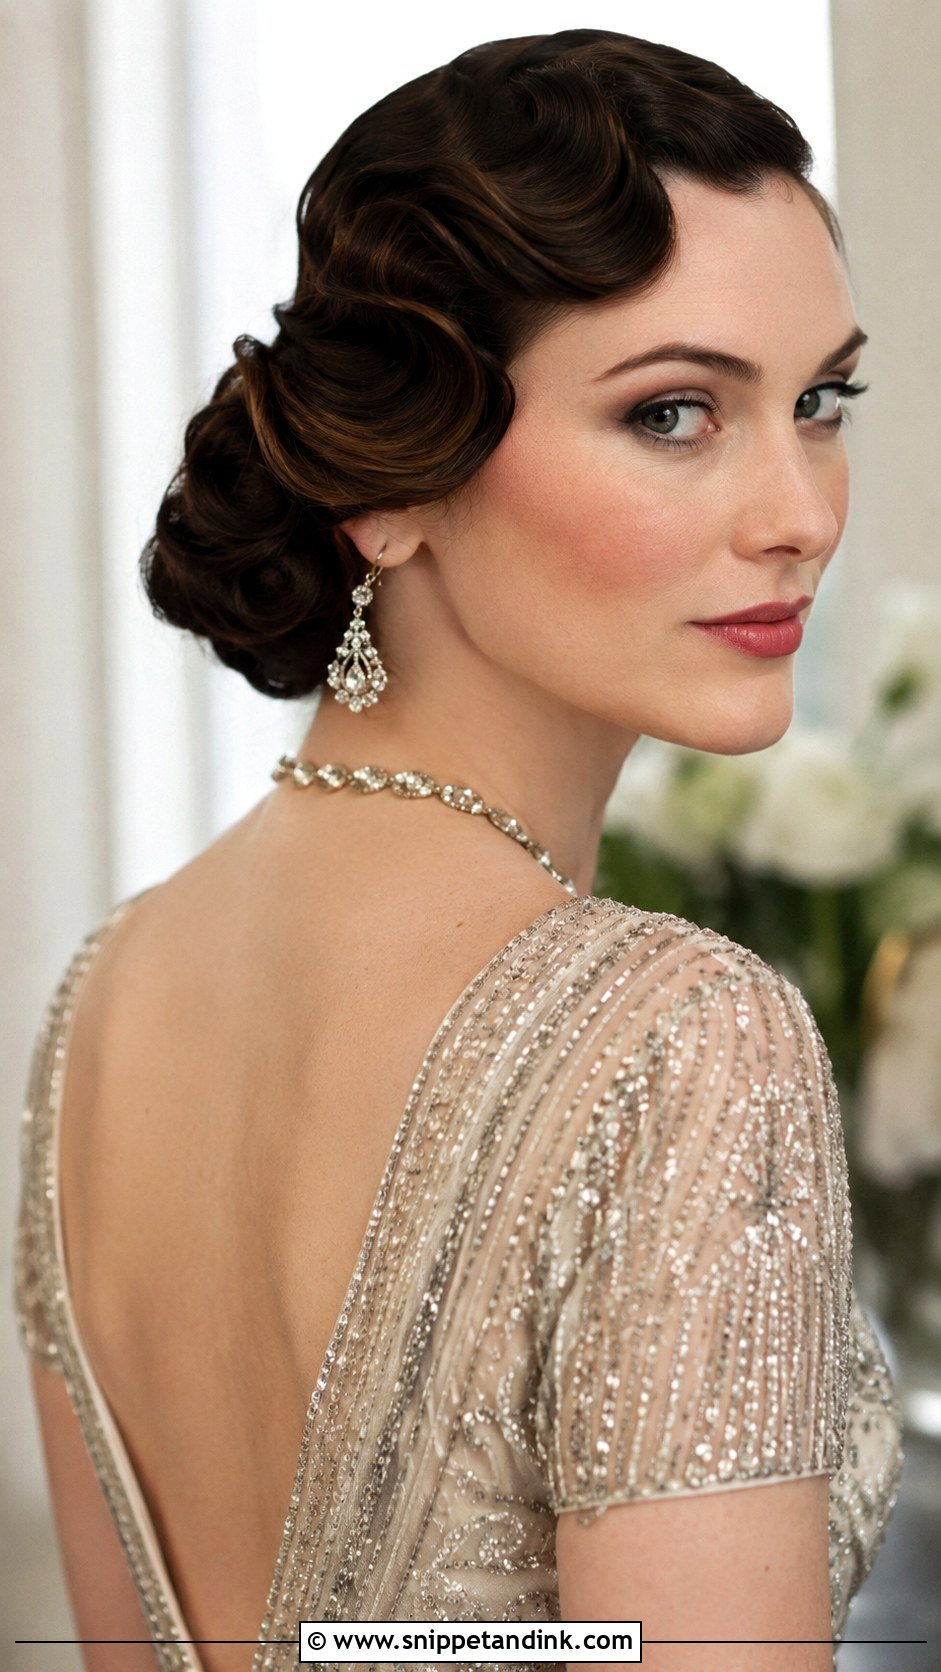
Finger waves need skill and setting time, and they’re the hardest element of any style in this list. The front is sculpted into S-shaped ripples with gel and clips, then left to set while the bun is built at the back. That pairing makes a vintage low bun and finger waves look suited to 1920s and Art Deco themes. I’d only suggest it with a stylist; it’s very difficult to do at home. Fine, straight hair holds the waves best.
14. Low Bun With a Bridal Tiara
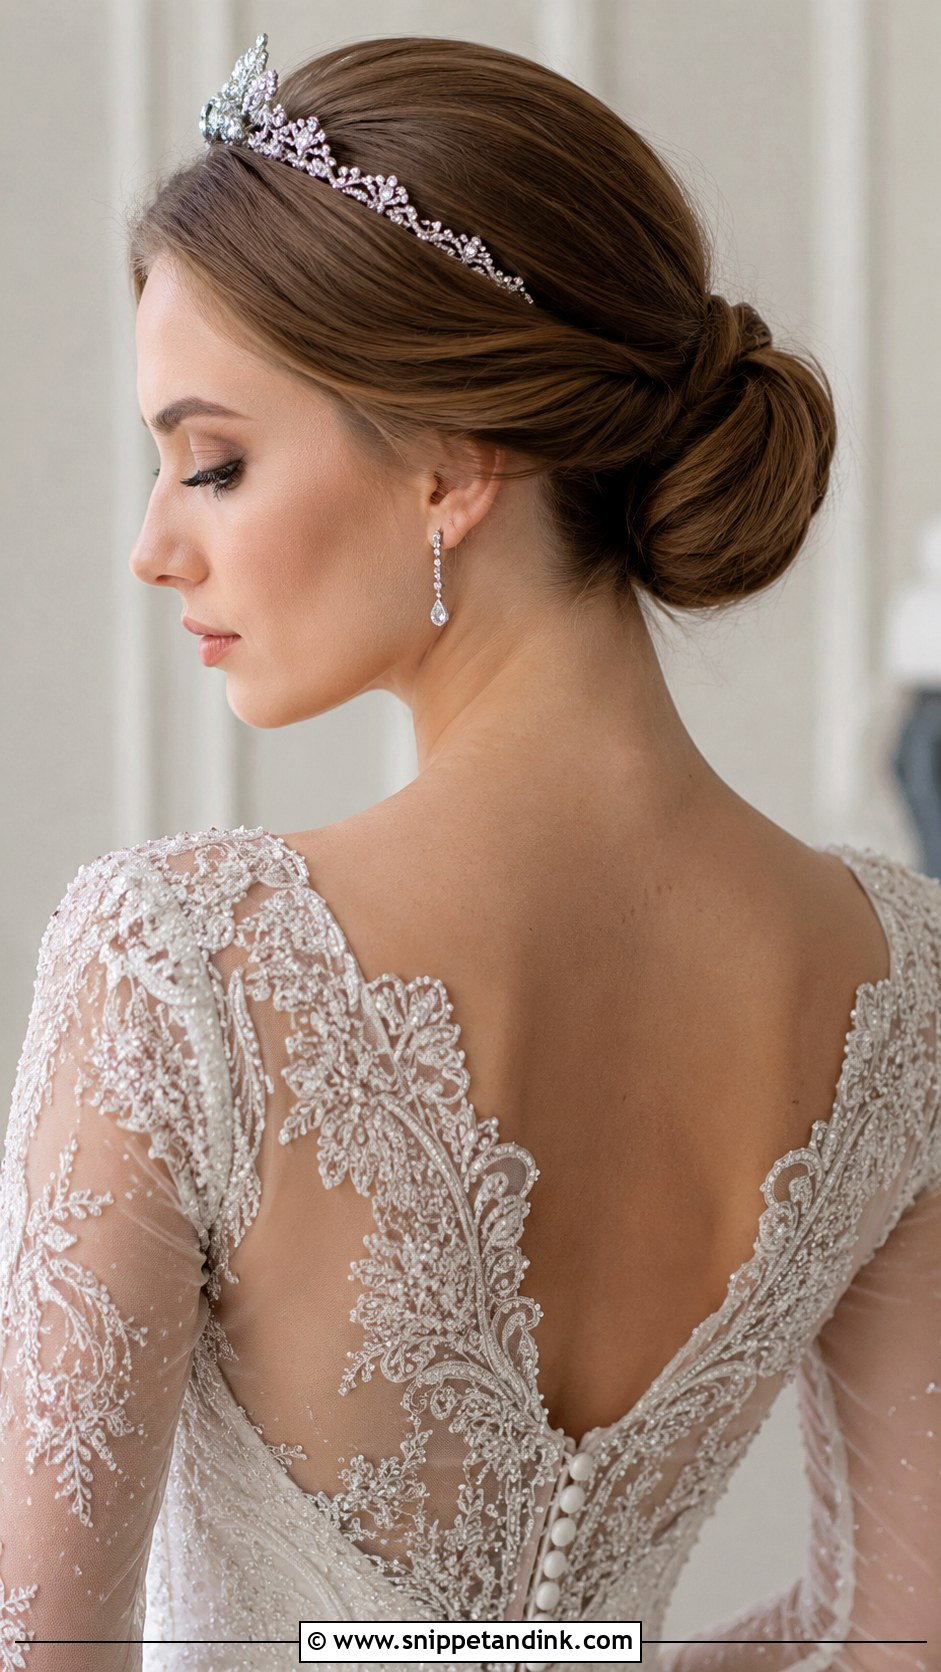
A tiara looks best with a bun that sits low enough to leave the crown clear. I place the bun first, then the tiara, pinning its combs or loops into small anchors of crossed pins hidden in the hair. That sits well above a smooth, gathered knot. A delicate tiara looks modern; a larger one suits a formal or grand wedding. If you also wear a veil, it goes behind the tiara and above the bun.
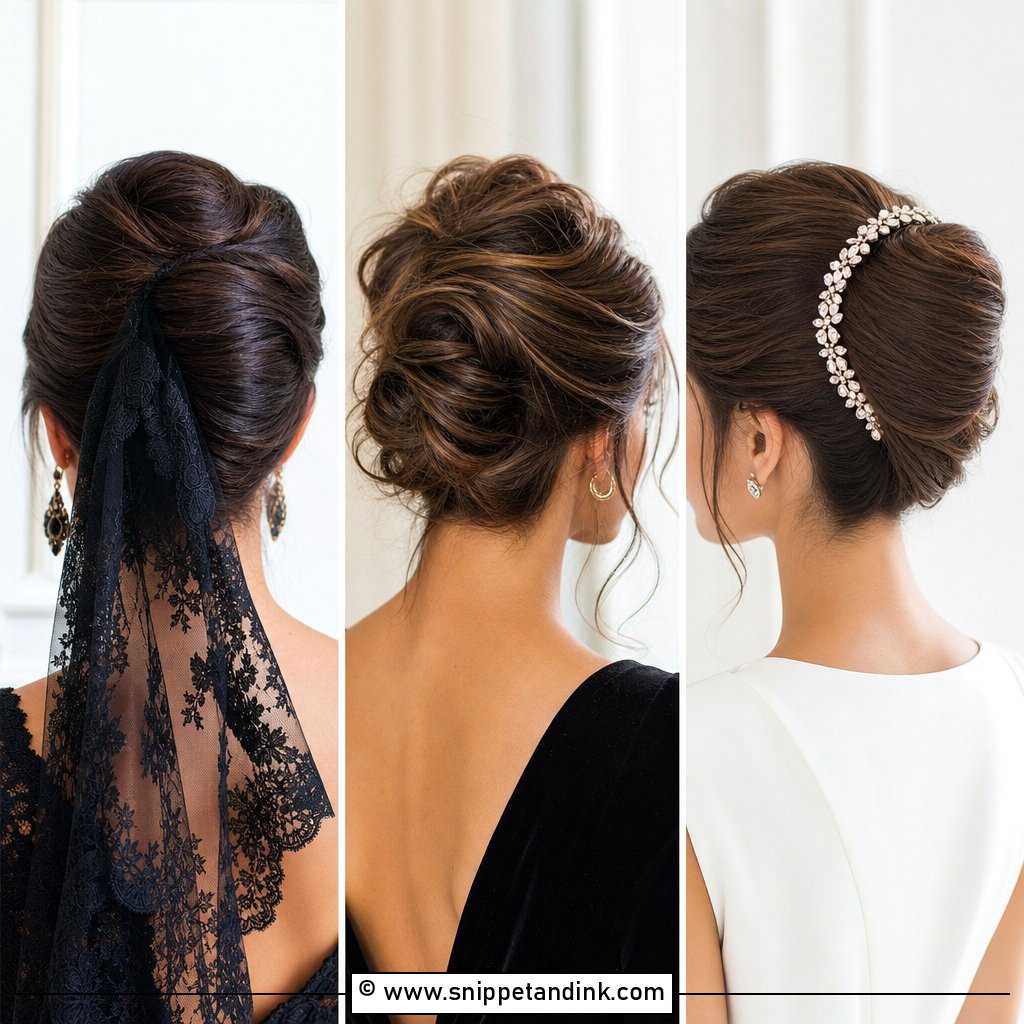
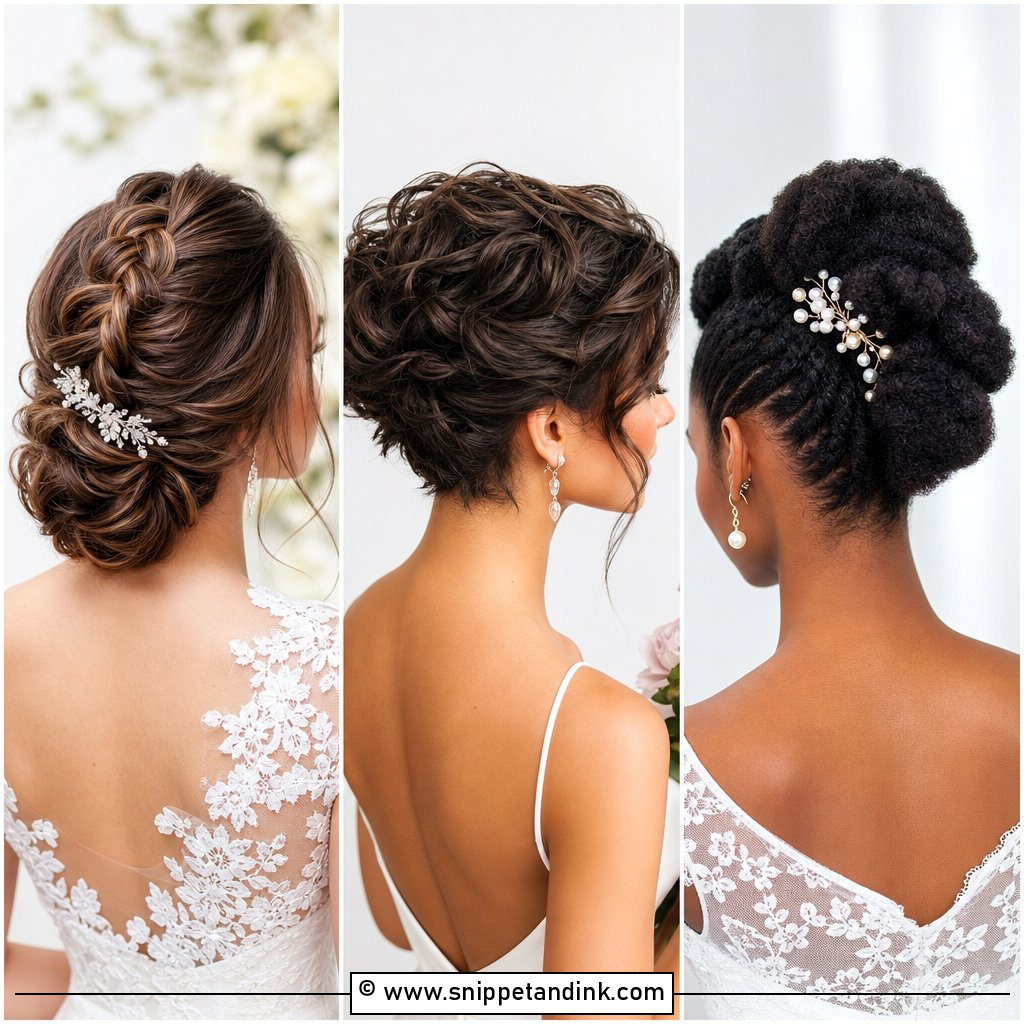
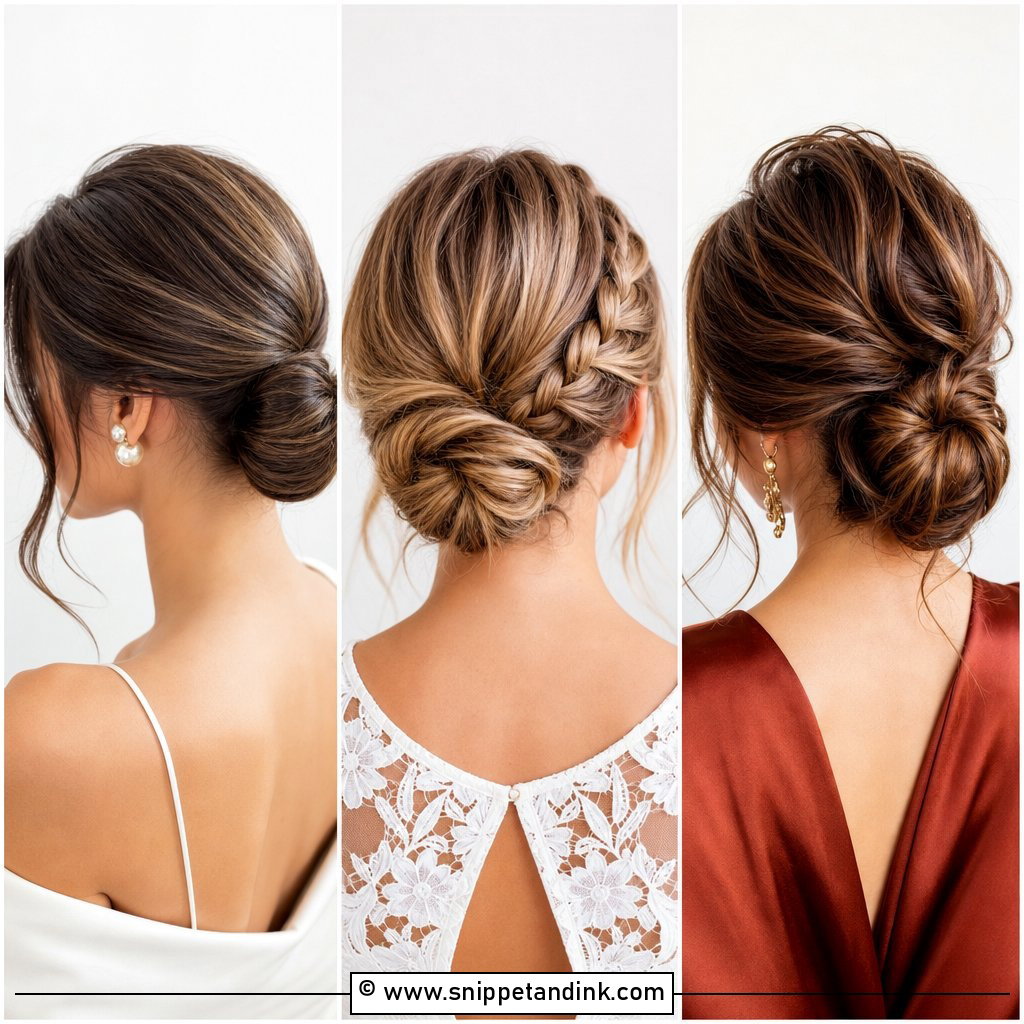
15. Knotted Low Bun for Long Hair
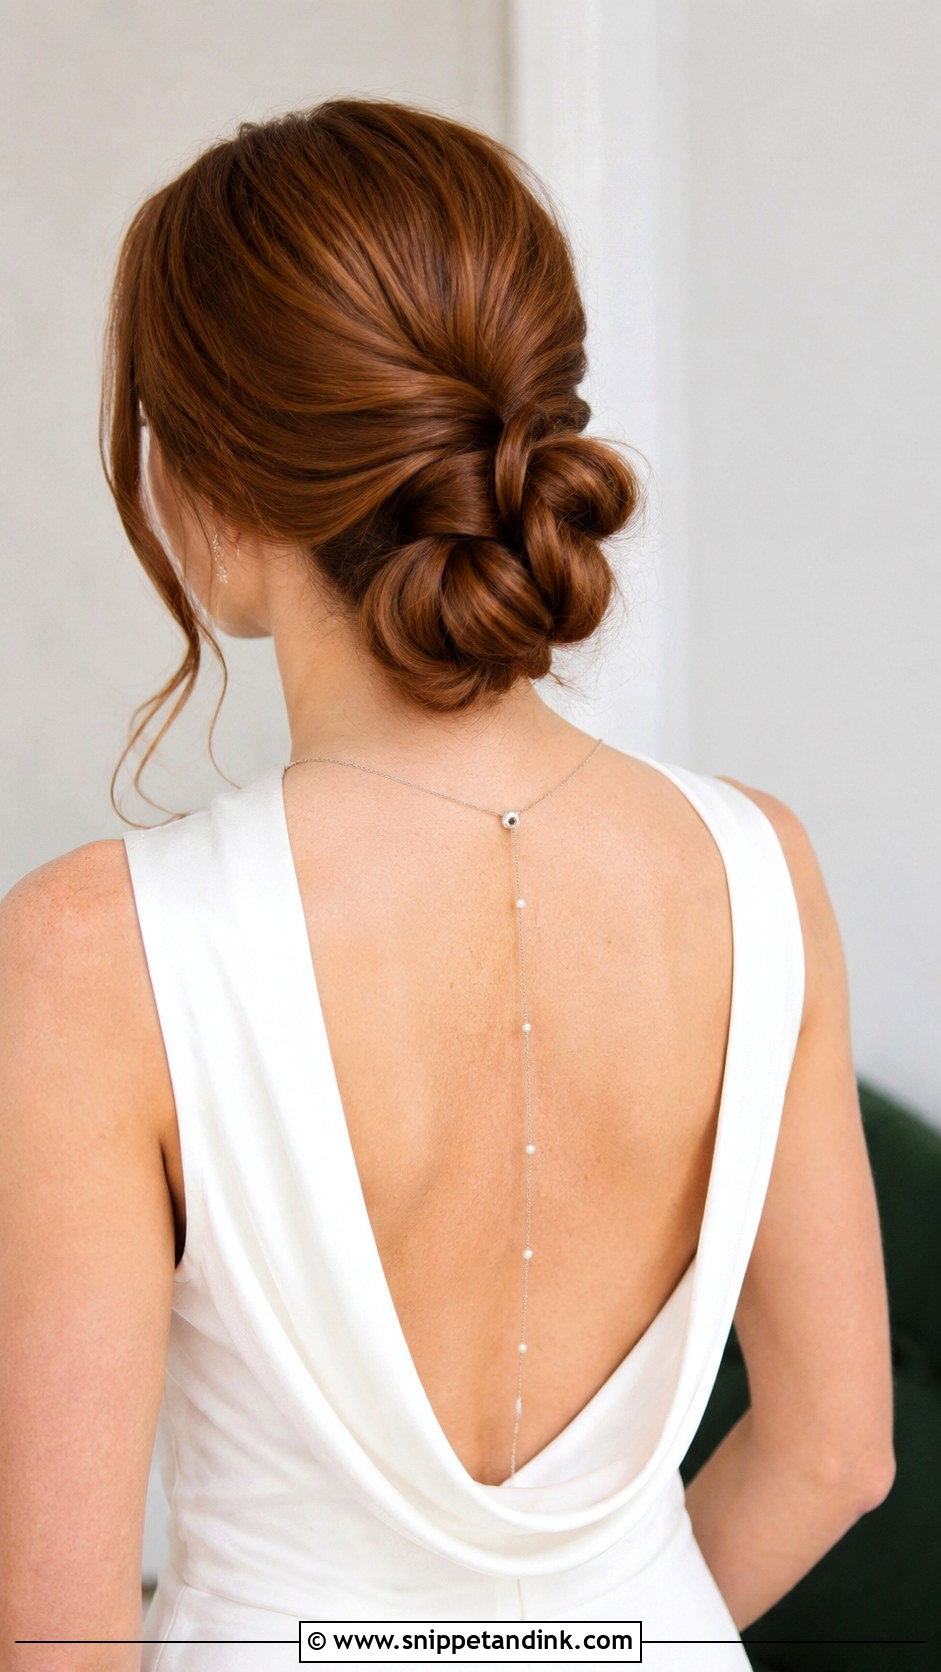
Long hair can make a low bun heavy and oversized. Knotting sections before wrapping them is my answer: the knots take up length and add texture at the same time. I knot two sections like a shoelace, pin through the centre, then knot again with the ends and wrap what’s left. The finish looks sculptural without accessories. It suits very long, thick hair, and very fine long hair may need a little backcombing to make the knots visible.
16. Low Bun With a Deep Side Part
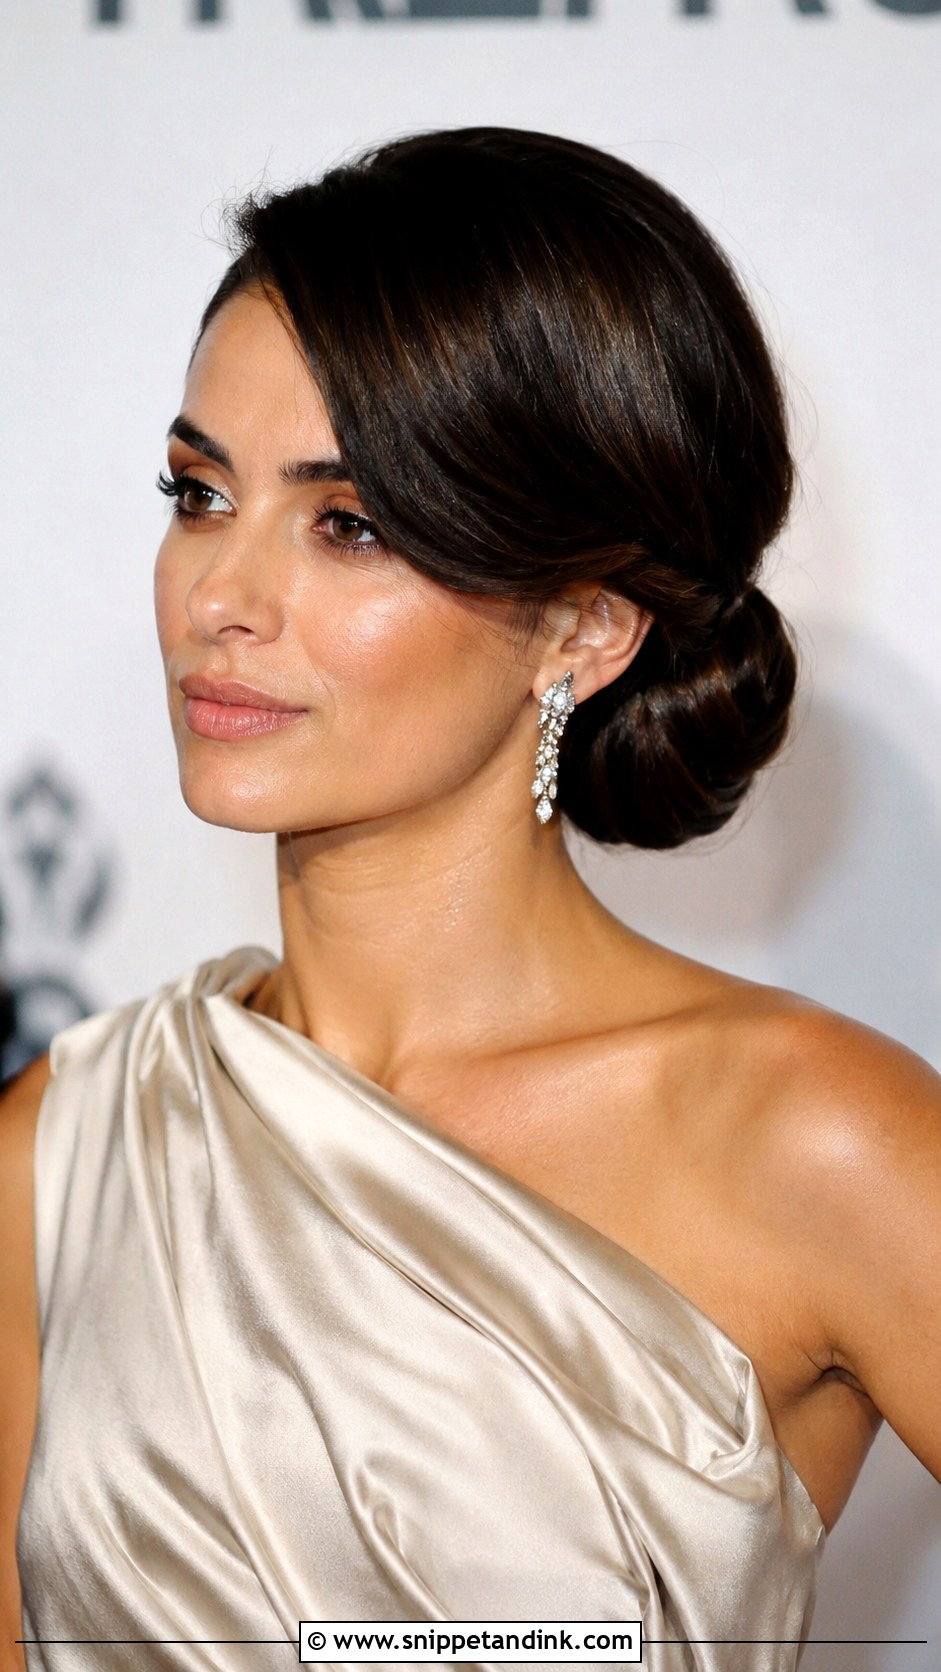
A deep side part adds height on one side and drama to an otherwise plain bun. I set the part before anything else, then curl the heavy side away from the face and sweep it back into the bun. It suits most face shapes and goes well with bold lips and statement earrings. If the hair at the part is very fine, a little dry shampoo there keeps it from collapsing flat by the afternoon.
17. Textured Low Bun With Curls
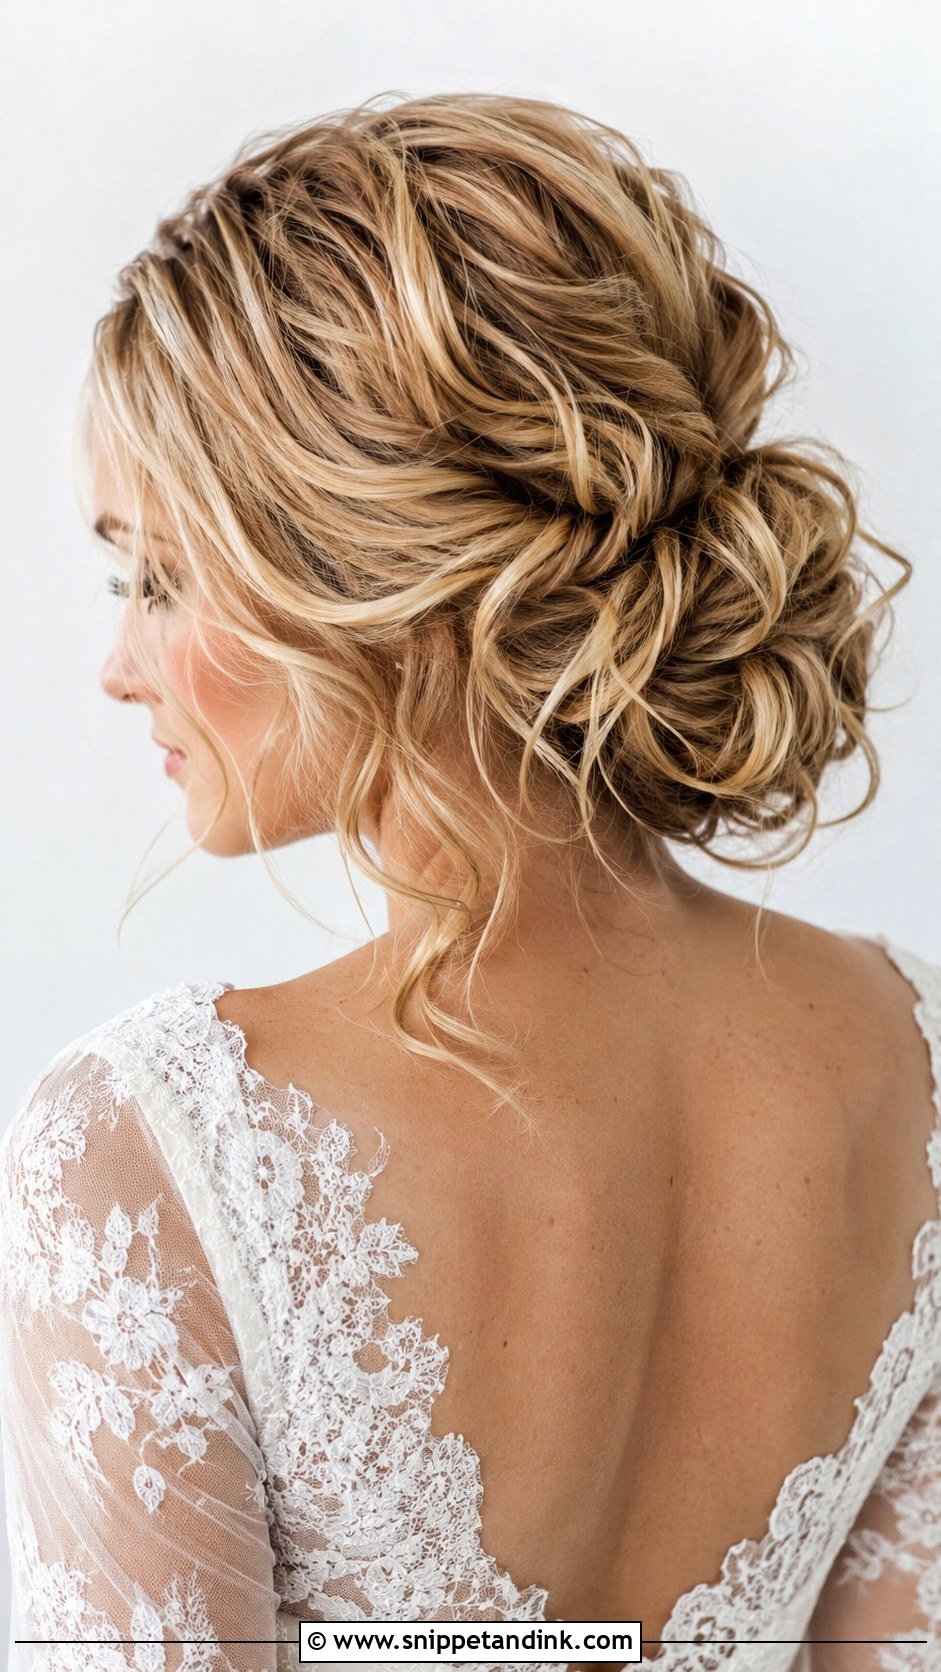
Curls add volume a flat bun can’t match. I curl the whole head with a medium barrel, let the curls cool, then pin each one into the bun so it keeps its shape rather than being brushed out. A few loose pieces at the face finish it. Naturally wavy hair is ideal; straight hair needs mousse at the roots and a flexible hairspray to keep curls from dropping through the day.
18. Low Bun With a Ribbon Accent
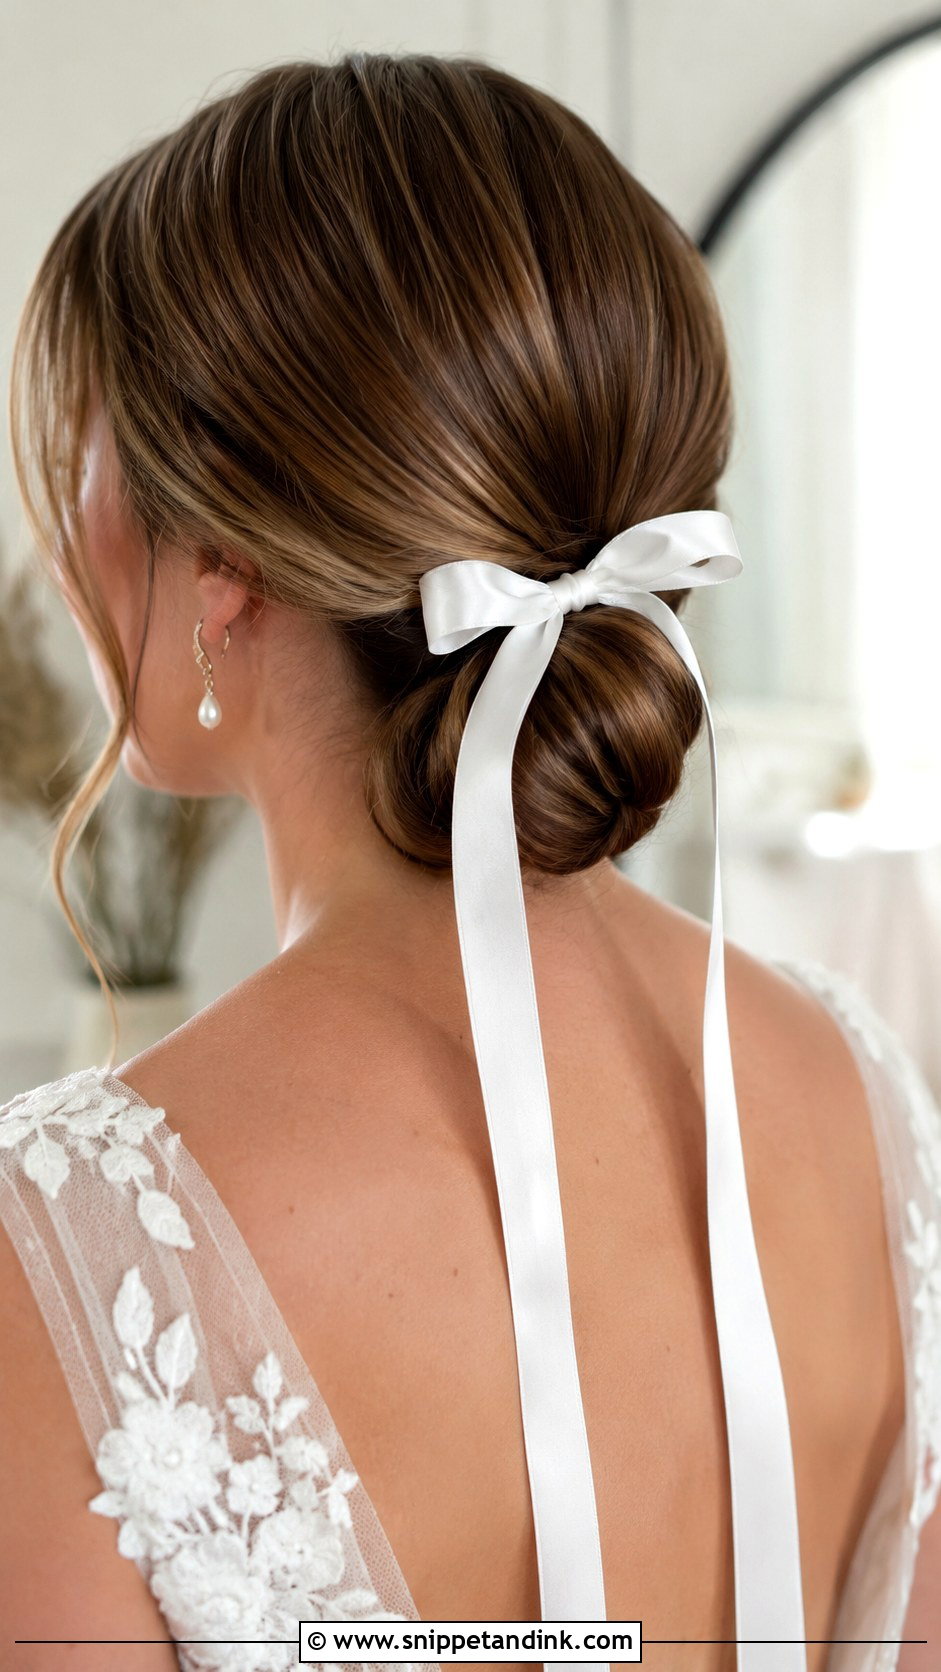
A ribbon wrapped around or tied into a bow below the bun gives a soft, slightly retro look. I pin it at both ends underneath so it doesn’t slip, and choose satin or silk for drape; velvet is heavier and better for winter. Ivory, blush or a color picked up from the bridesmaids’ dresses works. It’s an inexpensive way to dress up the bun, and it sits comfortably under a veil.
19. Wet-Look Low Bun for Modern Brides
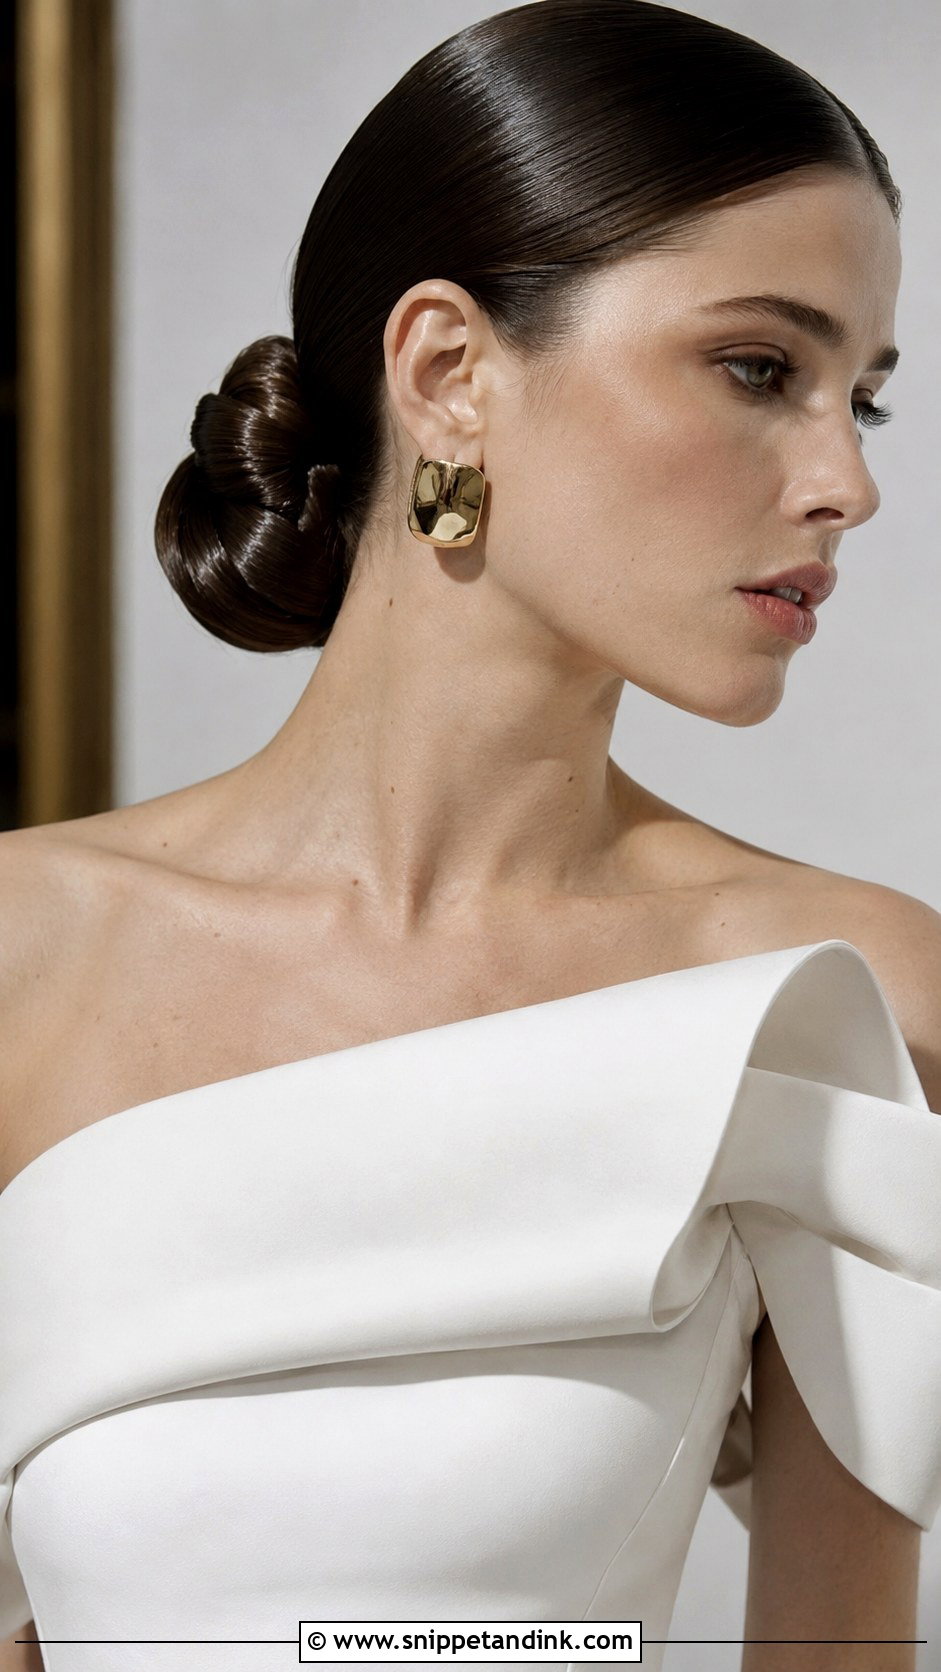
The wet-look bun is gel, a tight ponytail and a clean coil. It stays put all day with no flyaways, which makes it practical for a long celebration. It suits minimal brides and contemporary venues, and it shows well under bright lights. The catch is skin: heavy gel can make the hairline look greasy in close-ups, so I wipe the edges and set them with a light powder. Brides with dry or fragile hair may find a whole day under gel uncomfortable.
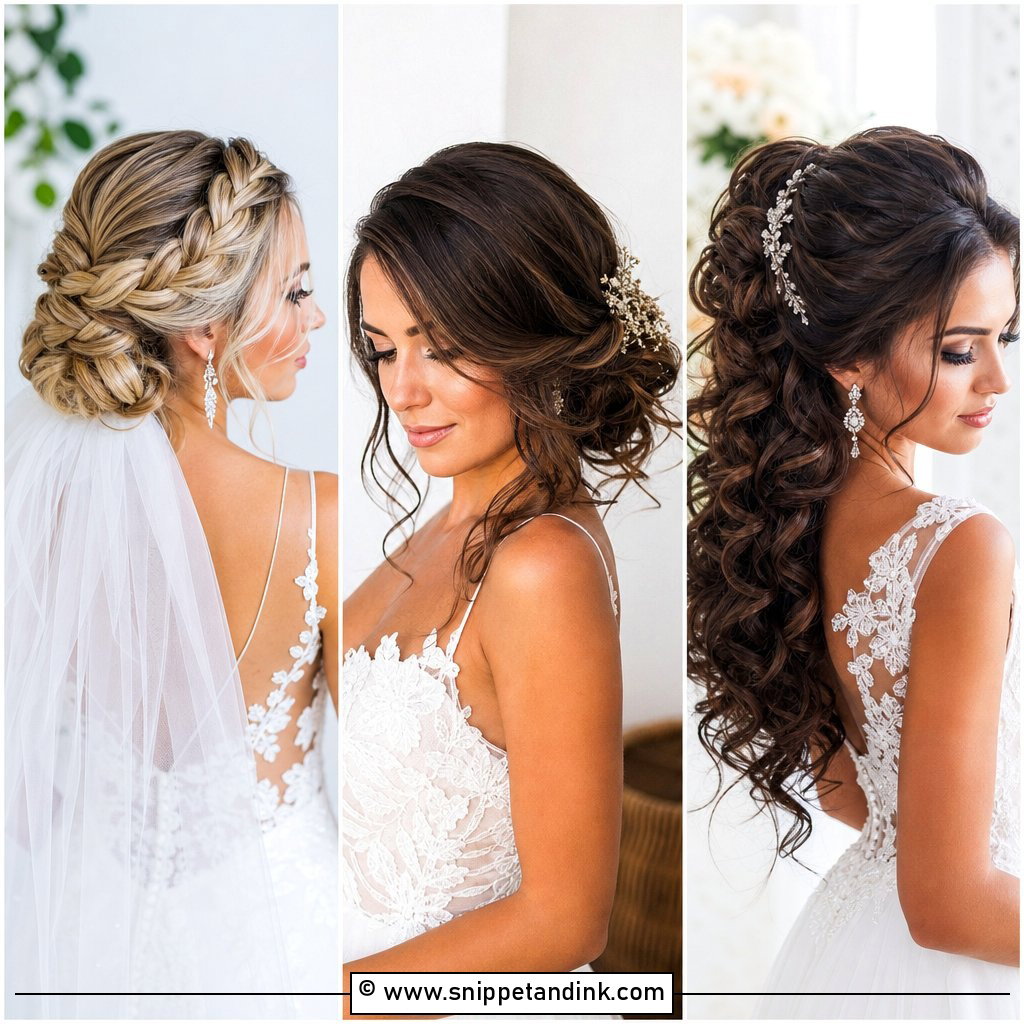
20. Low Bun With Braided Crown
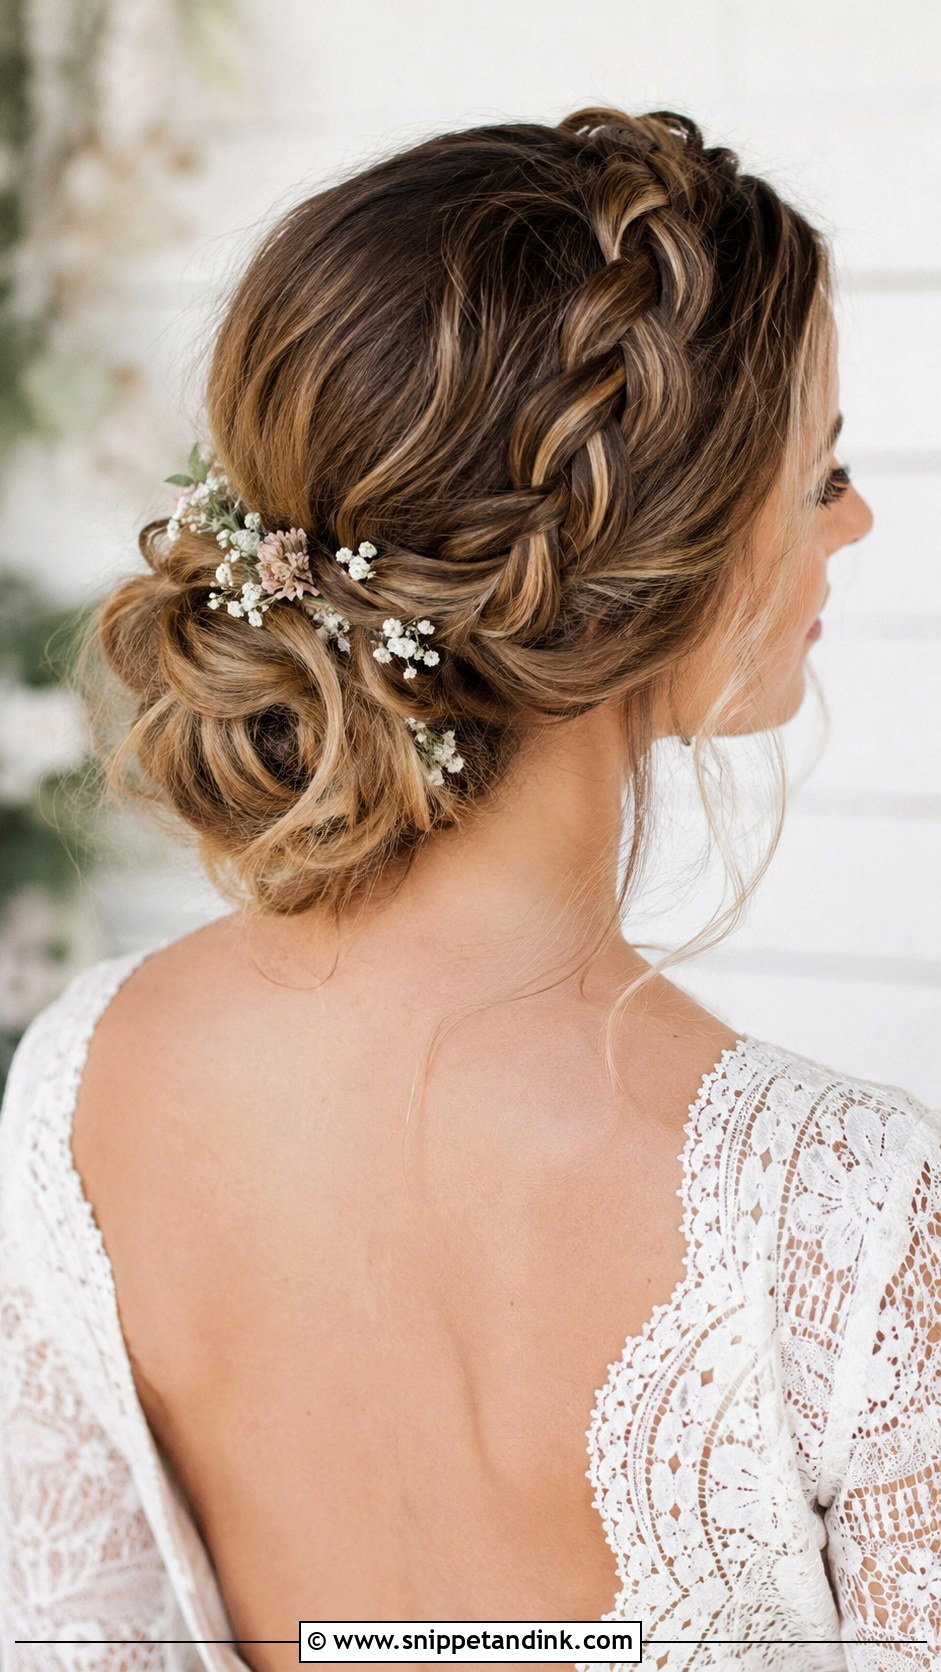
A braided crown leading into a low bun gives detail at the top and structure at the back. I braid from one temple around the crown, then gather the braid and the rest of the hair into a soft knot. The braid keeps the front off your face, which helps on a breezy day. Small flowers along the braid look whimsical. It suits medium and long hair and garden or rustic weddings.
21. Simple Low Bun With Babys Breath
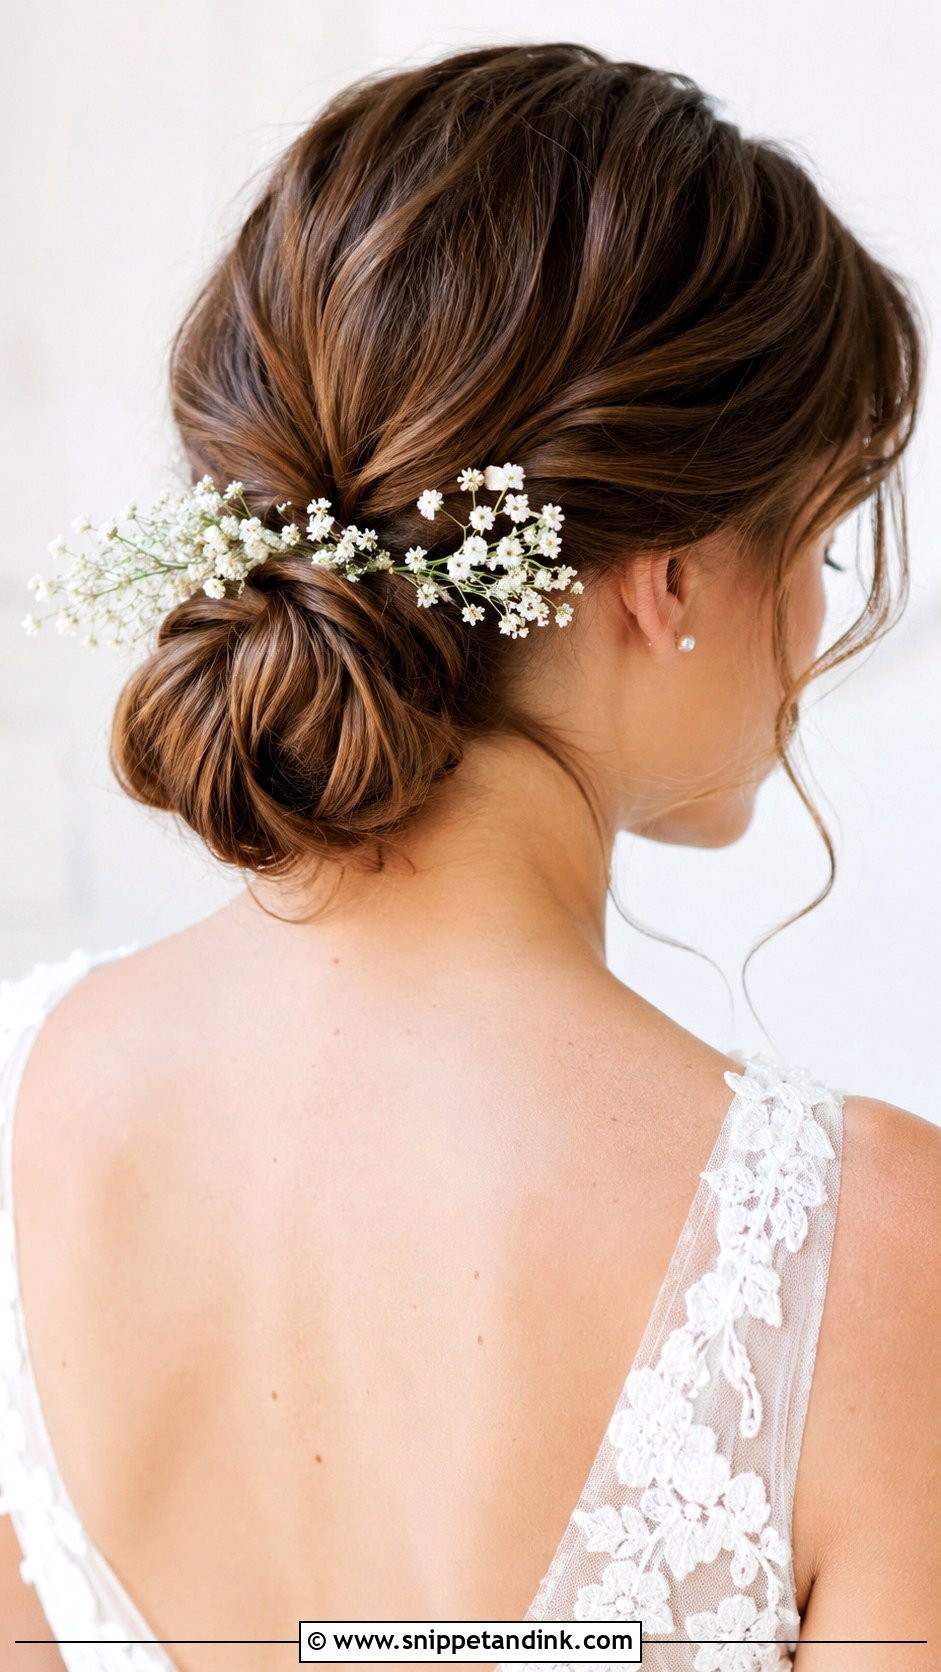
Baby’s breath is light and hardy, which makes it one of the best flowers for hair. I tuck small sprigs around the bun after it’s pinned, using a pin crossed over each stem. It costs little and stays fresh for most of the day, though it dries out in strong heat. A few sprigs look delicate; a lot looks like a crown. It suits spring and summer weddings and boho or garden themes.
22. Low Bun With Curtain Bangs
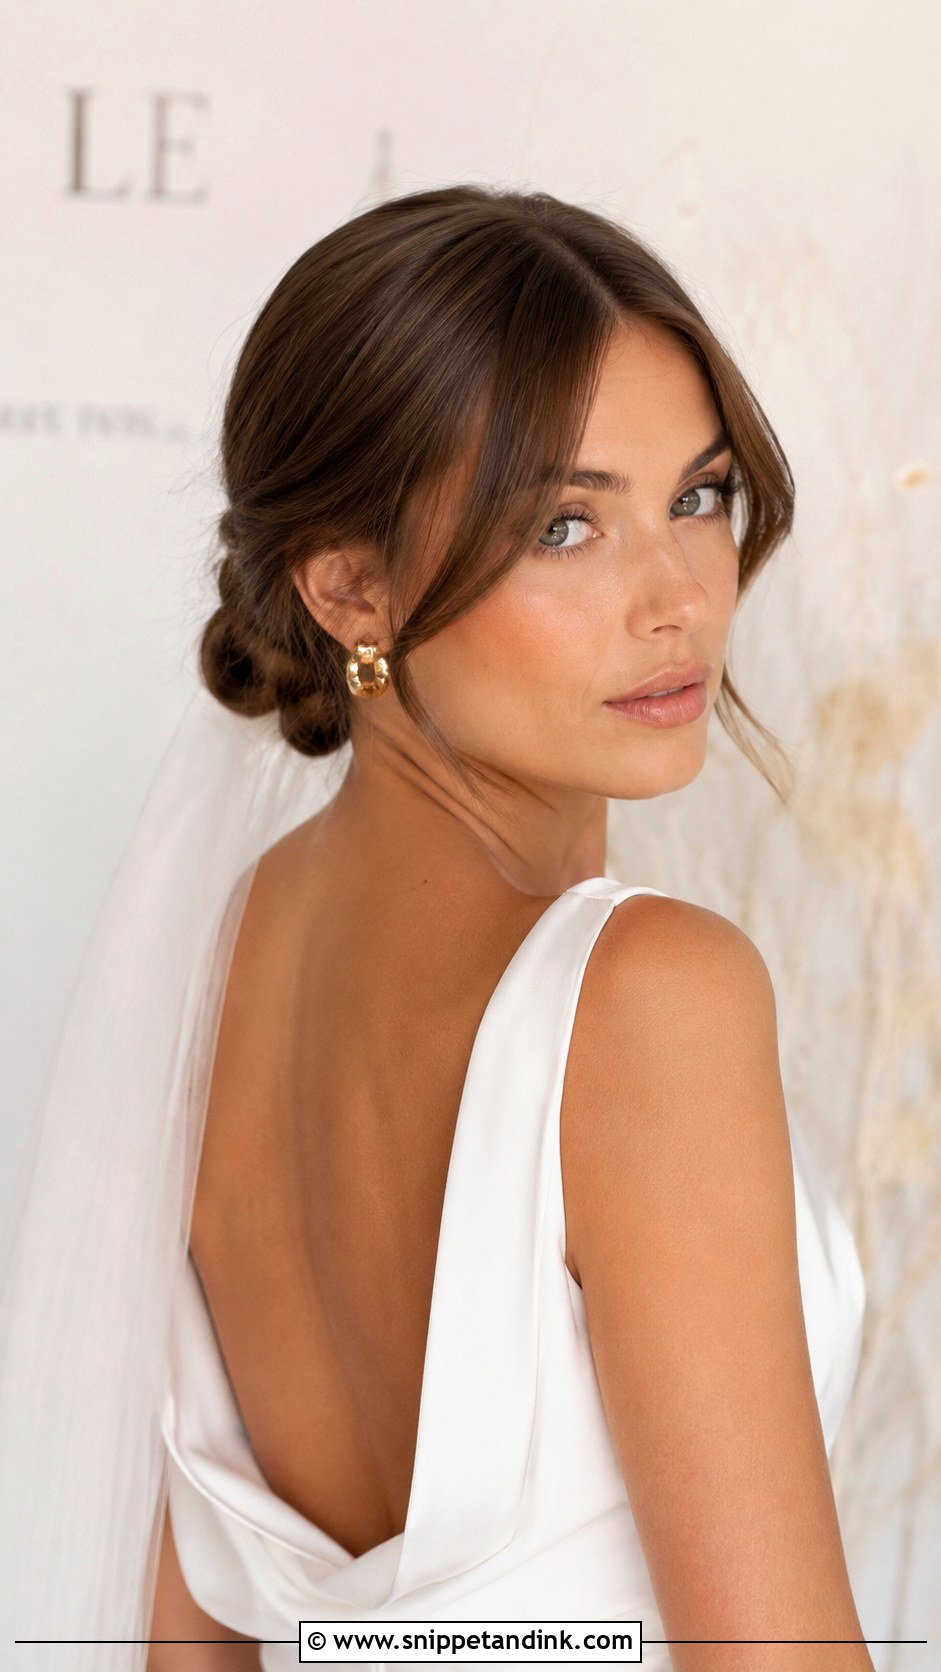
Curtain bangs with a low bun suit brides who already wear bangs. I style the bangs with a round brush and a light curl, then build the bun behind them. Freshly cut bangs sit short and blunt, so cut them at least four to six weeks before the wedding. The bangs soften most face shapes and pair with either a sleek or textured bun.
23. Low Bun With Crystal Hair Pins
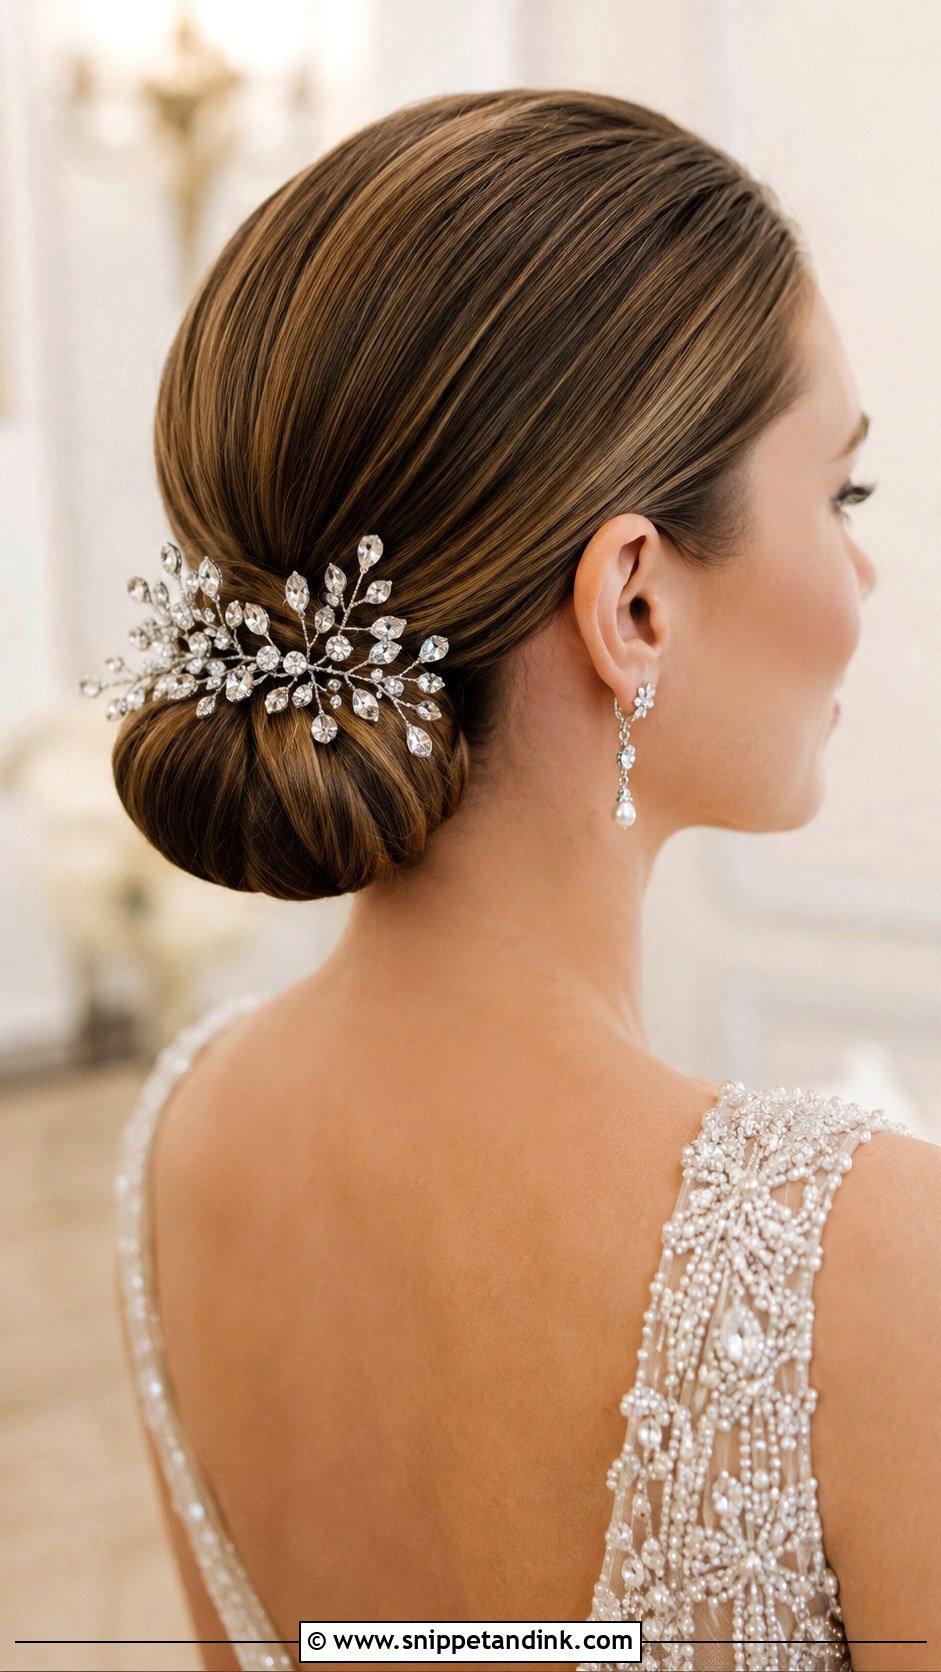
Crystal pins scattered across a low bun give sparkle that moves with you. I push each pin in at an angle so it catches hair underneath, clustered on one side or spread across the knot. Clear crystals suit any palette; colored ones add a personal touch. They work at formal and evening weddings and pair with crystal earrings and beaded gowns. Use fewer pins than you think you need; too many can look busy in close-ups.
24. Low Bun for Curly Hair Brides
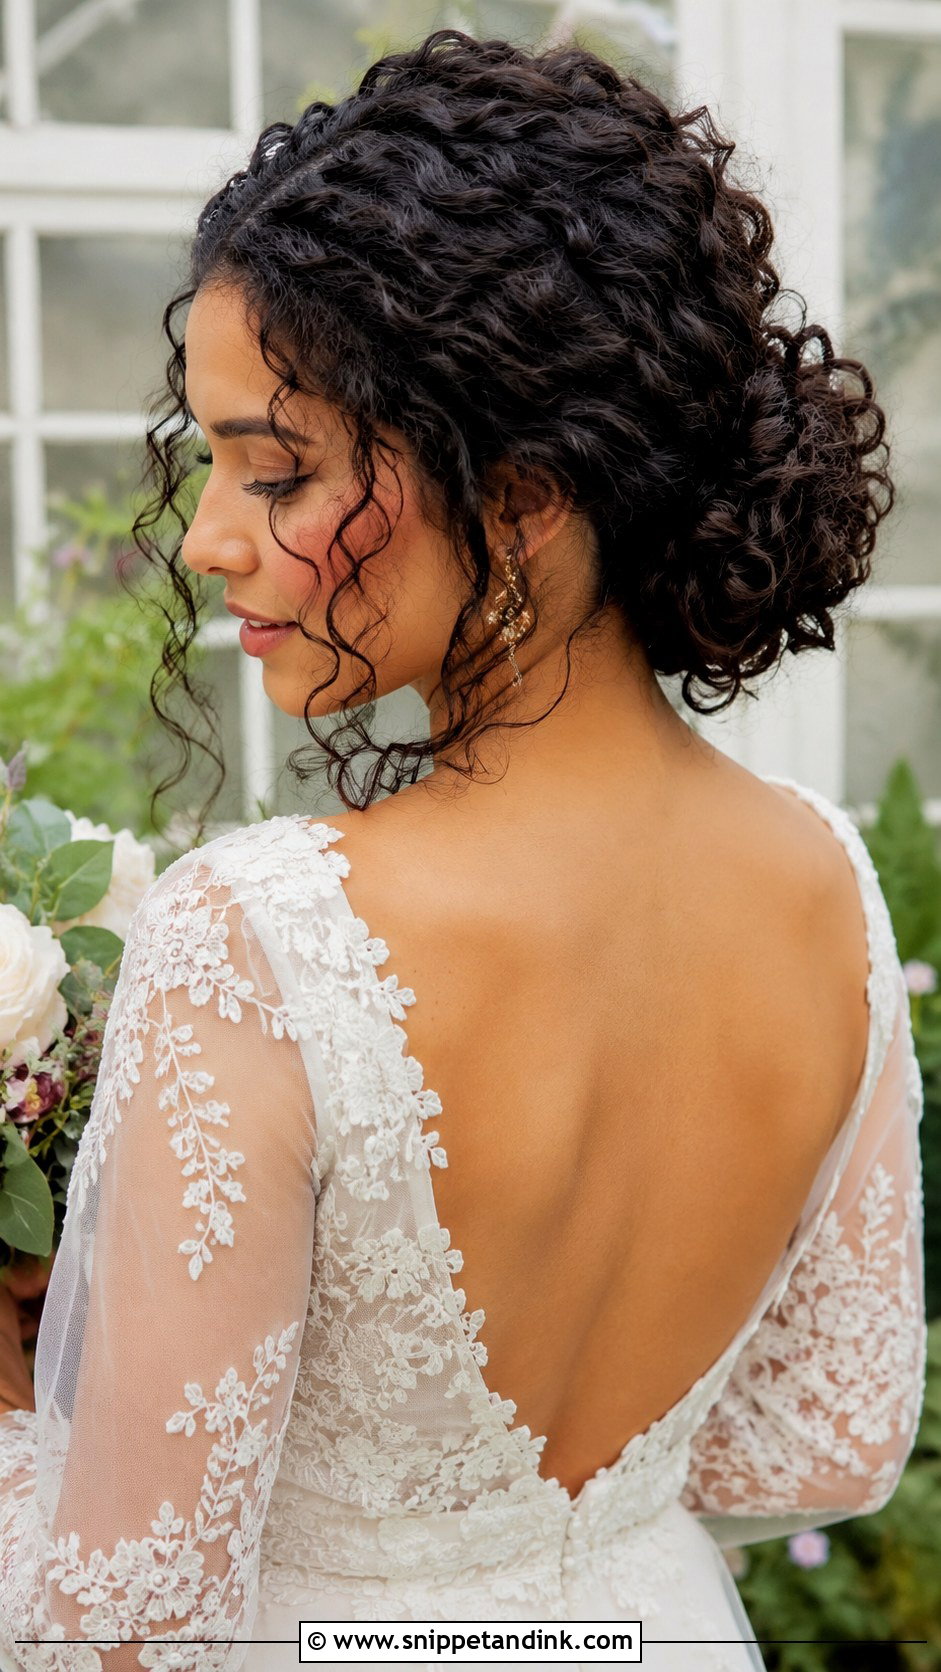
With curly hair I don’t brush the curls out; I gather them loosely at the nape so the bun keeps its natural volume. That makes a voluminous low bun full of texture. Wash and define the curls the day before, then refresh with a little water and leave-in conditioner in the morning. Gather with a wide-tooth comb or fingers, secure with a soft scrunchie or a spiral tie, and pin with U-pins. A few curls at the face soften it.
25. Low Bun With a Birdcage Veil
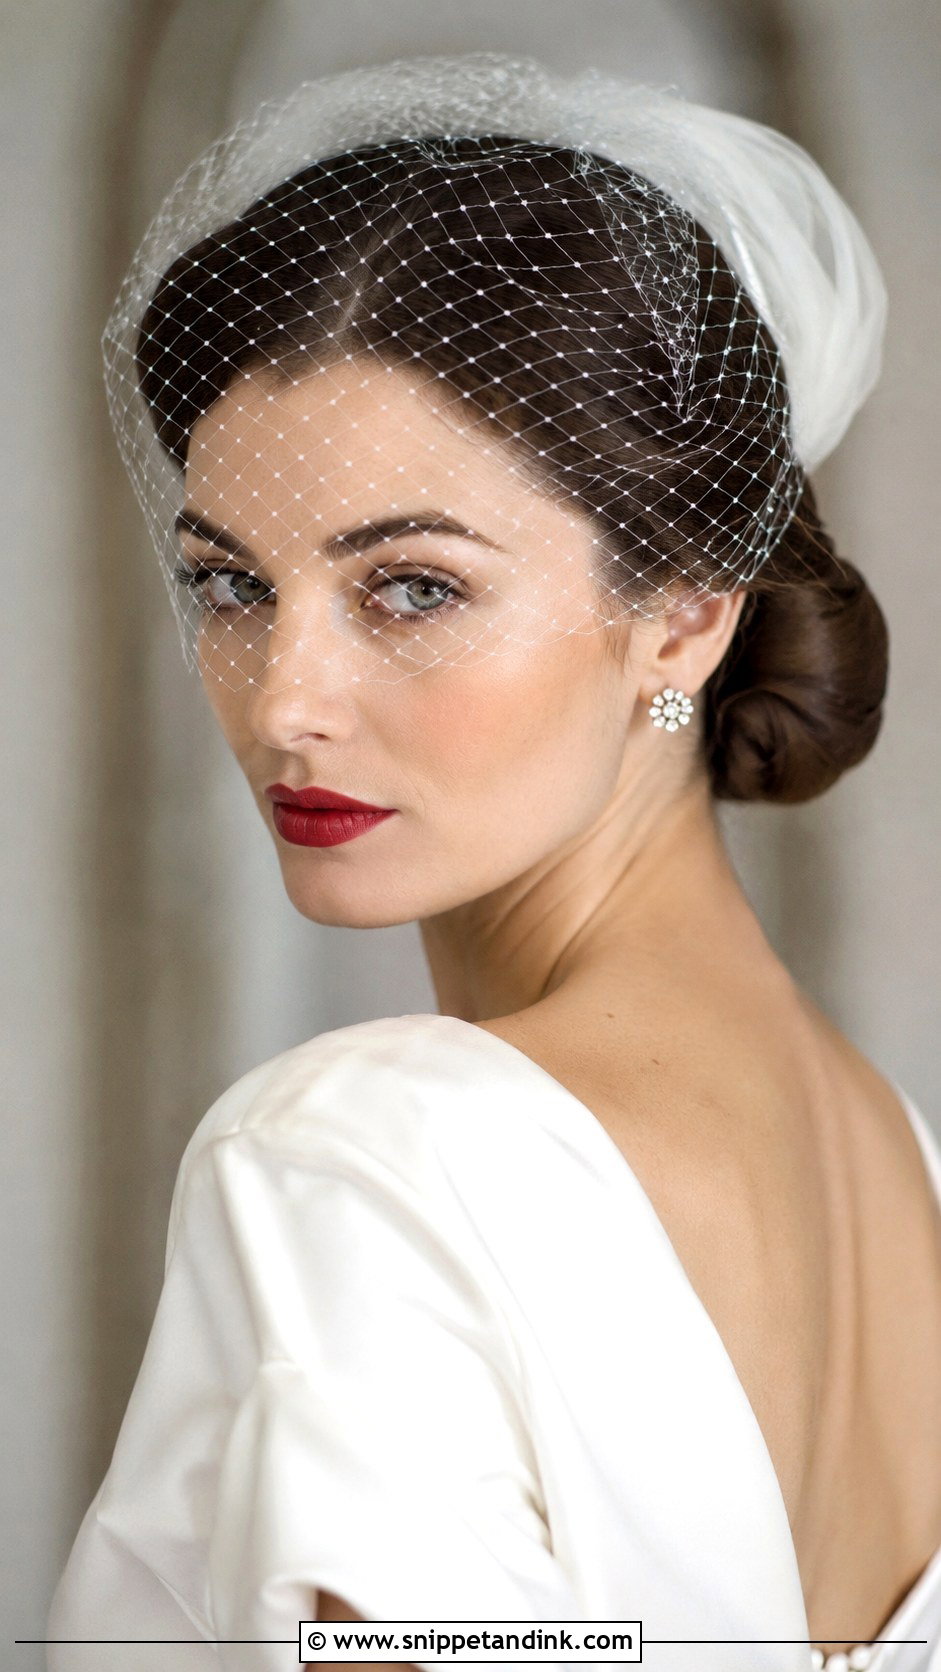
A birdcage veil is short netting that covers part of the face, usually pinned to one side above the bun. It suits a 1950s look with bold lips and a smooth, polished bun. I pin the comb into a small anchor of crossed pins just above the ear so the netting sits at the right angle. Remove the veil after the ceremony and the bun stays. If you’ll be crying through the vows, consider how netting interacts with your makeup.
Too Fine, Too Short or Too Thick for a Bun?
Almost any hair can wear a low bun, but some need help to get the shape in the pictures.
Fine or Thin Hair
A small bun on fine hair can look tiny from behind. I use a bun padding or a hair donut in a shade matching your hair, wrapped with the length, or I add a clip-in weft at the nape. Backcombing the length before wrapping also adds bulk.
Shoulder-Length or Layered Hair
If your hair only just reaches a ponytail, I make two smaller buns stacked one above the other, or roll the ends under and pin them in a horizontal line. Short layers at the nape need extra pins and some spray.
Very Thick or Long Hair
Heavy hair pulls a bun down through the day. I split it into two sections and make a smaller bun from the inner hair as a base, then wrap the outer layer around it. U-pins hold this much hair better than bobby pins, and the weight stays close to the head.
One Knot at the Nape, Dressed Up or Left Bare
A low bun stays neat, carries a veil, and suits nearly every dress code and neckline. Start with the base shape that suits your hair: sleek, curled, braided or loose. Then decide how to dress it, whether with pearls, flowers, crystals, ribbon or a veil, or keep it plain. Try your favourite at a trial, wear it for a few hours, and see how the weight feels at the end of a long day. That will tell you more than any picture.
You'll Like These Ideas:


Leave a Reply