
Your hands end up in more photos than you would guess: wrapped around the bouquet stems, sliding the ring on, resting on a shoulder during the first dance. That is why I treat a bridal set differently from a regular appointment. The polish has to sit quietly next to the dress and the ring, and it has to hold up in a ring shot taken from a few inches away. Most brides who sit at my desk now ask for texture rather than color: sheer bases, a soft chrome, a single pearl, a French line drawn thinner than they thought possible. Below are twenty-five sets I would happily do for a wedding, with notes on which nail shapes each one suits and where each tends to go wrong.
Which Base System Can Carry Fine Bridal Art
Every design below sits on a base, and the base decides how long the art survives. Regular soft gel polish is thin and flexible; it suits natural nails at short to medium length and soaks off easily. Structured builder gel is thicker and adds strength, and it is what I would use for 3D pearls, crystals or a long almond shape on a thin natural nail. Acrylic or gel extensions are the answer if your own nails won’t reach the length you want in time. Press-ons have improved a lot, but fine hand painting on them rarely holds as well as art built over your own nails.
The appointment calendar I would follow
- Six to eight weeks out: stop picking at cuticles and start a cuticle oil morning and night. Healthy skin around the nail matters more in ring photos than the color does.
- Four to six weeks out: book a trial for anything with hand-painted art, chrome or 3D pieces, and photograph the result in daylight.
- One to three days before: the real set. Gel looks its best in the first few days, before any gap appears at the cuticle.
- If you use self-tanner, apply it before the nail appointment rather than after, so it does not settle into the cuticles and stain the edges of a pale set.
Short or bitten nails can still get there. A builder gel overlay put on a few weeks ahead and refilled close to the date protects the growth underneath and gives me a smoother surface to paint on.
1. Milky White Wedding Nails
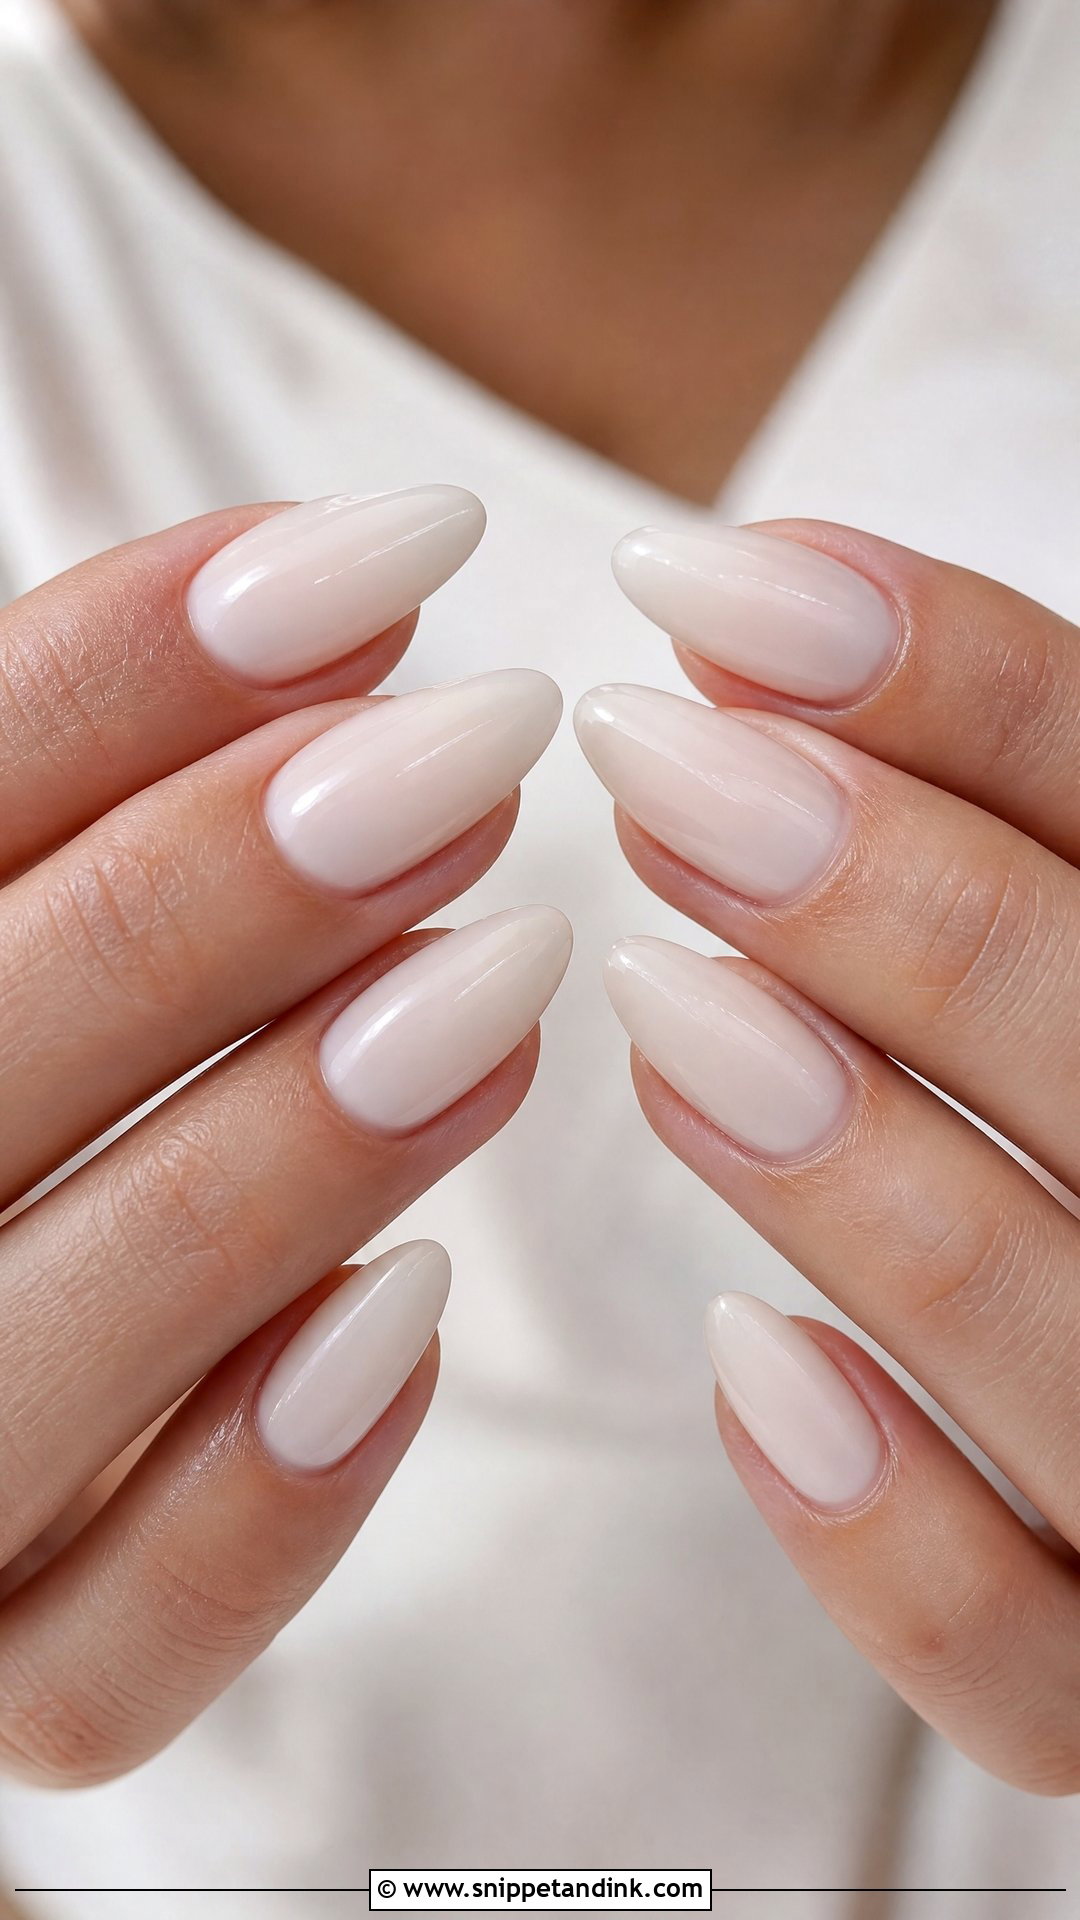
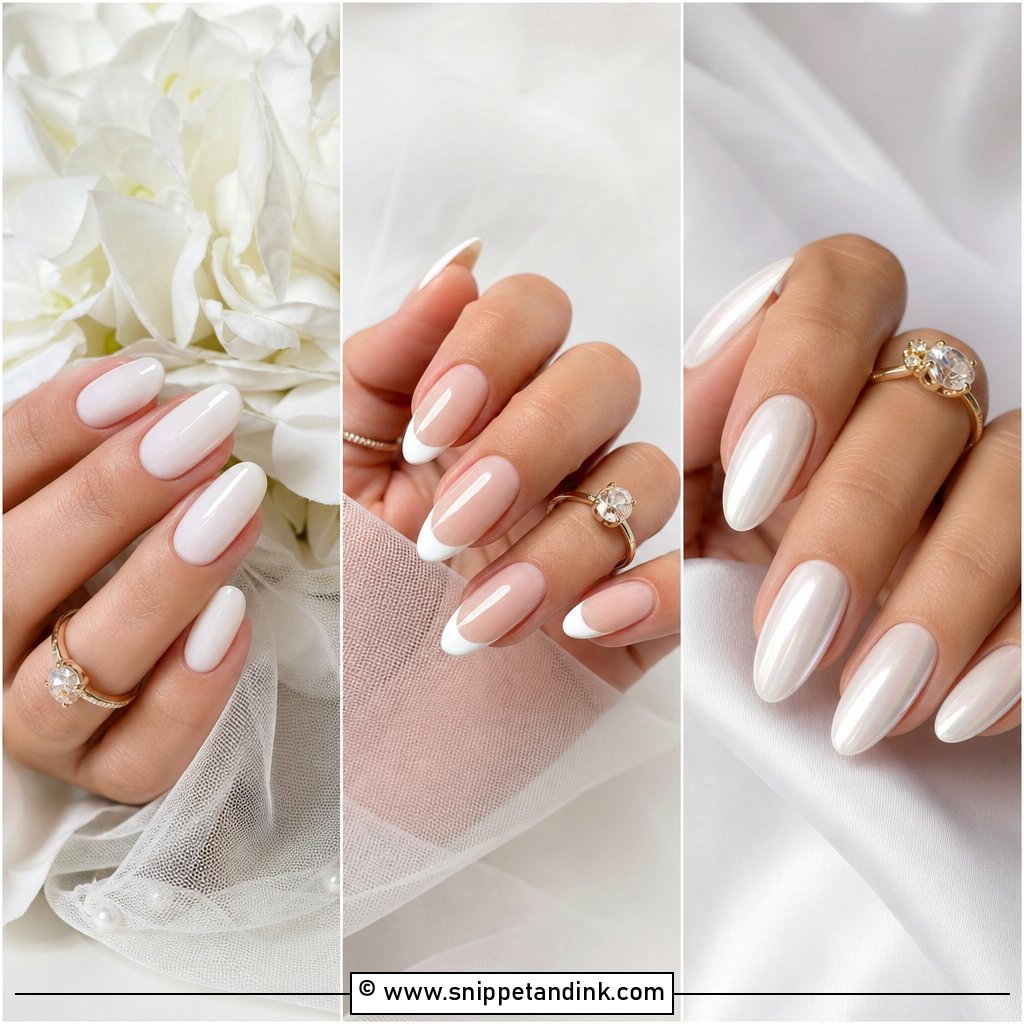
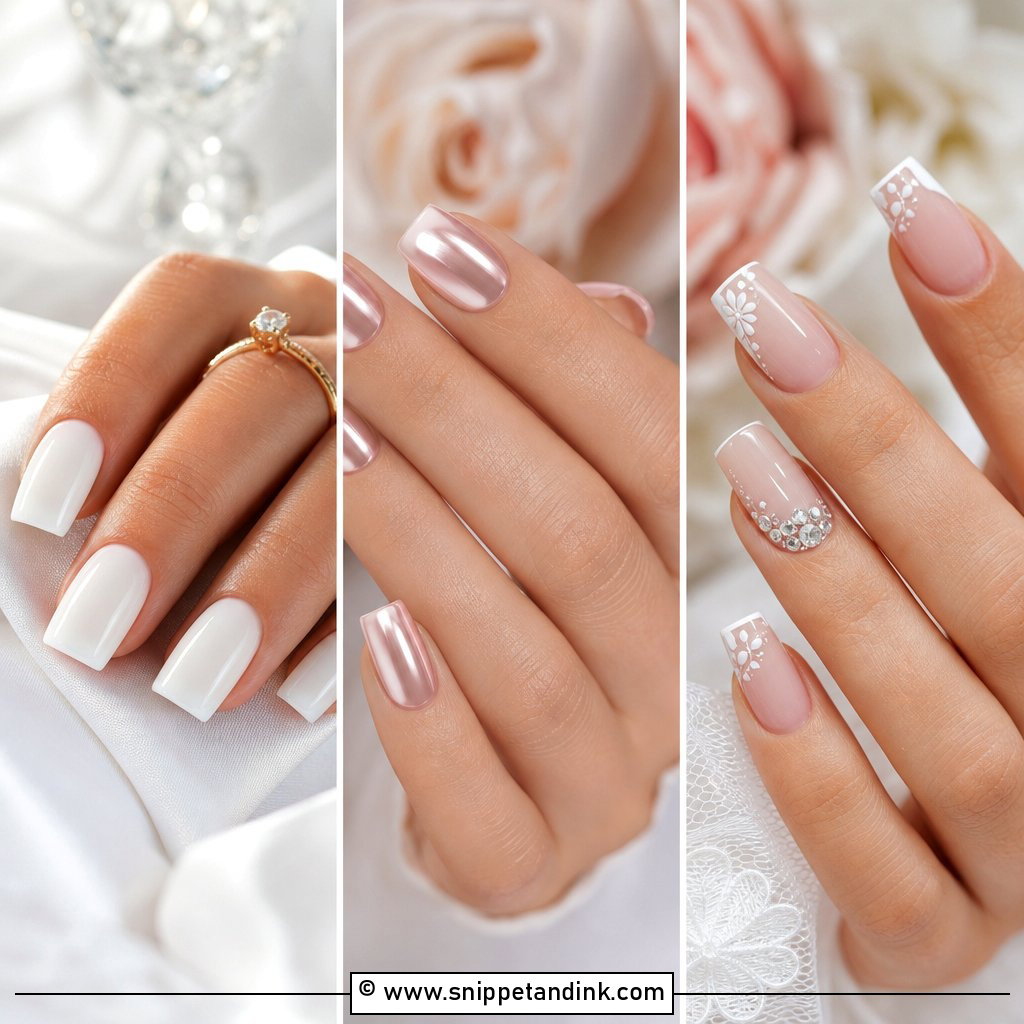
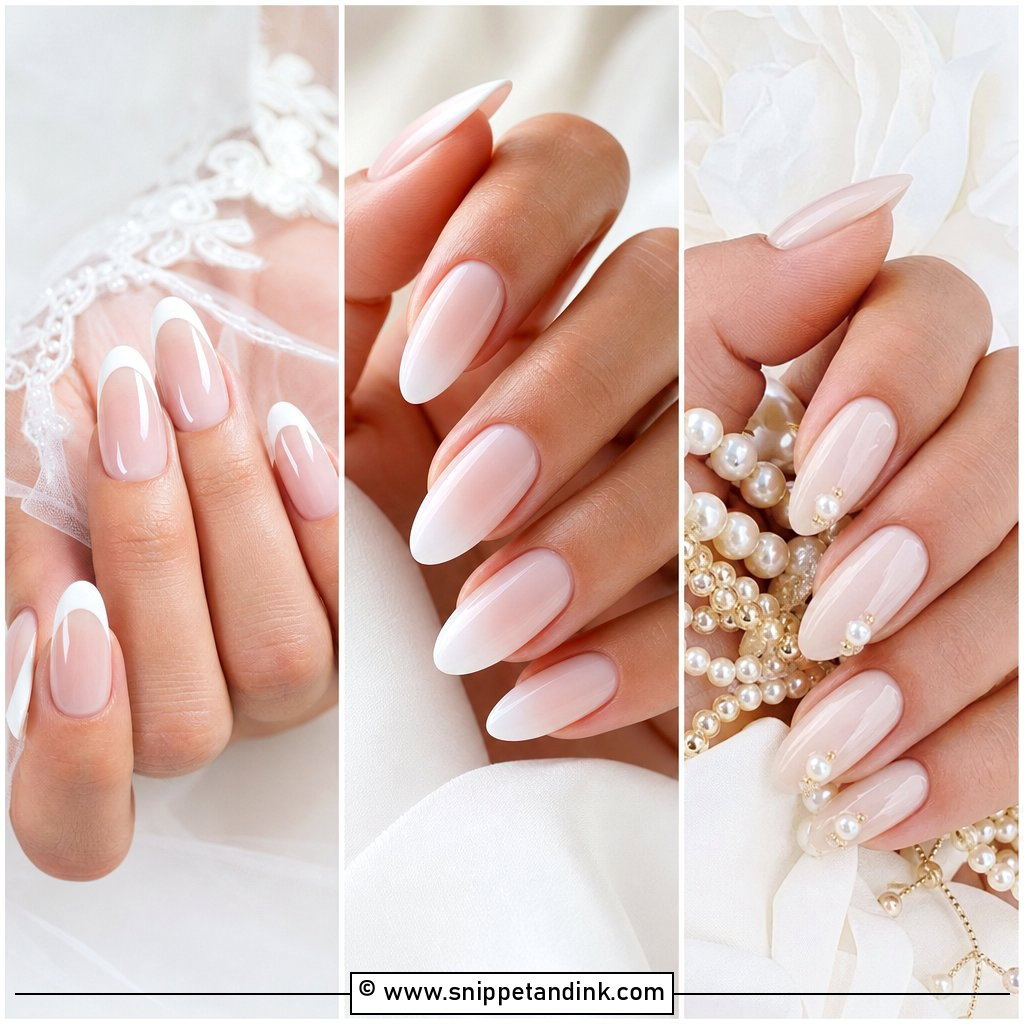
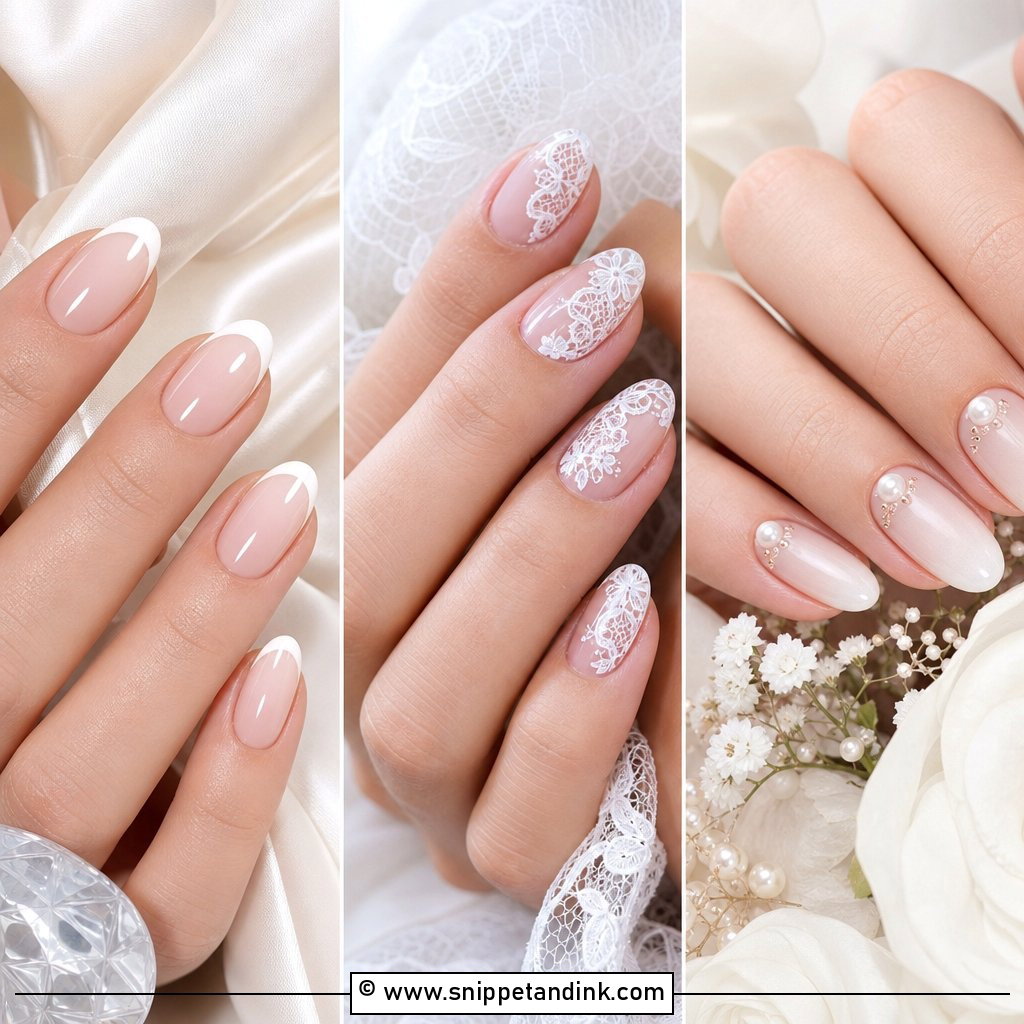
Milky white wedding nails are the set I suggest most when a bride can’t decide. The secret is translucency. I build them with a sheer white builder or a milky gel cut with clear, so a hint of the nail bed still shows through, because a fully opaque white reads like correction fluid under flash. Two thin layers also cure flatter than one thick one, and a lumpy milky nail shows every ridge in a close-up. It sits happily beside any metal, so you won’t need to rethink your jewelry around it.
2. Pearl Chrome Wedding Nails
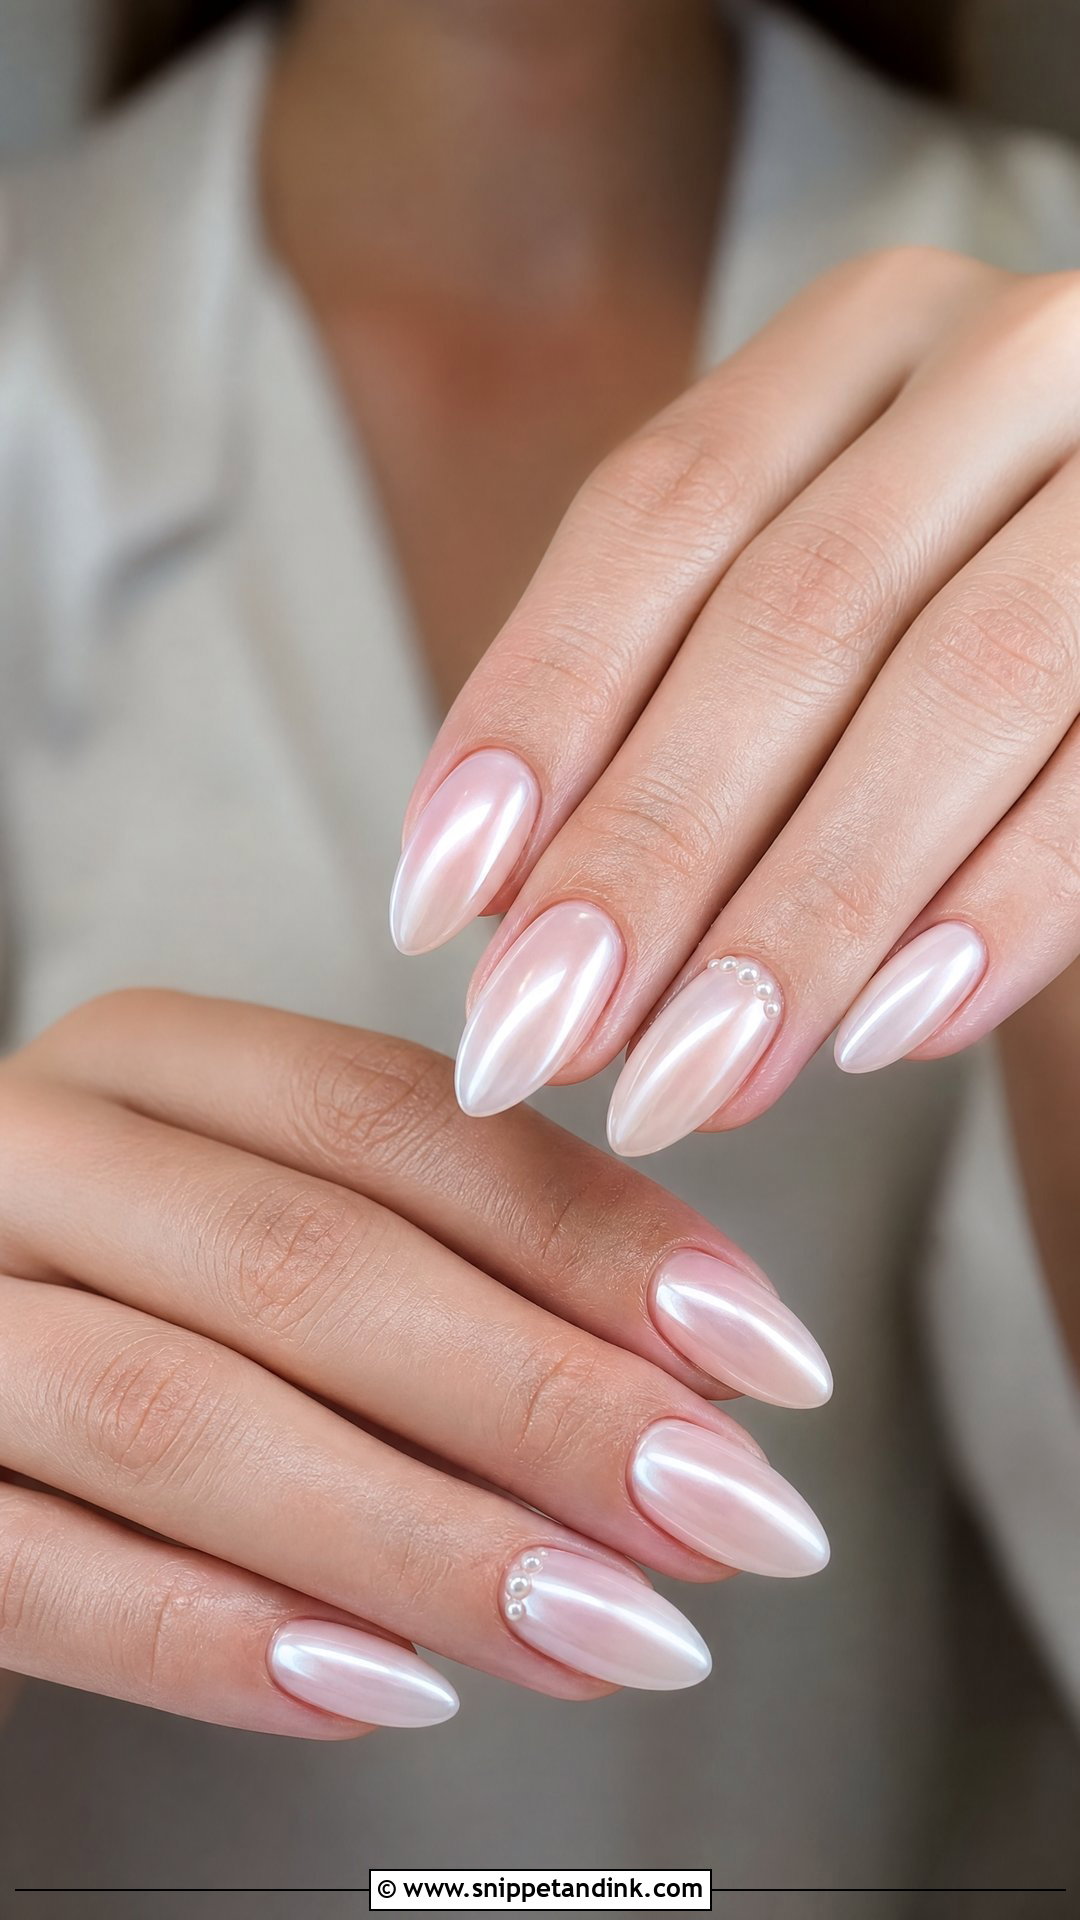
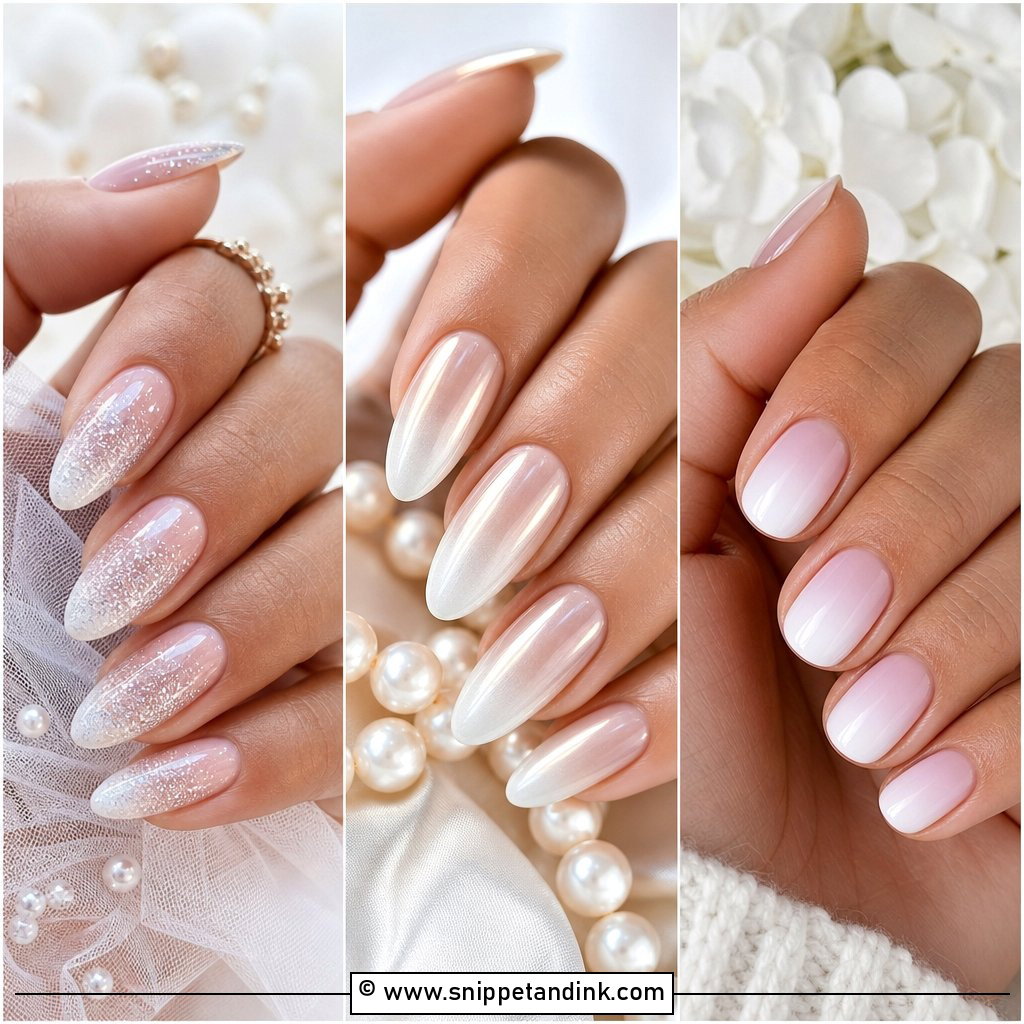
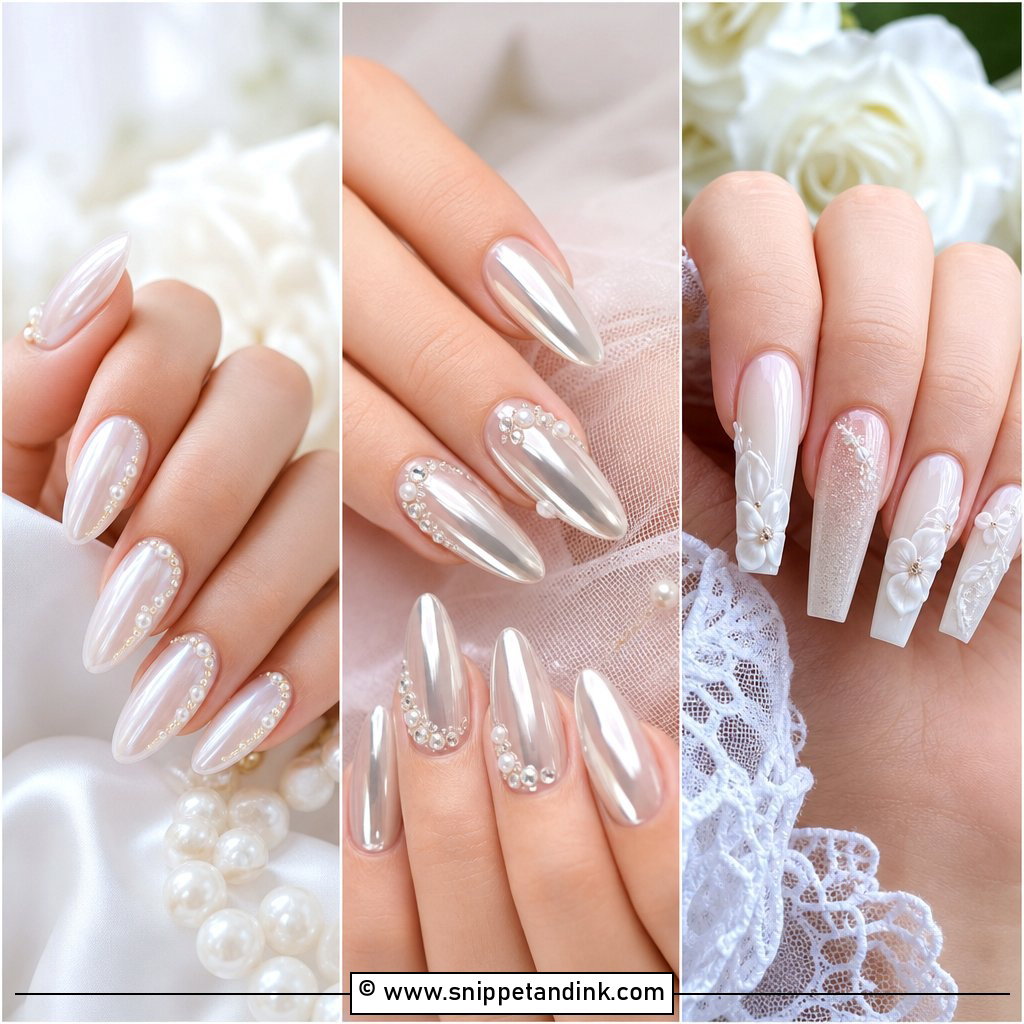
Pearl chrome is a powder, not a polish, and that changes how it behaves. I cure a no-wipe top coat, rub the pigment in with a silicone tool while the surface is still warm, then seal it twice. Chrome left under a single top coat starts wearing off at the free edge within days. Over sheer pink or milky white the effect is a glow rather than a mirror, and longer almond or coffin shapes show more of it. Pick one: chrome on every nail, or chrome plus a couple of tiny pearl studs on the ring finger. Both together gets busy fast.
3. French Tip Wedding Nails
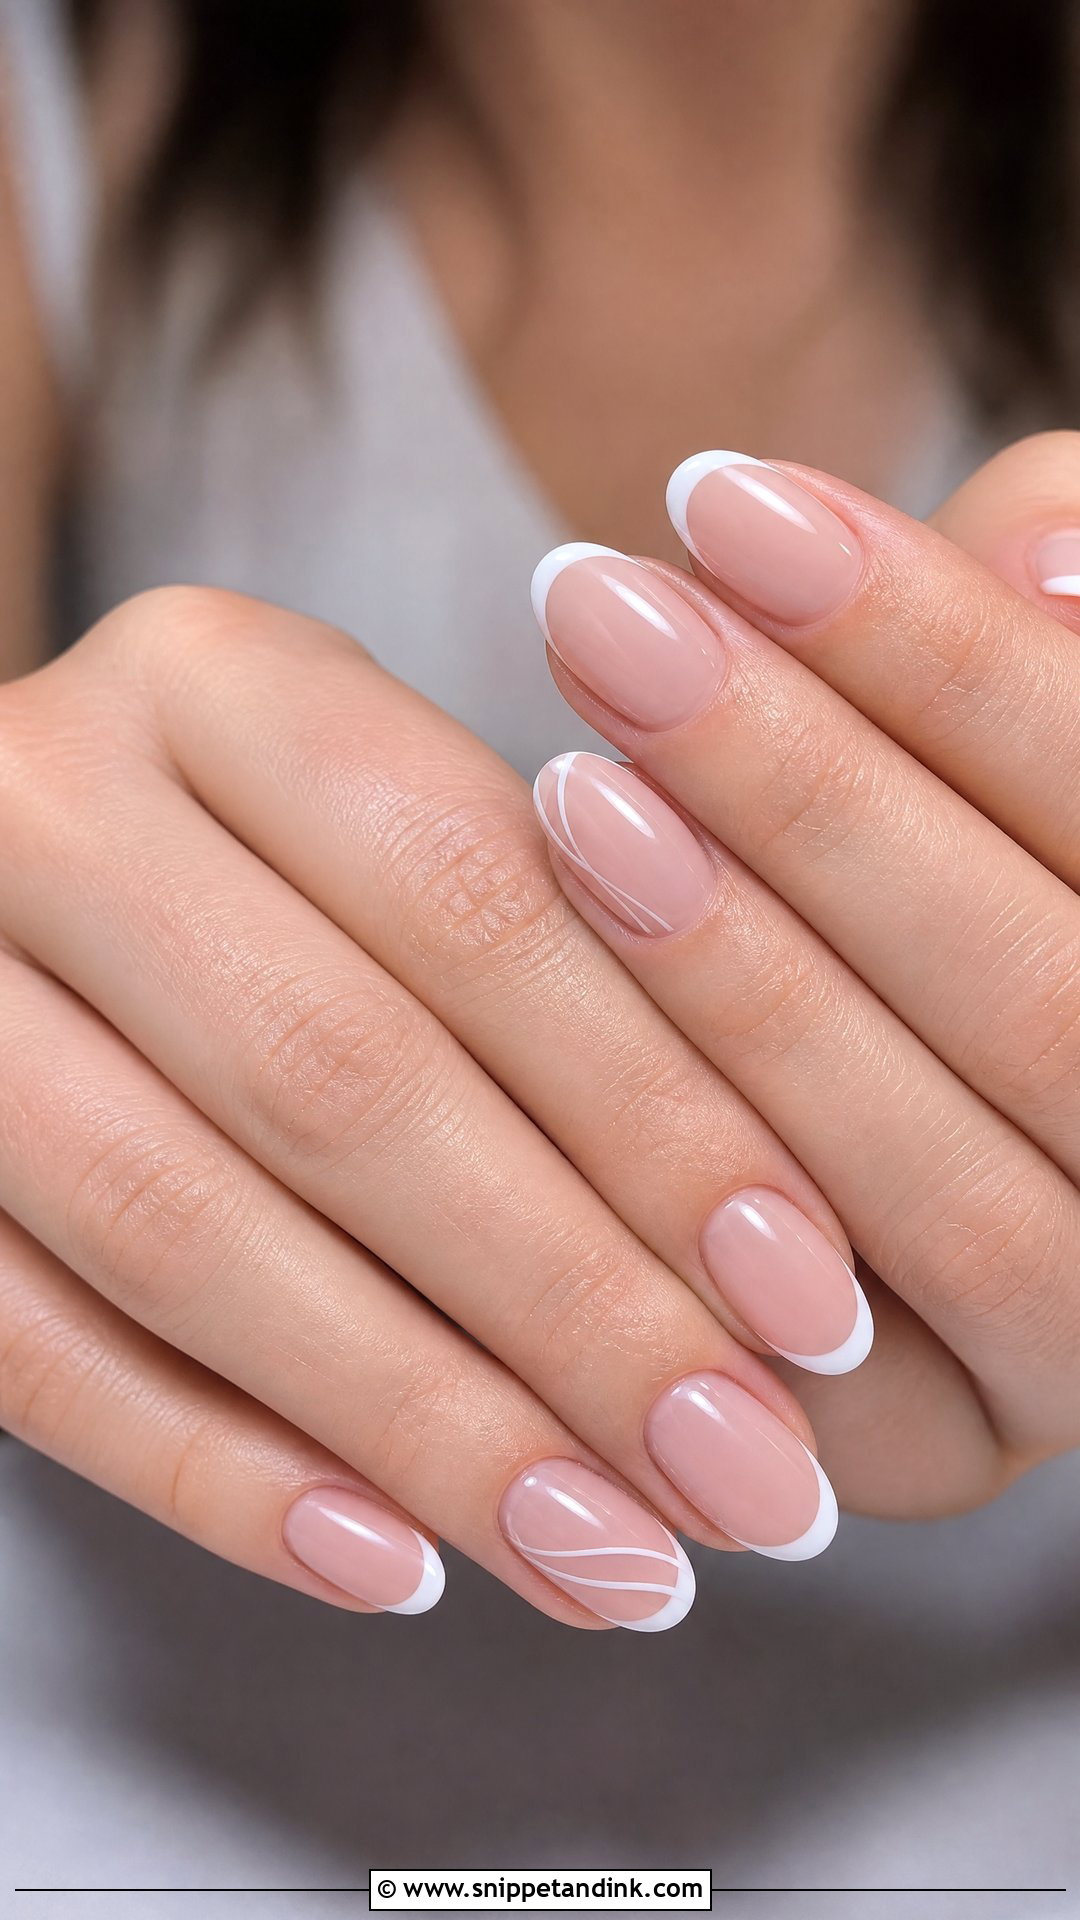
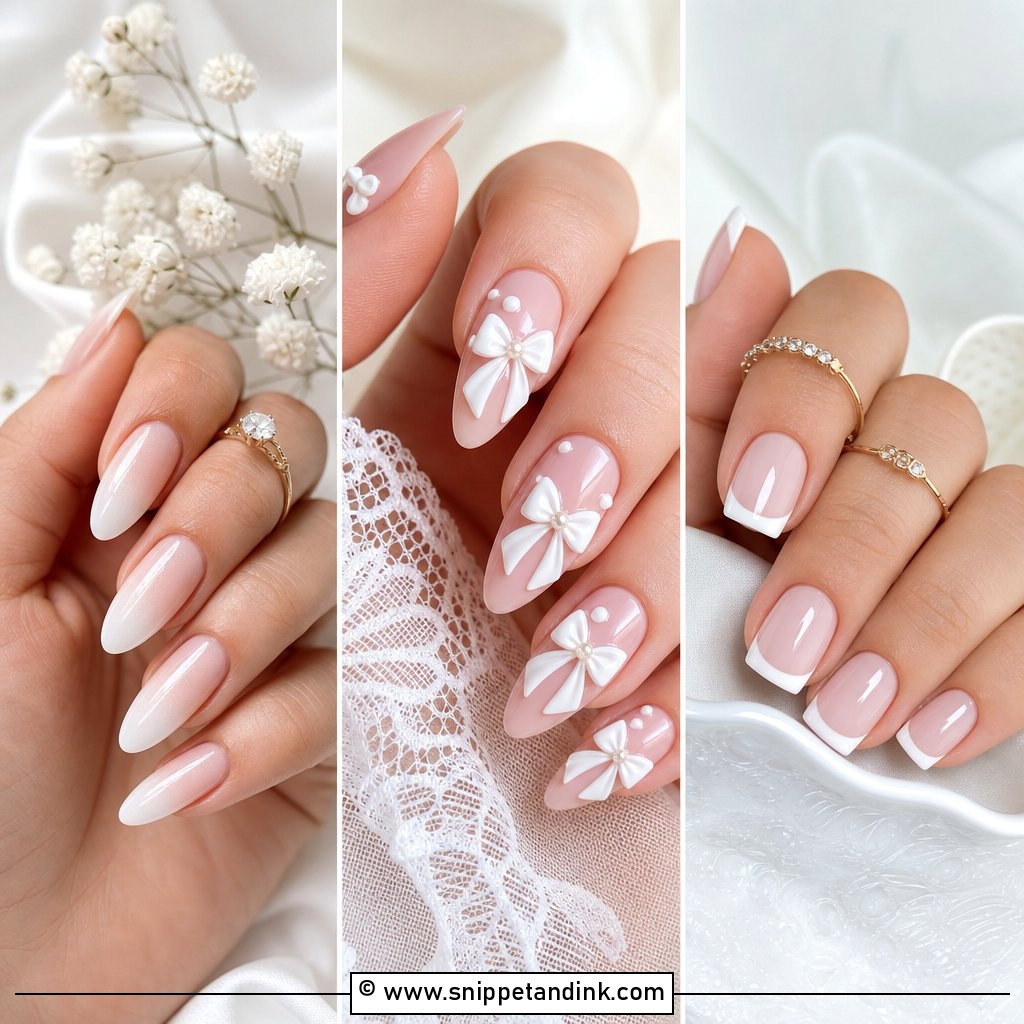
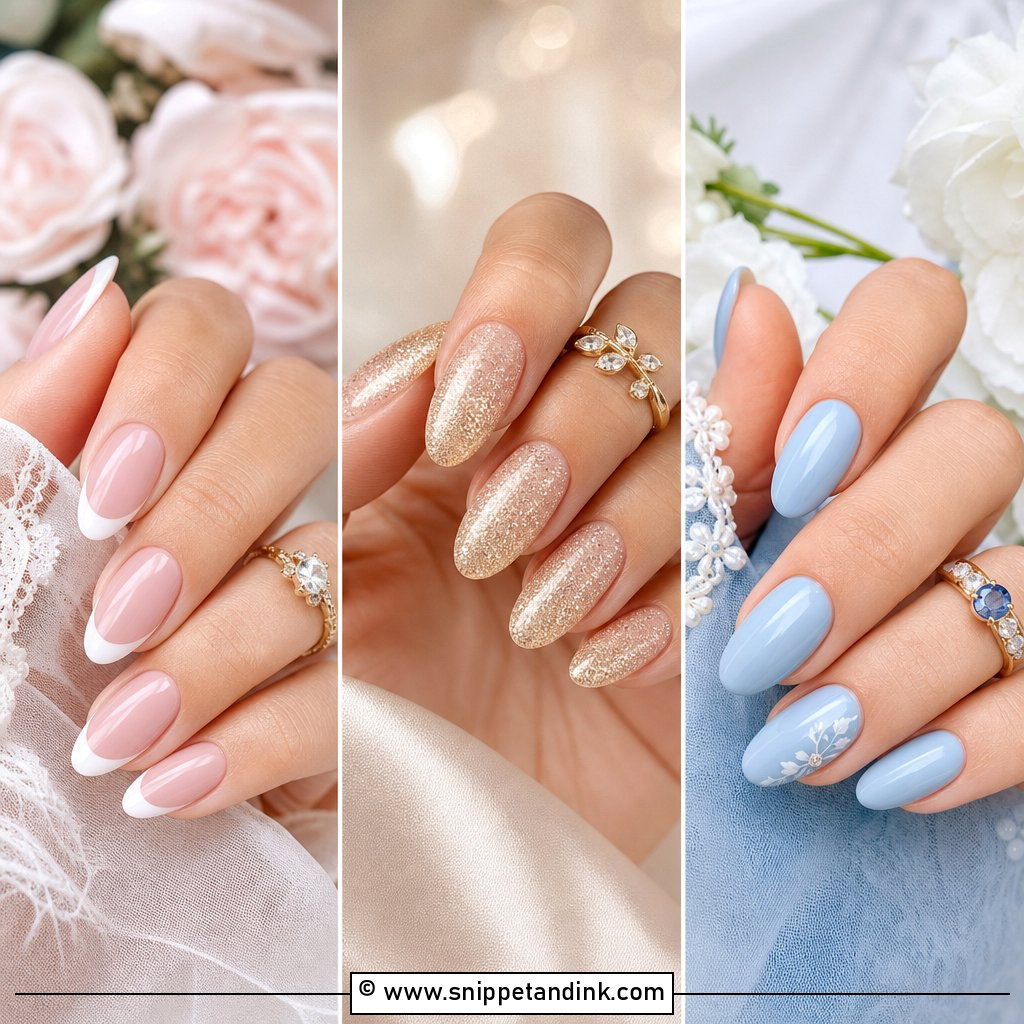
French tip wedding nails look modern again the moment the tip gets thinner. I trace the smile line from your own free edge instead of painting a straight band, so the white follows your nail’s curve and grows out without a hard step. A deep curve flatters almond and oval; a flatter line on a square nail looks crisp. The base matters as much as the tip. A pink that is too opaque hides the nail bed and the whole set starts to look fake. On the ring finger I will sometimes add a second hairline under the tip, and that is as far as I would push it.
4. Blush Pink Wedding Nails
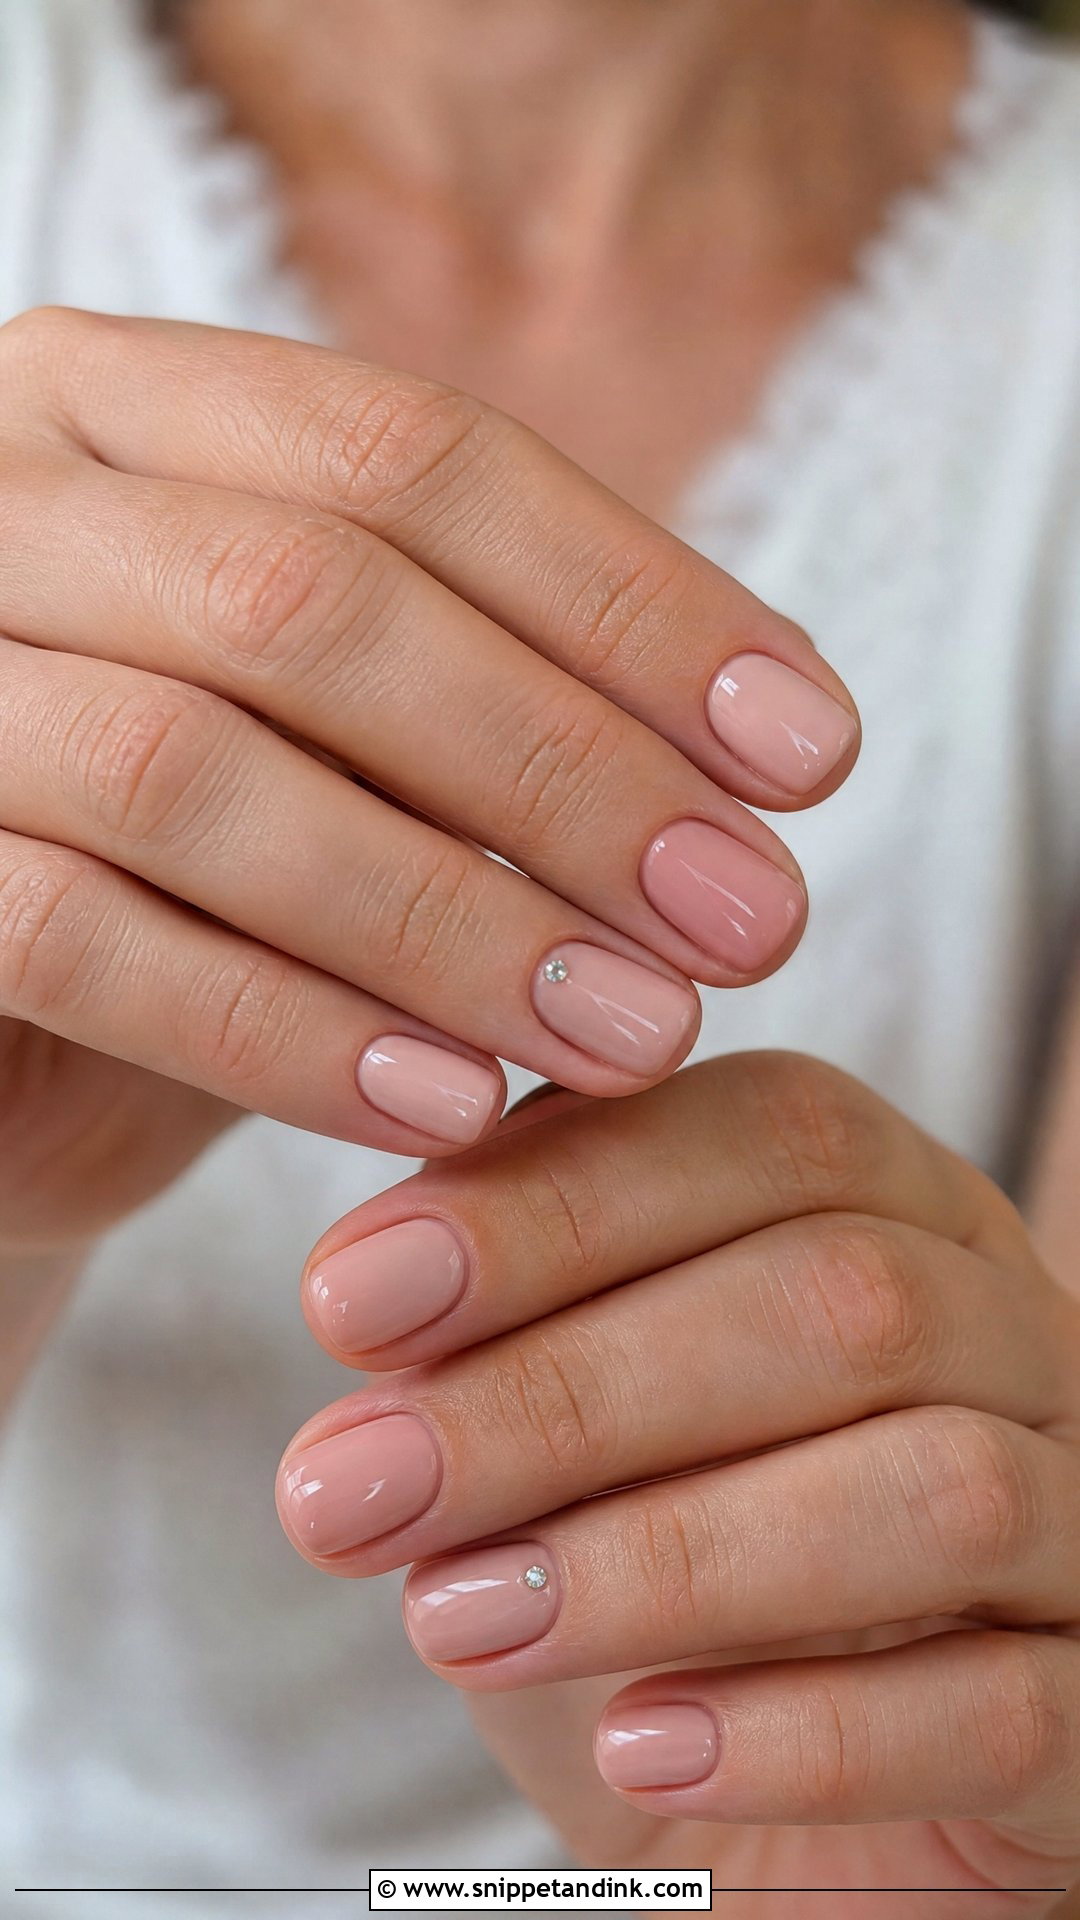
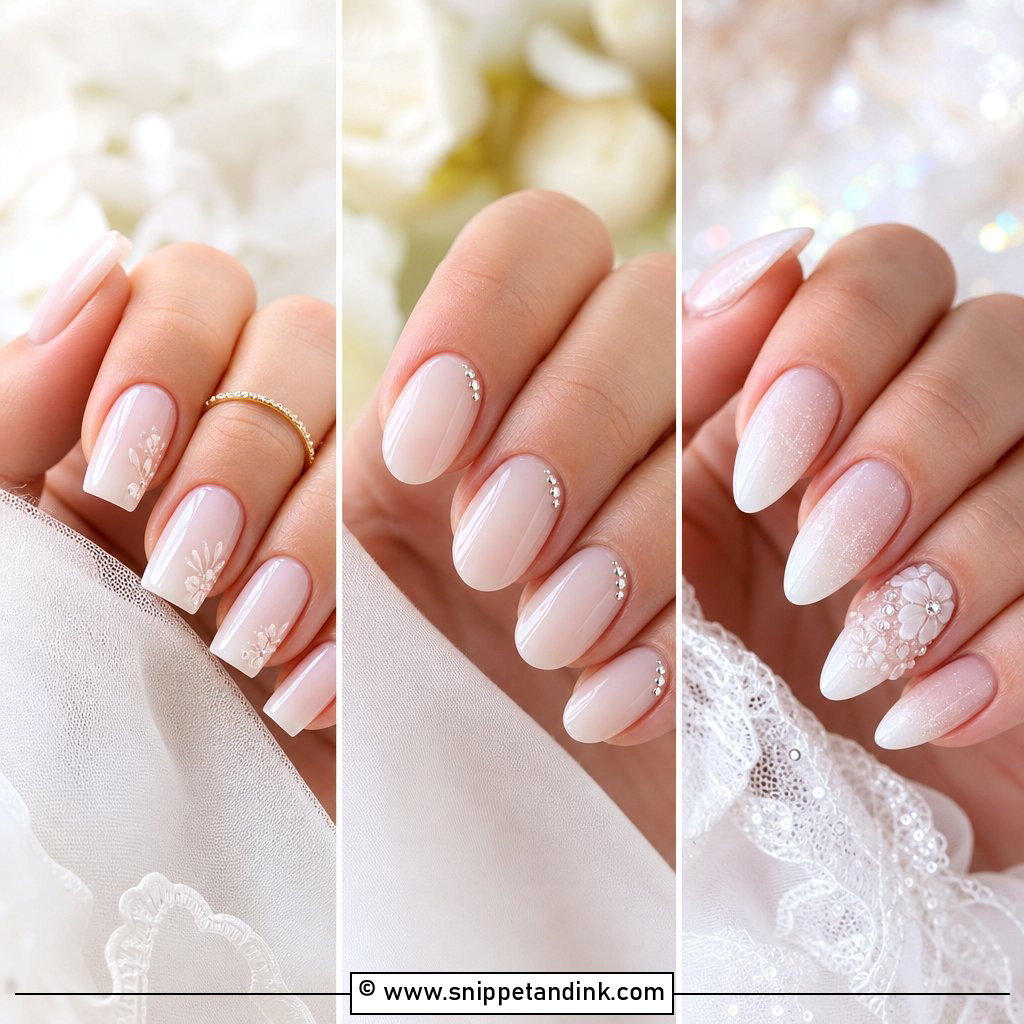
Blush pink sounds simple until you swatch it. On fair skin with pink undertones, a cool baby pink can vanish, and a shade with a little peach in it usually sits better. Rosy nudes suit medium skin. Deeper skin tones tend to look healthier in a warm mauve or sheer berry than in a pale pastel, which can turn chalky. I paint a swatch stick and hold it against the knuckle rather than the nail, since that is the skin you will see beside it in photos. One small crystal or a single white flower at the cuticle is all the detail it needs.
5. Nude Ombre Wedding Nails
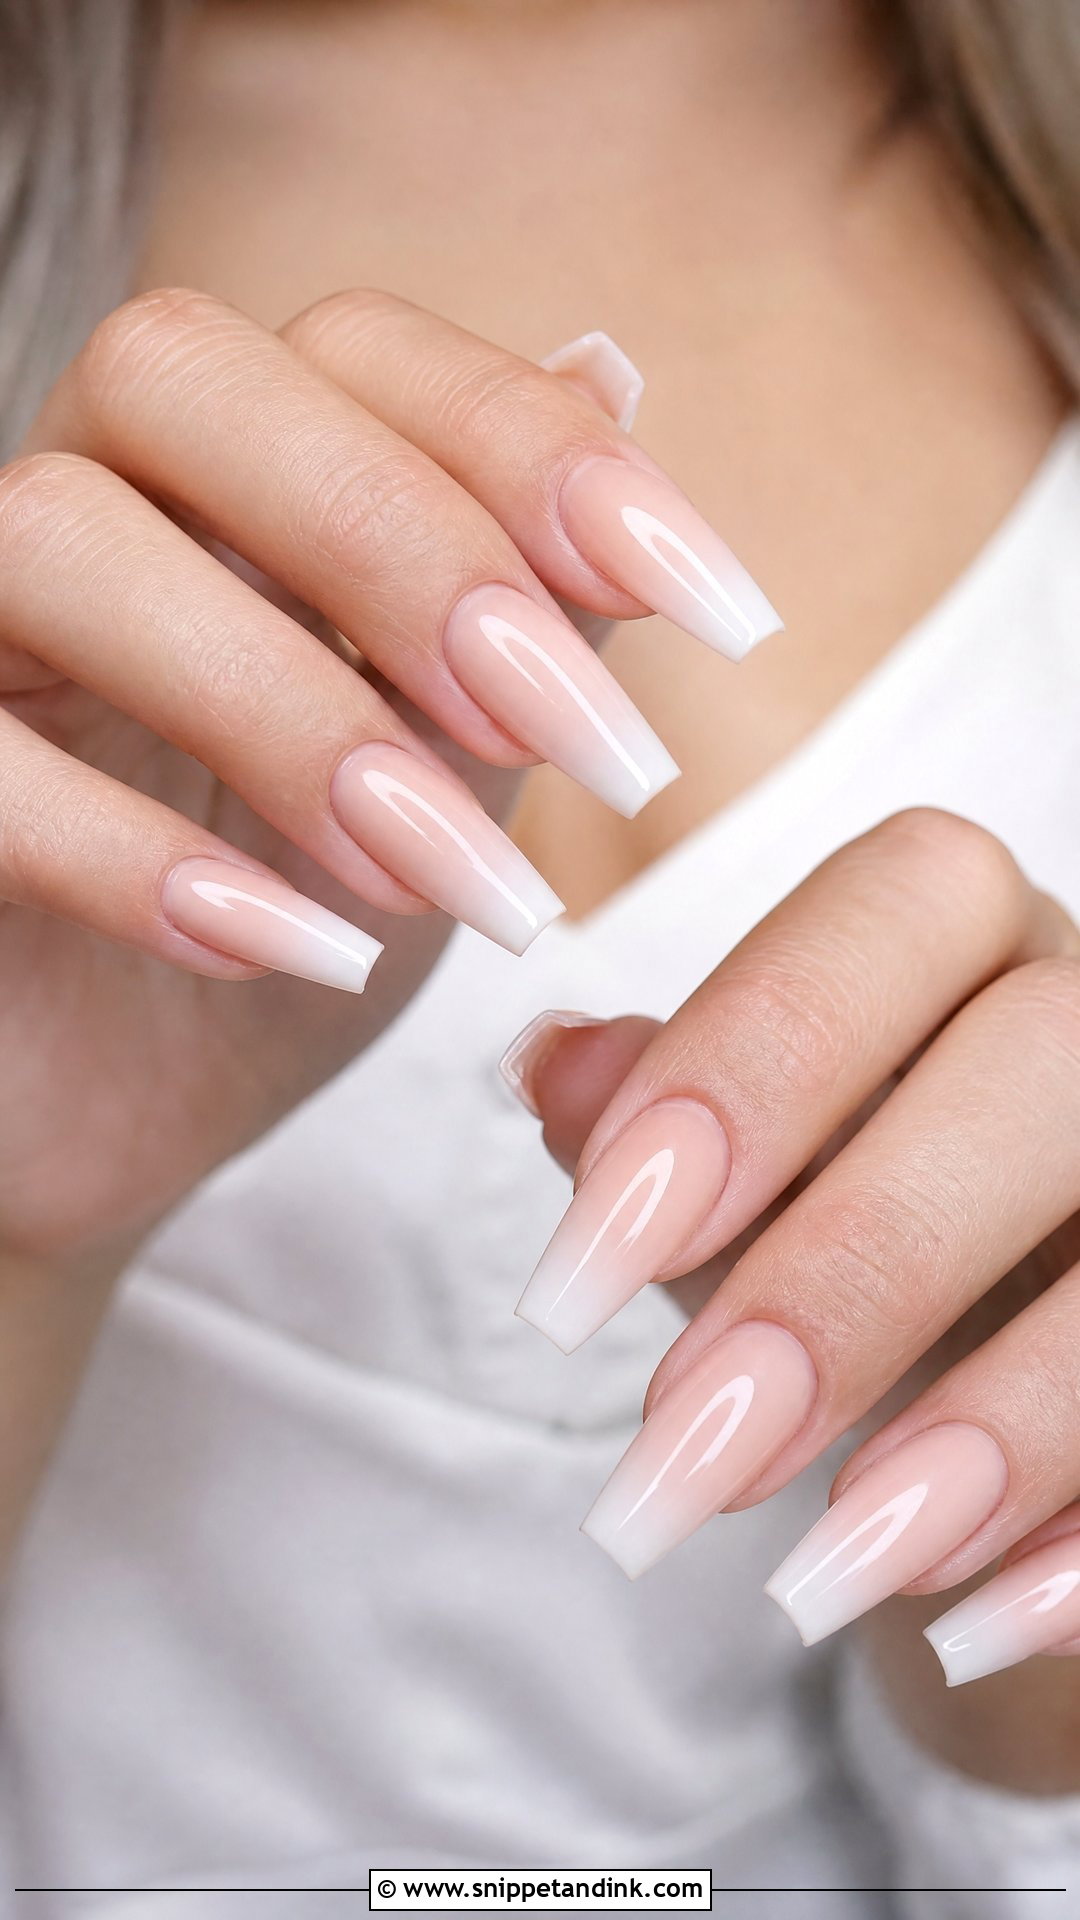
Nude ombre wedding nails, often called baby boomer nails, fade a skin-matched base into soft white at the tip. The blend is where they succeed or fail. I sponge or brush the white on in very thin passes and cure between them, because rushing leaves a visible band halfway up the nail. Match the nude to your skin, not to the bottle, or the white looks stuck on. Coffin and almond give the gradient length to travel. On short nails I keep the white lower and softer, since a full fade on a tiny nail can look like grow-out.
6. Lace Wedding Nails
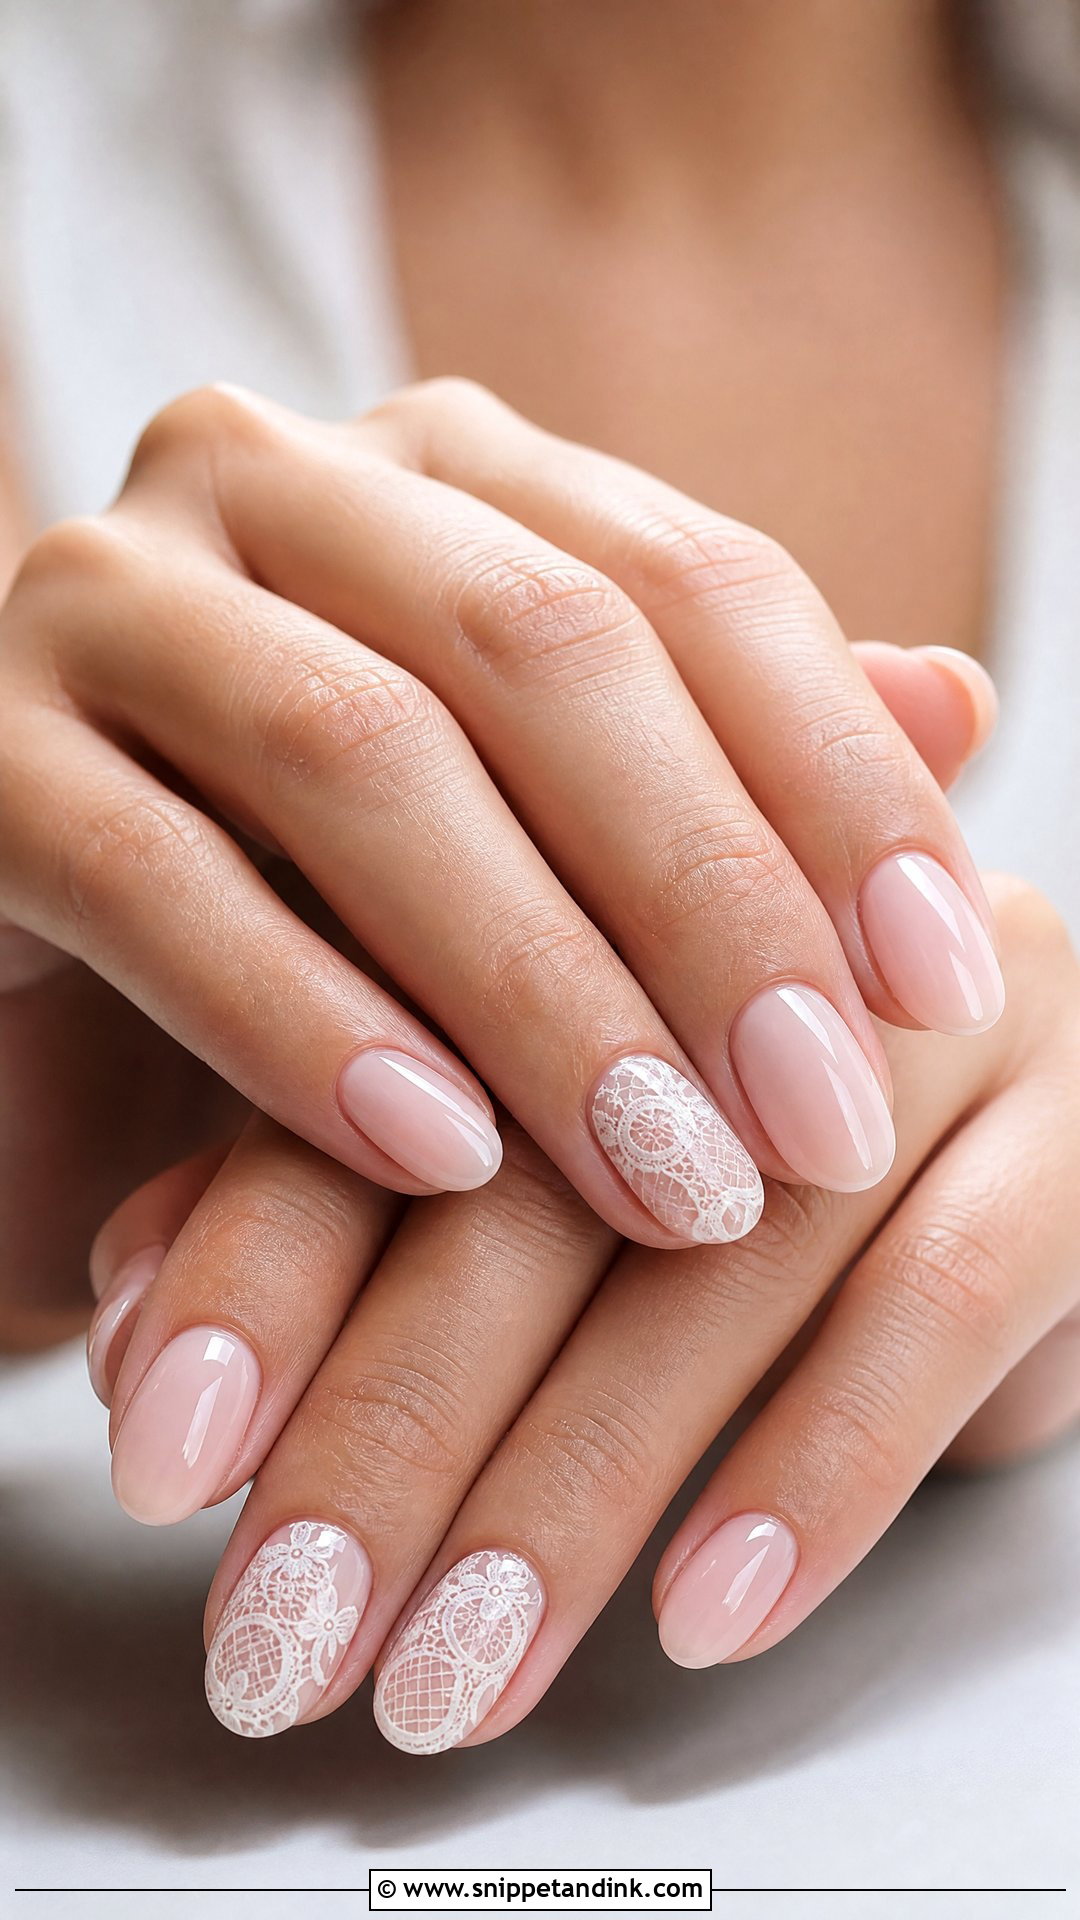
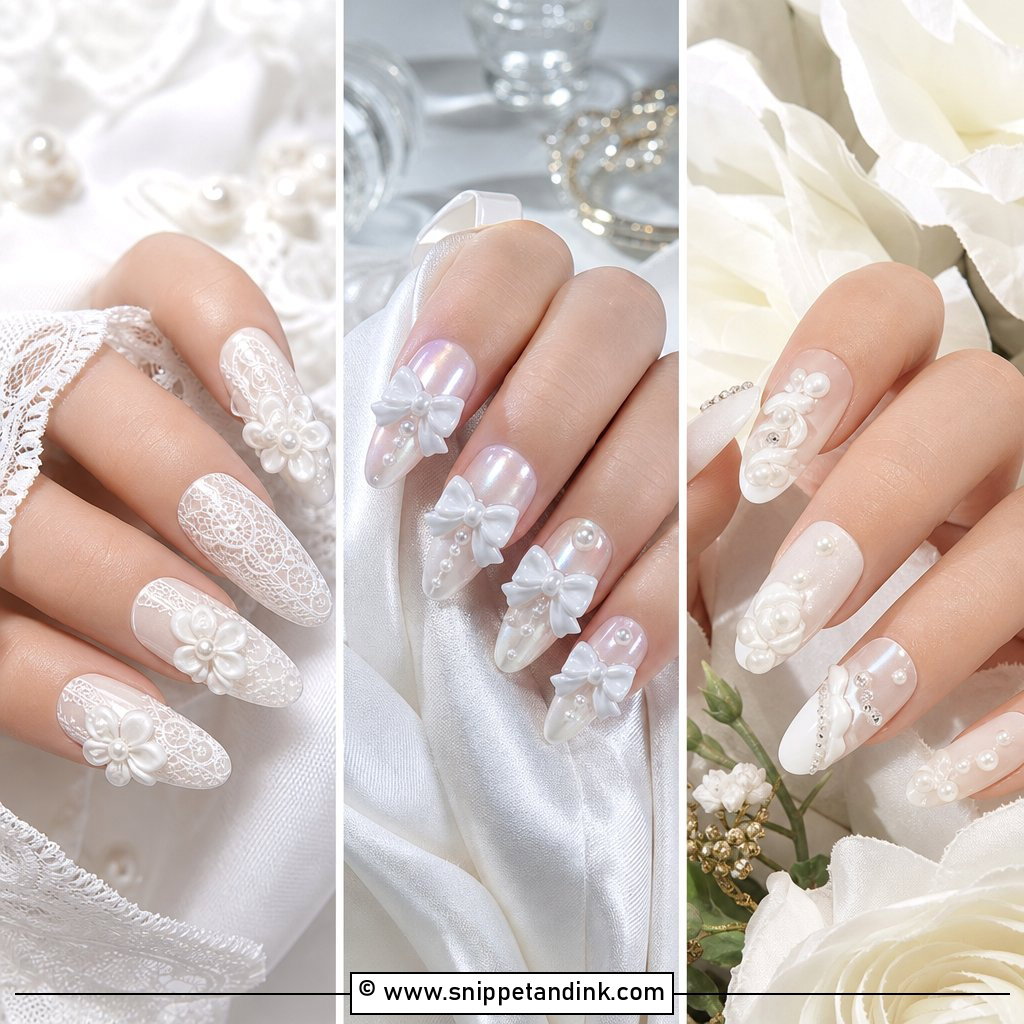
Lace art earns its place when the dress actually has lace. Bring a close-up photo of the fabric to the appointment, because a scalloped Chantilly edge and a heavy guipure need completely different brushwork. I either hand paint with a long liner or use a stamping plate; stamping gives cleaner repeats, painting lets me copy a motif from your sleeve. Two to four lace nails per set is plenty, with the rest glossy over a milky base. Nervous nail pickers should know that lace wears at the tip first, so ask for an extra layer of top coat.
7. Floral Wedding Nails
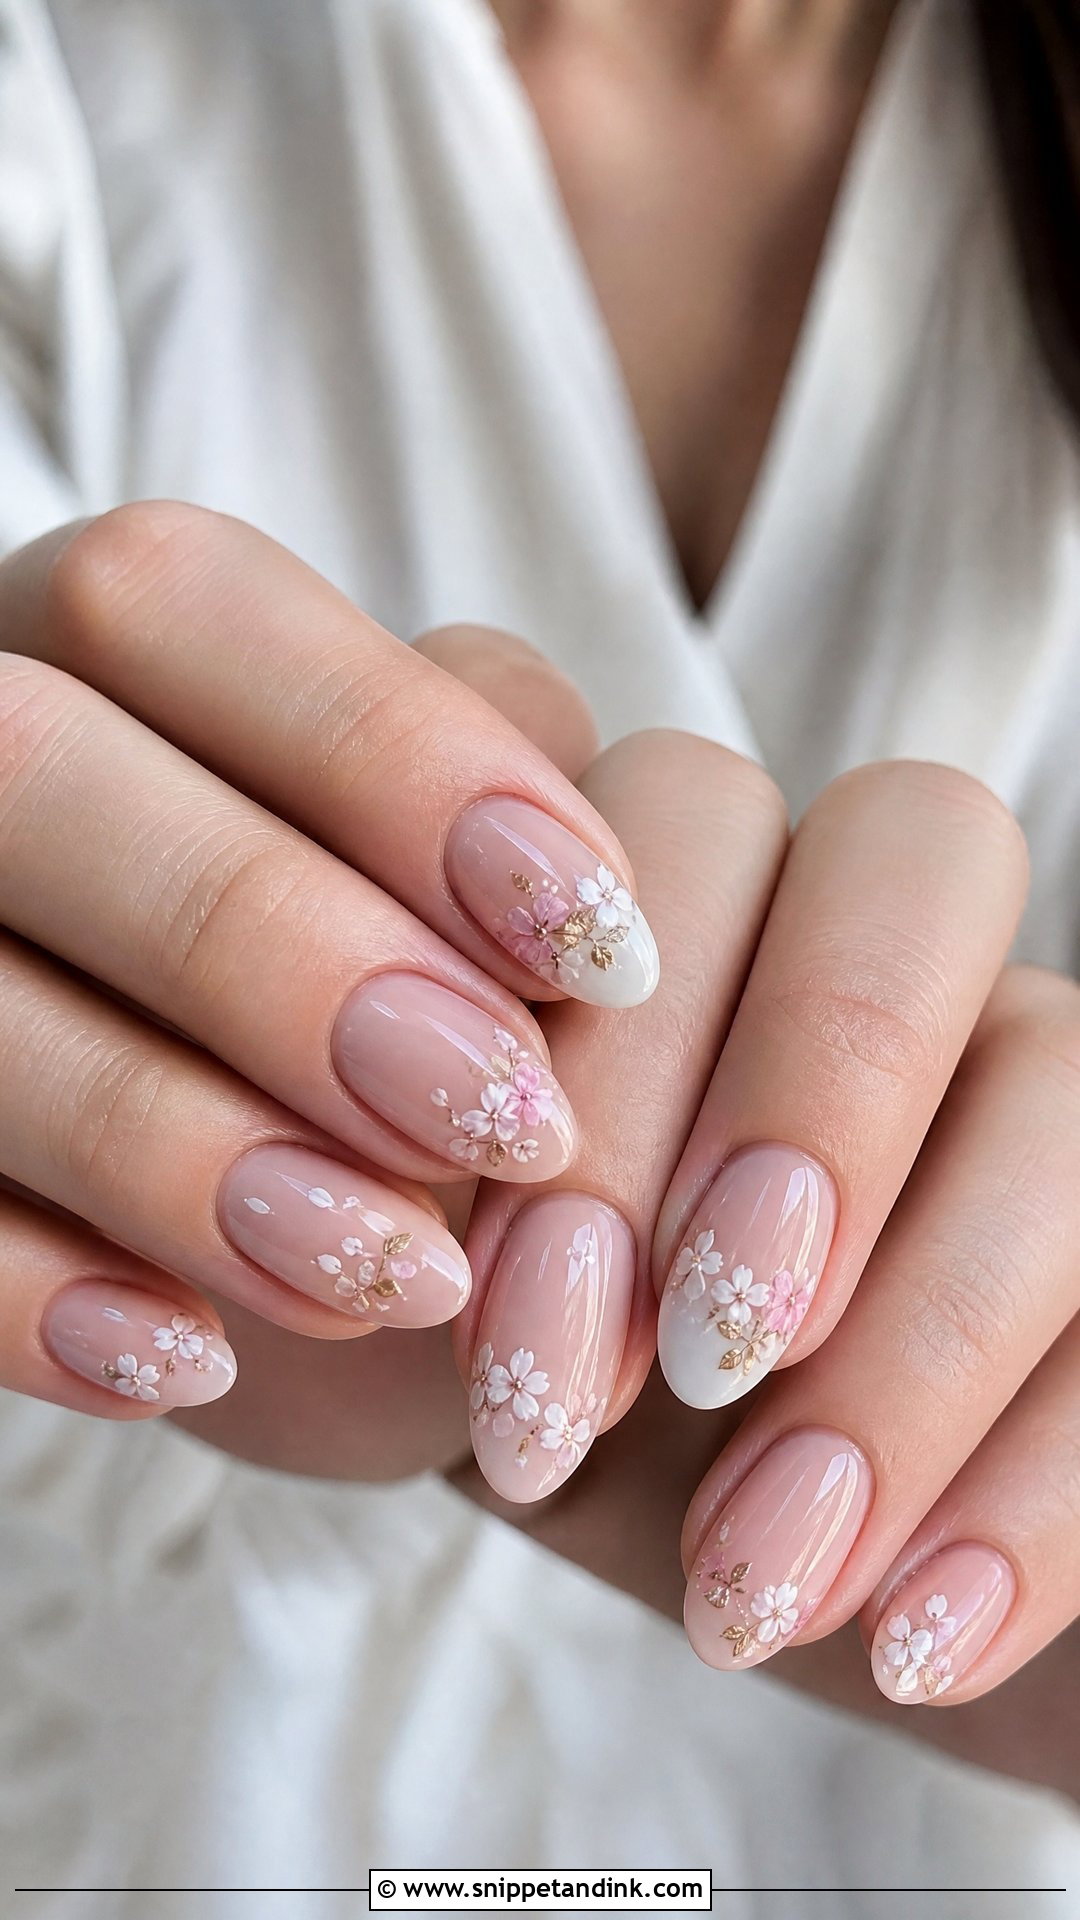
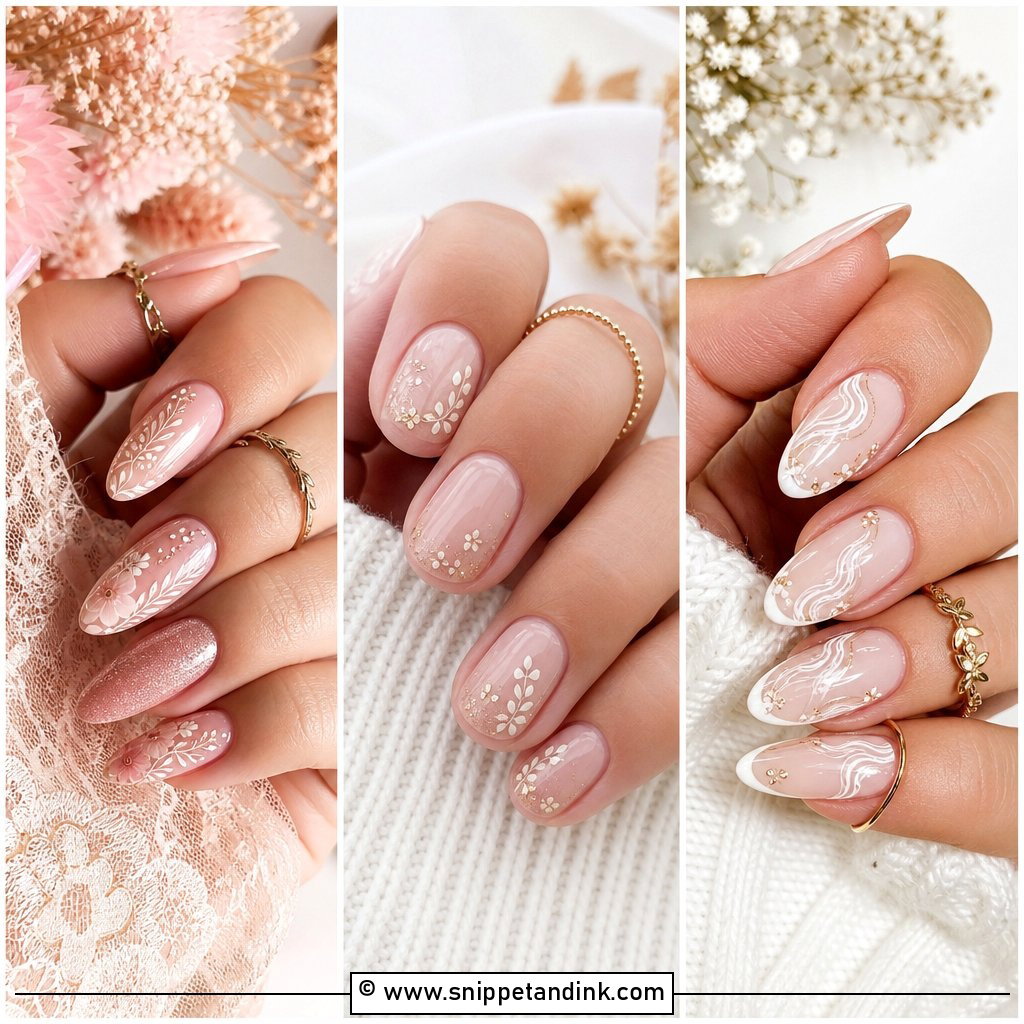
Florals go wrong when they crowd the nail. I keep each bloom about the size of a grain of rice and leave plenty of bare base around it, usually sheer nude or milky white, so the set still reads as clean from across a room. Micro blooms scattered across every finger feel like a garden; flowers on just the ring finger and thumb feel quieter. Oval and almond shapes echo the round petals. Each petal is a dot of gel cured before the next one goes down, so this design takes longer in the chair than people expect. Book the extra time.
8. Gold Foil Wedding Nails
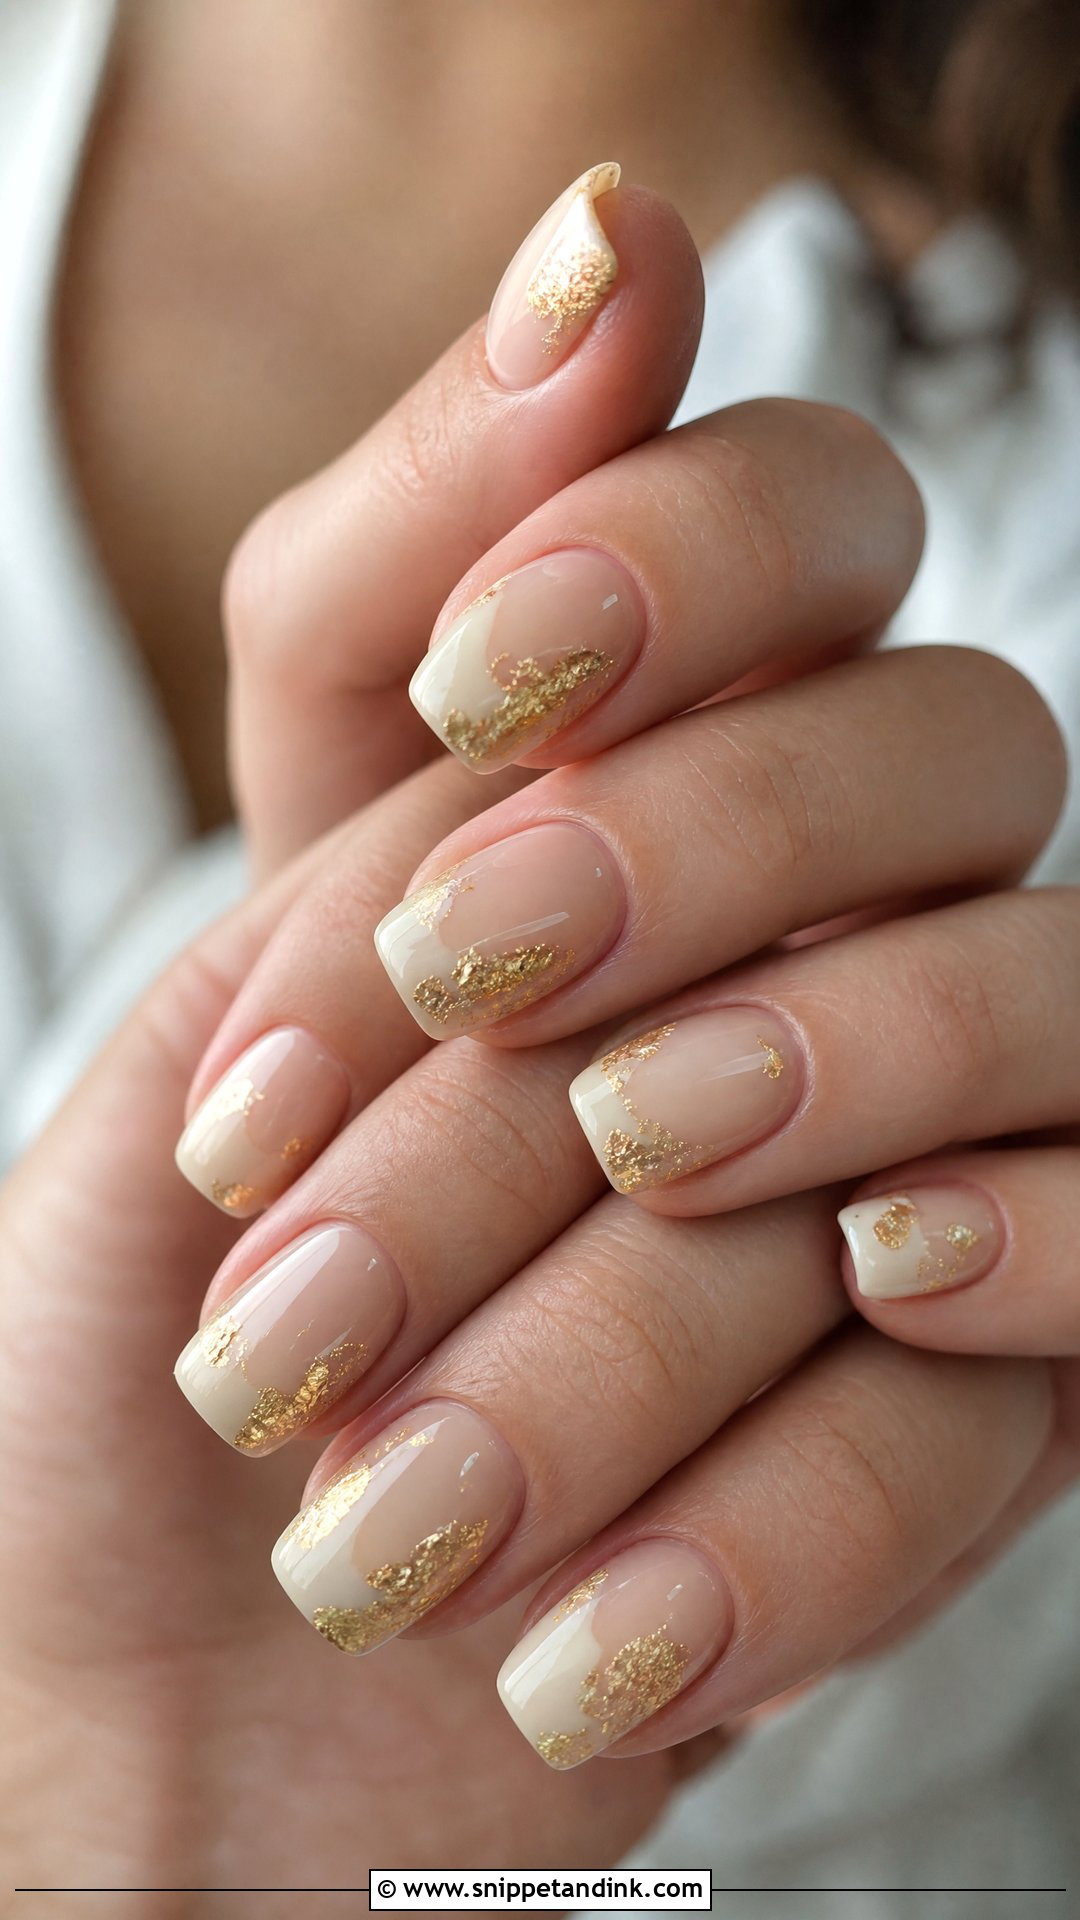
Gold foil comes in tissue-thin sheets that tear into irregular flakes, which is exactly the look you’re after. I press it into a tacky layer of gel near the tip, sidewall or cuticle, keep it sparse, then cap it with enough top coat that you cannot feel an edge with a fingertip. Unsealed foil catches on tulle, knitwear and hair. A sheer nude or blush base suits most hands. Milky white softens the gold, while a beige nude gives it more contrast. It looks warmest next to a yellow gold band.
9. Silver Glitter Wedding Nails
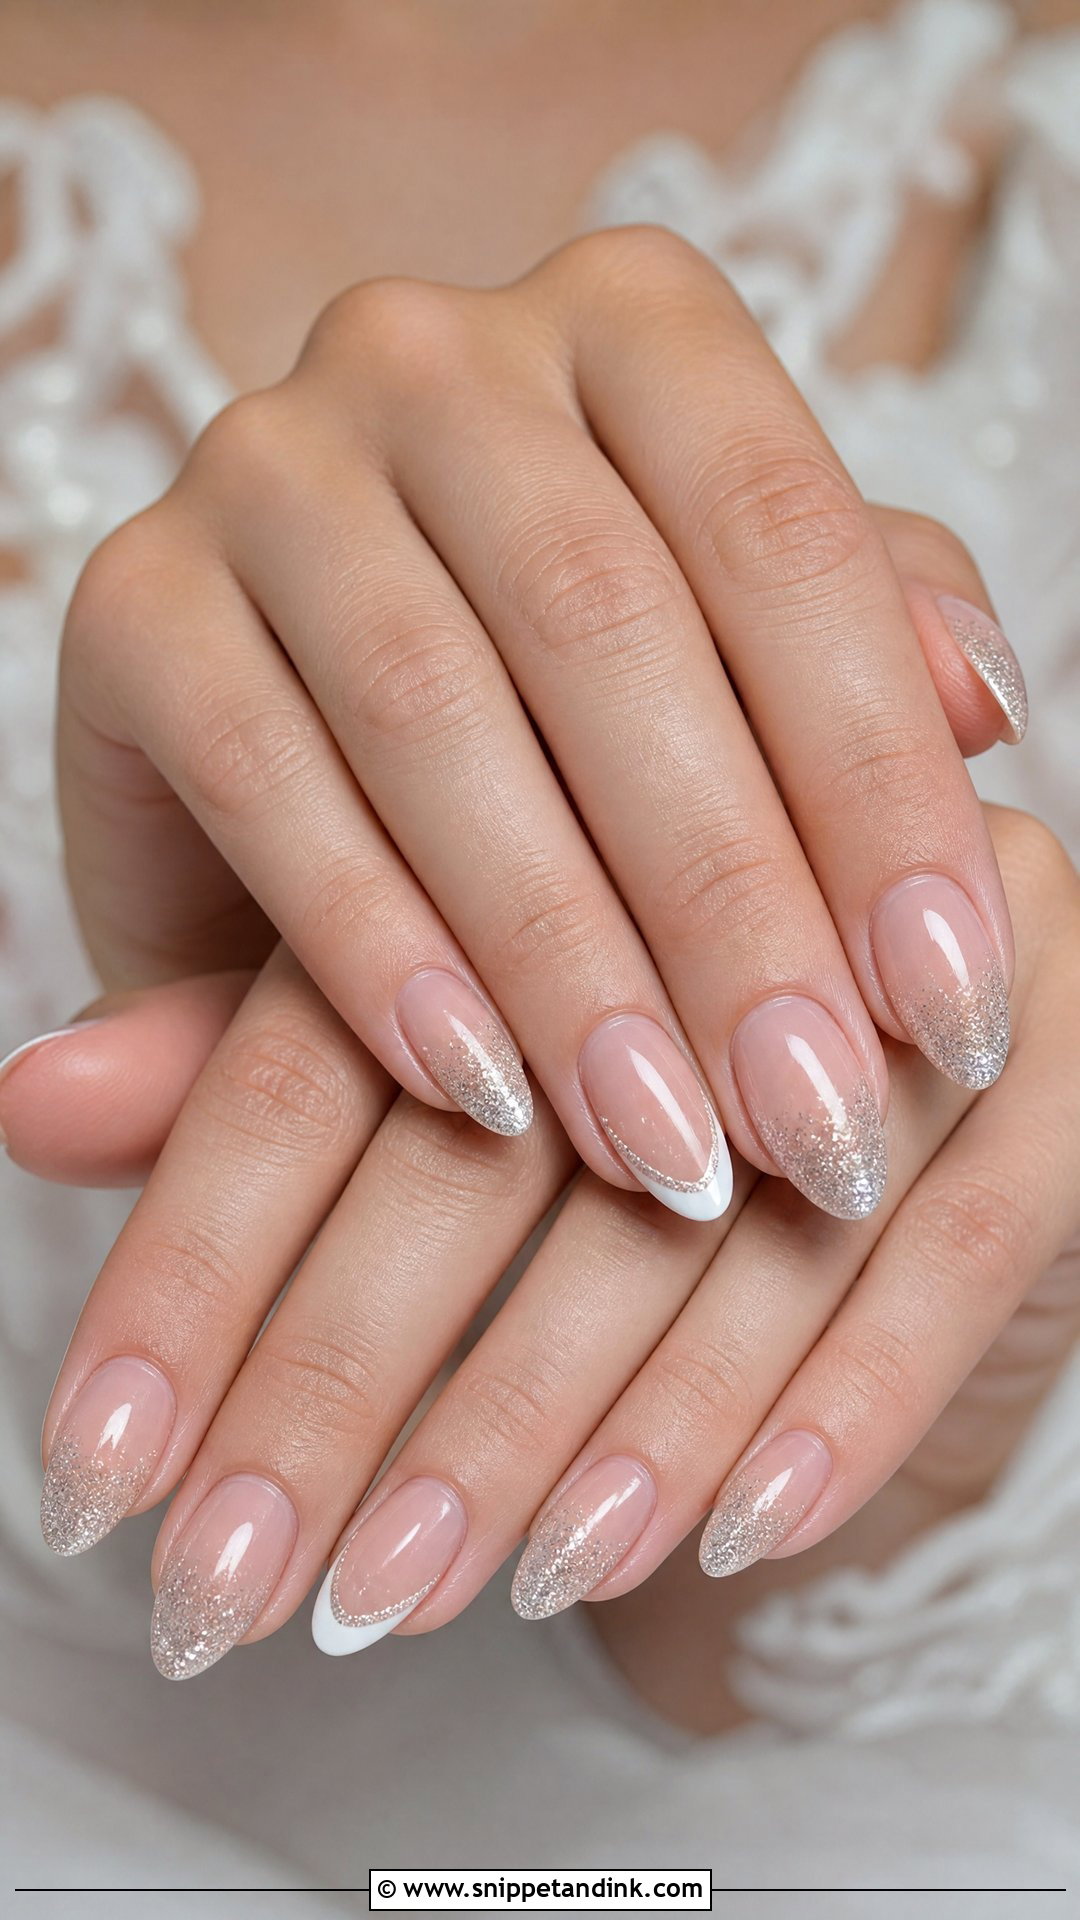
Silver glitter needs restraint at a wedding. My usual approach is a fade, dense at the tip and thinning toward the middle of the nail, over sheer pink or icy white. Fine glitter turns into a soft shimmer under flash; chunky hex glitter photographs as specks and leaves a bumpy surface unless I level it with builder gel. It makes the most sense with platinum, white gold and diamonds. One honest warning: glitter is the slowest gel to soak off, so plan a longer removal appointment after the honeymoon.
10. Champagne Wedding Nails
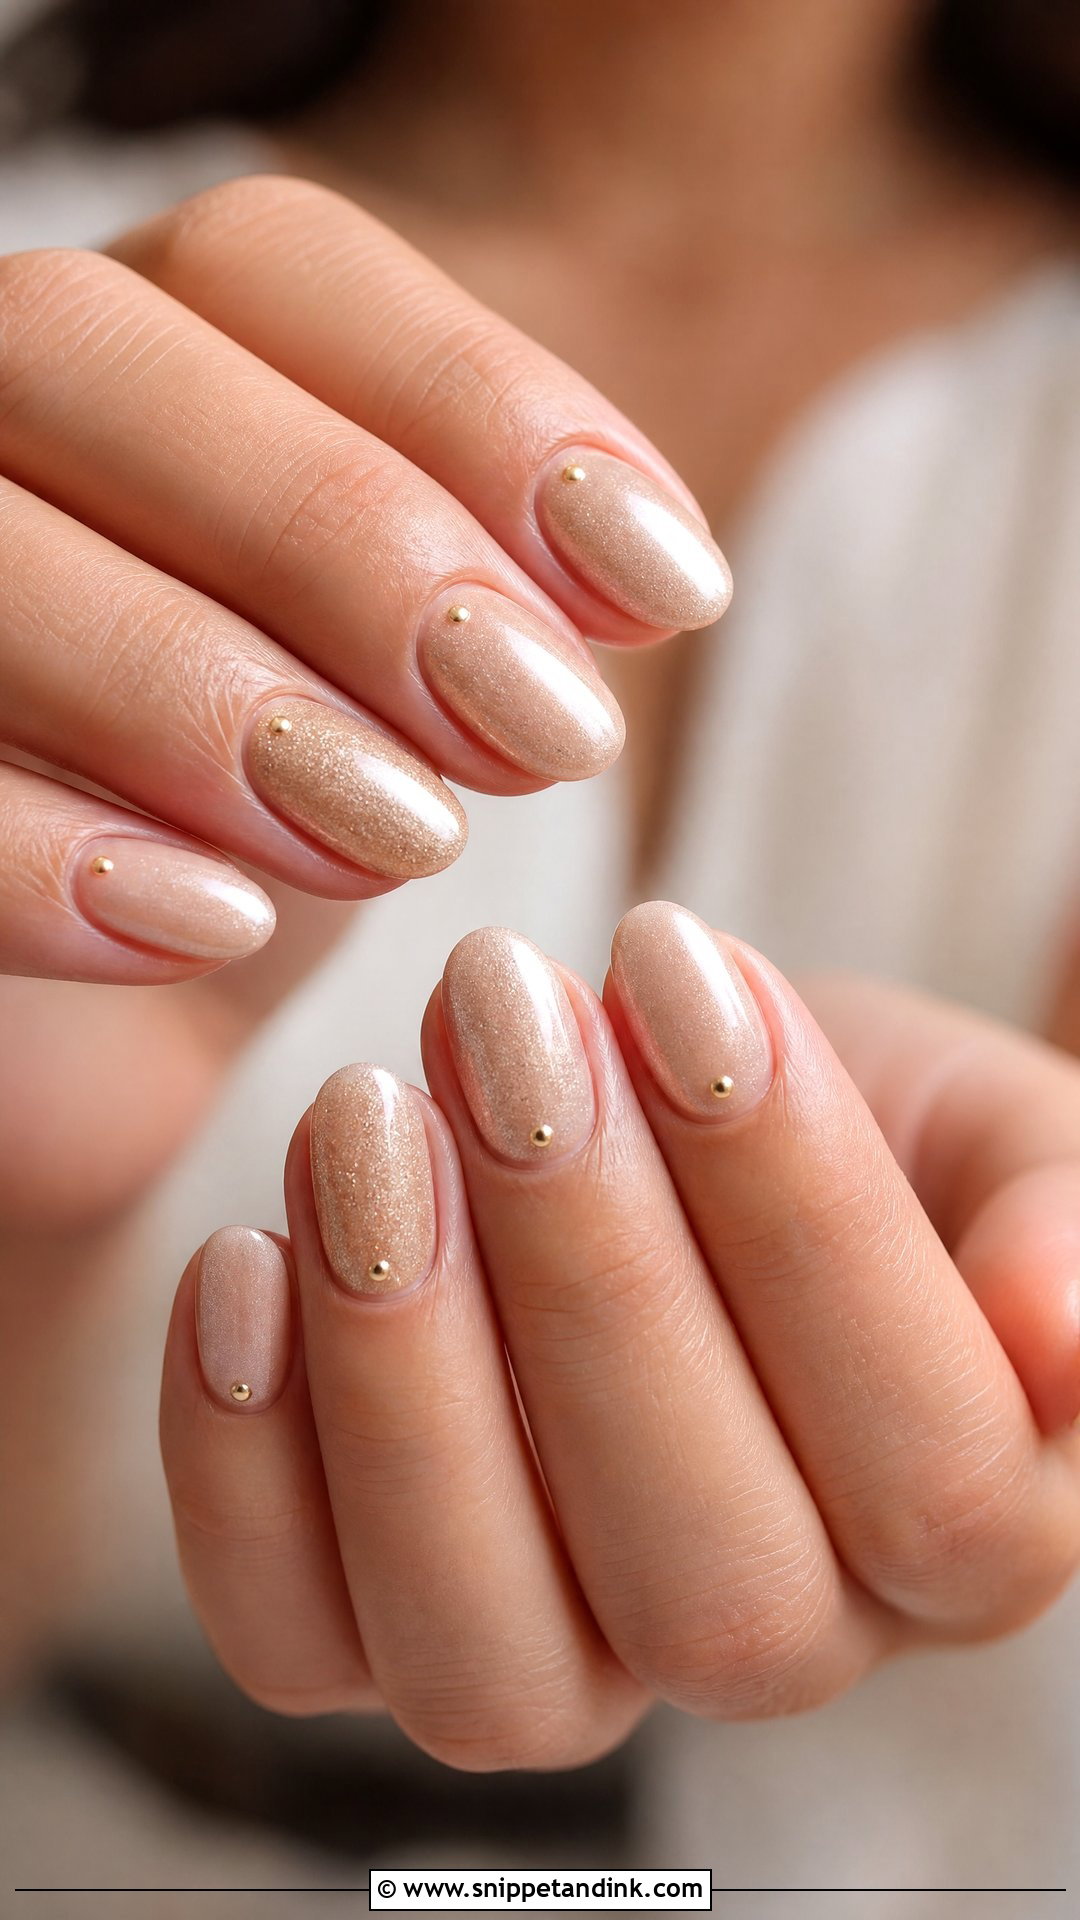
Champagne sits between beige and gold, which makes it the answer for brides who find white too bright and nude too flat. A sheer champagne polish gives a wash of warmth, and a fine metallic gel gives more shine. It flatters medium, olive, tan and deep skin, and for fair hands I mix it a little lighter with milky white so it doesn’t look yellow. A row of tiny gold dots along the cuticle line turns it into something close to jewelry. Ask for a satin top coat if high gloss feels like too much.
11. Something Blue Wedding Nails
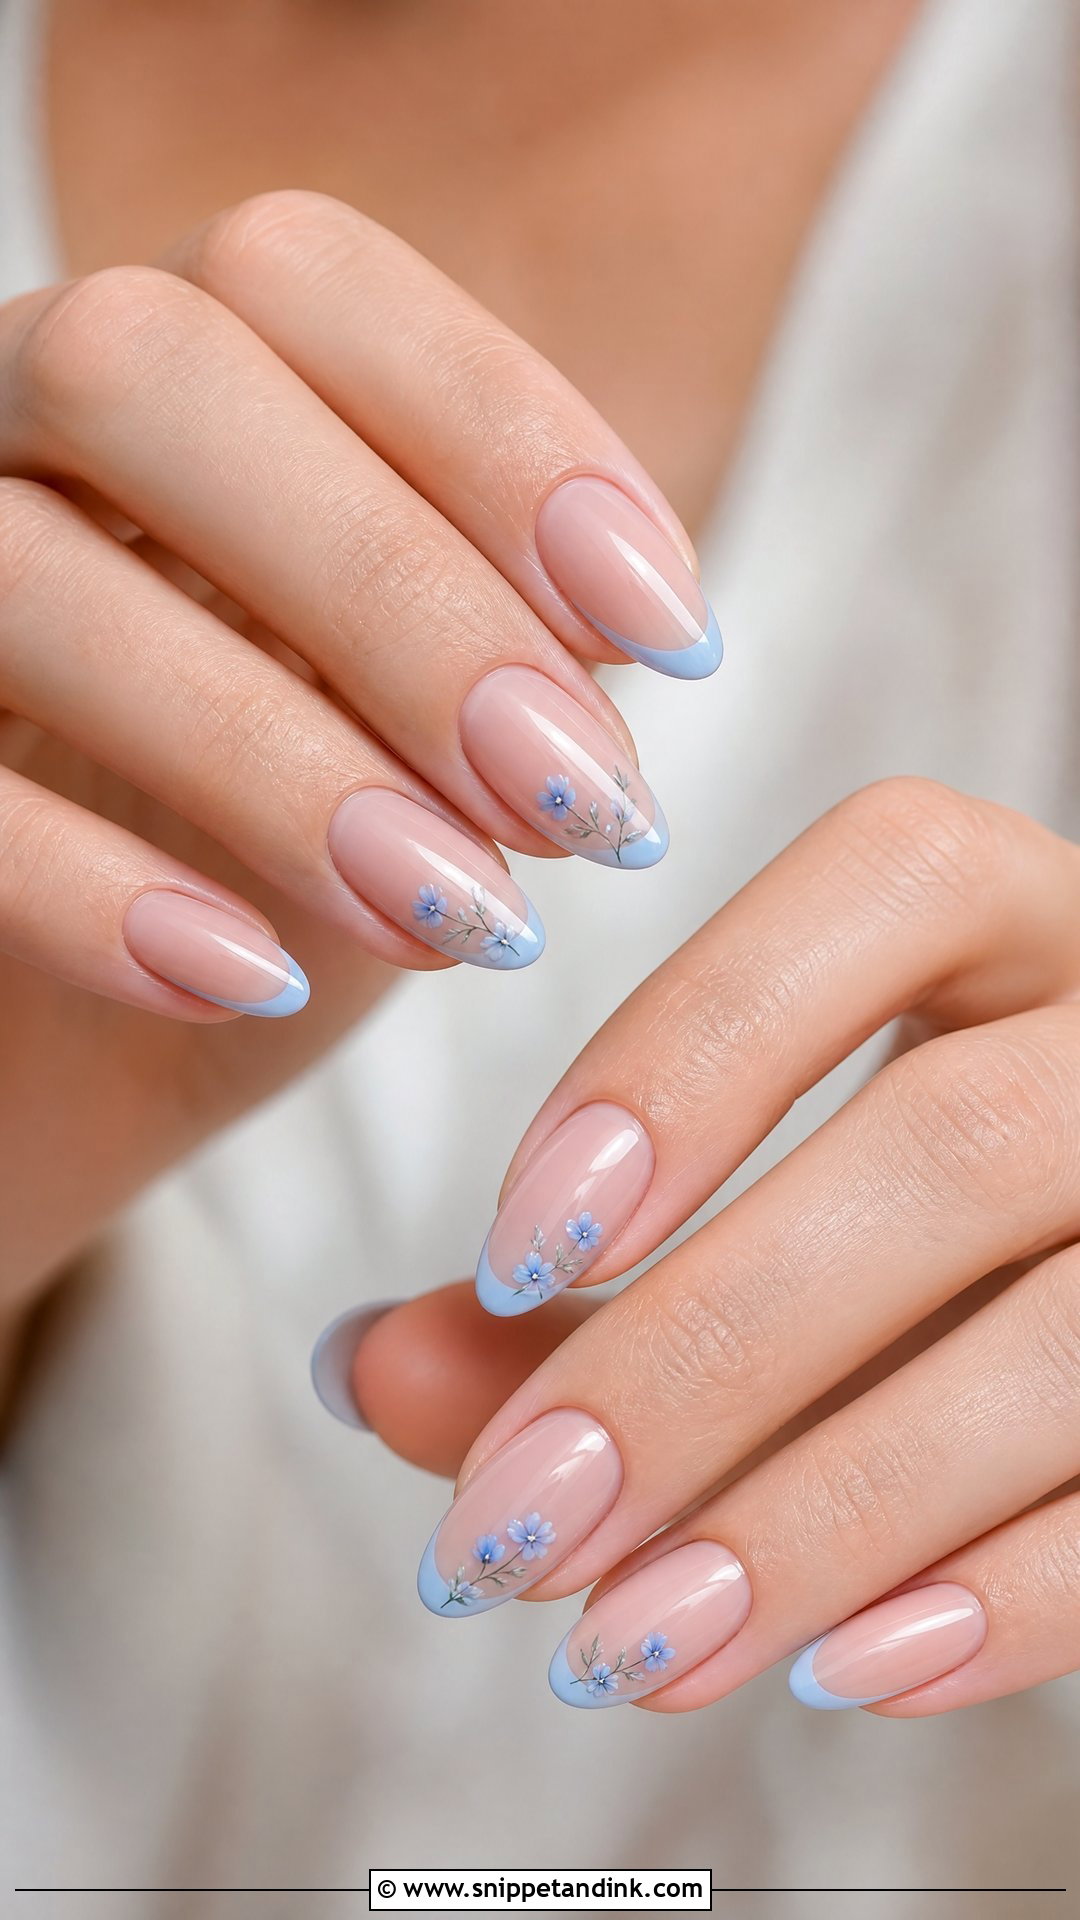
Something blue works as an accent, not a whole set. The versions I like best are a powder blue micro French over sheer nude, a few tiny forget-me-nots, or one dusty blue nail under a glazed top coat. Bright cobalt fights with most white dresses in photos, while muted blues sit next to ivory without looking like an accident. Short square nails make blue tips look graphic and fresh; almond softens them. If your shoes or bouquet already carry a cool tone, match the blue to that and your hands tie into the rest of the picture.
12. Bow Wedding Nails
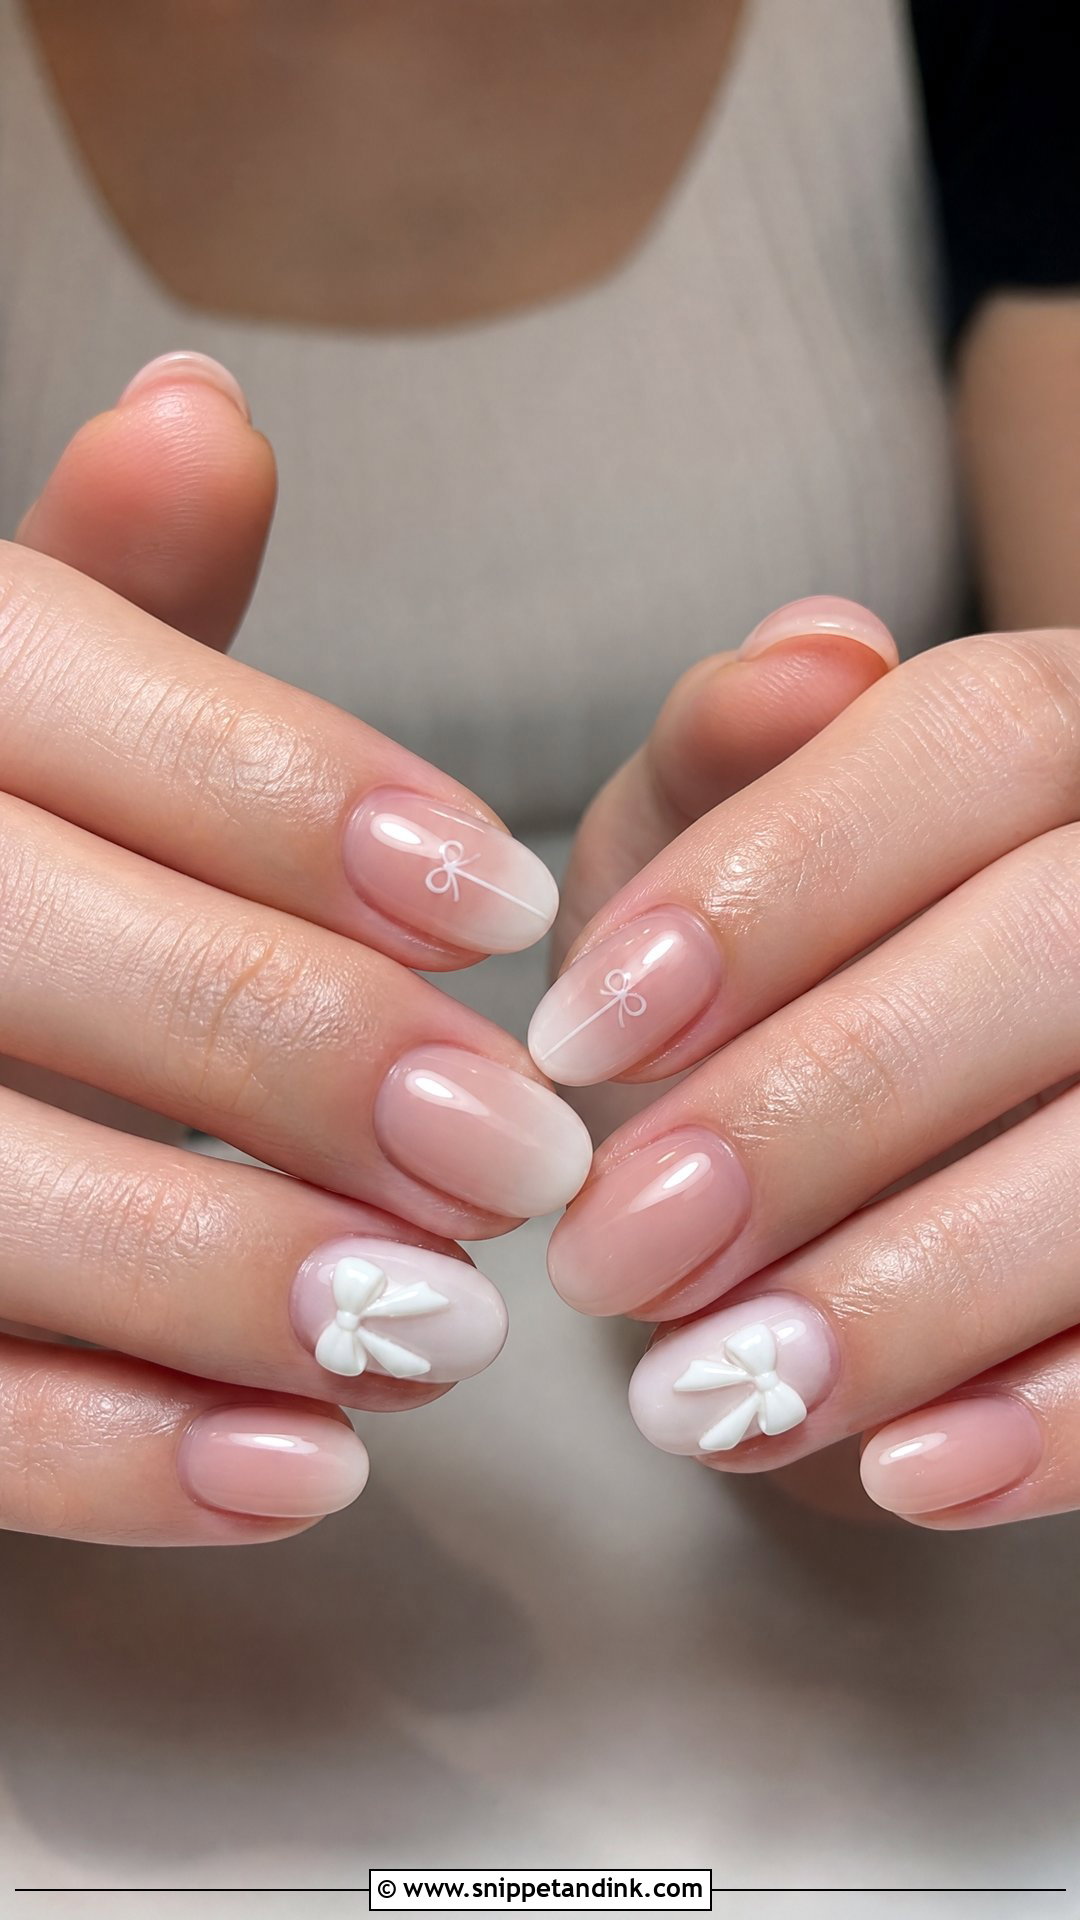
Bows are everywhere right now, and they tip from chic to childish quickly. I keep them small, symmetrical and on one or two nails per hand, either painted flat near the tip or built as a tiny 3D gel bow on the ring finger. A raised bow sits proud of the nail and catches strands when you push your hair back, so brides wearing their hair down usually do better with the flat painted version. A sheer pink or milky base keeps it bridal. If your dress has a bow at the back, this is a quiet nod to it.
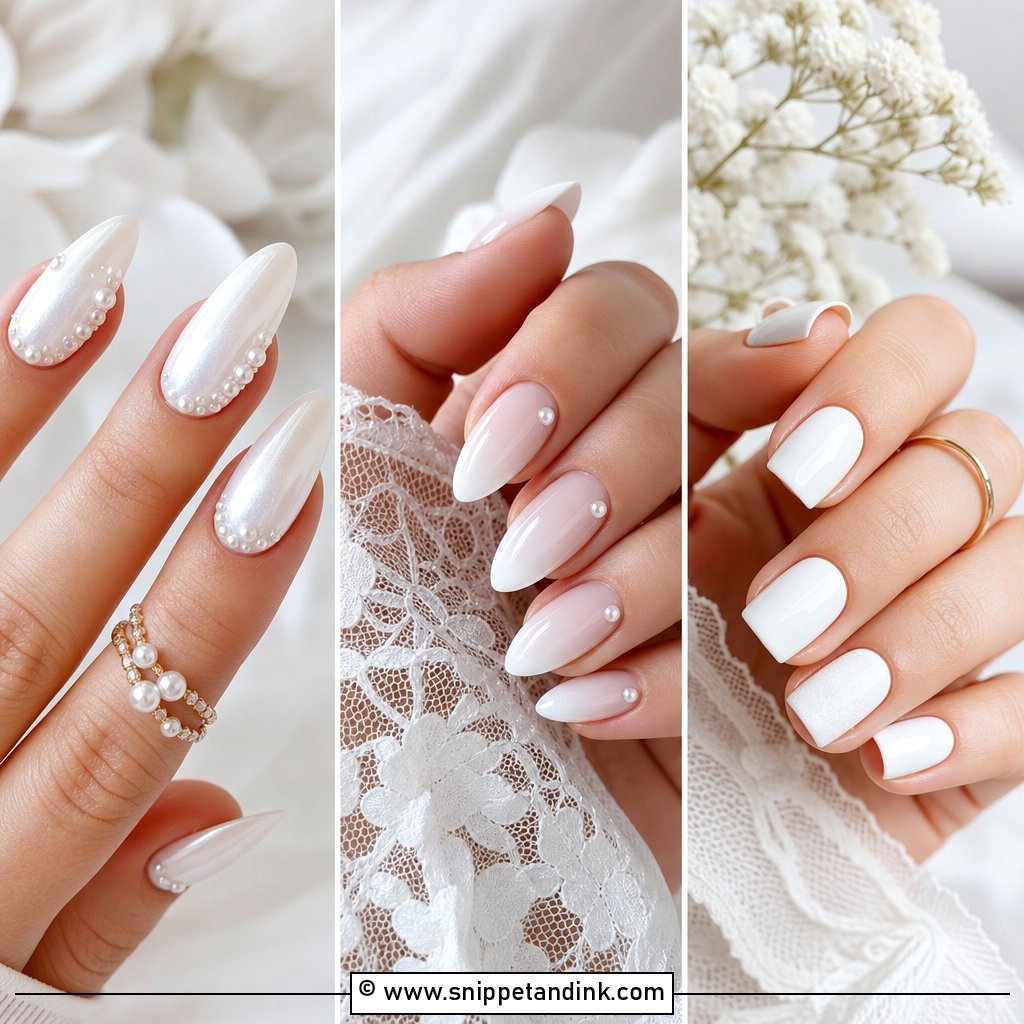
13. 3D Pearl Wedding Nails
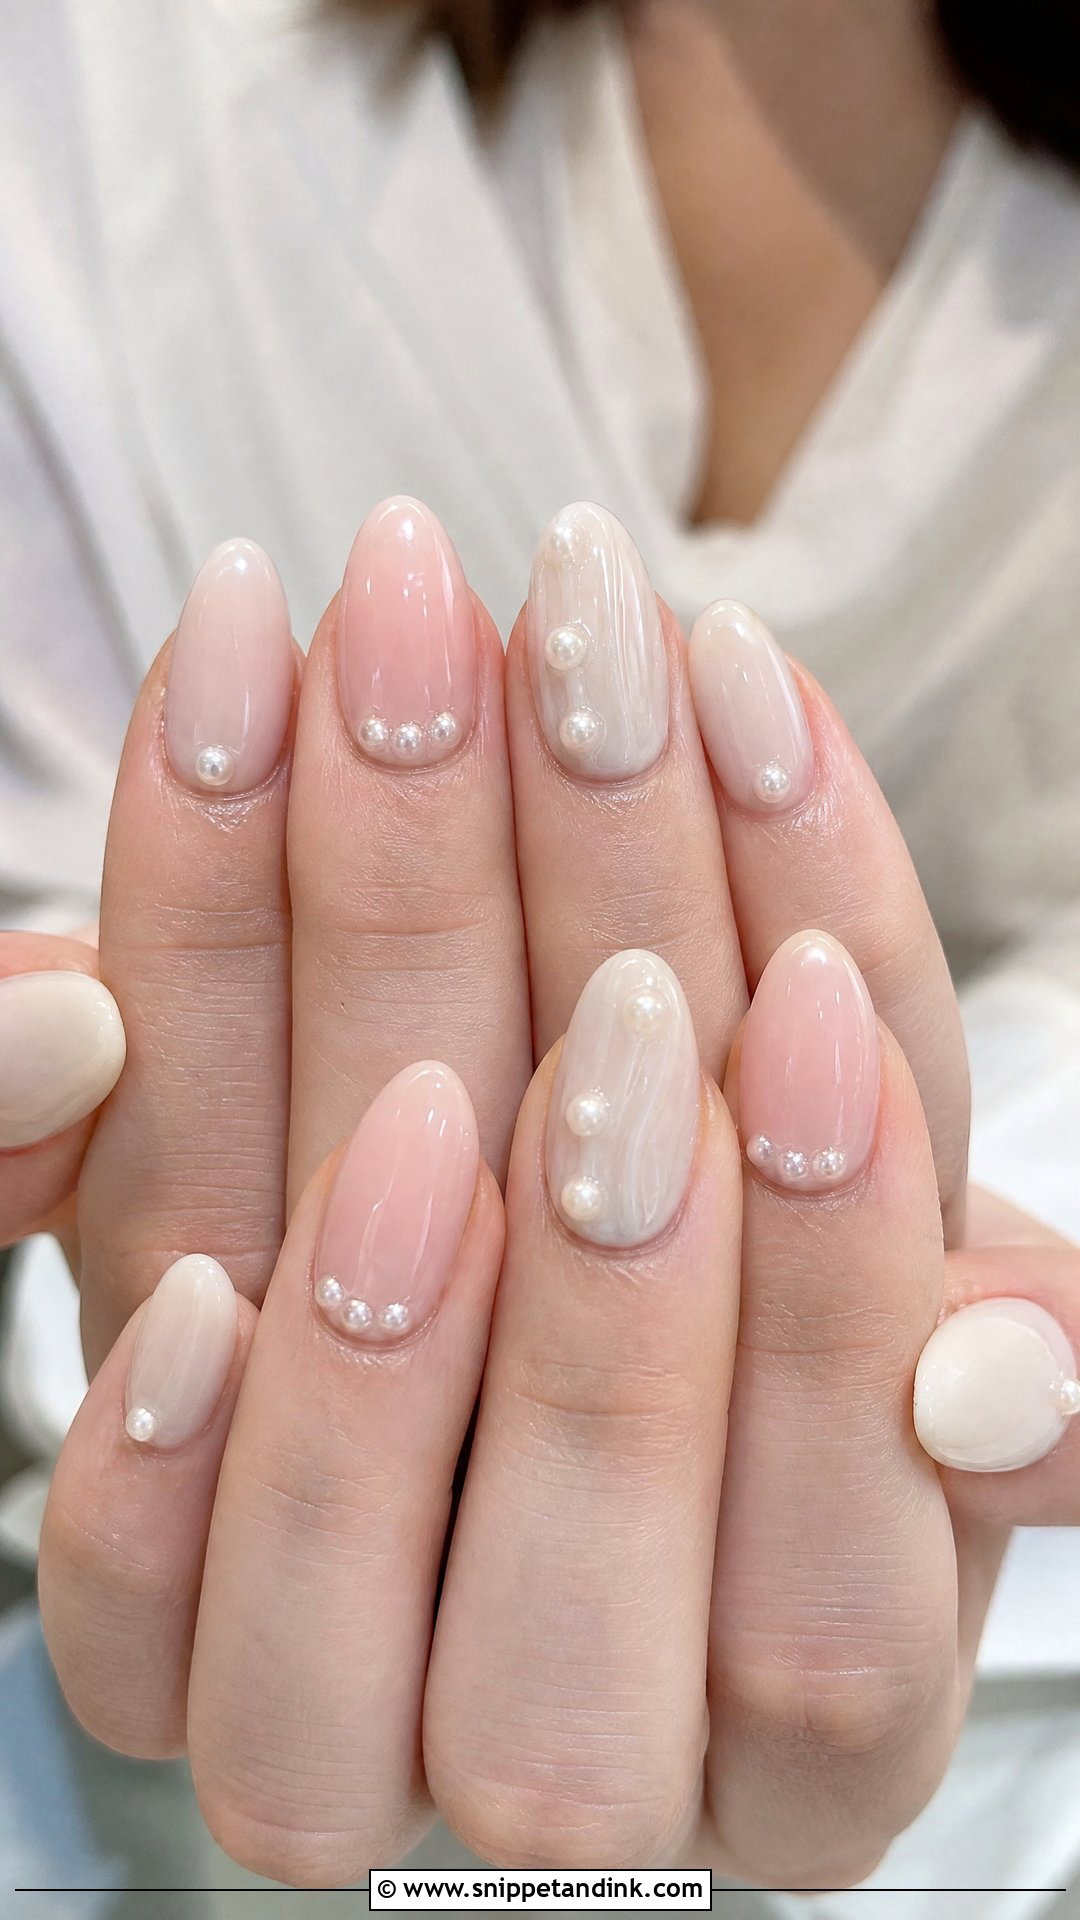
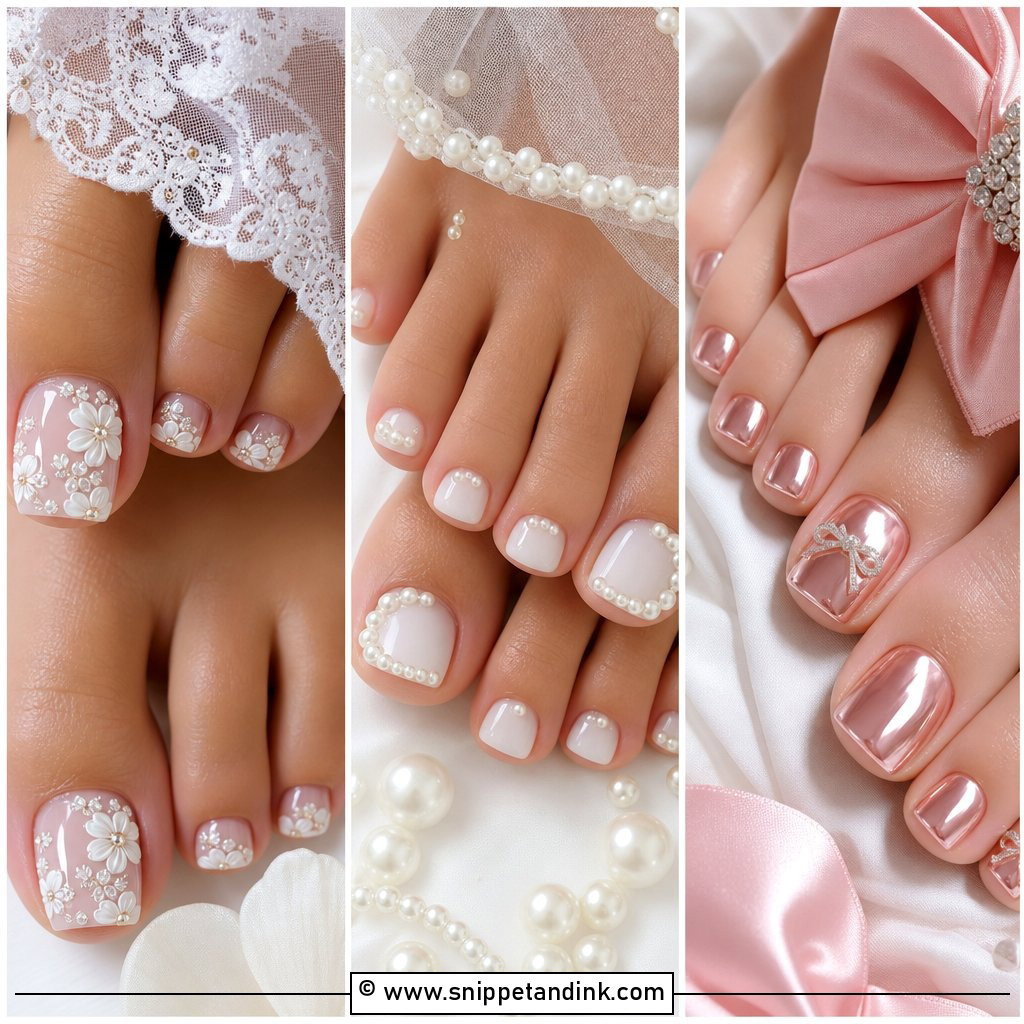
3D pearls give you texture you can actually feel. I set flat-backed pearls into a bead of builder gel, flash cure, then build gel up around the base so no edge is left exposed. Exposed edges are what snag veils and lace sleeves, and a pearl that drops off mid-reception was nearly always sitting on top coat alone. Placement at the cuticle, down one sidewall or on a single accent nail per hand keeps them wearable. Almond, coffin and oval shapes give the pearls room to sit. Wear them with pearl earrings or hairpins and the whole look reads as planned.
14. Marble Wedding Nails
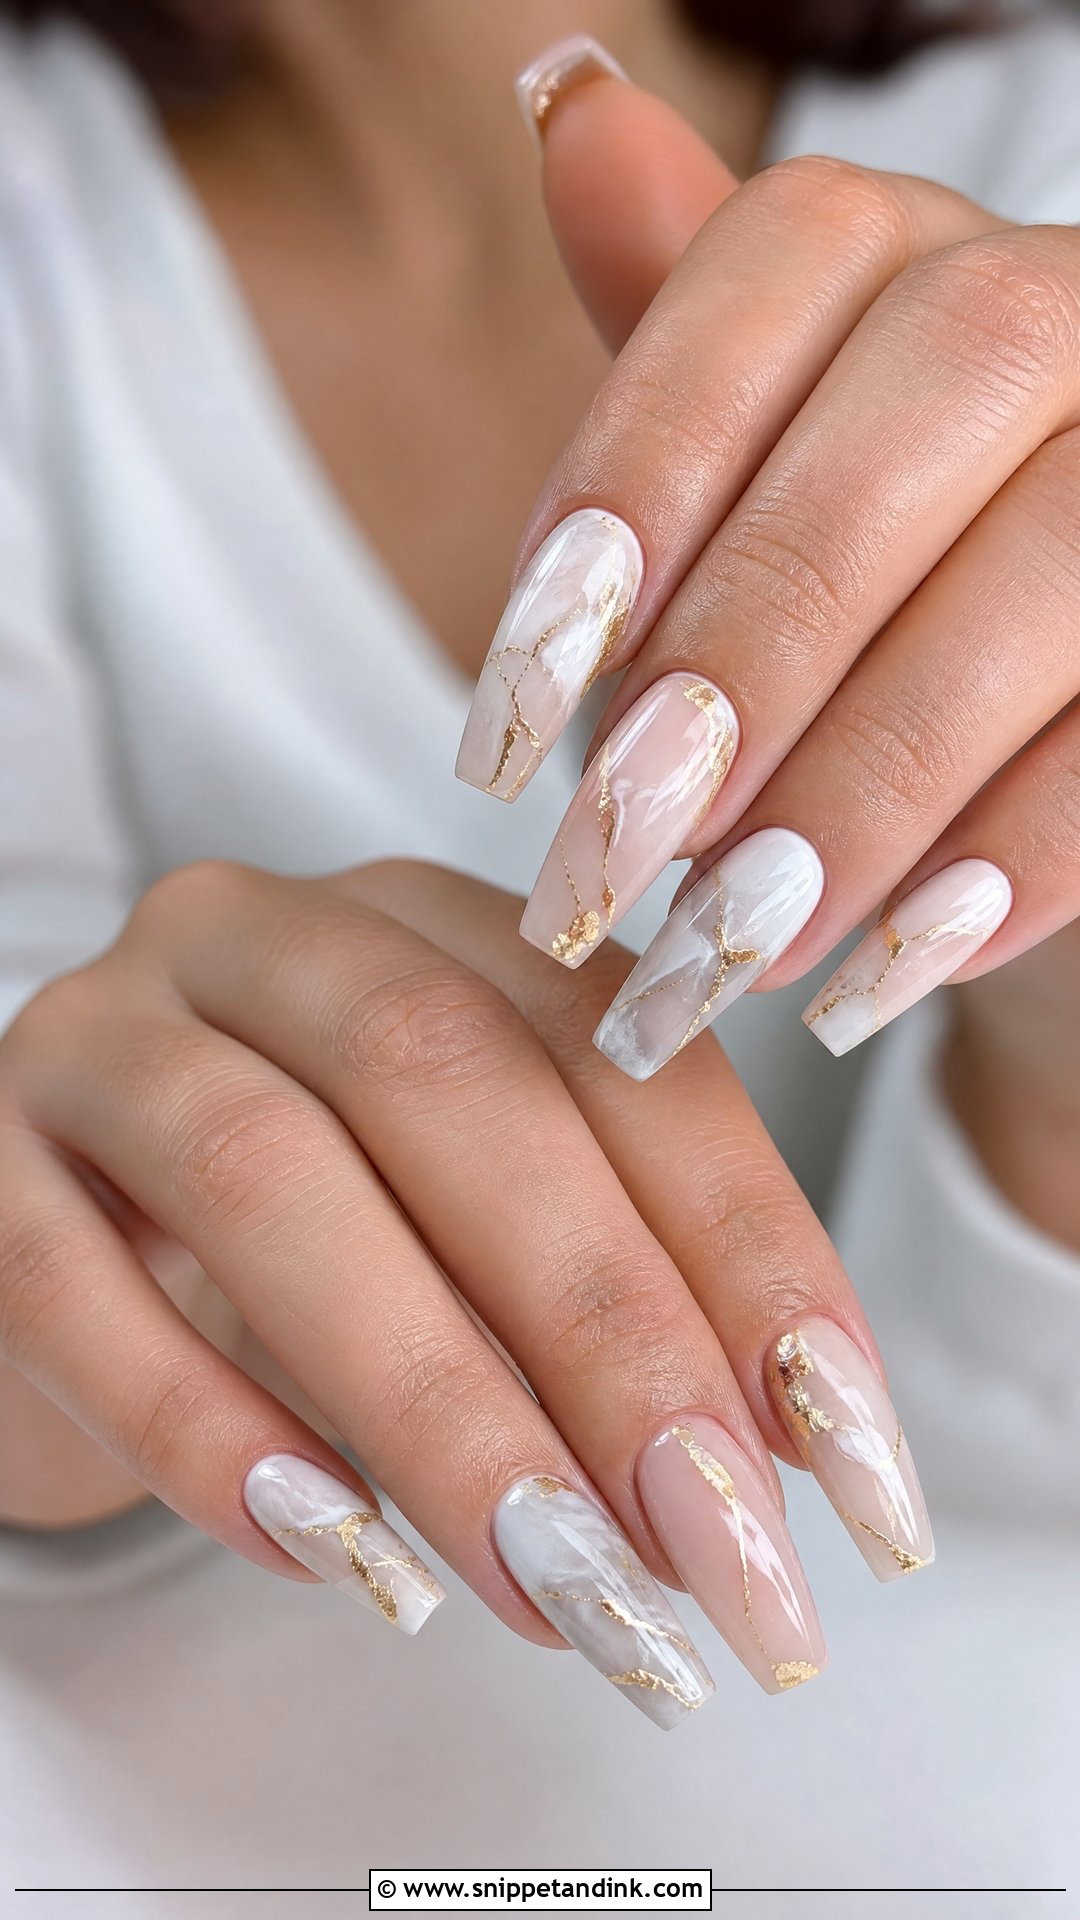
Marble wedding nails work when the veining looks like real stone: thin, broken, cloudy lines in grey or blush over white or ivory, never bold black streaks. I drop diluted color into wet gel and drag it with a fine brush, so no two nails come out the same, and that is the charm of it. A full marble set is a fashion statement of its own. Two marble accents with the rest in milky nude is easier to wear with a detailed dress. A few flecks of gold or silver foil caught inside the veins add warmth without shouting. Give it medium to long almond, oval or coffin nails so the pattern has room to run.
15. Cat Eye Wedding Nails
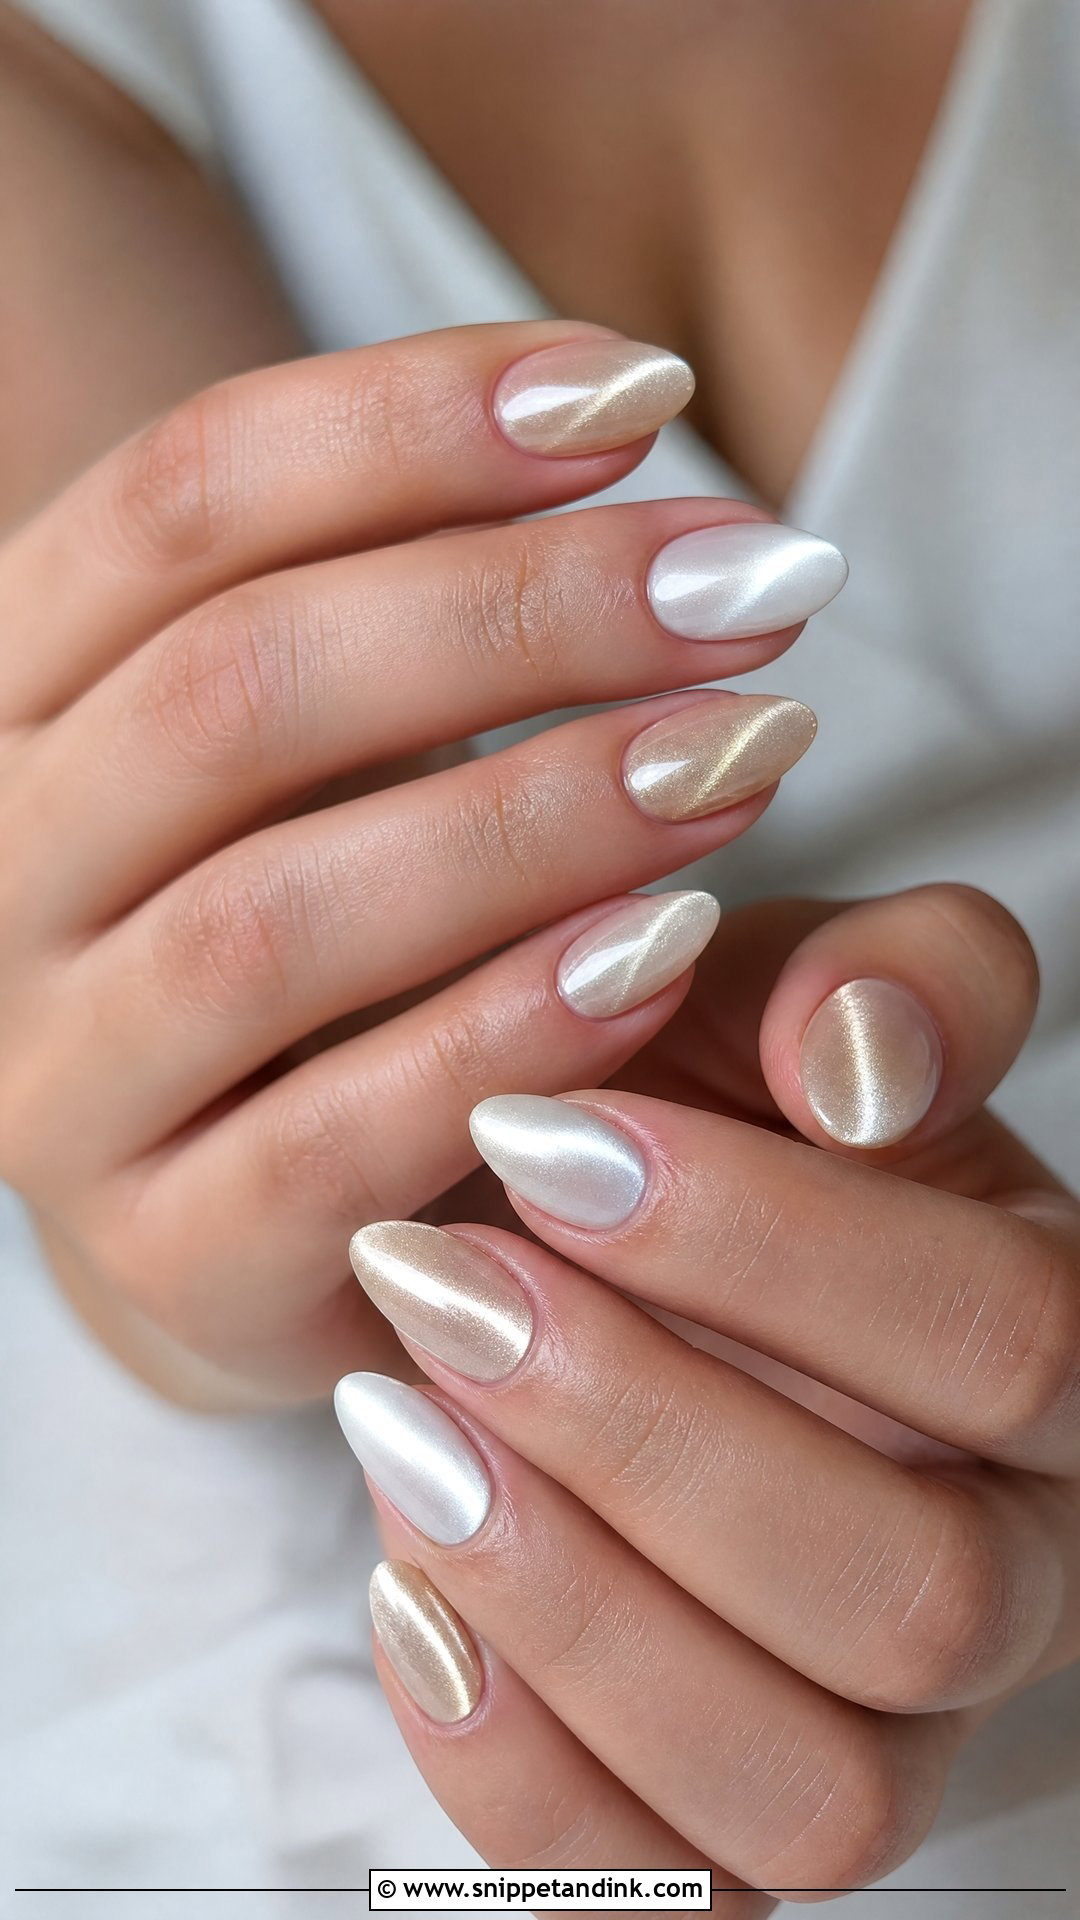
Cat eye uses a magnetic gel packed with fine metal particles. Before curing, I hold a magnet over each nail to pull a band of light into place, and because that band shifts as your hand moves, it comes alive in candlelight and on video. For a wedding I reach for pearl white, pale pink, champagne or rose gold rather than the dark shades the technique is known for. The magnet goes nail by nail, and if you move your hand before the cure the line smears, so this is one to sit very still for. Almond and coffin shapes show the longest stripe.
16. White Swirl Wedding Nails
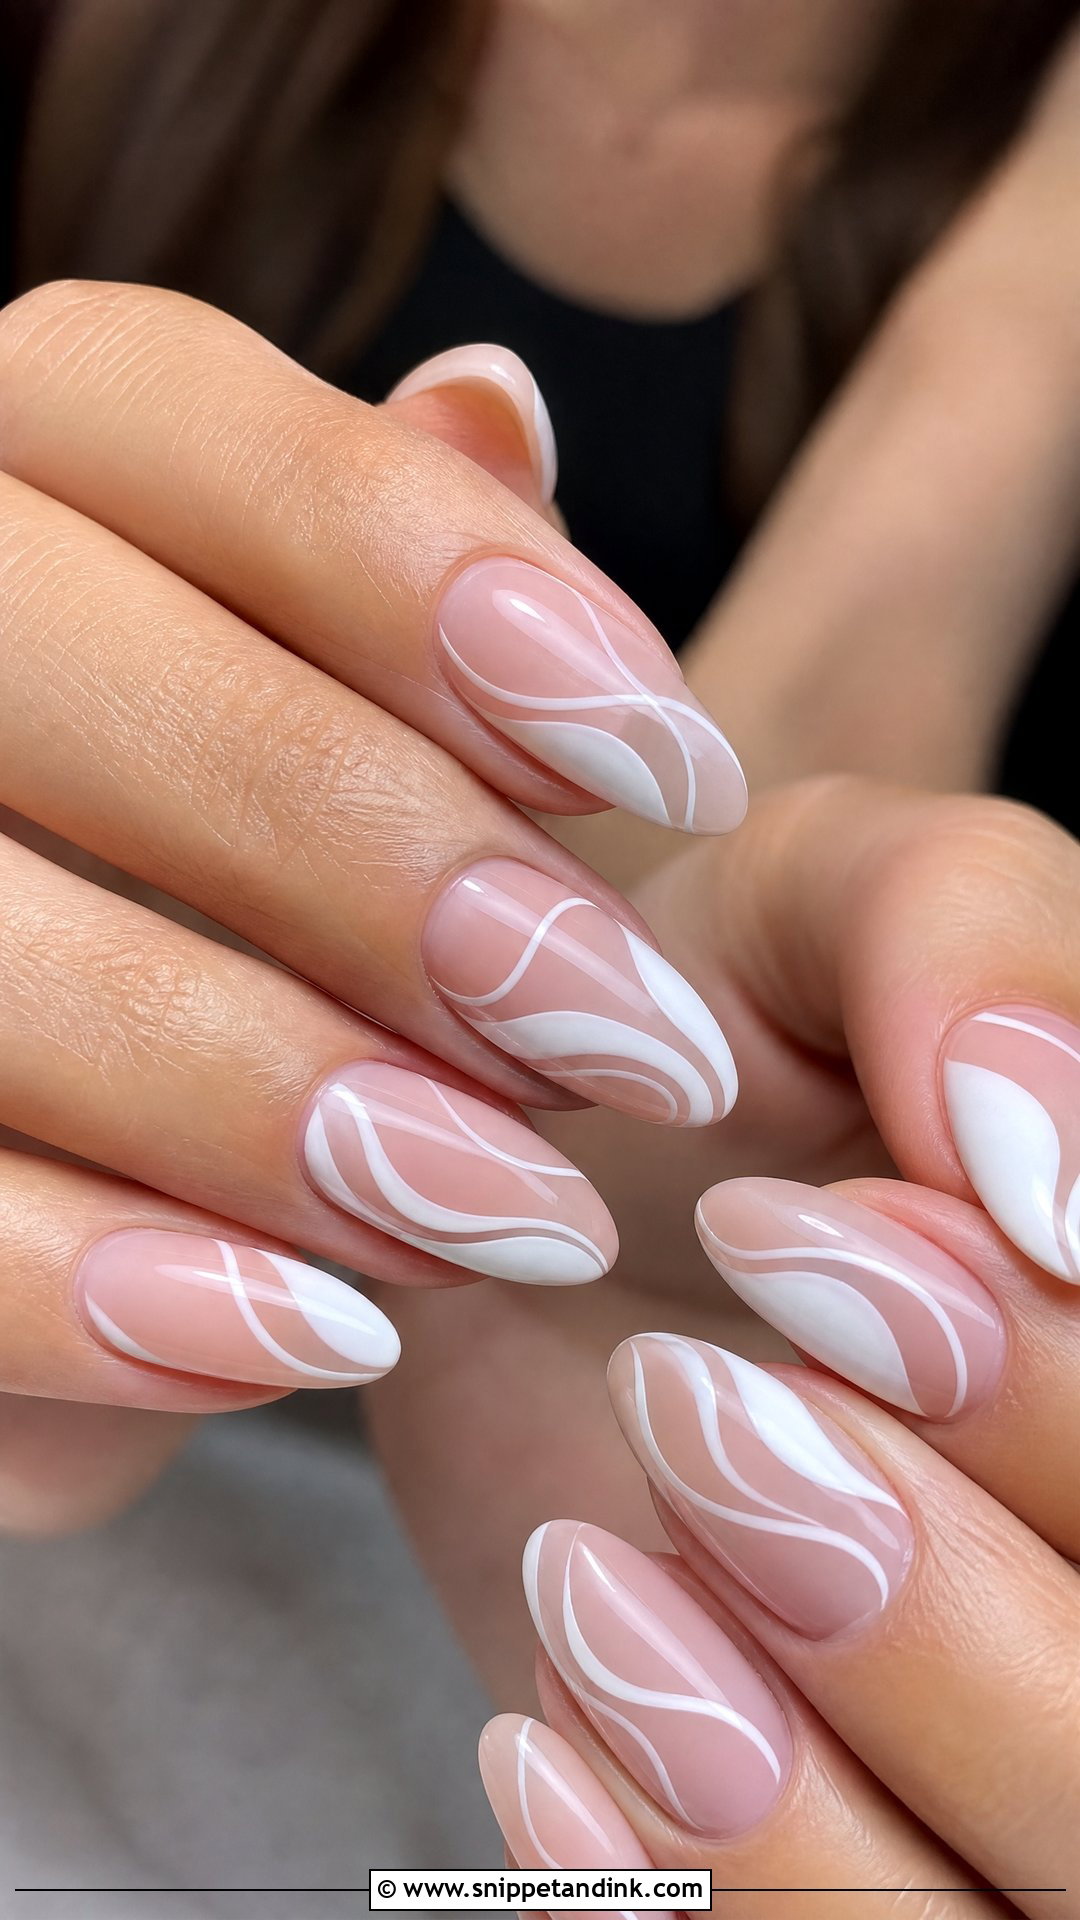
Thin white swirls are my suggestion for anyone who finds French tips too formal. I pull each curve with a long striping brush in one stroke, because a line that has been stopped and restarted shows a tiny knot. Diagonal swirls make short nails look longer, and swirls running along the tip read as a relaxed French. Oval and almond keep the curves natural; square nails turn the same line graphic. Finish with high gloss or a pearl glaze over everything.
17. Minimal Crystal Wedding Nails
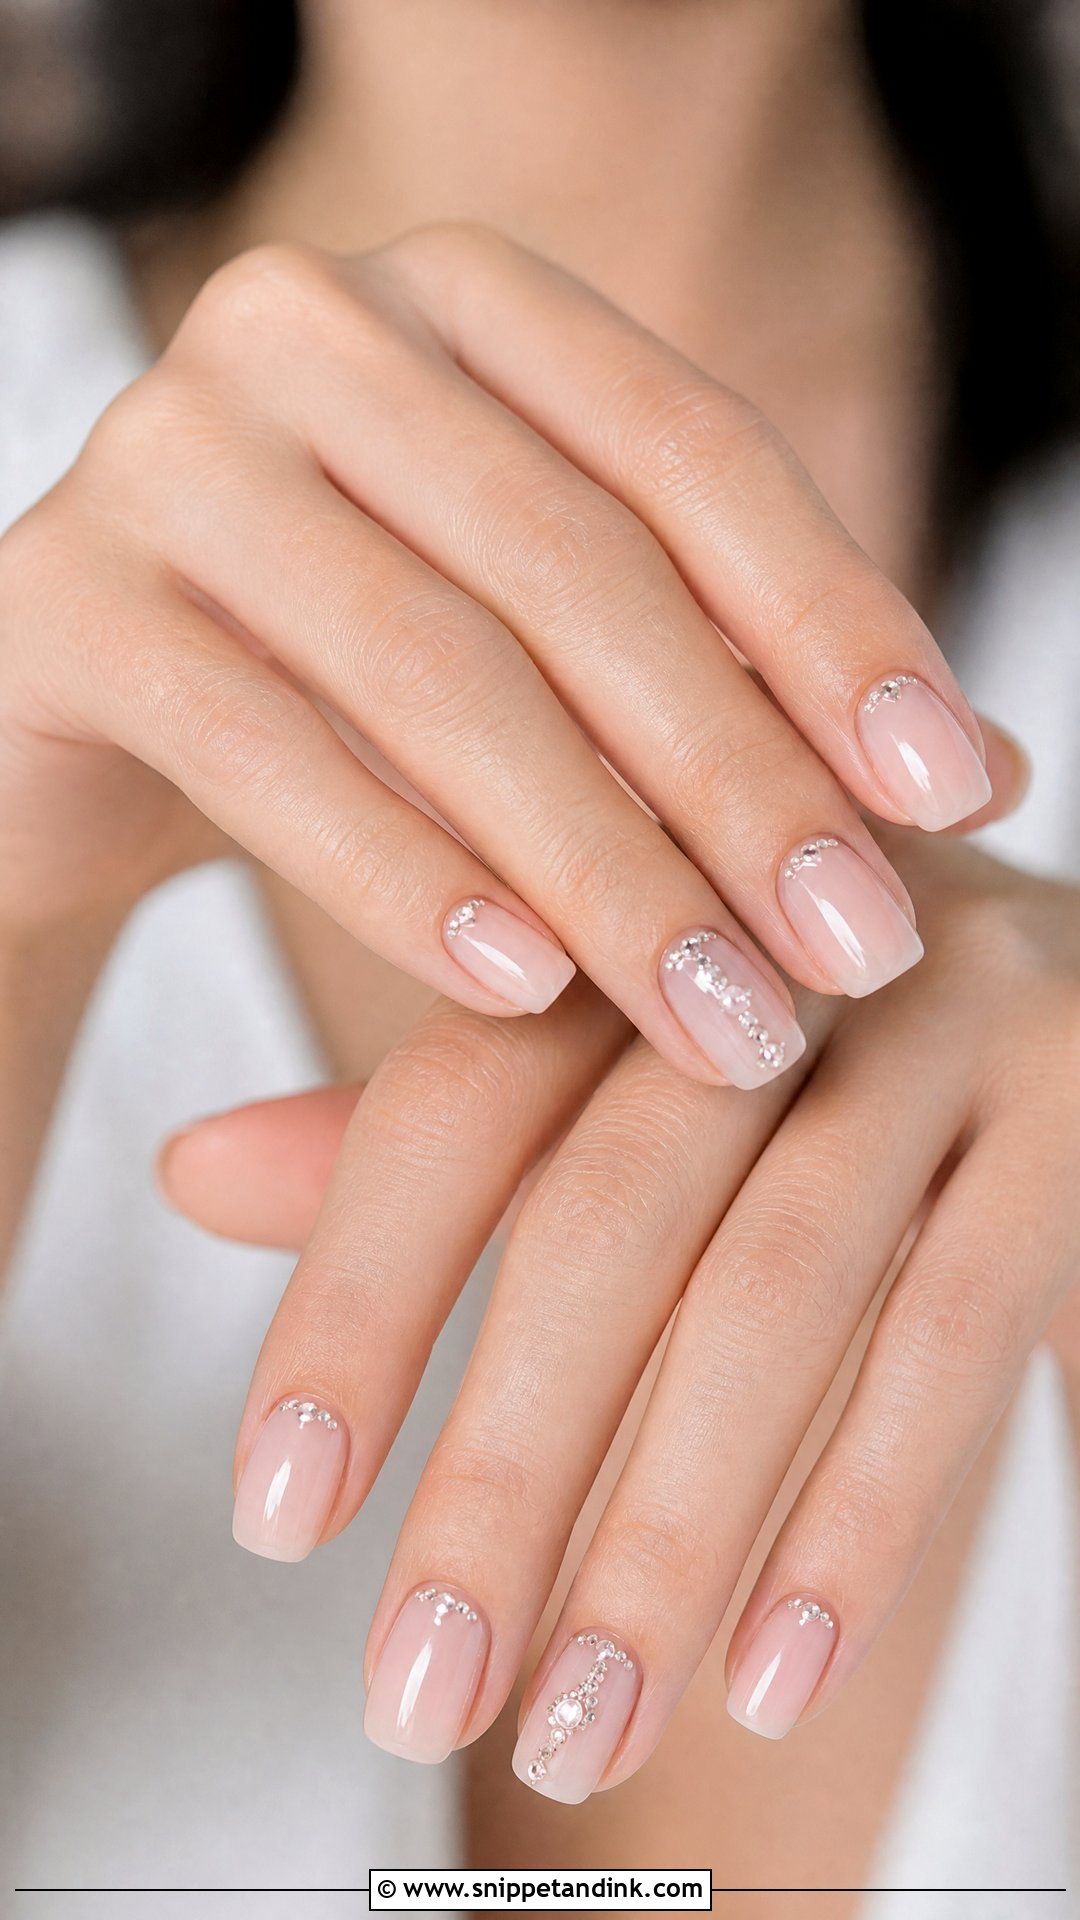
Crystals should look like a jeweler placed them. I use tiny clear or champagne stones set in builder gel at the cuticle or down one accent nail, then run gel around the stone’s edge without covering the facets, since a crystal buried under top coat loses its sparkle. Short nails take a single stone; longer ones can carry a short line. Delicate fabric is the real risk, because a raised stone pulls threads on chiffon and silk. Run a fingertip over the set before you leave the salon and say so if anything catches.
18. Micro French Wedding Nails
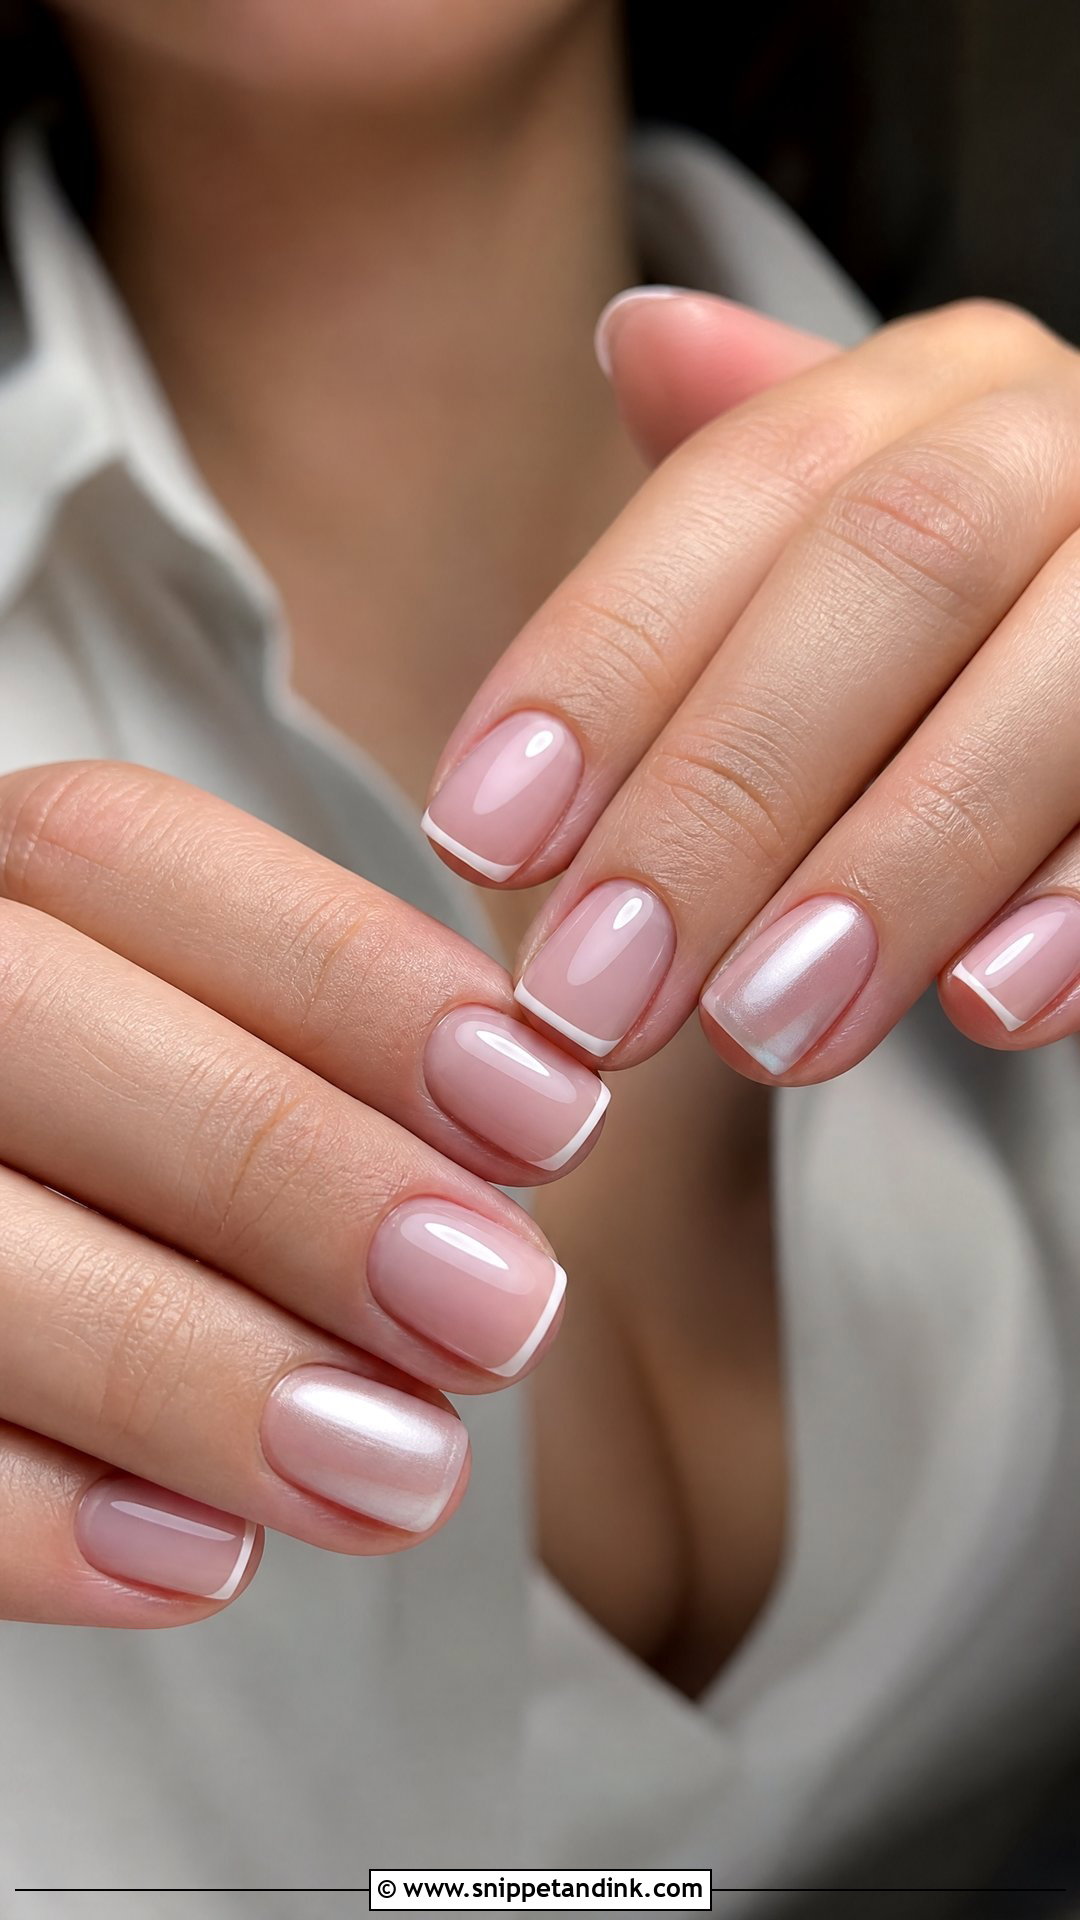
Micro French is what I reach for when a bride asks for almost nothing but still wants her hands to look finished. The tip is barely a millimeter, which defines the nail without visually shortening it, so it is the kindest French on short nail beds. White is classic, ivory and champagne soften it, and pale blue doubles as your something blue. Hand steadiness matters more here than in any other design, so only book an artist whose portfolio shows clean micro lines photographed up close. A pearl glaze on one accent nail is about as much extra as it needs.
19. Glazed Donut Wedding Nails
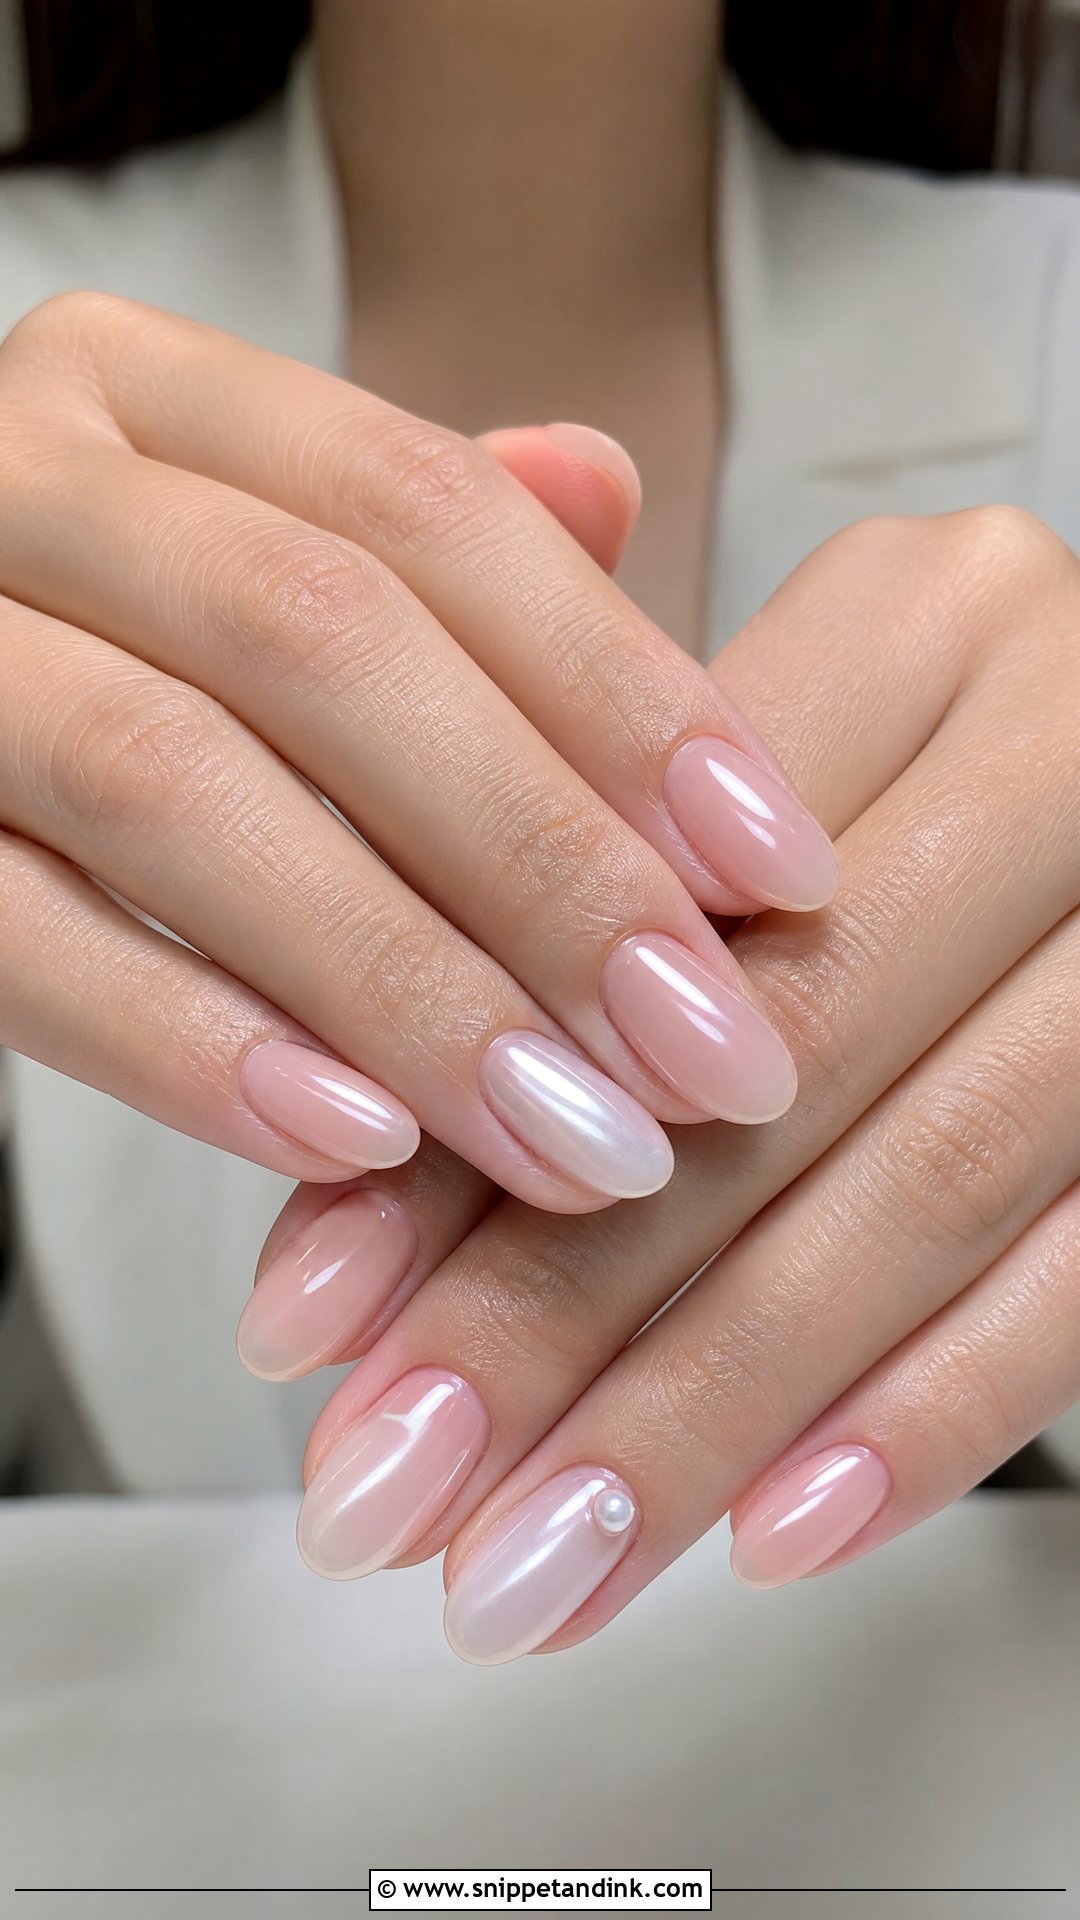
Glazed donut wedding nails are a sheer base, usually pink, milky white or nude, with a pearl chrome powder rubbed over a no-wipe top coat. I keep the powder light so it glows instead of reflecting. It suits every length, which makes it an easy pick for brides with short or bitten nails. The glaze flatters a smooth surface but exaggerates any bump underneath, so the gel below has to be level. A soft French under the glaze, or one pearl at the cuticle, makes it feel more personal.
20. Matte Nude Wedding Nails
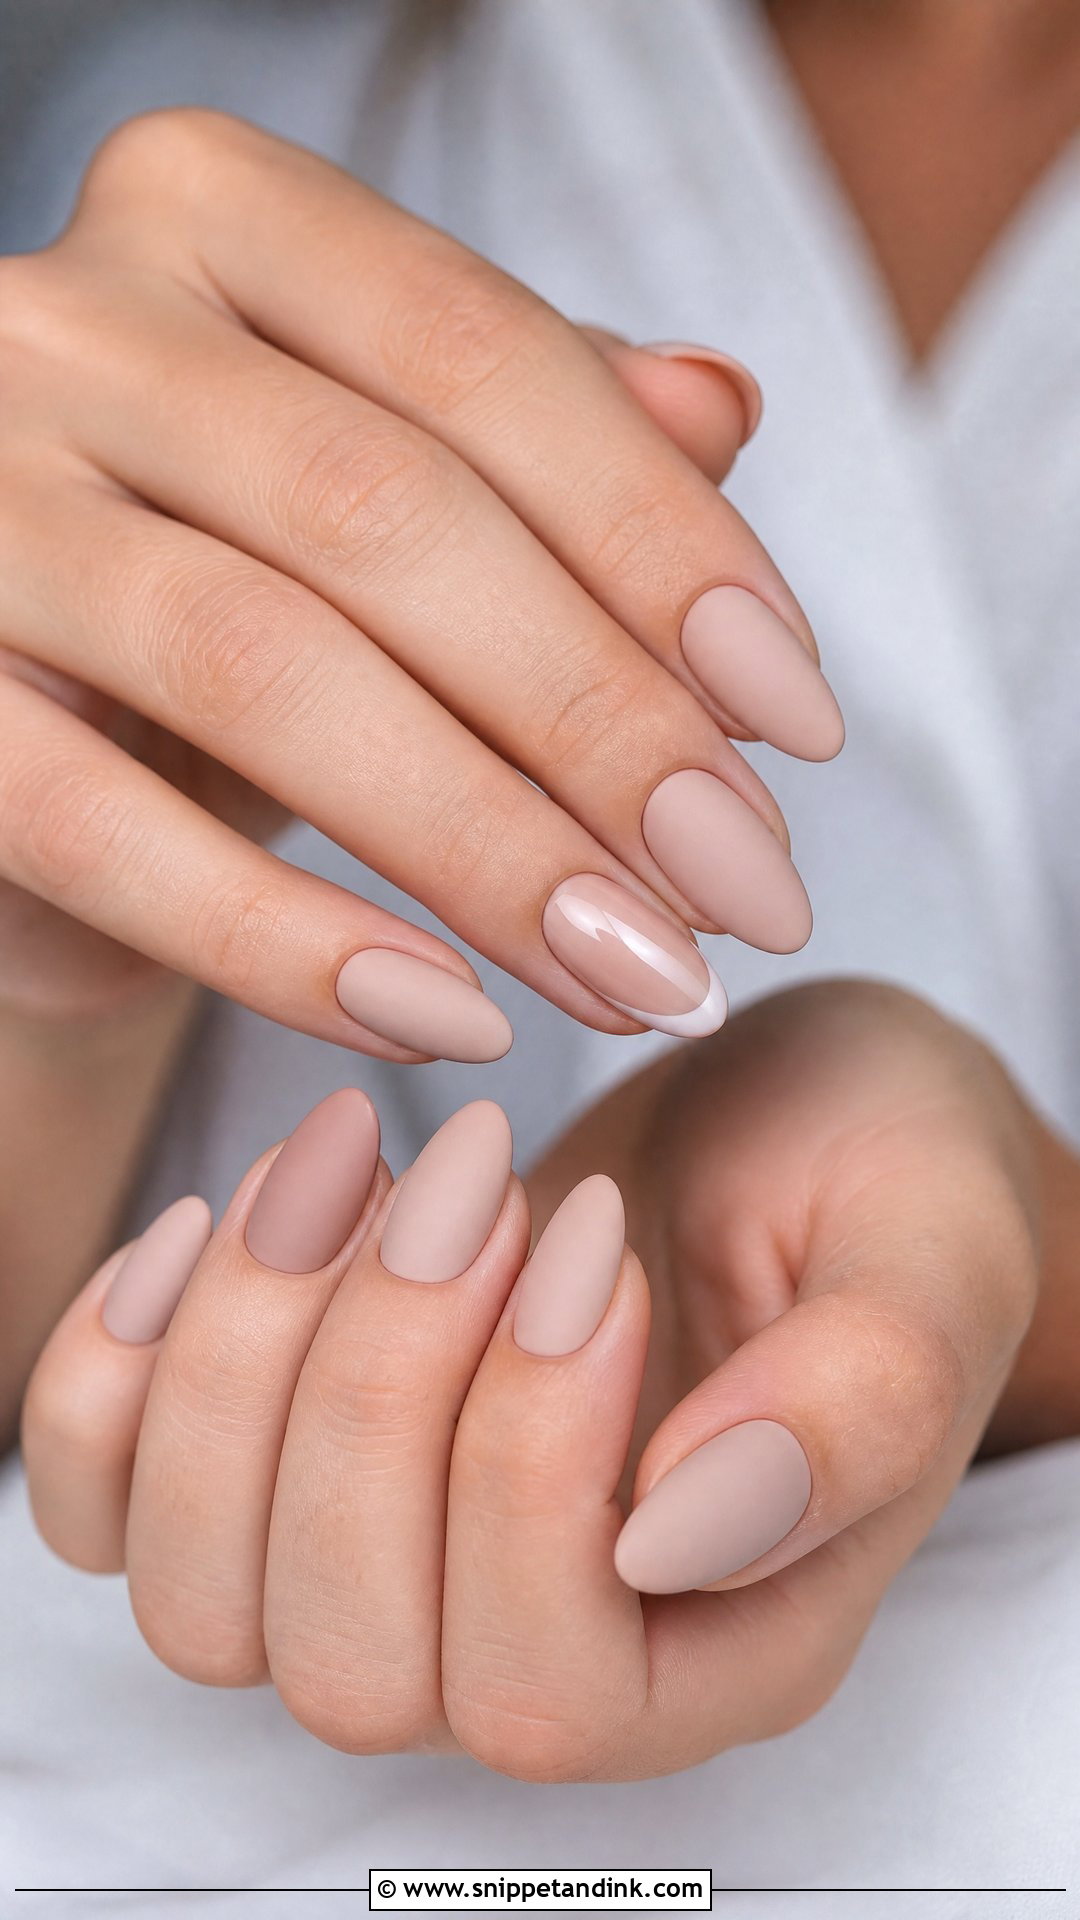
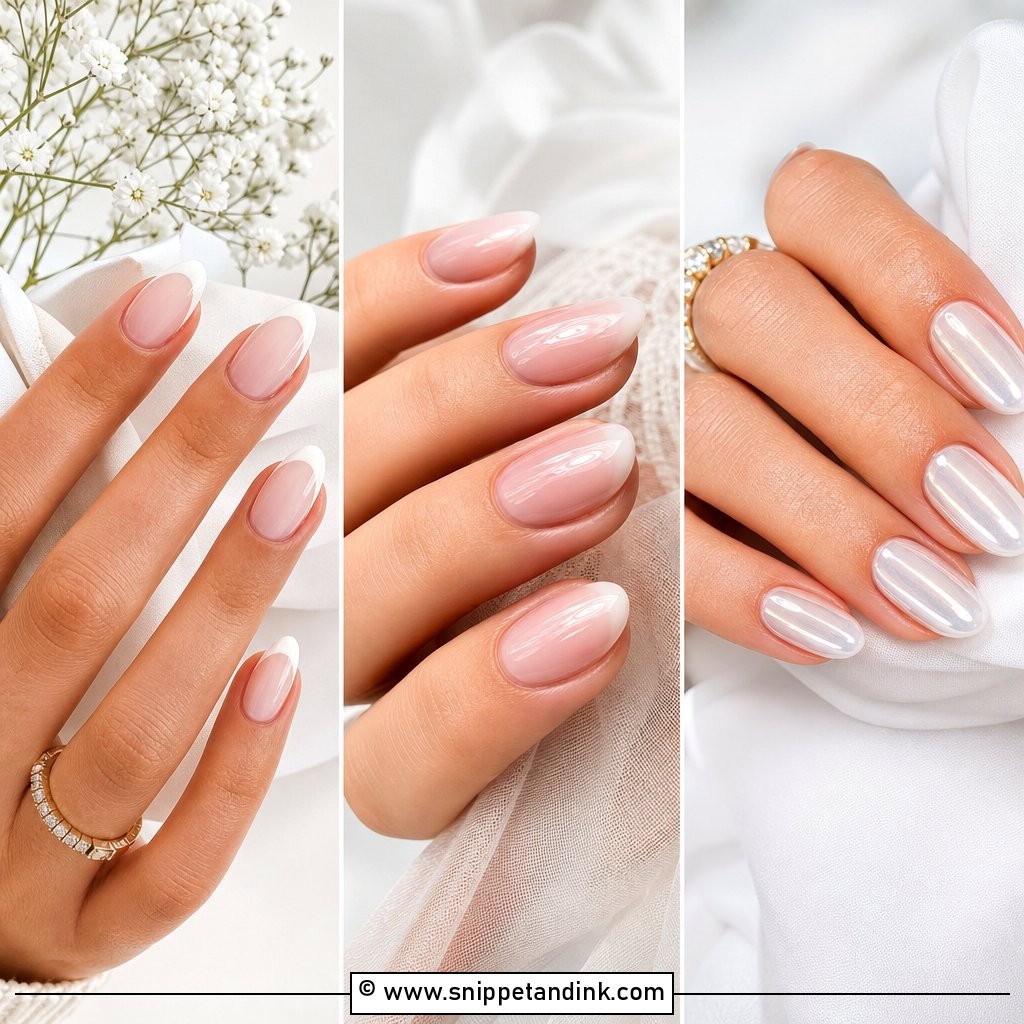
Matte nude is the set where shade choice decides everything. Too light goes chalky and makes fingers look cold; too dark can read as a different skin tone in photos. I match the nude to the skin on the back of the hand, landing somewhere among beige, pink, caramel and mauve nudes. Matte top coat picks up lint, face powder and fingerprints, and it slowly buffs itself shiny where you grip things, so I apply matte sets no earlier than a day or two before the wedding. Short square and almond shapes suit it, and one glossy French accent breaks up the flatness.
21. Rose Gold Wedding Nails
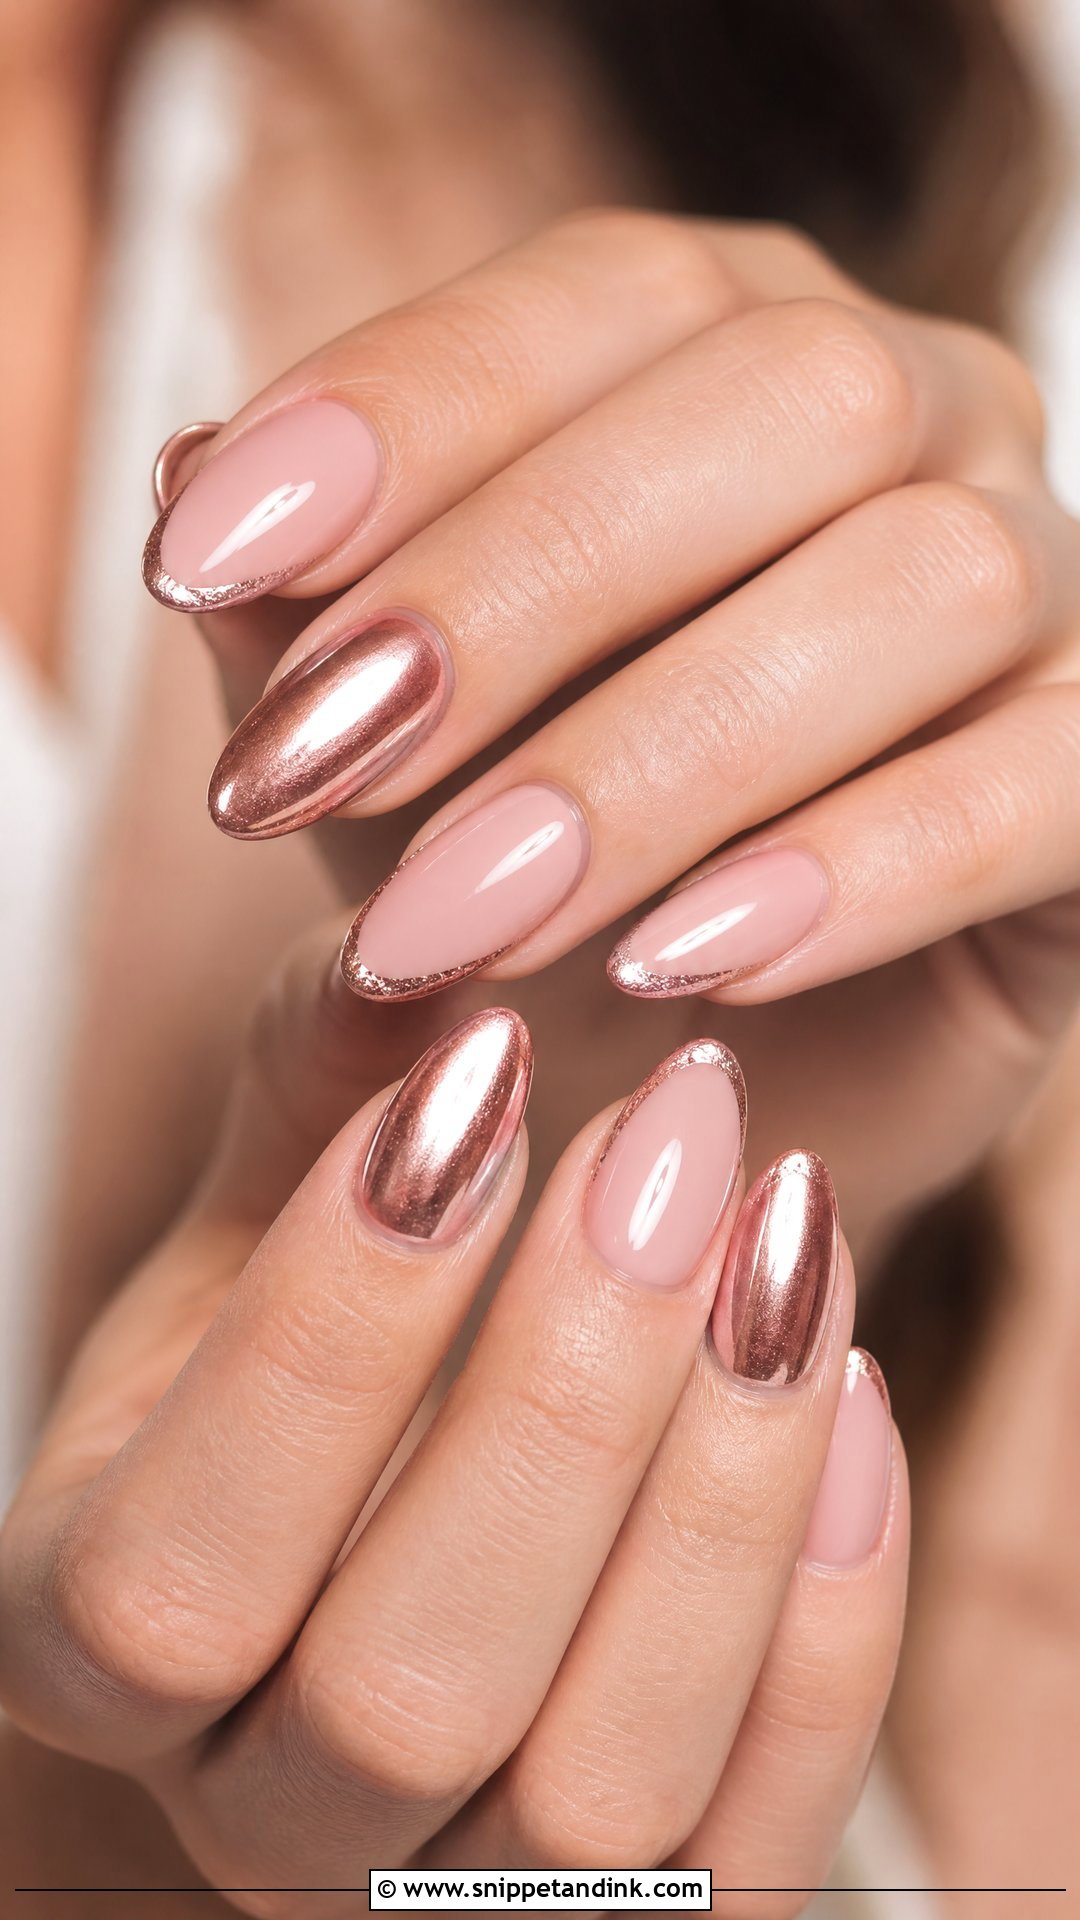
Rose gold wedding nails give you metallic detail with a softer edge than yellow gold. Over blush or nude, I would use it in one form only: micro French tips, a few foil flakes, a fine shimmer or thin striping, not all four at once. A full sheer pink set with rose gold chrome on one or two accents is the cleanest version. Coffin shapes bring out the metal; almond softens it. Keep it alongside rose gold jewelry and warm makeup, because next to cool white gold it can look slightly brassy.
22. Pressed Flower Wedding Nails
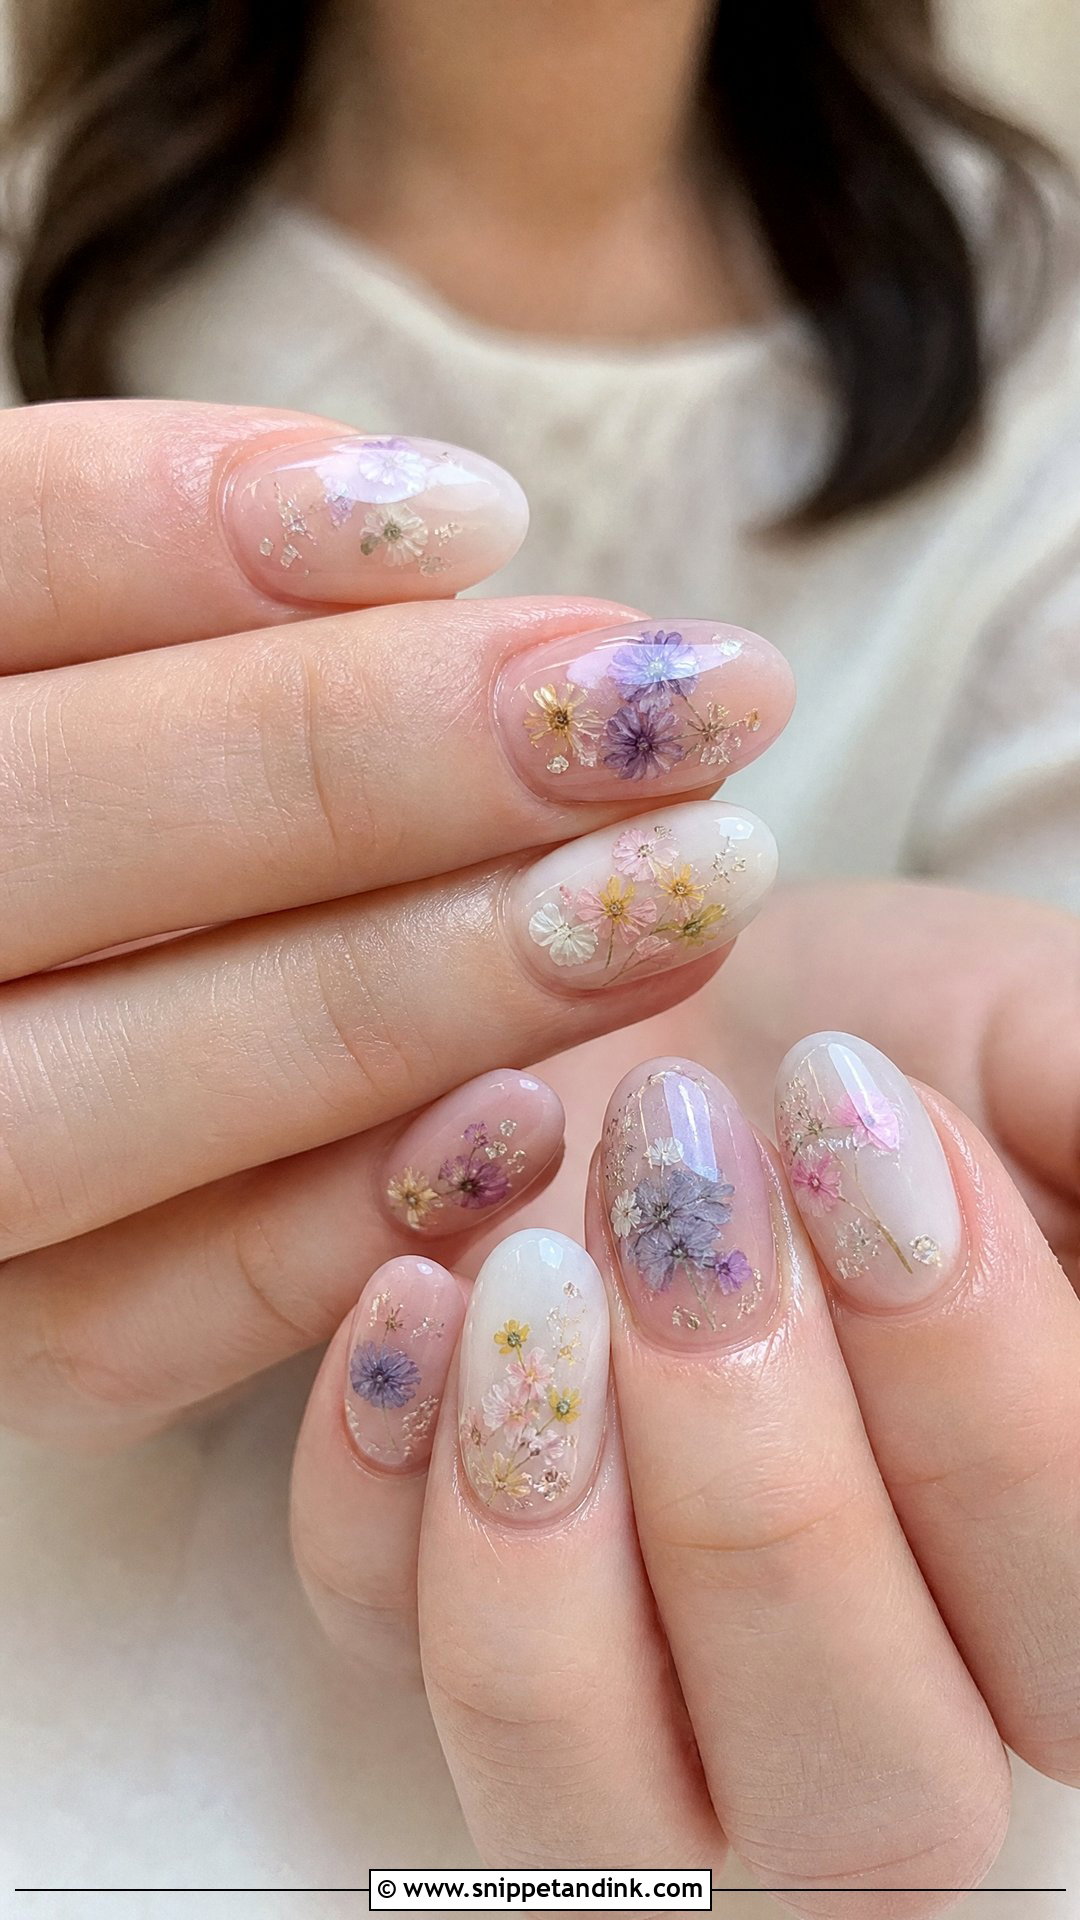
Pressed flower nails use real dried blooms or printed floral decals sealed into gel. Real petals are thin enough to lie flat, but they need full encapsulation, and any edge left sticking out will lift within days. I keep them small, with clear space around each one on a sheer nude, pink or milky base. Pale pink, white, lavender and soft yellow sit easily with bridal colors. Matching them to the flowers in your bouquet, or to the season, gives the set a reason to exist. Almond and oval shapes suit the loose, organic placement.
23. White Chrome Wedding Nails
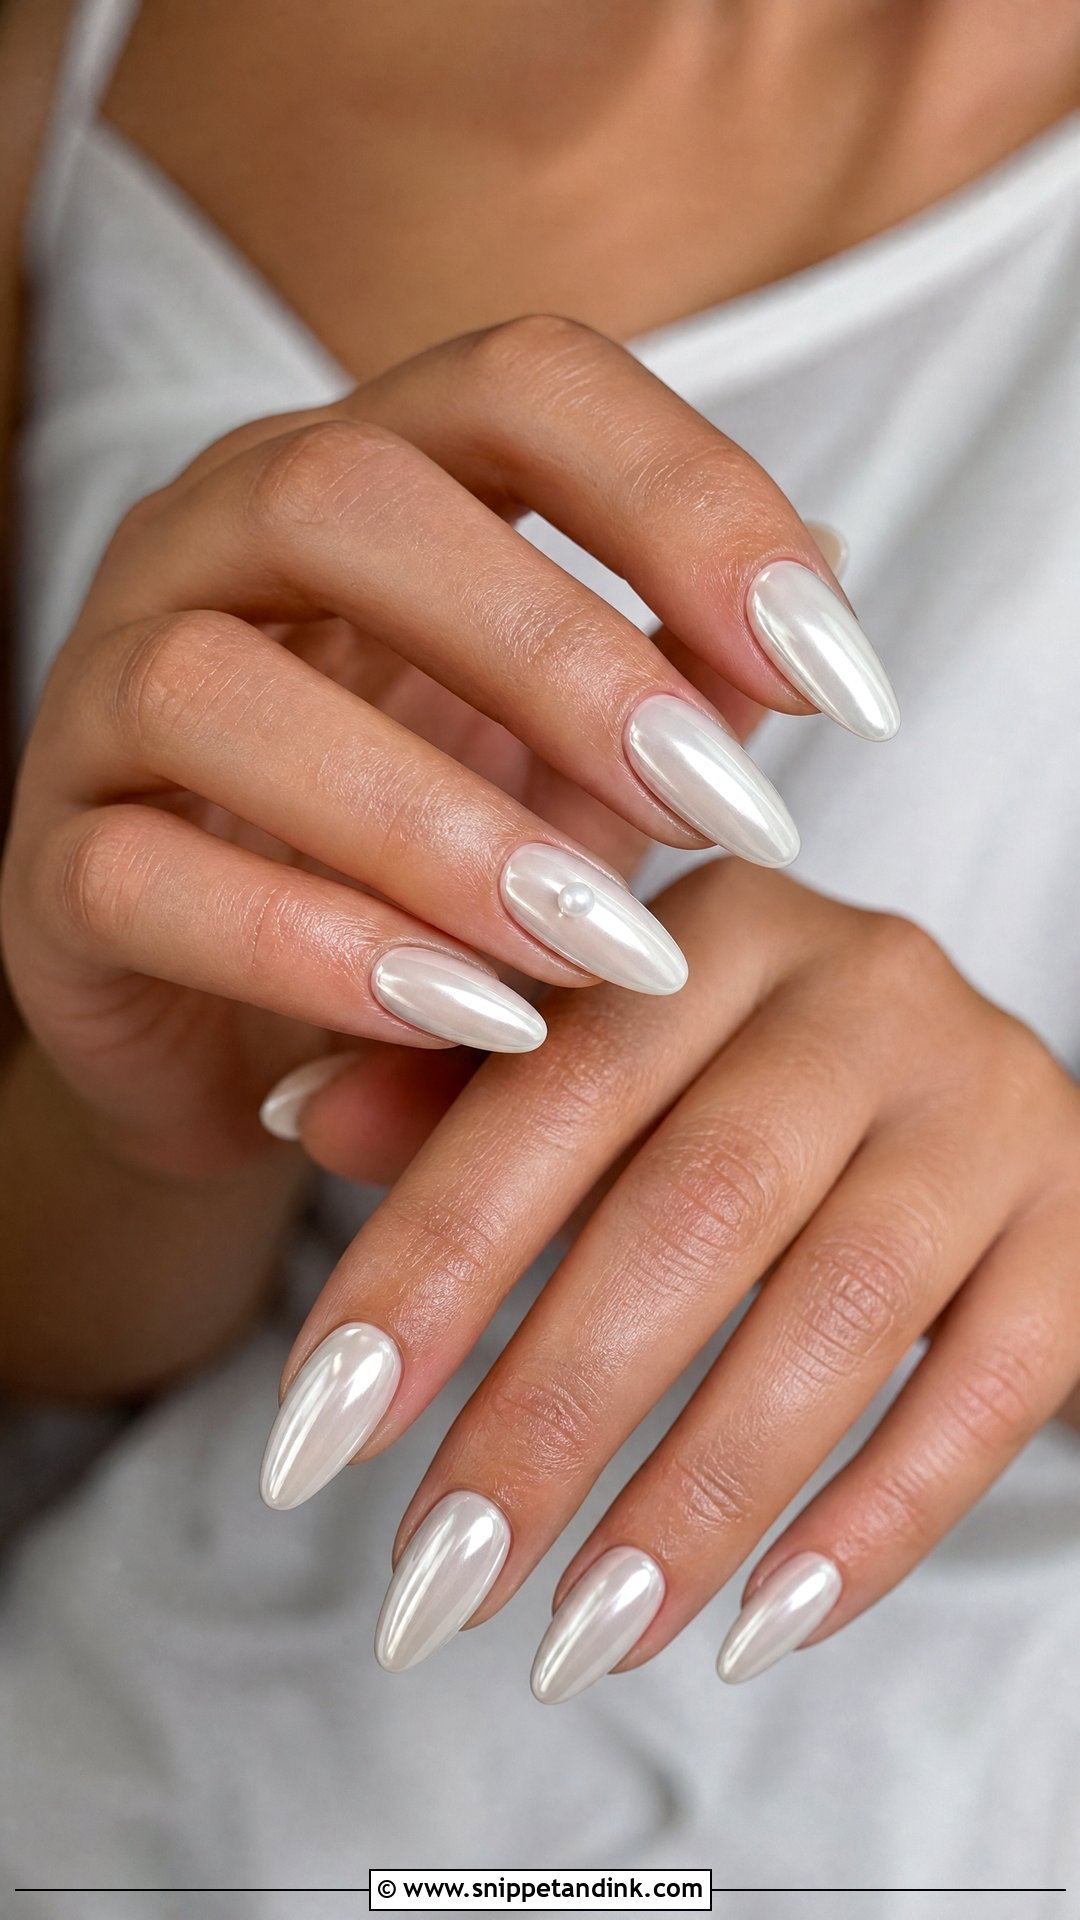
White chrome is brighter and harder-edged than milky white. I lay it over an ivory or soft white base and use a pearl white powder instead of silver, which keeps it bridal rather than icy. A reflective finish shows every dent, so the structure underneath has to be smooth and well shaped, and long almond, stiletto or coffin nails show it at its best. It pairs naturally with silver and white gold. If you add a fine French line or one pearl, place it so it doesn’t interrupt the chrome across the whole nail.
24. Sheer Jelly Wedding Nails
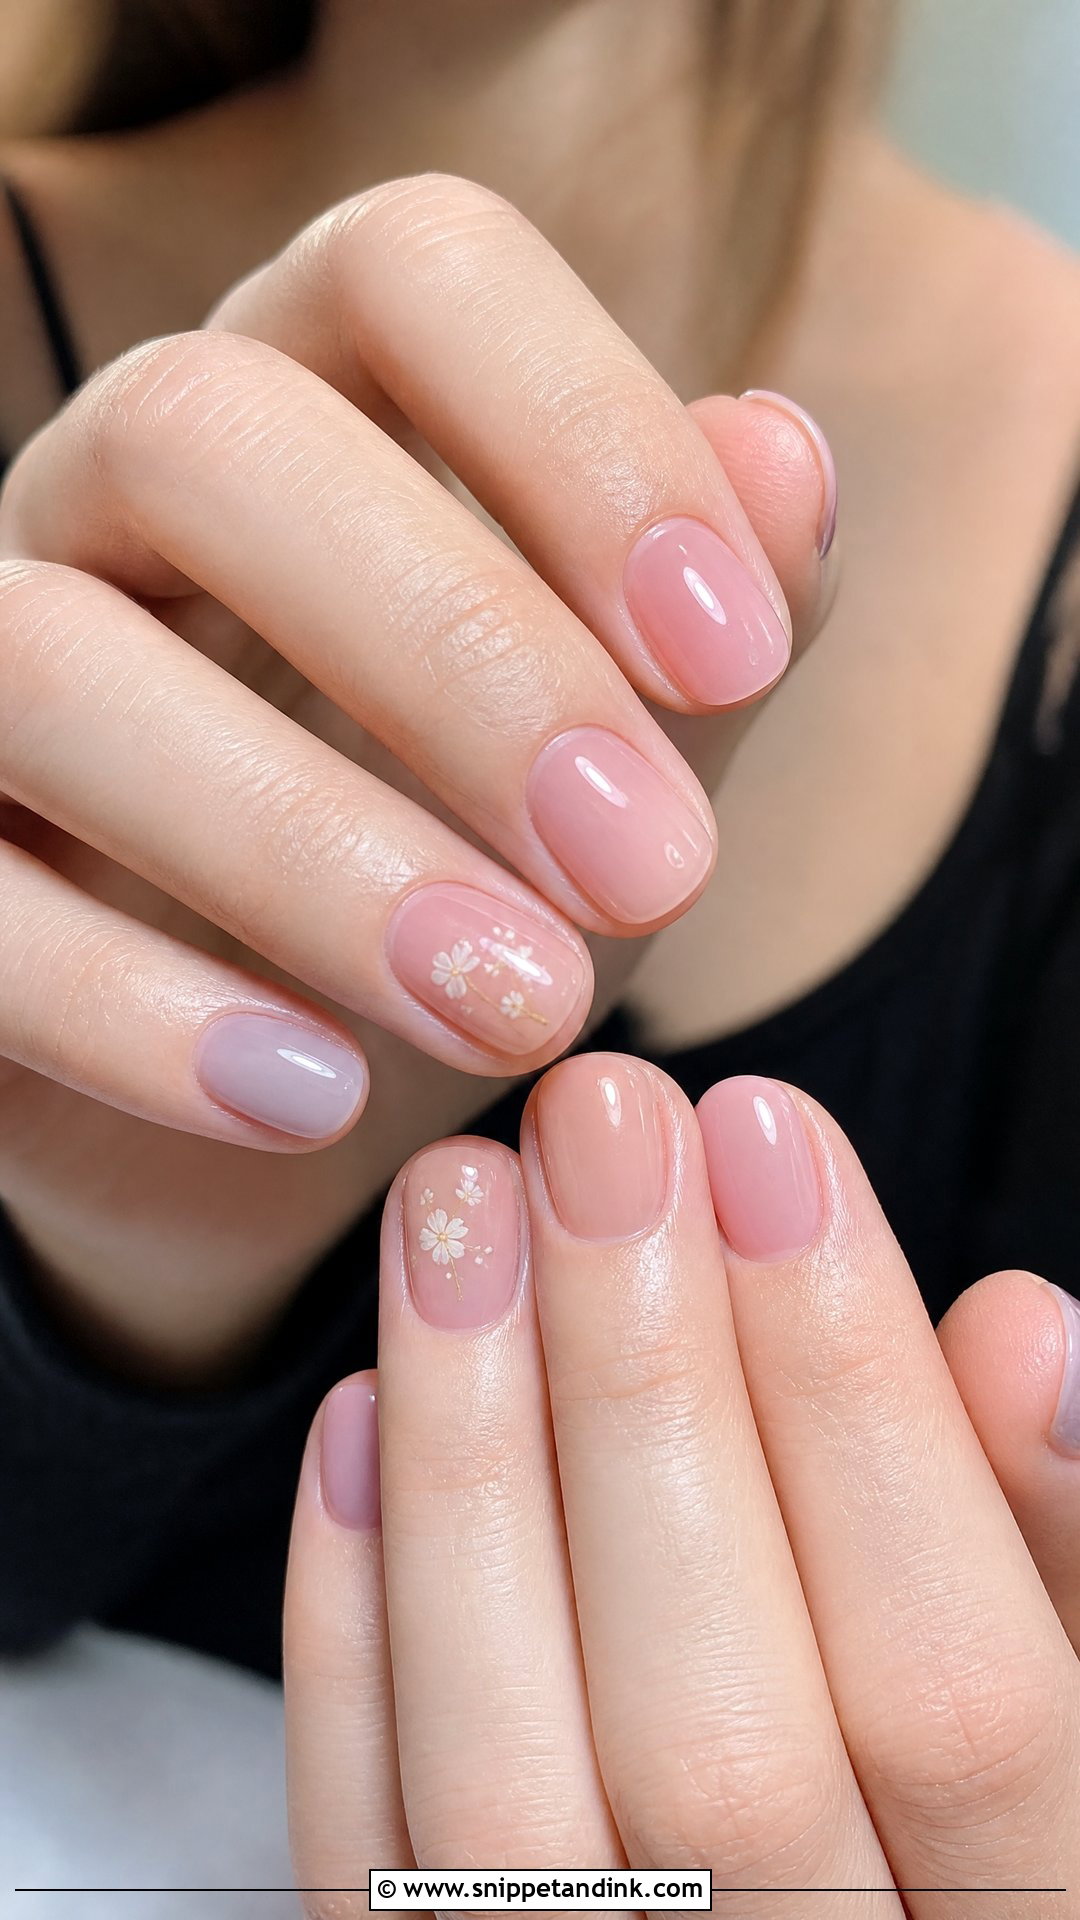
Jelly polish is tinted, translucent gel, so it looks like colored glass laid over the nail. Rose pink, peach nude, milky beige, soft mauve and a faint lavender are the shades I’d consider for a bride. Because you can see through it, staining, ridges and white spots on the natural nail all show, so I buff first and sometimes lay down a clear builder layer. Short rounded nails suit it best. A shimmer top coat or micro white flowers on two nails is enough extra. It also grows out more gracefully than opaque color, which helps when the wedding runs straight into travel.
25. Abstract Gold Line Wedding Nails
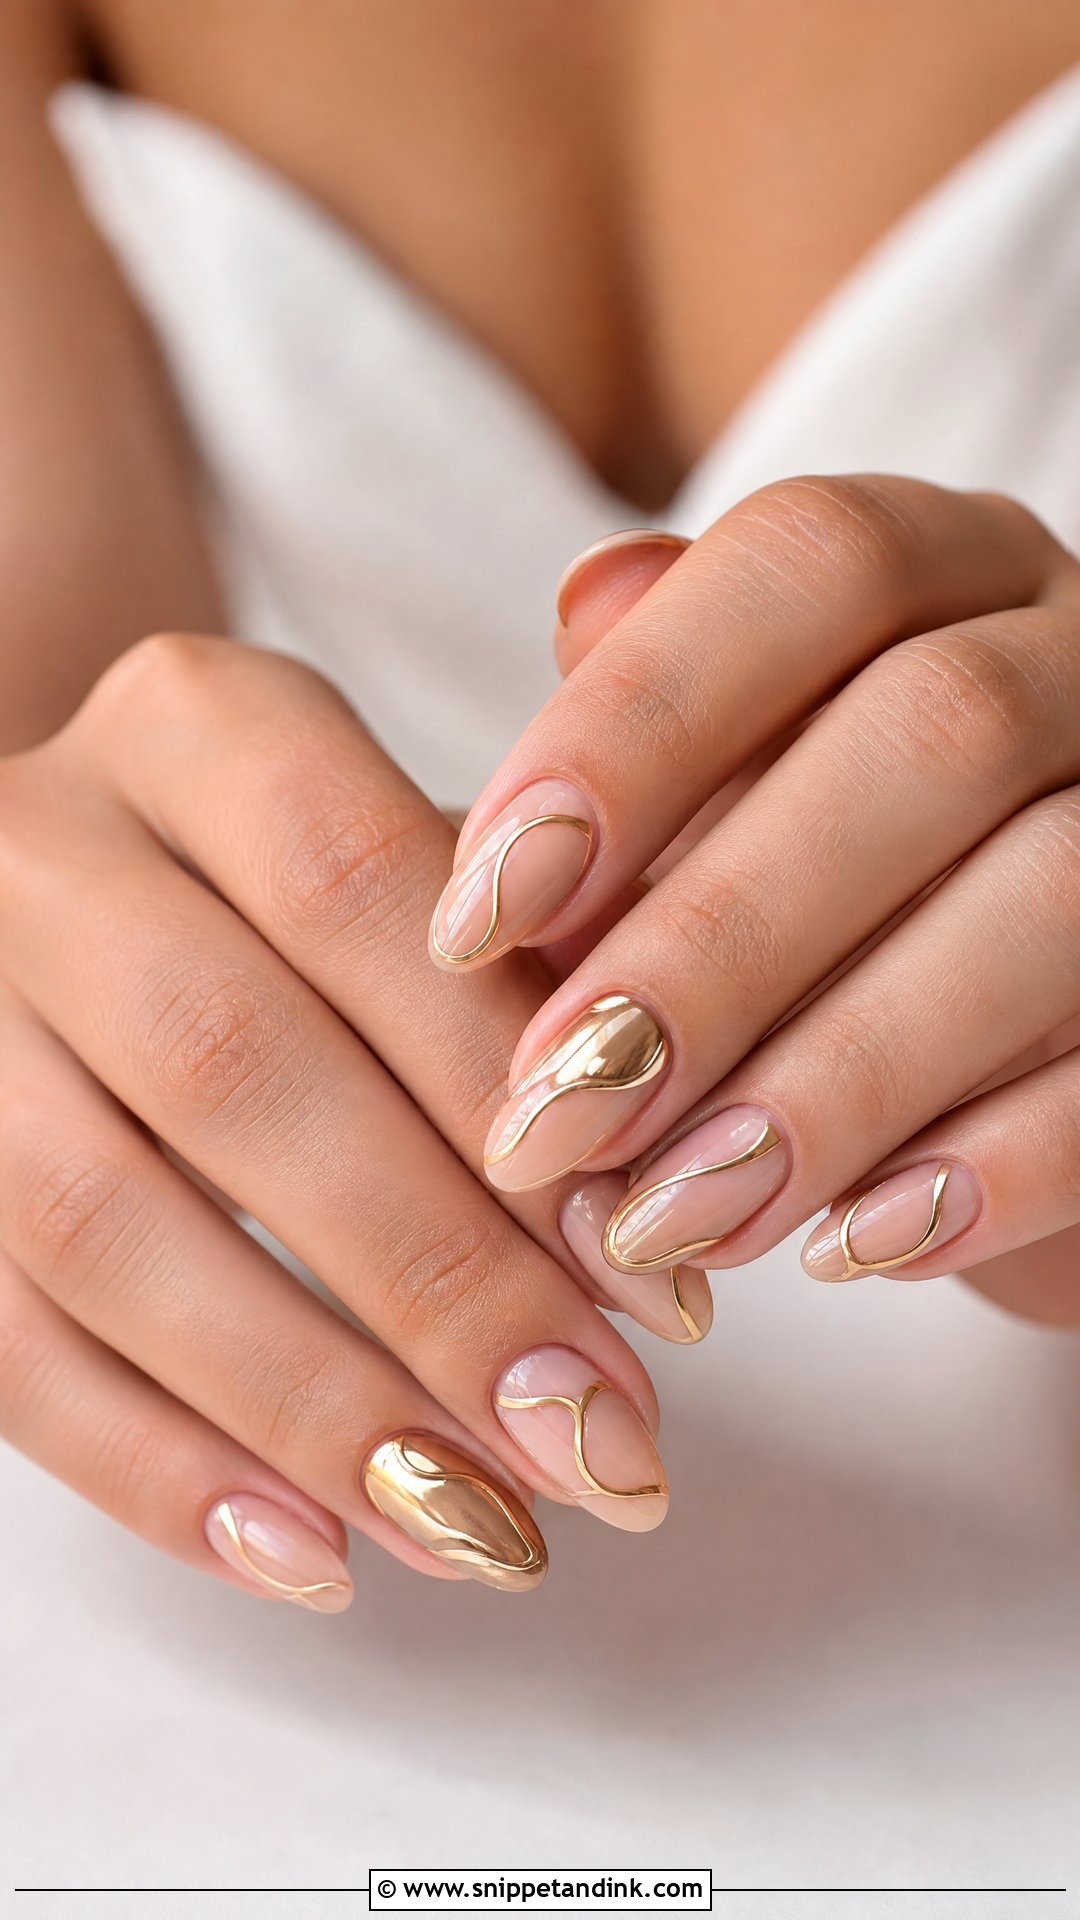
Gold line art is one of the easiest designs to wear with a busy dress, simply because there is so little of it. For lines I use a gold gel liner rather than foil, since it cures solid and won’t peel at the ends. Curves around the tip, a single diagonal or a loose wave all work. Keep it to a few nails and leave the rest glossy. Almond and oval shapes follow the curve best, and next to yellow gold rings it looks deliberate.
Twelve Hours of Hugs, Hairpins and Hand Sanitizer
A bridal set has a harder day than most people imagine. Hand sanitizer barely touches cured gel, but it dries out the skin around it, and dry cuticles look ragged in close-ups by evening. Tuck a cuticle oil pen into the bag someone else is carrying. Gel also chips when nails get used as tools: opening bobby pins, peeling labels off favors, prying a bracelet clasp. Hand those jobs to your maid of honor.
If a pearl or crystal pops off
It happens, usually to a stone that was never fully encased. Ask your artist for a few spare stones and carry a small tube of nail glue: a dot of glue, press the stone in, hold for ten seconds. Add a fine glass file to the kit for any edge that keeps catching your veil.
What a Macro Lens Sees in a Ring Shot
Your photographer will probably get very close to your hand for the ring details. At that distance the lens notices things your eye skips: gel that flooded onto the cuticle skin, dust trapped in a matte top coat, a wobble in a French line, dry knuckles. I clean the cuticle line with a fine brush before every cure for exactly this reason. Moisturize your hands well the night before rather than right before the photos, since a fresh layer of lotion looks greasy under flash.
One Direction, Then One Detail
None of these sets needs to be loud to stand out. The ones I am happiest sending a bride home with have a single direction: a glow, a fine line of art, a clean color or one texture. Before you commit, photograph the swatch beside your ring and a scrap of the dress fabric in daylight. Be honest about length, too, because a nail you are not used to makes buttons, earring backs and phone screens awkward on the morning itself. When in doubt, start from nude, blush or milky white and pick one detail from this list to sit on top.
You'll Like These Ideas:


Leave a Reply