
Glam bridal hair is less about how much sparkle you add and more about finish: how smooth the surface is and how cleanly the shape reads from across a room. At a first consultation I sort styles into two families, polished looks that rely on tension and gloss, and textured looks that rely on volume and placement. Both can look luxe. Below are thirty I’d happily build, with notes on how each one behaves on real hair, what it needs underneath and who I’d talk out of it. Save the ones that suit the hair you actually have, not only the ones you like on a model.
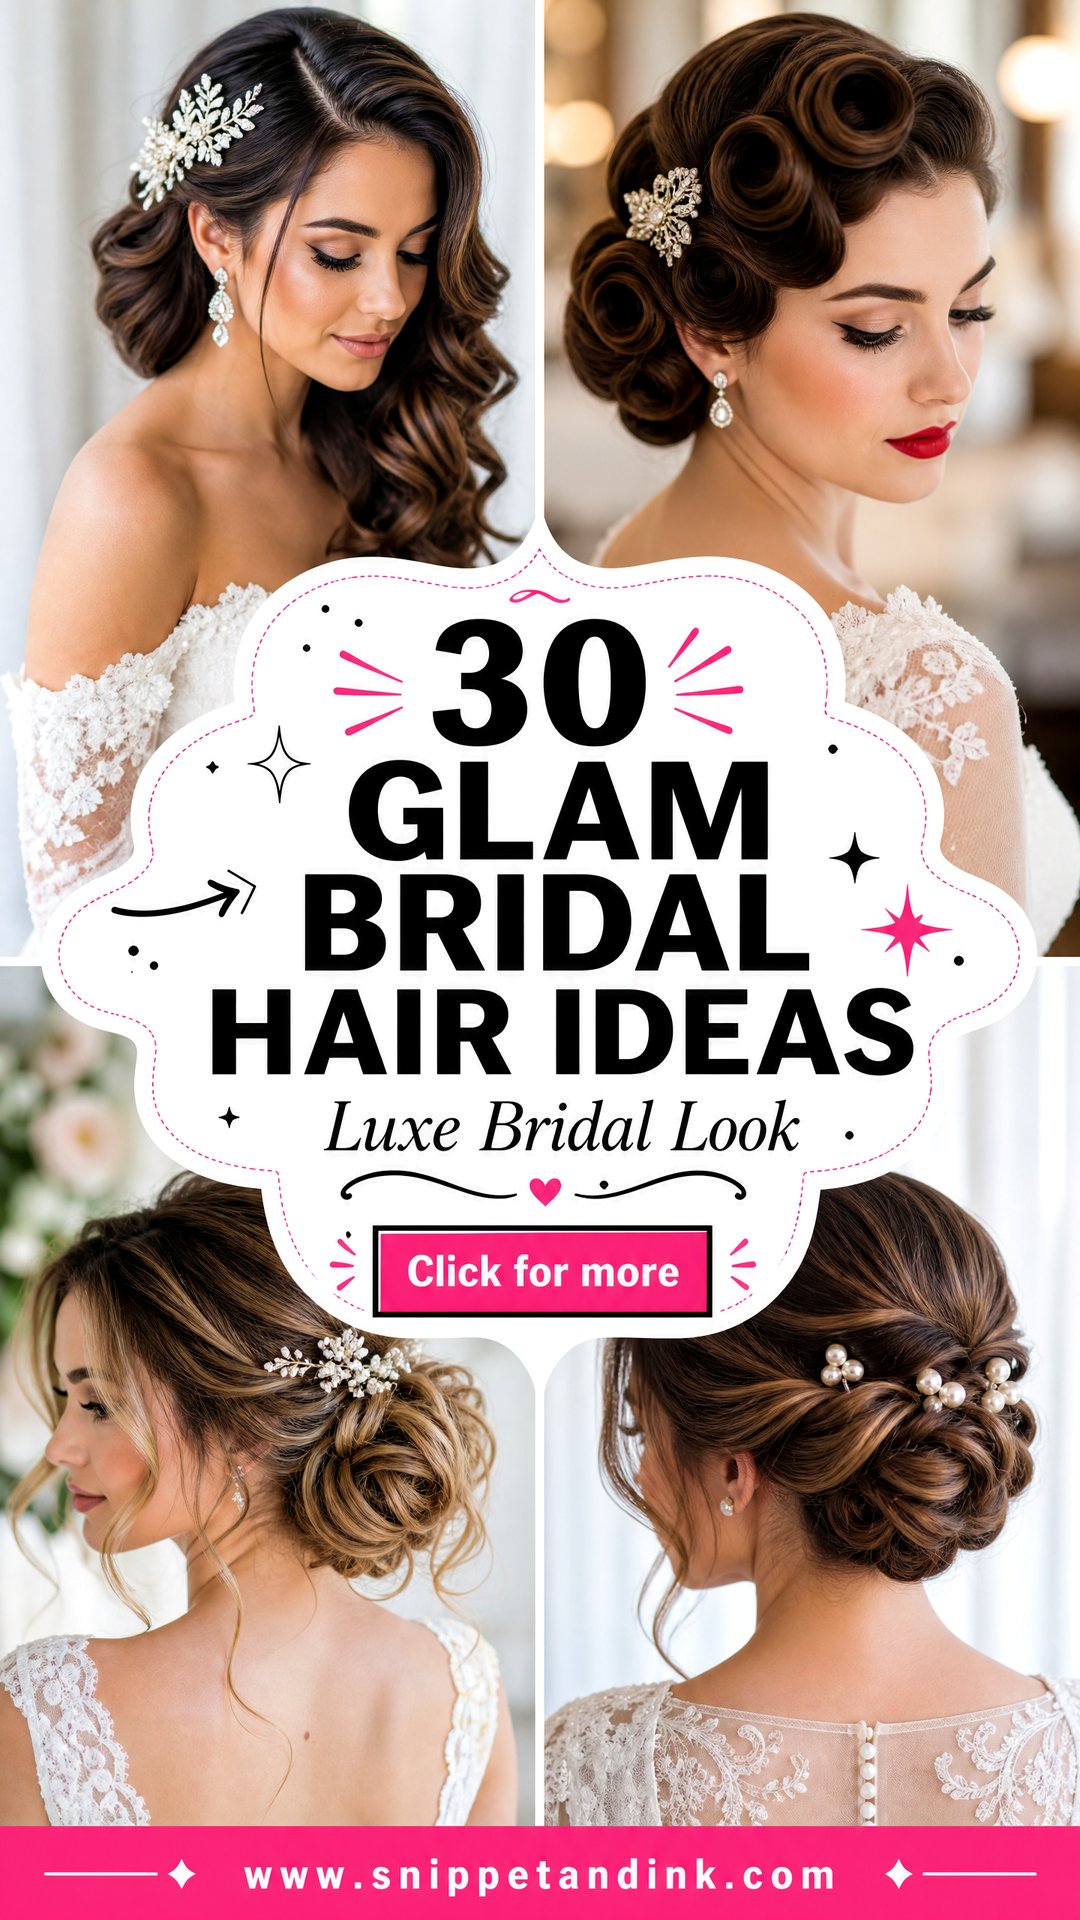
Sleek or Textured? Read Your Hair Before You Fall for a Photo
Most glam styles belong to one of two families. Sleek ones, such as buns, ponytails, straight hair and French twists, rely on smoothness and gloss, and they show every flyaway. Textured ones, such as chignons, tousled updos and braids, rely on volume and movement, and they forgive a lot. Your hair usually leans one way already. Fighting that costs time in the chair and durability by evening.
Fine or slippery hair
Fine hair holds sleek shapes well and struggles with volume. For textured looks I prep with mousse at the root and a texture spray once it’s dry, and I often add a clip-in weft to fill out a bun. Curls should be set smaller than you want them, because they will relax.
Thick or curly hair
Thick hair holds curl and volume easily but makes sleek styles heavy. A sleek low bun on very thick hair can feel like a weight pulling at your scalp after a few hours, so I split the hair into two smaller buns stacked together. Curly hair is happiest in styles that keep the curl, like a curly updo, curly half up or a soft chignon.
The two days before
- Wash when your stylist told you to at the trial; most updos grip better on hair that isn’t squeaky clean.
- Skip conditioning masks and hair oils for two days beforehand, since they make pins slide.
- Arrive with hair completely dry and free of product.
- Wear a button-up top so nothing goes over your head once your hair is done.
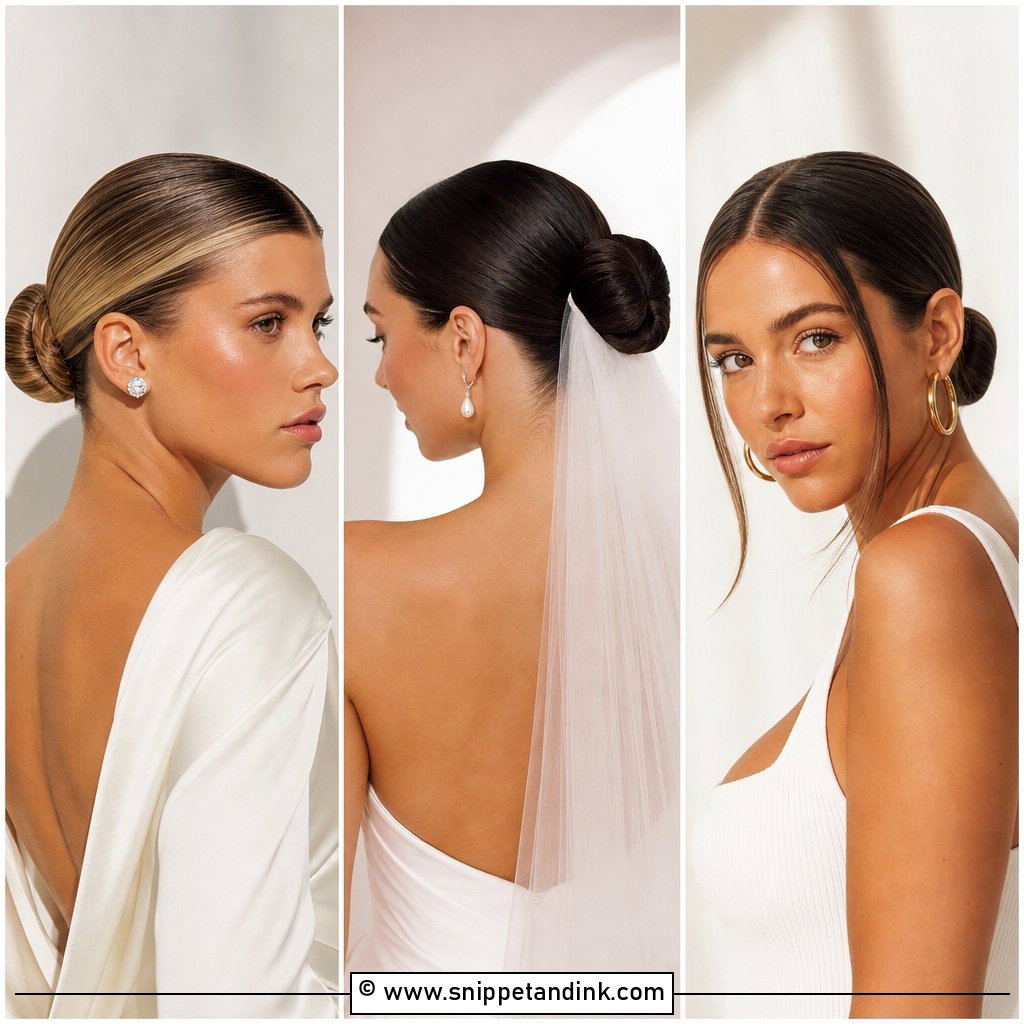
1. Sleek Low Bun for Brides
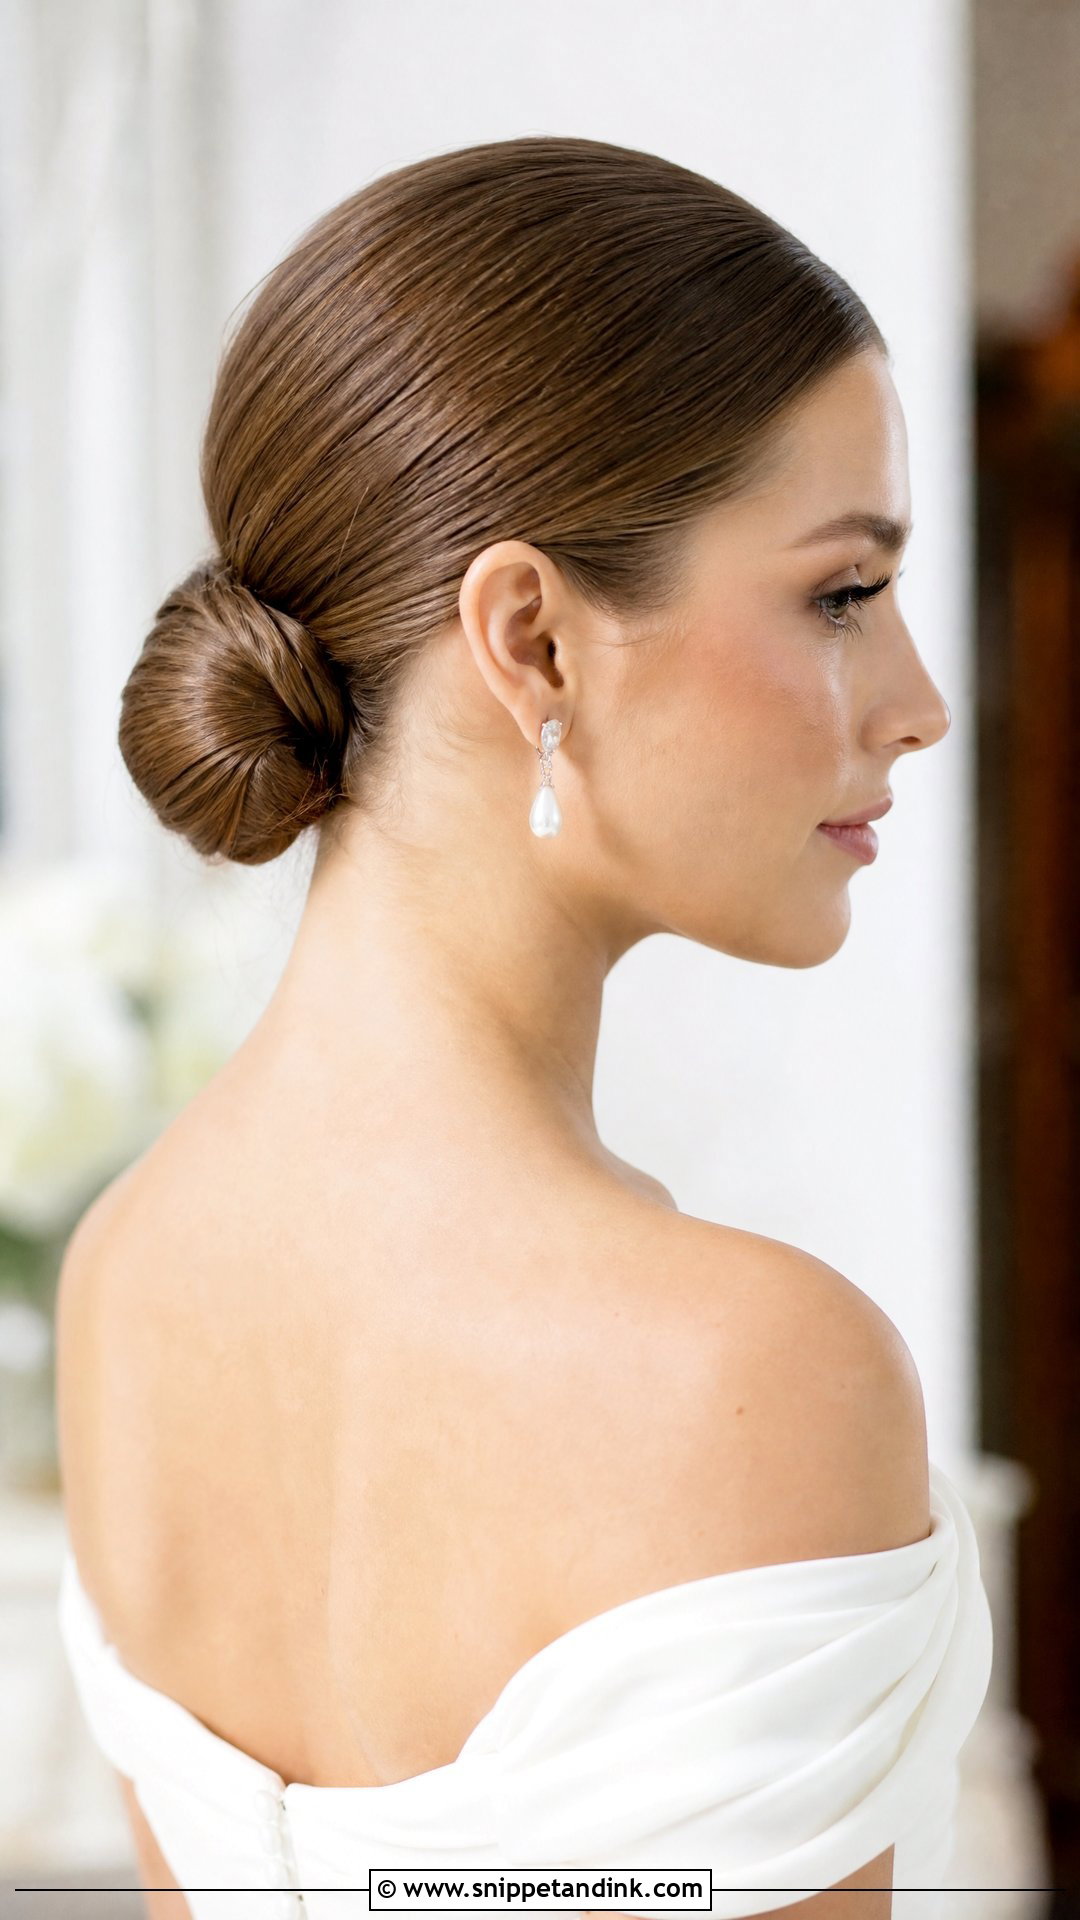
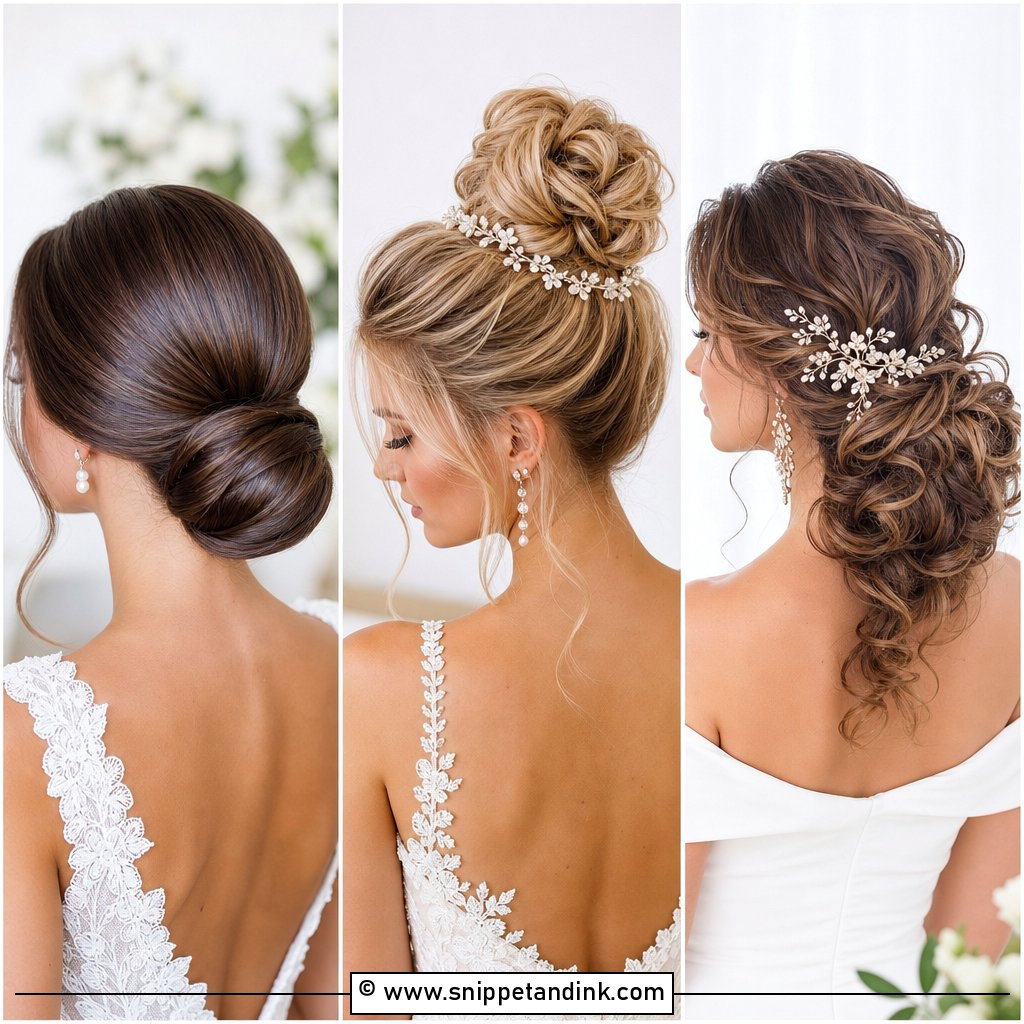
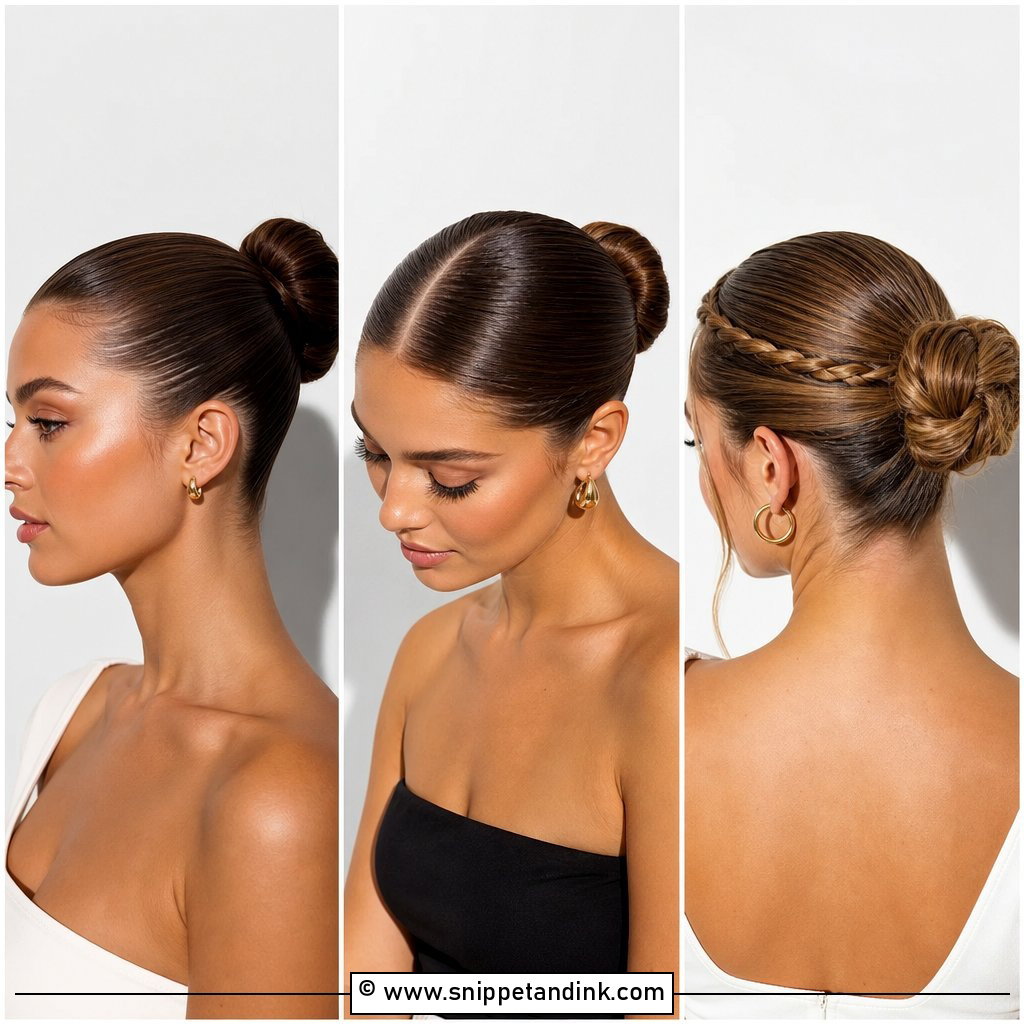
The sleek low bun is the style I’m asked for most, and it’s also the least forgiving. Every bump shows, so I blow-dry the hair completely straight first and brush it back with a boar bristle brush while it’s still warm. A center part suits it best. It takes a veil comb without strain and holds all day because there’s almost nothing to drop. If you have a lot of baby hair or a cowlick at the front, mention it at the trial; a sleek bun exposes both.
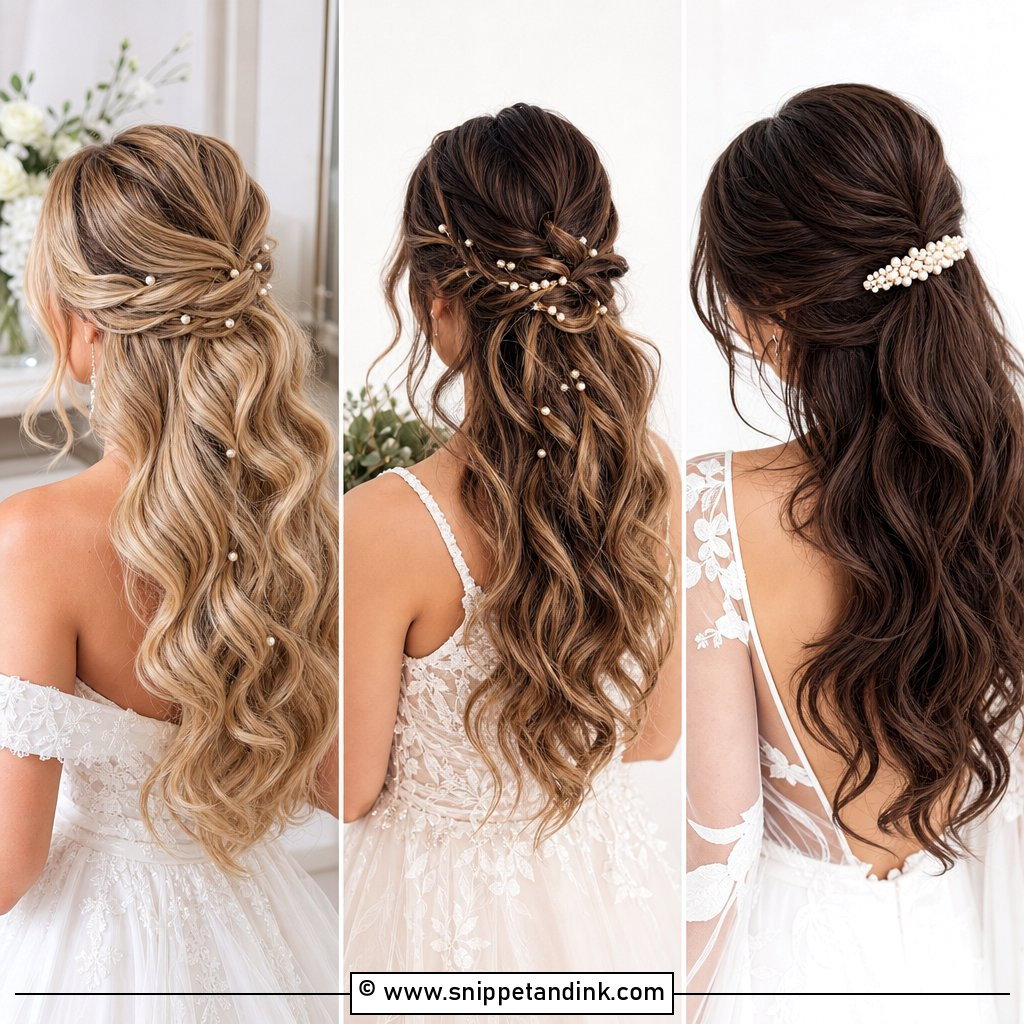
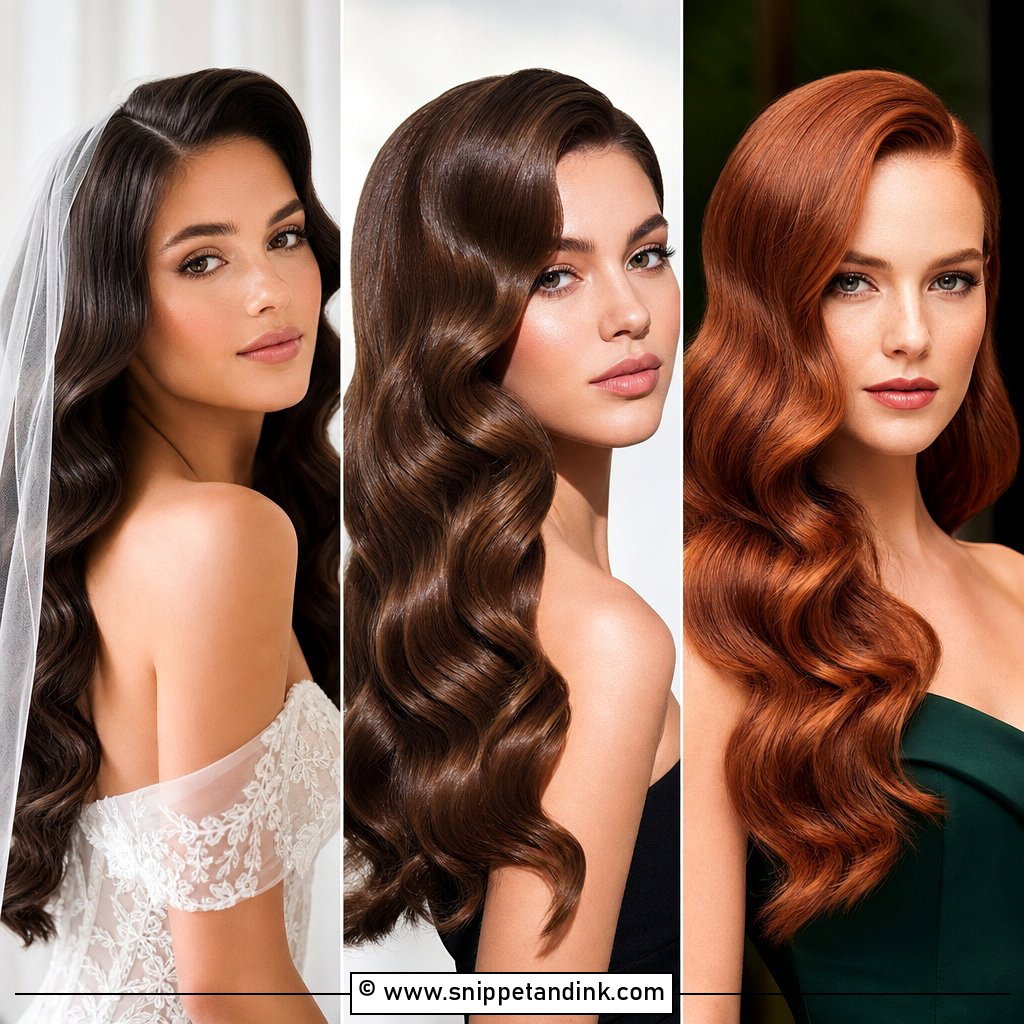
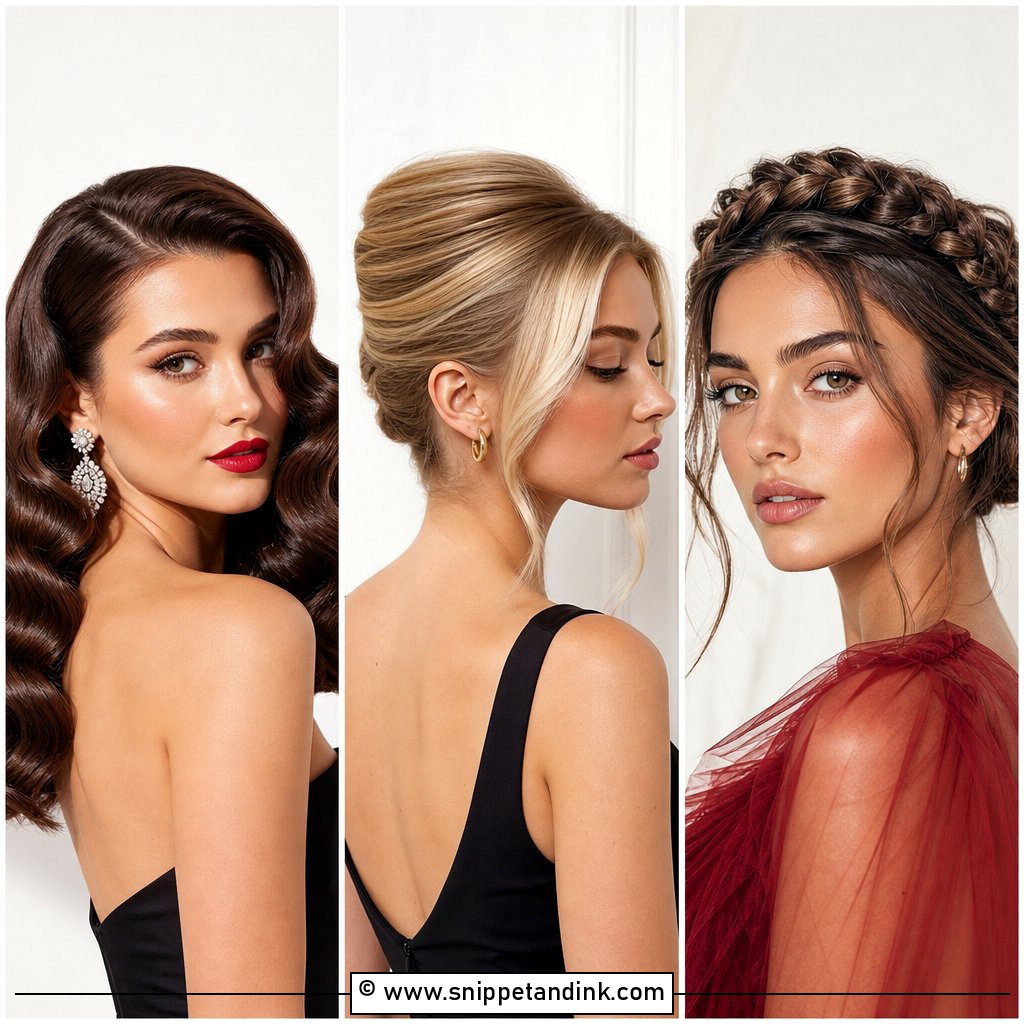
2. Hollywood Waves for Wedding Day
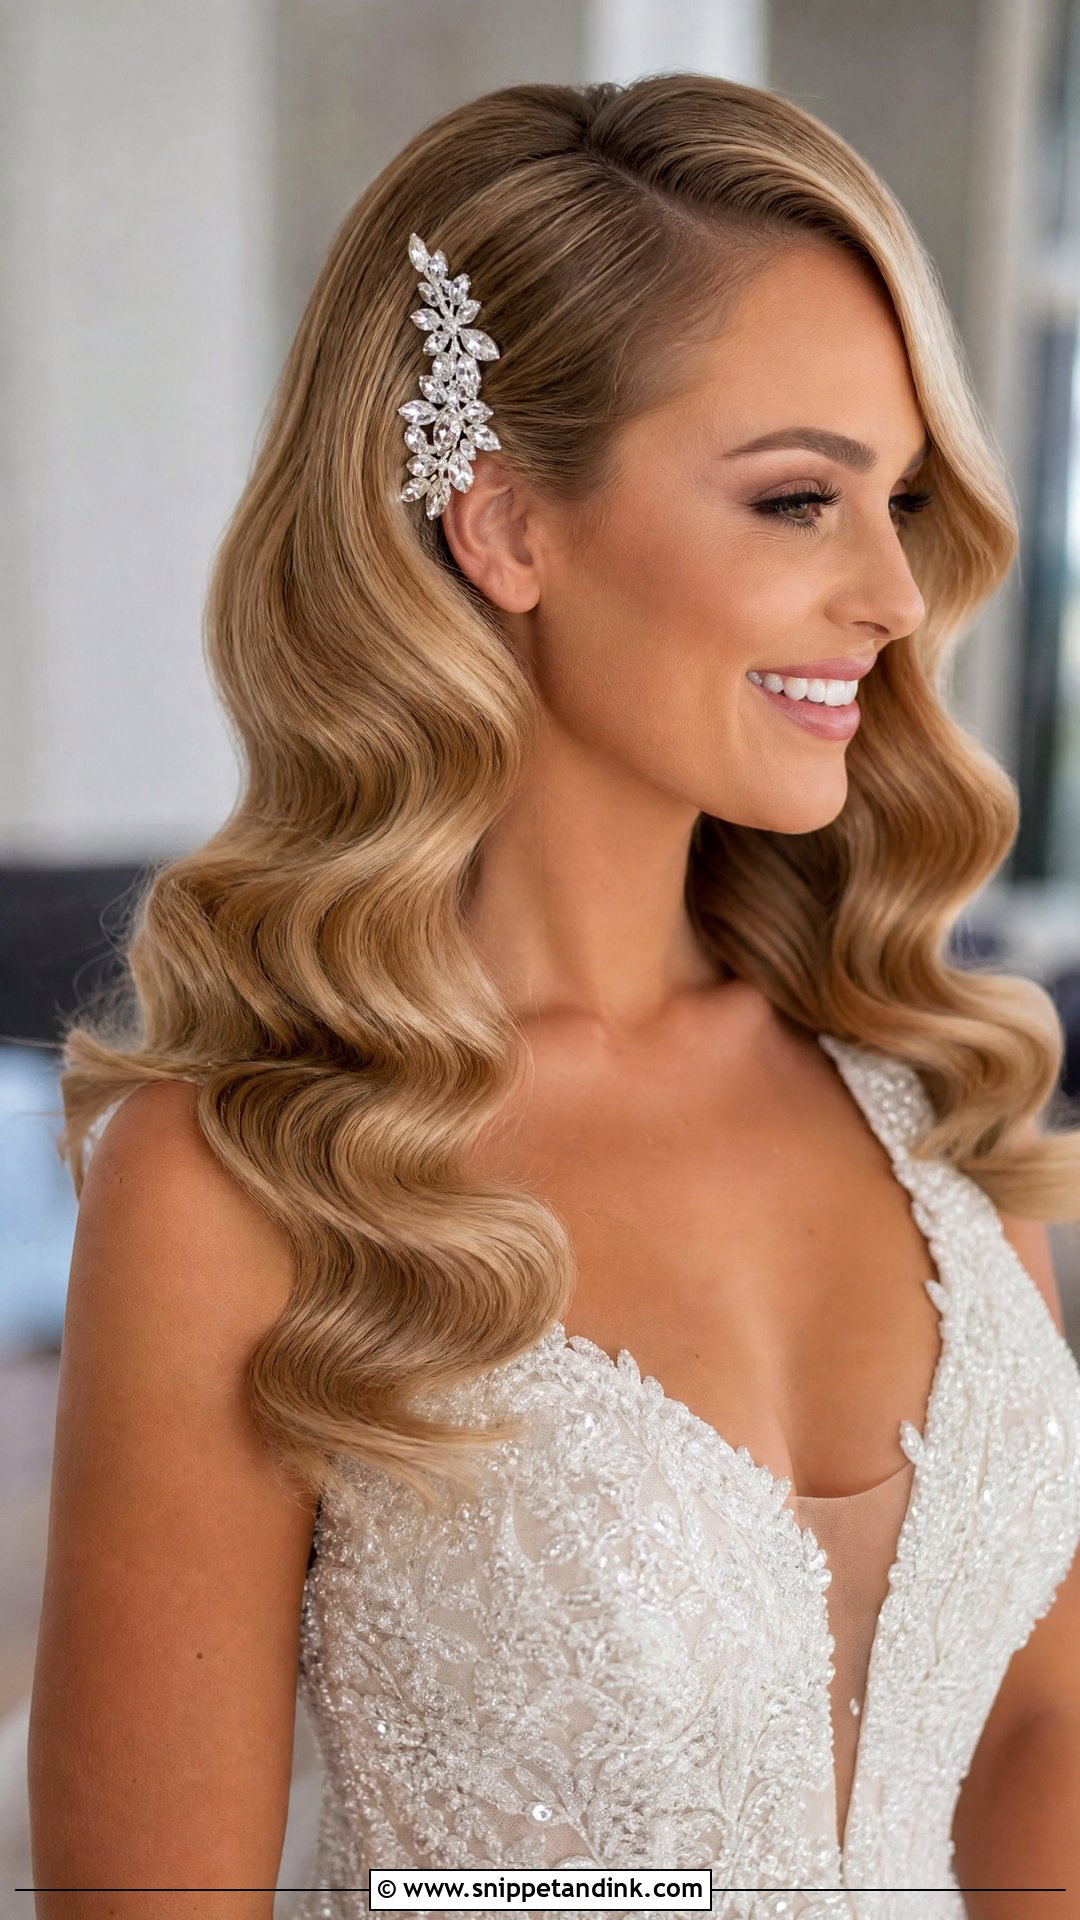
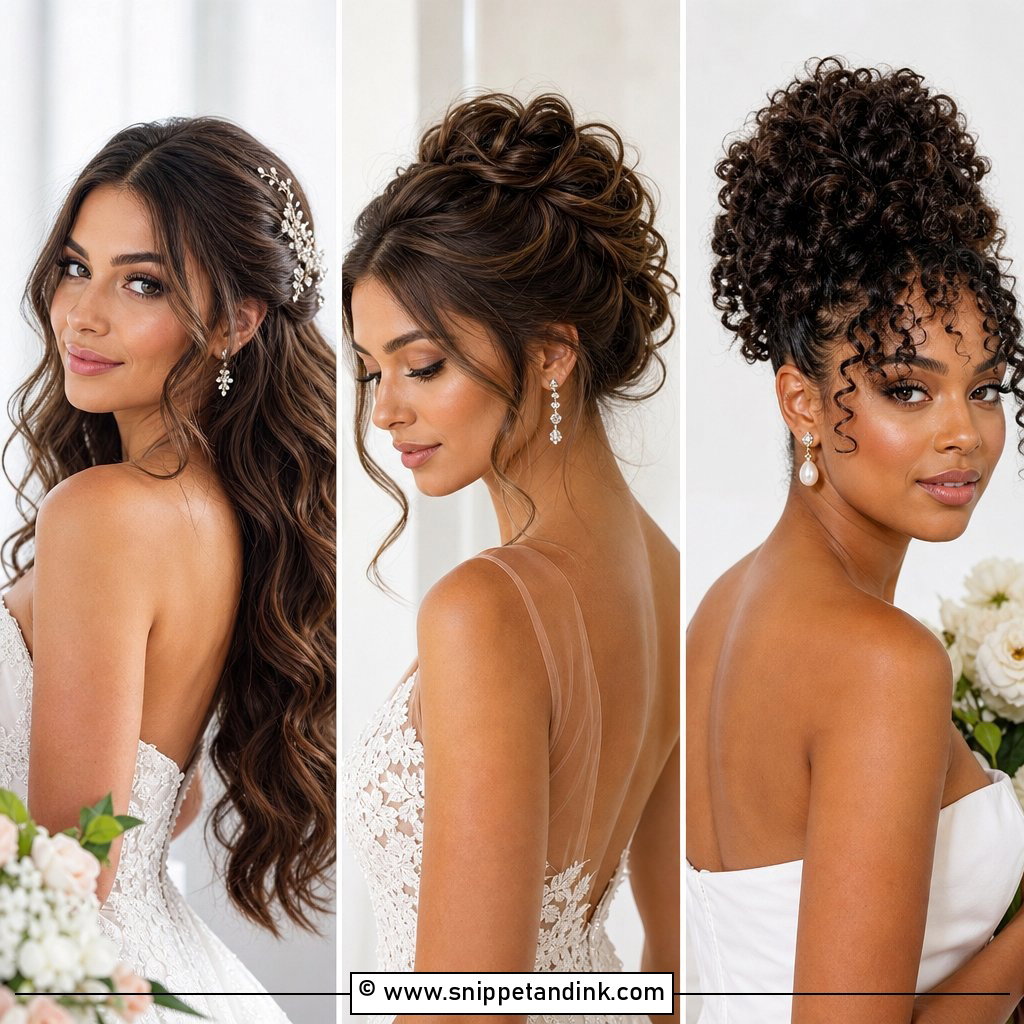
Hollywood waves are set, not just curled. I curl every section in the same direction, pin each curl flat while it cools, then brush the whole lot out into one continuous S-shape. That brushing step is what turns separate ringlets into glossy ridges. They need medium to long hair with some weight; on very fine hair the waves fall out of sync within a few hours. They’ve been overtaking beach waves with brides lately, and a jeweled comb on the deep-part side is all the extra they need.
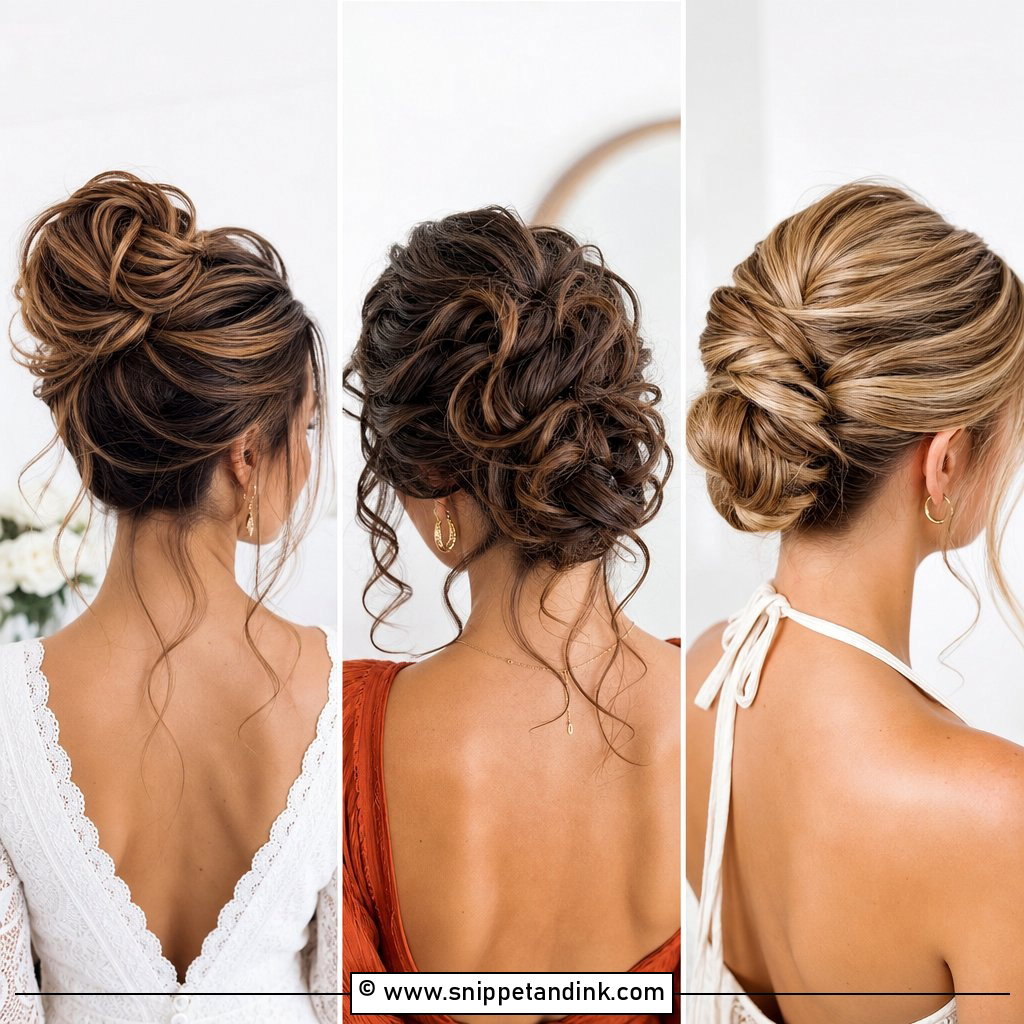
3. Romantic Low Chignon
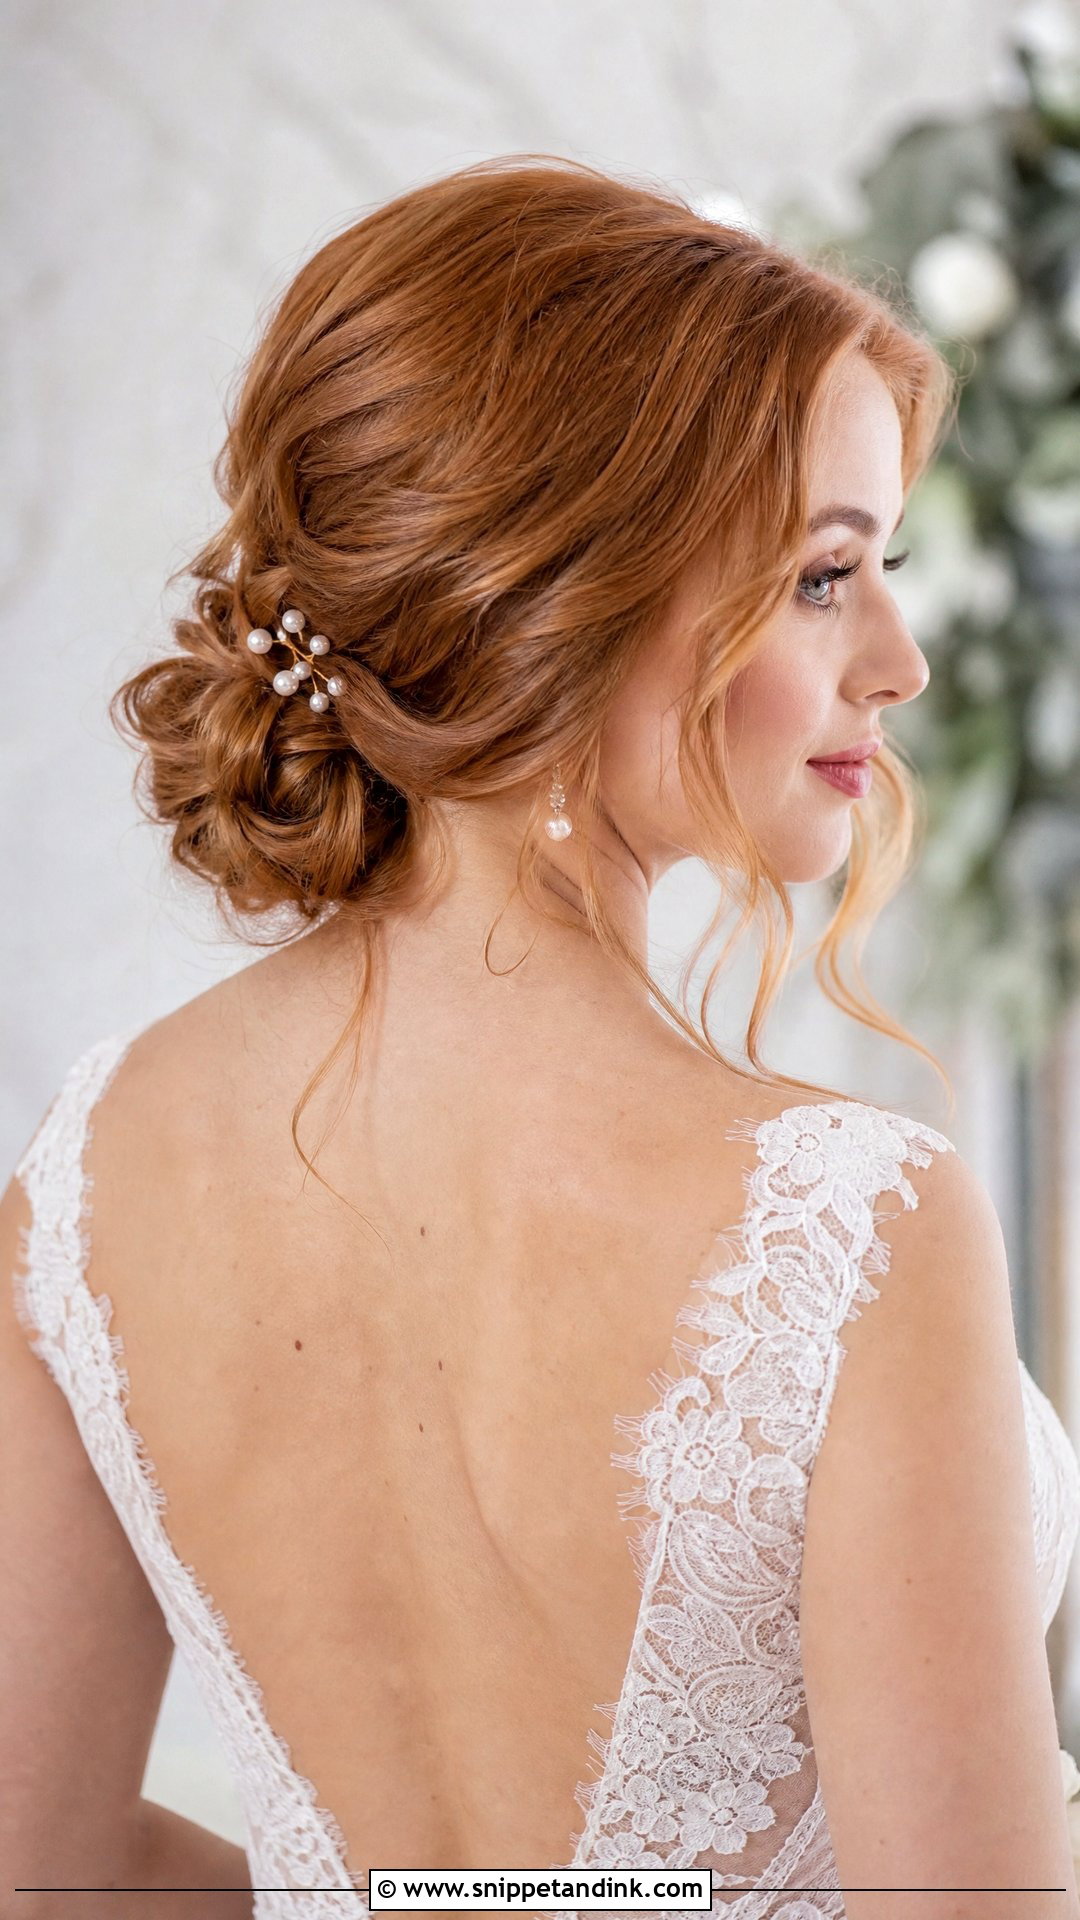
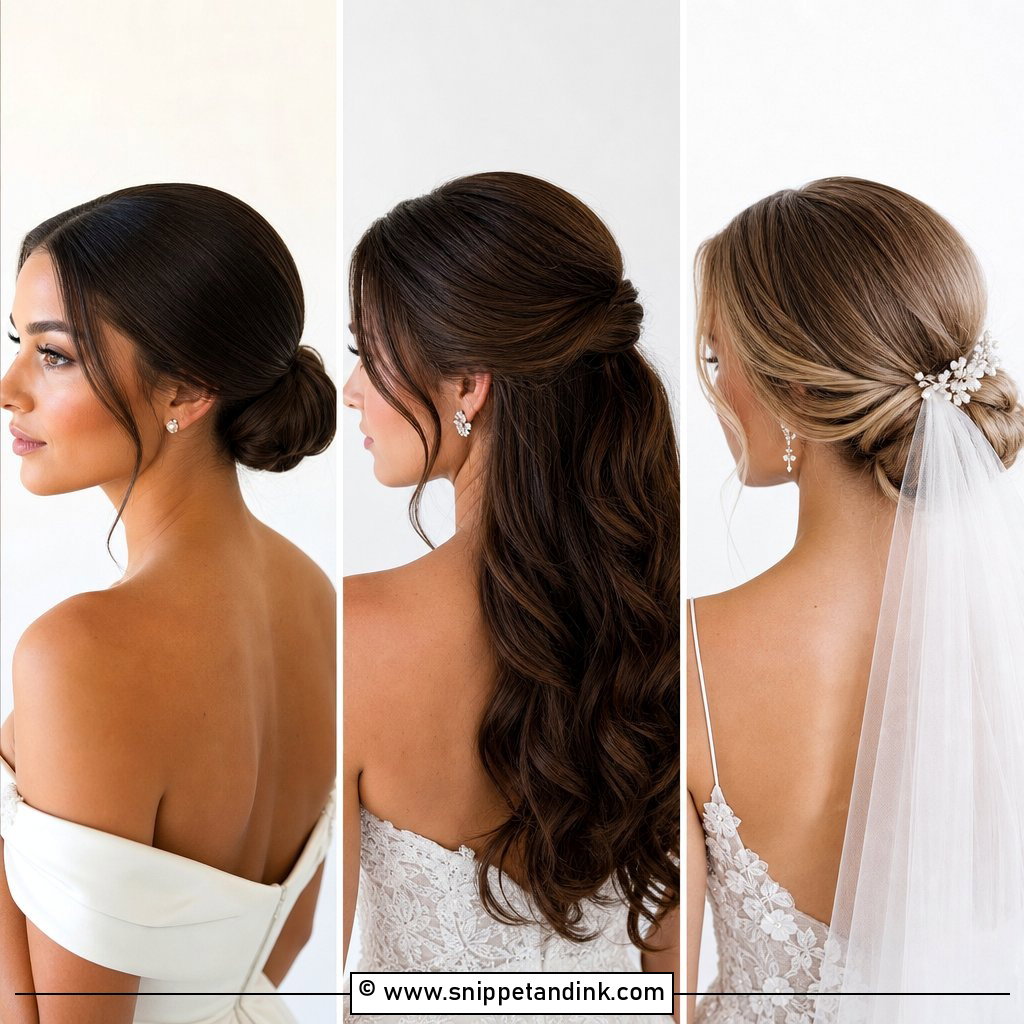
A soft chignon is the relaxed cousin of the sleek bun. I build it from loose twists rolled toward the nape and secure it with U-shaped pins rather than bobby pins, because U-pins hold the shape without flattening the texture. Pull out a few face-framing tendrils after the shape is locked, not before, or they get caught in the pinning. Fresh flowers or pearl pins slide into the twists easily. You need at least shoulder-length hair to give the roll enough body.
4. Half Up Half Down Bridal Hair
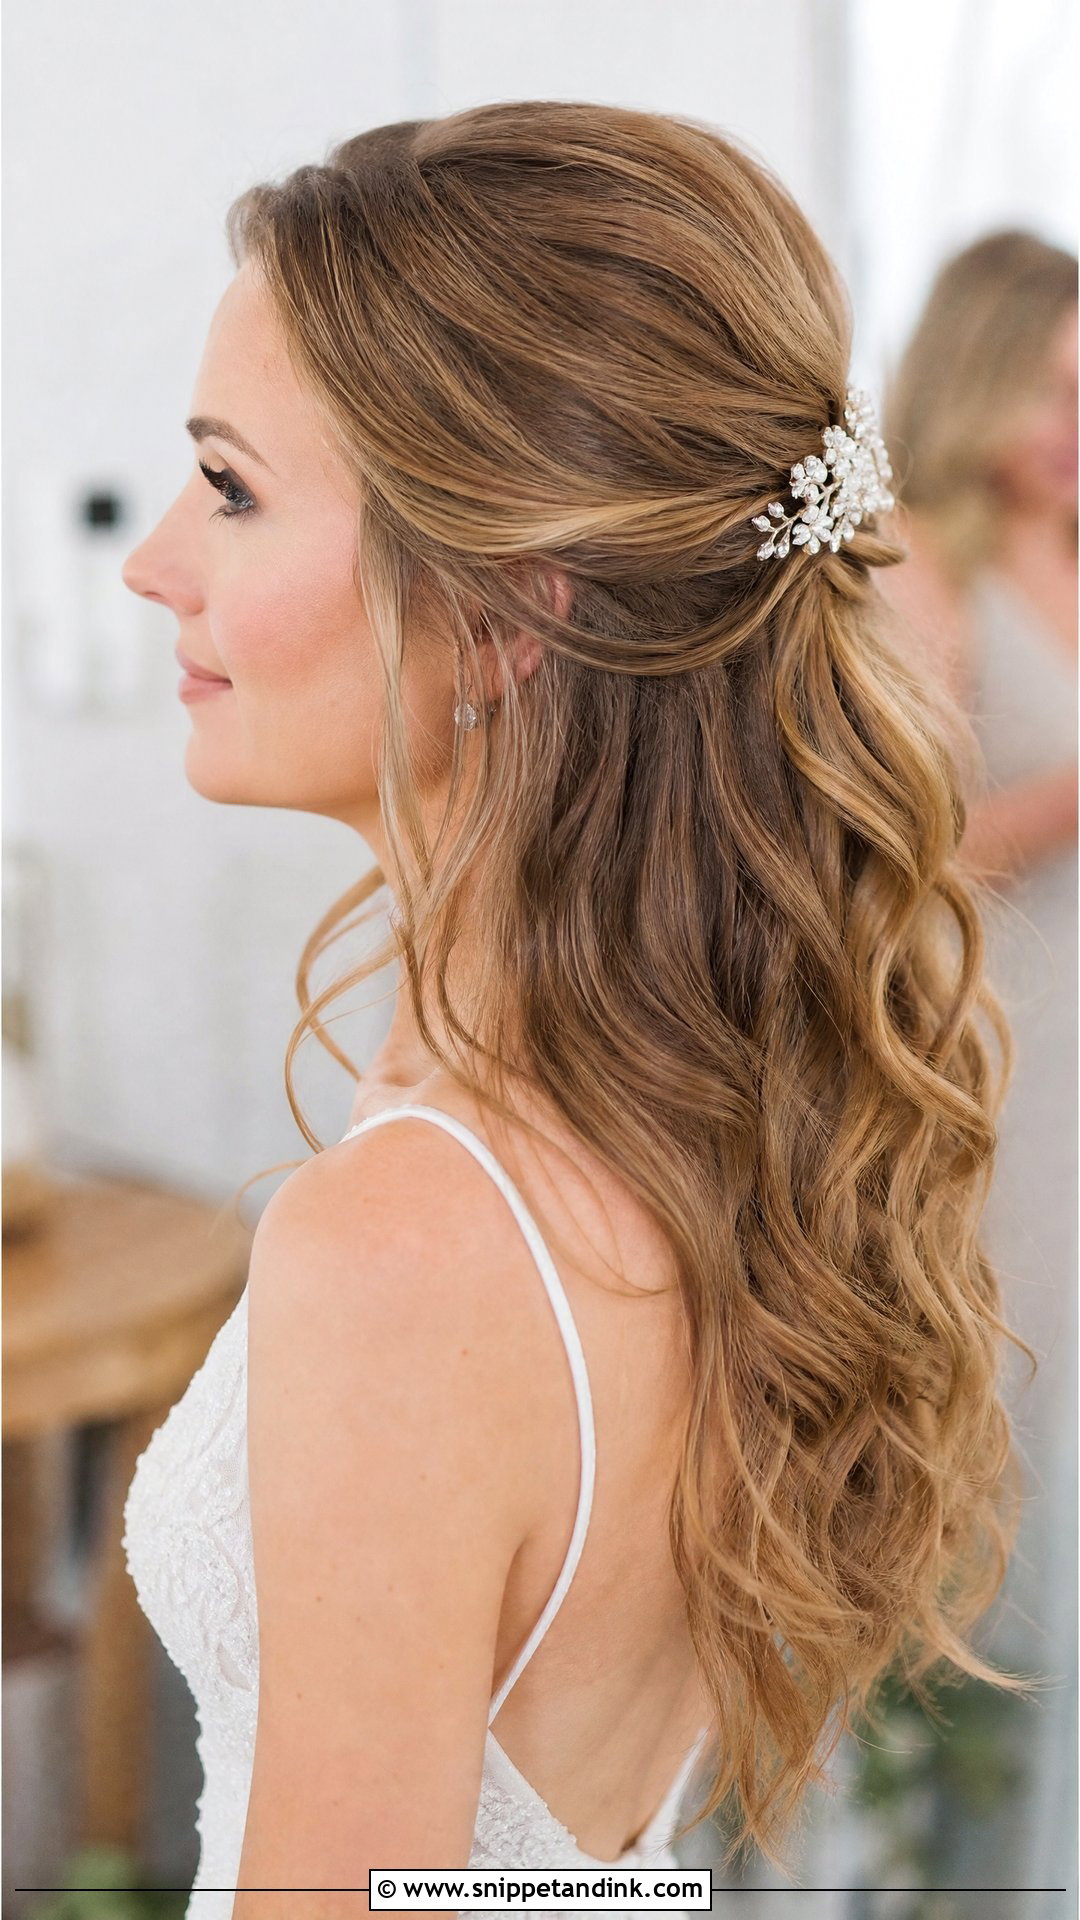
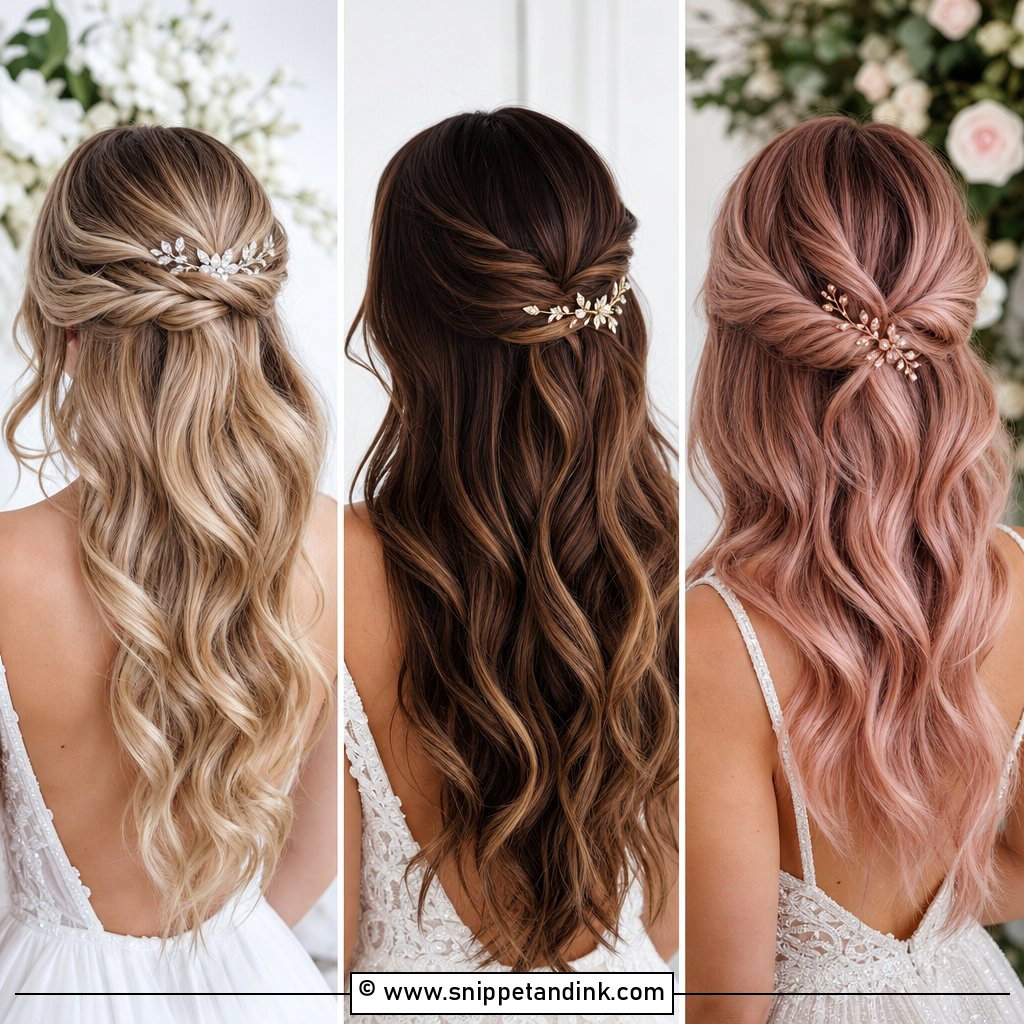
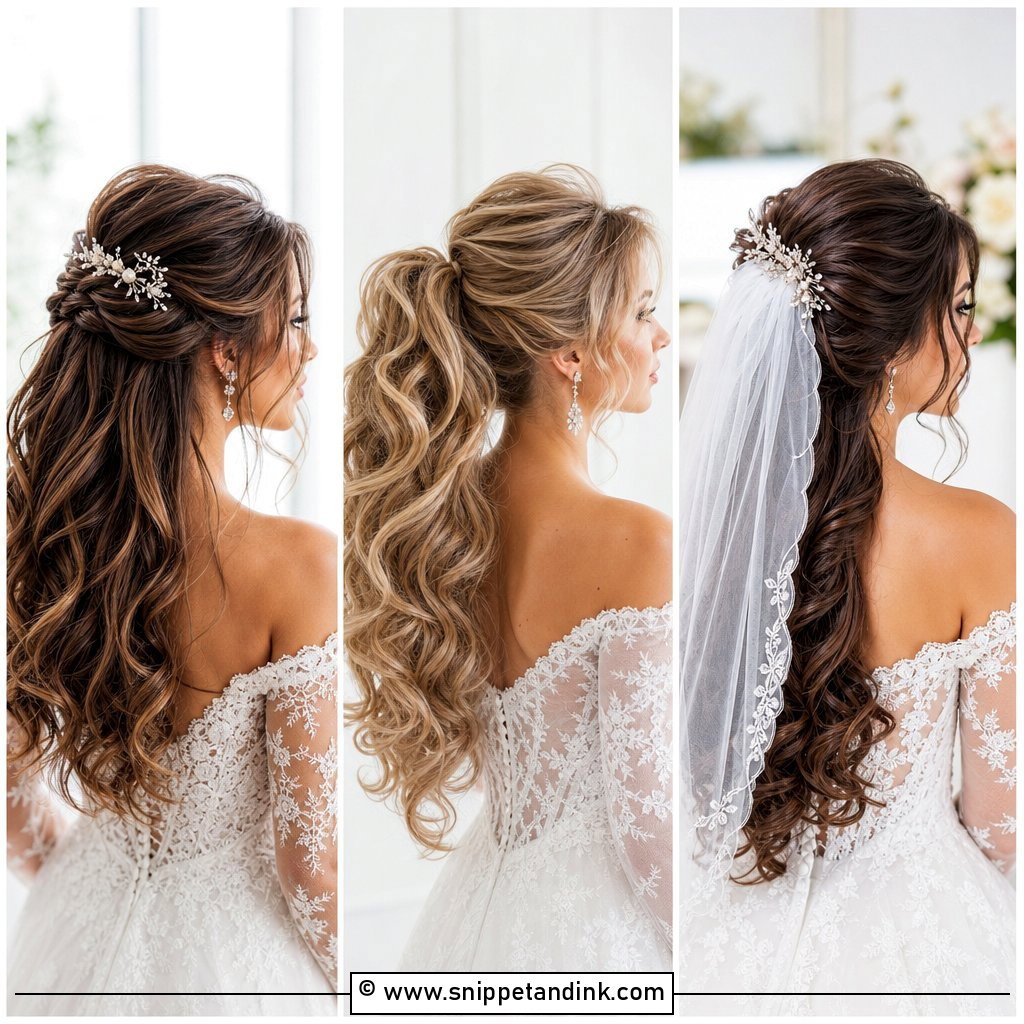
Half up, half down is the style I warn humid-venue brides about. The pinned top section holds fine, but the loose lengths carry all the curl, and that’s what drops first. I set the curls with a small barrel and let them cool completely before touching them. The back section gets crossed pins under a small braid or clip so it doesn’t slide down over the day. It suits almost any length past the shoulders and gives you hair down in photos without it falling across your face during the vows.
5. Braided Crown for Brides
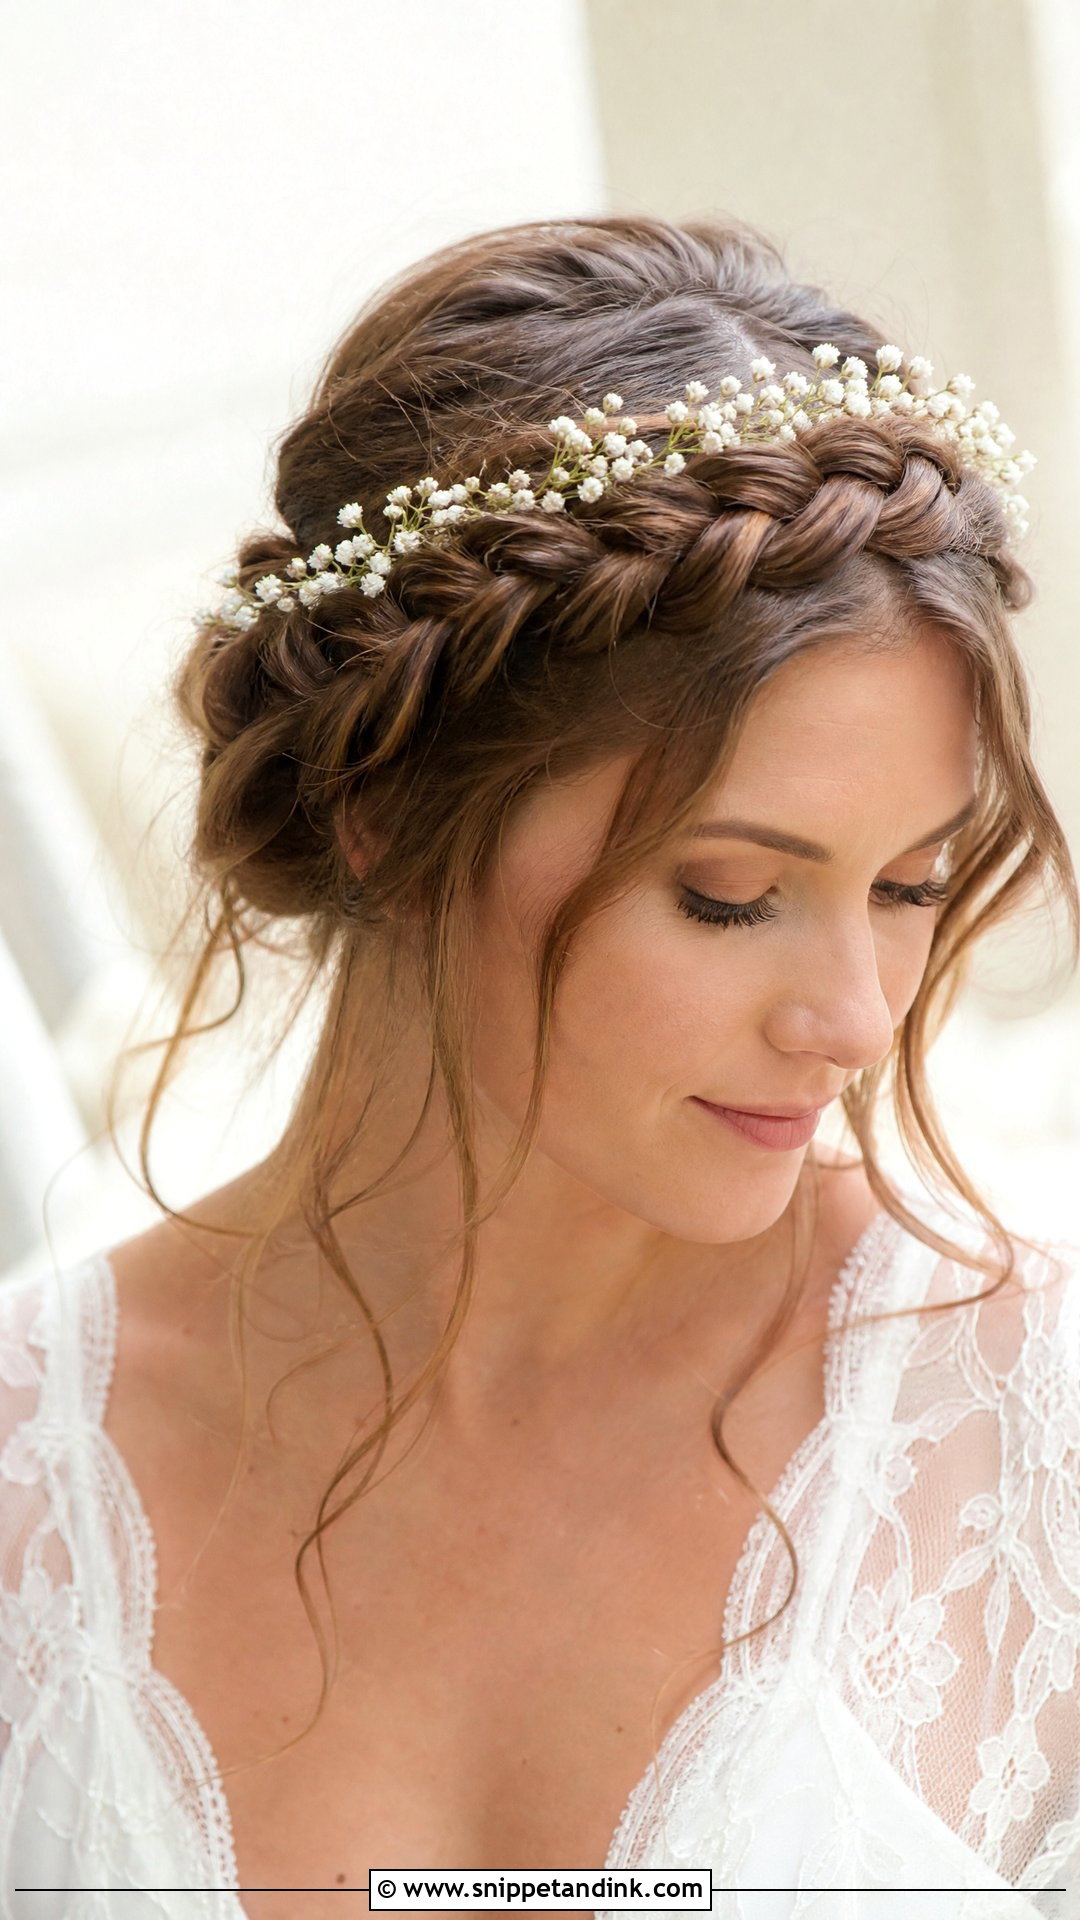
A braided crown sits on top of the head, so the braid has to carry its own weight around the whole circle. I start it behind one ear and finish by tucking the end under the starting point so there’s no visible tail. Thin hair often needs a clip-in piece braided in to look full enough. Baby’s breath tucks neatly between the plaits, and because every strand is off your face and neck, it’s the style I suggest for hot outdoor ceremonies.
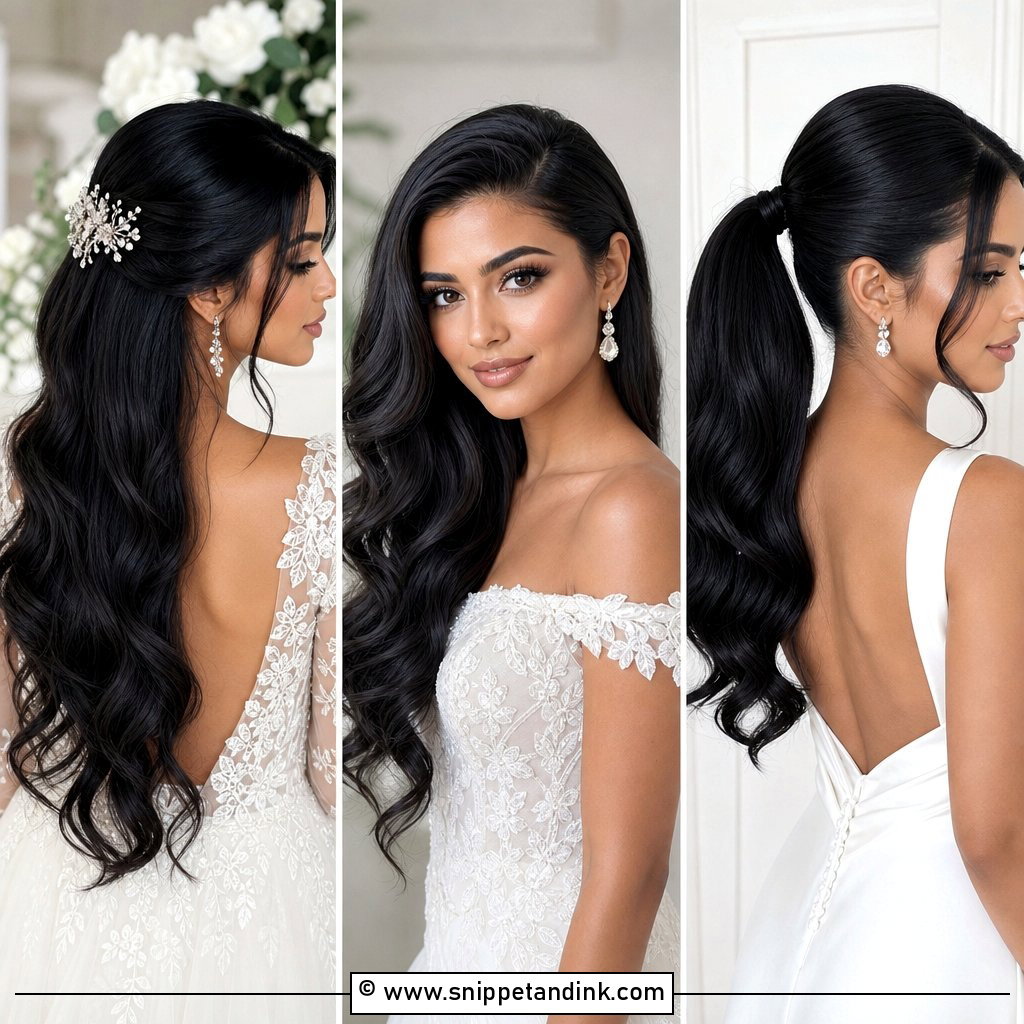
6. Sleek High Ponytail Wedding Look
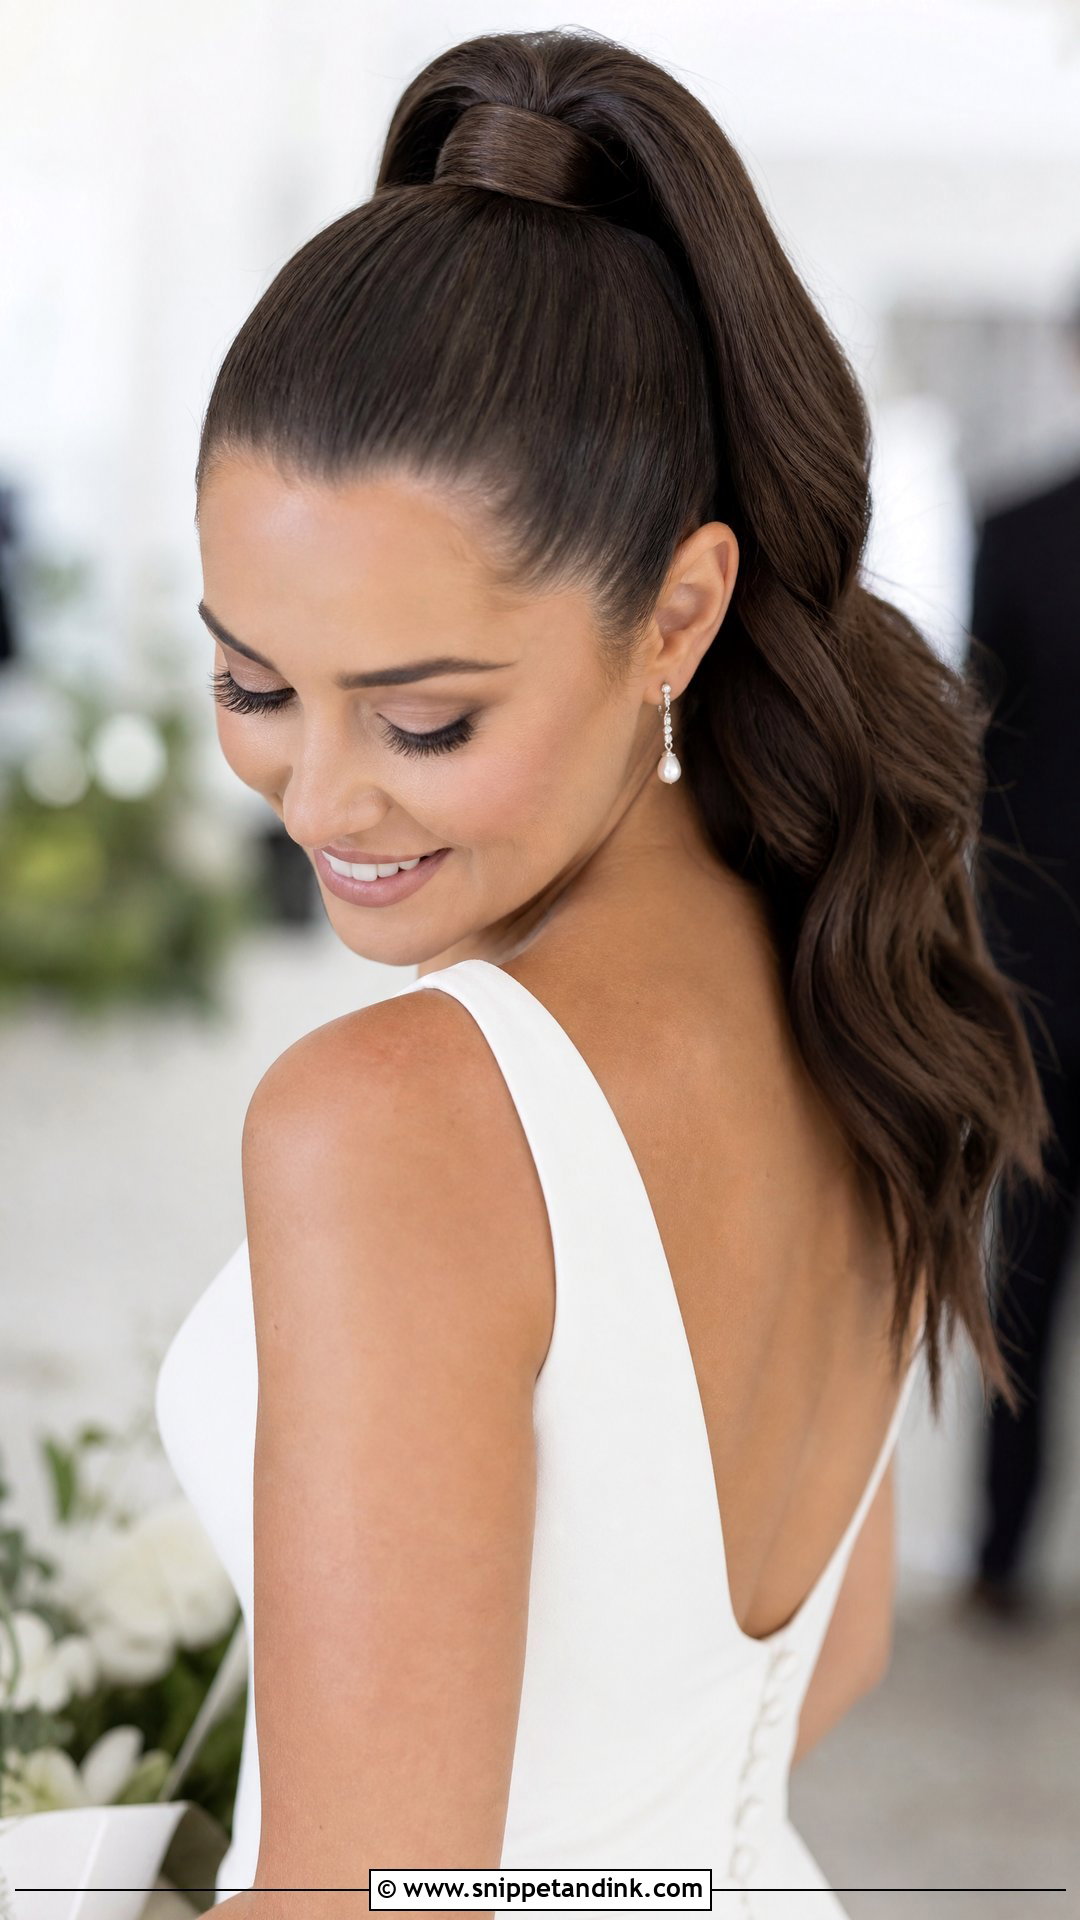
A high ponytail looks simple and takes more work than most updos. The crown has to be brushed completely smooth before the elastic goes on, and I use two elastics, one at the base and a second just below it, so the tail stands up instead of drooping by the reception. A strand wrapped around the base hides both. I’d steer you away from this one if you’re planning a heavy cathedral veil, since there’s nowhere secure to anchor it. Statement earrings, on the other hand, get the whole stage.
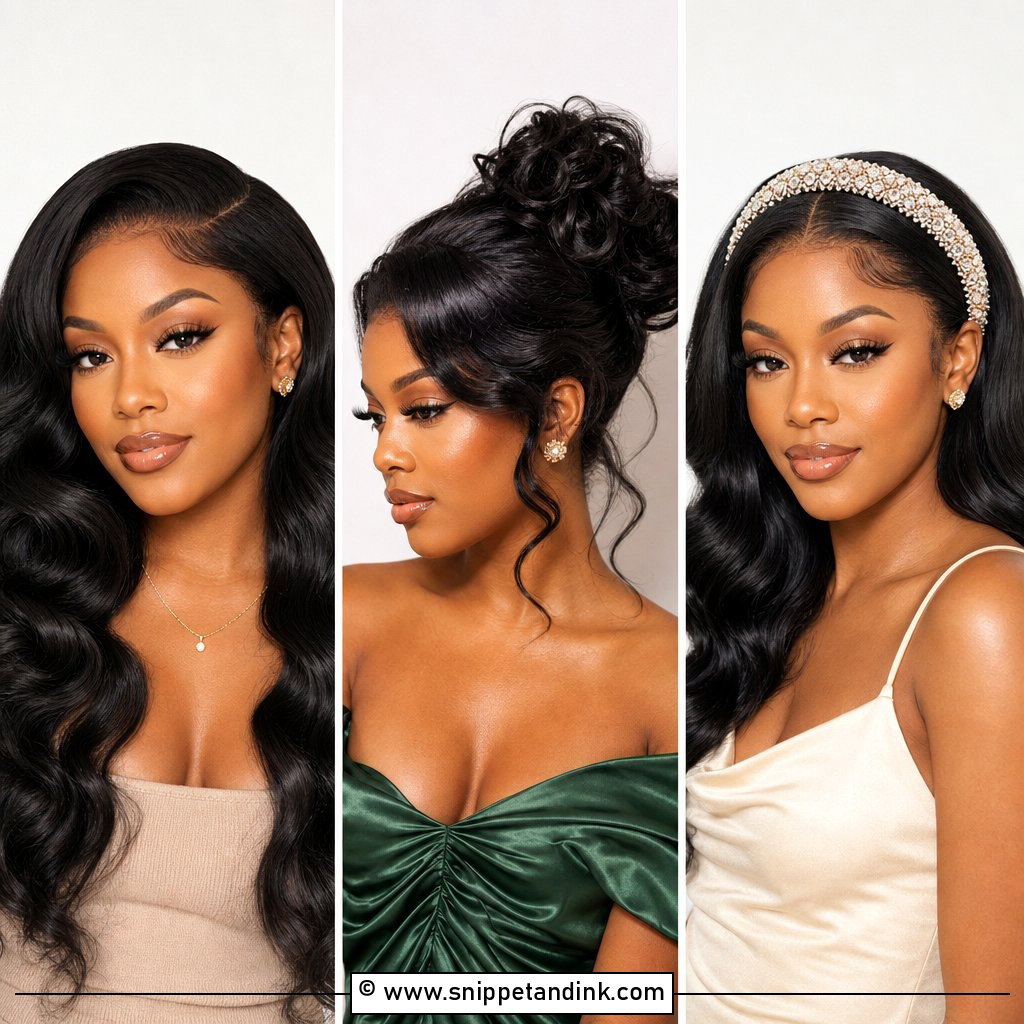
7. Loose Curls with Face-Framing Waves
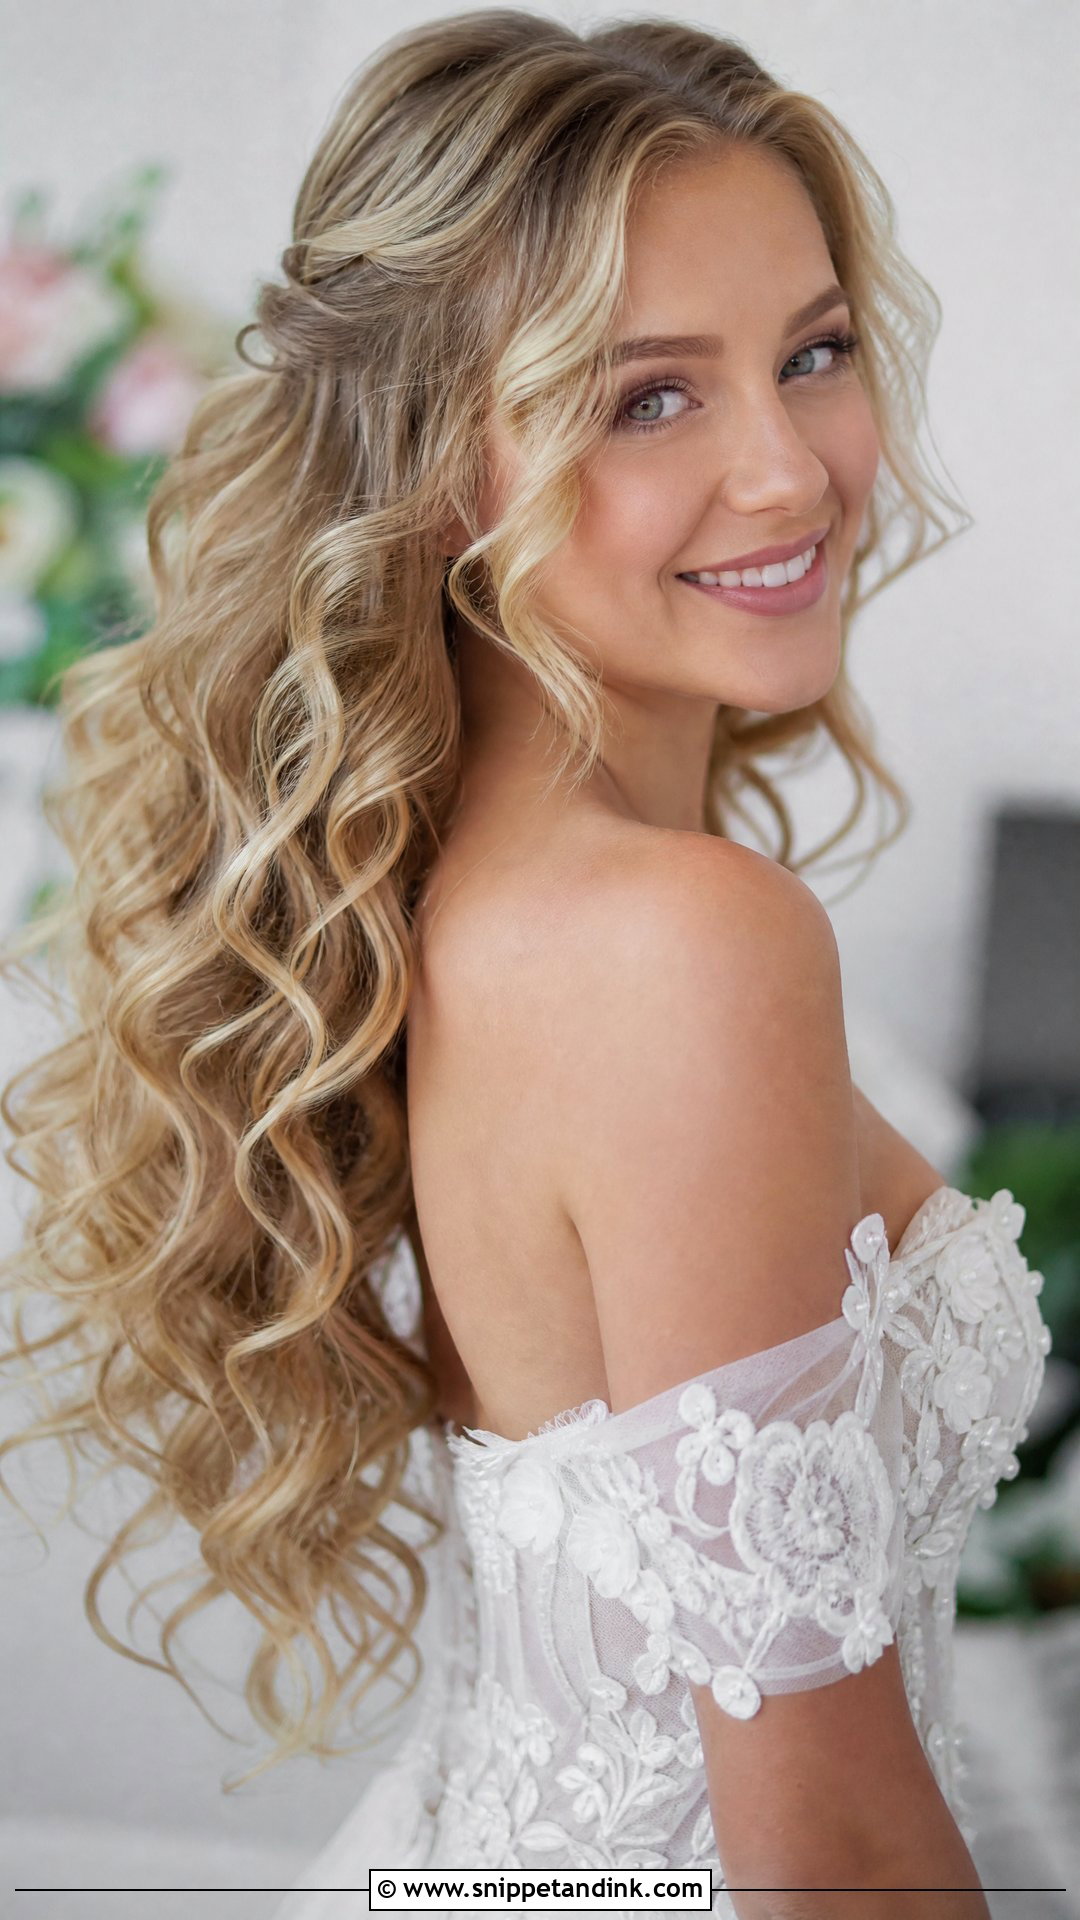
With loose curls, the front pieces matter more than the rest. I curl the sections around the face away from it, so they open up the cheekbones instead of hiding them, and I alternate direction through the back so the curls don’t merge into one sheet. They hold best when I put a light mousse through damp hair before blow-drying. Leave them free or pin one side back with a small clip. Expect them to relax a little by evening; most brides like that softer version even more.
8. French Twist Updo
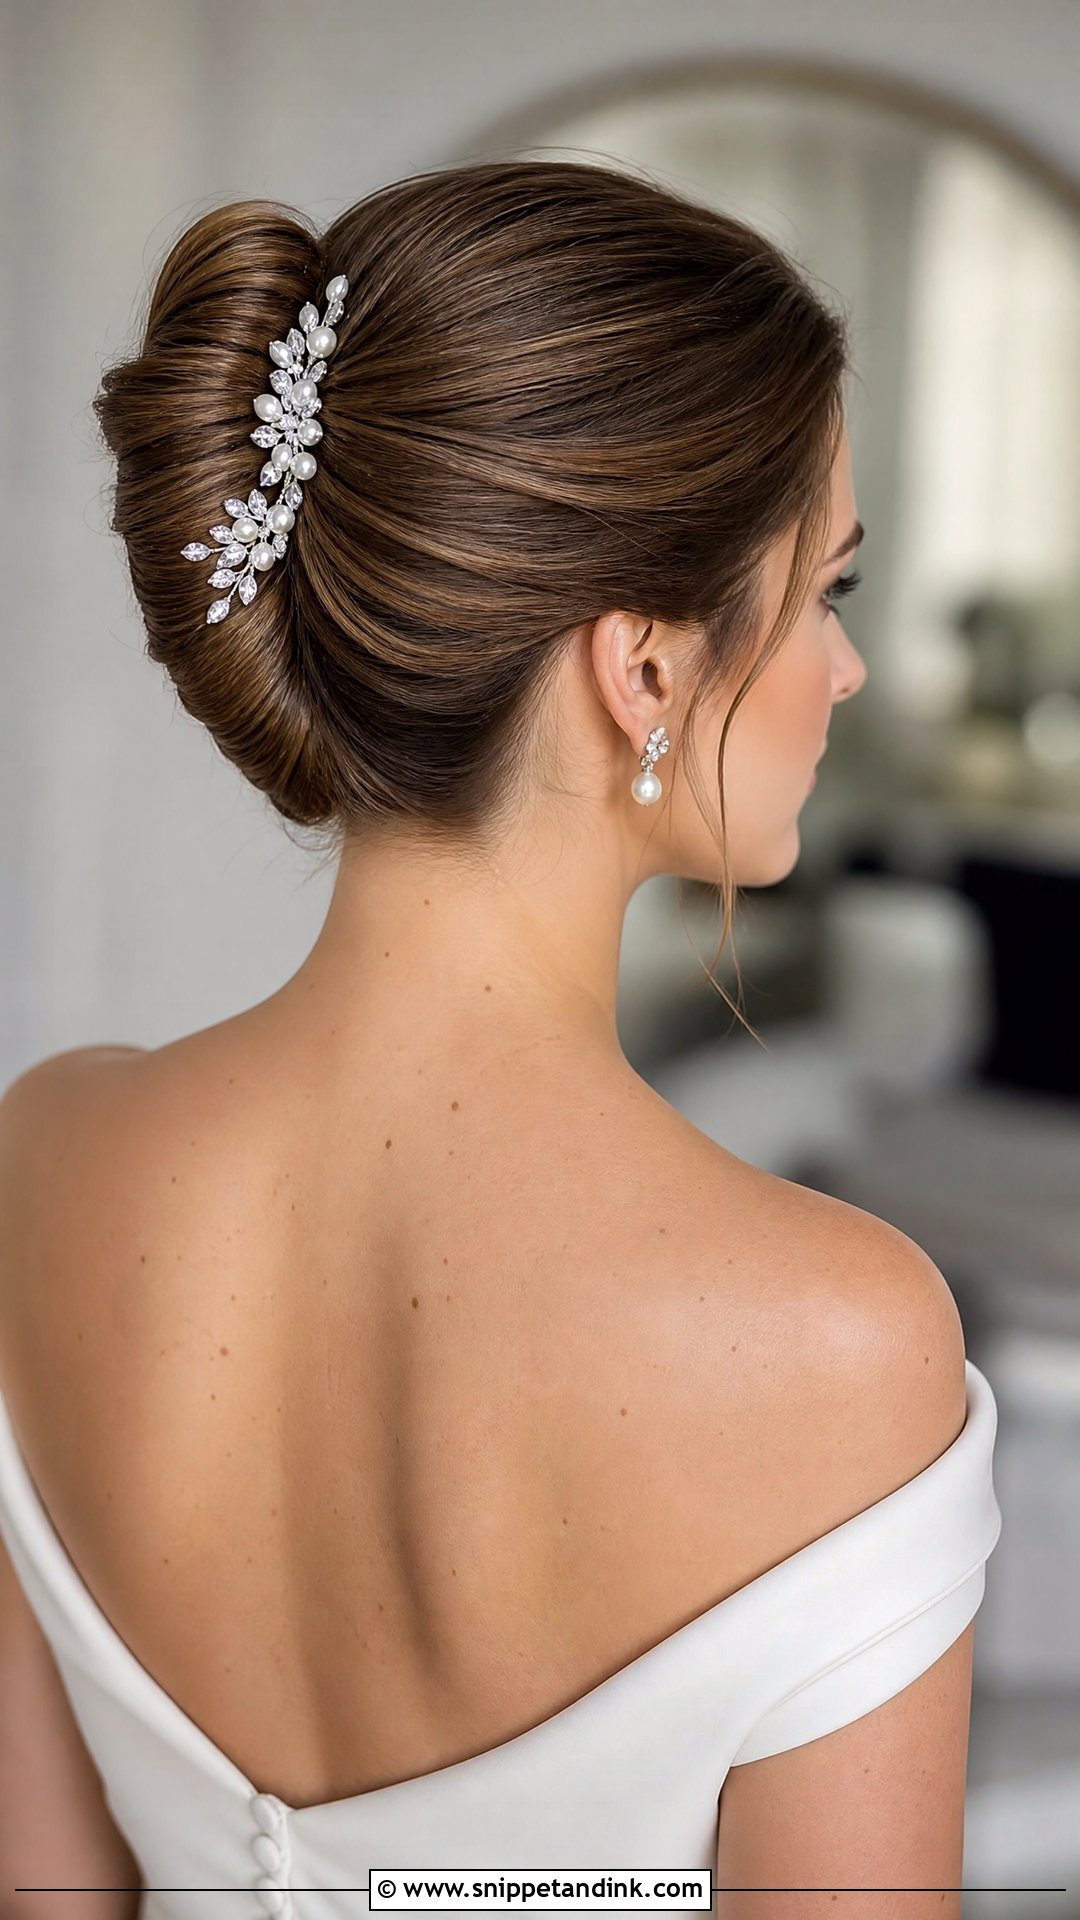
The French twist folds the hair vertically up the back of the head, and the secret is a little backcombing along the fold line so the pins have something to grip. Without it, sleek hair slides out of a twist within hours. Nothing touches your neck, which makes it comfortable through a long reception. A jeweled comb tucked along the seam adds sparkle. If your hair is shorter than collarbone length the fold won’t close cleanly, and I’d suggest a low bun instead.
9. Boho Braided Updo
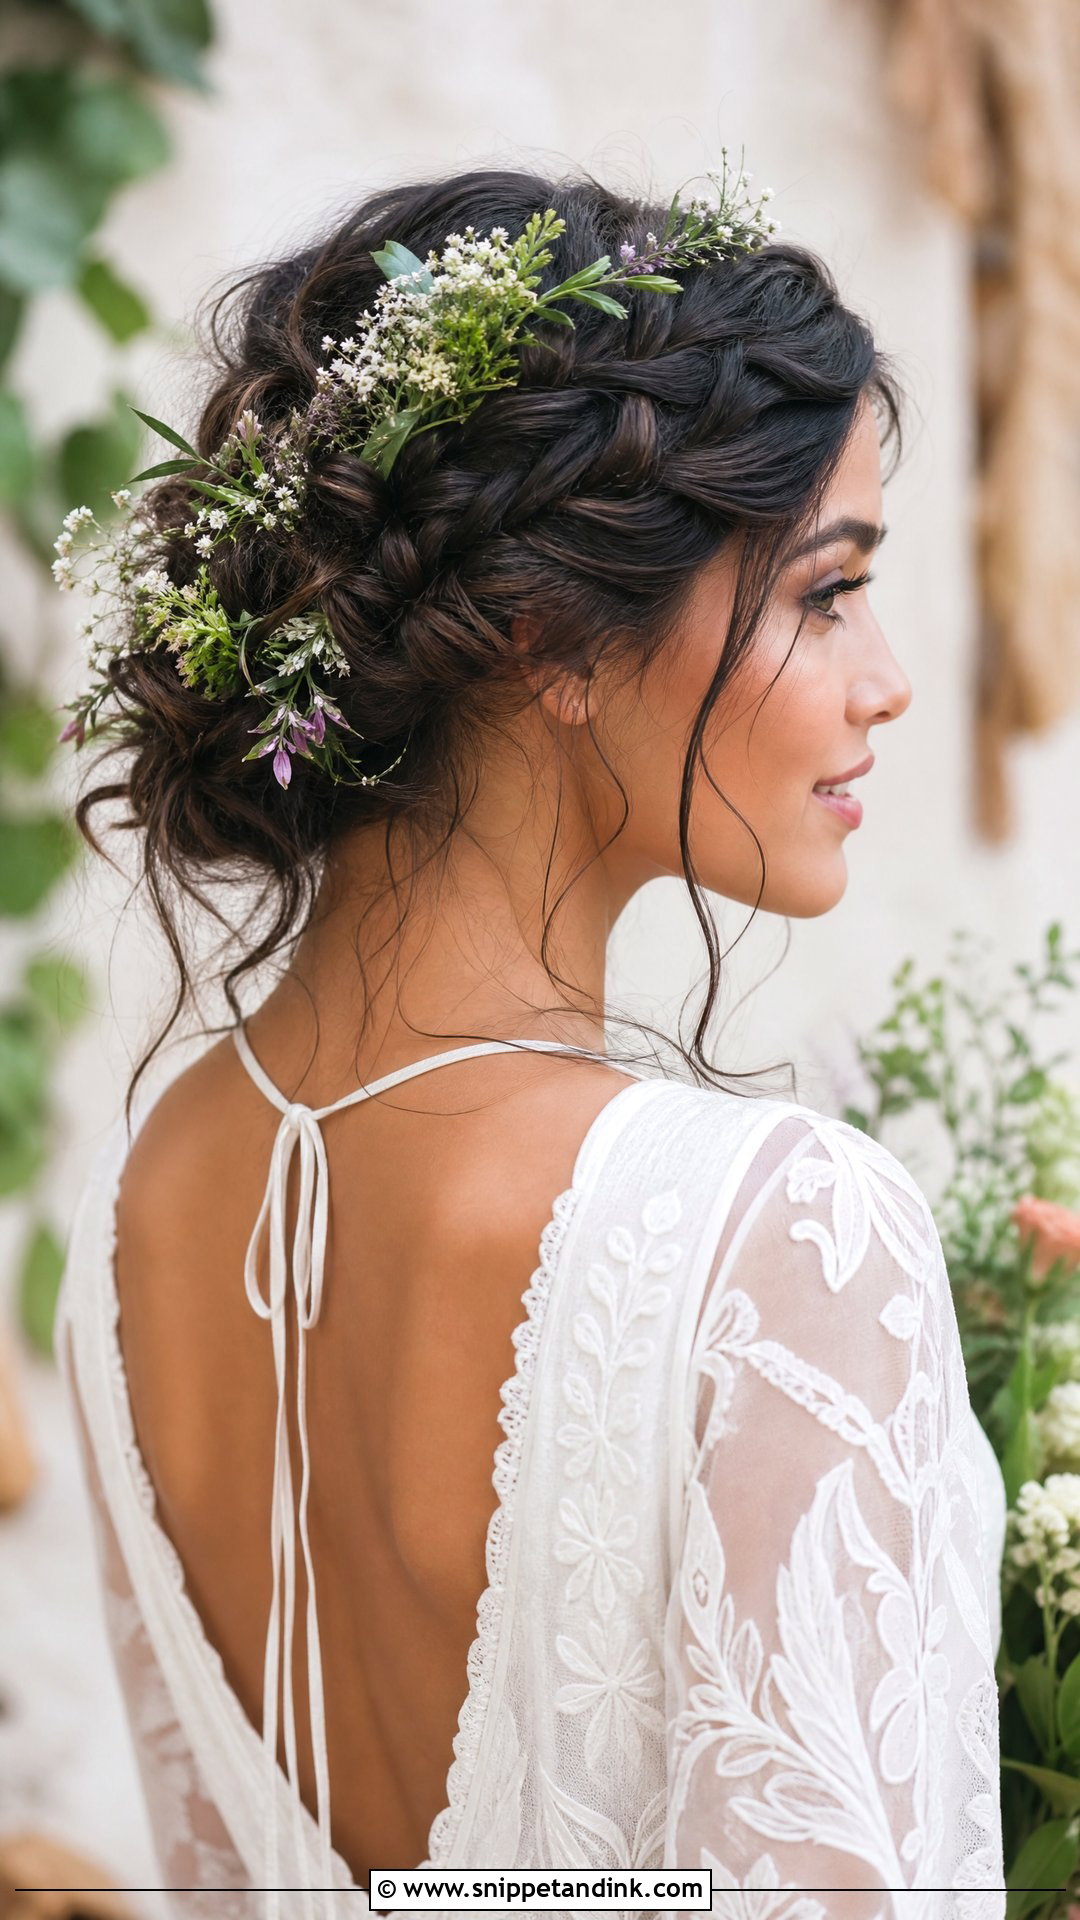
A boho braided updo is several loose braids and twists pinned together so the joins disappear. I braid it on second-day hair or add a texturizing spray first, because freshly washed hair is too slippery to stay loose without falling apart. Pull pieces out with your fingertips, a little at a time. Wildflowers and greenery suit it, but pick stems that won’t wilt: small sprigs of waxflower or dried blooms outlast soft petals in the heat. Wavy and curly hair carries this better than very straight hair.
10. Classic Bridal Bun with Veil
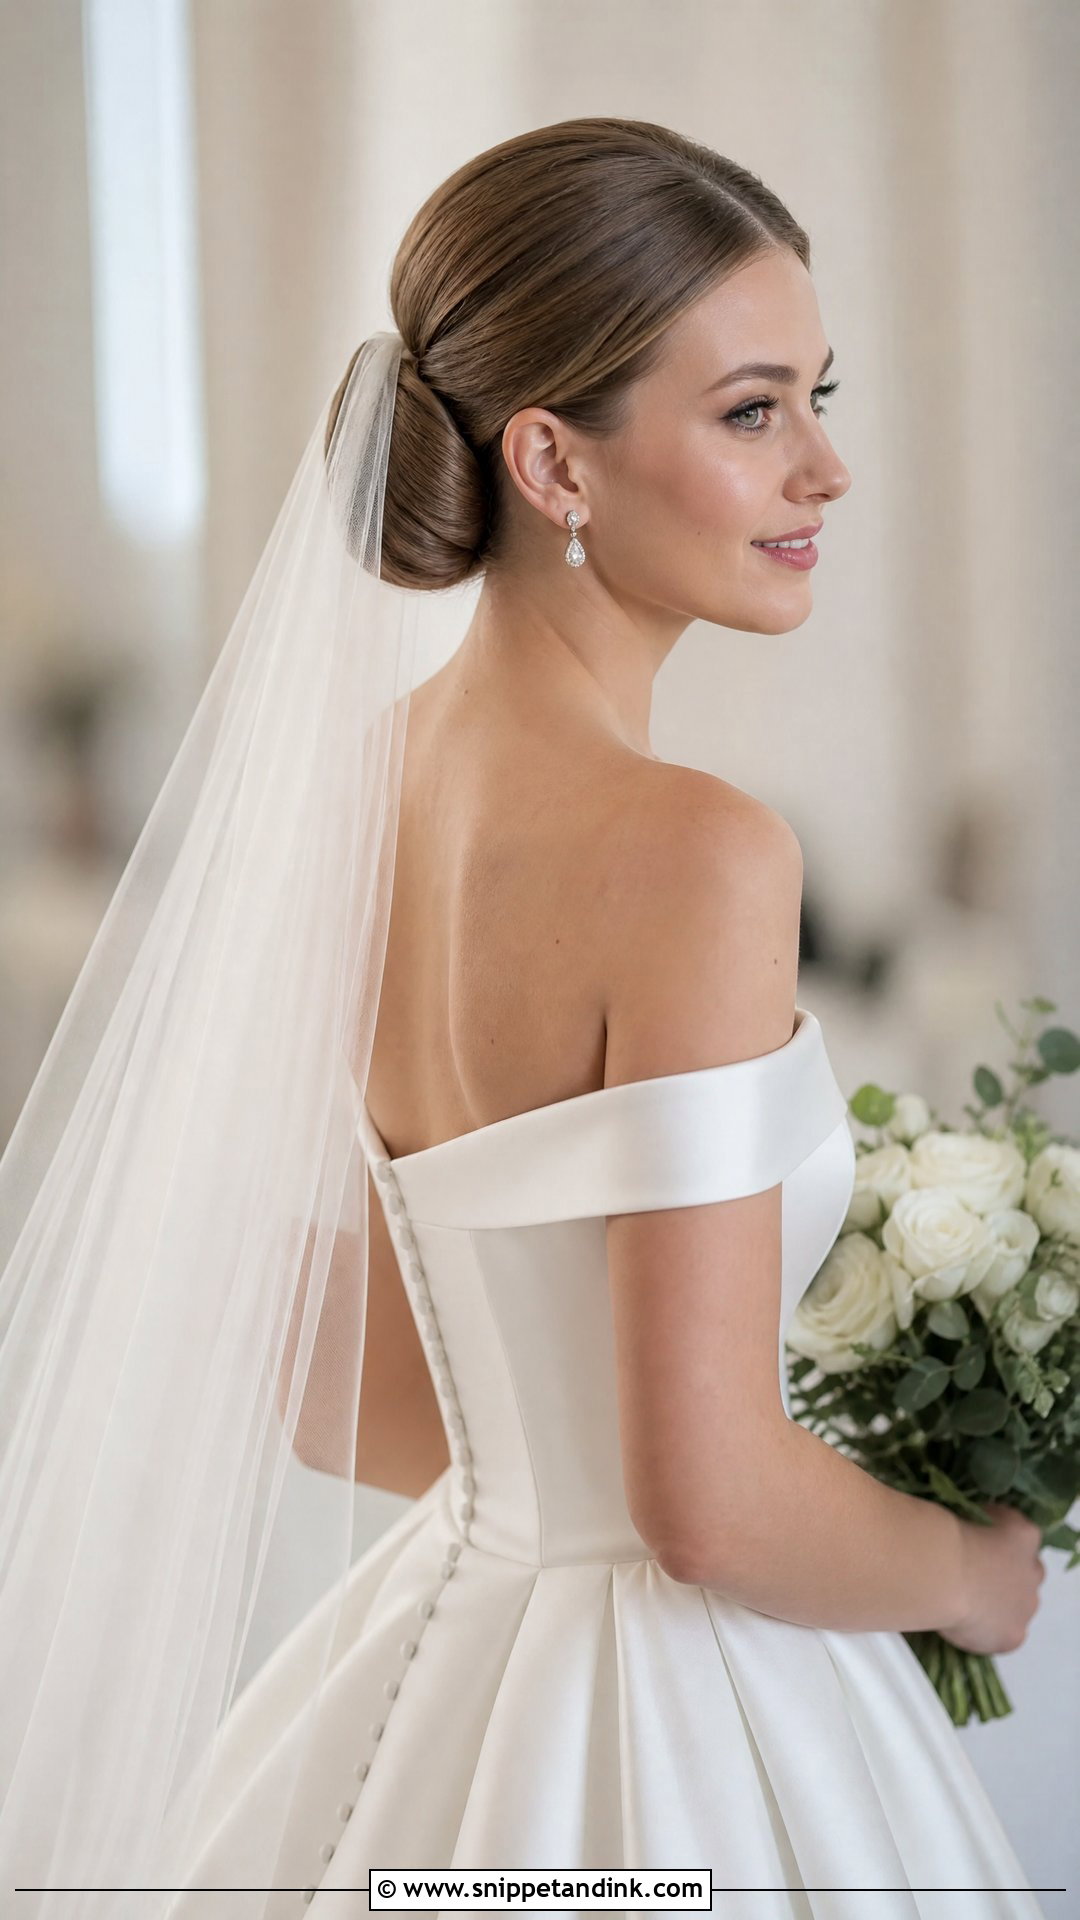
A rounded classic bun is the safest base for a veil. I place the bun first, then decide comb position at the trial with the actual veil in hand, because a cathedral length pulls backward and needs the comb above the bun, while a short veil can tuck beneath it. The smooth shape keeps attention on your face and earrings. A jeweled piece under the veil gives you sparkle once the veil comes off for the reception. Pinned properly, it looks the same at the last dance as it did at the first look.
11. Tousled Updo with Loose Tendrils
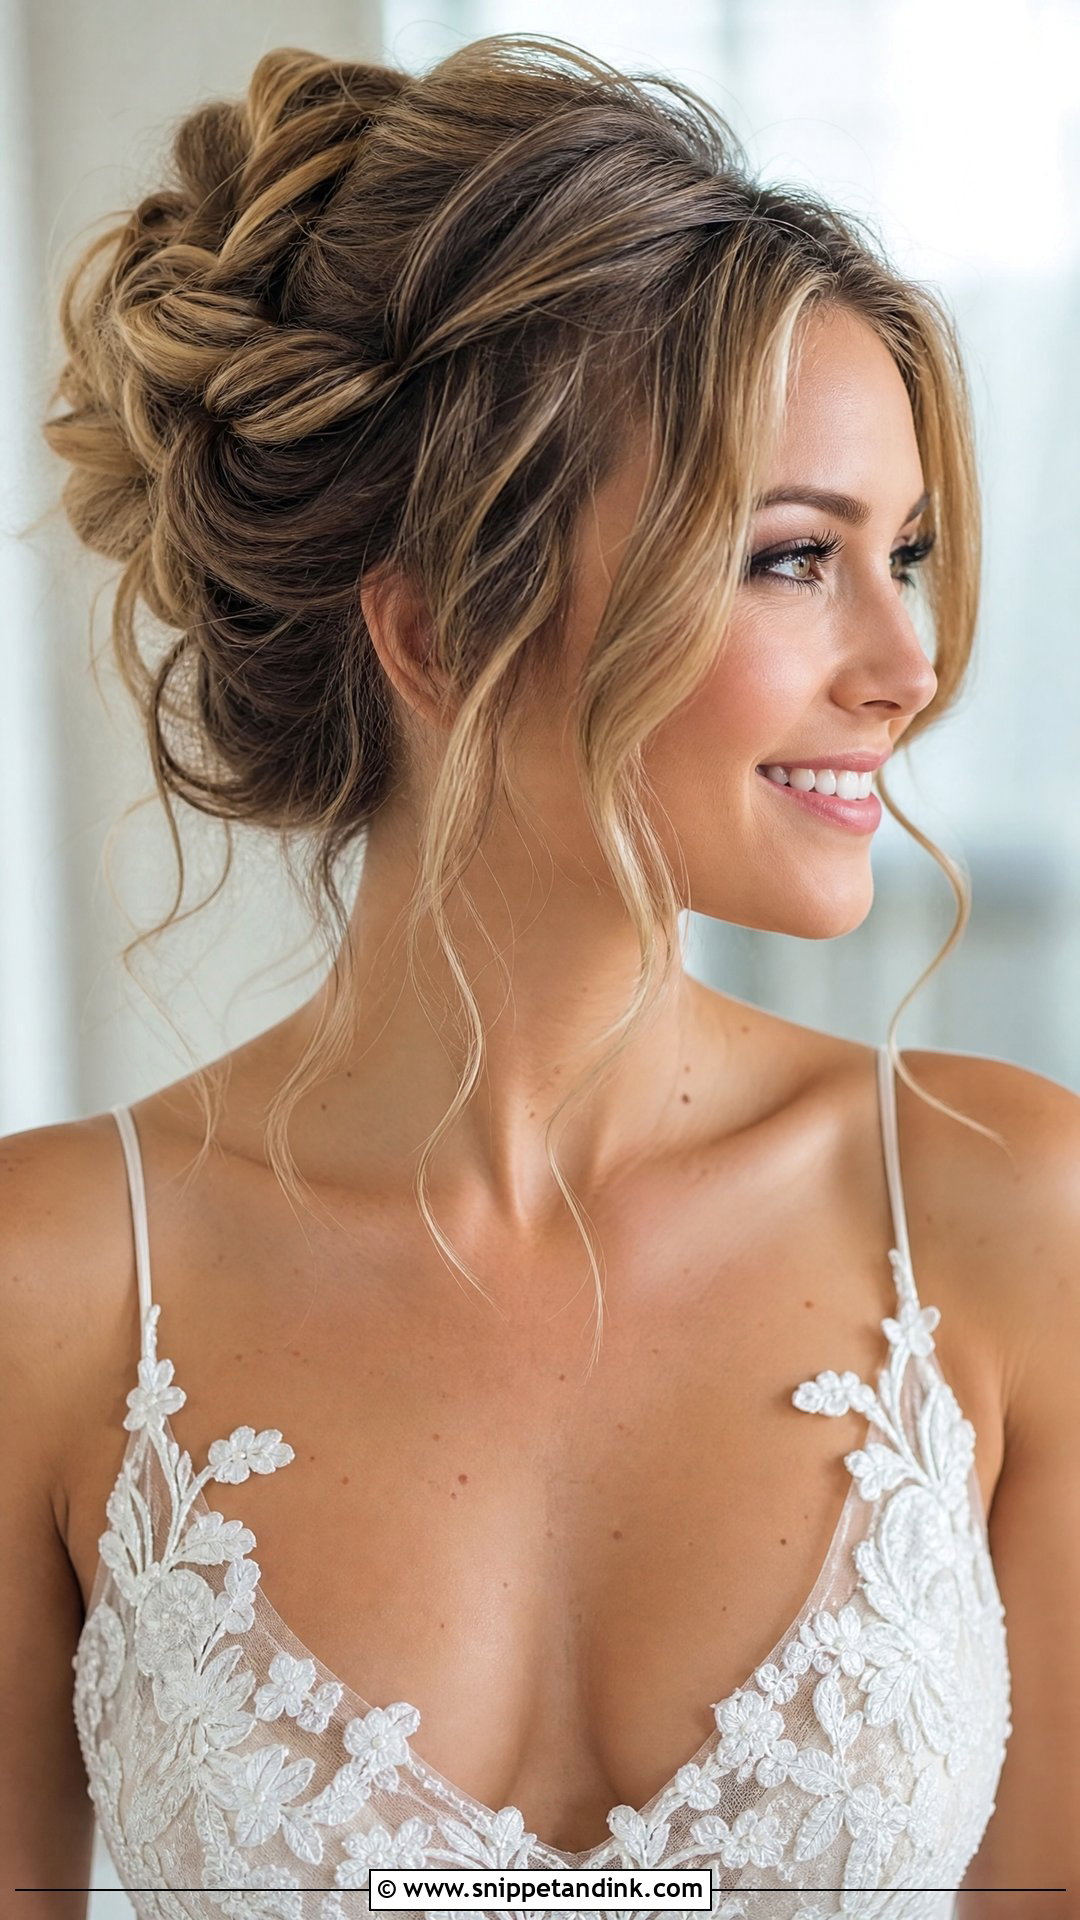
A tousled updo needs structure under the mess. I pin a solid base first and only then pull out texture on top, which is why it holds even though it looks like it might fall down. The tendrils at the hairline are curled separately with a small iron and left to set before they’re released. Wavy and curly hair does most of the work here. Very straight, fine hair tends to look flat rather than undone, so I add texture spray and a loose curl to everything first.
12. Fishtail Braid Bridal Hairstyle
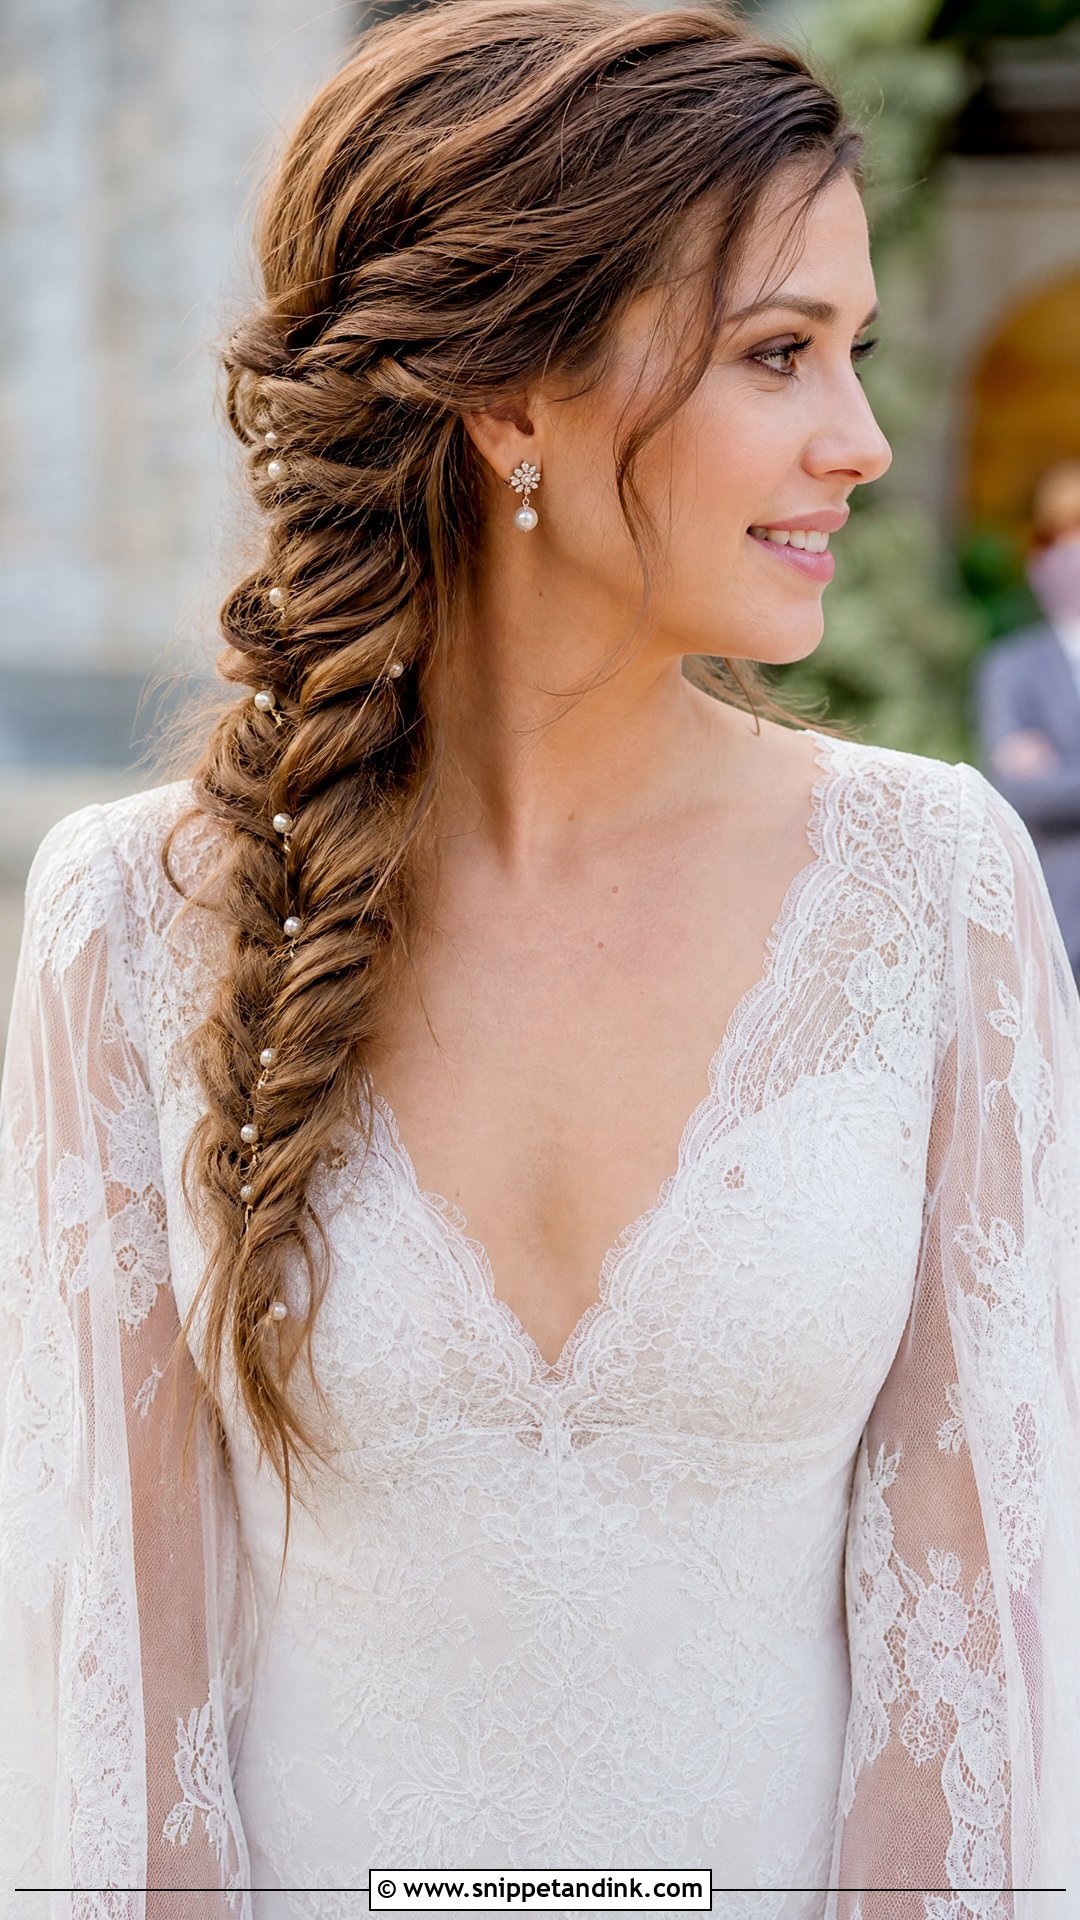
A fishtail uses only two sections, crossing a tiny piece from the outside of each, and the smaller the pieces, the finer the herringbone looks. Over one shoulder or wrapped into an updo, it reads well in close-up photos. I loosen it by pulling the outer edges gently after it’s secured, working up from the bottom. It needs hair past the shoulders and rewards thickness. Tiny pearls pinned along the braid add detail without hiding the pattern.
13. Voluminous Curly Updo
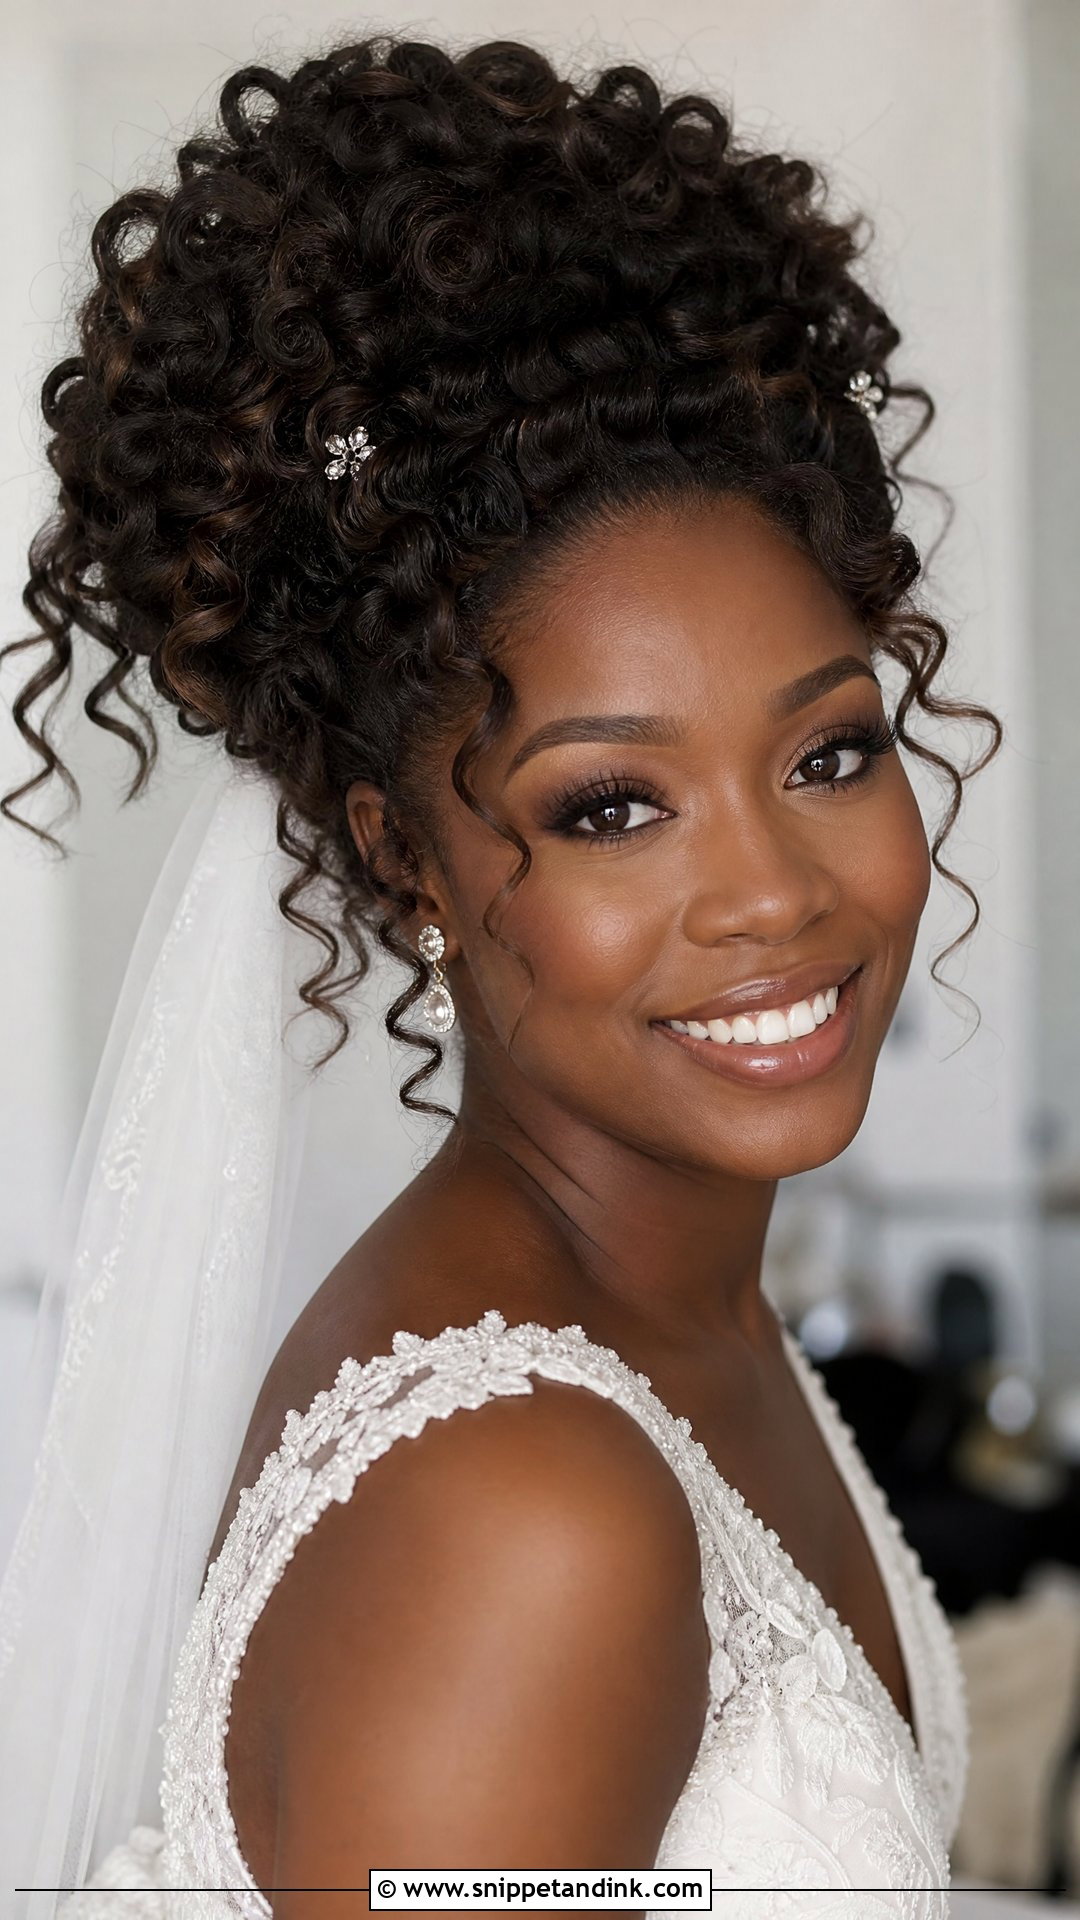
For a curly updo I work with the natural curl pattern instead of ironing it out. I’d rather refresh curls with a little water and gel than brush them, because brushing breaks curls into frizz. They’re gathered loosely high on the head and pinned in clusters, with a few coils left free around the face. Height comes from placement, not teasing, which keeps every curl defined. Flowers or sparkly pins tuck easily between the clusters, and the result is full, regal and very much your own hair.
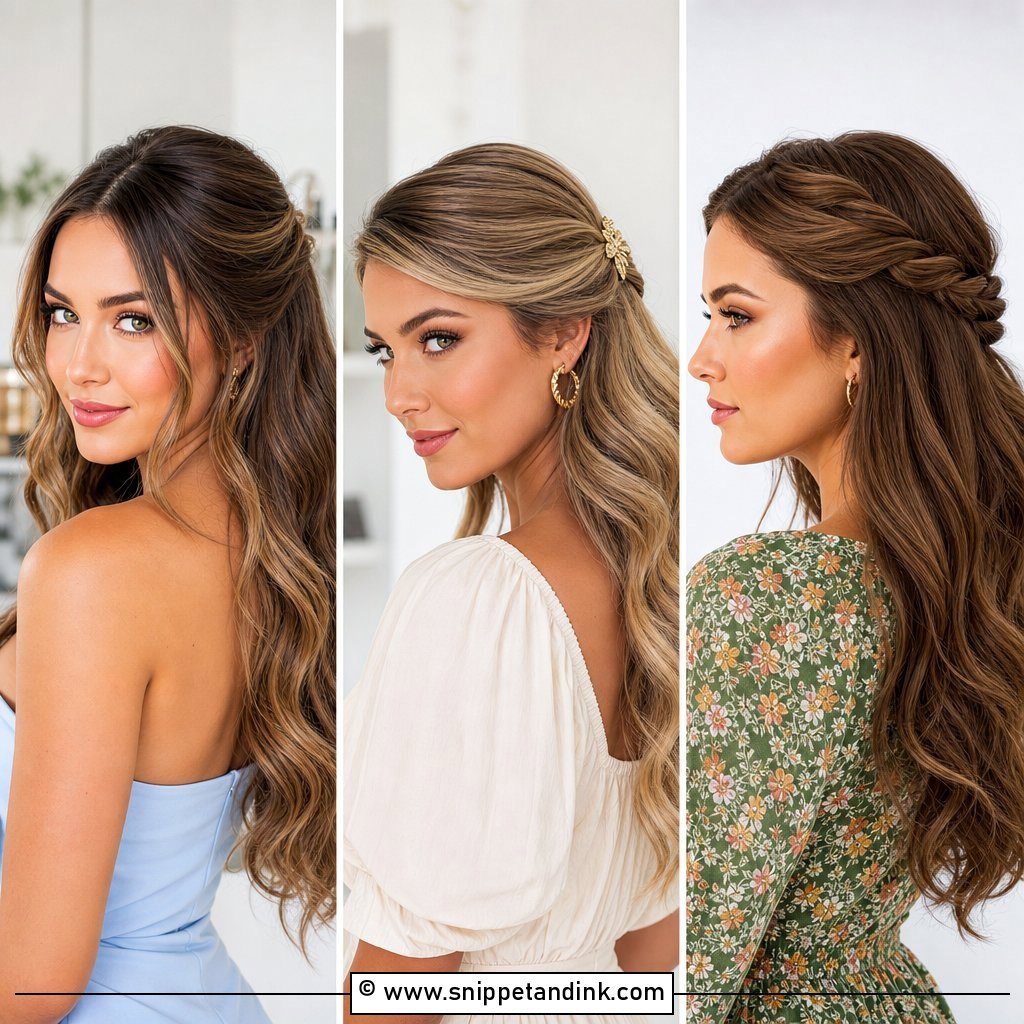
14. Side Swept Curls for Brides
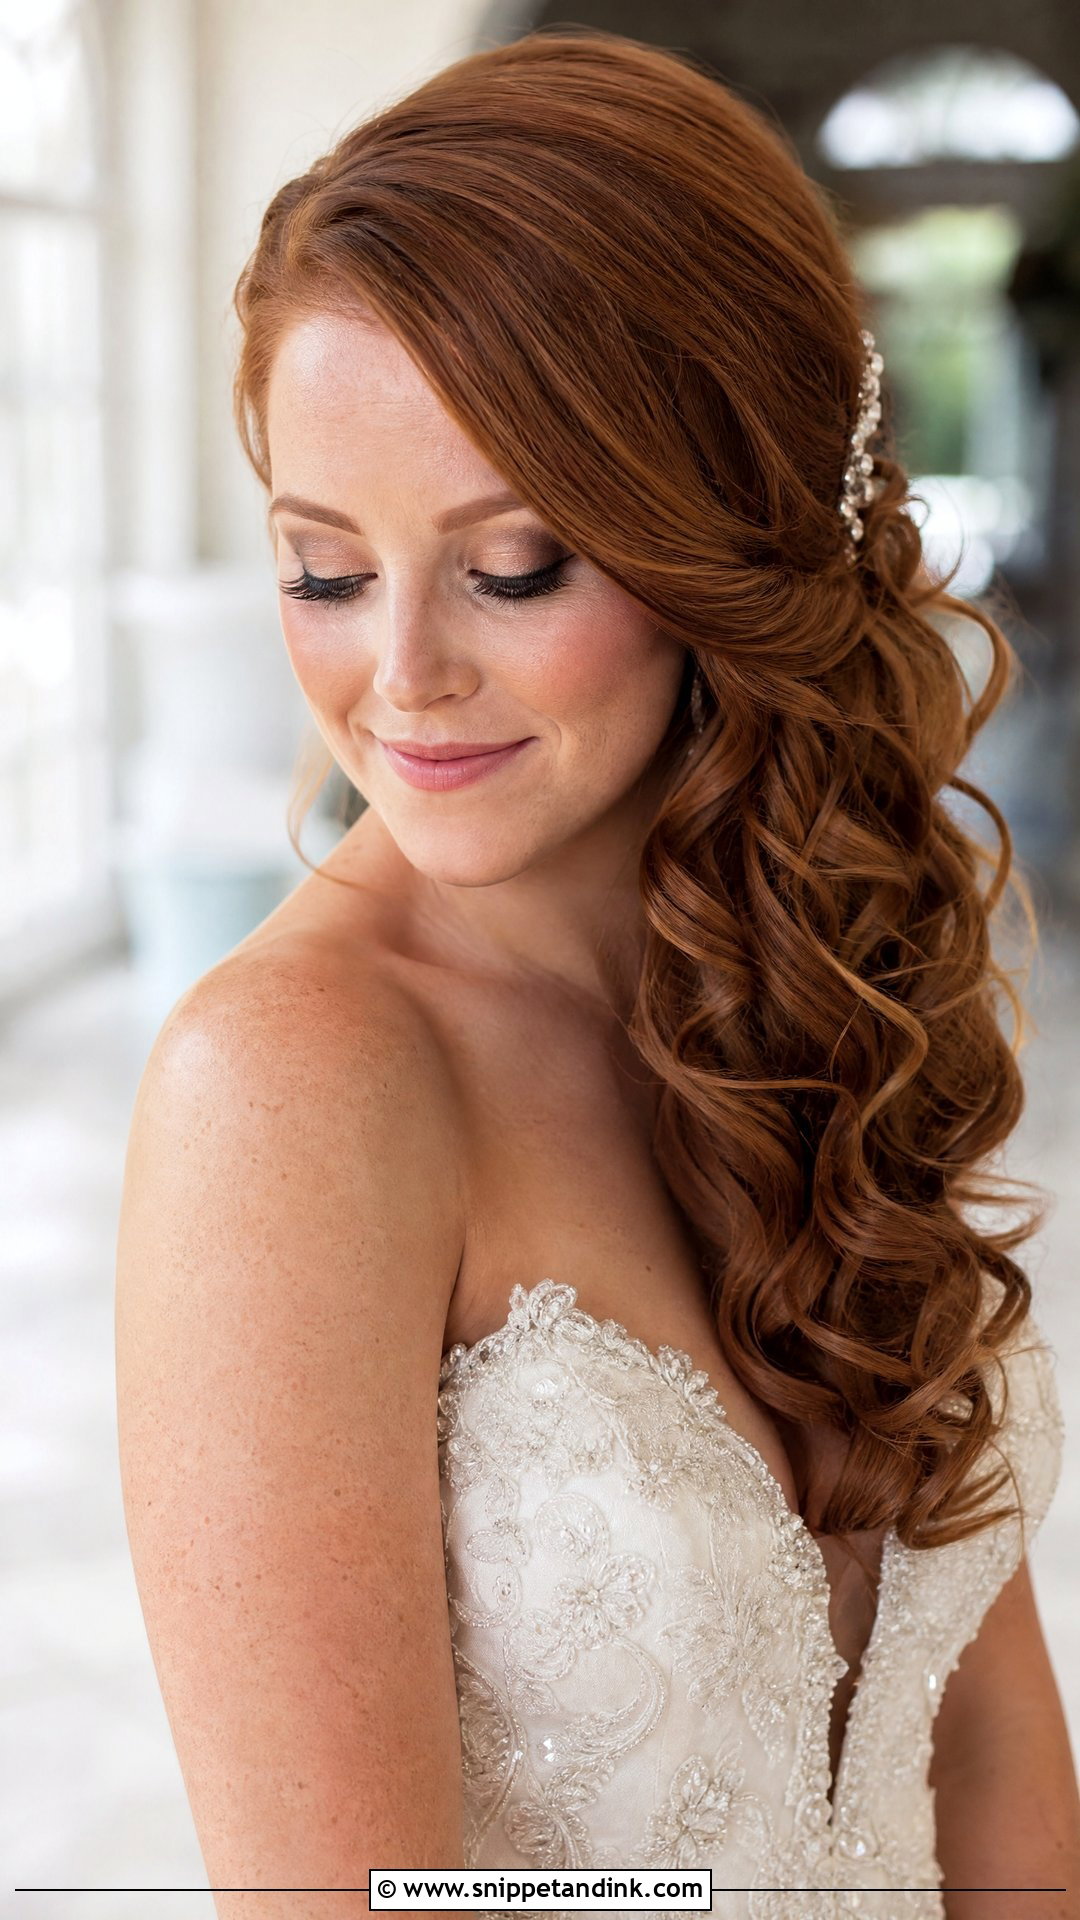
Side-swept curls need an anchor behind the ear on the swept side, or the weight drags everything back to center within an hour. I cross two bobby pins under the hair there and cover them with a decorative clip. The open side shows off your neckline and earrings, so think about which profile you’d like photographed as you walk down the aisle. Medium to long hair works best. You get old Hollywood charm without the full sculpted set of the waves above.
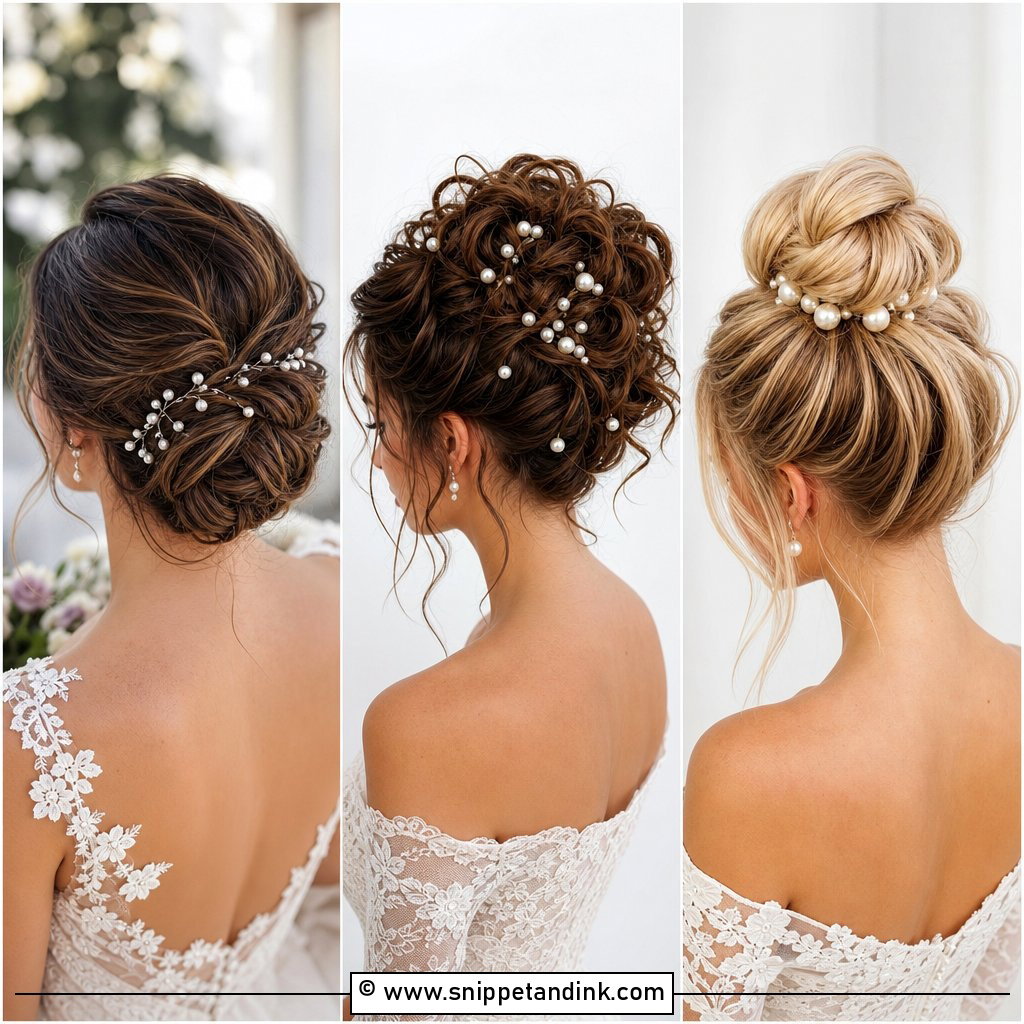
15. Sleek Ballerina Bun
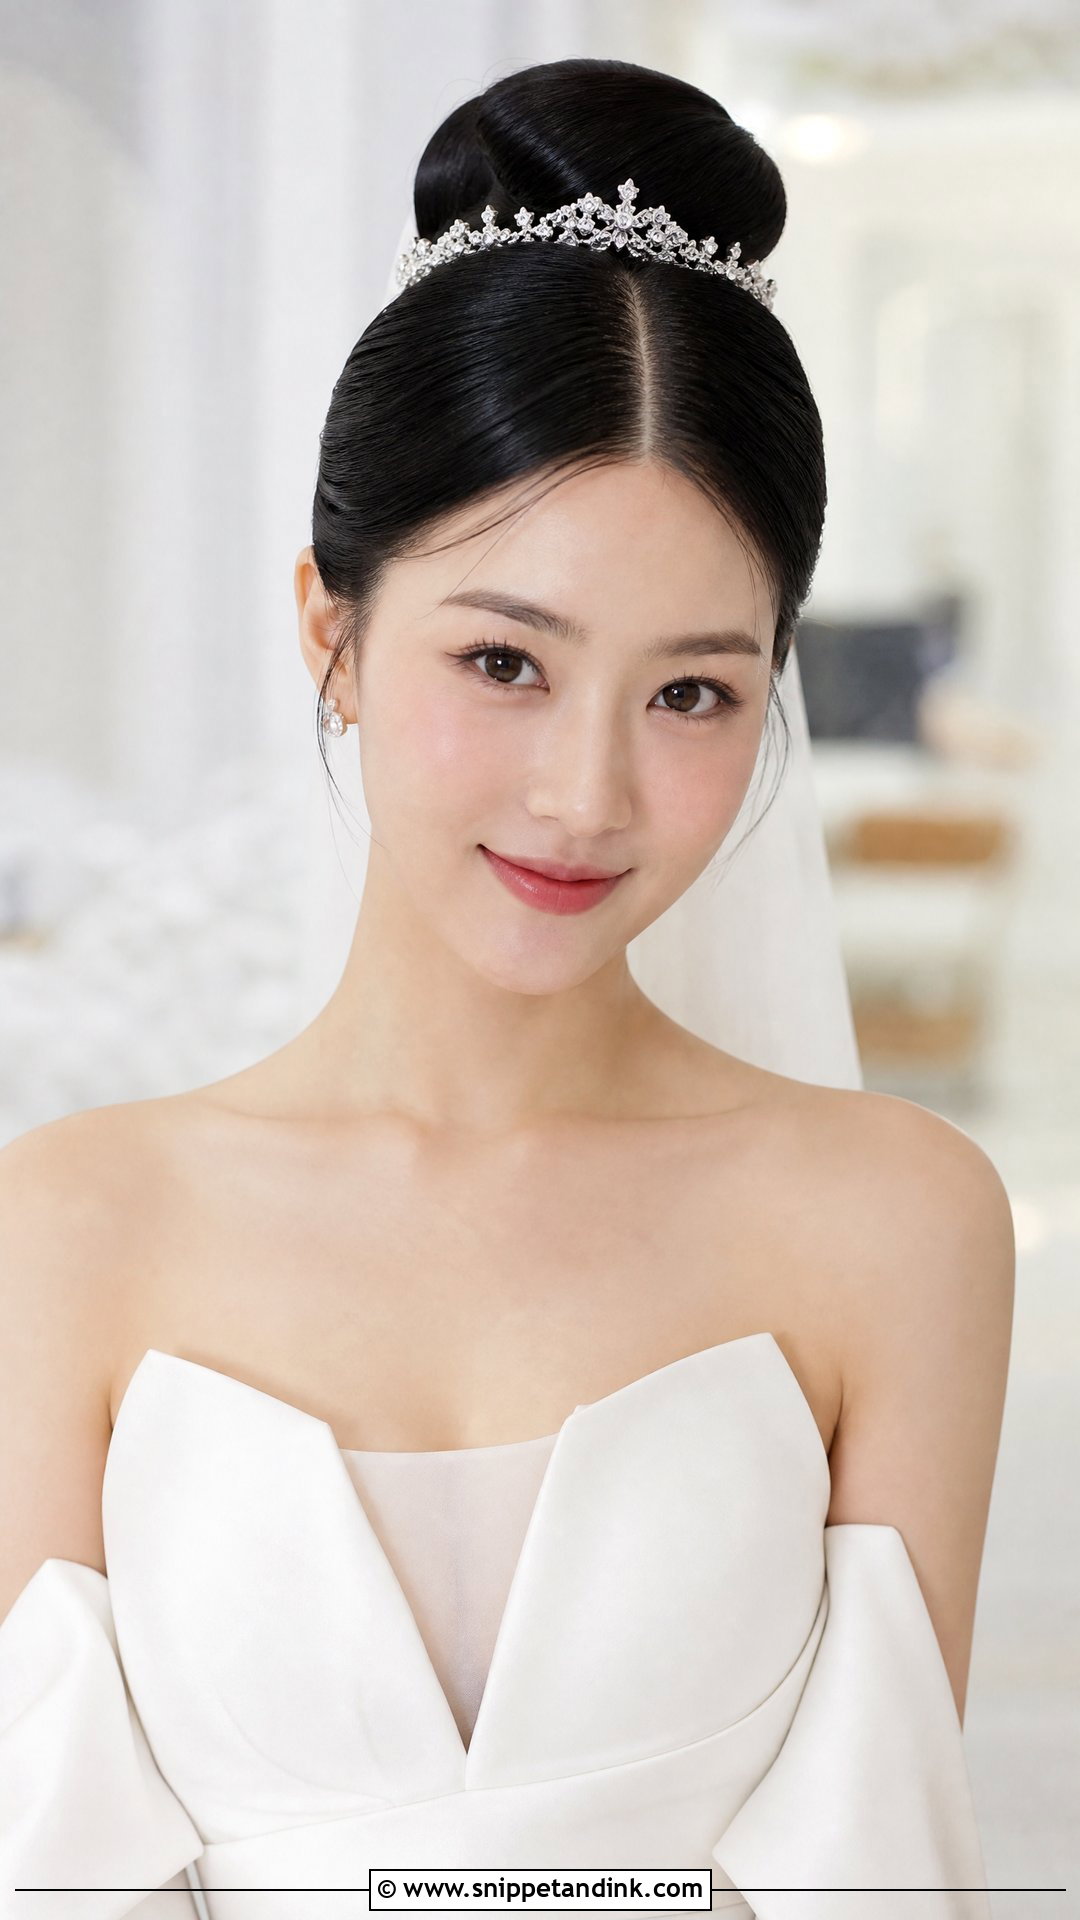
The sleek ballerina bun is having a real moment, and it’s quick to execute once the prep is right. The hair is pulled smooth to a high or mid crown, twisted tight and wrapped, with a center part that has to be perfectly straight because it frames everything. A high bun changes your profile, so I always ask brides to look at side-on photos at the trial before committing. It’s secure and clean, and it gives bold earrings or a minimalist tiara plenty of room.
16. Romantic Waves with Center Part
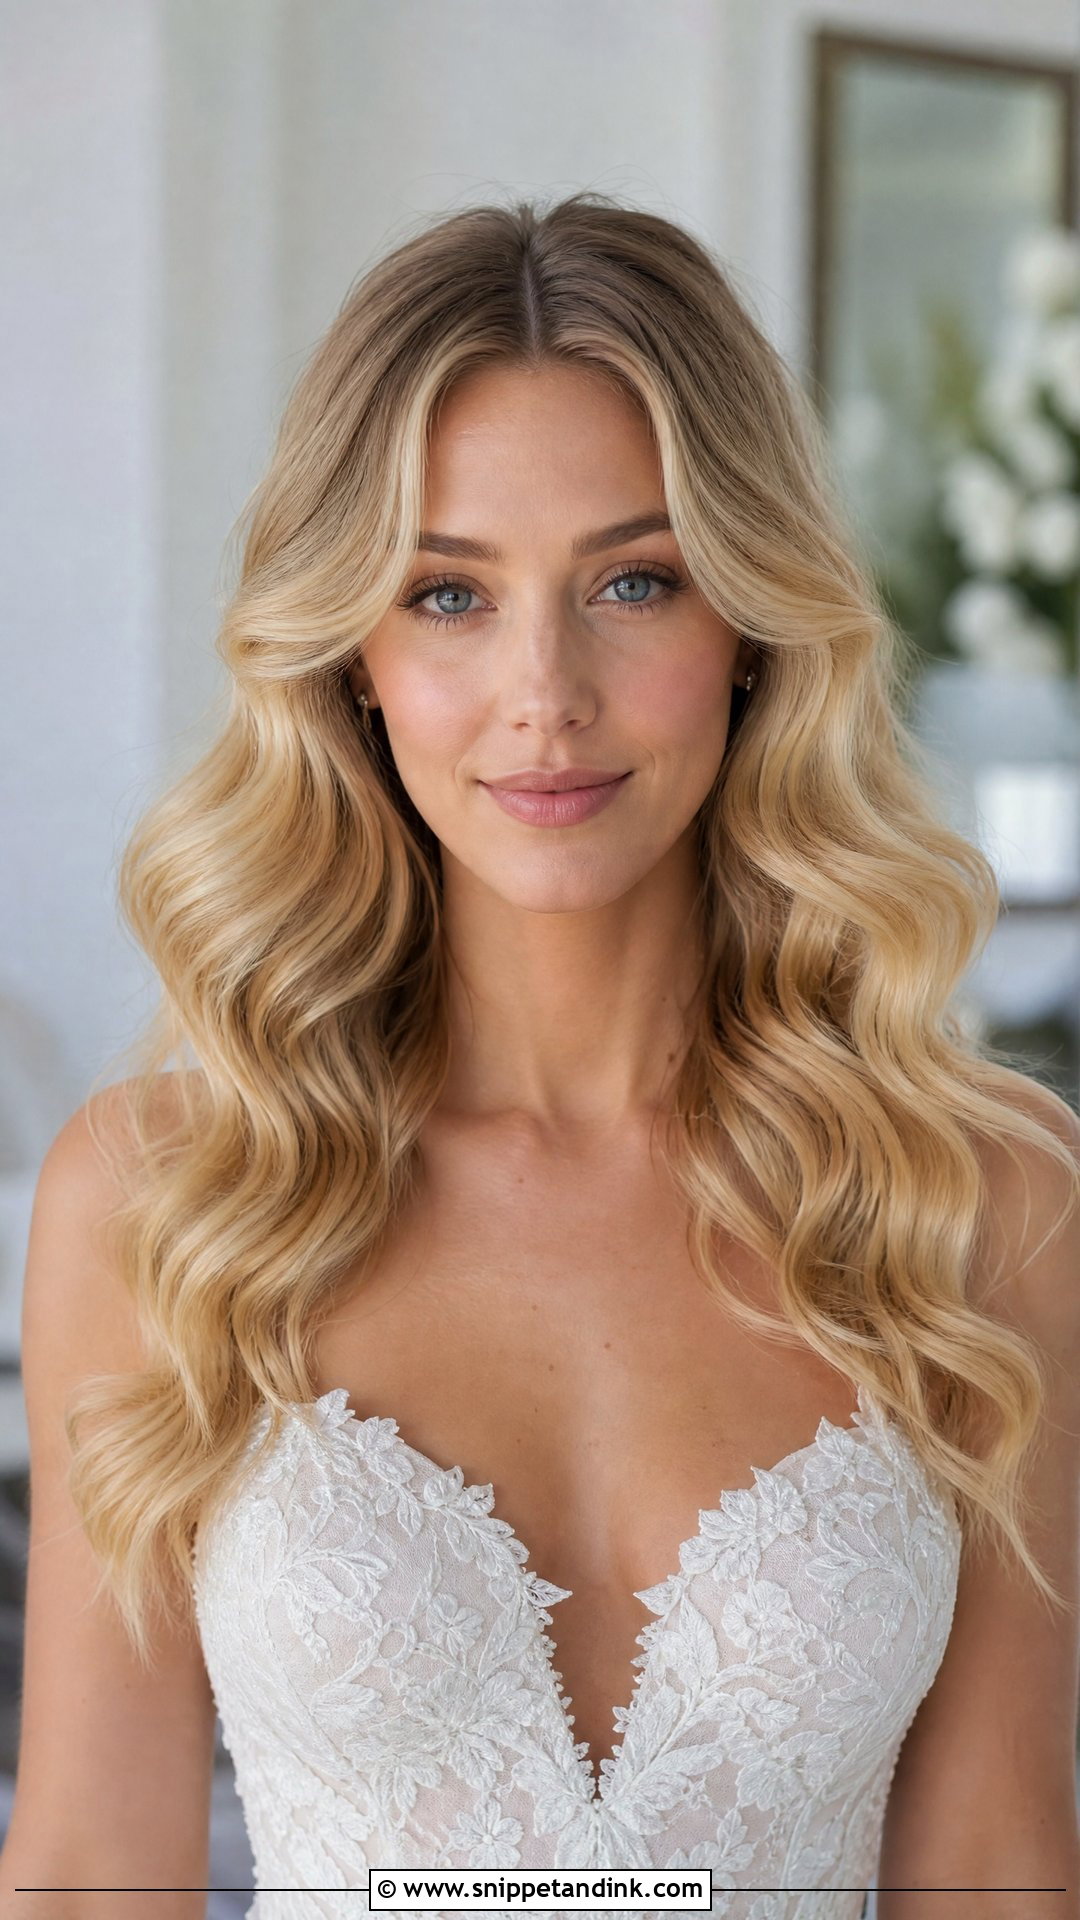
Waves with a center part depend on symmetry. I curl both sides away from the face so they open evenly, then check them straight on in the mirror and on a phone camera, because a part that’s slightly off is easy to miss in person and obvious in a portrait. A mist of shine spray at the end gives the glossy finish. Brides with a strong natural part on one side should test this first; hair trained to fall left will fight a center part all day.
17. Floral Adorned Updo
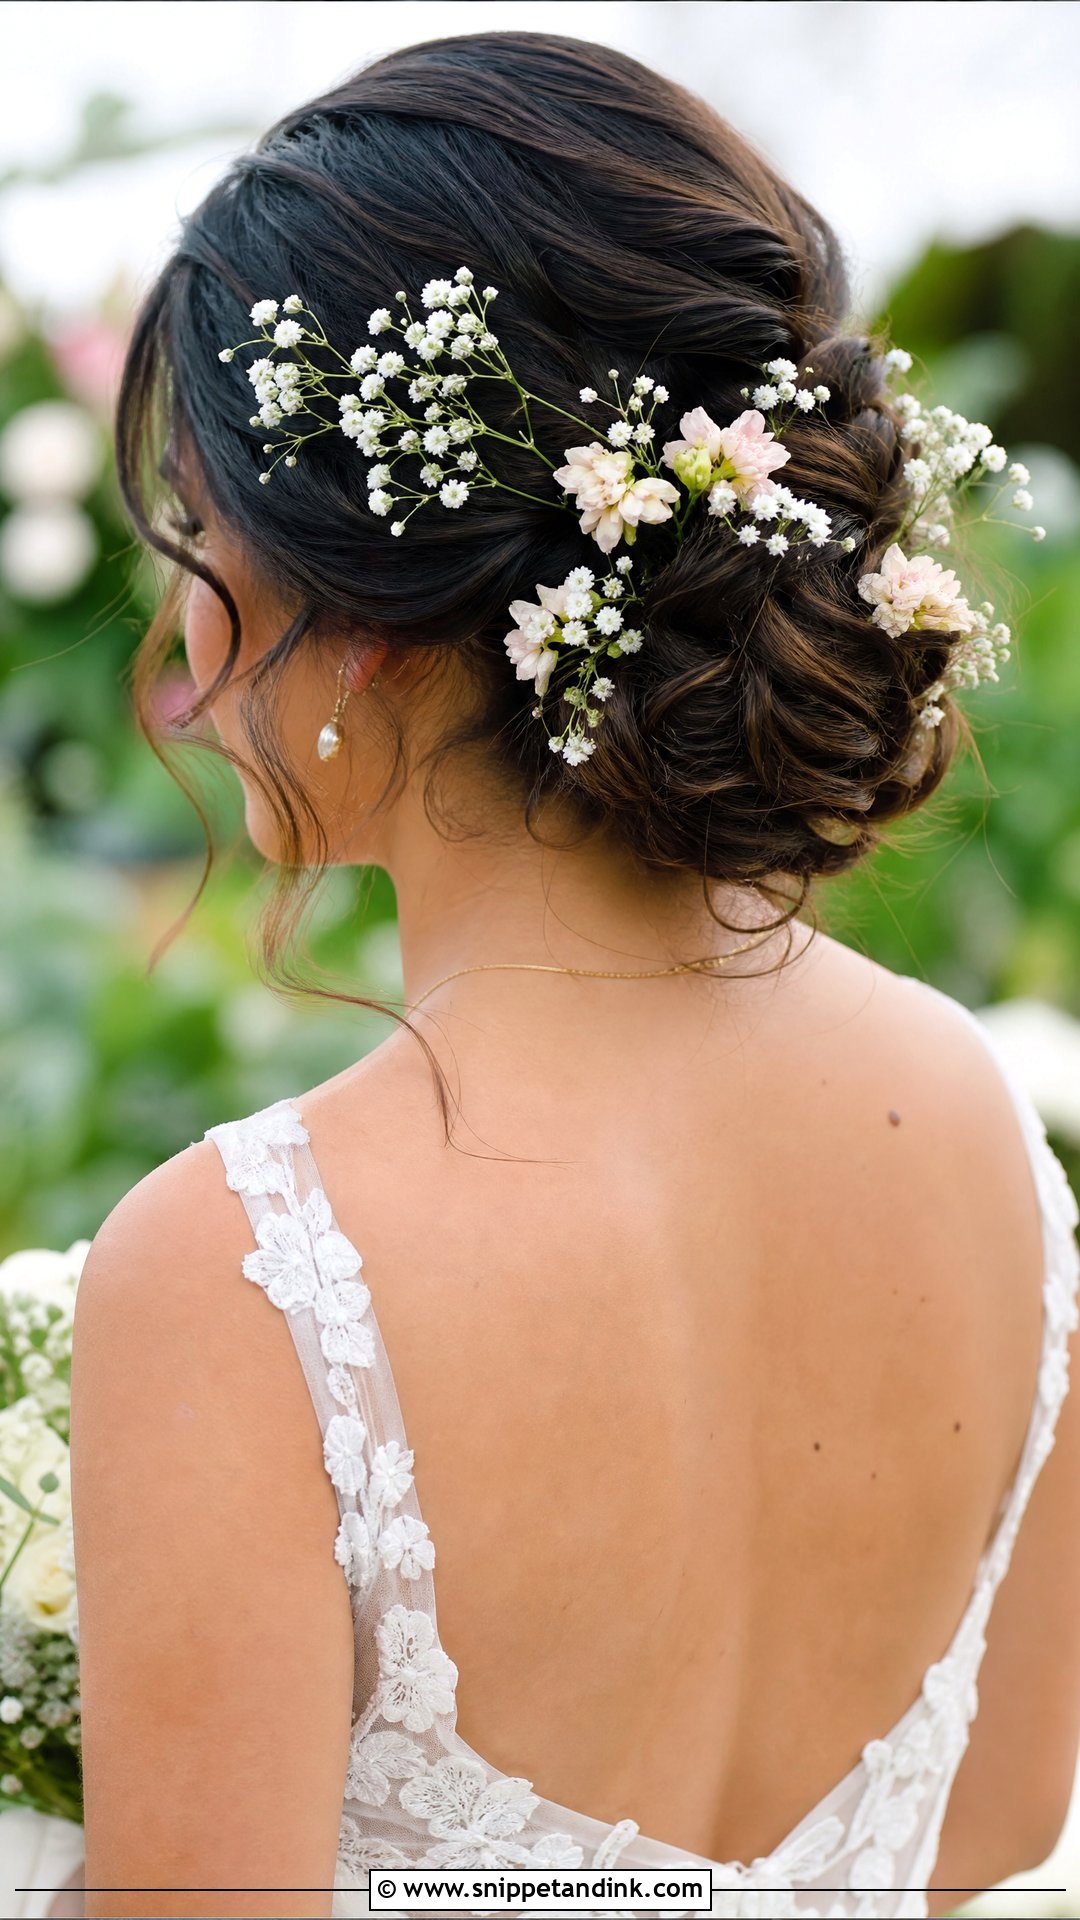
Fresh flowers in an updo should come from your florist, wired and taped into small picks so I can pin them in without stems poking the scalp. Baby’s breath and spray roses hold up well out of water; gardenias and peonies bruise and brown quickly against warm skin. I set the textured bun or twist first and place the flowers around it at the very end. It’s the easiest way to carry your wedding colors into your hair for spring and summer.
18. Low Twisted Bun with Accessories
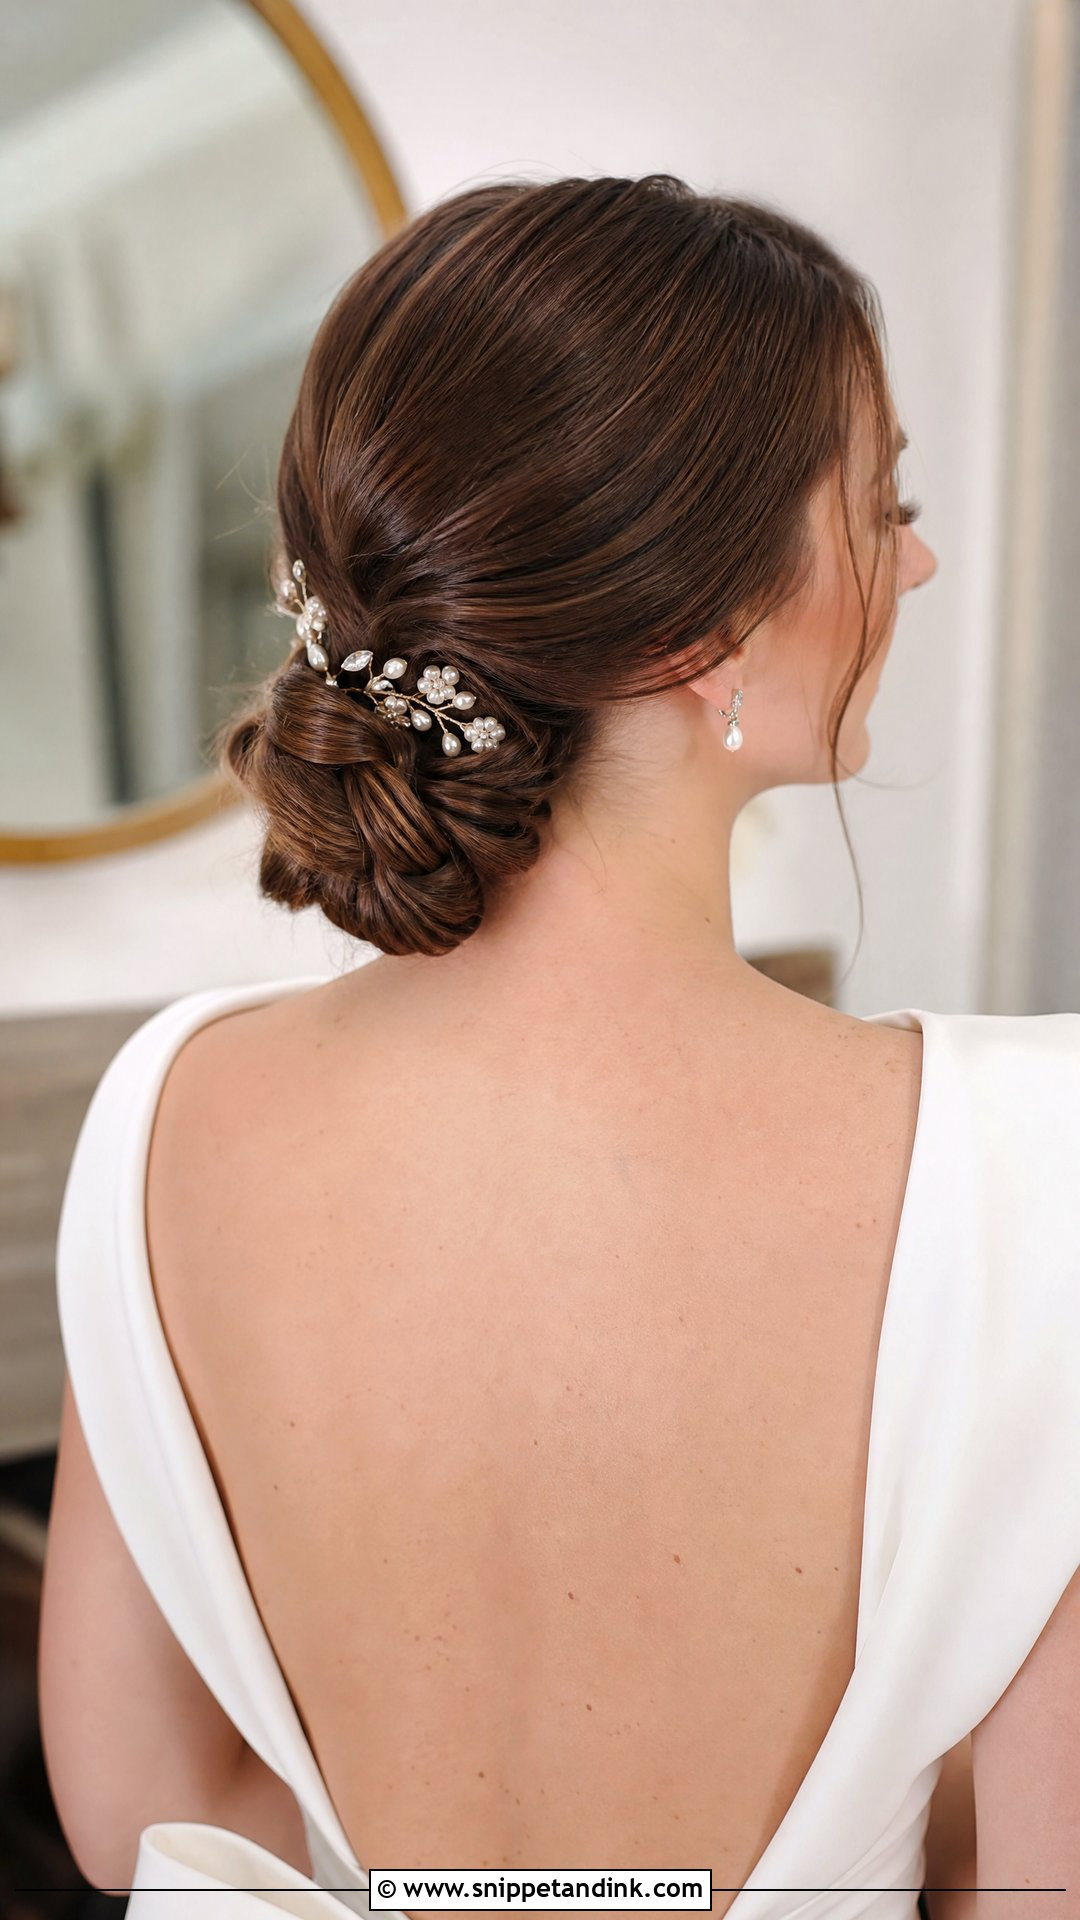
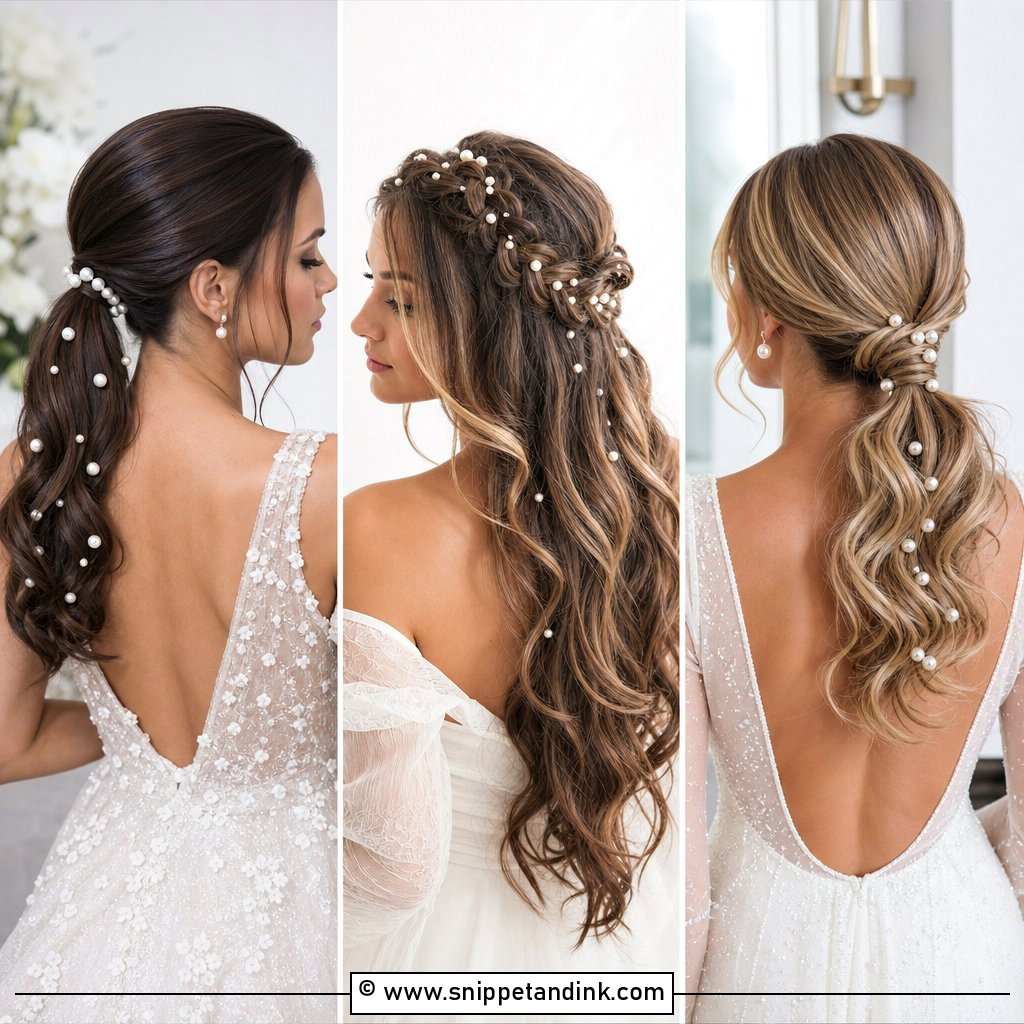
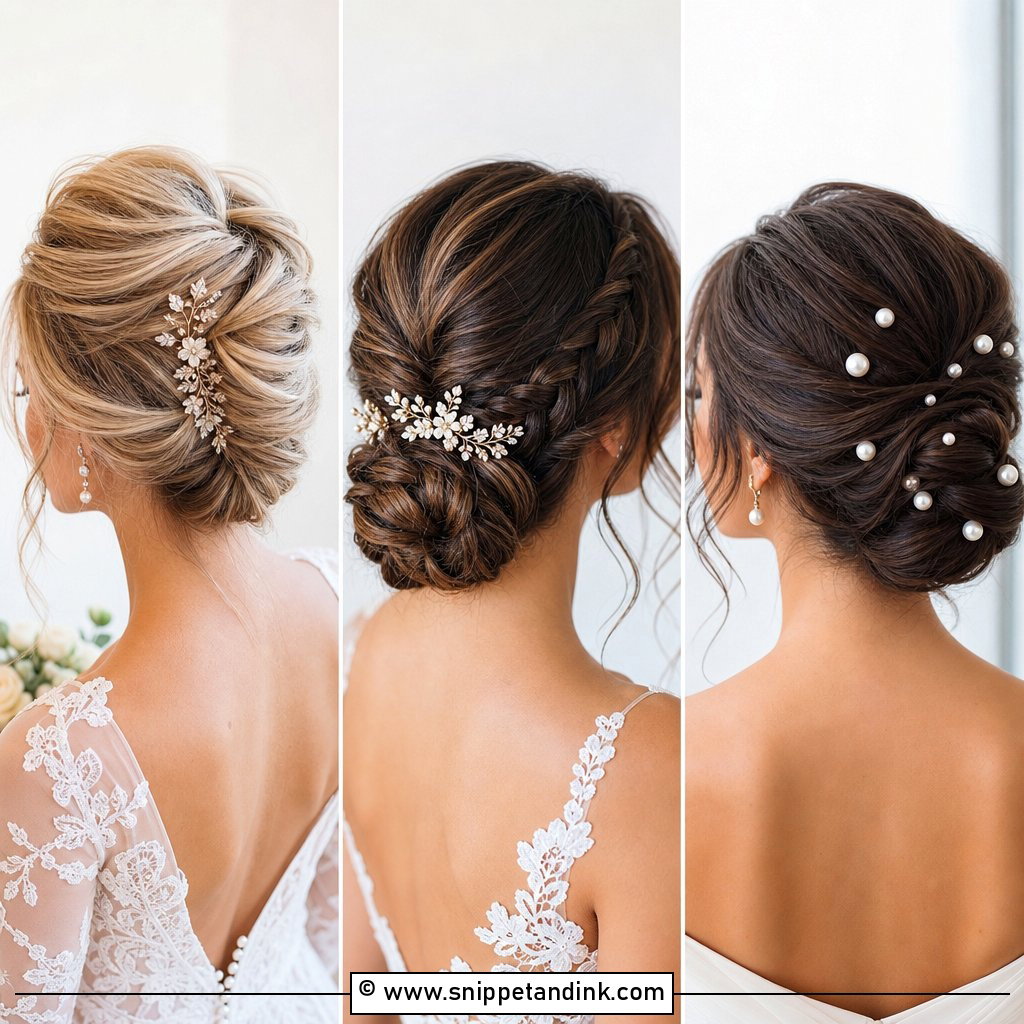
A low twisted bun has ridges and dips built into it, and those grooves are exactly where jeweled pins and pearl combs sit most securely. That’s why I recommend it when a bride wants several accessories that won’t slide. Each section is twisted away from the face and pinned at the nape. It sits comfortably under a veil and next to statement earrings. Limit yourself to one main piece and a couple of smaller pins, though; too much sparkle on a twisted texture looks busy.
19. Boho Waves with Braided Detail
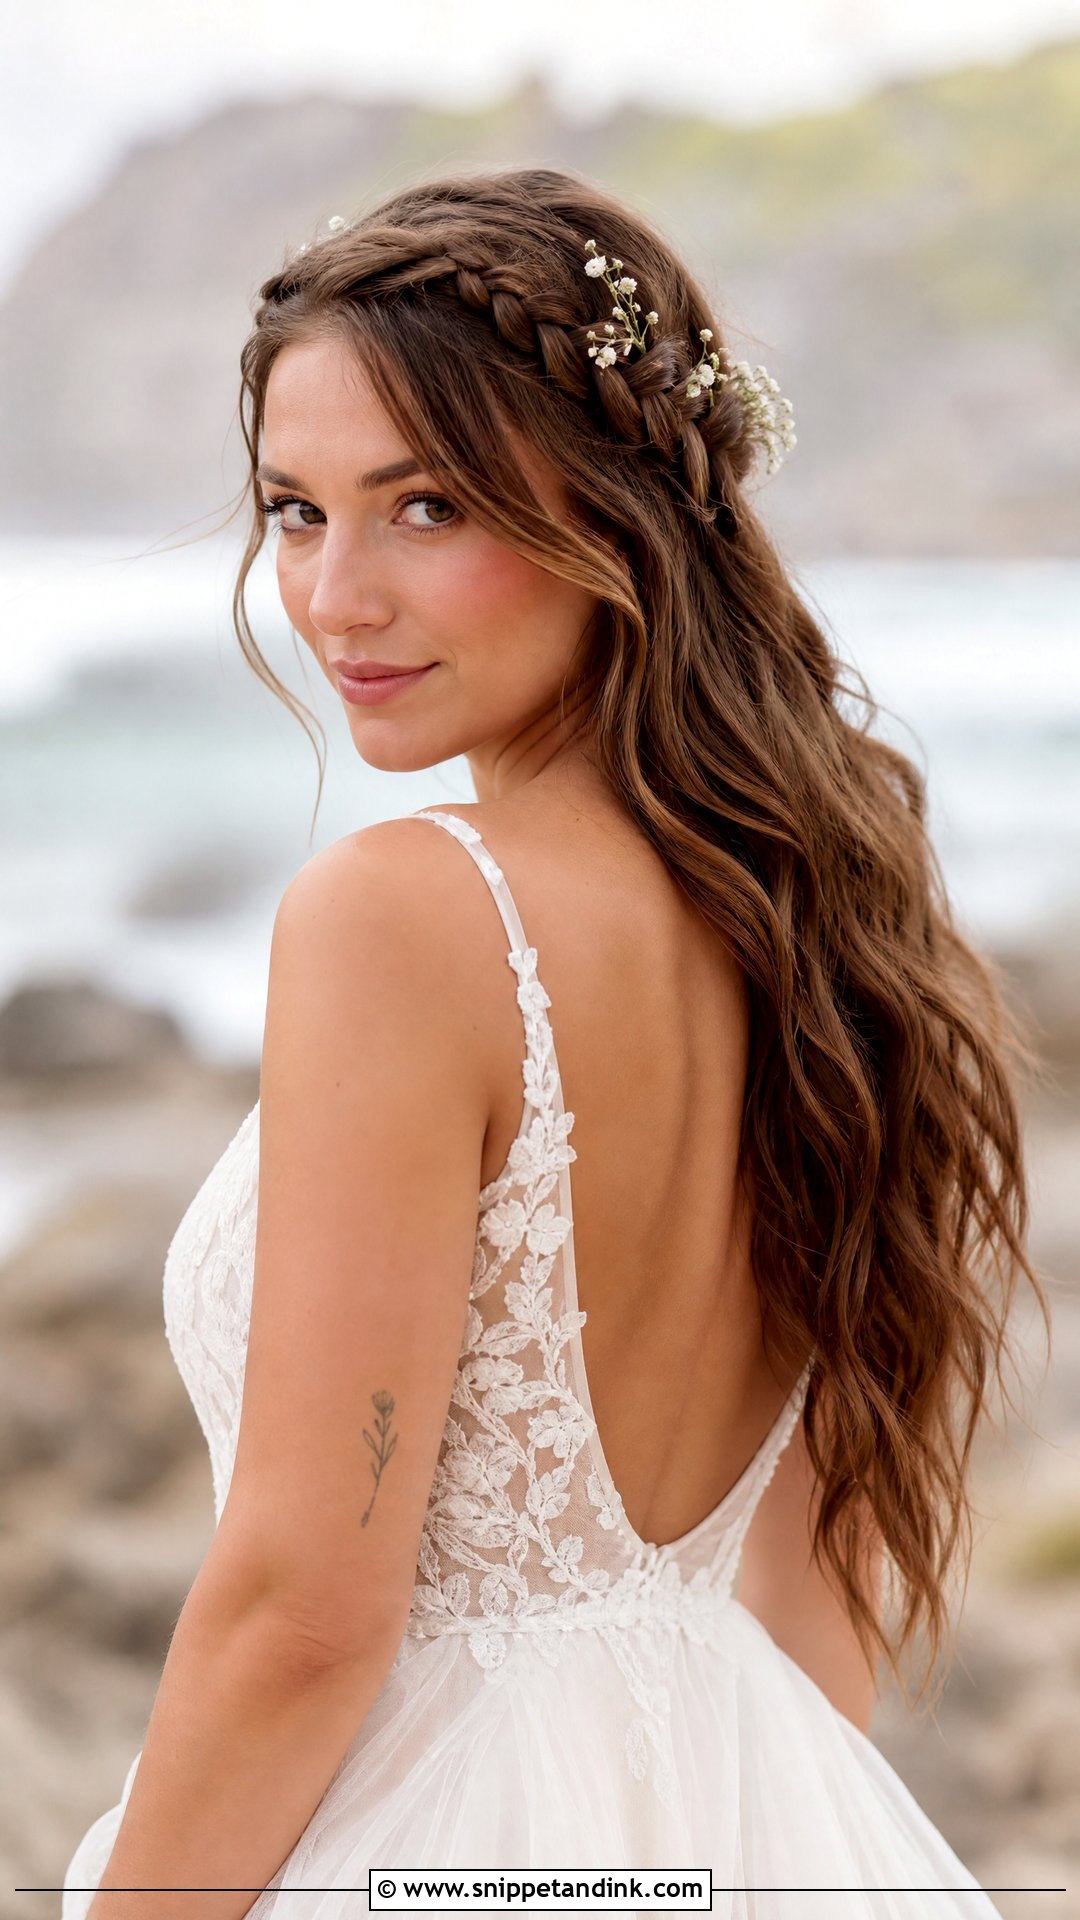
Small braids at the crown or temples give you waves down but out of your eyes. I braid the side pieces fairly tight before loosening them, because a braid started loose falls apart once the waves are brushed out around it. The braids then pin together at the back of the crown and help hold some weight. Longer hair suits it, and so do outdoor ceremonies. On a breezy beach, expect the lengths to tangle by evening; a wide-tooth comb in your bridesmaid’s bag fixes it in a minute.
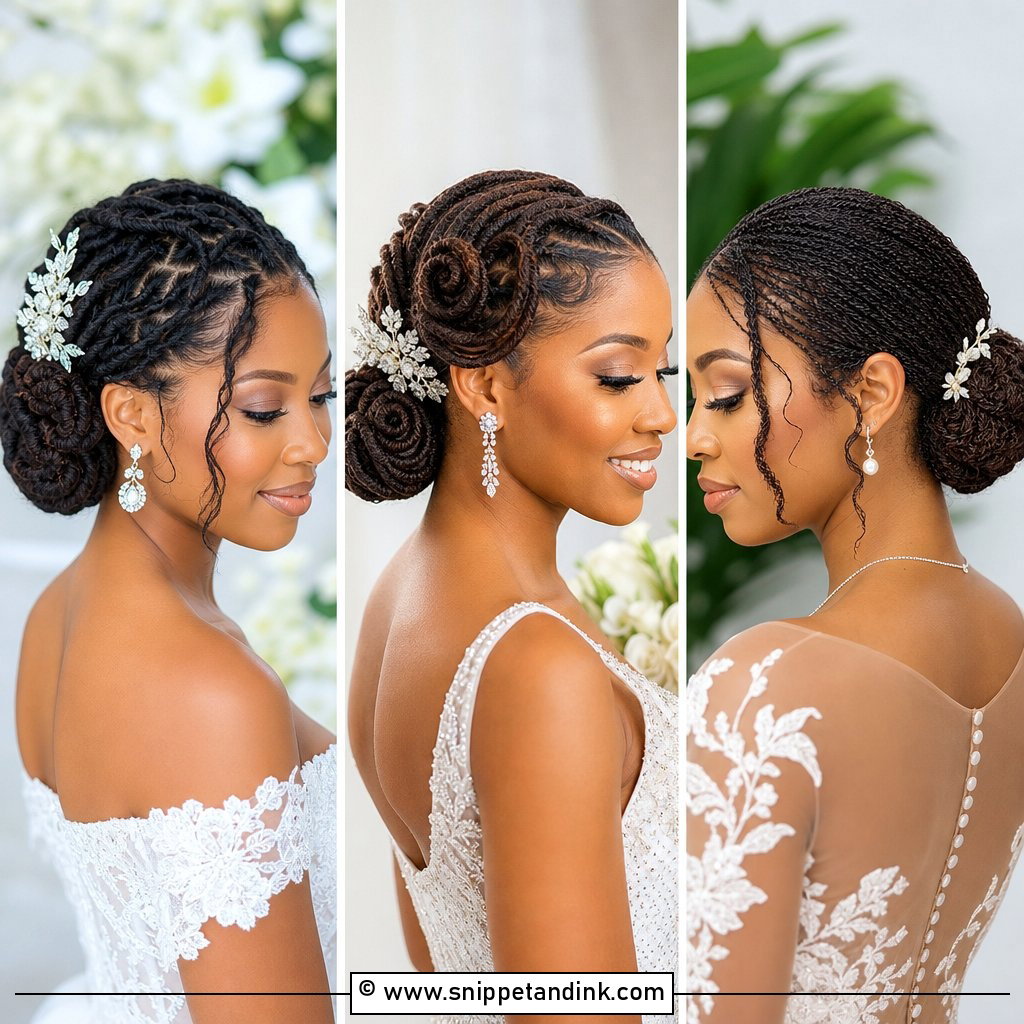
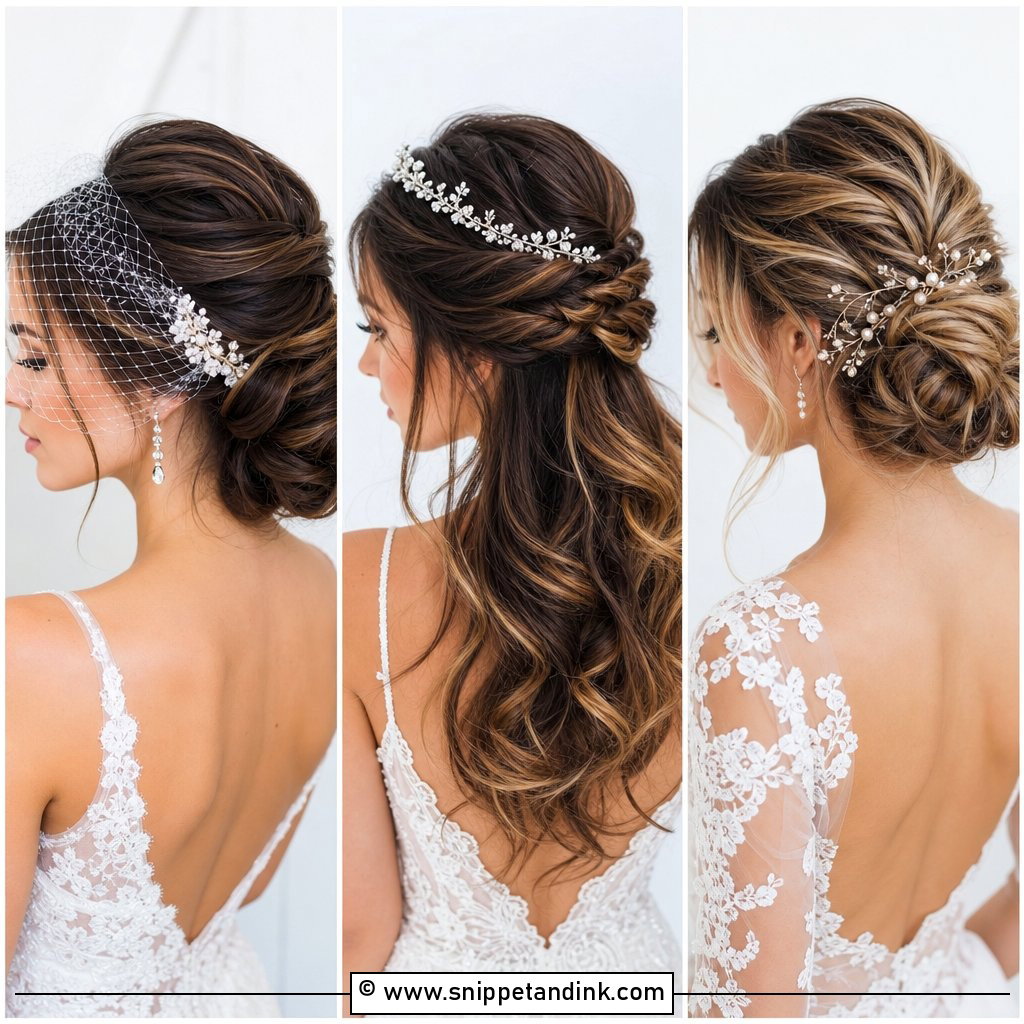
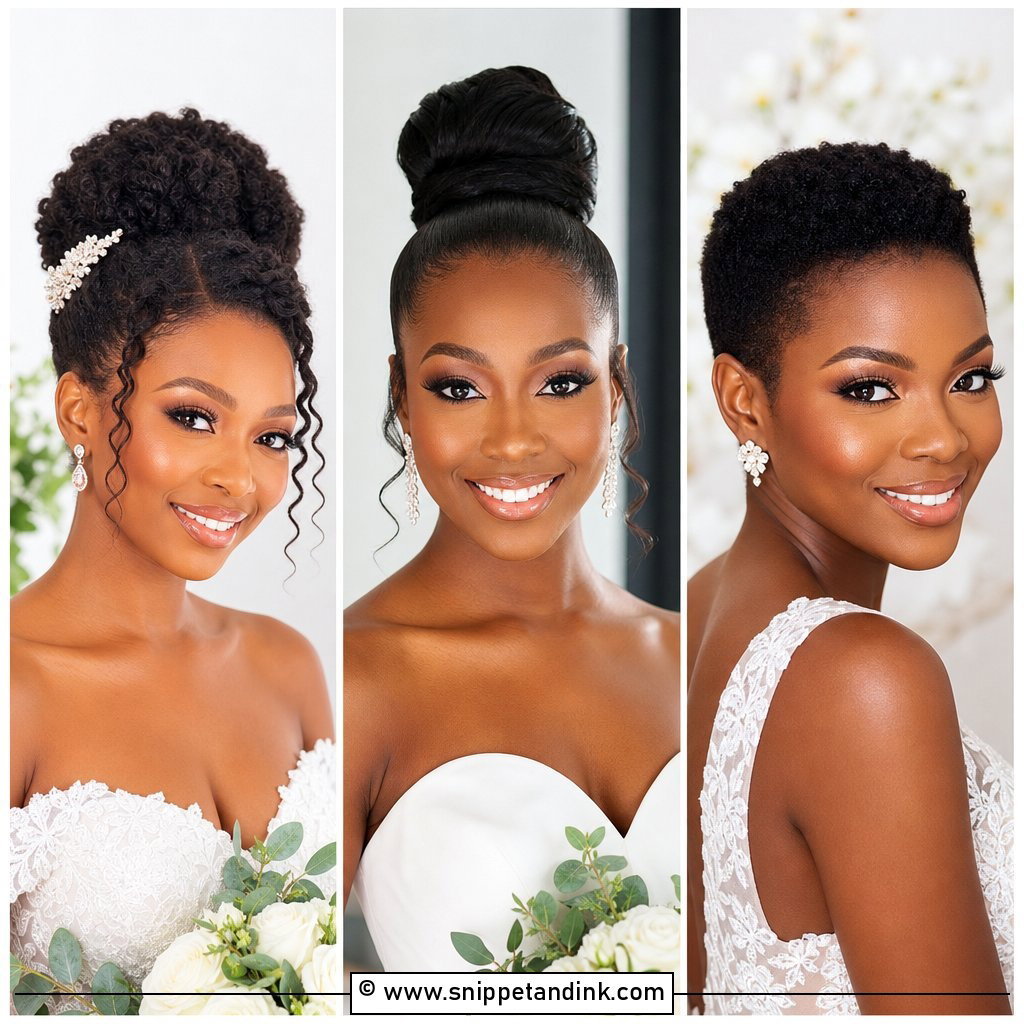
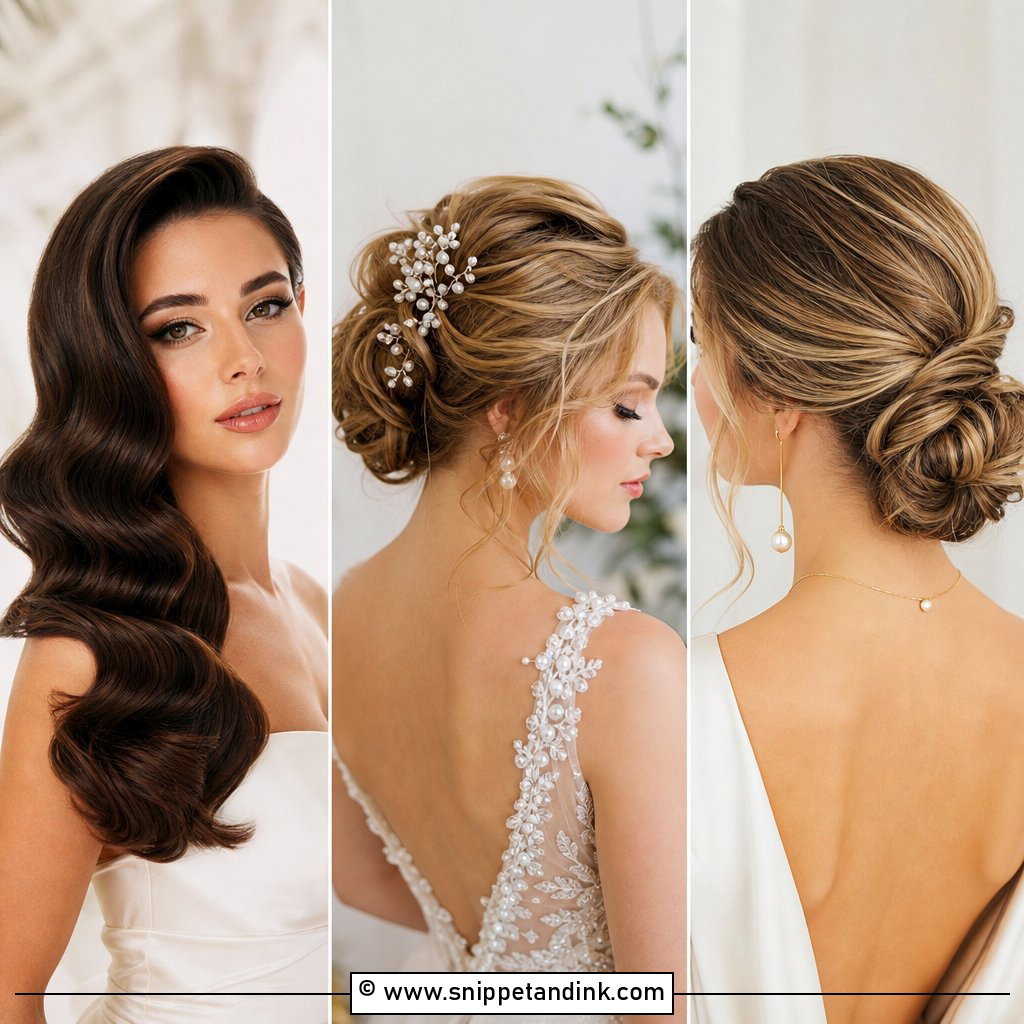
20. Vintage Pin Curls
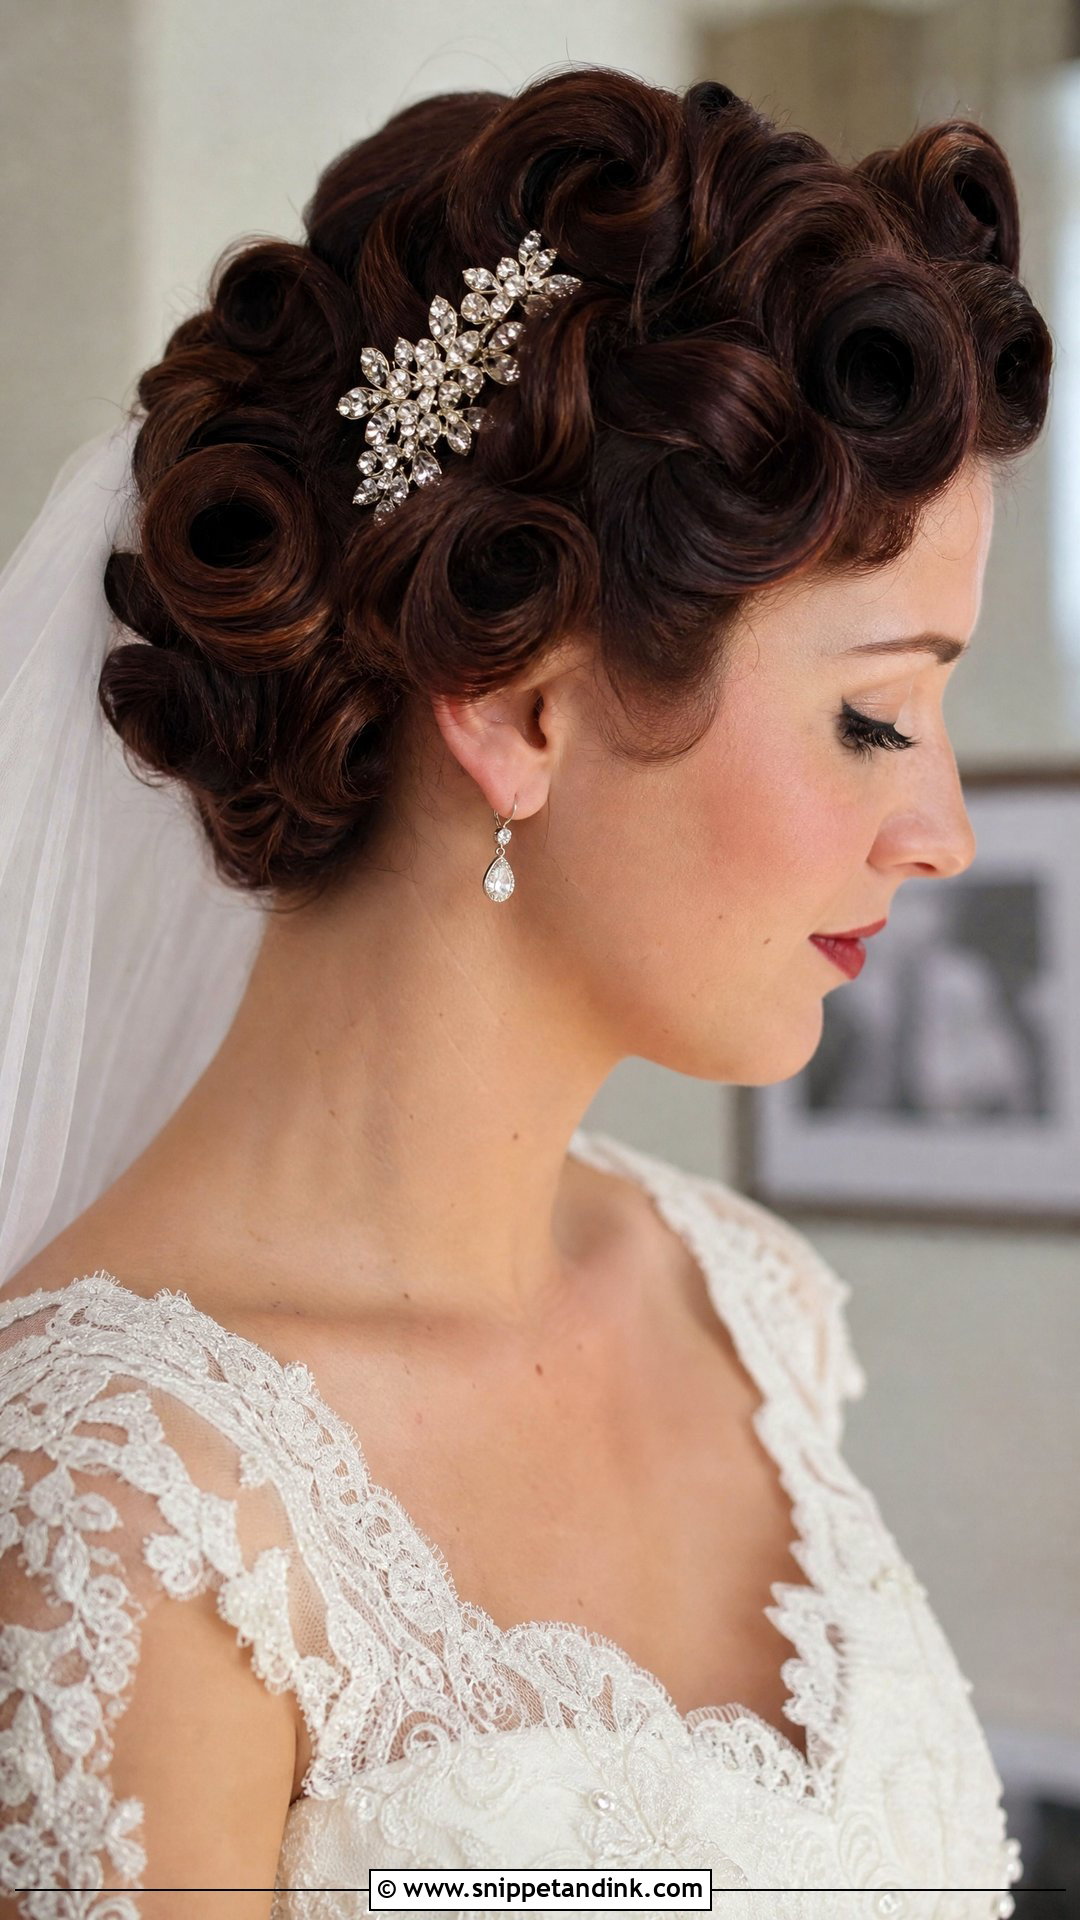
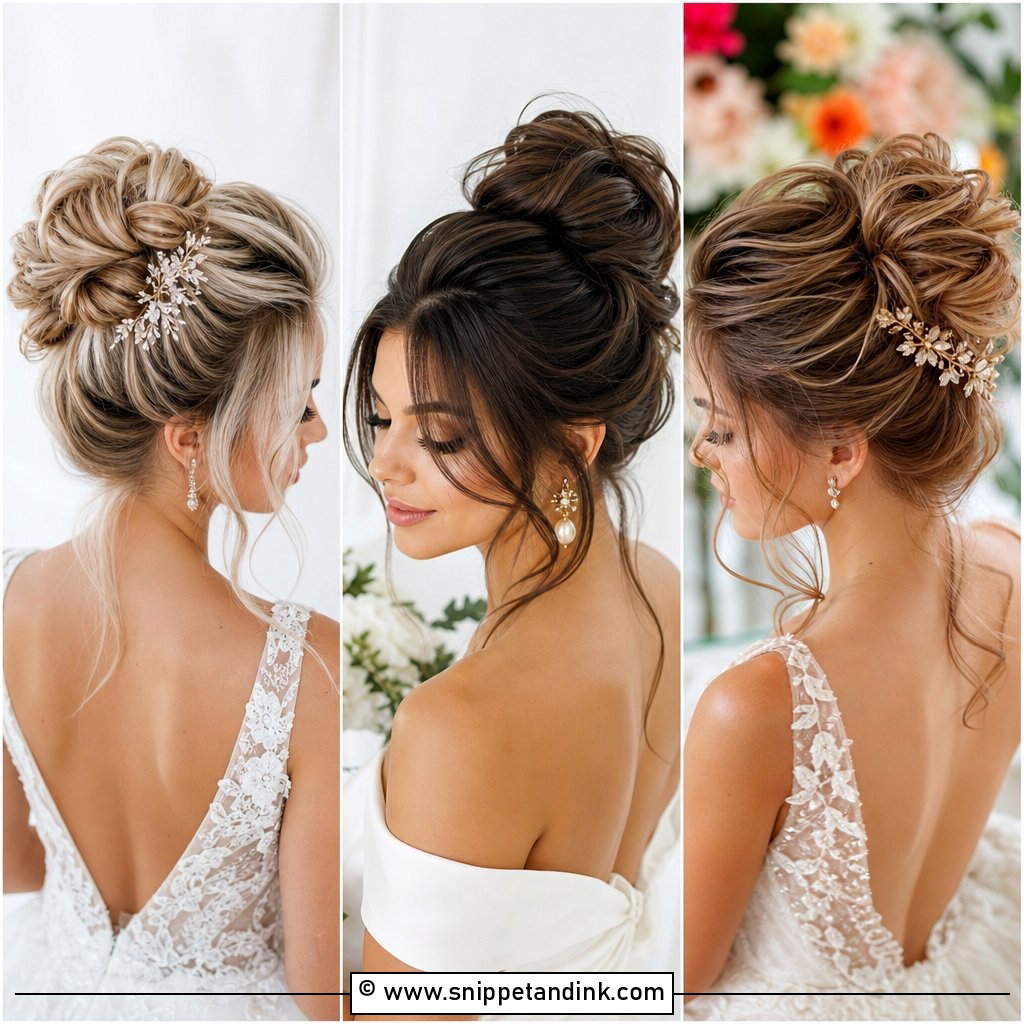
Vintage pin curls are a proper set, and a set needs time: each curl is wound flat, clipped and left to cool or dry before brushing out, so build extra time into the morning schedule. The result is defined, sculpted curls that suit a themed or very formal wedding. Worn down or rolled into a period updo, they pair naturally with statement jewelry and a decorative comb. Fine hair holds the shape best with a setting lotion beforehand. If your hair resists curl, trial this one twice.
21. Soft Updo with Curtain Bangs
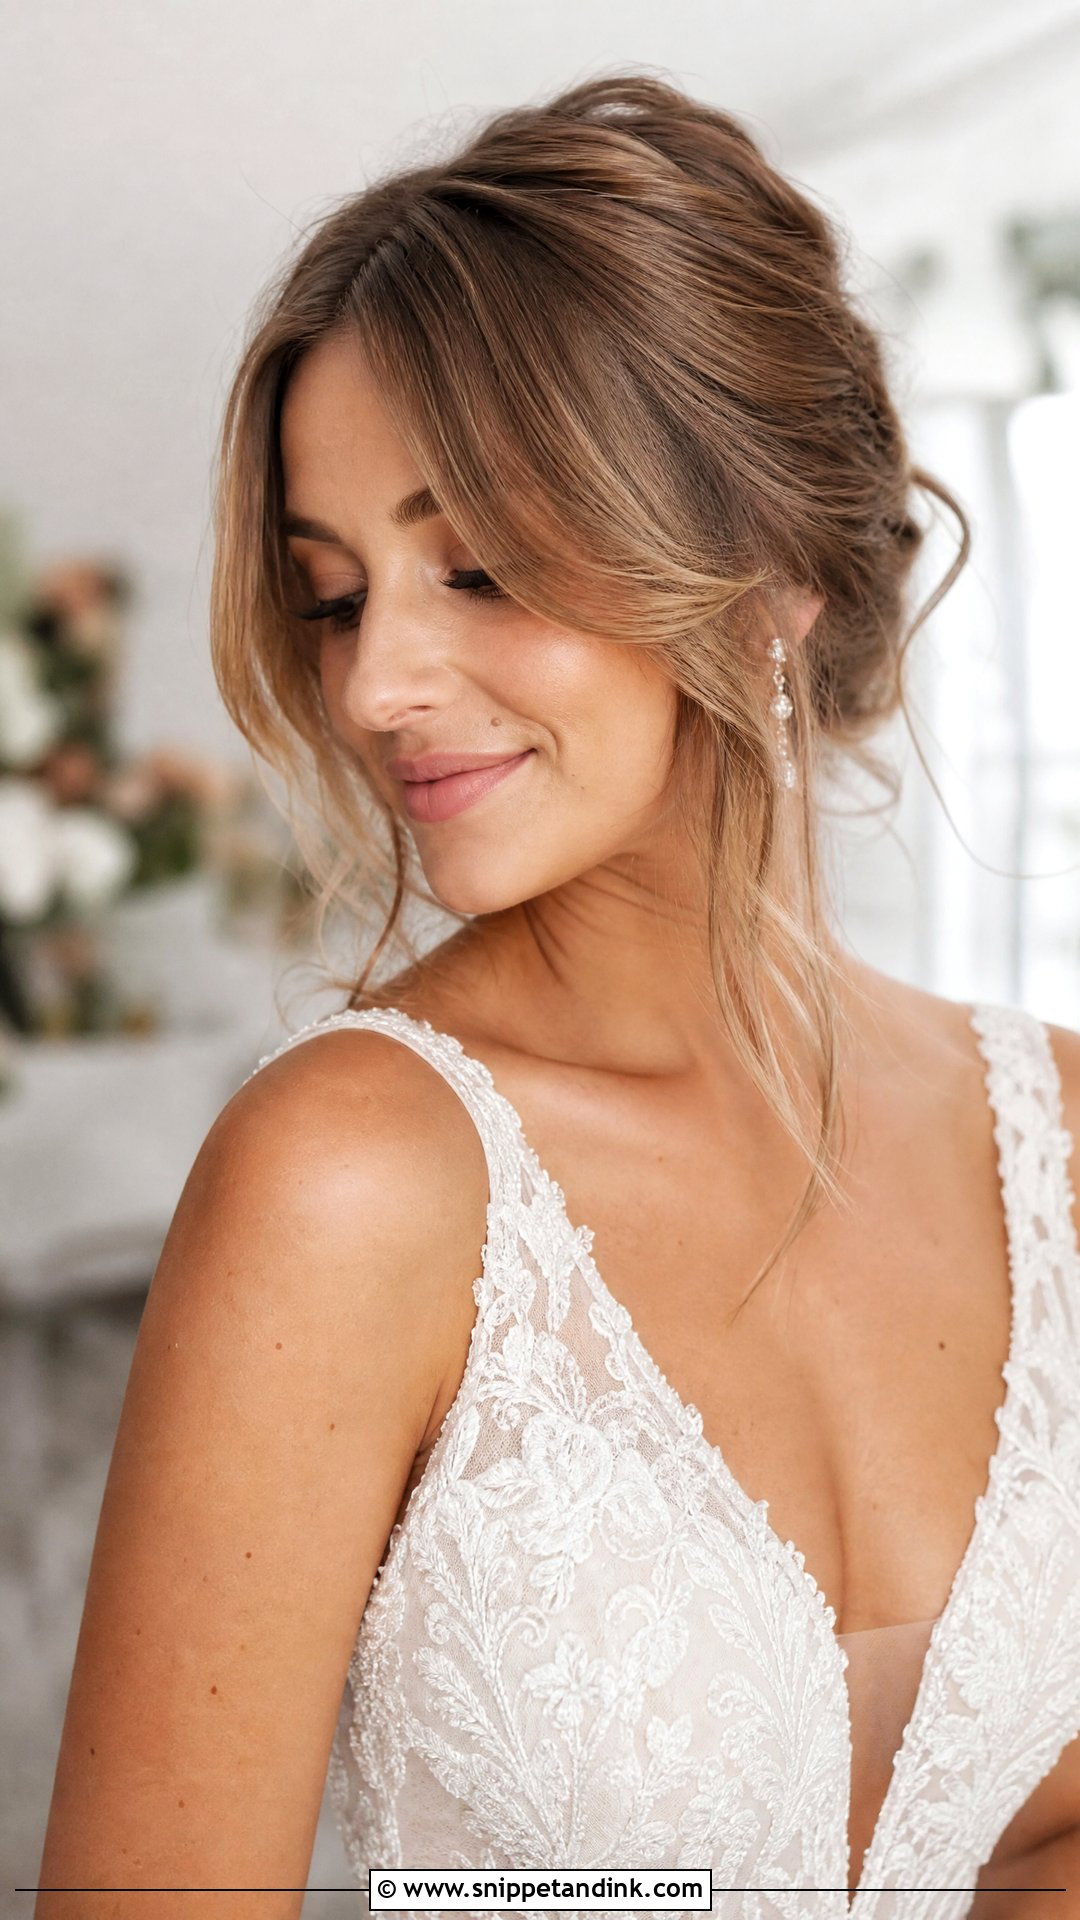
Curtain bangs change a soft updo instantly, opening up the eyes and softening a strong jaw. Only commit if you already have them or can get them cut at least six weeks before the wedding; freshly cut bangs sit too short and too blunt. I blow-dry them over a round brush, split at the center, then pin the rest into a loose textured updo. Keep that updo relaxed, because a severe bun makes soft bangs look like an afterthought.
22. Dutch Braid Updo
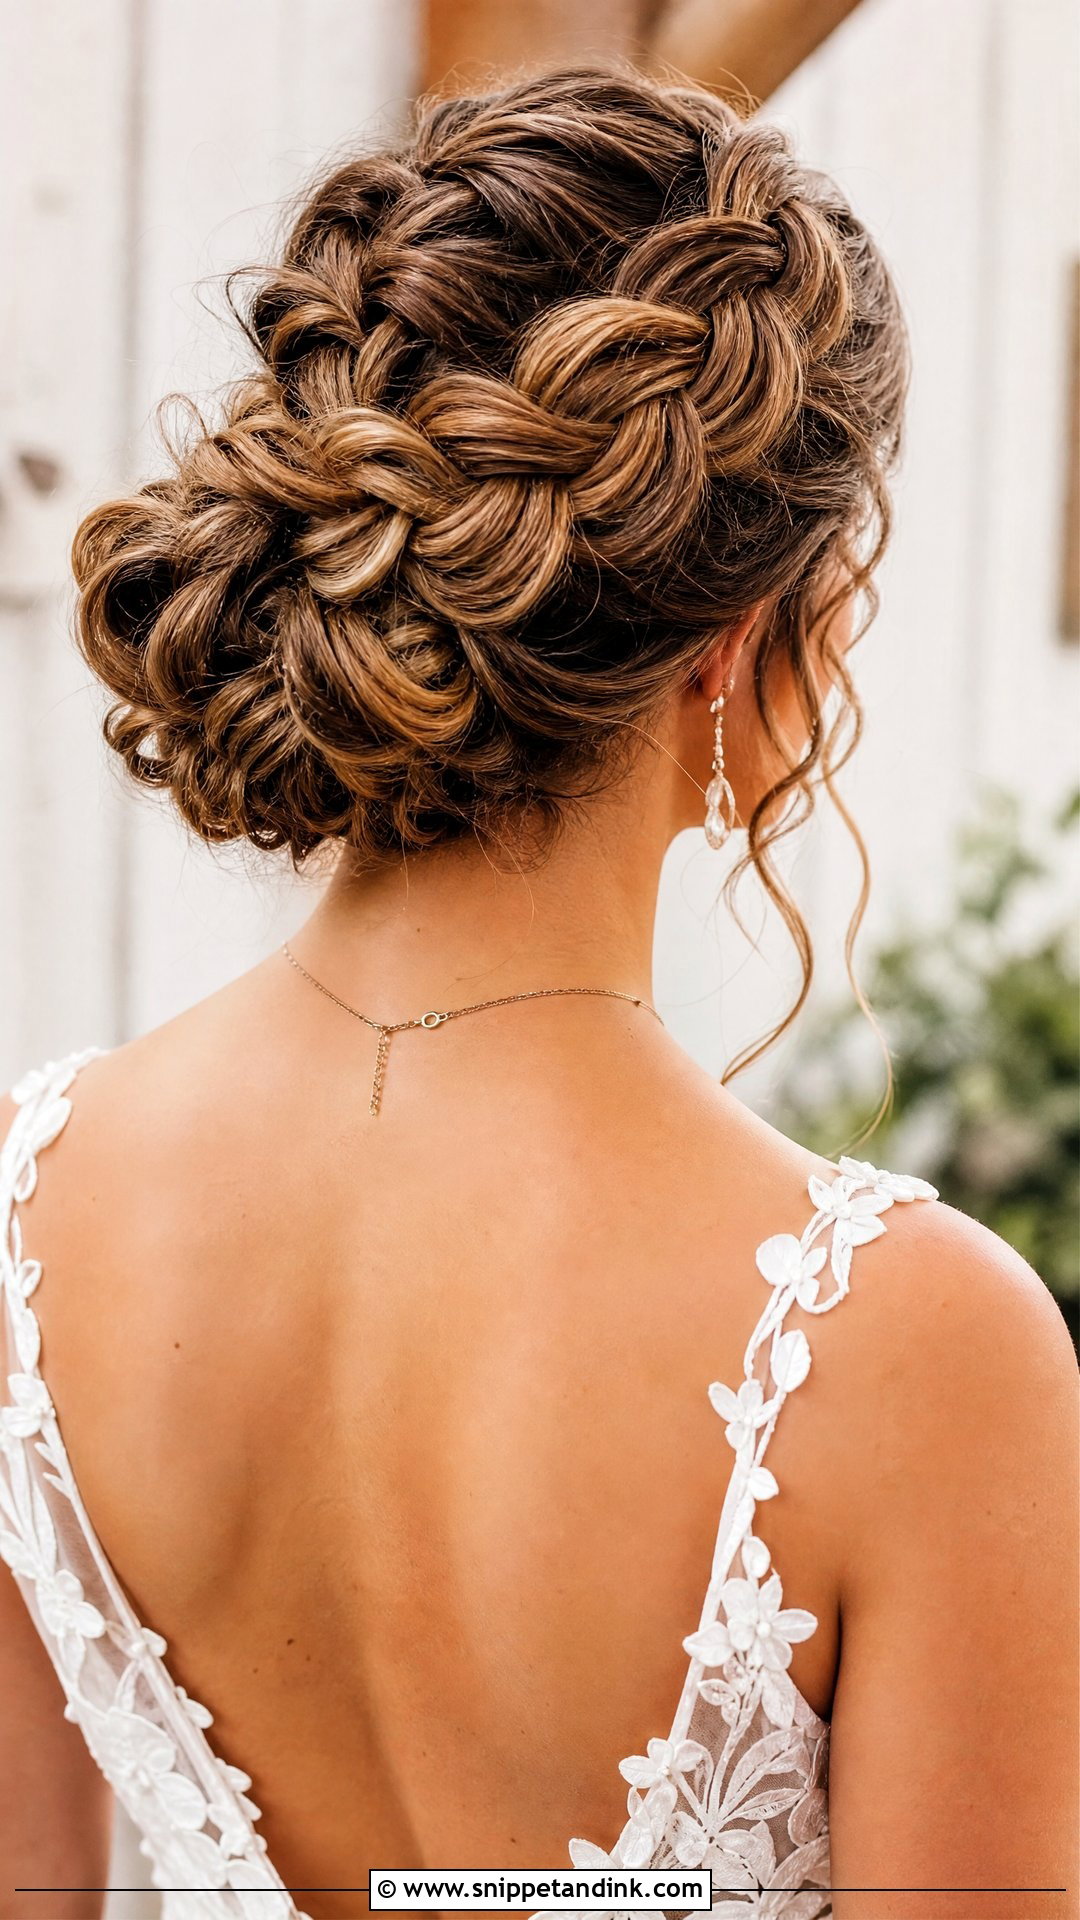
A Dutch braid is braided under rather than over, so the plait rises above the hair instead of sinking into it. That raised texture grips pins well and keeps everything off your face for outdoor or active celebrations. One braid can lead into a bun, or several can wrap together. Loosen them gently after pinning to add width. It’s my first suggestion for layered cuts, because the braid catches shorter layers that would poke out of a smooth updo.
23. Glamorous Wavy Half Updo
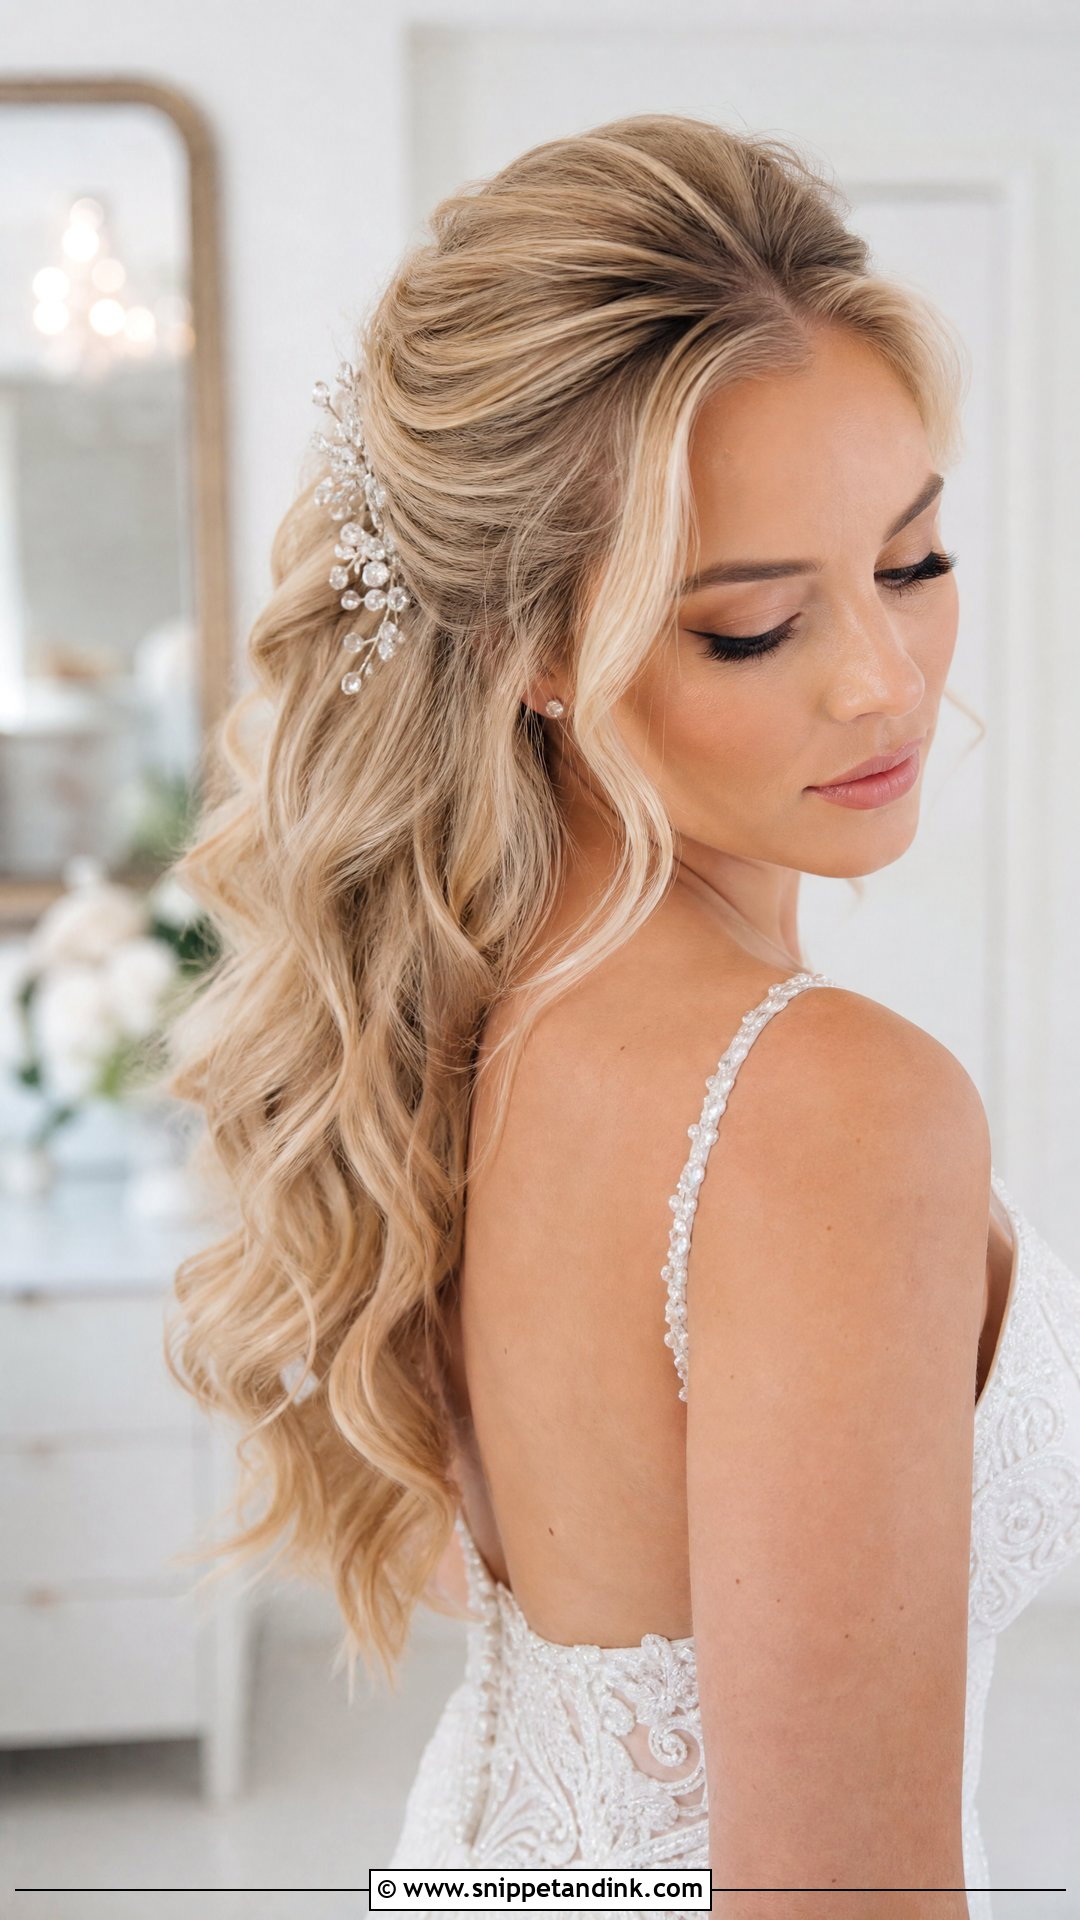
A wavy half updo is half up with real height at the crown, built with a little backcombing at the root under the top section and smoothed over. That lift is what makes it read as glam rather than casual. A sparkling hairpiece at the crown hides the pinning point. Medium to long hair holds the waves; shorter hair can work if the lengths reach past the collarbone. Leave a few loose pieces at the face so it doesn’t look too sculpted.
24. Sleek Straight Bridal Hair
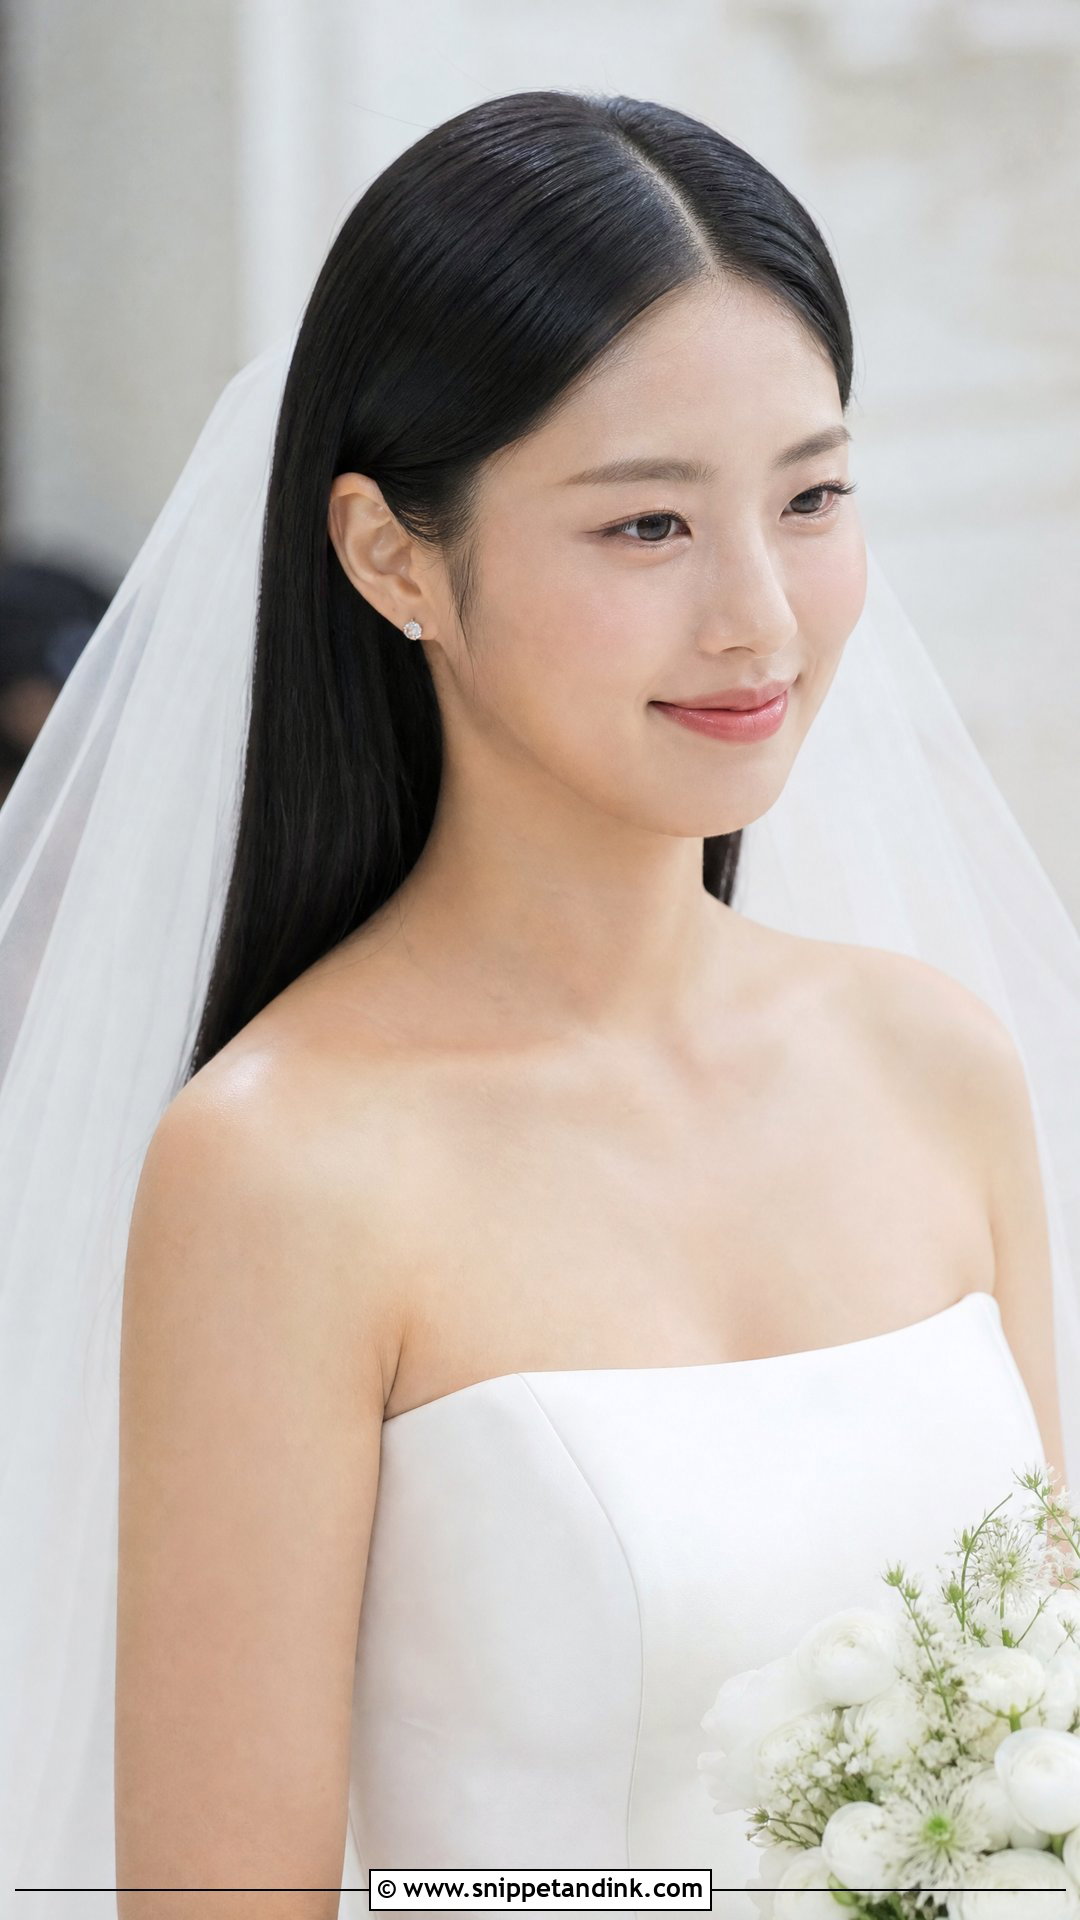
Sleek straight hair looks like the least effort and actually asks the most of your hair’s condition. Split ends and frizz show in close-ups, so I recommend a trim and a gloss treatment a few weeks ahead. I flat-iron in small sections with heat protectant and finish with a light serum on the lengths only, never the roots, or it goes limp by afternoon. Center or side part both work. Humidity is its weakness; at a summer garden wedding I’d move you toward a sleek bun instead.
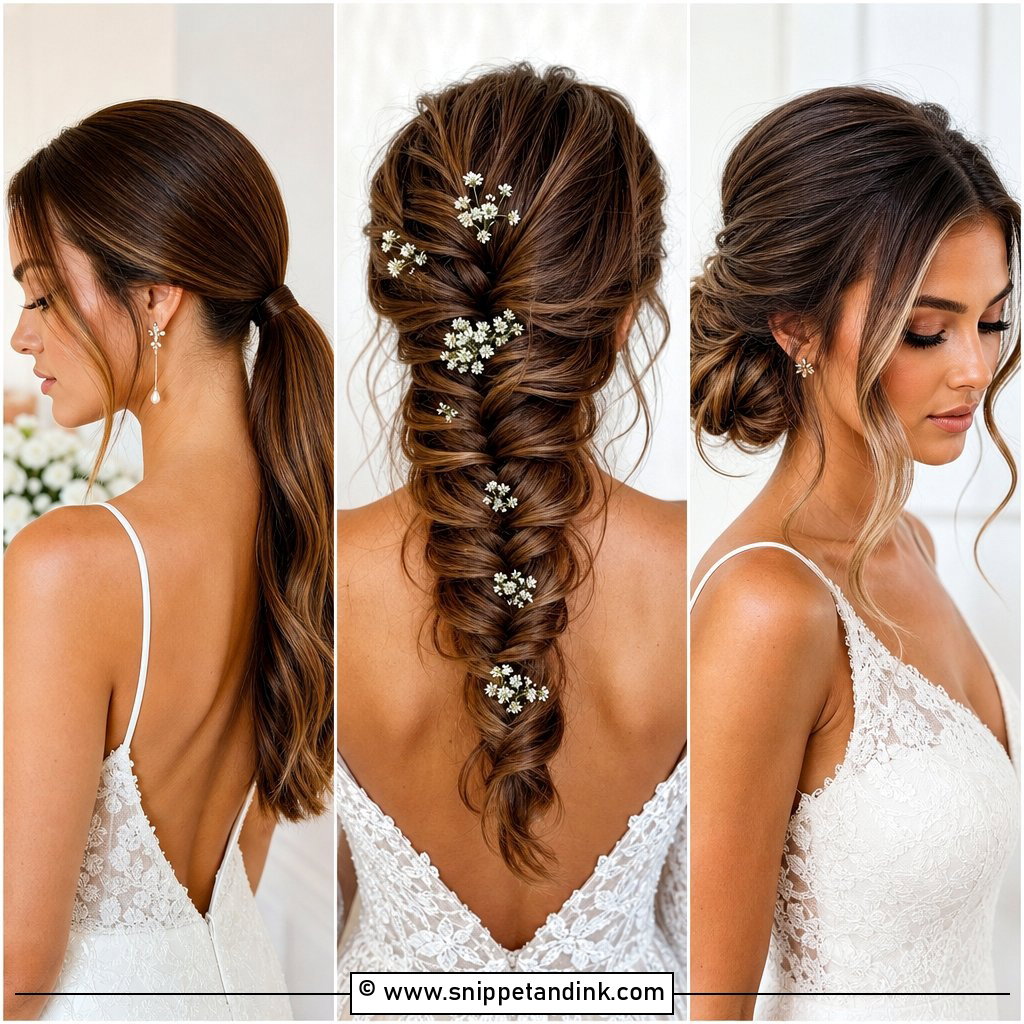
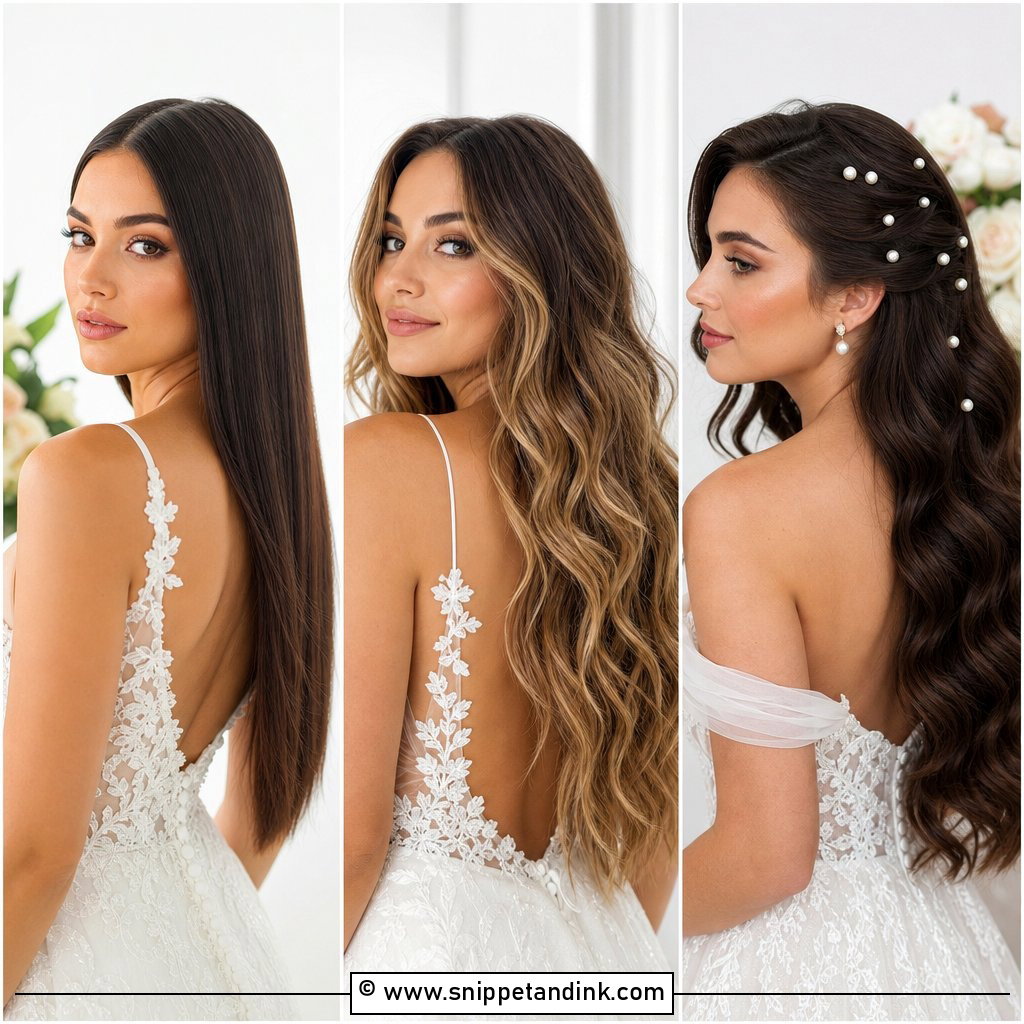
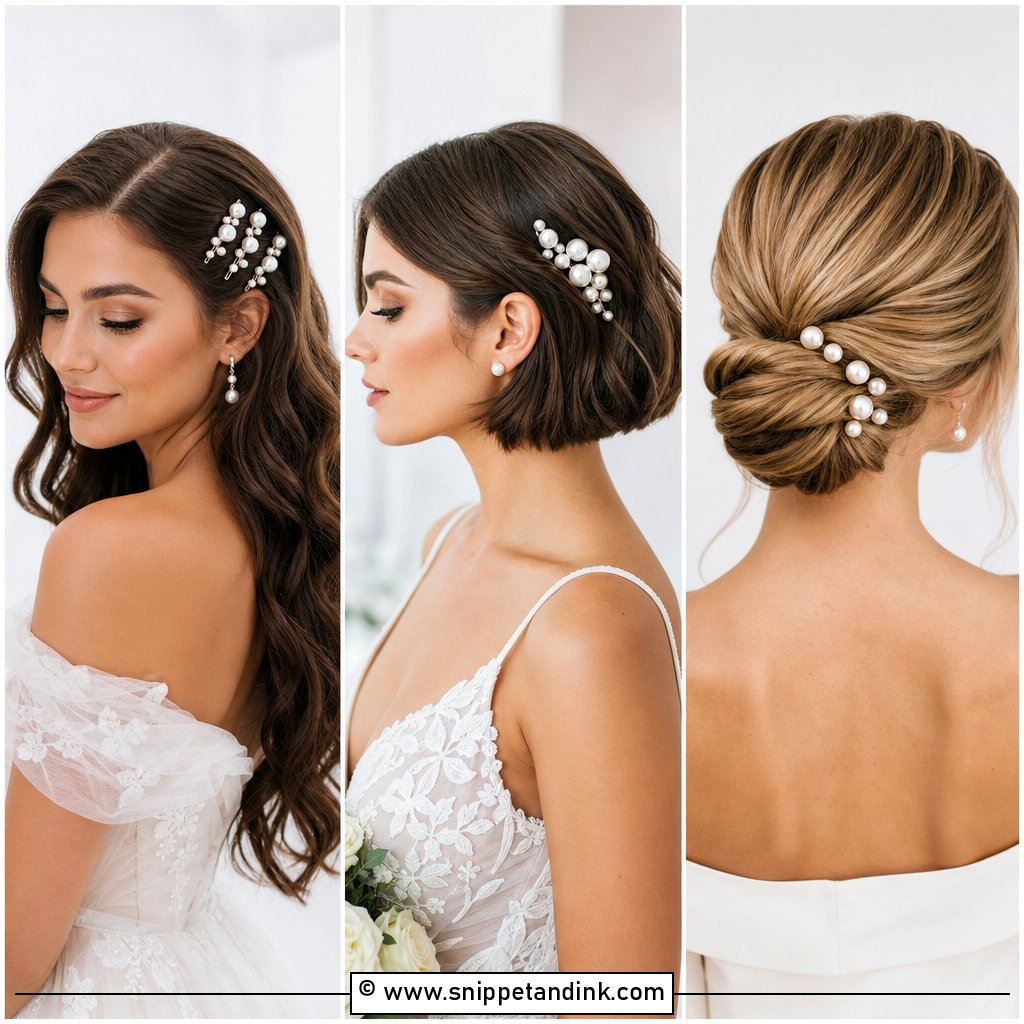
25. Twisted Halo Updo
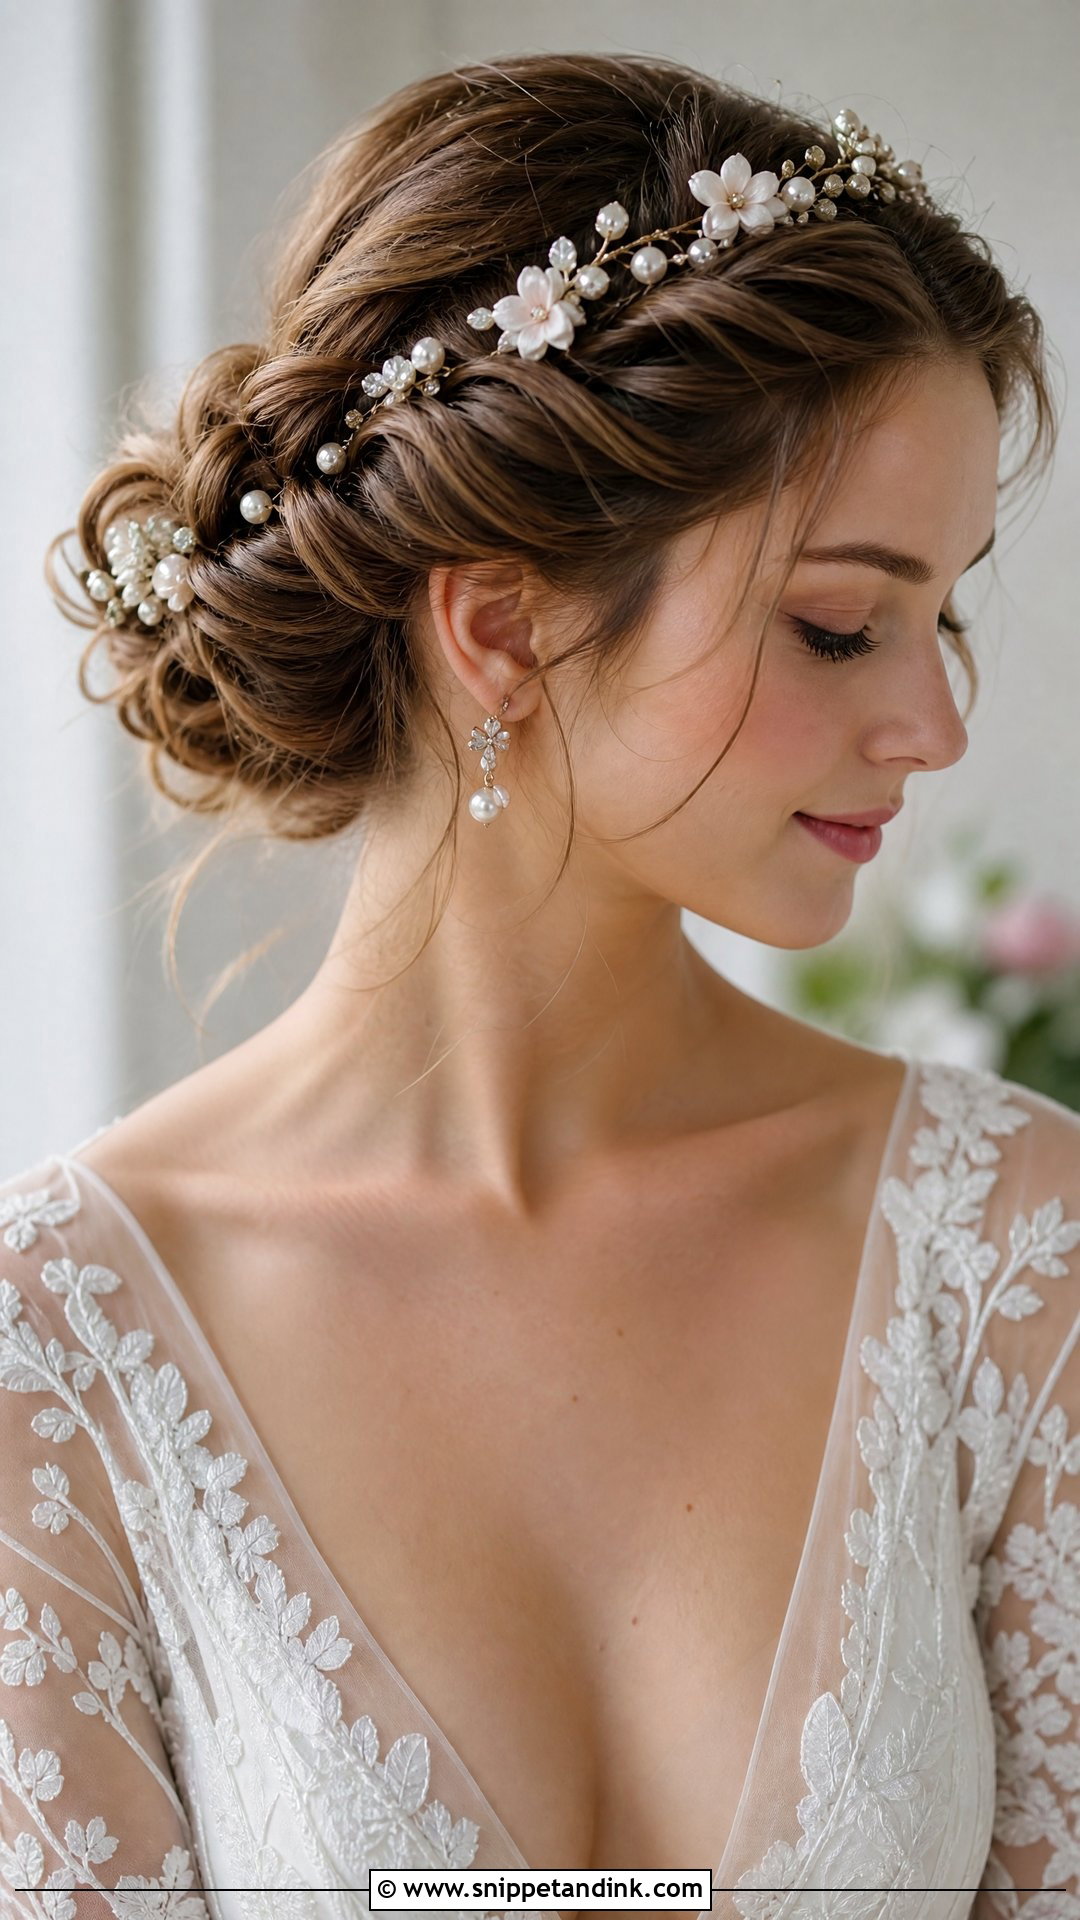
A twisted halo is rope twists wrapped around the crown and pinned in sections, a softer alternative to the braided crown and quicker to do on medium hair. It suits fairytale weddings without asking much of your length. Pearl pins tuck into the twists easily. I pin each section as I go rather than at the end, so the halo stays level all the way around. Pull a few pieces loose at the temples if the whole thing feels too neat.
26. Messy Bun with Loose Pieces
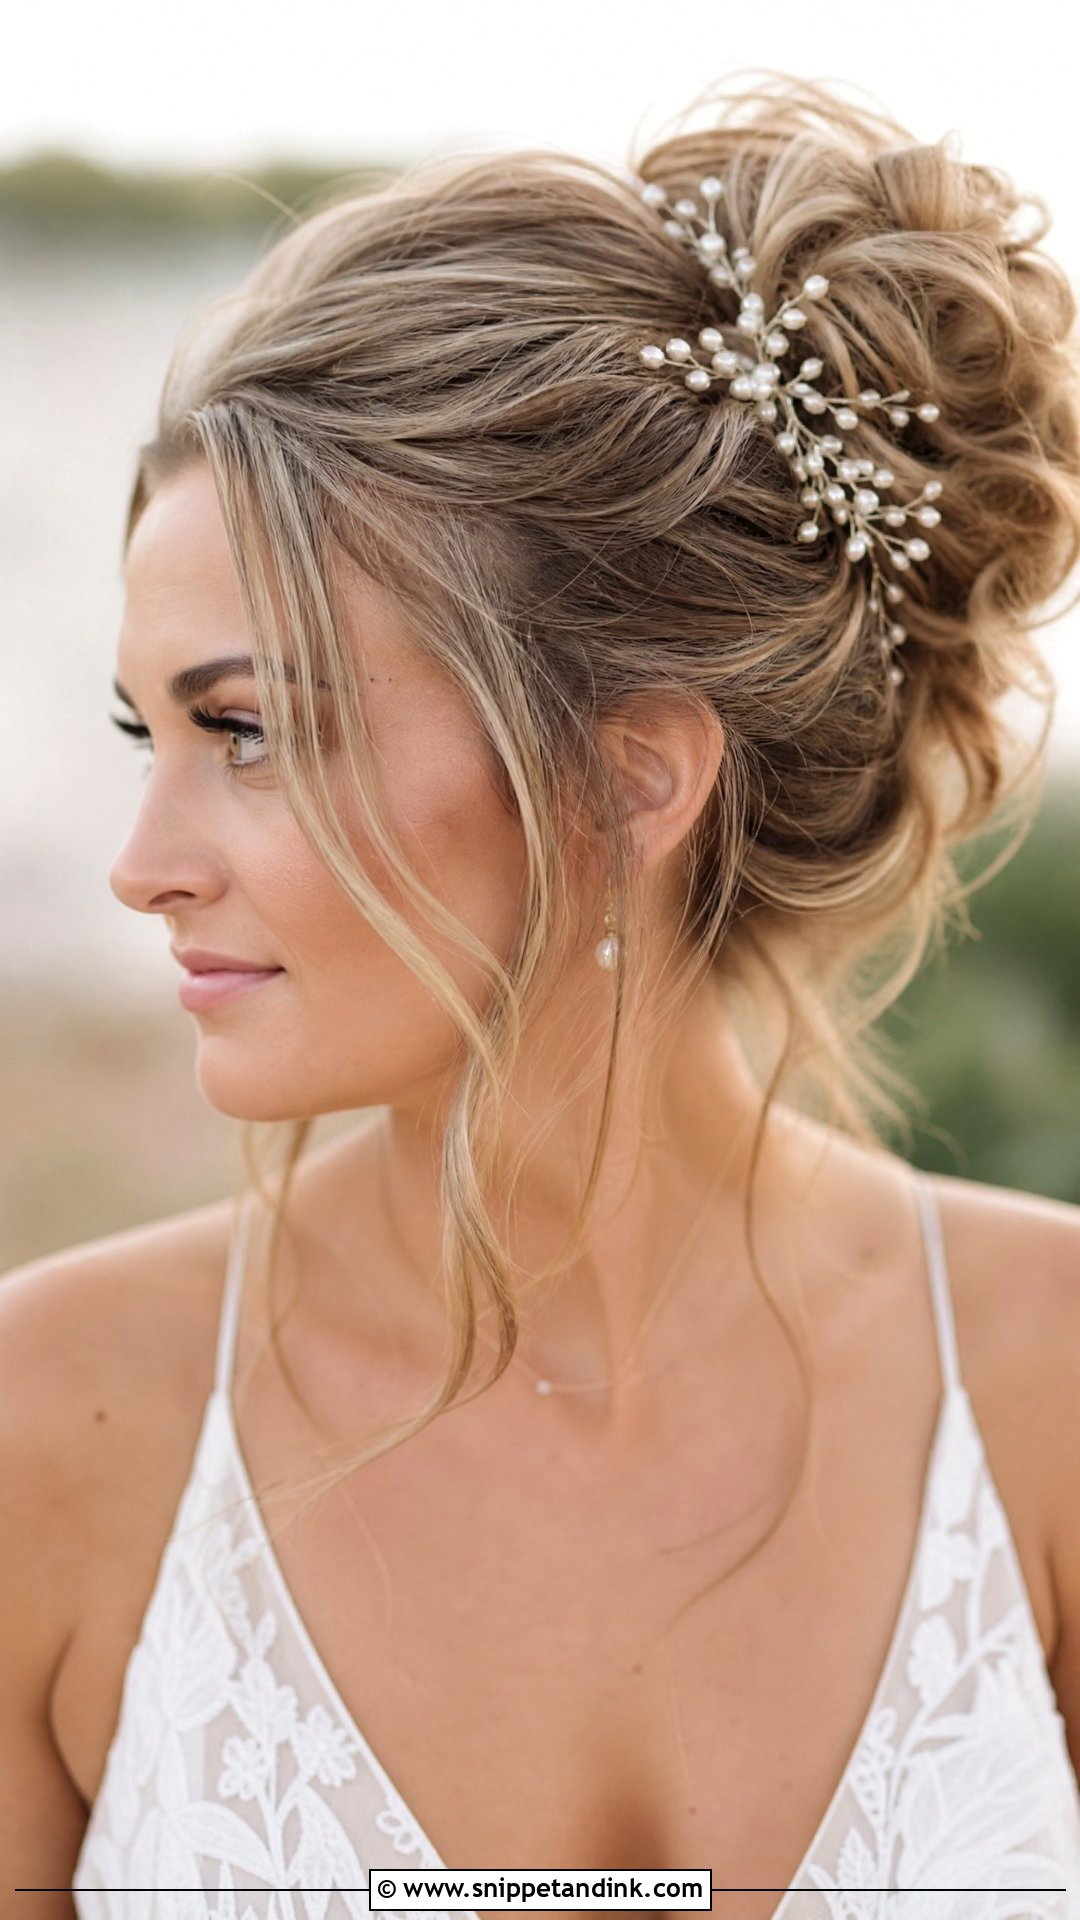
A messy bun is the hardest style to make look intentional. I curl all the hair first, then gather it loosely with pins instead of an elastic, so I can adjust the shape piece by piece. The loose strands are chosen, not accidental: a couple at the temples and one or two at the nape. Wavy and curly textures give it body on their own. It stays comfortable all night, and a small hairpiece or a few flowers match its relaxed feel.
27. Accessorized Sleek Bun with Hair Vine
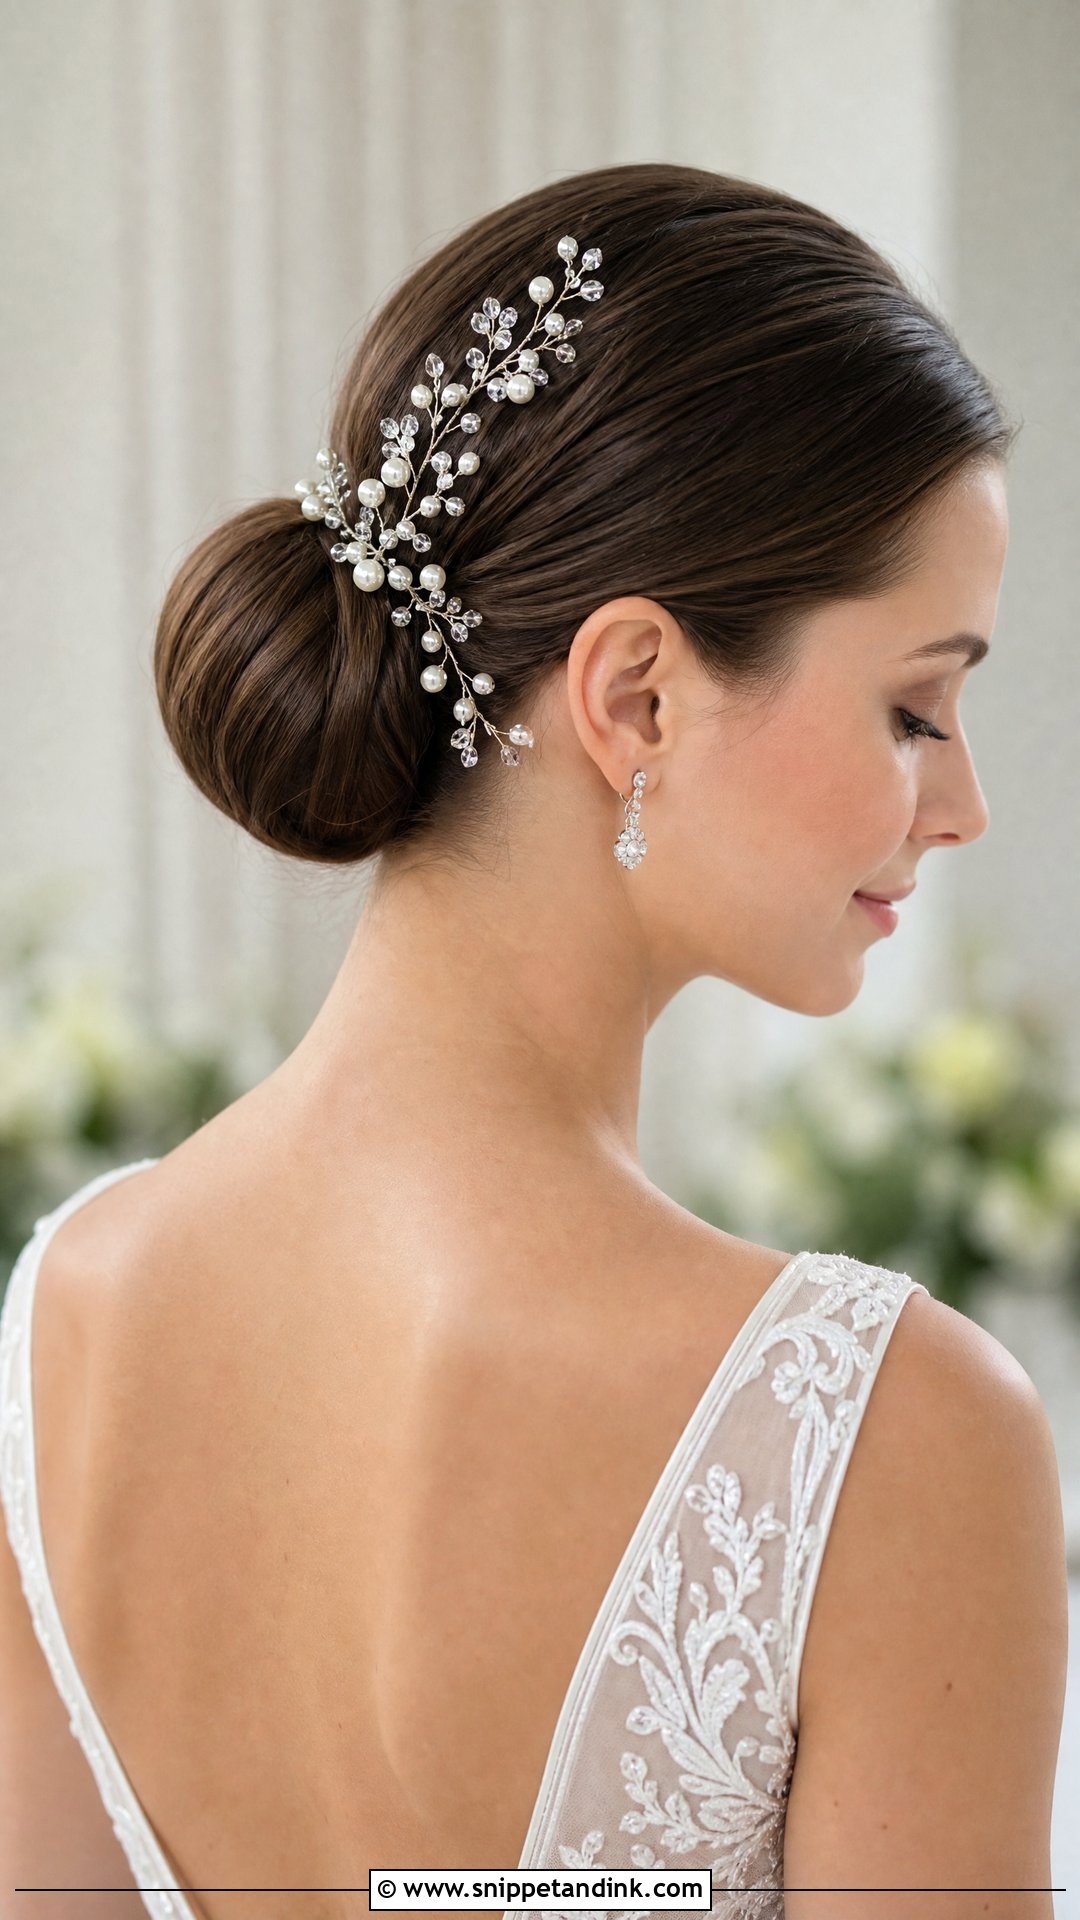
A sparkling hair vine turns a plain sleek bun into the centerpiece of the look. Vines are made on flexible wire, so I bend them to the curve of the bun before pinning, then thread small pins through the loops every few centimeters. Draped across the crown or wrapped around the bun, a vine catches light without the weight of a tiara. Keep the bun itself very clean; on a textured bun a fine vine simply disappears.
28. Curly Half Up with Volume
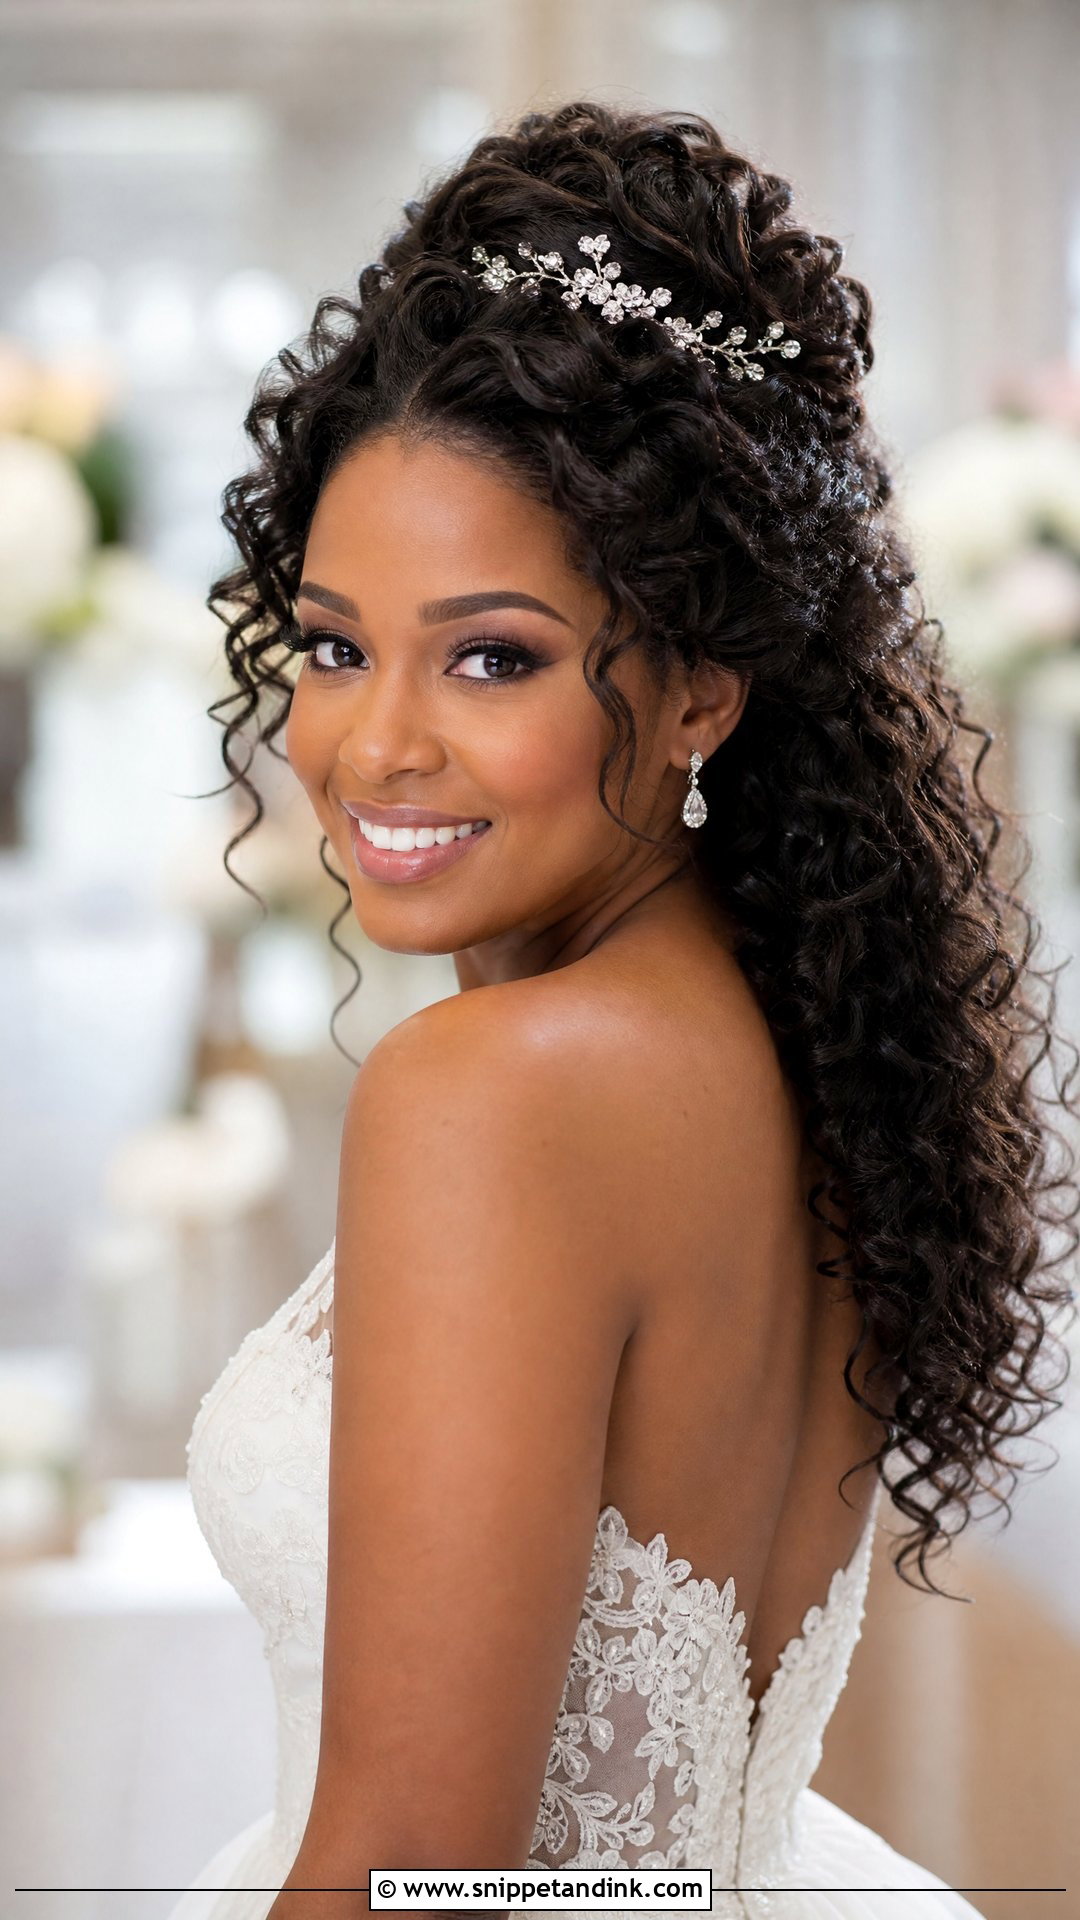
Curly half up works when the crown section is gathered loosely enough that the curls on top keep their shape. I lift at the root with a pick instead of teasing, since teasing frizzes curls. Before photos I refresh the face-framing curls with a damp hand and a dab of gel. Flowers or pins at the back hide the gathering point. It shows off natural curl without asking you to straighten anything.
29. Side Braid with Soft Waves
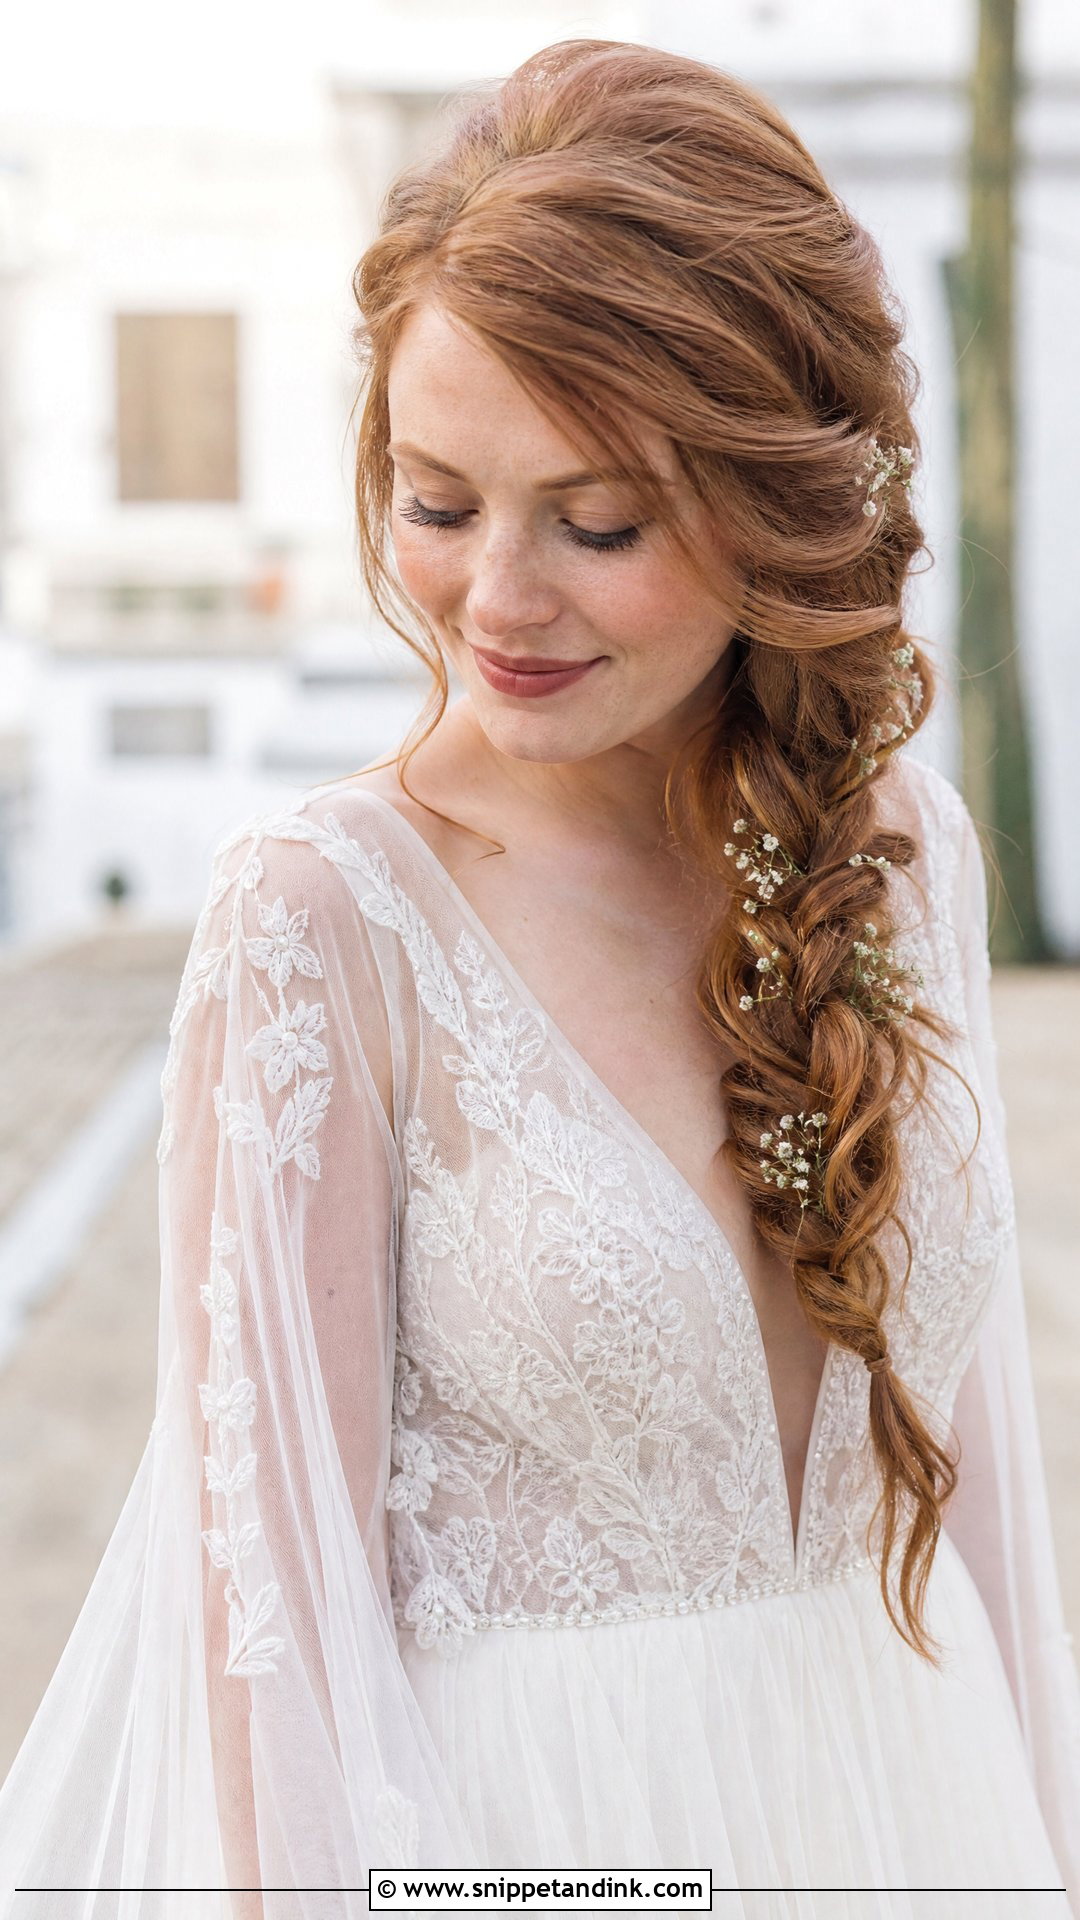
This one is relaxed and practical. I braid loosely from behind one ear so the plait drapes forward naturally instead of being pulled tight across the back, and the lengths stay waved and free below it. Tiny flowers or pearls woven in add detail. It needs hair past the shoulder blades. A clear elastic at the end, hidden by a wave, keeps it from unravelling during the reception.
30. Elegant Updo with Pearl Pins
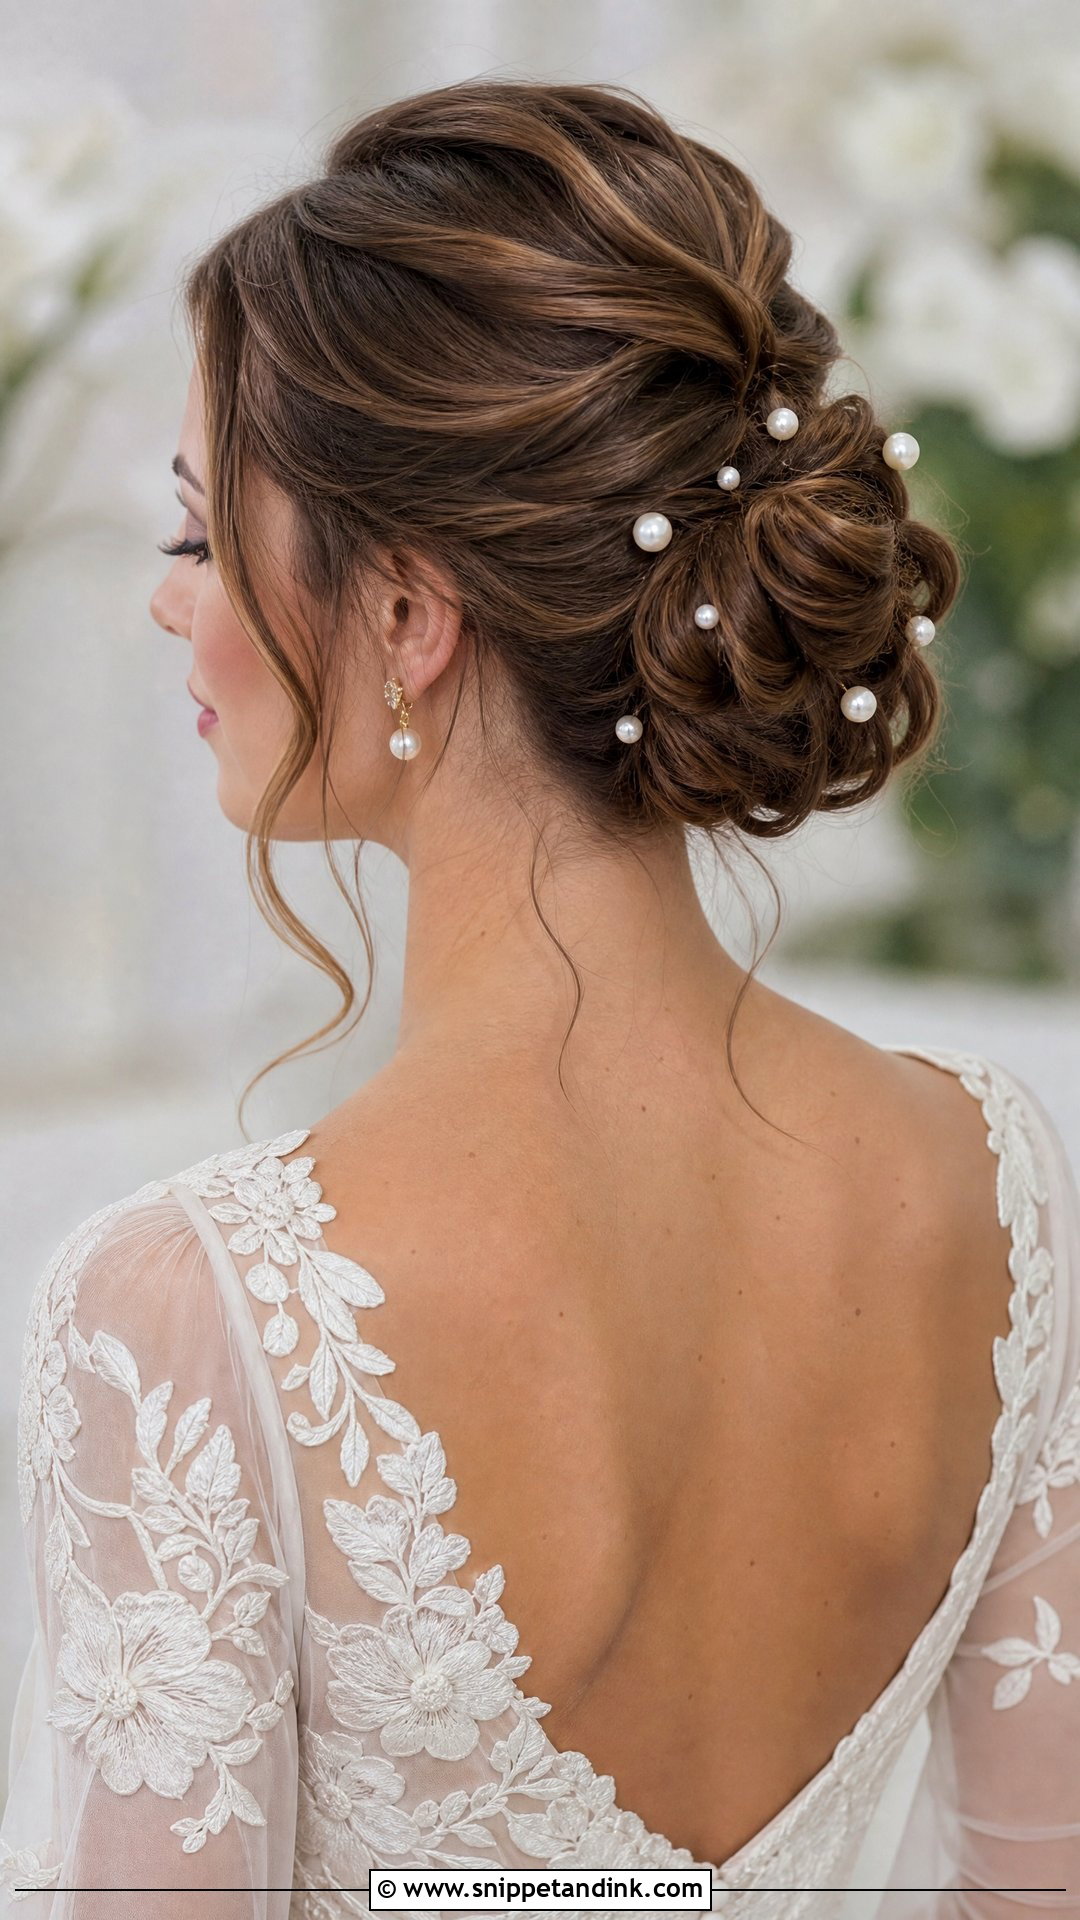
Pearl pins work on almost any soft updo, but placement matters more than quantity. I scatter them in an uneven line following the direction of the twists rather than spacing them evenly, so they look as though they’ve grown out of the hair. Too many and it starts to look like polka dots. They sit comfortably beside a veil or statement earrings. Pull a few face-framing pieces loose for softness, and you have classic glam that won’t compete with a bold lip or a big ring.
Getting Glam Hair Through a Ten-Hour Day
A style that looks perfect at ten in the morning has to survive tears, hugs, a veil coming out and a dance floor. Longevity is built in the prep and the pinning, not in a final layer of hairspray. These are the habits I rely on.
- Curls are left to cool fully before they’re brushed. Brushing warm curls is the main reason they drop by dinner.
- Pins are crossed in an X, and U-pins hold soft shapes better than bobby pins pushed straight in.
- Hairspray goes on in light layers from arm’s length, never as one wet coat that leaves hair crunchy and dull in photos.
- Veil removal is planned. Show whoever takes it out which pins to release so they don’t pull the whole style apart.
Give your maid of honor a little touch-up pouch: ten bobby pins, a travel hairspray, a few clear elastics, a tail comb and blotting papers. That covers almost every problem between ceremony and reception.
When Humidity and Wind Join the Guest List
Damp air is the biggest threat to glam hair. Curls lose definition and sleek styles frizz at the hairline. For a summer outdoor wedding I lean toward updos over hair down, and toward textured over sleek, because texture hides frizz while a glossy finish exposes it. Anti-humidity spray works when it goes on before styling, not after.
Wind is the second problem. Half up styles and loose waves tangle fast on a beach or a rooftop. Braided and pinned styles are far more forgiving, and a veil anchored above a bun copes with gusts much better than one resting on loose hair.
Take Two Styles to Your Trial, Not Thirty
The right glam style suits the hair you have, your neckline and the way your day will actually unfold. Narrow this list to two or three, save photos of the front and back of each, and bring them to your trial along with your veil, earrings and a picture of your dress. Then ask your stylist to let you wear the finished style for an hour before you decide. How it looks after that hour tells you more than any photo can.
You'll Like These Ideas:


Leave a Reply