
Down waves are the style brides ask me for most, and the one I work hardest to keep in place. Choosing to wear your hair down means nothing is pinned to hold the shape, so the curl itself has to last through hugs, a veil, dancing and whatever weather the day brings. Below are 20 wave styles I’d happily put on a bride, from brushed-out glamour to loose beach texture, with notes on which hair each one suits and where it tends to struggle.
What Holds a Wave When Nothing Is Pinned Up
A curl sets as it cools, not while it’s on the iron. That’s the main reason down styles fall flat at so many weddings: hair is curled, released hot, brushed out straight away, and the shape relaxes before the ceremony starts. When I do a down style, every section either cools in my hand or gets clipped in a loop until it’s cold to the touch. Only then do I brush or rake it out.
Prep counts as much as the curling. Freshly washed hair loaded with conditioner is slippery and won’t hold, and hair that’s several days dirty goes limp. I prefer hair washed the evening before or that morning, dried properly, with a light mousse or heat protectant through it. Shine oils wait until the very end.
Fine, thick and curly hair start in different places
- Fine or silky hair: texture spray before curling, smaller sections, a slightly smaller barrel than you’d guess, and a light flexible hairspray between sections.
- Thick or heavy hair: big sections don’t heat through, so keep them moderate and give each curl longer to cool. Weight drags waves out, so start tighter.
- Naturally curly or coily hair: a smooth blow-out or silk press a day or two ahead if you want the polished waves shown here. Or ask for a defined version of your own curl pattern, which often outlasts a heat-set wave.
- Colour-treated or bleached hair: it takes heat fast and can scorch, so I keep the iron lower and hold it a little longer.
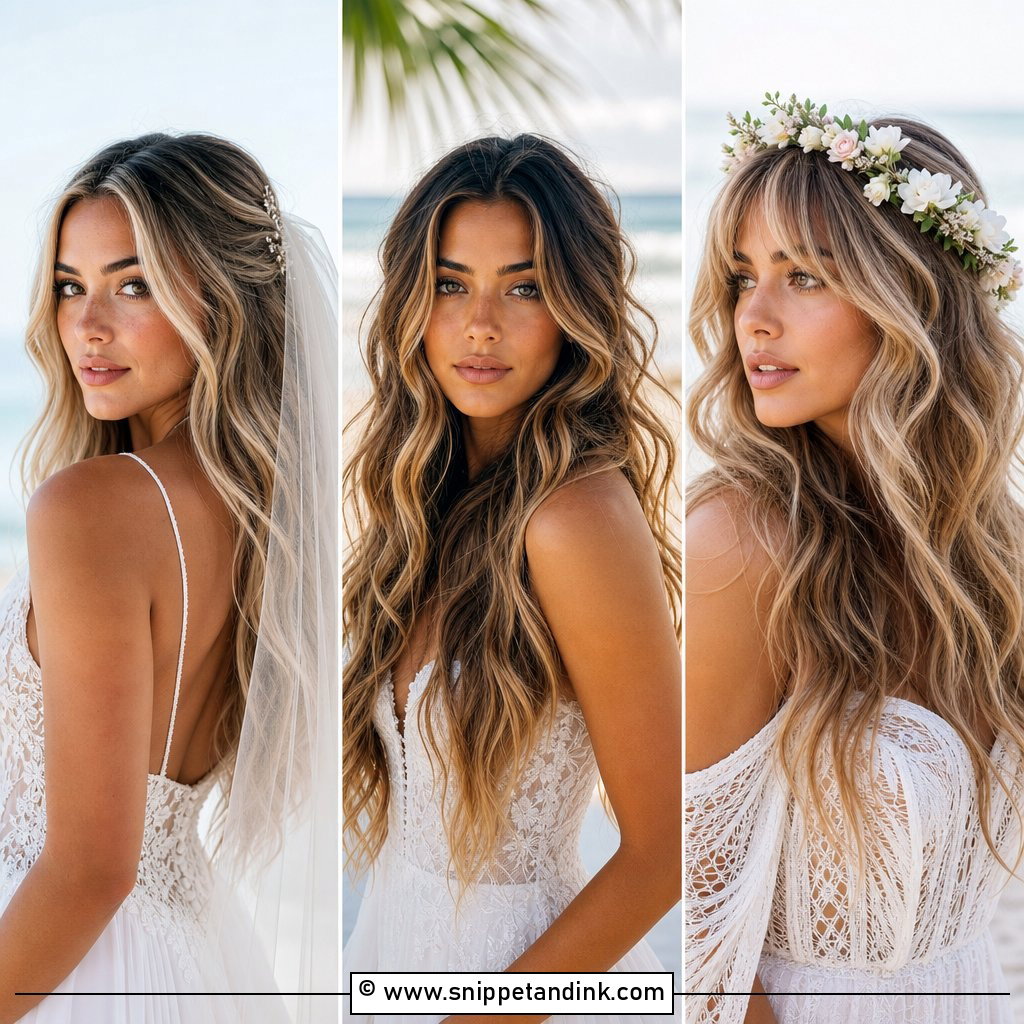
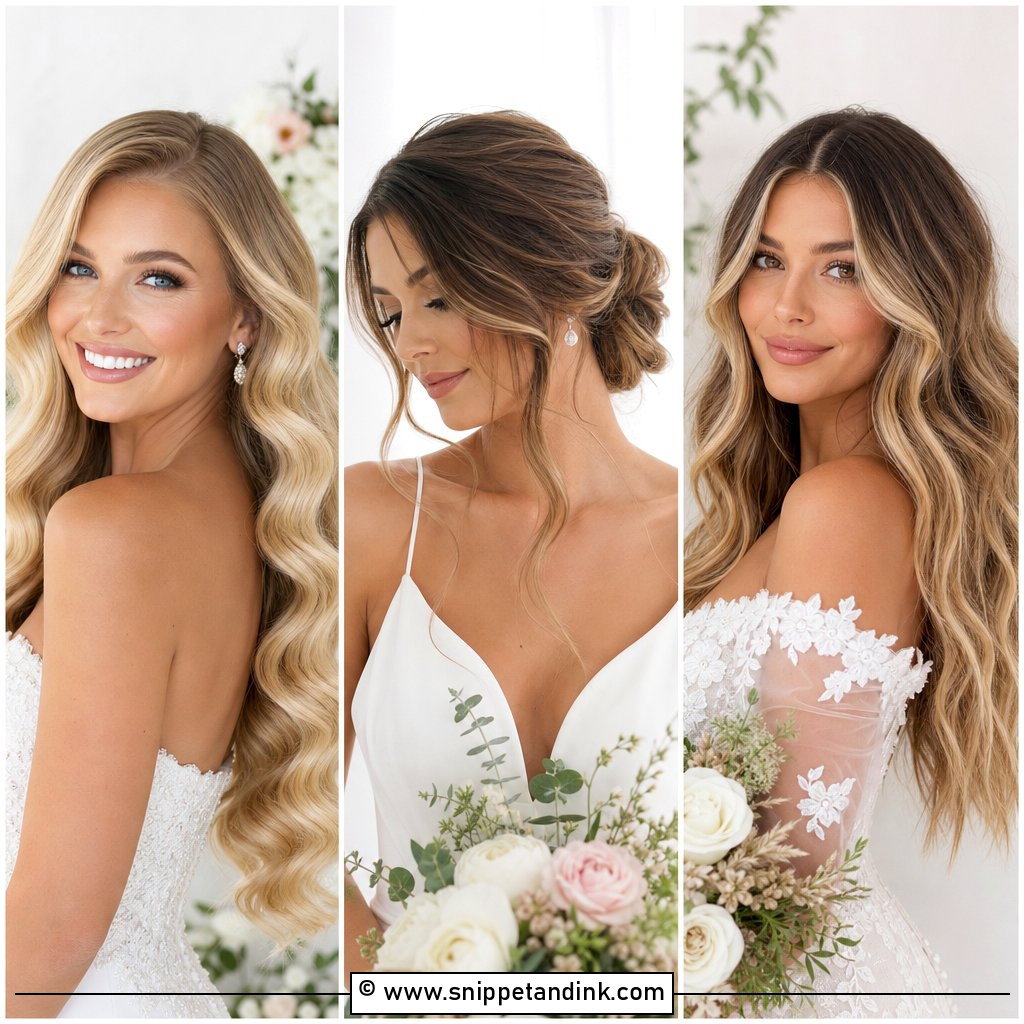
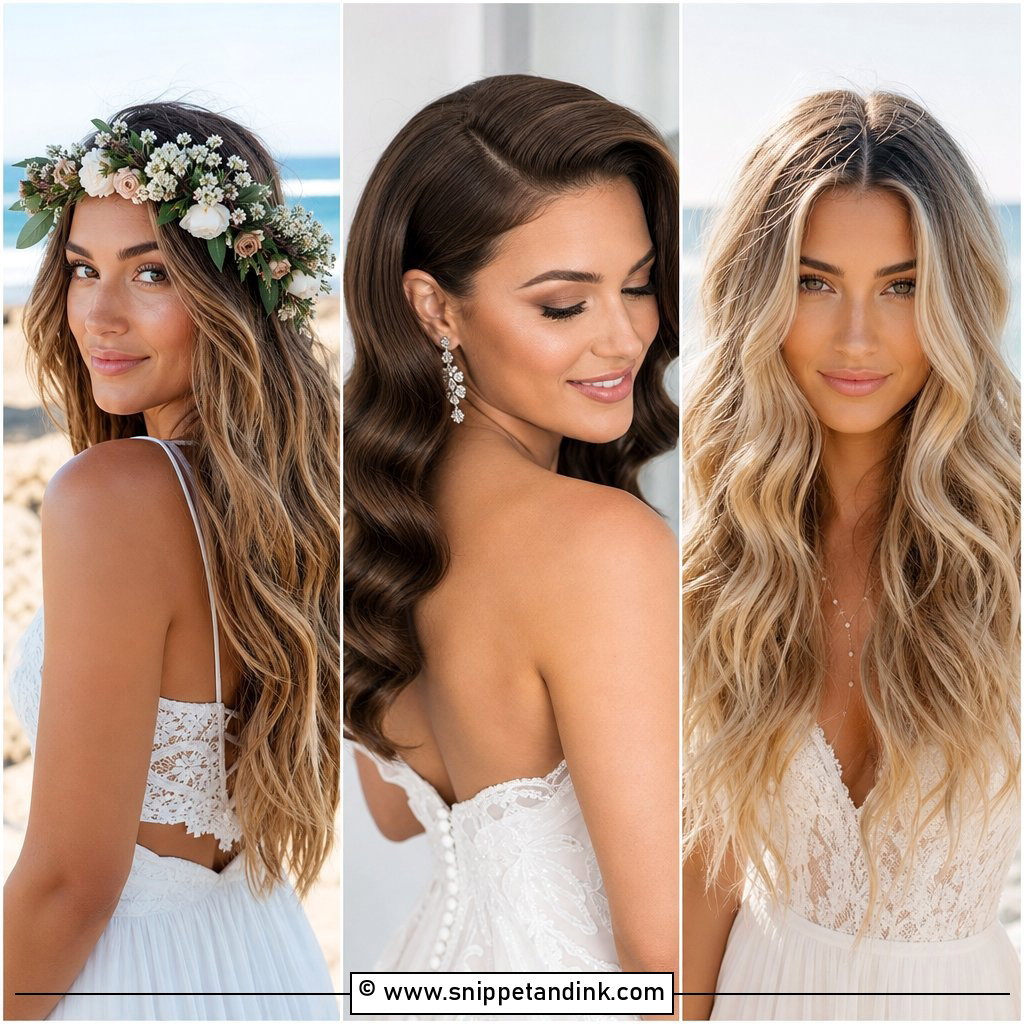
1. Loose Beach Waves With Side Part
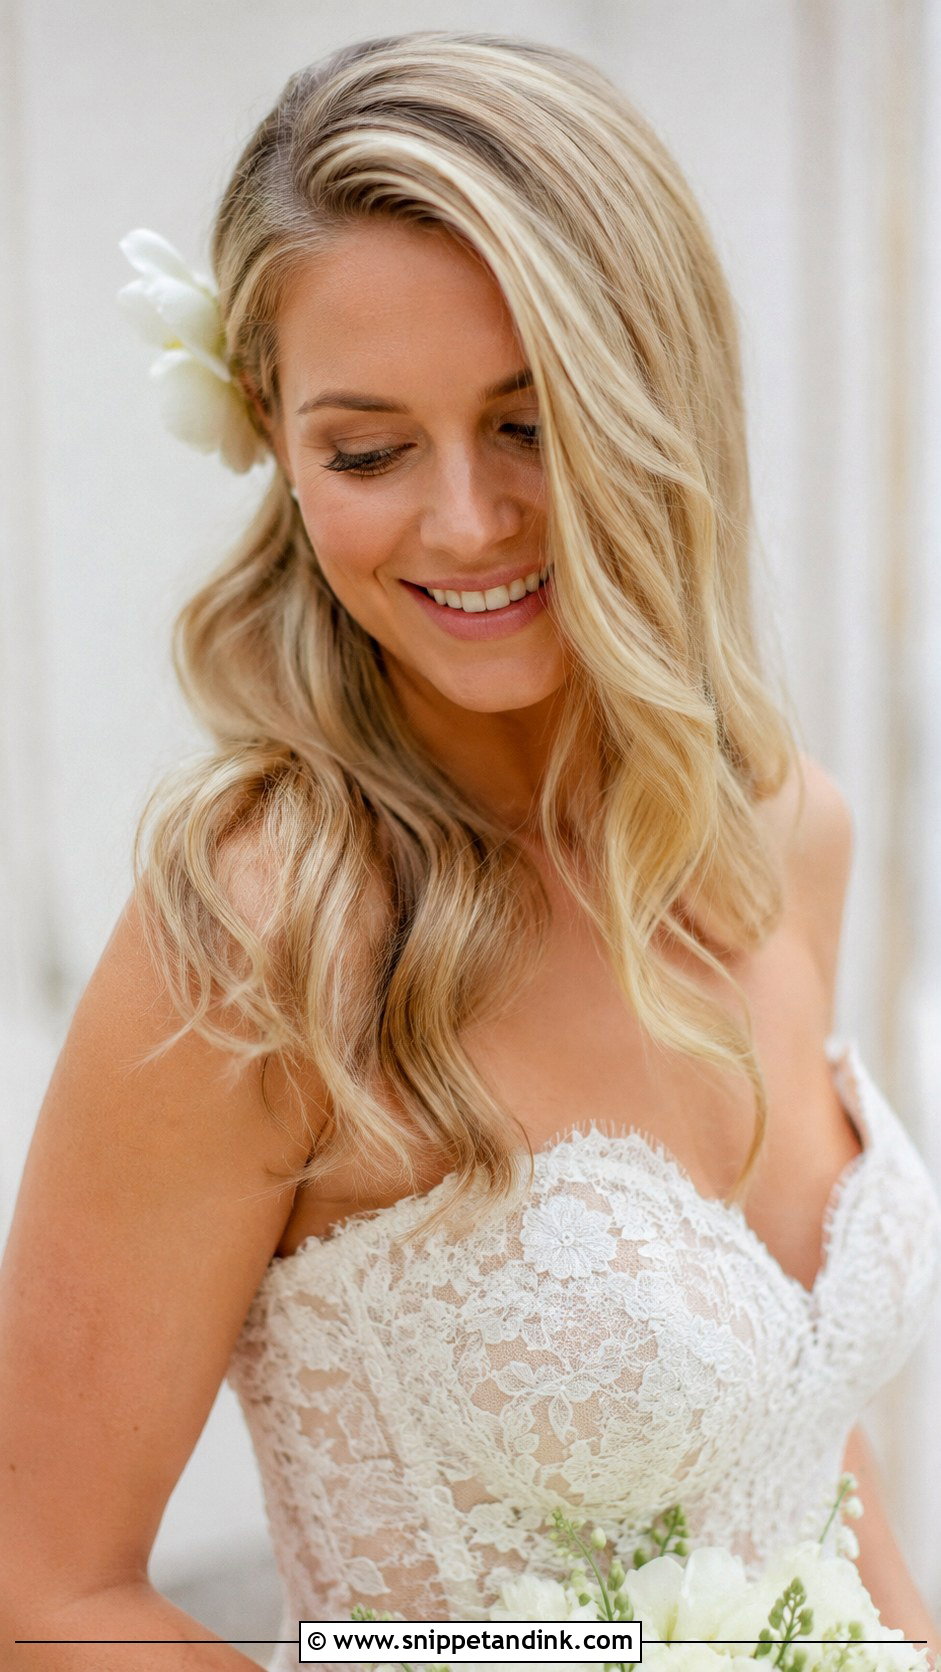
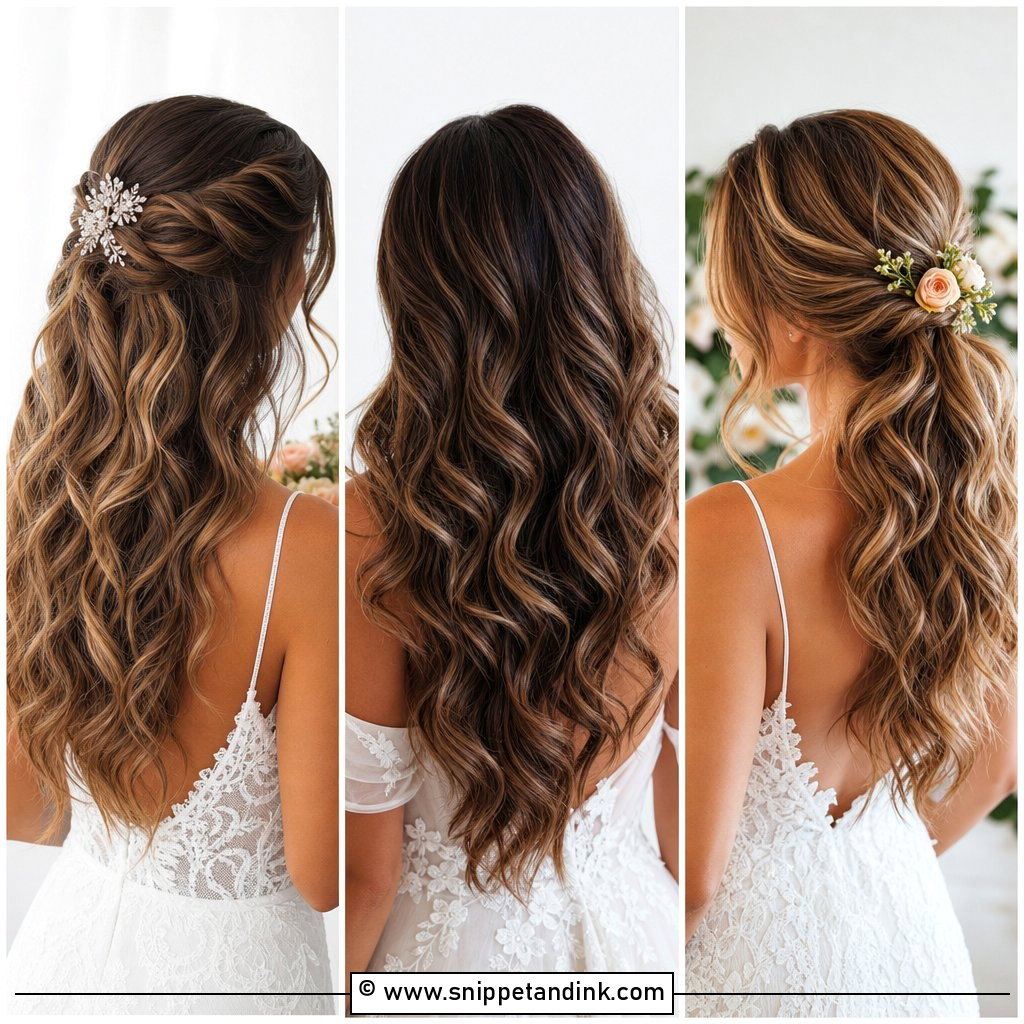
Alternating the curl direction is what stops beach waves from turning into neat ringlets, so I wrap one section toward the face and the next away from it. I leave the last inch or two of each section out of the iron; slightly straighter ends are what make the texture read as sea air rather than salon. A deep side part adds height near the face, but it needs to be set early with a little heat or it slides back toward your natural part by lunchtime. Medium to long hair with some grip takes it best. On very silky hair, I add a texture spray before curling, or the waves fall flat inside an hour.
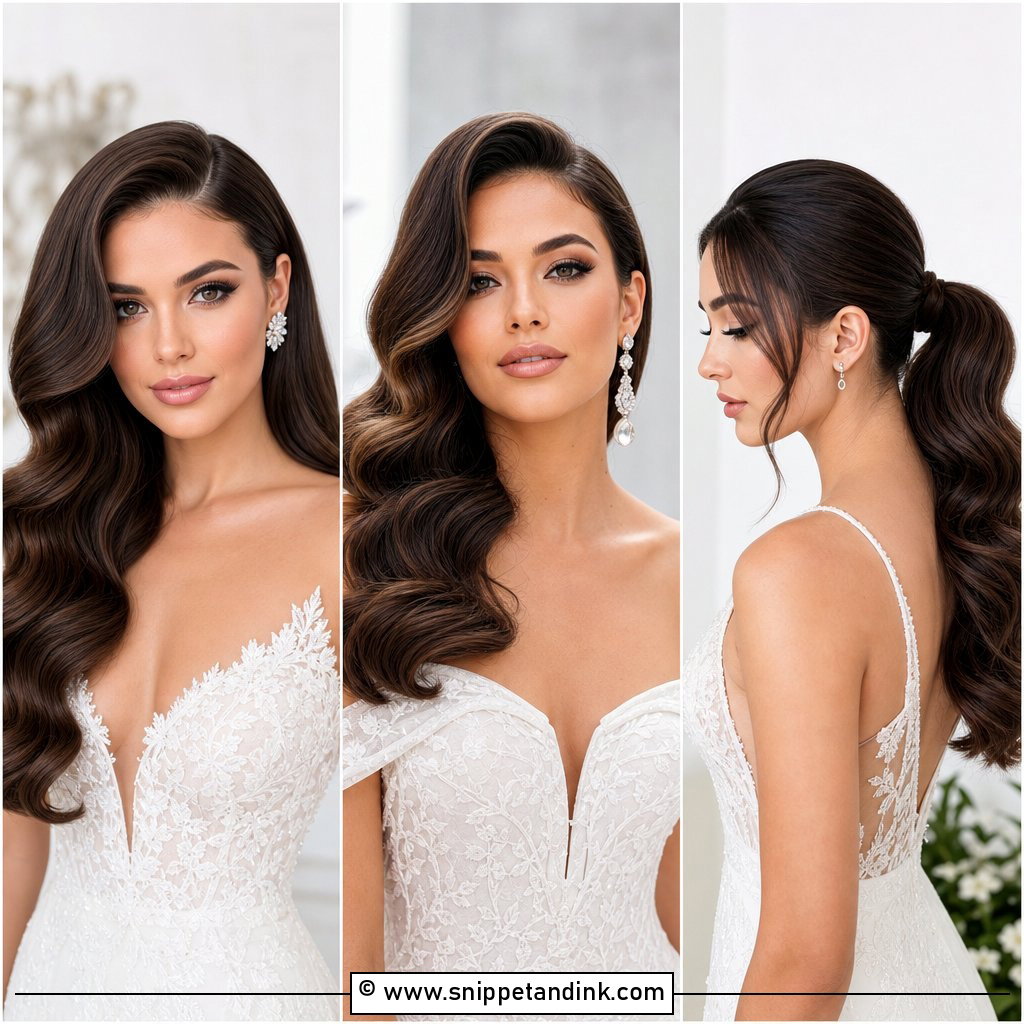
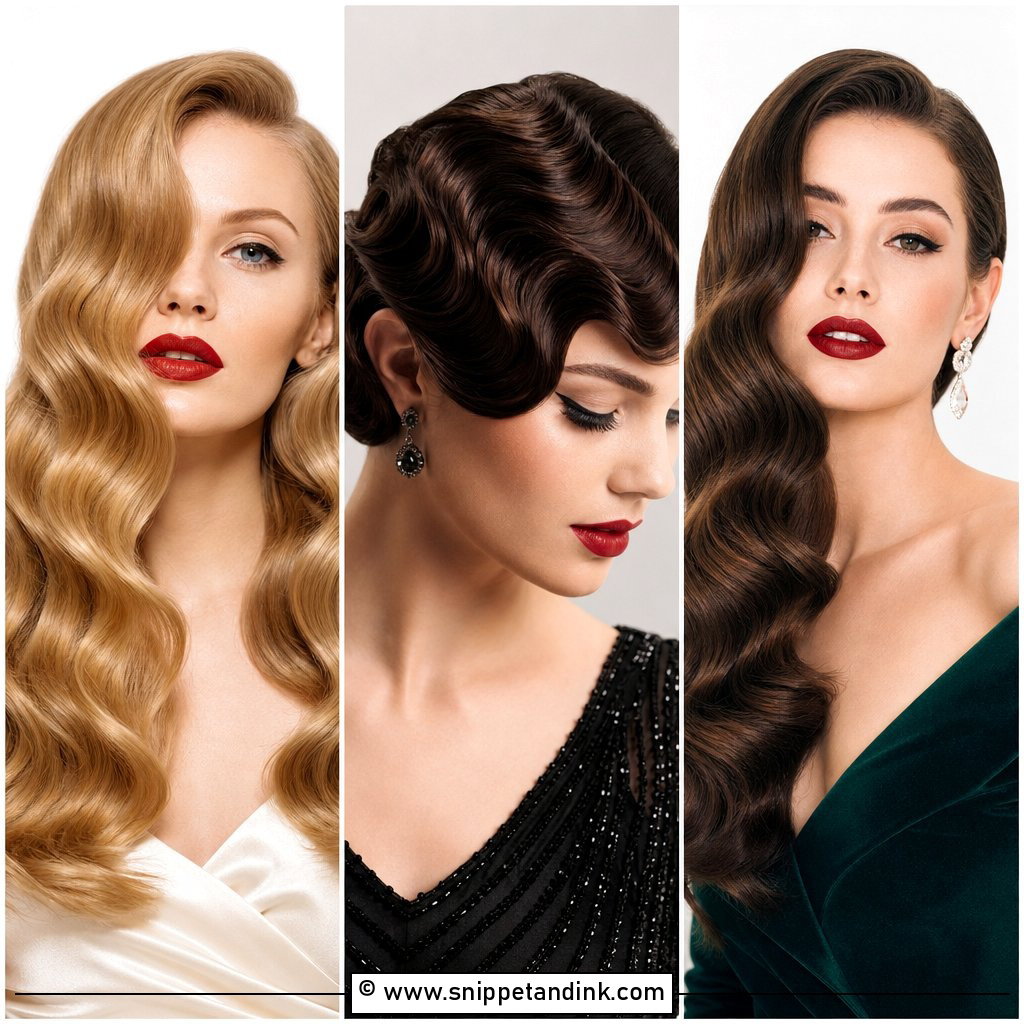
2. Old Hollywood Glam Waves
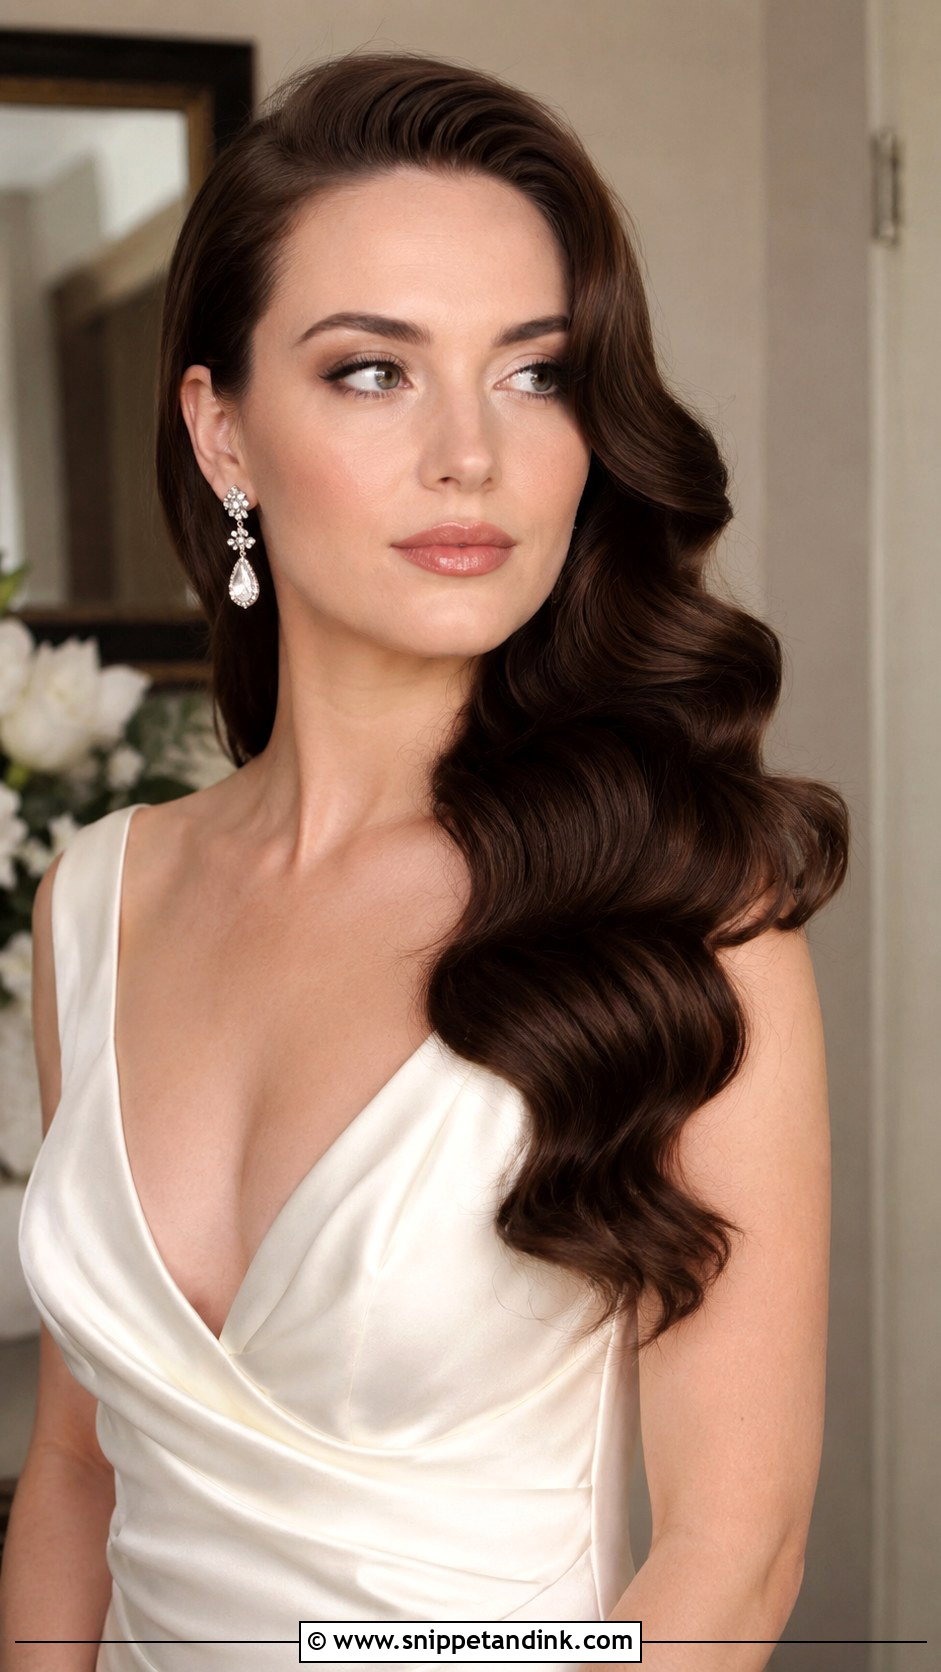
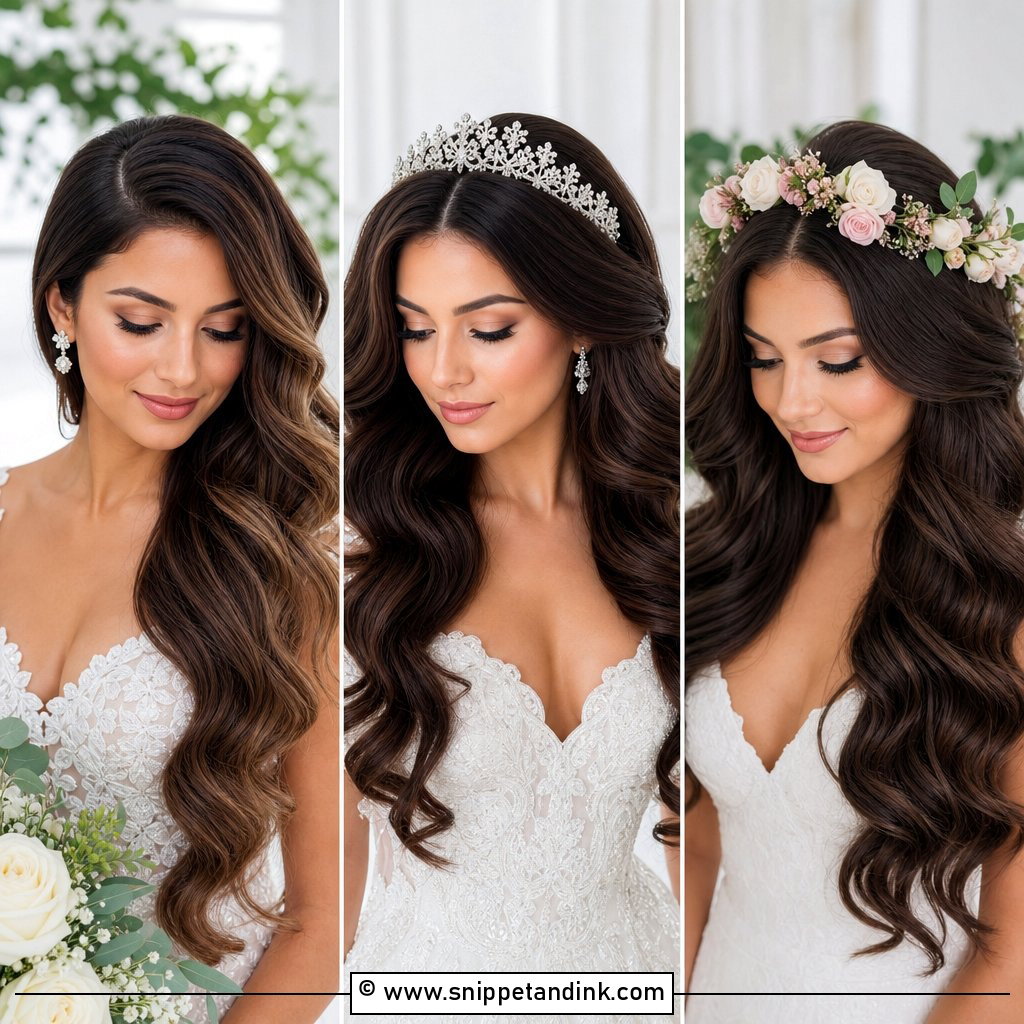
This is the one wave where every curl goes in the same direction, because the sections have to link into one continuous S once brushed. I clip each curl in a loop while it cools, then brush it out with a boar bristle brush and press the ridges with clips for a few minutes. It’s more structured than it looks in photos and takes longer in the chair. Thick, healthy hair holds it well. Heavily layered cuts break the line, since short layers pop out of the wave instead of joining it. A touch of serum on the surface gives the gloss; too much and the hair separates into strings.
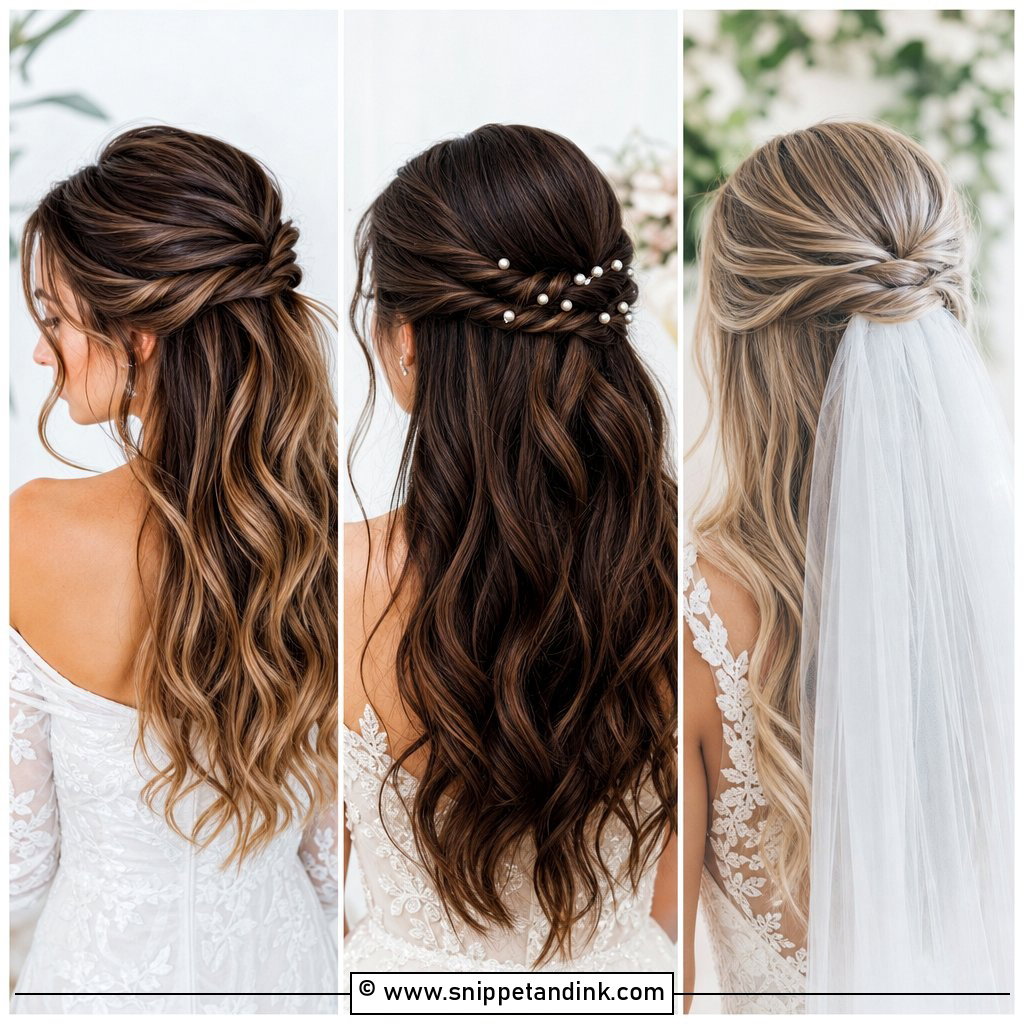
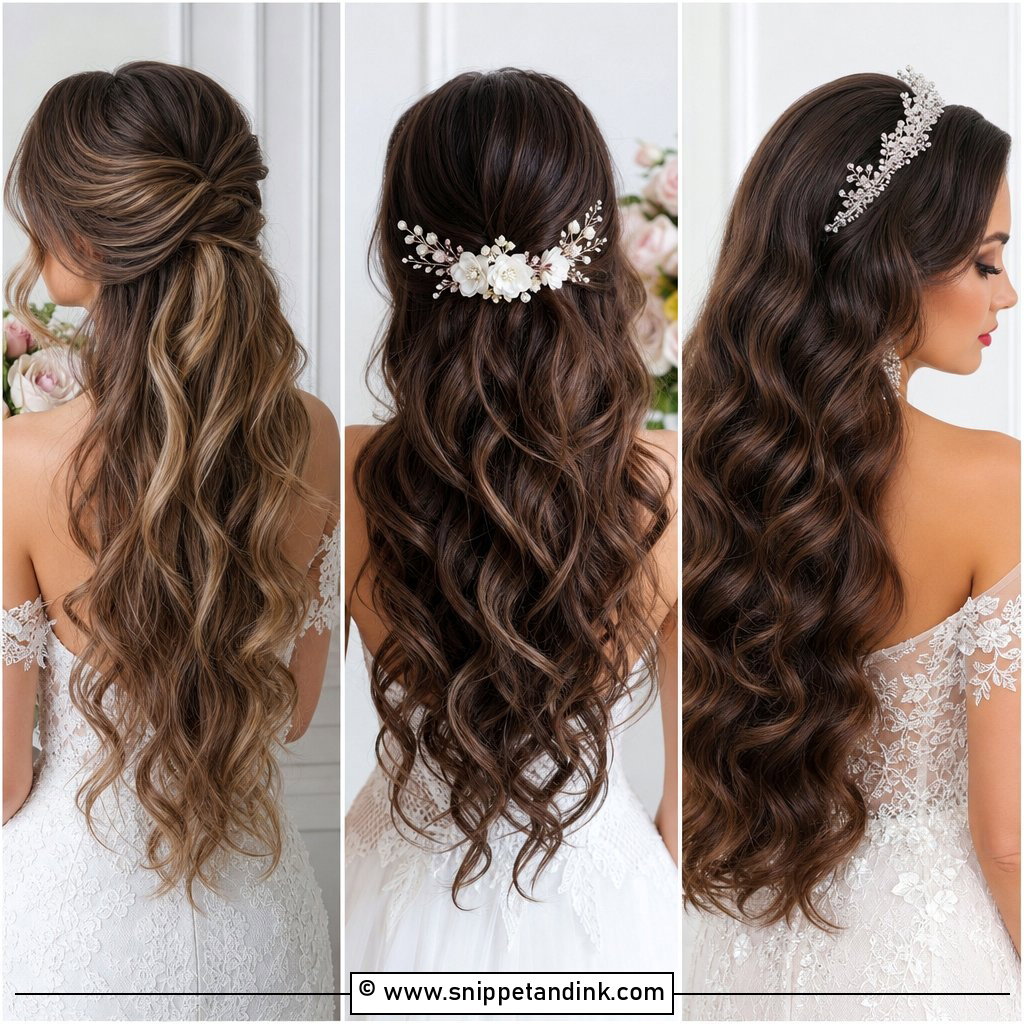
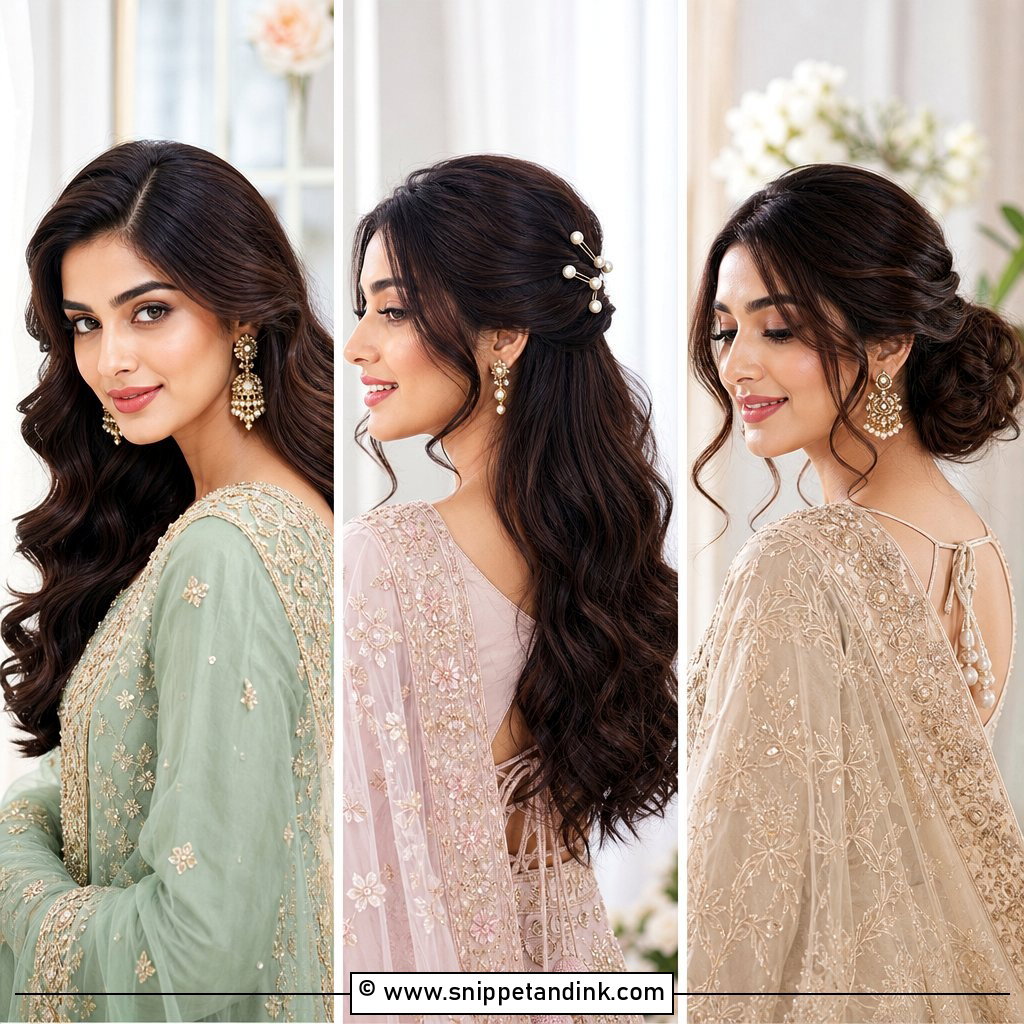
3. Half Up Half Down Loose Waves
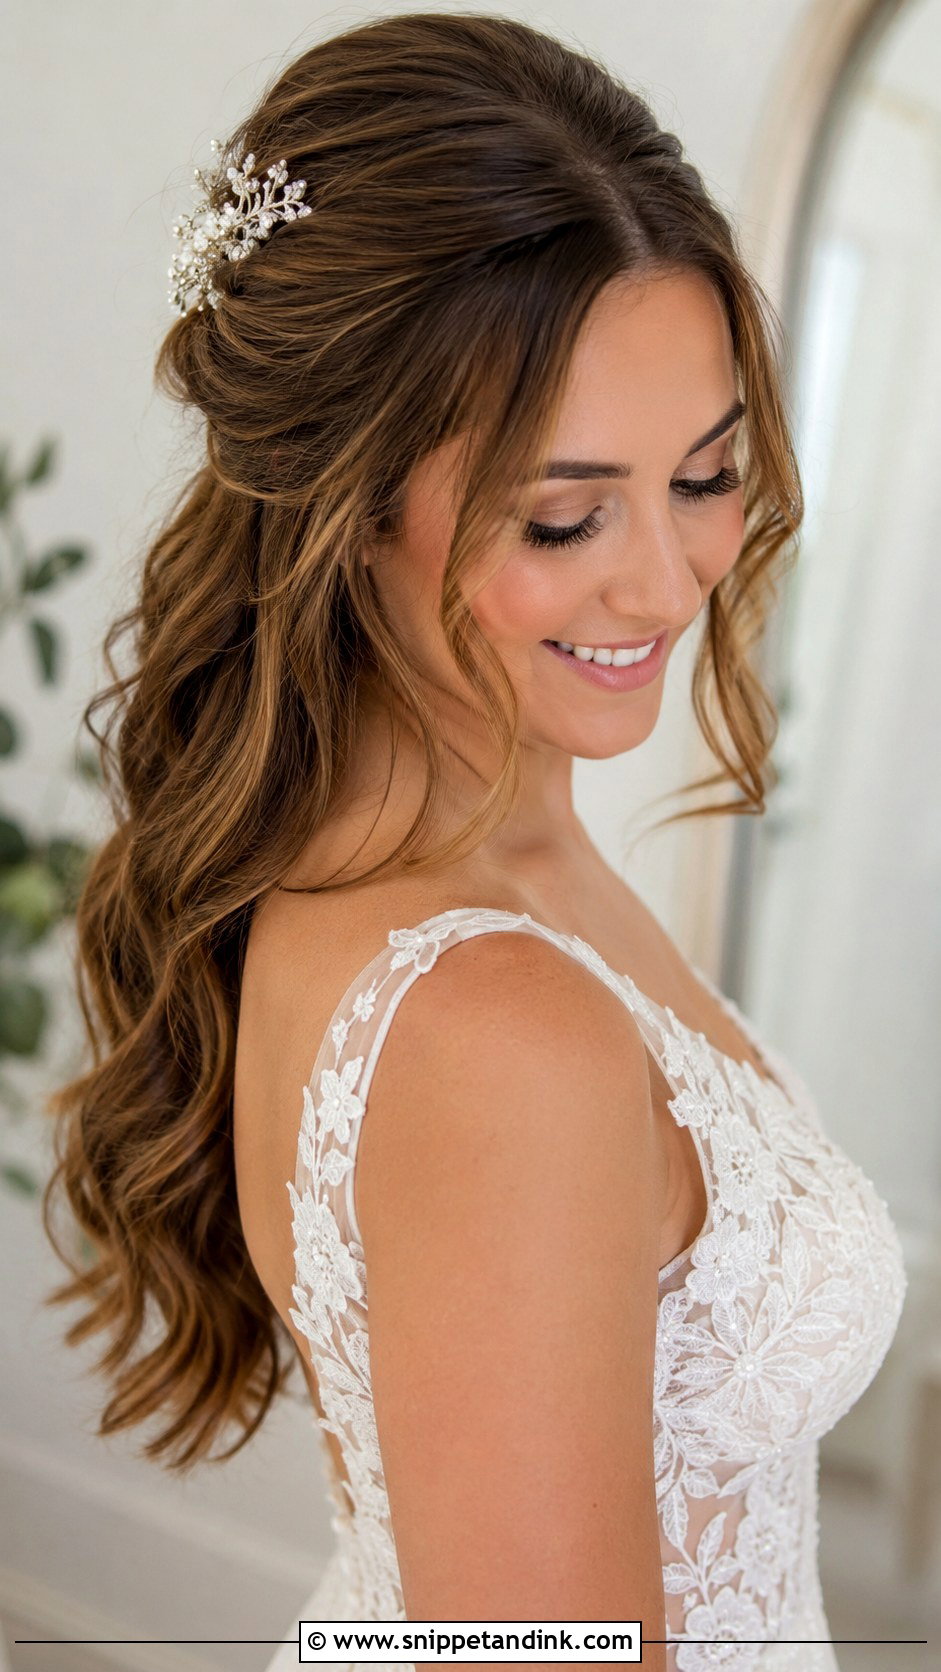
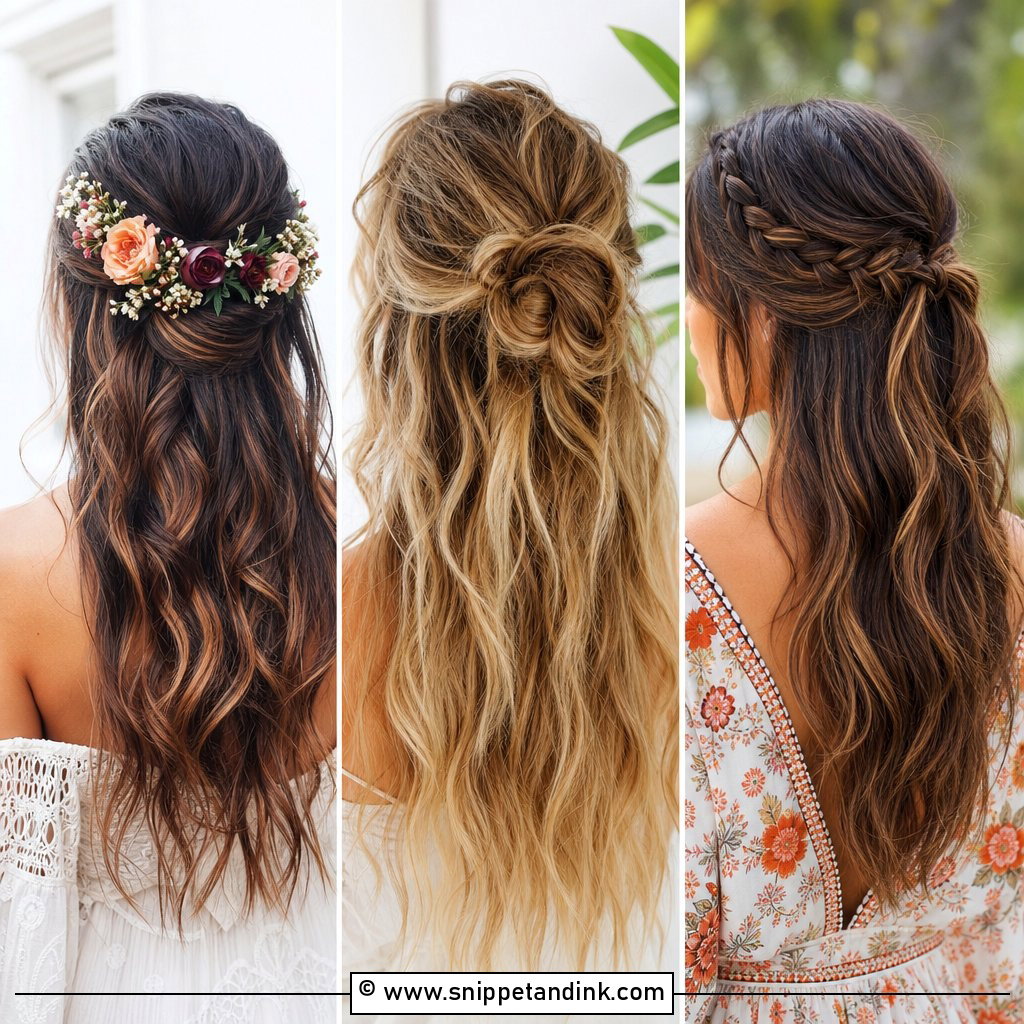
Taking the top section back keeps hair off your face, which is why I suggest half up to brides who are nervous about strands blowing into their lipstick. I secure the crown section with a small elastic hidden under a wrapped piece of hair, then add crossed bobby pins over it so it can’t sag under an accessory. Curl the lengths before you pull the top back, otherwise you flatten the waves you just made. Leave a few face pieces loose, but keep them longer than chin length so they wave instead of sticking out. A jeweled comb or small flowers can sit right over the anchor point.
4. Center Part Loose Waves
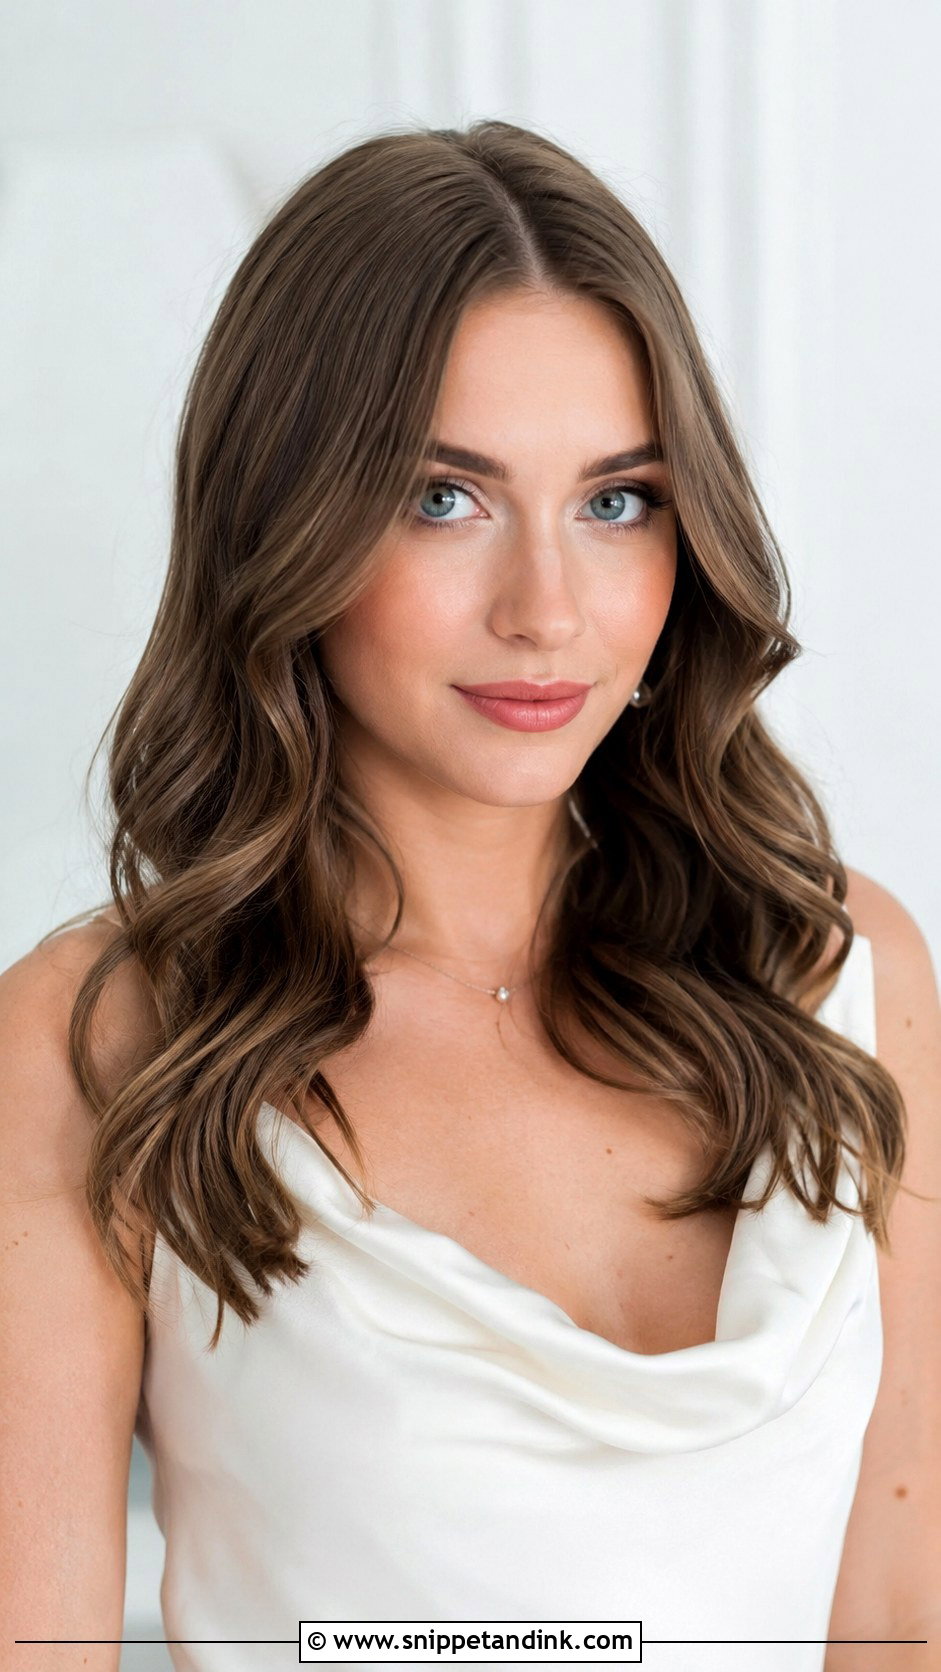
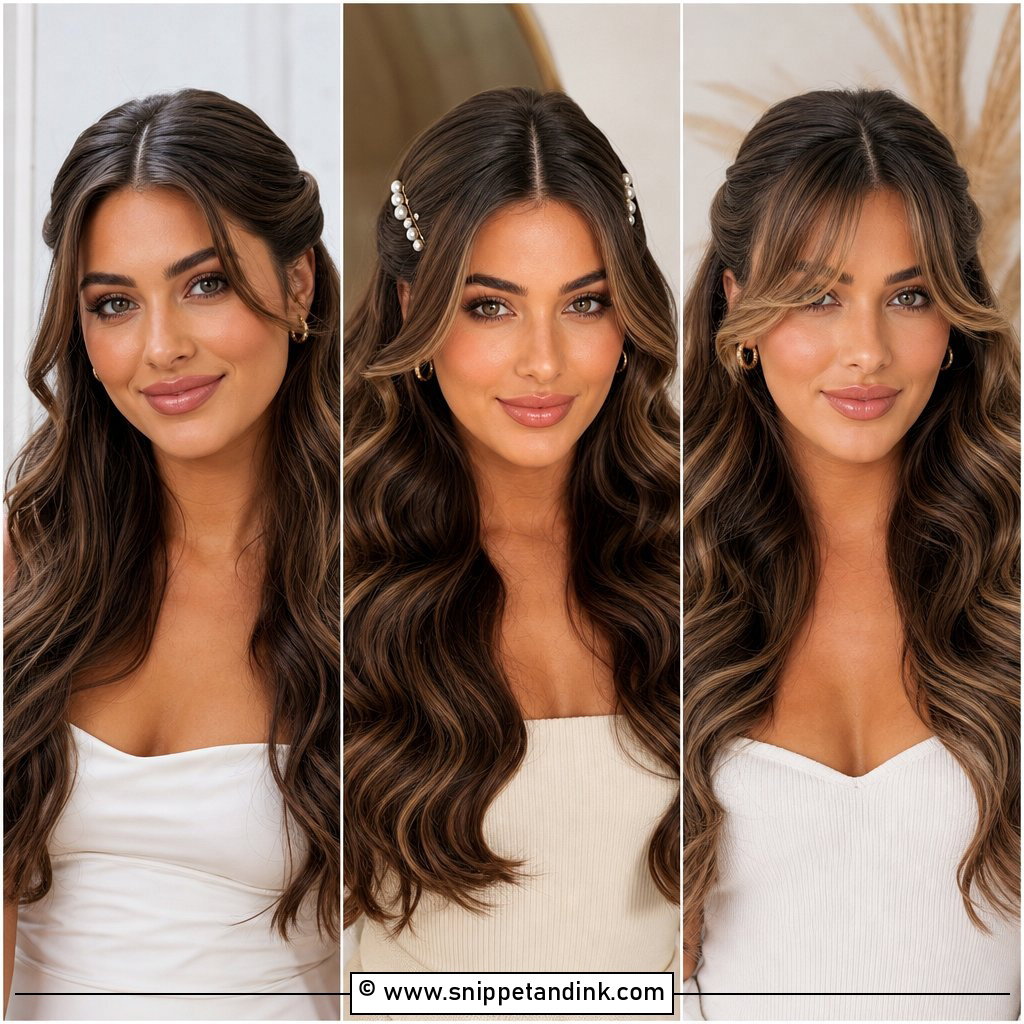
A center part shows every bit of asymmetry, so I check where your hair naturally splits before committing to it. If a cowlick at the hairline pulls one way, the part will fight you all day. I keep the first few inches smooth and start the wave around cheekbone level, which gives the clean, modern shape in the picture. Oval and heart-shaped faces carry it most easily; on a rounder face I’d start the wave higher to add width at the temples rather than the jaw. A thin veil anchored at the back of the crown sits neatly behind it.
5. Loose Waves With Flower Crown
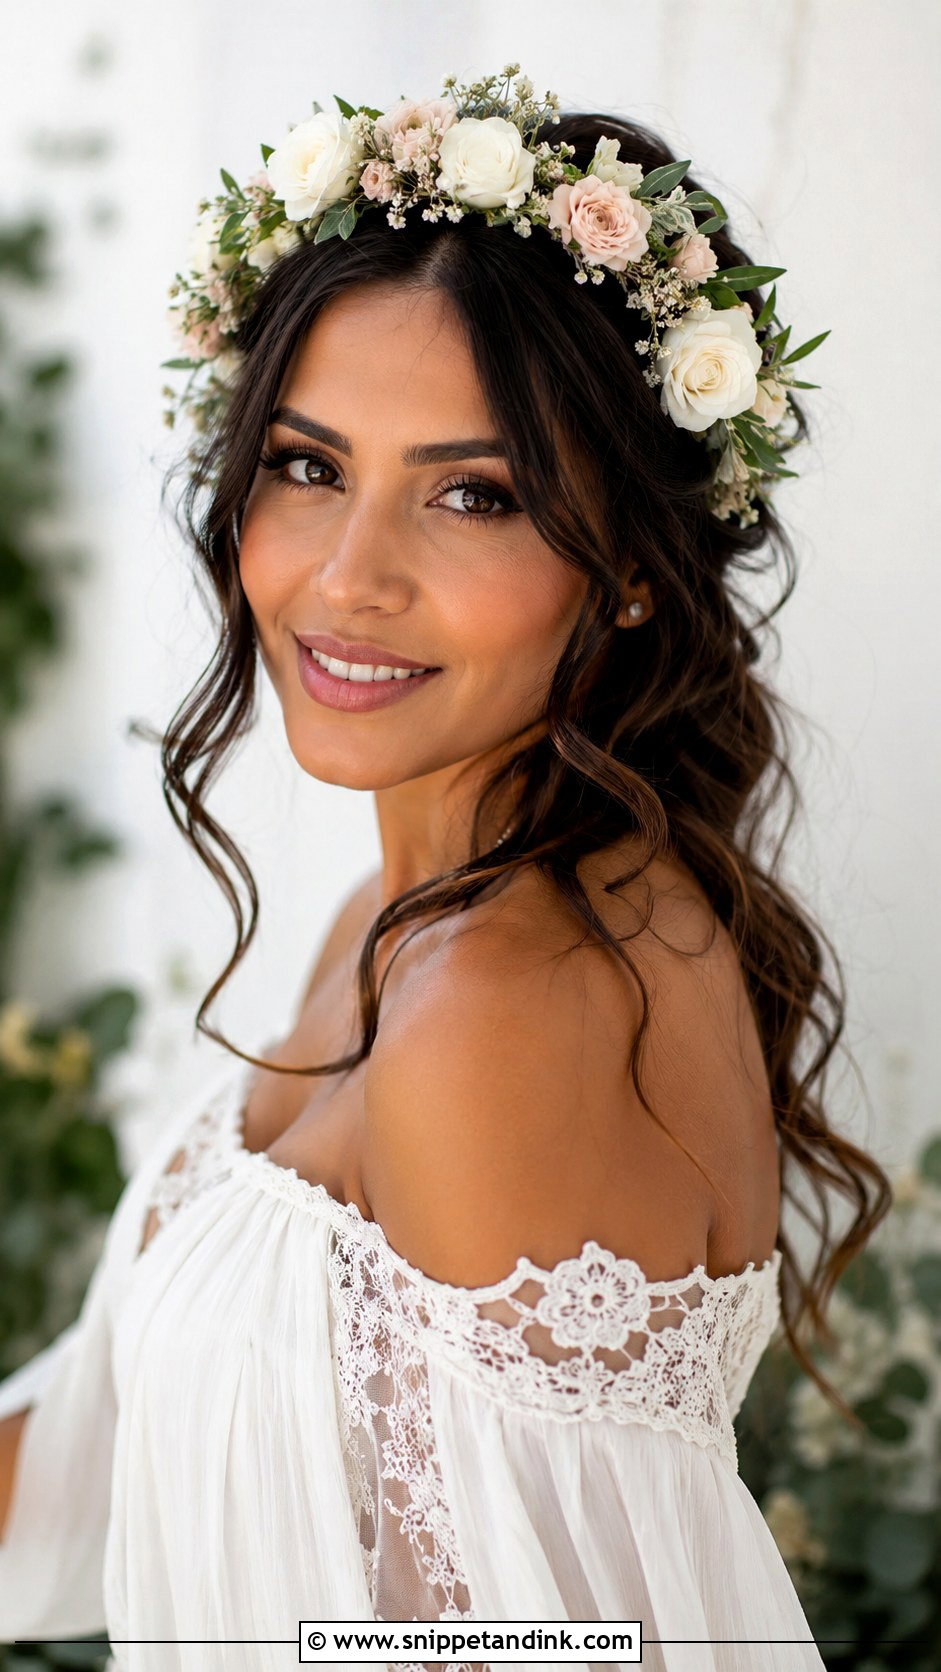
A crown needs something to grip, and freshly curled hair is slippery. I tease a narrow band of hair where the crown will sit and pin through the base of the wire in four or five places, crossing the pins so they lock. Ask your florist to keep it light; heavy blooms tip forward by the reception. Matching the flowers to your bouquet ties the look together, and the waves can be a little messy here because the crown is the focus. Fresh flowers wilt in heat, so keep it somewhere cool until the moment it goes on.
6. Loose Waves With Veil
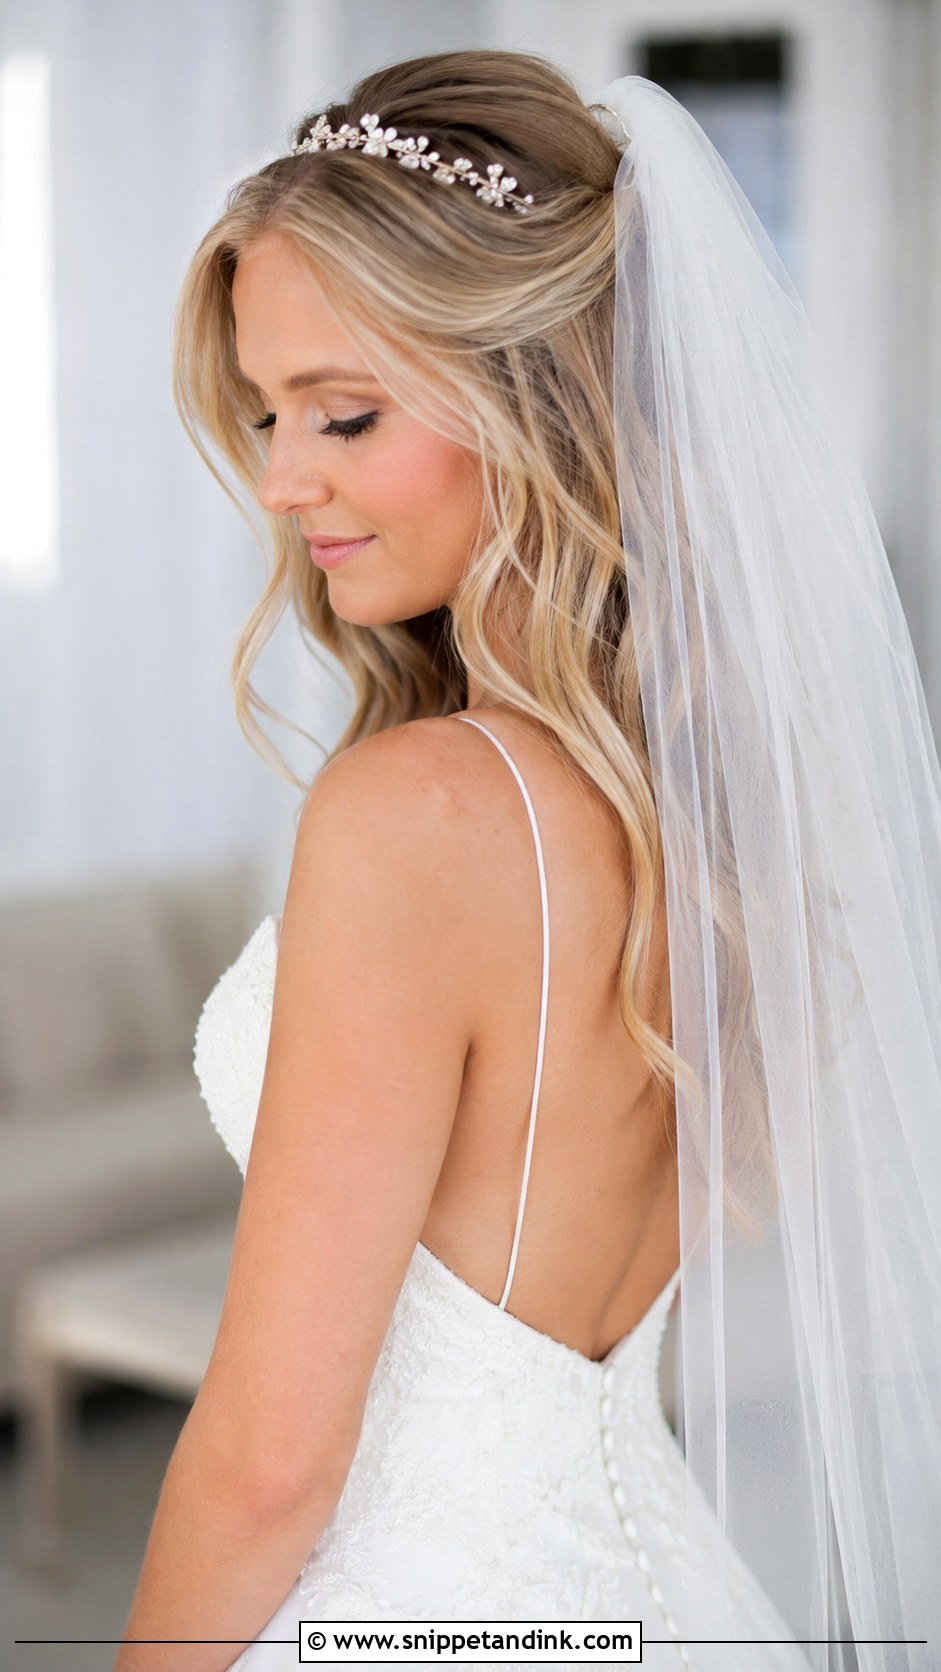
The veil goes in after the hair is finished, and its placement decides how the waves fall. I set the comb at the crown or just below, then build a small anchor of crossed bobby pins underneath so it has something firm to slide into. A long, heavy veil drags on loose hair and slowly flattens the waves at the back, so I curl those sections a little tighter to compensate. Short veils are far easier with down hair. When the veil comes out after the ceremony, run your fingers through the back to lift any dent the comb left. A beaded comb above the veil can hide the anchor.
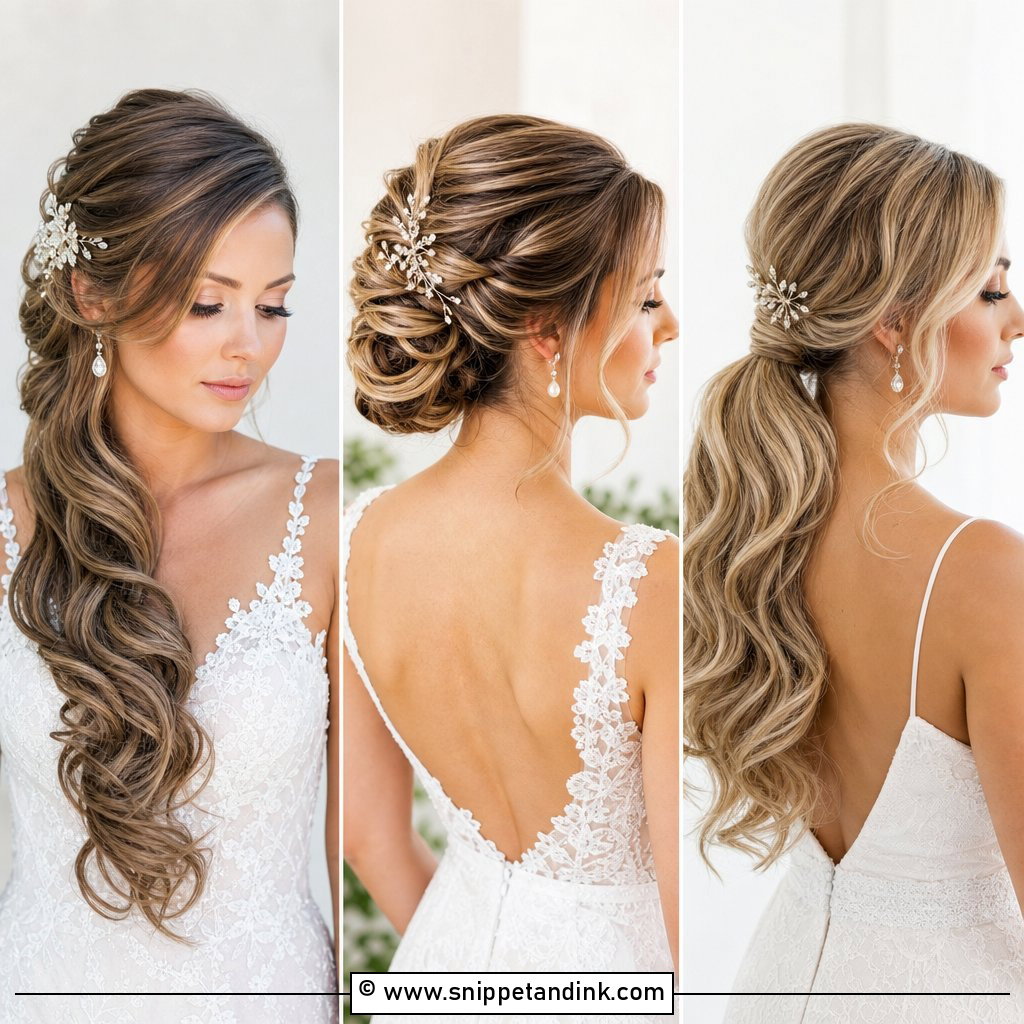
7. Loose Curls With Side Swept Style
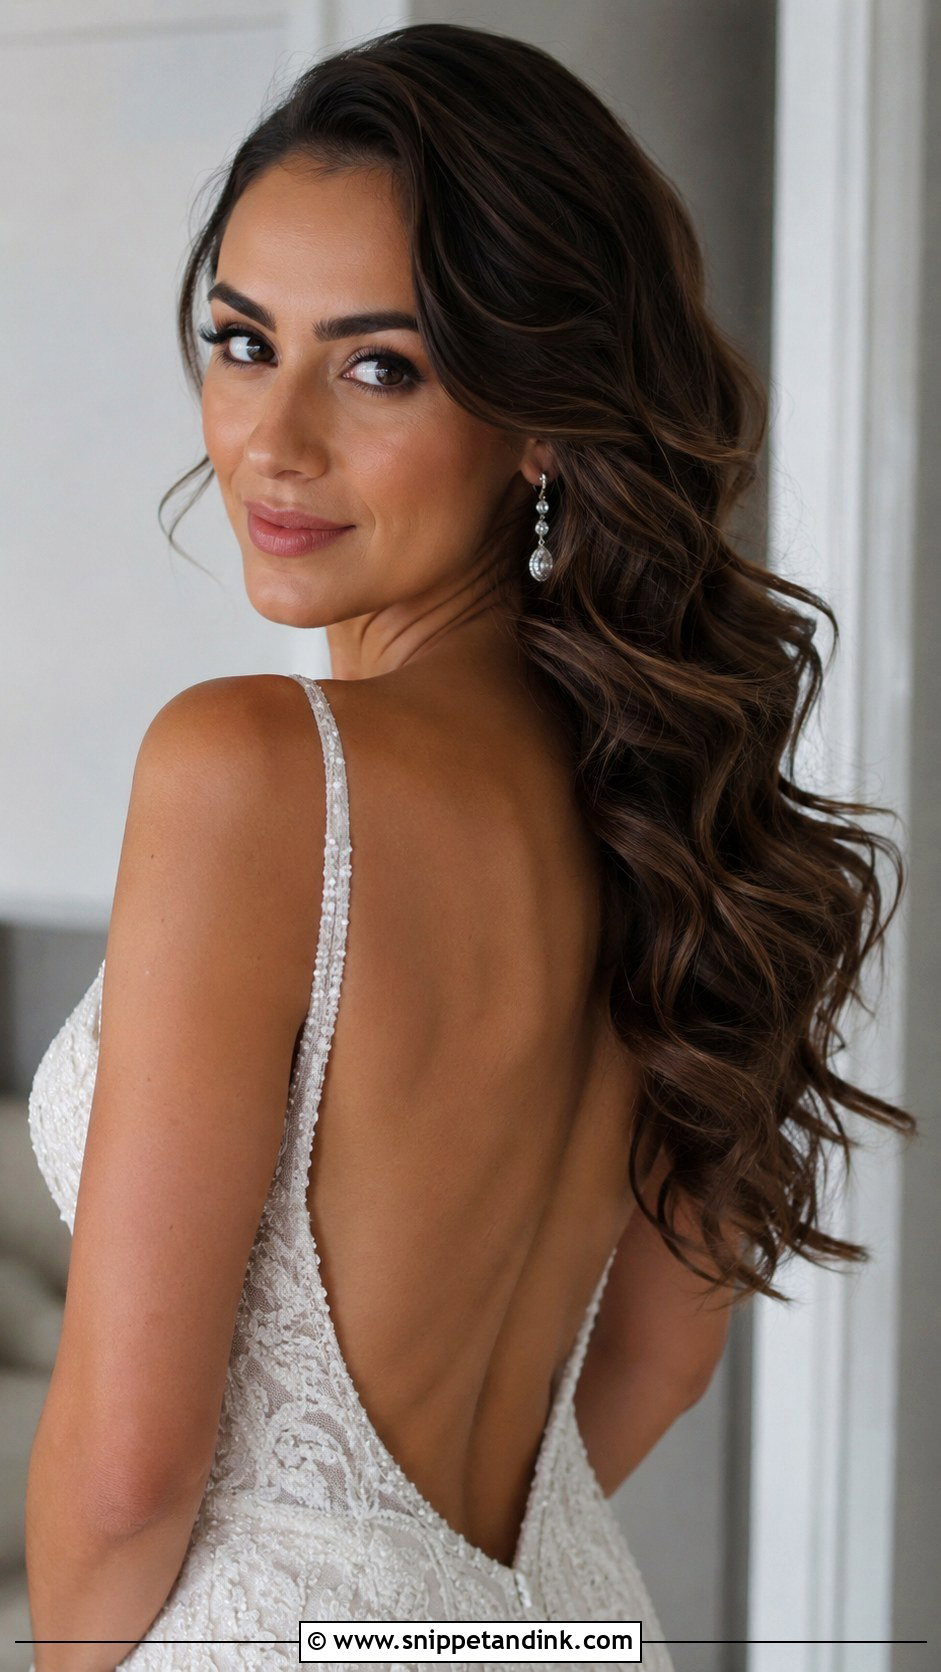
Sweeping everything over one shoulder needs hidden support, or the hair creeps back across your neck as you move. I pin a row of bobby pins behind the ear on the opposite side, crossed in pairs, and that holds the sweep for hours. The bare neckline on that side is why I suggest it with statement earrings or a backless gown. Think about which side faces your partner at the altar, so guests see your face rather than a wall of curls. Very thick hair can feel heavy on one shoulder by evening; medium density suits it better.
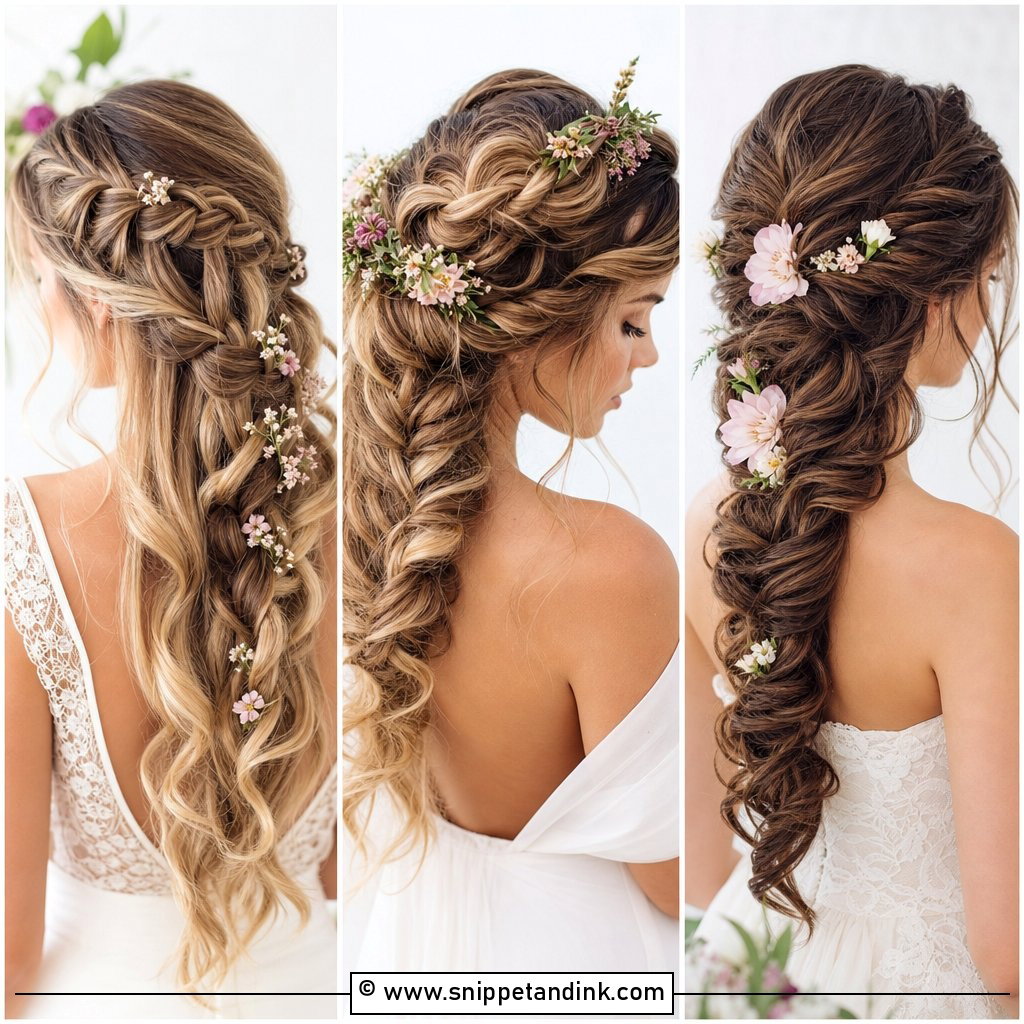
8. Boho Loose Waves With Braided Detail
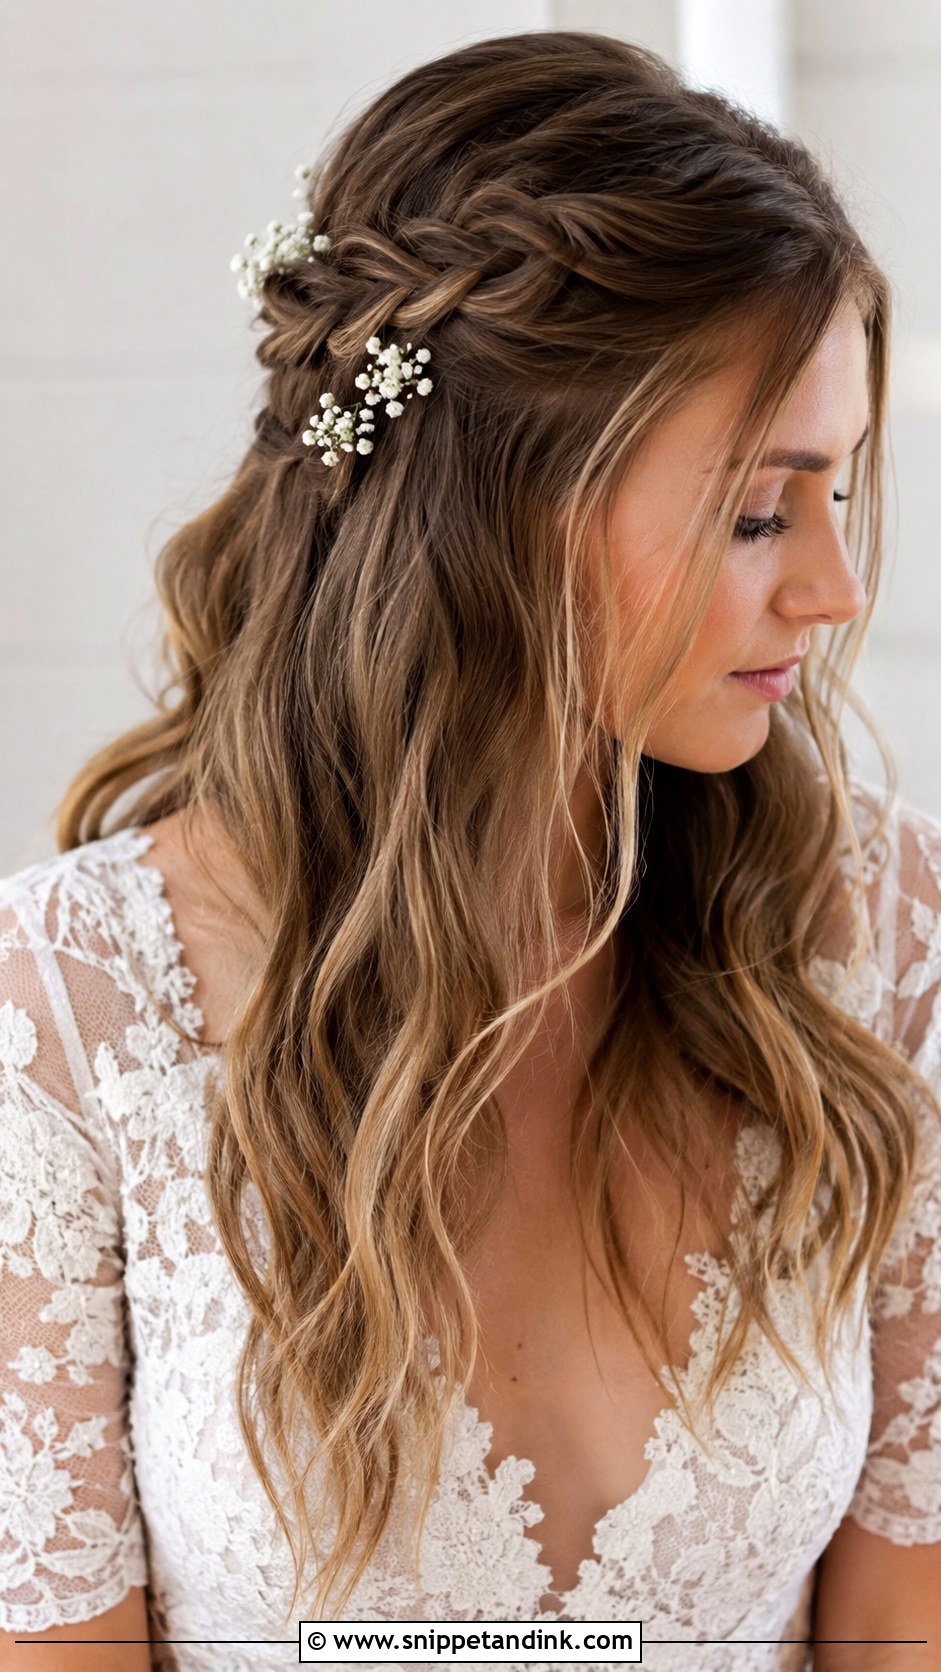
A small braid along one side or around the crown is one of the easiest ways to make loose waves extra special without pinning anything up. I braid before curling the lengths, then gently pull out the edges of the plait so it looks fuller on camera. On fine hair a braid can look skinny, so I take a larger section than you’d expect. Leave a few tendrils loose. Tiny flowers or sprigs of greenery stay put far better tucked into the braid than into loose hair, because the plait grips the stems.
9. Long Loose Waves With Deep Side Part
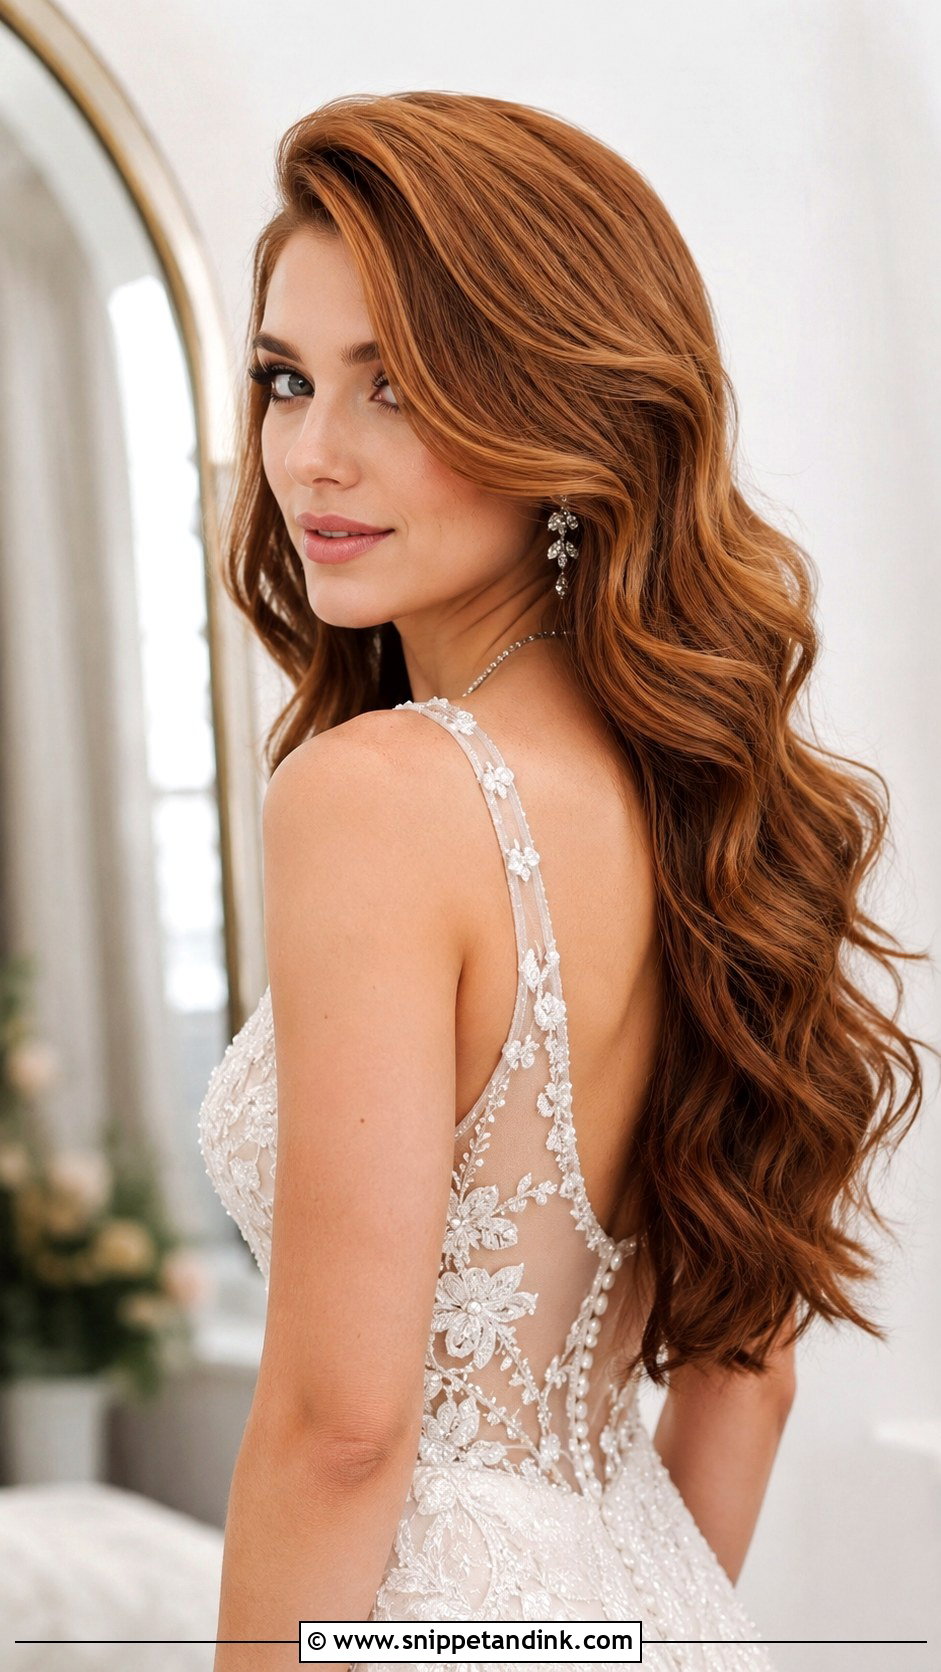
Waist-length hair is heavy, and weight is what pulls curls out. For long lengths I use a slightly smaller barrel than the finished wave I’m after, because the curl stretches as it hangs. The deep side part lifts the front and frames one side of the face, which tends to suit longer face shapes. Brush the waves out loosely and put serum only on the mid-lengths and ends so the roots stay lifted. If your hair is both very long and very fine, a few hidden pins at the back stop the bulk from separating into clumps.
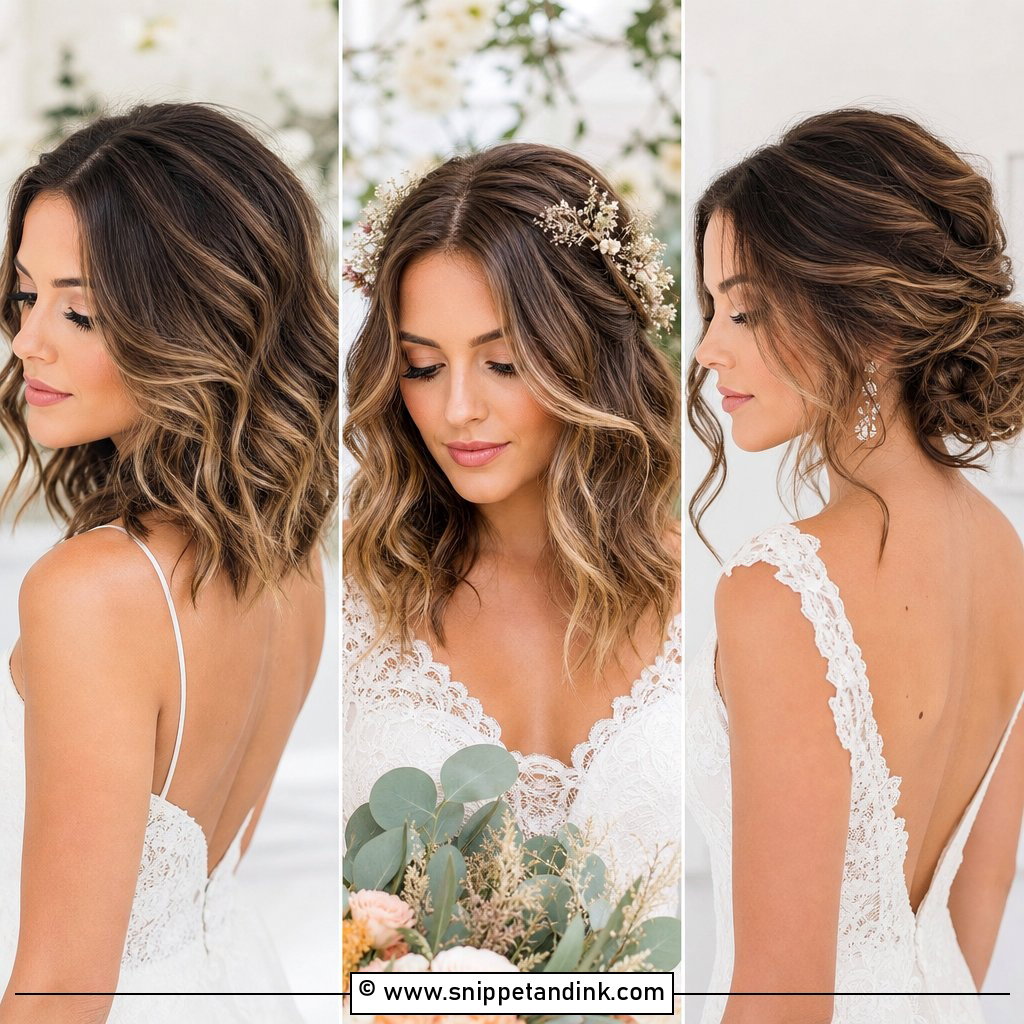
10. Tousled Waves With Tucked Sides
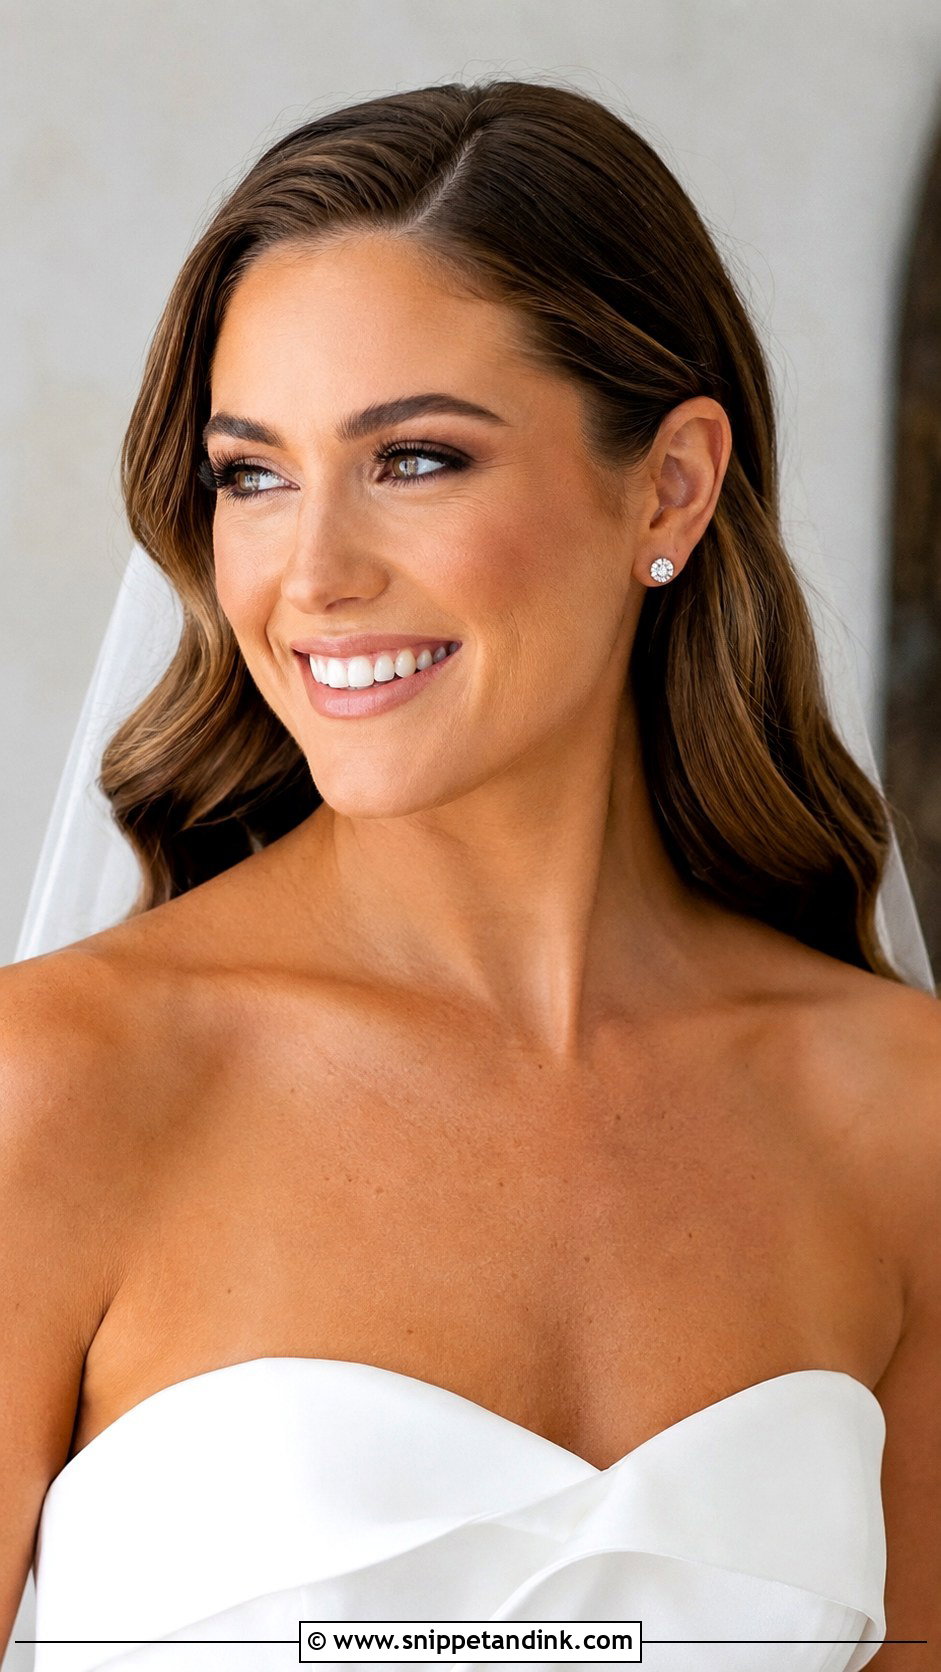
Tucking the sides of your wavy hair behind your ears is as practical as it is pretty: it keeps hair out of your face during the vows and while you eat. A tuck rarely stays there by itself. I slip a bobby pin behind each ear, hidden under the hair, and it holds all night. Your ears are on show, so choose earrings with that in mind. Short hair can do this too, as long as it reaches past the ear.
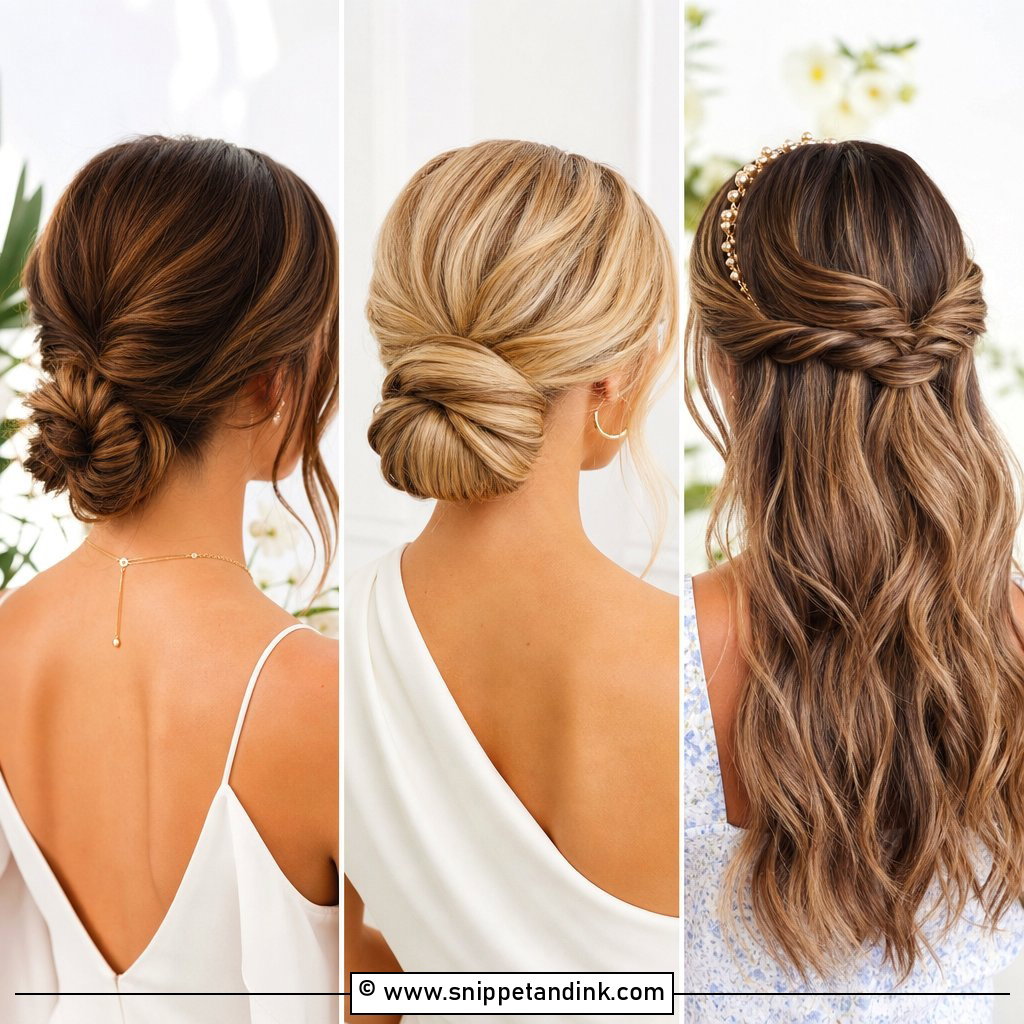
11. Romantic Loose Waves With Hair Vine
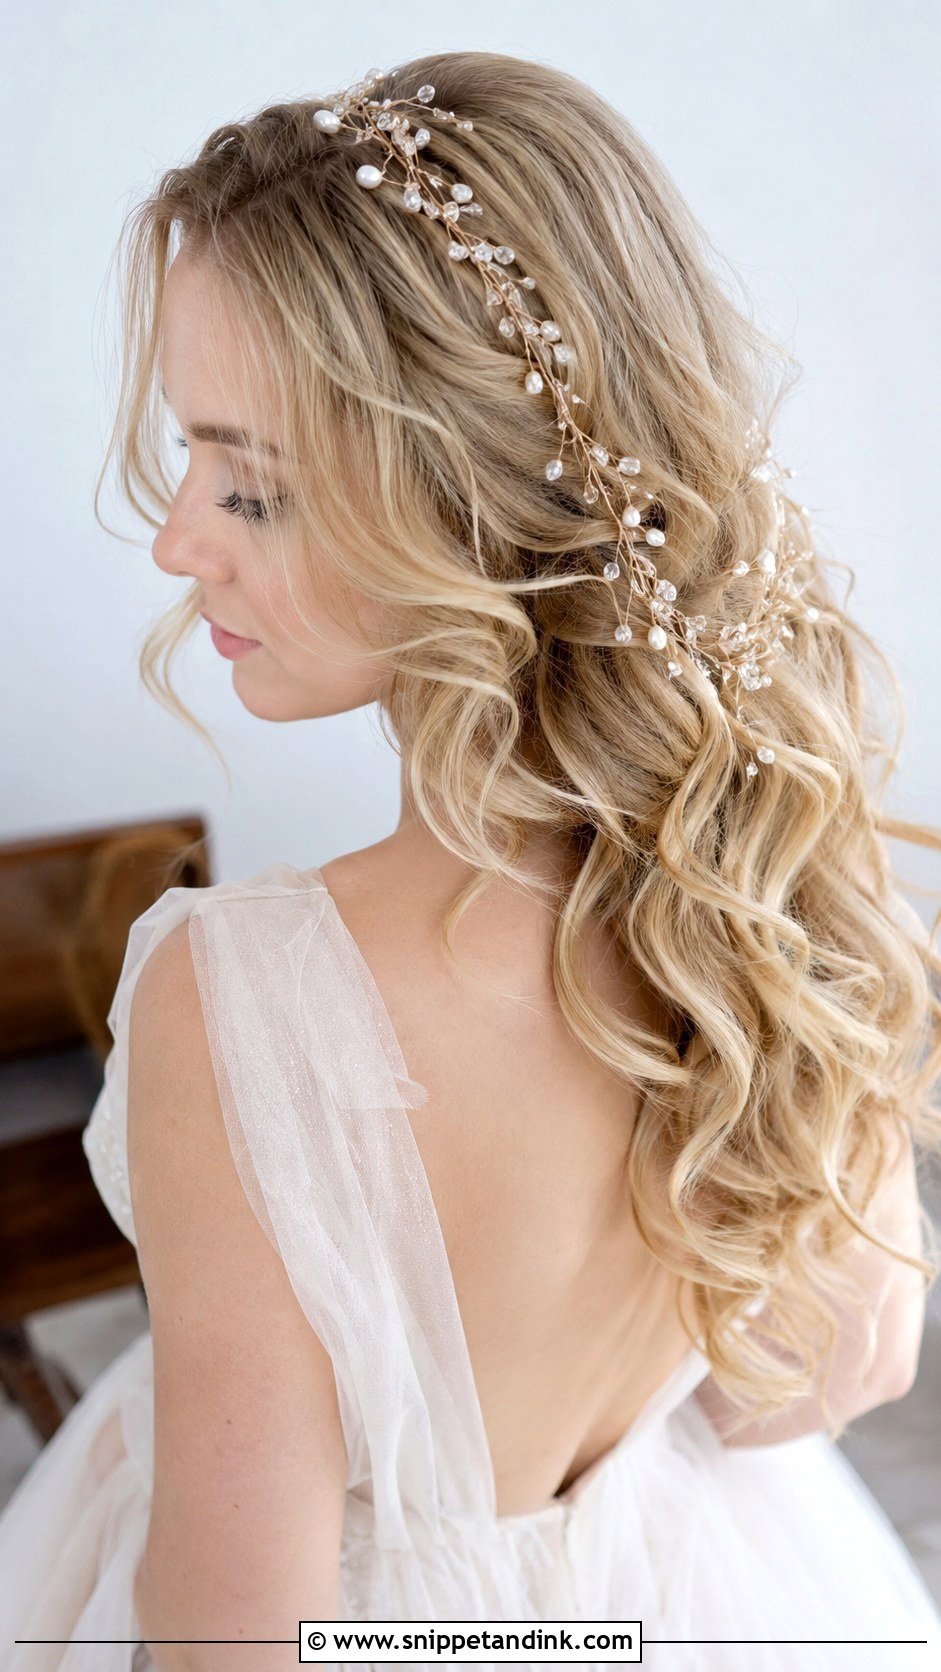
A vine bends, so it can follow the edge of a half-up section or trace one side of the head. I weave the wire through the hair and pin it at both ends with small pins in your hair colour, then add a pin every few inches so it doesn’t lift when you turn your head. On very fine hair a heavy crystal vine lets the pins show through, so I’d steer you toward a light pearl version. It sits well with a center or side part.
12. Loose Waves With Volume at the Roots
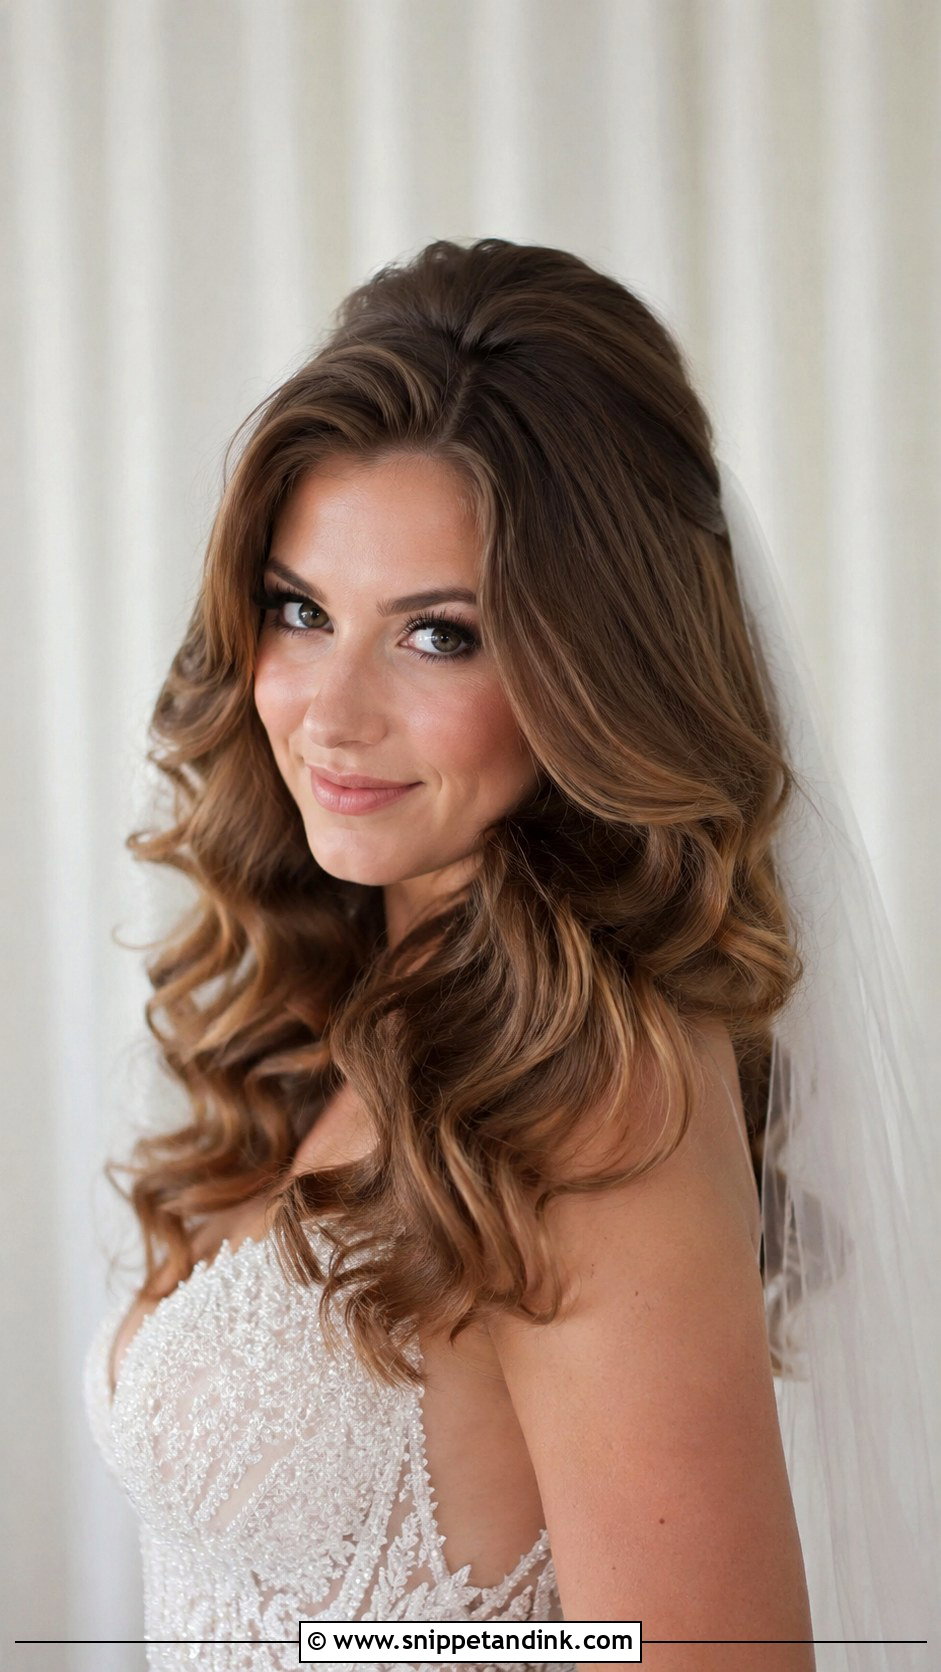
Root volume gives that full 90s blow-out feel, but backcombing has to go in the right place. I tease only the underside of each crown section and smooth the top layer over it, so the matted texture never shows in close-ups. Curl the lengths, then break them up with your fingers. Fine hair loses its lift first, so for fine hair I build volume at the blow-dry stage with mousse and a round brush instead of relying on teasing. Thick hair rarely needs teasing at all.
13. Sleek Loose Waves With Glossy Finish
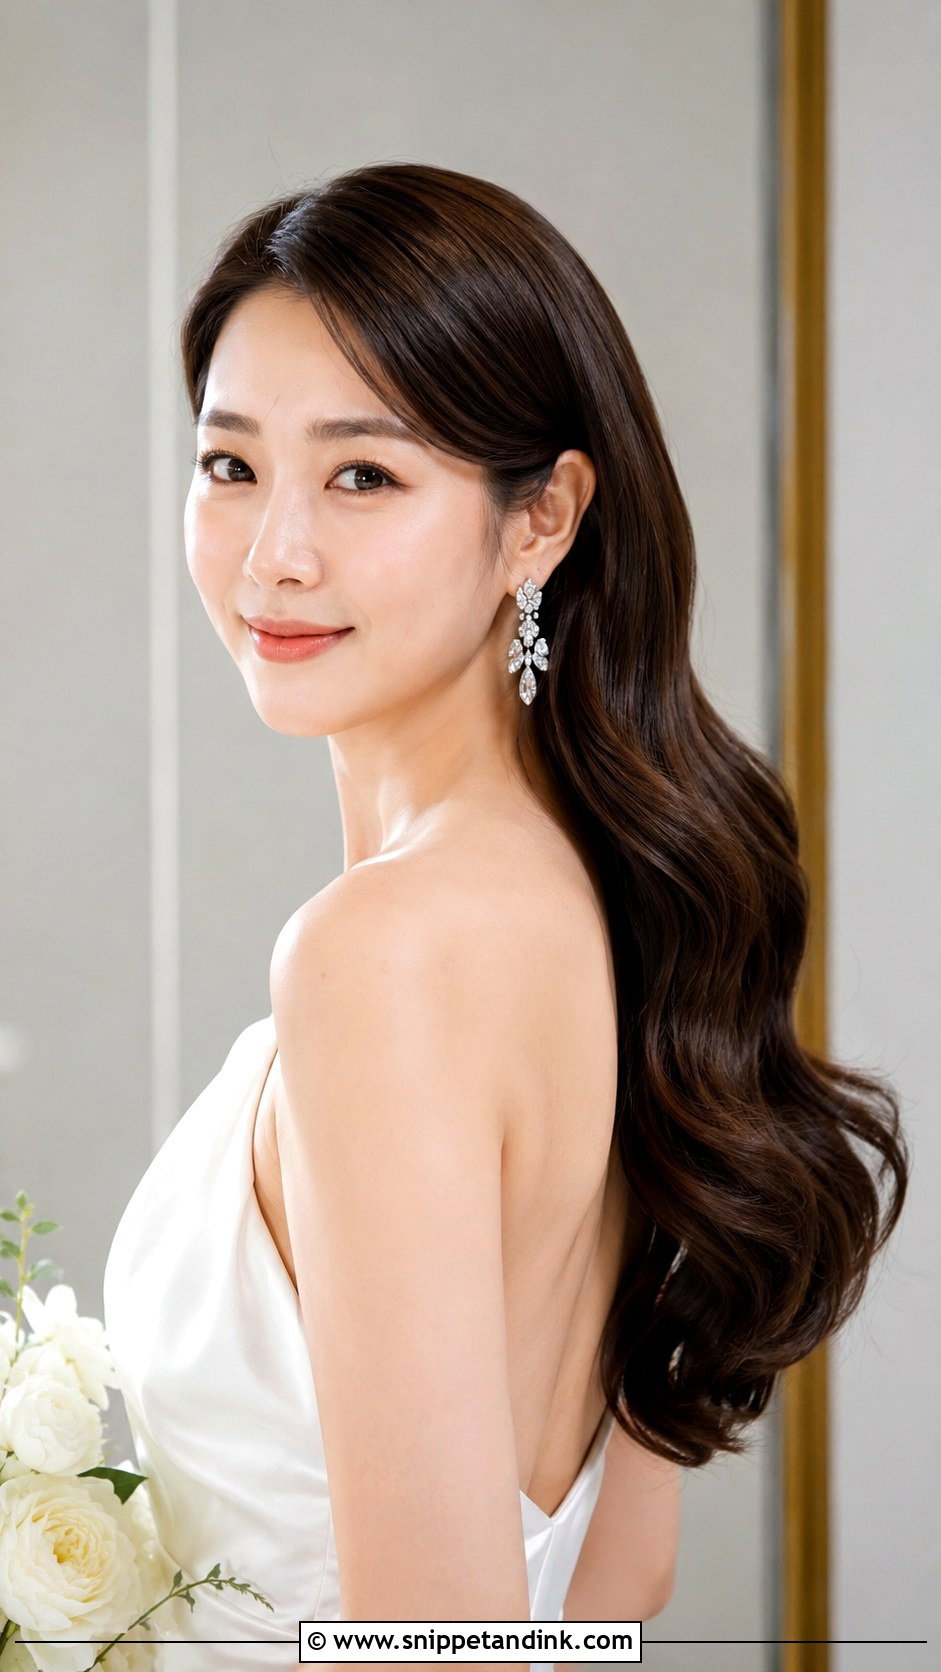
Gloss depends on a smooth cuticle, and that starts at the blow-dry, not at the serum bottle. I dry each section with the brush pointing down the hair shaft, curl with a large barrel, then finish with a light shine spray held at arm’s length. City and formal venues suit it. Frizz shows instantly on such a sleek surface, so this is the style I’d warn you about for a humid day. Dense hair holds the shine longest; very curly or coily hair needs a silk press first for this to be realistic.
14. Loose Waves With Pearl Hair Pins
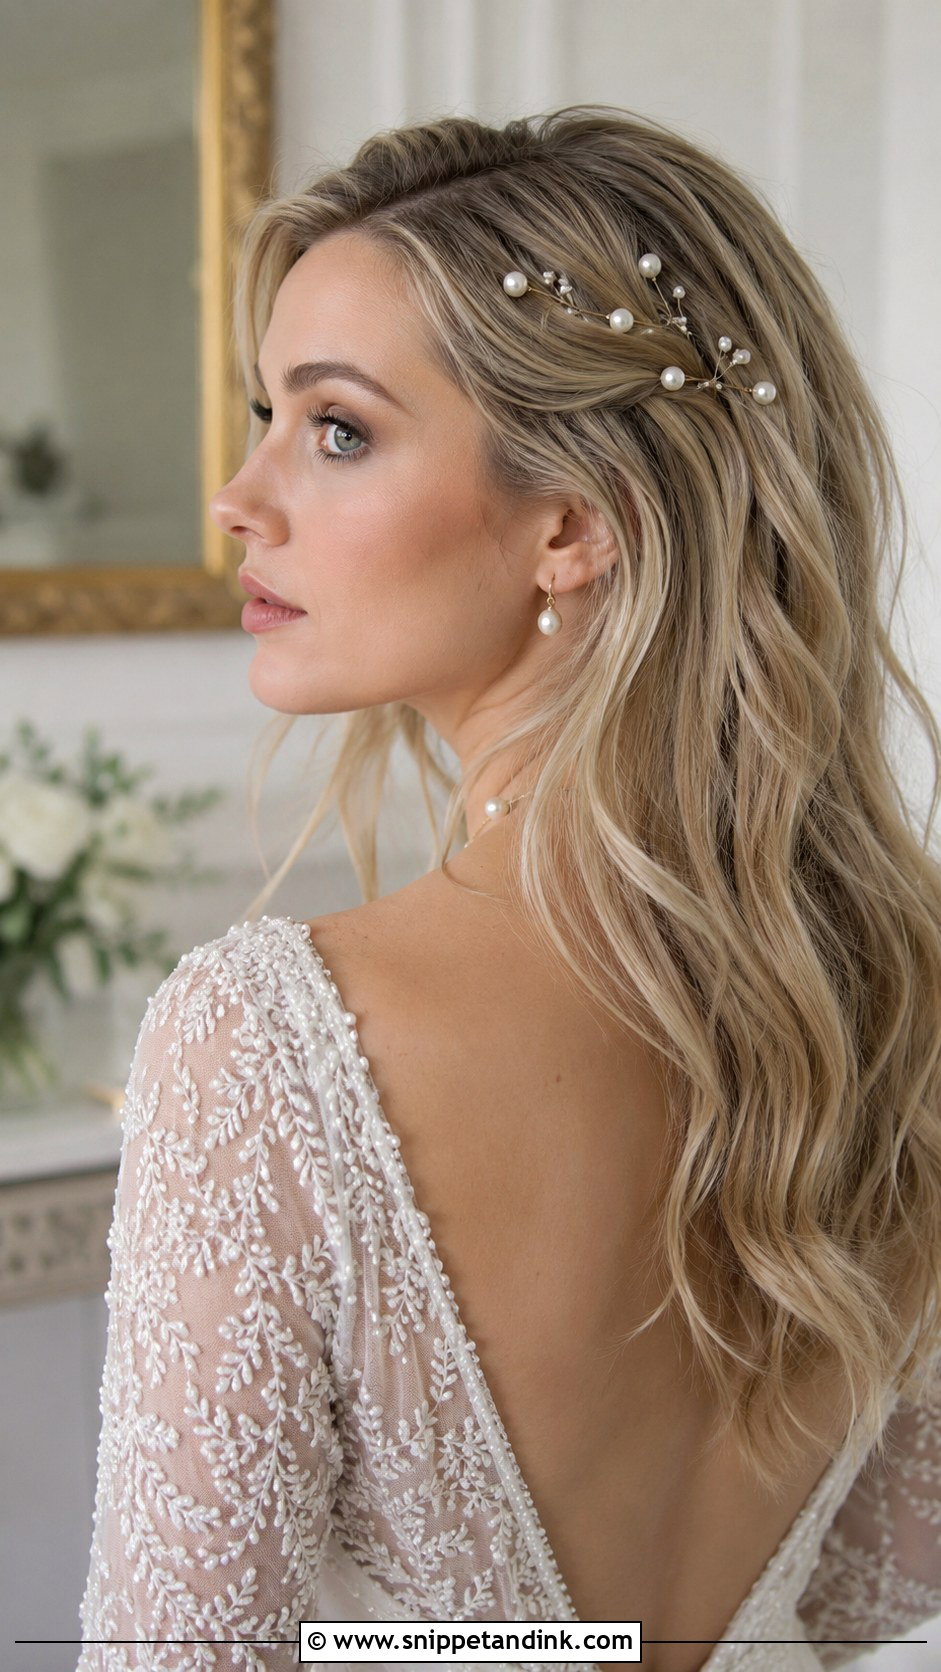
Pearl pins slip straight out of freshly curled, silky hair, so I set each one into a small crossed-pin anchor or a tiny pinned twist. Scattered pearls need roughly even spacing to look intentional, while a cluster on one side reads more vintage. On very pale blonde hair, small white pearls almost vanish, so I’d use slightly larger or ivory ones. Pearl earrings make an easy pairing, and the pins work on half-up and fully down hair alike.
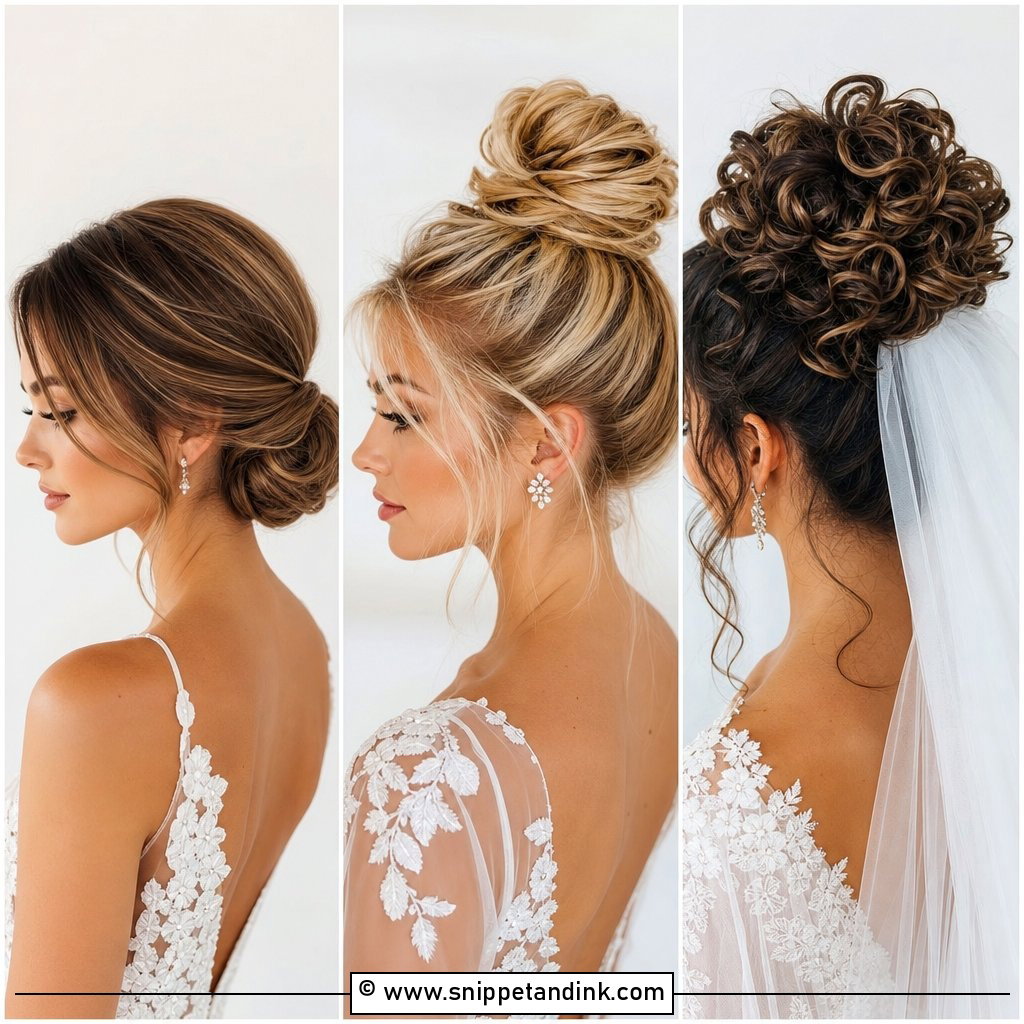
15. Effortless Waves With Middle Part and Tendrils
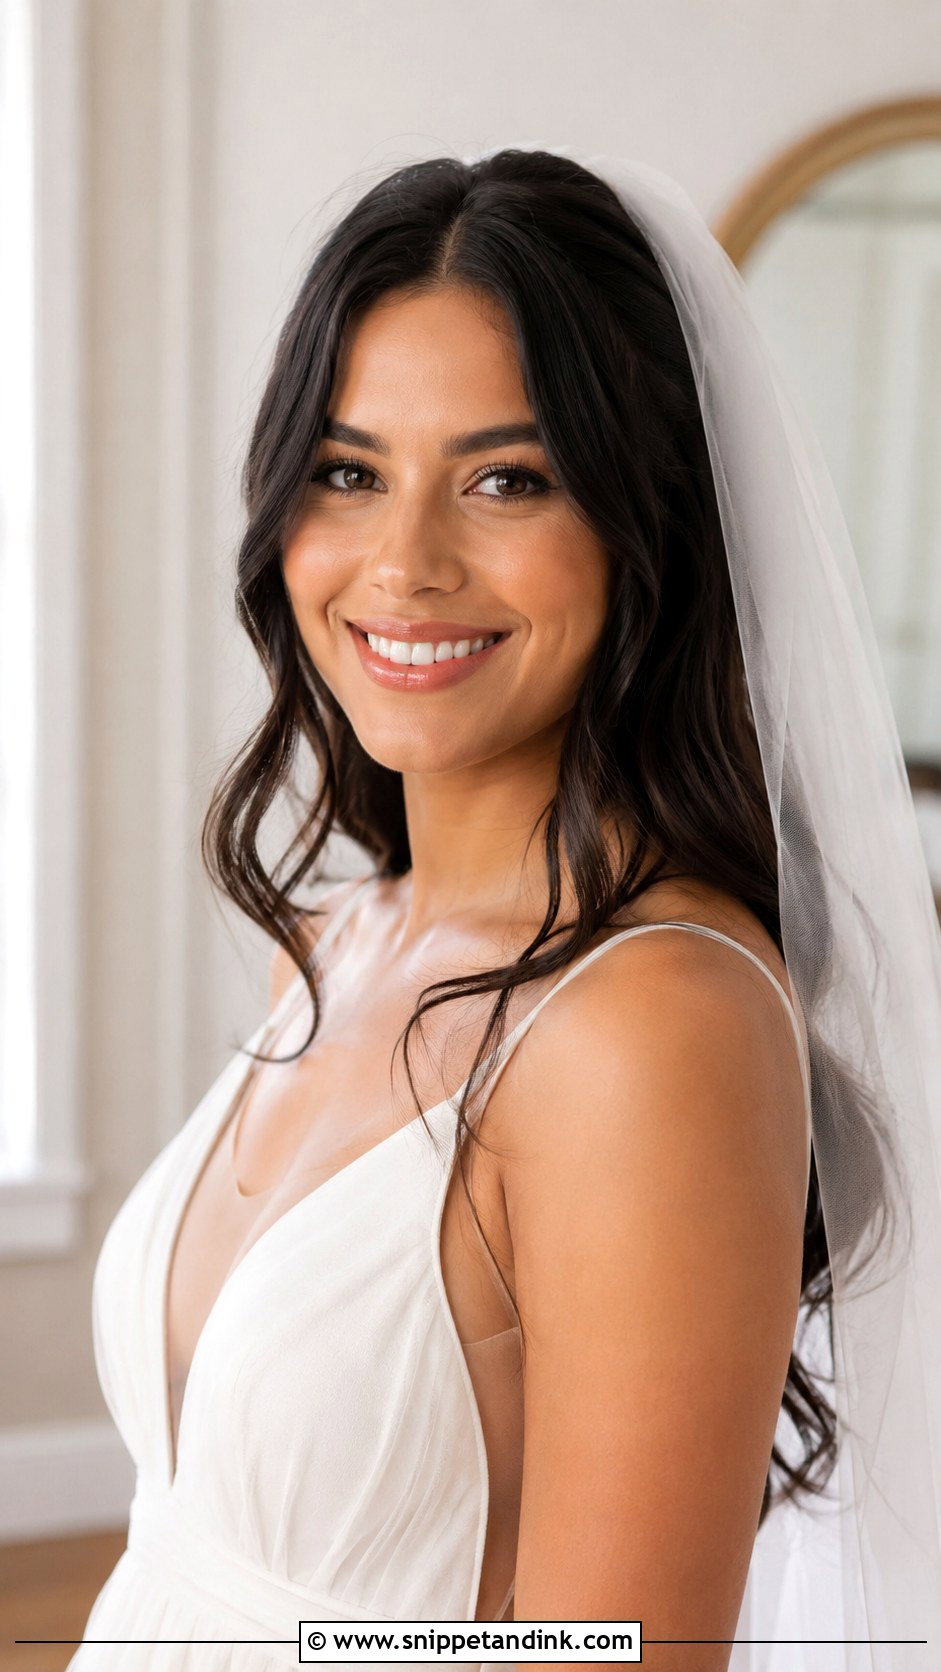
Tendrils are where many down styles go wrong. Pulled from too far back or cut too short, they stick straight out by evening. I take them from just in front of the ear and around the temple and curl them away from the face with a smaller iron so they frame the cheekbone. They catch on lip gloss and lash glue, so I curl them last, after makeup. A relaxed middle part, a simple veil or a few fresh flowers is all this one needs.
16. Loose Waves With Bejeweled Comb
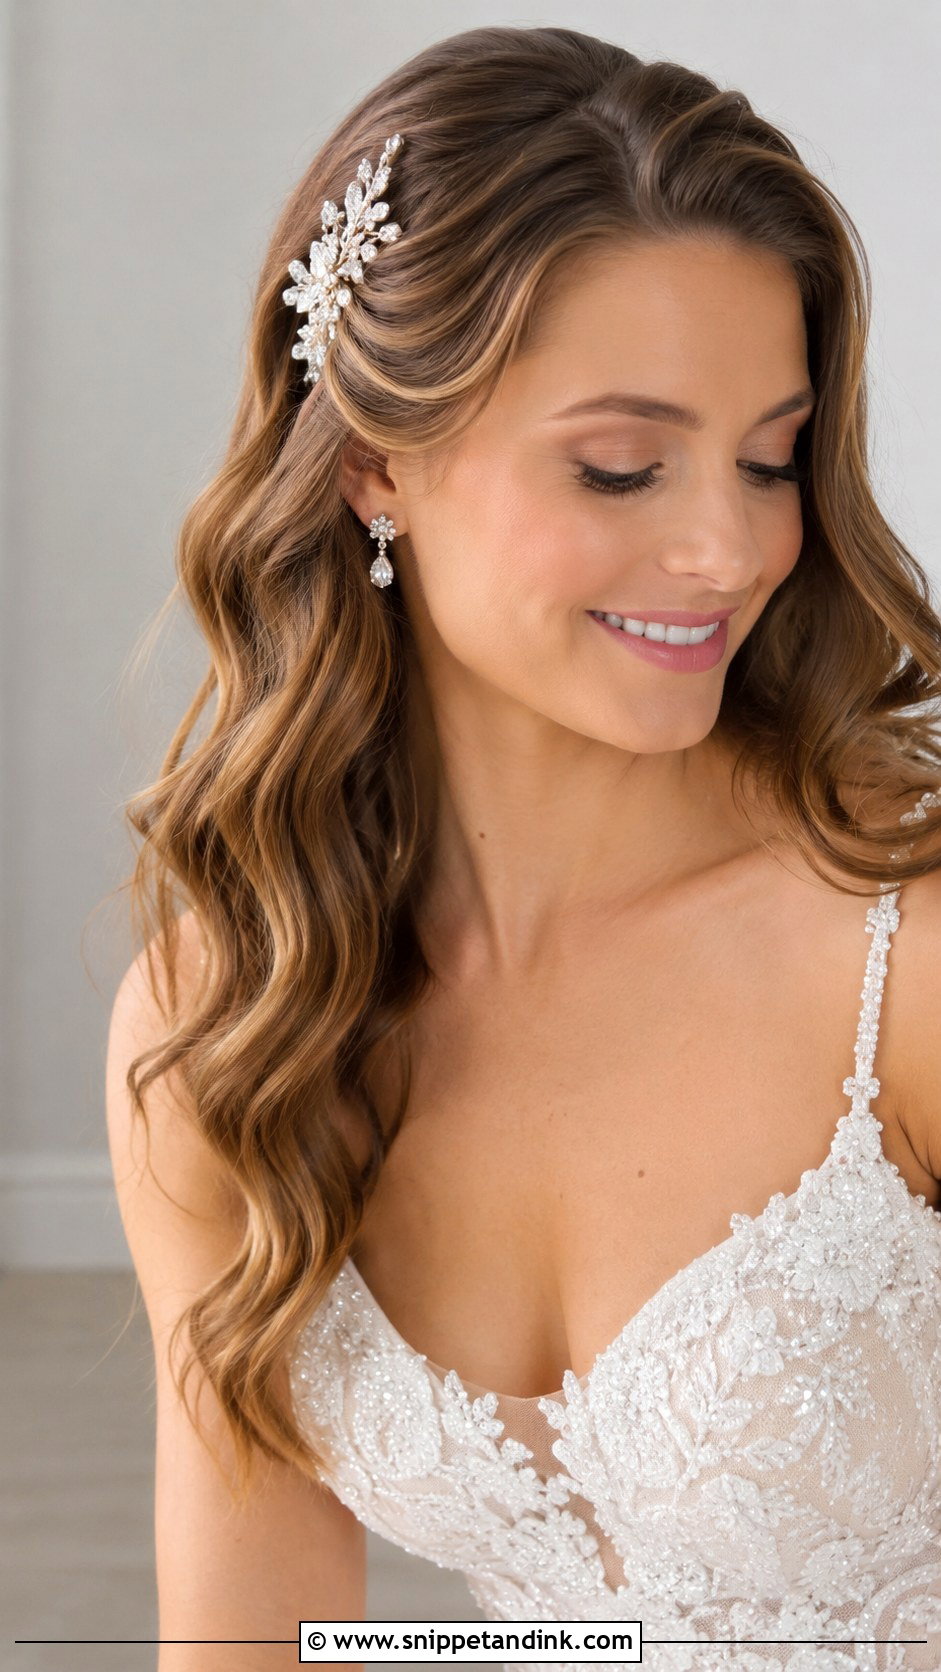
A crystal or jeweled comb dresses up soft, flowing waves in seconds, but a comb pushed into loose hair just slides out. I twist a small section above the ear, pin it flat, and slide the comb’s teeth into the twist so it has something to grip. Place it above a tucked section or near a side part. Heavier combs suit thick hair; fine hair needs a lighter piece or it droops toward the ear. Match the metal to your earrings.
17. Beachy Waves for Destination Wedding
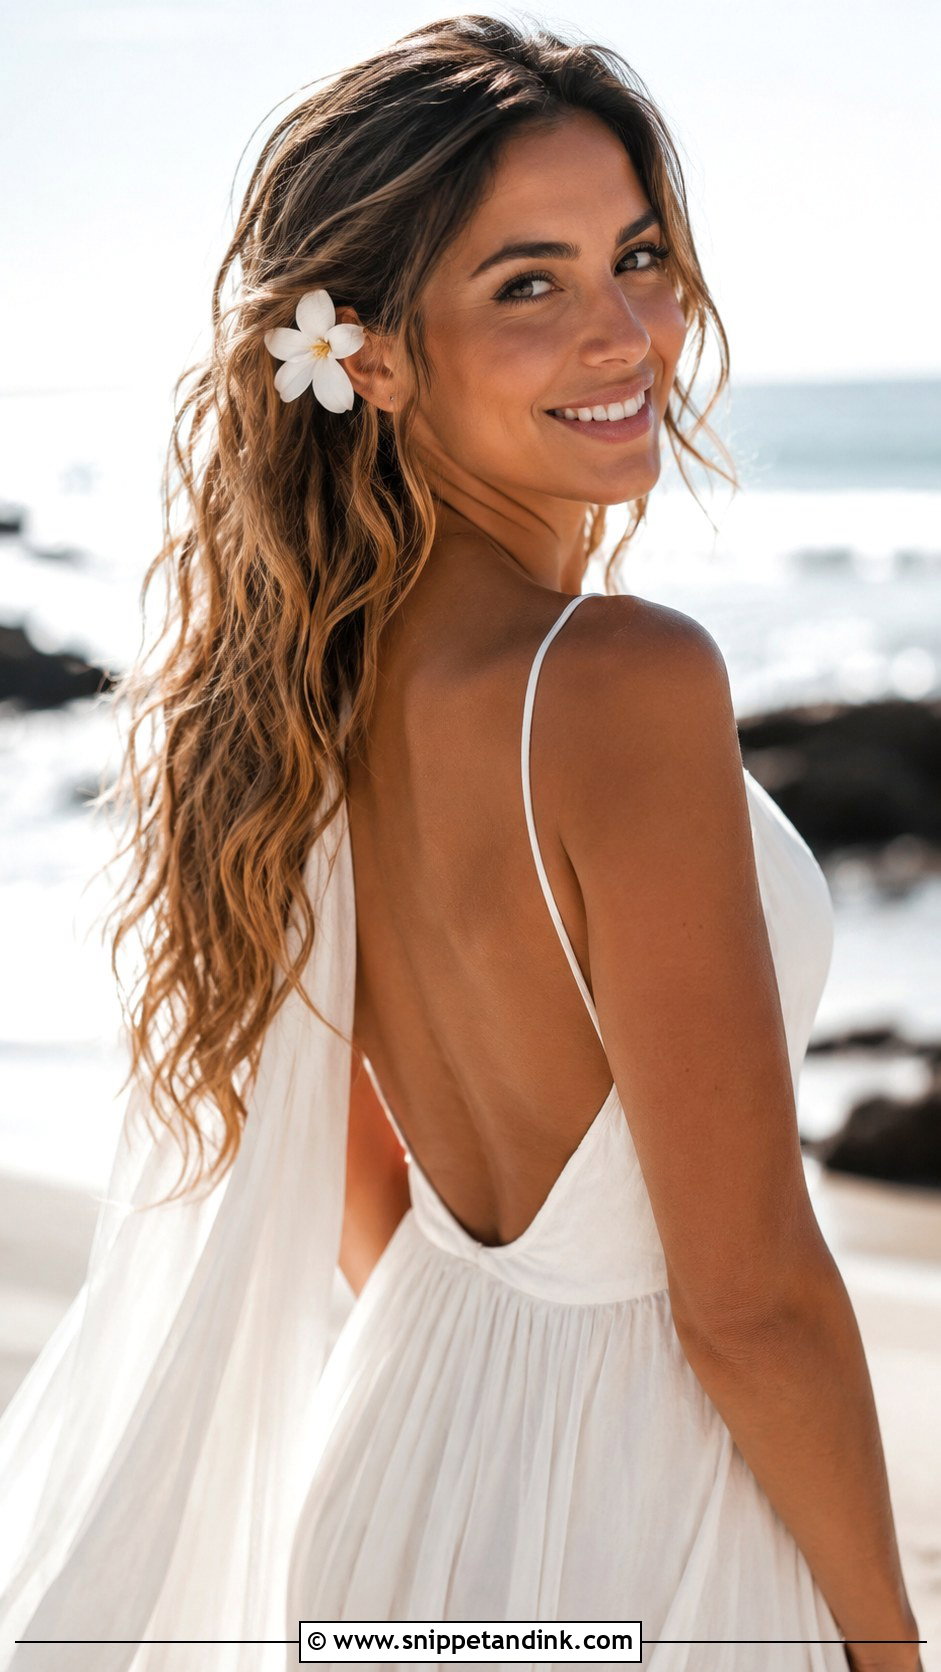
Getting married by the ocean? Beachy waves are the most forgiving style for it, because sea air pushes hair toward this texture anyway. Salt and humidity drop a tight curl but barely touch a loose one. I use less hairspray here and lean on texture spray, since heavy hold turns crunchy once moisture gets into it. A tropical flower behind one ear needs two crossed pins against the wind. If you’re packing your own tools, check they’re dual voltage; a single-voltage iron can burn out abroad.
18. Loose Waves With Low Crown Twist
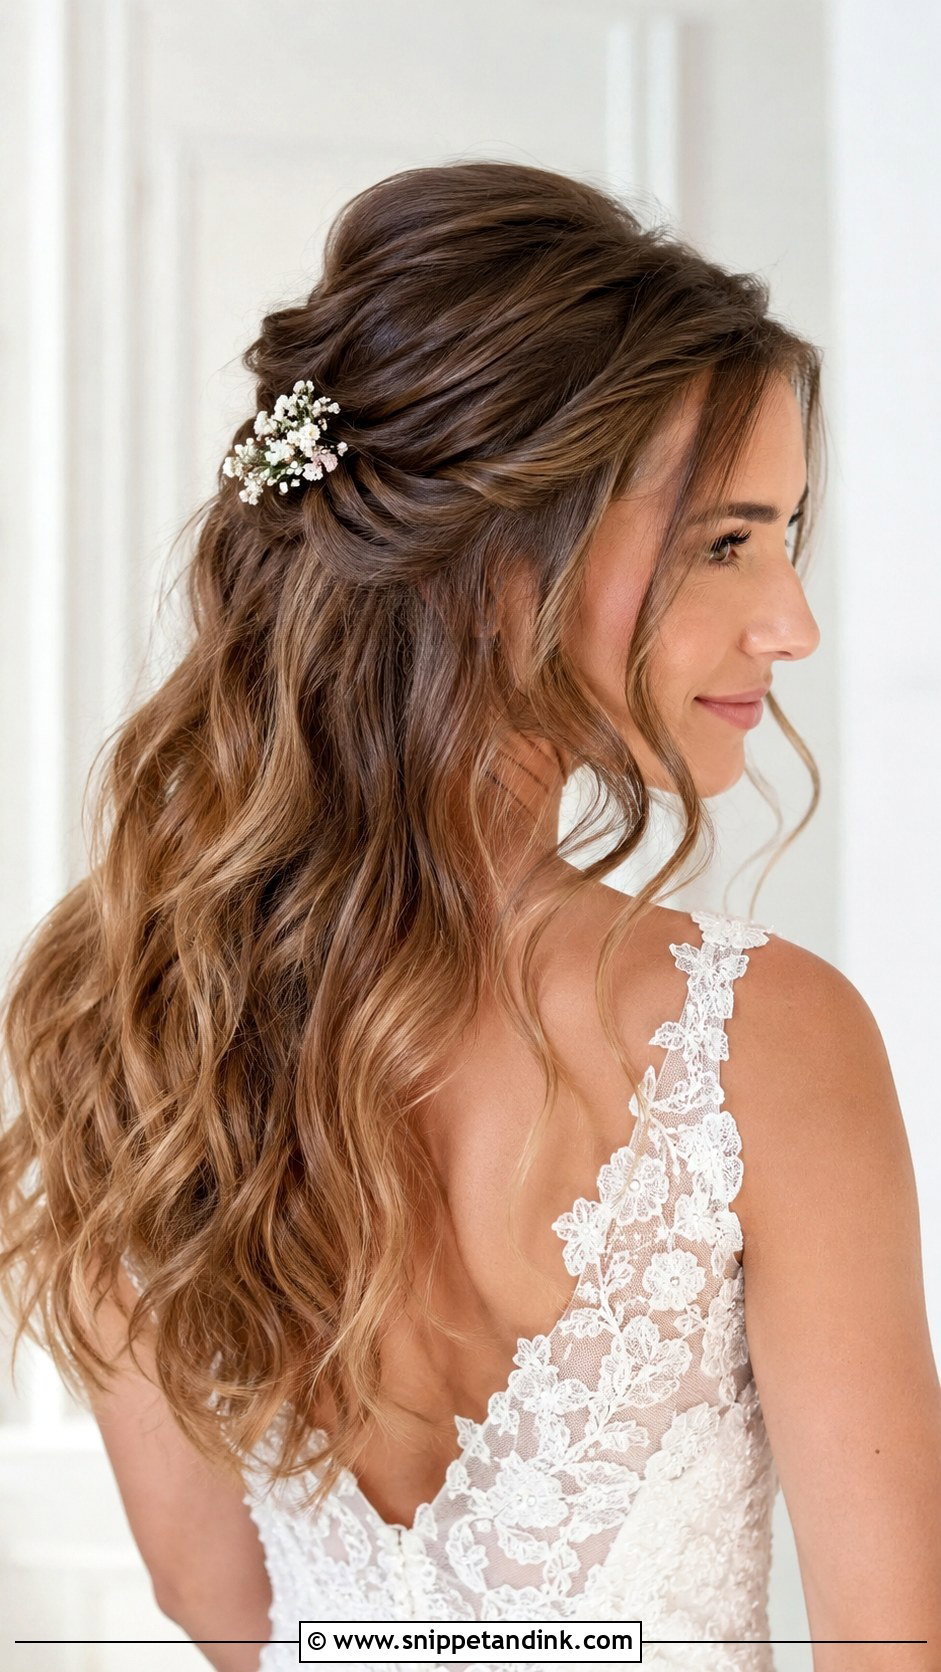
A small twist at the crown adds structure and keeps hair off the face without the commitment of half up. I twist two sections from the temples back toward the crown and pin them where they meet, pushing the pins in against the direction of the twist so they lock. It can sit to one side or wrap to the back. Flowers or a comb at the meeting point hide the pins. Layered hair tends to poke out of a twist, and a dab of pomade on the section keeps it tidy.
19. Voluminous Waves With Deep Curls
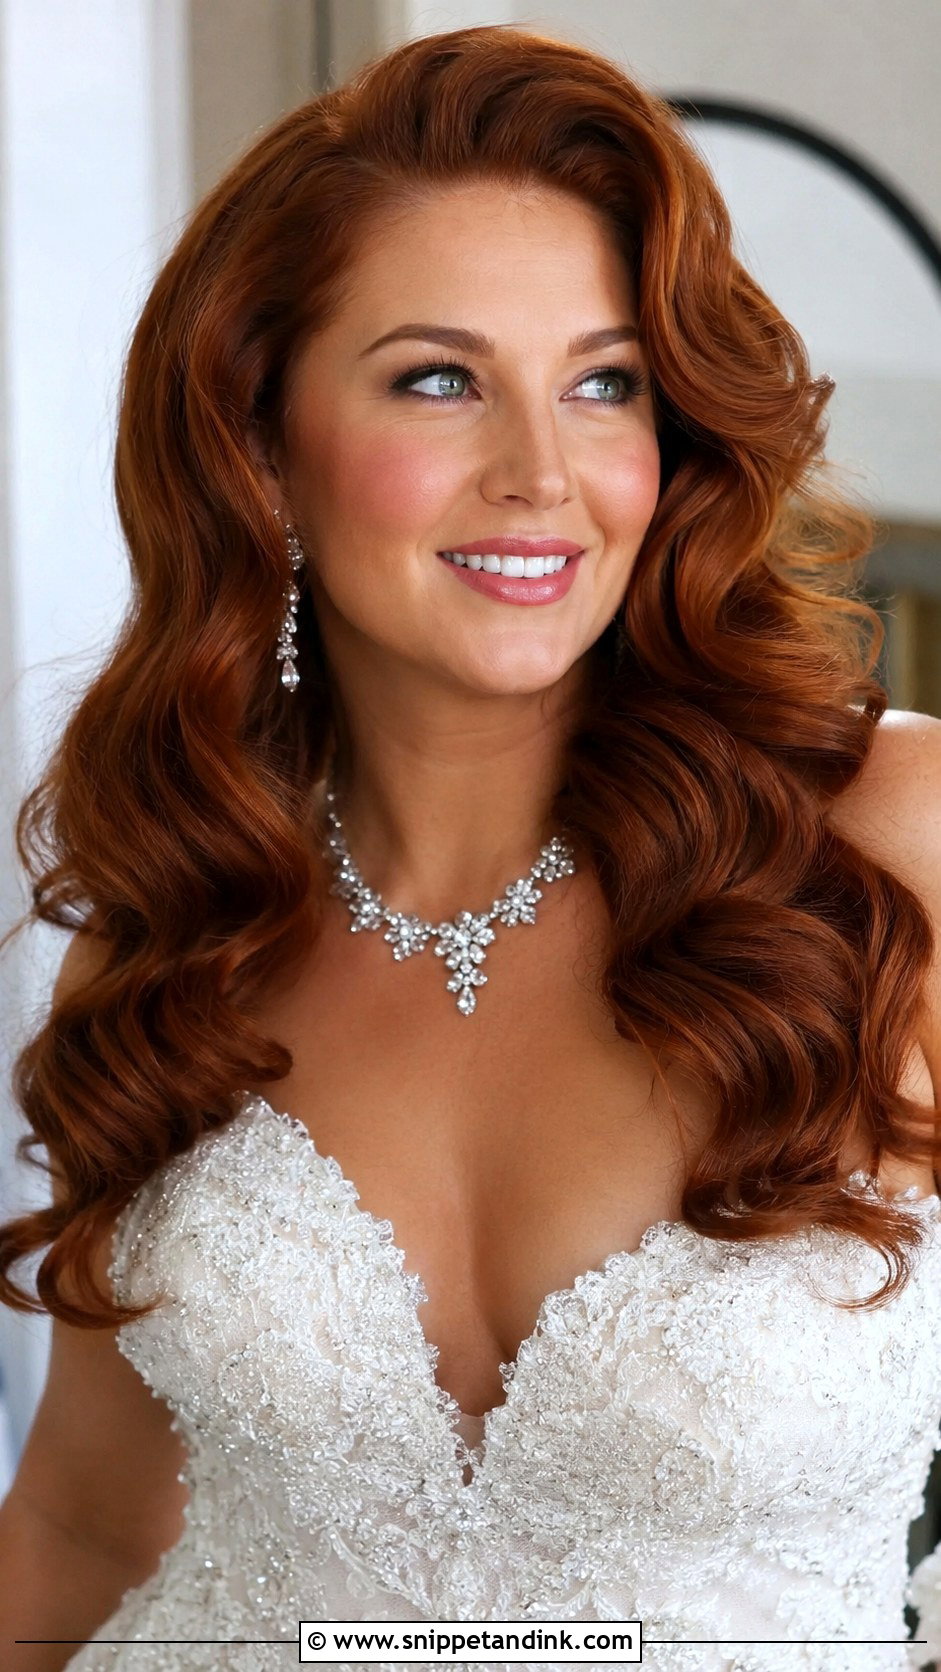
Big, deep curls need enough density to fill them; on fine hair the same set looks thin once brushed out. I use a large curling iron, roll each curl off the barrel and clip it to cool, then brush out gently. Expect them to relax through the day, so I start tighter than the finished look. Long, thick hair is the natural match, alongside a glamorous gown and statement jewelry. In summer, keep in mind that a full head of curls traps a lot of heat on your neck.
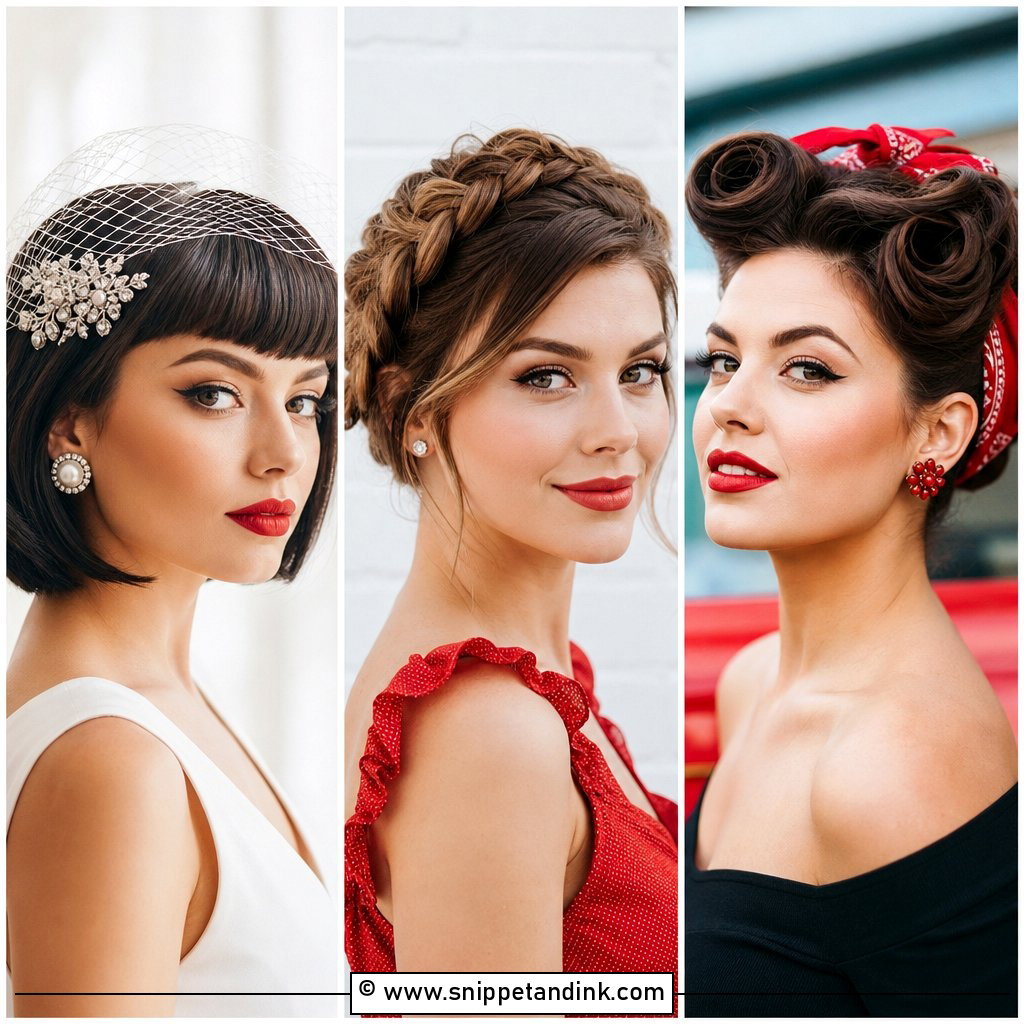
20. Soft Waves With Simple Side Tuck
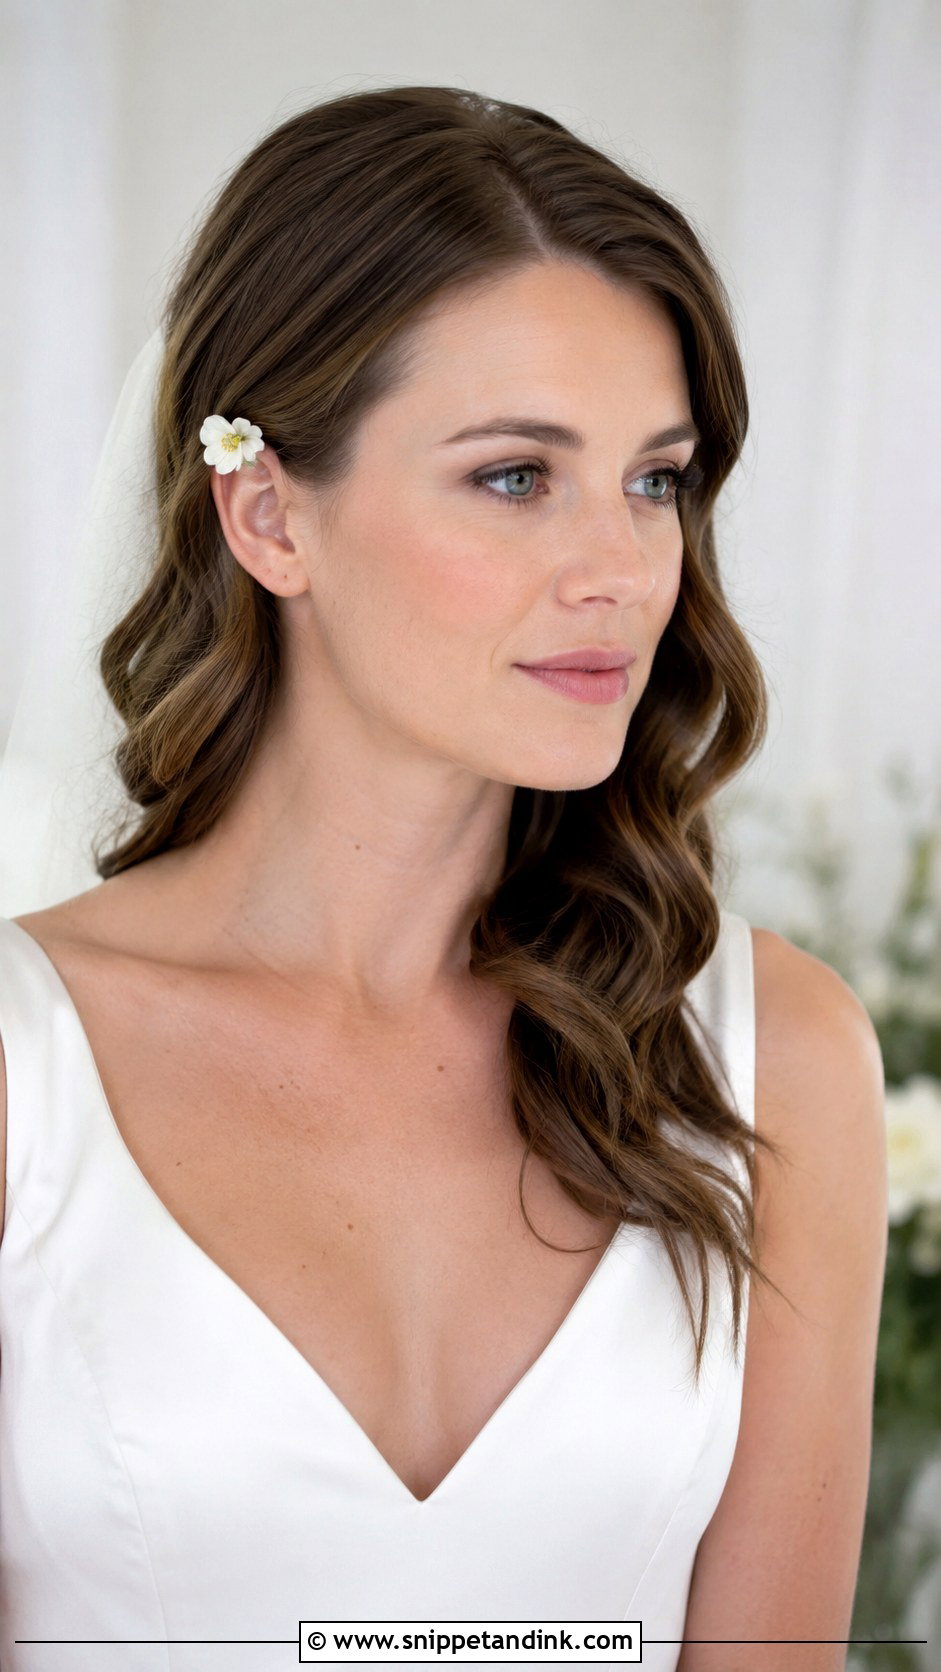
One side tucked behind the ear and the rest left down is the simplest style here and the quickest in the chair, which helps on a morning with a big bridal party. A pin hidden behind the ear stops the tuck from slipping. It shows off one earring and the line of your jaw, and it suits a casual day as well as a formal one. A tiny pin or a single flower at the tuck is all it needs.
Where Down Waves Give Up During the Day
Most down styles look their best for the first couple of hours, then drop in predictable spots. Knowing which ones lets you plan around them.
- The back, under a veil: fabric rubs and weight flattens. Rake your fingers through once the veil comes out.
- Behind the shoulders, from leaning back in the car and at dinner. Sit forward before photos if you can.
- Around the face, from hugs and humidity. A little hairspray misted onto a brush, not straight onto your head, smooths flyaways without crunch.
- The front, from your own hands. Brides touch down hair constantly without noticing; try to leave it be.
A small rescue kit for a bridesmaid’s bag
Give someone you trust a few bobby pins in your hair colour, a travel-size flexible hairspray, a small paddle brush and a handful of flat duckbill clips. If a section drops badly, wind it around a finger, clip it flat against your head for ten minutes while you do something else, then release it. That brings back a surprising amount of shape with no heat at all. A cordless iron is handy, but if the set was done properly you shouldn’t need it.
Smooth or Undone? Let Your Hair Texture Settle It
Loose waves can be glossy and structured or soft and beachy, and which way to go depends mostly on your hair. Fine, silky hair needs extra texture and a tighter set; thick hair carries big glam waves without much help. Bring photos of the waves you like and of your dress to your trial, and ask your stylist to show you how the wave will look later in the day, not just the minute it’s finished. Then wear the trial hair through an afternoon and see where it drops.
You'll Like These Ideas:


Leave a Reply