
A two-tone cake pop is one of the easiest things I make for a wedding and one of the hardest to make well. Black and white hides nothing: a crack in white coating shows instantly, and a streak of grey in black coating tells everyone it was rushed. The reason couples love the palette is the same reason it works on a dessert table, though. It reads as formal at a ballroom reception and just as tidy at a courthouse lunch, and guests can take one without anyone cutting or plating. Below are the twenty designs I’d actually put on a table, with notes on how each one behaves once it leaves my kitchen.
How Many Pops to Order and When to Get Them Made
My first question is always whether the pops are the dessert or a side to a cut cake. If there’s a full cake as well, I plan roughly one pop per guest, plus a few extra for the people who take two. If the pops are replacing cake, two per guest is more realistic, and a little more for a late-night crowd.
Timing matters more than most couples expect. I bake and roll the centres a few days before the wedding, dip them two or three days out, and decorate after that. A dipped pop keeps well for several days in a cool, dry room, so there’s no benefit to making them the night before in a panic. What I need from you, ideally a couple of months ahead and earlier in peak season, is the final guest count, the designs, and whether any go into favour bags.
- Tell your baker about any nut allergies early. Almond flavouring and some candy coatings are made in shared facilities.
- Ask how they’ll be transported. Pops travel standing in drilled boxes, not lying in trays.
- Confirm who sets up the stand and who takes leftovers home.
1. Black And White Bride And Groom Cake Pops
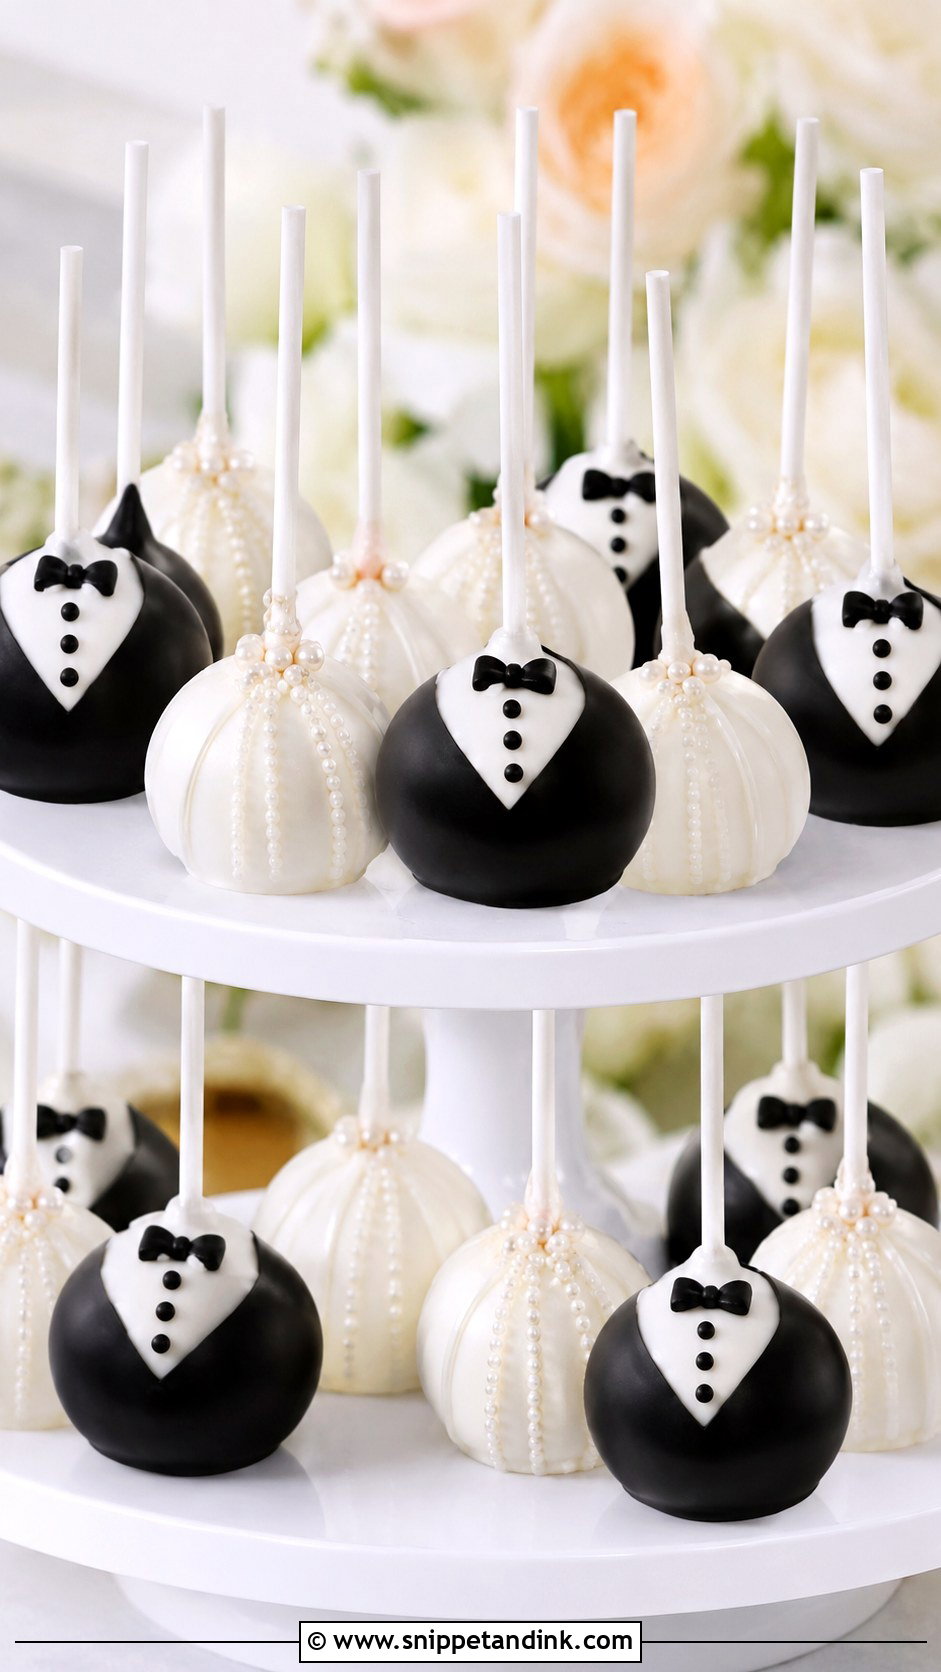
Bride and groom cake pops are the set guests recognise from across the room. White pops carry the bride, with tiny pearl sprinkles and a bit of piping that suggests a bodice; black pops get a bow tie and two button dots. I pipe the bow ties onto parchment the day before and let them dry hard, because a bow piped straight onto a curved pop tends to slide while it sets. Vanilla almond cake sits well under white chocolate. Alternate them in rows rather than clustering all the brides on one side, or the table looks lopsided in wide shots.
2. Black And White Tuxedo Cake Pops
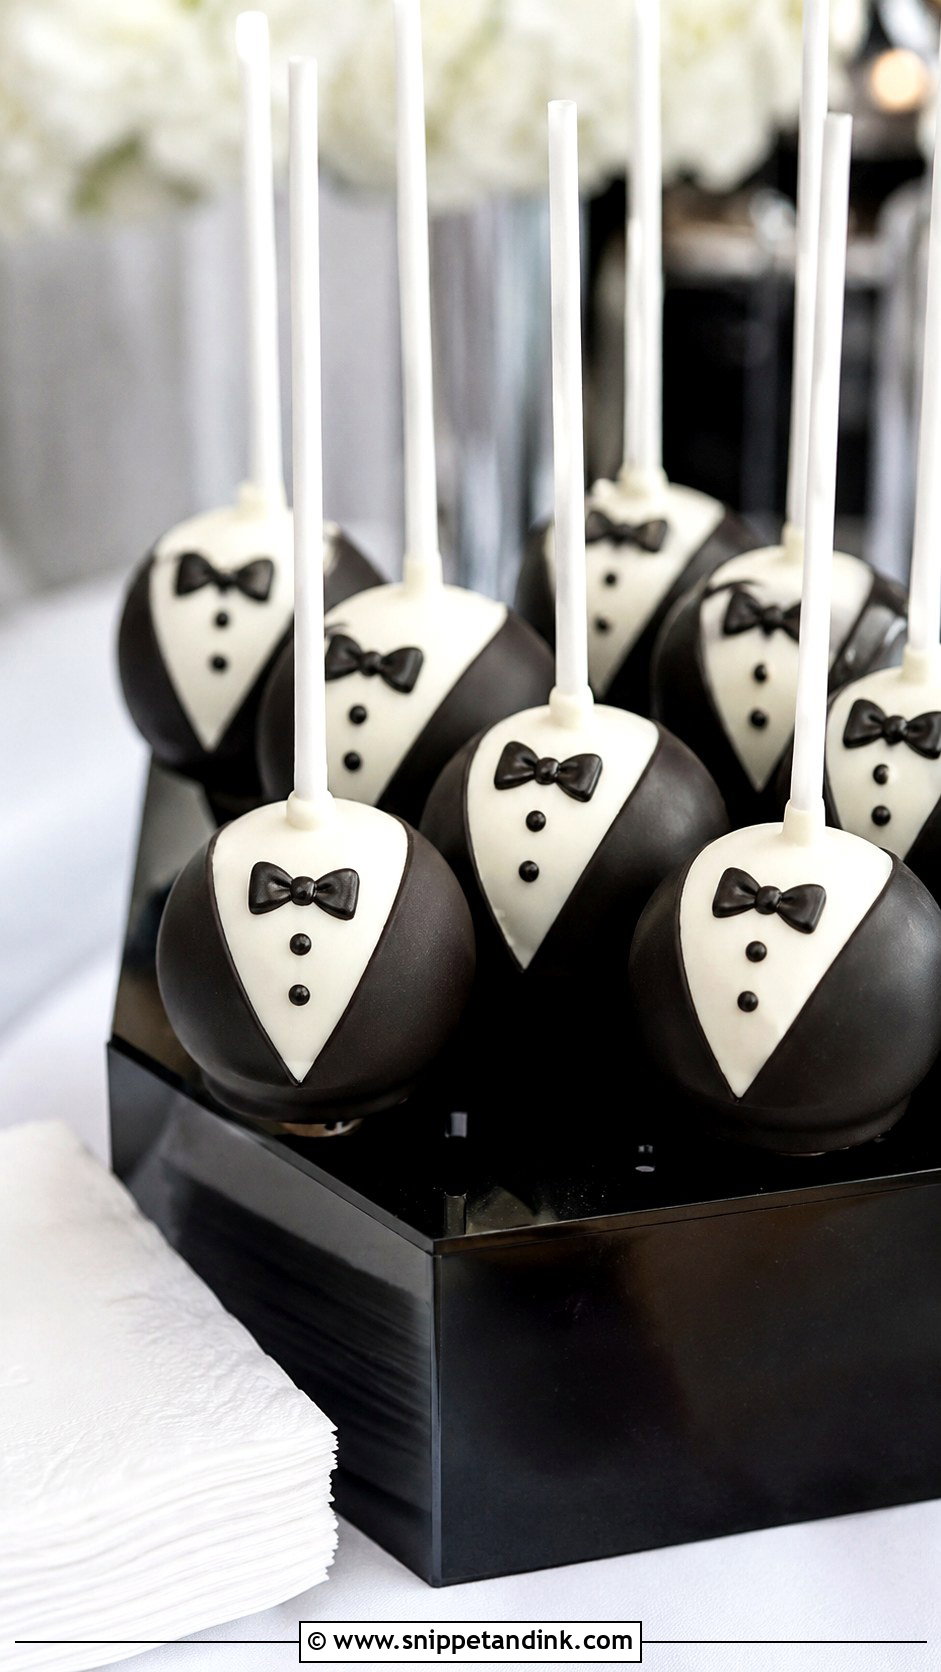
The tuxedo is mostly a lesson in clean lines. I dip the pop in white, let it set completely, then pipe the black V of the jacket with a fine tip so the edges stay crisp instead of bleeding into the white. If the white is still tacky, the black spreads and the whole thing looks smudged. A chocolate cake centre gives a nice surprise under the pale shell, though vanilla is the safer bet for a traditional crowd. Set them on a black acrylic stand and the white fronts do the work.
3. Black And White Wedding Dress Cake Pops
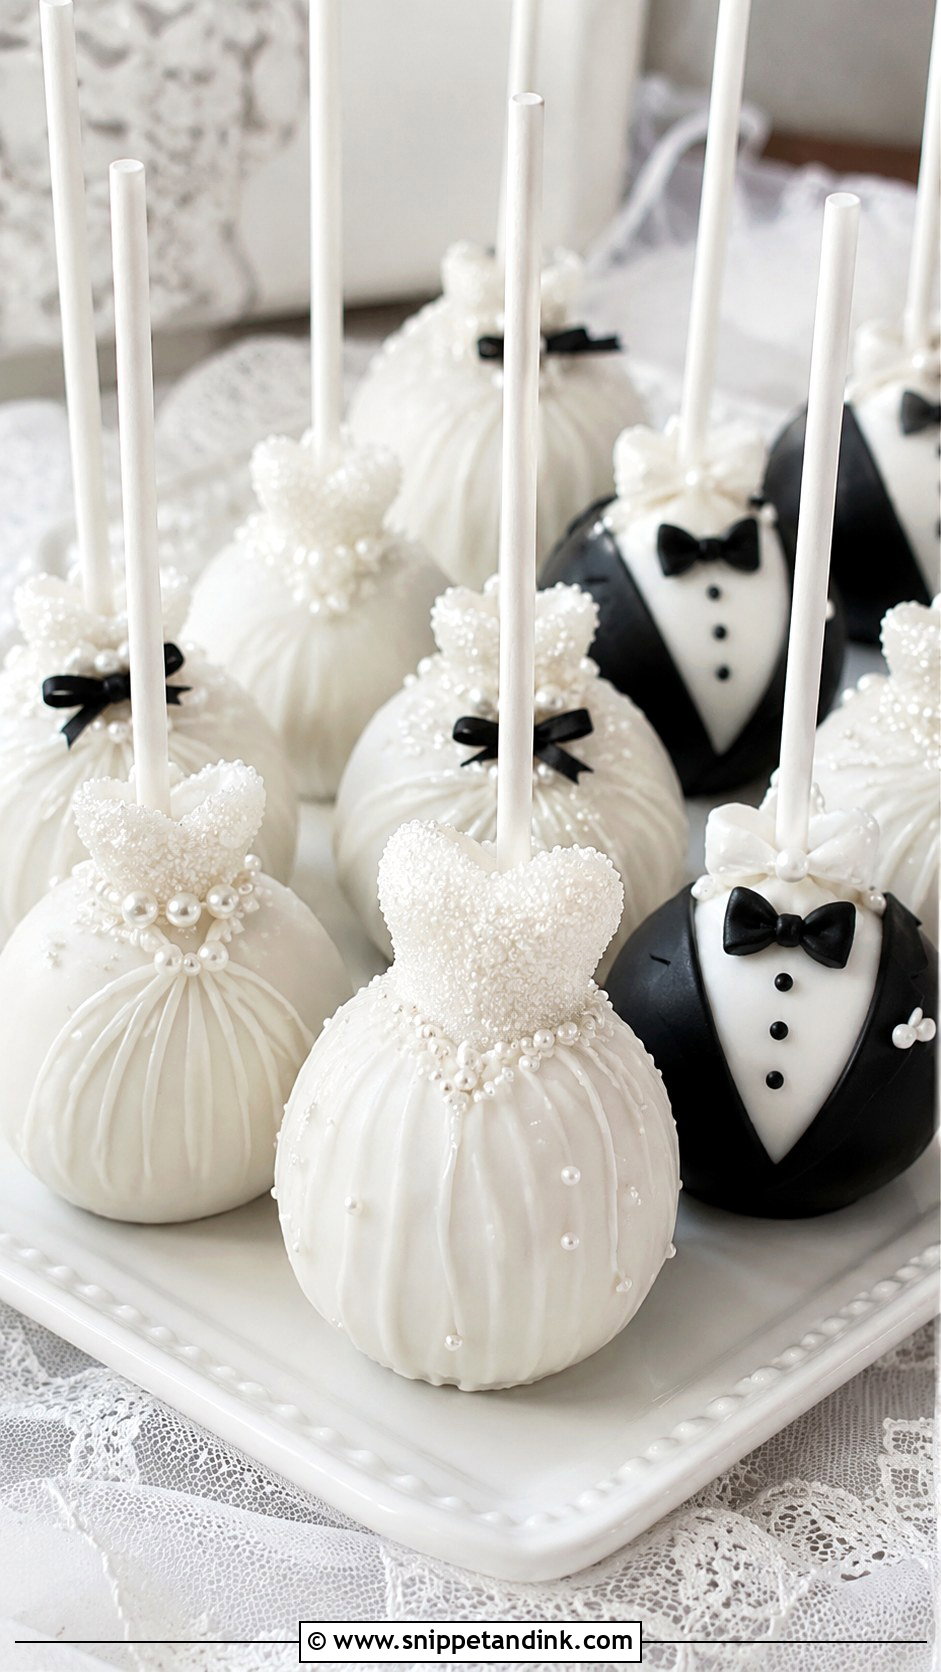
Here the pop stays round and the decoration does the suggesting: white coating, delicate piping across the front like a neckline, a few pearls and a thin black ribbon detail just above the stick. Keep that black to a single accent. Once there’s more than one dark element, the eye stops reading it as a gown. I add fine sanding sugar while the coating is still wet if a couple wants texture, since it won’t stick once the shell has set. They sit nicely beside the tuxedo pops at the reception and work for a bridal shower on their own.
4. Black And White Marble Cake Pops
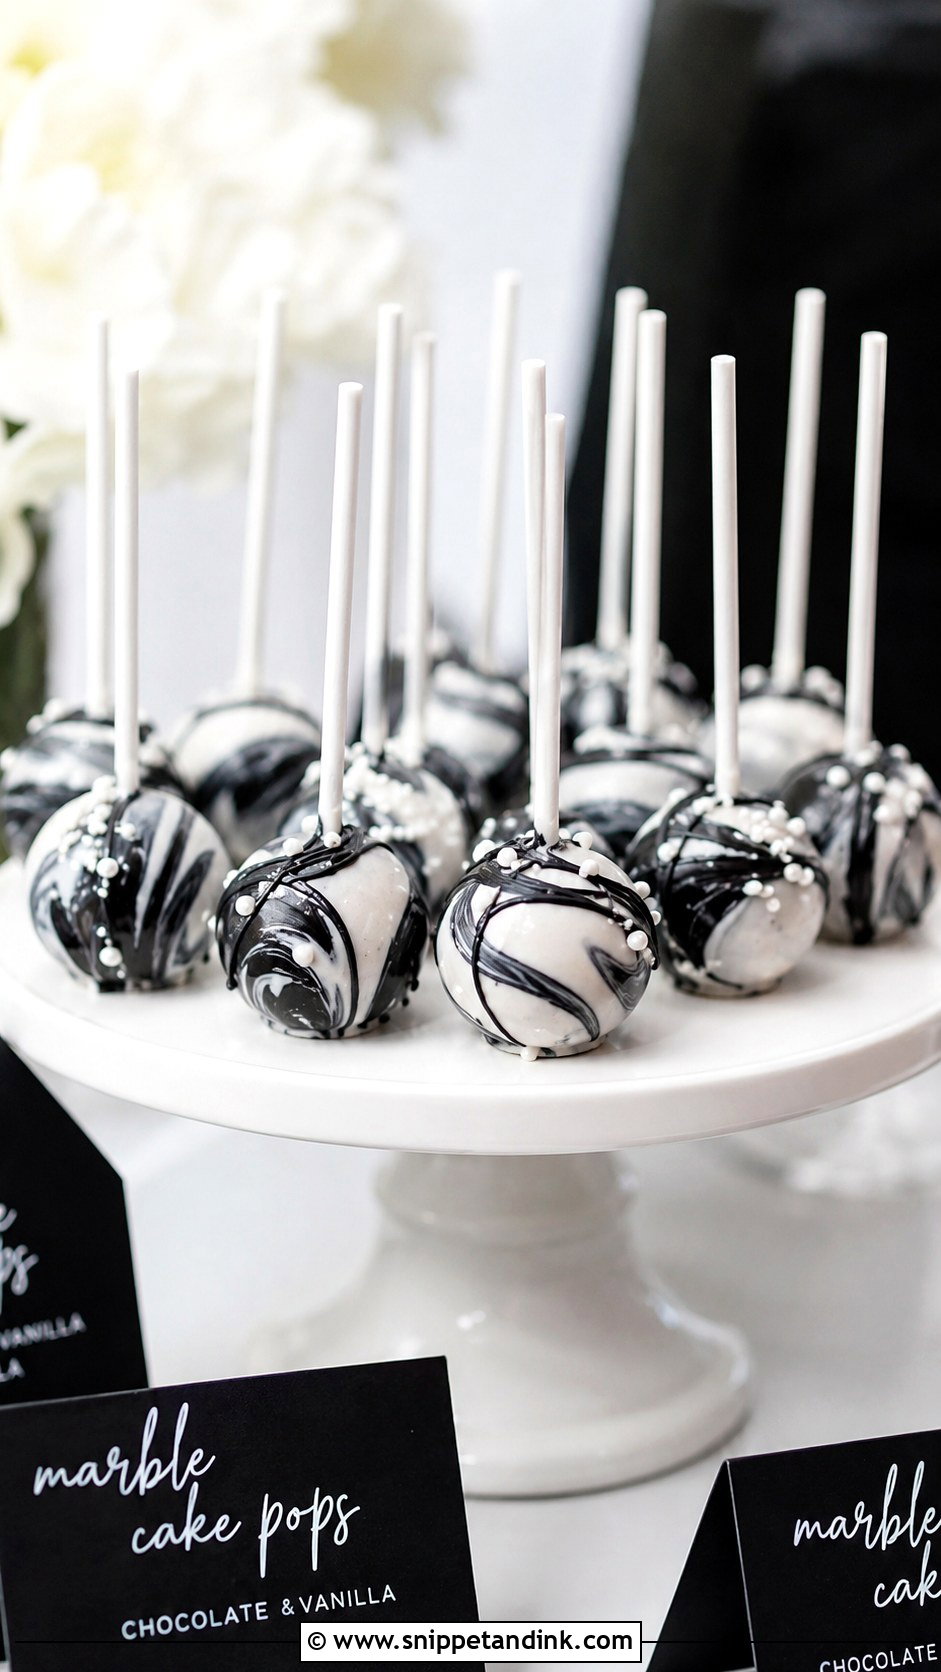
Marble is the one where you have to stop fiddling. I float a few spoonfuls of melted black coating on the white, drag a skewer through once or twice, and dip; every extra stir turns the swirl into flat grey. No two come out the same, which is the charm. A chocolate vanilla marble sponge inside echoes the shell nicely. I keep decoration to a few pearl sprinkles at most, because the pattern is already busy enough, and a plain white stand lets it show.
5. Black And White Pearl Cake Pops
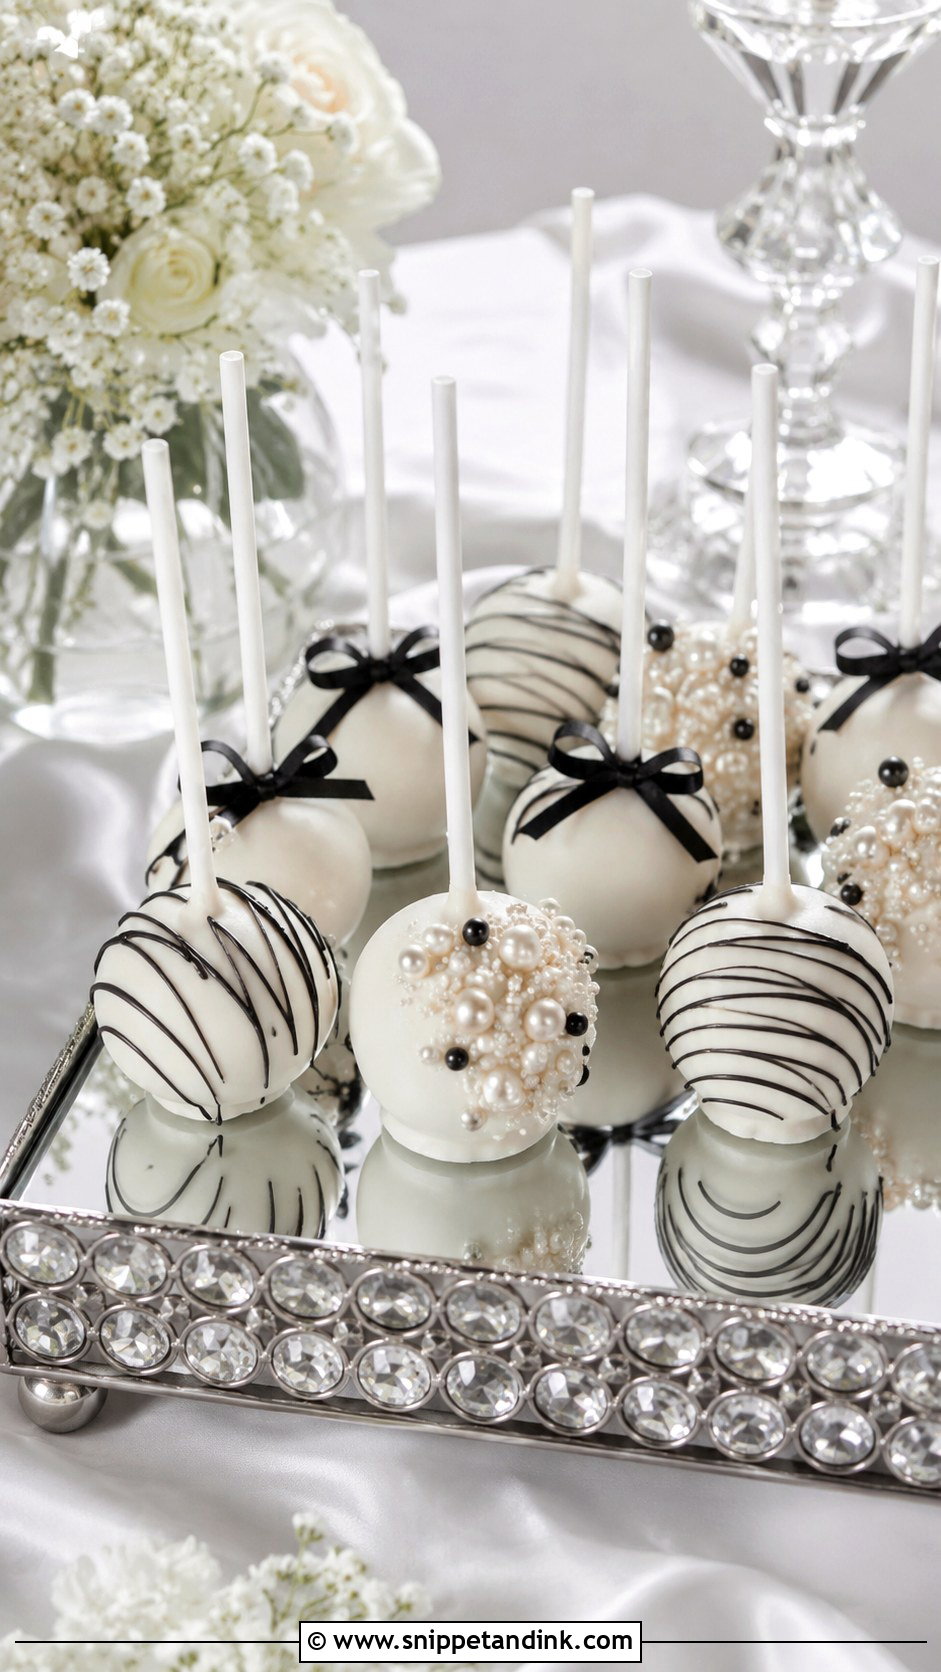
Edible pearls are prettiest in small doses. I place three or five in a cluster near the top of each white pop, mixing sizes so it looks like a brooch rather than a scattered handful, then add a thin black drizzle or a tiny bow for contrast. Pearls need to go on while the coating is wet; pressing them in later just cracks the shell. A vanilla bean sponge bound with buttercream is a flavour almost nobody refuses. Covering the whole pop in pearls looks heavy and makes it hard to bite, so I’d skip that.
6. Black And White Lace Cake Pops
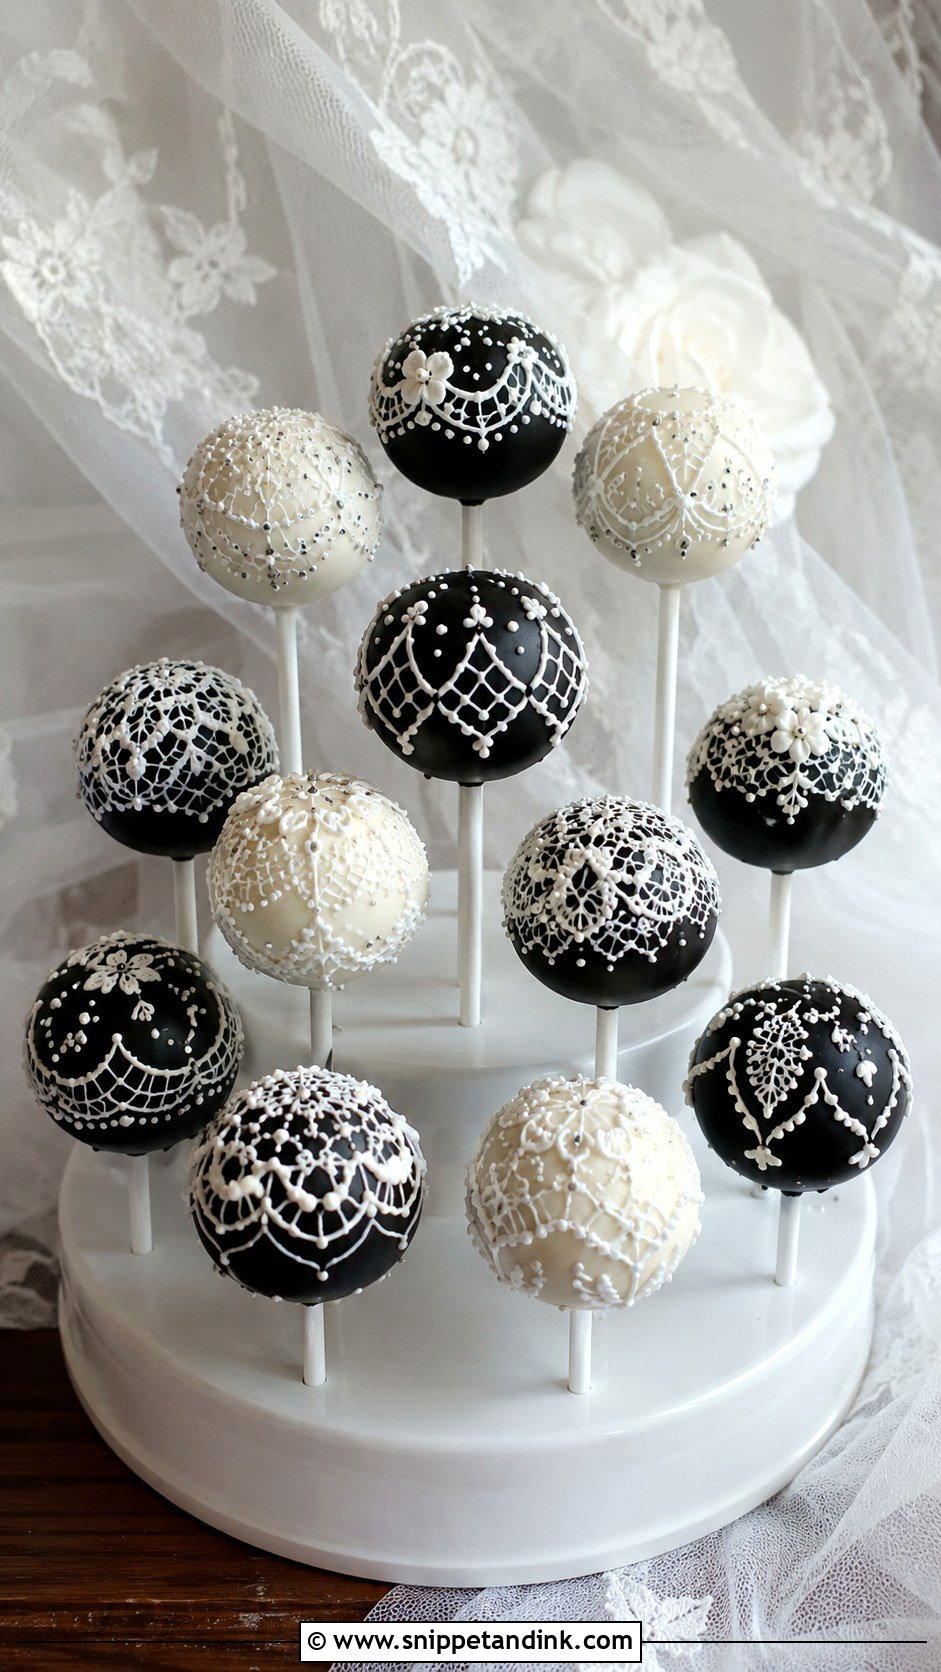
Lace piping takes the steadiest hand on this list. I use royal icing or thinned candy melt in a bag with a very small opening and pipe a simple repeating scallop or net, because an intricate freehand pattern looks wobbly by pop number forty. White on white is subtle and bridal; white lace on a black pop is the higher-contrast option and shows every line. Almond or white chocolate cake keeps the flavour light. I display these upright in a stand so the lacework faces guests rather than the ceiling.
7. Black And White Bow Cake Pops
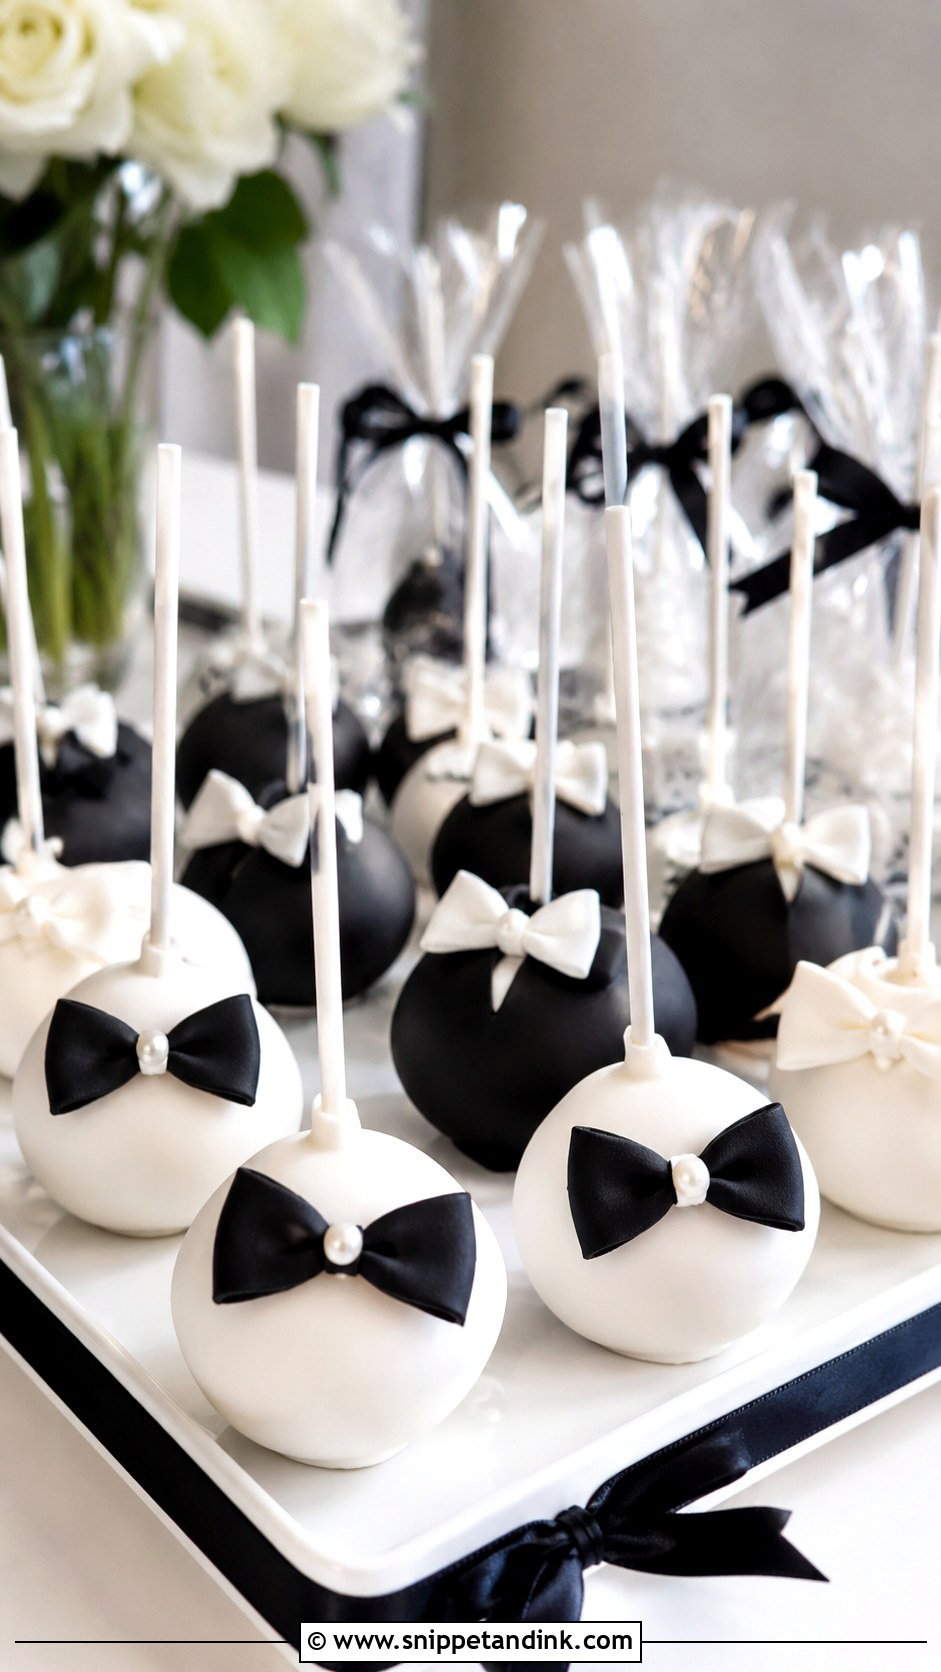
A bow changes the mood more than the colour does. Black on white feels formal; a white bow on a black pop is moodier. I cut bows from fondant or modelling chocolate a couple of days ahead so they firm up and hold their loops, and attach them with a dot of melted coating. Piped bows are softer looking but flatten if the room is warm. Cookies and cream cake suits the colour story inside. Bagged in clear cellophane with black ribbon, they double as favours on the place settings.
8. Black And White Drip Cake Pops
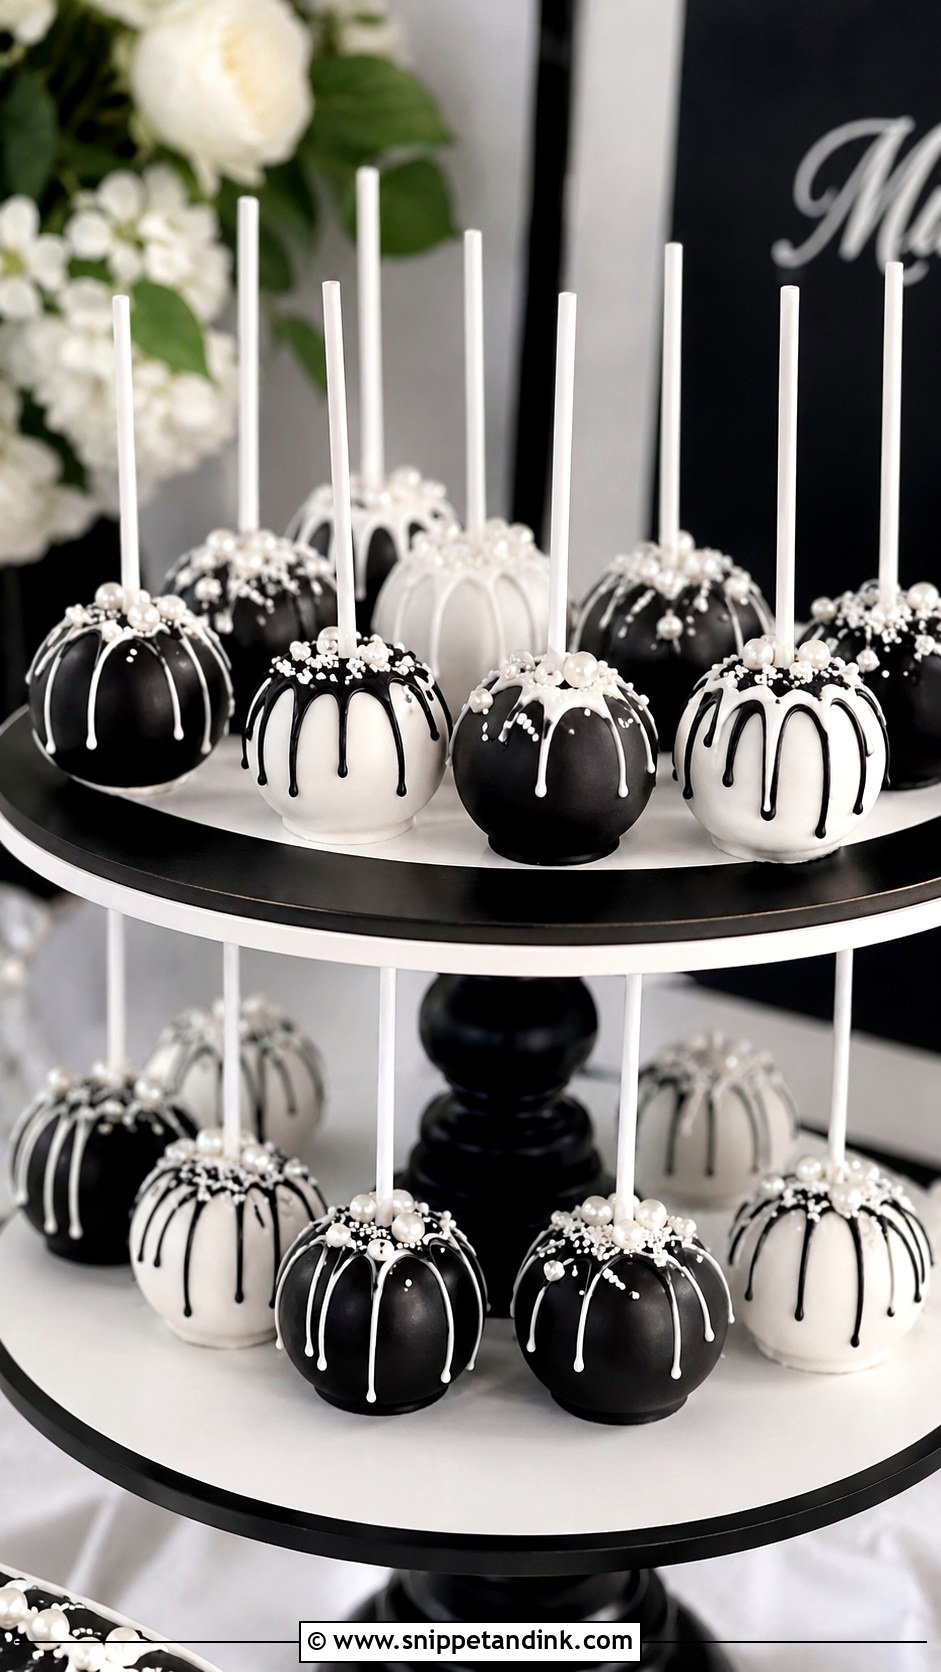
This is the design I suggest when a couple wants a stylish table but a smaller budget, since it skips piping and fondant entirely. Dip in one colour, let it set, then drizzle the opposite colour from the top so it runs down in uneven lines. The coating for the drizzle has to be slightly warmer and thinner than the dip or it sits in blobs instead of running. A white pop with a black drip is crisp; reversed, it’s more dramatic. Chocolate fudge cake underneath makes it feel properly indulgent.
9. Black And White Floral Cake Pops
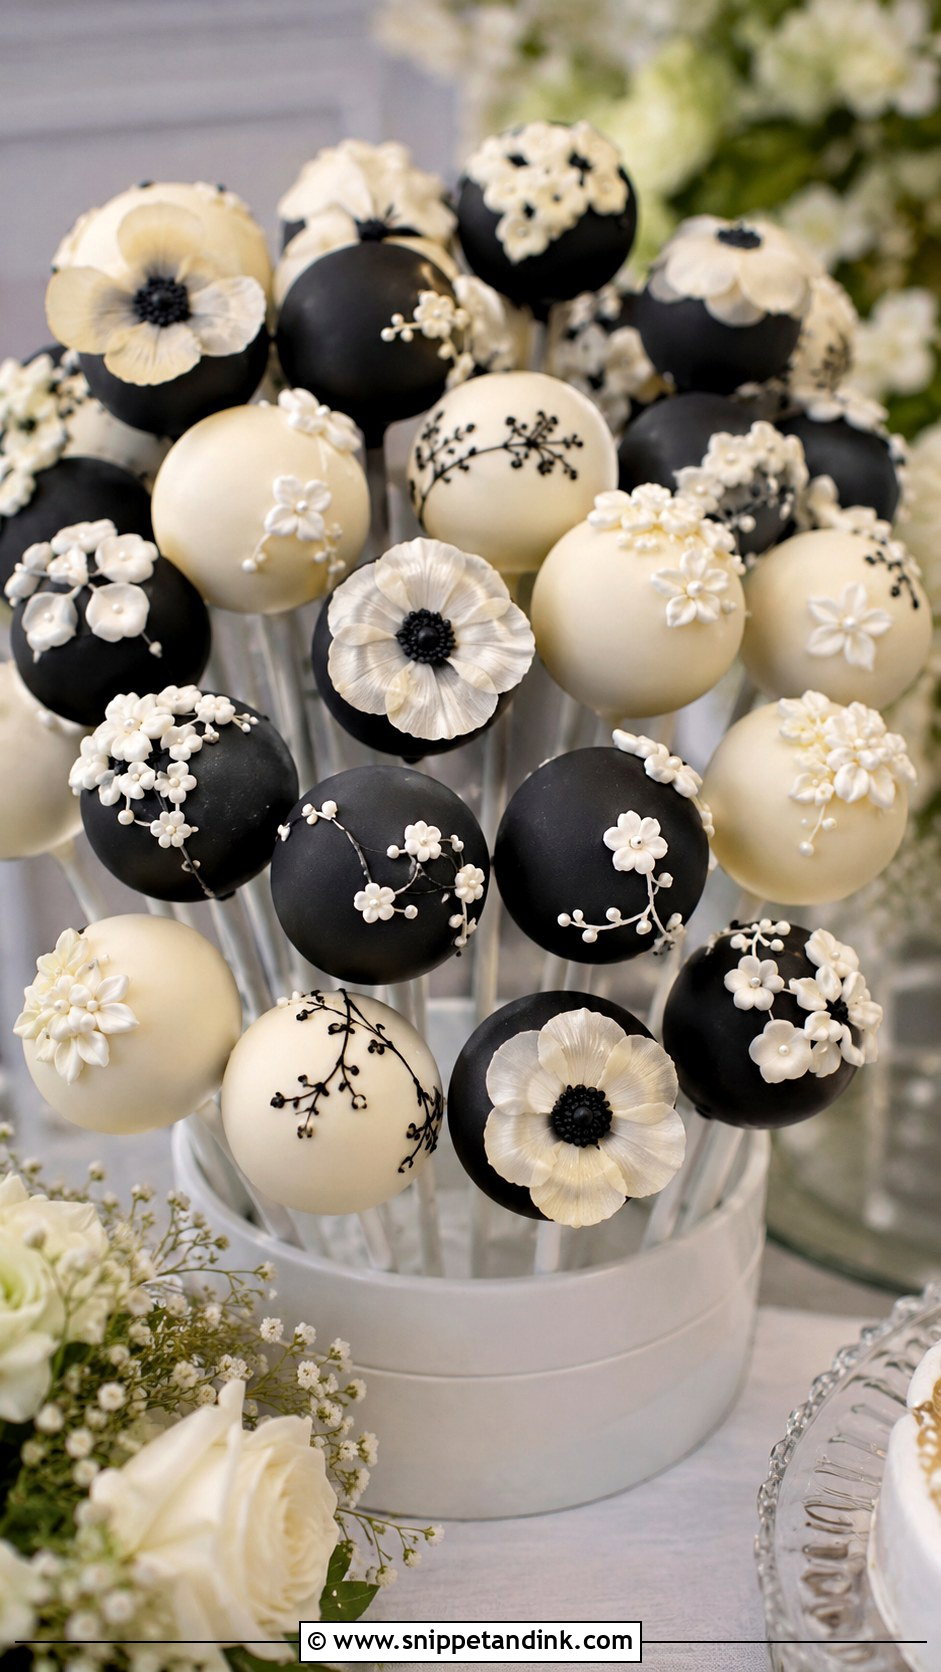
Flowers on a cake pop have to be tiny to work. I use wafer paper petals or small piped blossoms, roughly the size of a fingernail, because anything larger hangs over the edge and snaps off in a favour bag. White blooms on a black base read as bold and graphic; black piped florals on white are quieter. Vanilla cake with a little cream cheese frosting in the mix suits the delicate look, though it does make the centre softer, so those pops need to stay chilled until close to service. A bouquet-style stand ties them to the centrepieces.
10. Black And White Monogram Cake Pops
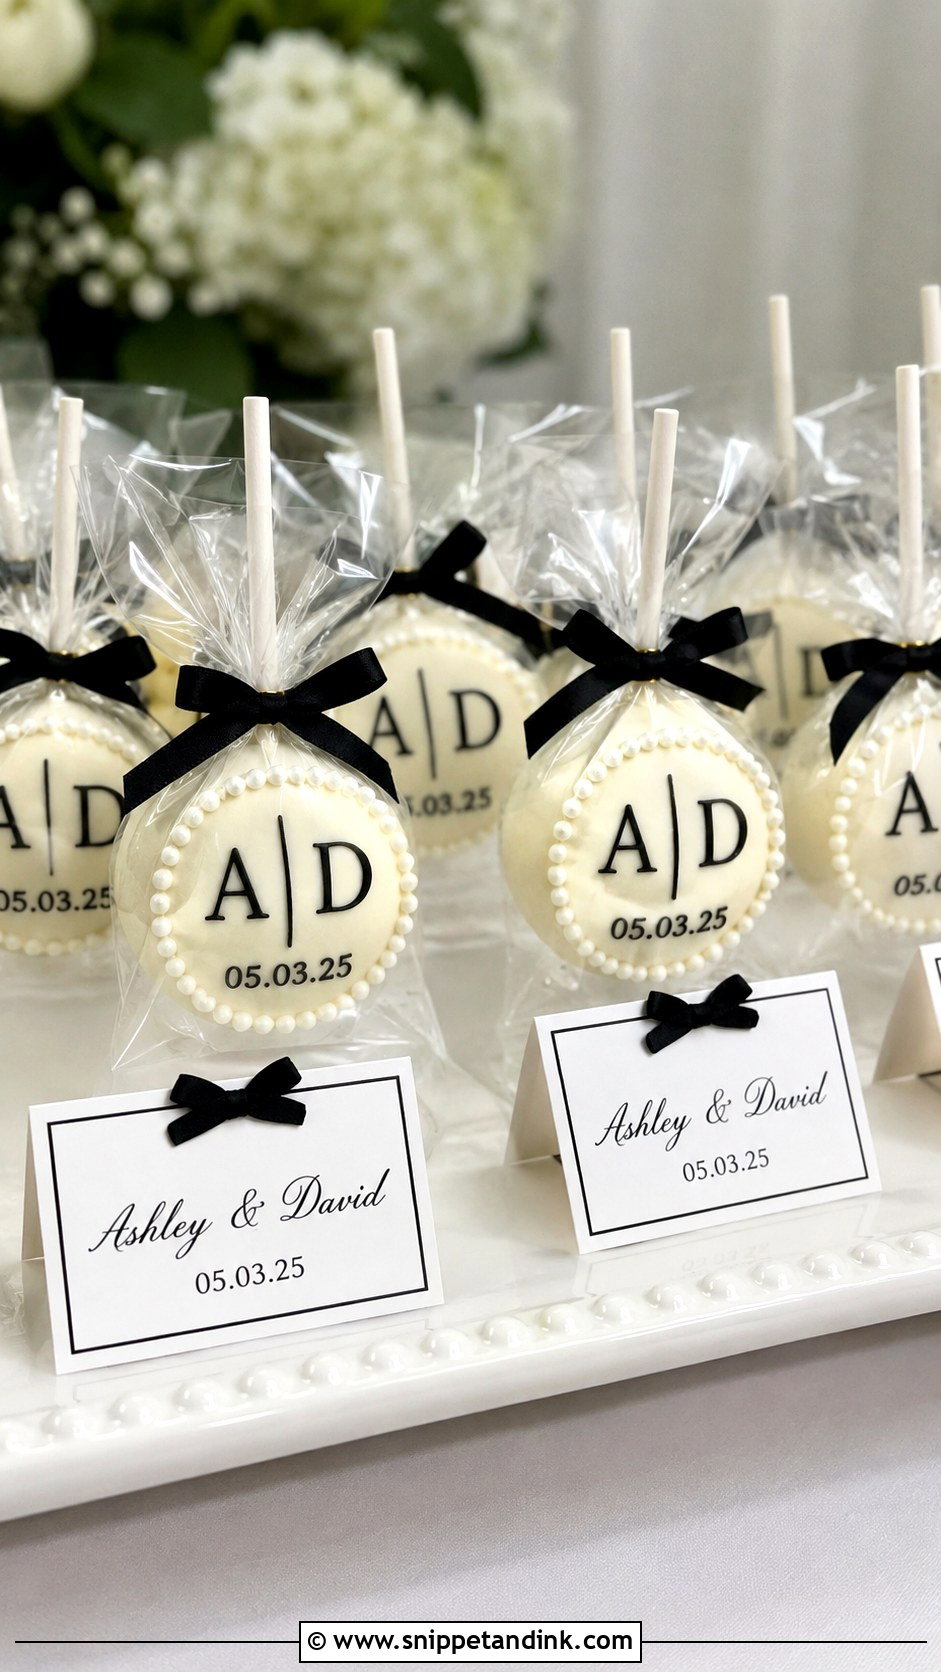
Monograms make the table feel personal, but lettering on a sphere is unforgiving. I pipe the couple’s initials or the date onto the flattest face of each pop, and for a large order I’ll use edible-ink printed discs instead so every letter matches. Black on white is easiest to read from a distance. Almond cake is traditional without being dull. A small pearl border or a bow near the stick finishes it, and guests do tend to pocket these to take home.
11. Black And White Striped Cake Pops
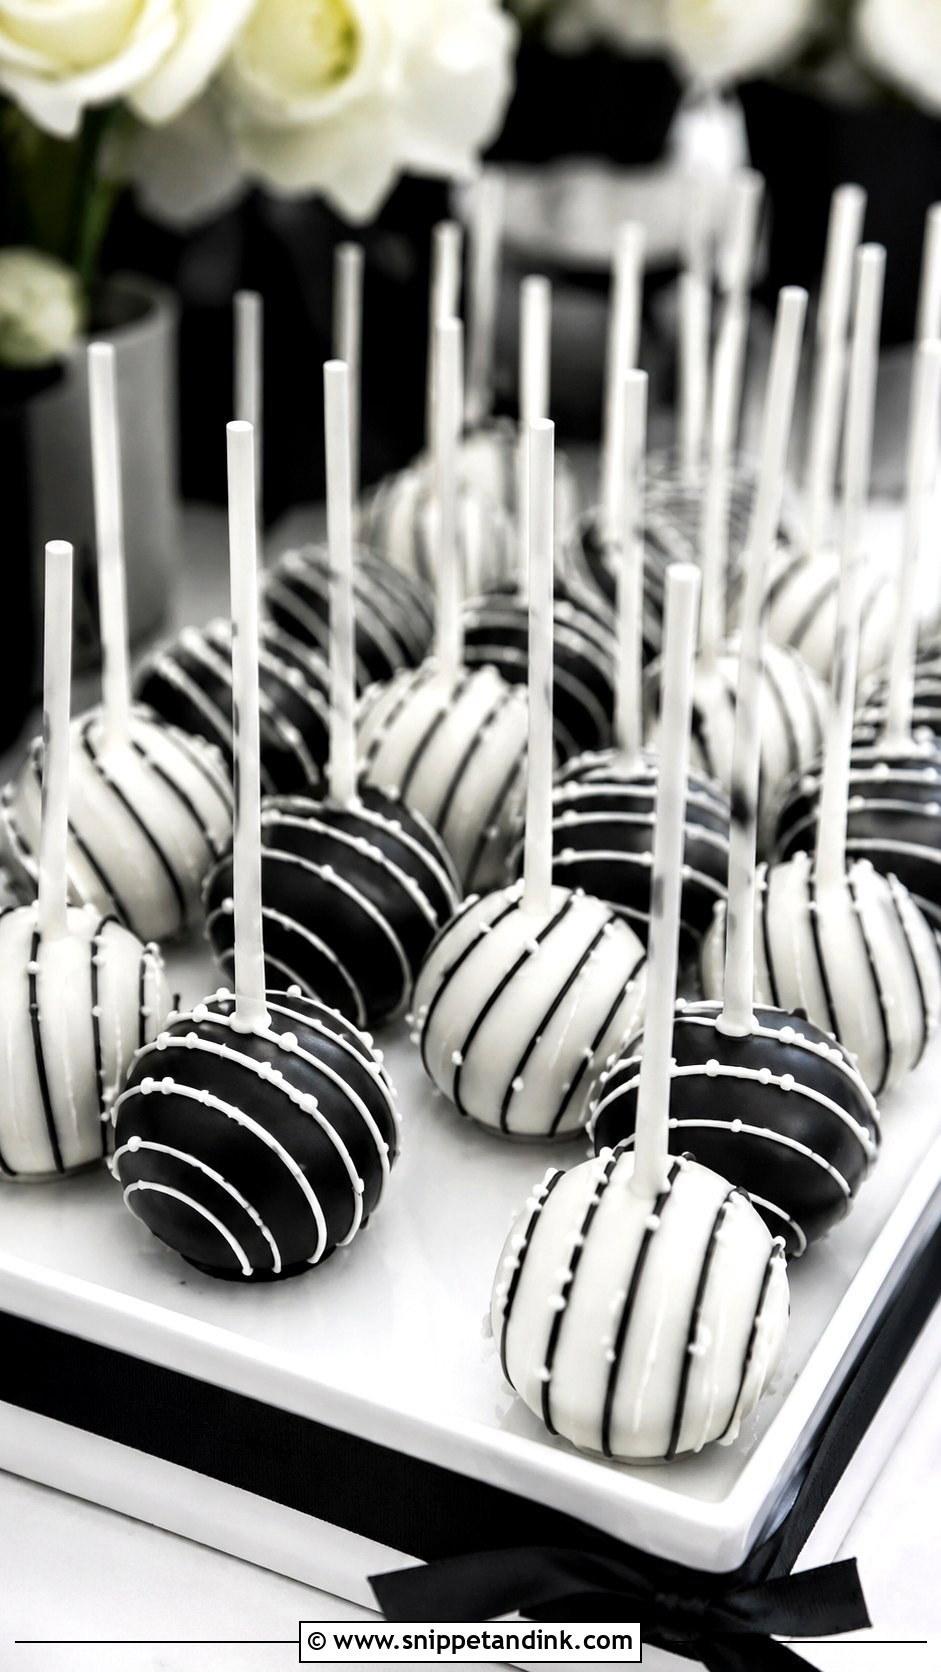
Striped cake pops look clean but punish uneven spacing. I mark the pop lightly with a toothpick before piping, or for very straight lines I use edible striping on a pop that’s been coated and fully set. Vertical stripes are more forgiving than horizontal ones, because a slightly tilted horizontal line is the first thing people notice. A cookies and cream centre keeps the black-and-white theme going inside. Line them up in neat rows on a white tray; stripes look best in repetition.
12. Black And White Polka Dot Cake Pops
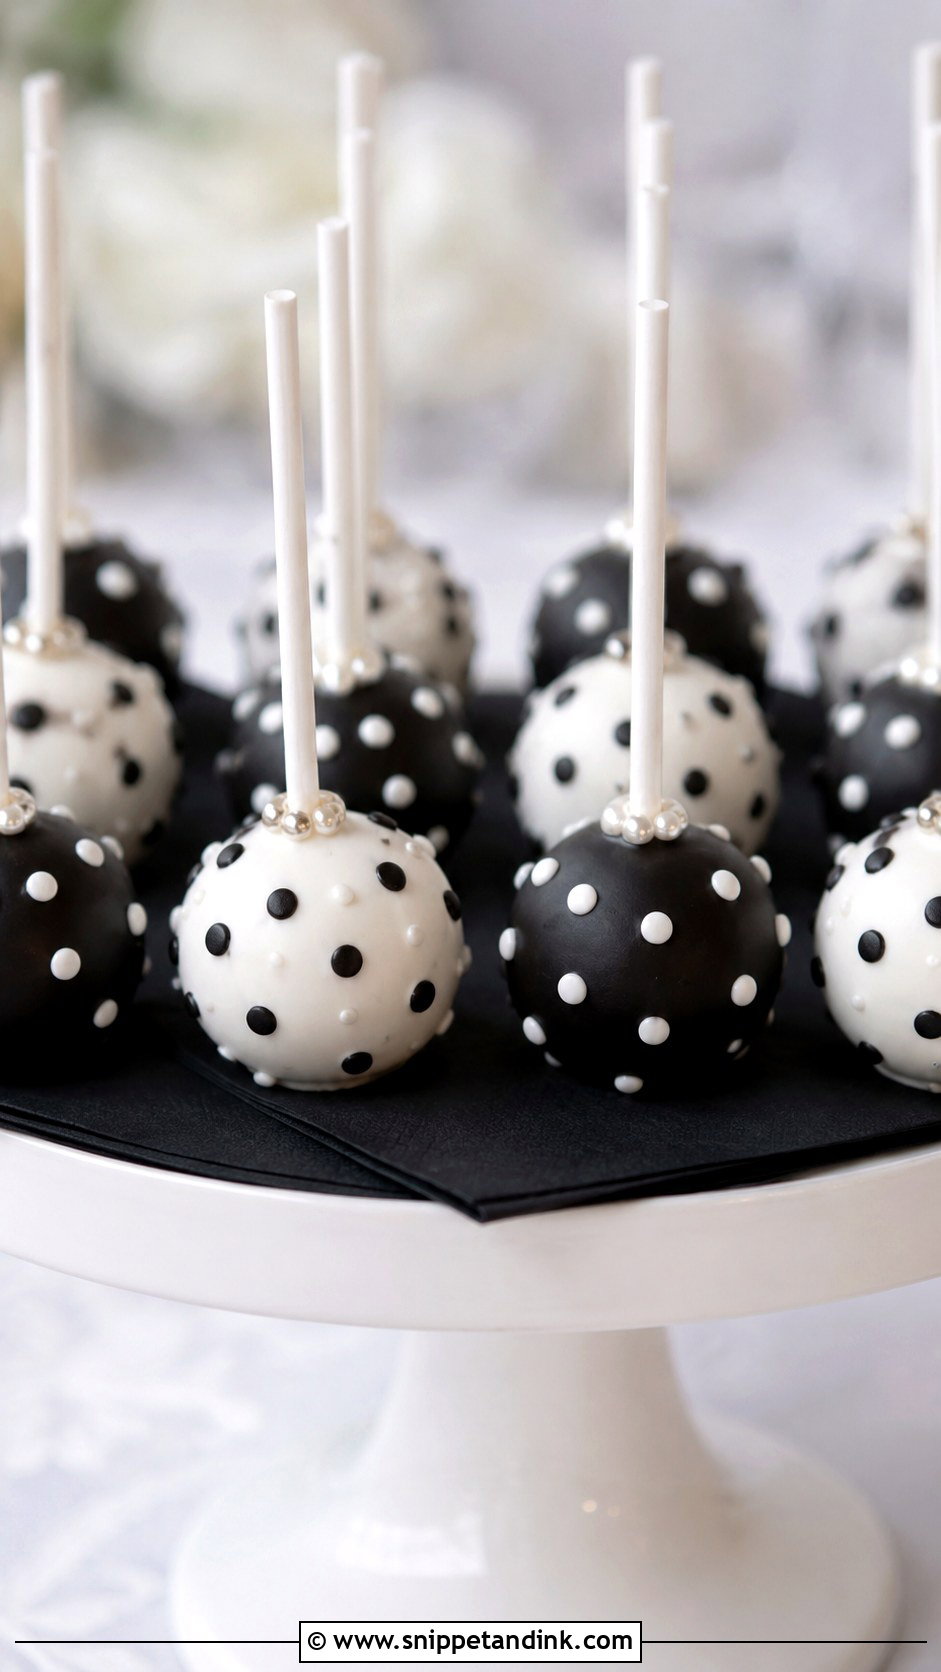
Dots can tip into a children’s party very quickly, so I keep them small and evenly sized. Round sprinkles pressed into wet coating are the most consistent; piped dots vary unless you’re very careful about pressure. Mixing black-dot and white-dot pops on one tray gives variety without adding another colour. Vanilla cake with chocolate buttercream is a crowd-friendly centre. This one suits a retro or cheerful reception better than a candlelit black-tie room.
13. Black And White Swirl Cake Pops
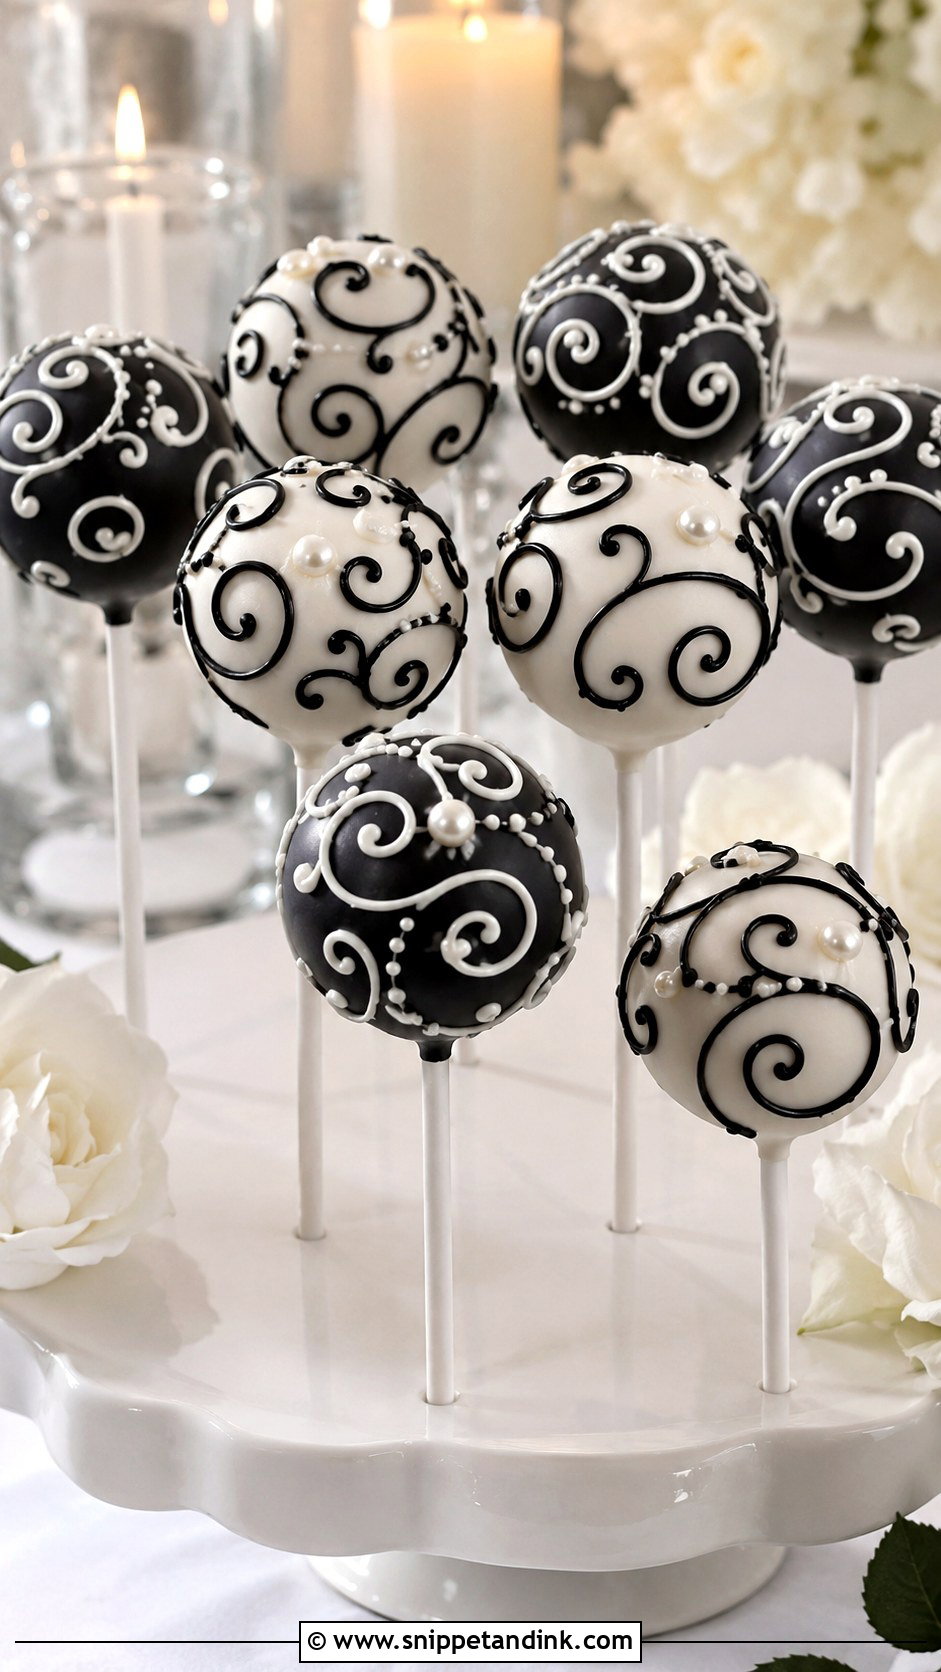
Scrollwork looks handmade in the good sense. I pipe swirls on a white base with black, or reverse it for stronger contrast, and I decide early whether the pattern wraps all the way round or sits on the front like a medallion. A front-only swirl is quicker and looks tidier on a stand where only one side faces out. One pearl sprinkle at the centre of each swirl hides the spot where the piping starts. White chocolate cake keeps the inside smooth and rich.
14. Black And White Glitter Cake Pops
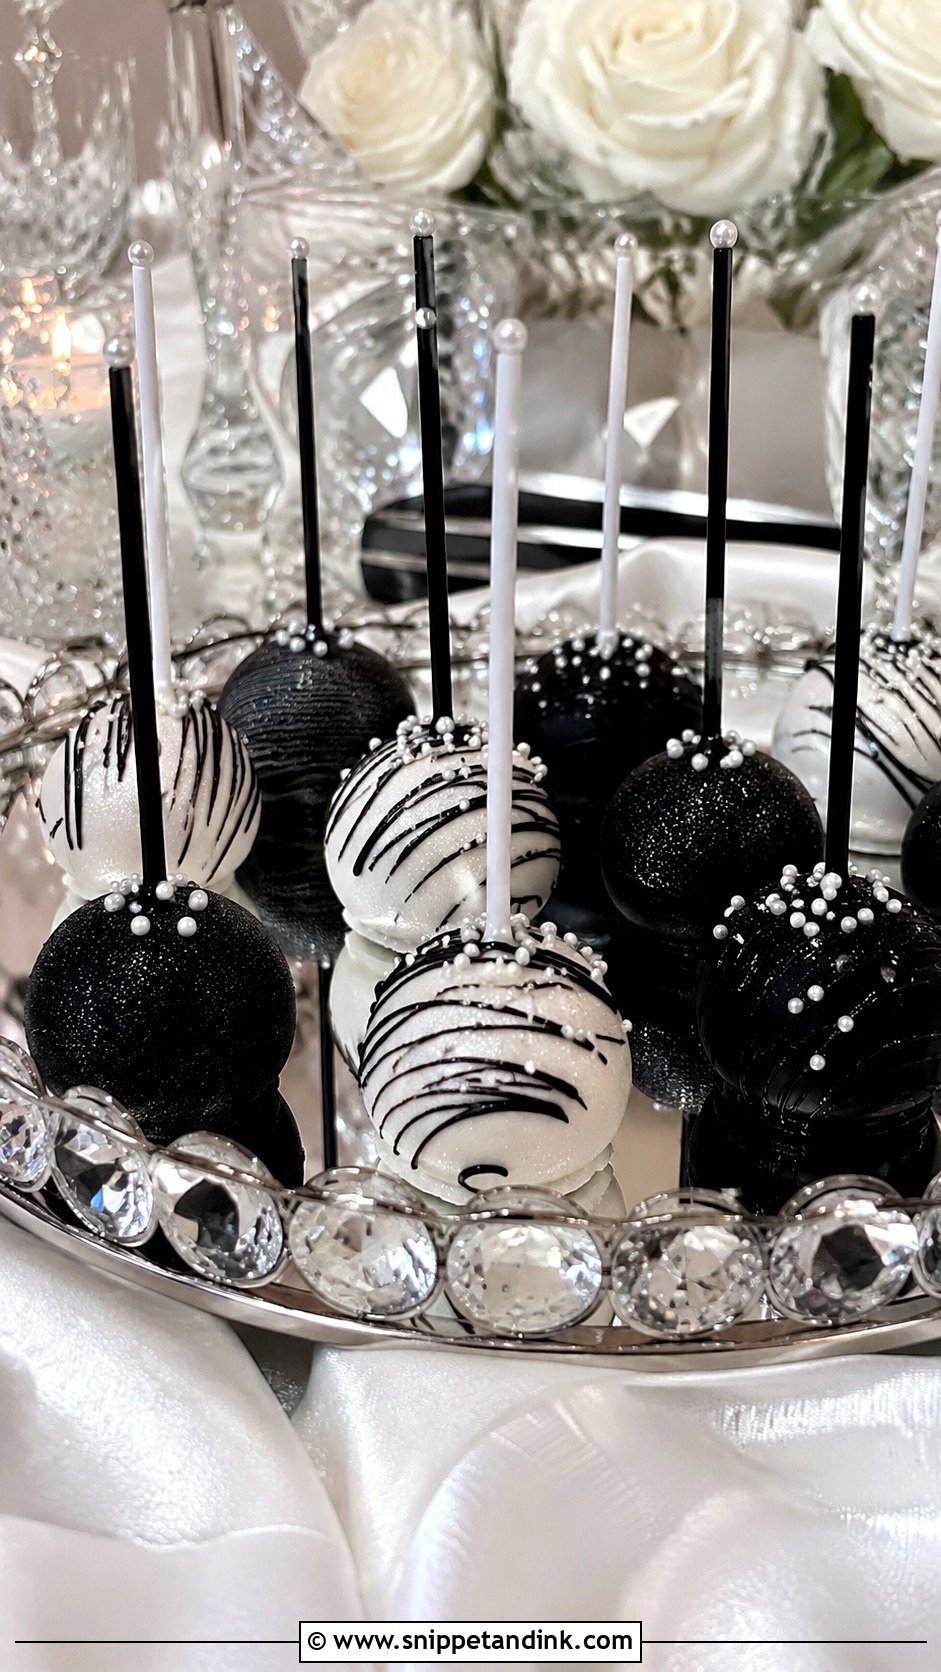
Sparkle needs a light hand and the right product. I only use dusts and glitters labelled as edible, not ones sold as “non-toxic” or for display, and I brush them on rather than dumping them so the pop shimmers instead of looking gritty. Silver-white shimmer over a white pop with a black drizzle looks bridal. On black coating, white sparkle reads as evening and catches candlelight and mirrored trays. A chocolate centre suits the dark version. If they’re going into favour bags, use clear ones so the shine still shows.
15. Black And White Rose Cake Pops
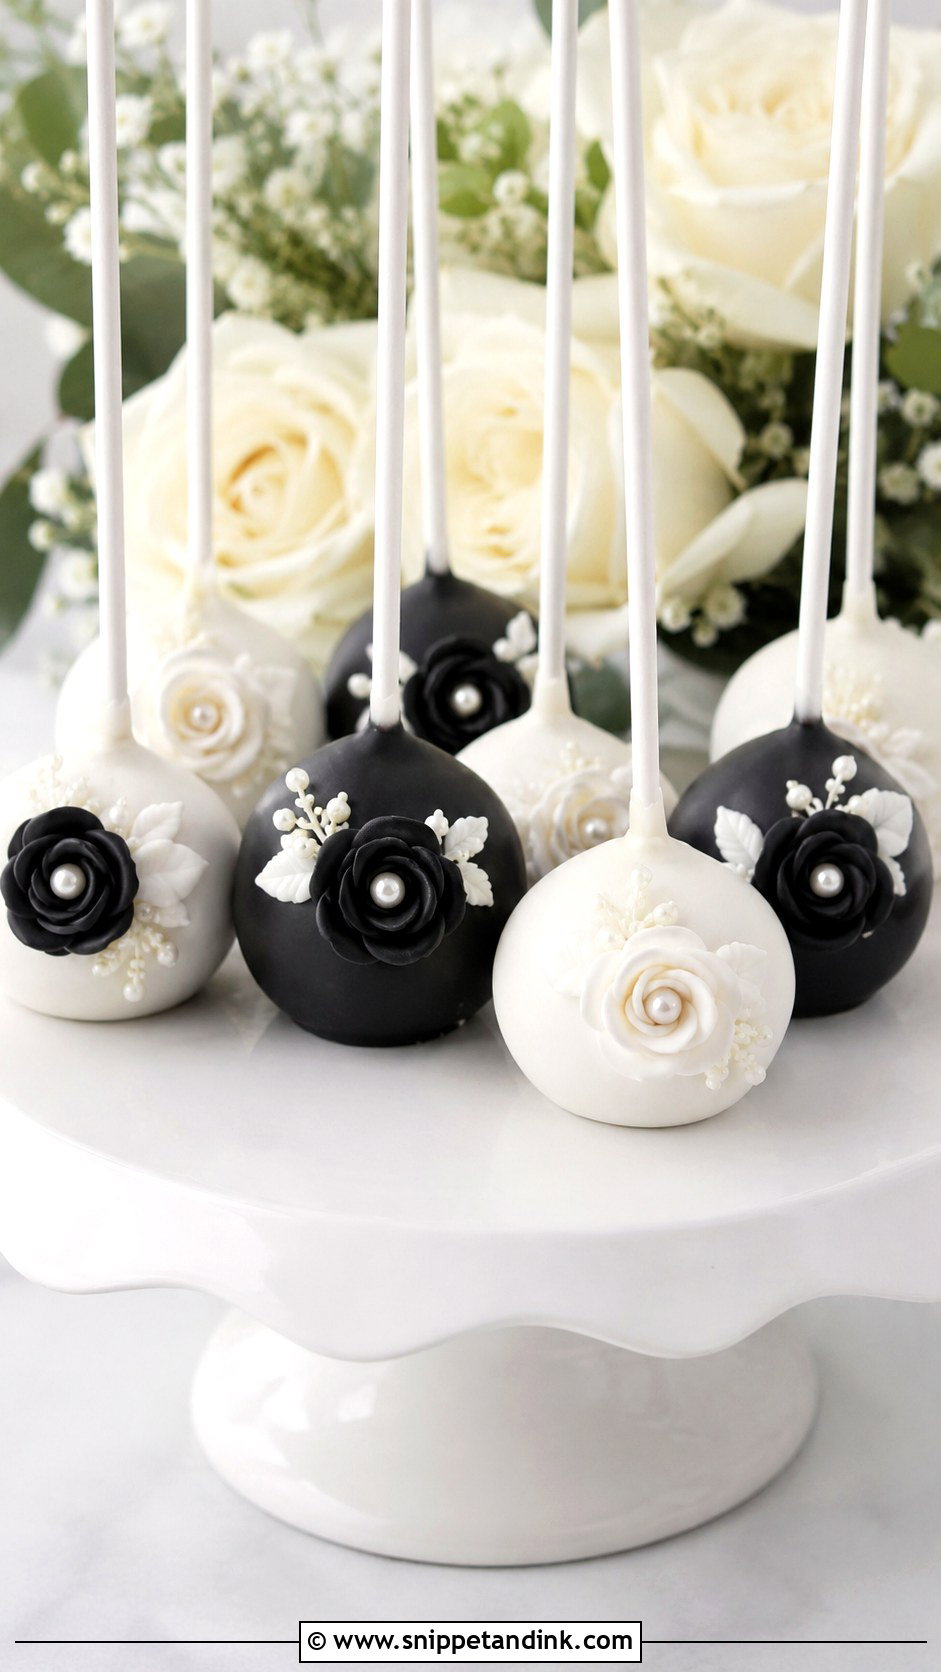
A single small rose on the front of a white pop is enough. I make the roses from fondant or modelling chocolate a few days ahead so they’re firm, then fix them on with melted coating once the shell has set. Piping a rose directly is possible, but only on a fully hardened pop. Almond, white chocolate or a lightly rose-flavoured sponge all suit it. If there are fresh roses on the table too, keep the stems and floral foam away from the food; florist flowers are often treated and shouldn’t touch anything edible.
16. Black And White Heart Cake Pops
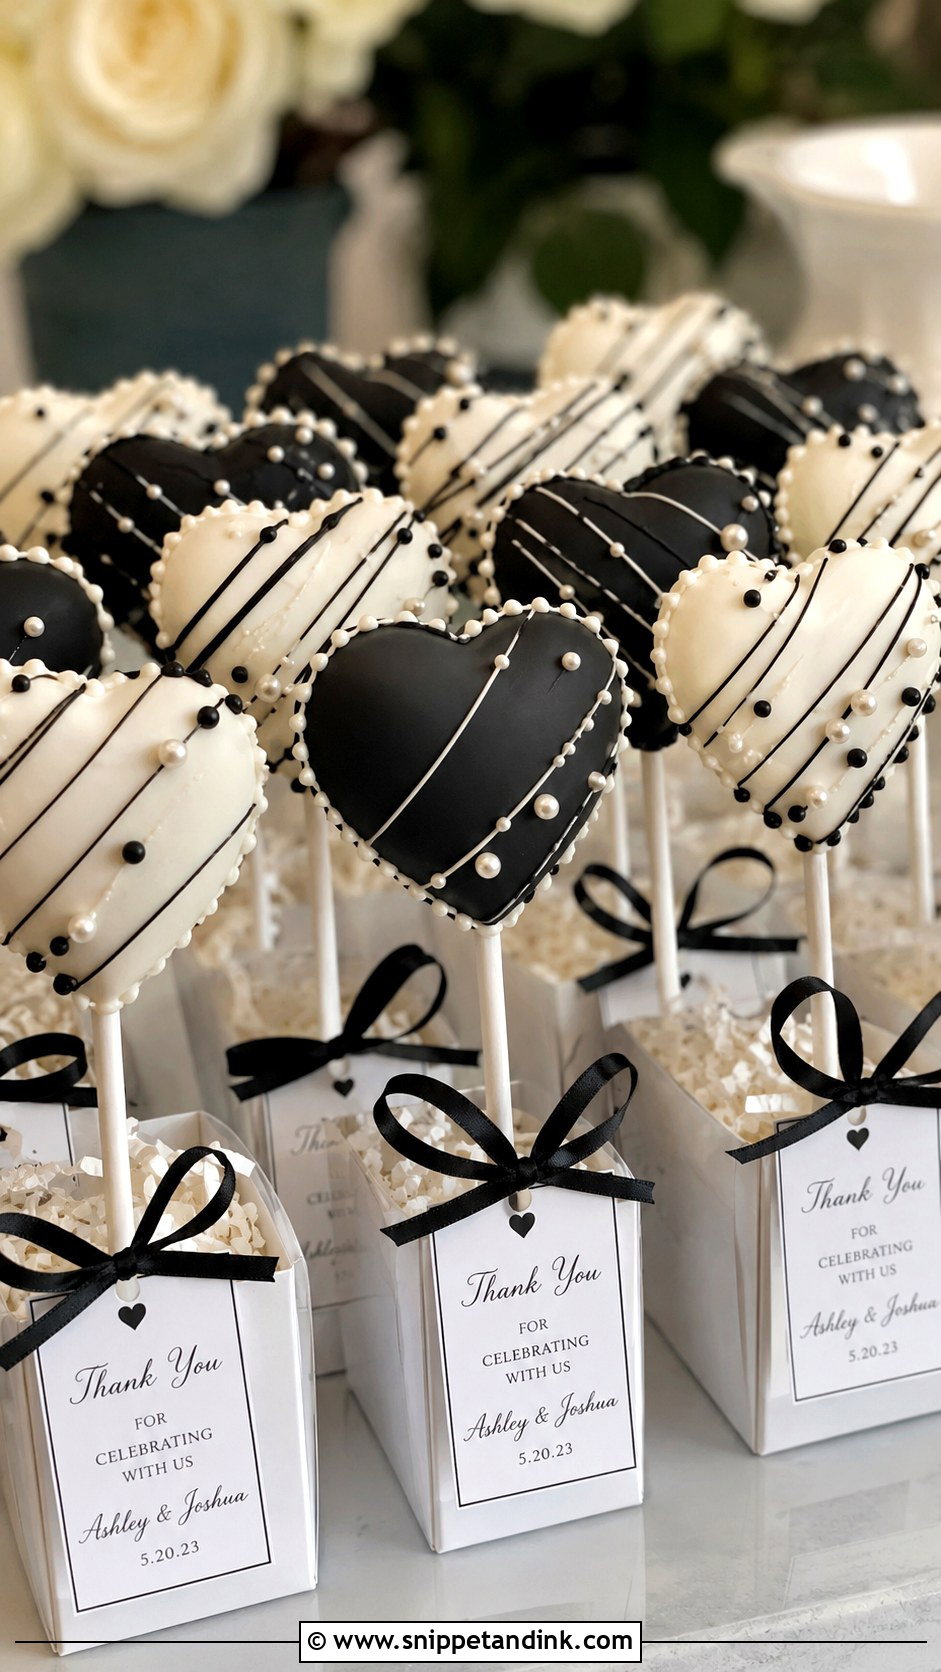
Hearts need shaping before the coating, not after. I press the cake mixture into a small heart cutter, chill it until firm, and only then insert the stick, otherwise the point of the heart cracks off during dipping. Coat in black or white and edge it with the opposite colour. You don’t need red here; the palette keeps the shape formal. Chocolate cake with a little berry buttercream folded in gives a chocolate-strawberry nod. They fit neatly into favor boxes or beside a sign with the couple’s names.
17. Black And White Geometric Cake Pops
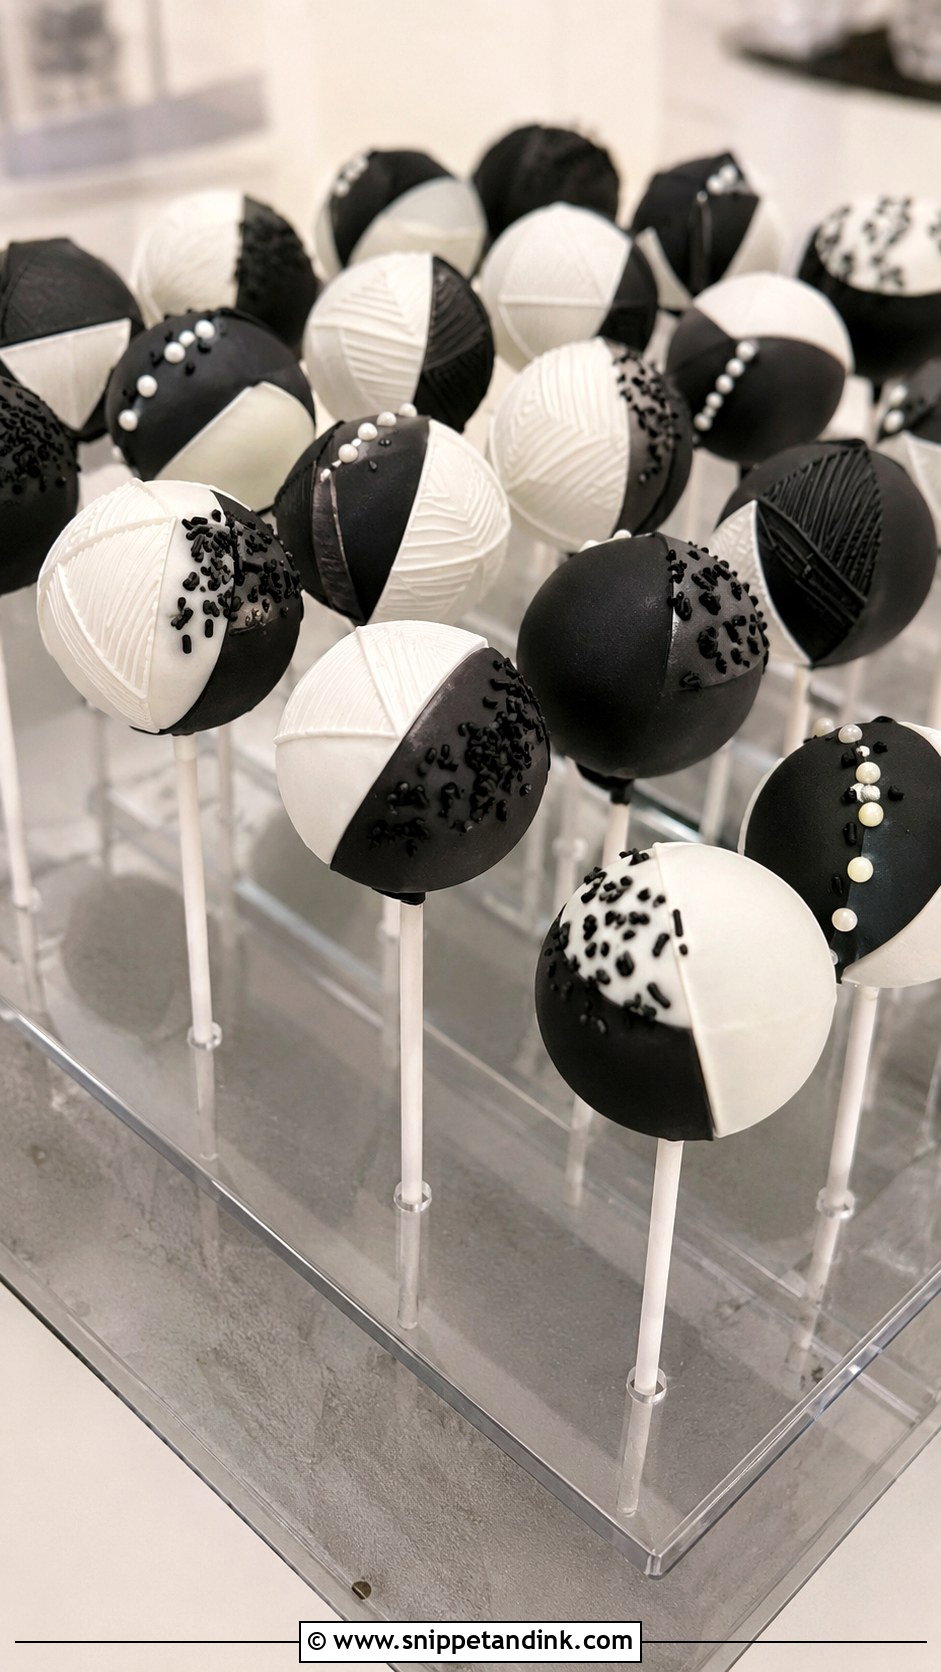
Geometric designs fall apart if the pattern changes from pop to pop. I choose one treatment, usually a half-dip at an angle or a single triangle panel, and repeat it exactly across the whole order. Masking a clean line on a curved surface is fiddly, so a steep half-dip is the most reliable way to get a sharp edge. Dark chocolate cake suits the bold outside. A few matte black sprinkles add texture without breaking the lines. Display them in a grid on a rectangular platter.
18. Black And White Minimal Cake Pops
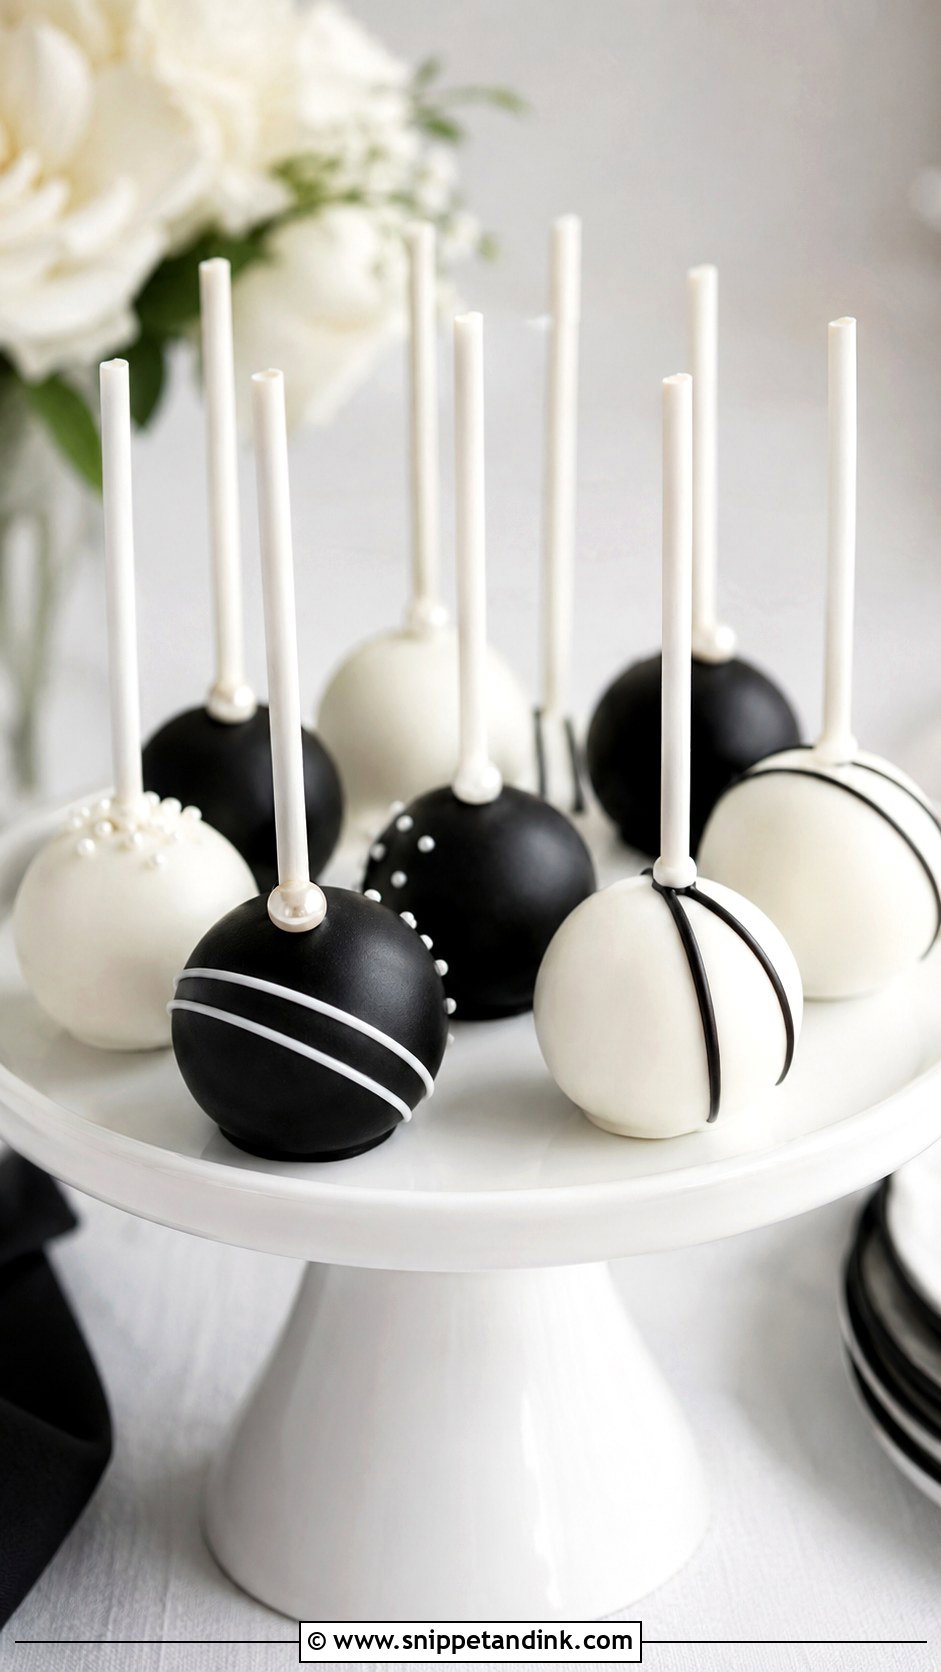
With nothing to hide behind, the coating itself has to be flawless. I tap off the excess for longer than feels necessary, turn the pop slowly so the drip line evens out, and let it dry upright in a block so there’s no flat spot. Then one detail: a black line, a tiny bow or one pearl. Reverse it with black coating if the room is darker. Vanilla bean is the safest flavour for a large guest list, and the look sits comfortably beside simple stationery.
19. Black And White Cookies And Cream Cake Pops
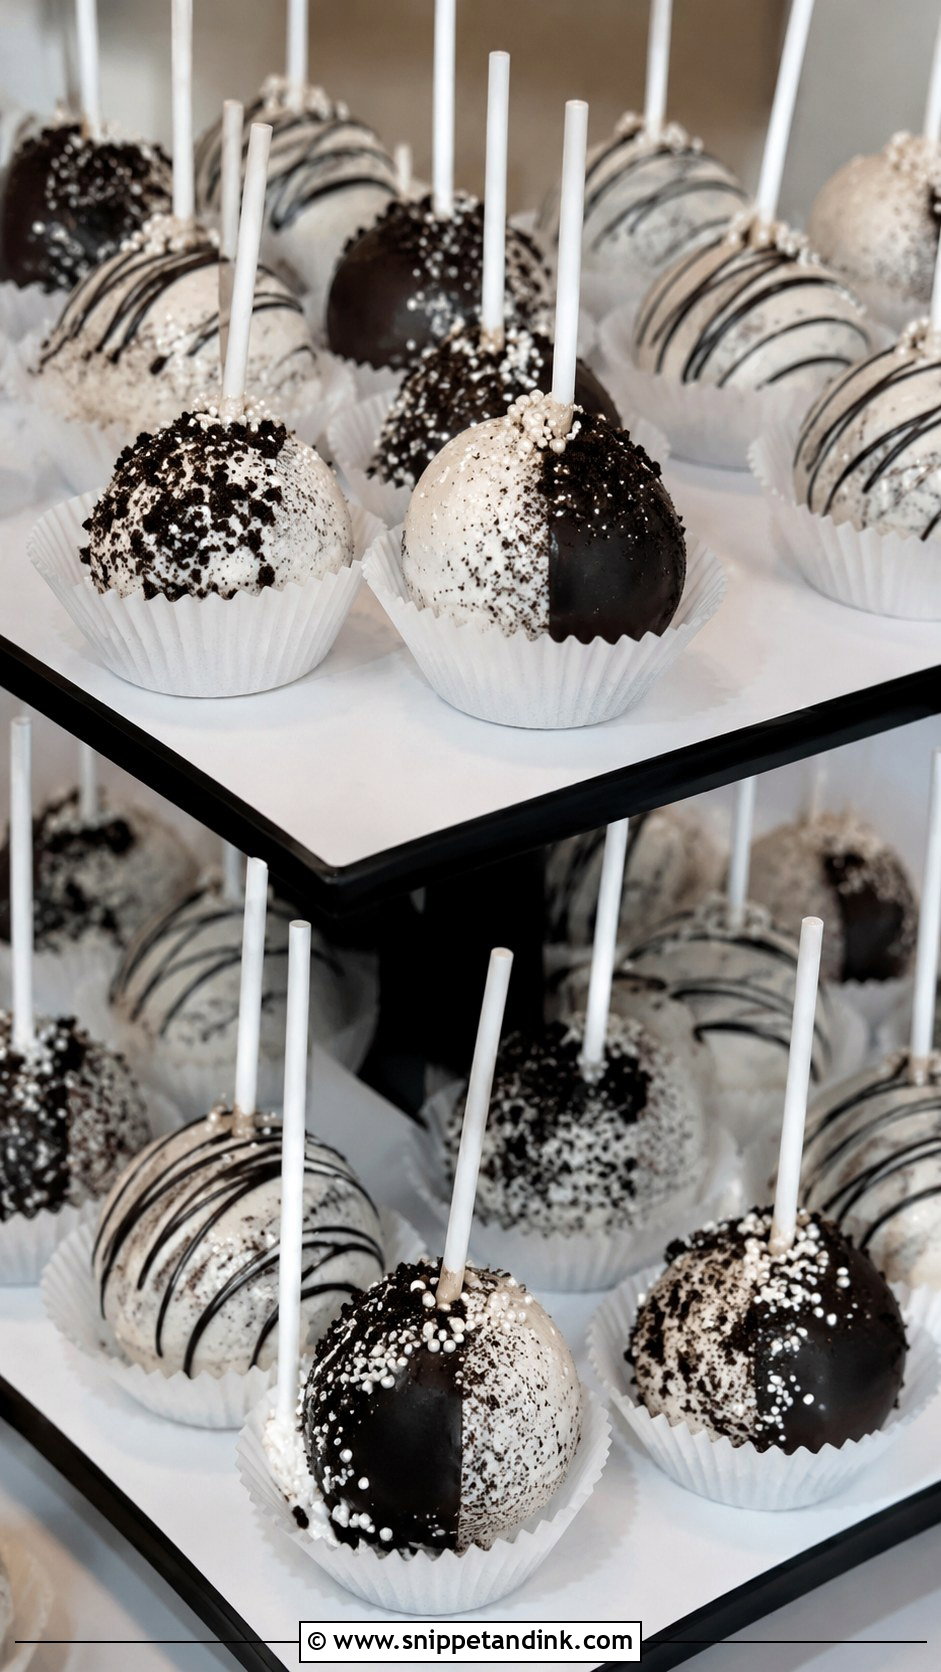
The inside does half the theming here. I mix vanilla sponge with crushed chocolate sandwich cookies and just enough buttercream to bind, then dip in white so the speckled centre is a surprise when guests bite in. Outside, a few fine crumbs, a black drizzle or a half-and-half dip keeps the link obvious. Use crumbs sparingly or the pop starts to look messy. It’s the one I see guests go back for, especially the ones who’d skip a slice of traditional cake. Serve them in white cups or a tiered stand with a matching label.
20. Black And White Cake Pop Wedding Favors
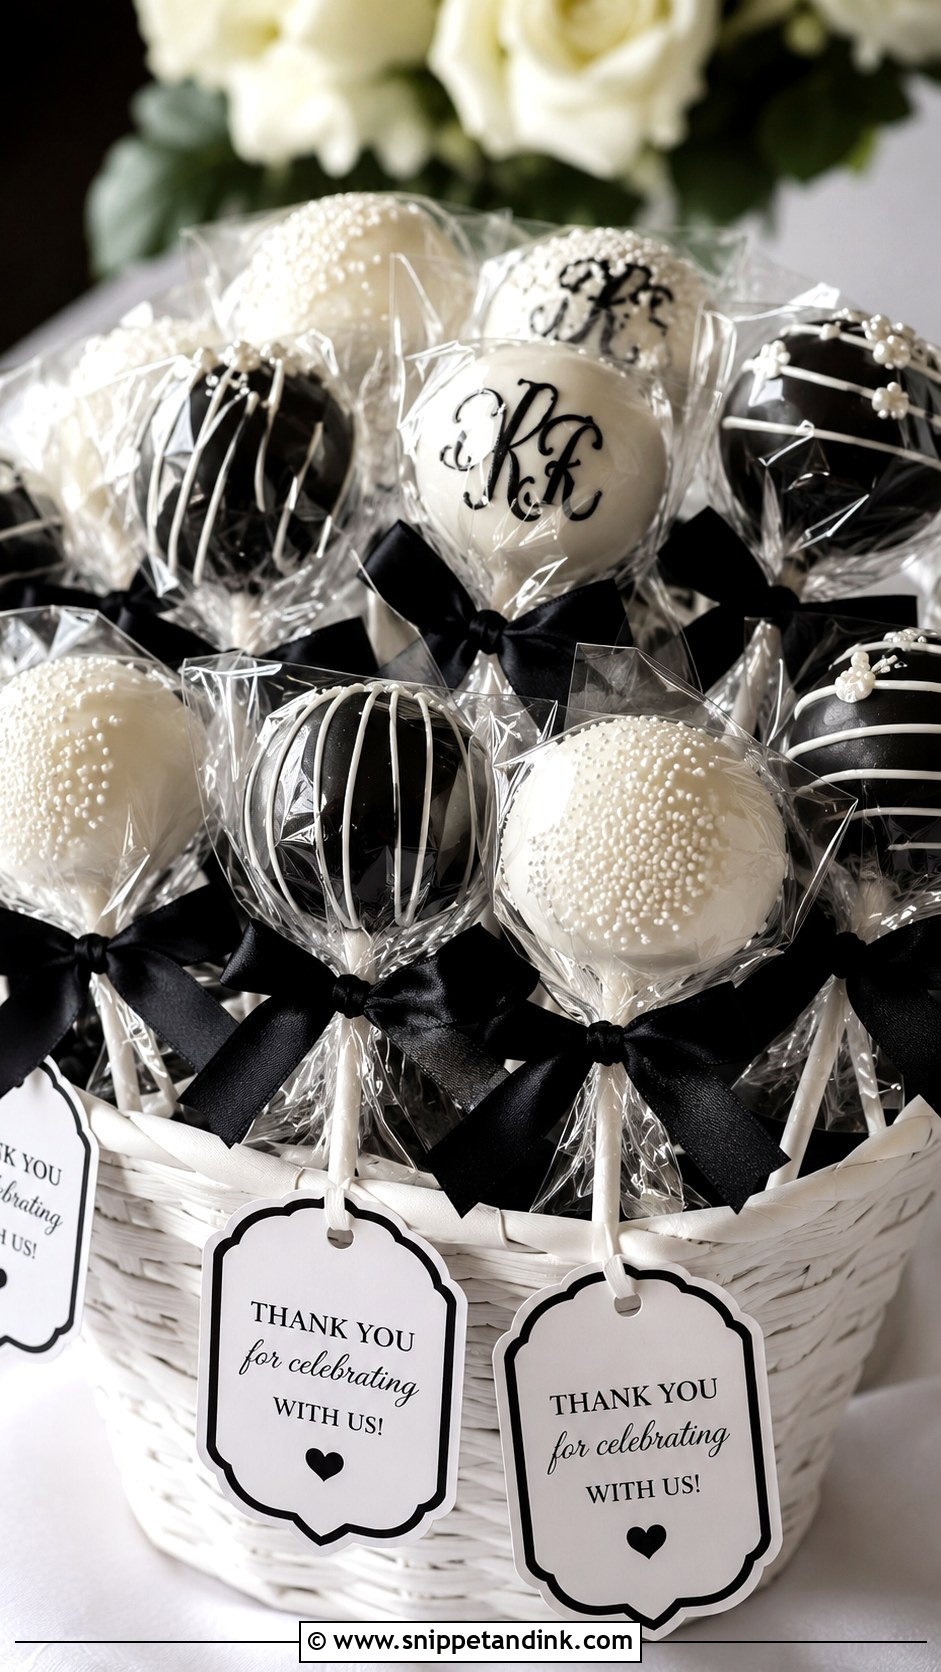
Cake pop wedding favors have to survive pockets and handbags, so I build them sturdier than display pops: a firmer cake-to-frosting ratio, a slightly thicker shell and a full day to set before bagging. Bagging too soon traps moisture and the coating goes tacky. Keep the decoration flat to the surface, like a monogram or a drizzle, because raised bows snap in transit. A printed tag with names and the date finishes them. Set one at each place, along the escort table or in a basket by the exit.
Why Black Coating Is Harder Than It Looks
True black is the trickiest part of this palette. White candy melts need a lot of black colouring to get dark, and that much colour can make the coating thick, change its taste and leave a grey tint on teeth and tongues. I start from dark chocolate or a black cocoa coating so I need far less dye, and I use oil-based colour rather than water-based, which can make melted coating seize.
The other common failure is cracking. If I dip a very cold centre into warm coating, the shell sets around it and then splits as the cake warms and expands slightly. I let chilled centres sit for a few minutes before dipping, and I keep the coating only just fluid. With black, those hairline cracks catch the light; with white, they show a dark line of cake.
On the Day: Heat, Sun and When to Put Them Out
Moving pops straight from a fridge into a warm room makes condensation bead on the shell, which leaves spots on black coating and can make colours bleed. I bring them up to room temperature in their closed box before opening it. Outdoors, keep the stand in the shade; direct sun softens coating fast and fondant details start to droop.
I’d put them out after the ceremony rather than hours before. A stand of pops sitting through a long cocktail hour in summer is the one way I’ve seen a good order look tired by the first dance.
The Smaller Set Usually Looks Better
Pick two or three of these designs, not ten. A table with tuxedos, marble and one pearl style looks deliberate; a table with every idea at once looks like a sampler. Match the detail level to the venue, check the forecast and the room temperature with whoever makes them, and leave room in the timeline for the pops to be set out late rather than early. Done that way, they’re the dessert people keep reaching for long after the cake has been cut.
You'll Like These Ideas:


Leave a Reply