
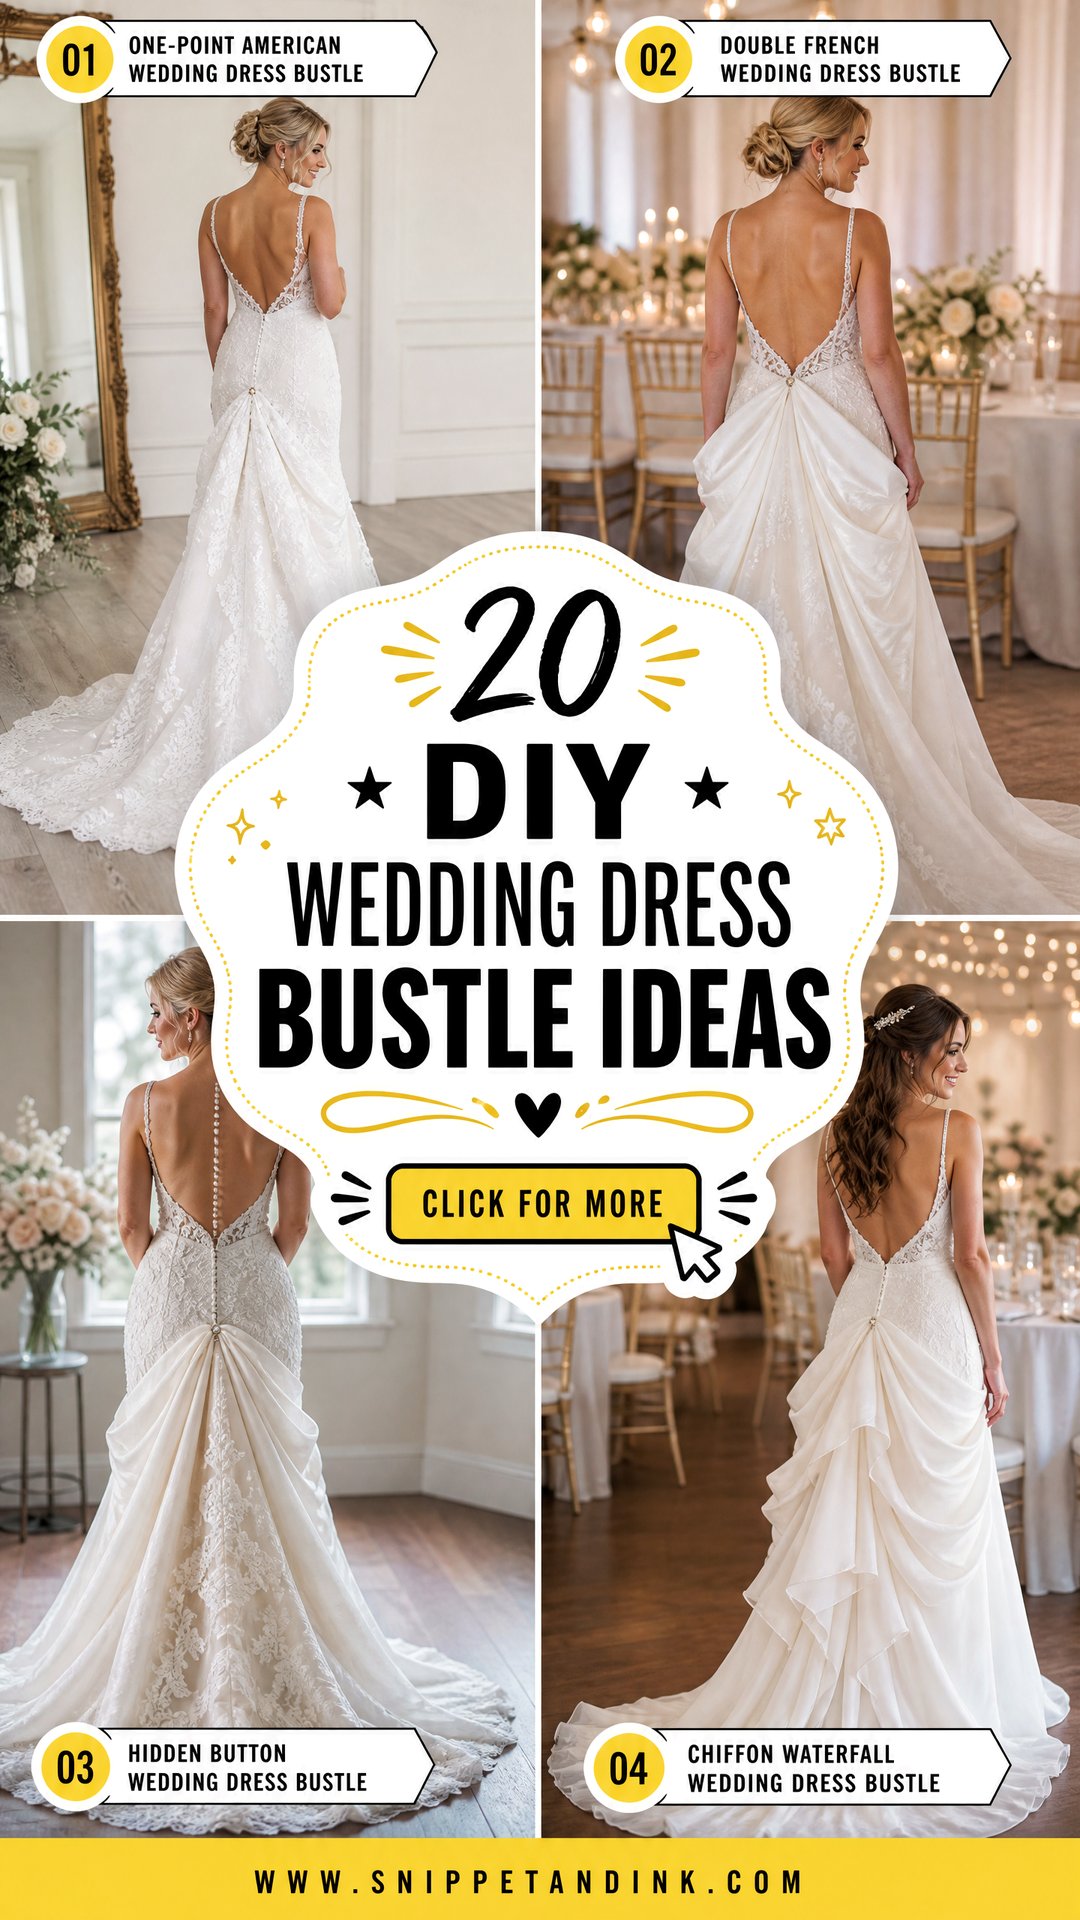
A good bustle gets the train off the dance floor without wrecking the shape of the gown. The twenty options below run from a single over-bustle pickup to ribbon systems tied underneath, decorative buttons, bows and sashes that hide the hardware, and ways to handle tulle and chiffon. Which one suits you depends on four things: train length, skirt fullness, fabric weight, and where the dress has seams strong enough to hold an anchor. I always clip a bustle on the bride, in her actual wedding shoes, before anything gets sewn. Every anchor then goes through a seam allowance or a backing patch, never through lace alone. Heavy beading, several layers or an expensive gown are good reasons to hand the job to an alterations professional.
Reading Your Train Before Picking a Bustle Style
I never choose a bustle from a picture. I choose it from the fabric in my hands and the way the train falls on the floor behind the bride. A few rules of thumb I work from:
- Short, light train in crepe or plain satin: one or three American points is usually enough.
- Long or wide train in satin or mikado: a French or ballroom under-bustle hides the bulk and spreads the weight across more anchors.
- Lace with a scalloped edge: an over-bustle, so the scallops stay on show after the train is lifted.
- Tulle or chiffon in several layers: many small, light pickups, sometimes layer by layer.
- Heavily beaded train: get professional help; beading adds far more weight than a single loop is built to carry.
The clip test, done properly
You need the bride, her shoes, a long mirror, a handful of plastic hair clips or safety pins, and one other person. Have her stand still while the helper lifts the train to each trial point. Then ask her to walk, sit on a chair, stand up and turn quickly, as she would during a dance. If the hem drops, a fold opens or the front of the skirt rises, move the points before you sew anything. I take a photo from behind at each attempt so we can compare.
Timing matters too. Bustles go in at the last fitting, once the hem has been set to the final shoe height, so leave room for that appointment a few weeks before the wedding.
1. One-Point American Wedding Dress Bustle
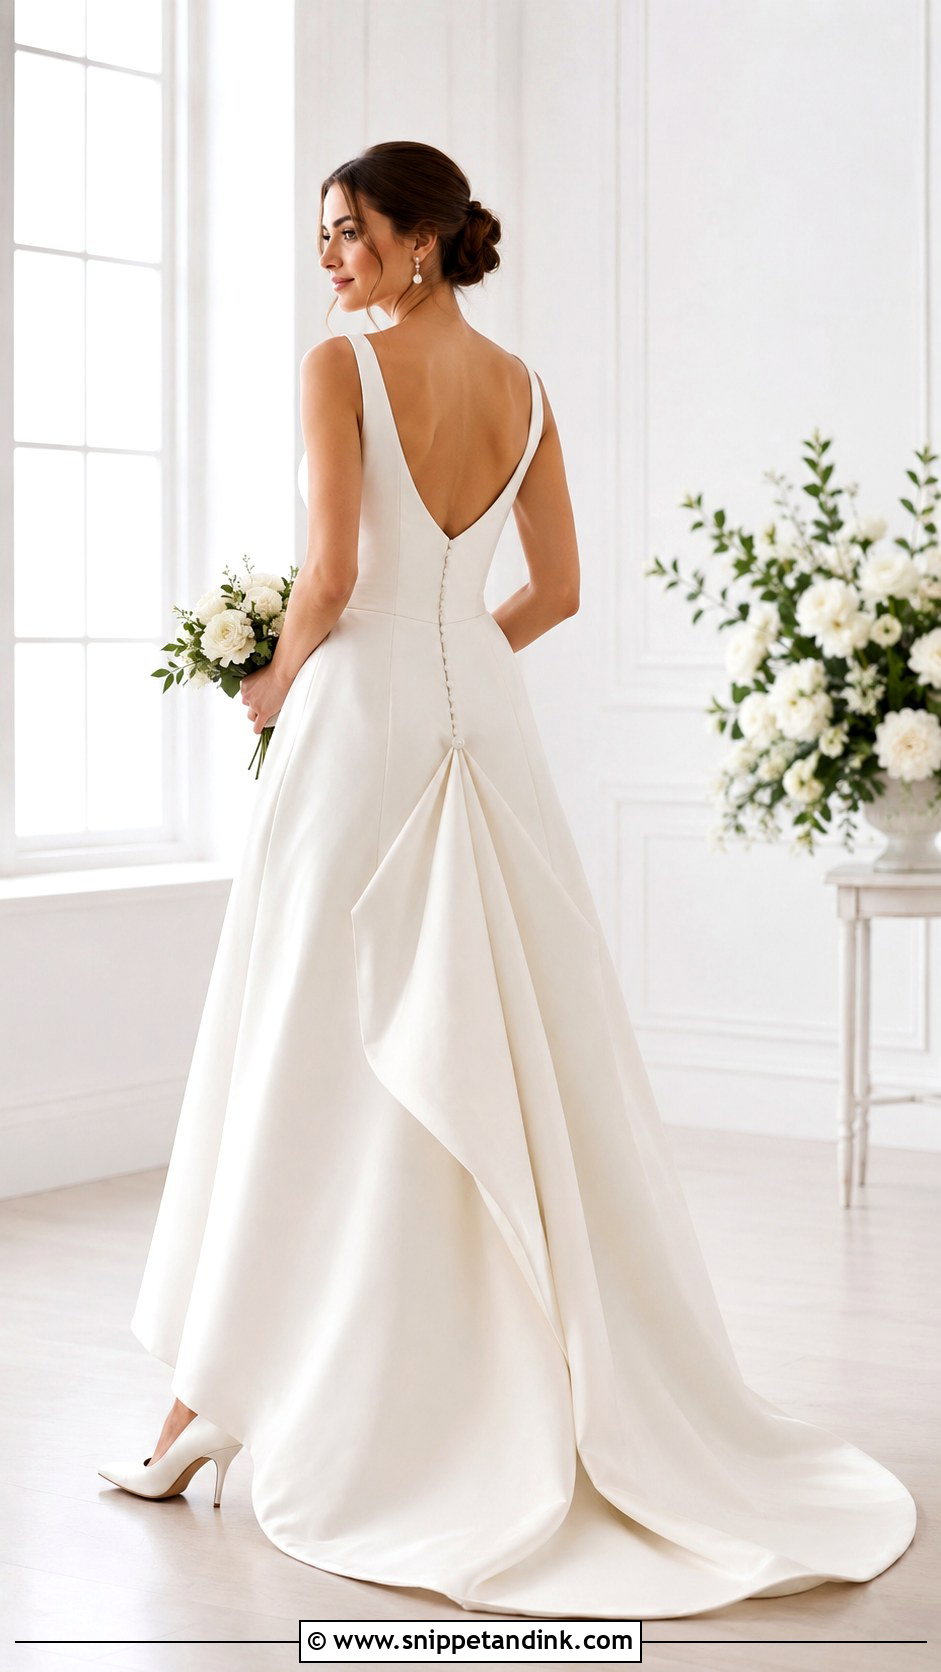
The one-point American bustle is where I start with any light gown that has a short or chapel train. The train lifts over the skirt and hooks near the centre-back waist or the top of the zip. With the bride standing in her shoes, raise the train until the hem hangs evenly just off the floor, then mark the pickup and its anchor with removable tailor’s chalk. A covered button or sturdy hook goes into a reinforced seam, with a narrow loop underneath the train. You get one soft fold down the back. Walk, sit and turn in it; if the side edges still sweep the floor, one point isn’t enough and you need three.
2. Three-Point American Wedding Dress Bustle
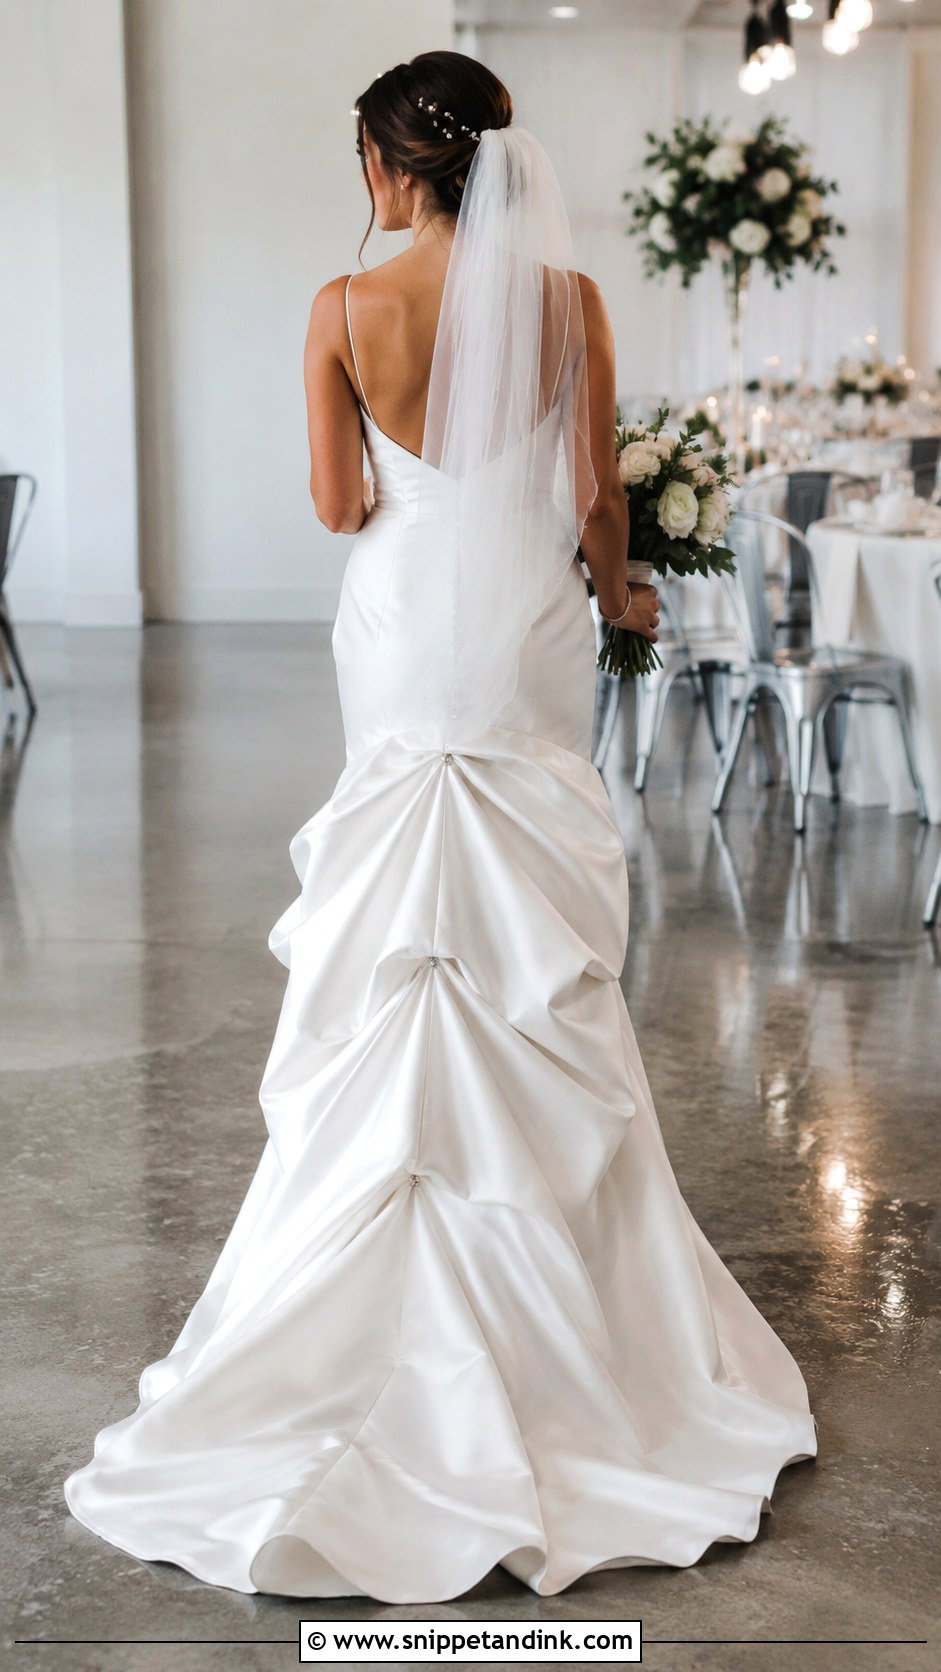
Three points fix exactly that problem: the corners of the train that drag when only the centre is lifted. One pickup sits at the centre and two go evenly either side, usually around the waist or lower back. I pin it first and then walk all the way round the bride, because a bustle that looks level from directly behind can dip on one side at a three-quarter angle. The folds should look deliberate without hitching the front of the skirt. Clear loops vanish against lace; ivory thread loops suit satin and crepe. Keep all three at one height unless the gown is cut asymmetrically.
3. Five-Point American Wedding Dress Bustle
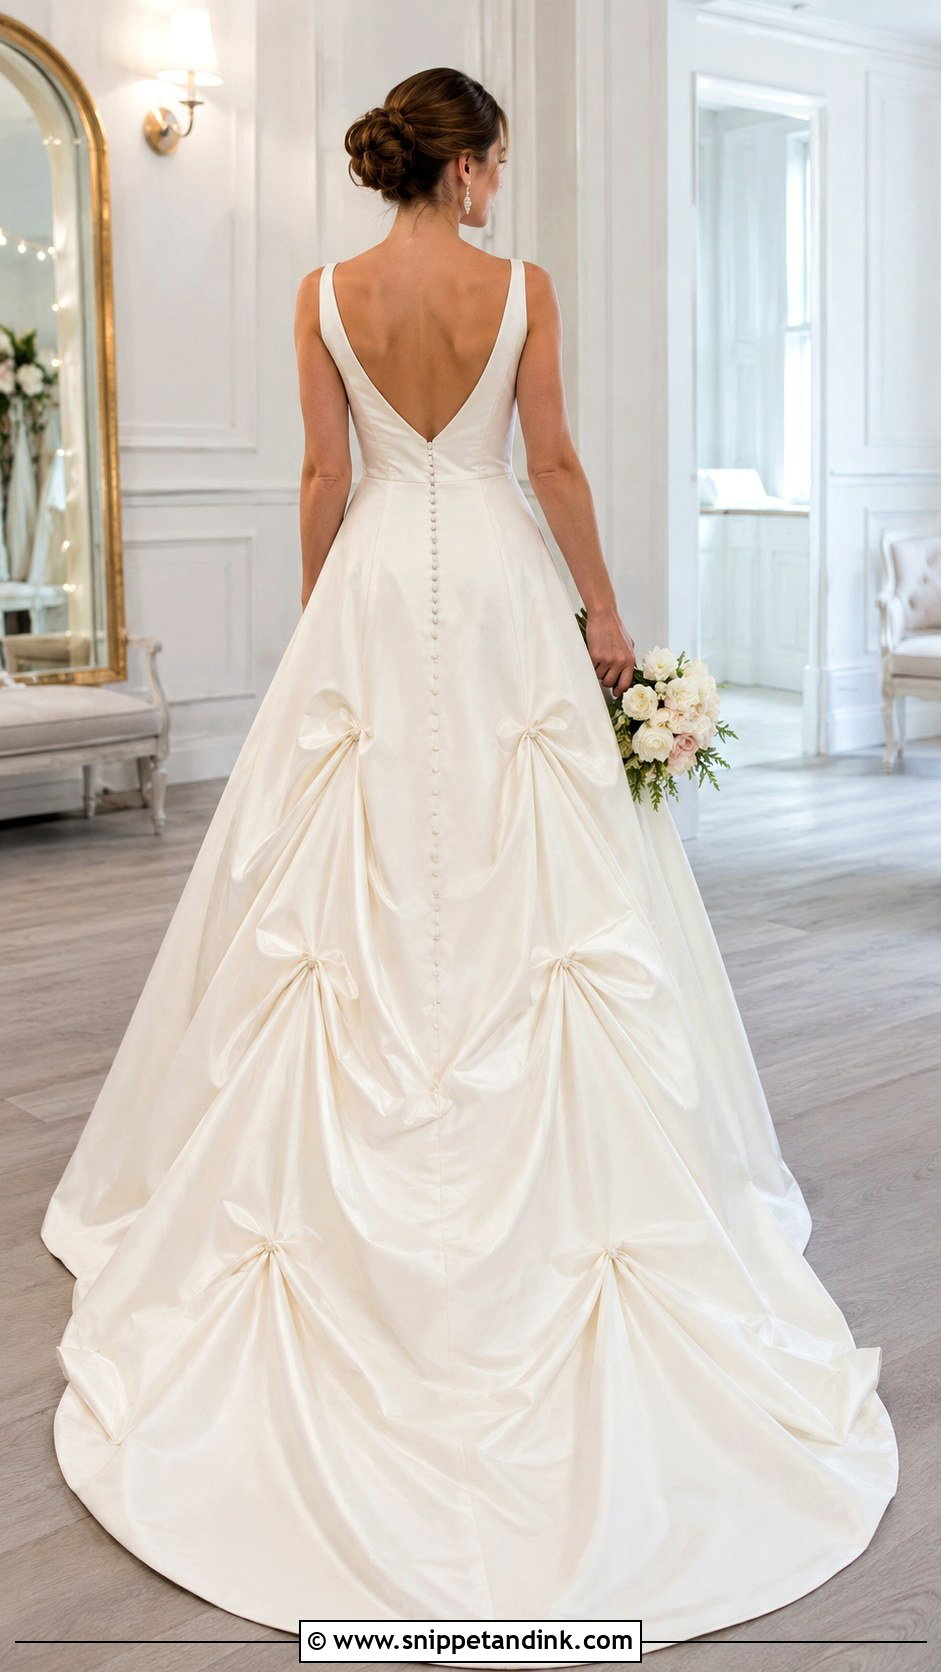
Picture a full A-line with no support at its outer edges: the middle lifts, the sides sag, and the bride trips on her own hem by the second song. Five points spread the load. Put one at the centre, two near the back princess seams and two toward the side-back panels. Clip all five before sewing so you can nudge the spacing until the hem is level. Every anchor needs a reinforced seam allowance, an inner support patch or a firm waistband behind it. Matching loops and covered buttons stay discreet. If the skirt has several layers, I’d handle them separately; lifting them together tends to twist the lining.
4. French Ribbon Wedding Dress Bustle
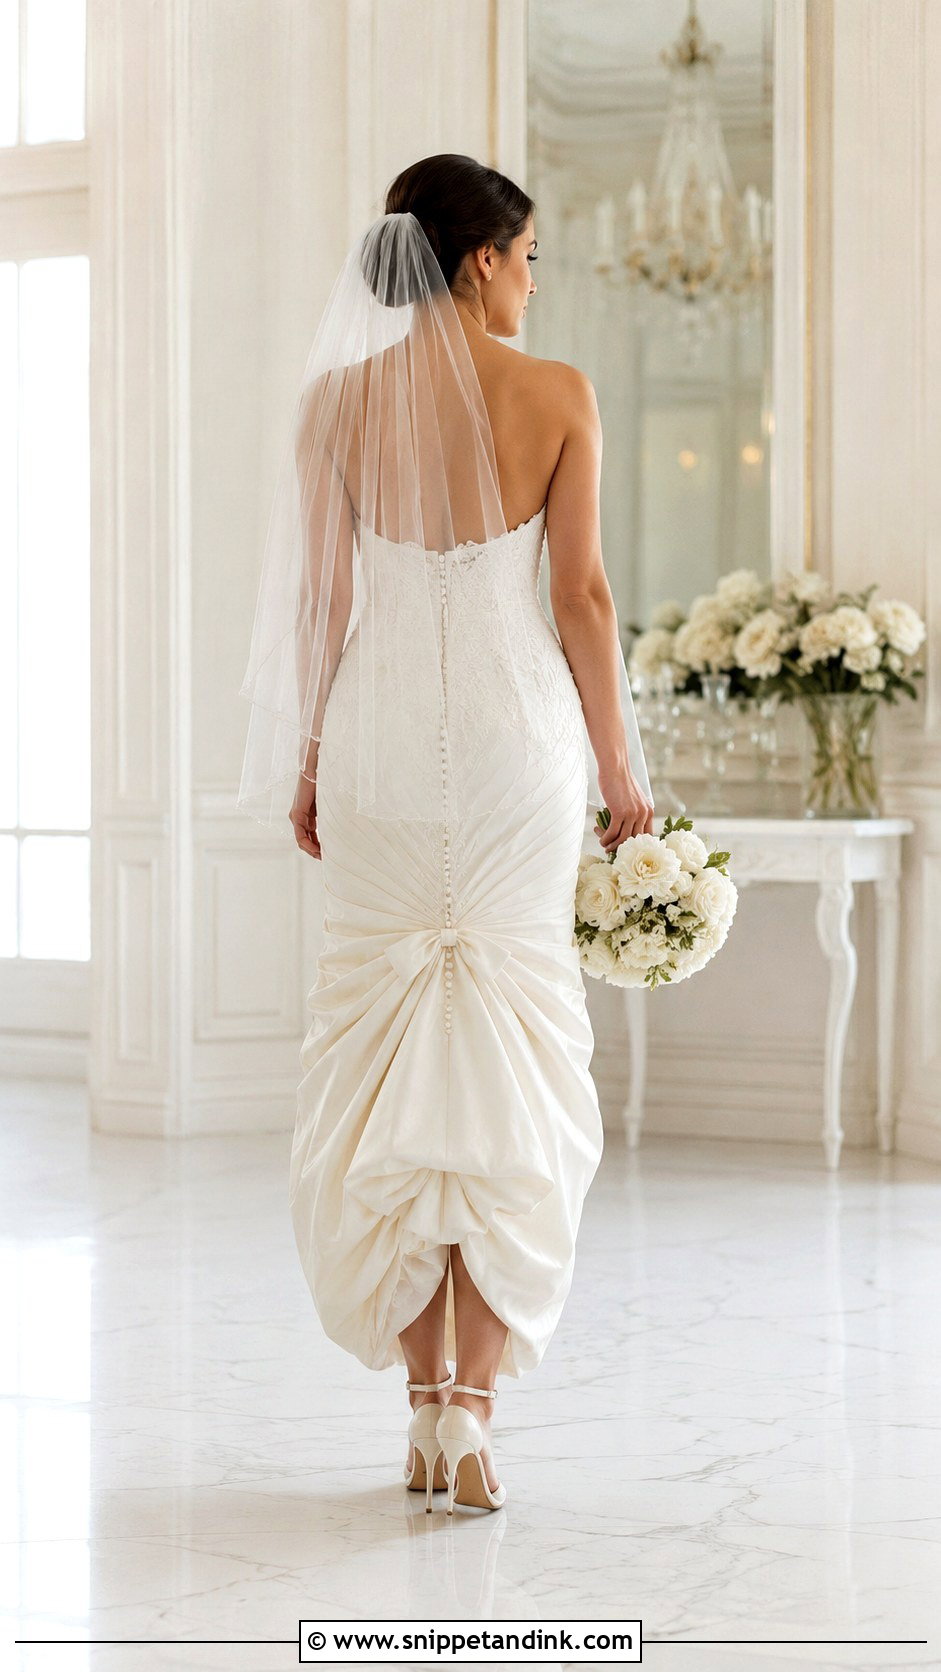
The French bustle, also called an under-bustle, tucks the train up underneath instead of lifting it over the top. Mark a pickup on the train lining and a matching anchor inside the gown, then sew narrow grosgrain ribbons to reinforced spots so no stitch shows outside. Tie the pairs in a firm bow under the skirt. What you want is a controlled fold, not a bulky roll, and that mostly comes down to placing the pickups at the right height. A small train may need one pair; wider ones need several. Grosgrain grips a knot far better than satin ribbon, which tends to slip loose during dancing. Trim the ends so nothing hangs below the hem.
5. Double French Wedding Dress Bustle
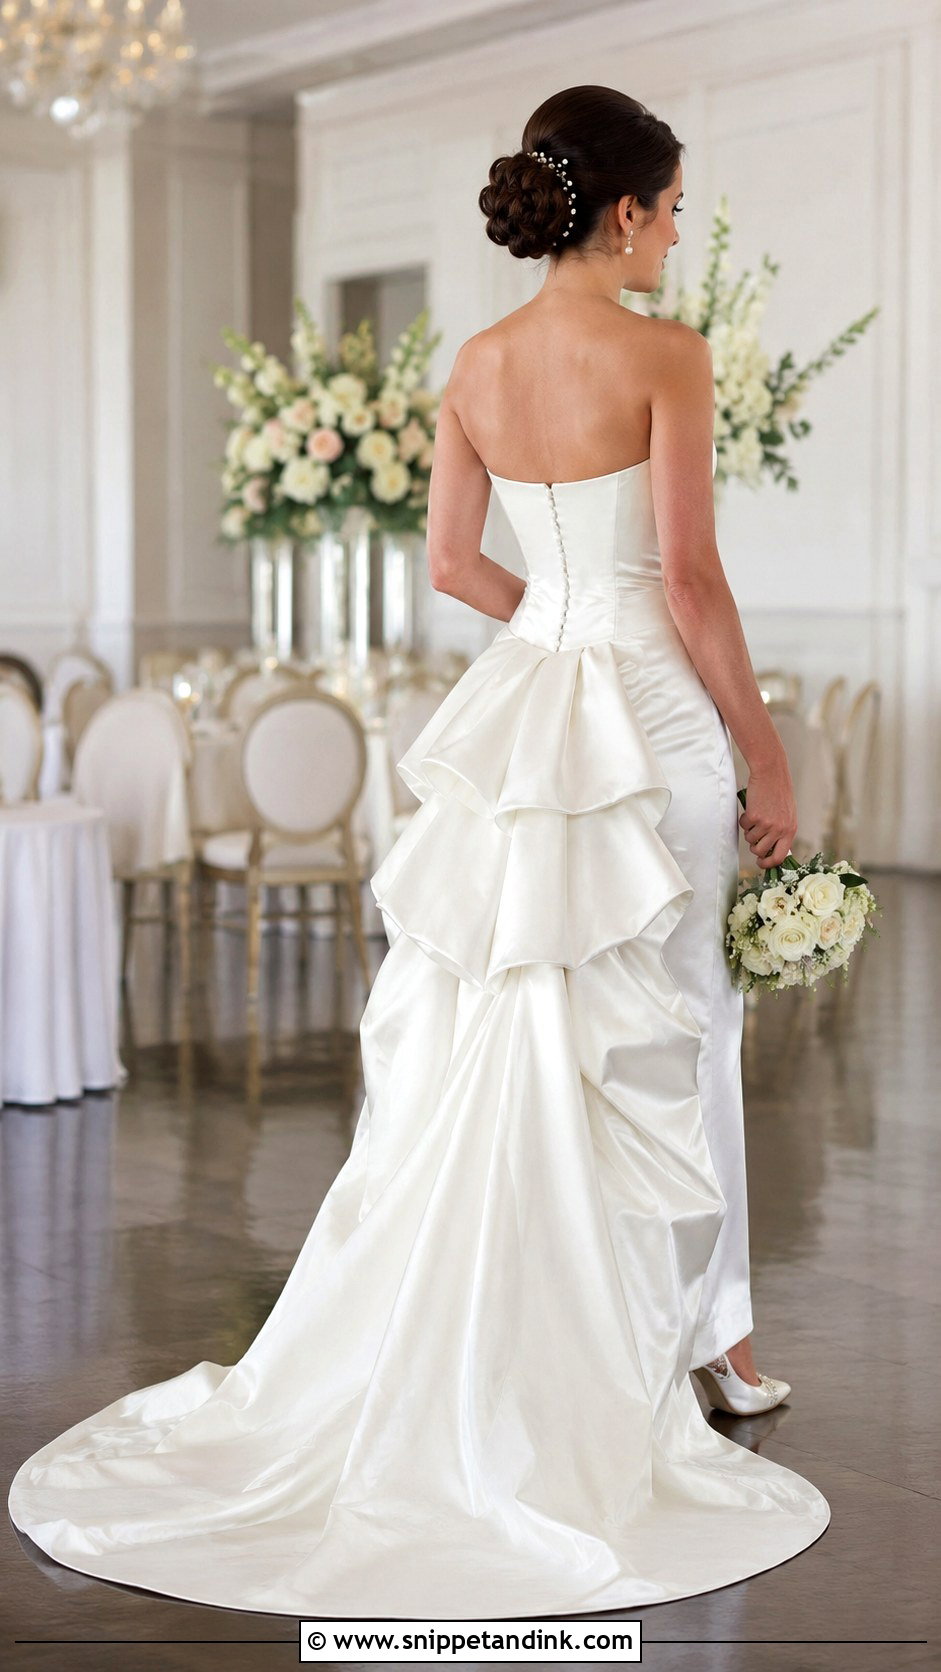
A double French bustle builds two rows of folds under a long or fairly full train. The lower row lifts the end, the upper row shapes what’s left. I clip the bottom row first and get that hem right before even thinking about the top row; doing both at once is how you end up with a lopsided back. Sew the ribbon pairs into reinforced seams and tie them firmly but not so tight they crush the fabric. Use a different ribbon colour per row, say pale blue below and ivory above, so whoever ties it works in the right order. The result is compact and carries more weight than a single under-bustle.
6. Ballroom Wedding Dress Bustle
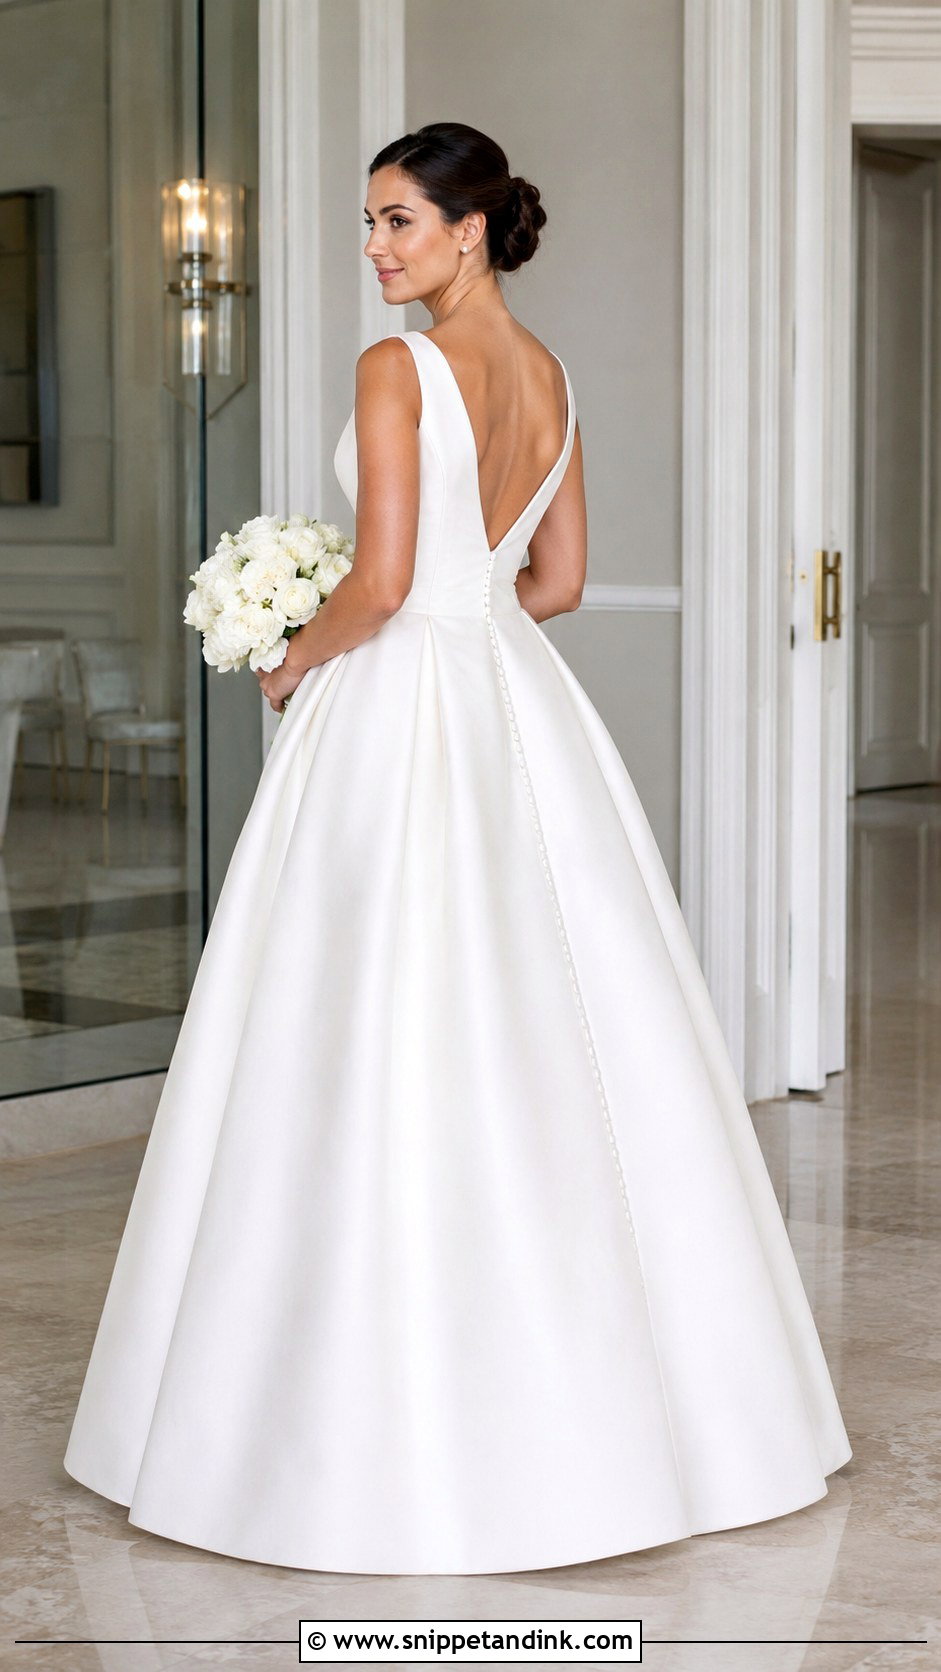
Want the reception dress to look as if it never had a train? The ballroom bustle folds the train under and fastens it at several interior points until the skirt reads as a plain floor-length gown. Mark it on the bride or on a dress form, never flat on a table. Turn the train inward until its edge lines up with the hem all the way around. Loops, buttons or ribbons go along reinforced inner seams, each carrying a manageable share of fabric. It takes the most measuring of any bustle here, because a hem that is uneven by even a couple of centimetres shows. If a clean, uninterrupted back is your priority, it is worth that effort.
7. Austrian Drawstring Wedding Dress Bustle
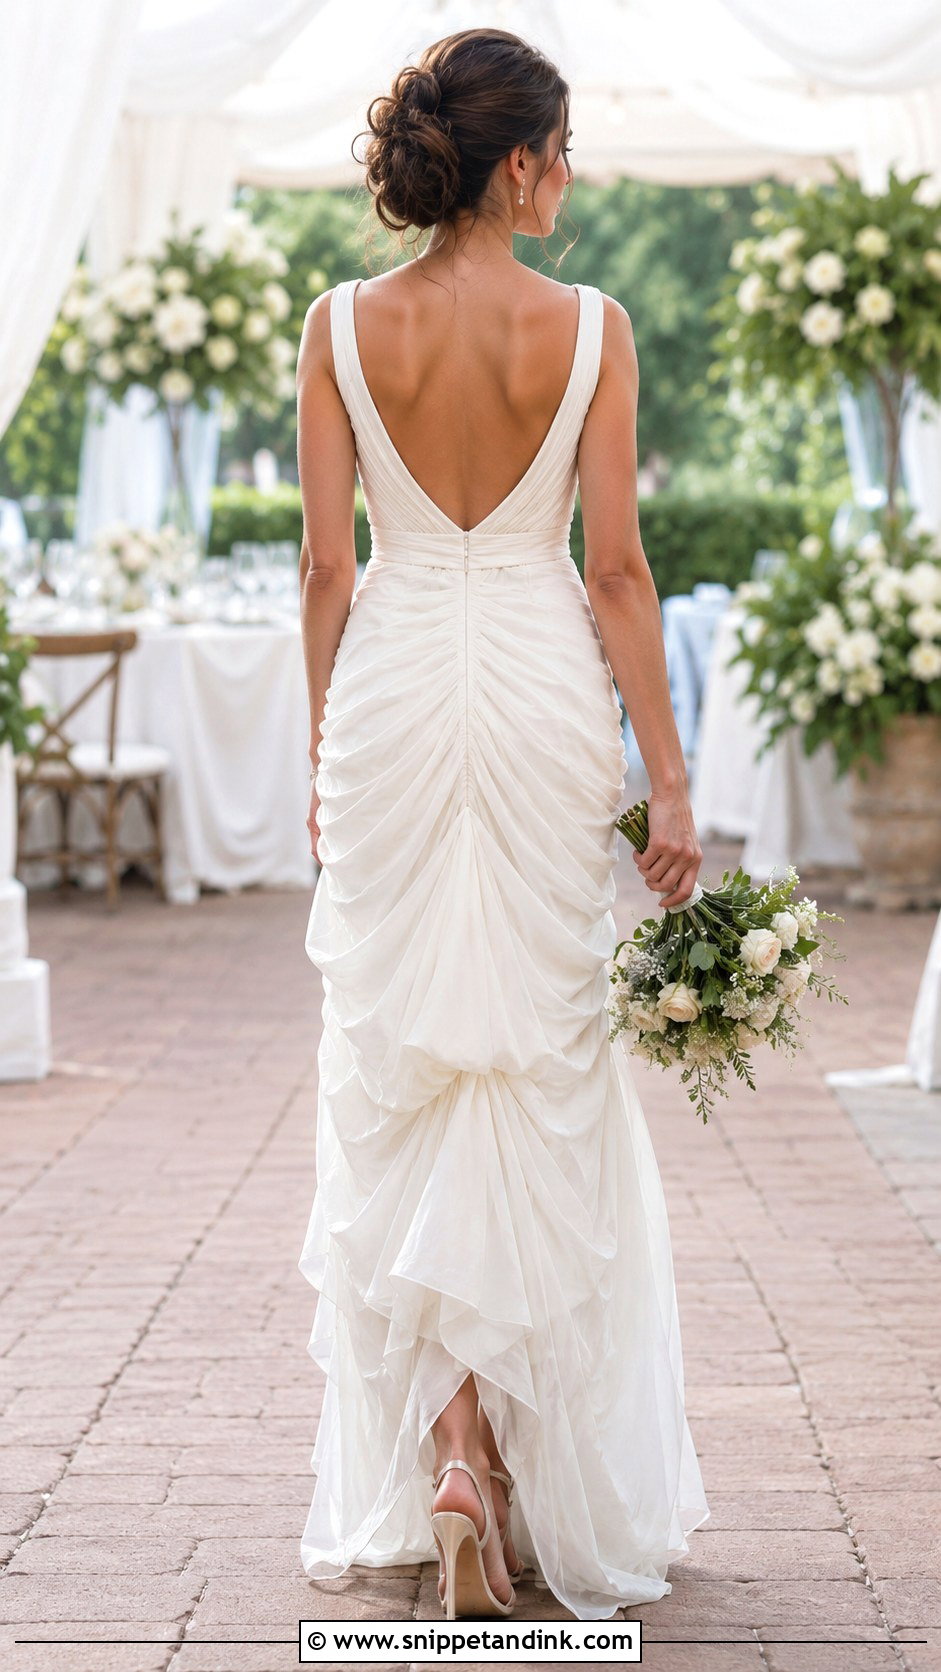
The Austrian bustle gathers the train into vertical ruching, a little like a theatre curtain. A narrow casing is sewn onto the lining with a strong ribbon or cord threaded through; pull the cord and the train rises into stacked folds. Chiffon and organza gather nicely this way. Heavy satin does not, and I’d steer a satin gown toward an American or French bustle instead. Baste the casing in first to test where it sits, and make sure it is on the lining or a supported layer so the outer fabric never takes the pull. Tie off with a cord lock inside, away from her skin. Wider trains lift more evenly with two or three channels than with one.
8. Bow Wedding Dress Bustle
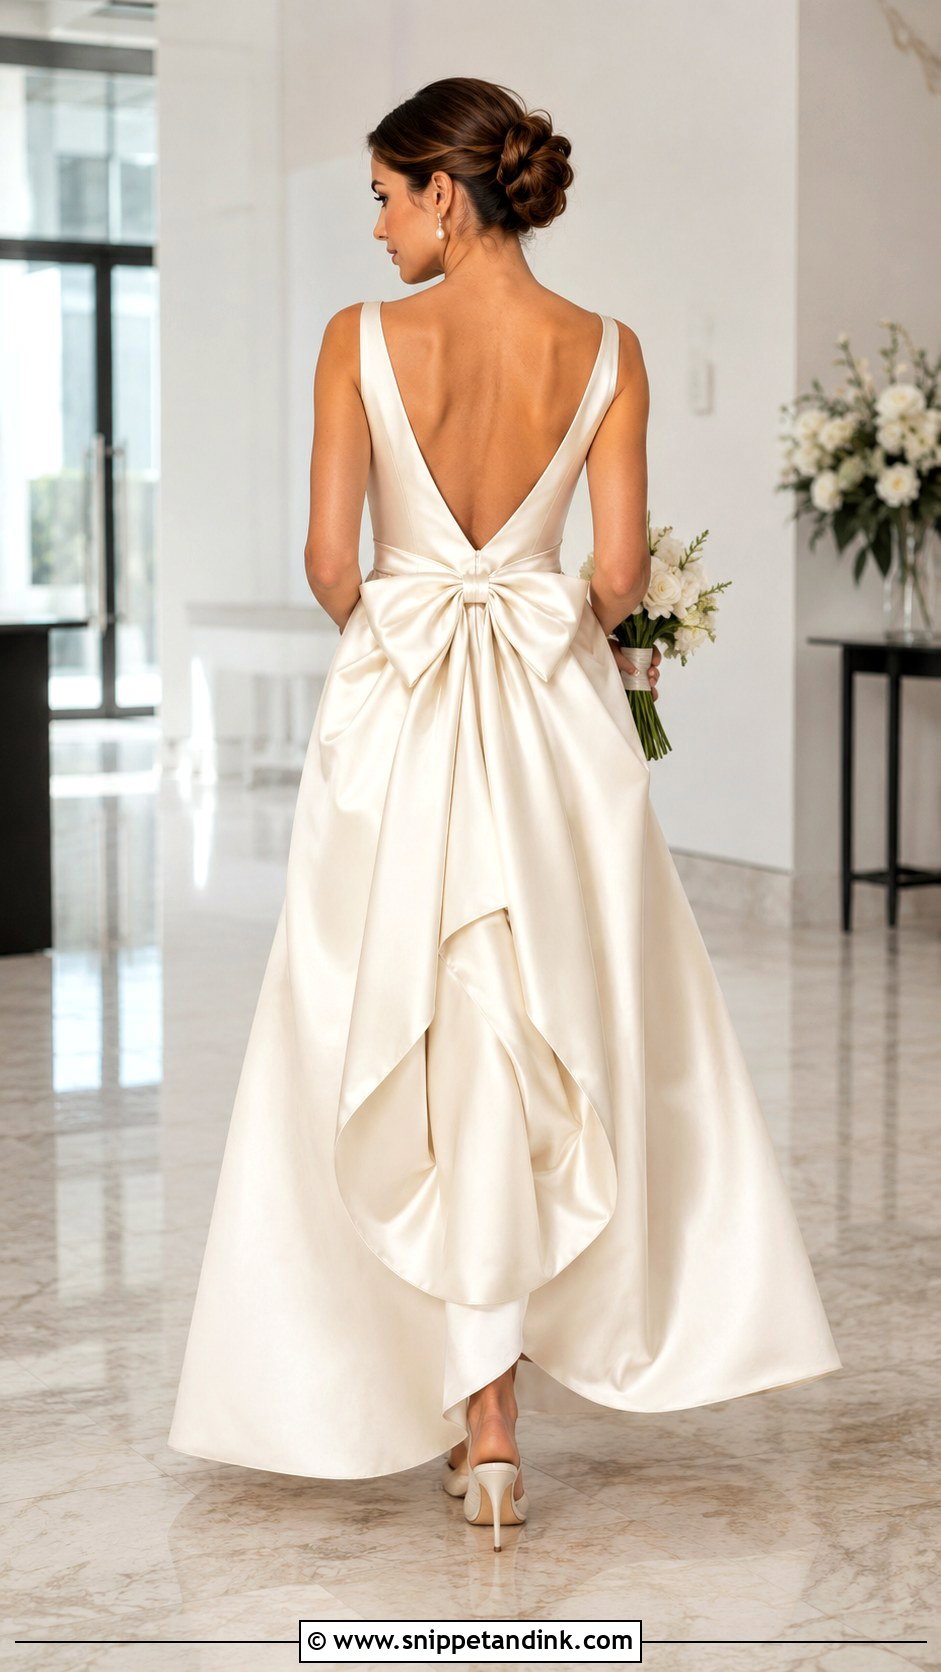
Here the fastening becomes the decoration. The train lifts over the skirt and hooks in under an existing bow, sash or detachable fabric accent. Build a sound one-point or three-point over-bustle first, with reinforced loops and buttons, and only then position the bow over the hardware. The bow hides the hooks; it should never carry the train itself, because bows are usually stitched only at their centre and will pull out of shape. If it detaches, hidden snaps or hooks let it come off for cleaning. Match the fabric to the gown or use a satin one shade off. A-line and ball gowns suit it best, since the bow gives the gathered fabric a natural centre.
9. Royal Victorian Wedding Dress Bustle
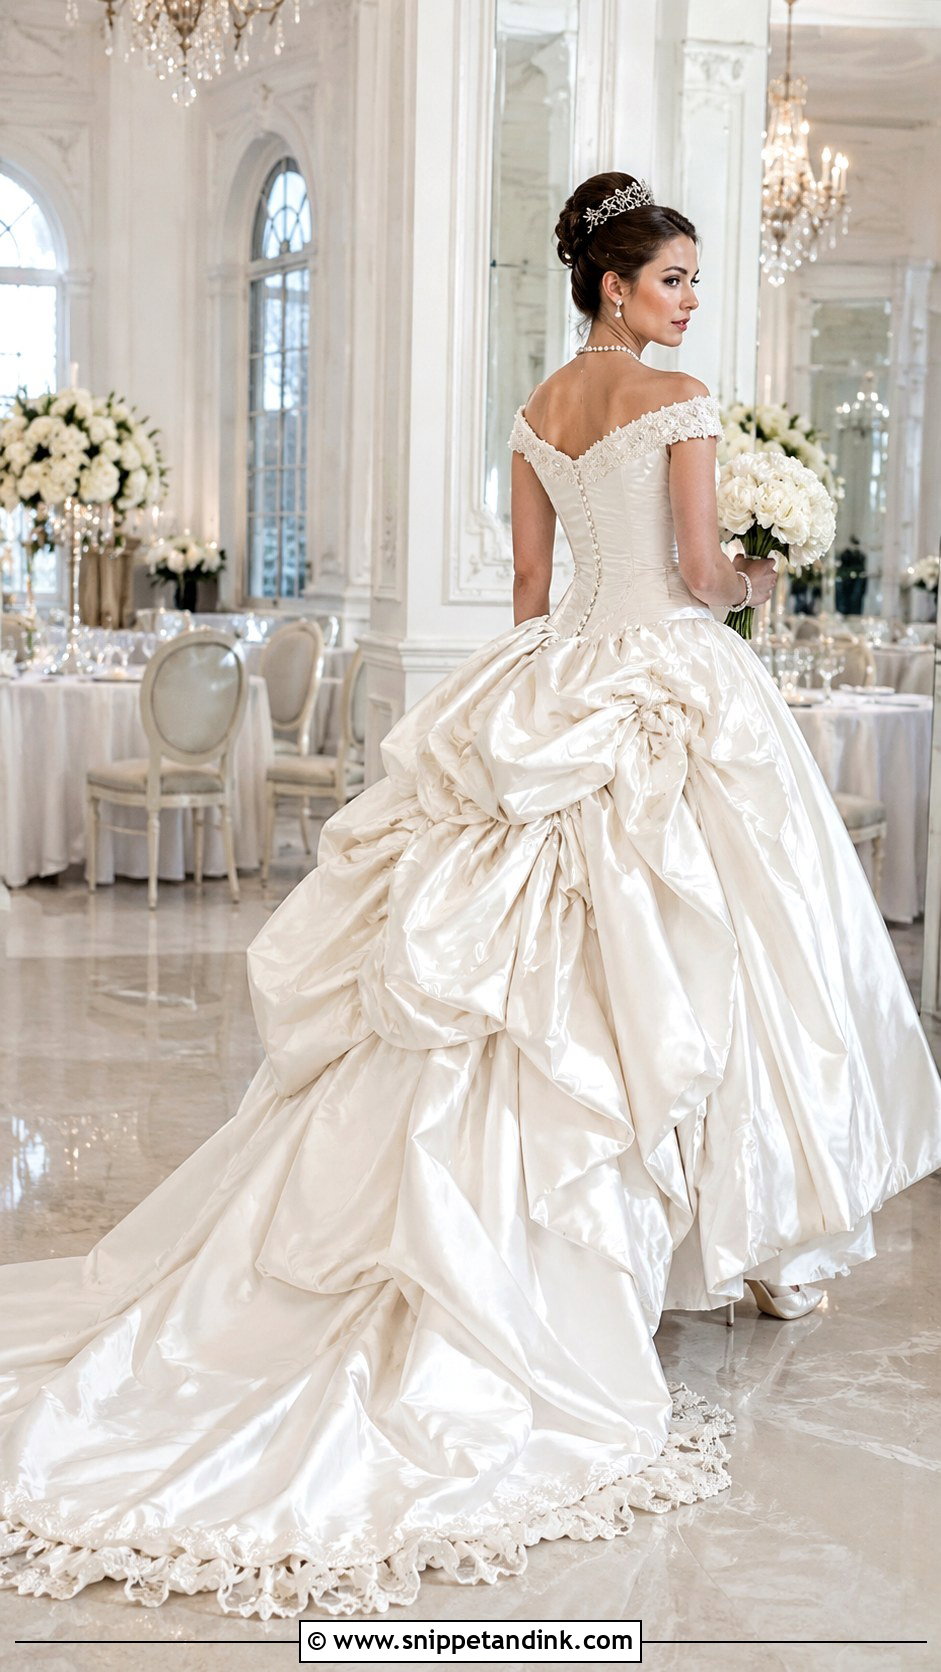
A royal or Victorian wedding dress bustle celebrates the fullness rather than hiding it, lifting the train into sculpted folds across the back. Start with one central pickup, then add points outward and slightly lower. When I pin one of these, I step back a couple of metres before every adjustment, because the overall shape matters far more than any single fold. Watch for lining showing at the edges and for side seams being dragged backward. Satin, brocade and layered skirts all need firm anchors, and numbered ribbons help when there are many connections. Save it for gowns that already have real volume, and test it seated.
10. Wrist Loop Wedding Dress Bustle
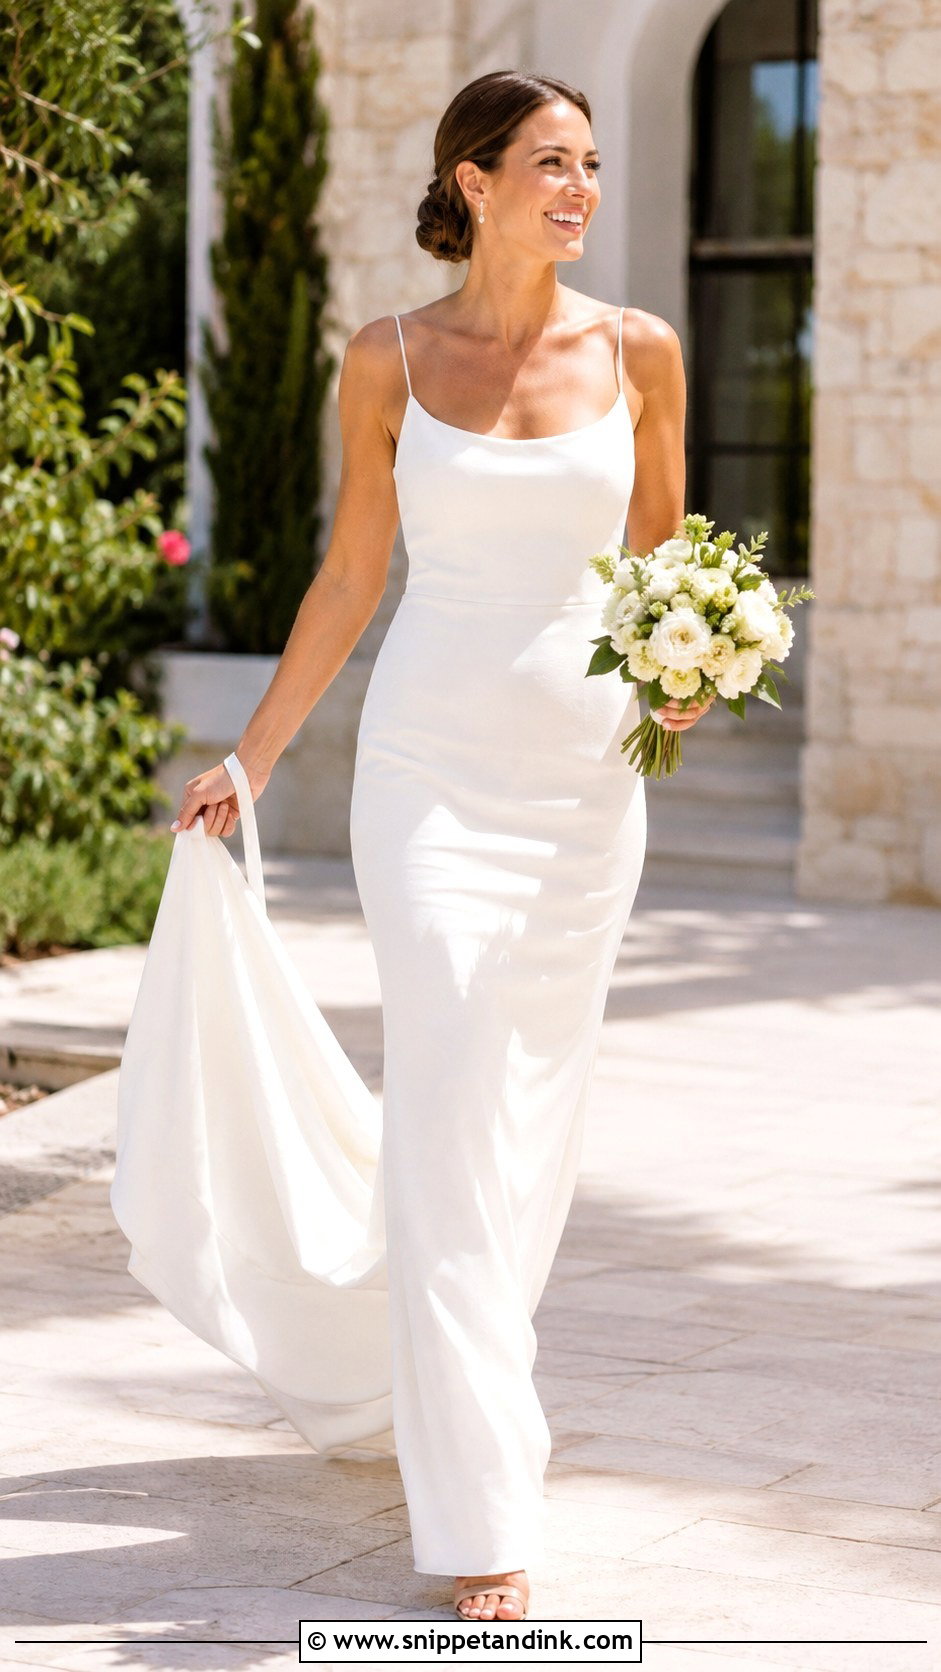
Sometimes there is no bustle at all, only a ribbon loop the bride slips over her wrist and carries the train with. Sew the loop to a reinforced point on the train’s underside, sized to slide over the hand easily but short enough to hold the hem clear. Work out its position with her standing in her wedding shoes. I only recommend it for short, light trains, since holding fabric all night ties up one hand and gets tiring fast. A small inner button lets the loop tuck away when not in use. Never attach it straight to unsupported lace, tulle or appliqué.
11. Hidden Button Wedding Dress Bustle
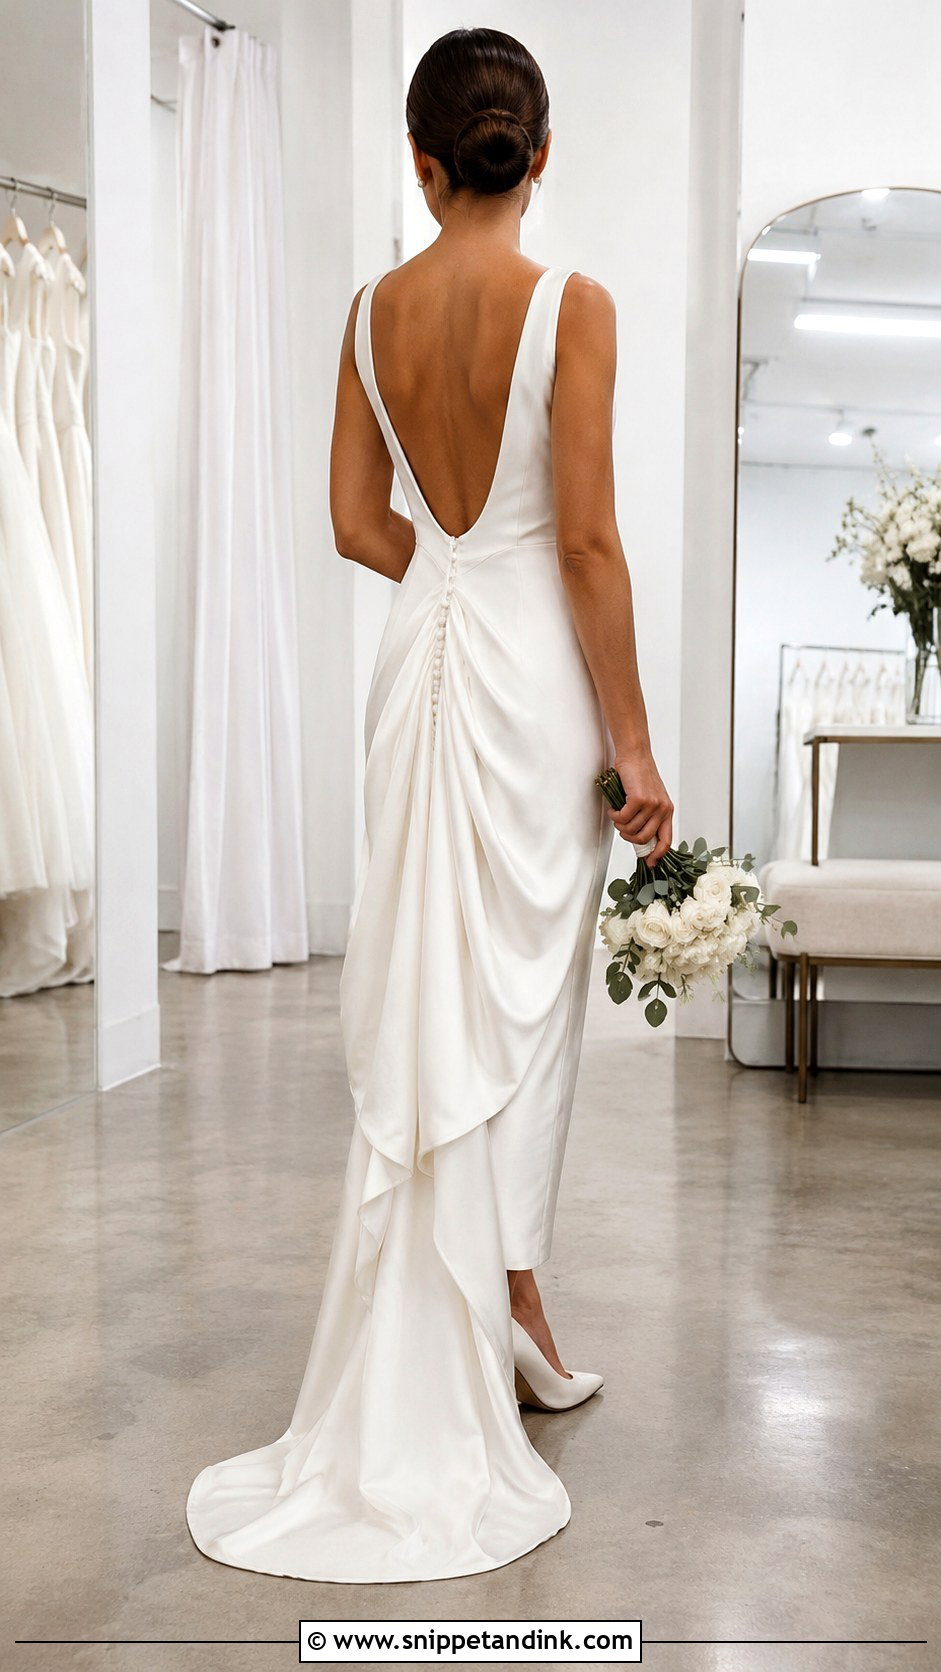
Sometimes the most polished bustle is the one guests barely notice. A hidden button bustle places small fabric-covered buttons along existing seams, lace motifs or other detail, with thread or ribbon loops sewn under the train where they stay invisible until fastened. Strong polyester thread and a backing patch stop a button from tearing through. Loop length is the fiddly part: too loose and it pops off when she sits, too tight and the fabric puckers around the button. I’d make one test loop and adjust it before sewing the rest. It adapts to an American or a ballroom layout.
12. Color-Coded Ribbon Wedding Dress Bustle
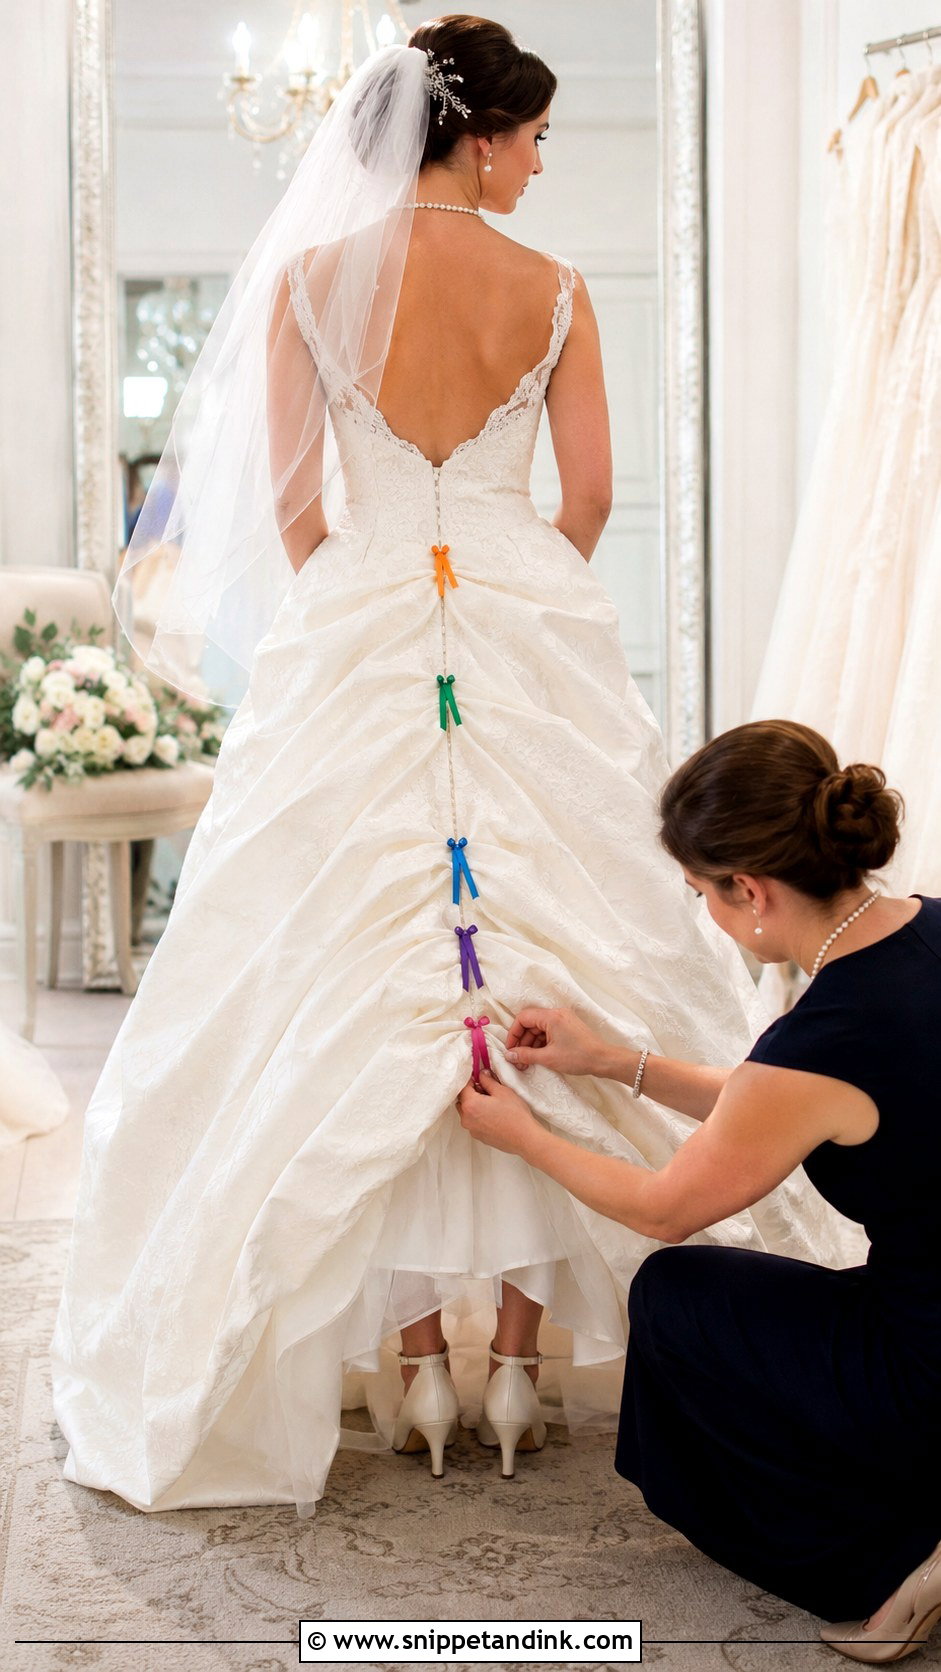
A bustle that seemed simple at the final fitting can become a puzzle at the reception, when a bridesmaid is crouched under the skirt facing six identical ivory ribbons. Colour coding solves it: blue ties to blue, blush to blush, ivory to ivory. Pick tightly woven ribbon that won’t stretch under weight, and heat-seal or finish the cut ends so they don’t fray. Keep them short enough that nothing drops below the hem once tied. Draw a quick diagram and practise the sequence at least twice before the day. French, ballroom and royal bustles with several interior points benefit most.
13. Numbered Loop Wedding Dress Bustle
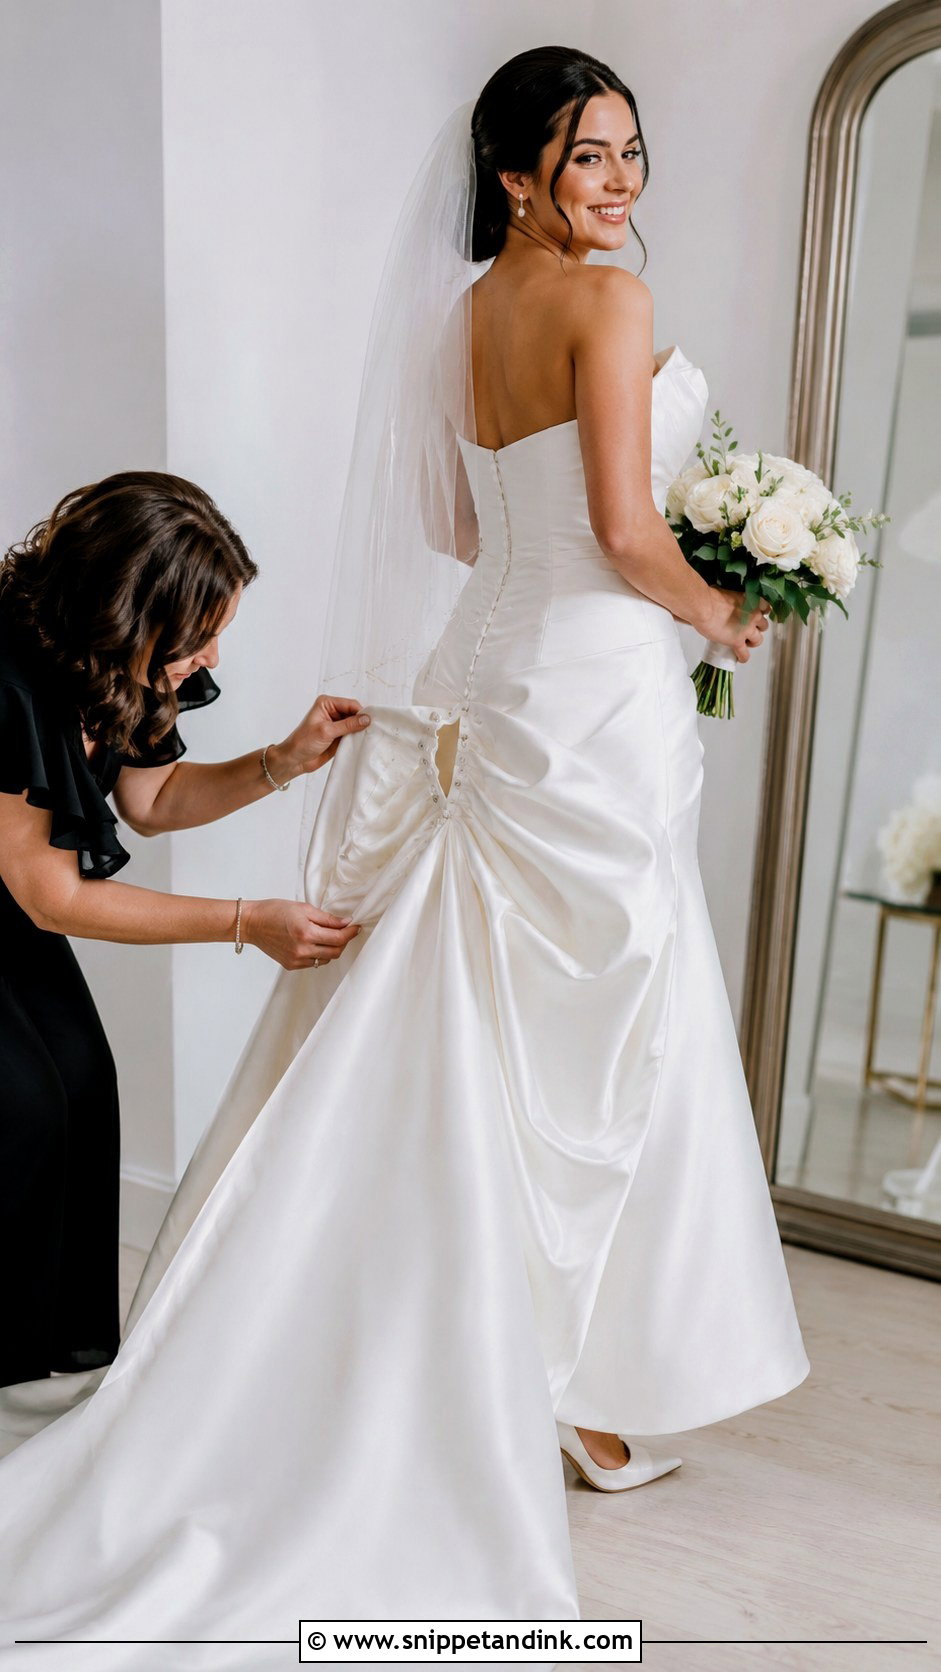
Numbers do the same job as colours, and some helpers find them even easier. Each train pickup is paired with its anchor: one to one, two to two. Sew tiny labels next to the inner loops and buttons, using fabric-safe ink or a few embroidered stitches, always on the inside where they can’t show through. It works for American, French and ballroom layouts alike. Take a photo of the finished bustle from behind and a short video of someone fastening it, and save both to the helper’s phone. Numbering won’t rescue a badly built bustle, but it makes a good one much quicker to fasten.
14. Lace Appliqué Wedding Dress Bustle
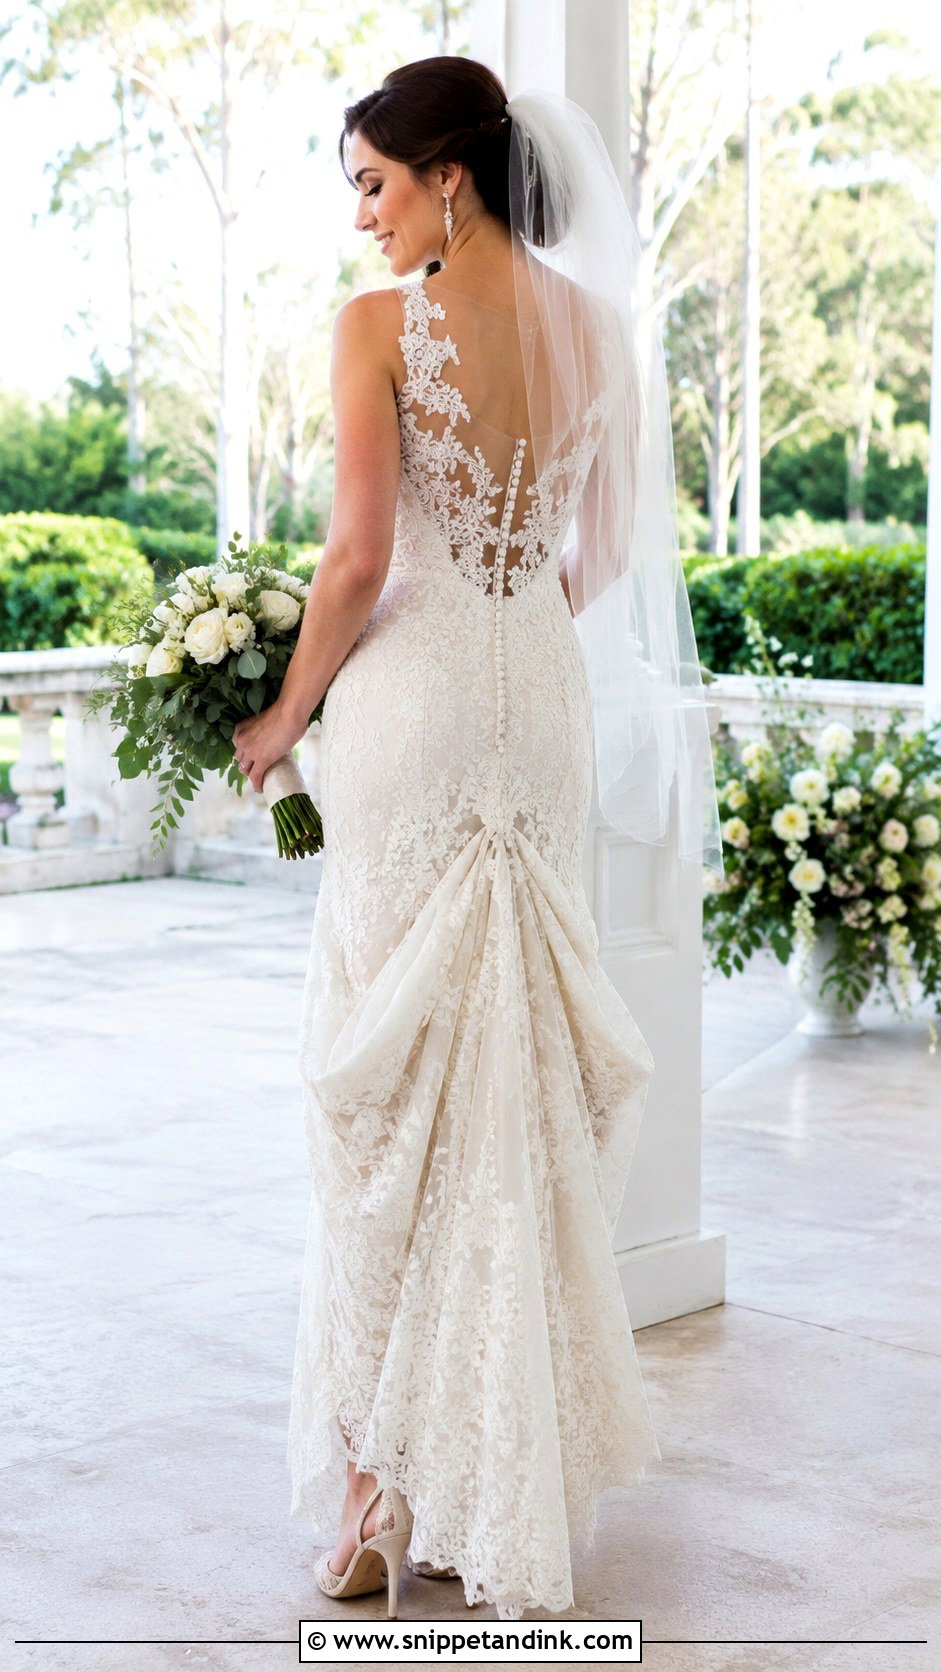
Heavy lace is the best camouflage an over-bustle can have. Find a strong seam junction or an appliqué edge near where the pickup should go, sew a reinforced button underneath a motif, and put the matching loop on a supported part of the train’s underside. Then clip it and look closely at how the flowers, scallops or vines overlap when the train is raised; the aim is for the lace to line up so the join disappears into the pattern. Loose appliqué alone will tear under the weight of a train, so the anchor always goes through stable base fabric or an inner patch.
15. Pearl Button Wedding Dress Bustle
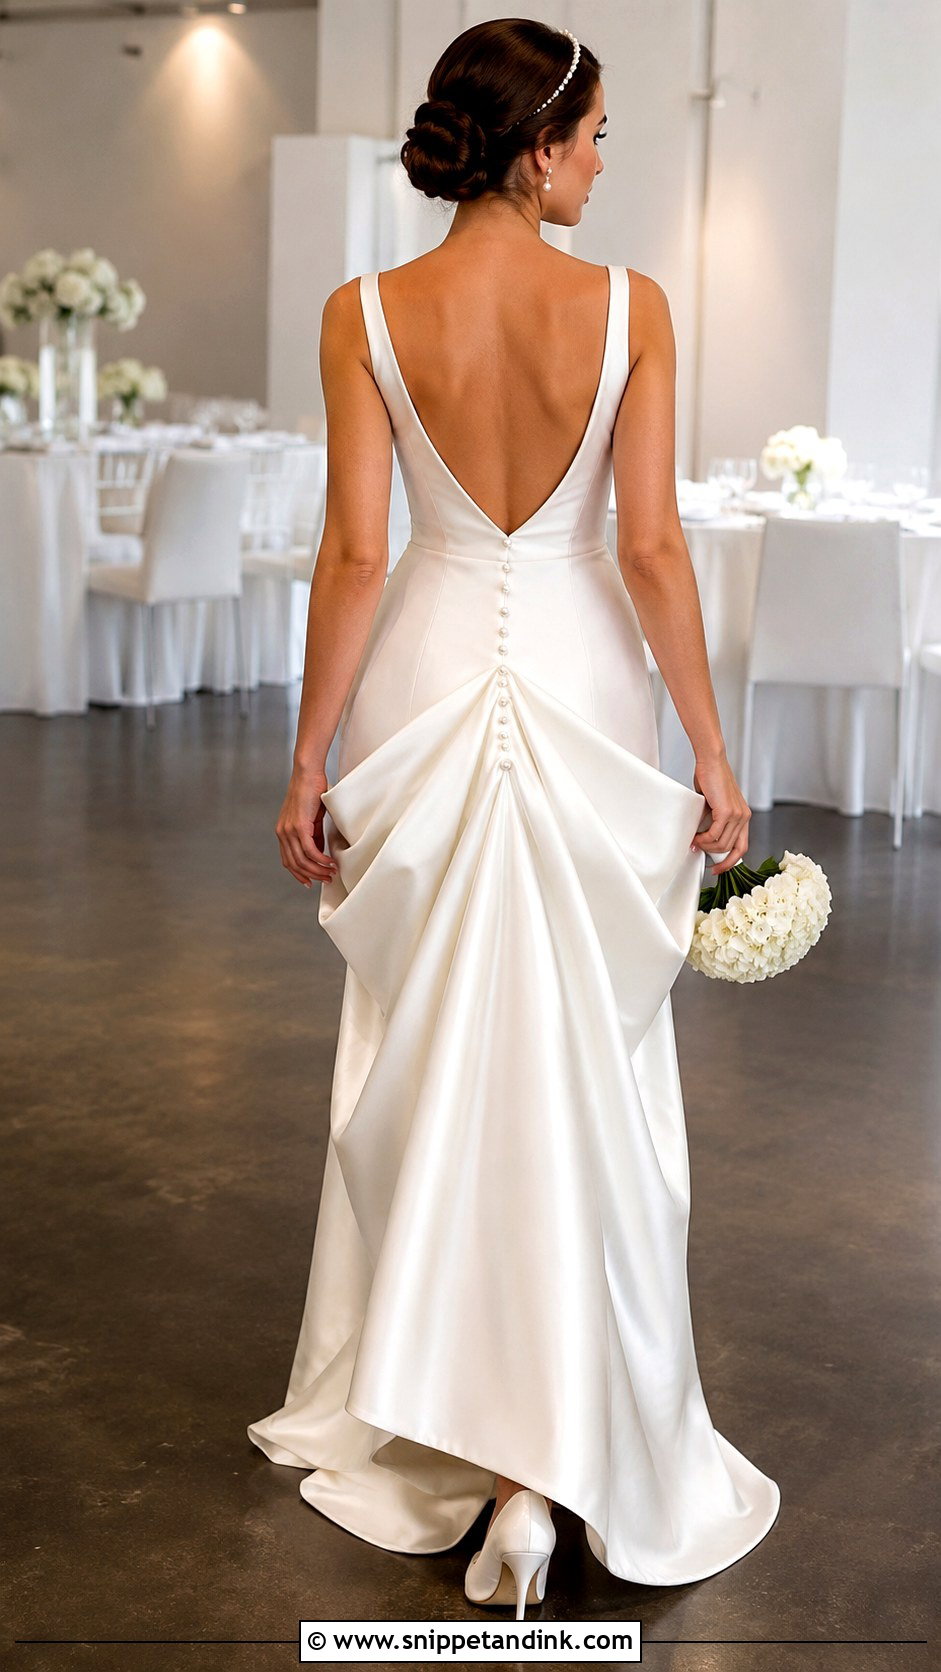
A small pearl button can make visible hardware look like it was always part of the design. Pick a smooth shank button that matches beading or pearls already on the gown and place it on a centre-back seam, the waistband or another reinforced point, sewn through an inner backing patch. Decorative pearl buttons are often glued or moulded rather than solid, so I test the connection over and over before trusting one. On a heavier train, use several, or hide a proper structural hook beneath the pearl and let it do the real work. It looks most natural on a gown that already has pearls elsewhere.
16. Corset Lacing Wedding Dress Bustle
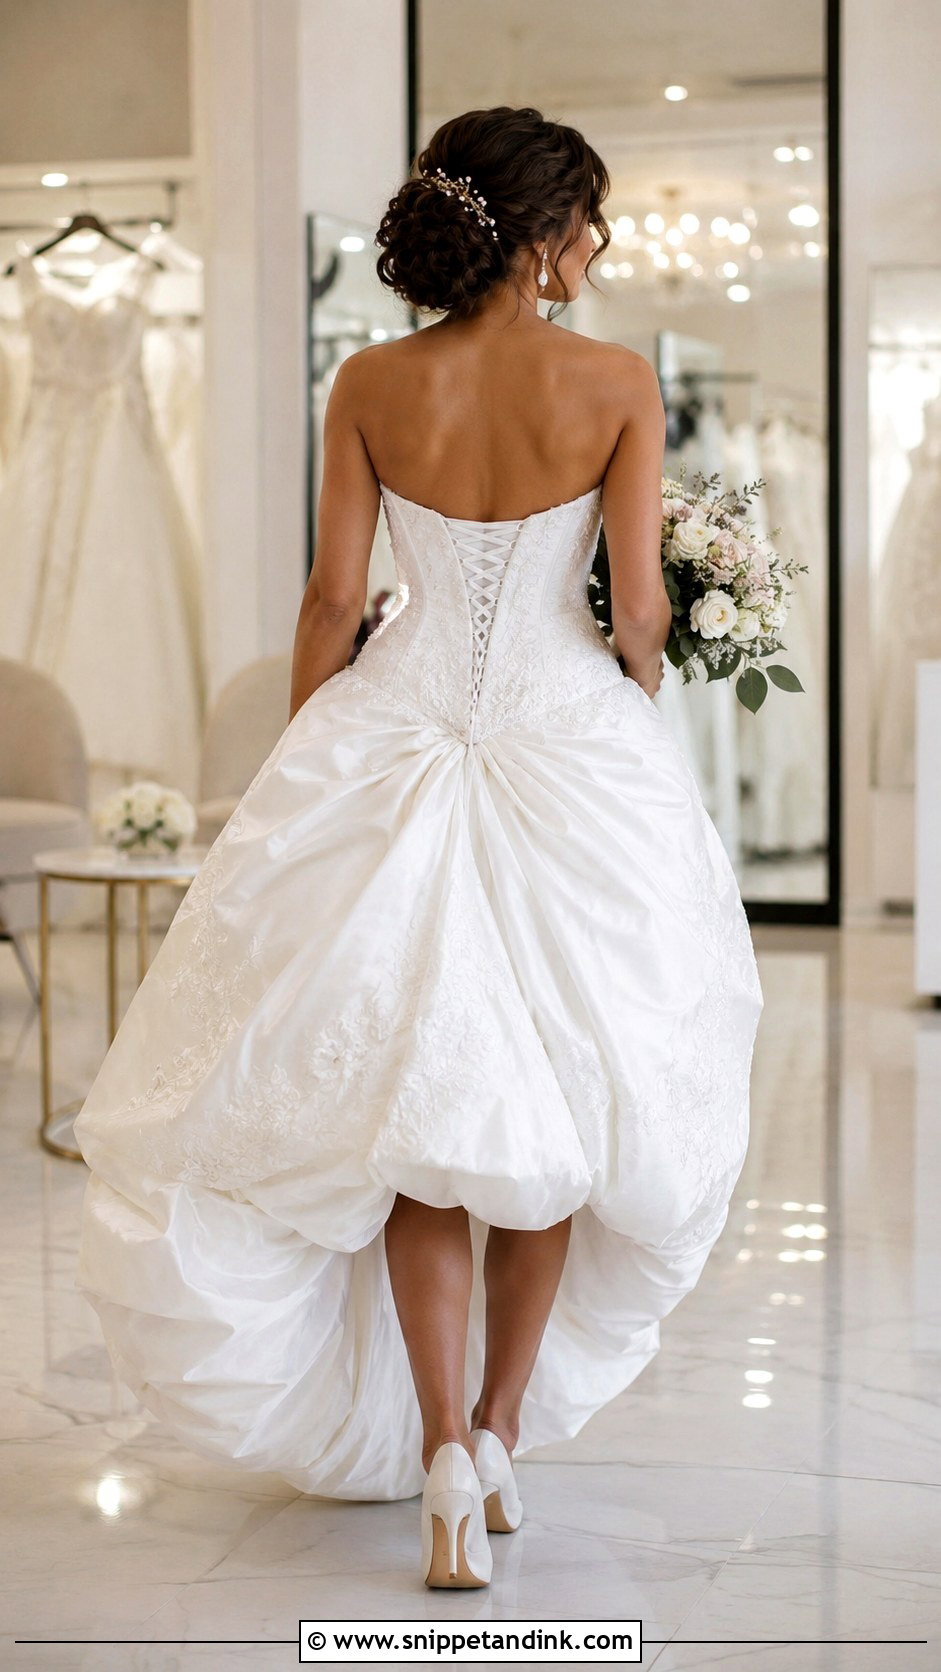
A corset back gives a natural target for the train folds to rise toward, but the lacing itself is not hardware. Unless the gown was built for it, the laces should never carry the train; they’ll loosen and the bodice will sag. Instead, put separate buttons, hooks or ribbon anchors under the modesty panel or at the waist seam and create an American-style lift from there. Clip it and check that it doesn’t drag the corset downward or alter the fit. Keep every attachment clear of the lacing path so the dress can still be tightened during the evening.
17. Detachable Sash Wedding Dress Bustle
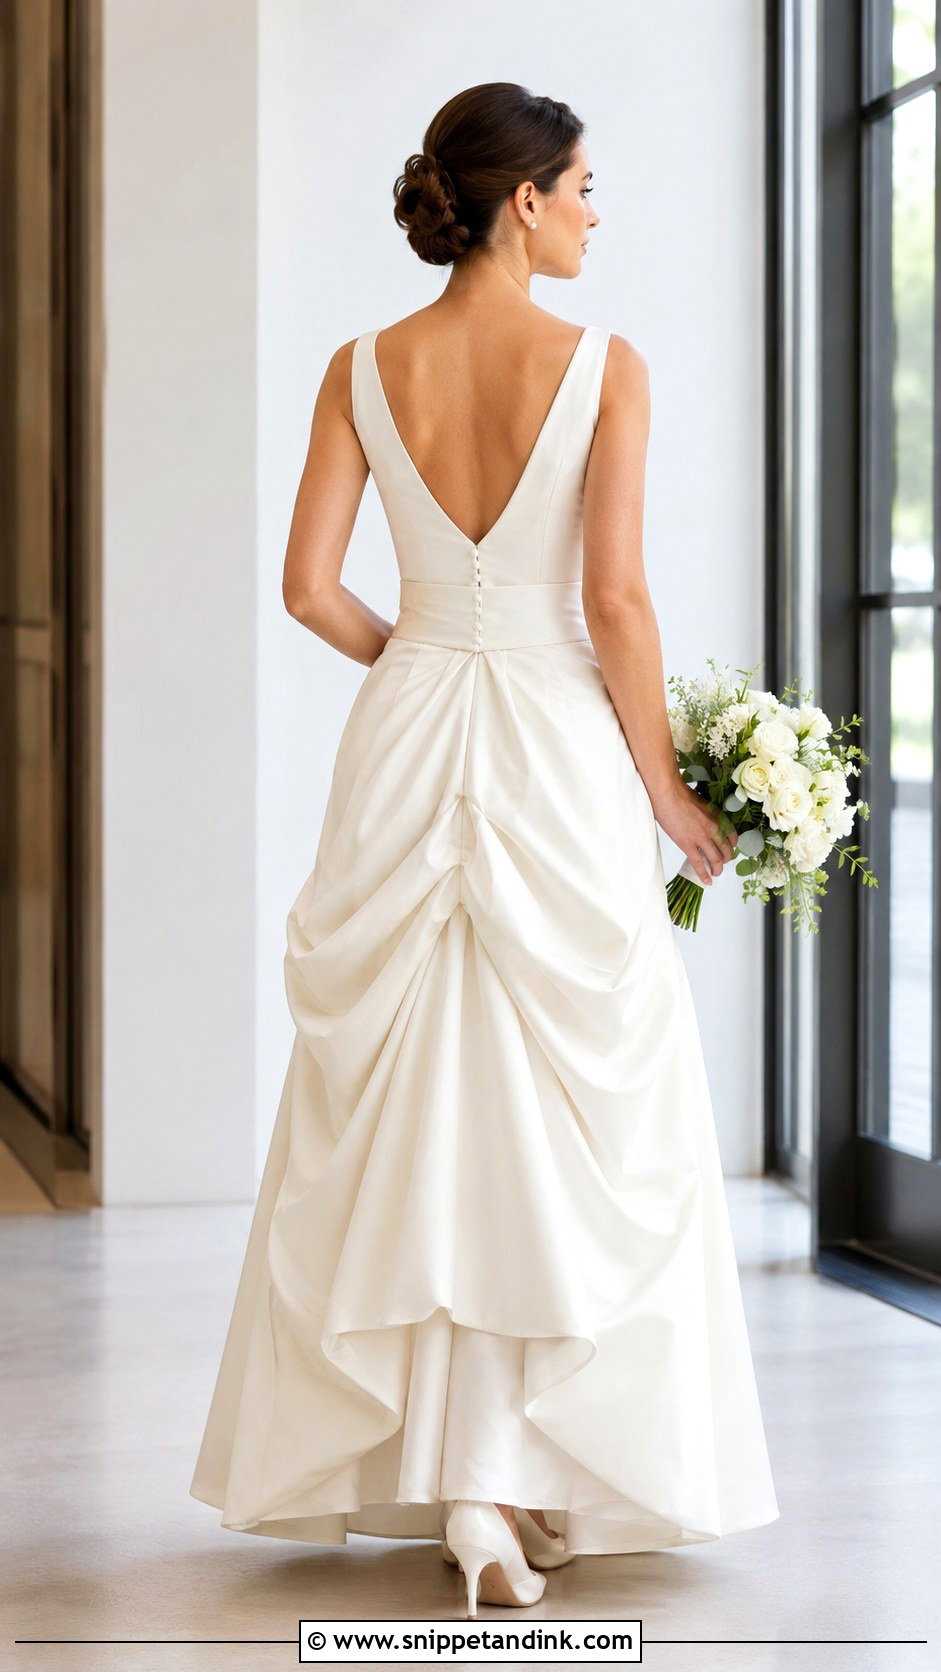
A detachable sash covers the bustle hardware and adds waist definition at the same time. Build the bustle first with reinforced hooks, buttons or ties, and only when the train hangs correctly do you lay the sash over the pickups, fastening it with hidden snaps at the side seams. The sash hides the hooks; it carries none of the train. Flat satin gives a clean finish, while soft chiffon falls into tails over the gathered fabric. Keep the tails short, or you’ve just swapped one dragging piece of fabric for another. It’s a neat way to give the ceremony gown a slightly different look for the party.
18. Layered Tulle Wedding Dress Bustle
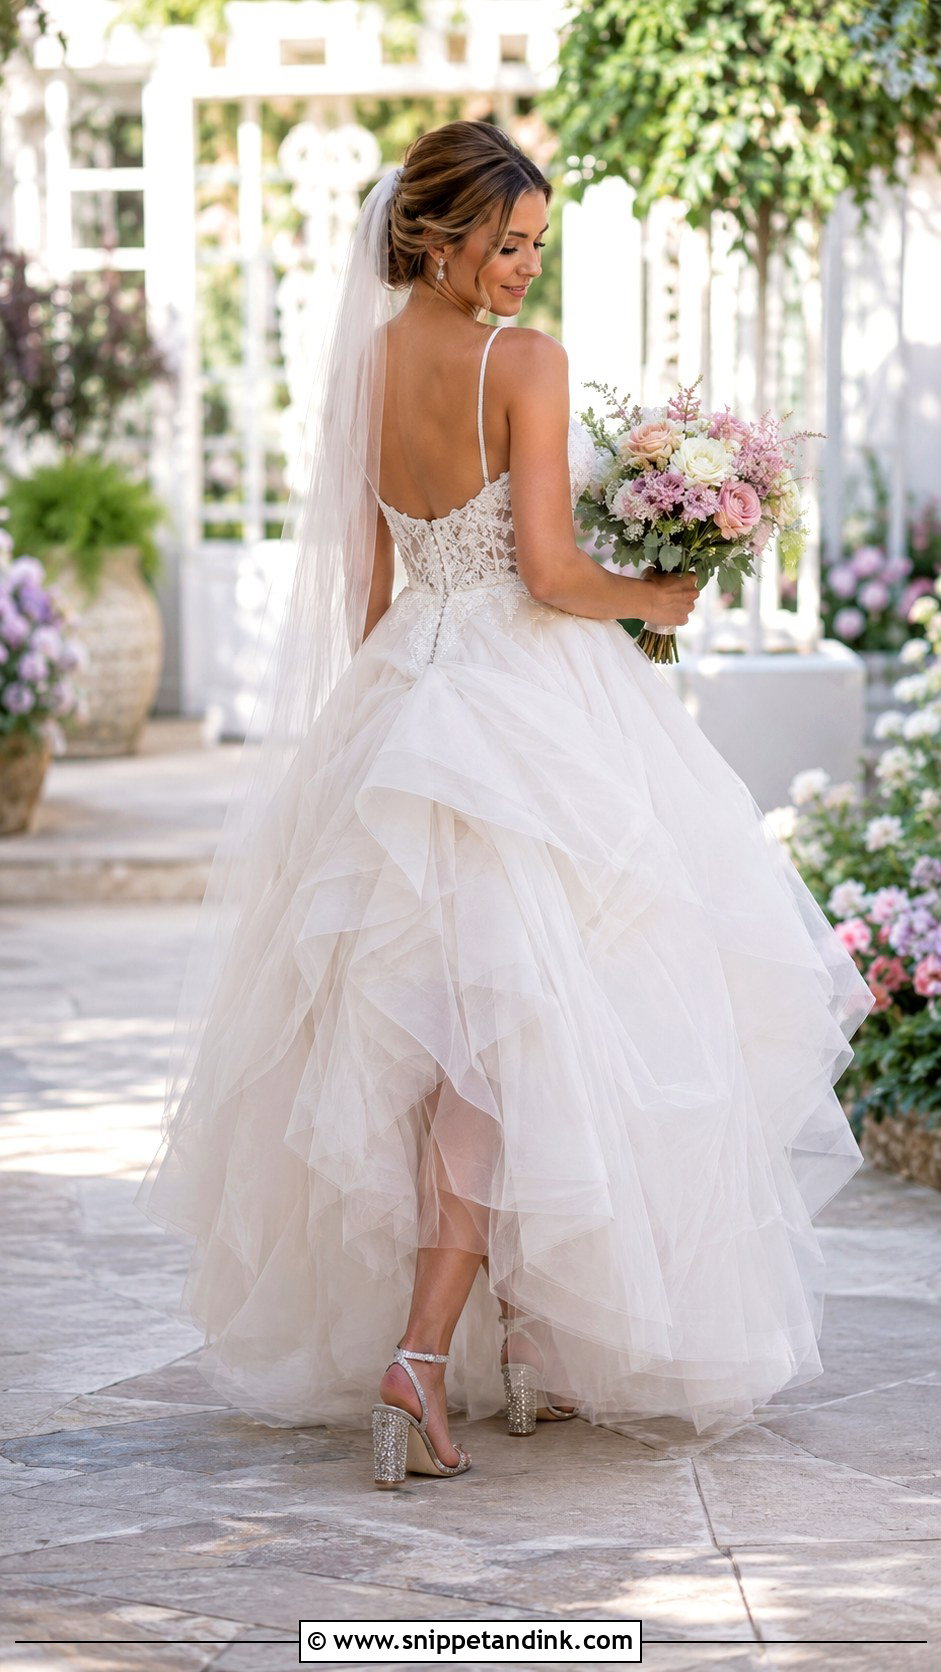
Tulle gowns are the hardest to bustle because each layer wants to move its own way. Work out first which layers actually extend into the train; often it is the lining and the underskirt that carry the length, and they need firmer support than the outer net. Lift the lining first, then arrange the outer layers with their own light loops if needed. Several small pickups give a softer cloud than one tight central gather, which can crush tulle into a clump. Hide the hardware under appliqués or along seams, and smooth each layer after fastening, checking the hem for twisted net. Test it with the bride walking, not standing still.
19. Chiffon Waterfall Wedding Dress Bustle
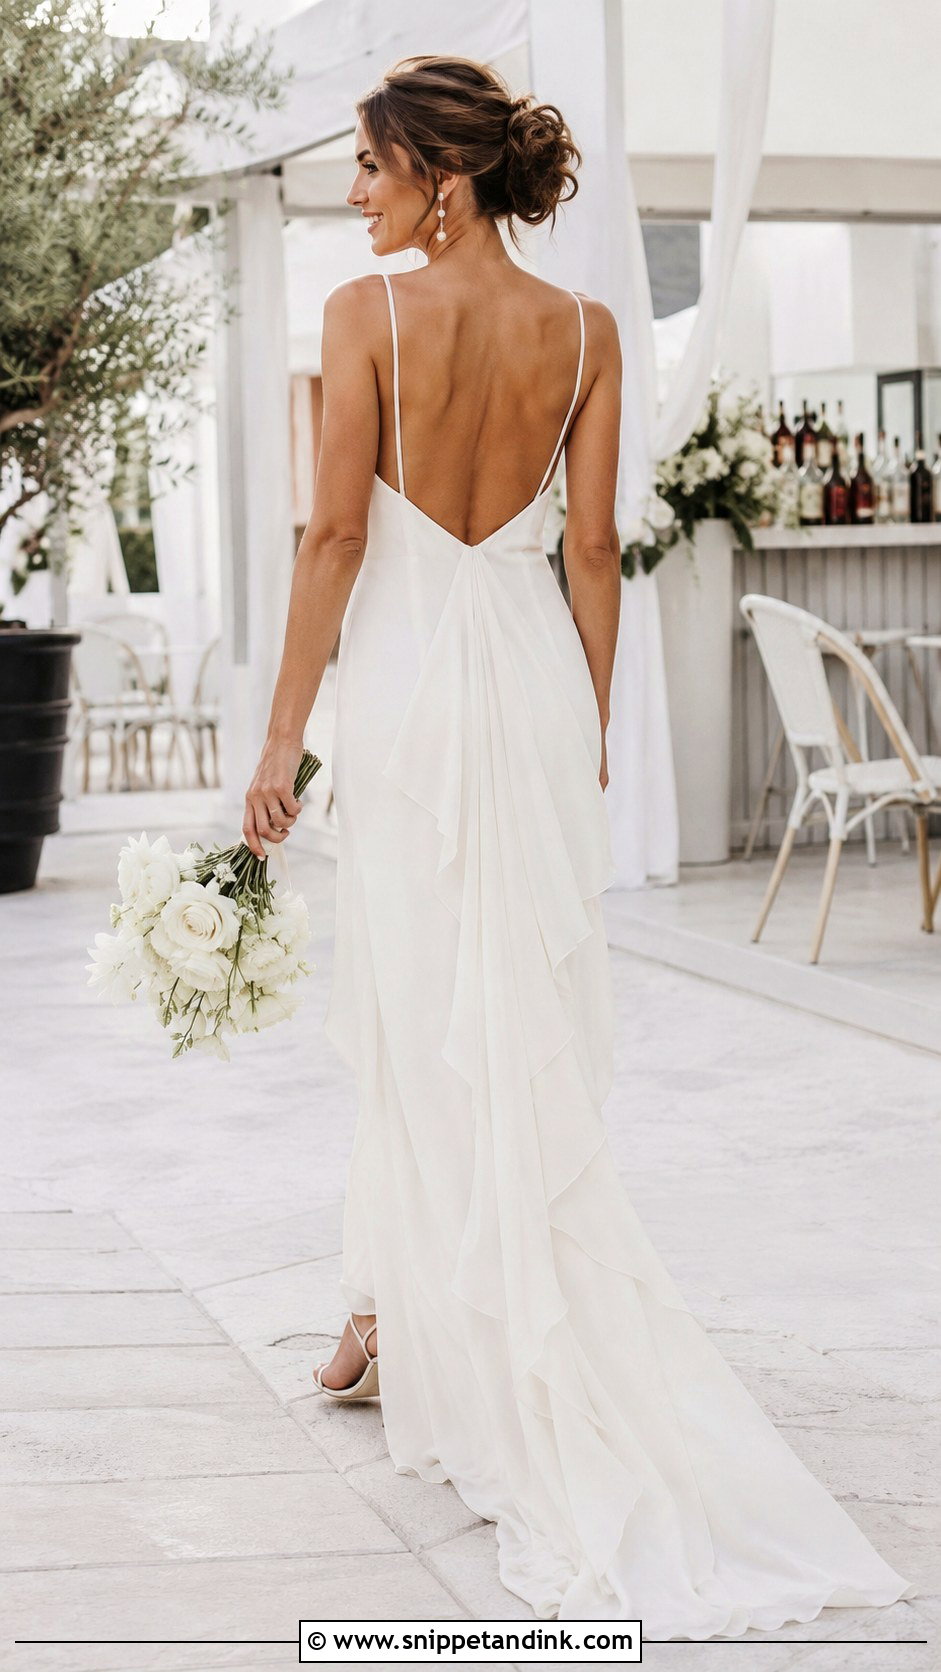
Lifted at a few well-spaced points, chiffon falls in long waterfall folds. Start at the centre and add side points only where the fabric actually needs holding. Keep the pickups high enough to clear the floor but low enough that the drape still looks natural. Under sheer fabric, narrow ribbon loops show far less than buttons or hooks. Sew every loop into a seam or the lining, never straight into a fragile chiffon panel; a small inner patch spreads the tension. After fastening, I loosen and rearrange the folds by hand. Too many points will make chiffon look stiff, so stop as soon as the hem clears.
20. Hidden Snap Wedding Dress Bustle
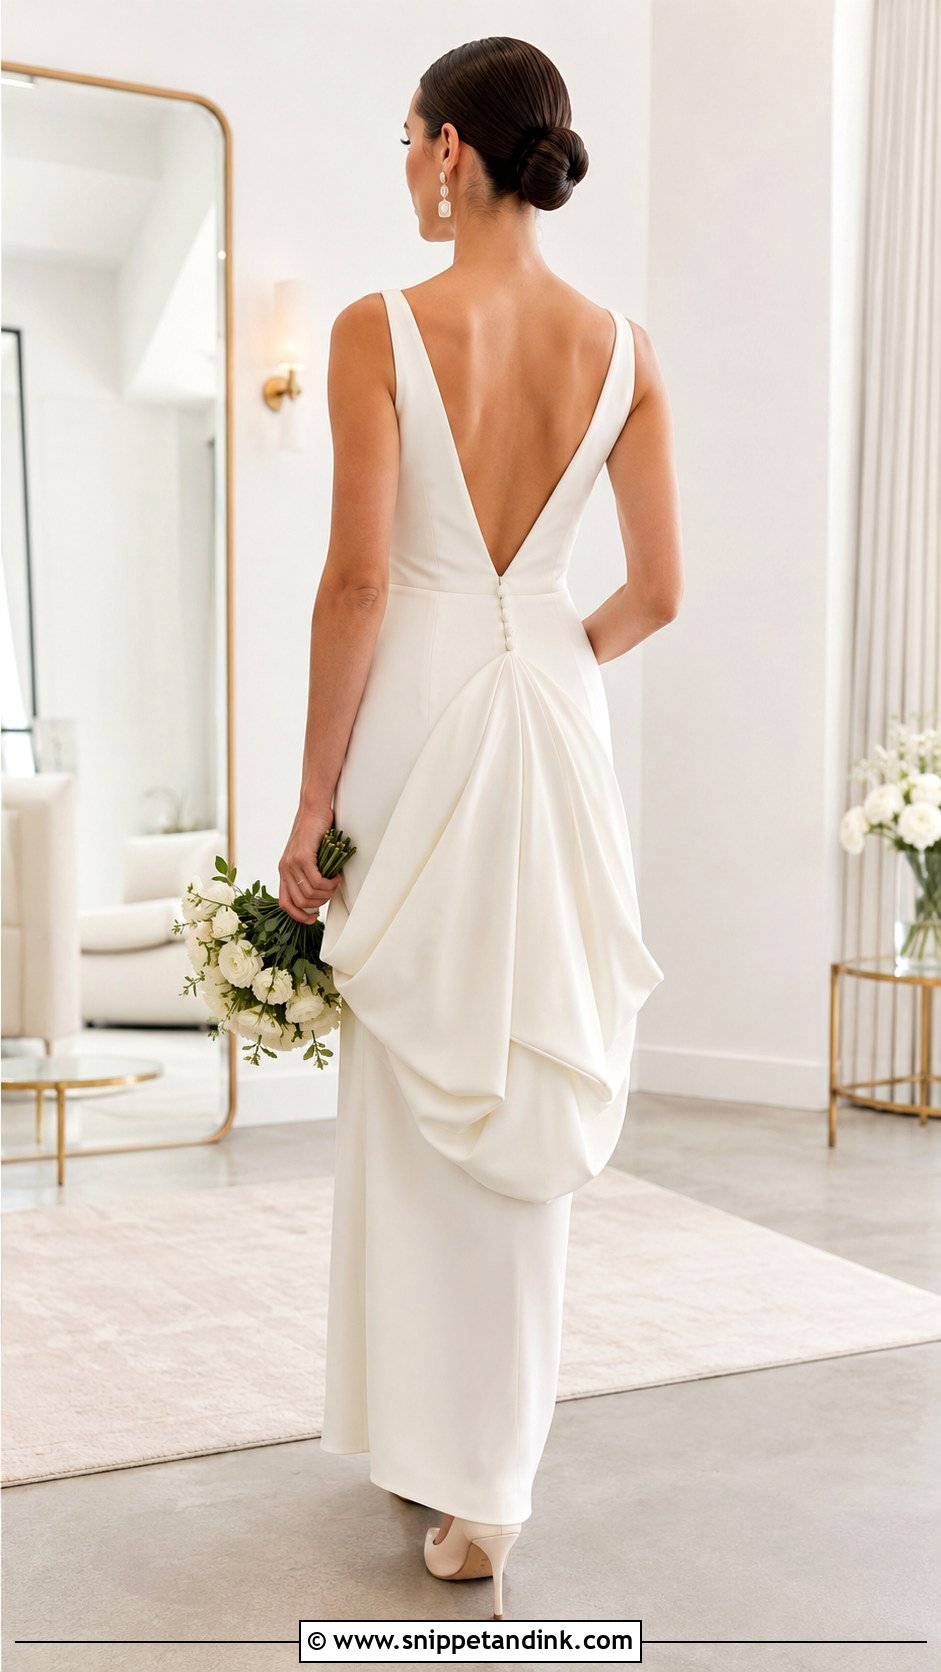
A hidden snap bustle keeps a minimalist gown clean when buttons would interrupt the line. Use good sew-on snaps, never adhesive ones. One half goes under the train, the other on a reinforced spot on the gown, stitched so nothing shows outside. Several snaps share the load and keep the hem level. Test by moving the train gently rather than yanking it. Snaps let go under real weight, so I wouldn’t use them on heavy satin, dense beading or a cathedral train. A backup loop or hidden ribbon tie beside each snap adds security without changing the look.
Handing the Bustle Over to a Bridesmaid
The bride almost never fastens her own bustle; she can’t see behind herself and she can’t bend inside the dress. So the person who will do it needs to learn it while there’s still time. I ask that one helper, ideally two, to come to the final fitting and fasten it themselves, not just watch me.
Plan when it happens. Most couples bustle after the ceremony and portraits, just before the grand entrance or first dance, and it takes a practised helper about five to ten minutes. Build that pause into the timeline and find a quiet corner with decent light; a dim reception hall makes ivory ribbons very hard to tell apart.
If a loop snaps halfway through the evening
It happens, usually on the dance floor. Keep a small kit with the helper: ivory safety pins, a needle threaded with matching thread, a few spare ribbon lengths and small scissors. A broken loop can be replaced for the night by pinning from the inside, through the seam allowance, with the pin pointing down so it can’t scratch. Never pin through the visible outer fabric of satin, because the hole stays. If several points fail at once, it is kinder to the dress to take the bride somewhere quiet and redo the whole bustle than to patch it one pin at a time.
Clip It, Wear It, Then Sew It
A bustle has three jobs: lift the whole train, carry its weight, and keep the gown’s silhouette intact. Whichever of these you try, start with clips and test it while the bride wears the dress and her actual shoes. Reinforce every button, loop, snap and ribbon through a strong seam or a backing patch, label anything complicated with colours or numbers, and practise fastening it until it takes minutes, not a quarter of an hour. Pack a small repair kit. A light, simple train is a fair project for a confident home sewer; heavy, beaded, layered or precious gowns belong with a professional bridal alterations specialist.
You'll Like These Ideas:


Leave a Reply