
Brides send me dozens of photos of the back of a hairstyle, and almost none of the front. Yet the front is what guests see during the walk down the aisle, what the photographer shoots during vows, and what you’ll see in nearly every close-up. The part, the hairline and those few loose pieces decide whether a style flatters your face or fights it. These fifteen front views are the ones I’d actually show a bride at a consultation, with what each needs to stay put and who it suits.
Where Your Part Goes Changes Everything
Before I pick up an iron, I look at where your hair parts on its own. Most people have a cowlick or a natural fall at the crown, and fighting it for twelve hours usually loses. A part that’s moved against the grain springs back by the evening, or it leaves a little gap at the root that shows in close-ups.
If you want a different part for the wedding, start training it a couple of weeks ahead: comb it into the new position every time you dry your hair. It won’t be perfect, but it’ll be far more cooperative on the day.
- A center part is the hardest to fake if your hair naturally falls to one side.
- A slightly off-center part flatters most faces and hides small asymmetries.
- A deep side part adds volume quickly, which helps fine hair.
- A zigzag or blurred part can disguise a thin spot or a strong cowlick.
Bring the trial photos home and look at them on a phone screen, which is how most people will see your wedding pictures. A part that looked fine in the salon mirror can look crooked straight on, and that’s a two-minute fix at the trial rather than on the morning itself.
1. Wedding Bun With Face Framing Pieces
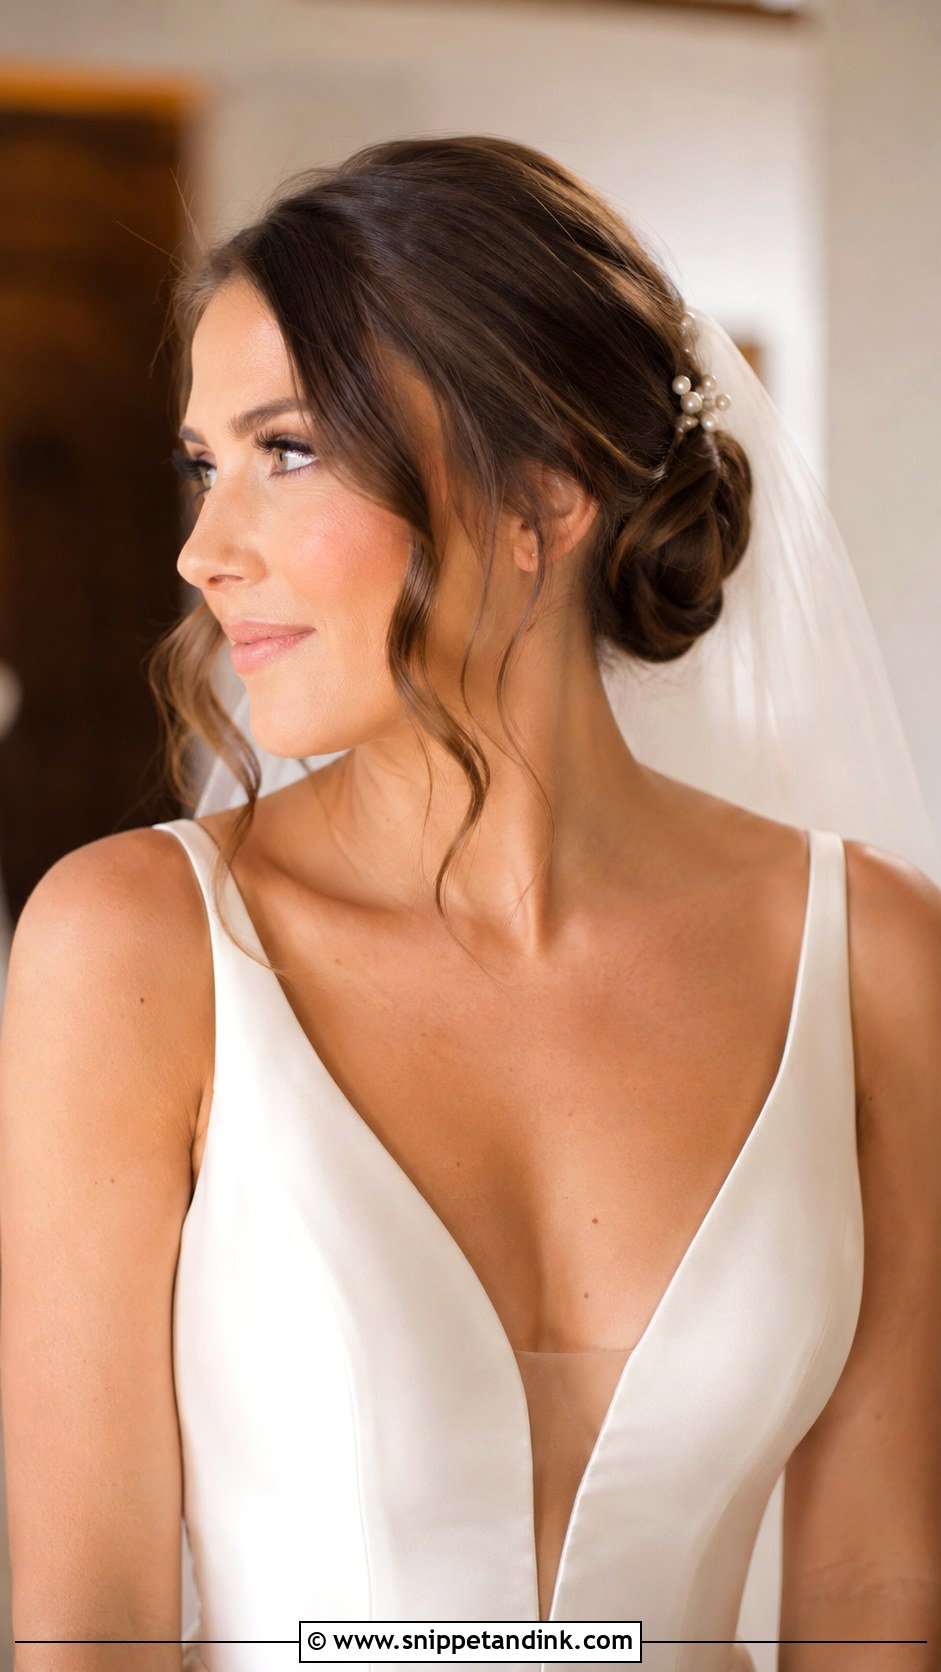
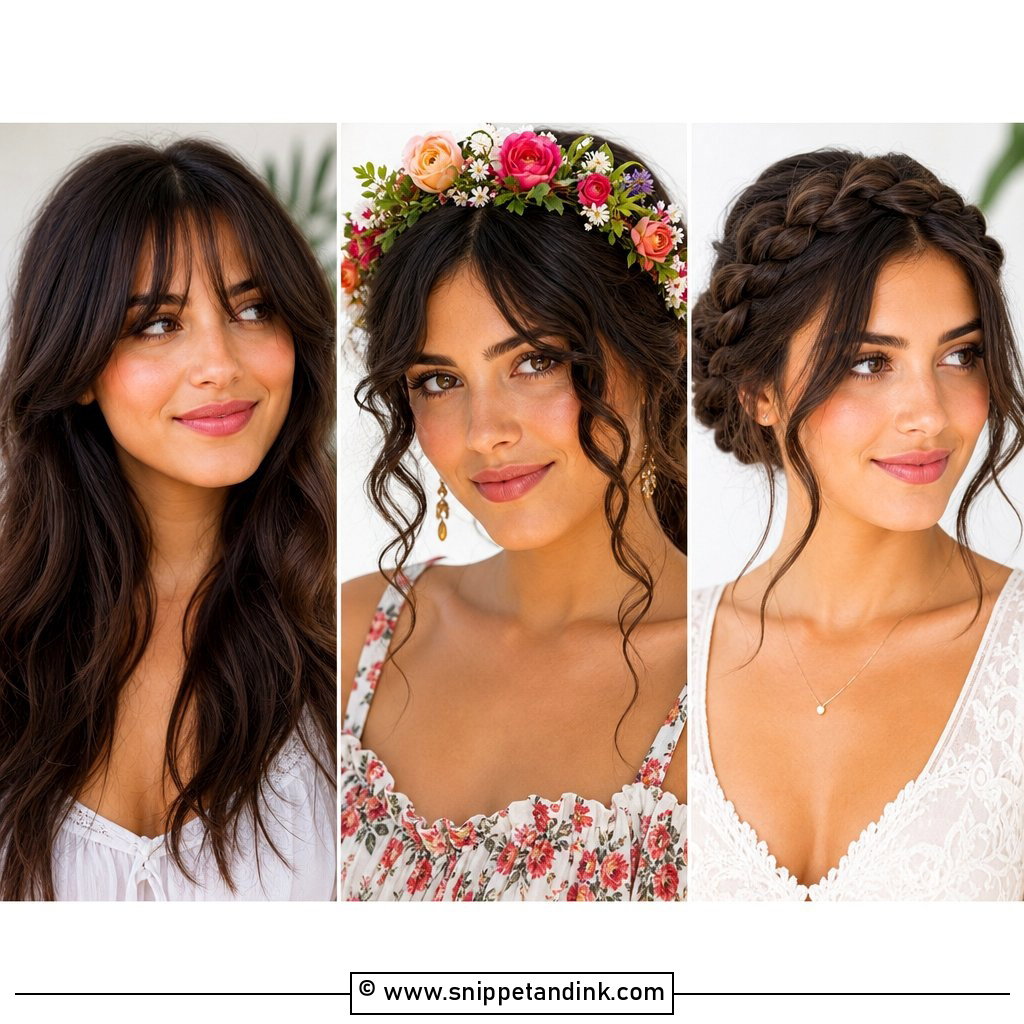
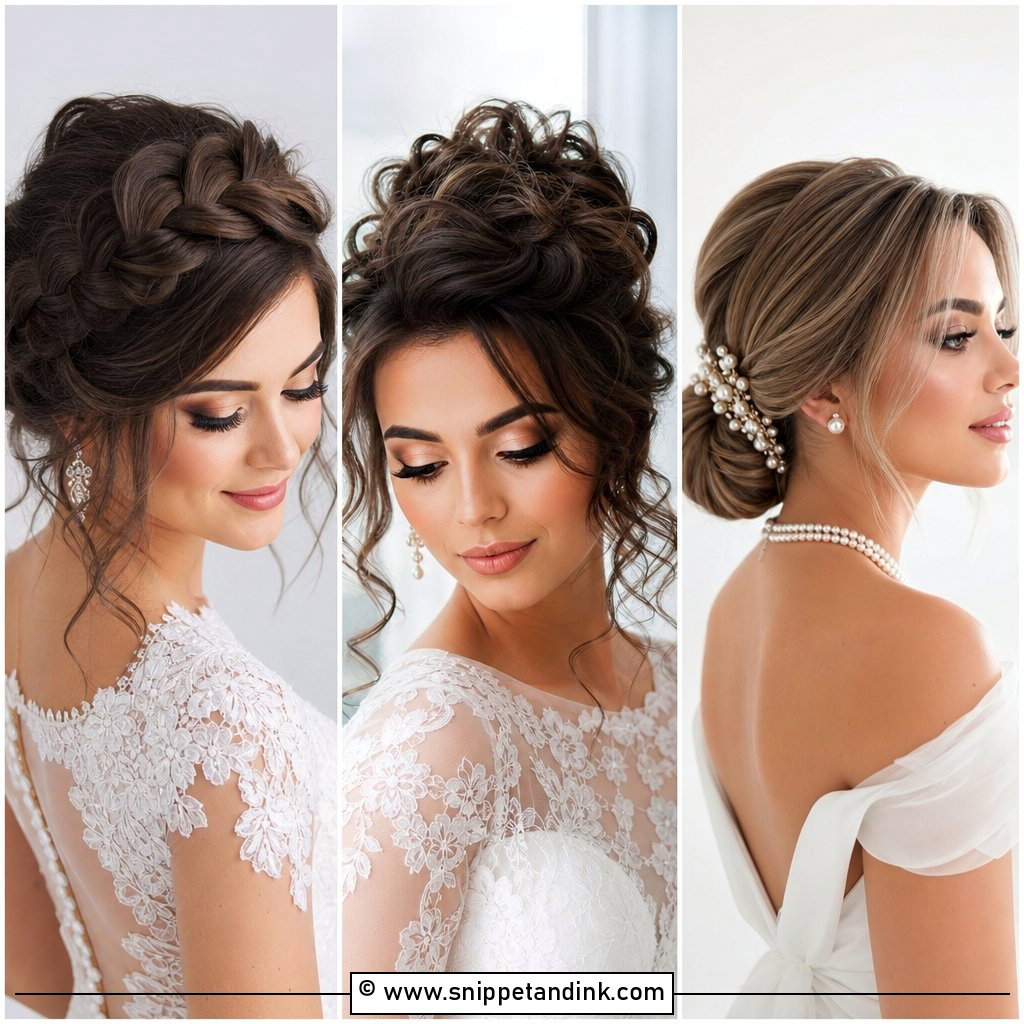
Tendrils are the easiest thing in bridal hair to get wrong. Too many and they hang in your face during the kiss; too few and the bun looks severe. I usually pull out two or three thin pieces on each side, curl them away from the face with a small iron, then brush them loose so they bend instead of coil. They soften the angles of square and round faces especially, and they move the eye toward the cheekbones. The bun behind them gives a veil, pearl pins or drop earrings a clean background.
2. Wedding Half Up Half Down Front Look
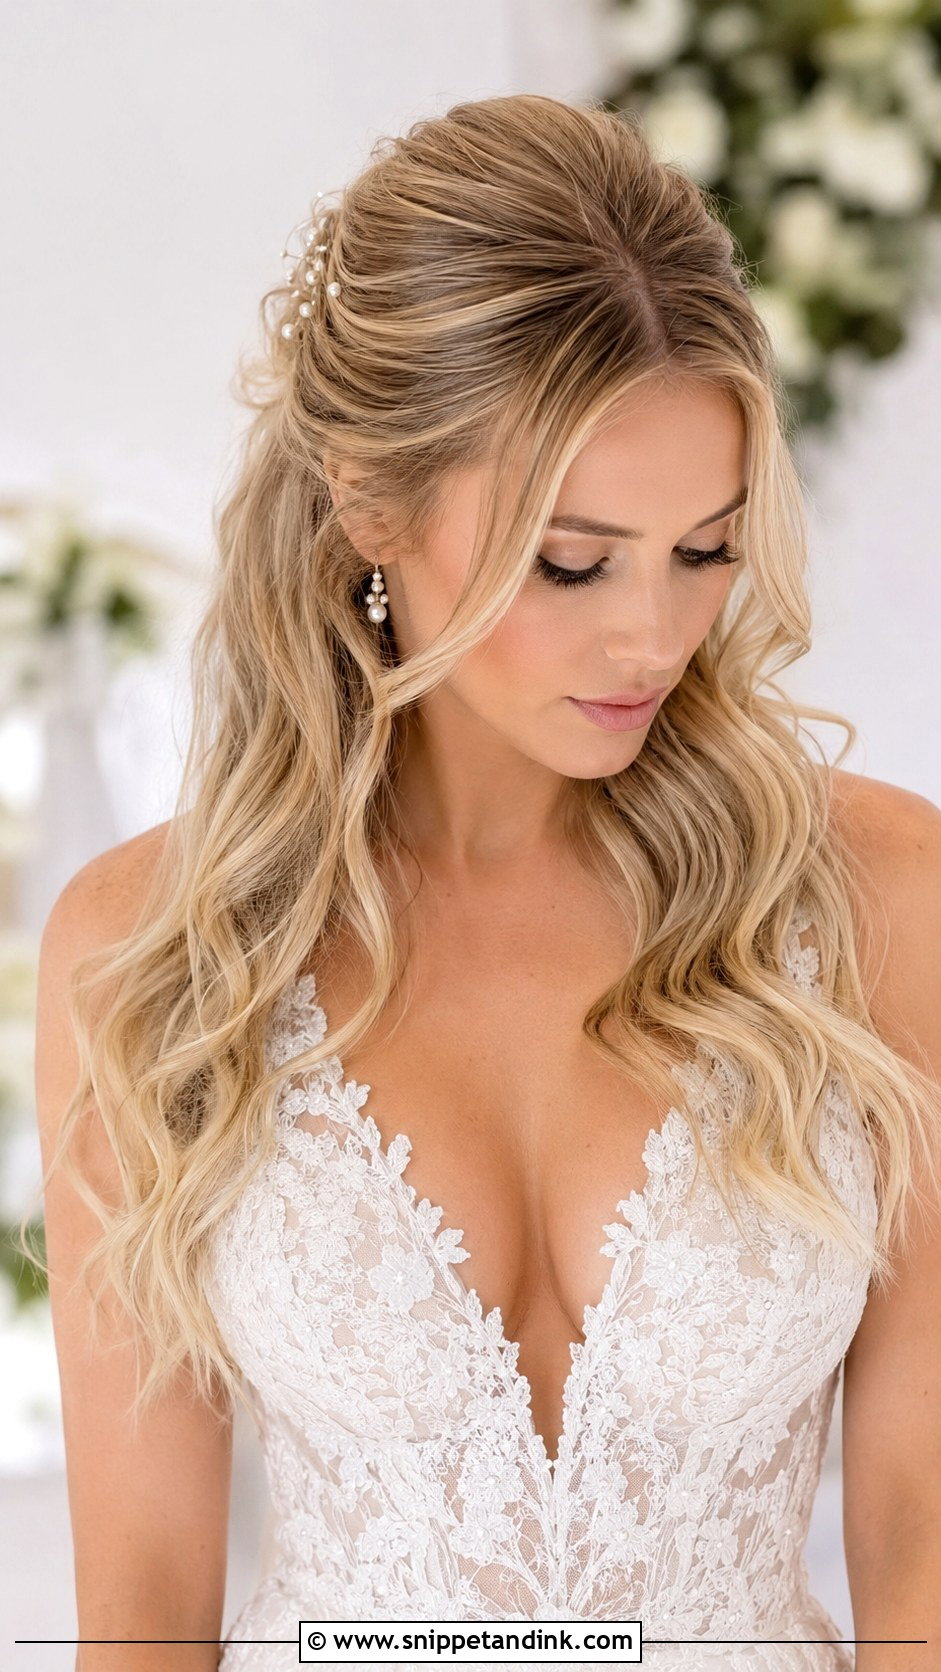
From the front, half-up hair lives or dies on the part. A middle or slightly off-center part looks balanced; a very deep side part can make the lifted section look lopsided head-on. The pinned crown keeps hair out of your eyes while the length stays down. I add a texture spray at the root before pinning so the top doesn’t go flat by the afternoon, and I hide the pins under the twist where a small comb or a few pearls can sit. Medium and long hair carry it best.
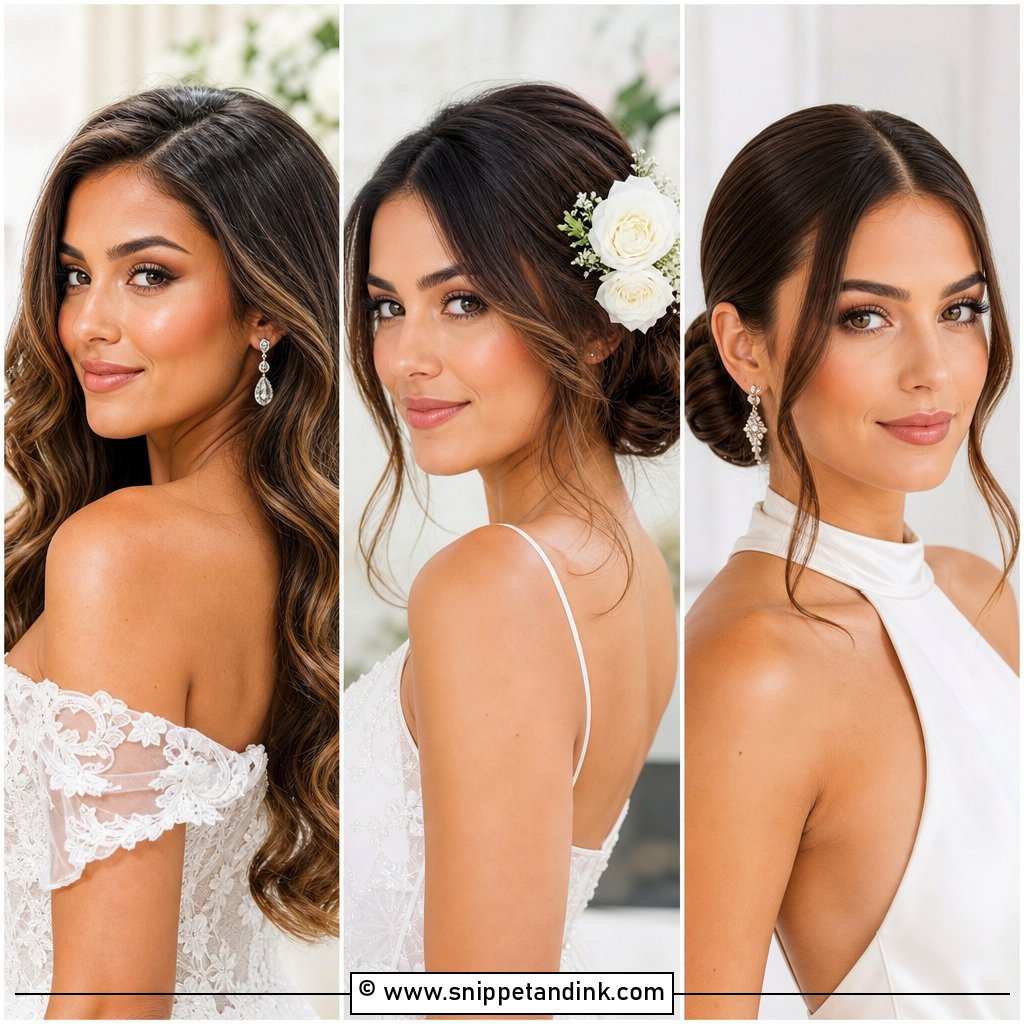
3. Wedding Low Chignon Front Look
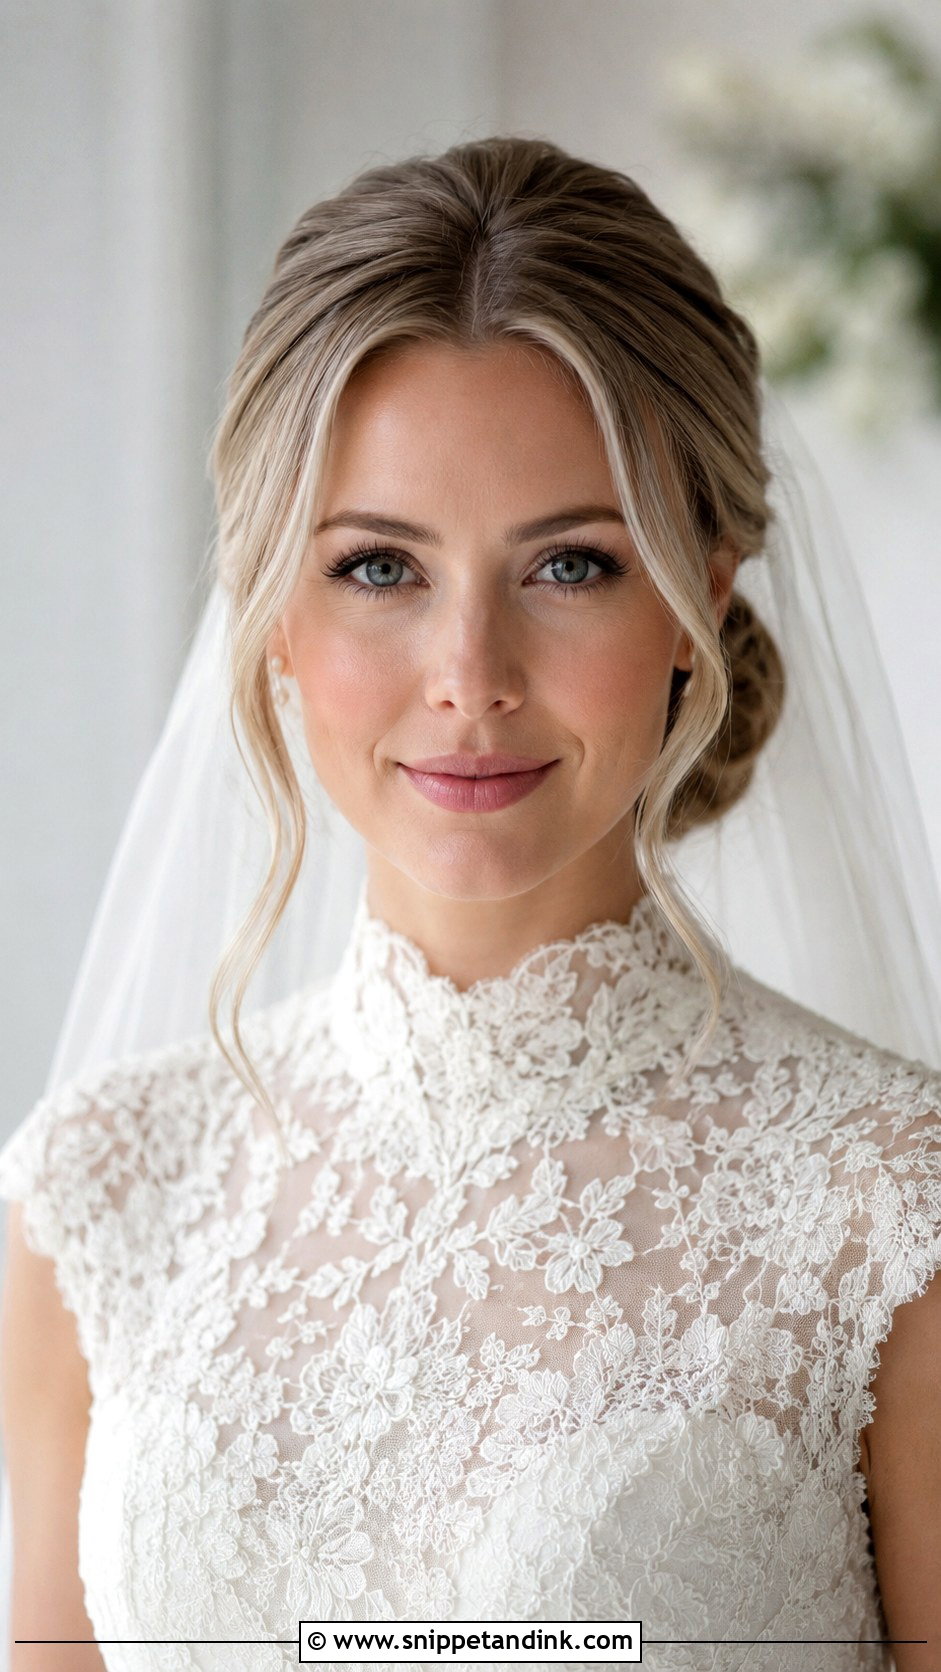
The chignon itself sits at the nape, so from the front all you see is the crown and the edges around the temples. That’s where the work goes. I keep the crown smooth with a little lift instead of dragging it flat, and leave a wisp or two near each temple. It works under veils, with high necks, strapless gowns and statement earrings, and it ages well in photos because it doesn’t rely on a trend. Pulled tight, though, it can look harsh from the front, so I’d always loosen the hairline slightly.
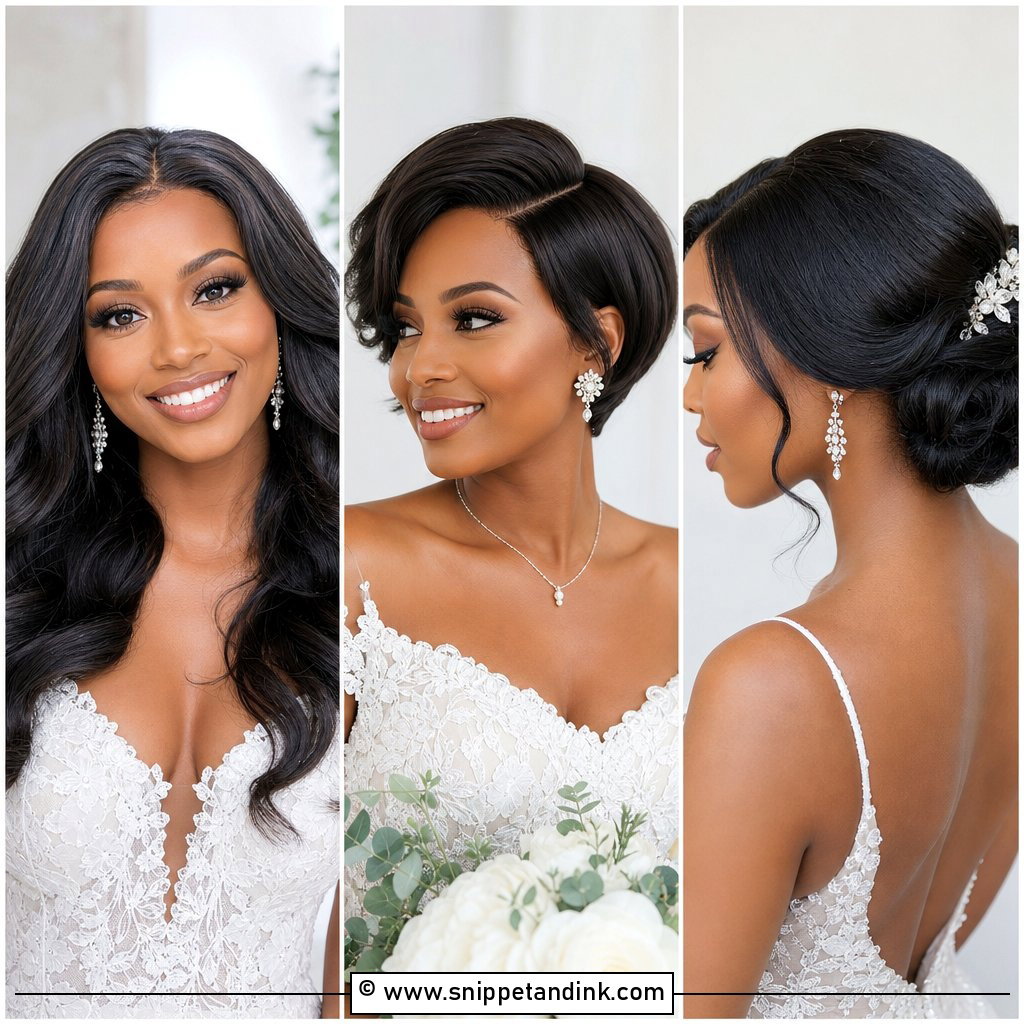
4. Wedding Side Part Waves
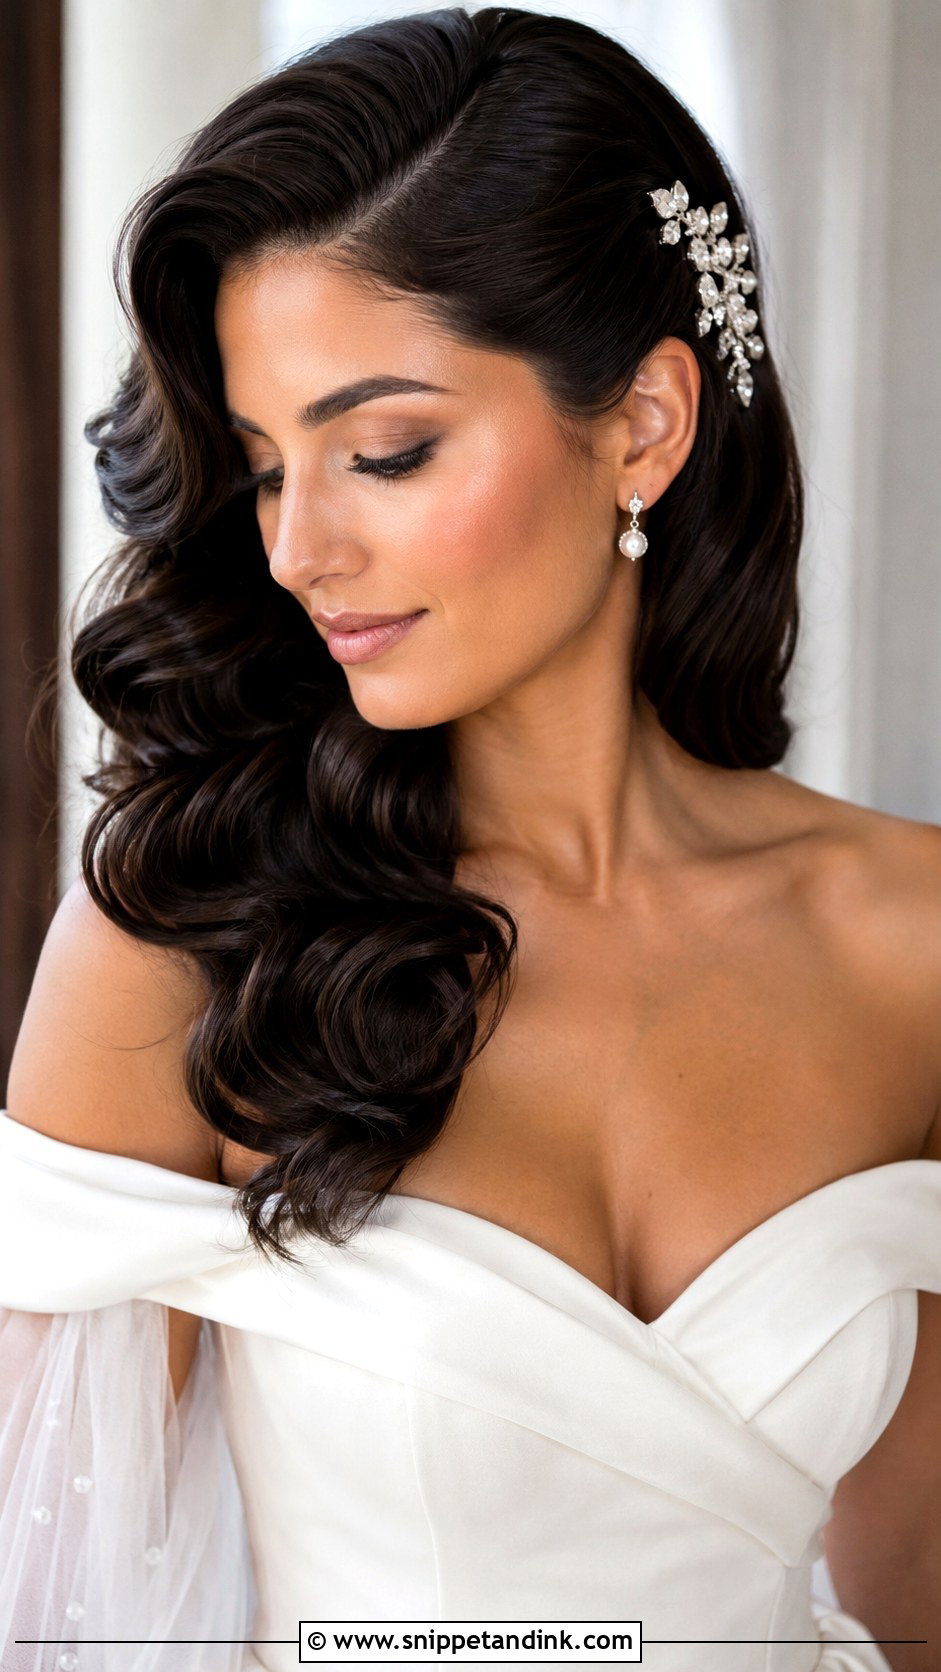
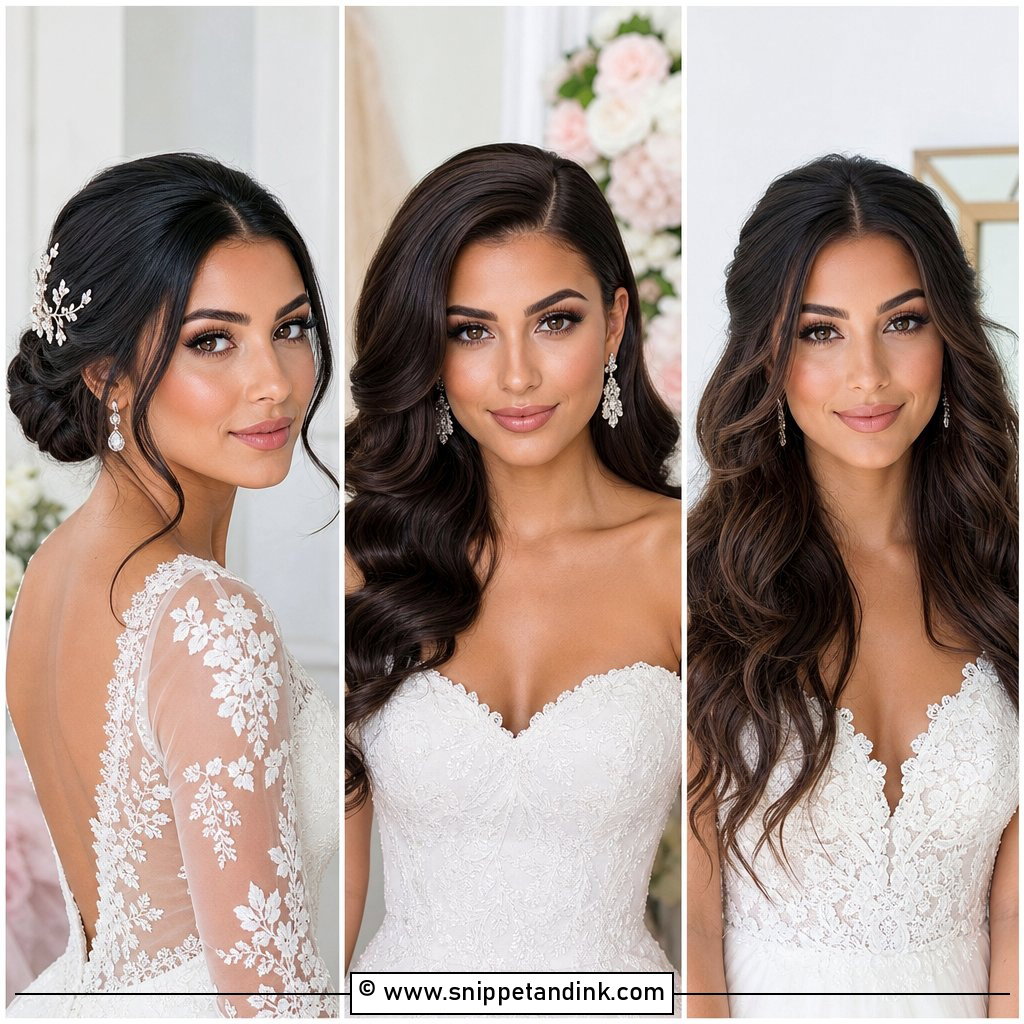
A deep side part does half the styling for you: it creates volume on one side and shape around the face before any curling starts. With waves through the length, it reads formal enough for an evening ceremony without an updo. Tucking the shorter side behind one ear shows an earring or a comb. On the heavy side, the hair can fall into the eyes when you look down at your vows, so I pin it discreetly behind the ear or just above it. Use a flexible spray; waves that can’t move look like a wig.
5. Wedding Middle Part Sleek Bun
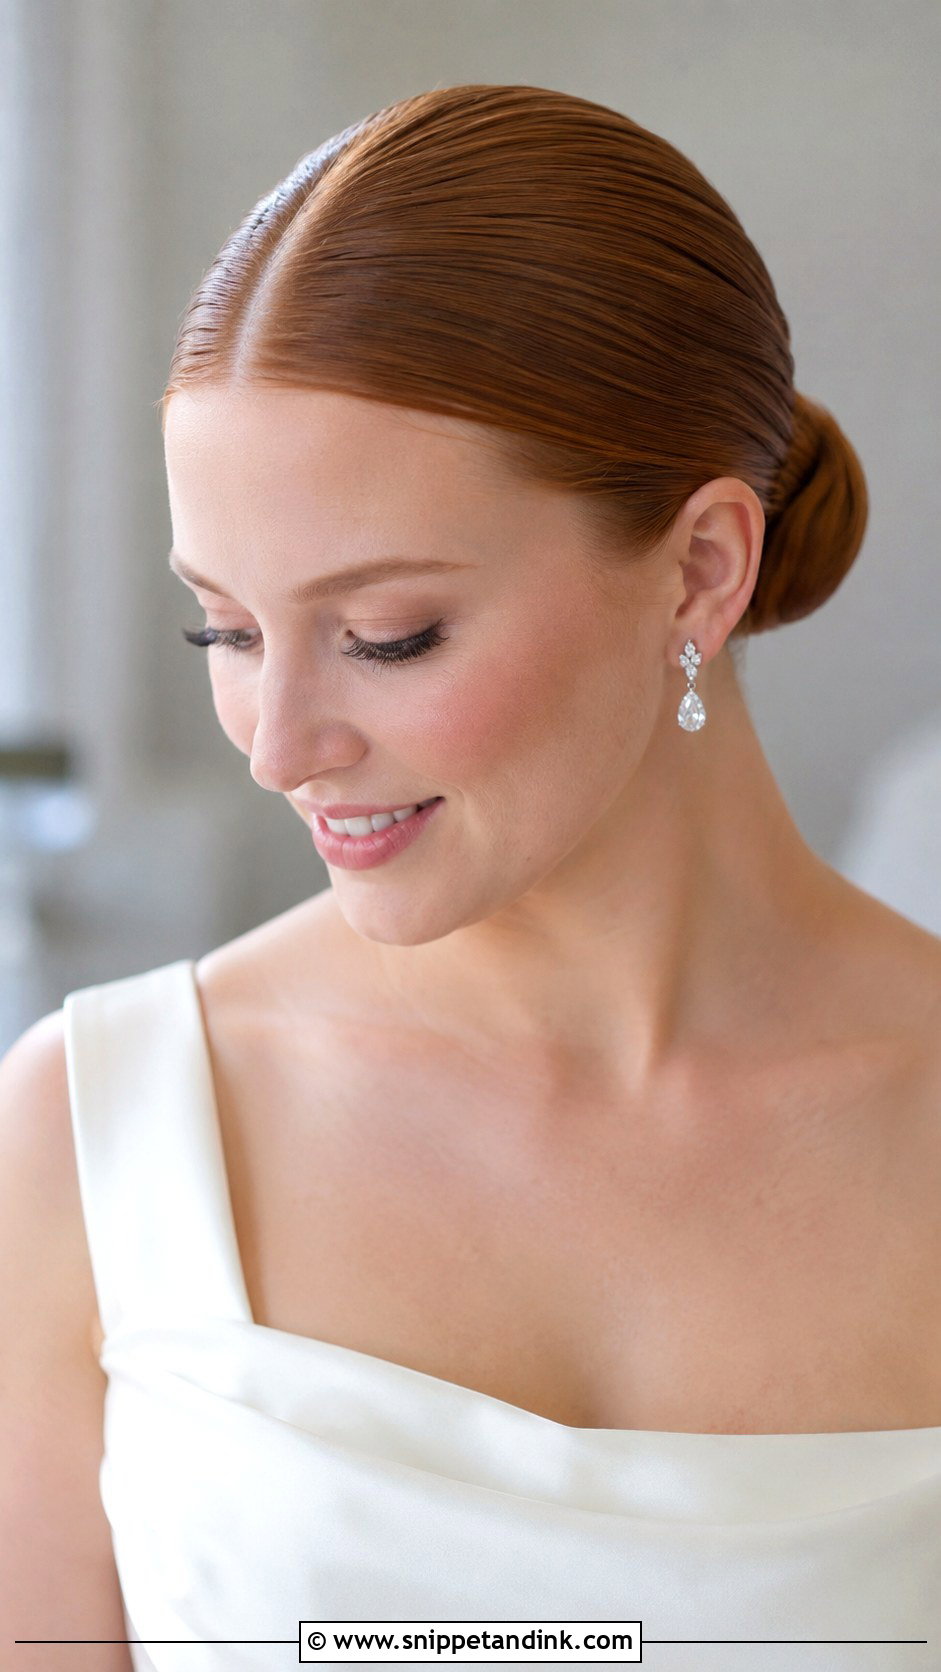
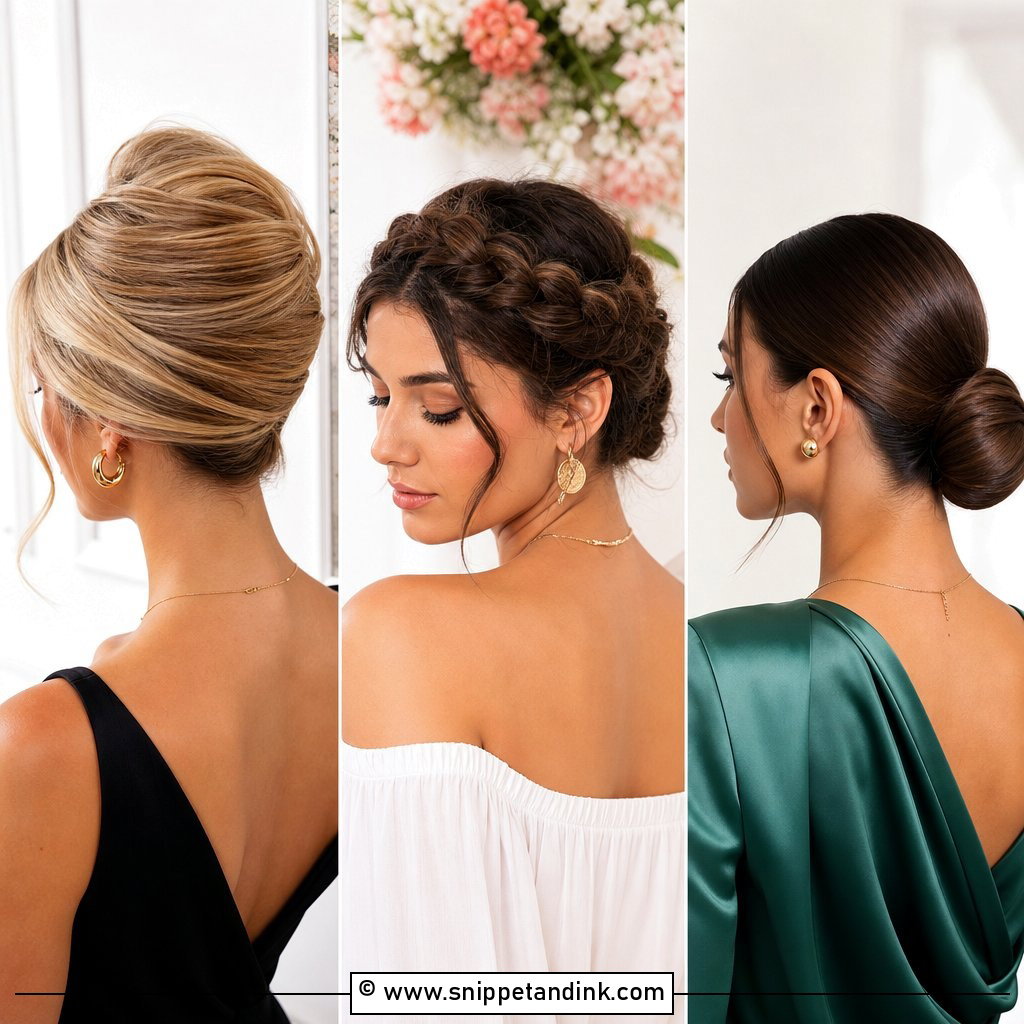
There’s nowhere to hide in a middle-part sleek bun, which is exactly why some brides love it: it puts all the attention on the eyes, brows, and makeup. It’s my first suggestion with a heavily detailed gown or long veil, because it doesn’t compete. The part has to be dead straight, so I set it on damp hair and blow-dry it into place. A gloss serum gives shine, but too much looks wet in photos. I also keep a little softness at the hairline; scraped-back edges look tight and tired by the evening.
6. Wedding Curtain Bangs Updo
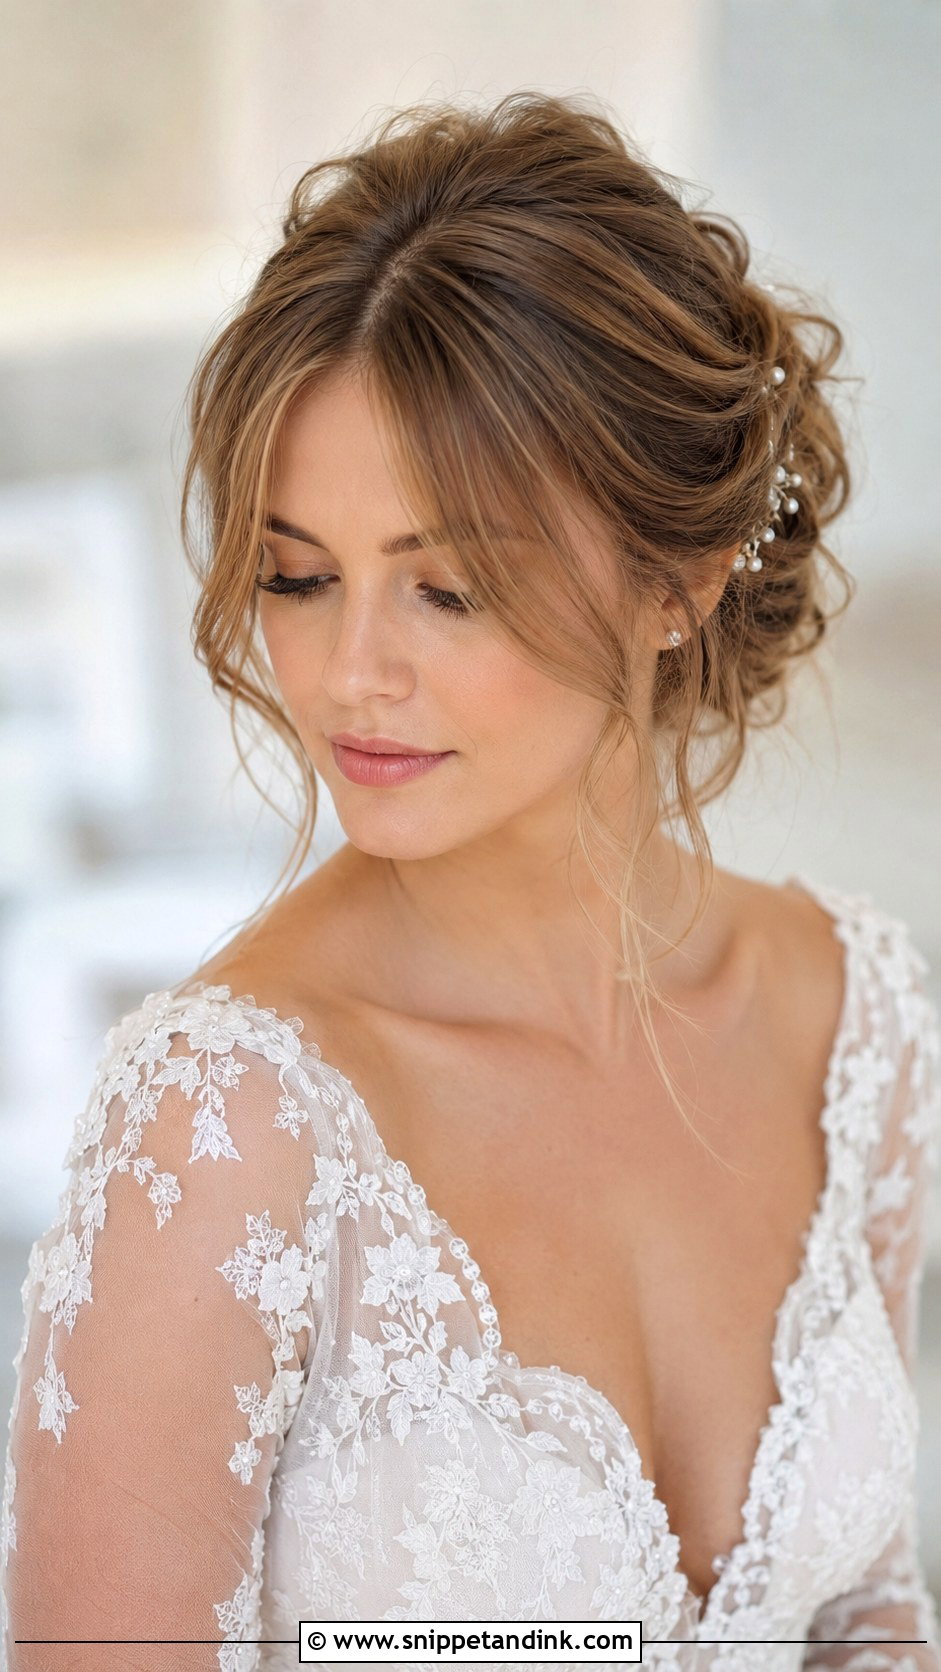
A wedding curtain bangs updo works best when the bangs are already cut and have grown in for a few weeks. Fresh curtain bangs are short and stubborn, and they split in odd places. The parted fringe frames both sides of the face; the rest goes into a bun, twist or textured updo. It suits longer faces and softens a strong jaw. I round-brush the bangs and blend them into the side sections with a small curl, so there’s no hard line where fringe ends and updo begins.
7. Wedding Braided Crown Front Look
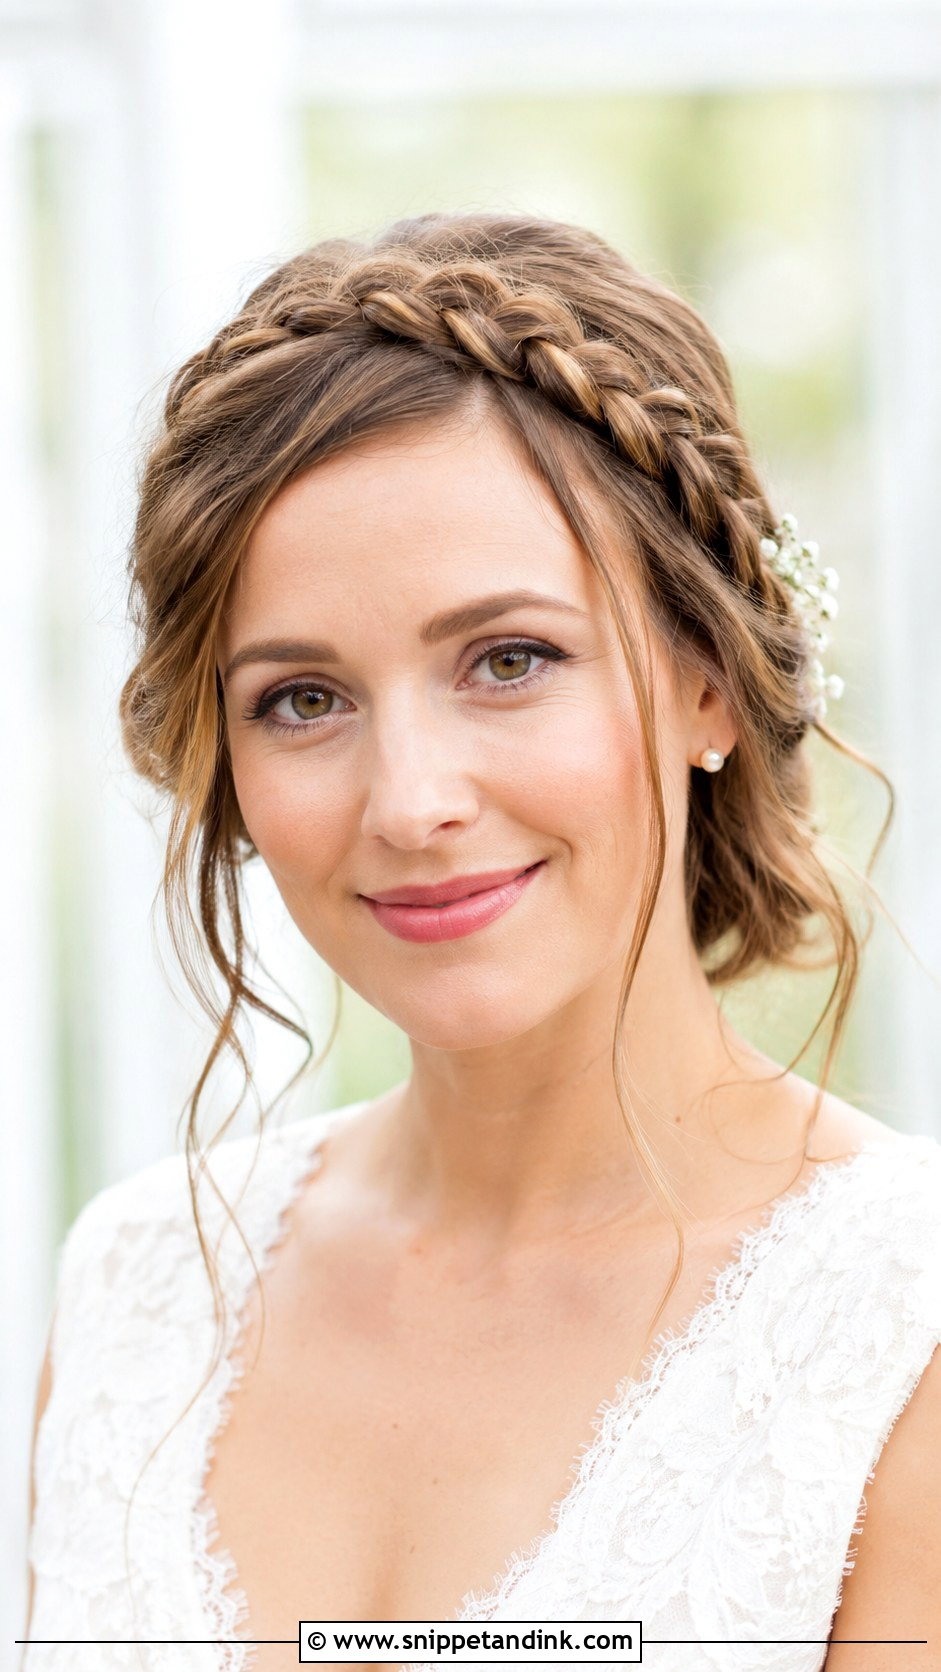
Placement changes the whole front view of a braided crown. Close to the hairline, it acts like a headband and reads more structured; set an inch or two back, it looks softer and lets the hairline show. I like it for brides who hate stray strands falling forward, because nothing in front is loose unless I leave it loose. A low bun or curls at the back keep it bridal. Small flowers or pearls tuck straight into the braid without extra pins.
8. Wedding Soft Curls With Middle Part
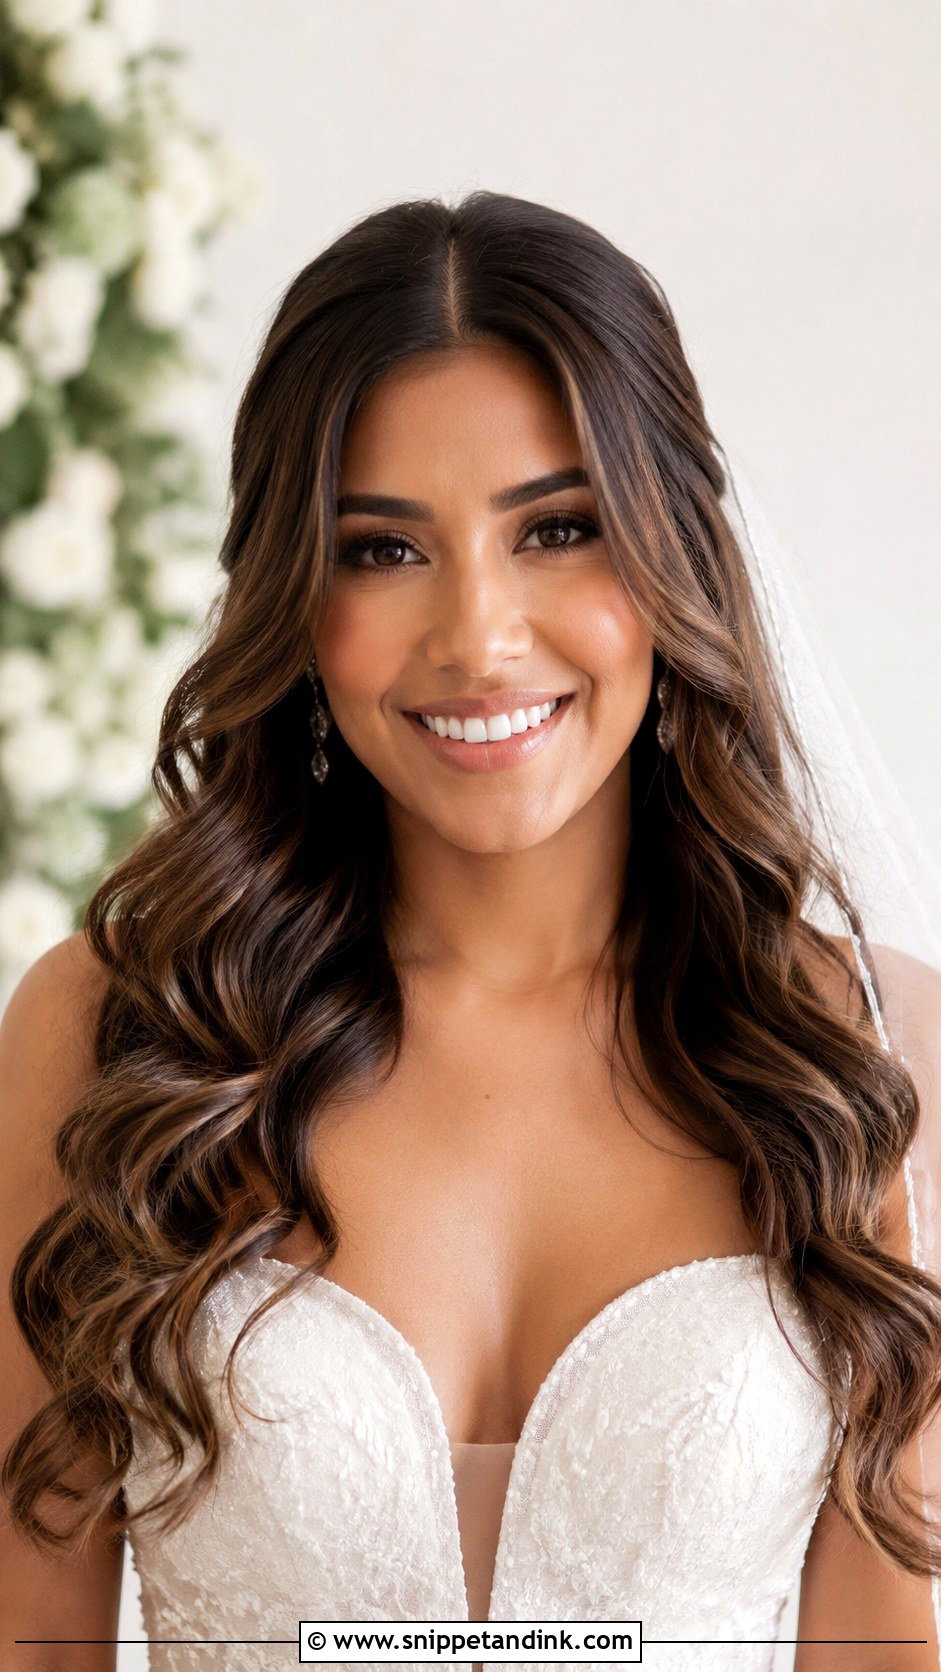
Symmetry is the point of a middle part with soft curls, and also the risk. A center part shows any difference between the two sides of your face and your hair, so I check where your hair naturally falls and sometimes shift the part a few millimeters. I start the curls below the cheekbones to keep the face open, and add a little root lift at the crown so it doesn’t sit flat. Long layers and highlights give curls more depth on camera. Keep accessories light, or the symmetry looks busy.
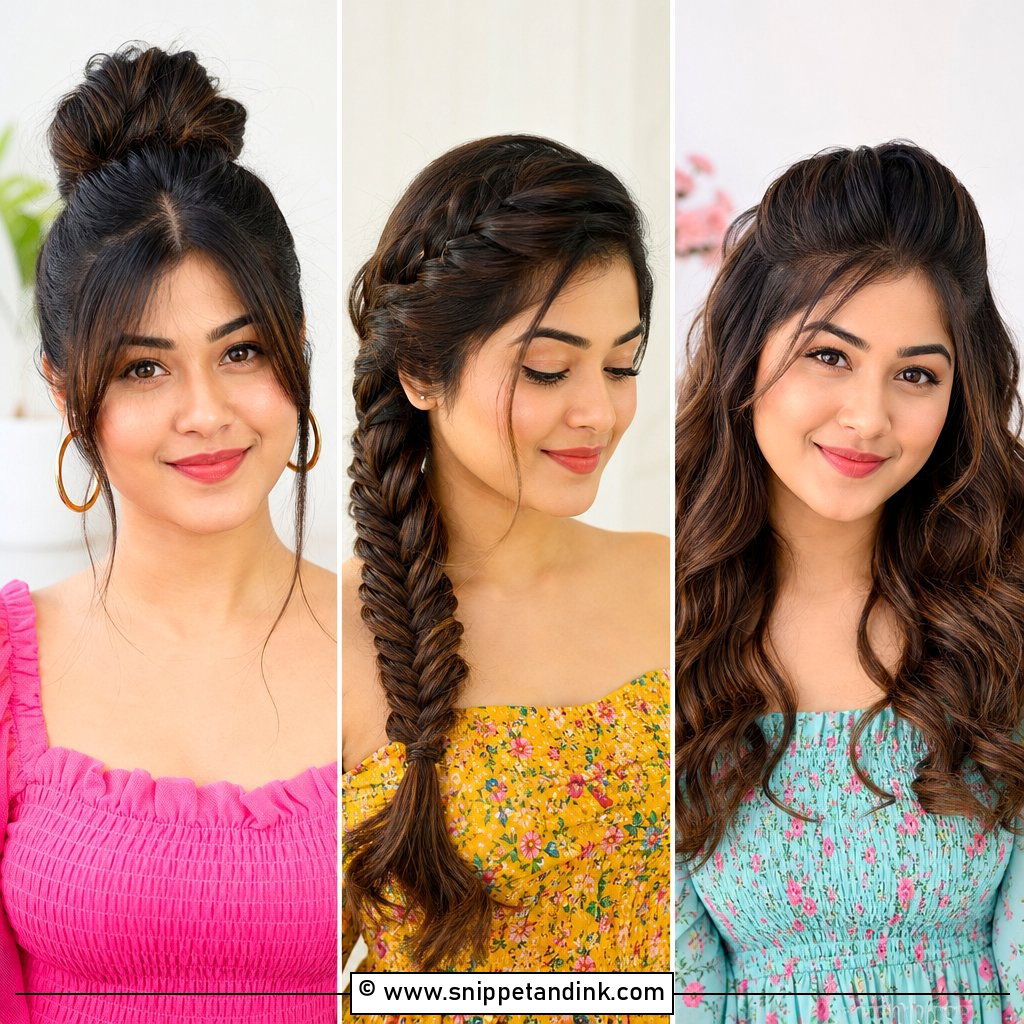
9. Wedding High Bun Front Look
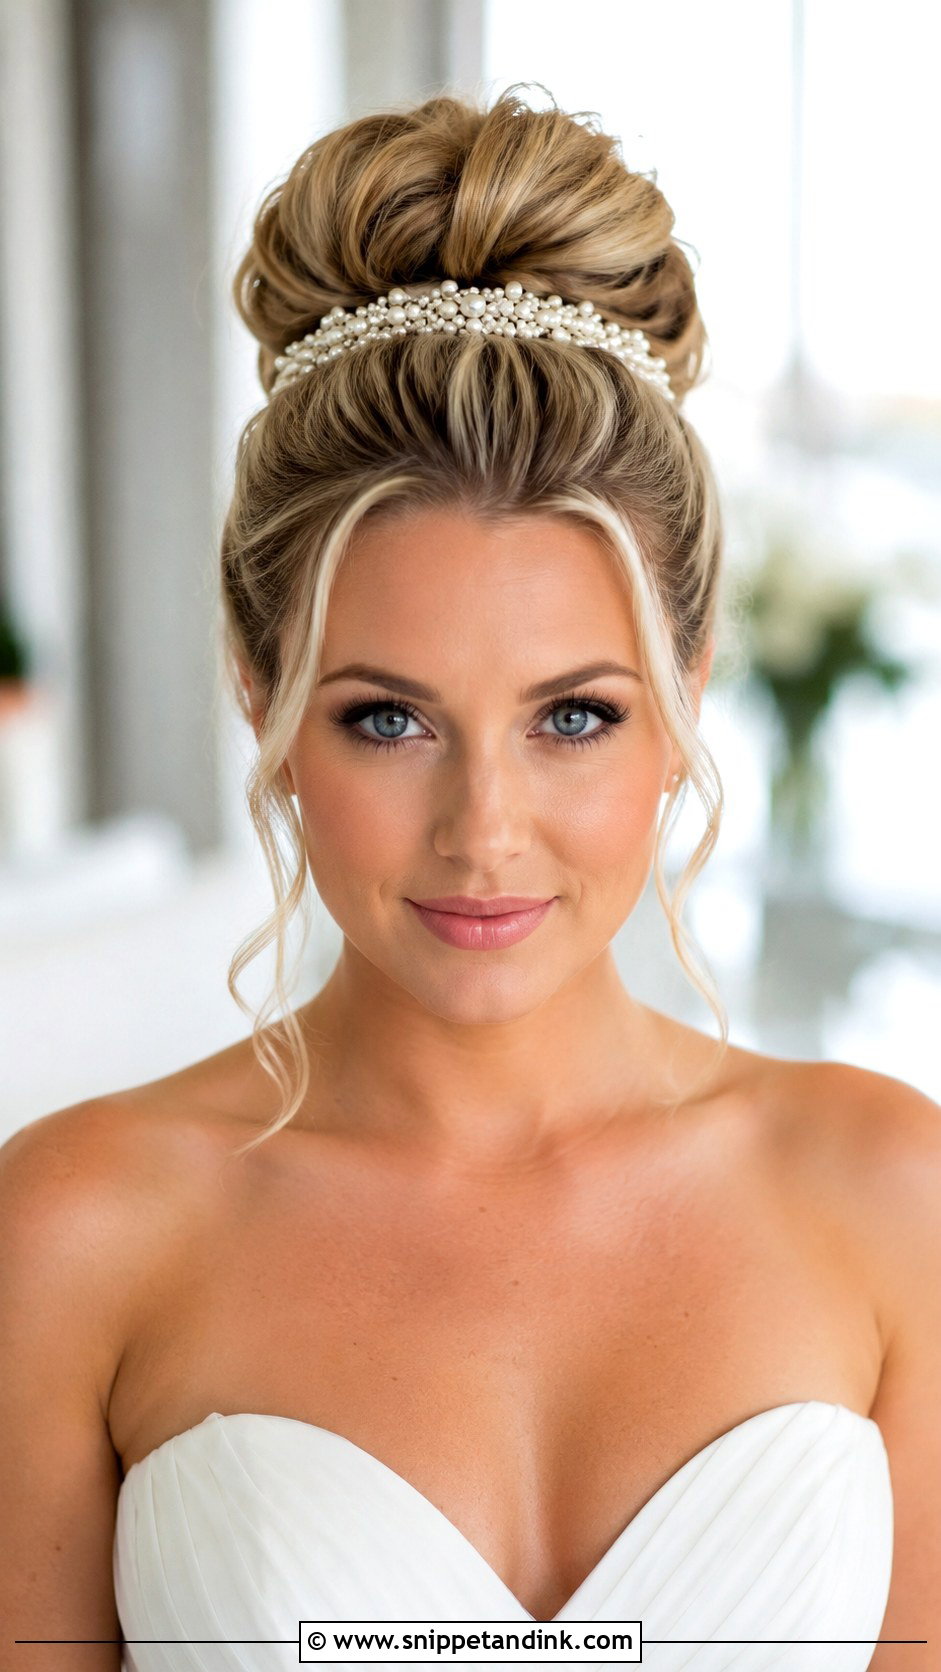
A high bun adds height, which lengthens a round face and shows off a neckline. From the front, though, a bun placed too high can peek over the head and look like a topknot. I set it at the crown so you just see its curve behind the head. Sleek reads modern; lightly textured reads softer. Tiaras and veils anchor in front of or under it easily. For a gentler front, I leave two small curled pieces at the temples.
10. Wedding Ponytail With Front Pieces
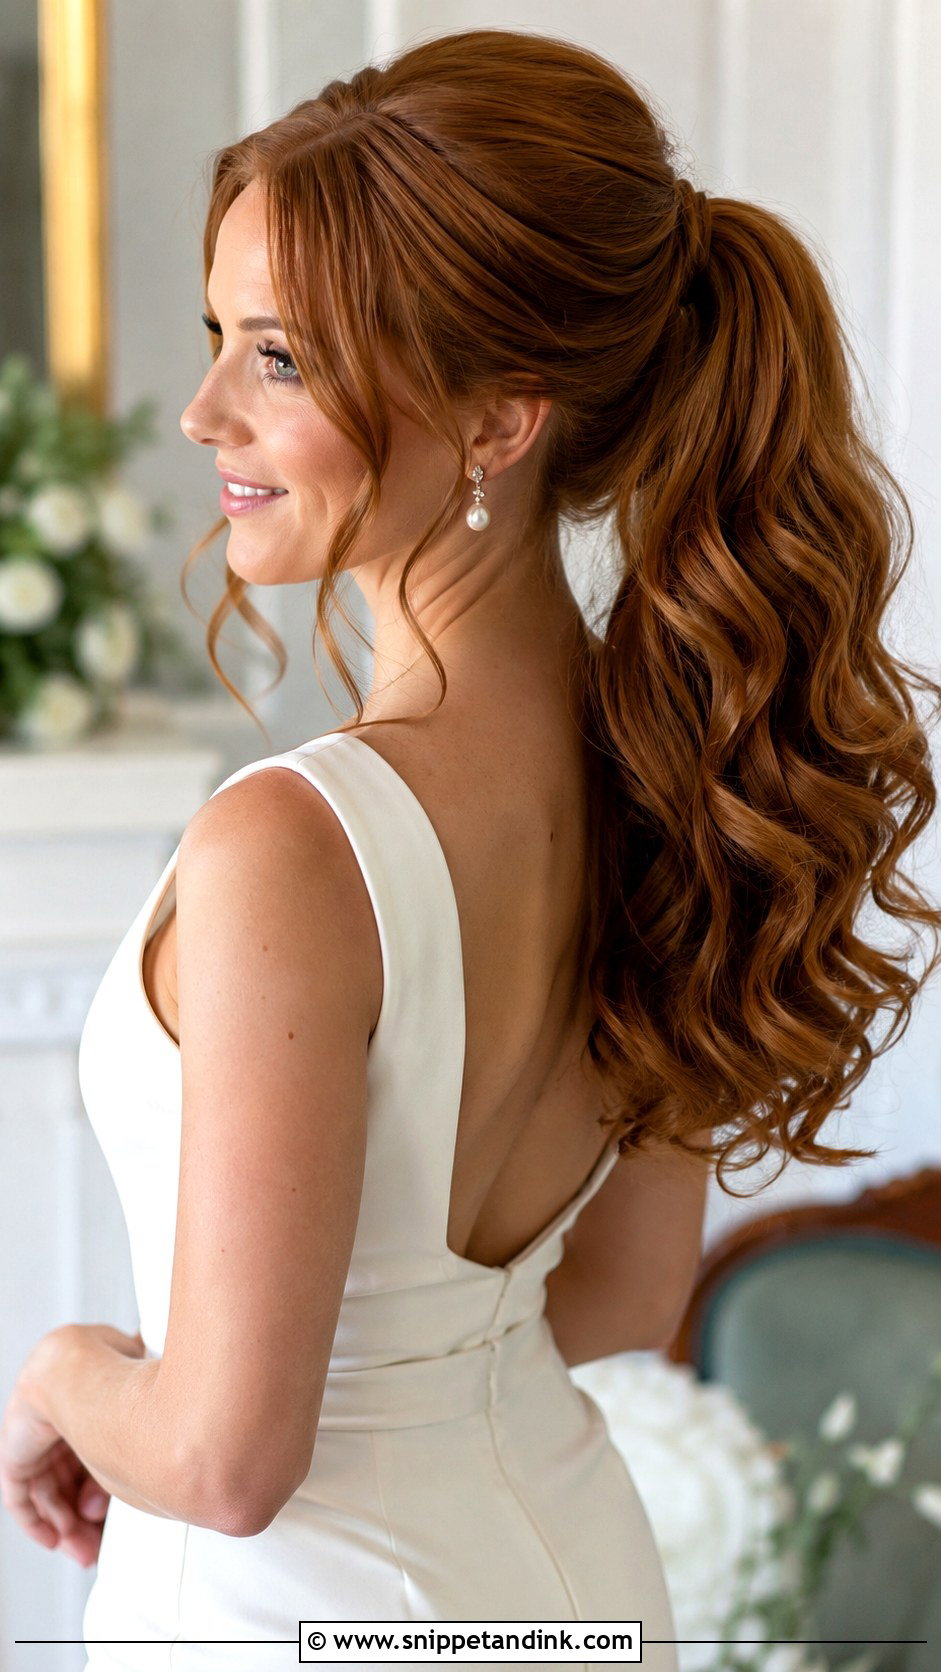
Ponytails get heavy, and a heavy one drags the front back and flat by mid-afternoon. To stop that, I tease lightly at the crown and set the ponytail base with two elastics and a pin wrapped through. Then I curl a few soft pieces around the face, which is what makes it read as a wedding style instead of a gym one. Height depends on the dress and your face: low feels romantic, mid-height is the most wearable, high is the most dramatic. A strand wrapped around the base hides the elastic.
11. Wedding Side Swept Curls
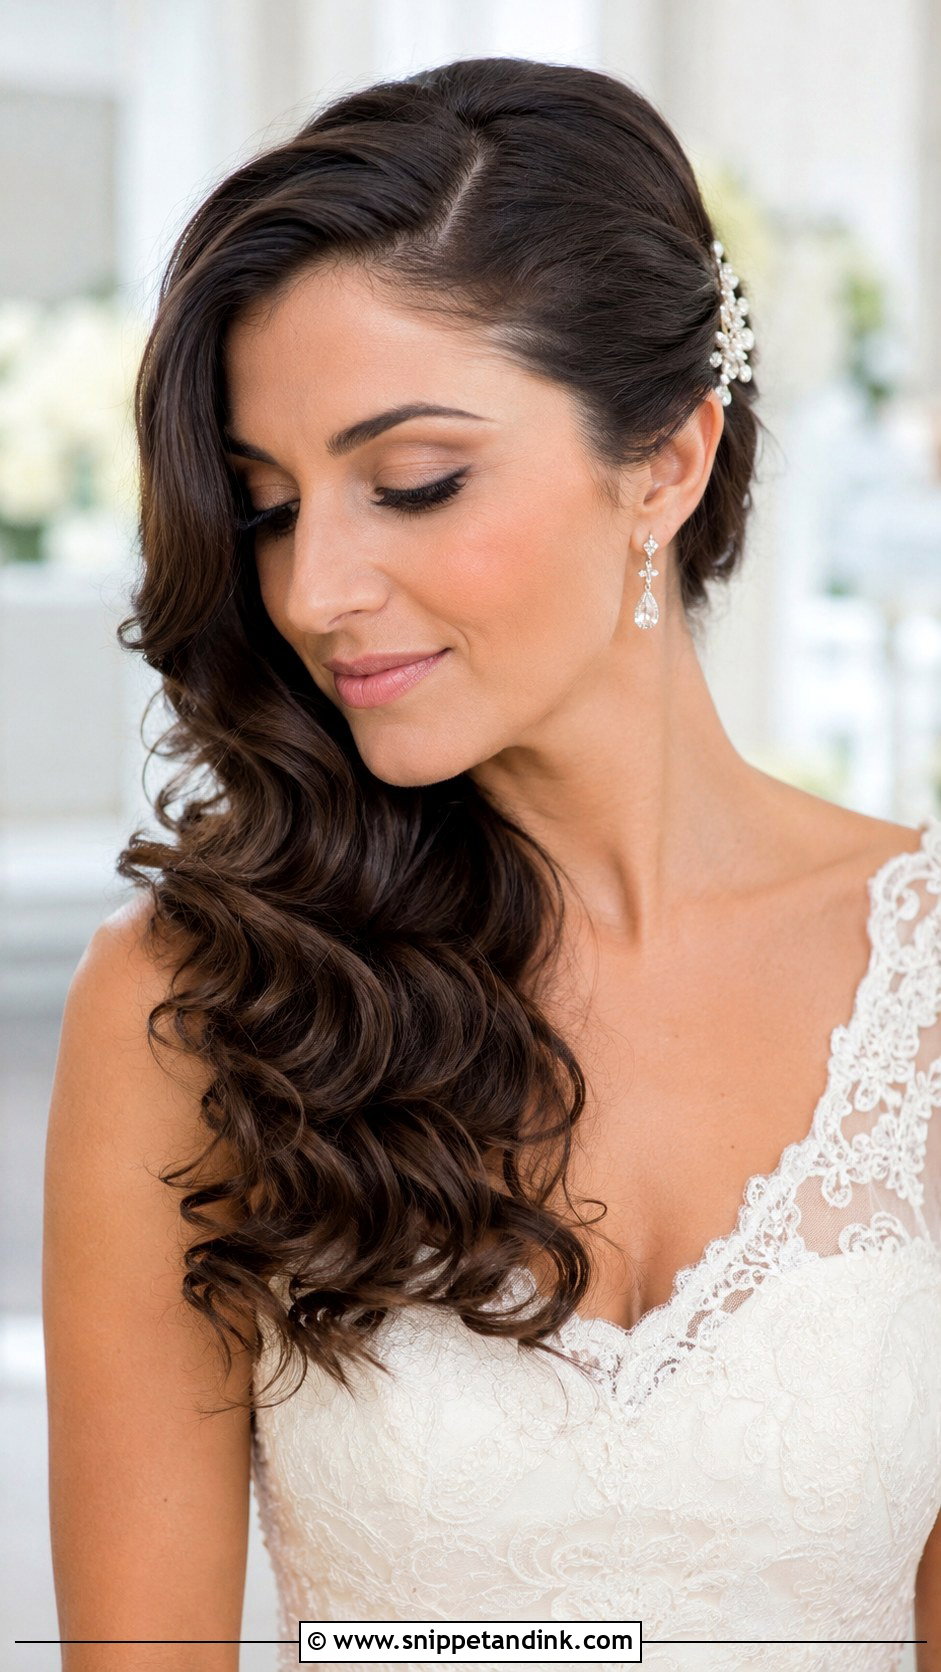
From the front, side-swept curls are asymmetrical by design: one side tucked and smooth, the other full of curls over the shoulder. Put the curls on the side opposite your best earring or your bodice detail so both get seen. It gives drama without an updo and suits medium and long hair. The tucked side needs crossed pins hidden behind the ear, because that’s the side that gets bumped in every hug. I’d avoid it with a one-shoulder dress whose strap is on the curl side; they fight for the same space.
12. Wedding Bob Front Look
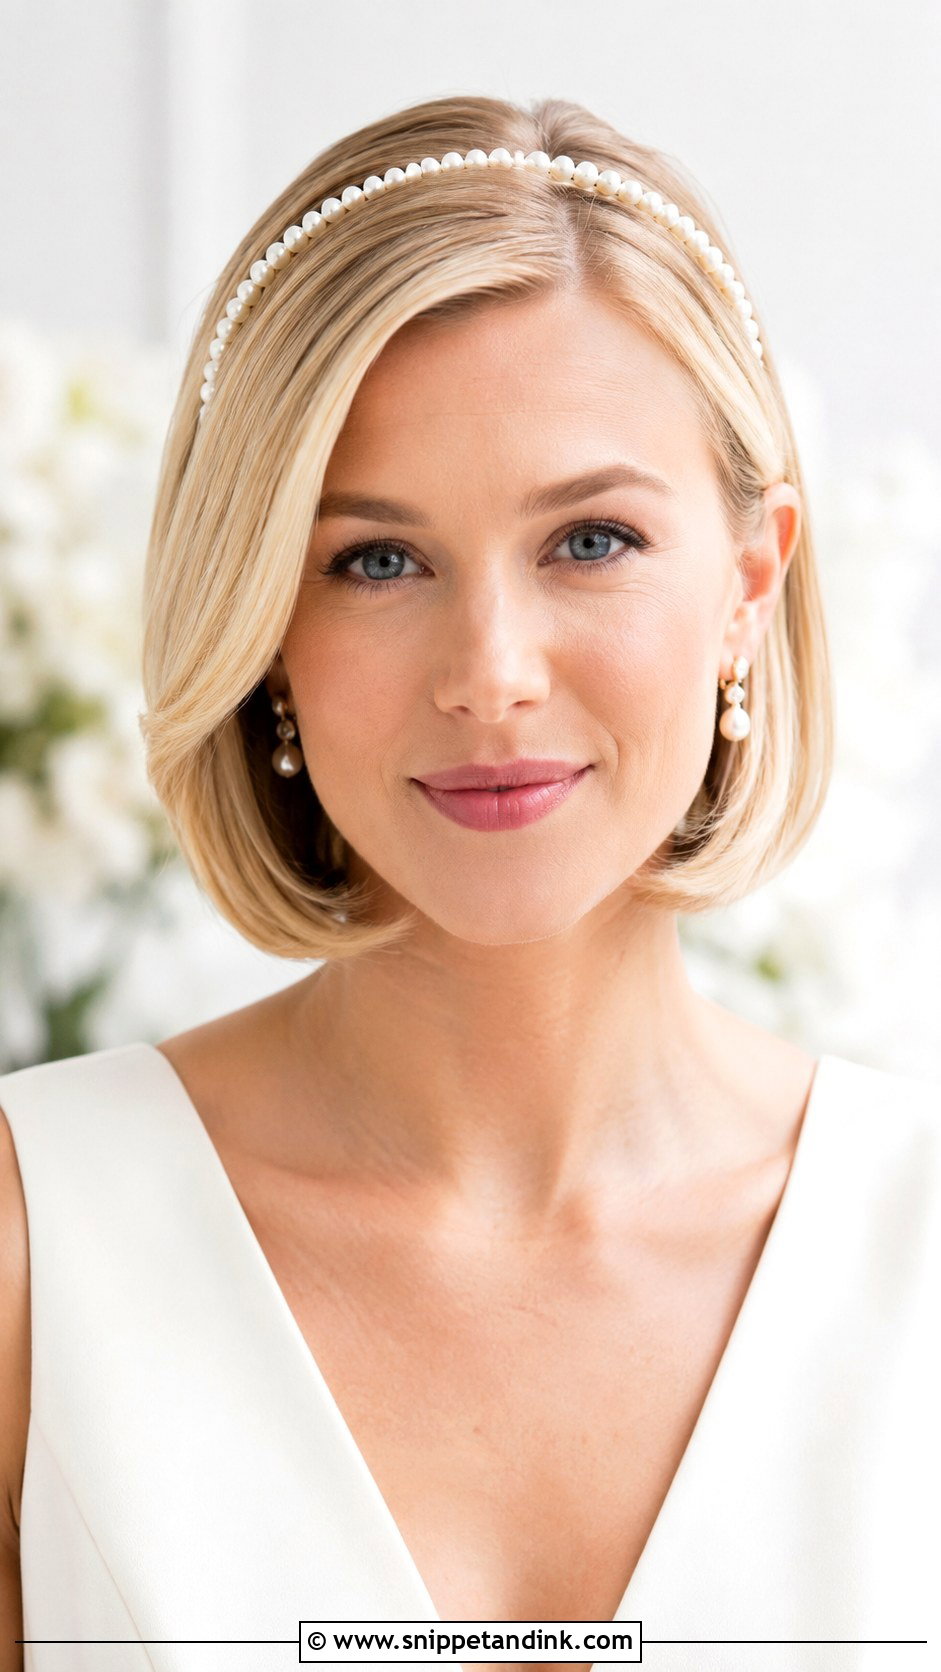
A bob frames the jaw and cheekbones directly, so a wedding bob front look is as much about the cut as the styling. Get it trimmed one to two weeks before, not the day before, so the ends have time to settle. On the day I smooth it, add a soft bend or a curve at the ends, and tuck one side behind an ear if you want earrings seen. A blunt bob looks best kept sleek at the front. Veils, pearl headbands and short combs all anchor well in a bob.
13. Wedding Pixie Cut Front Look
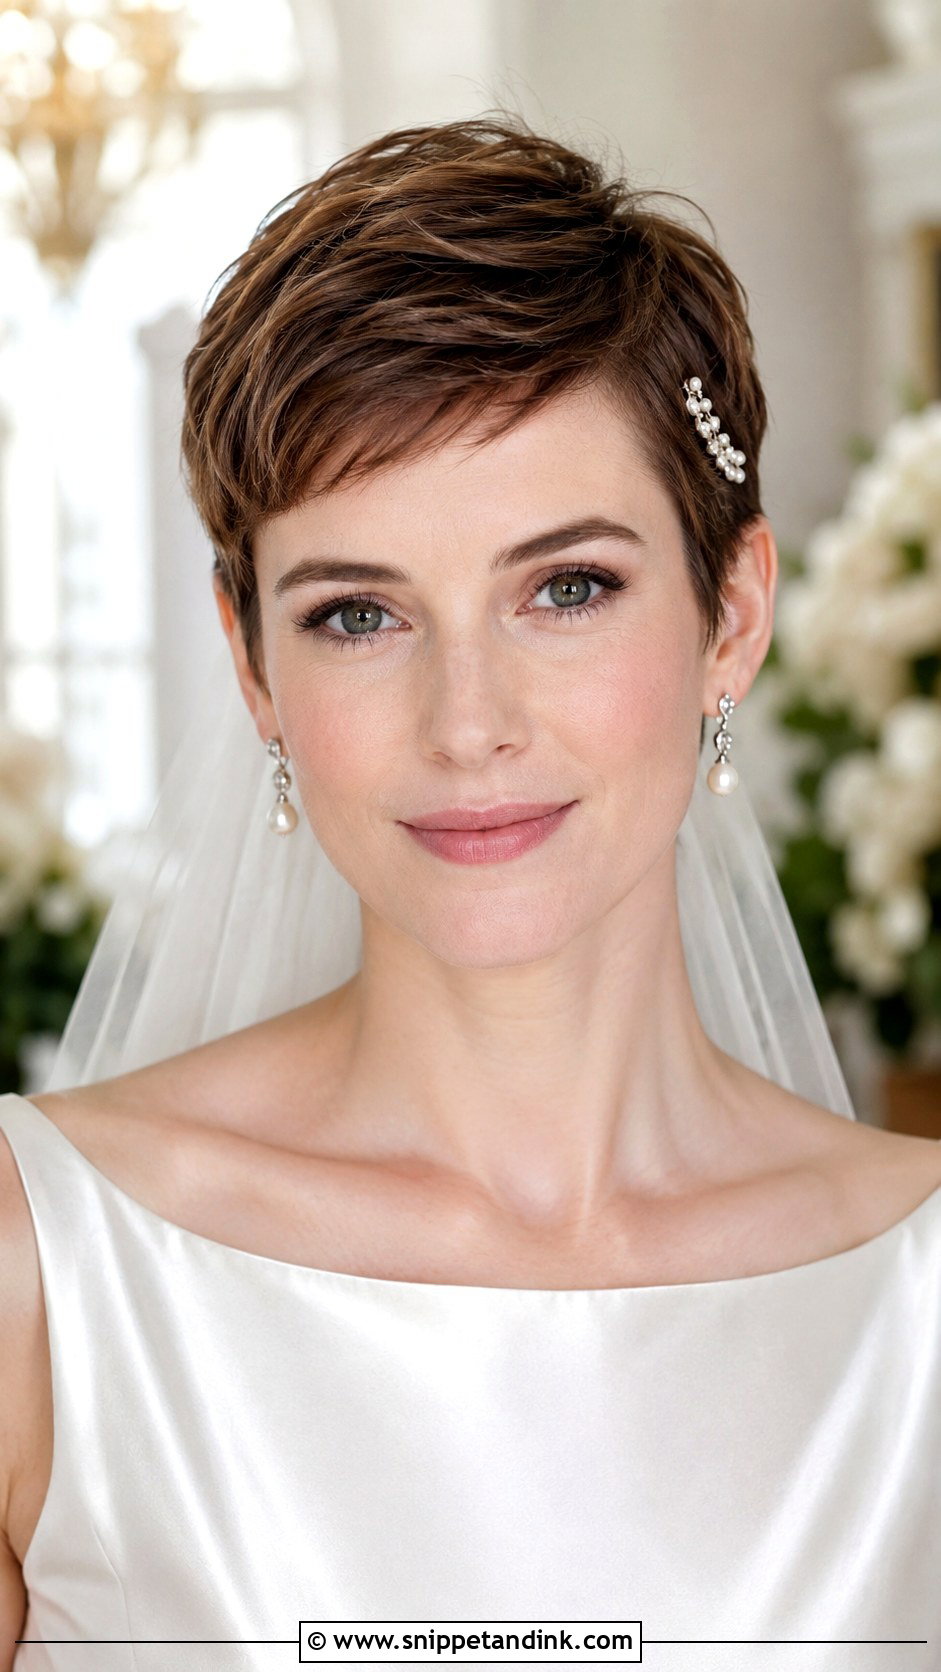
With a pixie, every millimeter at the hairline shows. I shape the front with a little light cream or paste, swept to one side, lifted slightly or smoothed flat, and keep the product light so it still looks like hair. Heavy wax shines under flash. A pearl barrette, a slim headband or a short veil on a small comb makes it instantly bridal. The cut puts the eyes, cheekbones, earrings and neckline on full show, so it’s worth having a trim about a week ahead.
14. Wedding Loose Updo Front Look
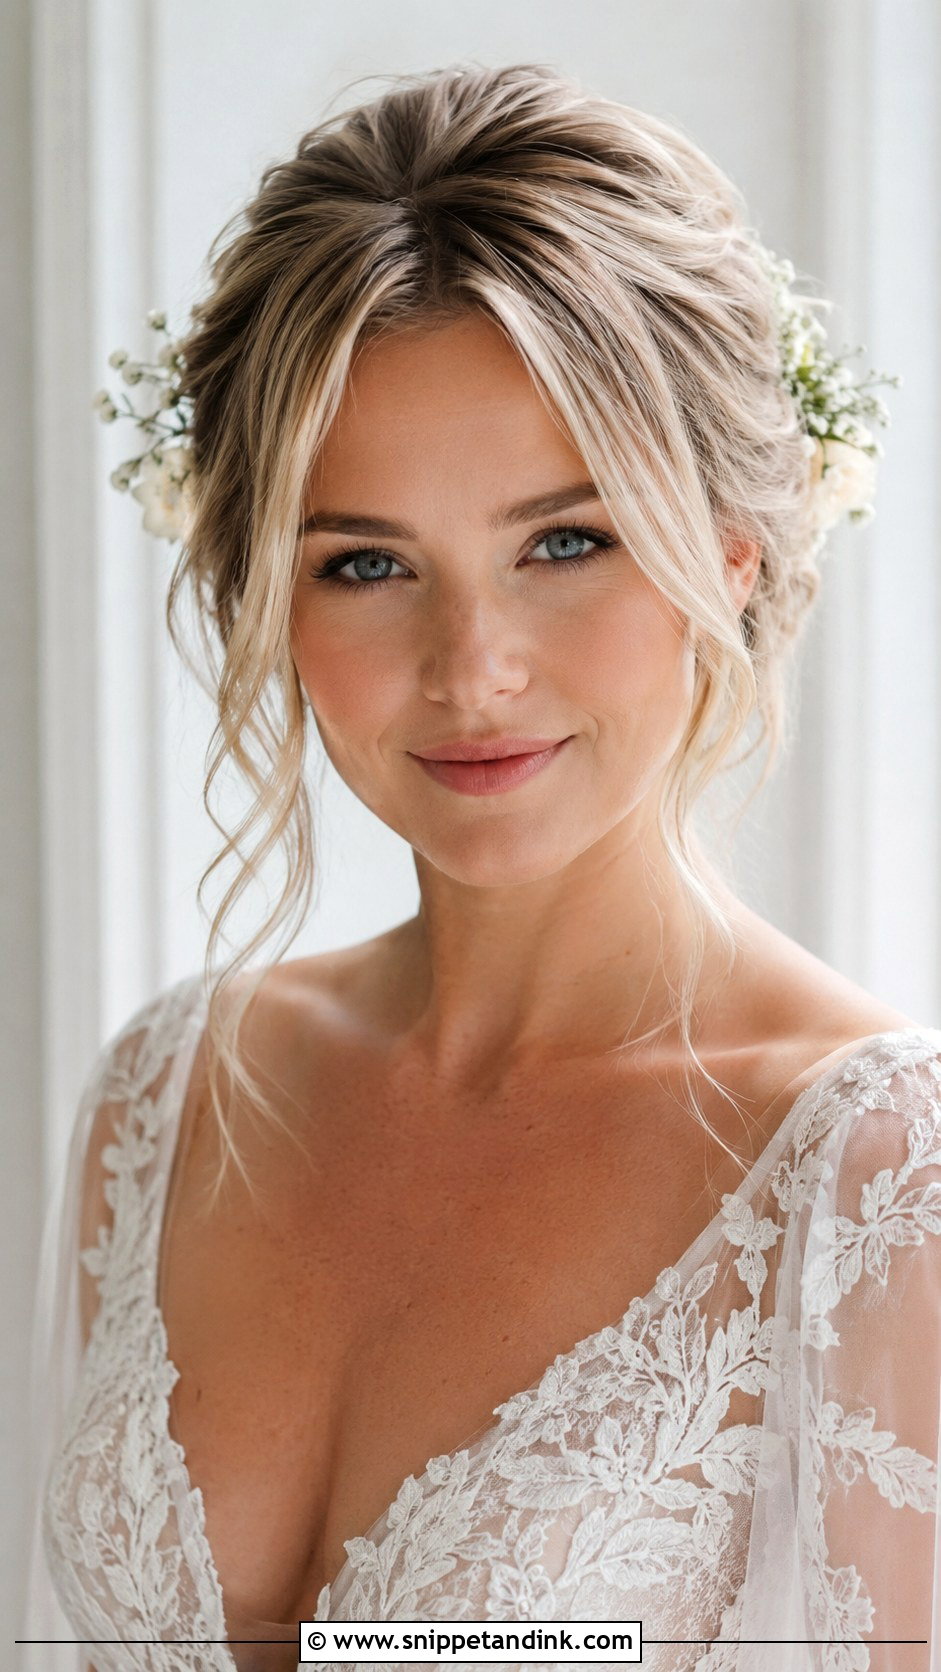
A loose updo looks undone, but from the front every piece is placed. I lift the crown, pull a few airy pieces out around the face, and pin them so they look like they fell there. If the pieces are too long, they sit on the lips and catch on lipstick, so I keep the face-framing strands above the jaw or tuck them behind the ear. It sits naturally with lace, floral pins and outdoor ceremonies, and the relaxed shape holds through a long day better than you’d expect.
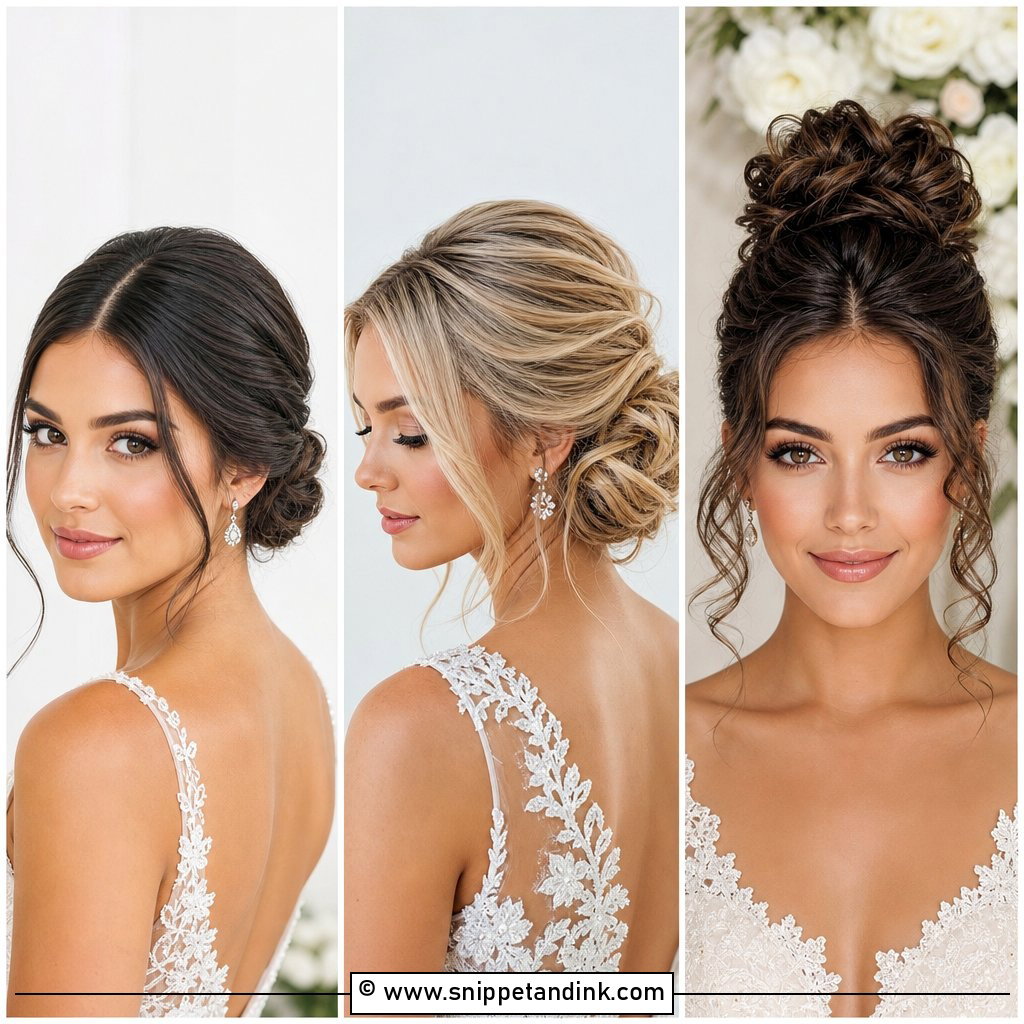
15. Wedding Front Twist Hairstyle
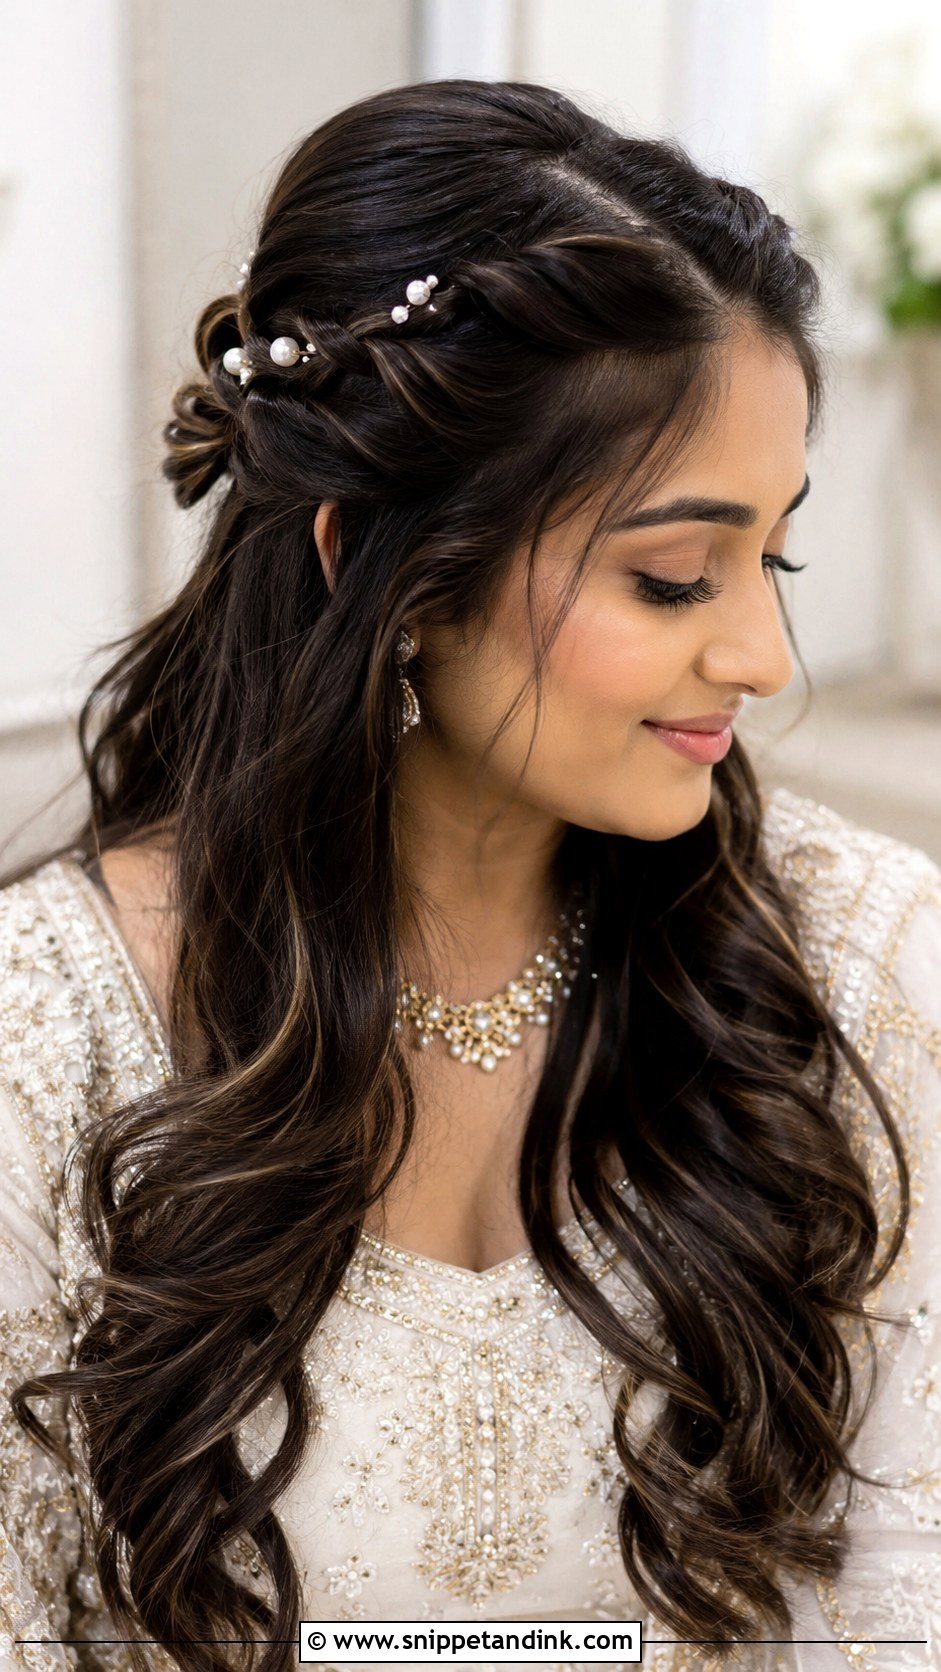
Not everyone wants a braid at the front, and a twist gives similar framing with a softer, flatter line. I take the front sections, twisted back from the hairline, and blend them into a bun, ponytail or half-up style. Twists unravel if the hair is too silky, so I spray the sections with texture before twisting and pin each one under itself. It suits medium and long hair. Tiny pearl pins along the twist are the simplest finish, and it keeps hair out of your eyes through photos and dancing.
Makeup, Sweat and the Hairline
The front of the hair touches the front of the face, so hair and makeup have to work in the right order. I like to set the hair, pin back the front pieces, let makeup finish, and only then release and style the tendrils. Curling face-framing pieces before foundation means they end up coated in powder or stuck to setting spray.
Three things that happen to the front by evening
- Baby hairs at the hairline frizz up, especially outdoors. A clean toothbrush with a little hairspray on it smooths them in seconds.
- Face-framing pieces stick to lip gloss. Keep them short enough to sit above the jaw, or tuck one side.
- The crown flattens under a veil. Lift it gently with your fingertips after the veil comes out; don’t backcomb it again.
Give whoever does your touch-ups a photo of the front taken right after styling. It’s much easier to put a piece back where it was when you can see where it started.
Most Guests Only Ever See the Front
The front is the view you’ll see most in your photos, so give it more thought than the back. Save front-view inspiration before your trial, because the part, the bangs and the face-framing pieces change the mood more than the bun does. Factor in your neckline, veil, earrings, face shape and hair texture. Sleek buns read polished, loose updos read soft, waves read relaxed, and braids or twists add detail. Then look at the trial photos straight on and decide whether it still looks like you.
You'll Like These Ideas:


Leave a Reply