
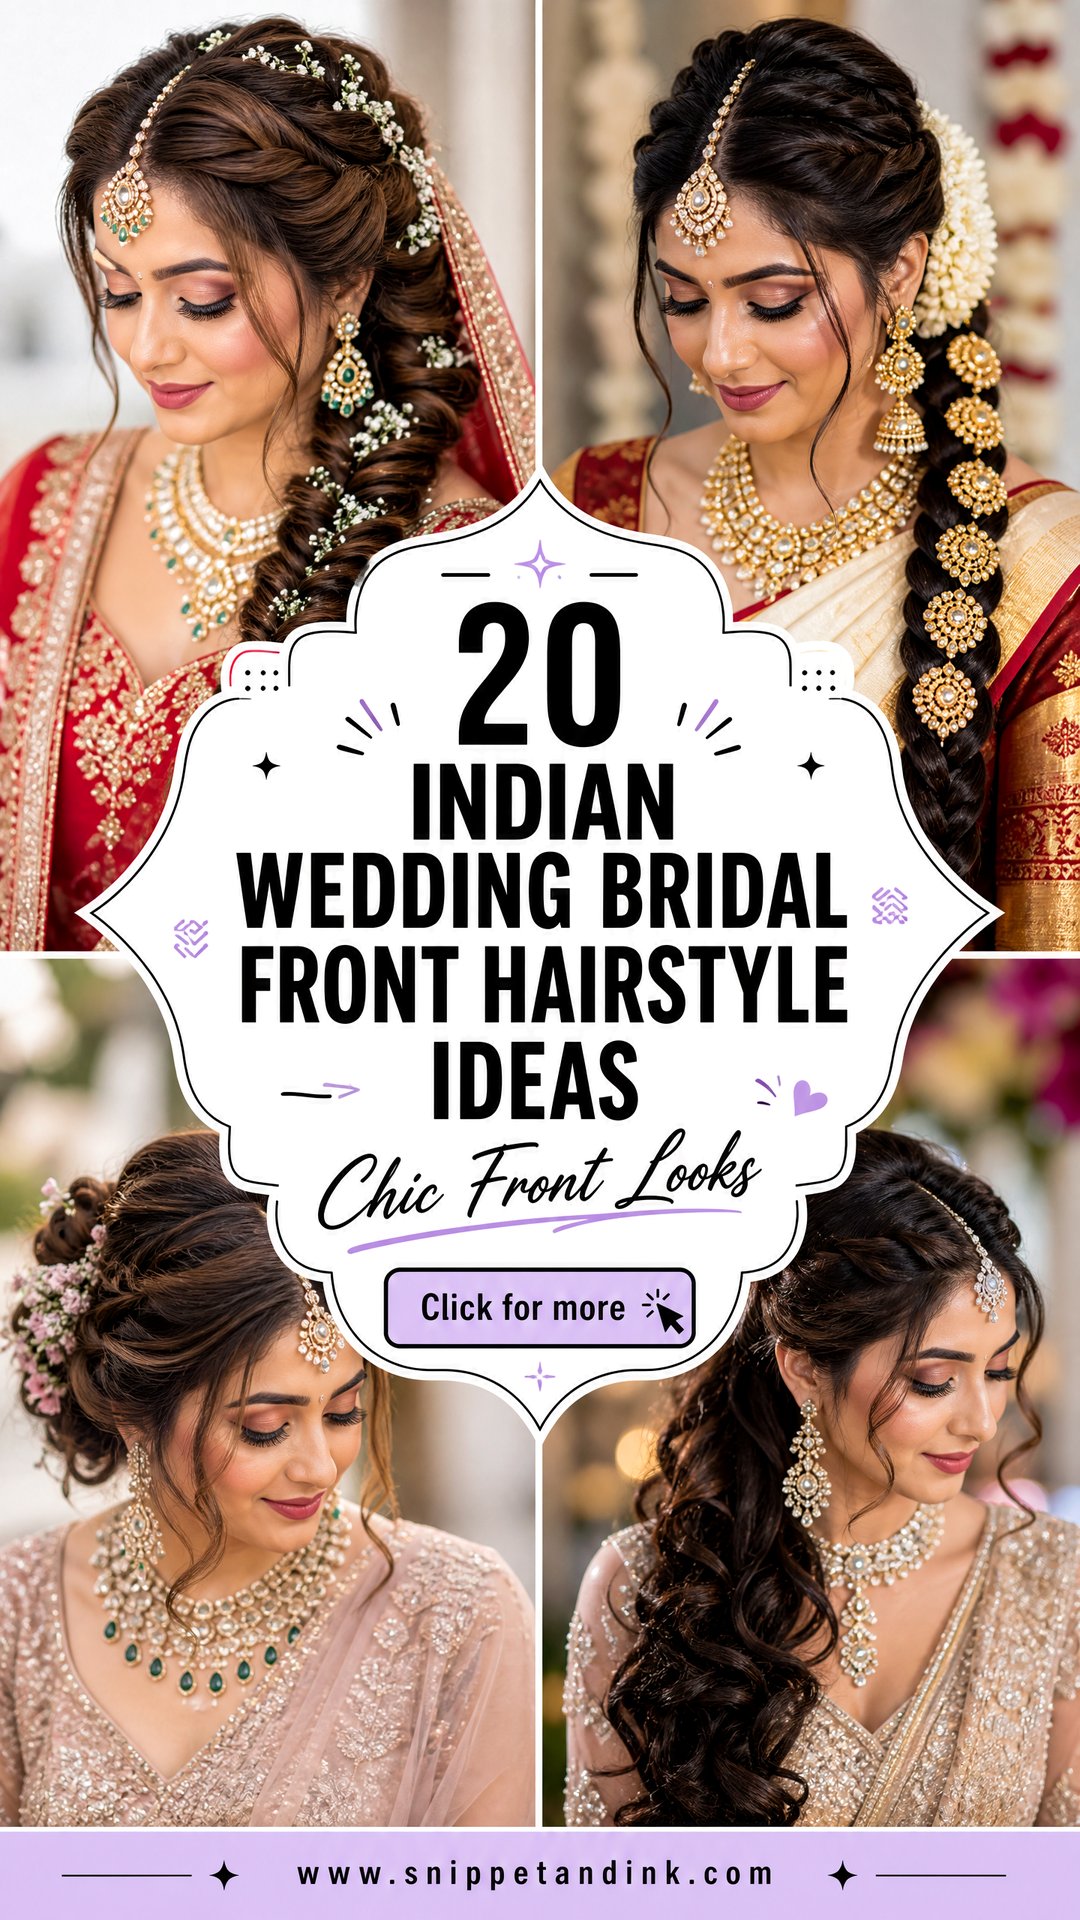
With Indian bridal hair, I always work the front view first. It’s what fills the varmala close-ups and the mandap portraits, and it’s where the maang tikka, matha patti, jhumar or passa meets your face. The back of the hair matters for maybe a fifth of the photographs. The front is in nearly all of them. Below are twenty front styles, from a strict center part to a royal puff, each with what it asks of your hairline and your jewelry.
Hairlines, Cowlicks and Thin Temples
Before I decide on any front style, I look at the hairline with the hair pulled straight back. That few seconds tells me more than the inspiration photos do, because the front sits right on the hairline and every quirk in it shows in close-up.
A cowlick at the front
A cowlick decides the part for you. Fight it with a center part and it will spring up by the second hour. I either part with the cowlick’s direction or blow-dry it hard the opposite way while wet, then pin it flat under the jewelry.
Thinner temples or a widow’s peak
Sleek, scraped-back fronts expose thin temples. A soft side sweep, flicks or a jhumar placed over that area hides it far better than a tight center part. A widow’s peak is the opposite: it suits a center part and a matha patti that follows the line.
Very short baby hairs
They frizz the moment the room warms up. I lay them with a small brush and a little gel so they look neat rather than scraped, and that touch-up only takes a few seconds later on.
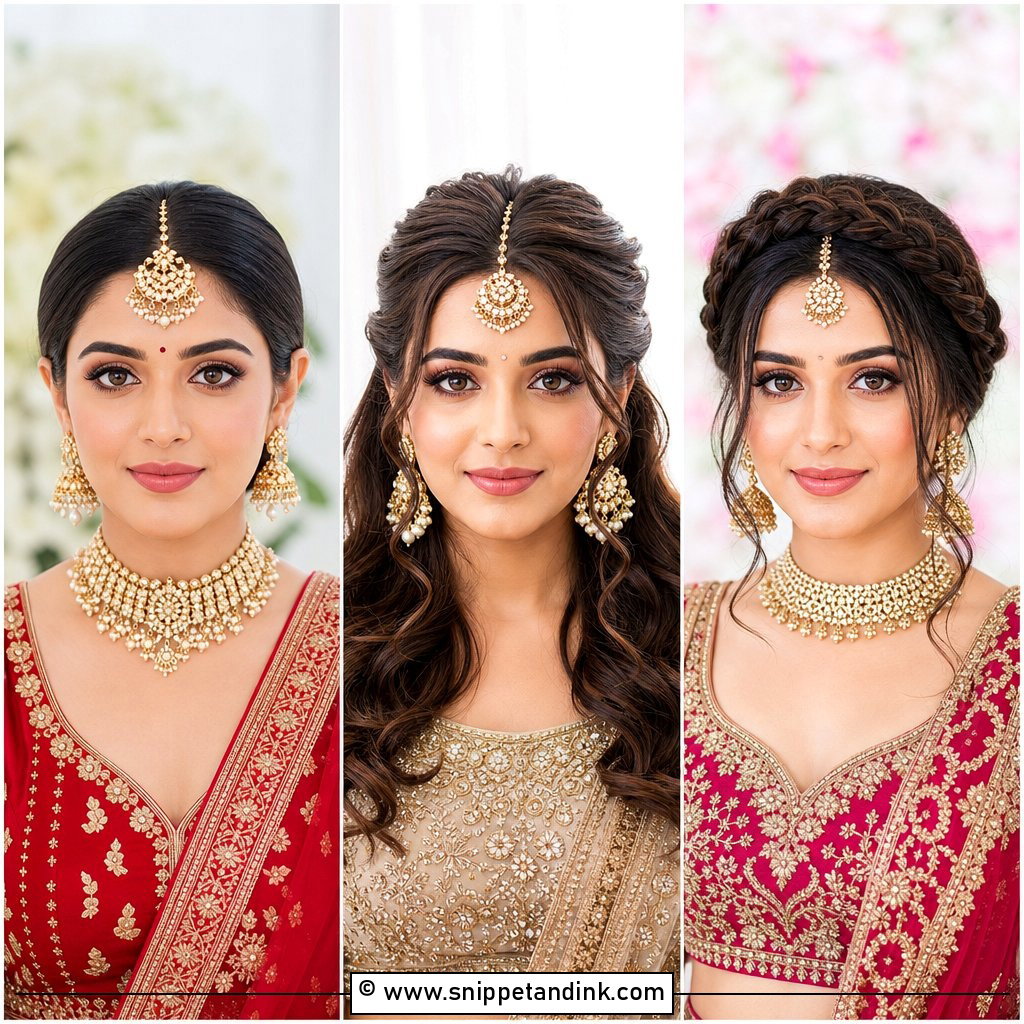
1. Indian Bridal Center Part Low Bun
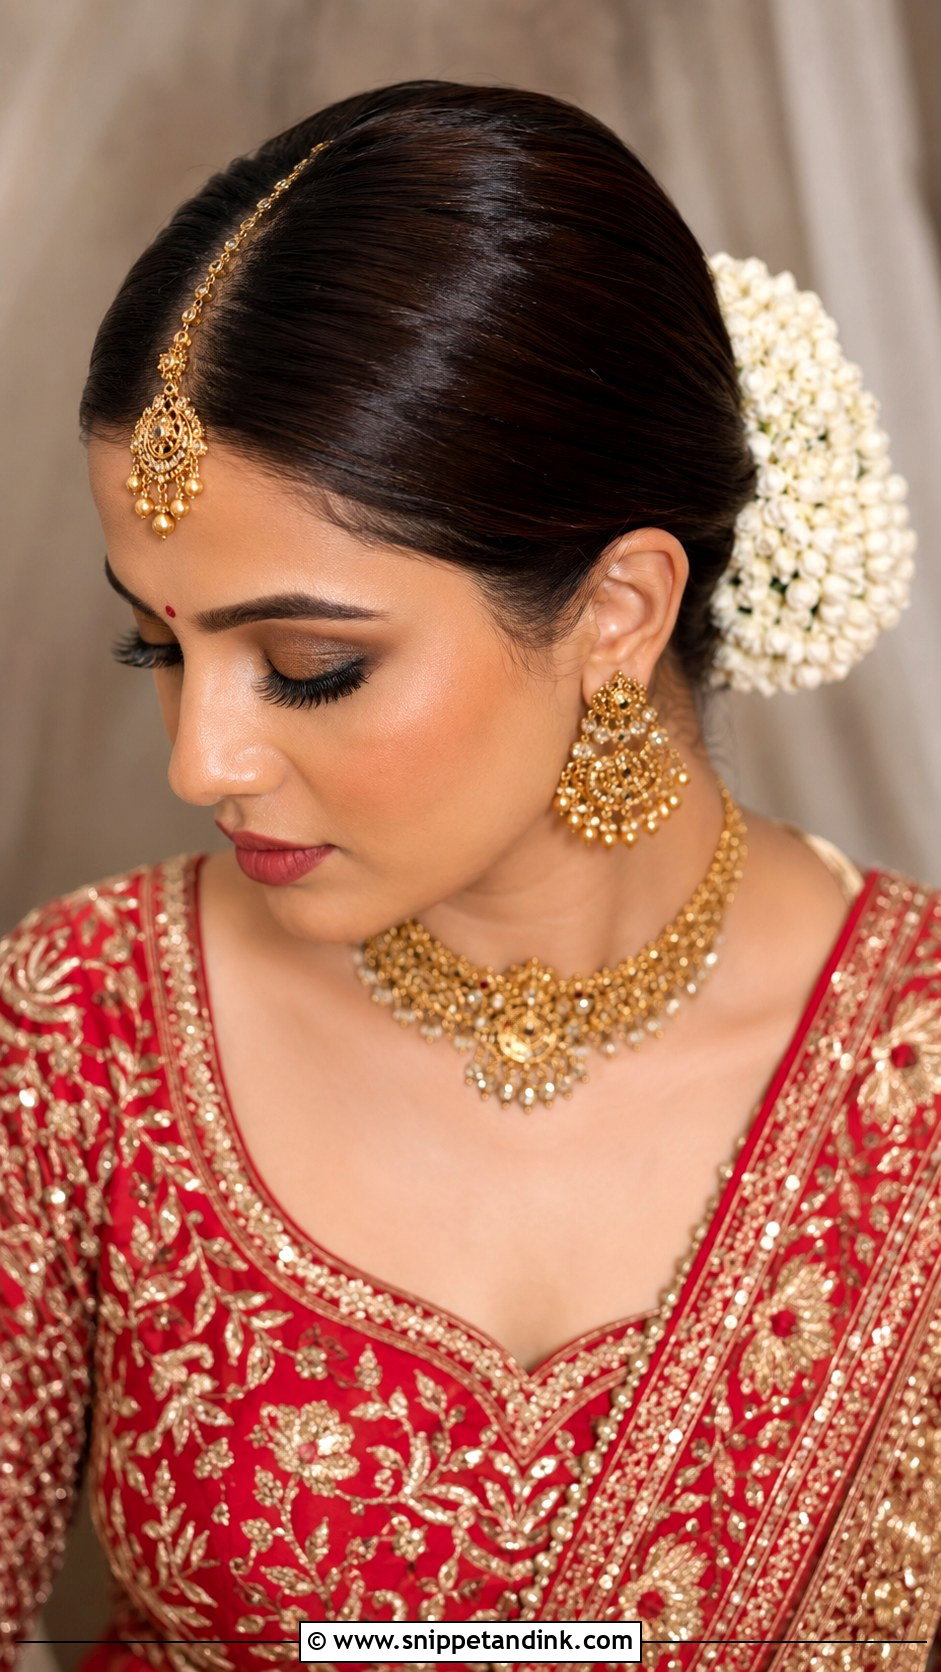
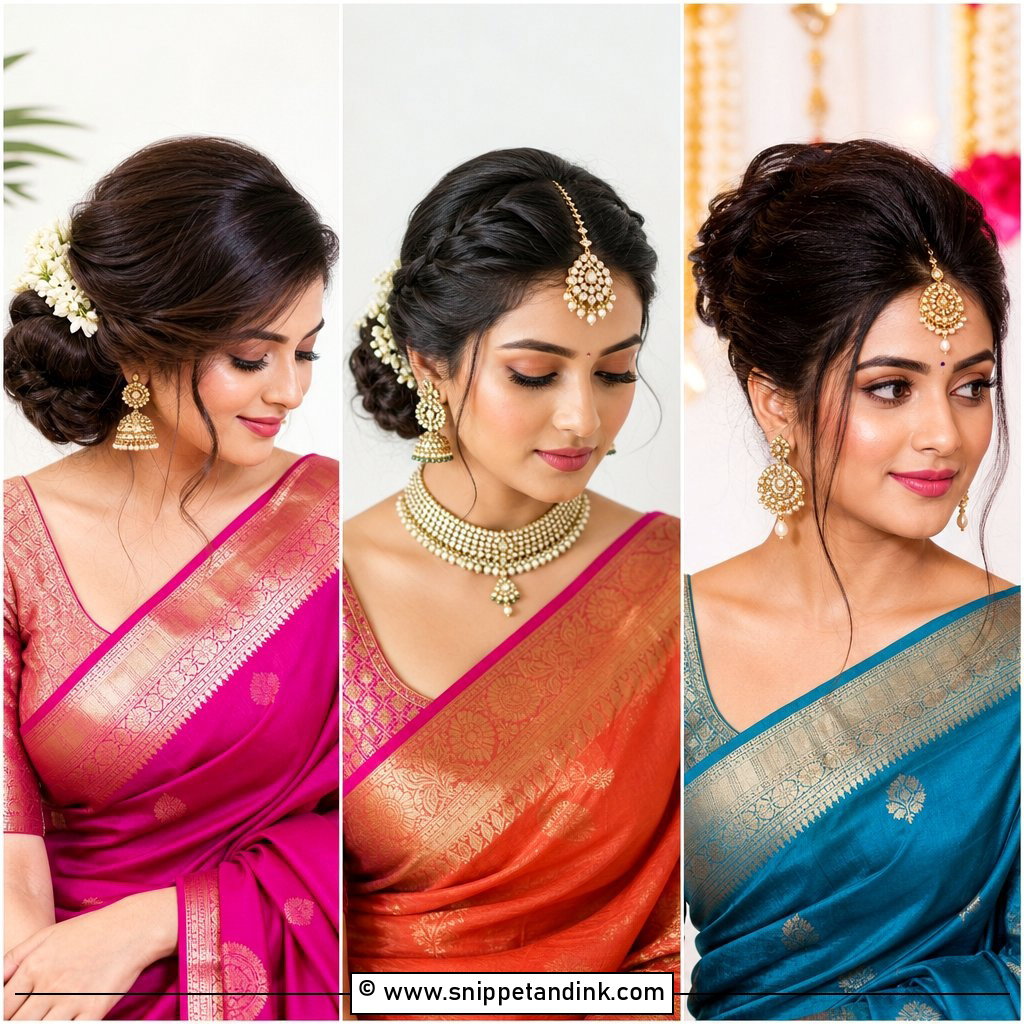
The center part with a low bun has lasted because it does one job perfectly: it gives a maang tikka a straight, symmetrical line to hang from. I part from the middle of the brow and check it against the nose, not the hairline, since hairlines are rarely even. The bun can stay smooth or carry jasmine and pearl pins. It suits most oval and heart-shaped faces and takes a dupatta pinned over the head without fuss. A strictly flat center part can look severe on a long face, so I leave a whisper of lift at the crown.
2. Indian Bridal Front Puff Bun
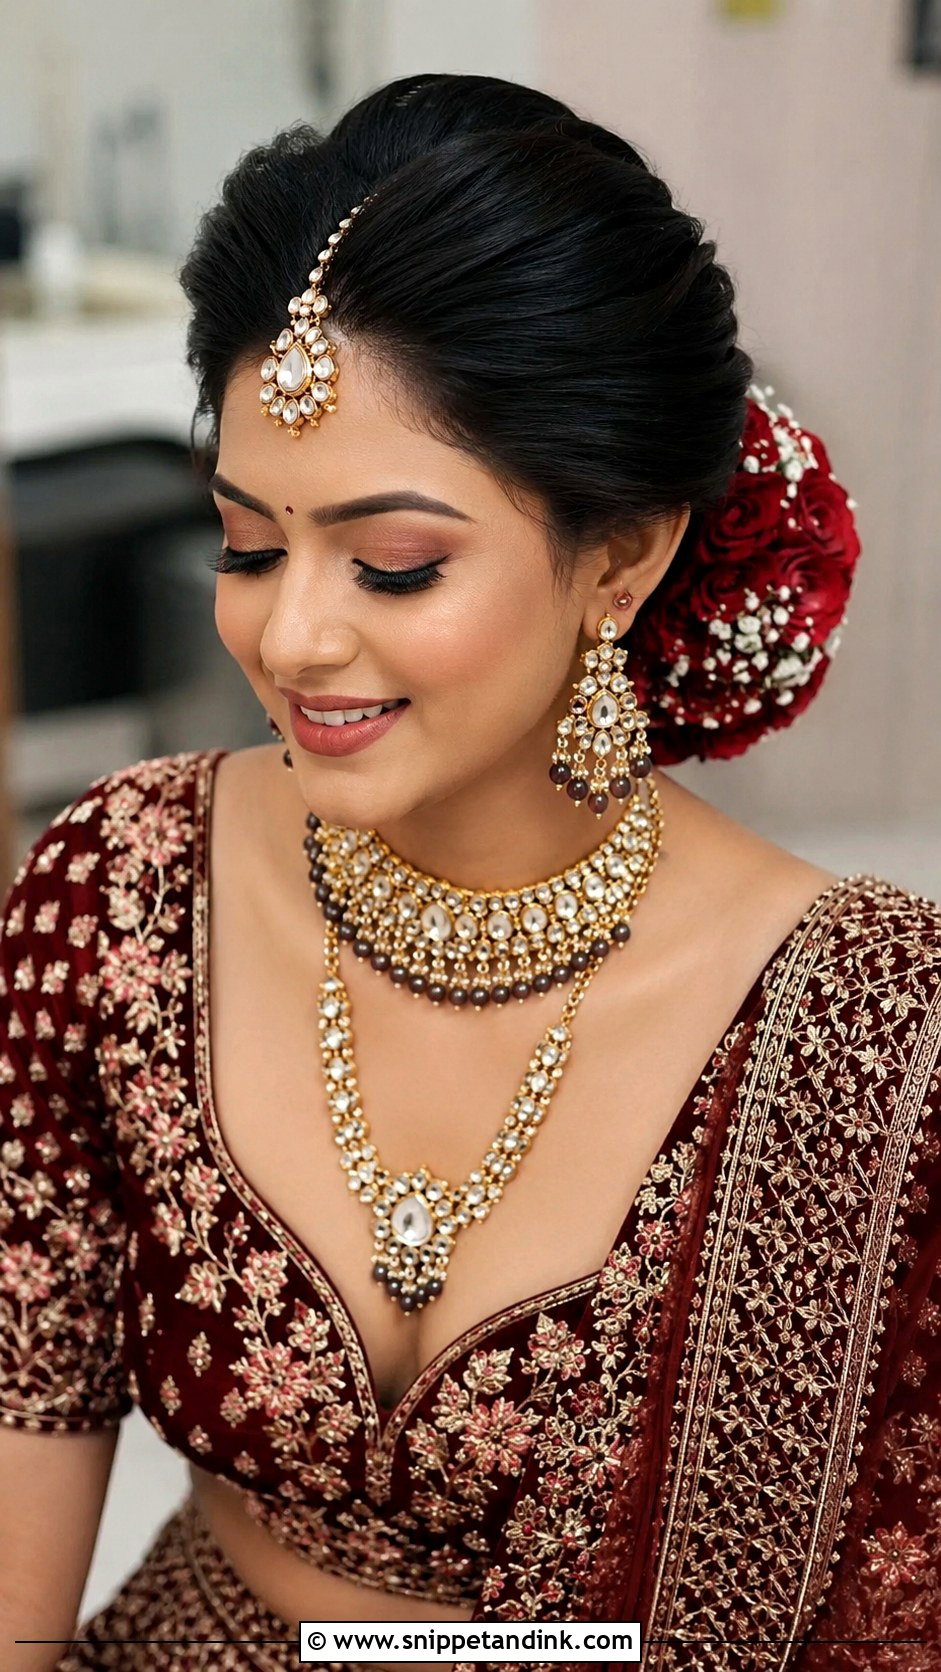
A front puff bun adds height right where the jewelry sits, which is why North Indian brides with heavy kundan sets lean toward it. I lift the crown in small backcombed sections, smooth the top layer over them, and pin the rest into the bun. A small puff reads natural; a tall one reads grand and a bit dated. The dupatta should sit just behind the puff, pinned into the bun, or it will squash the volume flat within the first hour.
3. Indian Bridal Side Part Bun
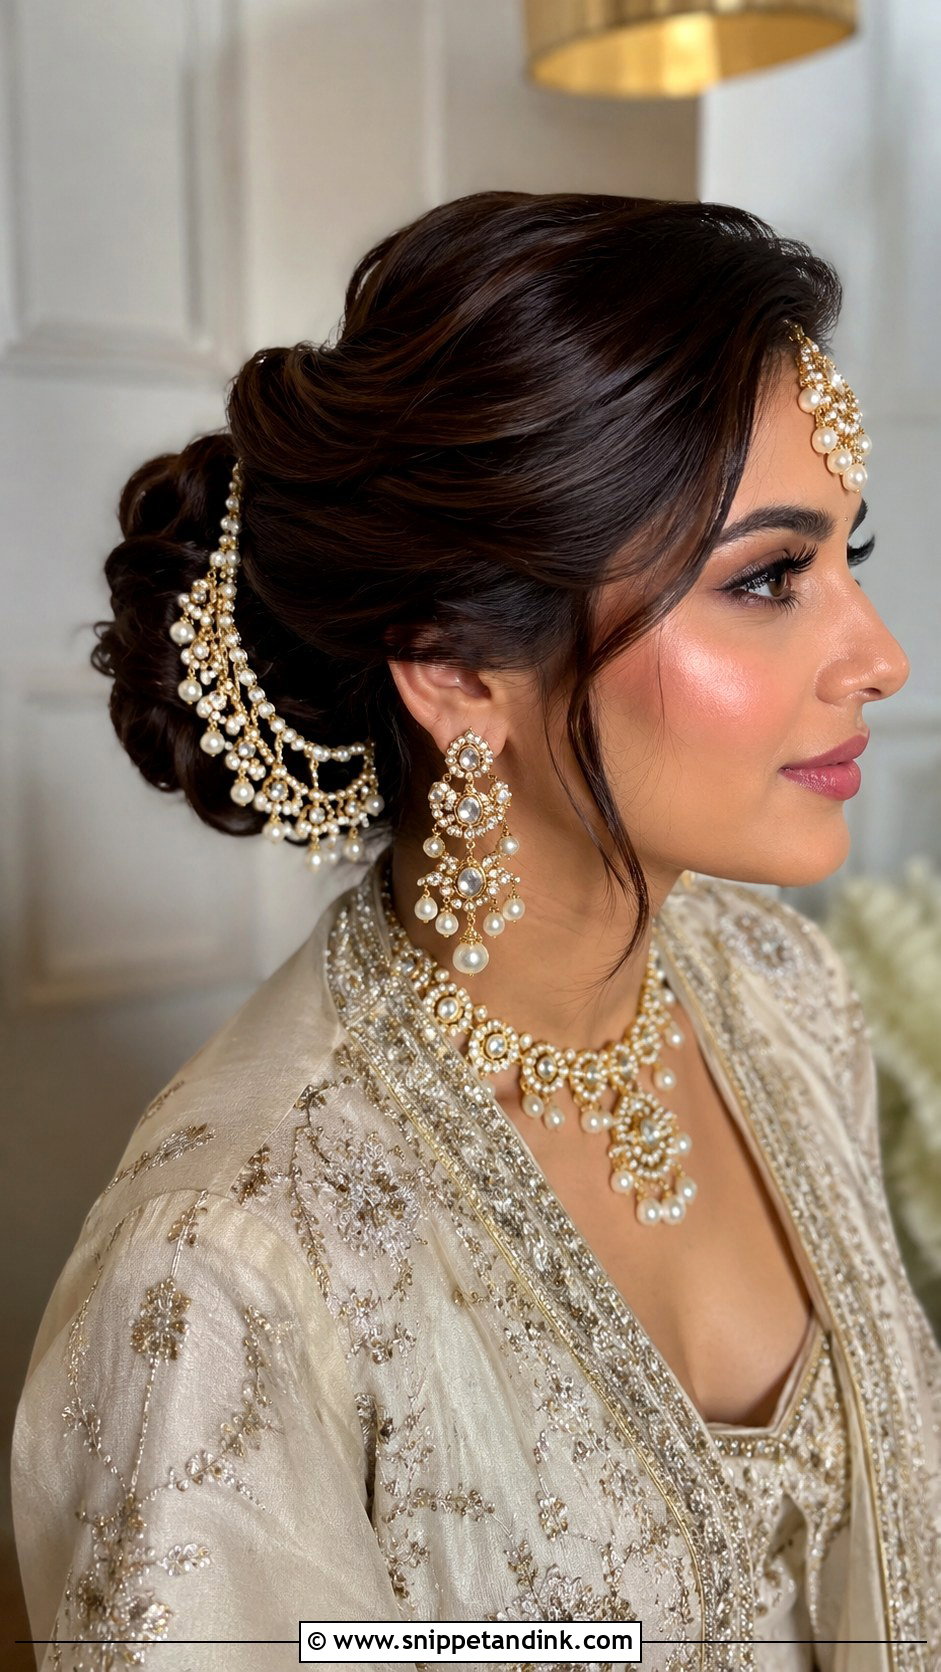
Moving the part to one side changes which jewelry works. A passa, jhumar or side tikka sits naturally on the fuller side, and the diagonal line softens a square or long face. I sweep the front across the forehead and pin it under the top layer, then build the bun low, or slightly higher if the dupatta needs more support. A couple of face-framing strands can stay out, but keep them few and set, or they end up in your lip color by the pheras.
4. Indian Bridal Sleek Bun With Matha Patti
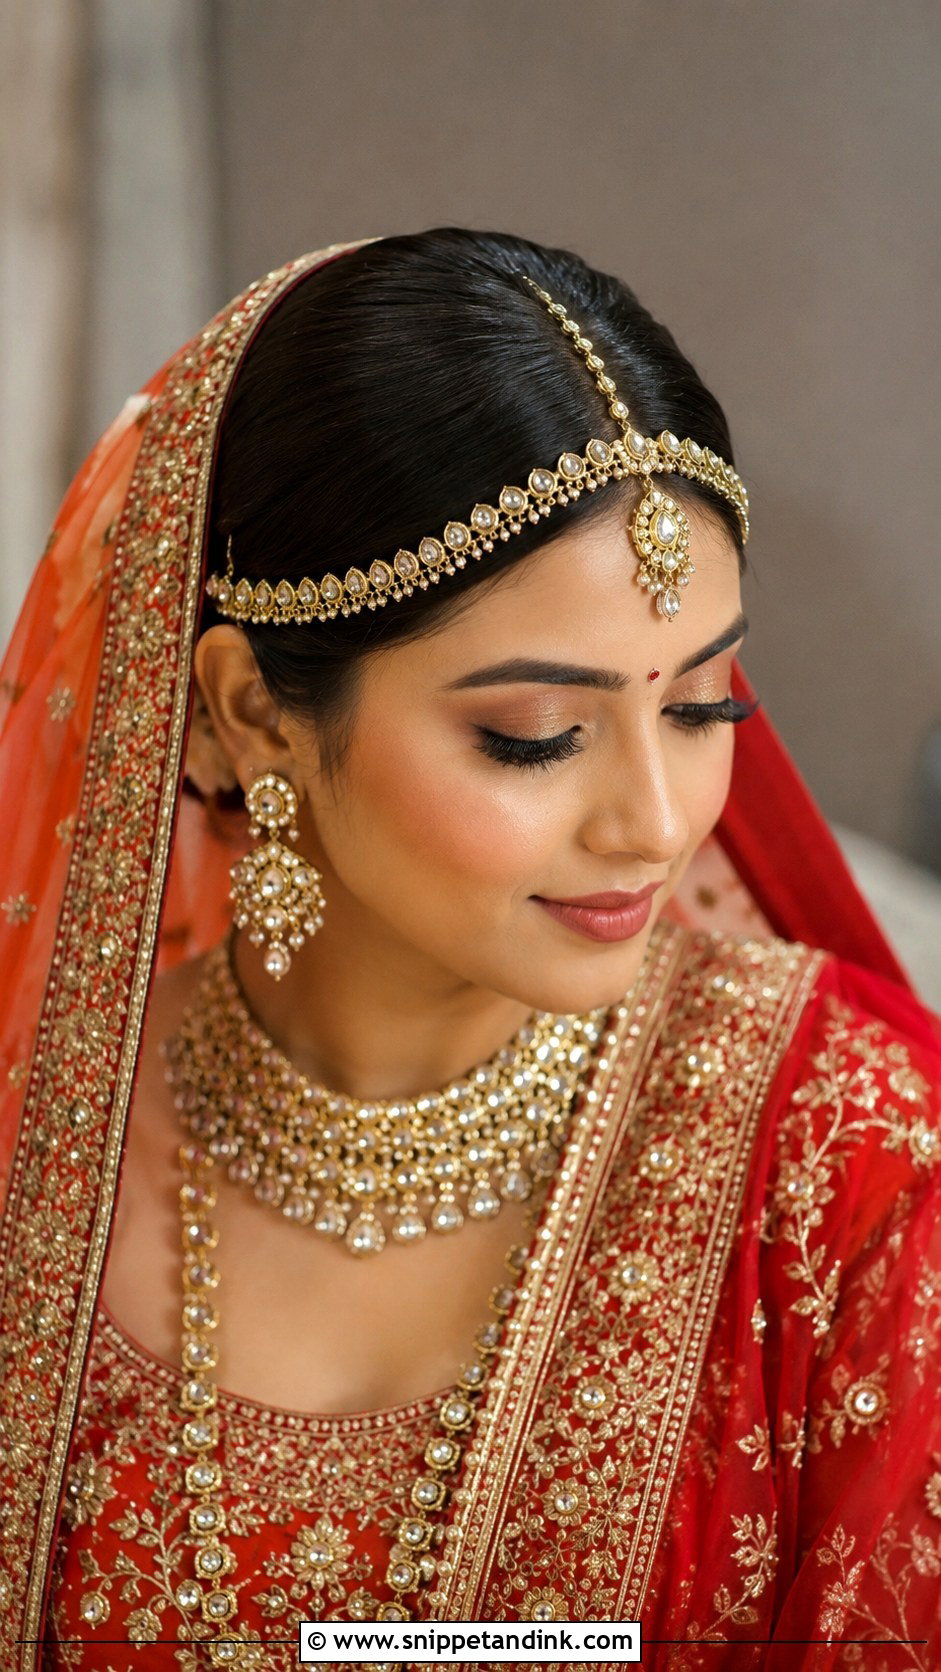
Pressing the front flat and smooth gives a matha patti a clean hairline to follow, so the jewelry becomes the whole story. With red, maroon or gold bridal outfits this is very traditional and very calm. Shine and clean edges carry it, so I lay the hairline with a little gel and a fine comb. The matha patti goes on and gets pinned before the final spray. If it’s added after, it sits on a slick surface and creeps forward every time you look down during the rituals.
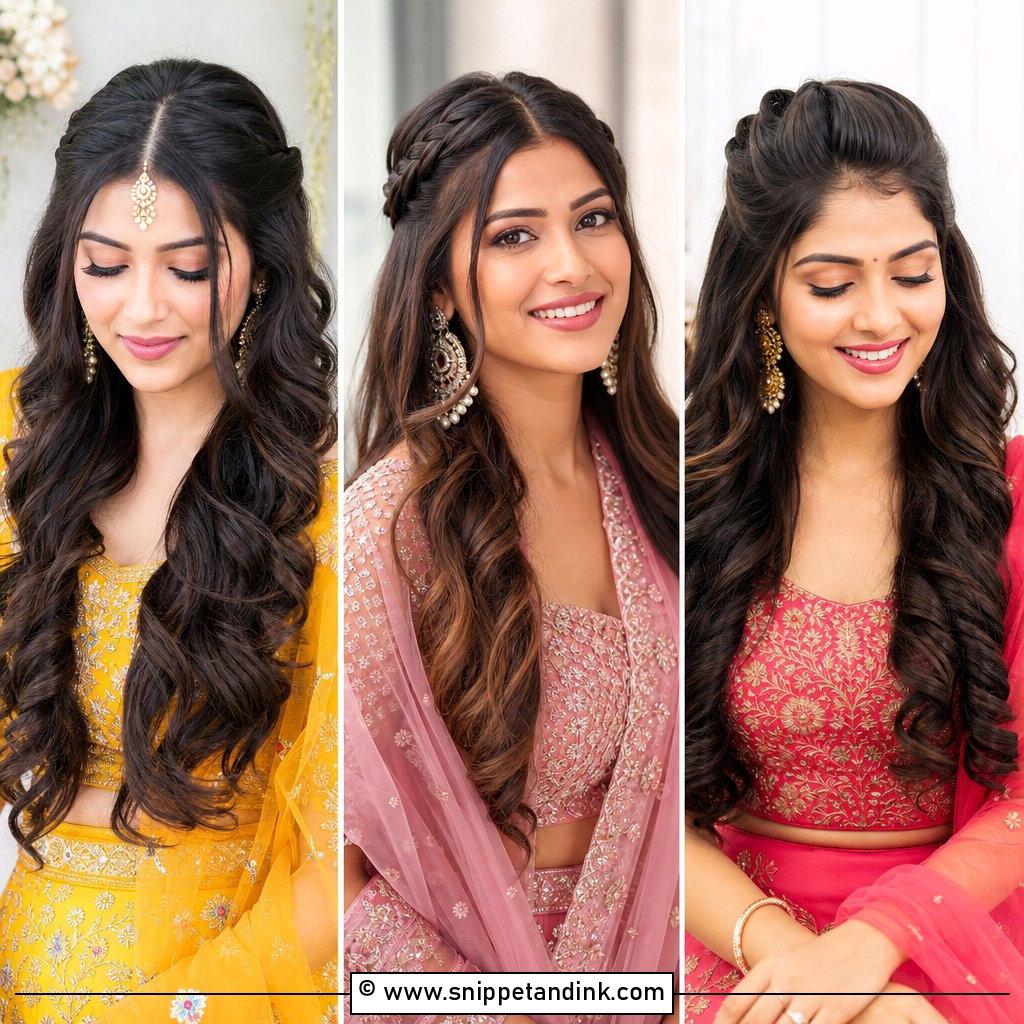
5. Indian Bridal Loose Curls With Maang Tikka
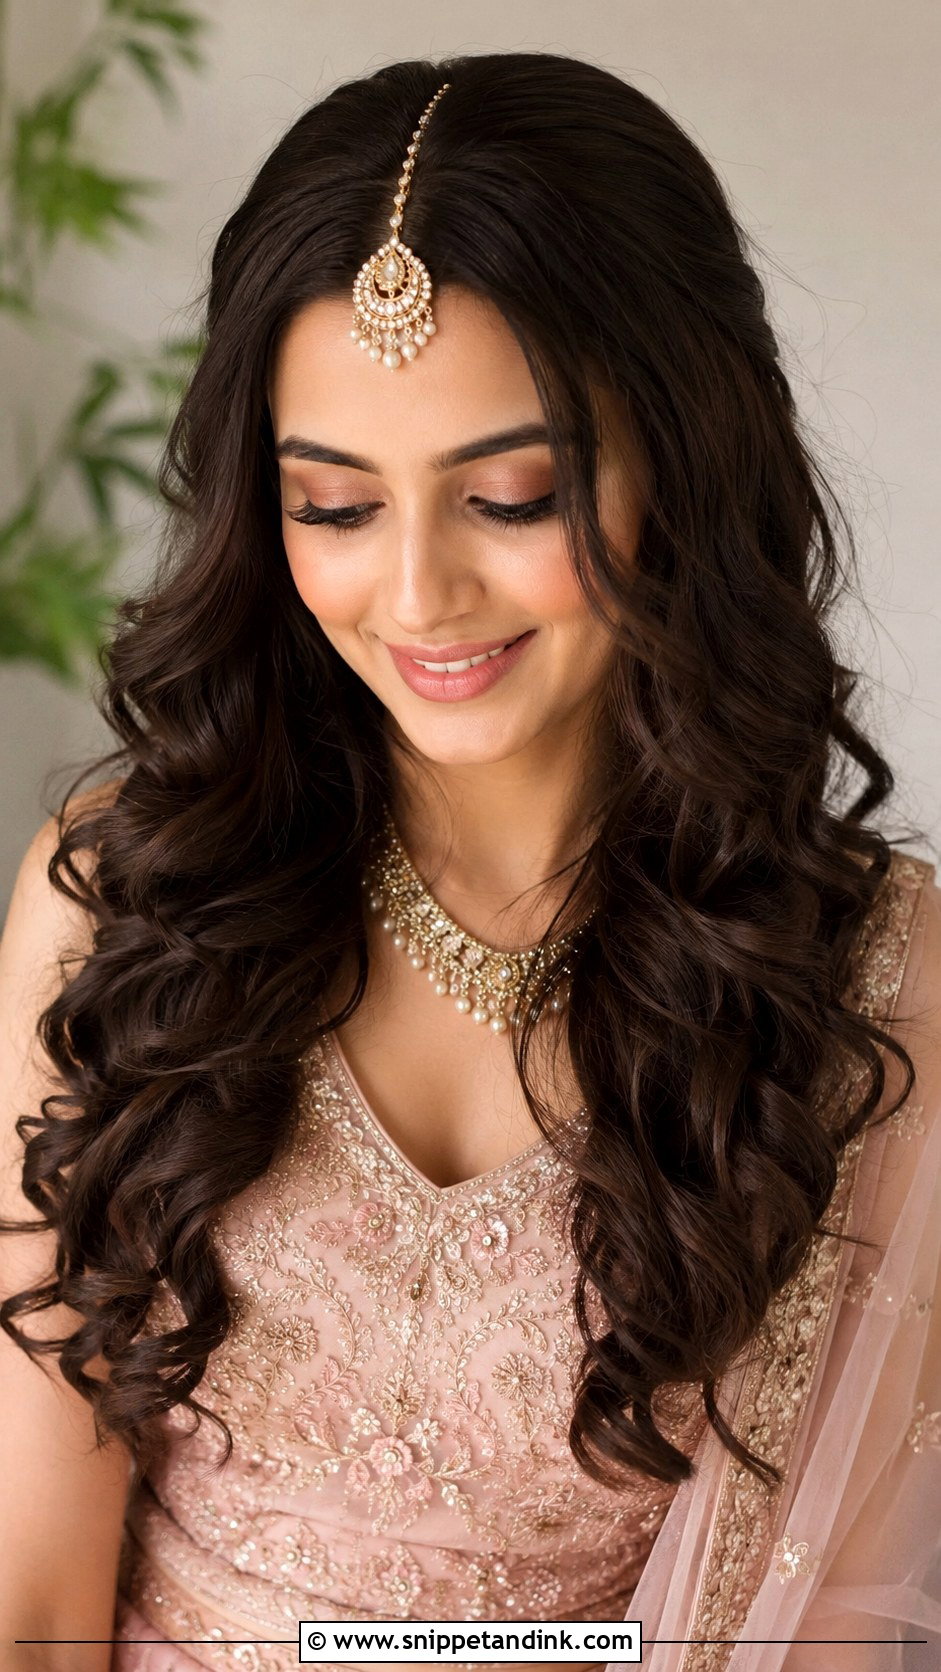
Open curls with a maang tikka keep the front bridal while the rest of the hair moves freely. I curl the face-framing pieces away from the face so they open it up instead of closing it in. It’s lovely for an engagement or reception with a light dupatta, and it softens a deep neckline. With a heavy dupatta on the head, though, the curls get crushed and the tikka chain tangles, so I wouldn’t choose it for the main ceremony. Use a setting spray that holds movement without crunch.
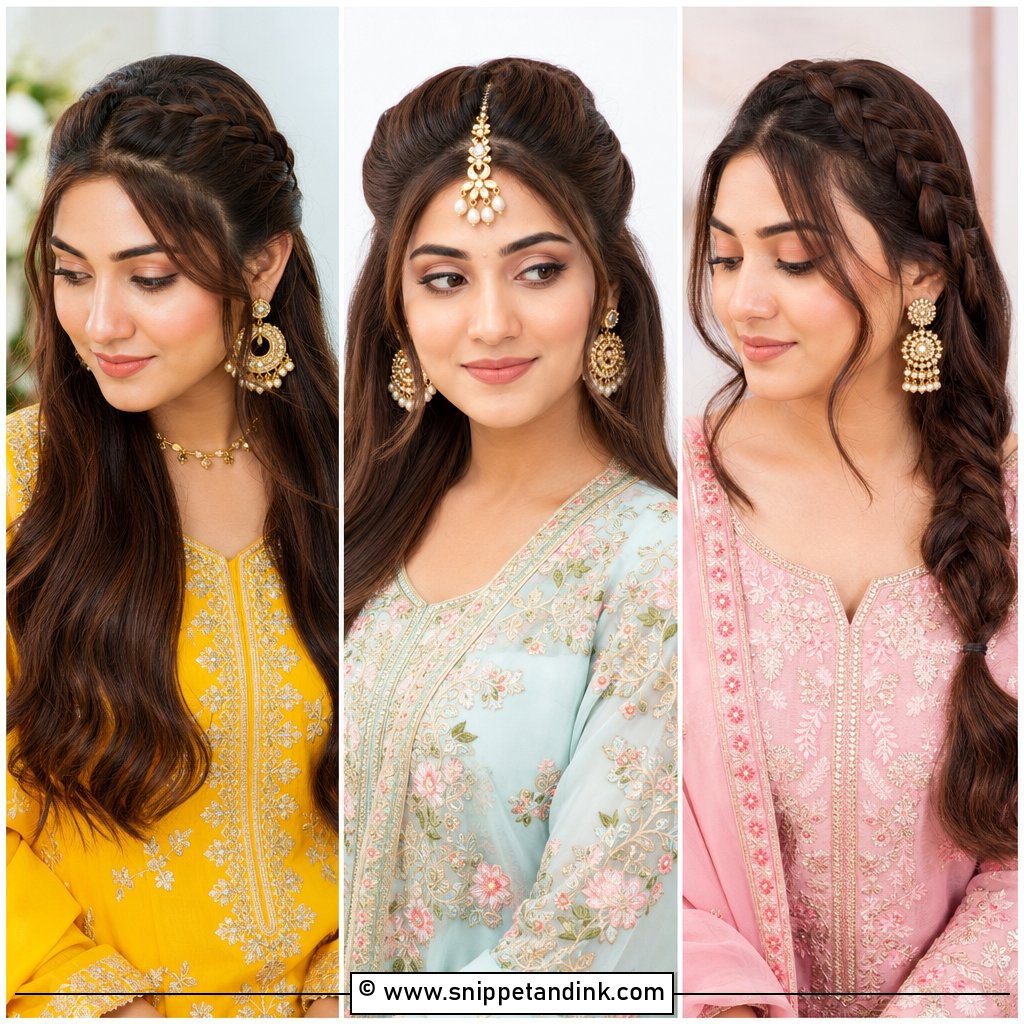
6. Indian Bridal Half Up Curls
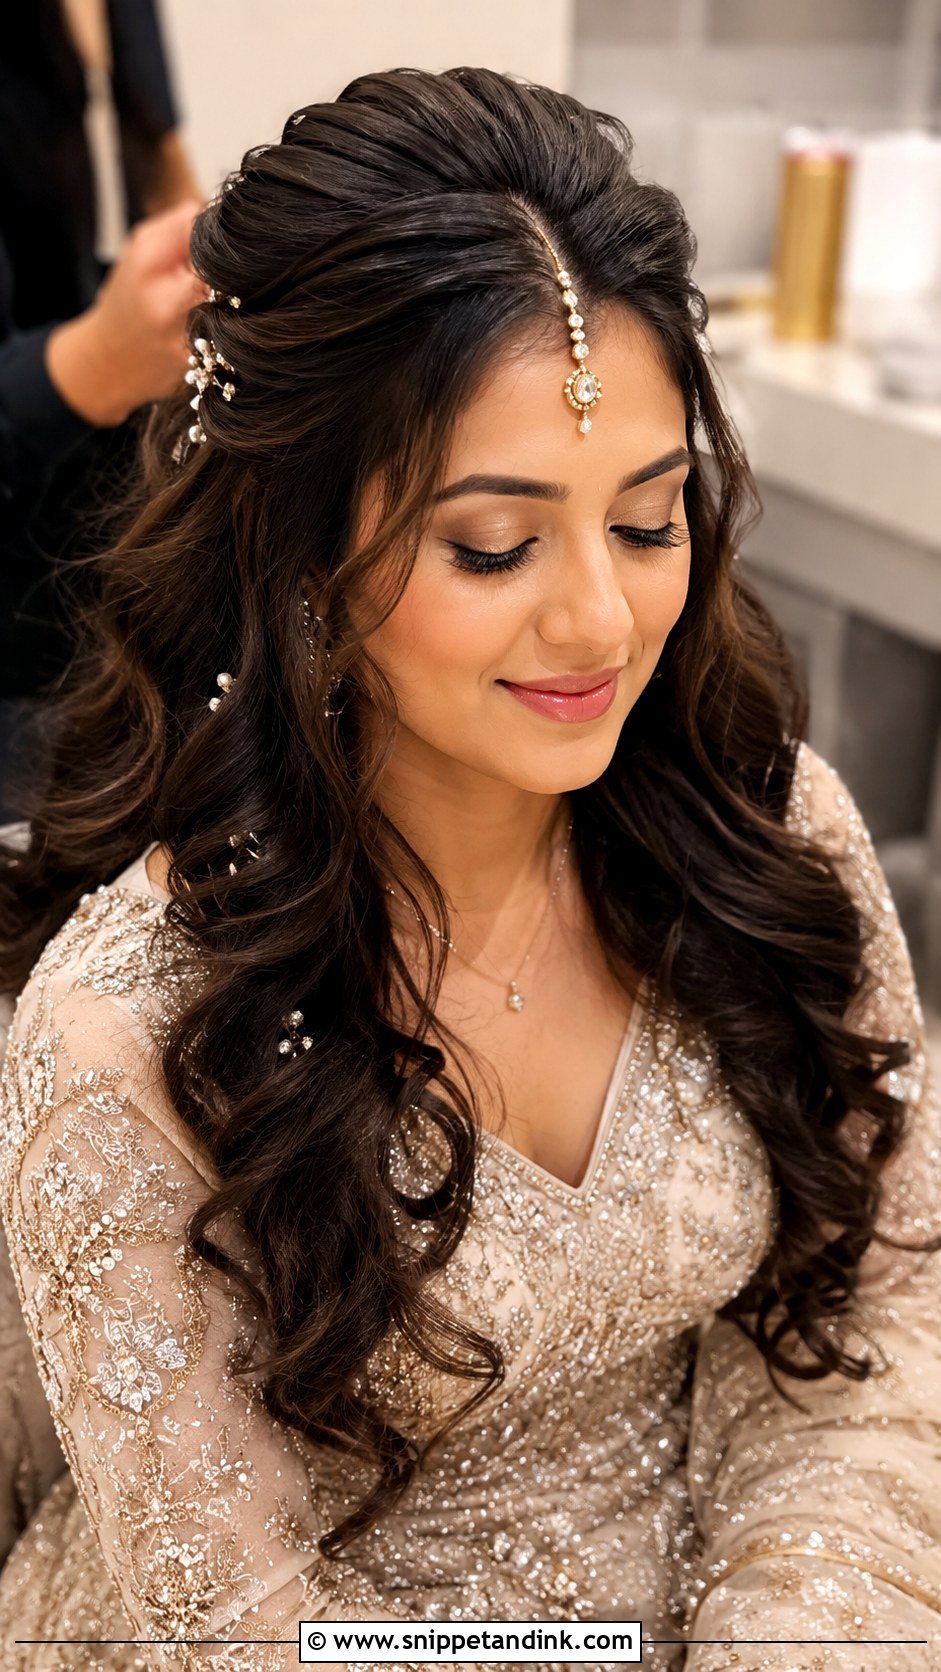
Pulling the front back while the lengths fall in curls gives you a clean face and the length on show. The front section is lifted and pinned at the crown, which also gives a maang tikka a pinned base to hook into. Pearl chains or floral clips sit well on that pinned section. It’s a good fit for sangeet and reception. On heavy hair, the curls below drop by evening, so I set them with pins while they cool.
7. Indian Bridal Front Braid Bun
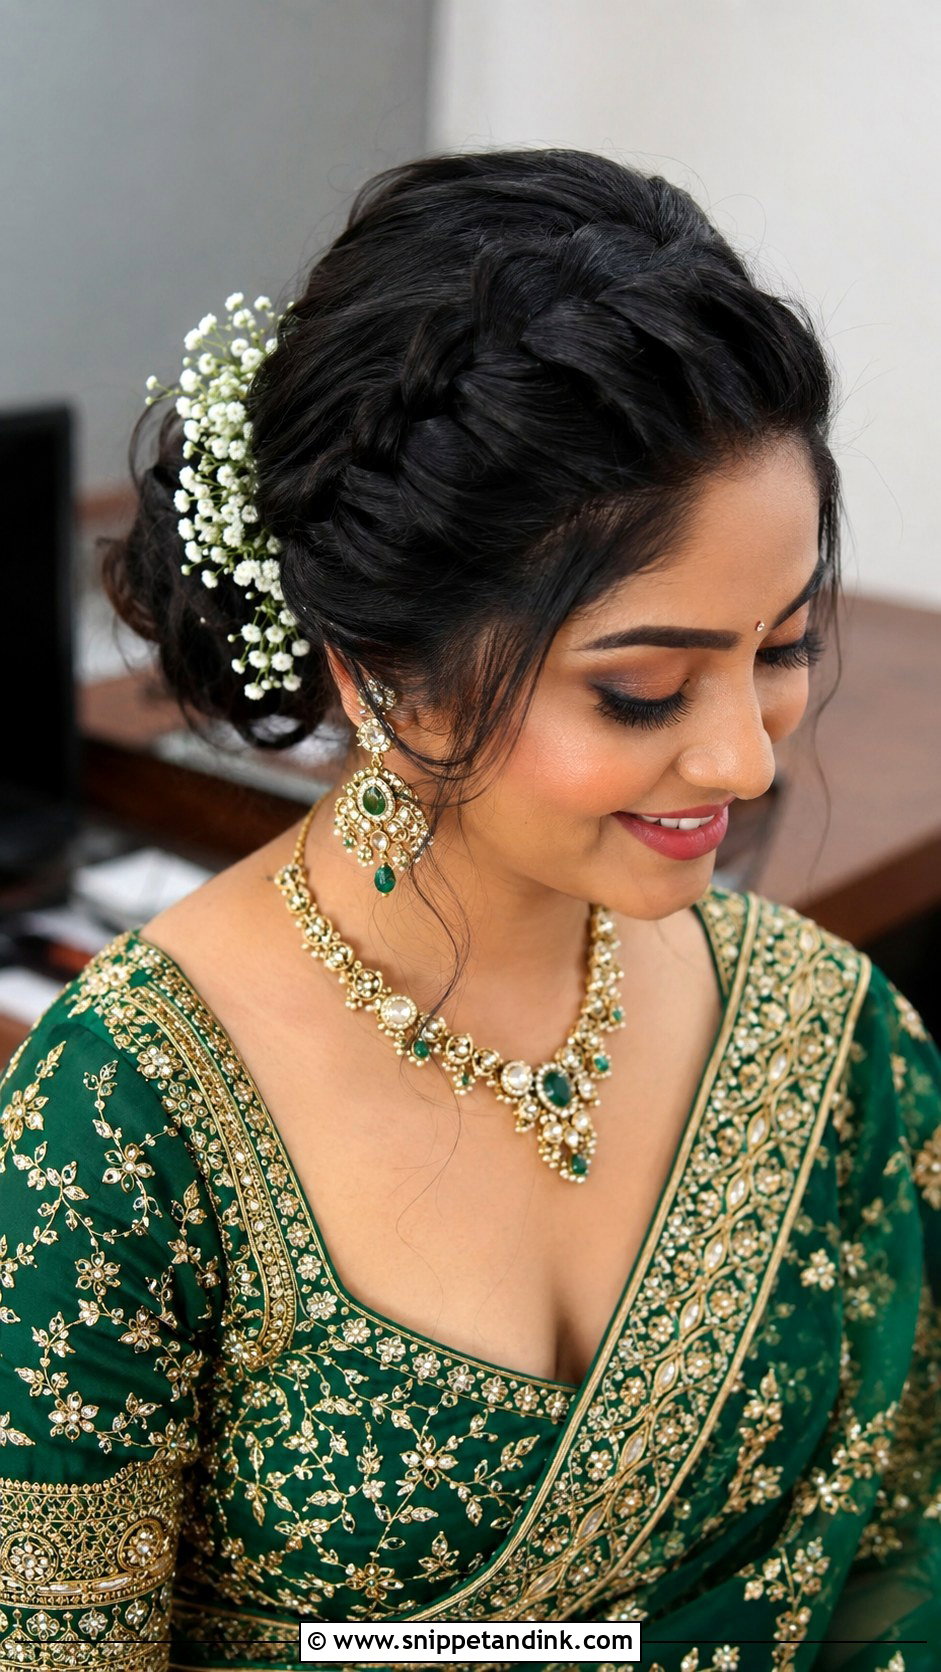
A braid starting at the hairline gives you detail near the face with a bun’s security behind it. I start a slim braid at the front, carry it along one side, and fold it into a low or mid bun that can hold a dupatta. Slim braids look delicate; thicker ones read from across a room. Layered hair pokes out of a front braid, so on layers I braid tighter and add a few hidden pins along its length. It shows best in side-angle photos.
8. Indian Bridal Crown Braid Bun
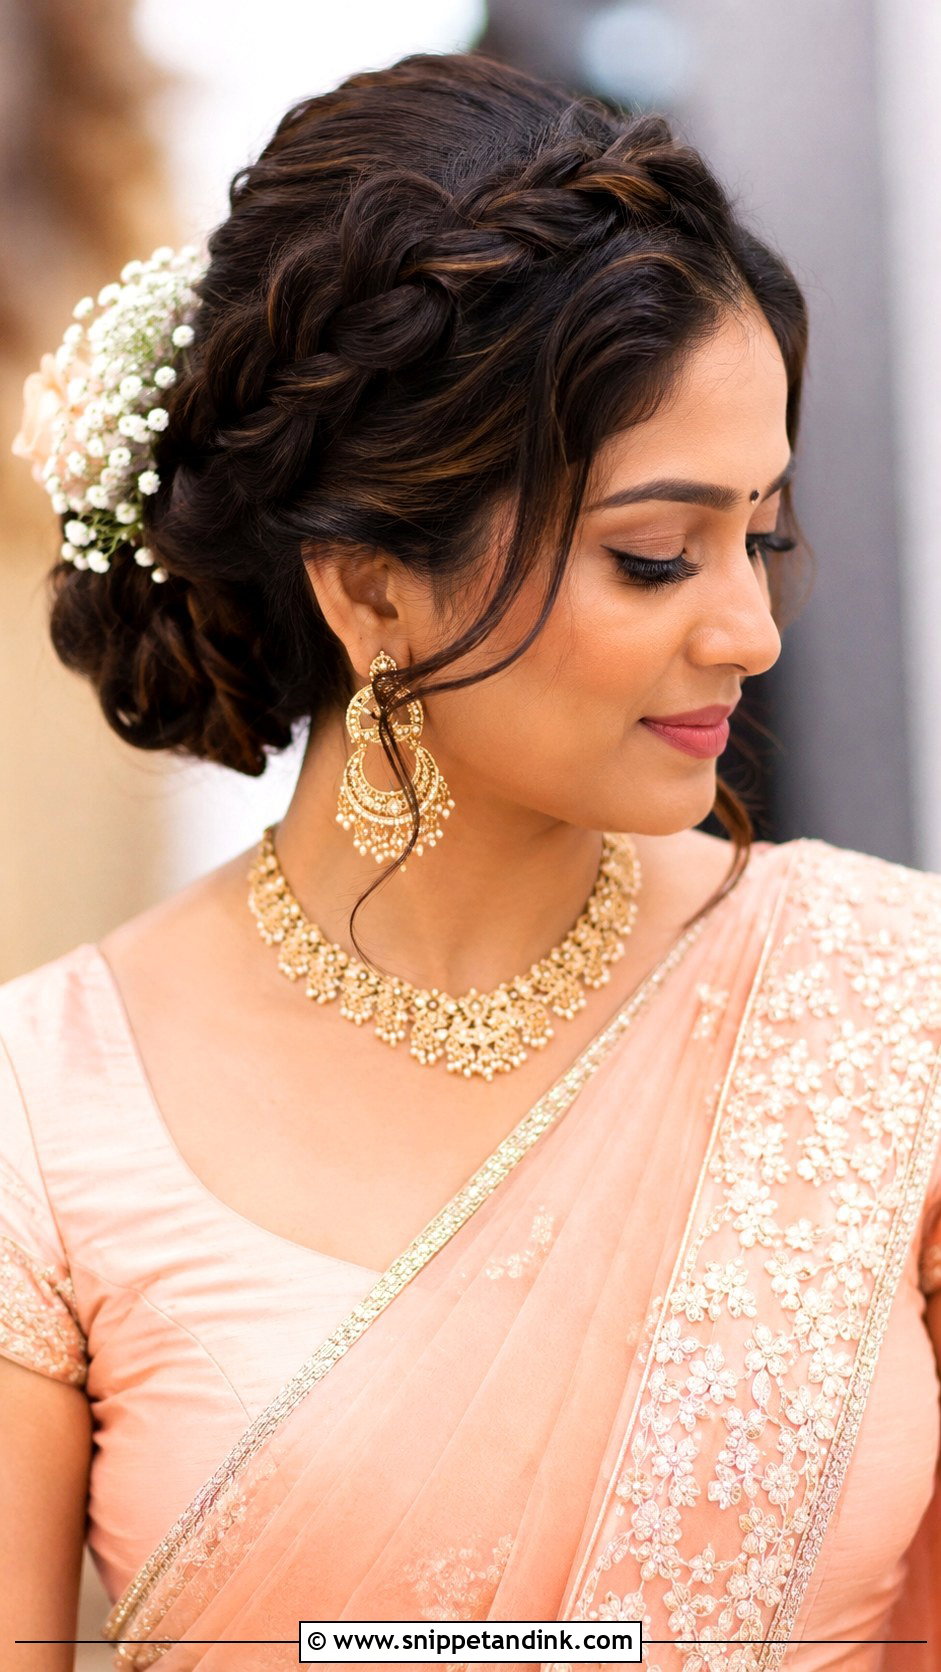
Wrapping a braid across the front of the crown keeps every loose piece off the face, which makes this my pick for outdoor ceremonies in wind. The braid connects to a bun at the back and holds small pearls or gold accessories well. It adds width around the top of the face, so it balances a long or narrow face nicely. I pull the braid’s edges slightly apart for softness, but only a little; a messy crown braid looks unfinished next to full bridal jewelry.
9. Indian Bridal Side Swept Curls
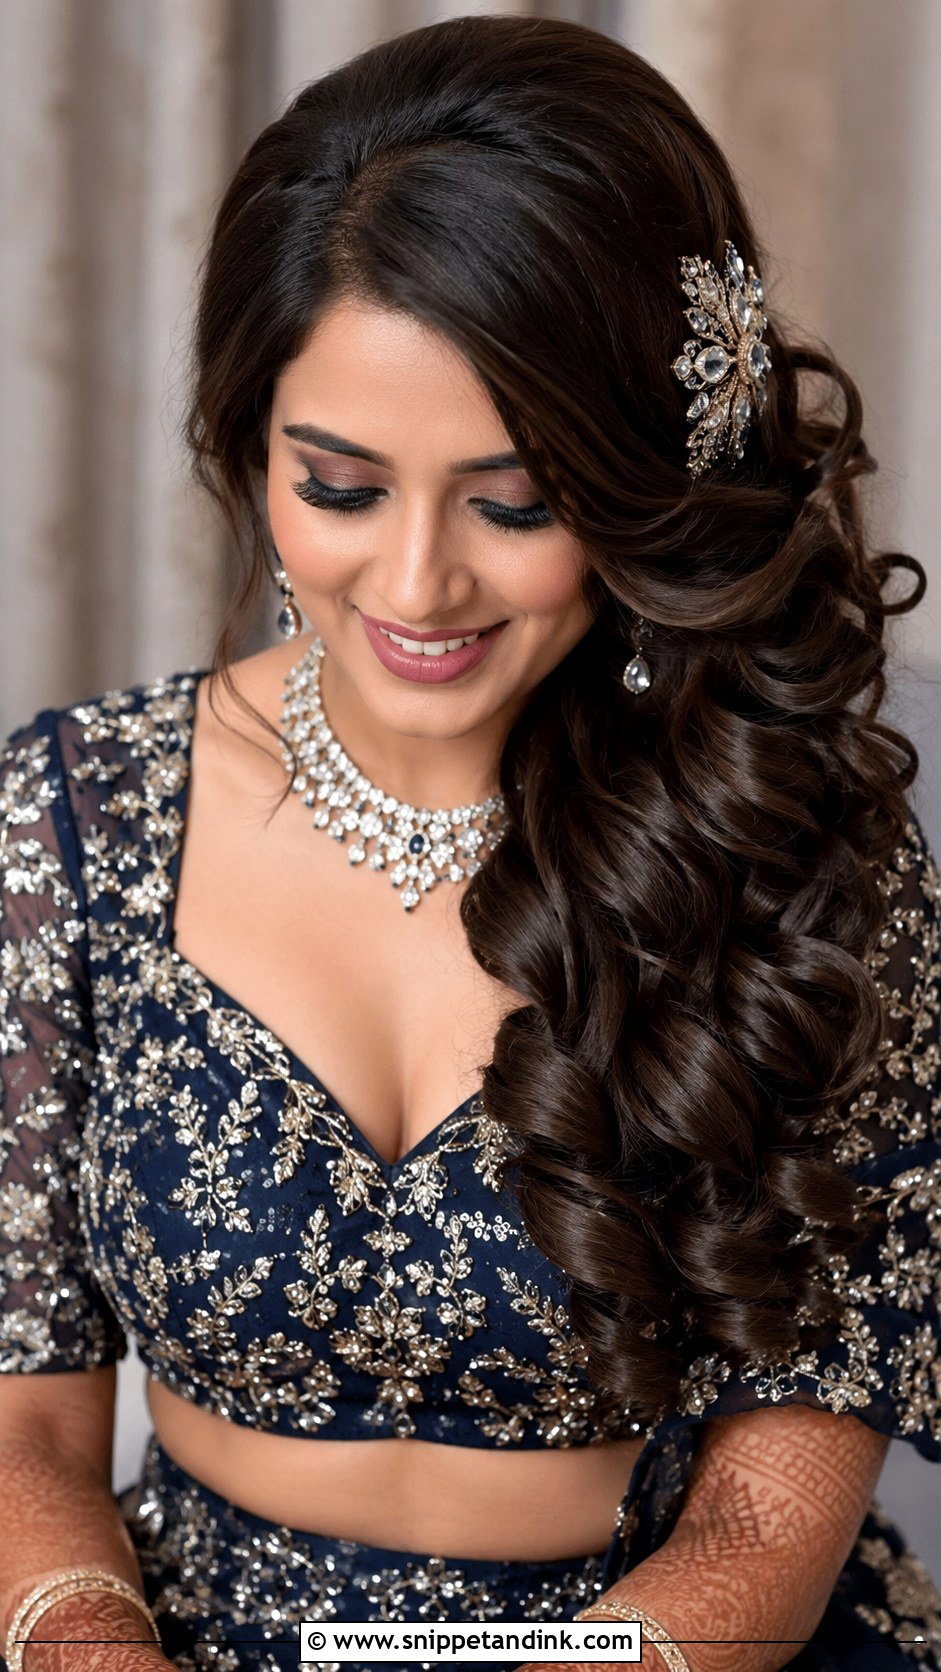
Sweeping all the volume to one side opens the other shoulder, which is useful when the blouse or necklace deserves the attention. I set a deep side part with lift at the roots, then smooth the waves into curls and anchor the swept side with pins hidden under the top layer. A passa or one floral pin on the fuller side finishes it. Open hair like this suits a reception or cocktail function better than the pheras, where a dupatta would fight it all day.
10. Indian Bridal Soft Waves With Center Part
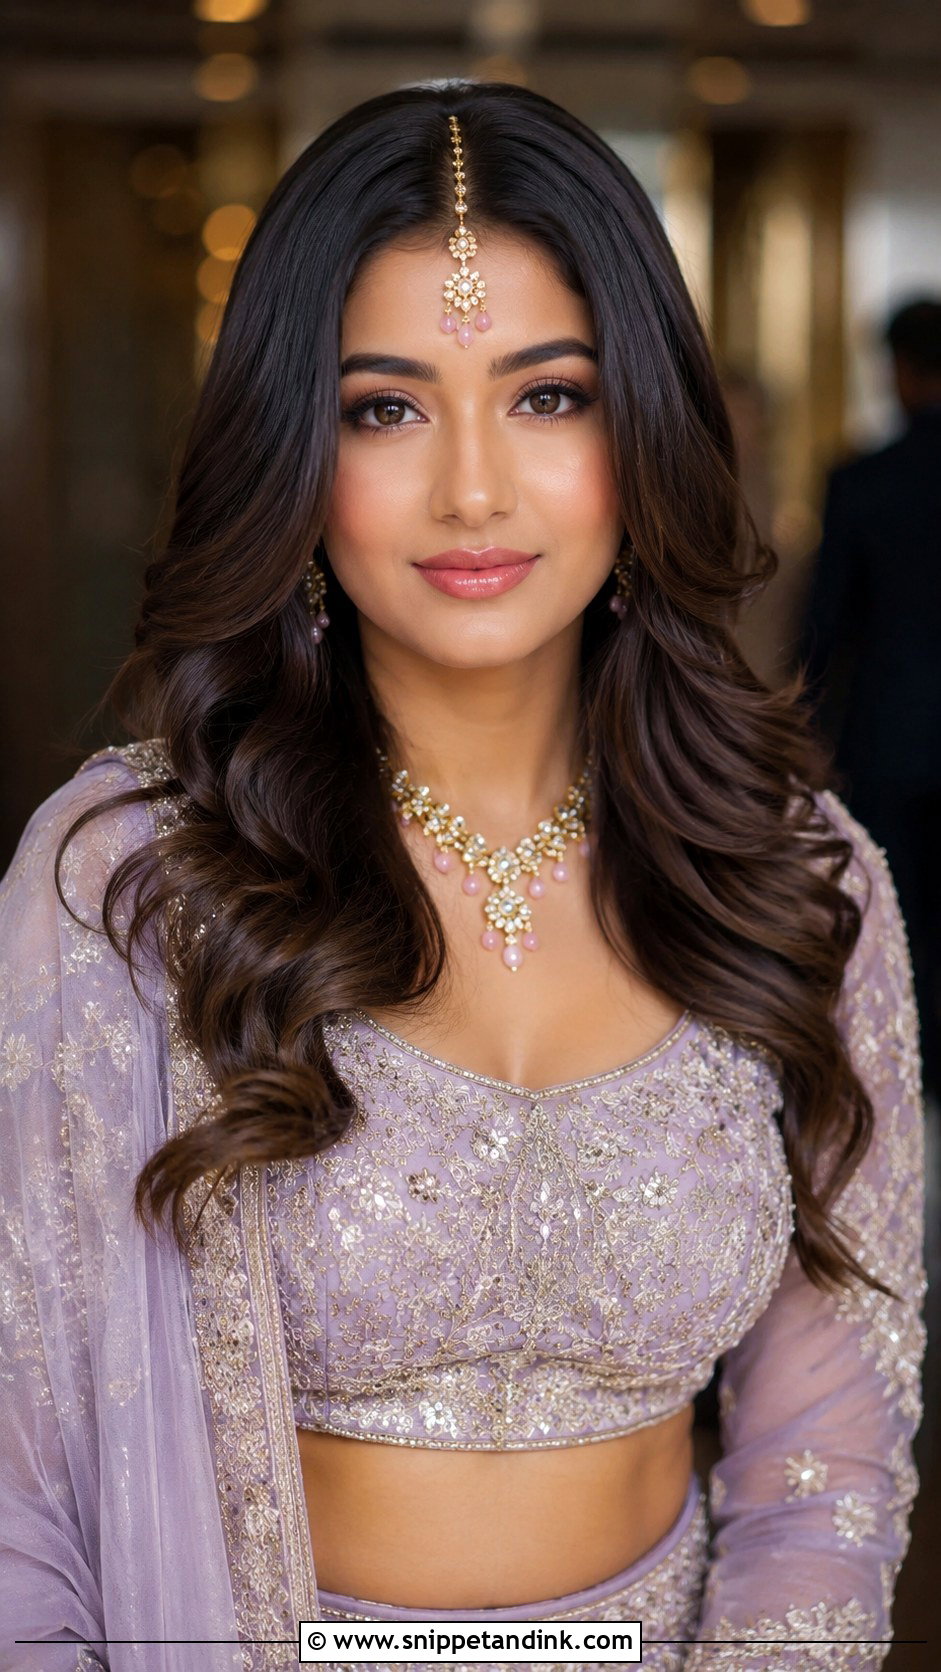
A center part with soft waves is the least structured front on this list, which is exactly why some brides want it. The part holds a maang tikka; the waves give movement. It goes with pastel lehengas and organza sarees, and it can balance a heavier outfit if the waves are polished. Keep the roots smooth and the ends shaped. If you’re wearing a dupatta, I pin it a little further back than usual so the waves aren’t hidden.
11. Indian Bridal Low Bun With Face Framing Curls
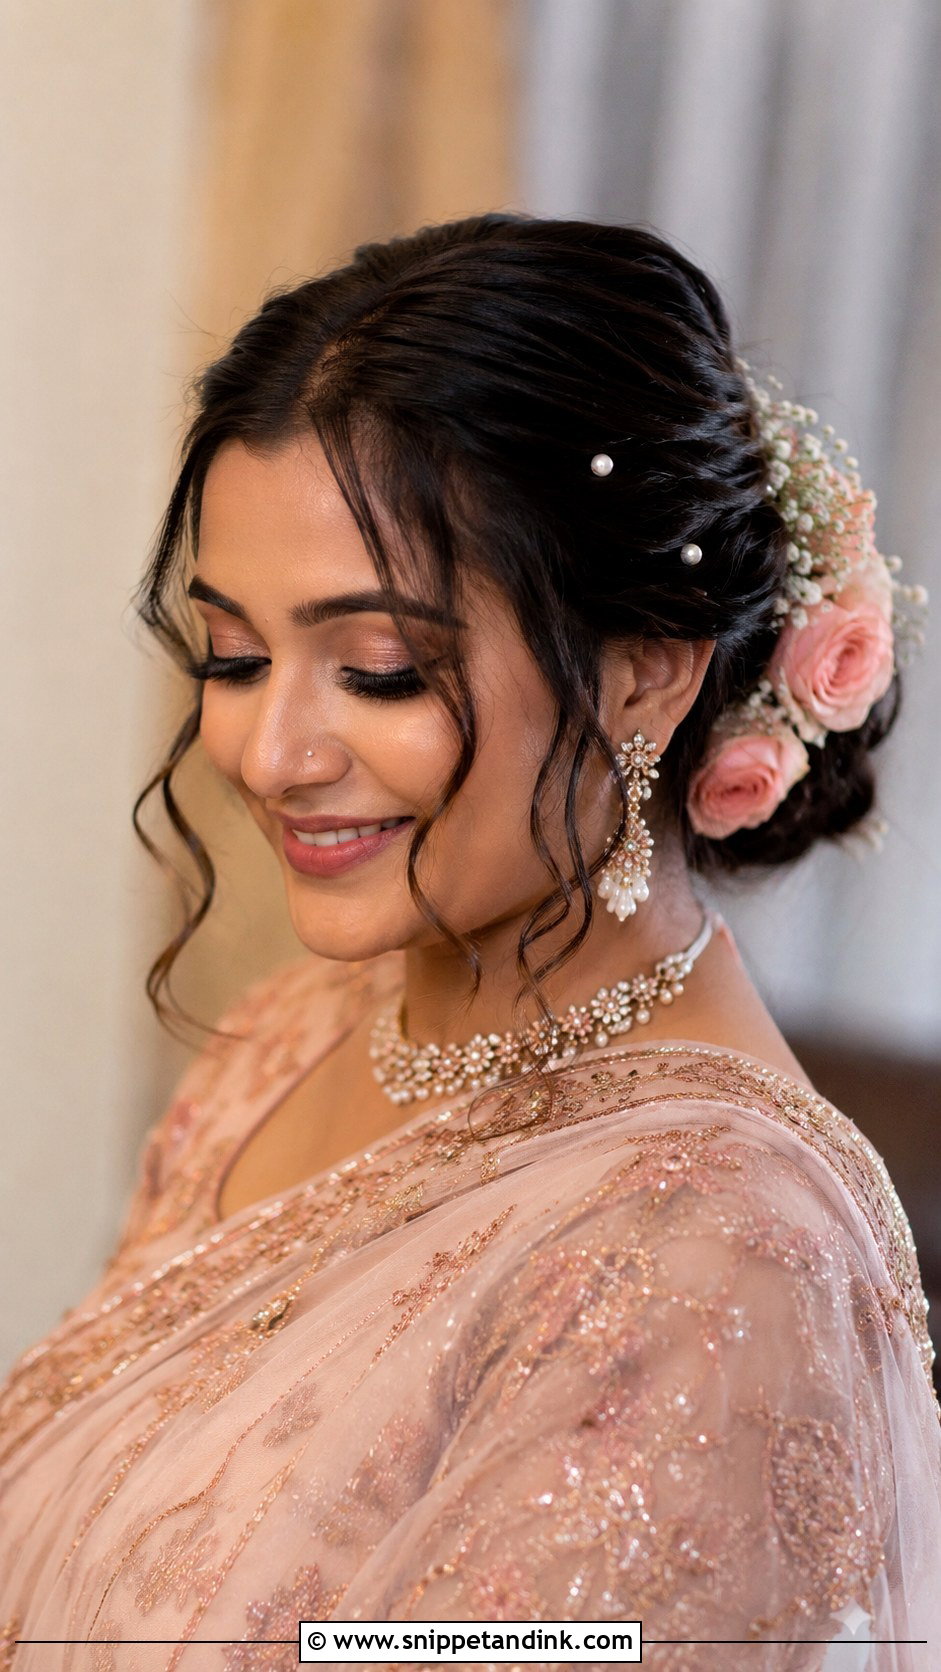
Face-framing curls soften a low bun for brides who feel a fully sleek front looks too strict on them. I curl two or three thin pieces at each side and leave the rest in the bun. The number matters: too many curls and it looks like the bun is coming loose. Keep the pieces thin and shaped. A gajra or a light matha patti suits this front well.
12. Indian Bridal High Bun With Front Volume
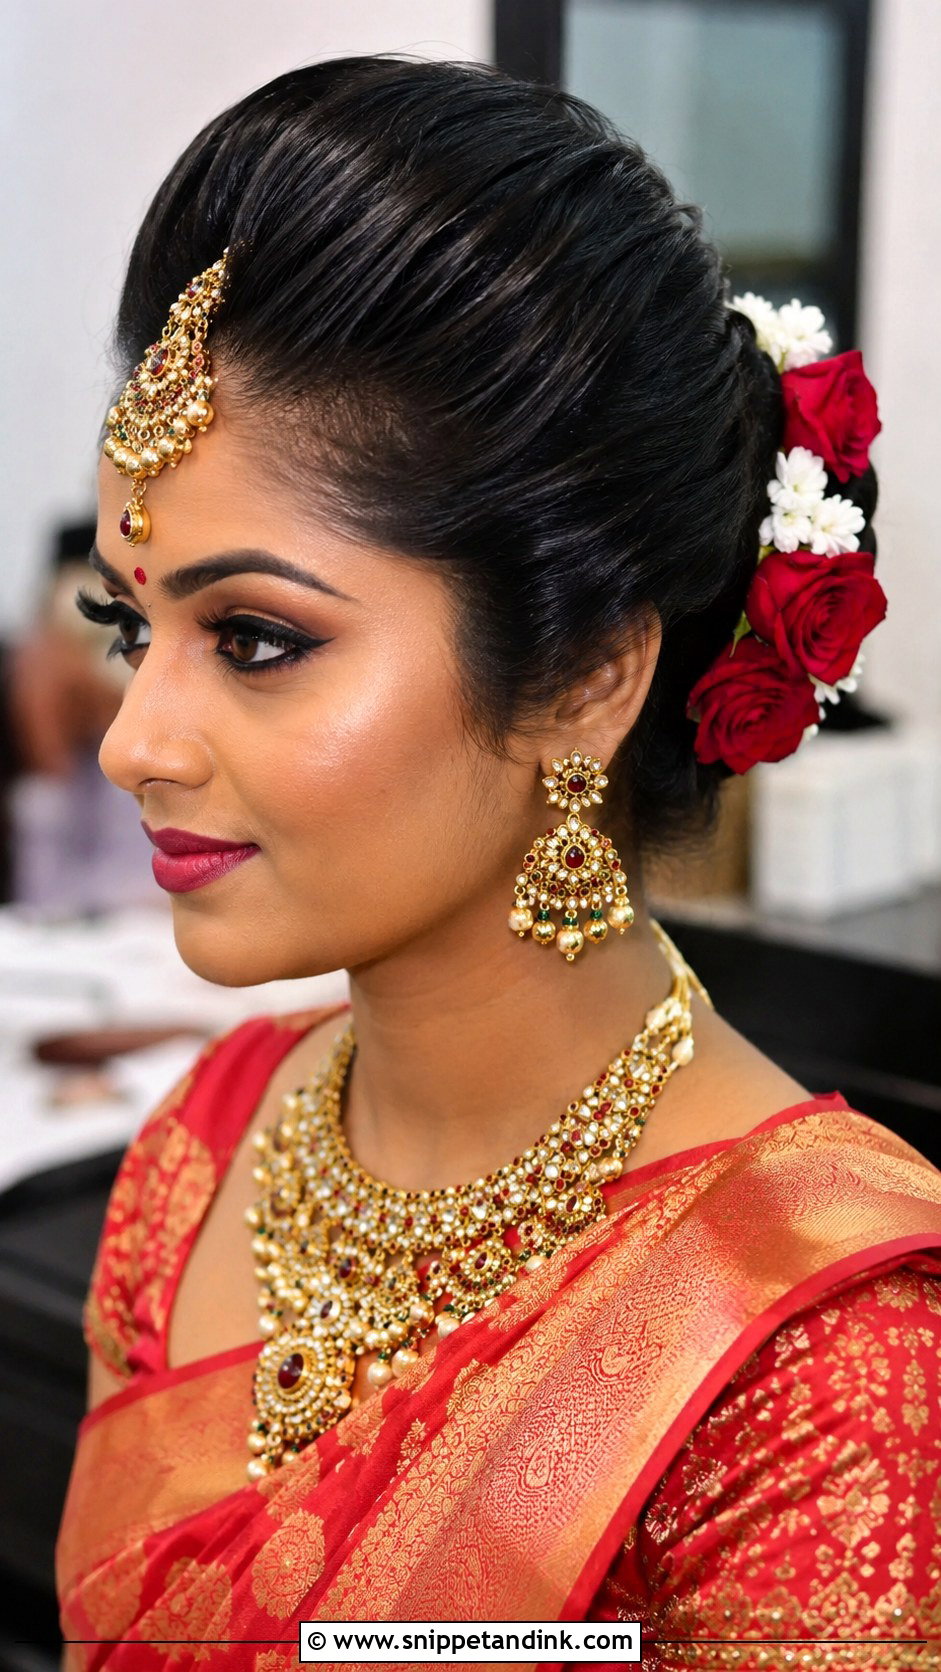
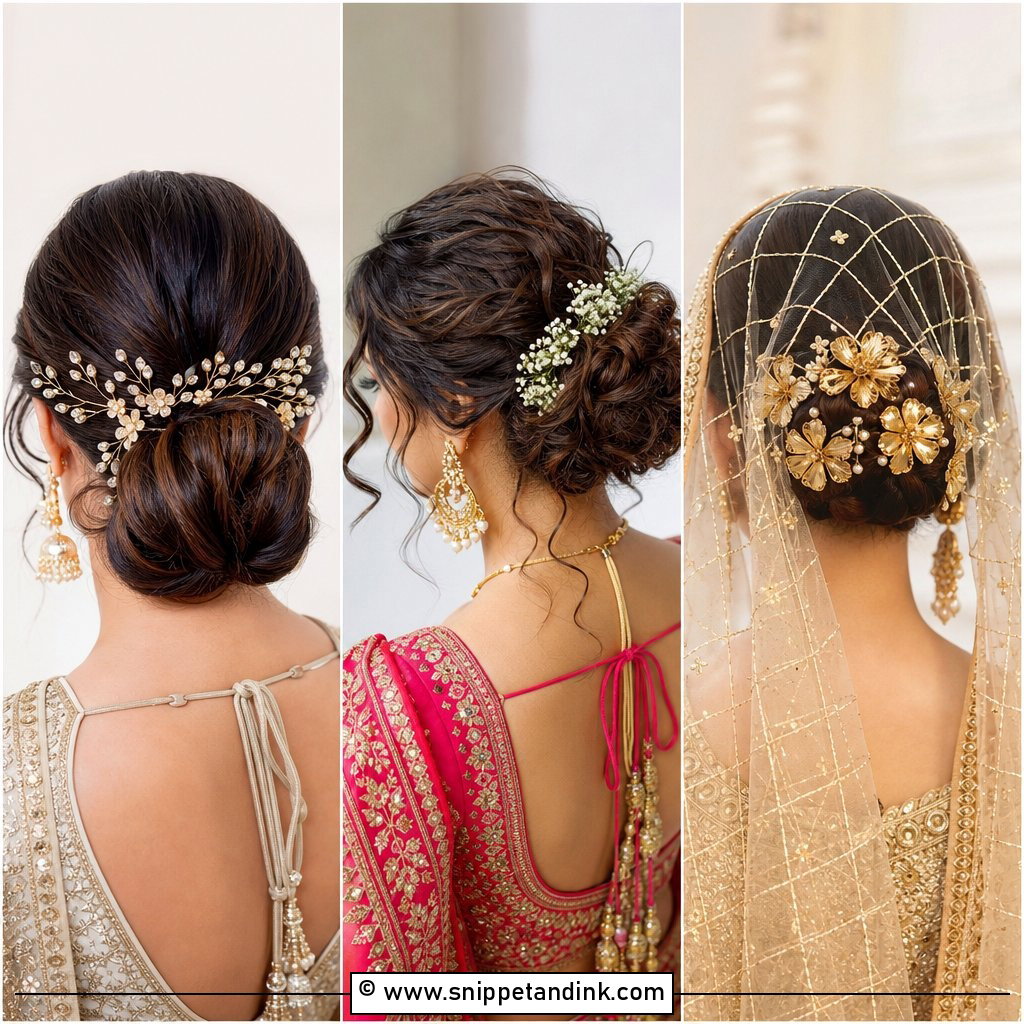
Placing the bun higher keeps the hair visible above a high-neck blouse, a heavy dupatta or a long veil, all of which would bury a nape bun. The crown gets gentle height and the front is swept back or lightly parted for jewelry. It lengthens a round face. Fresh flowers make it ceremonial; crystal pins move it toward the reception. A high bun takes more pins than a low one, because the weight pulls downward against it, so I build it on a firm ponytail base.
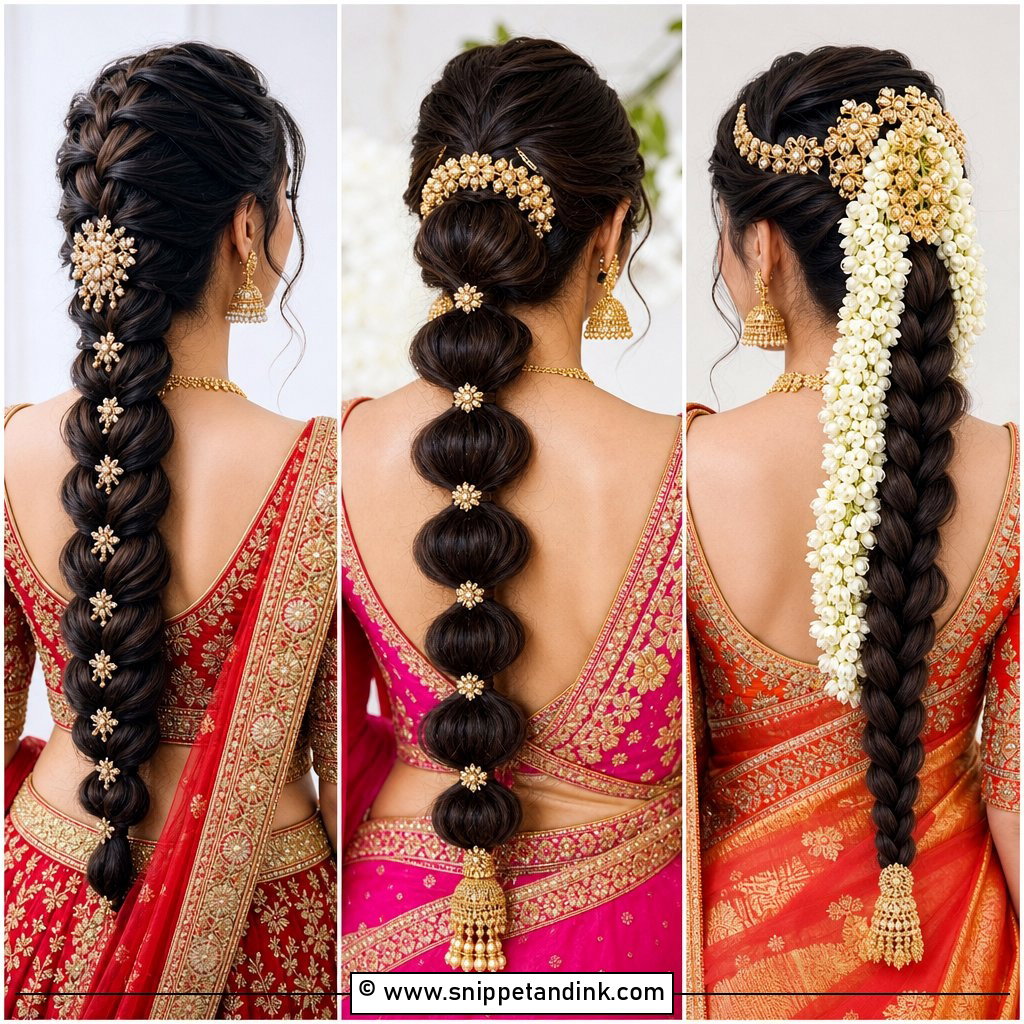
13. Indian Bridal Fishtail Braid Front Look
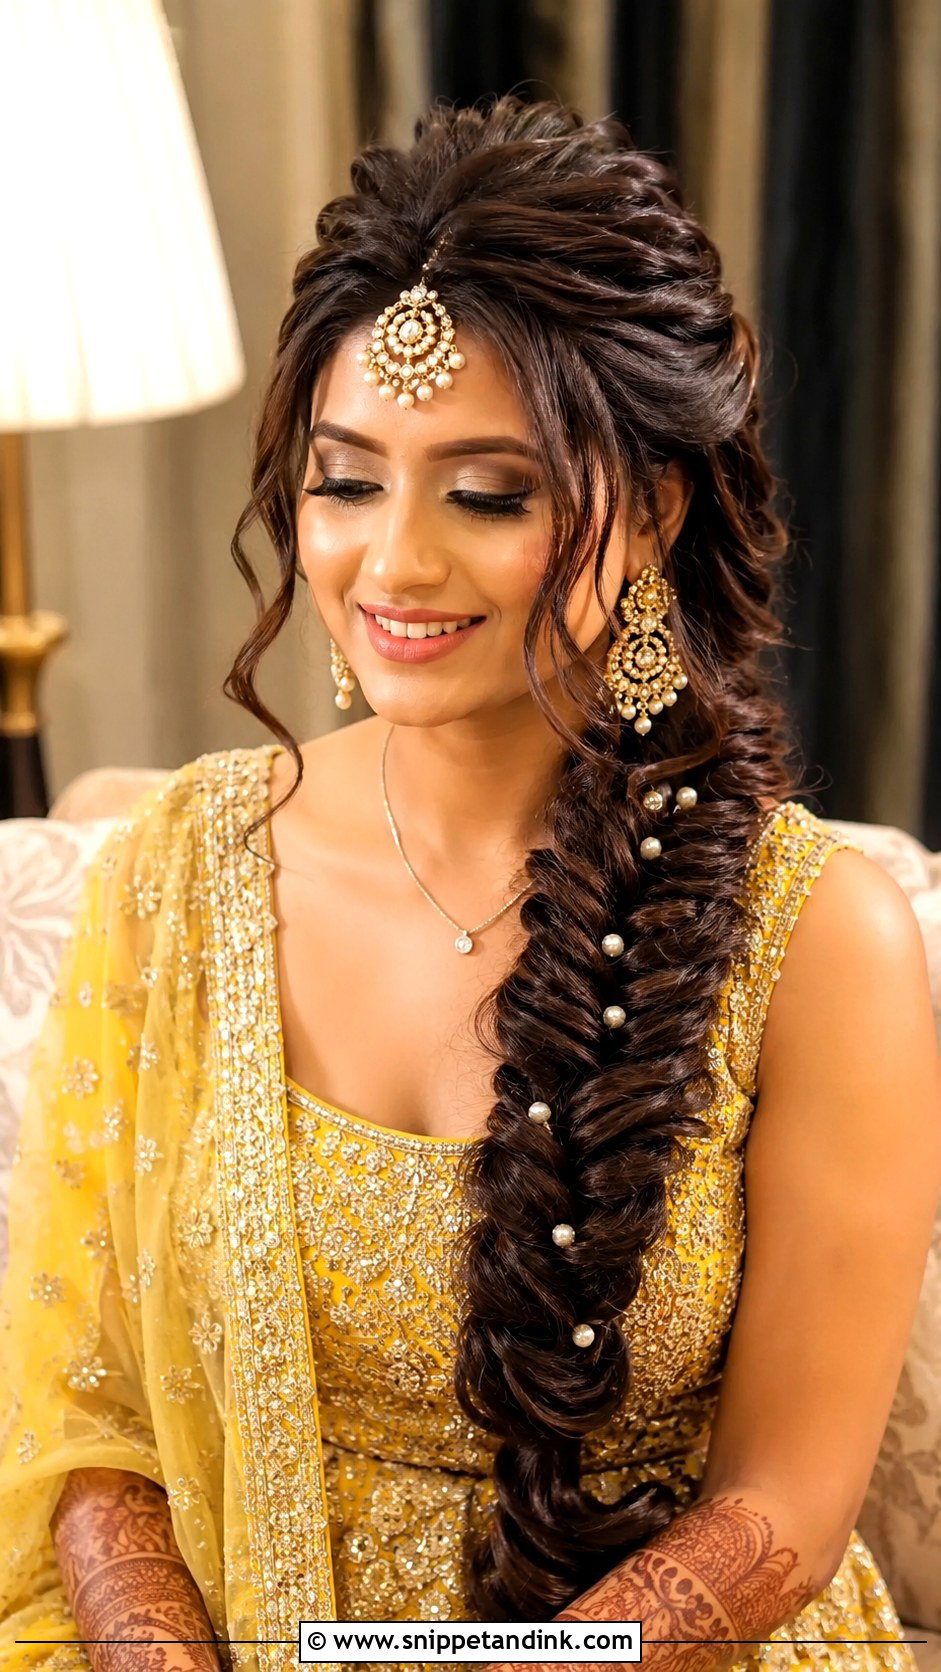
A fishtail looks complicated from behind, but from the front it lets you choose: a center part, a soft puff or side-swept sections all lead into the same long braid. It works with lehengas, mehndi outfits and fusion bridal looks. Small flowers or gold braid accessories add richness. Keep the front polished and loosen the fishtail slightly so it looks full. On fine hair, a weft woven into the braid makes the length read properly in photographs.
14. Indian Bridal South Indian Braid
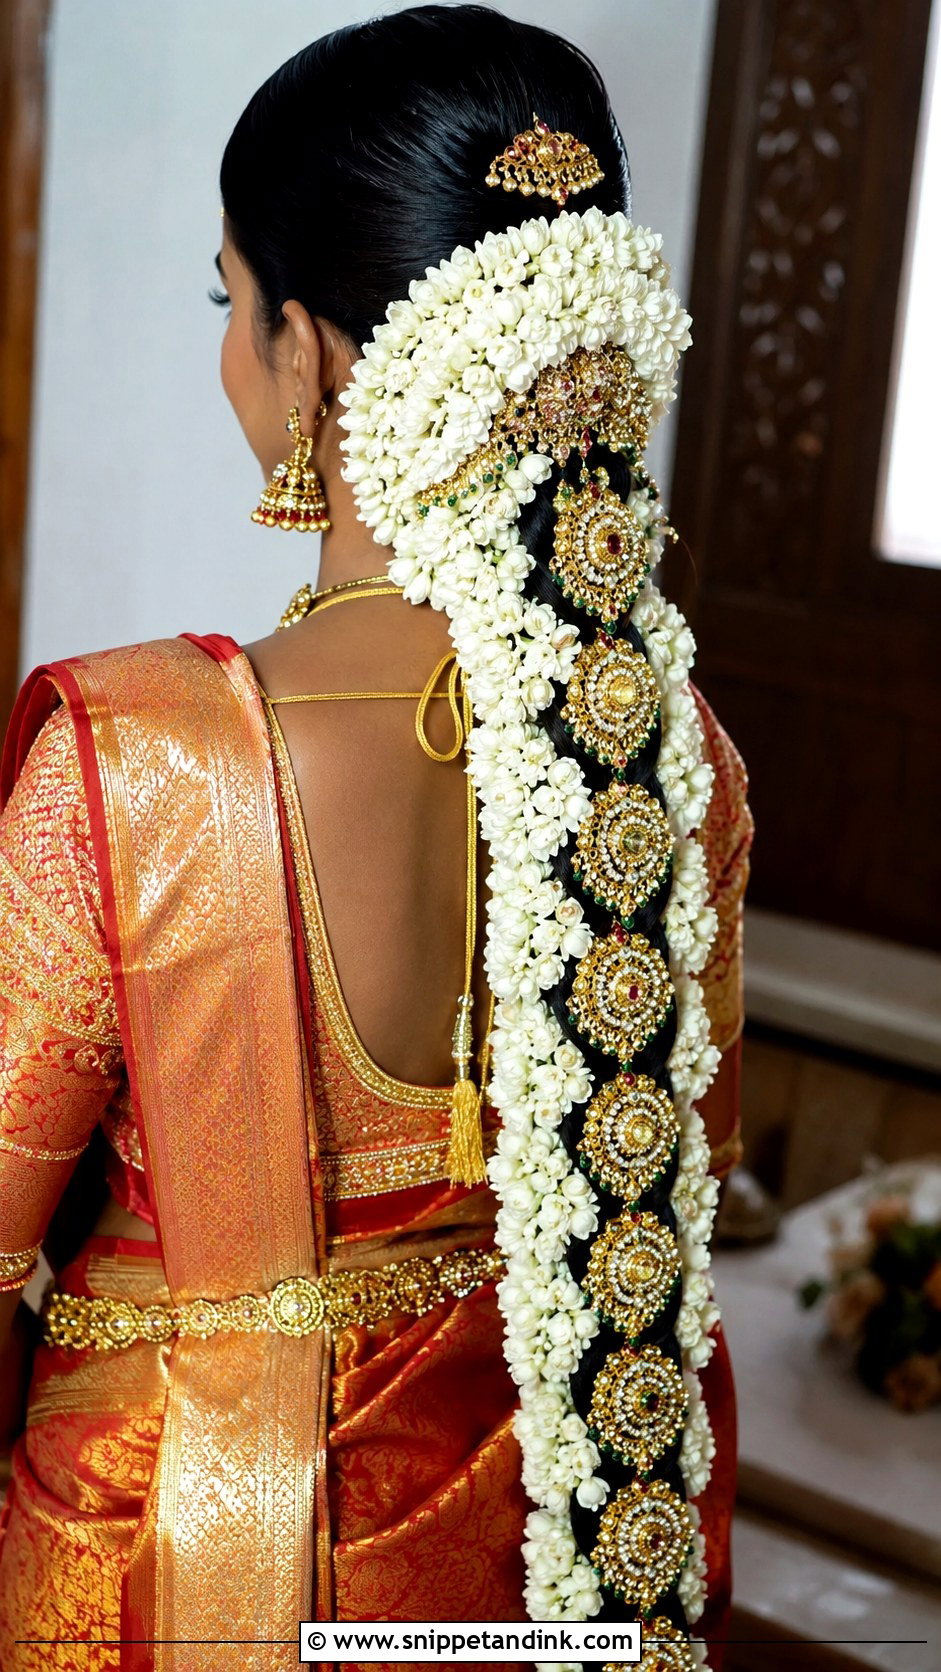
From the front, a South Indian bridal braid is a clean center part, a maang tikka and temple jewelry, with smooth hair leading back into the decorated plait. The braid itself carries jasmine, jada billalu and gold ornaments. With a Kanjeevaram saree and layered gold jewelry the front should stay simple, since the jewelry already brings detail. Short hair can still wear this with a braid extension underneath. I make sure the front is pinned firmly, because the weight of a jada pulls the whole front backward over a long ceremony.
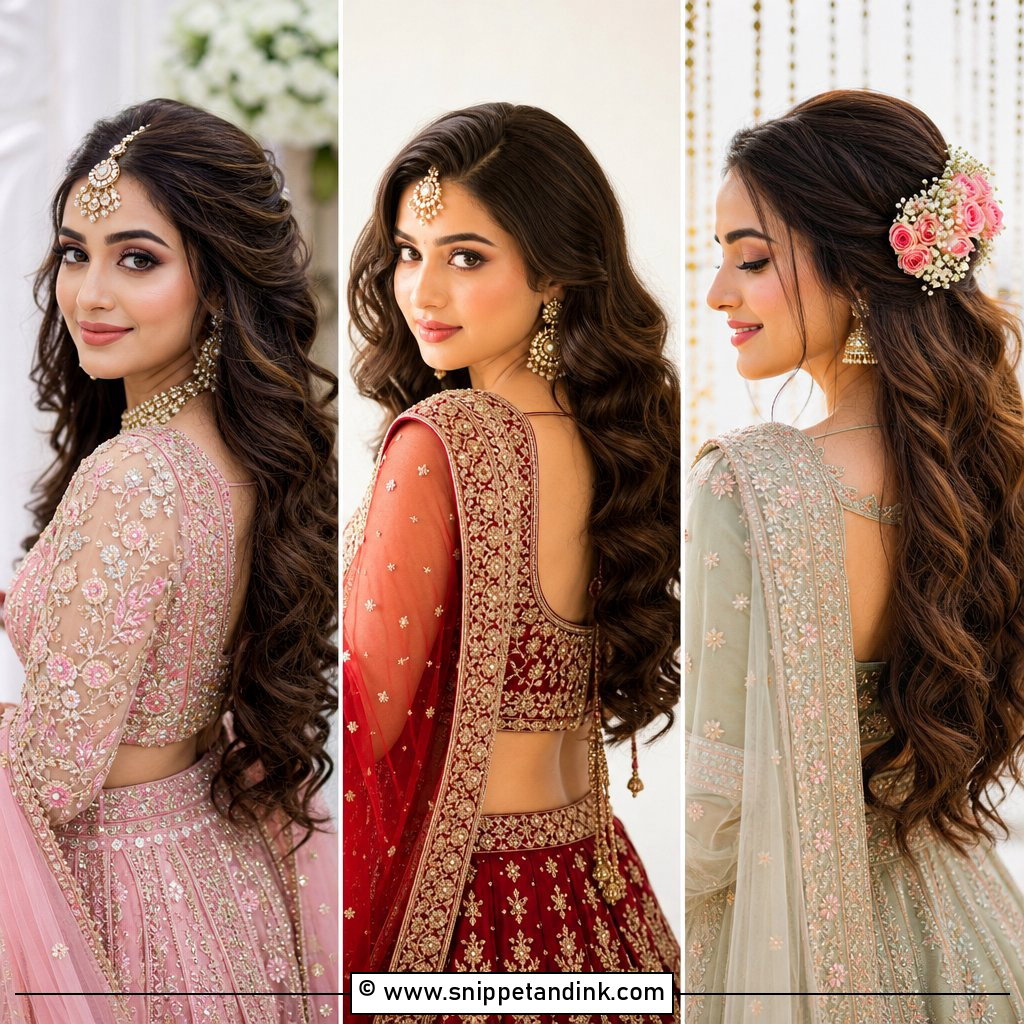
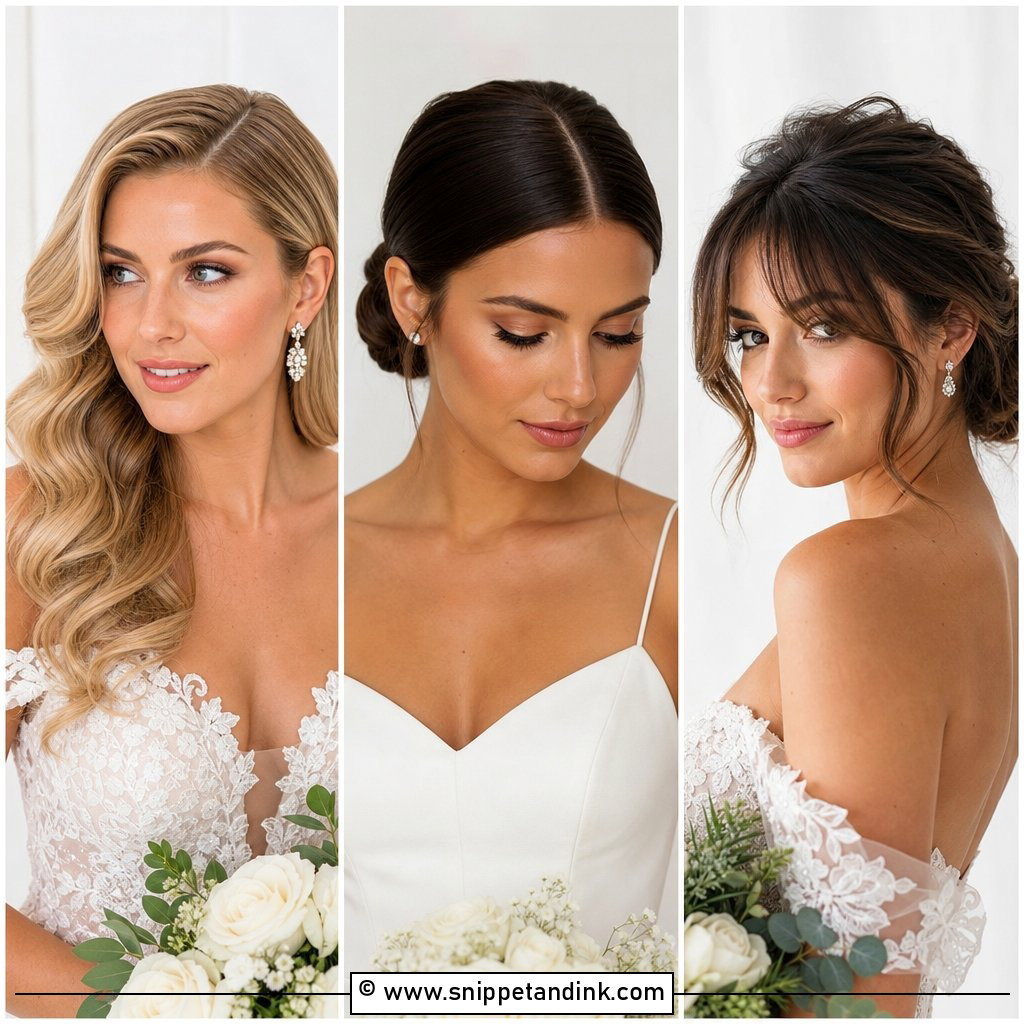
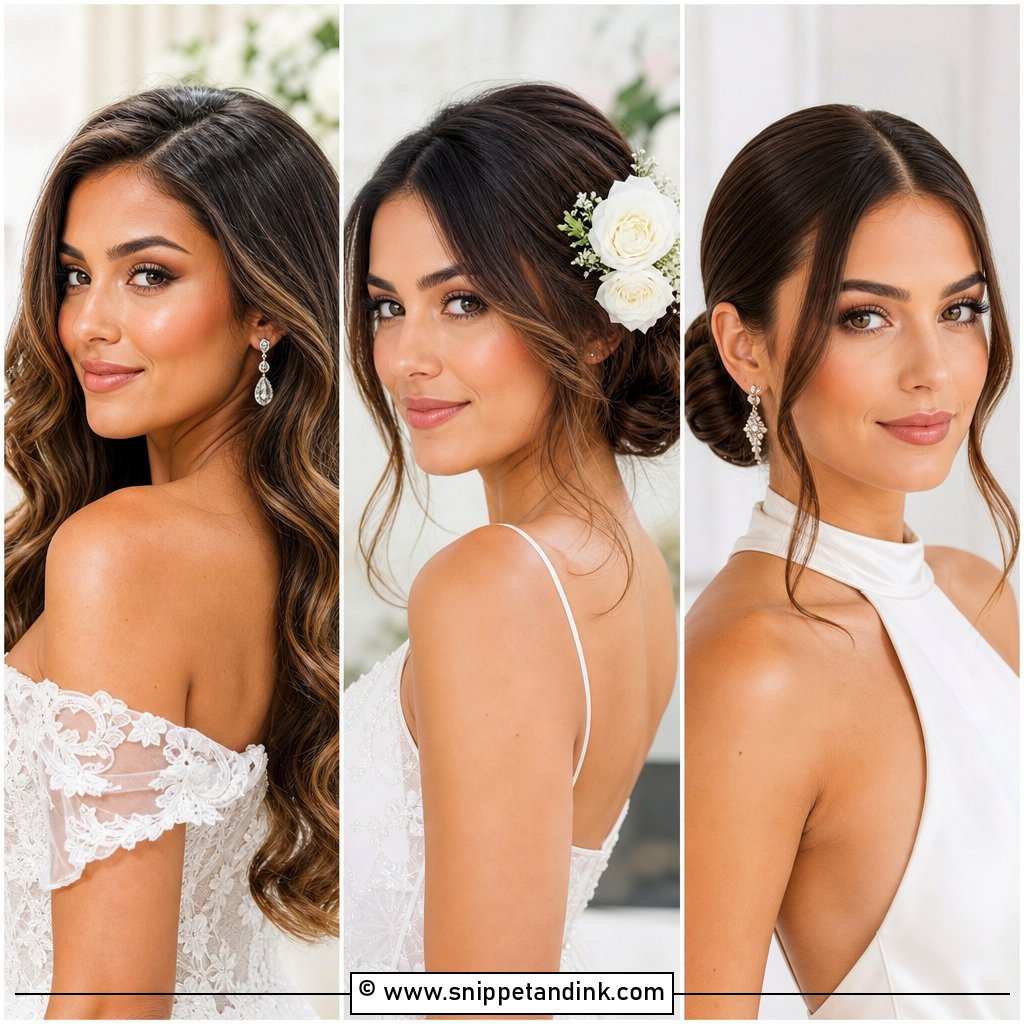
15. Indian Bridal Open Hair With Front Twist
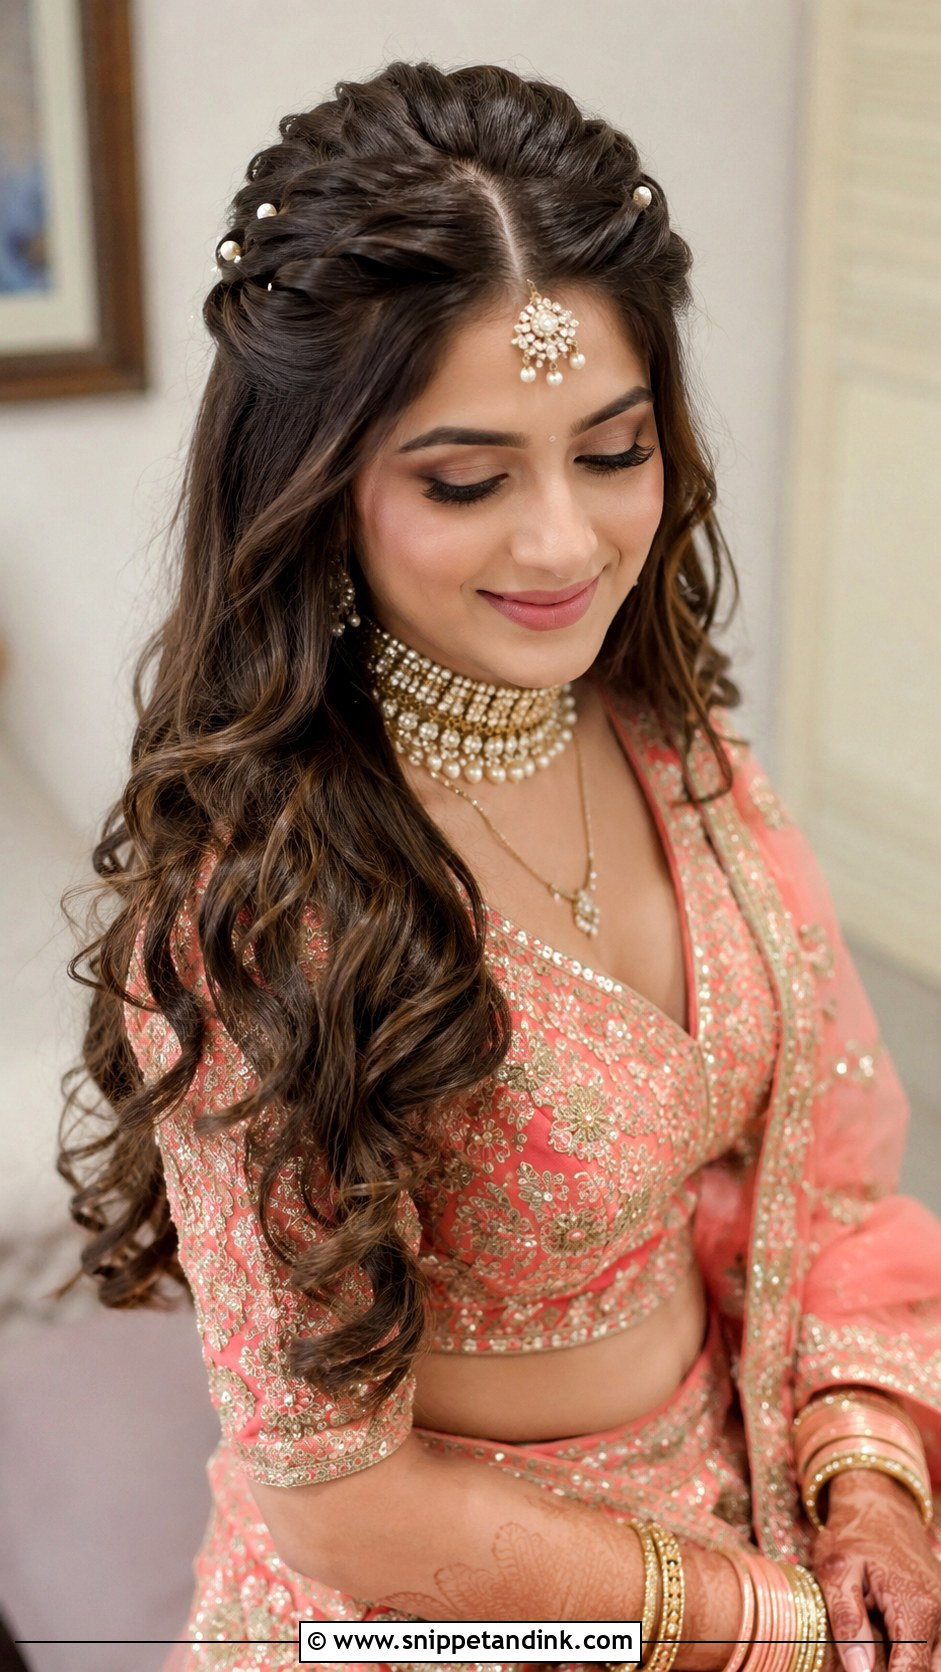
Twisting the front sections away from the face and pinning them back frames it without any updo. The rest of the hair falls in curls or waves. It’s a good choice for pre-wedding events or an intimate ceremony with a light dupatta. Each twist can hold a small pearl or a tiny flower. I twist toward the back of the head, not upward, so the twists stay flat under a dupatta.
16. Indian Bridal Messy Bun With Front Strands
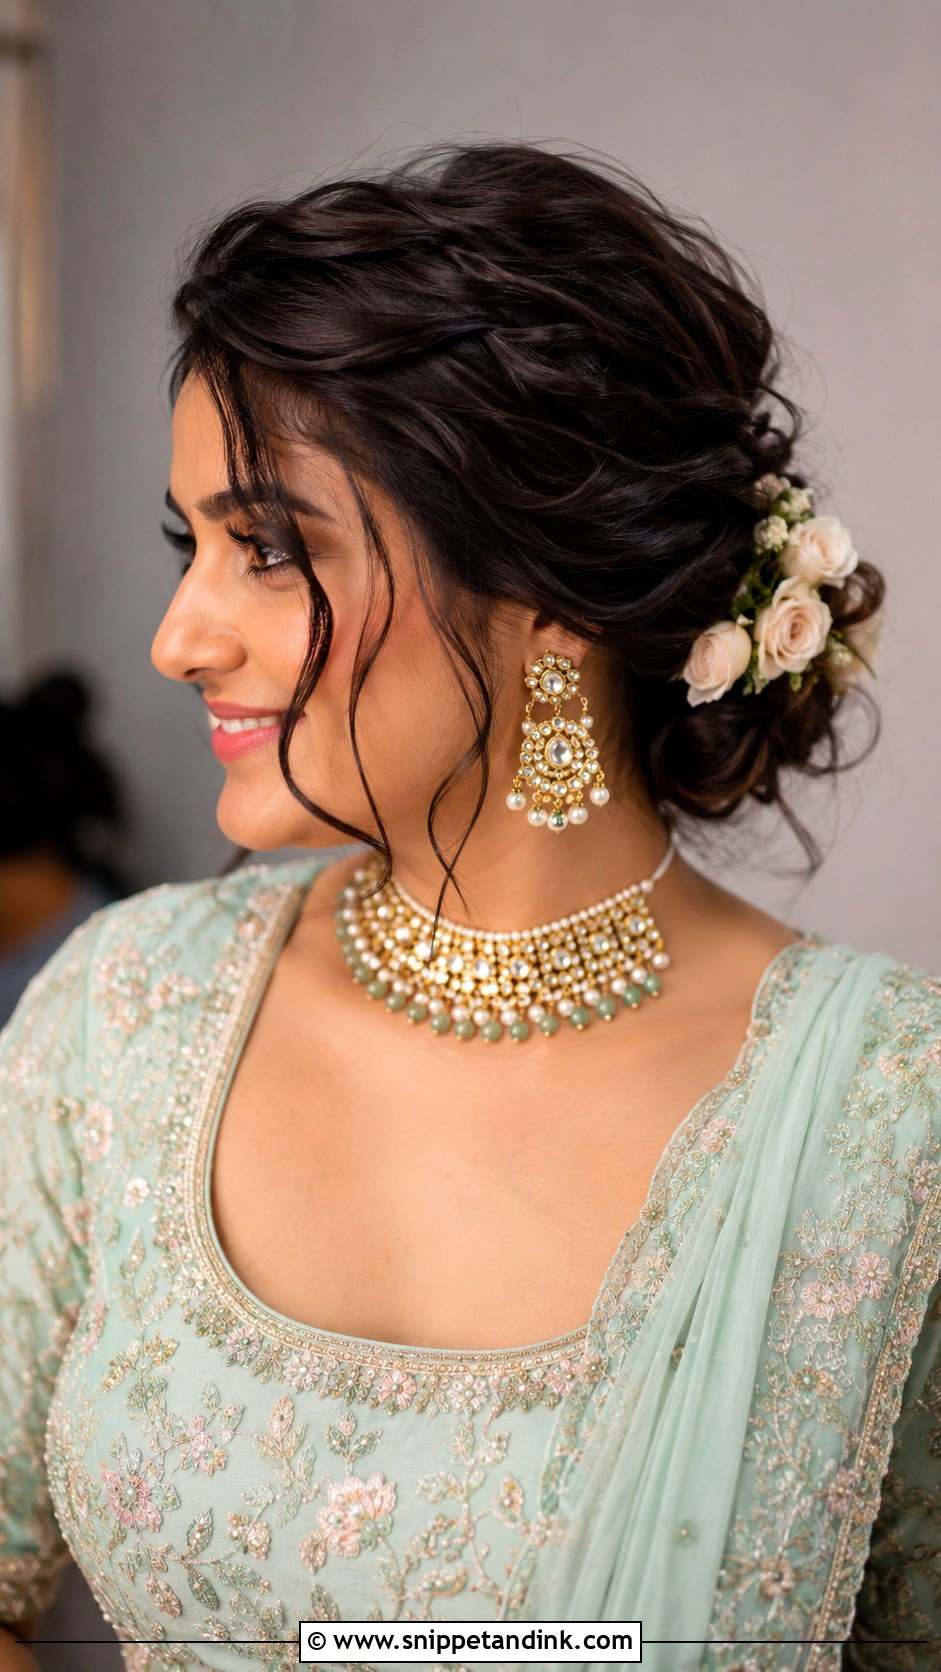
Messy buns are only ever controlled mess. The bun is soft and textured but pinned firmly underneath, and the front strands are curled in the same direction so they look deliberate. It suits outdoor settings and pastel outfits with floral jewelry, roses or baby’s breath. I wouldn’t choose it if you want a crisp, formal look for the pheras; it reads relaxed, and that relaxed feeling grows over the day as the curls loosen.
17. Indian Bridal Side Bun With Passa
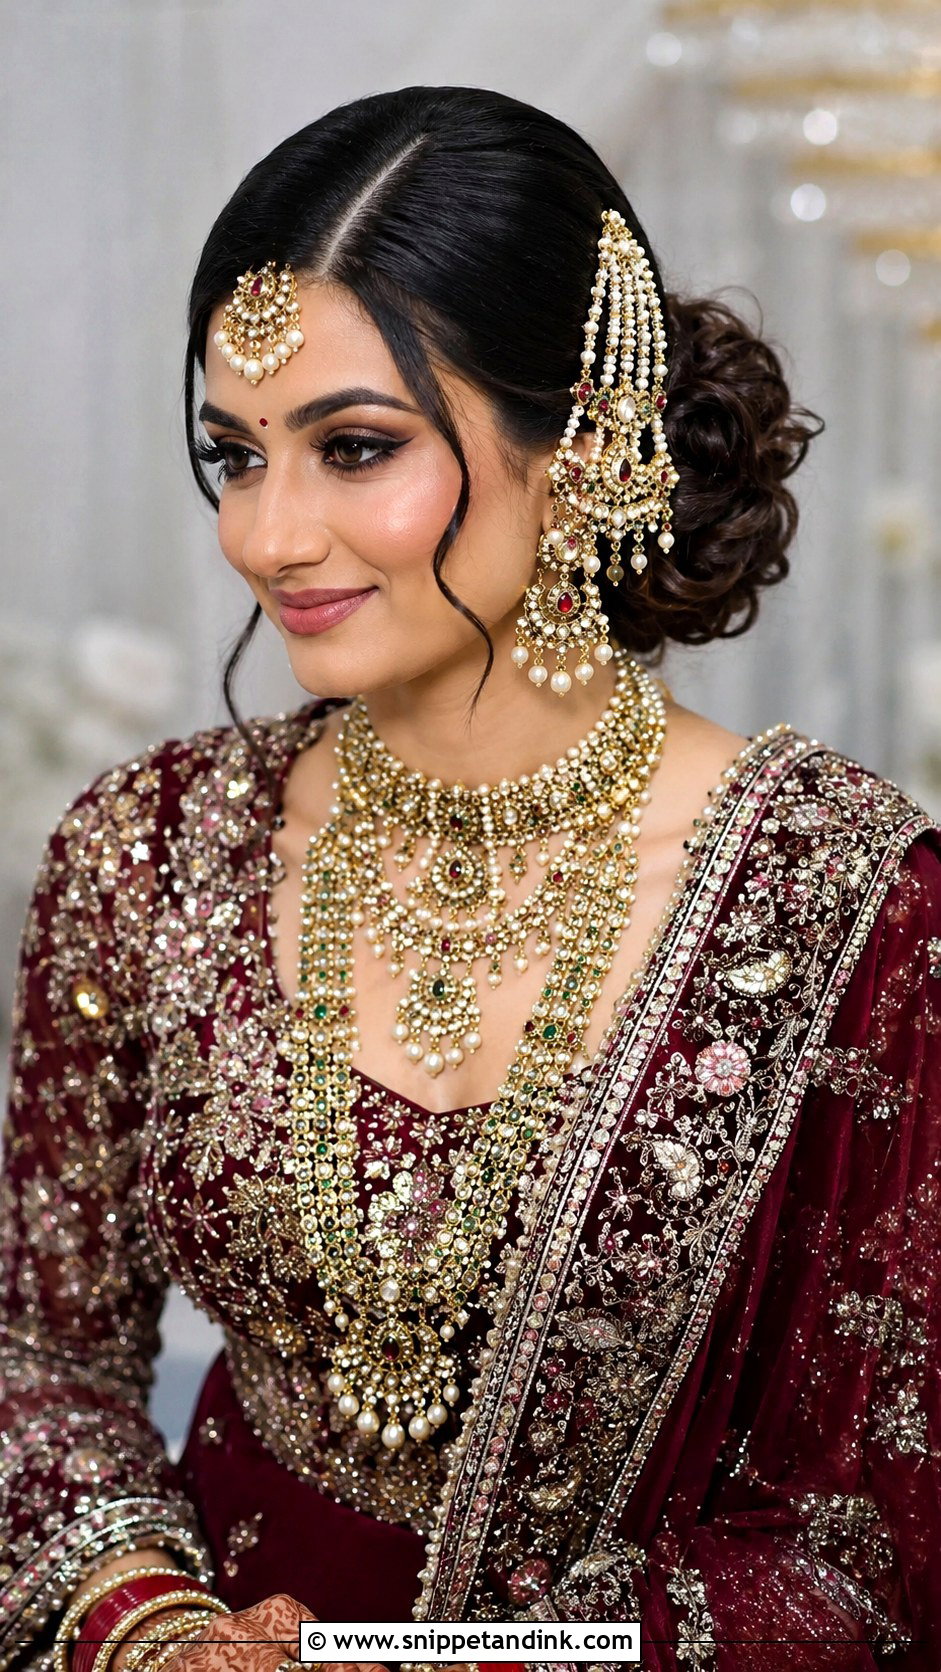
A side part with the passa on the fuller side and a low bun set slightly off center gives that Mughal-inspired front. It suits ghararas, shararas and heavy dupattas, and it leaves statement earrings and layered necklaces in clear view. A passa is heavy for its size, so I give the roots on that side a little volume and pin a base underneath for the passa to hook into. Without that base it pulls the hair flat and slides toward the ear.
18. Indian Bridal Braided Half Up Hairstyle
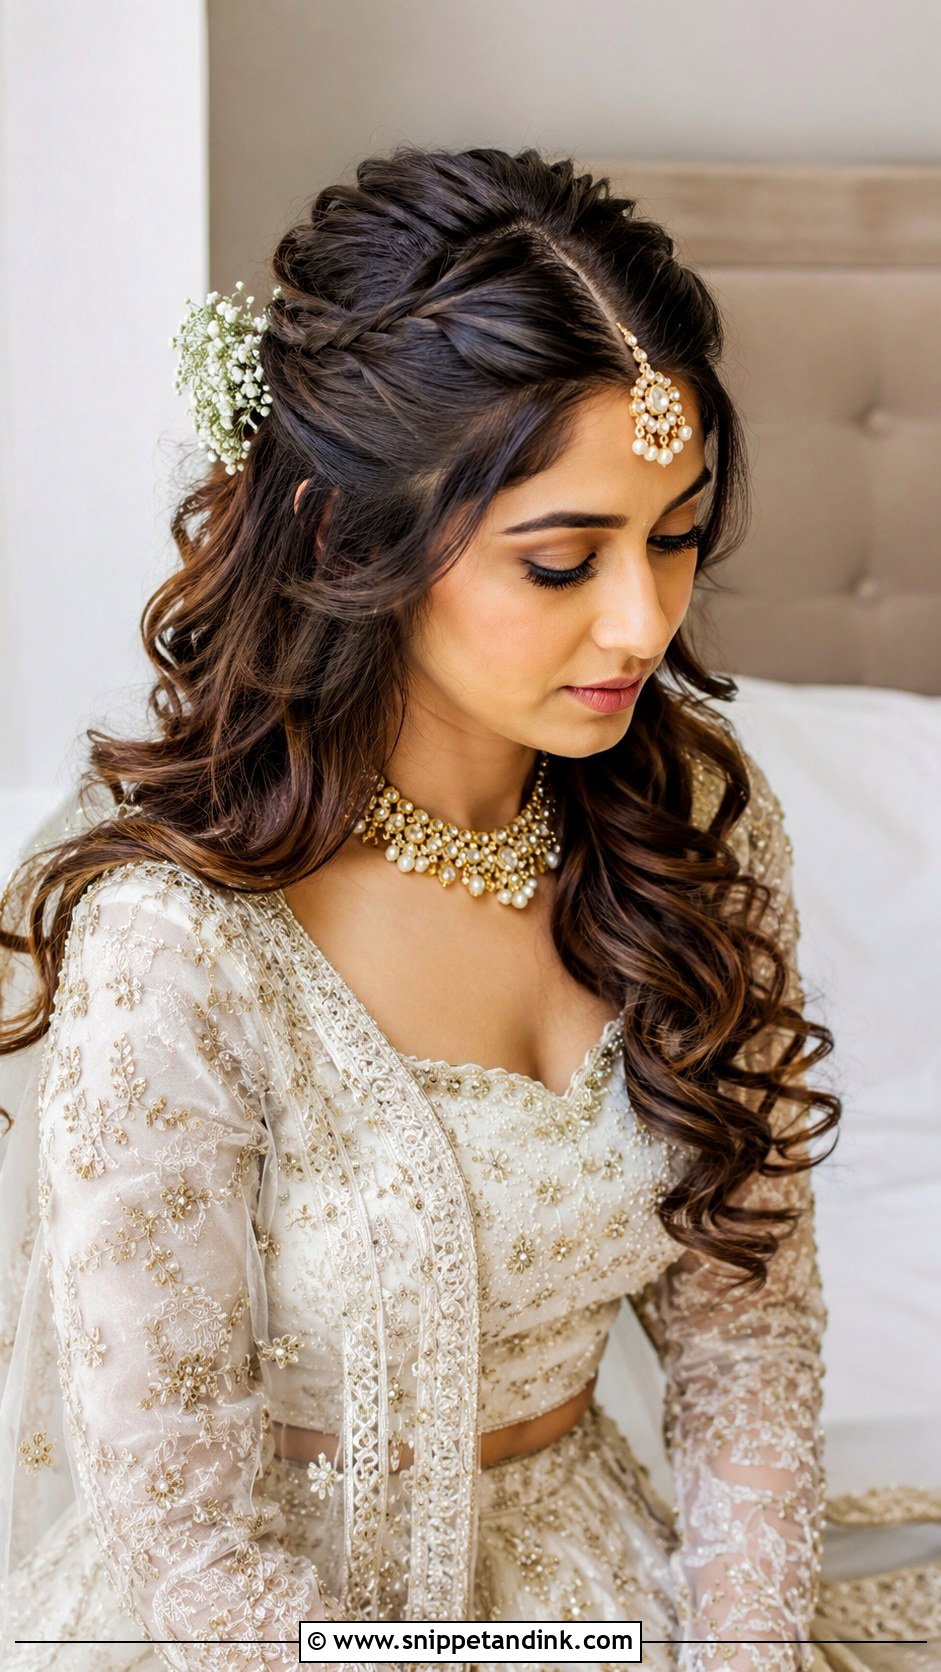
Two small braids starting at either side of the front and meeting at the crown give the face a frame and keep jewelry secure, while the rest stays open in curls. It works with floral lehengas, reception gowns and lighter sarees. Add a maang tikka if the center part shows, or skip it for a modern finish. Even braids matter here; I braid both sides with the same tension so one doesn’t look thicker in the front view.
19. Indian Bridal Front Flicks Bun
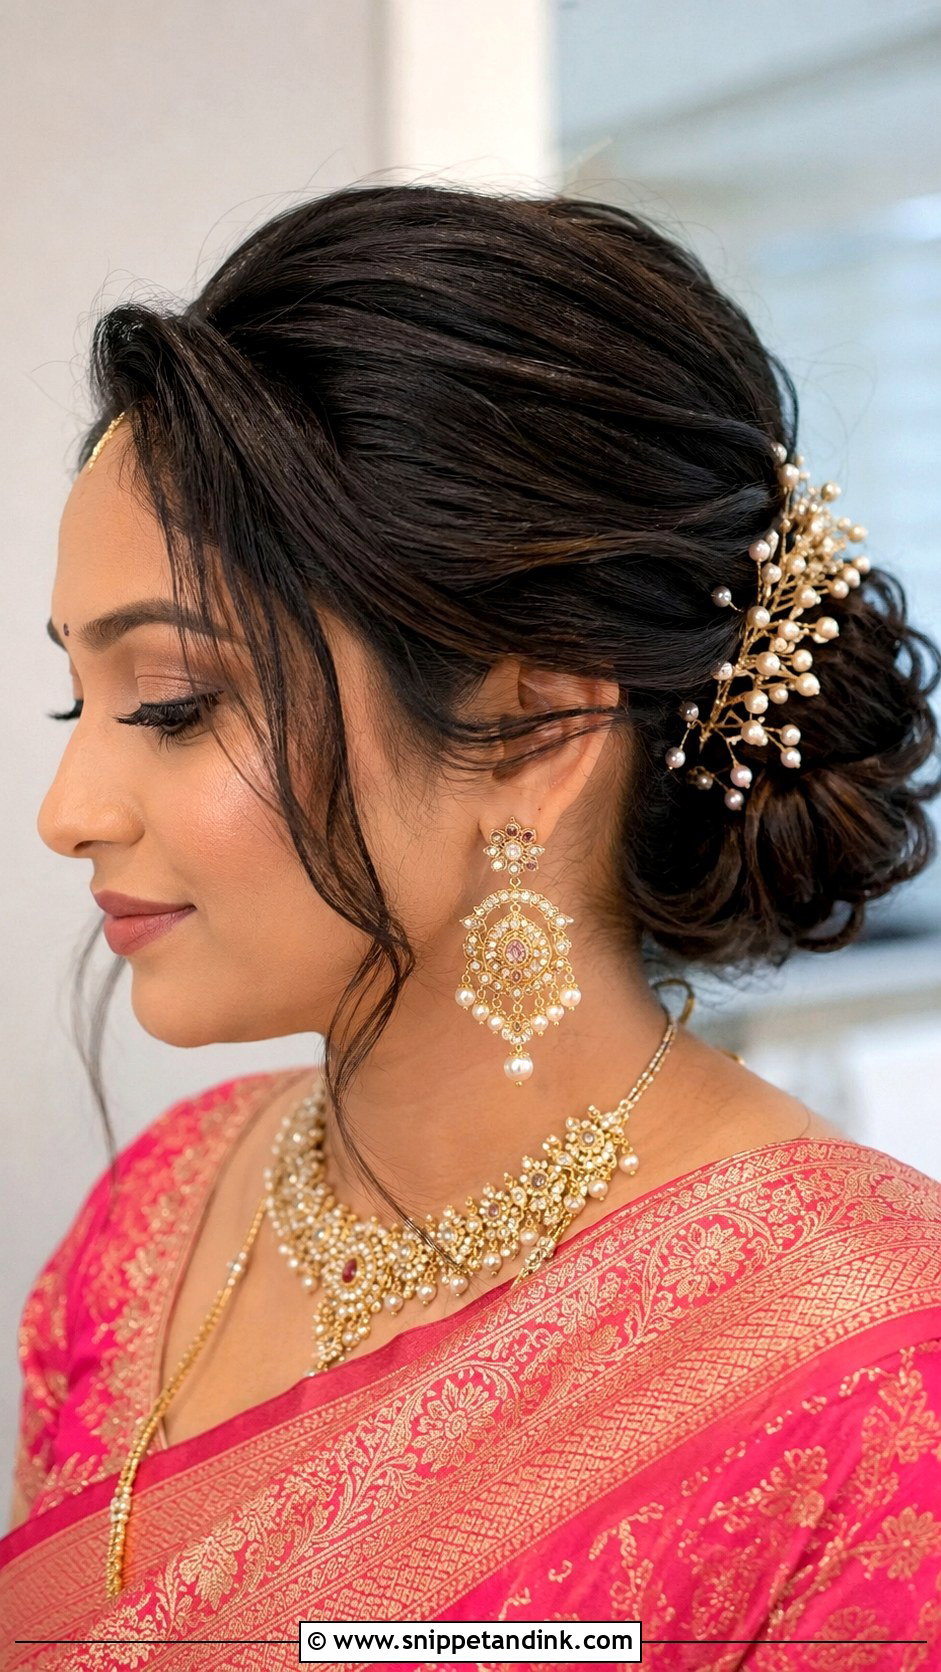
Flicks are shaped front pieces swept away from the face, and they’re the friendliest option for brides with curtain bangs or short front layers that won’t reach a bun. The rest of the hair goes into a neat bun decorated with flowers or pins. Flicks soften a heavy outfit and keep the face young. I keep them light and lifted with a round brush and a little spray, because heavy flicks drift down into the eyes and over the tikka by the evening.
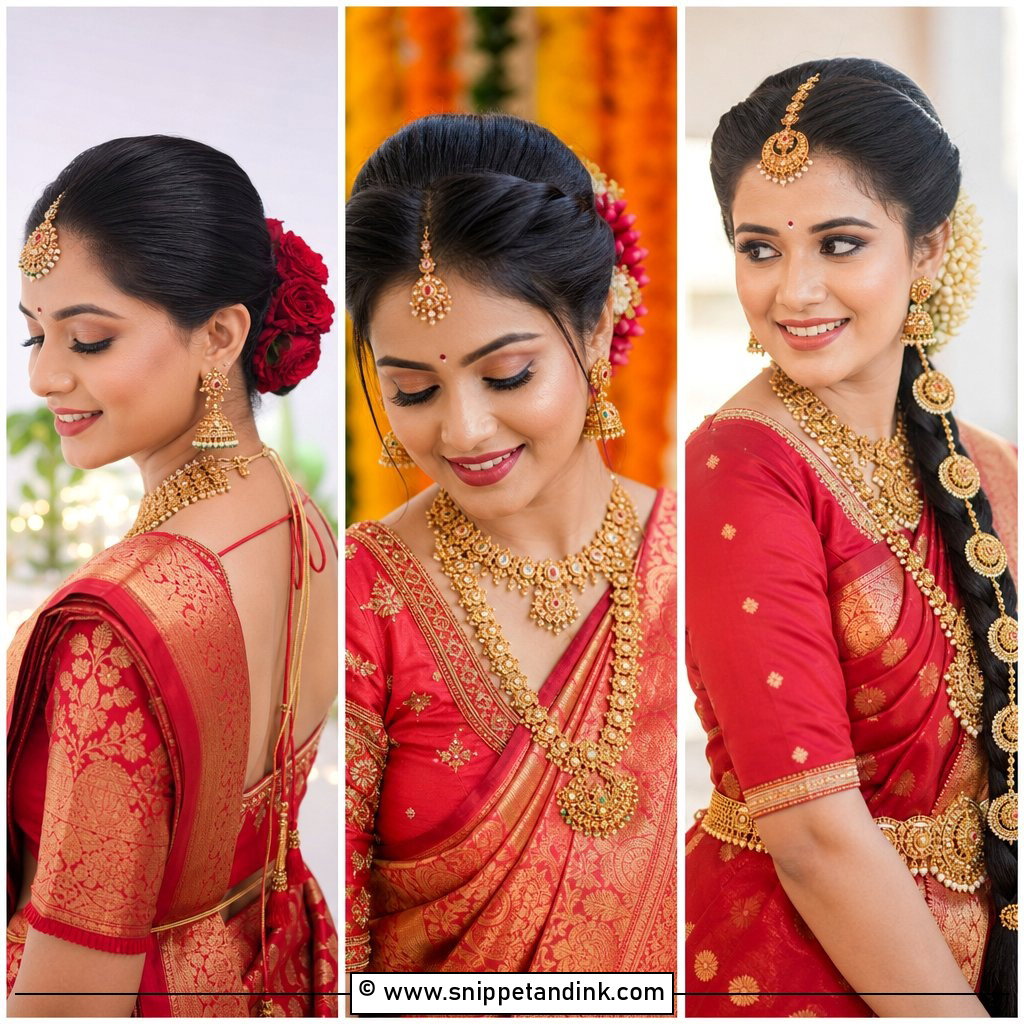
20. Indian Bridal Reception Front Hairstyle
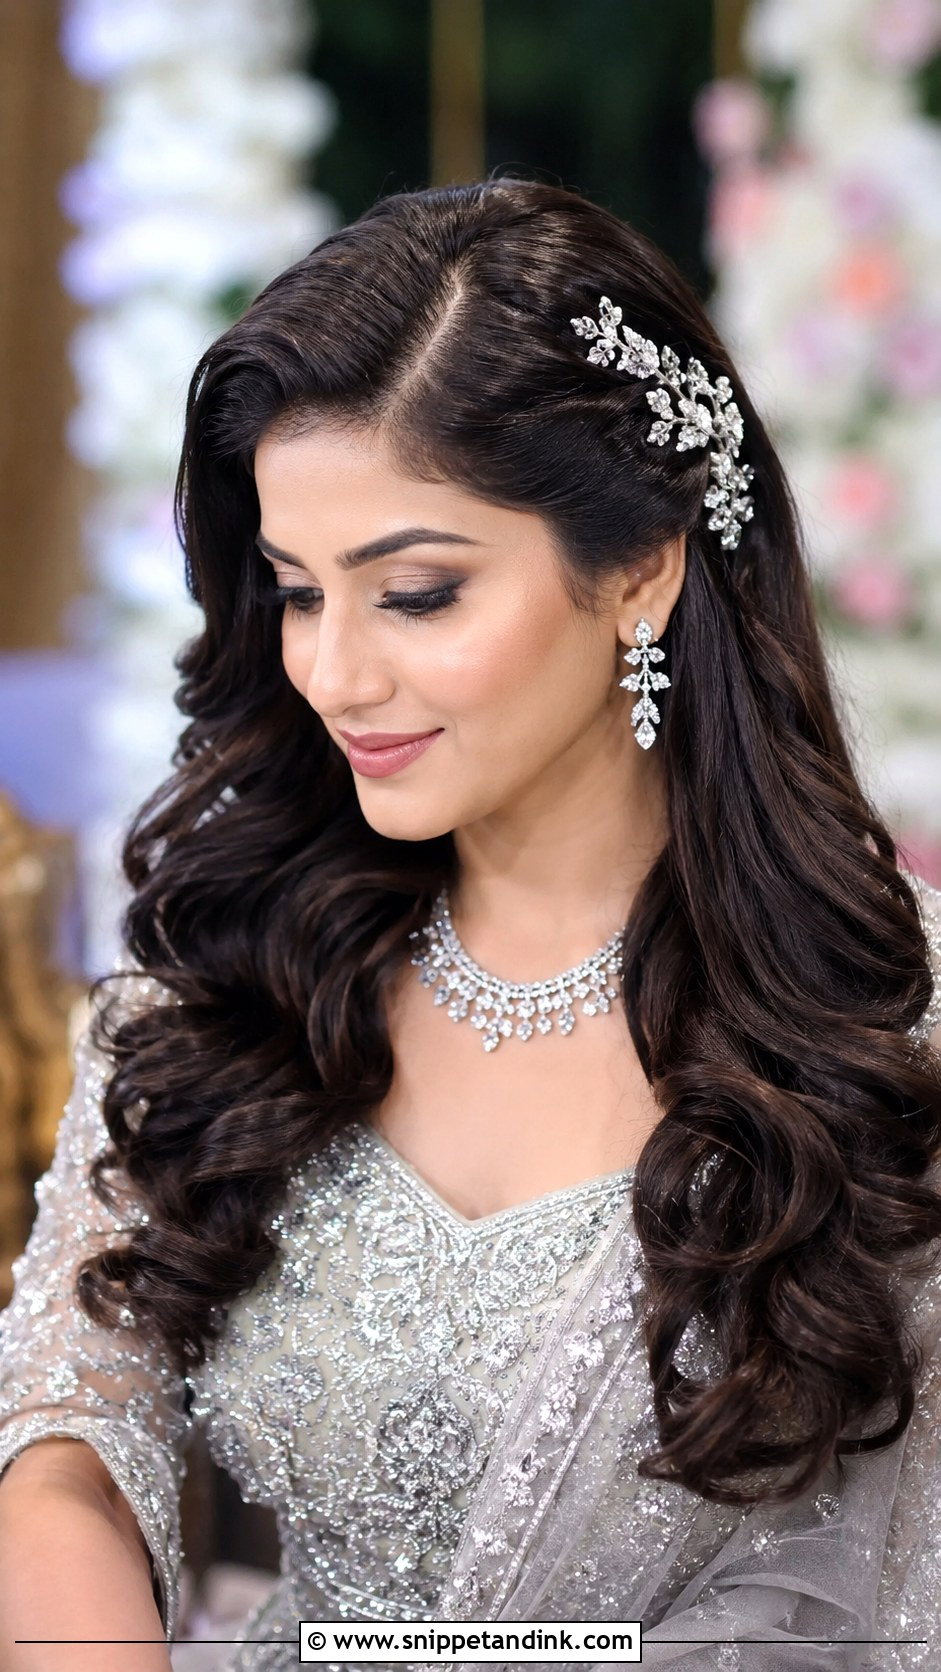
The reception front can be looser than the ceremony one. Polished waves, a deep side part or a lifted crown work well with gowns, lighter lehengas and modern sarees, and it’s a good moment to swap heavy traditional jewelry for crystal pins or a sleek clip. Reception lighting shows flyaways, so smooth the front with a little balm before you walk in. If you’re changing hair between ceremony and reception, give your stylist at least forty-five minutes for the switch.
Your Front Under a Dupatta, Five Hours Later
The dupatta is the front hairstyle’s biggest test. Its weight flattens a puff, its edge rubs flyaways loose along the part, and every adjustment for photos drags it a little further back. I plan for that from the start: the dupatta is pinned into the bun or a comb at the crown, never just to the front hair, and the puff is built slightly fuller than it will finally look.
Ask whoever holds your touch-up kit to carry a fine-tooth tail comb, a few bobby pins in your hair color, a mini hairspray and a small anti-frizz balm. Between rituals, lift the dupatta, smooth the part with the comb’s tail and re-pin anything that shifted. It takes less than a minute and saves the varmala photographs.
Jewelry First, Then the Shape of the Front
Start with the jewelry. The maang tikka, matha patti, passa, earrings and the way the dupatta sits decide which front can work, and the face shape fine-tunes it from there. A sleek bun stays classic, a puff adds height, a braid adds texture and open curls soften everything. Book a trial wearing the real jewelry and a similar neckline, and photograph it from the front, the side and the back before you commit.
You'll Like These Ideas:



Leave a Reply