
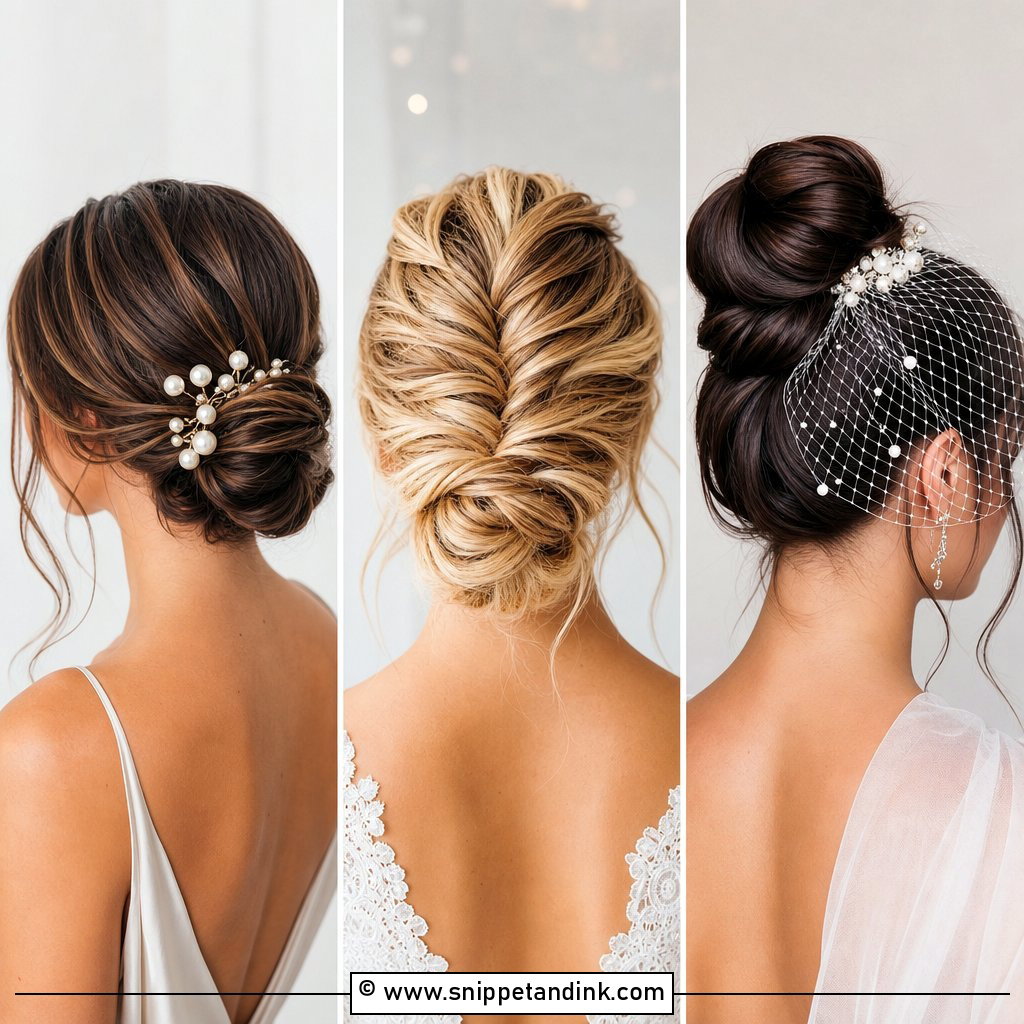
If I had to pick one bridal style that suits the most brides, it would be a low bun. It sits at the nape, out of the way of a veil comb, a high neckline and a hug, and it holds through a long day better than almost anything worn down. The variations are wide: glossy and pulled tight, soft with tendrils, braided, twisted or dressed with pearls and flowers. Below are 20 low buns I build for weddings, with notes on how each is made, what hair it needs and where it can go wrong.
How Low Is Low? Placing the Bun for Your Neckline and Profile
A low bun can sit right at the hairline on the neck or a few centimeters higher, at the bony bump at the back of the head. That small difference changes the whole look, and I decide it with the dress, not the hair.
High necklines, collars and some lace backs push a bun that sits too low, so the hair rubs and drops. For these, I place the bun a little higher. Strapless and off-shoulder gowns leave the neck open, and a bun right at the nape looks balanced there. With a very open back, the bun becomes part of the view down your back, so I keep it neat and in line with the spine.
Profile matters too. Turn sideways in a mirror. A bun that sticks out far from the head can look heavy in side-on photos, especially on a long or slim neck, while a flatter chignon follows the shape of the head. A short neck often looks better with the bun slightly higher, which shows more neck.
Length sets the limit. Shoulder-length hair can make a small low bun, but layers will escape and the knot may need padding or a few extension wefts. Hair below the shoulders gives the most choice.
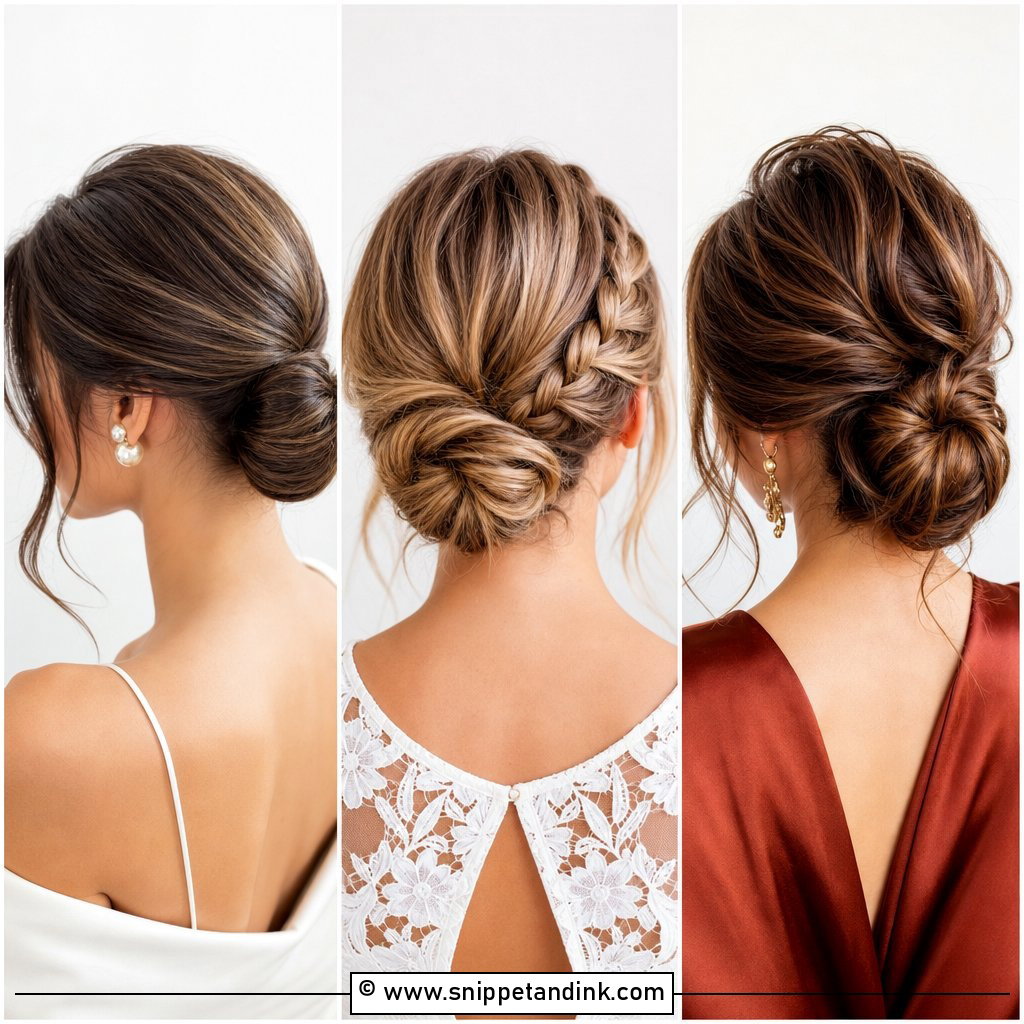
1. Sleek Low Bun With Middle Part
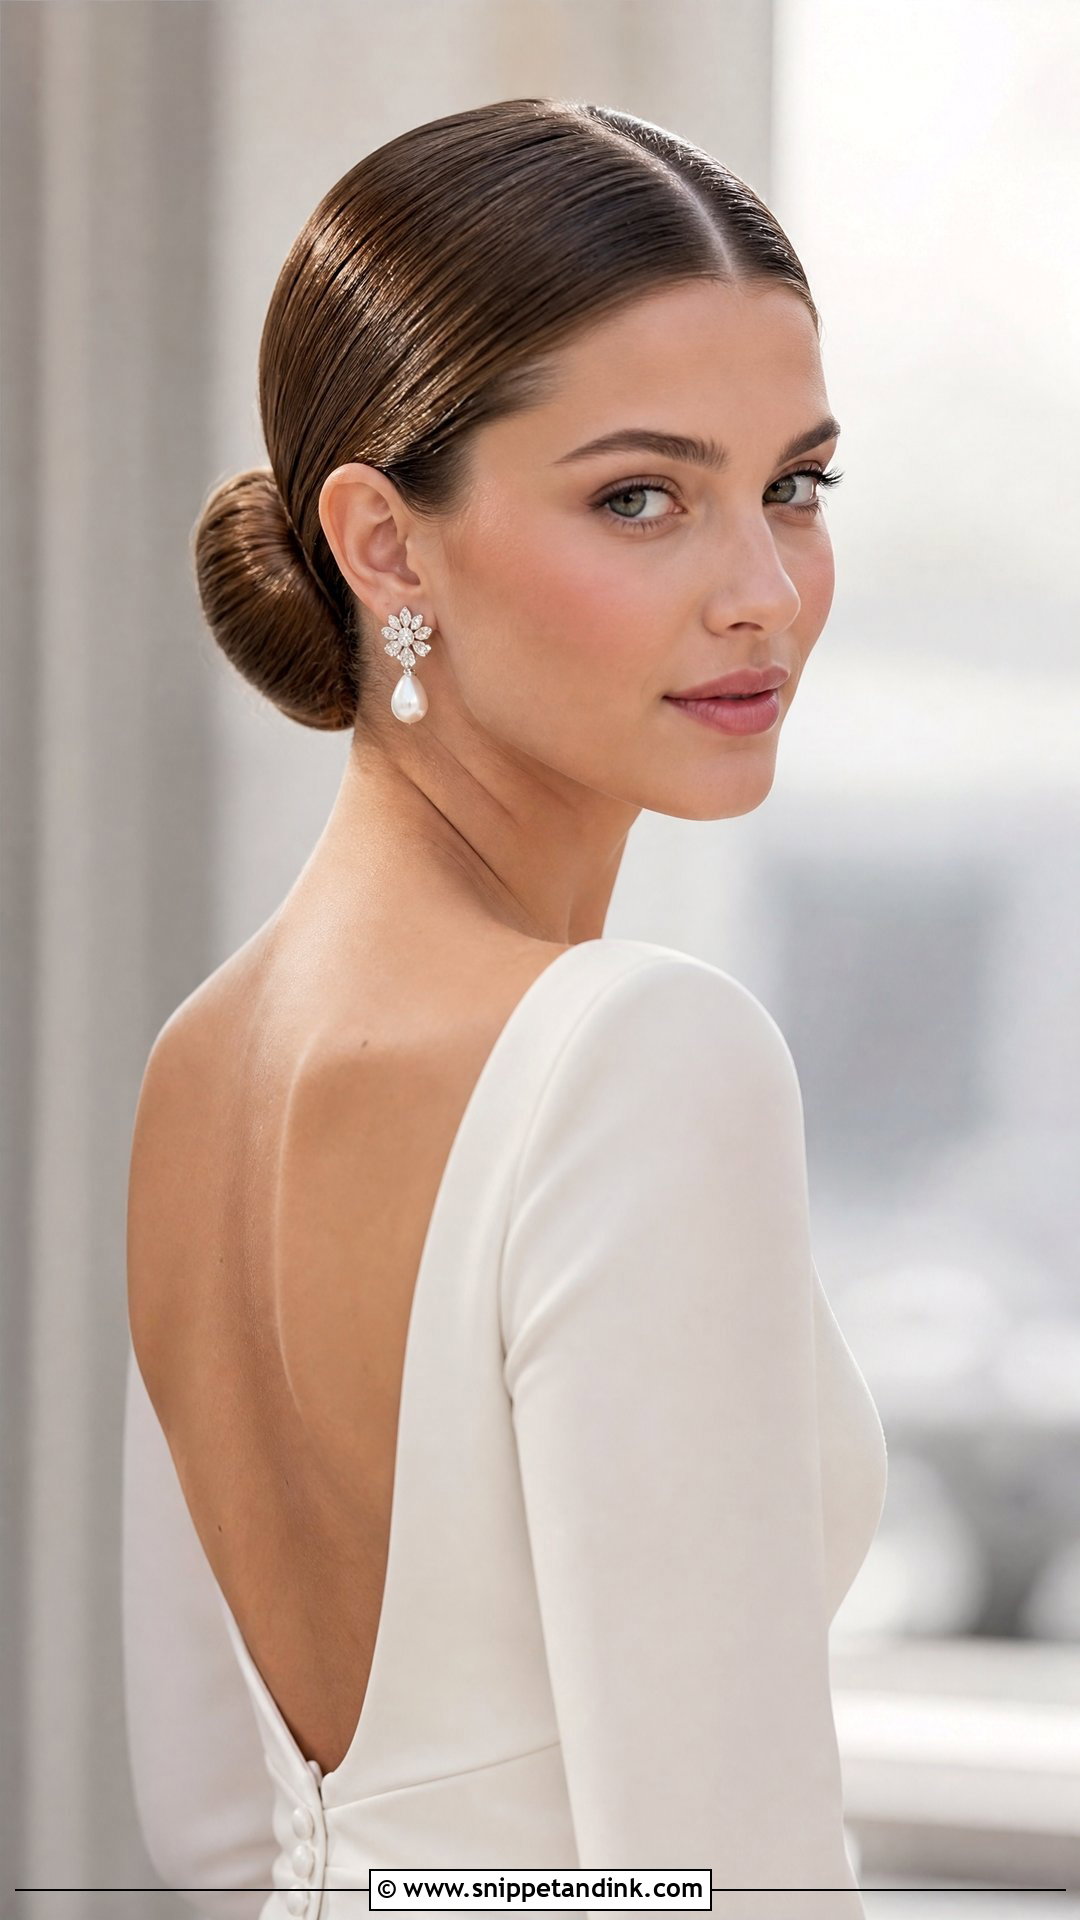
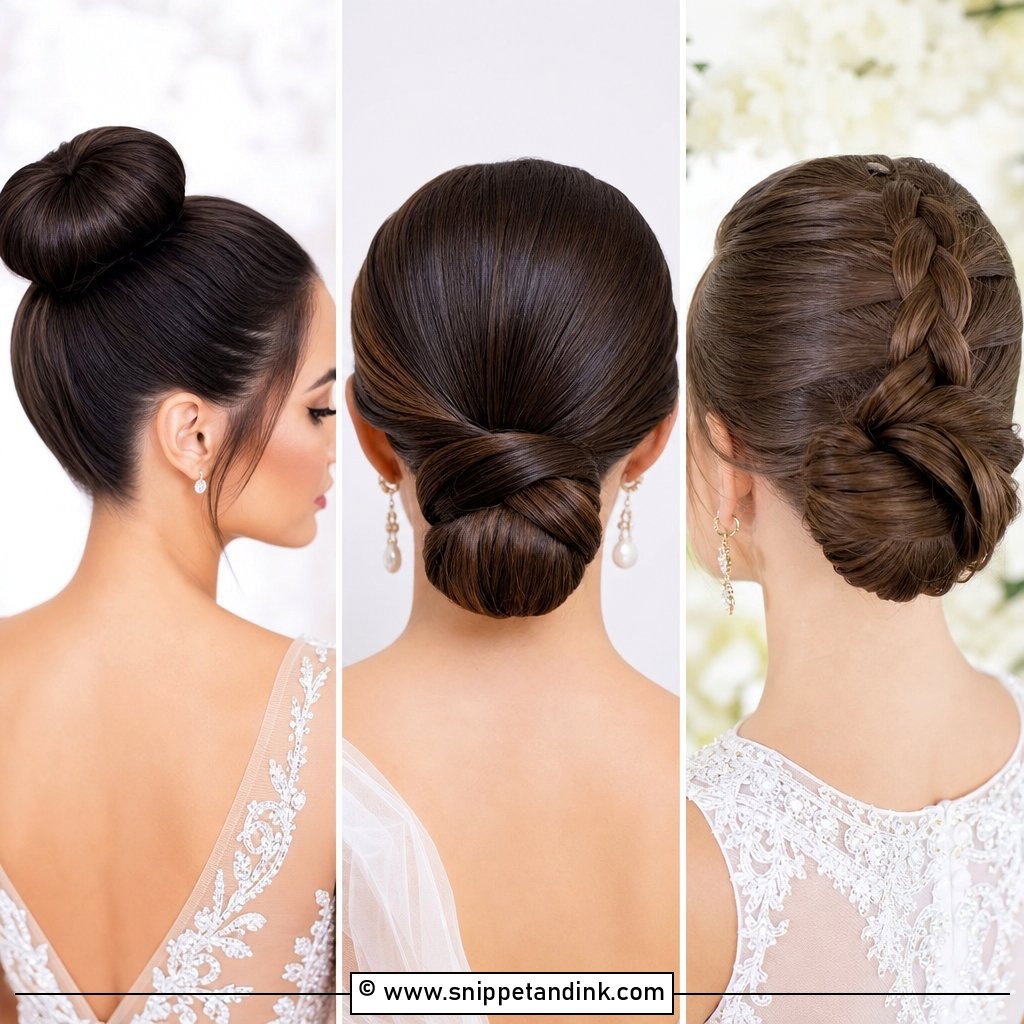
Everything about this bun depends on the part. A center part has to be truly central, so I find it by lining up the comb with the bridge of the nose rather than eyeballing it. The hair is flat-ironed, smoothed with a little serum, brushed back and set into a tight ponytail before it’s wrapped into a knot. There’s no volume to hide flaws, so any bump shows in photos. It suits structured gowns and statement earrings. If your hairline has cowlicks or baby hairs that stand up, plan for a little extra gel and a toothbrush at the edges.
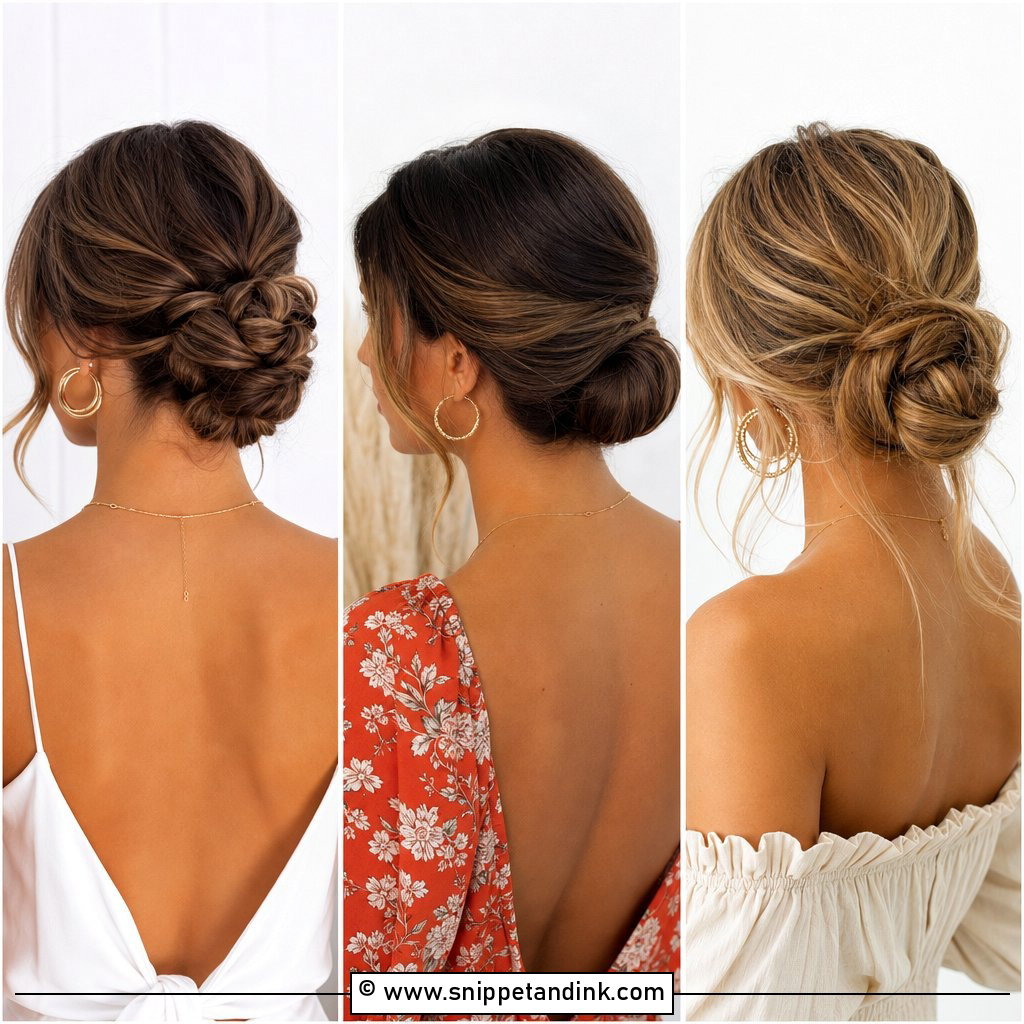
2. Messy Low Bun With Loose Tendrils
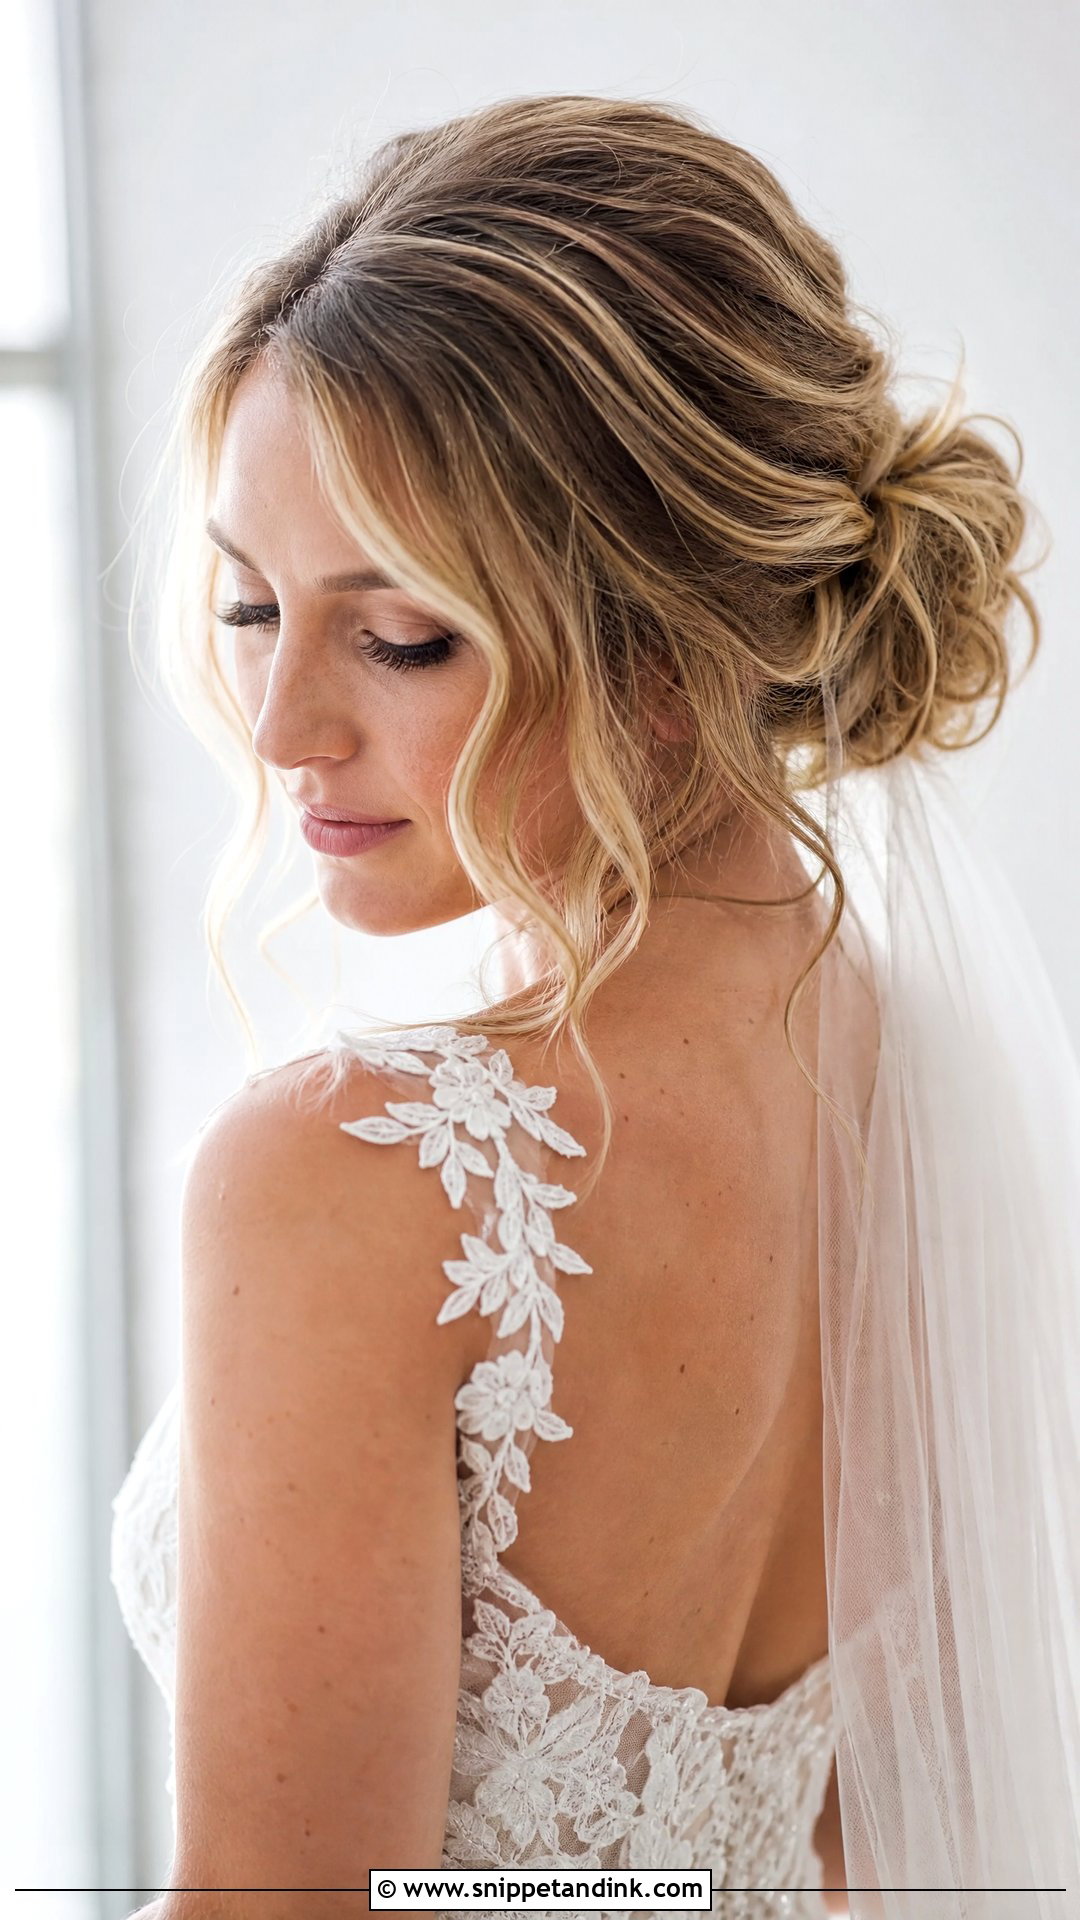
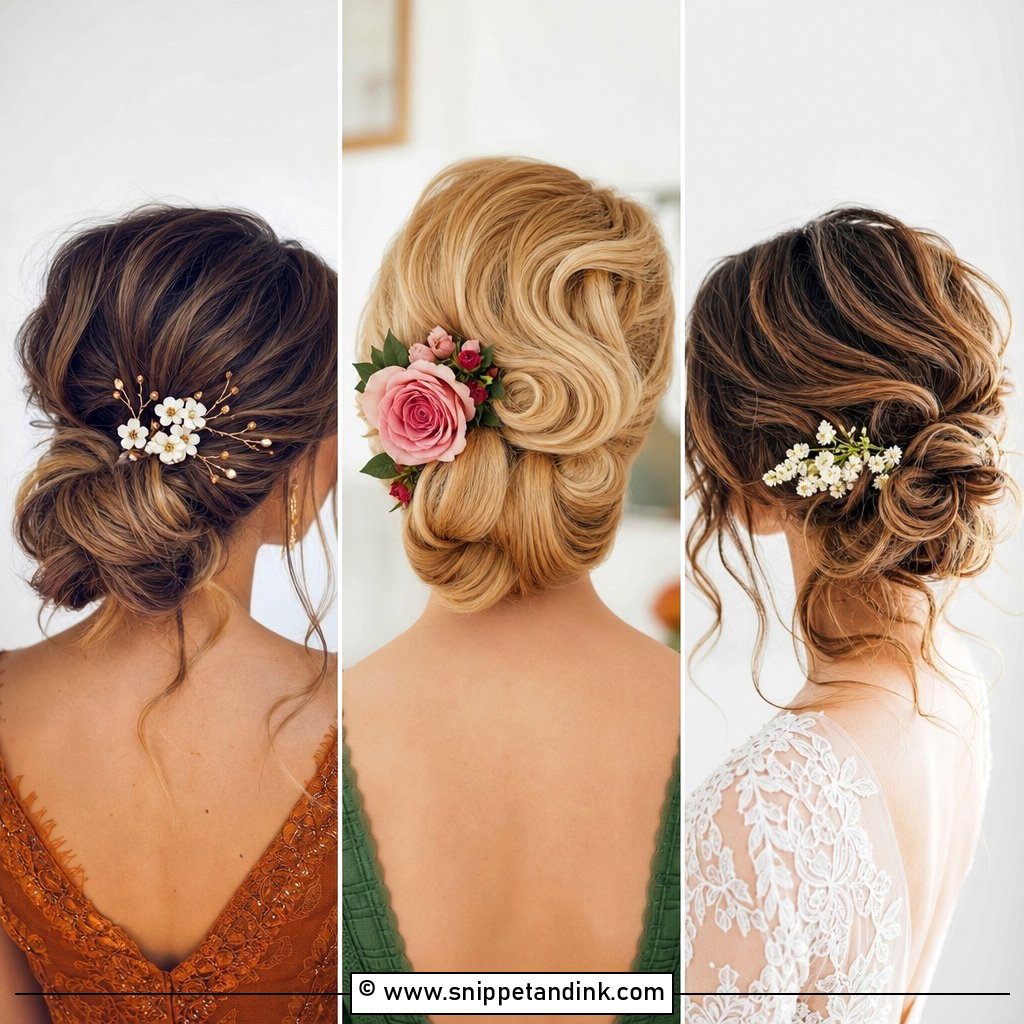
A messy bun isn’t actually messy underneath. I pin a secure base at the nape first, then gather the hair loosely around it and pull out a few face-framing tendrils at the end. Curling some sections before pinning gives the texture that makes it look intentional rather than slept in. It suits garden and bohemian weddings and works with soft flowers or a fine veil. The relaxed shape is forgiving, too: if a piece slips out at the reception, it simply looks like part of the style.
3. Braided Low Bun
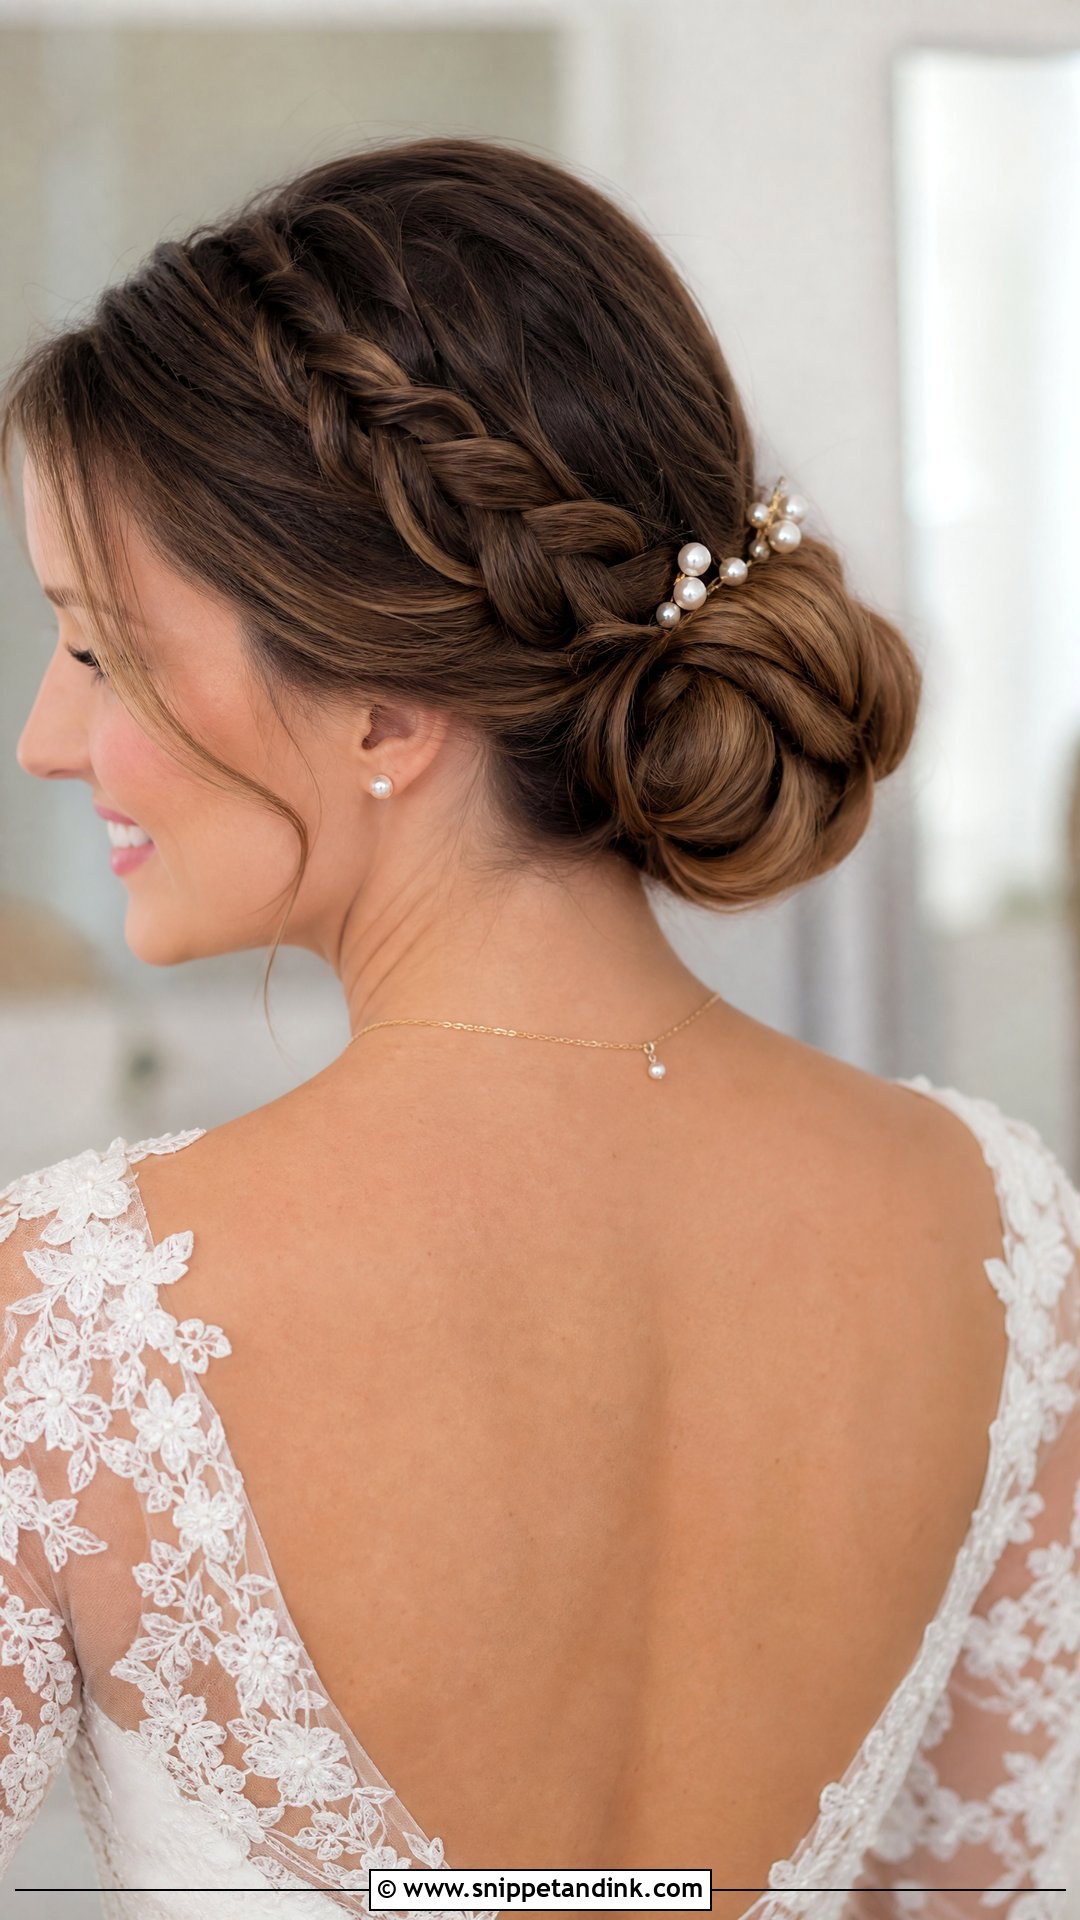
A braid that starts near the crown and feeds into the bun adds detail and, usefully, extra hold, since the braid locks the top section in place. It’s simpler to do than it looks. I usually braid tighter for a structured gown and looser for a relaxed dress, then pull the edges out a little once it’s pinned. Tiny pearls or crystal pins slide easily into the weave. On fine hair, braids can look thin once loosened, so I’d keep this one closer to its original tension.
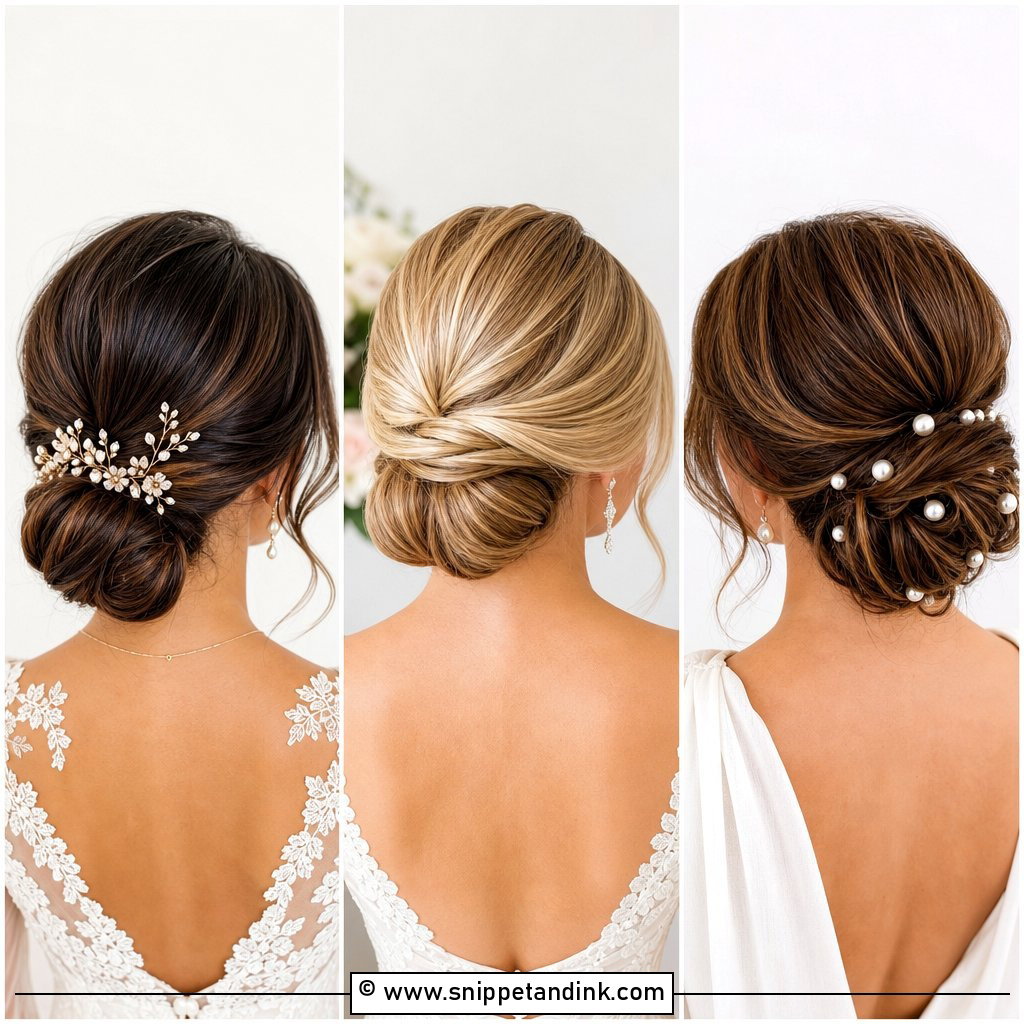
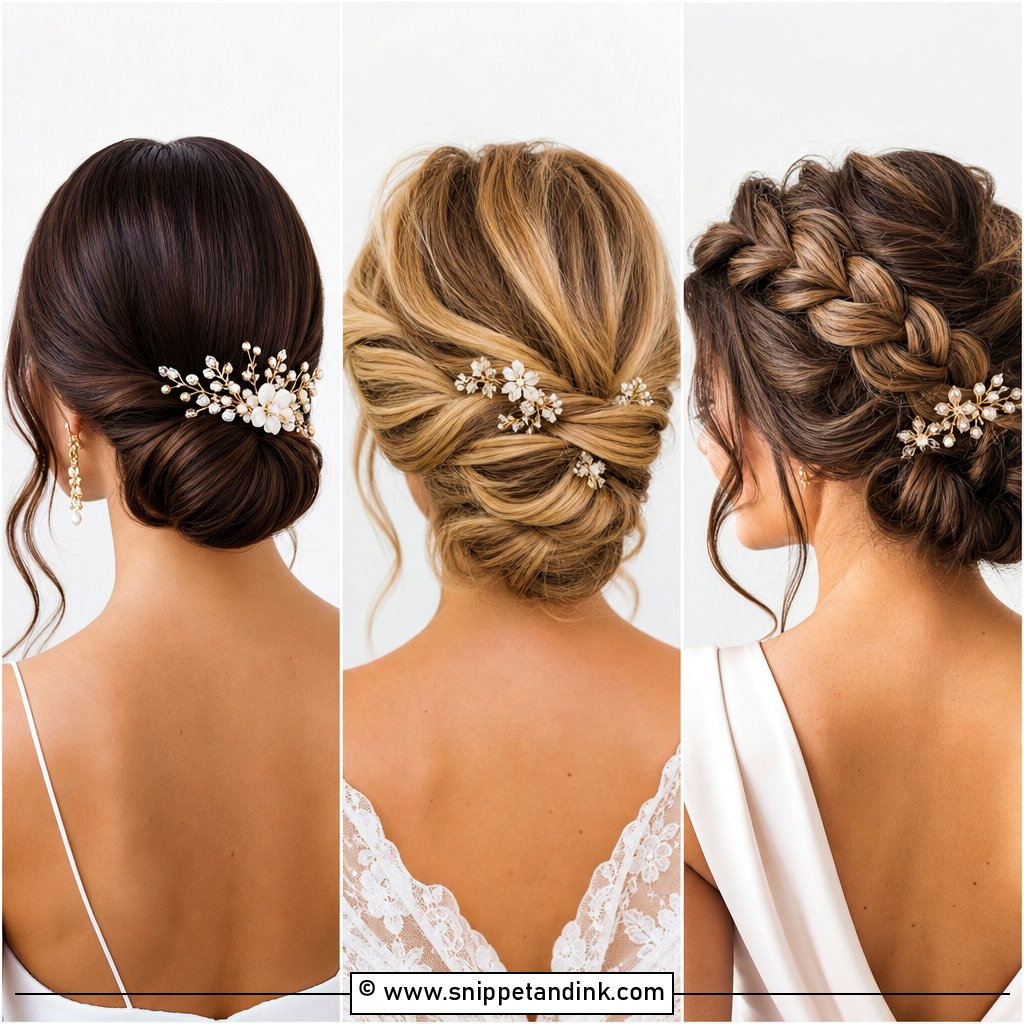
4. Low Chignon Bun
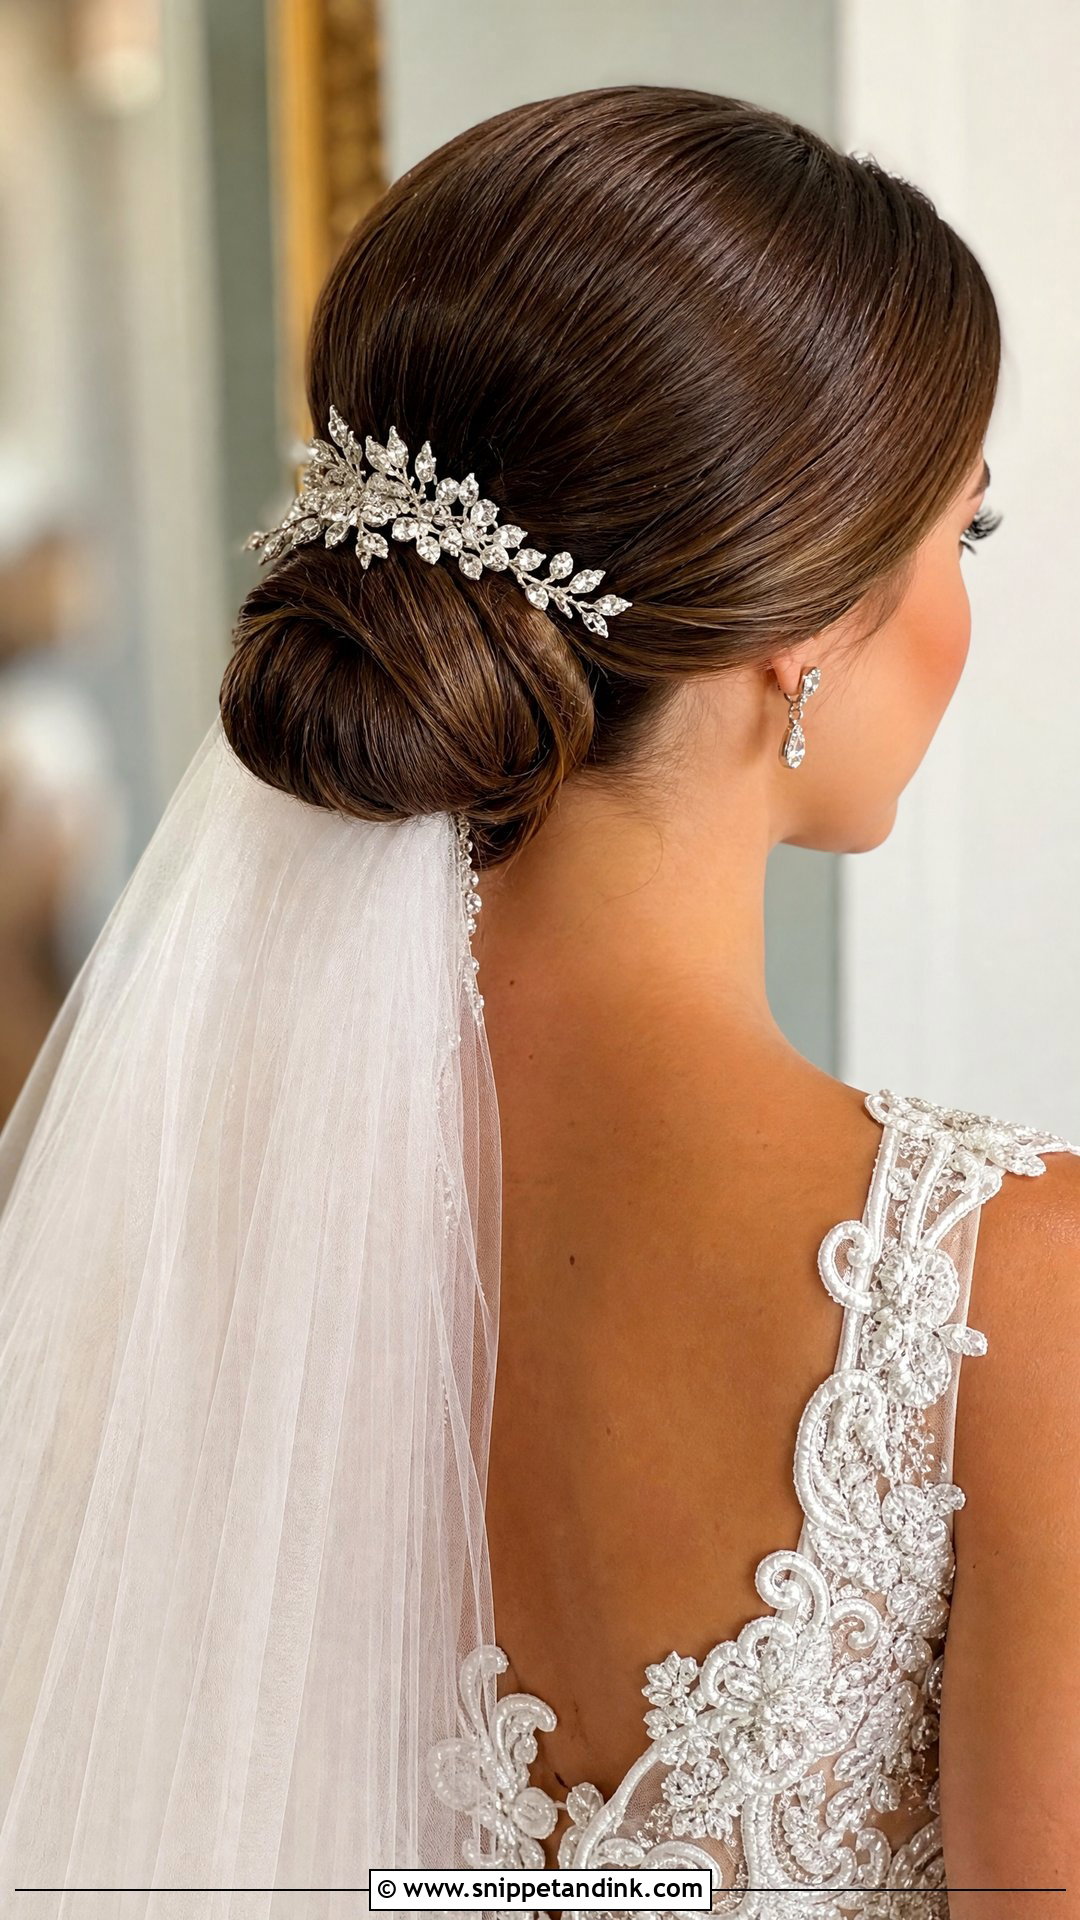
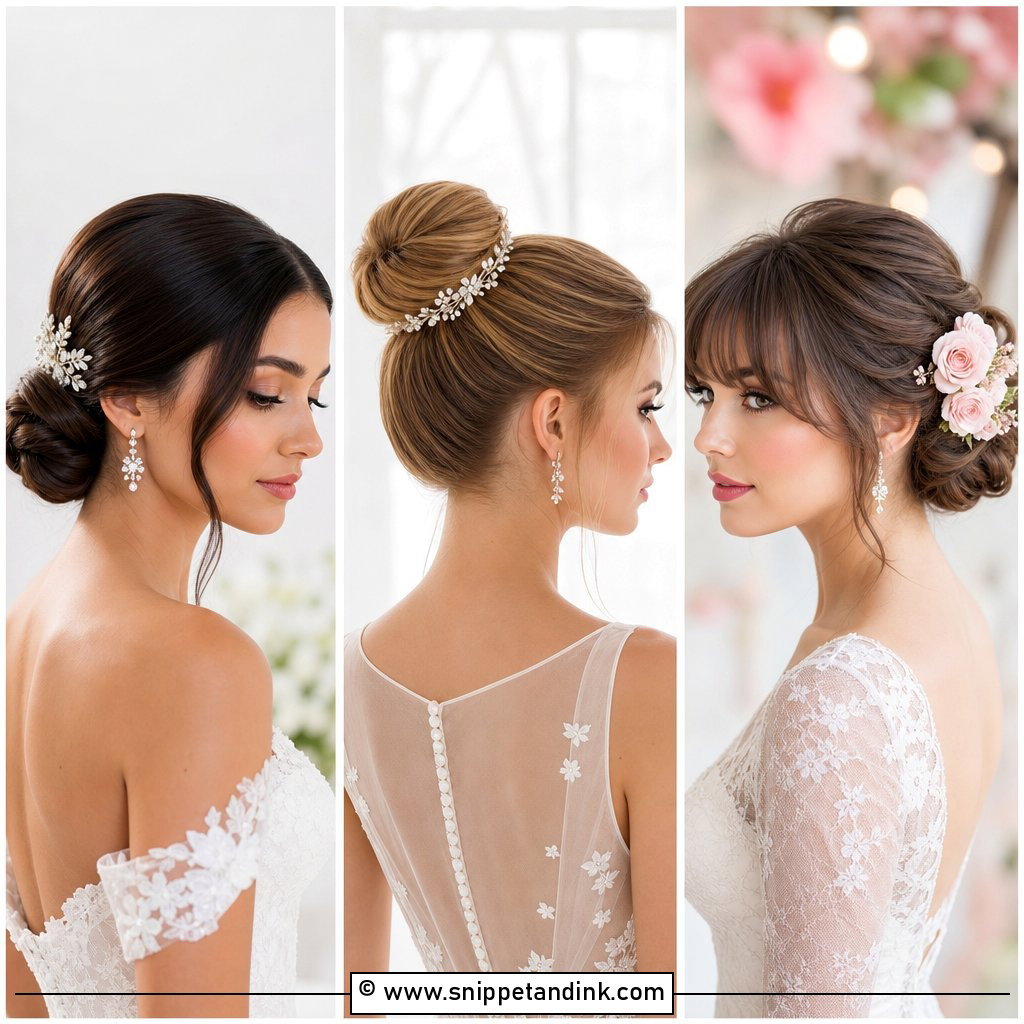
The classic chignon is rolled and tucked rather than wrapped, which gives that smooth, rounded shape at the nape. I set it with U-pins pushed into the roll rather than bobby pins across it, so the surface stays clean. It sits close to the head, which is why it pairs so well with cathedral veils and formal gowns, and why it stays put all day. A couple of loose pieces at the face soften it. A jeweled comb or pearl pins at one side finish it without crowding the shape.
5. Twisted Low Bun
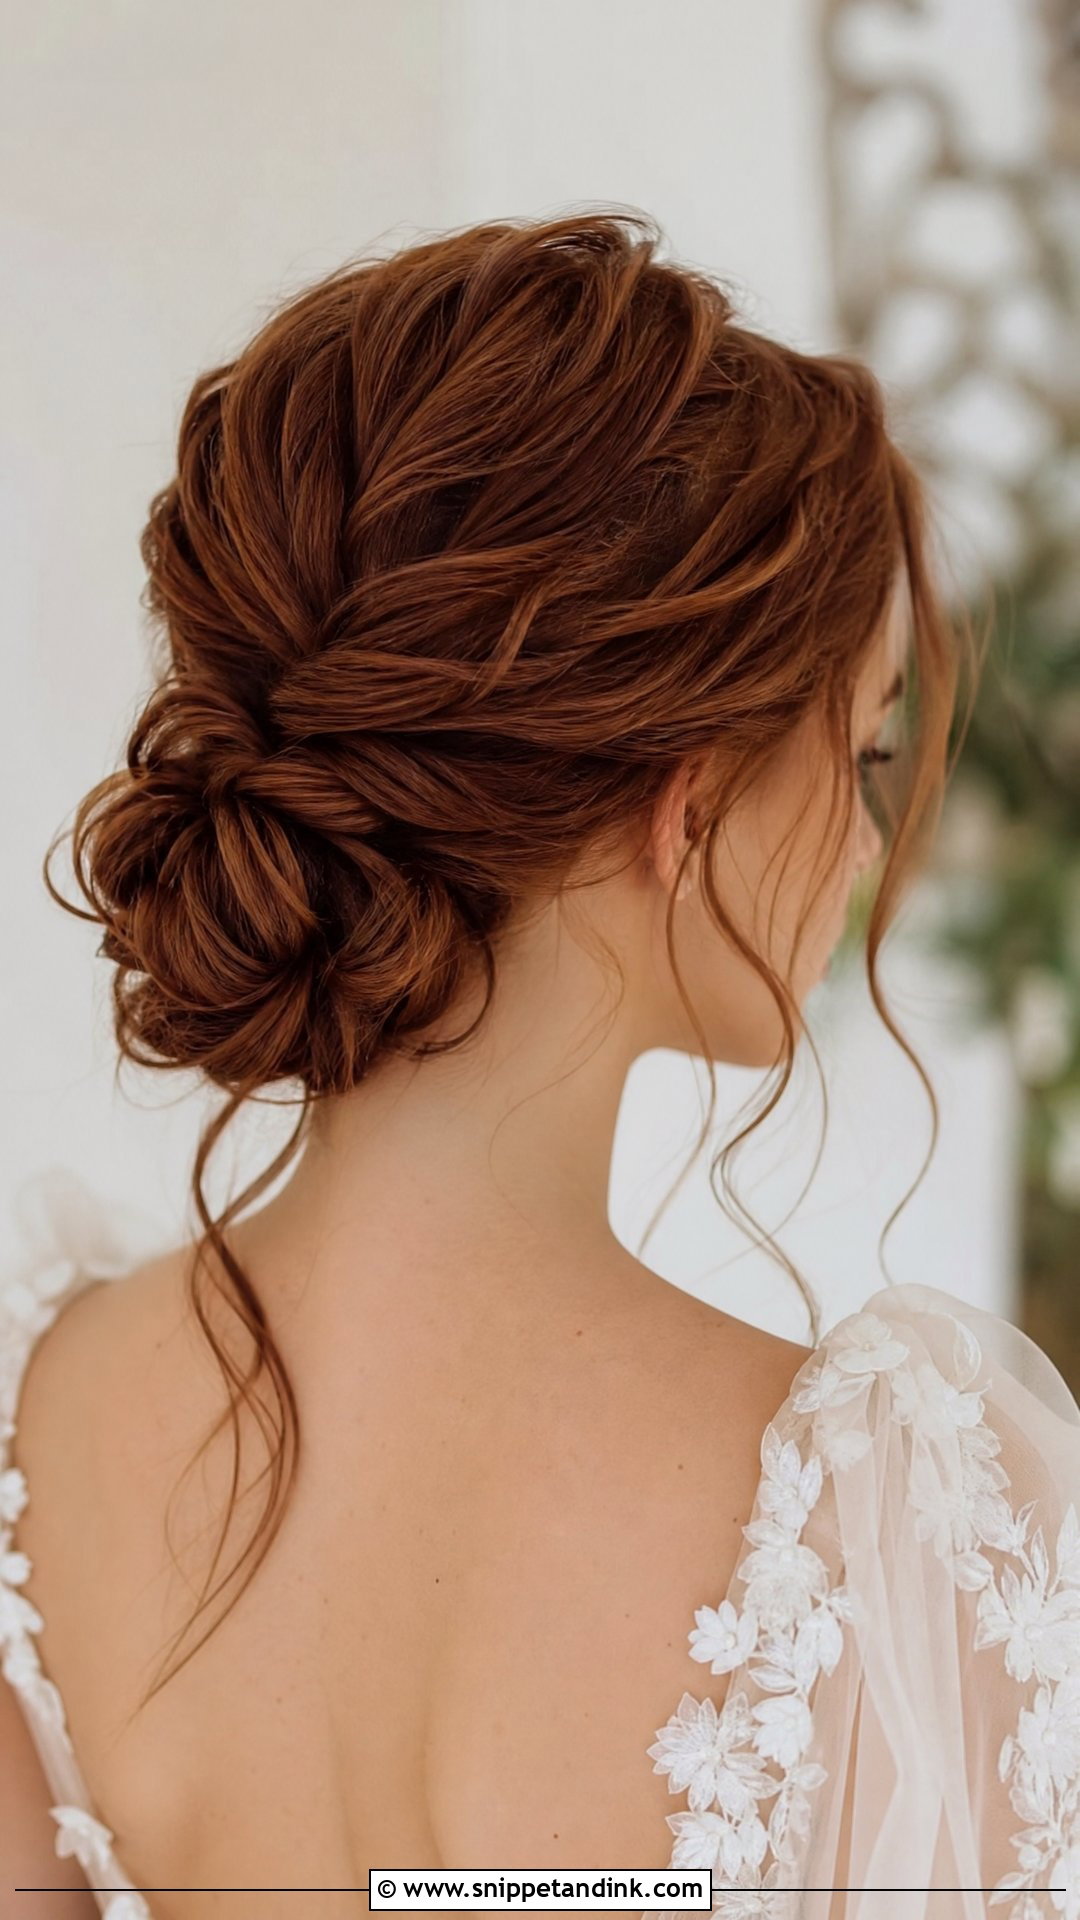
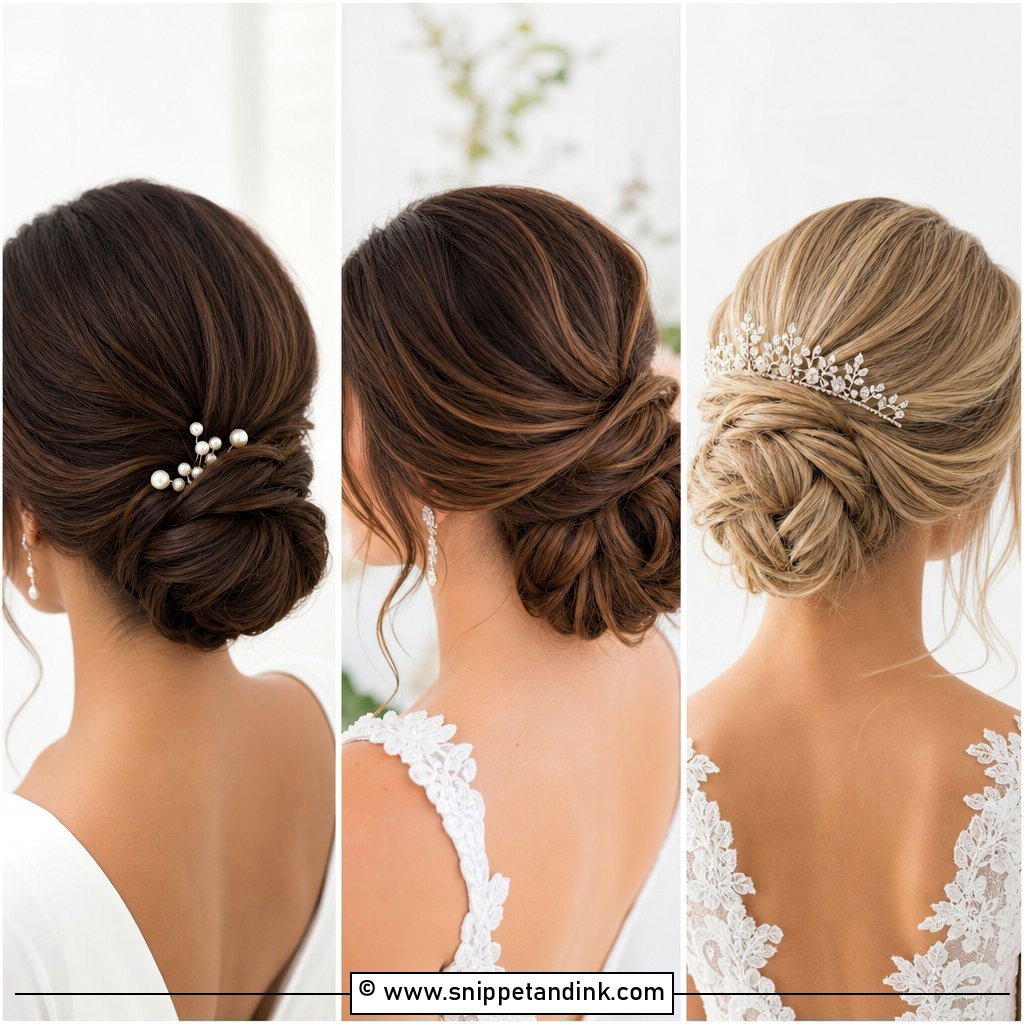
Here the knot is built from separate twisted sections, each pinned at the nape, so the finished bun has ridges and depth instead of one smooth surface. I twist each section away from the face, which keeps the shape tidy, and pin along the twist rather than only at the end. It’s a little more detailed than a chignon but still relaxed. Floral crowns, hair vines or a simple veil all sit well with it. Twists hold best on hair with some grip, so very silky hair needs texture spray first.
6. Low Bun With Side Braid
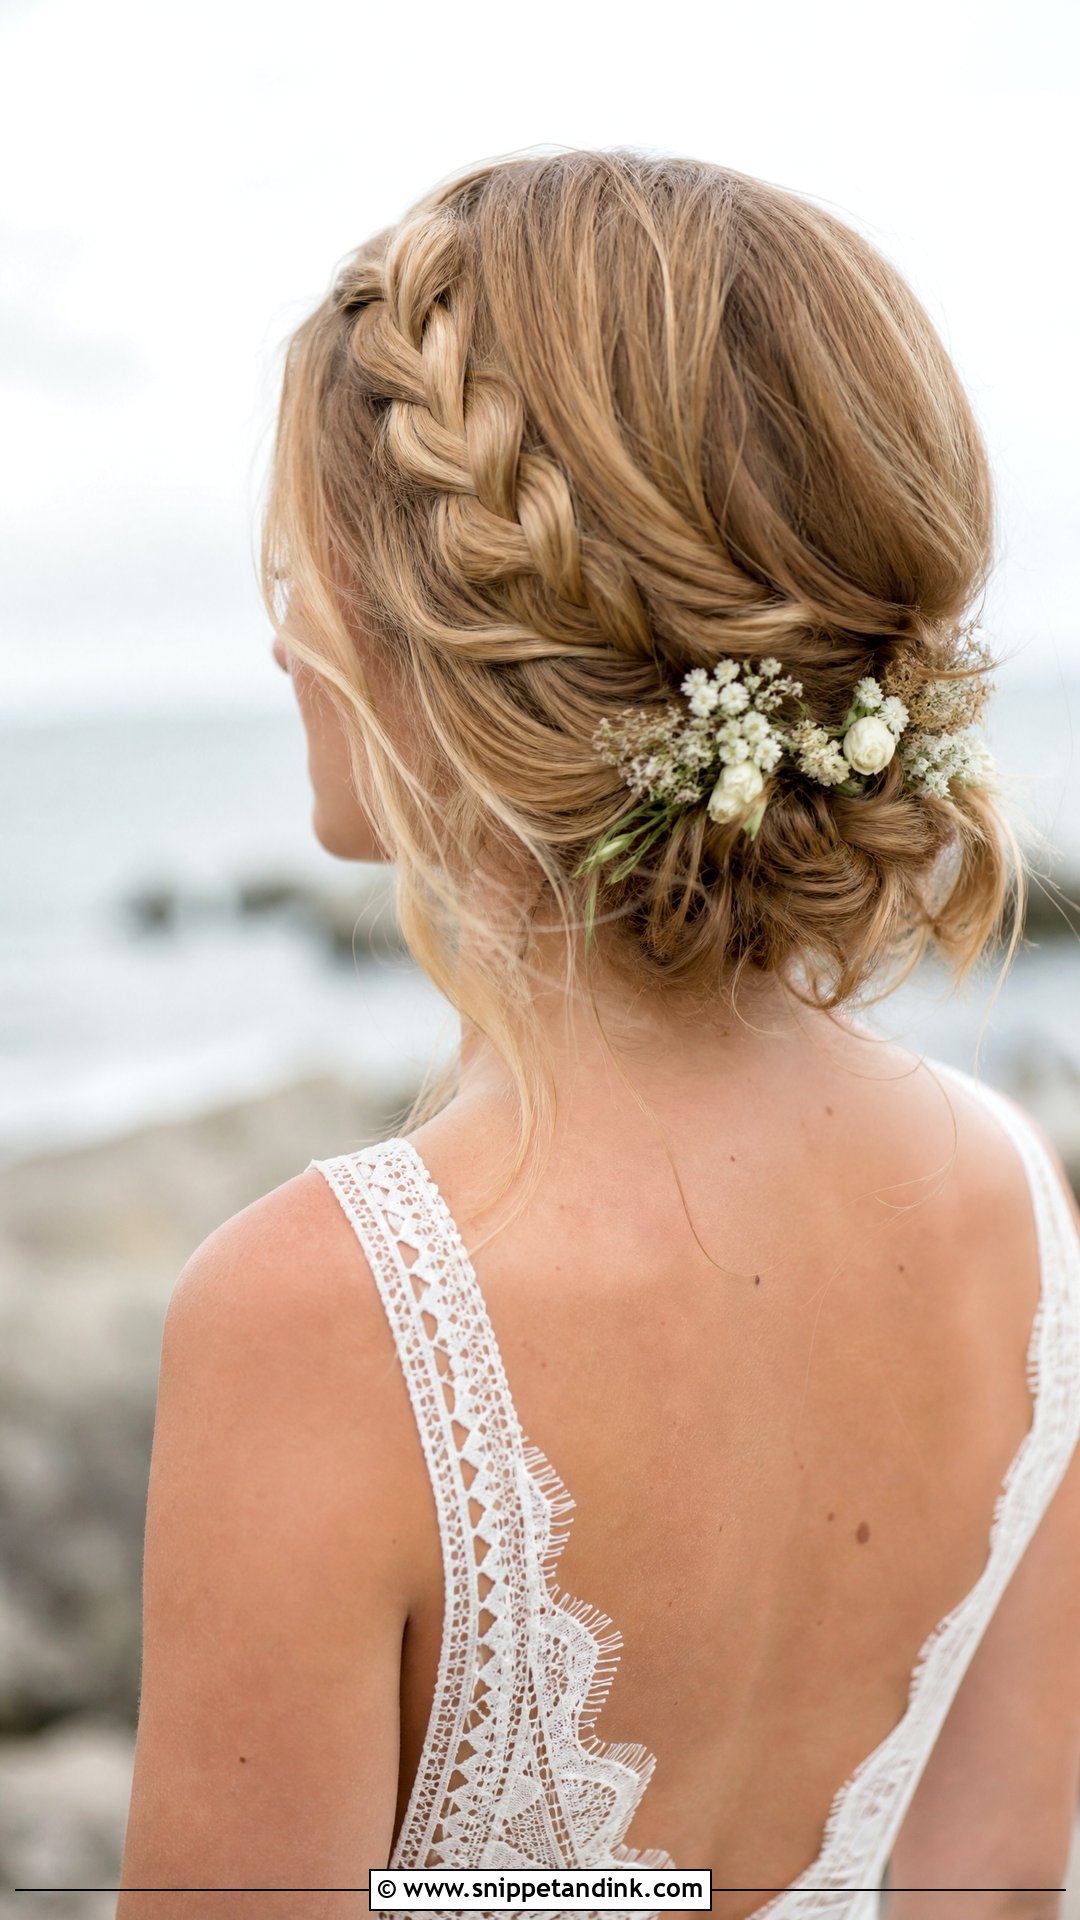
A side braid flowing into a low bun adds bohemian charm without leaving hair loose to blow around. The braid starts above one ear and sweeps along the side before joining the knot. I place the bun slightly off center toward the braided side so the line flows naturally. It suits outdoor, beach and garden weddings. Keep the braid airy or tight depending on the dress, and tuck small flowers along it. Check which side you’ll be photographed from most at the ceremony; that’s the side I’d braid.
7. Sleek Low Bun With Pearl Pins
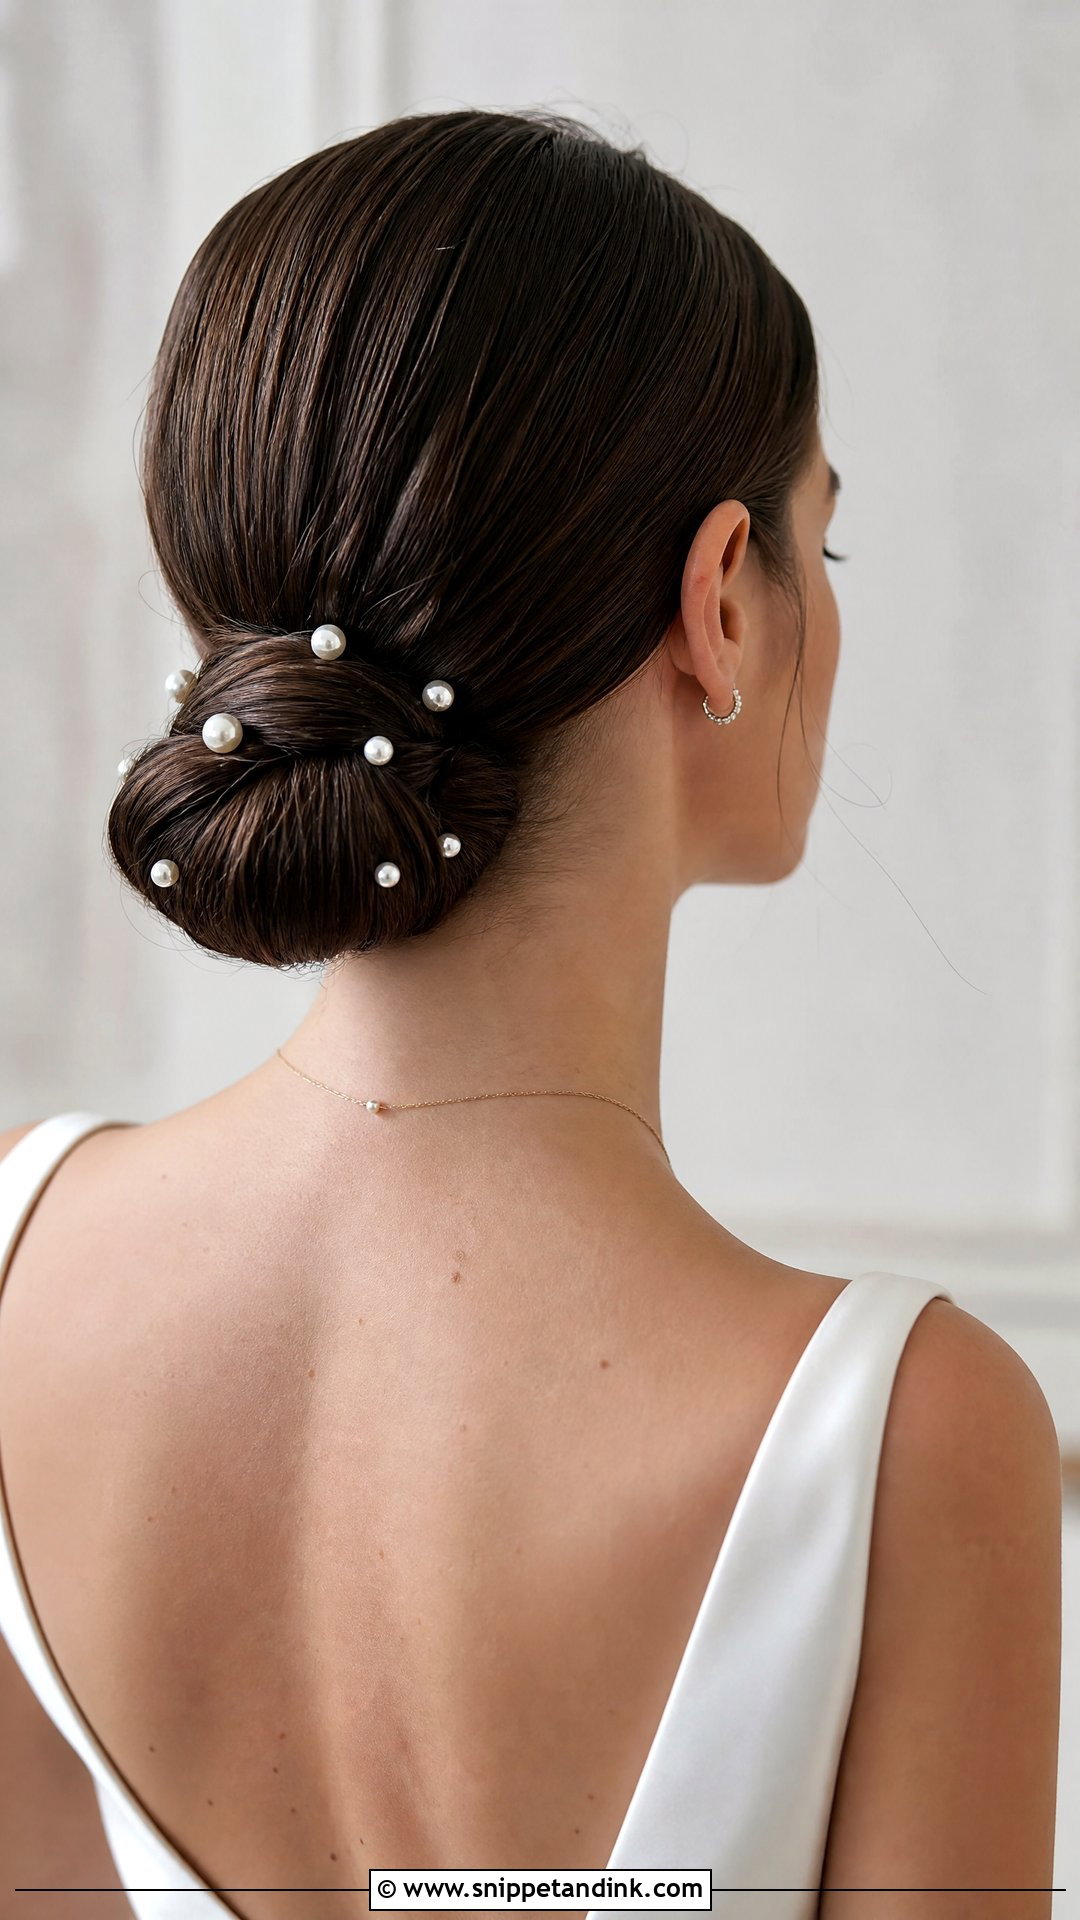
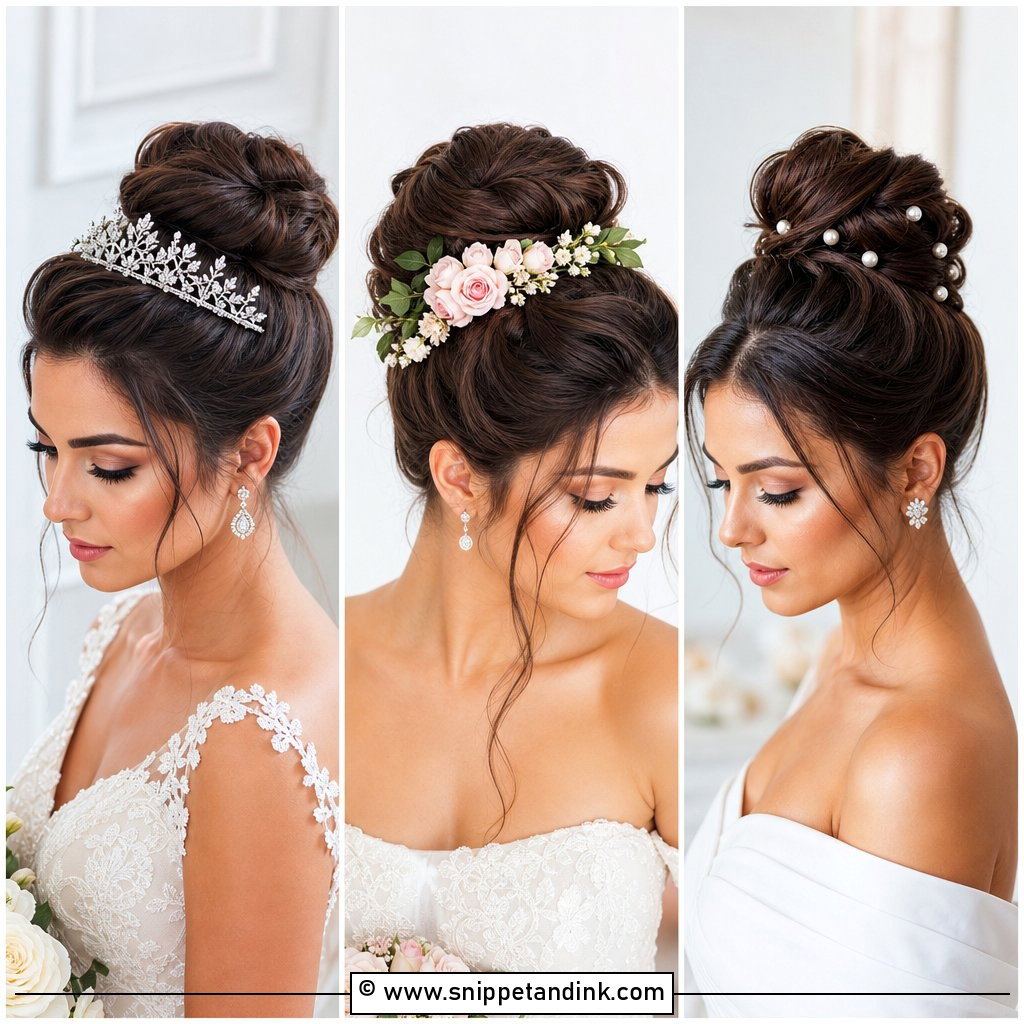
A sleek bun adorned with pearl pins mixes clean lines with a bit of detail. The hair is smoothed into a tight, glossy knot first, then the pearls are added where the light will catch them. I place them in a loose curve around the bun rather than dotting them evenly, which can look like a pattern rather than decoration. The pins also add some hold. It works with classic gowns and minimal jewelry, and pearl pins are easy to take out after the ceremony if you want a plainer look later.
8. Voluminous Low Bun
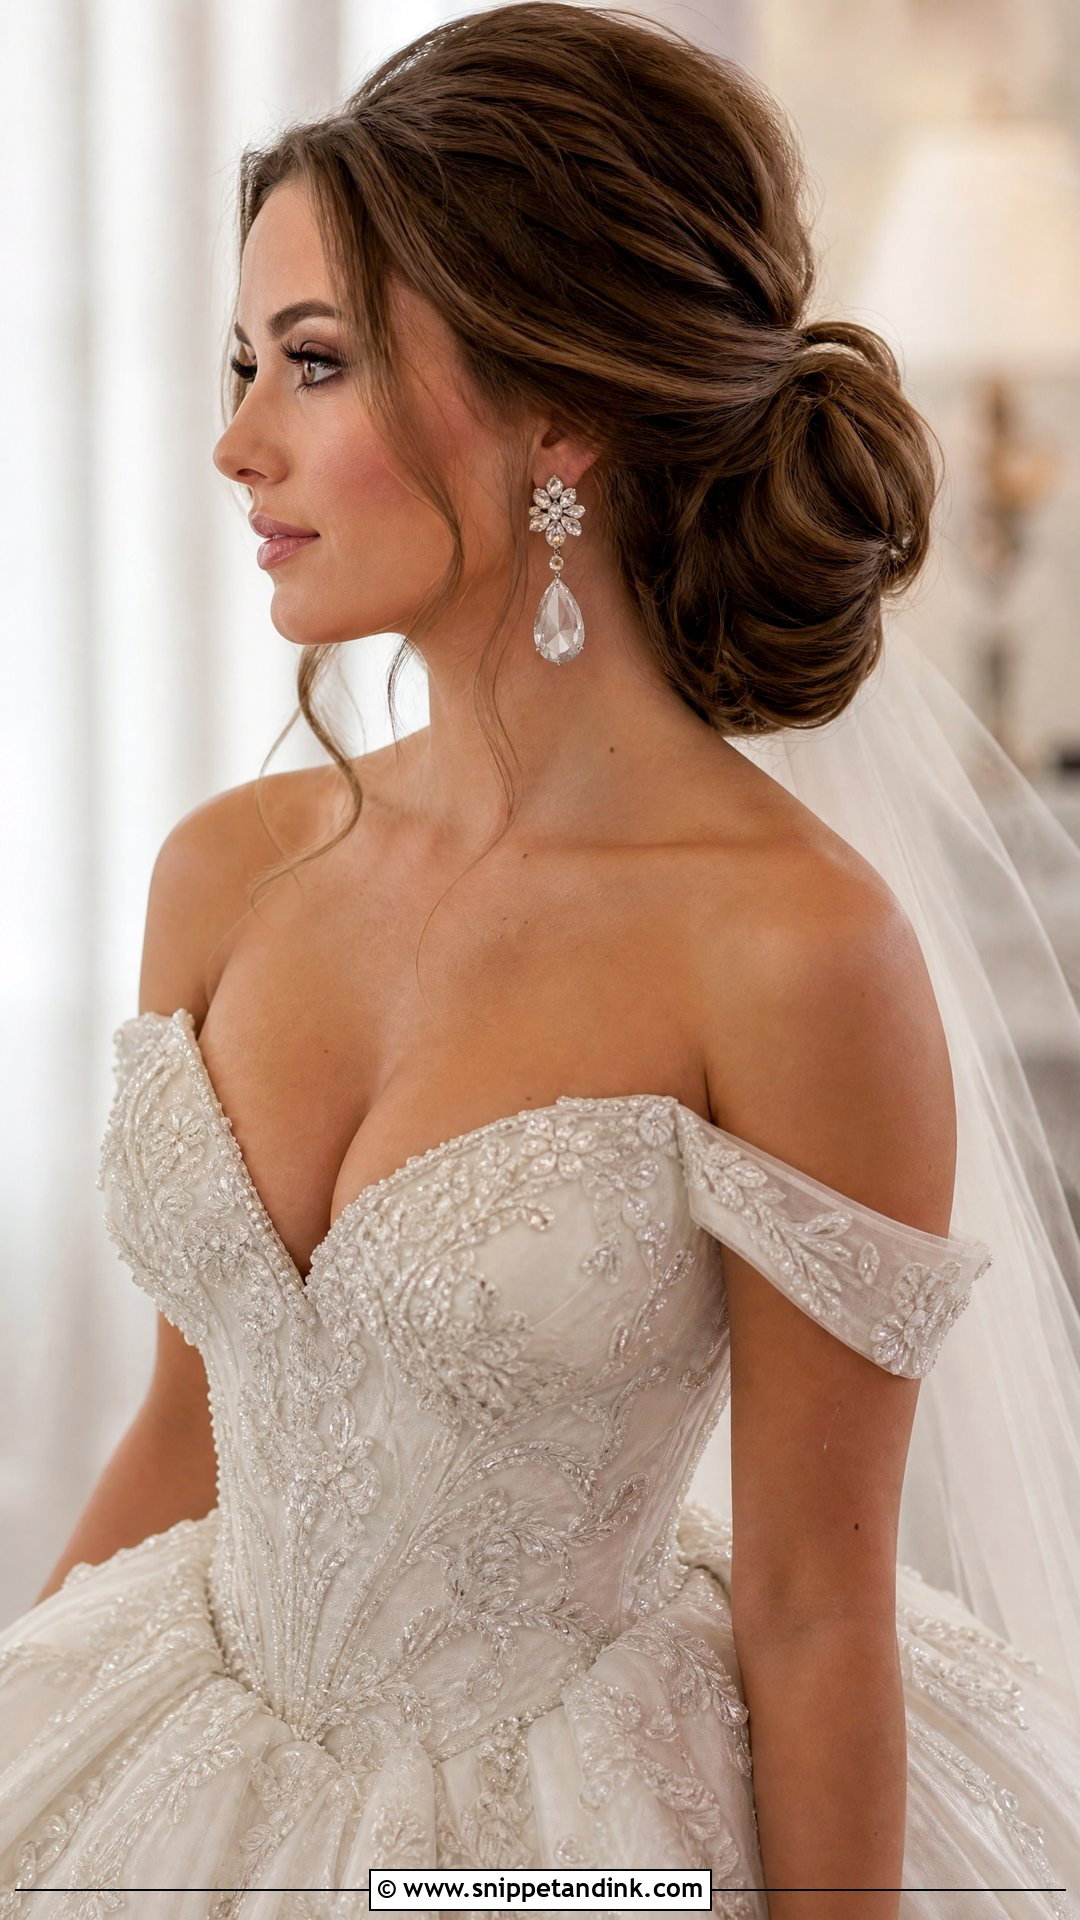
This one needs hair. A large, softly rounded knot with plenty of body is easiest on thick, long hair, with a little backcombing at the crown for height. If your hair is finer, extensions or a hidden padding piece can supply the volume; I’d rather add fullness than tease fine hair so hard it breaks. It suits ballgowns and formal celebrations, and a few loose tendrils soften the shape. Keep the bun in proportion to your shoulders. On a petite frame, a very large bun can look top-heavy from the side.
9. Low Bun With Front Braids
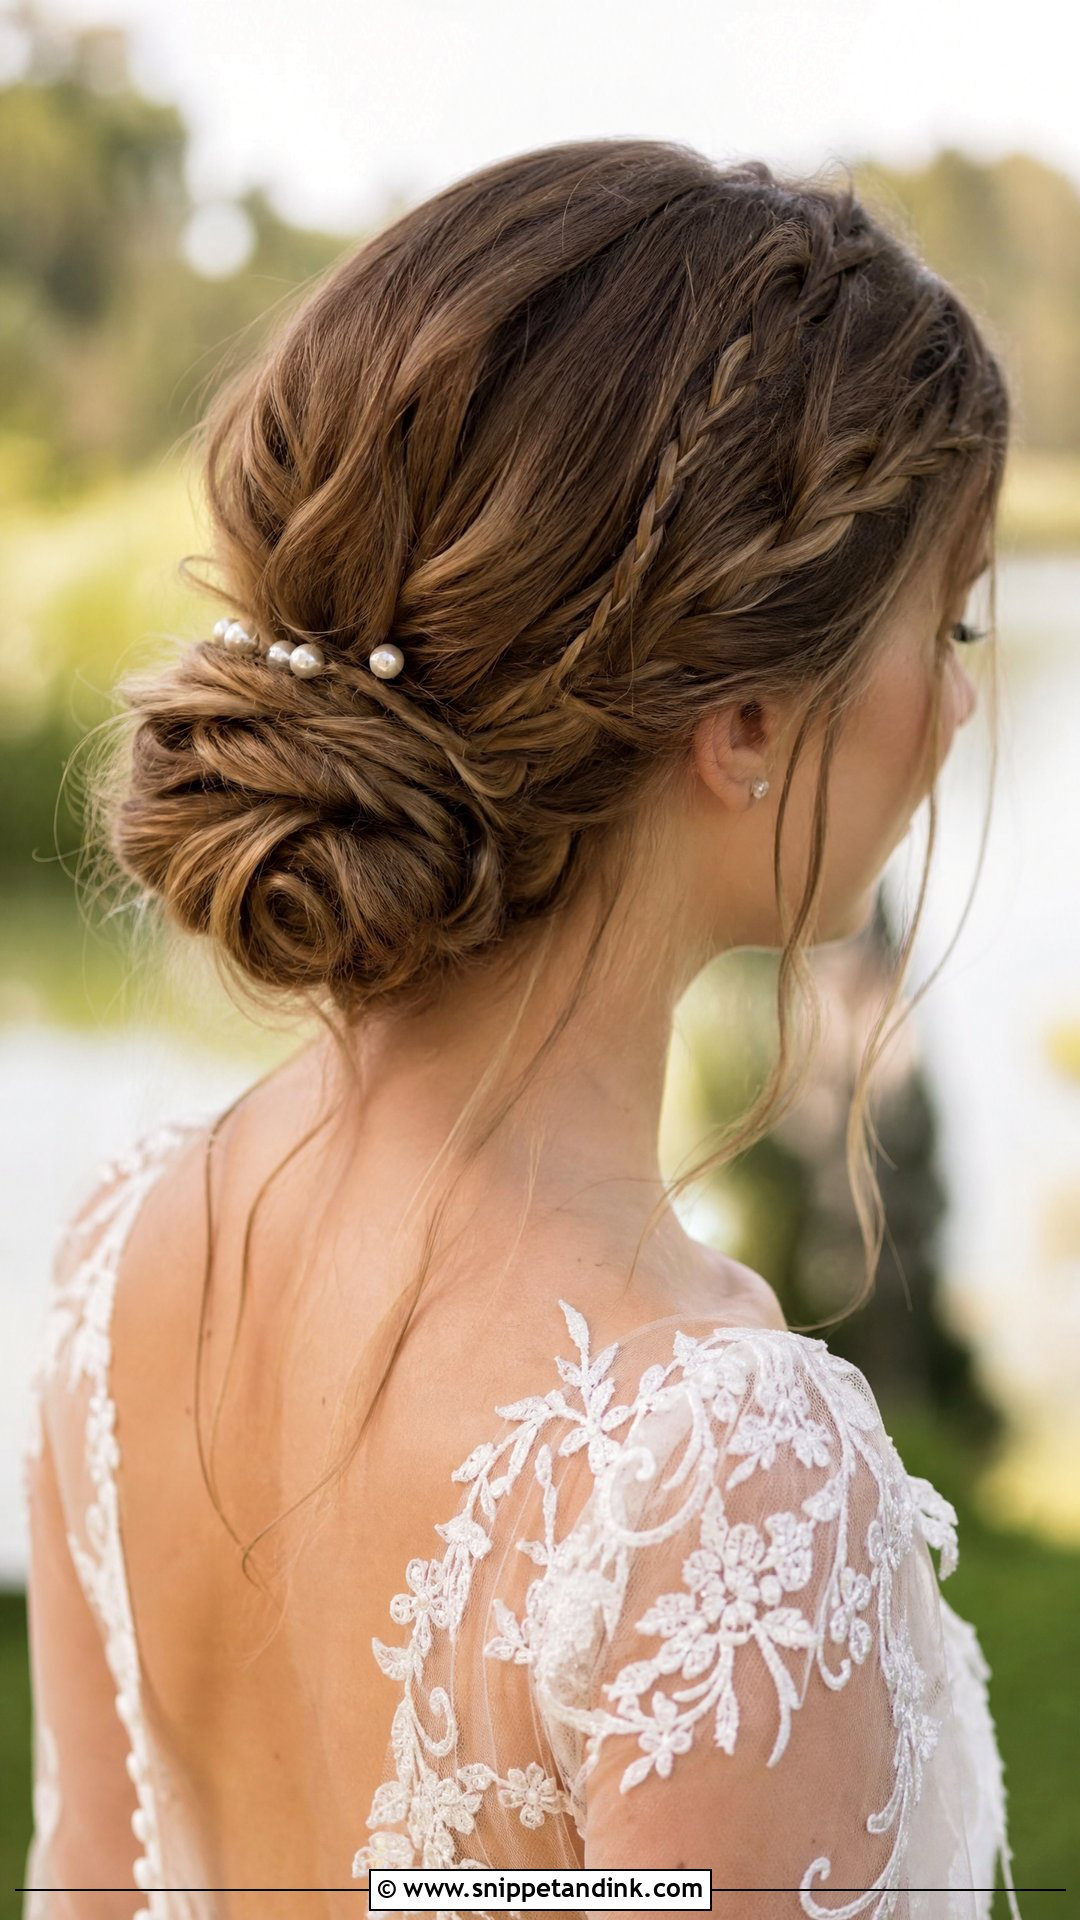
Two small braids start at the front, frame the face and feed back into a low bun. They keep the hair off your face all day, which is the practical reason I like them for outdoor and festival-style weddings. Tight braids look more defined; loosened ones look softer and more relaxed. Small flowers or pearl pins can be tucked along them. If your hairline is fine at the temples, I start the braids a little further back so they don’t pull or show scalp.
10. Fishtail Braided Low Bun
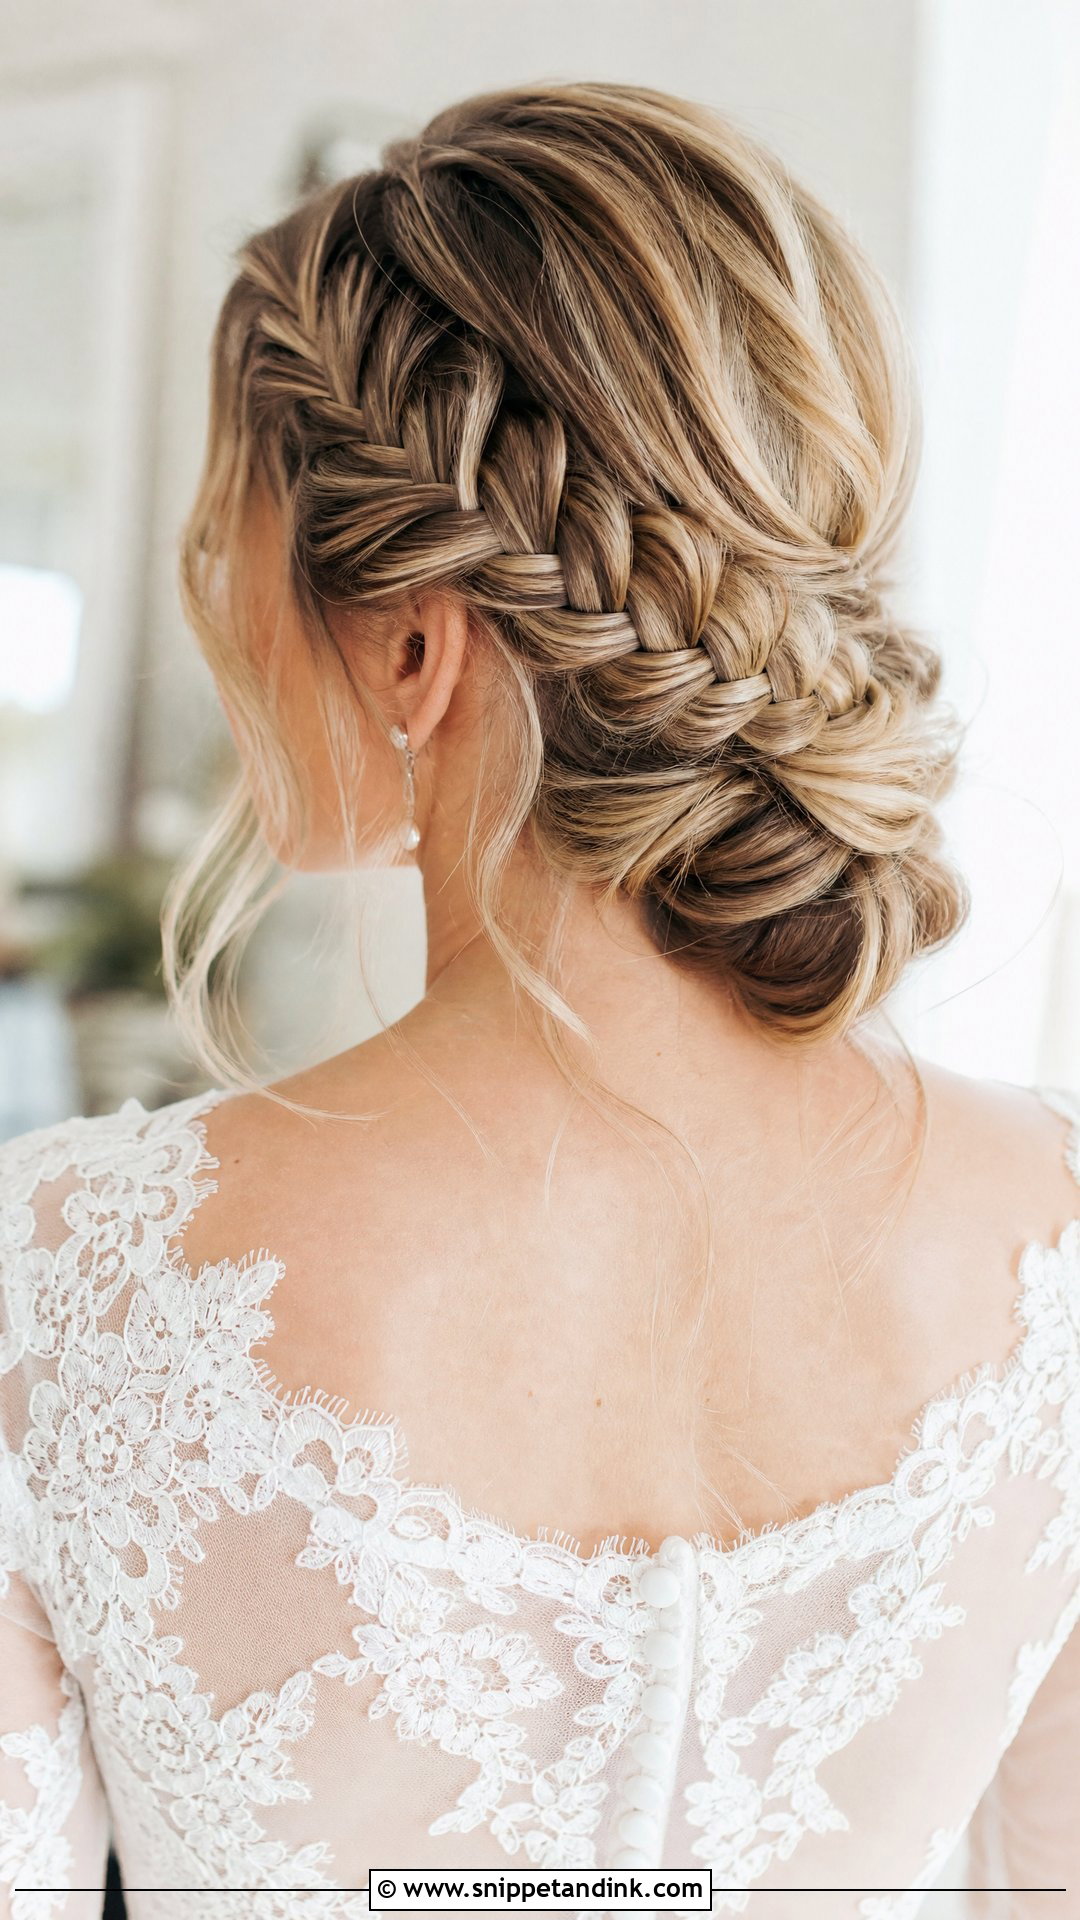
A fishtail is just two strands crossed in small sections, but the herringbone pattern it makes looks far more complicated. It can wrap into the bun or run along the side before joining the knot at the nape. I braid it fairly tight and then pull the edges loose, since loosening as you go makes the pattern fall apart. Soft face-framing pieces balance the detail. It suits both boho and classic weddings. Hair with lots of short layers will poke out of the weave, so a touch of wax on the fingertips helps keep the pattern clean.
11. Low Bun With Hair Vine
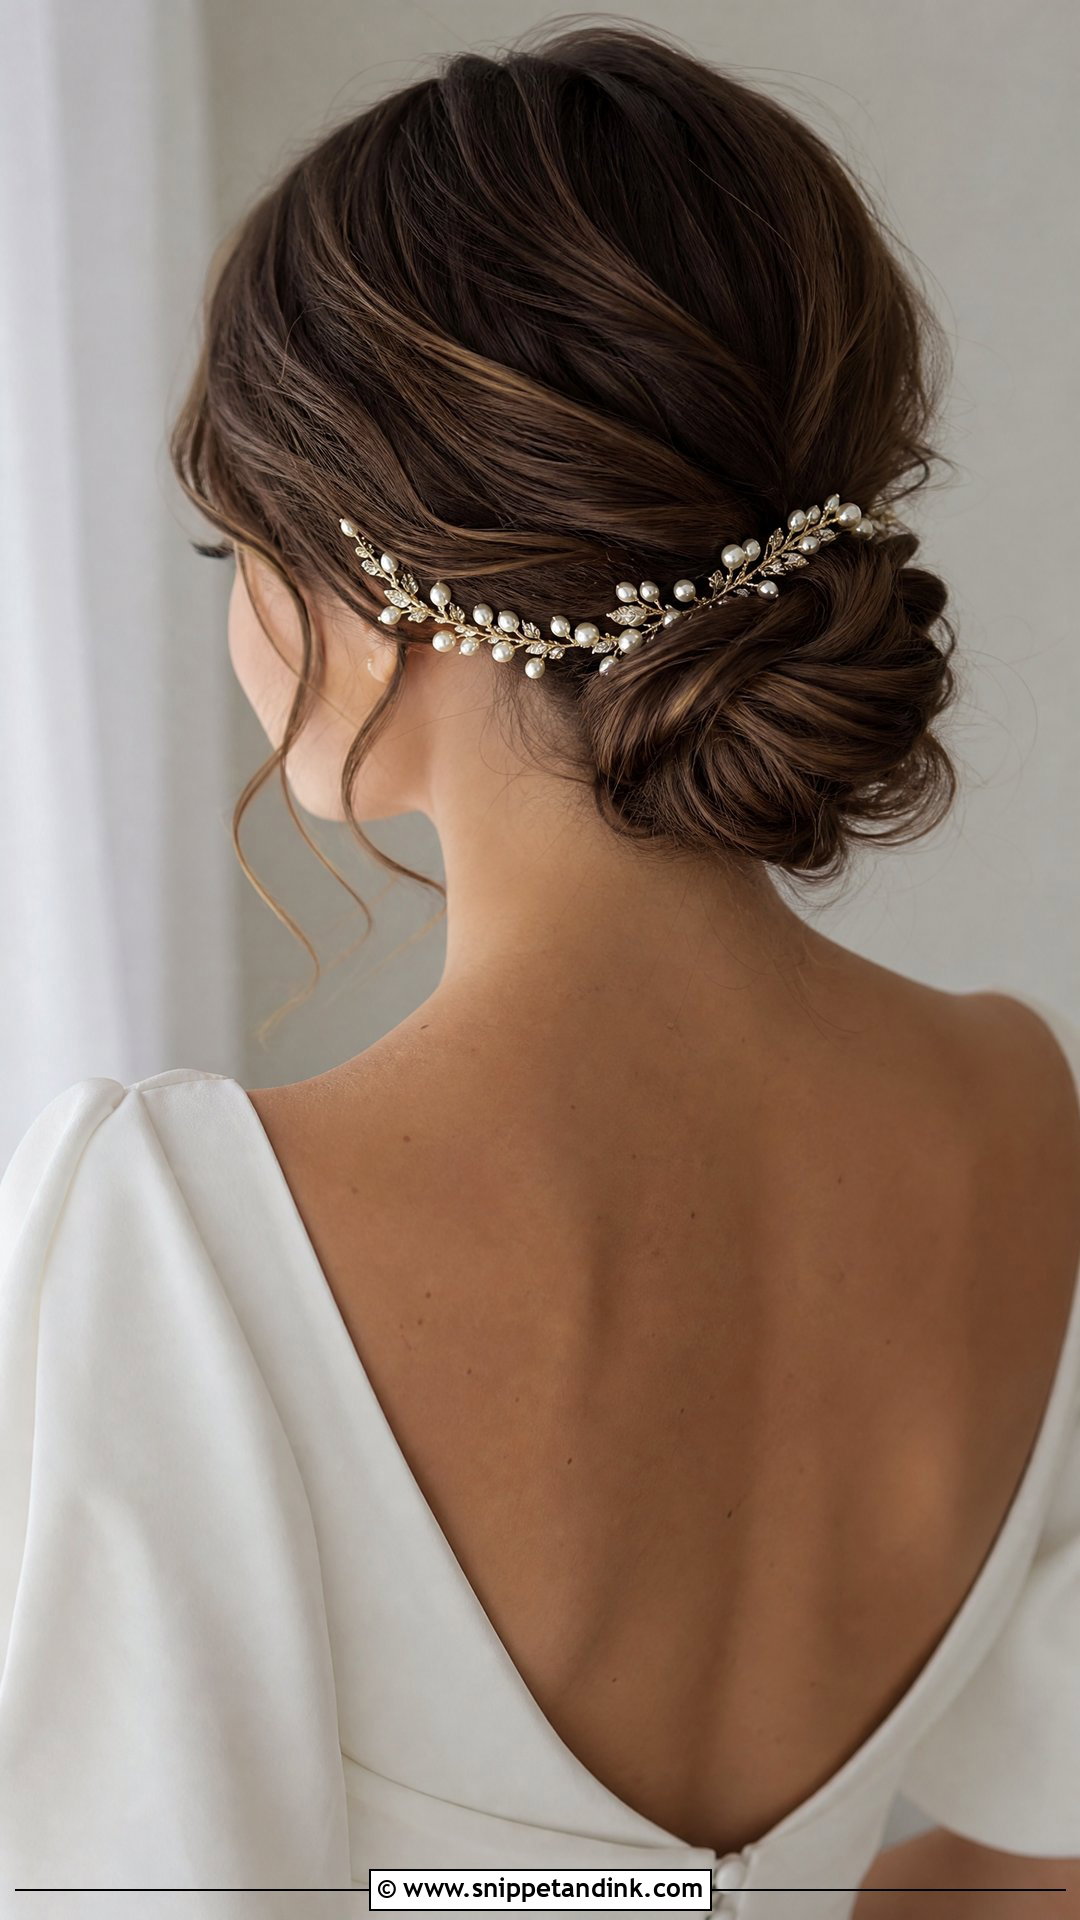
A hair vine wrapped around the base of a low bun adds sparkle without a heavy headpiece. Vines are flexible wire with pearls, crystals or small leaves along them, so I can shape them around the knot and pin them into the bun at several points. It suits sleek and textured buns equally. The thing to check is the wire ends: if they aren’t tucked into the hair they scratch the neck, and you’ll notice it within an hour. Match the metal tone of the vine to your earrings.
12. Reverse Braided Low Bun
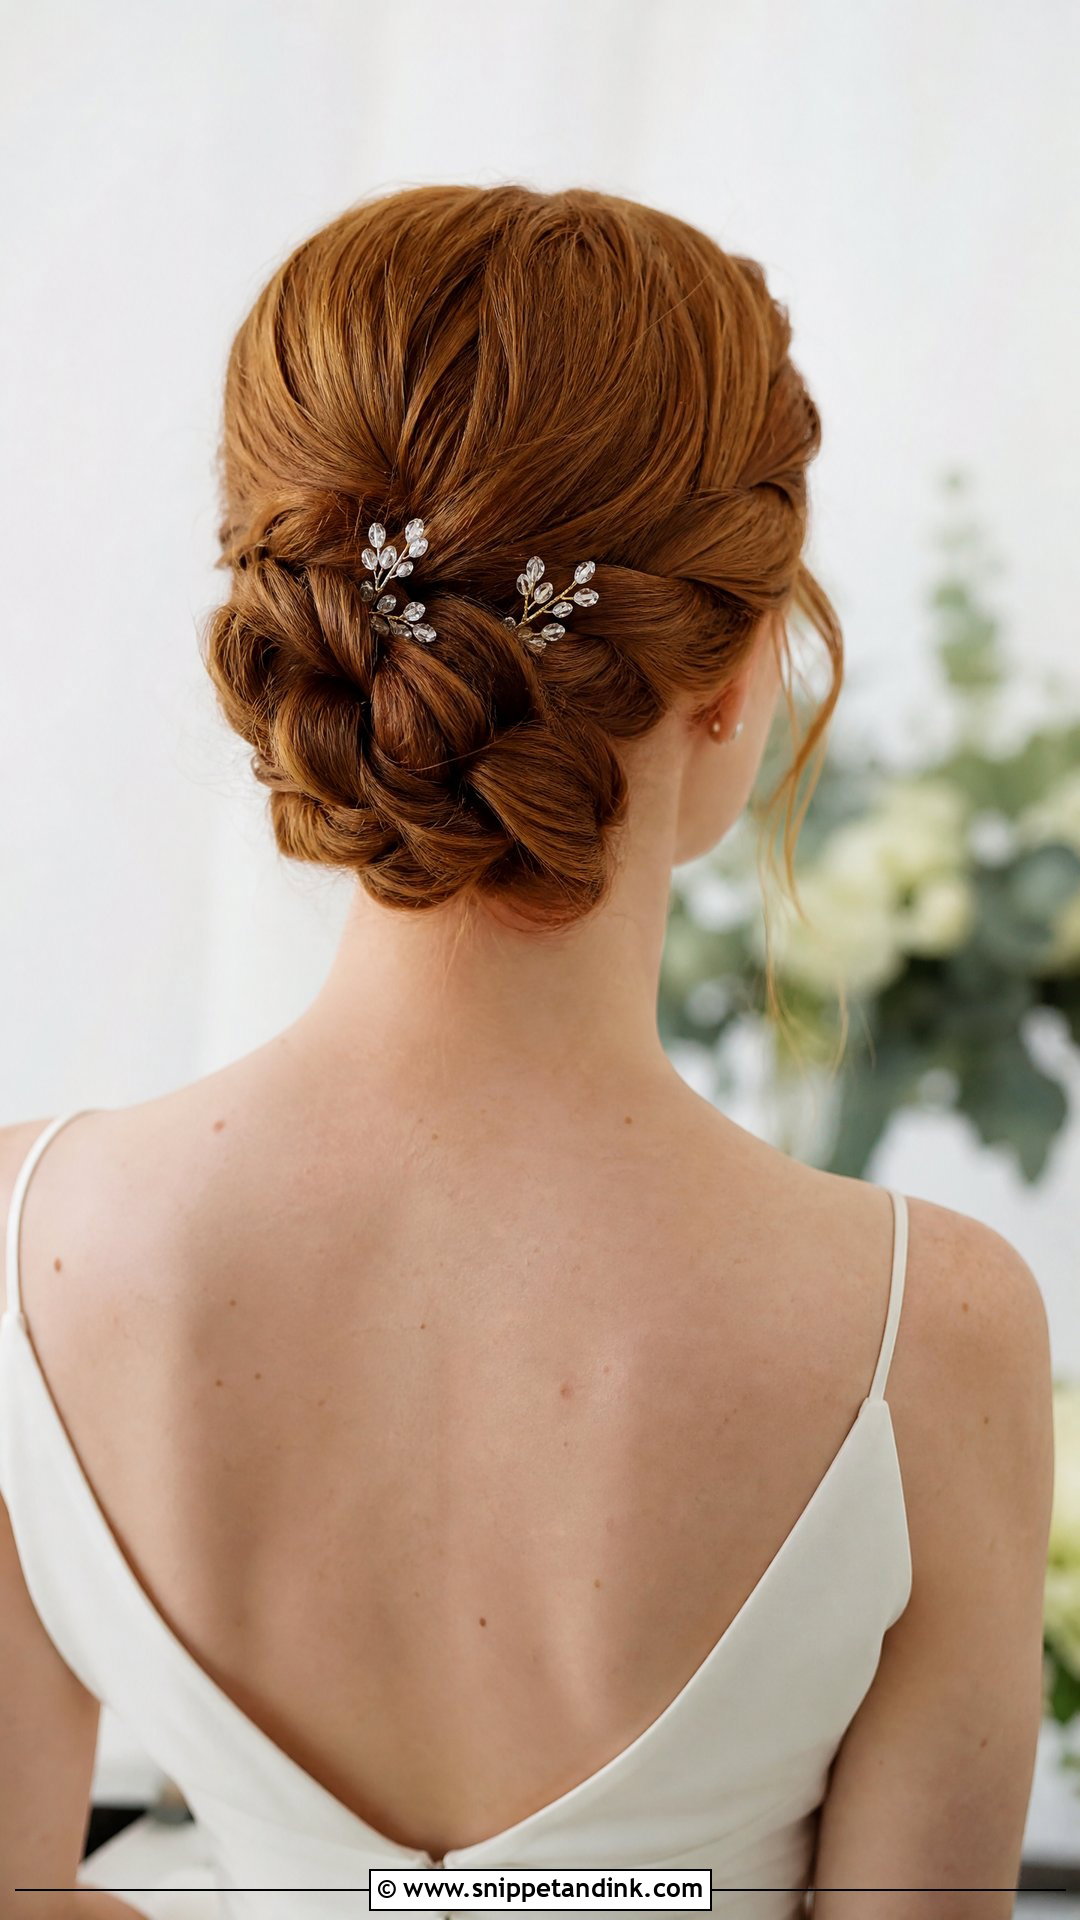
In a reverse braid, the hair is braided upward from the nape and then rolled into a bun, so the back of the head carries the detail. Brides usually choose this because most guests see the back of you during the ceremony, and it gives them something to look at. The upward braid also locks the nape hair in place, so short hairs there don’t escape. You’ll need to bend your head forward while I braid, which isn’t comfortable for long, so expect a few short breaks. Pins or small jewels can decorate it.
13. Low Bun With Flowers
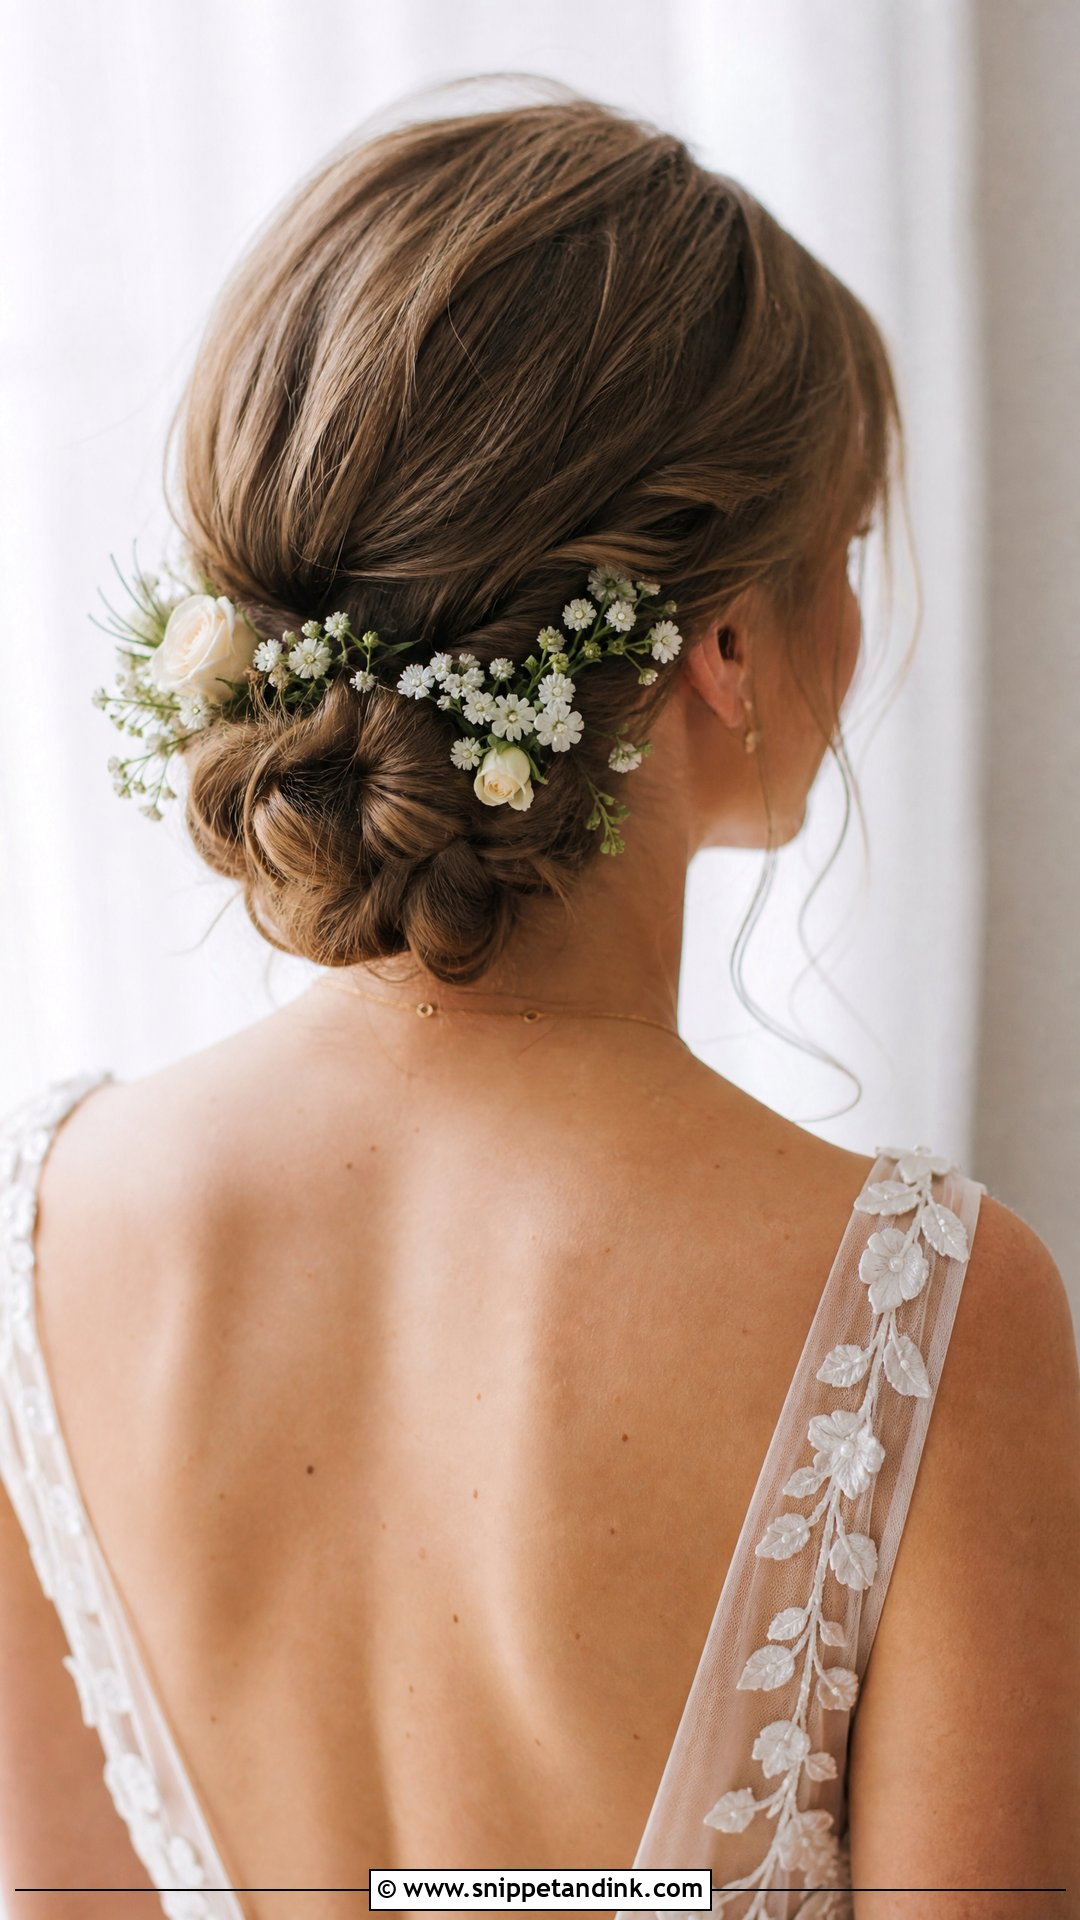
Flowers in a low bun look soft and garden-like, and they suit spring and summer weddings especially. You can scatter small blooms through the knot or cluster them on one side. I’d match them to your bouquet so the two read as one look. With fresh flowers, choose sturdy ones that hold up out of water for hours; delicate petals wilt against warm hair by the evening, so many brides switch to silk. A flower-adorned low bun is also easy to change: pull a few blooms out for the reception and it looks different.
14. Curly Low Bun
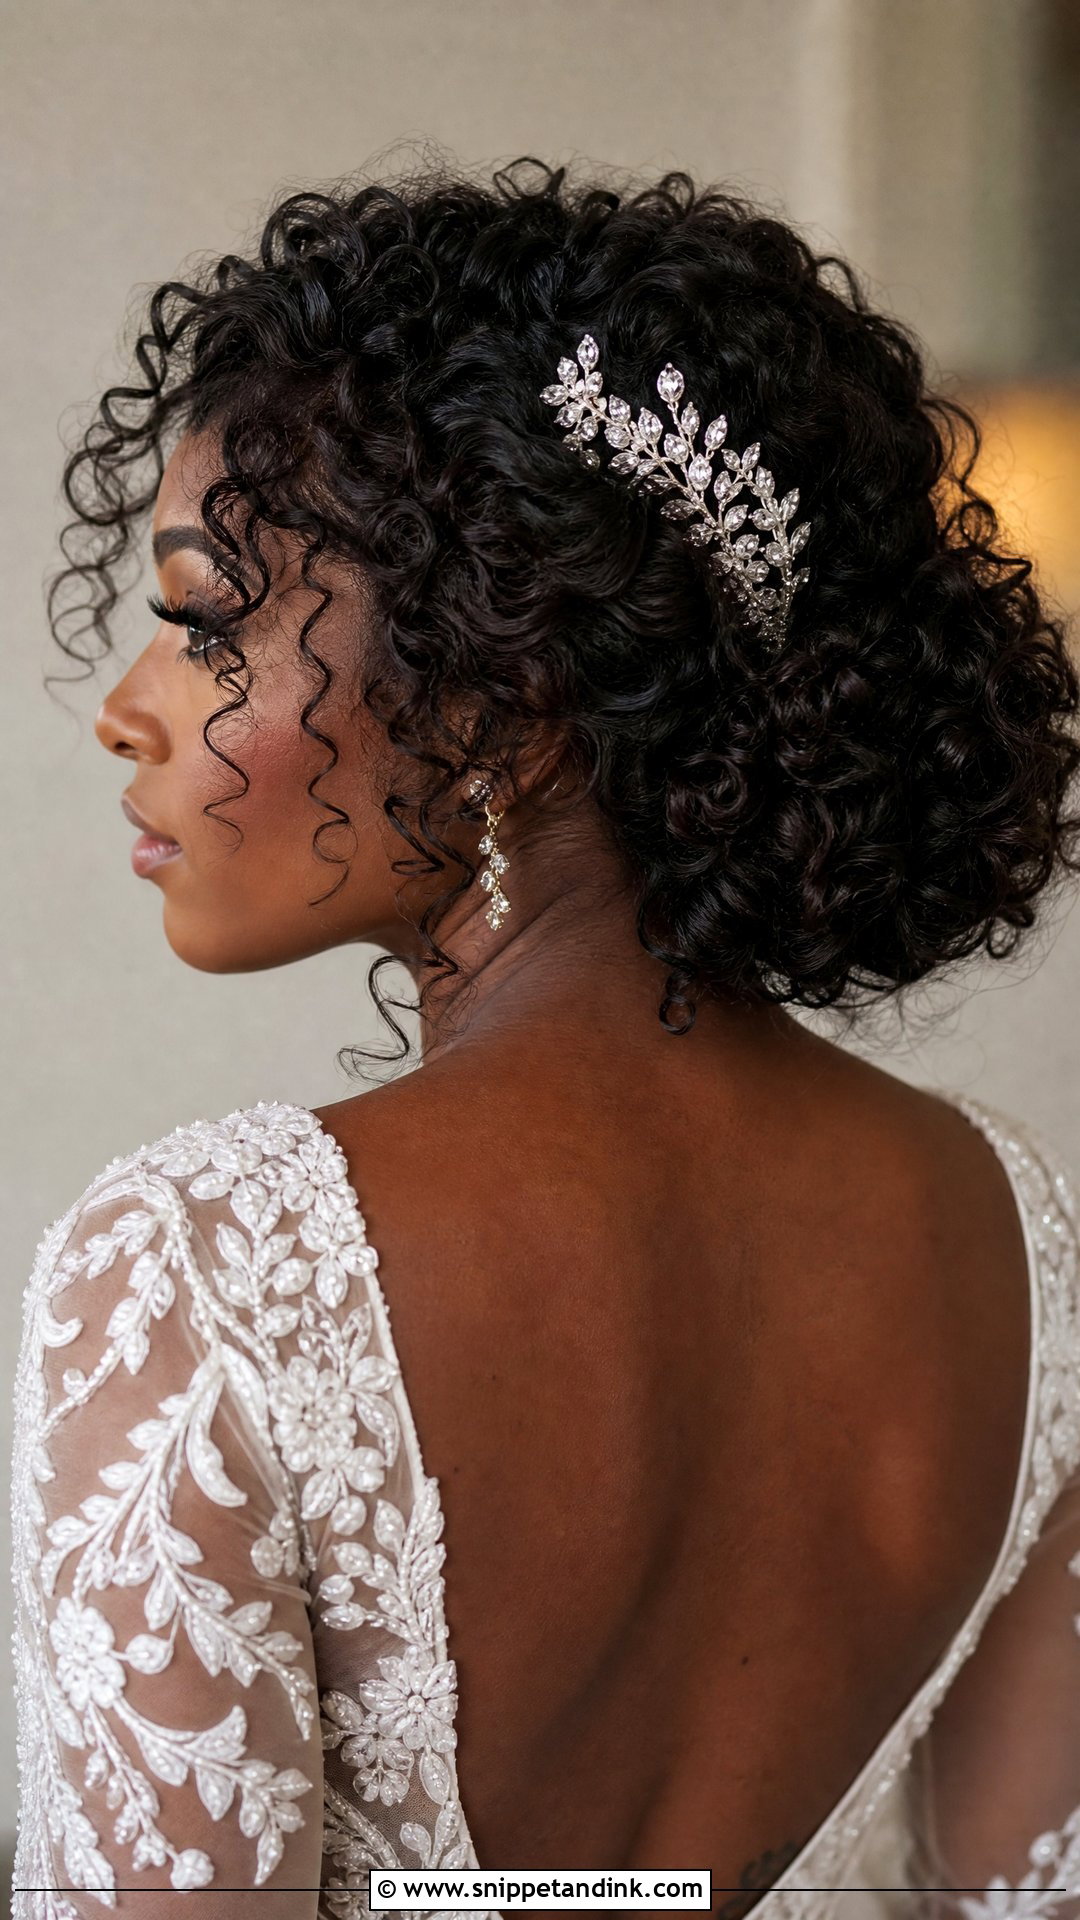
Curly and coily hair can make a full, defined low bun without being straightened first. I work with the hair in its natural state, using a cream and a light hold product to keep the curl pattern clear, then gather it into a soft knot at the nape and leave a few curls loose at the face. The texture gives the bun real dimension. I avoid brushing curls once they’re set, which turns them to frizz. A sparkling hairpiece or fresh flowers suit it, and it works for formal and relaxed weddings alike.
15. Sleek Low Bun With Deep Side Part
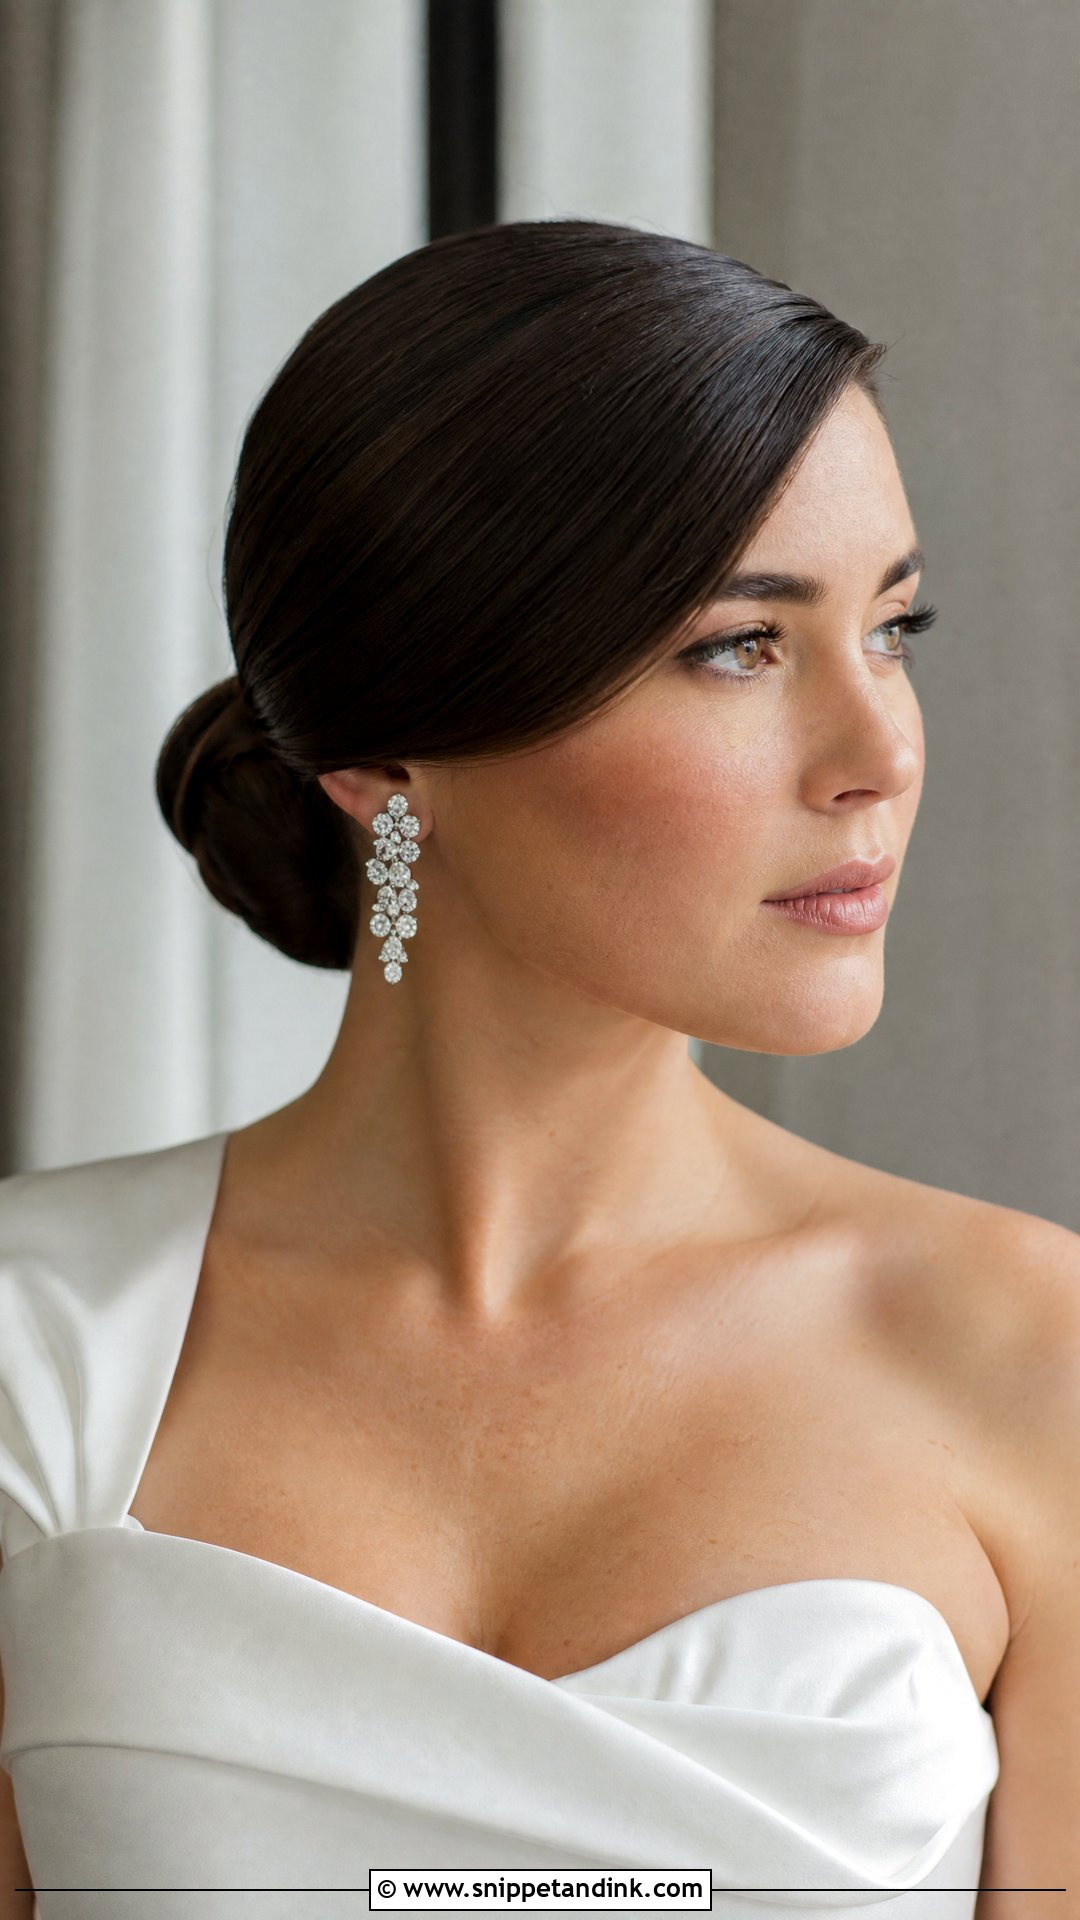
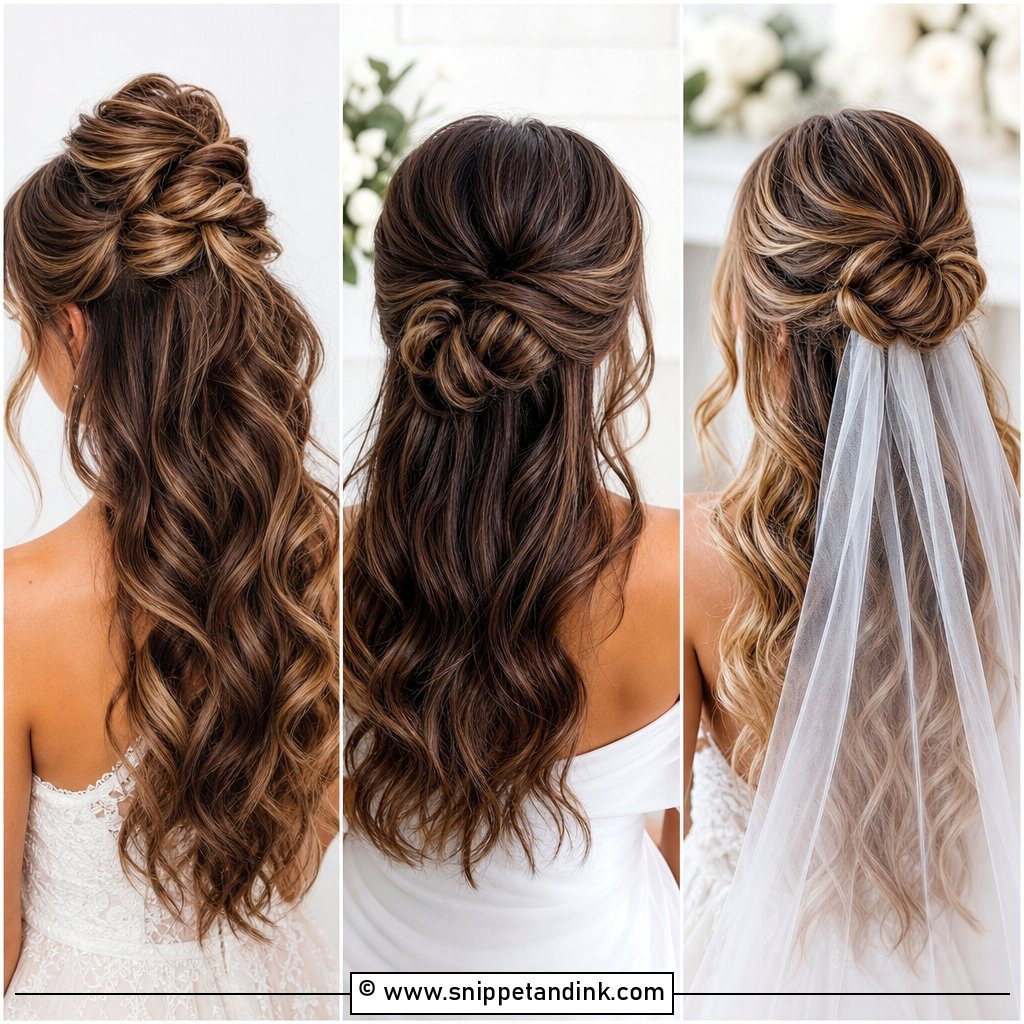
A deep side part sweeps the hair across before it’s smoothed into the knot, giving an old-Hollywood edge to a modern bun. I place the part roughly in line with the arch of your eyebrow, which flatters most faces. The heavier side should be pinned firmly behind the ear, or it drifts forward over the day. Clean lines and a glossy finish suit structured gowns and statement earrings. If you’ve always worn a center part, try this at your trial first, because a deep part changes your face more than you’d expect.
16. Low Bun With Side Swept Bangs
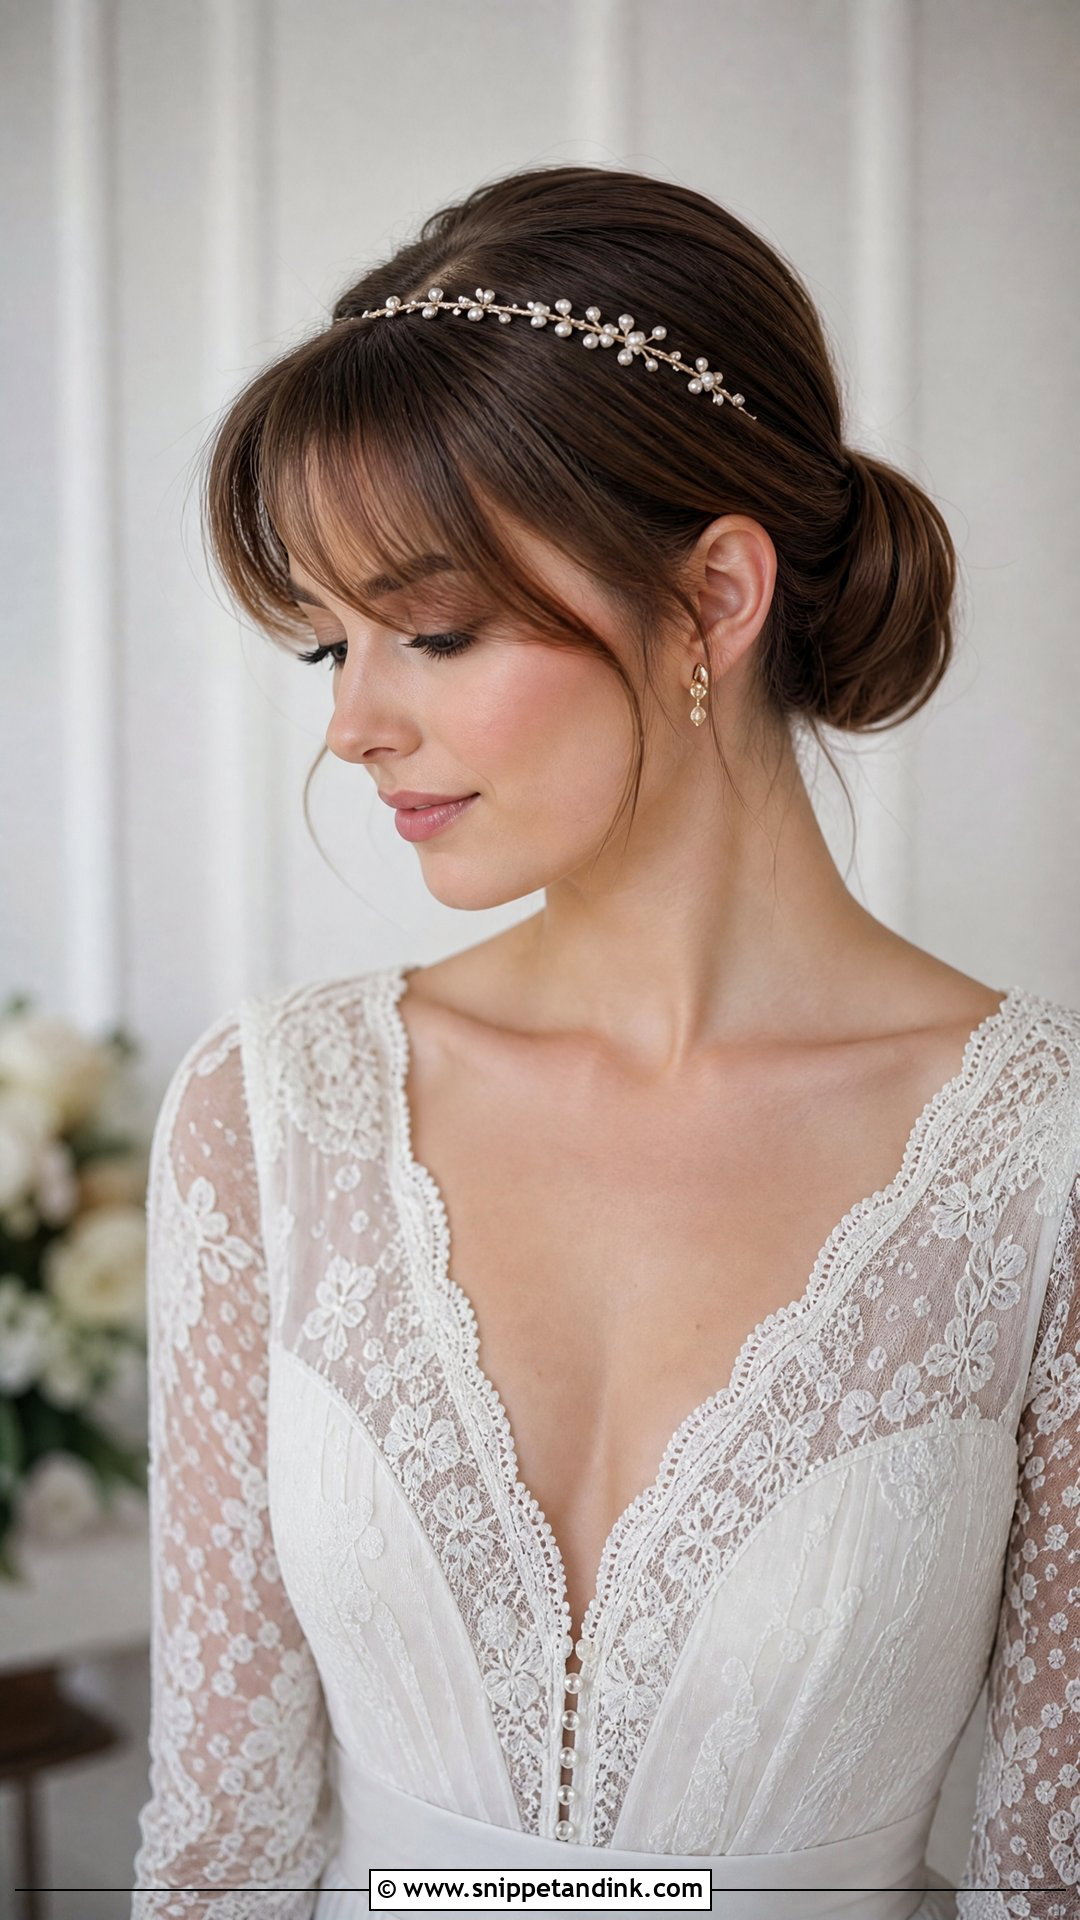
Side-swept bangs soften a smooth low bun and frame the face. They work best when you already have a fringe or longer face-framing layers. I blow-dry the bangs into the sweep and set them with a light spray so they stay off the eyes, since bangs that hang straight start to annoy you within hours. A thin headband or hair vine can add detail. If you’re planning to cut bangs for the wedding, do it well before your trial so they’ve settled.
17. Bubble Braid Low Bun
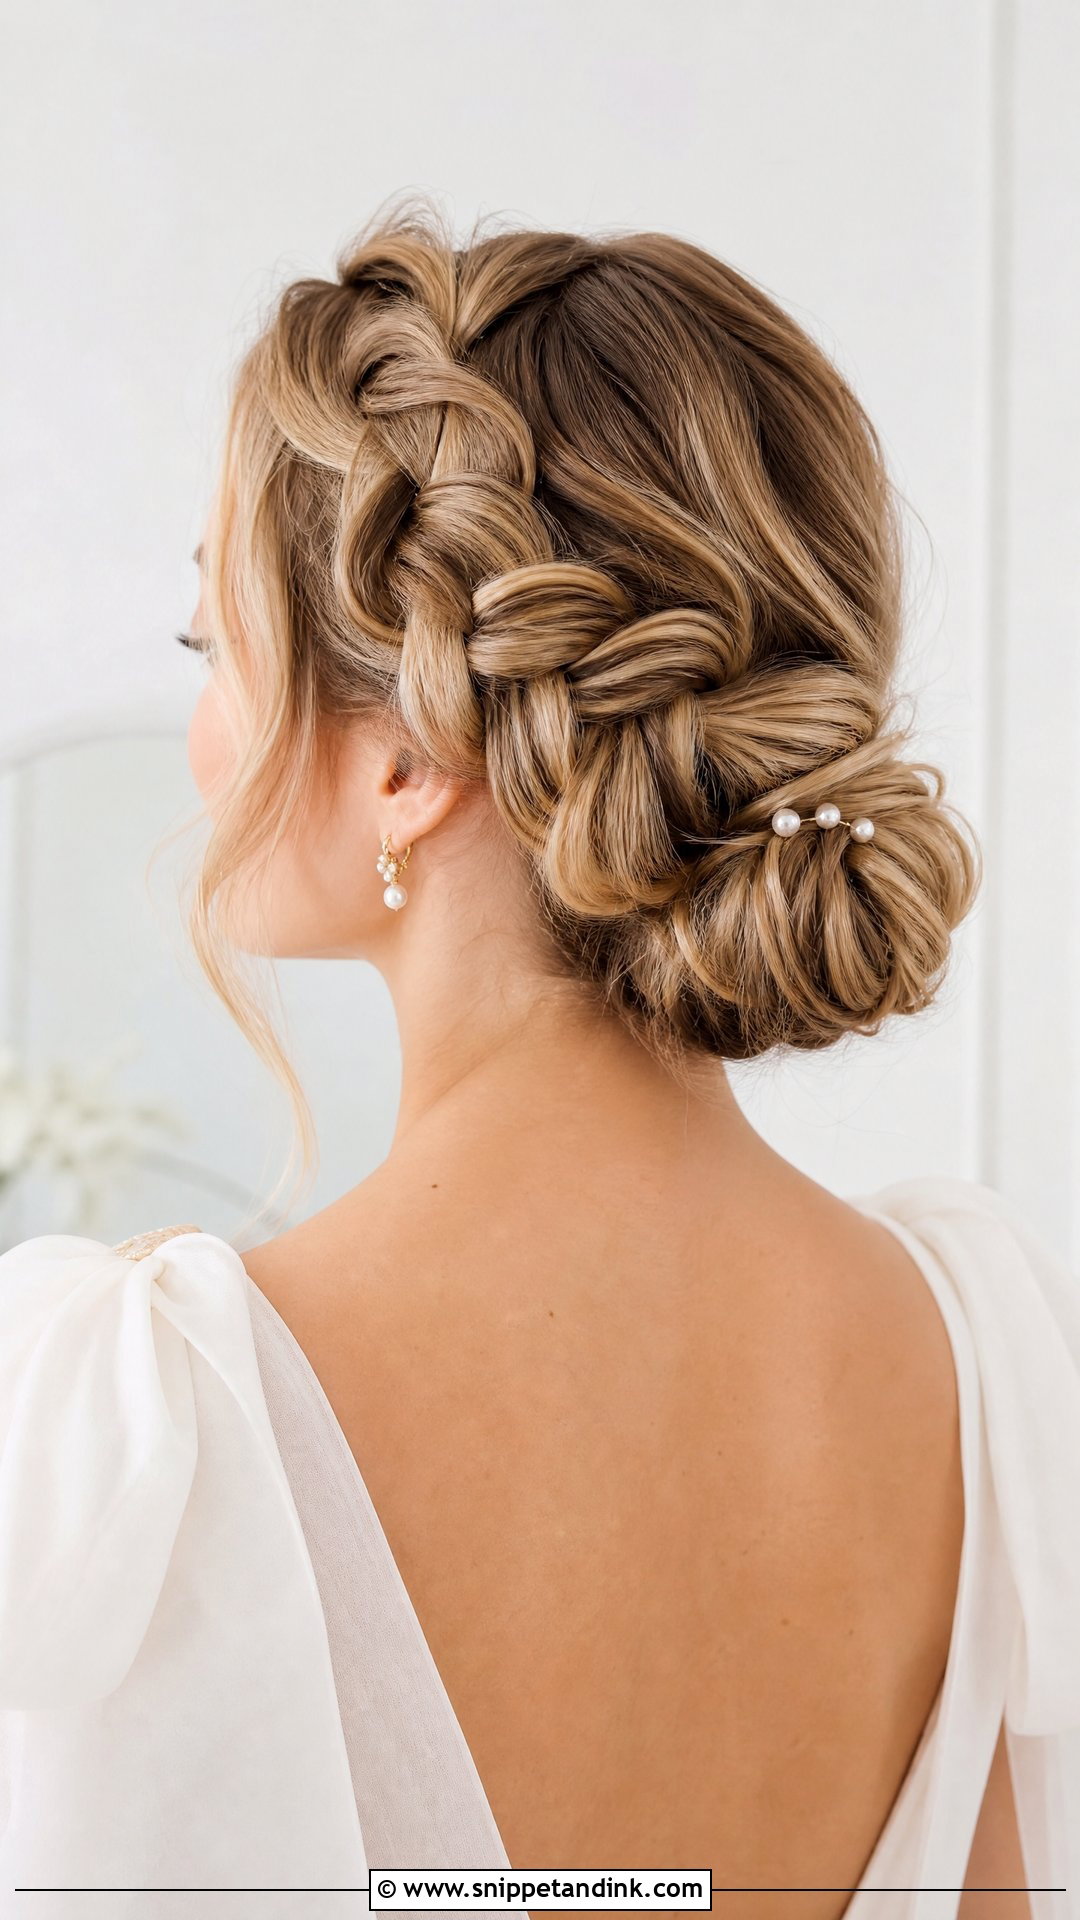
Bubble braids are sections tied with small elastics and gently puffed out into rounded shapes before they flow into the knot. They’re quick, playful and more modern than a traditional braid. I use clear elastics so they disappear, and pull each bubble out evenly, which is the part that takes care. It suits modern and boho weddings and looks good from the back during the ceremony. Fine hair makes small bubbles, so a little texture spray before tying gives them more body.
18. Low Bun With Crown Braid
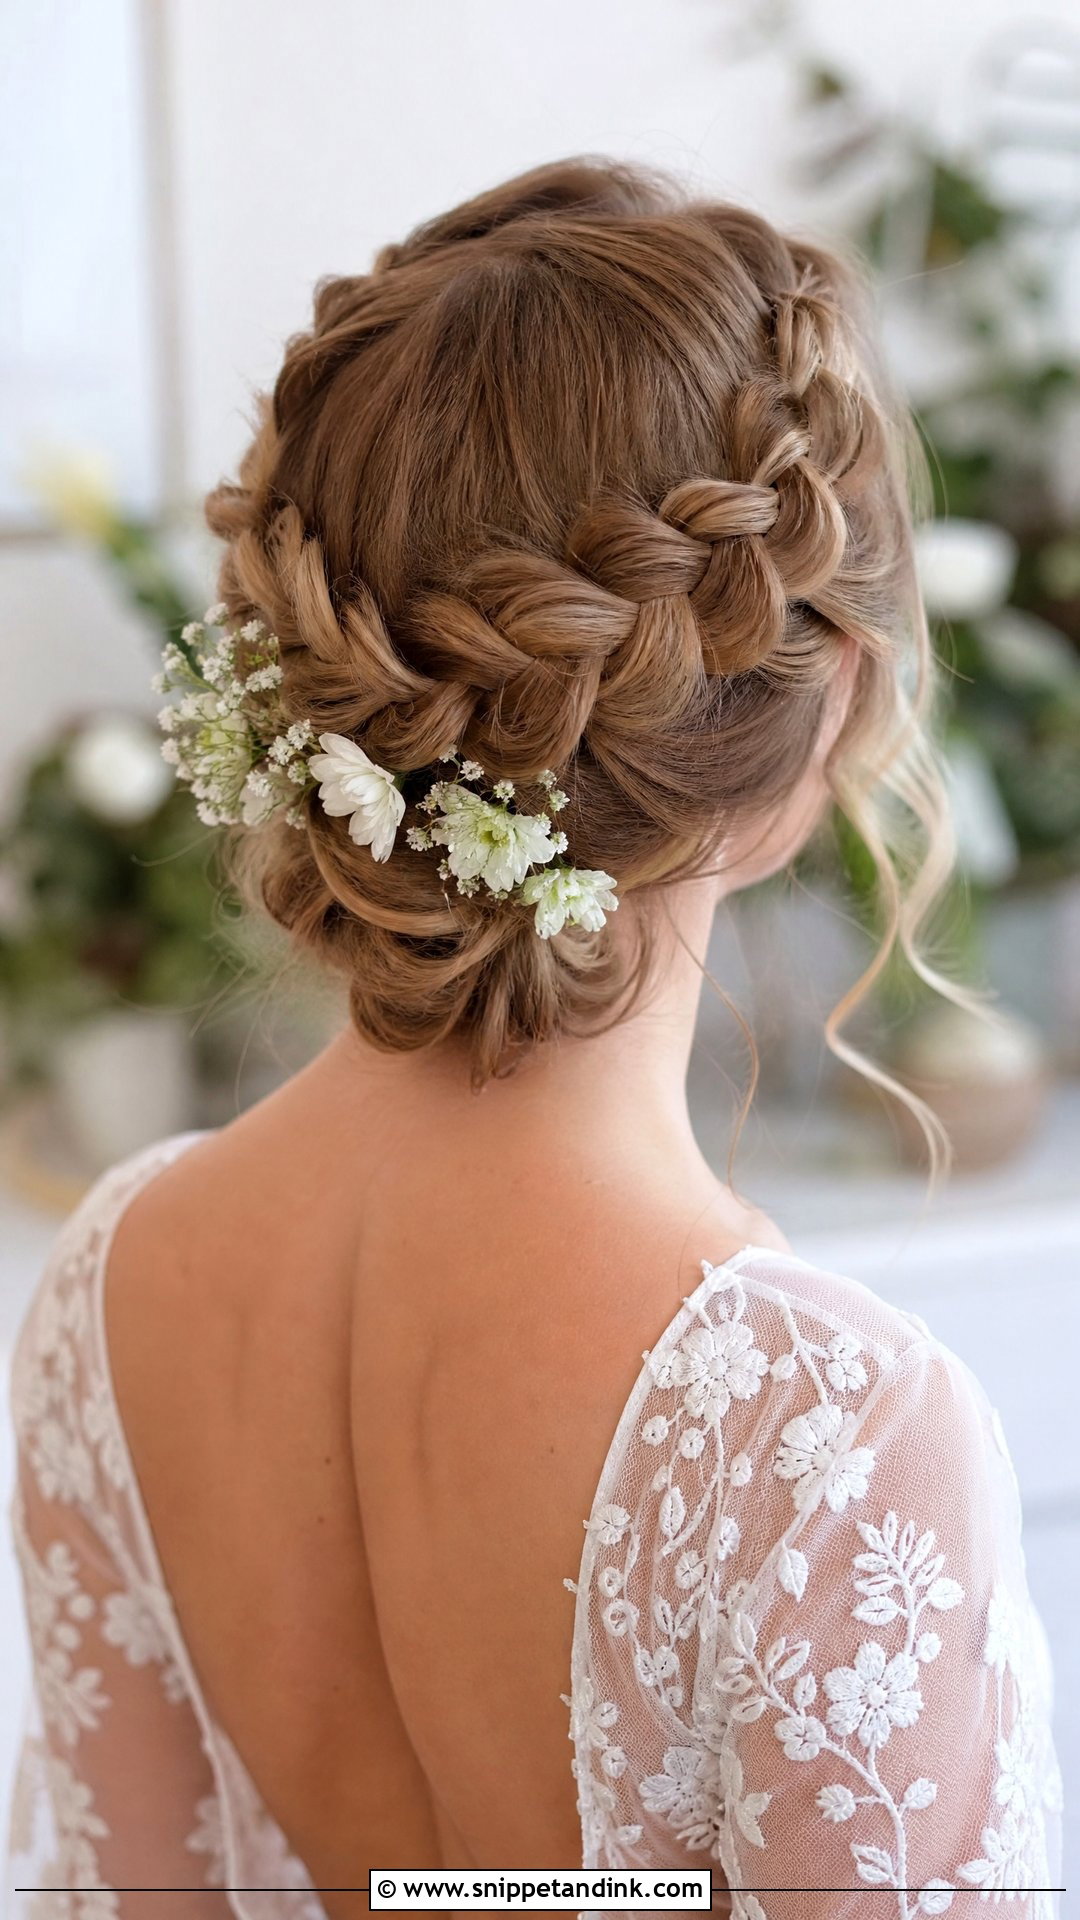
A braid circles the head like a halo and then drops into a low bun at the nape. It keeps the hair completely off the face and is one of the most secure styles I do, which makes it a good choice for outdoor or windy weddings. You need enough length for the braid to travel all the way round, or a hidden extension to finish it. Small flowers tuck into the braid easily. I check tension at the trial, as a crown braid bun that feels fine at noon can ache by evening.
19. Textured Low Bun With Face Framing Strands
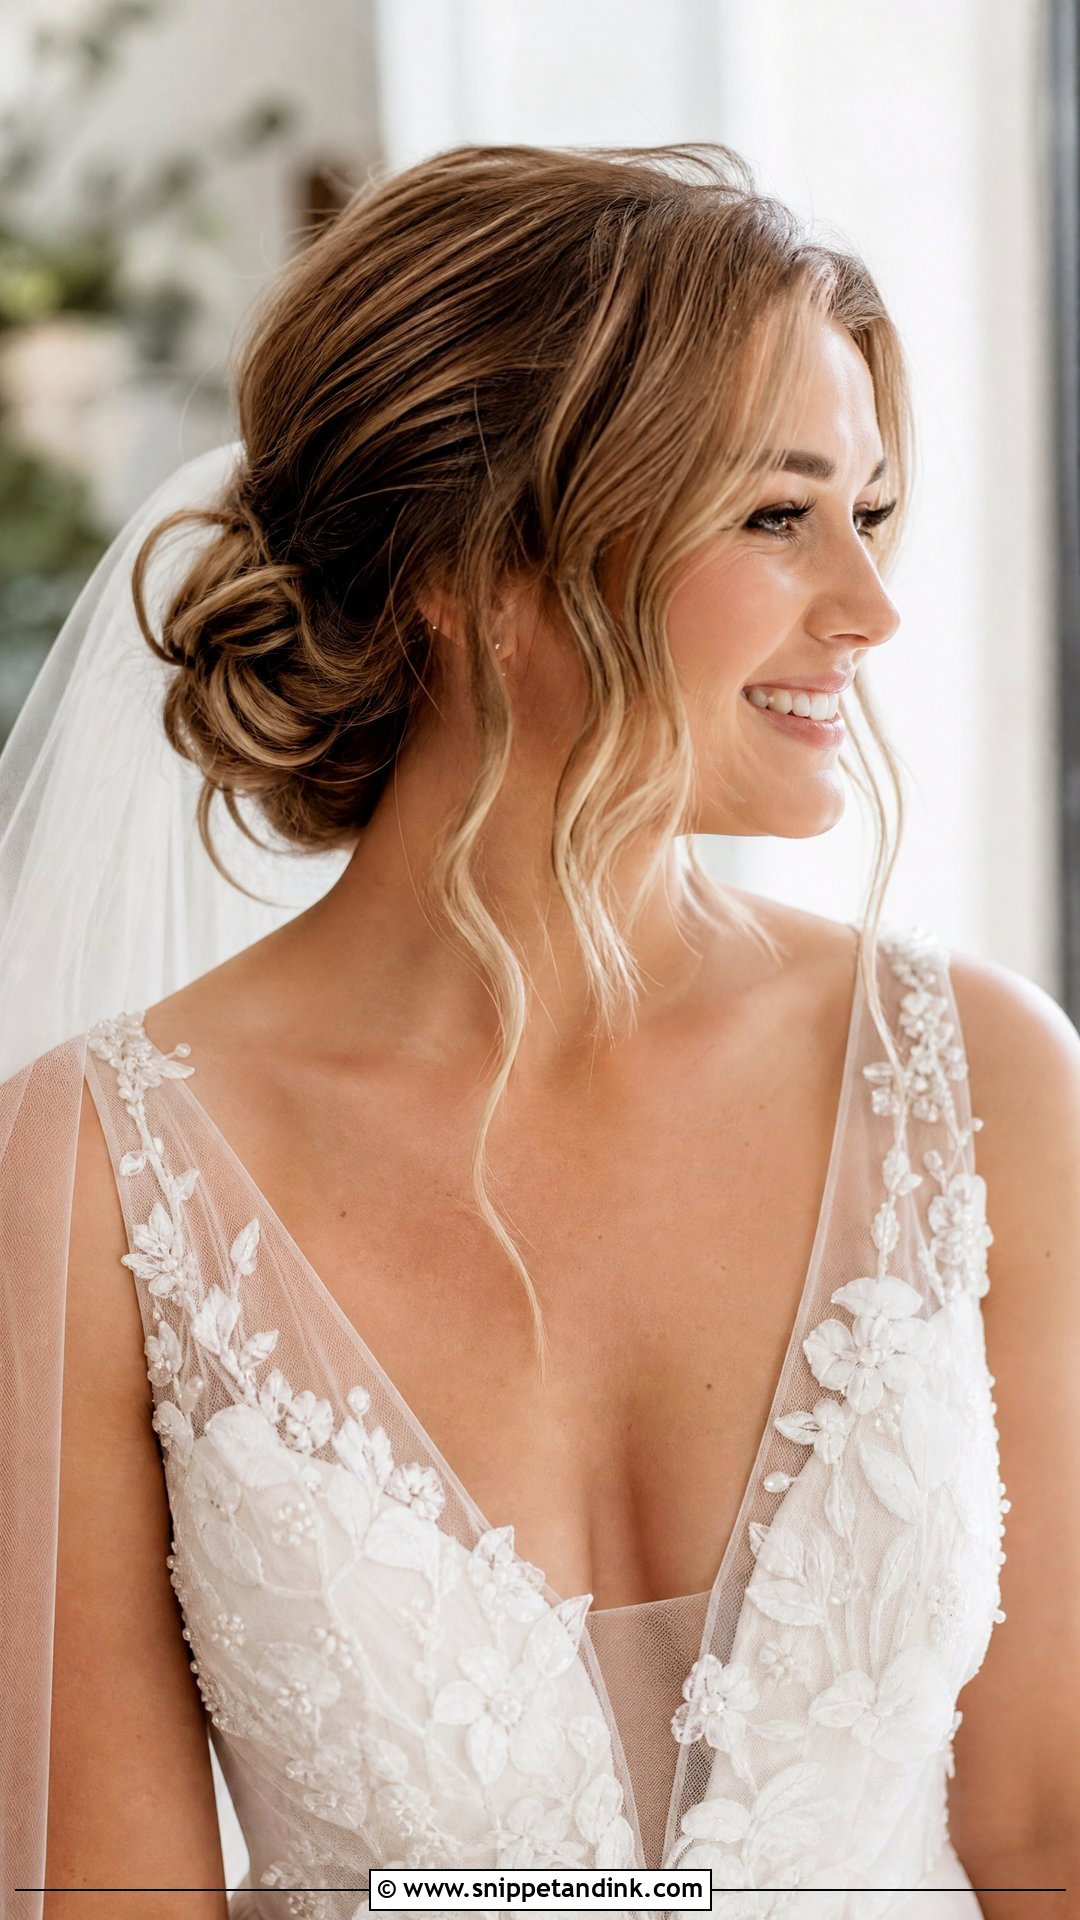
This is the softer cousin of the sleek bun: hair loosely gathered into a textured knot, with wavy strands left out at the face. I curl the face-framing pieces away from the face and set them, so they keep their shape rather than hanging limp by the reception. The base still needs to be pinned firmly, even though the surface looks undone. It pairs with delicate accessories and flowing veils. Keep the loose pieces to a few; too many and it starts looking unfinished.
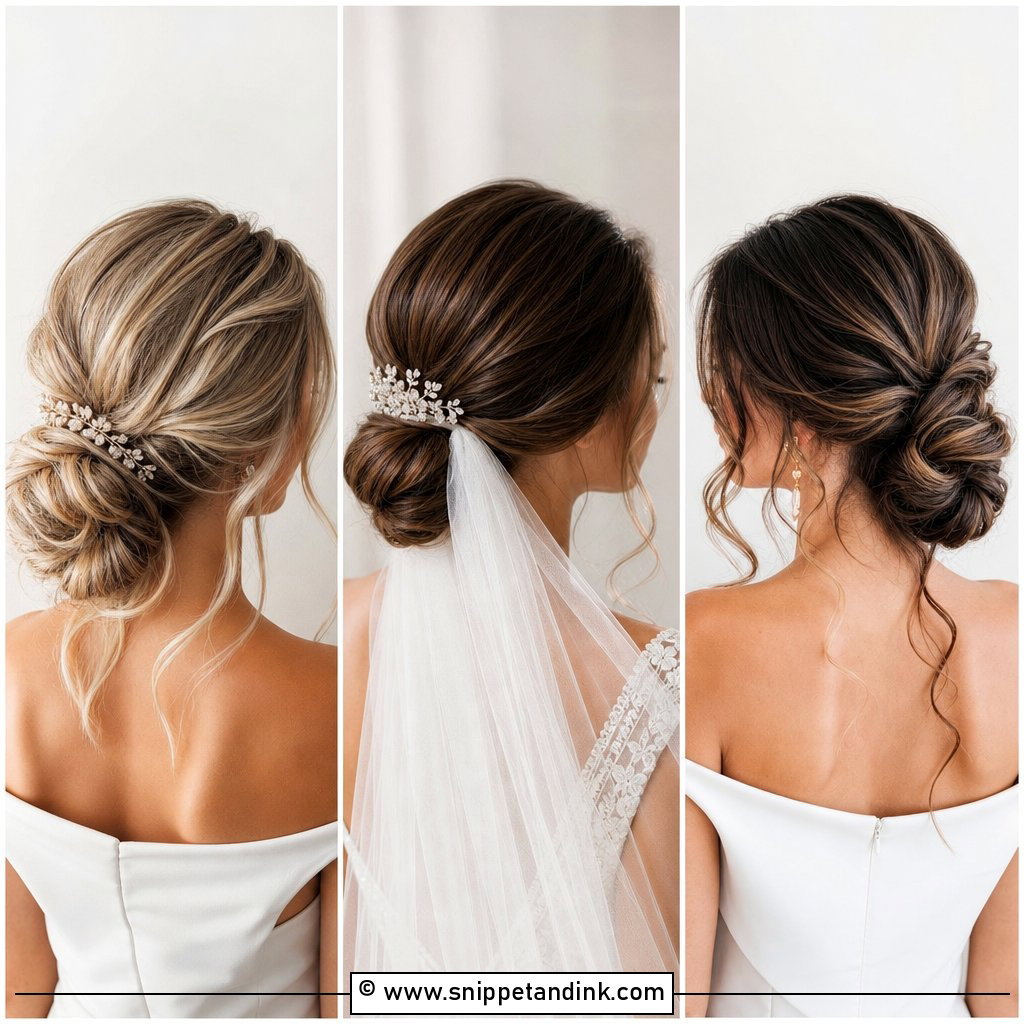
20. Low Bun With Veil Underneath
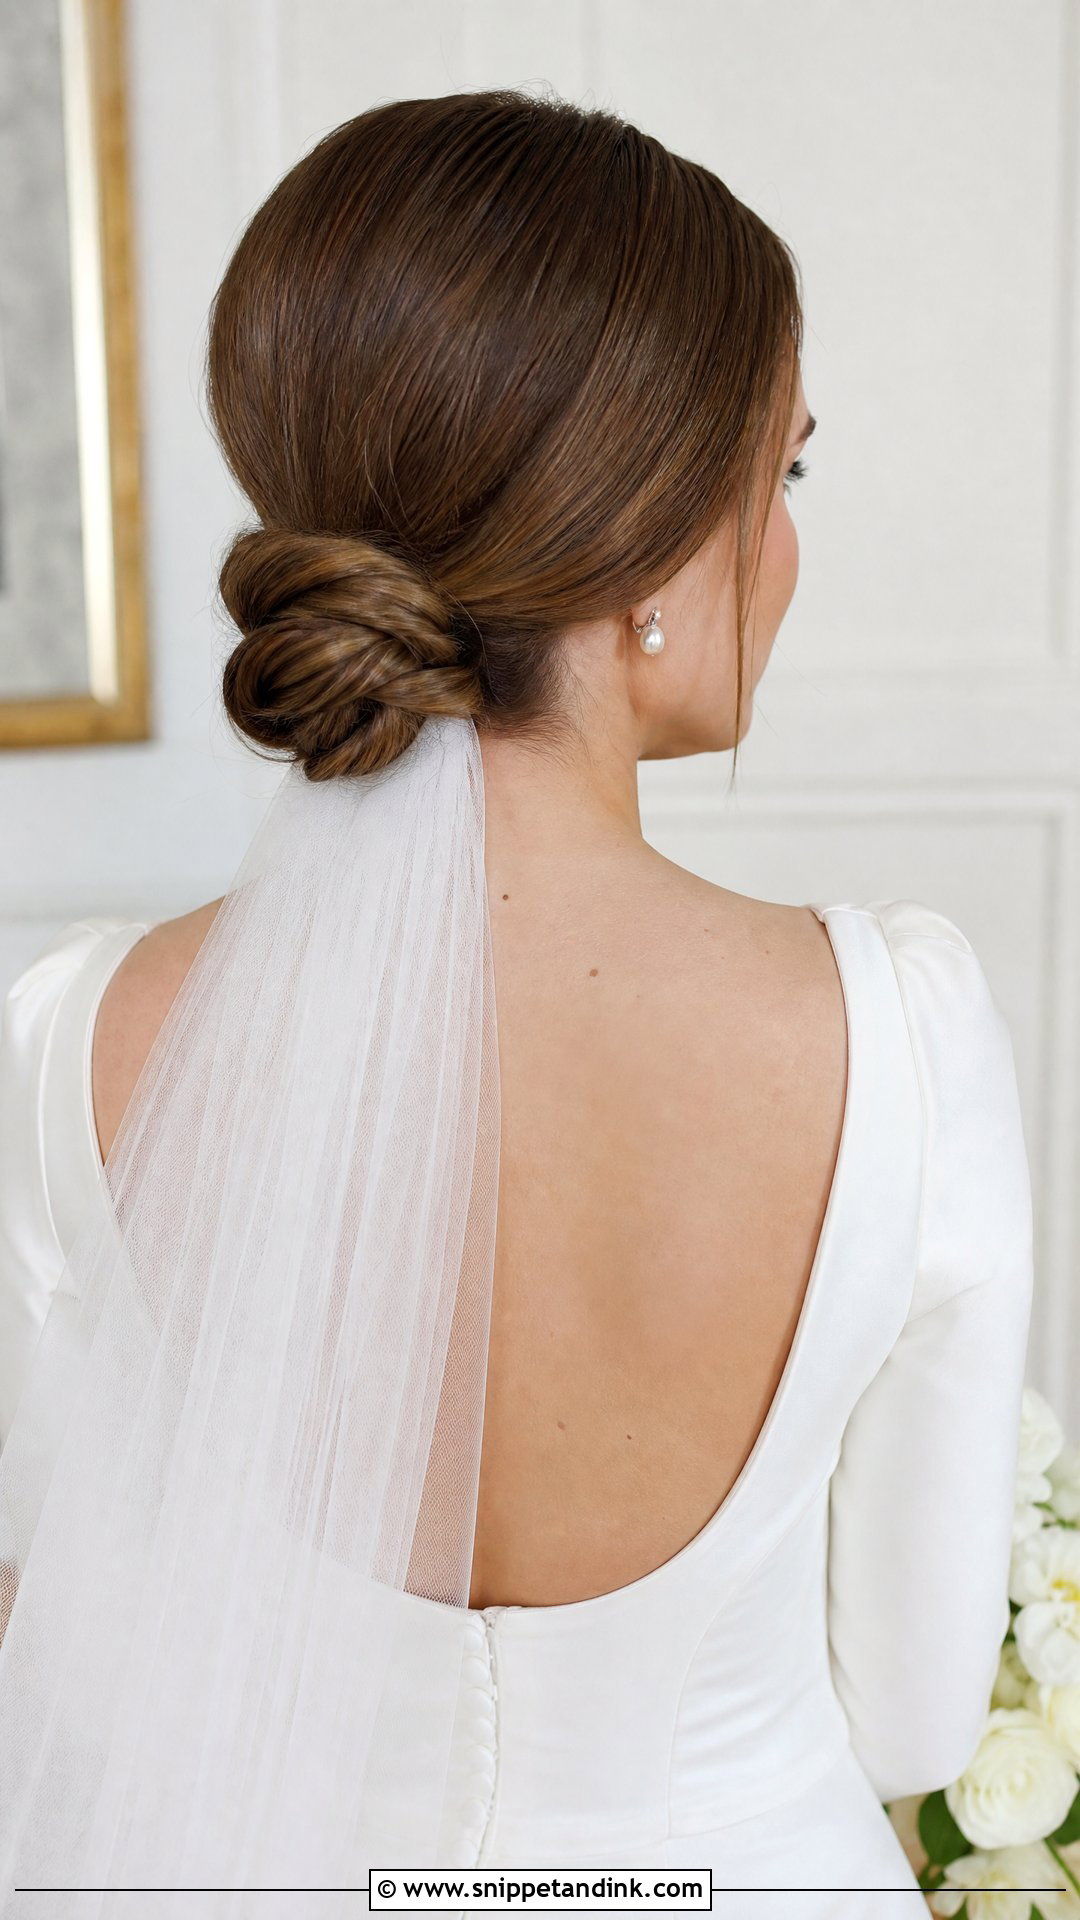
Putting the veil comb under the bun lets the knot sit above the fabric and stay visible. I slide the comb in at the base of the bun, angled upward into a pinned section so it grips. When the veil comes out for the reception, the bun is untouched, which is the real benefit. It works with sleek and textured buns. A cathedral or heavy veil pulls downward from this point, so I add extra pins under the comb. Tell your stylist early that this is the plan, as it changes how I build the bun’s base.
Headrests, Chair Backs and Hugs: What Happens to a Bun at the Nape
A low bun sits exactly where you lean, which is the one weakness of the style. Here is what I tell brides to watch for on the day.
- The car. Headrests crush a nape bun. Sit forward, or ask for the headrest to be lowered on the drive to the ceremony.
- The chair. At dinner, a bun pressed against a chair back flattens and the pins can dig in. I angle pins inward so they don’t stab when you lean, but sitting slightly forward still helps.
- Hugs and dancing. Guests’ arms catch accessories at the nape. Pearl pins and vines need to be pinned into the bun, not just resting on it.
- The veil coming out. Remove it slowly while someone holds the bun, so the comb doesn’t pull pins with it.
- The end of the night. Take out every pin before brushing, and work conditioner through the backcombed parts. Brushing a set bun with pins still in breaks hair.
If your bun loosens during the reception, a couple of bobby pins pushed back in at an angle usually rescue it. Put four or five in your clutch.
Low, Secure and Quietly Personal
A low bun suits more hair types, veils and necklines than almost any other style, which is why it keeps coming back. The differences are in the details: sleek or soft, braided or twisted, plain or dressed with pearls, a vine or flowers. Pick the texture that fits your dress, choose one accessory and test it with your veil at the trial. Then wear it for a few hours afterwards to see if it’s still comfortable.
You'll Like These Ideas:


Leave a Reply