
A bubble braid isn’t really a braid. It’s a ponytail broken into sections with small elastics, and each section is gently pulled wider to make a rounded bubble. That’s why I like it for weddings: there’s no plaiting to unravel, so it holds its shape through a hug line and a dance floor far better than a loose fishtail does. Where it sits, how big the bubbles are and what goes between them changes the whole mood, from sleek and fashion-led to soft and undone. Below are twenty versions I’d happily put on a bride or a bridal party, with notes on who each one suits.
Spacing, Elastics and the Puff That Makes a Bubble
Before you pick a look, it helps to know what your stylist is actually doing, because it explains why some versions hold all night and some sag by the reception.
The elastics
I use small clear or hair-colored polyurethane bands for the sections and a stronger snag-free elastic for the ponytail base. Clear bands disappear on most hair colors in photos, but they can snap if they’re doubled too tightly, so I always carry spares. On dark hair I’d use black ones, since clear bands catch the flash and show up as shiny dots.
Spacing the sections
On shoulder-length to mid-back hair, I space elastics roughly two to three inches apart. Closer together gives small, neat bubbles that suit a sleek look; wider apart gives big, soft bubbles. Even spacing matters more than the exact number. I measure with my fingers at each section so the braid doesn’t suddenly change rhythm halfway down.
Pulling them out
After each elastic goes on, I pinch the section between the bands and gently pull from the edges outward, working around the whole circle. Pulling only from the back makes the bubble flat and lopsided. Clean, freshly washed hair is too slippery for this, so I ask brides to wash the day before and I add dry shampoo or texture spray before tying anything.
1. Bubble Braid Ponytail Wedding Hair
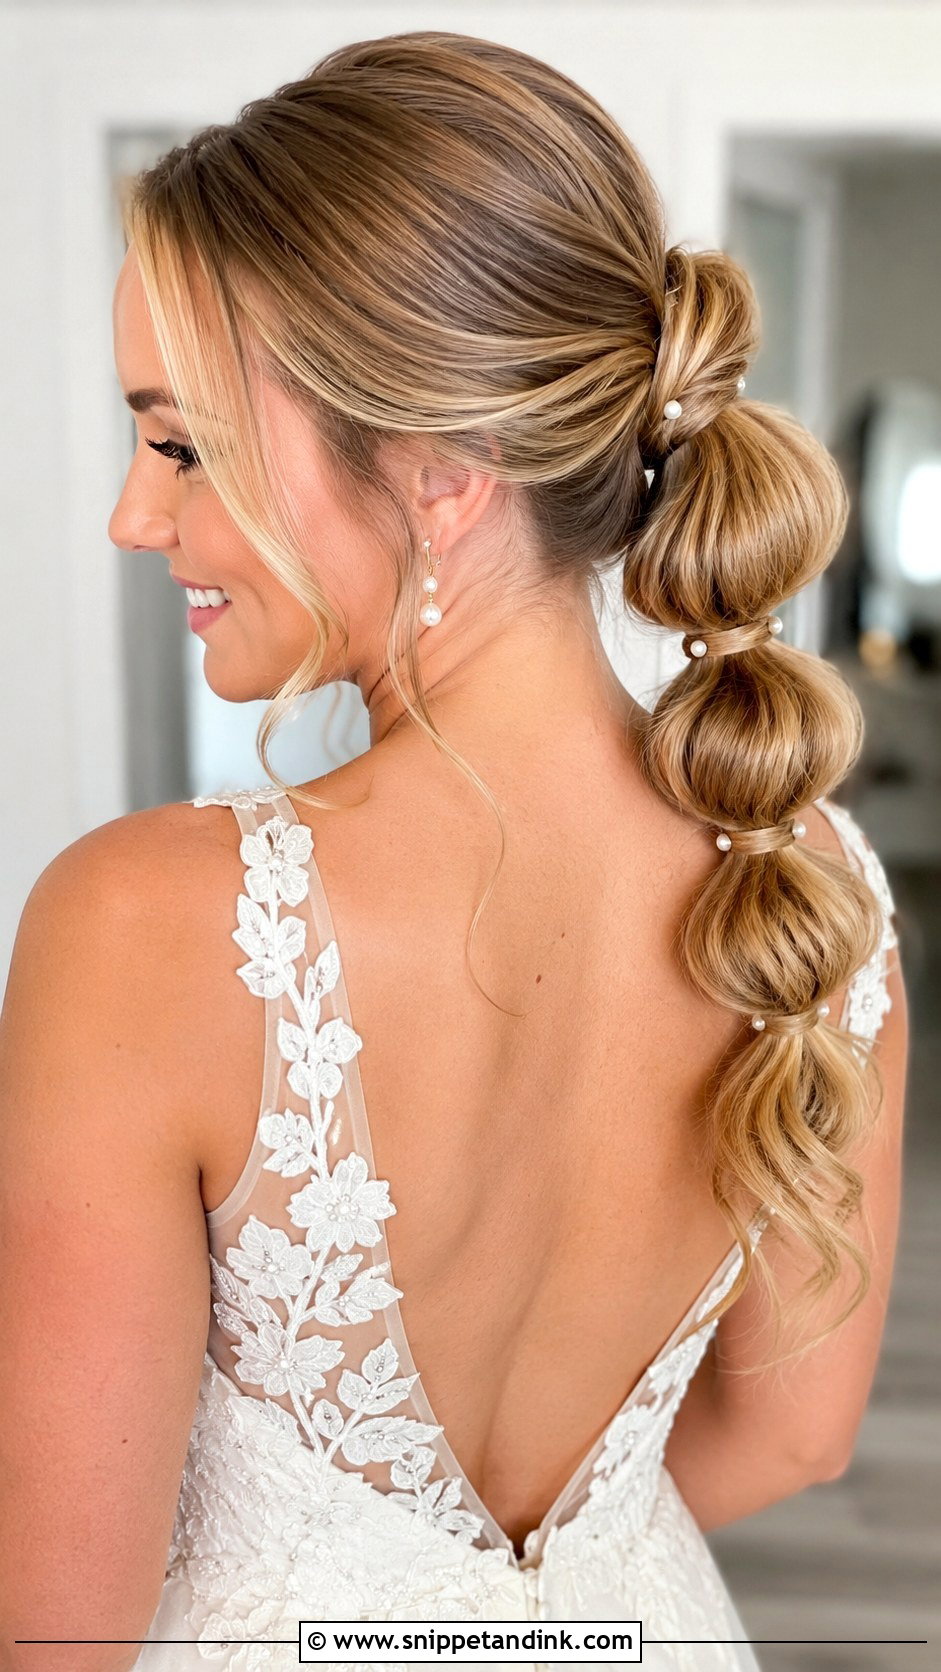
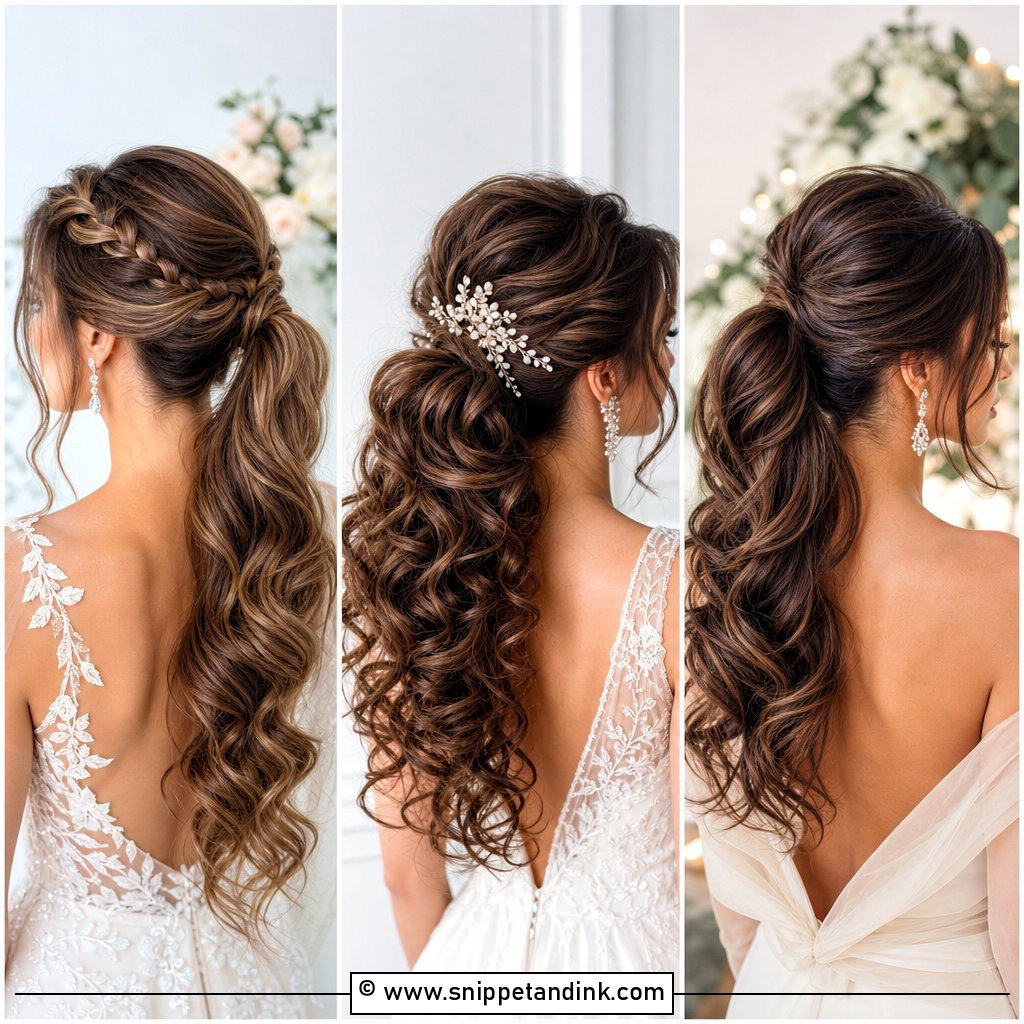
The bubble braid ponytail starts with a smooth, well-anchored base, and that base is where most of my time goes. If the ponytail elastic isn’t tight and the sides aren’t brushed flat, every bubble below it looks sloppy. I wrap a thin strand around each elastic and pin it underneath, so photos show hair rather than bands. It keeps the neckline clear, so it suits a strapless or square neckline. A pearl pin or small bow at the base is enough decoration.
2. Low Bubble Braid Wedding Hair
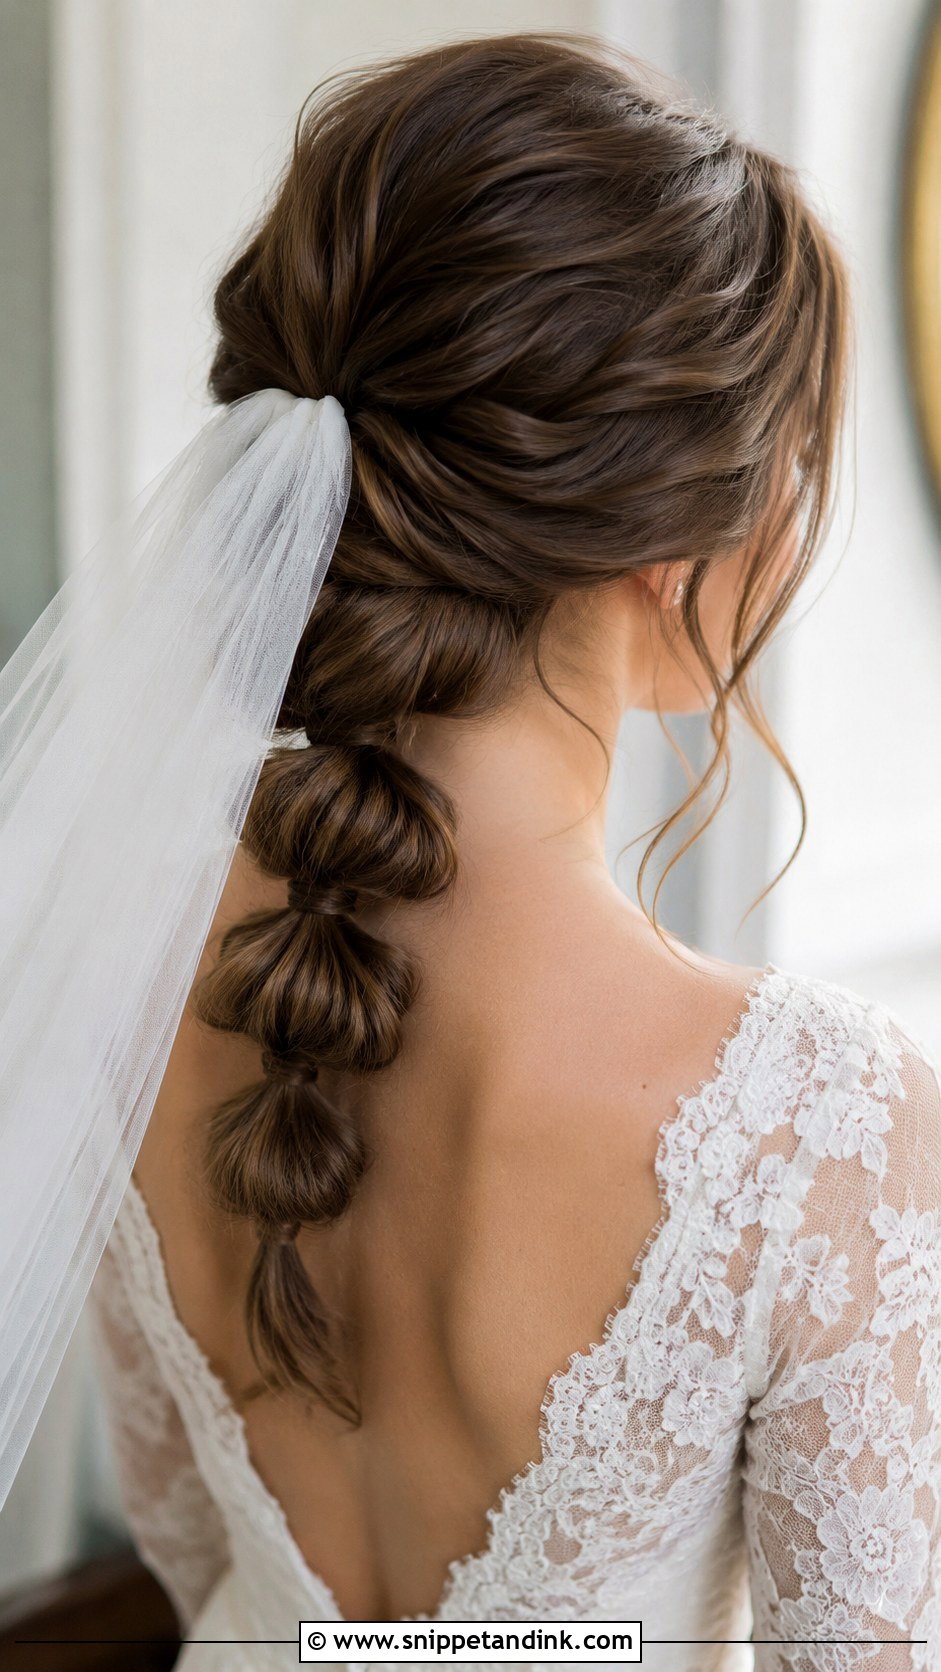
Starting the braid at the nape keeps it soft and out of the way of a high-backed gown. I add some lift at the crown before I tie the ponytail, otherwise a low style can look flat from the front and drag the face down in photos. Fine or medium-density hair benefits from wider bubbles here; I tease the inside of each section lightly before pulling it out so it has something to hold the shape. A veil comb can go above the braid or slide in just under the crown for a cleaner profile.
3. Side Bubble Braid Wedding Hair
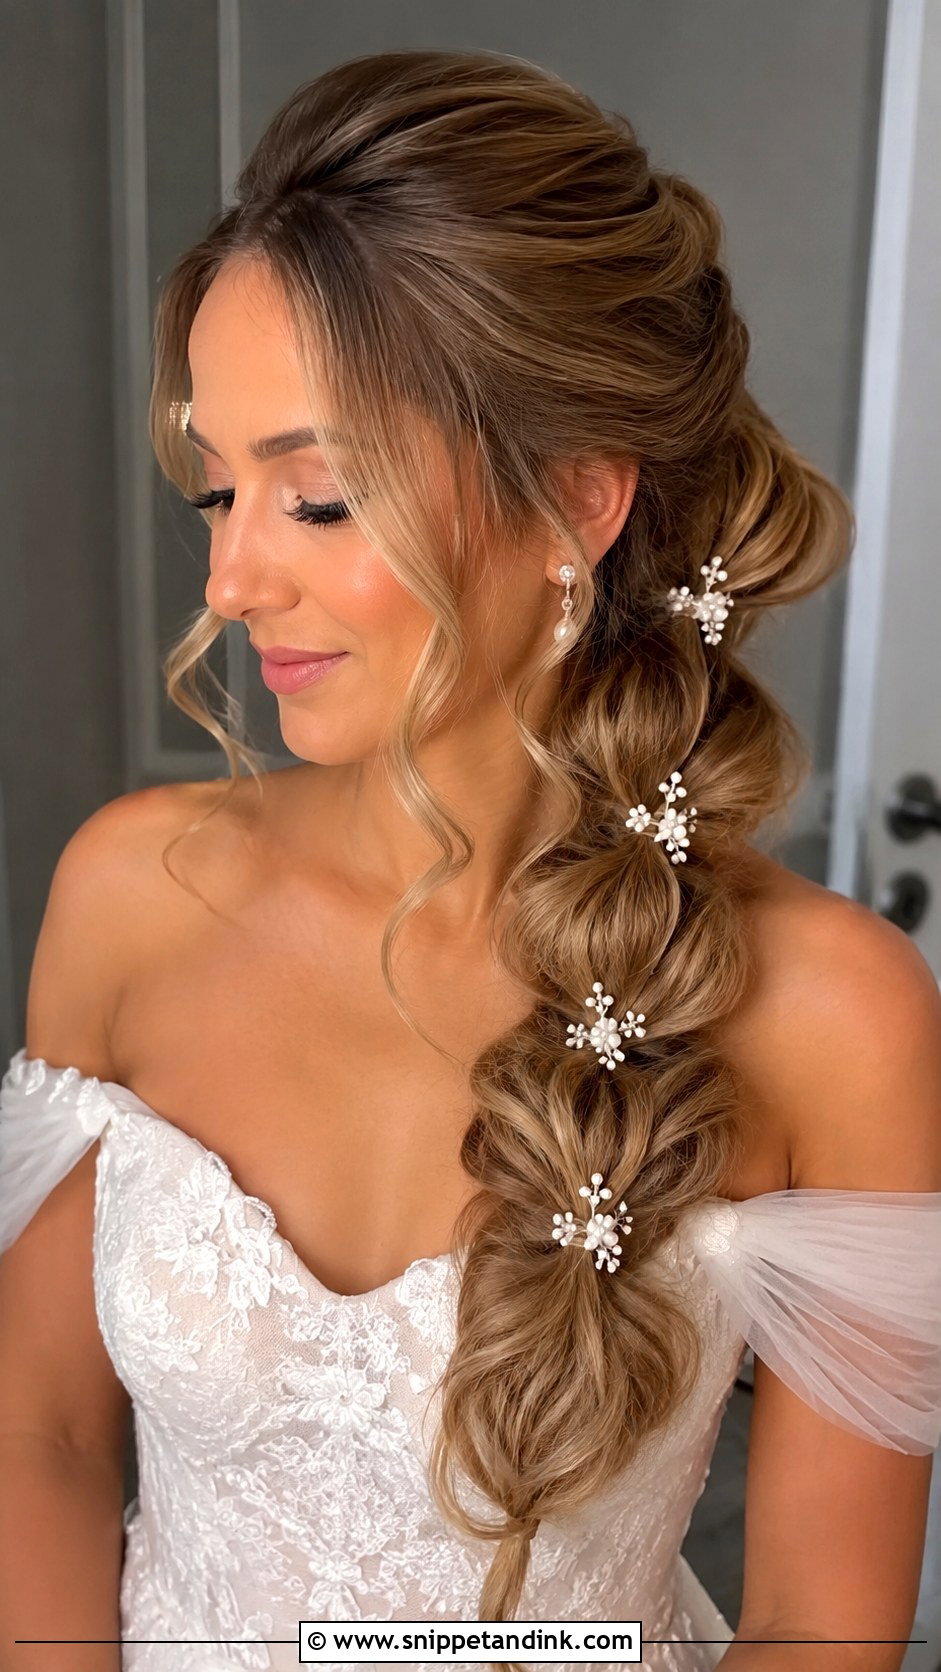
Over the shoulder, a bubble braid shows its full length to the camera, which a braid down the back never does in front-facing portraits. Placement matters more than people expect. I tie the ponytail low and just behind the ear, because tied too high on the side it starts to look like a school style. It sits nicely against a one-shoulder or off-shoulder gown, and since the hair stays in front it won’t tangle with a cathedral veil or catch on a lace back.
4. Half Up Bubble Braid Wedding Hair
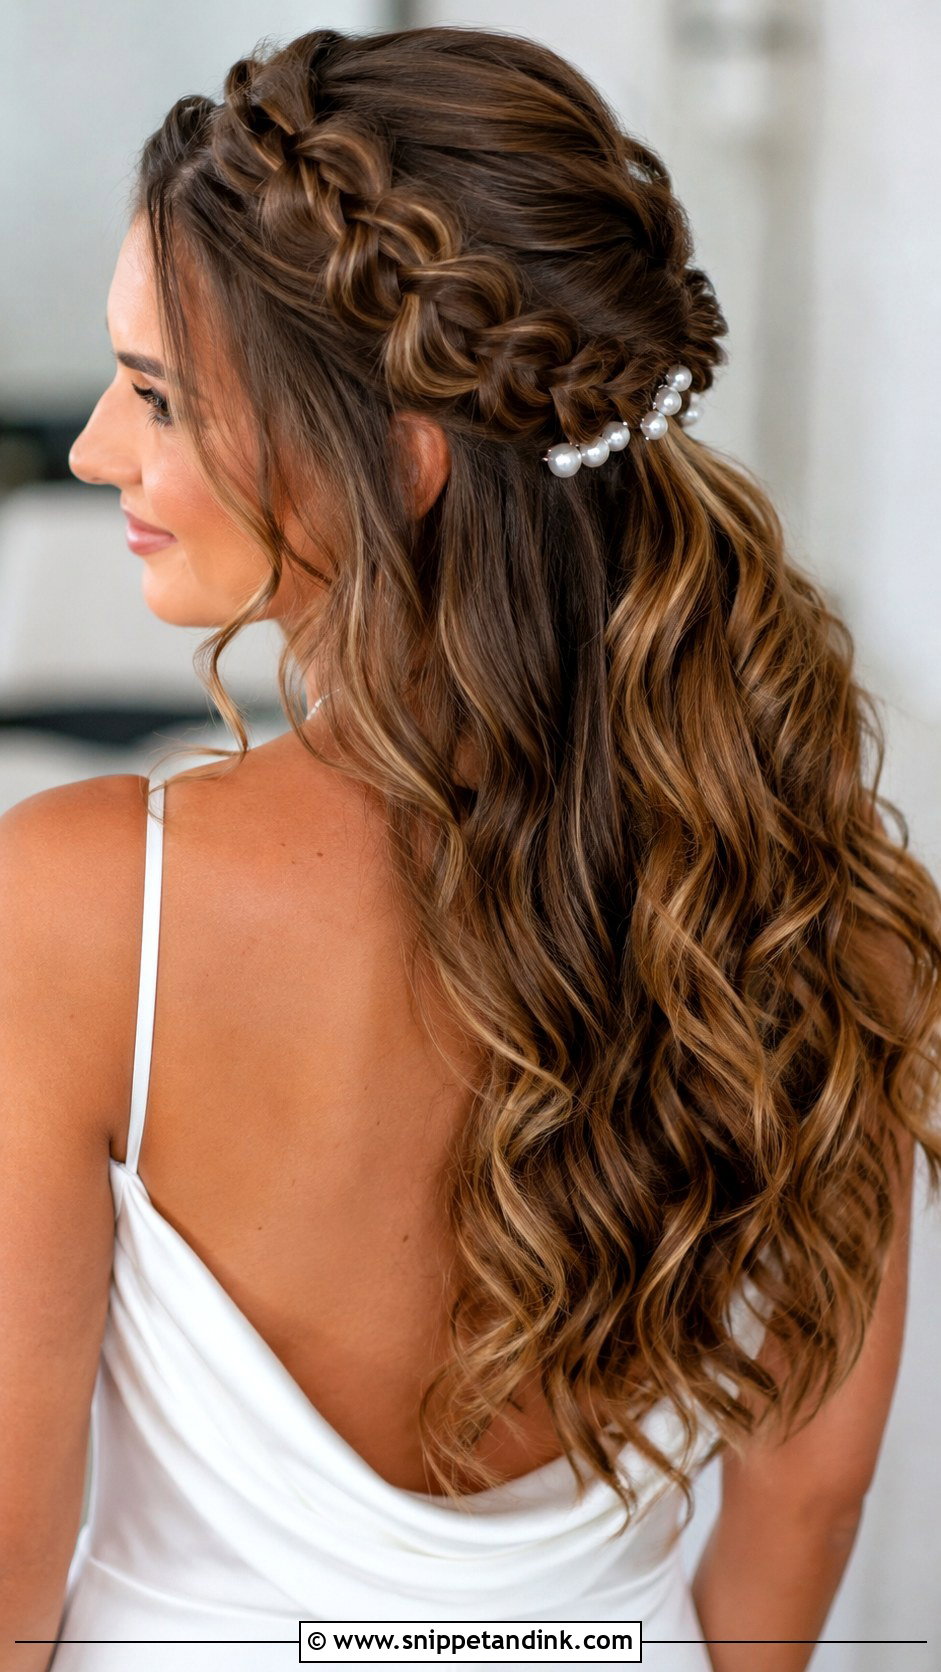
Half up bubble braid wedding hair keeps the front sections controlled while the rest of the hair stays loose in waves or curls. The top section gets its own small bubble braid, and the elastic at its base becomes a firm anchor for a veil comb, which is the main reason I suggest it to brides who want a veil and loose hair together. I’d curl the loose lengths before tying the top section; curling afterward means working around the braid and risks catching it with the iron.
5. Boho Bubble Braid Wedding Hair
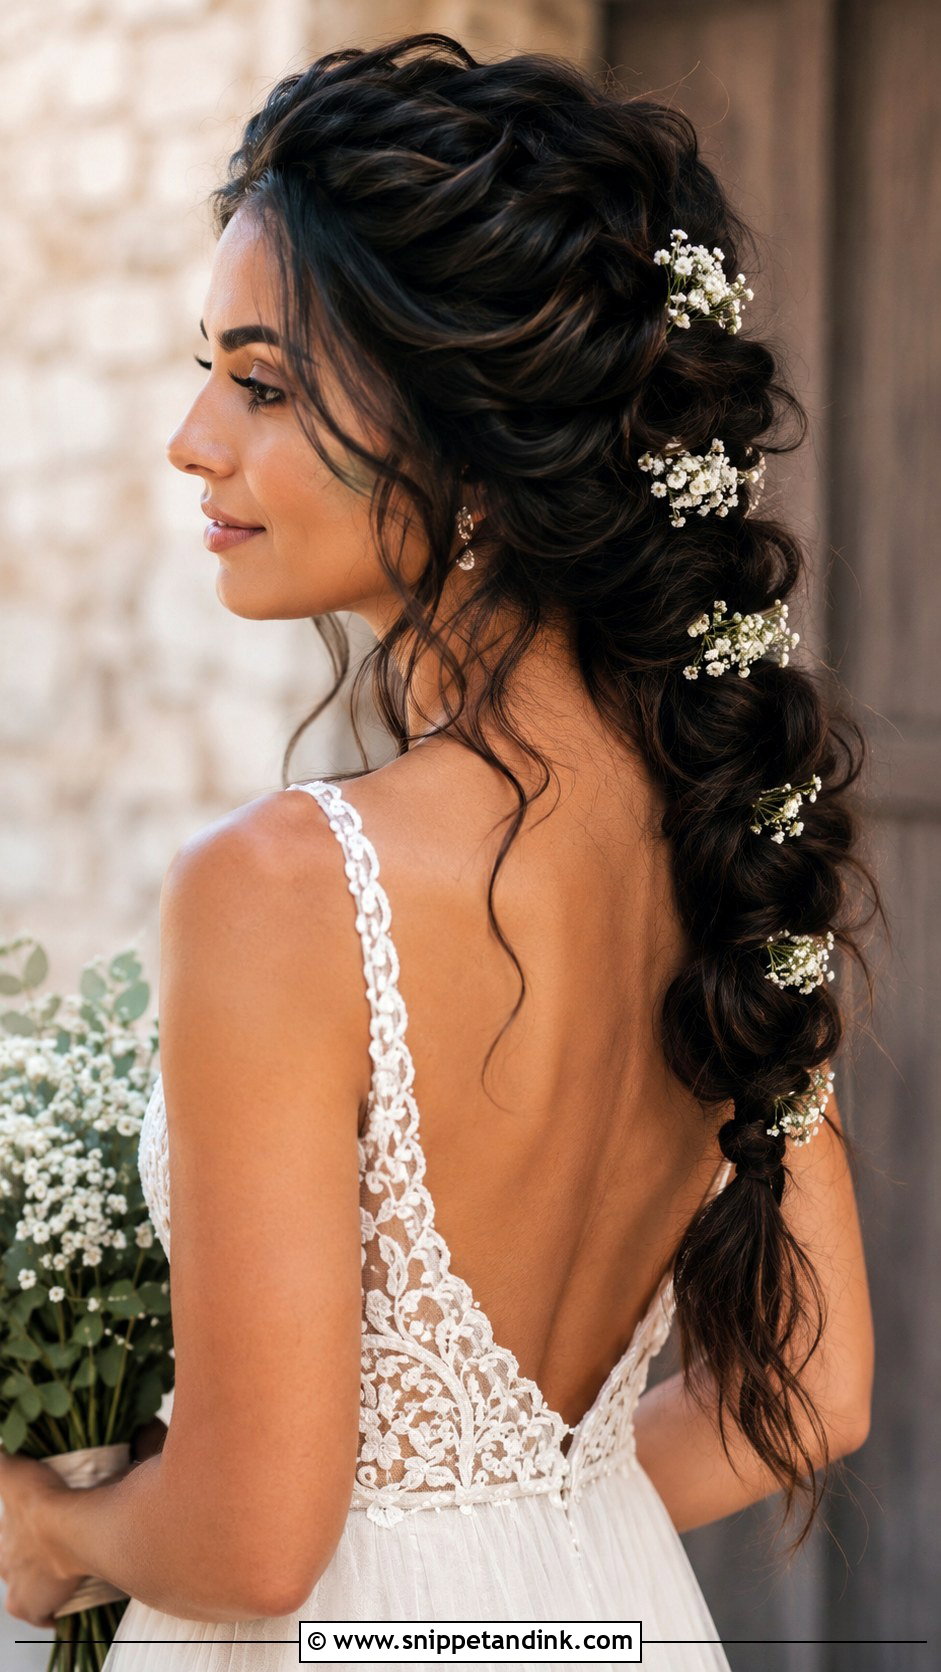
The boho version needs texture first. I set soft waves through the whole head, then tie the sections loosely and pull each bubble wide and slightly uneven, so it looks lived-in rather than tight. Tucking dried flowers, baby’s breath or gold pins between sections adds a handmade finish. It’s also the most forgiving of all twenty in wind or humidity. When a strand slips loose after the ceremony, it just looks like part of the style.
6. Sleek Bubble Braid Wedding Hair
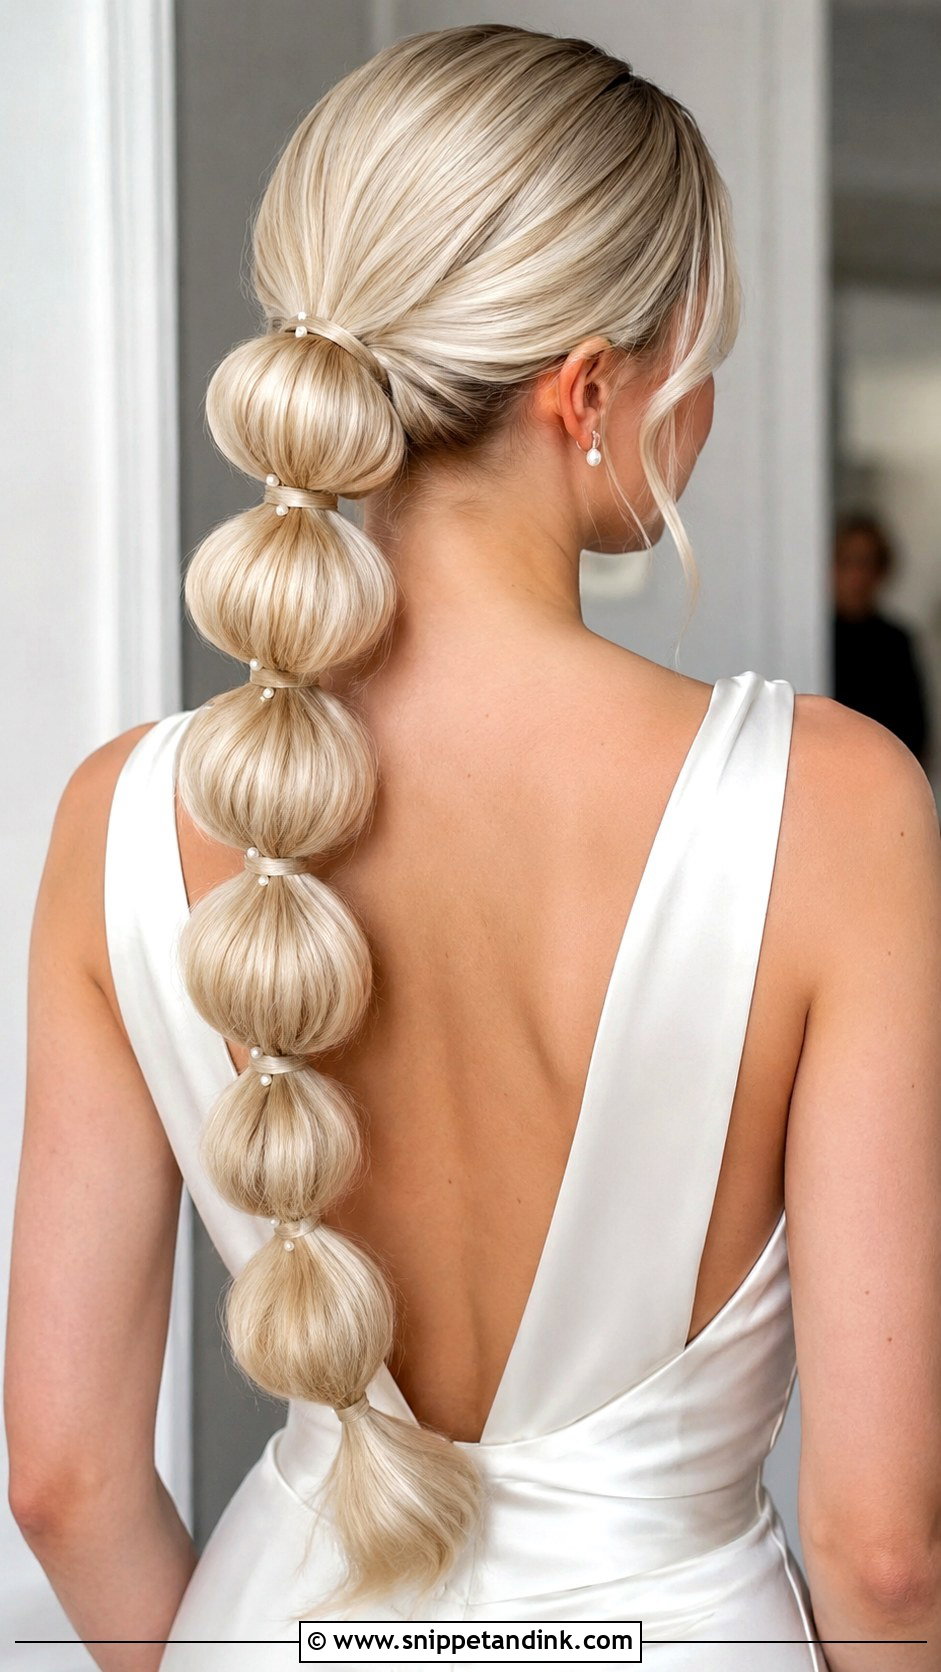
Sleek is the hardest version to get right, and the one that shows every flaw. I smooth the hair with a light cream and a boar bristle brush, tie it tight, then make every section the same length so the bubbles line up evenly. Lightweight shine spray goes on at the end, never heavy oil, which flattens the bubbles and makes them look greasy by evening. It sits best with a satin or structured gown and a statement earring. Very fine, slippery hair struggles to look smooth and full at the same time, so I’d rather add a clip-in ponytail than over-tease it.
7. Bubble Braid With Veil Wedding Hair
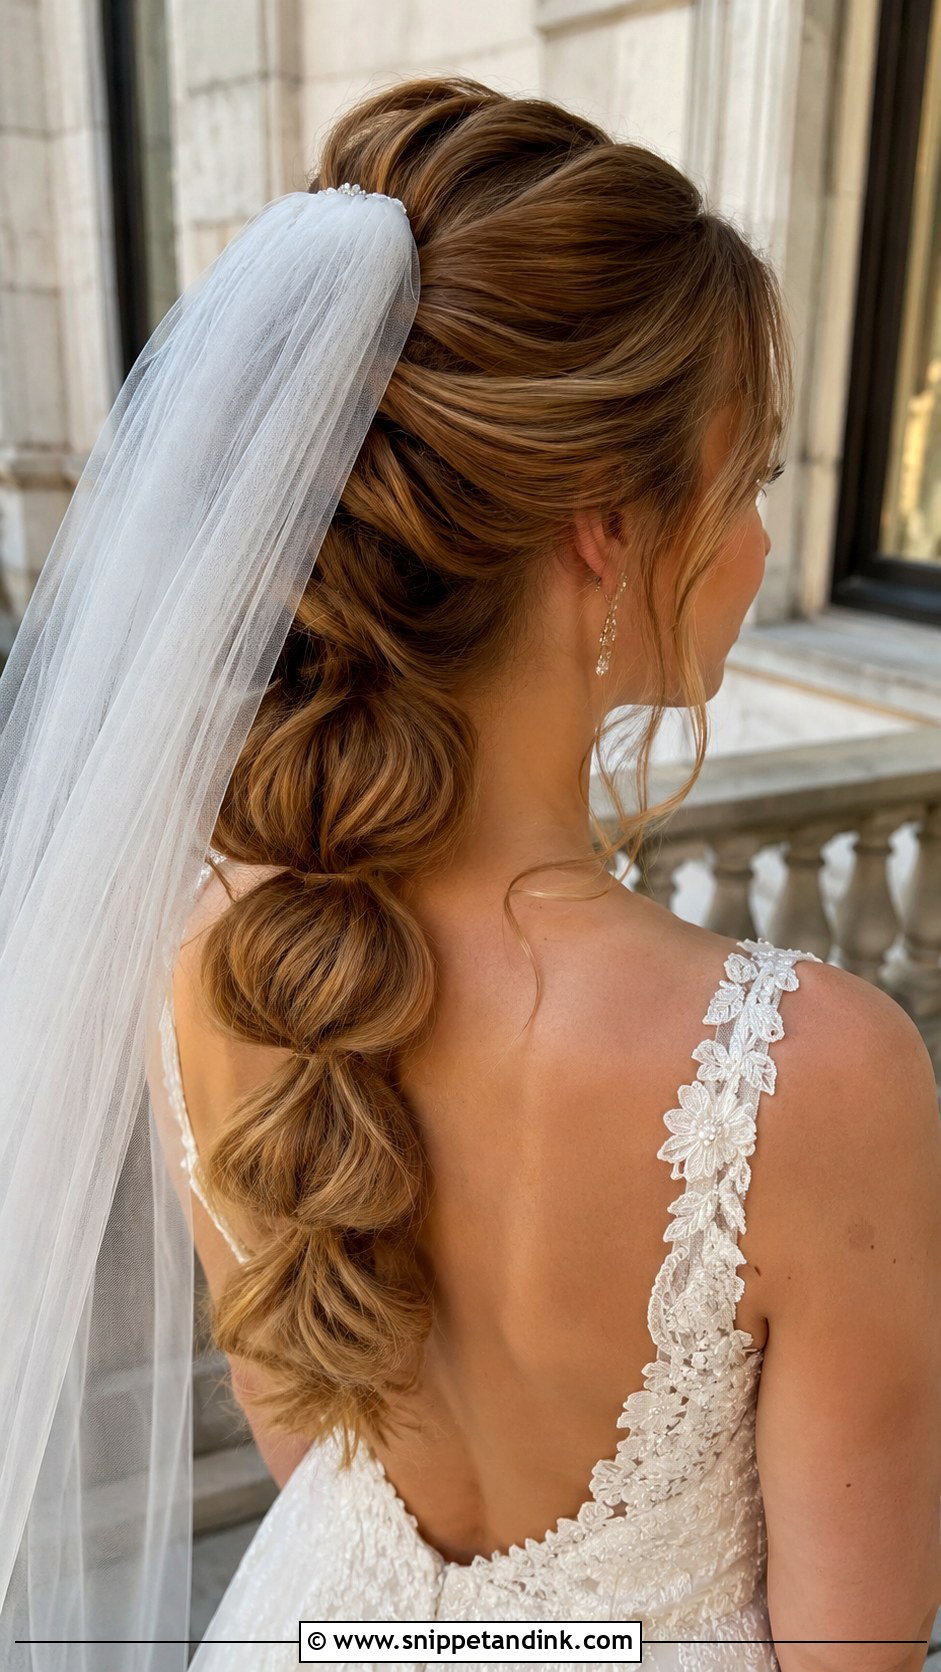
A veil comb needs something to grip, and the elastics in a bubble braid give it that. I slide the comb in just above the first elastic, angled downward, so its teeth bite into the base of the ponytail. Put the veil above the braid and you get more height; tuck it under the crown and the braid shows from the back. If the veil has heavy lace or beading, I’d keep the braid itself plain, because two busy details in one place look crowded in a back shot.
8. Bubble Braid With Flowers Wedding Hair
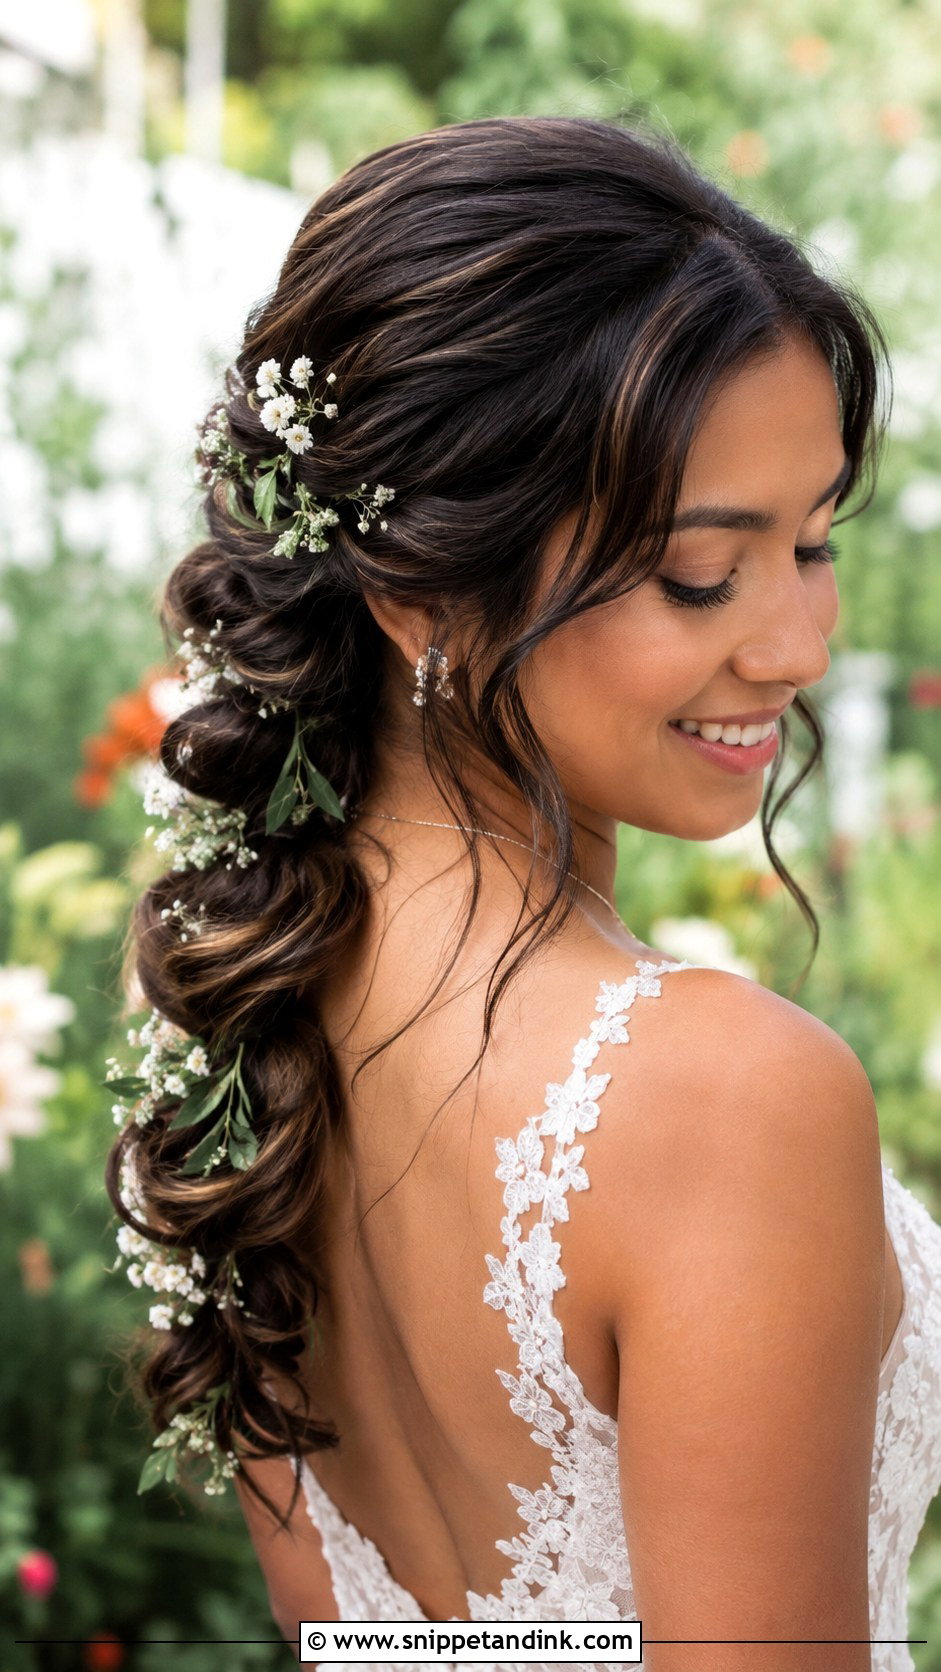
Flowers in a bubble braid need to be small, wired and slow to wilt. Waxflower, spray roses and baby’s breath hold up for hours, while soft-petaled blooms like garden roses start to droop by the reception. I pin them into the gaps between bubbles, not on top, so they sit flush and don’t snag on a veil. Ask your florist for a few extra stems set aside for hair, and match them to the bouquet so the two read as one.
9. Bubble Braid With Pearls Wedding Hair
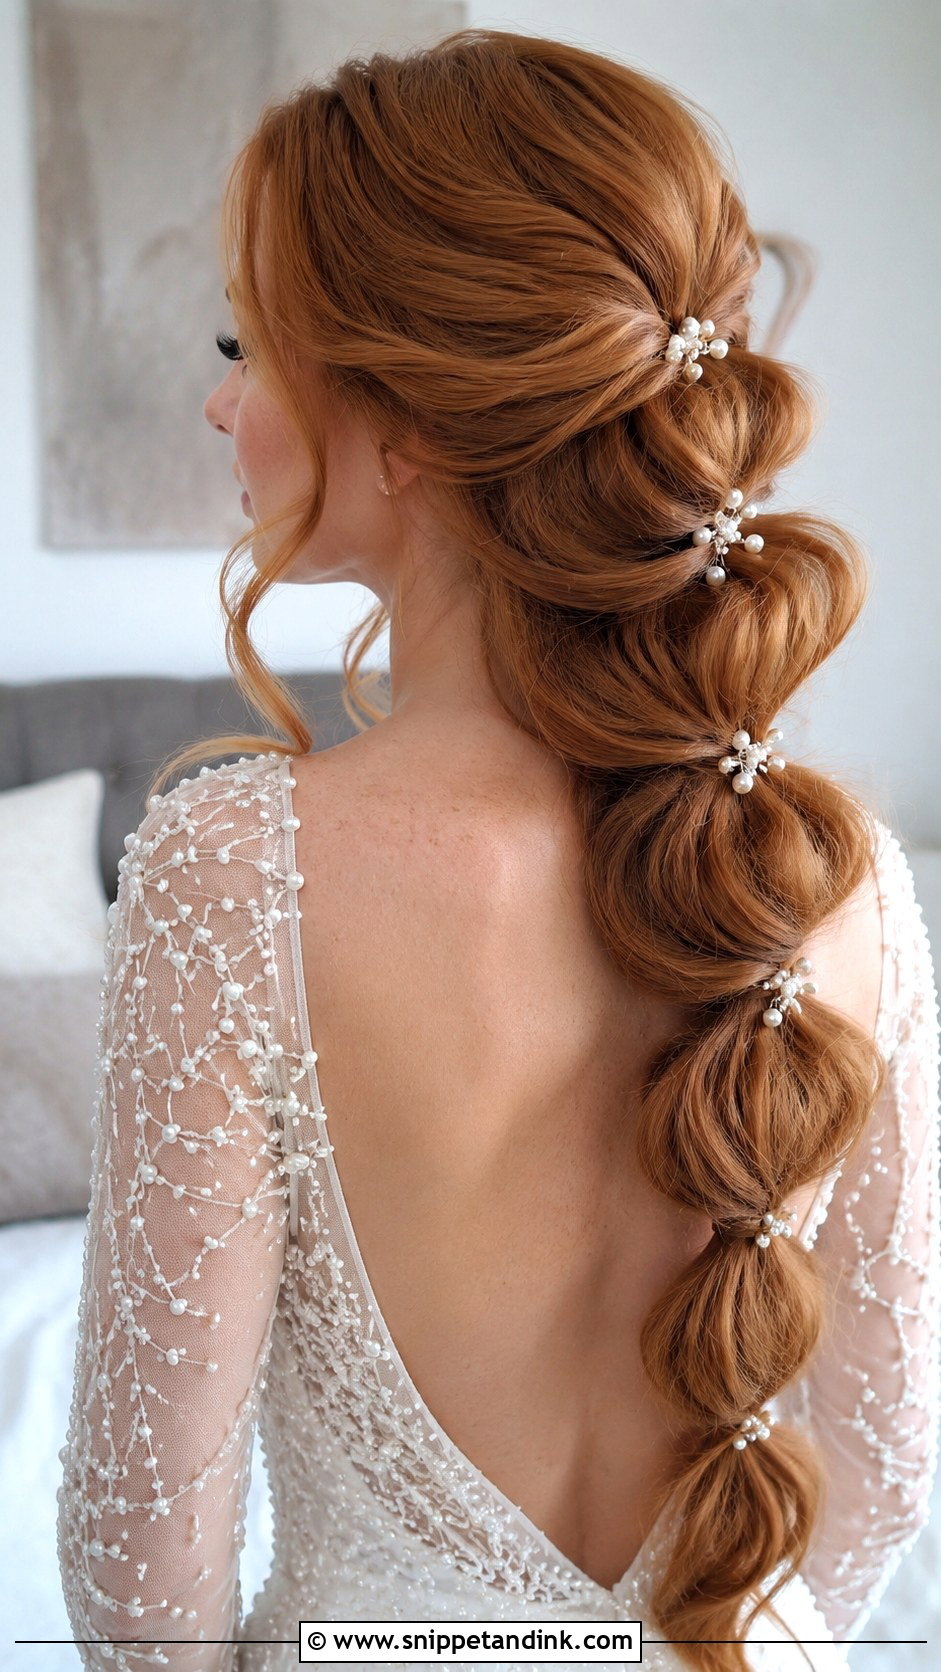
Pearls catch light without adding weight, which is why I reach for them more than crystals on a braid this textured. I place pearl pins in the dips between bubbles where they’ll sit level, or wrap a fine pearl vine loosely along the length and pin it every few inches so it doesn’t slide. Keep the bubbles even and fairly full; on a loose, messy braid pearls get lost. Satin gowns and pearl earrings make an easy match.
10. Bubble Braid With Ribbon Wedding Hair
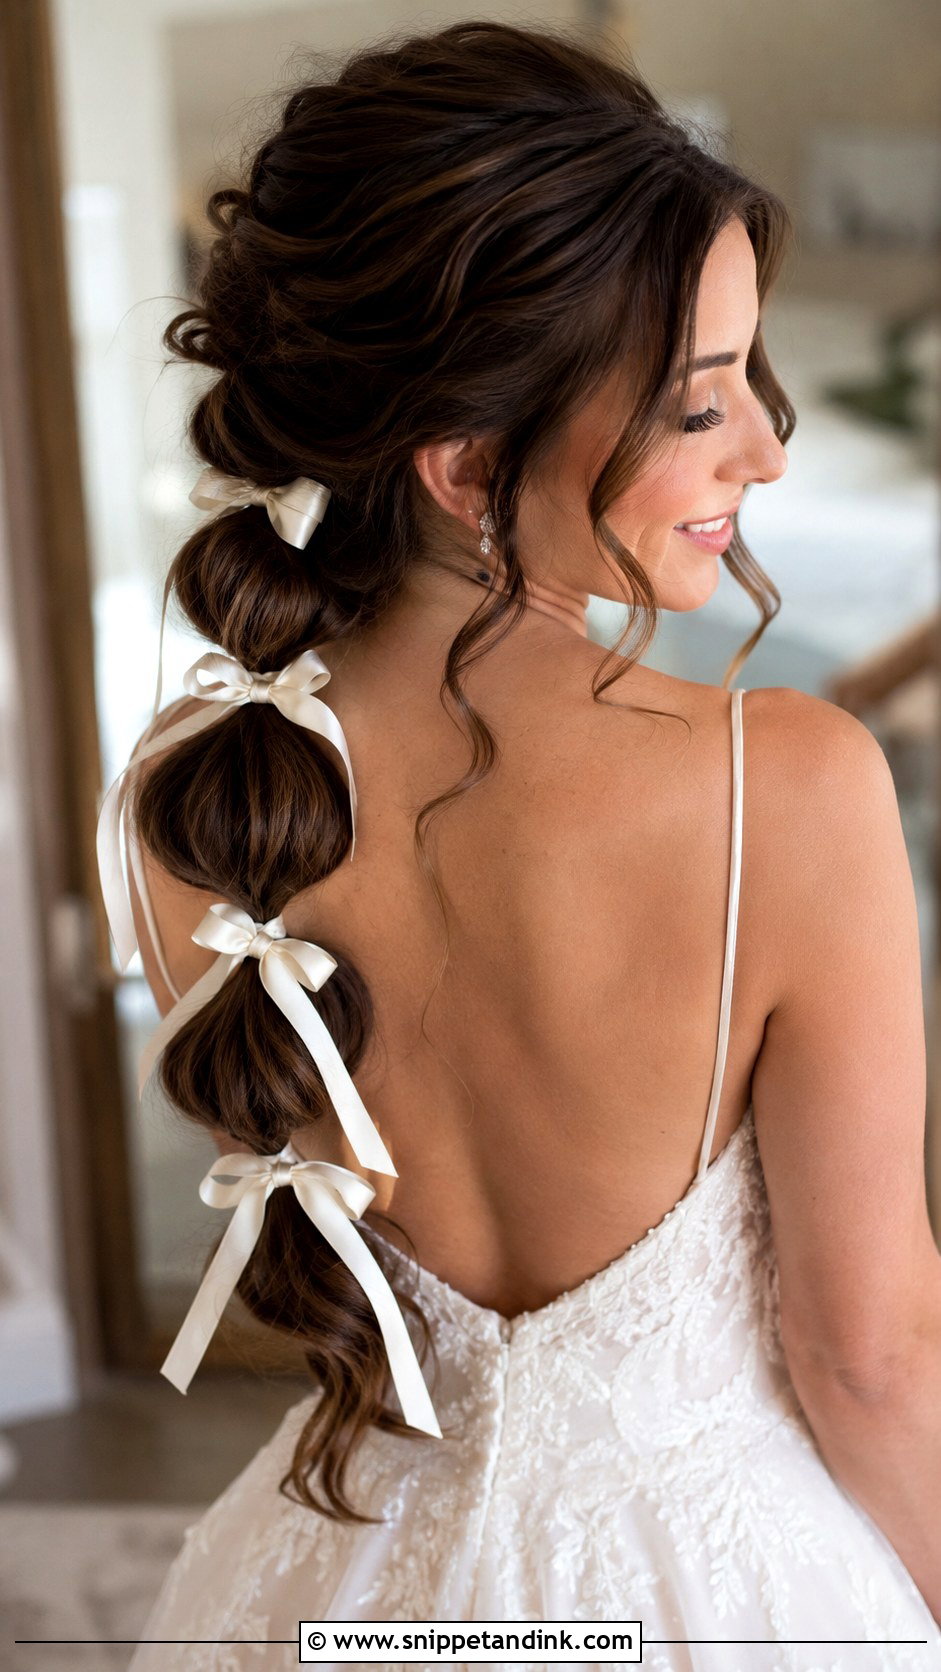
Ribbon is softer than any pin. I tie it at the base and either let the tails hang, weave it through every second section, or knot small bows around the bubbles. Narrow satin or organza stays put; velvet has more grip but is warmer and heavier. Ivory reads bridal, and a dusty blue or blush ties into a bridesmaid palette nicely. Thick ribbon on a thin braid looks out of proportion, so I match ribbon width roughly to the width of the bubble.
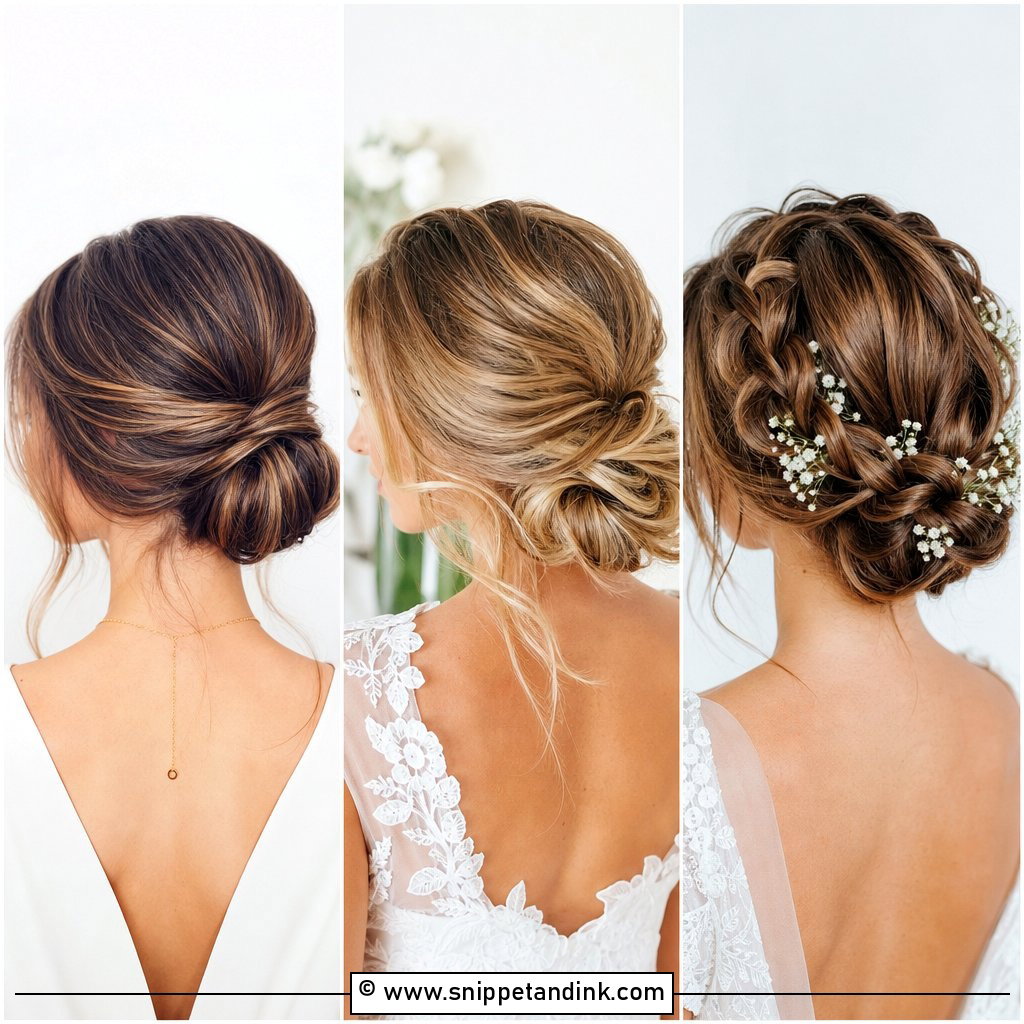
11. Bubble Braid Updo Wedding Hair
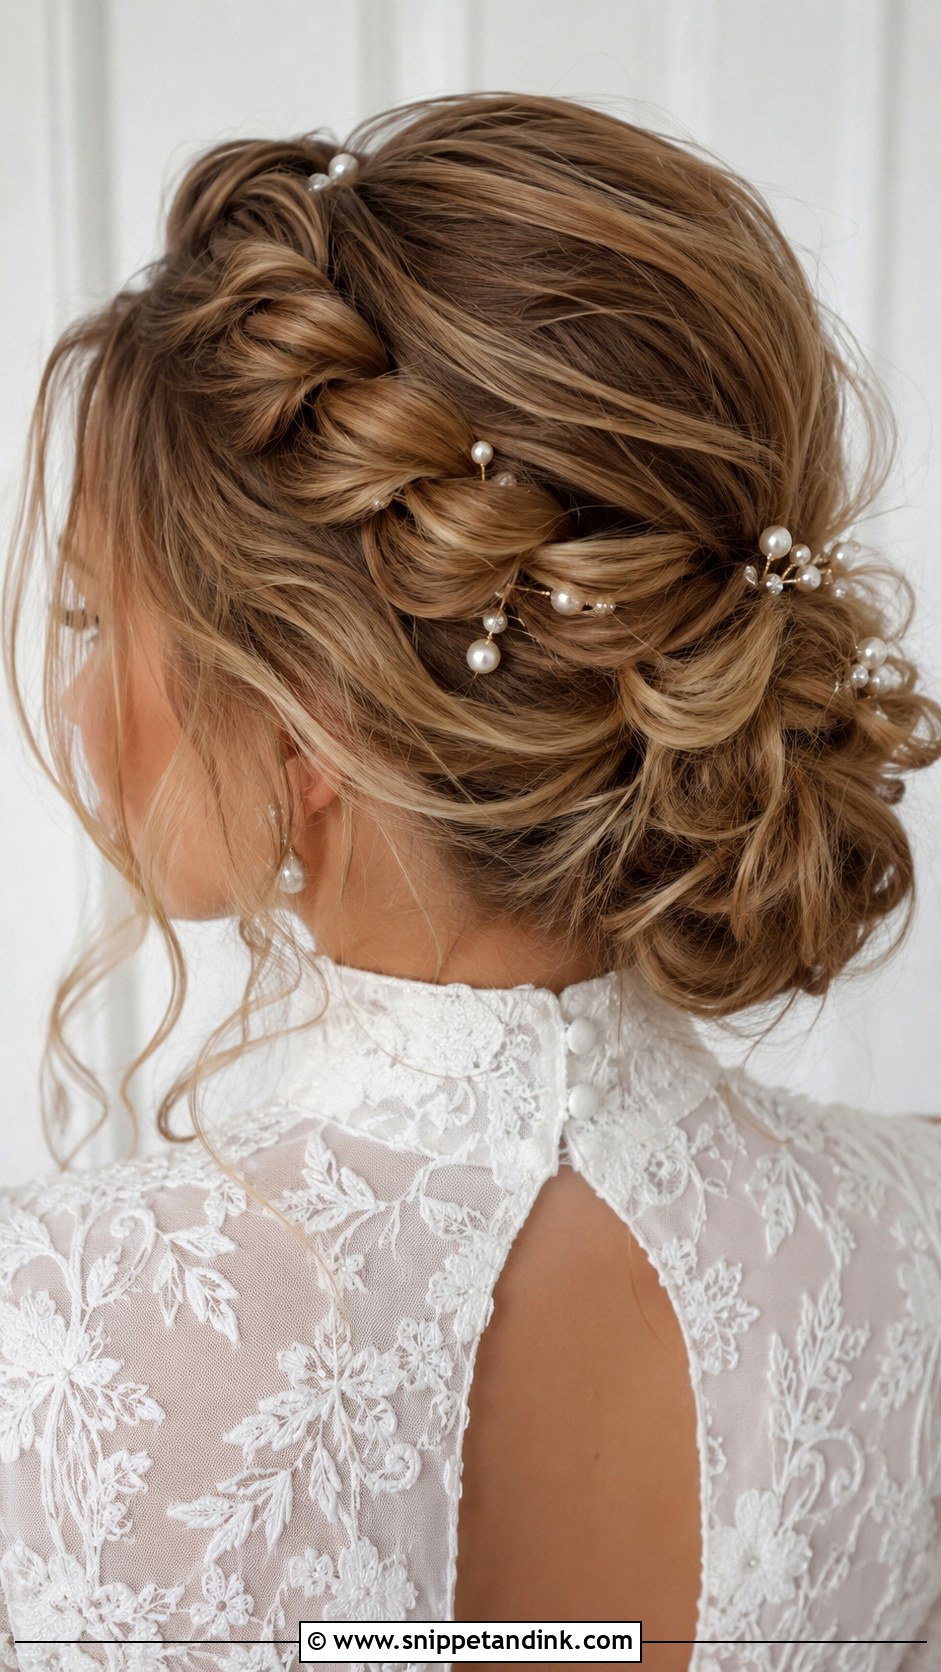
Wrapping a finished bubble braid into a chignon gives you an updo with built-in texture, so it never looks flat from behind. I coil it at the nape and secure it with U-pins pushed in toward the head rather than straight down, which keeps the bubbles from collapsing. Getting the hair off the neck is a relief at a summer wedding, and it leaves room for a high neckline. A couple of loose face-framing strands keep it from looking severe.
12. Bubble Braid Bun Wedding Hair
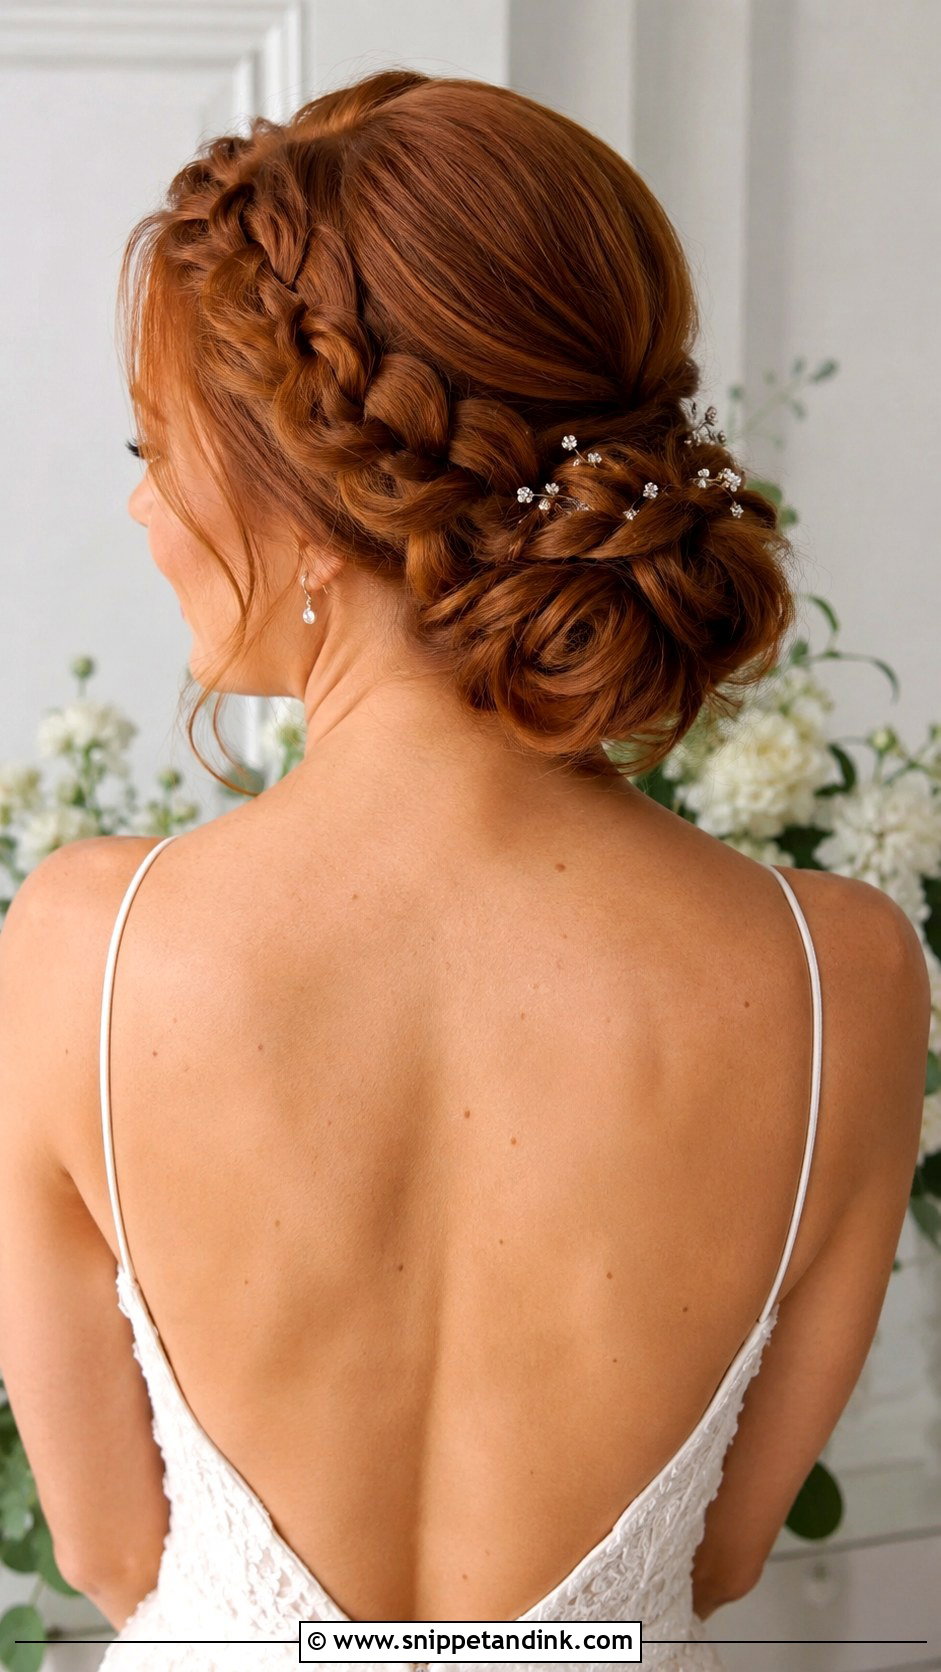
For the bun, I make the bubbles first and then gather them into a bun, so the sections show around the edges. Tie it low and leave it slightly loose for a softer finish, or smooth the crown and pull the sections tight for something sharper. This one stays put. Because the weight is gathered close to the head, it survives hours of hugging and dancing better than any ponytail on this list, and it leaves the shoulders and a backless gown on show.
13. Bubble Braid Crown Wedding Hair
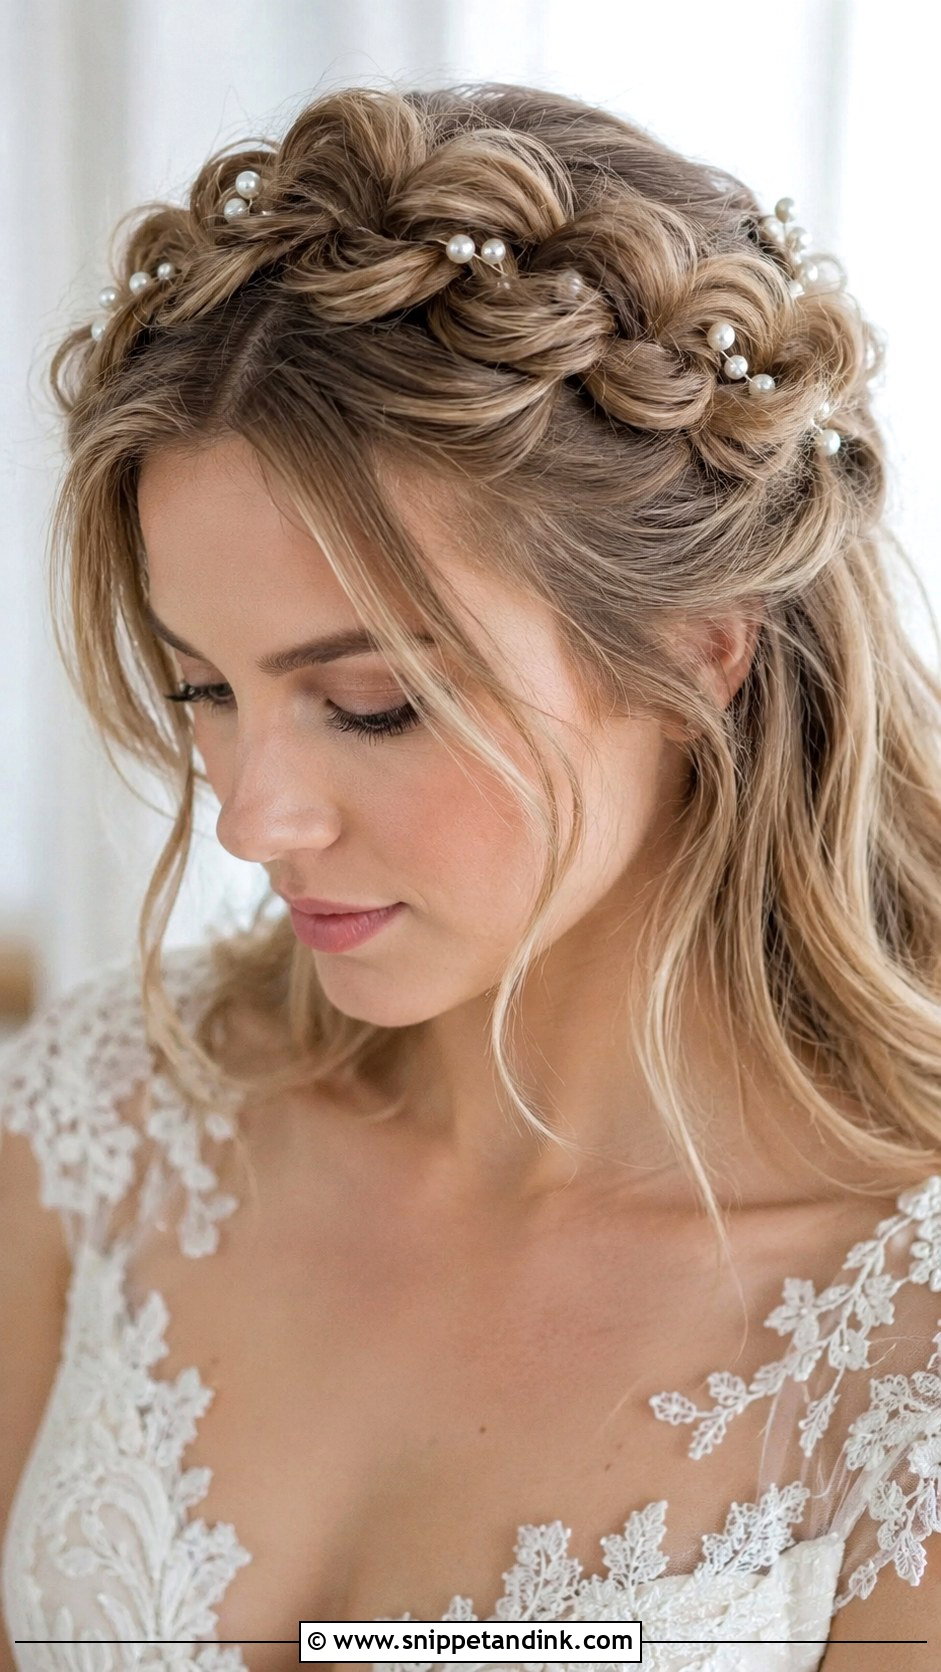
A bubble crown works like a halo braid, but each section is tied rather than plaited, so it needs medium-length or longer hair to reach around. I keep the bubbles smallest along the hairline and slightly larger at the back, otherwise the shape looks bulky from the front. Clean partings are what make it look refined; uneven sections show clearly on the top of the head in overhead shots. It can sit above loose waves or a low bun.
14. Double Bubble Braid Wedding Hair
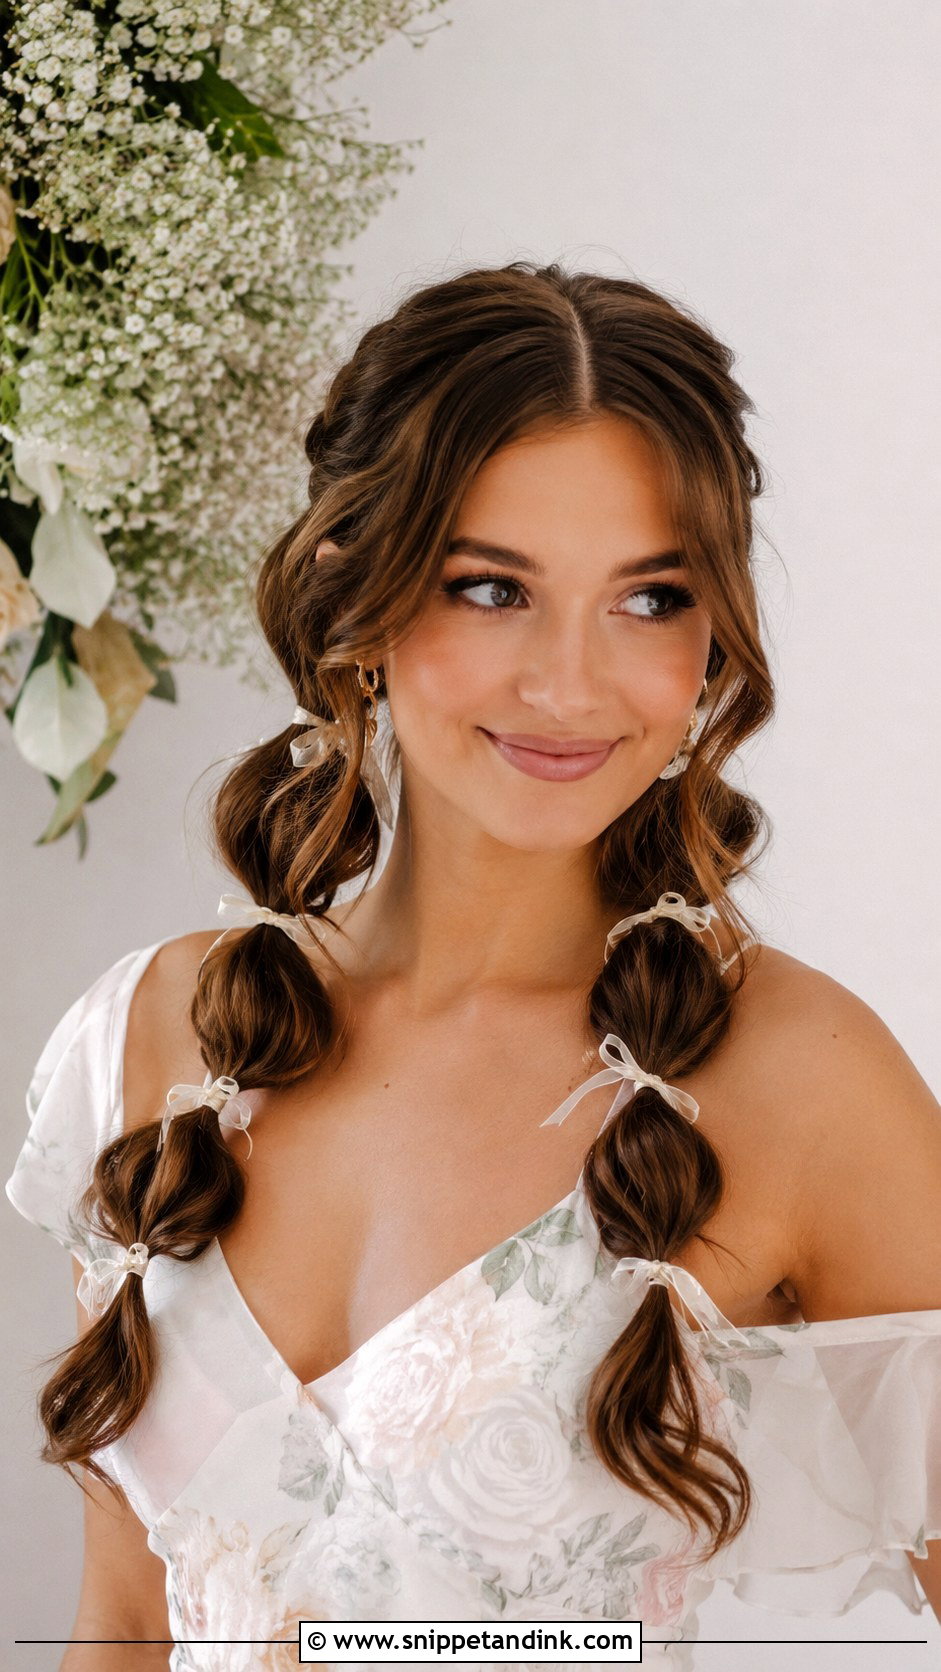
Two bubble braids can look playful very quickly, so I make them wedding-appropriate with a clean center part, a little lift at the crown and full, evenly spaced bubbles. Worn down the back they look polished; brought over the shoulders they’re more relaxed. They suit bridesmaids and flower girls especially well, and children sit still for them more easily than for an updo. A small bow at each base softens the look.
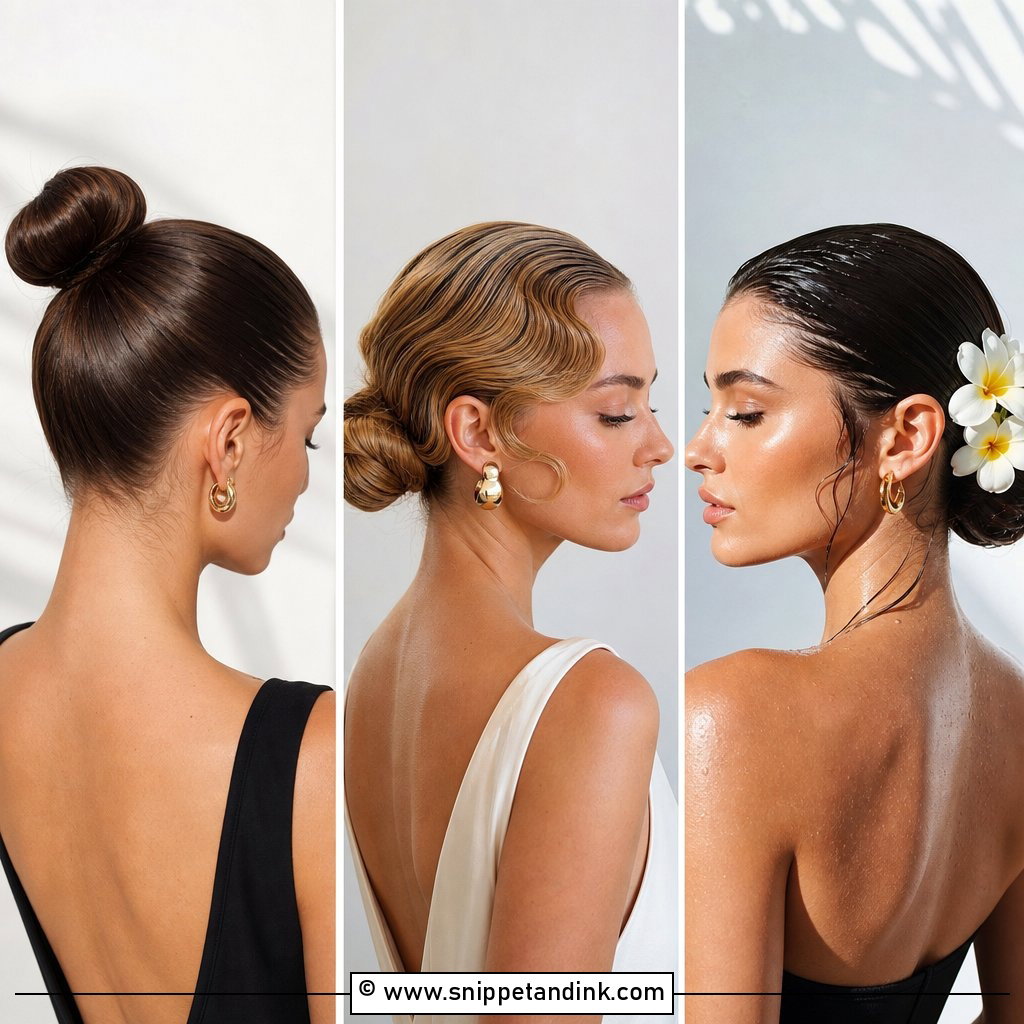
15. High Bubble Braid Wedding Ponytail
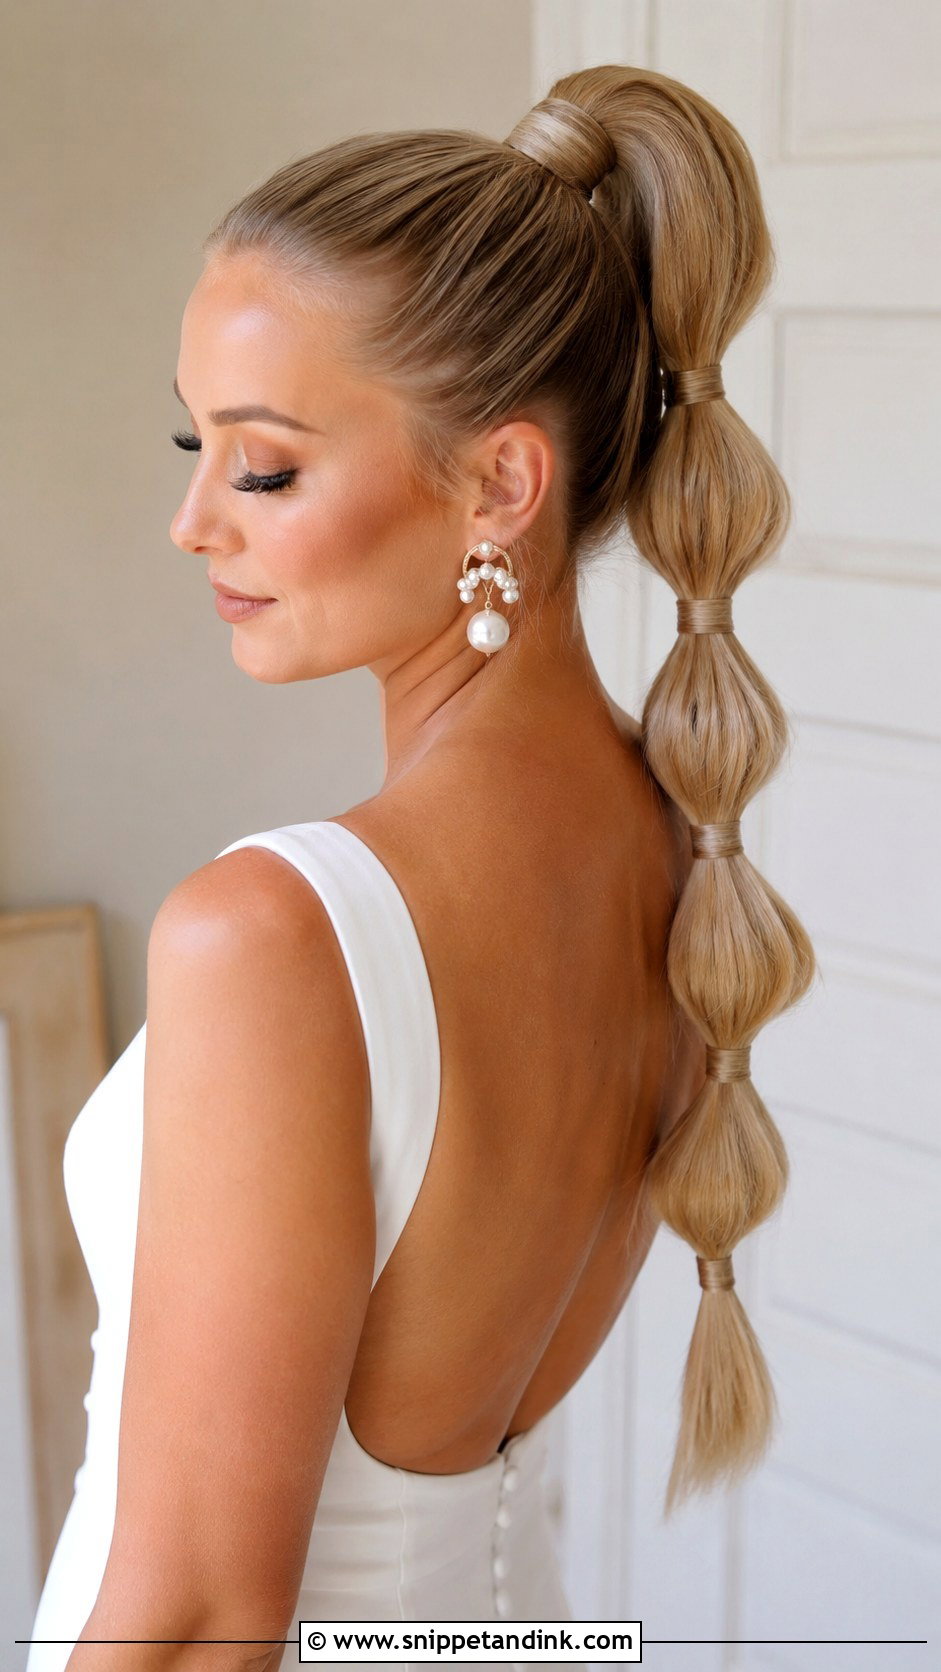
A high ponytail lifts the face, but it’s the most demanding on the scalp. I tie it at the crown with a strong elastic and then secure it with two crossed bobby pins under the base, because a high ponytail with any weight starts to sag after a few hours. Long hair or extensions make the bubbles more dramatic. If you get headaches from tight ponytails, I’d suggest a mid-height version instead. Do a test day before you commit.
16. Loose Bubble Braid Wedding Hair
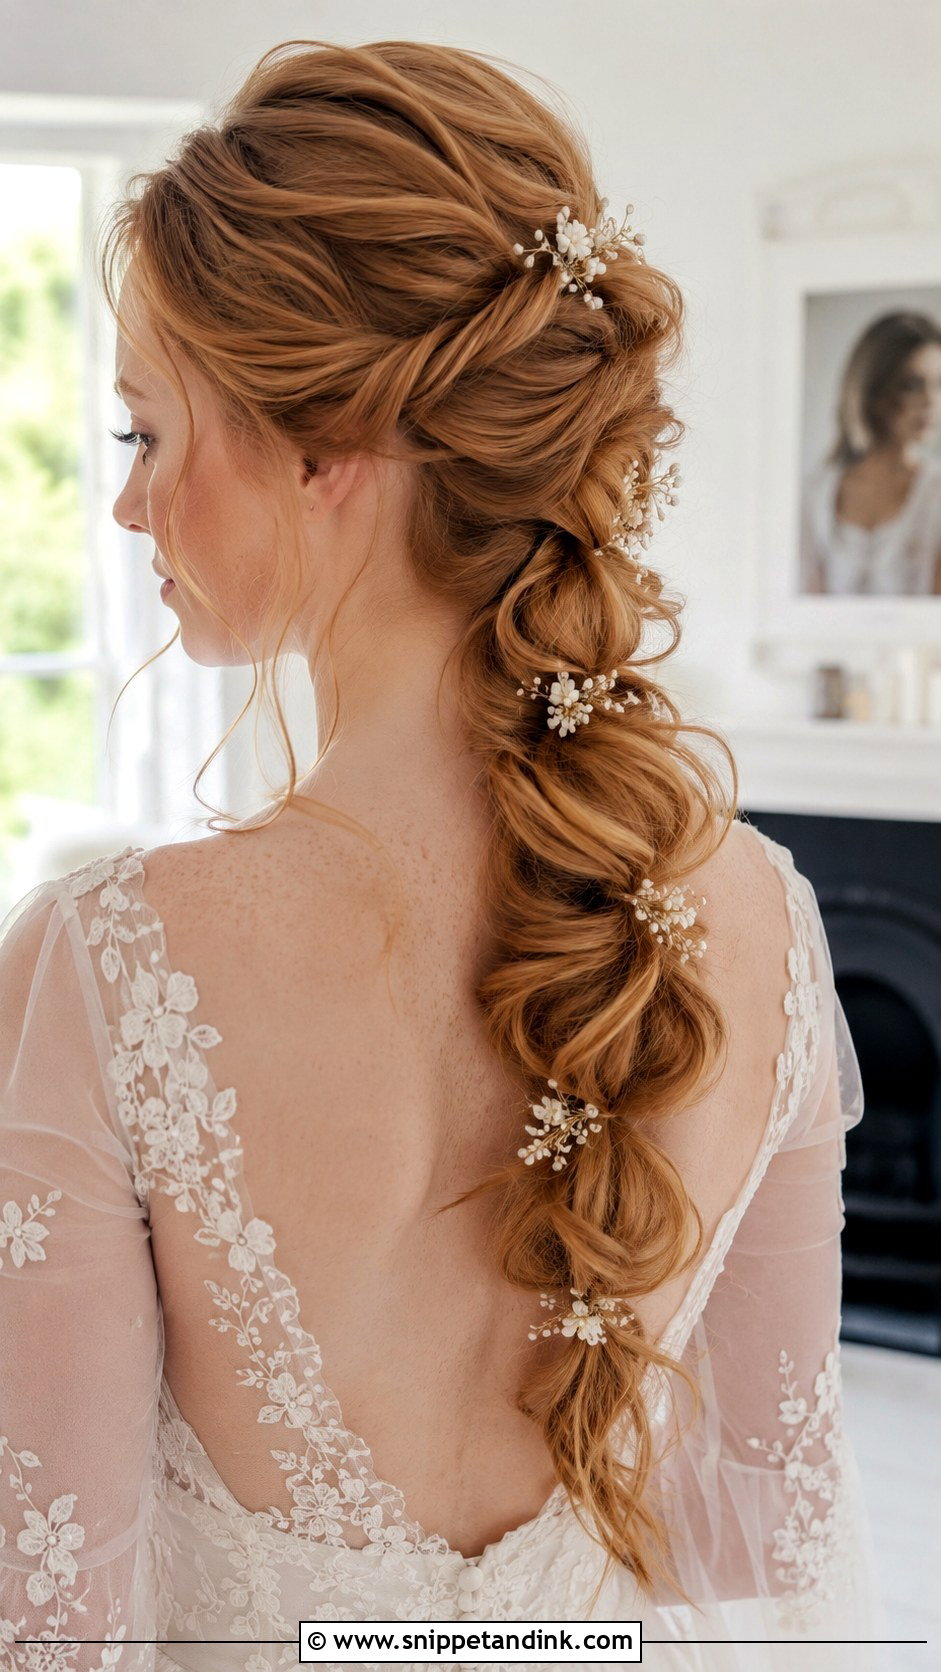
Loose bubbles need curled or waved hair to begin with, because straight hair slides out of the elastics once the sections are pulled wide. I curl first, brush the curls out, tie the sections with medium tension, then pull each one out with my fingertips. A light, flexible spray keeps the shape without the crunch. Expect it to relax over the evening. That’s part of its charm, but it’s not the right pick if you want photos at 10pm to match photos at noon.
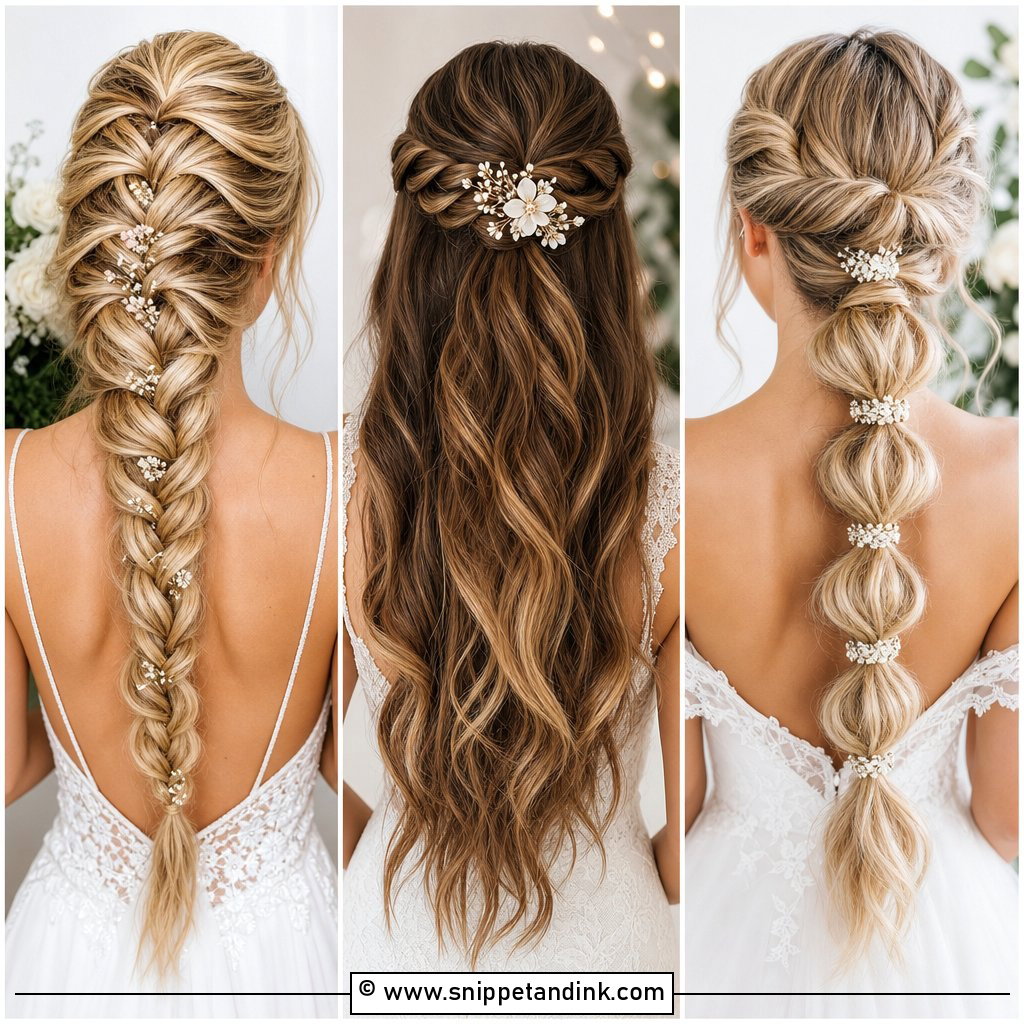
17. Bubble Braid For Long Wedding Hair
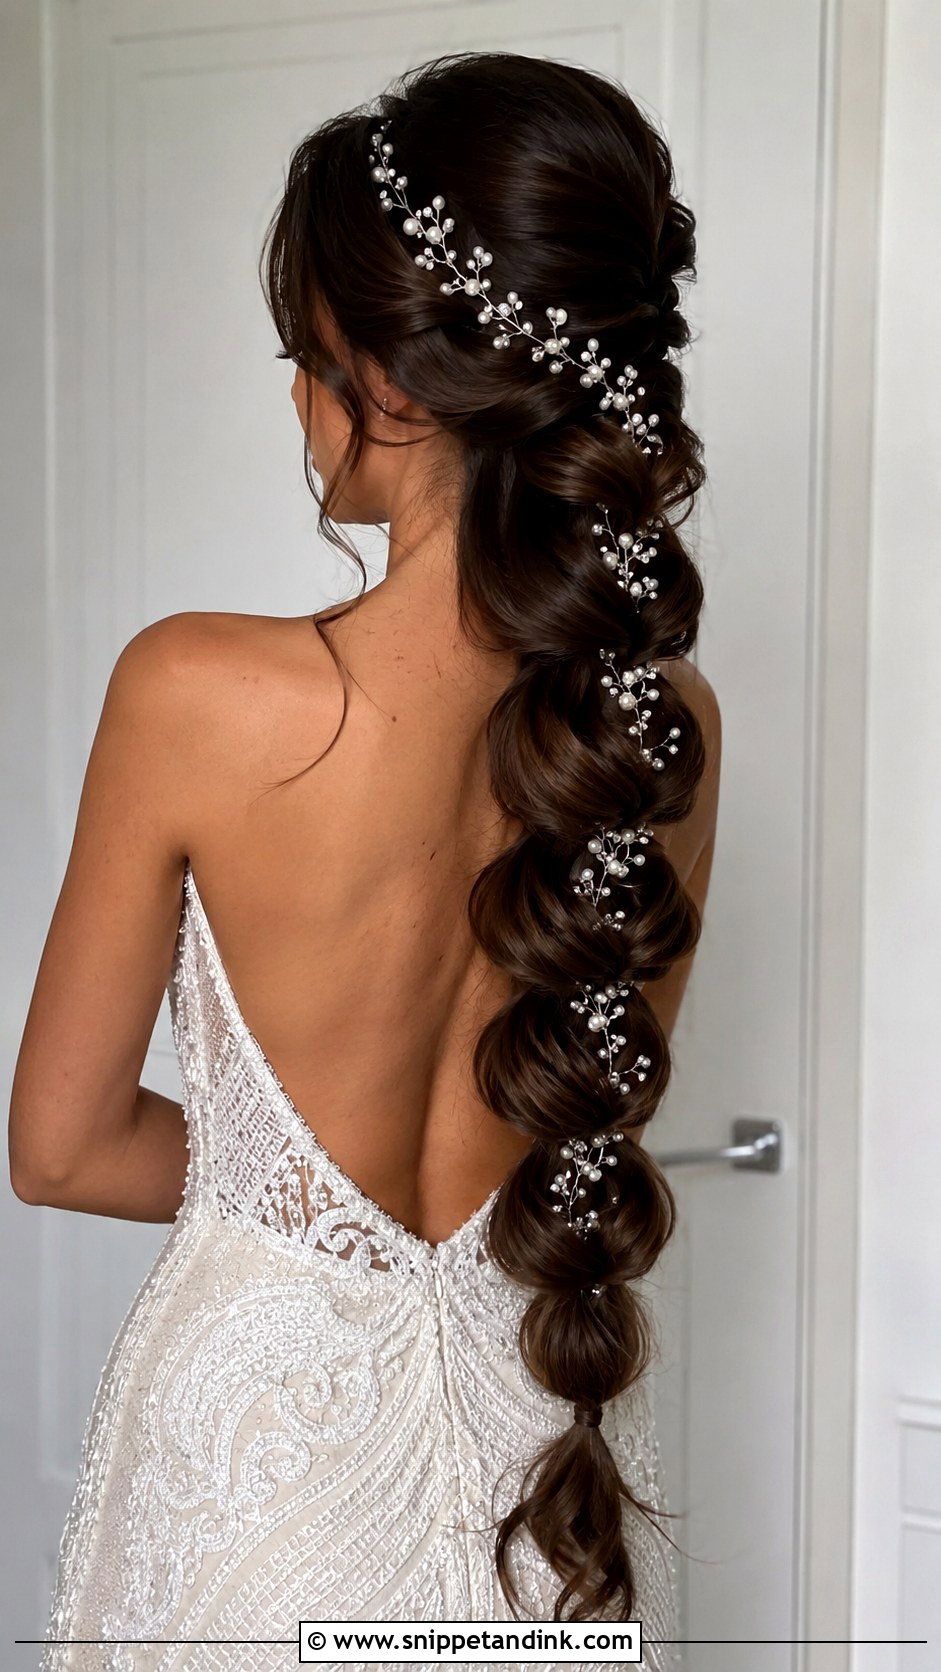
With long hair, I graduate the bubbles: larger near the base and gradually smaller toward the ends, which keeps the braid from looking like a row of identical beads. Long hair is also heavy, so I use thicker elastics near the top where the weight sits. In full-length photos the braid lines up with the dress train and lengthens the silhouette. Extensions can add thickness at the ends, where long hair is often thinnest.
18. Bubble Braid For Medium Wedding Hair
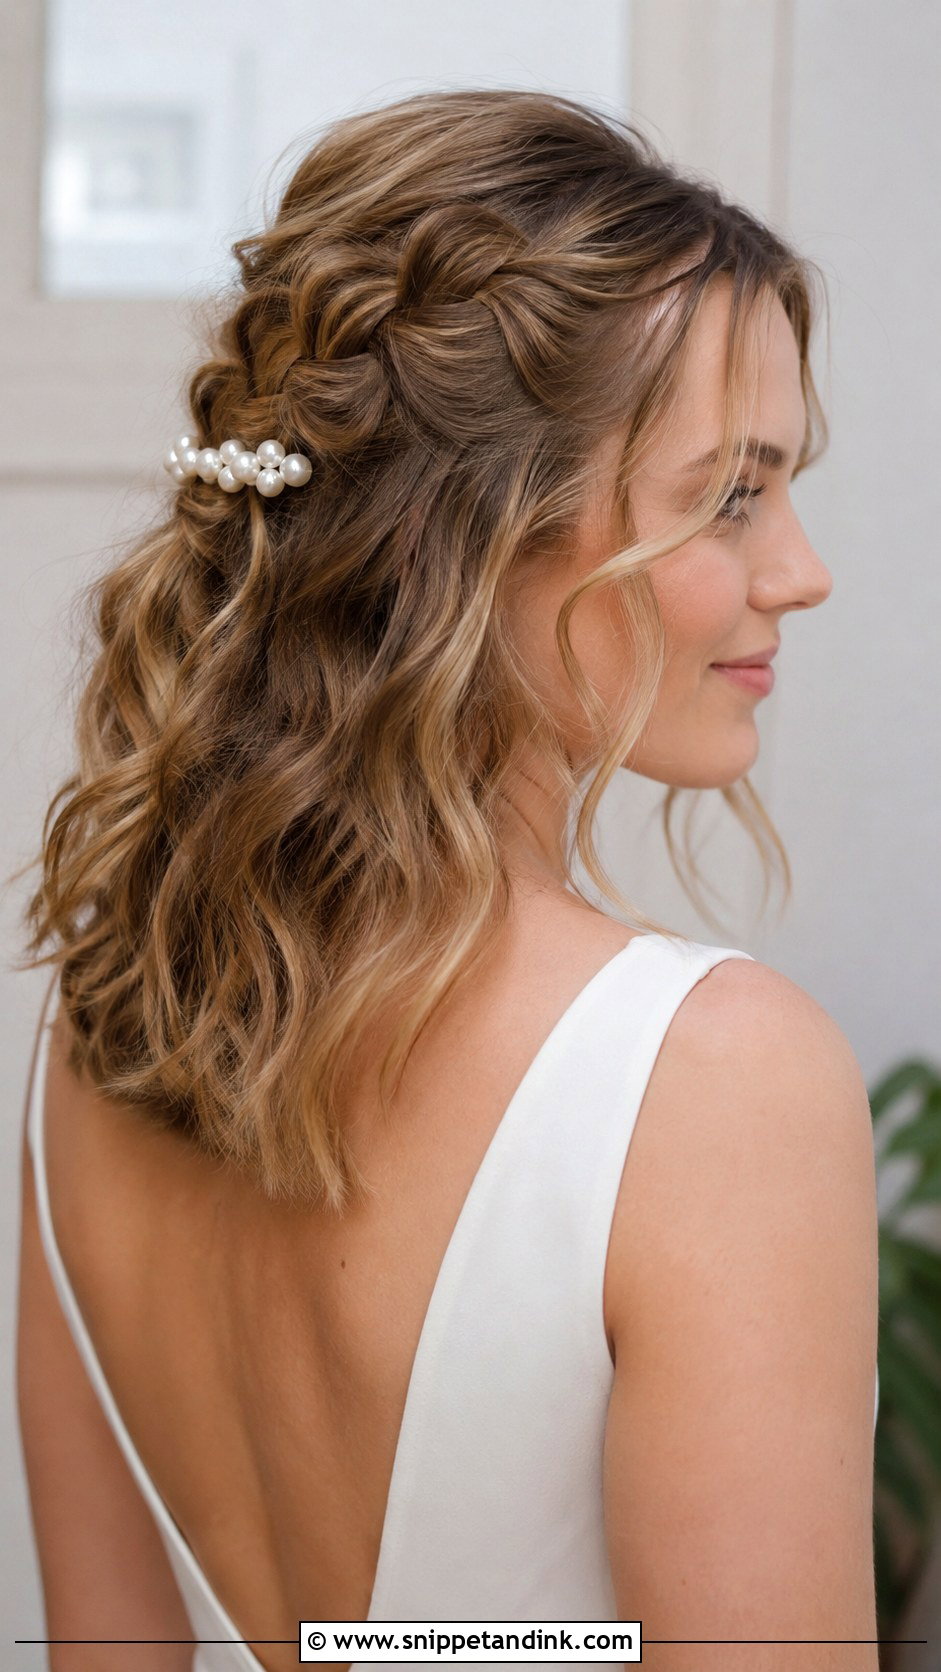
Medium hair gives fewer bubbles, so each one needs to count. I go for a half-up version or a short low ponytail with only three or four sections, and I backcomb the inside of each section lightly so it puffs out fuller. Accessories go further here too; a small bow or comb at the base finishes it. Shoulder-length hair can’t make a full-length braid without extensions, so be realistic about what the length will give you.
19. Bubble Braid For Curly Wedding Hair
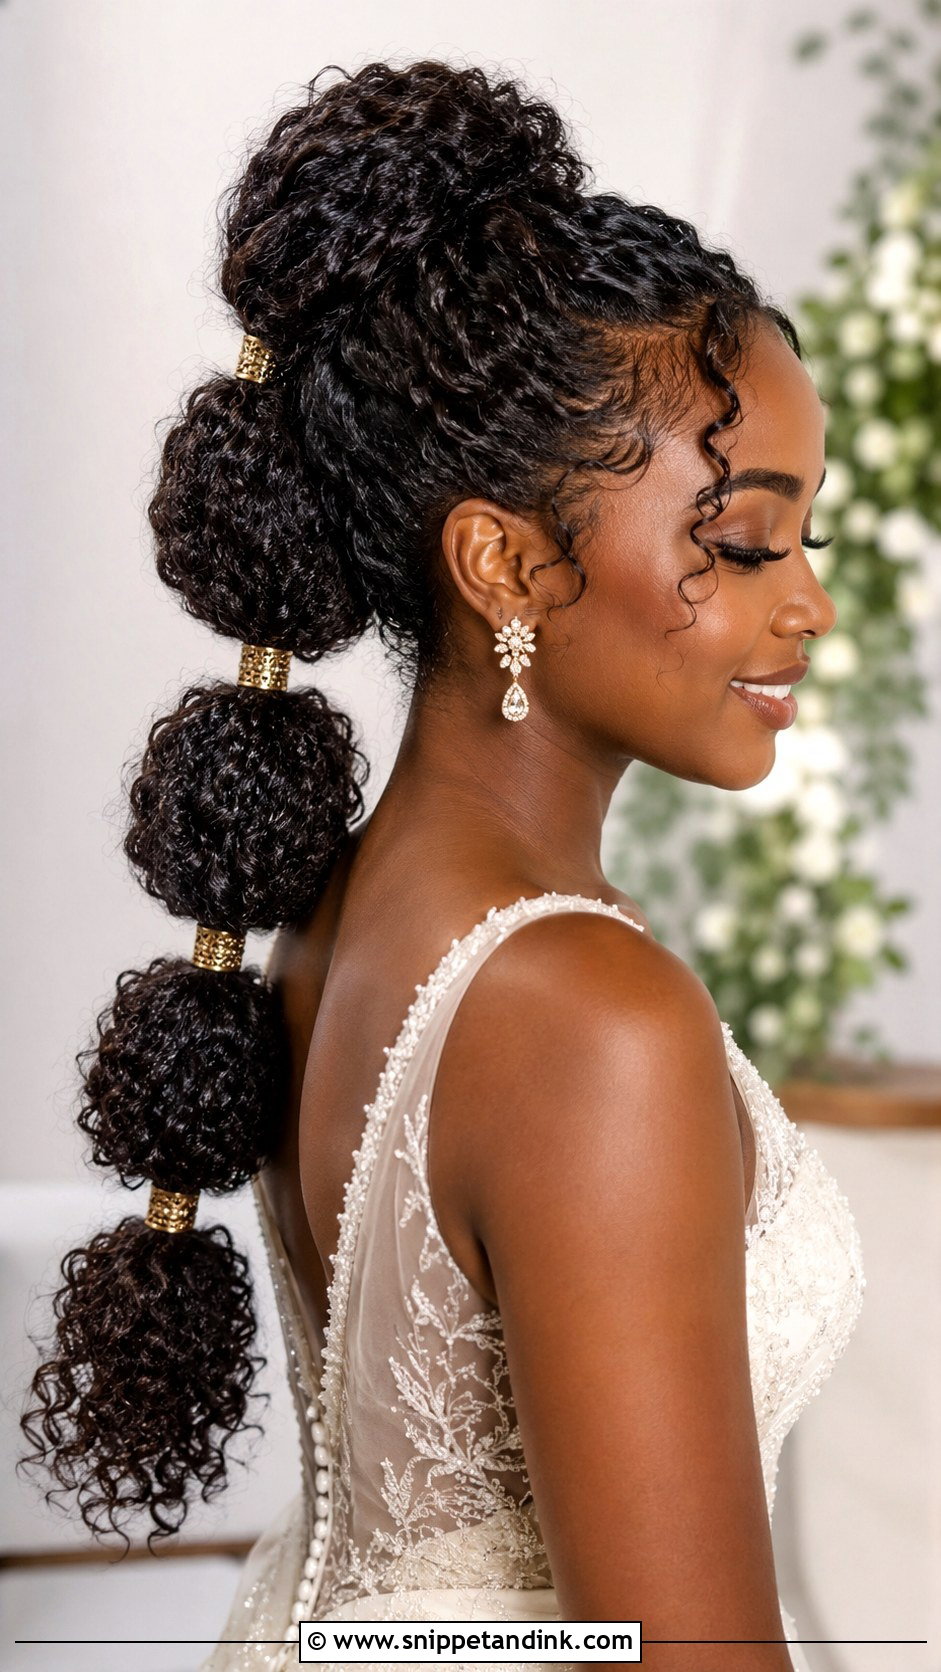
Curly hair makes the fullest bubbles of any texture, and I don’t fight that. I prep with a leave-in, curl cream or gel while the hair is damp, let it set, and tie the sections without brushing through, so the curl pattern stays defined. Elastics go on with less tension than on straight hair to avoid breakage and flattening. Gold cuffs or pearl pins slide well between curly sections. The style can be high, low or half-up depending on your curl pattern and neckline.
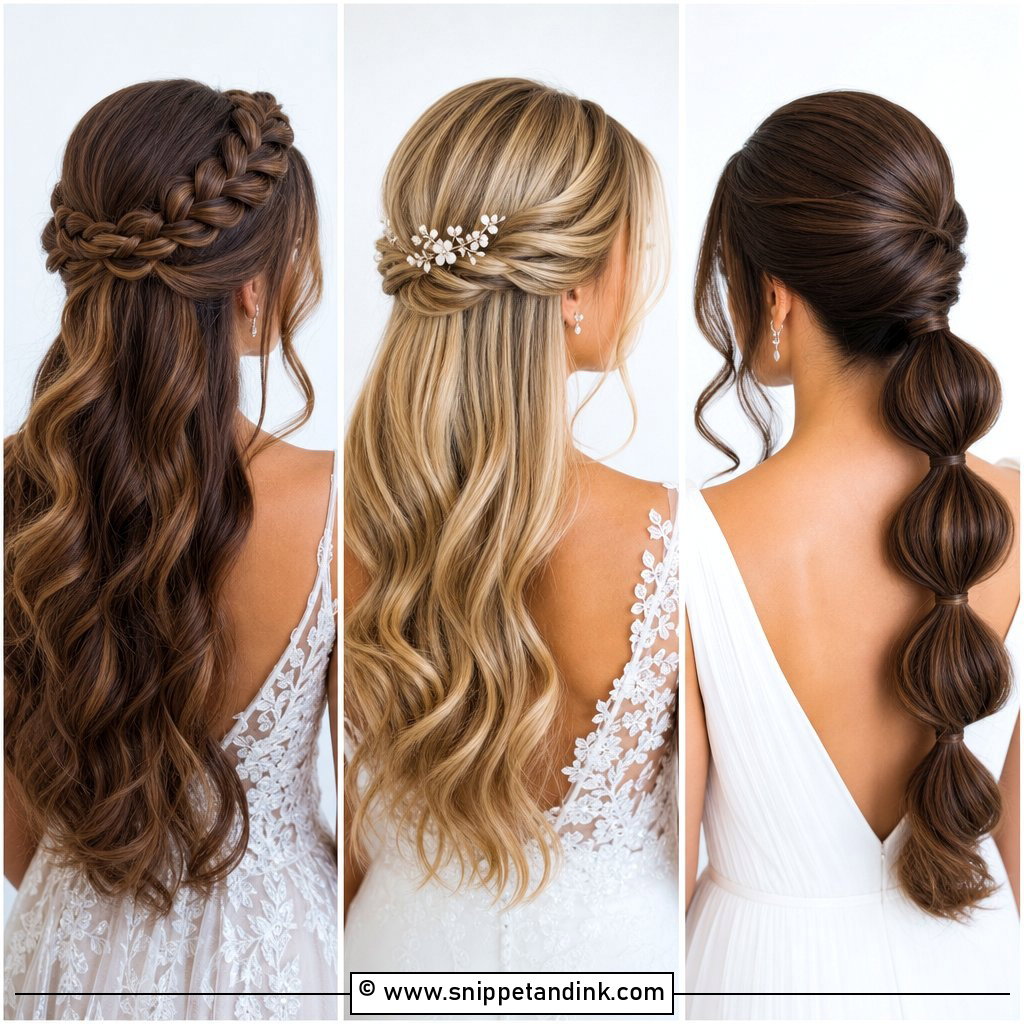
20. Bubble Braid For Bridesmaids Wedding Hair
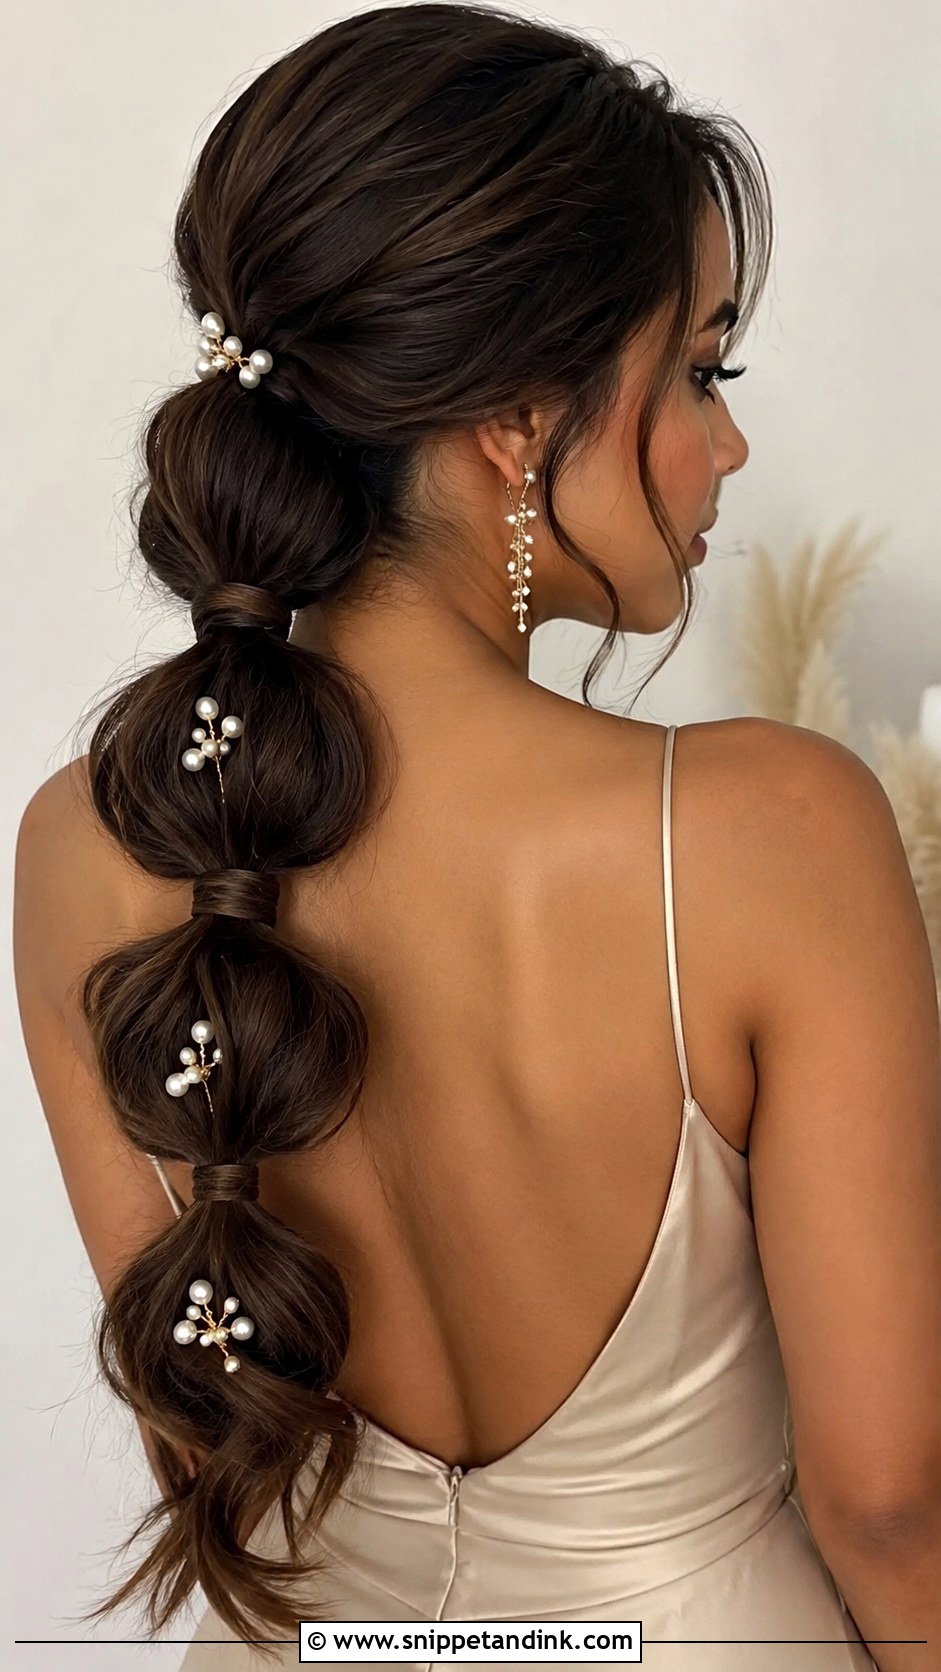
A bubble braid adapts to almost any length, which makes it easy for bridesmaids wedding hair where everyone has different hair. One can wear it low, another half-up, another over the shoulder, and the group still looks coordinated as long as the accessories match. I like giving everyone the same pearl pins or ribbon color. It’s also quick to do, which helps when you’re working through a full bridal party before a morning ceremony.
When a Bubble Collapses Halfway Through the Reception
The most common problem I see isn’t the braid falling out, it’s one bubble flattening because the bride leaned back against a chair or got hugged hard from behind. You can fix it in under a minute. Pinch the flat bubble at both ends with your fingertips and pull it outward a little at a time, the same way it was shaped in the morning. A short burst of hairspray holds it.
A snapped elastic is the other one. If it’s one of the section bands, the bubbles above and below will just merge into one larger bubble, and most people won’t notice. If the base elastic goes, the whole ponytail slips, so I always put two crossed bobby pins under the base as backup. I’d hand your maid of honor a small bag with spare clear elastics, a few bobby pins and a travel hairspray.
At the end of the night, don’t pull the elastics out. Clear bands grip hair and tear it as you drag them down. Snip each one carefully with small nail scissors, angling the blade away from the hair, then let the hair loosen for a few minutes before brushing from the ends upward. If the braid was tight, your scalp may feel tender for a few hours; that’s normal and it settles once the hair is down.
Sleek, Soft or Somewhere Between
Every version here comes down to the same few decisions: how high to tie the base, how many sections, how far to pull each bubble out and what sits between them. Sleek and evenly spaced looks fashion-led; wide, uneven bubbles over curled hair look relaxed. Bring your favorites and a photo of your dress neckline to your trial, and let your stylist suggest the height and size of bubble your hair will actually hold.
You'll Like These Ideas:


Leave a Reply