
Not every bride wants a soft updo with curled tendrils, and I’m always glad when someone sits in my chair and says so. Edgy hair is about clean lines, deliberate texture and the occasional shaved side, and it asks more of the cut and the products than a romantic style does. Below are 25 looks I’d happily build for a bride with attitude, from blunt bobs to braided crests. If you already wear a shaved undercut, a pixie or hip-length hair, there’s something here that works with what you have instead of fighting it.
Timing the Cut, Color and Shave So Nothing Looks Brand New
Edgy styles depend on sharp lines, and sharp lines need planning in the weeks before. A soft updo forgives a cut that’s overdue. A blunt bob or a buzzed undercut doesn’t, and a cut done the day before looks raw in photos. Here’s the schedule I give brides who want any of the bolder looks below.
- Color first. Bleach, platinum and money piece highlights go in two to four weeks ahead, which leaves room to tone again if anything turns brassy.
- Cut about a week out. Bobs, pixies, shags and bangs all settle after a few days of washing, so the line looks intentional rather than freshly chopped.
- Shave three to five days before. That’s enough time for any redness or razor bumps on the scalp to calm down while the line still looks clean.
- Trial with your real accessories. Clips behave differently in short or very sleek hair, and you’ll want to know which ones slide before the morning.
If you’re changing your hair dramatically for the wedding, say going platinum or shaving for the first time, do it at least six weeks ahead. That gives you time to get used to it and to fix it if you hate it.
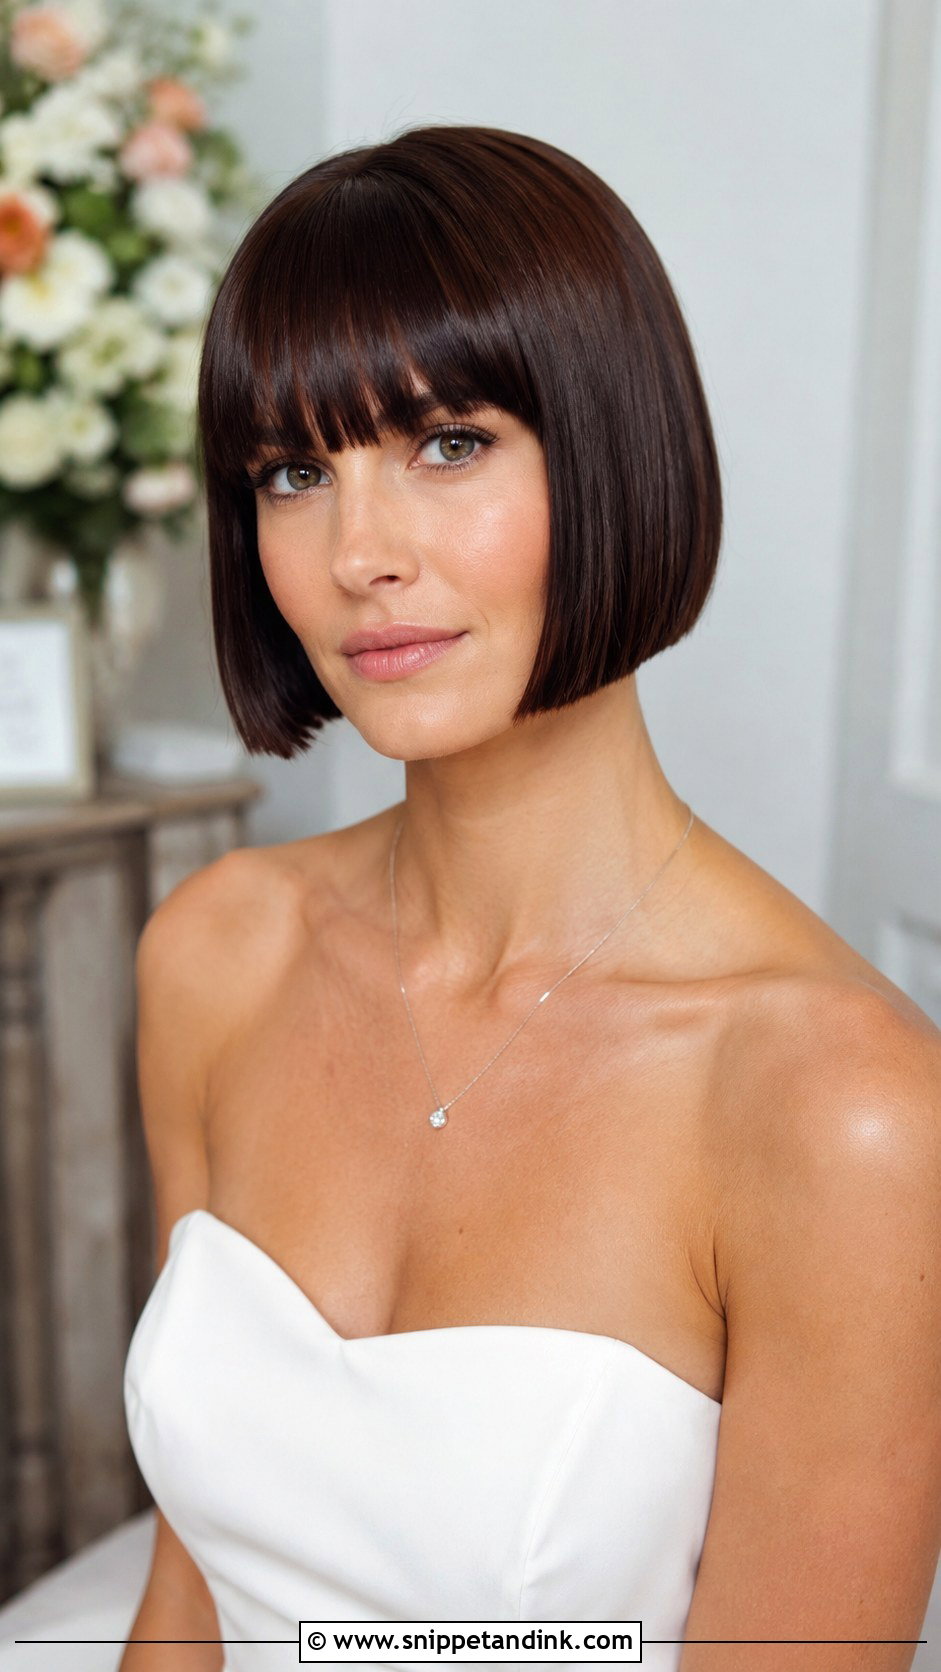
1. Sleek Straight Bob With Blunt Bangs
A razor-sharp bob with blunt bangs lives or dies on the cut, not the styling. I ask for the trim about a week out so the line is crisp but the bangs have had a few days to settle, because freshly cut bangs always sit a touch too short and too stiff. On the morning I blow it dry with a paddle brush and finish with a drop of serum on the ends only; serum at the roots makes a bob look greasy by the reception. Strong jaws and angular faces carry this best. Keep jewelry small so the line of the hair stays the focus.
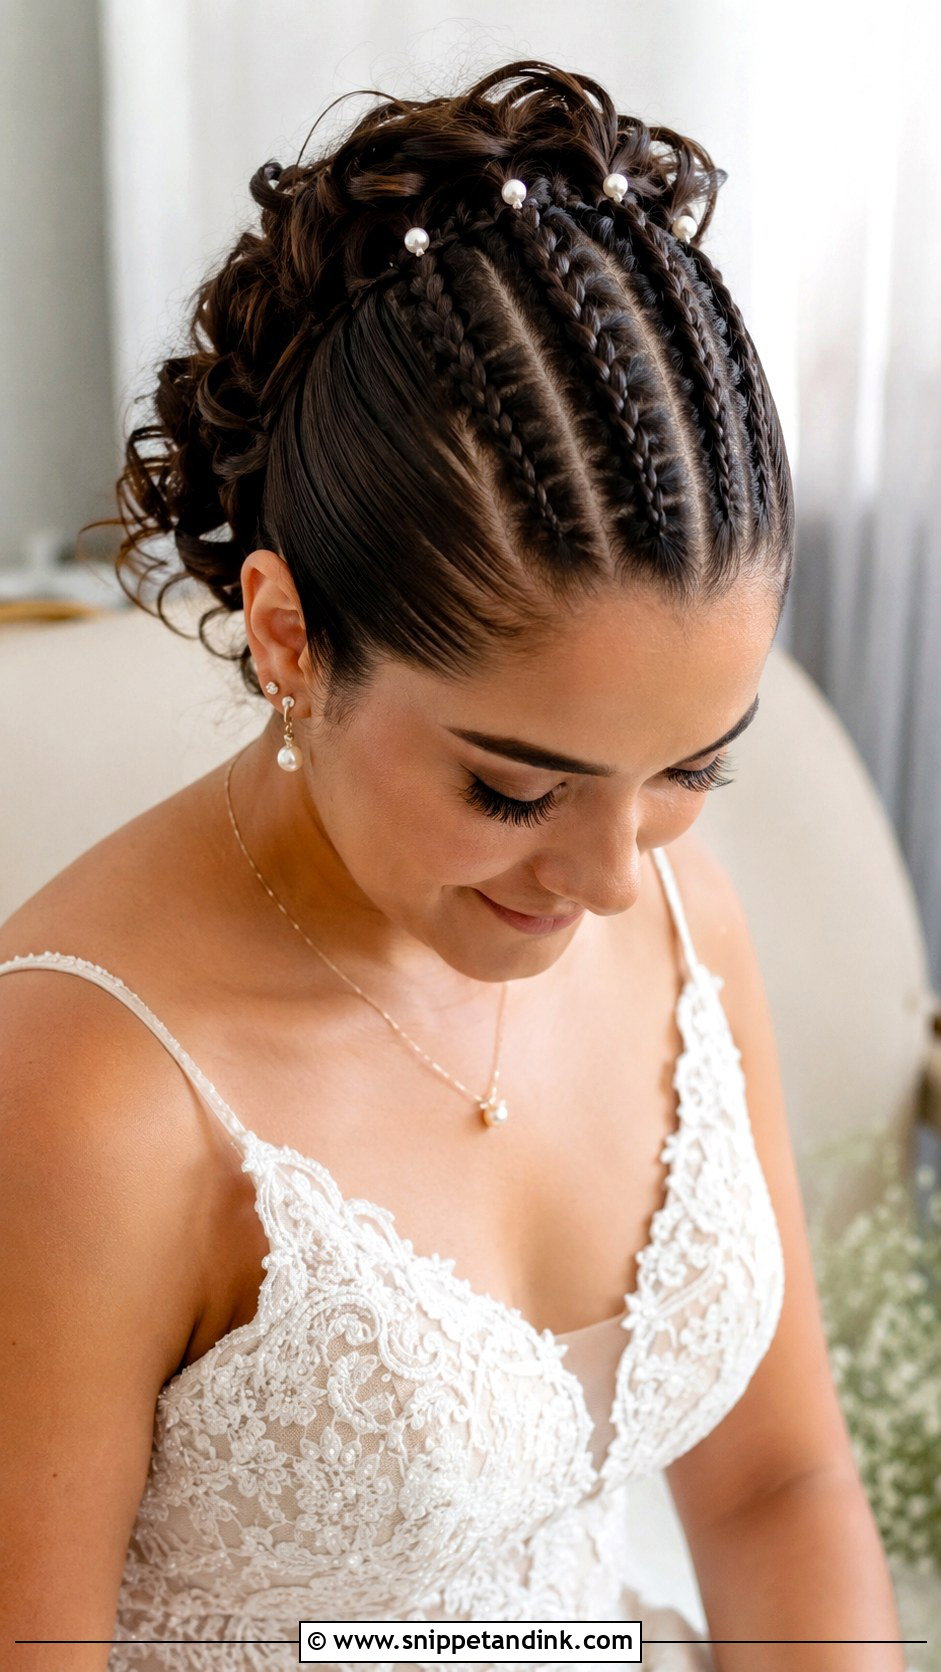
2. Braided Mohawk Updo
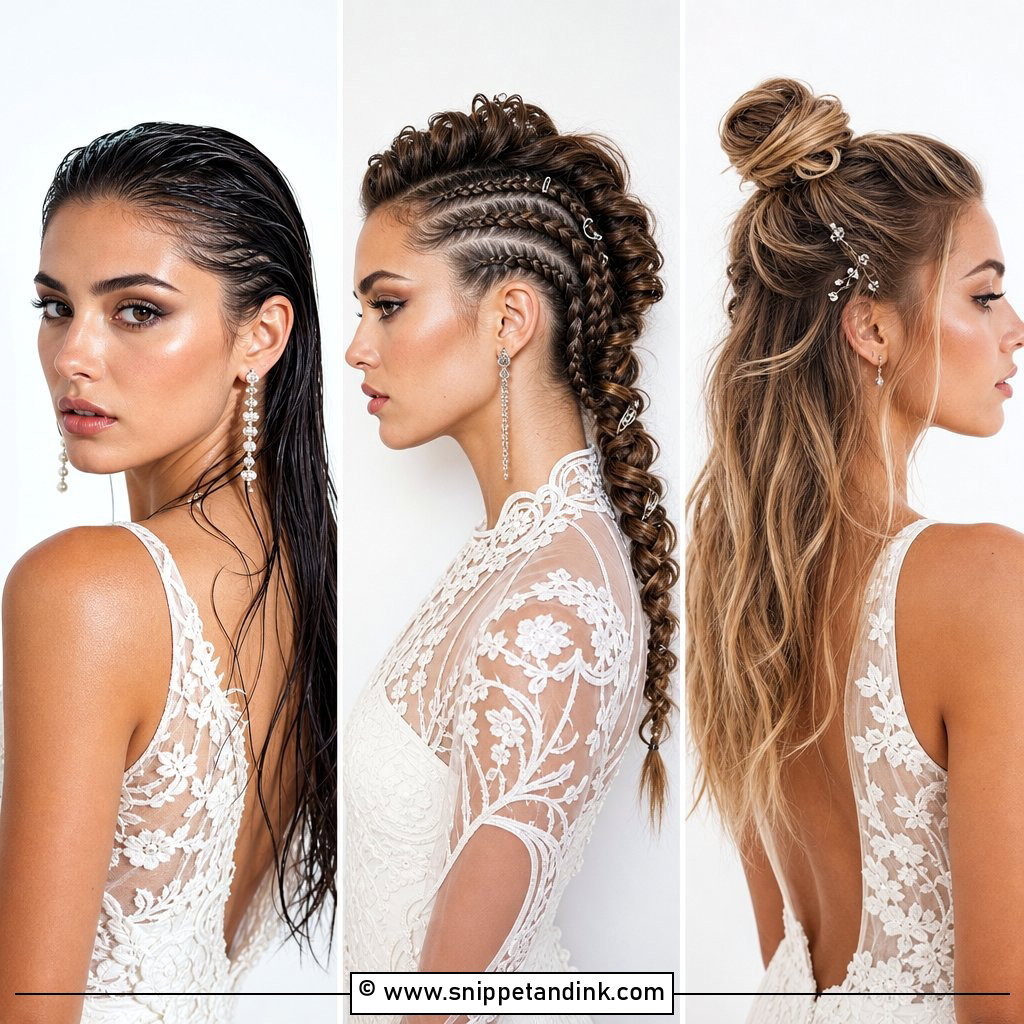
The braided mohawk updo is really two or three tight cornrow-style braids running down the center, pinned into a raised crest at the back. Because the braids are anchored to the scalp, it barely moves all night, which makes it one of the most reliable styles on this list for dancing. You need medium to long hair, and very layered cuts will poke out of the braid by evening unless I use a little edge gel as I go. Pearl pins pushed into the braid ridges add sparkle without softening the shape too much.
3. Textured Spiky Bun
A textured spiky bun is the opposite of a smooth chignon: the ends are left out of the knot on purpose and pushed into points with pomade. The trick is to make it look deliberate rather than unfinished, so I twist each loose end between my fingers with a firm wax instead of just roughing it up. Very fine hair collapses here within a couple of hours, so I’d suggest a sleeker bun if that’s you. It pairs well with architectural dresses, and a thin metallic vine threaded through the knot gives it a finished edge.
4. Shaved Undercut With Long Waves
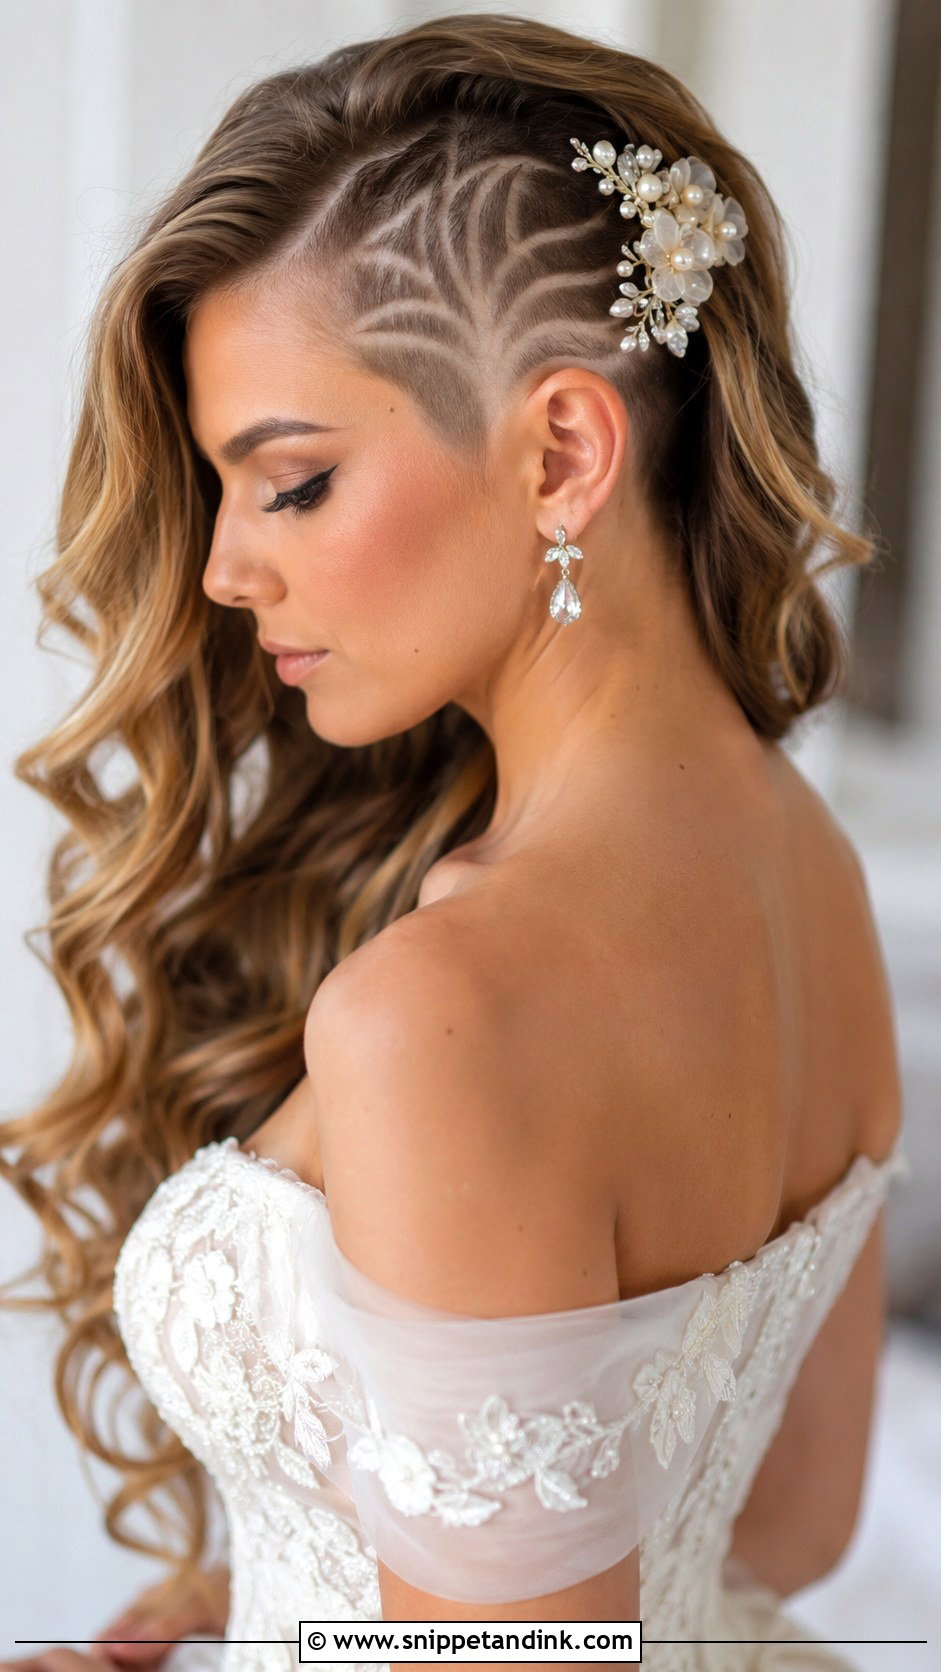
A shaved undercut with long waves is about choosing how much of the shave you want people to see. A deep side part flipped away from the shaved side shows it off; flip the part the other way and it disappears under the waves until you tuck your hair behind your ear. I always ask brides to get the undercut buzzed three to five days before, not the morning of, so the skin isn’t red and the line has softened slightly. A small floral pin placed right at the edge of the shave connects the two halves of the look.
5. Slicked Back Wet Look
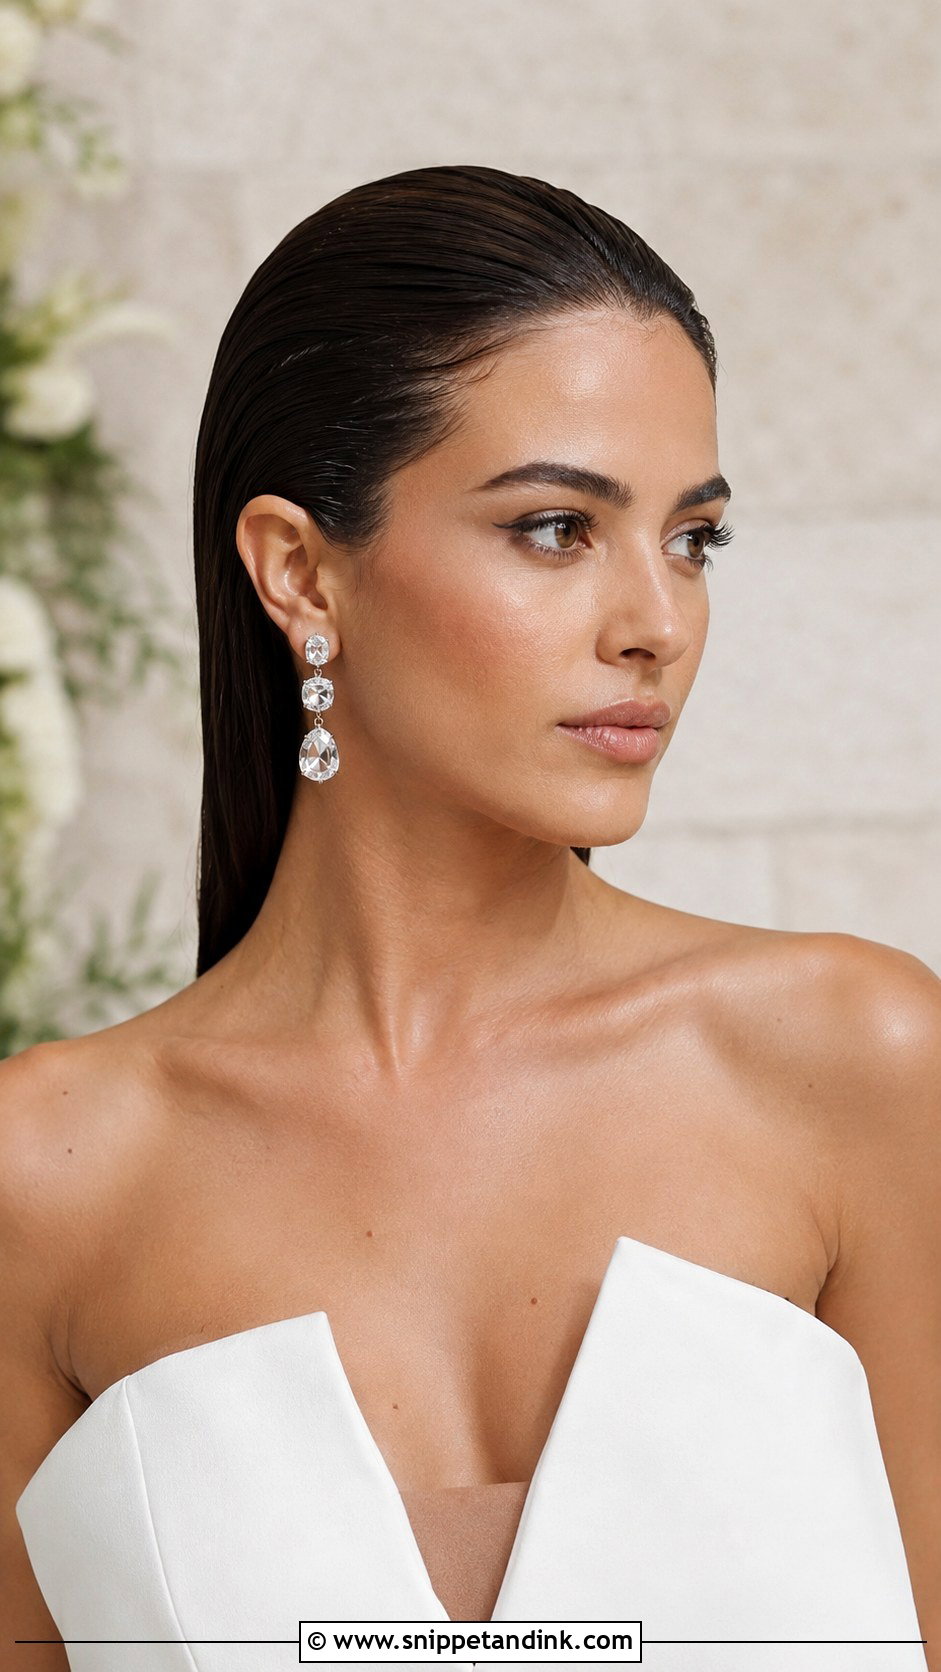
The slicked-back wet look reads as pure editorial, and it’s harder than it looks. The finish comes from layering a strong gel over a little hair oil while the hair is damp, then combing it back with a fine-tooth comb and leaving it alone to set. Heavy gel alone dries crunchy and can flake white under a flash. Short to long hair all work, though very thick long hair gets heavy and wants to pull loose at the nape after a few hours. I’d pair it with big earrings and a structured gown; it looks odd with lace and ruffles.
6. Fishtail Braid Crown
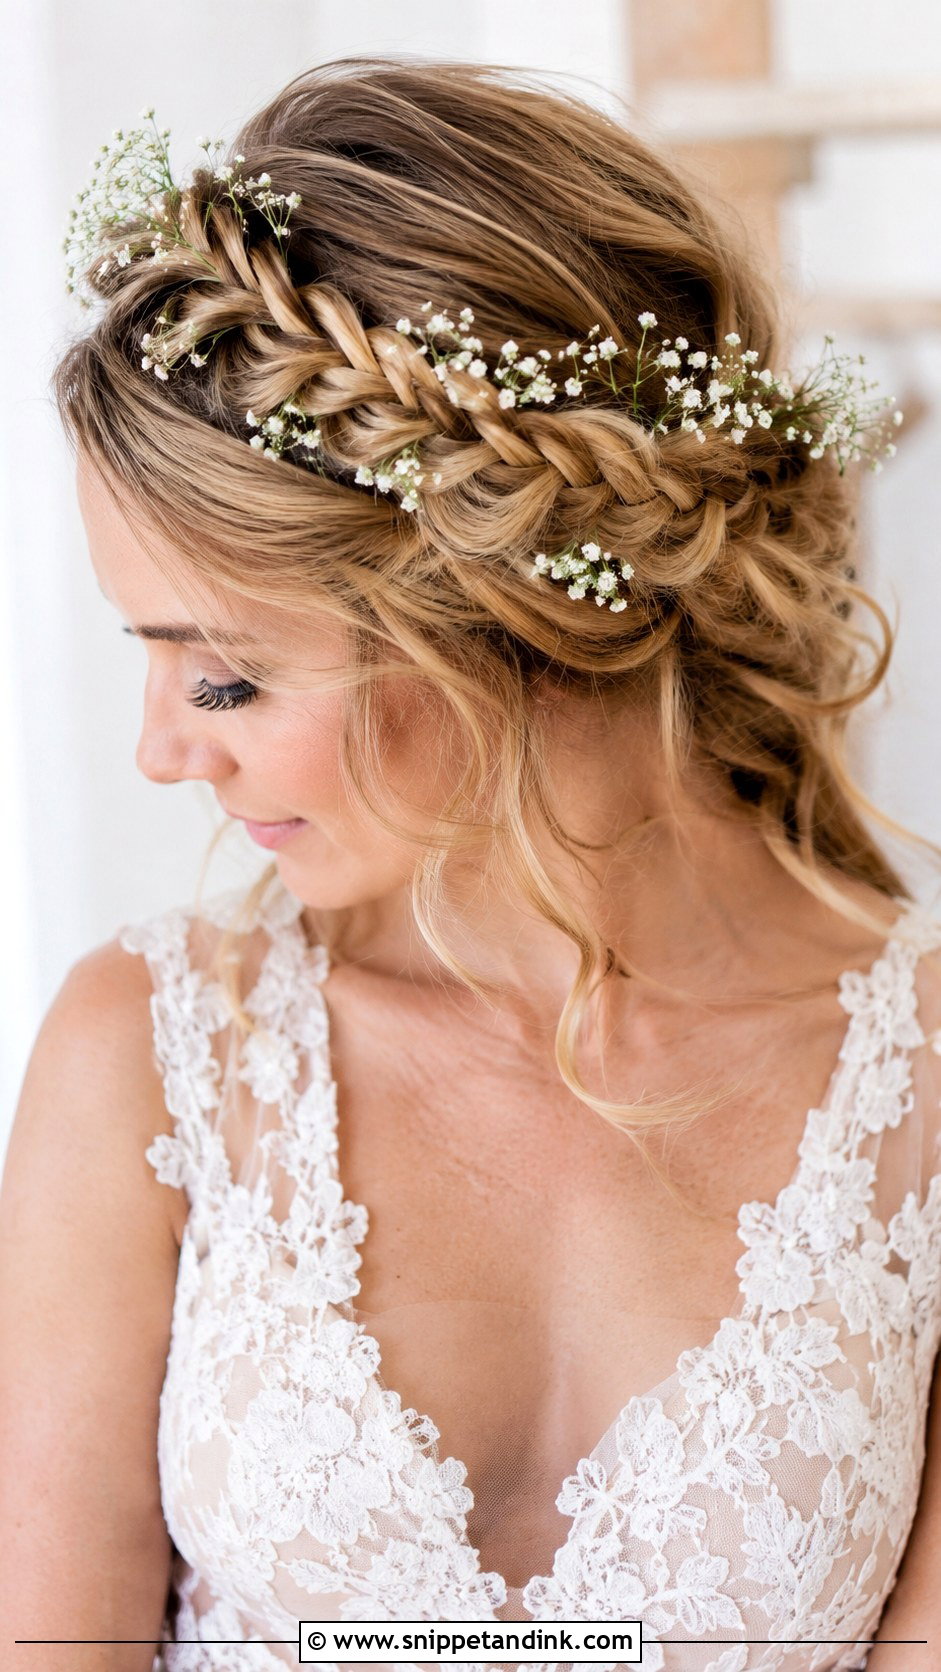
A fishtail braid crown has a finer, more woven texture than a standard braided crown because it’s made from two sections crossing tiny pieces back and forth. It takes longer to braid, so I allow about forty minutes on long hair. I pancake the braid out gently once it’s pinned so the fishtail pattern shows from a distance, otherwise it just looks like a rope. Wildflowers or baby’s breath tuck easily into the weave. Shoulder-length hair usually won’t reach all the way around, so I braid two side fishtails and meet them at the back instead.
7. Asymmetrical Pixie Cut
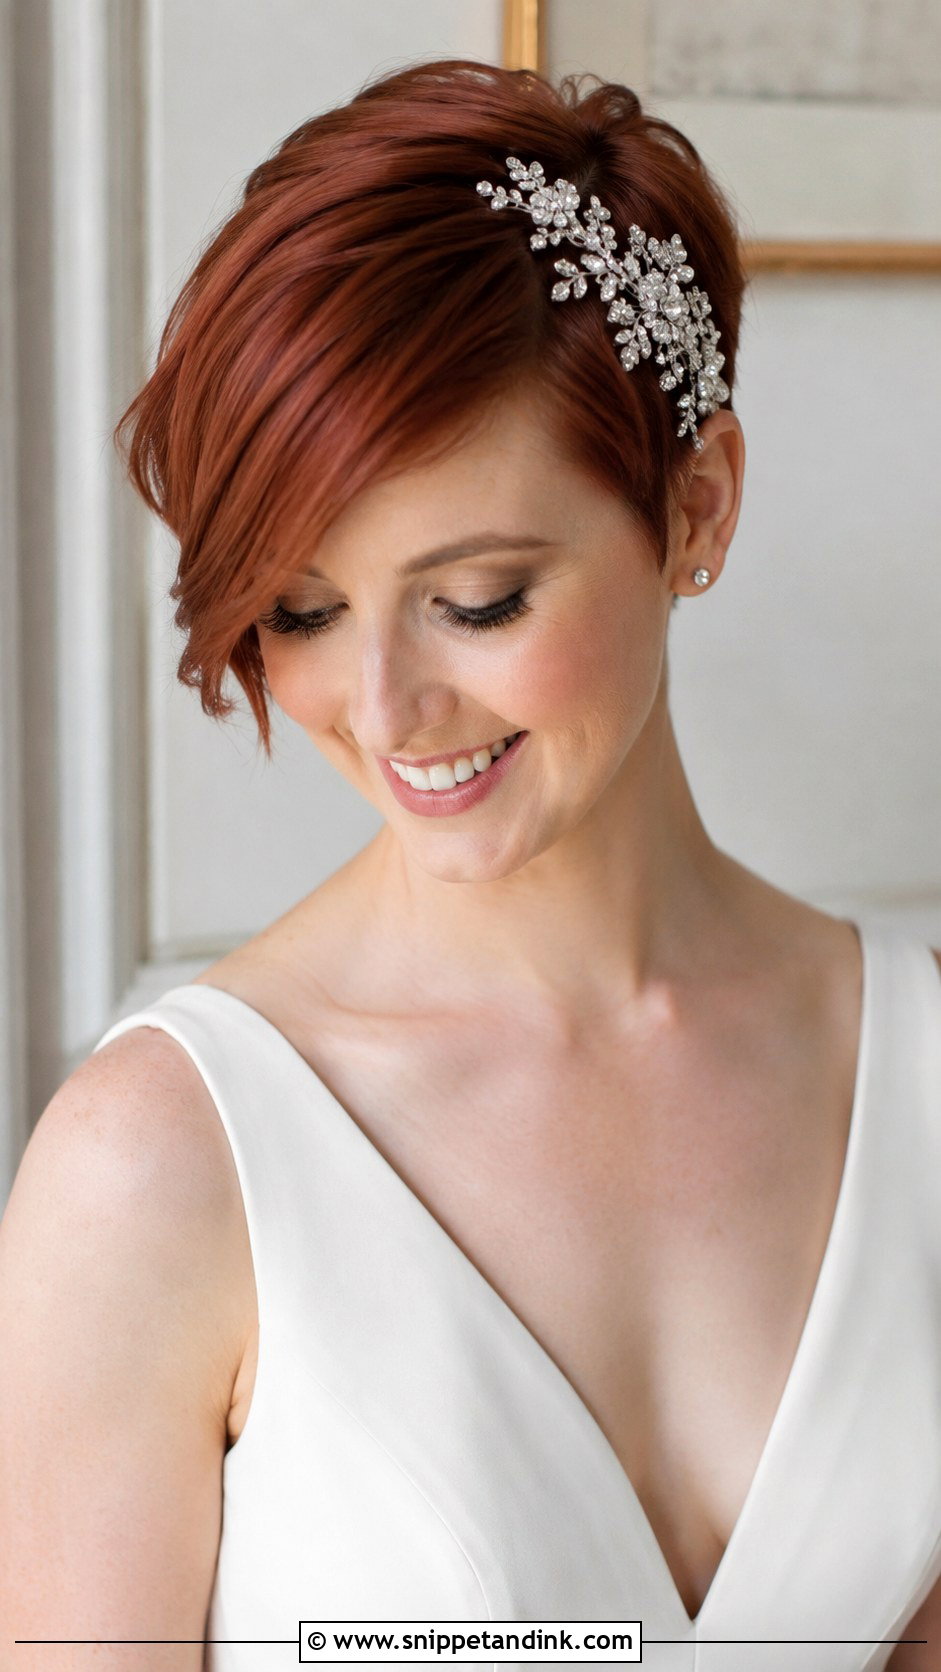
An asymmetrical pixie is about the easiest wedding hair there is, as long as the cut is fresh. I’d book the trim seven to ten days before so the longer front piece falls naturally rather than looking newly chopped. On the day I work a pea-sized amount of texturizing paste through the top and pinch the longer side so it sweeps across the forehead. Put any sparkle on the longer side; a clip on the short side tends to sit on the ear and slide.
8. High Sleek Ponytail
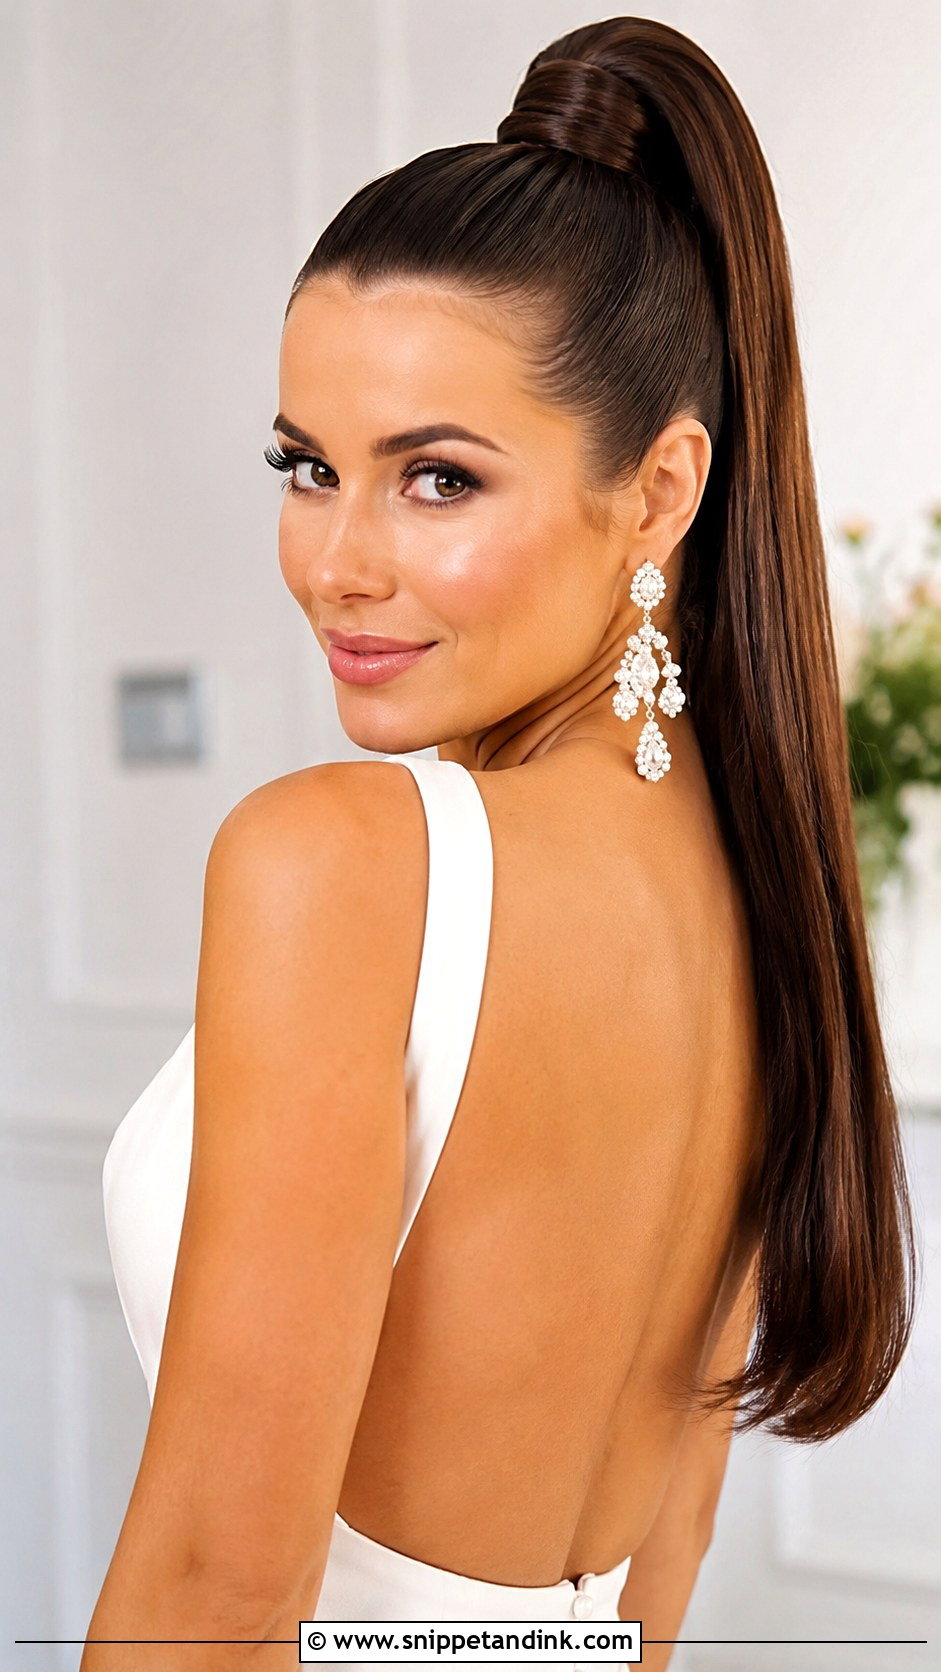
A high sleek ponytail brings real height and a lifted look to the face, but placement matters. I set it in line with the top of the cheekbone and the back of the crown, because a pony that sits too far forward looks sporty in profile. The elastic gets wrapped with a strand of the ponytail’s own hair and pinned underneath so no band shows. Long hair works best, and clip-in extensions add the length and swing if yours stops at the shoulders. Tight high ponytails can give some people a headache by evening, so try it at your trial for a full afternoon before committing.
9. Messy Low Bun With Face Framing Pieces
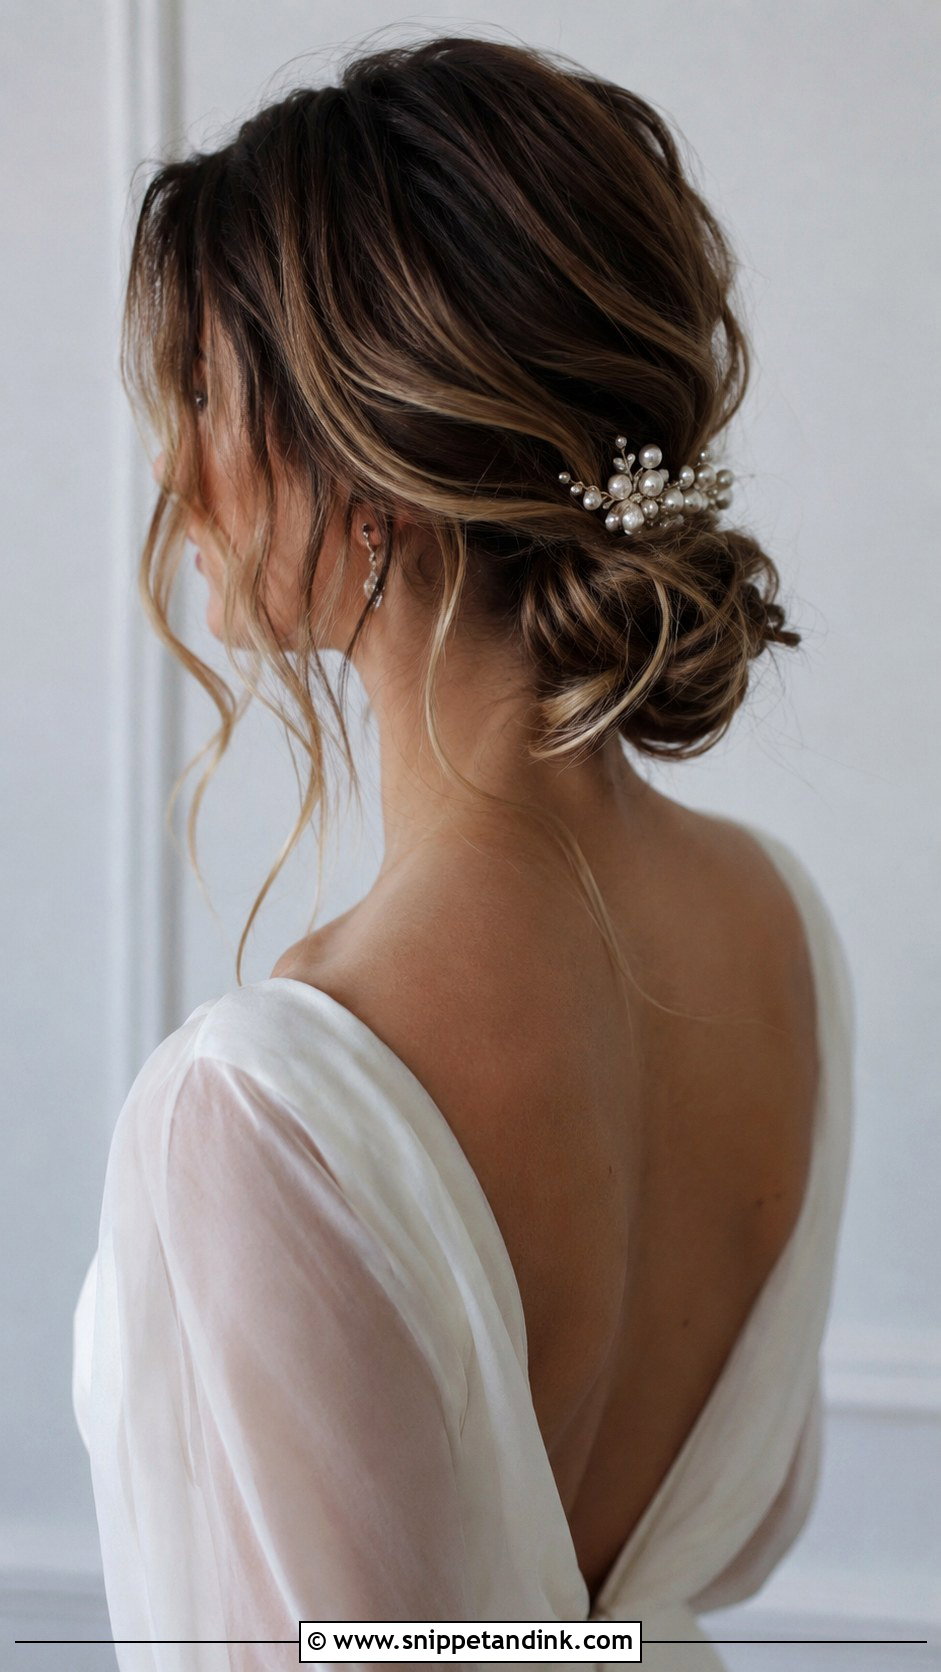
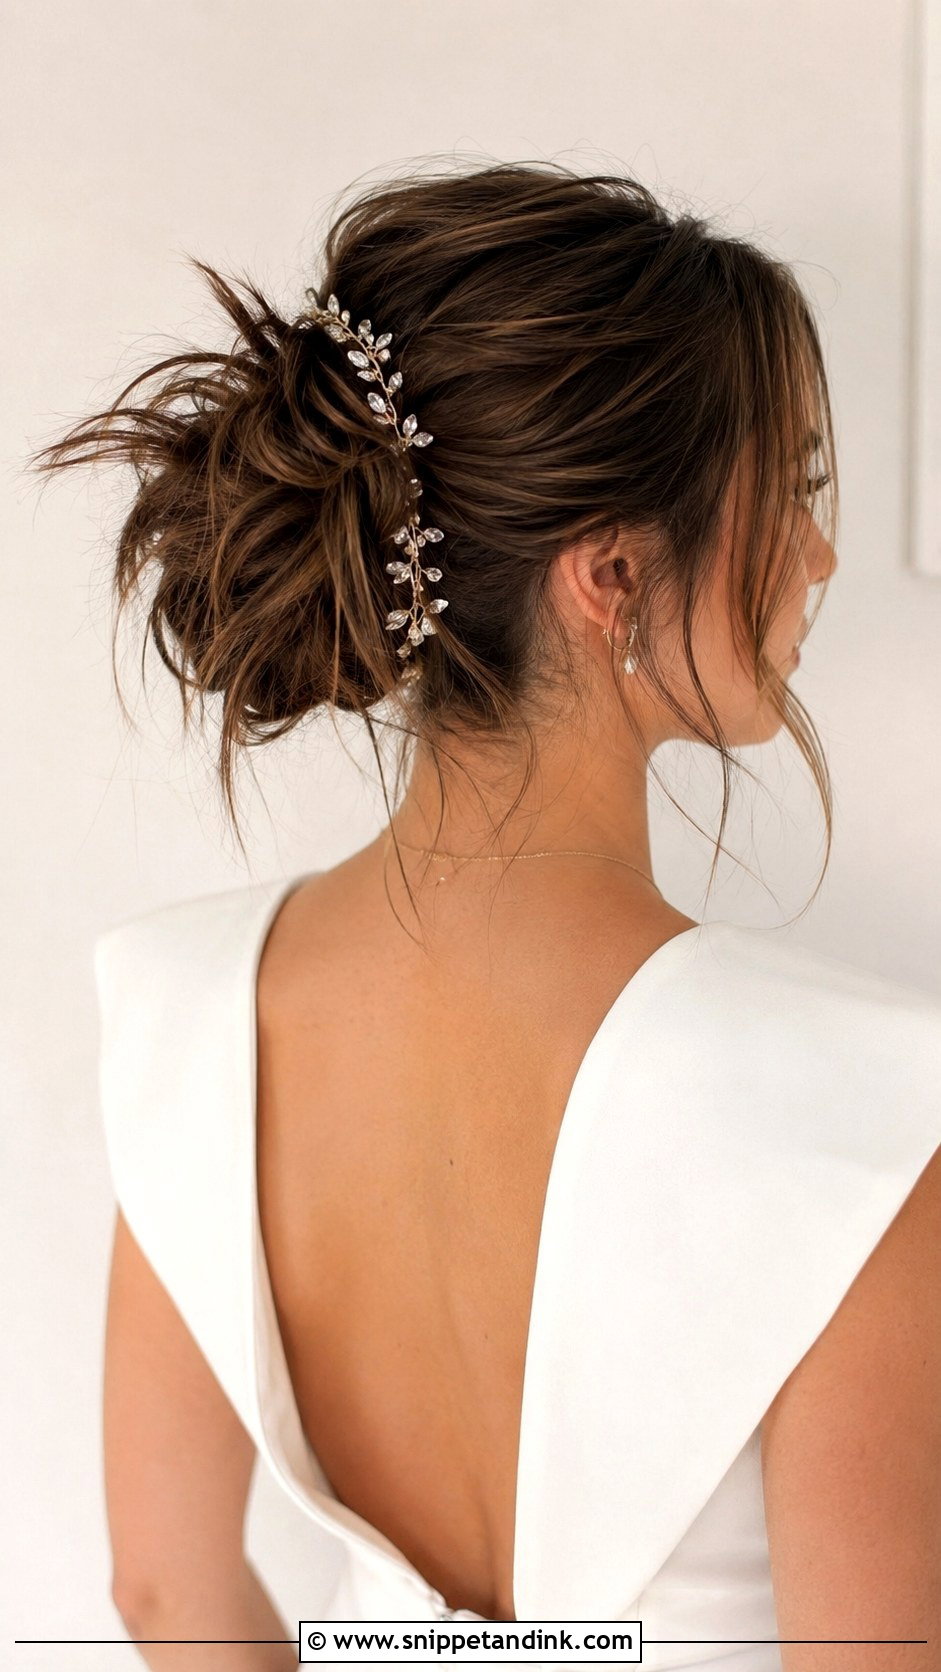
A messy low bun with face-framing pieces suits almost every length and face shape, which is why I suggest it to brides who can’t decide. The mess has to be built, though. I tease the crown lightly, gather the hair loosely at the nape, and pin it in sections so the bun holds its shape even though it looks undone. The front pieces should be curled and brushed out, not left straight, or they look like they fell out by accident. A pearl comb pushed into the side of the bun is plenty.
10. Dutch Braid Into Bun
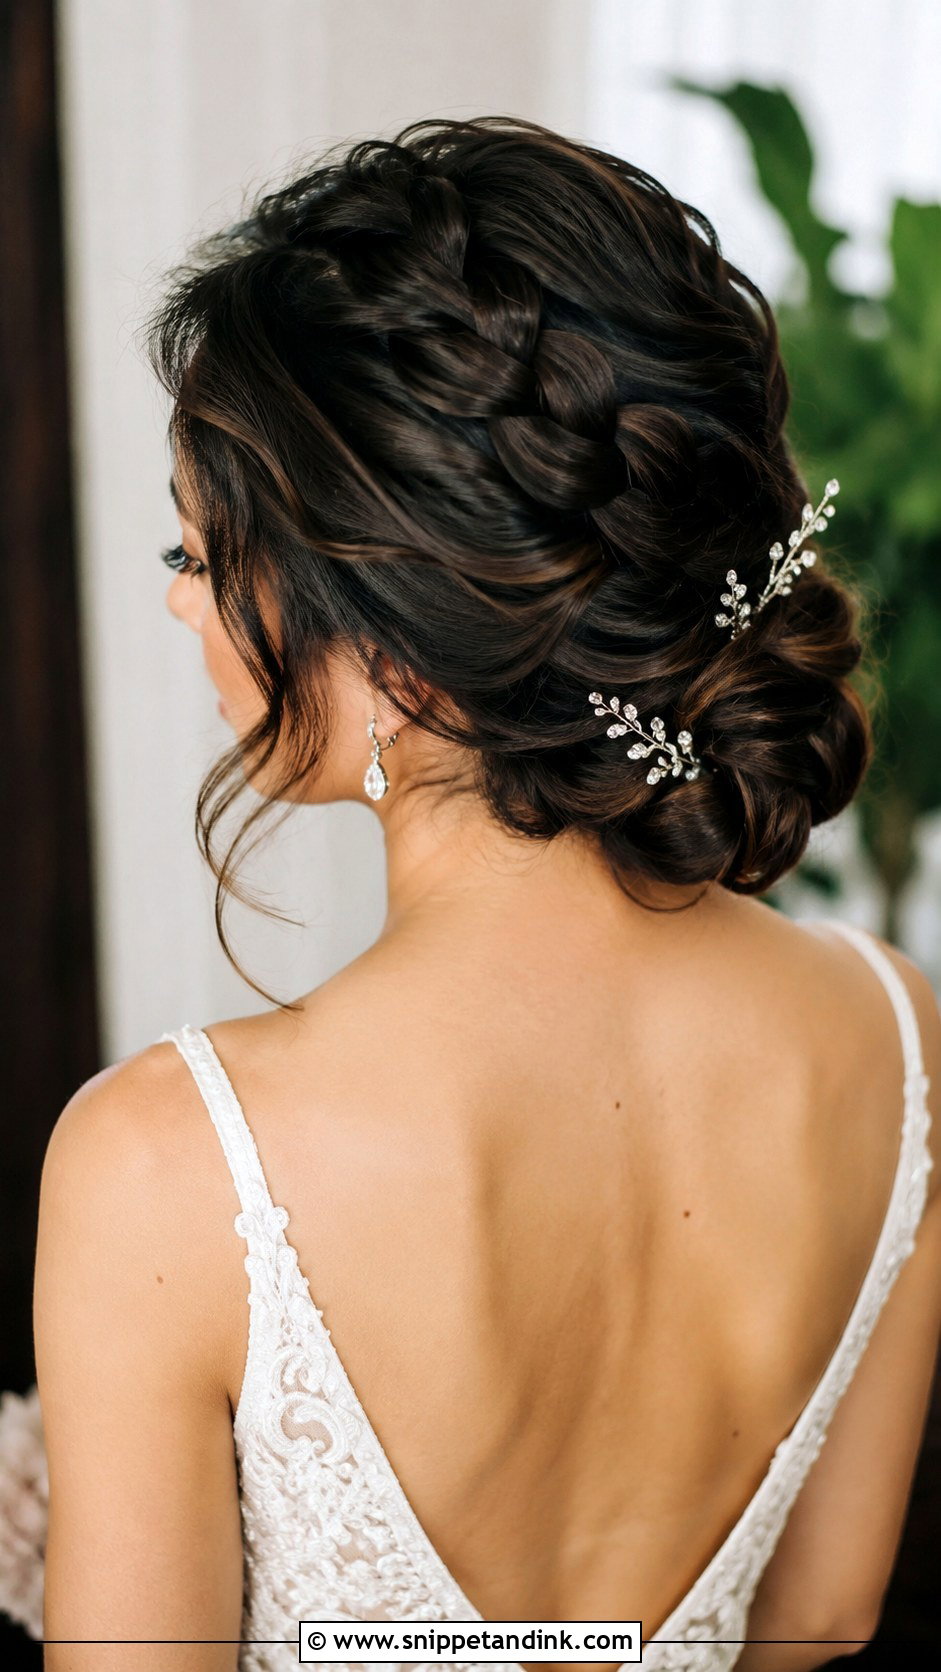
Running a Dutch braid into a bun gives you structure up top and a solid anchor at the back. Because a Dutch braid is crossed under rather than over, it sits raised off the scalp, and that raised ridge is what reads in photos. Pull it tight for a clean finish or loosen the loops for texture, but decide before I pin the bun, because loosening afterwards drags the bun out of shape. Small crystal pins down the length of the braid catch light as you move. It’s one of the most secure styles I do on medium to long hair.
11. Pin Curls With Vintage Waves
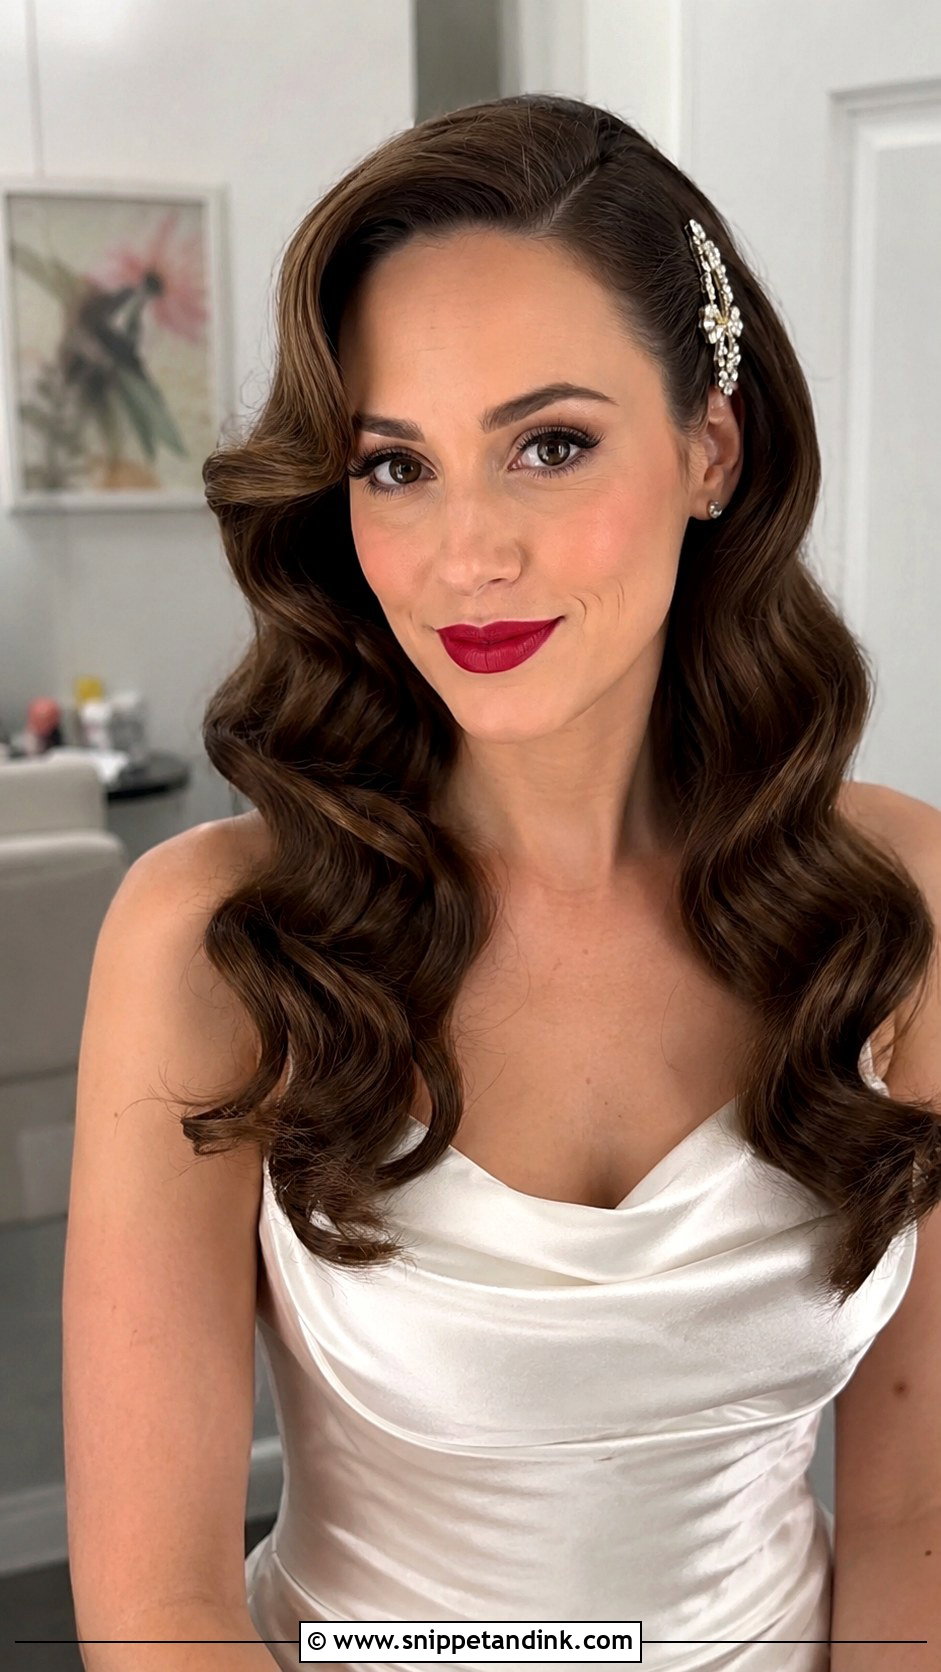
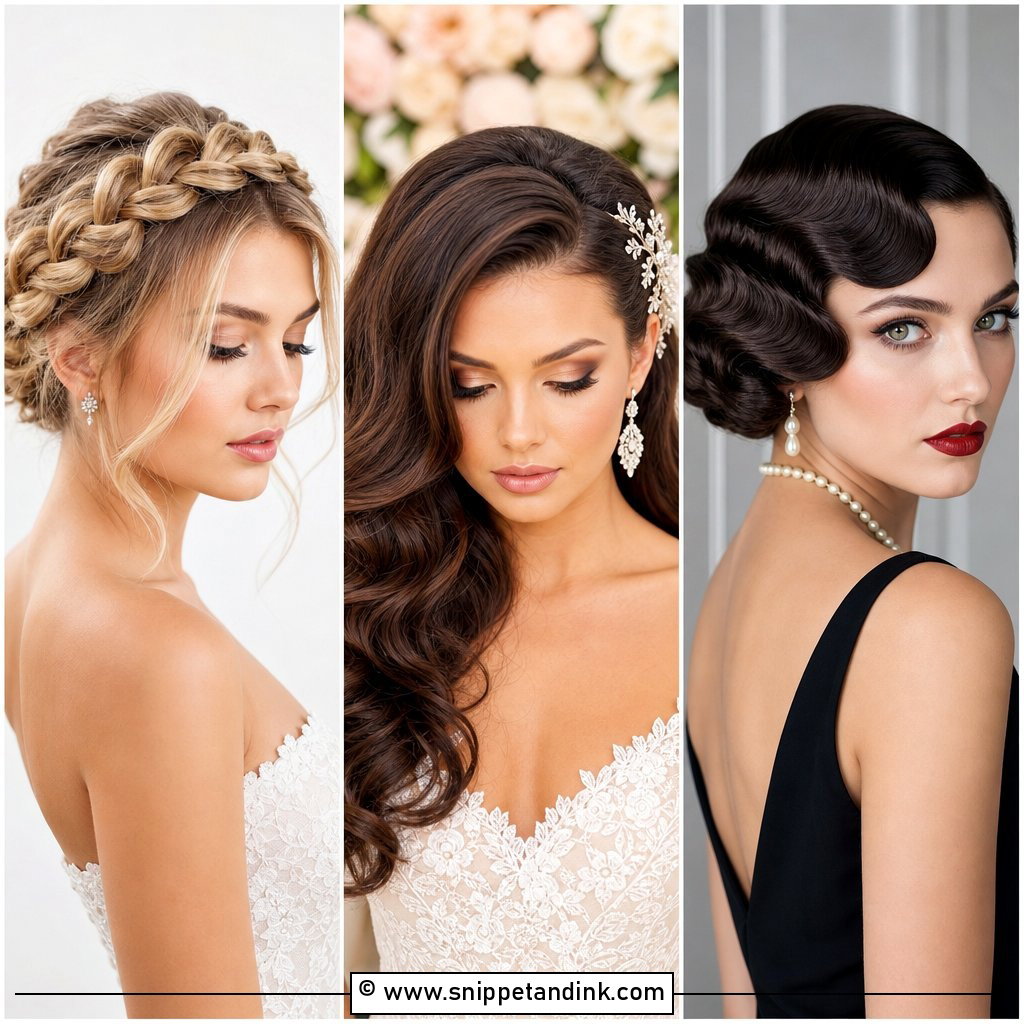
Brushed-out pin curls are the old Hollywood method: each section is wound flat against the head, pinned, set with heat or left overnight, then brushed into one continuous wave. A bold side part keeps it from looking like a costume. It works on short to medium hair; very long hair is too heavy for the wave to hold its S-shape past the cheekbone. A red lip and a jeweled clip on the shorter side are classic partners. Humidity is its enemy, so if your venue is muggy, ask for a firmer set.
12. Curly Mohawk Updo
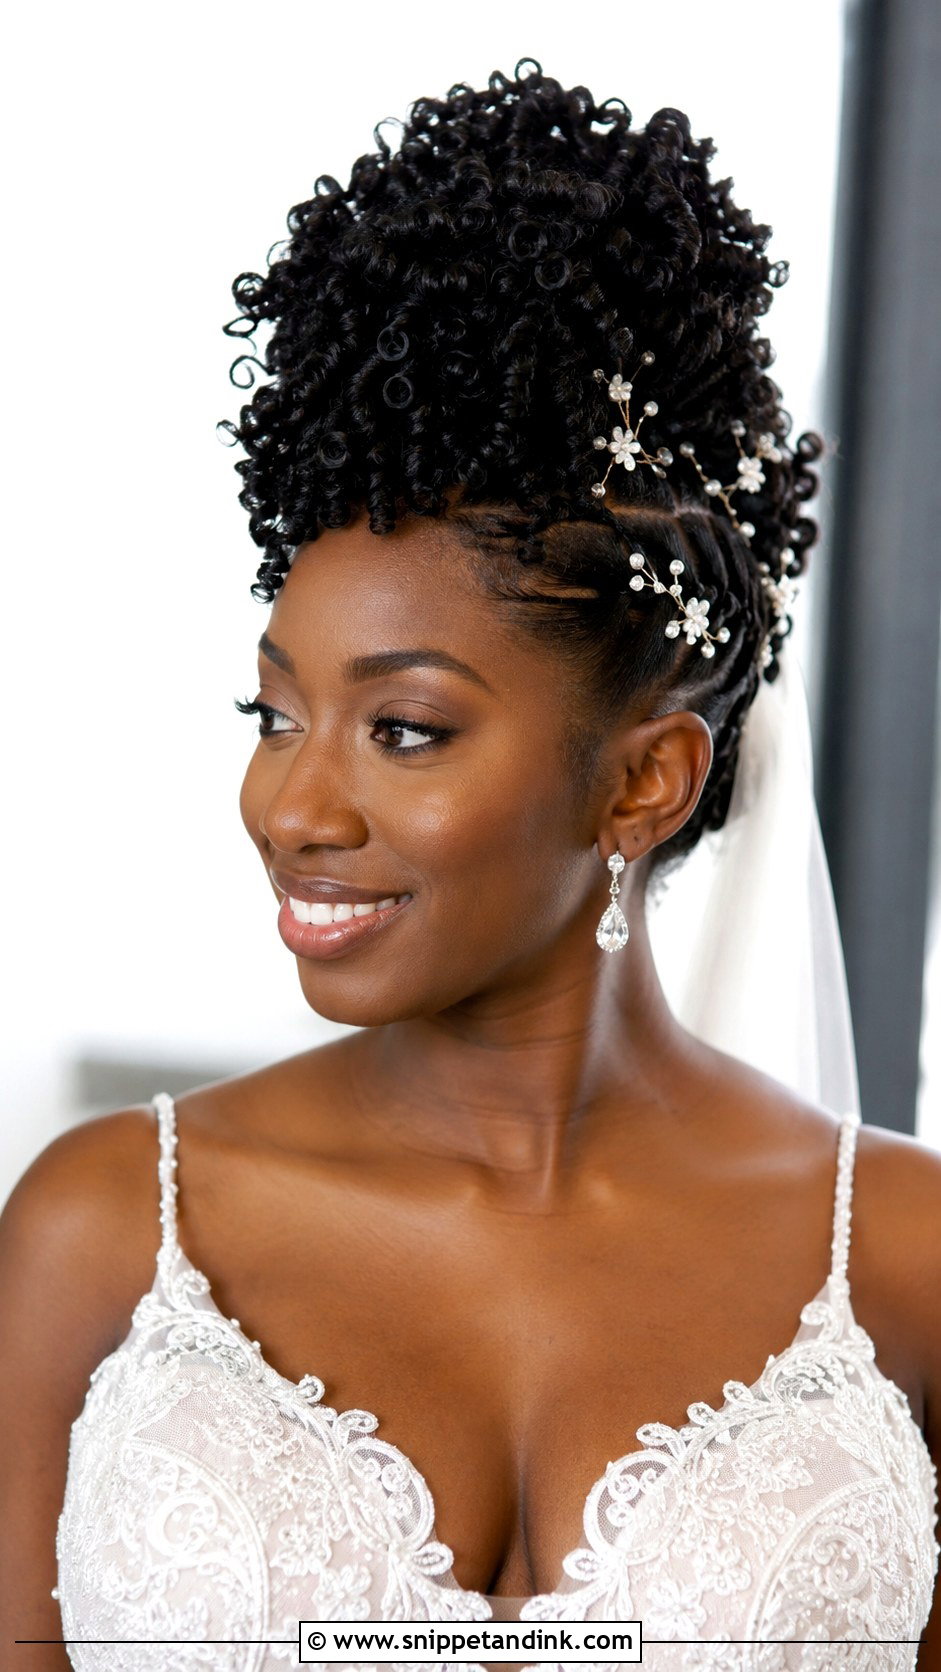
For curly and coily hair, a curly mohawk updo shows off natural texture instead of hiding it. I pin the sides close with flat-twisted sections or decorative pins and let the curls rise into a crest down the center. Define curls with a cream the day before or on wash day so they’re settled and not puffy; a fresh wash right before often frizzes. I’d skip heavy spray, which dulls coils. Gold cuffs or a few pearls slid onto the twisted sides are the right amount of finish.
13. Half Up Space Buns
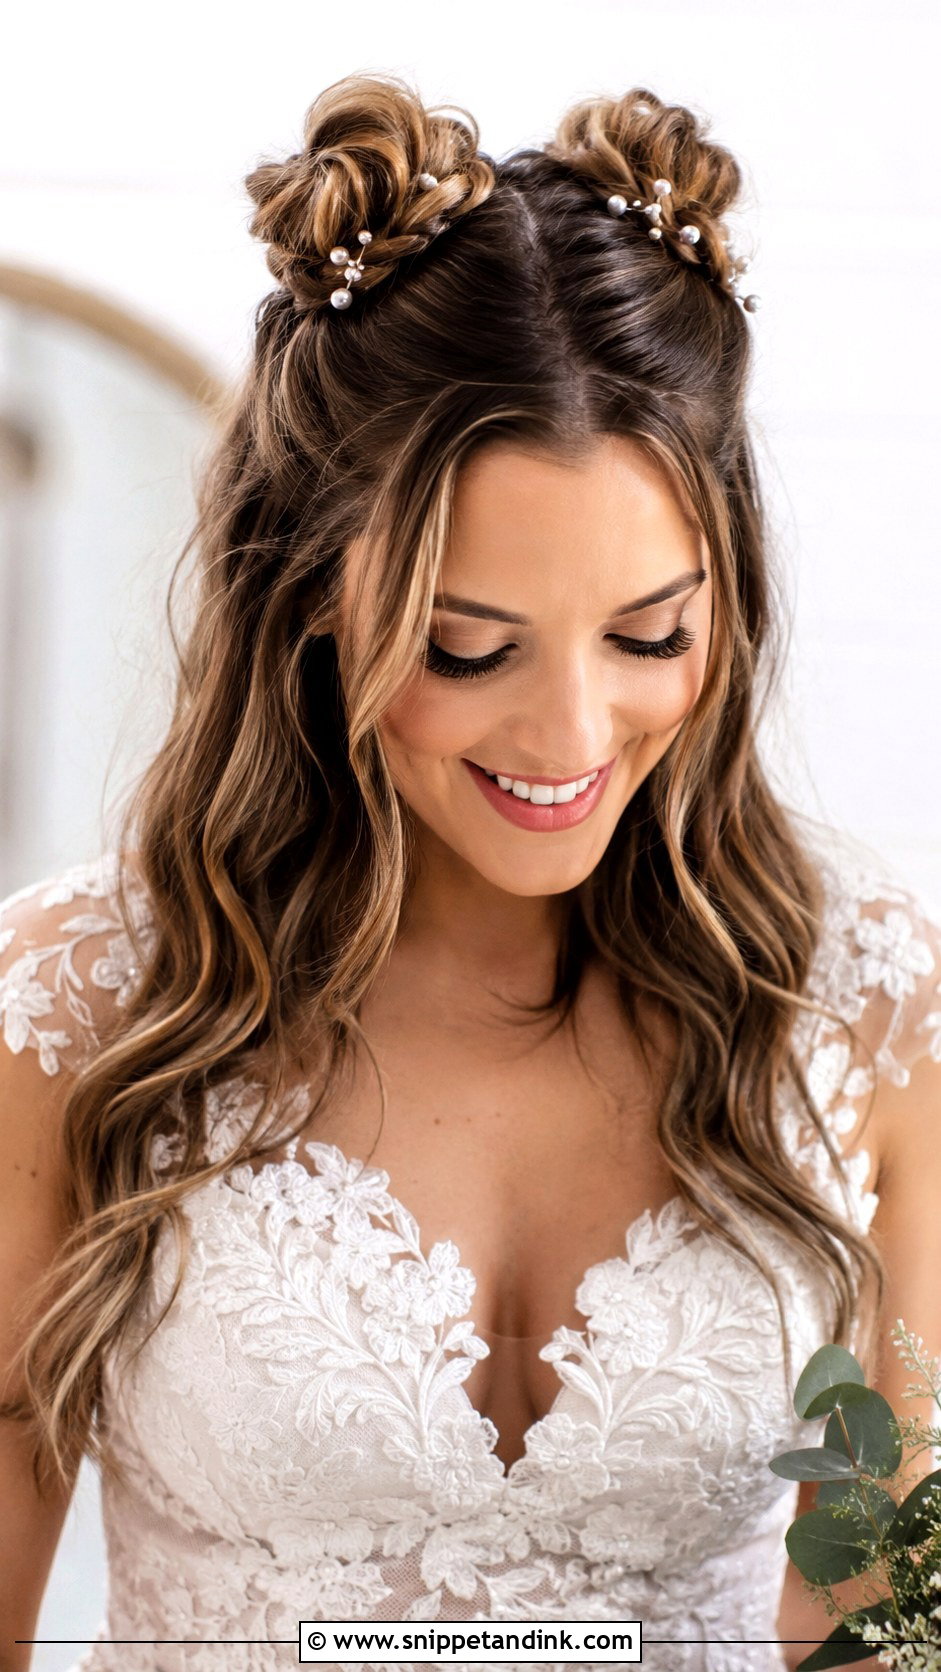
Half-up space buns are playful, and I’ll be honest that they read young, so they suit relaxed or nontraditional weddings more than a formal ballroom. Two small buns sit high at the crown and the rest hangs in soft waves. I pin each bun in a crisscross so it doesn’t rotate when you hug people. You need medium to long hair to have enough left below. A few tiny florals or pearl pins in each bun make them feel bridal rather than festival.
14. Sleek Side Part With Deep Waves
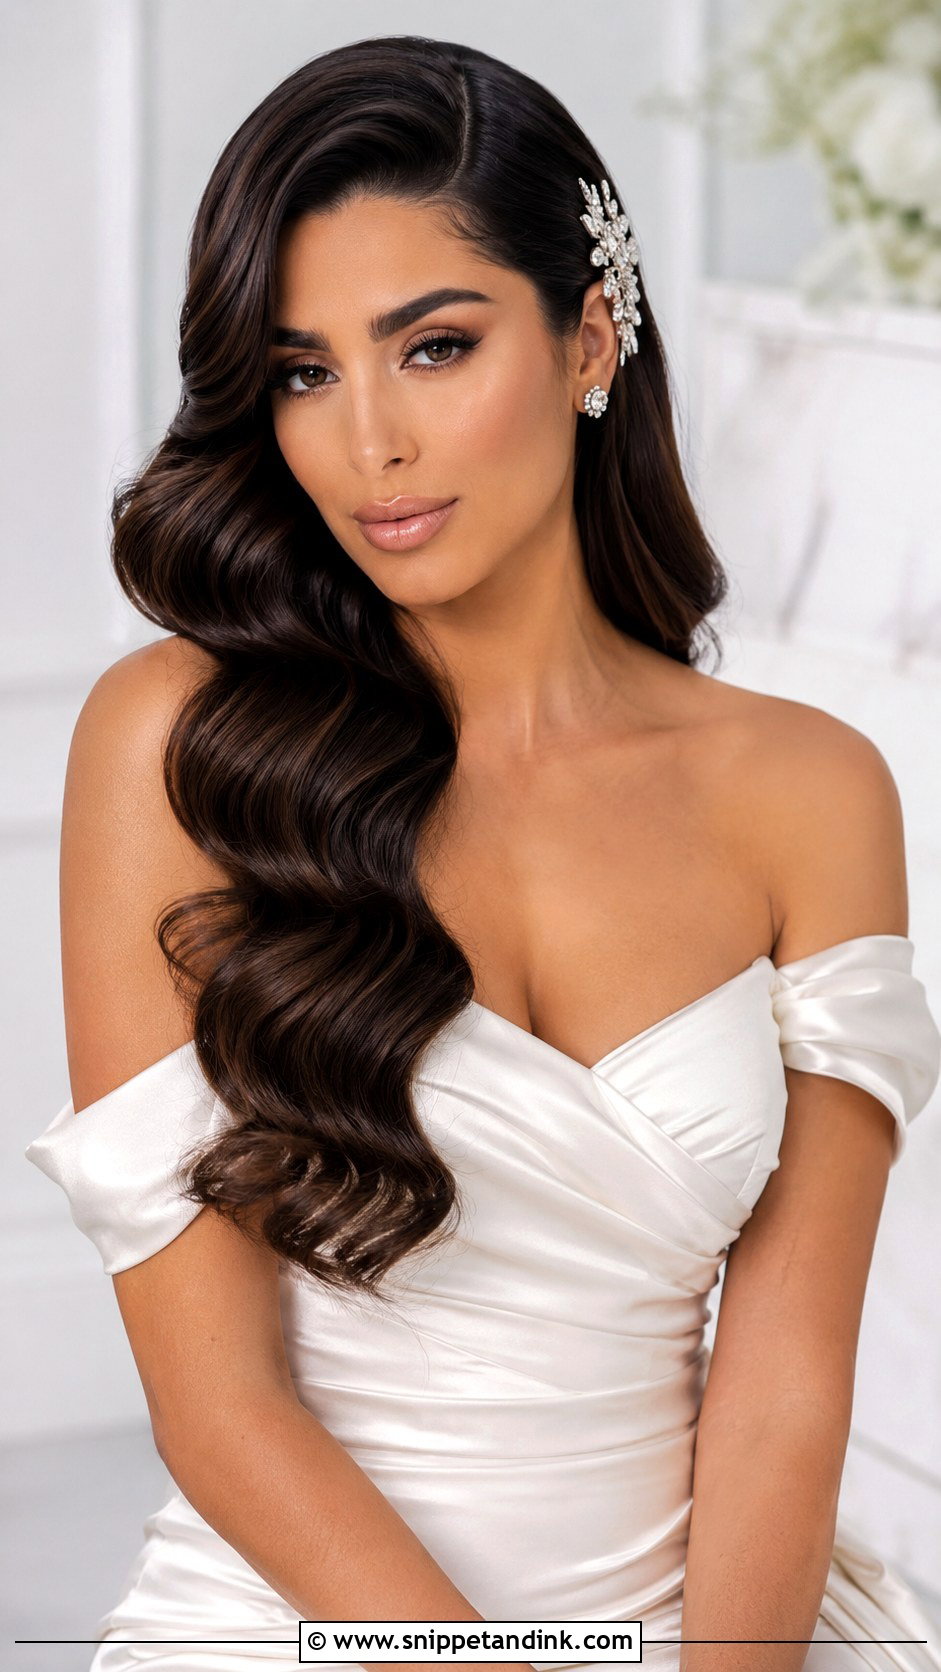
A deep side part with sculpted waves is glamour with an edge because of the exaggerated part. I flip the hair across before curling, so the waves form on the side they’ll be worn, then brush them into one pattern and set the lighter side behind the ear with a jeweled pin. The heavy side can sit over one eye if you’re not careful, which is fine in photos but annoying during the vows. Medium to long hair, and a finishing shine spray, not oil, so it doesn’t separate.
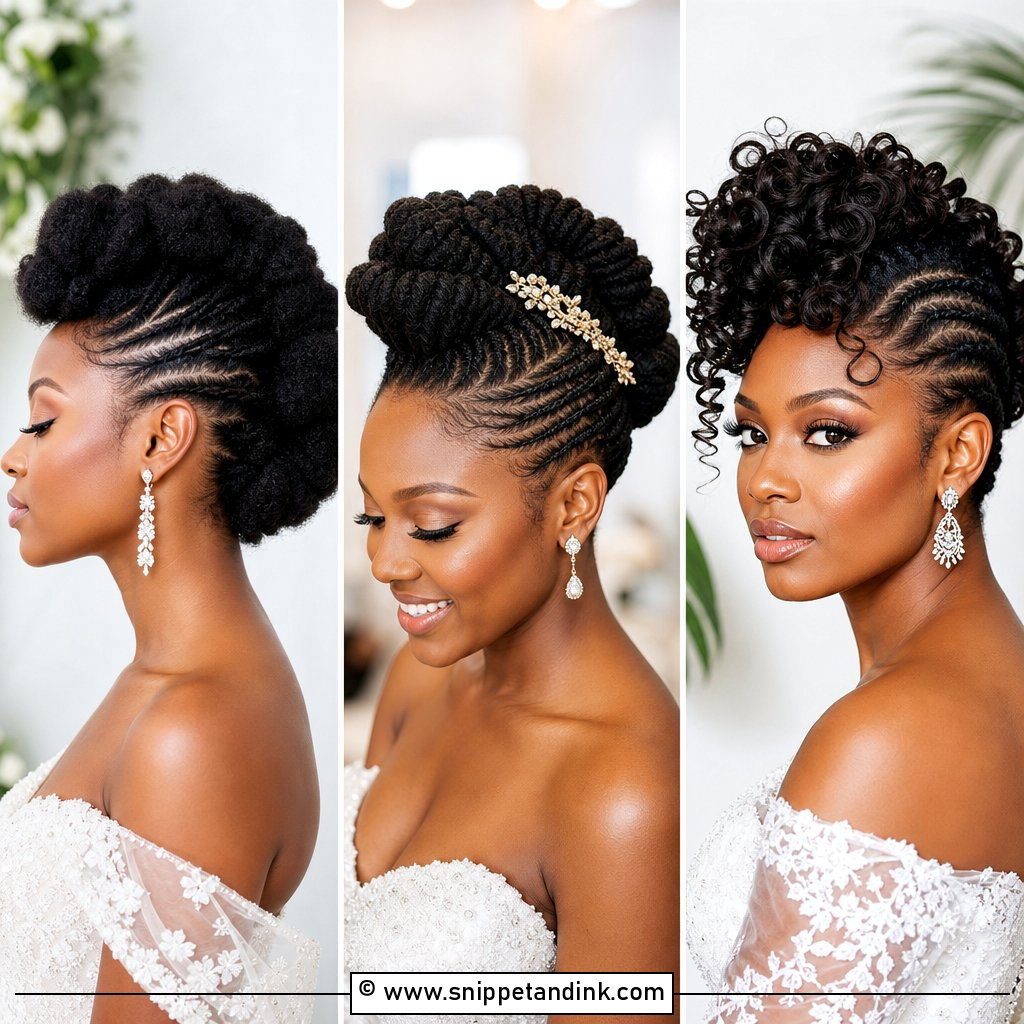
15. Braided Faux Hawk
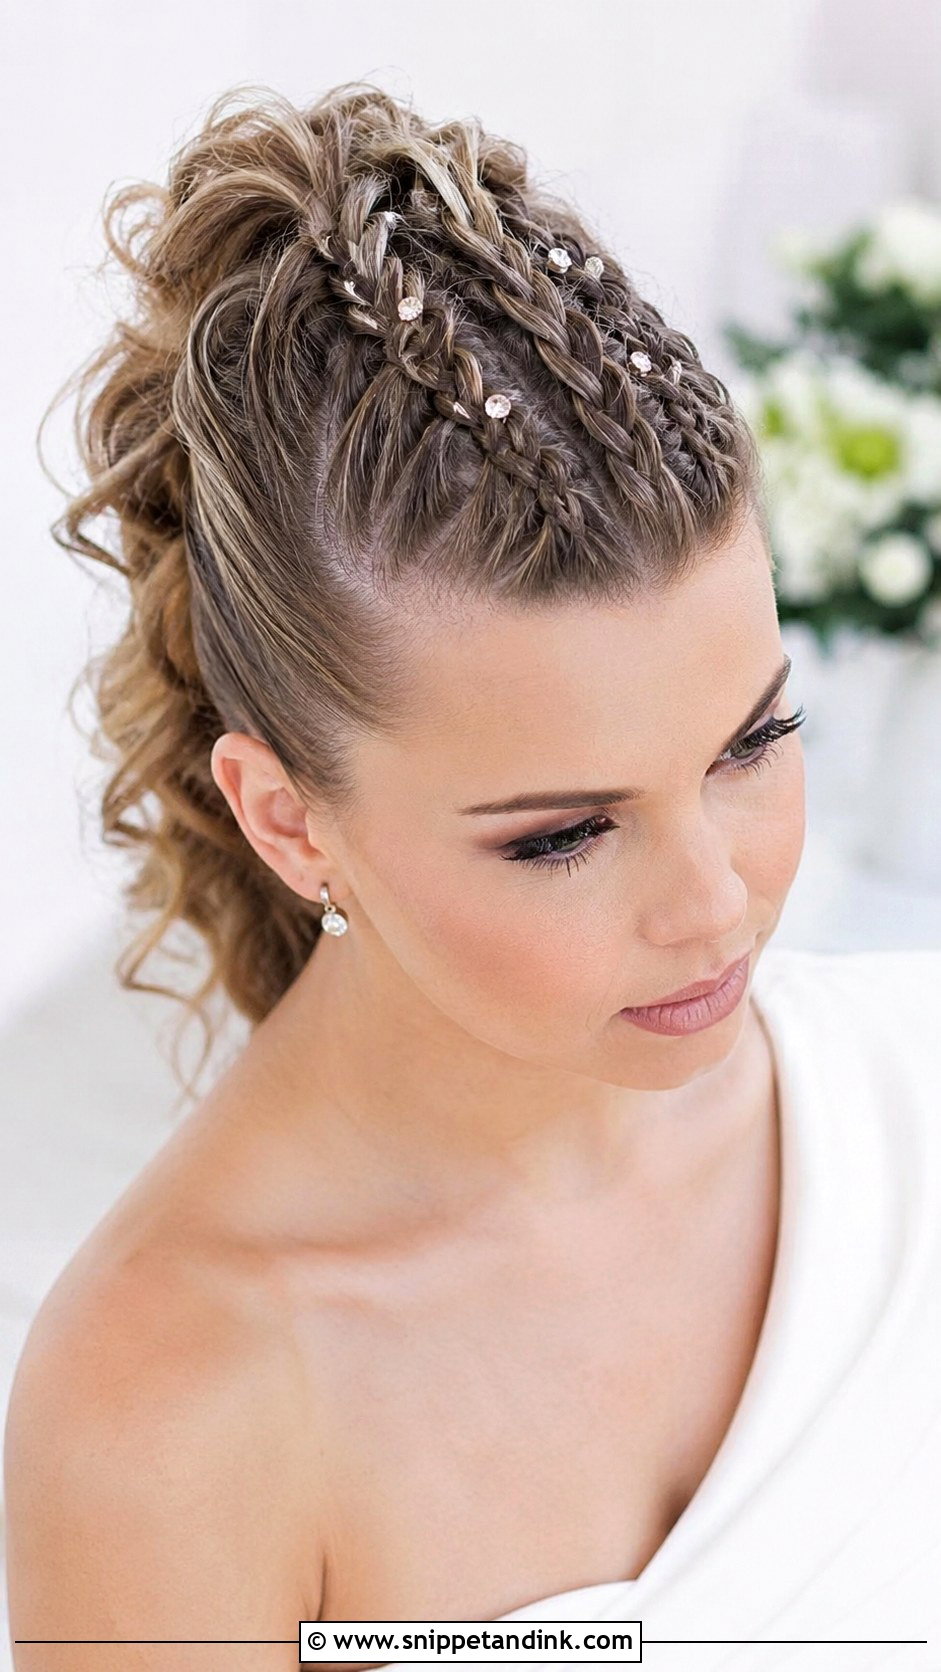
The braided faux hawk gives you mohawk height without shaving anything. Several braids run toward the center and get pinned into a ridge down the back of the head. I like to mix braid sizes so the ridge looks textured rather than uniform, and I pull the braids slightly once pinned so they look fuller. It’s a long-wearing style on medium to long hair. Scatter a few rhinestone pins rather than lining them up, or it starts to look like a costume.
16. Choppy Lob With Textured Ends
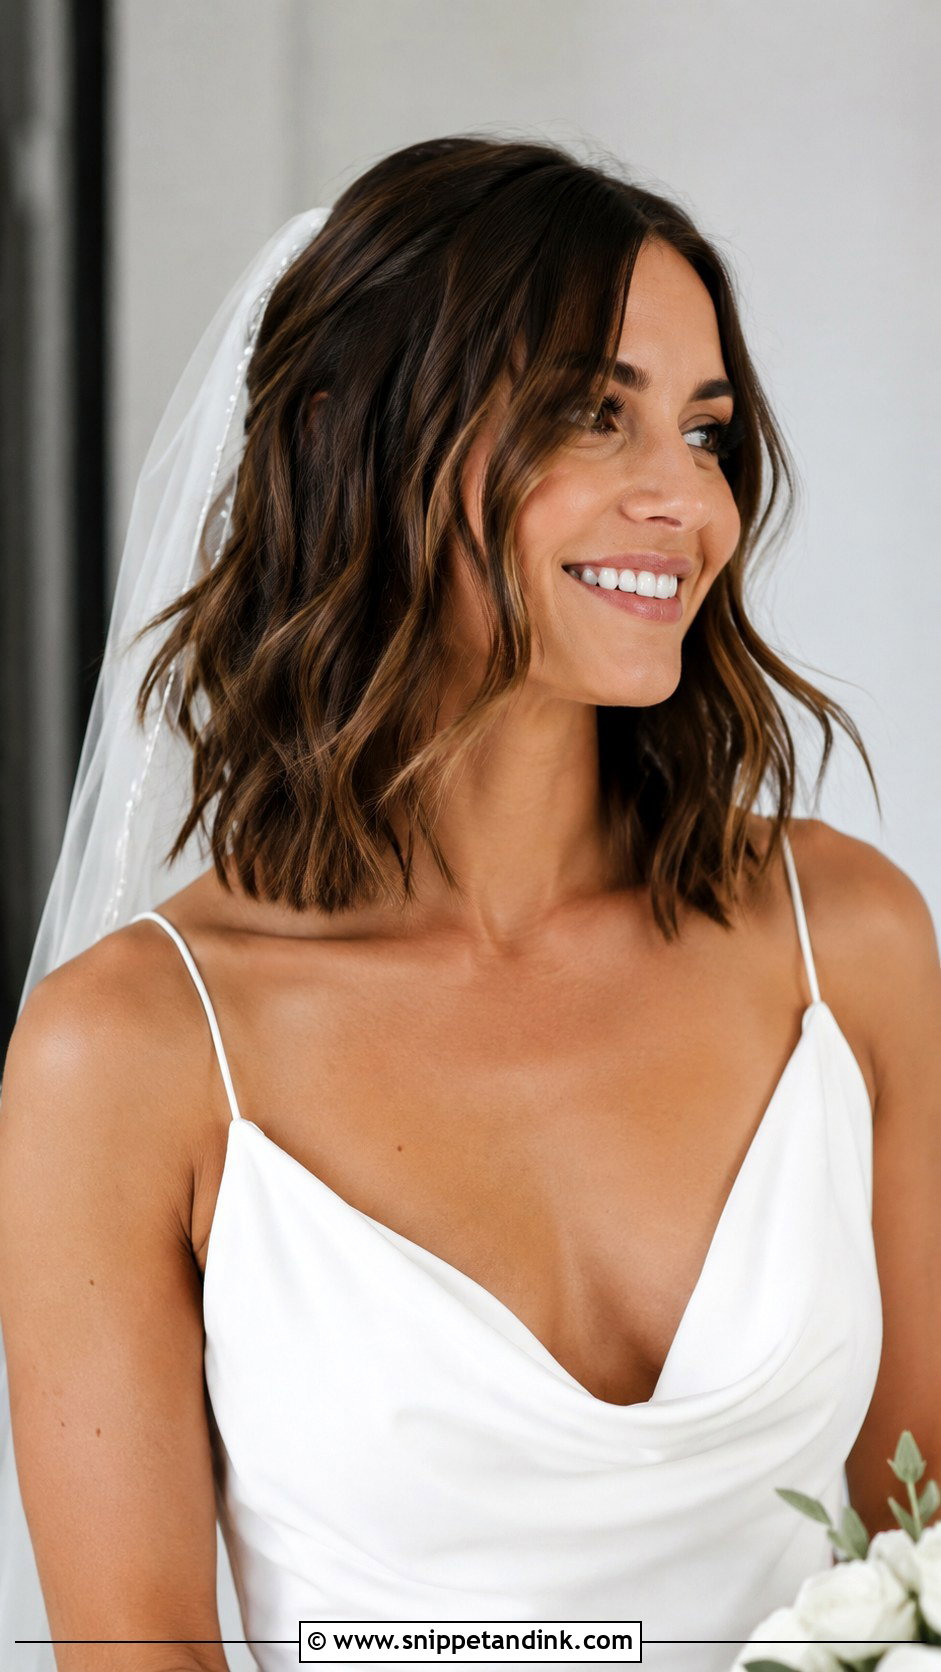
A choppy lob grazing the collarbone needs very little on the day, which is the appeal. I add bends with a flat iron rather than a curling iron, because the flat iron leaves the ends straight and that keeps the choppy shape. Texture spray goes in last, worked in with fingers. Collarbone length does catch on straps and high necklines and flip out, so try it with your actual dress. A delicate clip or a short veil sits fine with it, indoors or out.
17. Embellished Slick Bun
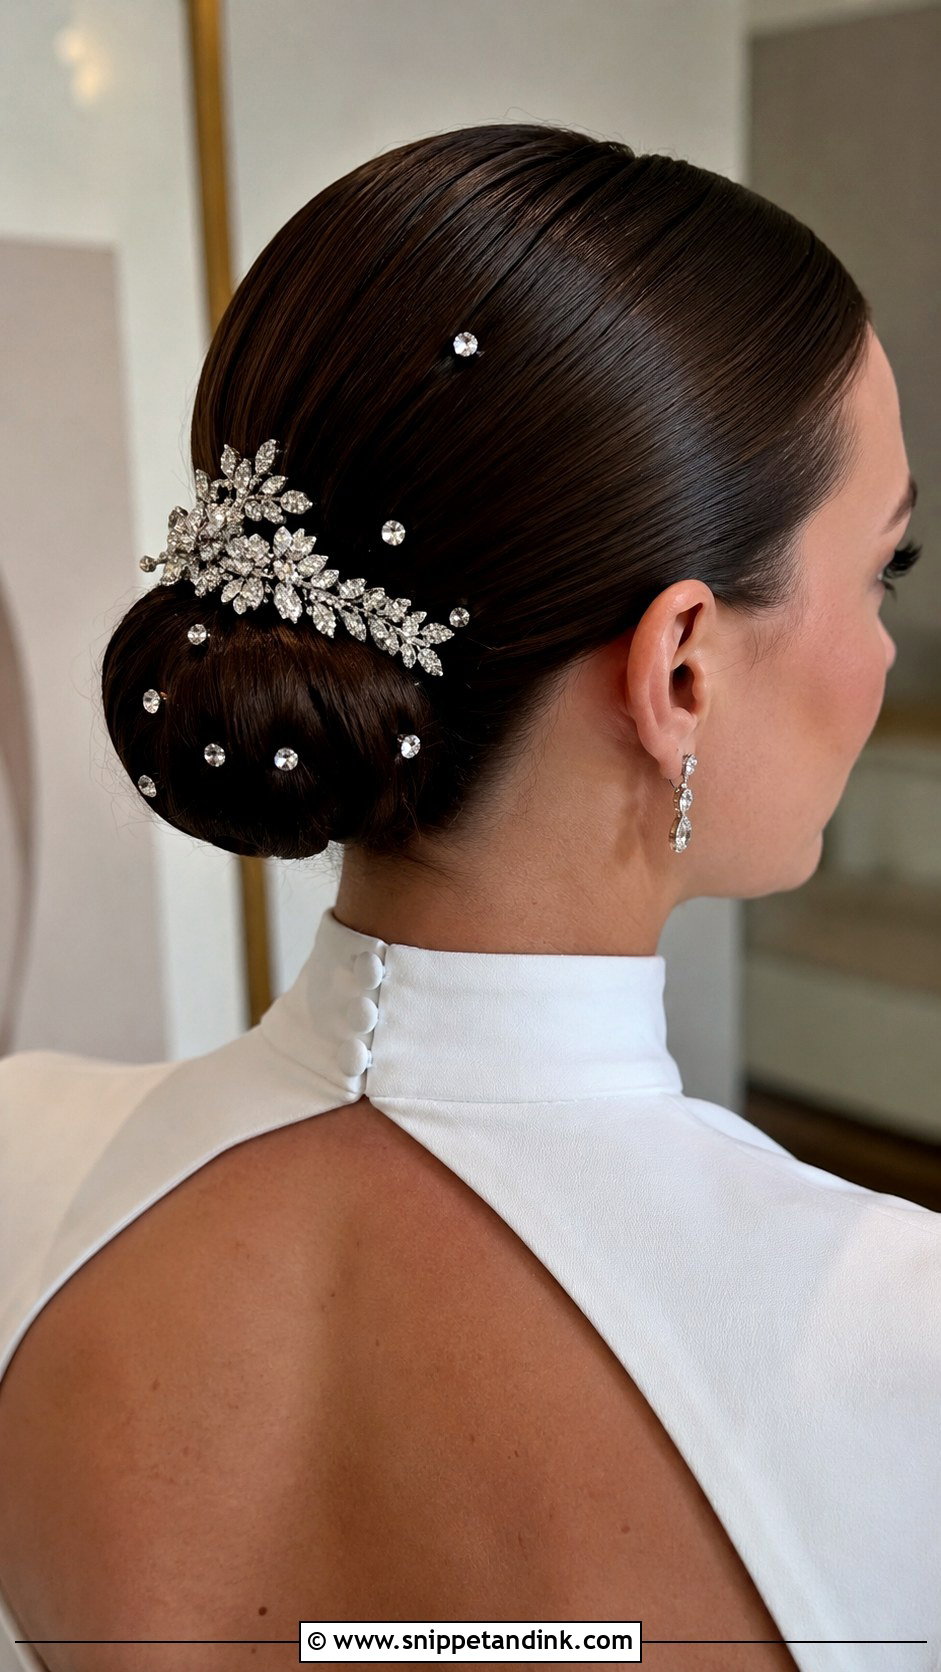
An embellished slick bun relies on the accessories for its edge, so the hair underneath has to be glass-smooth. I use gel and a fine brush and work in small sections, then twist the bun and set it low for a high neckline or high for an open back. Too many pieces fight each other; I usually choose either crystal pins or a hair chain, not both. It’s very secure on medium to long hair, and it stays neat under a veil.
18. Wavy Bob With Money Piece Highlights
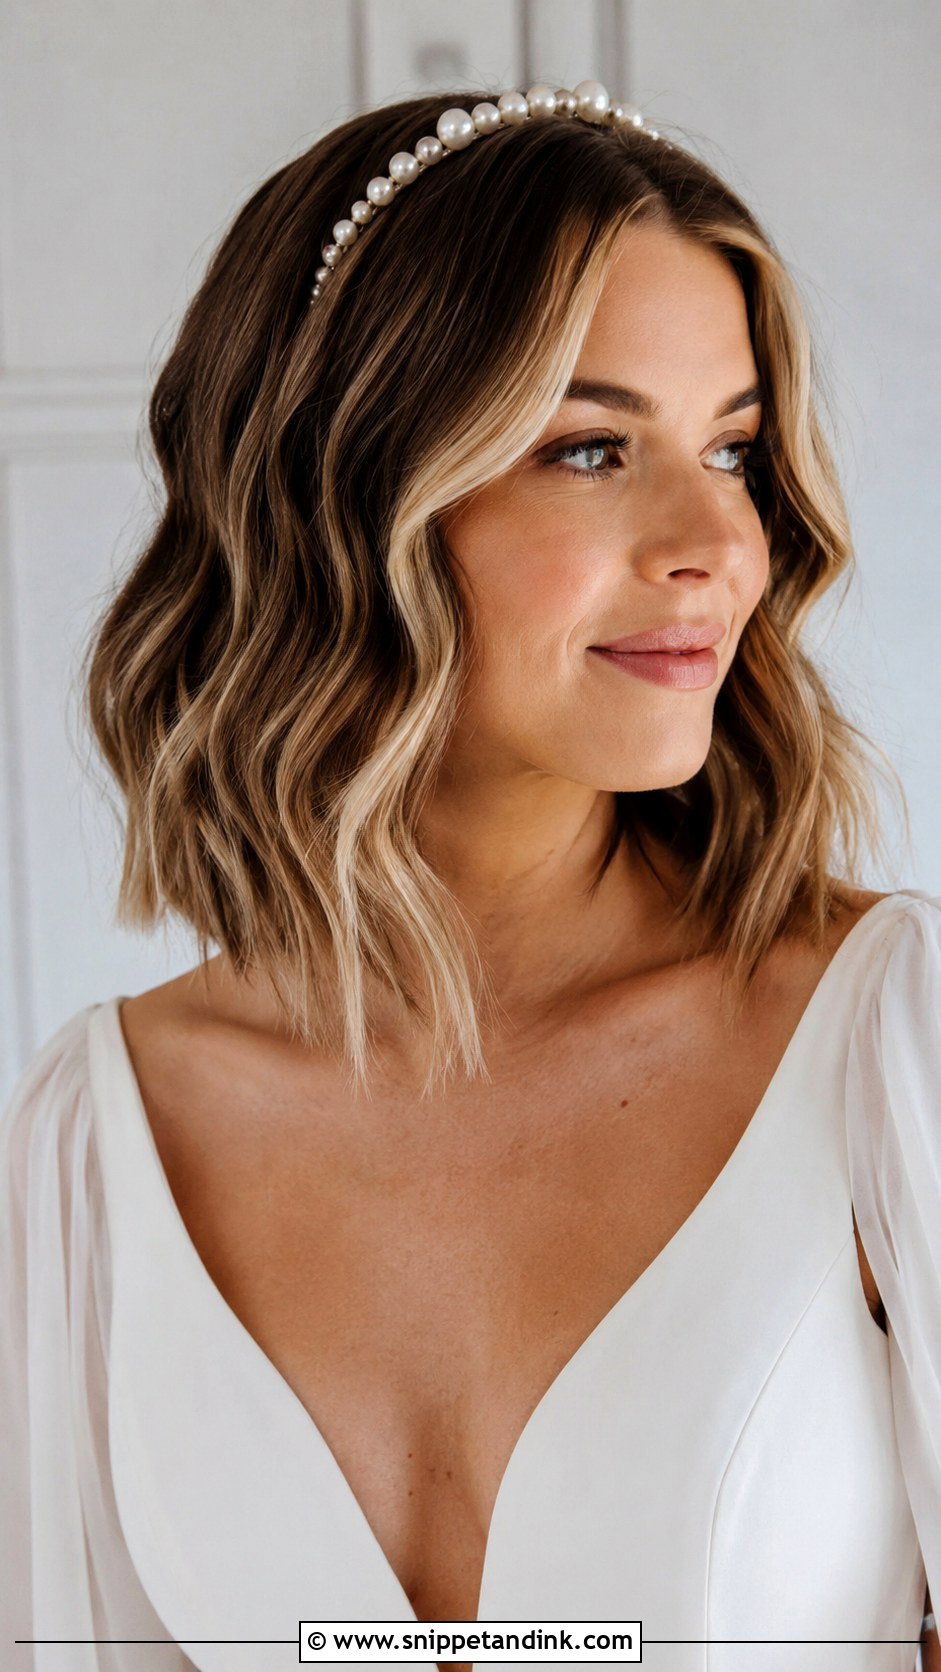
A wavy bob with money piece highlights puts the color right where the camera looks, at the face. If you’re adding the money piece for the wedding, get it done two to three weeks ahead so your colorist can tone it if it pulls brassy. On the day I curl the bob with a wand in alternating directions so the bright front pieces show in every frame. It’s a good option if you want color contrast without lightening your whole head. Keep accessories simple; a plain pearl headband is enough.
19. Twisted Crown With Loose Curls
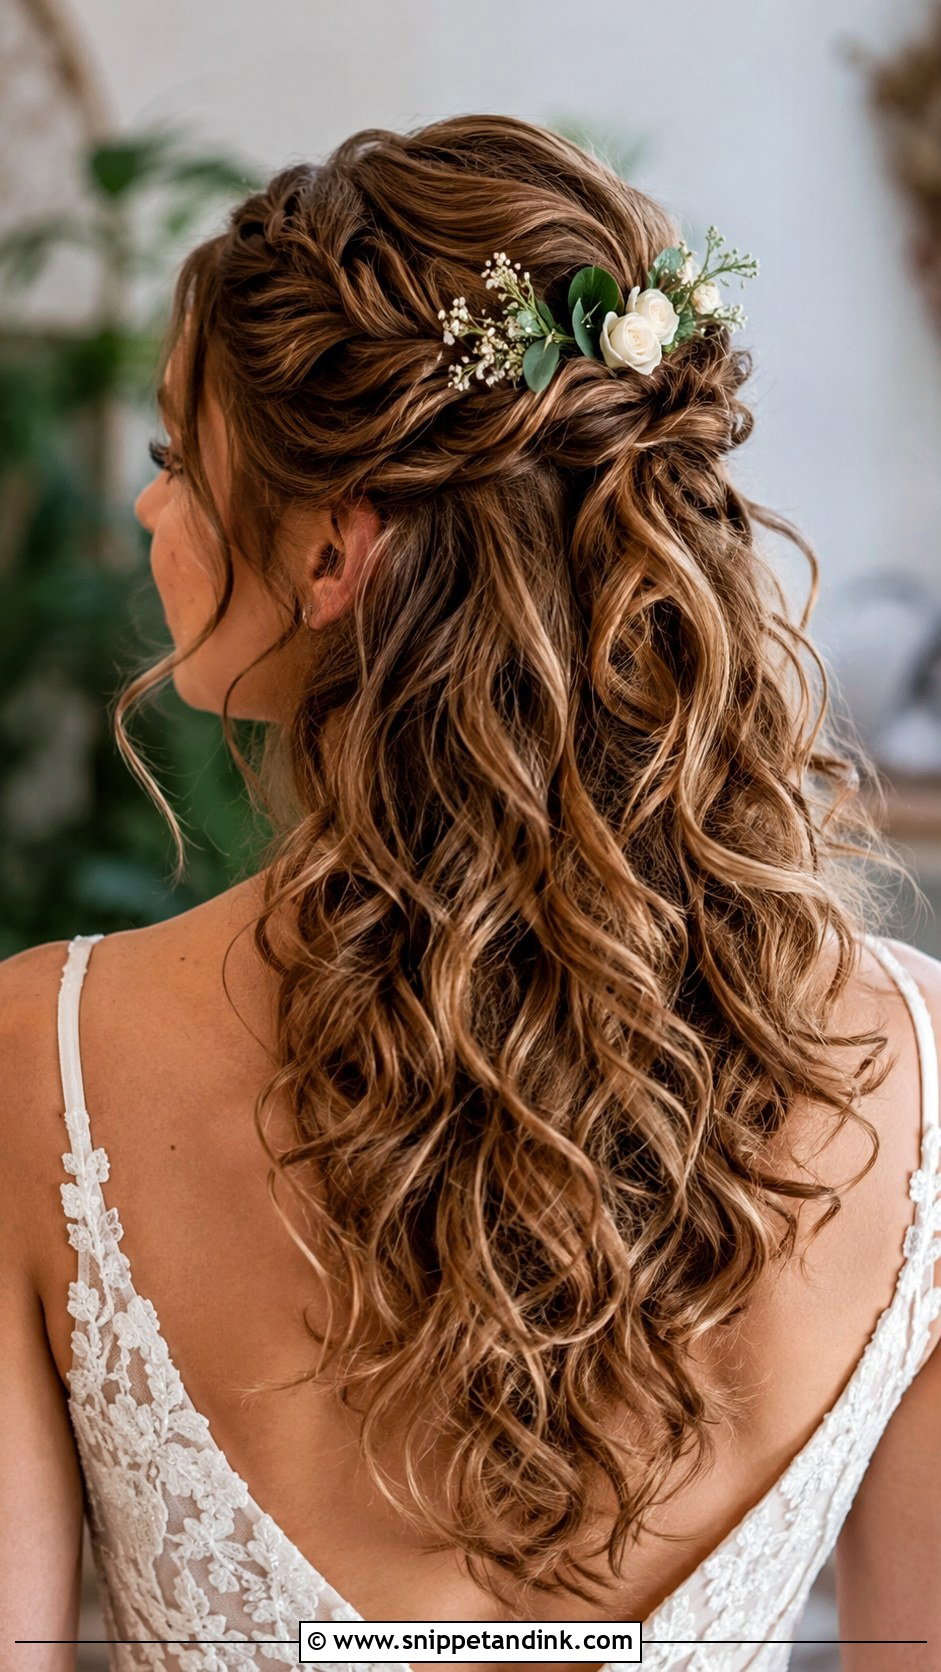
A twisted crown with loose curls is a half-up style where sections twist back from the temples and meet at the crown. I always pin the twists with a crossed pair of bobby pins, because one pin lets the twist slip once the curls below start to pull. The curls should be set firmly and brushed out later in the day, as they’ll drop a little. Small floral pins along the twists look right at a garden or boho wedding.
20. Platinum Pixie With Side Sweep
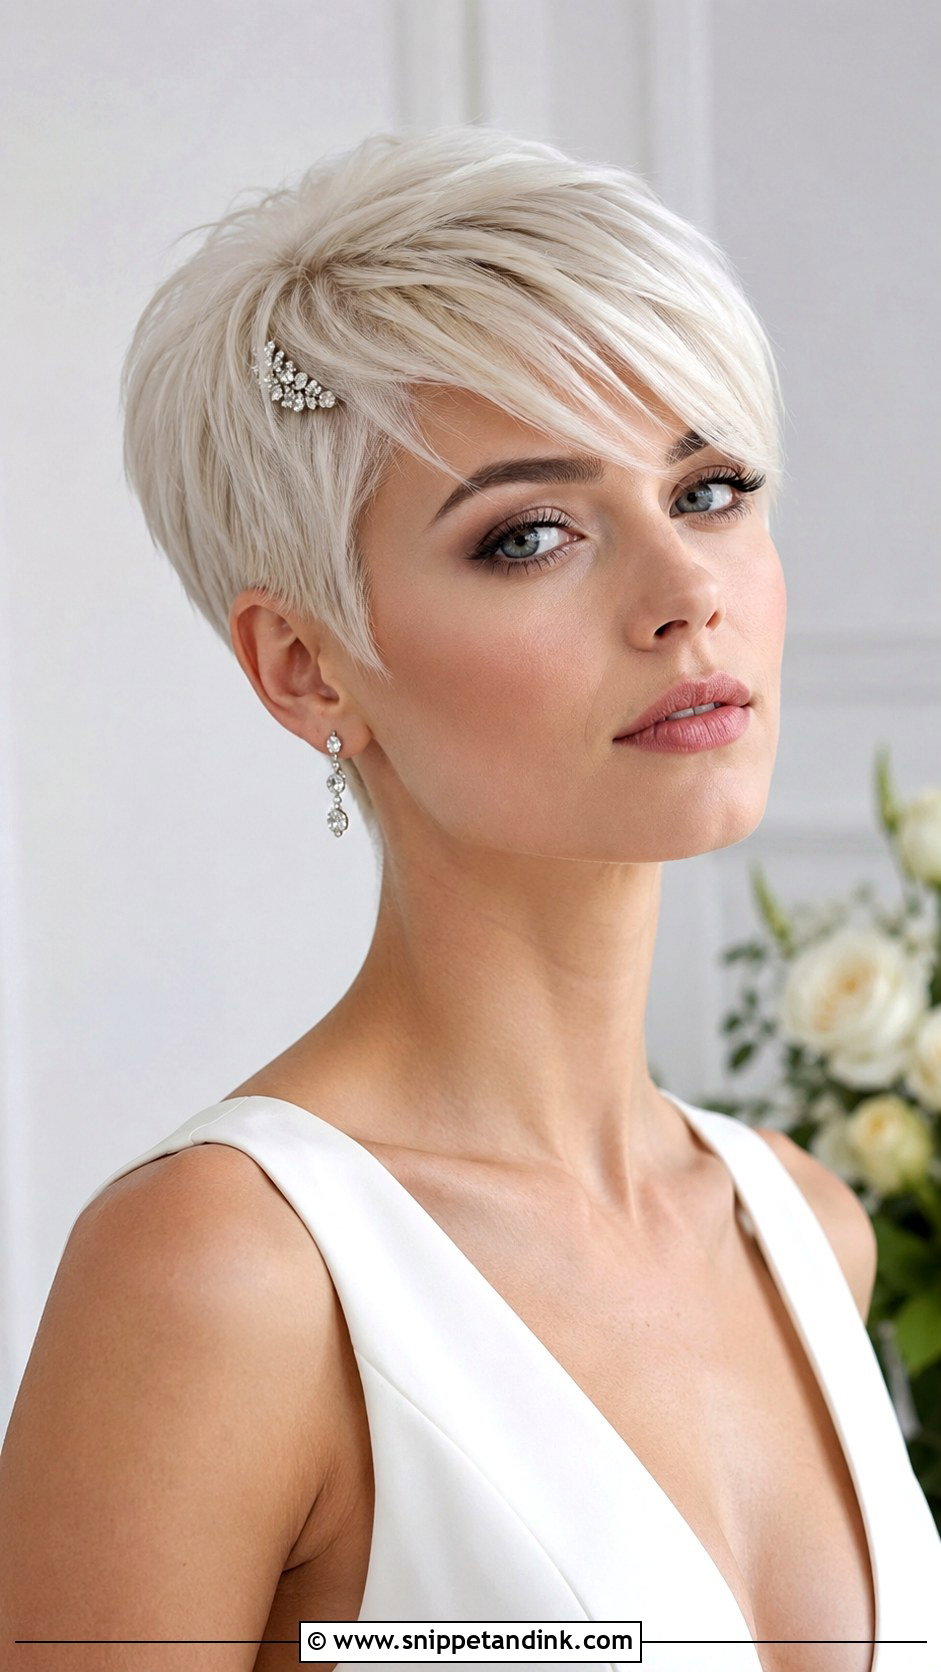
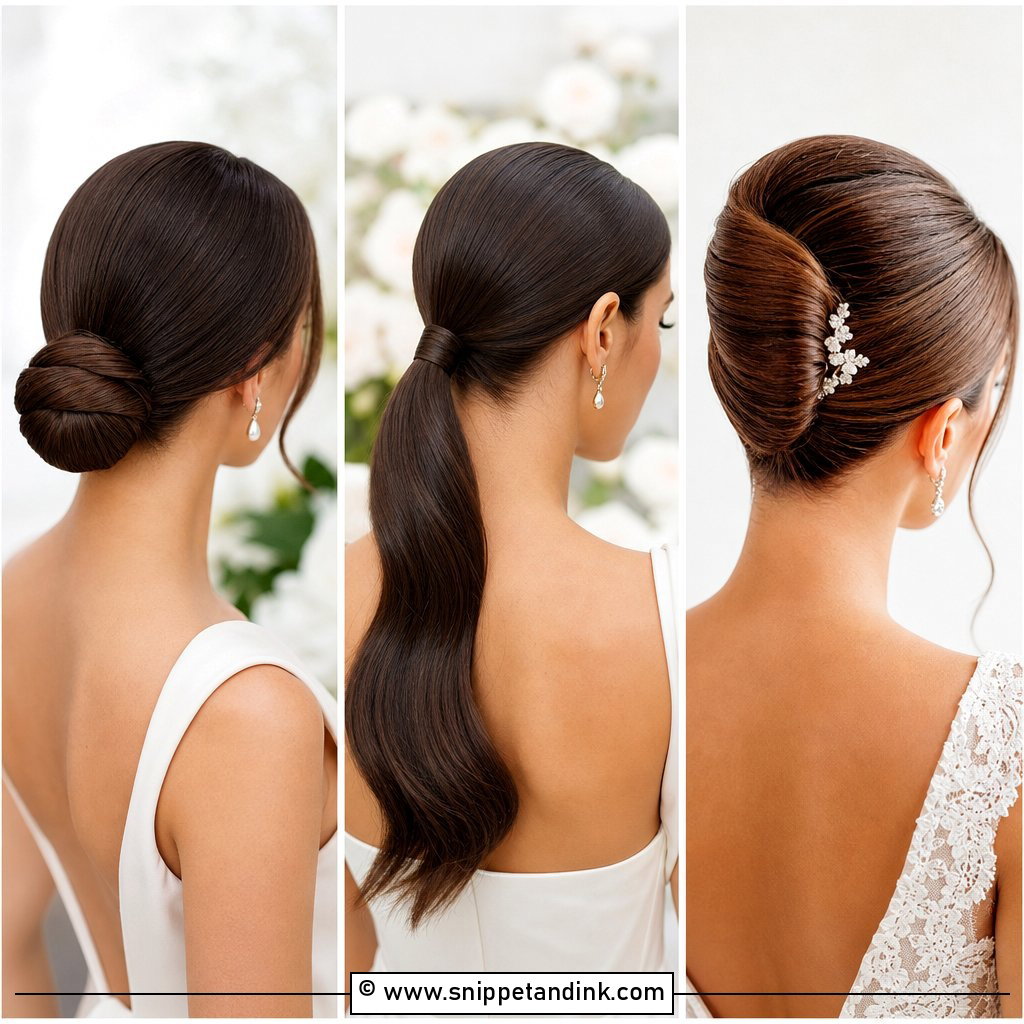
A platinum pixie with a side sweep is a bold commitment, and the color needs as much planning as the cut. Platinum yellows quickly, so I’d tone it about a week before and use a purple shampoo once in between. The sweep is styled with texturizing paste, pushing the longer top pieces across the forehead and pinching the ends. The pale color makes any accessory stand out, so one sparkling clip on the long side is enough.
21. Halo Braid With Undone Texture
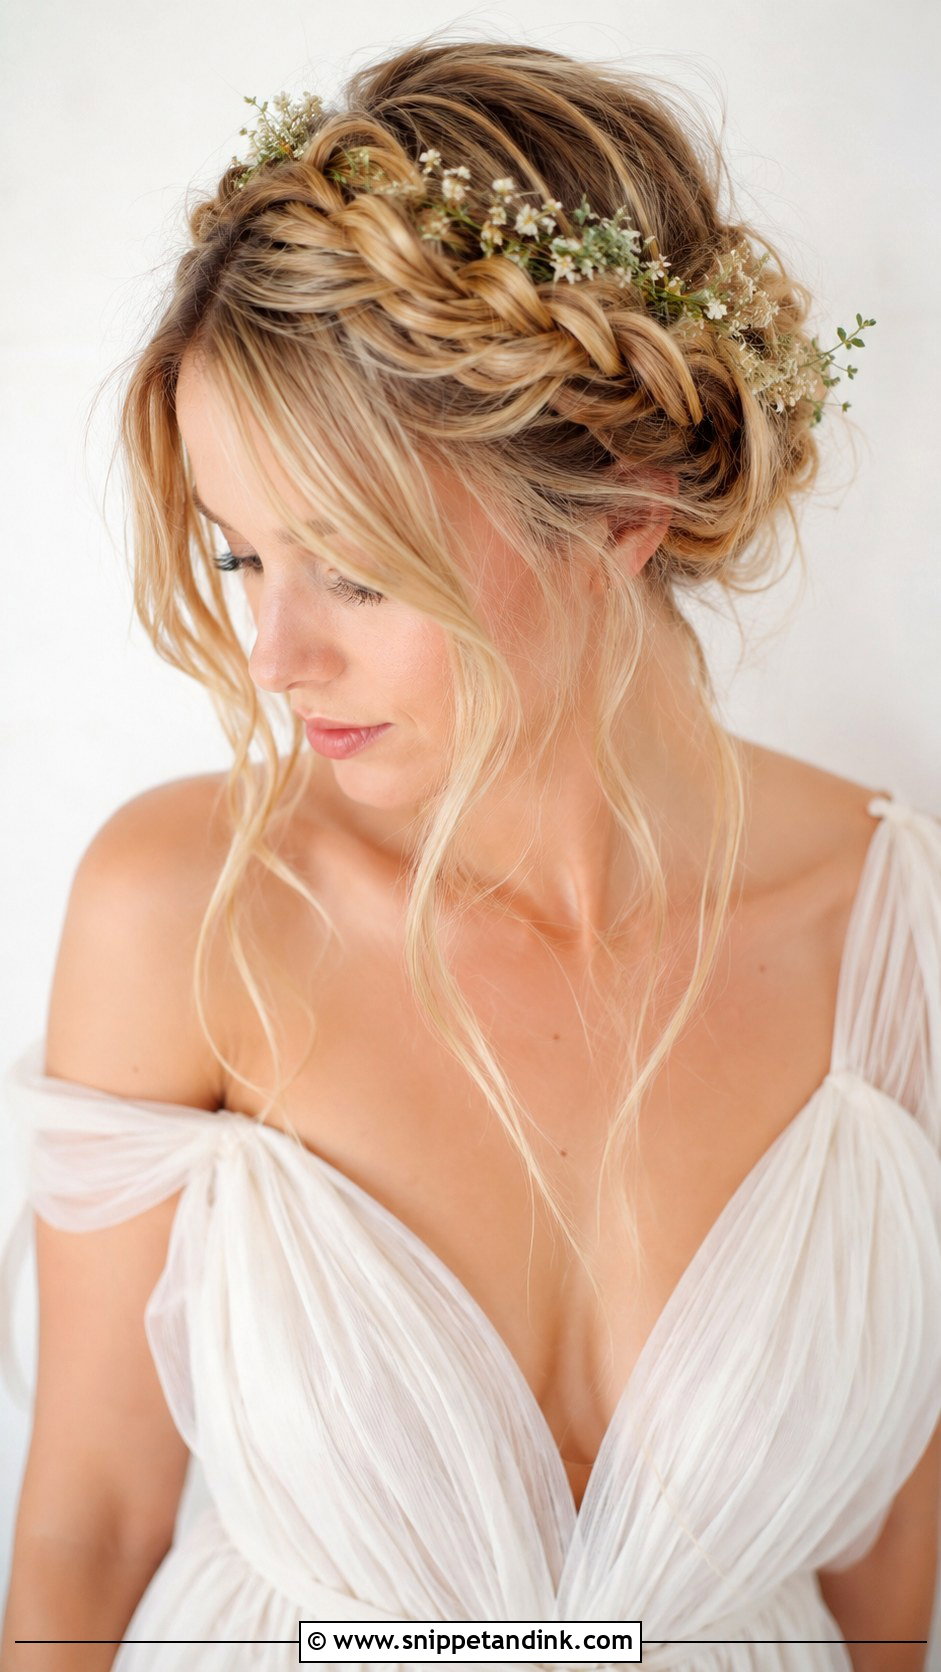
A halo braid with undone texture wraps around the head and is then gently pulled apart so it looks soft and full. I leave a few tendrils at the temples and neck, curled so they don’t look stray. It works on medium to long hair; with shorter lengths I hide where the ends meet under a flower. Delicate flowers or pearl pins tucked into the braid suit outdoor weddings. Very slippery straight hair benefits from a little dry shampoo before braiding so the pulled-out loops hold.
22. Sleek Center Part With Straight Hair
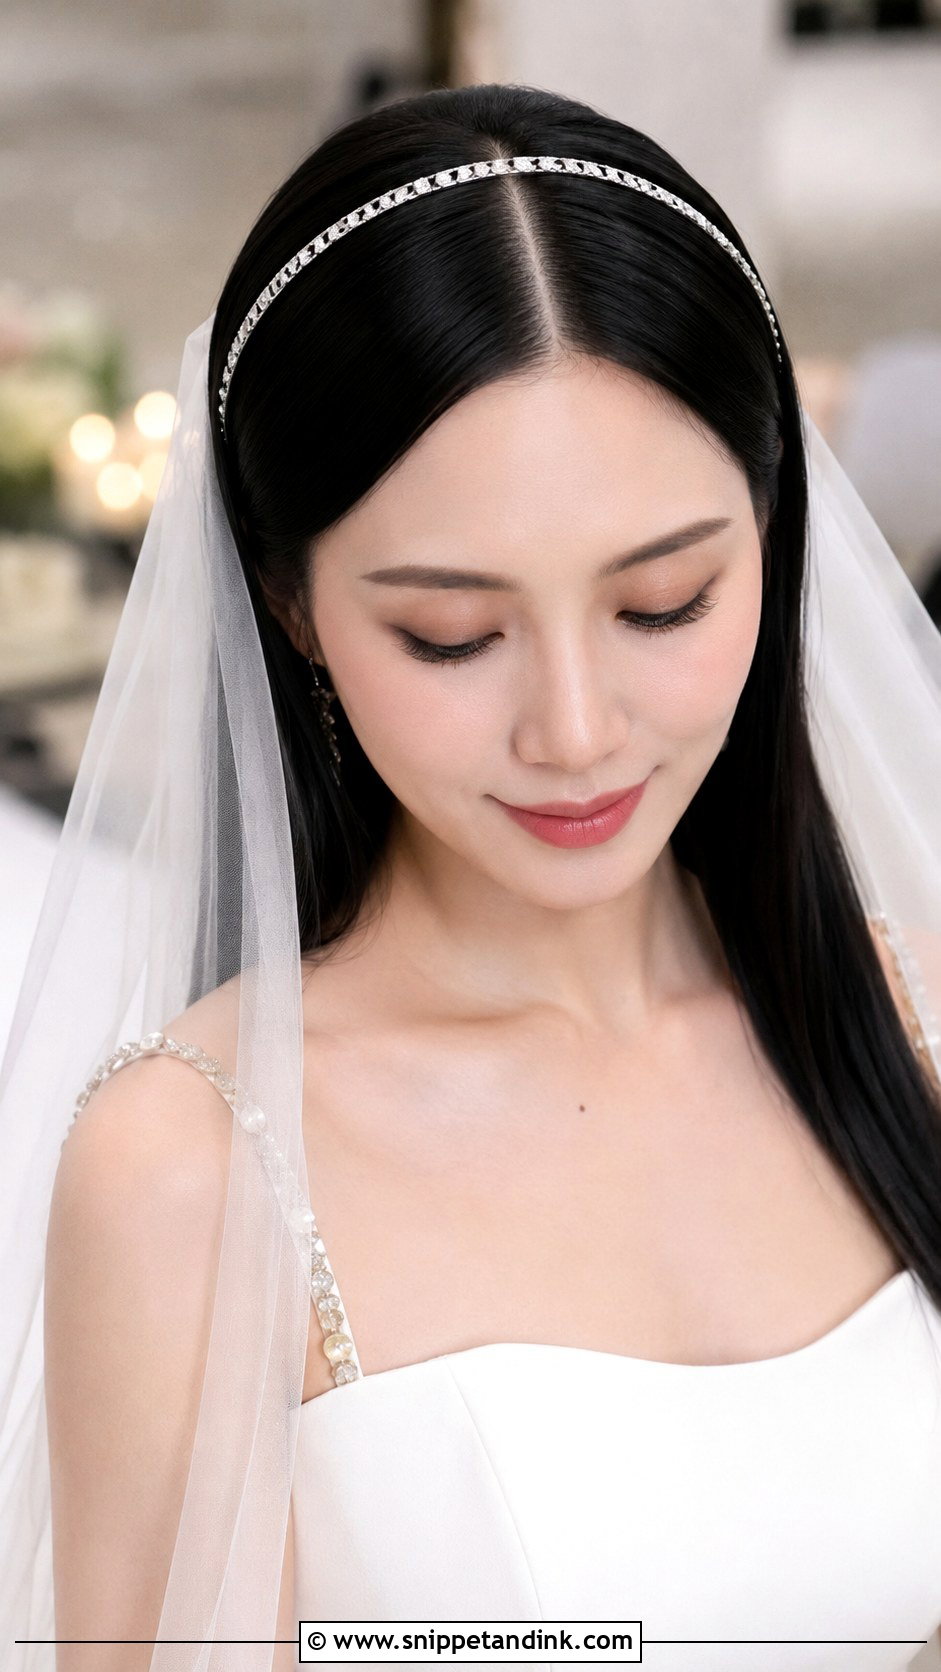
A sleek center part with straight hair is minimal, and minimal shows every flaw. I flat-iron in thin sections, take the part exactly in line with the nose, and finish with serum on the lengths, not the roots. It works best on medium to long hair with healthy ends; split ends show immediately when hair is this straight. Humidity is the risk, so I keep a small flat iron in my kit for touch-ups. A metallic headband pushed just behind the hairline adds a clean edge.
23. Voluminous Curly Updo
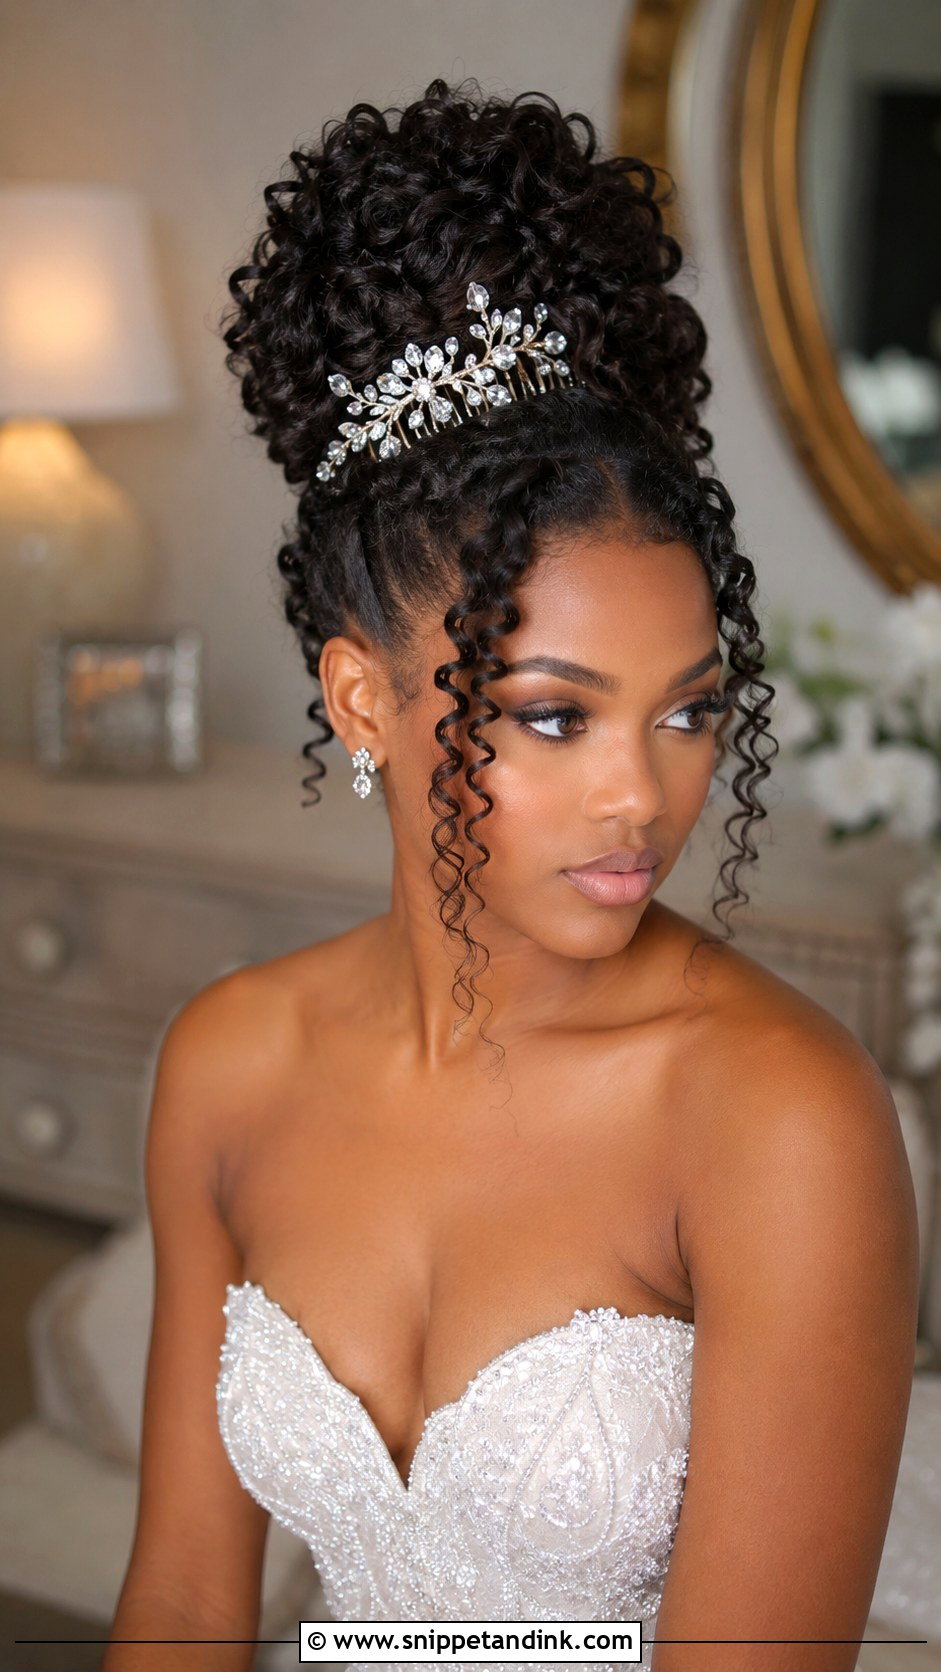
A voluminous curly updo gathers natural curls high on the head, and it’s one of my favorite ways to show texture. I define curls with cream, let them dry fully, then pin loosely in sections so the shape is full rather than tight. Wet or damp curls shrink and lose definition once they’re pinned, so they must be completely dry first. A few curls left down at the face soften it. A jeweled comb or a handful of decorative pins goes in last.
24. Wavy Shag With Curtain Bangs
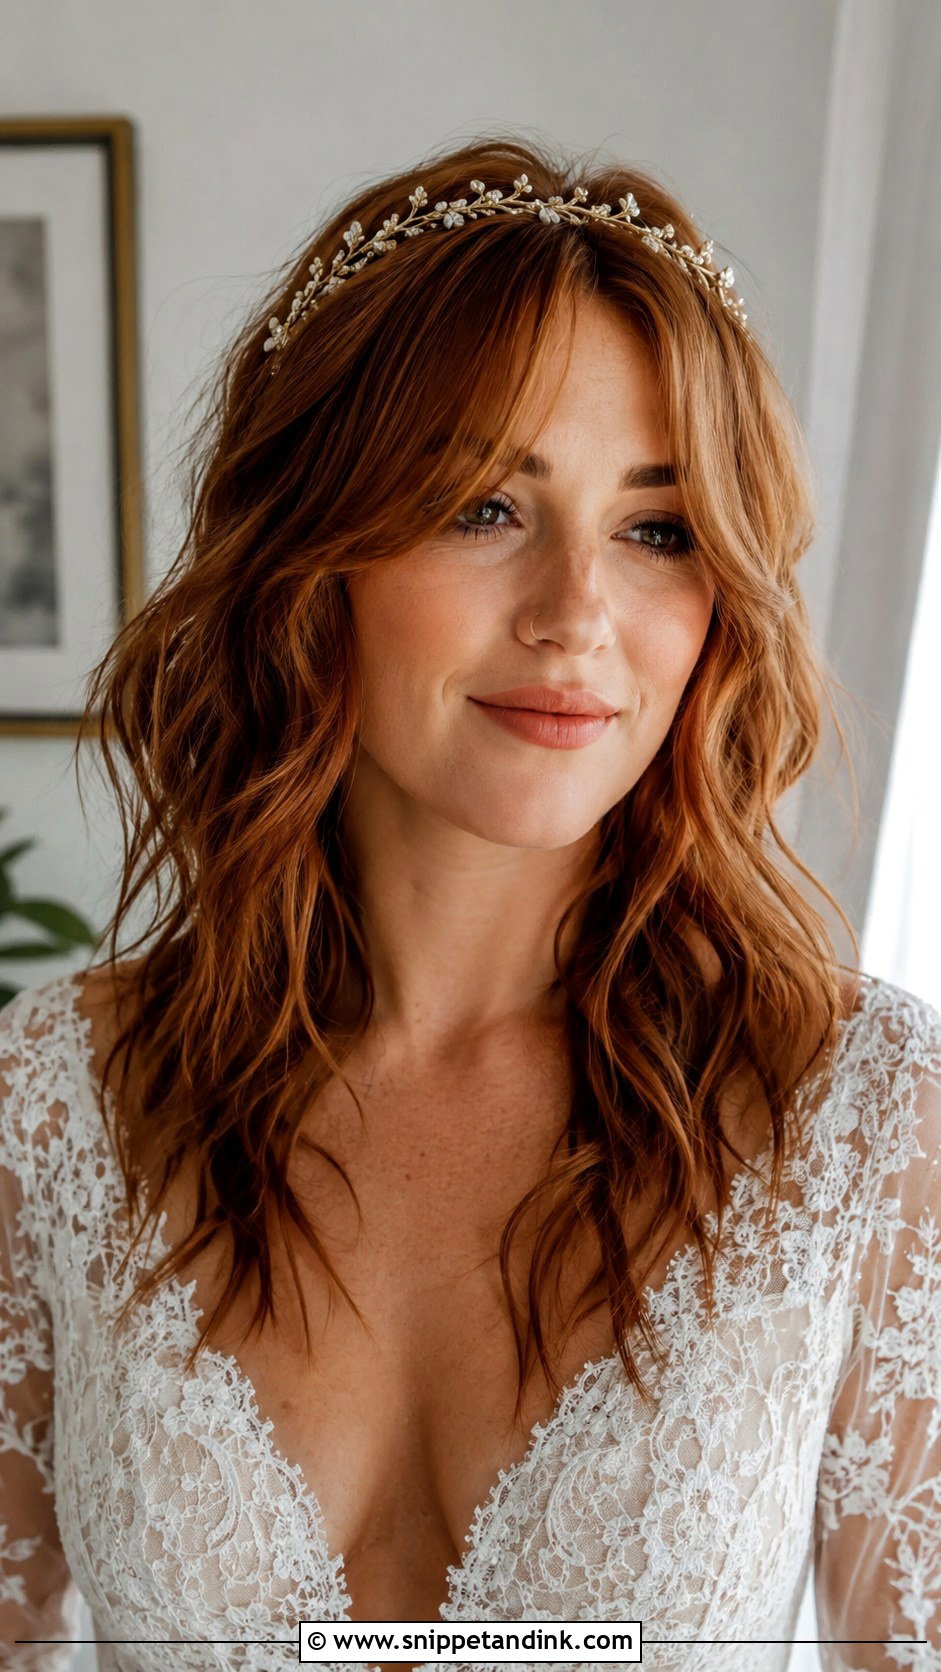
A modern wavy shag with curtain bangs already has the edge built into the layers, so styling is light. I curl the layers loosely with an iron, then shake them out with texturizing spray and blow the curtain bangs over a round brush so they split cleanly at the center. Bangs cut too close to the wedding fall too short, so get the trim done a week or so ahead. A thin hair vine suits it, and it’s a good fit for a laid-back ceremony.
25. Low Knotted Bun With Hair Accessory
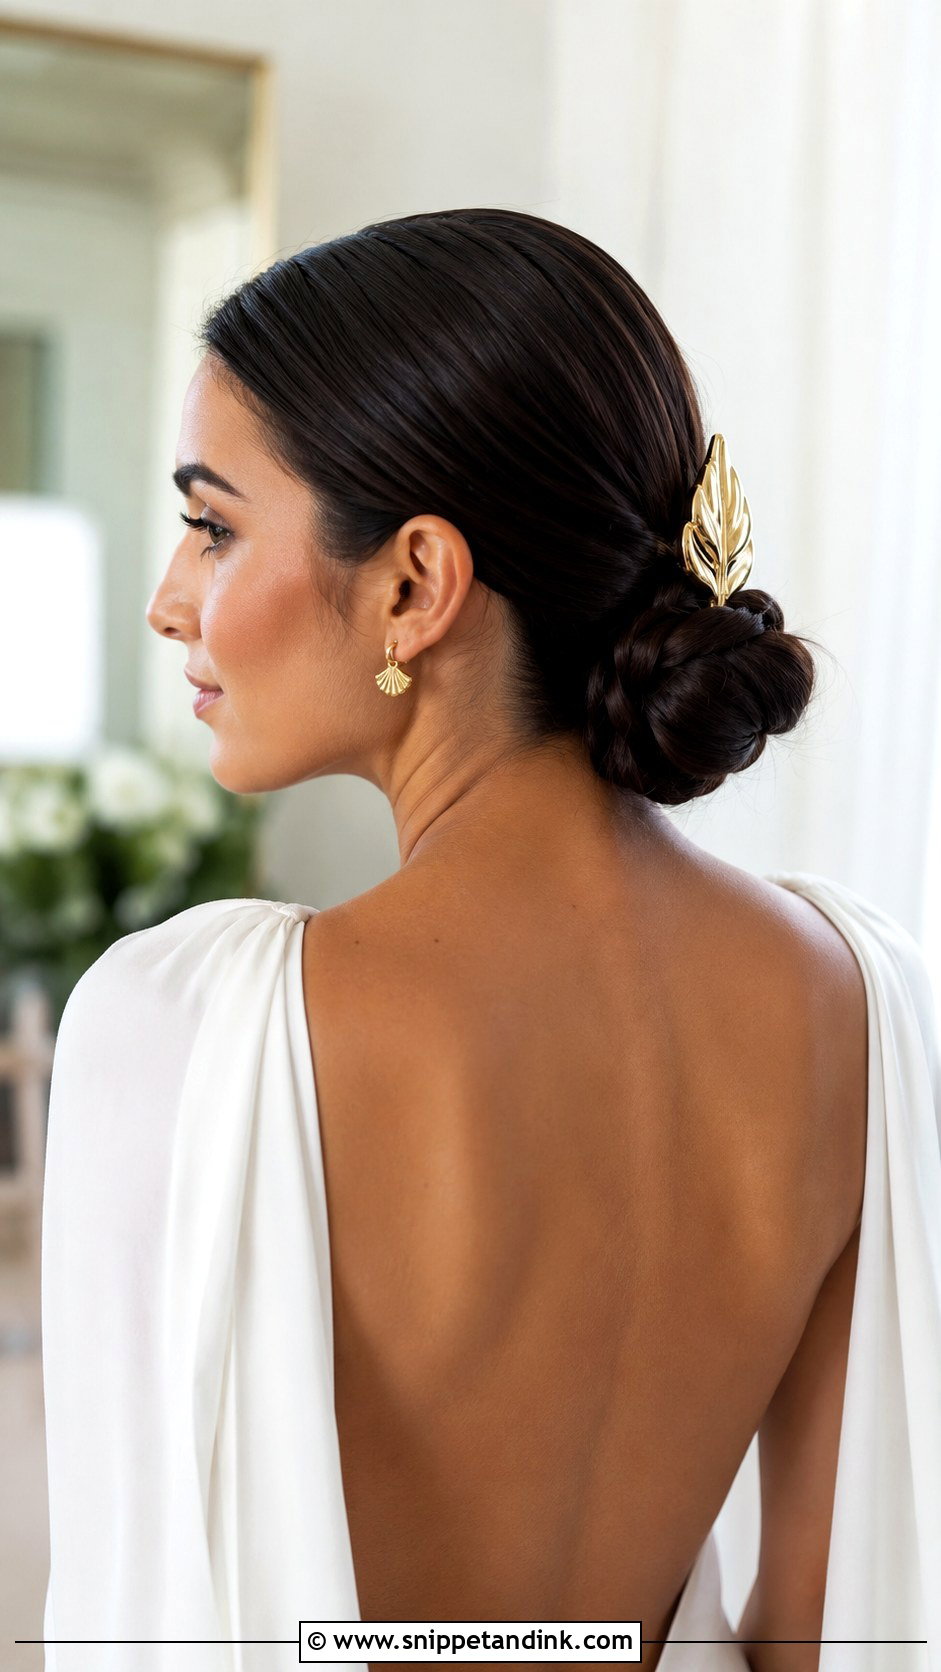
A low knotted bun is a smooth, twisted knot at the nape with one strong accessory doing the work. I smooth the hair back with a little pomade, twist and knot it, and pin it in at least four points so it doesn’t drop. The accessory should be a single statement piece, a metallic clip or a crystal pin or a hair chain, not all three together. It’s secure on medium to long hair and sits cleanly under a veil.
Why Sleek Hair Fails Faster Than Curls, and the Fixes I Carry
Brides are often surprised that a slick bun or poker-straight hair needs more upkeep than a curly updo. Curls can absorb a little frizz and still look intentional. A glass-smooth surface shows every lifted strand, and flash photography picks up flyaways at the hairline that you’d never notice in a mirror.
Humidity and the wet look
Gel styles hold well, but in heat they can soften, and if you sweat at the hairline the gel can turn tacky. I set wet looks with a light mist of strong spray after the gel dries. Outdoor summer brides should plan a quick check after the ceremony, before portraits.
What goes in the touch-up pouch
- A clean toothbrush or brow brush with a little spray on it to lay down flyaways
- A few bobby pins that match your hair color, plus two spares for any accessory
- Blotting papers for an oily part line in sleek styles
- A small amount of pomade or wax for re-pinching spikes and pixie ends
Hand the pouch to someone who will actually be near you all day. A pouch packed into the getaway car doesn’t help anyone during the first dance.
How Much Edge Your Hair Can Carry on the Day
Edgy wedding hair asks for precision more than drama: a clean cut timed right, the right product, and fewer accessories than you think you need. Whether your inspiration is a platinum pixie, a braided mohawk or a slick bun, bring photos to your trial, wear something with a similar neckline to your dress, and see how it holds through a full afternoon. Then ask for the version that still feels like you once the shoes come off and the dancing starts.
You'll Like These Ideas:


Leave a Reply