
Waves are the style I’m asked for more than any other, and they’re also the one most likely to disappoint by evening if the set is rushed. The appeal is easy to understand: waves sit with almost any neckline, they move when you walk, and they work under a veil or on their own. The range is wider than most people expect, from sculpted 1940s ridges to loose, raked-out texture that barely looks styled. Below are 20 versions I’d happily create, with notes on which hair each one suits and what keeps it holding.
Why Waves Drop by the Speeches, and How I Stop It
Waves fall for three reasons: the set wasn’t strong enough, the curls were brushed out while still warm, or the hair is fine and heavy and simply pulls itself straight. Most of what I do on the morning is aimed at the first two, because the third can only be managed, not changed.
Set it, cool it, then brush it
Heat shapes the hair, but the shape only locks in as it cools. I pin each curl in a loop against the head straight off the iron and leave the whole head pinned while makeup is done. Brush out a warm curl and you stretch it flat before it has set.
What your hair type changes
- Fine, silky hair: a light mousse on damp roots and a heat protectant with some hold, curled smaller than the finished look. Wash it the day before rather than the morning of.
- Thick, coarse hair: holds a curl well but takes longer, so allow extra chair time and work in thinner sections so the heat reaches the middle.
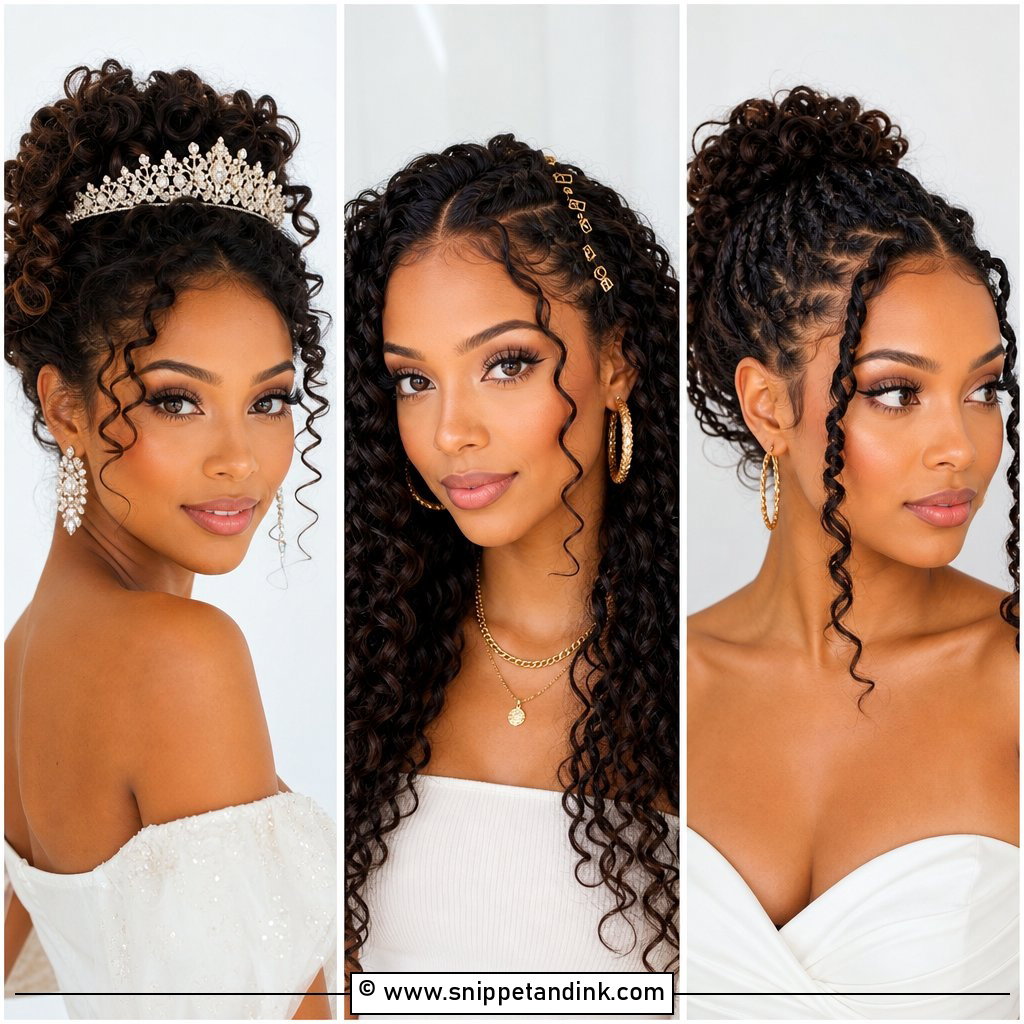
- Naturally wavy or curly hair: it often makes more sense to enhance your own pattern than to blow it straight and curl it back in.
- Layered cuts: layers help waves break and move, though very short layers can poke out of a sleek finished shape.
On the front sections I always curl away from the face. It keeps hair out of your eyes during the ceremony and opens up the cheekbones in photos.
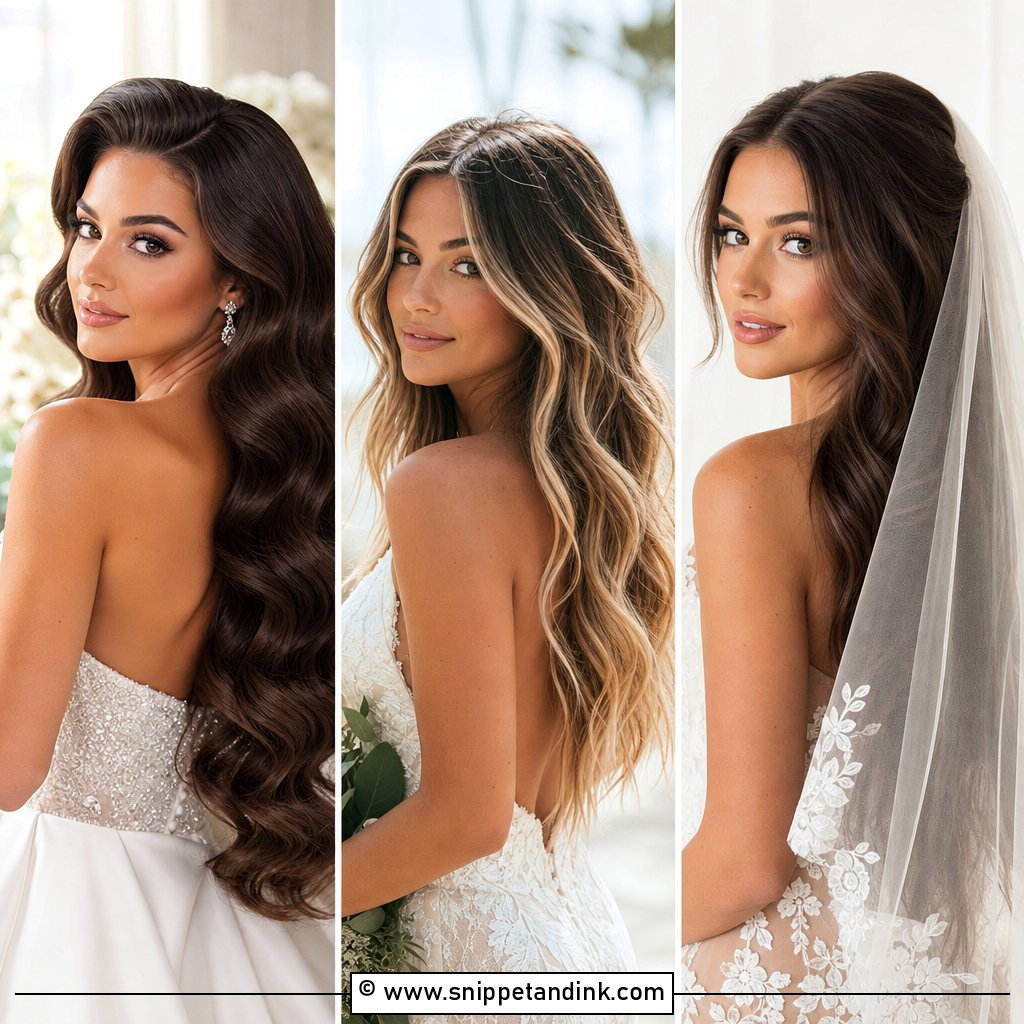
1. Old Hollywood Glamour Waves
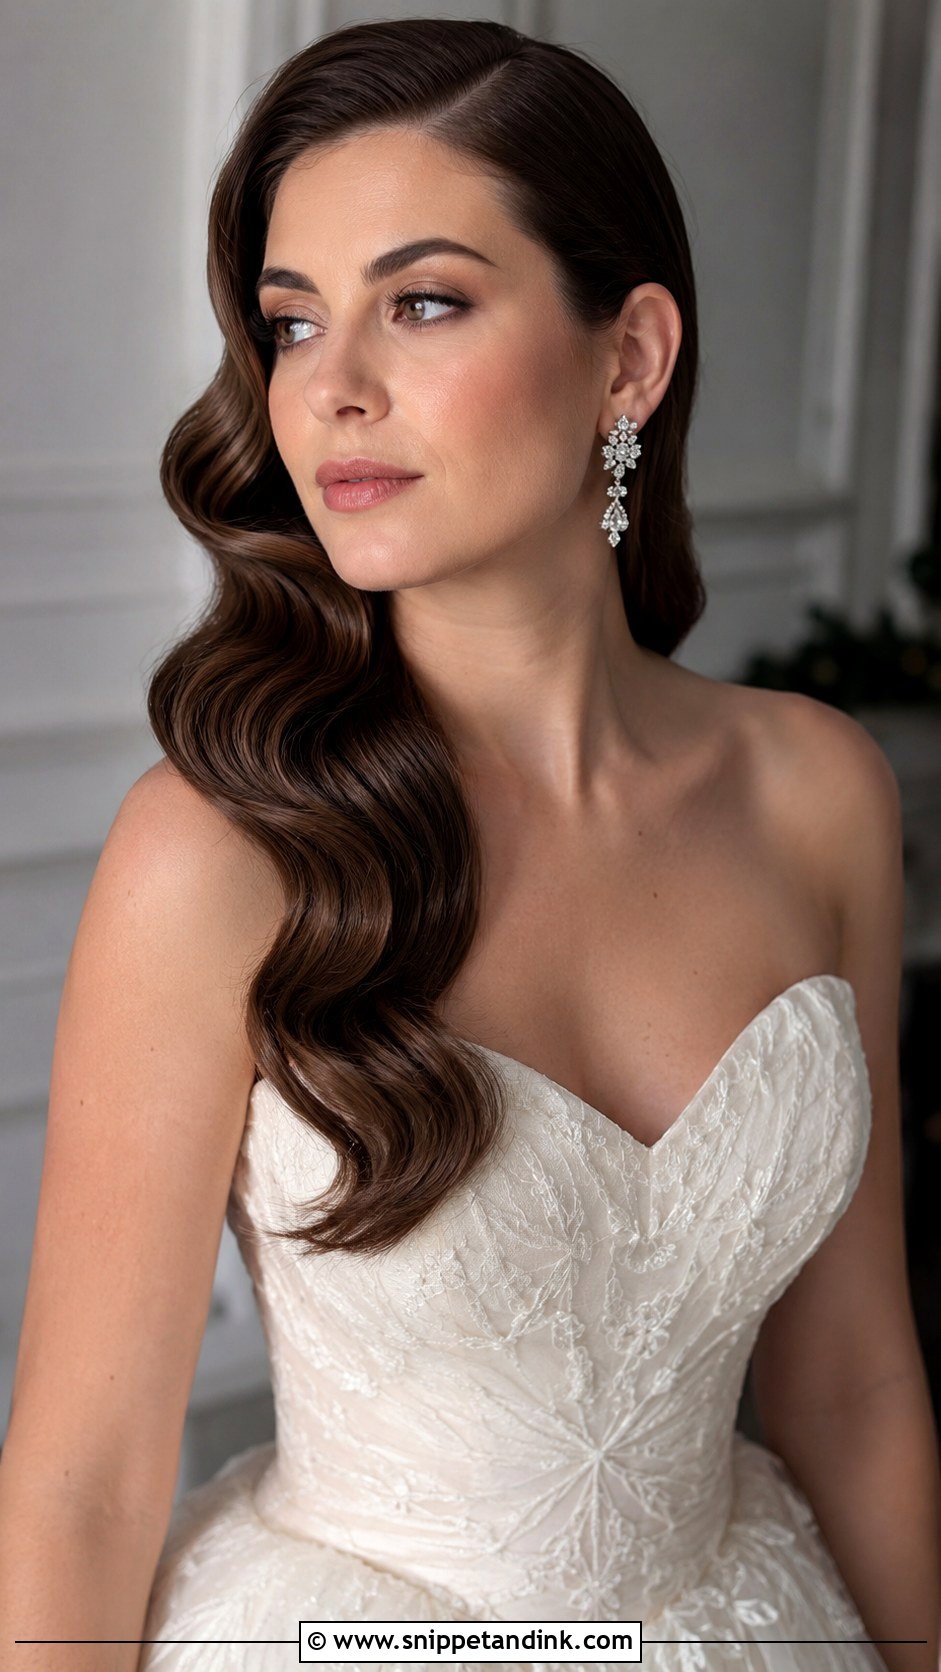
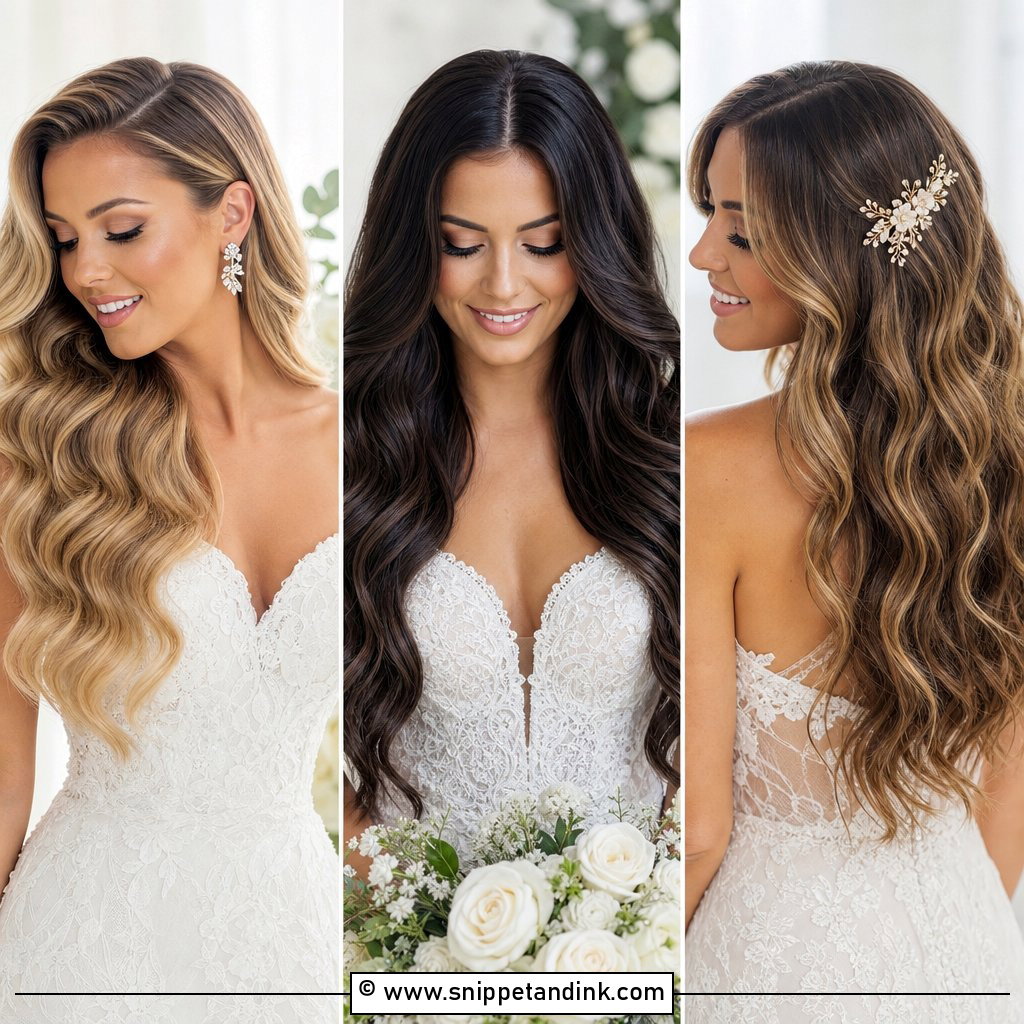
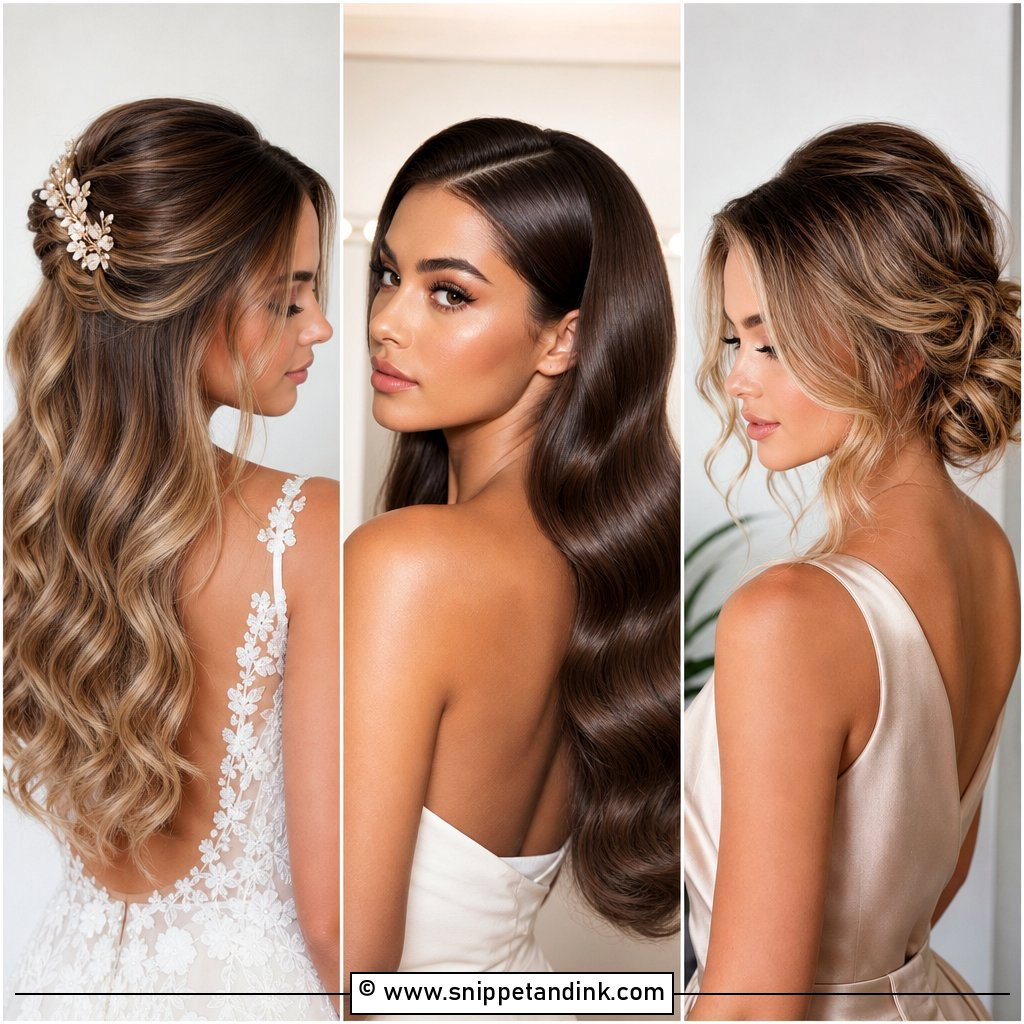
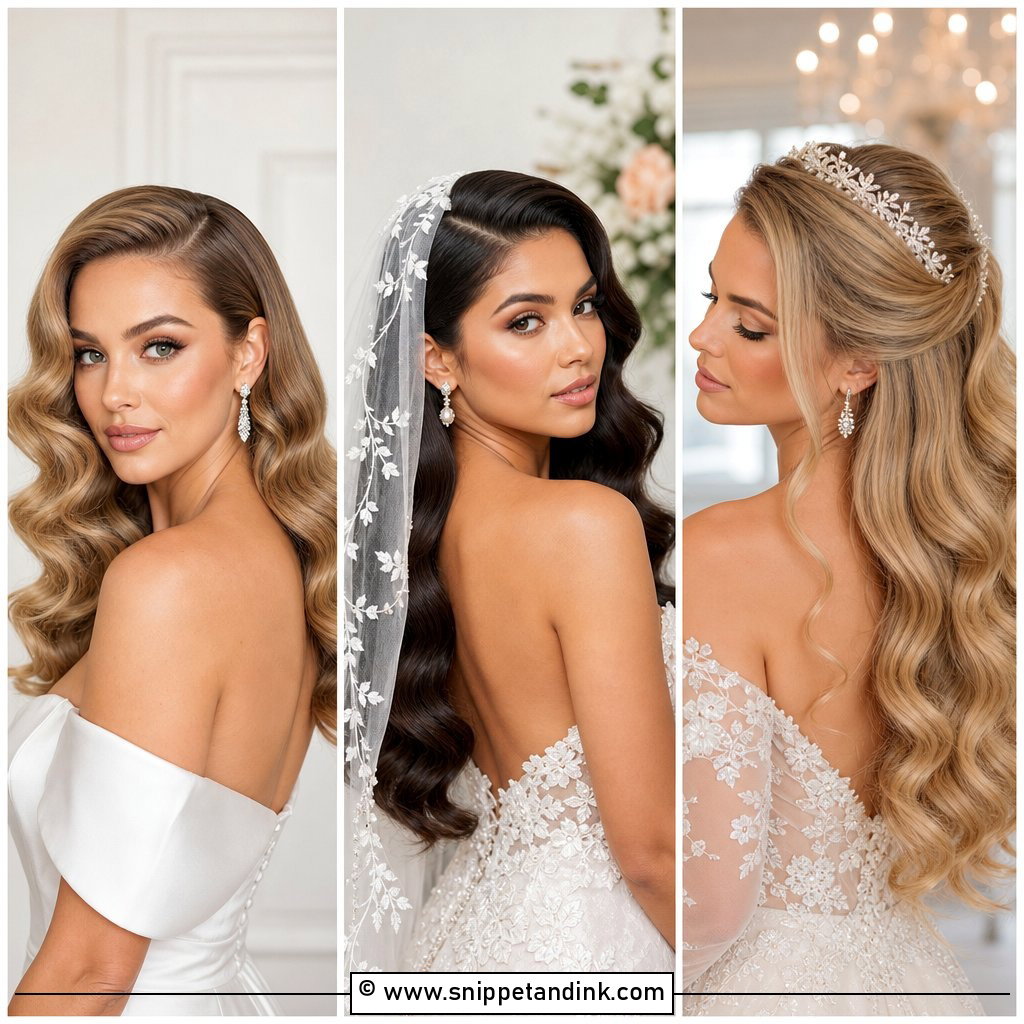
Old Hollywood waves are the most technical style on this list. Every curl is wound in the same direction, pinned while hot and left to cool before I brush the whole side out into one continuous ribbon; skip the cooling and the pattern never connects. The 1940s shape sweeps down one side of the face, so it needs a deep part and enough length to reach at least the collarbone. I finish with a light shine spray and hold the crease points with flat clips that come out just before photos. It’s at its best with a fitted gown and a single strong earring.
2. Loose Beachy Waves
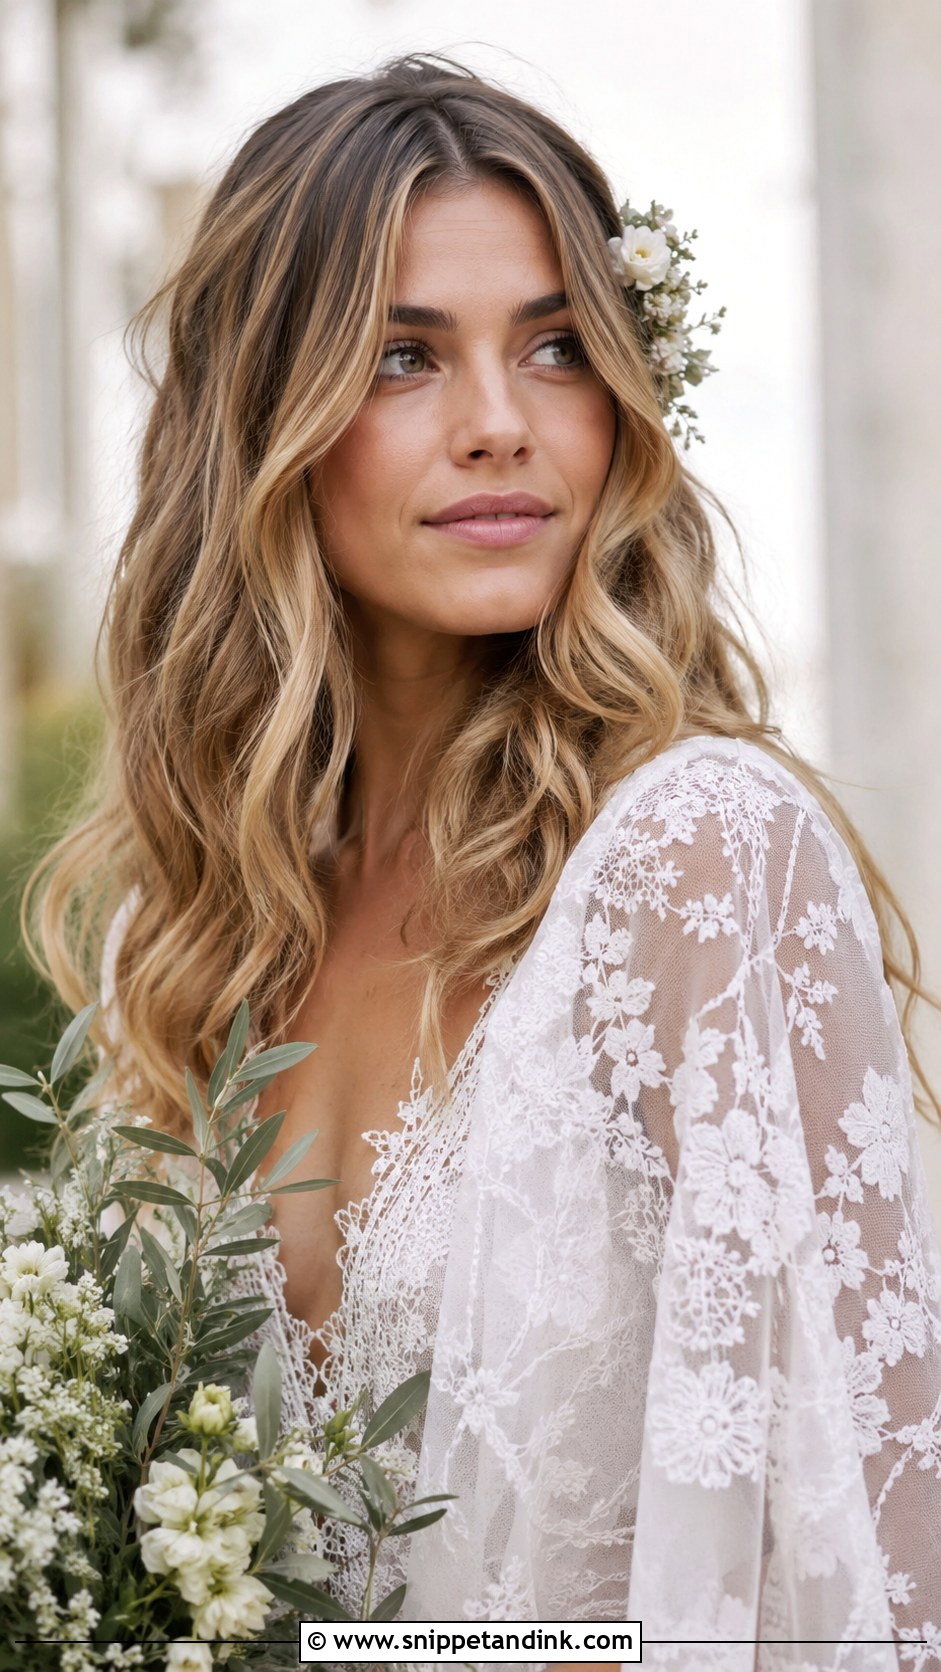
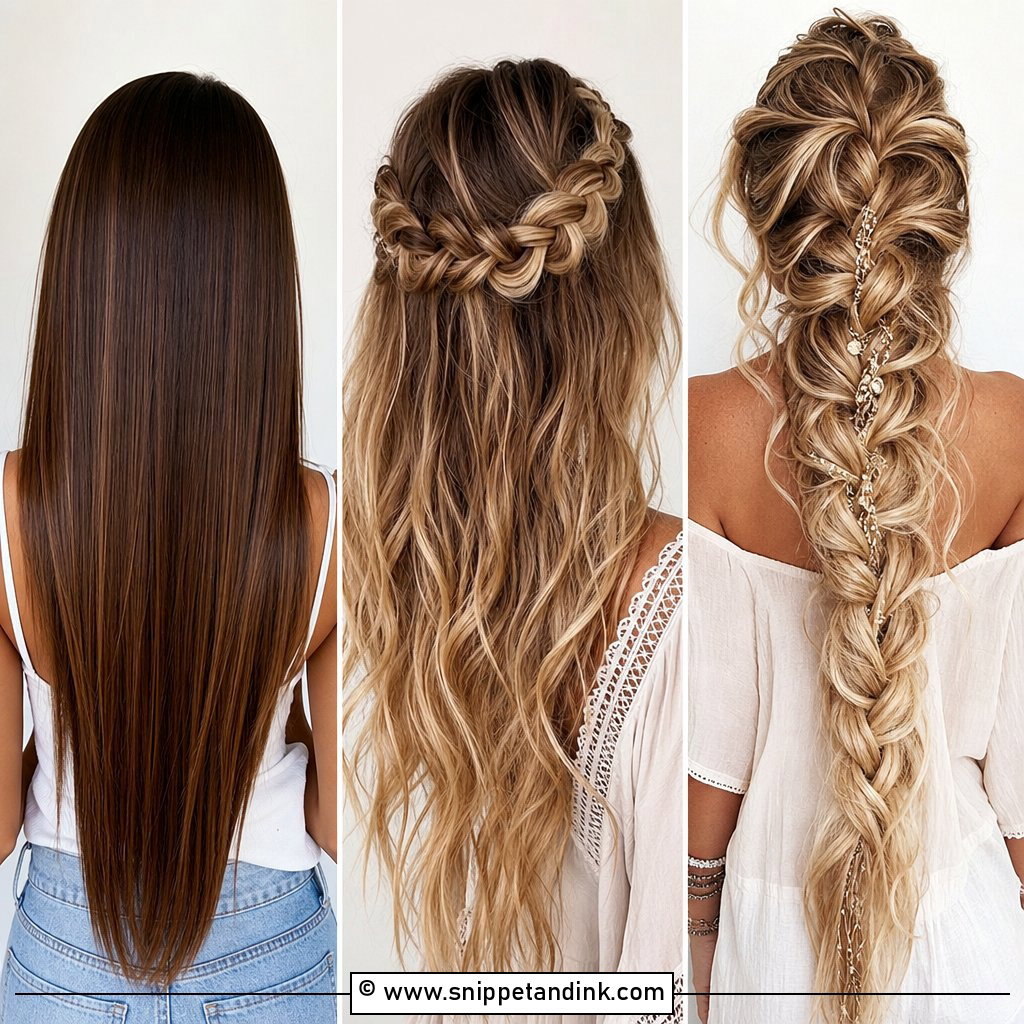
Loose beachy waves look as if nothing was done, which takes more work than it seems. I curl with a wide barrel, leaving the last few centimetres of each section straight so the ends don’t flip, then rake everything apart with my fingers once it cools. Texturising spray adds grip and that slightly dry, sun-warmed feel. Fine, silky hair can lose this within an hour, so I often curl it tighter than the finished look and let it relax. A centre part keeps it current, and it sits naturally with a flowing bohemian gown at a garden or seaside ceremony.
3. Side-Swept Bridal Waves
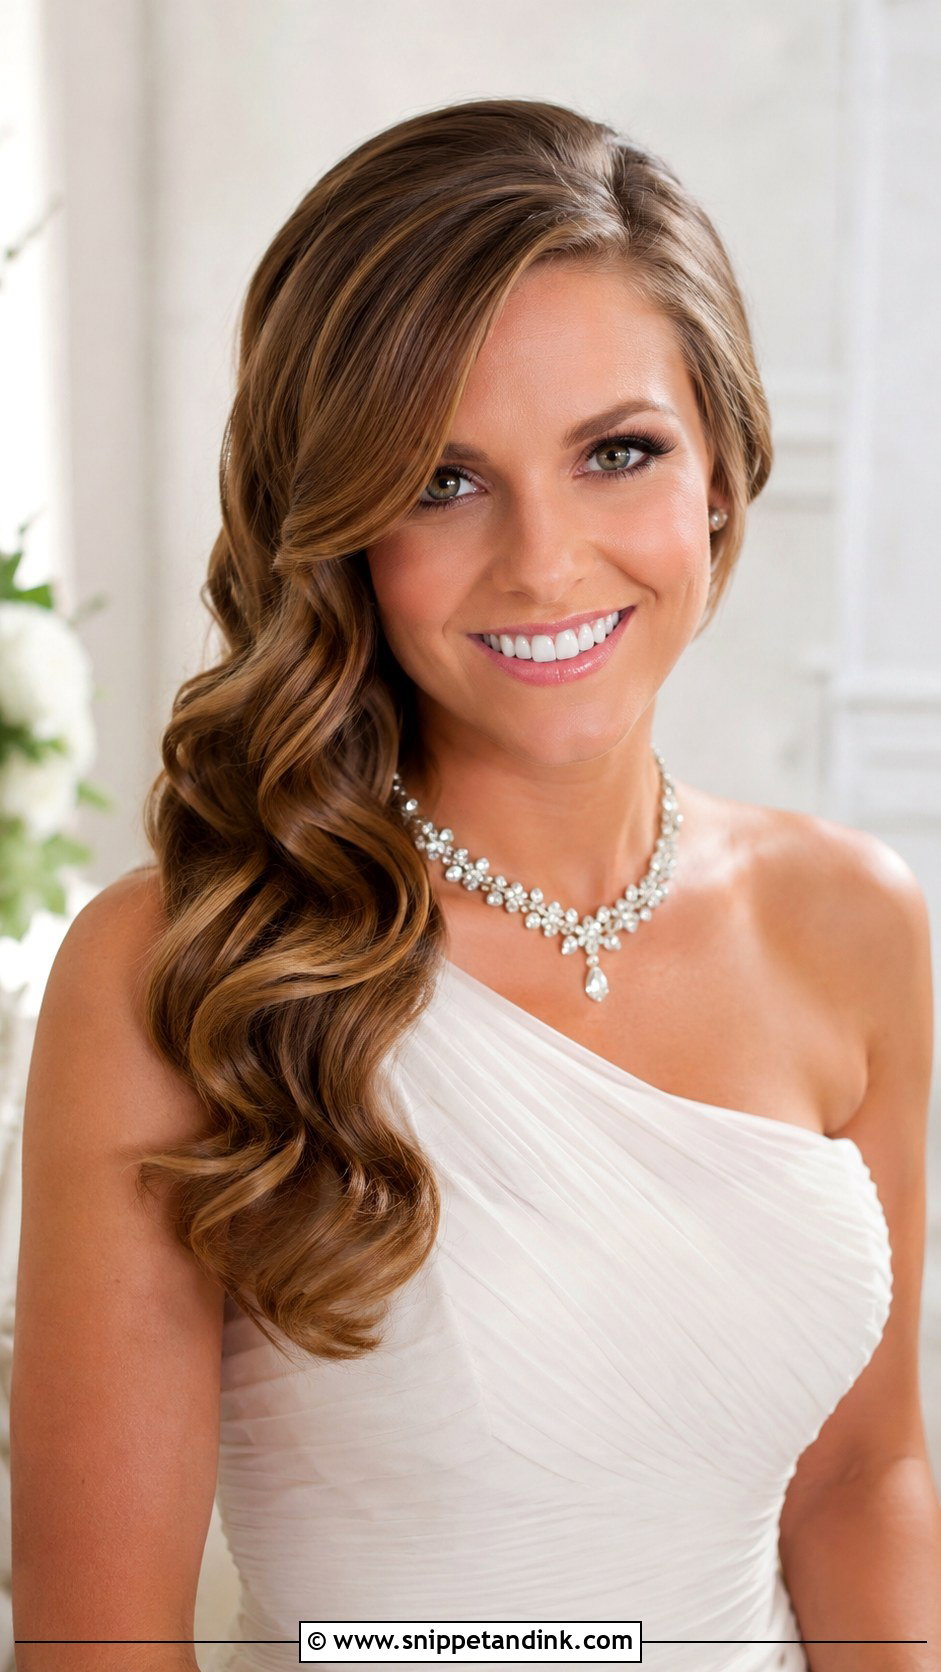
Sweeping every wave over one shoulder puts all the weight on one side of the head, so the secret is the anchor behind the opposite ear. I cross two or three pins there, hidden under a lifted section, and that’s what stops the shape sliding back to centre by mid-afternoon. A deep side part adds height on the heavy side. The asymmetry shows off a one-shoulder neckline or a statement necklace well. Keep the waves loose, though; tight curls bunched on one shoulder look crowded rather than swept.
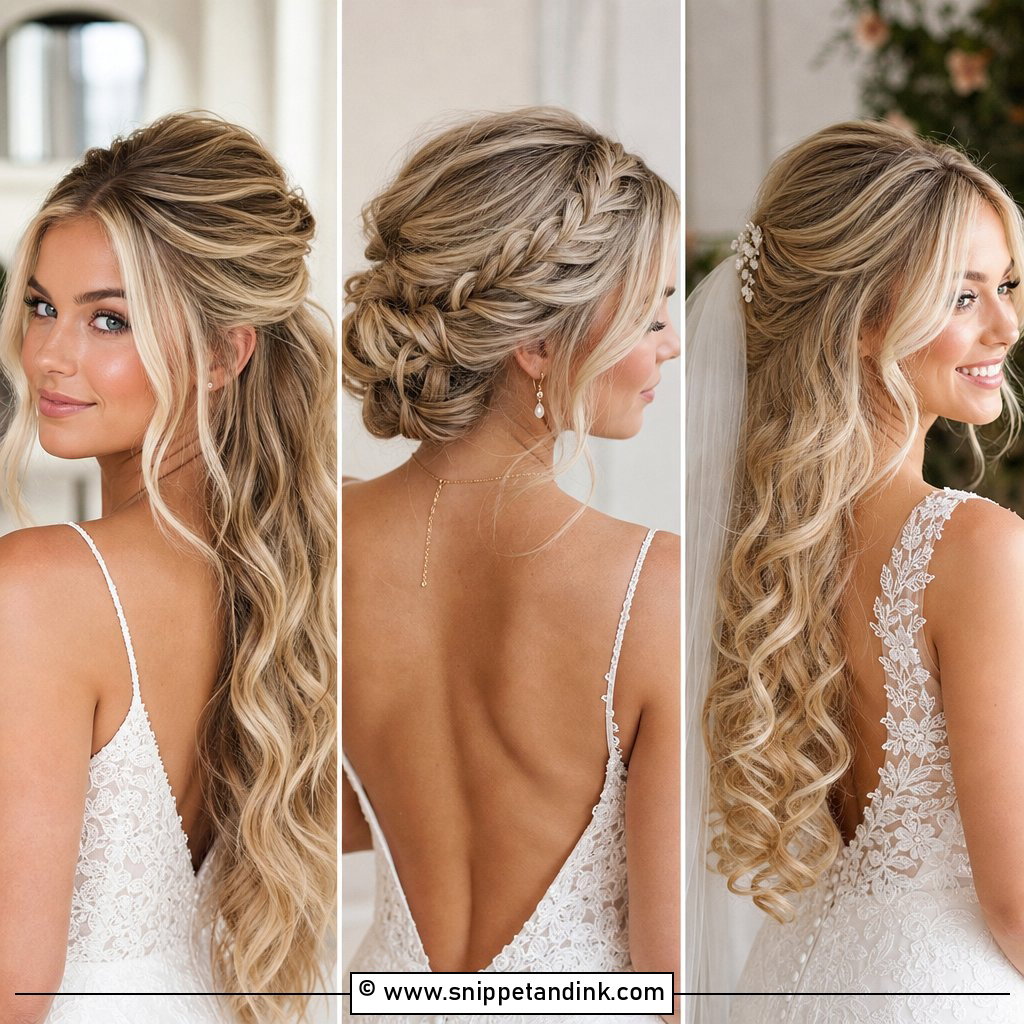
4. Half-Up Half-Down Waves
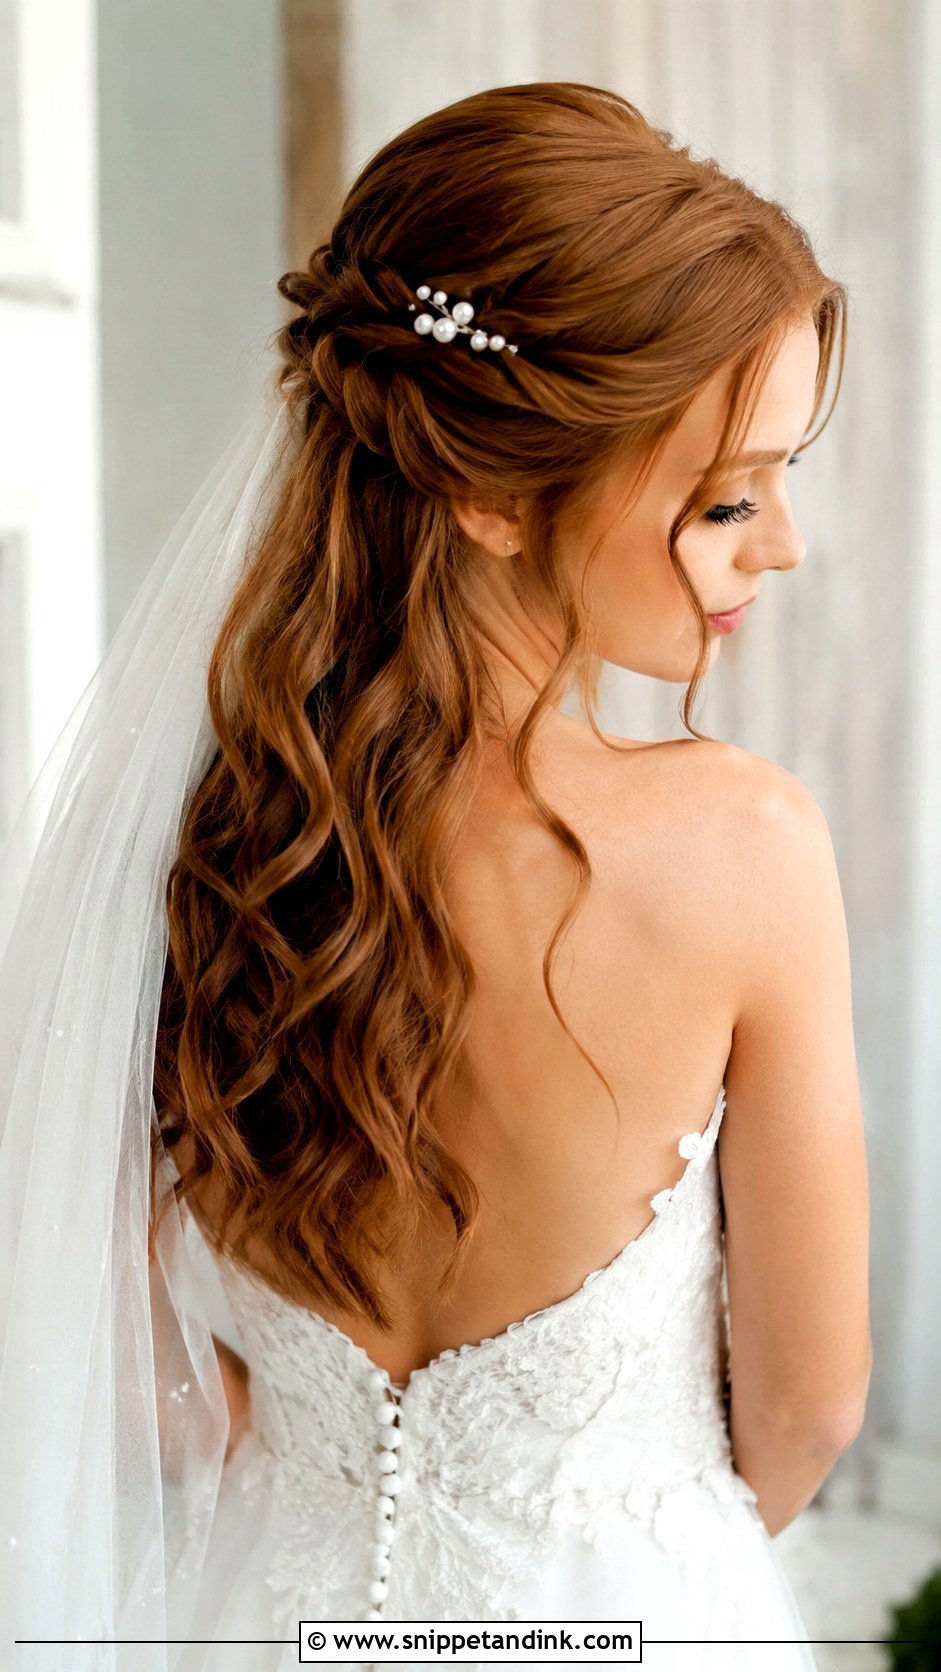
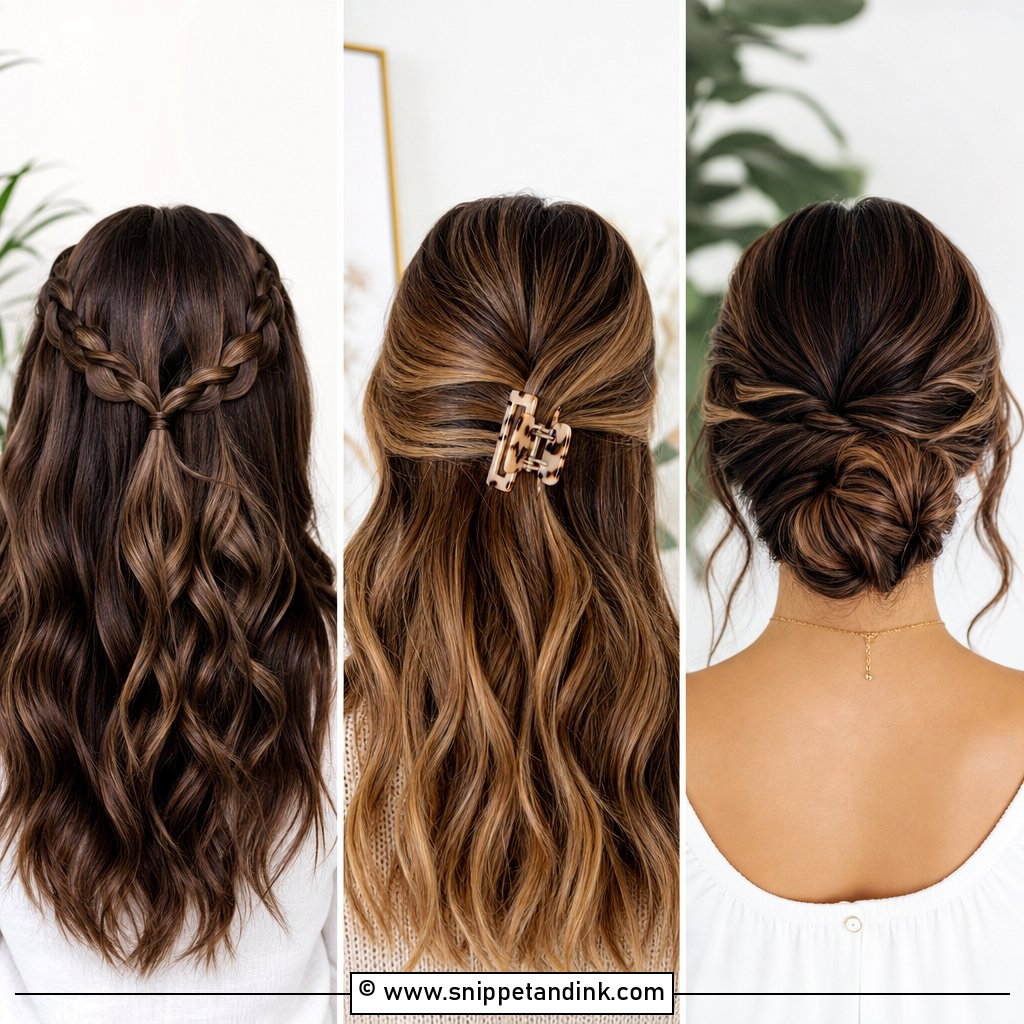
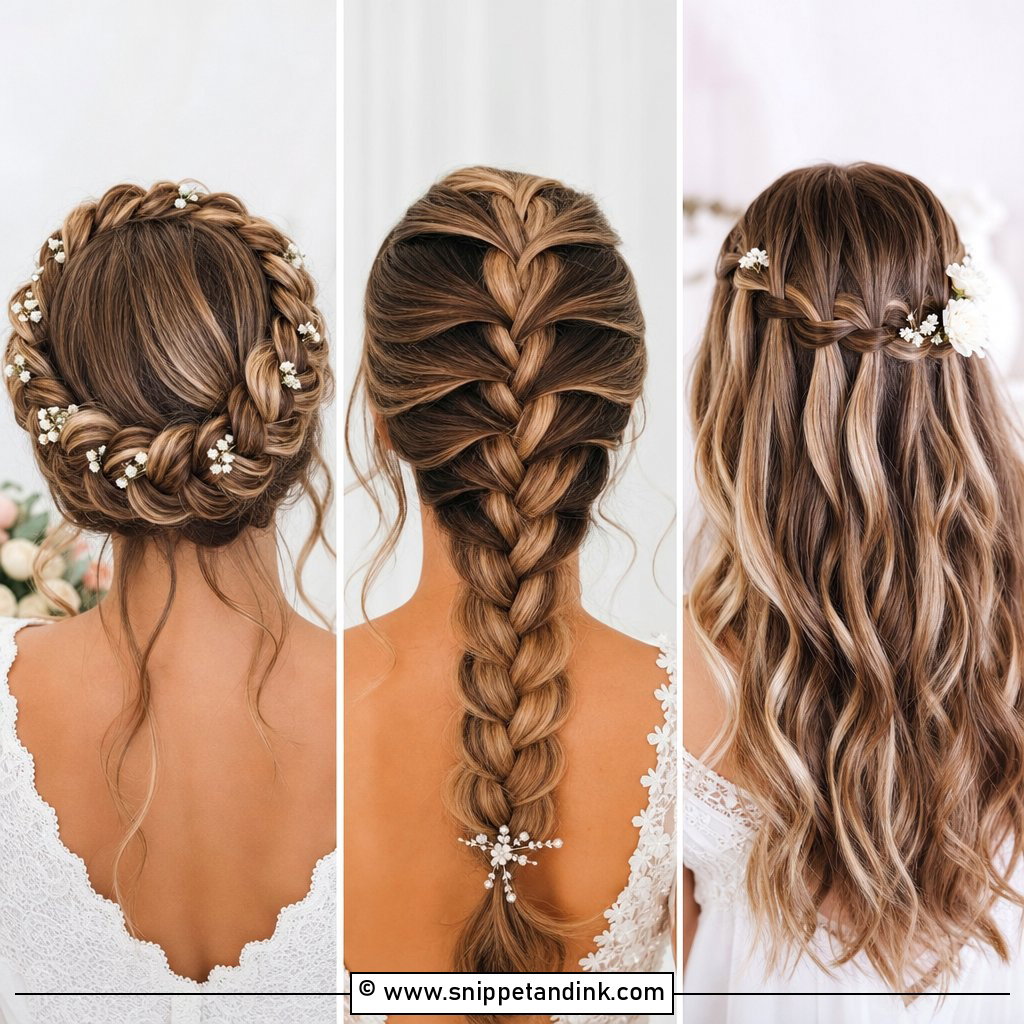
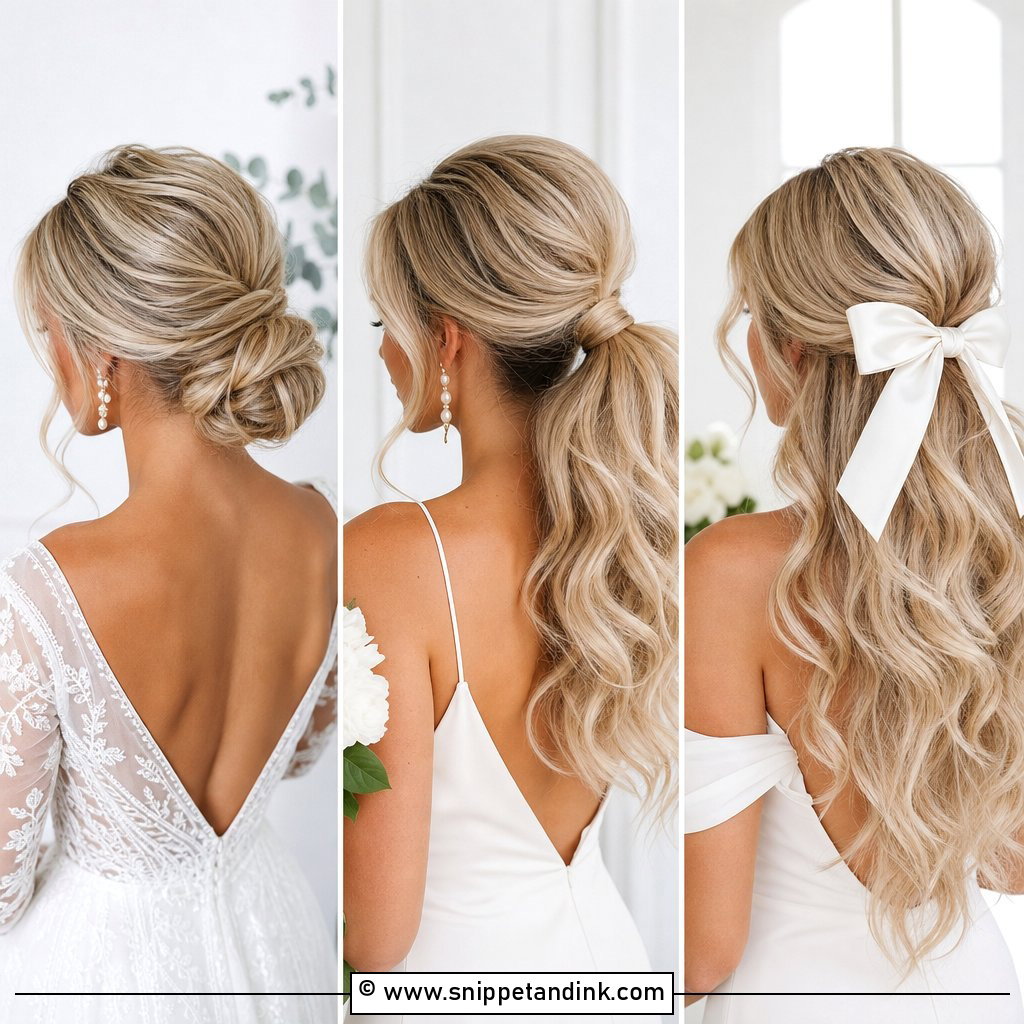
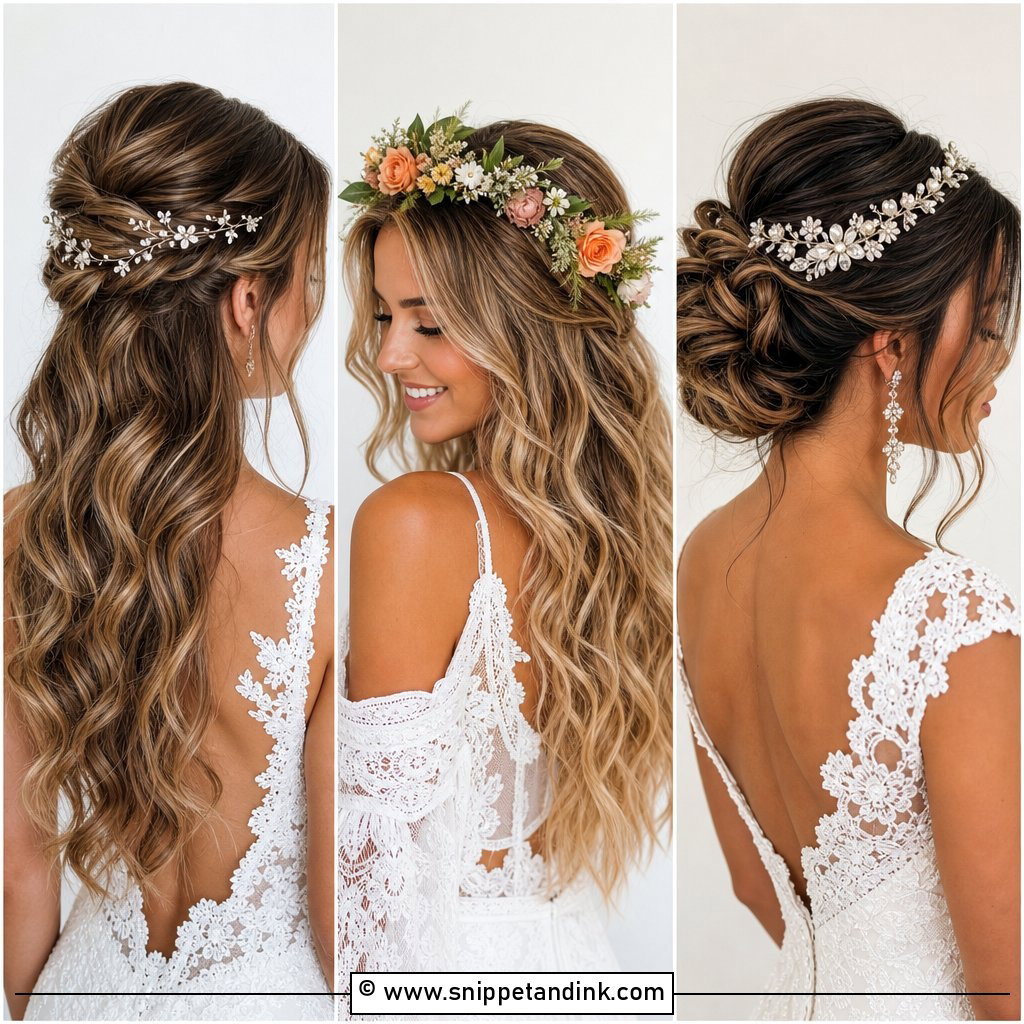
Half-up solves the classic up-or-down dilemma, but I recommend it just as often because it gives a veil comb somewhere solid to sit. The top section is pulled back and secured, usually on a small hidden elastic, so the crown keeps its lift all day. A twist, a slim braid or a couple of pearl pins can decorate the join. The lengths below need a strong set, since they hang free with nothing supporting them. It flatters most face shapes and almost any length past the chin, which is why it stays one of the most requested wedding styles.
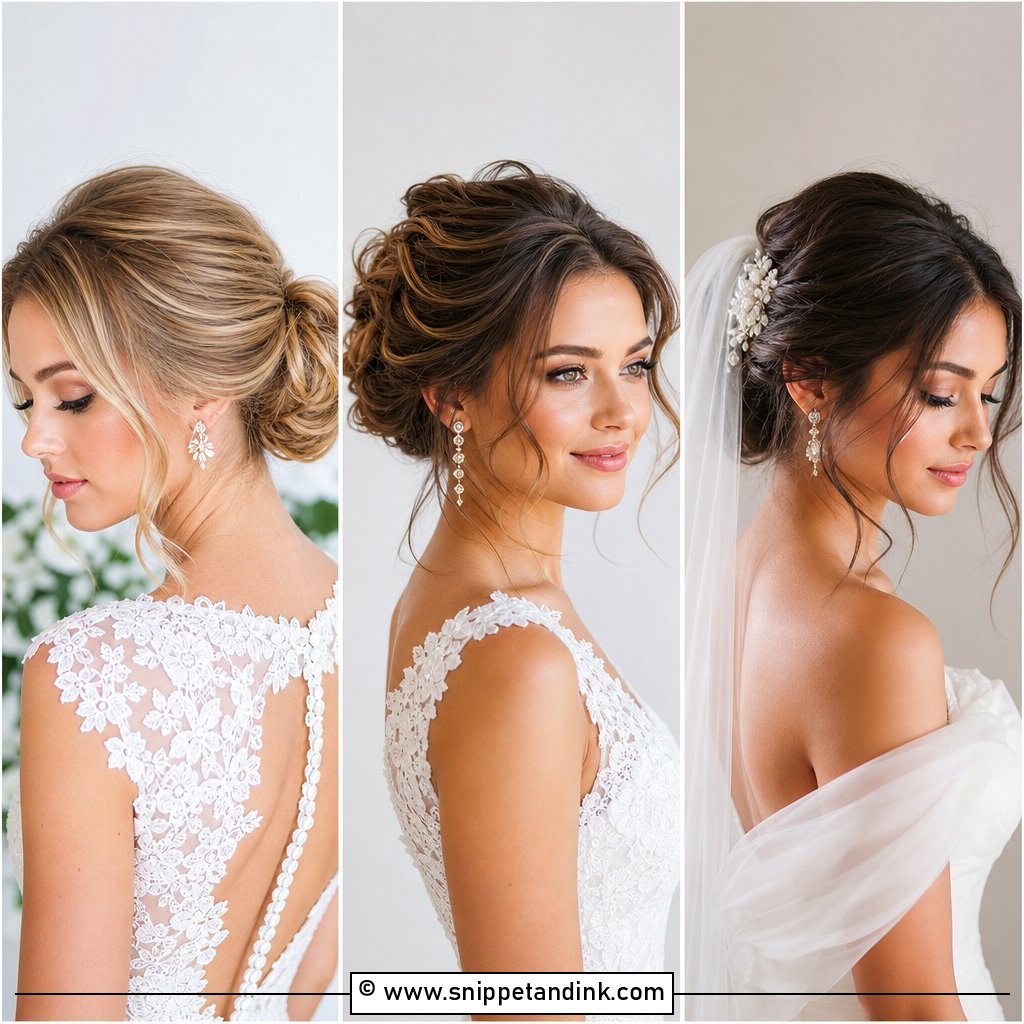
5. Soft Romantic Waves With Veil
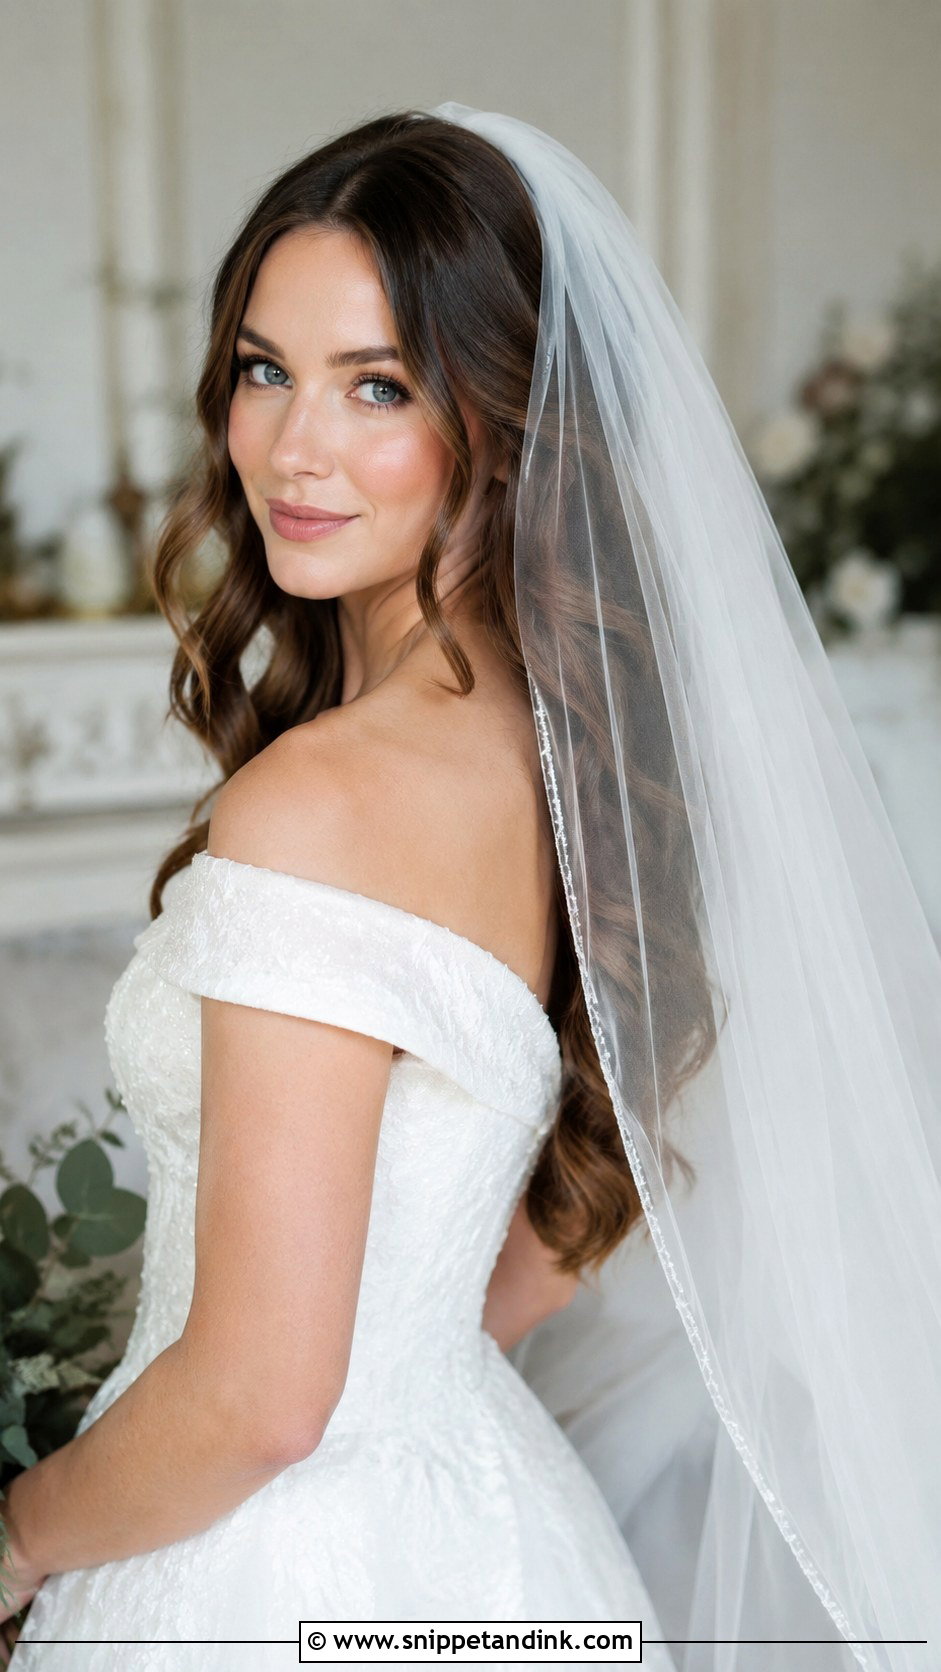
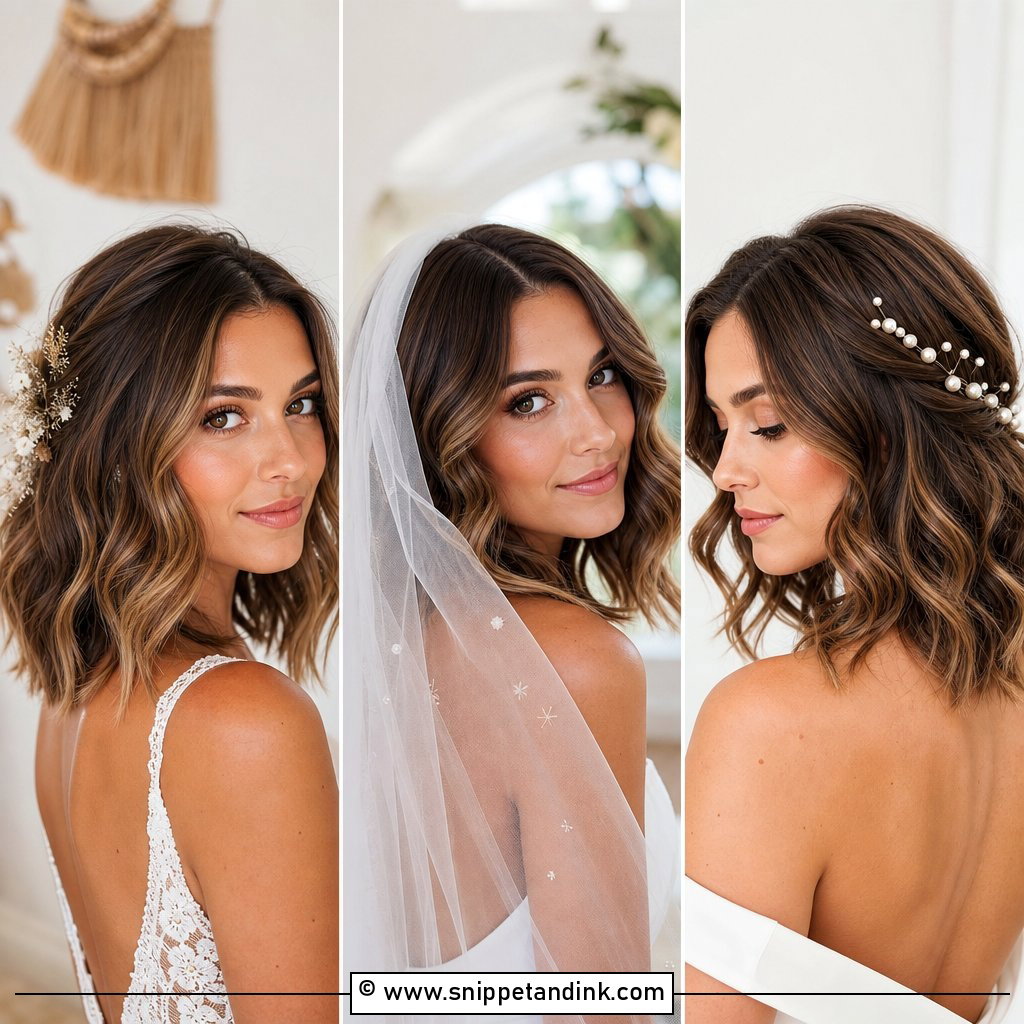
Waves and a veil need to be planned together. A comb pushed into loose waves will slip, so I build a small anchor first, either a mini bun or a crisscross of pins at the crown, and slide the comb into that. Where the veil sits, above or below the waves, depends on the back of your dress and how much of it you want on show. Brushed-out waves flatten a little under tulle, so I set them slightly stronger than usual. When the veil comes off at the reception, a quick lift at the crown and the waves look freshly done.
6. Glam Hollywood Waves With Deep Part
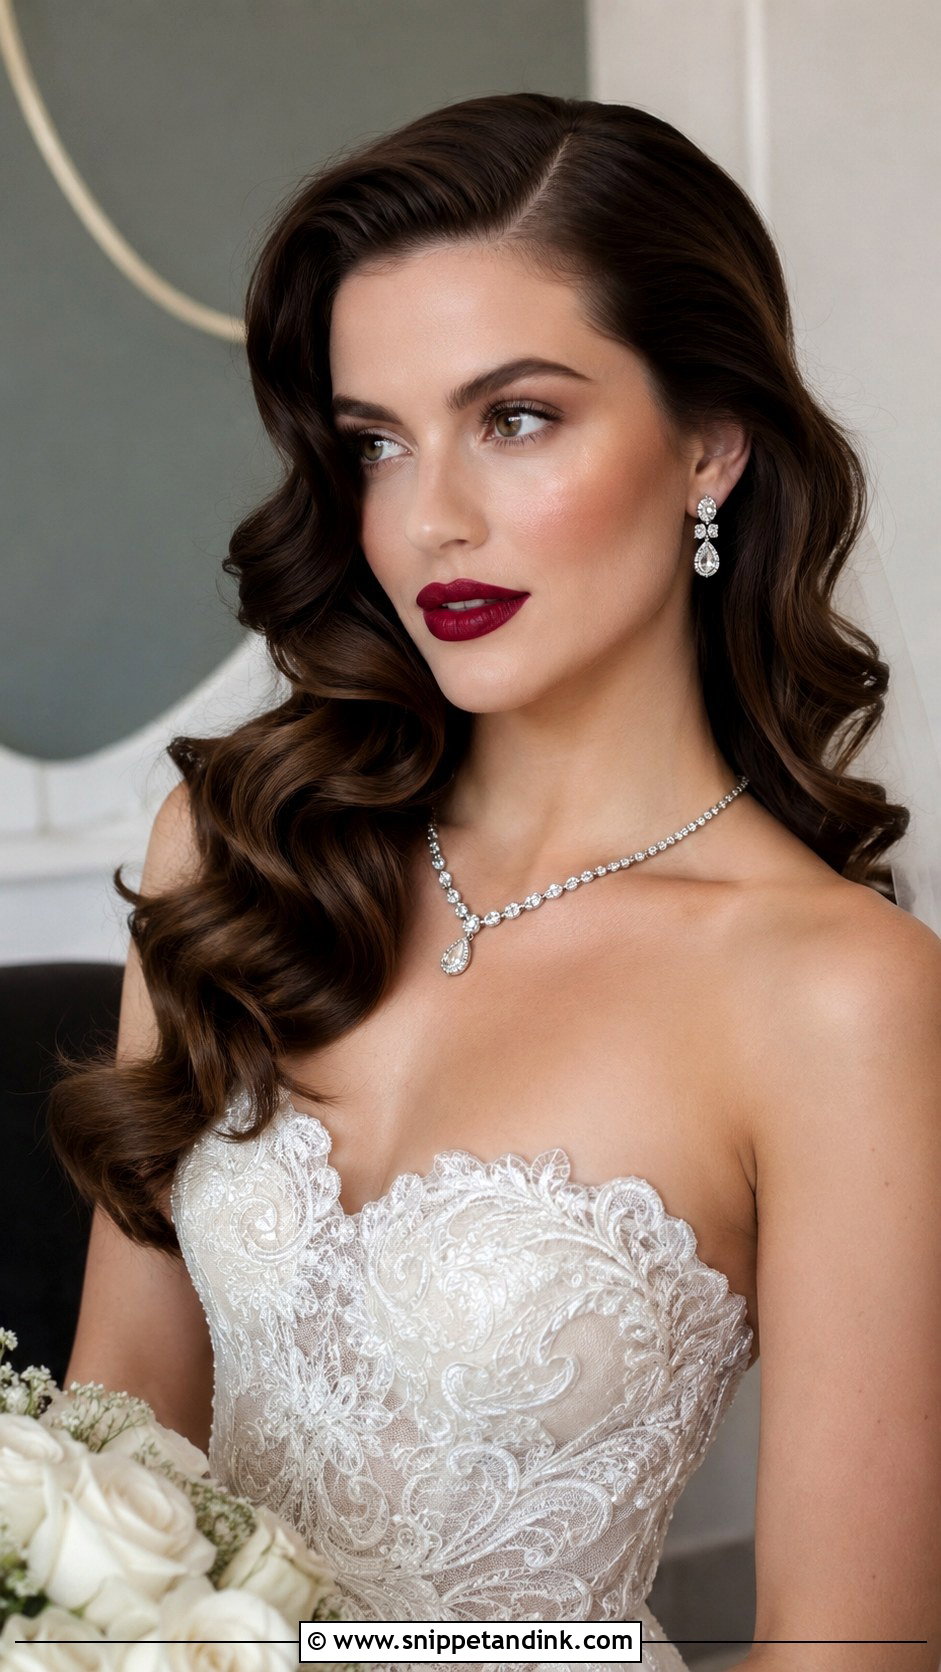
This is the evening version of the Hollywood look: tighter, more defined and glossier. The exaggerated part lifts one side and pushes a wave across the forehead, which suits a high forehead and softens a strong jaw. I smooth each wave with a fine-tooth comb and lock the crease with a firm hold spray. It’s unforgiving of humidity and of hands, so warn your bridesmaids not to touch. Bold lips and sparkling jewellery belong with it; soft boho accessories don’t.
7. Tousled Waves With Center Part
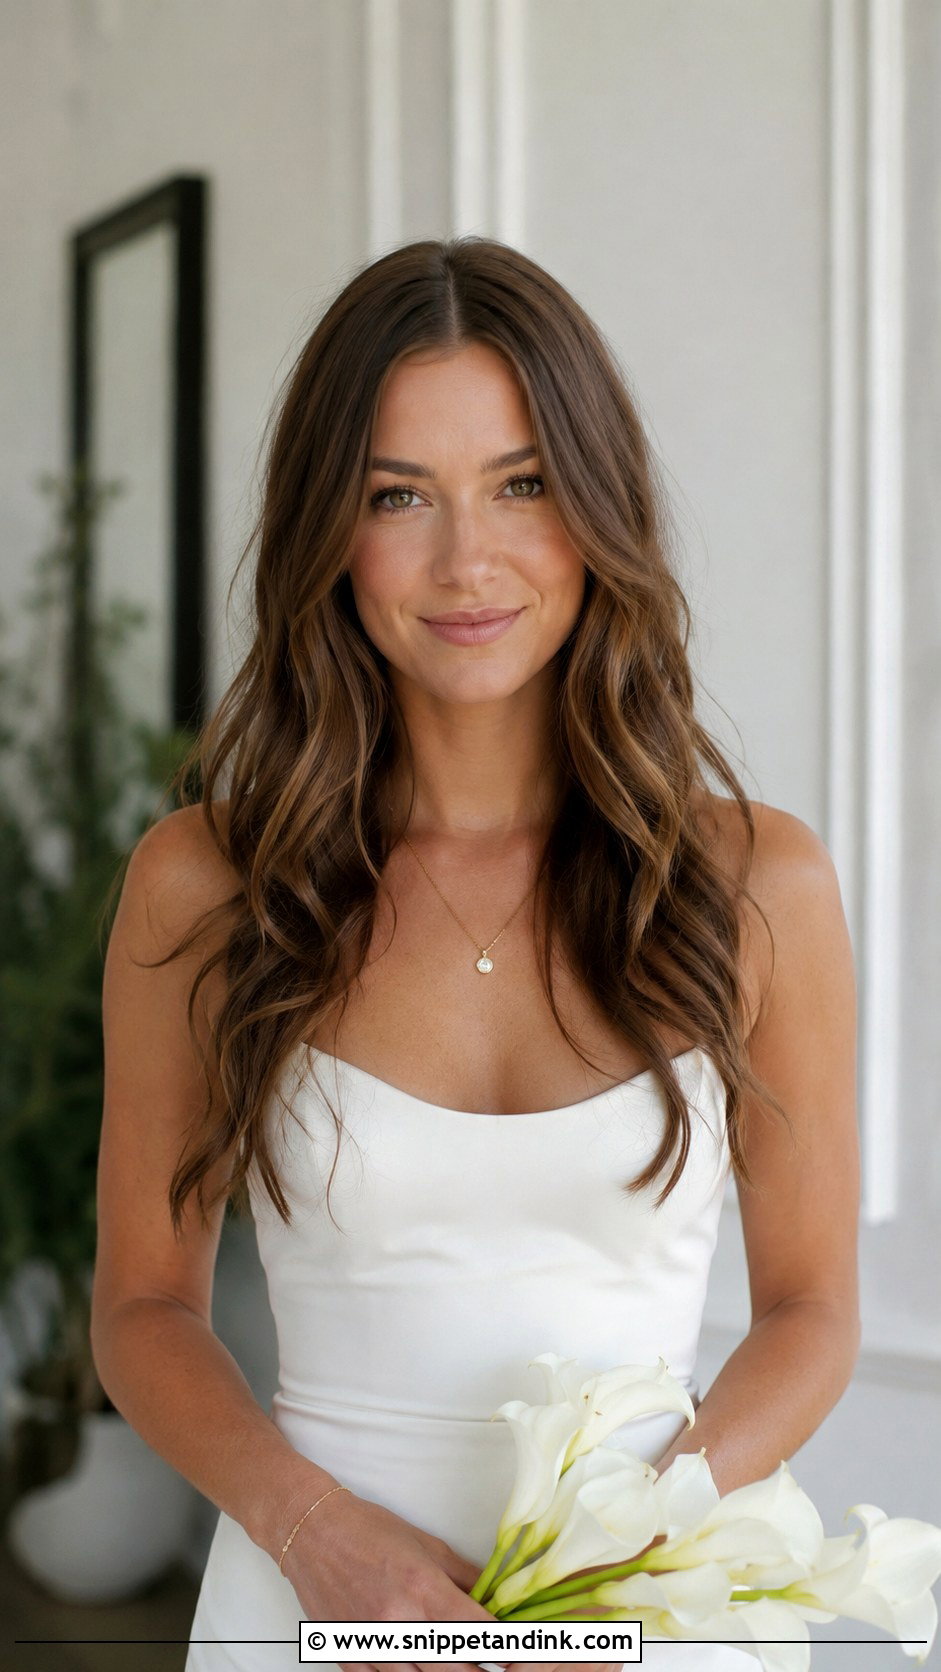
Tousled waves are deliberately imperfect, and that makes them one of the easiest styles to keep looking right all day. A centre part frames the face symmetrically, so I check at the trial that it suits you, because it can highlight any natural unevenness in the features. I curl in alternating directions to stop the waves stacking into neat ringlets, then break them up with a light sea-salt or texture spray. The finish should feel soft when you touch it, never crunchy. Minimal gowns and simple jewellery suit it best.
8. Long Cascading Waves
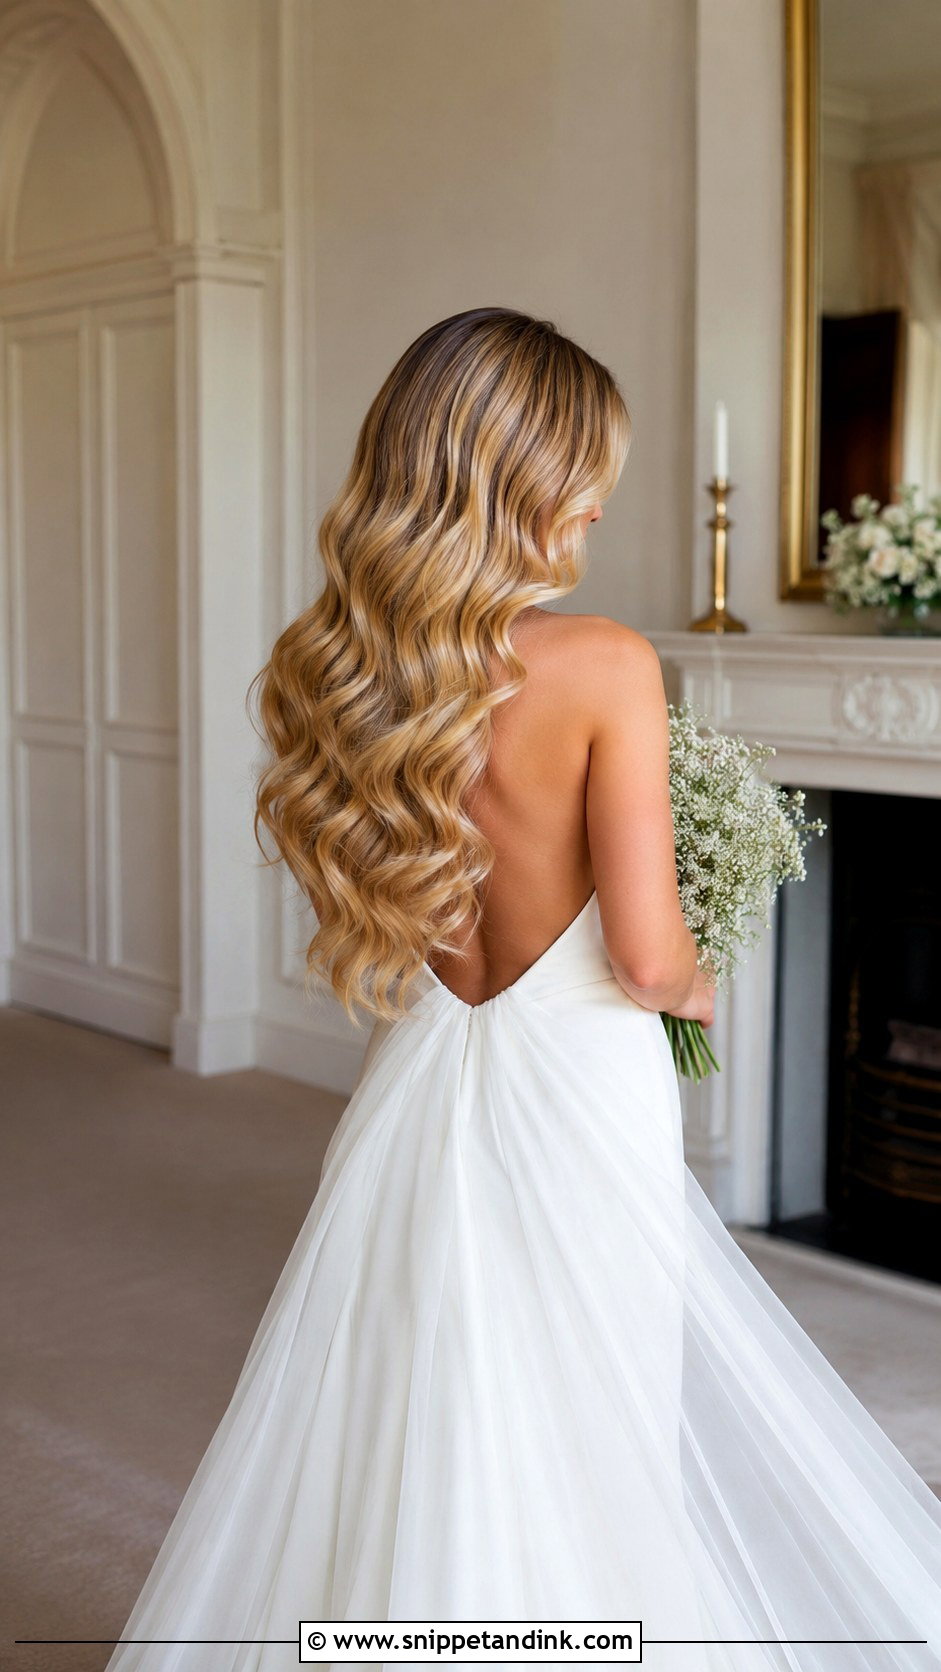
Long hair is heavy, and weight pulls waves straight. When a bride has grown her hair out for the wedding, I curl in smaller sections than she’d expect and pin every curl to cool before brushing out. Layers help, taking off some weight and giving the waves places to break. A little shine serum on the mid-lengths controls frizz without flattening the root. Worn fully down or with the front pieces pulled back, it pairs naturally with a backless gown or a long train, and it shows off all that growing time.
9. Vintage Finger Waves
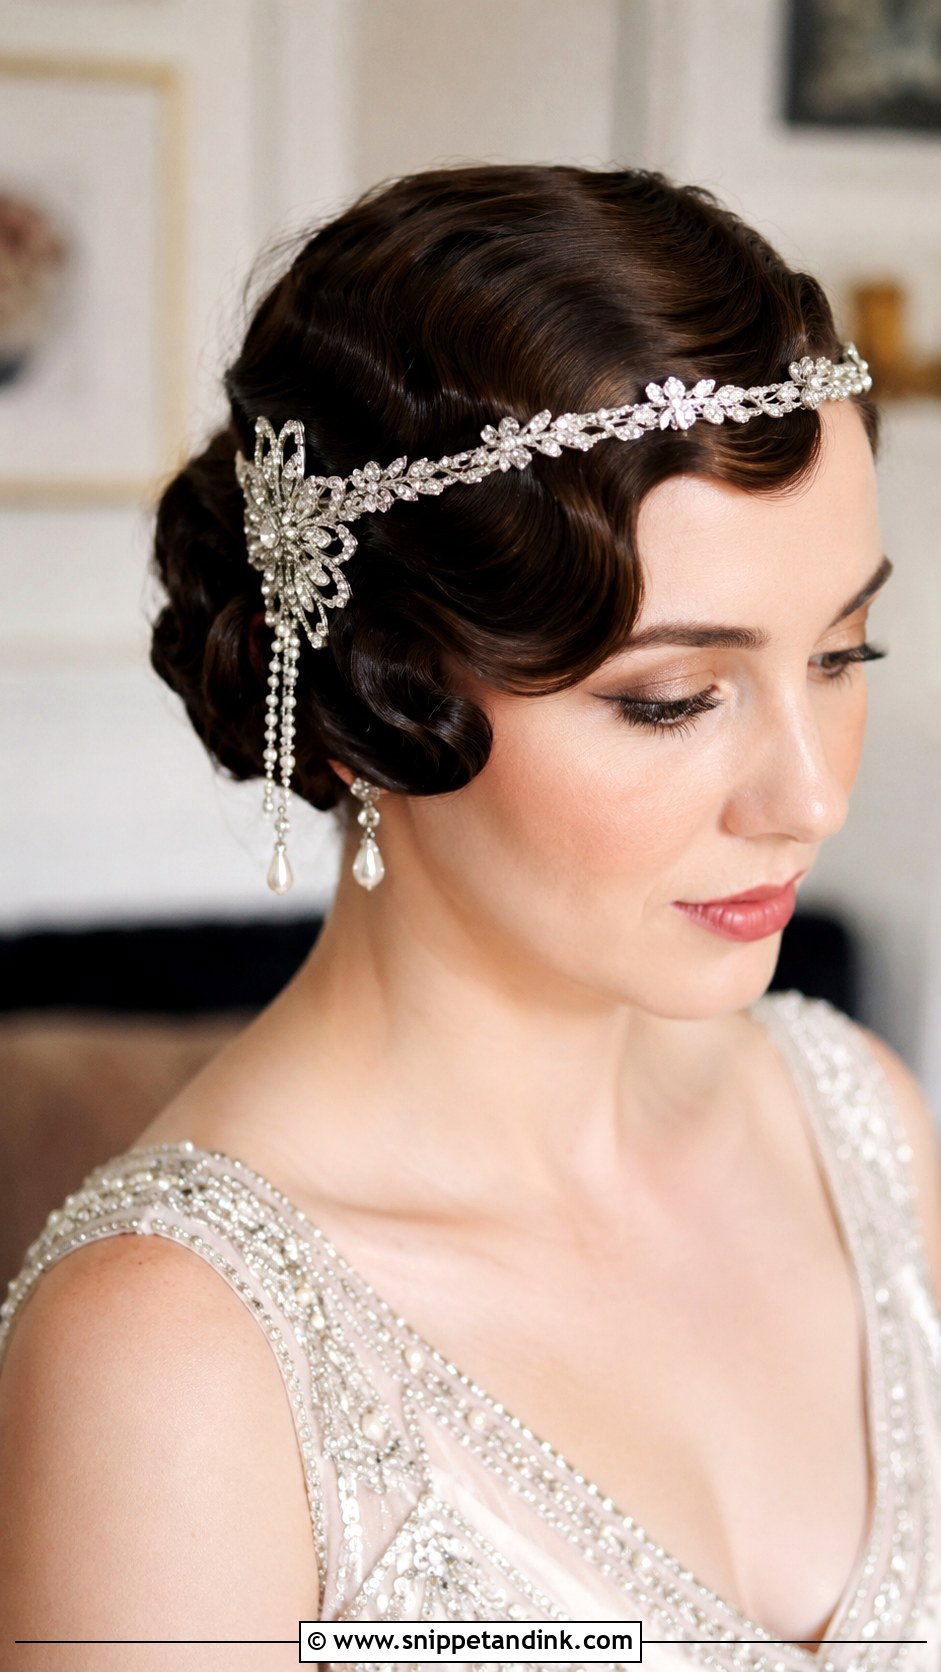
Finger waves are sculpted rather than curled. The hair is coated in setting gel, combed into an S and pinched into ridges with fingers and clips while still wet. This 1920s-inspired style sits flat against the head, so it suits short hair best, or just the front section of longer hair with the rest tucked into a low bun. The gel has to dry completely before the clips come out, so I book it as one of the first appointments of the morning. A jewelled headpiece suits an Art Deco or Gatsby theme. Once set, it barely moves all day, which makes it surprisingly practical.
10. Waves With Braided Detail
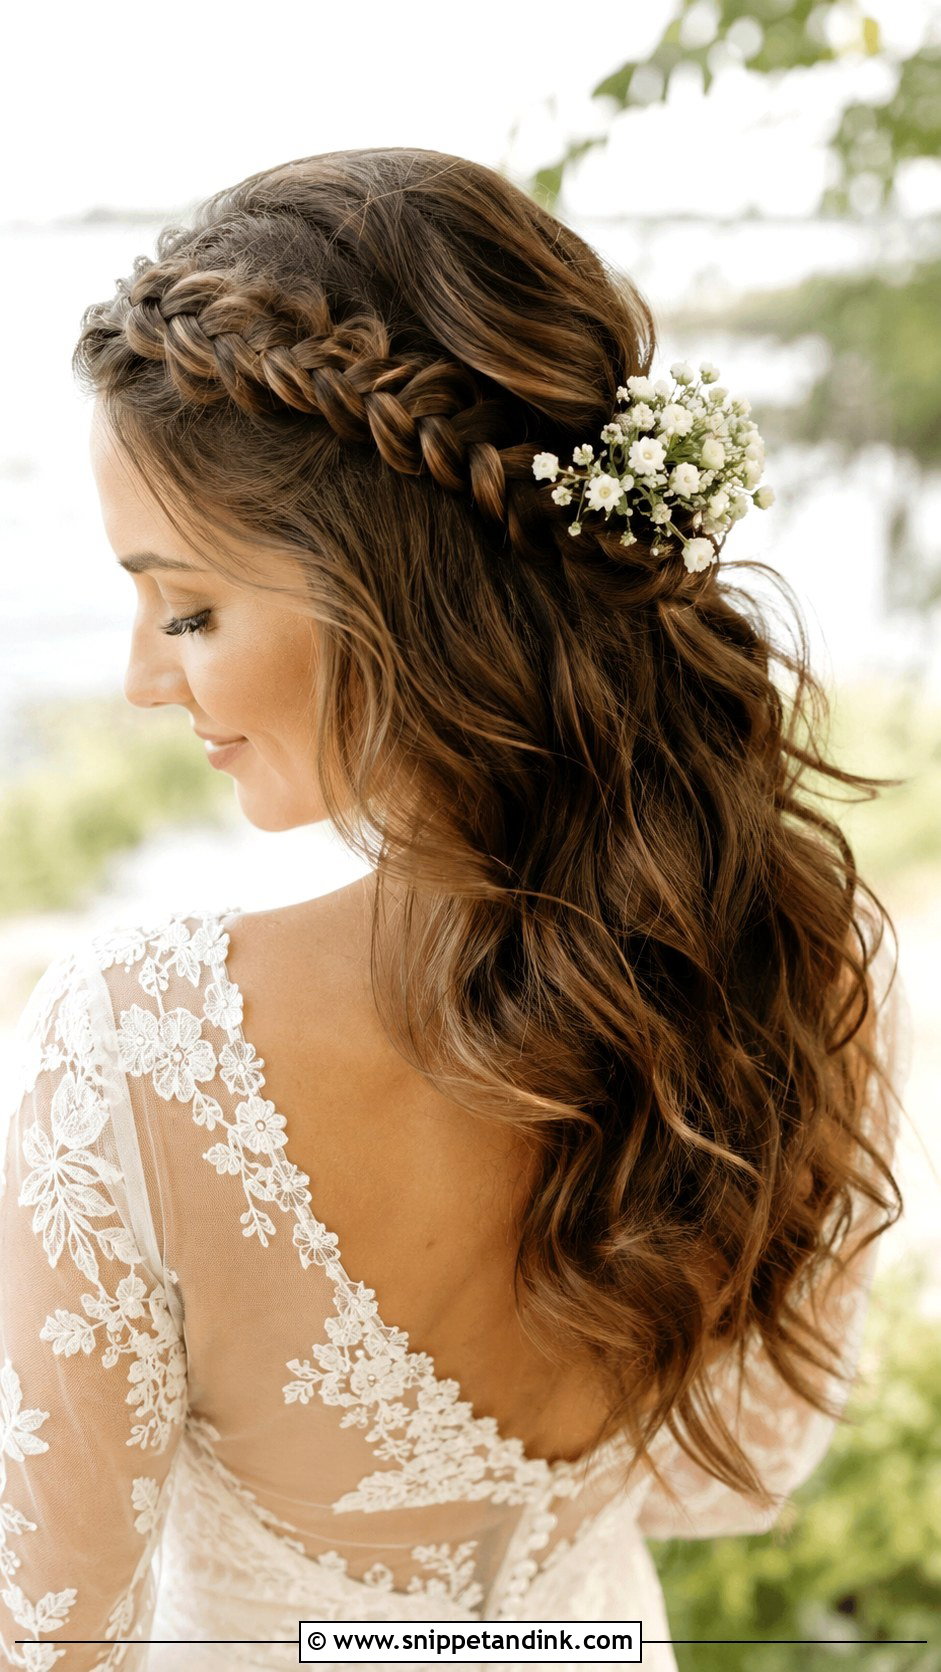
A braid in a wavy style does more than decorate: it holds the front pieces off your face so the waves underneath stay untouched. I braid along the hairline or around the crown before curling the rest, because braiding through fresh curls stretches them out. Keep the braid slightly loose and pancaked so it matches the softness of the waves. Small flowers or pearl pins tuck neatly into its loops. Outdoors, it’s the thing that stops a breeze from blowing hair into your lipstick.
11. Waves With Floral Accessories
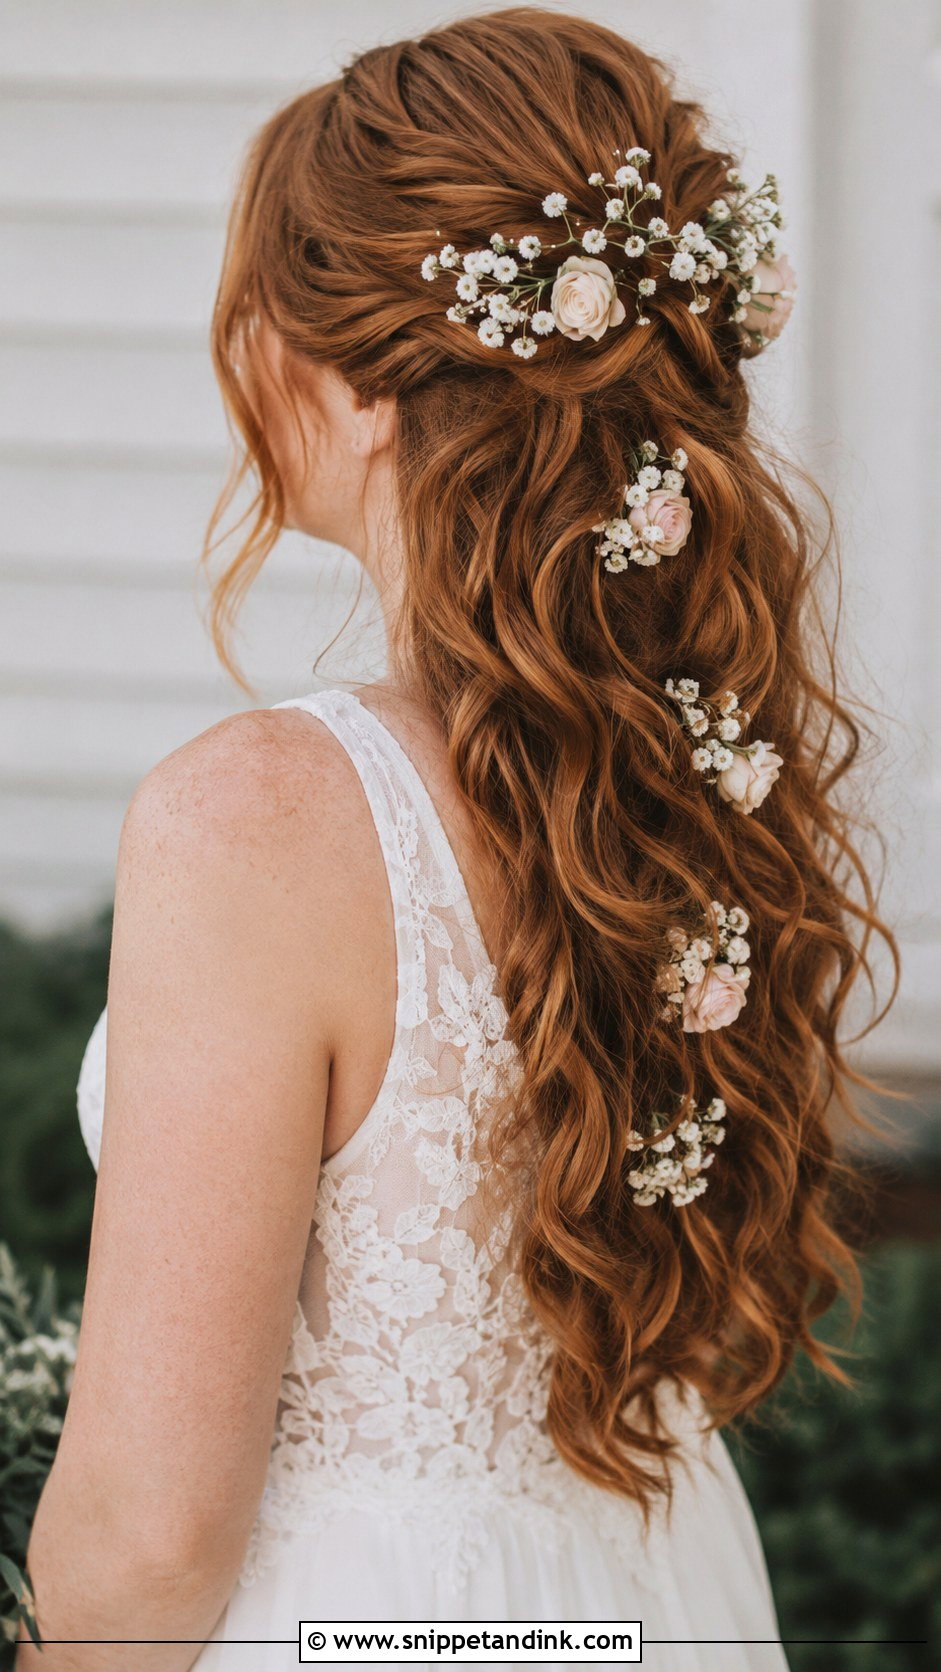
Fresh flowers wilt, and they wilt faster against a warm head. I ask the florist which blooms last out of water; hardy stems of baby’s breath, roses, or wildflowers usually cope, while soft petals like gardenias bruise at a touch. Each stem is wired or taped first, then pinned into a small braid or twist hidden under the waves rather than into loose hair. Scatter them or arrange them as a crown. I always finish the hairspray before the flowers go in, since spray can mark delicate petals.
12. Sleek Glossy Waves
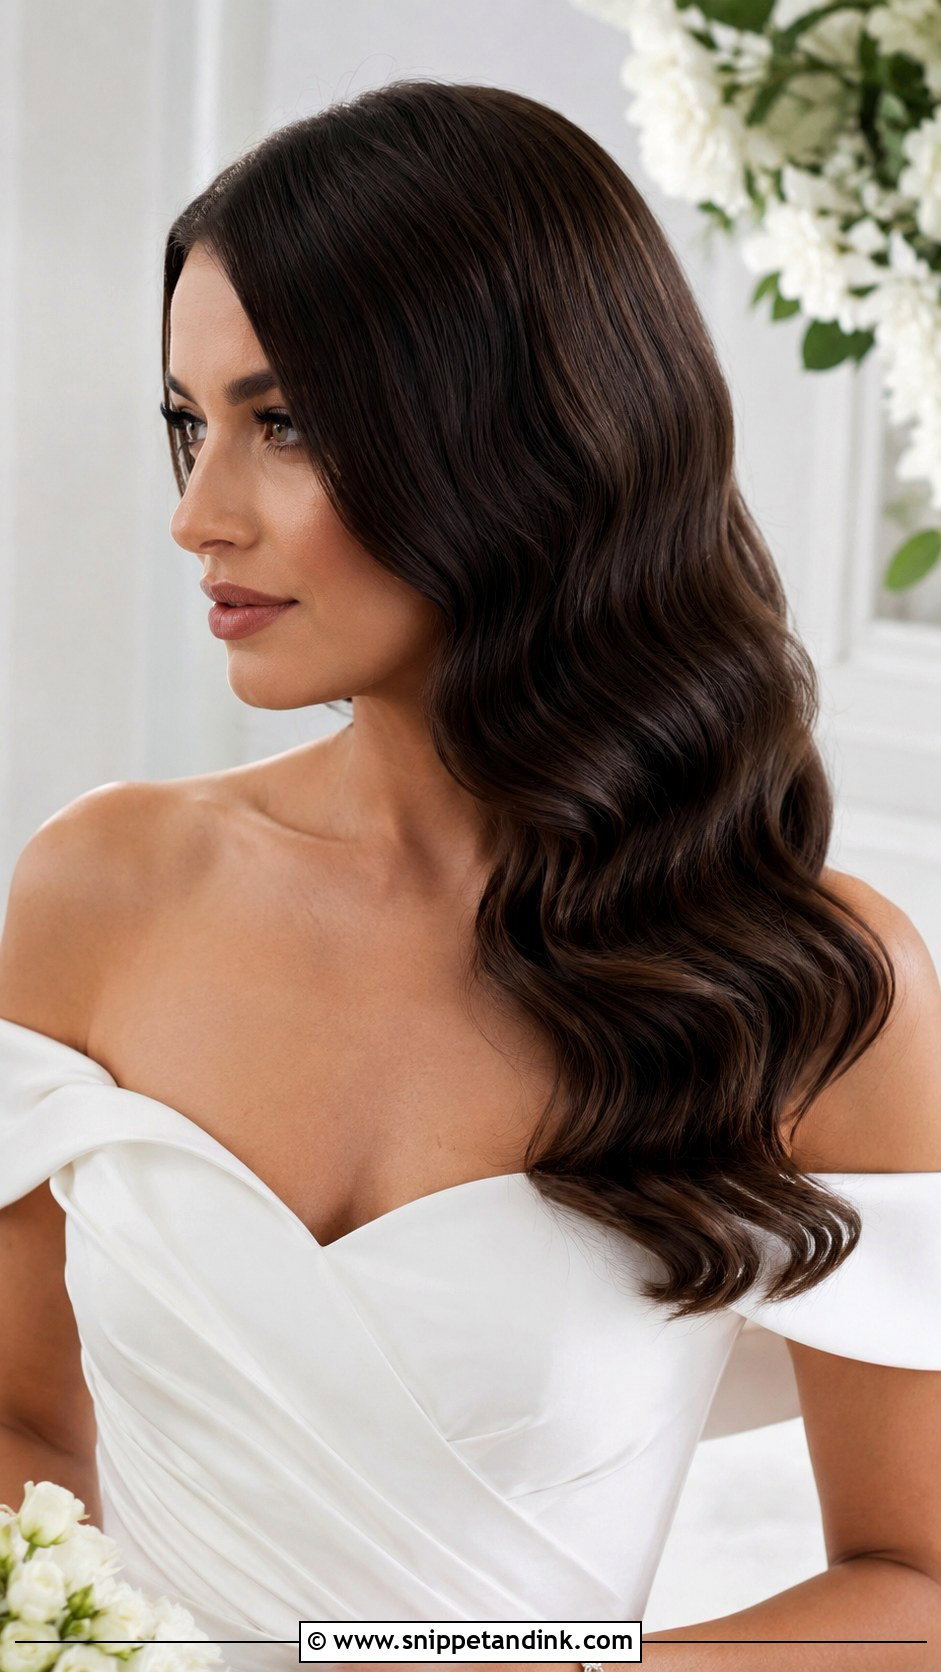
Sleek waves leave nothing to hide behind, so the prep matters more than the curling. I blow-dry completely smooth with a round brush before the iron touches the hair, because any frizz left from drying shows in every wave. Then I curl, cool and brush out with a boar-bristle brush for that glassy finish, adding a drop of serum to the ends only. It works from a lob through to long hair. Too much product at the crown looks greasy under flash, so I keep the roots clean and put the shine where the light hits. A structured gown and minimal jewellery let it lead.
13. Voluminous Bouncy Waves
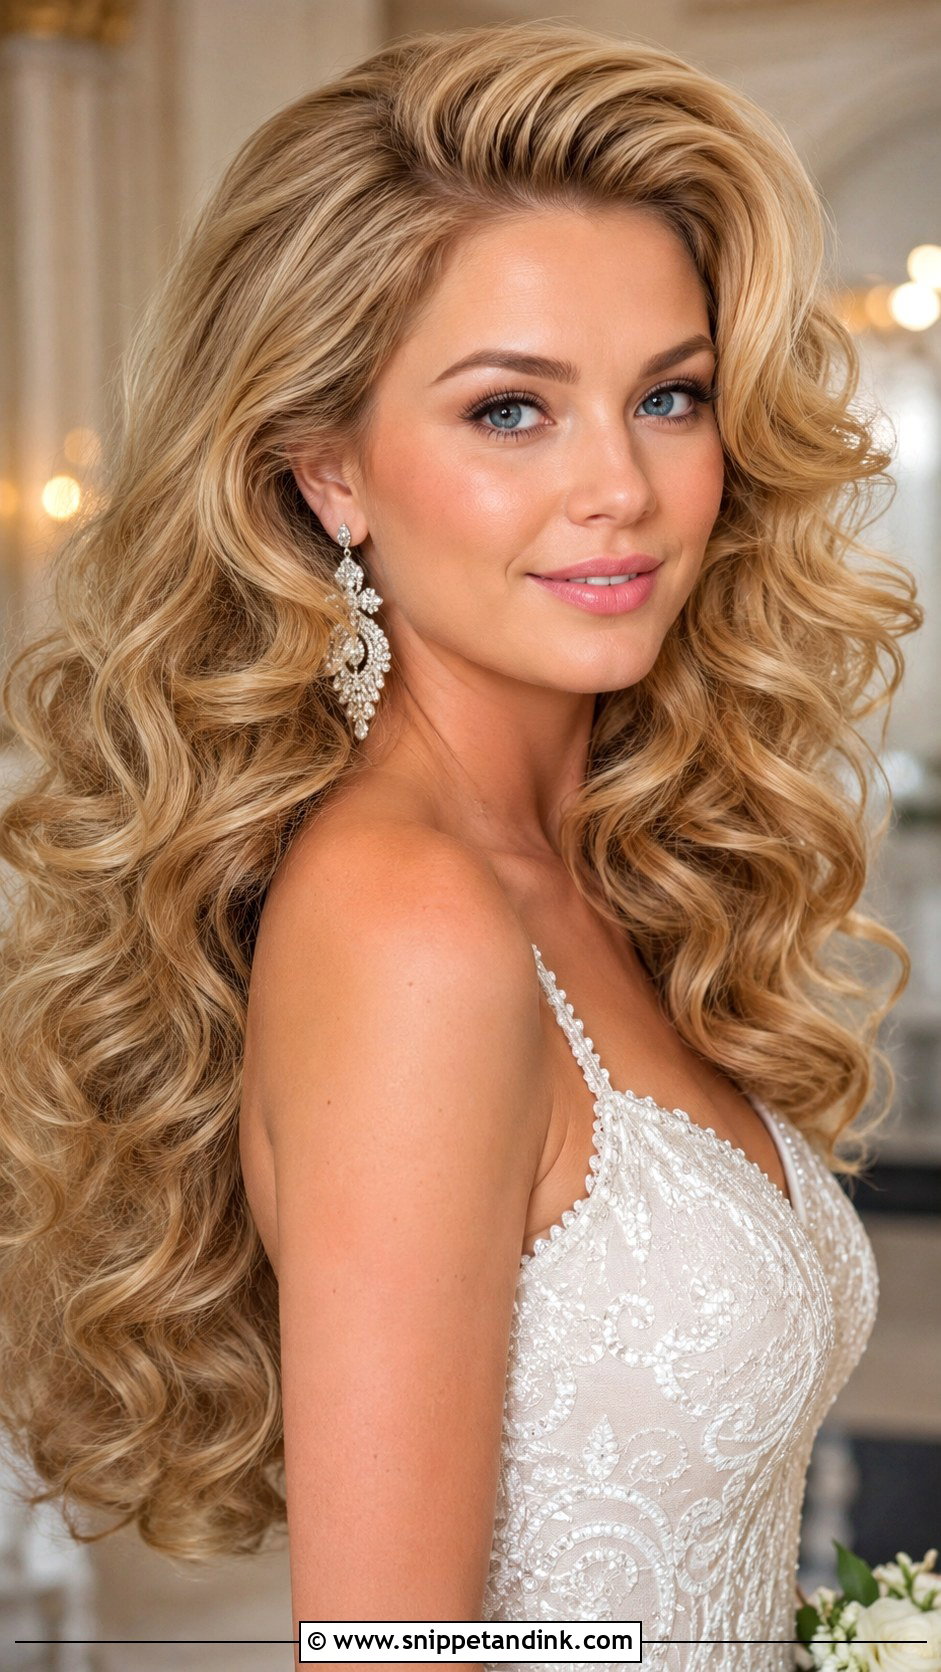
Root volume is what separates this from every other wave here. I apply mousse to damp roots, blow-dry with a large round brush lifting each section upward, then curl the lengths with a large iron. Fine hair needs that mousse plus a little backcombing at the crown, or it flattens by the first dance; thick hair often just needs the blow-dry. It suits medium to long hair and big formal rooms where a small style can get lost. With a full gown and statement earrings, it gives you show-stopping bridal glamour with no accessories needed.
14. Waves With Pearl Hair Pins
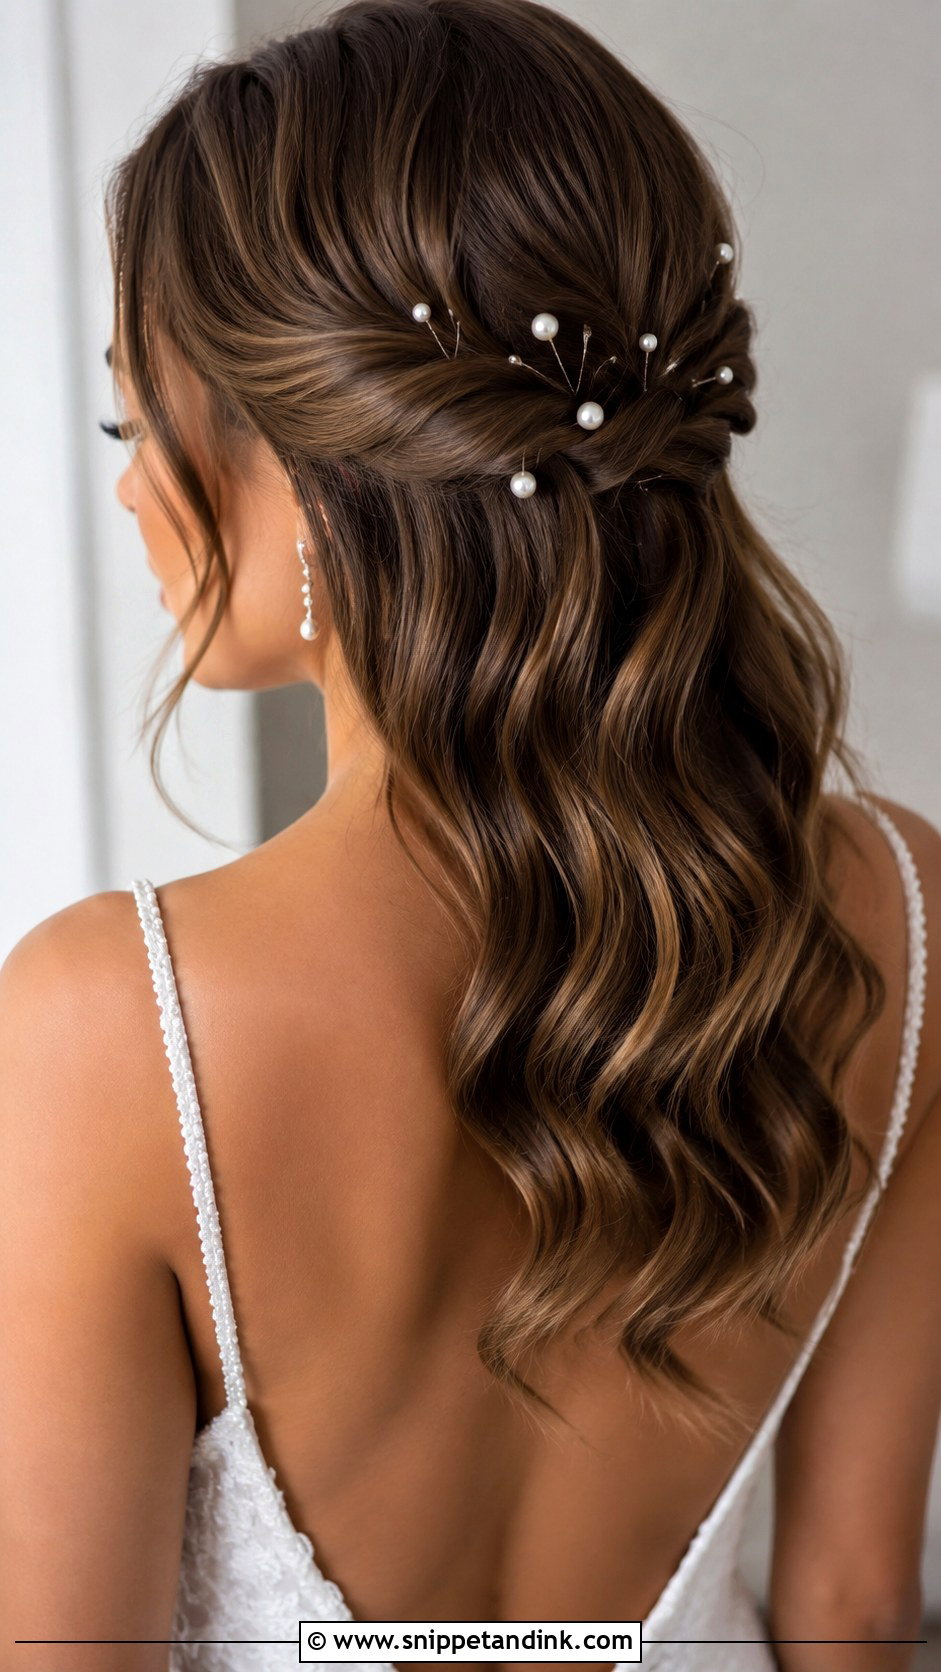
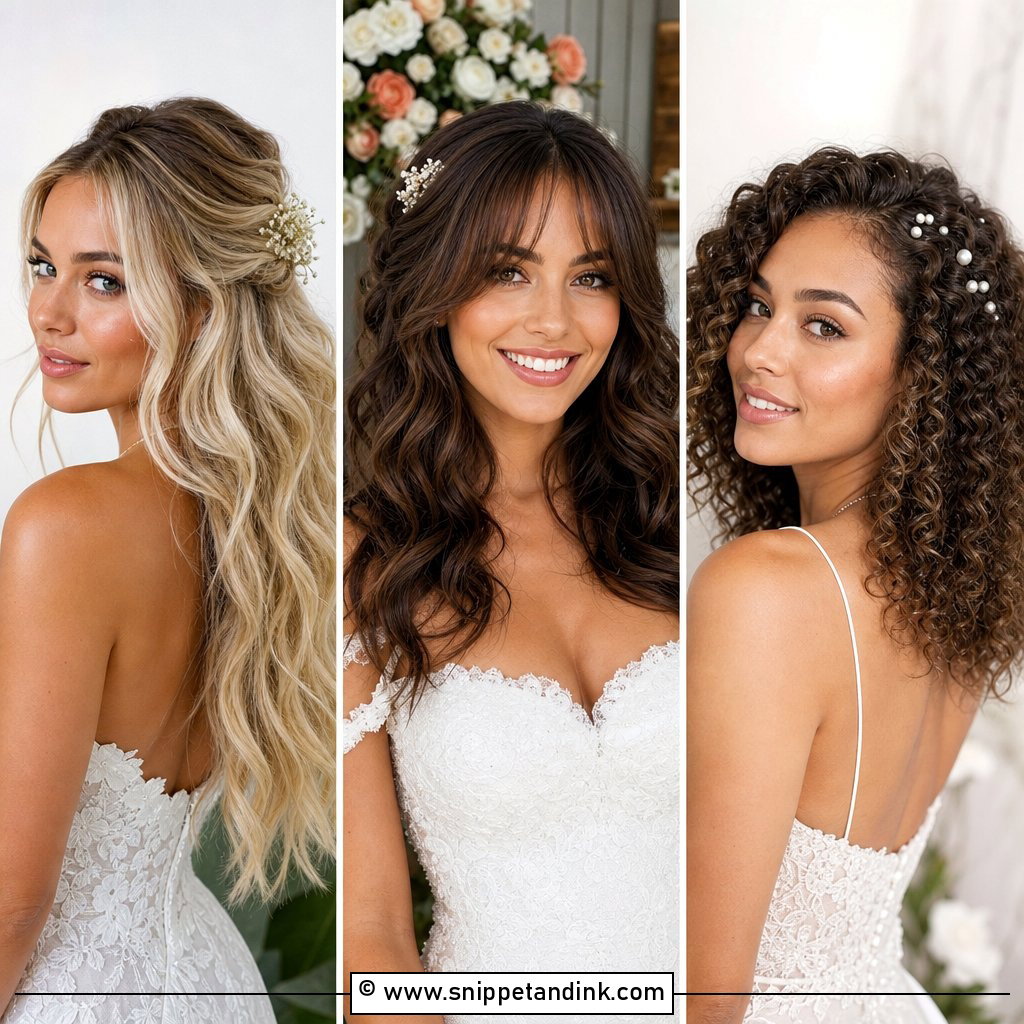
Pearl pins add detail to waves without changing the style underneath. I slide them in at an angle along the edge of a wave, so each pin follows the curve and grips the hair below it. A small cluster behind one ear looks intentional. Scattered evenly across the back, they hold better on a half-up style, where there’s a pinned base to grab. On very slippery hair, a dusting of dry shampoo at the root gives them grip, and they sit happily alongside a veil or a few flowers.
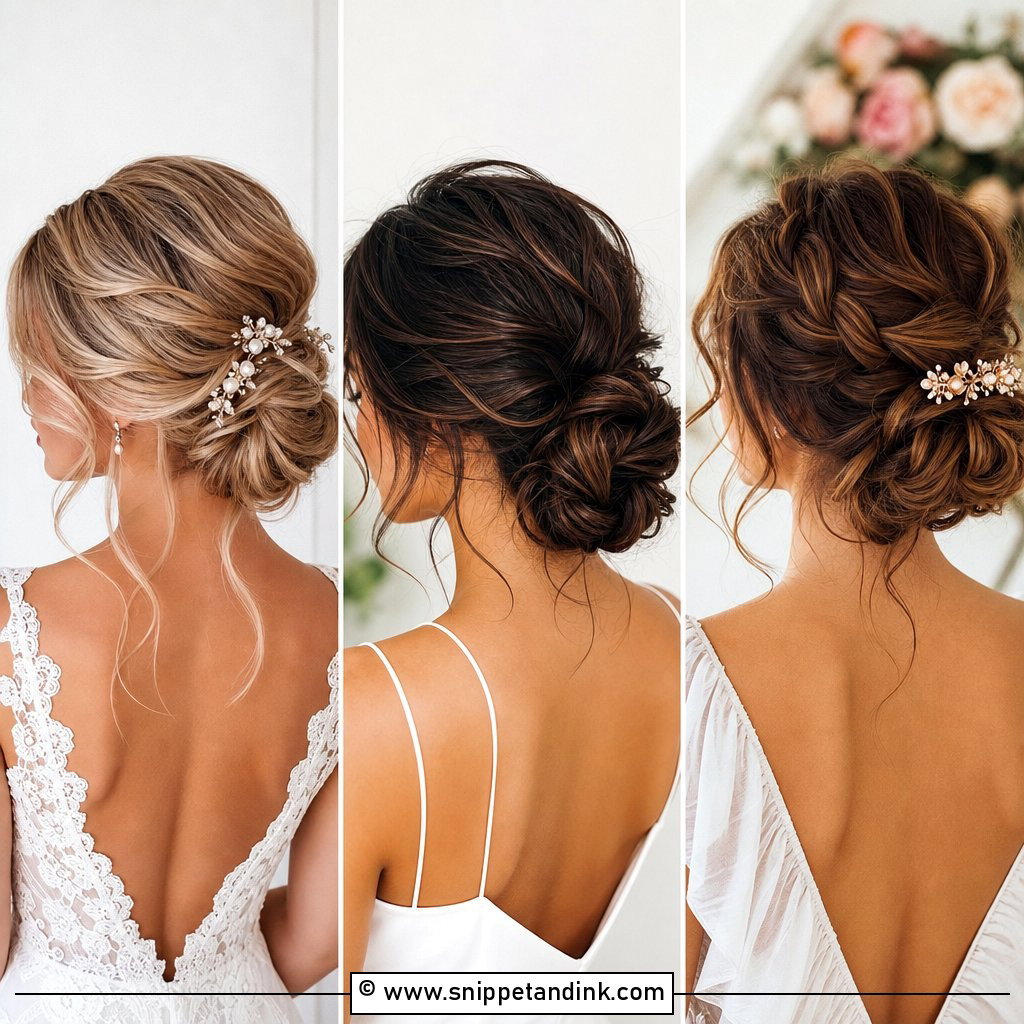
15. Wavy Low Bun With Face-Framing Pieces
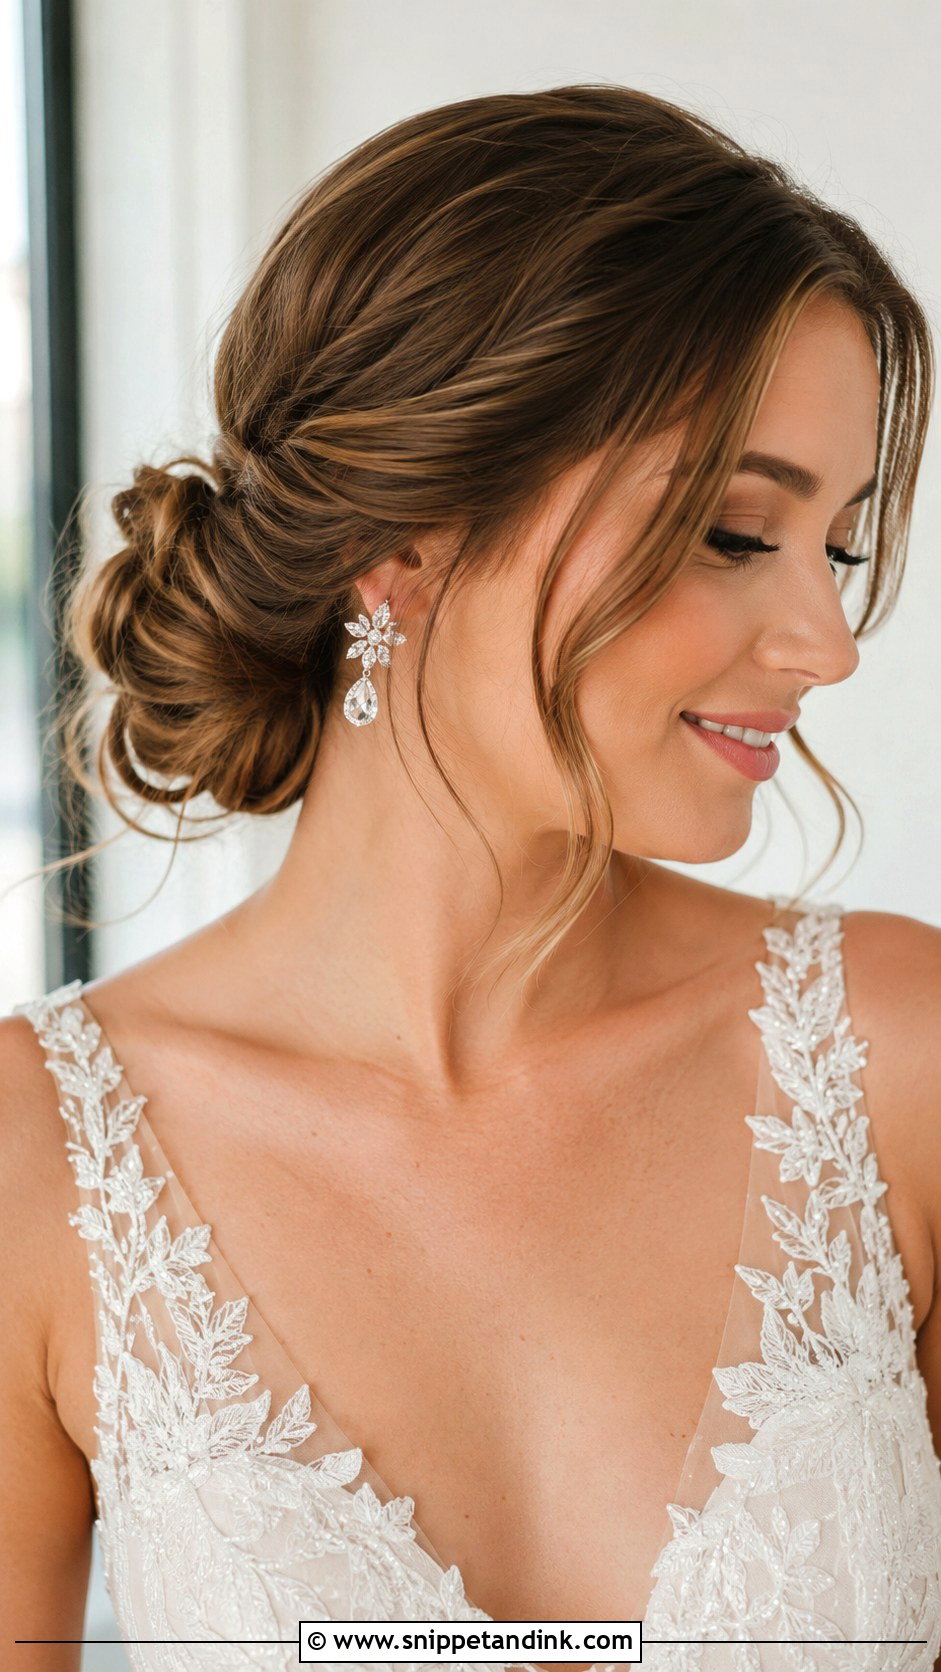
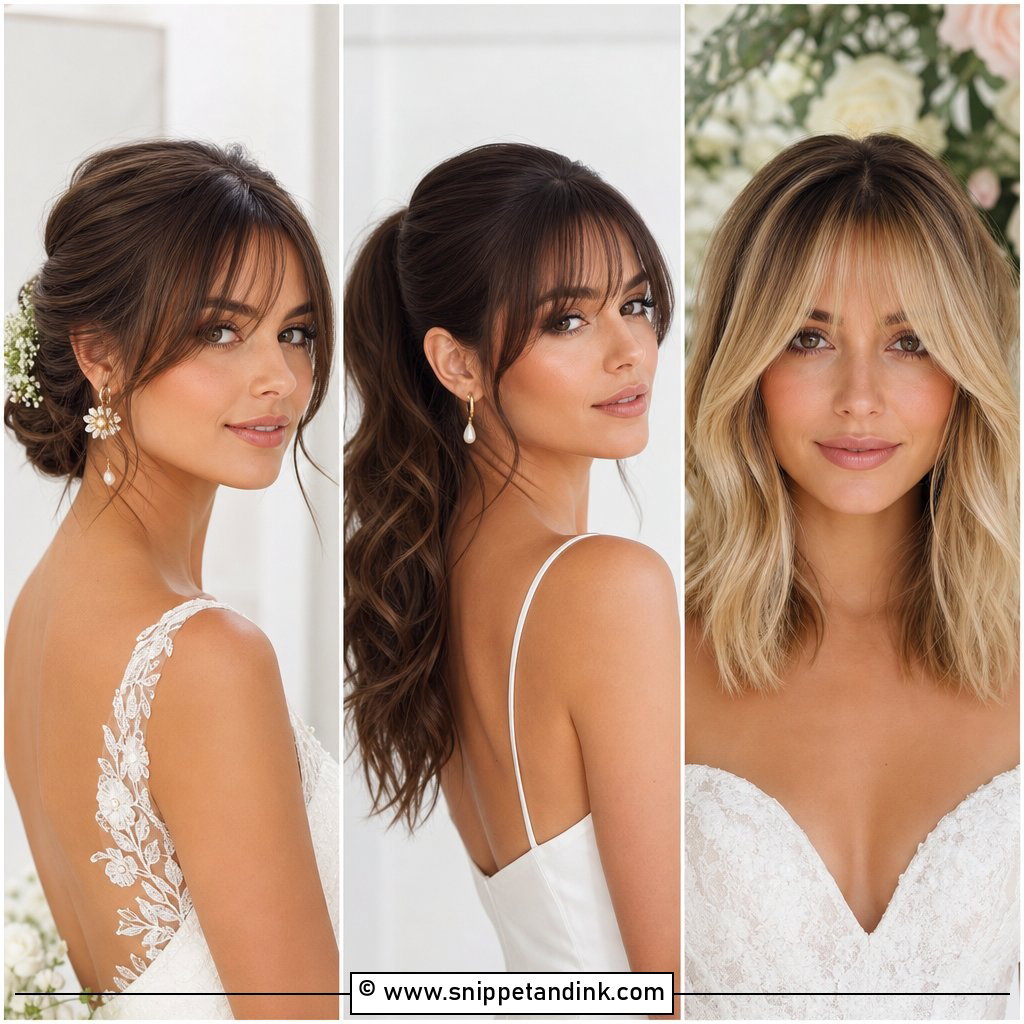
When a summer bride needs her hair off her neck but still wants softness, this is what I suggest. I curl everything first so the texture shows in the bun, then gather it loosely at the nape and pin each section individually instead of wrapping it into one tight coil. Face-framing pieces are curled separately and away from the face, so they don’t fall into your eyes during the vows. The bun should look slightly loose but feel solid when you press it. Statement earrings get plenty of attention with it.
16. Wavy Ponytail With Soft Texture
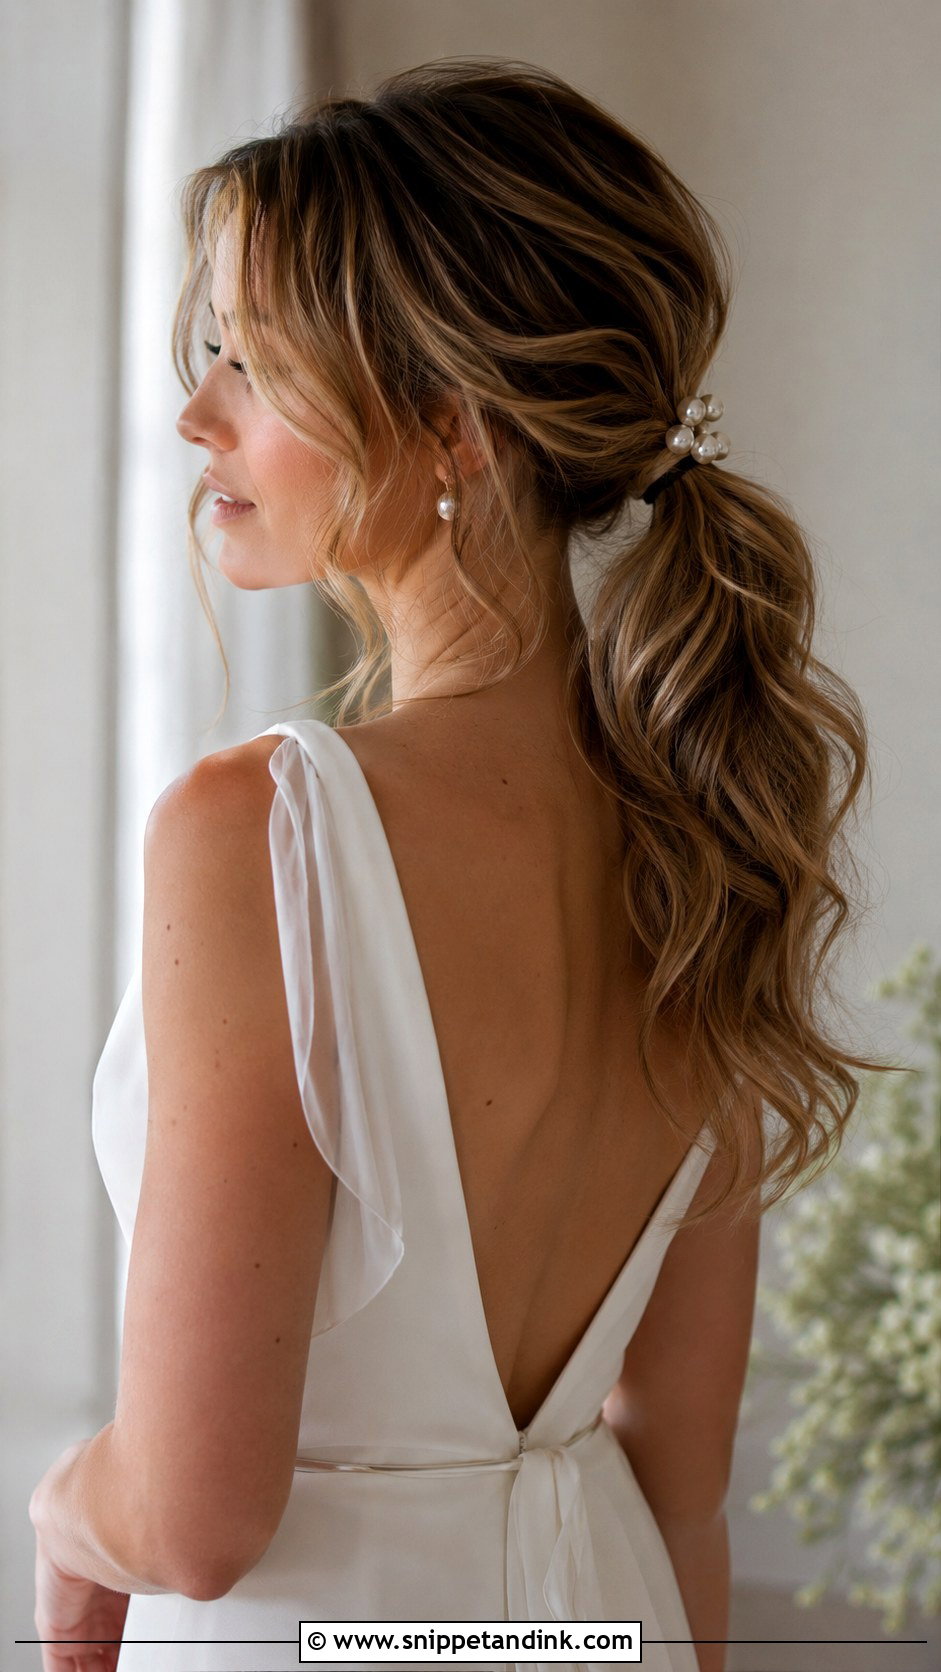
A wavy ponytail stays exactly where you put it, which makes it one of the most practical choices here for a long reception. I set the waves before gathering the hair, secure the ponytail low or at mid-height, then wrap a strand around the base to hide the elastic. A few waves are left out at the front. If your hair is thin, the tail can look sparse once curled, and a clip-in weft under the top layer fixes that. A pearl clip or a ribbon at the base finishes it.
17. Curtain Bangs With Bridal Waves
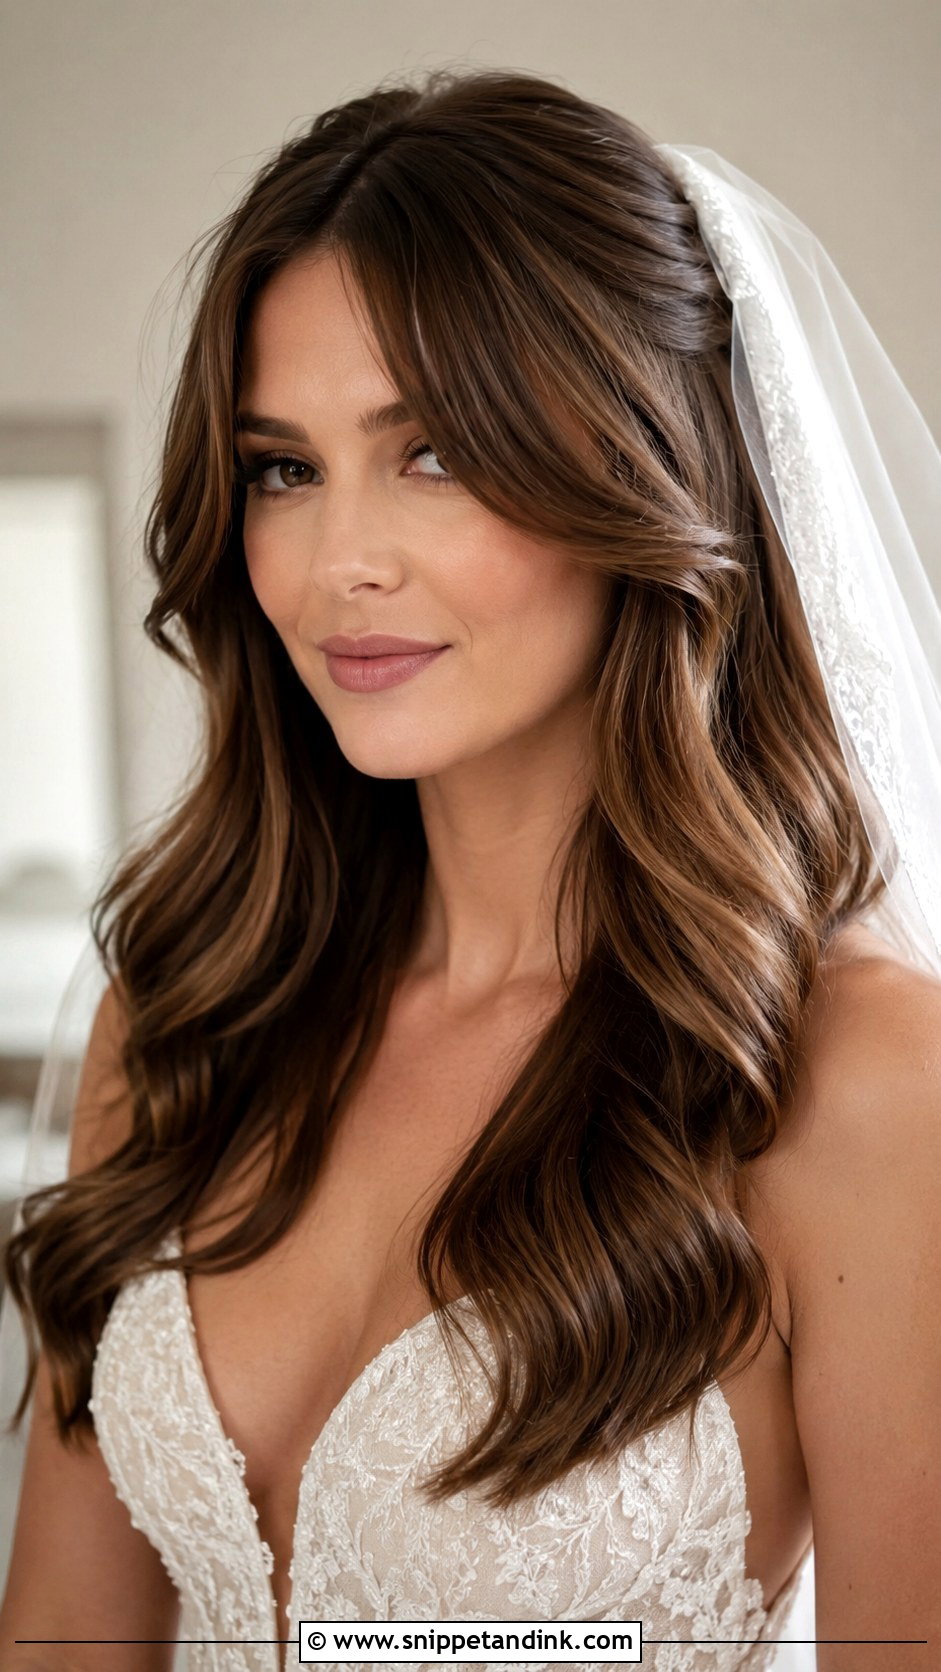
Curtain bangs need their own treatment before anything else. I blow-dry them with a round brush, rolling each side away from the face, and only then curl the lengths so the two blend. Have the fringe trimmed a week or two before the wedding rather than the day before, because freshly cut bangs sit too short and blunt. They open the face rather than covering it, so they work with most face shapes. Veils and flowers both pair well, and the overall result looks current without looking forced.
18. Deep Side Part Glamour Waves
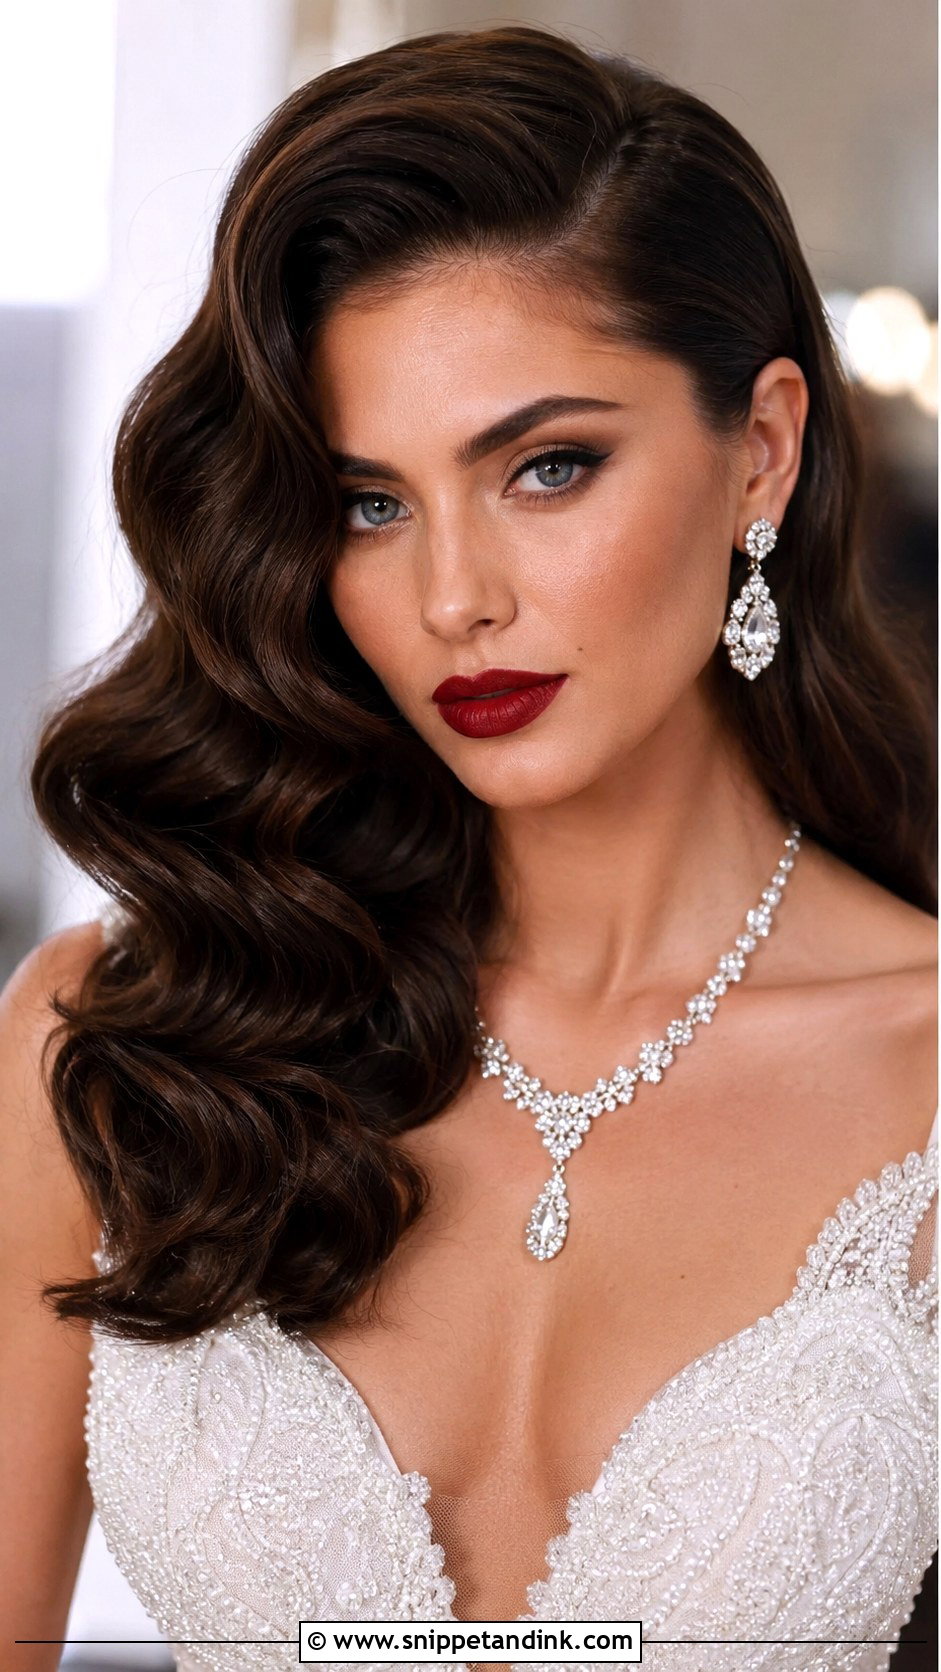
Think of this as a softer, wearable cousin of the glam waves above. The deep side part still adds lift on one side, but the waves are looser and brushed further out, so they move instead of sitting in a sculpted shape. I set the part while the hair is damp so it can’t flip back during the day. The asymmetry flatters most face shapes, rounder ones especially, because it adds height and an angle. Bold makeup and statement jewellery suit it, and it’s worth telling your photographer which side is the fuller one.
19. Boho Waves With Loose Tendrils
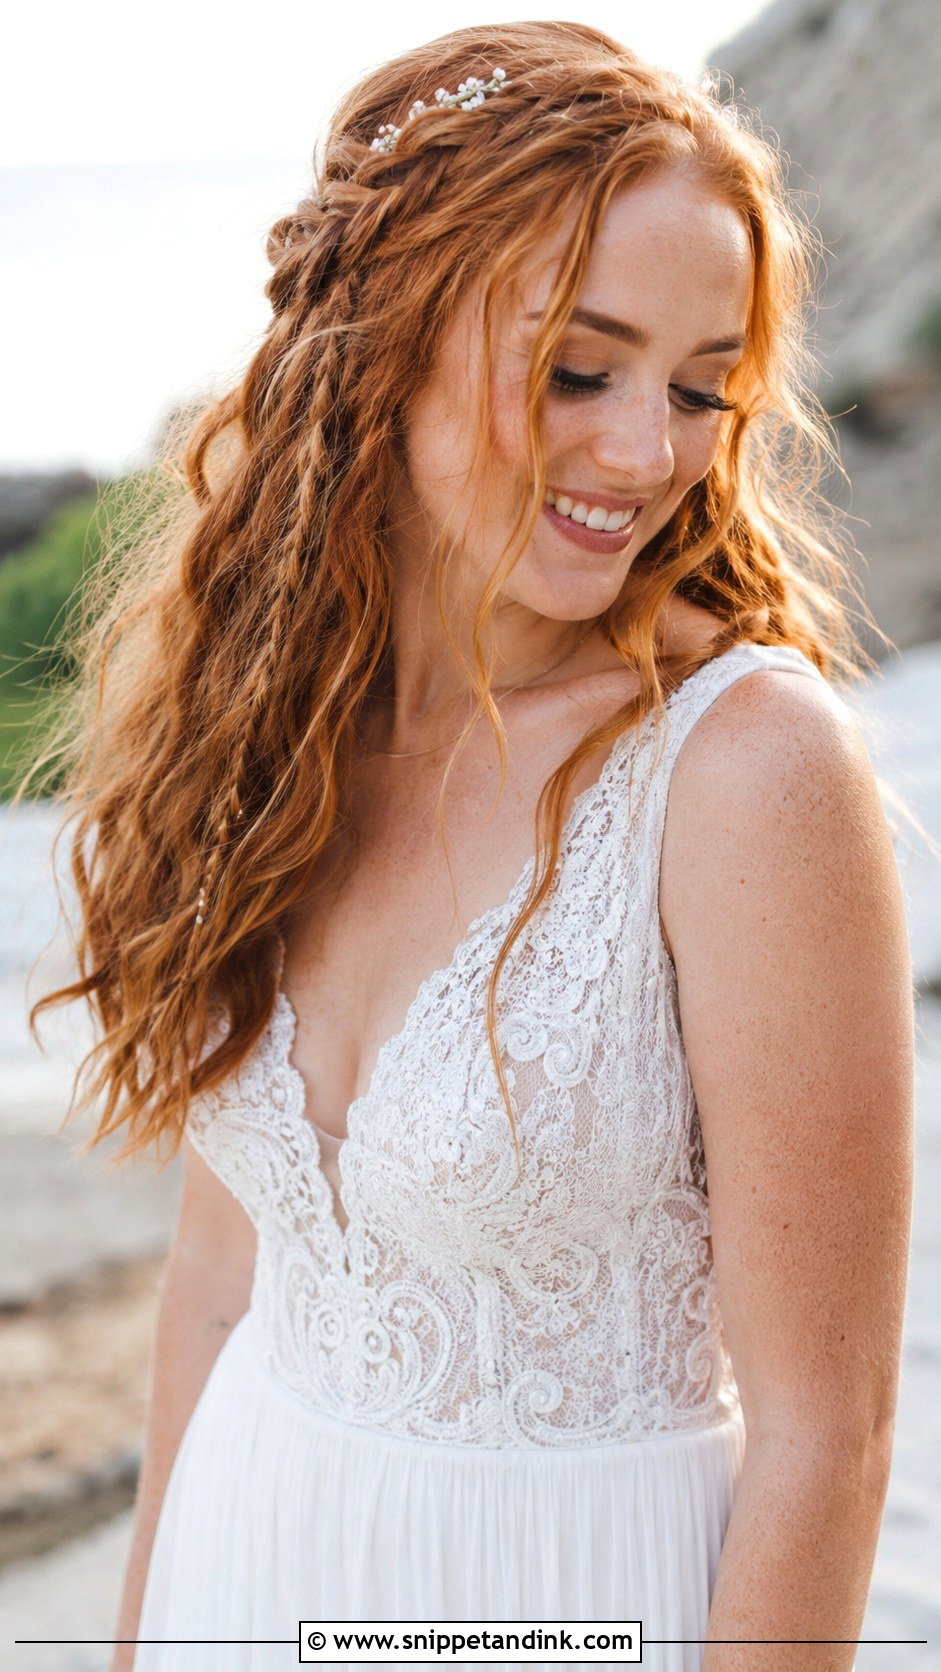
Boho waves should look slightly imperfect, and the easiest route is curling in mixed directions with a medium iron and leaving some sections straighter than others. Tendrils at the face soften it, though I pull them out sparingly; too many and they stick to lip gloss all day. It suits outdoor, beach and bohemian-themed weddings, and small braids or fresh flowers tuck in easily. A texturising spray adds a lived-in feel. Expect the waves to relax as the day goes on, which is rather the point here.
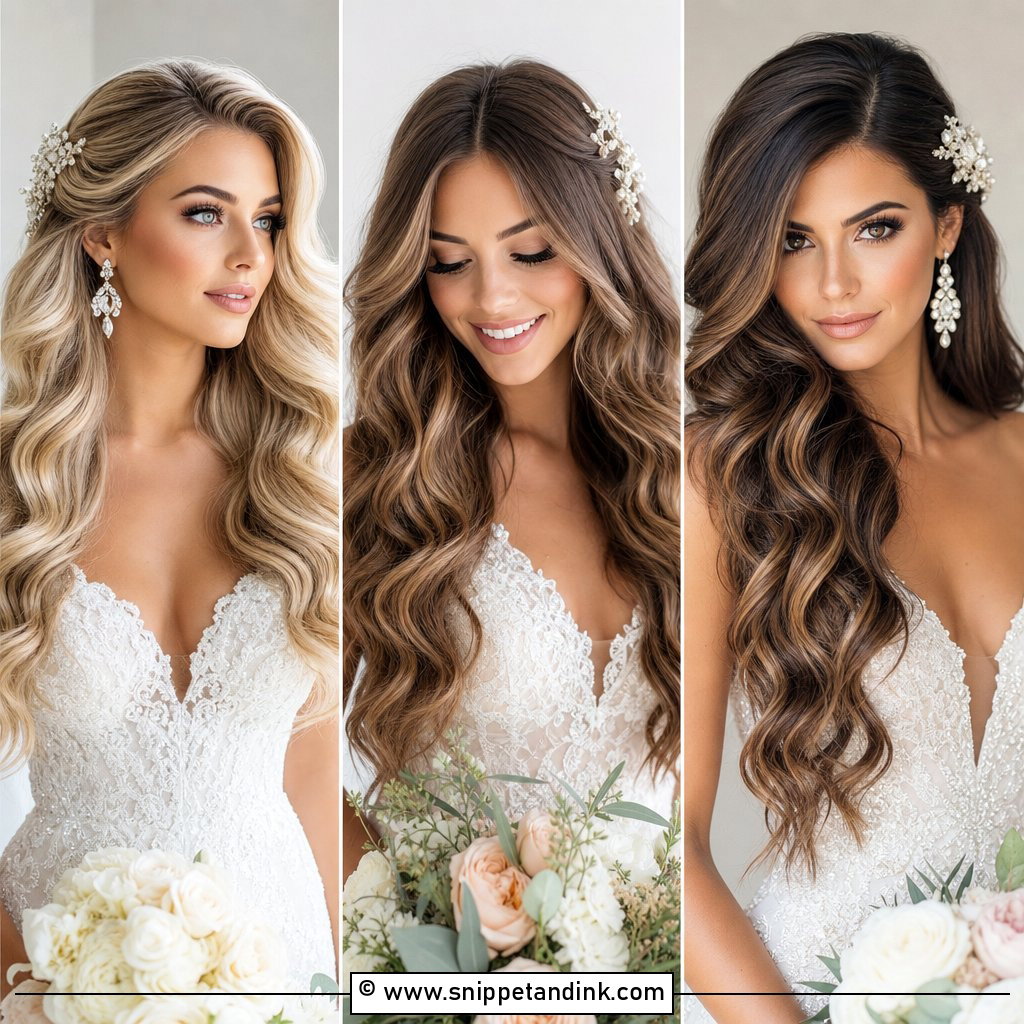
20. Mermaid Waves For Long Hair
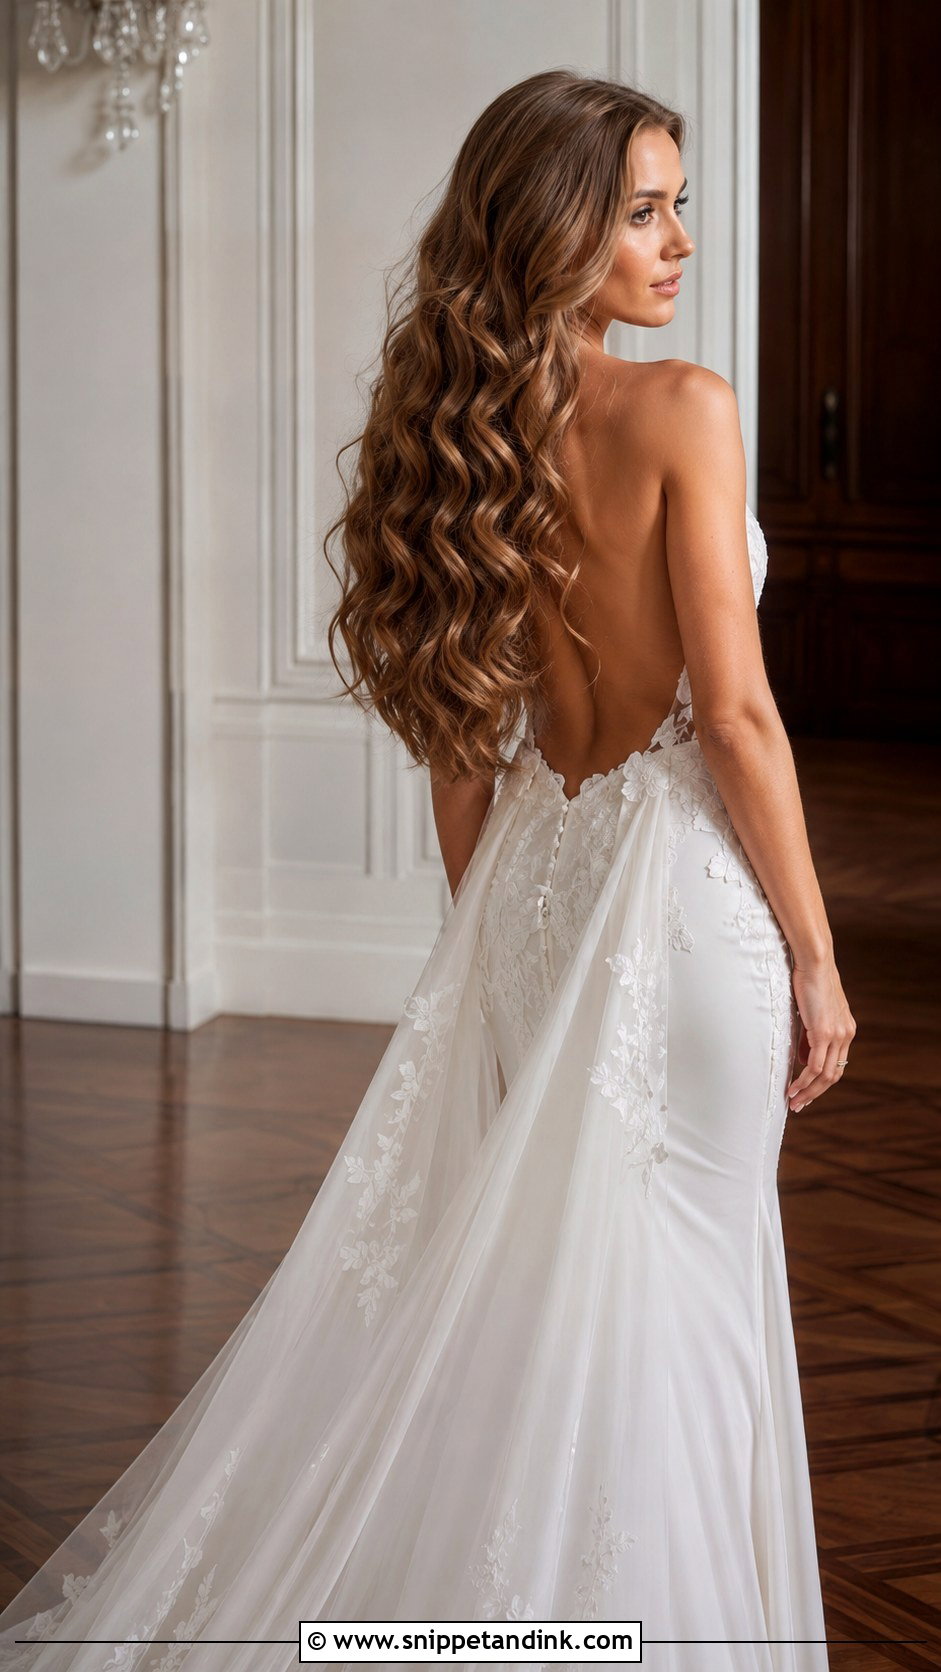
Mermaid waves are the most uniform style in this collection: deep, even S-bends from root to ends. A wide wand or a three-barrel waver creates them, and that evenness is what makes them read as mermaid rather than beachy. They need real length, ideally well past the shoulder blades, and they hold best on thick hair. On fine hair the bends relax quickly, so I mist them with a firm spray before brushing. A little shine serum on the ends keeps them glossy against a backless gown or a long train.
Can Waves Survive a Beach Wedding or a Humid Marquee?
Honestly, a sleek glossy wave rarely gets through a humid evening intact. Moisture in the air swells the hair shaft, the pattern relaxes, fine hair goes limp and curly hair frizzes. Looser styles cope far better, because they were never meant to look precise in the first place.
If your forecast is warm and damp, I’d plan for it like this:
- Pick a style with some hair pinned up, such as a half-up or a low wavy bun, so only part of your hair is exposed to the air.
- Finish with an anti-humidity spray rather than a heavy lacquer, which can turn tacky in the heat.
- Keep the curls clipped in their pins until just before you step into your dress.
- Accept a little movement. A wave that relaxes slightly by the evening still looks soft; one that was never set properly looks straight.
For the clutch
Give a bridesmaid a few bobby pins in your hair colour, a pea-sized pot of anti-frizz cream, a travel hairspray and a wide-tooth comb. Leave the brush at home; brushing pulls waves out, while a wide comb or your fingers only separate them.
A Wave Is Only as Good as Its Set
The right wave depends on your hair as much as your dress. Sleek and sculpted styles need smooth, well-prepped hair and calm weather, while tousled and boho waves forgive heat and movement. Take photos of the few you keep returning to, and book your trial early enough to try a second option if the first falls flat. Then wear the trial style for the rest of that day, because how it looks at dinner tells you how it will look at your reception.
You'll Like These Ideas:


Leave a Reply