
The neckline is the part of a bridal blouse that sits closest to your face, so it decides more than people expect: how the necklace lies, whether the dupatta stays put, and how your shoulders look in every close-up. Some brides want a regal high neck heavy with zardozi; others want a deep V or a sculpted sweetheart. The twenty cuts below cover both fronts and backs, and under each one I’ve noted the construction it needs and the jewelry it actually works with. Pick the shape first, then let the embroidery follow it.
Reading Your Neck, Shoulders and Necklace Before You Pick a Cut
When I help a bride narrow down necklines, I look at three things in the mirror before I show her a single design: the length of her neck, the width of her shoulders and the necklace she’s already bought or inherited. Those three usually rule out half the list.
- Shorter neck: V, U and scoop fronts open up space and make the neck look longer. A tight high neck tends to shorten it further.
- Long, slim neck: high, boat and Queen Anne cuts look regal rather than restrictive.
- Broad shoulders: V and U fronts break up the width. Boat and off-shoulder lines run straight across and add to it.
- Narrow or sloping shoulders: square, boat and off-shoulder cuts build width; a halter narrows them even more.
- Fuller bust: sweetheart or V with proper built-in cups. An unstructured high neck can look heavy across the chest.
Then the jewelry. A choker or collar necklace needs bare skin below it, so it wants a sweetheart, square or off-shoulder line. A long rani haar sits best on a round or U neck. If the necklace is the heirloom, the neckline works for it, not the reverse.
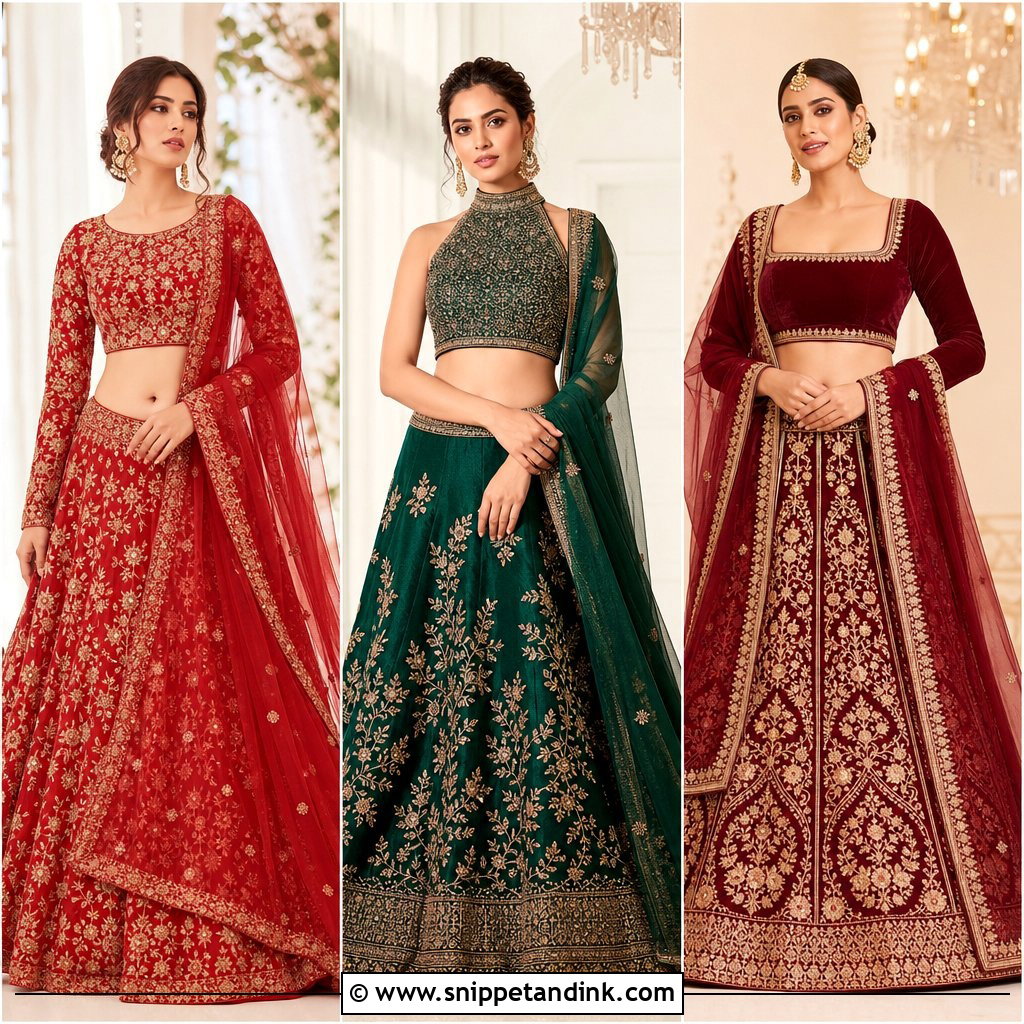
1. Sweetheart Bridal Blouse Neck Design
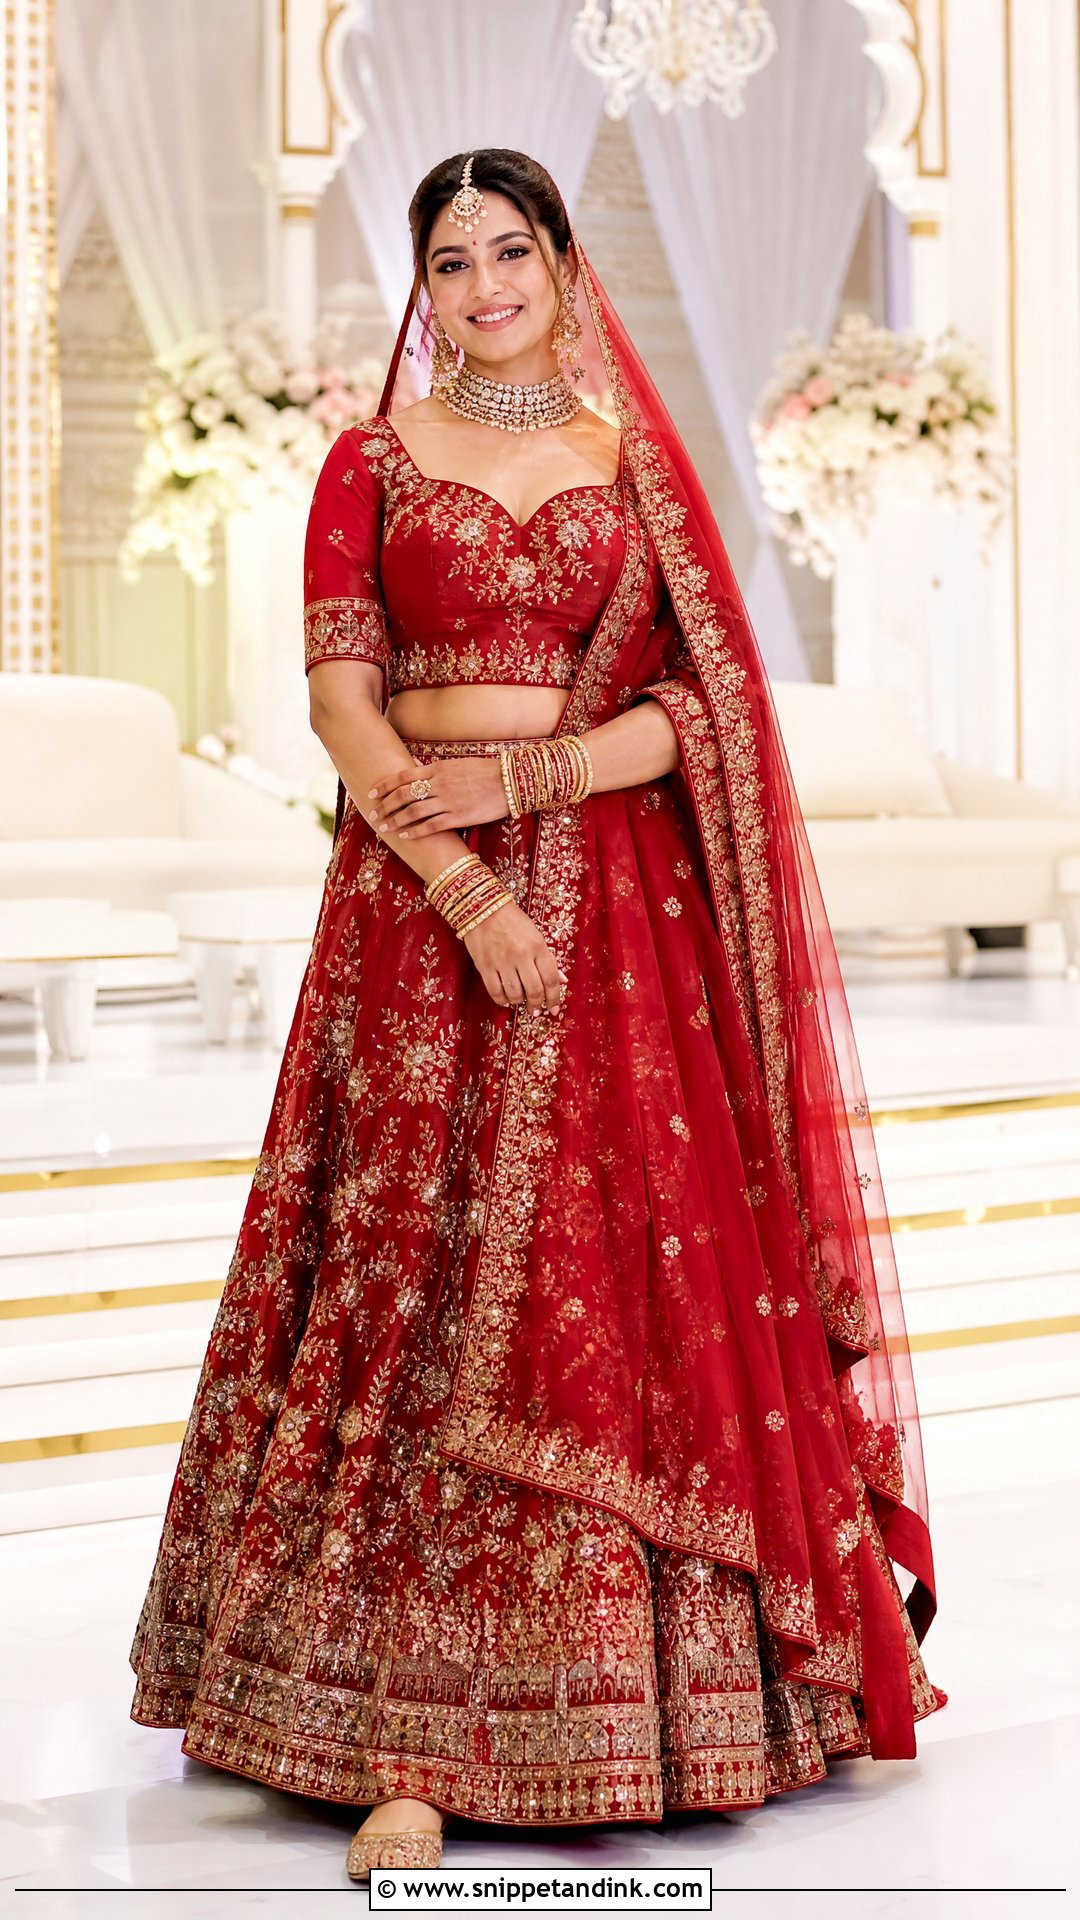
The sweetheart curve frames the collarbone and softens a heavily worked lehenga. It only holds its shape with proper construction, though: hidden cups, firm lining and a well-fitted underbust seam. Without those, the two curves flatten out by the second hour. Red velvet or raw silk carries it well. I keep heavy embroidery along the lower edge rather than on the curve itself, so a choker and maang tikka have clear skin to sit against. For more coverage, a fine illusion net panel above the neckline keeps the shape visible.
2. Deep V-Neck Bridal Blouse Design
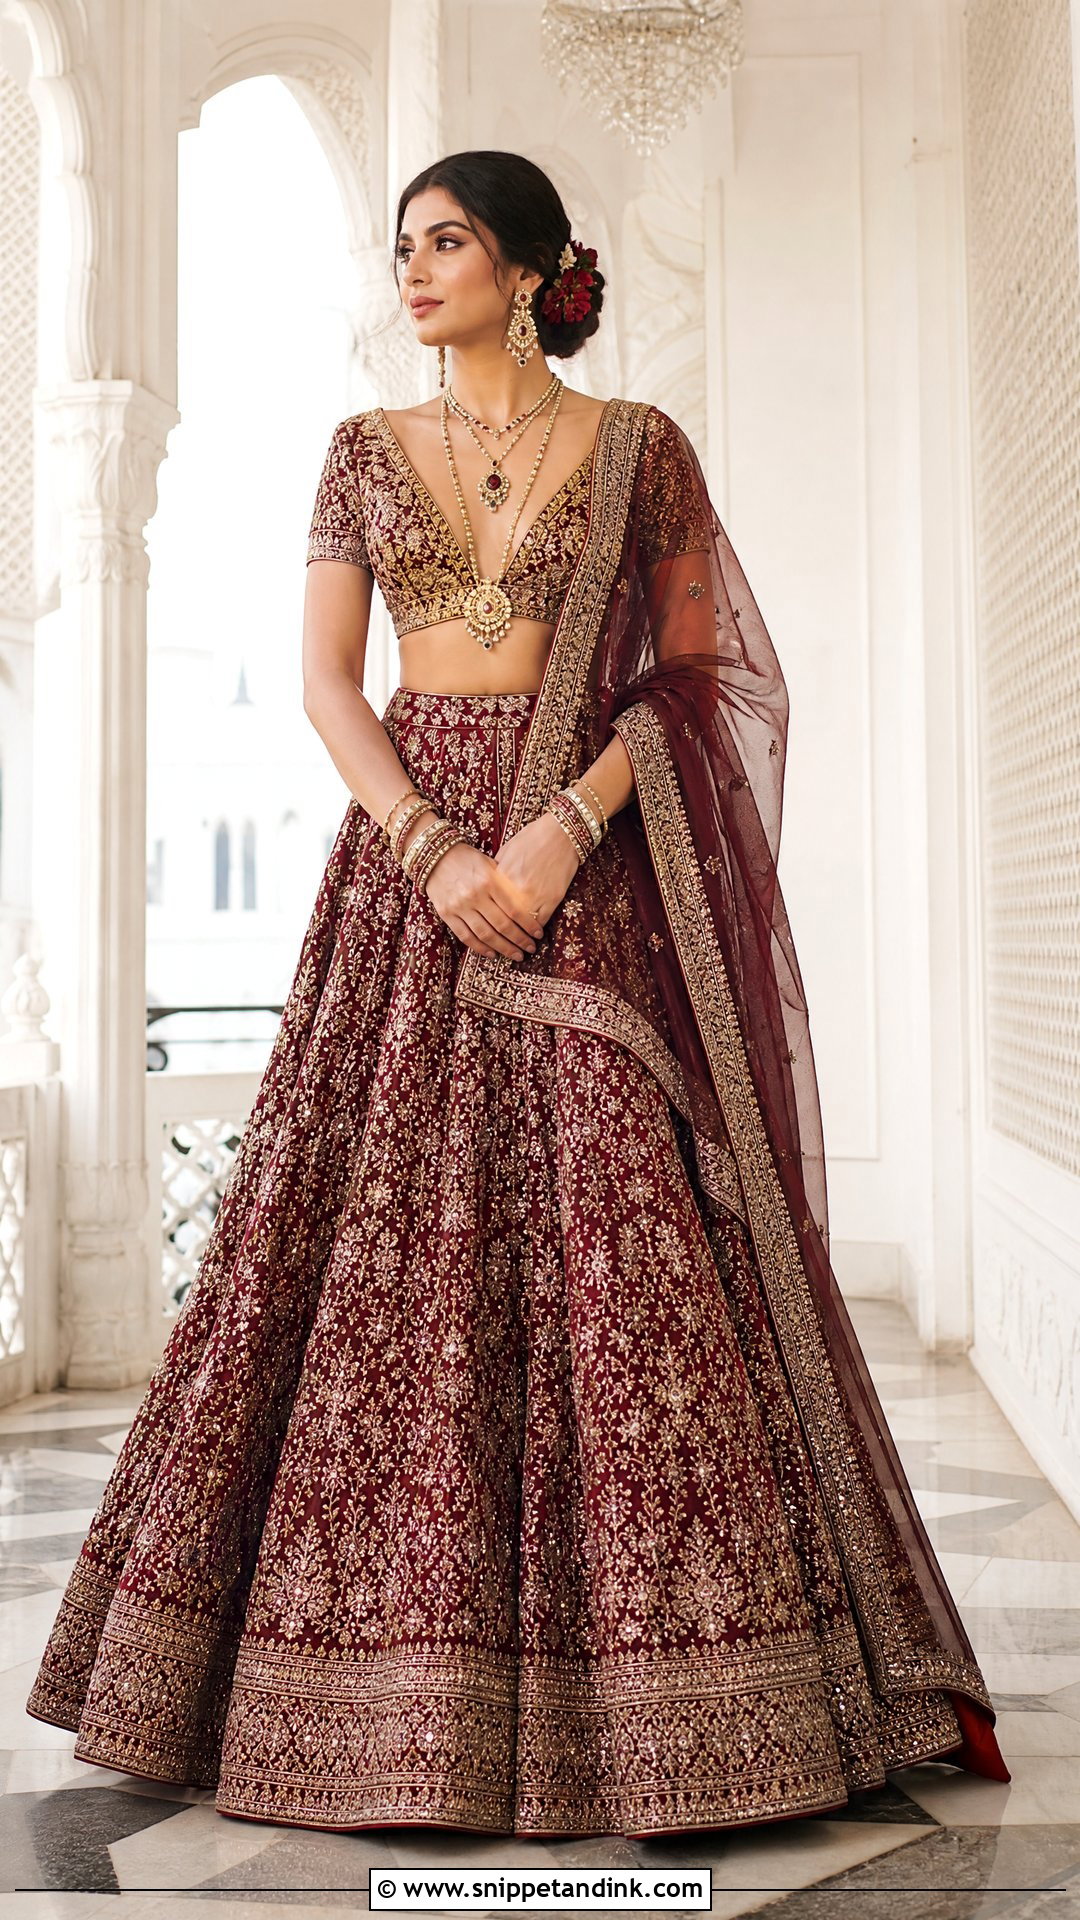
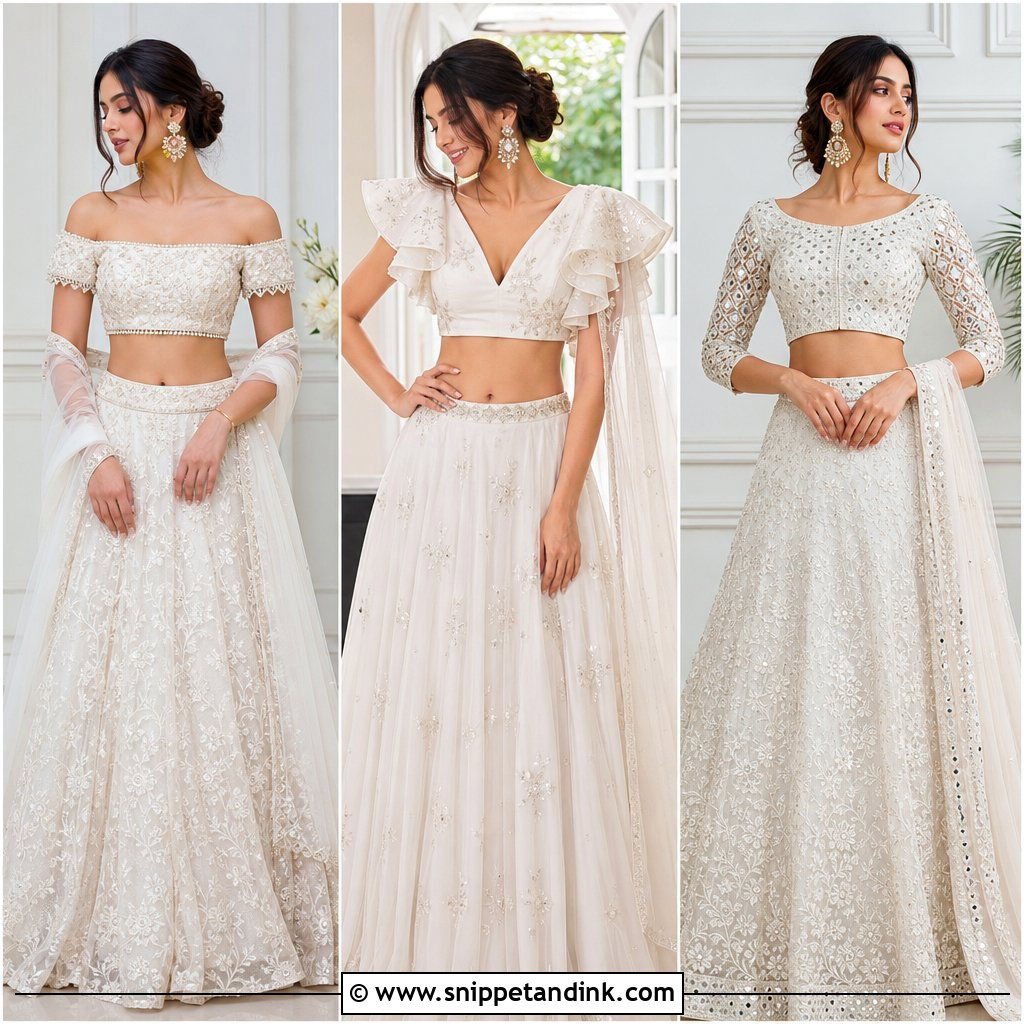
A deep V draws a long vertical line, which is exactly what a layered necklace or single long pendant needs. It is also the neckline most likely to shift, so I ask for strong side panels, secure cups and reinforced shoulder seams, plus a skin-tone insert if you want security without losing the shape. Pair it with a high-waisted lehenga and statement earrings. Elbow sleeves or a modest back balance the openness. Edge the V with a narrow zardozi or beaded border; heavy work there only competes with the jewelry.
3. Square Neck Bridal Blouse Design
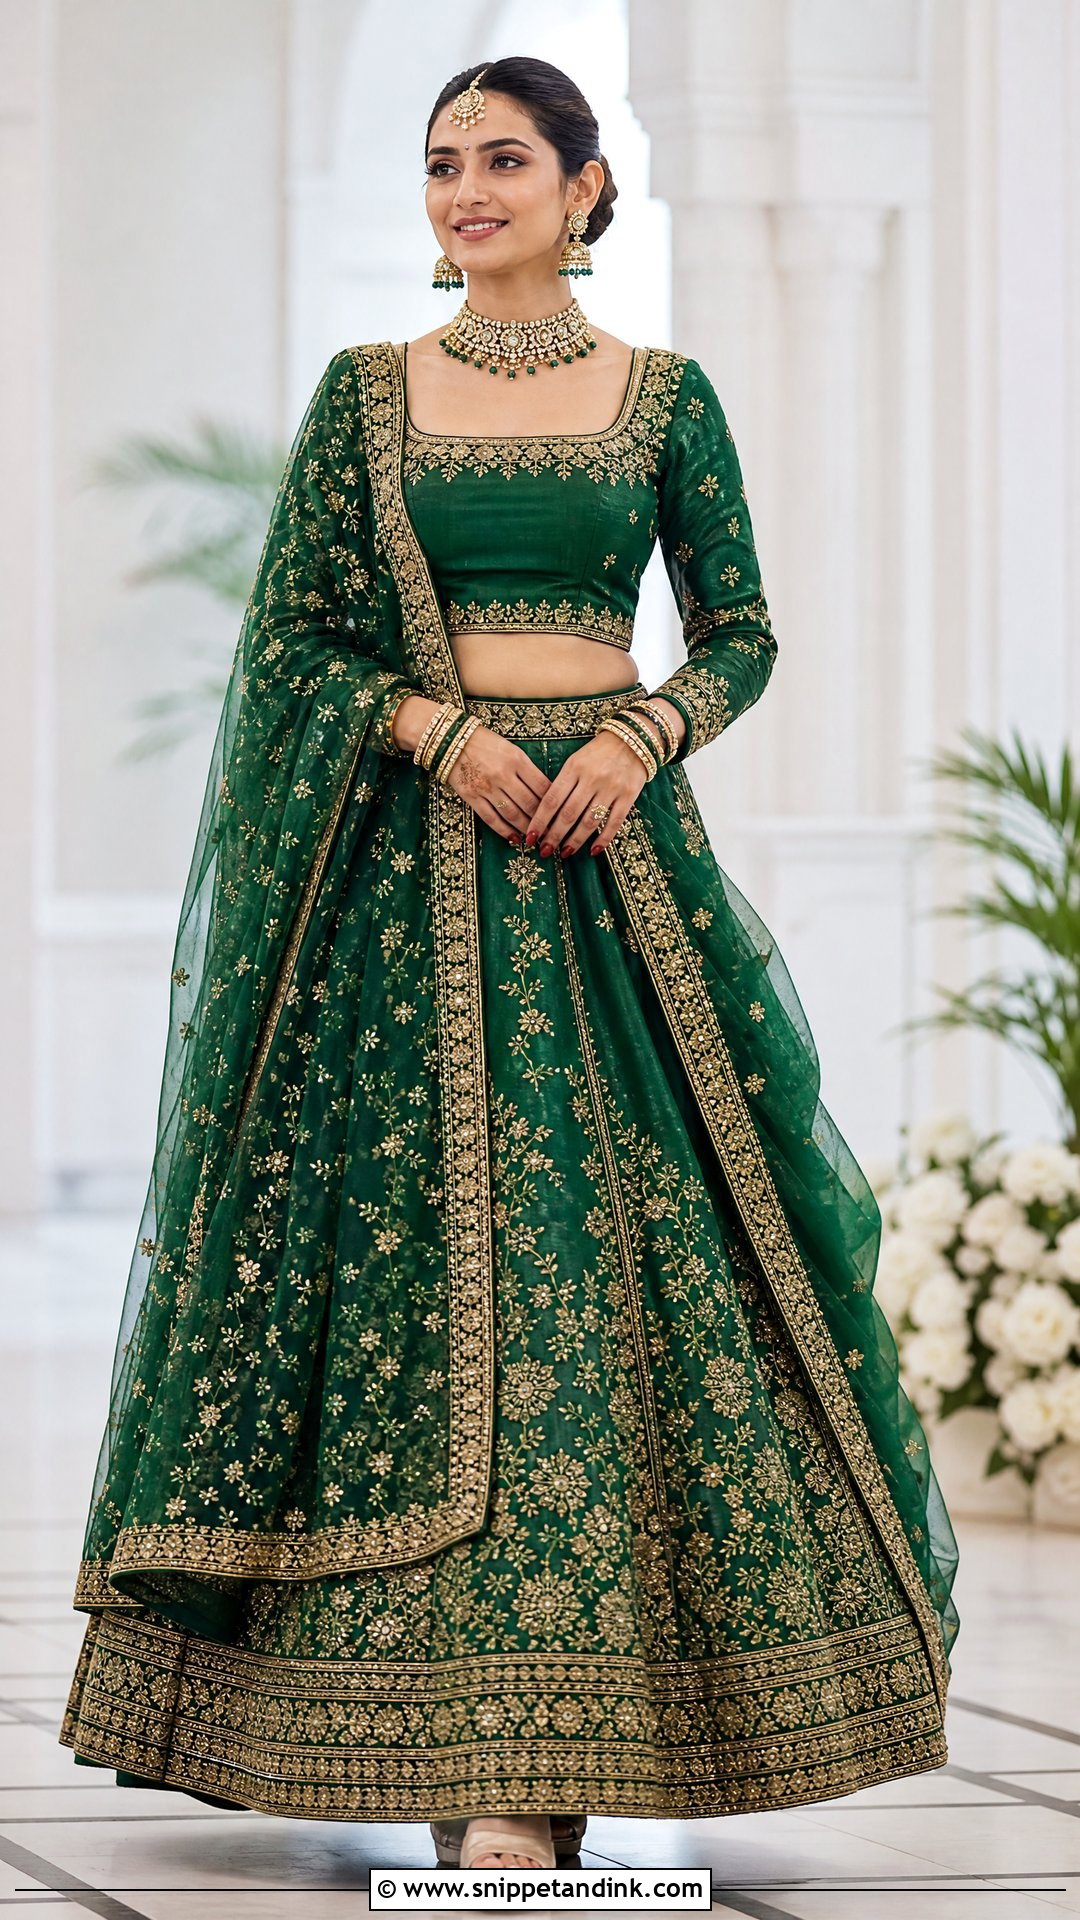
Square necks look architectural, and they leave a neat open space for a choker, collar necklace or short Kundan set. The width is the decision that matters. Too wide and the straps slip toward the shoulder edge; too narrow and the square looks pinched, so I have the tailor mark it on you rather than from a chart. Brocade, silk or velvet keep the corners crisp. Wide straps make room for supportive inner construction, and a thin embroidered border defines the edge without crowding it.
4. Scoop Neck Bridal Blouse Design
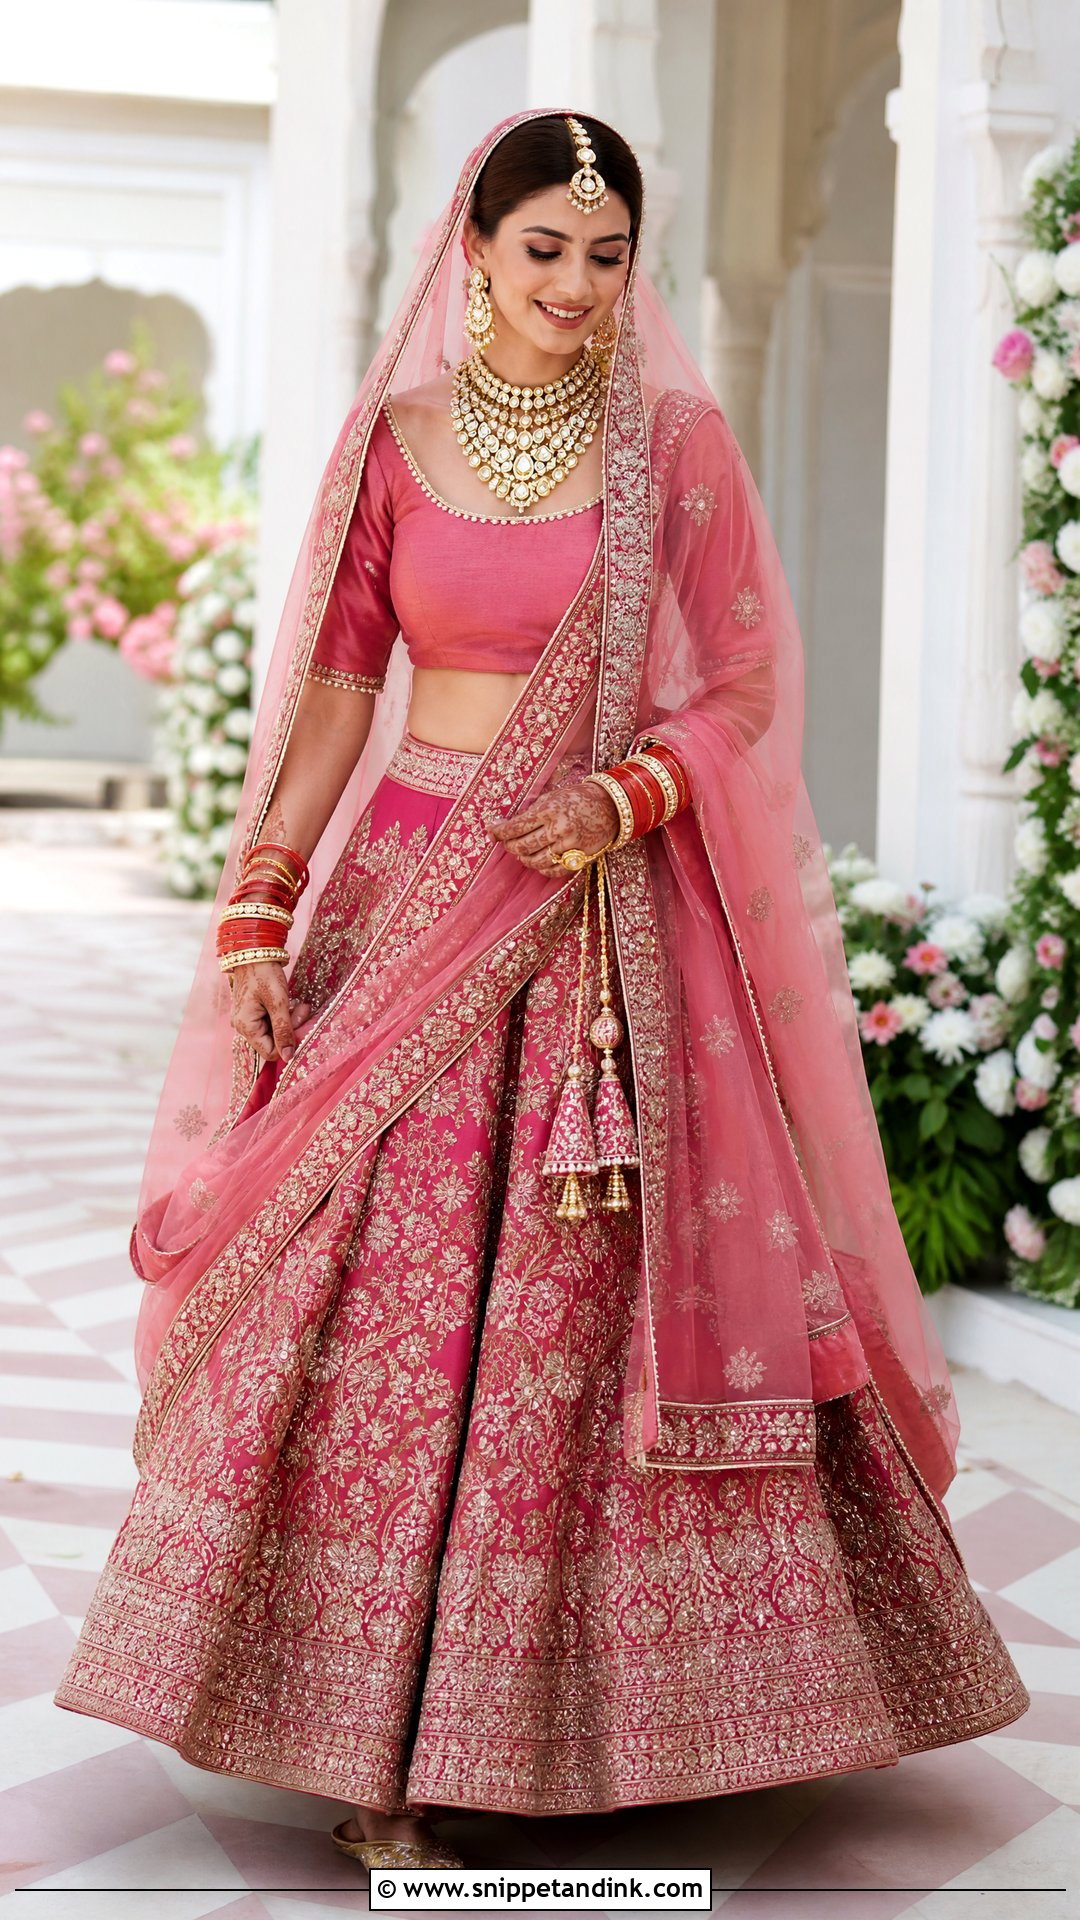
A scoop is softer than a square and less formal than a sweetheart. Its open centre gives a traditional bridal necklace somewhere to sit, and the curve takes the edge off a very embellished lehenga. If your necklace is heavy, go wider, because a scoop that’s narrower than the necklace means the jewelry rides over the embroidered border and both look messy. I’d keep the edge to small pearls or a line of zari. Proper lining and reinforced armholes do the supporting.
5. Boat Neck Bridal Blouse Design
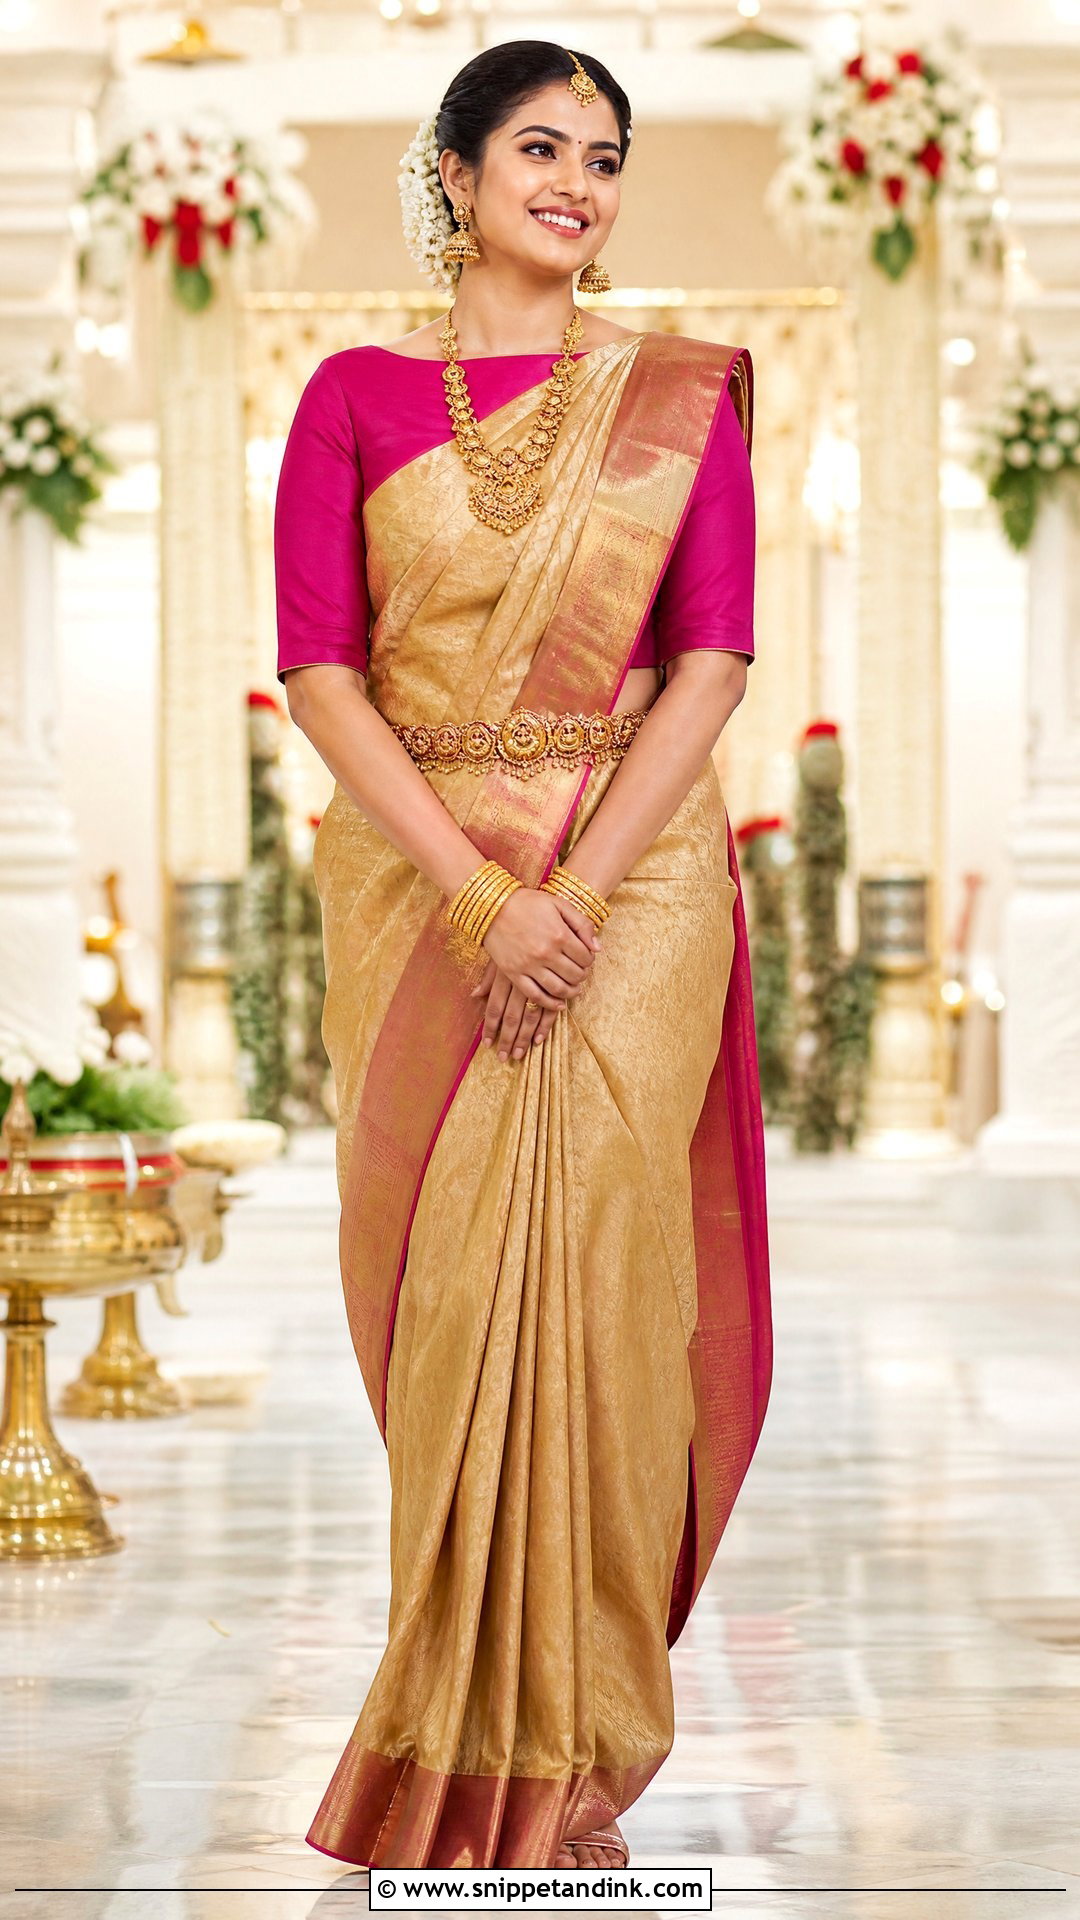
Boat necks run straight across the collarbone, so the upper chest is already covered and a necklace often has nowhere to go. I’d style a fitted boat neck blouse with temple earrings, a waist belt and a Kanjivaram saree, and either a longer necklace or none at all. Ask for a slight curve rather than a dead-straight line; it moves better when you lift your arms. The shoulder fit has to be exact or the neckline drifts toward one side all day. Zari piping is enough to outline it.
6. High Neck Bridal Blouse Design
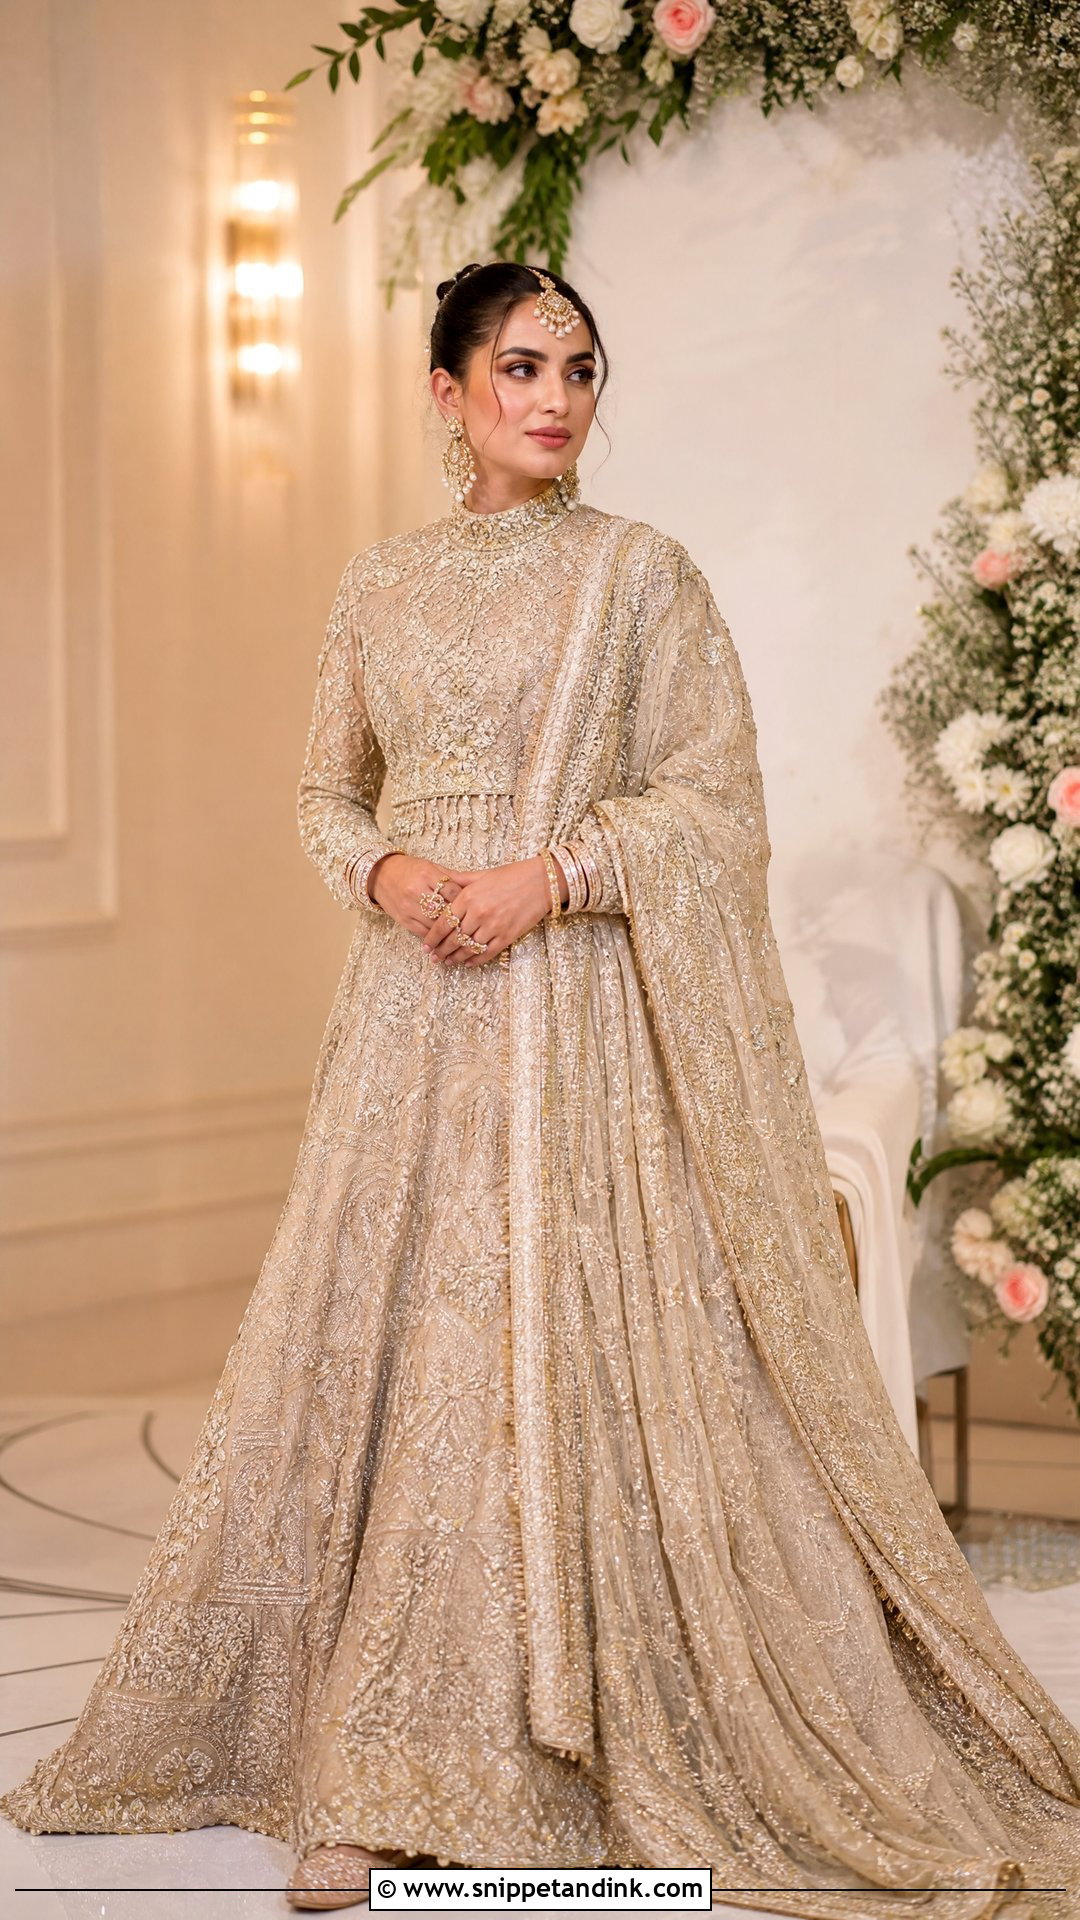
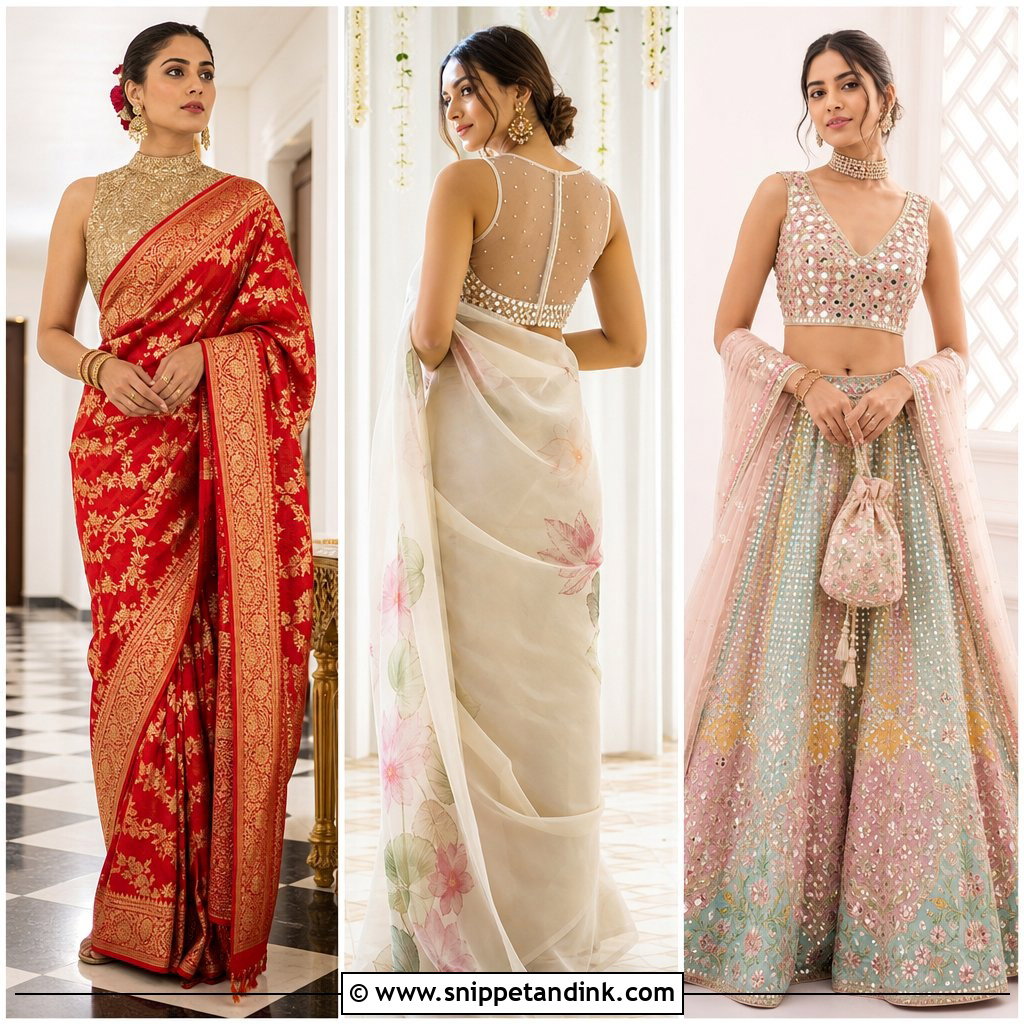
High necks turn the blouse into the jewelry. The collar becomes a canvas for zardozi, aari, pearls or motifs taken from the lehenga, which is why I always tell brides to skip the heavy necklace and let earrings and a maang tikka do the work. Comfort is the risk. In a warm venue a stiff, tight collar is the first thing you’ll want to take off, so ask for a lightweight lining and a neck opening you can turn your head in. Concealed back hooks or a zip make dressing easier, and the cut works with any sleeve length.
7. Halter Neck Bridal Blouse Design
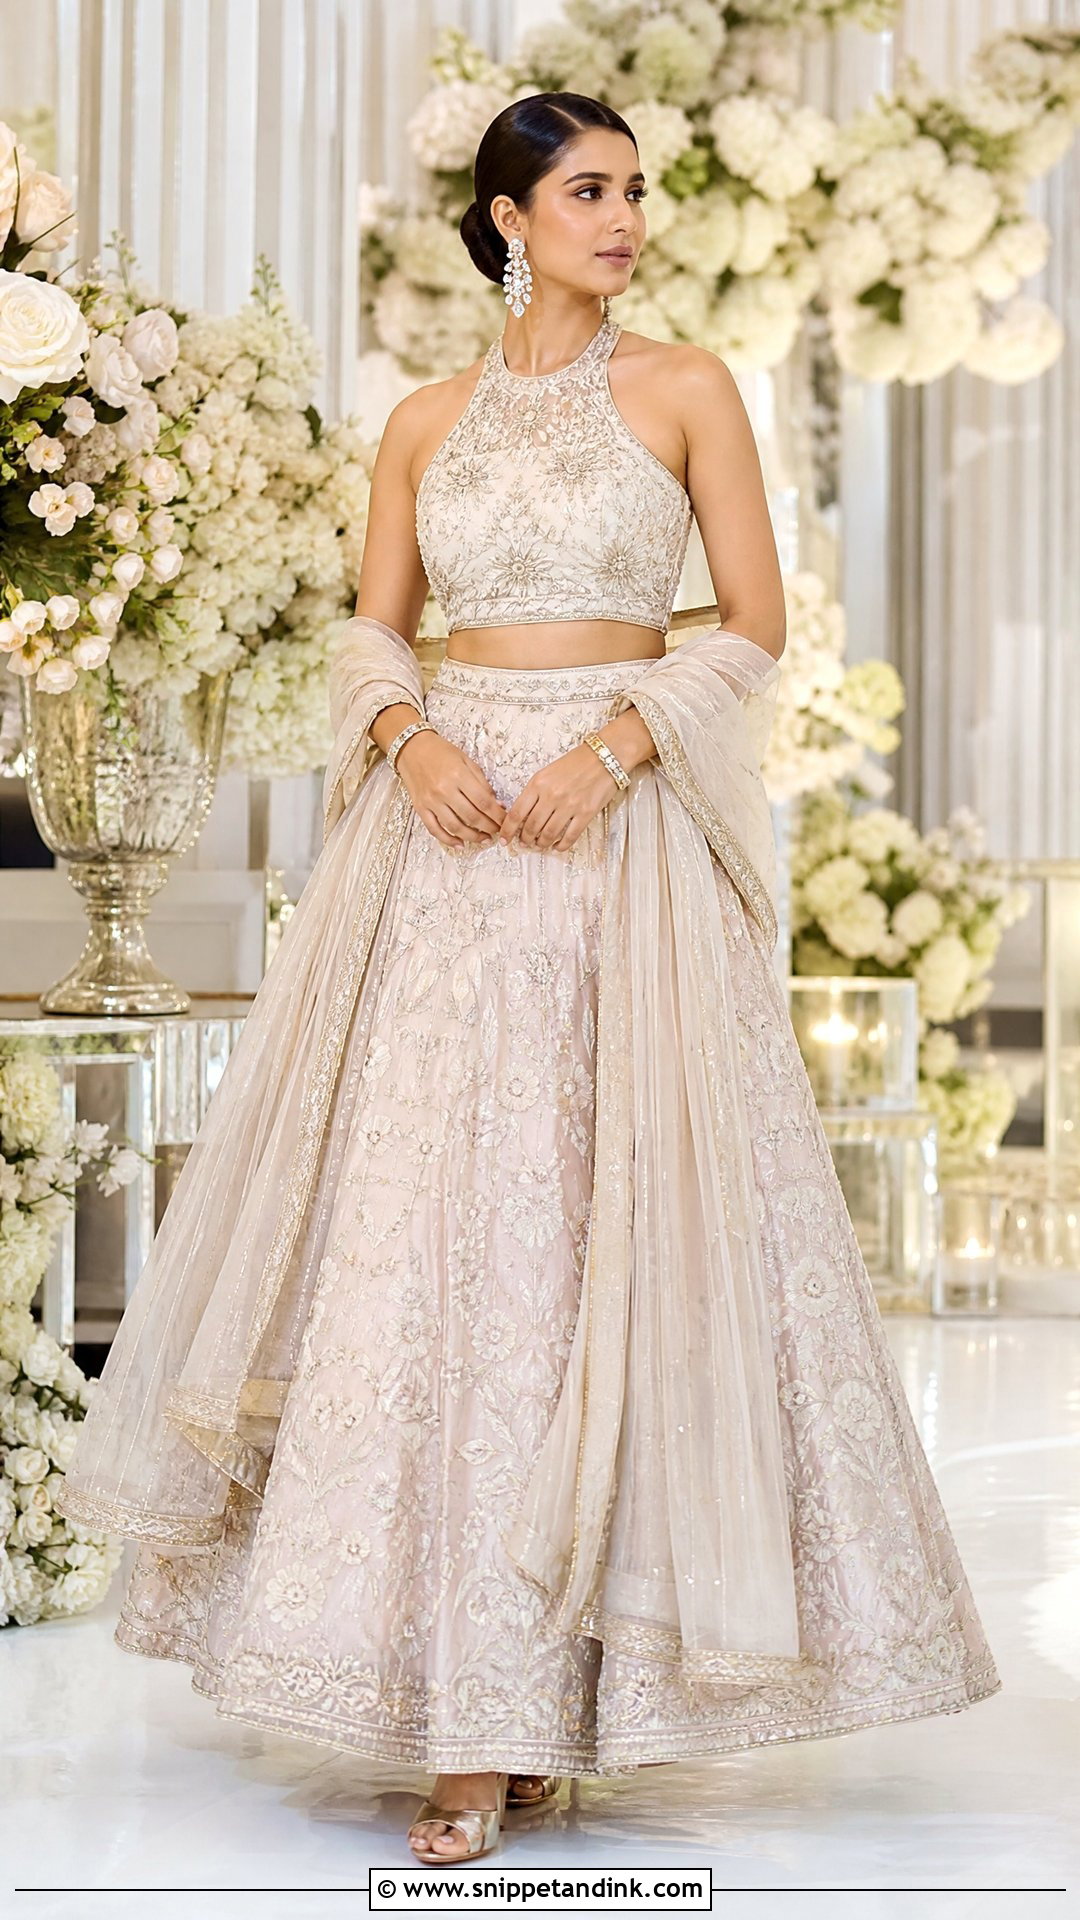
Halters show off the shoulders and suit a reception lehenga or pre-wedding outfit better than the main ceremony. The band around the neck carries more weight than you’d think, and if it’s narrow or tight it digs in within an hour. I ask for a wider, padded band plus proper cups and secure side seams. Because the neckline climbs, skip the choker and wear chandelier earrings instead. A low bun or sleek ponytail keeps the halter line in view, and a mesh centre panel adds coverage.
8. Off-Shoulder Bridal Blouse Neck Design
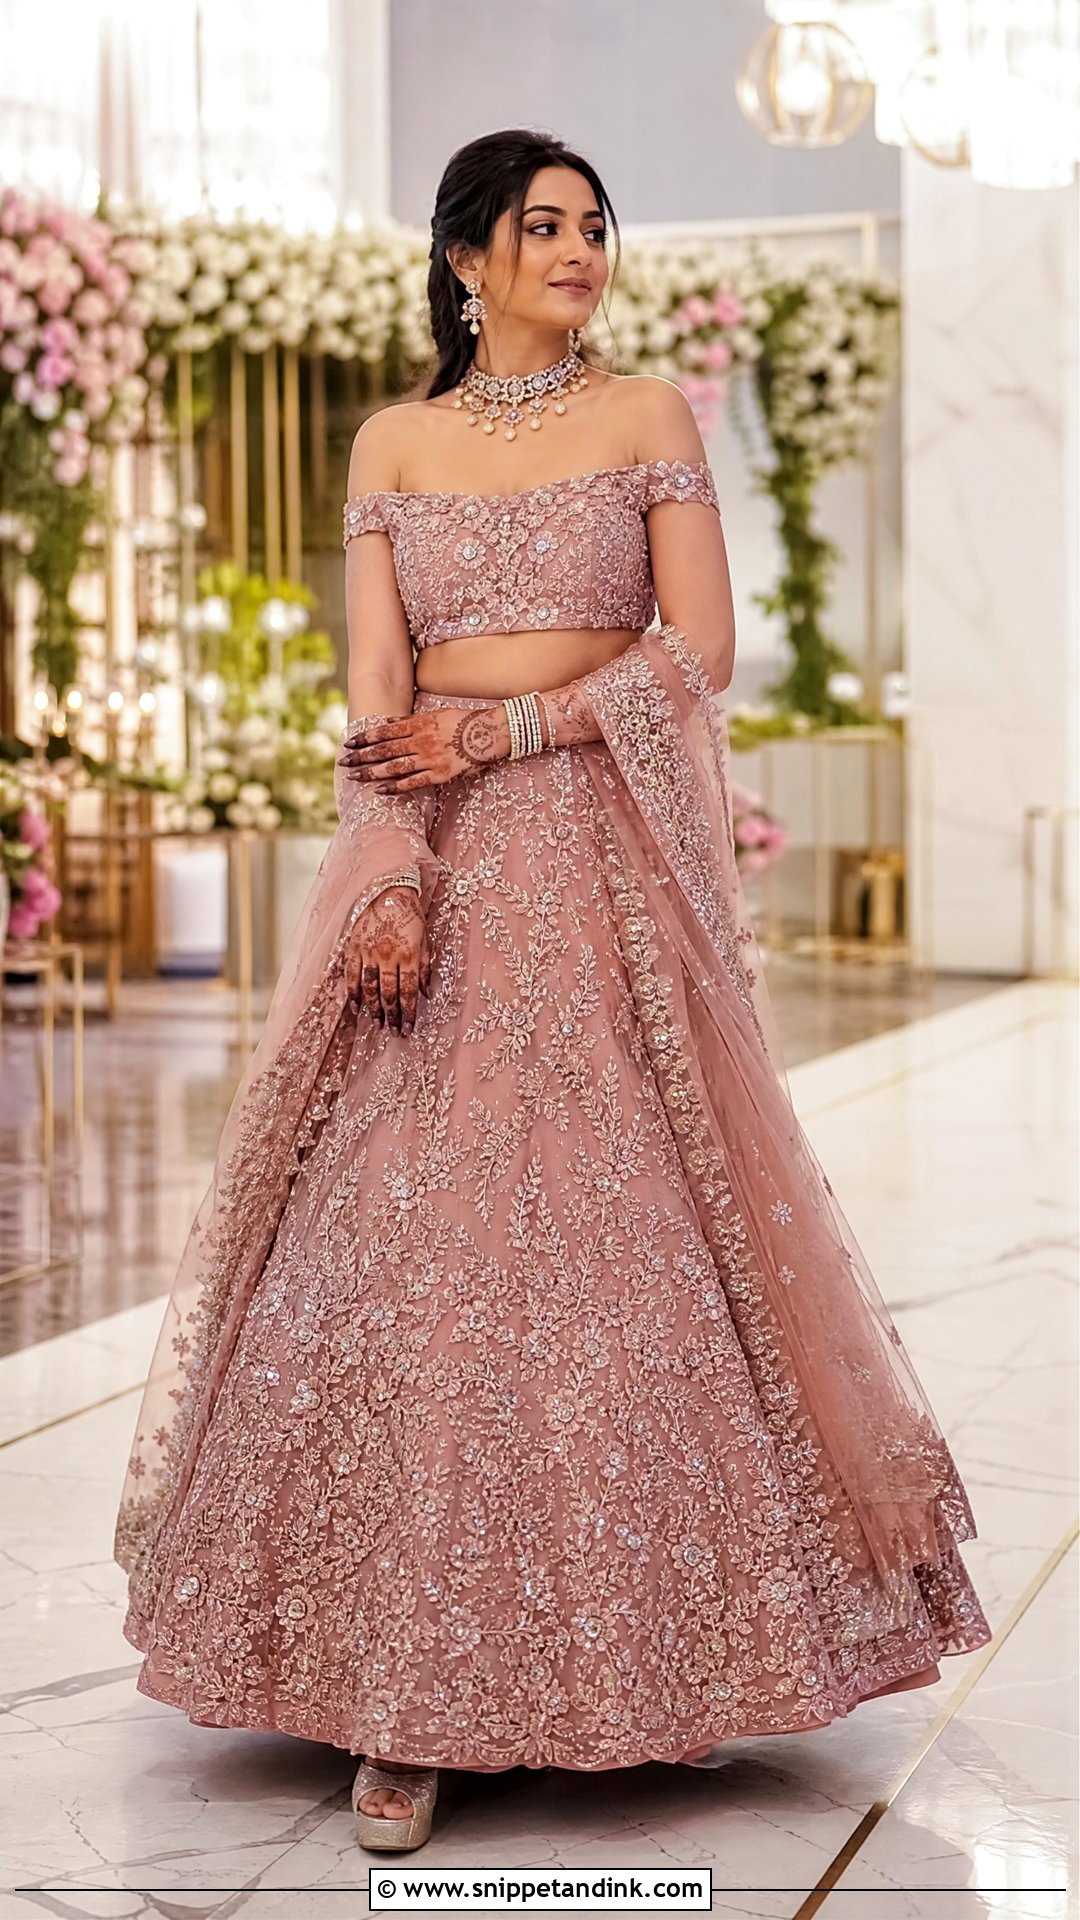
Off-shoulder blouses can’t lean on straps, so every bit of support has to be built inside. I ask for boning, fitted cups, a firm underbust band and a non-slip finish along the neckline. The test I always run at the fitting is arm movement: lift your arms, hug someone, mime the dance you’ll do at the sangeet. If the neckline climbs or the sleeves pin your arms down, it needs reworking. Pair it with a short choker. A scalloped or beaded edge softens the straight line and links it to the lehenga.
9. Illusion Neck Bridal Blouse Design
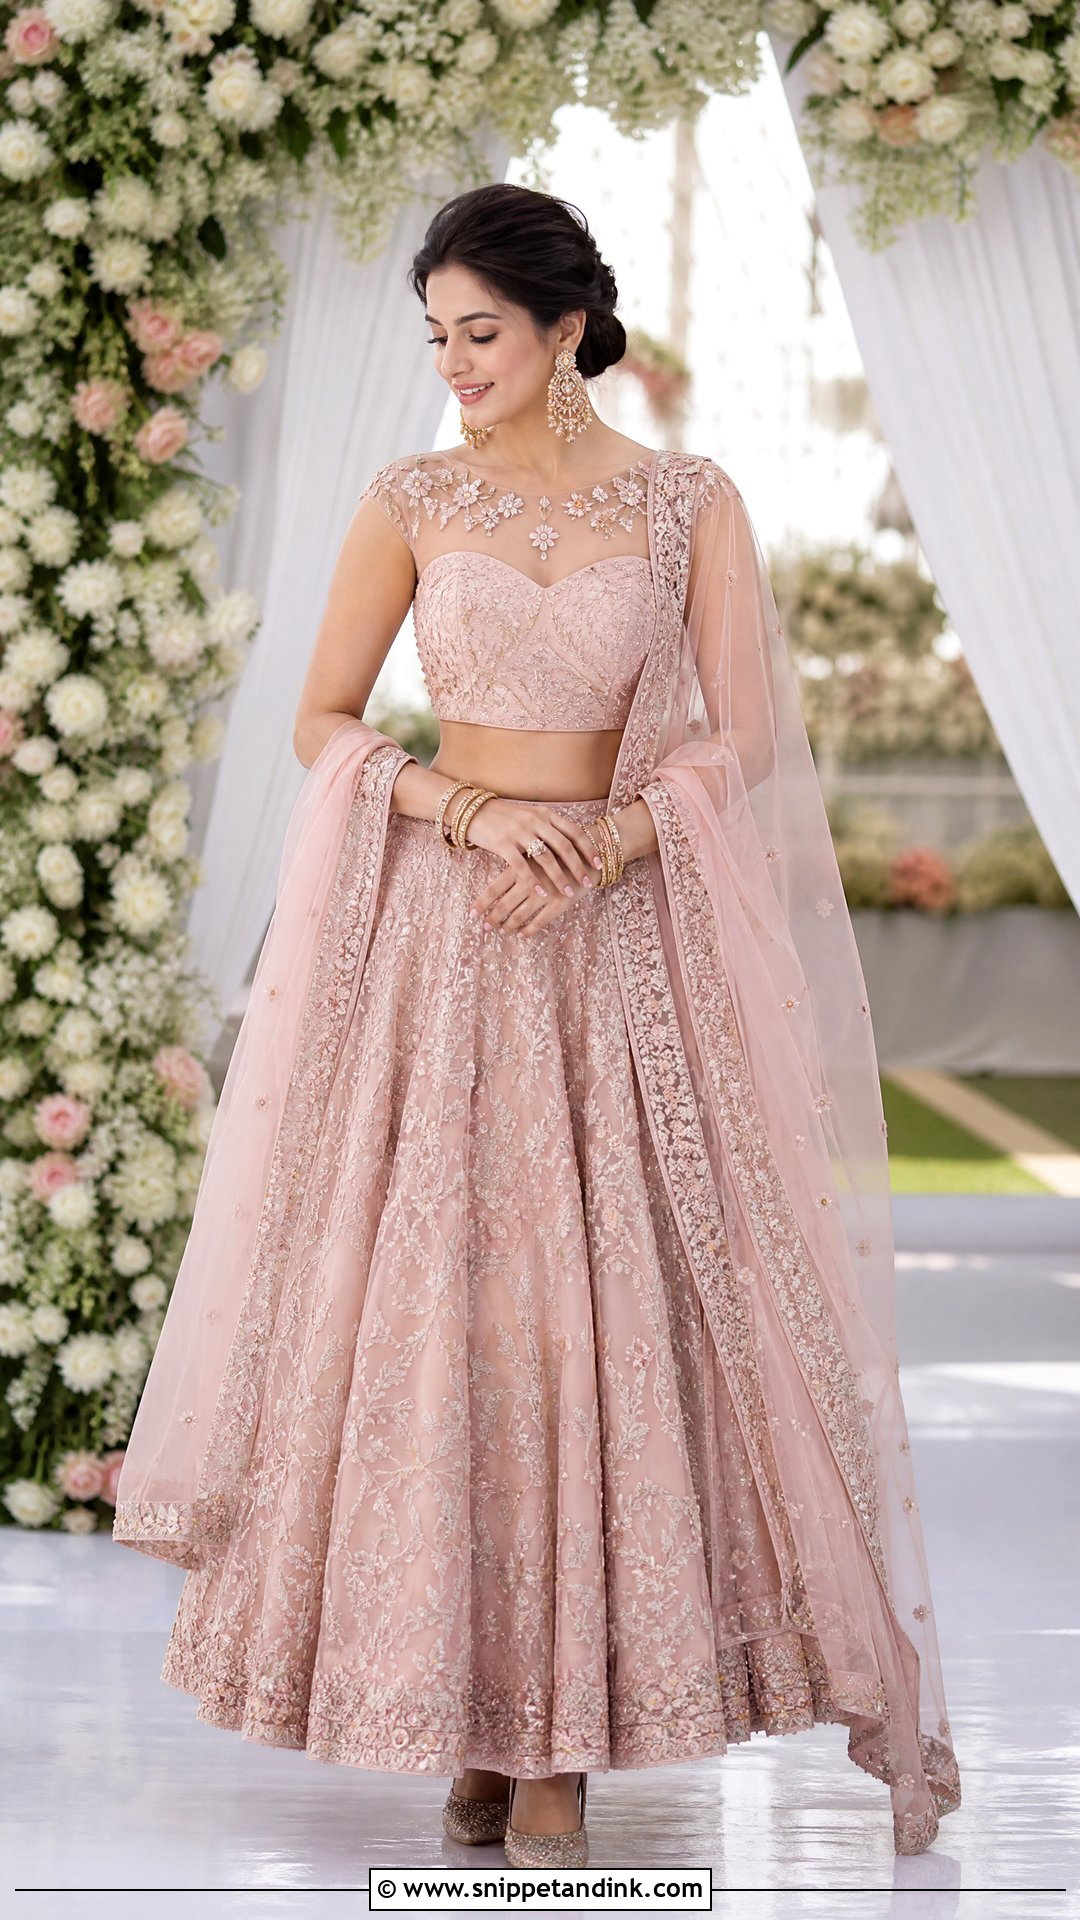
Illusion necks look open while the net does the supporting, so the net itself decides whether this works. It must match your skin tone closely in daylight, not just under shop lighting, and feel soft against the neck. Floating florals or scattered pearls look as if they rest on the skin. Under the net you can have a sweetheart, round or V base. Keep stiff embellishment away from the edges, where it rubs as you move. A neat back fastening and reinforced shoulders stop the delicate fabric from stretching out.
10. Keyhole Bridal Blouse Neck Design
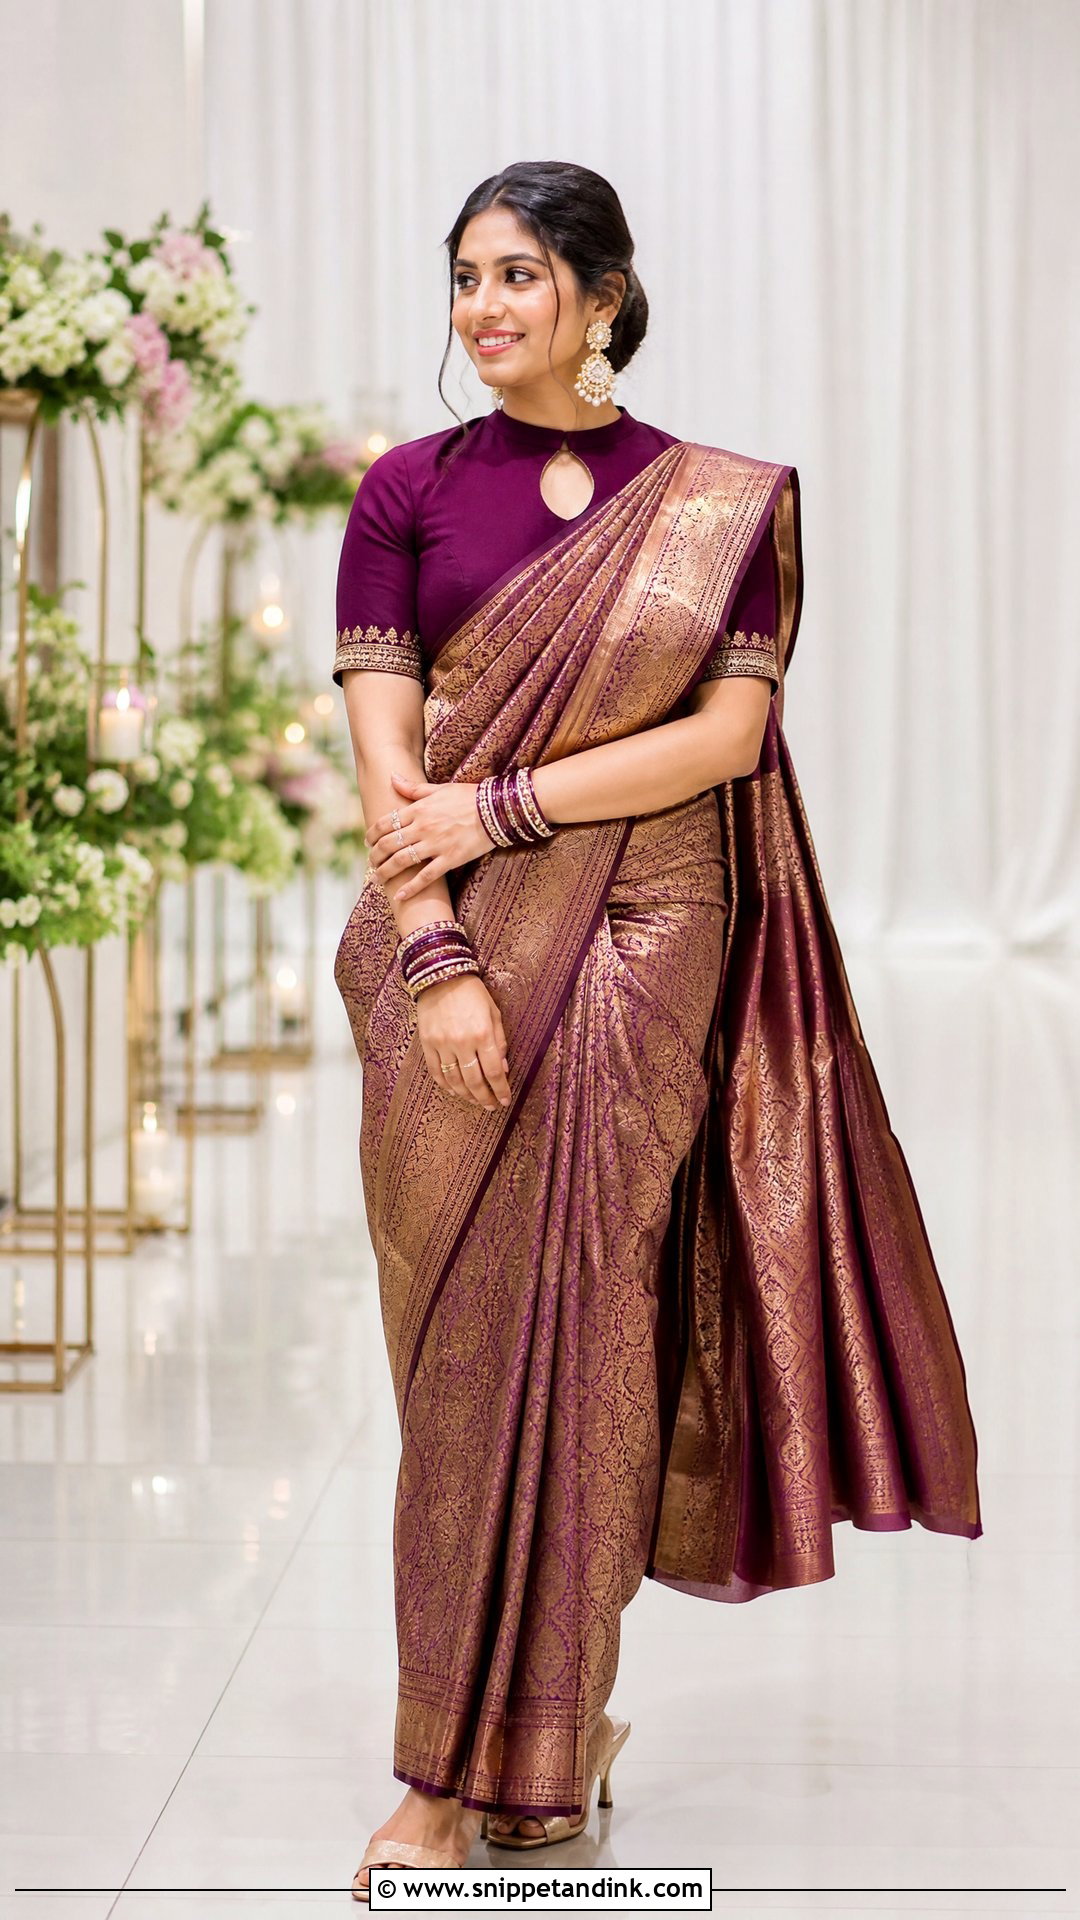
A keyhole adds one small, controlled opening to an otherwise covered front or back. Round, teardrop or a narrow vertical slit each change the mood. I’d wear a keyhole blouse with an embroidered silk saree and a neatly pinned pallu, and finish the top of the opening with a pearl closure or covered button. Since the cutout is already the detail, a big necklace is usually too much; a small pendant can work if the keyhole sits high. Look closely at the edges at your fitting. Uneven stitching around a cutout shows immediately.
11. U-Neck Bridal Blouse Design
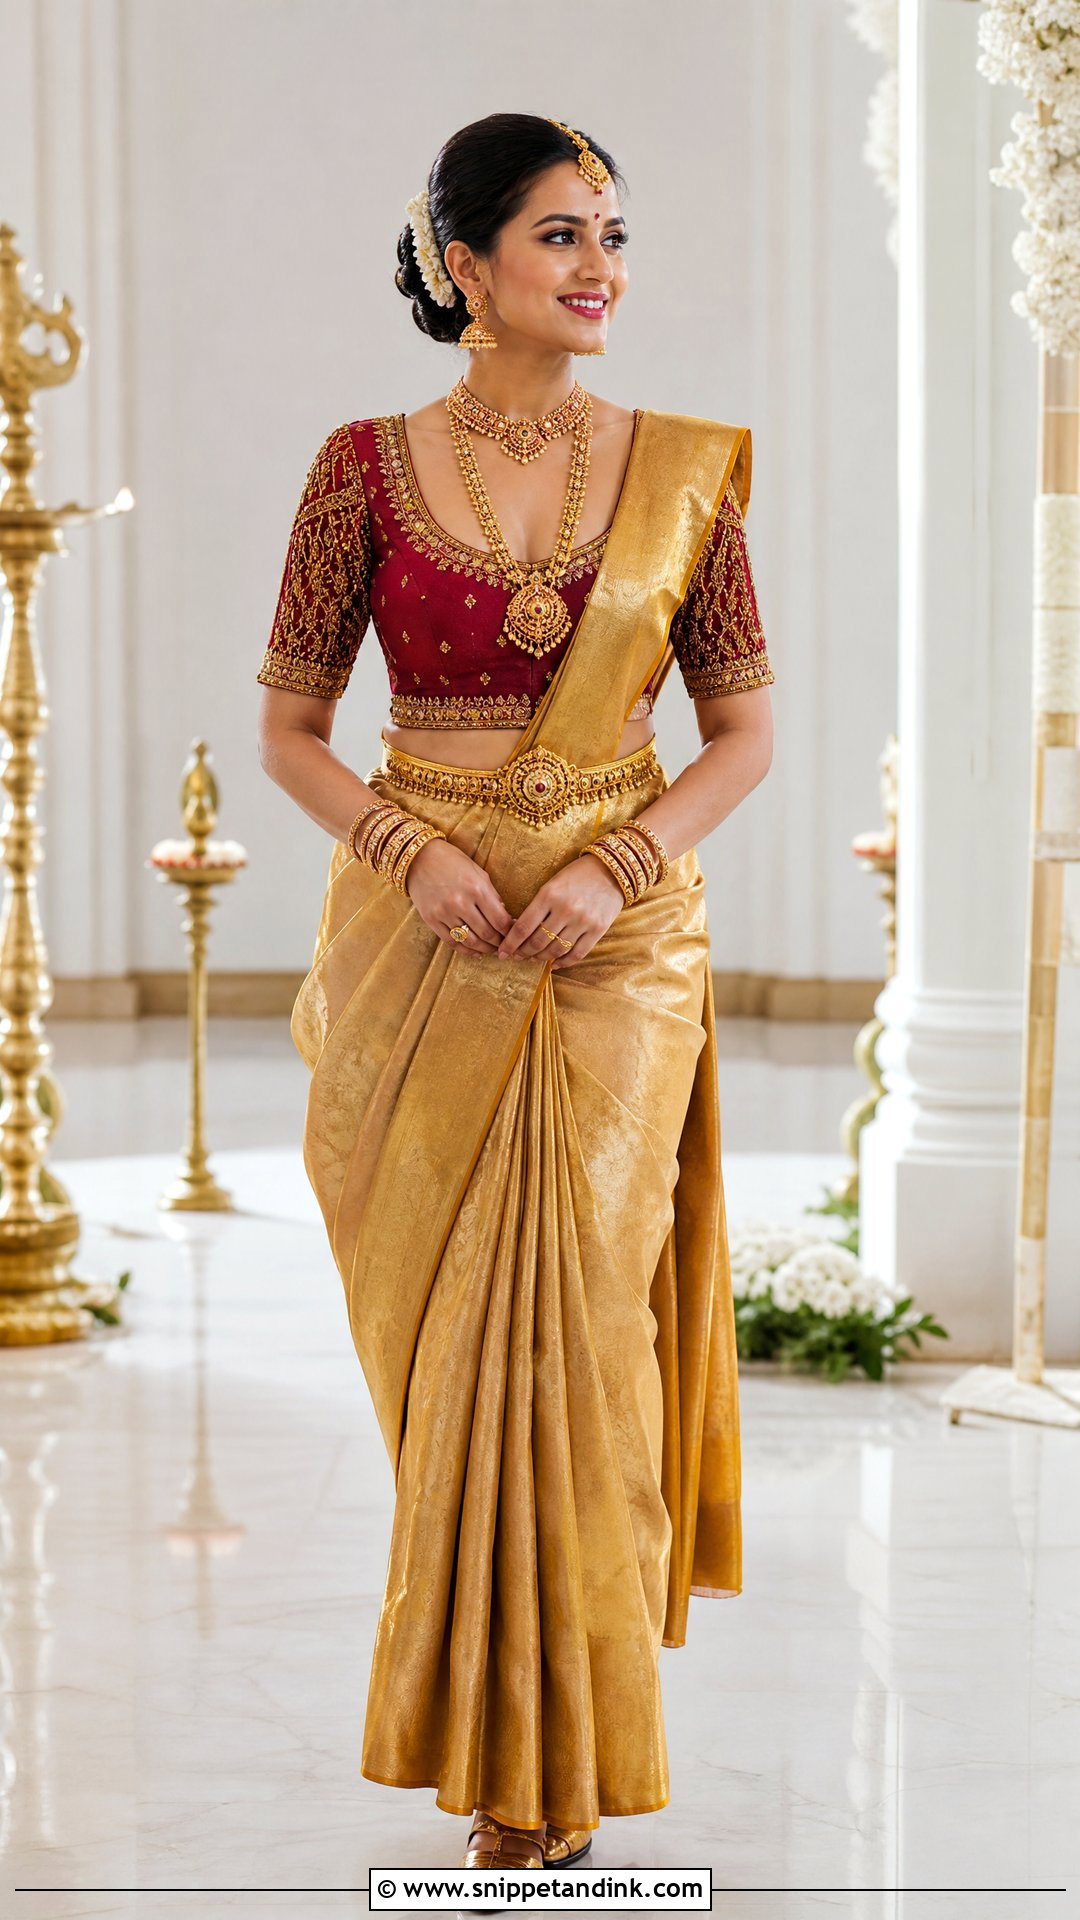
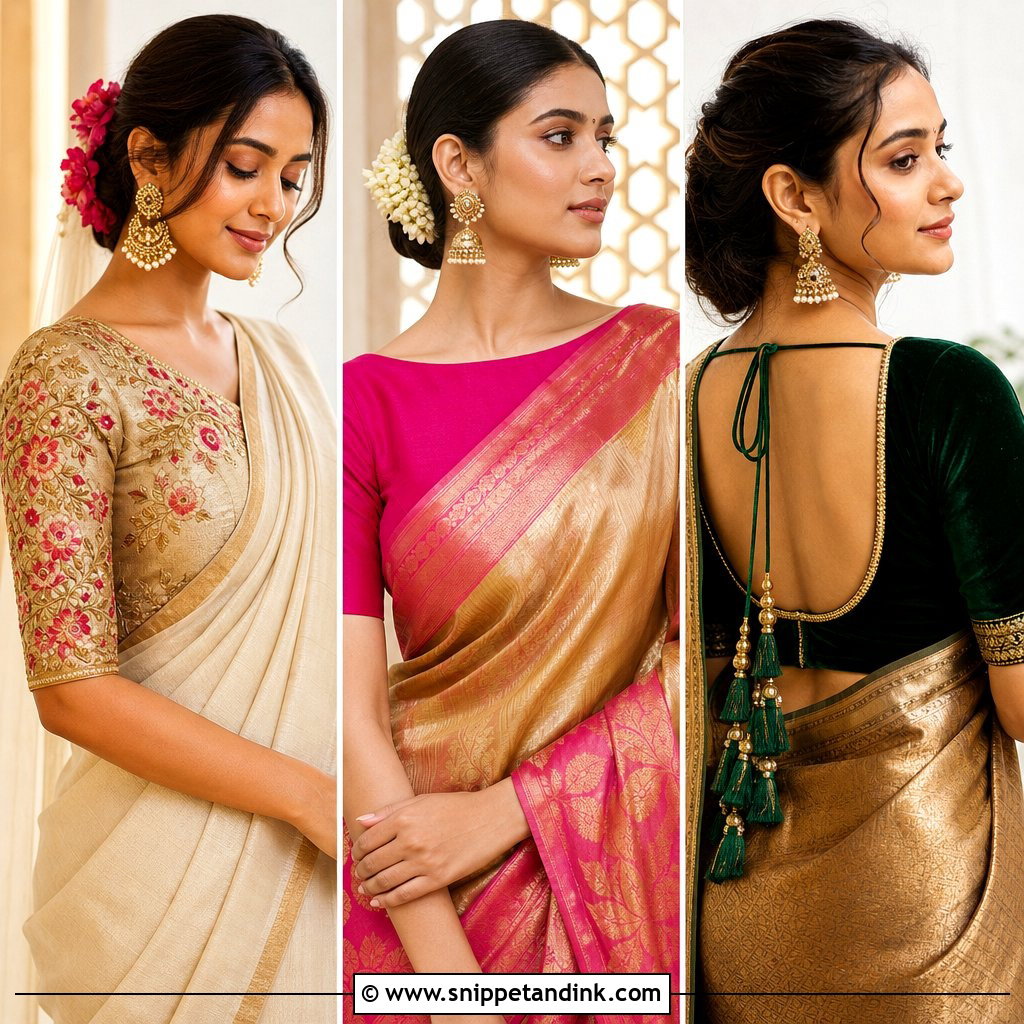
U-necks are the most adaptable cut in this list. They open up more than a round neck yet stay easy to accessorize, so they’re my default when the fabric and jewelry are both already elaborate. For a saree, pair it with a layered necklace and waist belt; for a lehenga, repeat the skirt’s border around the neckline. The depth and width can be adjusted to your jewelry. What prevents gaping here is an accurate shoulder measurement and well-placed darts, not extra embroidery.
12. Round Neck Bridal Blouse Design
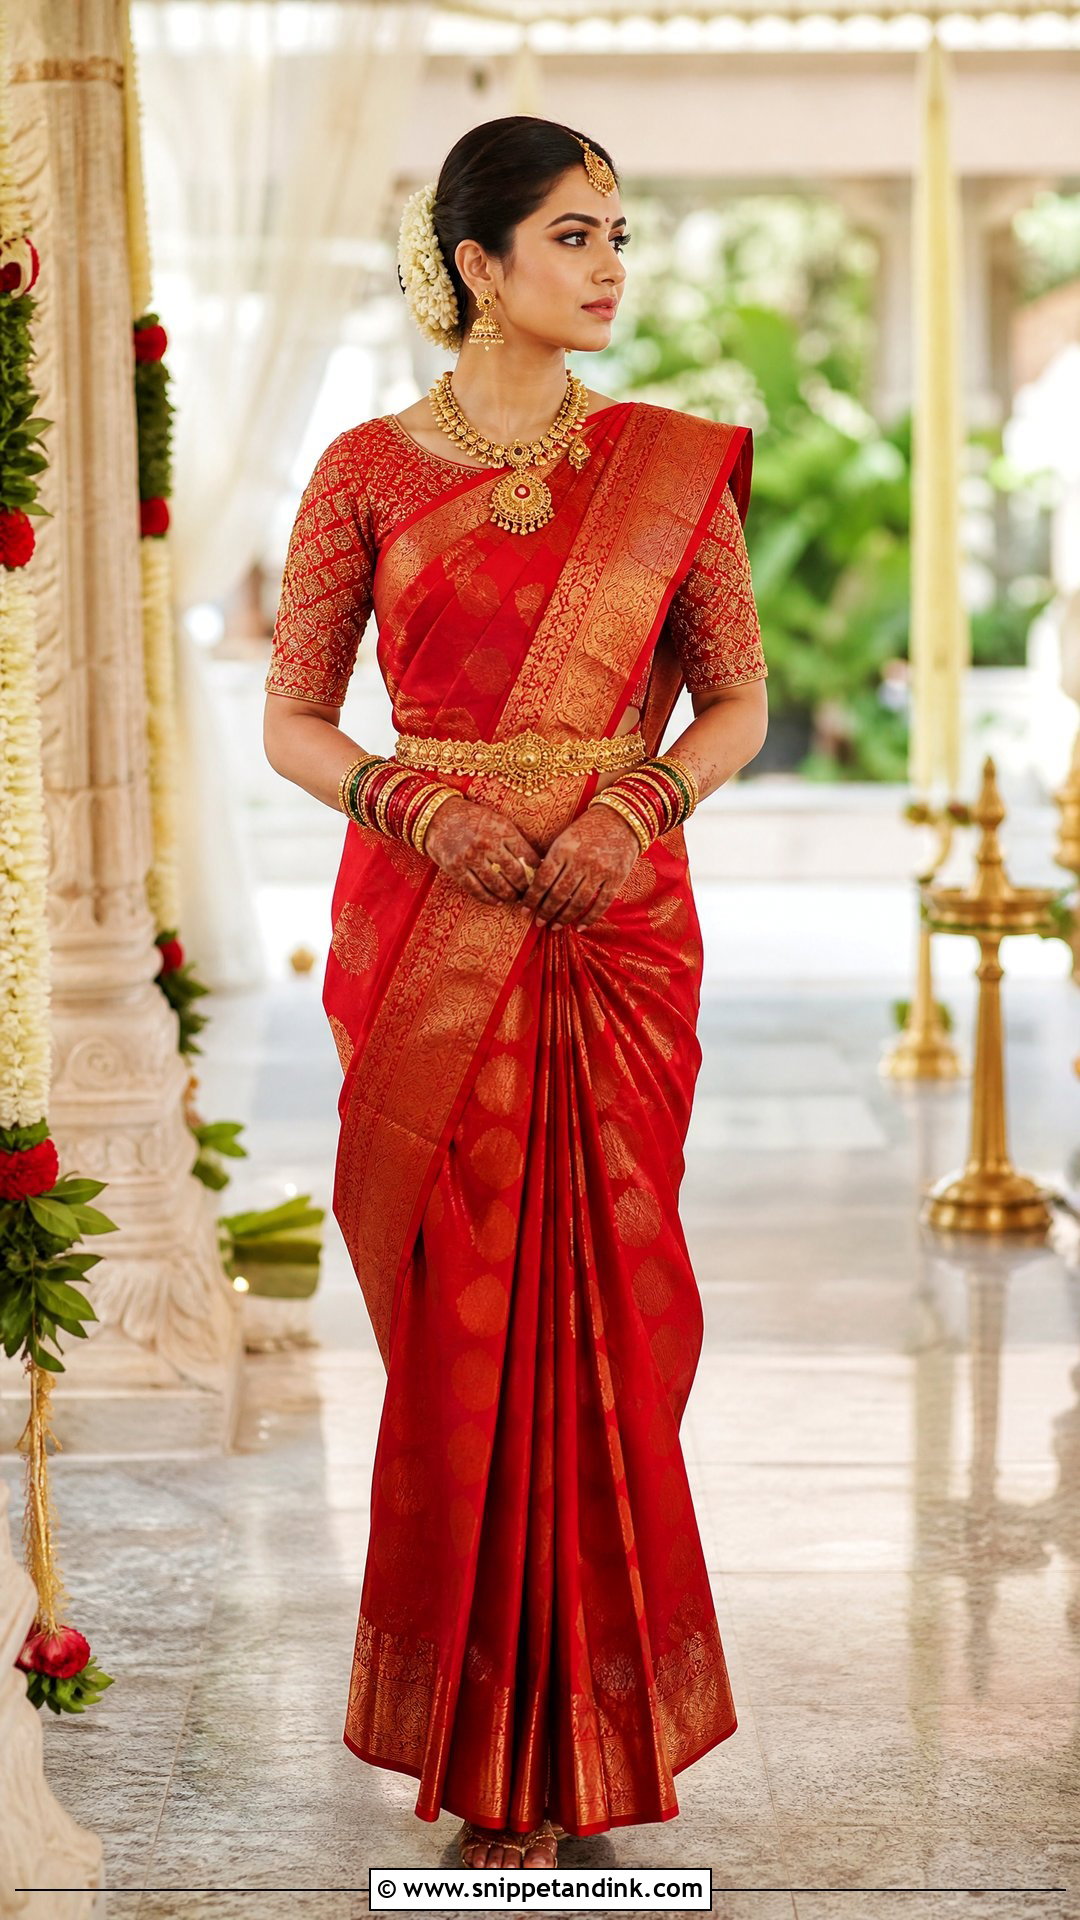
Round necks are the safest support you’ll get, especially with wider shoulders, firm lining and well-positioned darts. Cut close for a modest look or a little wider to show the collarbone. A round neck blouse sits naturally with a Banarasi or Kanjivaram saree, temple jewelry and a jasmine bun. On a heavily decorated blouse I keep the necklace streamlined so it doesn’t hide the neckline. A narrow pearl border or contrast piping makes the curve readable in photos.
13. Scalloped Bridal Blouse Neck Design
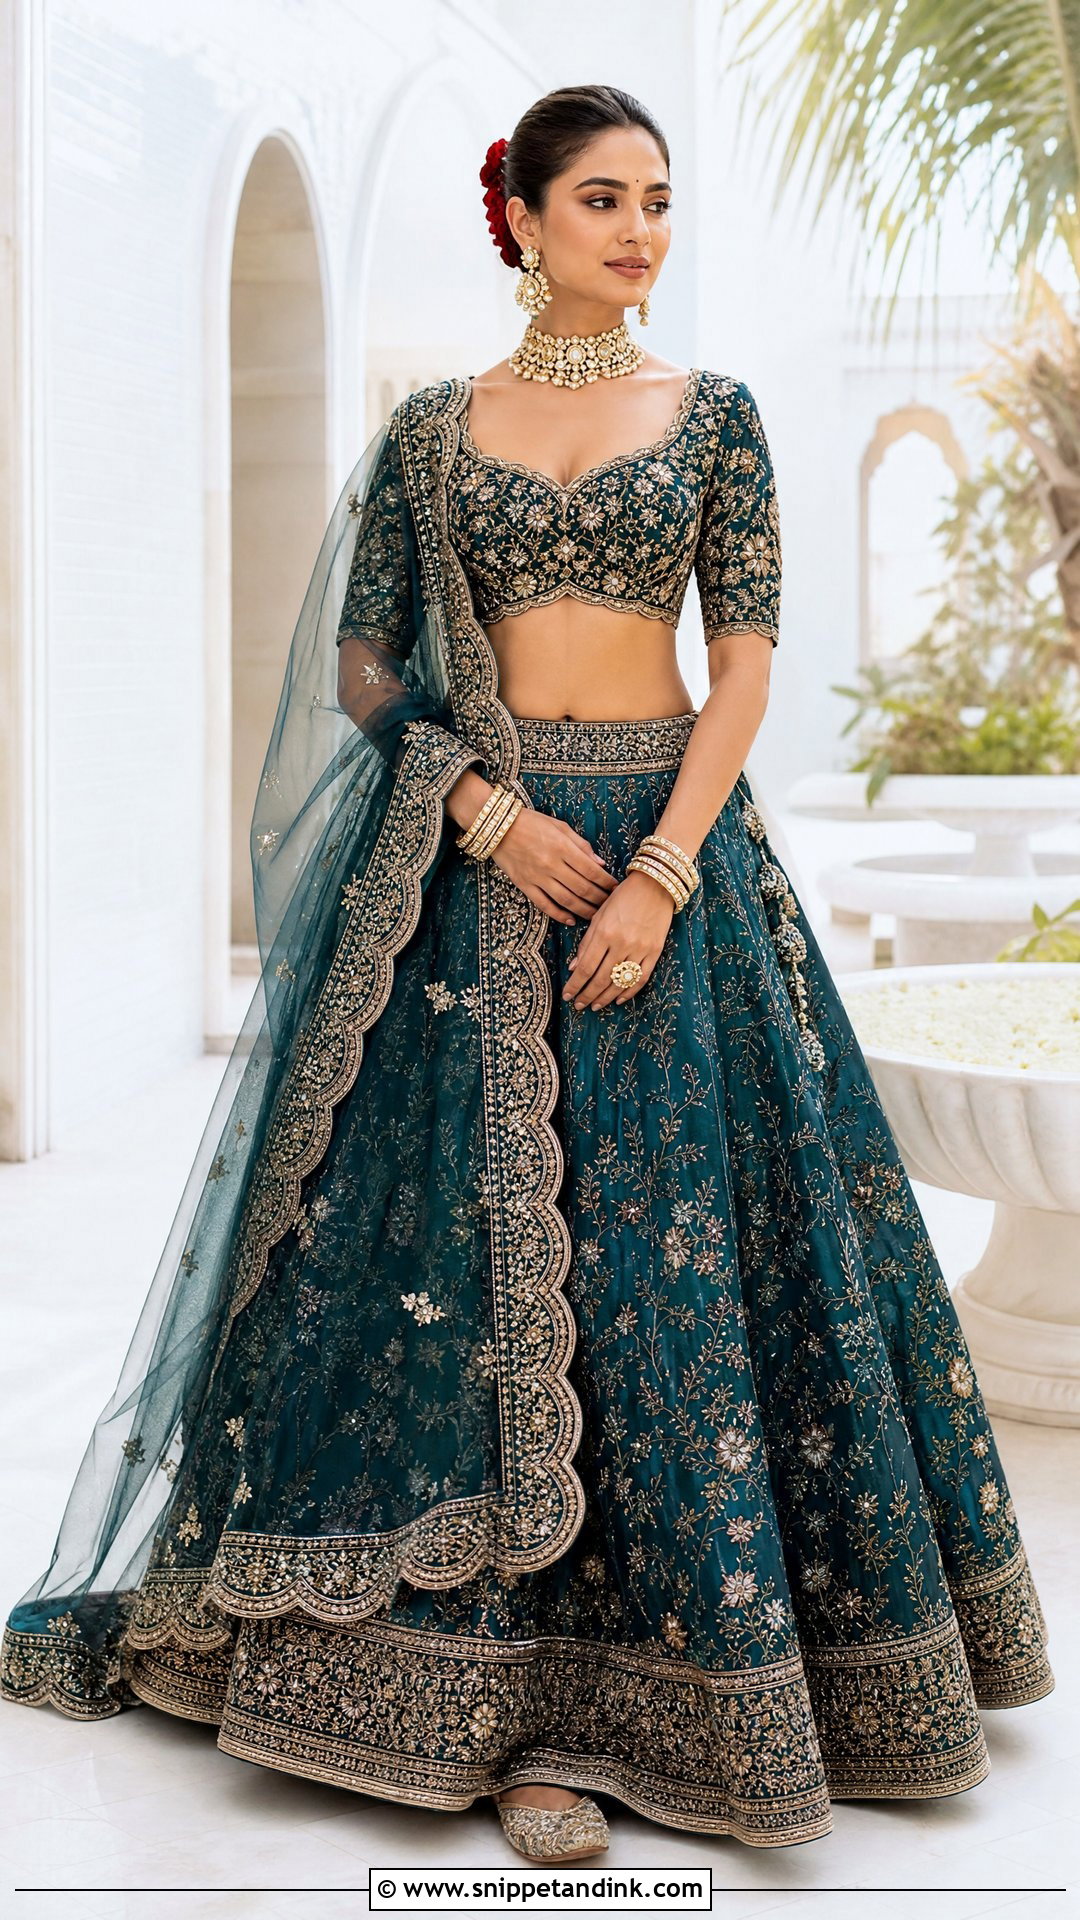
Scallops turn a familiar neckline into a detail without needing an unusual cut. They can trace a round, square, sweetheart or V shape, picked out in pearls or metallic thread. Two things decide whether they look expensive. First, every scallop should be the same size, because uneven curves are obvious in close-up portraits. Second, the edge needs firm interfacing or the scallops curl outward after a few hours of wear. On patterned fabric go for larger, simpler curves; plain silk can take finer work. Repeat the scallop on the sleeves or the dupatta border.
14. Queen Anne Bridal Blouse Neck Design
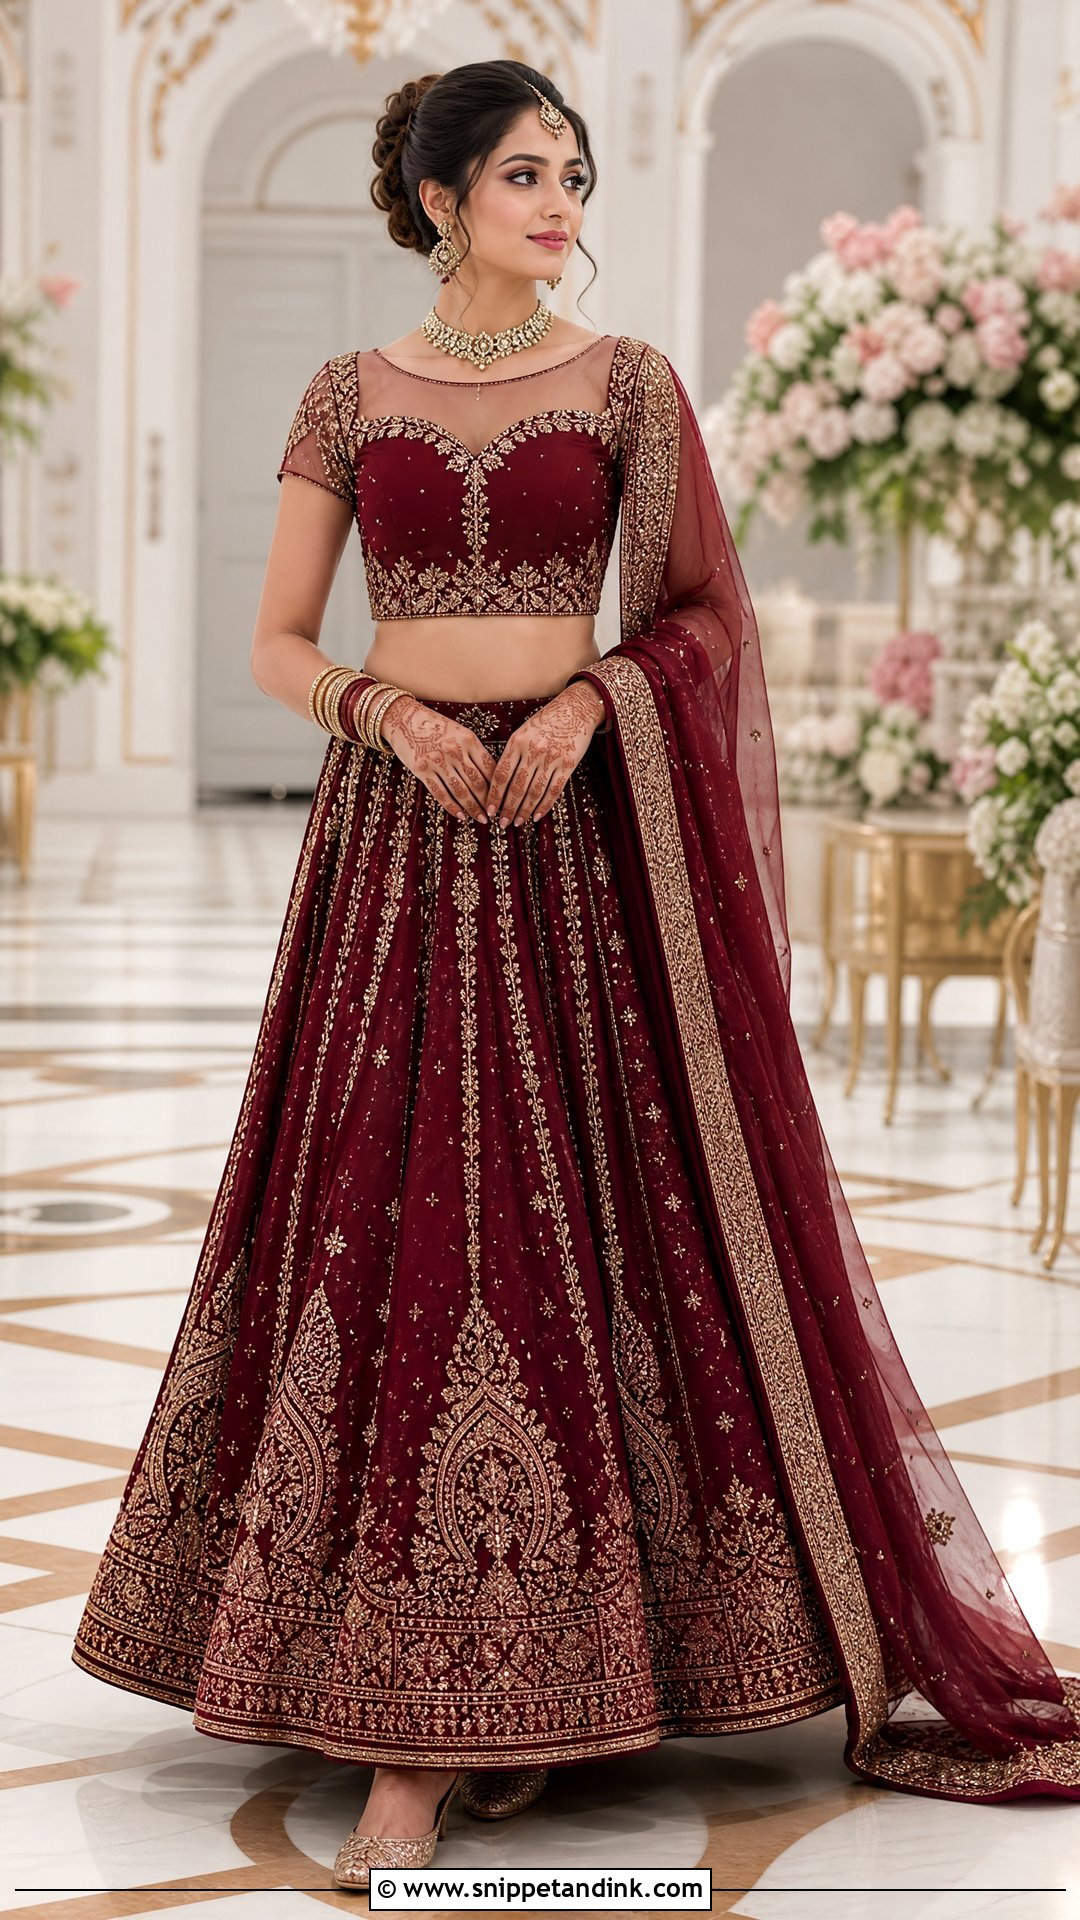
The Queen Anne neckline pairs a higher back or shoulder line with a lower curved front, and it’s one of the less common cuts for a bridal blouse. That’s its appeal. It can be made in solid silk, sheer net or both. I’d embroider the shoulders to draw the eye up and keep the centre clear for a short necklace. The upper section must sit flat against the neck and shoulders without pulling, so the measurements around the neck base need extra care. Sleeveless, cap or elbow sleeves all work.
15. Portrait Neck Bridal Blouse Design
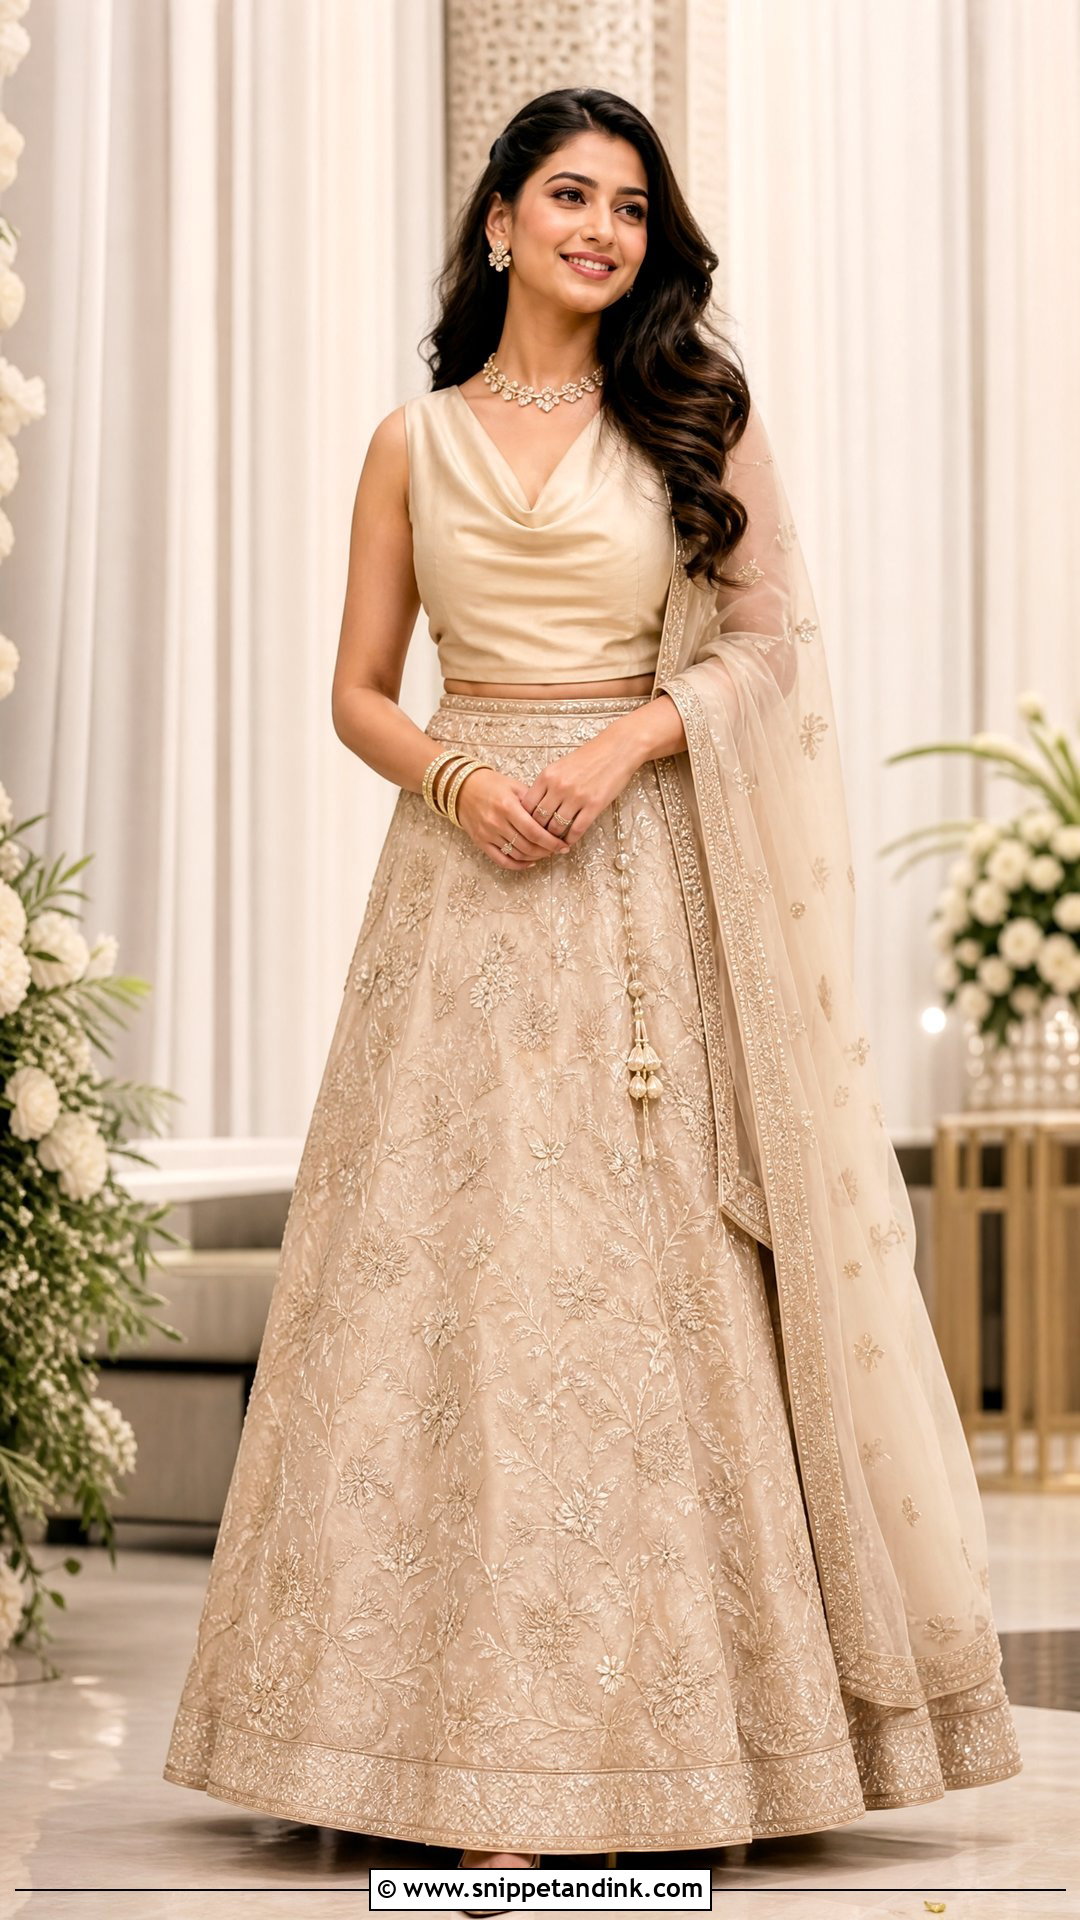
A portrait neckline folds back into a wide frame across the shoulders. It softens structured fabrics and makes a plain blouse look tailored. The fold needs light interfacing: too little and it collapses, too much and it stands away from the body like a collar. I keep embroidery on the border or the sleeves so the fold stays readable. Satin or silk with a short necklace, studs and a side-parted style or neat bun suits receptions and engagement parties more than a traditional ritual.
16. One-Shoulder Bridal Blouse Neck Design
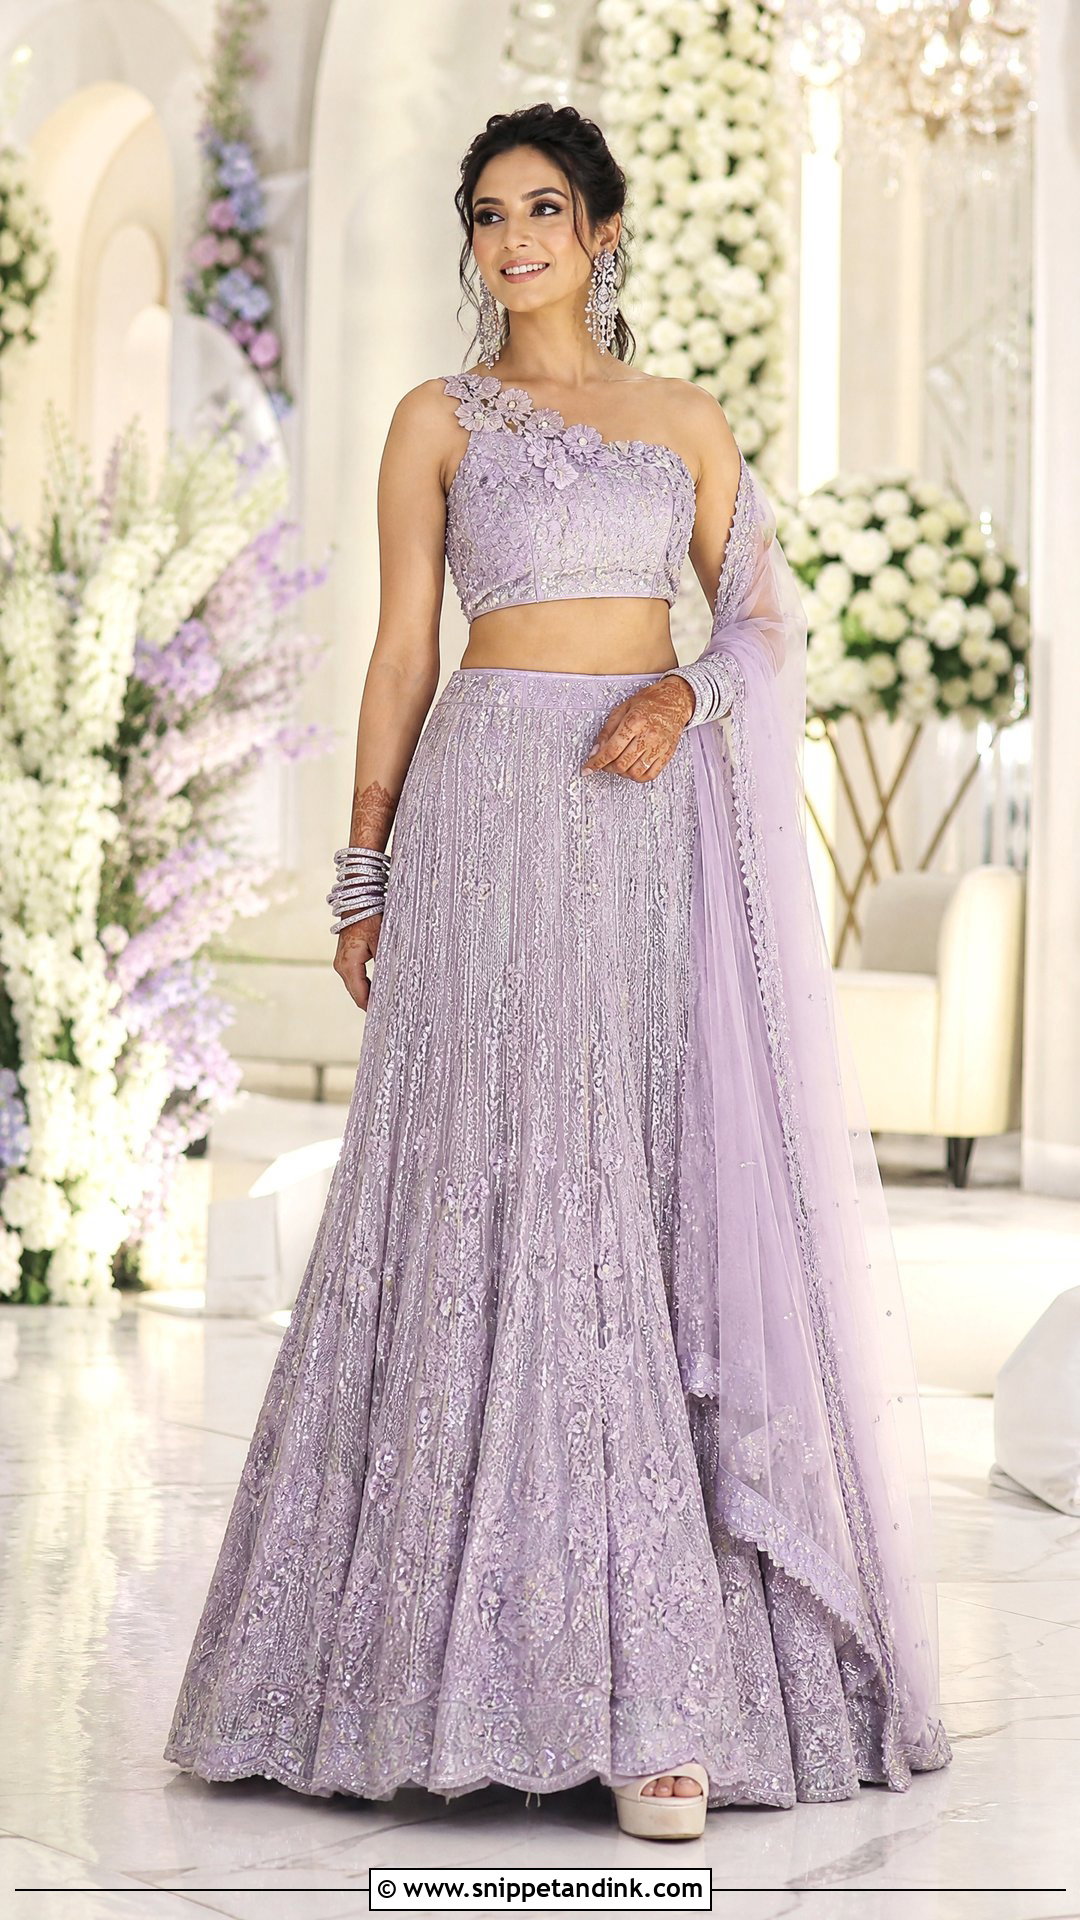
One-shoulder blouses depend on asymmetry: a wide embroidered strap on one side and either bare skin or sheer net on the other. Drape the dupatta from the opposite shoulder, or you’ll cover the one feature that defines the blouse. Inside, it needs firm structure, supportive cups and secure fastening, because nothing holds the bare side up except the fit. Floral appliqué or cascading beadwork along the strap looks couture. Skip the necklace. I’d keep this one for receptions where you’ve tested dancing in it beforehand.
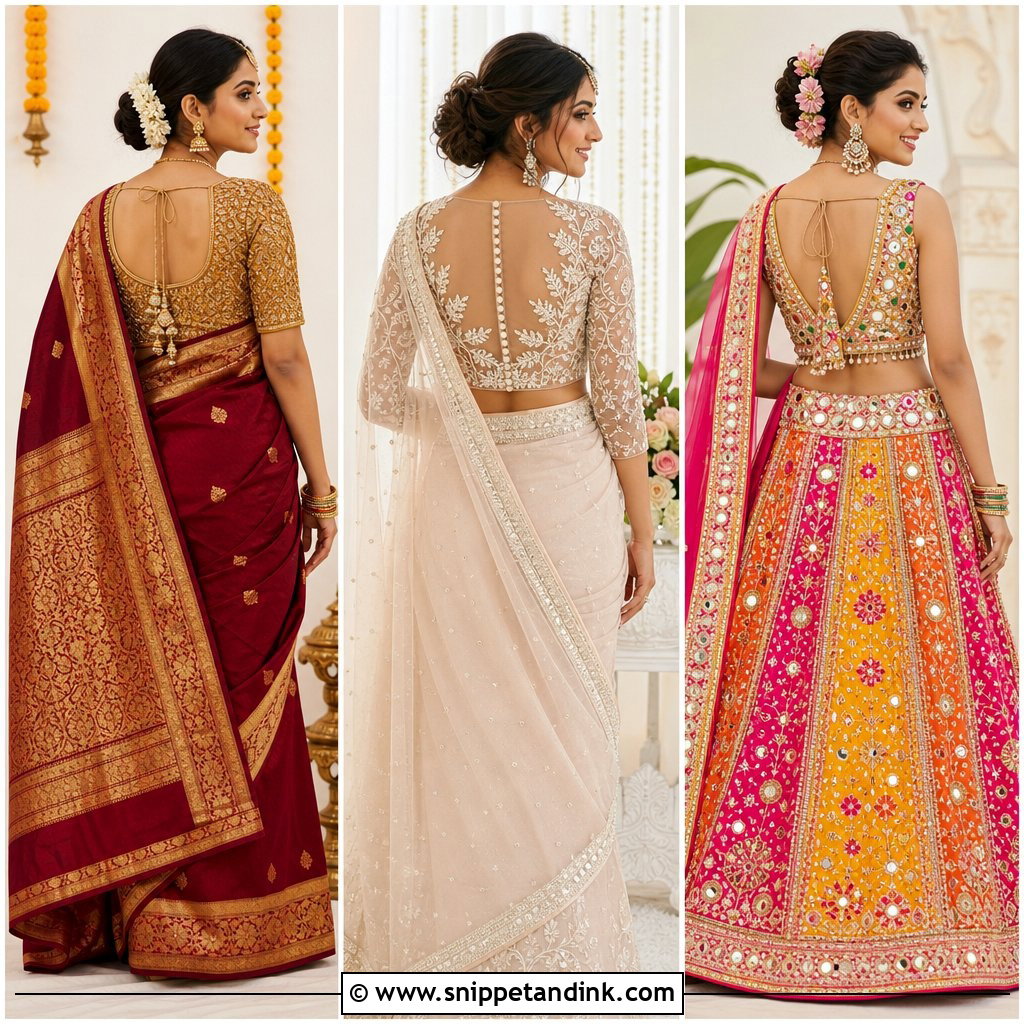
17. Pot Neck Bridal Blouse Back Design
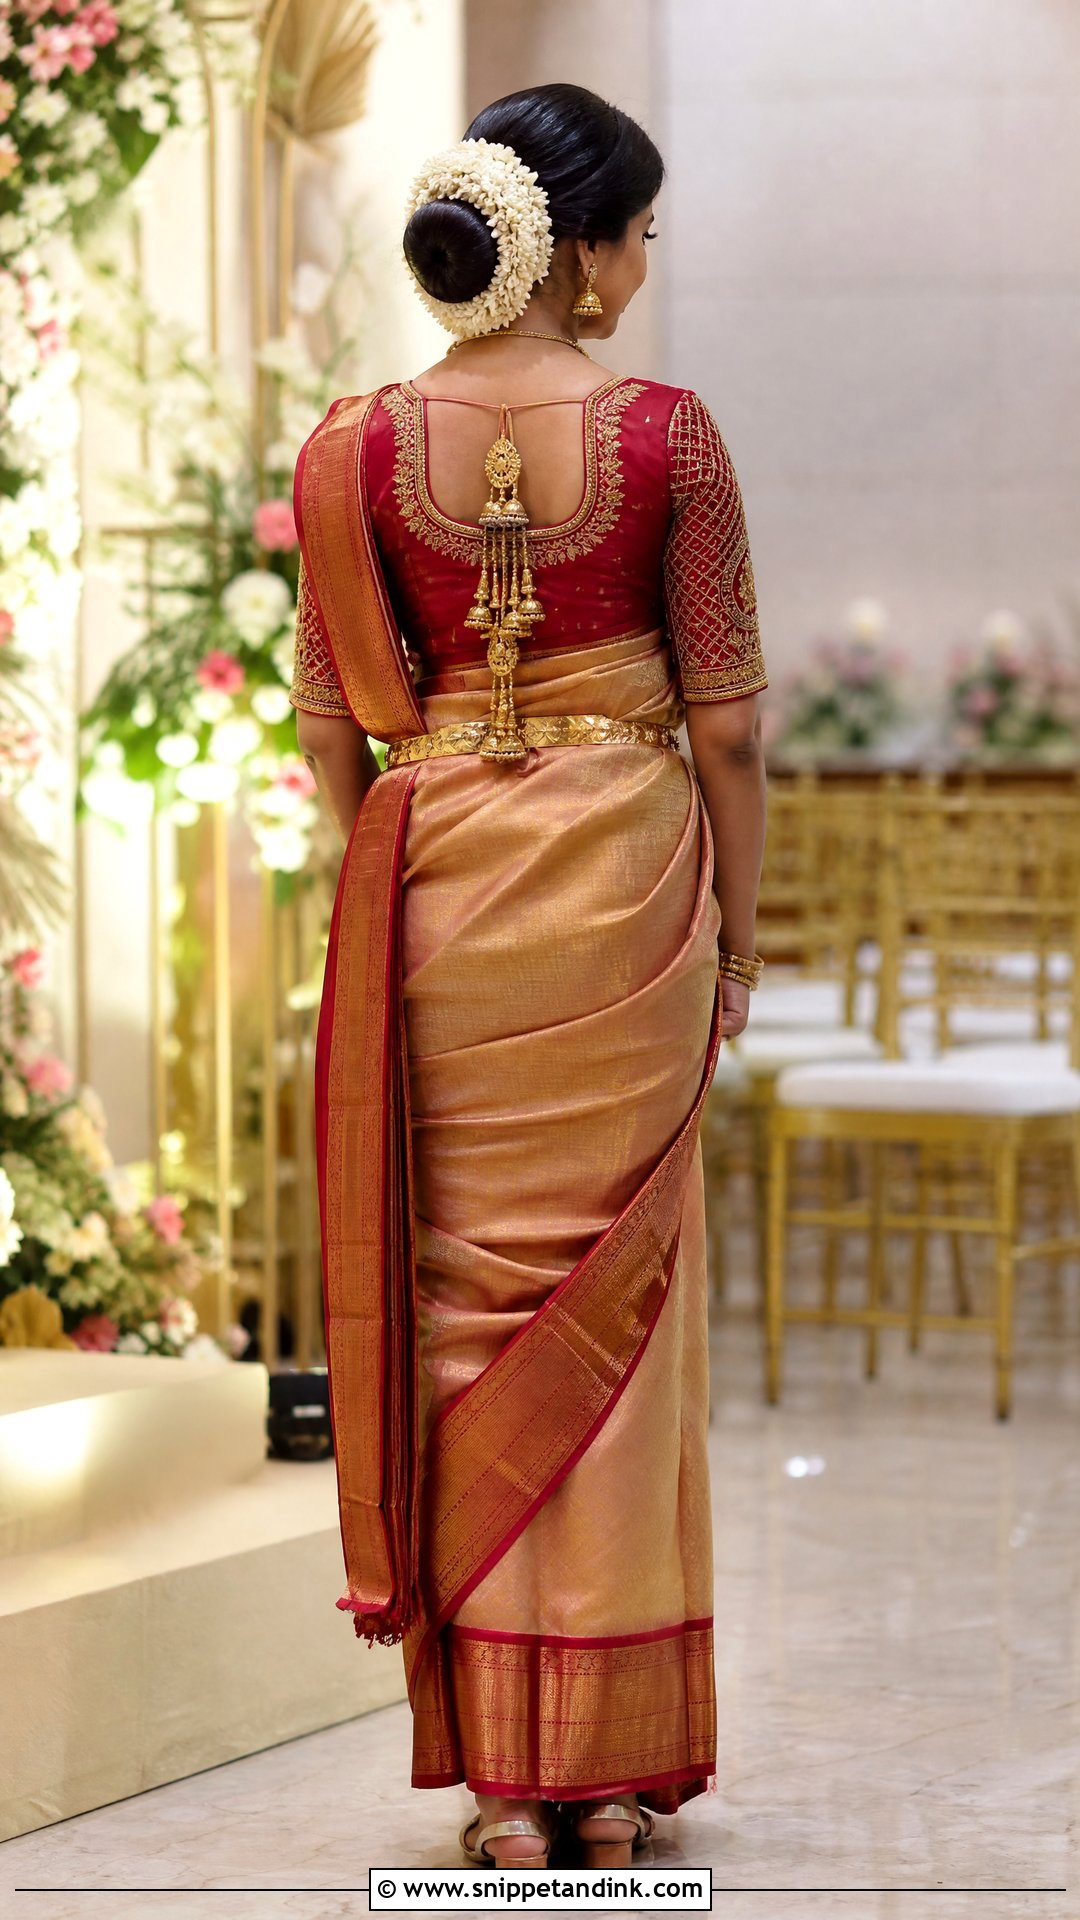
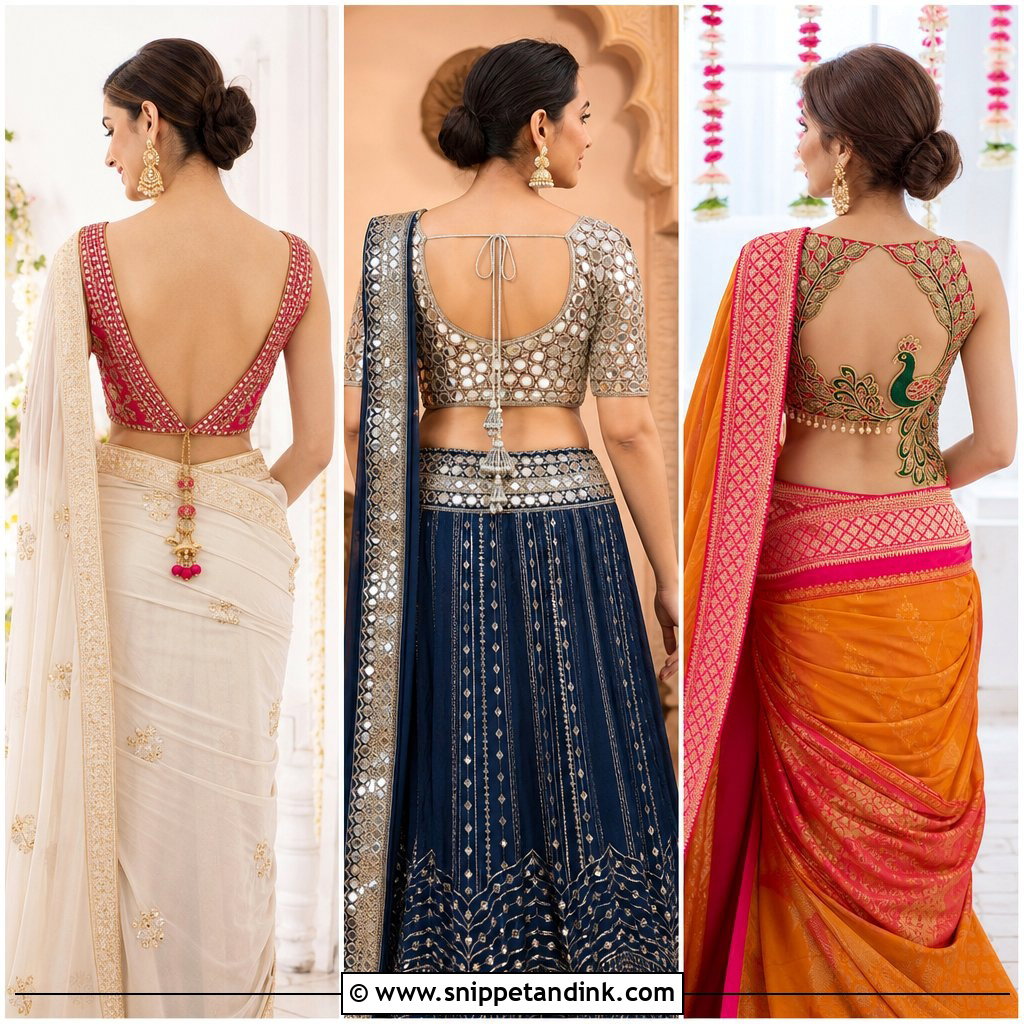
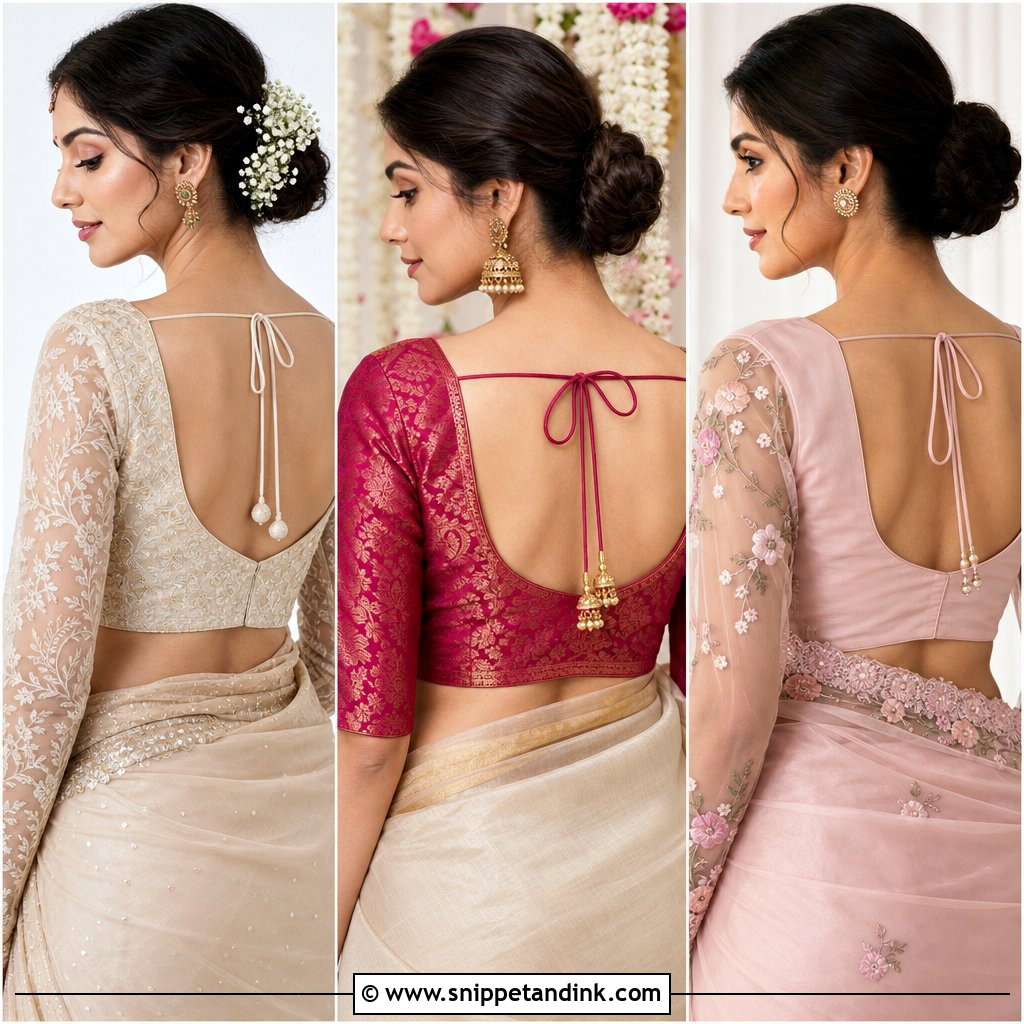
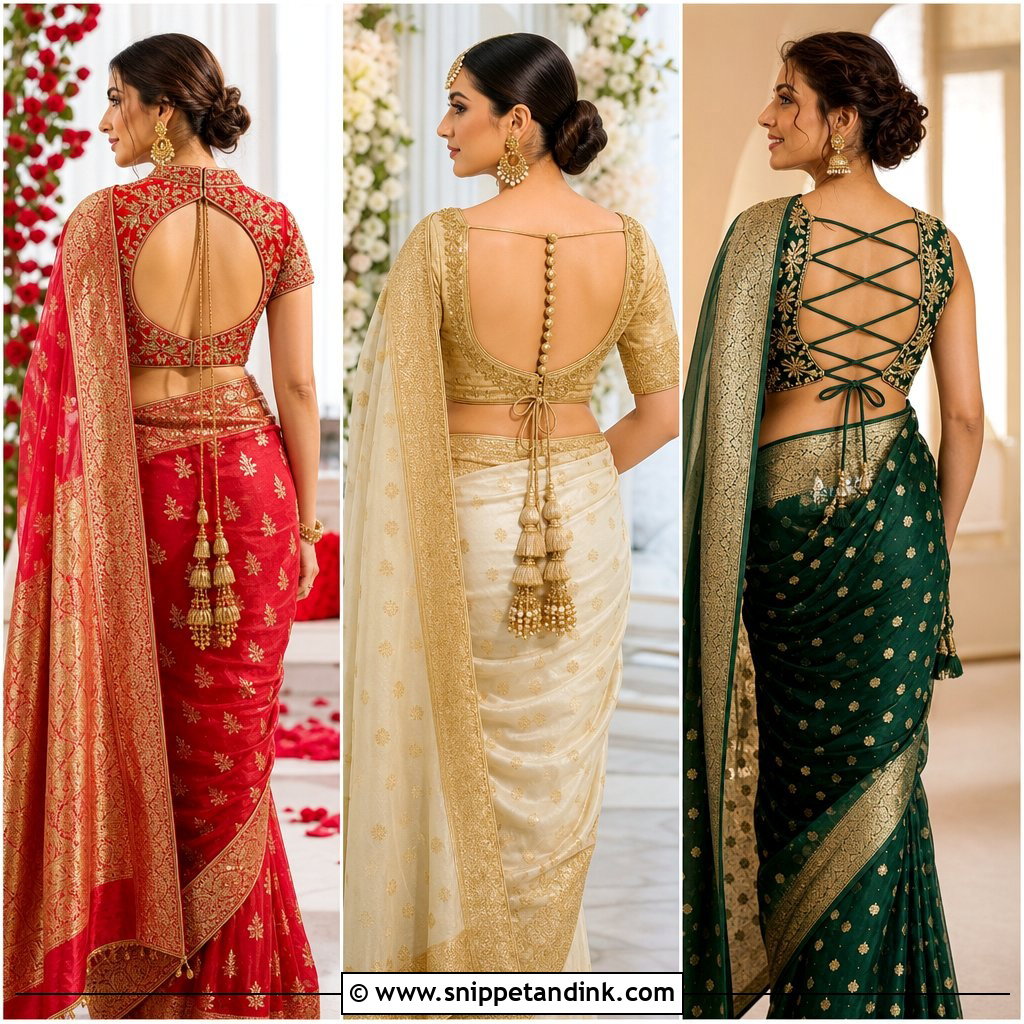
The pot-shaped back curves round at the top and narrows toward the lower band, a traditional shape that suits woven sarees, temple jewelry and a low bun with flowers. Edge the cutout in embroidery or small fabric-covered buttons, and add tassels if you like movement. A tie at the upper back gives security, but I position it a little below the neck so it doesn’t saw at the skin while you’re seated. Reinforced edges stop the curve stretching, and a well-fitted lower band keeps the whole blouse in place. Keep the front simple.
18. Deep U Back Bridal Blouse Neck Design
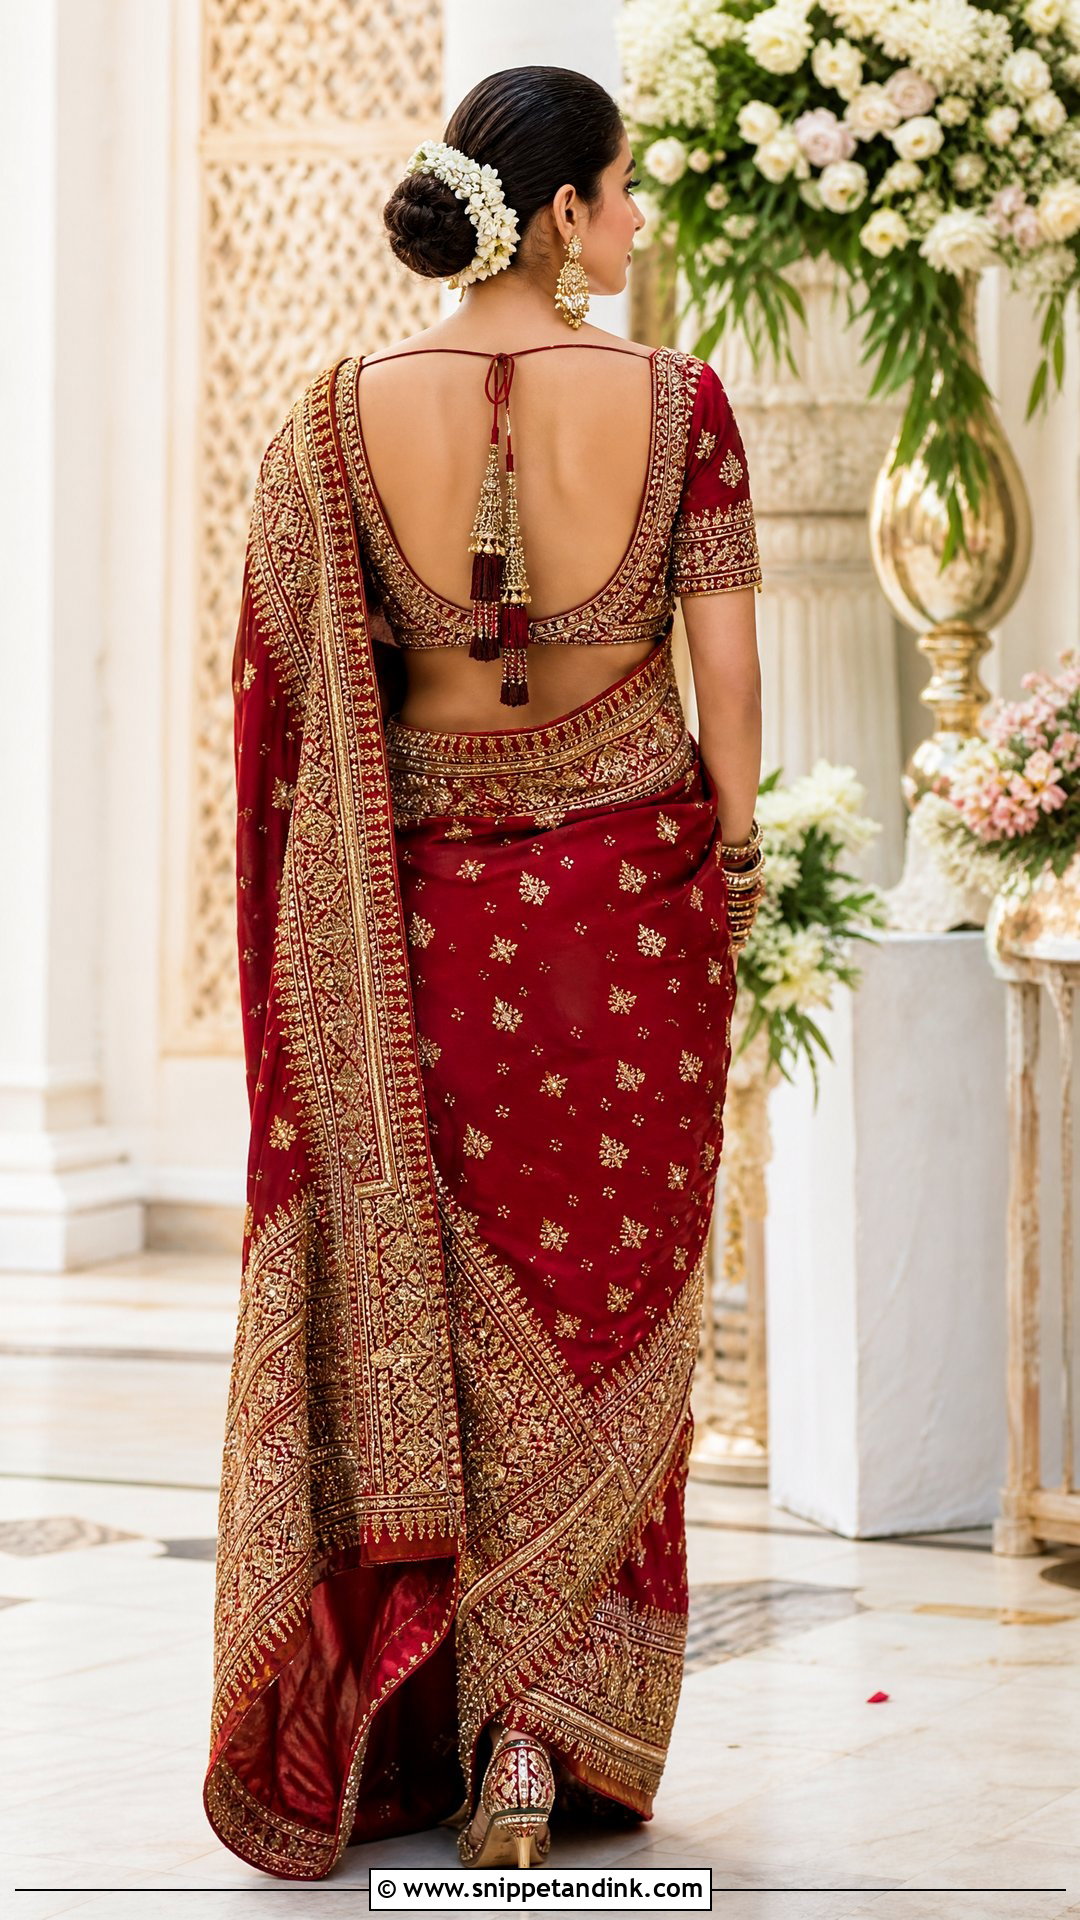
A deep U-shaped back gives a dramatic view from behind without any angular cutouts, and it pairs best with a simple front and elbow sleeves. The lower band must fit firmly or the whole back gapes. A dori tie with fabric tassels secures the top. Outline the U in zardozi, pearls or a motif taken from the outfit. The one thing brides forget: a normal bra strap will show through the opening, so sort out built-in cups or a low-back option at the very first fitting.
19. Teardrop Back Bridal Blouse Neck Design
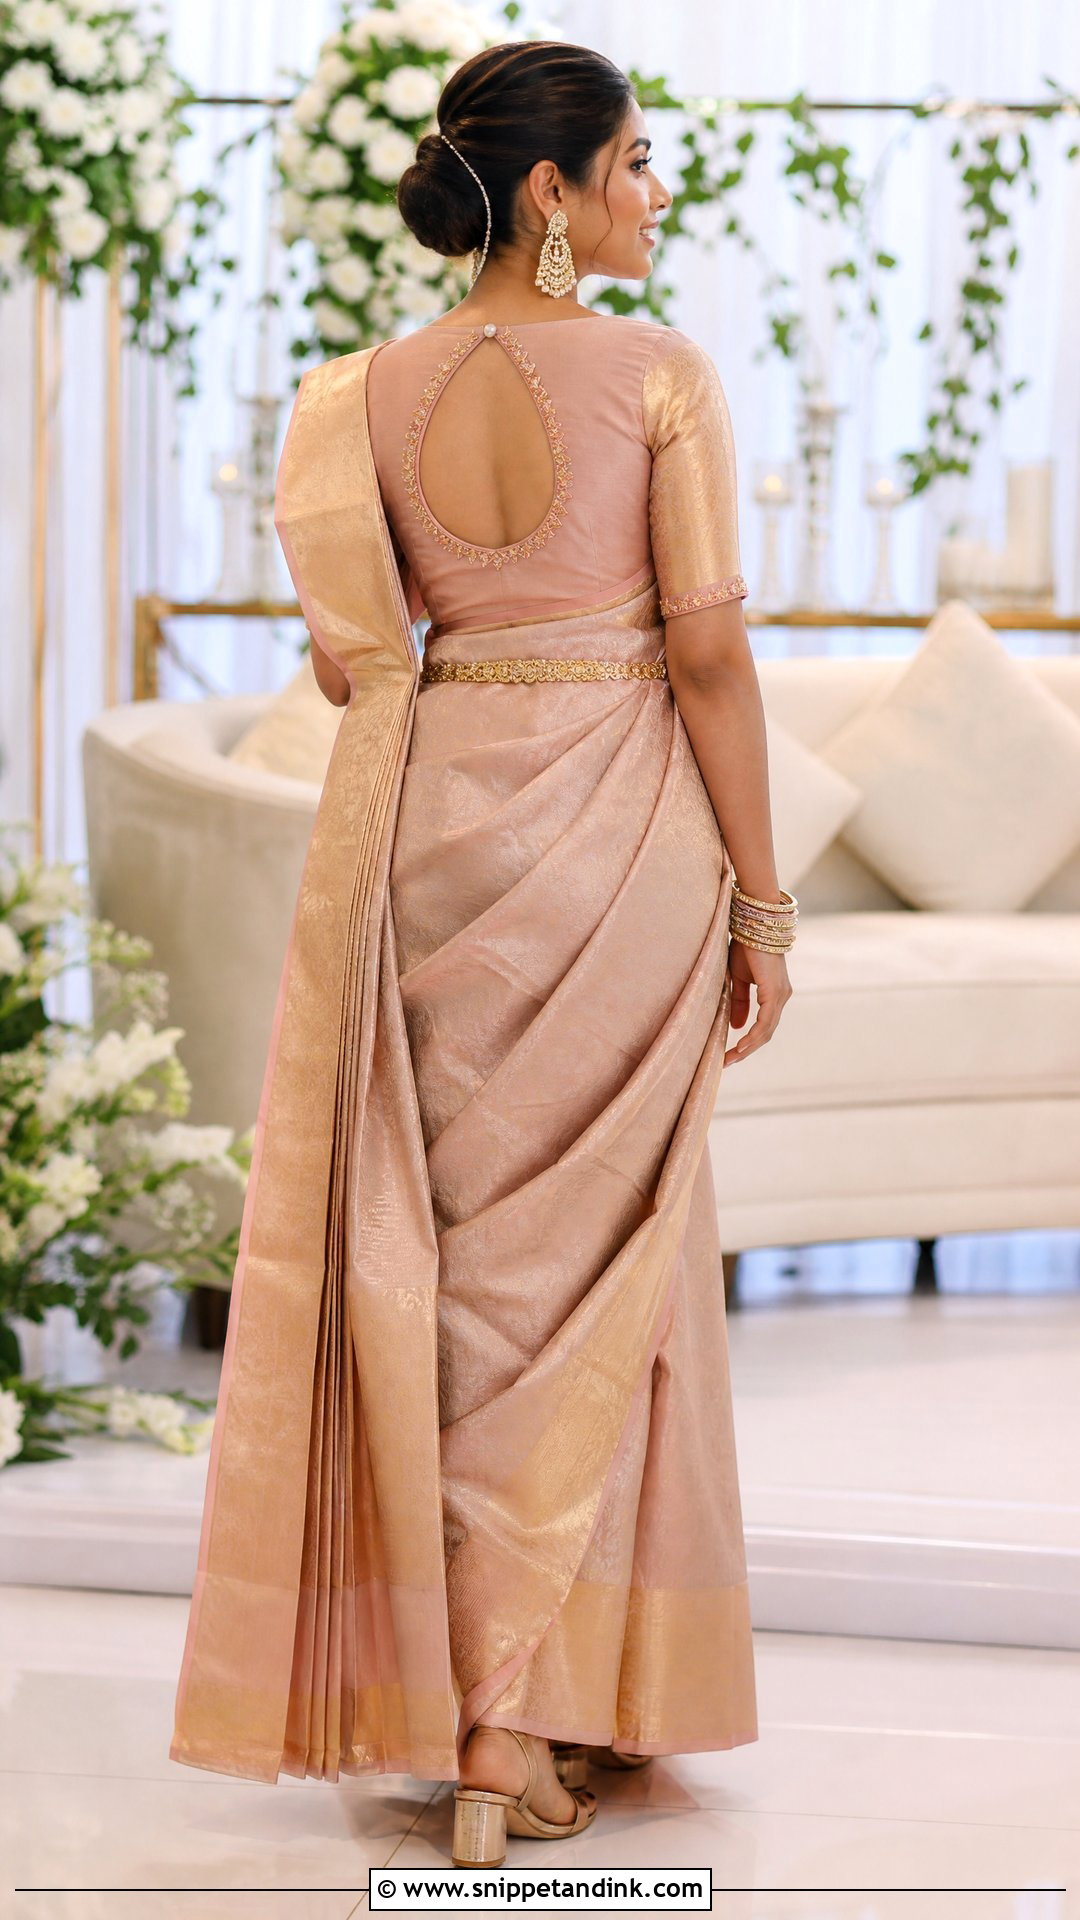
Teardrop backs keep the shoulders and lower band covered and open only a slim shape in between, so they’re more stable than most back cutouts. Make it small and subtle or stretch it vertically. A pearl button or decorative hook at the top completes the shape and makes fastening easier. I’d keep border embroidery fine, because raised stones at the edge snag the dupatta every time it slides. A covered front neck balances the cutout and leaves room for statement jewelry.
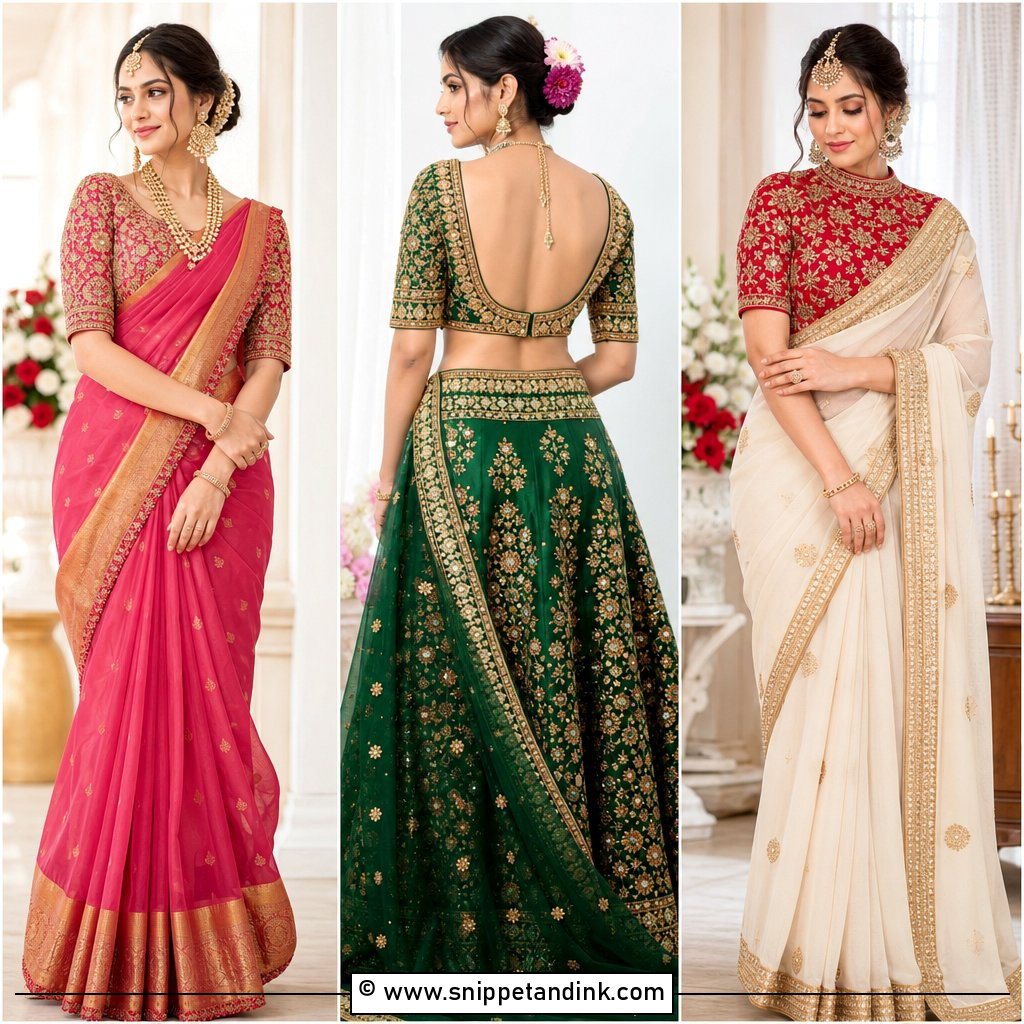
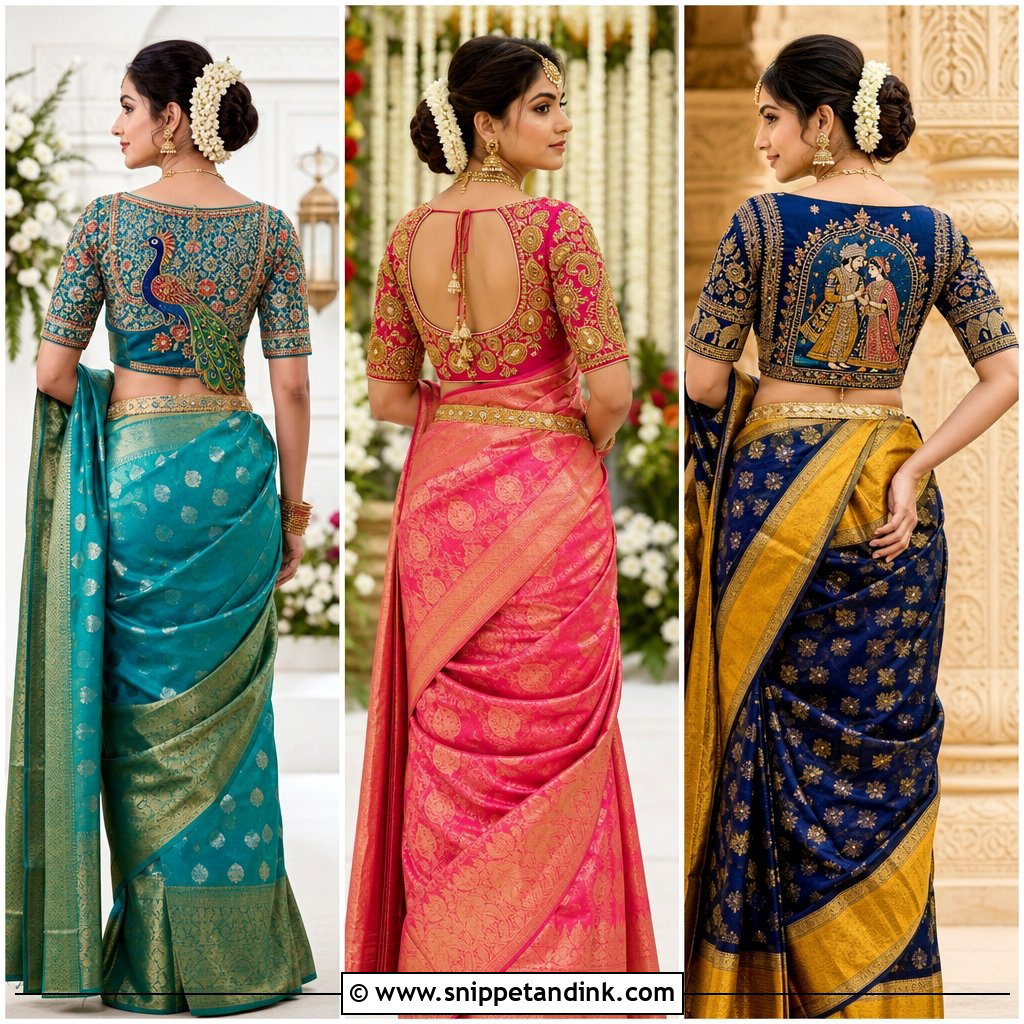
20. Embroidered Closed Back Bridal Blouse Neck Design
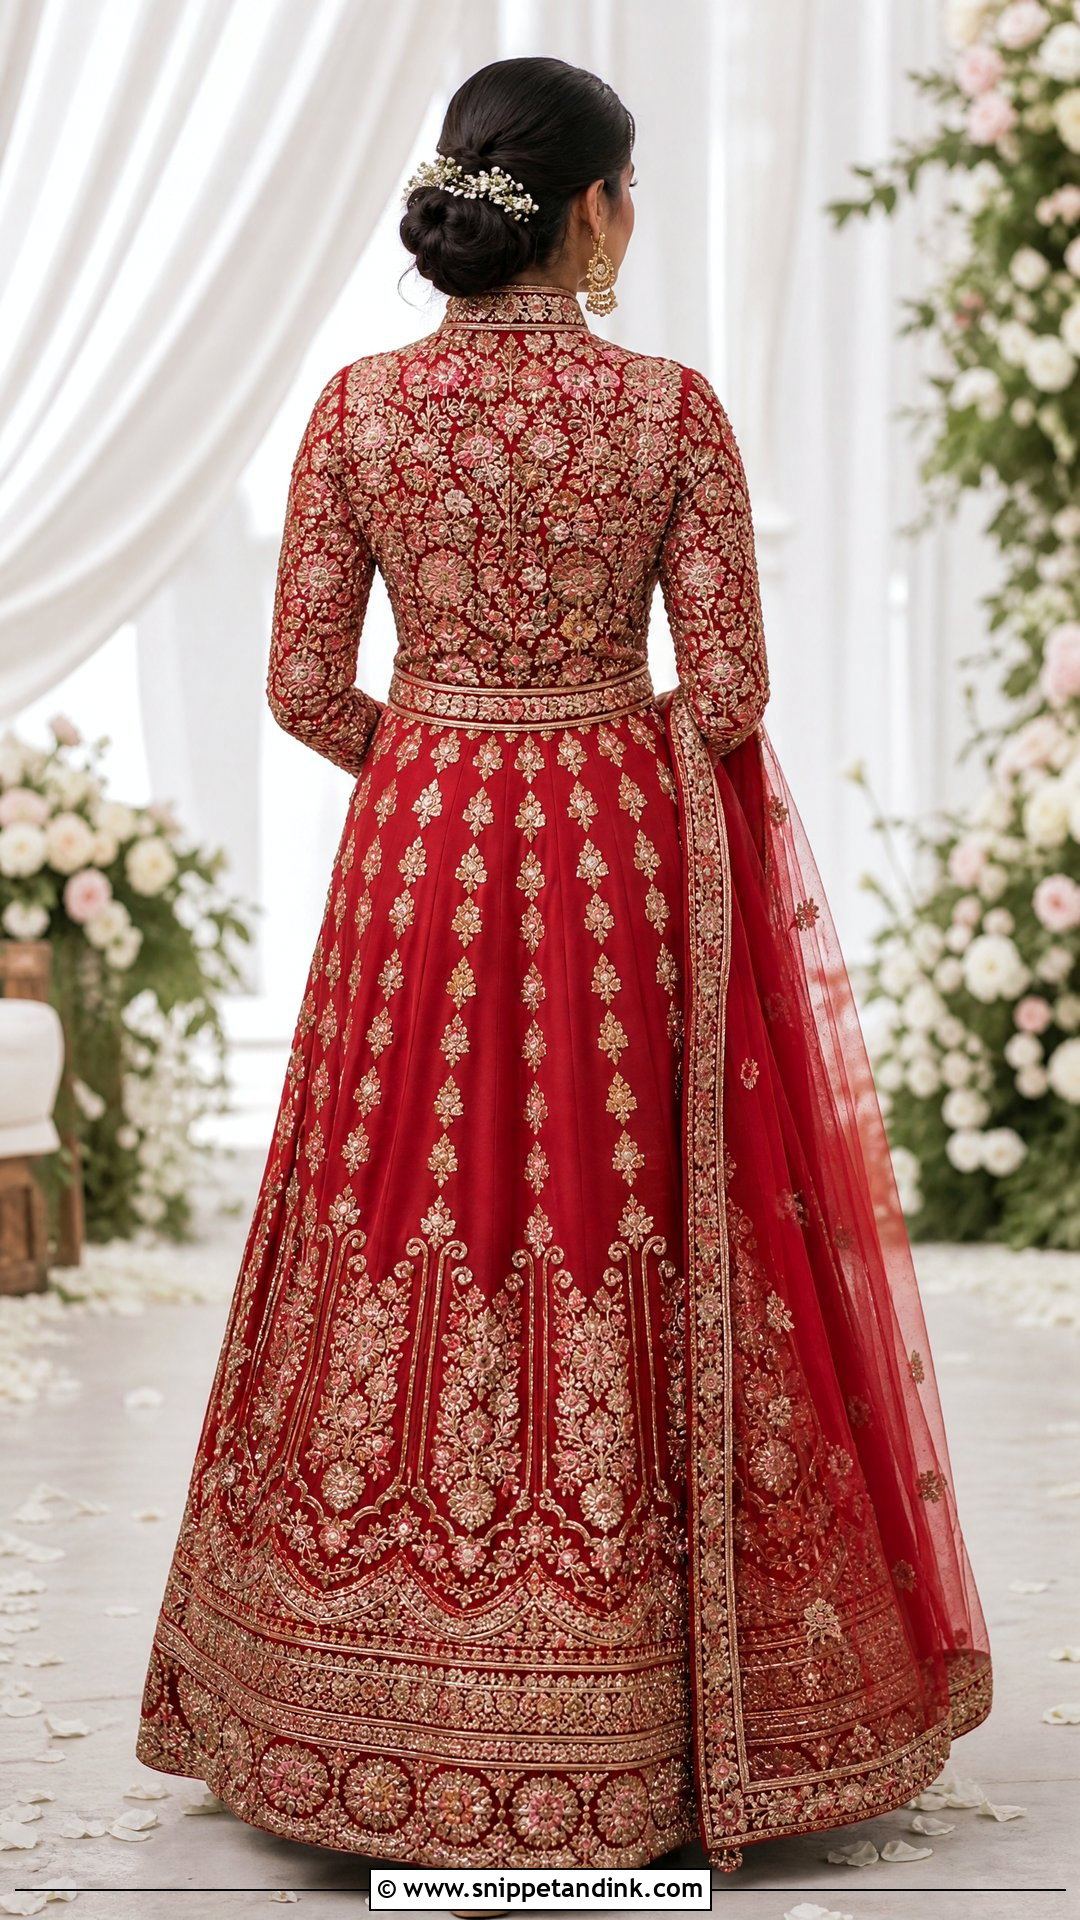
A closed back puts all the attention on handwork. The whole back panel can carry floral aari embroidery, peacocks, temple patterns or initials, uninterrupted by any opening. Use a concealed side zip or front-side fastening so nothing breaks the design. I’d pick a square or shallow sweetheart front to suit the necklace, and drape the dupatta to the front so the back stays visible. Dense work over a full back is warm, so ask for a light lining underneath. It gives full coverage and lets the craft carry the outfit.
Why Necklines Gape, and How a Good Tailor Stops It
A gaping neckline is almost always a measuring problem, not a design problem. The usual causes are measurements taken over a different bra from the one worn on the day, a lining that stretches more than the outer fabric, or front and back depths decided by eye instead of measured on the body.
The measurements I insist the tailor takes on you
- Front neck depth and back neck depth, measured from the shoulder point down, wearing your wedding innerwear.
- Shoulder width across the back, which decides whether straps stay put.
- Bust point position, so cups and darts sit where they should.
- Underbust and waist at the blouse hem, which hold the whole structure in place.
- Armhole round, taken with your arm relaxed, then checked with it raised.
Deep or open cuts need the blouse itself to do the supporting. Ask for built-in cups, a firm lining that doesn’t stretch, and a narrow strip of elastic or silicone along an open edge if the cut calls for it. Clear bra straps don’t stay invisible under bright lights or flash, so I’d plan the support into the blouse instead.
Bring Your Real Jewelry and Innerwear to Every Fitting
Sweetheart, square, scoop and U-necks give you flexible fronts; pot, teardrop and deep U backs give the memorable view from behind; high, illusion and closed necklines add coverage without losing impact. Whatever you settle on, take your actual necklace and the innerwear you’ll wear on the day to every fitting. Sit, walk, raise your arms and dance before you approve the blouse. A simple neckline cut precisely will always look better than an elaborate one that gapes.
You'll Like These Ideas:


Leave a Reply