
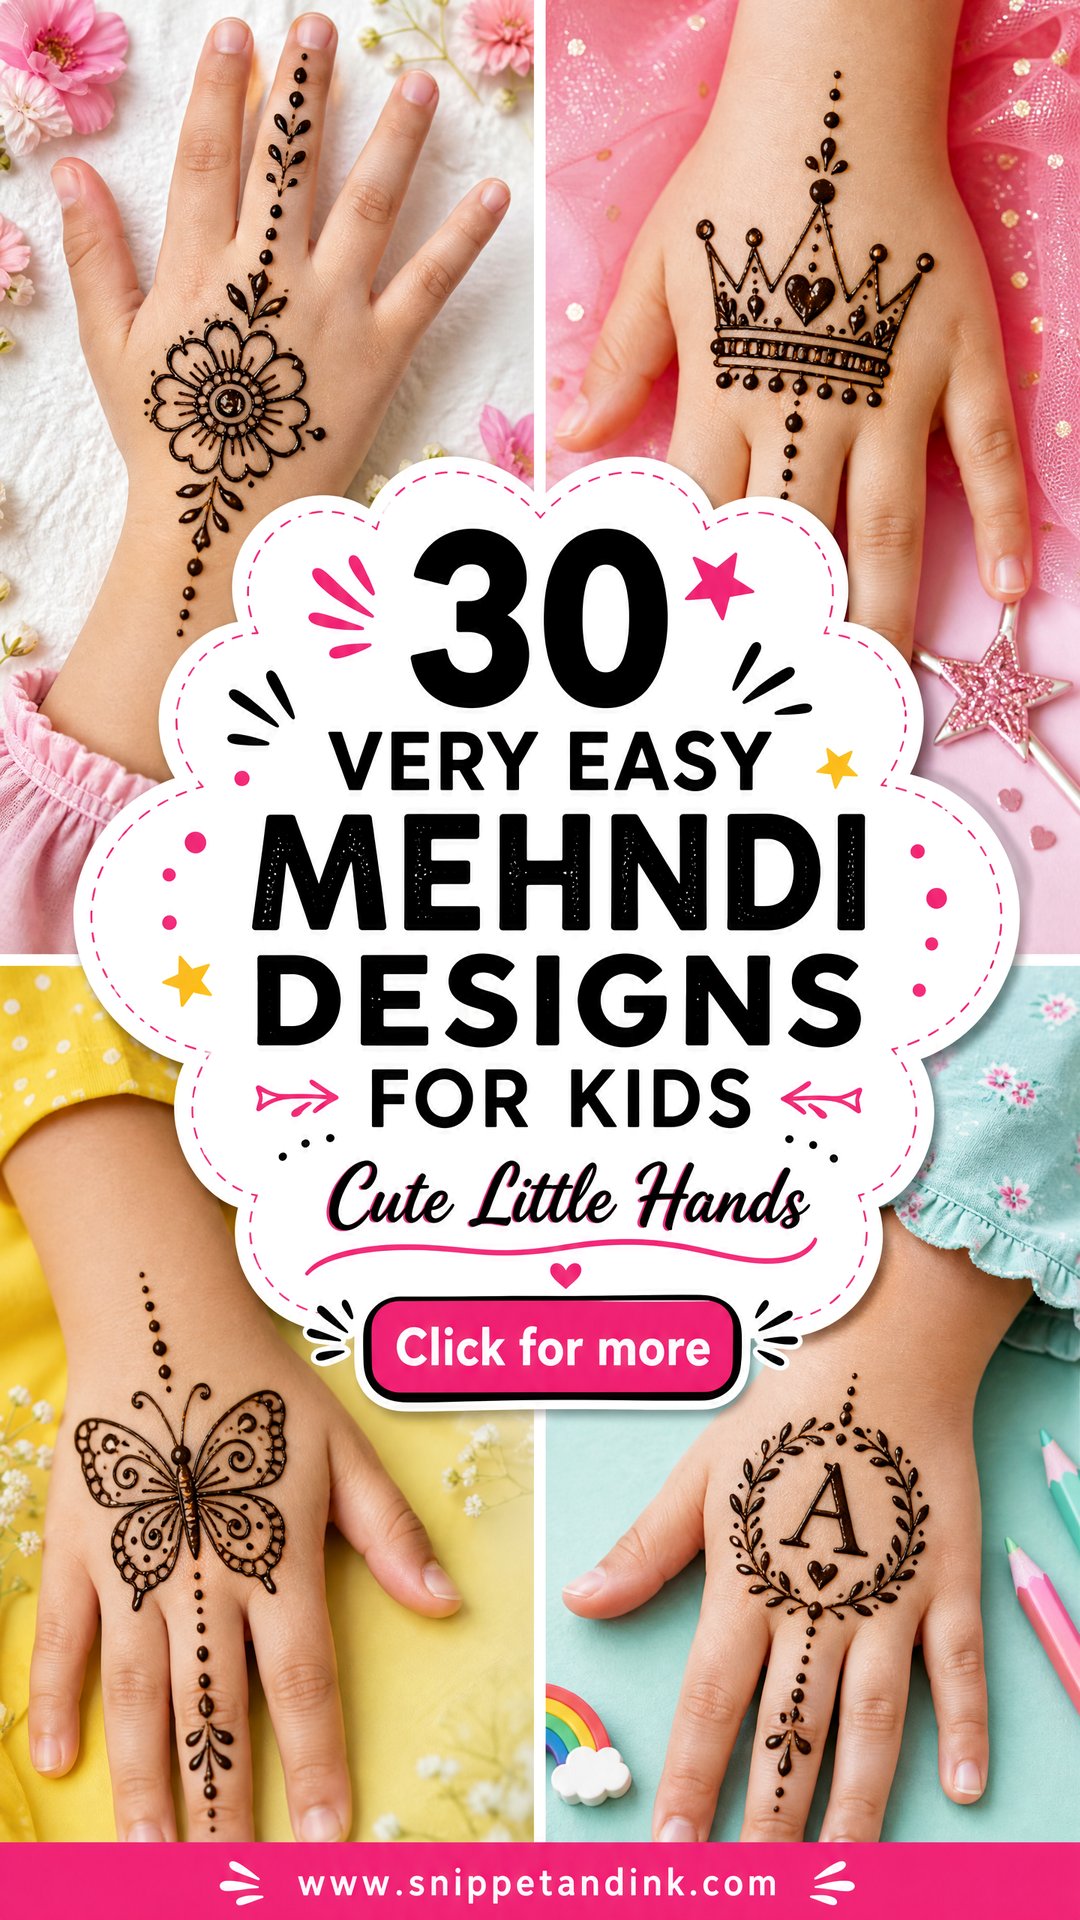
Doing henna for children is a different job from doing it for adults. The hand is smaller, the patience is shorter, and the paste has to survive a child who wants to touch everything the moment you finish. That’s why I keep kids’ designs to shapes they already love, flowers, hearts, stars, moons, butterflies, simple vines and a few cartoon faces, with open space between them so the paste dries quickly and doesn’t smear. Good kids’ mehndi designs take minutes, not an hour. Below are thirty I draw at Eid, Diwali, weddings, school functions and family parties, so the little ones feel part of it without being stuck in a chair.
Three Safety Checks Before Henna Touches a Child’s Skin
Henna is a plant, and natural paste is gentle on most children. But I don’t start on a child until I’ve asked the parent a few questions.
Is it real henna?
Natural henna paste is green to brown in the cone and stains orange, then darkens to brown. Anything sold as black henna, or promising a black stain within an hour, may contain PPD, a hair dye chemical that can cause painful blistering in children. Ready-made cones from shops sometimes contain added dyes and preservatives too. If the label doesn’t list ingredients, don’t use it on a child.
Does the child have G6PD deficiency?
Children with this inherited enzyme deficiency can react badly to the dye in henna itself, even pure henna. If a child has it, or you’re not sure and they are very young, skip henna and check with your pediatrician first.
Is the skin healthy?
Avoid cuts, scratches and eczema patches. Many artists mix essential oils like tea tree or lavender into their paste to deepen the stain, and those can irritate sensitive skin, so ask for a mild mix and do a small dot on the inner wrist an hour before the full design if the child has reacted to anything before.
1. Simple Flower Mehndi Design for Kids
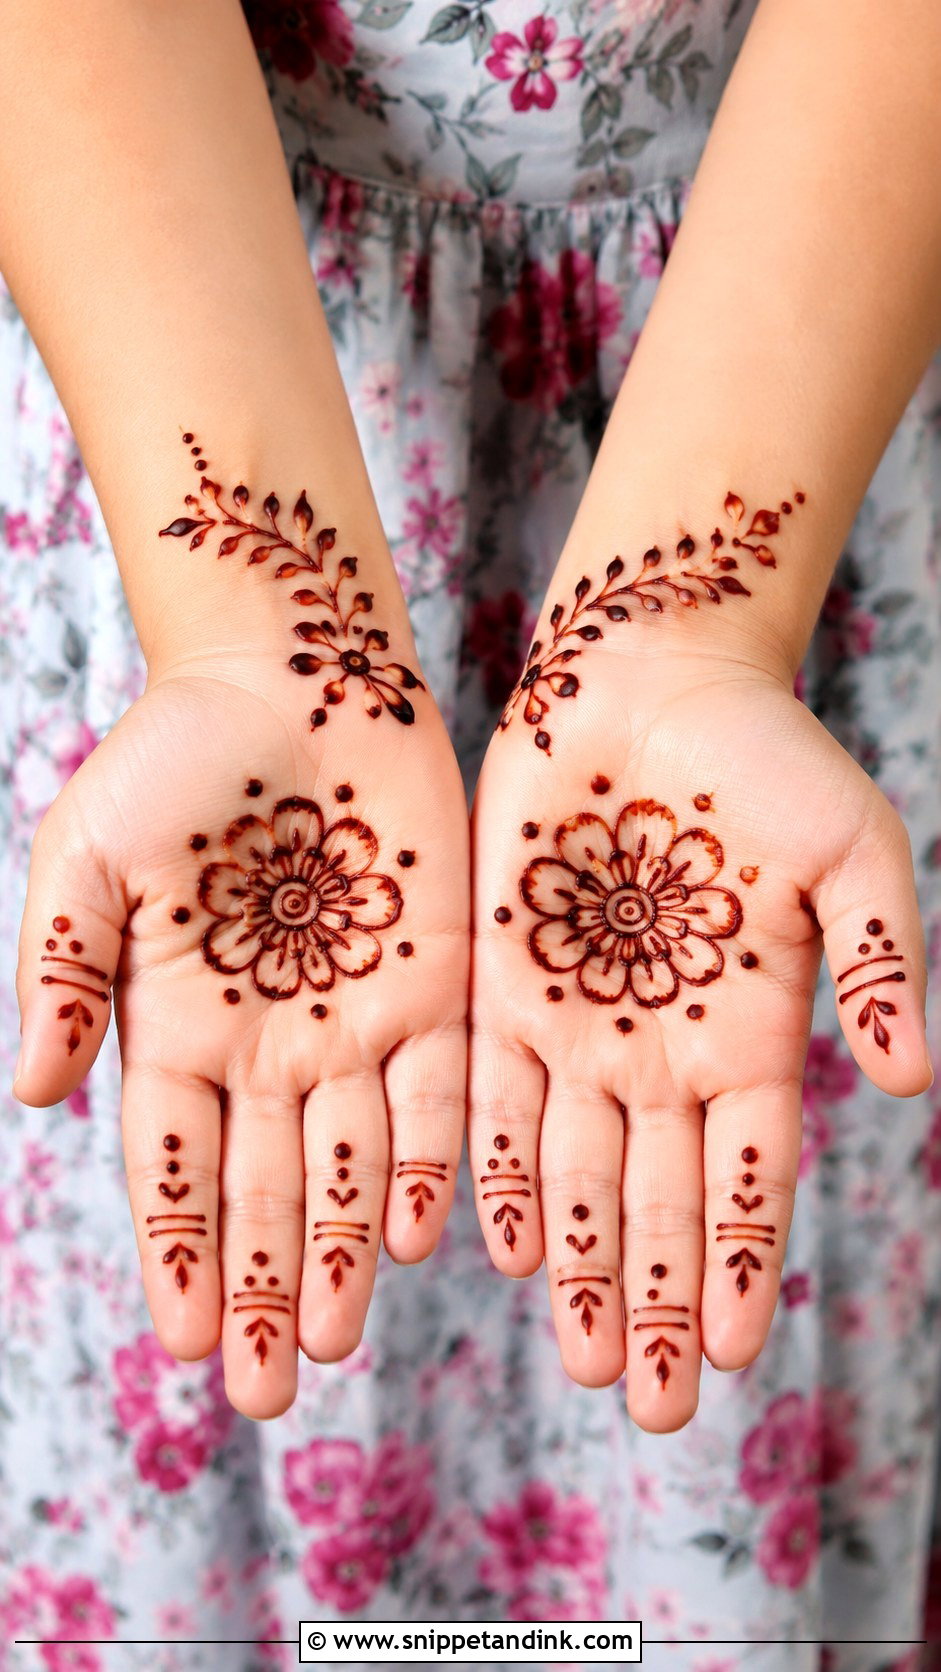
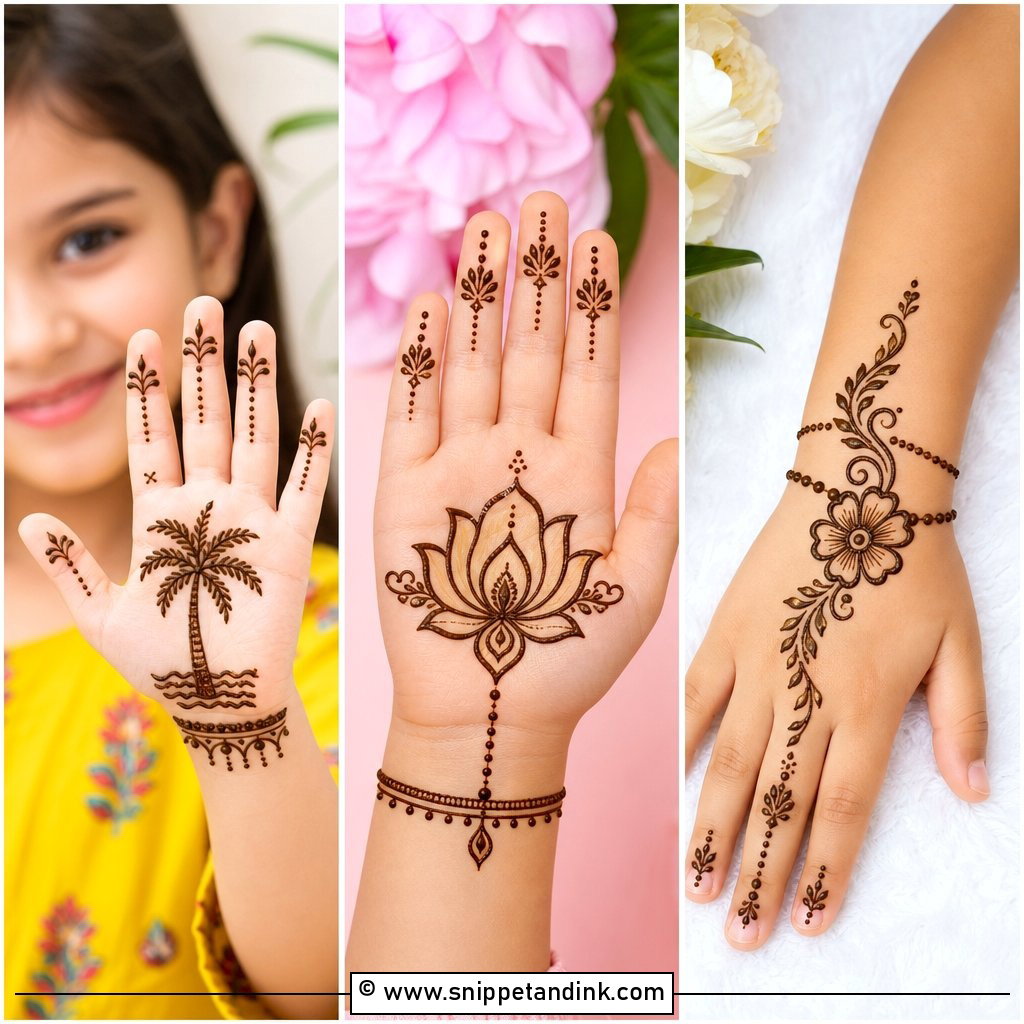
Start with one round flower in the center of the palm or back of the hand, give it five or six petals, ring it with tiny dots and run a short leafy trail toward the wrist. Fingers get a few dots or mini petals near the tips. It’s my go-to for toddlers because it doesn’t need precise detail; a petal that comes out slightly larger than its neighbor still looks like a flower. Festivals, birthdays and casual family visits all suit it.
2. Easy Heart Mehndi Design for Kids
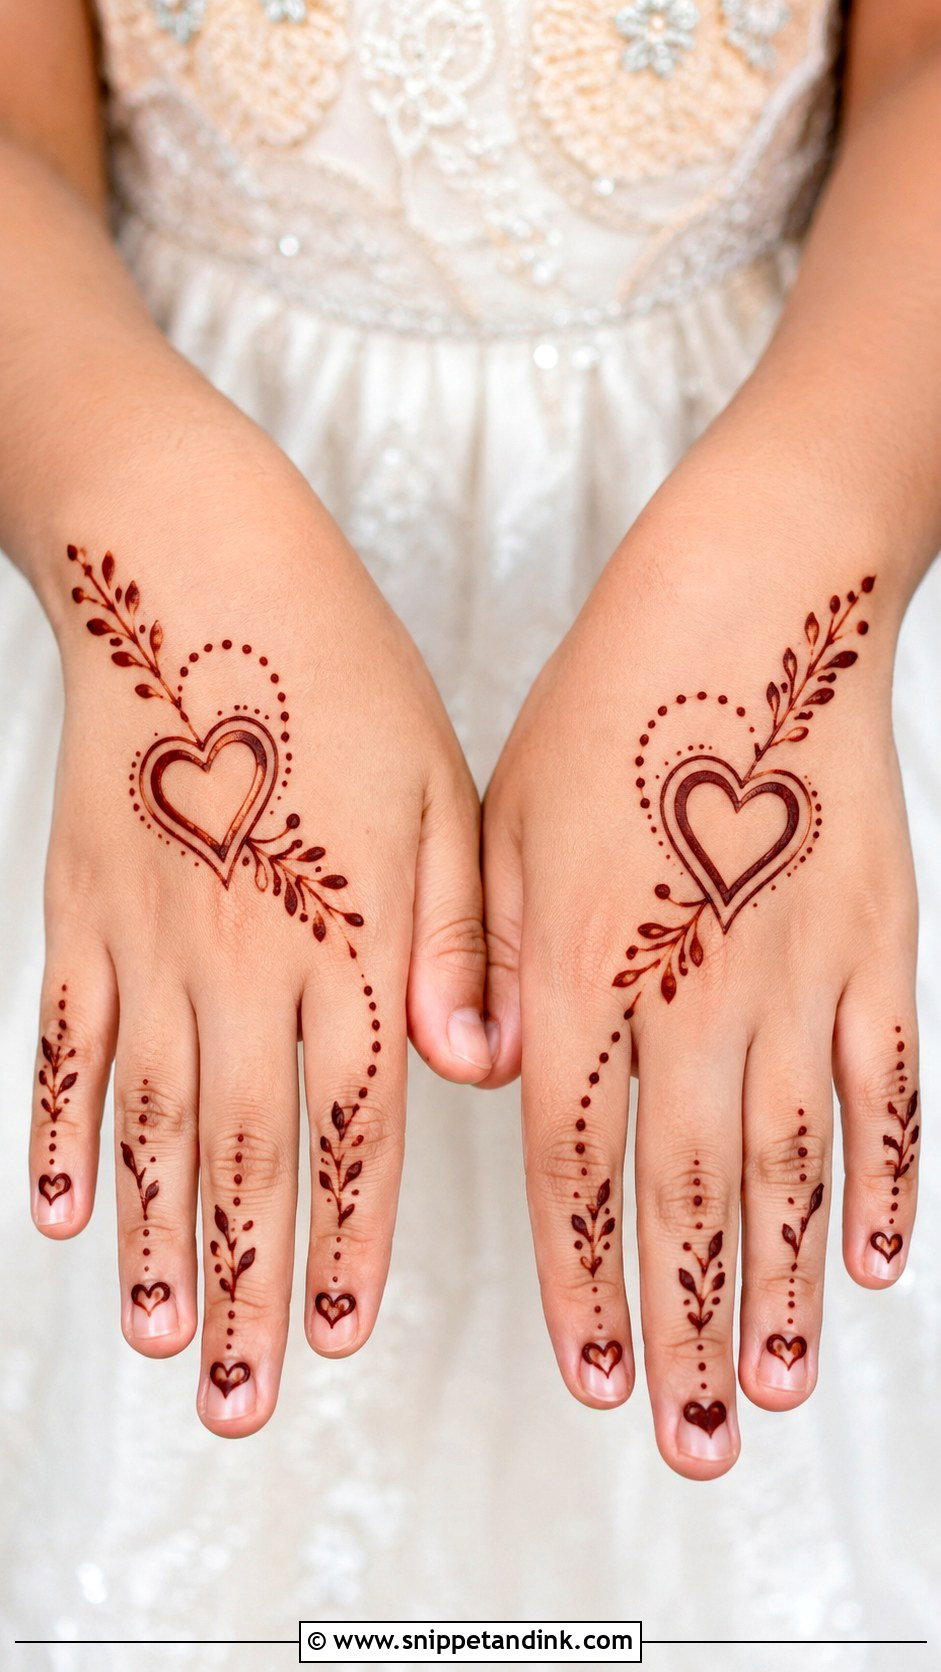
Hearts are the shape most children ask for by name. I place one medium heart in the middle of the palm or the back of the hand and outline it twice, which makes it look fuller without extra filling. Then come small dots, tiny leaves and a few curved vines heading toward the fingers, and a little heart or dot cluster on each fingertip if they’re still sitting. The double outline matters on a child: a single thin line on small skin can look faint once it stains.
3. Butterfly Mehndi Design for Kids
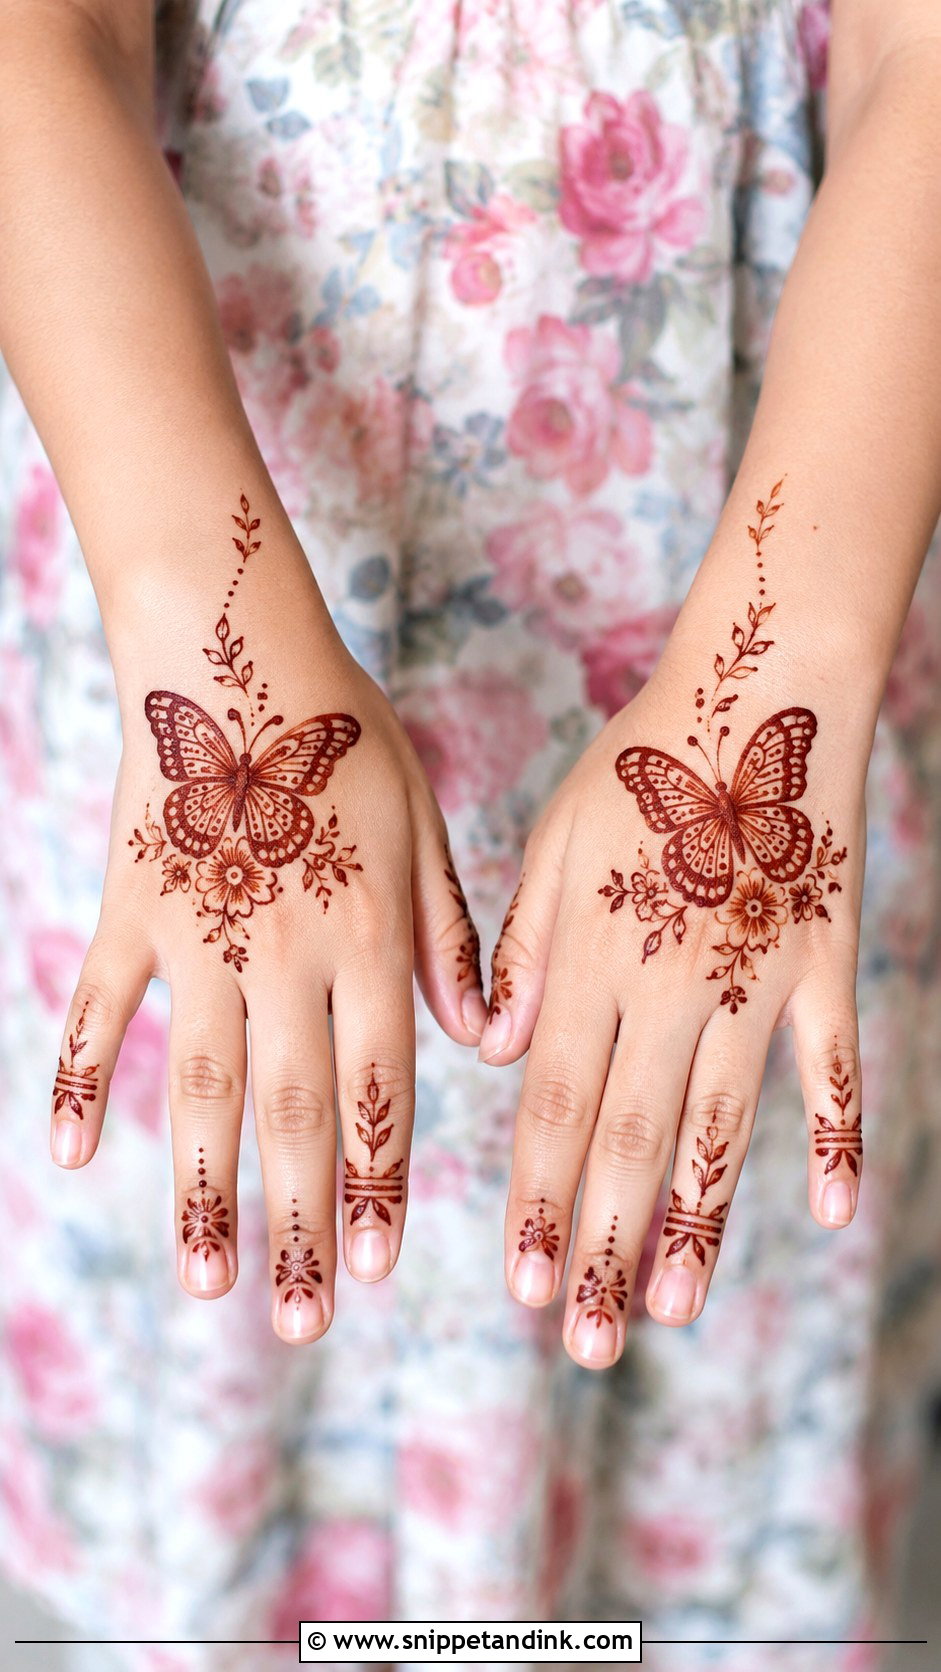
Draw the butterfly on the back of the hand, where the child can admire it and won’t press it into anything while it dries. Rounded wings filled with dots, short lines and little leaf shapes are enough. A short trail of mini flowers or stars toward the wrist completes it, and the fingers can stay almost bare apart from dots near the nails. I draw the body first, then both wings outward from it, so they come out roughly the same size even when the hand wriggles.
4. Moon And Star Mehndi Design for Kids
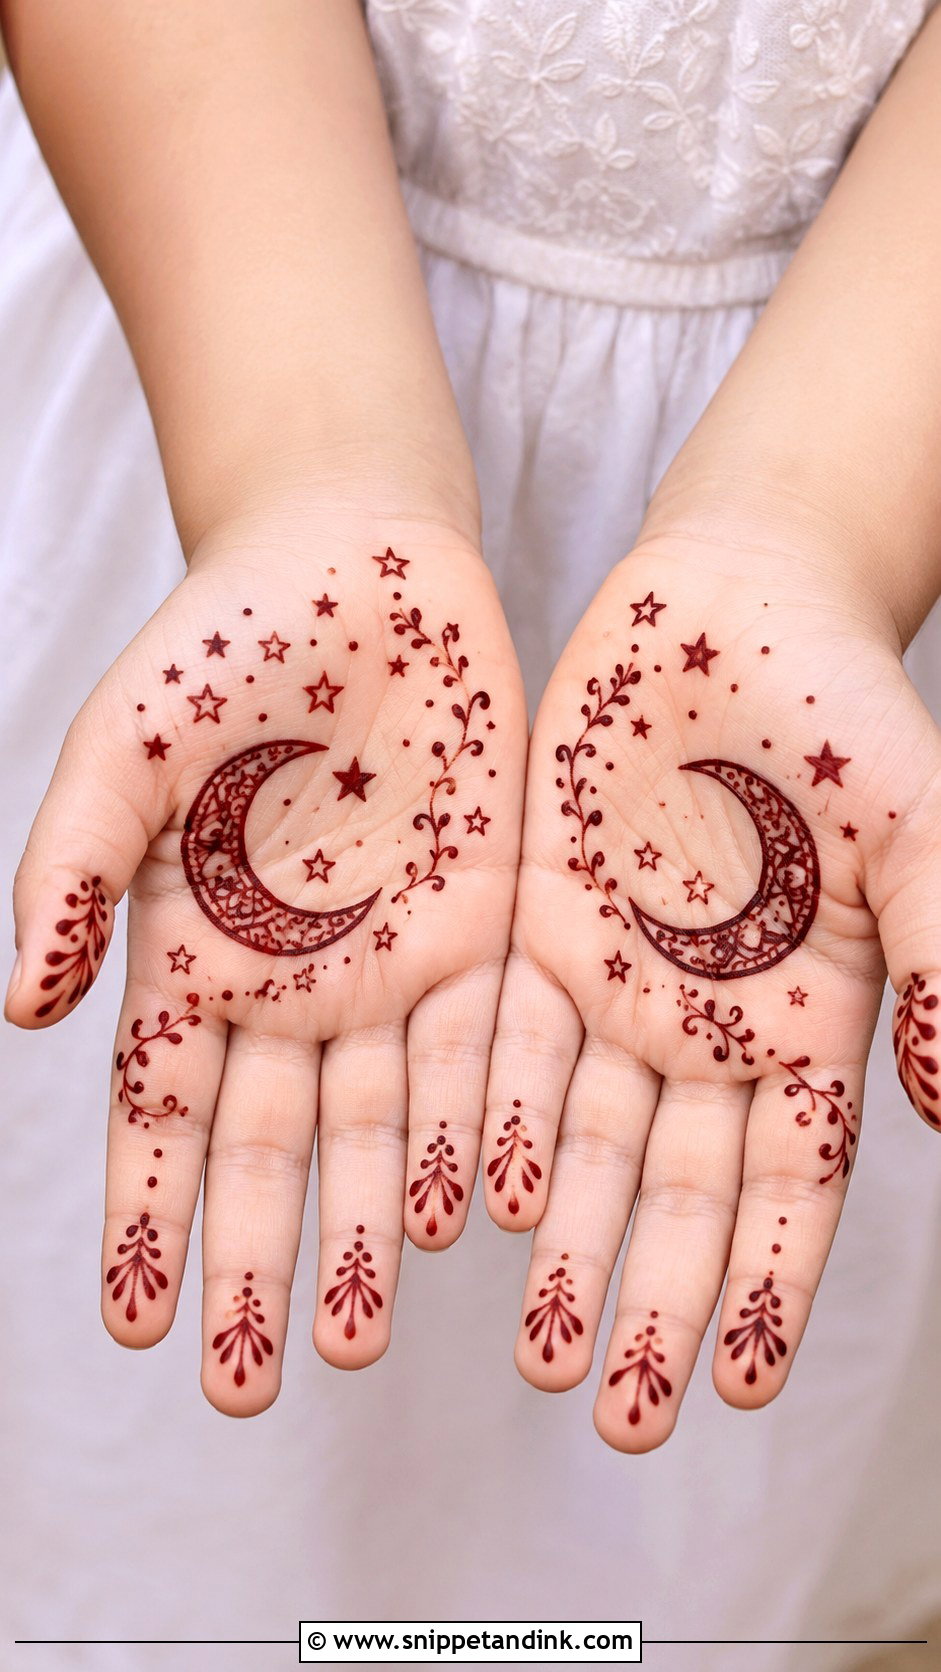
A moon and star mehndi design is the one I draw most during Ramadan and Eid. A crescent on the palm or back hand, tiny stars around it with small dot trails, and a short curved vine linking it to the wrist. Fingers get little stars, dots or short diagonal lines. There’s no heavy filling, so it dries fast and stays clean even if the child moves a little. Draw the crescent with one smooth stroke if you can; two joined strokes leave a visible bump.
5. Small Mandala Mehndi Design for Kids
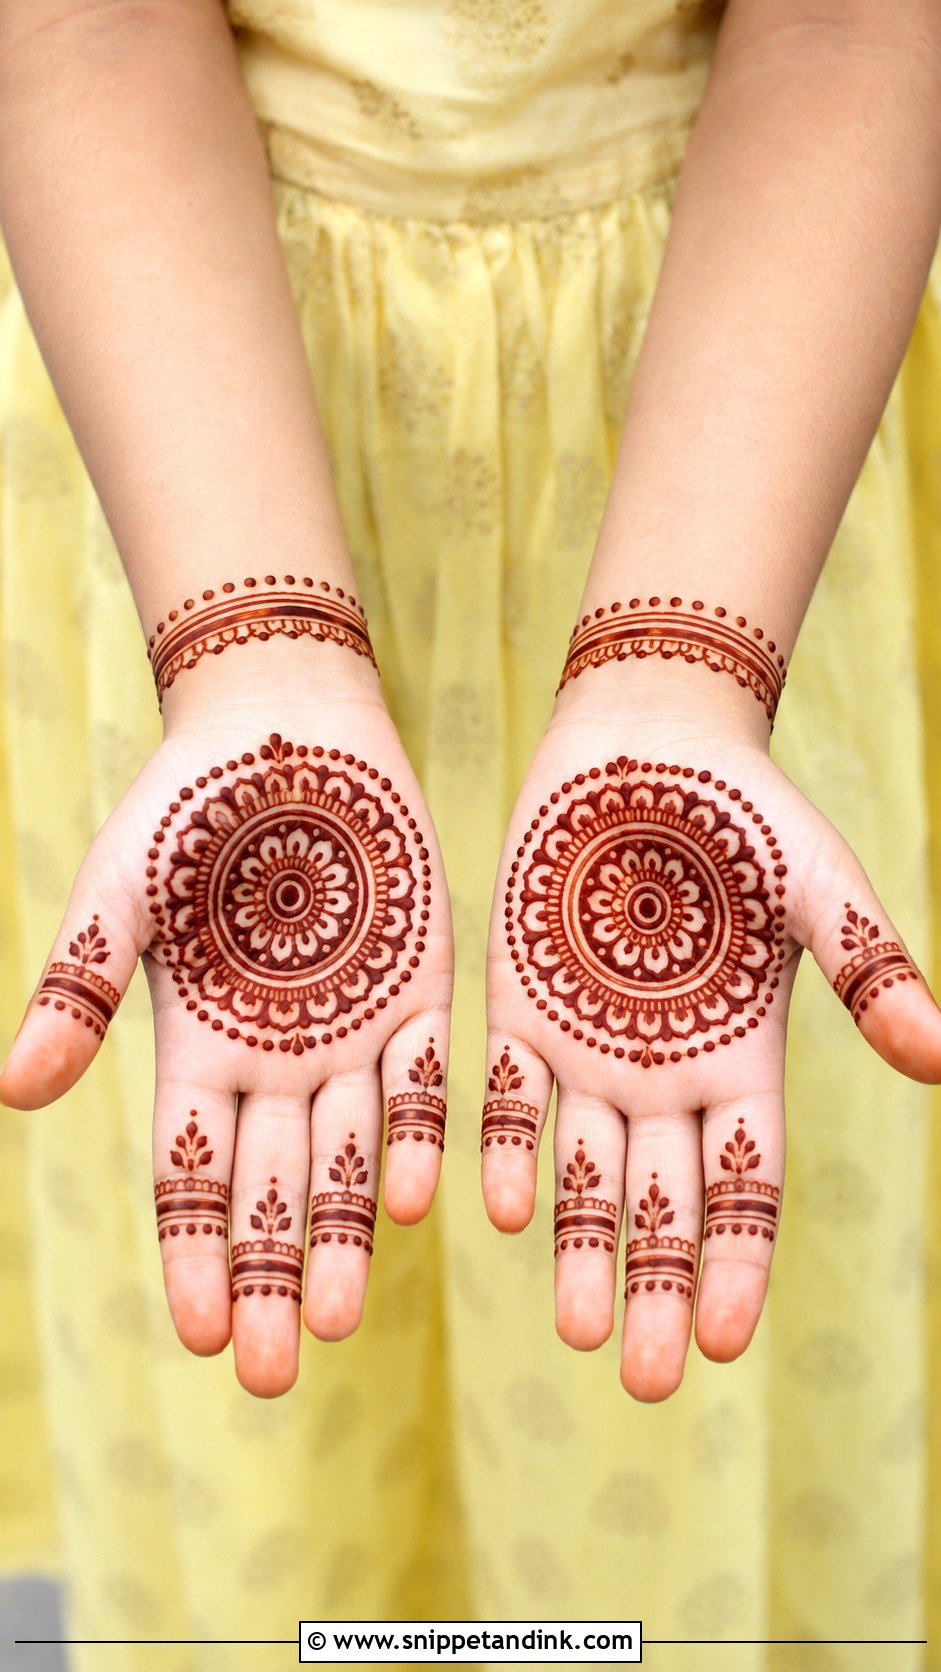
A tiny mandala gives a child a traditional look in a few minutes: a circle in the center of the palm, a ring of petals, a ring of dots, then stop. Keeping it small is the whole point, because a mandala that keeps growing is how a five-minute design becomes twenty. A thin bracelet line near the wrist and light finger details finish it. Weddings, poojas and cultural programs suit it. The centered layout is easy for a beginner to draw, and it sits in the middle of the palm where a child is less likely to rub it.
6. Easy Arabic Mehndi Design for Kids
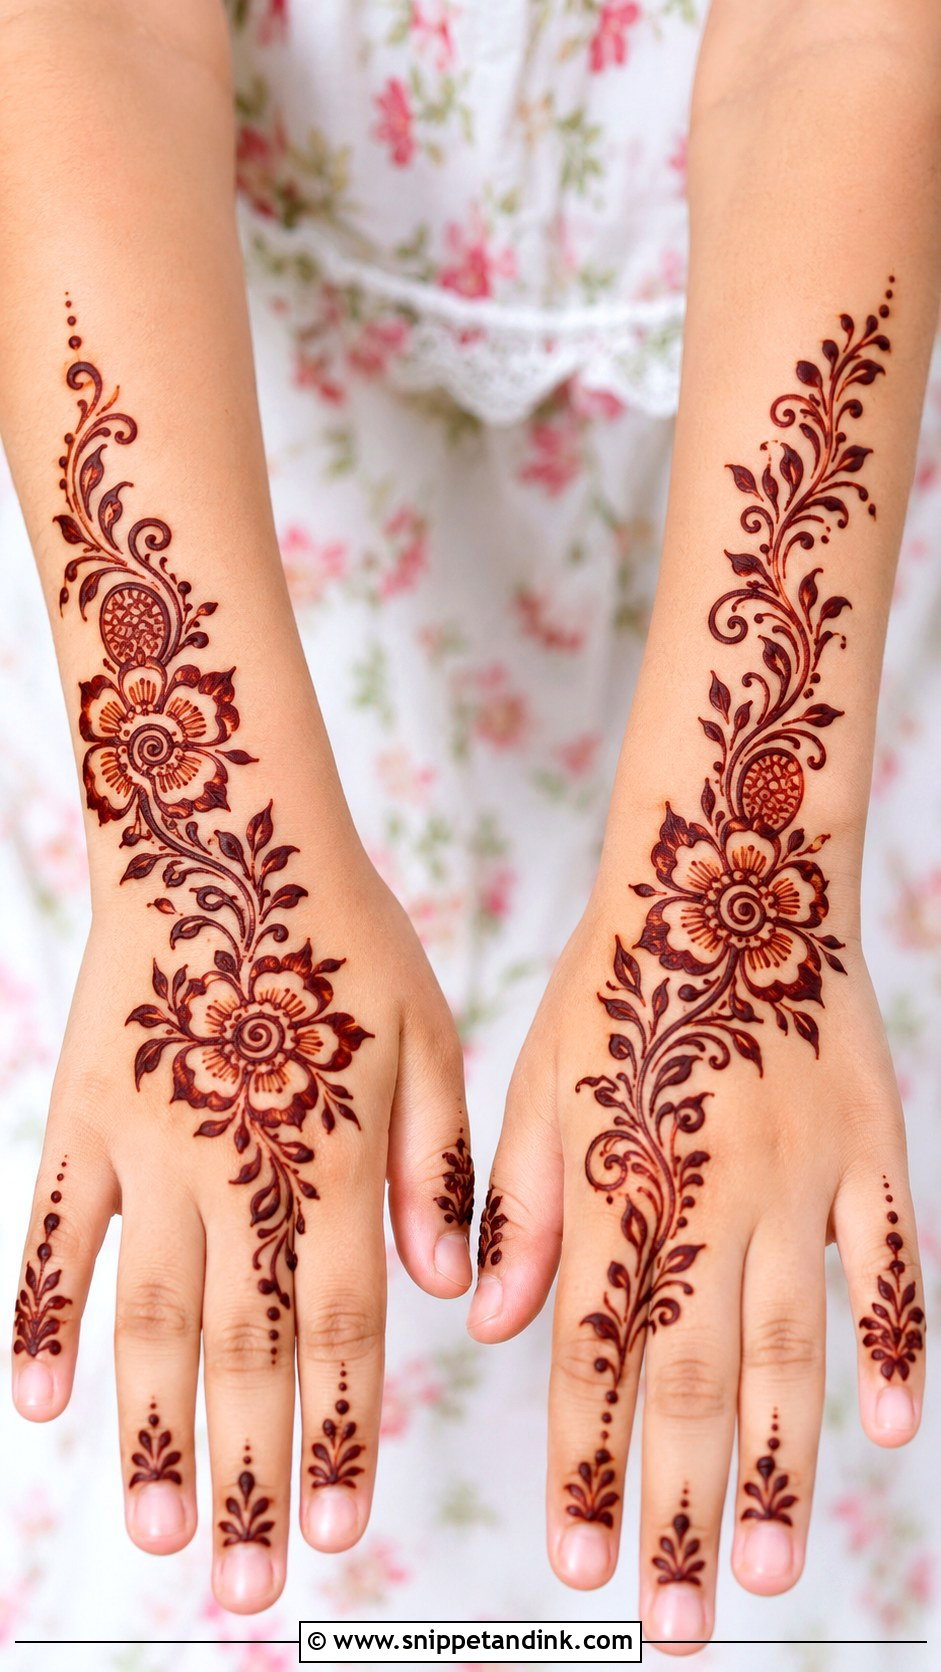
An easy Arabic mehndi design suits children because it’s mostly open skin. Begin at one side of the wrist and pull a diagonal trail toward the index finger, adding simple flowers, leaves, dots and small paisleys along it. Decorate only one or two fingers. Older girls often want this at family weddings because it looks a little grown-up without a long session. Keep the flowers larger than you would on an adult; small flowers on a small hand turn into dots once they stain.
7. Cute Finger Mehndi Design for Kids
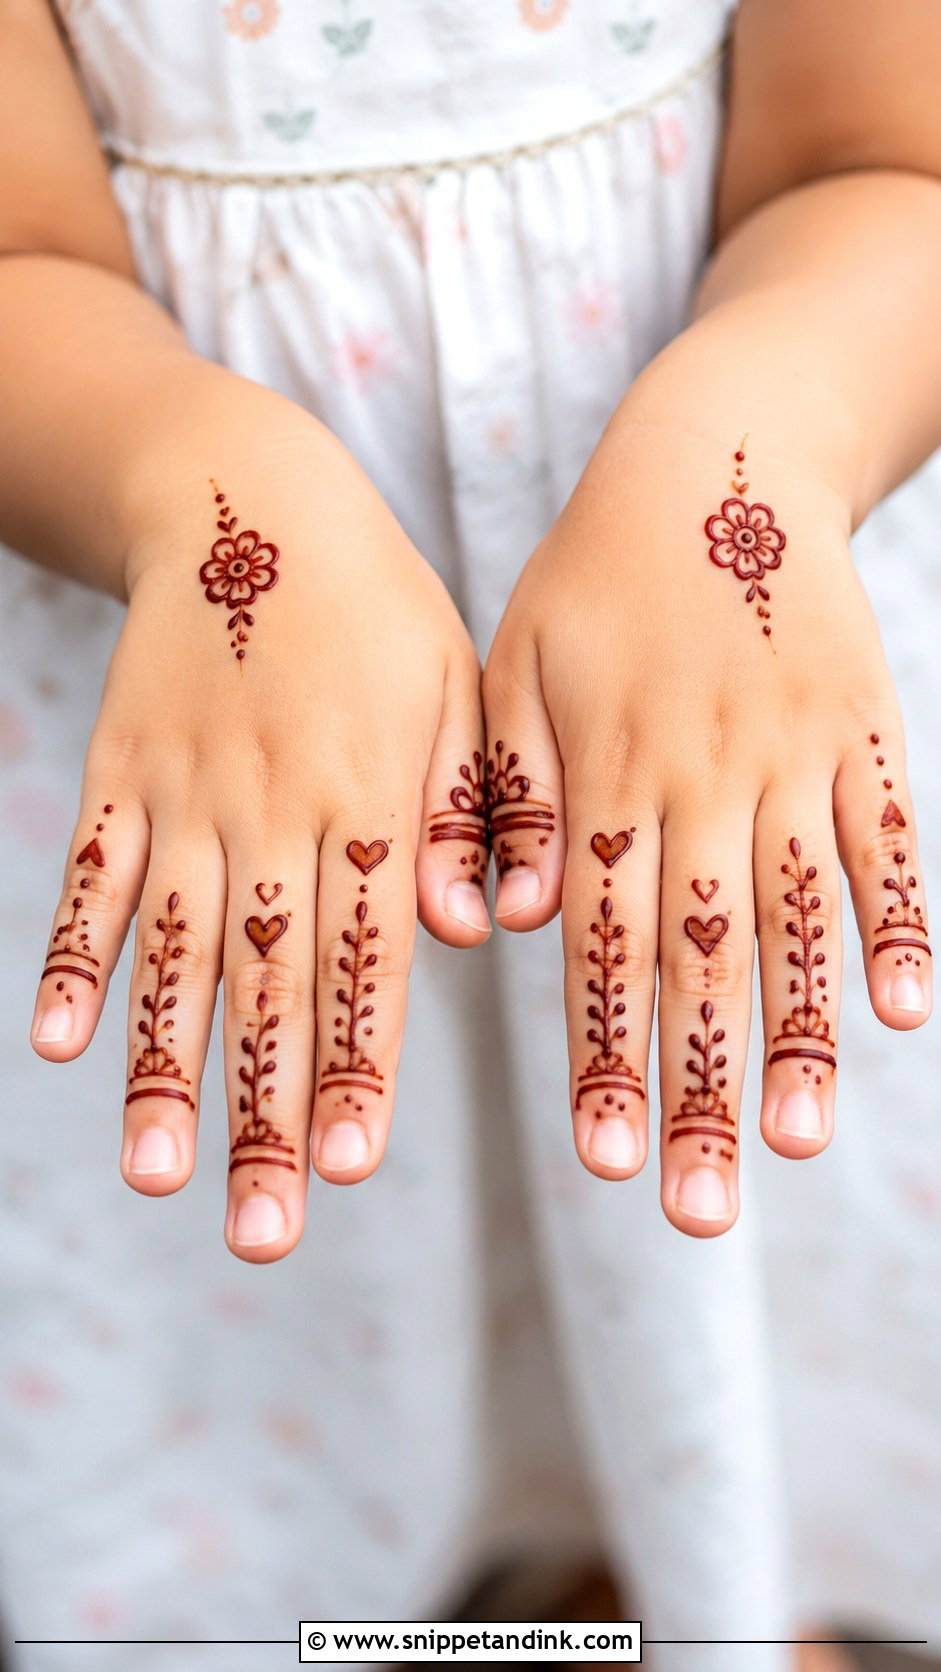
Some children want henna but hate sitting with a full hand of paste. For them, I decorate only the fingers with tiny dots, simple petals, mini hearts or short leafy lines, and leave the palm almost empty, adding one small flower near the wrist or on the back of the hand. It dries in minutes and rarely smudges. Parents of younger kids often prefer it for exactly that reason. Fingertips fade fastest with handwashing, so expect it to last a few days less than a palm design.
8. Easy Back Hand Mehndi Design for Kids
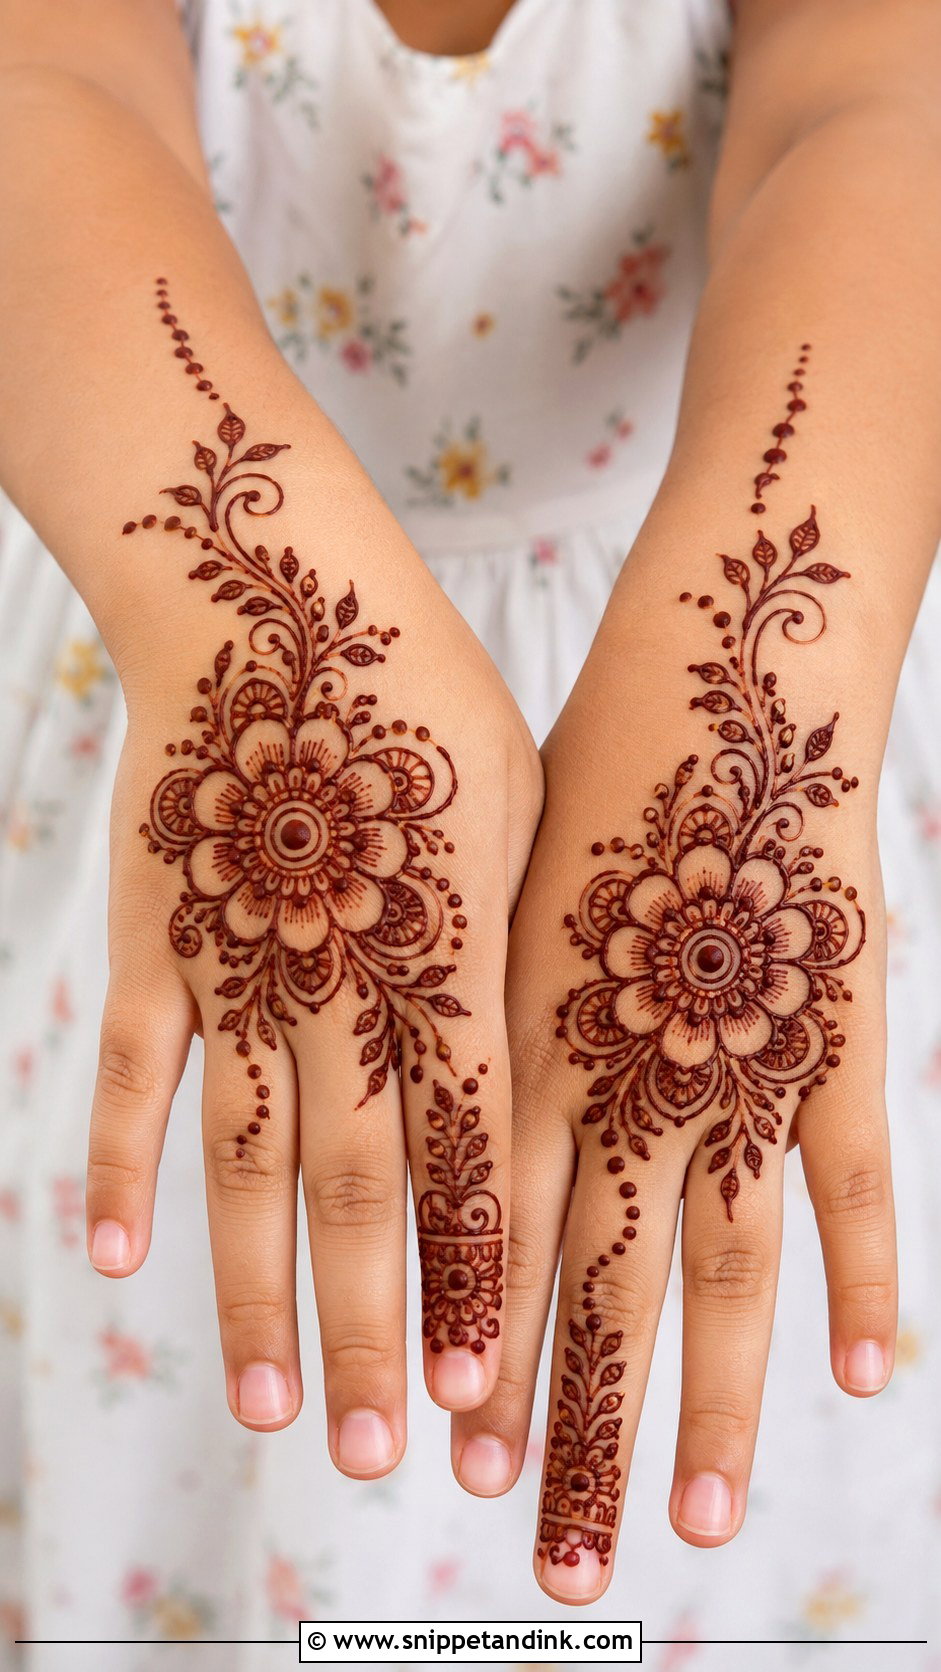
Putting the design on the back of the hand is the easiest way to protect it from a child who keeps touching things with her palms. A small flower or mandala in the center, soft vines toward the wrist and one or two fingers, and simple dots and curves on the rest. It looks decorated without much coverage. Children who dislike waiting do best with this, as long as they keep their hands palm-down on a towel until it dries.
9. Easy Front Hand Mehndi Design for Kids
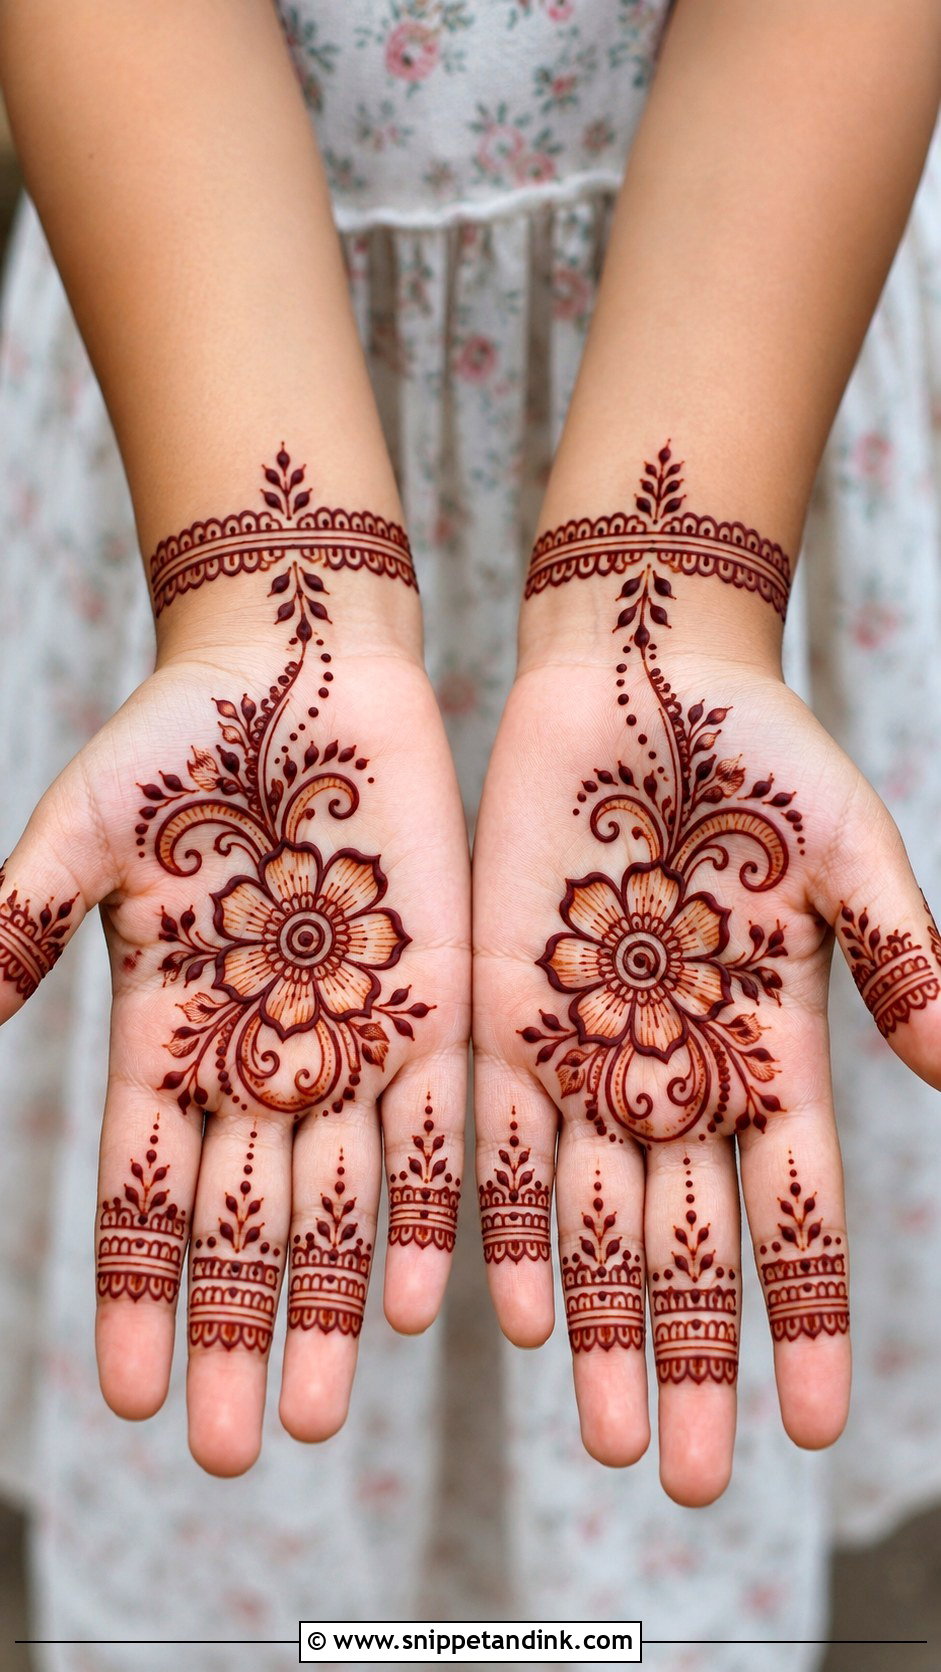
An easy front hand mehndi design should leave most of the palm open. Start with a flower, heart or small mandala in the center, add a few curved lines, and connect it to the wrist with dots or leaves. Small bands, dots or petal shapes go on the fingers. Palms stain darkest, even on children, so a light palm design still shows clearly in family photos. The downside is that kids touch everything with their palms, so this is better for a child who will sit for twenty minutes afterward.
10. Simple Bracelet Mehndi Design for Kids
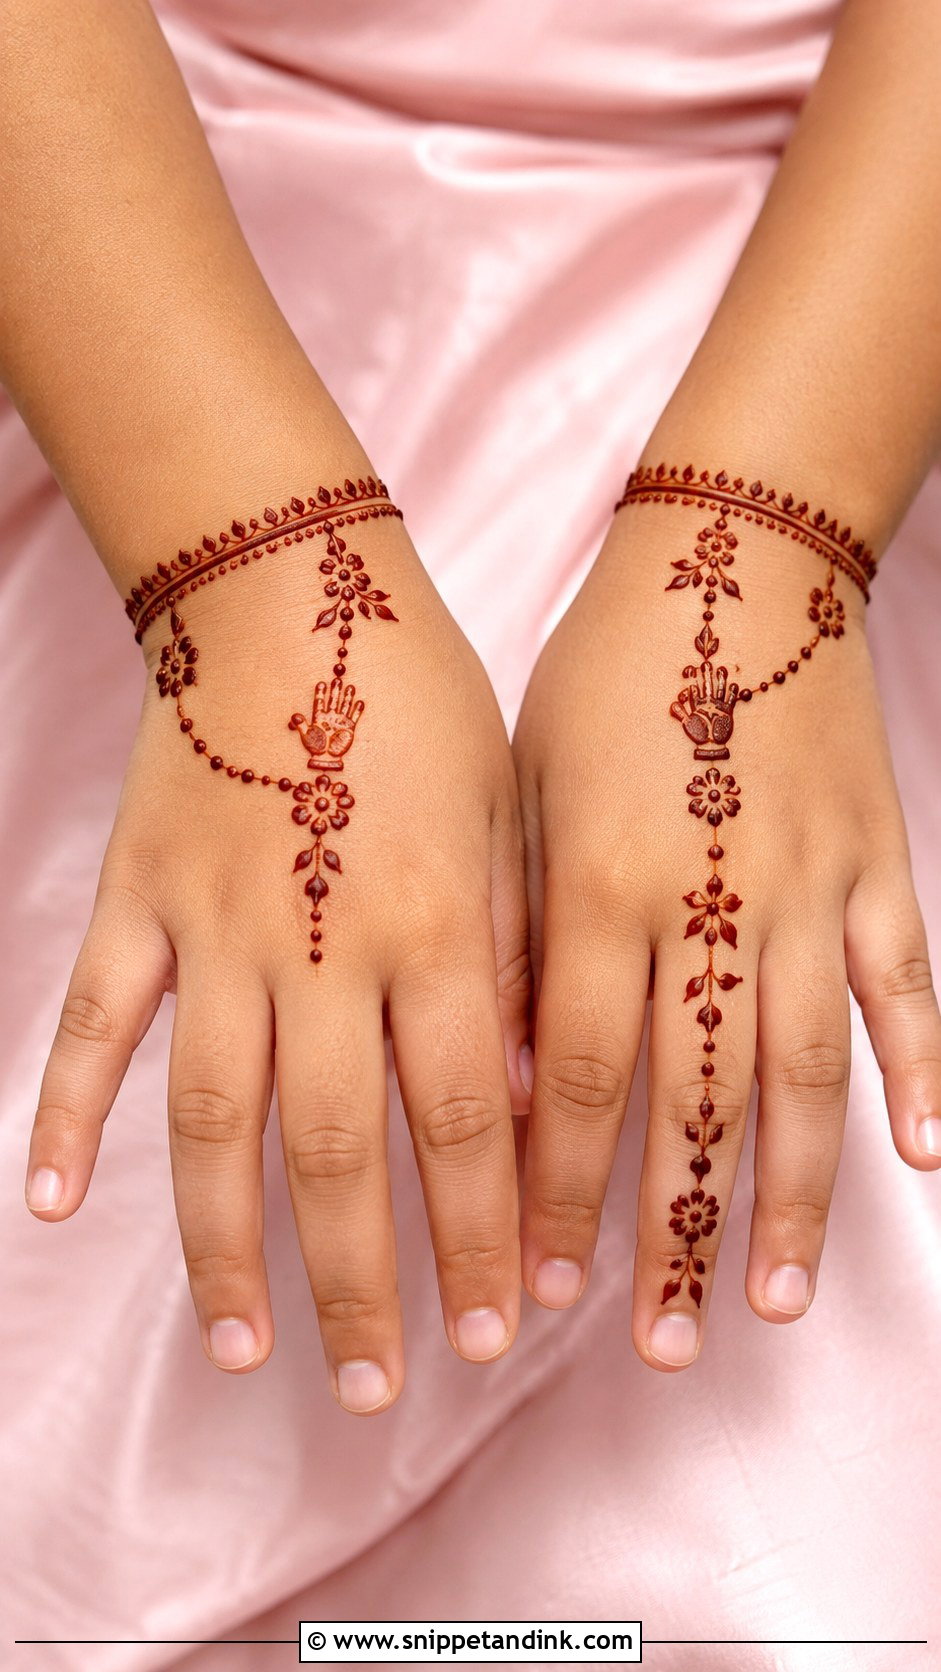
One or two curved lines across the wrist, decorated with dots, tiny flowers and small leaves, make a henna bracelet. Extend a short chain toward the middle finger with a little flower or heart at the end, and leave the palm and most fingers clear. It covers very little skin and is one of the least messy designs during drying. With bangles and traditional clothes it looks finished. Keep the child’s wrist straight and resting on a table while you draw, or the band ends up crooked.
11. Easy Paisley Mehndi Design for Kids
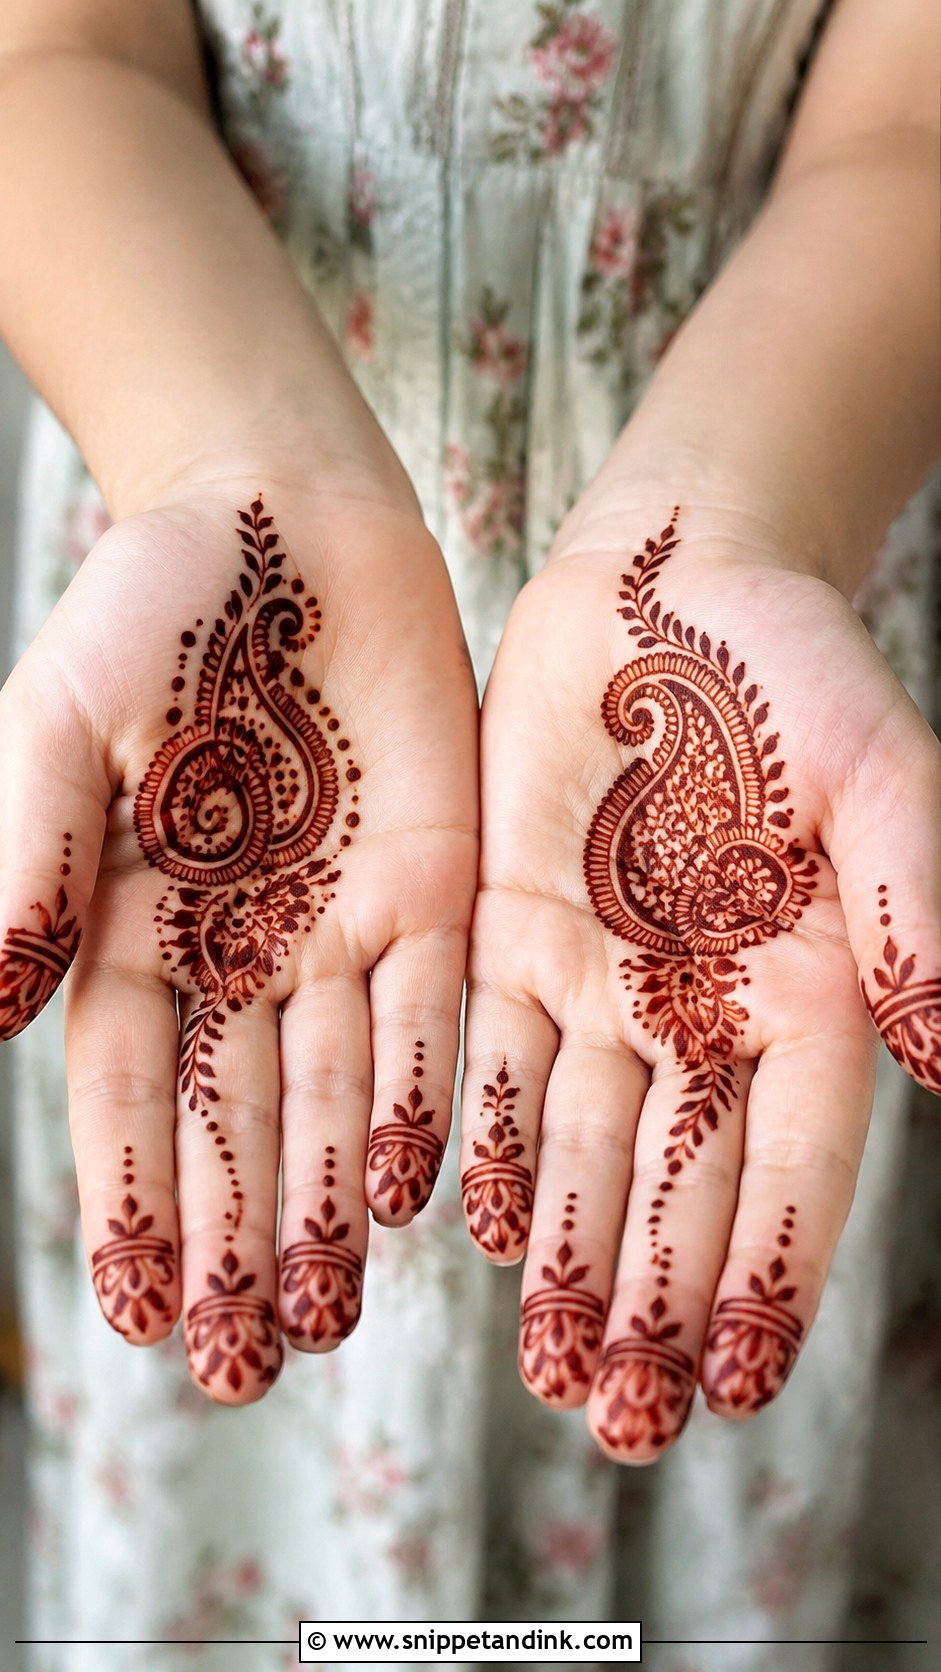
One small paisley on the palm or back of the hand, filled with dots, little curves or a tiny flower, gives a child the classic mehndi shape without the detail. Add a leafy trail around it and extend it gently toward the wrist or a finger. Bold, well-spaced lines keep the shape readable. I draw the paisley a bit plumper than usual on children, as a skinny tail is hard to see on a small hand. It’s a good fit for weddings and cultural events.
12. Easy Leaf Trail Mehndi Design for Kids
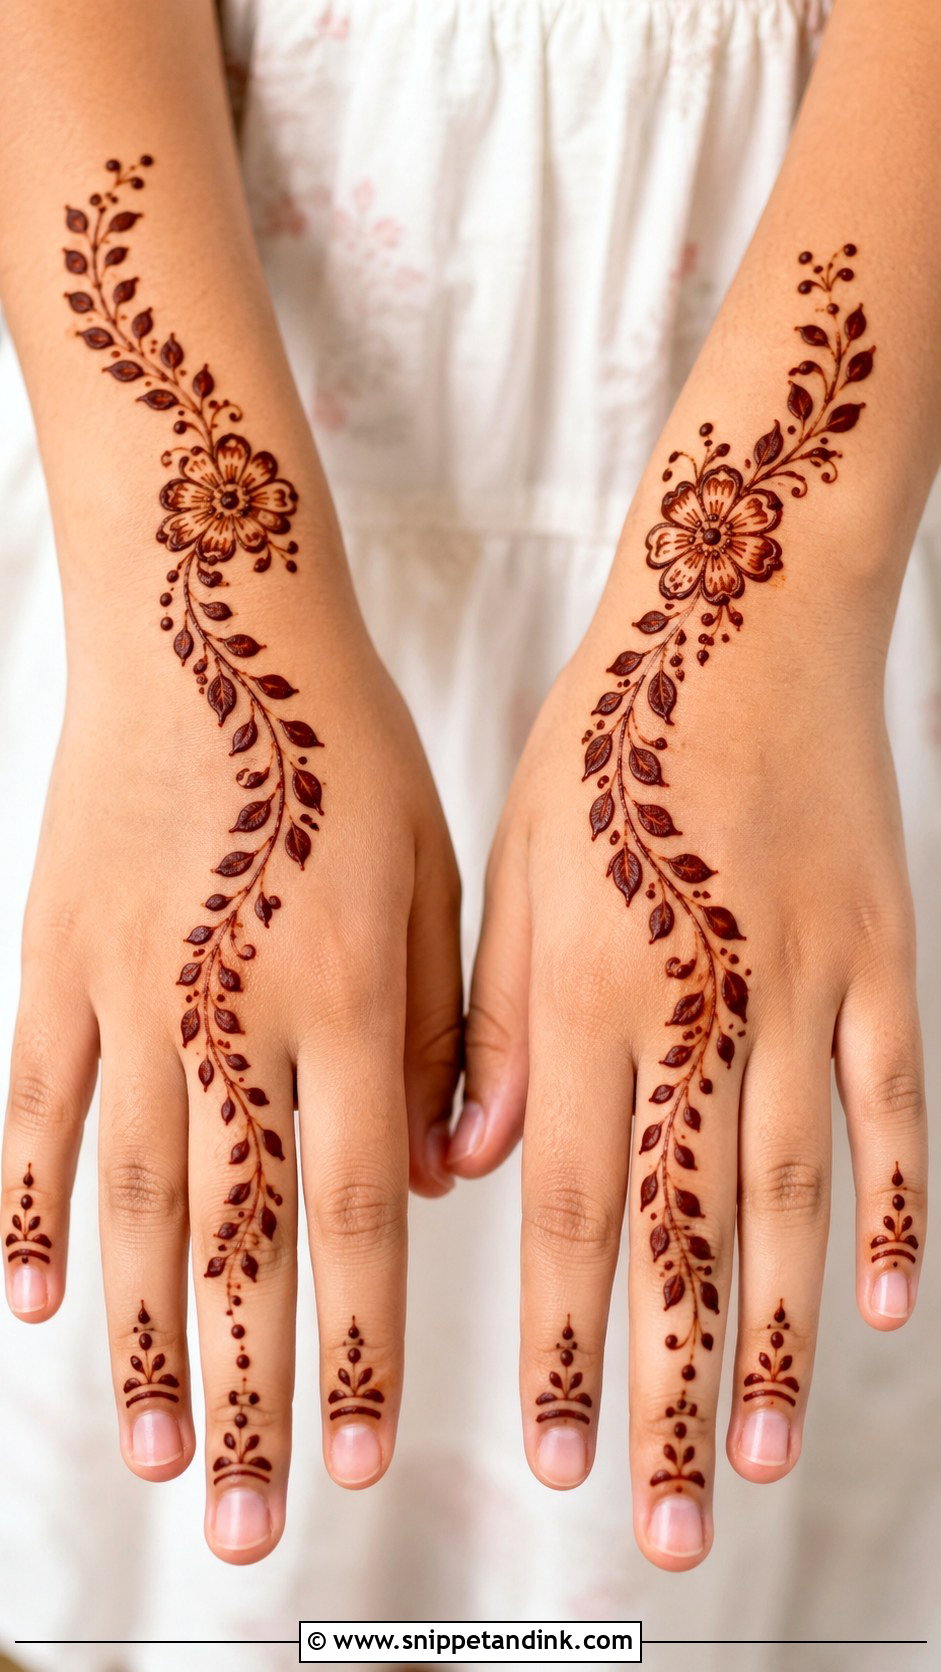
A curved vine from the wrist toward the ring or index finger, small rounded leaves on both sides, tiny dots between them and maybe one flower near the wrist. That’s all. It follows the natural line of the back of the hand, which is why it looks right on any size. It’s quick, light and dries fast. A vine is also the best design for a parent’s first attempt: if the line wobbles, the leaves hide it.
13. Easy Dots Mehndi Design for Kids
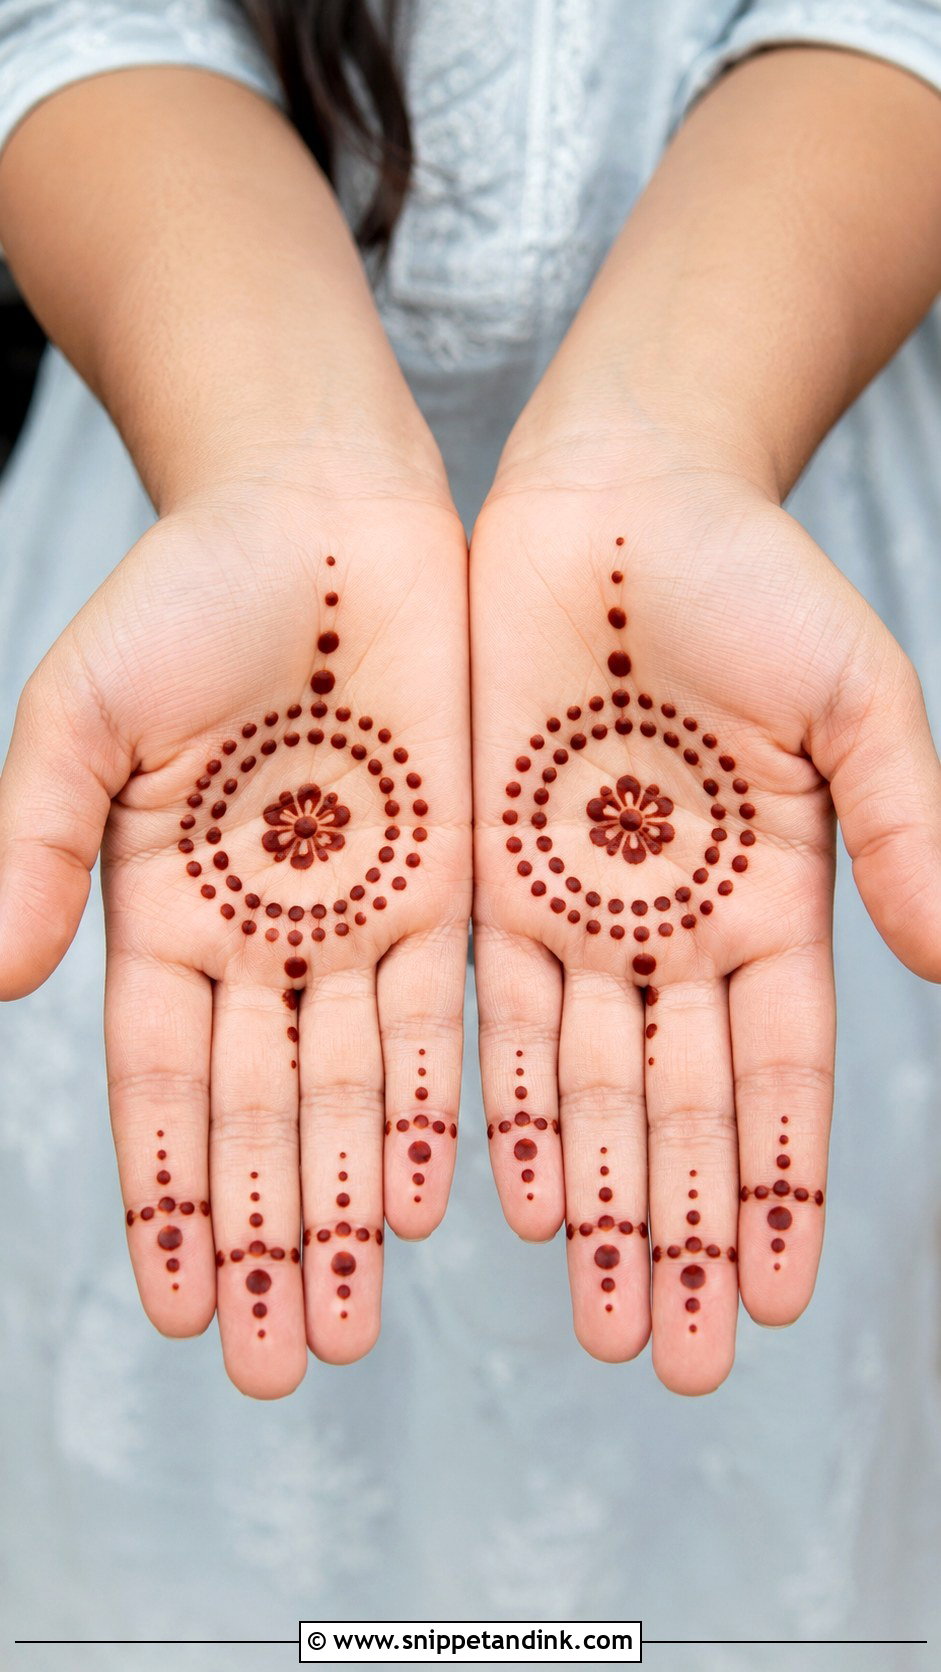
Dots are the most forgiving thing you can put on a child’s hand. Start with a small circle or flower on the palm, add dot trails around it, then dotted lines toward the wrist and fingers, and dotted rings or small clusters near the tips. Varying the dot size adds interest without complex shapes. Very young children do well with this one because it’s fast and uneven dots still look cute. Hold the cone upright and lift straight off each dot, or you’ll drag little tails.
14. Easy Star Mehndi Design for Kids
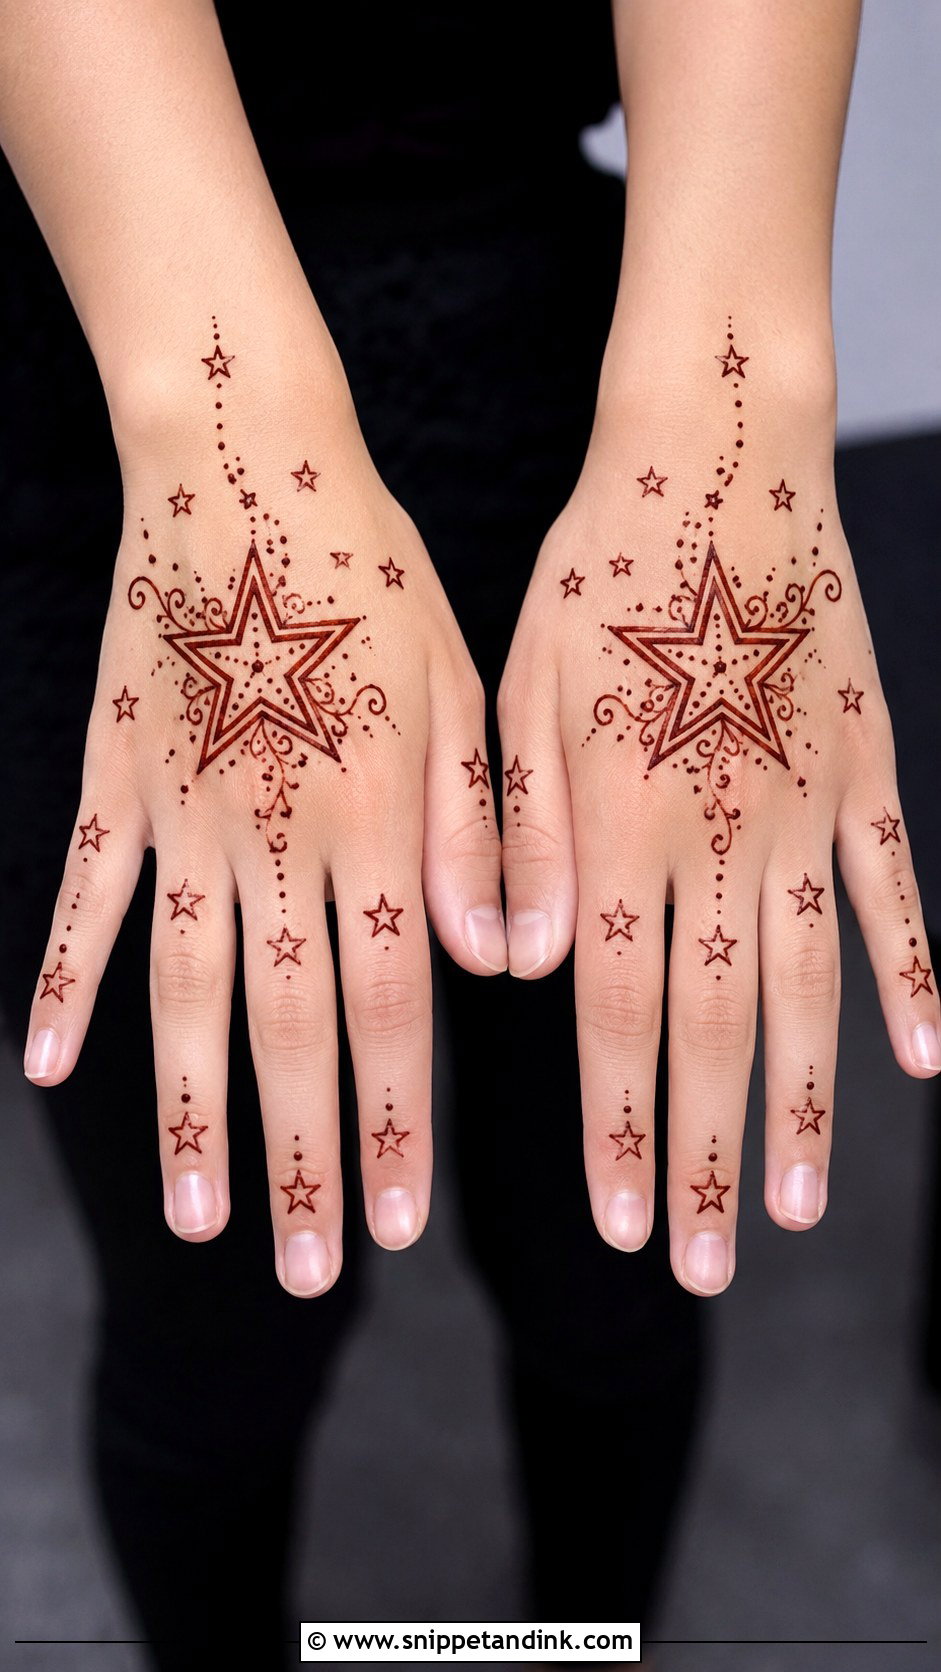
One large star in the center of the back hand or palm, smaller stars around it, linked by tiny dots or short curved lines, and a star near each fingertip or a dotted band. Children who prefer fun shapes to traditional motifs love it. Stars need little filling, so it stays light for Eid, Diwali, birthdays and school events. I round off the points slightly; sharp star tips on a small hand look scratchy once stained.
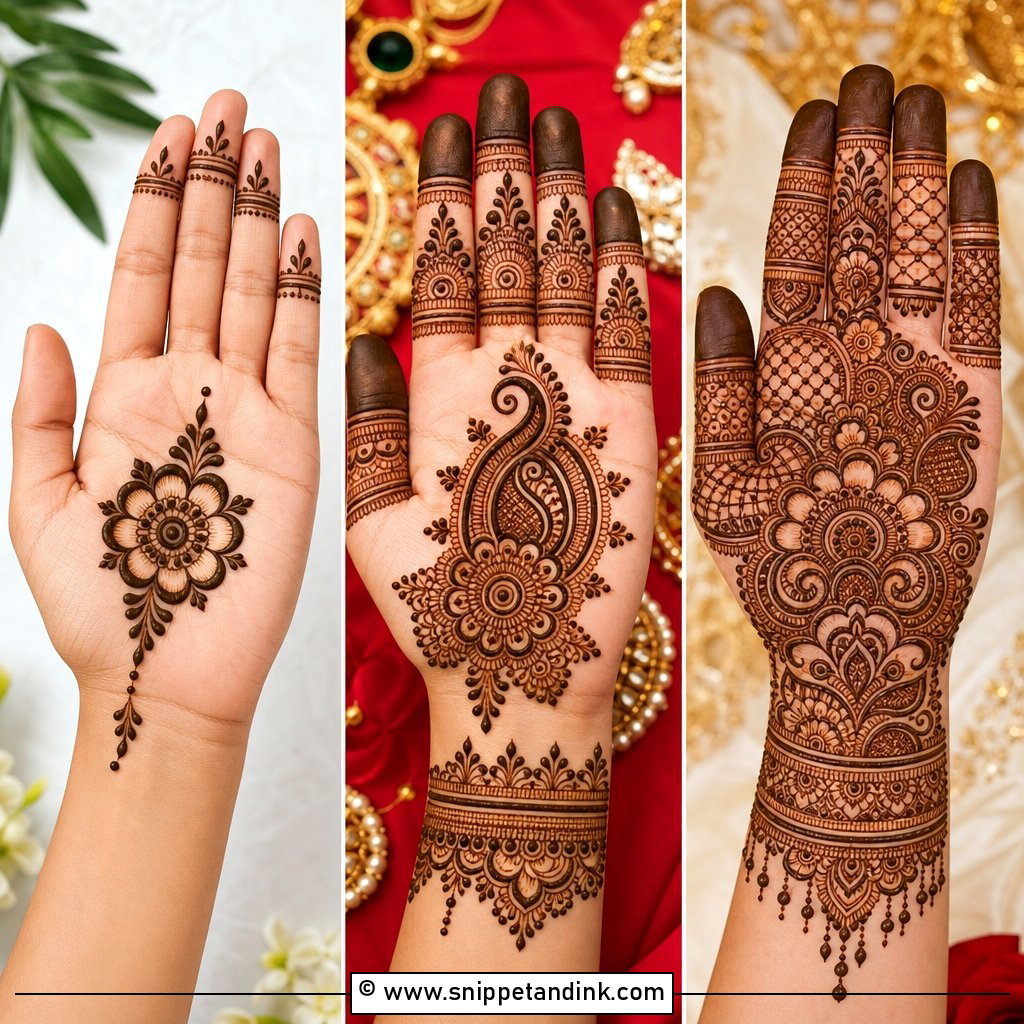
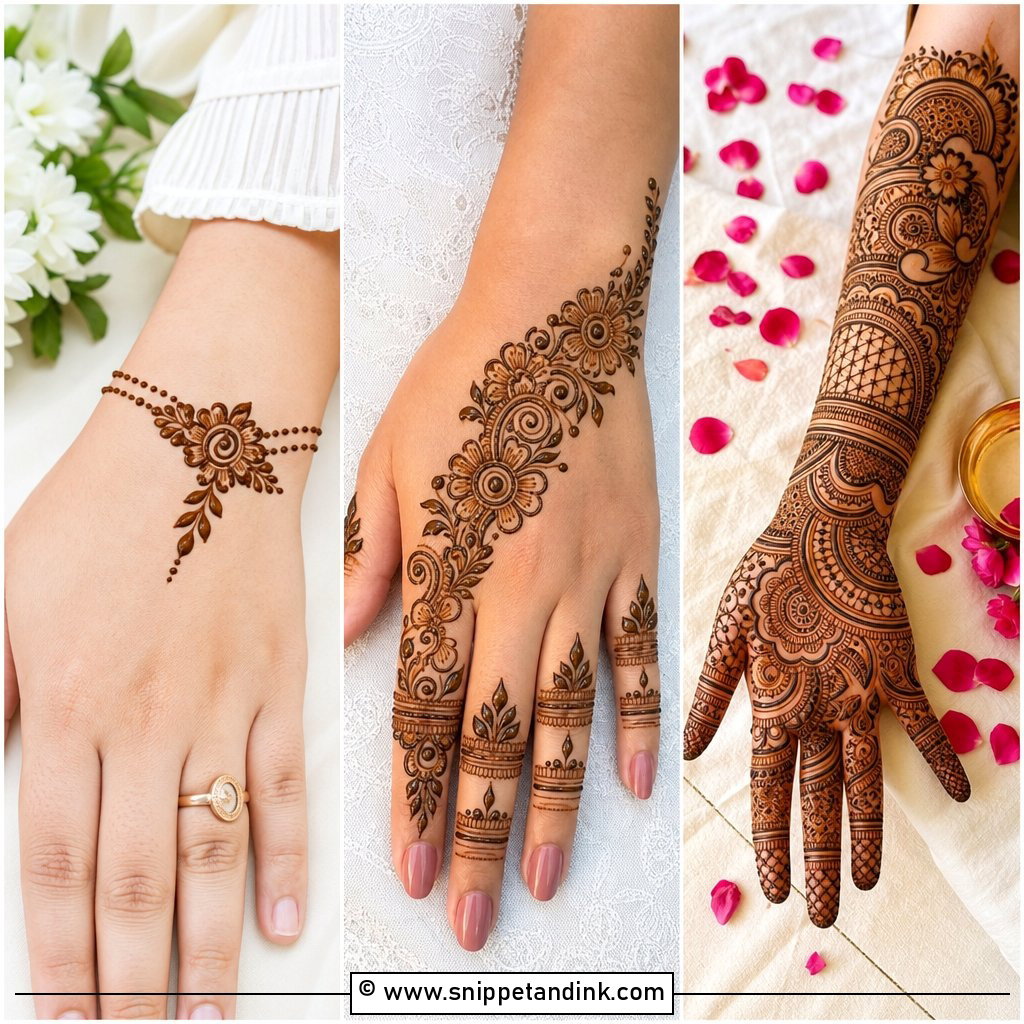
15. Easy Ring Mehndi Design for Kids
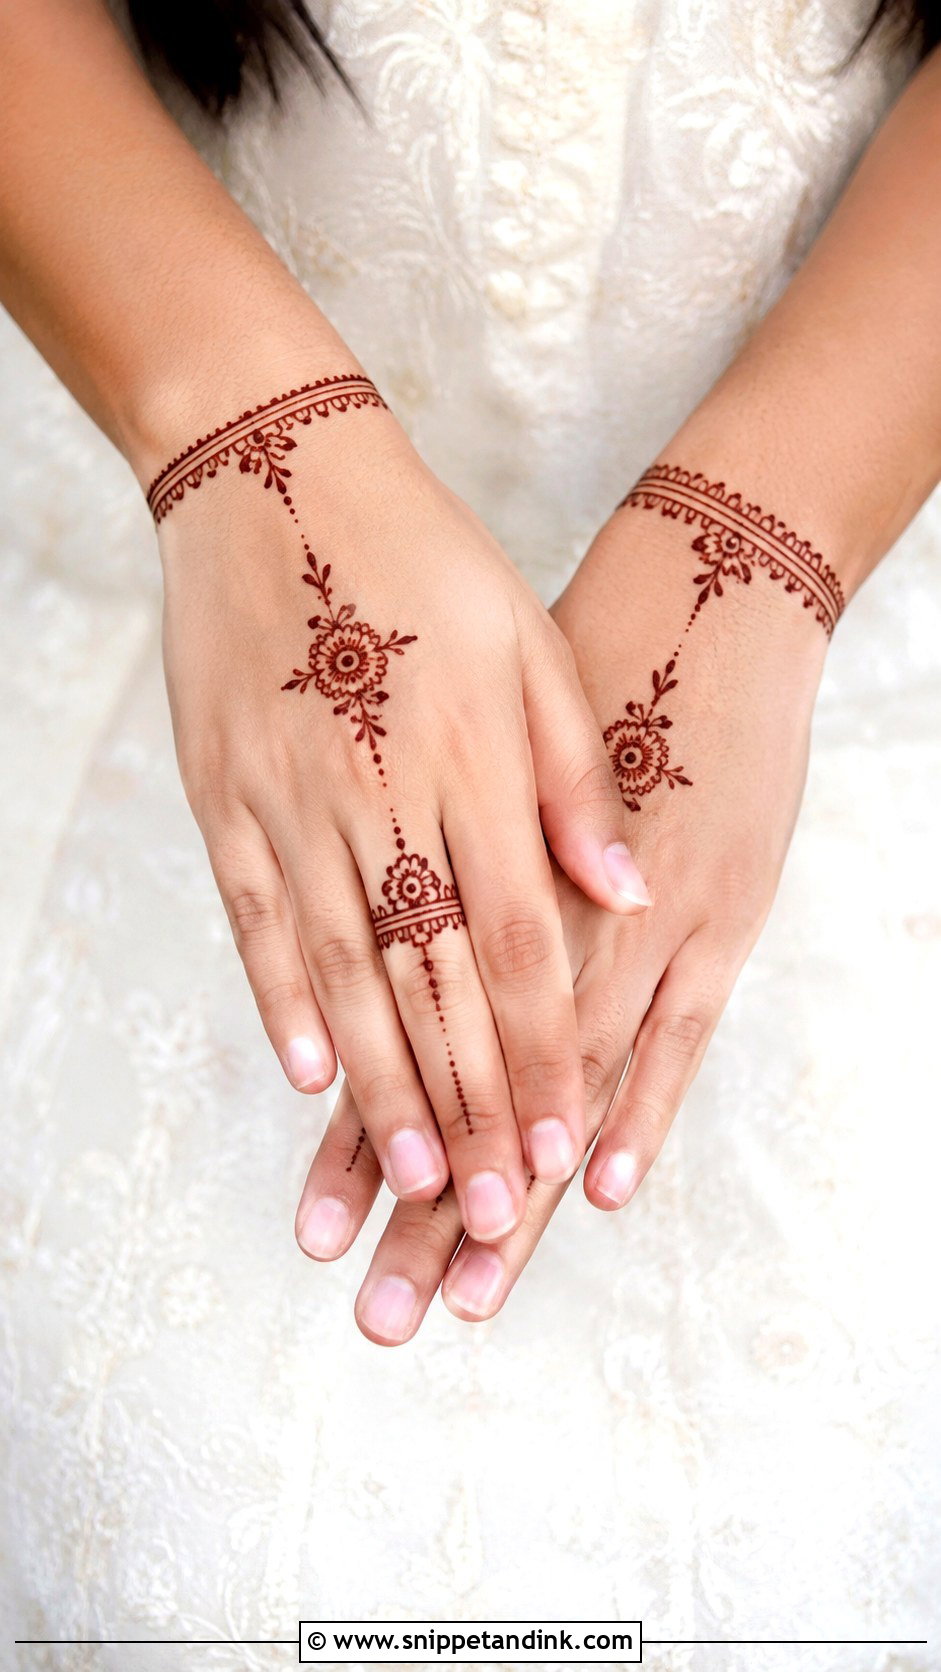
A small flower, heart or circle drawn on one finger like a ring, joined by a thin chain of dots to a small motif on the back of the hand, with a bracelet line at the wrist if you want more. The rest of the hand stays open. Kids like it because it feels like jewelry. It’s quick to apply and easy to protect while drying, which is welcome at a wedding or family gathering. Put the ring on a finger the child doesn’t suck or chew, or the design will be gone by bedtime.
16. Simple Crown Mehndi Design for Kids
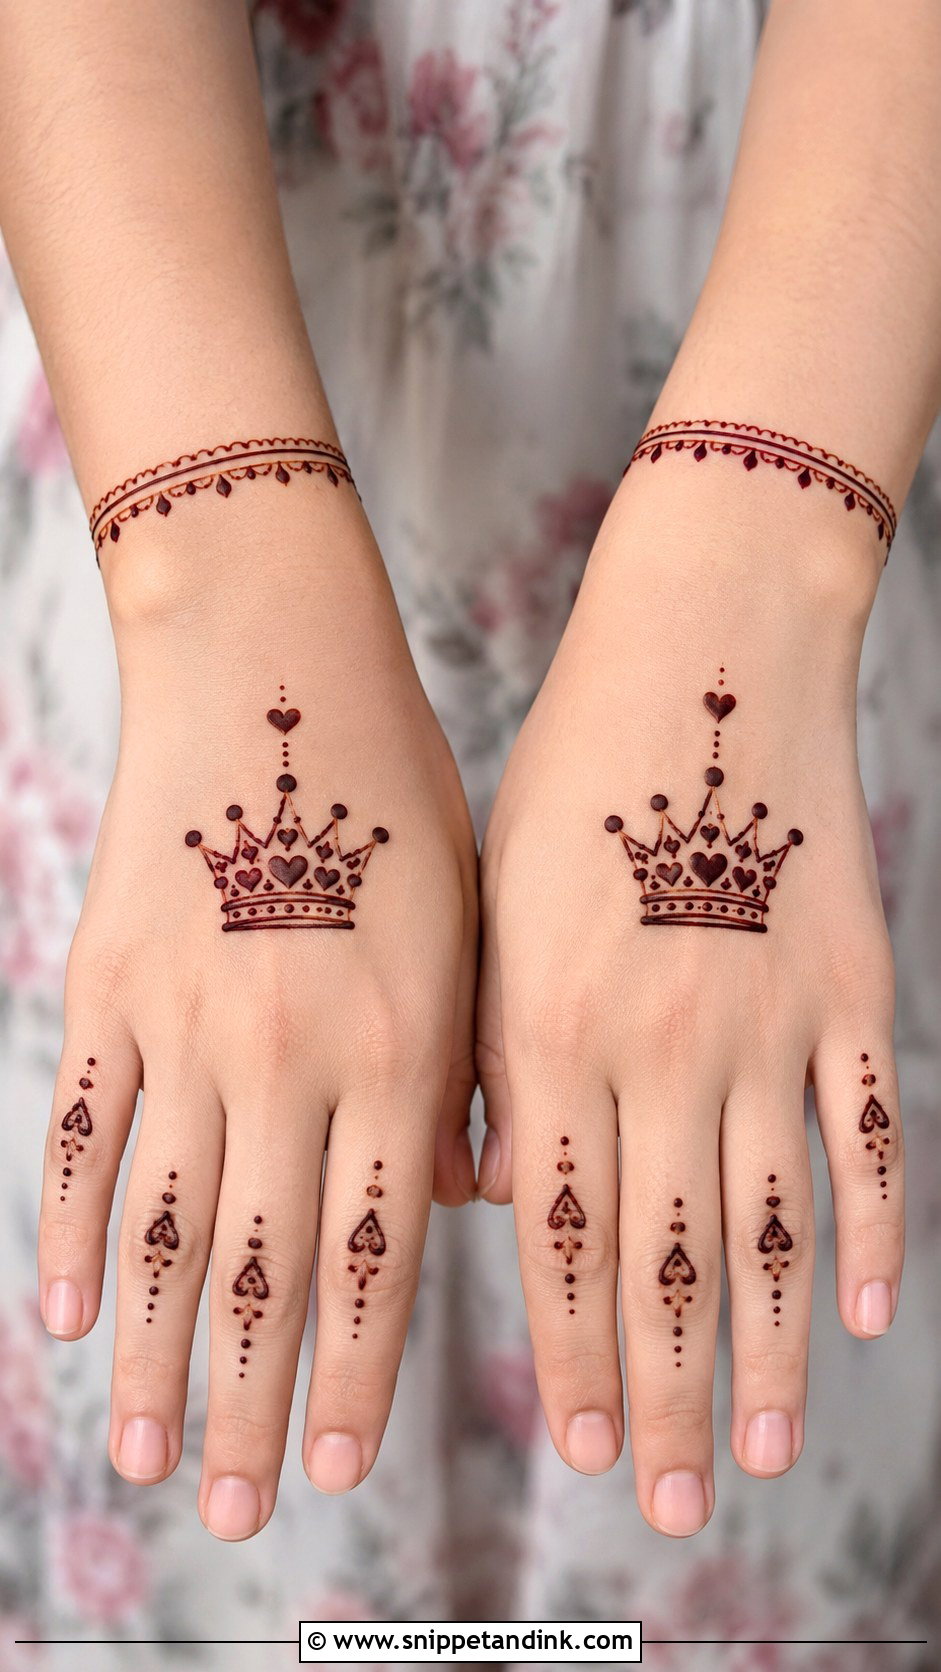
A small crown on the back of the hand or in the palm, built from rounded points, dots and tiny hearts, keeps the shape soft for a child. Add a short bracelet line at the wrist and light dots on the fingers. Birthdays and dress-up occasions are where I draw it most. Children love showing it off because everyone recognizes it immediately. Keep it small, about the size of a coin, so it stays neat.
17. Easy Cartoon Mehndi Design for Kids
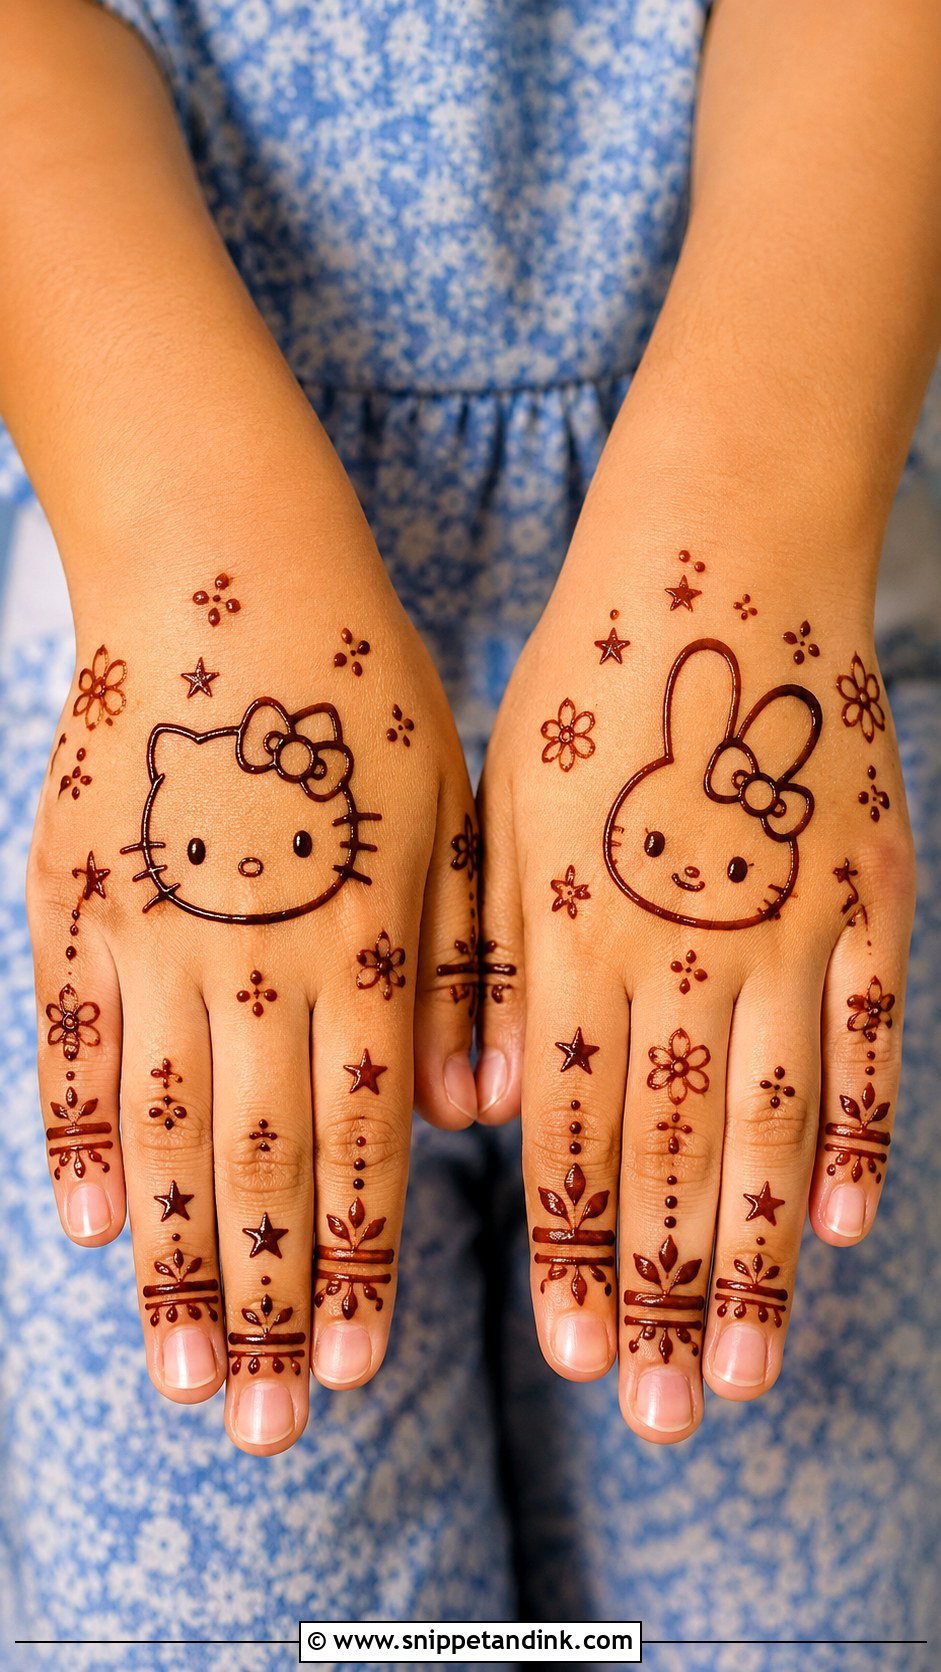
Cartoon designs need restraint. One cute face, animal shape or character-inspired outline, with no fussy detail, placed on the back of the hand. Around it, a few dots, small stars, flowers or a short vine, and simple bands on the fingers. The main shape should be outline only; filling a cartoon face with paste gives a solid brown blob once it stains. It’s best for kids’ parties and festive days at home.
18. Easy Peacock Mehndi Design for Kids
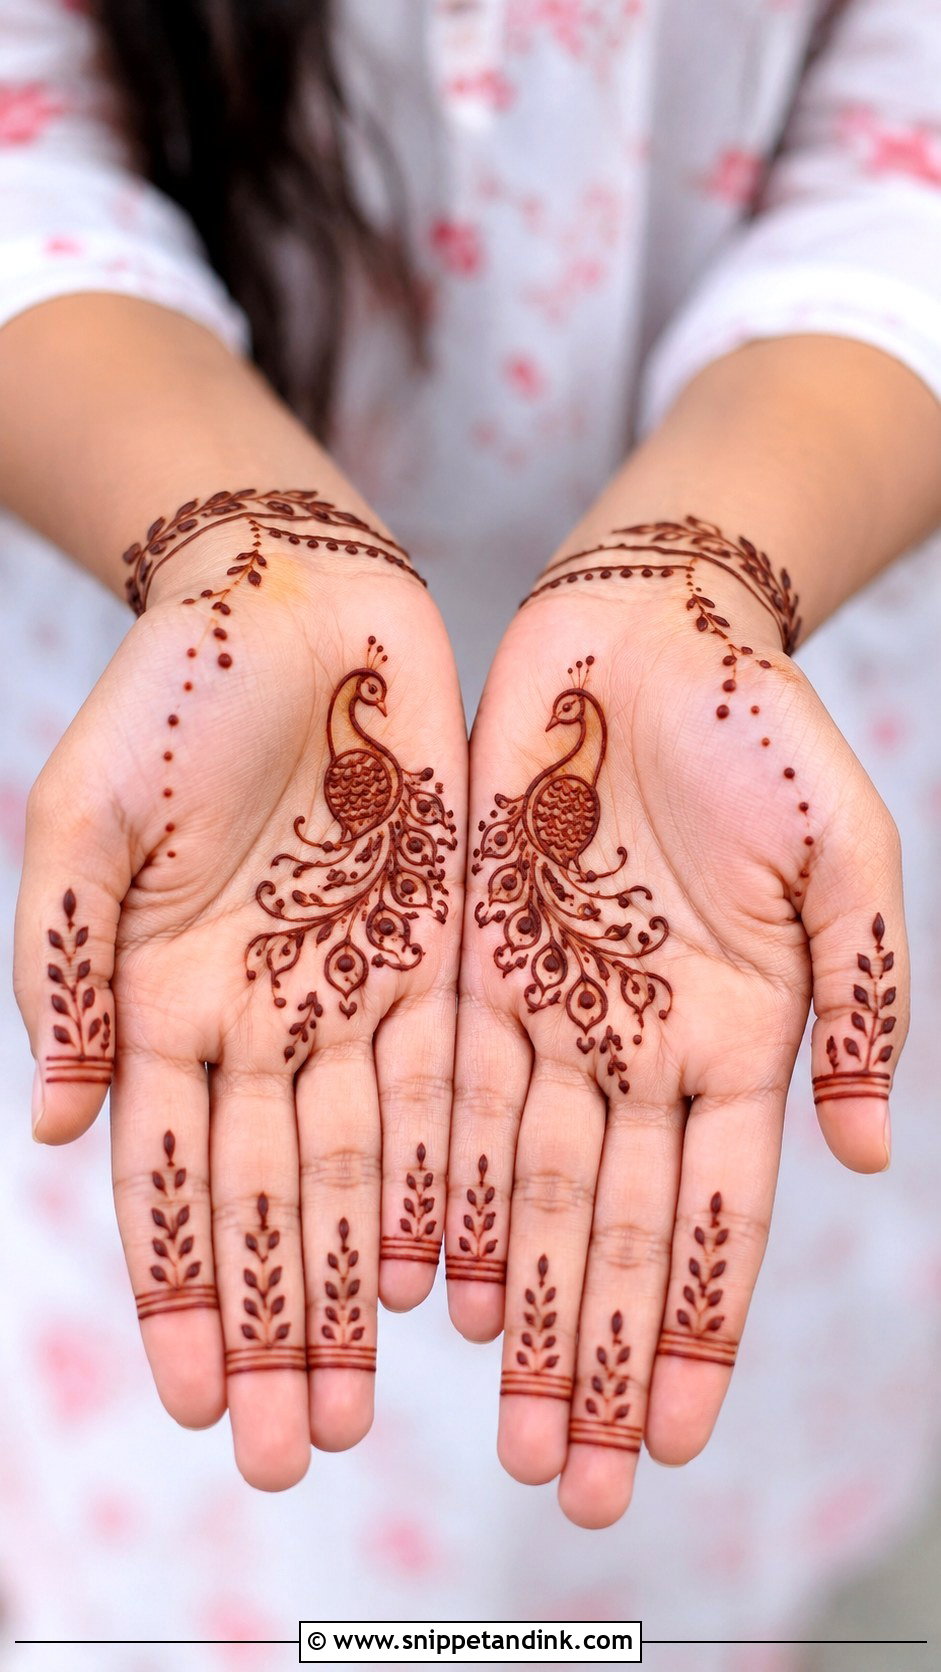
A peacock mehndi design can be made child-sized with one small bird shape and a single feather curve. A rounded body, small beak and a sweeping feather line on the palm or back of the hand, with dots and tiny leaves inside the feather instead of dense detail. A few vines near the wrist complete it. It feels traditional enough for weddings, Diwali and cultural programs. Keep the bird small, no bigger than the child’s palm center, and it’s done in a few minutes.
19. Simple Butterfly Back Hand Mehndi Design for Kids
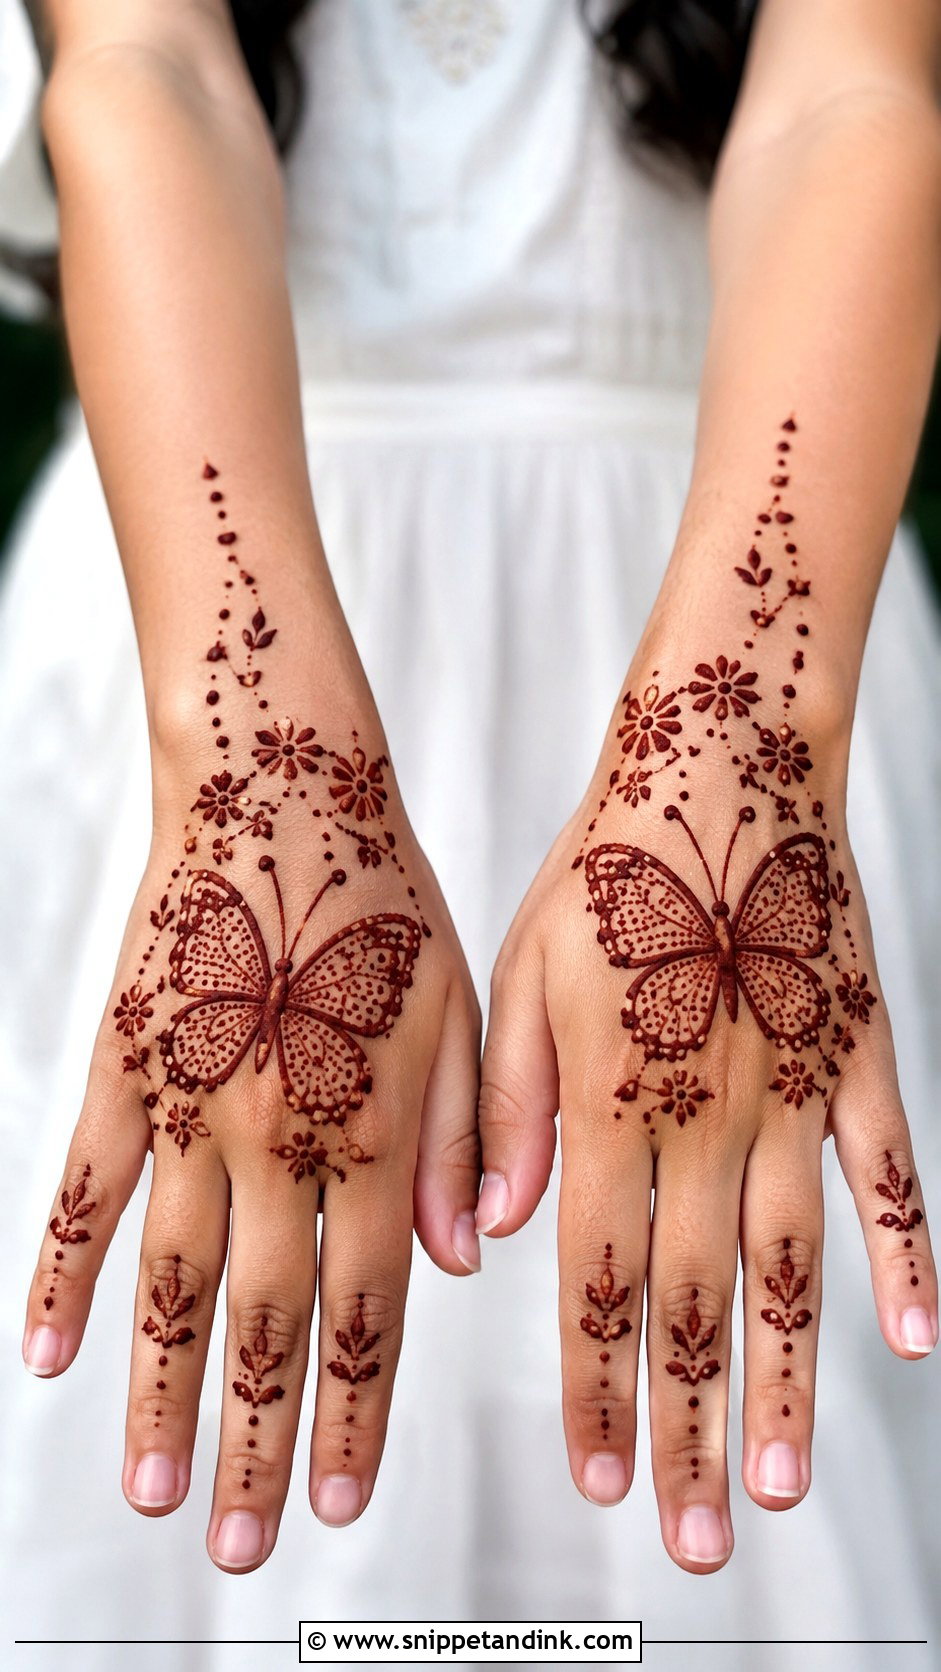
Two large upper wings, two smaller lower ones, all in the center of the back hand and filled with dots, short lines and tiny flowers. A dotted trail runs from the wrist up to the butterfly, and one or two fingers get petals or dots. This butterfly is bigger and more decorated than the simple version earlier, so I save it for children around school age who can sit a little longer. Doing it on the back of the hand means the child can rest her palm flat and comfortable throughout.
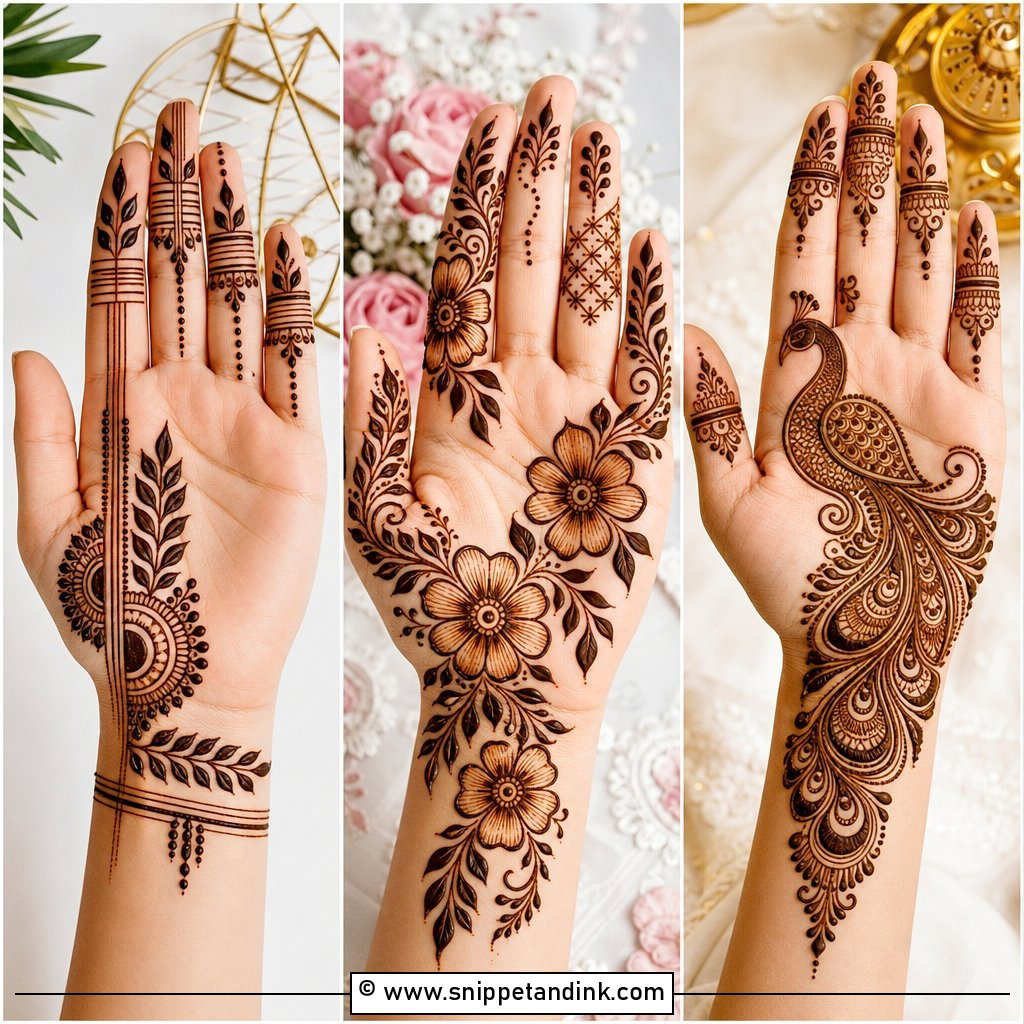
20. Simple Floral Vine Mehndi Design for Kids
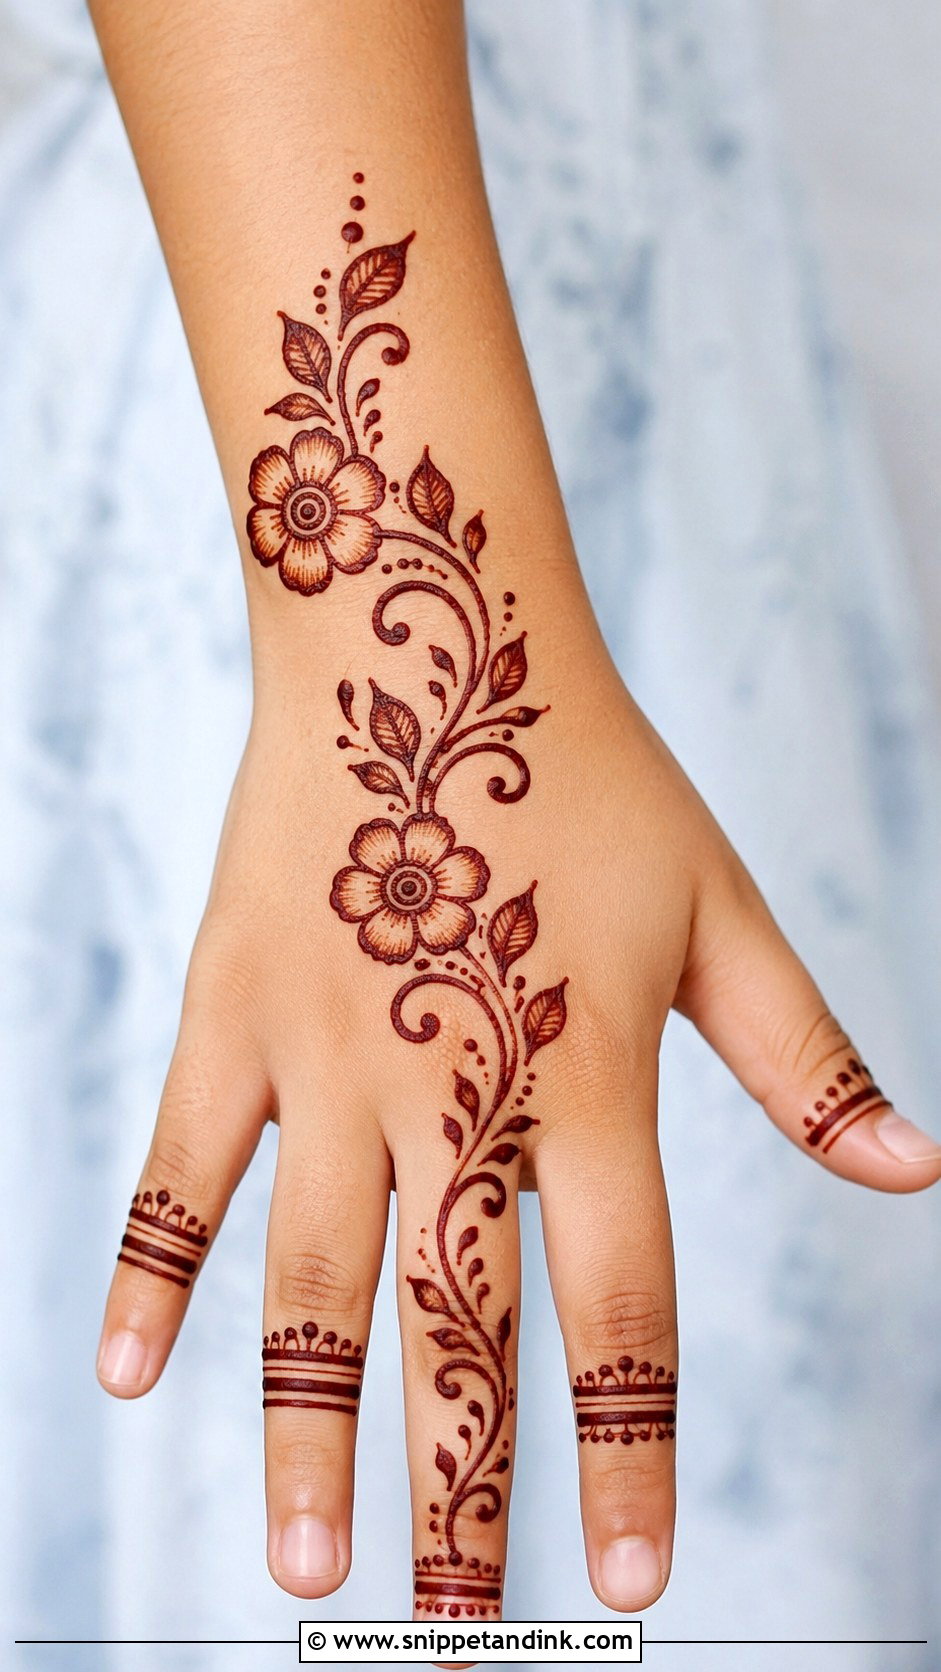
Start at the wrist with a small flower, pull a curved vine toward the middle finger, set two or three more flowers along it and fill the gaps with leaves and dots. Fingers get only tiny leaves or dotted bands. The flowers stay open and rounded, never detailed. It suits almost any occasion, from Eid and Diwali to weddings and family visits, and it looks graceful on a child without seeming too grown-up. It’s also one of the quickest full-looking designs I know.
21. Easy Sun Mehndi Design for Kids
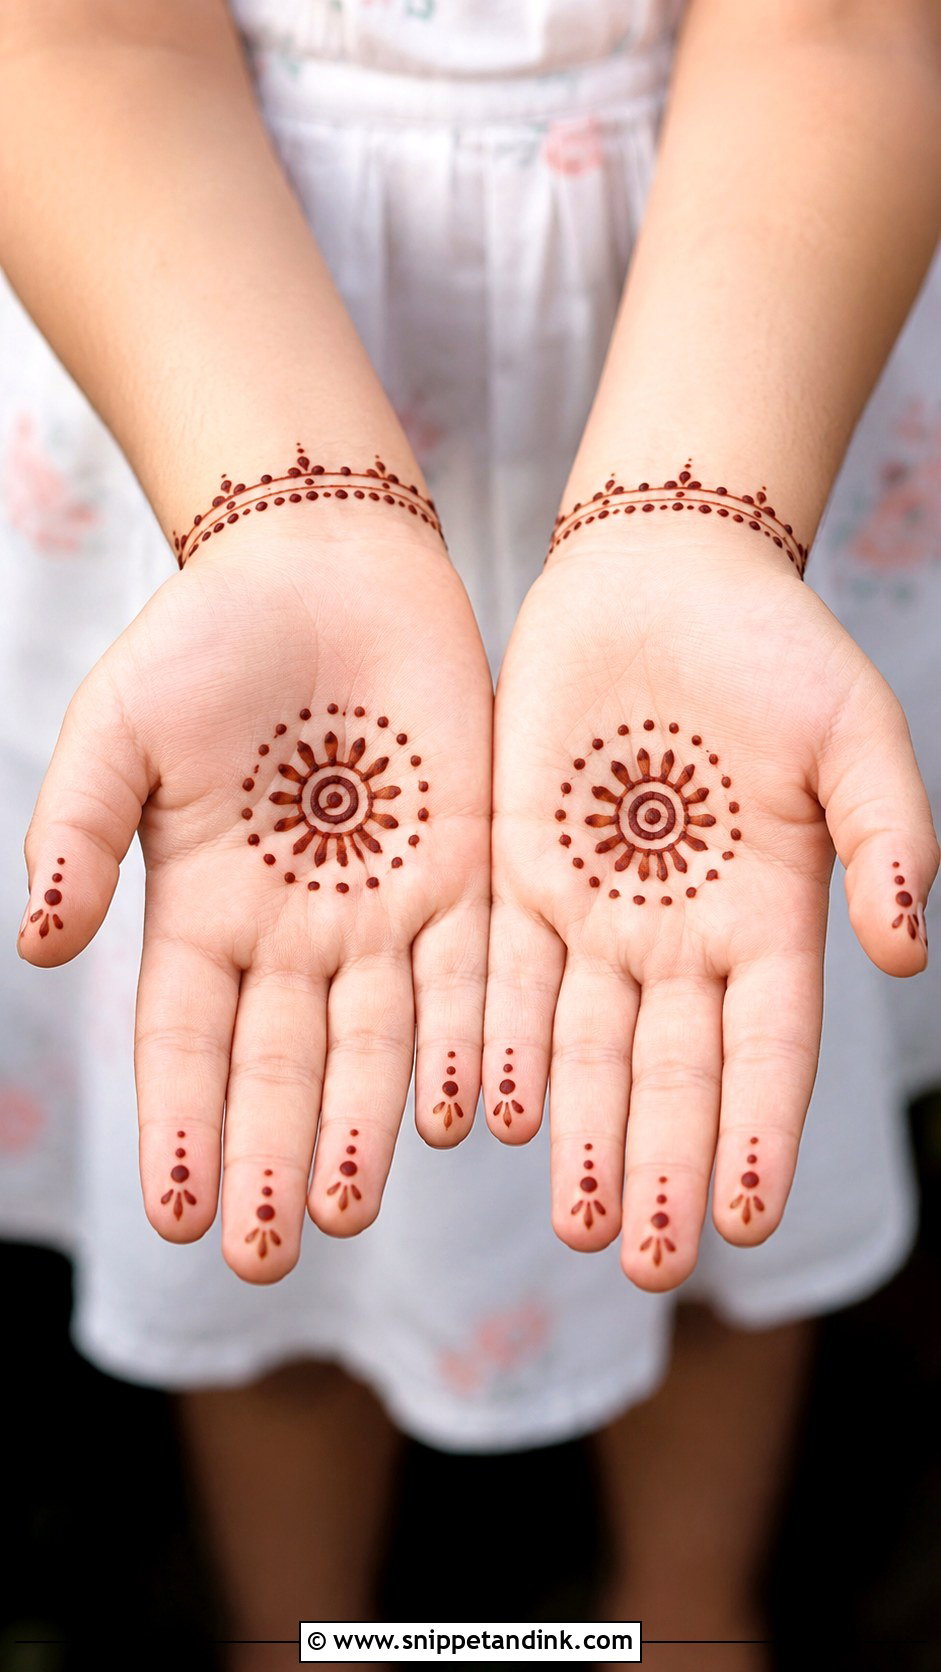
A small circle in the center of the palm with short, rounded rays, dots around it, and a bracelet line or a few tiny motifs on the fingers. Basic shapes make it ideal for the youngest children. Short rays matter: long thin ones blur together on a small palm. Done in a couple of minutes, it suits festivals, school events and casual family celebrations.
22. Easy Unicorn Mehndi Design for Kids
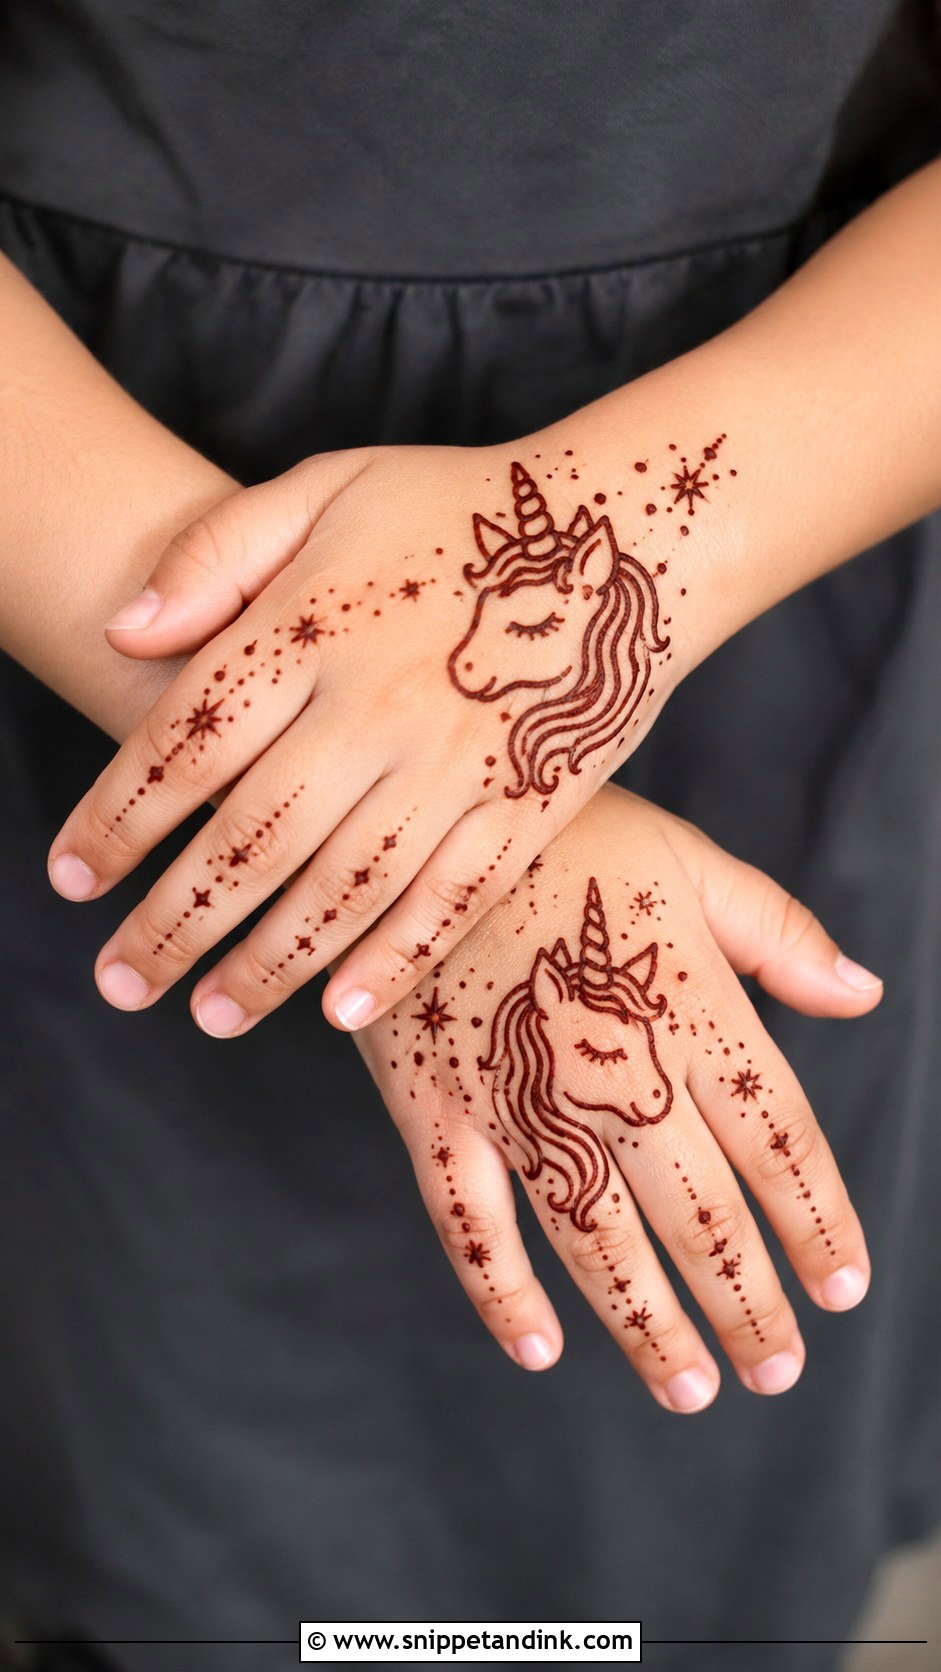
Unicorns are pure fun, but only if you resist the detail. A small face outline on the back of the hand with a tiny horn, soft ears, a closed eye and a few curved mane lines. Dots, stars and small flowers around it, tiny stars or dotted bands on the fingers. Add much more and the child will be restless long before you finish. Birthdays and play days are its natural home.
23. Easy Initial Mehndi Design for Kids
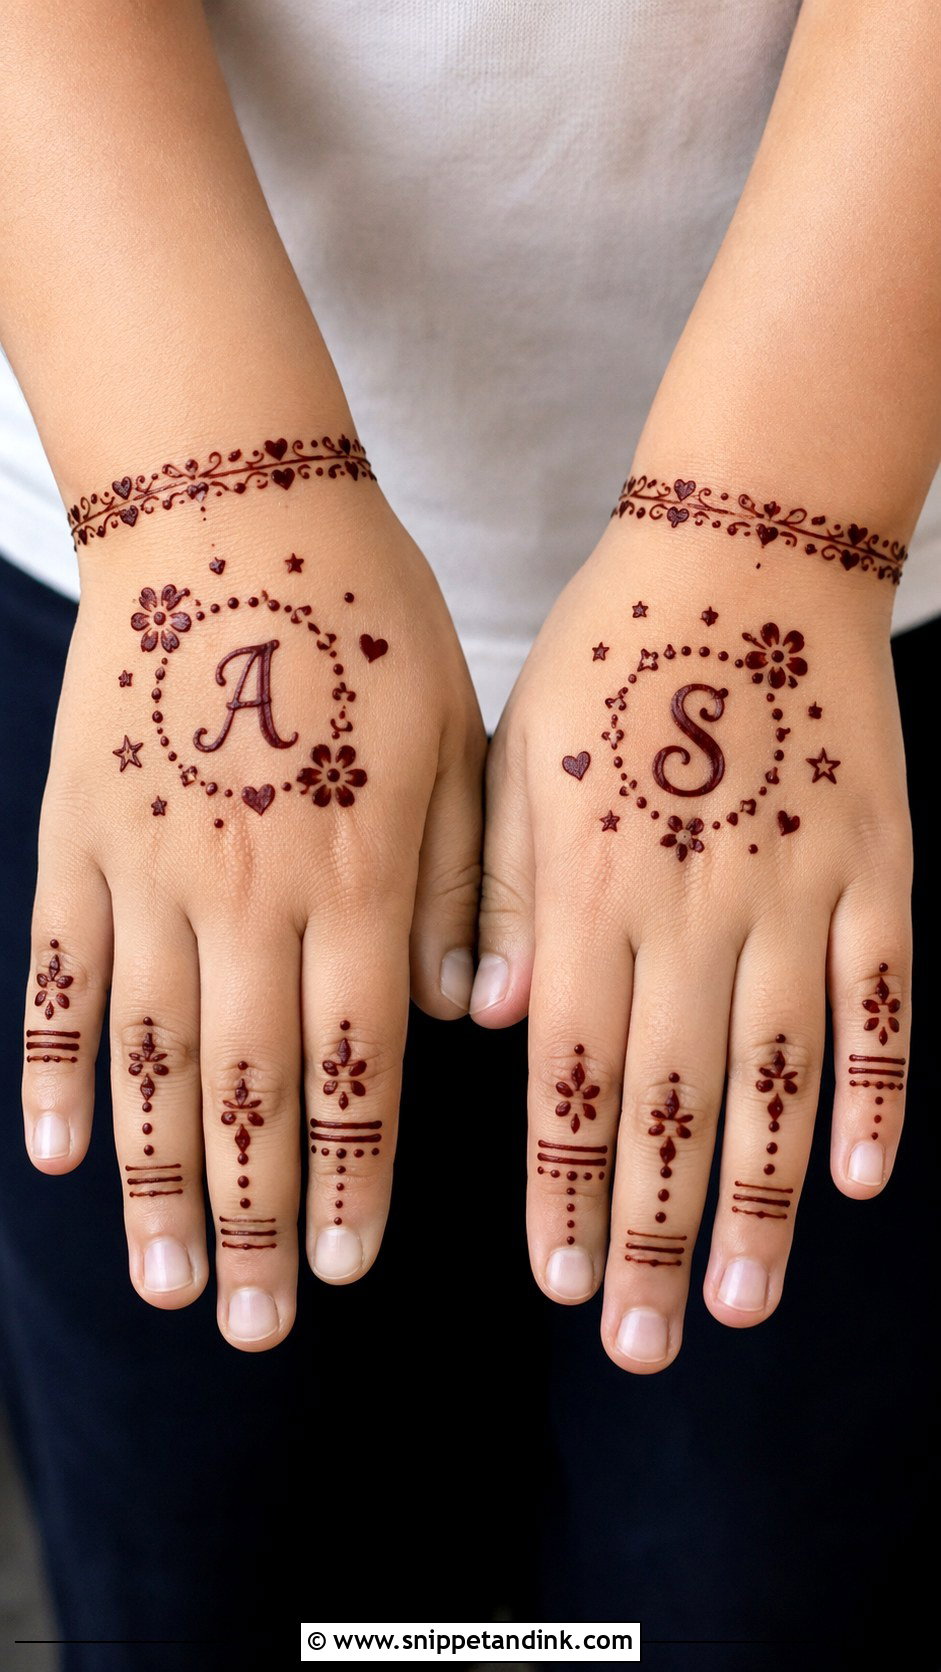
Write the child’s first initial in a soft, rounded letter in the center of the palm or back of the hand, then surround it with tiny flowers, dots, stars or hearts. A small wrist band or short finger trail completes the hand. It’s quick and personal, and easy to vary for siblings or cousins at the same party. Keep the letter clear and medium-sized, with open loops; small closed loops like the inside of an a or e fill in as the stain develops.
24. Easy Smiley Mehndi Design for Kids
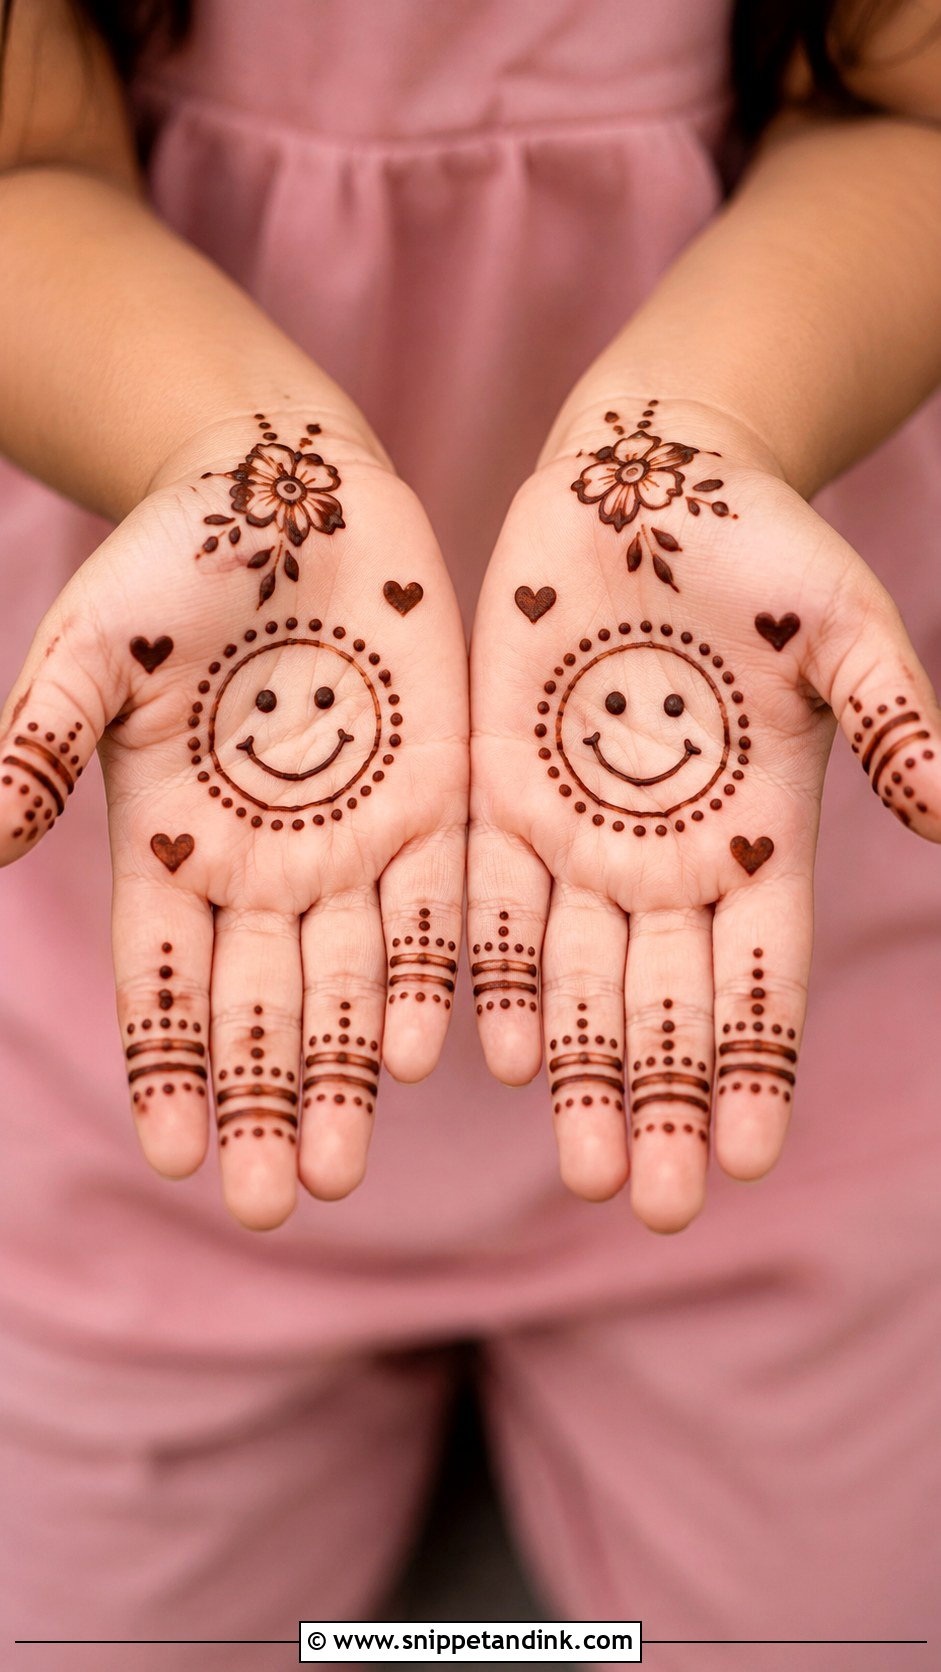
A smiley takes two minutes: one round face on the palm or back hand, small dots around it, a tiny flower near the wrist and light finger bands. Little stars or hearts can join if the child wants more. Very young kids recognize it instantly, which makes it easy to agree on. The eyes should be dots, not circles, so they stay crisp. It’s a happy choice for fun family days.
25. Easy Bow Mehndi Design for Kids
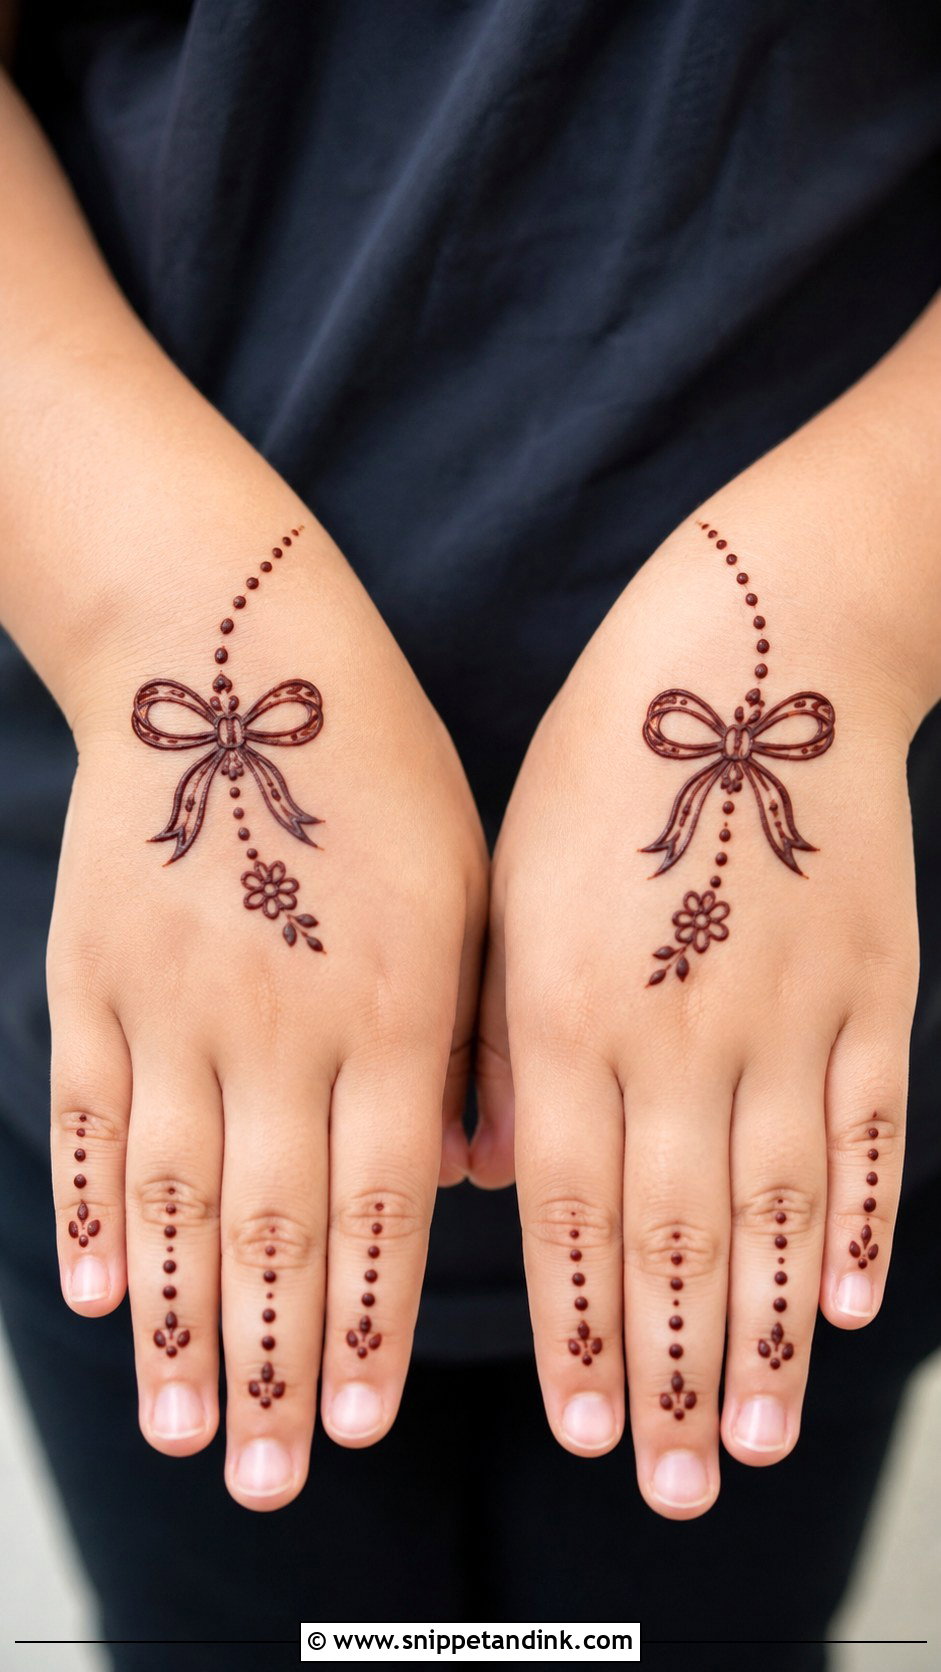
Two rounded loops, two short ribbon ends and dots in the middle make a bow, placed in the center of the back of the hand or near the wrist. A soft dotted chain runs toward one finger with a tiny flower or heart at the end, and the fingers get small bands or dots. It looks like an accessory, which girls who love dressing up enjoy. Draw the knot in the middle first, then the loops out from it, and both sides come out closer in size.
26. Simple Jaali Mehndi Design for Kids
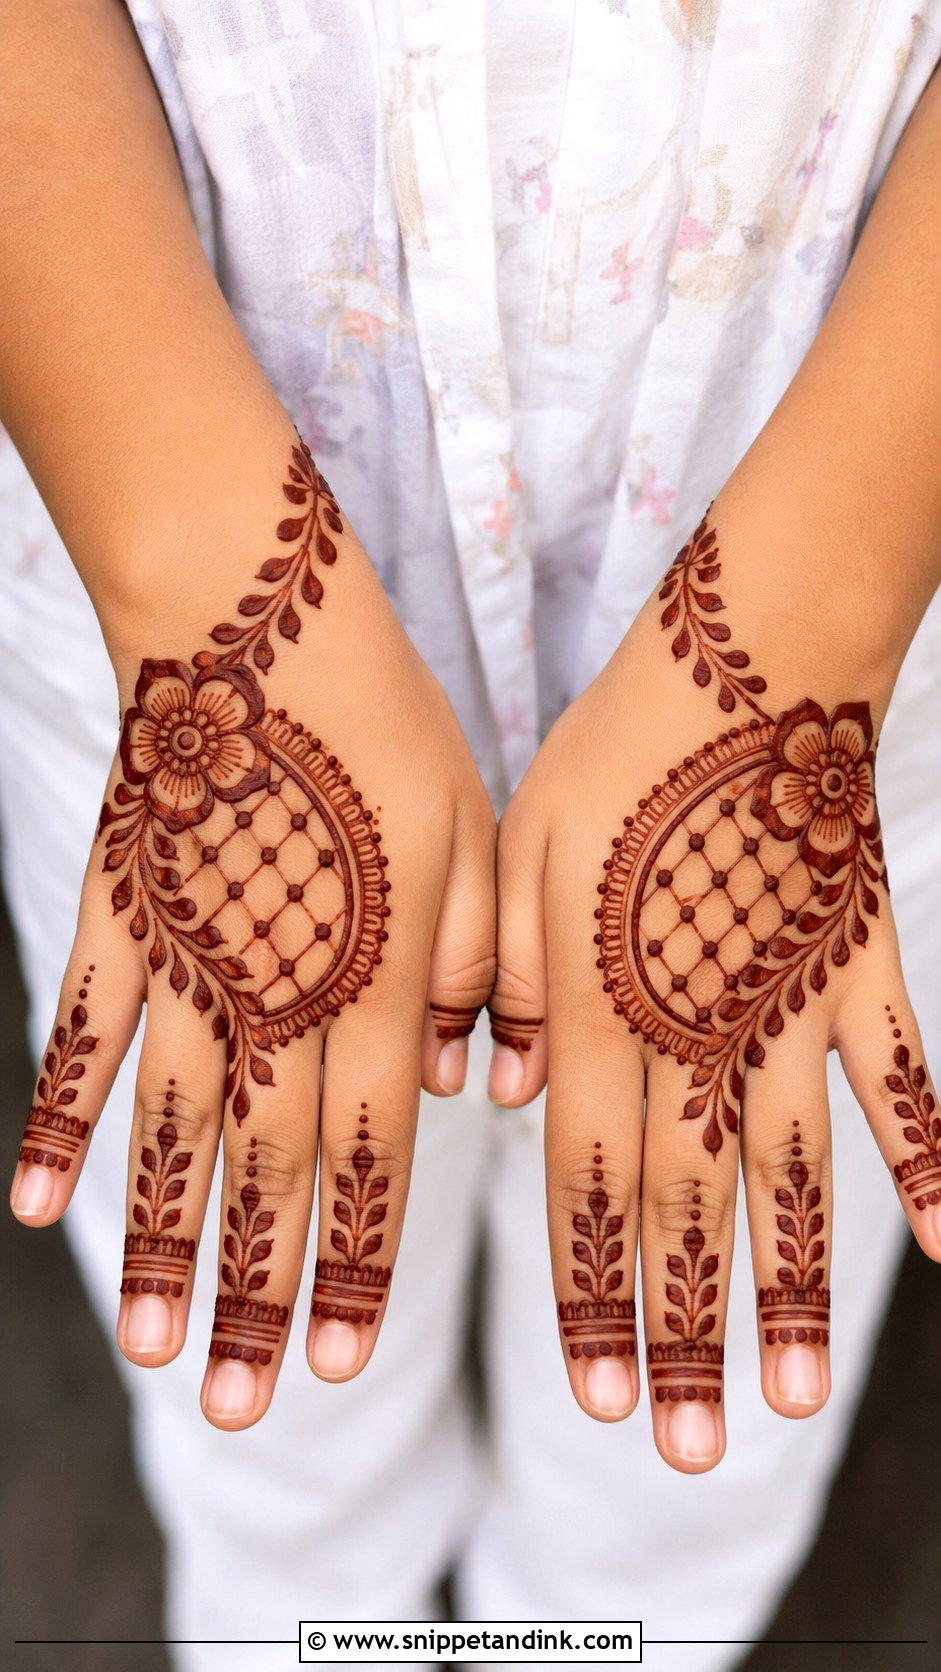
Jaali can work for kids if it stays small and airy: a little mesh patch on the back hand or wrist, with wide crisscross lines and dots where they meet, a small flower beside it and a short leafy trail toward a finger. Wide is the key word. Tight jaali lines on a child’s hand merge into one patch, so I space them at least twice as far apart as I would on an adult. It’s for a child who wants to look a little more dressed up at a wedding or festival.
27. Easy Half Hand Mehndi Design for Kids
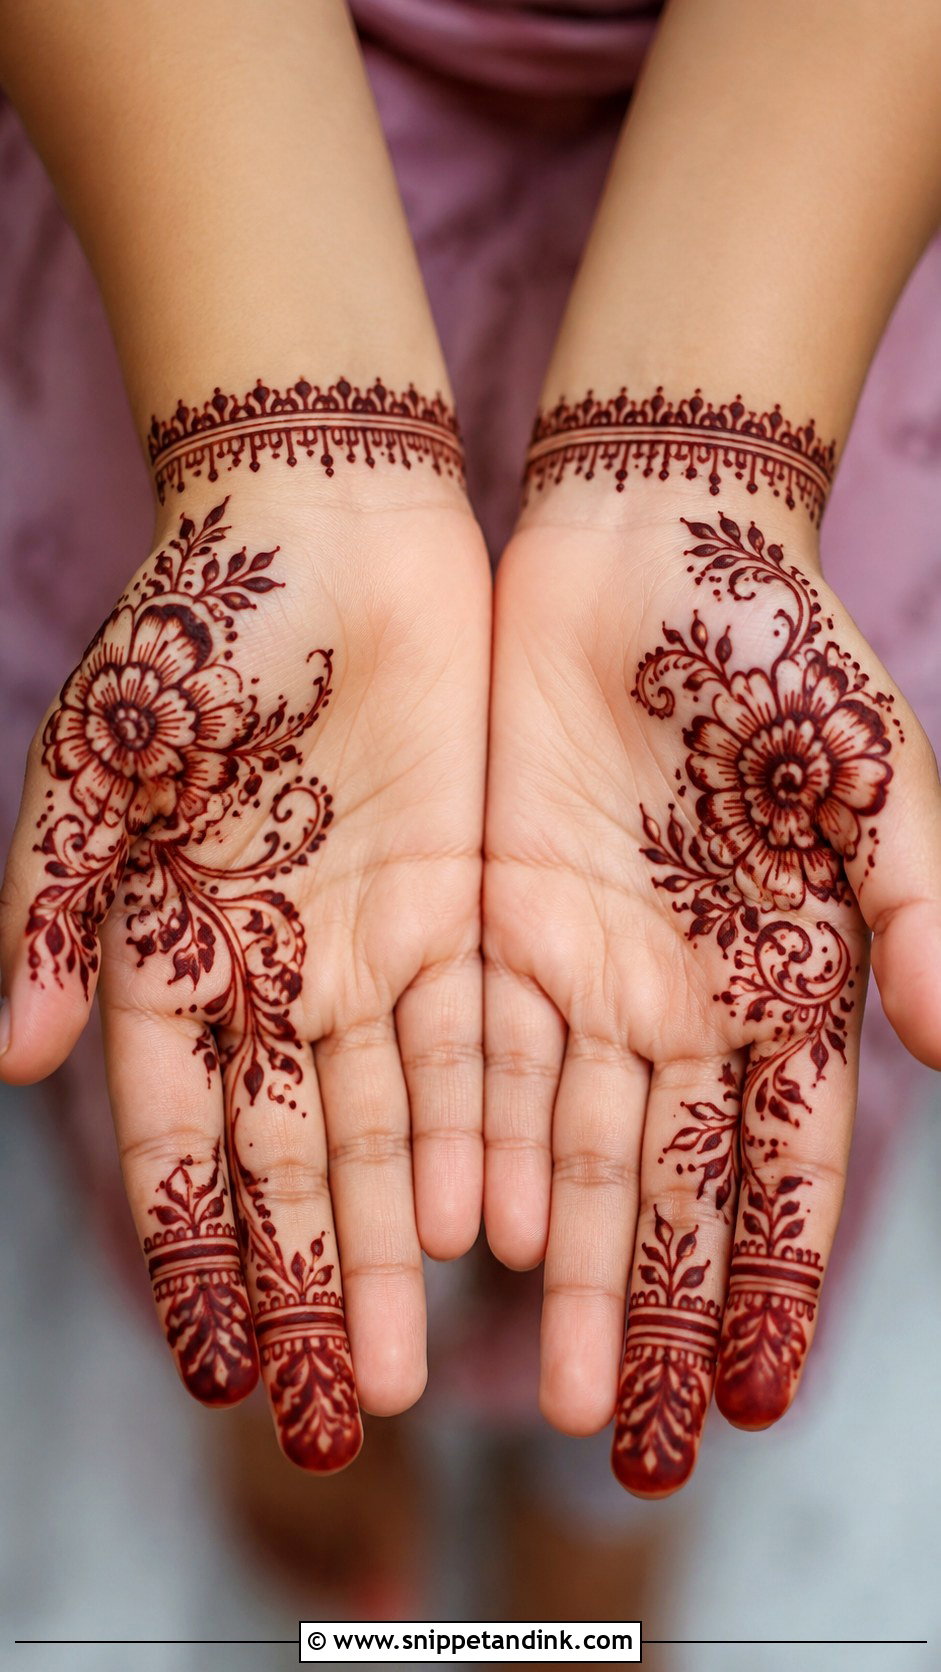
Cover one side of the palm or back hand with flowers, leaves, dots and curved lines, and leave the other side mostly open. Two fingers get simple details and the wrist gets a small border. This half-hand layout is for older kids who can sit a bit longer but don’t need dense coverage. It looks festive in photos with traditional clothes and dries faster than heavier work. Decide which side before starting: I usually decorate the side facing outward when the child holds her hands together.
28. Easy Minimal Mehndi Design for Kids
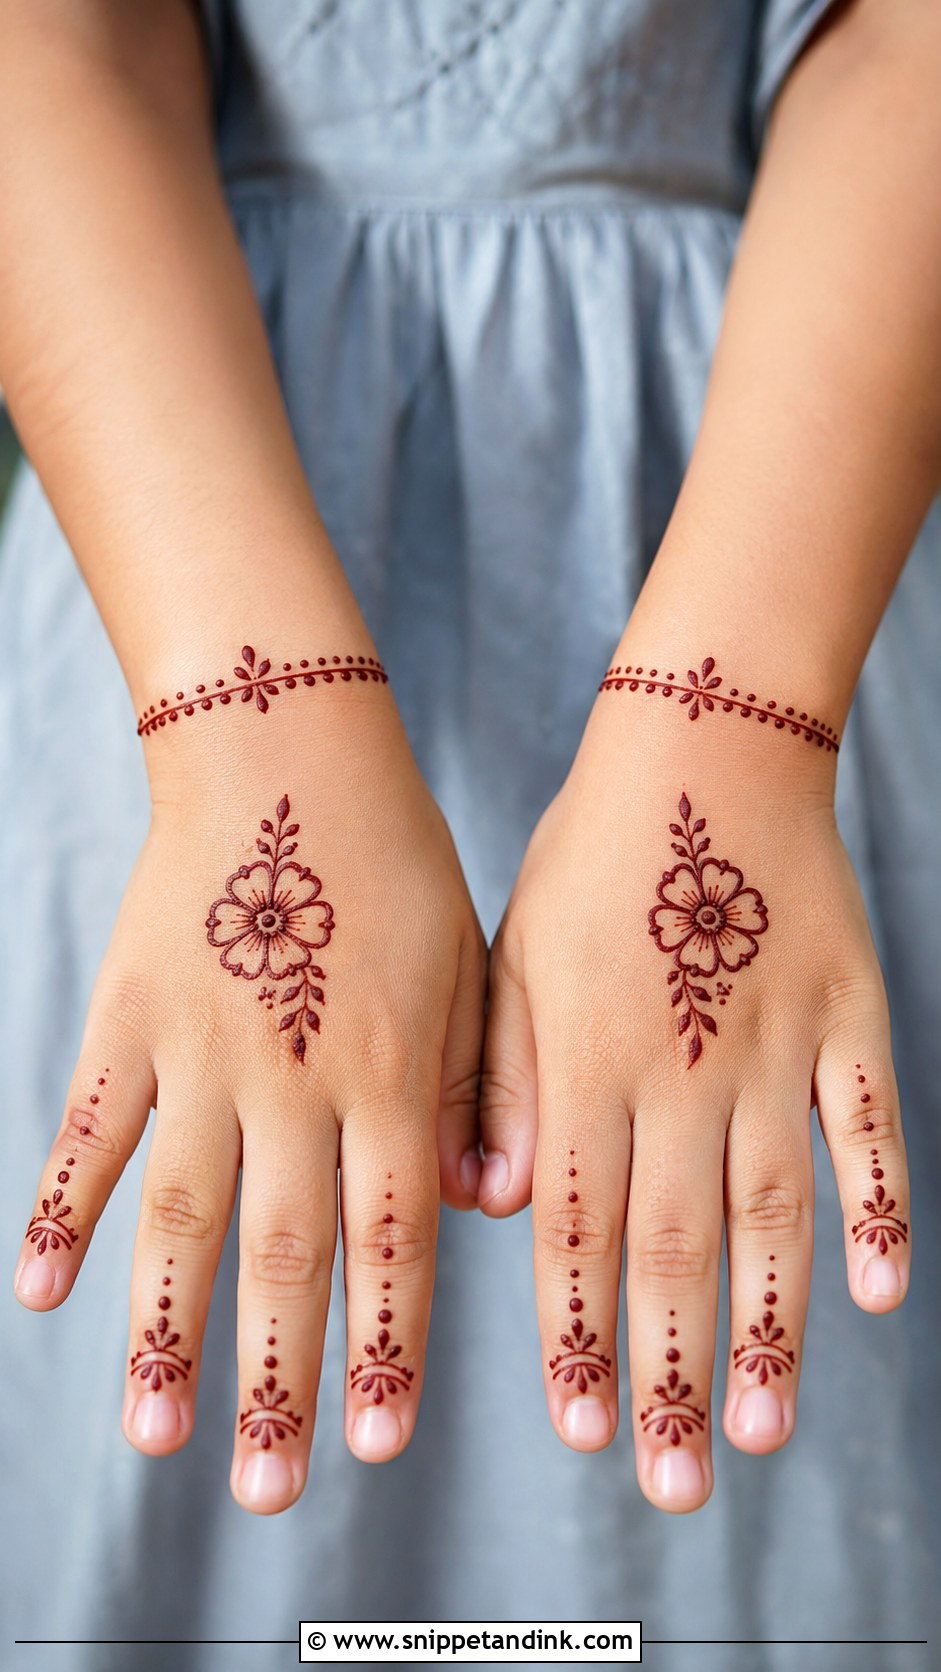
When a child wants just a touch of henna, one small motif on the back of the hand is enough: a flower, moon, heart or mini mandala, a few dots near the fingers and a tiny bracelet line. Most of the hand stays bare. It’s a good first try for very young kids, and the short session avoids restlessness. If she likes it, next time you can add more.
29. Easy Festival Mehndi Design for Kids
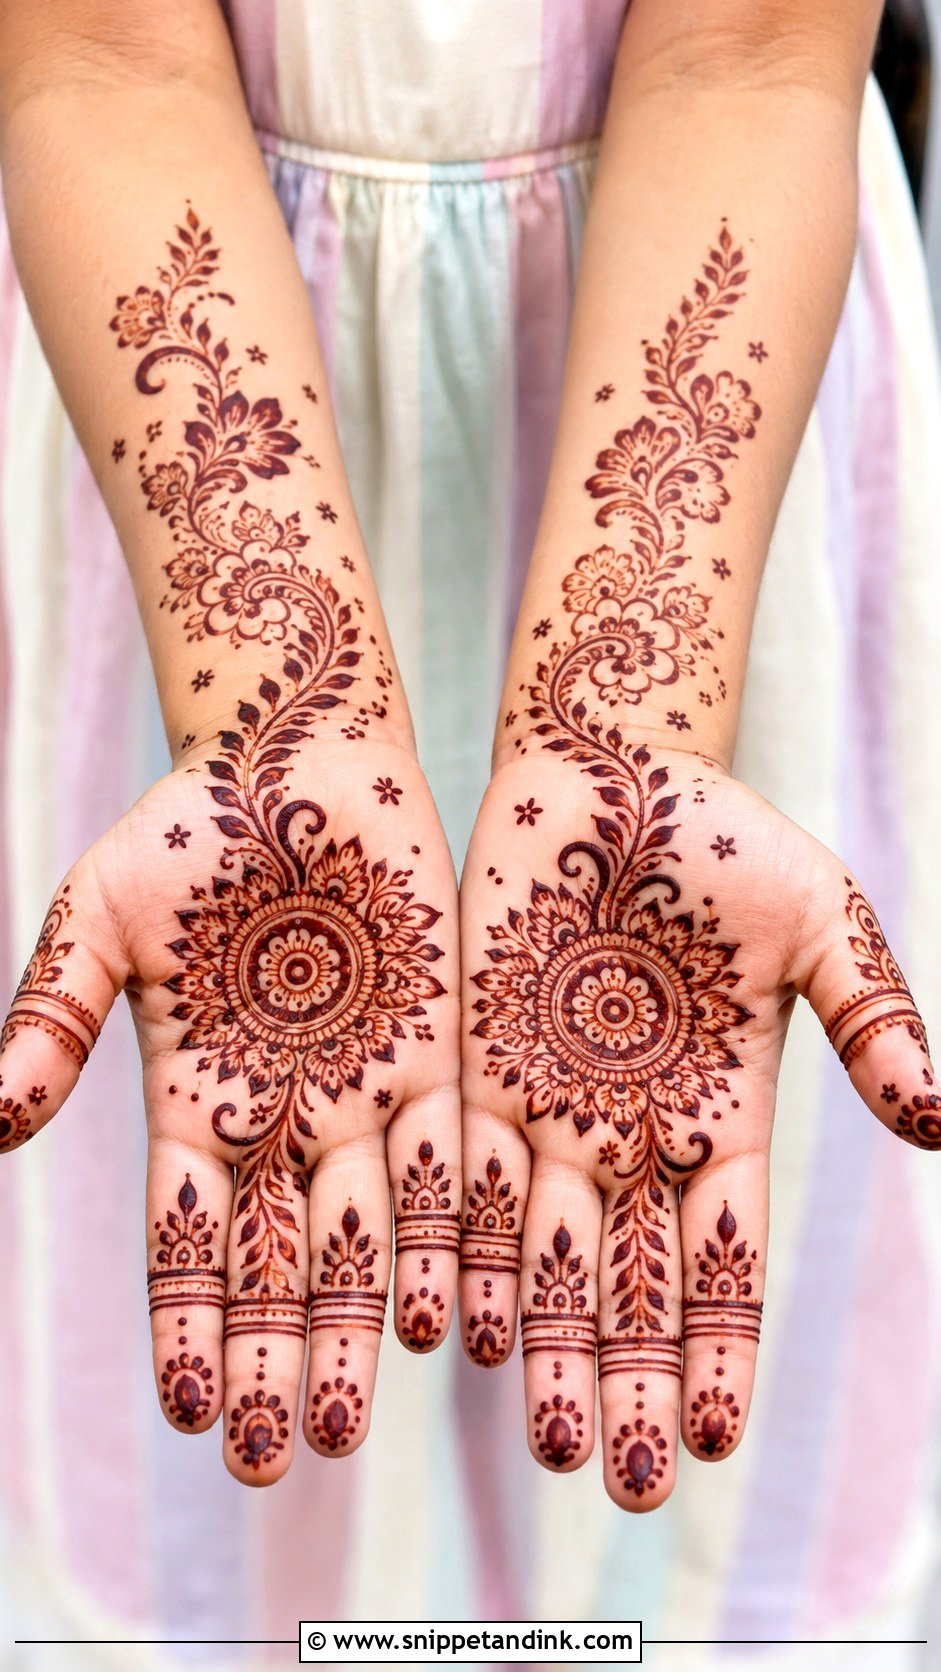
An easy festival mehndi design mixes a small mandala, a few flowers, dots and a short leafy trail on the palm or back hand, with simple bands or tiny stars on the fingers. Medium-small coverage means the child can join the celebration without worrying about smudges. It suits Eid, Diwali, weddings, cultural programs and family gatherings. Use bold outlines and open spacing. On children’s skin the stain tends to come up a shade lighter, and bold lines make up for it.
30. Easy Full Hand Mehndi Design for Kids
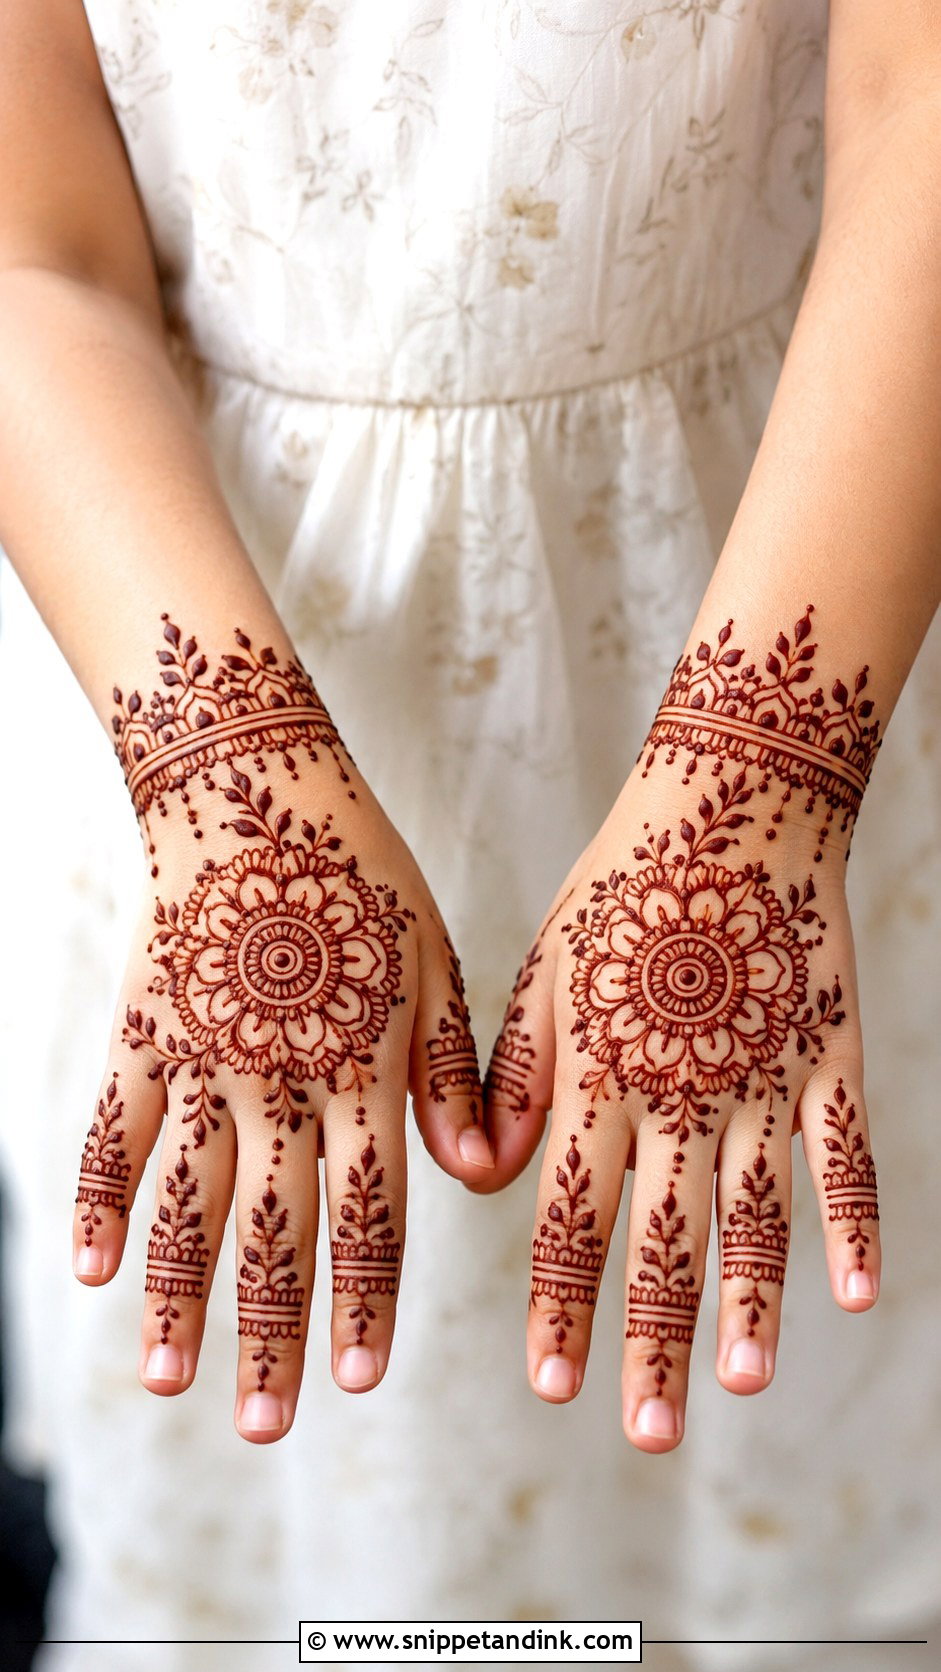
Full in appearance, light in detail: that’s the rule for a child’s full-hand design. A small central mandala or flower on the palm, leafy vines, dots, simple finger bands and a light wrist border, with small gaps between every motif. It’s for older children who can sit patiently, usually at weddings, Eid, Diwali or large family celebrations. Repeated simple shapes keep it quick. Do one hand fully, let it dry a little, then start the other, so the child always has one hand free.
How I Keep a Restless Six-Year-Old Still Long Enough
Most of a kids’ session is managing the child, not the cone. A few habits make a big difference.
- Bathroom trip and snack first. Once the paste is on, neither is easy.
- Let the child choose the design from three you’ve already narrowed down. Too many choices means ten minutes of deciding.
- Put on a short cartoon or have someone read to them. A distracted child holds still.
- Do one hand at a time and keep the other free, so they can still hold a cup.
- Rest the hand flat on a folded towel. A floating hand shakes.
Once it’s done, the paste only needs to stay on for an hour or two for a child; their patience usually decides that anyway. Let it dry, then scrape it off over a bin with a blunt butter knife or the back of a spoon, and keep it away from water for a few hours. Children’s stains are usually lighter and fade within a week or so with all the handwashing, which most parents are happy about before a school day.
Drawing These Yourself With Your First Cone
If you’re doing the kids at home, practice for ten minutes on paper or the back of a plastic plate first. Hold the cone like a pen but at a steep angle, squeeze gently from the top and let the line fall onto the skin rather than pressing the tip into it. Paste that’s too thick breaks into dots; too runny and it spreads. Start with dots and vines from this list, which hide wobbles, and save peacocks and unicorns for later.
Small Hands Need Simple Shapes and Short Sessions
Kids’ henna works when it’s comfortable, quick and made of shapes children already love: flowers, hearts, stars, vines, small mandalas and butterflies. Keep the patterns small and airy so they dry fast, especially on younger kids who won’t sit still. Back-of-hand designs, finger patterns, bracelets and small palm motifs are the safest and neatest picks, and fuller looks with open spacing can wait until a child is older or the occasion is bigger. Use only natural henna, plan the session around the child’s mood, and any of these designs will make a celebration more fun for them.
You'll Like These Ideas:


Leave a Reply