
The back of the hand is where henna gets seen: in greeting photos, when you hold a glass, when the ring goes on. That’s why I treat this placement, also called back hand mehndi, as the display side, while the palm is the private side that stains darkest. The skin here is thinner and moves over the knuckles, so a design has to be planned around bones and creases instead of drawn like a flat page. The ideas below run from a single wrist band to full bridal coverage, with notes on how each one sits on a real hand, how long it keeps you in the chair, and when I’d steer you toward something else.
Mapping a Design Around Knuckles, Rings and Bangles
Before I draw anything on the back of a hand, I ask the client to make a loose fist, then spread her fingers wide. The skin over the knuckles folds and stretches more than anywhere else on the hand, and a motif that looks centred on a relaxed hand can twist out of shape the moment she reaches for something. Watching the hand move tells me where the solid shapes can sit and where only thin lines or bands will survive.
Jewellery is the next thing I plan around. A ring finger that will carry an engagement ring and a wedding band needs a lighter pattern near the base, or the henna and the metal compete. Bangles cover the lower wrist and rub against it all evening, so the cuff band should start a little higher than you’d guess.
- Wear or bring the rings and bangles you’ll have on, so the artist can see where they land.
- Show a photo of your sleeves. A three-quarter sleeve, a net sleeve and a bare arm each need the design to stop at a different point.
- Say which hand you use more. The dominant hand smudges first while the paste is wet, so I often draw it second.
- Tell your artist how long you can sit. A simple trail takes minutes, and a full bridal back hand can take hours across both sides.
Hand shape matters less than people fear. Short fingers look longer with vertical bands and fine tips; long, narrow hands carry a wide mandala or a horizontal cuff easily. I’d only steer someone away from a design if their schedule can’t give the paste the hours it needs afterwards.
1. Simple Upper Hand Mehndi Design
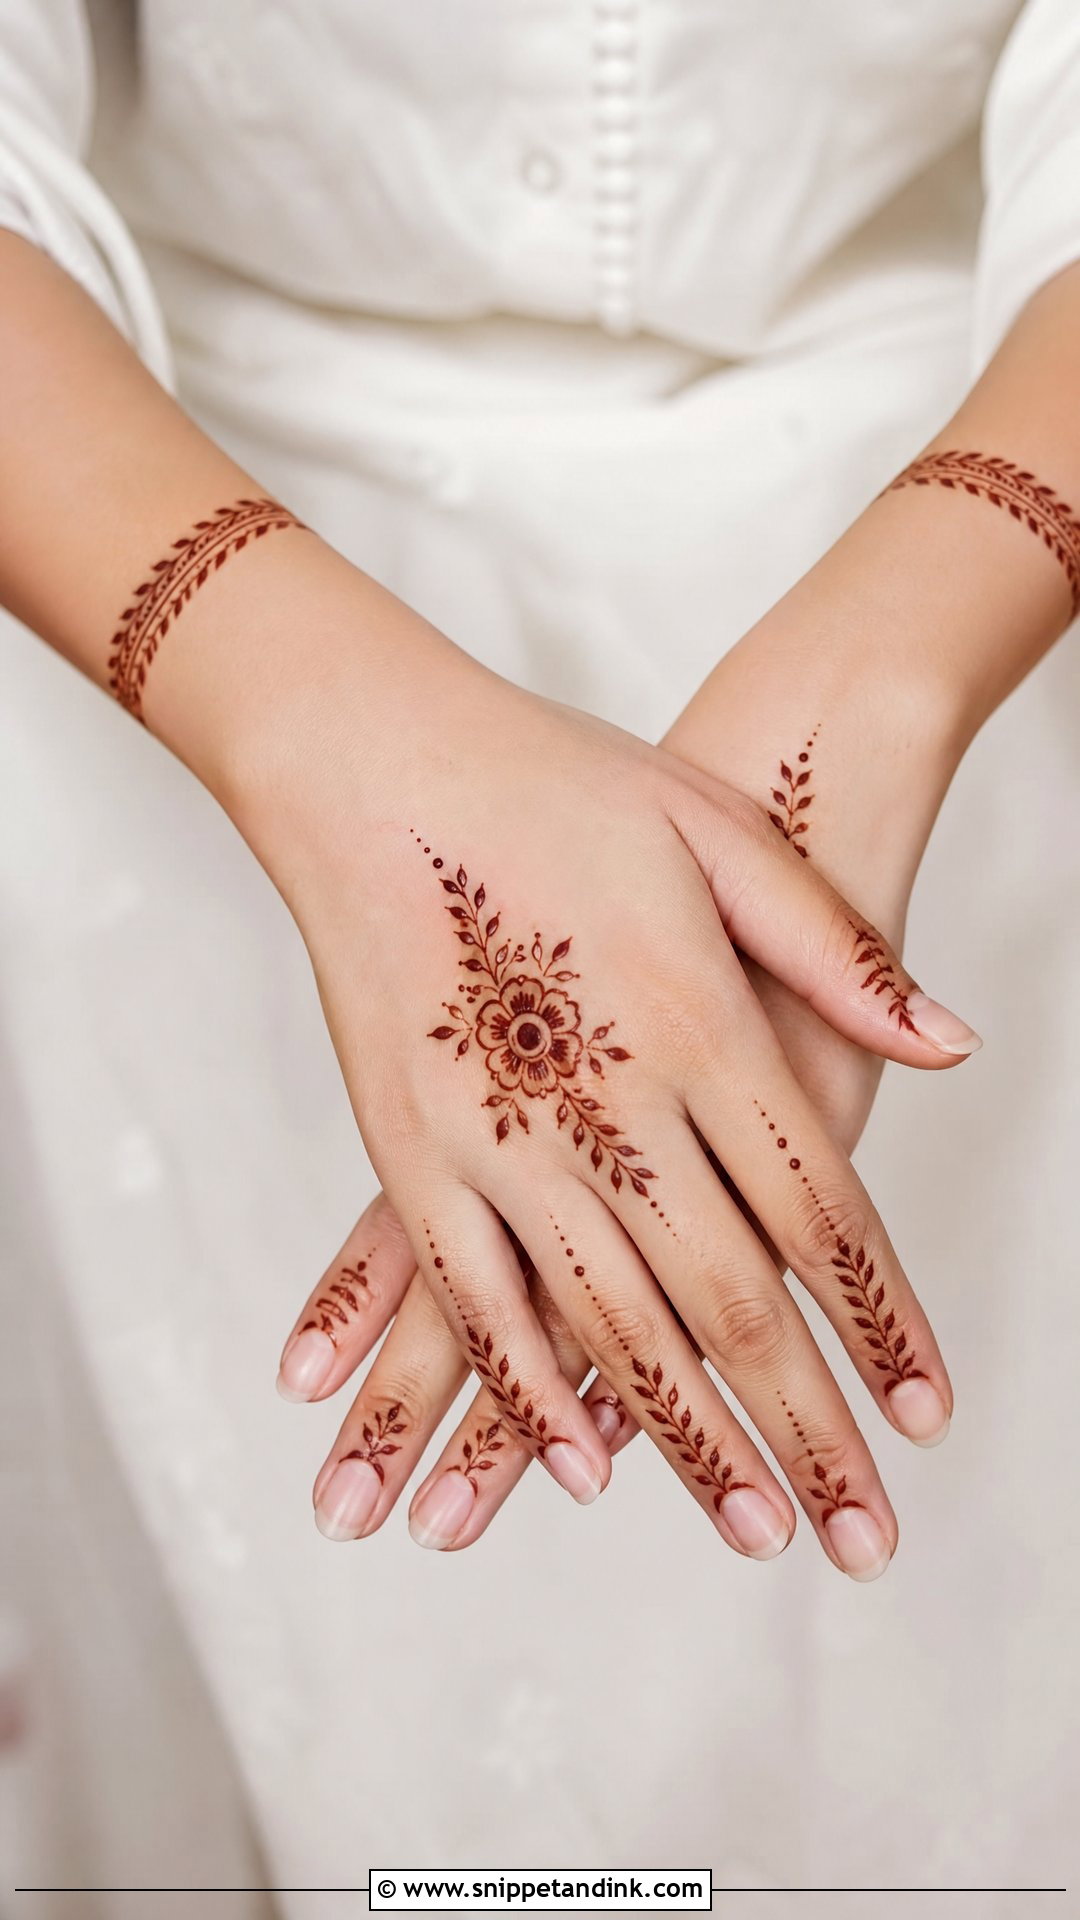
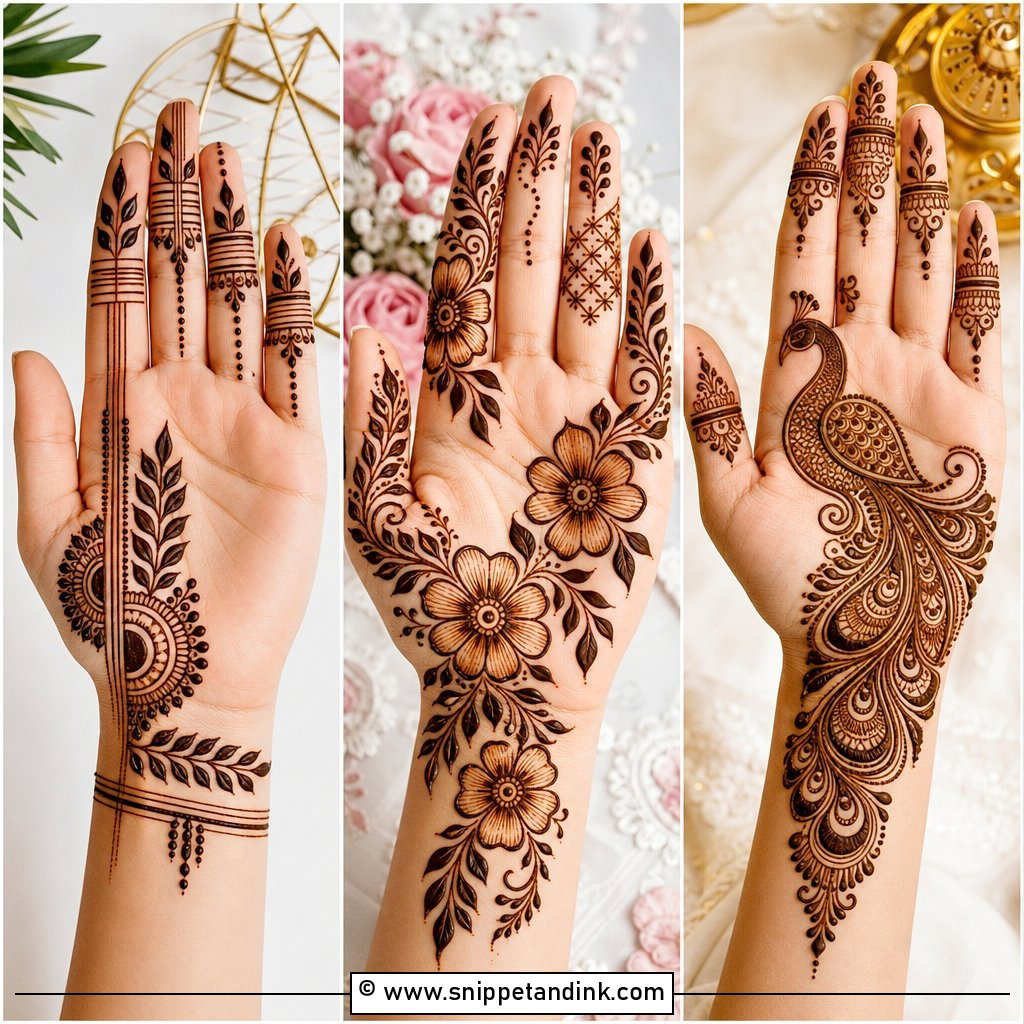
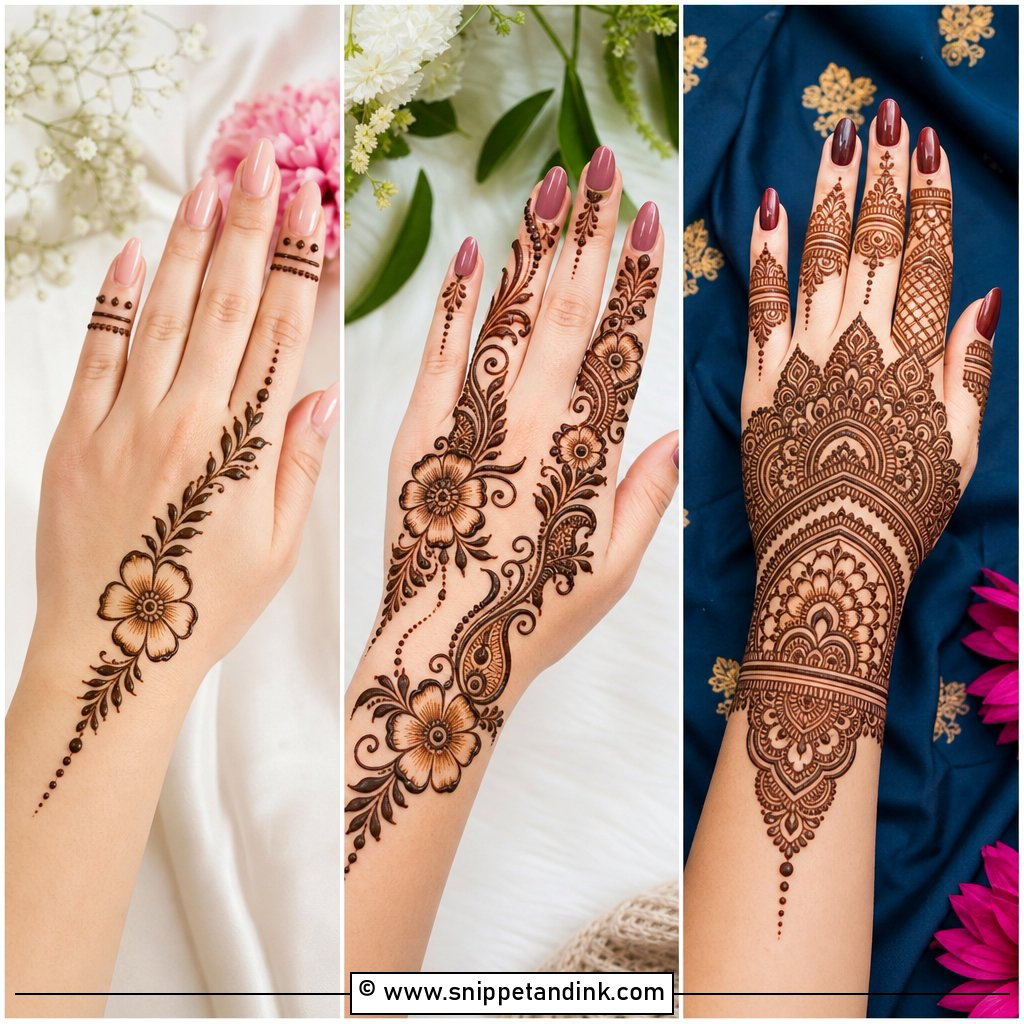
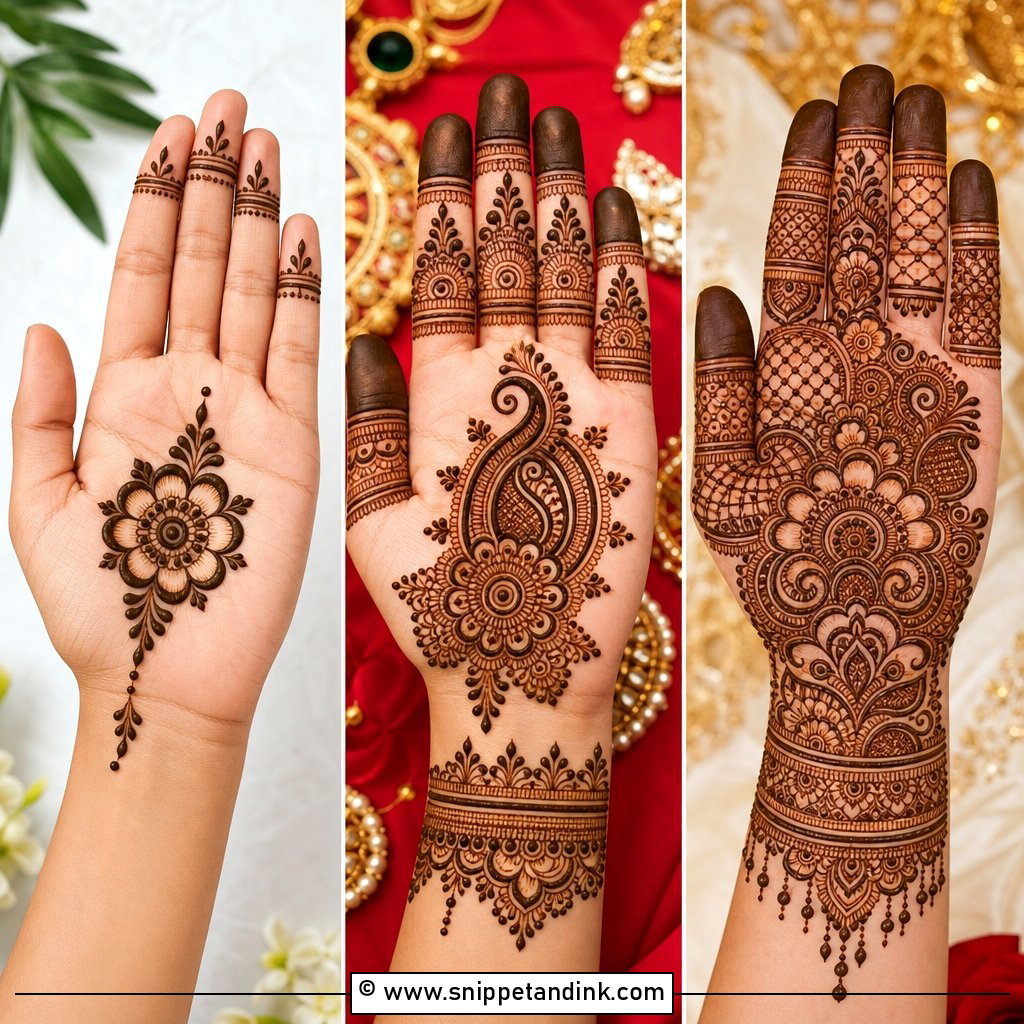
This is the design I sketch when someone has twenty minutes and wants the hand to look finished. One small floral or mandala motif sits just off the centre of the back hand, thin vines run up to two or three fingers, and a slim band closes the wrist. I place the motif slightly toward the thumb side, because the middle of the hand stretches when you grip and a motif there distorts in candid shots. Leave real space around it. On a sparse design the bare skin is part of the pattern, and a plain reddish-brown stain is plenty.
2. Arabic Upper Hand Mehndi Design
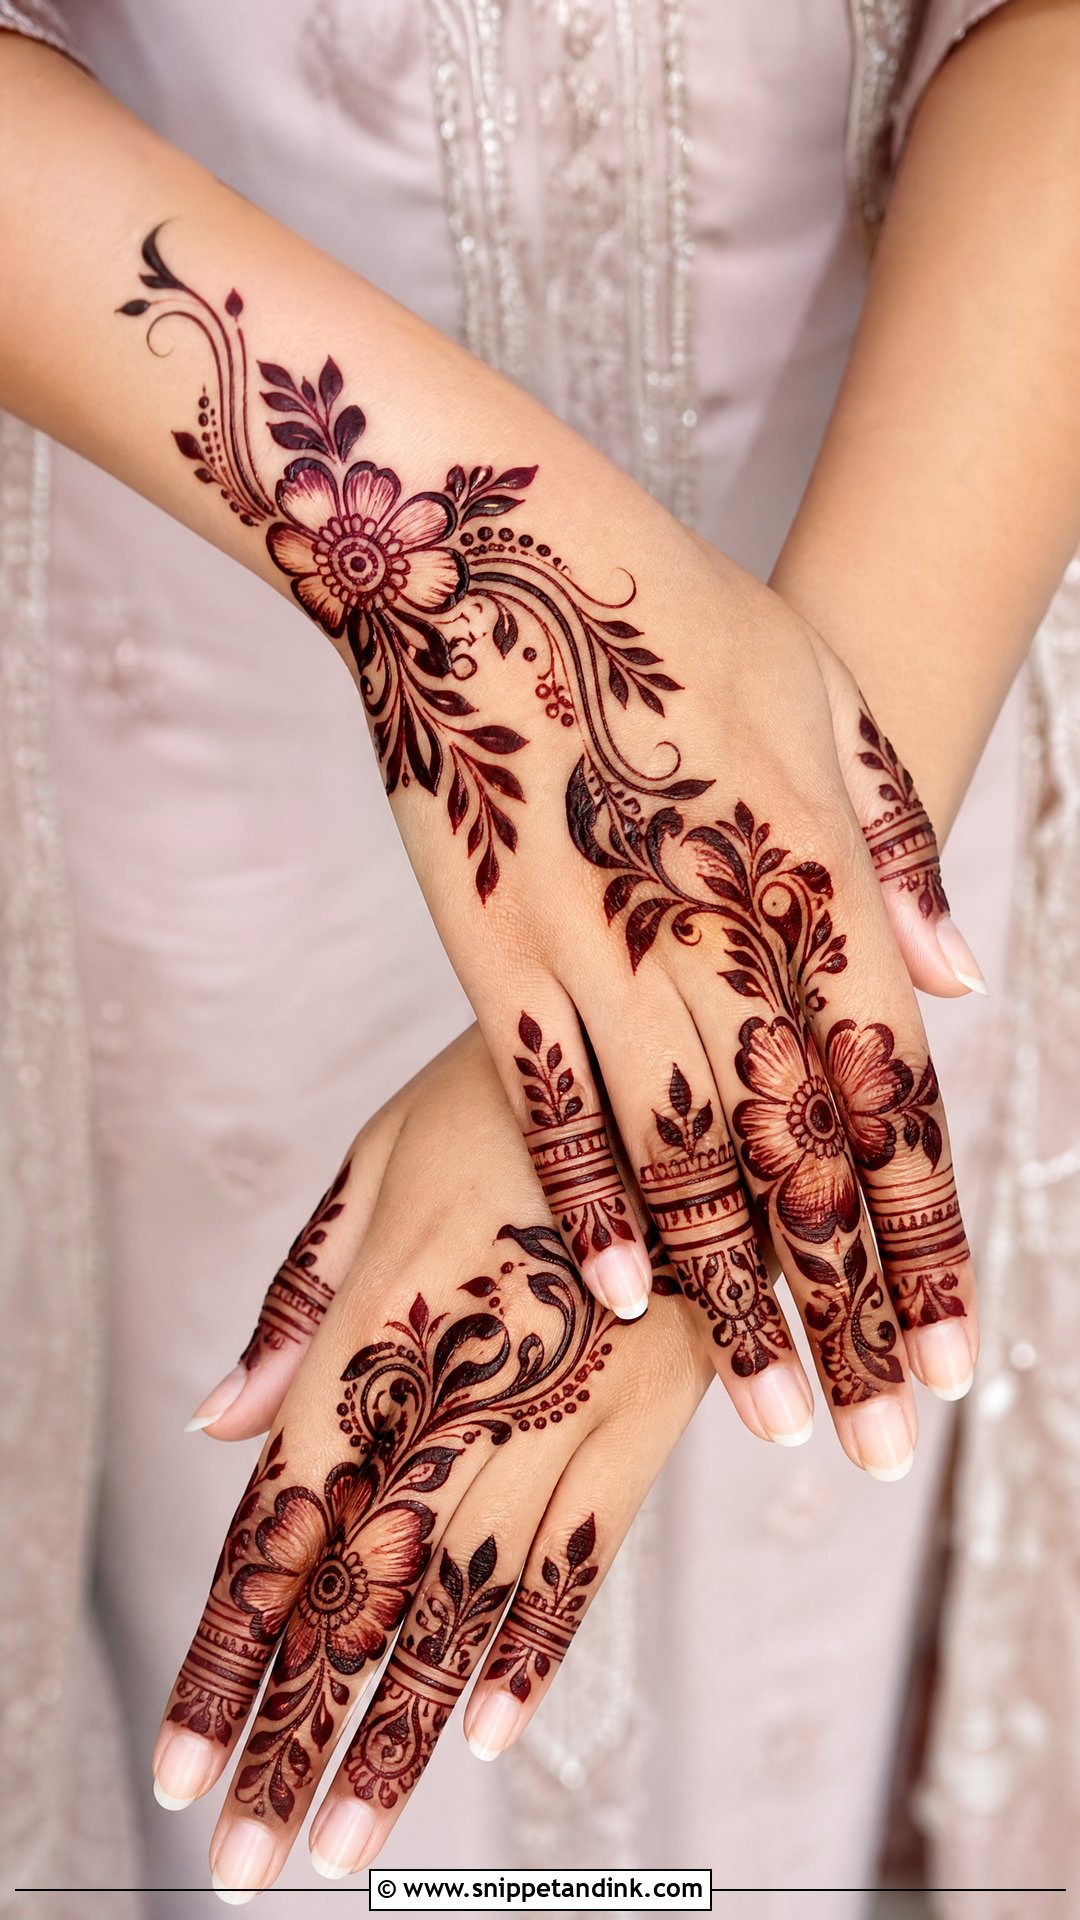
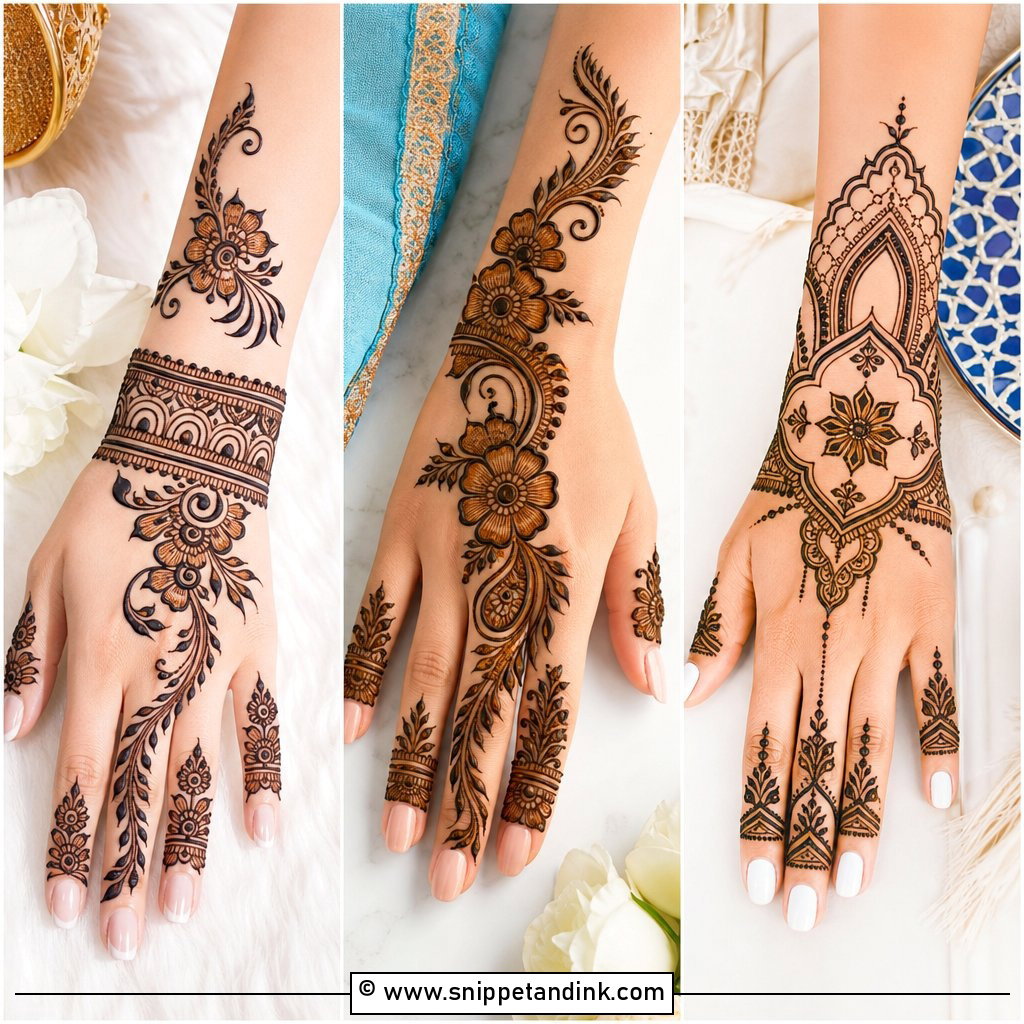
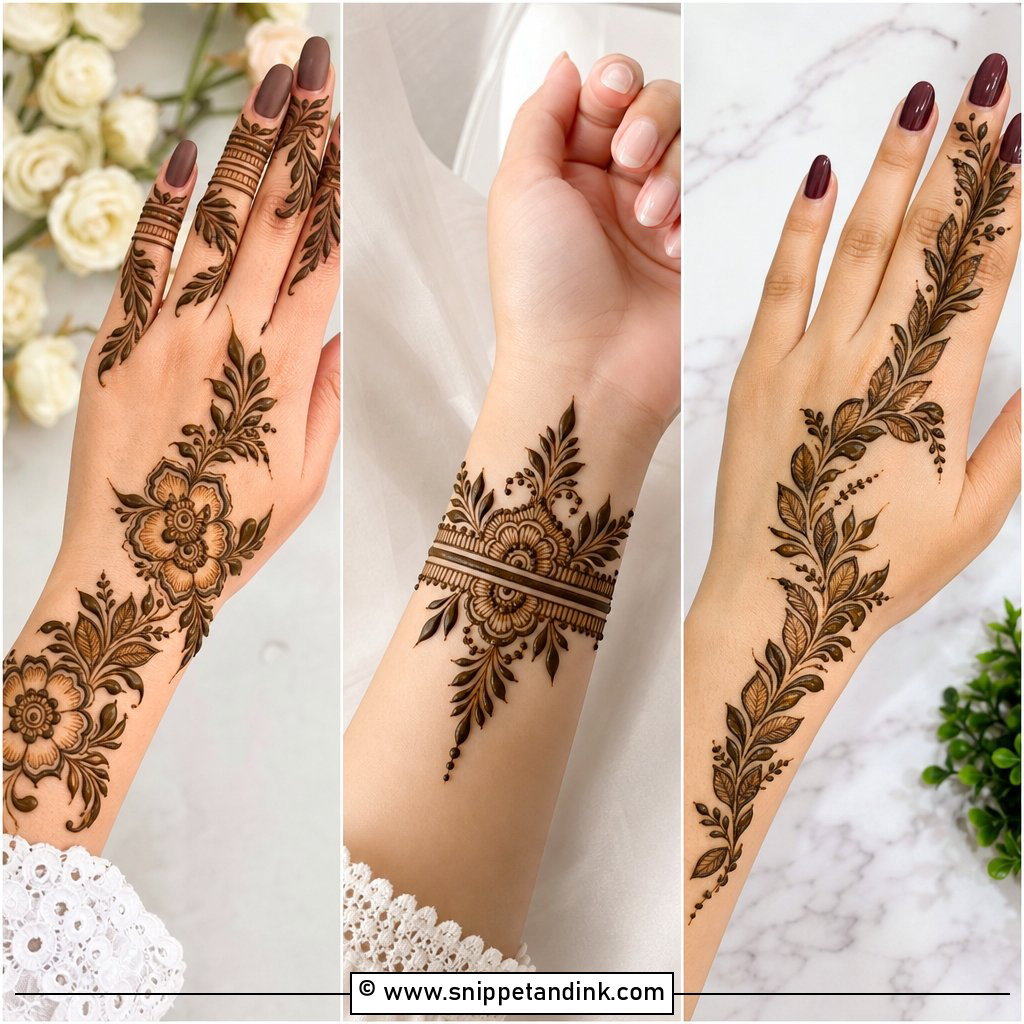
The diagonal is what makes Arabic work. I start at the outer wrist and pull the trail toward the index or middle finger, so the line follows the angle a hand naturally takes when it rests on a lap. Big shaded flowers sit along that trail with open skin on both sides, and the fingers get matching bands and small leaf chains so the eye finishes the line. Shading comes from pressing the cone lightly to leave a thinner film of paste, which stains paler and gives the petals depth. It reads well on younger and older hands alike, and it’s my default for Eid and engagement guests who want something bold that’s done within the hour.
3. Full Upper Hand Mehndi Design
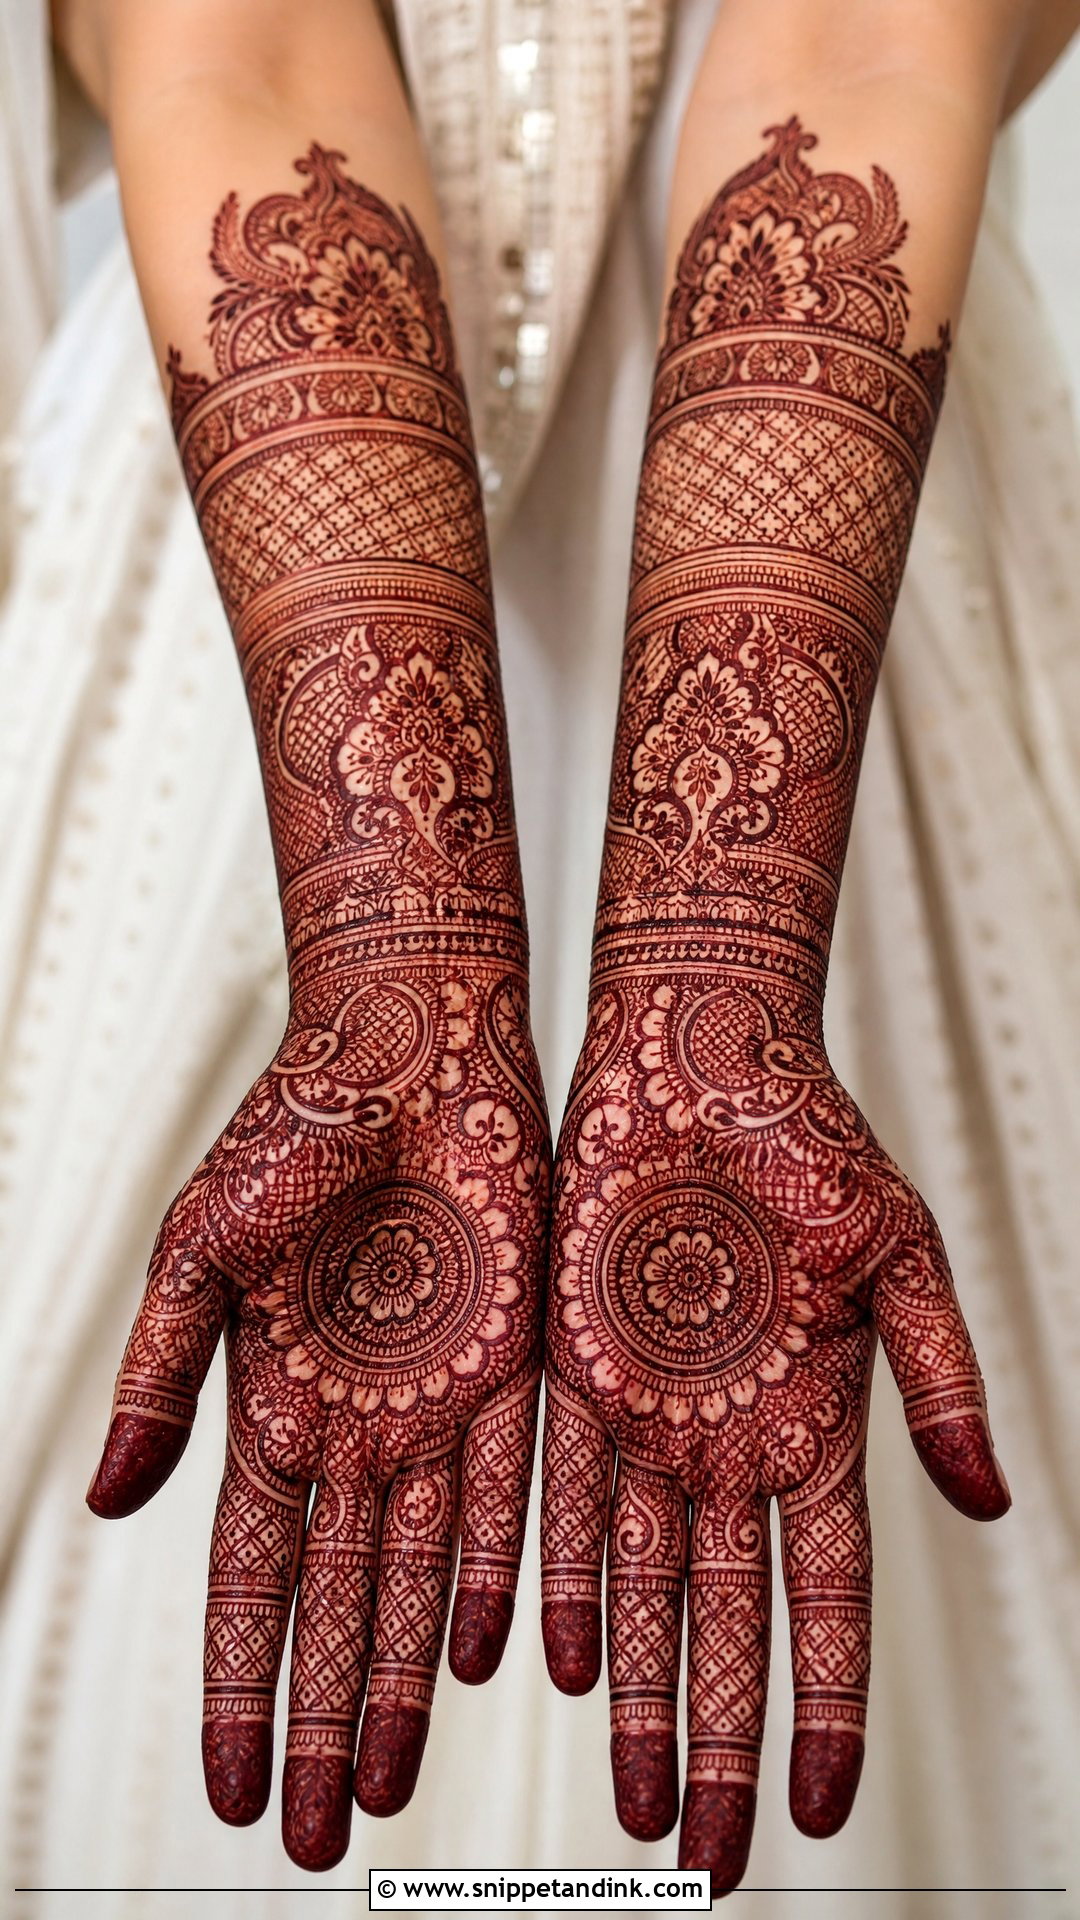
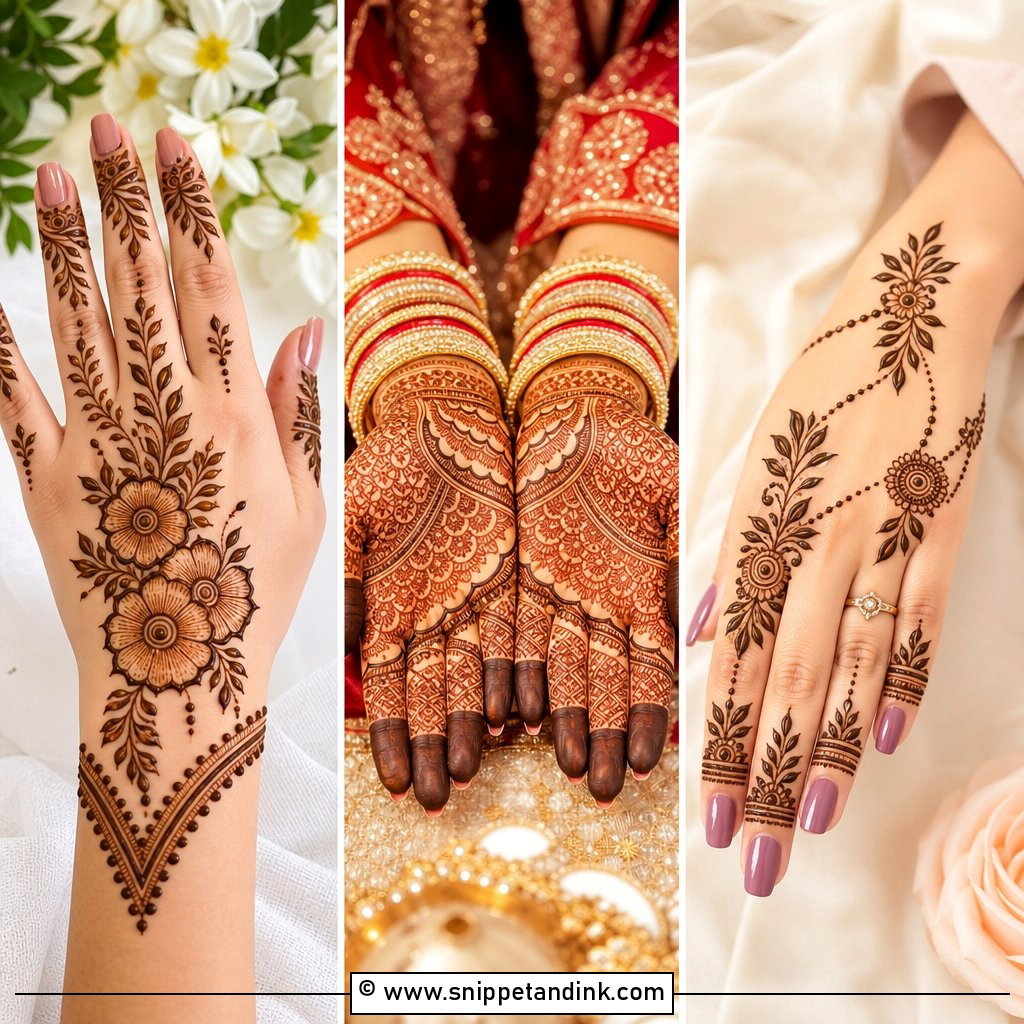
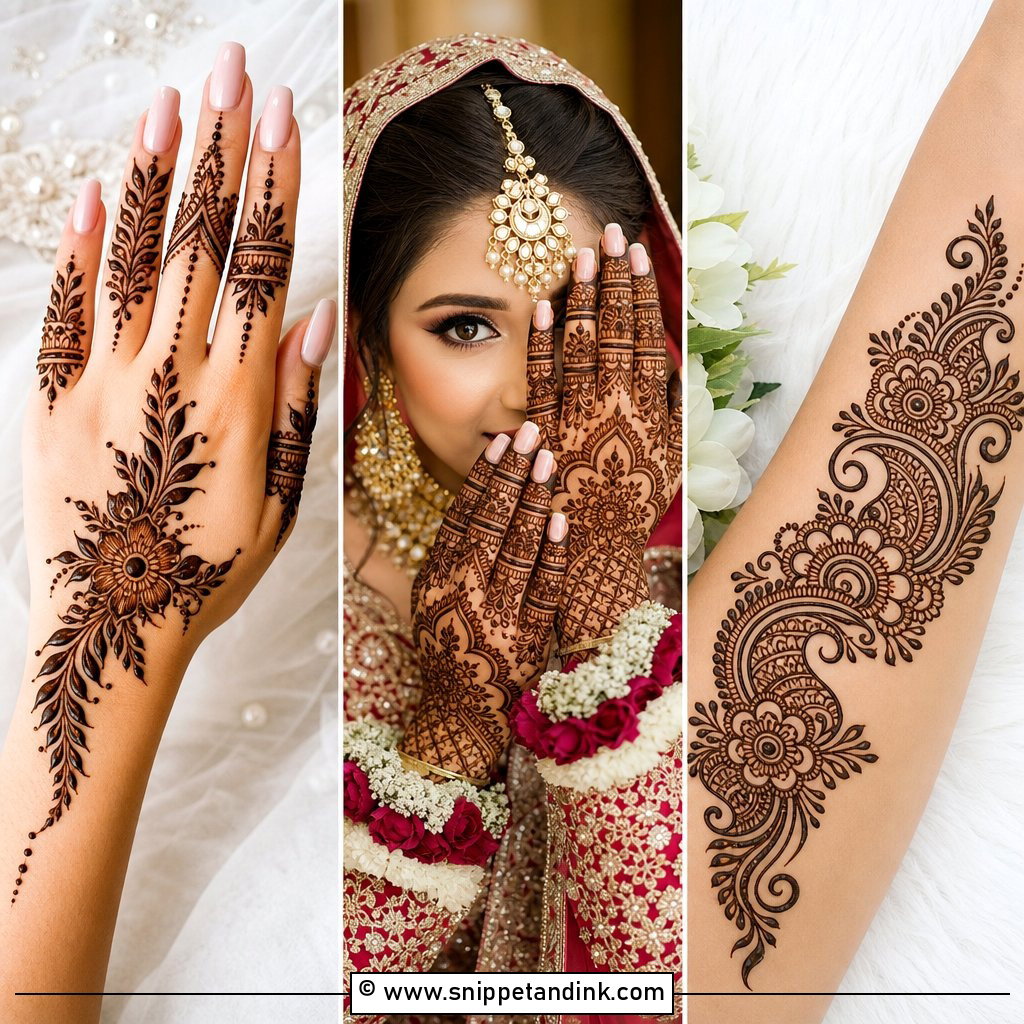
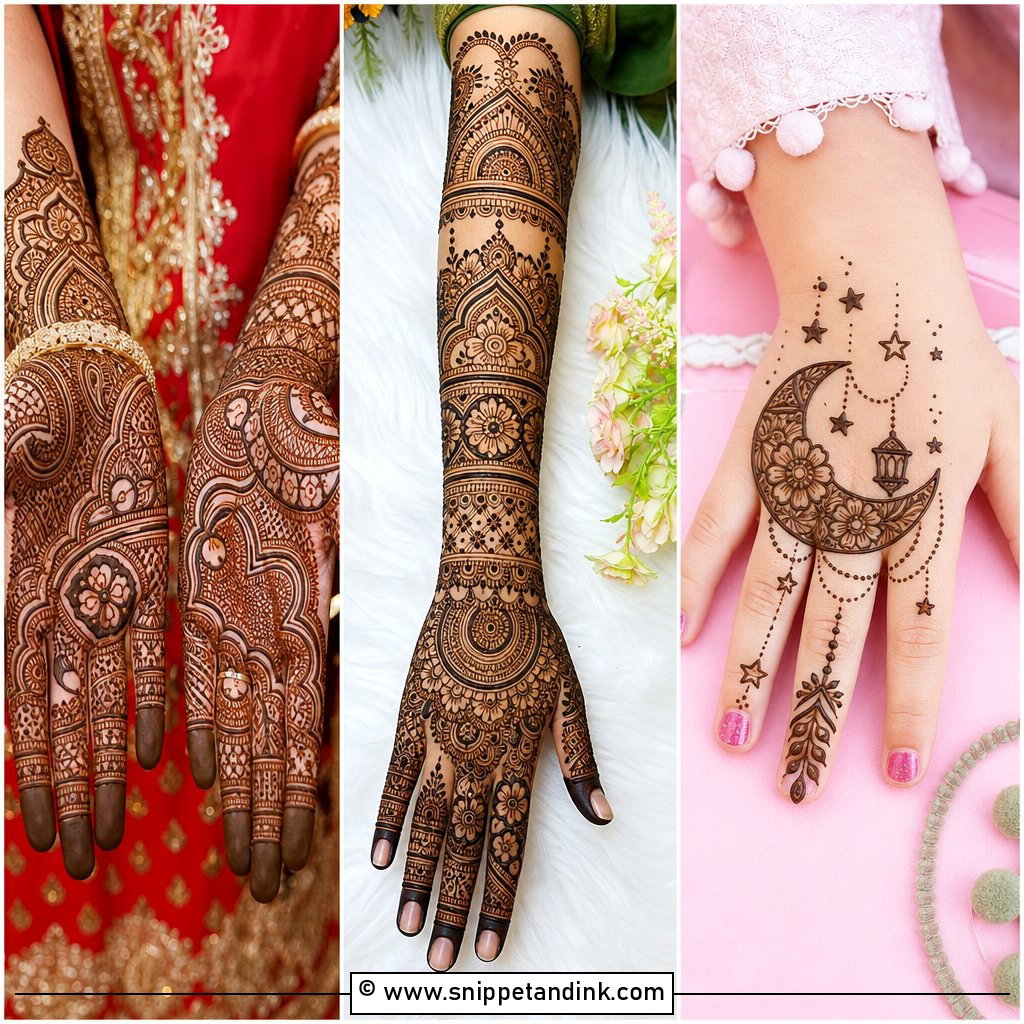
Full coverage runs from fingertips to wrist with layered paisleys, flowers, jaali and fine fillers, often finishing in a cuff-style border. The trap is density. When every gap is filled, the stain merges into a brown glove from a few feet away, so I alternate bold outlines with fine filler and leave a few small breathing spaces near the knuckles. Budget the time honestly: both back hands in full is a long sit, and the paste then needs hours to work. I suggest it for sisters and close family on the mehndi night, less so for a guest arriving straight from the office.
4. Bridal Upper Hand Mehndi Design
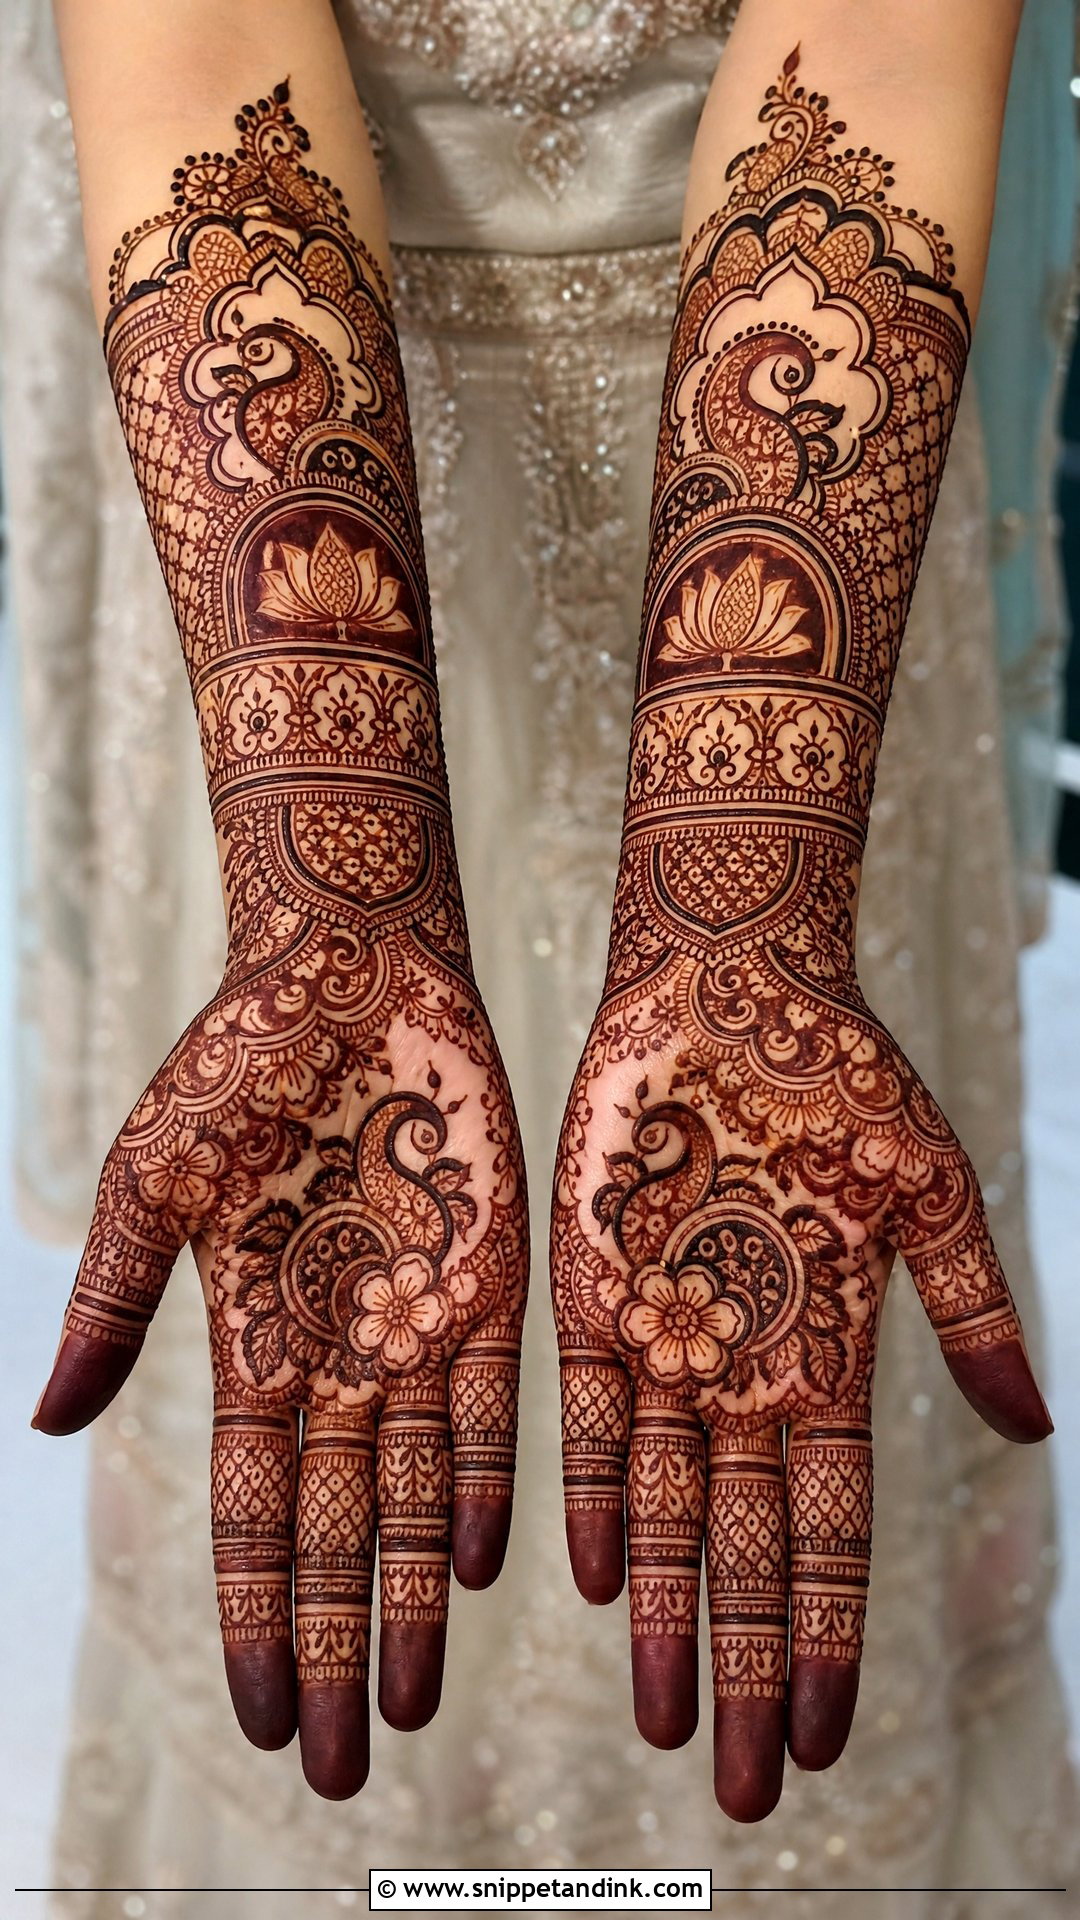
Bridal back-hand work carries the most symbolism: paisleys, lotus, peacocks, jaali panels and extensions that climb past the wrist toward the forearm. Some brides ask me to hide initials or echo a motif from the palm. That works only if the hidden element is drawn in a slightly bolder line than the filler around it; otherwise it disappears once the stain deepens. This is the side the camera catches during the ring exchange and the rituals, so I check the spacing between fingers with the hand both flat and loosely curled before committing to the finger bands. I apply bridal mehndi a day or two ahead so the colour has peaked by the ceremony instead of still sitting orange.
5. Modern Upper Hand Mehndi Design
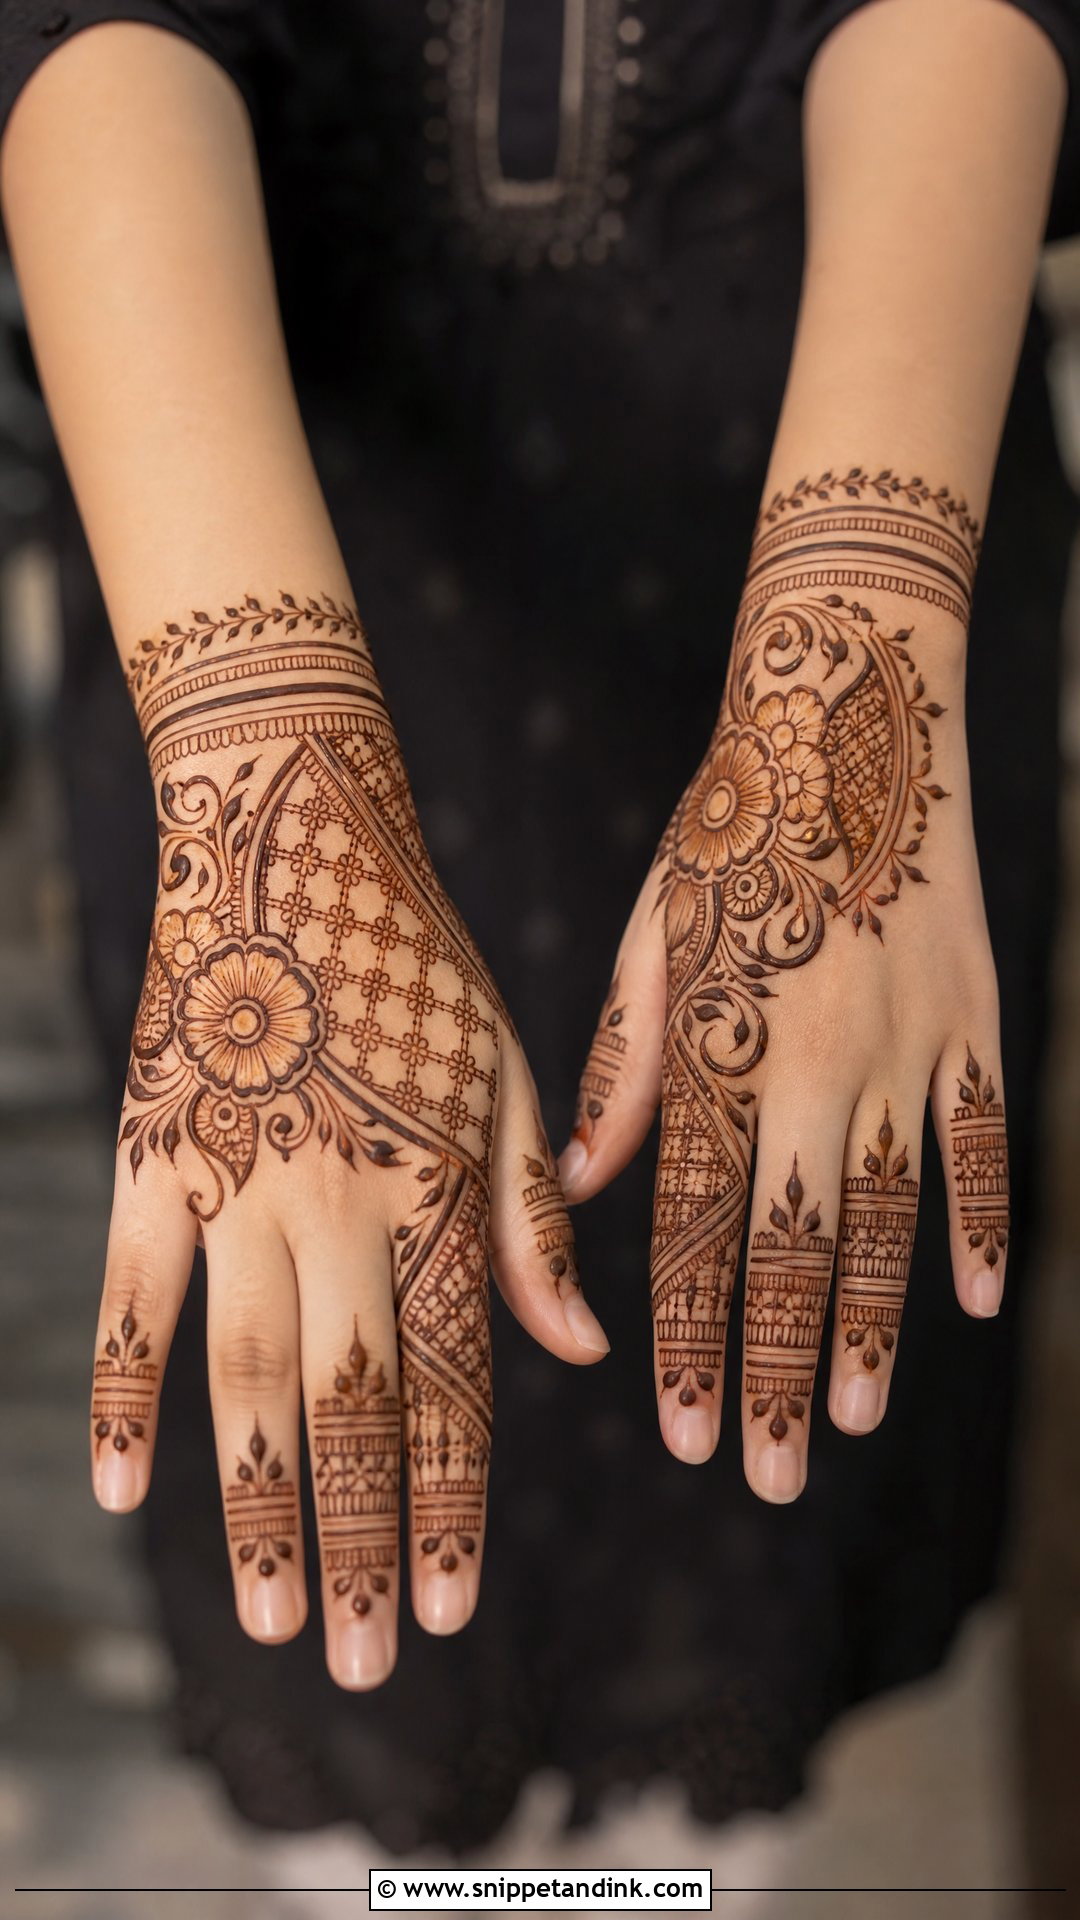
Modern layouts choose where to work and leave the rest bare: a half-hand floral, a geometric panel, finger caps, a thin bracelet line. A version I draw often puts one bold flower near the thumb and sends slim vines across the hand toward detailed fingertips. It sits well with Indo-western outfits and plain suits, where a dense traditional pattern would fight the clothes. The catch is that sparse lines show every wobble, so I use a fine tip and keep the paste slightly stiffer than usual so lines don’t spread while they dry.
6. Mandala Upper Hand Mehndi Design
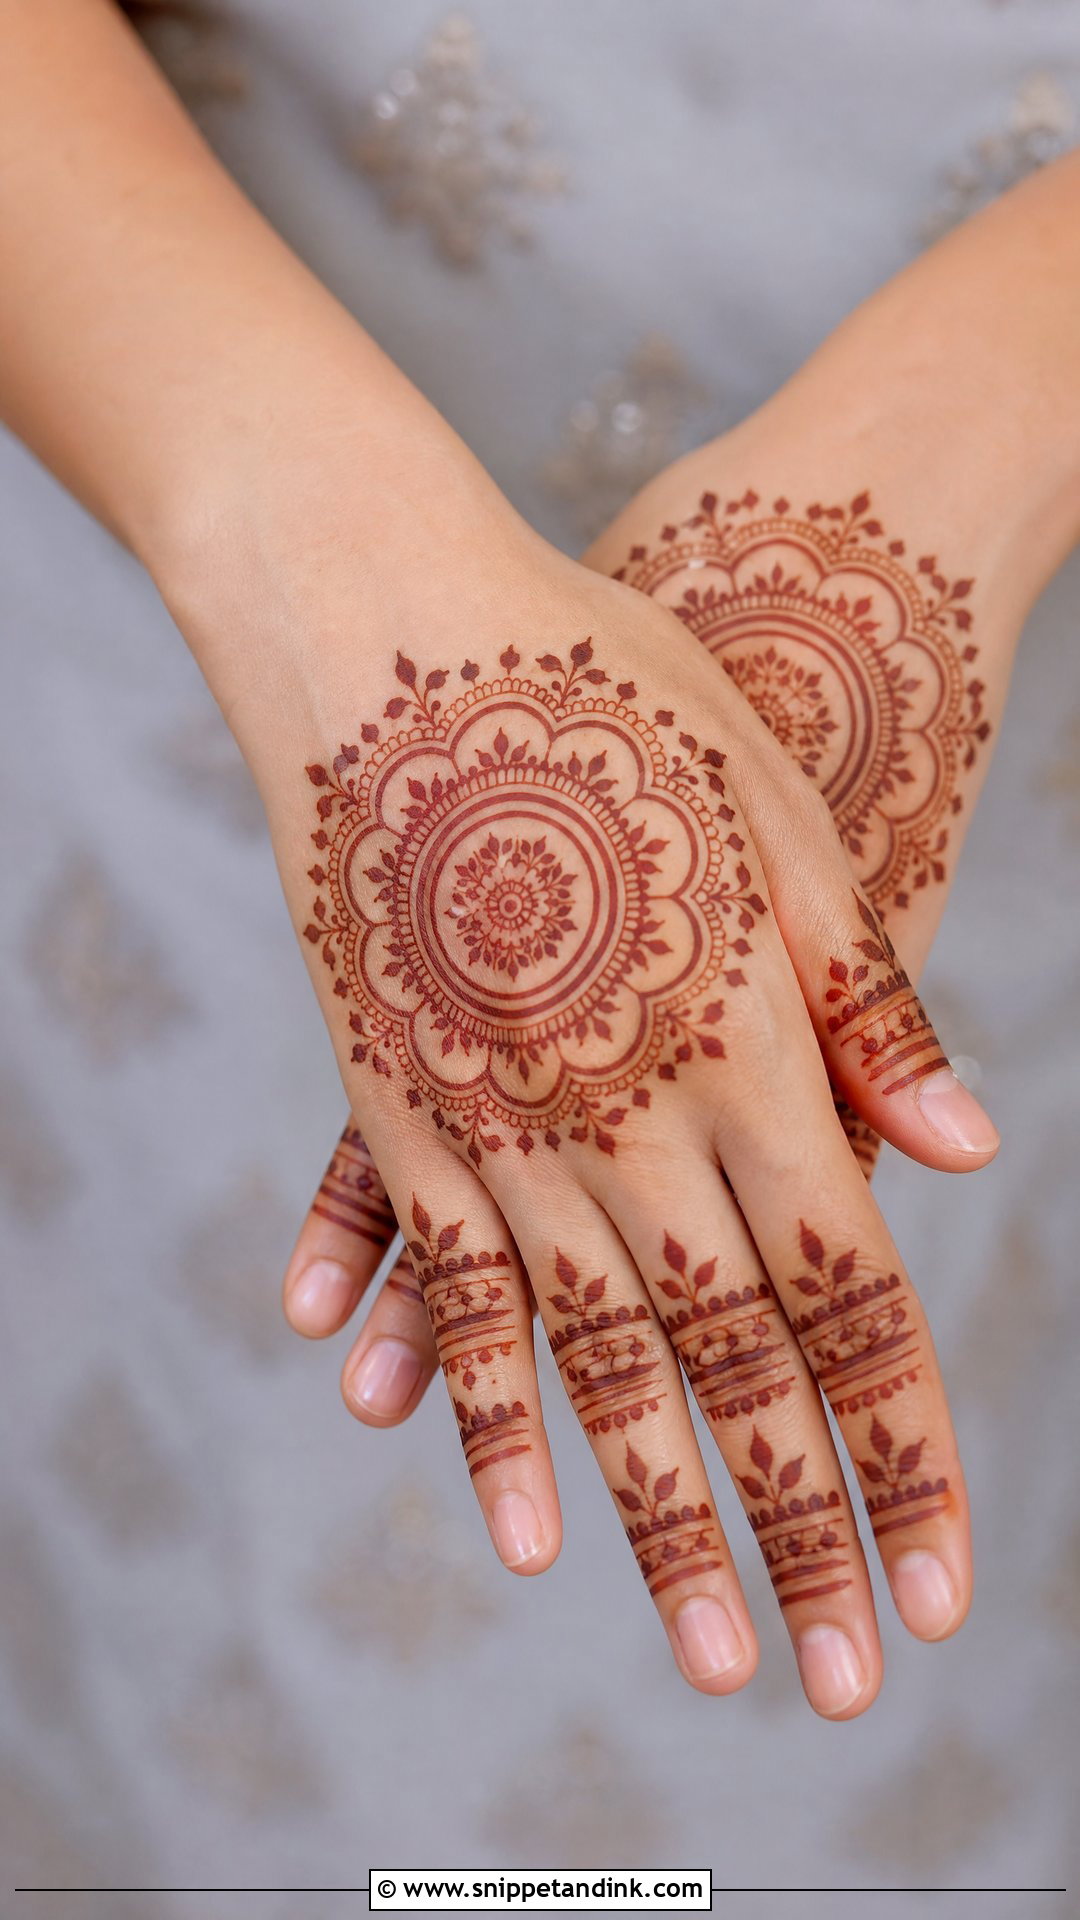
A mandala has to be centred on the hand as it actually is. I find the middle with the hand flat, then check again with the fingers spread, because a circle that looks even on a relaxed hand can drift toward the little finger once the hand opens. From there it grows through petals, dots, scallops and fine rings, with simple bands or small matching details on the fingers. On a small hand I keep the mandala medium with clear skin around it. On a long hand I let the outer ring reach a little toward the wrist so the proportion looks intentional.
7. Floral Upper Hand Mehndi Design
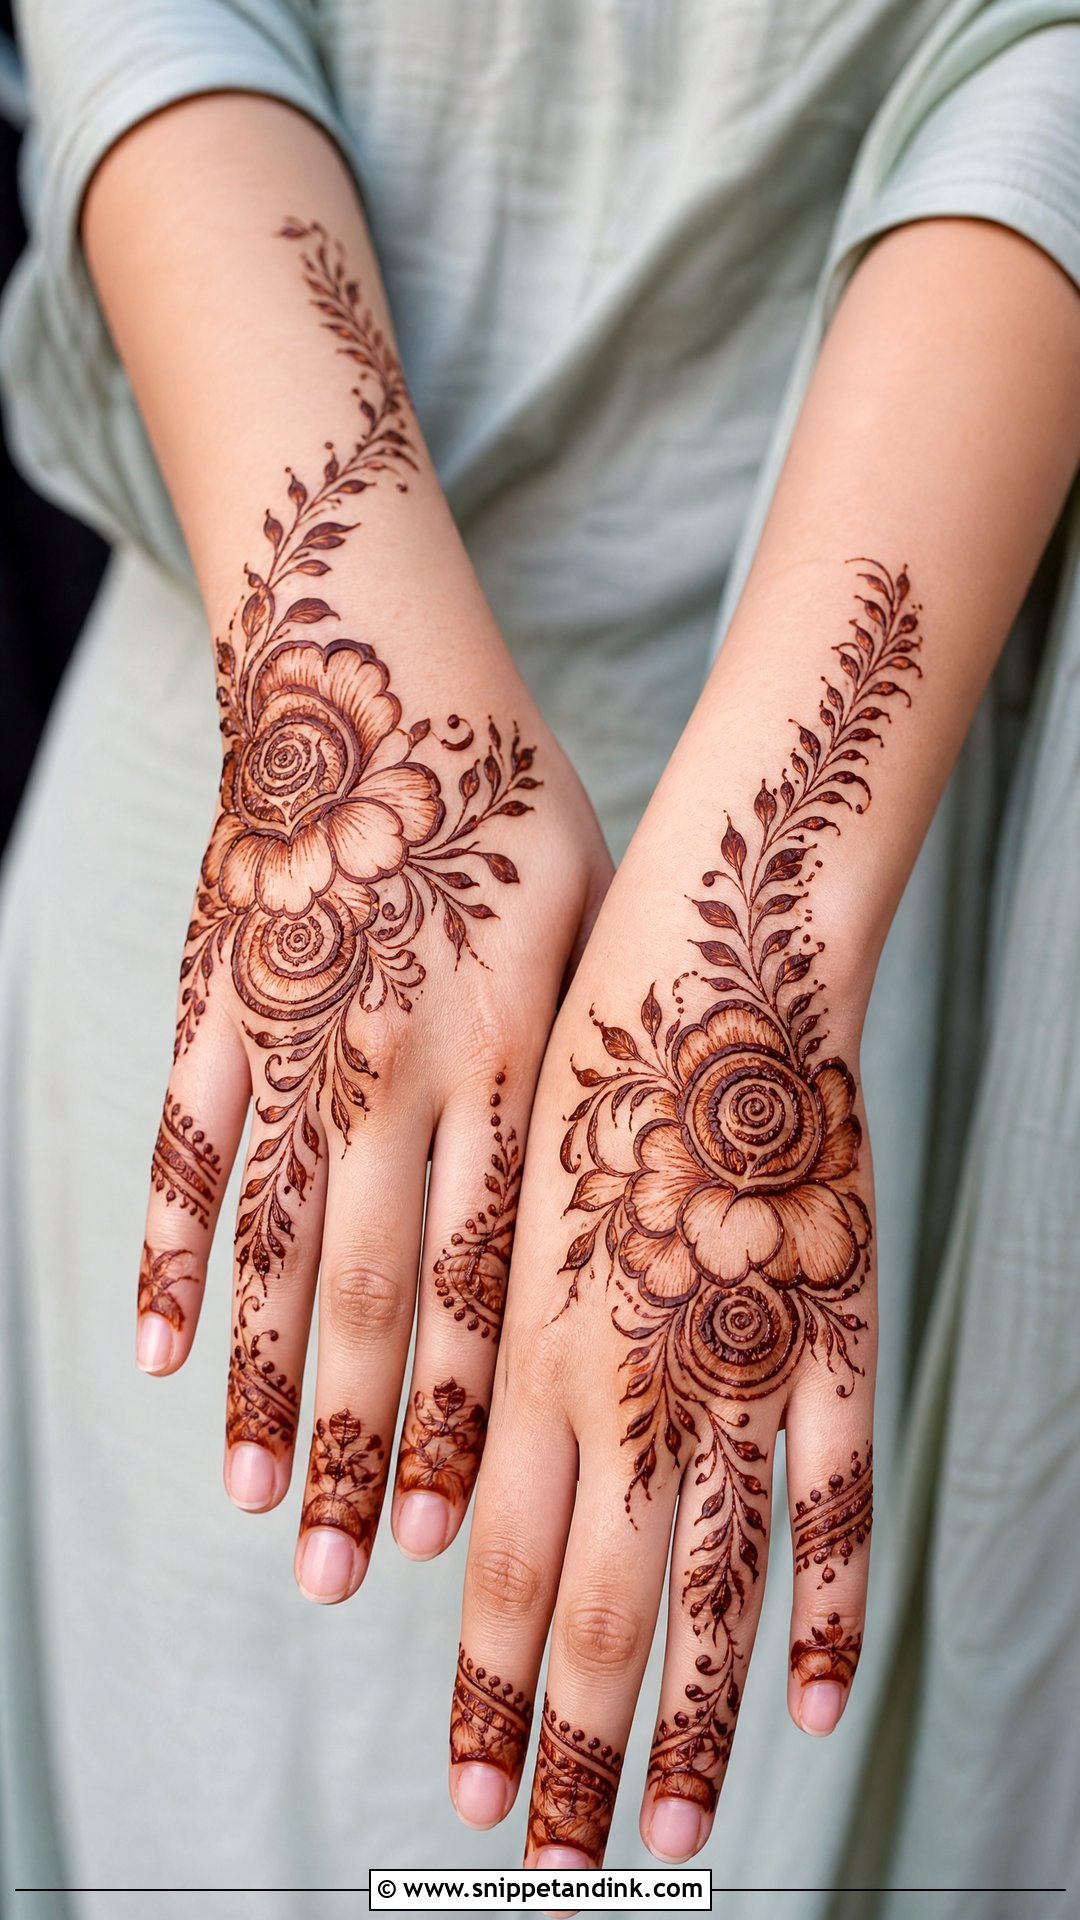
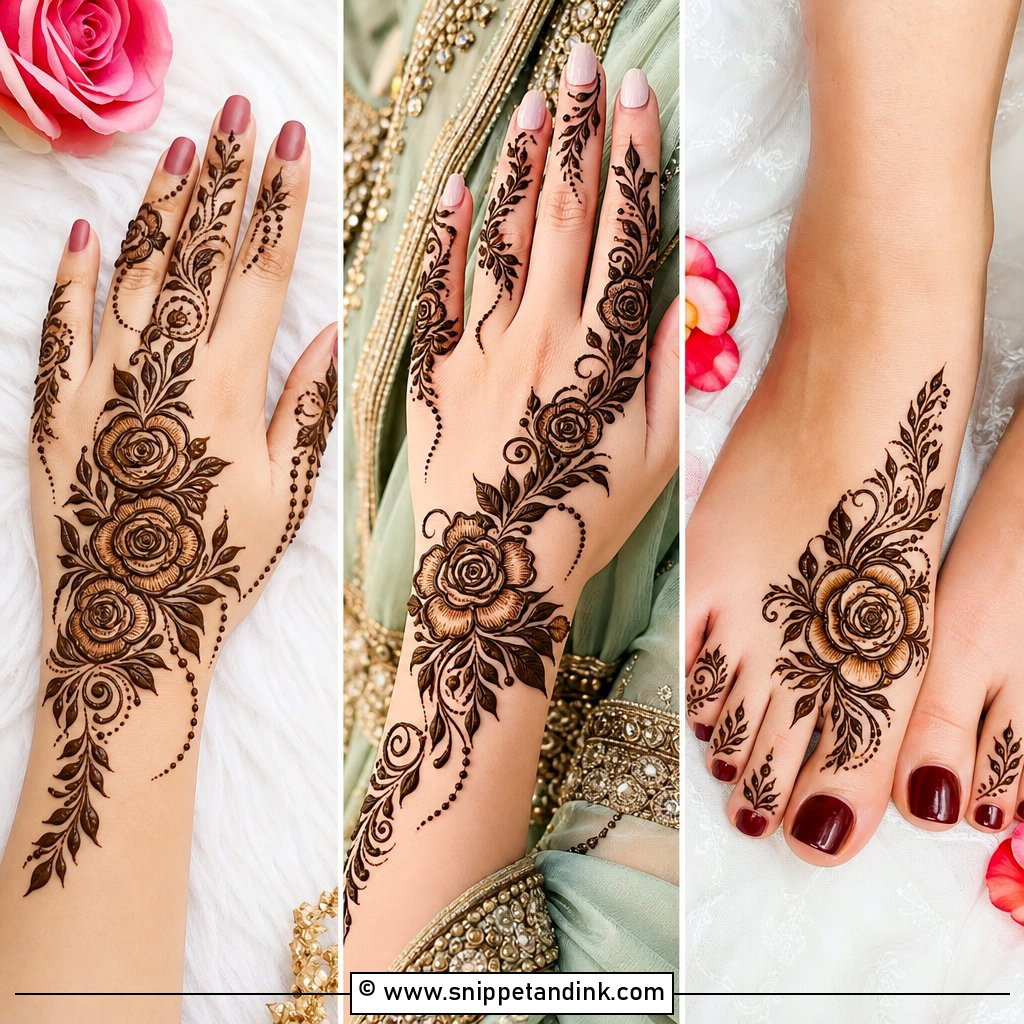
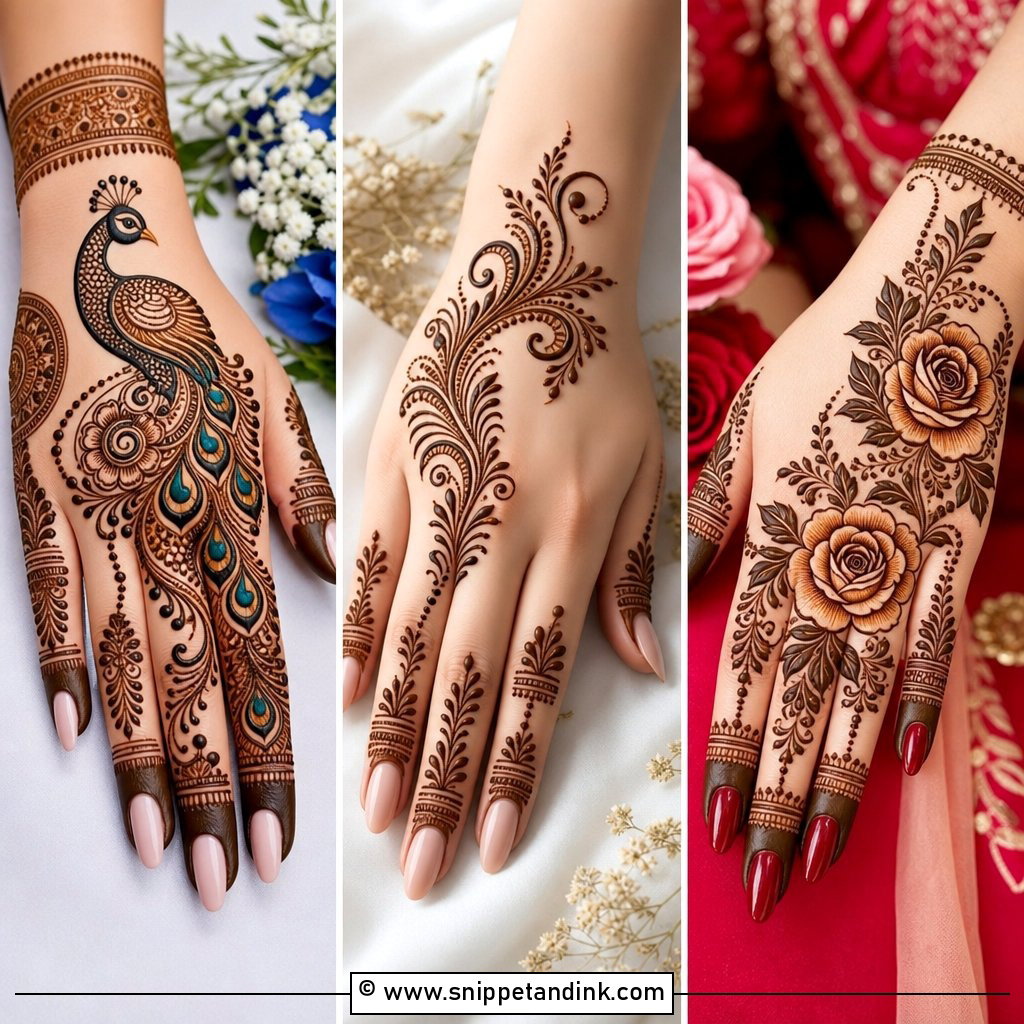
Flowers are the most forgiving motif on the back hand, since petals can be sized to fit wherever the bones allow. Roses, lotus or five-petal blooms run in a curved trail from wrist to fingers, with leaves, dots and thin stems in the gaps. Placement changes how a hand reads: a vertical trail makes a short, wide hand look longer, while a sweep across the hand adds width to very slender fingers. I outline petals boldly and keep the inner detail light, which gives dimension once the stain settles.
8. Jaali Upper Hand Mehndi Design
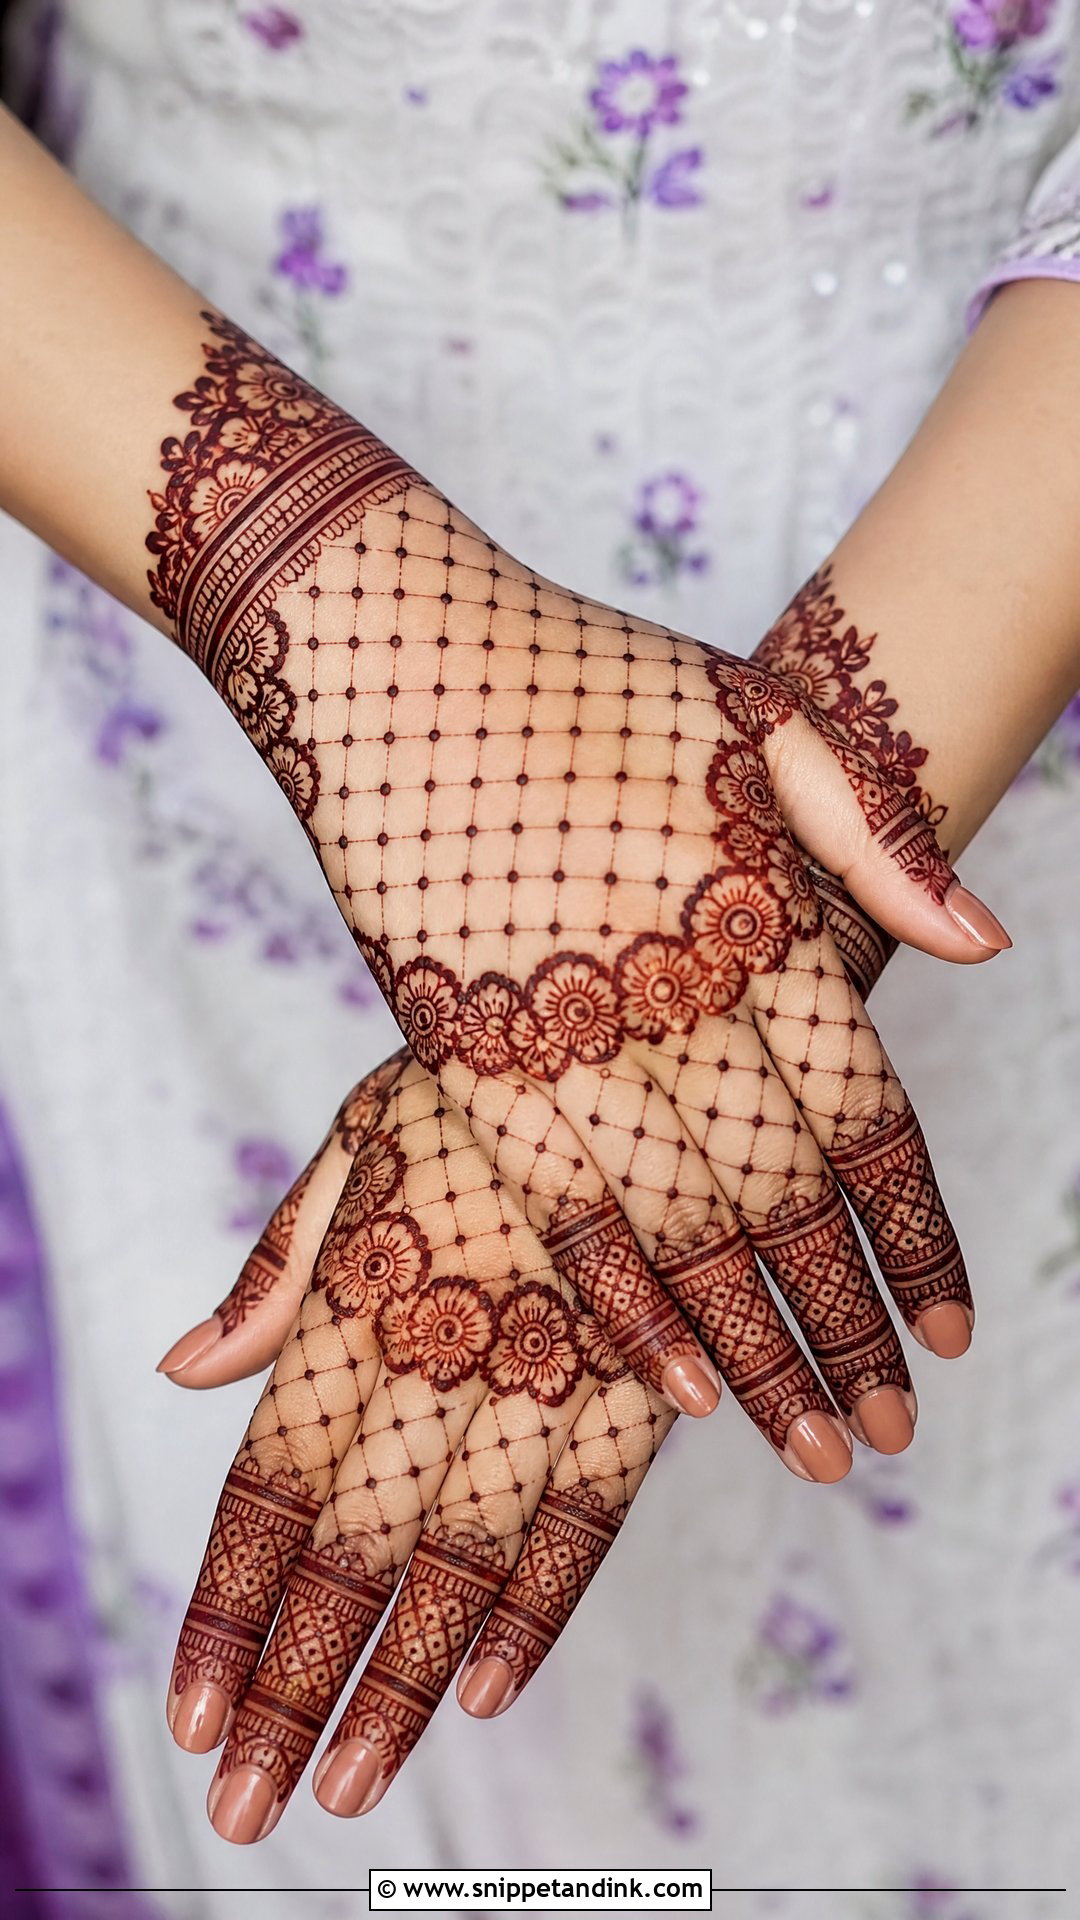
Jaali is a grid or net that reads like lace, filling the centre, one side panel or the fingers, framed by flowers and borders. It’s also the motif that exposes an unsteady hand fastest. I draw the outer frame first so the grid lines have a fixed edge to run to, work slowly with a fine tip, then add dots at the intersections. Pair it with open skin and one or two bold motifs. A whole hand of mesh tends to read as a smudge in photos.
9. Finger Upper Hand Mehndi Design
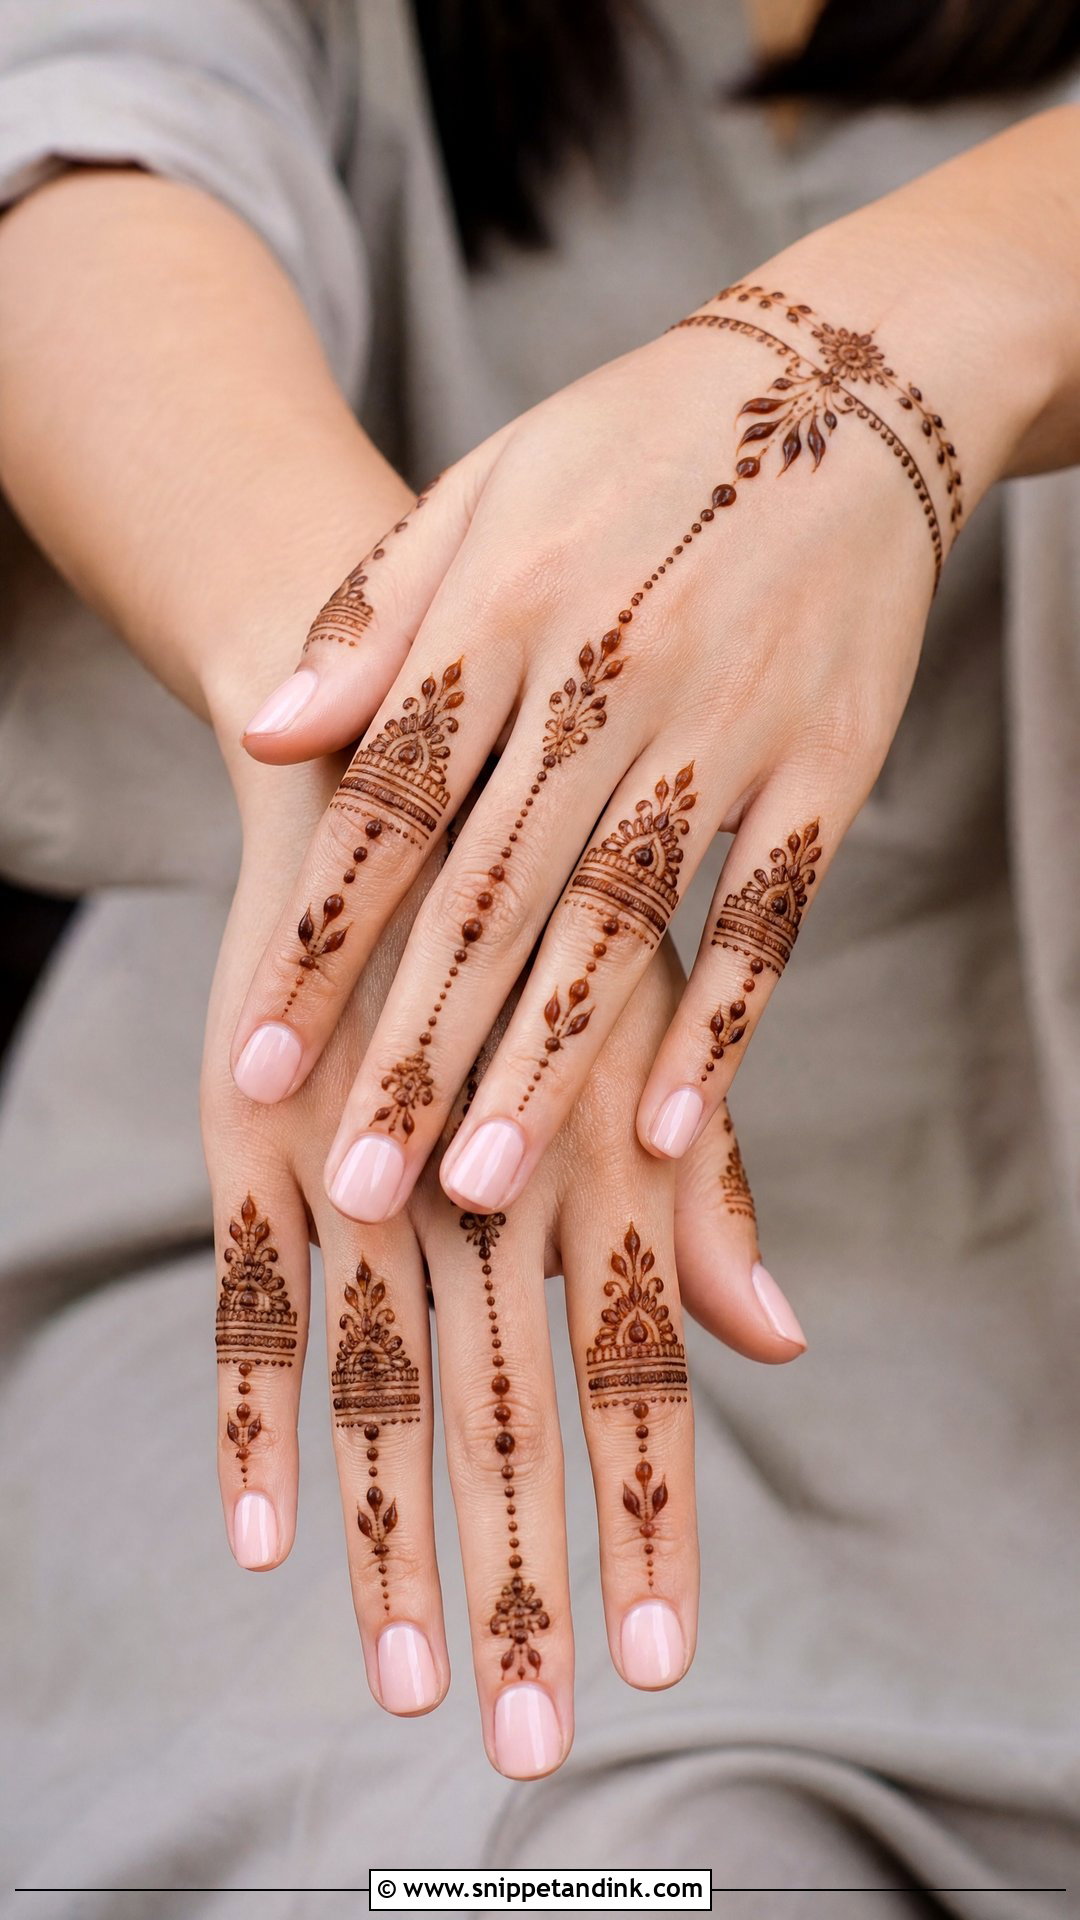
A finger upper hand mehndi design keeps the centre of the back hand light and puts the detail on the fingers: a different band, leafy line, dot pattern or tiny geometric shape on each one, sometimes with a slim chain back to the wrist. It’s quick and leaves room for rings. What I warn people about is the knuckle crease. Paste laid across the crease cracks the moment the finger bends, so I place bands just above or below it and let the stain carry the eye across.
10. Bracelet Upper Hand Mehndi Design
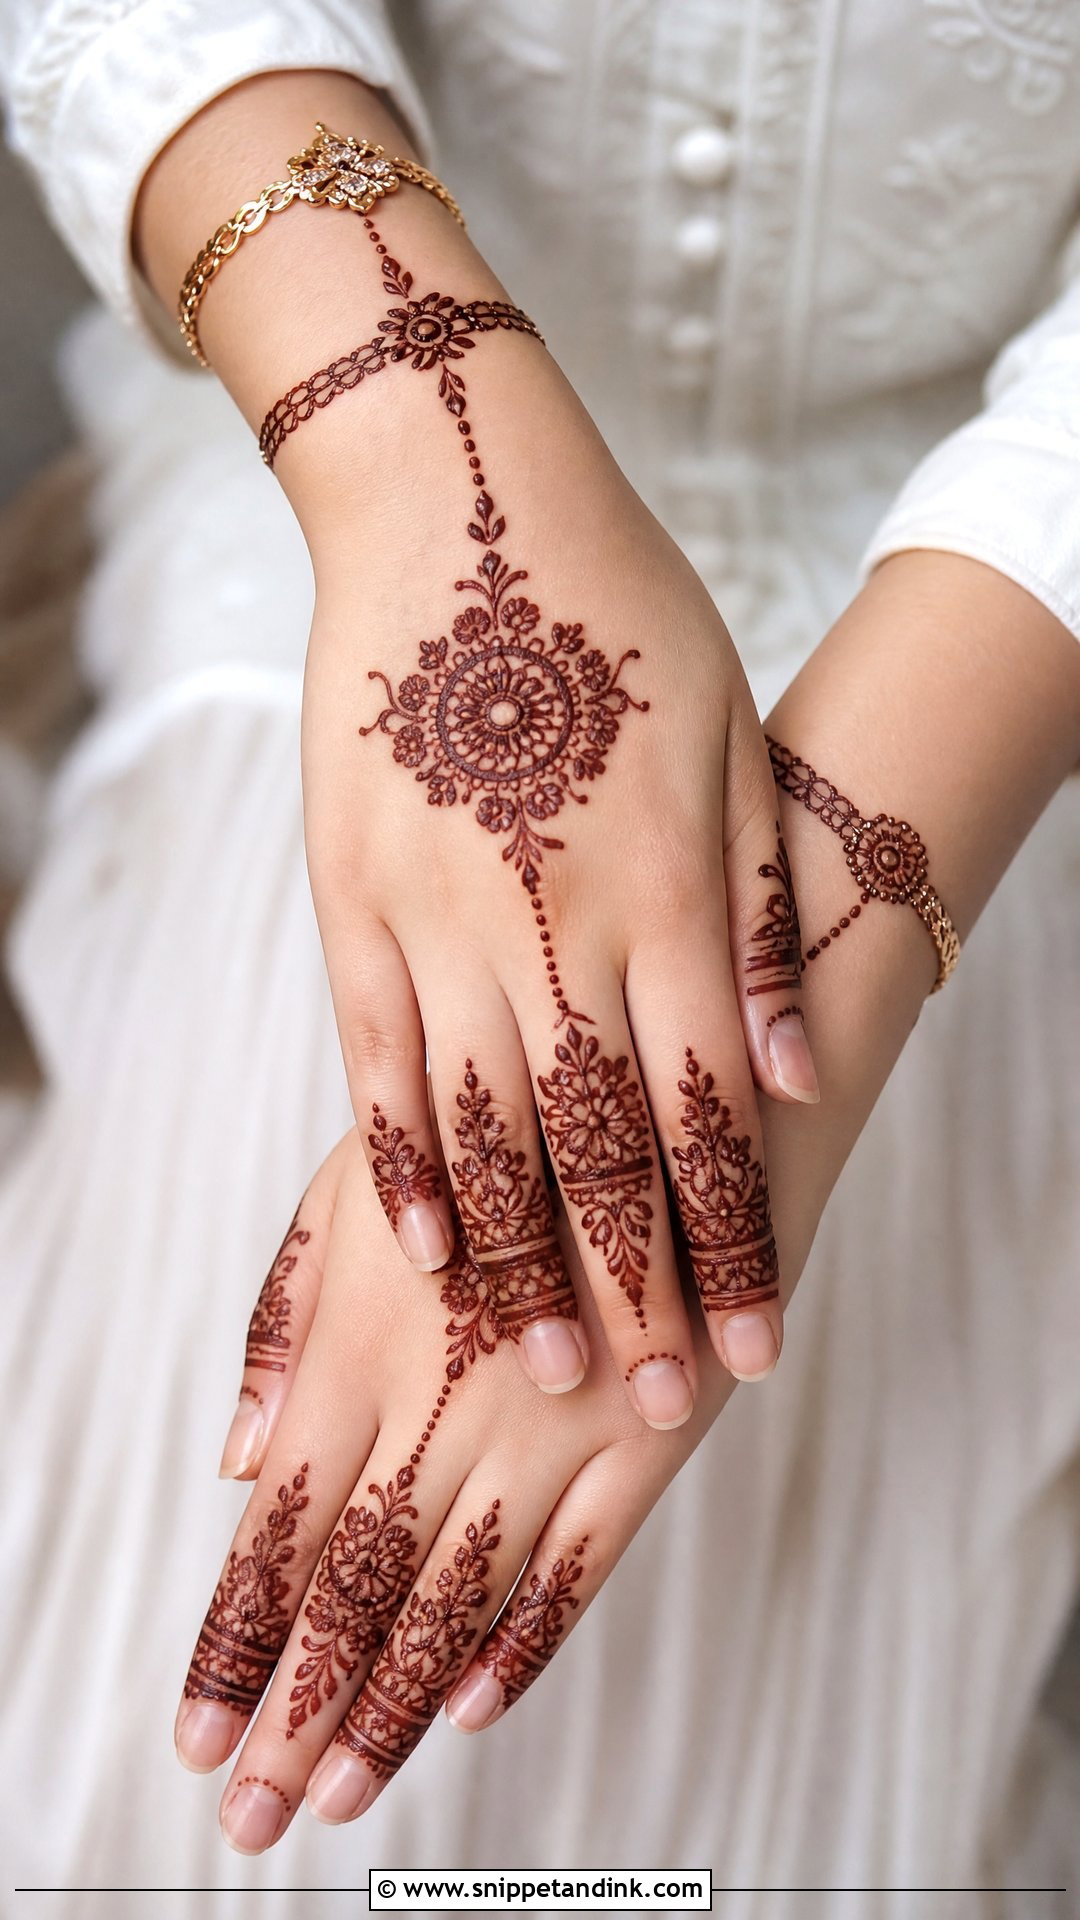
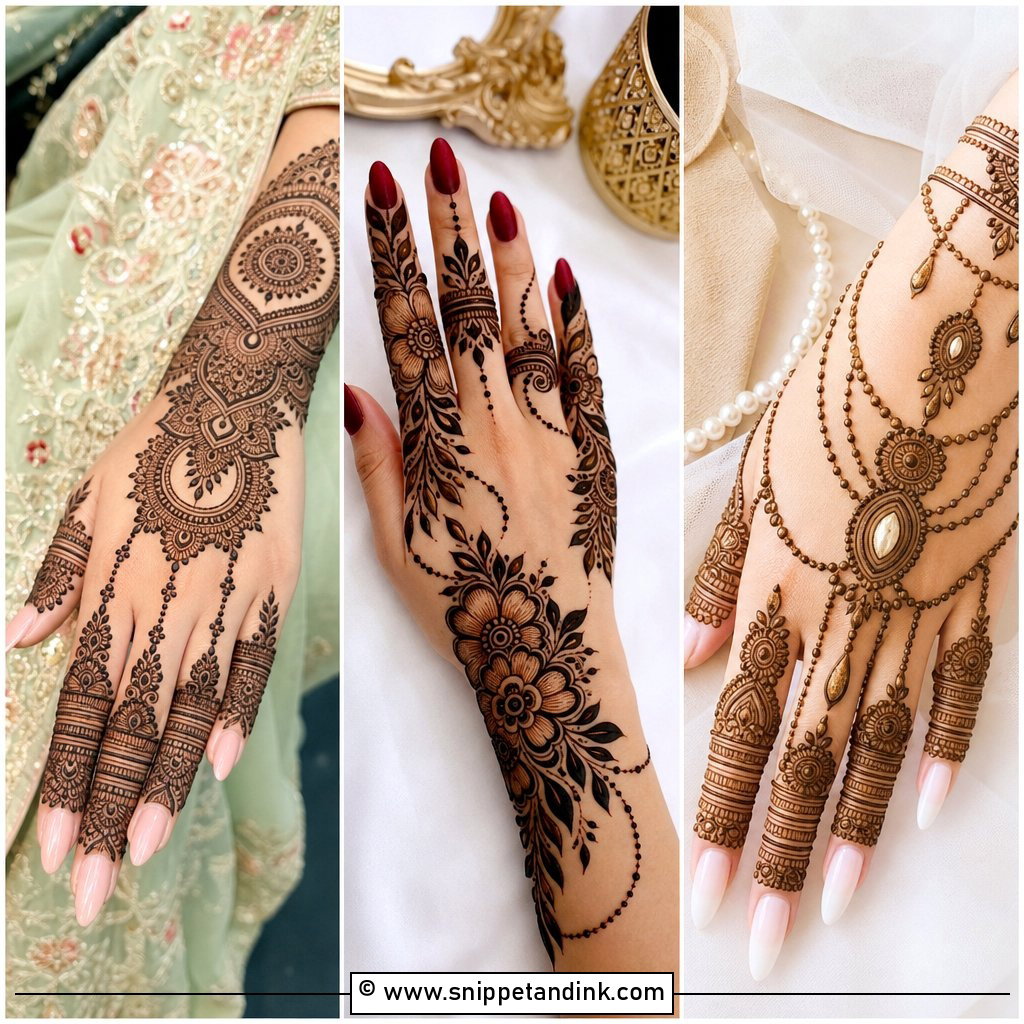
Bracelet upper hand mehndi design is henna drawn as jewellery: an ornamental band or two at the wrist and a fine chain to a central motif or to ring-style details on the fingers, close to the look of haath phool. I make the band the detailed part, with dots, scallops or mini paisleys, and keep the chain thin. Show me where your real bangles will sit before the band goes on. A henna cuff hidden under a stack of glass bangles is wasted work, and the rubbing of bangles wears that strip of stain faster too.
11. Indo Arabic Upper Hand Mehndi Design
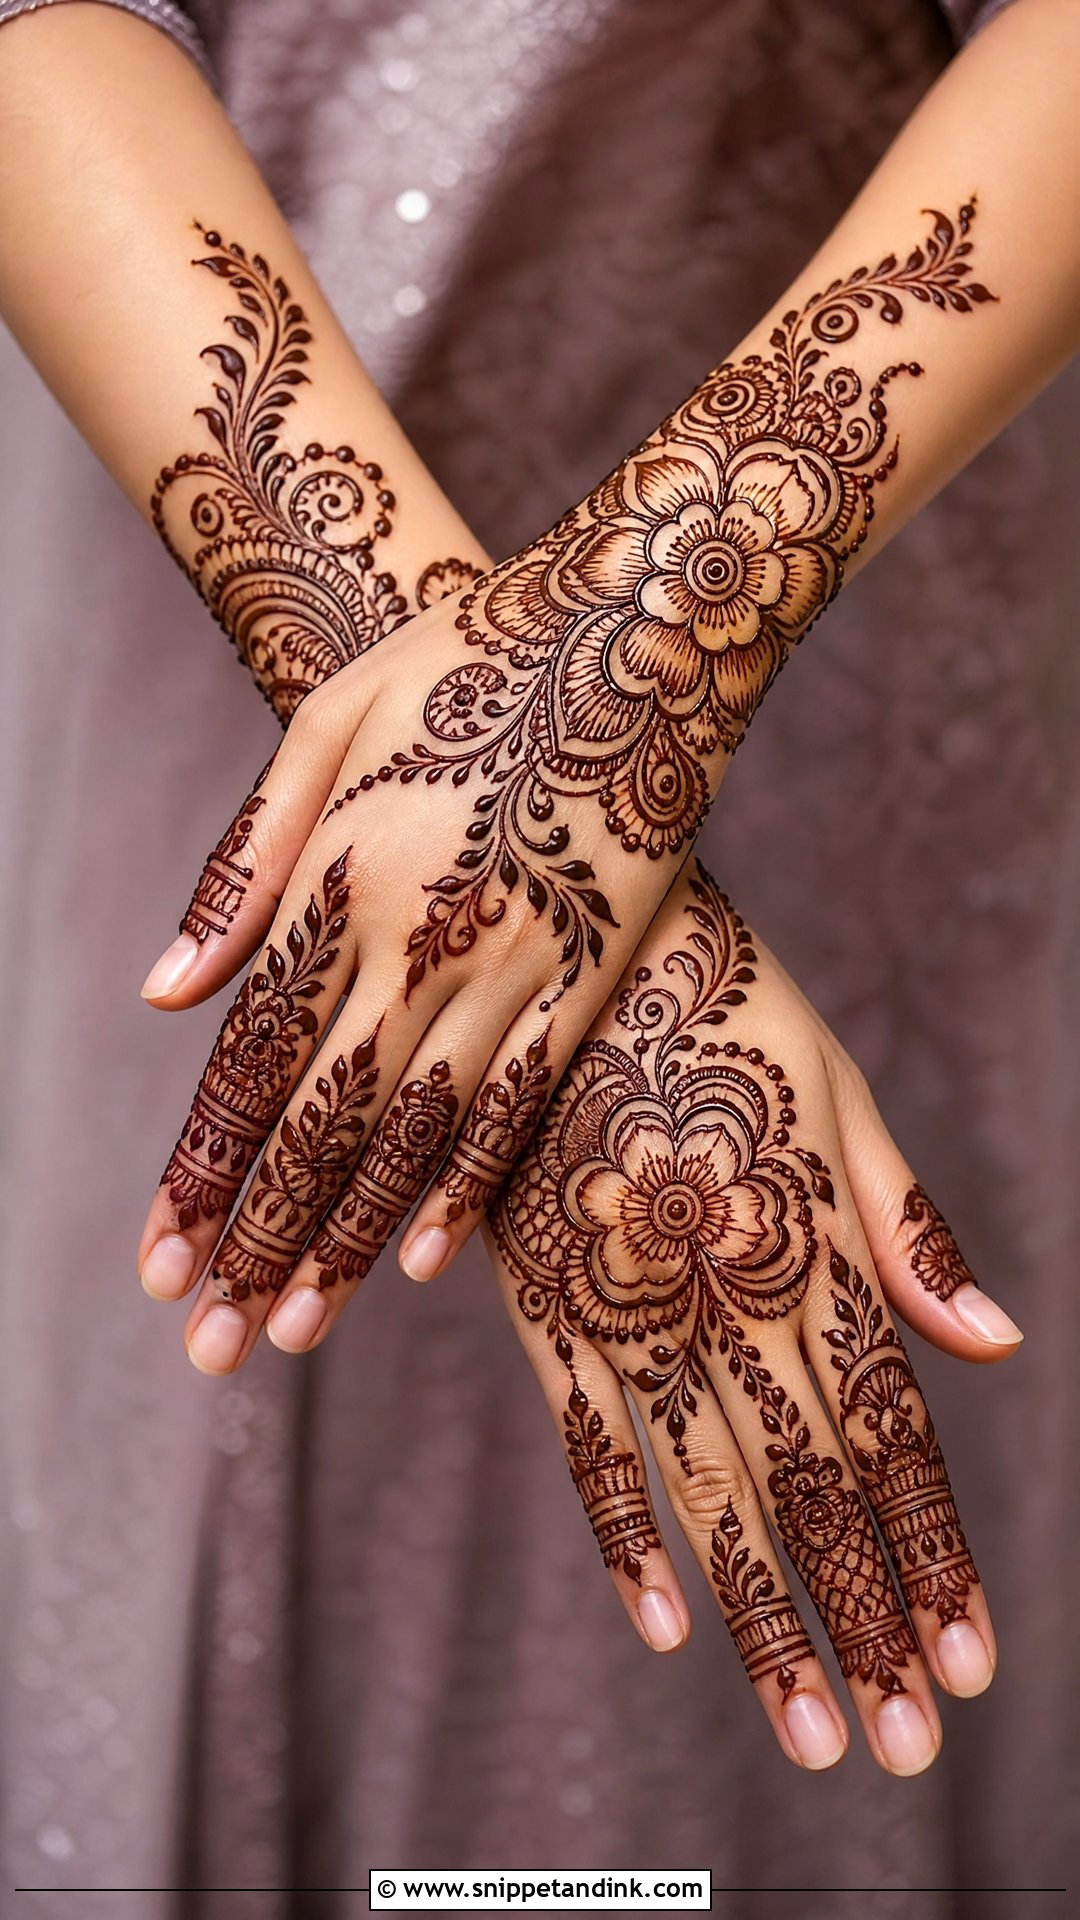
Indo-Arabic borrows the flowing trail of Arabic work and fills parts of it with Indian detailing: large flowers and paisleys, leafy runs, small fillers tucked inside. It covers more skin than pure Arabic and far less than traditional bridal. Contrast is the whole point, so I use a thicker line for the main motifs and switch to a finer tip for curls and checks. The diagonal layout is the usual pick, though on short fingers I often move to a centred floral trail with detailed fingers, because the diagonal can make a small hand look cramped.
12. Peacock Upper Hand Mehndi Design
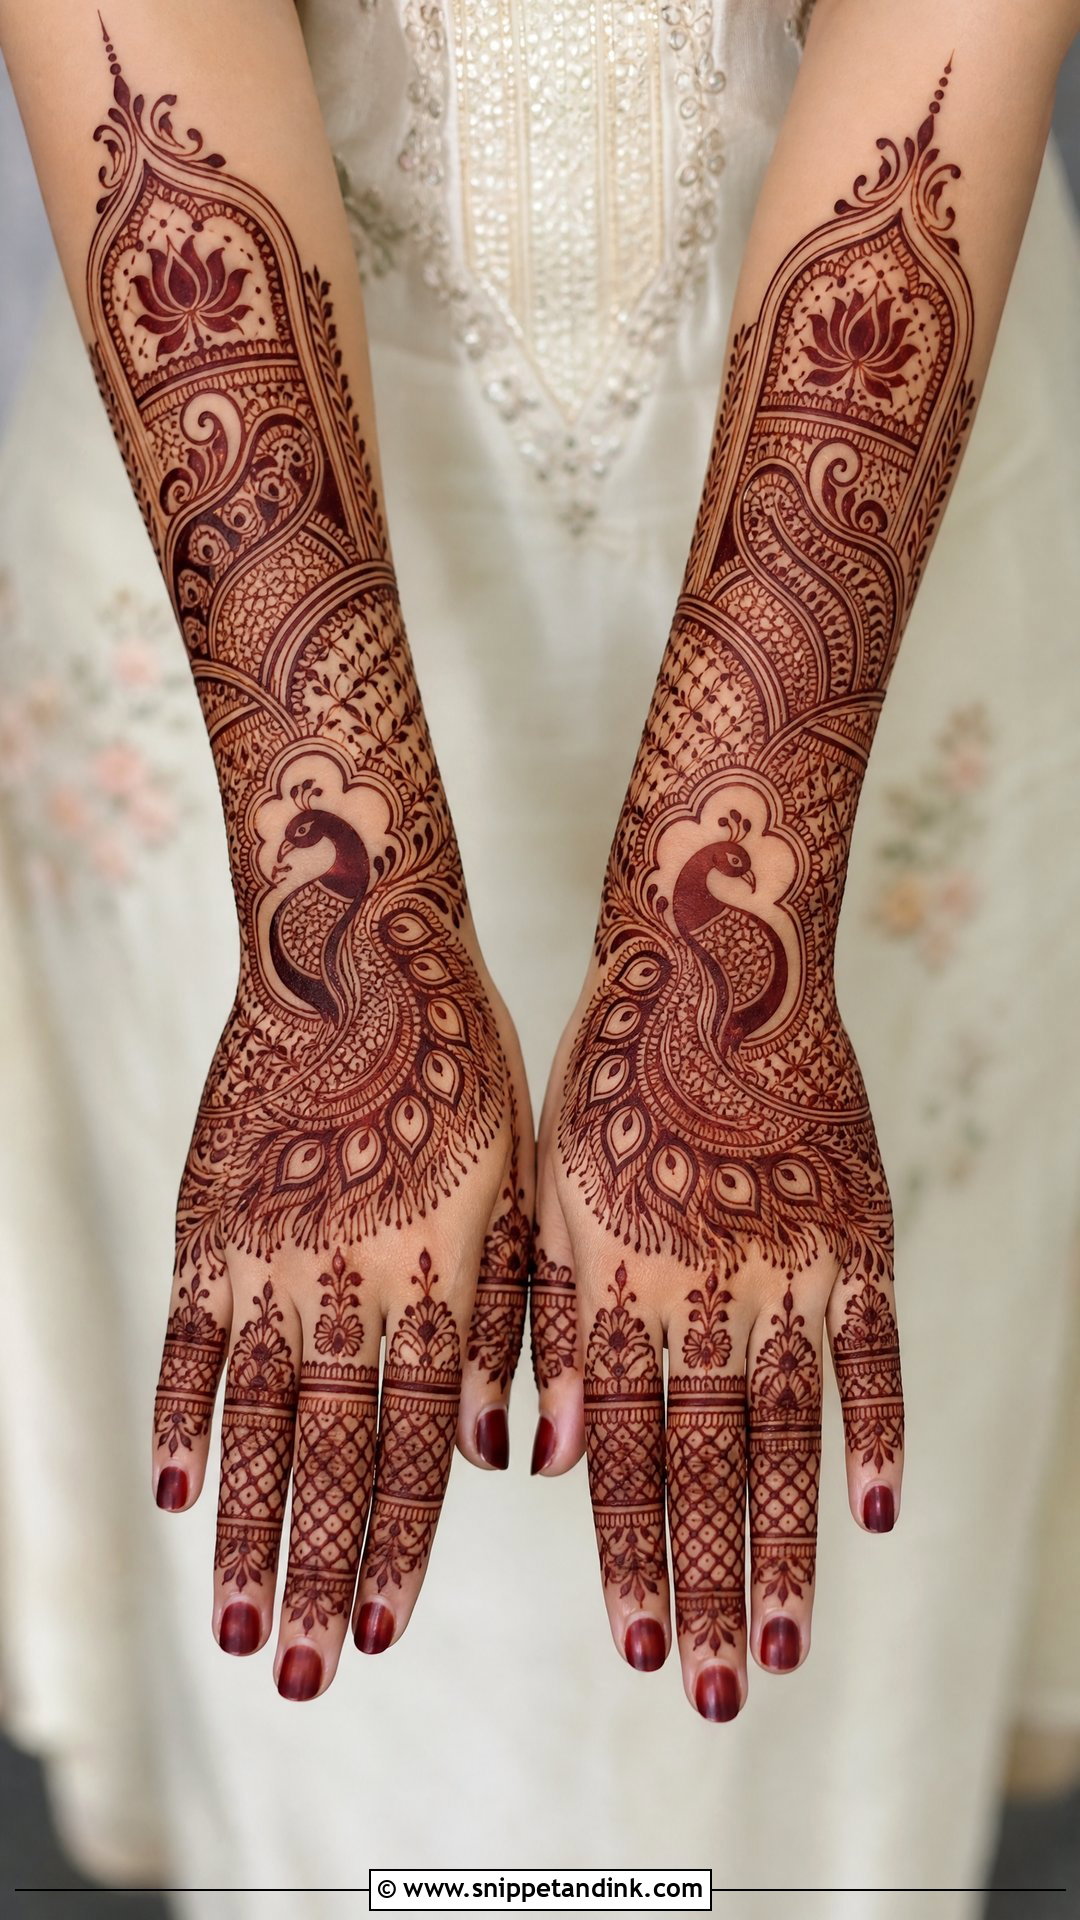
A peacock upper hand mehndi design is one of the few motifs people recognise from across a room, but only if the neck and head stay clear. I place the bird near the wrist or along the side of the hand with feathers sweeping toward the fingers, and keep filler well away from the neck. Fine lines inside the feathers, bold borders outside. Paisleys, lotus and jaali can complete the hand, with detailed fingers to balance the weight of the bird. It’s a long sit, so I suggest it to brides and bridesmaids more than to guests on a tight schedule.
13. Paisley Upper Hand Mehndi Design
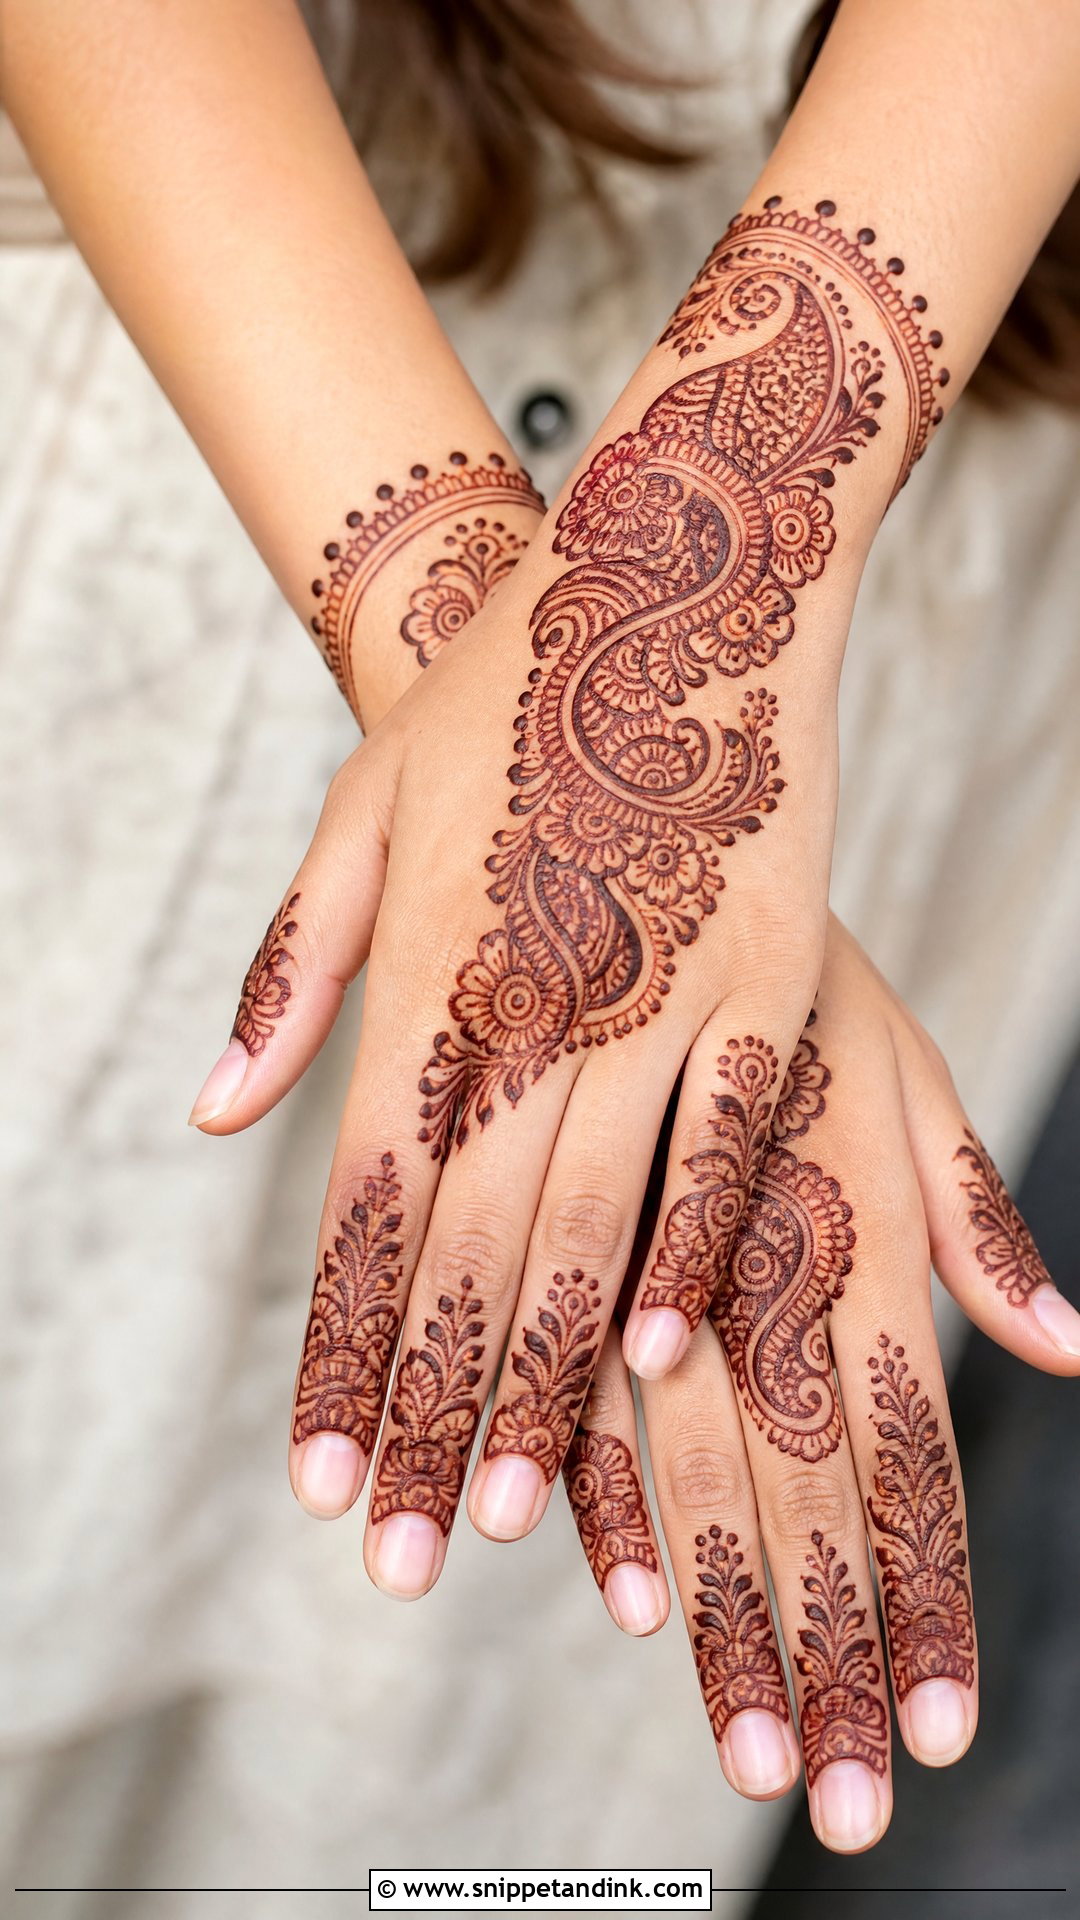
Paisleys suit the back hand because their curve follows the way the hand bends from wrist to knuckles. I set them in a diagonal trail, around a mandala or stacked across a full layout, with small flowers, leaf strokes and spirals inside. Two or three large paisleys with open skin make the simple version; for a heavier one I layer small paisleys between jaali and floral fillers. The inner spirals are where cone control shows, and they’re the part I’d look at closely in any artist’s portfolio before booking.
14. Minimal Upper Hand Mehndi Design
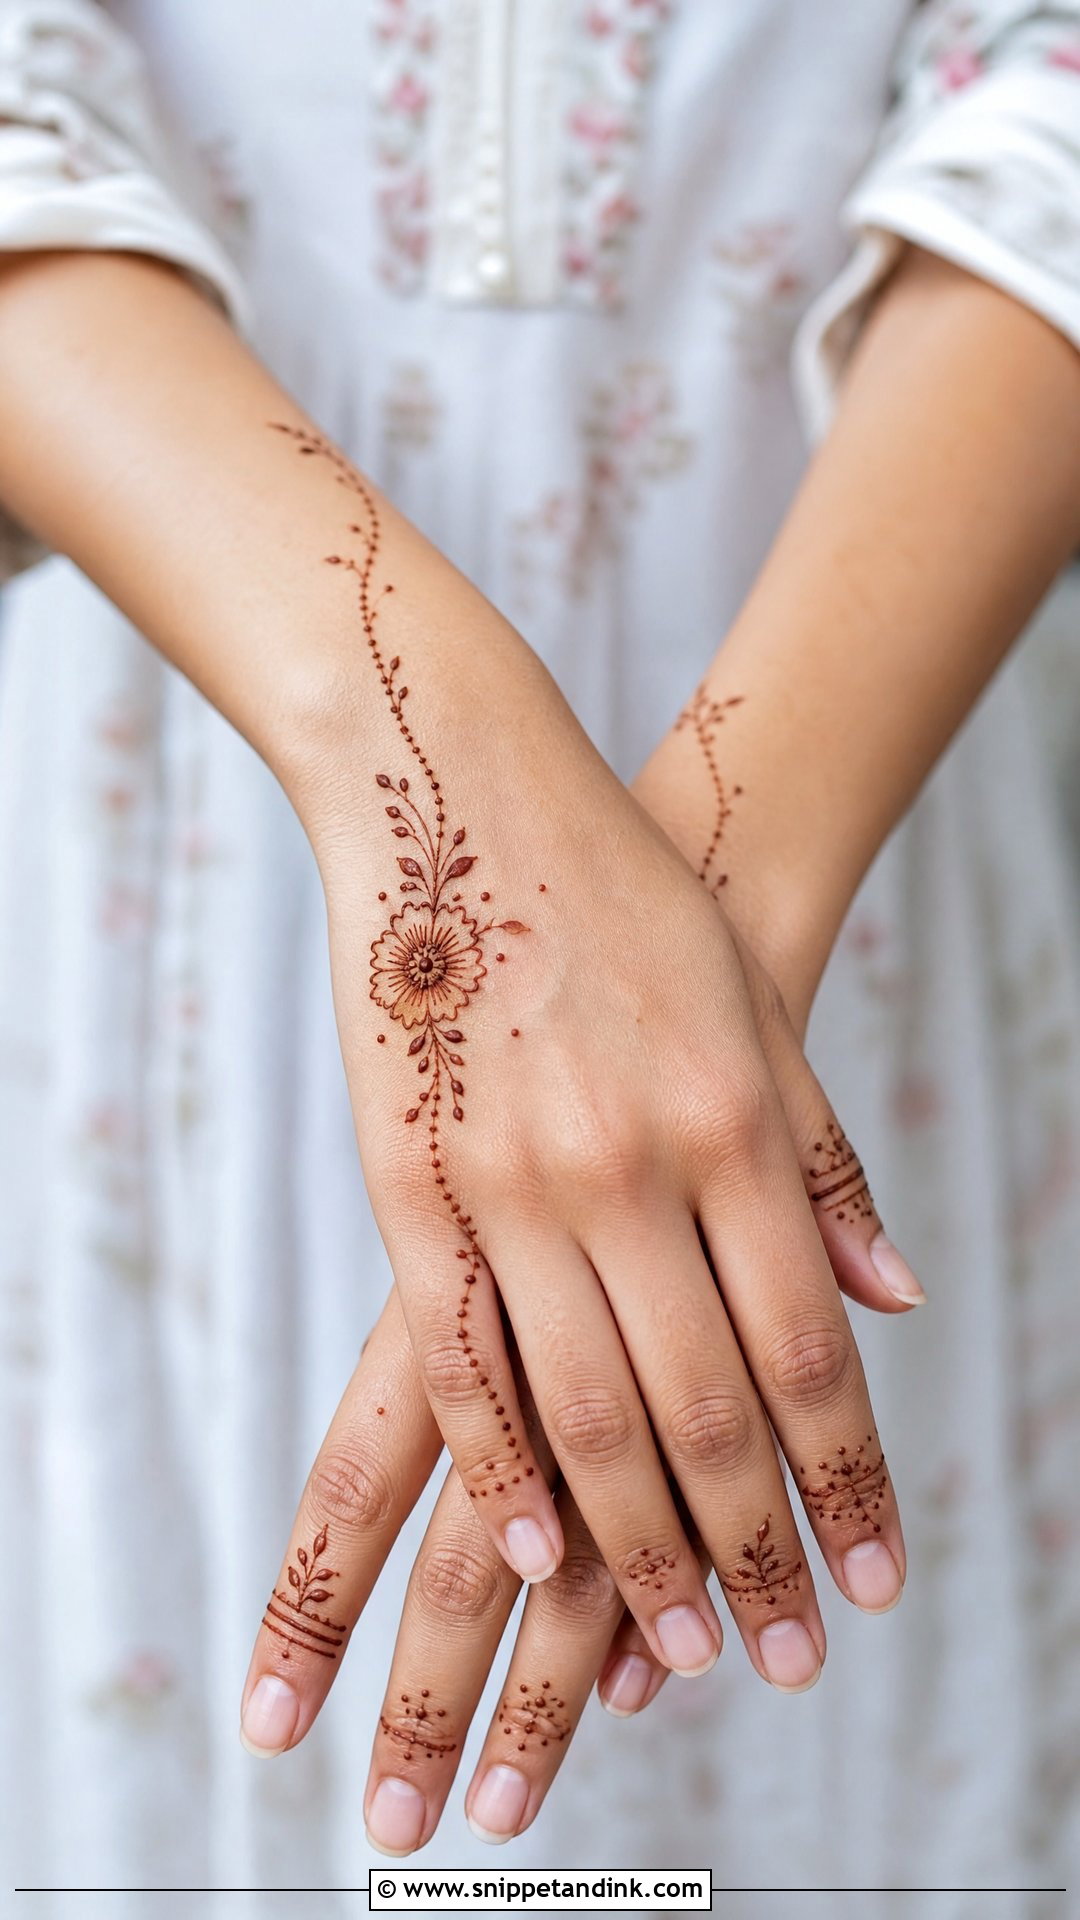
Minimal designs mean a tiny flower near the wrist, a thin vine along one finger or a small mandala with dotted accents, and a lot of bare skin. Office celebrations, teenagers and anyone who dislikes heavy henna tend to land here. They also fade more gracefully. When a dense design starts to exfoliate it goes patchy, while a few fine lines simply get fainter. Connect the motif to a finger with one delicate line or a dot trail so it looks placed, not stamped.
15. Geometric Upper Hand Mehndi Design
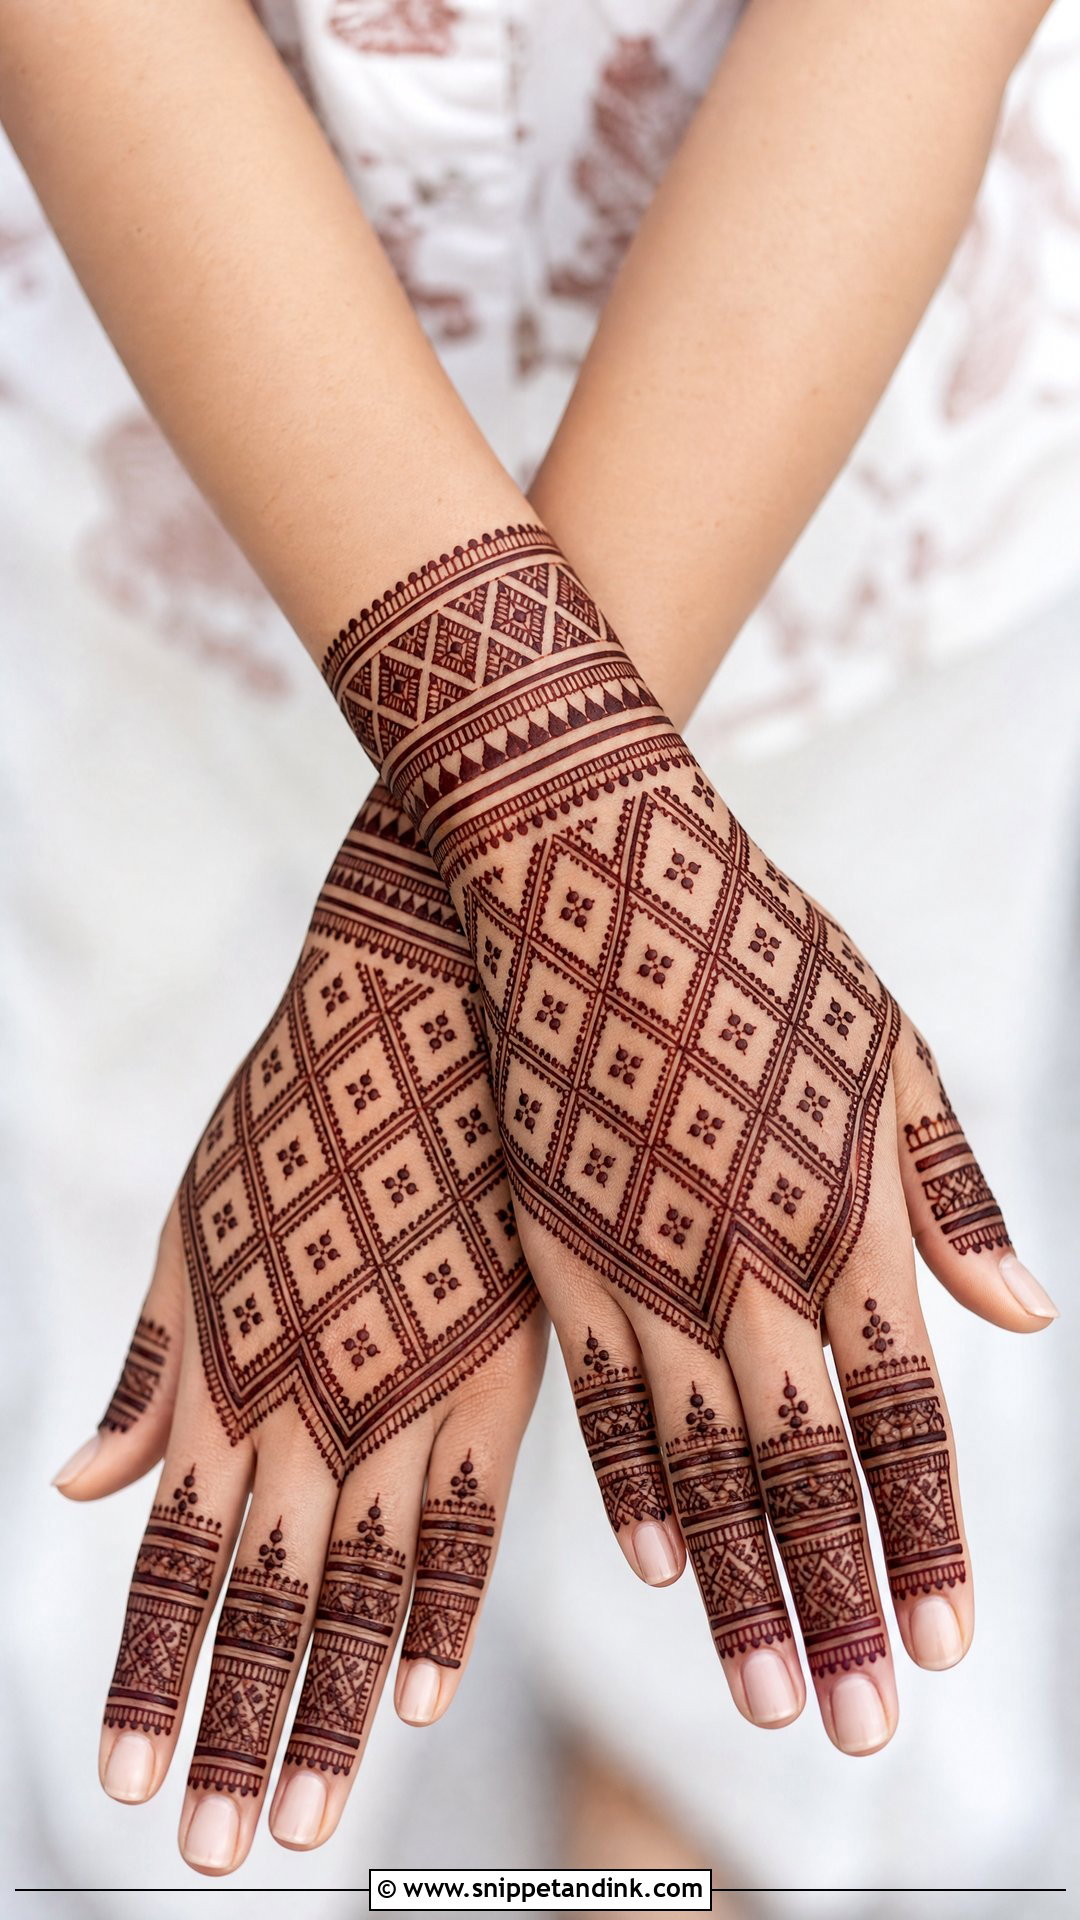
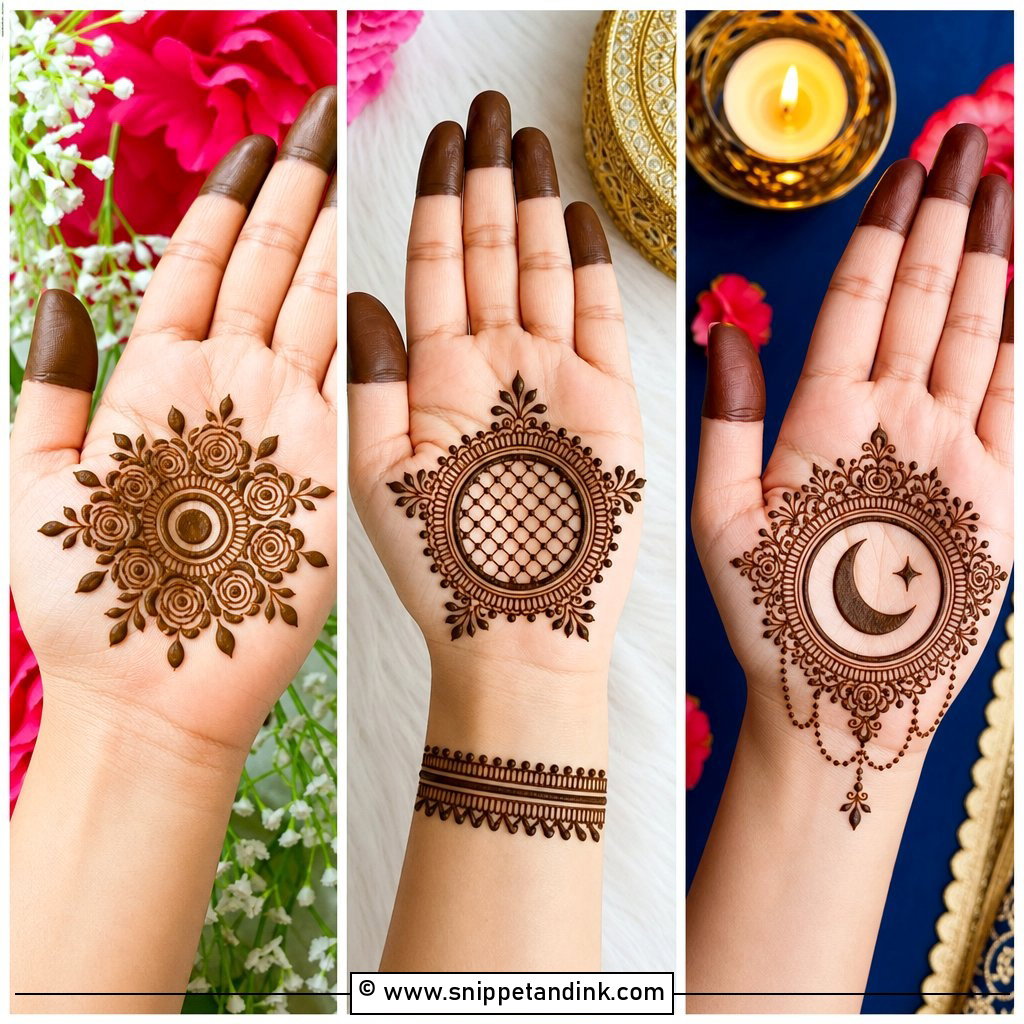
Geometric work uses diamonds, triangles, chevrons and clean line panels, often a diamond grid in the centre, repeating shapes on the finger bands and a structured wrist cuff. This is the style where I measure most. I mark a faint dot at each corner before drawing any lines, because a grid that drifts by a few millimetres across the hand is obvious. Fusion outfits suit it. If it feels too hard, a few small flowers at the cuff soften it without breaking the structure.
16. Moroccan Upper Hand Mehndi Design
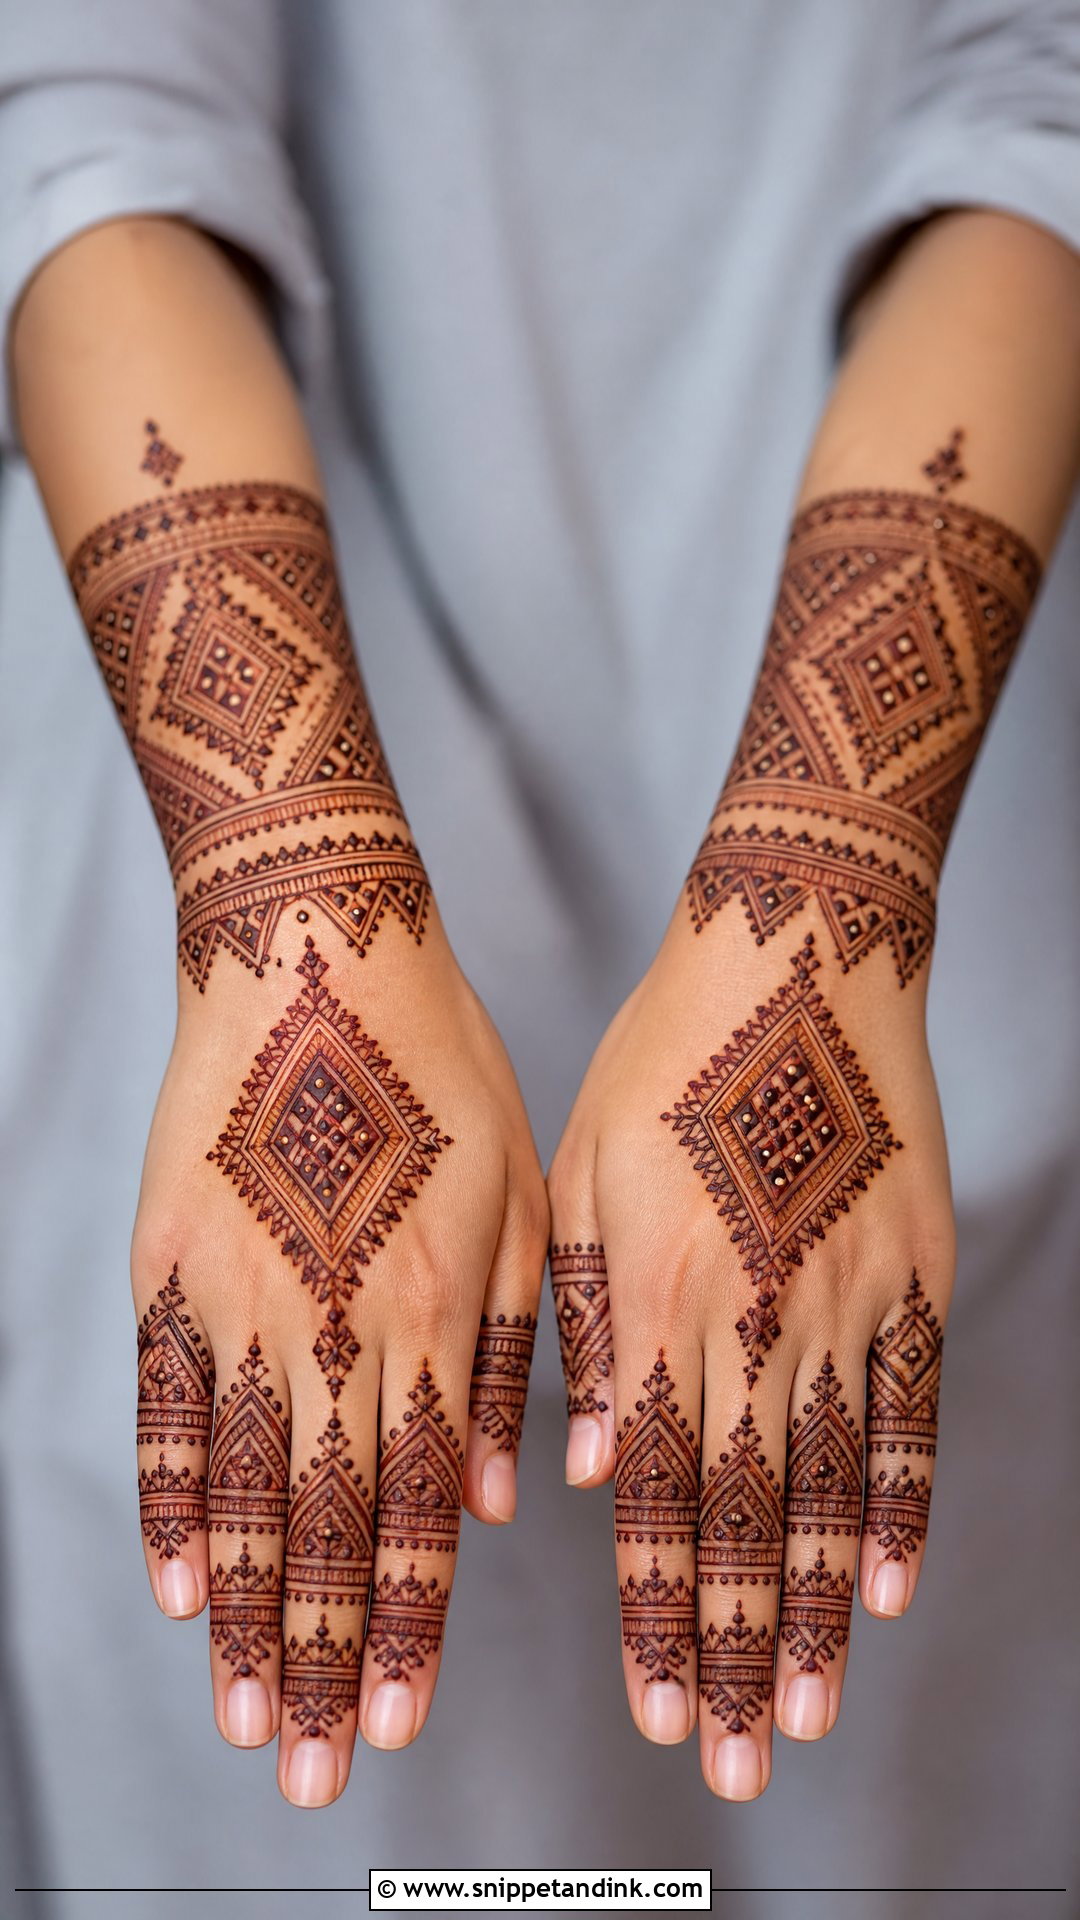
Moroccan patterns lean on diamonds, zigzags, dots and sharp borders rather than flowers, laid out in panels from wrist to fingers or around one central structured motif. Even line weight matters more here than in floral work: the geometry is the decoration, and one uneven line breaks it. It’s also the style I suggest most often to grooms and men in the family who want henna without florals. Skip the tiny fillers inside the panels. A deep, even brown stain on bold lines gives it all the presence it needs.
17. Gulf Upper Hand Mehndi Design
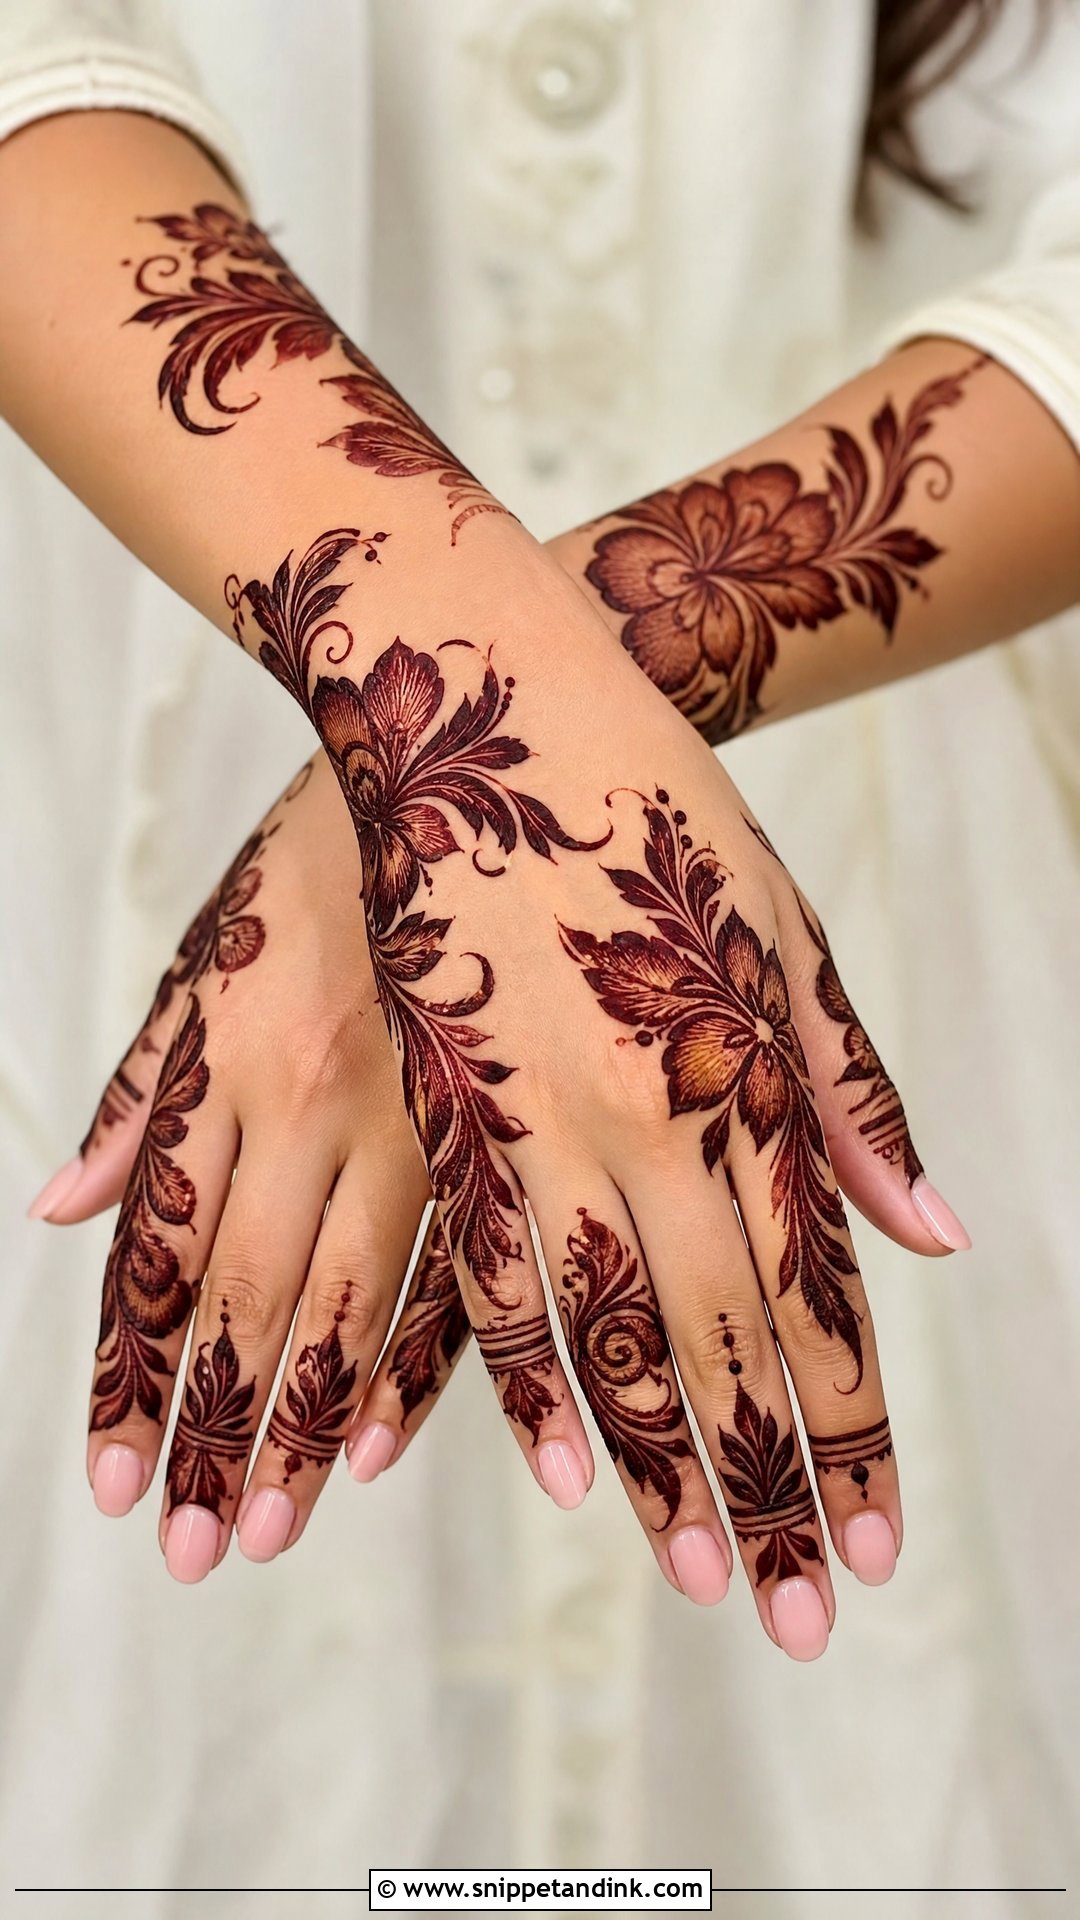
Gulf or Khaleeji-inspired work uses big blooms, shaded leaves, thick outlines and generous open skin, usually running along one side of the hand and across the fingers. The thick outline is the signature. It needs a cone with a slightly wider opening and continuous strokes, because hesitant lines show as bumps once the stain develops. It looks rich without full density, which is why it’s so requested for Eid. I finish the wrist with a flowing vine instead of a strict band to keep the whole thing loose.
18. Lace Upper Hand Mehndi Design
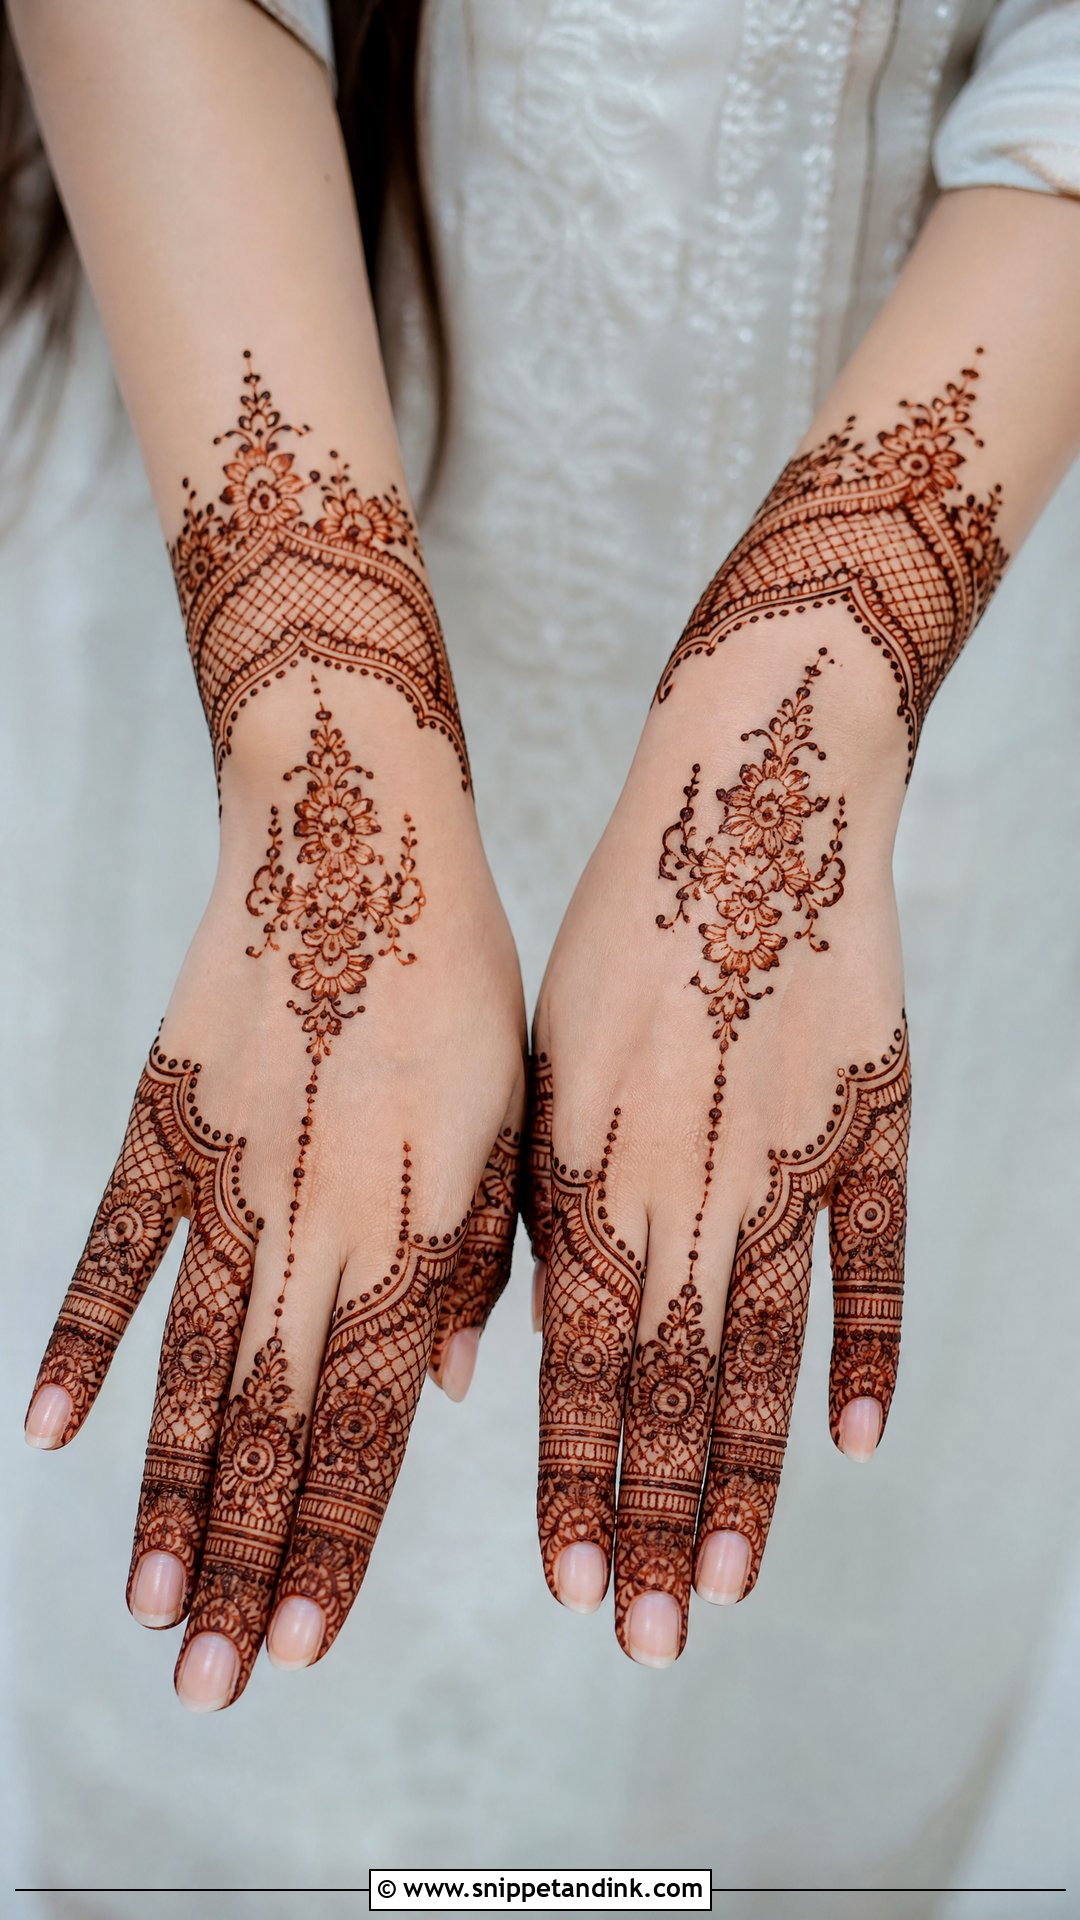
Lace mehndi copies fabric with scalloped borders, fine mesh, dotted edging and floral panels, either in the centre of the hand or as a glove over fingers and wrist. It pairs naturally with net or embroidered sleeves. I look at the sleeve edge before drawing, so the henna border doesn’t stop on exactly the same line as the fabric, where it would vanish. One detailed lace section beside plain skin keeps it refined. The edging dots have to be tiny and evenly spaced, so this is fine-tip work from start to finish.
19. Half Upper Hand Mehndi Design
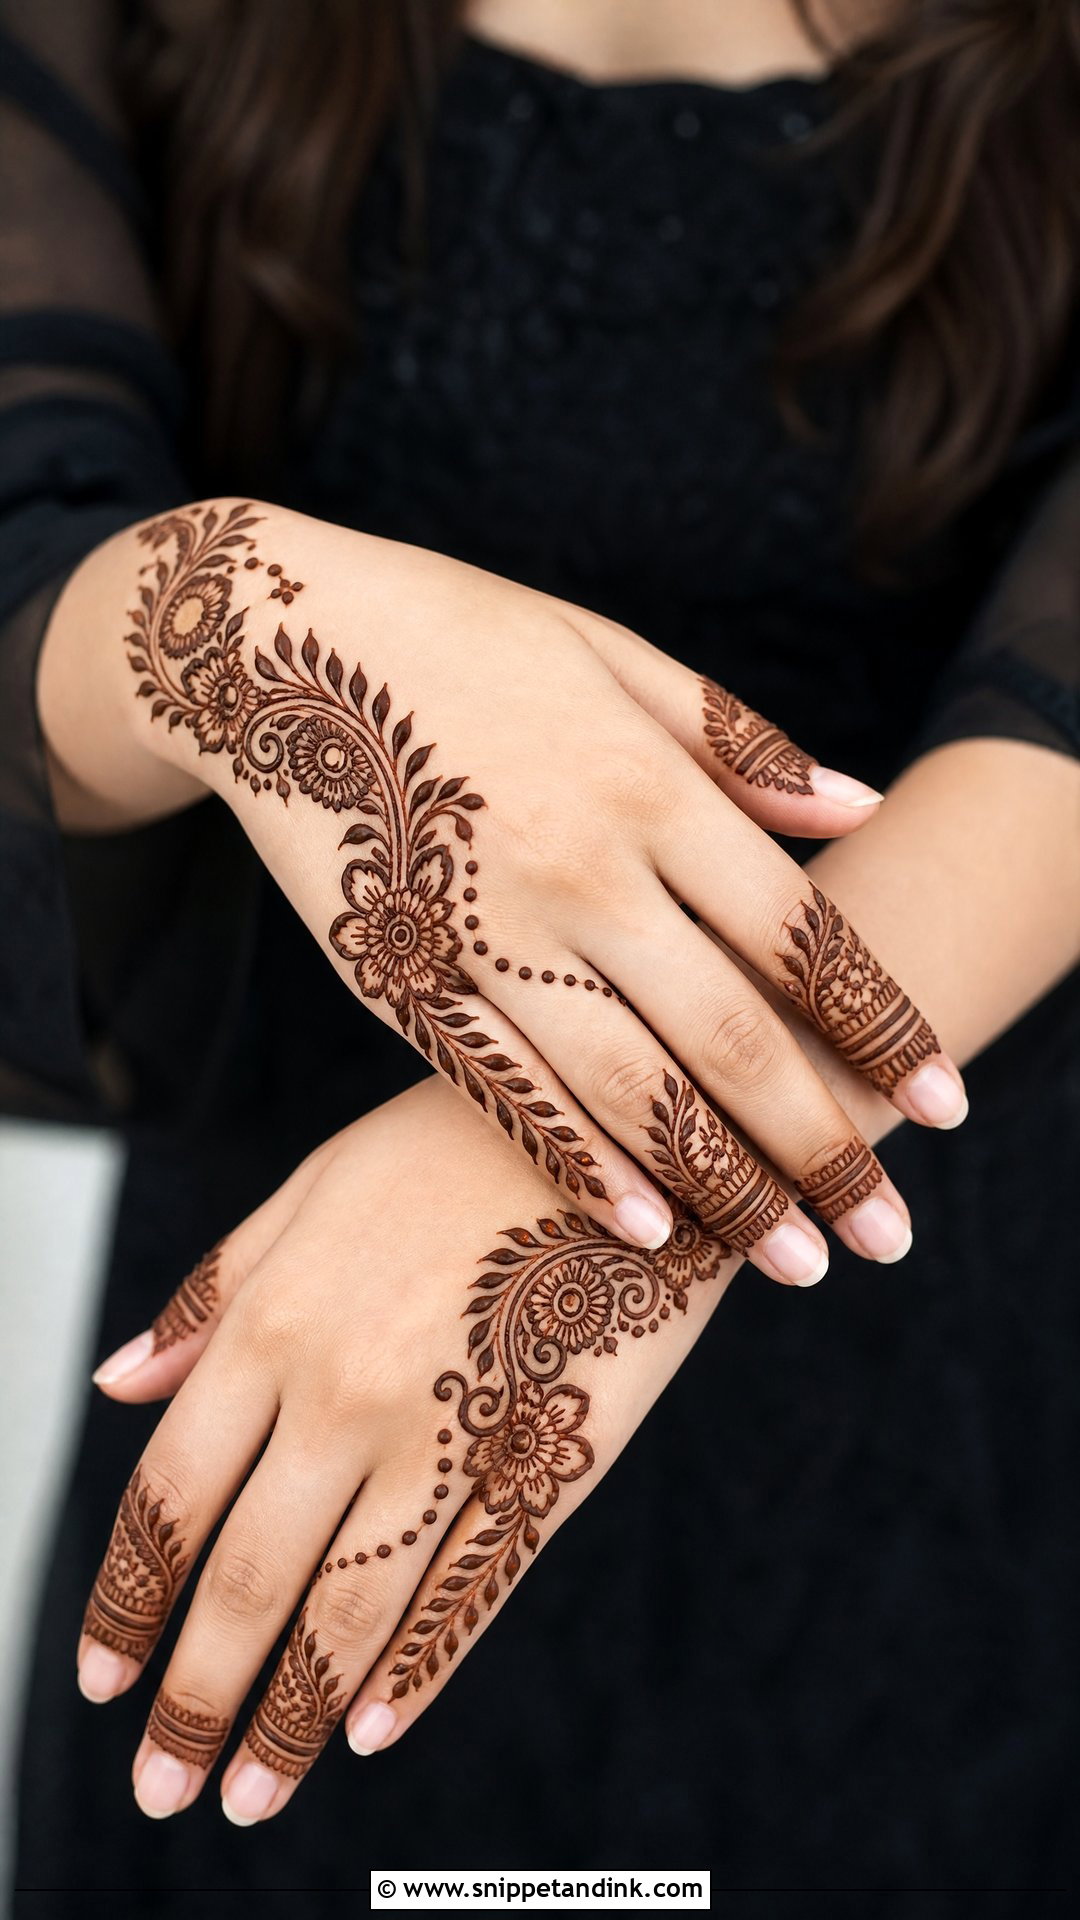
Half designs cover one side, the wrist area or just the fingers. My usual version runs flowers and leaves along the thumb side with light finger bands and an open centre; the other puts a cuff across the wrist and lower hand and leaves the fingers almost plain. They’re quick, which helps at a busy mehndi night when the artist has a queue of guests. The bare half still needs a link, a dot line or a tiny central detail, or the hand looks unfinished instead of deliberately light.
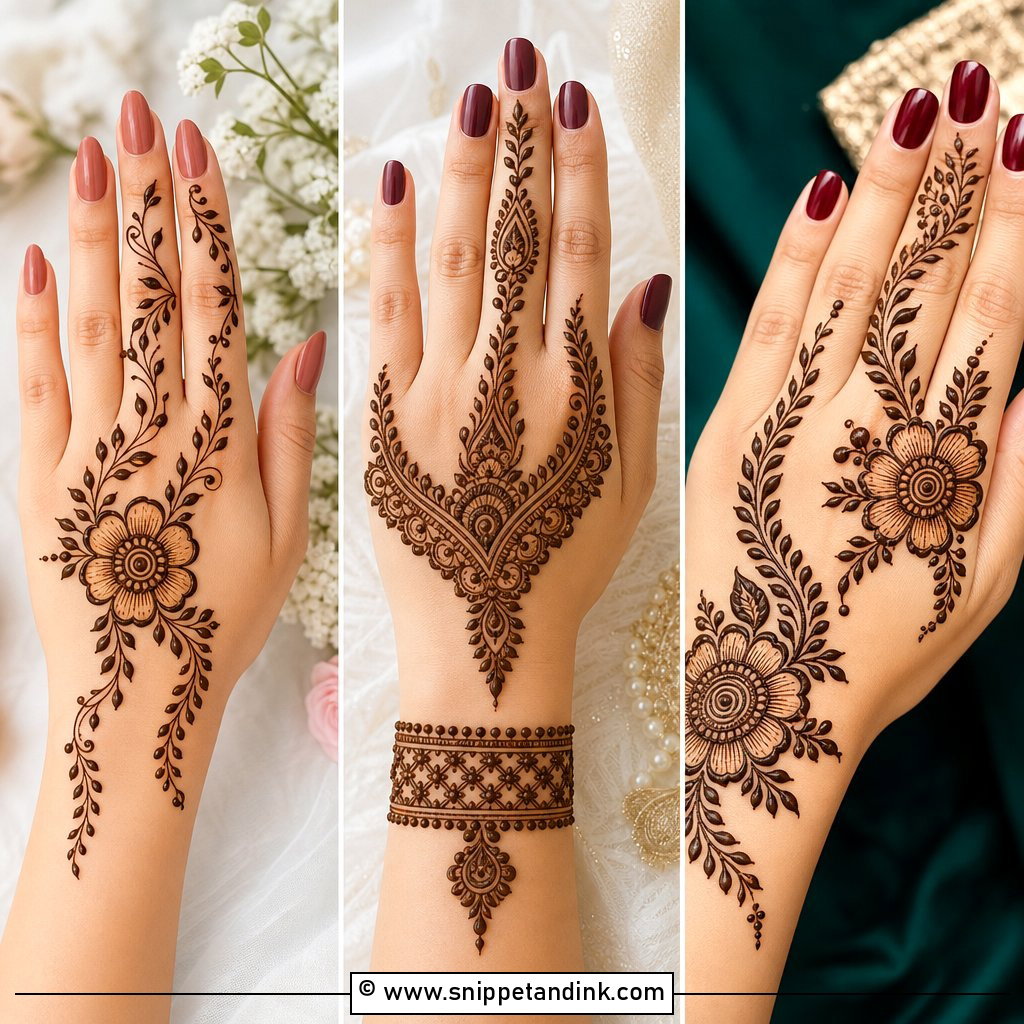
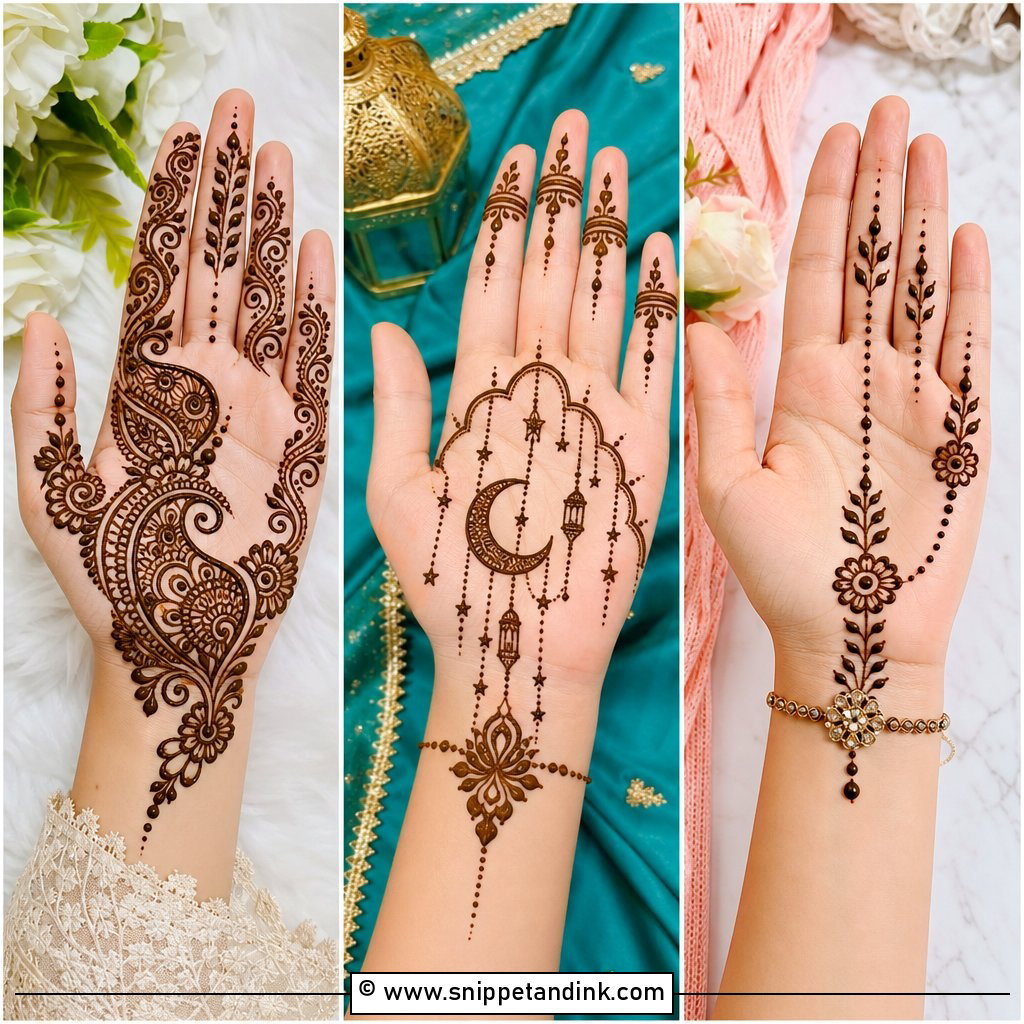
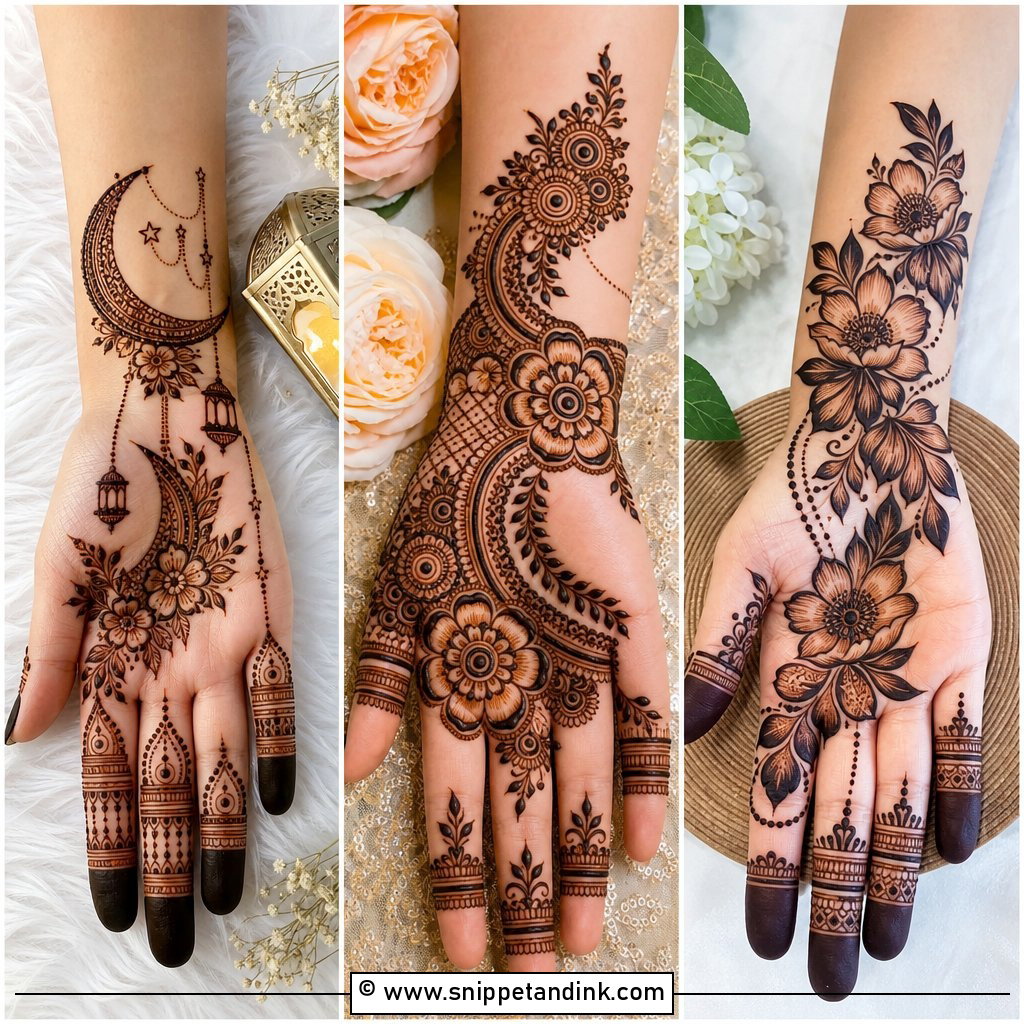
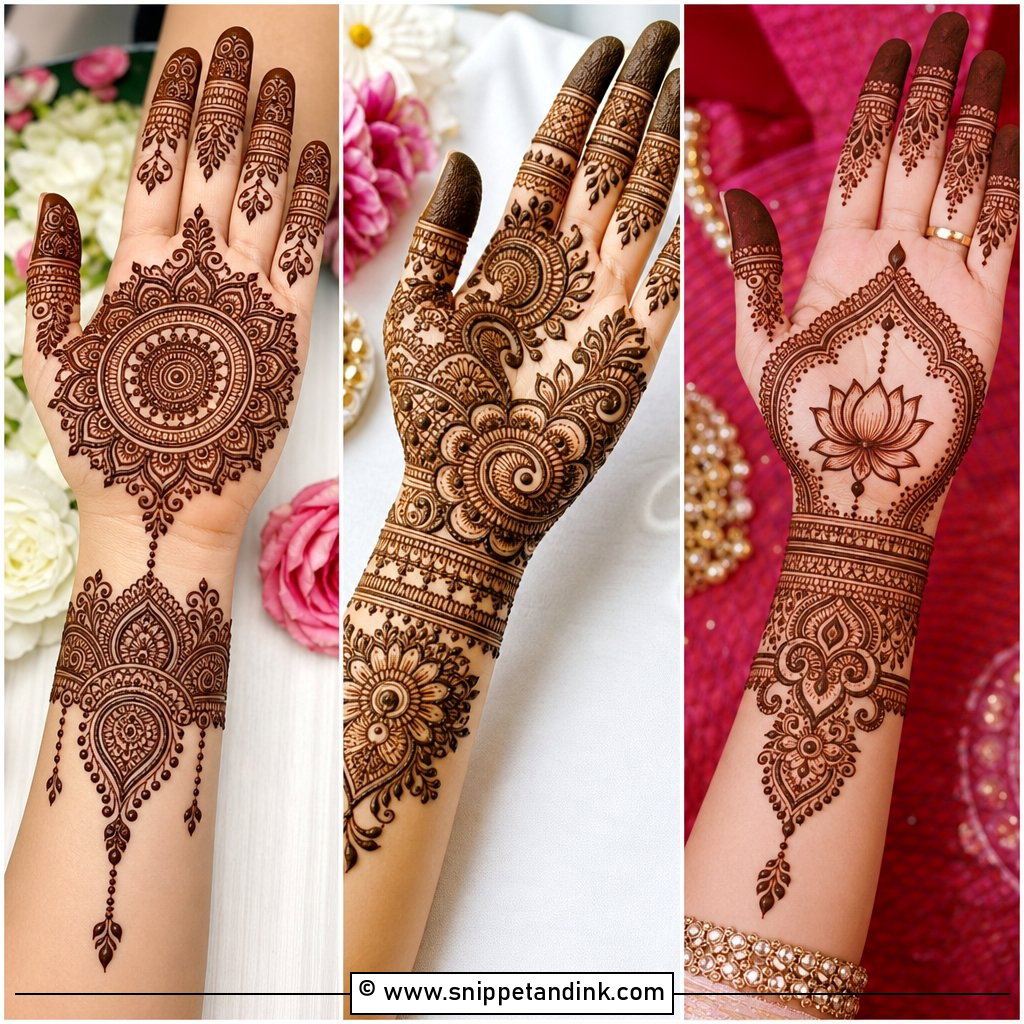
20. Royal Upper Hand Mehndi Design
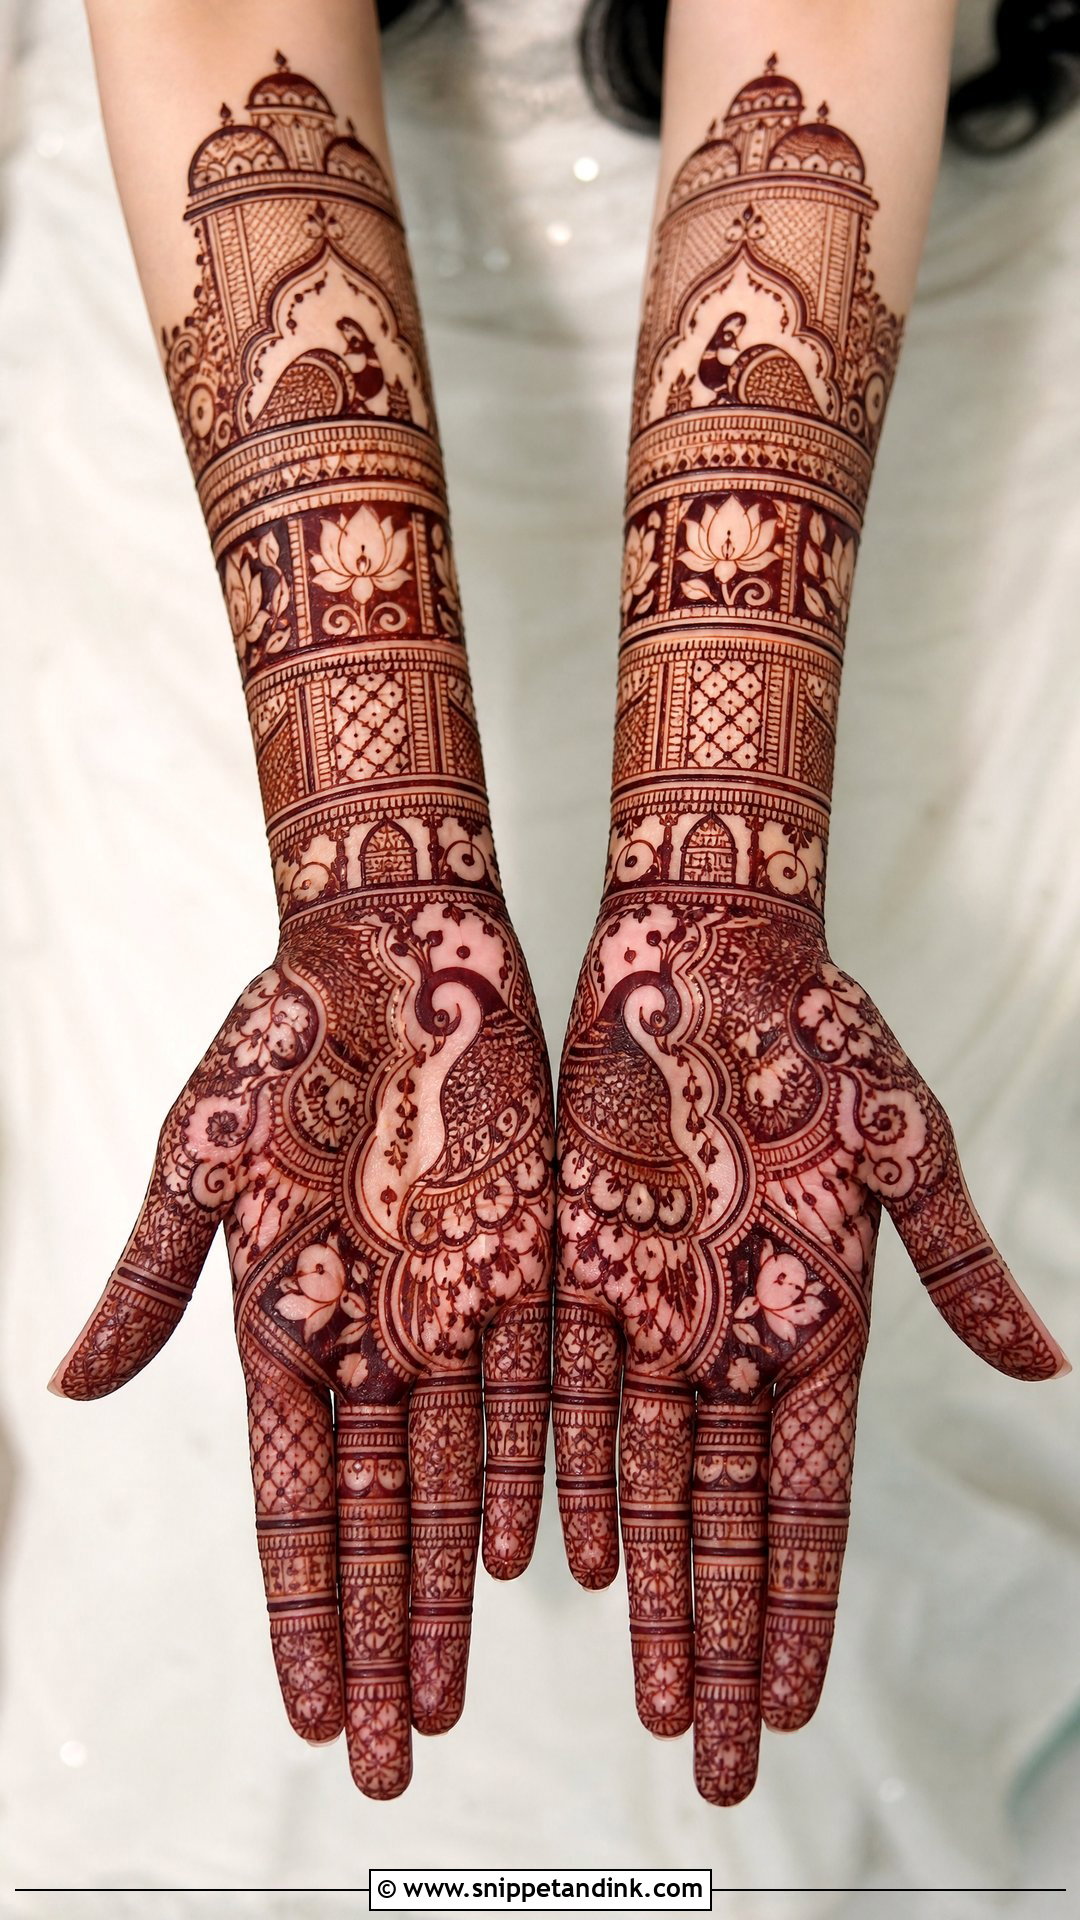
Royal designs layer peacocks, lotus, paisleys, jaali, domes and ornamental cuffs, and what separates a good one from a crowded one is that every motif has its place before any filler goes in. I draw the central focal point first, then the cuff, then the fingers, and fill last. A design this detailed needs a deep stain to read, so aftercare is half the result: leave the paste on for several hours, keep water off at first and let the colour develop on its own. Brides, sisters of the bride and anyone in heavily embroidered clothes suit it best.
21. Chain Upper Hand Mehndi Design
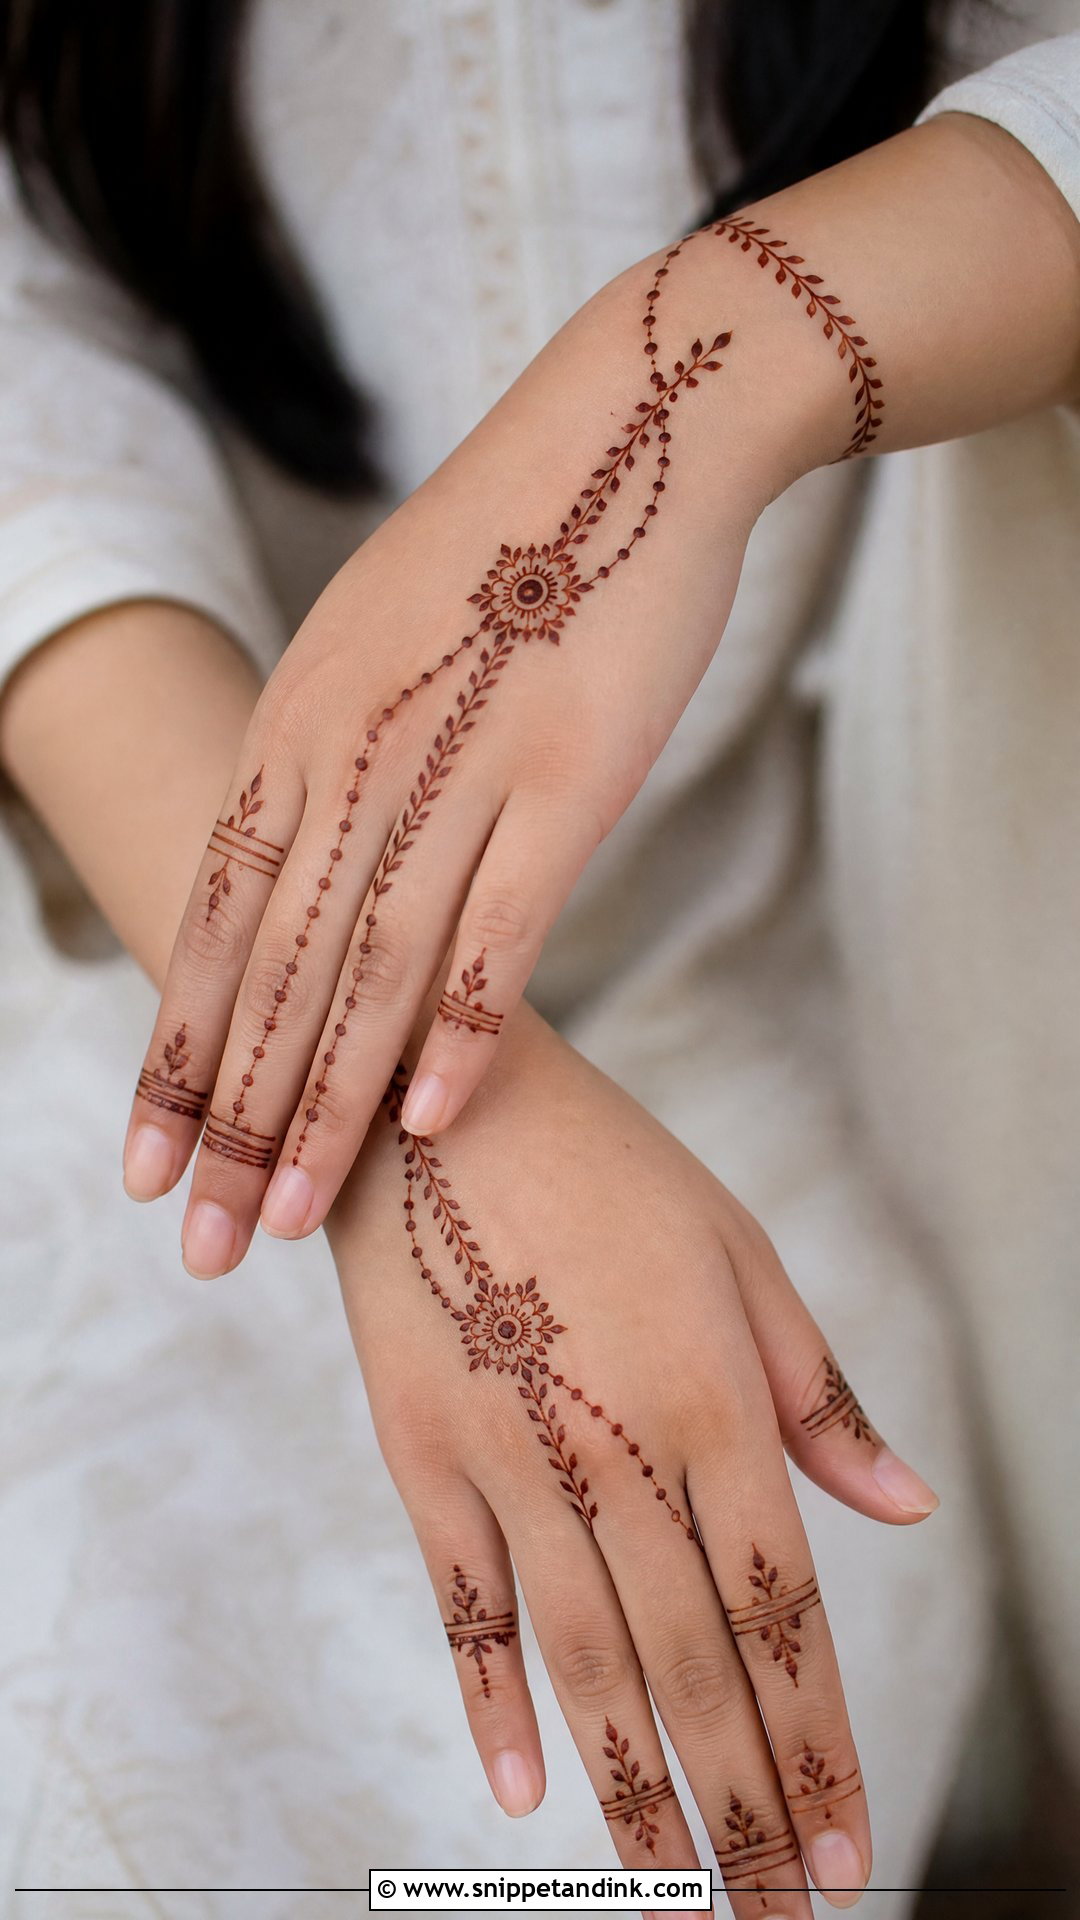
Chain designs link the wrist to one or more fingers with dotted chains, leafy strings or lines that imitate jewellery, usually anchored by a small flower, mandala or paisley in the centre. They sit comfortably next to real rings and bangles. Go thin chains with almost bare fingers for something modern, or add small floral clusters and dotted borders for a festive night. Either way, the chain has to read as one line from wrist to finger, so I never let filler cross it.
22. Rose Upper Hand Mehndi Design
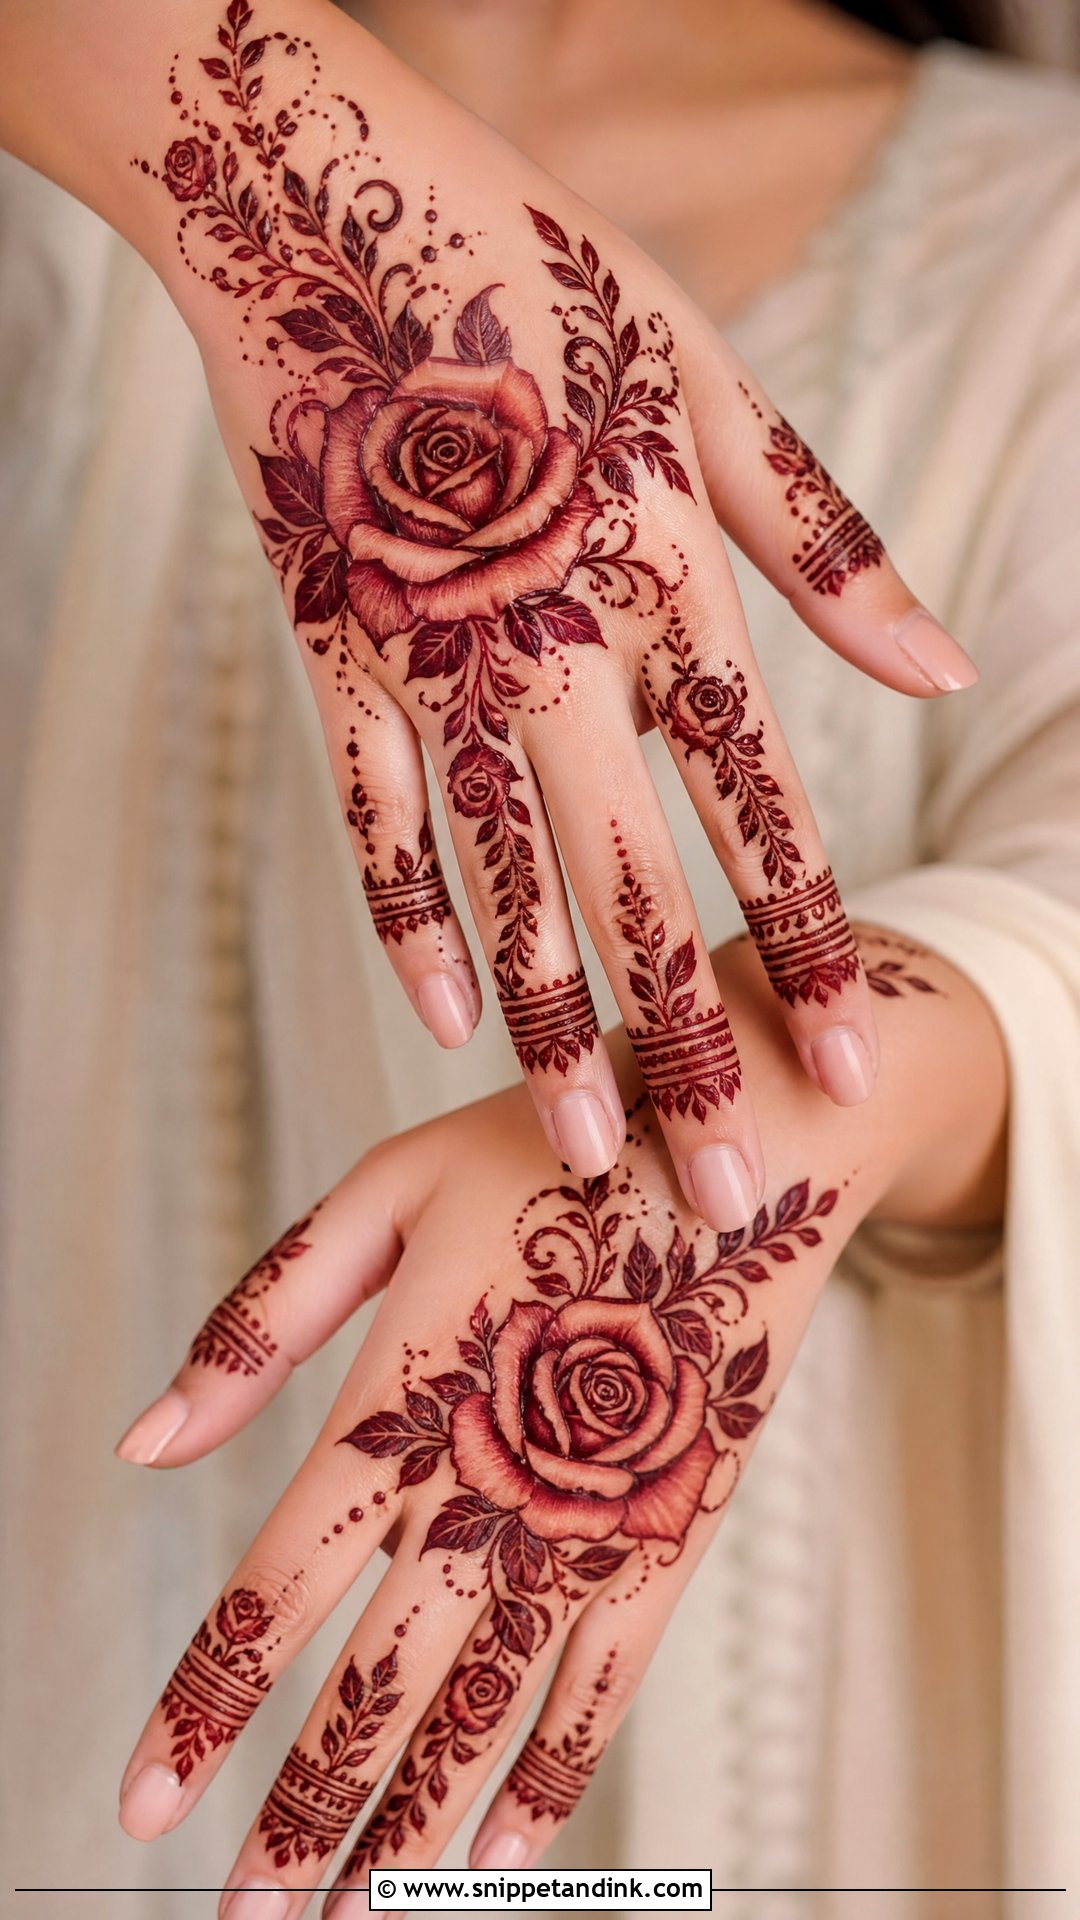
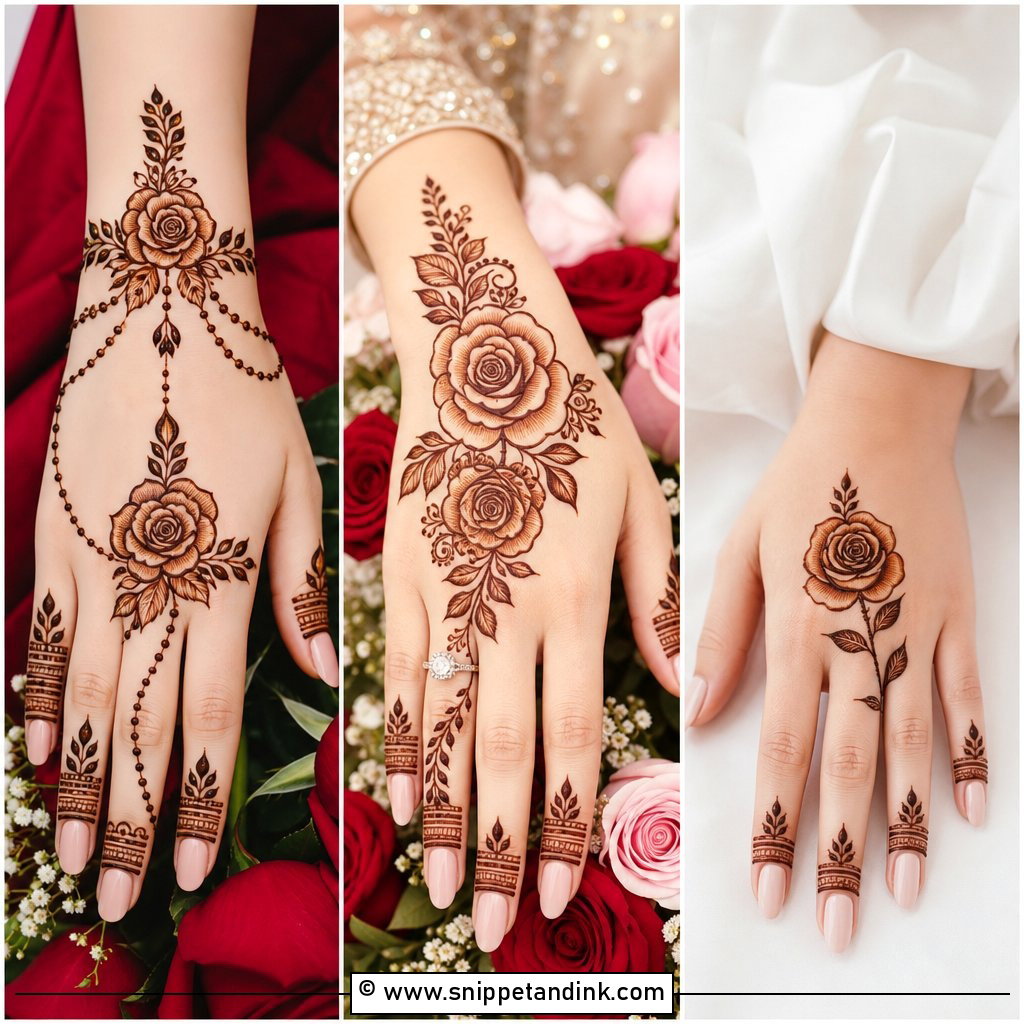
A rose looks clumsy in henna unless the petals are shaded. I draw the outer petal edges with a bold line and the inner strokes lighter, which mimics how real petals overlap. One large rose near the centre or wrist with leaves curling toward the fingers is enough; smaller roses in a trail give a fuller hand. Leave clear skin around each bloom. Henna keeps darkening for a day or two, and a rose with no space around it loses its shape as the colour deepens. It’s a favourite of mine for engagement events and bridesmaids.
23. Lotus Upper Hand Mehndi Design
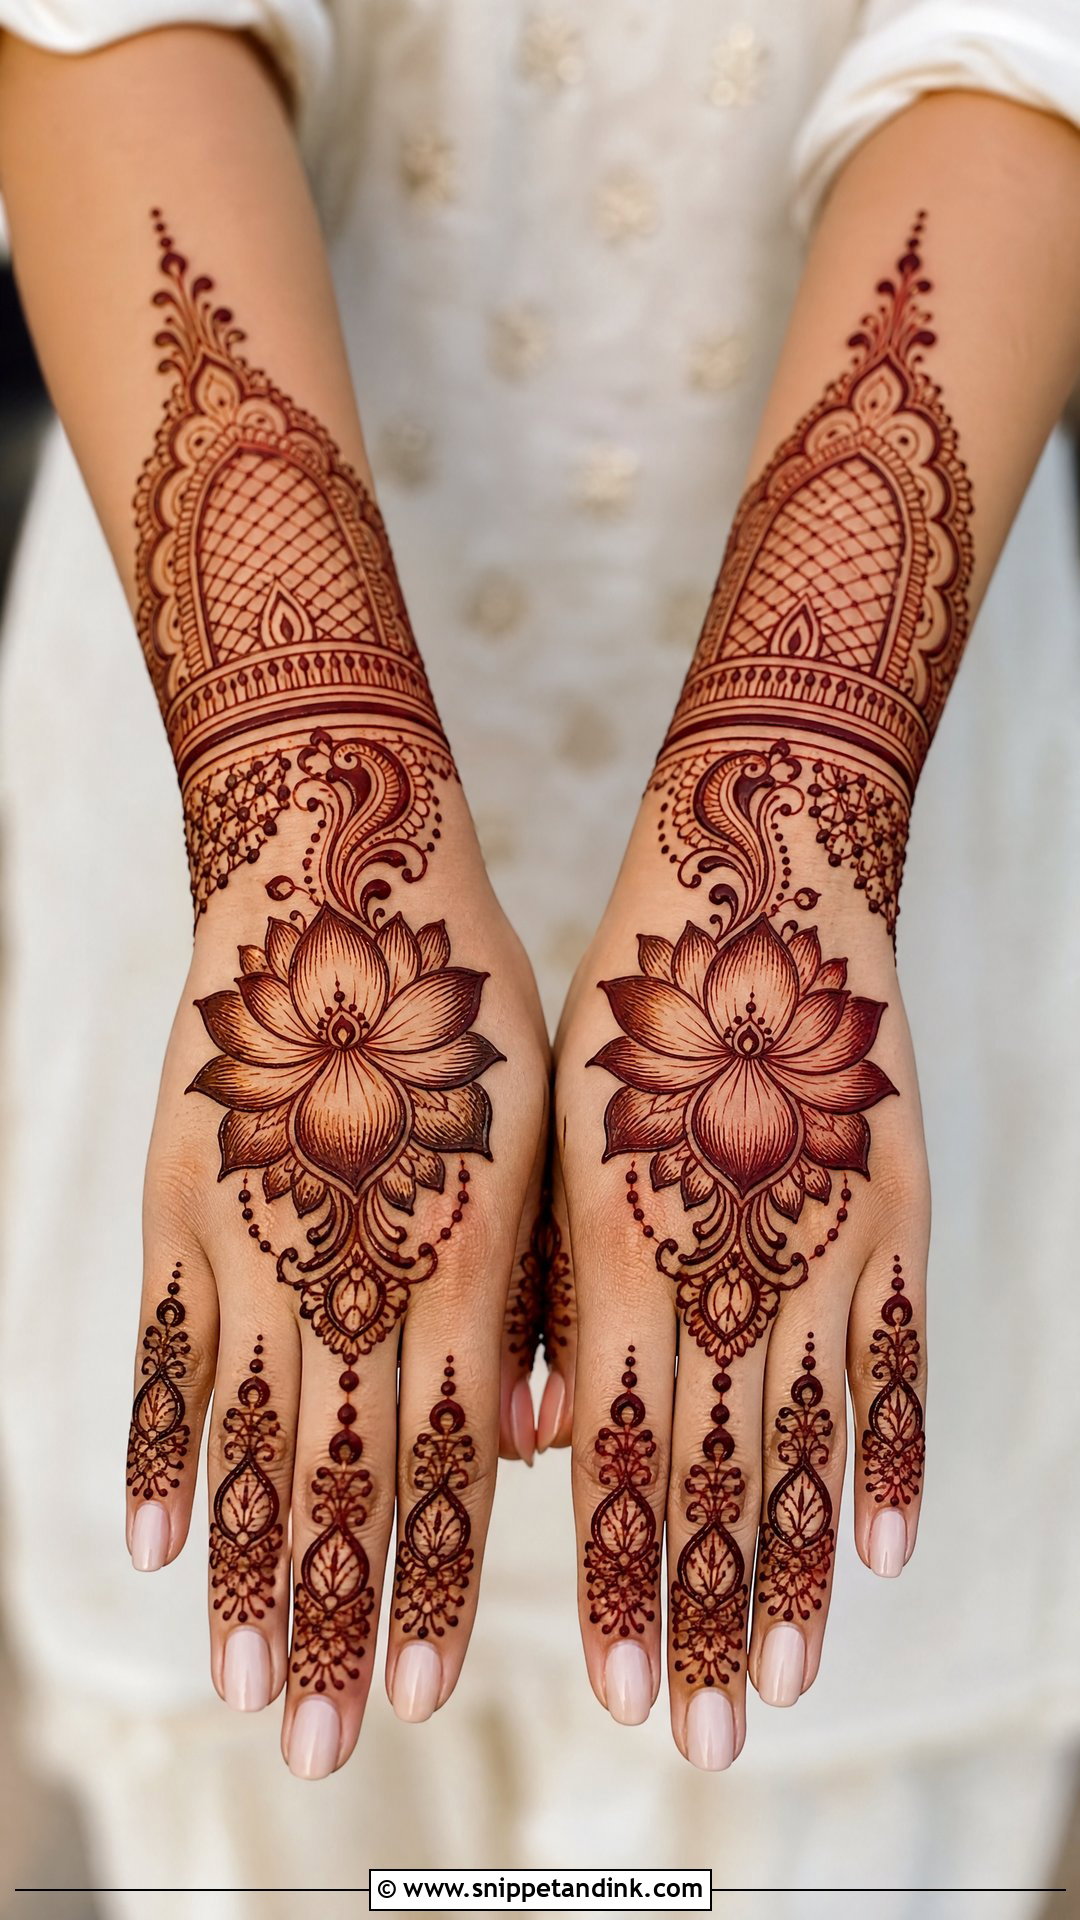
The lotus carries real meaning for many families, which is often why it’s requested for pujas and weddings. It can sit in the centre, near the wrist or inside a larger bridal layout, completed by paisleys, vines, dots and jaali. I’d rather draw one well-proportioned lotus than three cramped ones, and I keep the petal shapes open and even so the flower doesn’t sink into the fillers. One bloom with finger bands is the simple version; several with wrist coverage is the heavy one. A maroon stain suits it.
24. Kids Upper Hand Mehndi Design
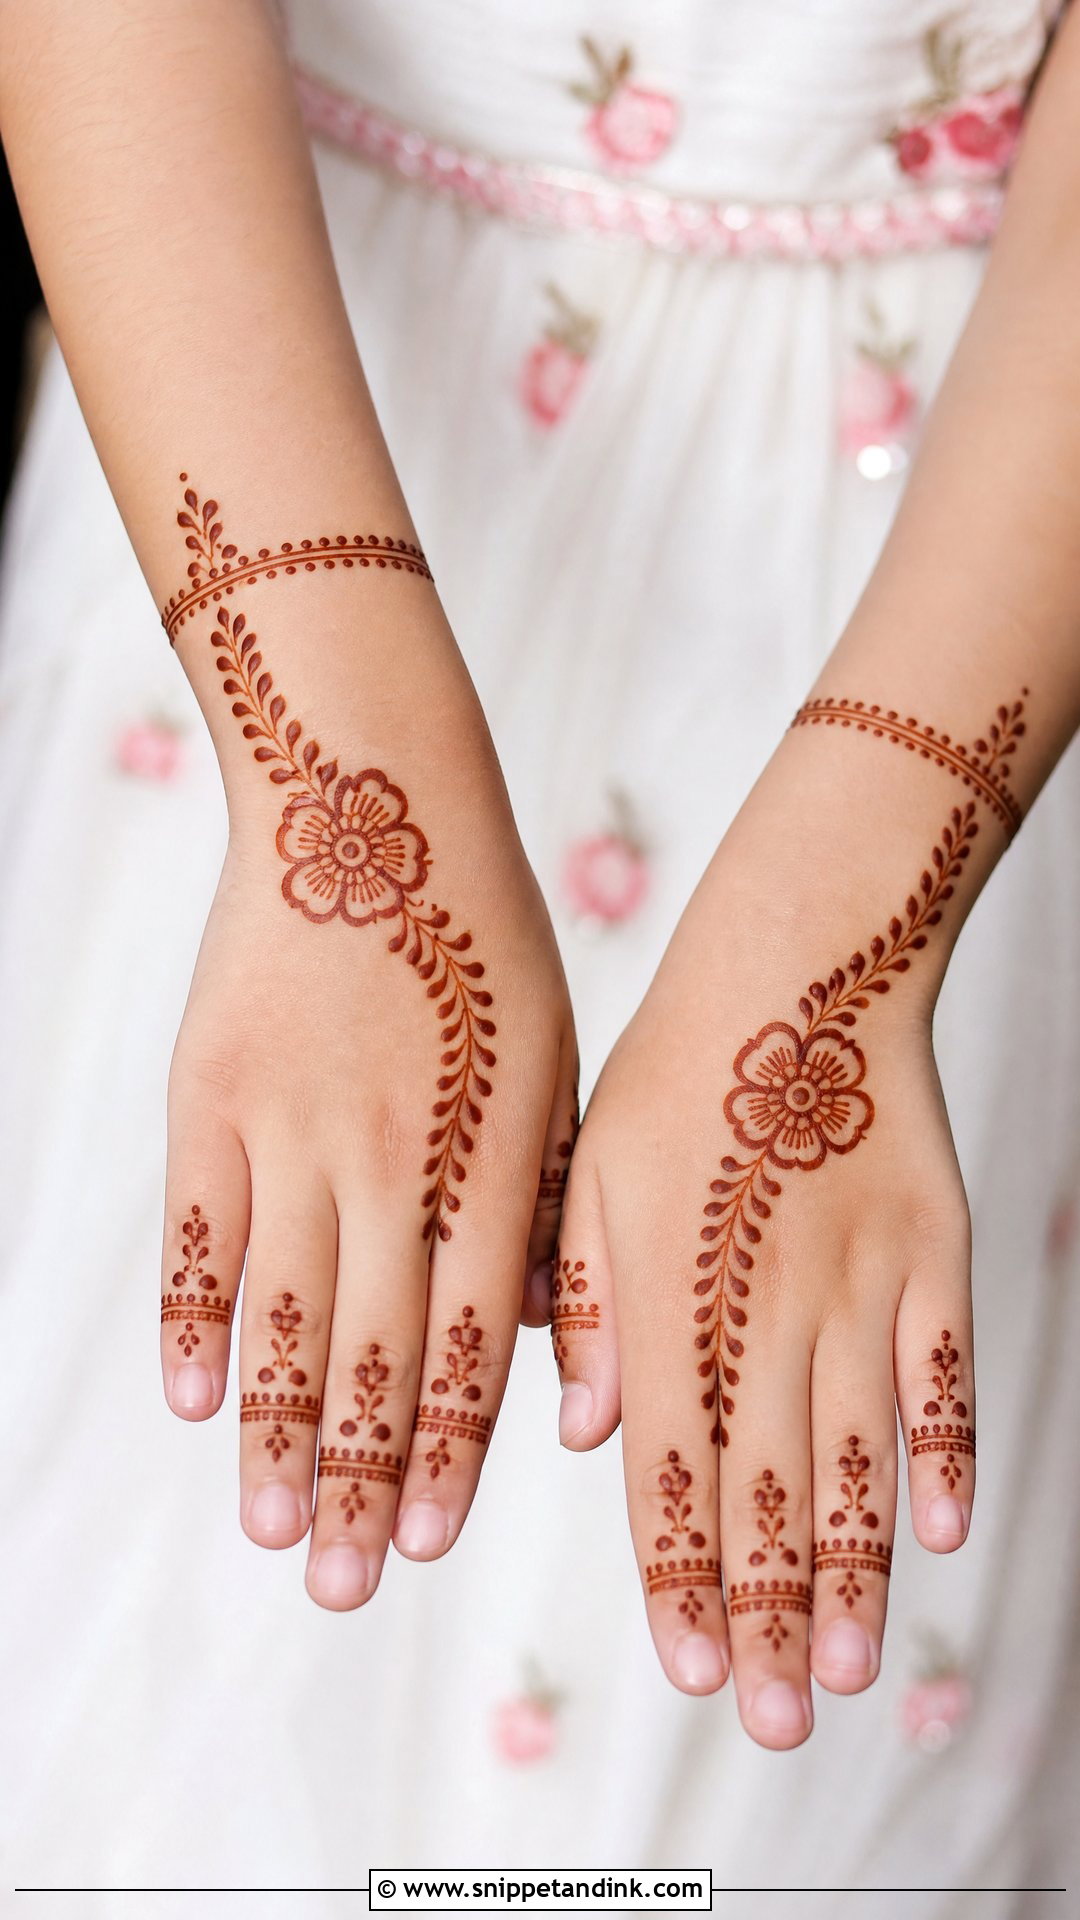
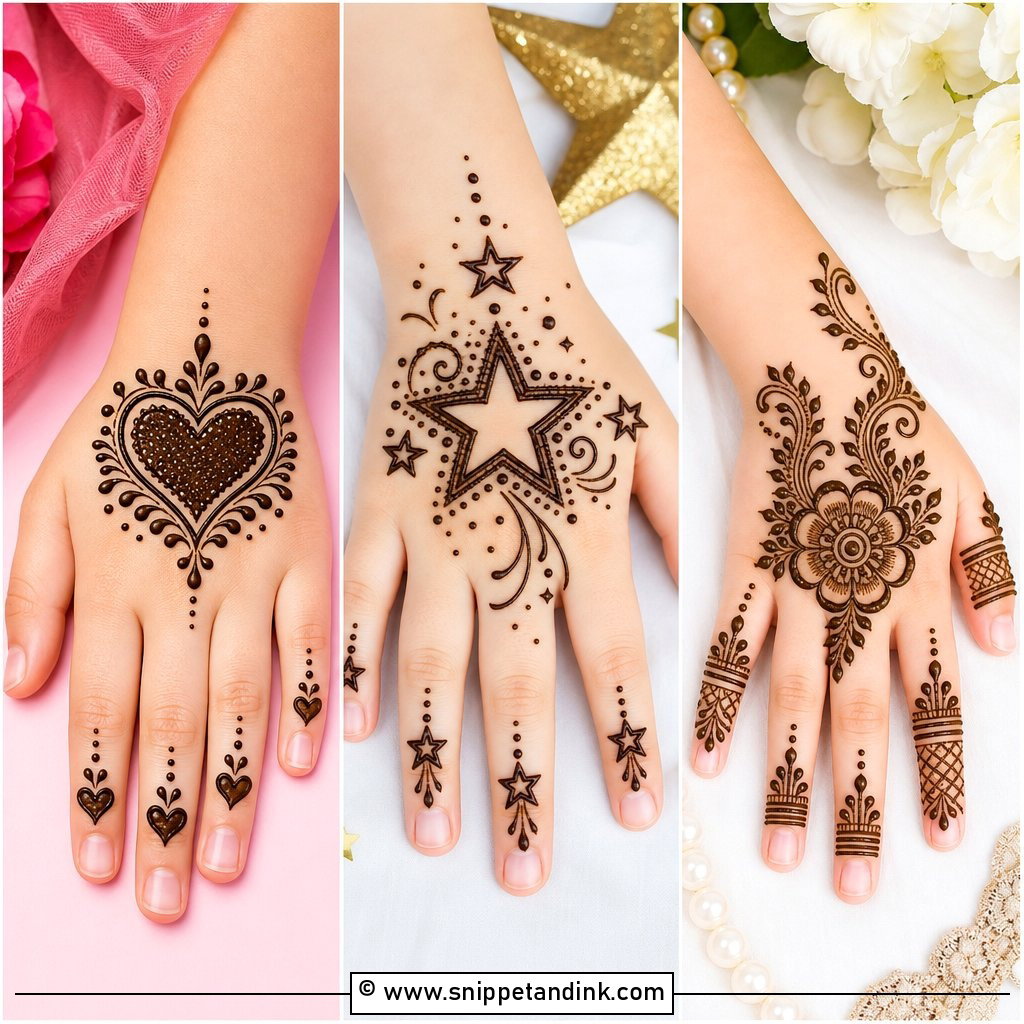
Kids upper hand mehndi design has to be finished before the child’s patience runs out, so I draw bold lines and skip fine fillers entirely: a small flower, an ornamental motif, a butterfly-like shape, a mandala or a leafy trail, with dots or simple tips on the fingers and a small wrist band. Thick lines also survive a child touching everything while the paste is wet. Use only natural henna on children. Anything sold as black henna or promising instant dark colour can contain PPD, a hair-dye chemical that can cause serious skin reactions.
25. Festival Upper Hand Mehndi Design
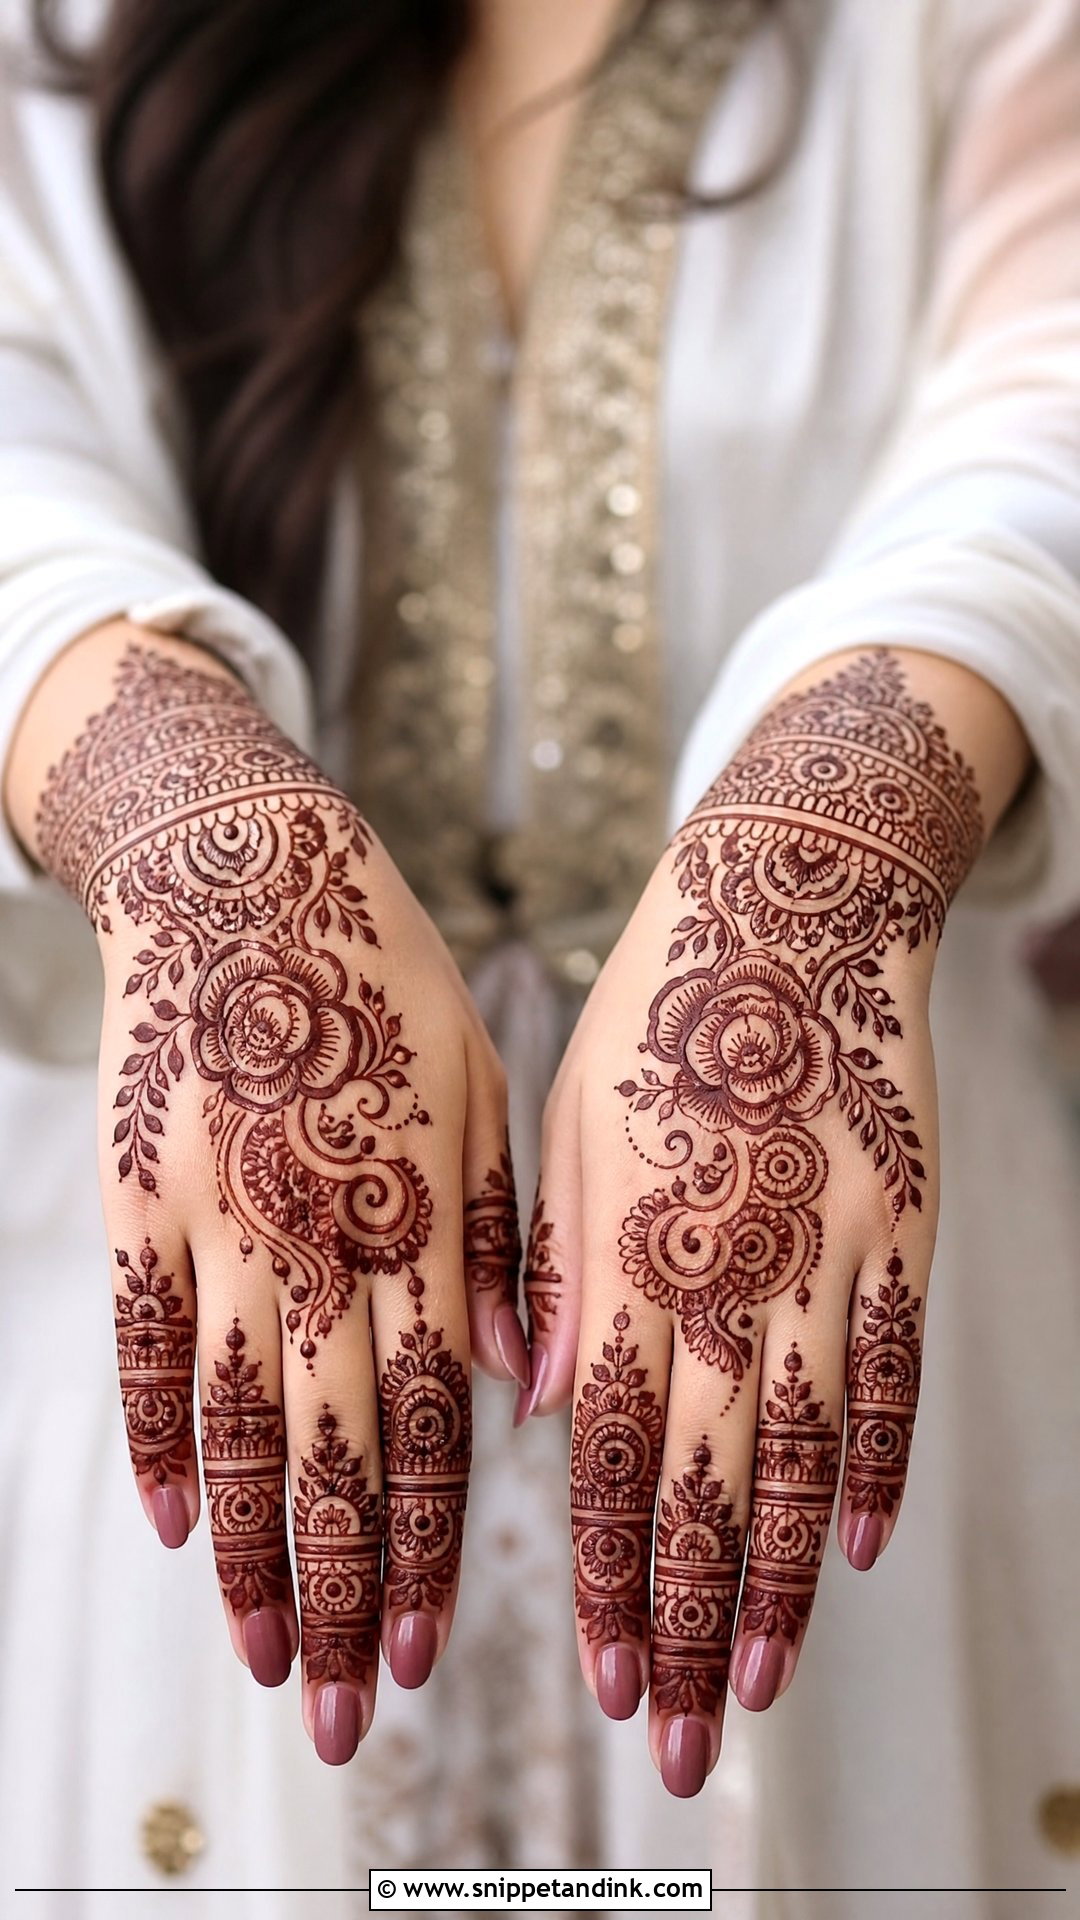
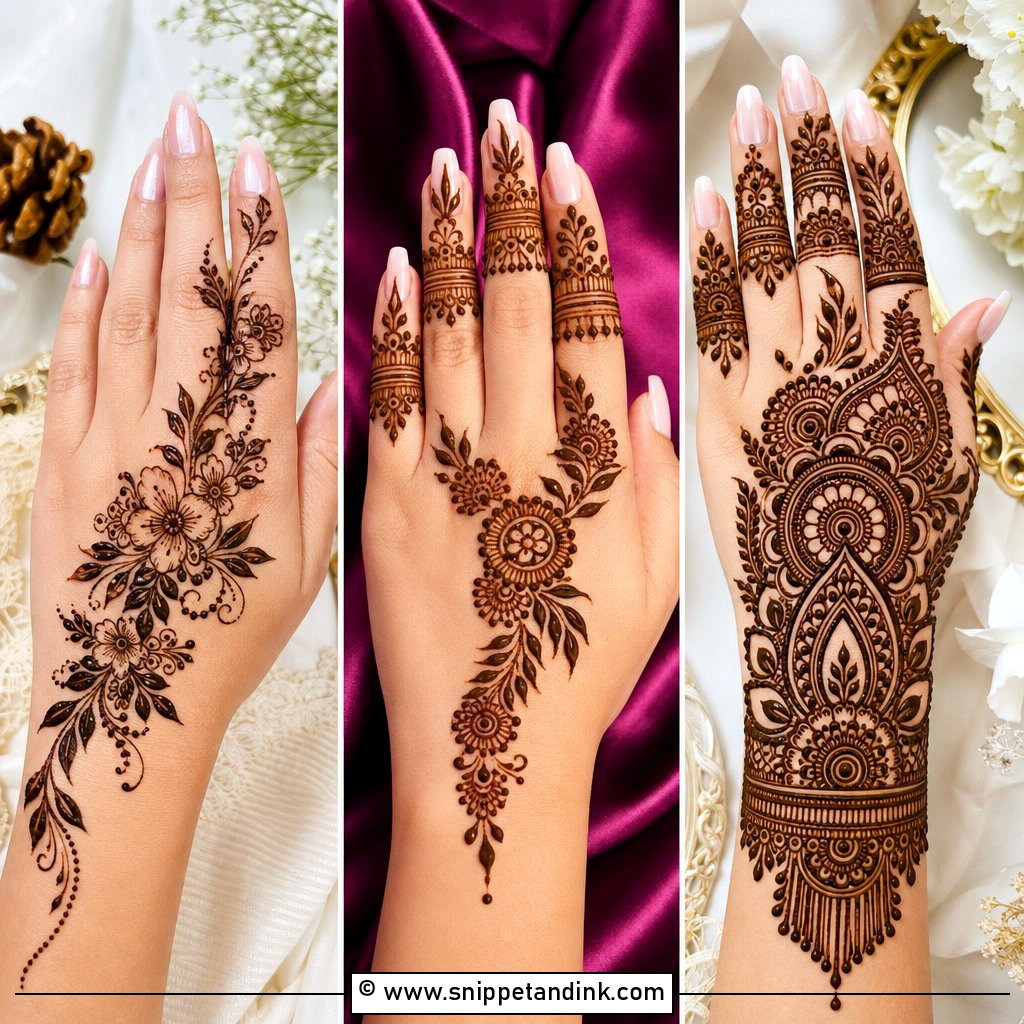
For Diwali, Eid, Karwa Chauth, Raksha Bandhan and family gatherings, I aim for medium coverage that reads from across the room: flowers, paisleys, a mandala, finger bands and a wrist cuff. A diagonal floral trail, a centred mandala with filled fingers or an Indo-Arabic wrist-to-finger layout all hold up. Apply the evening before if you can, since a fresh stain stays orange for the first several hours. Doing it yourself? Place the large motifs first and the dots and leaves last. Starting with filler is how designs end up lopsided.
Why the Back of Your Hand Stains Lighter Than Your Palm
Expect two different colours on the same hand. Henna dye binds to the outer layer of skin, and the palms and fingertips have a thicker outer layer than the back of the hand, so they finish darker. A back-hand design that comes out a warm reddish brown while your palm goes deep maroon is normal, not a weak cone.
The stain also changes over time. When the dried paste comes off it looks orange, and it darkens over roughly the next 24 to 48 hours. That is why I plan bridal application at least a day before the ceremony, and why judging the colour the same evening leads to needless worry.
The aftercare I give every client
- Leave the paste on for several hours, overnight if you can sleep without smearing it.
- Dab a little lemon and sugar mix on once the surface is dry, so the paste stays stuck to the skin instead of flaking early.
- Scrape the dry paste off with a blunt edge or your fingers. Don’t wash it off.
- Keep water away for as long as you reasonably can that first day, and skip scrubbing or chlorinated pools for a few days.
- Keep your hands warm. Henna develops better on warm skin than on cold hands in an air-conditioned room.
When Wet Paste Smudges or Cracks
Smudges are the most common problem I see, almost always on the dominant hand or where a sleeve brushed the wrist. If it happens while the paste is still wet, don’t rub it. A cotton bud or toothpick can lift the smeared paste off cleanly, and your artist can redraw the line within minutes.
Cracking and flaking come from paste drying out too fast, especially over knuckles. A light layer of sealant helps, and so does keeping your hands still for the first half hour. Once the stain has developed, a pale or patchy patch can’t really be corrected, so prevention is the only fix that works.
Let the Stain Finish Before You Judge the Design
The back of the hand is the side people see, so it rewards planning more than the palm does. Minimal, finger, bracelet and chain designs leave room for jewellery. Arabic, Indo-Arabic, jaali, floral and paisley work carries a festive night. Brides and close family can go royal, peacock, lotus or full-hand coverage. Whatever you pick, ask your artist to map it on your actual hand before the first line, and give the stain two days to reach its real colour before you decide how you feel about it.
You'll Like These Ideas:


Leave a Reply