
A light design is often the harder one to get right. With heavy bridal work, the filling hides small slips; with a few flowers and some open skin, every line shows. The designs below are the simple ones I draw most at festivals and family functions: neat florals, finger work, mandalas, Arabic trails, wrist bracelets, plus a few traditional motifs like paisley, peacock, jaali, rose and bel scaled down to suit front hands, back hands and wrists. Most take well under an hour. A few are easy enough to try on yourself, and I’ve said which.
Mixing Paste and Rolling a Cone at the Kitchen Table
Most of these designs are simple enough to try at home, and the result depends more on the paste than on your drawing. Shop-bought cones vary a lot, and some contain dyes that have no business being on skin. Fresh paste you mix yourself is cheap, safe and stains better.
- Buy body-art-quality henna powder, the finely sifted kind sold for skin rather than for hair.
- Stir in lemon juice a little at a time until it looks like thick mashed potato, then add a spoonful of sugar to help it cling.
- Cover it and leave it somewhere warm for several hours so the dye releases. Warm kitchens speed this up; cold ones slow it down.
- Add a few drops of a henna-friendly essential oil such as lavender or tea tree, then loosen it with more lemon juice until it flows like toothpaste.
- Test it: dab a little on your palm, wipe it off after a few minutes, and look for a clear orange mark. No mark means it needs longer.
To make a cone, I roll a small triangle of cellophane or a thin plastic sheet into a tight point, tape it, fill it no more than halfway, and fold the top closed. Snip the tiniest possible opening; you can always cut more, never less. Leftover paste freezes well in small portions.
Sitting so you don’t smudge your own work
Rest the forearm you’re decorating flat on a table with a towel underneath, and work from the fingertips back toward the wrist so your drawing hand never drags across wet paste. If you’re decorating your own dominant hand, keep it simple. Even experienced artists struggle to draw neatly with their other hand.
1. Simple Front Hand Mehndi Design
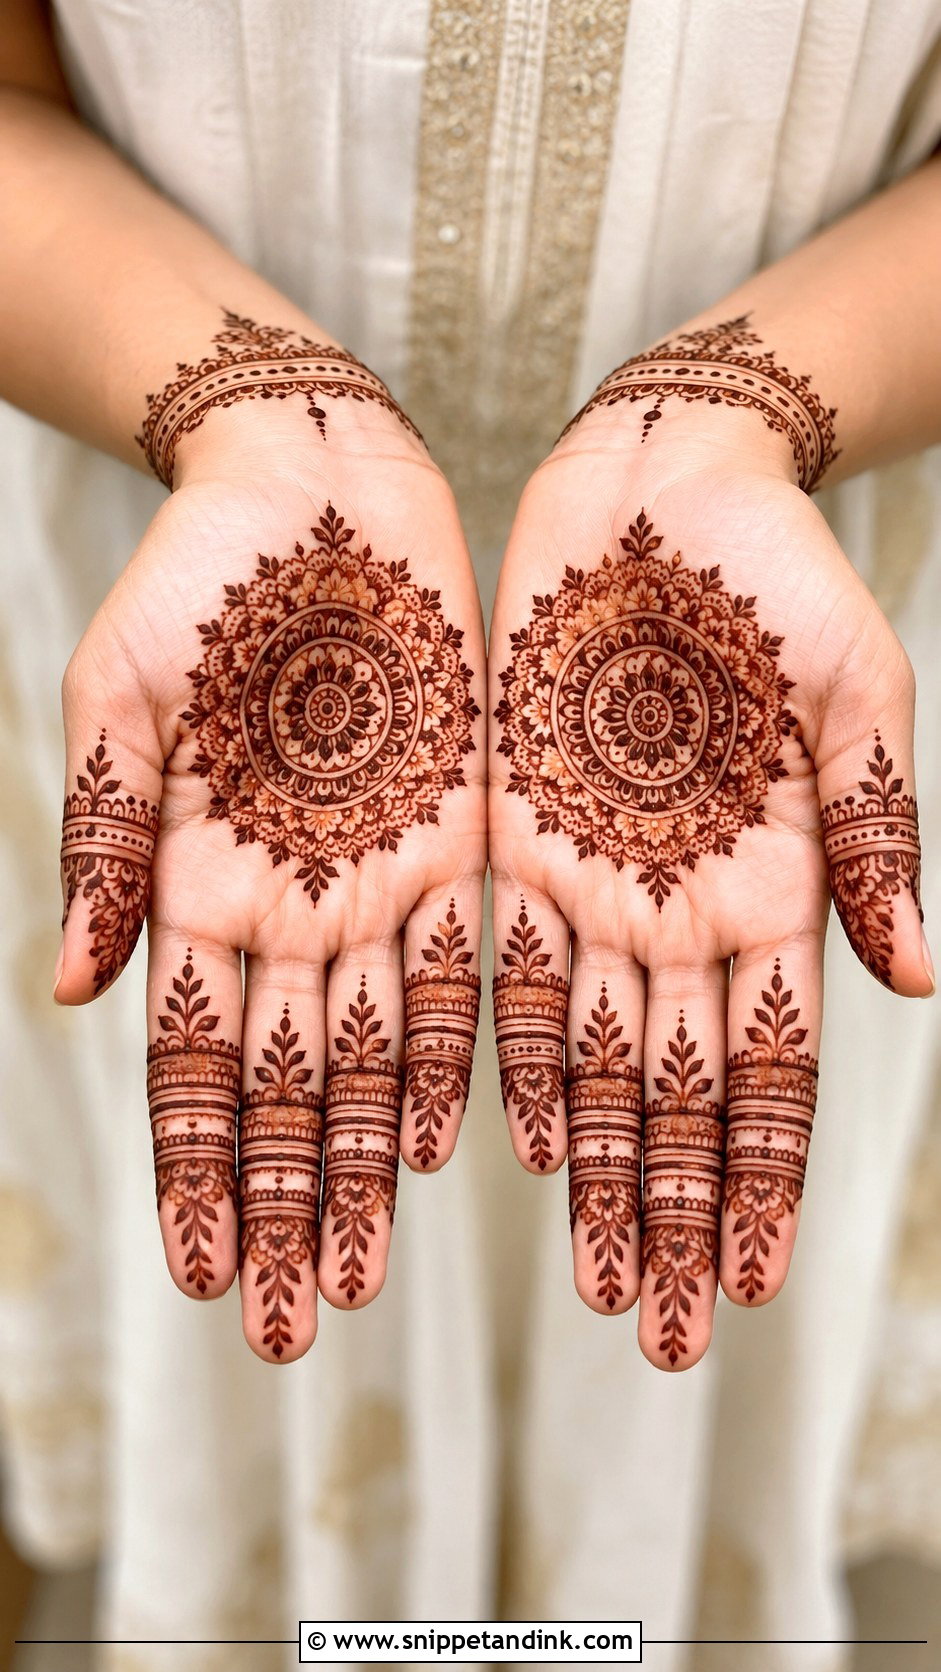
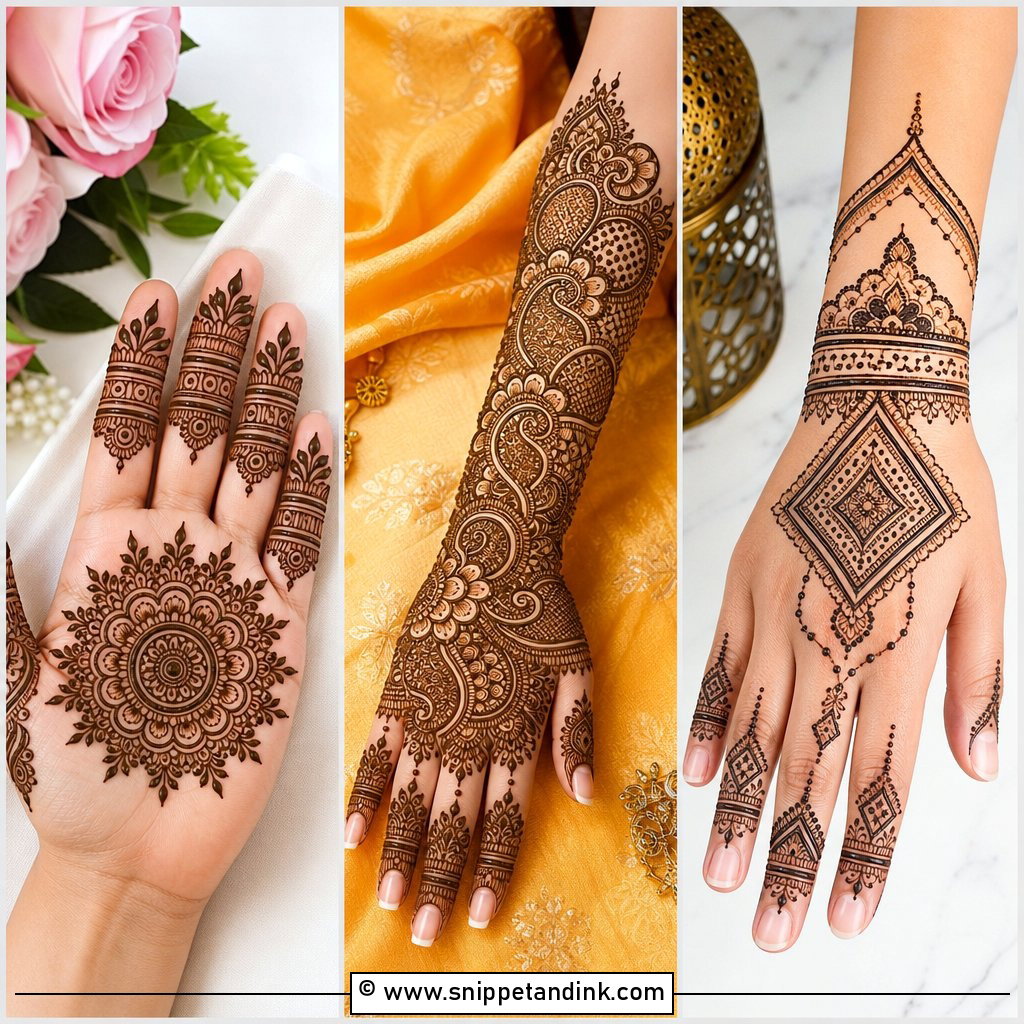
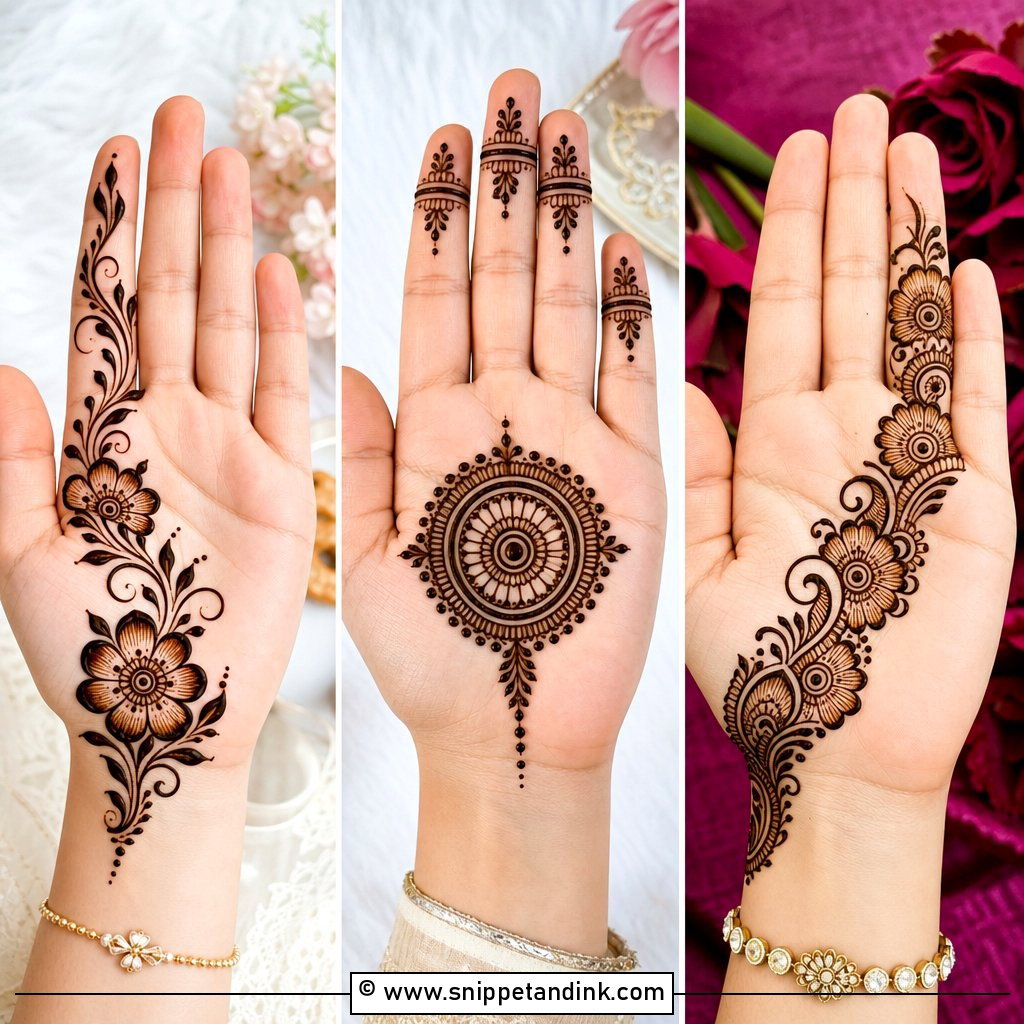
On the palm, I build from the middle outward. A neat mandala or flower goes in the centre, a little below the midpoint where the palm creases least, and light detailing runs up each finger. Leave bare skin between the motifs; palms stain dark, so the contrast does more work here than extra filling would. Finish with dots, a curved vine and a slim border at the wrist. Since everything hangs off one central shape, this is the layout I give people learning to hold a cone.
2. Simple Back Hand Mehndi Design
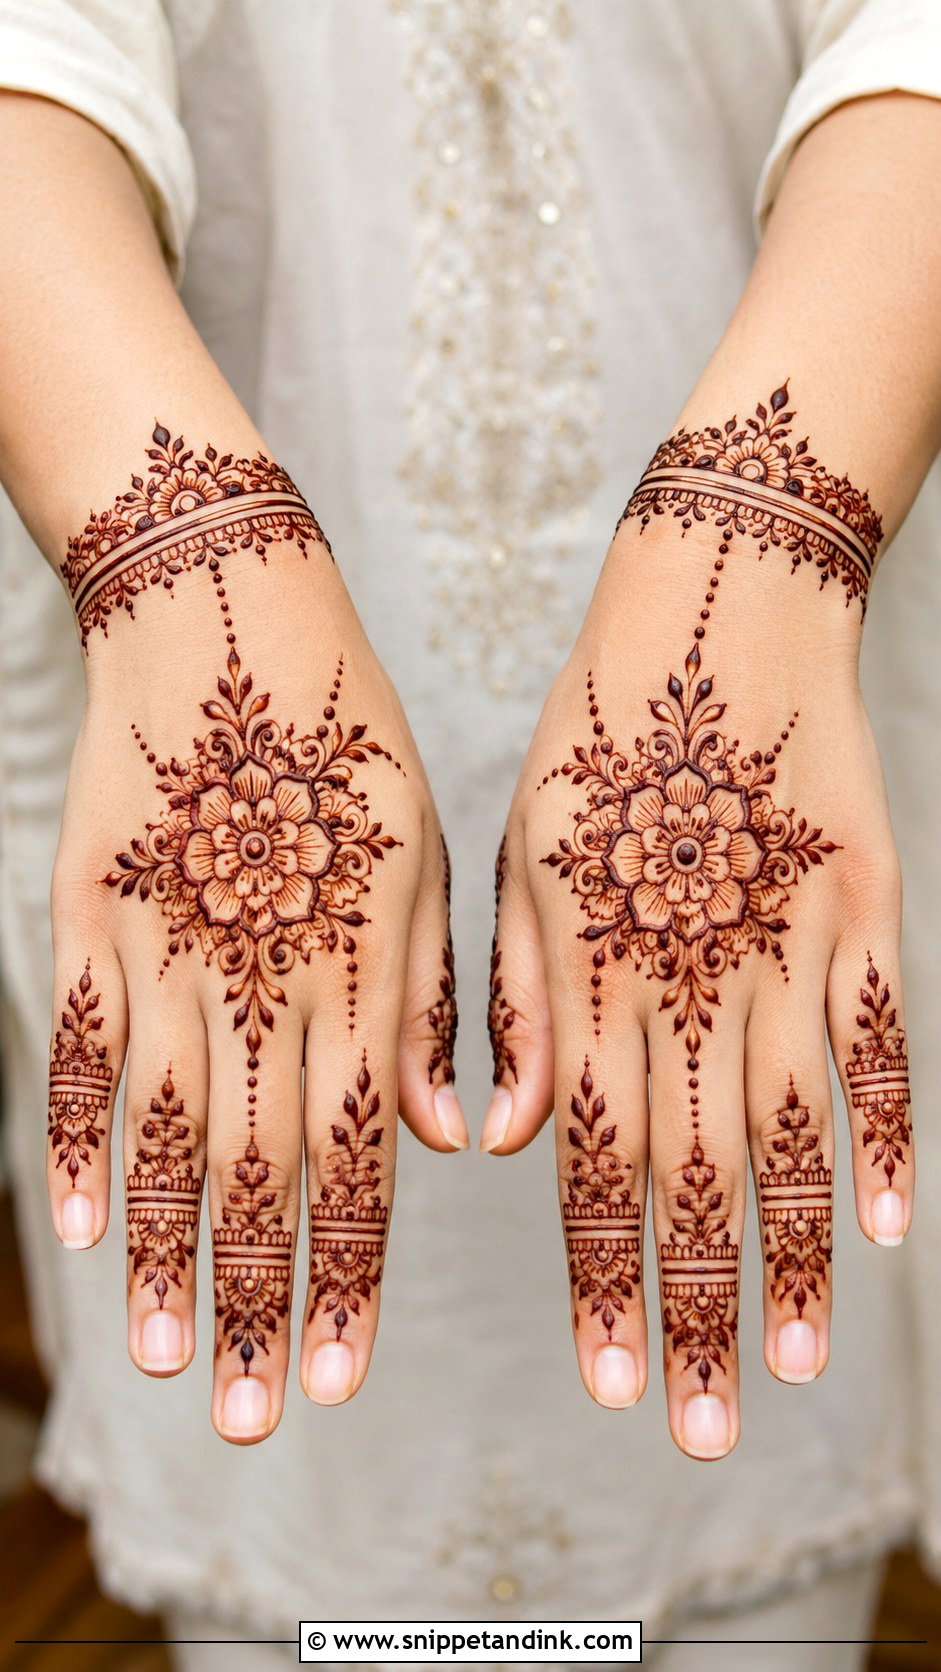
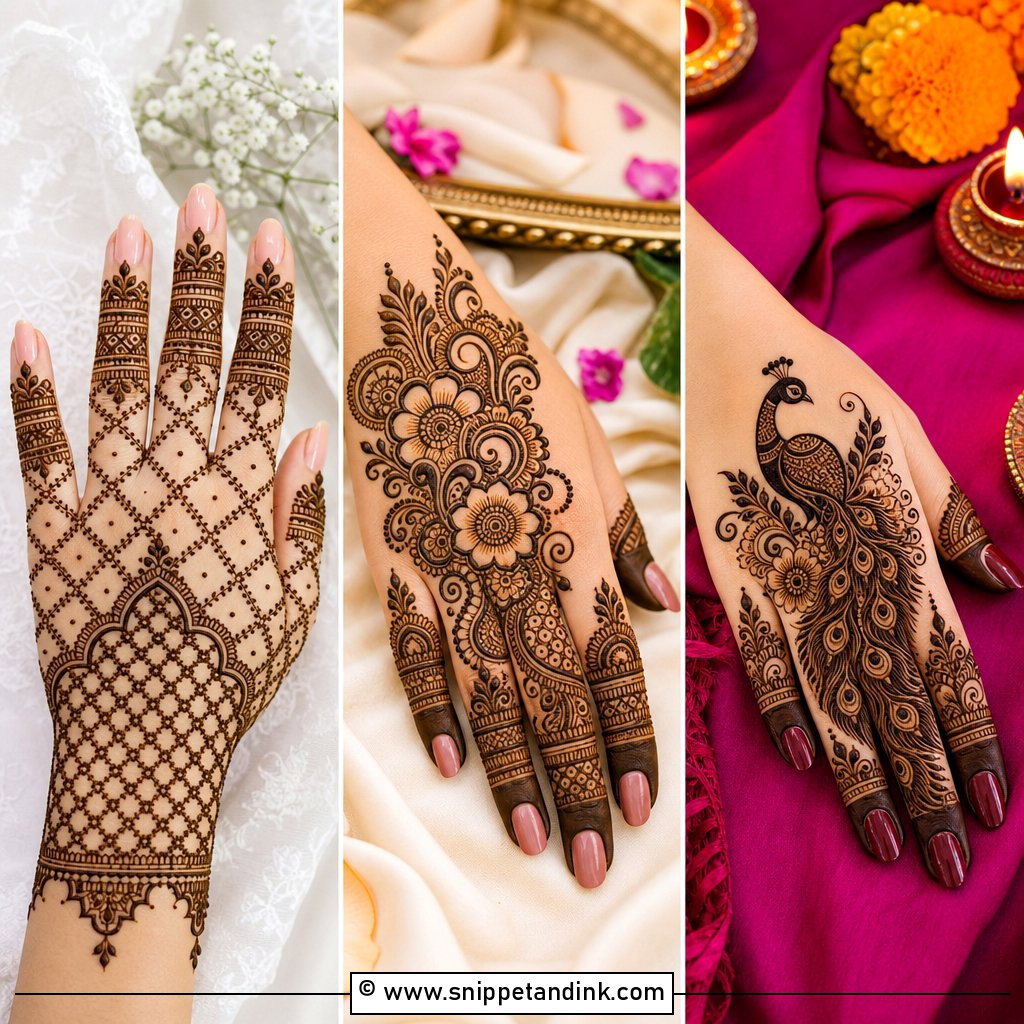
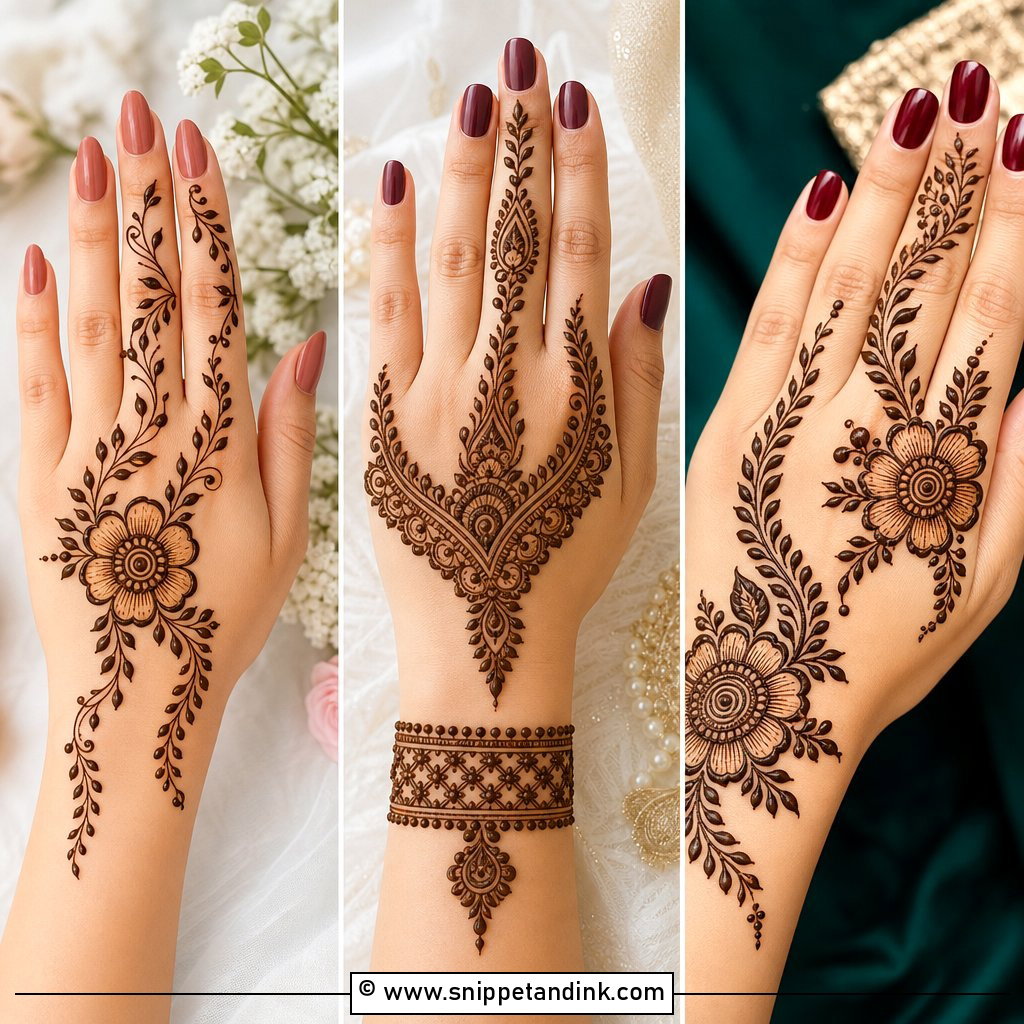
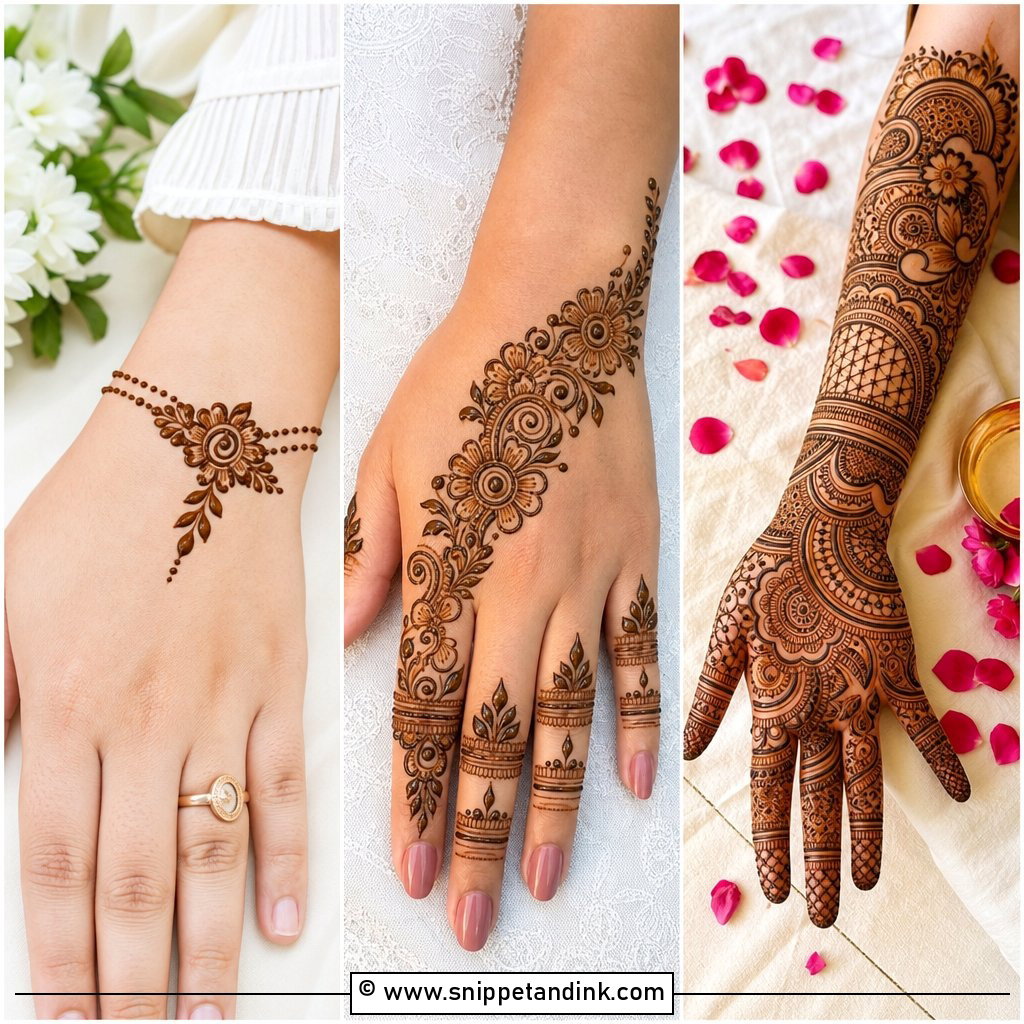
The back of the hand takes jewelry-style patterns naturally, because the knuckles and tendons give you a built-in frame. A simple back hand mehndi design starts with a small flower or mandala in the centre, then links to the fingers with thin chains, dots or leafy vines. Fingers get matching bands or half-flower tips; the wrist gets a soft bracelet border. Back-hand skin stains a shade lighter than the palm, so I keep these lines a touch bolder than I would inside the hand.
3. Simple Arabic Mehndi Design
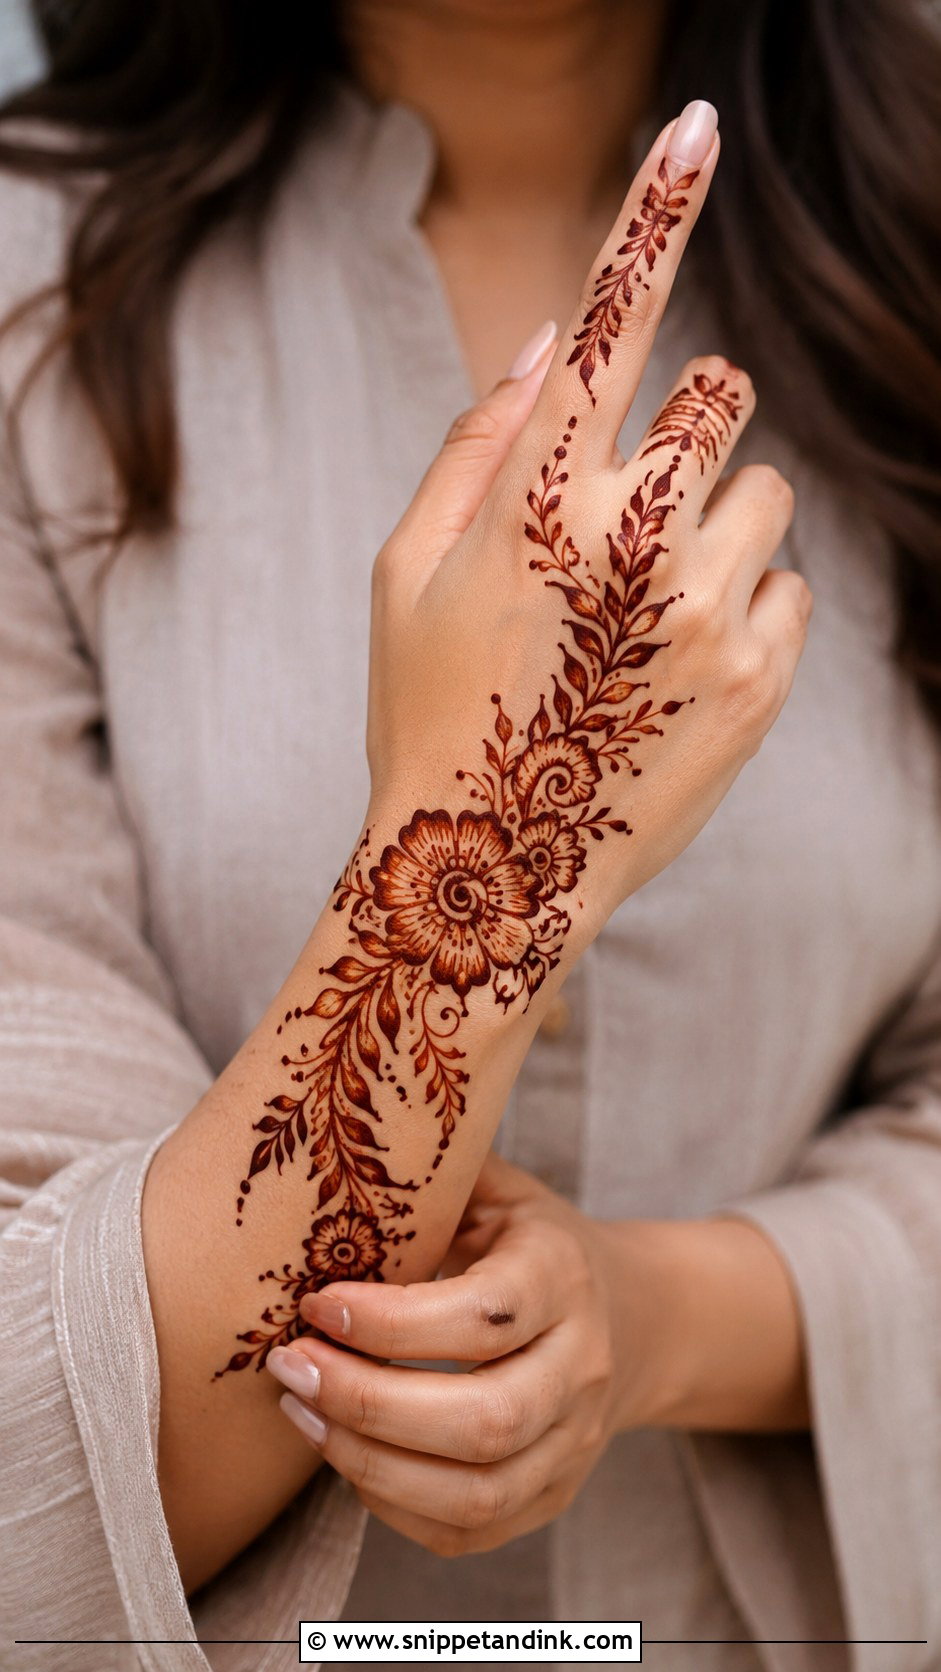
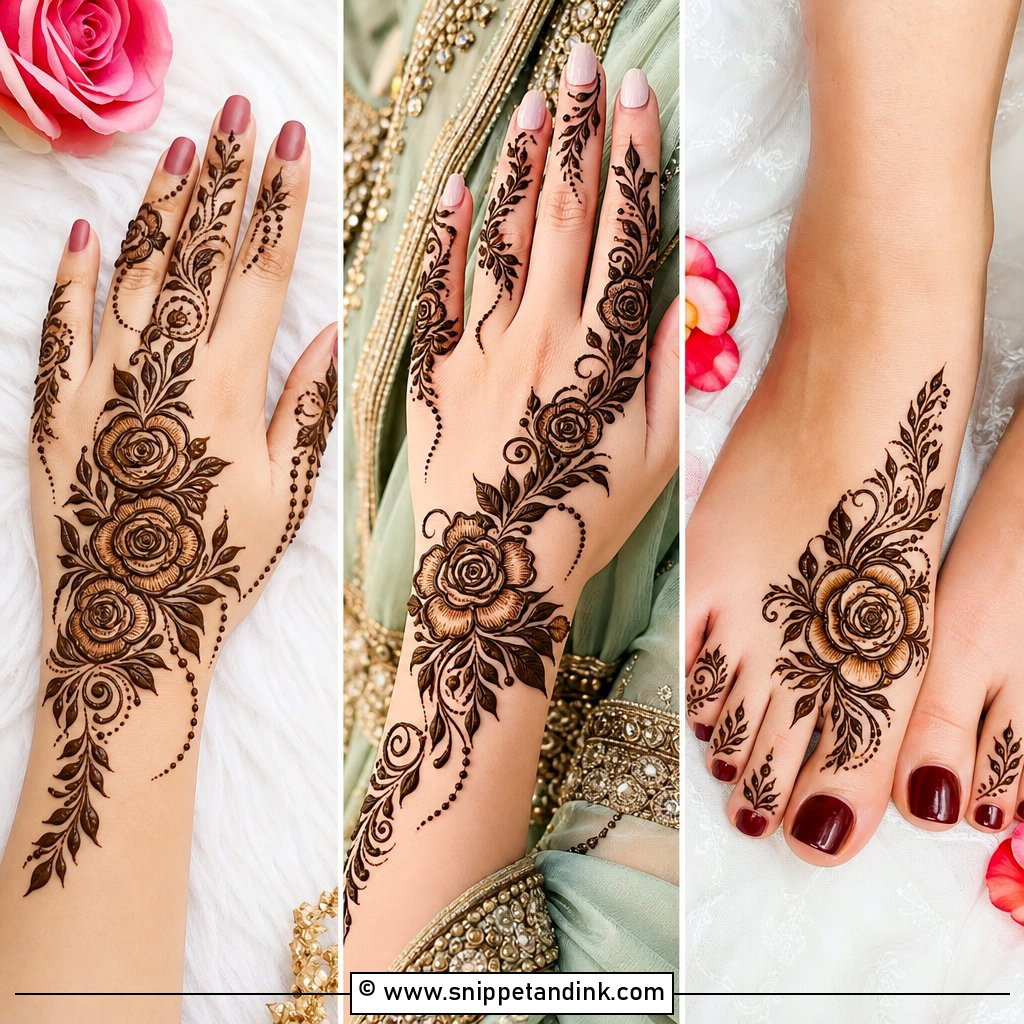
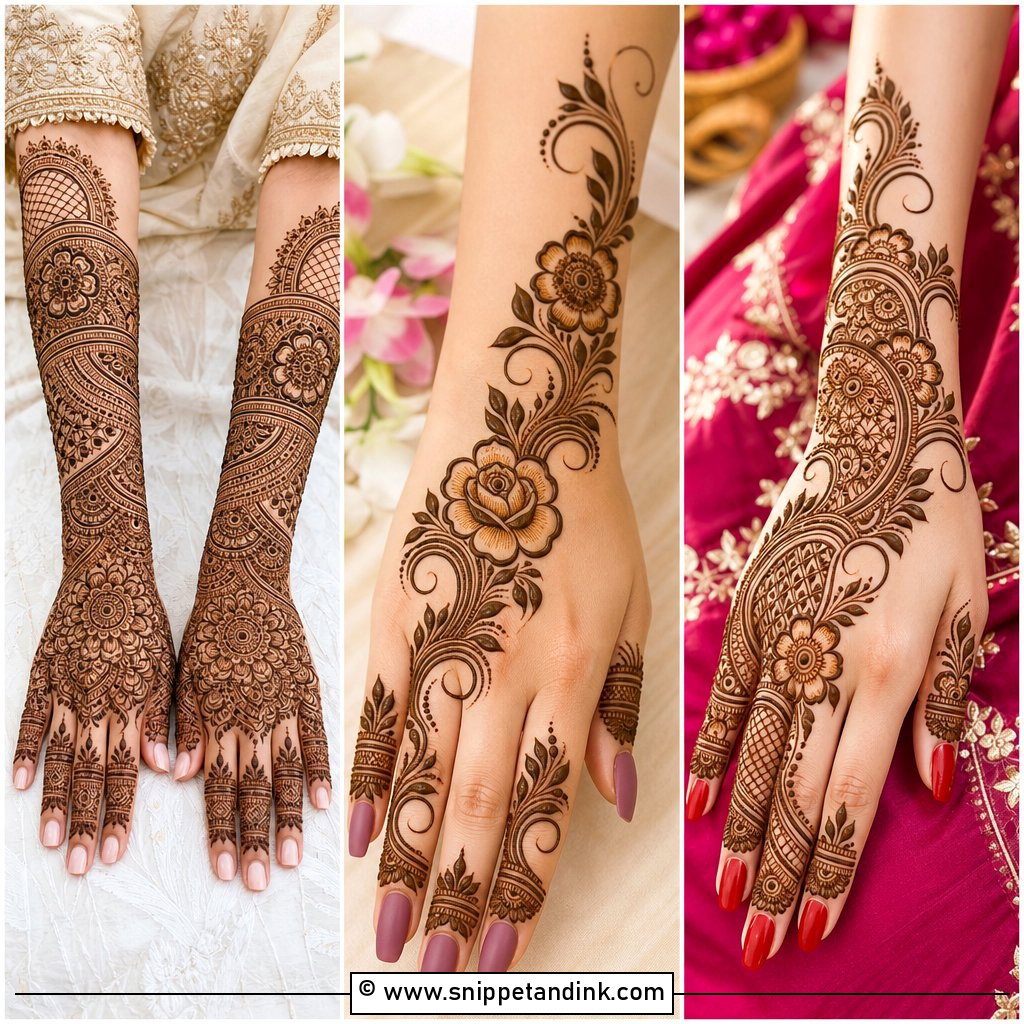
An Arabic trail is the quickest way I know to make a hand look done. One floral trail runs diagonally from the wrist toward the index finger, with thick outlines, a little inner shading and plenty of empty skin on either side. It doesn’t need symmetry, which is exactly why beginners do well with it. My one rule: draw the outlines first along the whole trail before shading anything, so the diagonal stays straight.
4. Simple Indian Mehndi Design
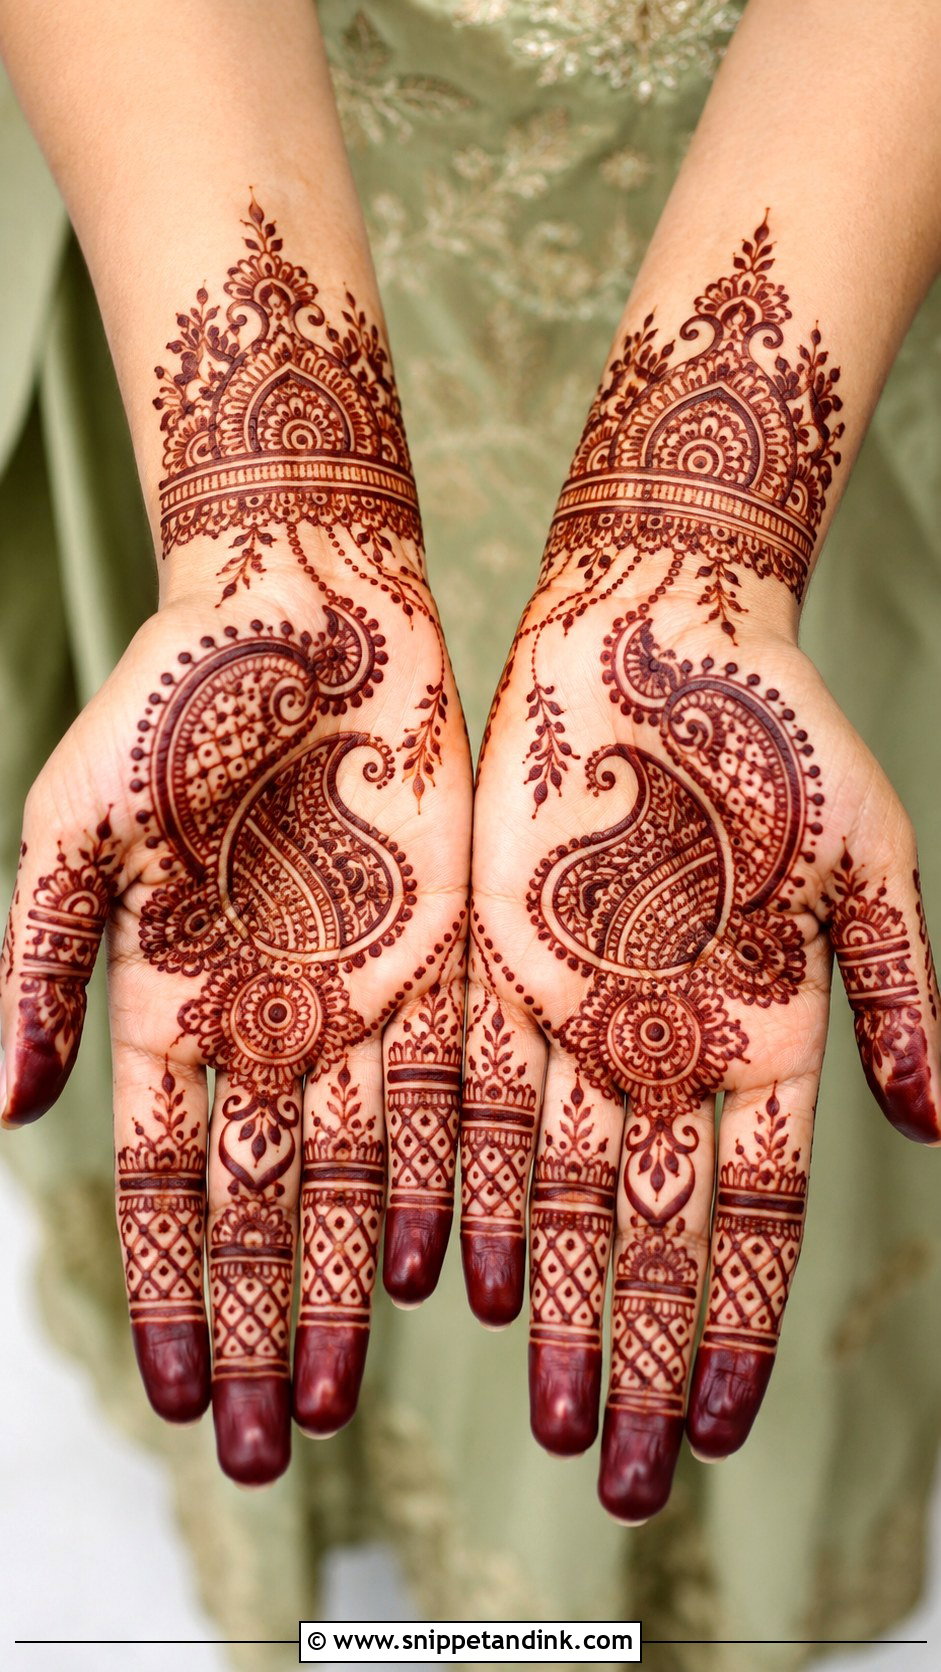
Simple Indian work keeps the traditional vocabulary, paisleys, small flowers, dots, leafy borders, but drops the dense filling. I size the motifs medium and space them evenly; tiny motifs packed together are what make Indian henna slow. On the palm, a mandala with paisley corners. On the back hand, a floral chain ending in wrist borders. It sits well at pujas, festivals and engagement functions, where you want a traditional feel without the long sitting.
5. Simple Mandala Mehndi Design
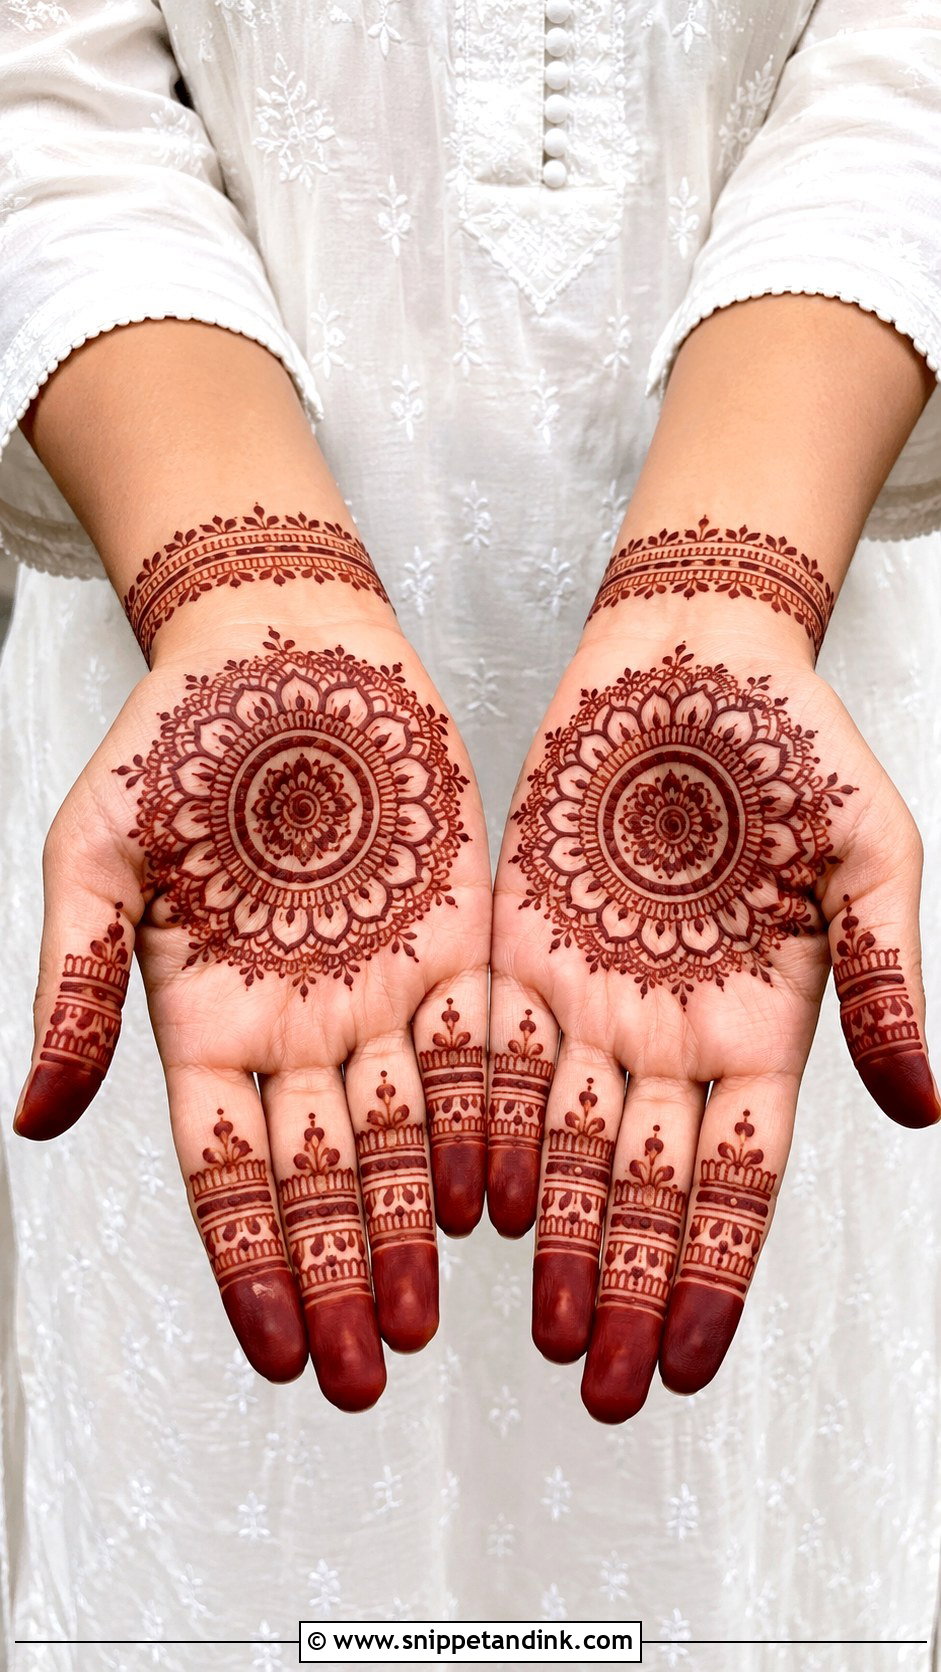
Symmetry is the whole design here, so I spend most of my time on the center circle. If that first ring is lopsided, every petal built around it exaggerates the error. Place the mandala in the centre of the palm or back hand, add petals, dots and small scalloped edges, then keep the fingers to straight lines or leafy tips. A dot chain at the wrist is enough. Kids, bridesmaids and beginners all do well with it.
6. Simple Floral Mehndi Design
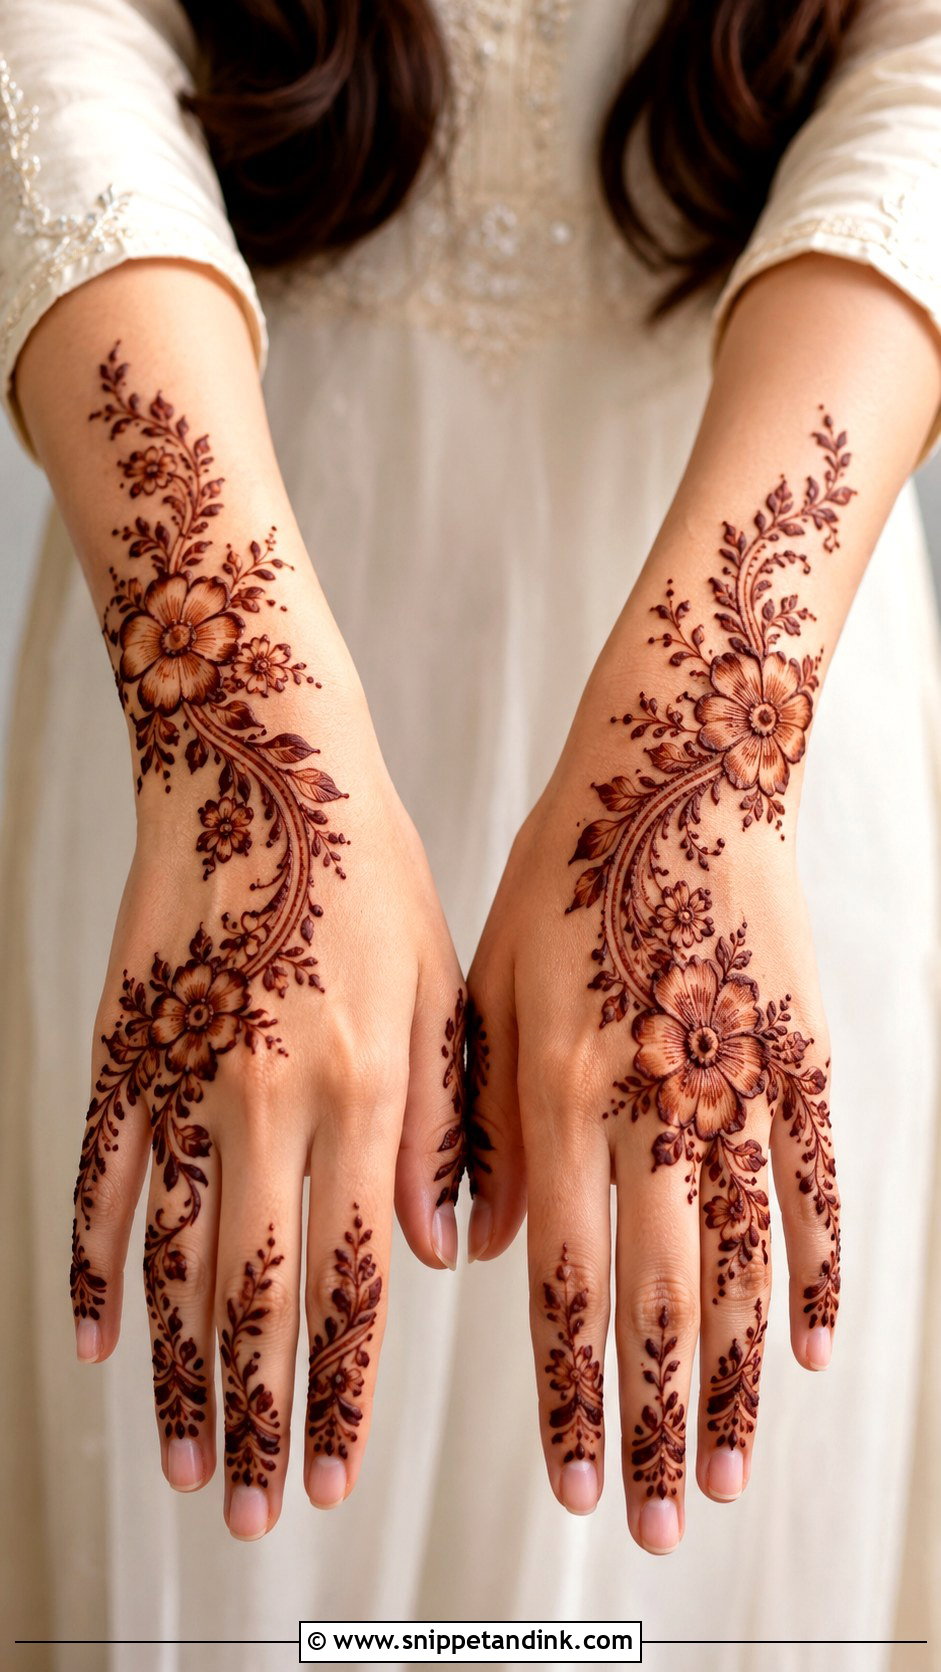
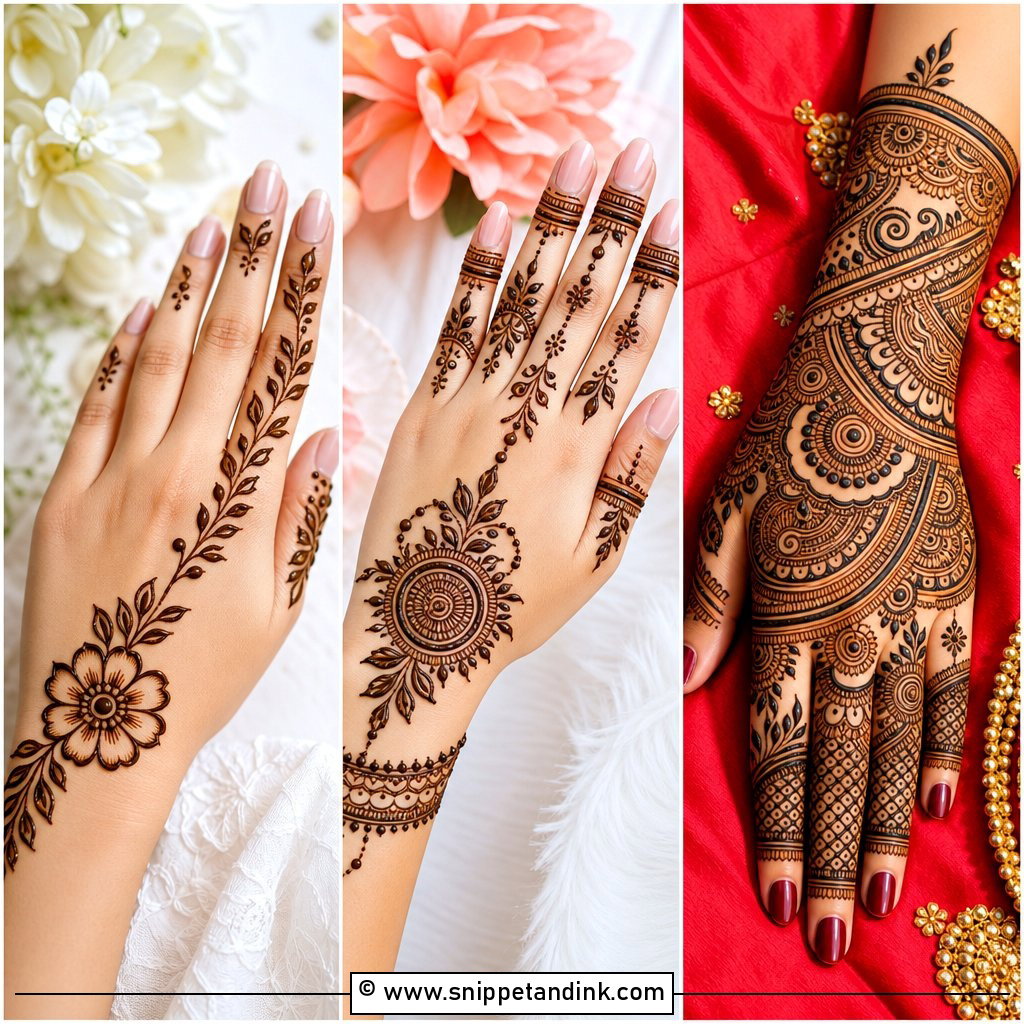
Flowers are the most forgiving motif in henna, because no two petals have to match. I put one larger flower near the wrist or the centre of the hand, then let smaller ones follow along a vine, joined with leaves, dots and stems. Keep the outlines slightly bold. Thin floral lines can look crisp in wet paste and then soften once the stain develops, so a little extra weight now pays off on day two. Spring parties, haldi and Eid all suit it.
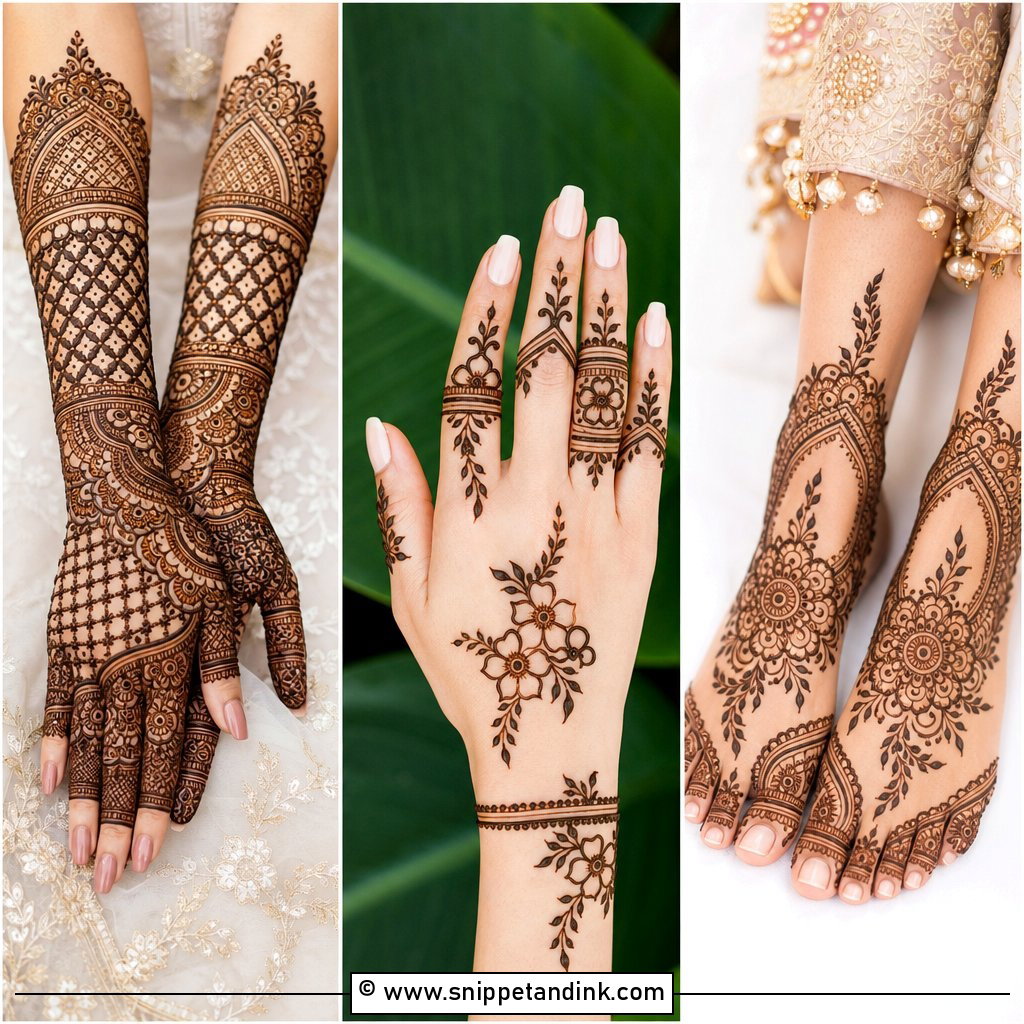
7. Simple Finger Mehndi Design
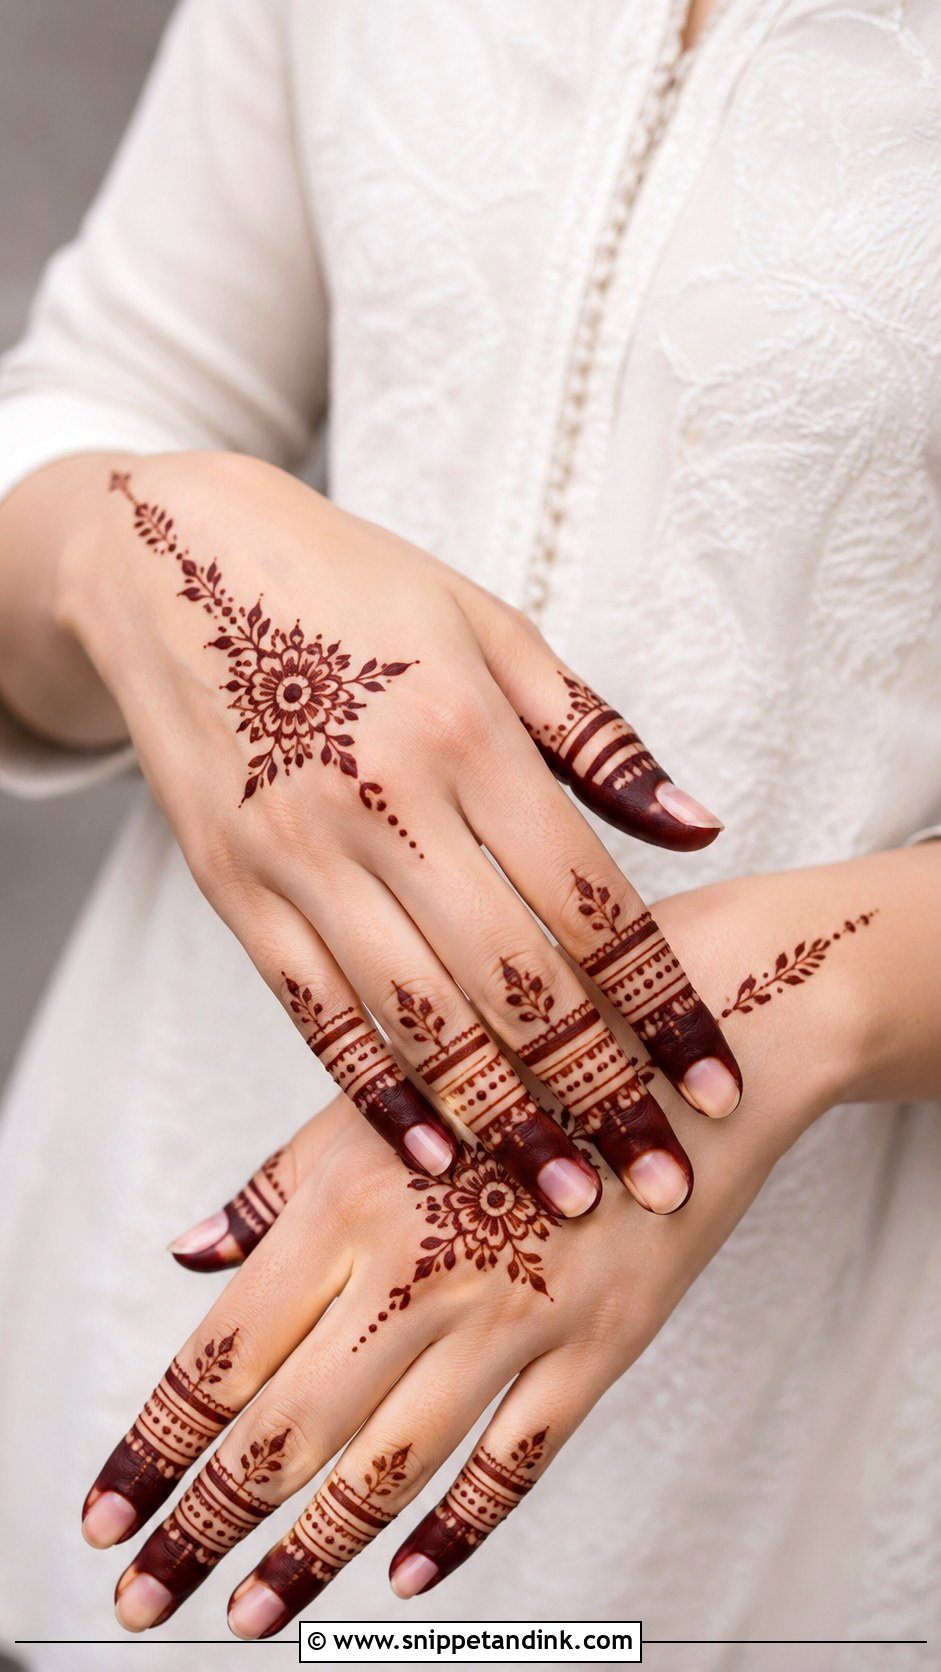
Finger-only work is the fastest design I do, and it dries quickest too, since there’s so little paste on the skin. Coordinate all five fingers with bands, dots, tiny leaves, half flowers or a bit of mesh, then add a small wrist bracelet or a little motif on the back hand so it doesn’t look unfinished. It suits rings and minimal outfits. Expect the side details to fade first, since fingers rub against everything.
8. Simple Bracelet Mehndi Design
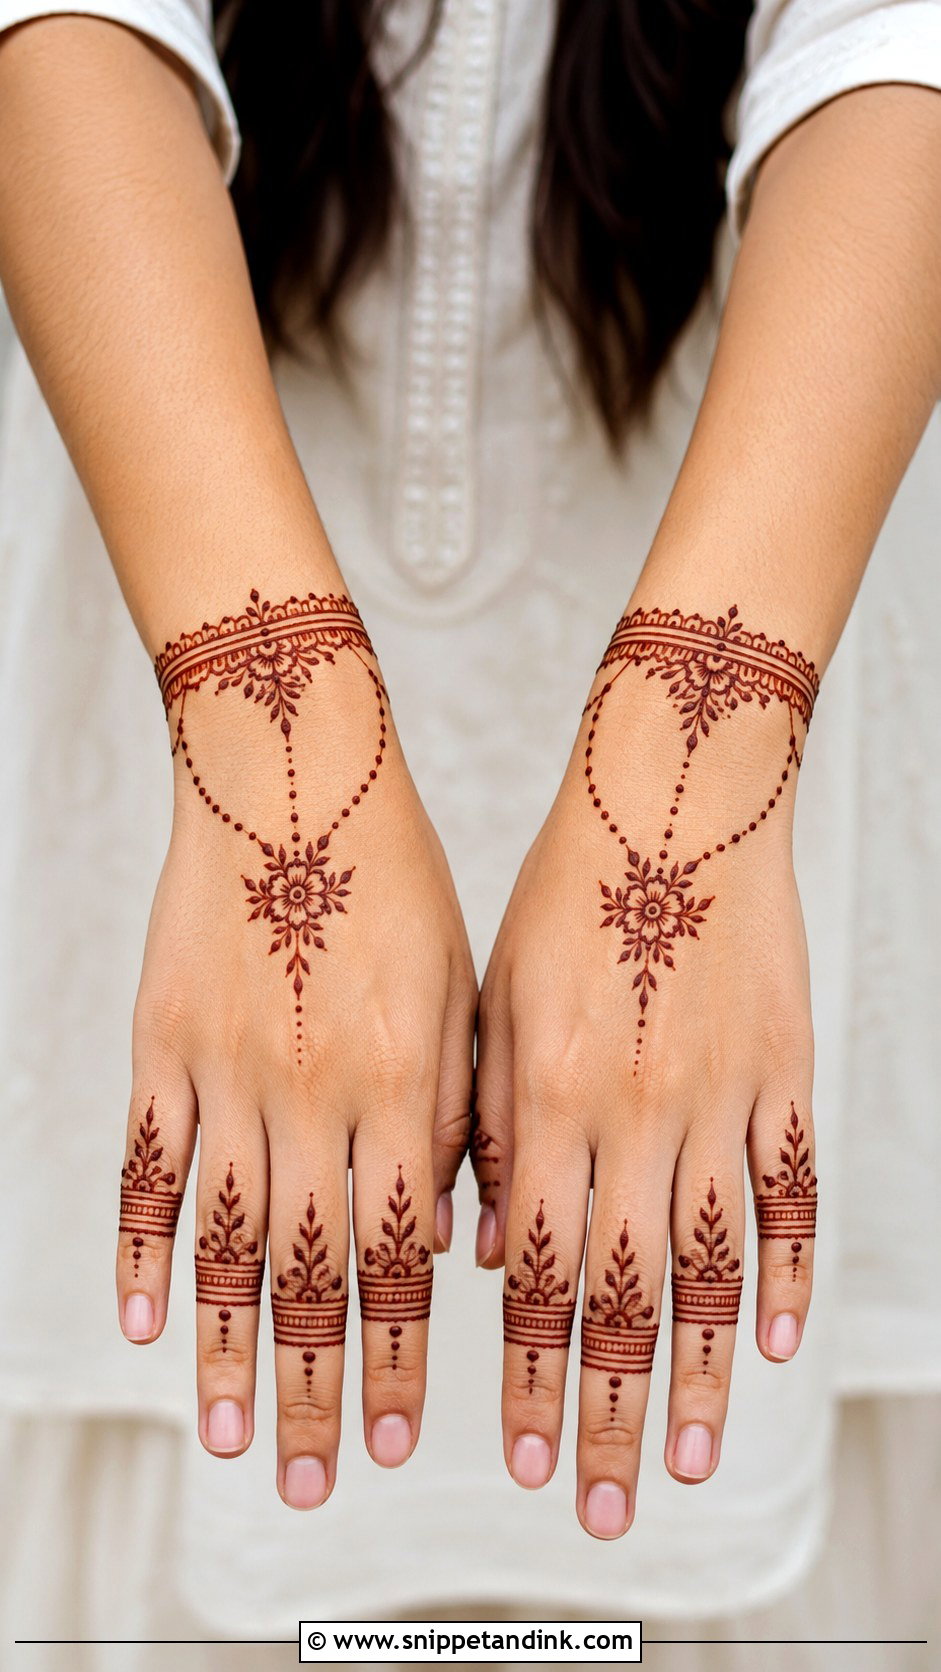
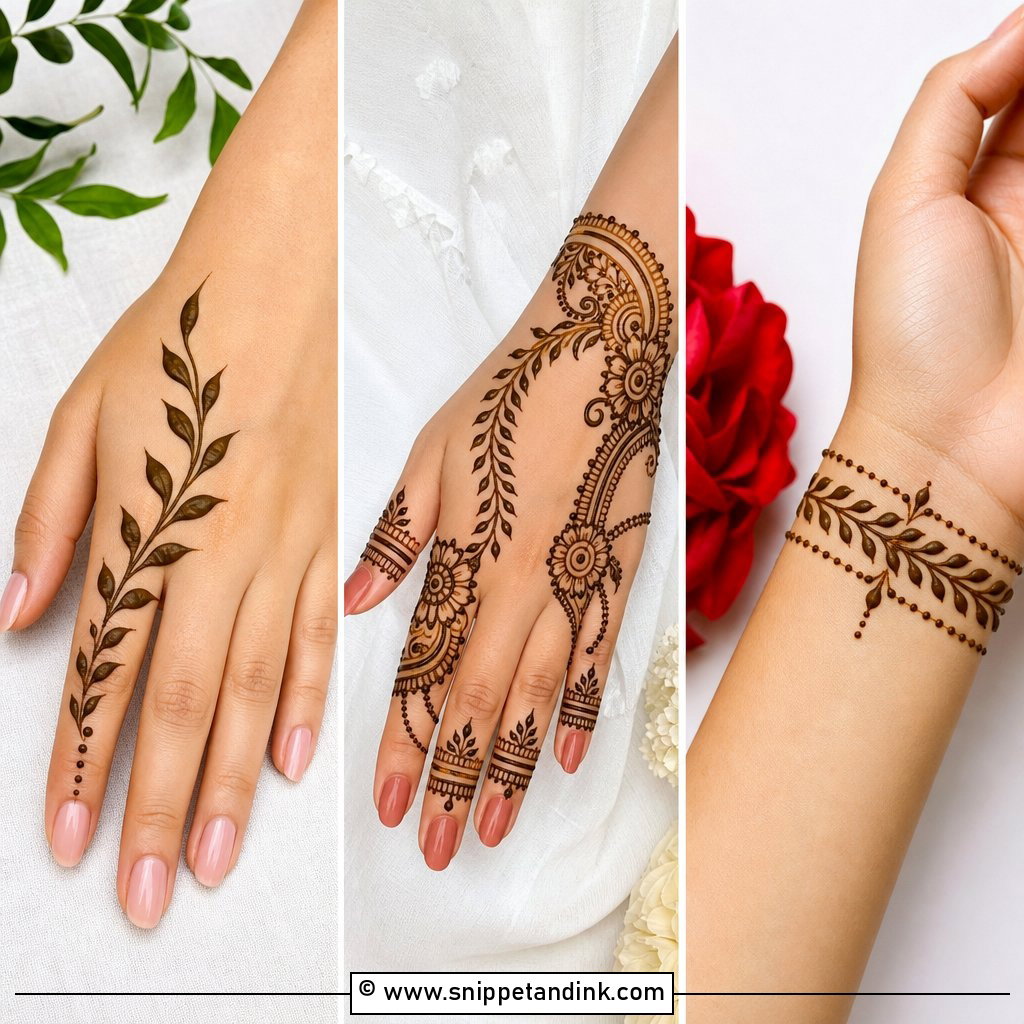
Bracelet mehndi wraps the wrist like a bangle and connects to one or more fingers with chains, dots or vines, with a small flower on the back hand to hold it together. I draw the wrist band with the hand relaxed and slightly bent back, because a band drawn on a flexed wrist shifts out of line when the hand straightens. Repeating petals or scalloped lines keep the border neat. It’s a good pick for parties and bridesmaids who want something polished but not full.
9. Simple Jewellery Mehndi Design
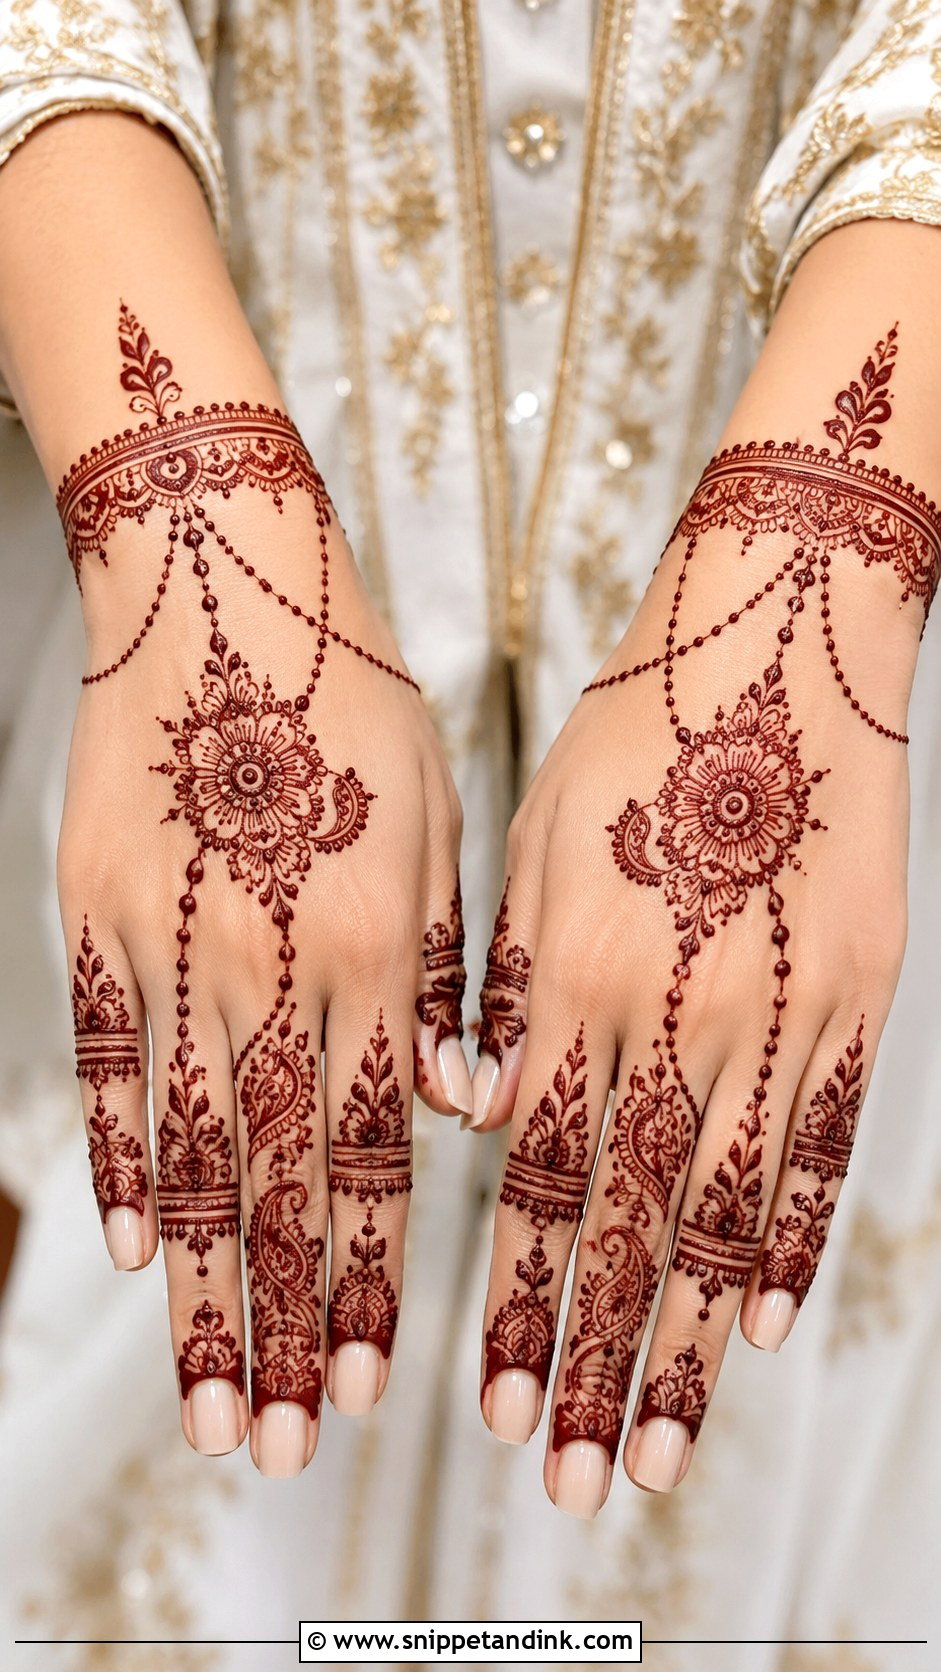
Jewellery designs turn henna into accessories: ring patterns on the fingers, chains across the back hand, a bracelet at the wrist. They look detailed but use only lines and dots. I start with a centre flower, connect it to the finger rings with dotted chains, then soften the layout with a few leaves or small paisleys. Spacing is everything; once the chains crowd together, the jewelry effect disappears into a general pattern. Engagement guests and Eid outfits both carry it well.
10. Simple Full Hand Mehndi Design
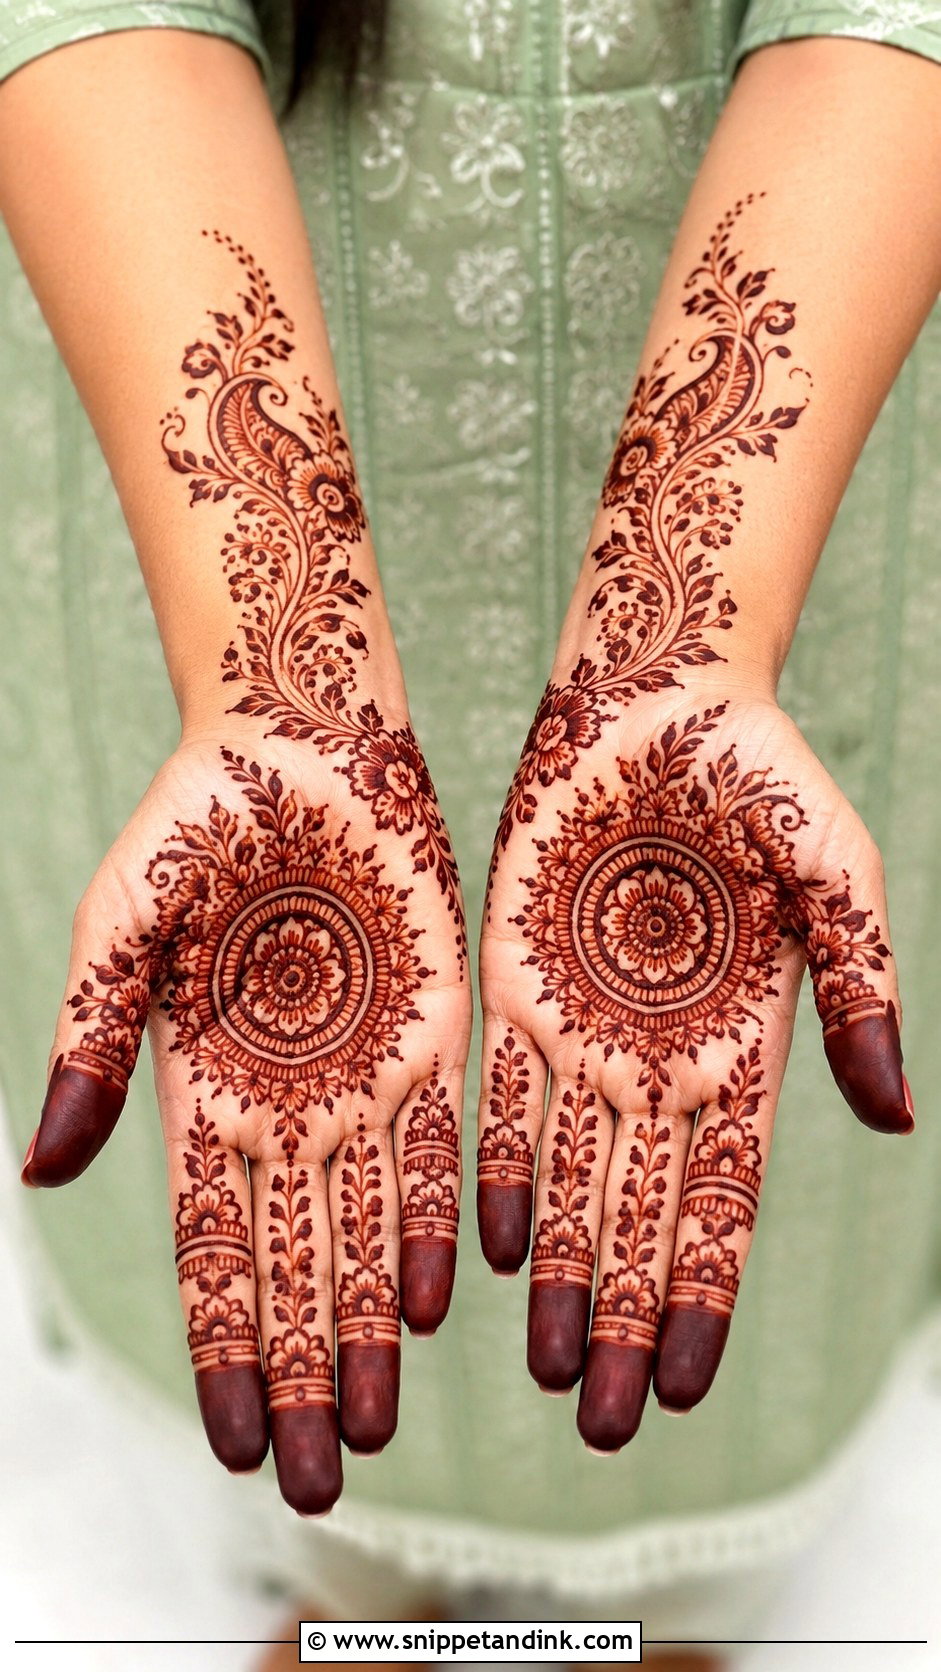
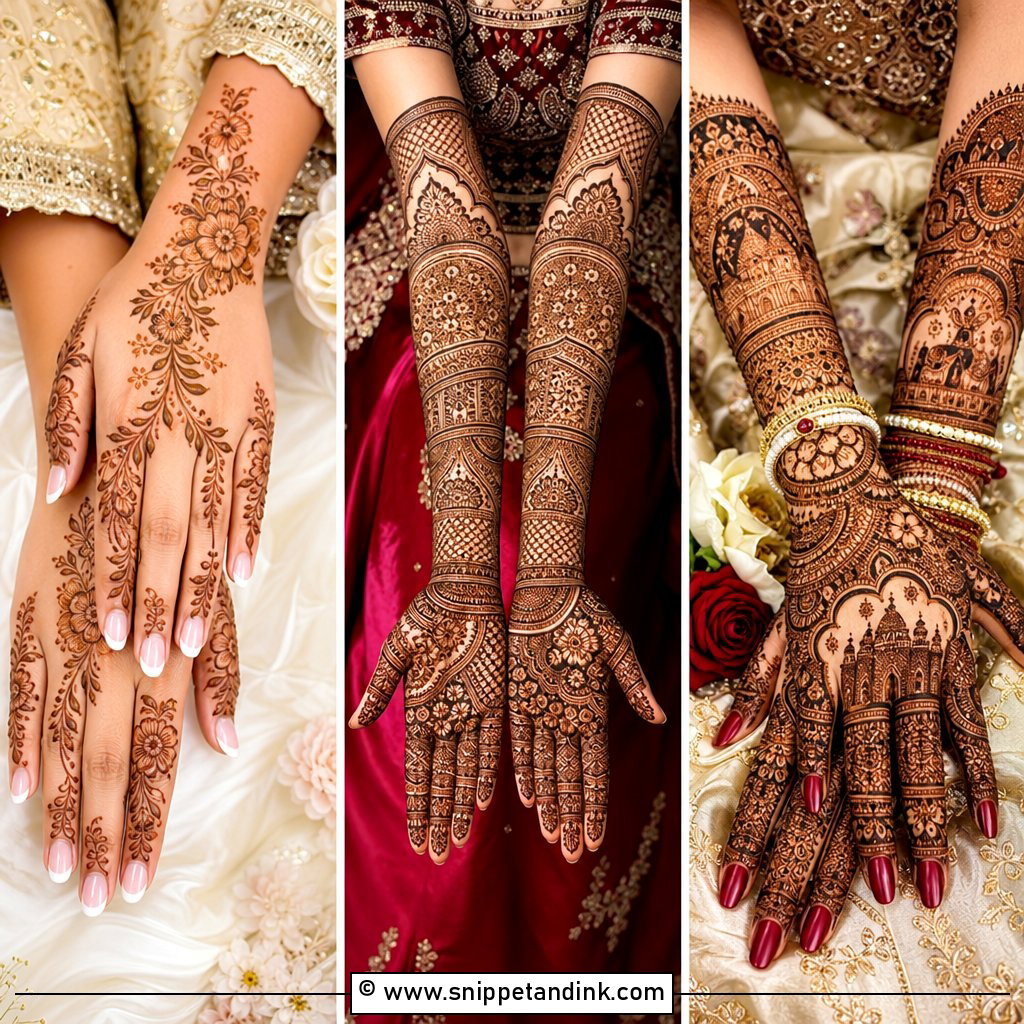
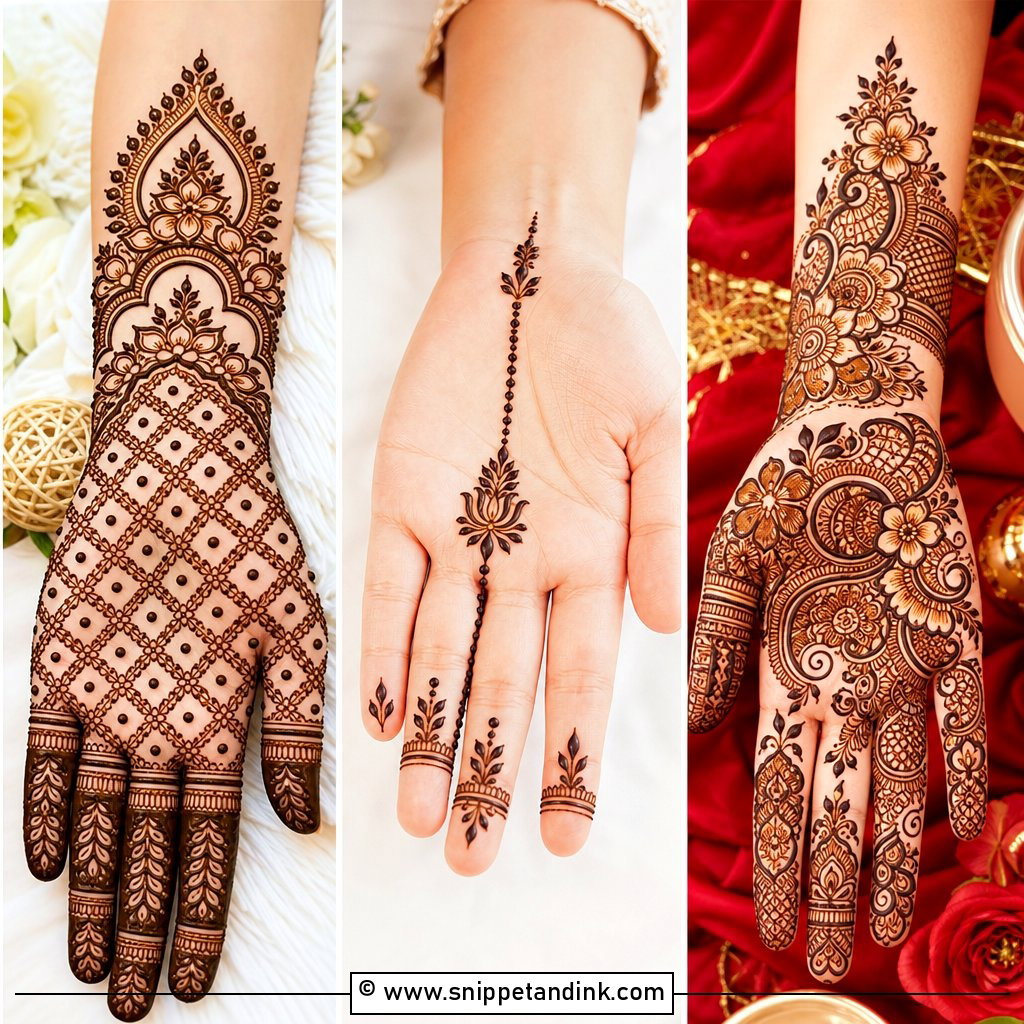
A full hand can still look light if you swap dense filling for open spacing. I begin with a palm mandala, run floral trails along both sides, and finish the fingers with repeated bands. On the back, a central motif with bracelet-style wrist coverage. Medium-sized motifs fill the hand faster and stay easy to draw. It’s what I suggest for bridesmaids and family weddings, where a complete look matters but the sitting can’t run to bridal length.
11. Simple Half Hand Mehndi Design
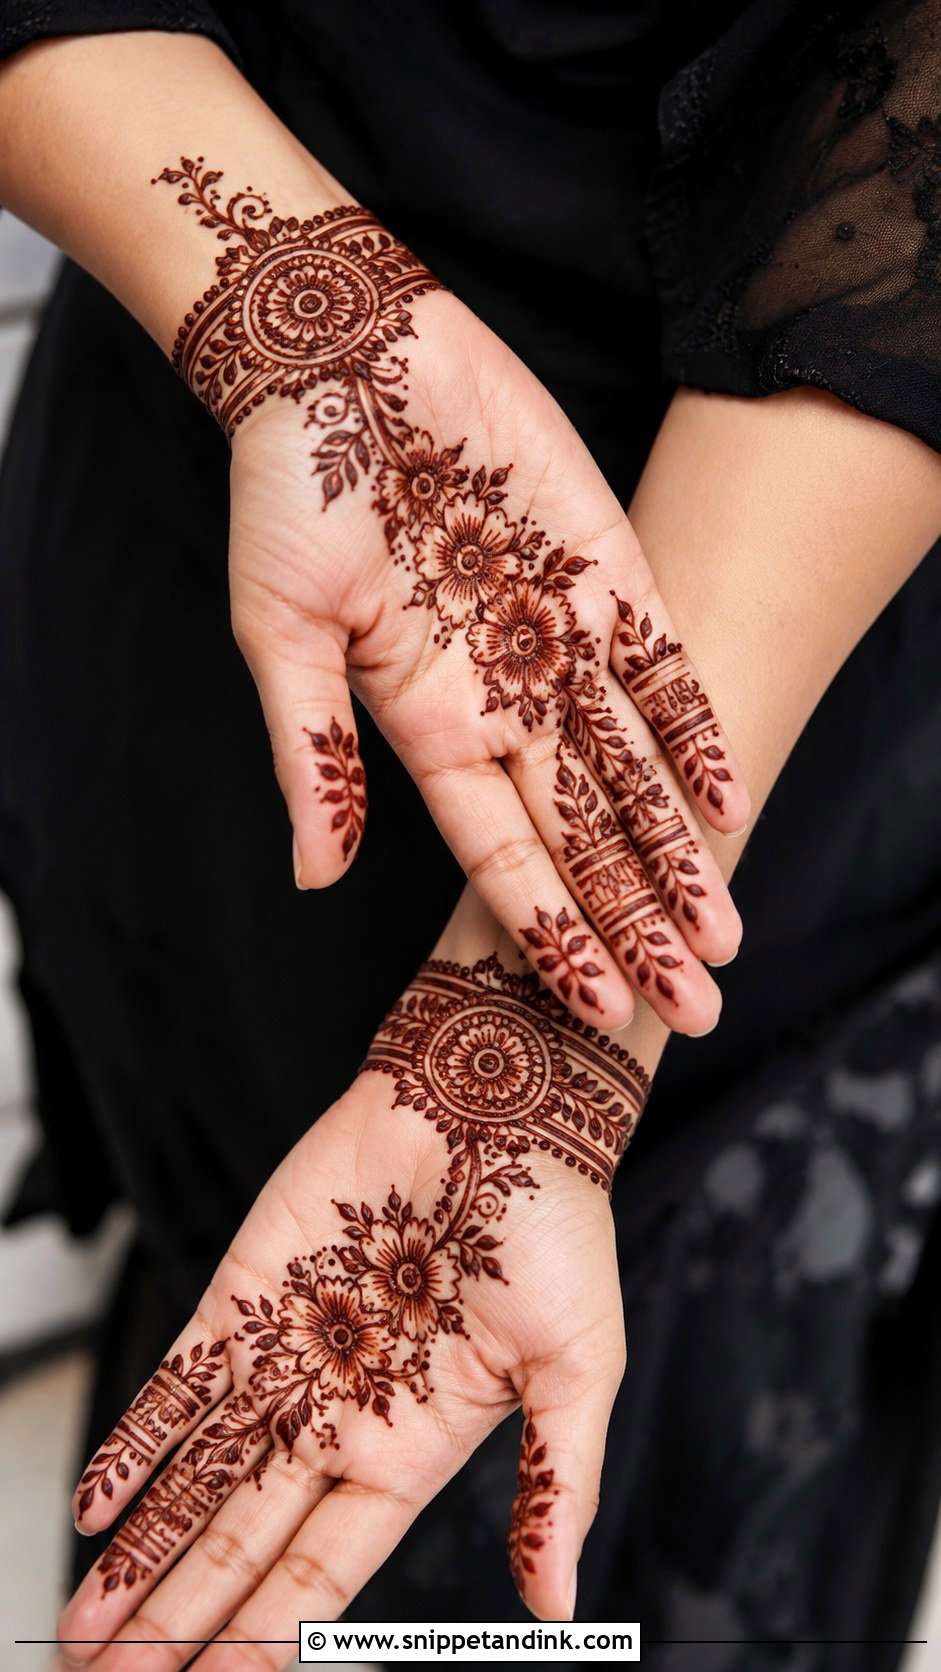
Half hand fills the gap between finger work and full coverage. It covers the palm or back hand up to the wrist and leaves the forearm plain, using a diagonal Arabic trail, a mandala with finger details, or a floral line from wrist to fingers. The edge matters most. I close it with a clean wrist border so it stops on purpose, rather than trailing off where I ran out of ideas. It’s quick and practical for busy events.
12. Simple Rose Mehndi Design
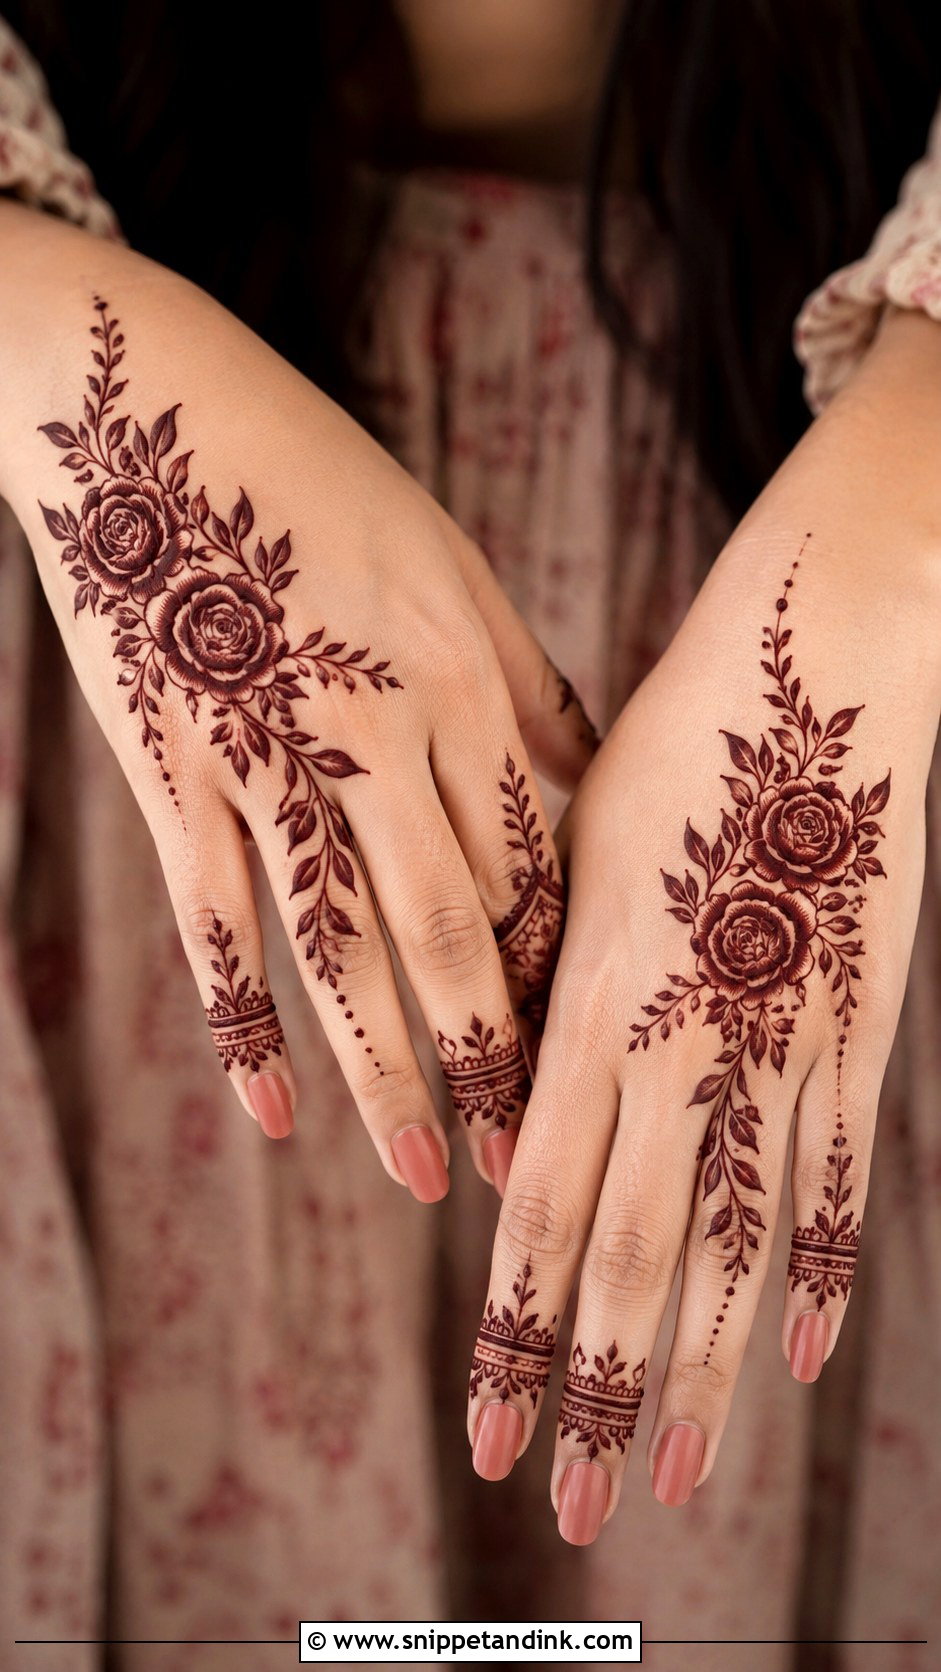
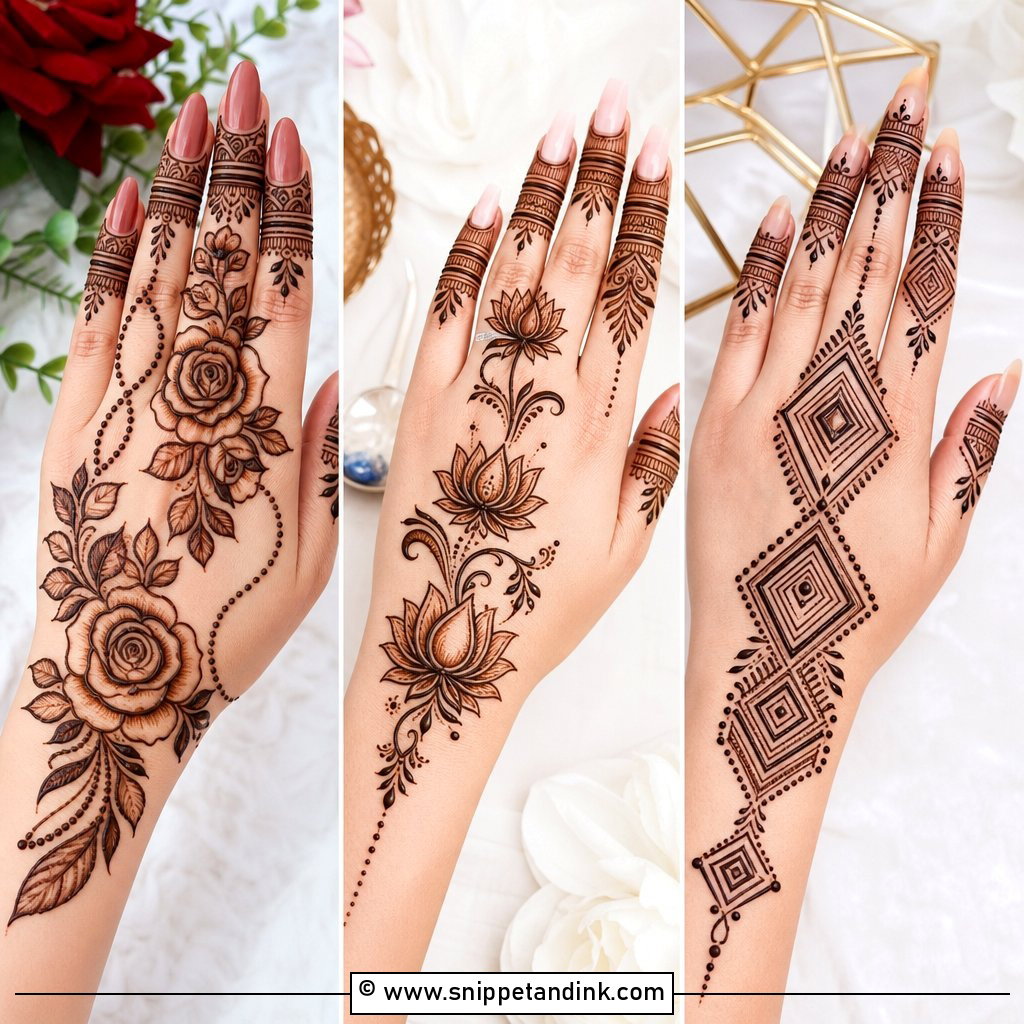
Roses give fullness quickly because round petals fill space with very few strokes. One rose near the wrist with a leafy vine toward the fingers is the cleanest version. You can also build a rose mandala in the center of the palm with small leaves around it. Go easy on shading. Heavy shading inside small petals closes them up when the stain darkens, and the rose turns into a dark circle.
13. Simple Paisley Mehndi Design
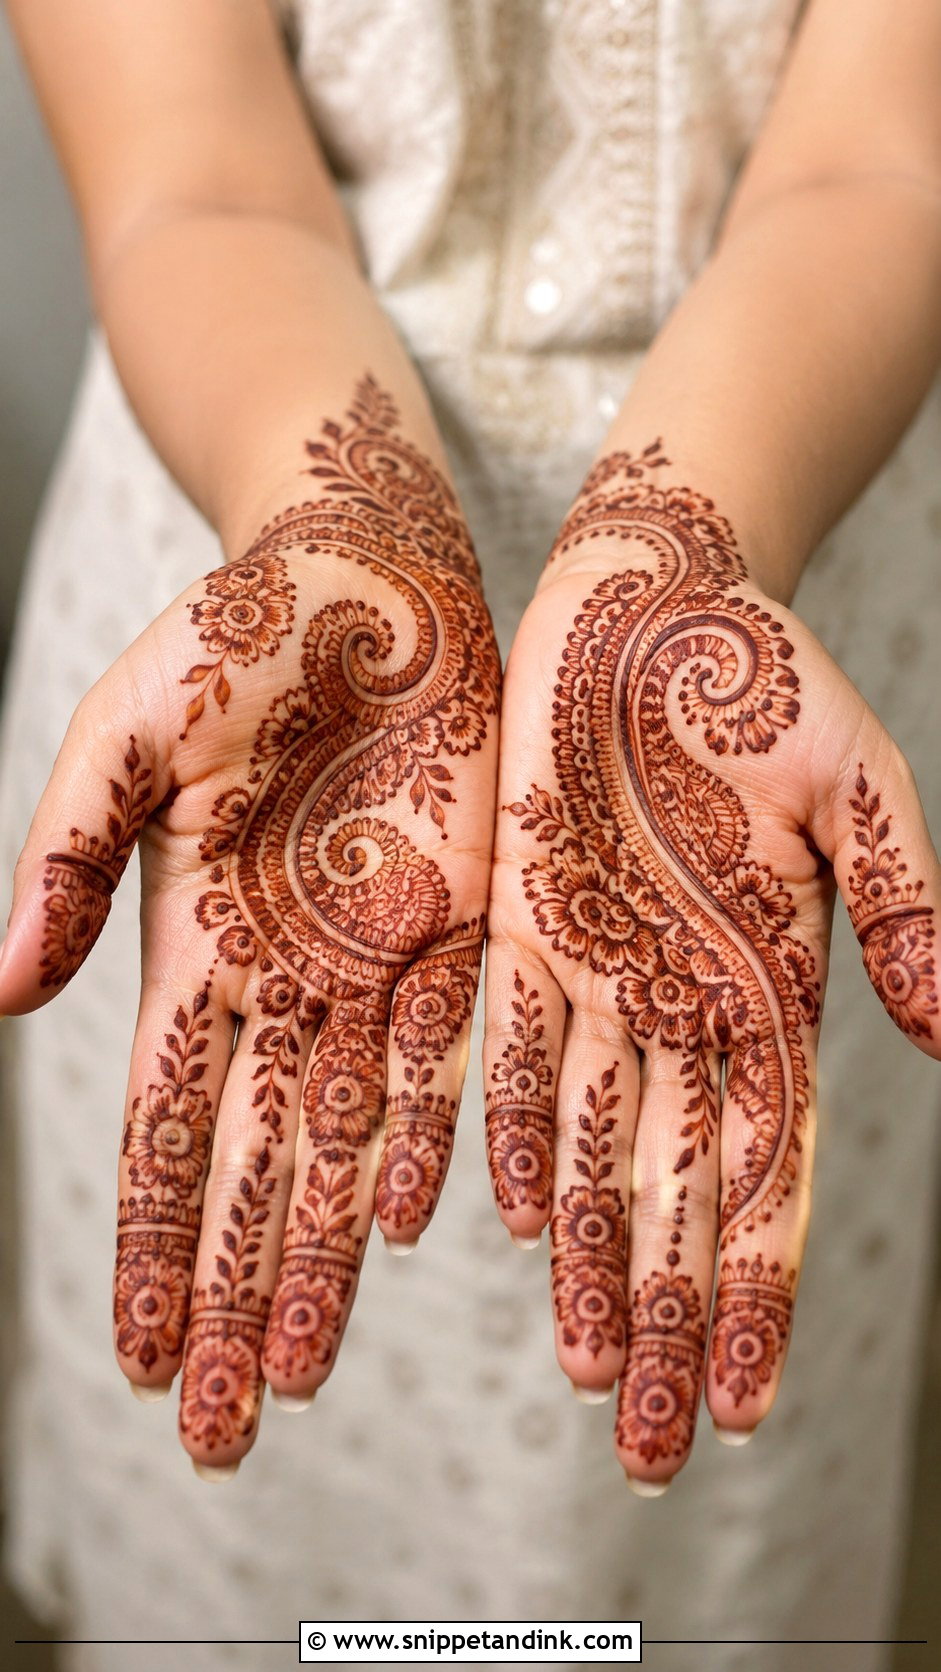
Paisleys, the curved mango shape, sit naturally in Indian and Indo-Arabic layouts. For an easy hand, I place two or three along a diagonal and connect them with flowers, dots and leaves. On the palm, one large paisley near the thumb side balances the whole design, since that’s the fleshy part of the hand with the most room. Keep the inner filling to lines, small petals or dots. Even a sparse paisley design reads as traditional, which makes it a reliable choice for ceremonies.
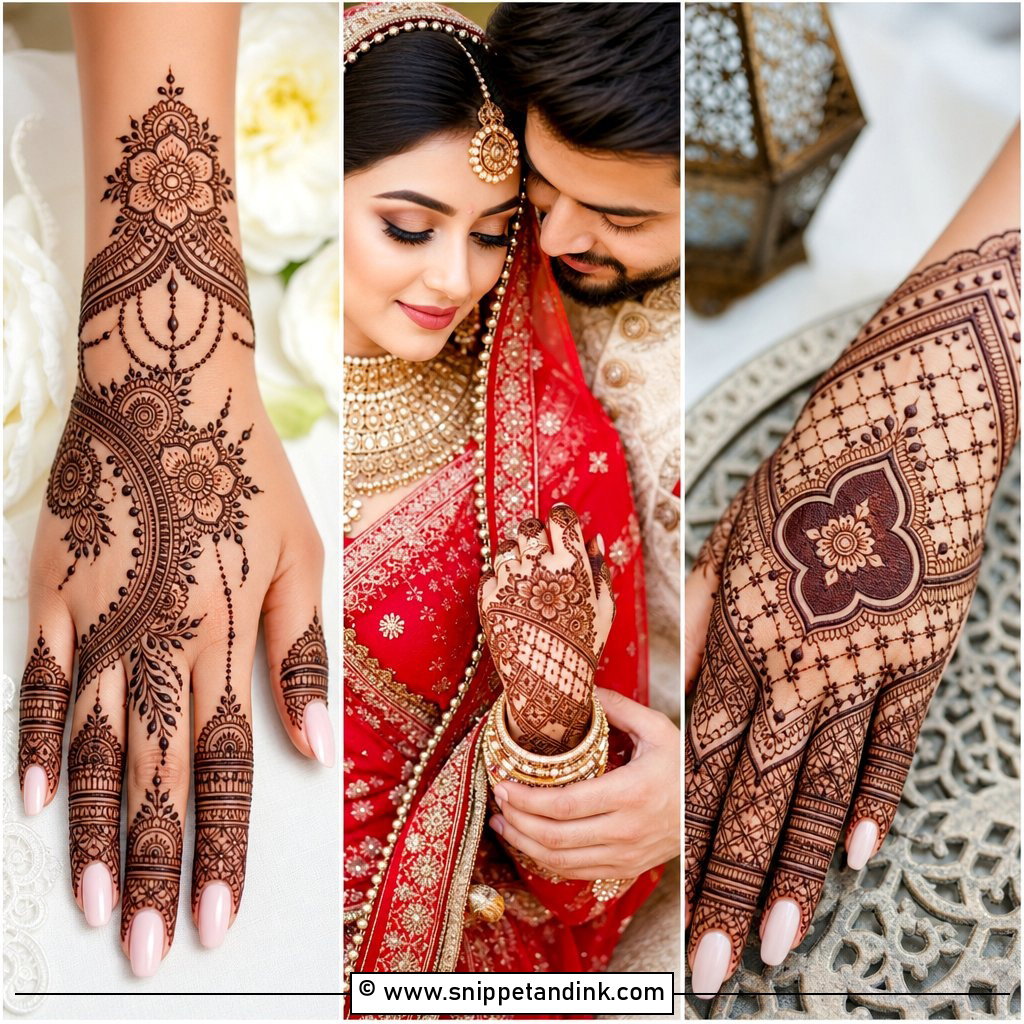
14. Simple Jaali Mehndi Design
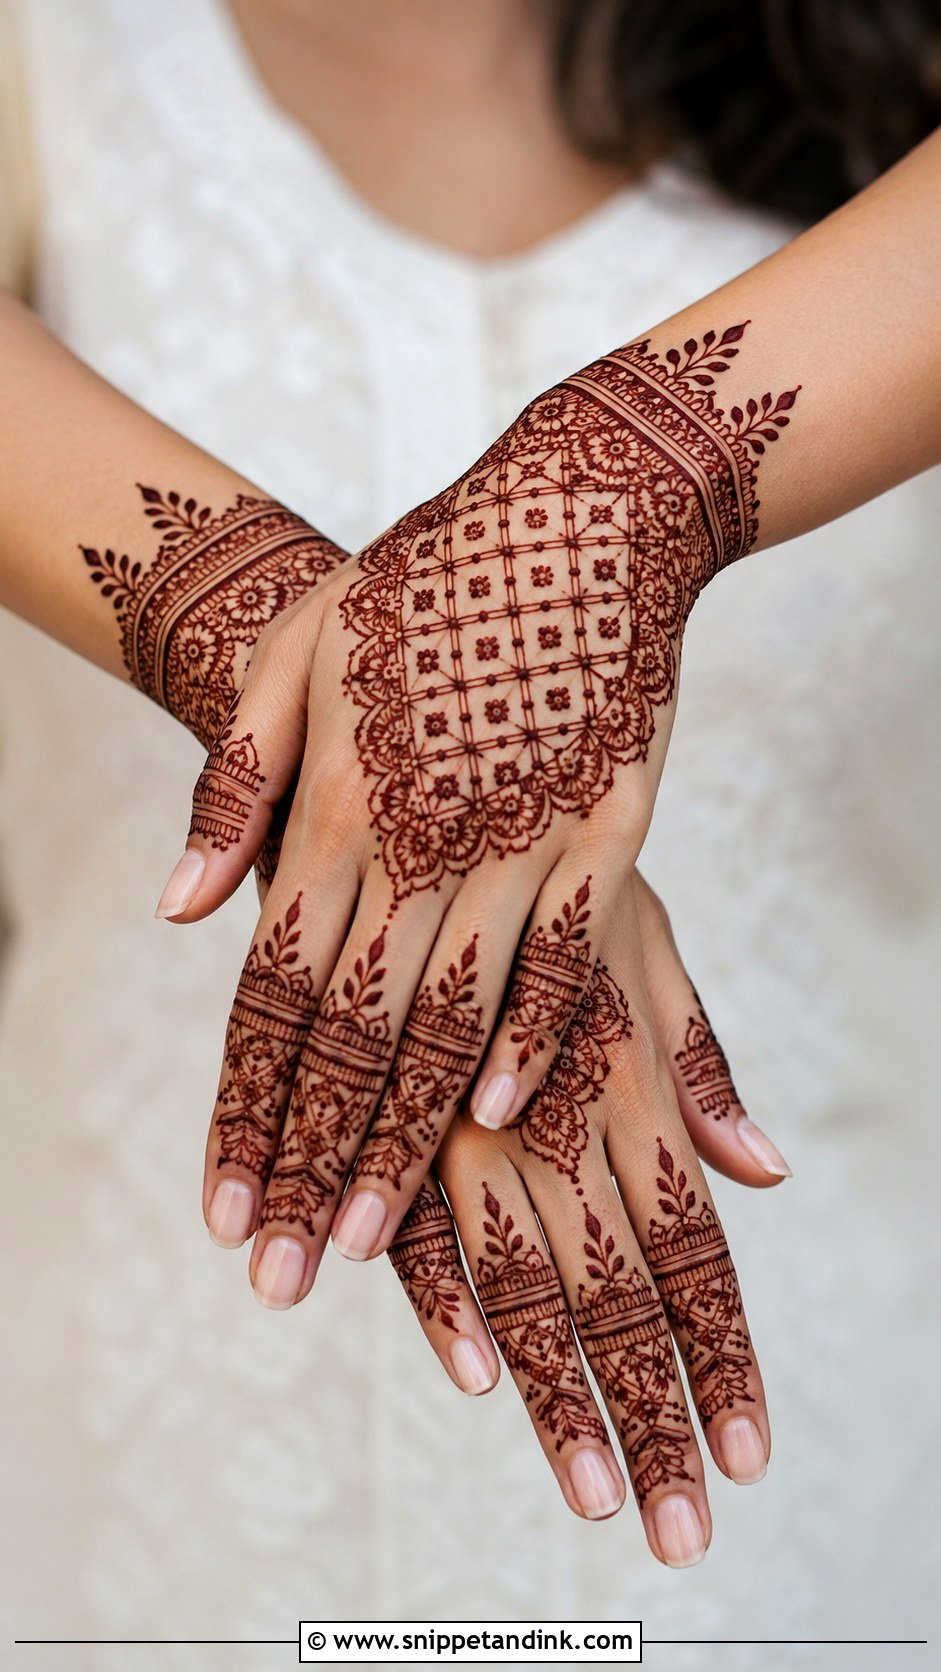
Jaali on the back hand gives a glove-like effect without much drawing. I start with a floral centre, then add a small mesh section on one side or near the fingers. Even squares or diamonds matter more than fine lines here; uneven mesh looks careless in a way uneven petals never do. A tiny dot in each square, then leaves, borders or a curved vine to stop it looking too rigid. Wedding guests and modern festive outfits both suit it.
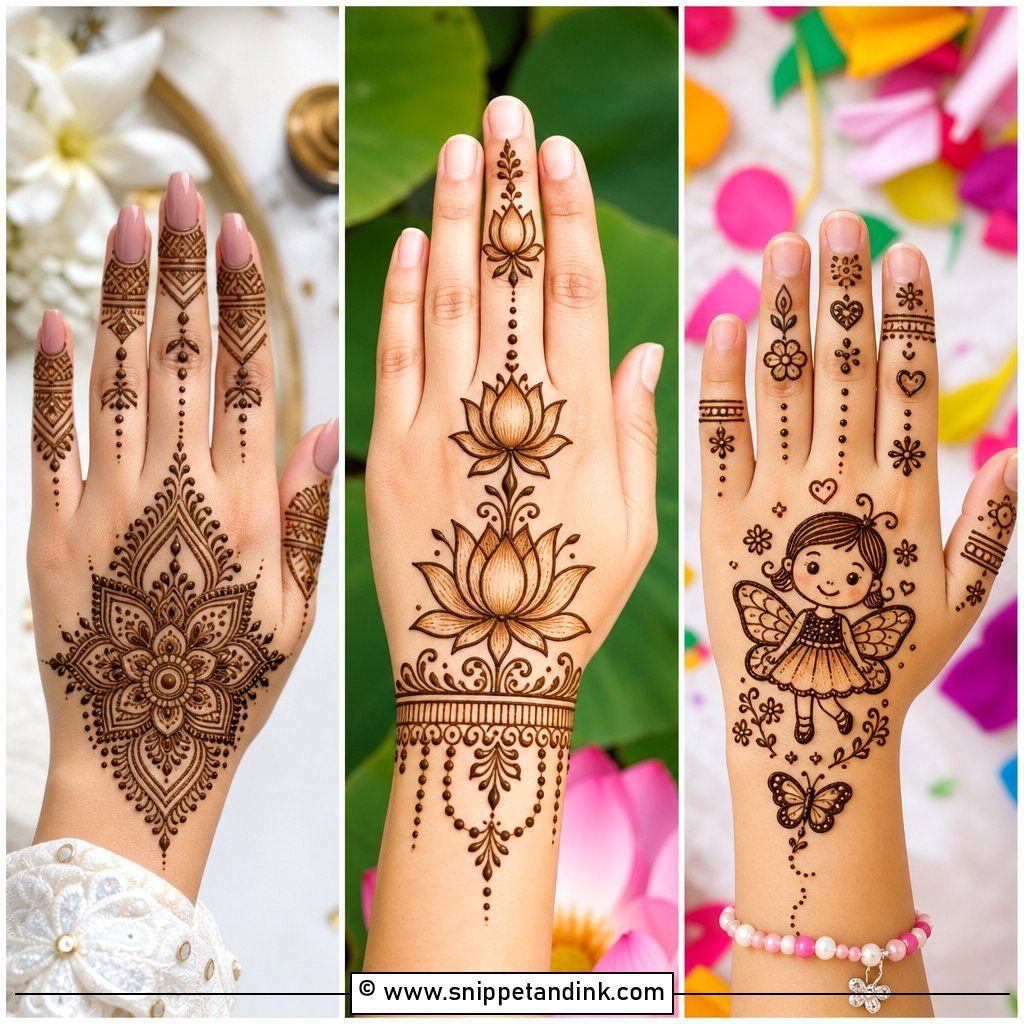
15. Simple Peacock Mehndi Design
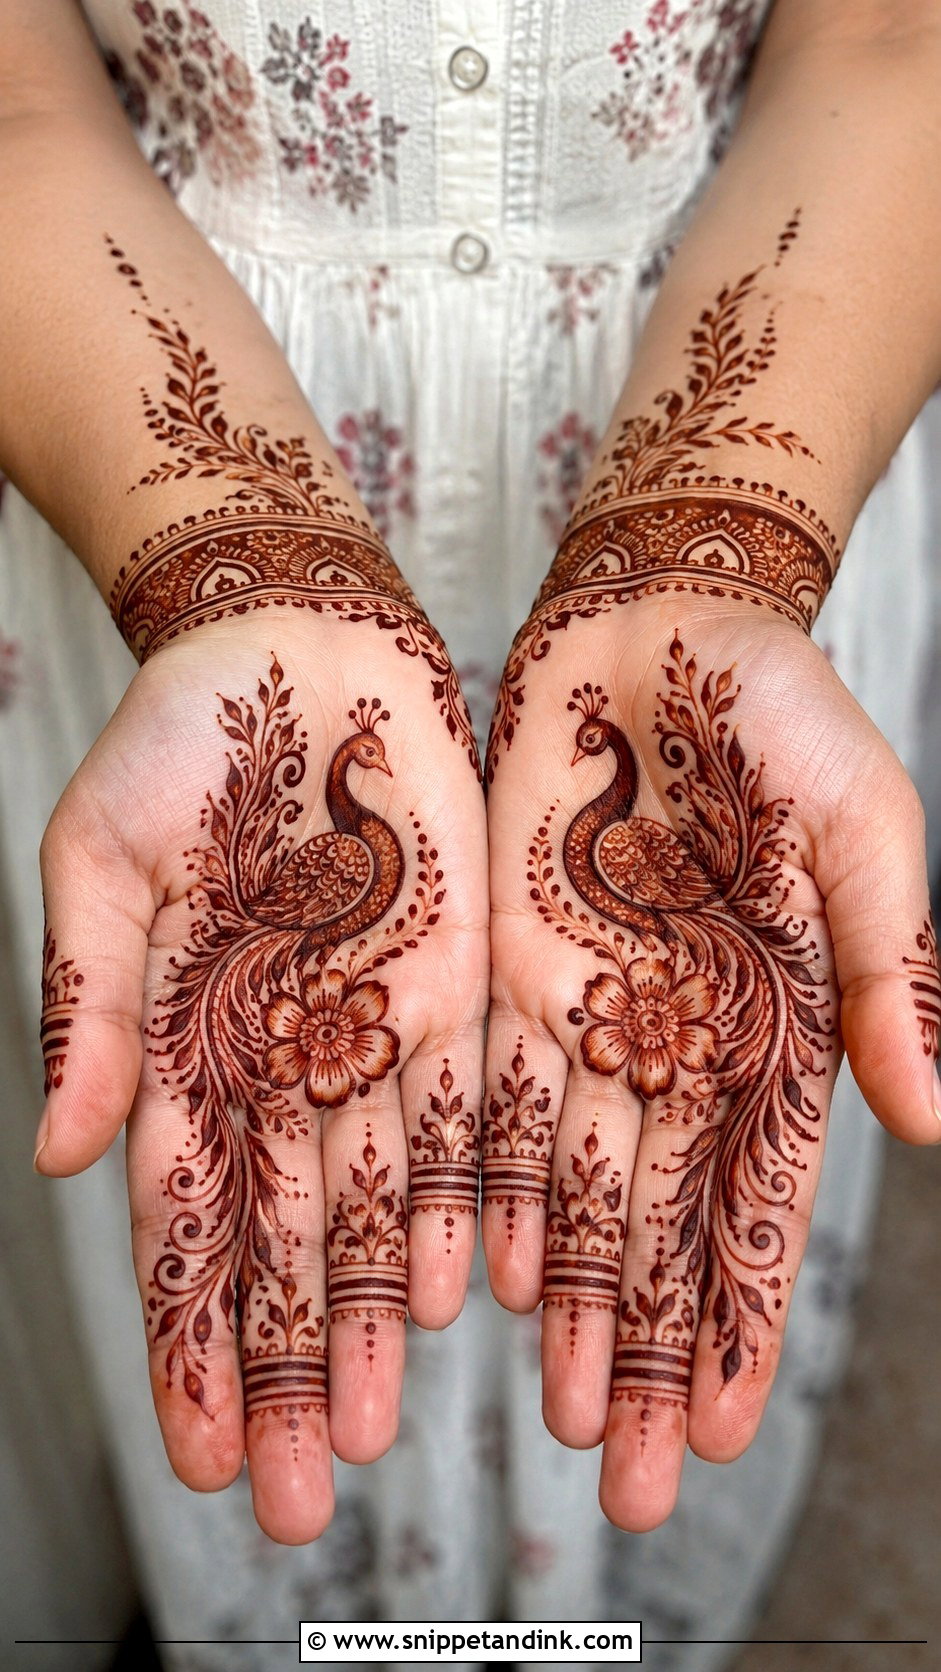
Rather than a large detailed bird, the simple version uses one small peacock as the main feature on the palm or back hand. The body gets a bold outline and minimal filling; the feathers spill out into curved leaves, dots and floral lines. Fingers can take plain bands or leafy tips. I keep the neck long and the head small, because a short, thick neck is what makes a simplified peacock look like a duck.
16. Simple Indo Arabic Mehndi Design
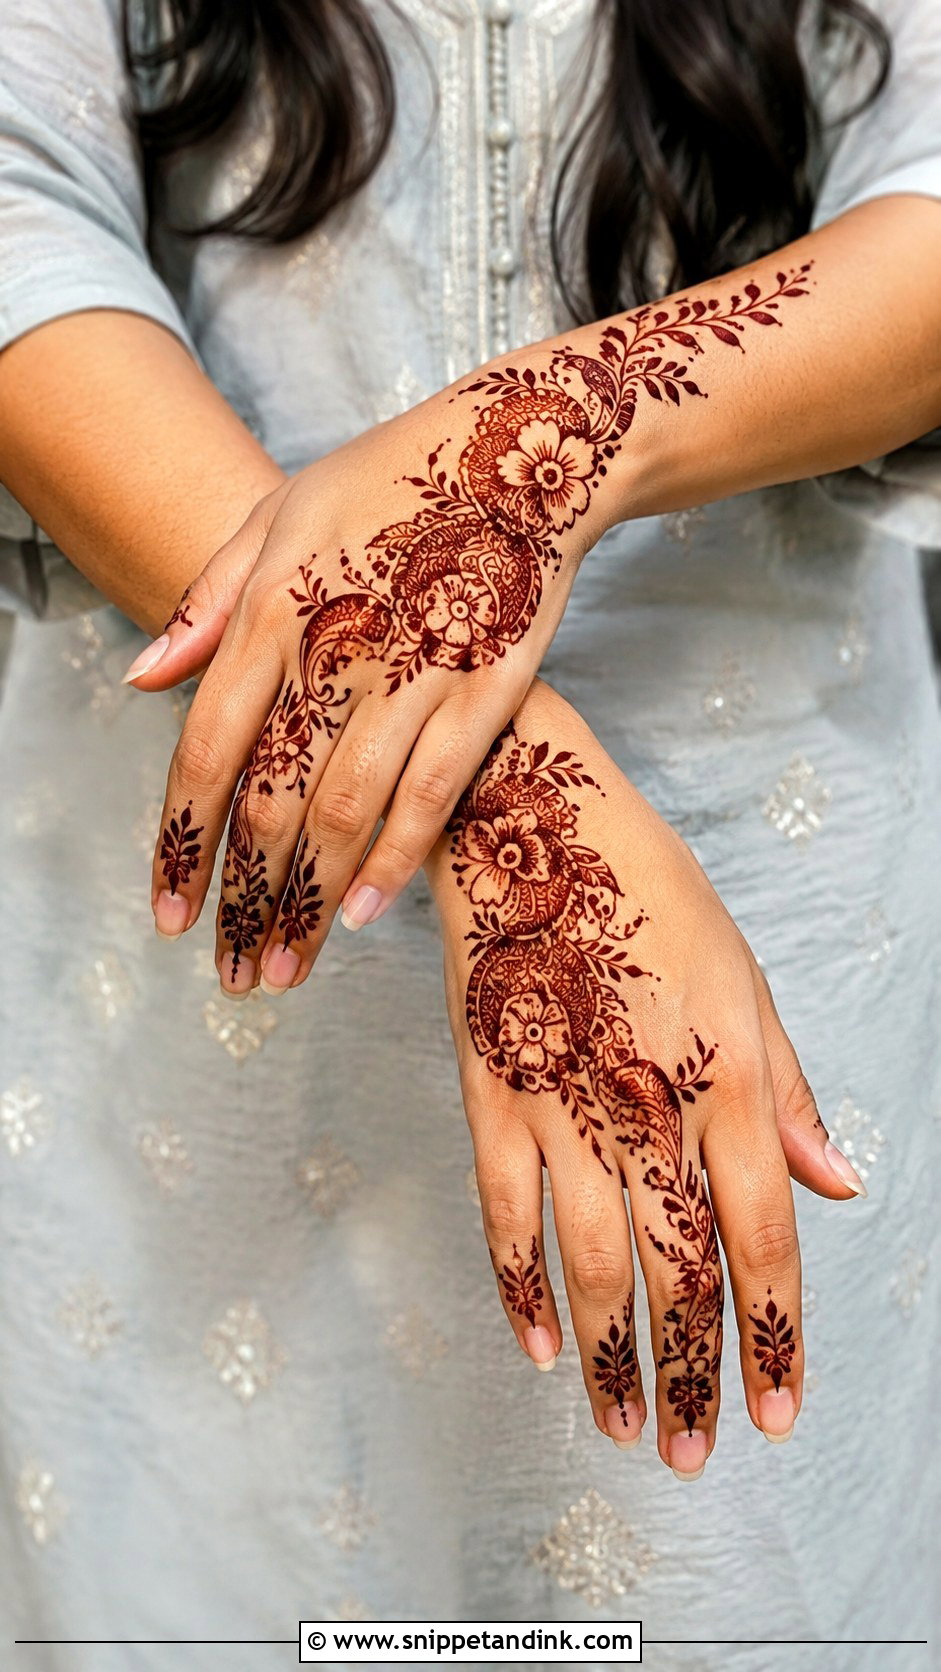
Indo-Arabic suits someone who wants a traditional look without the density. I lay out bold Arabic flowers on a diagonal, then tuck small Indian-style fillings inside a few paisleys or petals, leaving one side of the hand open. Light bands, dots and leafy tips on the fingers. It looks richer than a minimal design but takes far less time than heavy bridal work, which makes it my usual suggestion for close family at a wedding.
17. Simple Moroccan Mehndi Design
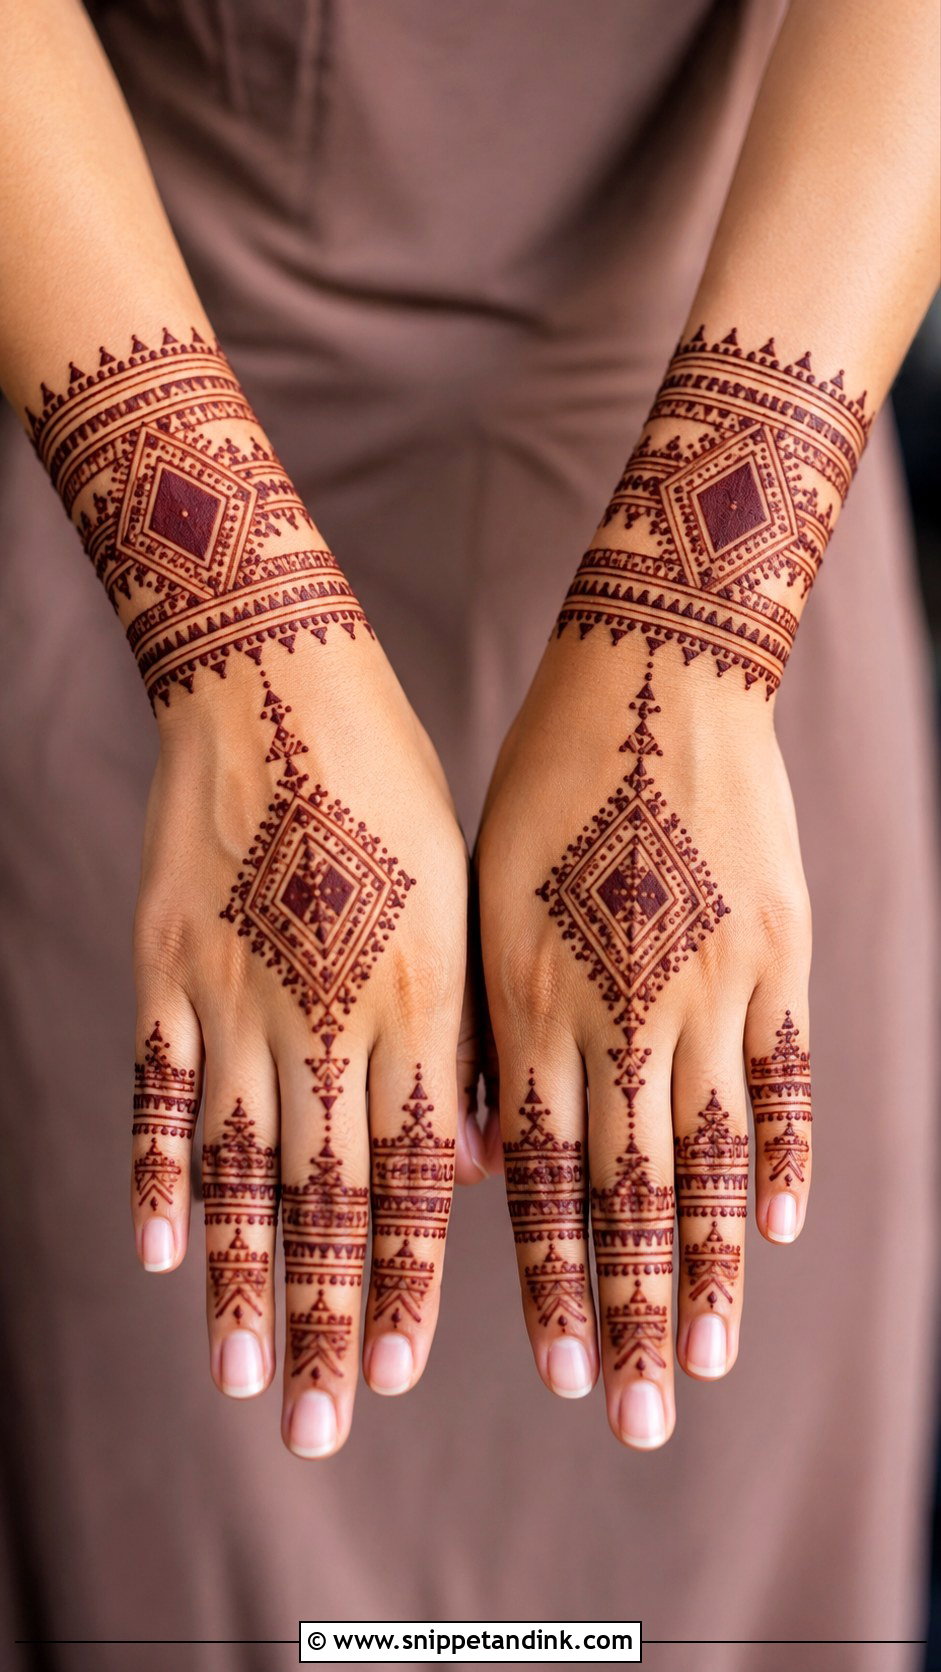
Moroccan henna uses diamonds, triangles, straight borders, dots and angular shapes instead of flowers. A geometric band across the back hand connects to finger patterns, with repeating diamonds at the wrist. Crisp lines are the whole point, so I hold the cone a little more upright for these than I would for floral work. It reads modern and graphic, and pairs especially well with fusion outfits.
18. Simple Gulf Mehndi Design
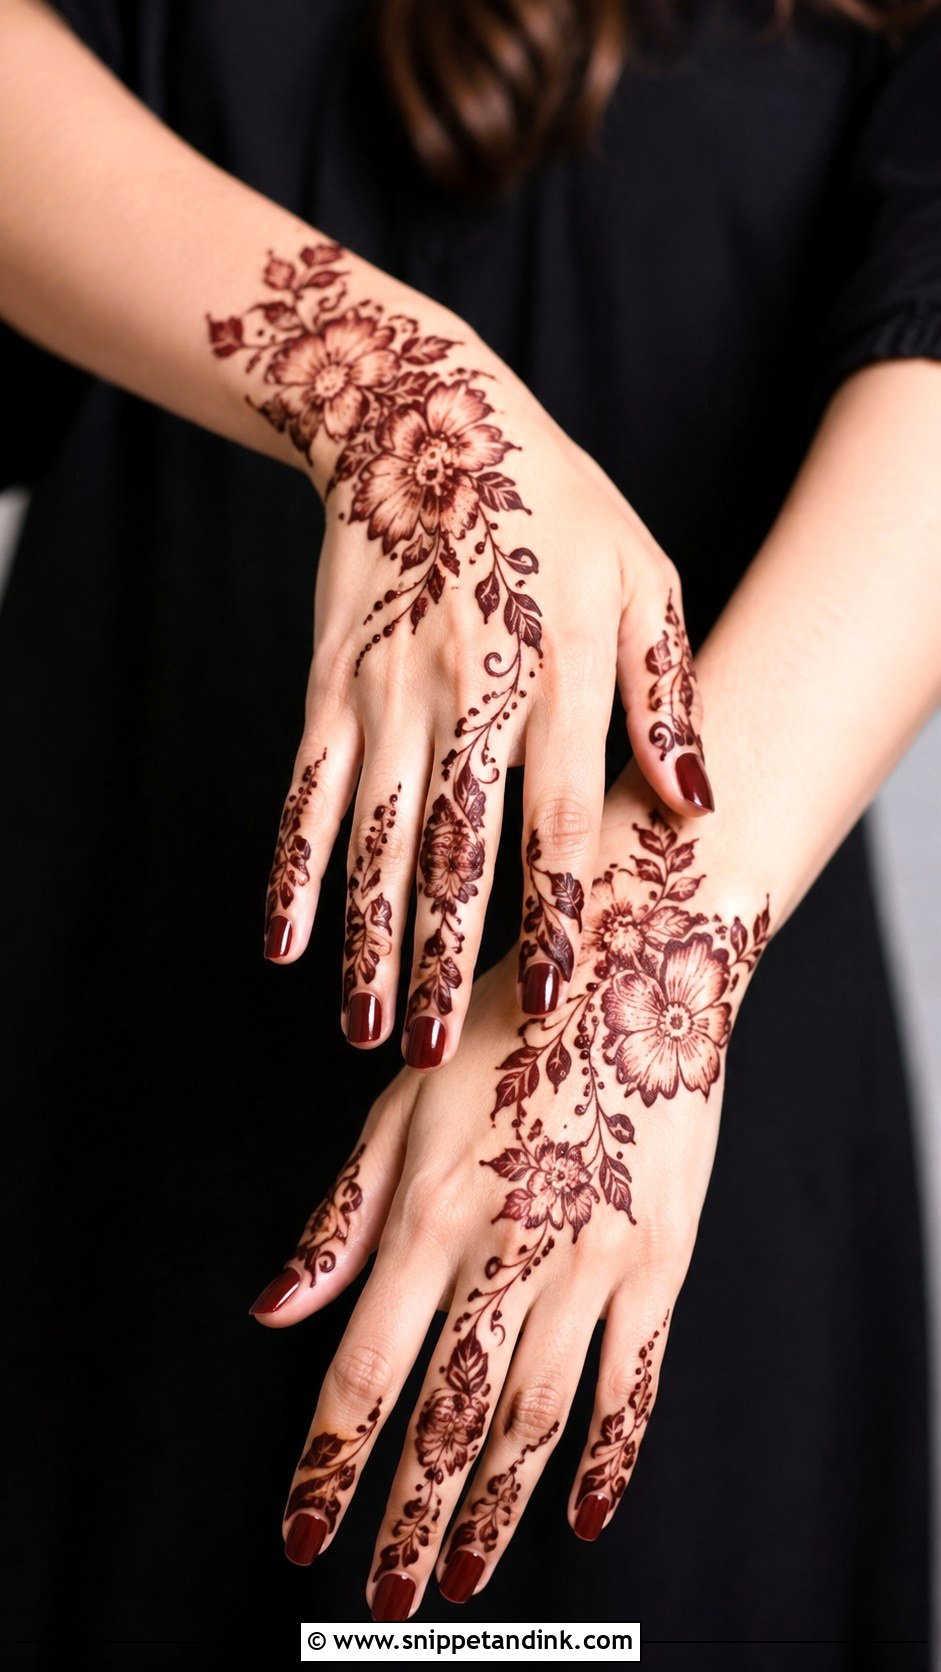
Gulf or Khaleeji-inspired henna sits between dense Indian work and the ultra-minimal: large flowers on the back hand, leafy curves running to the wrist and fingers, and clear empty areas between motifs. Thick outlines and light shading give a deep stain. The open spacing is what makes it read as Gulf style, so I resist the urge to fill. It’s a favourite for Eid, weddings and festive evenings because it’s noticeable from a distance.
19. Simple Minimal Mehndi Design
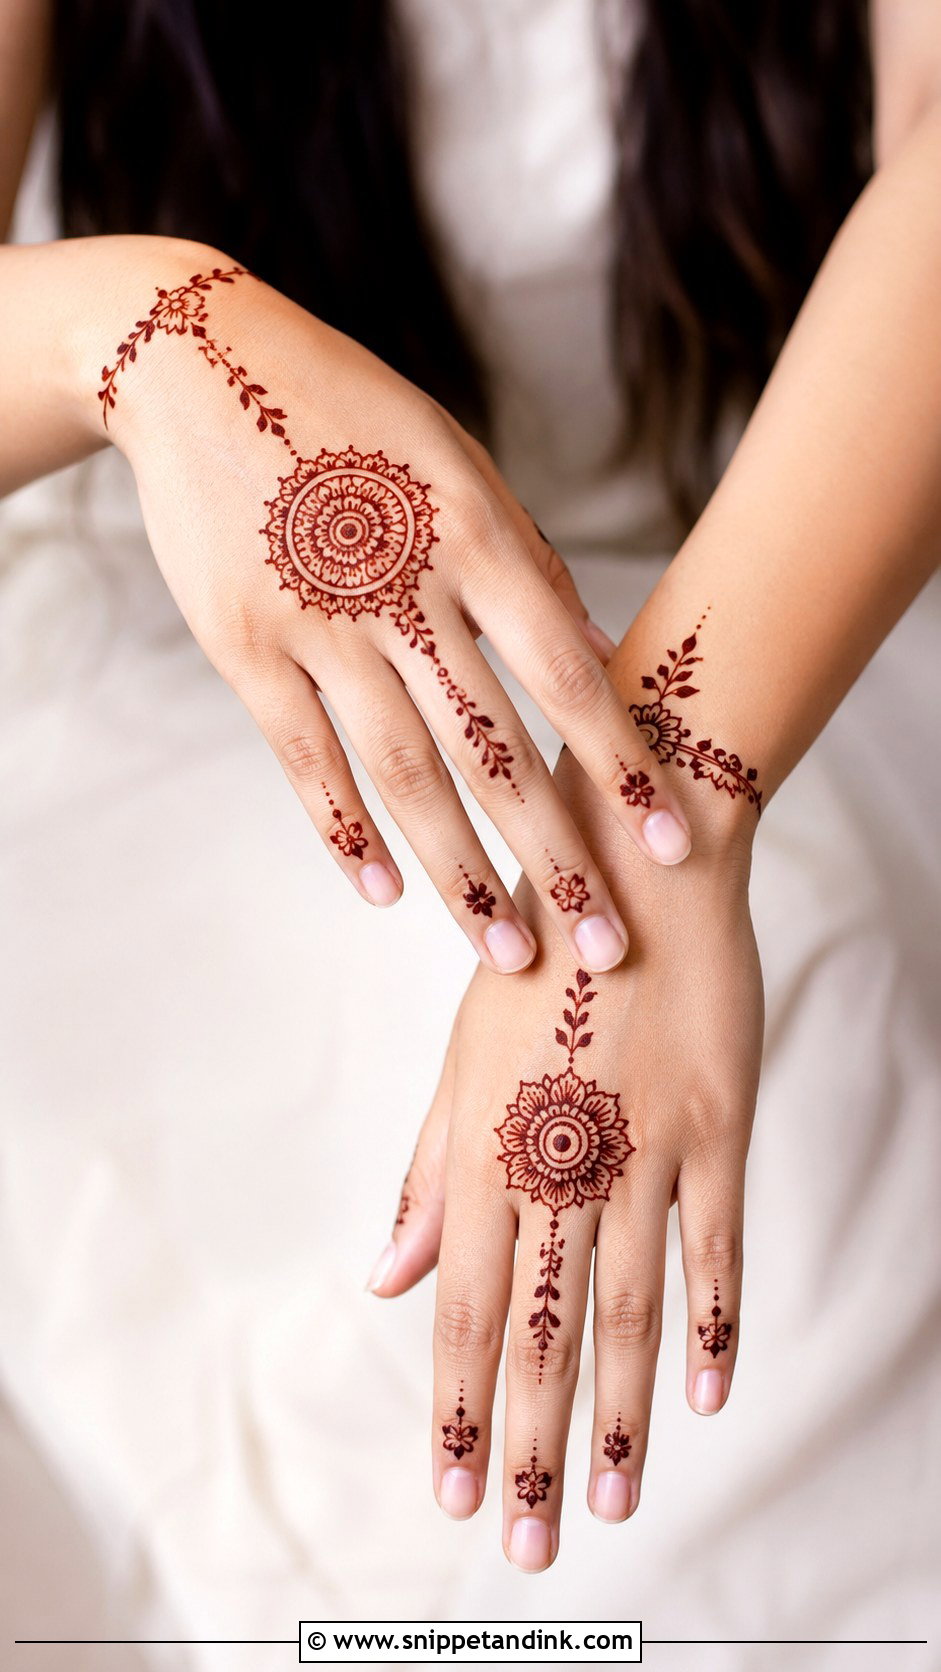
Minimal only works if it looks intentional. I pick one area to decorate, the fingers, a small mandala on the back hand, or a delicate wrist chain, and leave the rest of the hand bare. Dots, thin lines, mini leaves and small rings provide balance. If someone asks for minimal mehndi and then wants a little more here and a little more there, the result usually looks unfinished; better to choose a half hand outright. It goes with traditional and Western outfits alike, and suits work or school.
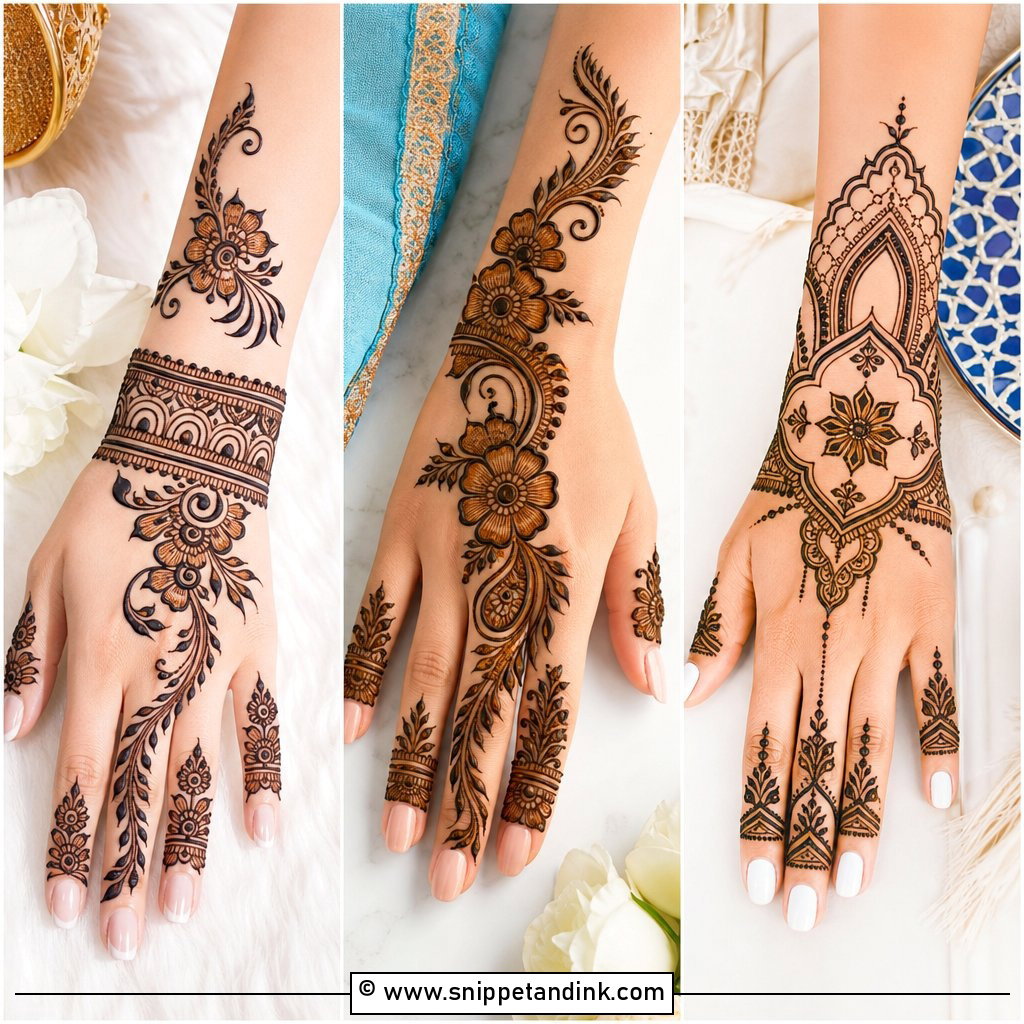
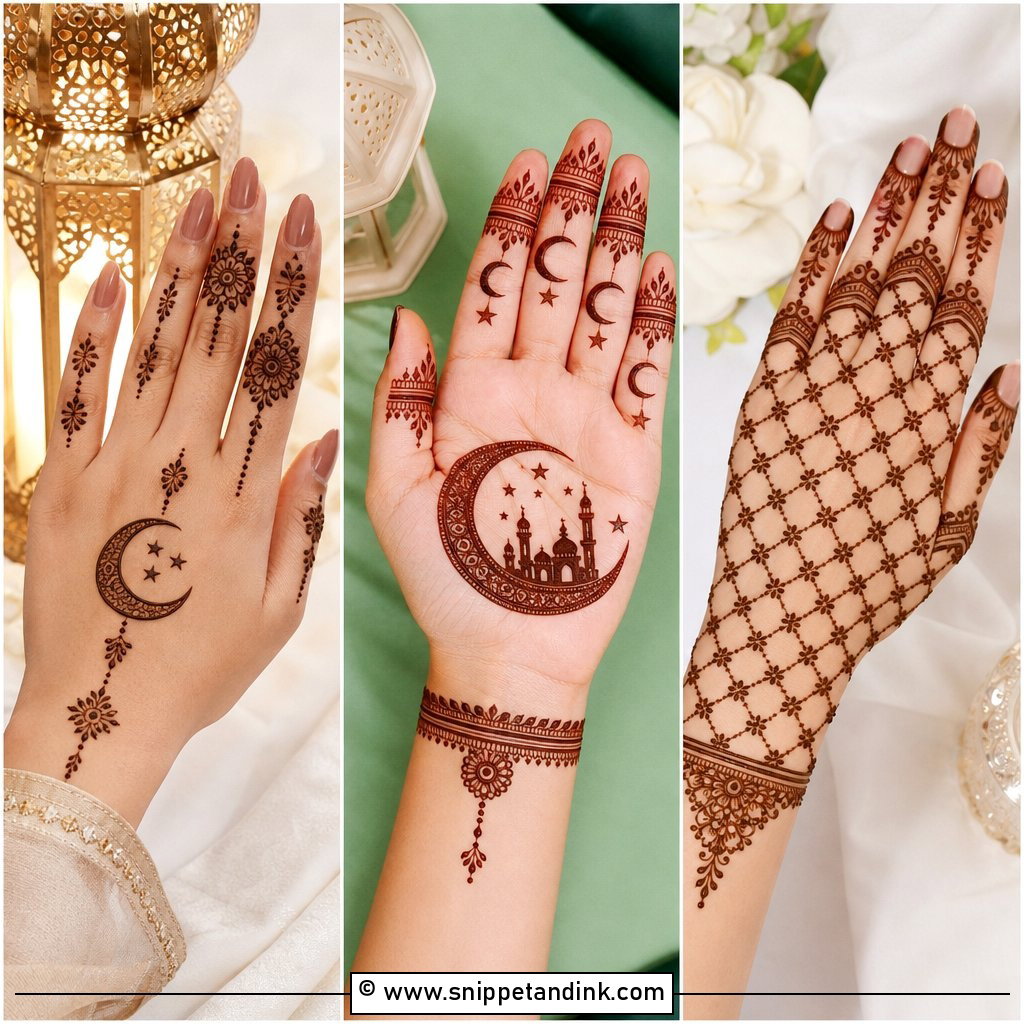
20. Simple Eid Mehndi Design
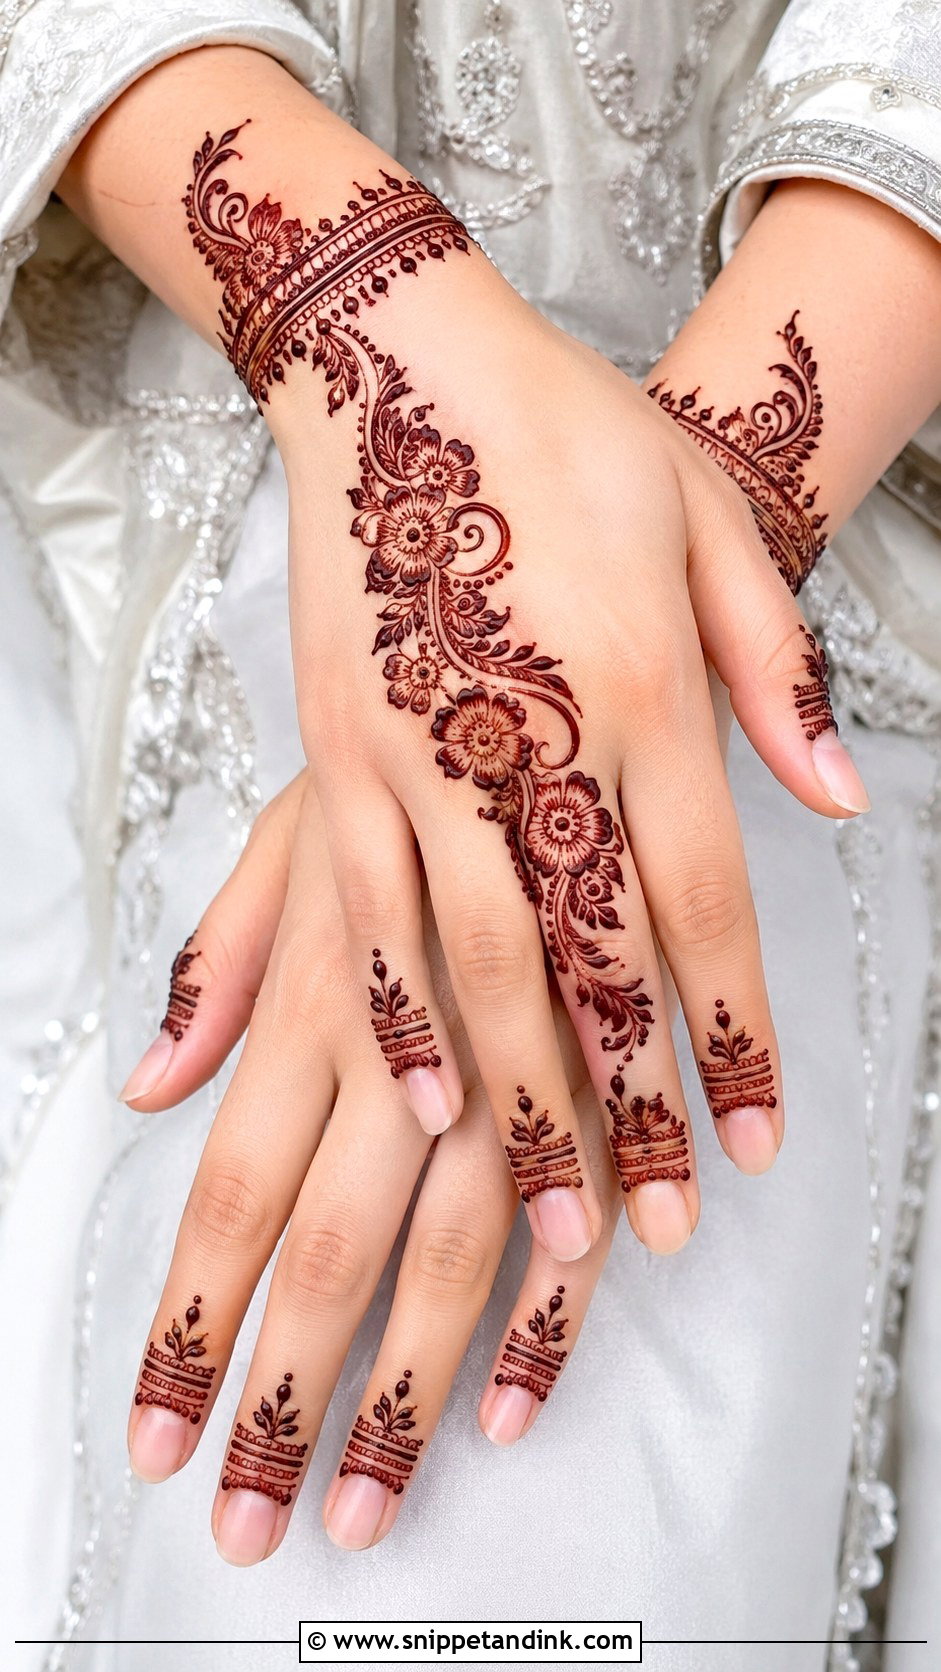
A simple Eid mehndi design has to fit into a crowded evening of cooking and getting ready, so speed counts. My go-to is a back hand floral trail from the wrist to near the index finger, with matching finger bands and tiny dots. The palm can stay lighter with a small mandala or a crescent-style curve. Apply it the night before if you can, and sleep in the paste; the stain will be far deeper by Eid morning.
21. Simple Bridal Mehndi Design
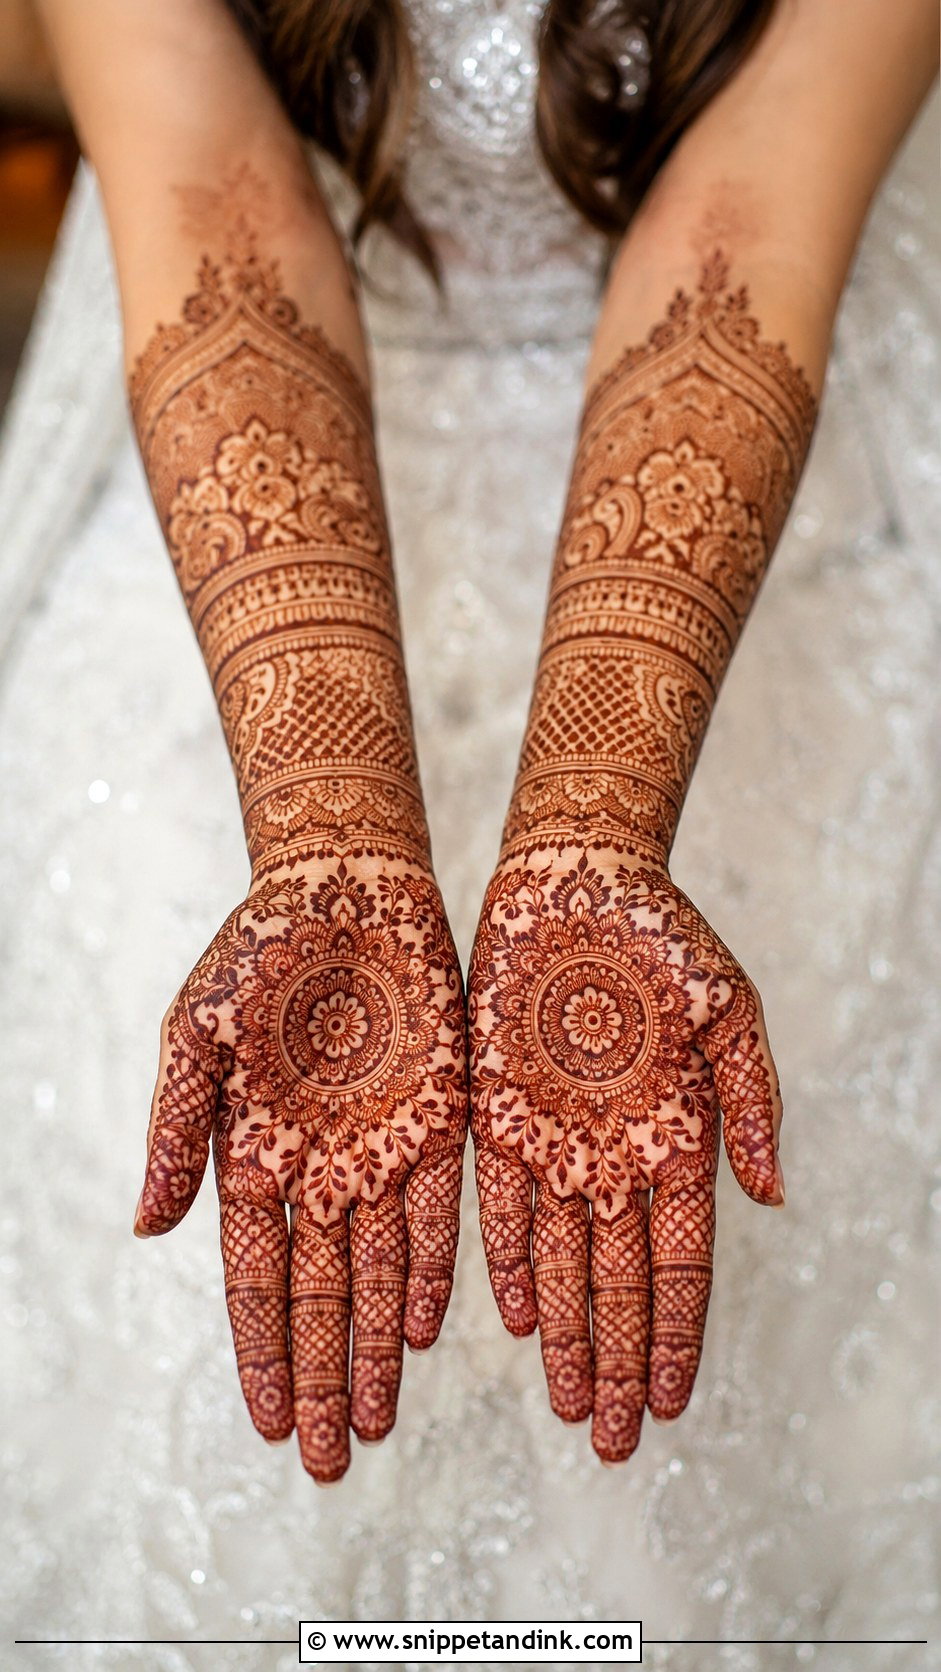
A bride who prefers elegance over heavy coverage can still have a full hand, just with open, breathable patterns. I combine mandalas, paisleys, florals, jaali panels and wrist borders in a balanced layout and skip the dense filling. Initials, tiny hearts or symbolic motifs can sit in it quietly. Engagement brides and court-wedding brides ask for this often. It still reads as bridal, because the coverage is complete and the finishing is careful.
22. Simple Engagement Mehndi Design
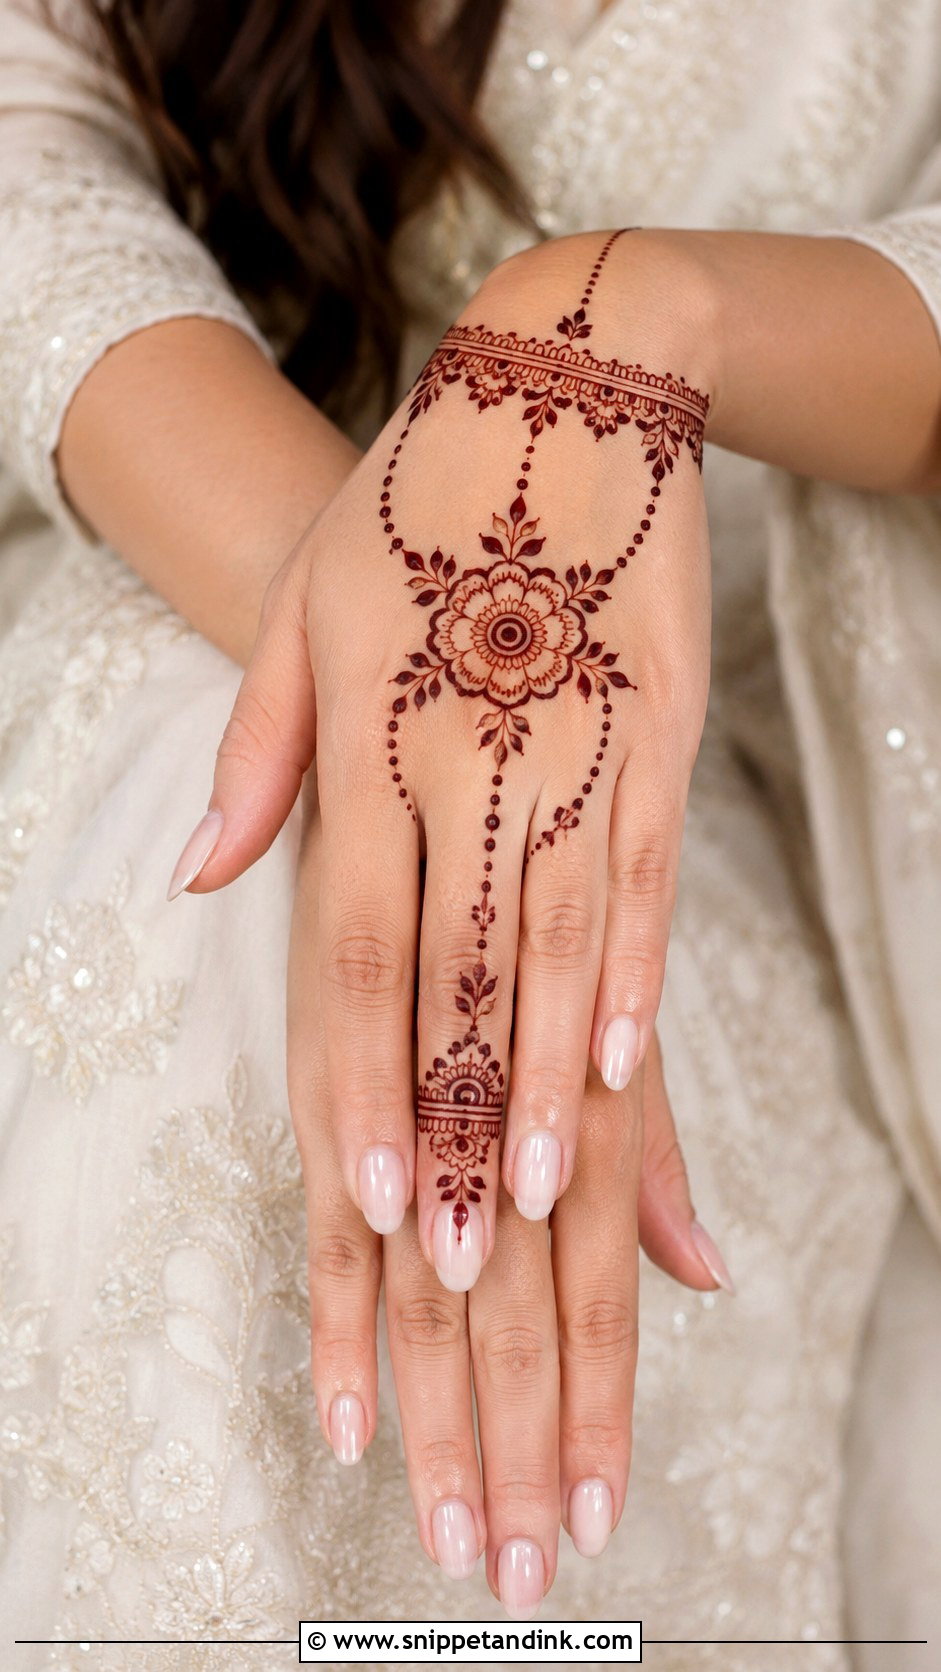
Engagement hands are photographed close up with the ring, so I design for that one shot. A bracelet at the wrist, a small floral centre on the back hand, and delicate chains leading toward the ring finger, which gets slightly more detail than the others. I leave a clear band of skin where the ring will sit, so the metal doesn’t land on top of a busy pattern. Small florals, dots and leafy borders soften it. Pastel suits, sarees and lehengas all suit it.
23. Simple Wedding Guest Mehndi Design
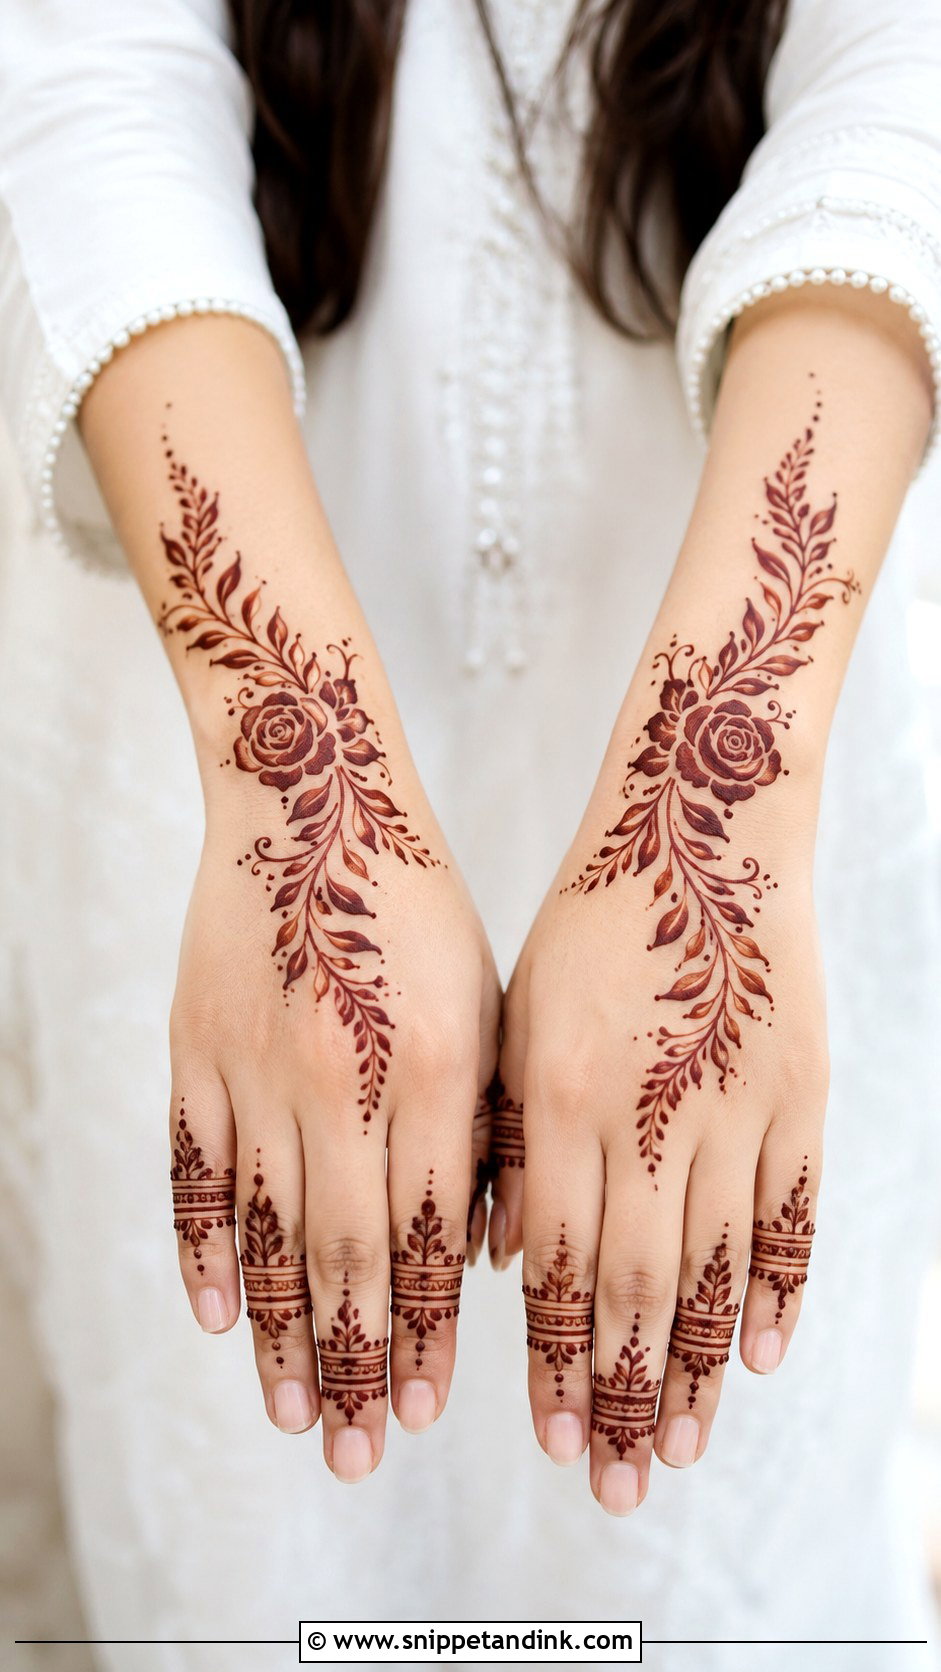
Guests should look festive without matching the bride’s coverage; that’s simple courtesy at most weddings I work. Arabic trails, half-hand florals, back hand mandalas and bracelet designs are the right weight. I ask guests to choose one strong focal point, then let the rest support it. A diagonal rose trail with finger bands, for instance, gives enough detail for photos while staying quick. A small wrist border finishes it, and it’s comfortable through sangeet, mehndi night or reception.
24. Simple Festival Mehndi Design
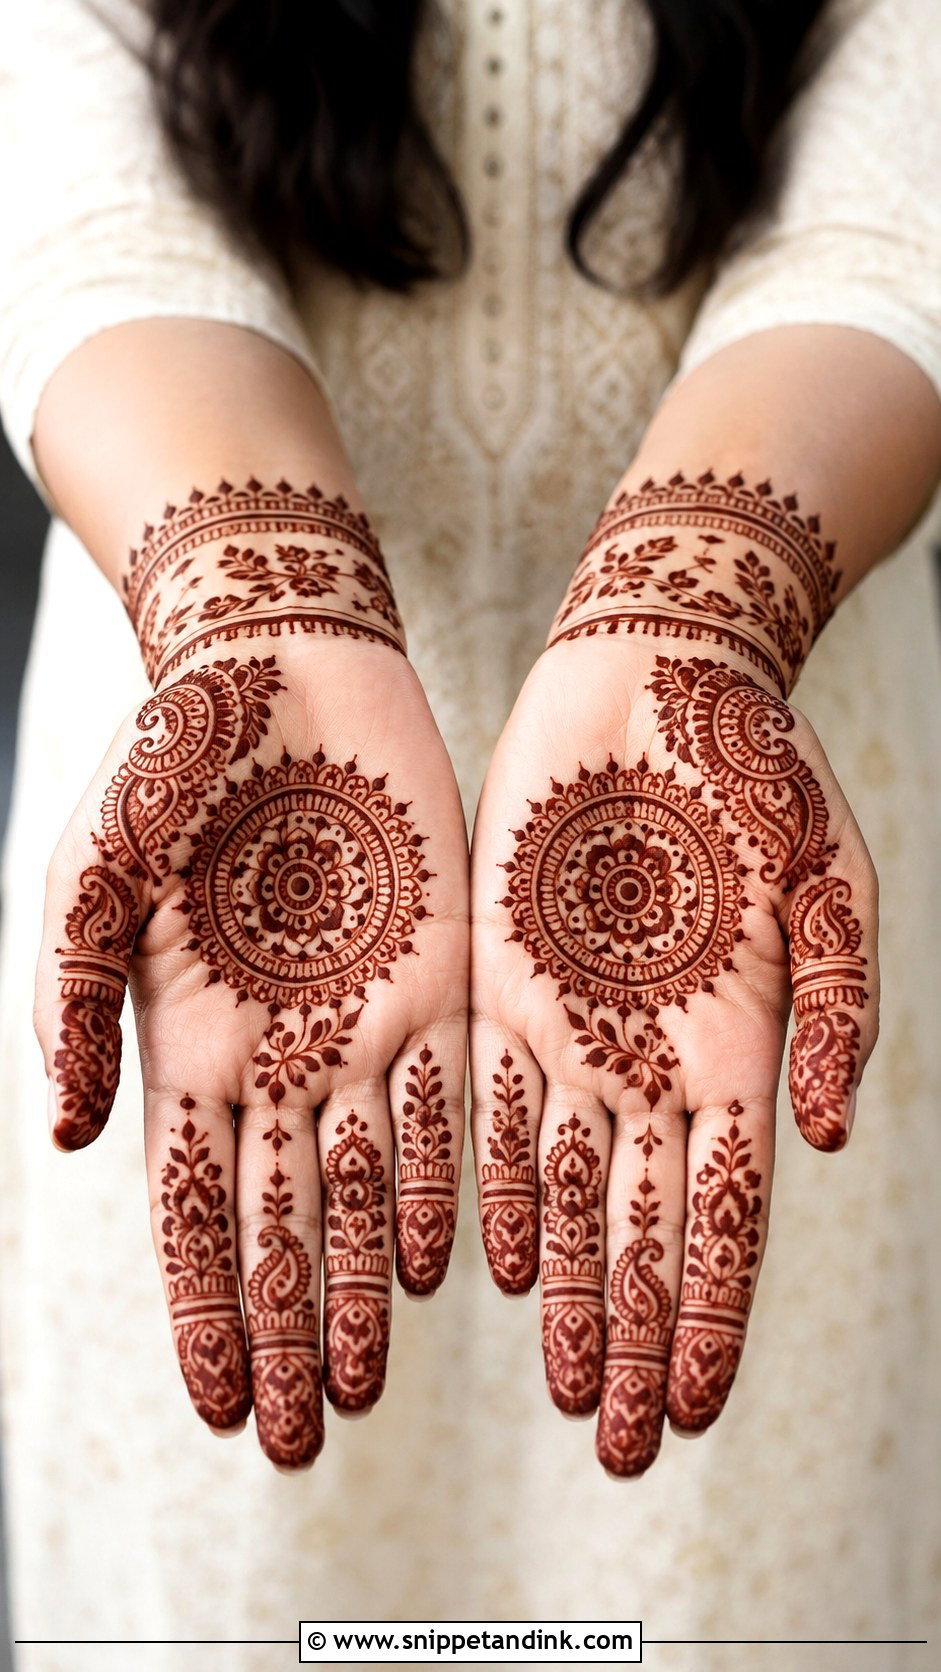
A simple festival mehndi design has to go on fast before a busy celebration. Mandalas, flowers, leaves, paisleys and dots do the job. On the palm, a circular motif with small vines running to the fingers; on the back hand, a bracelet layout or diagonal floral trail. A neat wrist border makes even limited coverage look complete. It fits Diwali, Eid, Karwa Chauth, Teej, Raksha Bandhan and family gatherings without a long sitting.
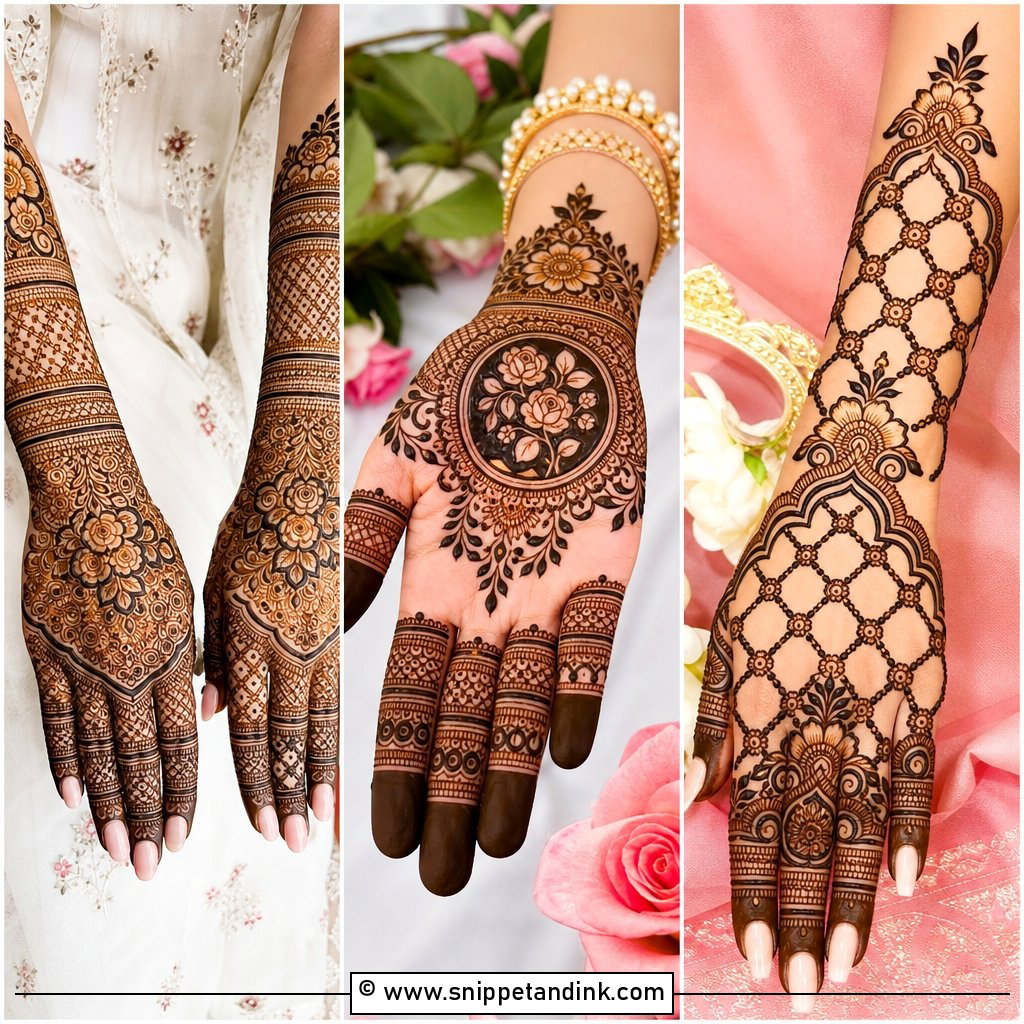
25. Simple Karwa Chauth Mehndi Design
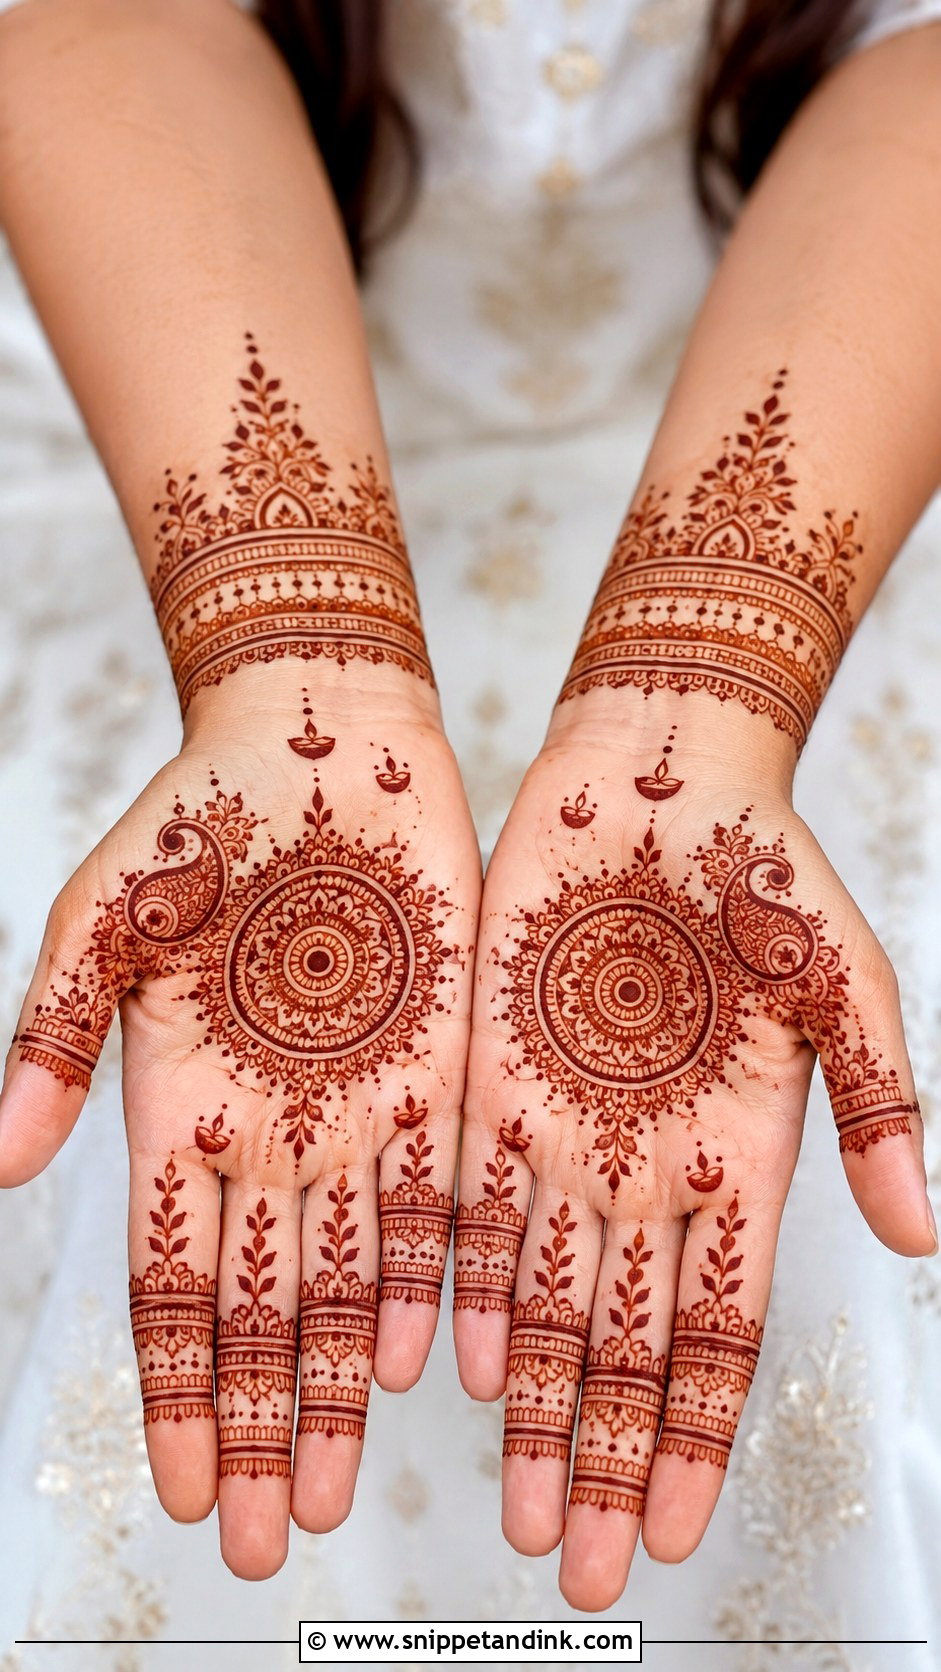
Karwa Chauth has so many preparations that a simple layout is often the sensible one. I’d suggest a palm-centred mandala with paisley corners, or a back hand floral bracelet pattern, finished with dots, leafy trails and finger bands. A small diya-inspired curve or decorative circle can mark the occasion if you keep it subtle. Apply it a day ahead so the colour has peaked by the evening puja, and it will sit well under a stack of bangles.
26. Simple Kids Mehndi Design
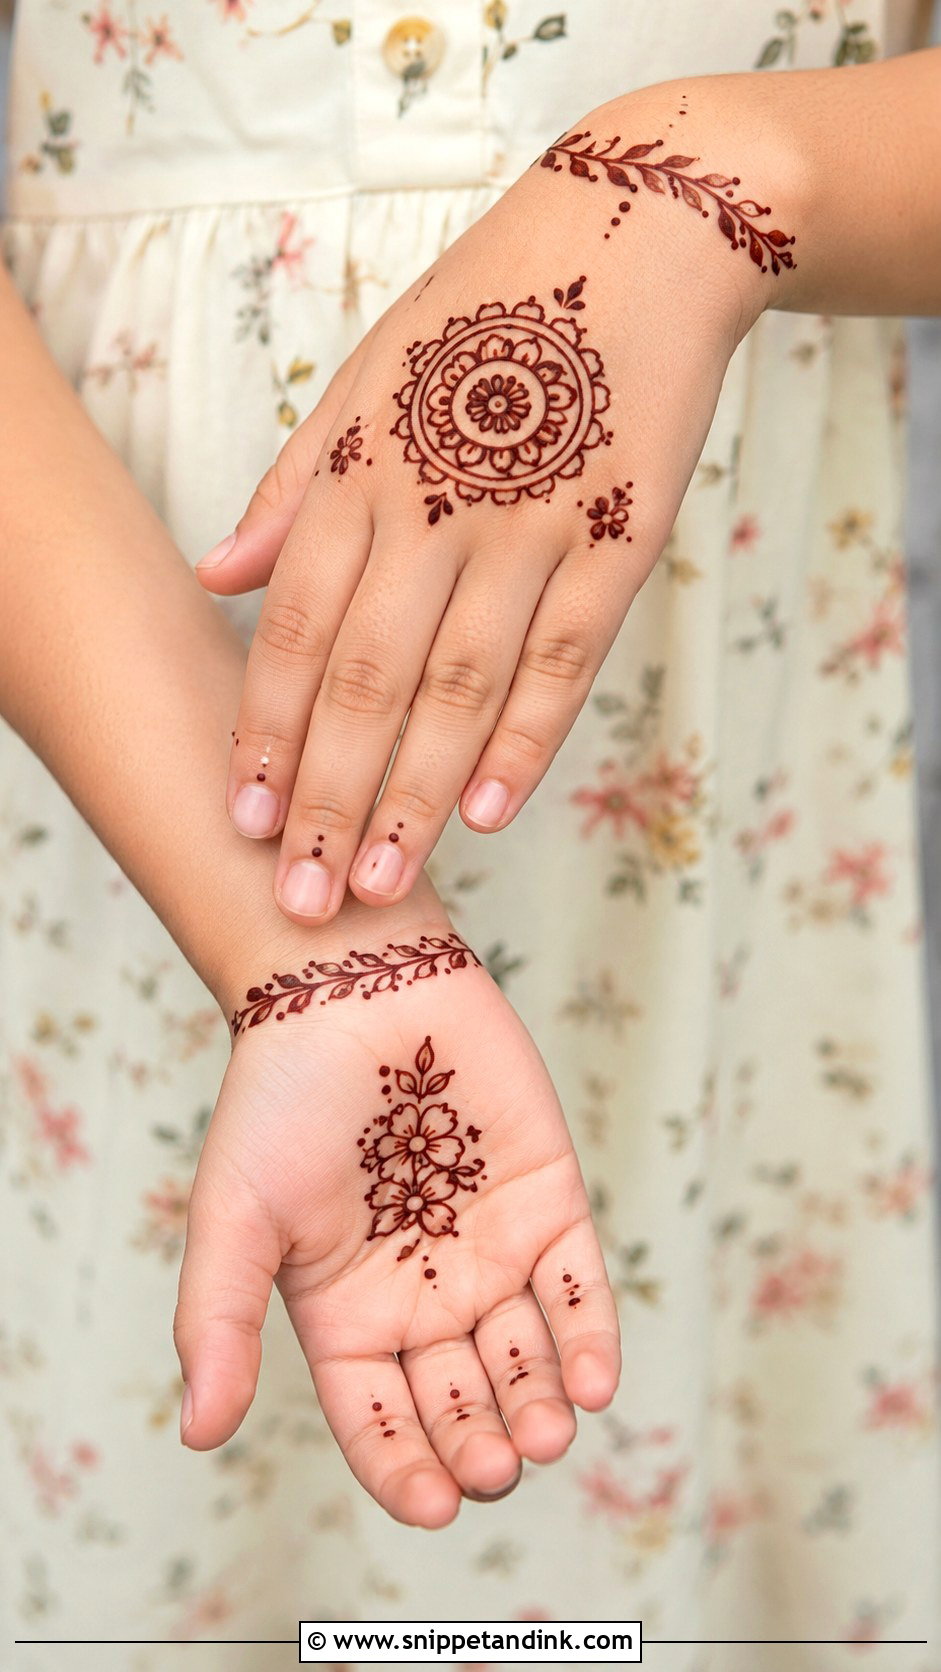
Children rarely sit still for more than a few minutes, so I keep their designs small and complete: a tiny flower trail, a mini mandala with finger dots, or a back hand bracelet. Bold lines and shapes they recognise. For very young children I skip full-hand coverage entirely and use only natural henna, testing a small spot first if their skin is sensitive. A design on the palm or back of the hand is plenty to make them happy, and it dries quickly.
27. Simple Beginner Mehndi Design
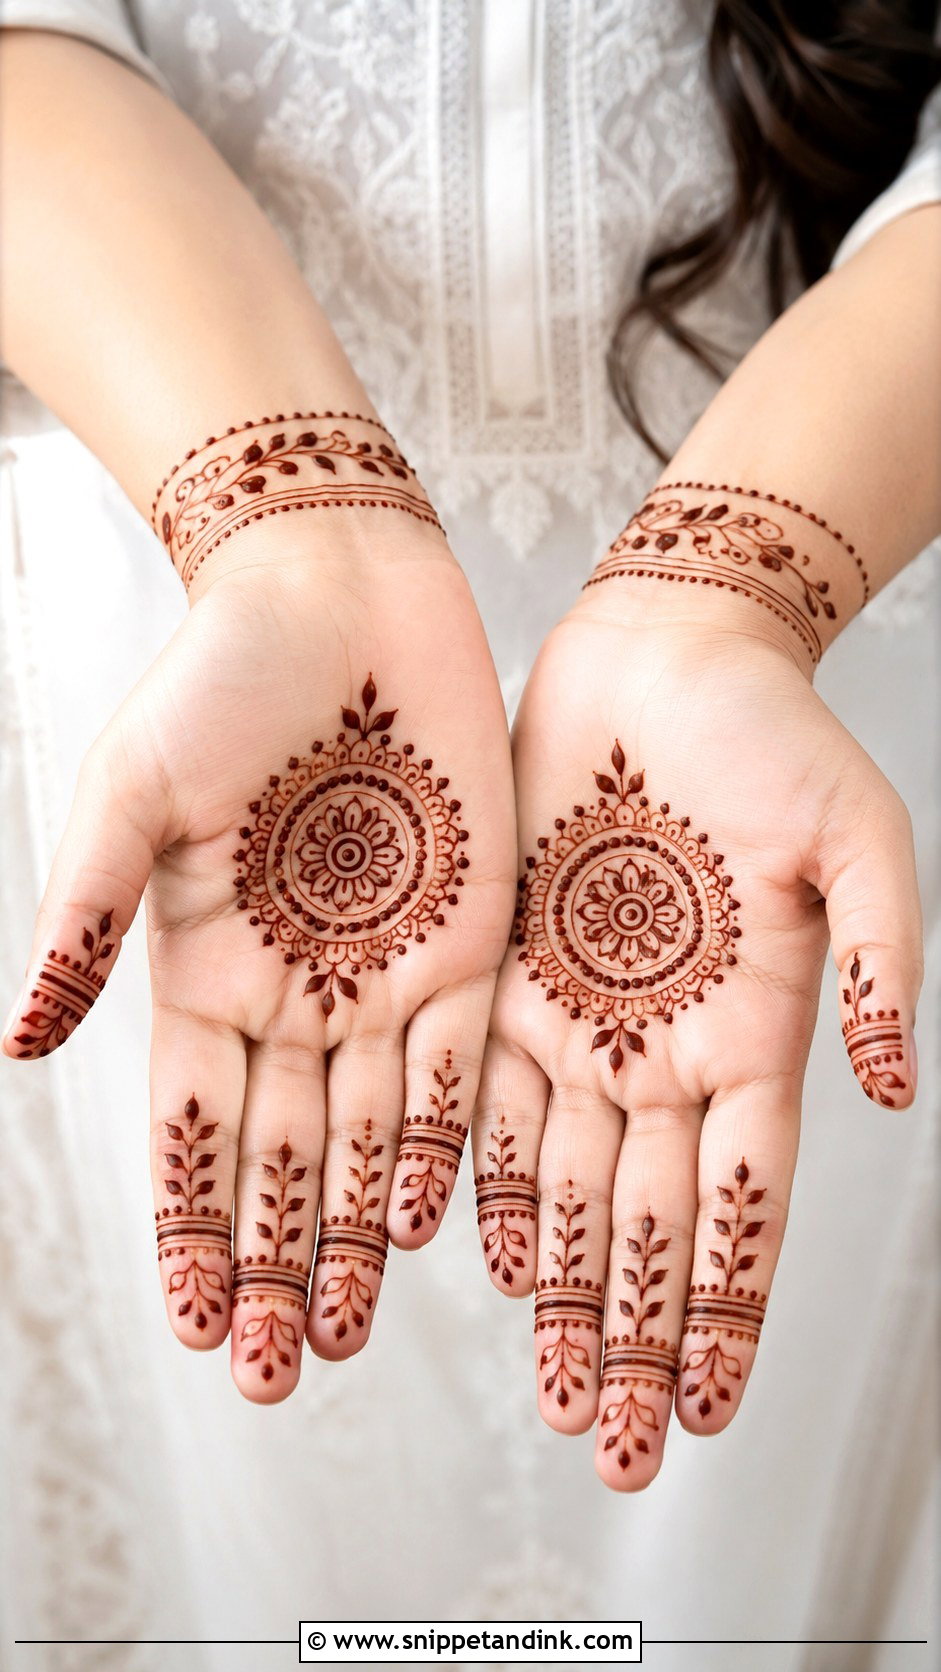
For a first attempt, stick to shapes that hide wobbles: dots, curves, leaves, flowers and round mandalas. Tiny details can wait until your cone pressure is even. A palm mandala with simple finger bands, or a back hand vine with flowers and dots, both look complete with very little skill. Repeat the same shapes so everything looks coordinated. When a line goes wrong, I’d add a dot or a leaf beside it rather than trying to wipe it, which usually just smears.
28. Simple Modern Mehndi Design
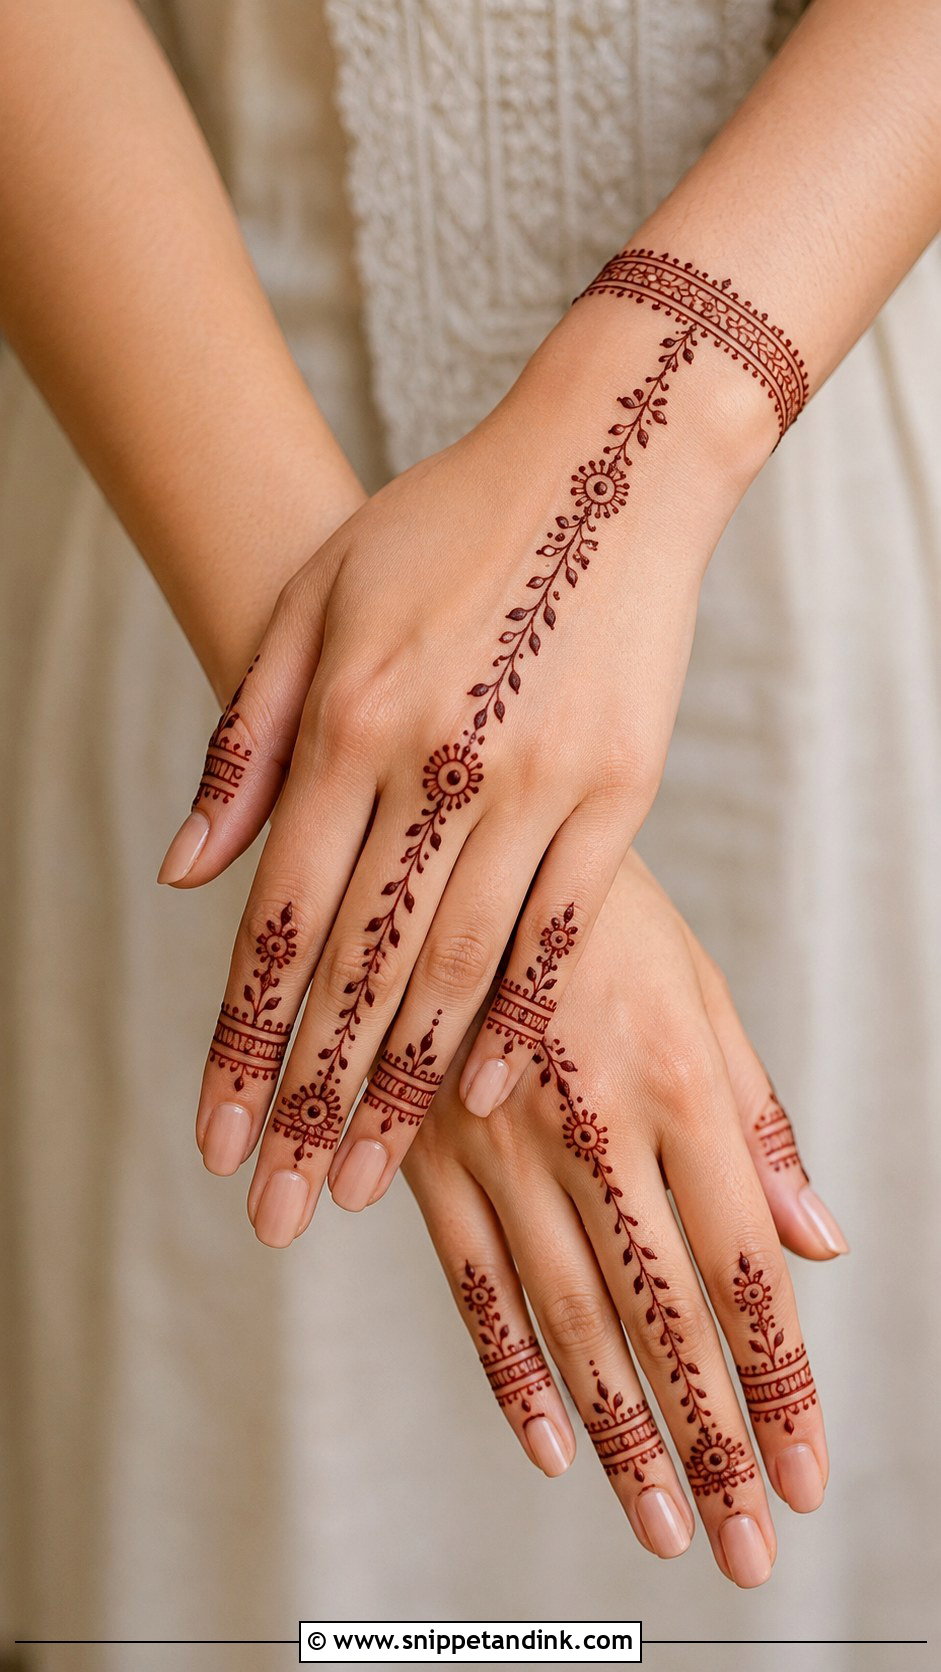
Modern simple designs lean on negative space: finger focus, small florals, a few geometric lines, a thin cuff. On the back hand, I draw one slim centre vine and leave wide spaces around it, then add matching finger bands and a thin wrist cuff. It pairs with minimal jewelry and contemporary outfits. Every line should look placed on purpose; if I can’t say why a line is there, I leave it out.
29. Simple Stylish Mehndi Design
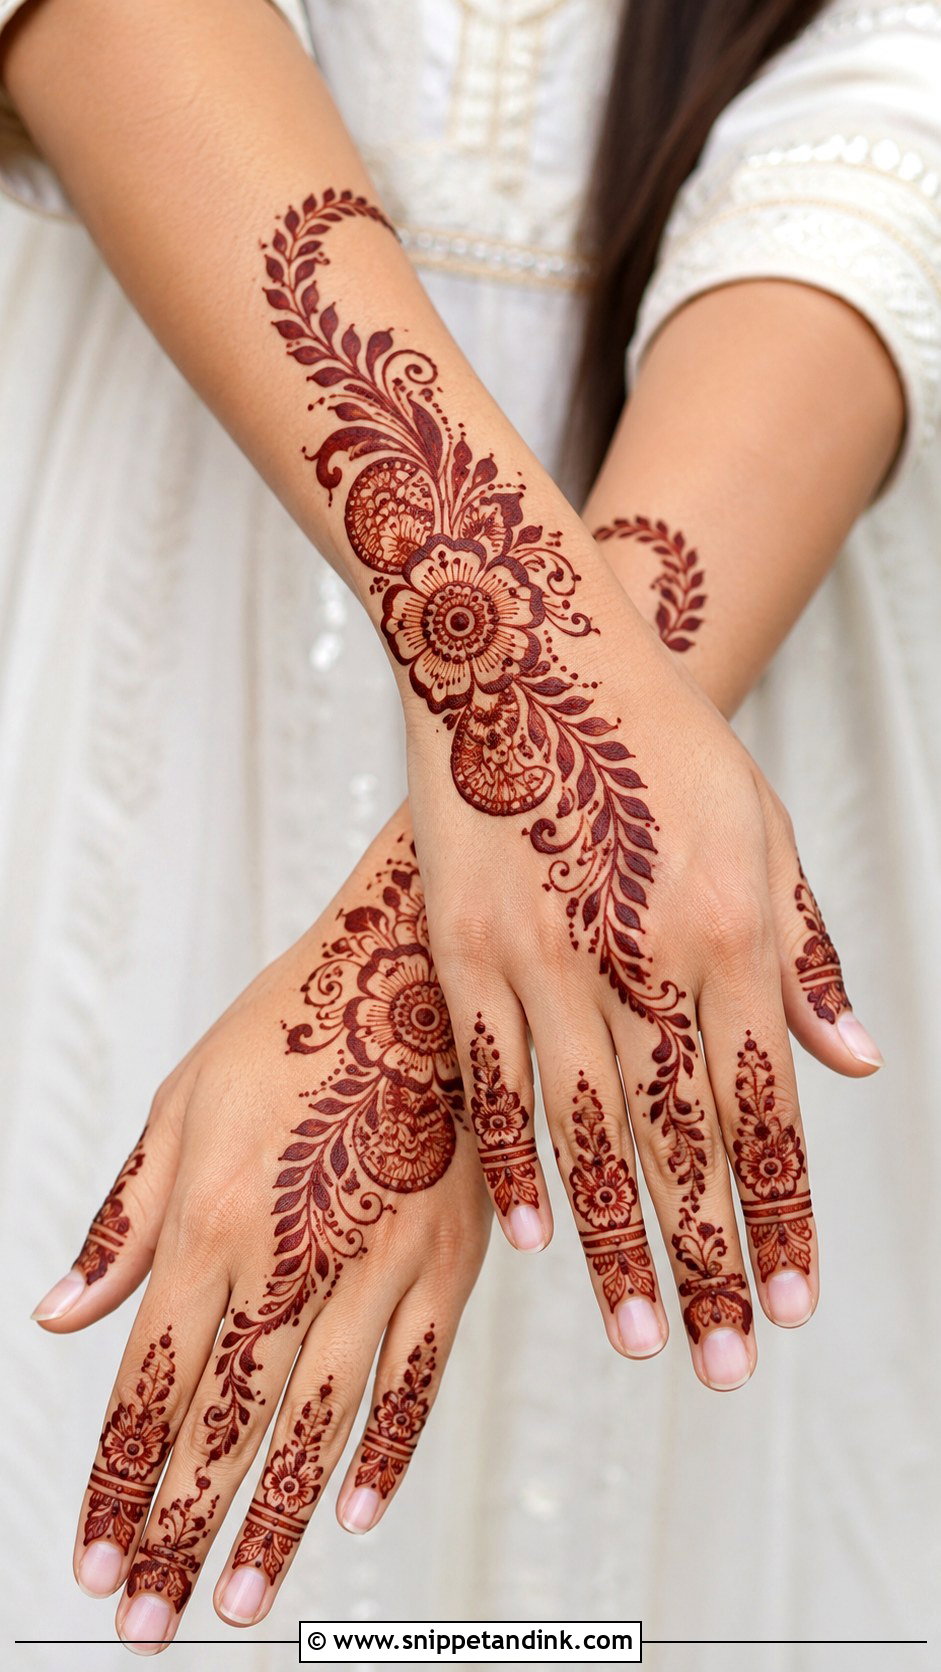
What makes a simple design feel current is mostly the layout: diagonal trails, clean fingers, a wrist cuff and open space. I start with one bold flower or paisley near the wrist and let the pattern travel across the hand, softening it with dots and leaves. Fingers should coordinate without being identical. Mirror-image fingers look stiff, while small variations on a theme look drawn by hand. Parties, festivals and wedding guests all suit it.
30. Simple Round Mehndi Design
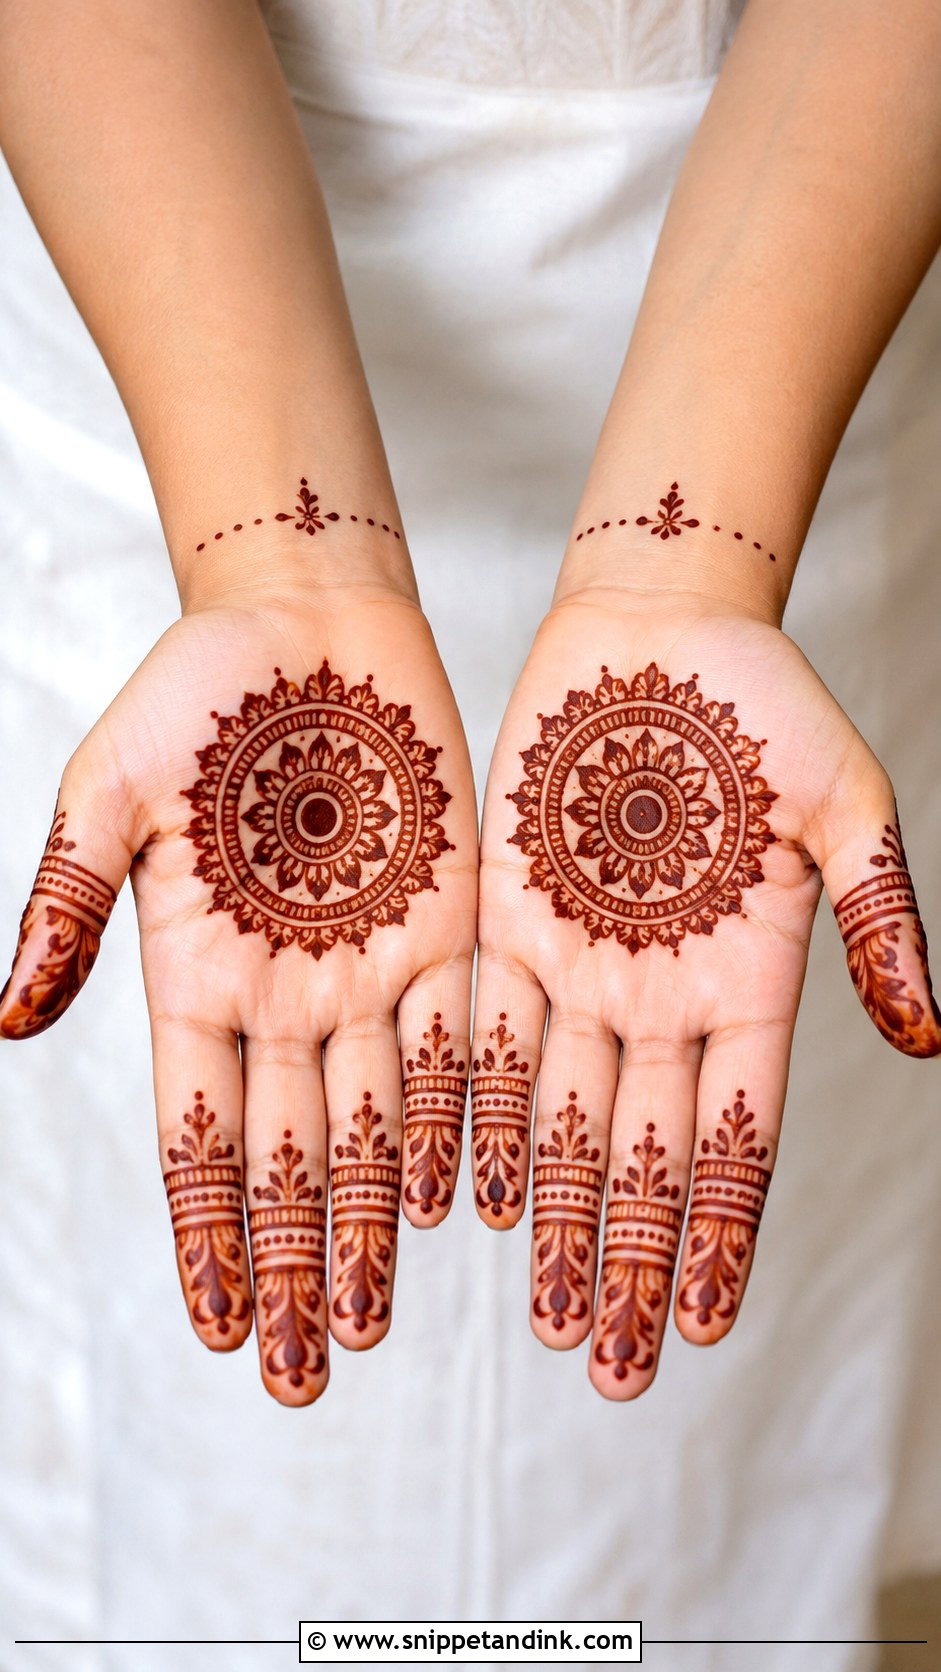
Round designs centre on circular shapes, usually a mandala of petals, dots, rings and scalloped edges, with finger details and a light wrist border. They balance easily because the main shape sits in the middle, and they suit small hands well since the circle can shrink without losing its look. Keep the first circle clean and build outward slowly. It’s a classic choice for traditional events and quick festive henna, and good practice for beginners.
31. Simple Leaf Mehndi Design
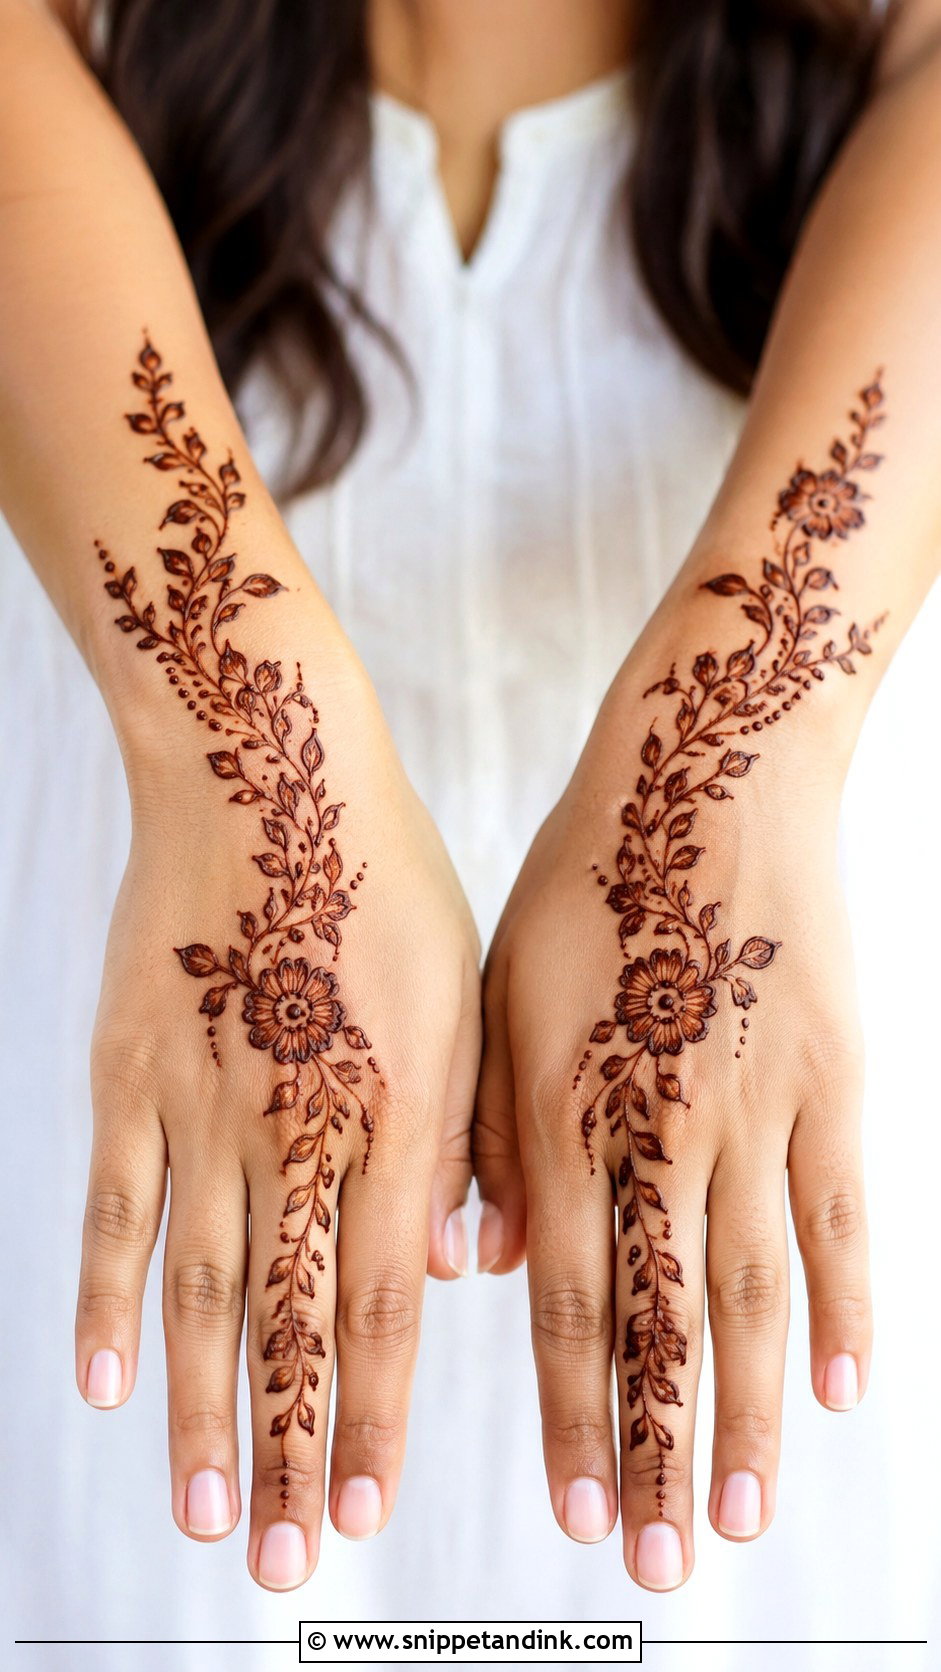
Leaves give movement without the weight of flowers. A leafy vine from the wrist to the middle finger, with small flowers or dots for softness, makes a complete hand; the palm can stay plain or carry a tiny centre motif. I draw each leaf with a single pull of the cone, thick at the base and tapering to a point, and that taper is what makes leaf work look skilled. Front or back hand, it’s light enough for everyday henna.
32. Simple Bel Mehndi Design
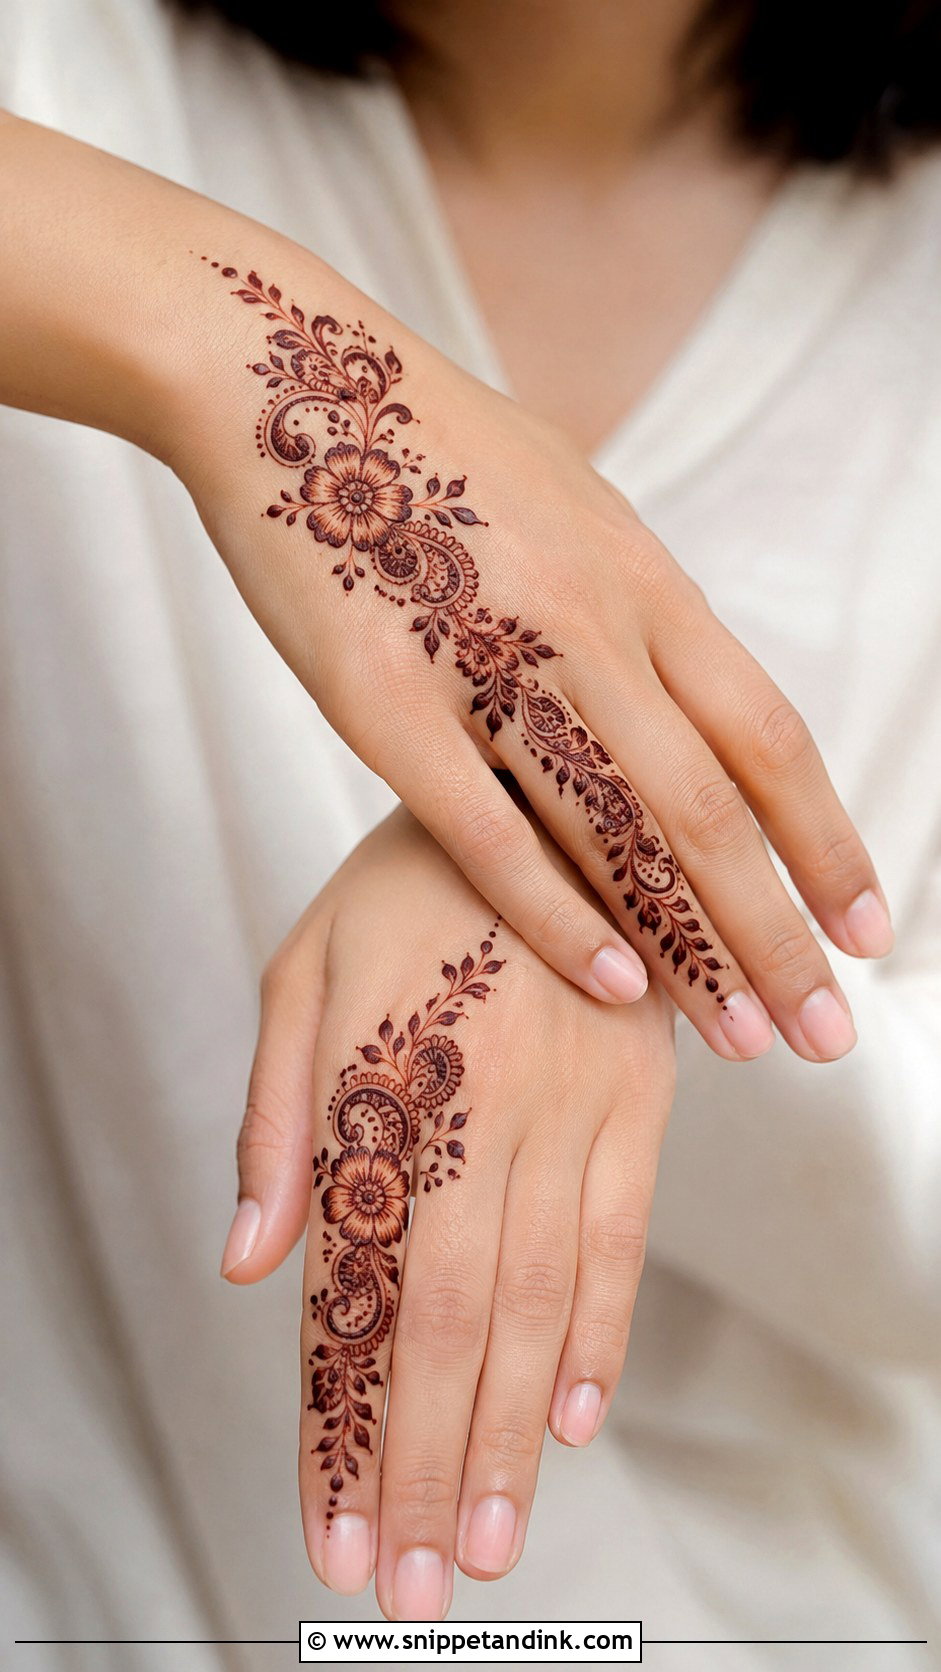
A bel is a flowing vine across the hand, and it’s popular for good reason: quick, flattering, and it lengthens the fingers. It can run diagonally from the wrist to the index finger, or from the thumb side toward the palm, with flowers, leaves, dots and small paisleys along the way. Keep one side of the hand open so the vine stands out. The layout bends to fit any hand, so it’s very forgiving for beginners and Arabic or Indo-Arabic lovers alike.
33. Simple Side Mehndi Design
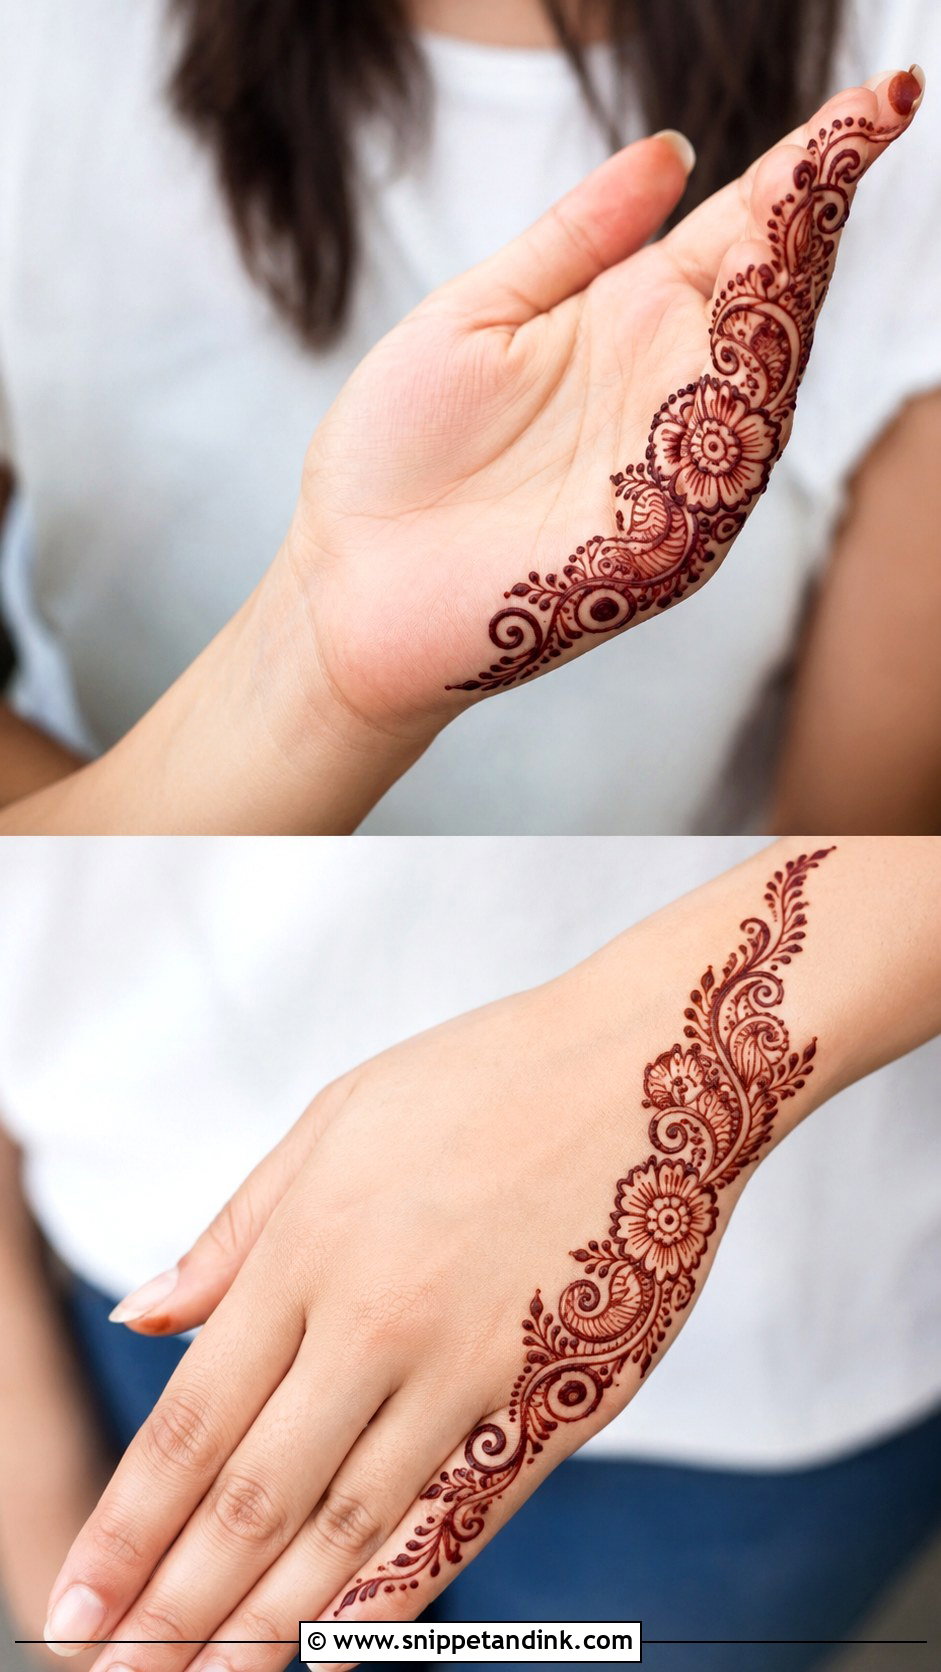
Side mehndi decorates one edge of the hand and leaves the rest open. On the palm, I run it along the thumb side with flowers, leaves and dots; on the back, the trail moves from the wrist toward the little finger. Keep it narrow. The bare skin beside it is half the design. It works with rings and looks good in close-ups, though it does show slips more than a centred design, so a steady hand helps.
34. Simple Palm Mehndi Design
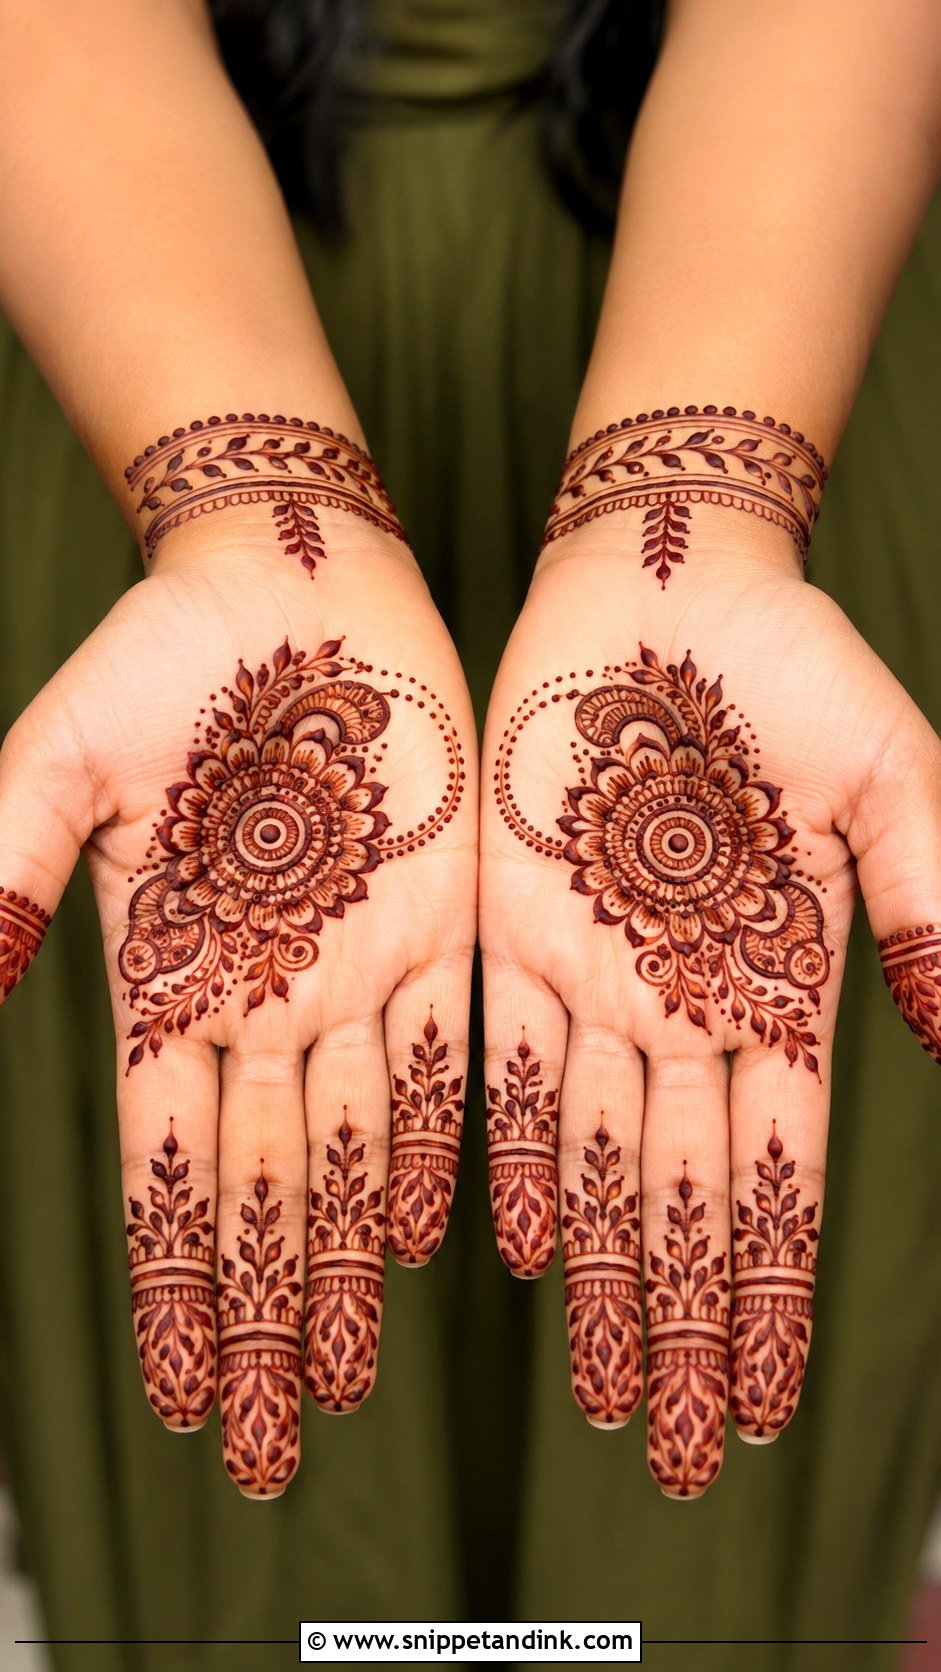
Palm henna is the traditional placement for a practical reason: the skin there is thick and stains deeper and clearer than anywhere else. I start with a mandala, flower, paisley or round motif in the middle, then add dots, vines and tiny leaves around it, with bands, tips or small florals on the fingers. Keep the wrist light or bare for a very simple finish. Bear in mind that palm designs need you to keep your hands open and still while they dry, so it’s not the one to do while cooking.
35. Simple Wrist Mehndi Design
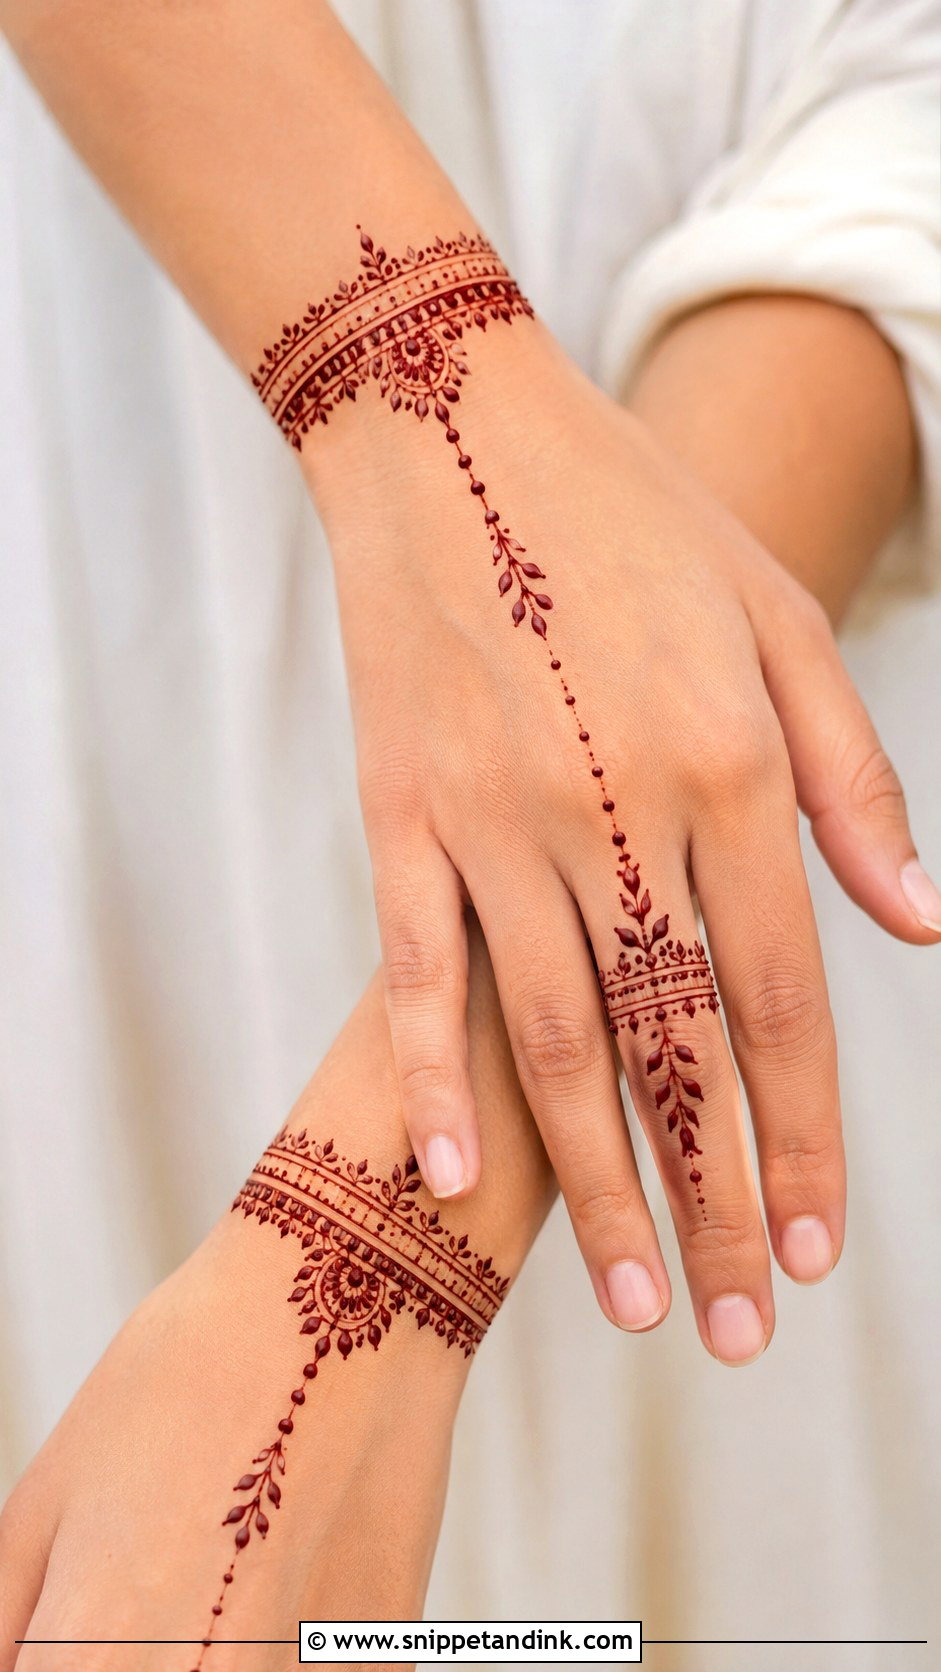
A wrist band of petals, dots, leaves or geometric lines, with a small extension onto the back hand or palm, gives a bracelet effect with almost no coverage. Connect it to one finger with a dotted chain if you want a jewelry finish. It’s quick and comfortable, and it’s the design I suggest for bridesmaids, teens and office-friendly festive looks. Wrist skin stains lighter than the palm, so I draw the band a little bolder than feels necessary.
Wiping Away a Wobble Before It Stains
Henna starts staining within seconds of touching skin, so mistakes have a very short window. If a line slips, lift the wet paste straight away with the point of a toothpick or a barely damp cotton bud, rolling it up rather than rubbing sideways. Rubbing spreads the dye into a smear that will show as a faint orange shadow later.
If you miss that window, don’t fight it. A stray dot can become part of a dot border; a crooked stem can grow an extra leaf. On simple designs I’d rather absorb a mistake into the pattern than leave a scrubbed patch beside it.
While the paste dries
- Keep your hands warm and still. Sitting near a heater or in a warm room deepens the colour; fanning the design or sitting in cold air works against you.
- Once the surface is dry to the touch, dab on a little lemon and sugar so the paste stays stuck to the skin longer.
- Wrap the hands loosely in tissue if you need to sleep in it, and scrape the paste away dry in the morning instead of washing it off.
- Expect bright orange at first. It darkens toward brown over the next day or two, so judge the colour then, not the moment it comes off.
How Little Henna Is Enough?
Henna doesn’t need to be heavy or slow to look festive. A clean mandala, a floral trail, a bracelet or a light Arabic bel can carry a whole occasion. When someone can’t decide, I ask what the day holds: how long you can sit, what you’ll be doing with your hands, and what you’re wearing. Then open spacing for a modern feel, bold outlines so the stain reads clearly, and fingers that match the rest of the design. Indian, Arabic, Indo-Arabic, Moroccan or minimal, a simple design done carefully always looks finished.
You'll Like These Ideas:


Leave a Reply