
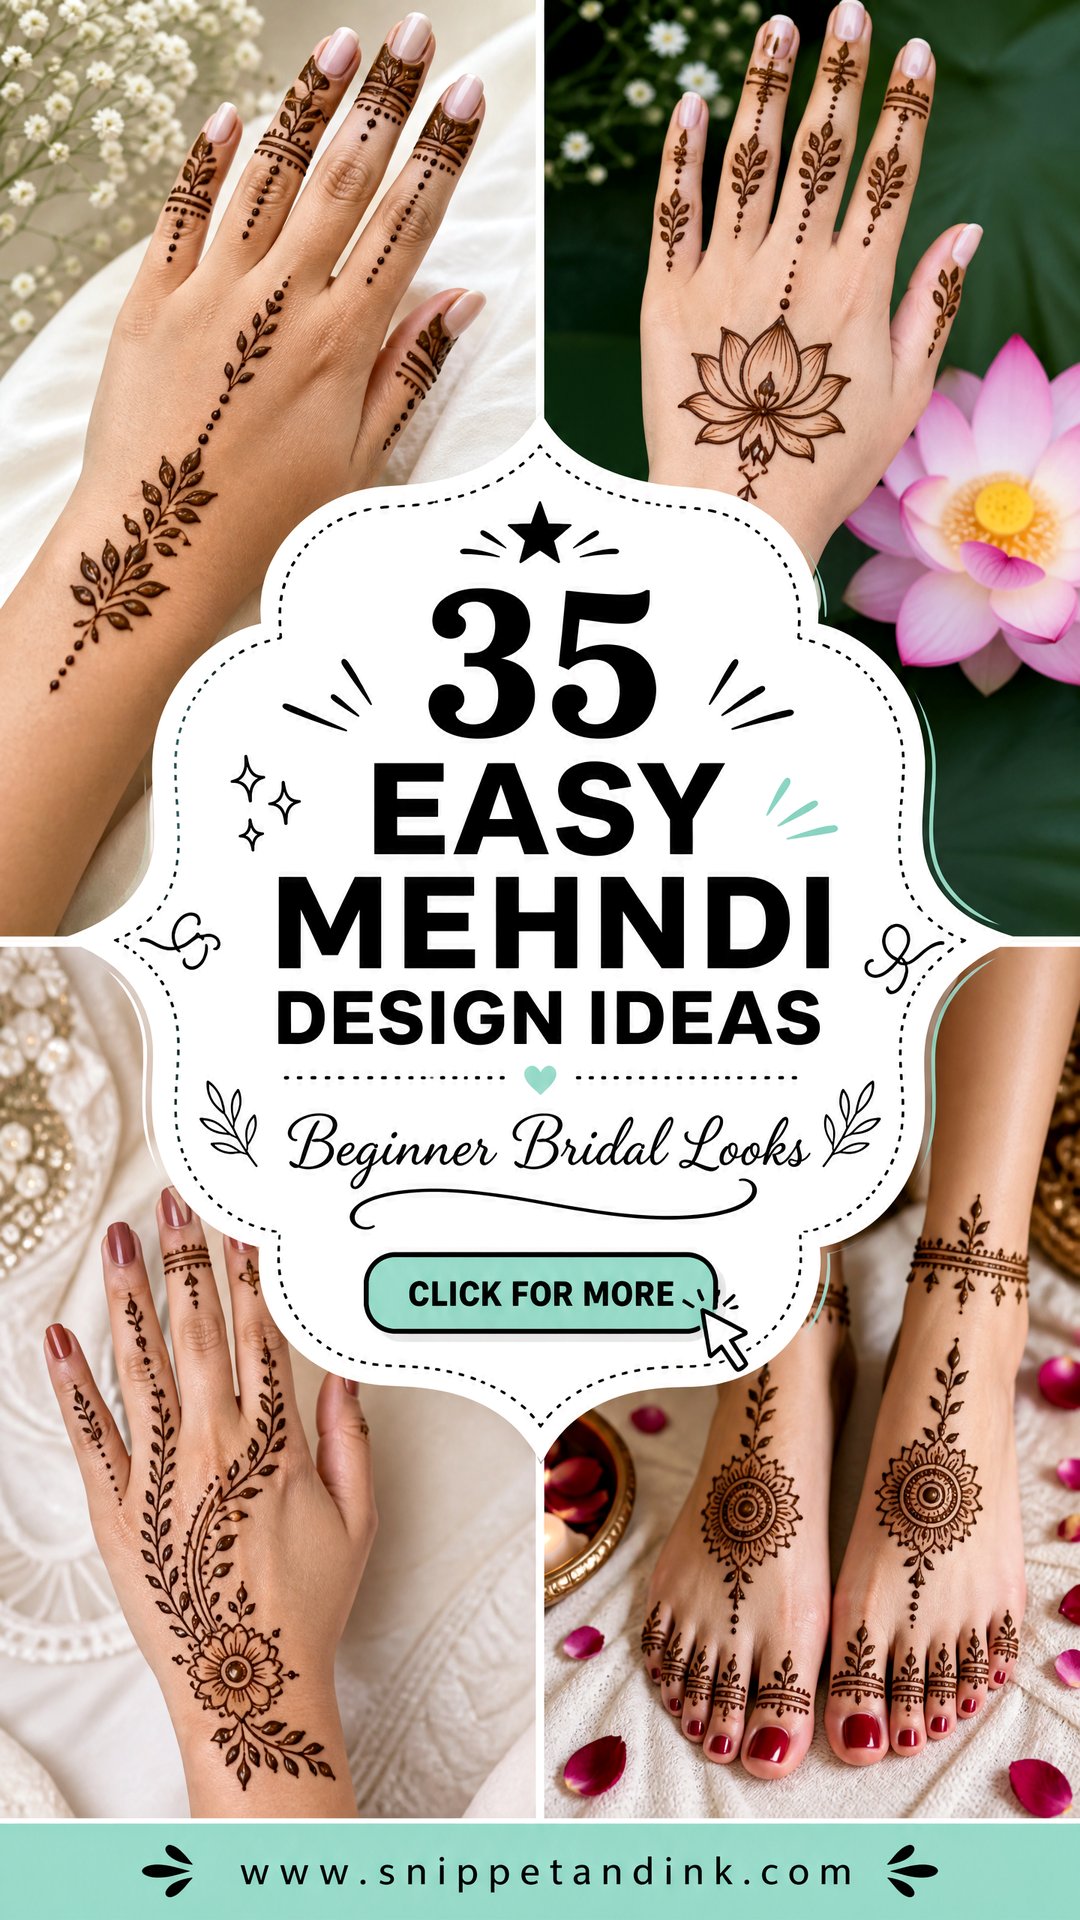
Most of my students arrive wanting to draw a bridal hand on day one. I start them somewhere else entirely: one clear shape, plenty of open skin, and a cone they can control. Simple mehndi is built from flowers, mandalas, paisleys, leafy vines, finger patterns and neat wrist bands, and every one of those can be scaled up or down to suit a small hand or a wide one. The aim isn’t to fill every inch. It’s a design that looks deliberate and goes on in the time you actually have, whether that’s the night before Eid or an hour between wedding errands. Below are the layouts I teach first, with notes on where beginners usually slip.
Getting the Cone Right Before the First Line
Most beginner frustration is a paste problem, not a drawing problem. Natural henna powder mixed with lemon juice or water needs several hours to release its dye before it will stain, so mix it the day before you plan to draw. It should end up about as thick as toothpaste: thin enough to flow with gentle pressure, thick enough to hold a line without spreading.
- Hold the cone like a pen, but squeeze from the top with your other fingers rather than pinching near the tip.
- Let the tip hover just above the skin and let the line fall into place. Dragging the tip across the skin scratches the line thin.
- Snip the tip a fraction at a time. A big opening gives thick lines you can’t make thinner later.
- Practise on paper or a plastic sheet until your pressure stays even through a long curve.
Ready-made cones from a shop are convenient, but read the ingredients. Natural henna lists henna and oils; anything that stays vague or promises black colour is one to leave on the shelf.
1. Simple Front Hand Mehndi Design
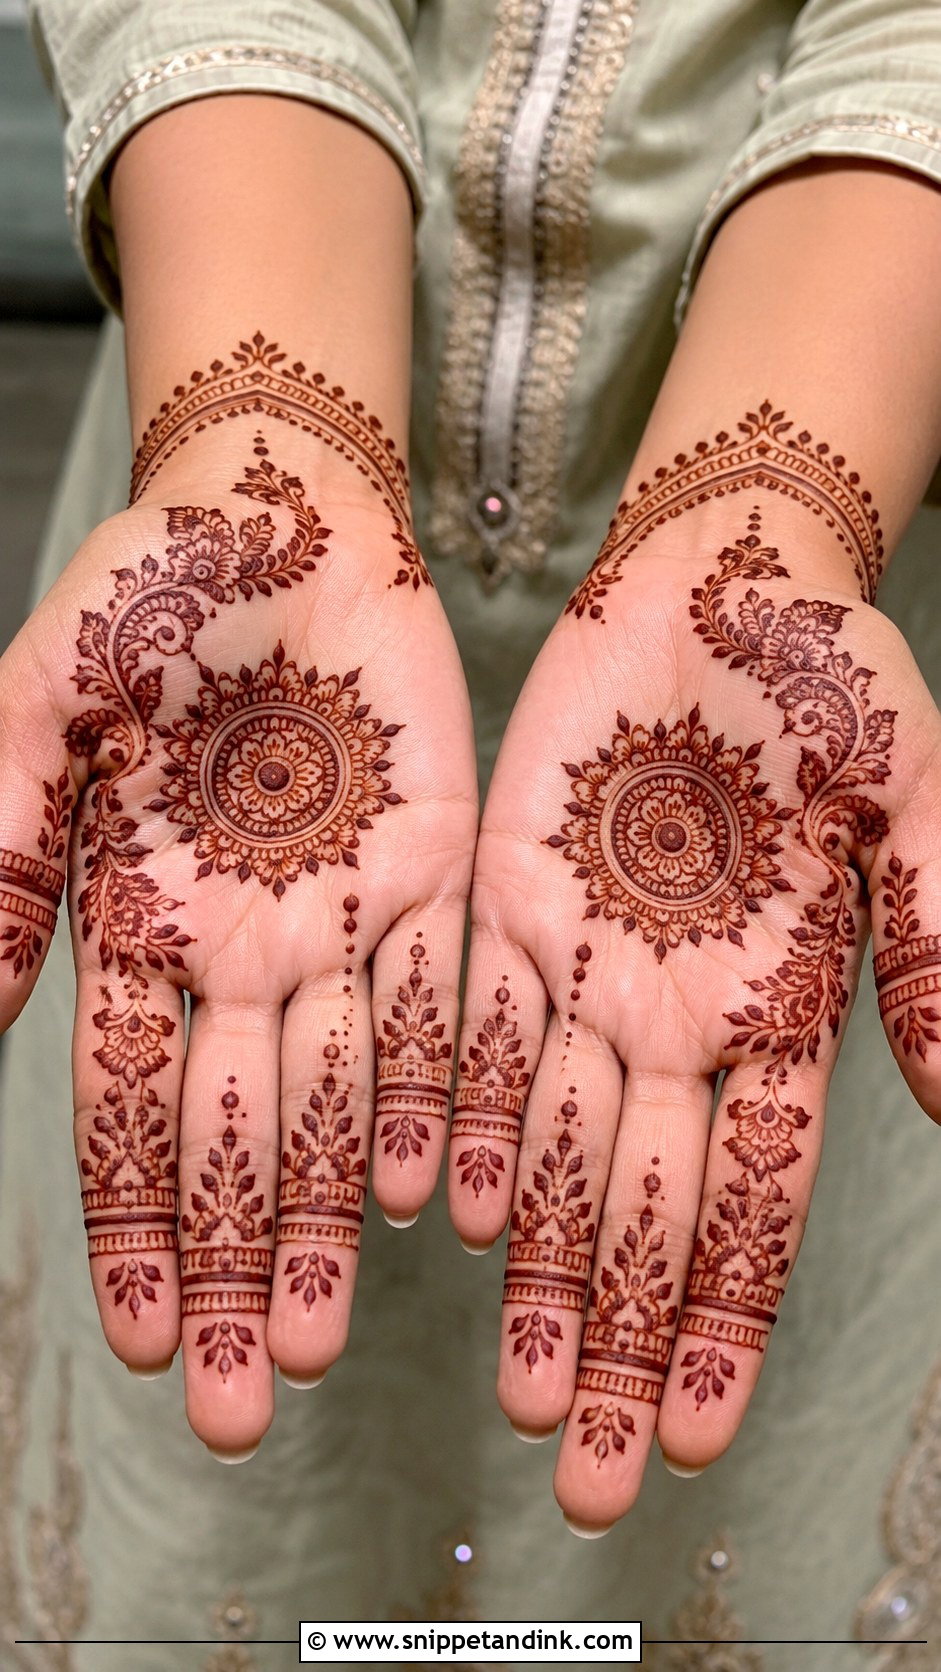
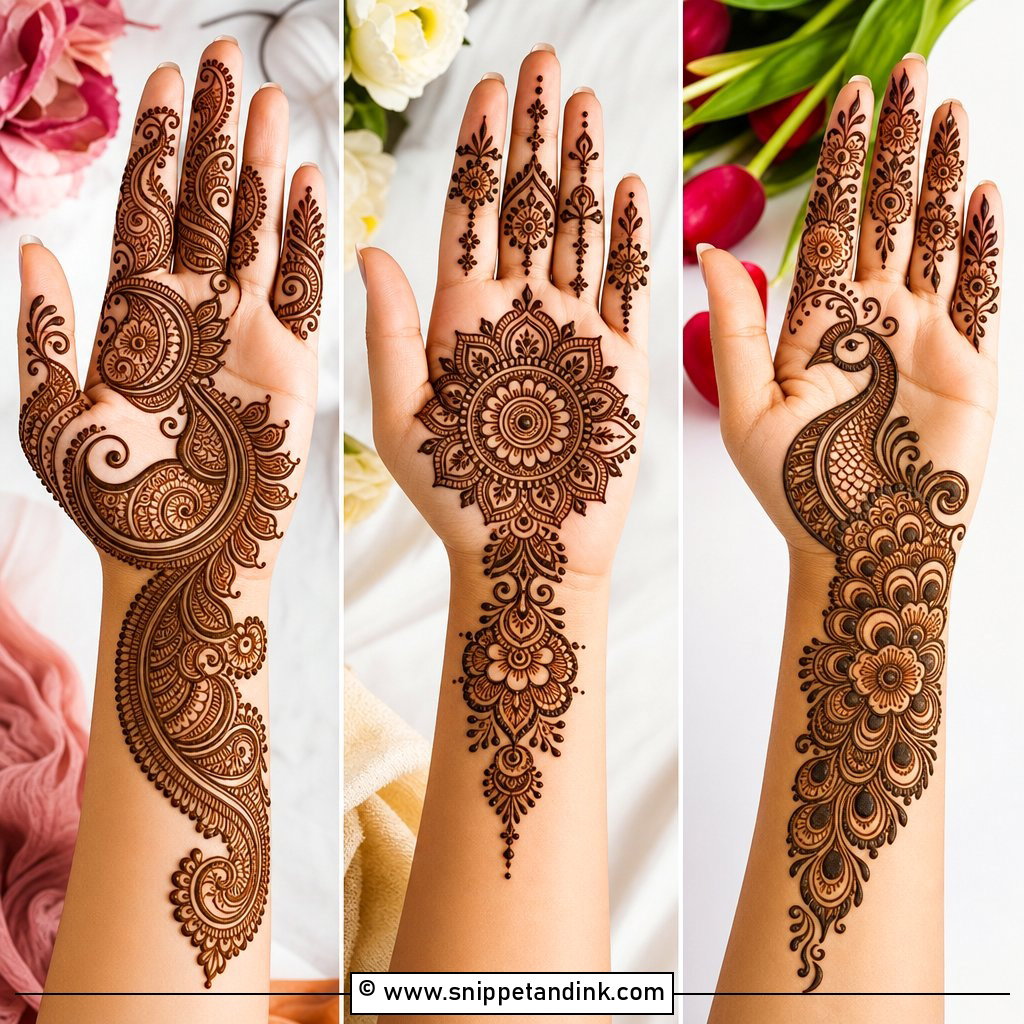
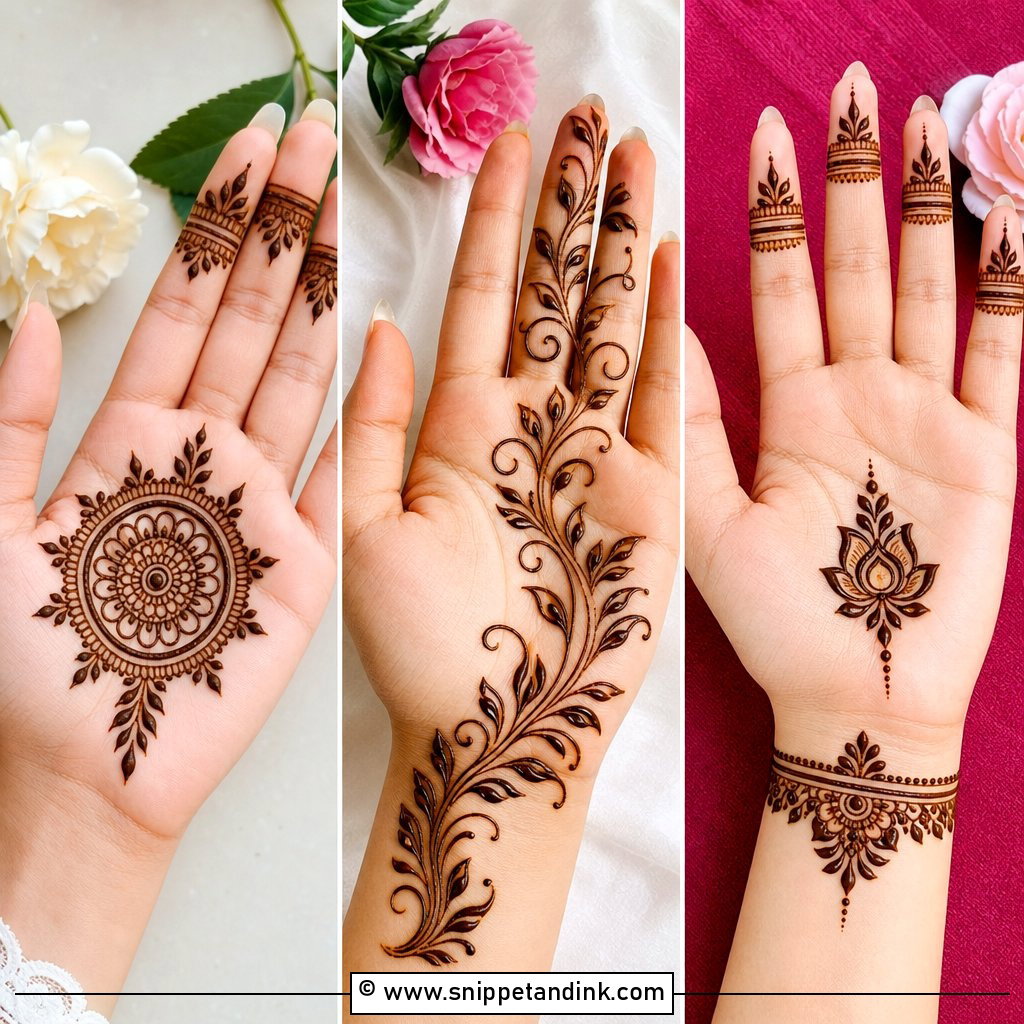
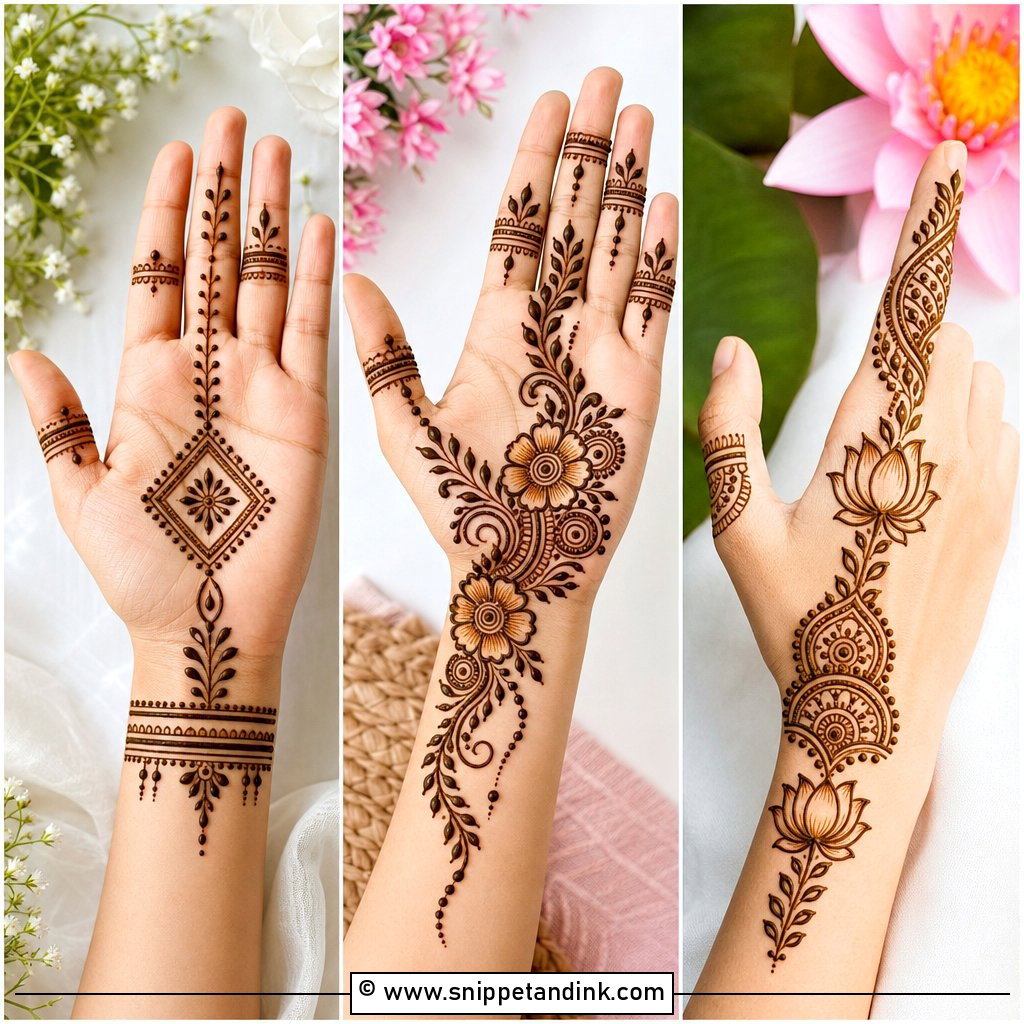
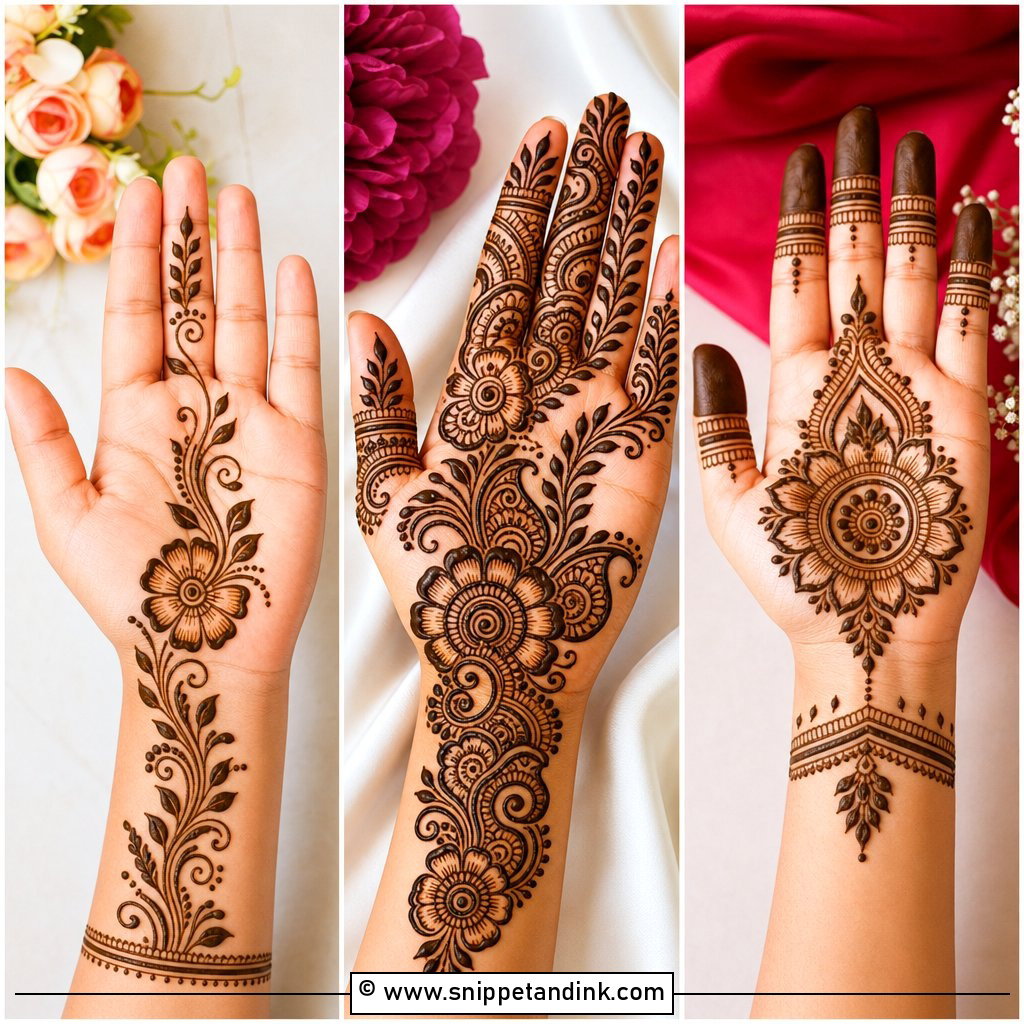
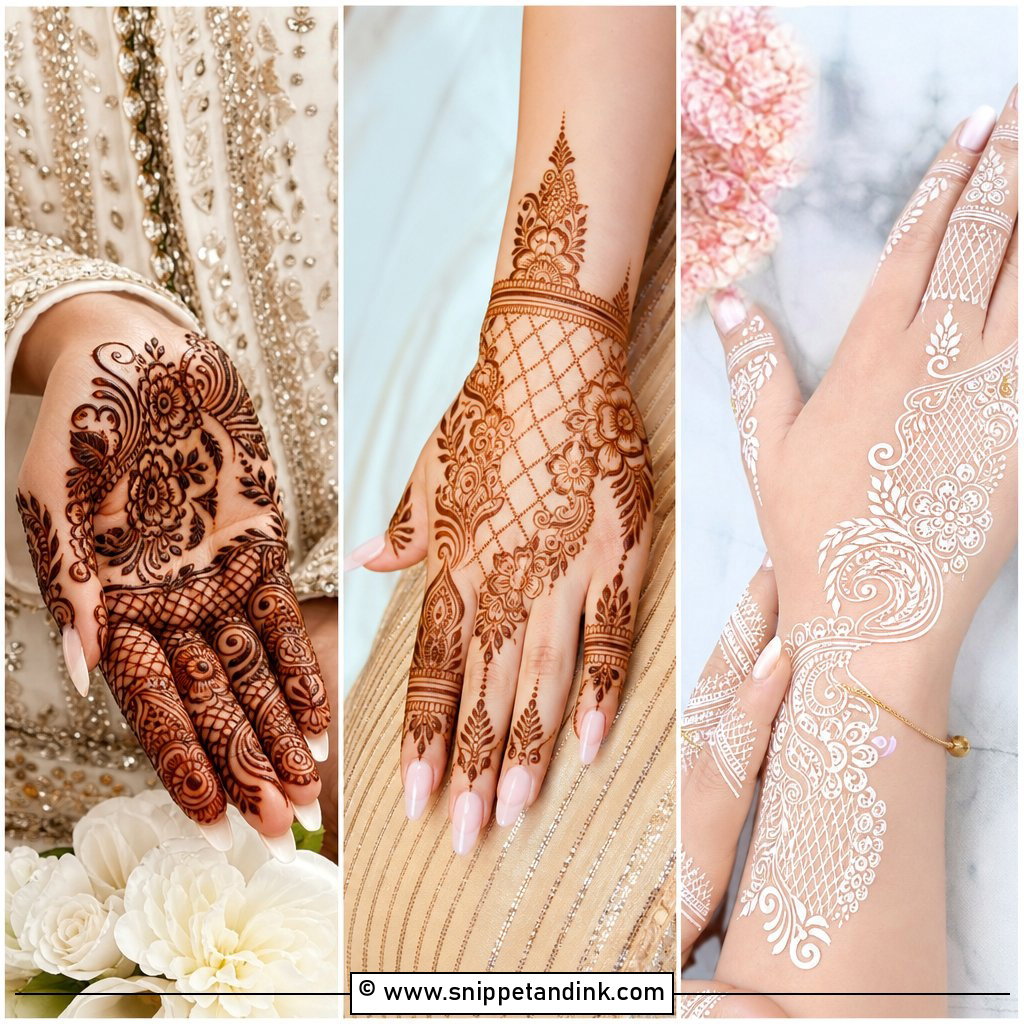
Start in the centre of the palm with a small mandala or flower, curve a few vines around it, then finish the fingers with dots, leaves and slim bands. That gap between palm and fingers matters more than it looks: a little bare skin there is what keeps a simple front hand mehndi design from looking smudged. Every shape repeats, so a beginner gets practice with each stroke, and the palm stains darker than anywhere else on the hand, which forgives a thin line.
2. Easy Back Hand Mehndi Design
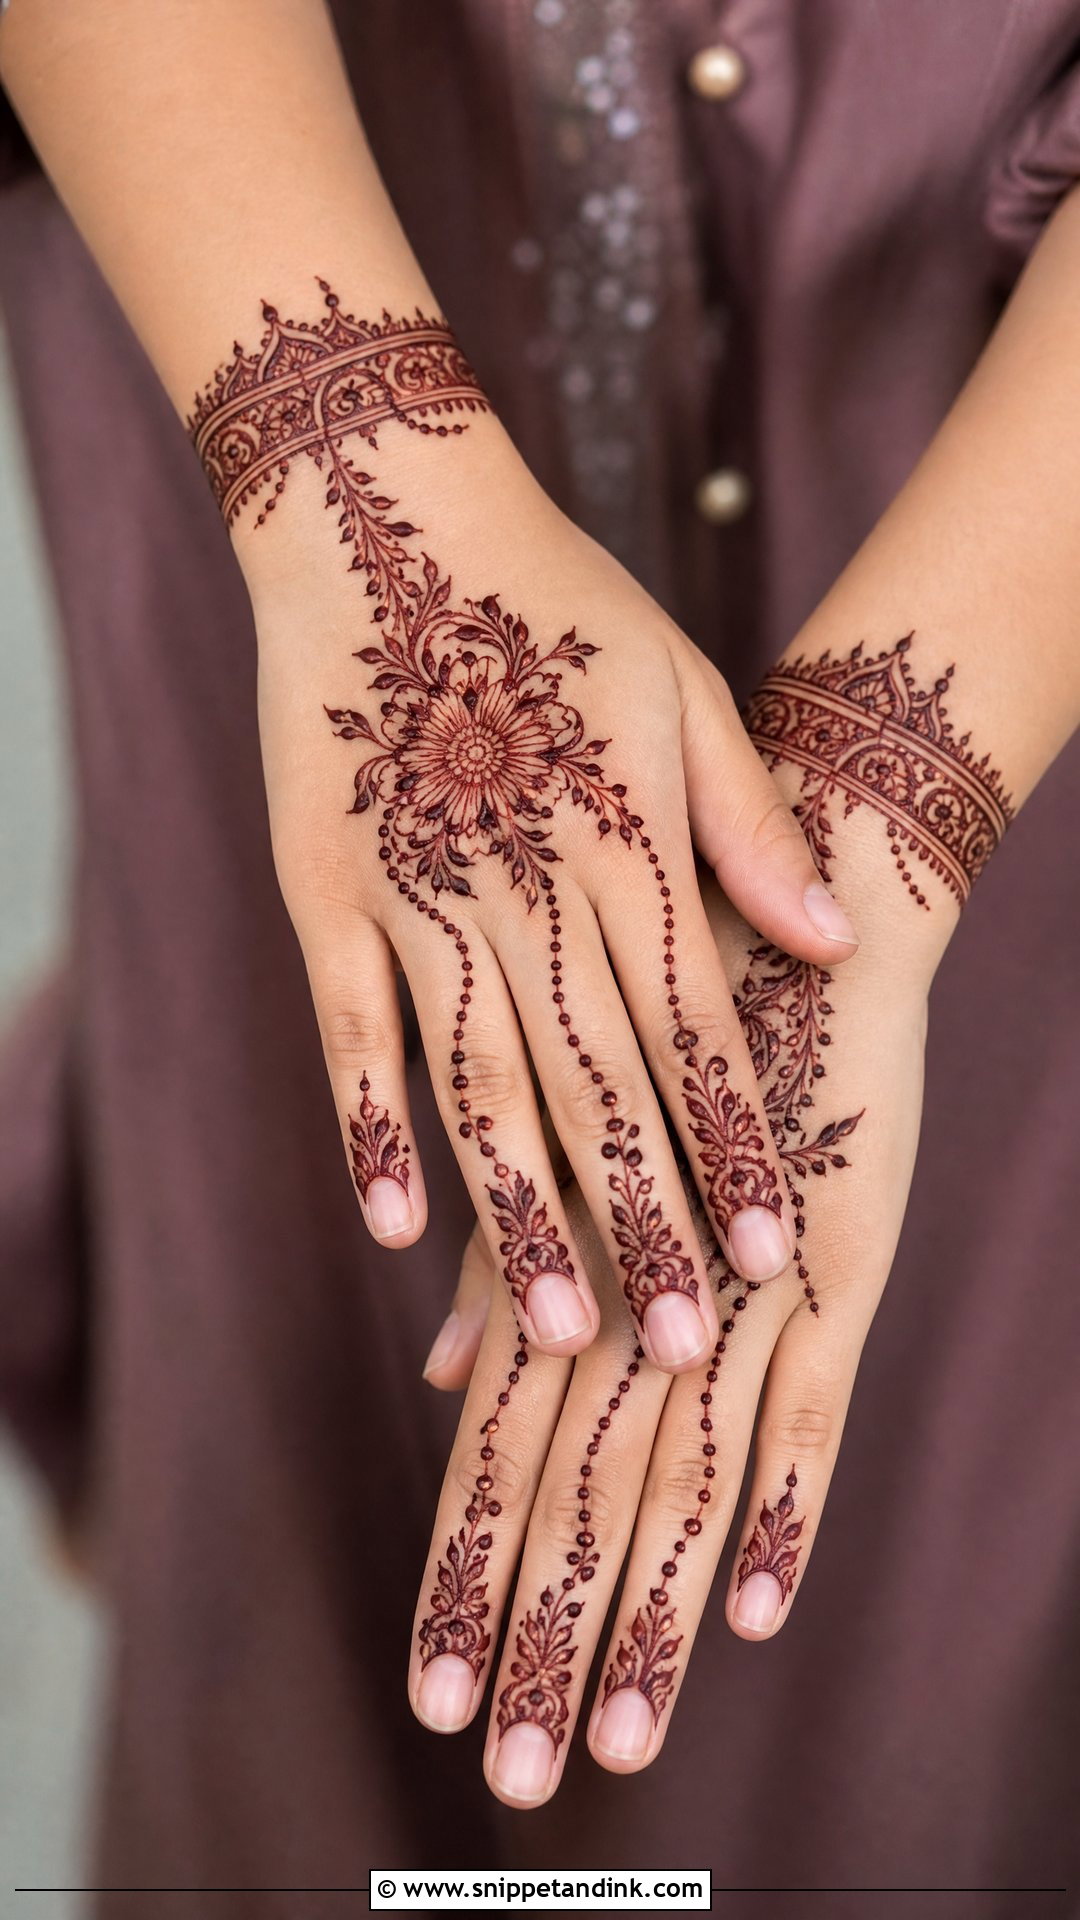
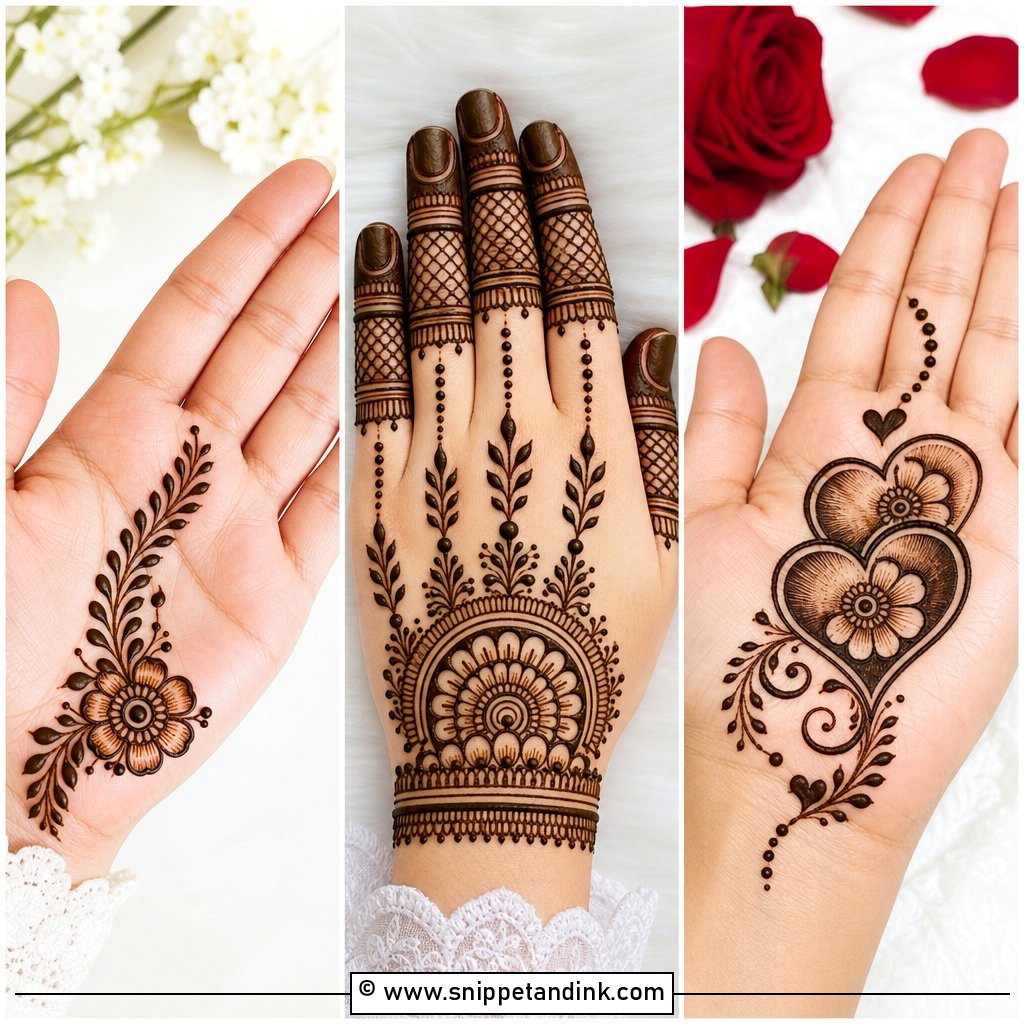
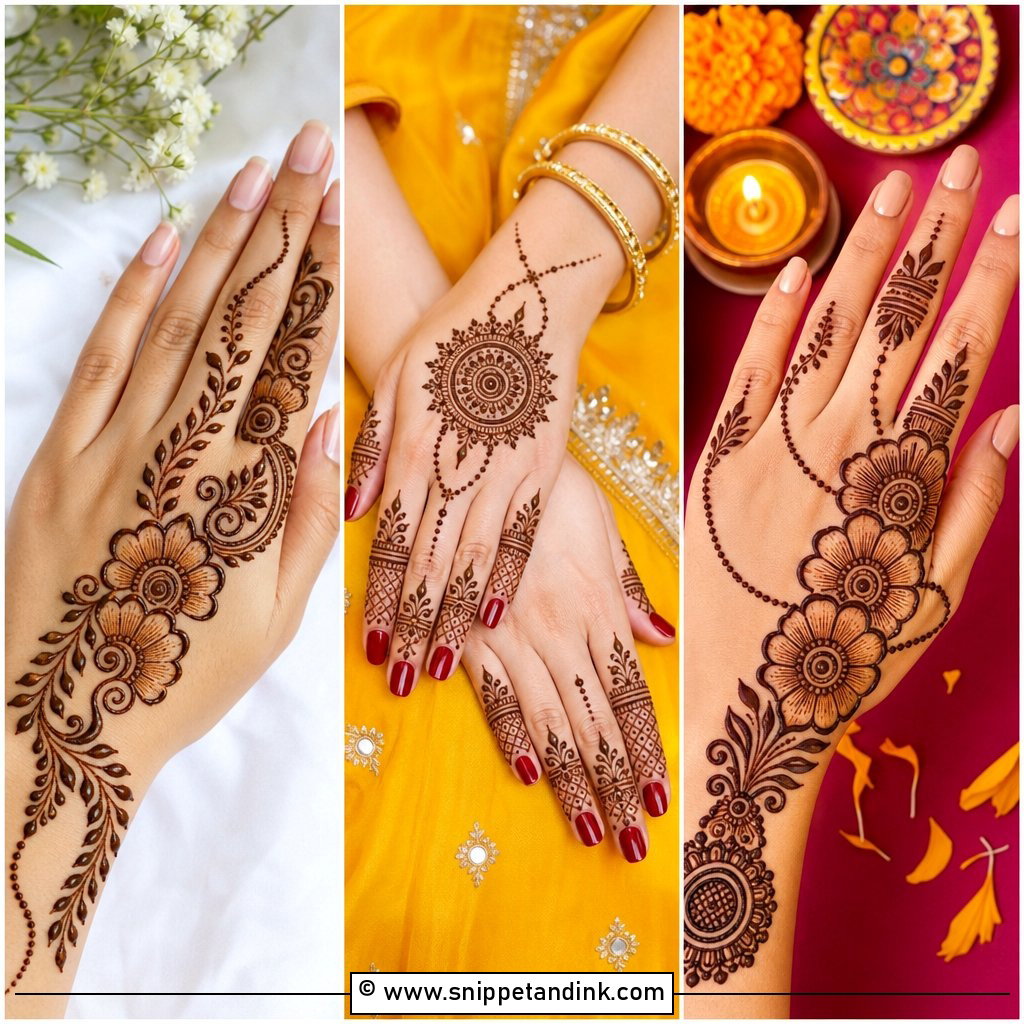
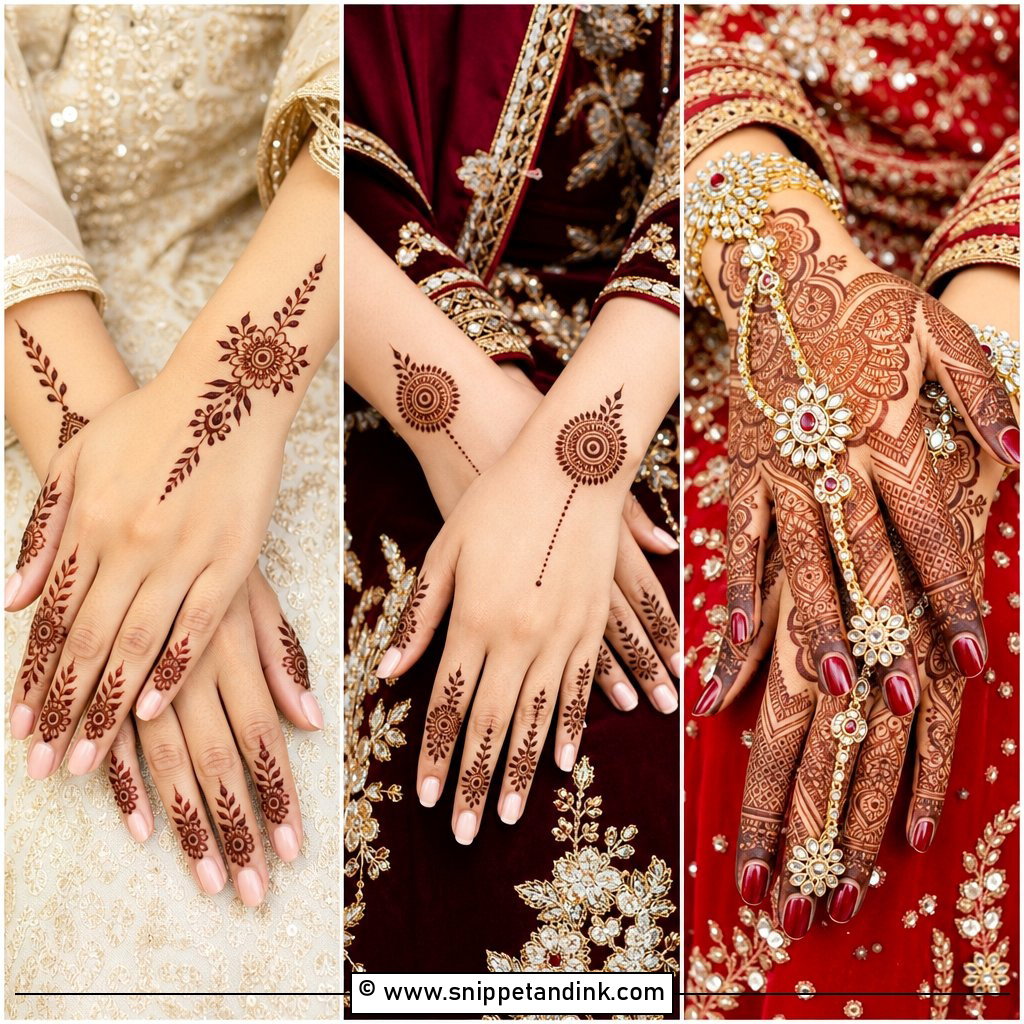
The diagonal trail is the first back-hand layout I teach. It starts near the index finger and flows toward the wrist, built from flowers, leaves, dots and small curved lines, with one side of the hand left bare. Turn the hand as you go rather than twisting your own wrist; lines stay smoother when the paper or skin moves under the cone. Fingertip caps or small vines on the fingers finish it, and it sits neatly next to rings and bangles.
3. Arabic Mehndi Design Easy
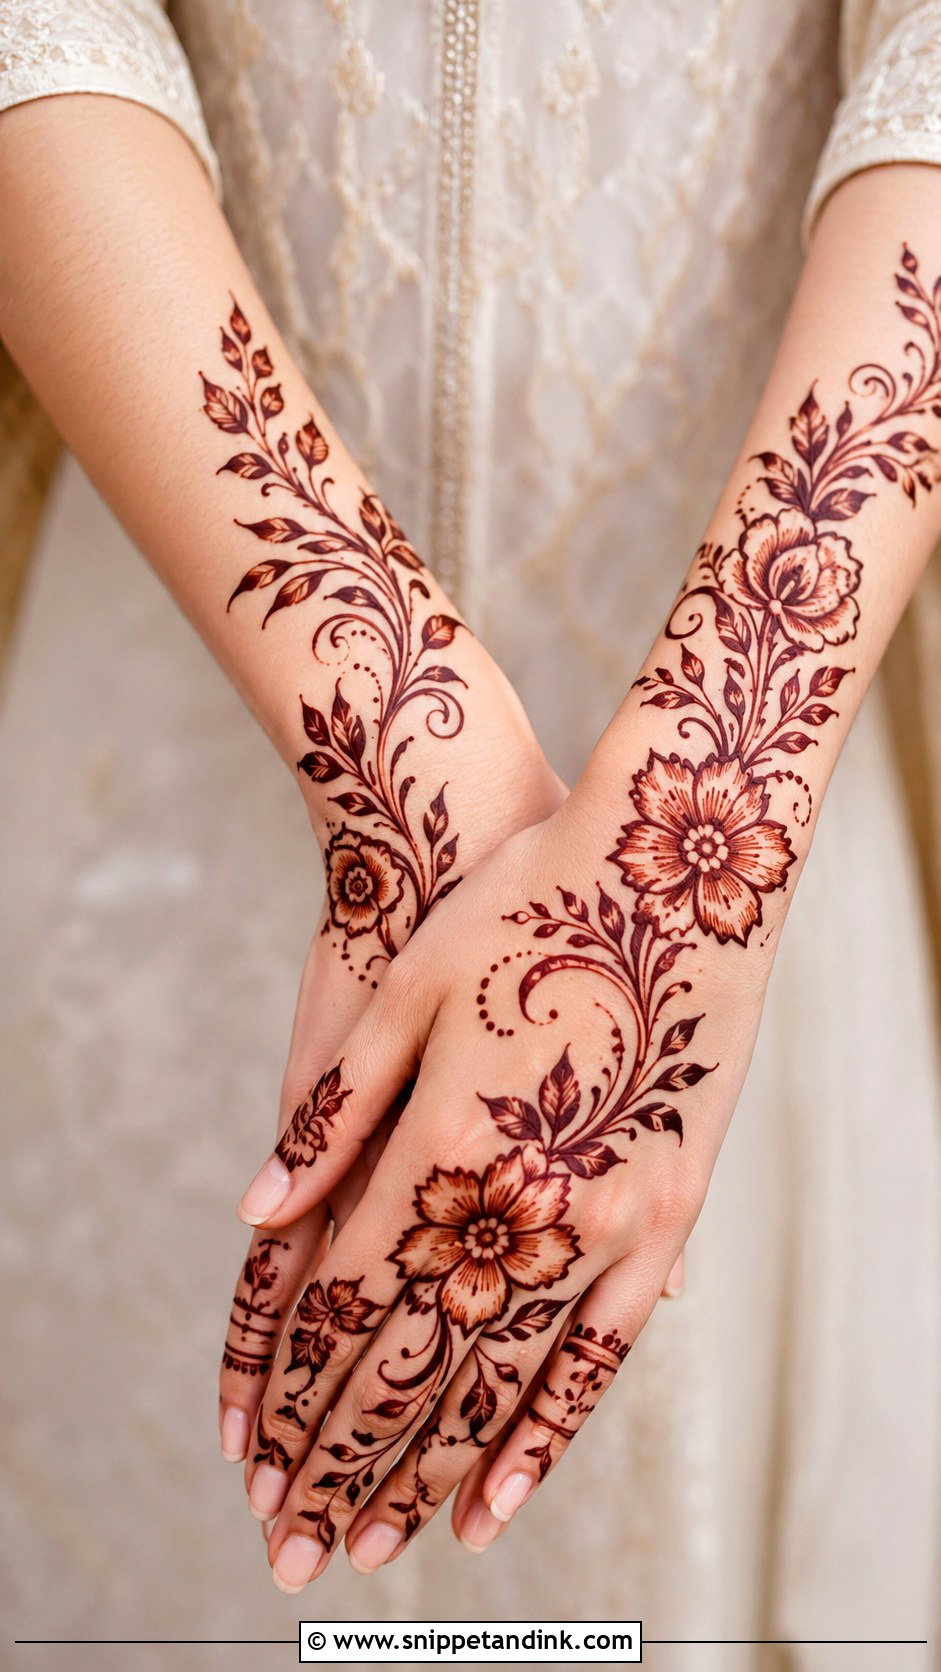
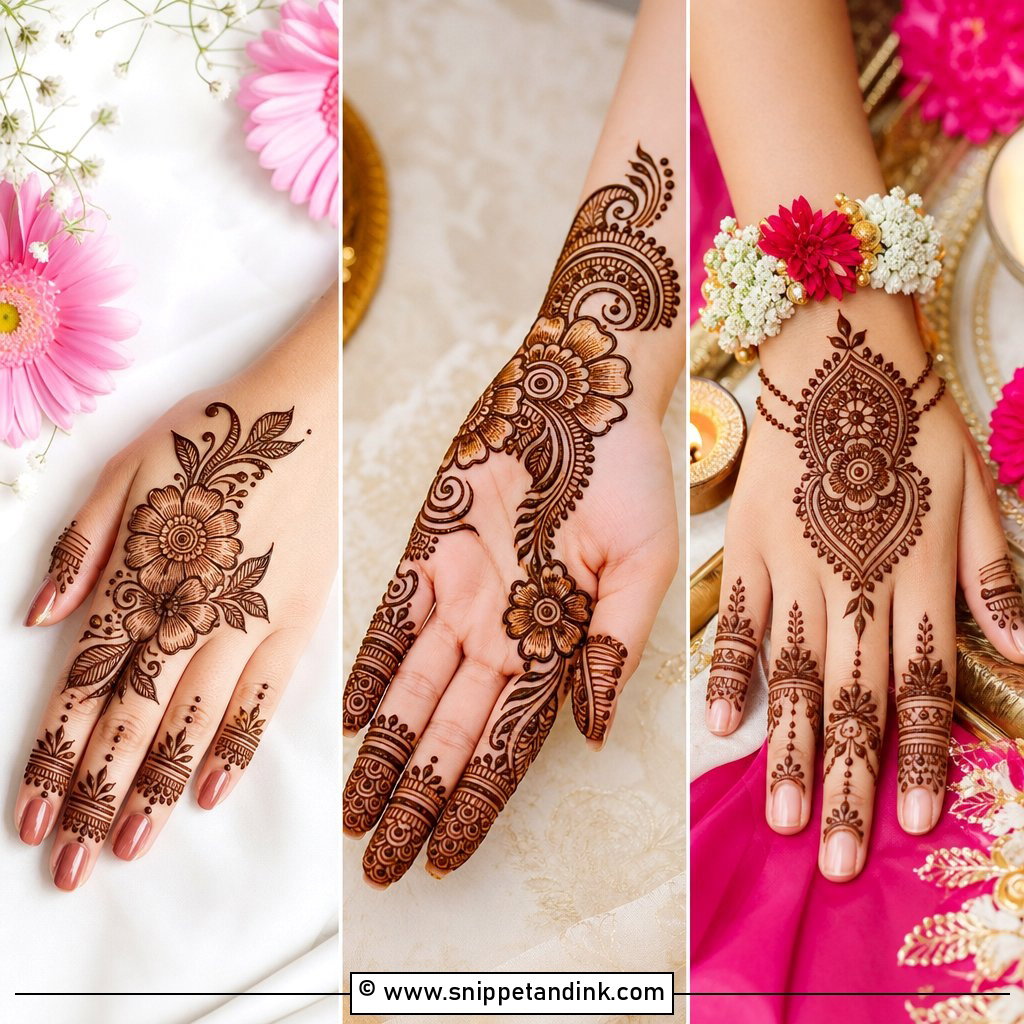
Bold outlines, flowing vines and open skin are what define this style, and all three are kind to a beginner. Begin with one large flower near the wrist or palm, then let leaves and smaller blooms follow a curved trail across the hand. Shade a few petals by drawing thin parallel strokes rather than filling them solid. The common mistake is hesitation: a slow, shaky outline shows every wobble, while a confident, slightly quicker line looks polished even if it isn’t perfect. Arabic work also goes on fast, which is why it’s my go-to for Eid nights and parties.
4. Simple Mandala Mehndi Design
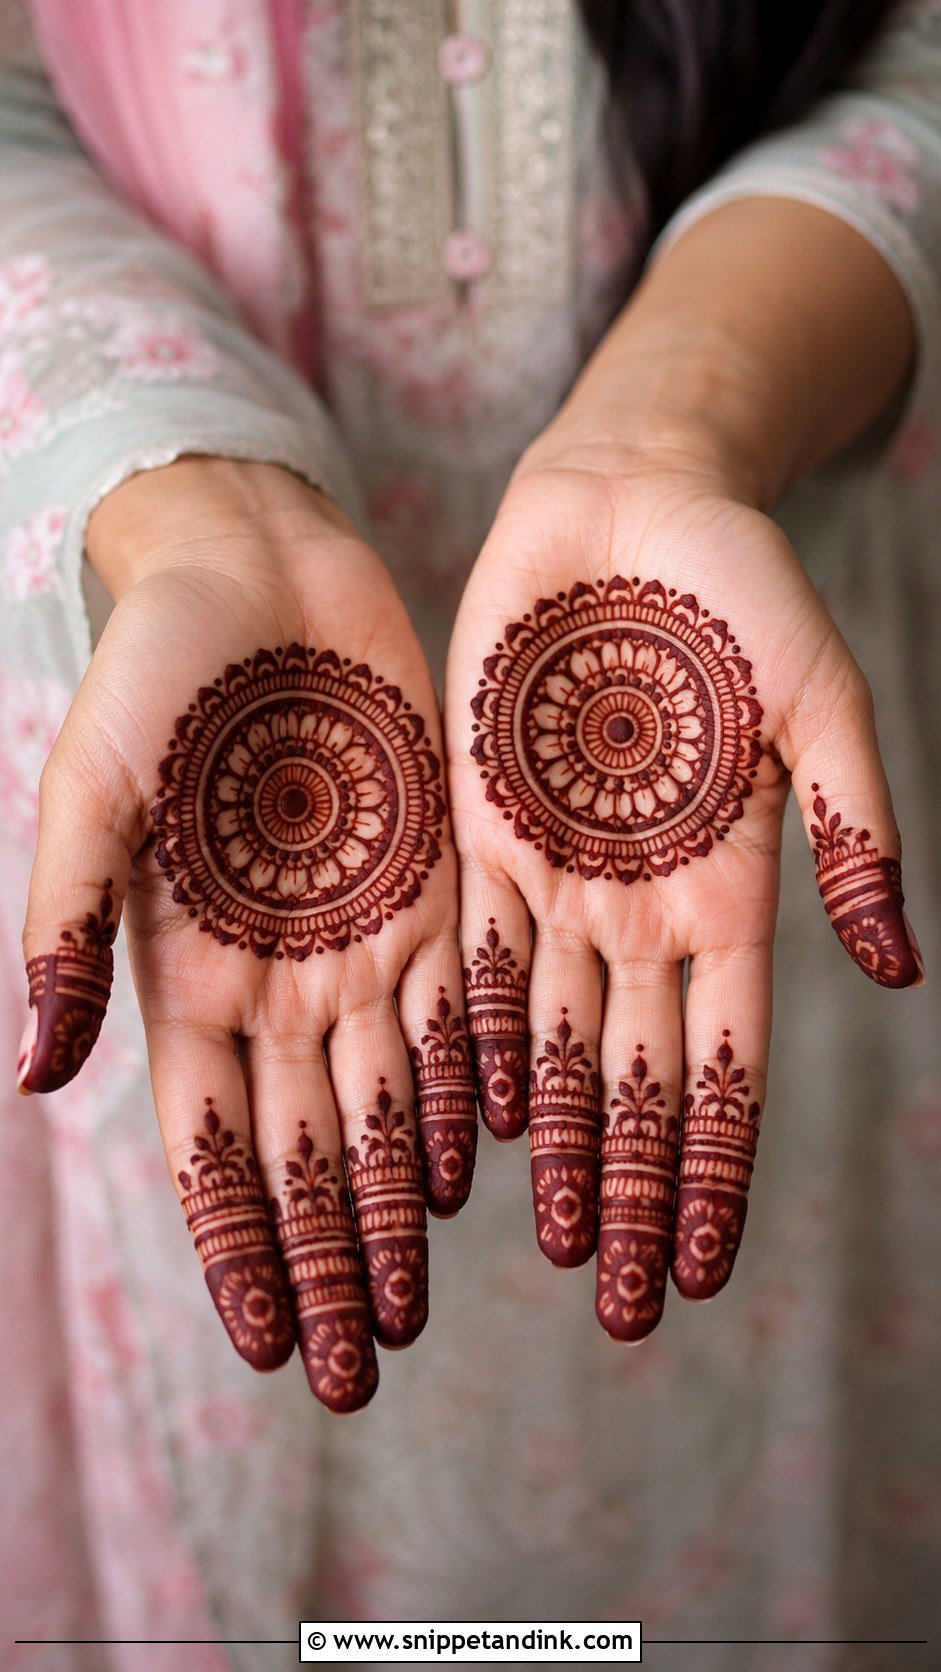
Circles, petals, dots and small scalloped borders build a mandala outward from one point, so placement is everything. Put a single dot where the centre goes before you draw anything, and check it with the hand relaxed, because a palm stretched flat makes the circle drift when the fingers curl. Keep the rings few and even. Small rings, leafy tips or dotted lines on the fingers tie it together, and it suits any age, from a puja to a family wedding.
5. Floral Mehndi Design Easy
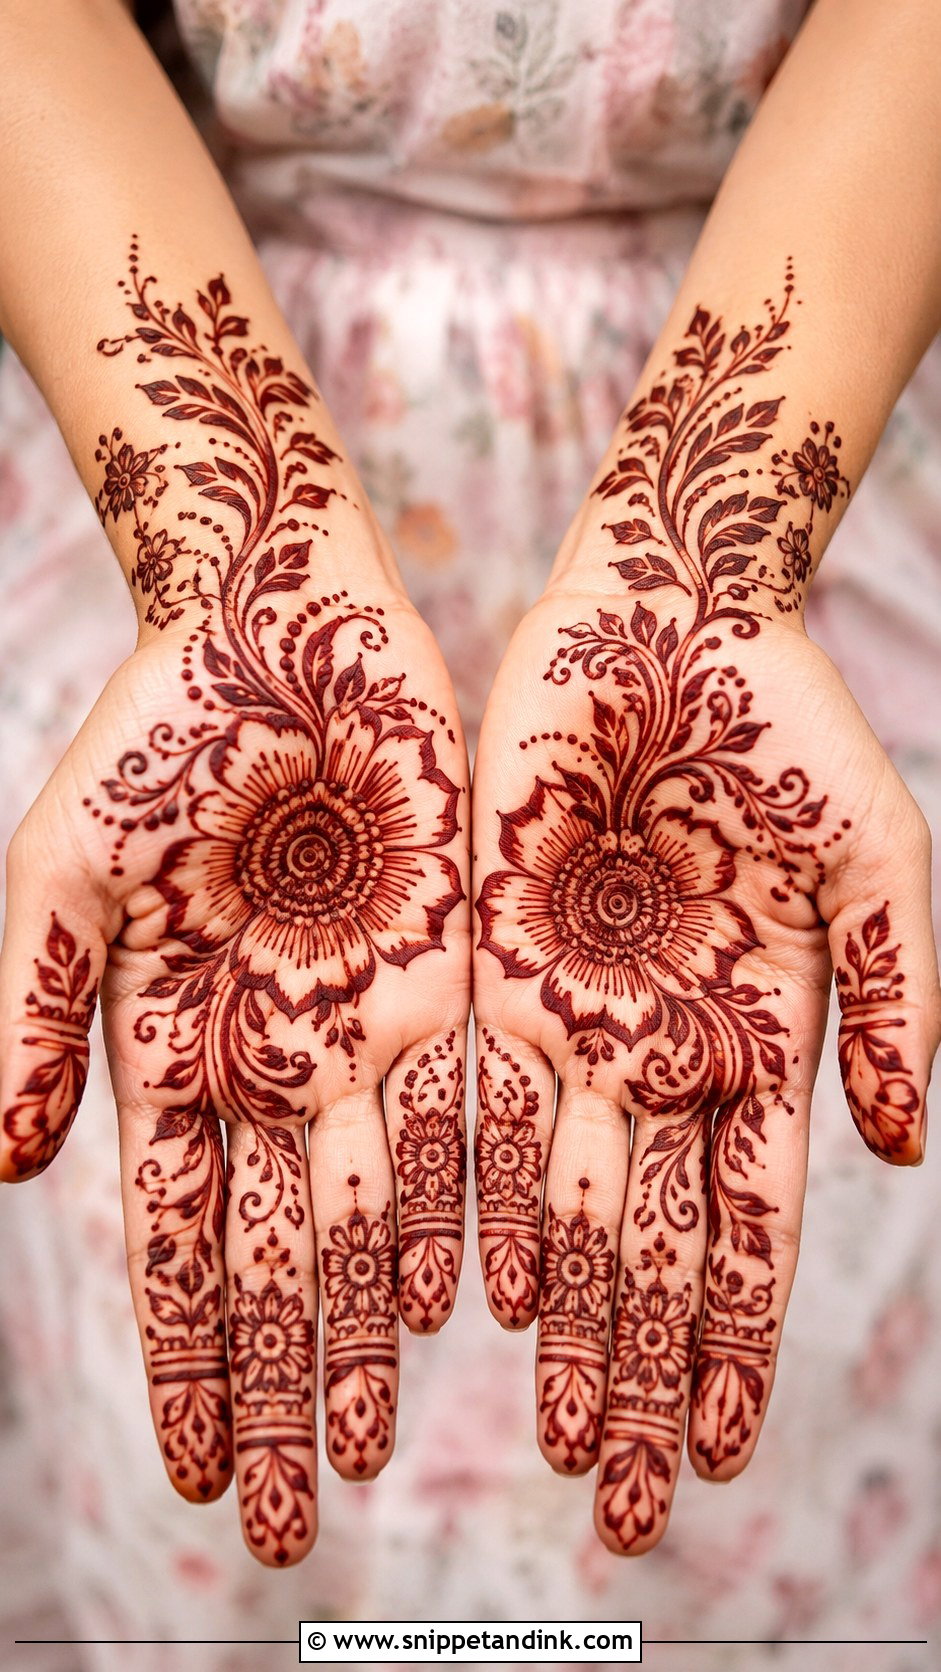
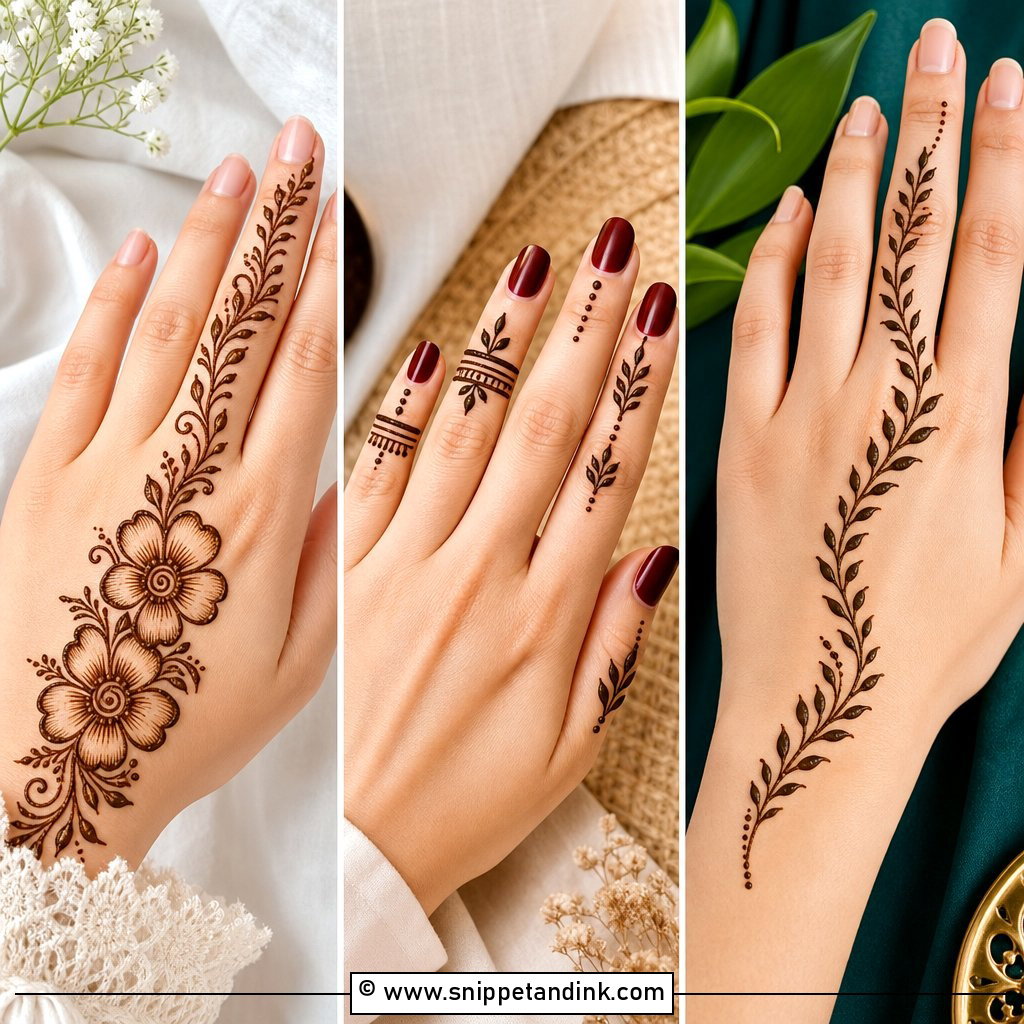
Soft flowers can make even the simplest mehndi look finished. One or two larger flowers with leafy vines around them is the whole recipe, placed on the palm, the back of the hand or near the wrist. Keep the petals rounded and fairly fat; thin pointed petals are much harder to draw cleanly with a cone. Flowers don’t need perfect symmetry, which is why I give them to nervous beginners, and they suit a birthday as easily as a wedding.
6. Finger Mehndi Design Simple
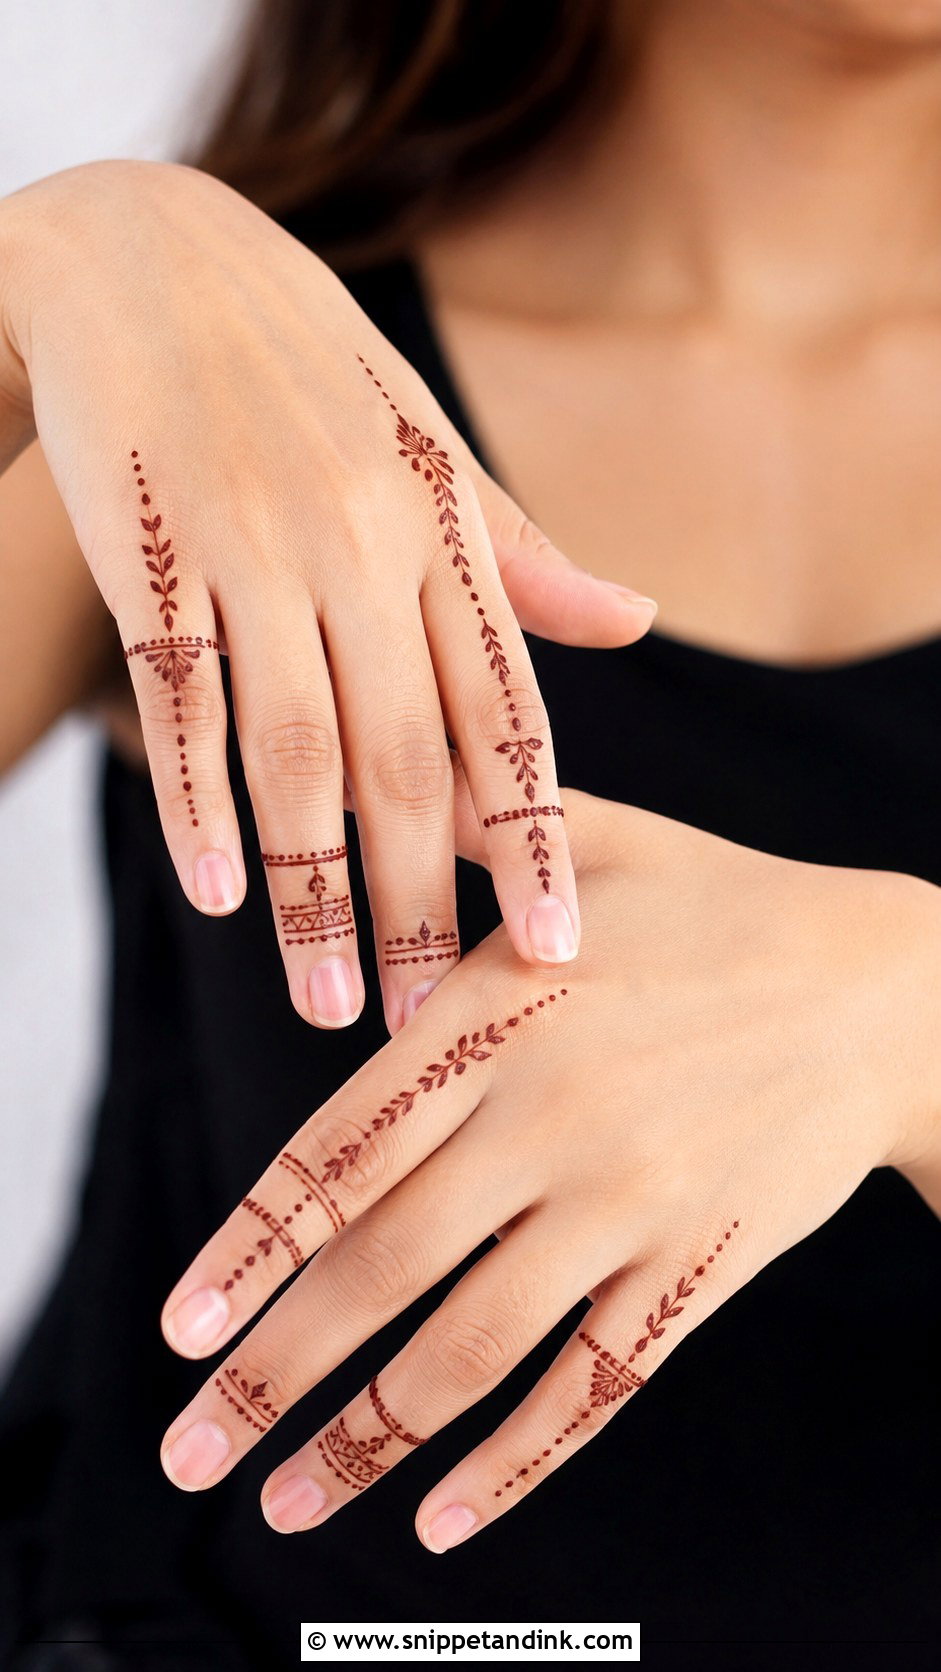
Tiny bands, dots, leafy lines and small geometric shapes on each finger, with the palm left empty or marked by one small flower at the base. That’s it. Subtle enough for the office on Monday, and the sections are so small that teens and first-timers can manage them. Spacing is the skill here. I draw the same element on all five fingers before moving to the next, so the rhythm stays even across the hand.
7. Bracelet Mehndi Design
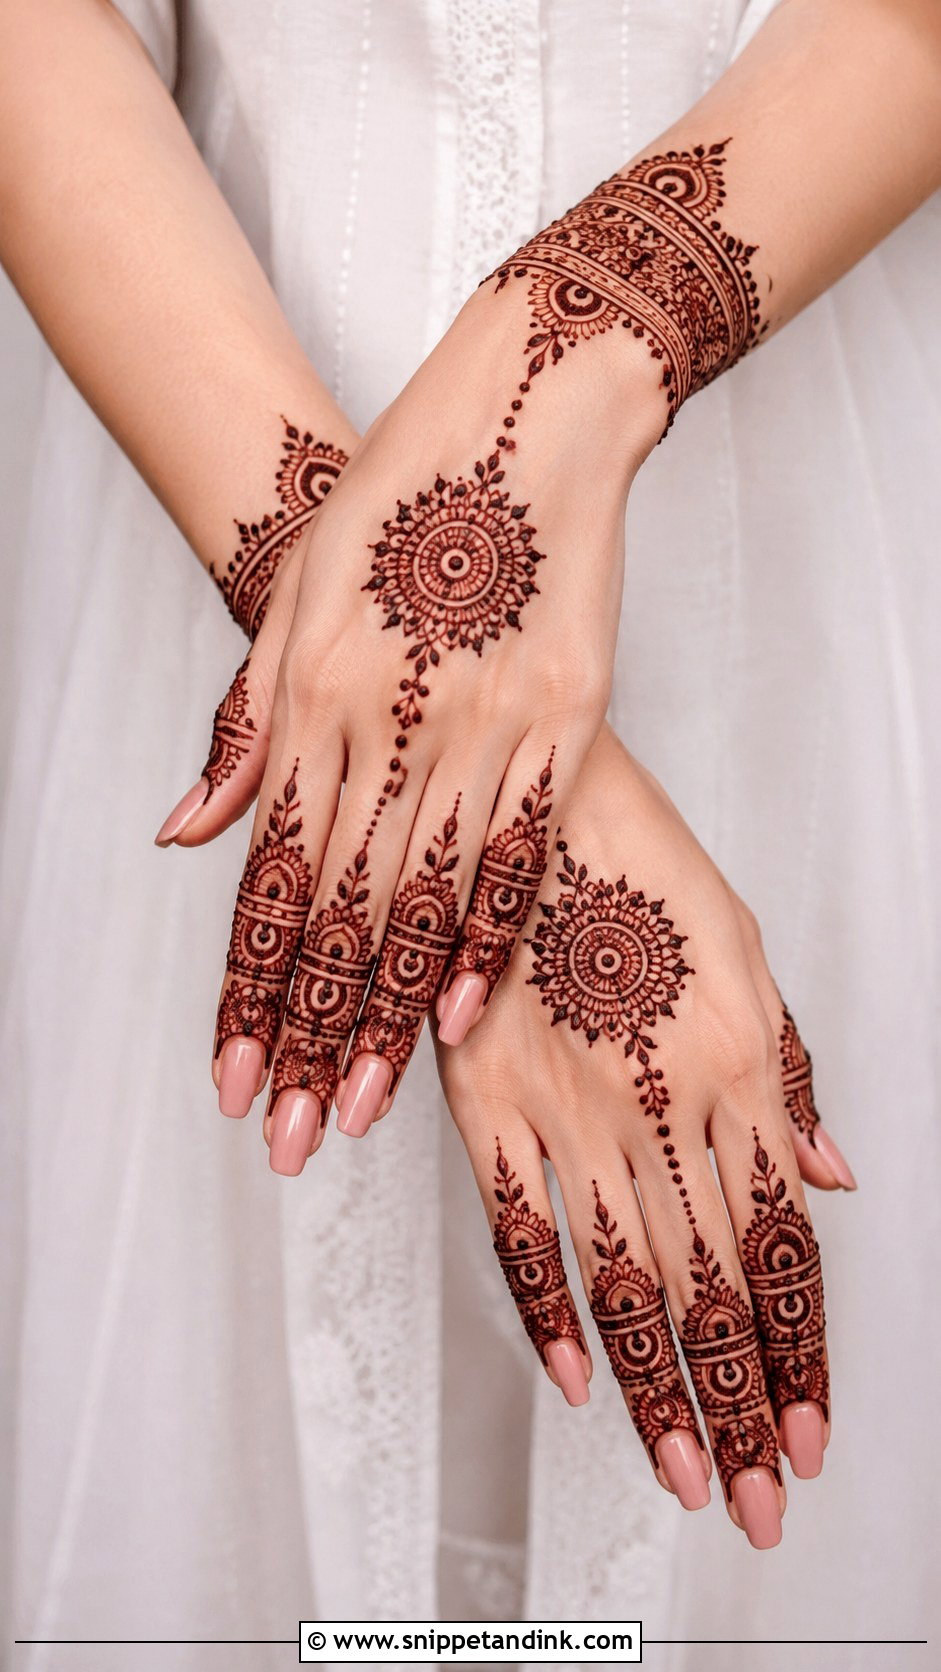
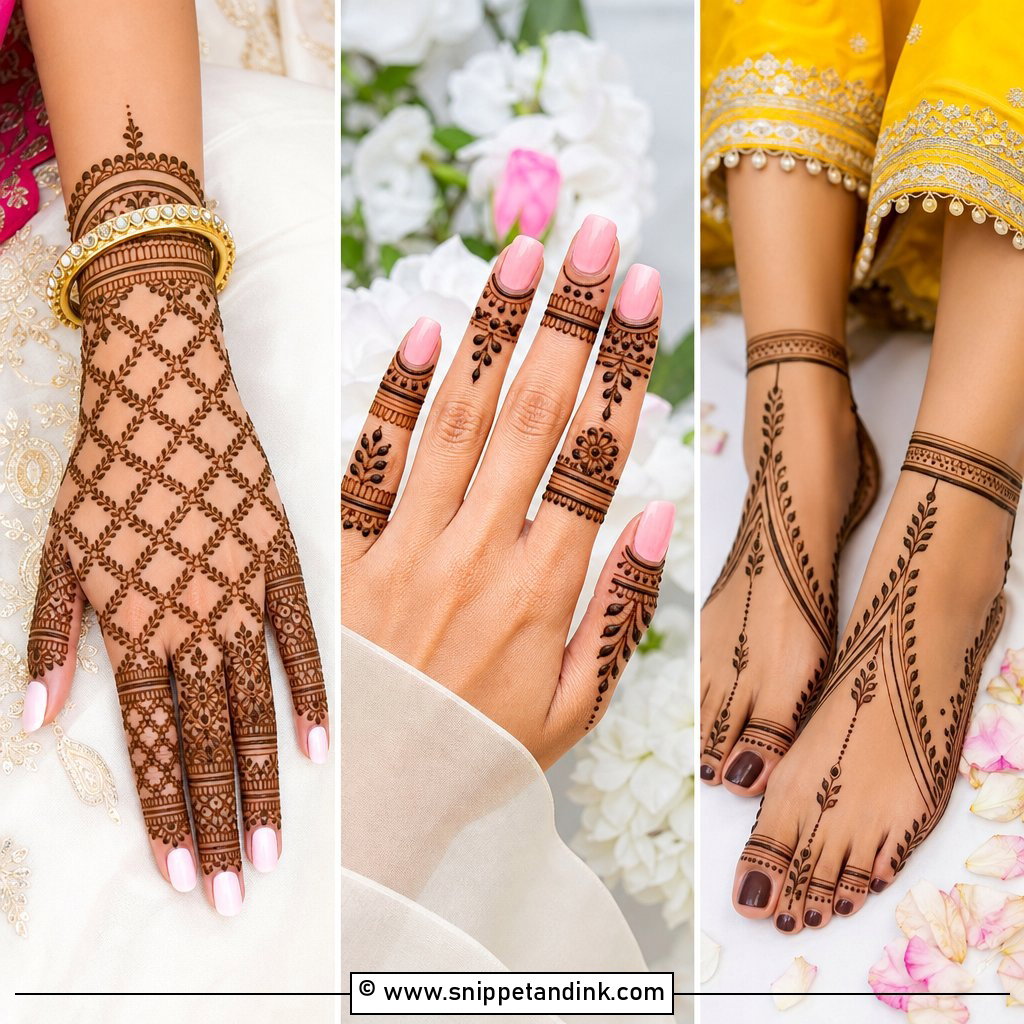
A wrist band of lines, dots, petals or small chains, connected to the middle finger with a delicate vine, gives the hand a jewellery effect without heavy coverage. A tiny mandala on the back of the hand completes it. The one thing to check first is where your bangles sit, because a band drawn right under them gets hidden. Thin lines read as delicate; bold ones read from across the room at a party.
8. Minimal Mehndi Design
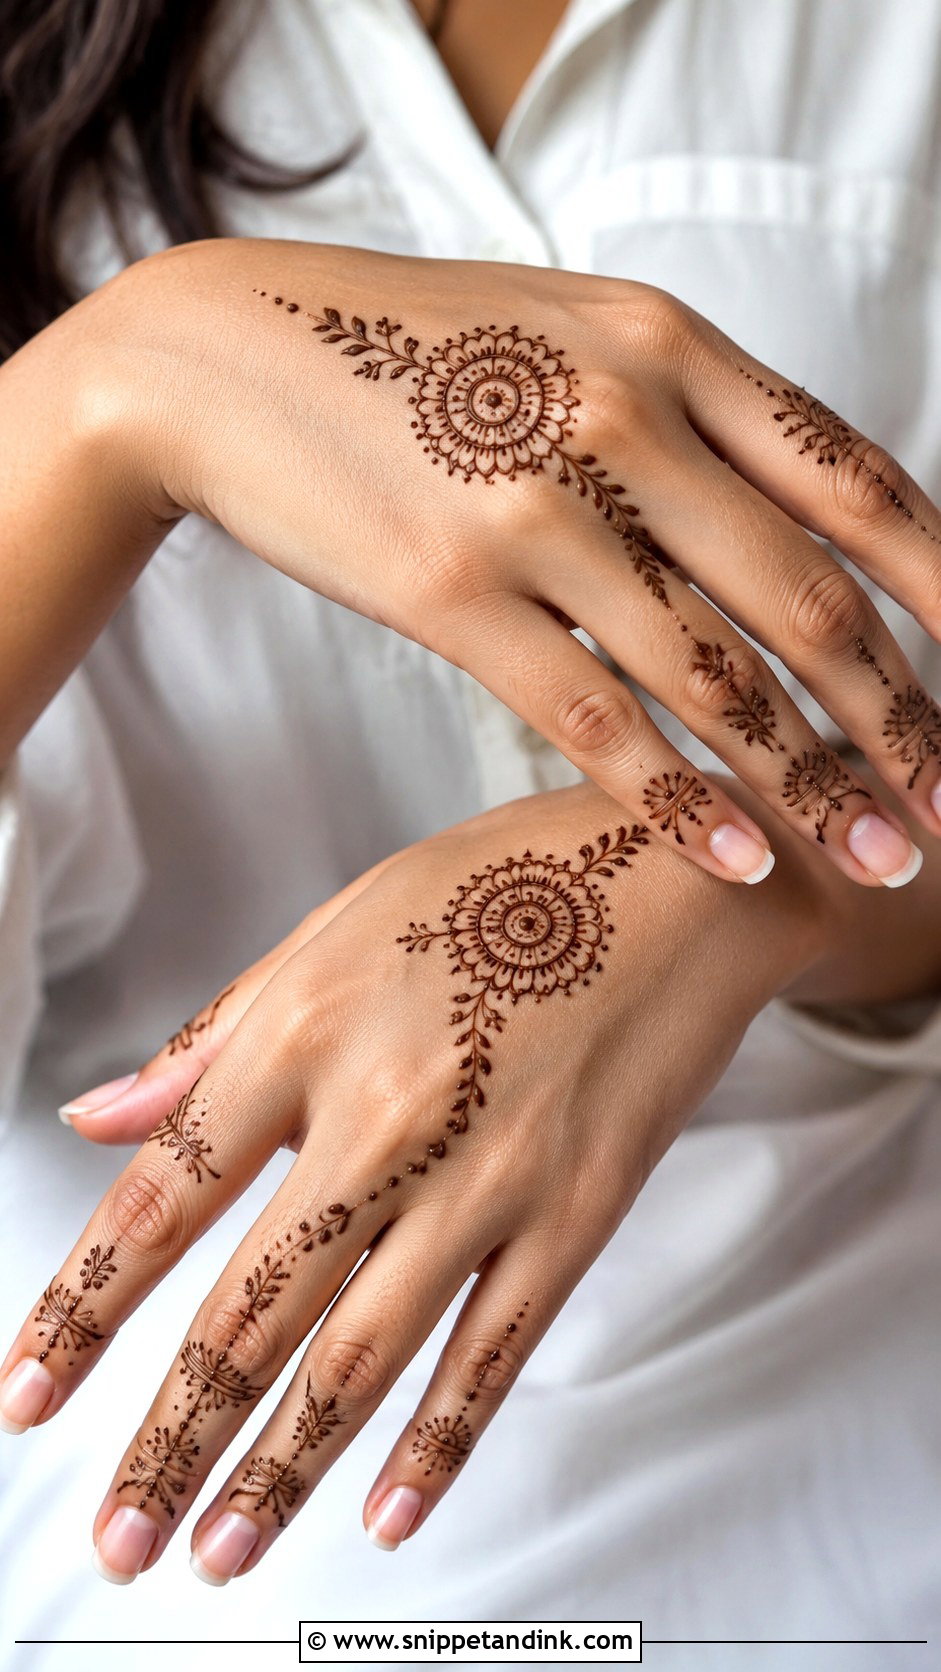
One element, placed well: a small mandala, a tiny floral trail or a slim leafy vine on the palm or back of the hand, plus light finger details. No heavy shading, no dense filling. Minimal mehndi dries fastest of anything here, and it suits modern outfits and office parties. The catch is that every line is on show, so this is a design to draw after a little practice rather than as your very first attempt.
9. Easy Full Hand Mehndi Design
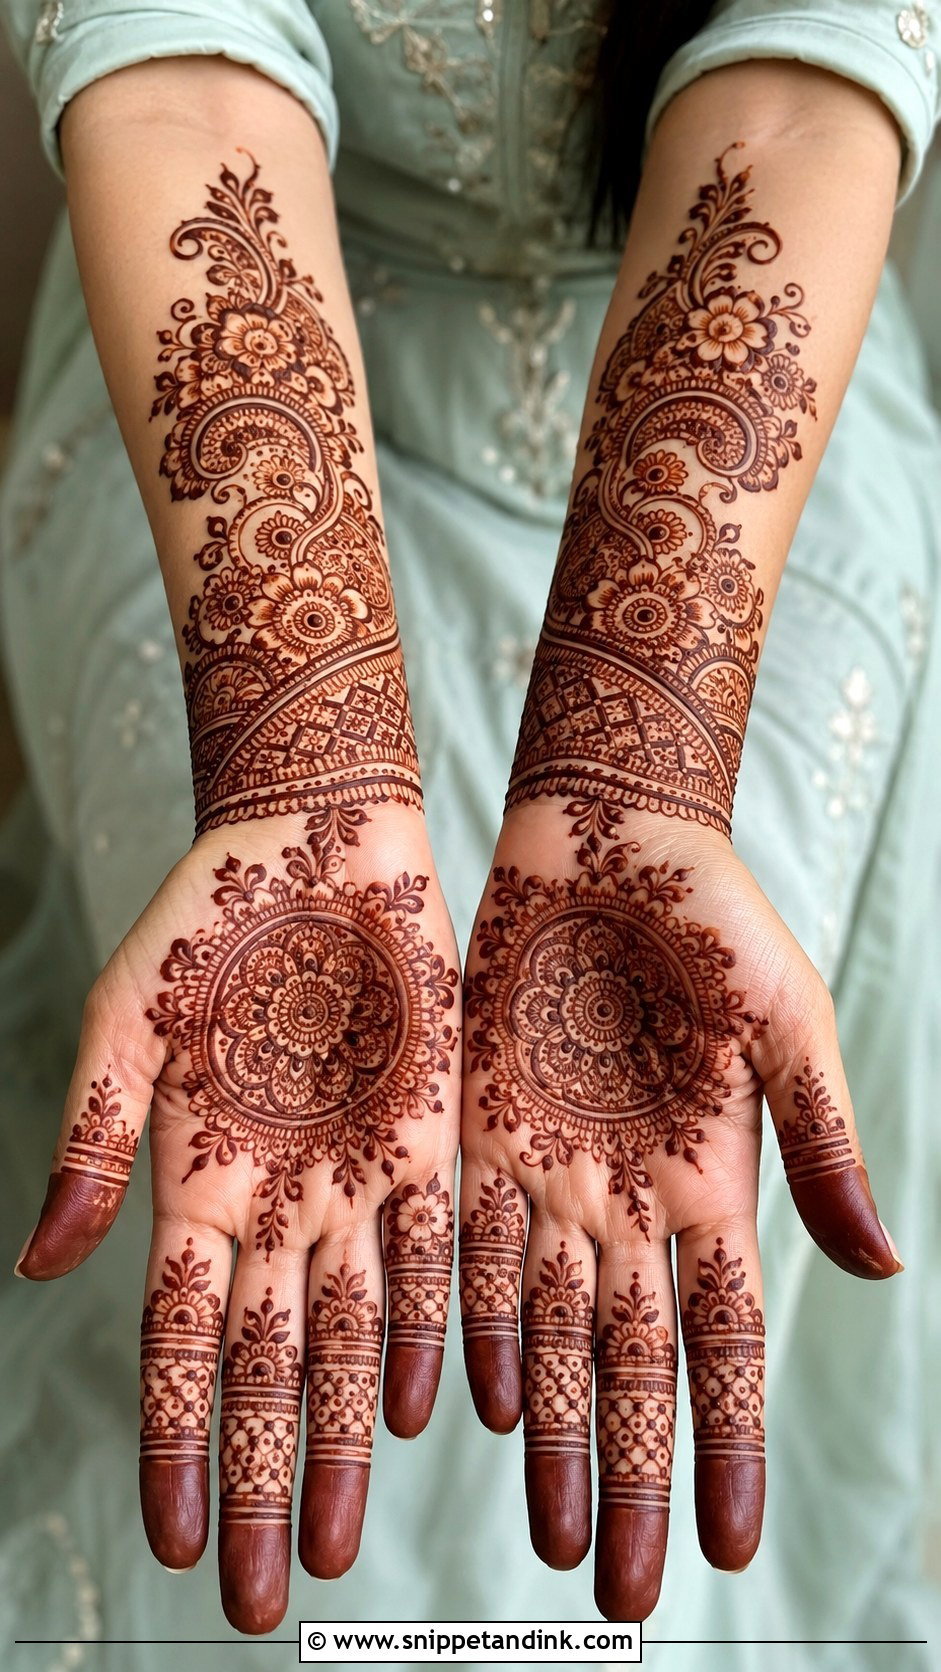
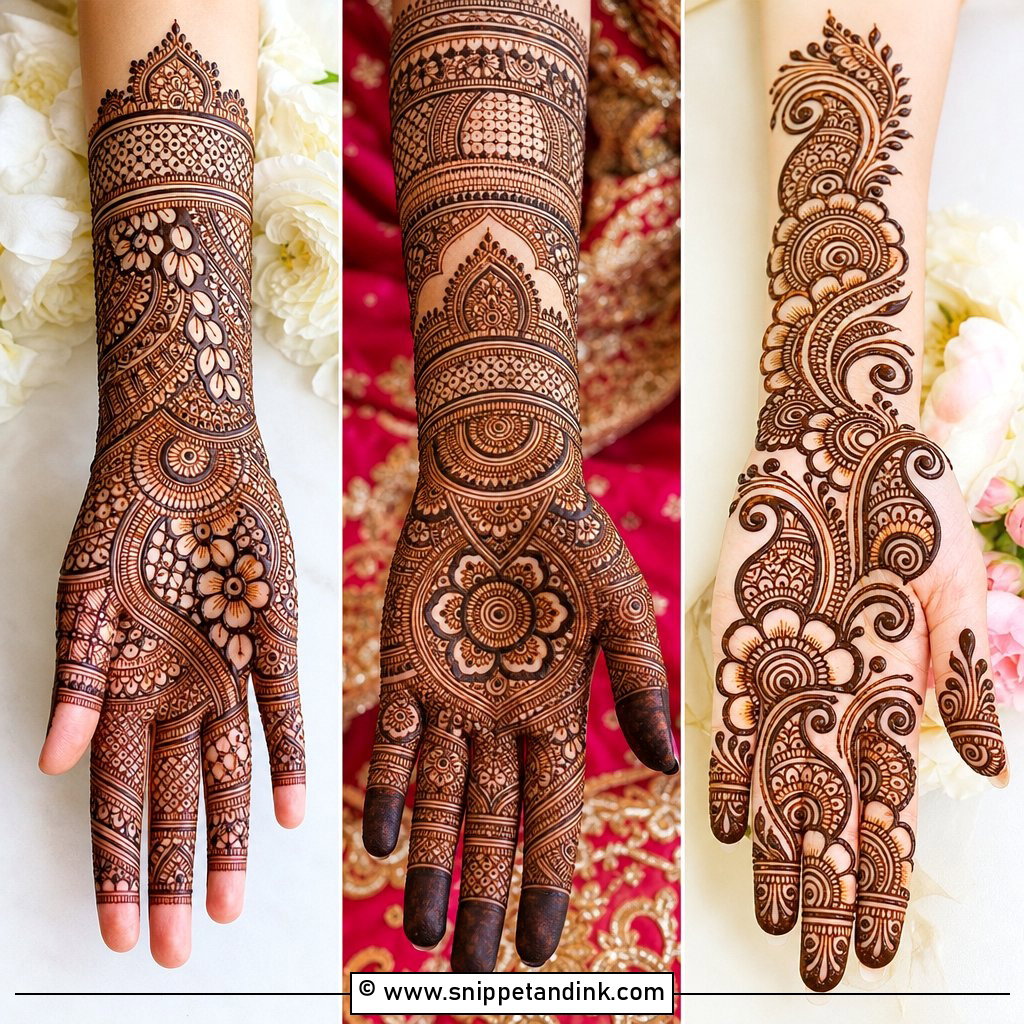
Full coverage stops being intimidating once you divide the hand into zones: a mandala on the palm, floral vines on the sides, small paisleys near the wrist, neat finger bands. Finish one zone before starting the next. Repeating the same flower or leaf across zones makes the hand look fuller without adding new shapes to learn. Bridesmaids often pick this for engagement functions because it reads as full from a distance but goes on in a reasonable time.
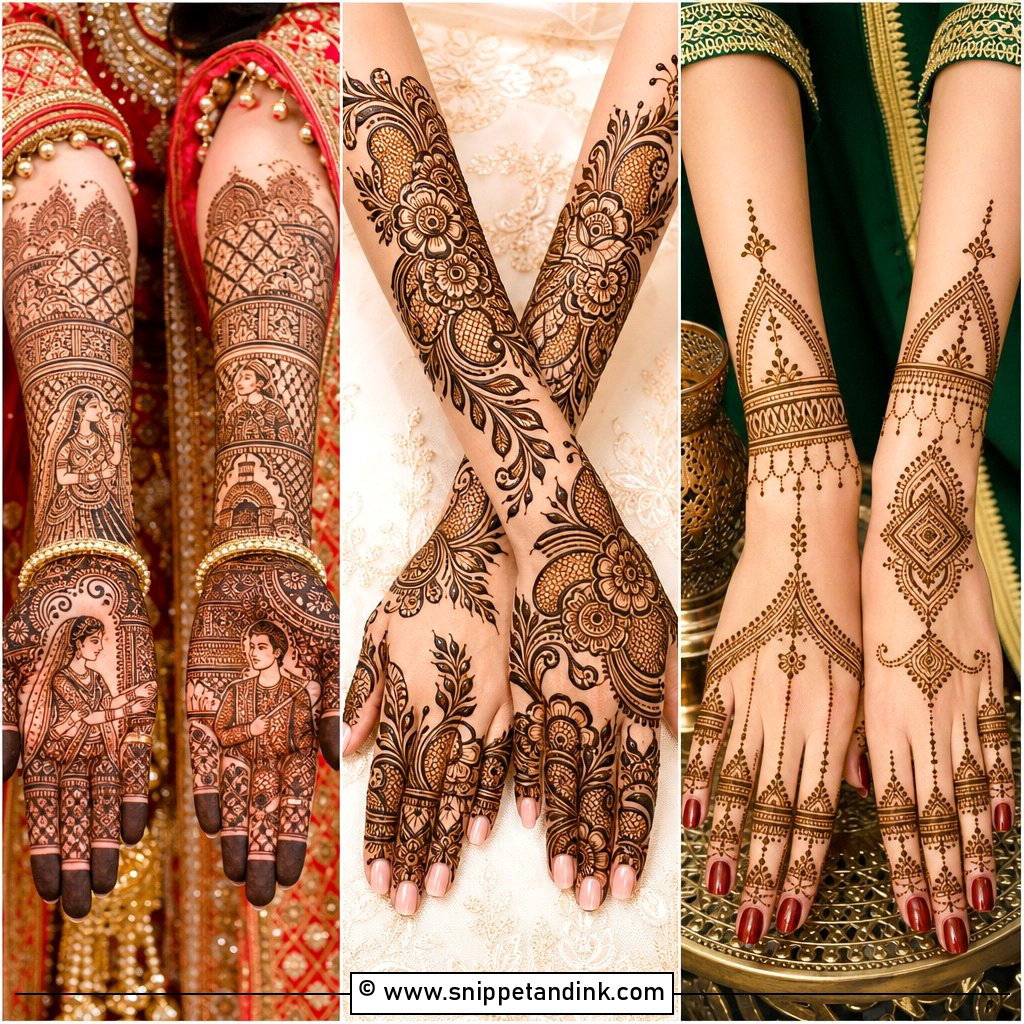
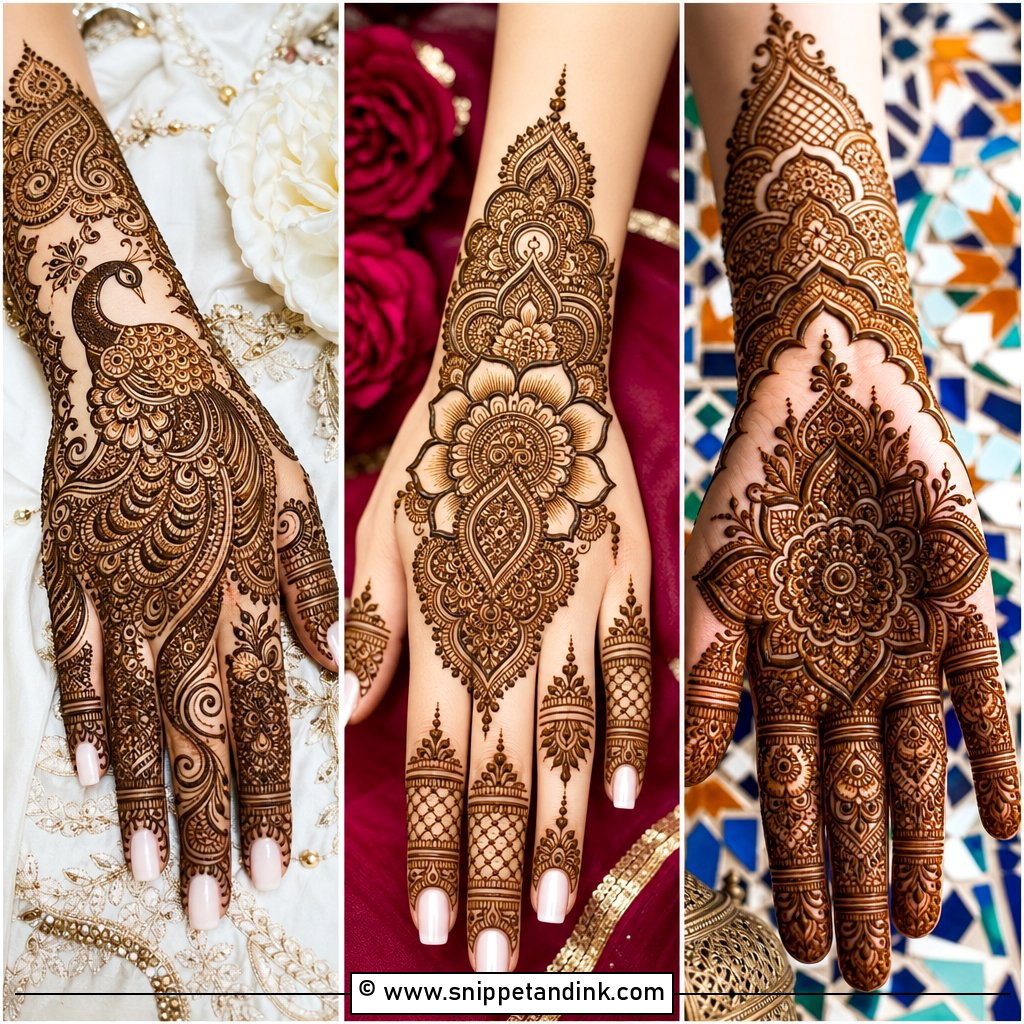
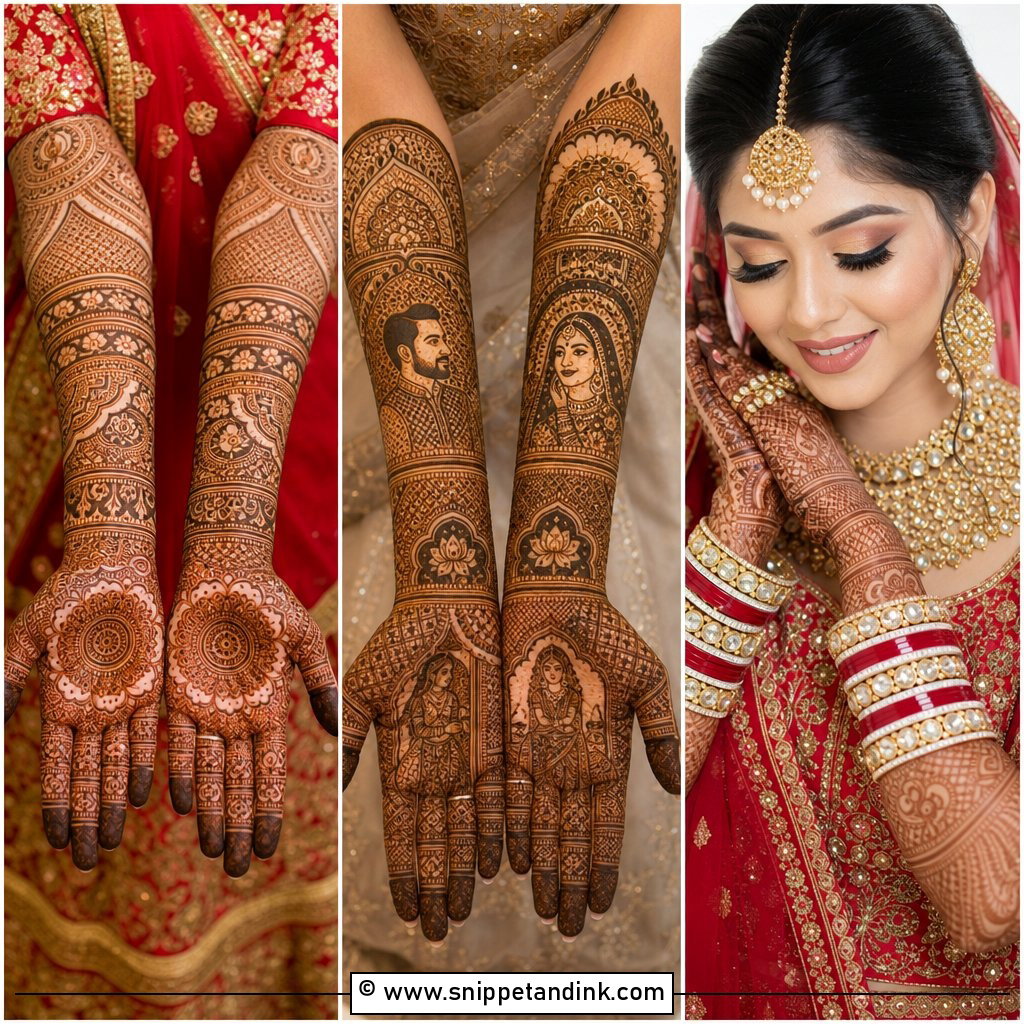
10. Easy Bridal Mehndi Design
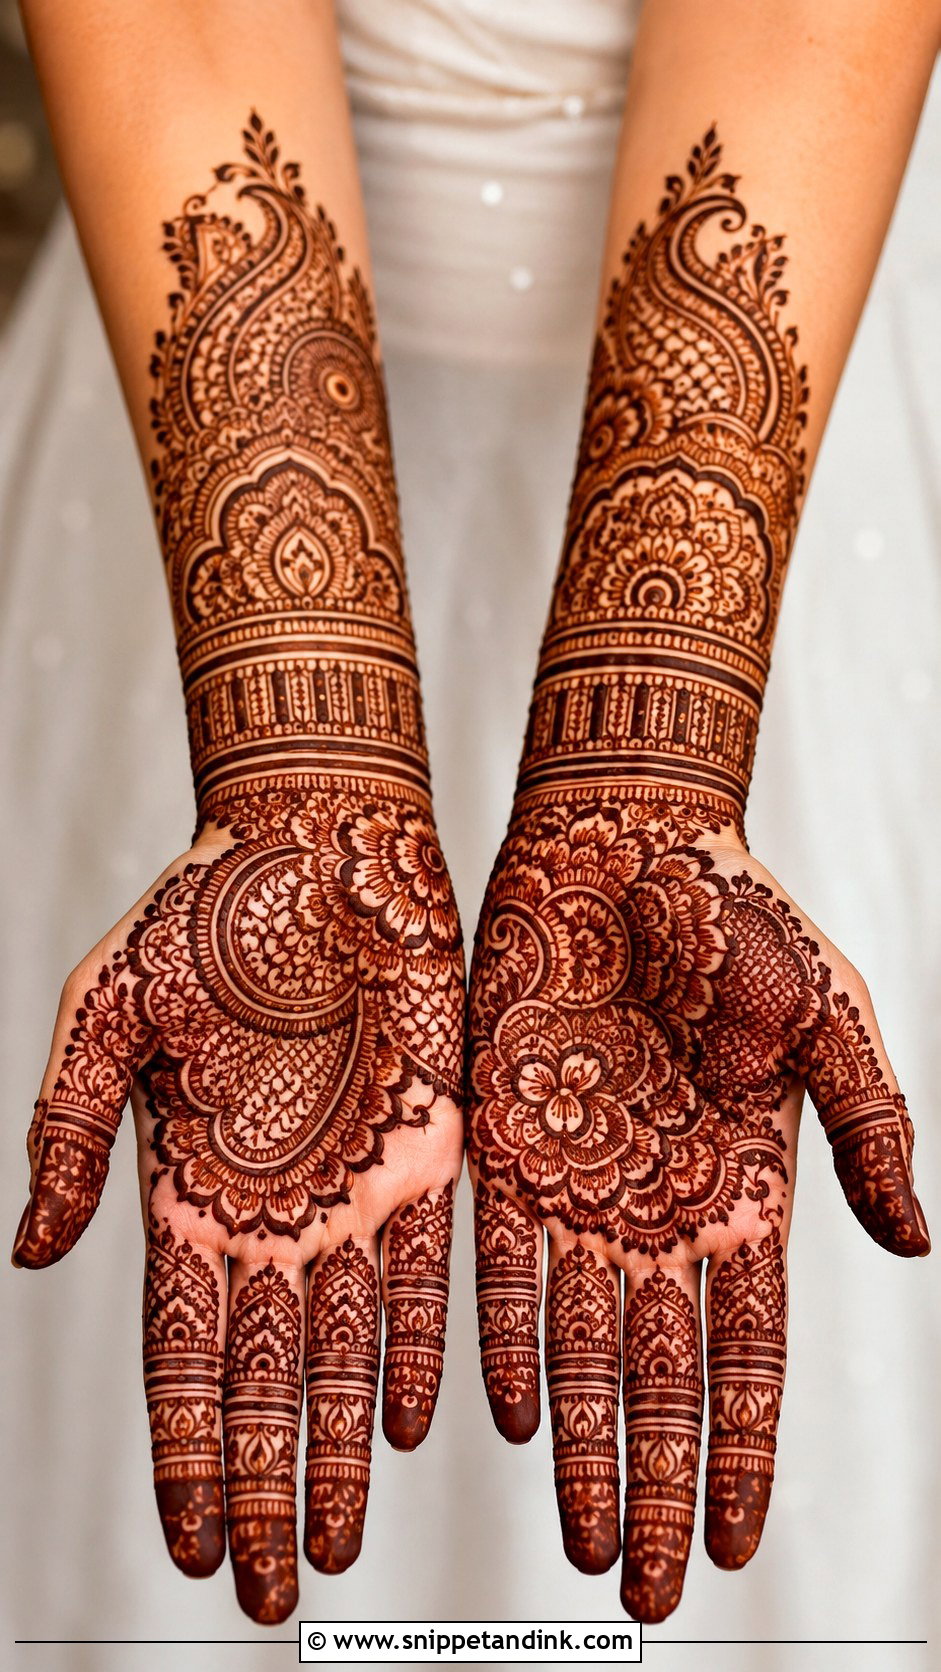
Busy brides ask me for this more than any other layout. The trick is to keep the palm centre detailed and then use bigger paisleys, flowers, mandalas and jaali sections around it, which fills the hand without hours of fine work. Wrist-to-forearm borders add the bridal weight. Portraits and bride-and-groom figures are best left to a professional; a clean floral and paisley layout still looks bridal and is far harder to get wrong. Carrying it slightly past the wrist suits an intimate ceremony or a bride who has a dozen other appointments that week.
11. Easy Eid Mehndi Design
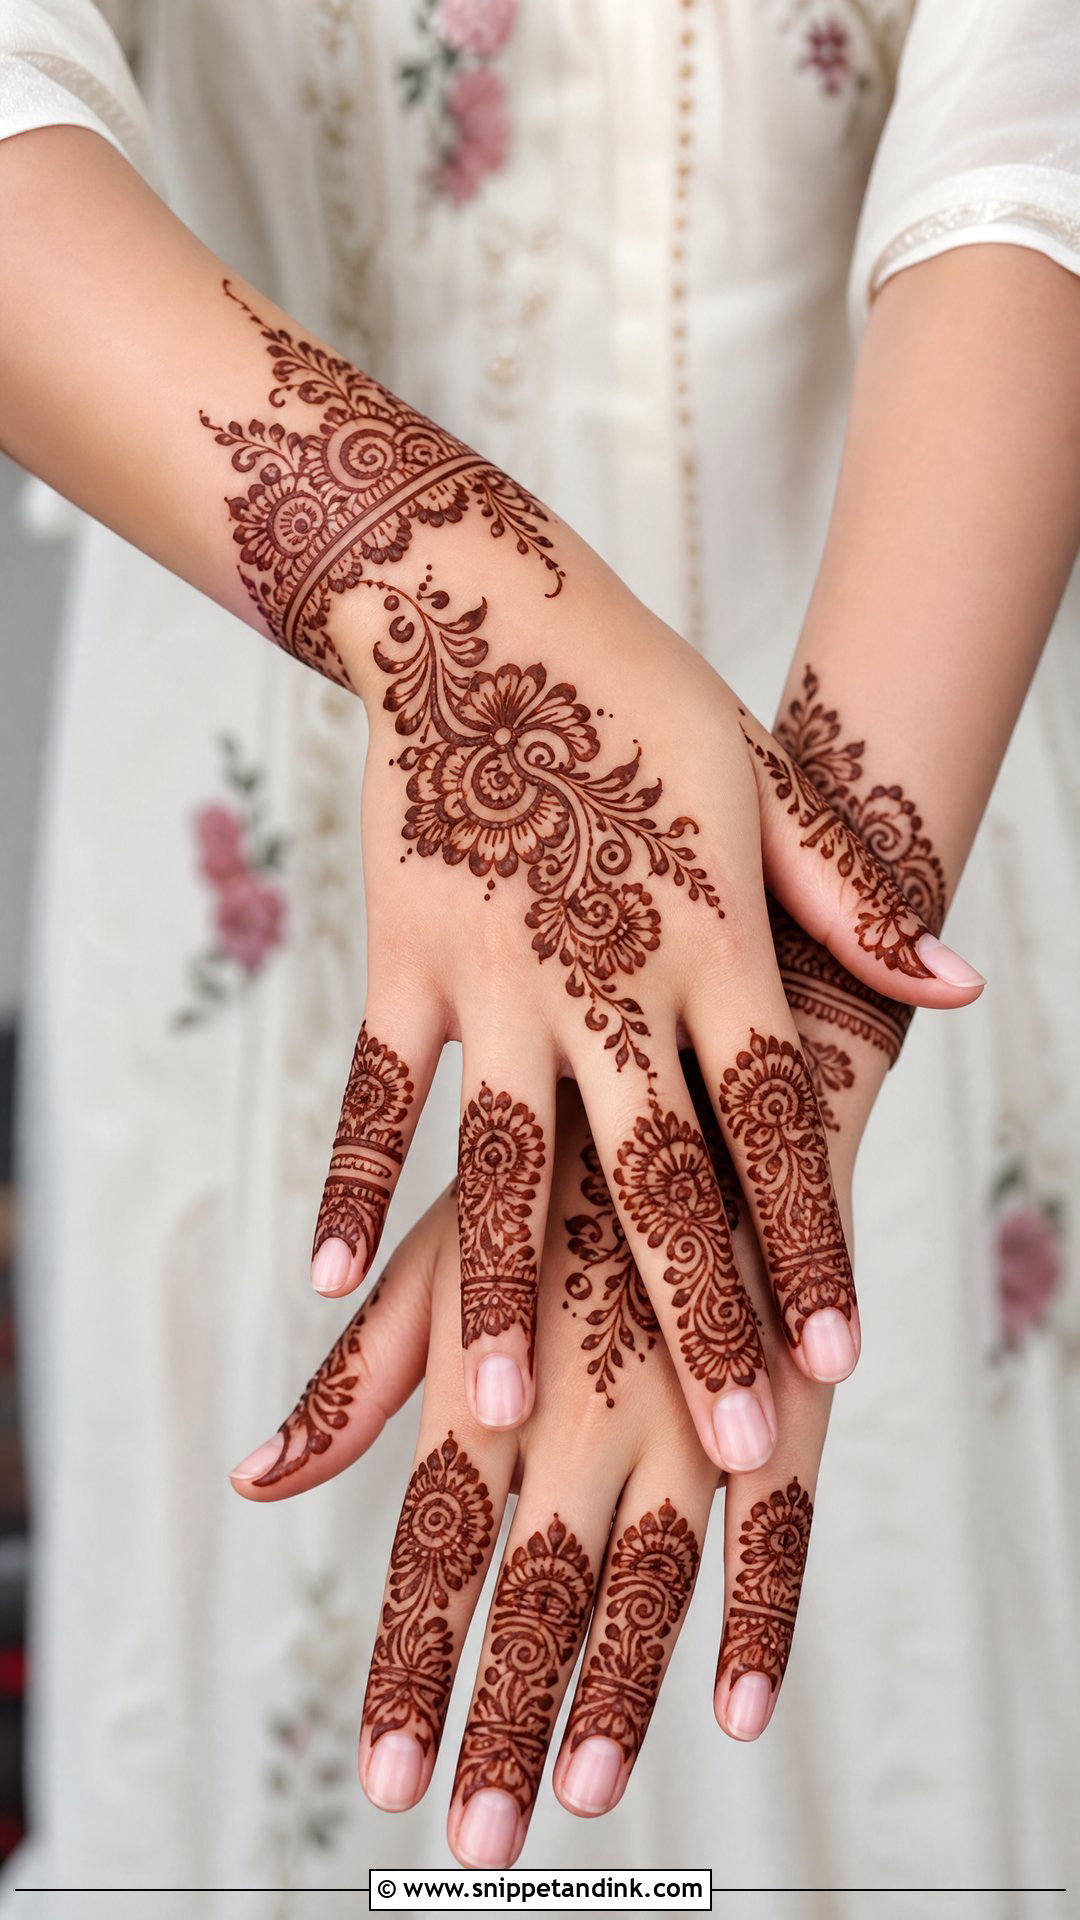
The night before Eid is always a rush, so an Eid mehndi design has to go on quickly and dry before bed. A diagonal Arabic trail from the index finger to the wrist with bold flowers and leaves is my usual answer, with small dots and a little shading to finish it. If you prefer the palm, a mandala and slim finger bands work just as well. Apply it early in the evening so the paste has hours on the skin before you sleep; the colour you wake up to on Eid morning depends on that time.
12. Easy Diwali Mehndi Design
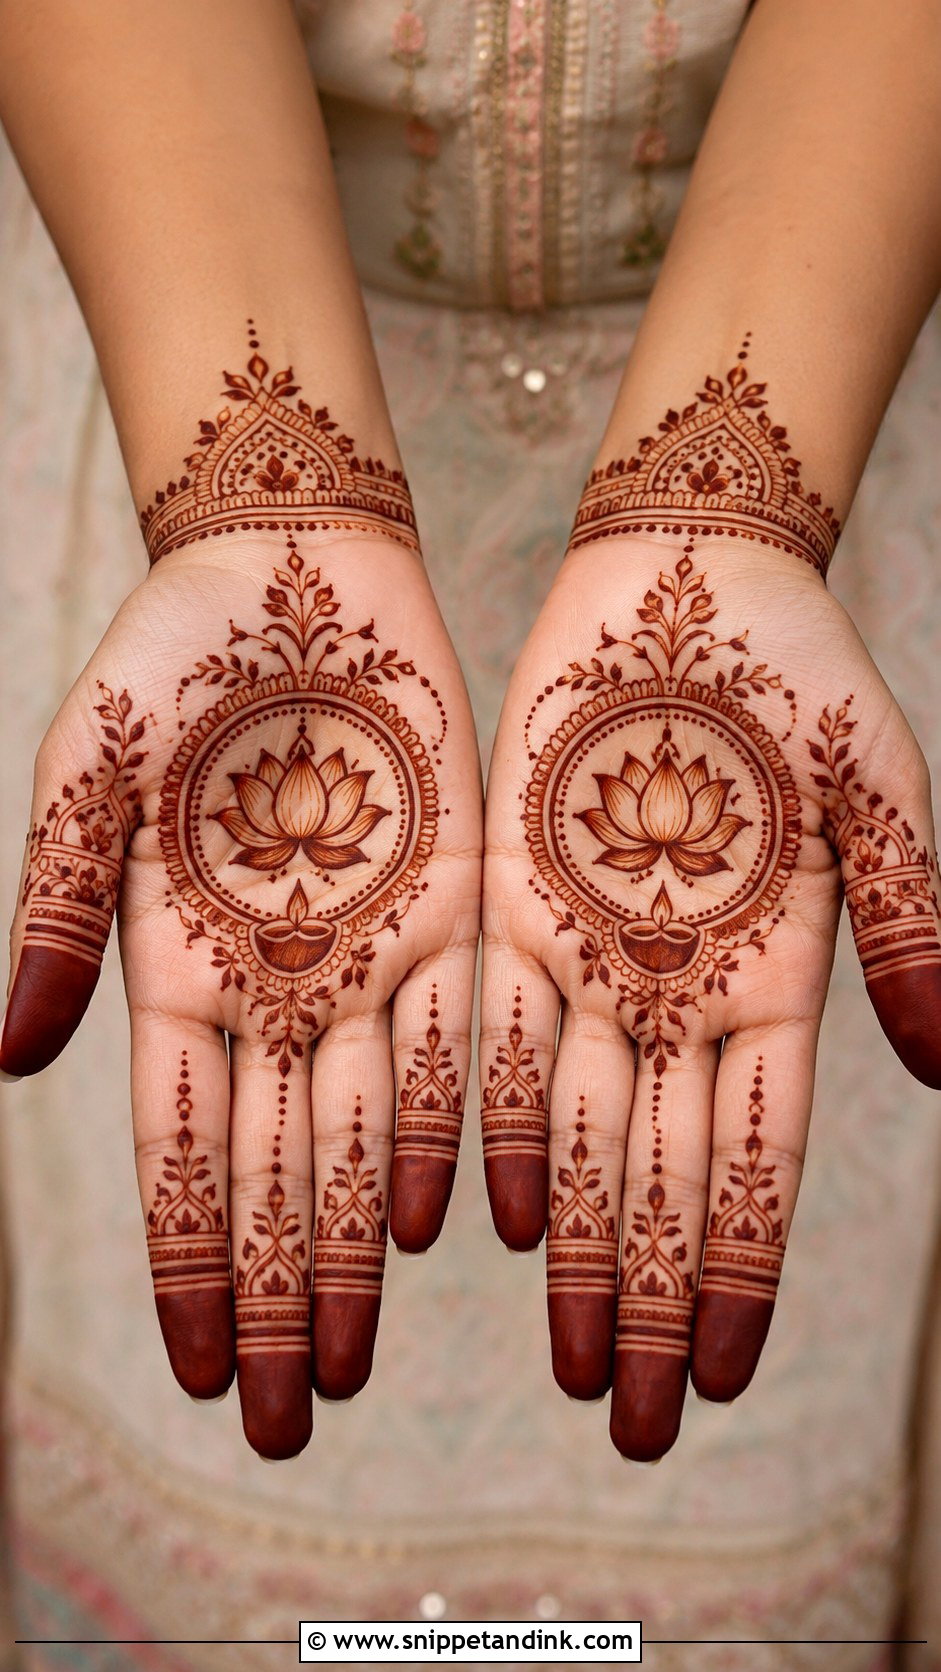
A palm mandala, lotus-inspired flowers, leafy vines and dotted borders carry a Diwali feel on their own. Small diya-shaped accents add the seasonal touch if you keep them simple, since a tiny flame shape blurs if it’s drawn too fussy. For puja, the front hand reads best; for parties, a back-hand bracelet pattern. Bold outlines with clean spacing keep it clear after staining, which matters if you’ll be photographed holding a diya.
13. Easy Wedding Guest Mehndi Design
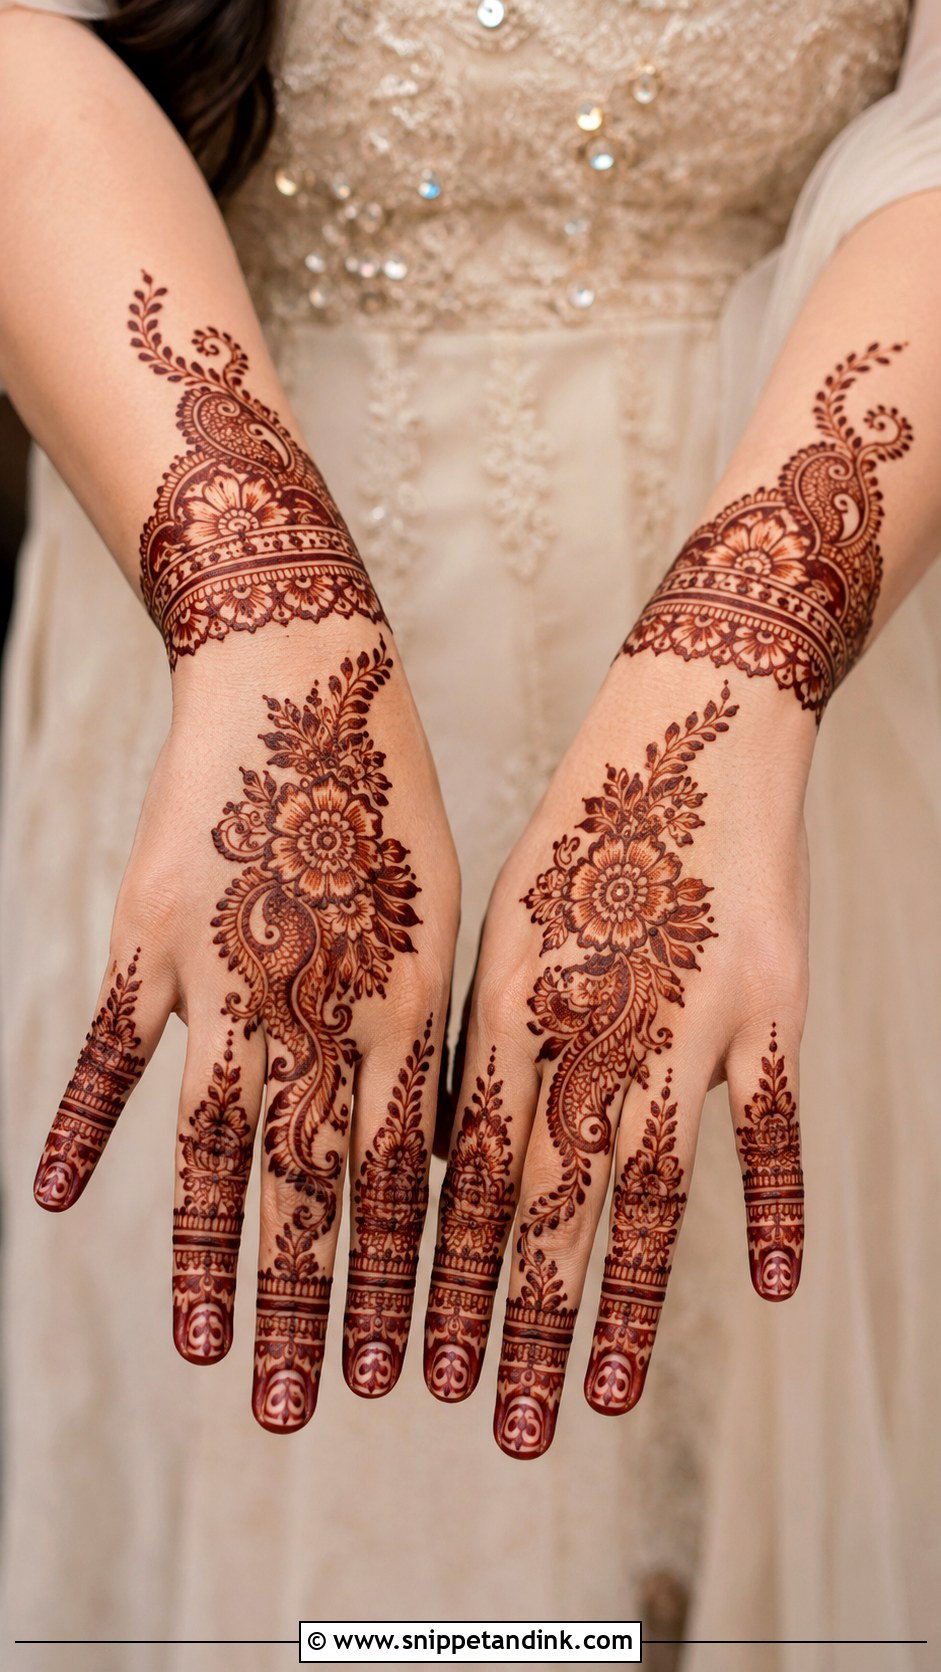
Guests should look dressed up without competing with the bride. A back hand floral trail with a wrist cuff and decorated fingers does that well, as does a palm mandala with paisley borders if you want something more traditional. Medium coverage is the etiquette I follow, and it also means you aren’t sitting for an hour at a crowded mehndi night. Light shading inside the flowers adds polish, and the open skin leaves room for rings and bangles.
14. Easy Paisley Mehndi Design
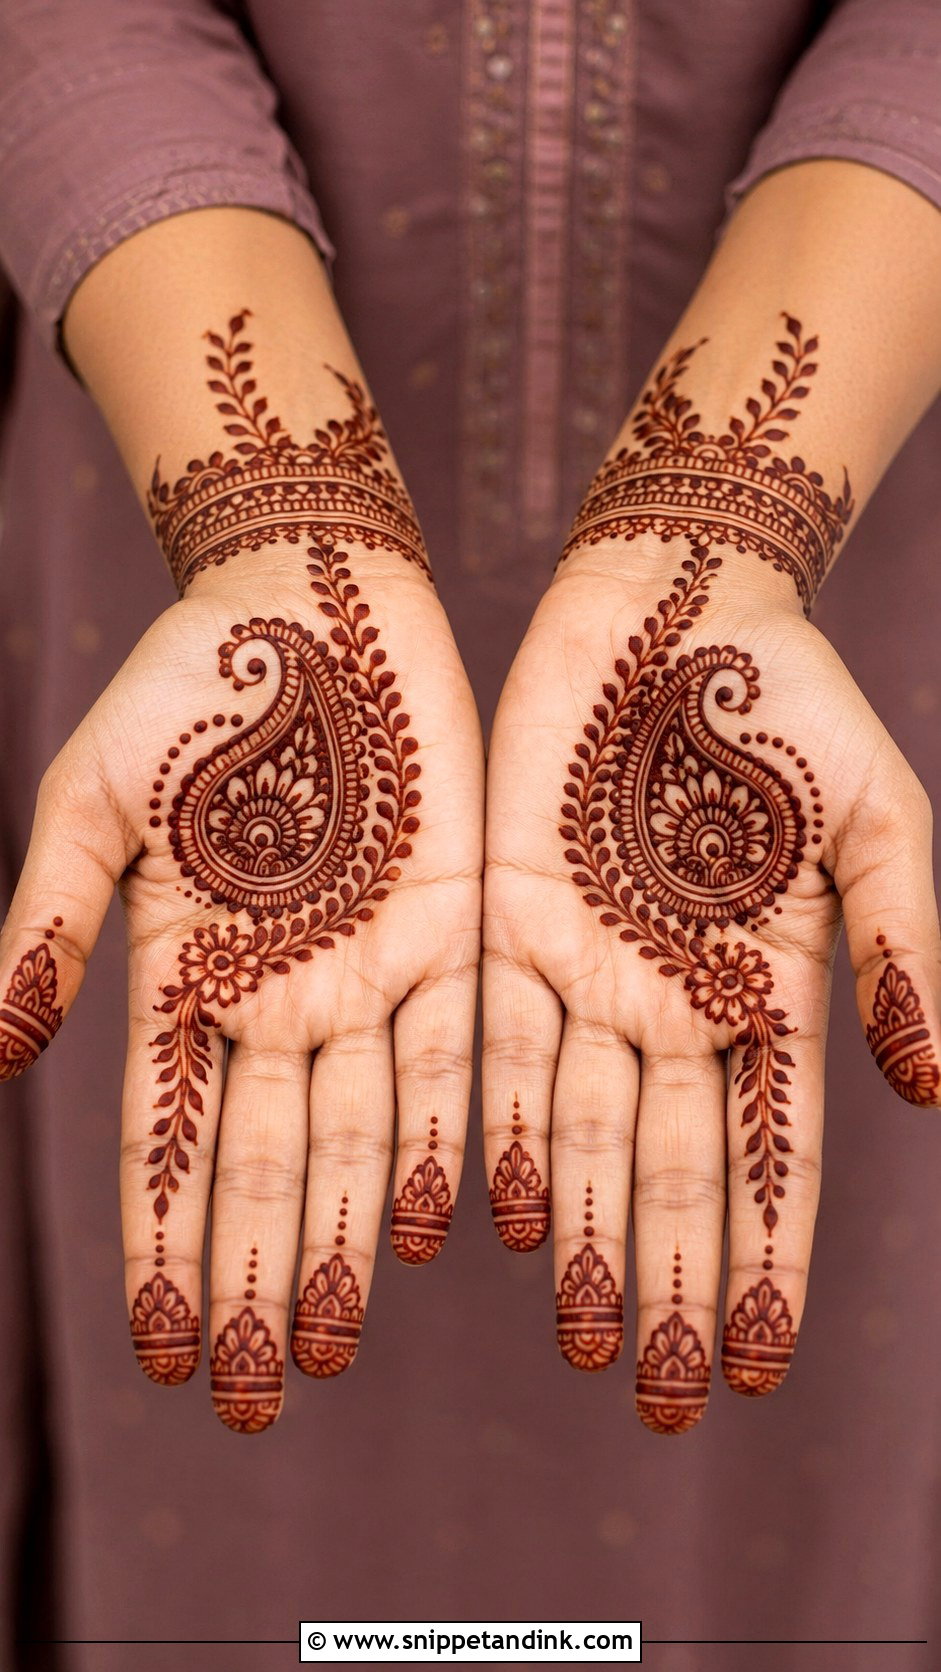
One large curved paisley does the work of several smaller motifs, which is why it’s a beginner’s friend. Draw the outline on the palm or back of the hand first, smooth and bold, then fill it with petals, dots, lines or tiny leaves. A floral trail connects it to the fingers and wrist. Fill densely for a traditional hand or leave the paisley half open for a modern one. If the outline wobbles, the fill can’t hide it, so take that first curve slowly and in one stroke if you can.
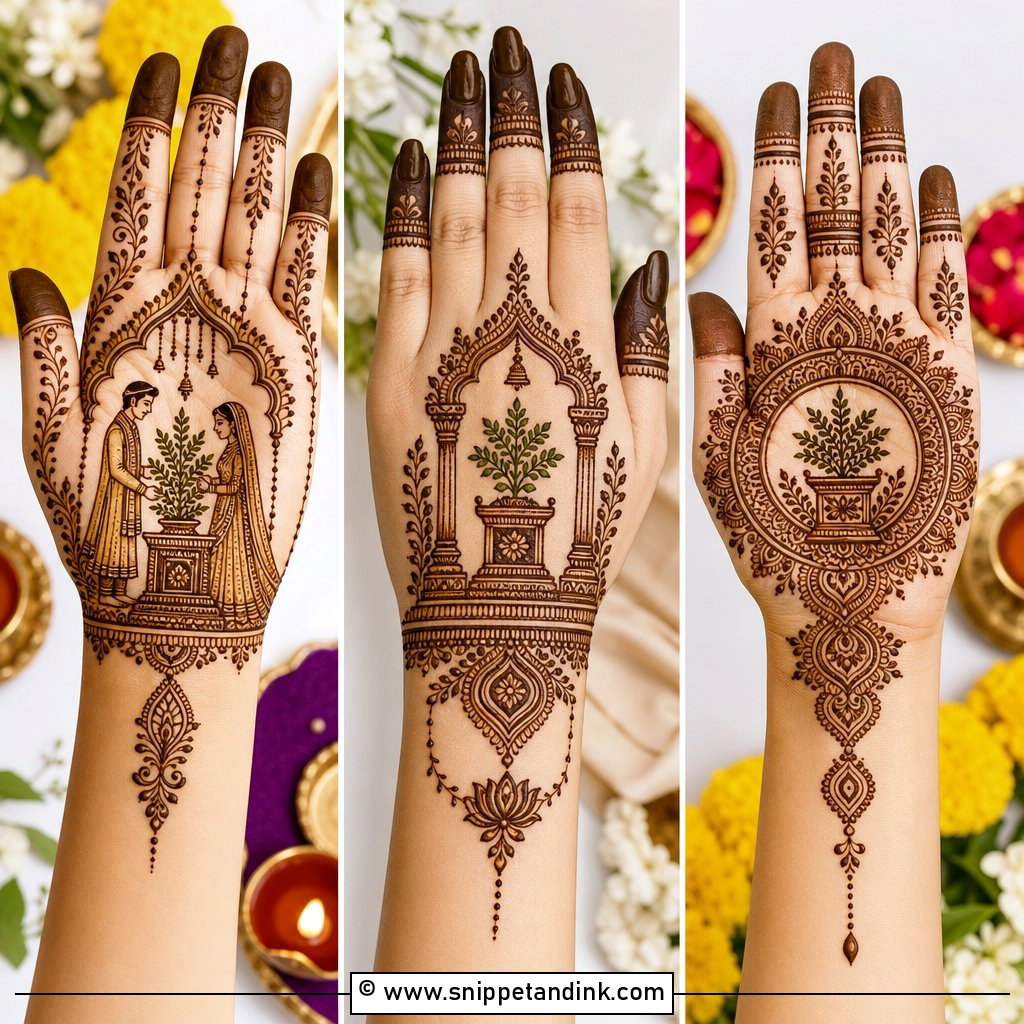
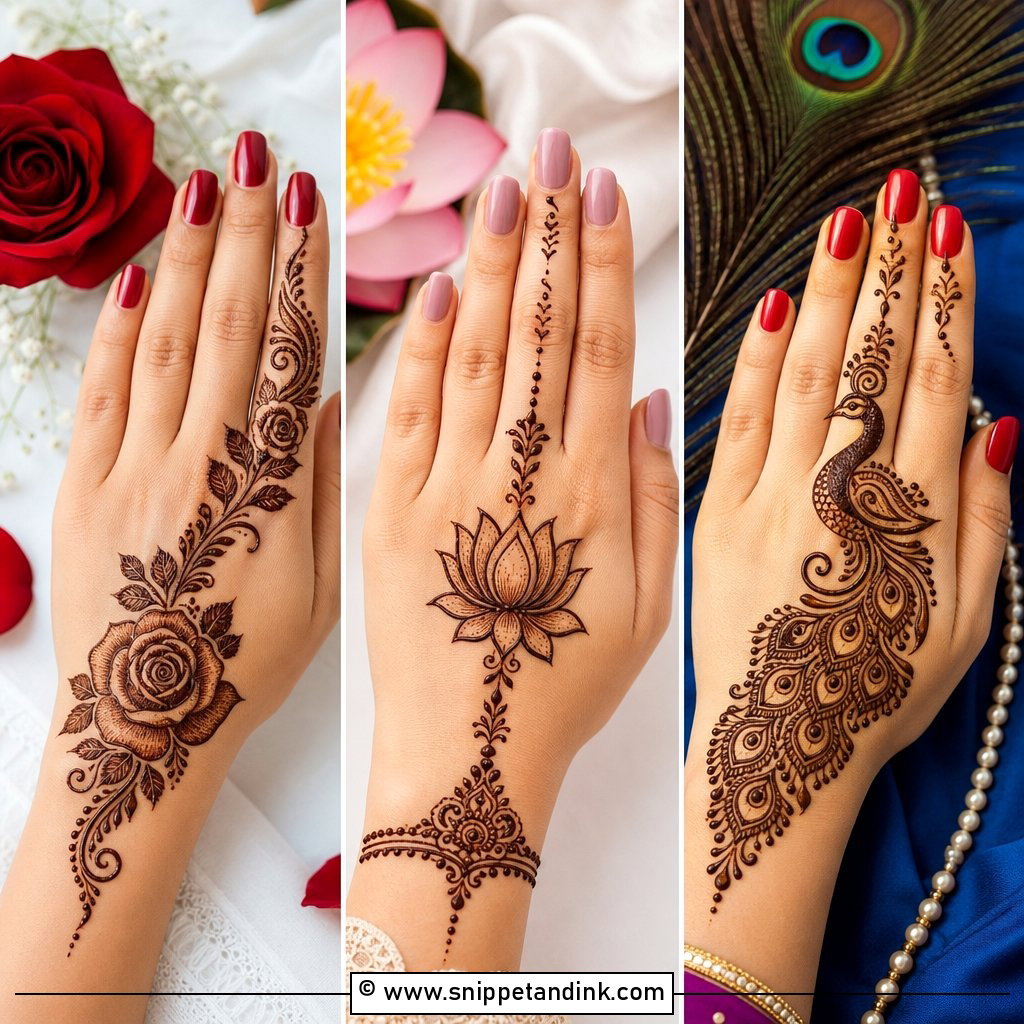
15. Easy Peacock Mehndi Design
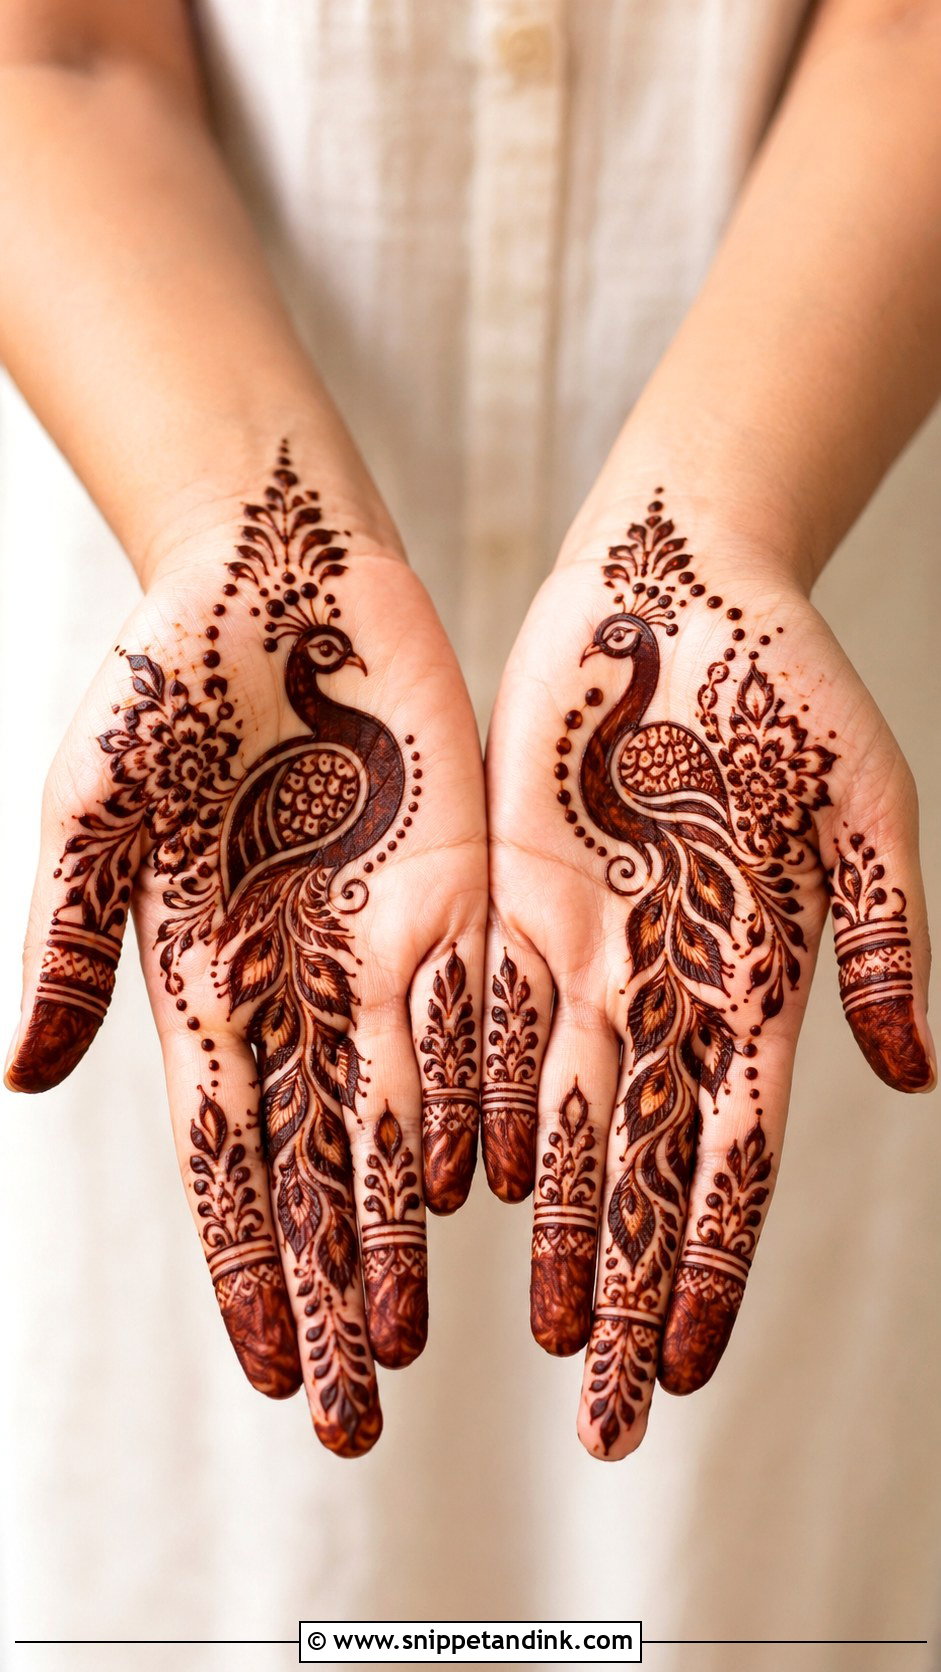
Peacocks look harder than they are. A small body near the palm or wrist, then feathers built from curved lines, dots and leaf shapes, with space left between the curves. You don’t need to fill every feather; in fact, filled feathers tend to merge into one dark patch once the stain develops. Flowers or paisleys around the bird complete the hand. It reads best as a front-hand or back-hand centrepiece.
16. Easy Lotus Mehndi Design
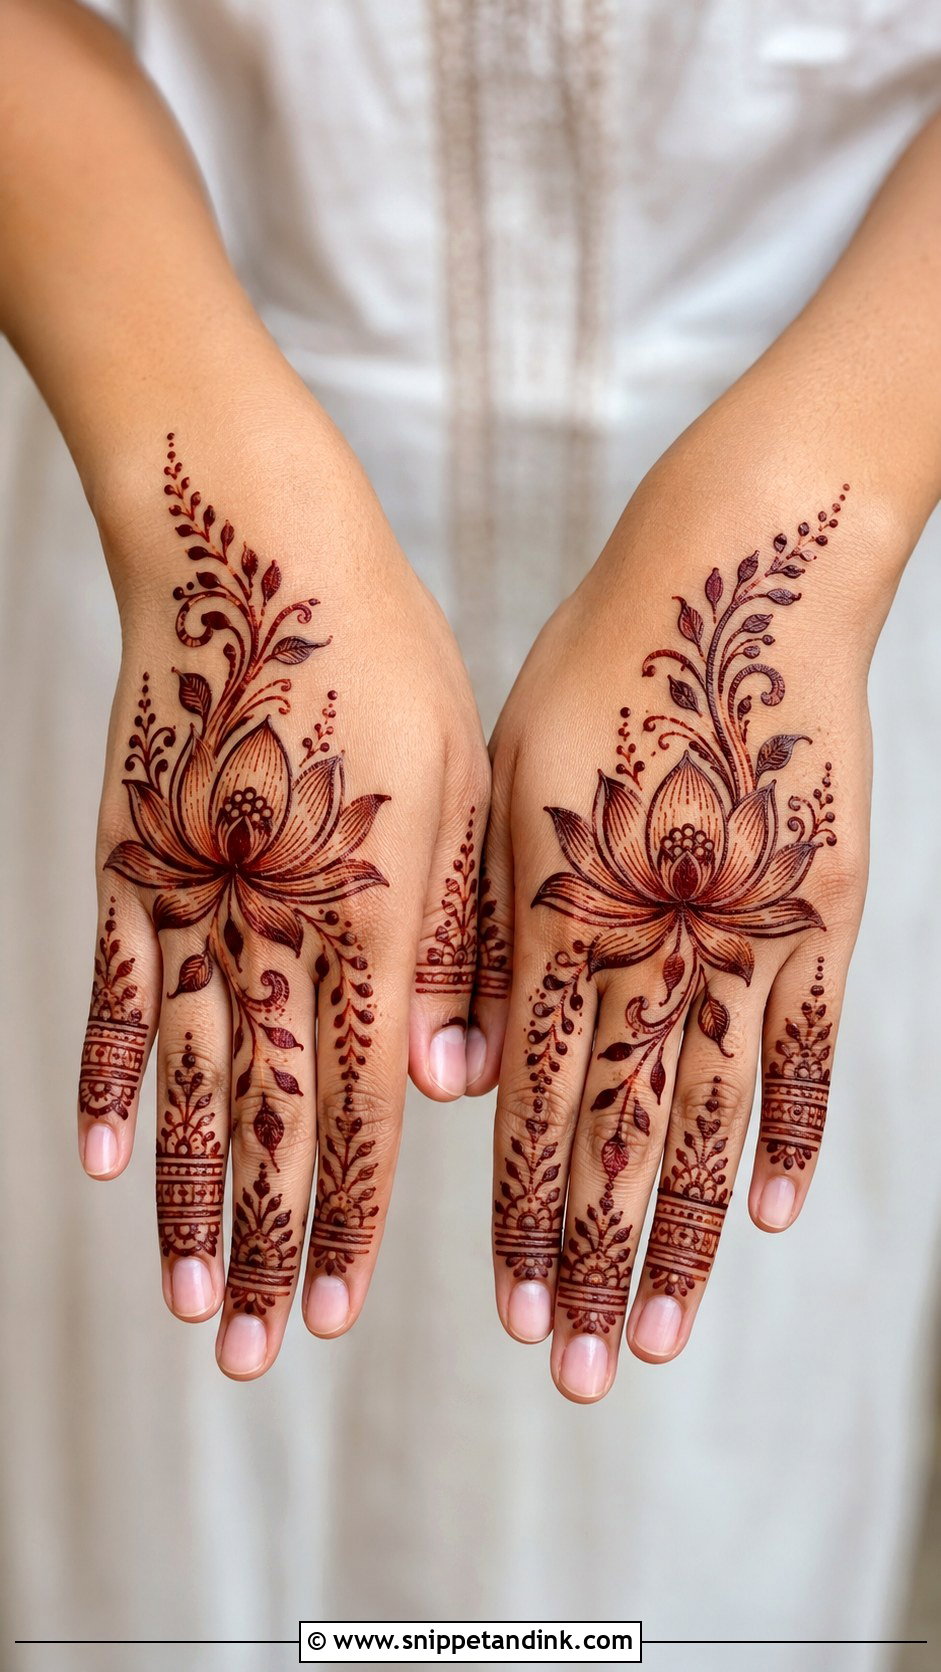
Wide, simple petals are what make the lotus beginner-friendly. Place one flower in the centre of the palm or on the back of the hand, then build vines, dots and small leaves outward. Keep the petals even in size; a lotus with one fat petal and one thin one looks lopsided straight away. Finger bands or leafy tips finish it, and it suits open-space layouts because the flower stays the focus.
17. Easy Rose Mehndi Design
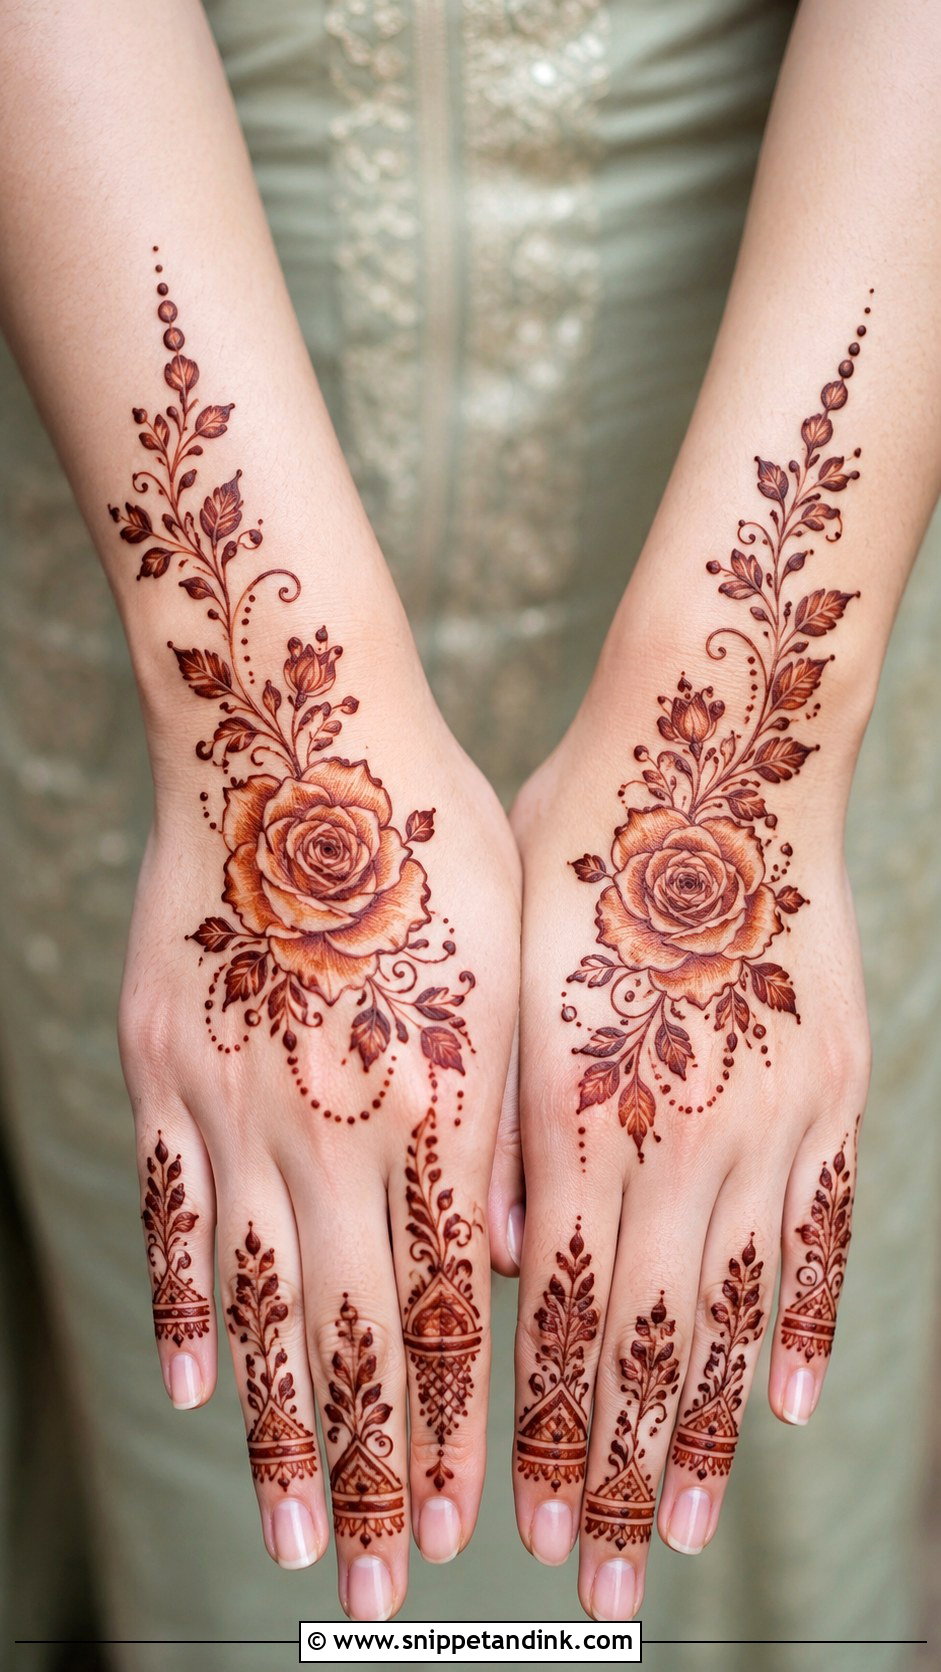
Start with a small spiral or curved centre and wrap layered petals around it, working outward. Roses are more defined than basic flowers, so they reward a bit of practice on paper first. Place the bloom on the back of the hand, the palm or near the wrist, extend it with leafy vines and buds, and keep the fingers plain so nothing pulls focus. A few light strokes inside the petals give the rose its fullness.
18. Easy Leaf Mehndi Design
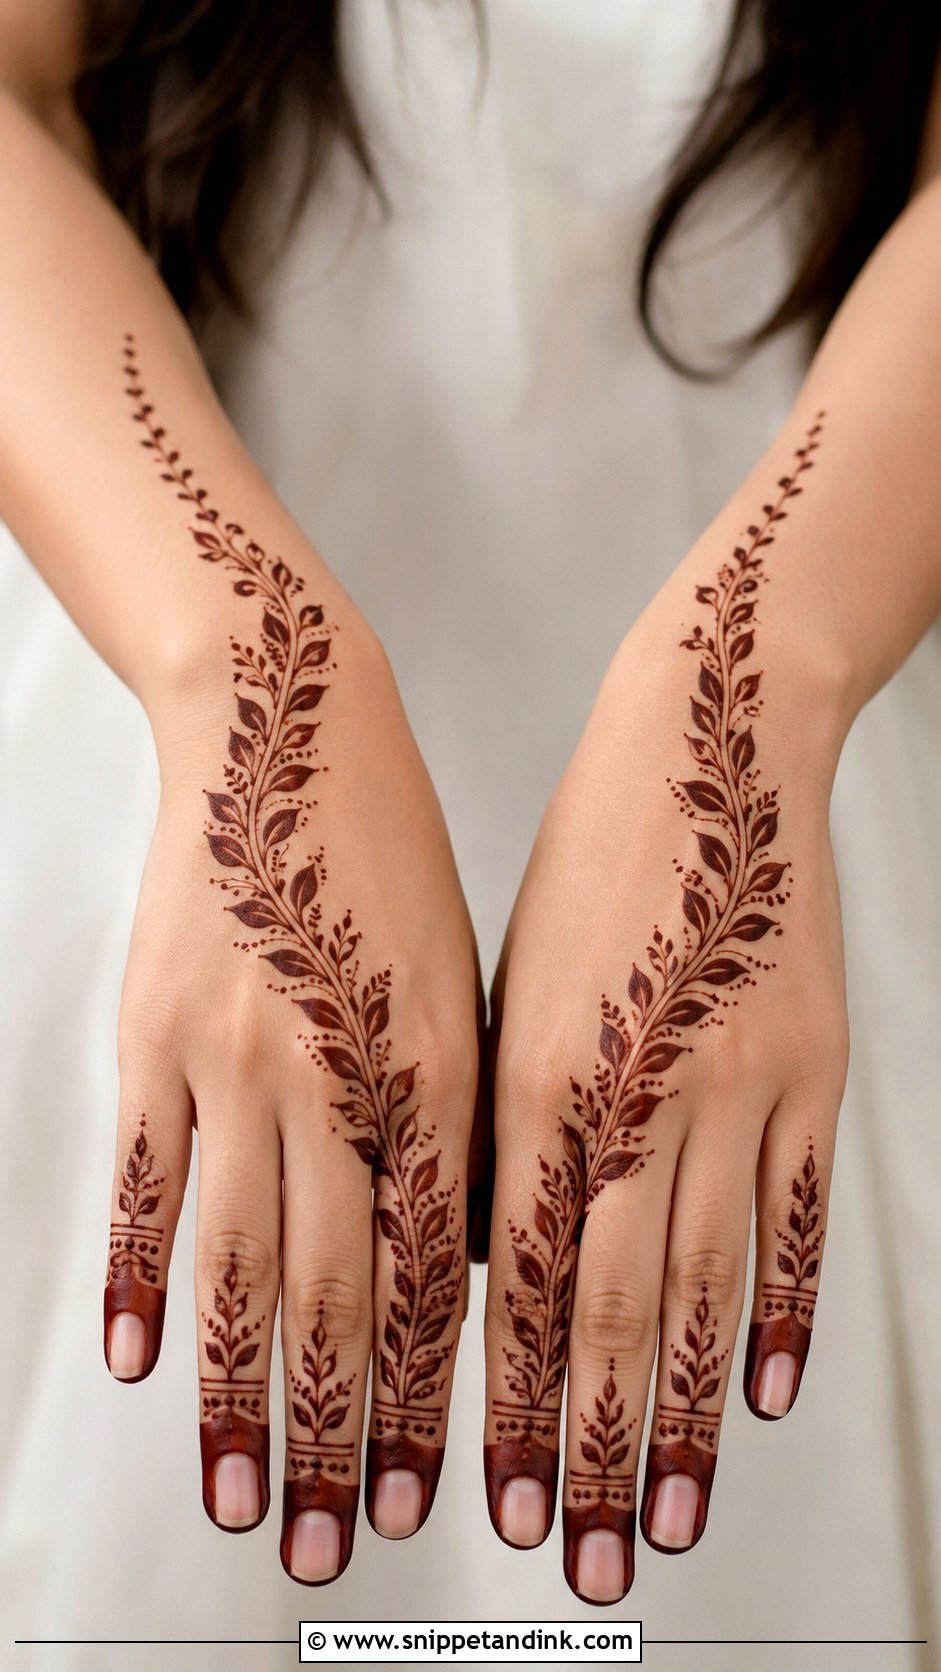
Repeated simple strokes, nothing else. Draw a vine from the wrist to the fingers, then add leaves on both sides, thin, round or pointed. Dots fill the gaps. On the back of the hand the trail follows the hand’s natural line, and if one leaf comes out uneven, the next one hides it. That forgiveness makes it the first design I give anyone practising on a friend.
19. Easy Tikki Mehndi Design
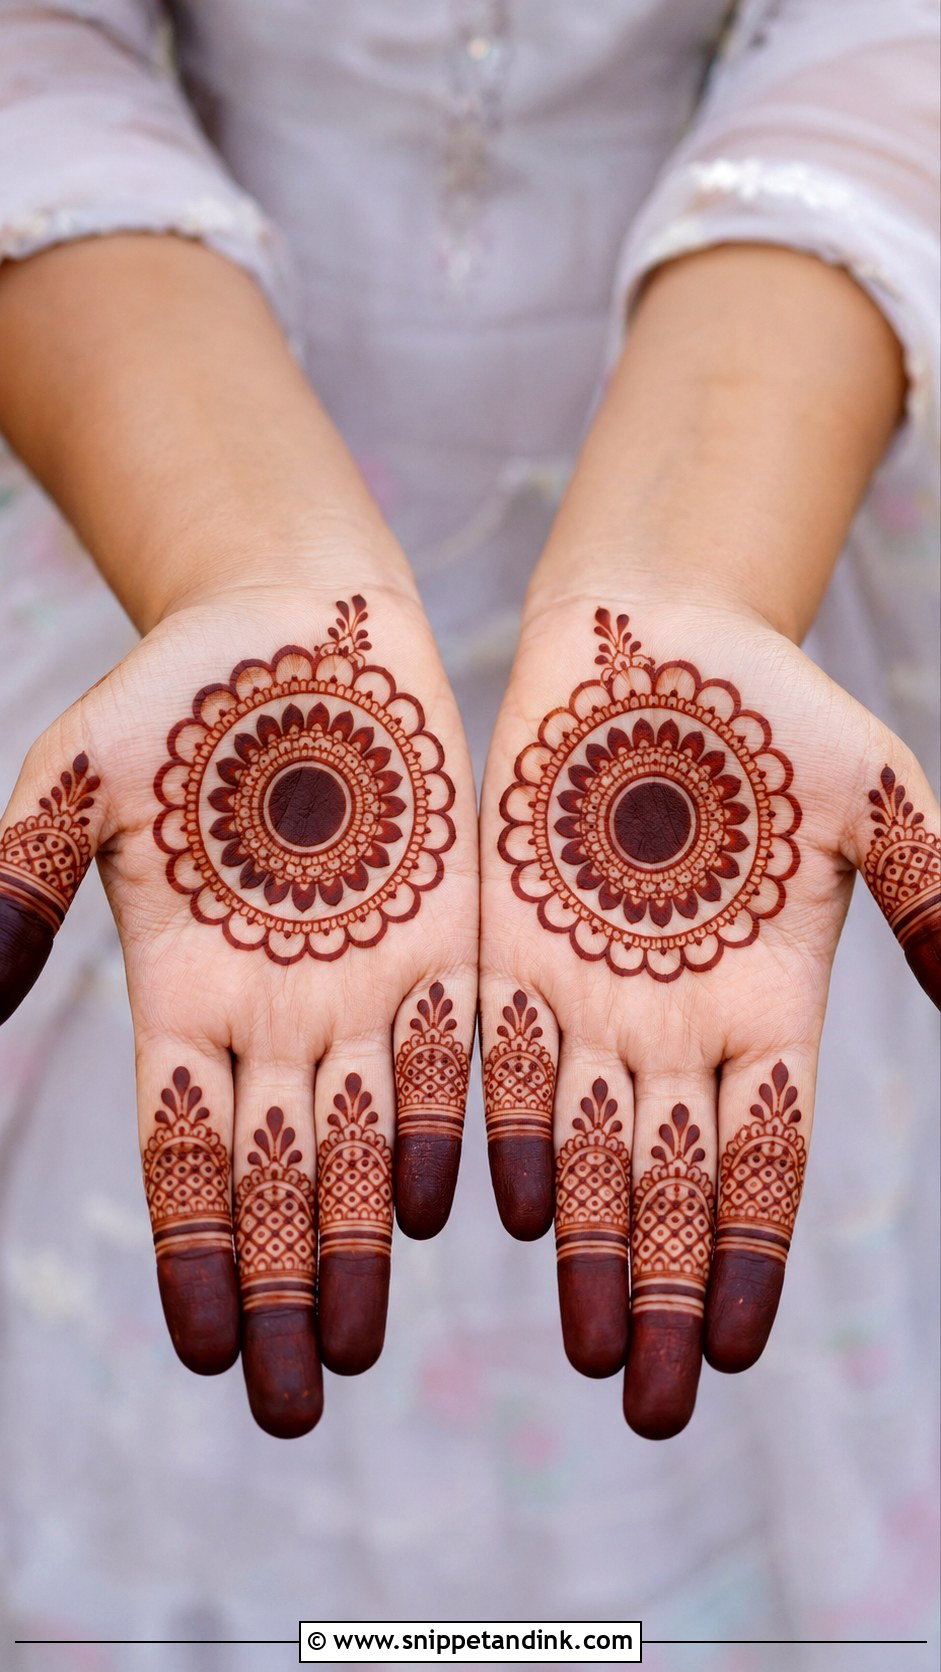
The tikki is the old round palm design, and it has never really left. A circle in the middle of the palm, petals, dots, scallops and small rings around it, filled fingertip caps or tiny bands on the fingers. The wrist can stay empty or take a small bracelet border. Everything grows from one central shape, so beginners always know where they are. Fill the centre of the tikki solid and it comes up as a deep dark disc once the stain matures, which is the effect families expect at Eid and weddings.
20. Easy Jaali Mehndi Design
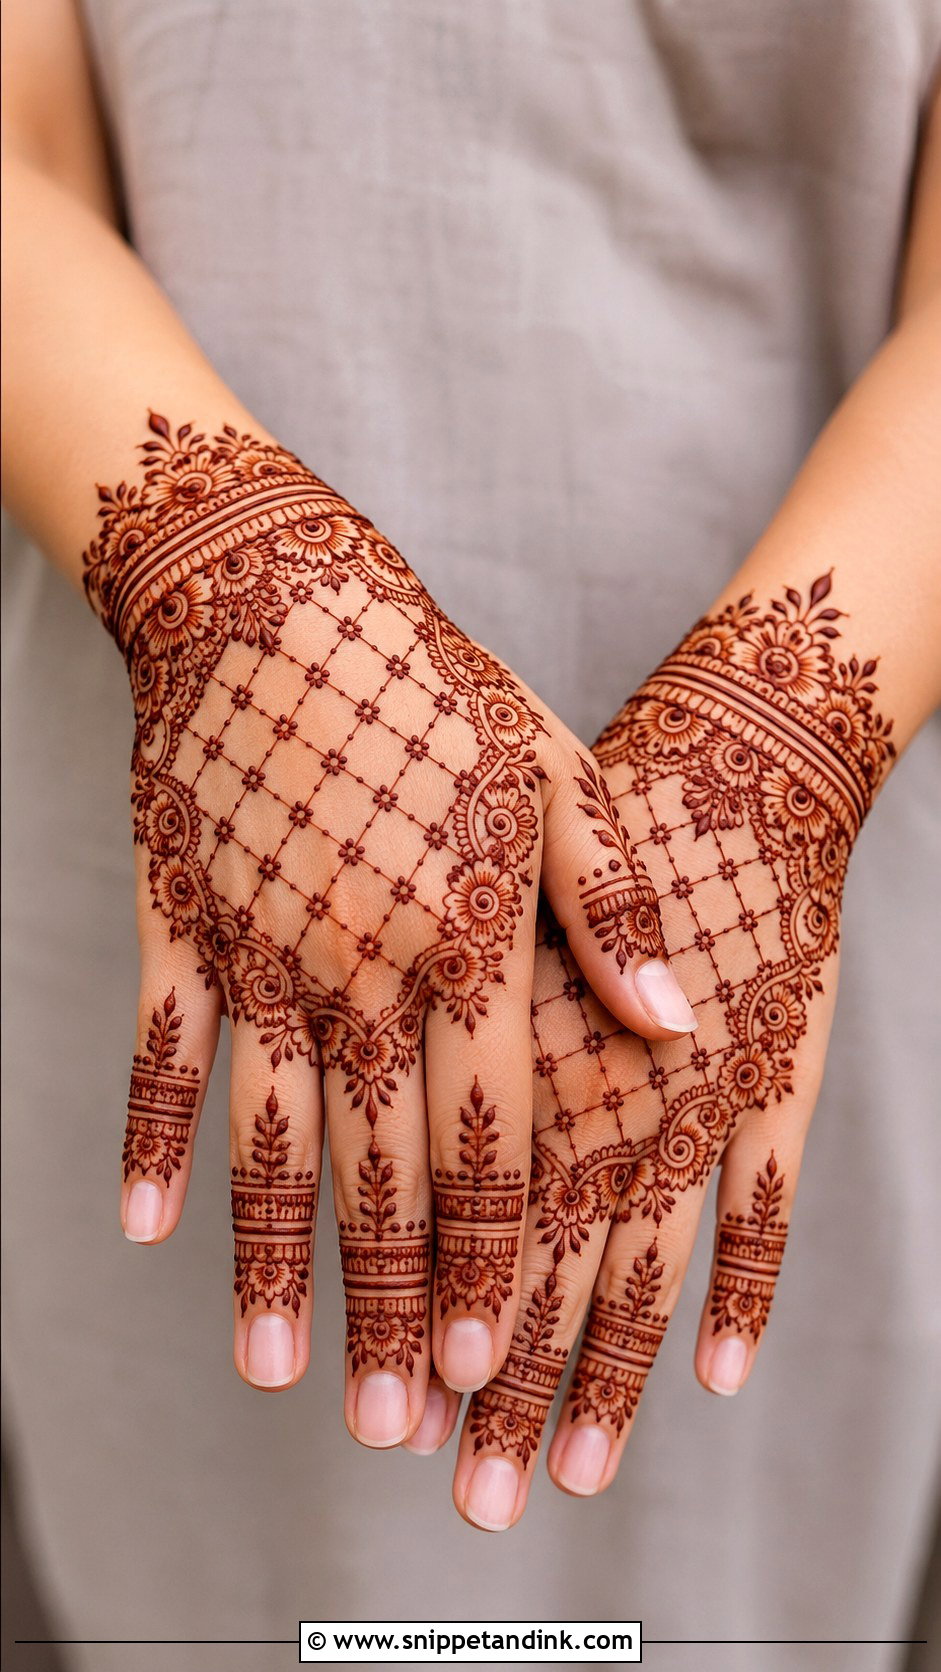
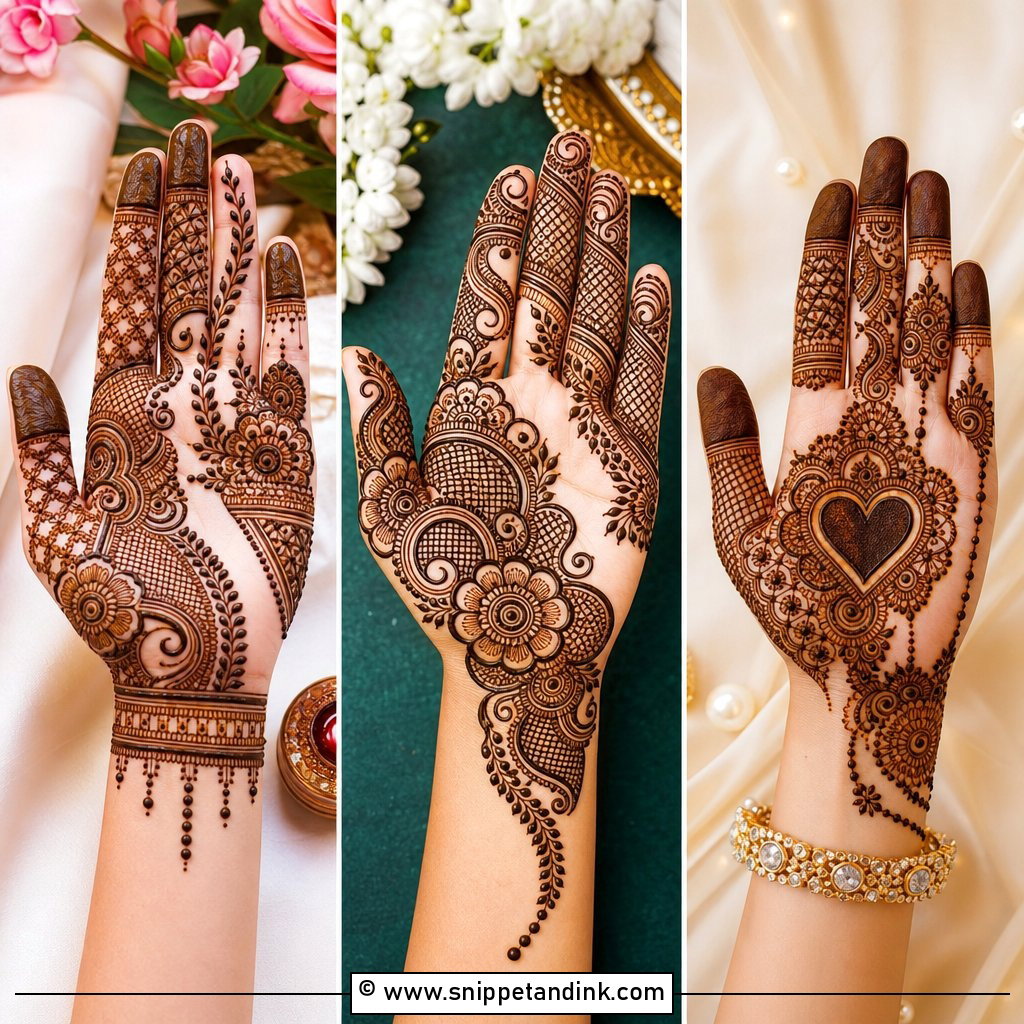
Crisscross lines form diamonds, and a dot at each crossing tidies the joins. Jaali looks detailed but is really patience: straight lines are harder than curves with a cone because the paste wants to drag. Keep your first jaali panel small, on the palm or back of the hand, and frame it with flowers, paisleys or a wrist band. If the spacing is uneven, the mesh looks messy rather than textured, so I sometimes mark the corners with dots before drawing any lines.
21. Easy Indo Arabic Mehndi Design
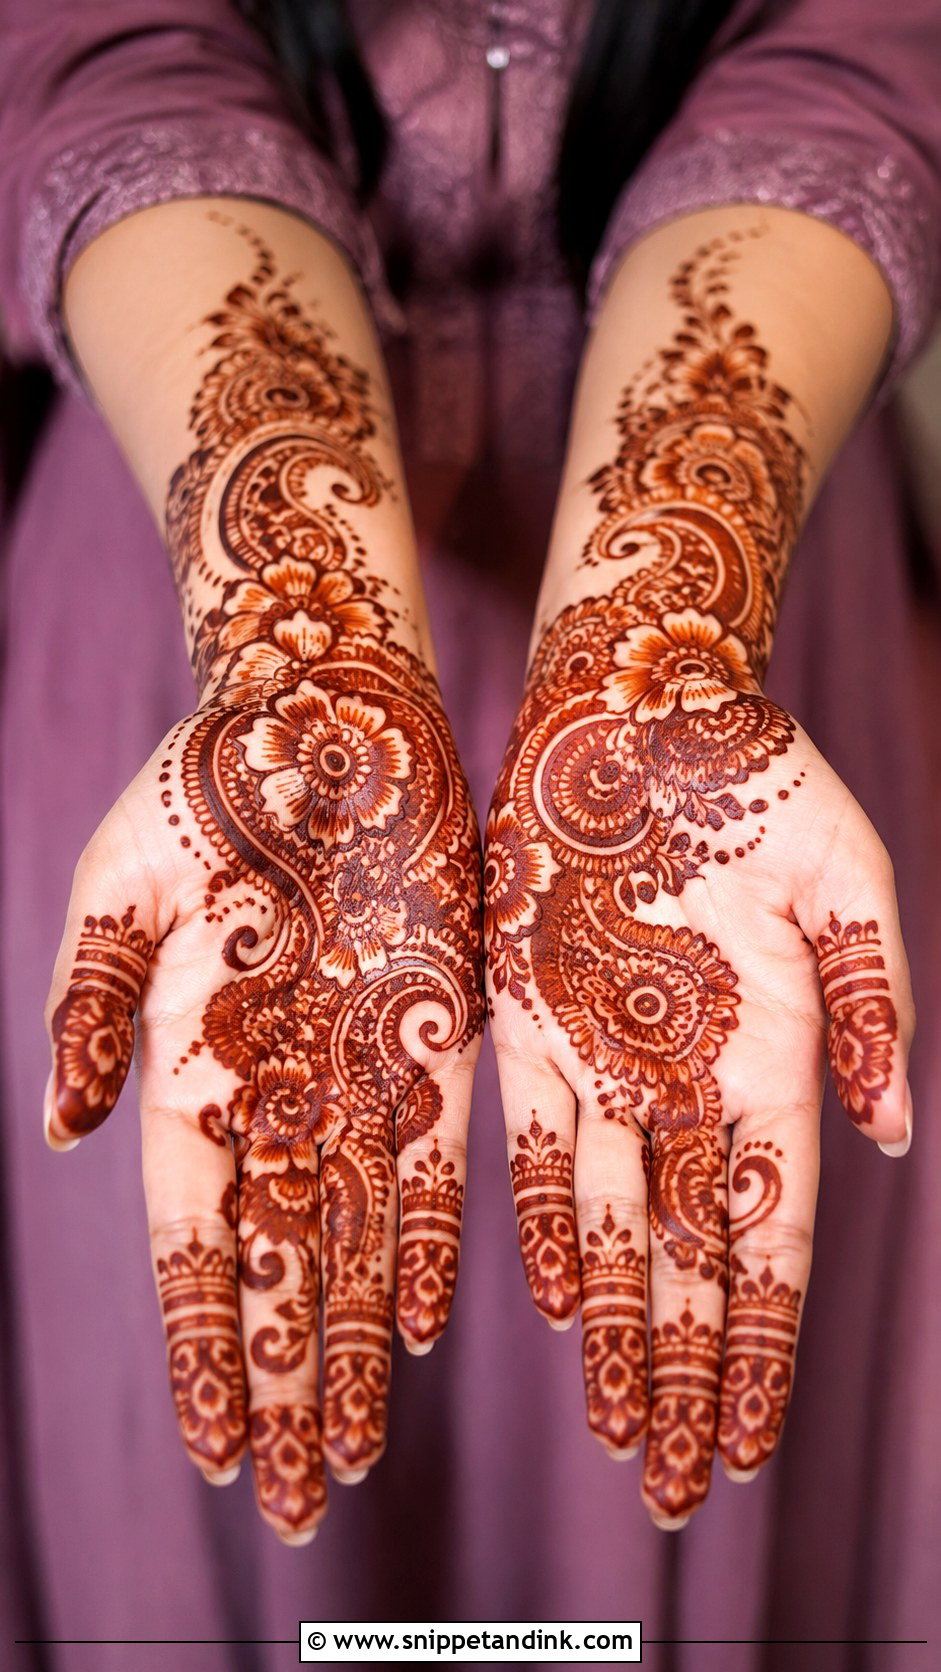
Lay down a diagonal Arabic layout first, with bold flowers, paisleys and leafy trails, then go back and add Indian-style dots, fine lines and small mandalas inside some of the open spaces. That order matters. If you start with the fine Indian fill, you’ll keep adding until the Arabic flow disappears. Used this way it suits weddings, Eid, Diwali and engagements, with Indian detail only where it makes the design look richer.
22. Easy Moroccan Mehndi Design
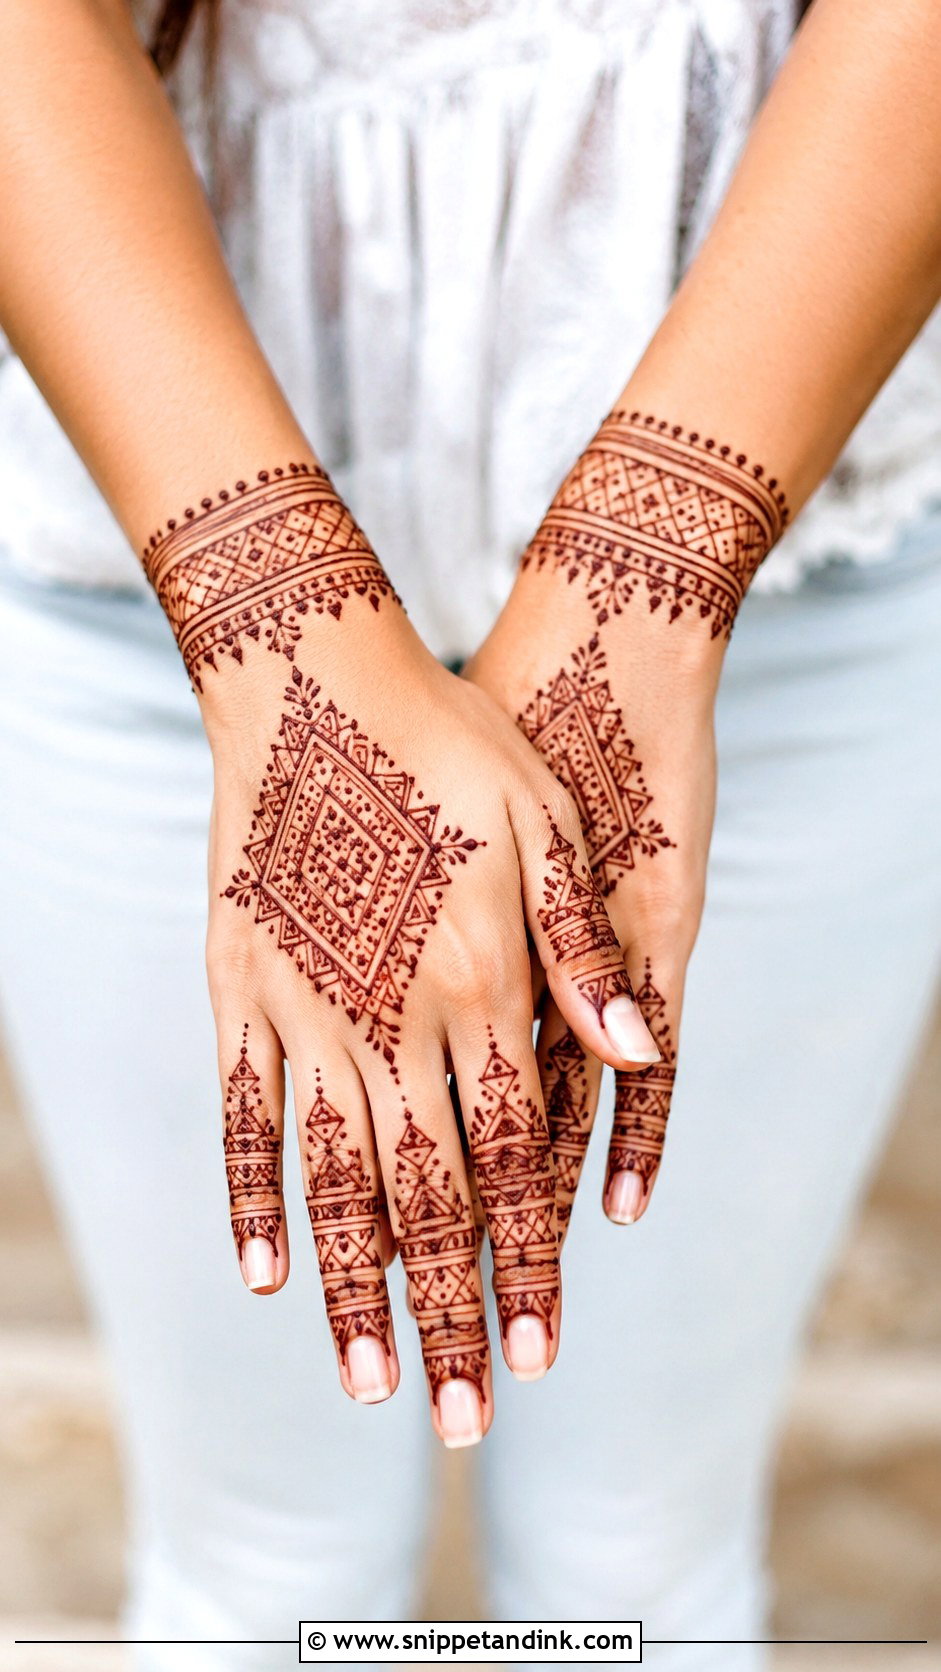
Prefer shapes to flowers? Diamonds, triangles, straight lines, dots and small blocks follow the bones of the back of the hand and fingers neatly. Start with a central diamond or wrist band and extend simple line patterns toward the fingers. Avoid tiny detail; geometry looks sharp only when the spacing is clean. Some beginners who find flowers frustrating take to this immediately, since there’s no petal shape to get right.
23. Easy Gulf Mehndi Design
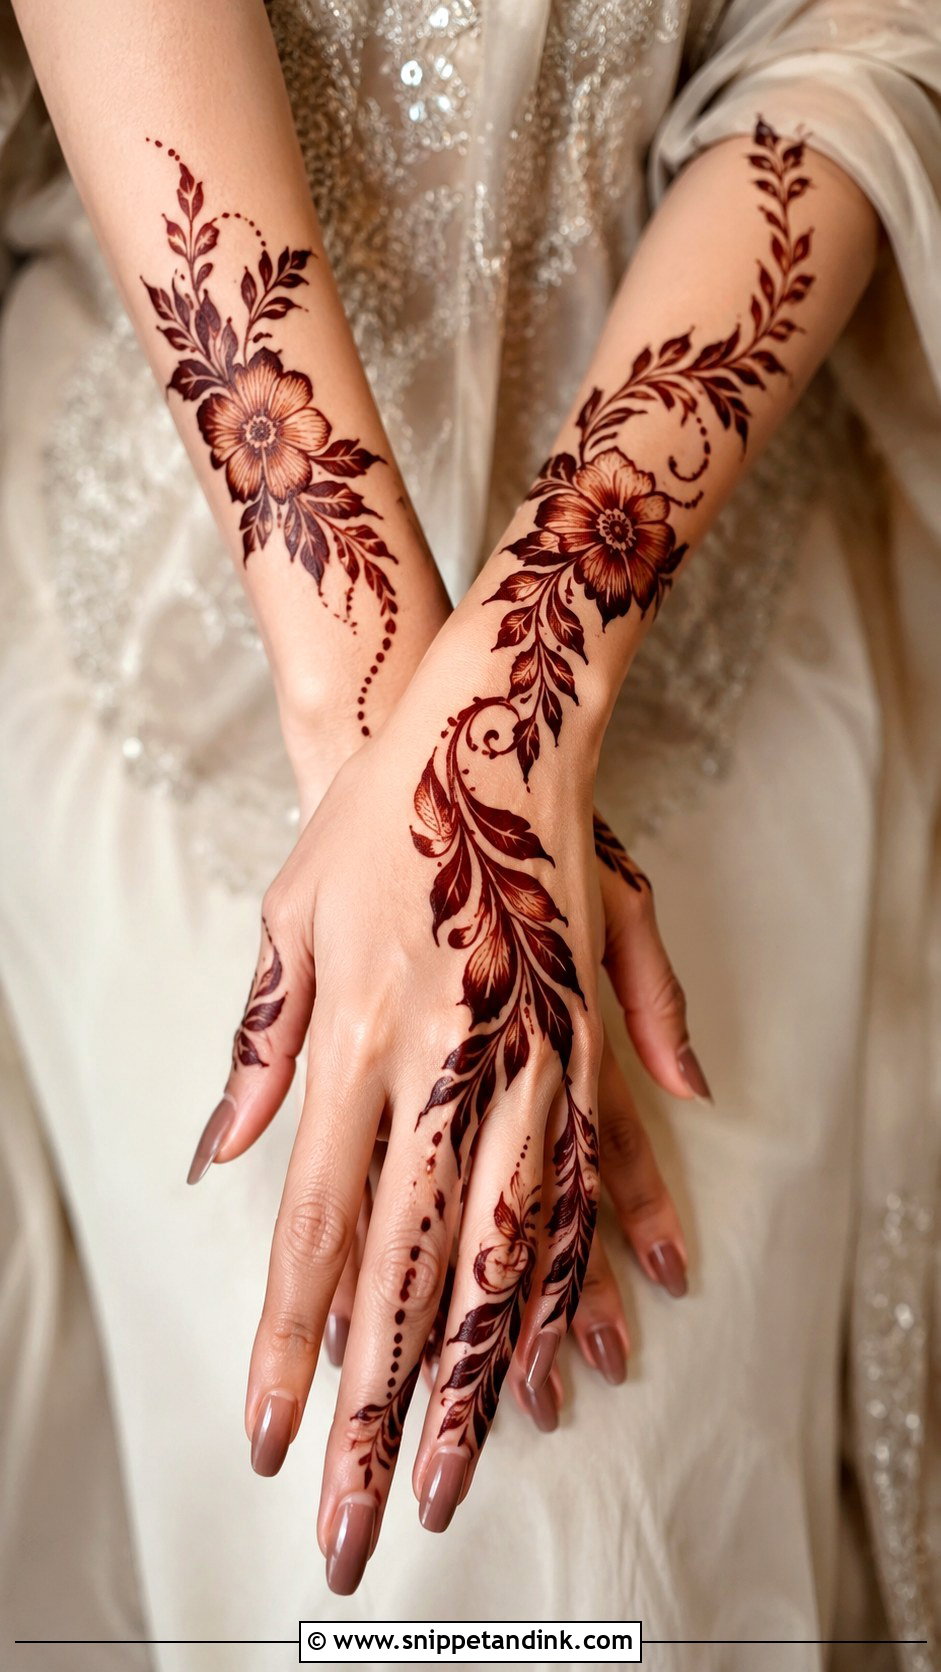
Khaleeji-inspired mehndi, the style many call Gulf mehndi, uses large flowers and thick vines with plenty of open skin. Large flowers on the back of the hand, joined by thick vines, with shaded leaves and dotted curves for depth. Bigger motifs are genuinely easier to draw than tiny ones, so this is a good confidence-builder. Keep the palm or one side of the hand open, use confident outlines, and it carries Eid and wedding parties with ease.
24. Easy Kids Mehndi Design
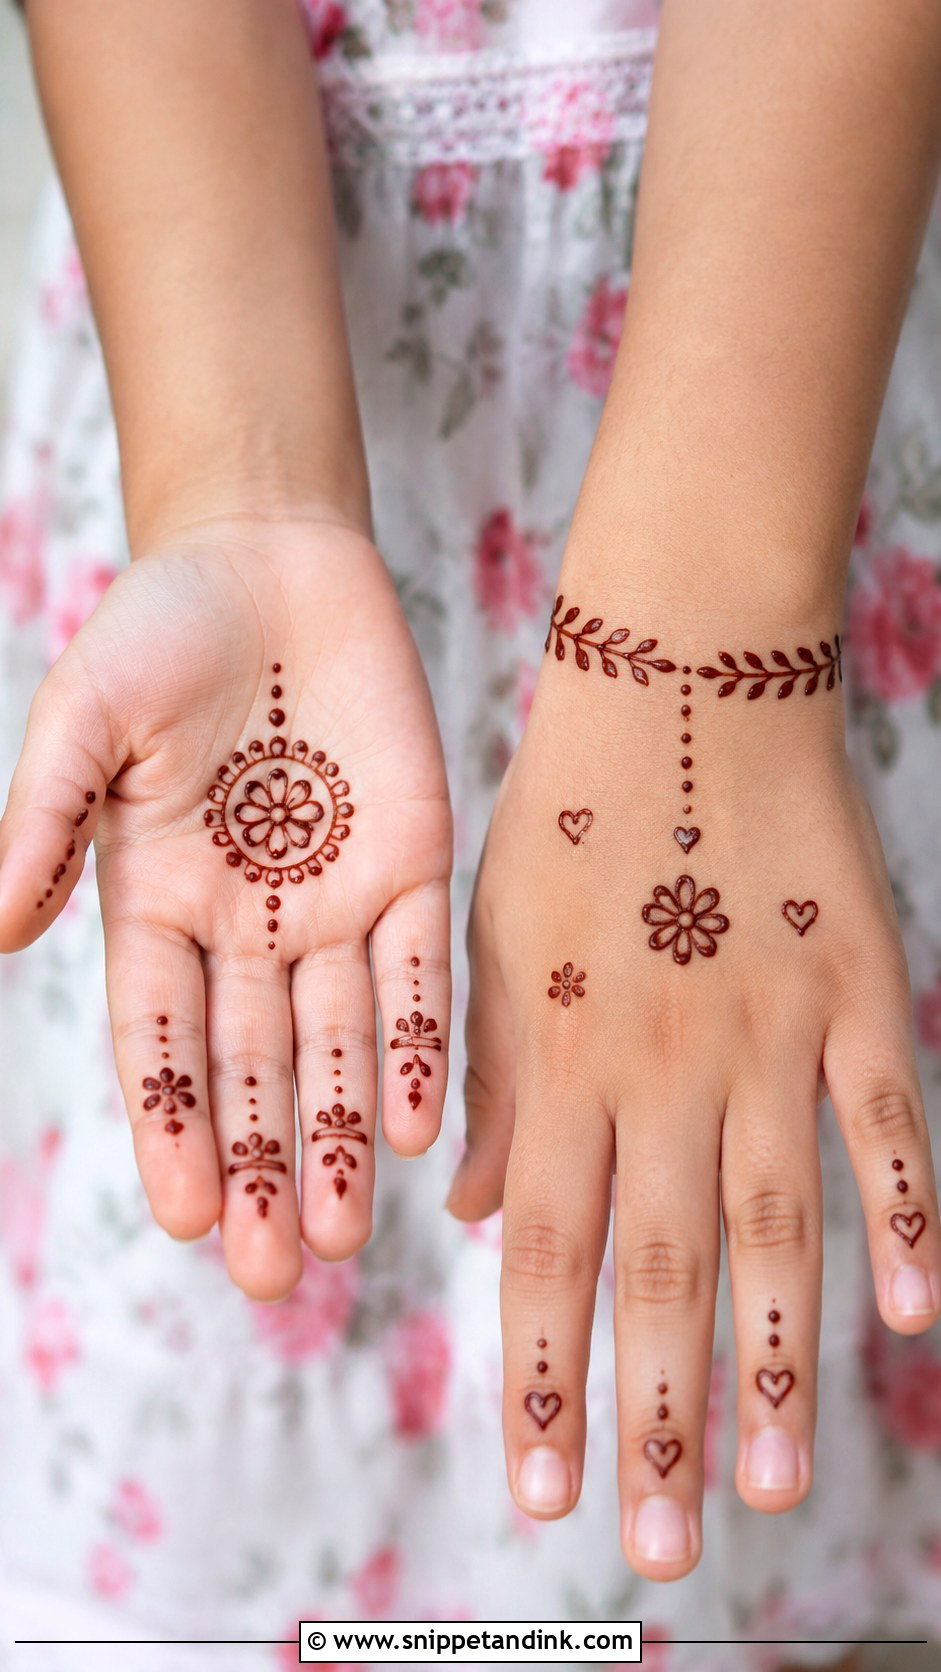
Children won’t sit still for long, so a kids mehndi design has to be small and quick: simple flowers, hearts, dots, stars, tiny vines or a small mandala on the palm or back of the hand. Dense patterns smudge the moment they grab something. A small bracelet with a flower or a tiny palm tikki is plenty. One firm rule from me: only natural henna on children. Never use black cones or anything promising an instant dark colour, as those can contain PPD and cause serious skin reactions.
25. Easy Teen Mehndi Design
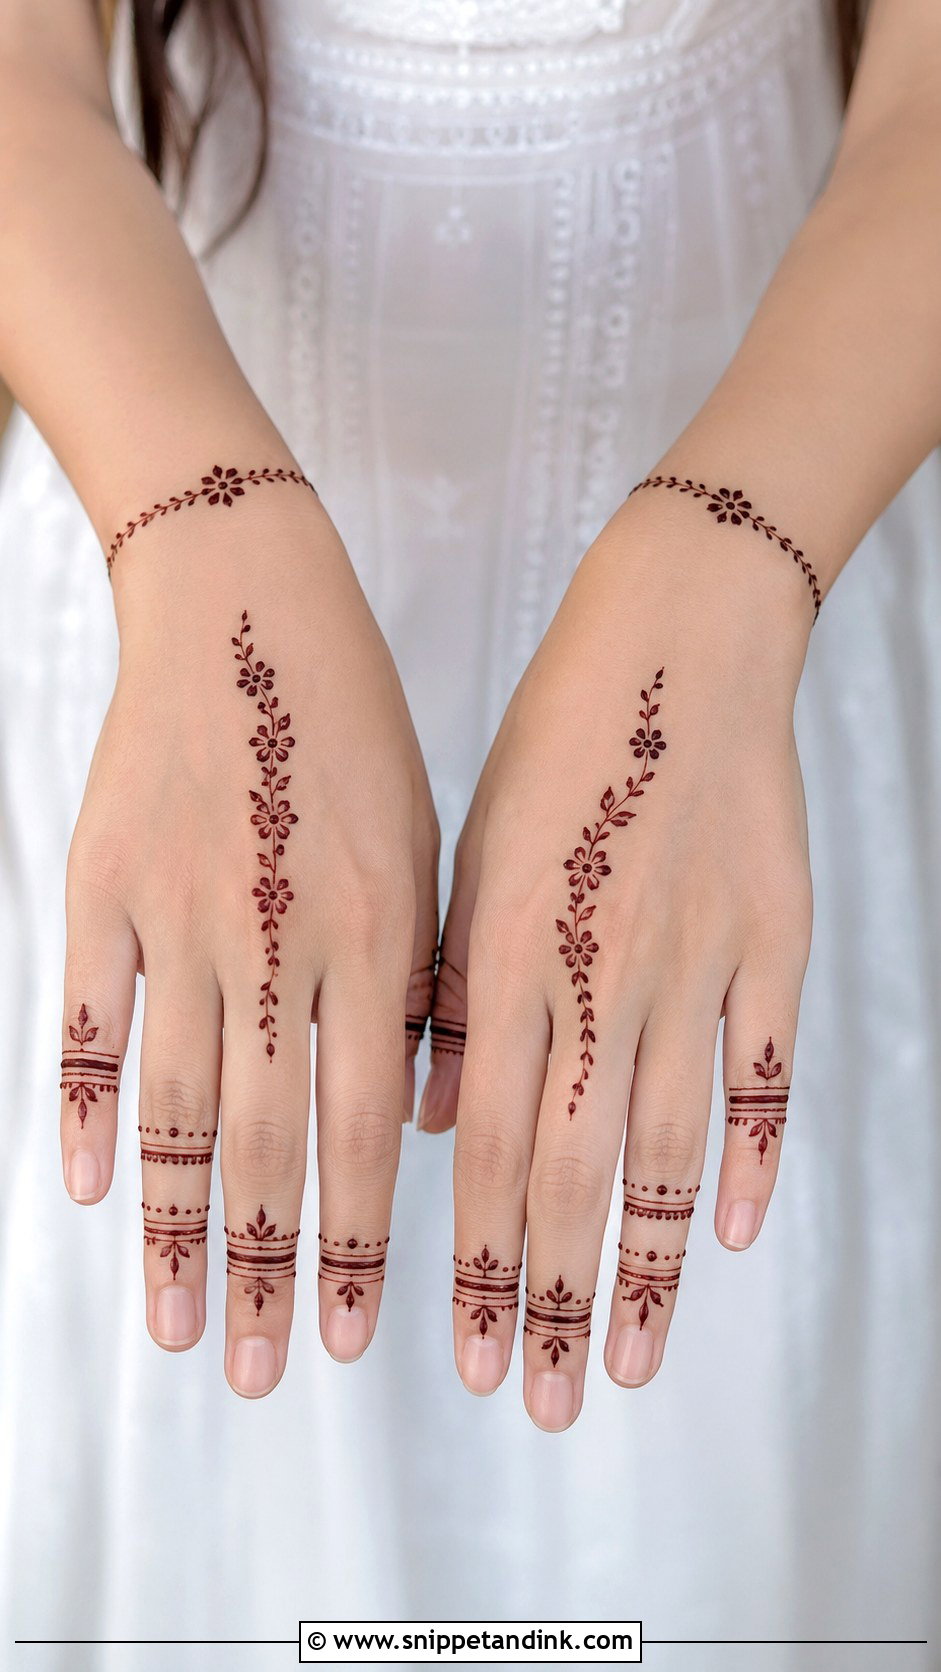
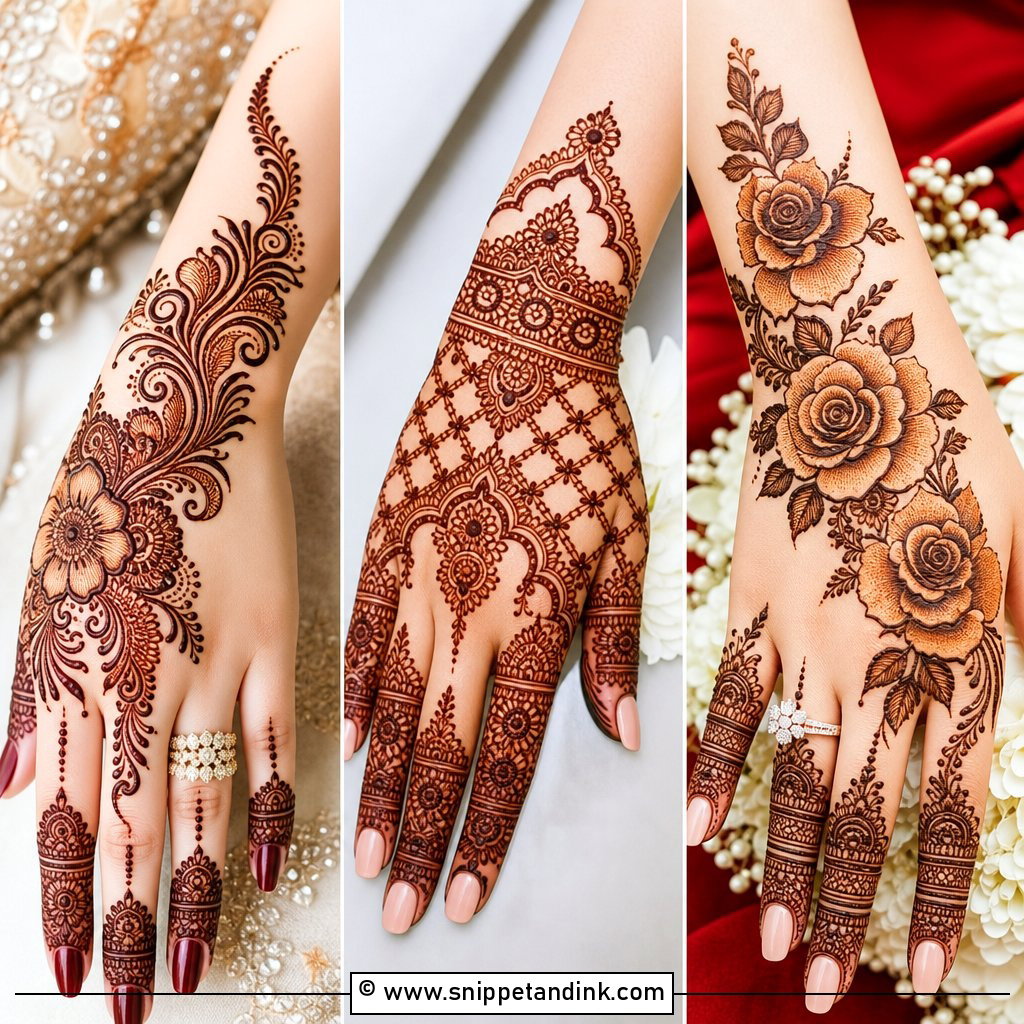
Teens usually want light and current rather than traditional. A back-hand finger pattern with a small floral chain, a bracelet detail or a side vine fits that, as does a minimal mandala with decorated fingertips. Open space and clean lines keep it wearable with jeans as well as a kurta. Tiny dots, rings and leaves add detail; the moment the hand starts to look crowded, stop.
26. Easy Modern Mehndi Design
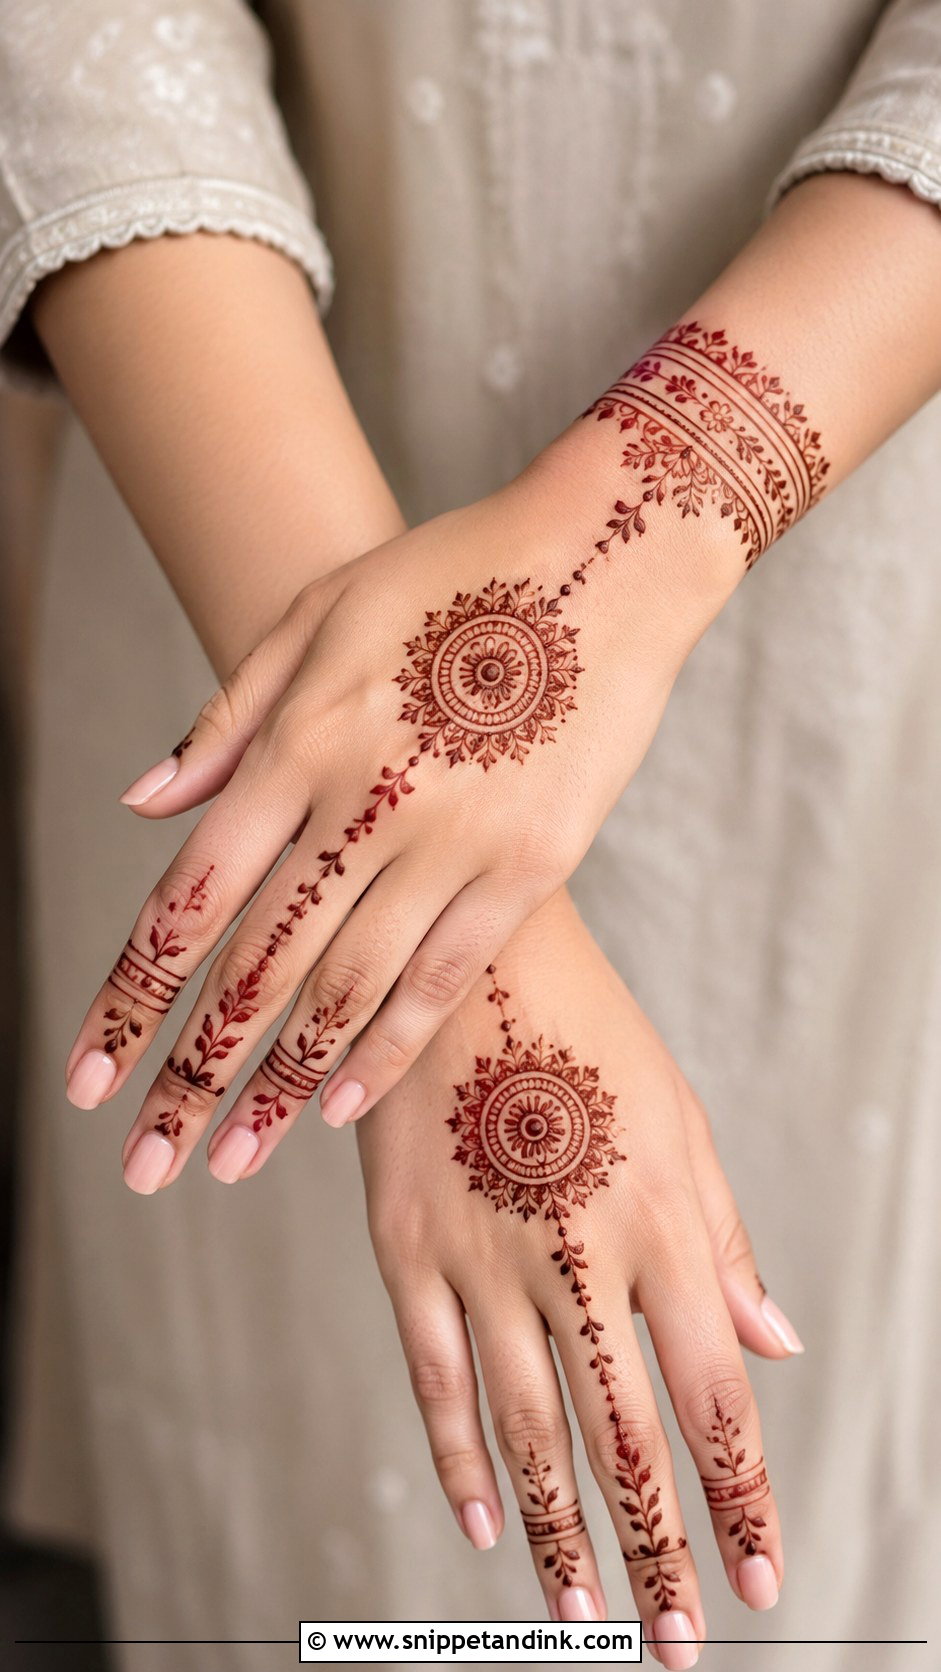
Pick one strong feature, such as a wrist cuff, a finger chain, a mandala or a side floral trail, and leave the rest of the hand alone. Slim lines and neat spacing do the work. Modern mehndi goes with simple outfits, pastels and minimal jewellery, and the back of the hand gives the cleanest photo. It’s also the most honest test of your line control, because nothing busy surrounds the one feature.
27. Easy Aesthetic Mehndi Design
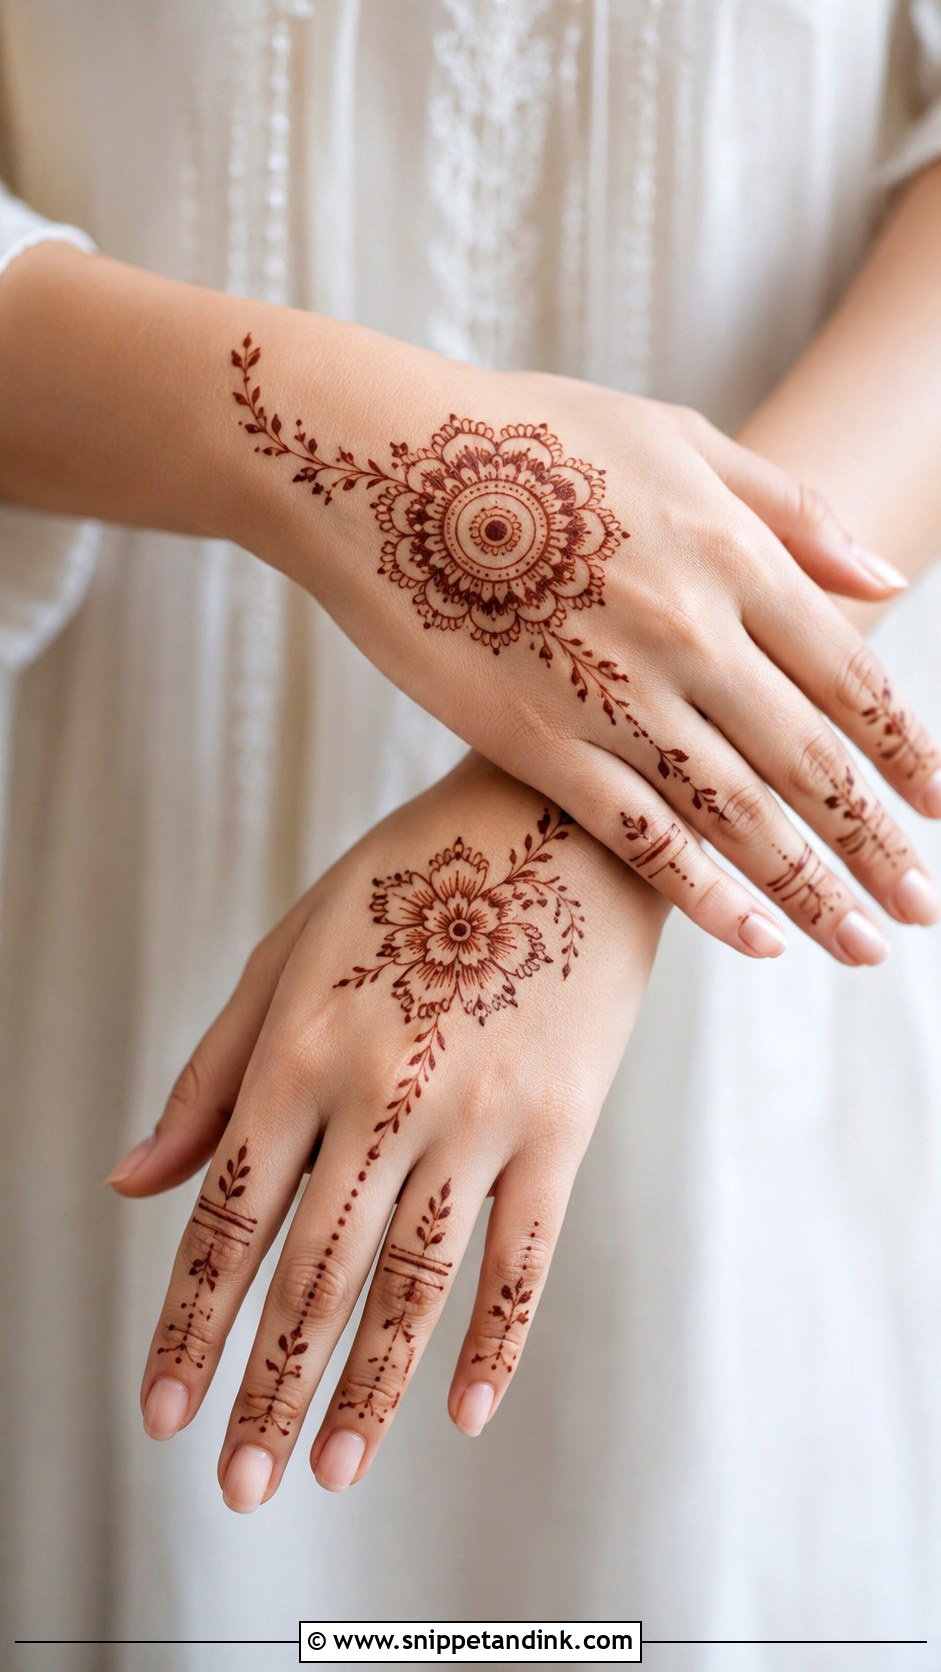
The look people save on Pinterest is mostly about restraint: a small mandala, a delicate flower, a leafy wrist trail or a simple finger pattern, with intentional spacing and nothing crowded. The back of the hand shows it most clearly. Tiny dots and fine curved lines give it a gentle finish. Natural henna keeps the classic red-brown colour; the black stains that sometimes appear in those photos are usually edited or made with products I won’t use.
28. Easy Shaded Mehndi Design
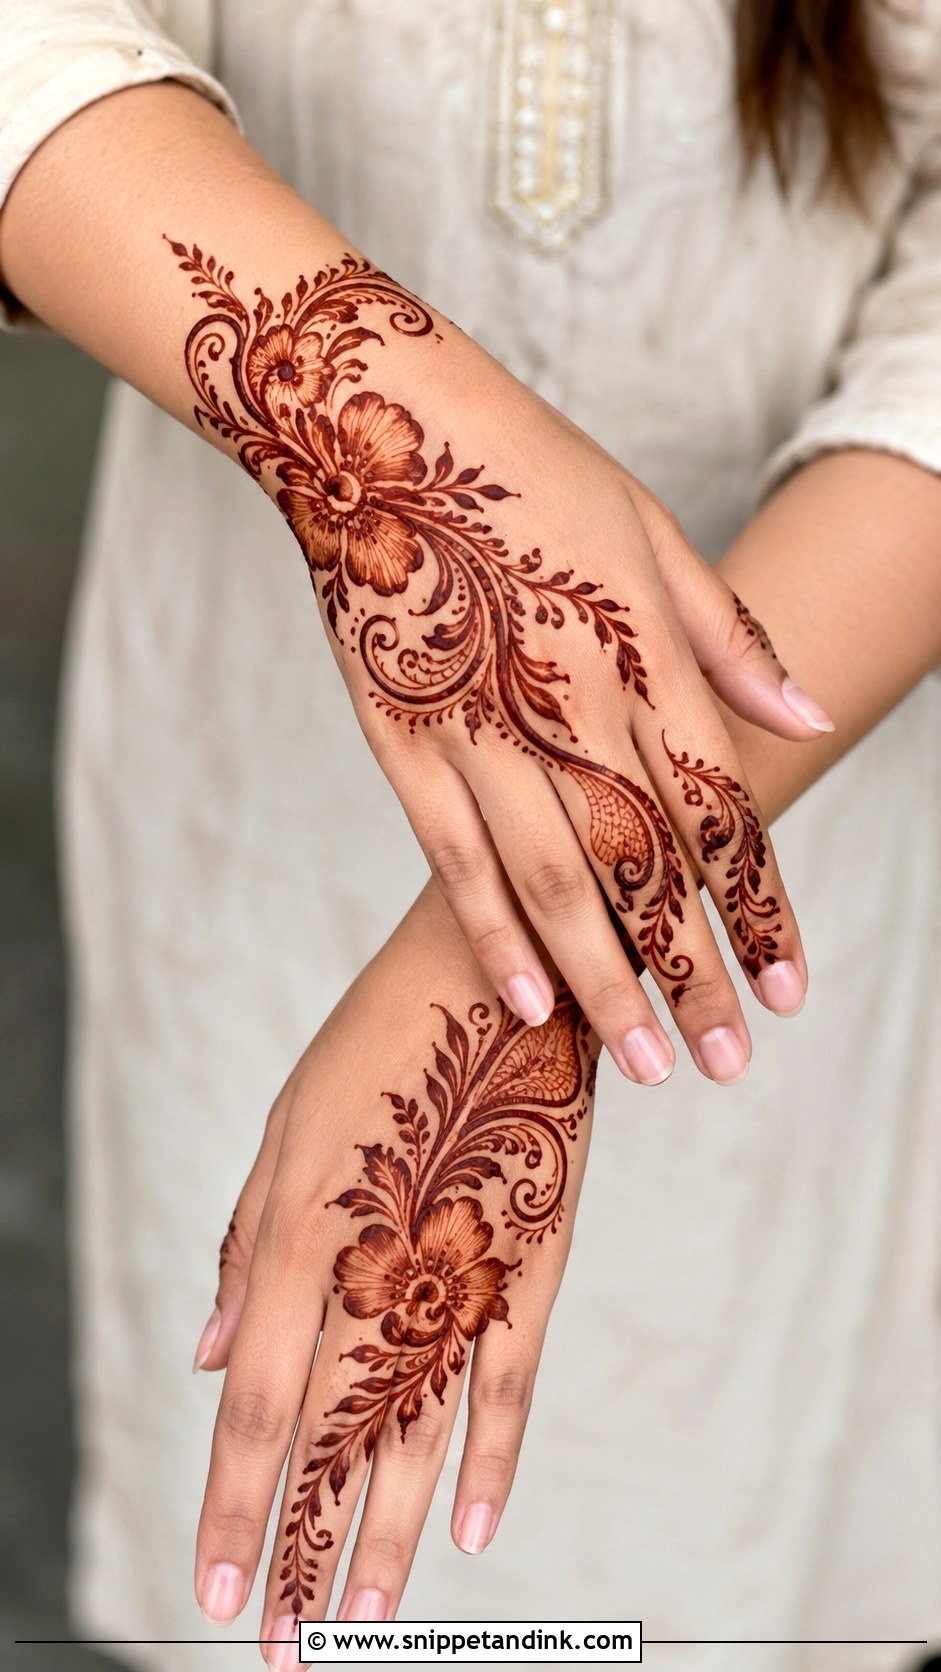
Shading is the step that makes beginners look more experienced than they are. Draw flowers or paisleys, then lightly shade one side of each petal or leaf with small parallel lines or thin strokes. Stop before every area goes dark. Over-shading is the usual mistake, and it turns the design into a muddy patch once the stain develops. A simple Arabic trail is the best base, since its open spaces let the shading stand out.
29. Easy Half Hand Mehndi Design
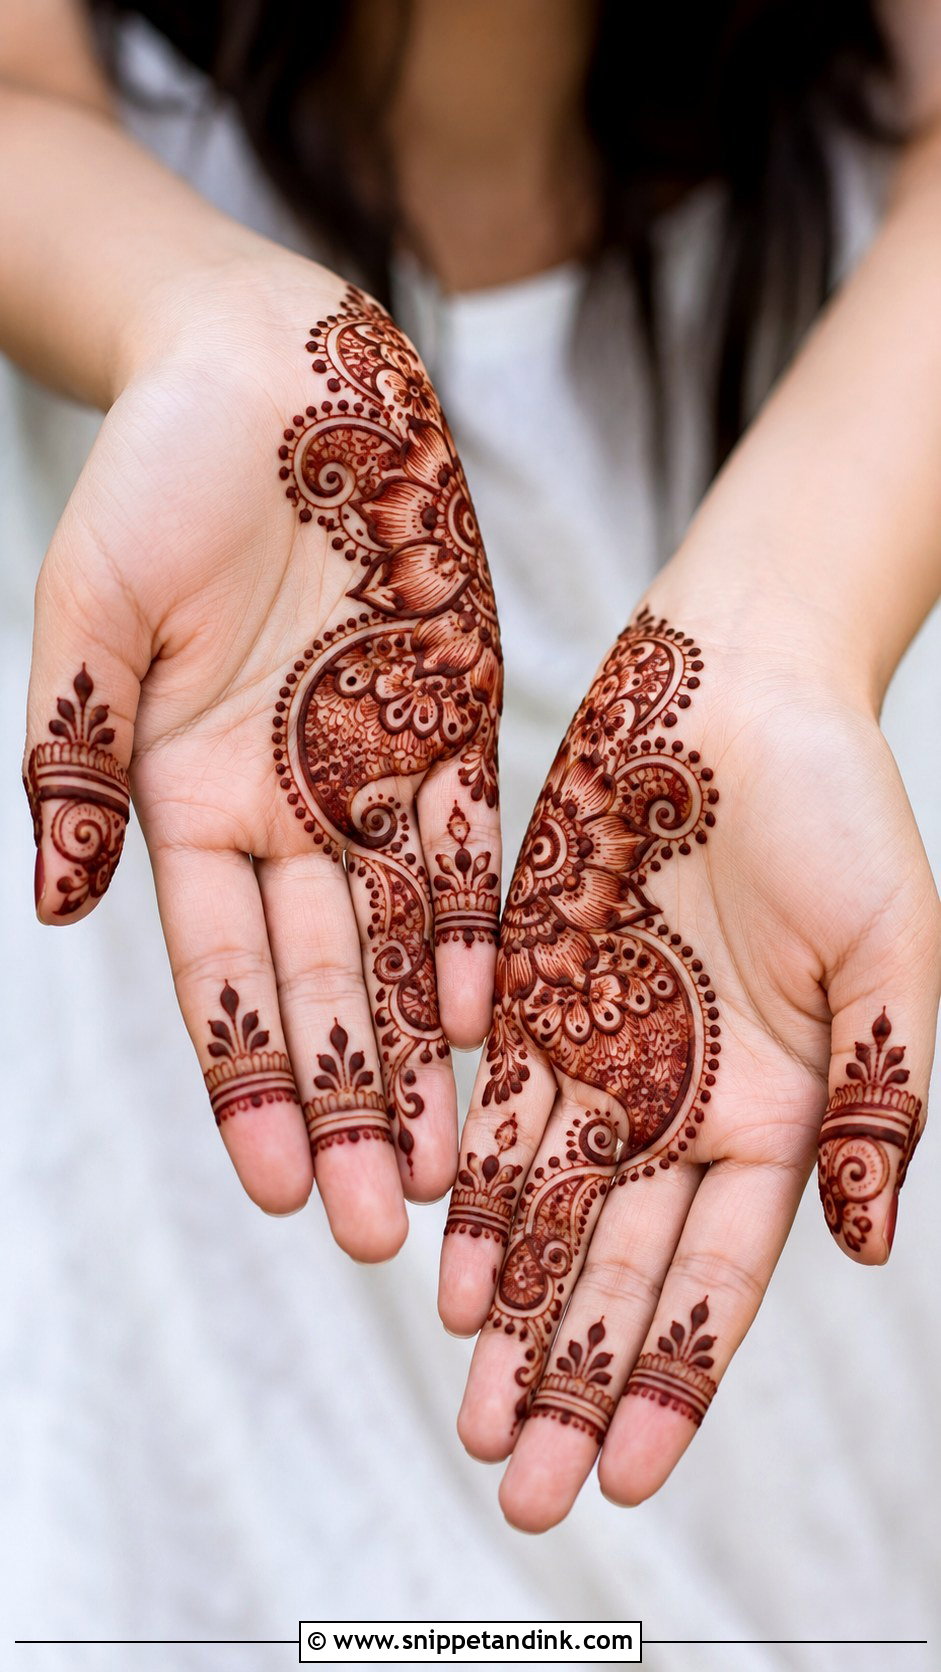
Decorate the fingers and upper palm, or run a pattern from the wrist to the middle of the hand, and leave the rest bare. Flowers, vines, dots and small paisleys give it a complete look without full coverage. The edge is the only tricky part: finish it with a clear border or a final leaf so it looks intentional rather than abandoned. Quick and comfortable, it fits a festival morning when time is short.
30. Easy Side Mehndi Design
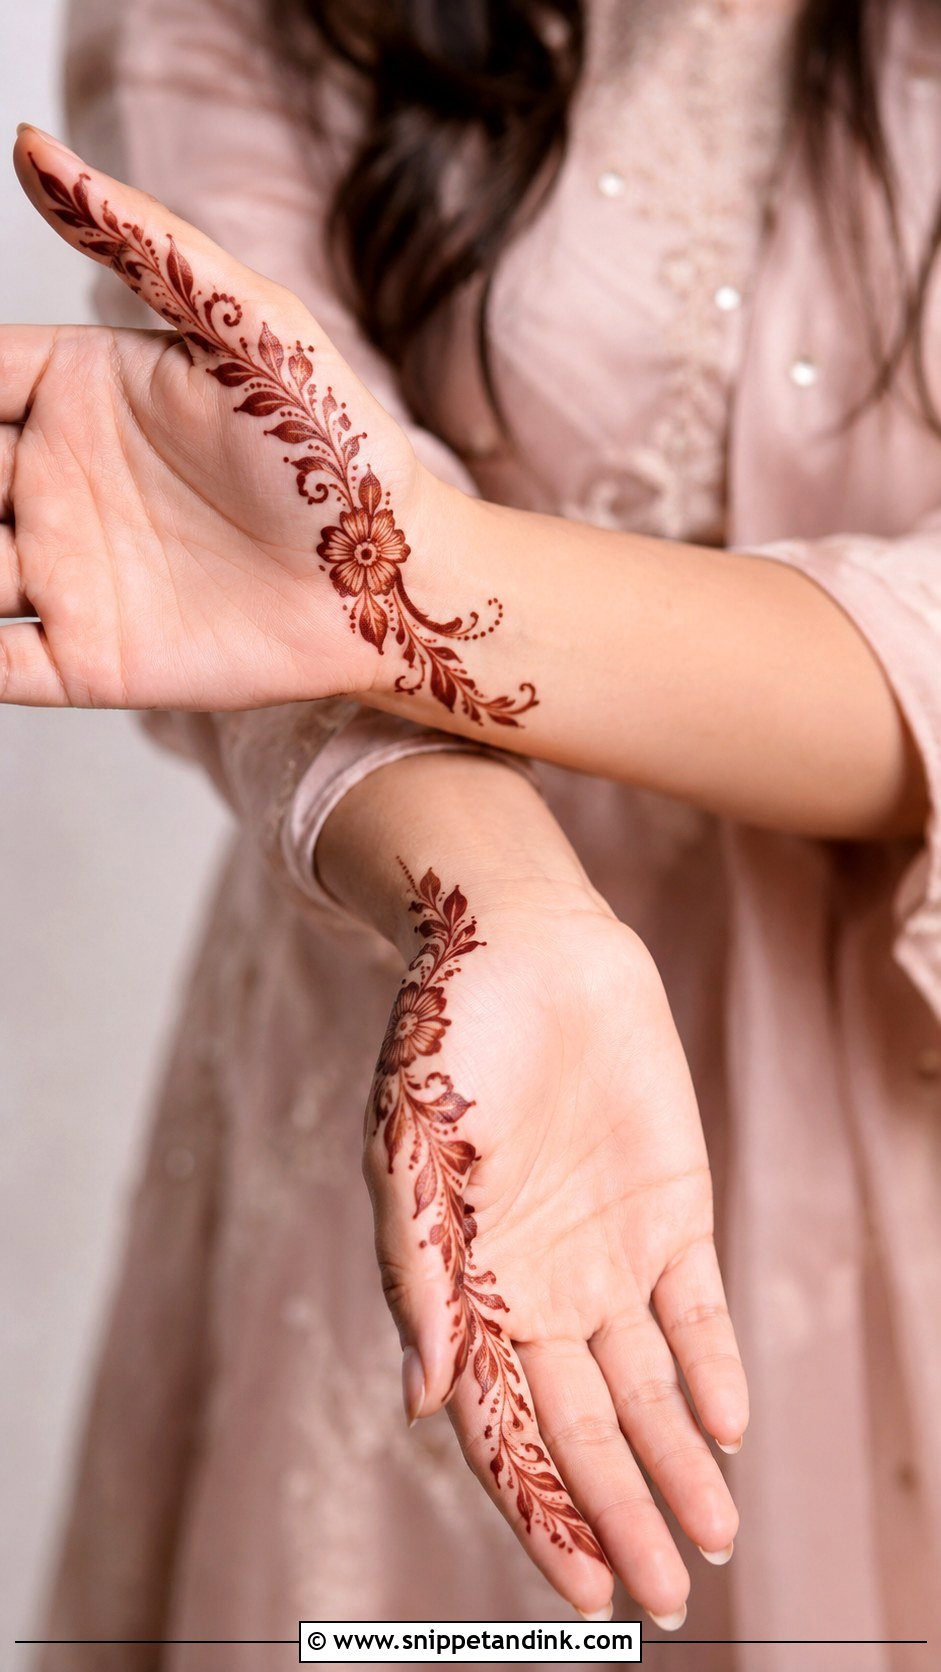
One edge of the hand, from the wrist along the side of the palm toward the little finger or the index finger. Leaves, flowers, dots and curved vines build the trail, and the centre of the hand stays empty. Because it never asks for symmetry across the full hand, it’s a kind first project. Draw it on your non-dominant hand first if you’re applying your own; working along the side of your dominant hand is awkward for almost everyone.
31. Easy Wrist Mehndi Design
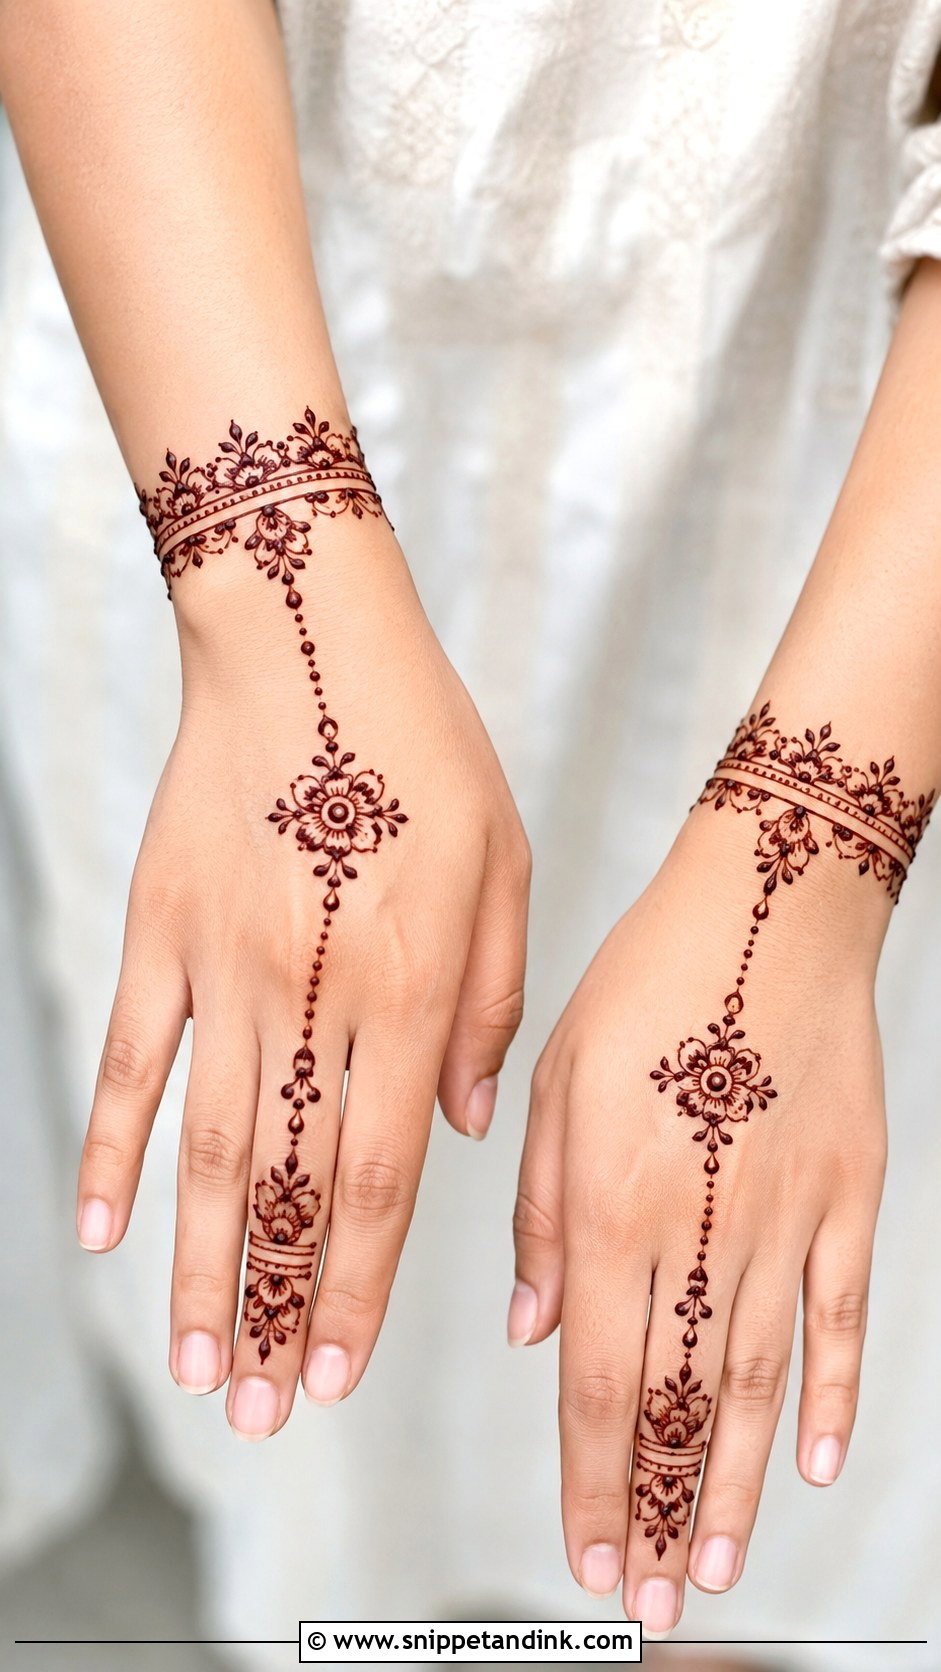
Two or three curved bands around the wrist, filled with dots, petals, leaves or tiny checks, give the effect of a delicate bracelet. Link the band to one finger with a dotted chain for a jewellery finish, or leave the hand nearly bare with a small flower on the back. It’s about the fastest design in this list and frames bangles naturally. Draw it slightly above the wrist bone; right on the crease, the paste cracks every time you bend your hand.
32. Easy Palm Mehndi Design
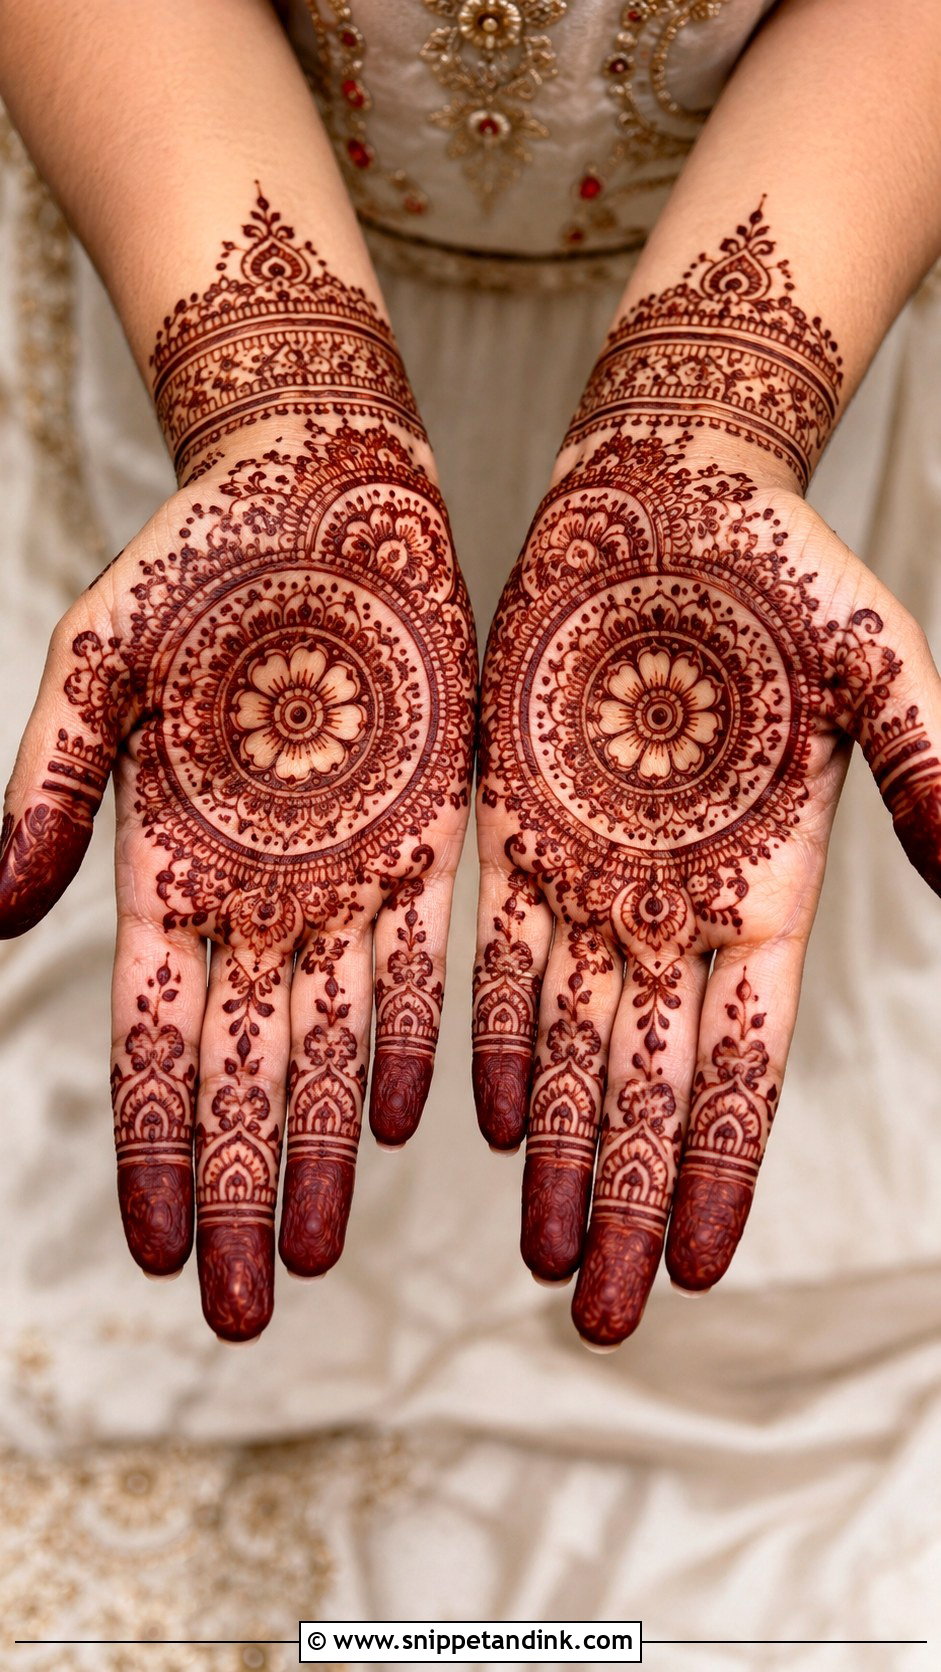
The palm takes stain more deeply than any other part of the hand, which is why a palm mehndi design has always carried traditional occasions. Start with a central mandala, tikki, lotus or flower, add small paisleys and dotted borders around it, and finish the fingertips with caps, rings or leafy lines. The palm is also the flattest surface to work on, so beginners find it easier than the back of the hand. Bold outlines here come up dark and crisp.
33. Easy Ring Mehndi Design
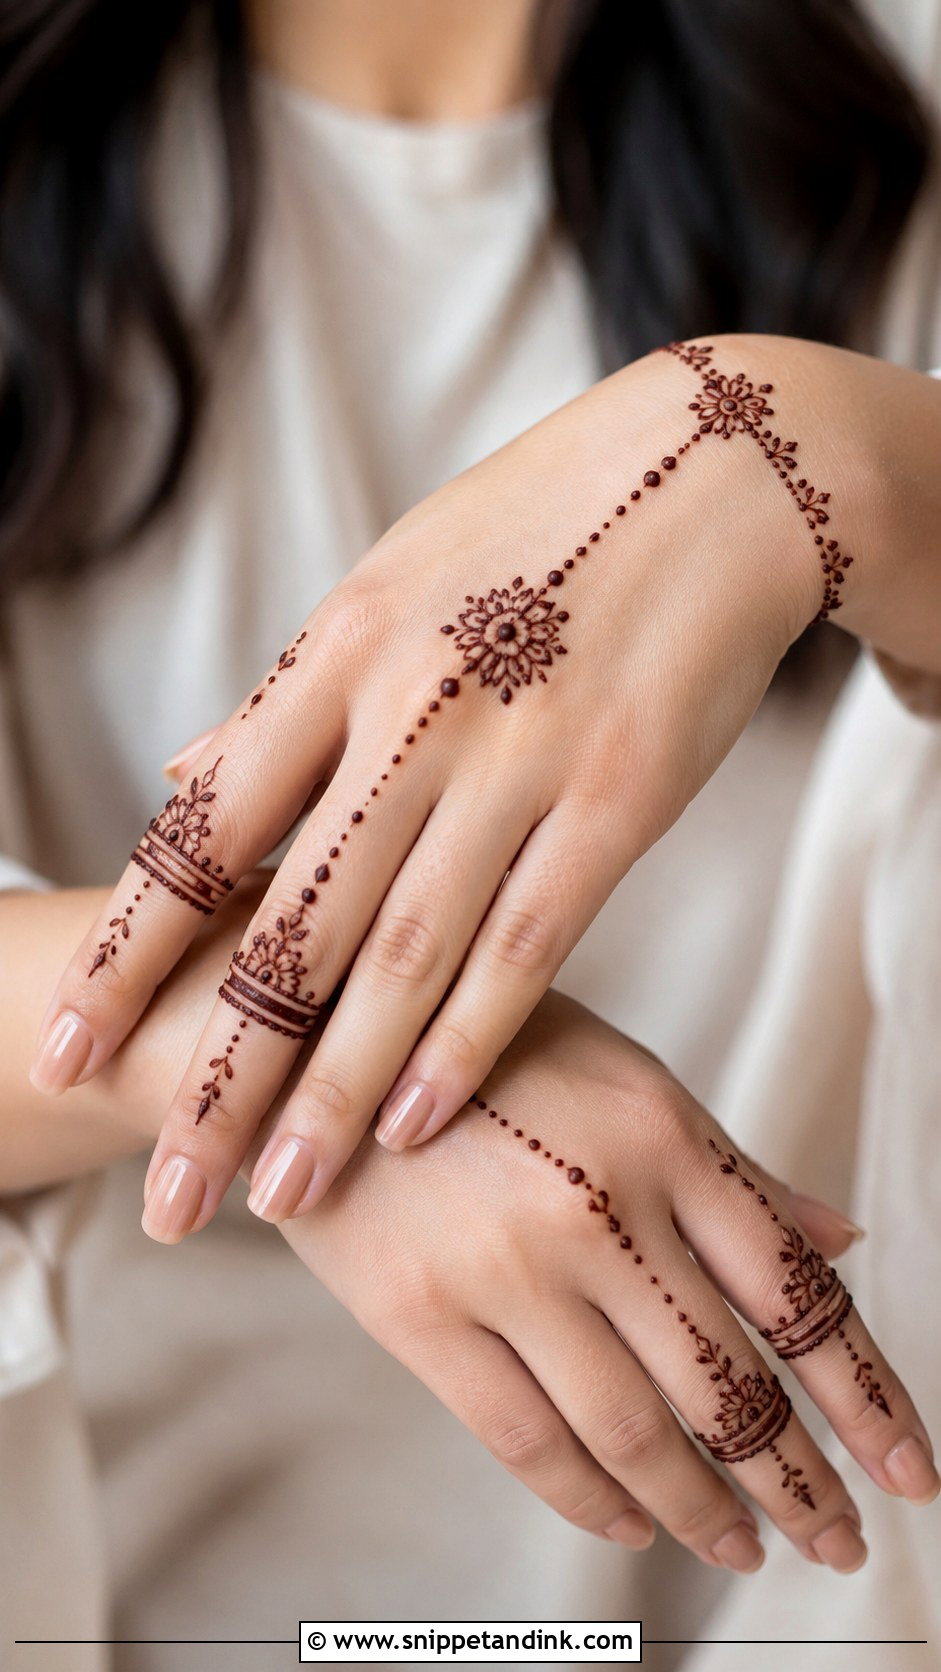
Small rings around each finger, linked by chains, dots or thin vines, with a tiny floral motif or mandala in the centre of the back of the hand. The wrist can stay simple or take a light bracelet band. Because the elements are small and repeated, it’s easy to learn, and it looks smart next to real rings. Even spacing is the whole skill; uneven finger rings are the first thing anyone notices.
34. Easy Negative Space Mehndi Design
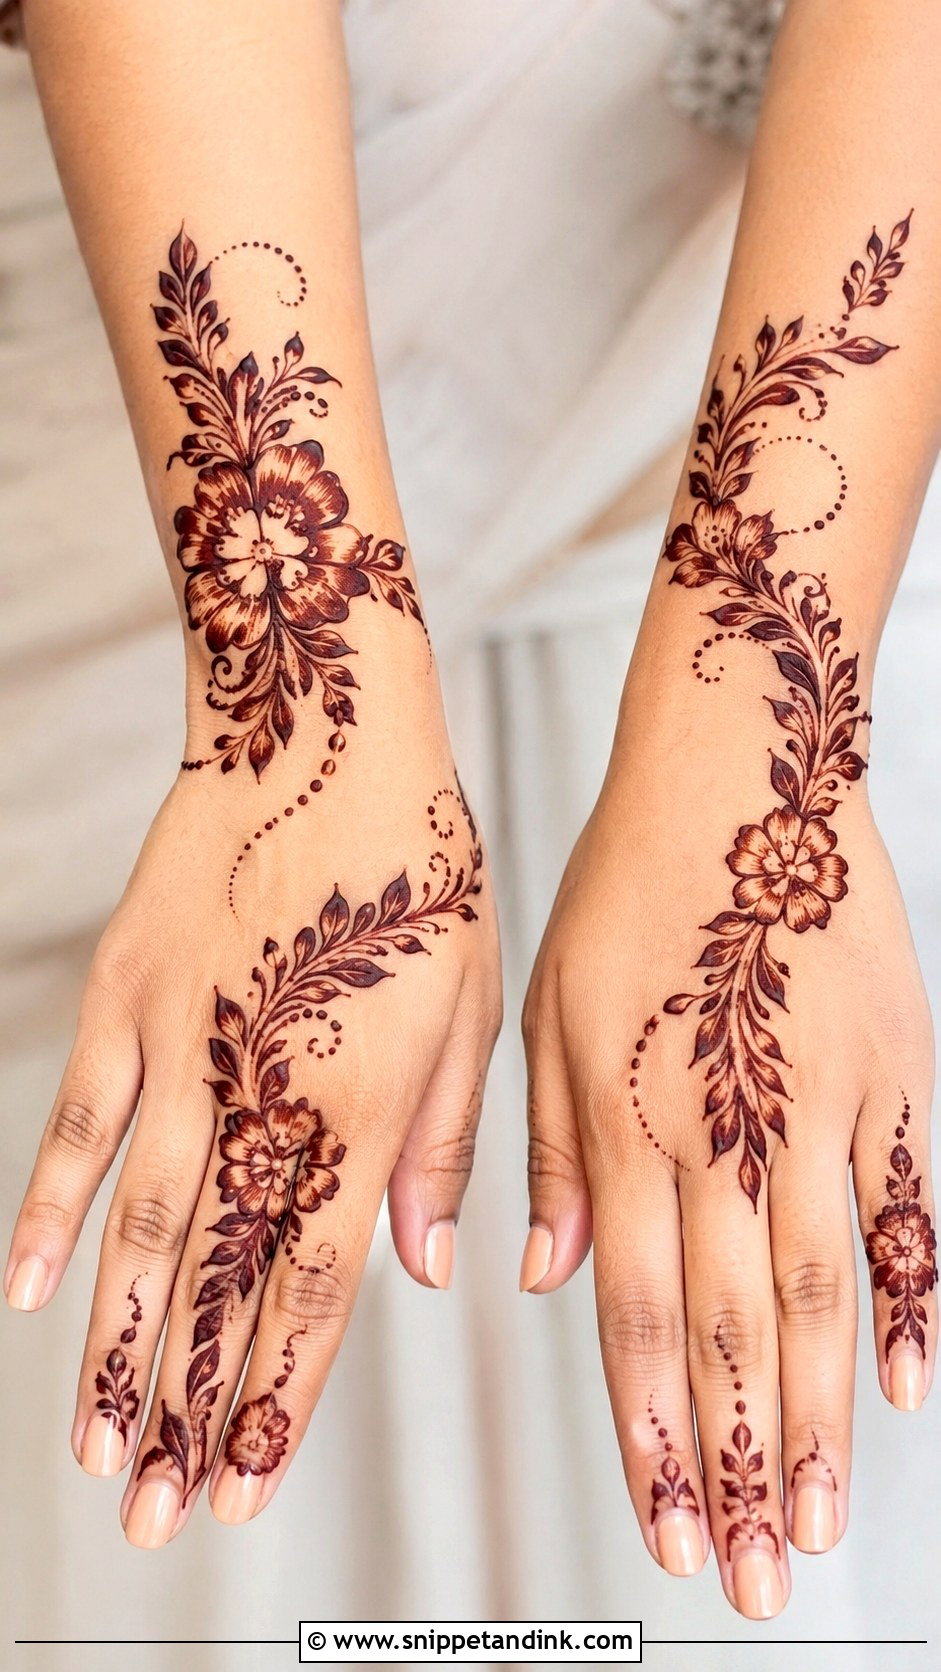
Empty skin is part of the pattern here. Bold flowers, vines or mandalas with clear gaps between them, usually in an Arabic or Gulf style, with thick outlines and light shading so each motif stands out. Less detail means less application time, and it dries quickly in warm weather. Plan the gaps before you draw; random bare patches just look unfinished.
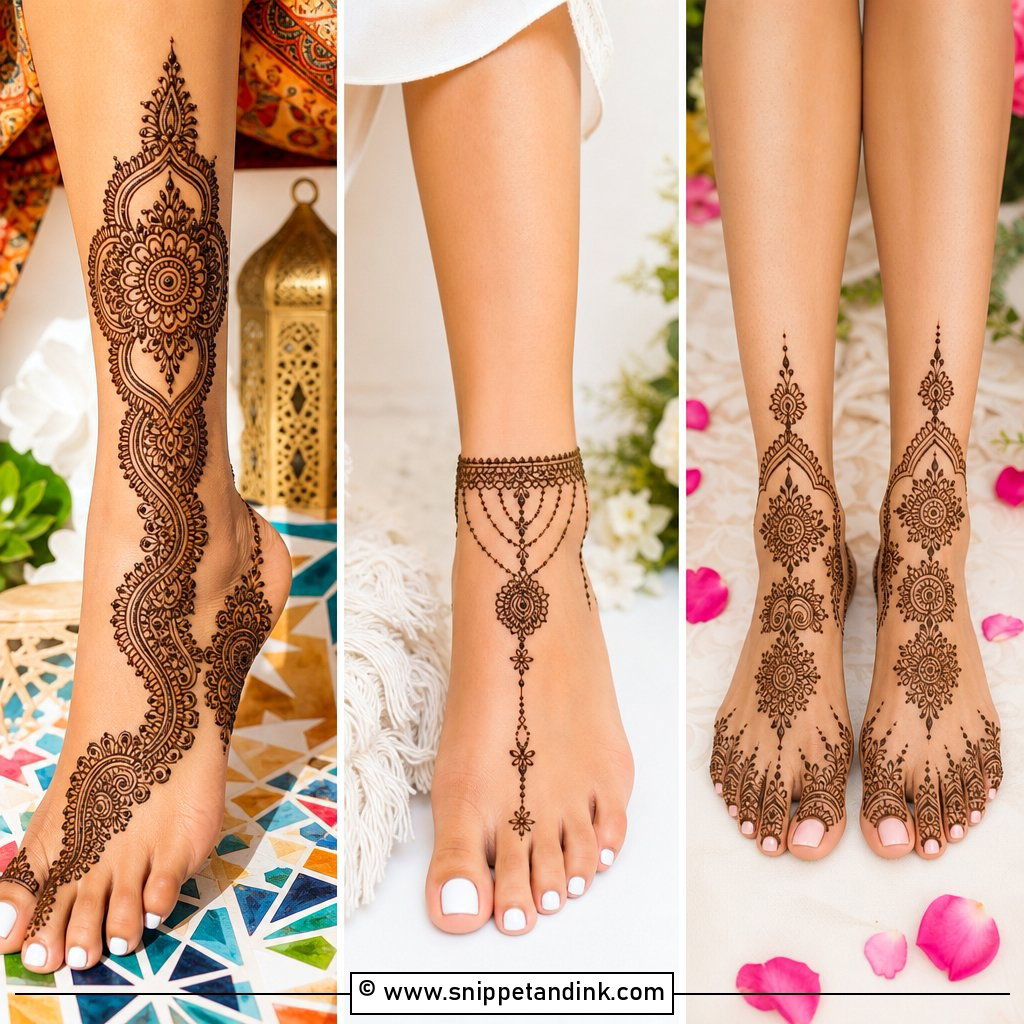
35. Easy Feet Mehndi Design
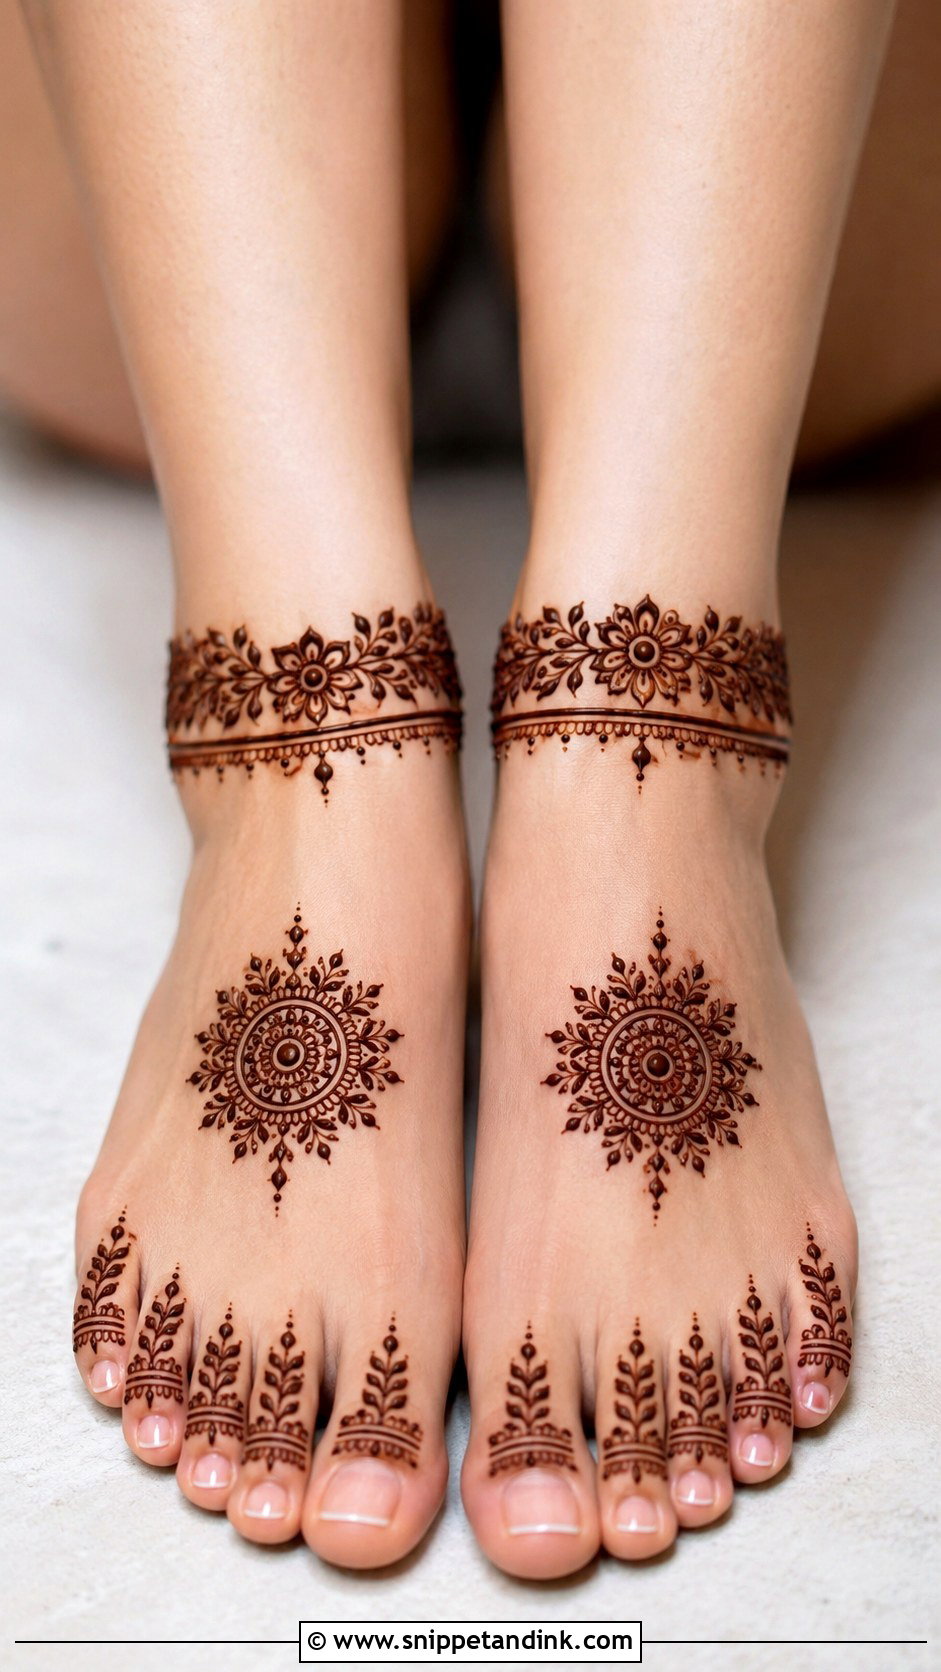
Feet need far less than you’d think. A small mandala or flower on the top of the foot, leafy trails toward the toes, a simple anklet band and tiny dots or caps on the toes are enough. Larger motifs are easier to apply on a curved foot and easier to see once stained, and soles and toes take a strong colour. Keep the paste thin, because you can’t walk until it’s dry, and anything thick smudges against the floor or a sandal strap.
Rescuing a Wobbly Line Before It Stains
Henna starts staining within minutes, so a mistake has to be dealt with straight away. Keep a damp cotton bud and a toothpick beside you. Lift the wrong line off with the toothpick, then wipe the spot once with the cotton bud. Often a faint mark remains, so turn it into a dot or a leaf rather than scrubbing; rubbing hard only spreads the paste.
If a whole section goes wrong, don’t keep correcting it. Build a larger motif over the area instead. That’s one of the quiet advantages of floral layouts: a flower can sit over almost any slip.
Squeezing Mehndi Into a Wedding Week With No Spare Evenings
For a bride juggling fittings and family visits, timing beats complexity. Apply simple designs one or two days before the main event so the stain has darkened by then, and do it in the evening so the paste can stay on while you sleep. Wrap the dried paste loosely in tissue or a cotton glove at bedtime. In the morning, scrape it off rather than washing, and keep your hands away from water for as long as you can. Exfoliating, waxing and manicures should all happen before the mehndi, never after.
Practise One Hand on Paper Before Anyone Else’s
Simple mehndi rewards patience far more than talent. Learn flowers, mandalas, paisleys, vines, dots and wrist bands as separate shapes first, then put them together one complete hand at a time. Front-hand layouts read as traditional, back-hand trails photograph best, Arabic work is the fastest, and minimal designs suit modern outfits. Practise each one on paper or a plastic sheet until the cone feels natural, and the first hand you draw on skin will look like you meant every line.
You'll Like These Ideas:


Leave a Reply