
Light henna is harder to get right than people expect. With a full bridal hand, a wobbly line disappears into the filling around it; with an open, airy design every stroke sits alone on bare skin, so spacing and line quality carry the whole look. The ideas below range from a single finger band to a full hand that still breathes, and they suit an Eid evening, a sangeet, a friend’s wedding or simply a weekend when you want your hands dressed. I’ve added notes on where each one stains well, how long it takes to apply, and who I’d steer toward something else.
Why Thin Lines Ask More of the Paste Than Heavy Bridal Work
A dense bridal hand hides weak paste. Hundreds of overlapping strokes sit on the skin together, and even a mediocre mix leaves a reasonable colour. An open design has nowhere to hide. Each line is a thin thread of paste, and if the henna itself is old or poorly mixed, that thread stains pale orange and fades within a week.
When I’m doing light work, these are the things I check before the cone ever touches skin:
- The paste is fresh, natural, body-art quality henna. Natural henna goes on greenish brown and stains orange first; anything that leaves a black mark straight away is not plain henna and I won’t use it.
- The consistency is smooth and stringy, close to toothpaste, so a fine line flows without breaking. Lumpy paste gives dotted, broken outlines.
- The skin is clean and dry, with no lotion or oil on it. A barrier of moisturiser under the paste is one of the most common reasons a fine design stains weakly.
- Thin lines go where the skin stains best. Palms and fingers take the darkest colour, the back of the hand a little less, and the wrist and forearm less again, so I keep the finest detail on the fingers.
If you only remember one thing, make it this: the thinner the design, the longer the paste should stay on. I ask for six hours at the very least, and overnight is better.
1. Simple Front Hand Mehndi Design
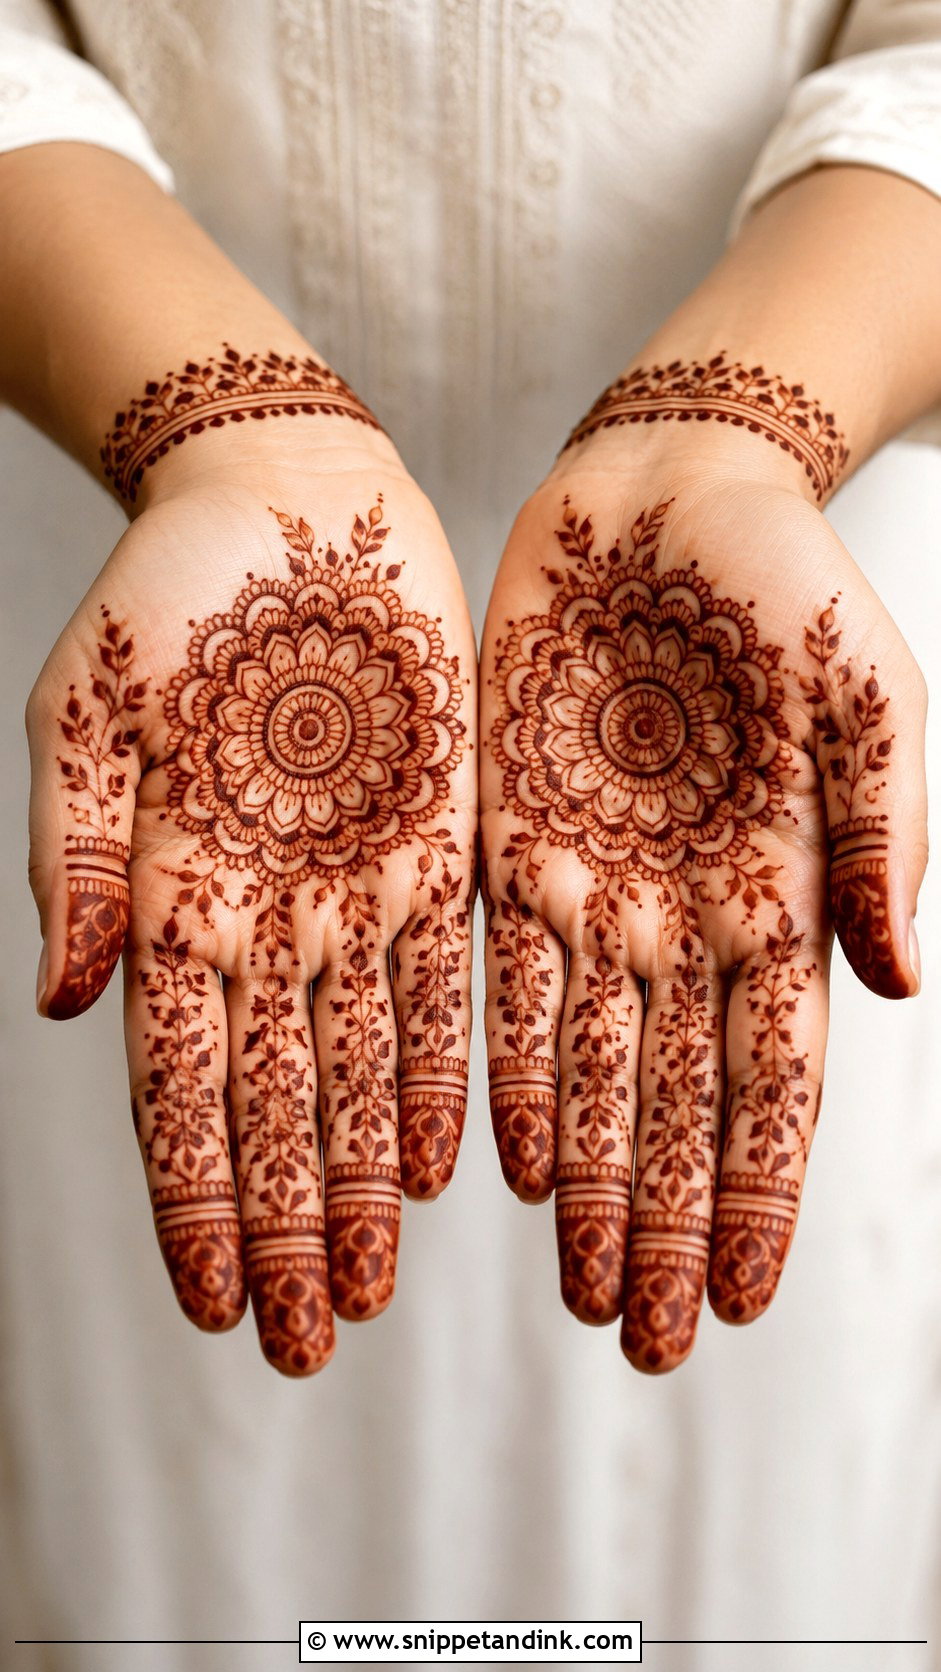
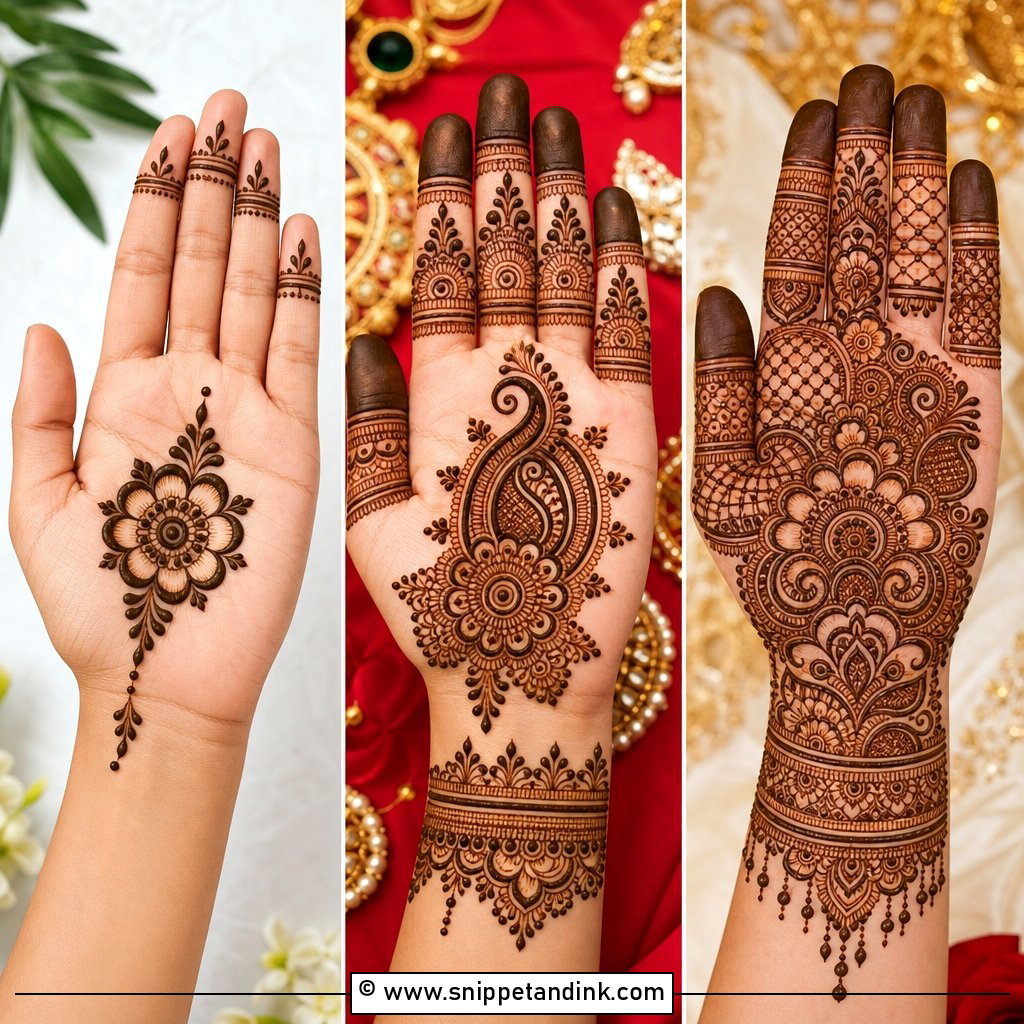
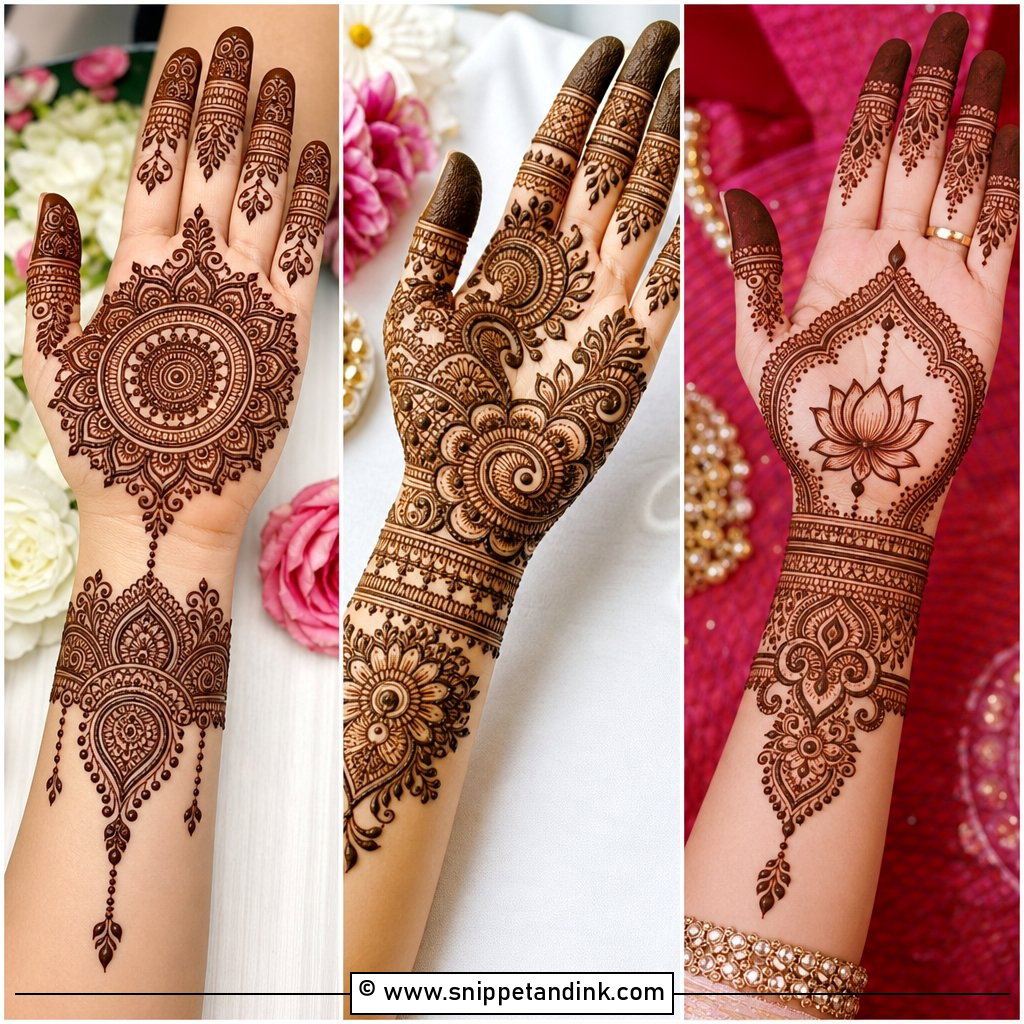
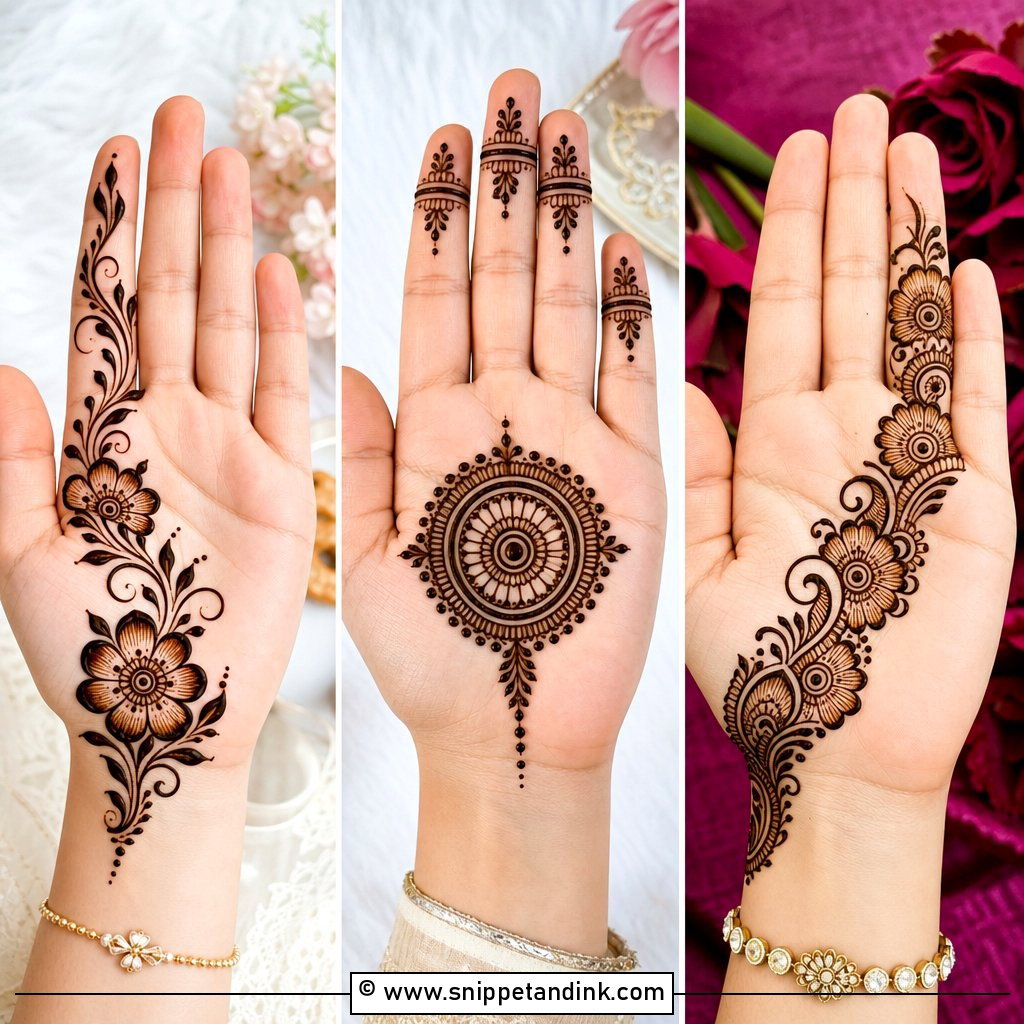
Keeping the palm mostly clear is what makes this one easy to live with. I start with a small mandala dead centre, then send two or three vines up toward the fingers, and I finish the tips with tiny leaves and dots rather than solid caps. Palms take the deepest colour on the body, so even a thin outline here will stain dark. The one thing I watch is the crease lines: a petal drawn across the heart line folds every time you close your hand and can crack the paste before it has done its work.
2. Simple Back Hand Mehndi Design
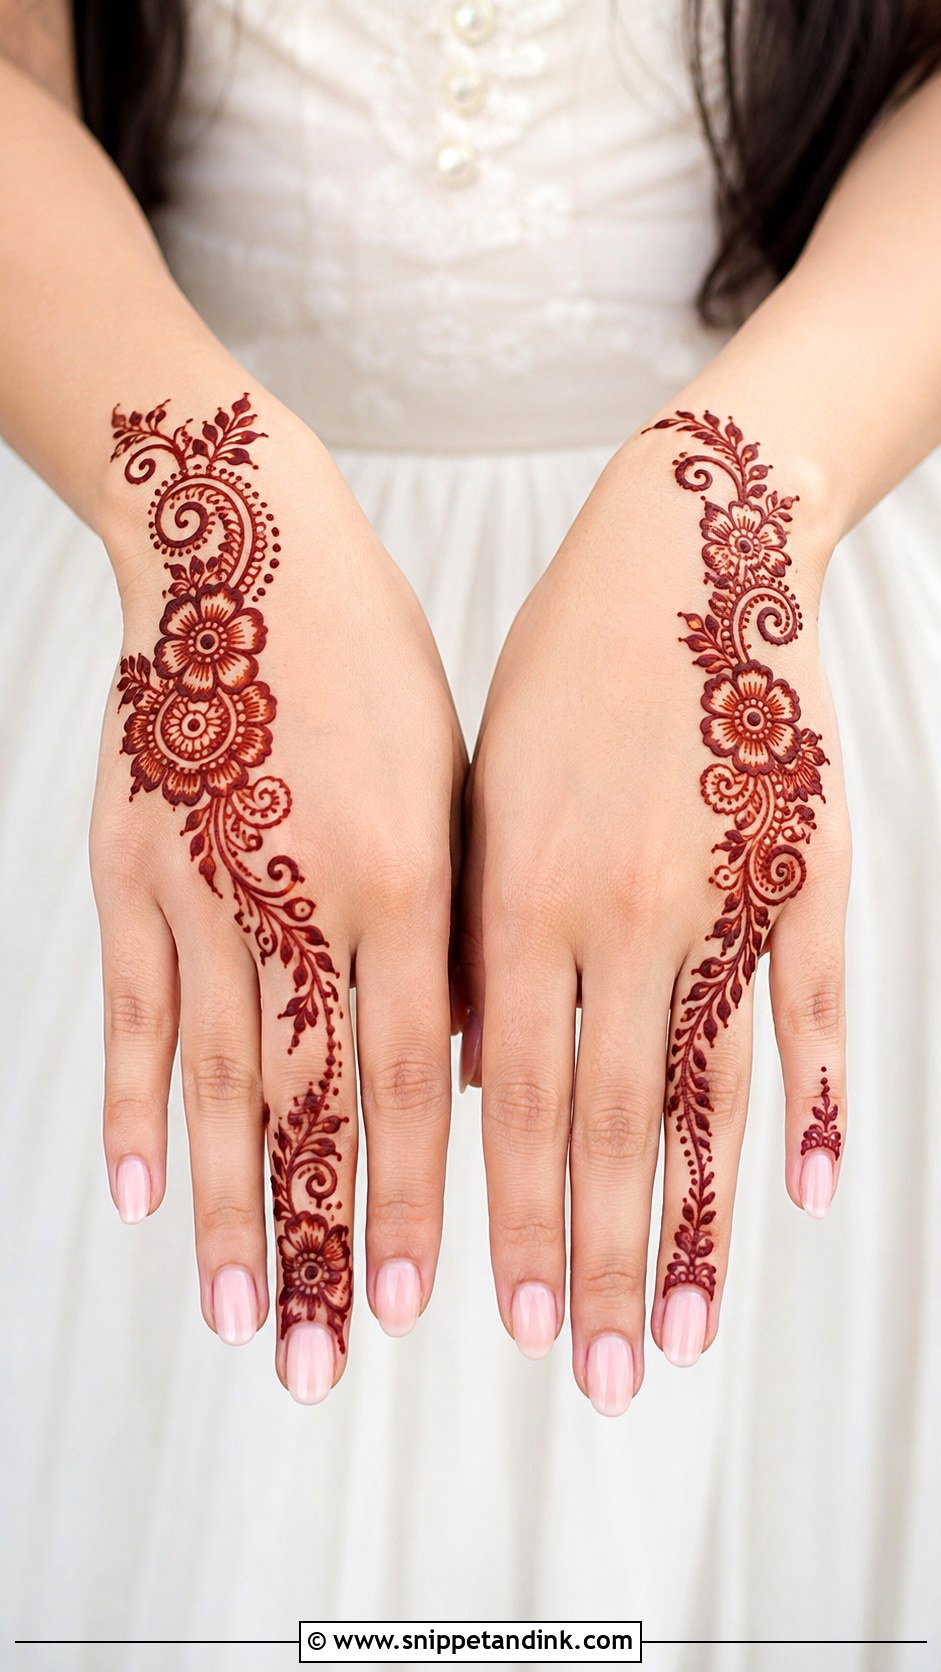
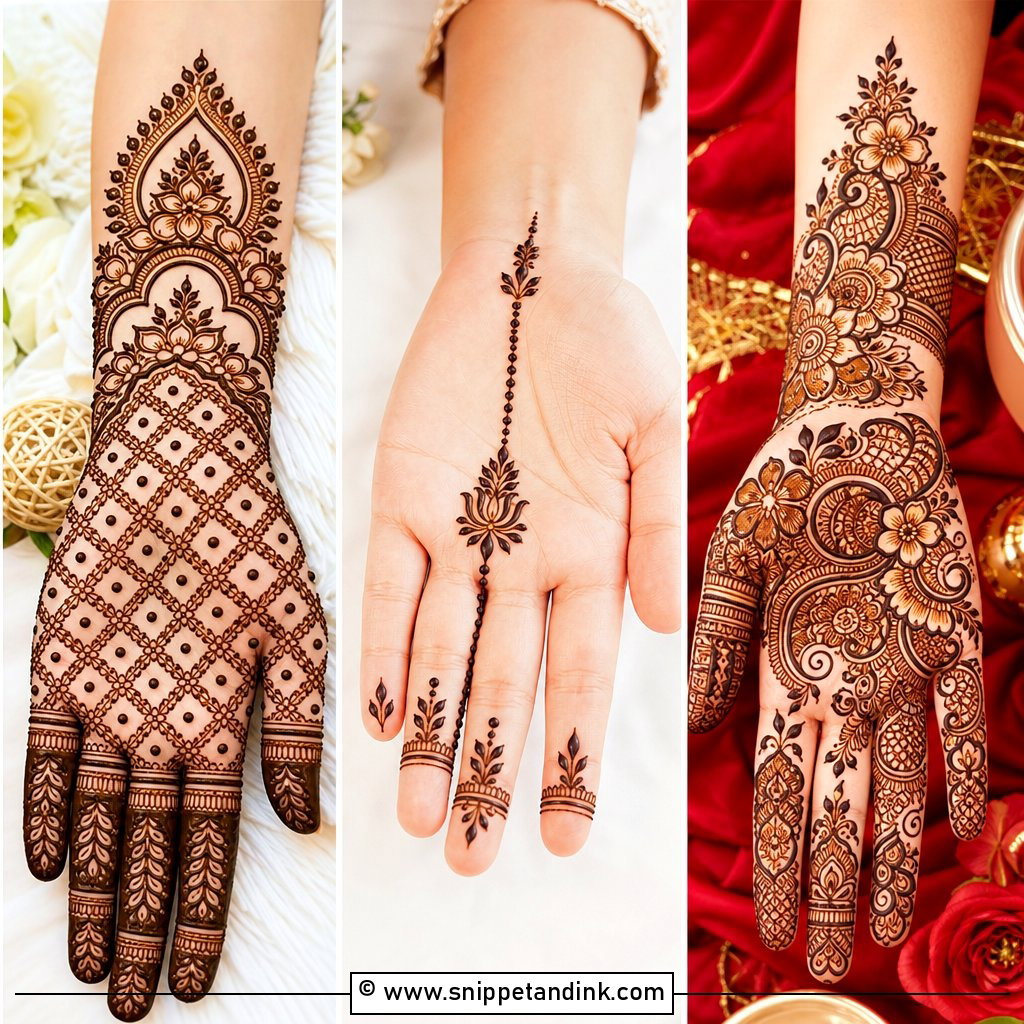
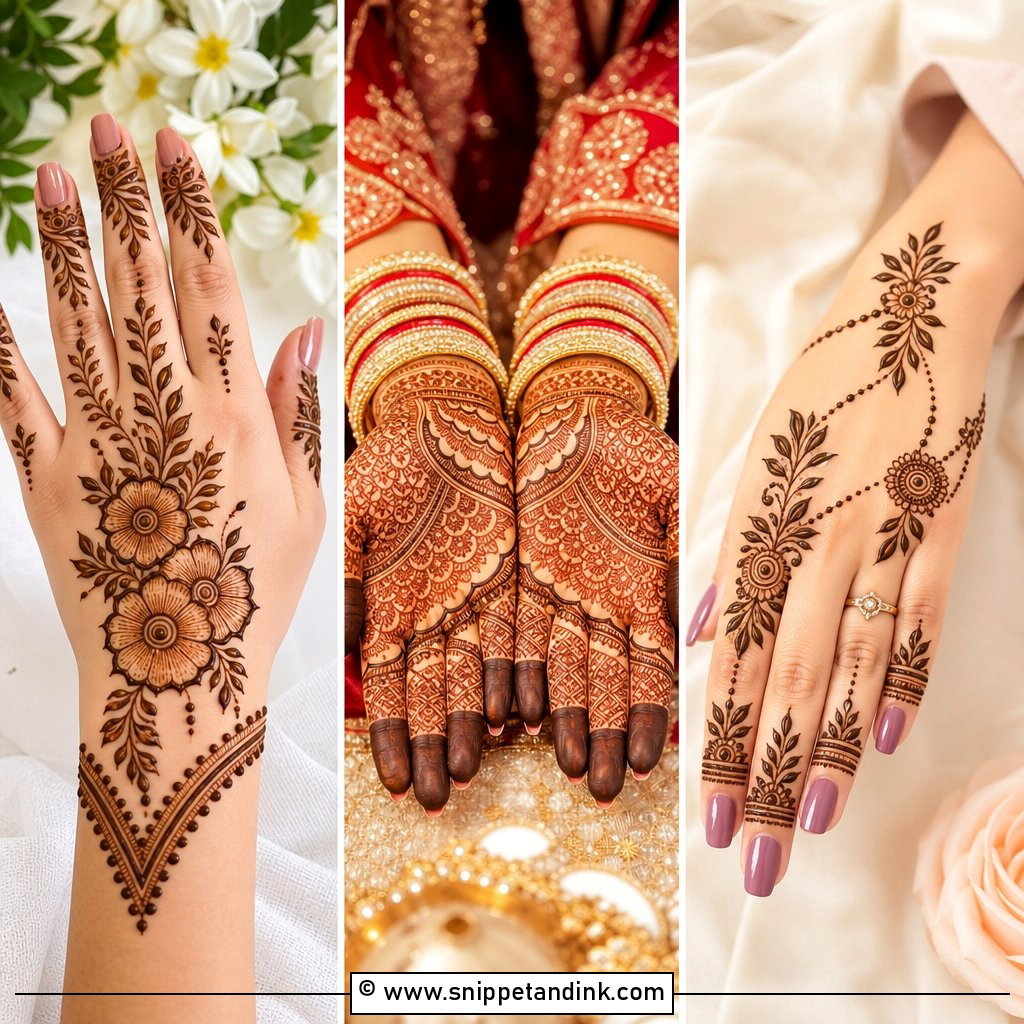
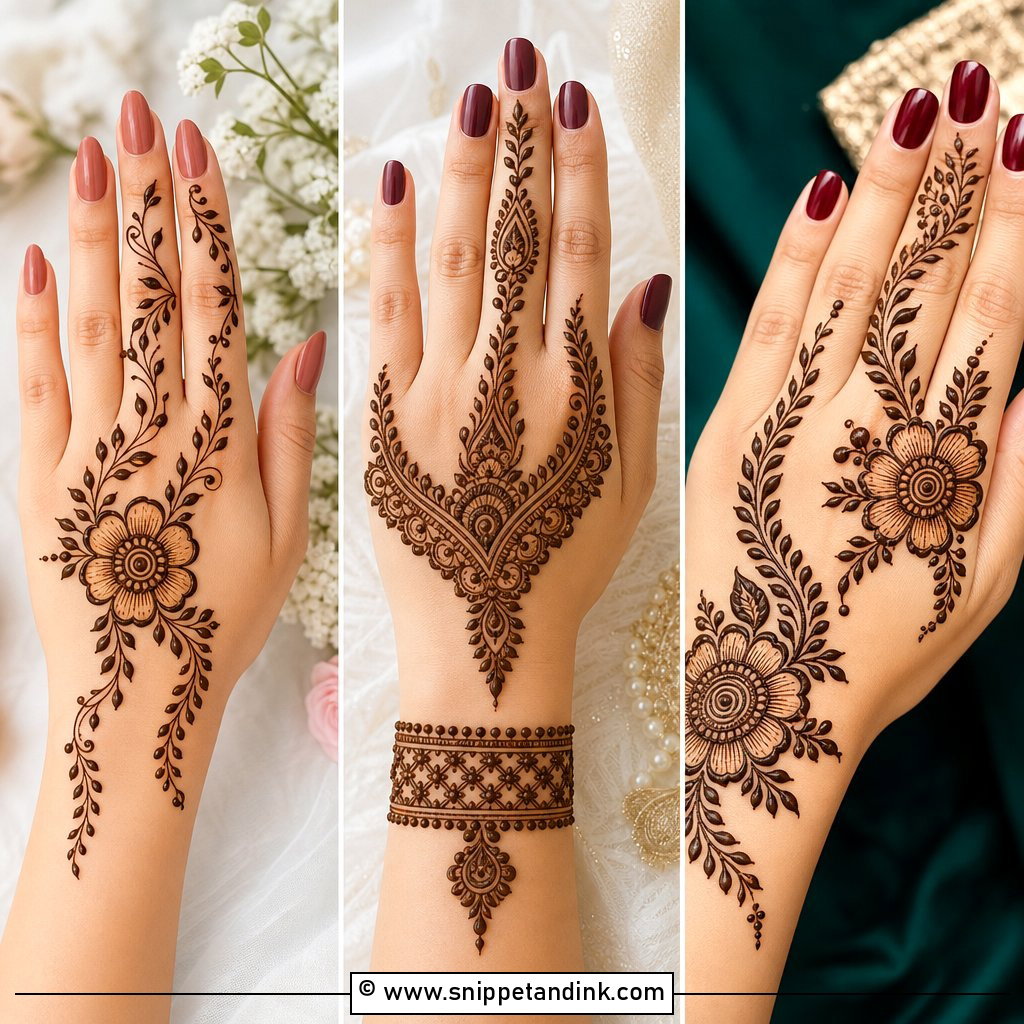
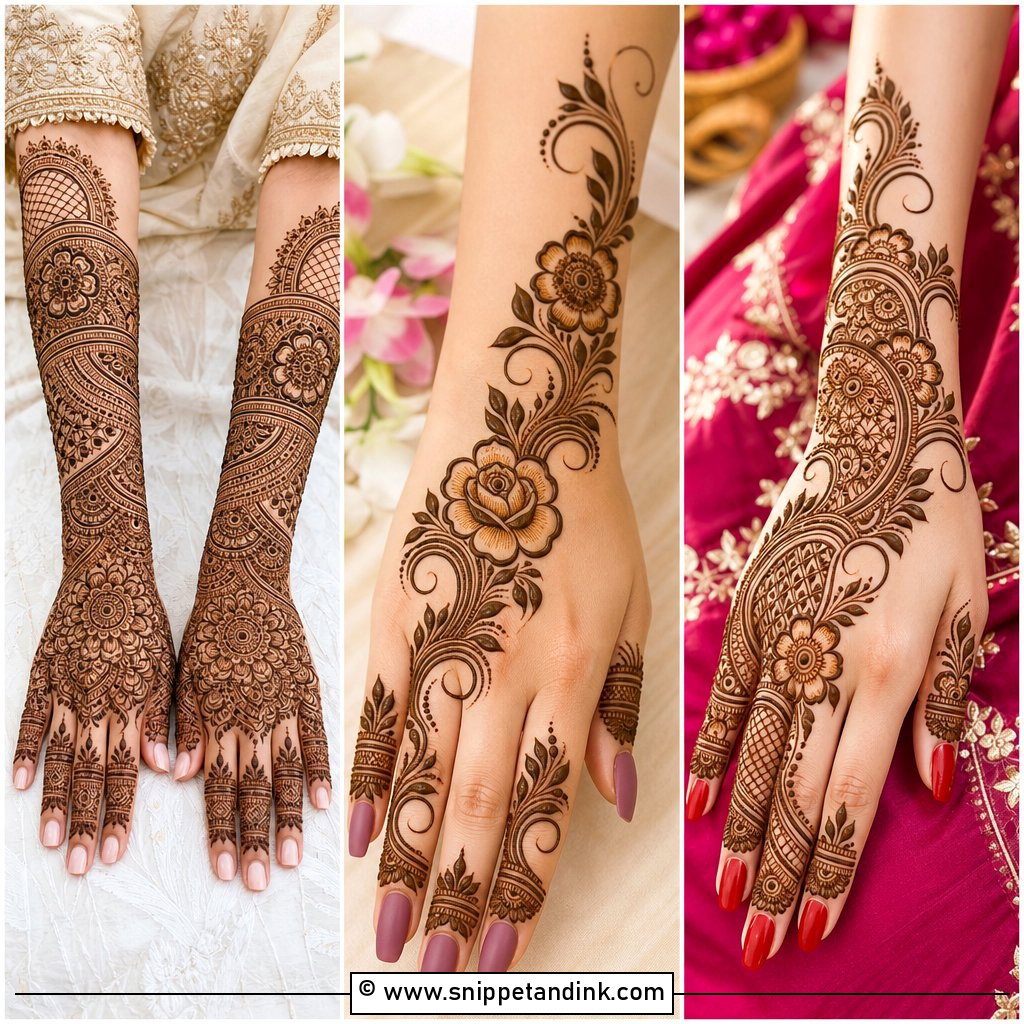
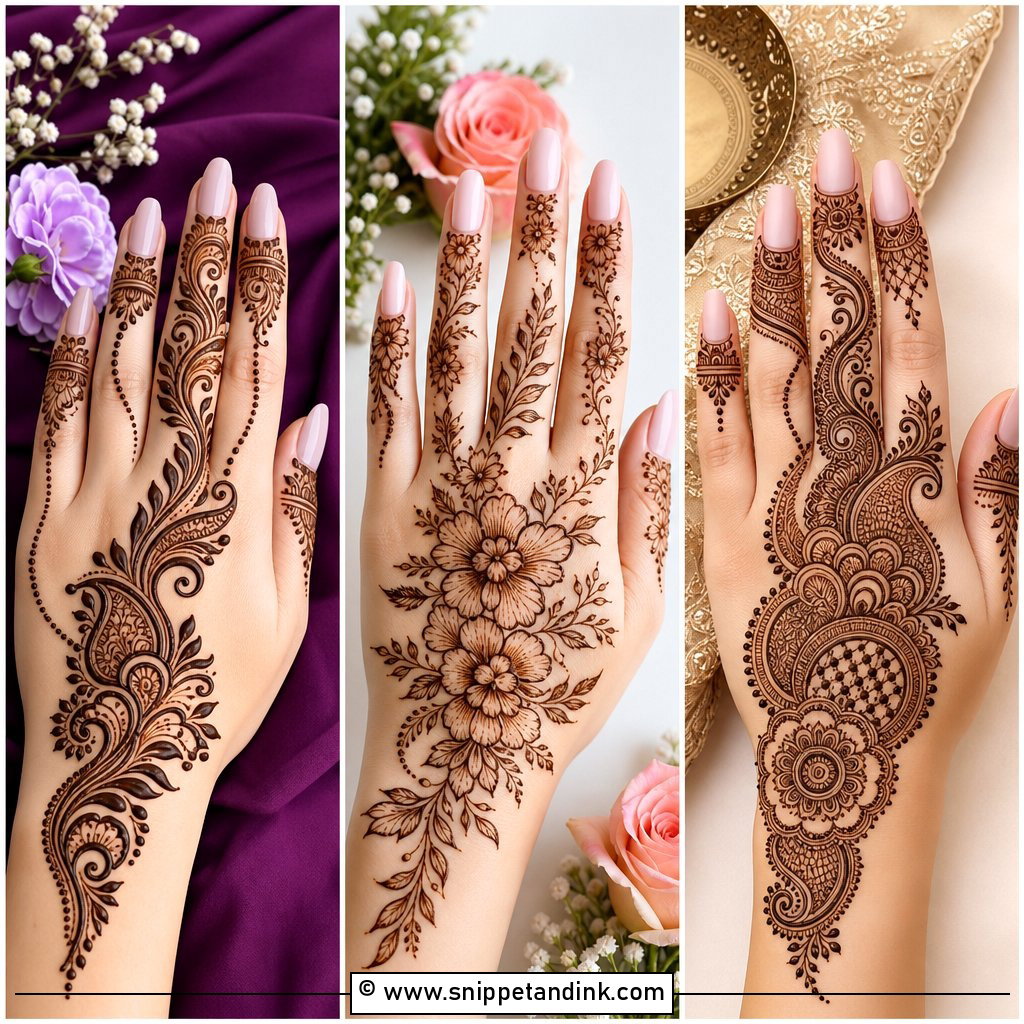
A diagonal trail from the index finger down to the wrist is the classic back hand mehndi design, and it reads well in photos because hands are usually shown palm-down. Be aware that the back of the hand stains lighter than the palm, often a warm brown rather than maroon. To compensate, I lay the paste a touch thicker on the main flower and leave it on overnight. Small paisleys and dotted lines fill the gaps without covering the skin, and mini vines on the fingers tie it together.
3. Simple Arabic Mehndi Design
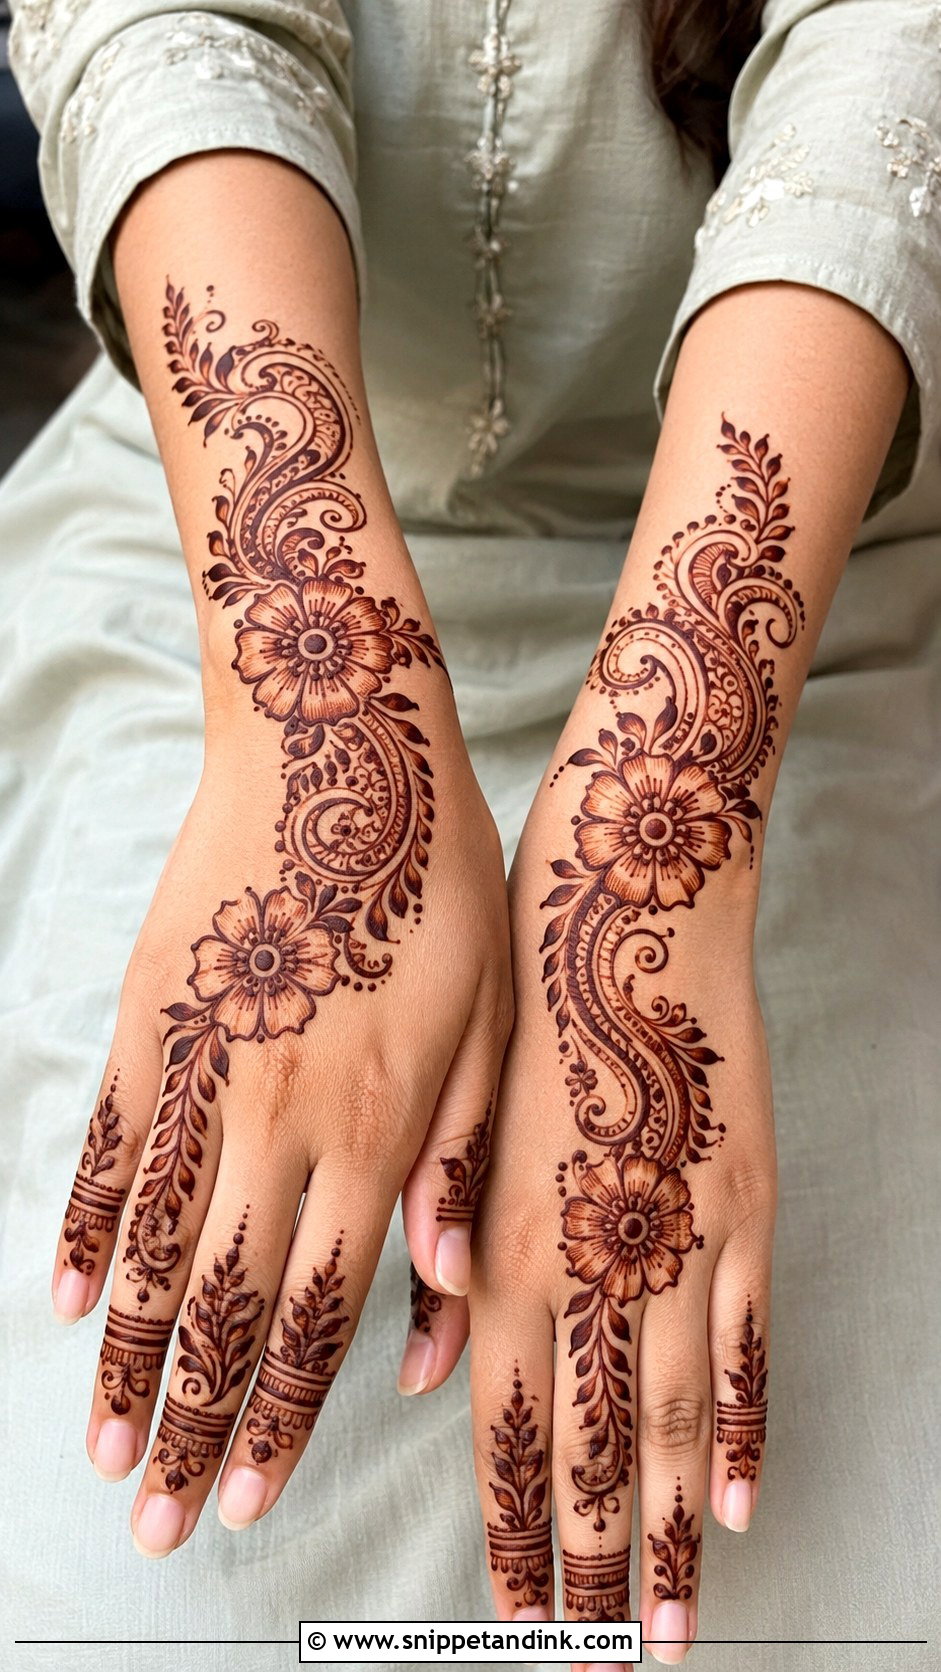
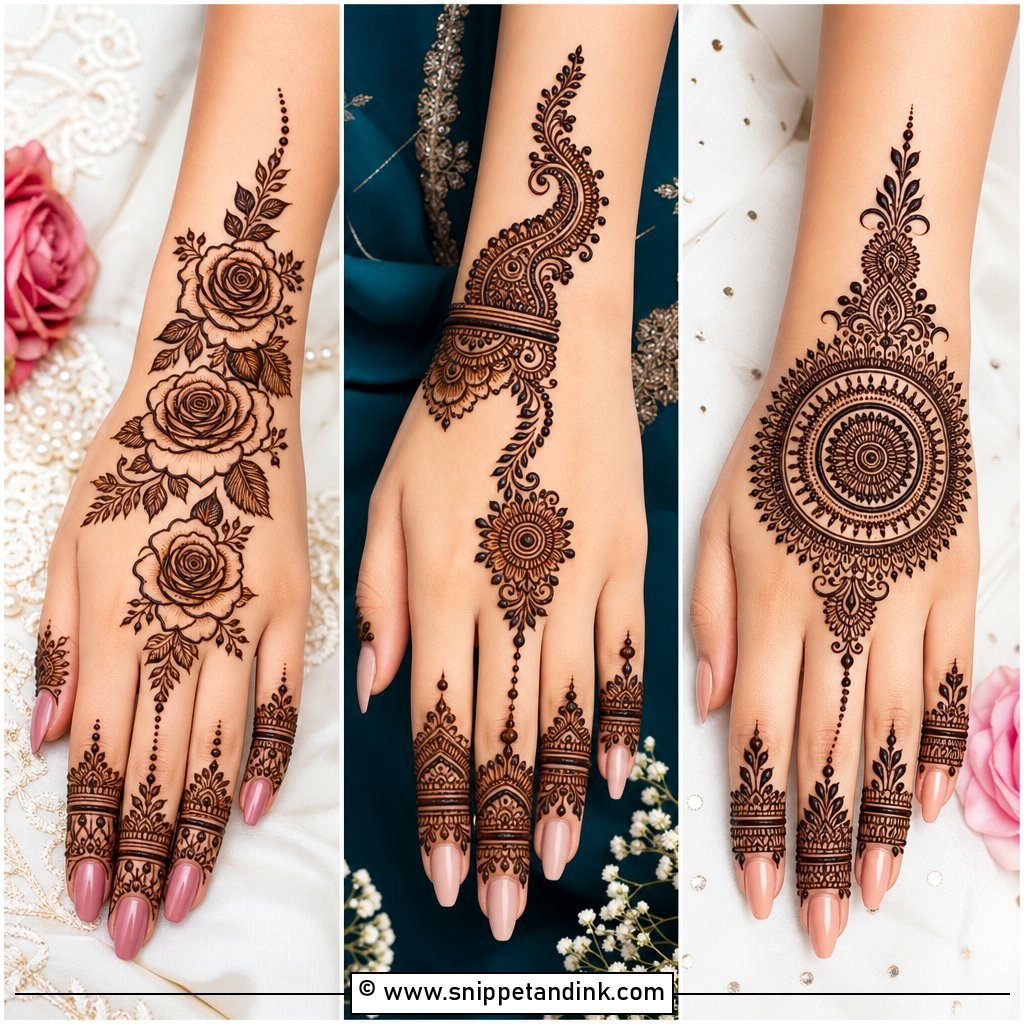
Arabic layouts move on a slant across the hand, with bold outlines and wide gaps between motifs. That open structure is why they’re quick: an experienced hand can finish one side in fifteen to twenty minutes. I put the heaviest flower near the wrist or the base of the palm and let the trail taper to one or two fingers. The bold outer stroke matters more than any filling inside it, so if your artist is rushed, ask them to keep the outlines and skip the shading.
4. Simple Mandala Mehndi Design
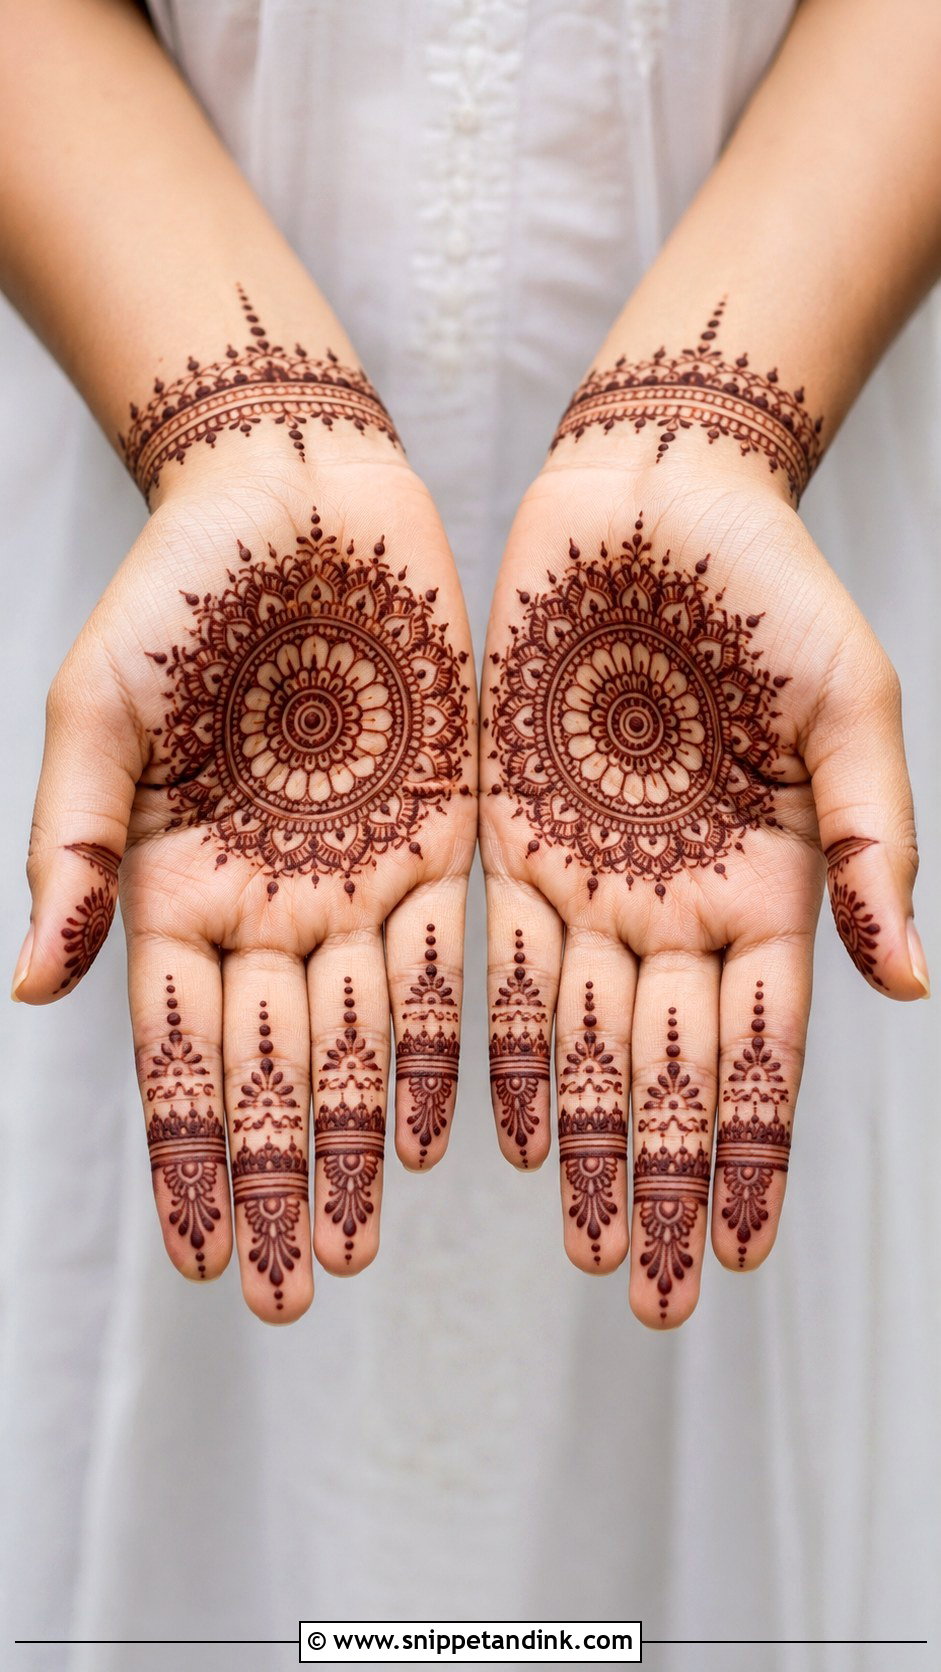
One circle in the middle of the palm, a few finger bands, done. The mandala is the first design I teach because it’s forgiving: if one petal comes out a little long, you echo it in the next ring and it looks intentional. The real skill is keeping the circle round on a hand that isn’t flat. I ask the person to rest their hand open on a cushion so the palm doesn’t cup while I draw. A thin wrist border finishes it if the hand looks bare.
5. Simple Finger Mehndi Design
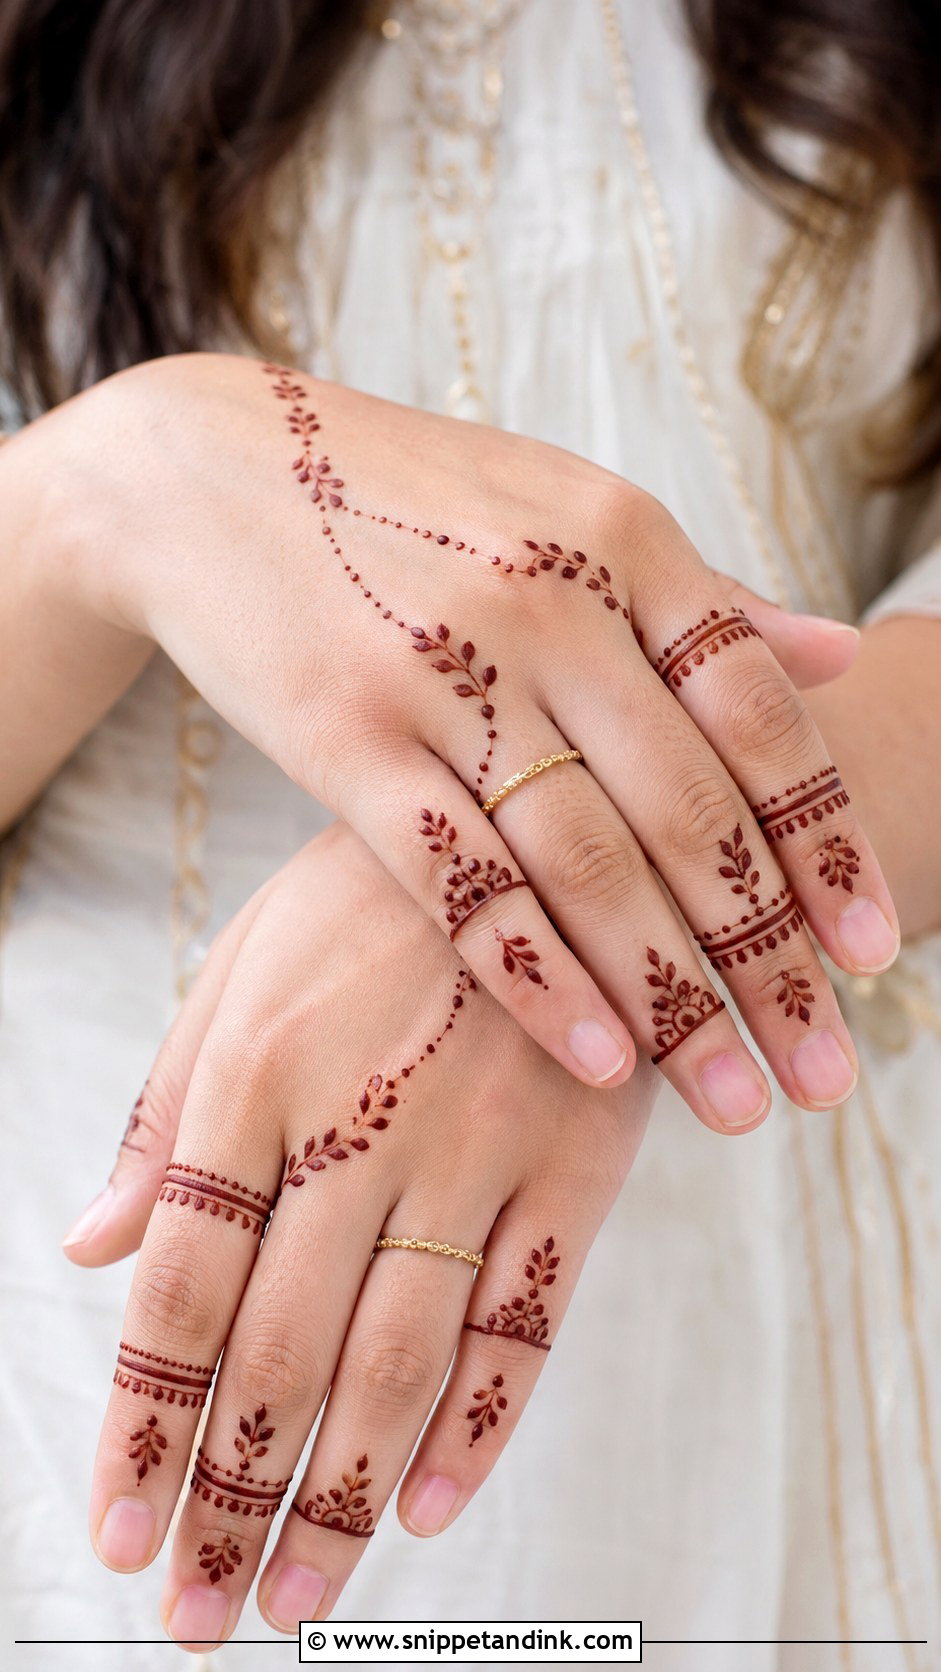
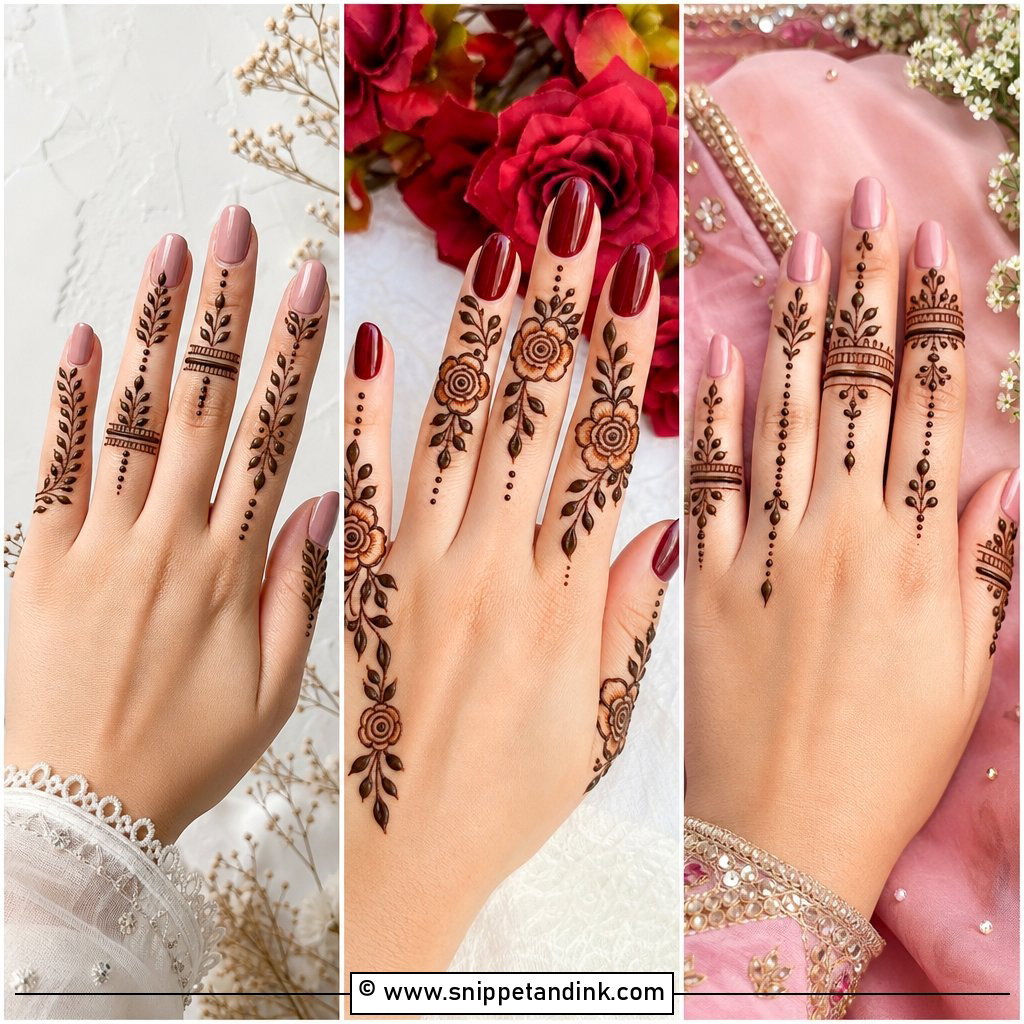
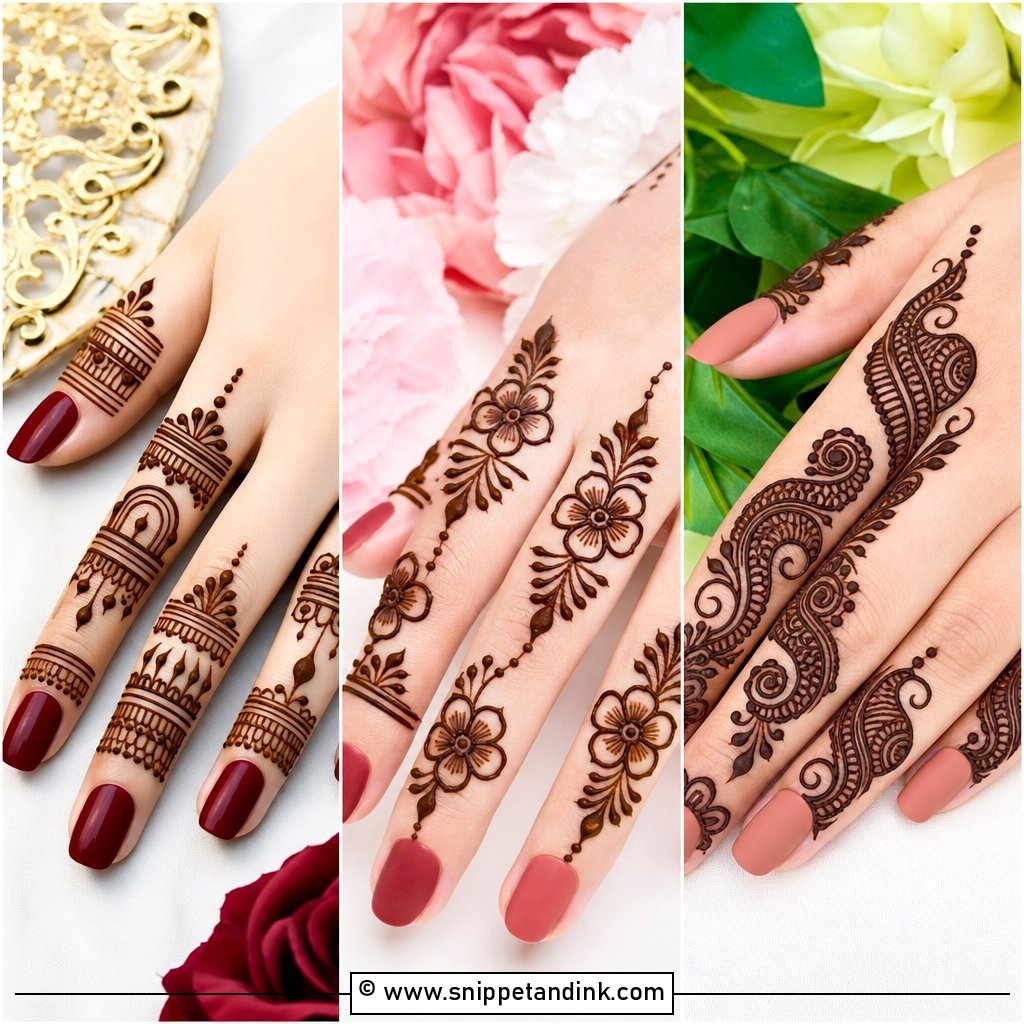
Very little paste, very little time, and fingers stain darker than almost anywhere else on the hand. Ring bands, dotted chains and leafy tips are the usual vocabulary. It suits long fingers and short nails best; on very short fingers I’d keep to one band per finger so they don’t look chopped up. Linking a single finger to a small wrist bracelet stops it looking unfinished.
6. Simple Floral Mehndi Design
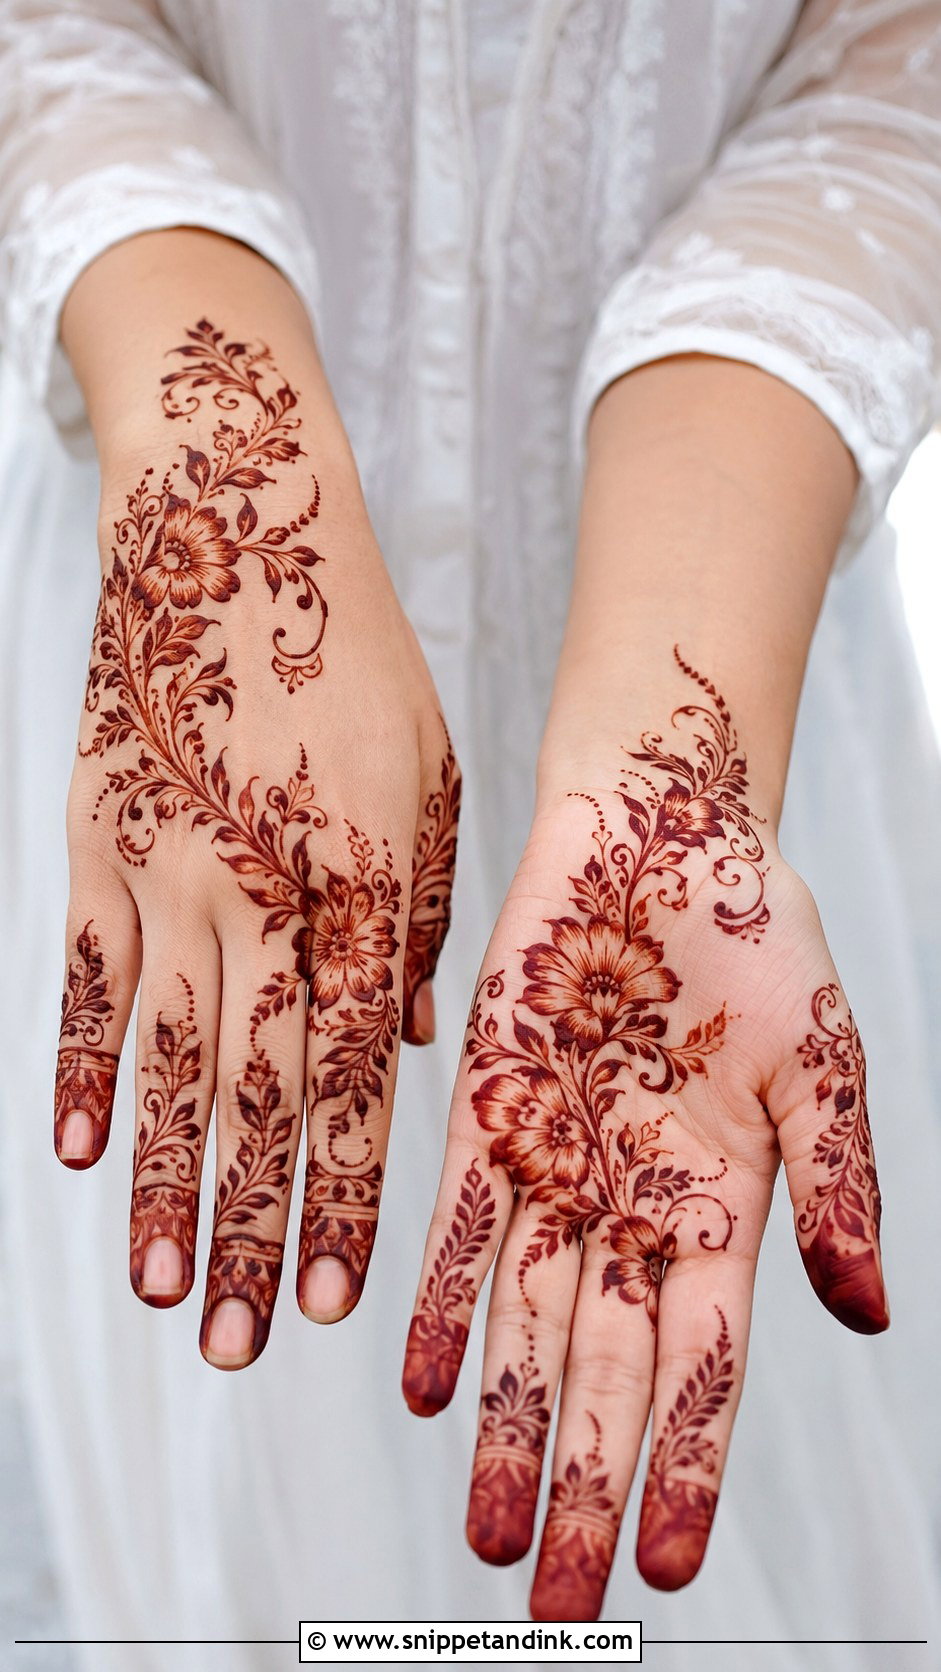
A single medium flower with leaves and buds coming off a curved stem can sit on the palm, the back of the hand or just above the wrist bone. Florals scale easily, which is why they work on small hands as well as large ones. My usual advice is to give the petals room; when they touch each other, the stain bleeds slightly and the flower turns into a blob by day two. Shade only the inner petal or the leaf centres, never everything.
7. Simple Rose Mehndi Design
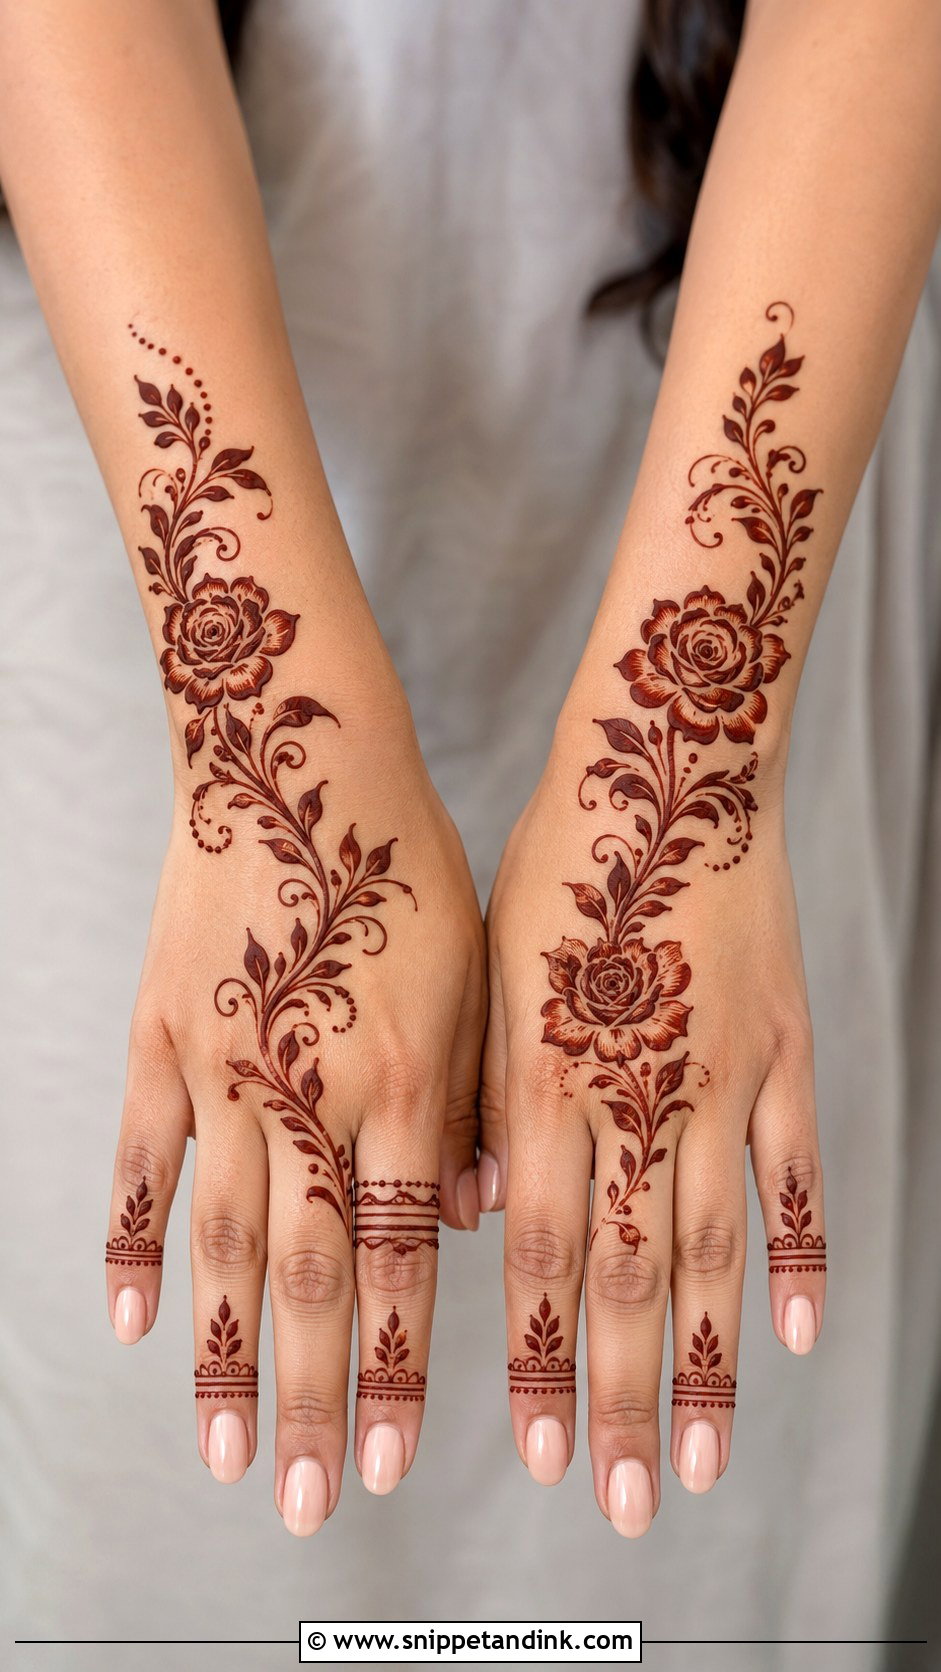
Roses are trickier than they look because the petals spiral, and a rushed rose reads as a cabbage. I draw it with three or four bold, rounded outer petals and a simple swirl in the middle, then run a curved vine toward the fingers. Leave plenty of bare skin around it so the shape is clear once the stain darkens. Pair it with a narrow cuff or a couple of finger bands for an engagement party or a small family function.
8. Simple Leaf Mehndi Design
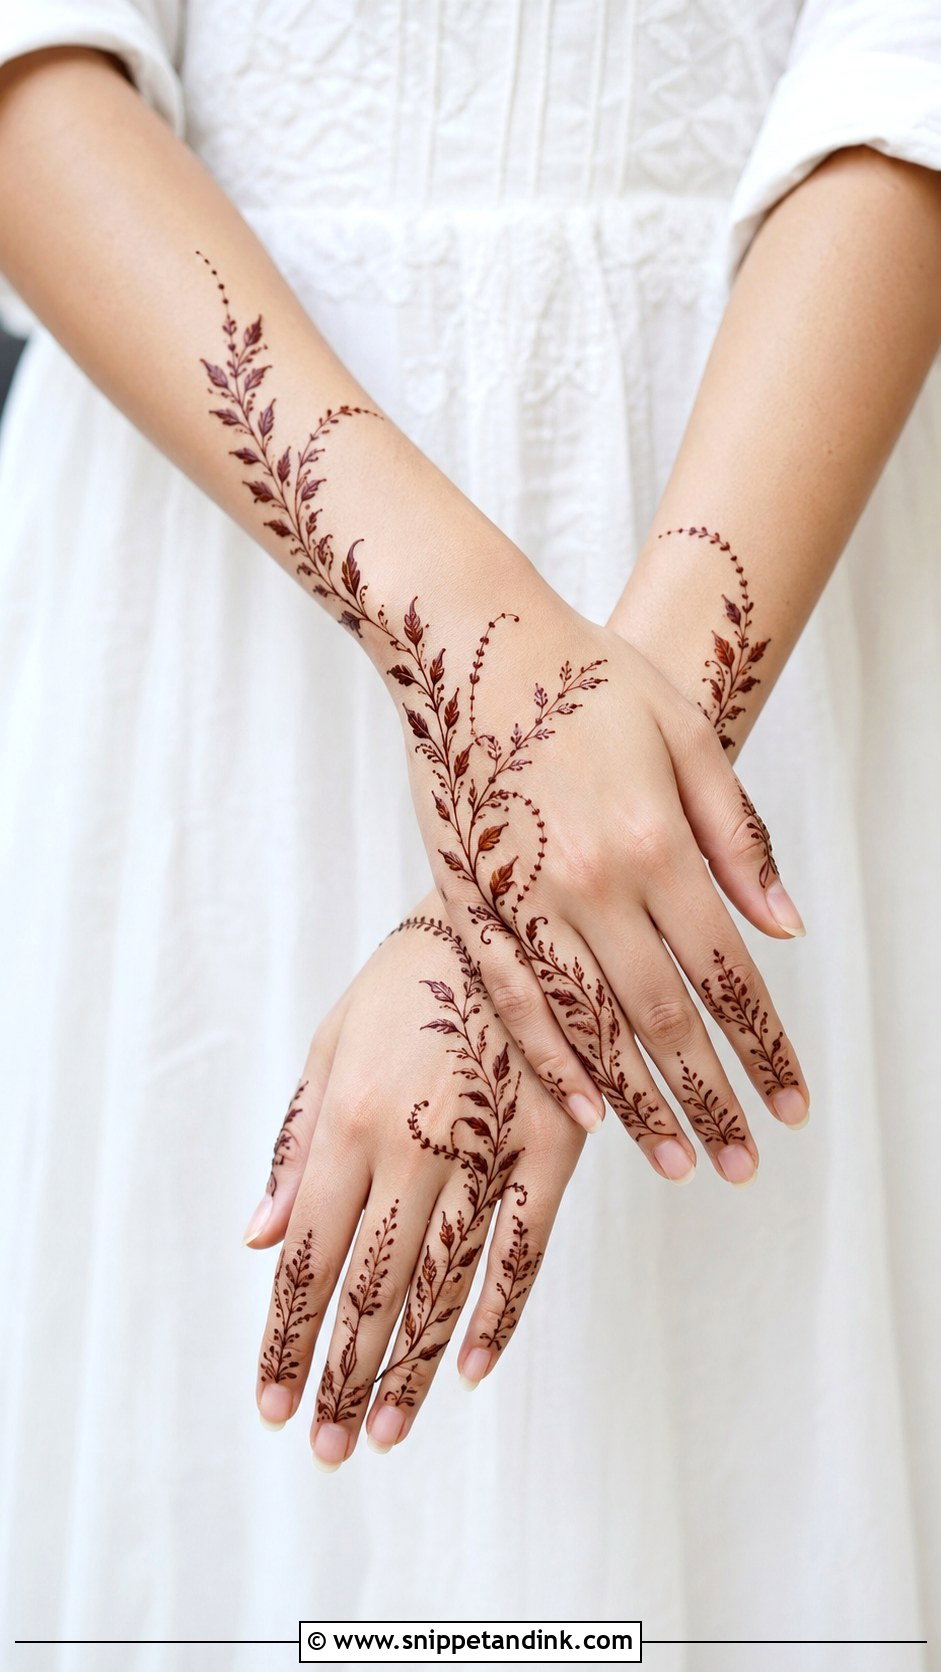
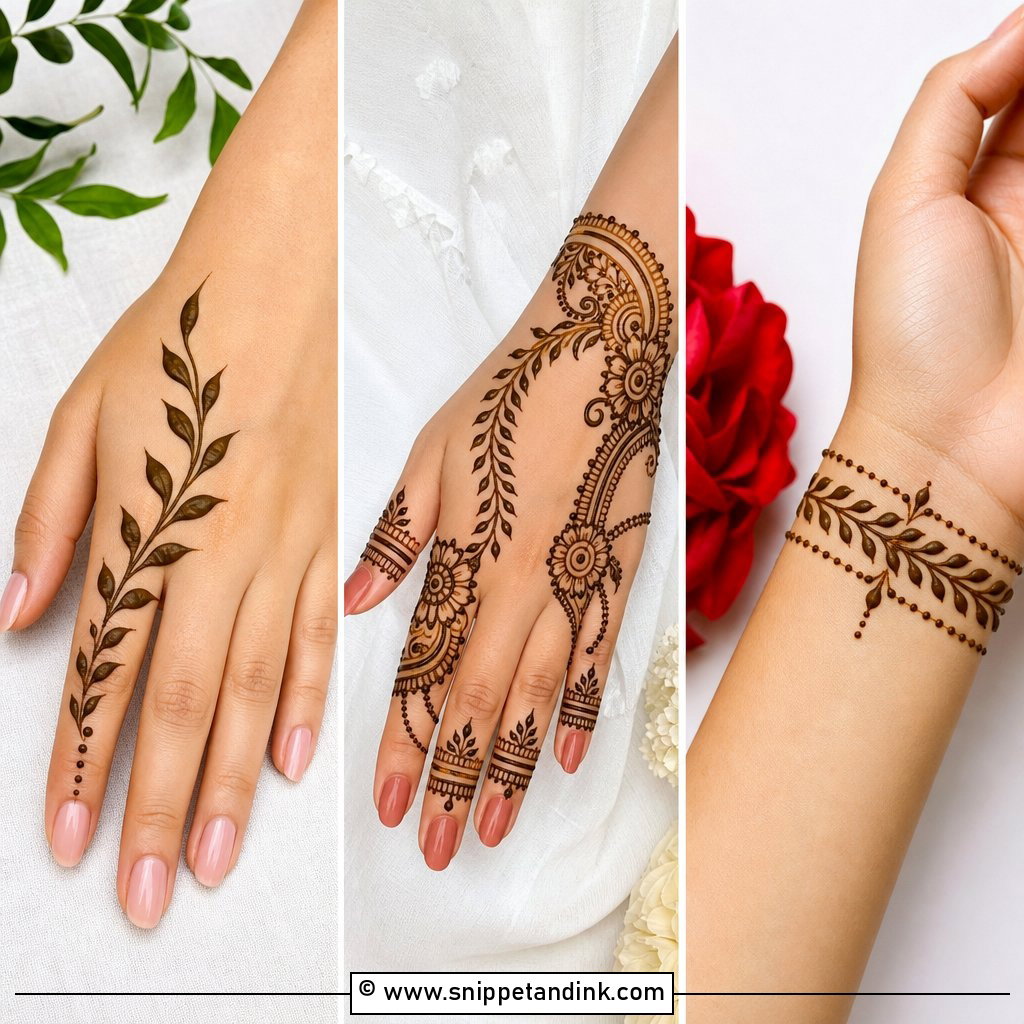
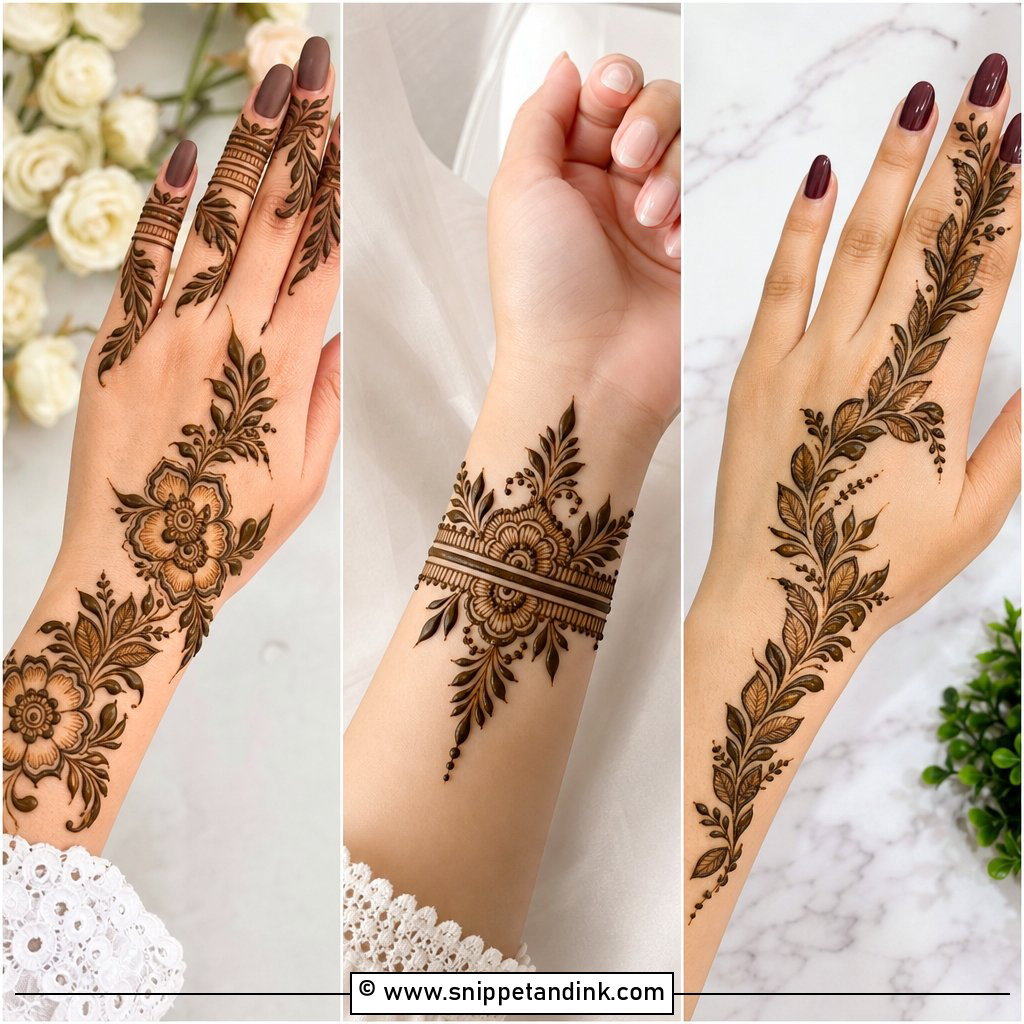
Leaf vines are where most people practising at home should start. One stem from the wrist to the middle finger, with smaller leaves stepping off both sides, gives a lot of movement for very little effort. The repetition is what makes it look detailed. Keep the leaves roughly the same size and the gaps between them even; if every leaf is filled solid, the hand looks heavy, so I alternate filled and outlined ones.
9. Simple Paisley Mehndi Design
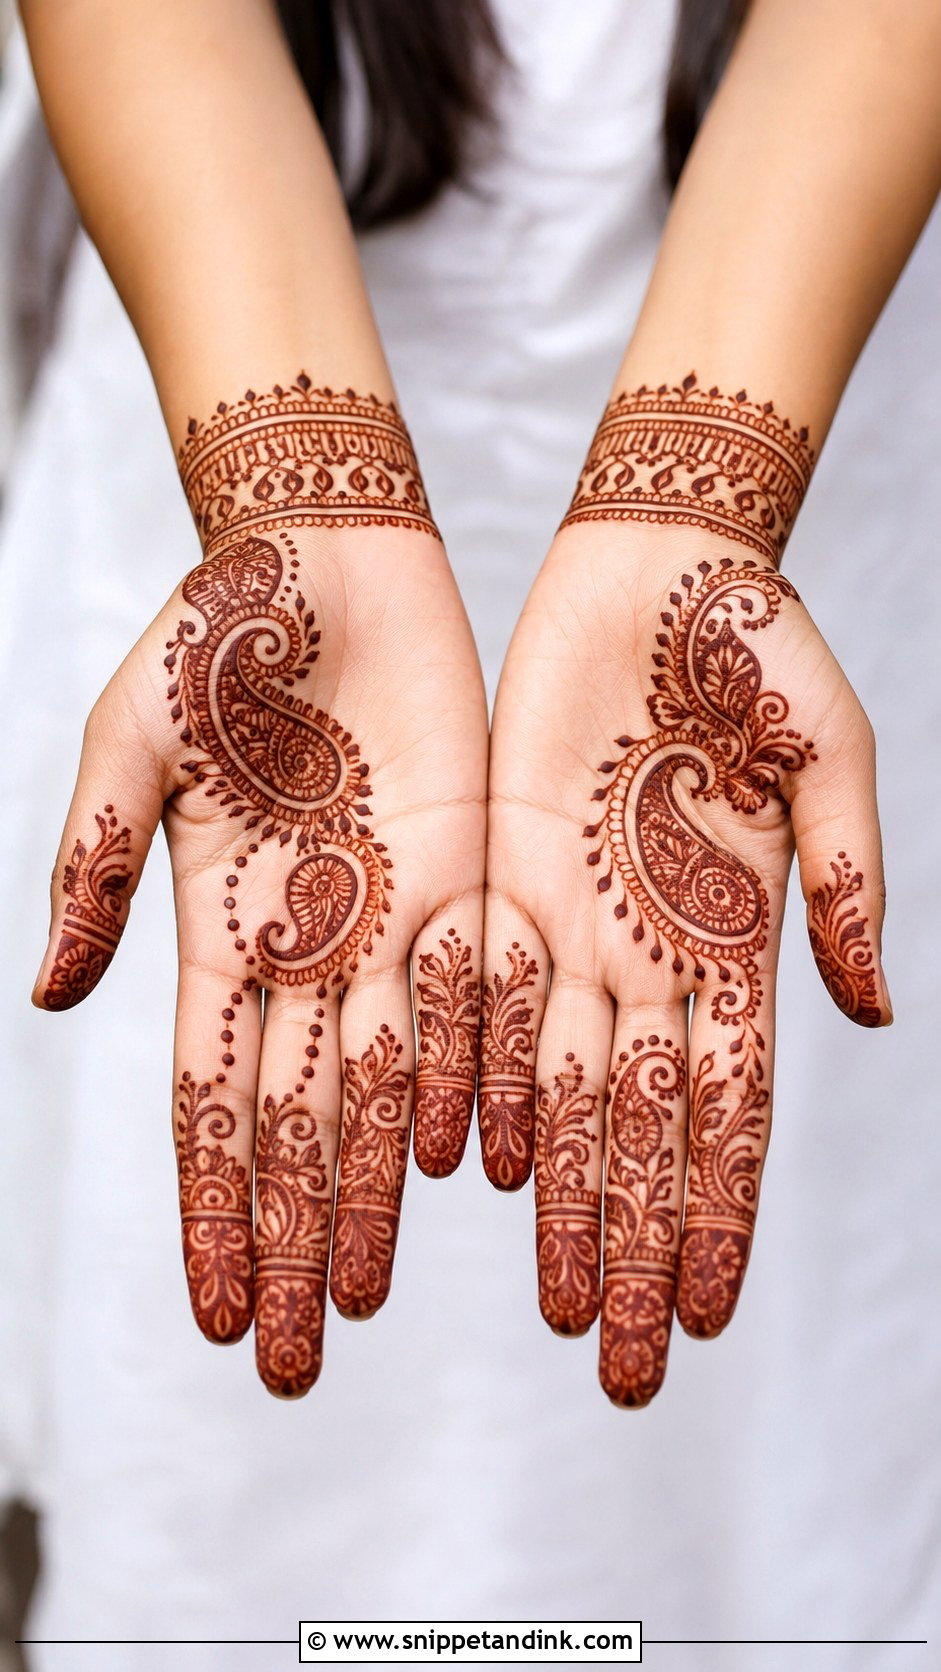
The teardrop paisley follows the curve of the palm almost by itself, which is why it has stayed in henna for so long. For a light version I use one or two paisleys as the anchor and join them with a vine instead of building a whole field of them. The inside can hold dots, small petals or a few parallel lines. What I avoid is tiny, crowded filling inside a small paisley: the lines merge as the stain develops and you lose the detail you paid for.
10. Simple Bracelet Mehndi Design
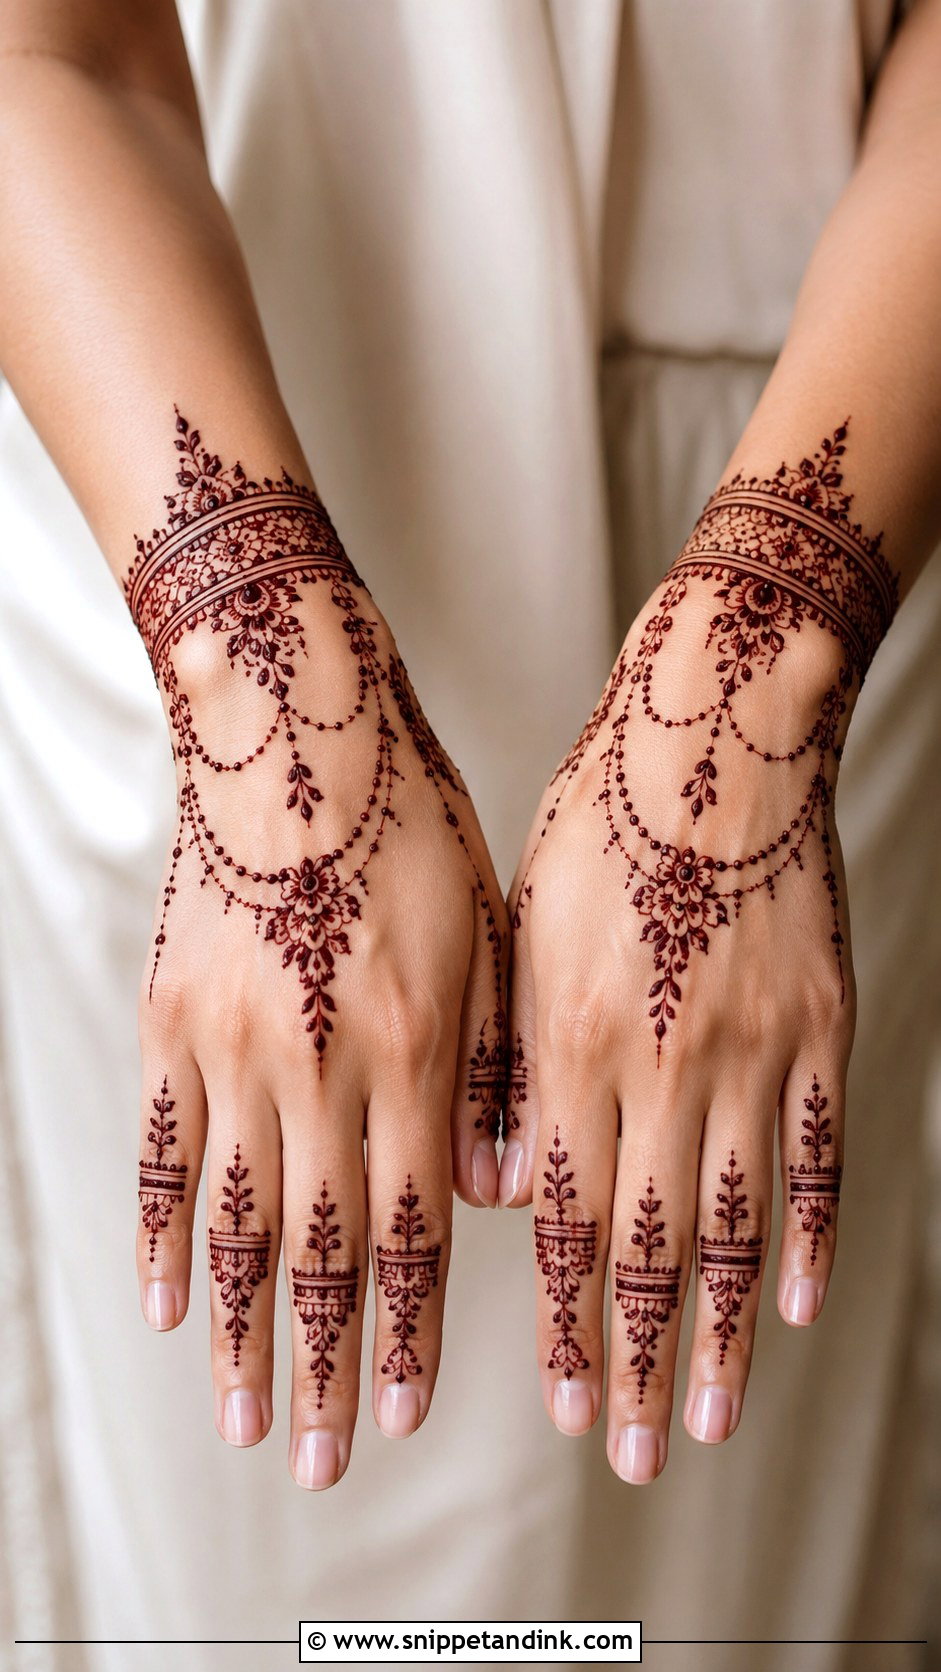
Think of it as jewellery drawn on skin. One or two cuff bands sit around the wrist, with short chains or dots hanging toward the hand and maybe a tiny flower at the centre. The palm can stay empty or carry a small mandala. The wrist bends constantly, so I keep the bands slim; a thick band cracks at the crease and smudges against sleeves and bangles before it has stained.
11. Simple Ring Mehndi Design
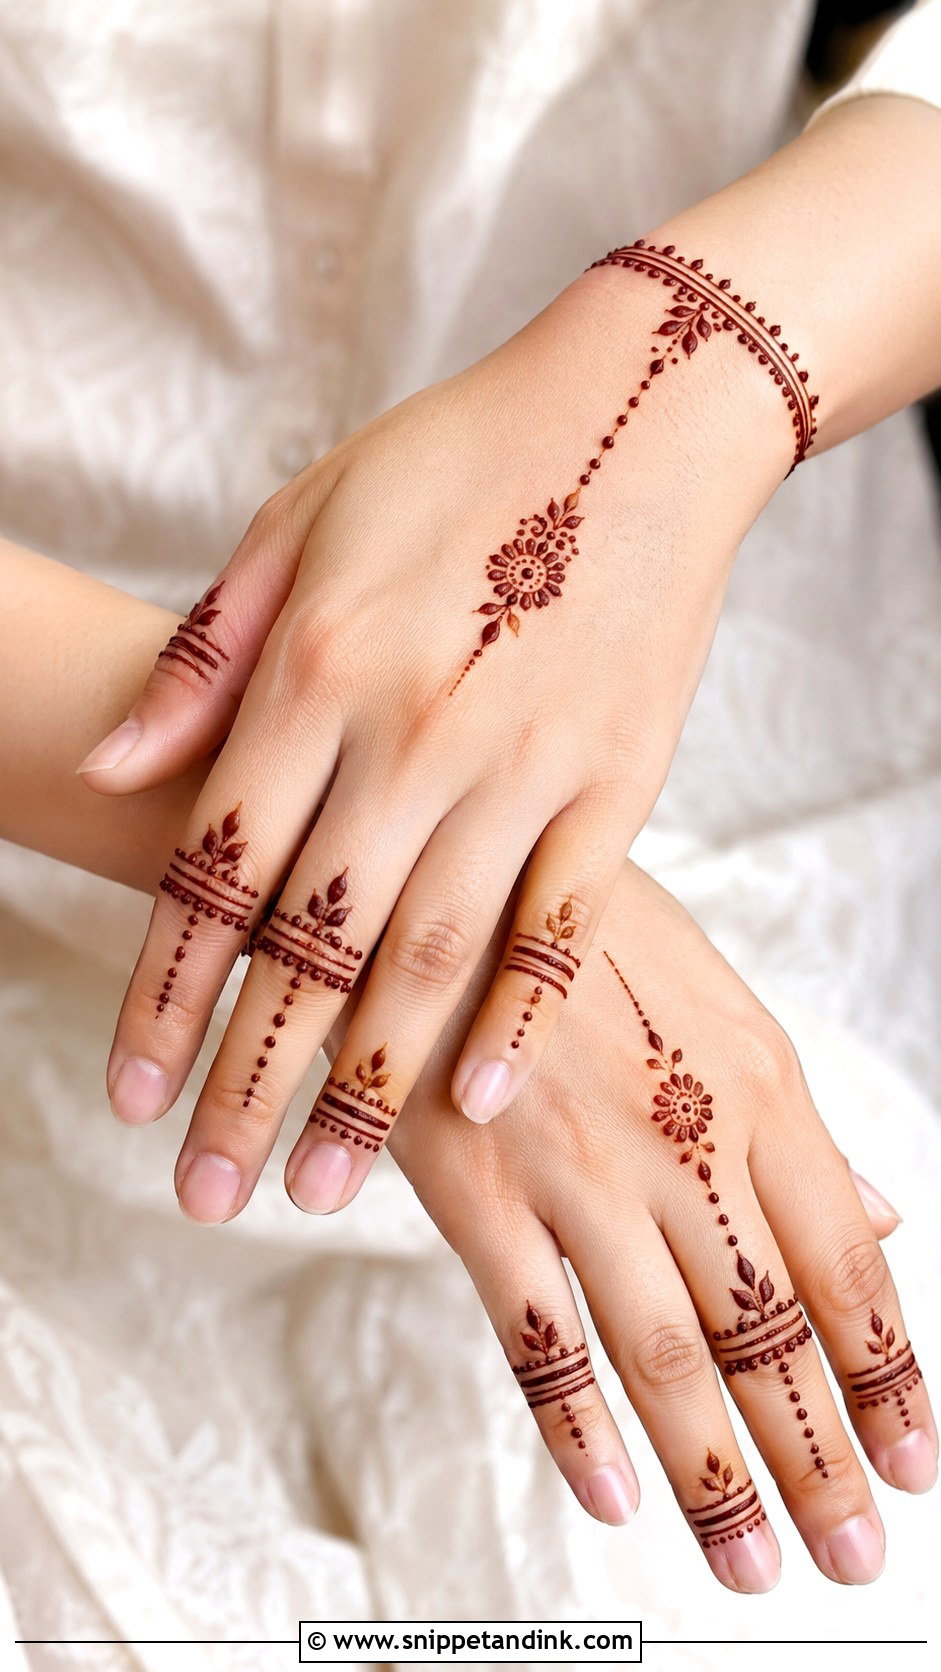
Thin bands around the fingers, one or two of them joined by a dotted chain to a small motif on the back of the hand. It takes minutes and is a good choice for a college event or a casual get-together. Precision is everything here because there is nothing to hide a shaky line. I use a fine-tipped cone and rest the side of my hand on the client’s to steady it. You can vary each finger or repeat one band, but mixing styles on a single hand usually looks unplanned.
12. Simple Half Hand Mehndi Design
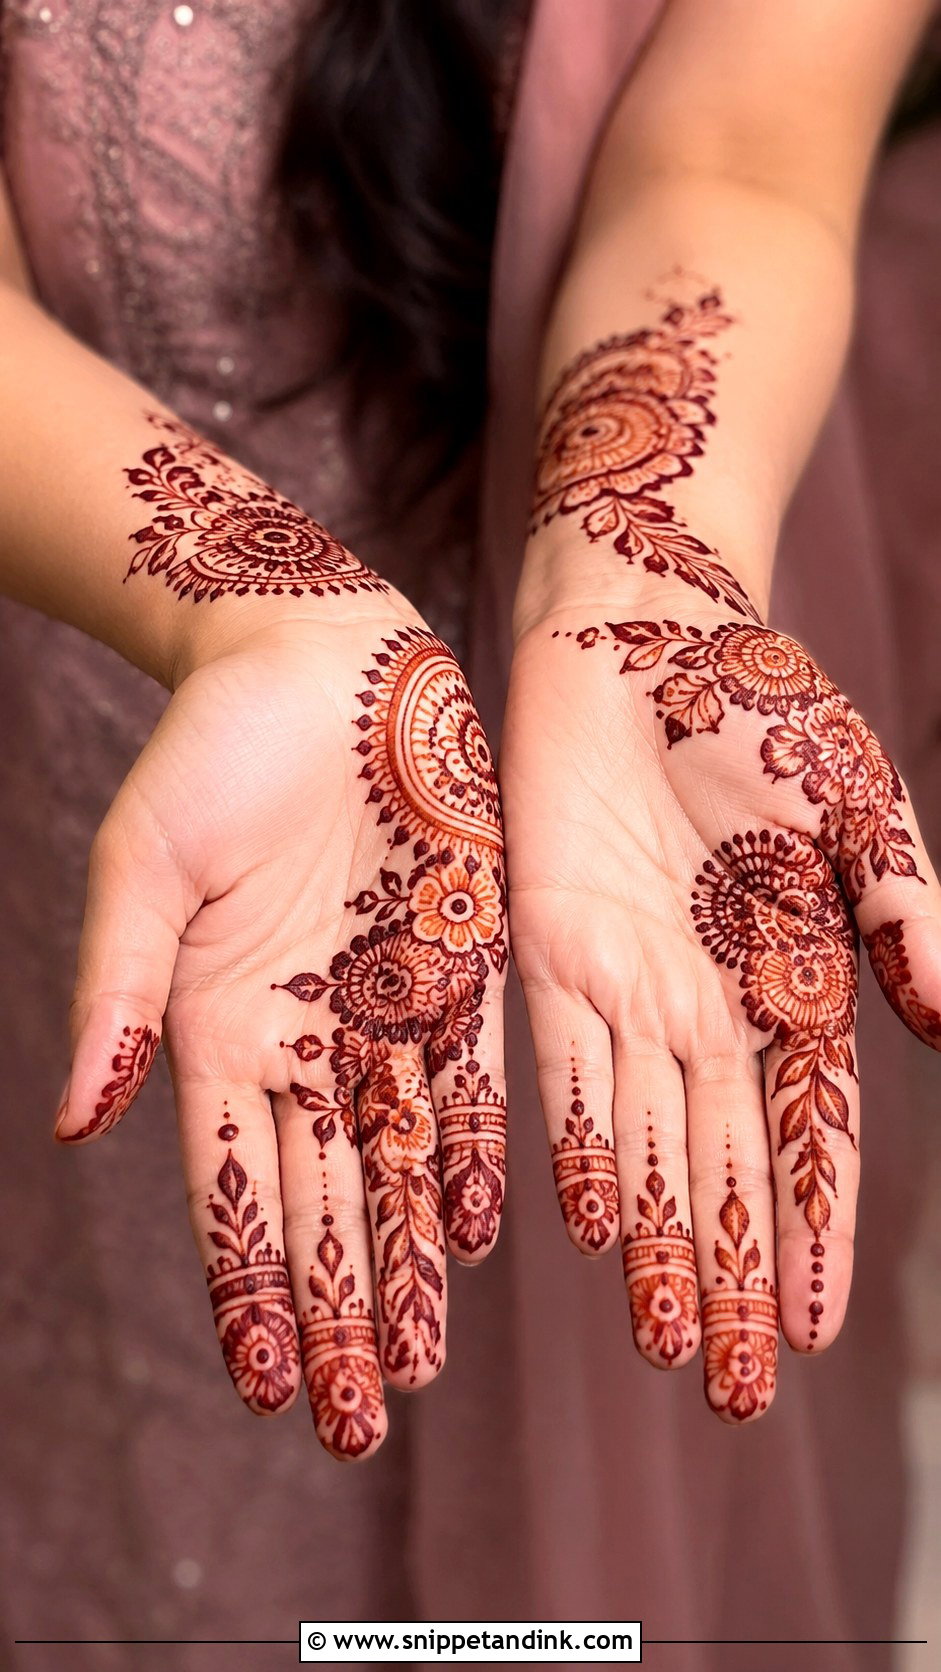
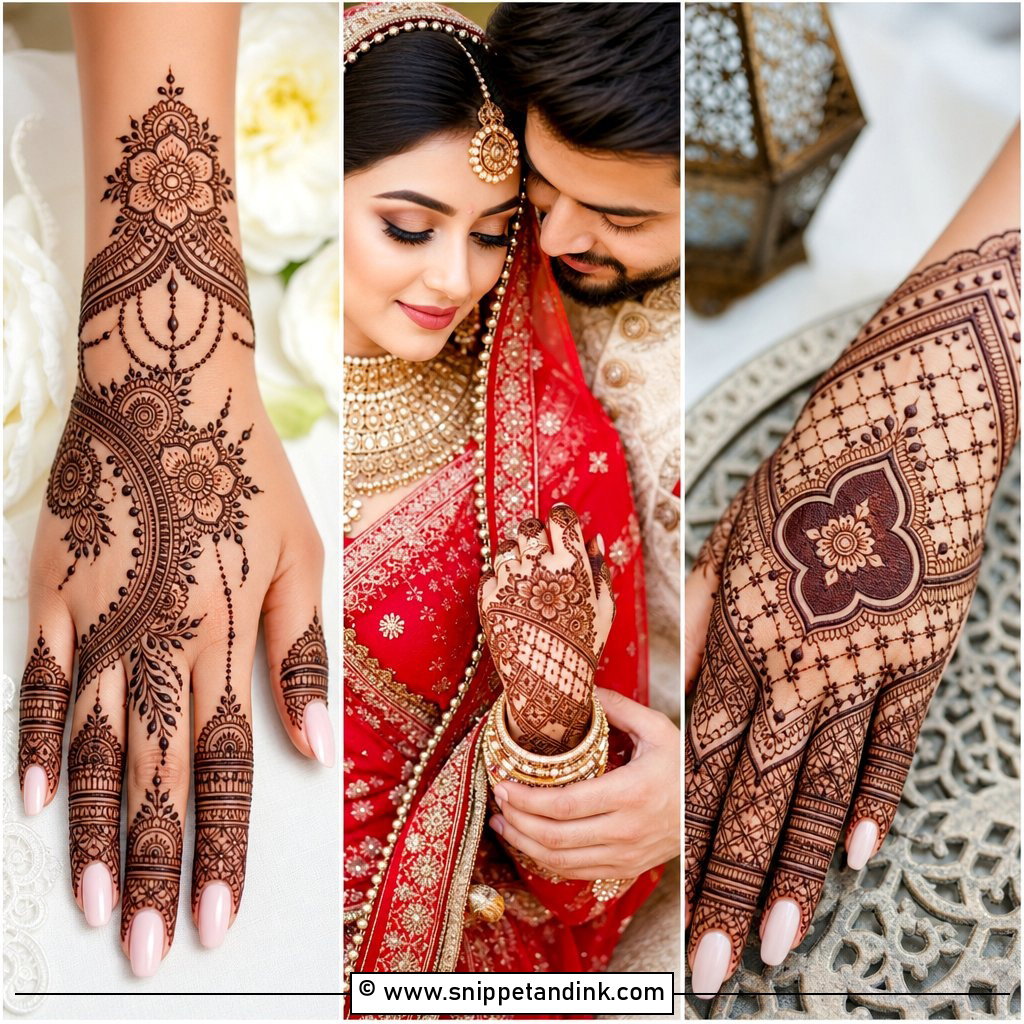
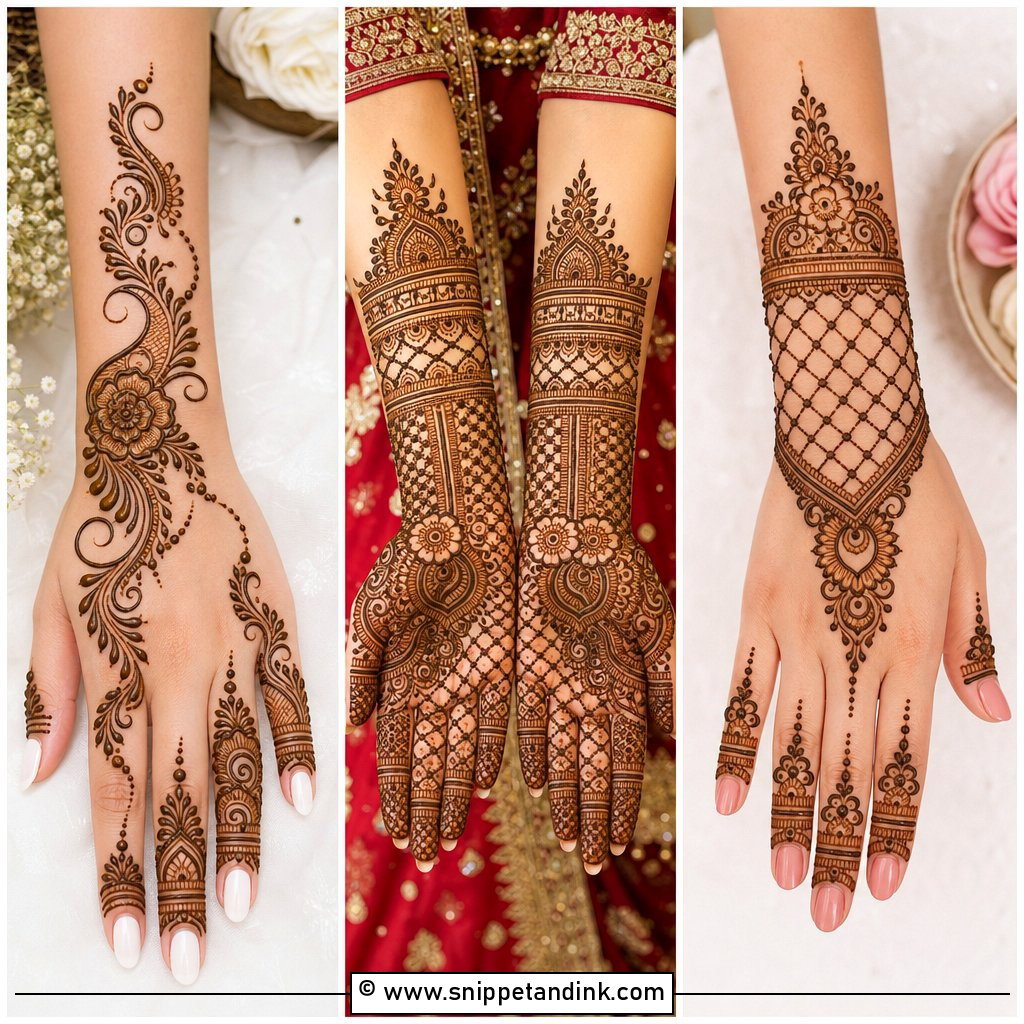
Half coverage sits between a minimal pattern and a full bridal hand: flowers, paisleys or a leafy trail across the lower half of the palm or back, with the upper half left open. It’s my usual suggestion for Eid, Diwali, Raksha Bandhan or a family wedding when someone wants to look dressed but doesn’t have two hours to sit still. Choose one theme and carry it onto the fingers so the two parts read as one design.
13. Simple Full Hand Mehndi Design
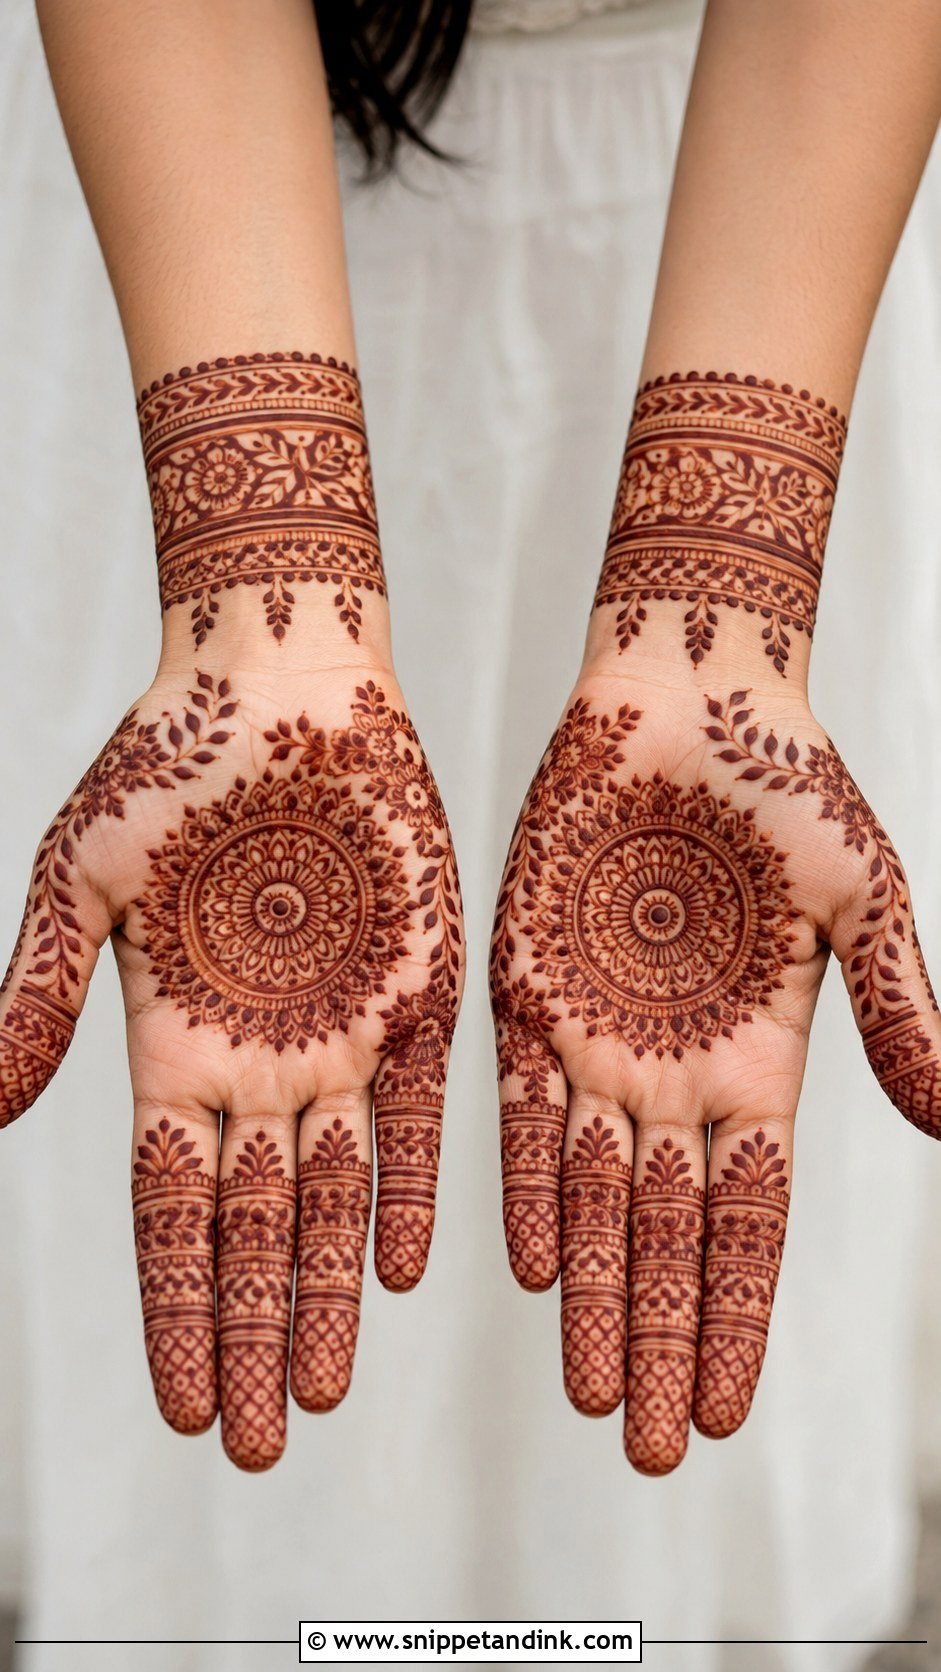
A full hand can still feel light if the motifs are larger and the filling is replaced by repetition. I typically build it from a palm mandala, matching finger bands, a leafy border and a soft wrist cuff, with open skin between each element. Symmetry gives a traditional finish; a diagonal Arabic flow gives a more modern one. The honest trade-off is time. Even a light full hand takes noticeably longer than half coverage, and it needs the full drying time before you can use your hands.
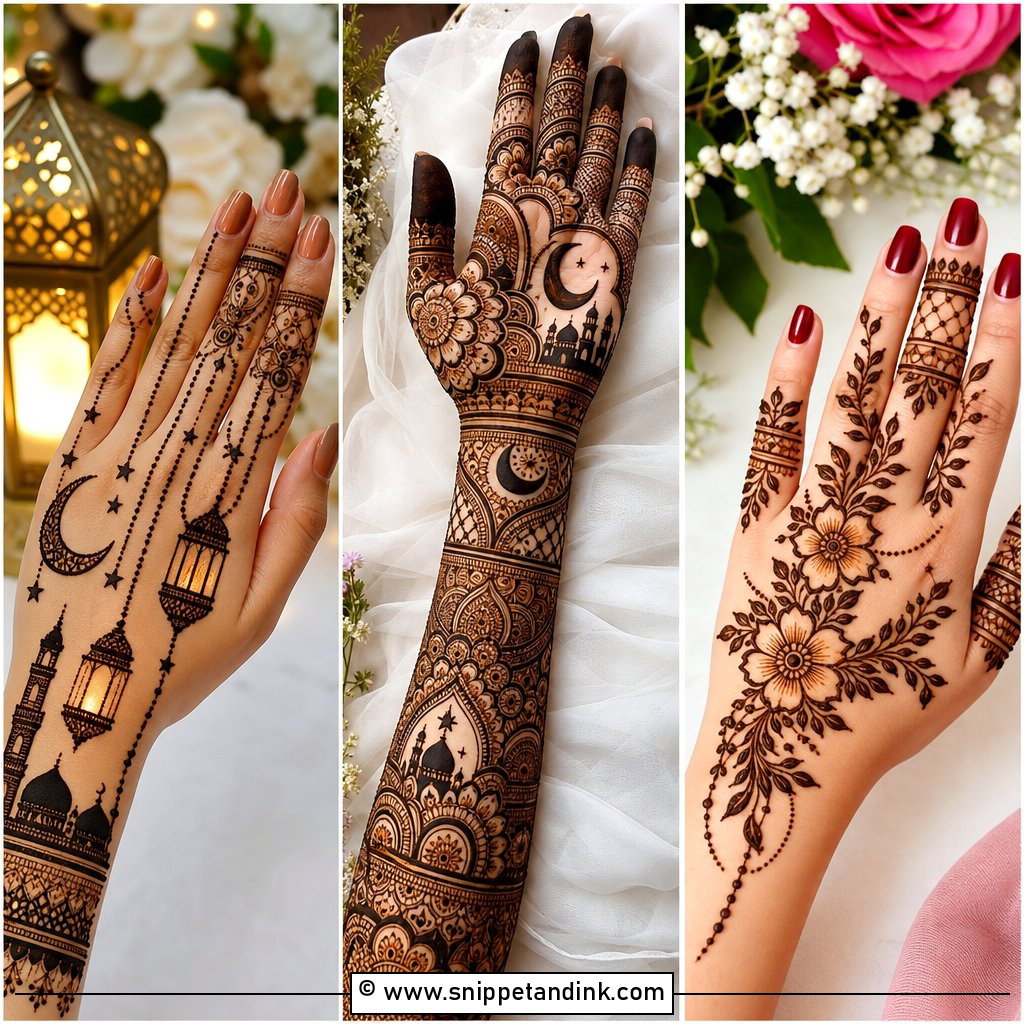
14. Simple Indo Arabic Mehndi Design
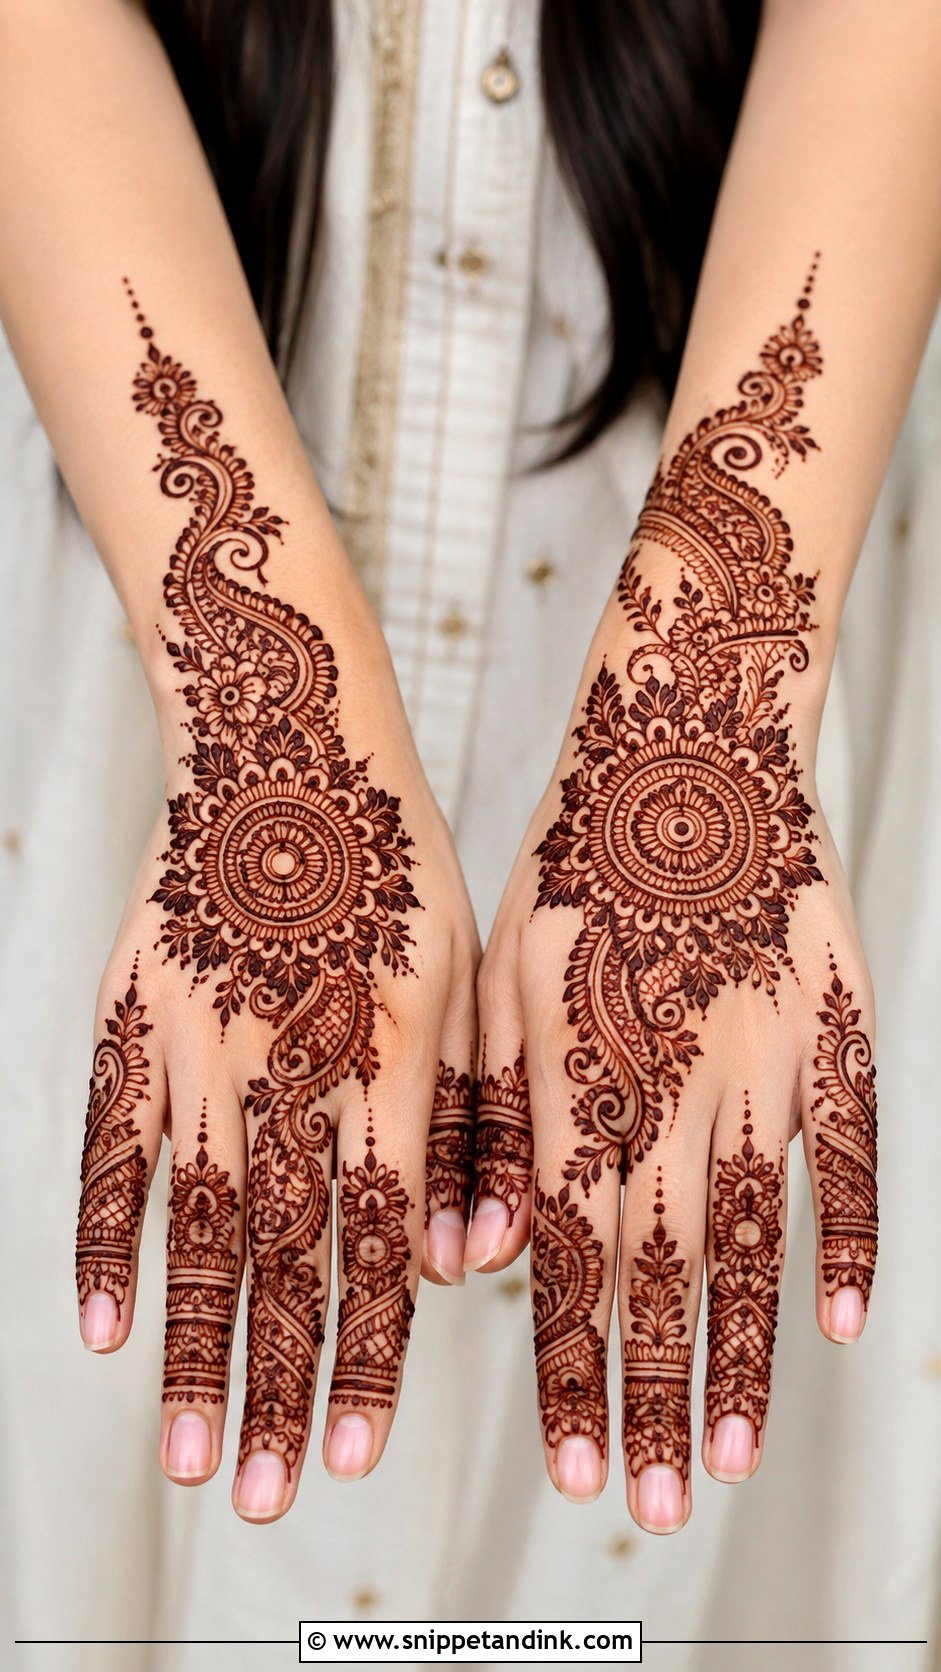
Indo-Arabic borrows the motifs of Indian mehndi, such as small mandalas, jaali patches and paisleys, and arranges them along an Arabic diagonal with gaps between. The result has detail without density. It’s the style I’m asked for most at family weddings because it looks rich in photos yet dries faster than traditional work. Keep the outlines strong and the inner details simple; when both are heavy, the open spaces close up and you lose the point of the style.
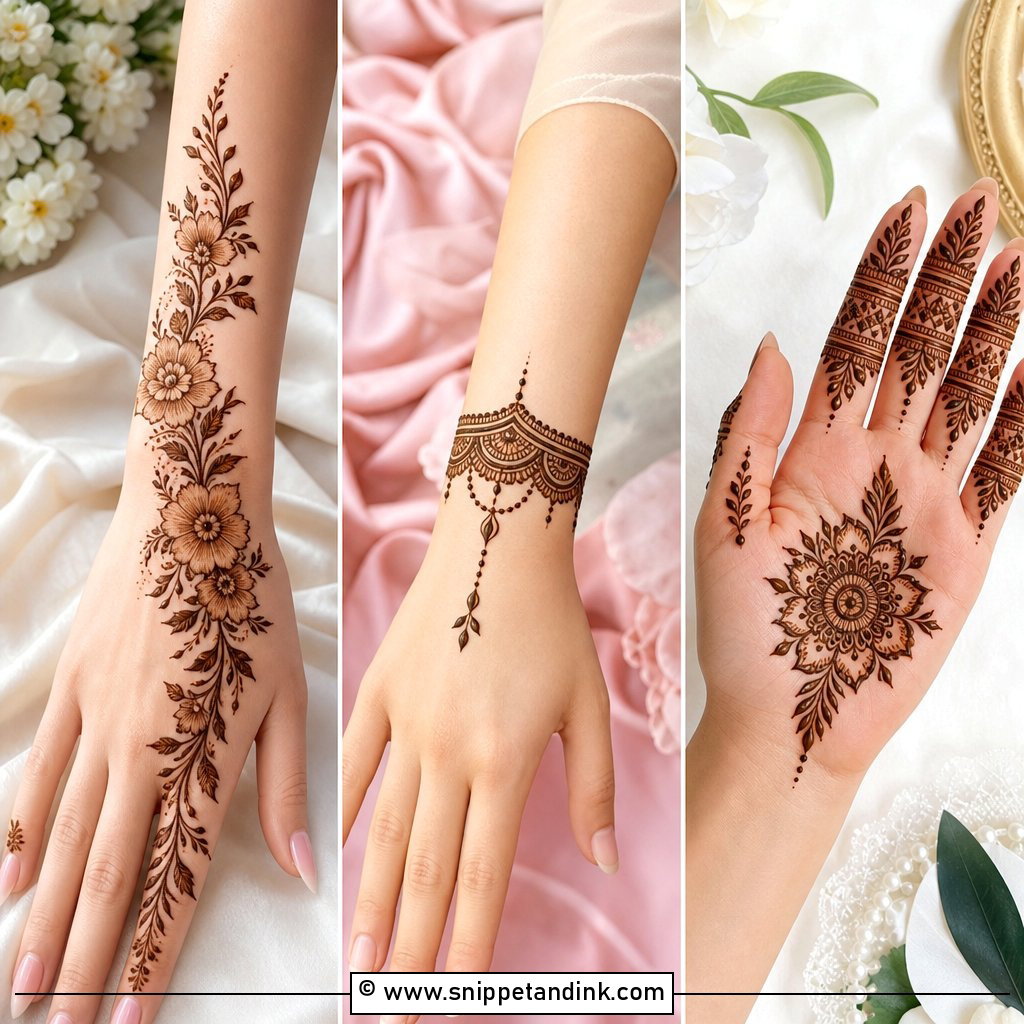
15. Simple Indian Mehndi Design
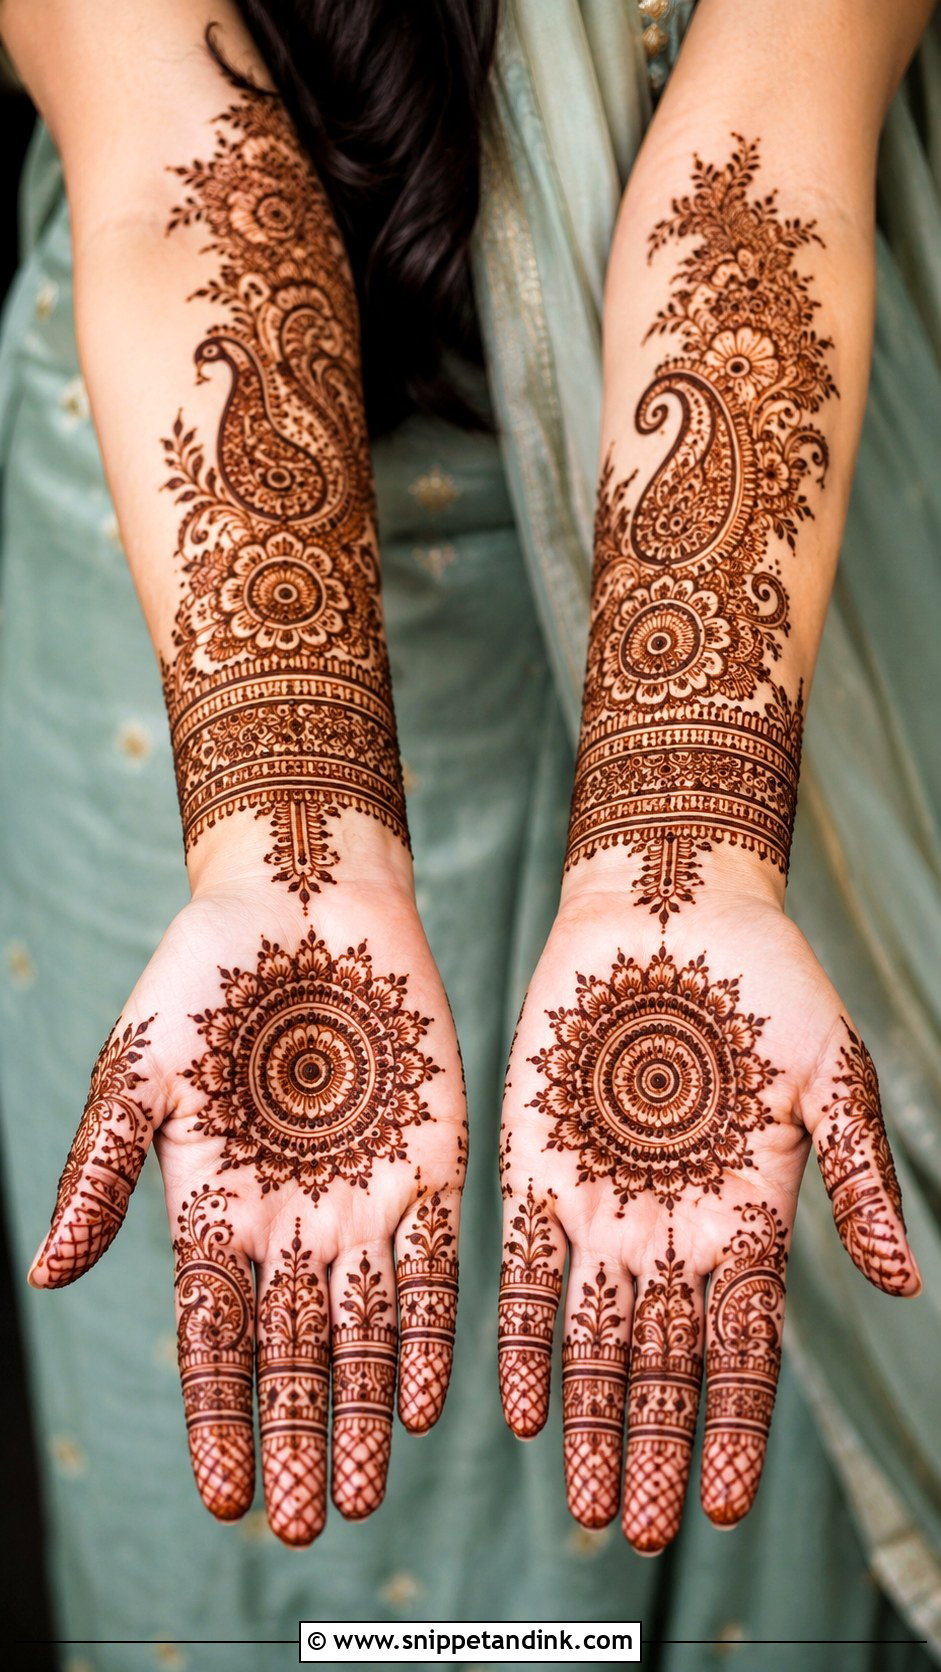
Traditional Indian mehndi relies on symmetry, borders and a strong central motif, and that structure survives even when you thin it out. For Karwa Chauth, Diwali or a puja, I’d keep a round mandala in the palm, light finger detail and a neat border at the wrist, and leave the dense jaali for the bridal hand. Balance matters more than quantity here. If the left and right sides of the mandala don’t match, it shows far more than it would in an Arabic design.
16. Simple Minimal Mehndi Design
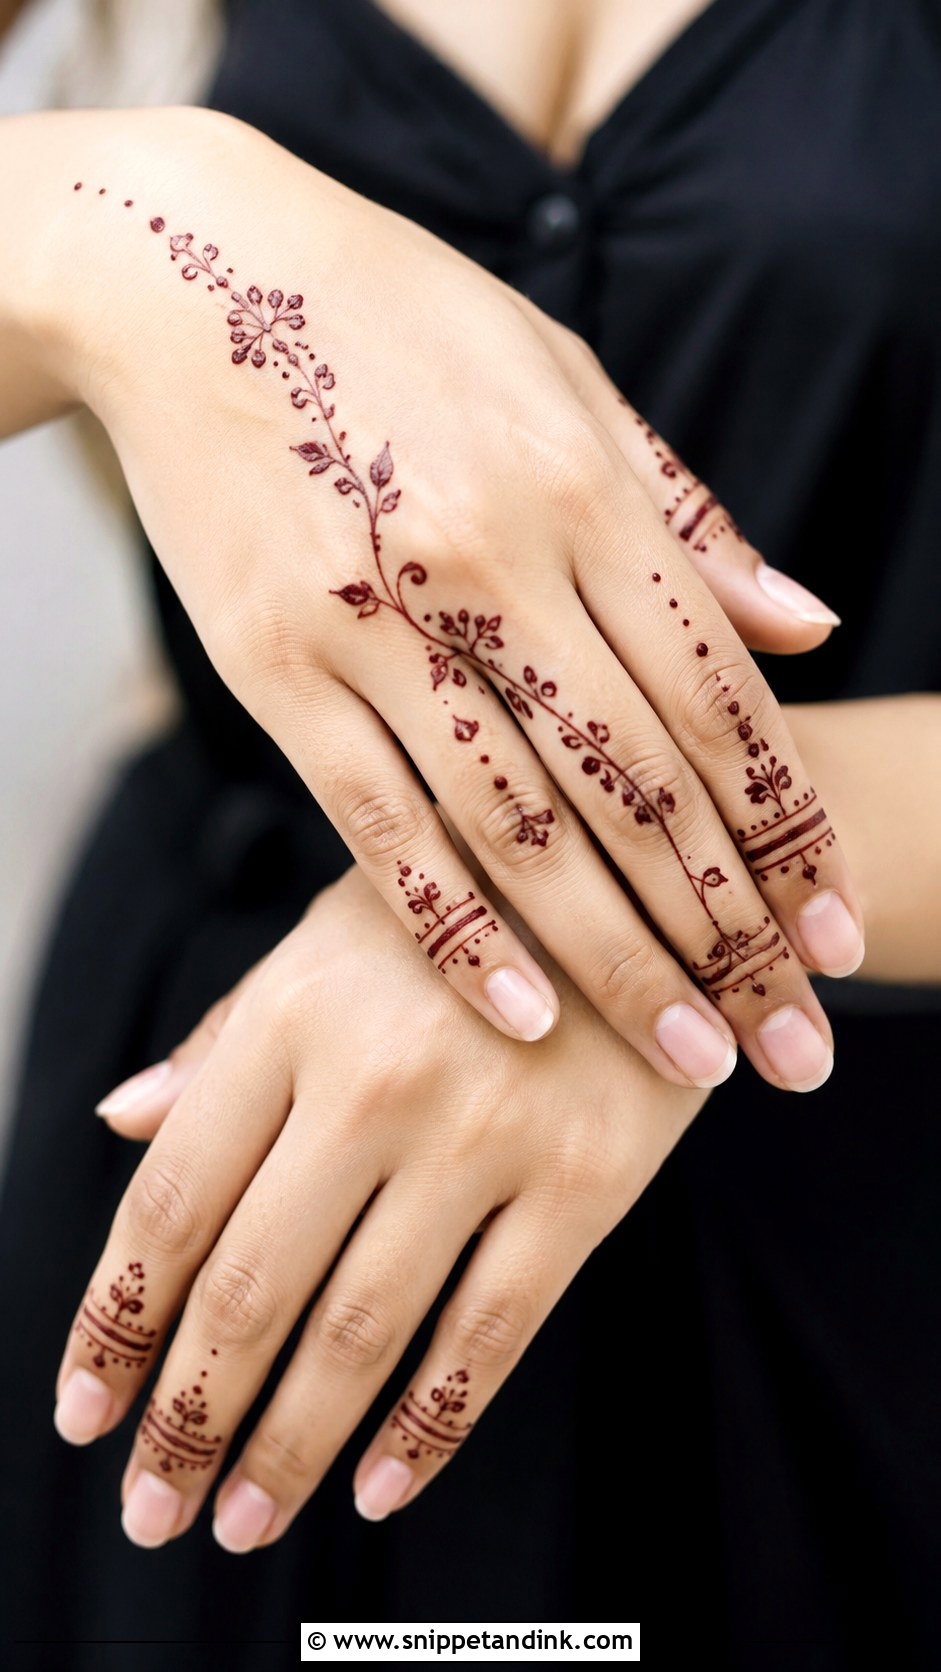
Minimal designs use fewer motifs and more bare skin, so every line is on show. A tiny vine on the back of the hand, a small palm mandala or a few banded fingers is typically all there is. Where people go wrong is stopping too early, which makes the hand look half done rather than light. I make sure the design has a clear start and finish, usually a small motif at one end and a band or dot cluster at the other.
17. Simple Modern Mehndi Design
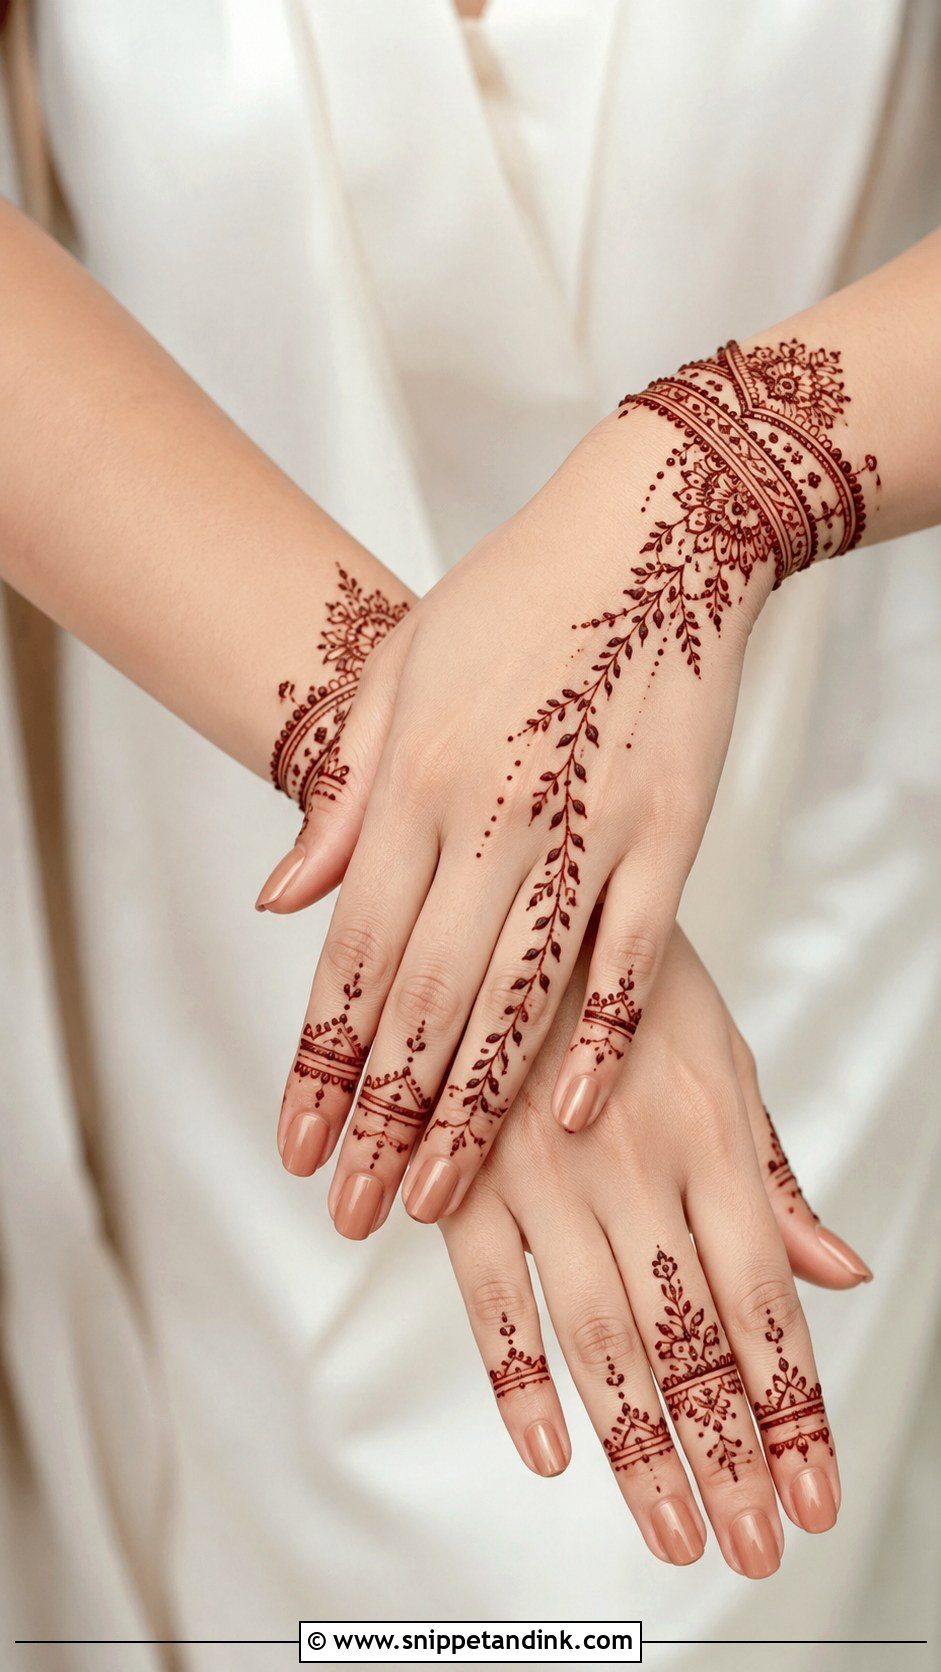
Modern layouts take classic elements and place them asymmetrically: half-empty palms, a trail that hugs one edge, fine finger work and a bracelet-style wrist. Florals, dots and a few geometric lines can all share one hand if they follow the same direction. It works with a kurta as easily as with western clothes. The design still needs a plan. I sketch the flow with a few faint dots before committing, because an asymmetric layout looks random the moment the spacing drifts.
18. Simple Eid Mehndi Design
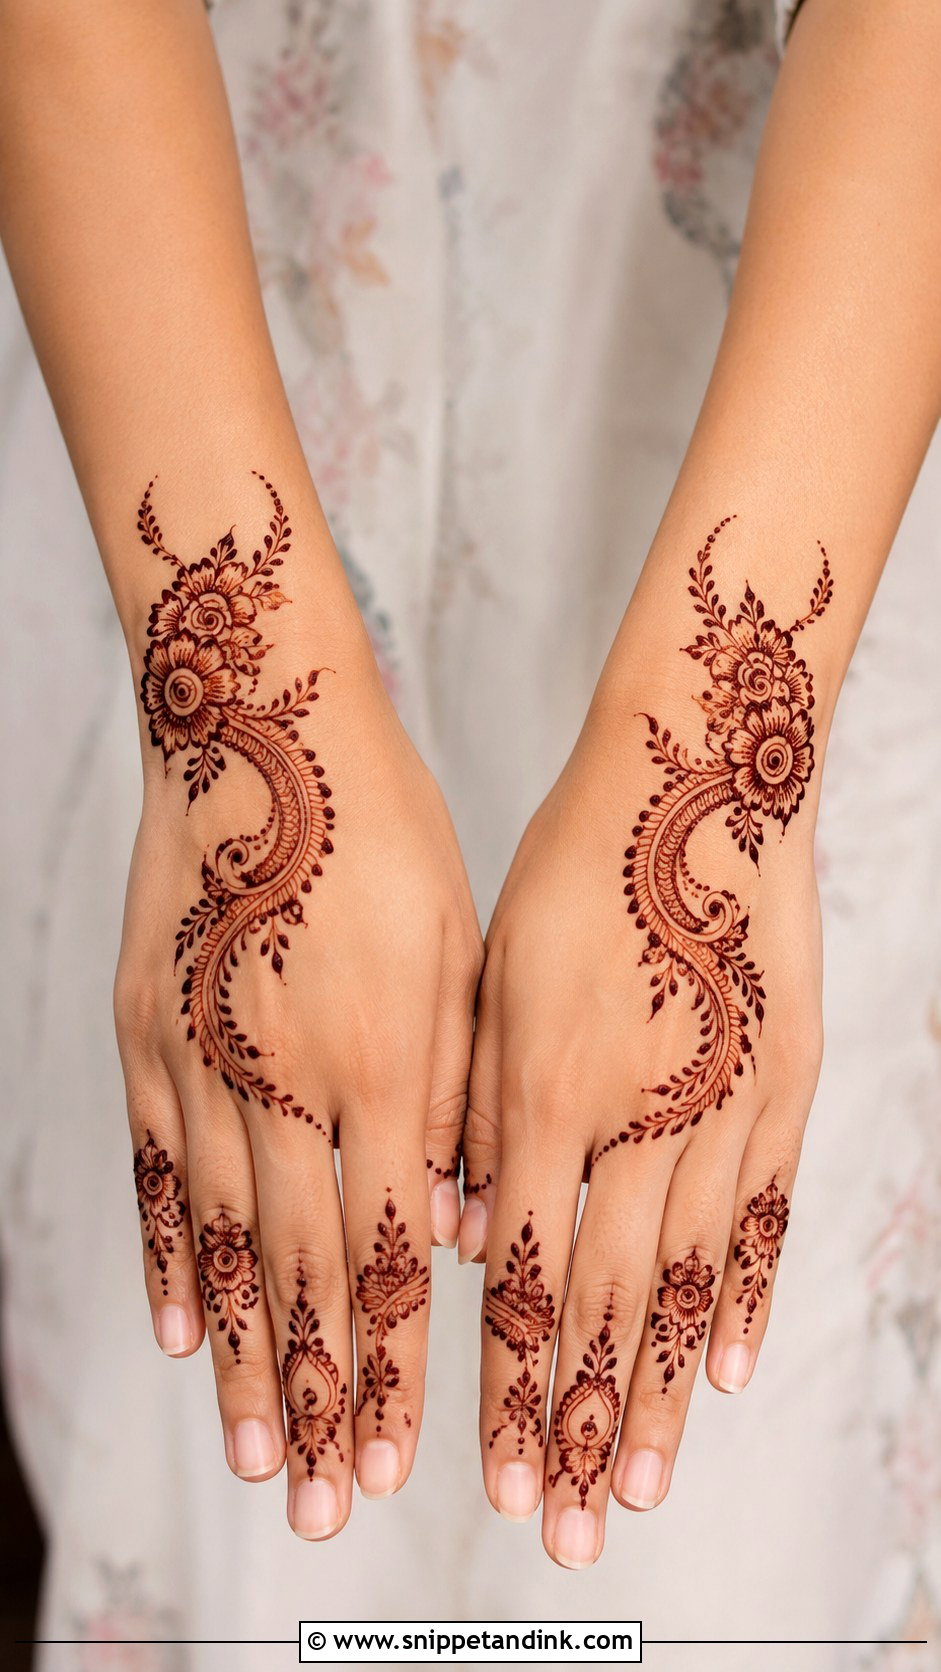
Eid henna usually goes on the night before, often in a crowded room with several people waiting, so open Arabic trails, finger bands and crescent curves make sense: they’re fast and dry quickly. I focus on the fingers and the back of the hand because those are what people see while greeting and serving food. Keep the coverage light enough that you can still wear bangles and eat comfortably the next day.
19. Simple Diwali Mehndi Design
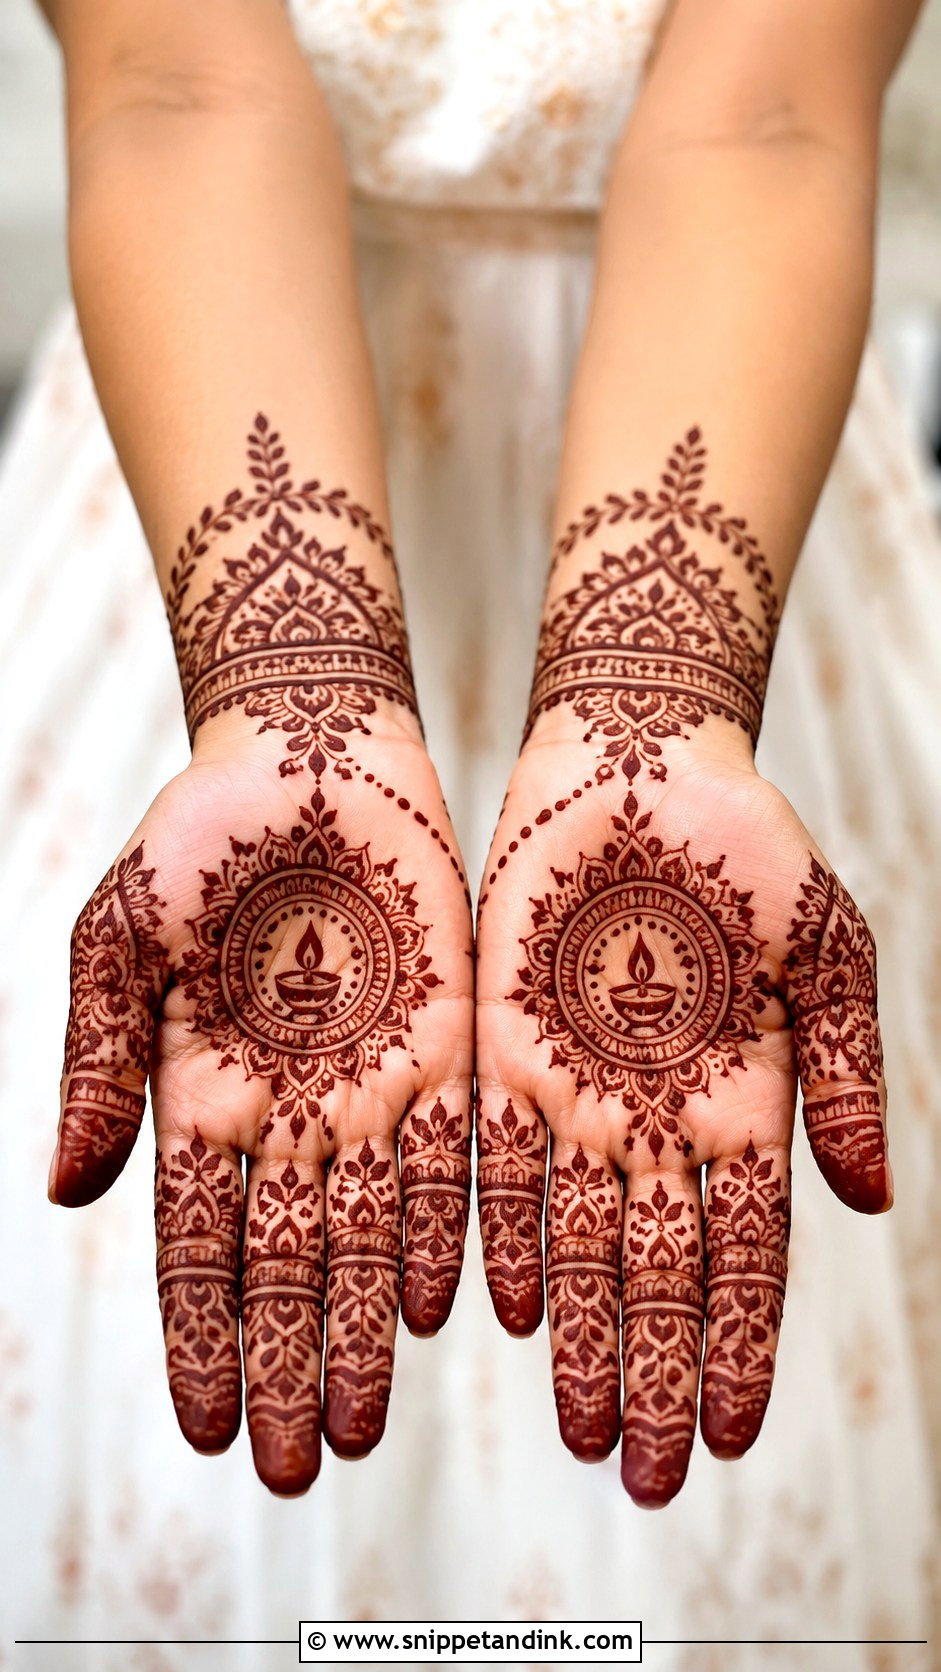
For Diwali I lean on the palm, since a central mandala with diya-shaped curves and a paisley border is what most families expect to see. A narrow cuff at the wrist dresses it up. Medium spacing gives the best colour on festival hands. Lines drawn too close together blur as the stain develops, and lines that are too thin go pale, so I keep the strokes a little fuller than I would for a casual design.
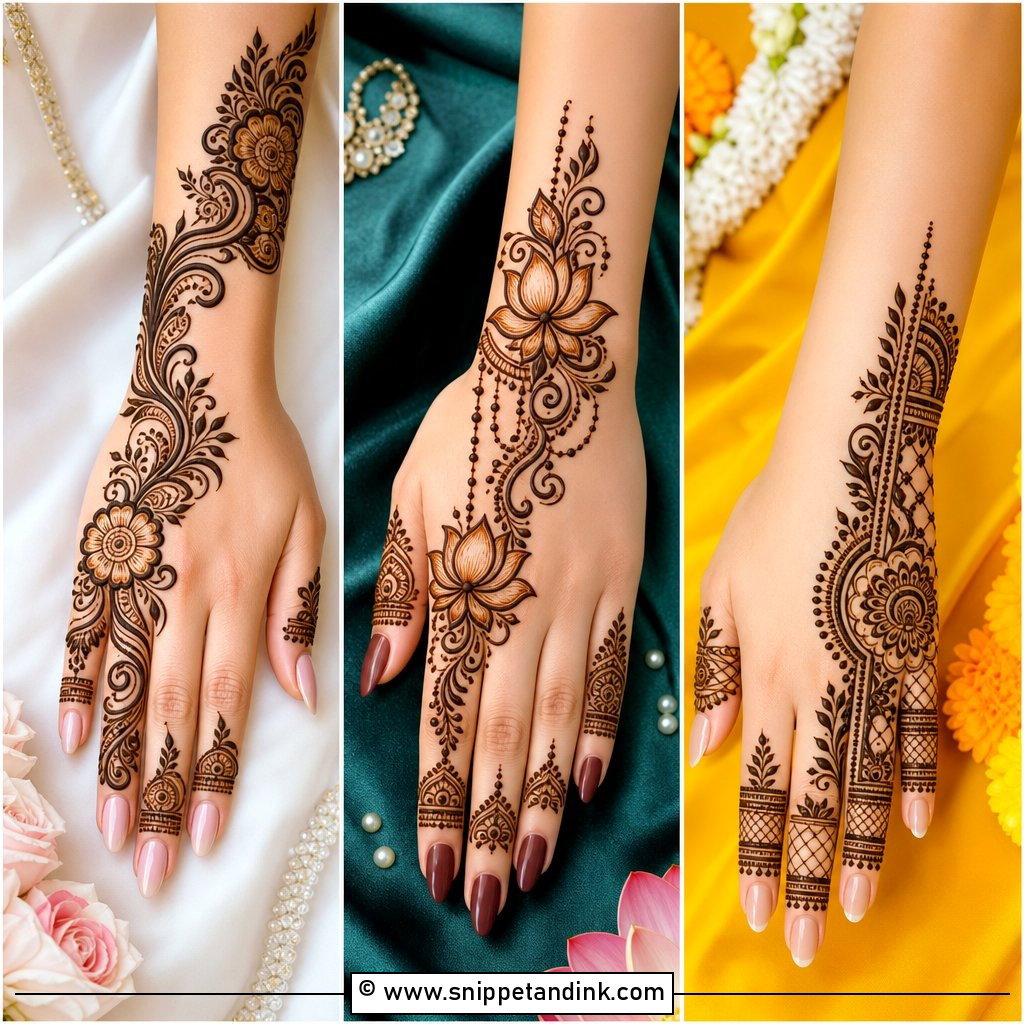
20. Simple Bridal Mehndi Design
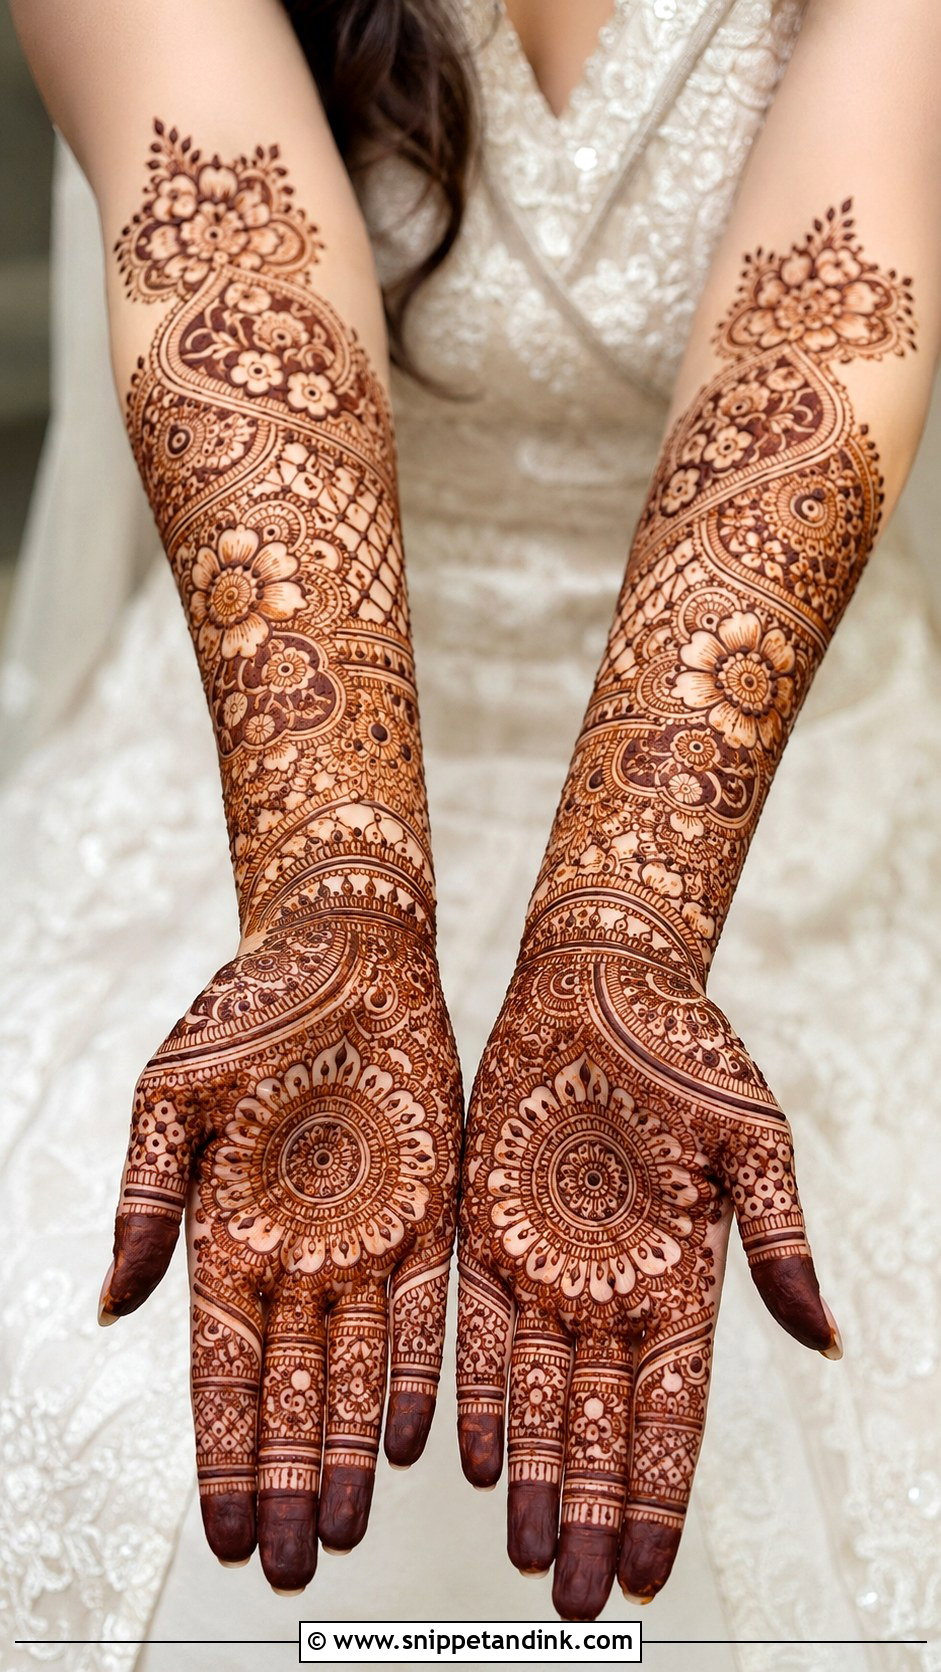
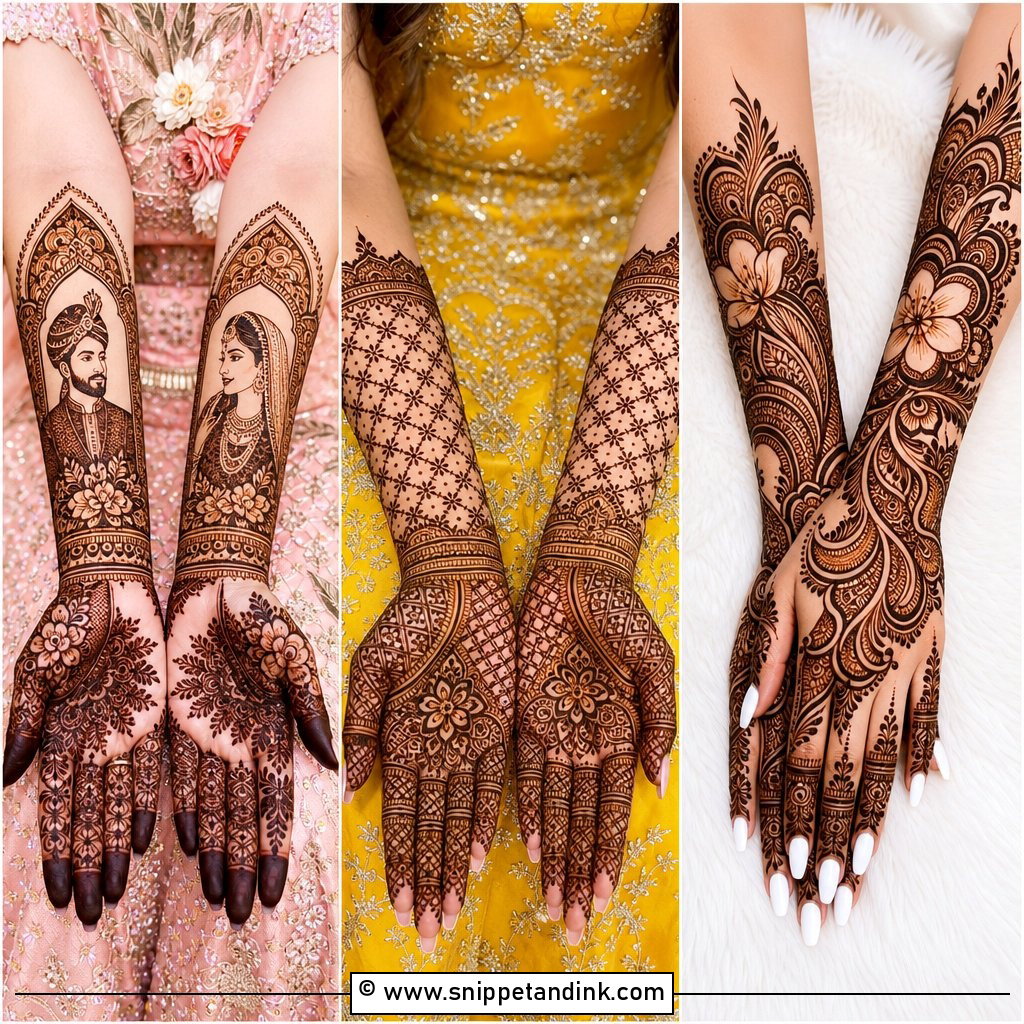
A light bridal design is a real option, especially for engagement brides, second-day functions or a small ceremony. It can carry florals, paisleys, a few jaali sections and wrist-to-forearm details, as long as the spacing stays open. I fill the fingers well because they’re front and centre in every ring photo, and I keep a soft mandala or a small couple motif in the palm. Brides should know the stain peaks a day or two after application, so it needs to go on two days before the wedding, not the night before.
21. Simple Bridesmaid Mehndi Design
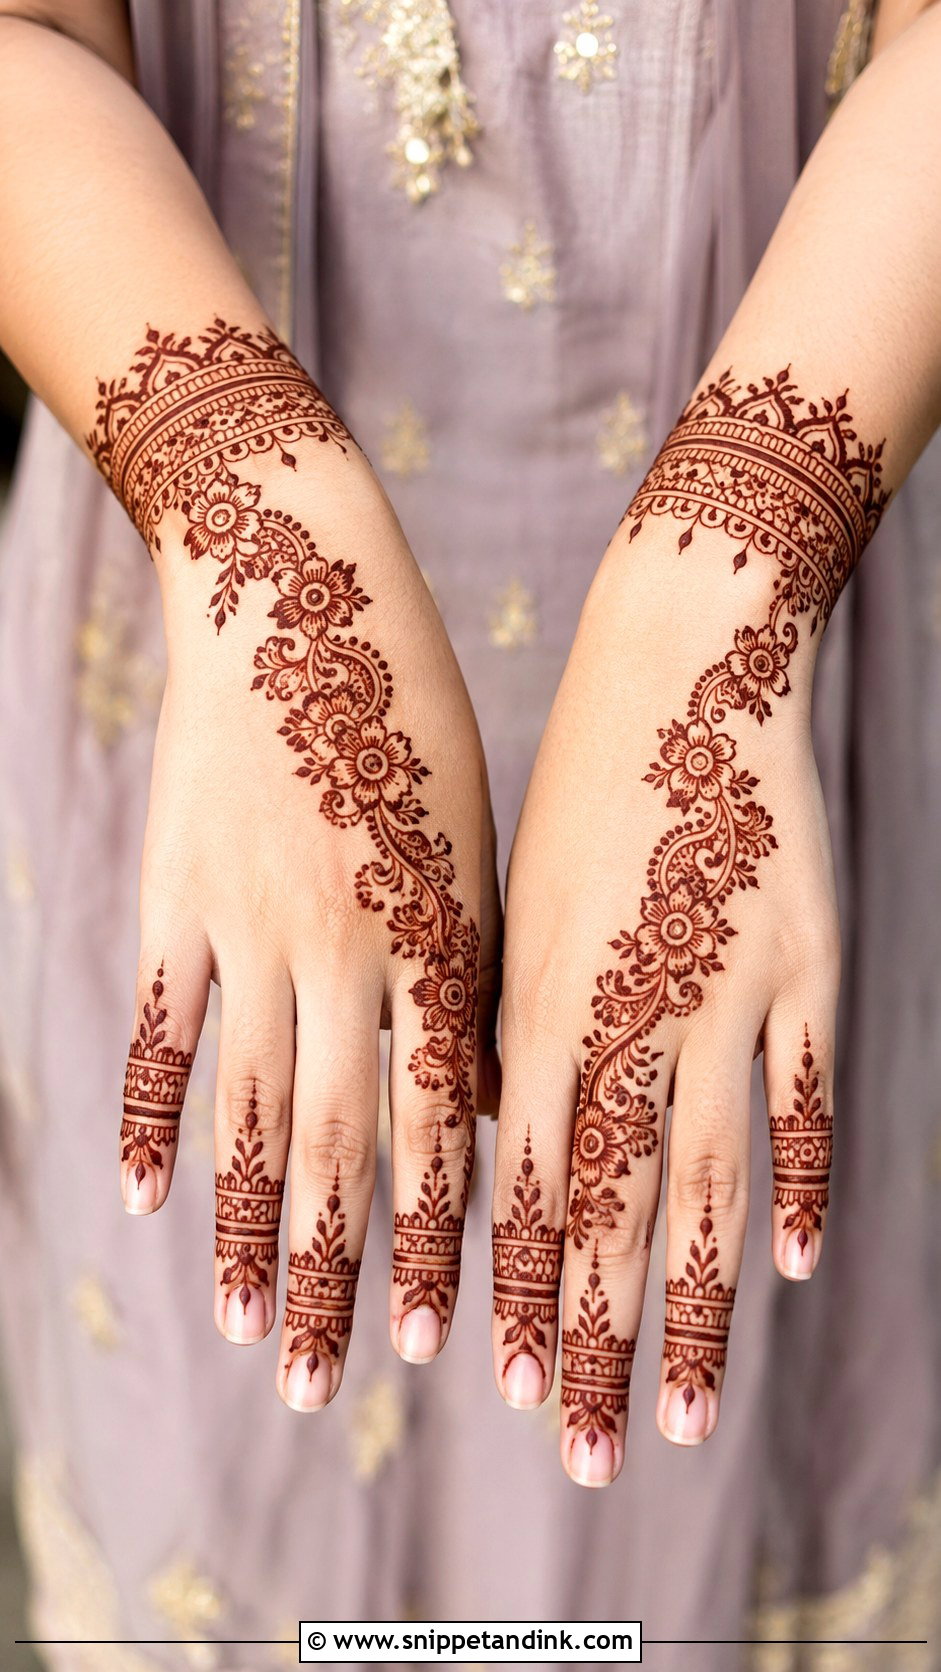
The bridesmaid’s job is to complement, never to compete, so their henna should stay a clear step lighter than the bride’s. Bridesmaids are also running errands all evening, which rules out anything that needs hours to dry. A diagonal Indo-Arabic pattern on the back of the hand, a wrist cuff and a few banded fingers is my usual plan. I skip dense palm filling for them; it’s the part most likely to smudge when someone is carrying trays.
22. Simple Engagement Mehndi Design
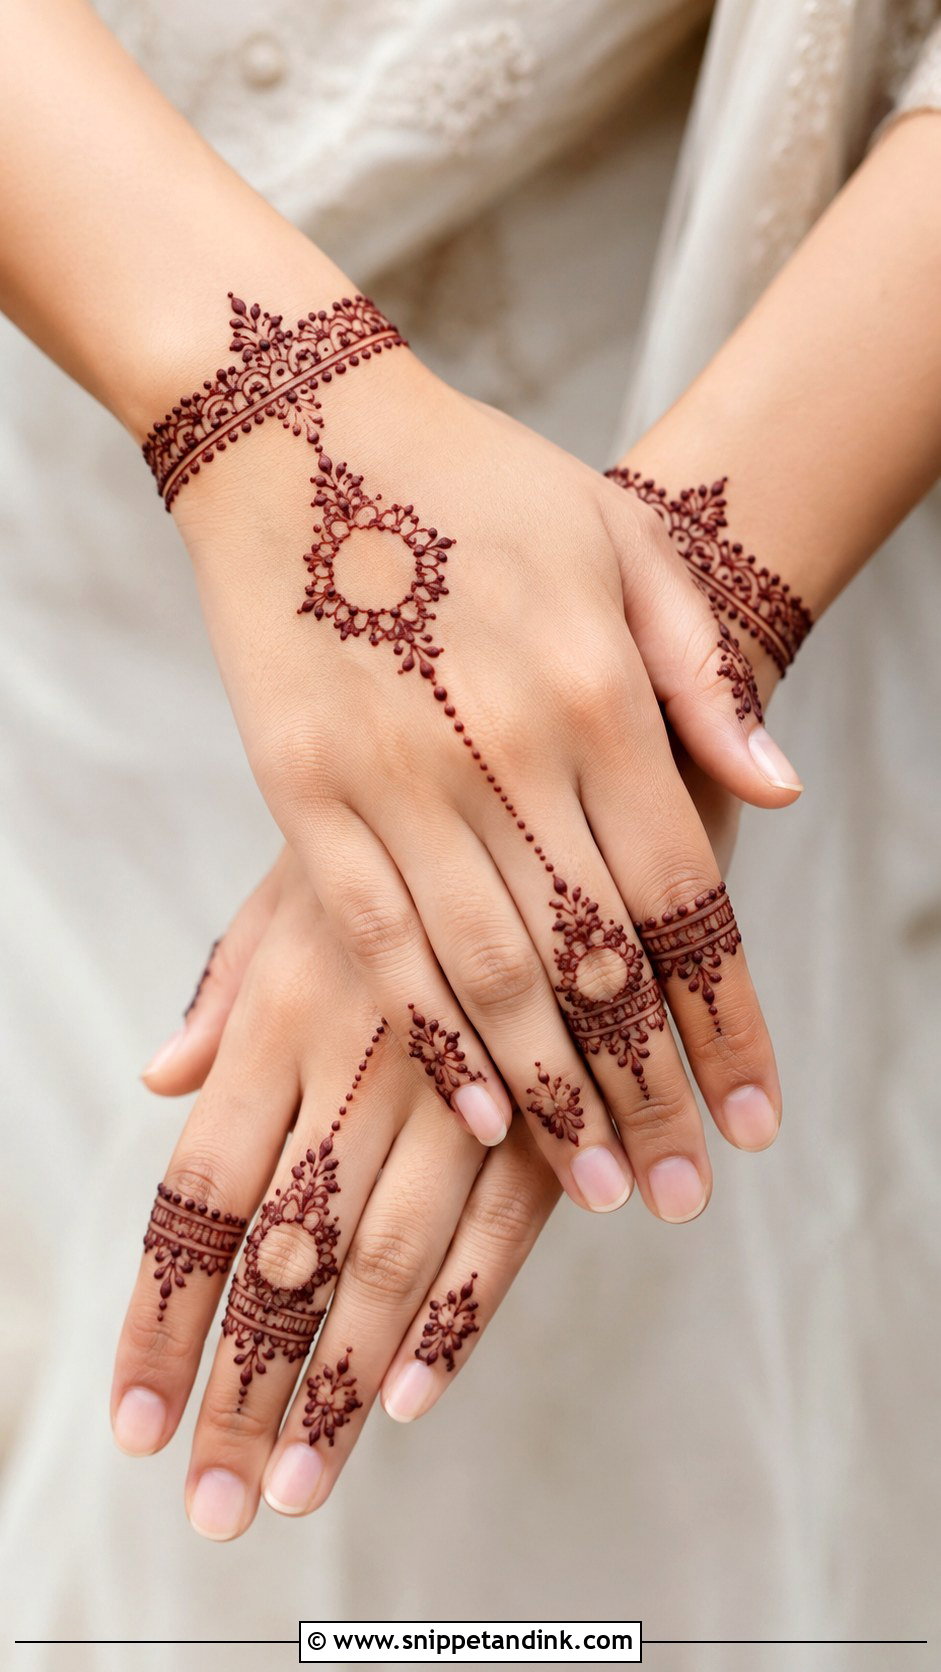
Engagement photos are mostly close-ups of hands, so the ring decides the layout. I keep the ring finger fairly clean, with just a band below the knuckle, and frame it with a ring-style design of dotted chains and small florals running to a wrist cuff. A small mandala on the back of the hand works too. If the ring finger is crowded with pattern, the stone gets lost in the photos.
23. Simple Wedding Guest Mehndi Design
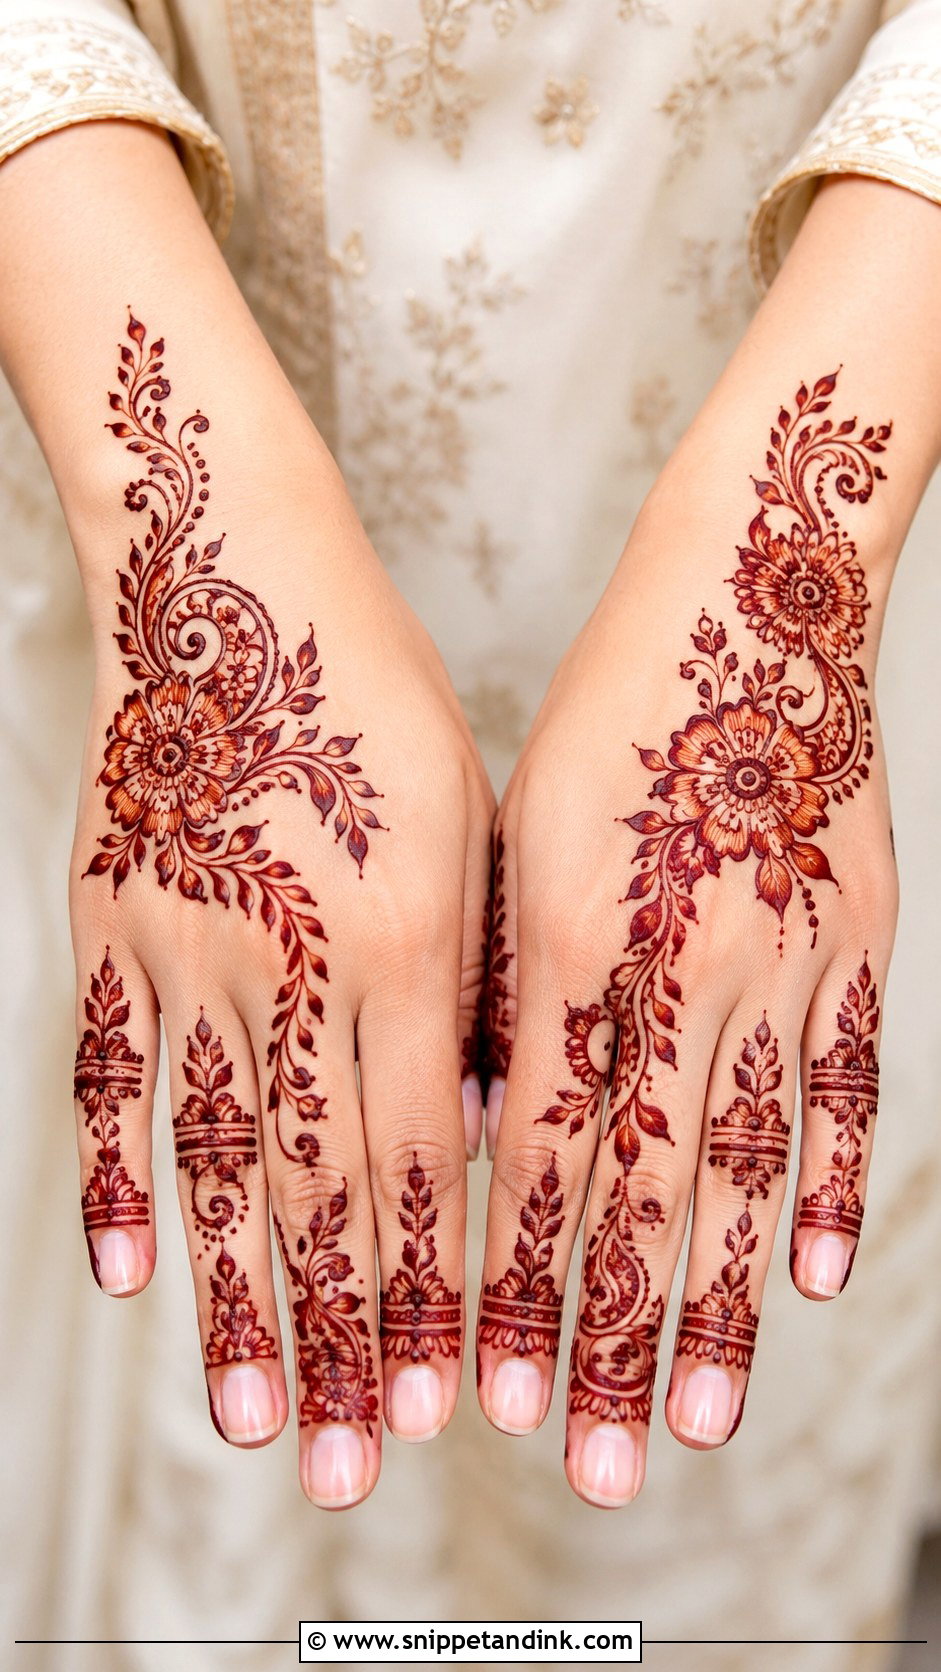
Guests need henna that looks dressed but clearly not bridal. A back-hand Arabic trail is the safest choice: quick to apply, quick to dry and easy to match with any outfit colour. Front-hand fans can have a central mandala with light finger and wrist detail instead. Moderate coverage is the target. I also remind guests to apply a day ahead if they can, because fresh henna is still orange on the day it goes on.
24. Simple Party Mehndi Design
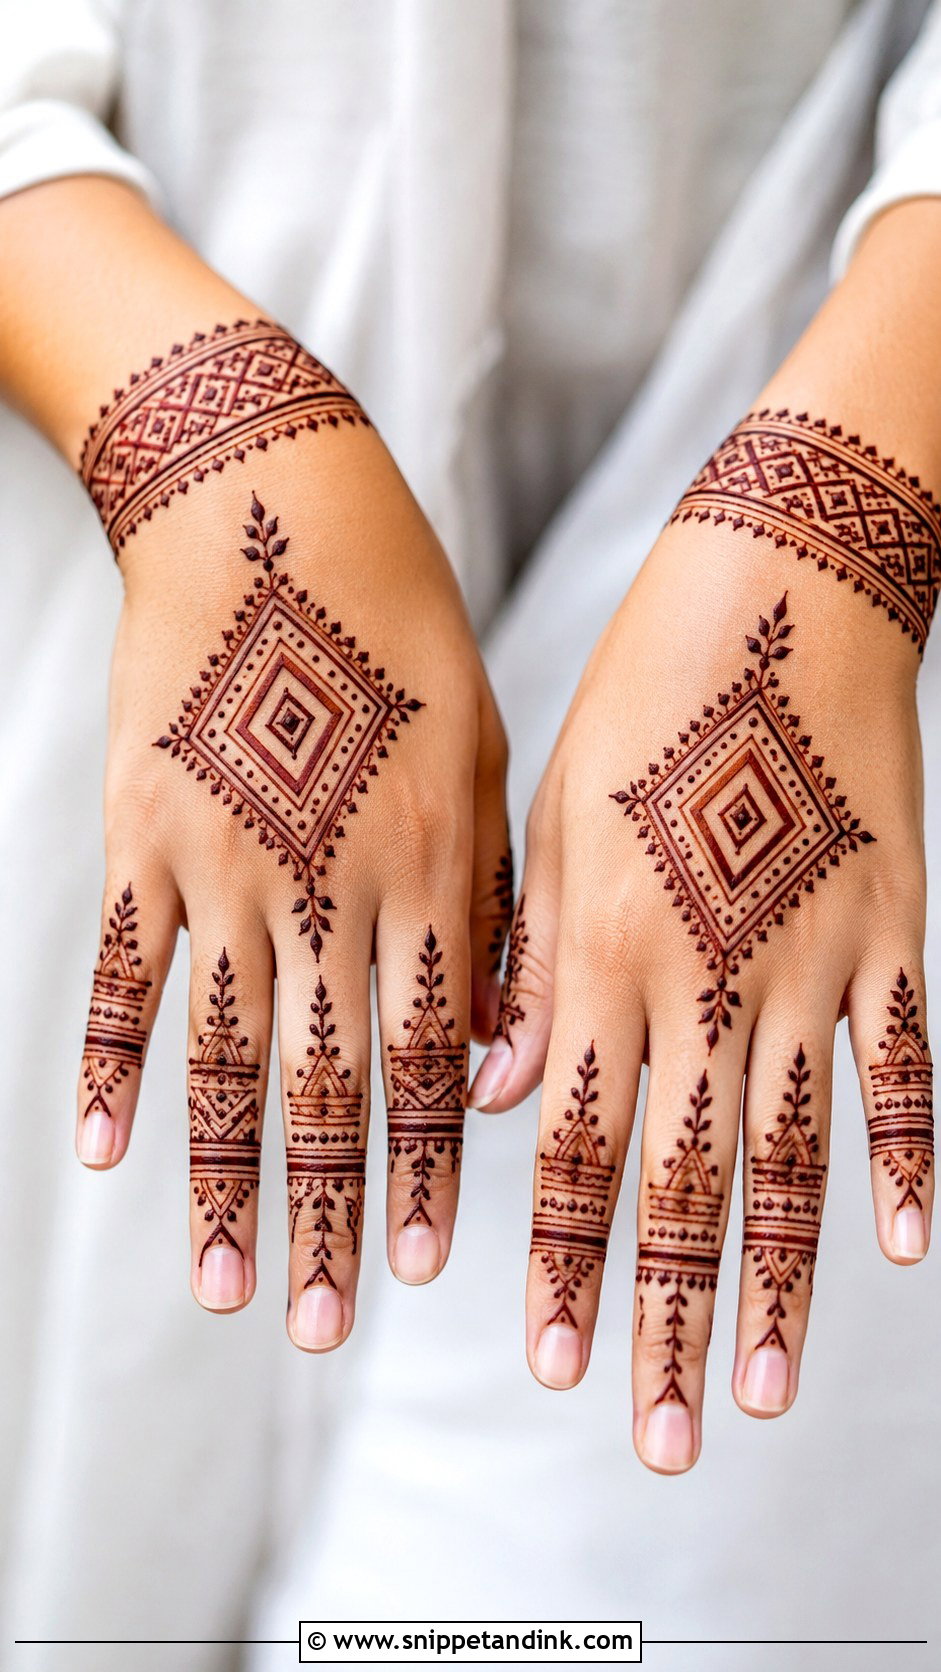
Party henna can be the most playful: finger-focused designs, a single rose trail, a bracelet cuff or one bold flower at the wrist with filled fingertips. Clean lines and open spacing are what make it look current. Because most parties are in the evening, I often apply these the same afternoon, which means the colour is still light. If the stain matters, get it done the day before.
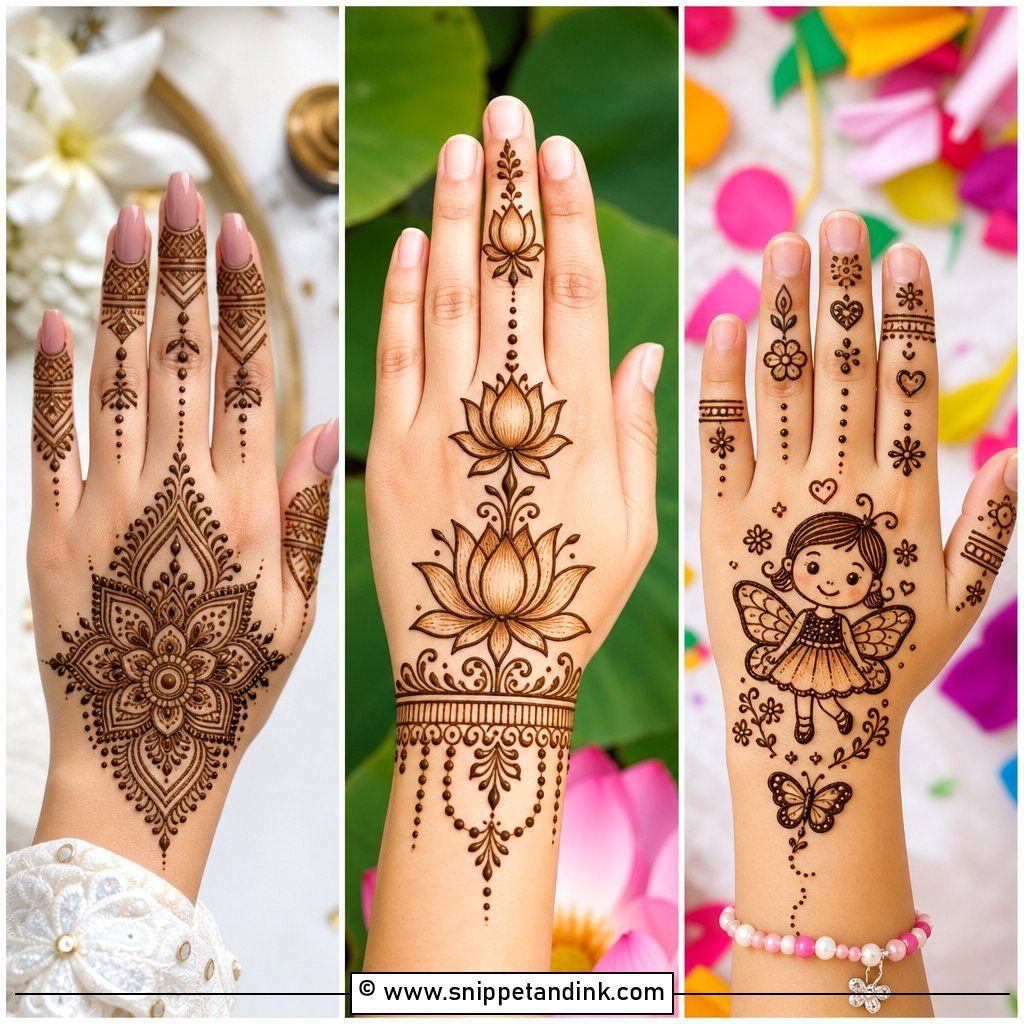
25. Simple Kids Mehndi Design
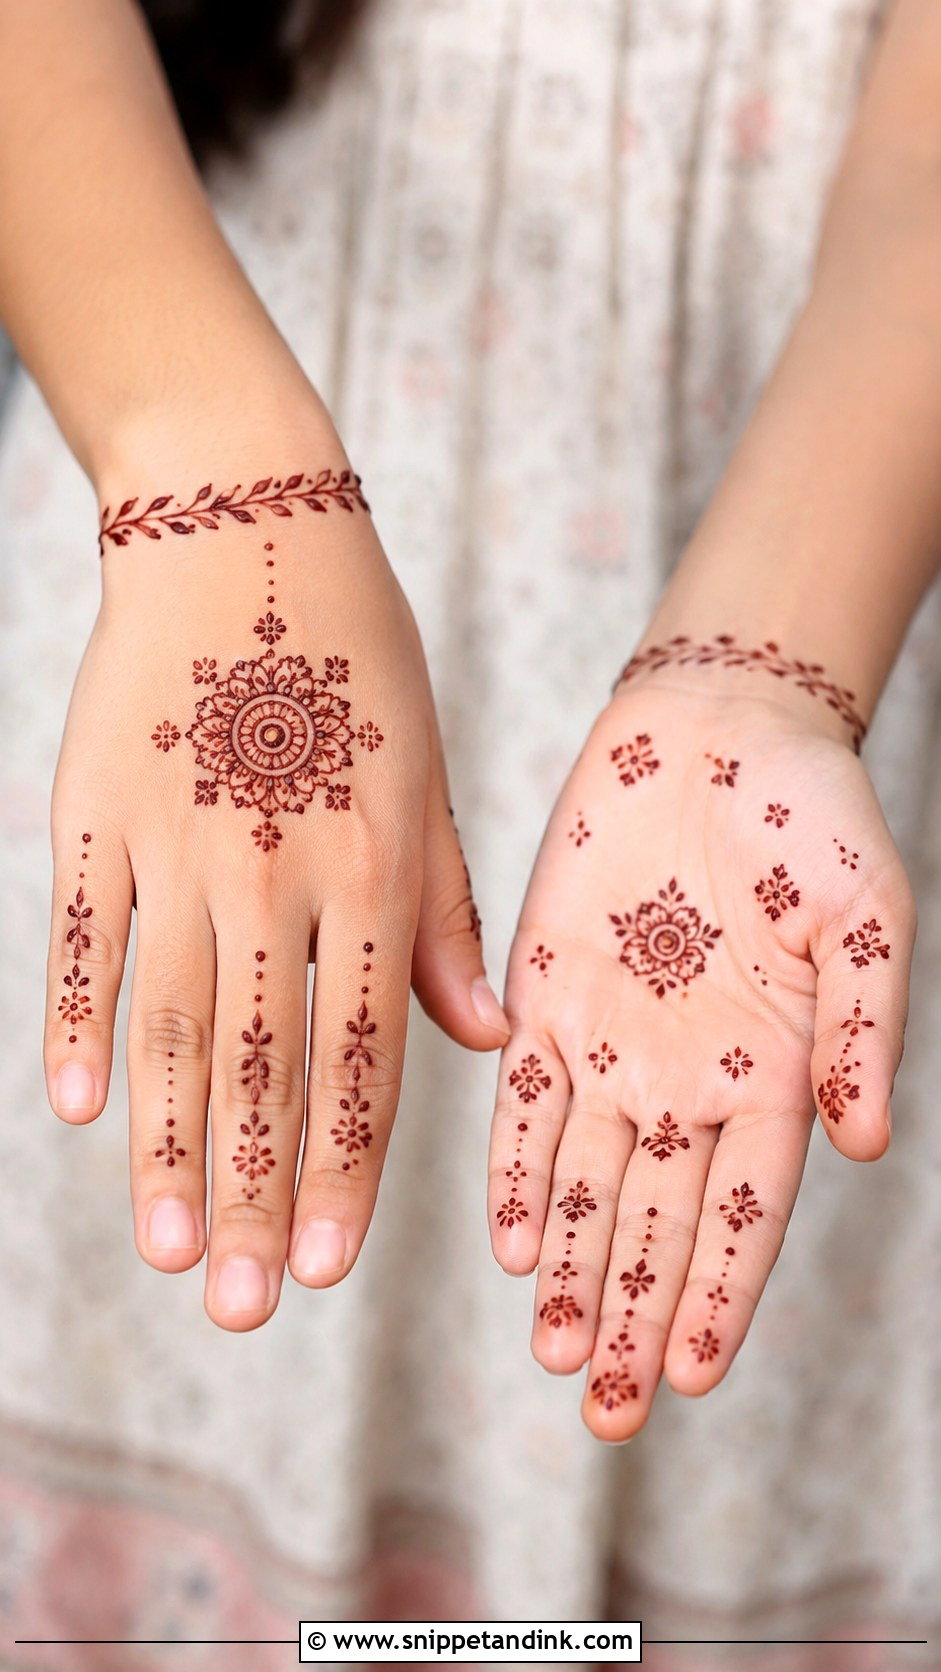
Children rarely sit still for more than a few minutes, so I keep their designs tiny: a flower circle on the back of the hand, dotted fingertips, a star or a heart. Small motifs dry before they can be smudged. I only use natural henna on children and do a small patch test first on sensitive skin. Any so-called black henna that stains instantly can contain a dye that causes serious skin reactions, and I’d never put it on anyone, least of all a child.
26. Simple Beginner Mehndi Design
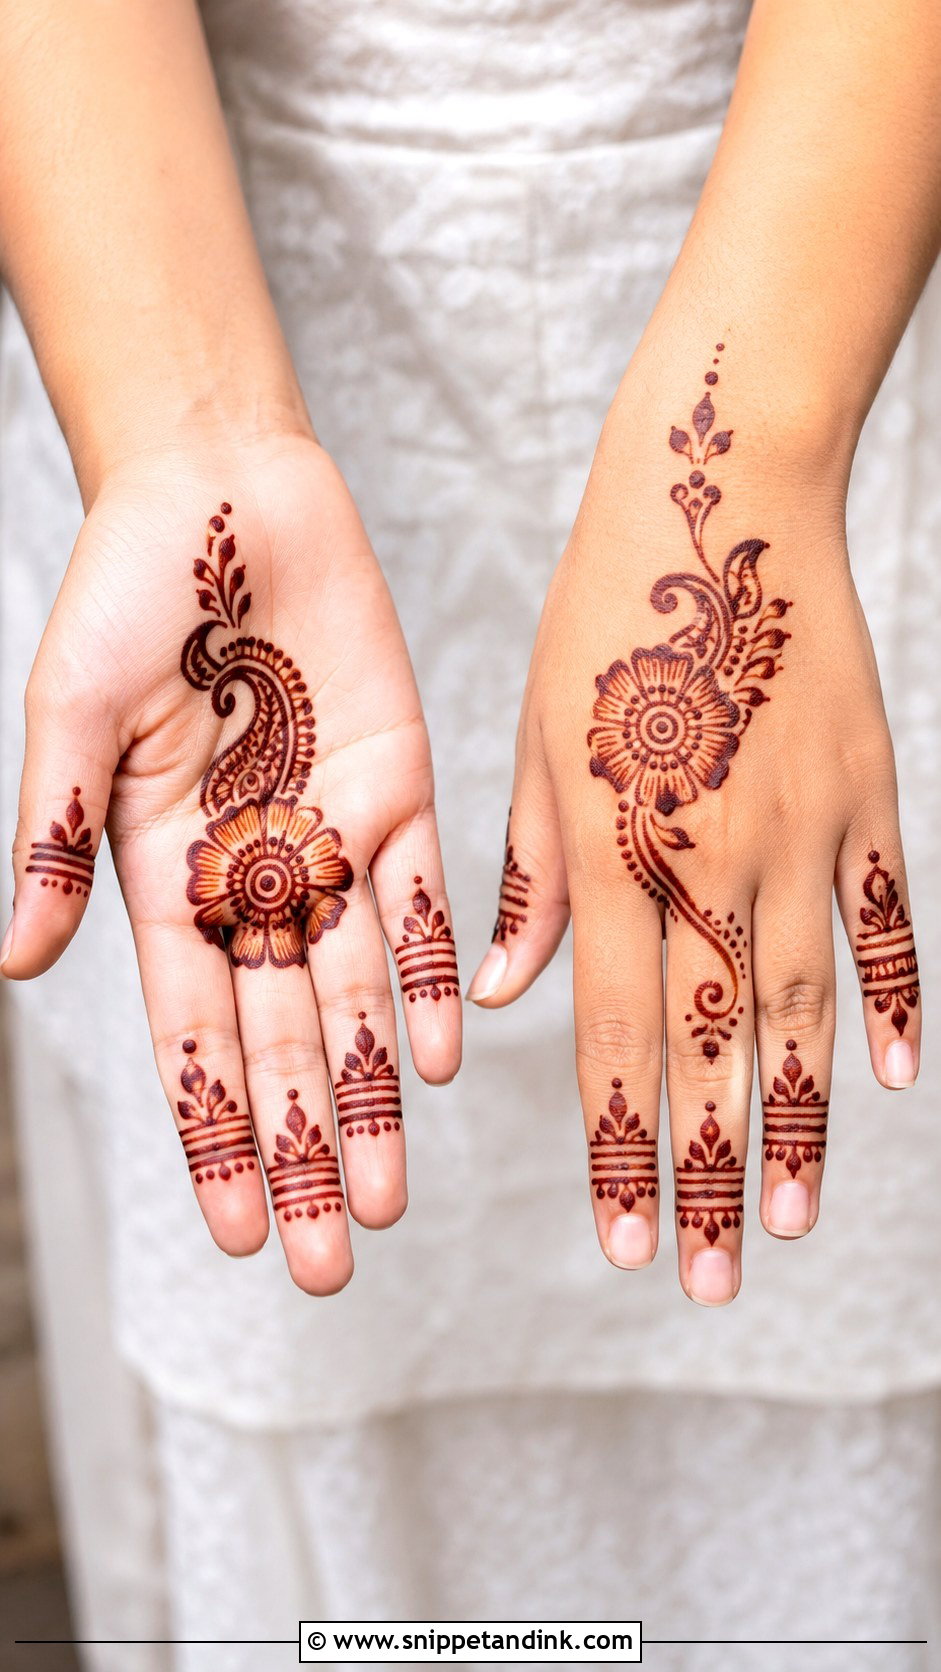
Start with shapes you can draw with a steady wrist: a flower, a mandala or a paisley, then leaves, dots and finger bands around it. A simple beginner mehndi design is better with fewer, bolder lines than with tiny details, which wobble and merge. Most beginners find the back of the hand easier than the palm because the skin is flatter and there’s more room. Practise the pressure on paper first; the cone should release a steady thread, not a blob.
27. Simple Jaali Mehndi Design
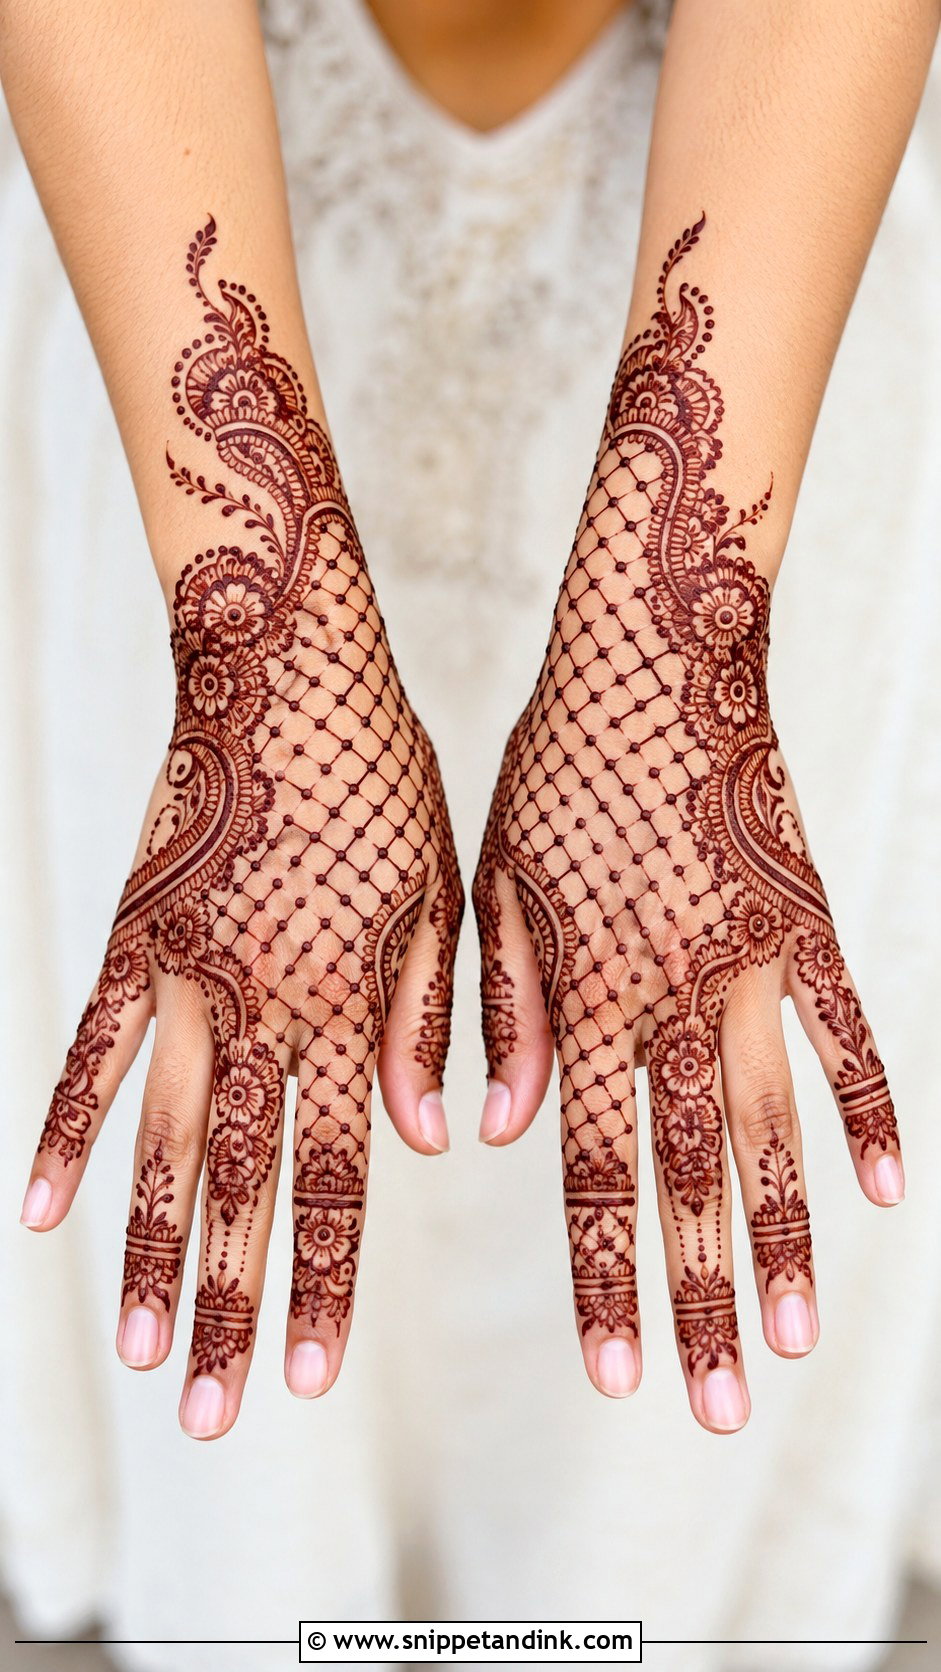
Jaali is a fine mesh of crossing lines, and in a light design it belongs in one panel only: inside a cuff, in a corner of the palm or at the centre of the back of the hand. Even spacing is non-negotiable. If the little squares vary in size, the eye catches it immediately. Surround the mesh with florals or a leafy border and keep the rest of the hand light so the texture stays the focus.
28. Simple Moroccan Mehndi Design
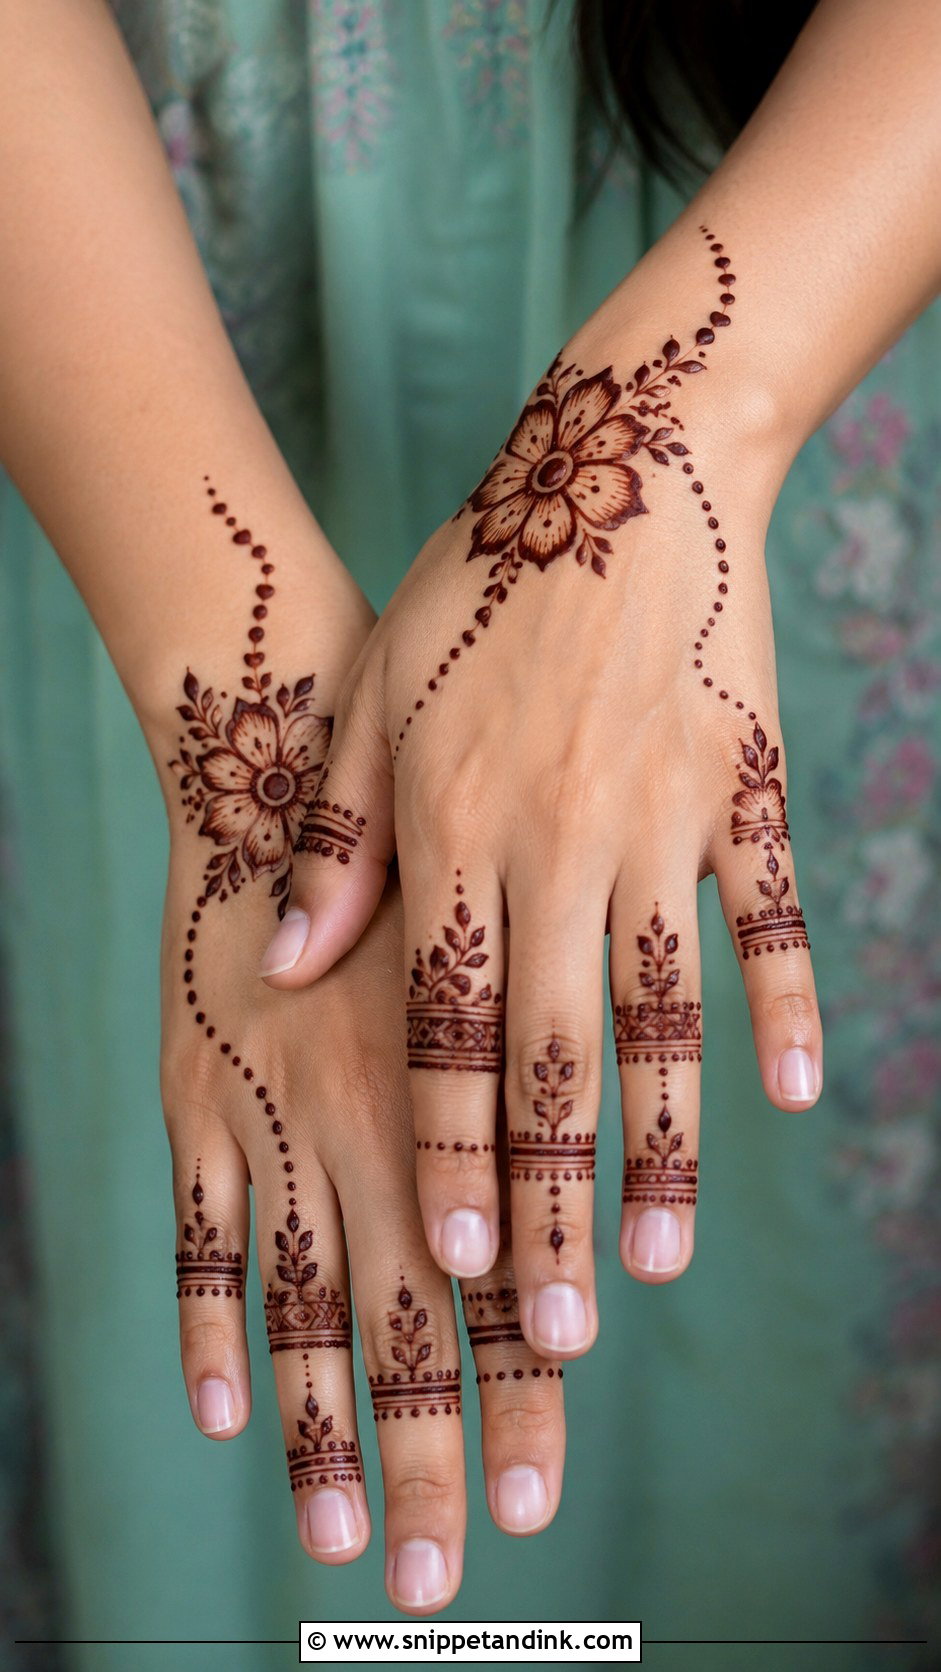
Moroccan-inspired henna swaps florals for diamonds, triangles, dots and straight borders. On the back of the hand with finger bands and a wrist cuff, it looks graphic and modern. It suits anyone who finds paisleys too traditional. Thin lines give a delicate result, and slightly thicker ones give stronger contrast. The challenge is straightness on a curved surface; I work in short strokes and rotate the hand rather than dragging one long line across the knuckles.
29. Simple Gulf Mehndi Design
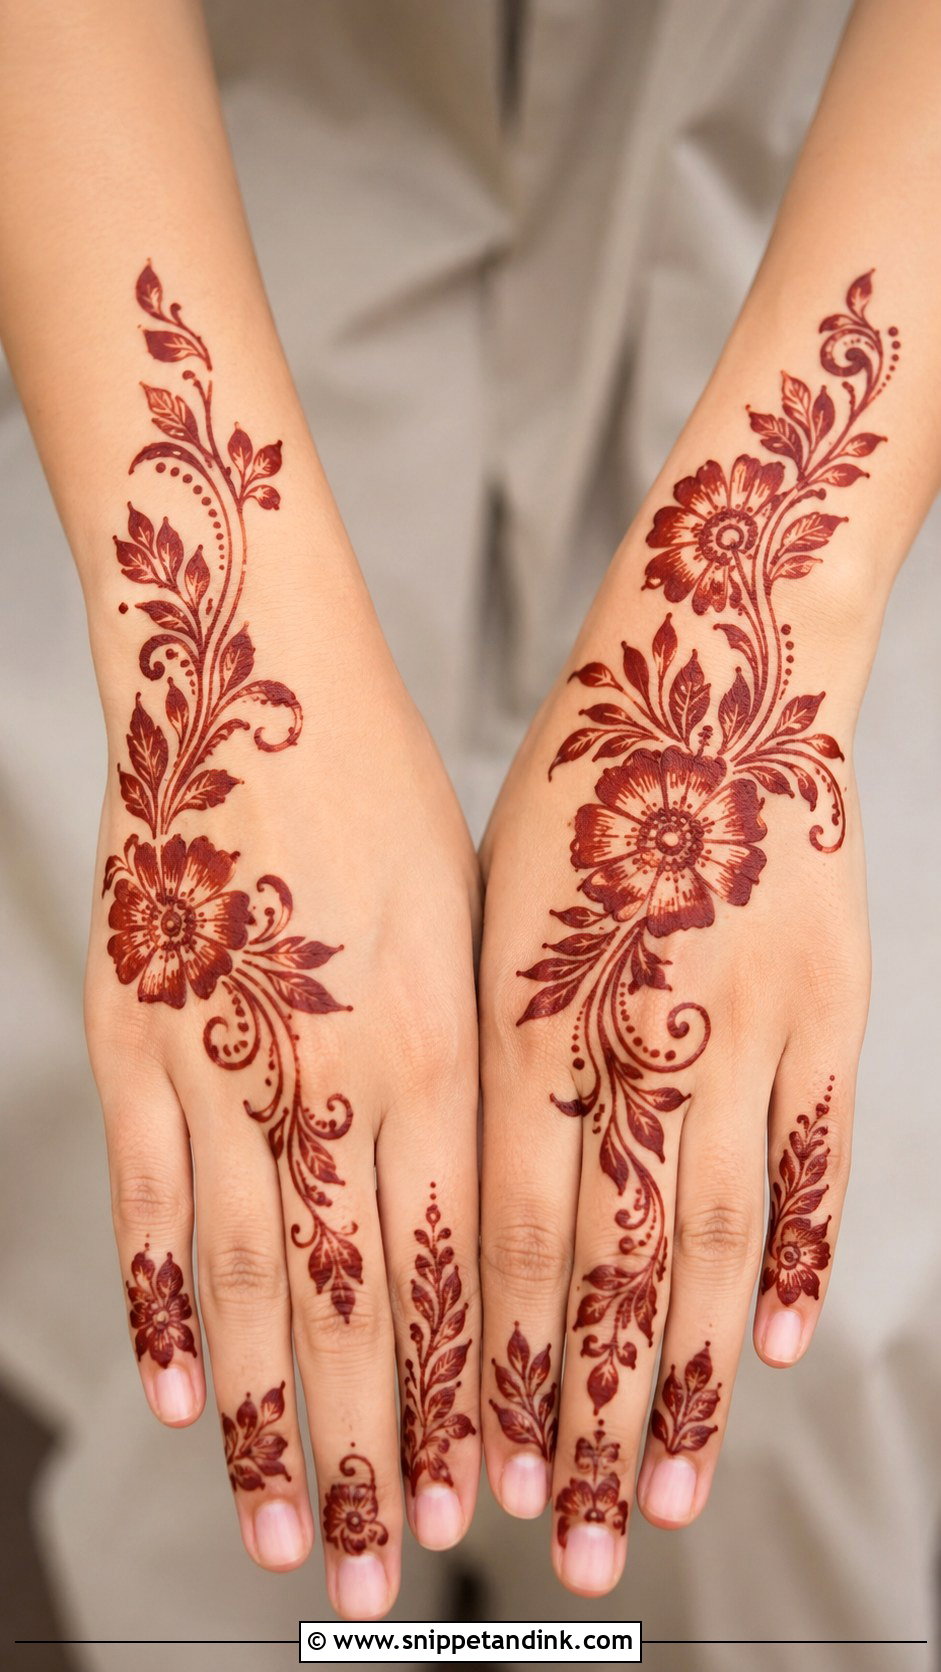
Khaleeji or Gulf-style henna is built from big, bold flowers and leafy sprays with plenty of air around them, traditionally on the back of the hand. One large bloom near the wrist or centre, leaves reaching toward the fingers, firm outlines and very little inner detail. The thick outlines carry a lot of paste, so this style tends to finish a deep reddish brown even on the back of the hand. It suits Eid, weddings and evening events.
30. Simple Peacock Mehndi Design
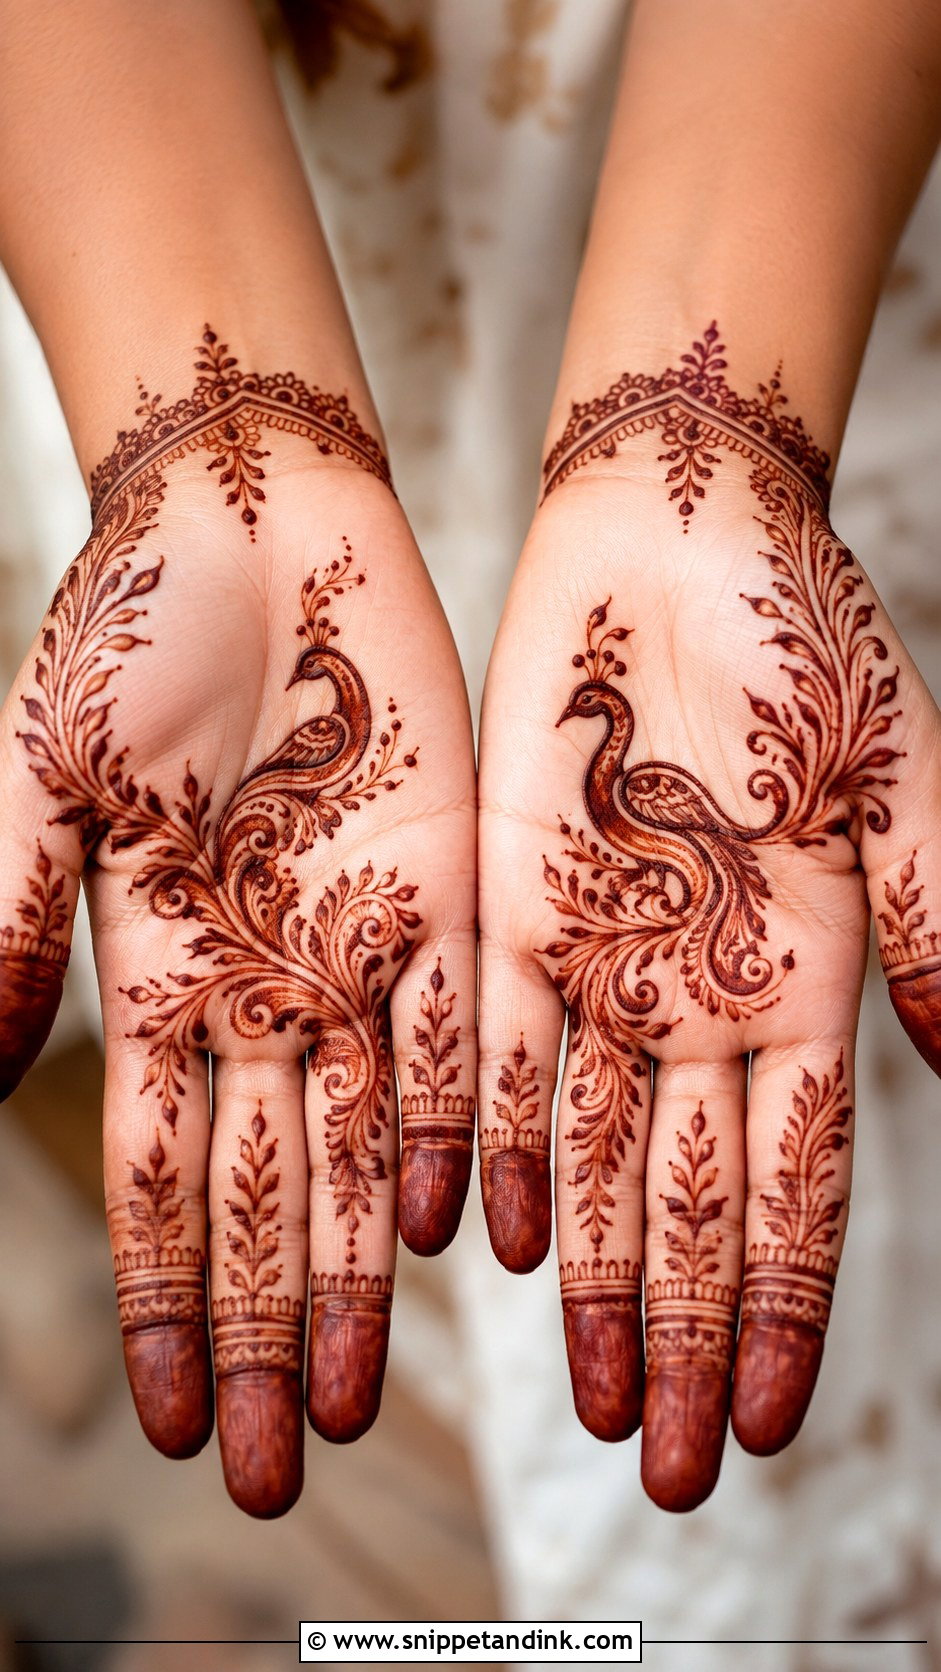
A peacock can make a light design feel traditional, but it needs restraint. I draw one small bird, with a plain body and feathers that turn into a curved vine, on the palm or the back of the hand, then surround it with leaves and dots. Keep it medium-sized. A tiny peacock blurs into an unreadable shape once the stain darkens, and a large one takes over the whole hand. Clean outlines on the neck and beak are what make it recognisable.
31. Simple Lotus Mehndi Design
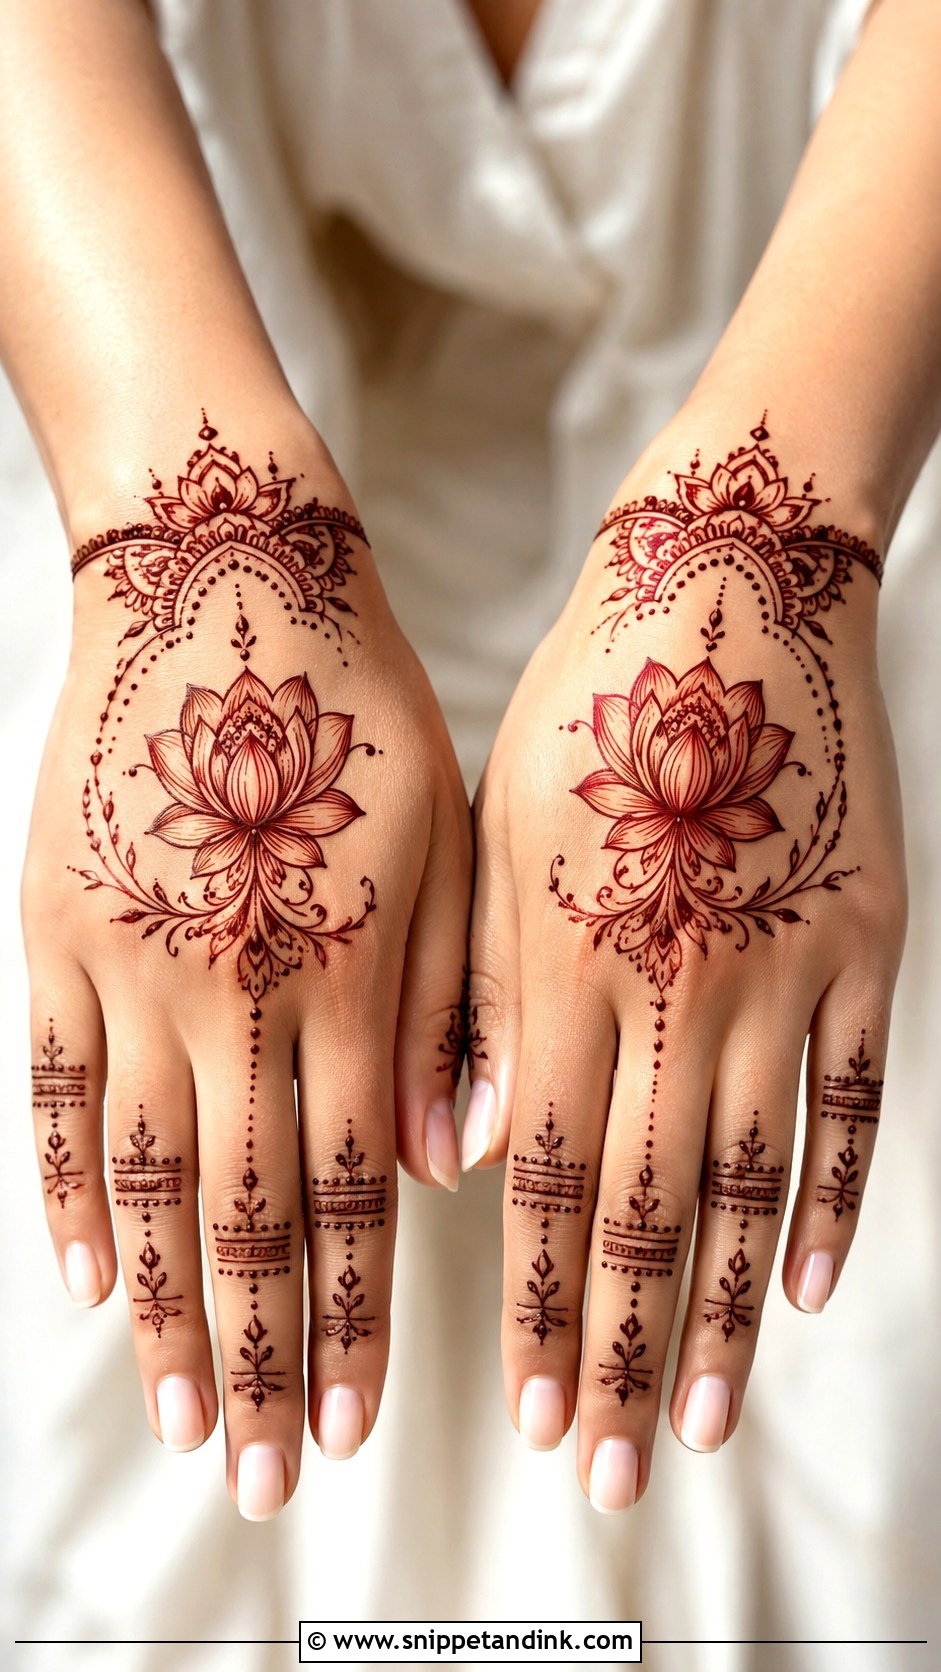
A single lotus in the centre of the palm, on the back of the hand or near the wrist, with curved leaves and a few dots around it, sits comfortably in both Indian and Arabic layouts. For a modern finish I leave it alone and band the fingers; for a festive one I set a mandala behind it. The lotus also shows up clearly on deeper skin tones, because its broad petals hold enough paste to stain well.
32. Simple Geometric Mehndi Design
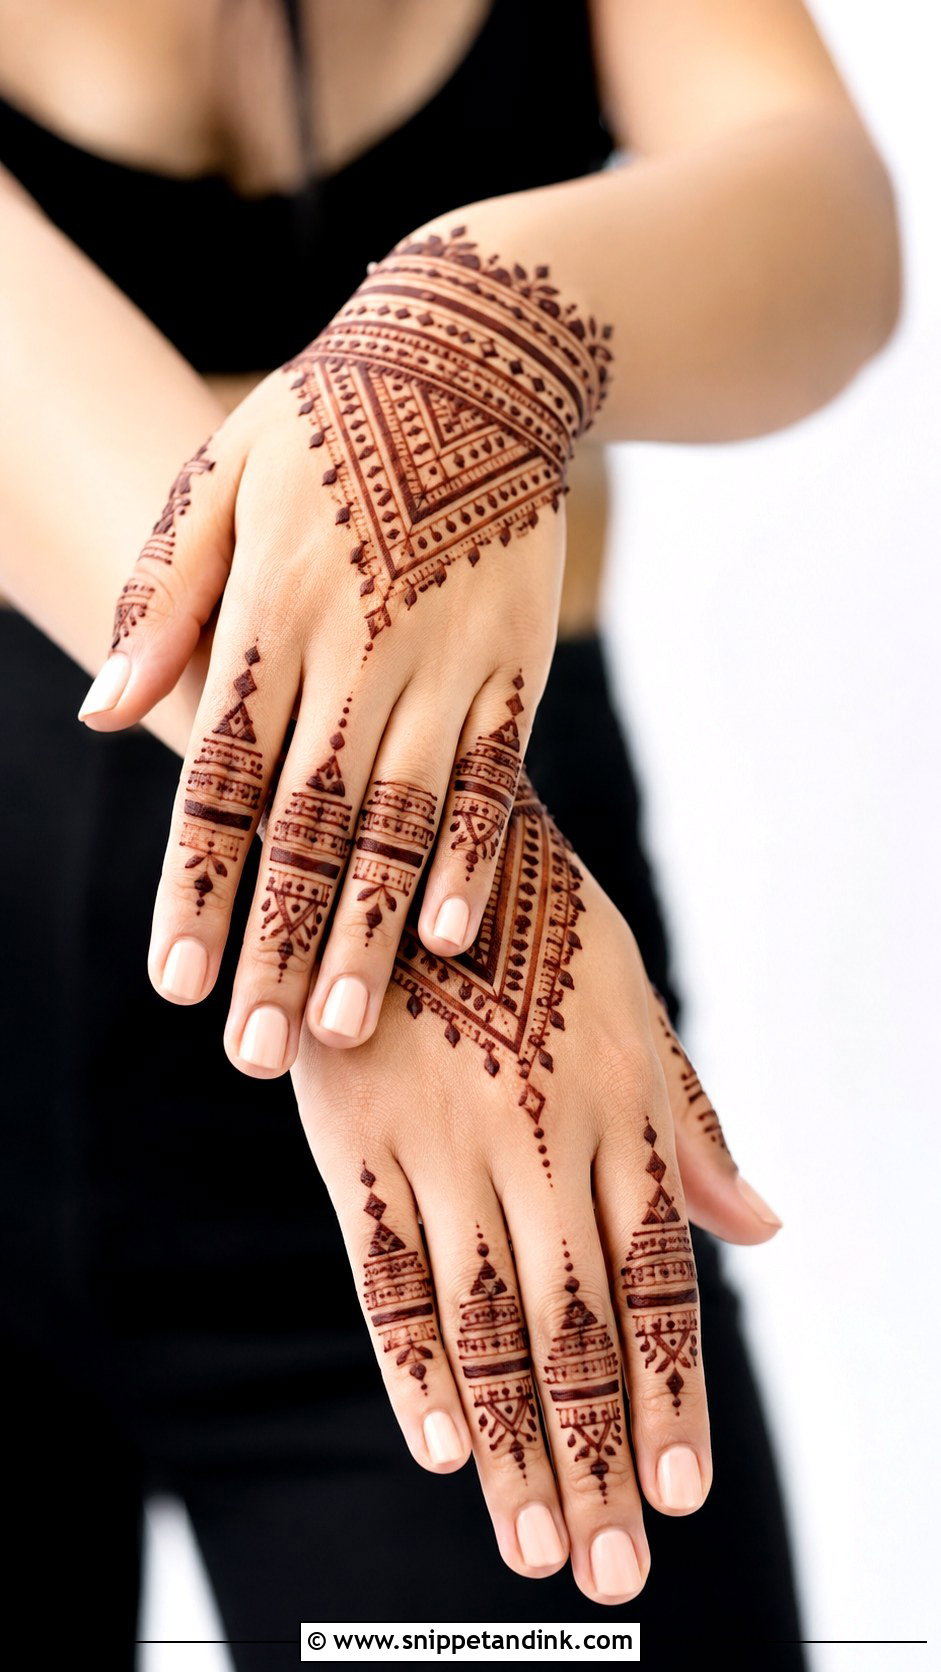
Straight lines, diamonds, triangles, dots and small grids give a structured pattern that appeals to people who don’t want florals. It’s also one of the hardest simple designs to apply well. Henna paste doesn’t forgive a wobbly line the way a curve does, so I go slowly and repeat the same shapes on the fingers and wrist to tie it together. A geometric bracelet with matching finger bands is the most wearable version.
33. Simple Tikki Mehndi Design
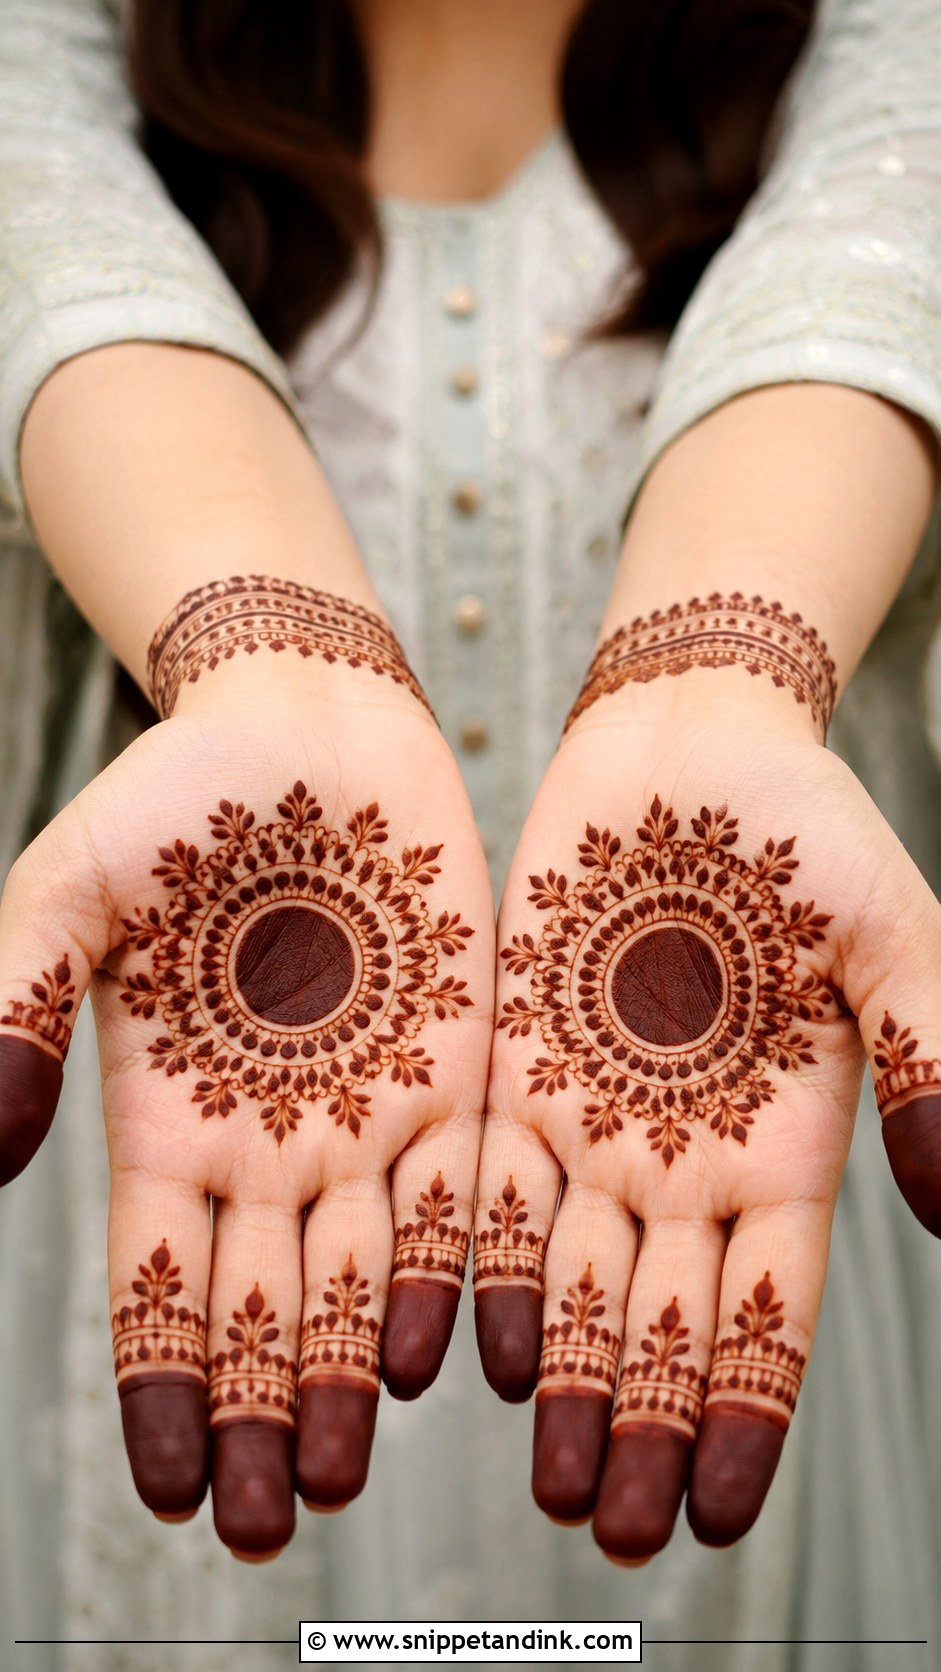
The tikki is the round motif at the heart of the palm, often ringed with petals, dots and small curves, with filled or banded fingertips to finish. It is about as traditional as henna gets, and quick, which is why it’s so common at Eid, weddings and family get-togethers. Leave space around the circle. A crowded tikki loses its outline, while a clean one with bare skin around it reads clearly from across a room.
34. Simple Side Hand Mehndi Design
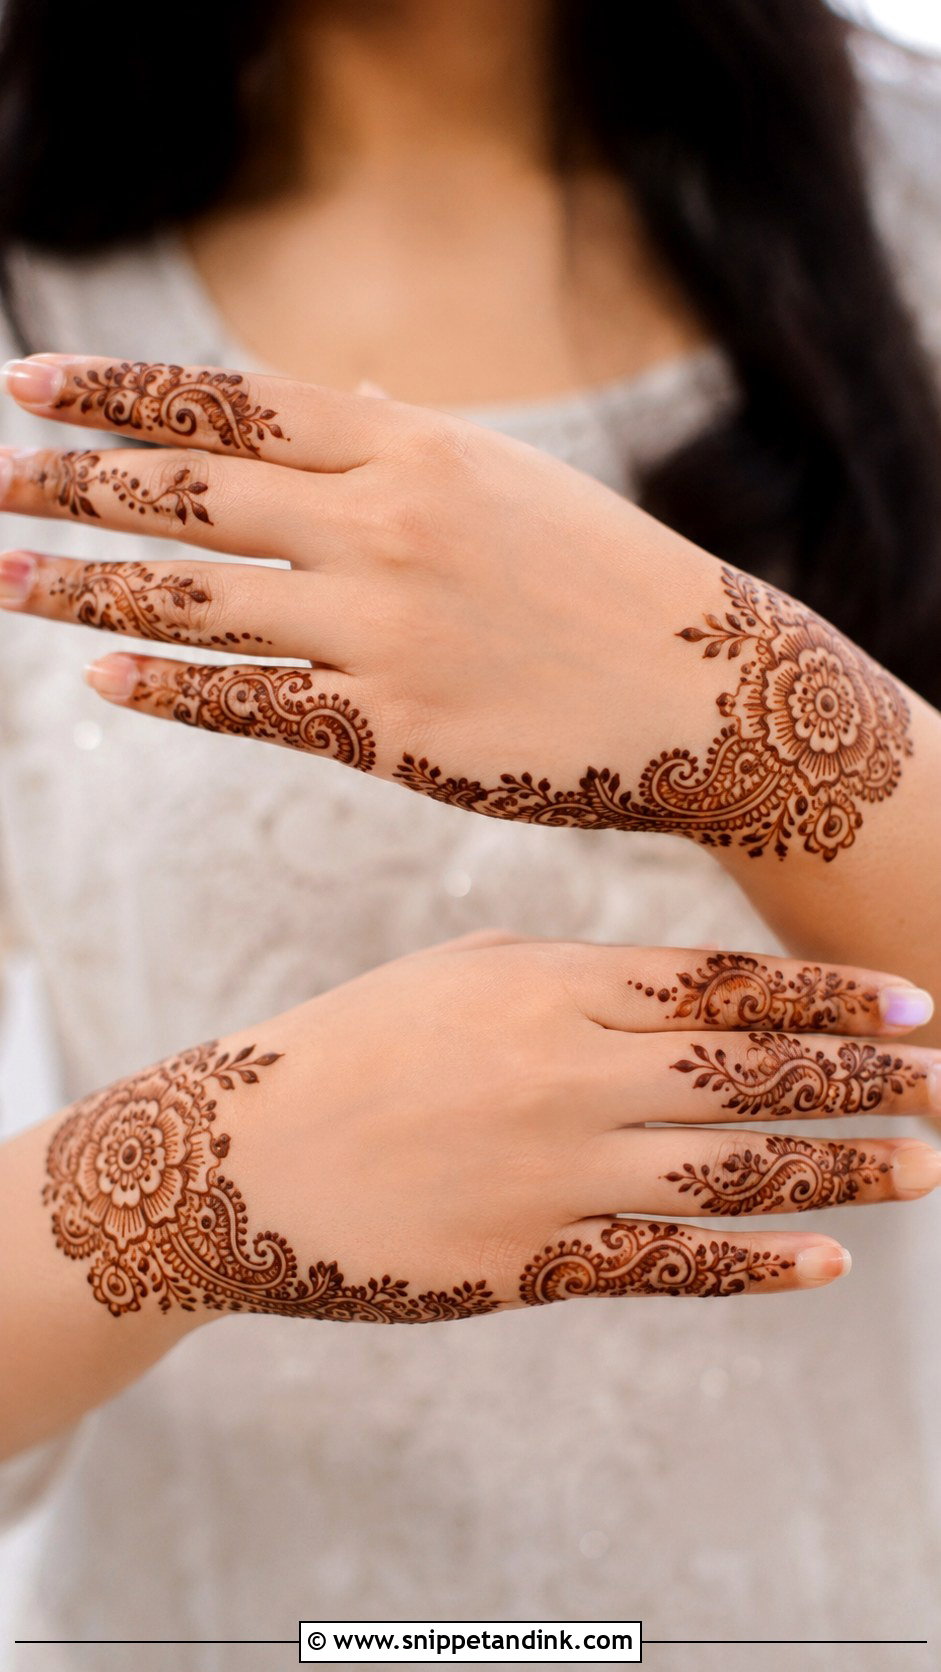
Side designs follow the outer edge of the hand rather than the centre, usually starting at the wrist with a flower or paisley and running along the side of the palm to the little finger. The middle stays almost bare, which gives a slim, fresh look and makes the fingers look longer. It works on the front or back. The outer edge rubs against surfaces more than you’d expect, so I tell people to keep the hand off tables while it dries.
35. Simple Wrist Mehndi Design
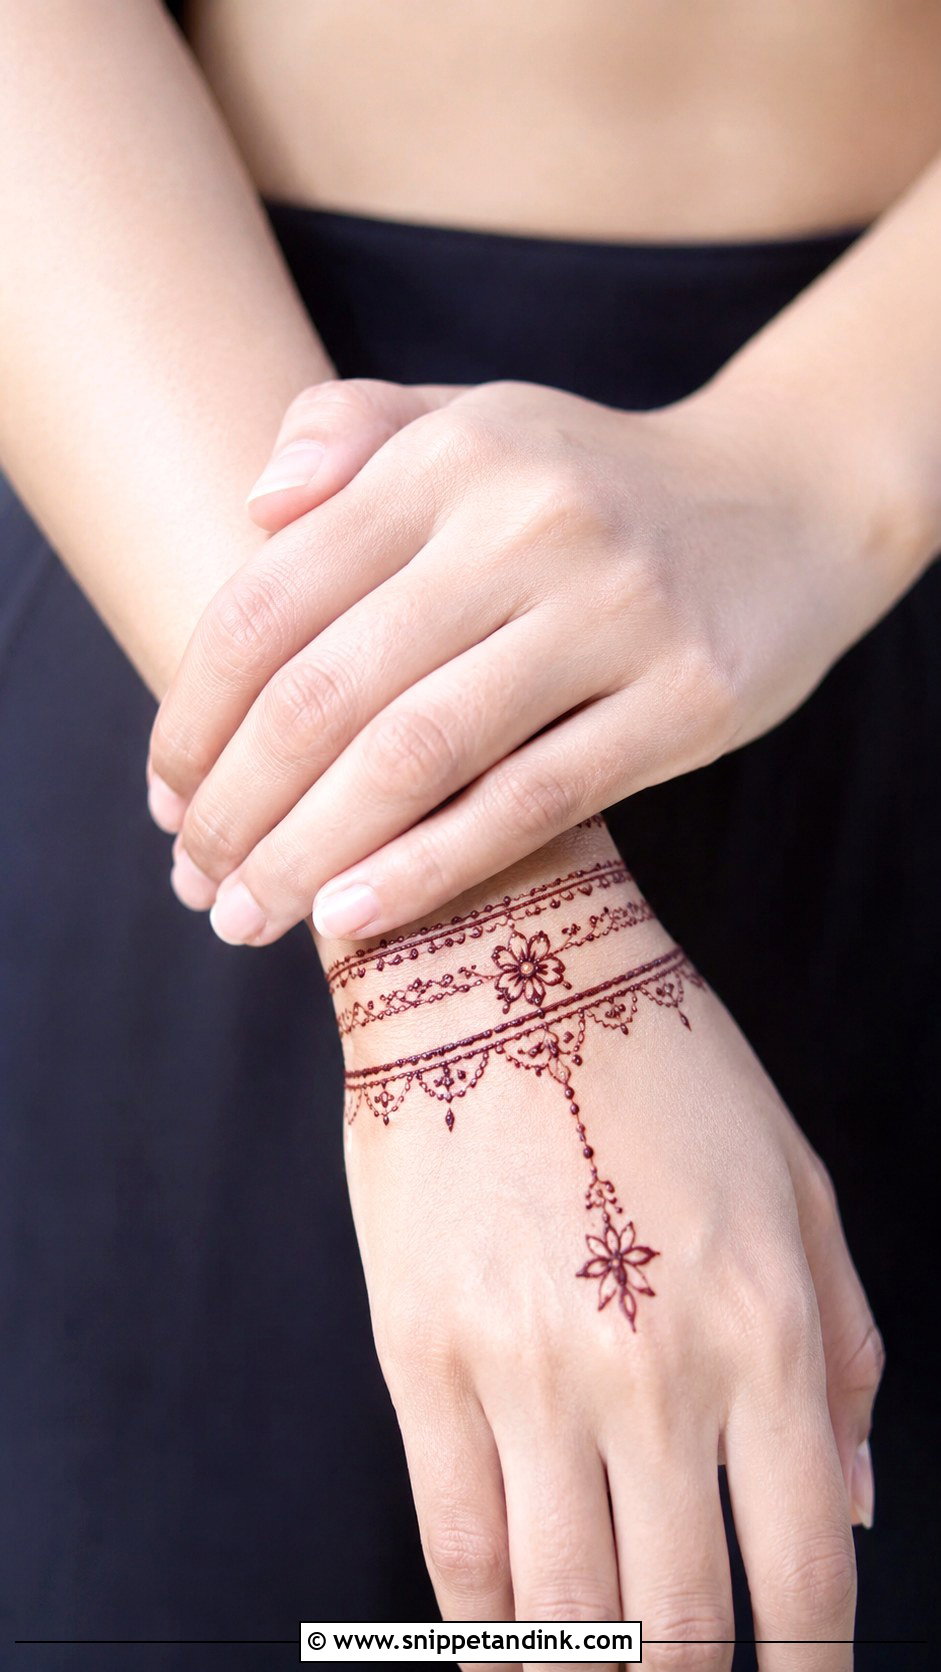
Wrist henna is the most discreet of all: bands, chains, dots and small flowers circling the wrist, with the hand left empty or carrying one small motif. It’s a sensible choice for anyone who needs something modest for work or school. Keep the band width comfortable and even. Wrist skin is thinner and paler on many people, so the stain usually comes out lighter here than on the fingers; leave the paste on as long as you can.
The First Two Days After the Cone Comes Off
Most of what decides your final colour happens after I’ve packed up. Henna stains in stages: the paste flakes off to reveal bright orange skin, and over the next day or two that orange deepens to a reddish brown. Light designs show every misstep in this window because there is so little paste to begin with.
While the paste is on
Let it dry fully before you move around, then dab a little lemon and sugar mixture over it with cotton so it stays stuck to the skin. Keep your hands warm. A cold room slows the stain, which is why some people wrap their hands loosely at night. Try not to bend the fingers sharply while it’s still wet.
Once it comes off
- Scrape the dry paste off with a blunt edge or rub it off gently. Don’t wash it off.
- Keep water away from your hands for as long as you reasonably can, ideally until the next morning.
- Skip hand sanitiser, bleach-based cleaners and chlorinated pools for the first day; they lift colour from fine lines quickly.
- Rub a little balm or a natural oil over the design before washing up or showering, so water beads off rather than soaking in.
If the colour still looks orange on the morning of your event, don’t panic and don’t scrub. It will usually have darkened by the evening. Simple designs typically last one to two weeks before they fade, with the palms holding colour longest and the back of the hand fading first.
A Light Design Still Needs a Plan
Simple henna works when the spacing, the line quality and the placement are thought through, not when there’s less of it by accident. If you’re new to it, a mandala, a leaf vine or a bracelet band is the easiest place to begin. For a festival or a wedding function, an Arabic trail or an Indo-Arabic layout gives you more presence without hours in the chair. Pick the design that fits your hand and your day, then give the stain the time it needs to darken.
You'll Like These Ideas:


Leave a Reply