
Not every bride wants to sit for six hours with both arms covered to the elbow. A lot of the brides I work with now ask for something that reads as bridal from across a room, stains well and lets them get up, eat and use their phone the same evening. That usually means bigger motifs and more open skin: bold flowers, a clear mandala, neat vines, paisleys, a little jaali, and fingers that are finished properly. Below are the twenty simpler layouts I’d suggest, with what I think about when I draw each one and who it suits.
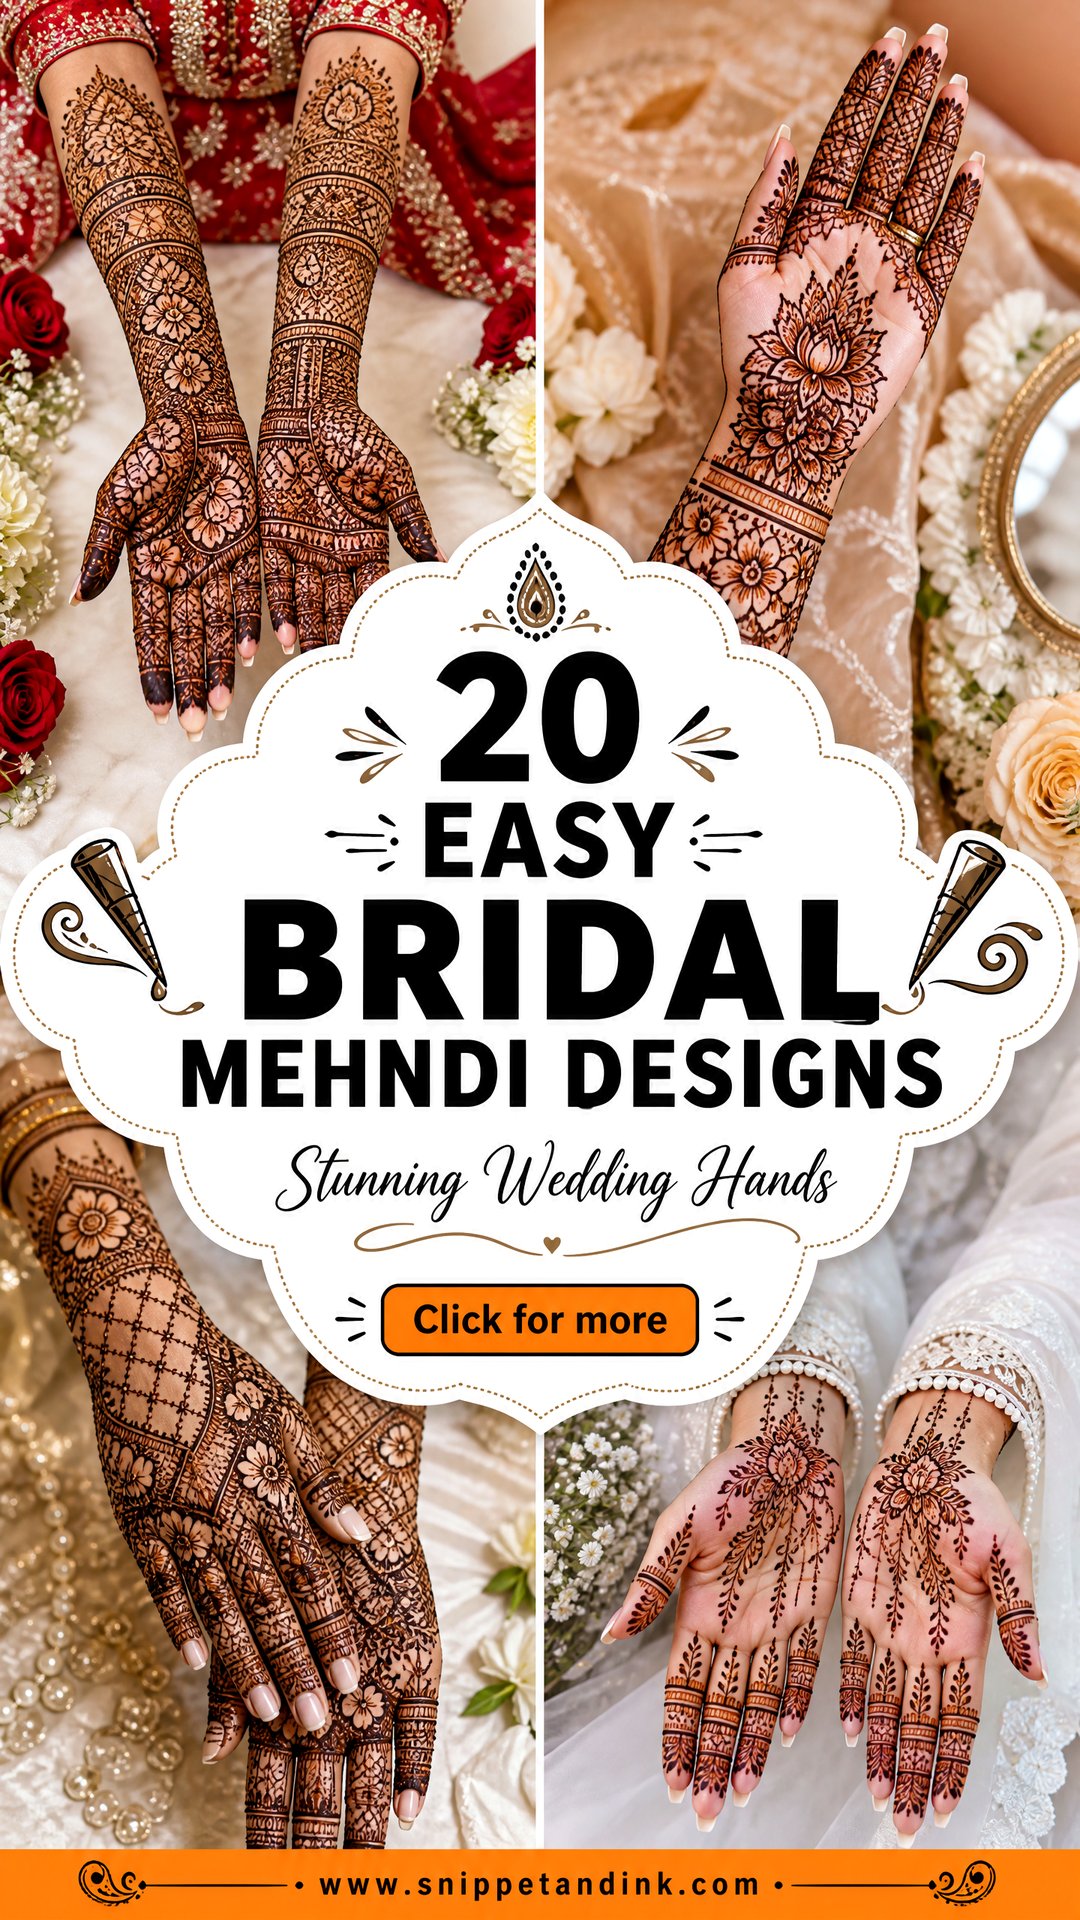
Why an Open Design Saves Hours in the Chair
Time is the real difference between these and heavy bridal mehndi. A simple design on both hands might take me an hour or two; the same hands in full traditional coverage to the elbow can run well past four, plus the drying. That changes how your day before the wedding goes, how many guests the artist can do afterwards, and how stiff you’ll be by the end.
Open space also helps the stain. Thick outlines hold more paste against the skin than dense, hair-thin filling, so a design with fewer, bolder lines often comes out darker and clearer. I’d rather draw a bride ten confident motifs than fifty cramped ones.
When you message your artist, send two or three reference photos, say which events need mehndi, and be clear about coverage: palms only, back hand too, wrist or forearm. That lets them quote time accurately and plan the session properly.
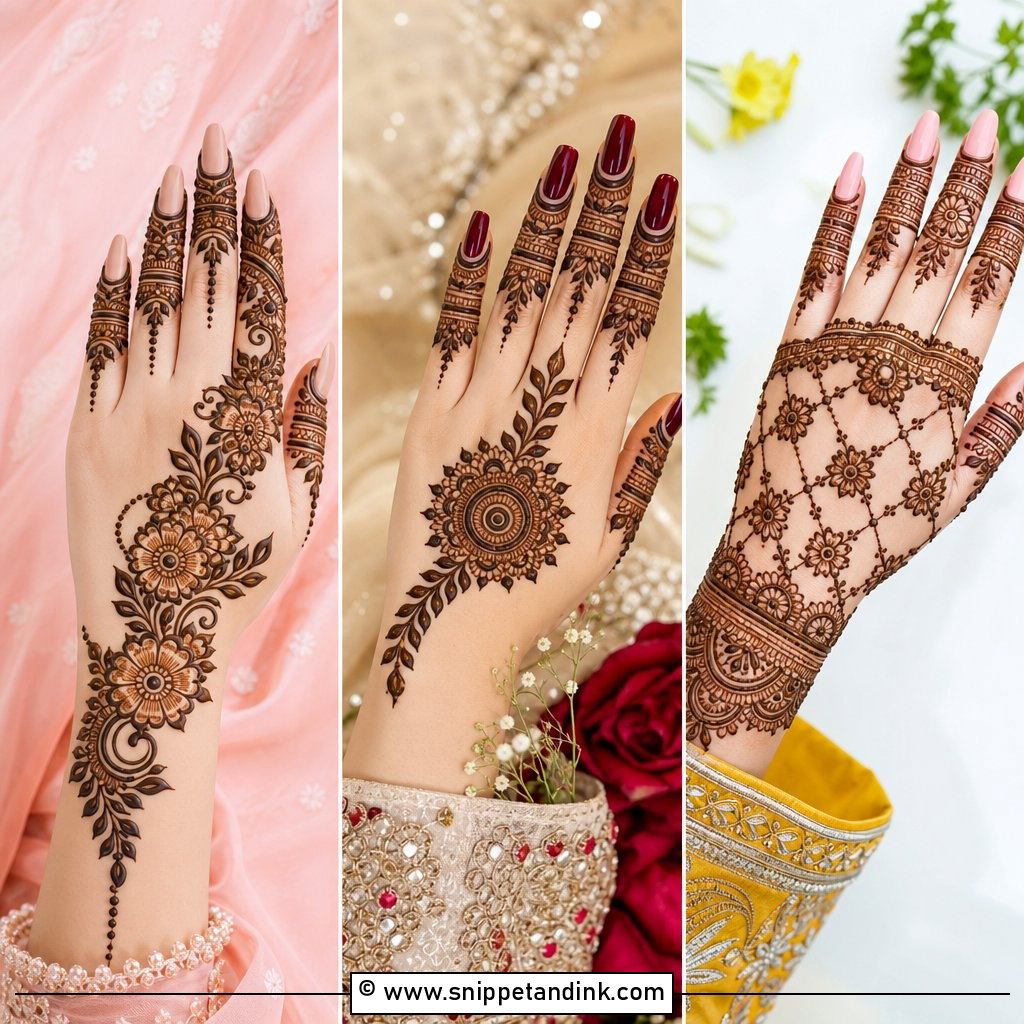
1. Simple Arabic Bridal Mehndi Design
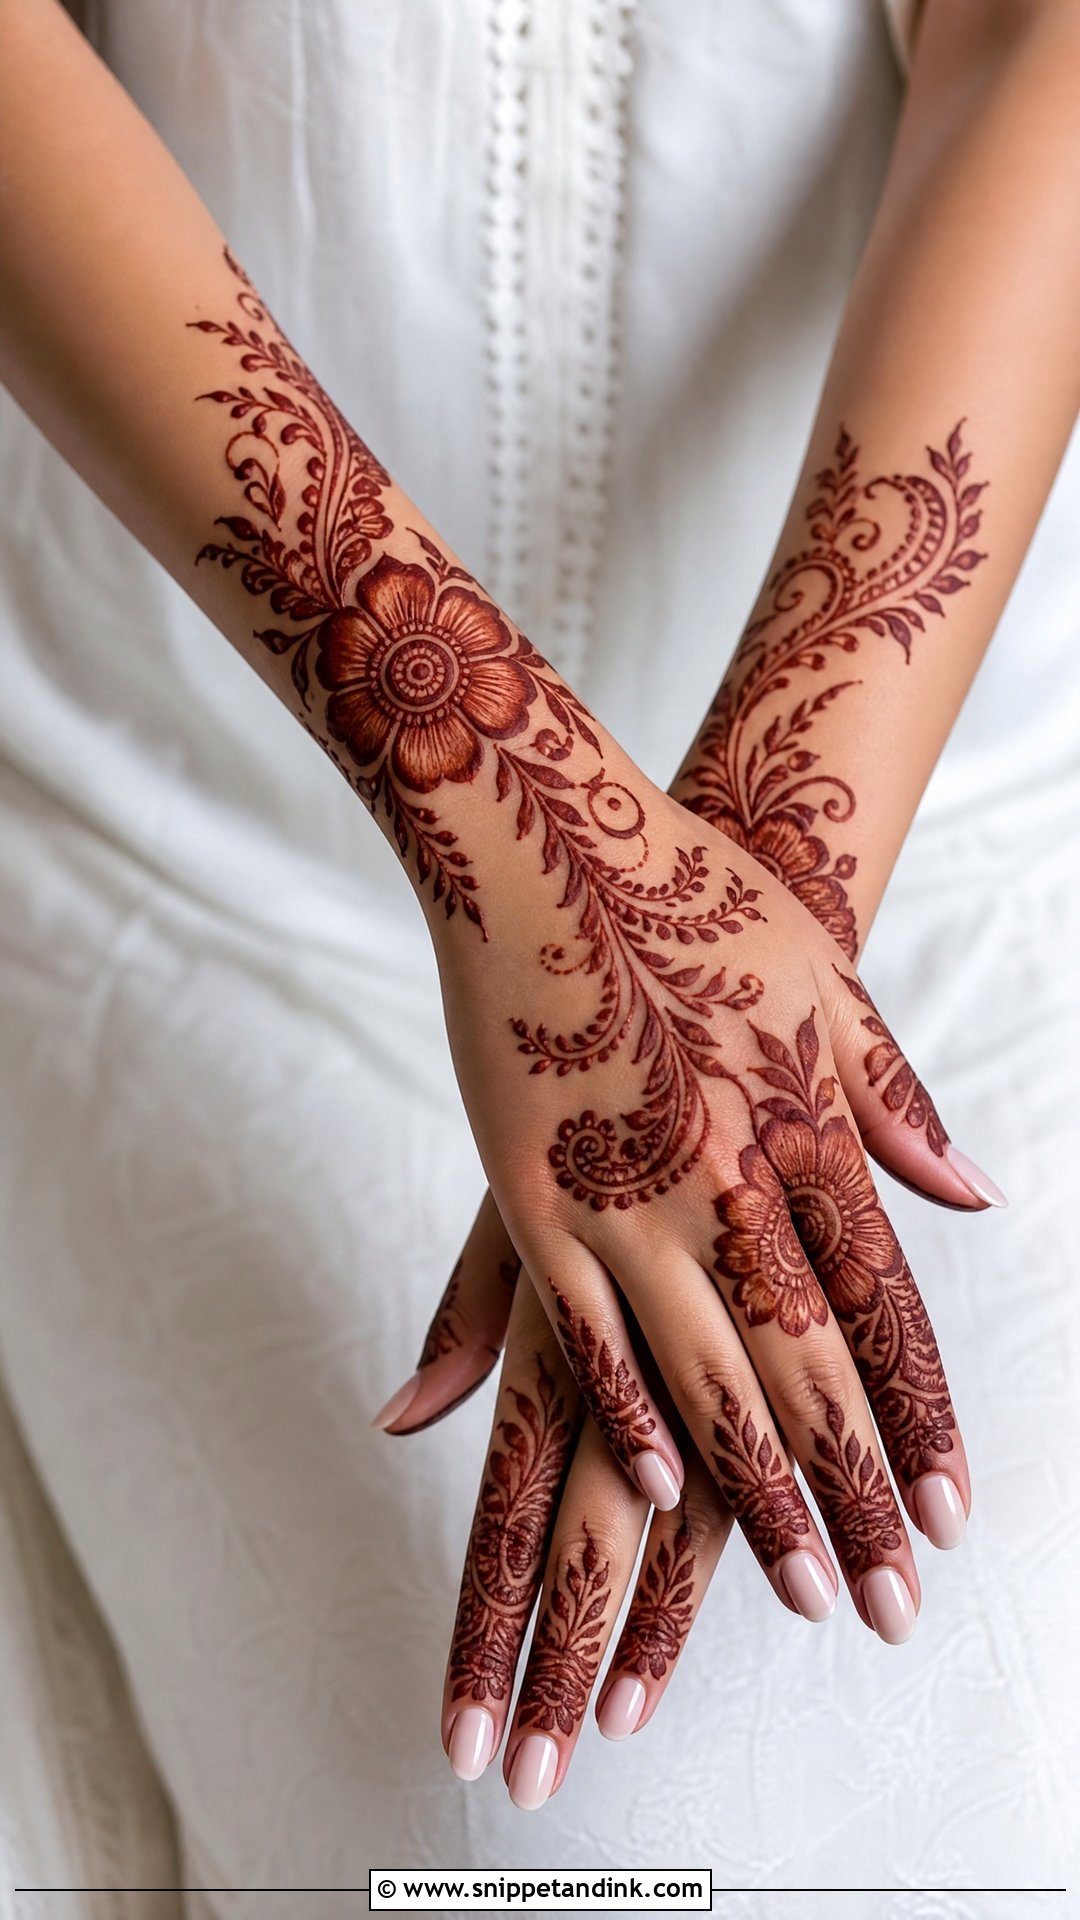
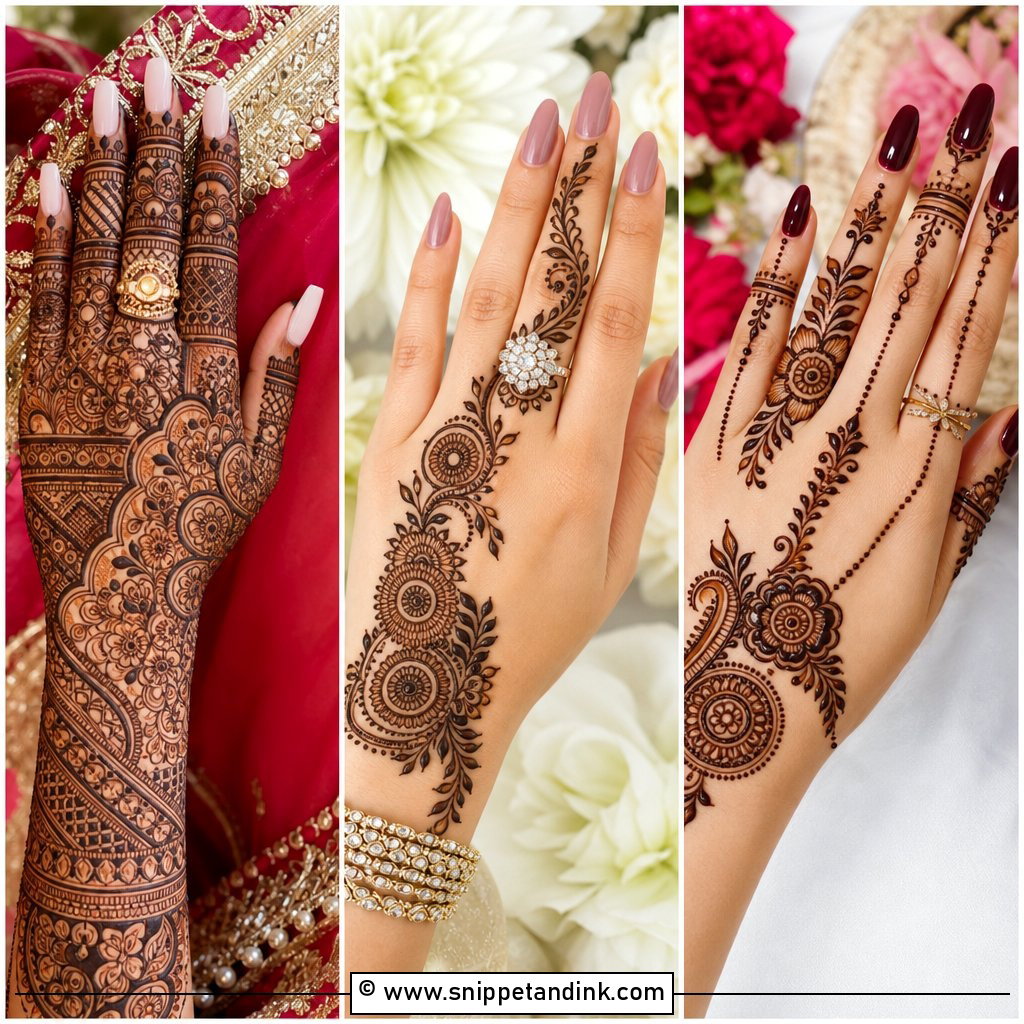
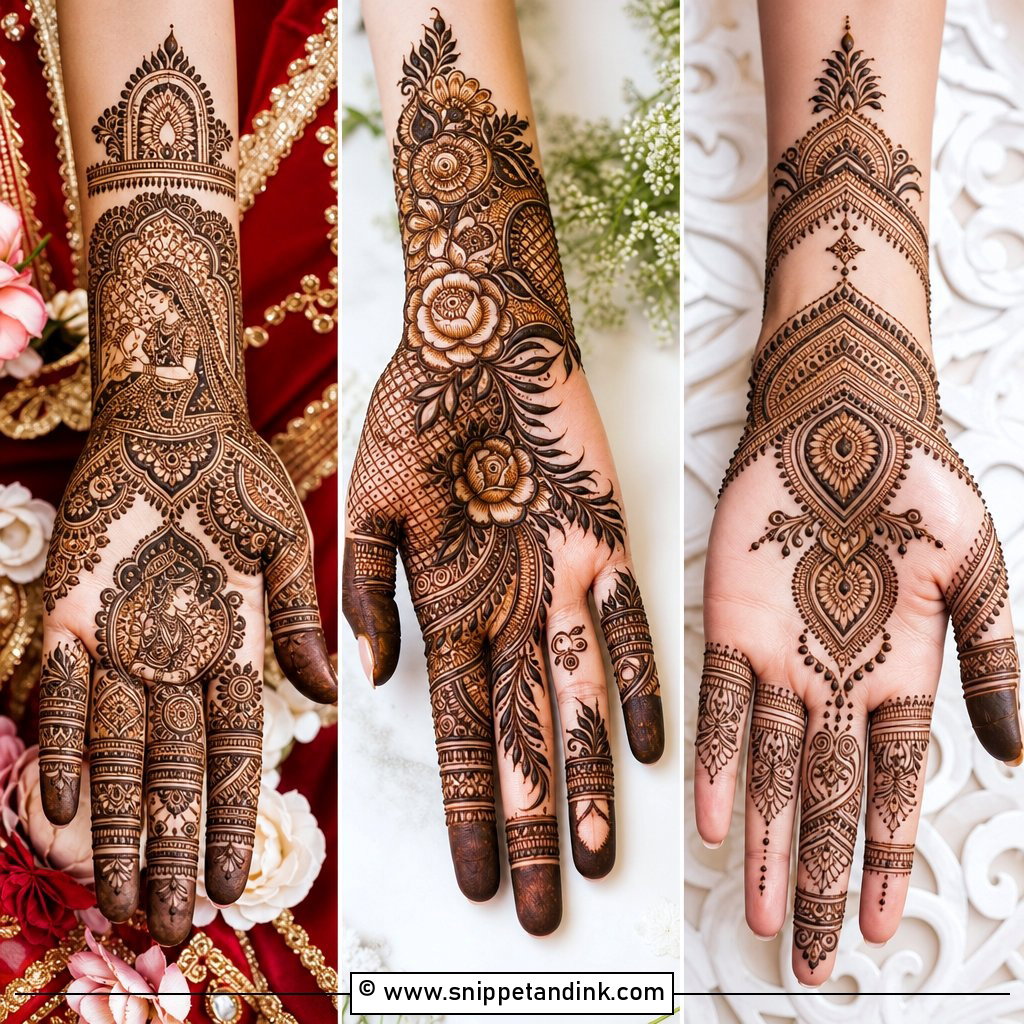
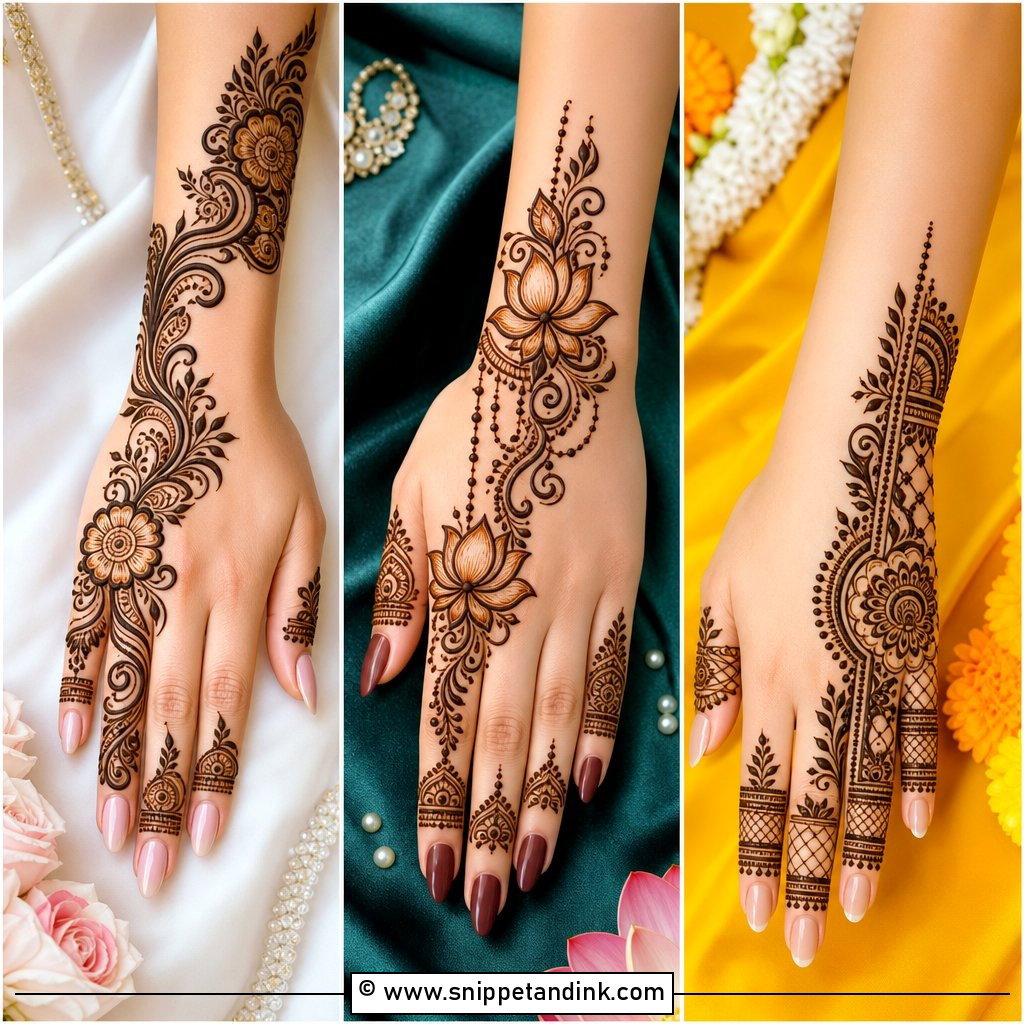
Arabic layouts run diagonally, from the outer wrist up toward the index or middle finger, and the empty skin around the trail is part of the design. I draw the flowers and leaves large and give each one a bold outline, because a thick line holds more paste and stains darker than fine filling ever will. Leafy fingertips, dotted trails and thin bands finish the fingers. Front or back, it sits well with modern lehengas and shararas, and since there are fewer lines, the stain reads crisply in photos.
2. Easy Full Hand Bridal Mehndi Design
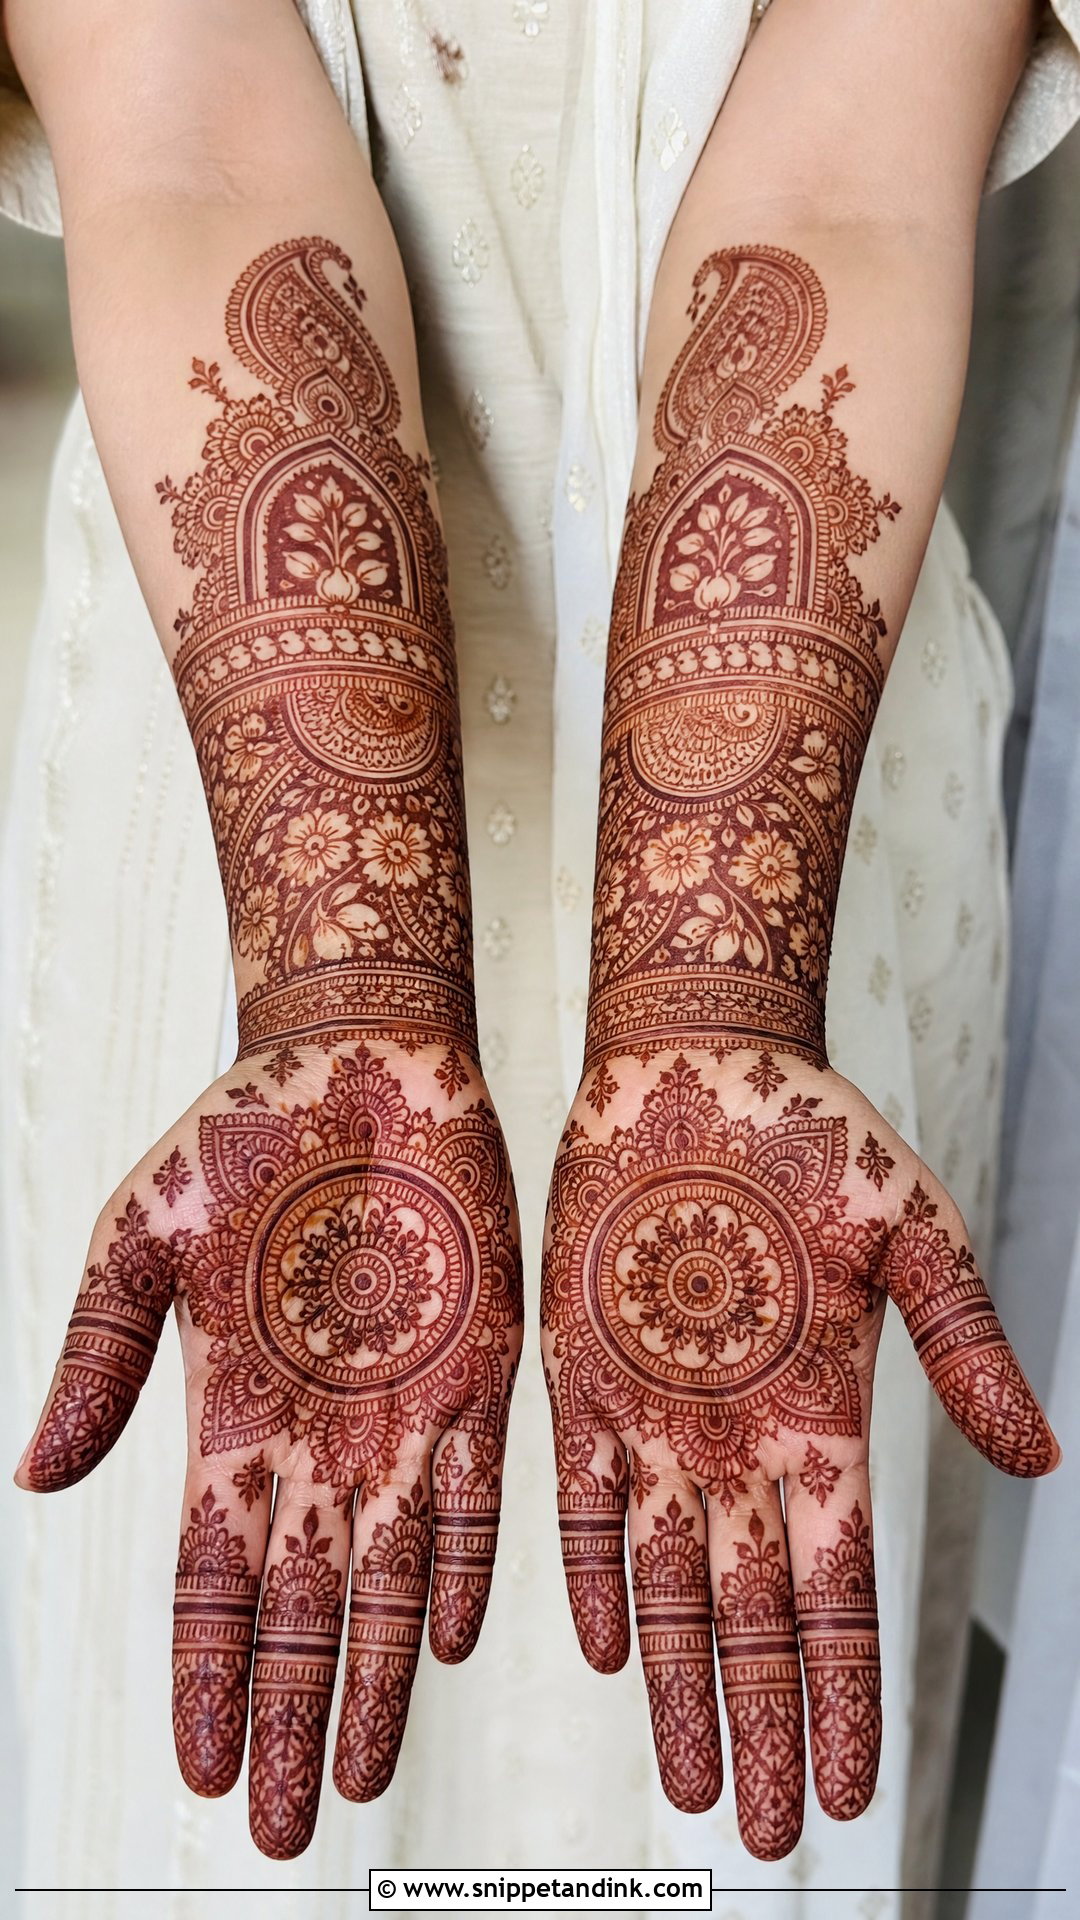
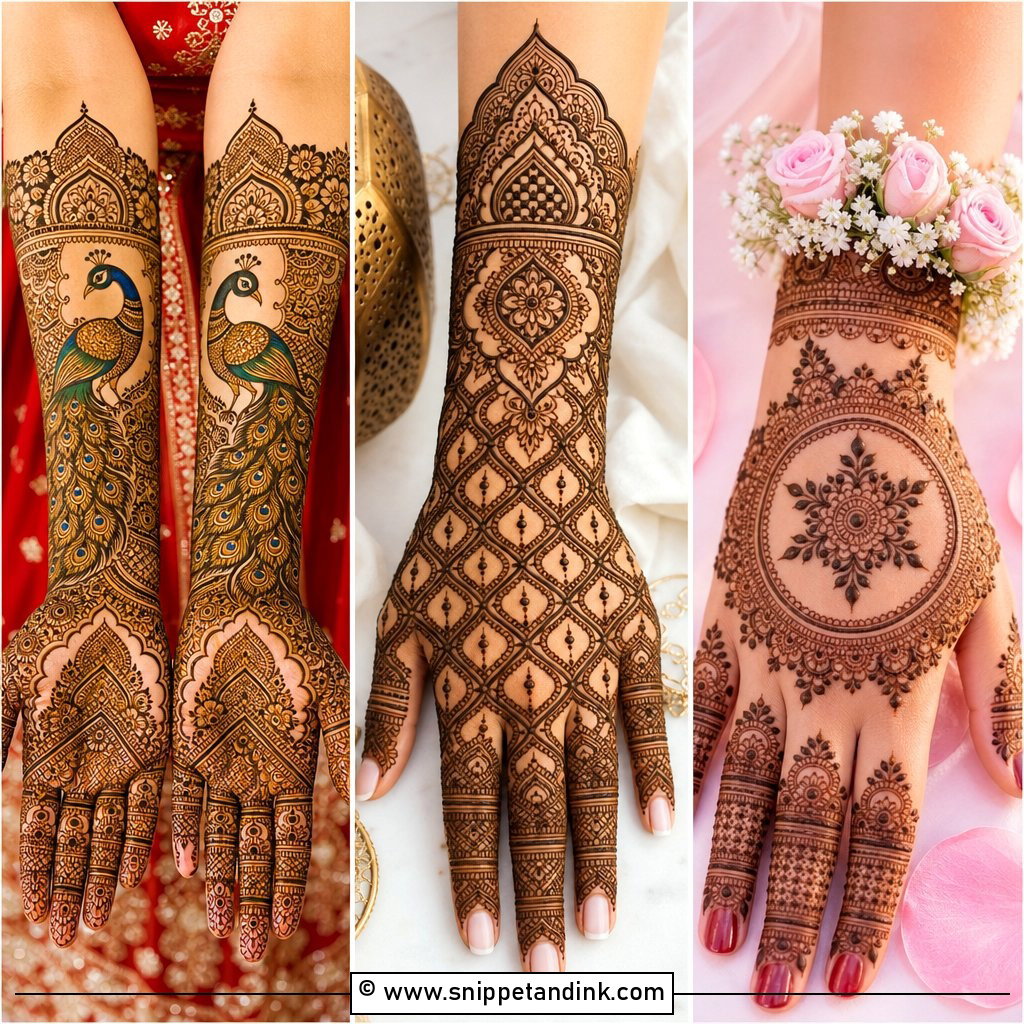
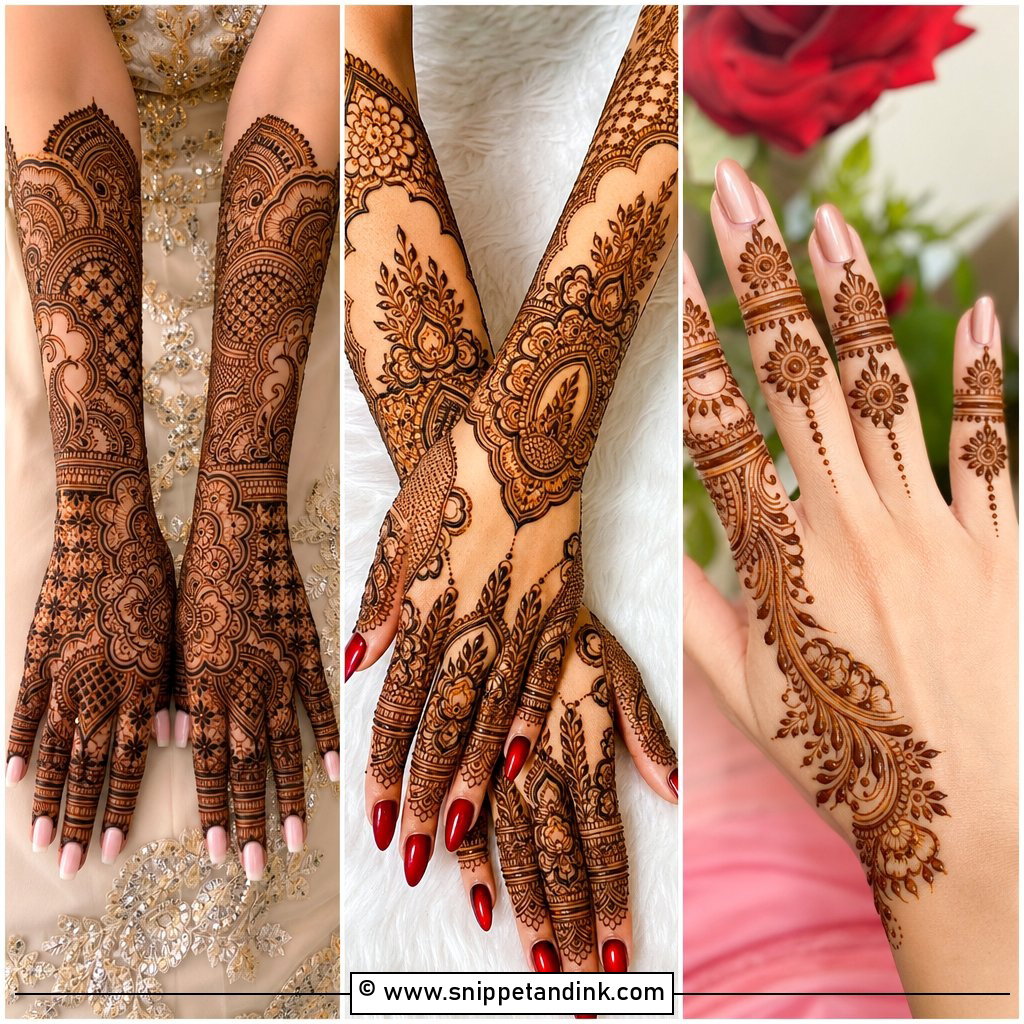
Full coverage doesn’t have to mean tiny work everywhere. I split the hand into a few big zones: a mandala on the palm, paisley borders near the wrist, floral vines down the sides and neat bands on each finger. It can run from fingertips to forearm and still breathe, because the zones are separated by narrow gaps instead of packed fill. Bold outlines and simple fillings also cut the sitting time a lot, which matters when you’re the bride and every hour in the chair is an hour of not moving.
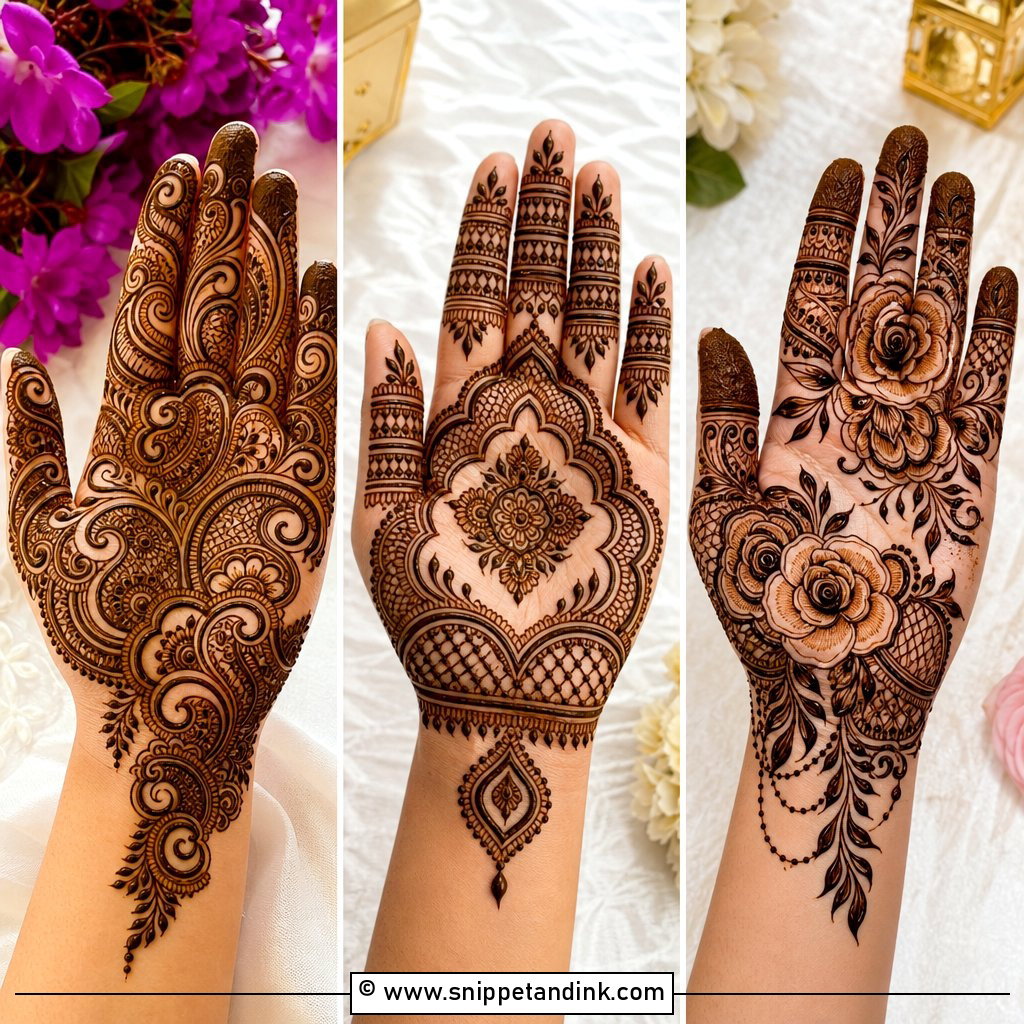
3. Easy Bridal Mehndi Design Front Hand
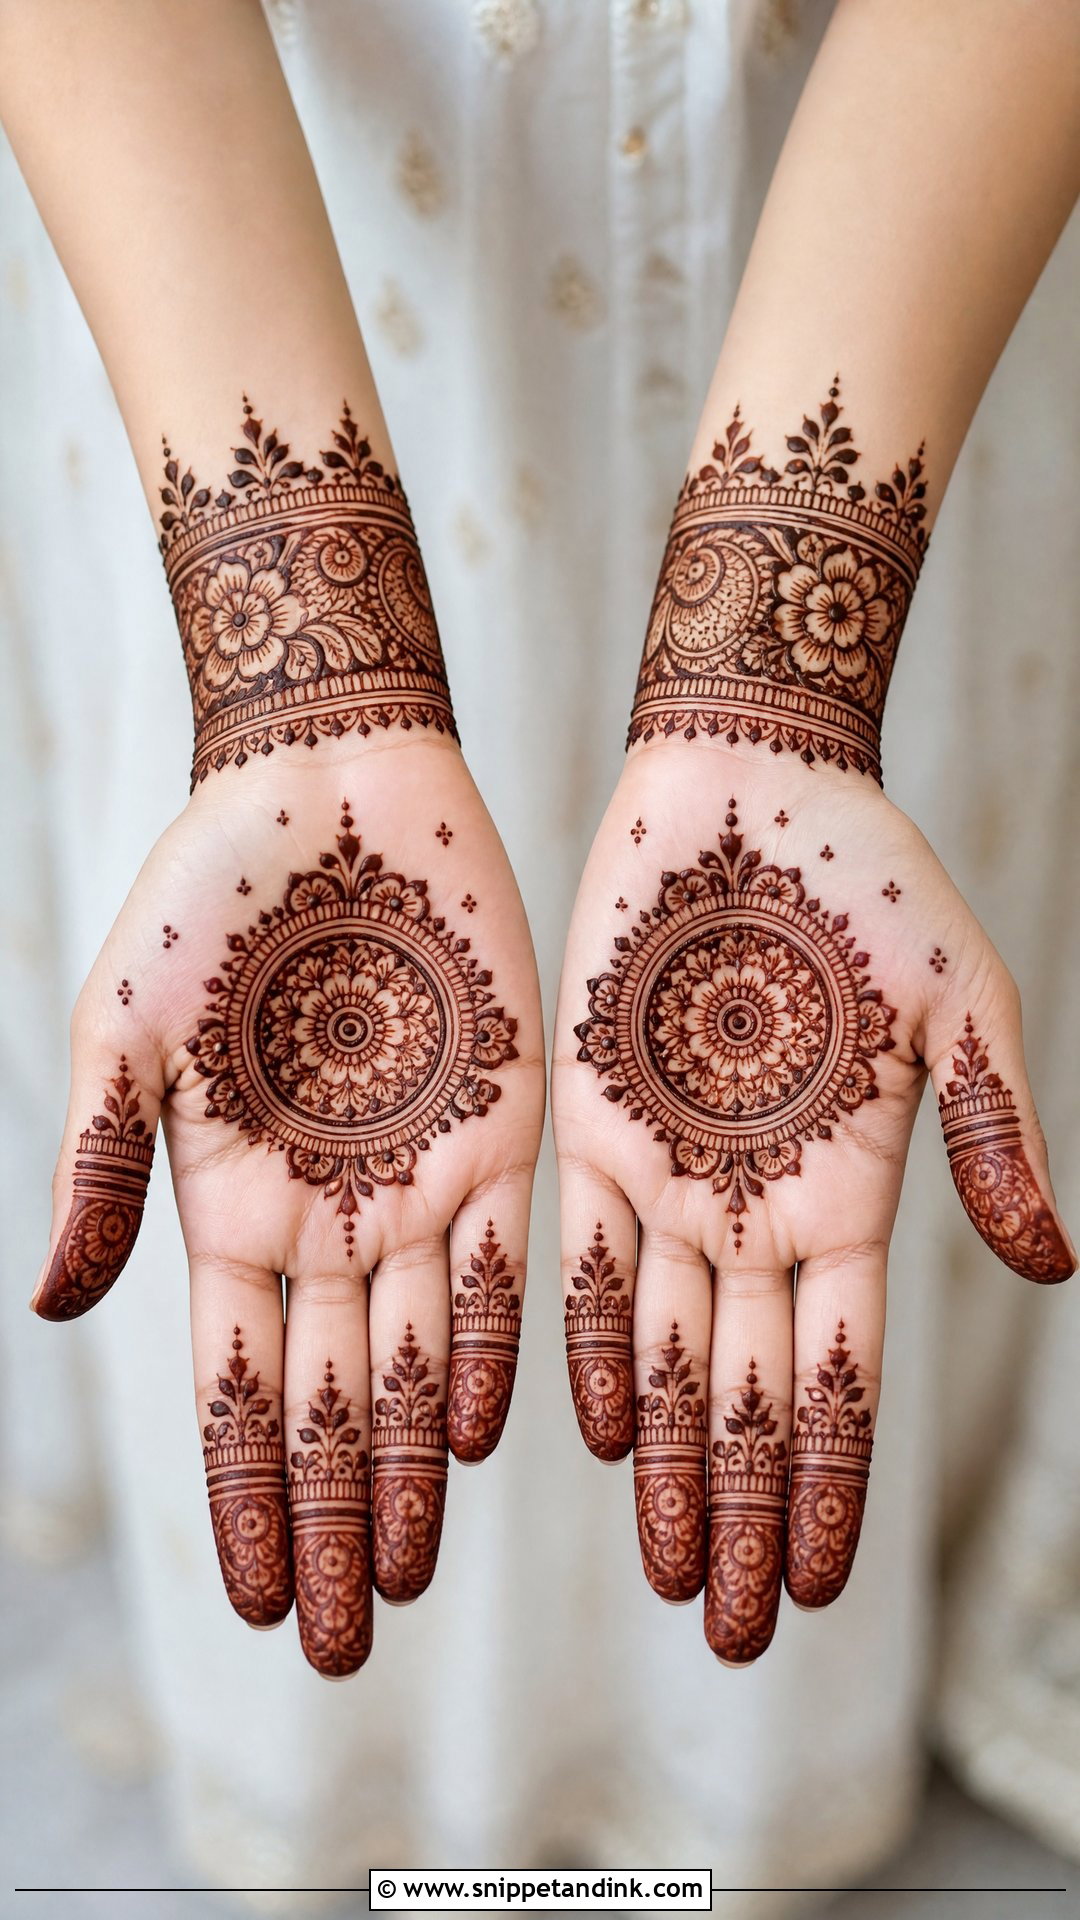
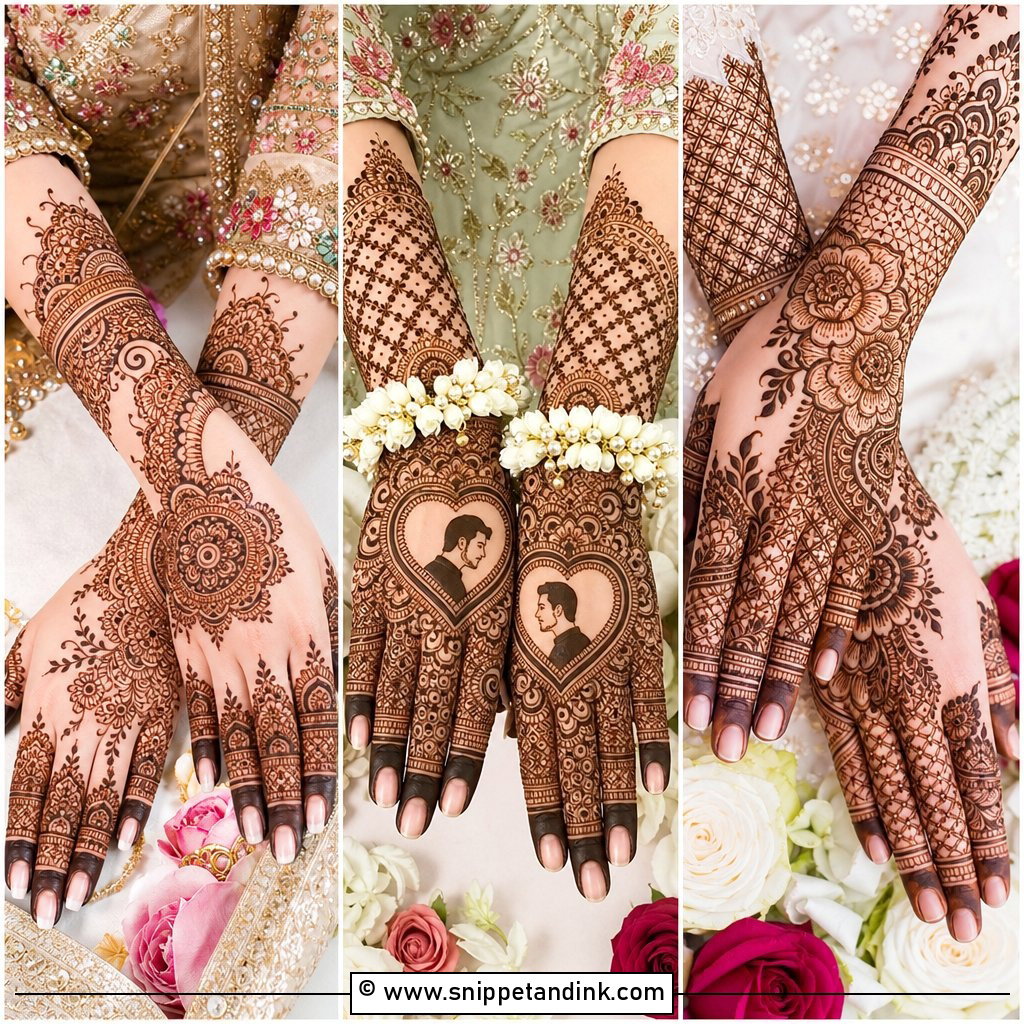
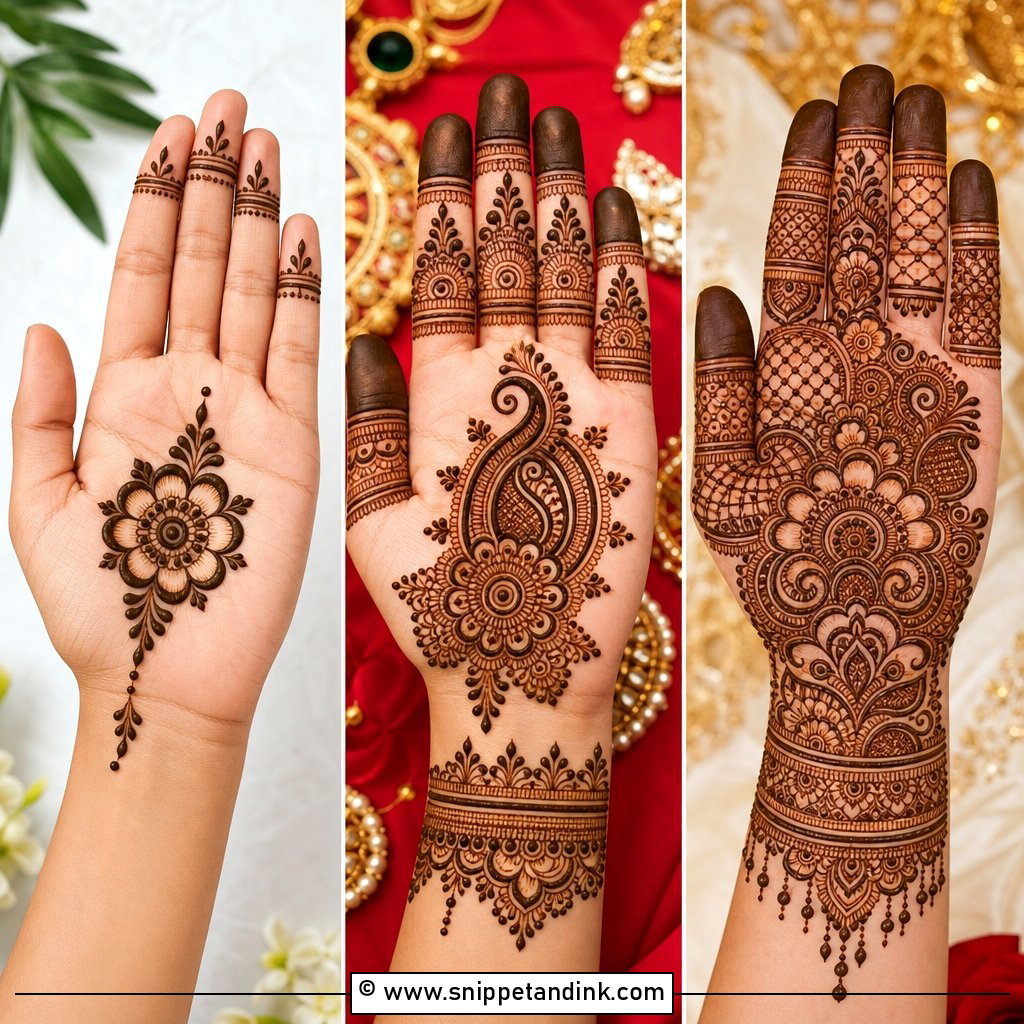
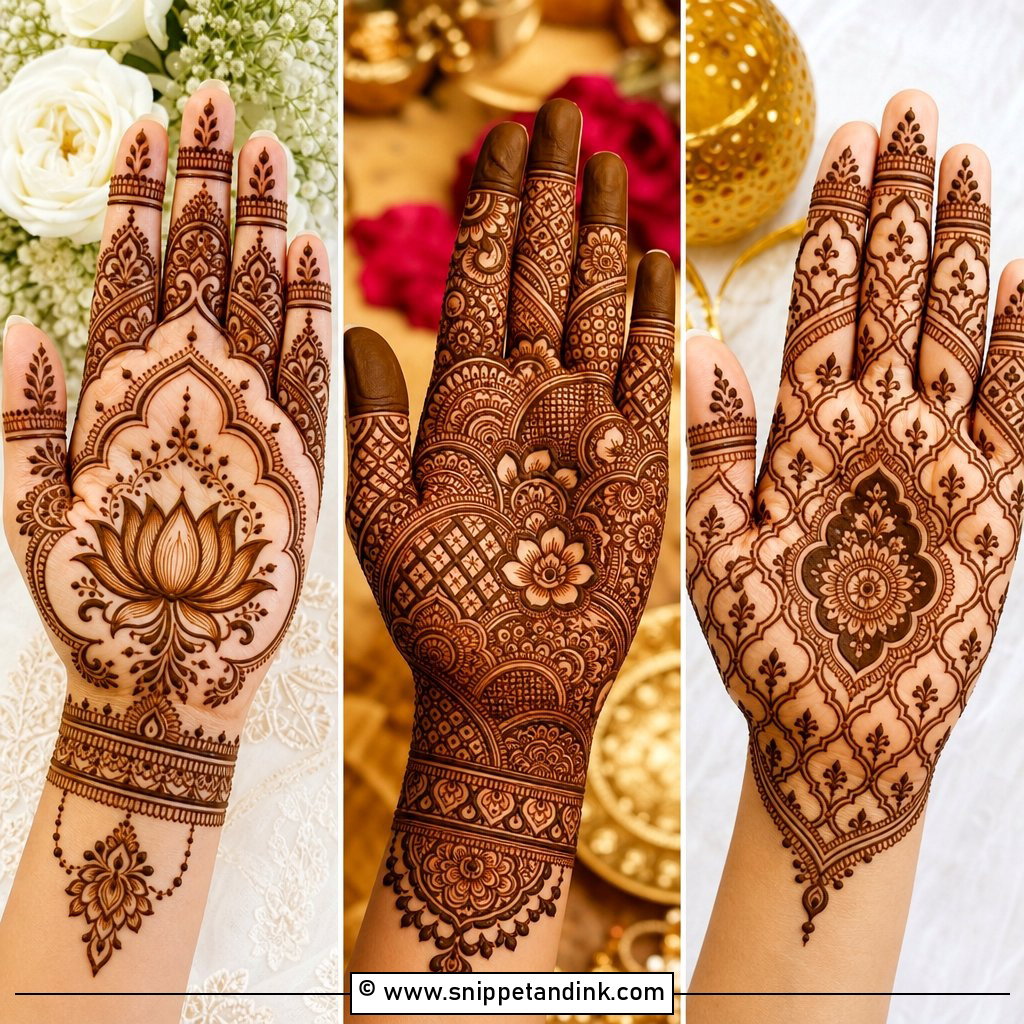
The palm is what everyone sees during the rituals and the ring photos, so I usually build it around one round mandala placed slightly above the centre, where it isn’t distorted when the hand cups. Floral cuffs at the wrist, a few paisleys near the thumb and simple finger detailing complete it. There’s room here for initials, a small heart or the date. I keep it symmetrical across both palms for brides who like order; it suits nearly any hand shape.
4. Easy Bridal Mehndi Design Back Hand
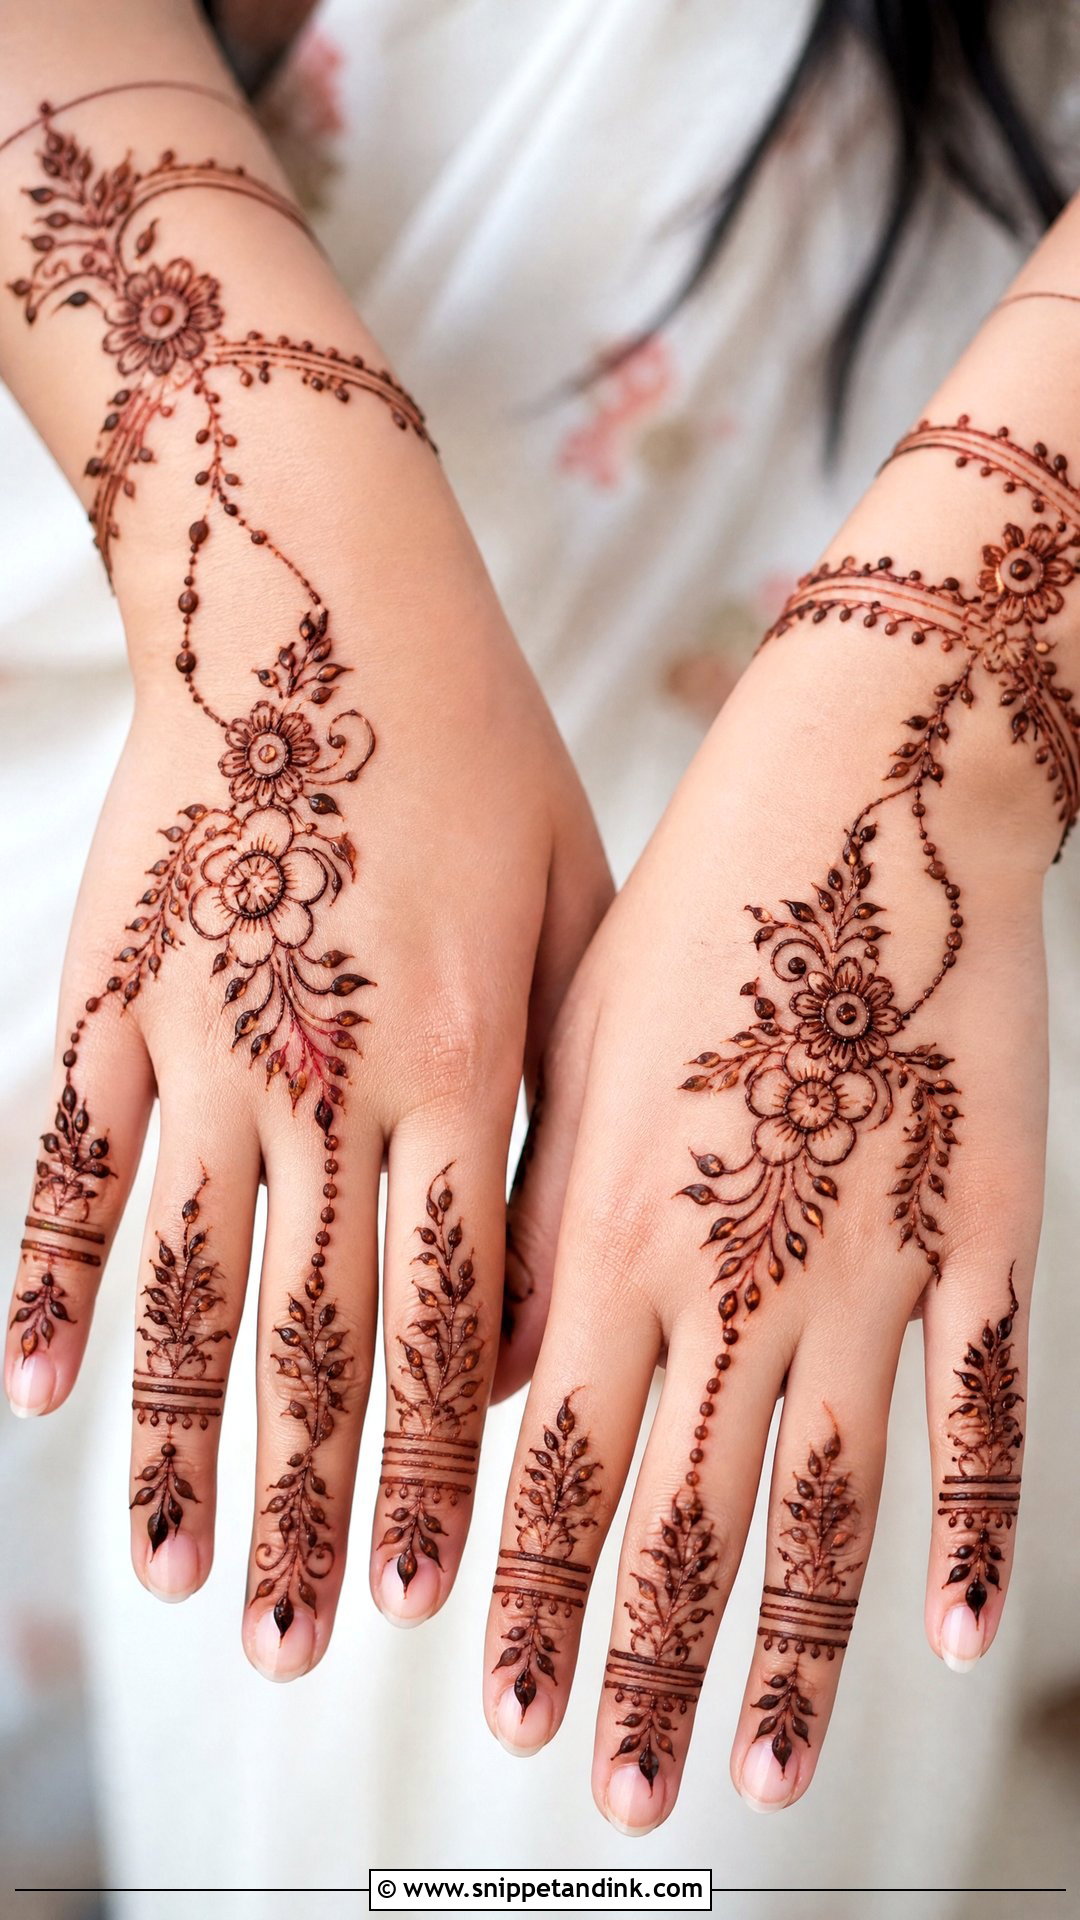
On the back of the hand, a wrist band joined by a floral trail to the middle finger gives that jewellery effect, especially with a ring chain drawn across the knuckles. I keep the knuckles themselves light, with small leaves rather than heavy fill, because skin creases there and dense lines crack as the paste dries. One thing to know before you choose this side: the back of the hand stains lighter than the palm, so expect a softer brown. It looks right with bangles and a few rings.
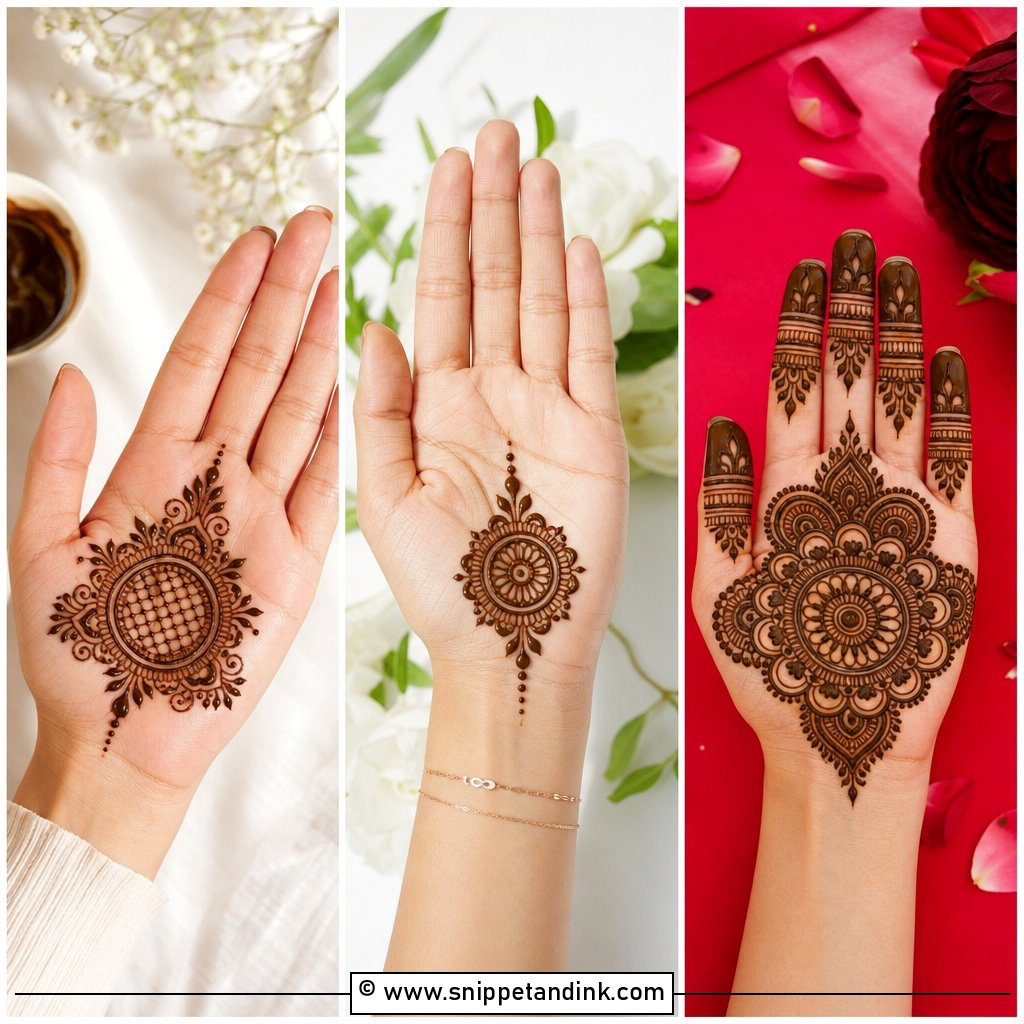
5. Easy Bridal Mehndi Design With Mandala
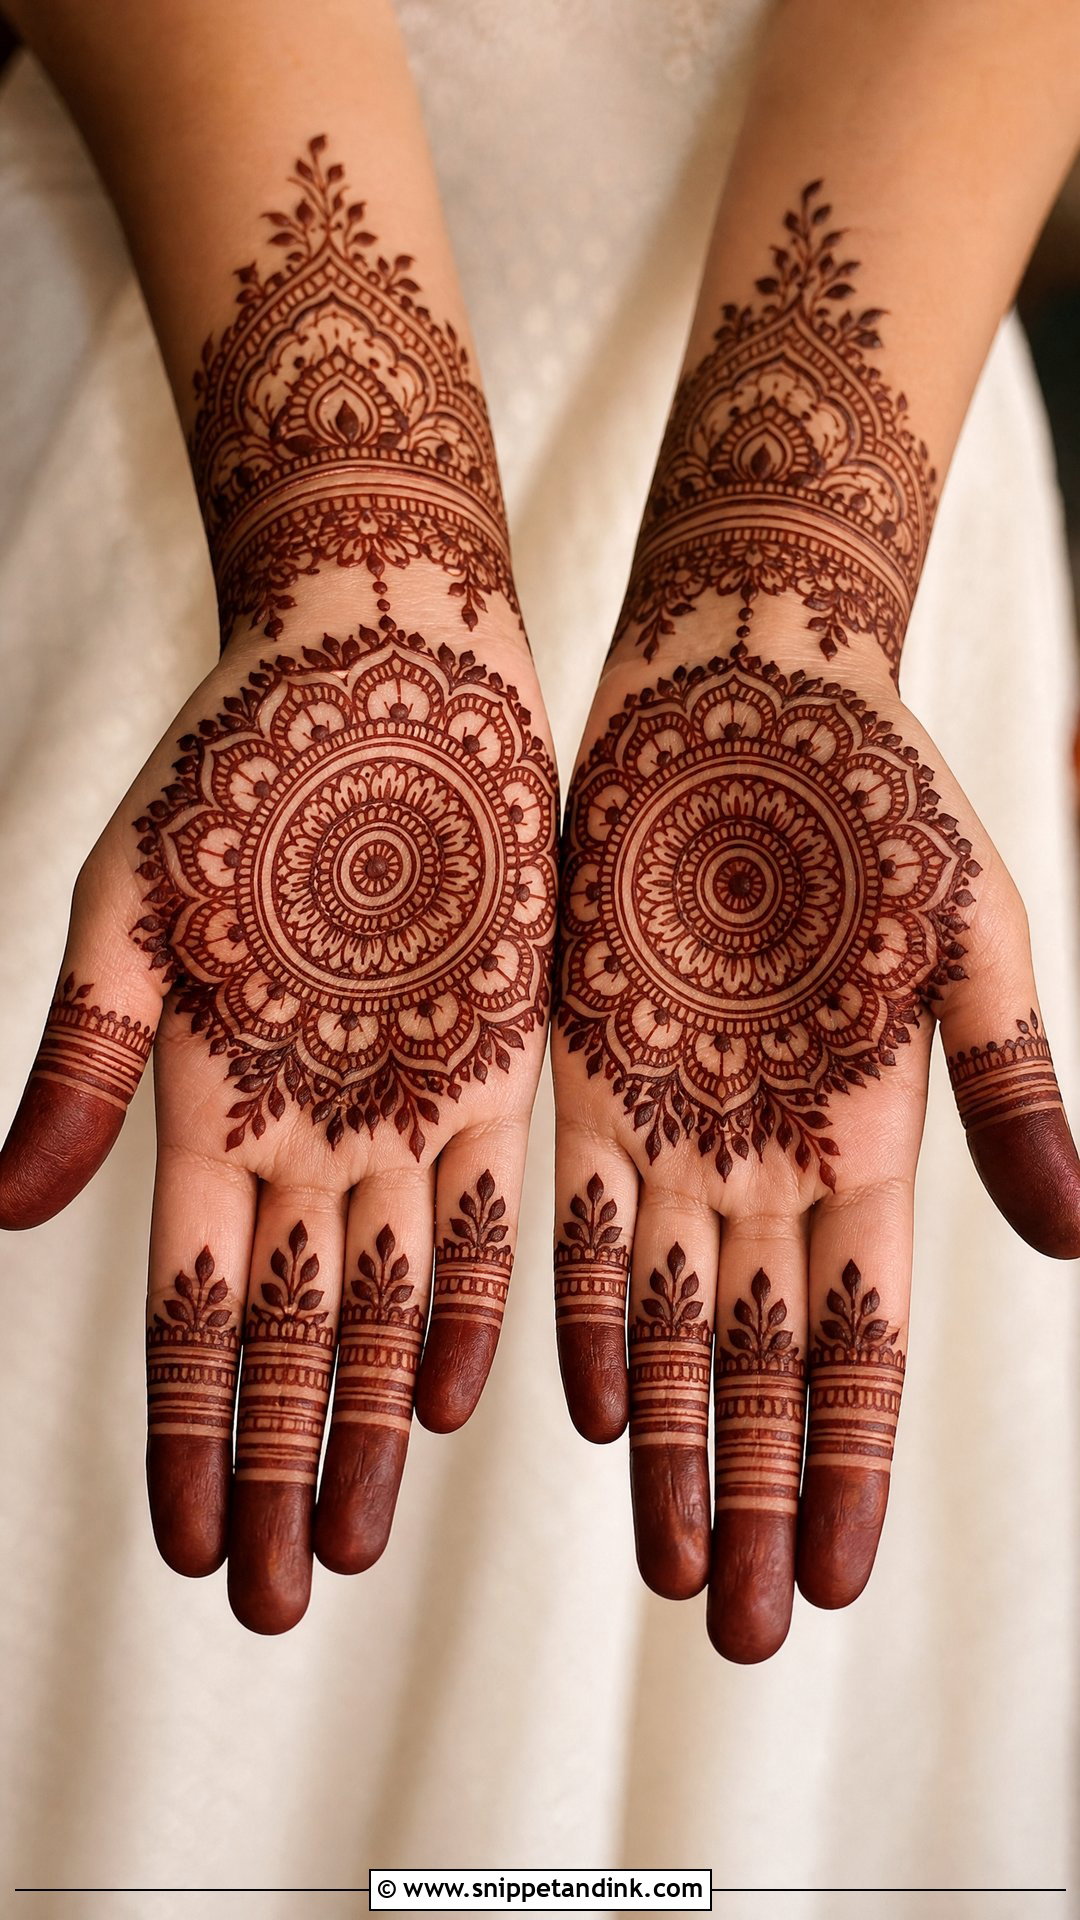
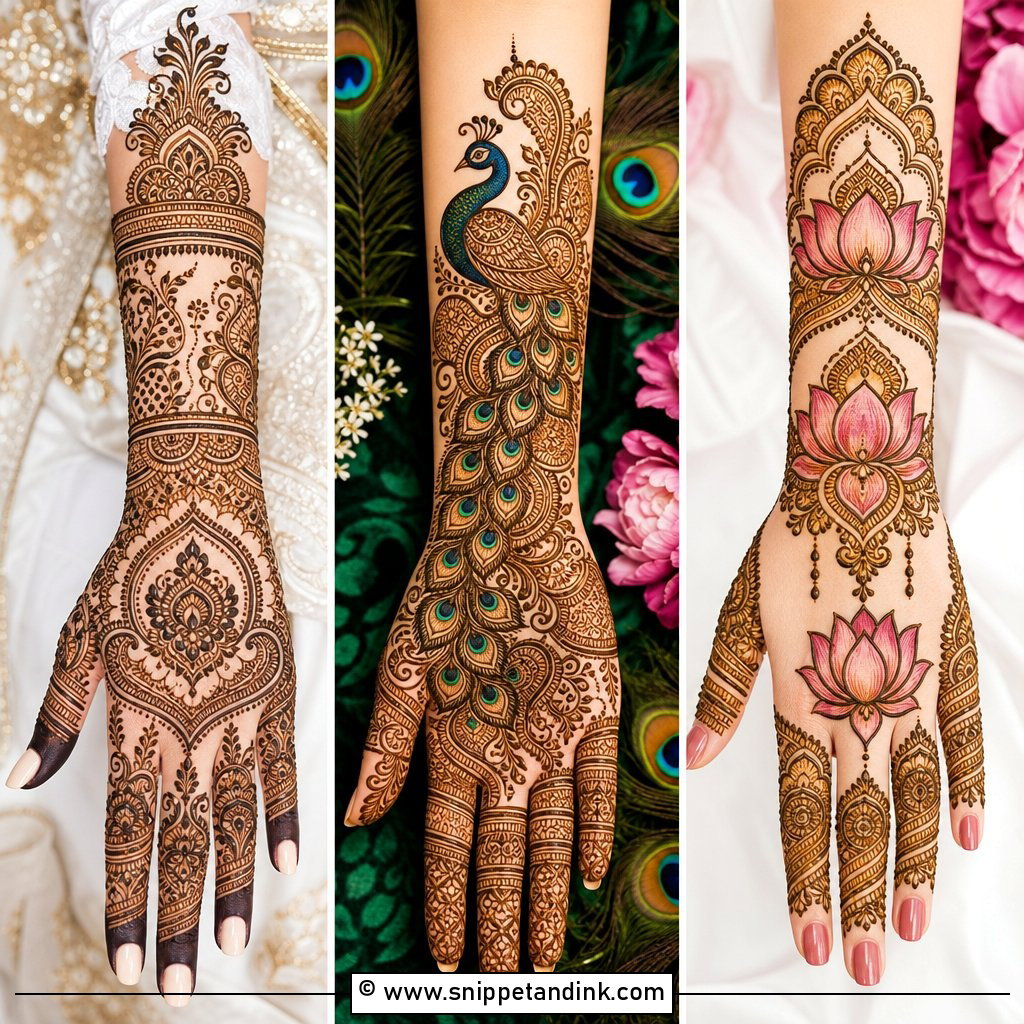
A large mandala in the middle gives the palm a finished look in the shortest time, which is why I recommend it to brides who are short on hours. I ring it with petals and dots, add a curved leaf border, and keep the fingers to horizontal lines, small florals and filled tips. Both palms can match, or one can shift slightly for a modern touch. The palm is also the darkest-staining part of the hand, so a mandala there will be the strongest colour you get.
6. Easy Bridal Mehndi Design With Floral Trail
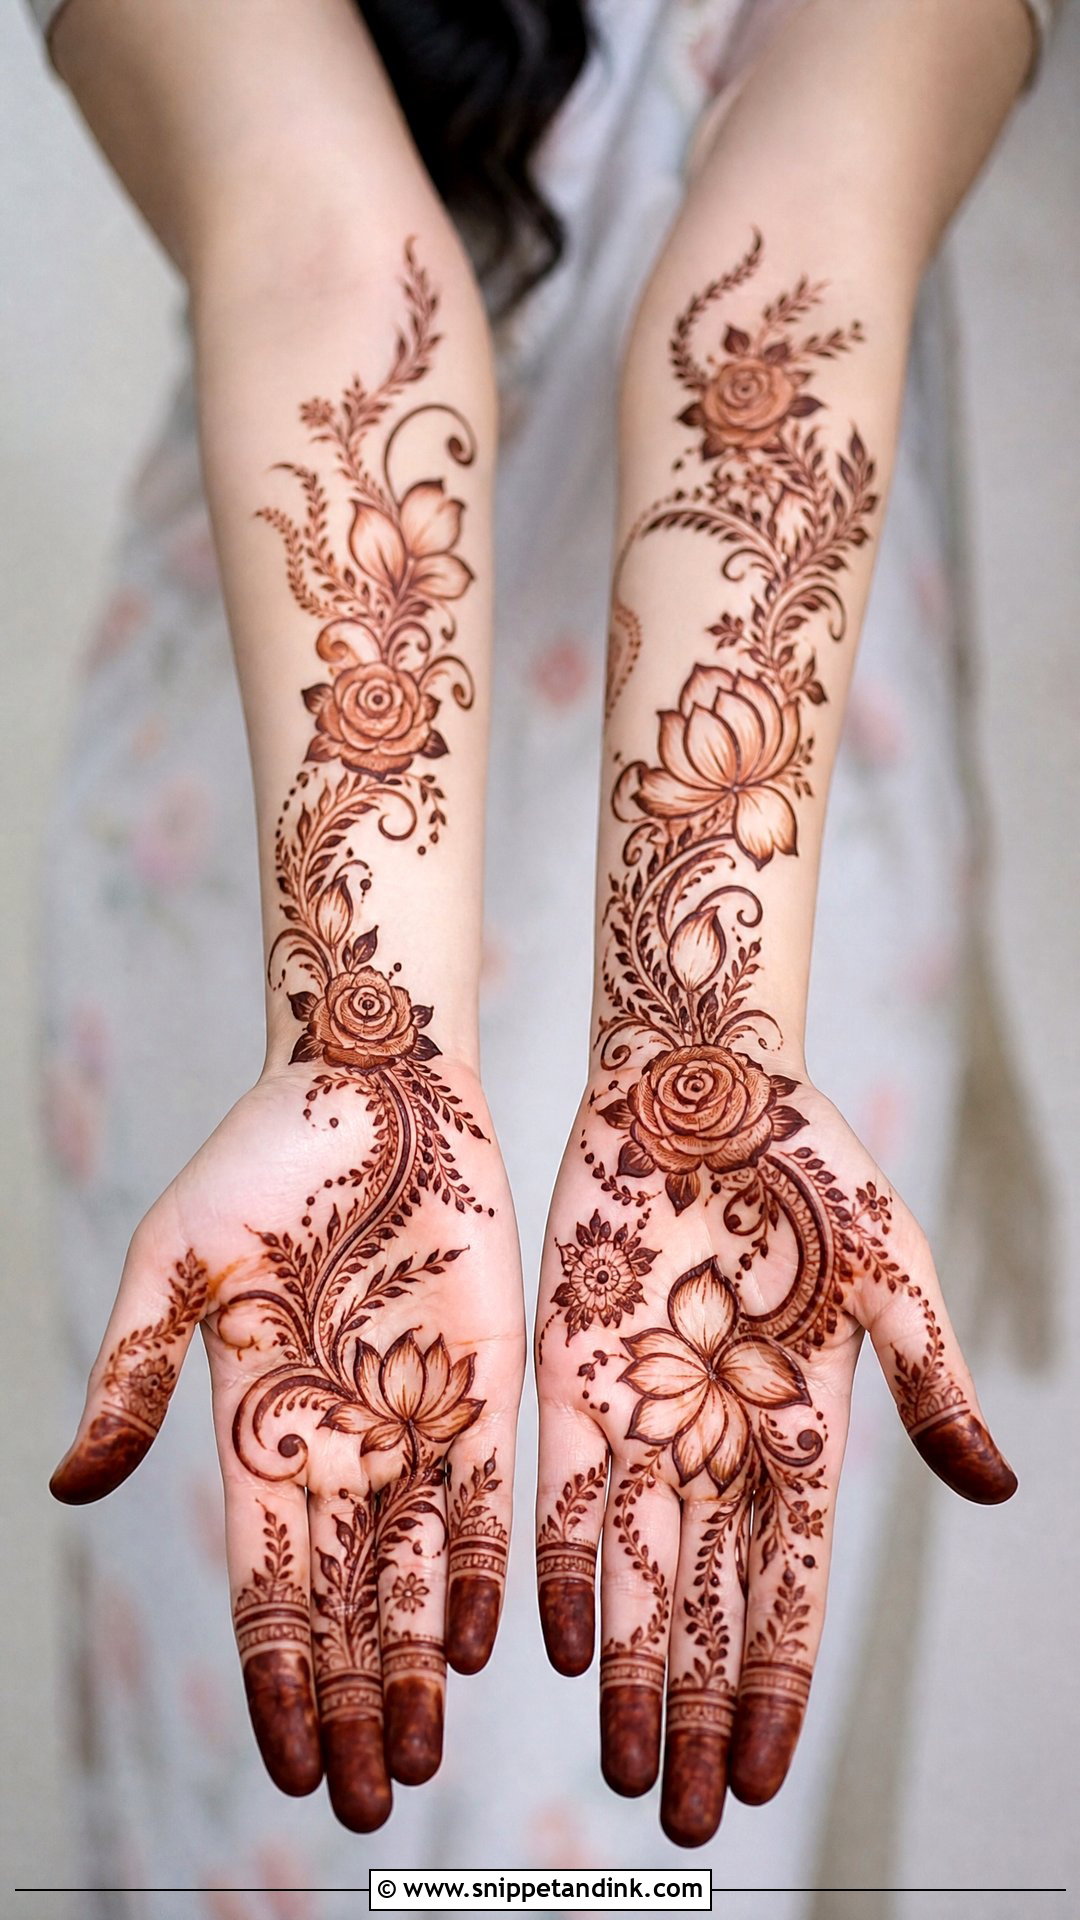
A floral trail starts at the wrist and moves diagonally across the palm or back hand toward the index or middle finger, with roses, lotus petals, leaves and small curves along the way. I draw the outlines bold and keep inner shading light; heavily shaded petals can blur into a single blob of colour once the stain darkens. Engagements, nikahs, court weddings and smaller functions all suit it, and it’s quick enough to do for several events.
7. Easy Indo Arabic Bridal Mehndi Design
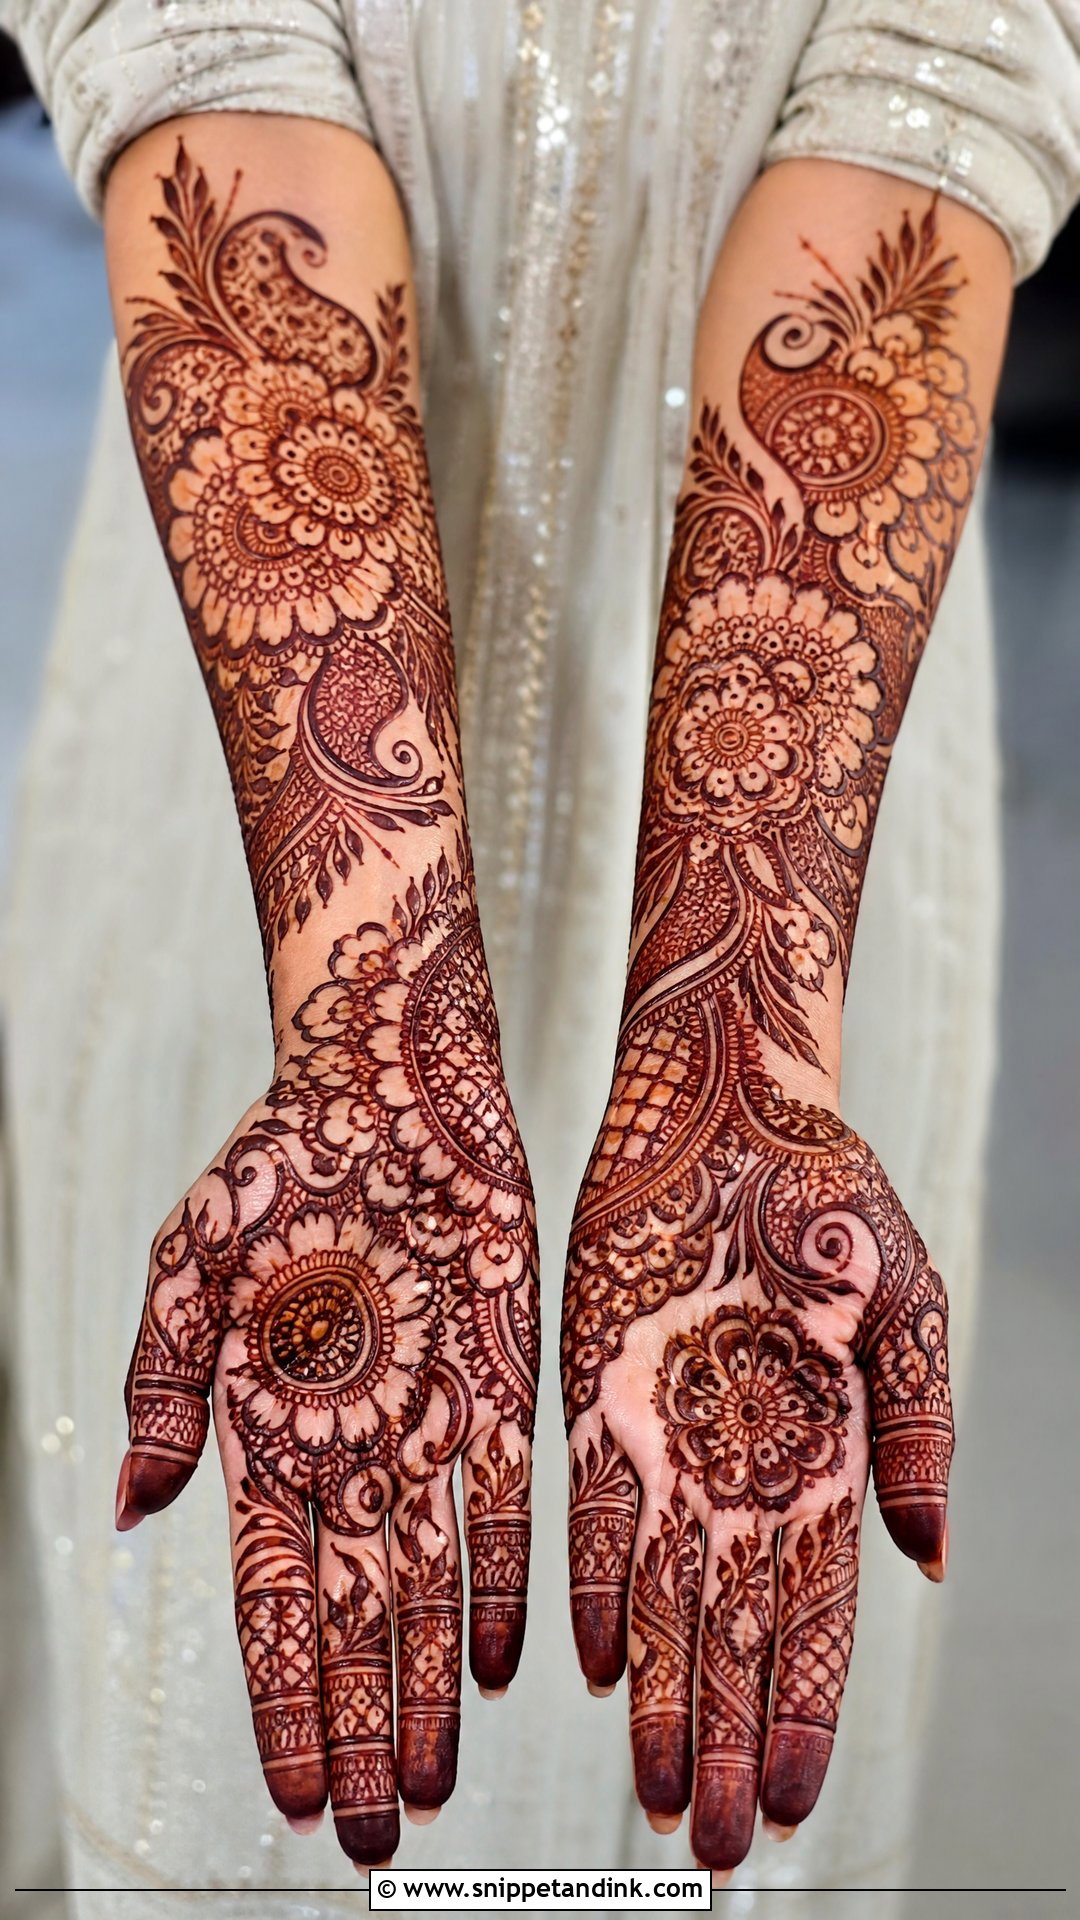
Indo Arabic mixes Indian motifs with Arabic spacing, so you get paisleys, flowers and a small mandala without every inch of skin filled. A version I draw often has a floral trail down one side, a modest mandala on the palm and paisley cuffs at the wrist. The fingers get simple jaali, dots and curved bands. Brides who want their culture to show but have a long event schedule tend to land here, since it takes noticeably less time than full Indian coverage.
8. Easy Bridal Mehndi Design With Paisley
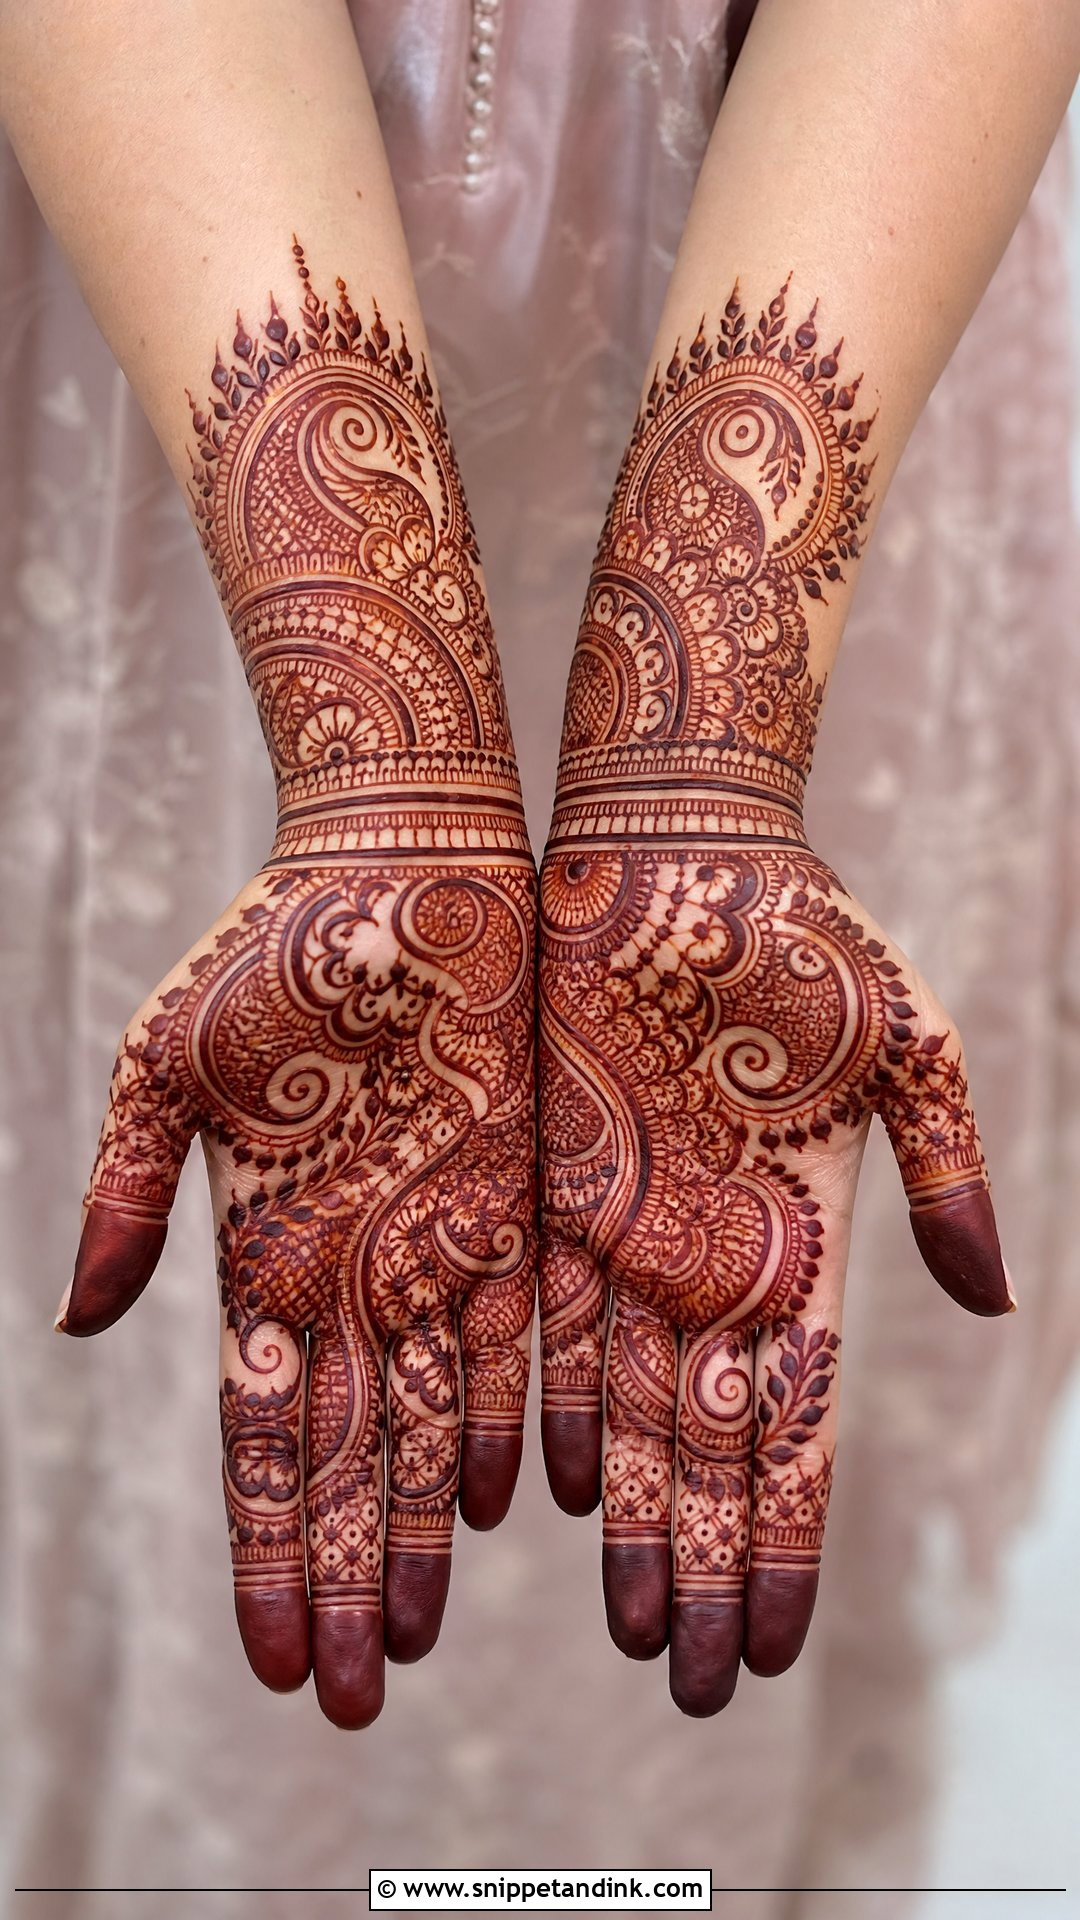
Two or three big paisleys on the palm, framed with flowers, dots and leafy borders, carry a lot of tradition with very little time. Larger shapes are easier for me to draw evenly and easier for a camera to read. Paisleys also stretch or shrink to fit any hand, so they work as a palm centrepiece or as a cuff along the wrist. Fill the fingertips and add delicate finger bands so it still reads as a bride’s hand rather than a guest’s.
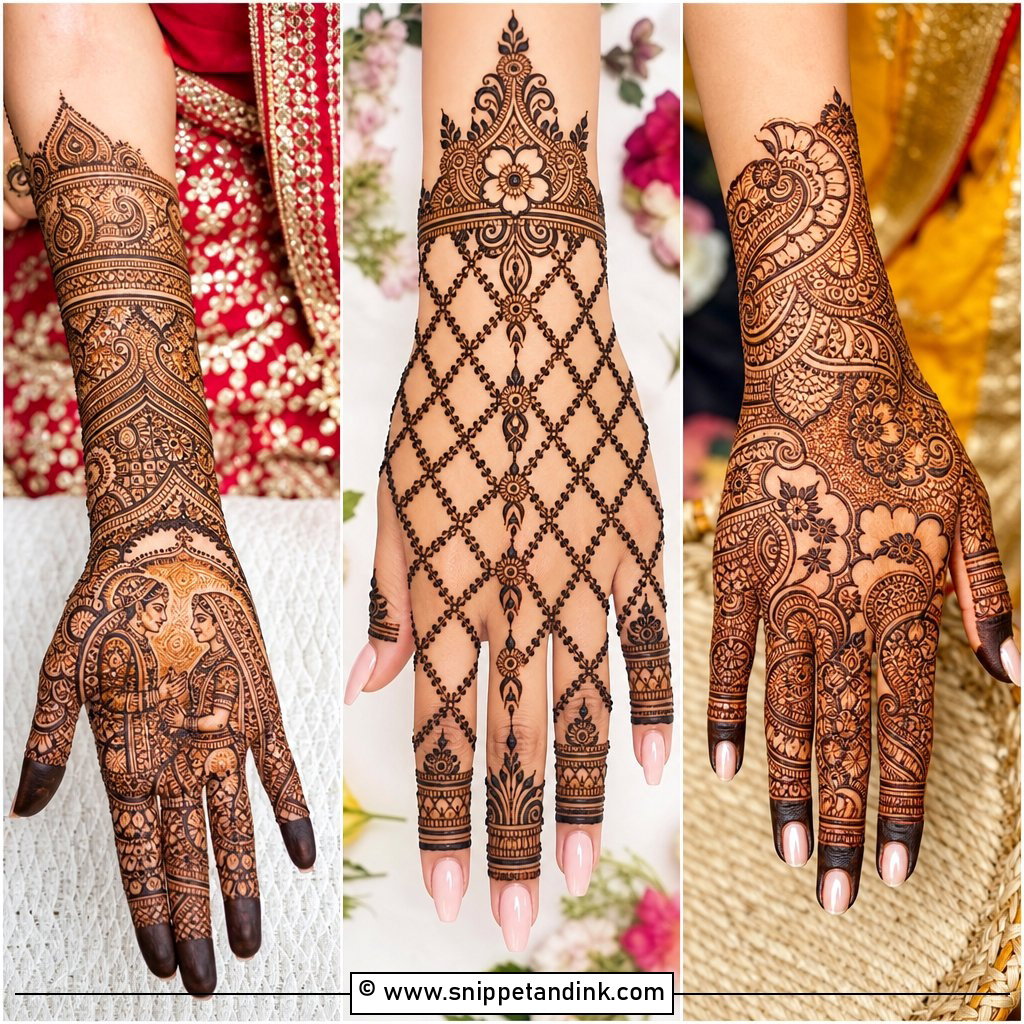
9. Easy Bridal Mehndi Design With Jaali
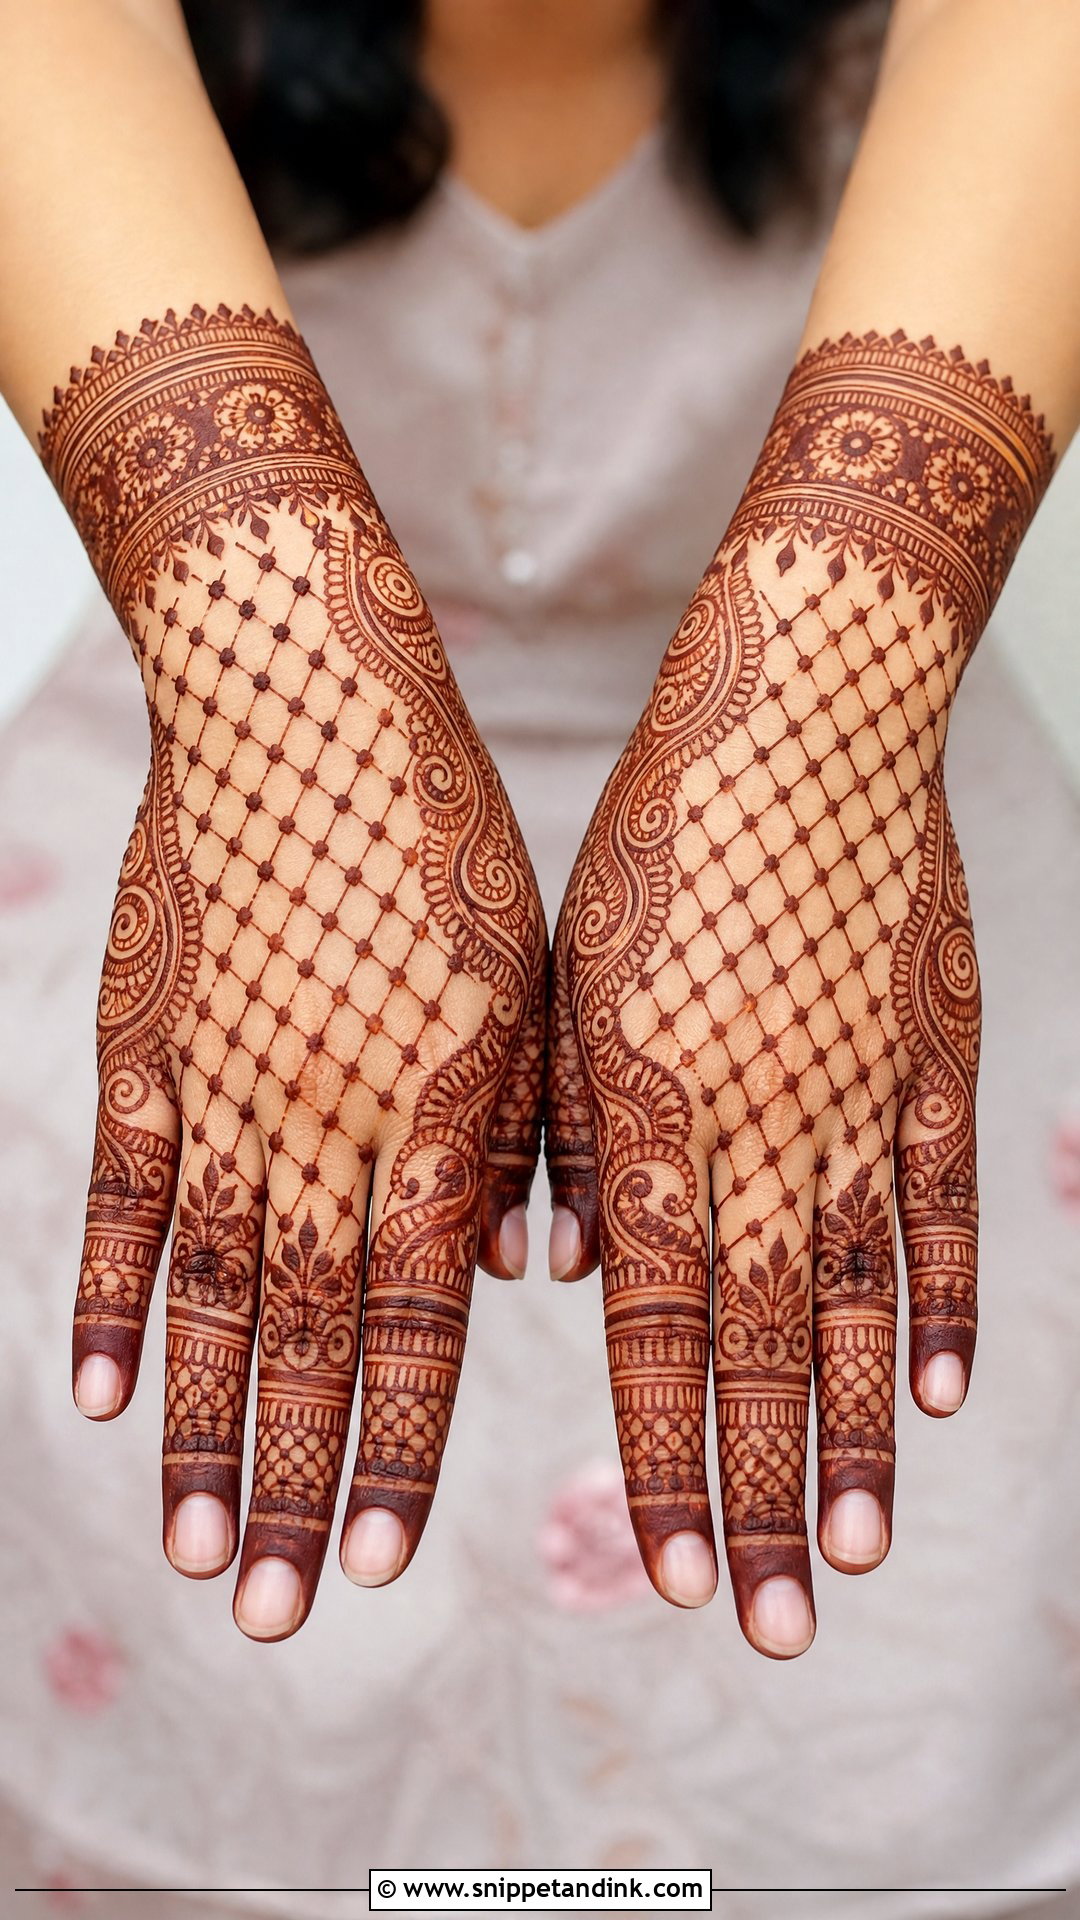
Jaali is a net pattern, and I use it like a lace panel: on the back hand, the wrist or one side of the palm, never everywhere. A neat diamond grid with a dot at each crossing looks clean. The practical catch is that jaali lines are fine and close together, so if your stain comes out very dark, the gaps can close up and the net turns into a solid patch. I space it a little wider on brides whose skin usually takes a deep colour. Pair it with flowers or a mandala so the hand doesn’t look plain.
10. Easy Bridal Mehndi Design With Peacock
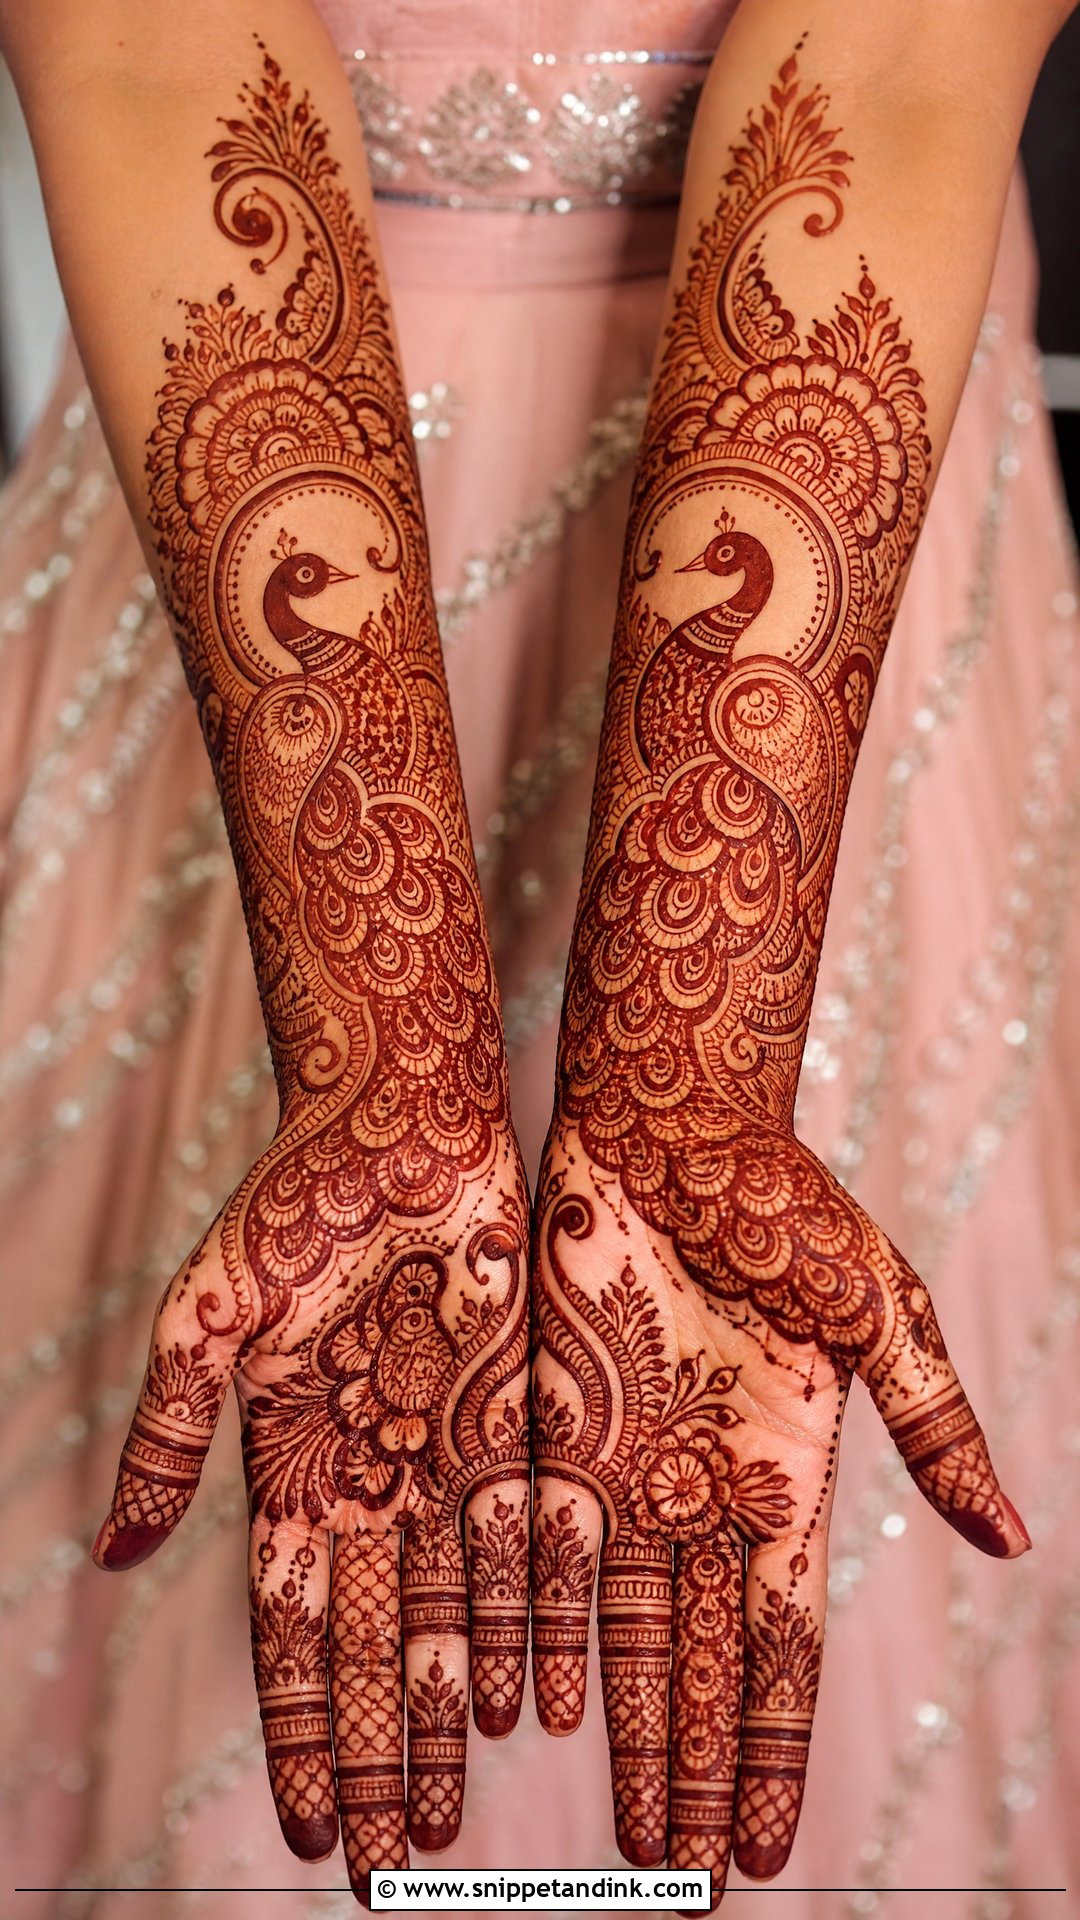
One bold peacock does more than several small ones. I place it either at the wrist with the tail sweeping upward or in the centre of the palm, then add curved feathers, paisley edges and dotted trails around it. Tiny birds lose their detail once the stain darkens and just look like smudges in photos. Keep the fingers quiet so the bird stays the focus. It belongs at traditional weddings and sangeets, where the motif’s meaning is part of the appeal.
11. Easy Bridal Mehndi Design With Bride And Groom Art
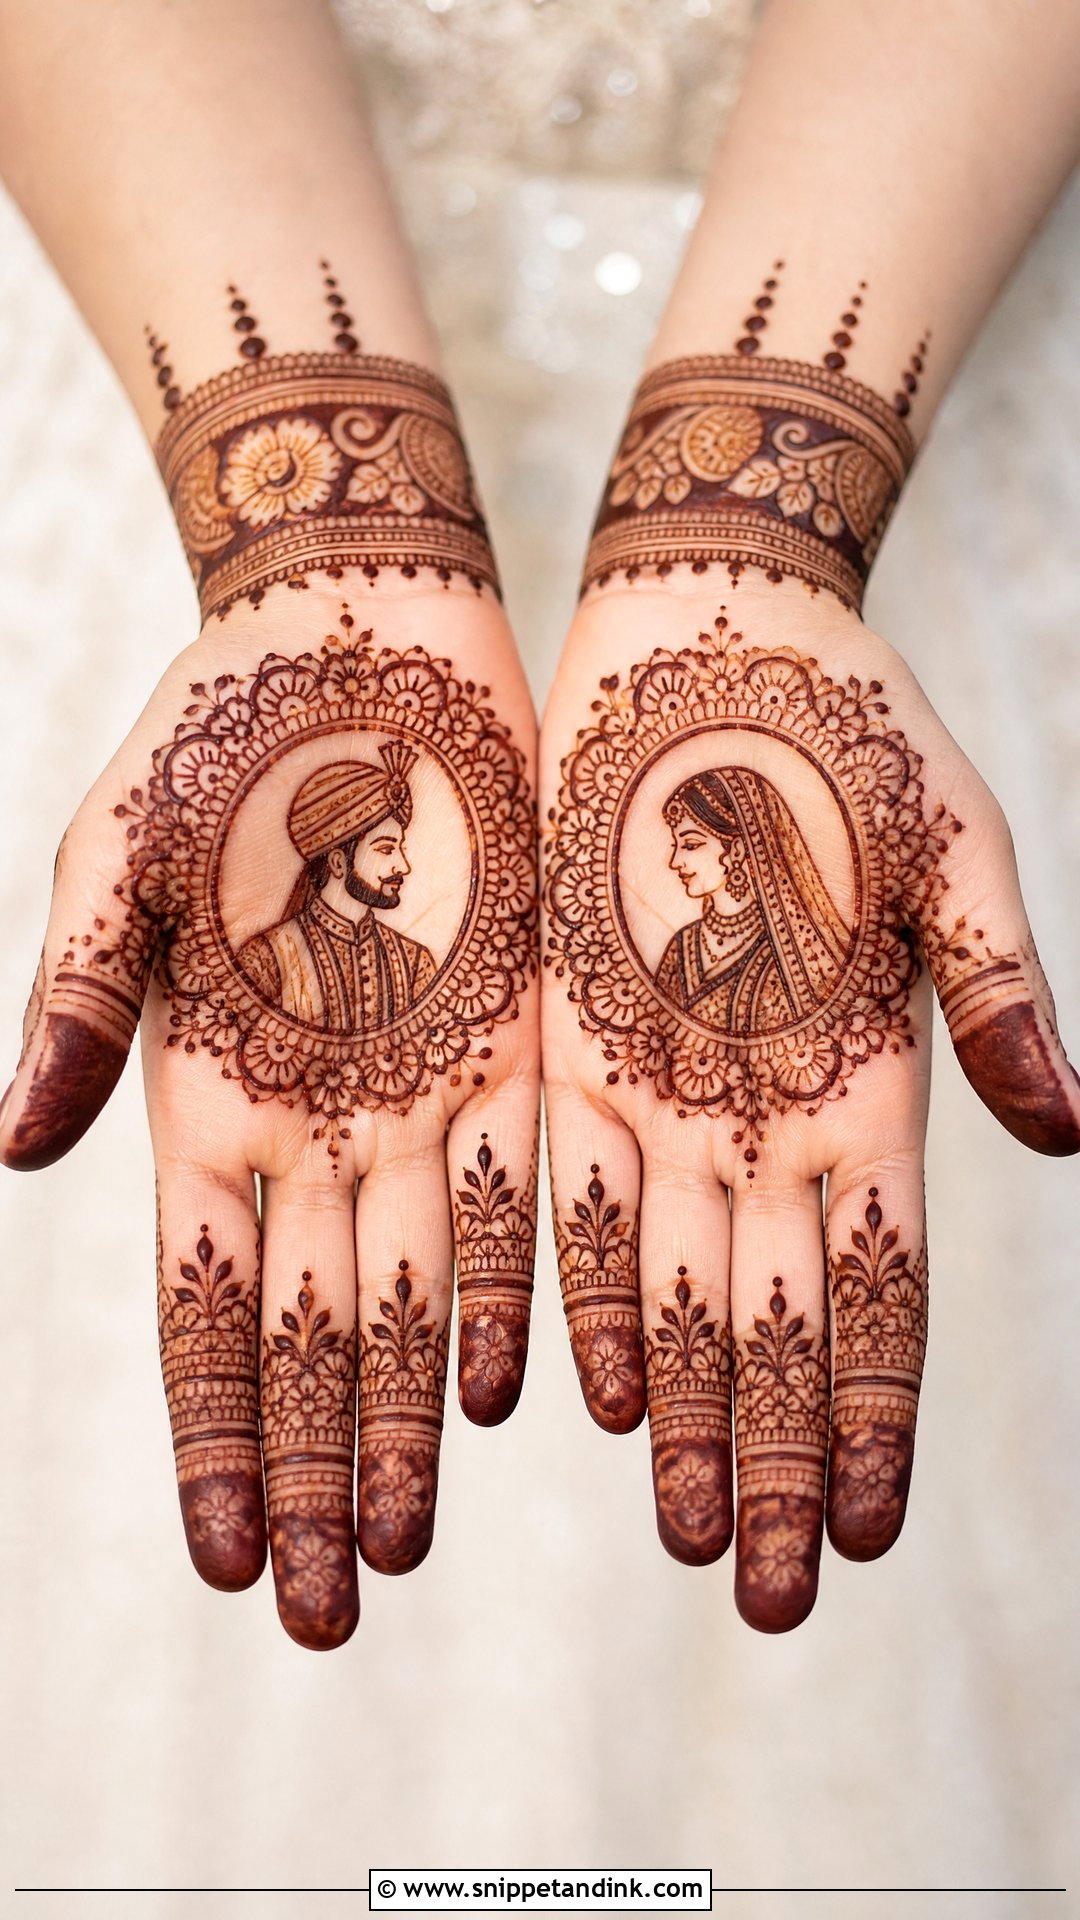
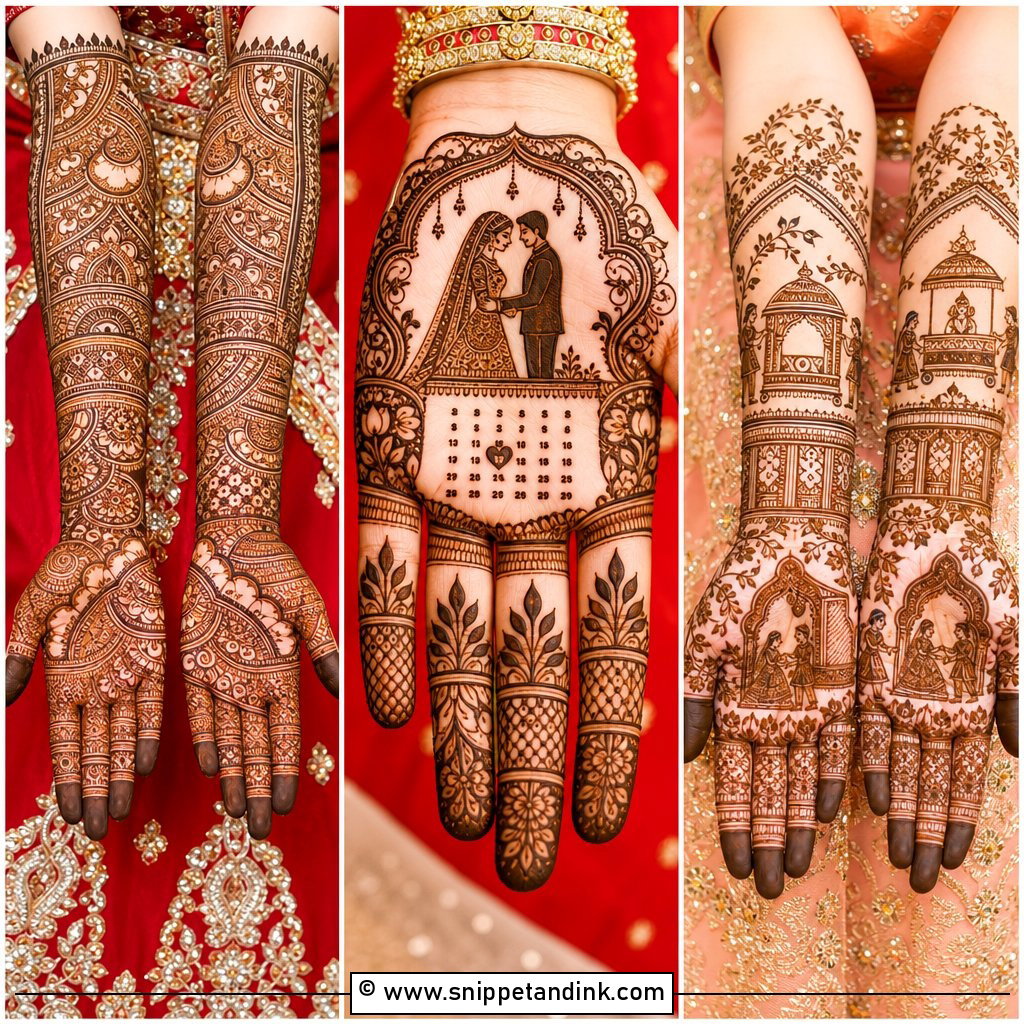
Couple art doesn’t need faces drawn line by line. Small silhouettes or simple outlined figures, bride on one palm and groom on the other, read better after staining than detailed portraits, where fine features tend to merge. I frame them with florals, a mandala or soft paisley borders, or set one small couple scene near the wrist. It gives the hands a personal story without the hours a full portrait palm takes.
12. Easy Bridal Mehndi Design With Name
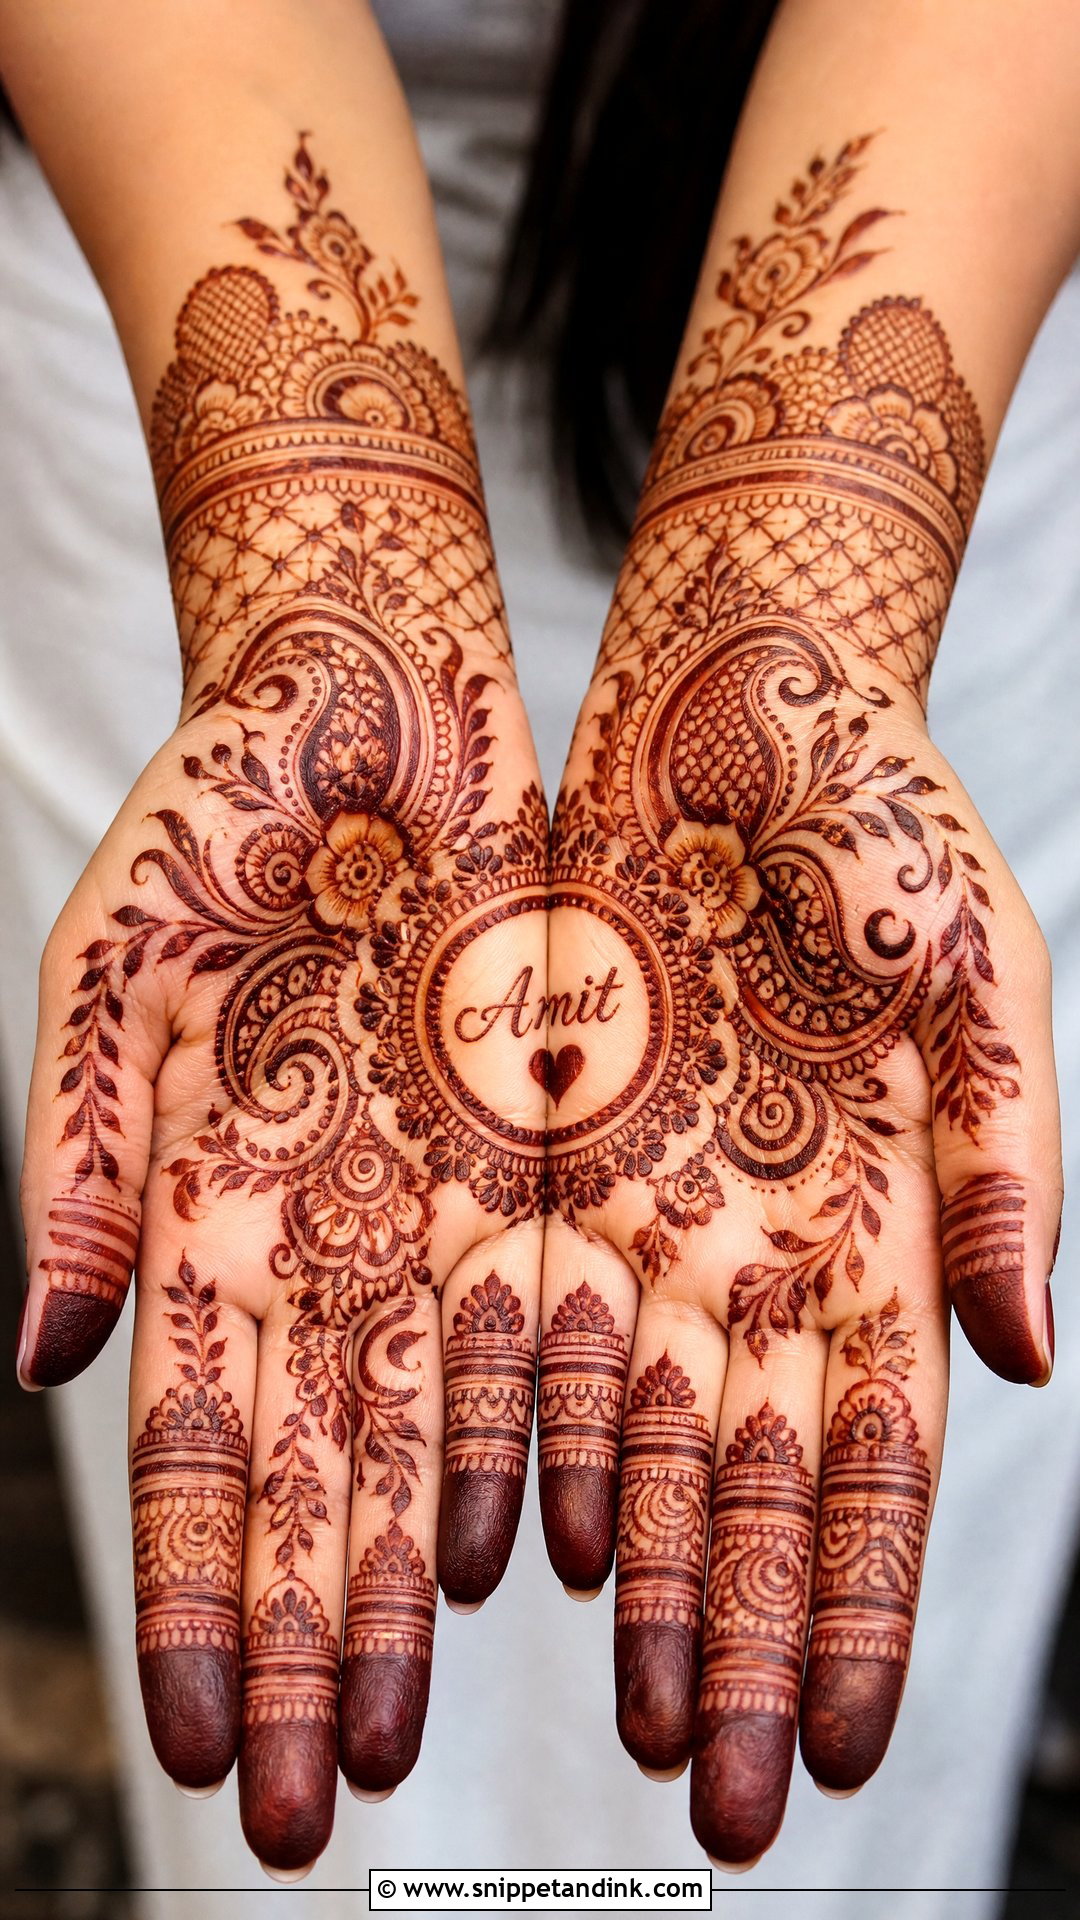
A partner’s name is a fun hidden detail, and many grooms are expected to search for it after the ceremony. I place it inside a small heart, a floral frame or the wrist band, and I write it a little larger than brides expect, because letters smaller than a fingertip fill in as the stain deepens and become hard to read. Arabic vines, paisleys, finger bands and light jaali can fill the rest without crowding it.
13. Easy Minimal Bridal Mehndi Design
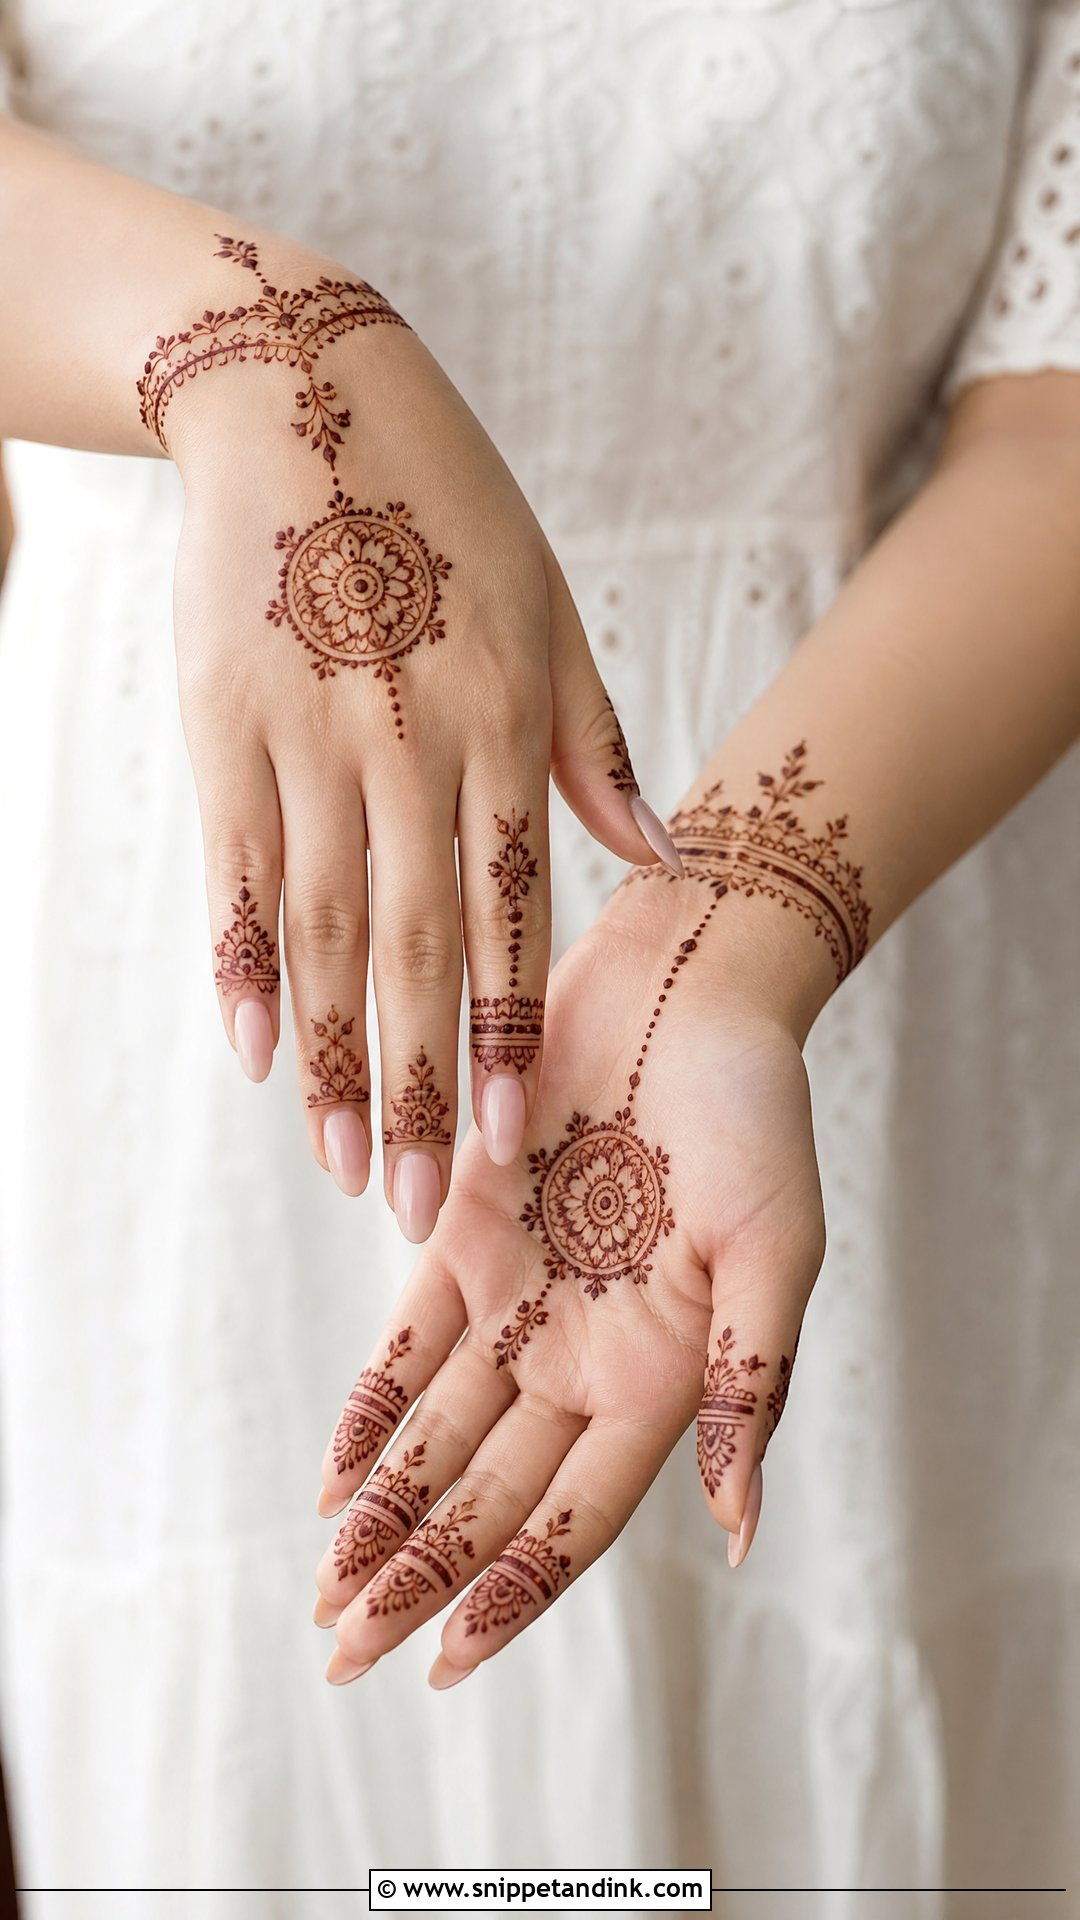
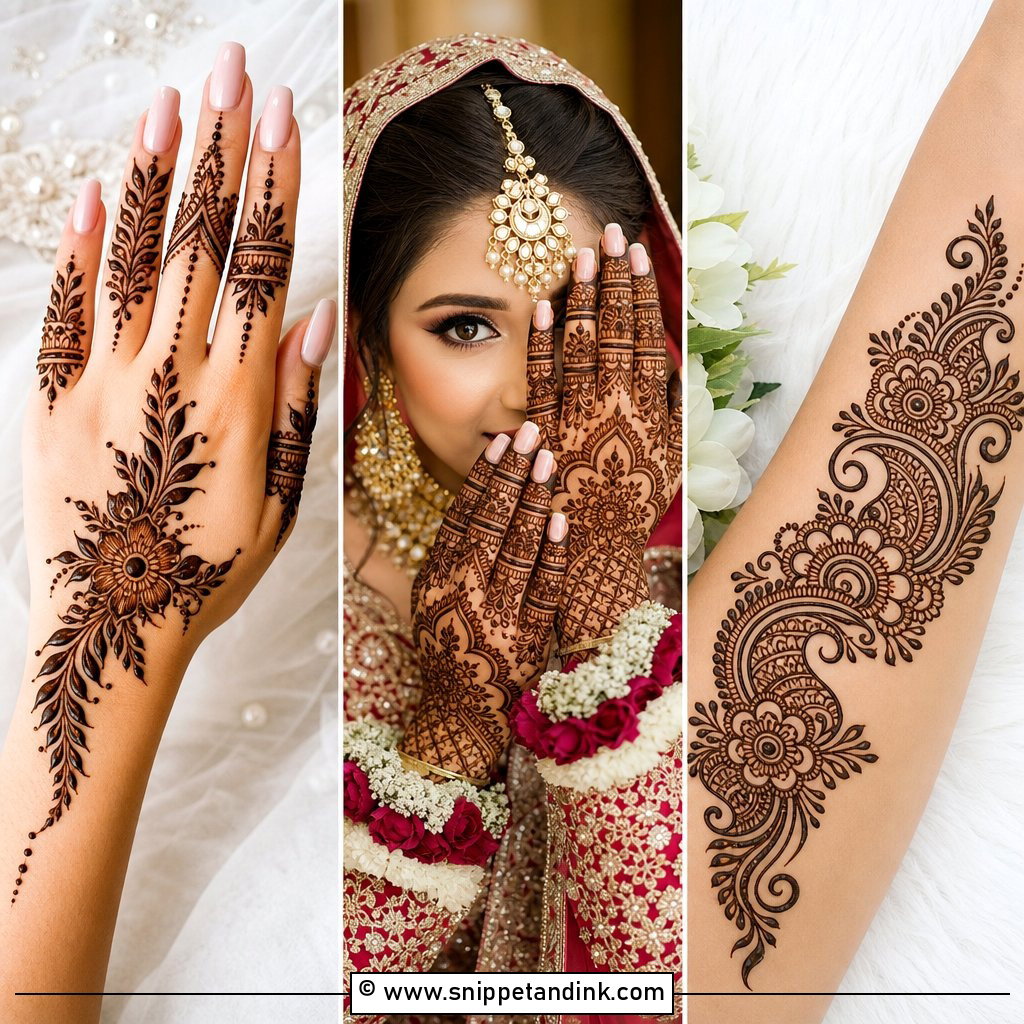
Minimal bridal mehndi uses fine lines, small florals, finger bands and plenty of bare skin, usually concentrated on the fingers, wrist and one palm motif. Placement is everything here, since there’s nothing to hide behind: every dot has to sit where it means to. A tiny mandala, initials or a bracelet pattern makes it read as bridal. Destination weddings and pastel lehengas suit it. One honest caution: fine lines stain lighter than bold ones, so aftercare matters even more with this look.
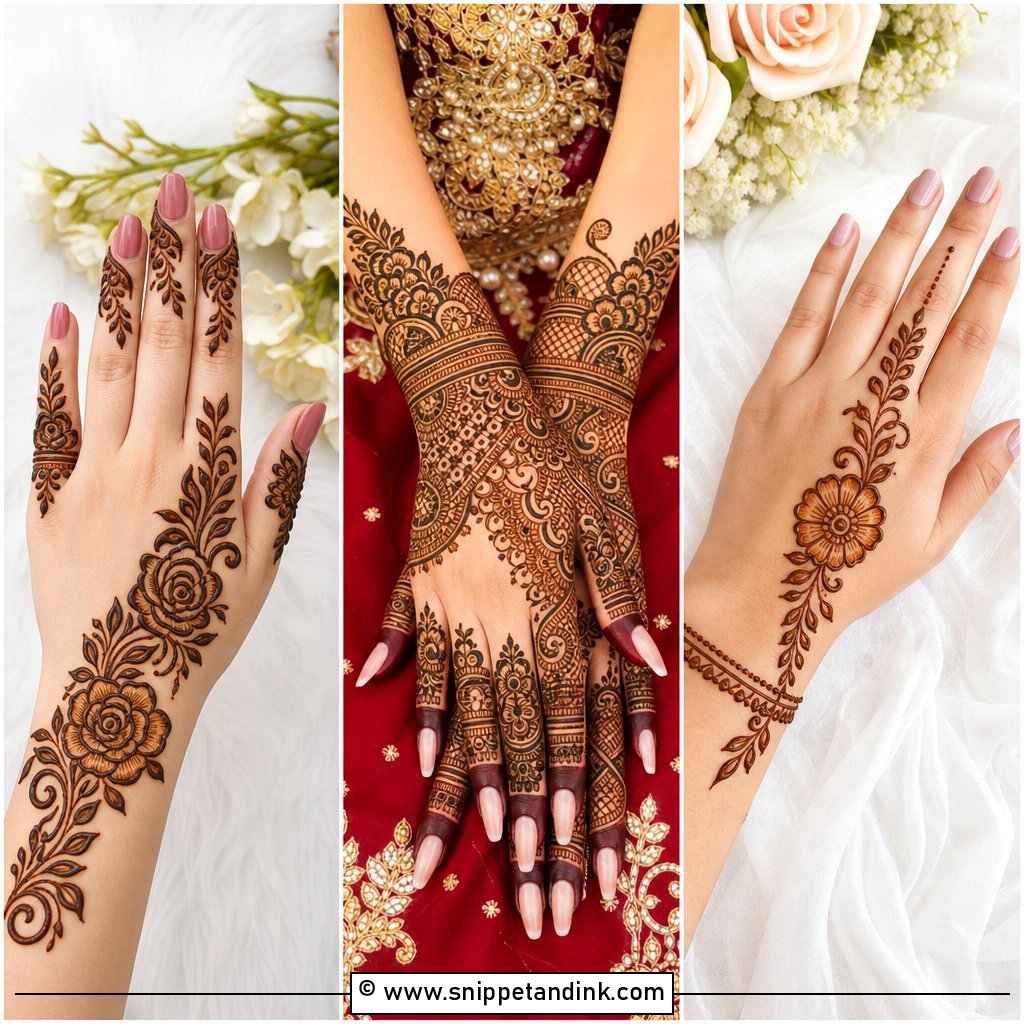
14. Easy Bridal Mehndi Design For Short Hands
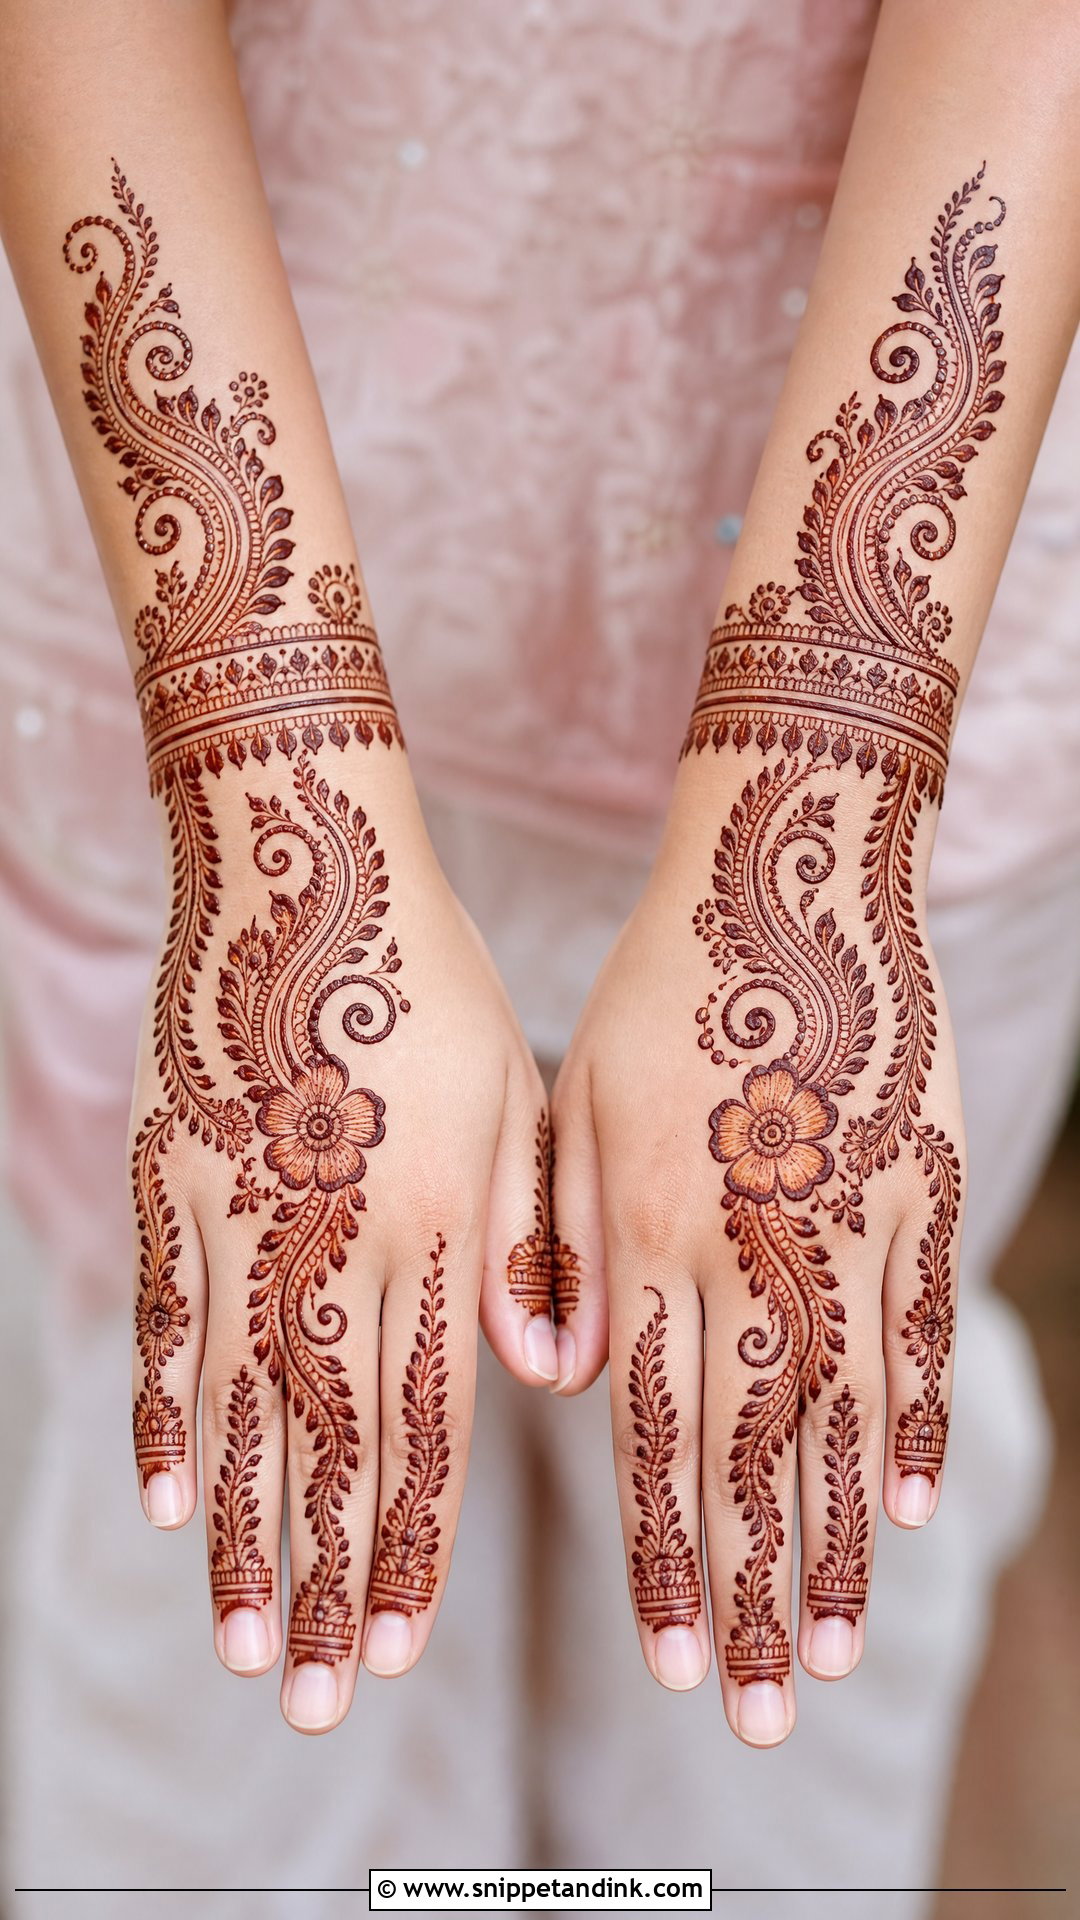
On shorter hands, I draw to lengthen. Vertical vines, slim paisleys and patterns that pull the eye up the fingers do that; a big block across the palm does the opposite and makes the hand look smaller. A diagonal Arabic trail from wrist to index finger is my usual choice, with narrow wrist cuffs, small florals and thin leaf chains. Keep the open spaces clean so the design doesn’t look squashed.
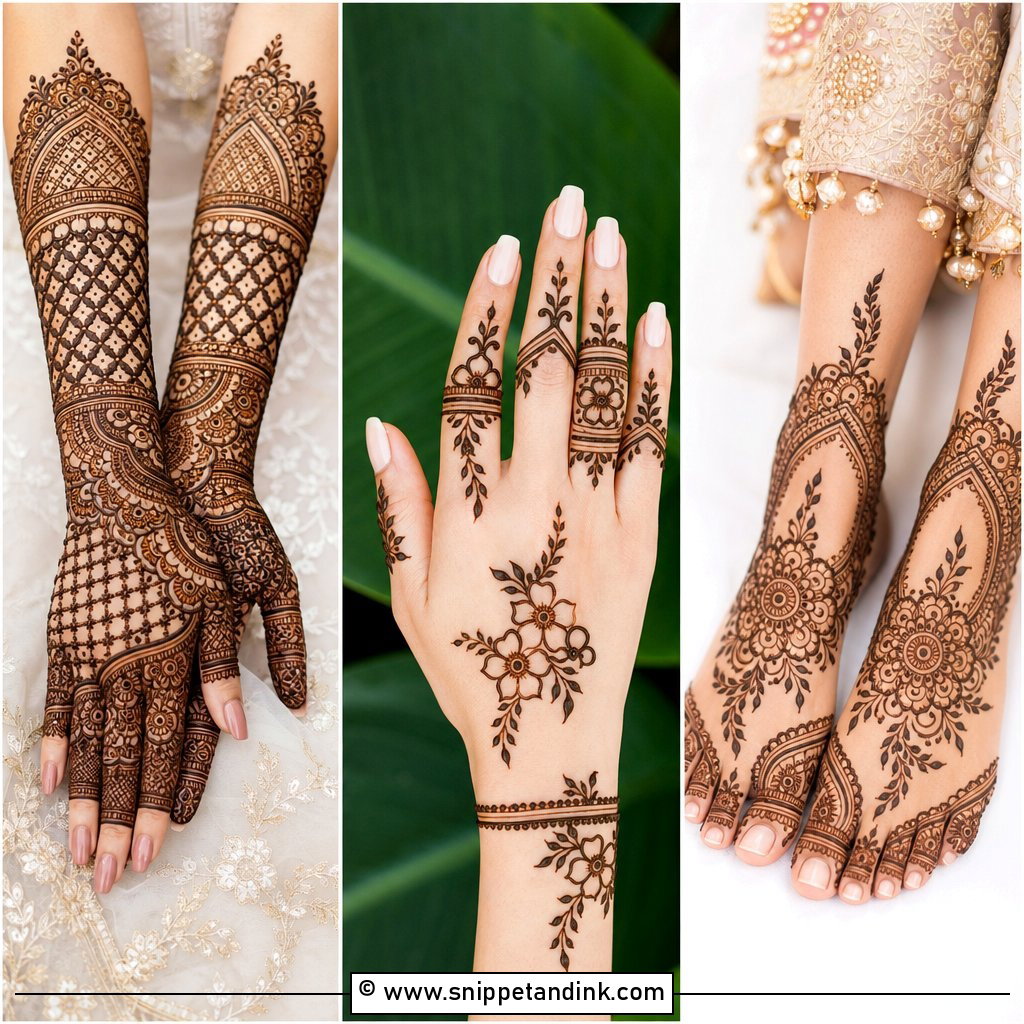
15. Easy Bridal Mehndi Design For Long Hands
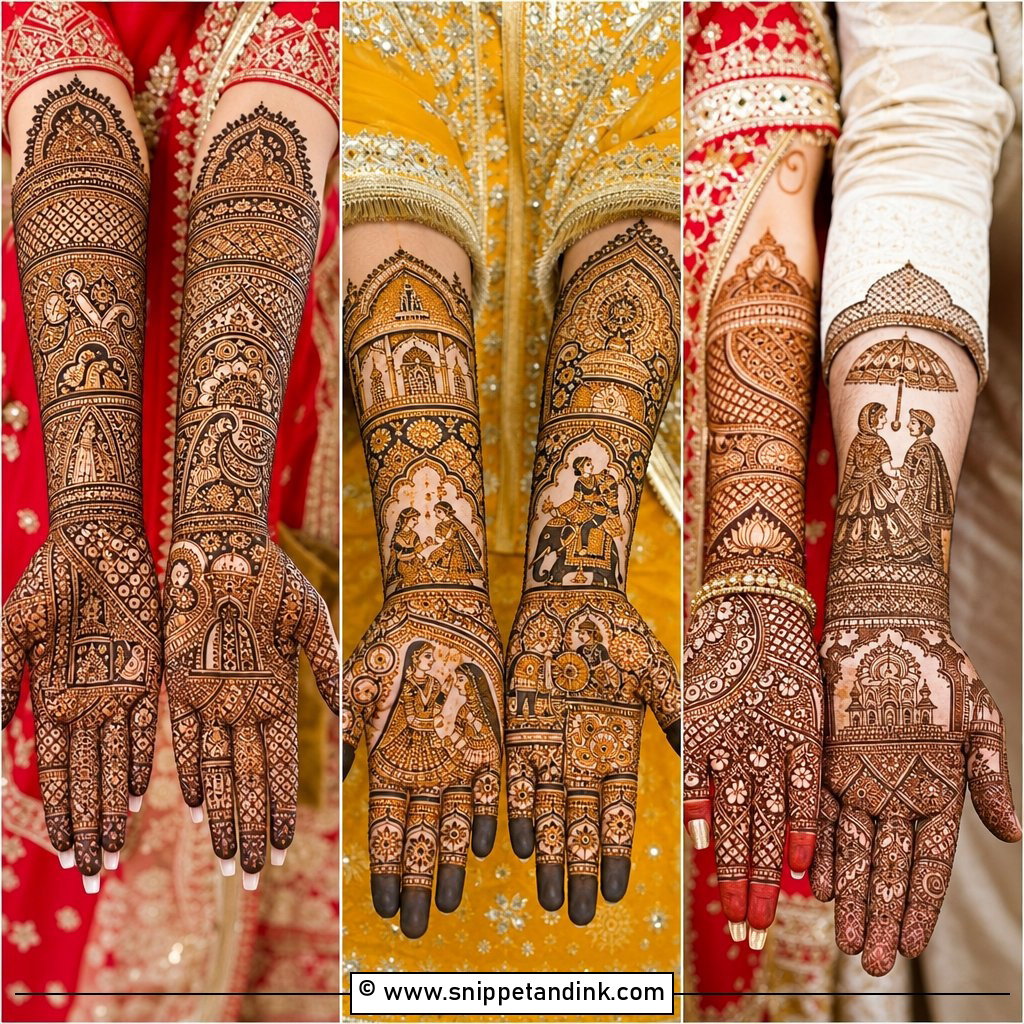
Long hands give me room, but the risk is a design that looks empty in the middle. I follow the length of the fingers and palm with a long floral vine, a slim mandala chain or an extended paisley trail, then add stacked finger bands, leafy tips and dotted curves. A bracelet section at the wrist with a short forearm extension balances the length. Simple details are enough because the hand itself already looks elegant.
16. Easy Bridal Mehndi Design For Engagement
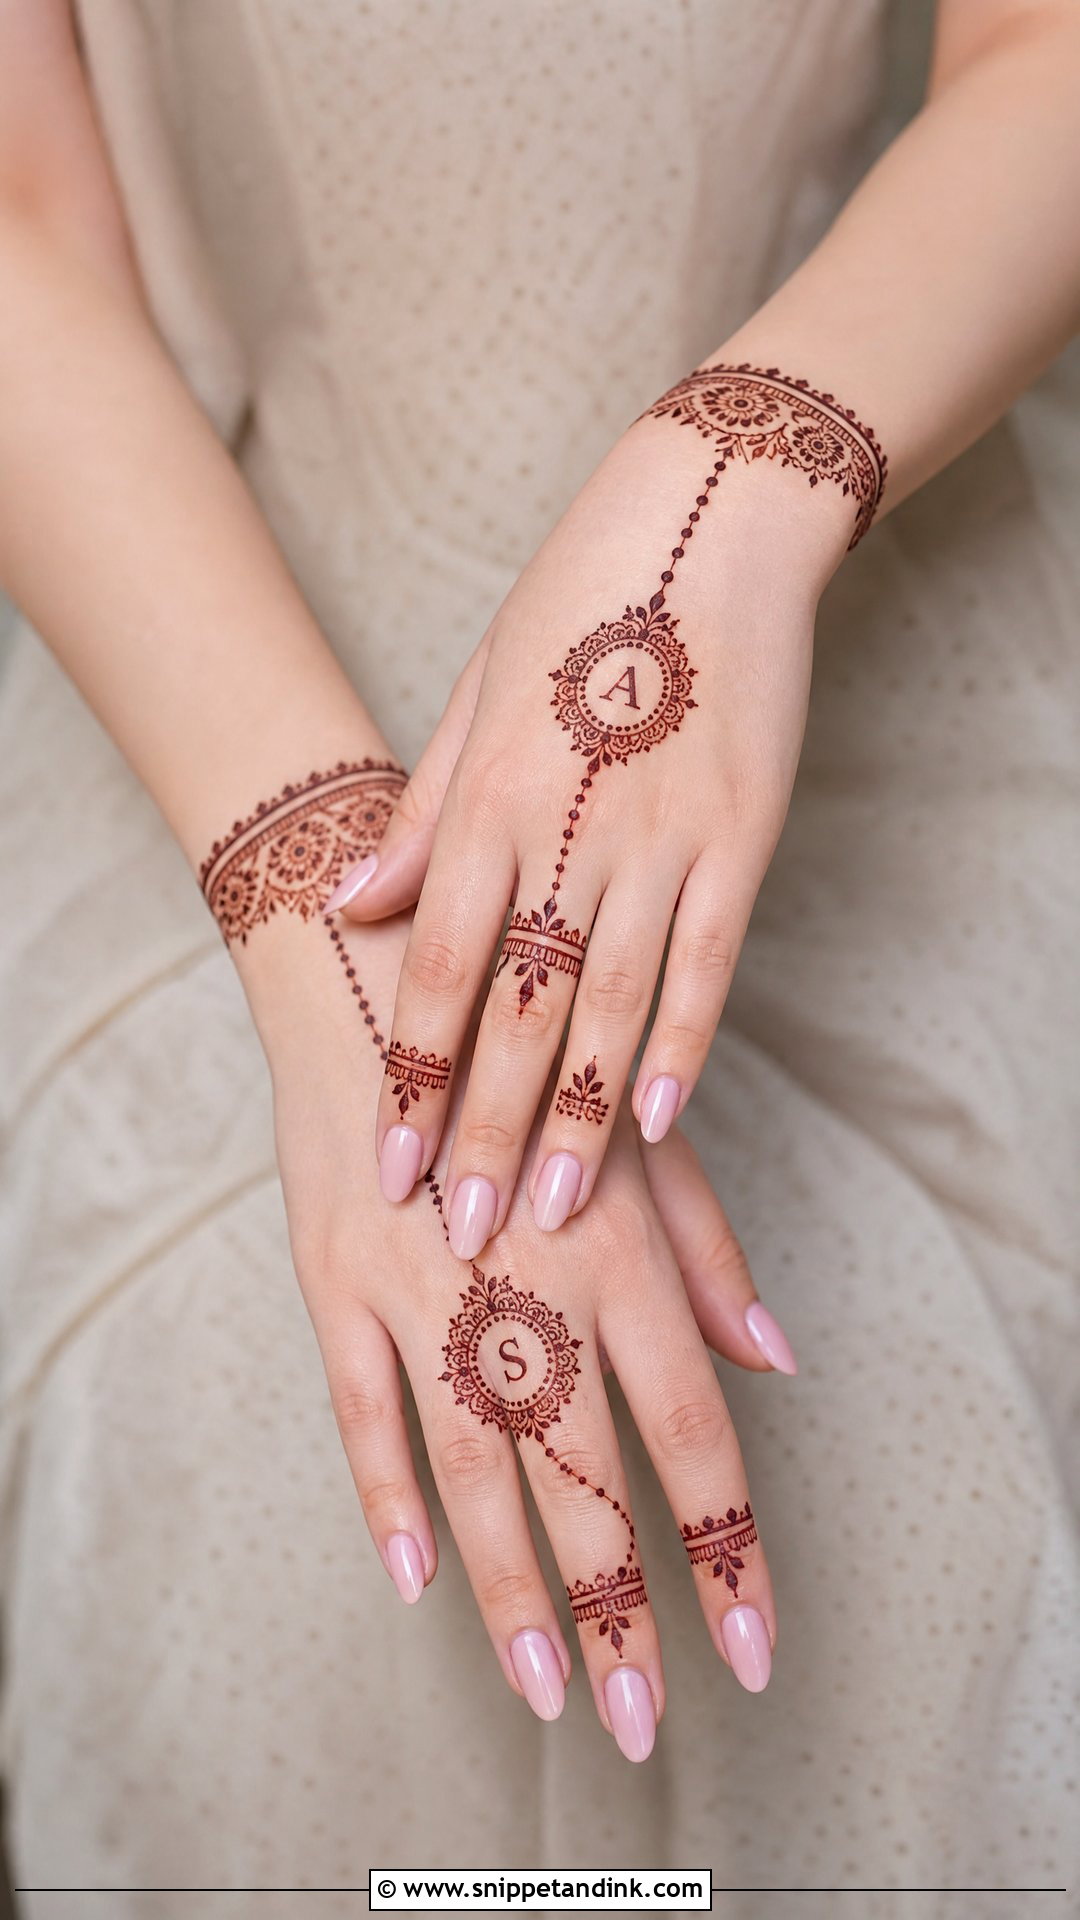
Engagement mehndi is usually lighter than the wedding set, and an easy engagement bridal design often puts most of the work on the back hand: ring chains, a floral bracelet and soft finger patterns that frame the ring in the exchange photos. A small mandala or heart on the palm is enough. If your engagement is only a few weeks before the wedding, keep it light on the palms; old stain fading unevenly under fresh bridal mehndi can show.
17. Easy Bridal Mehndi Design For Nikkah
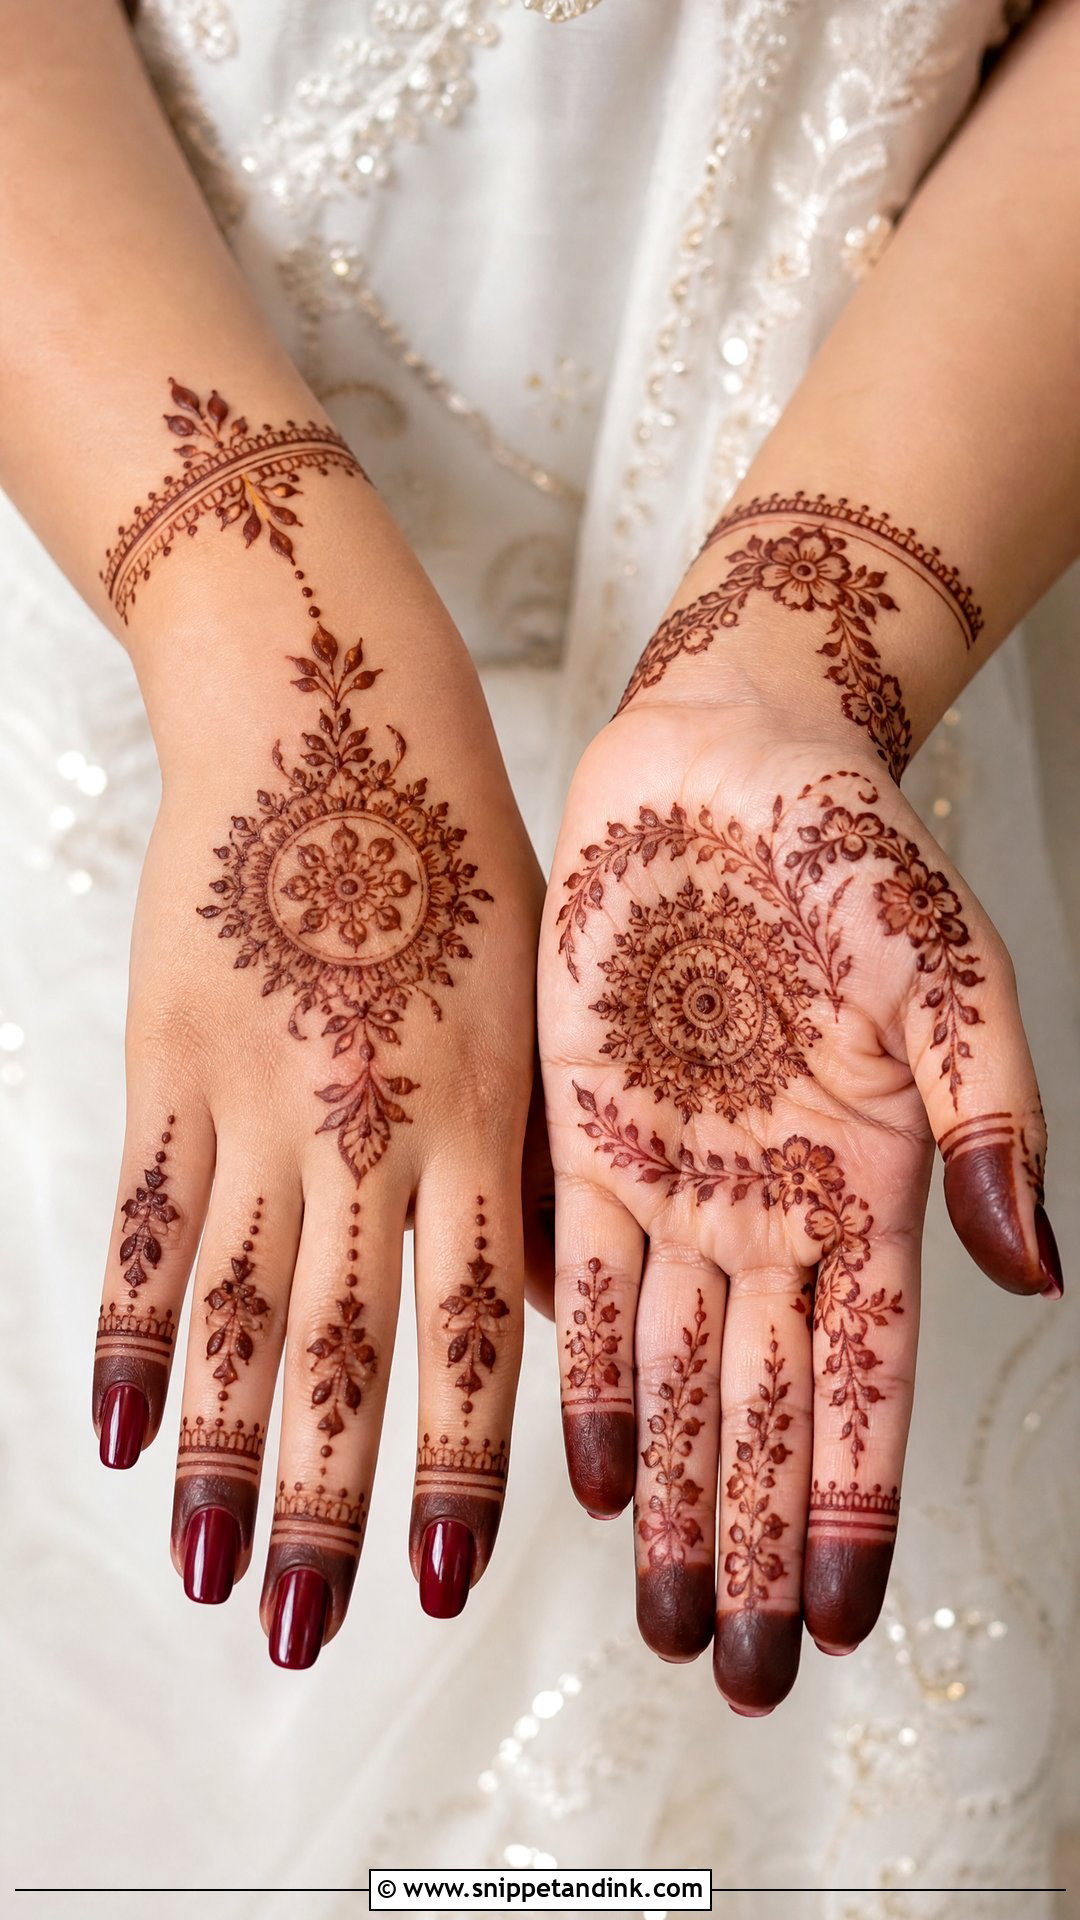
A nikkah bridal mehndi design tends to suit a refined, open style: flowing Arabic and Gulf-inspired florals with plenty of skin showing. I like a back hand with a floral bracelet, leafy ring chains and a centred mandala, and a simple vine with paisley accents on the palm. It sits comfortably with ivory, gold, pastel and jewel-toned outfits and holds up in close-up photos during the ceremony.
18. Easy Bridal Mehndi Design For Reception
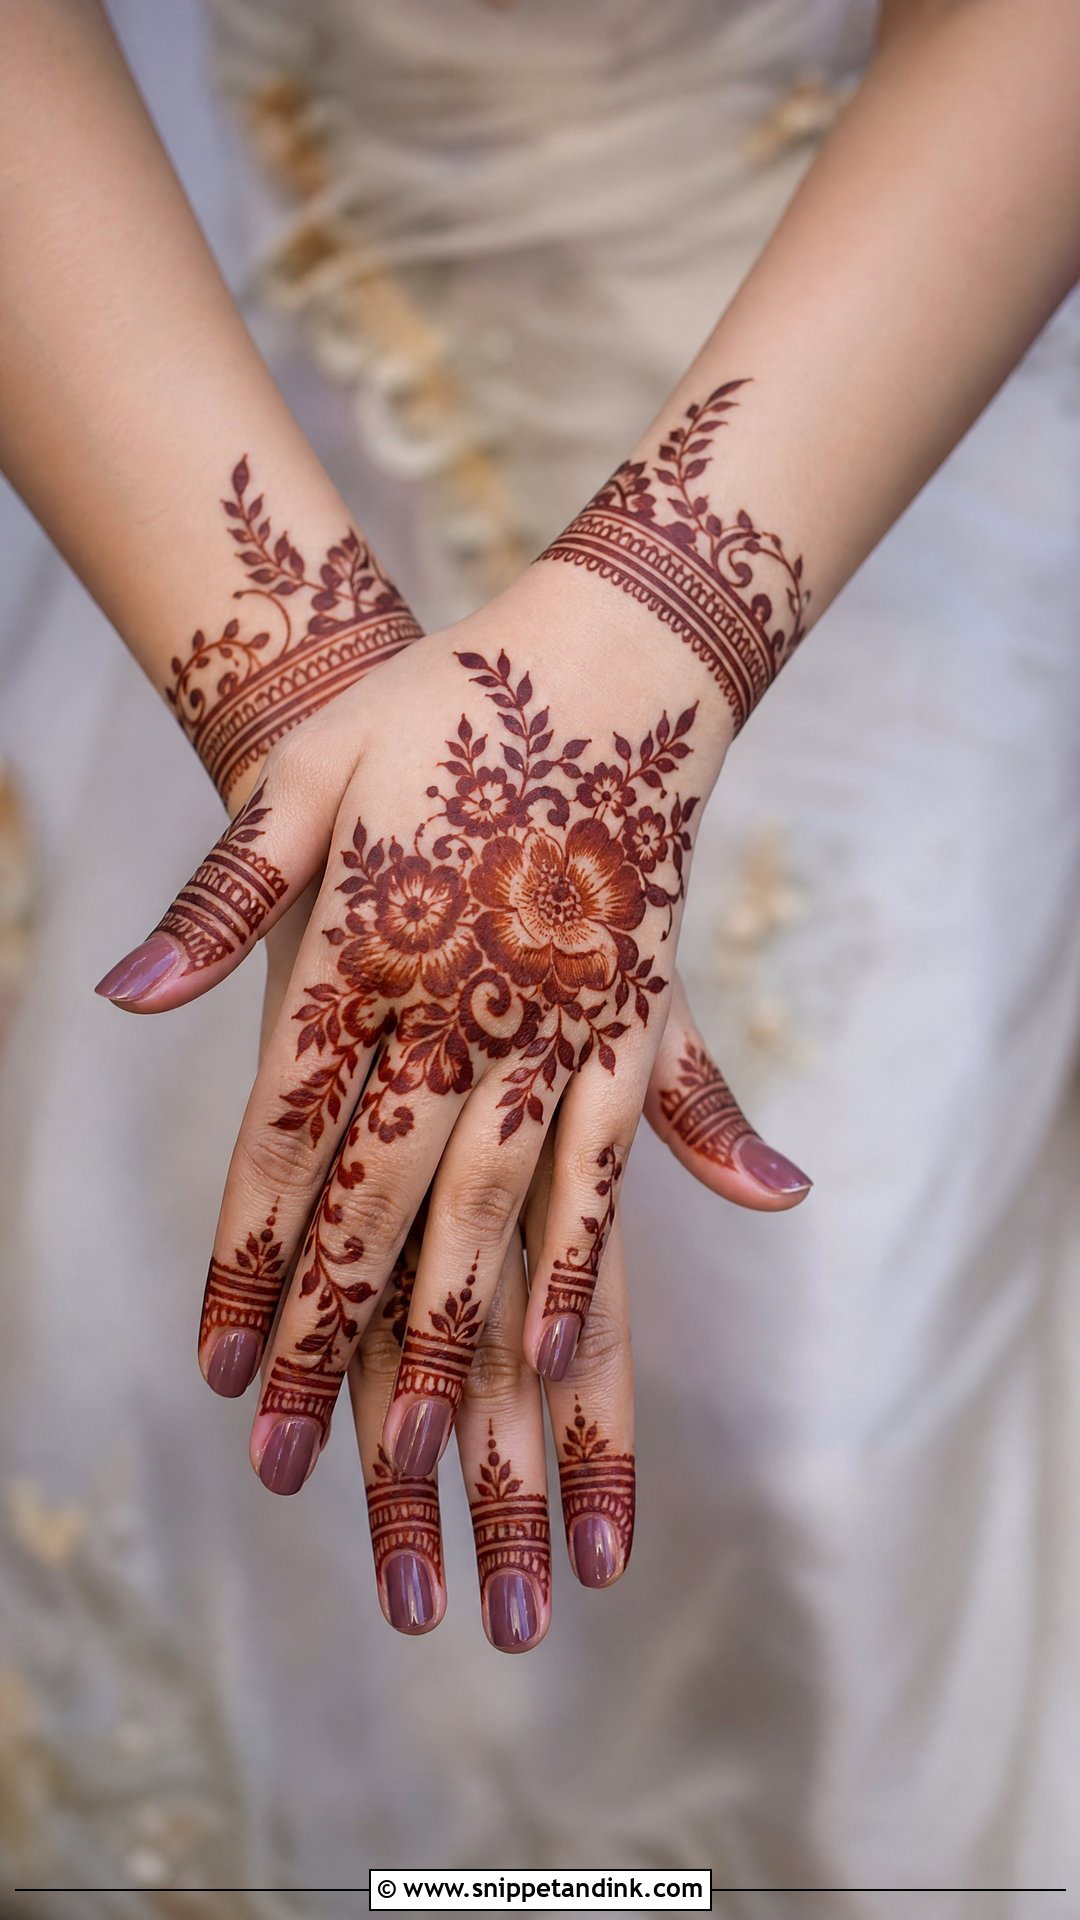
Reception hands can be more modern than the main ceremony. Bold back hand florals, clean wrist cuffs and finger jewellery patterns suit the movement and photography of a reception, and a half-hand layout or a mandala bracelet design keeps it light. Tiny dots drawn in henna can stand in for sparkle; I’d skip glitter, which rubs off and looks dated in photos. If the reception is a day or two after the wedding, remember your stain will be at its deepest then.
19. Easy Bridal Mehndi Design For Feet
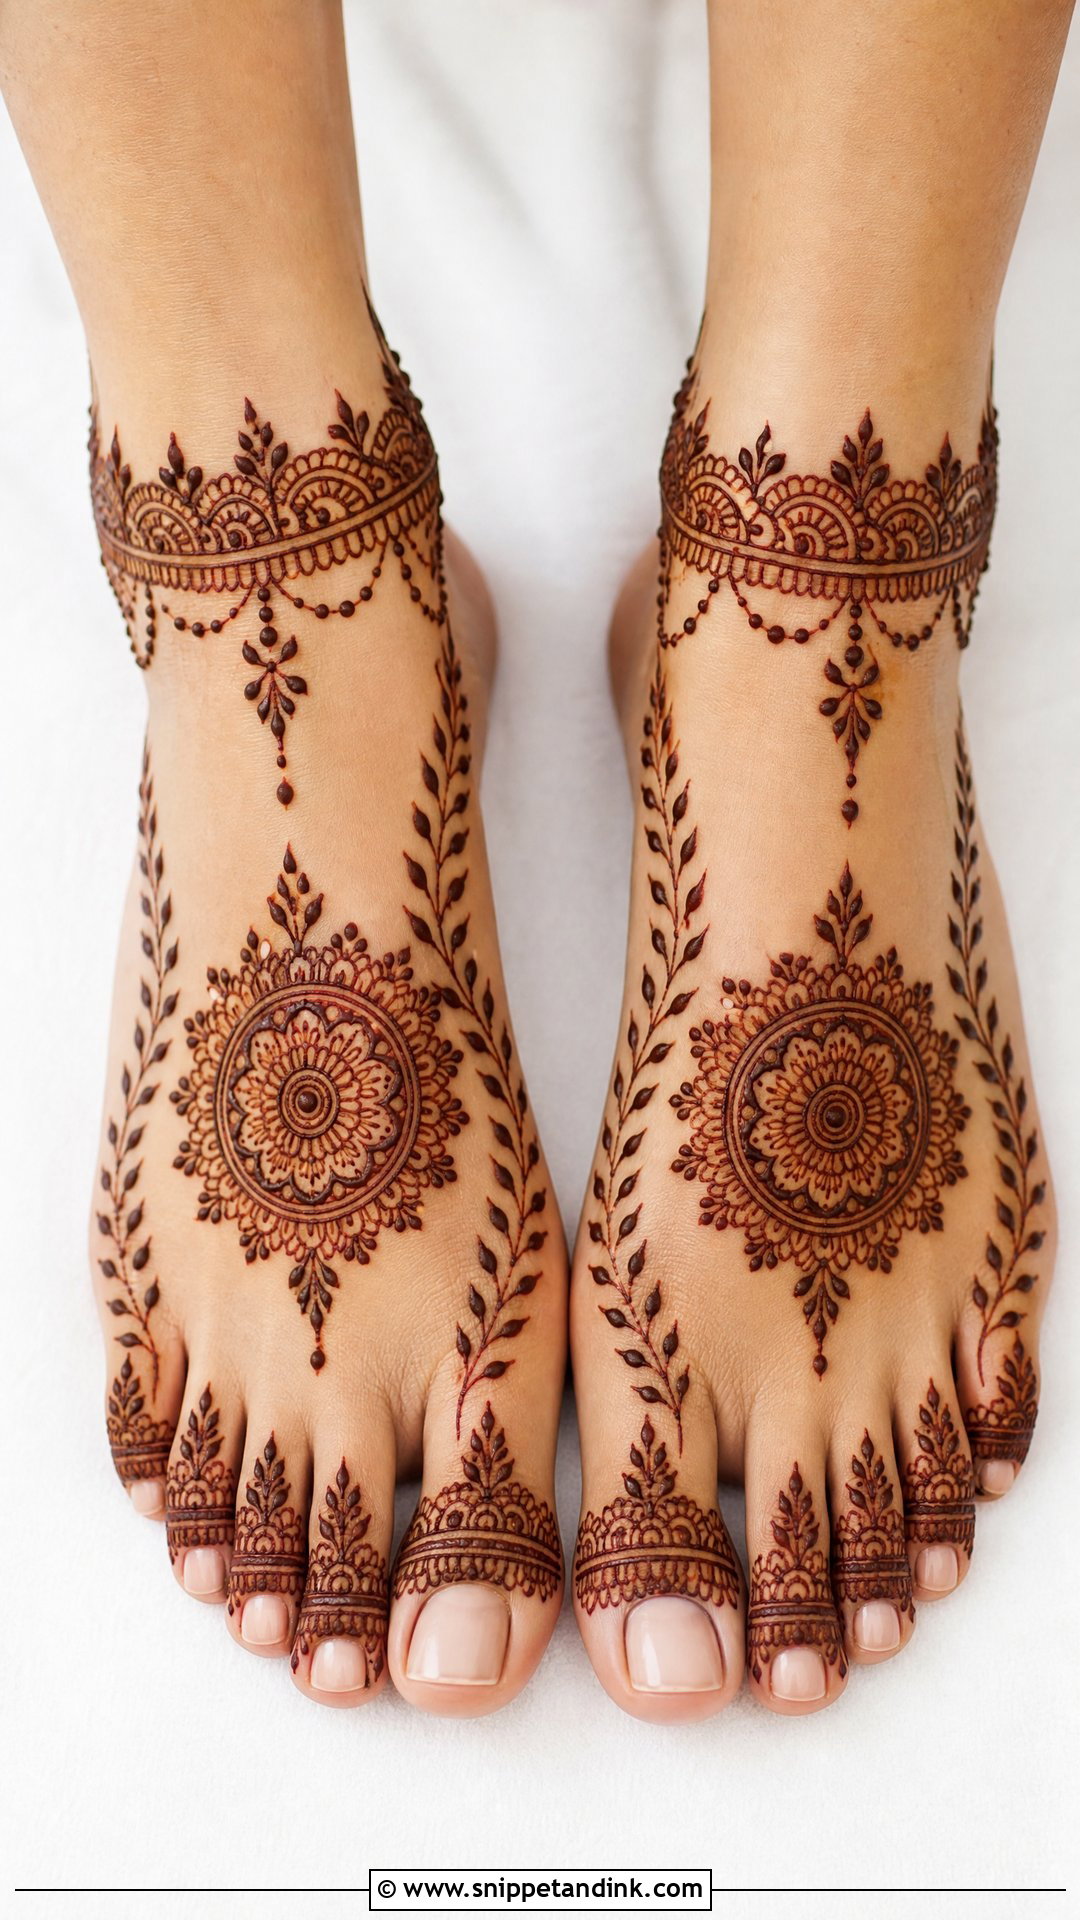
Feet are slower to dry and harder to keep still, so I keep bridal foot designs simpler than the hands: a mandala on top of each foot, leafy side trails, toe bands and dots, maybe a paisley border at the ankle for an anklet effect. Feet usually stain darker than the backs of the hands. Matching both feet looks polished, and a slight variation feels more modern. If you’re wearing open sandals or a traditional outfit that shows the feet during rituals, it’s worth the extra hour.
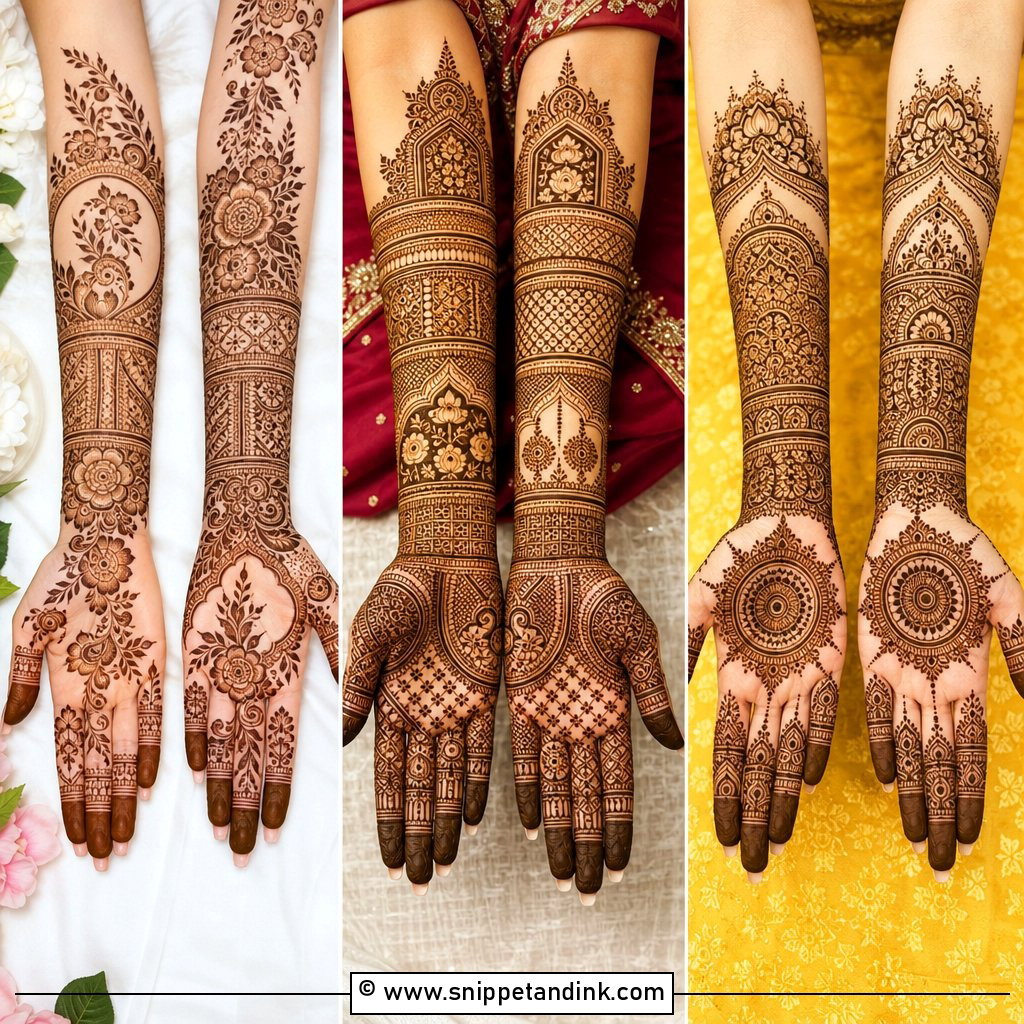
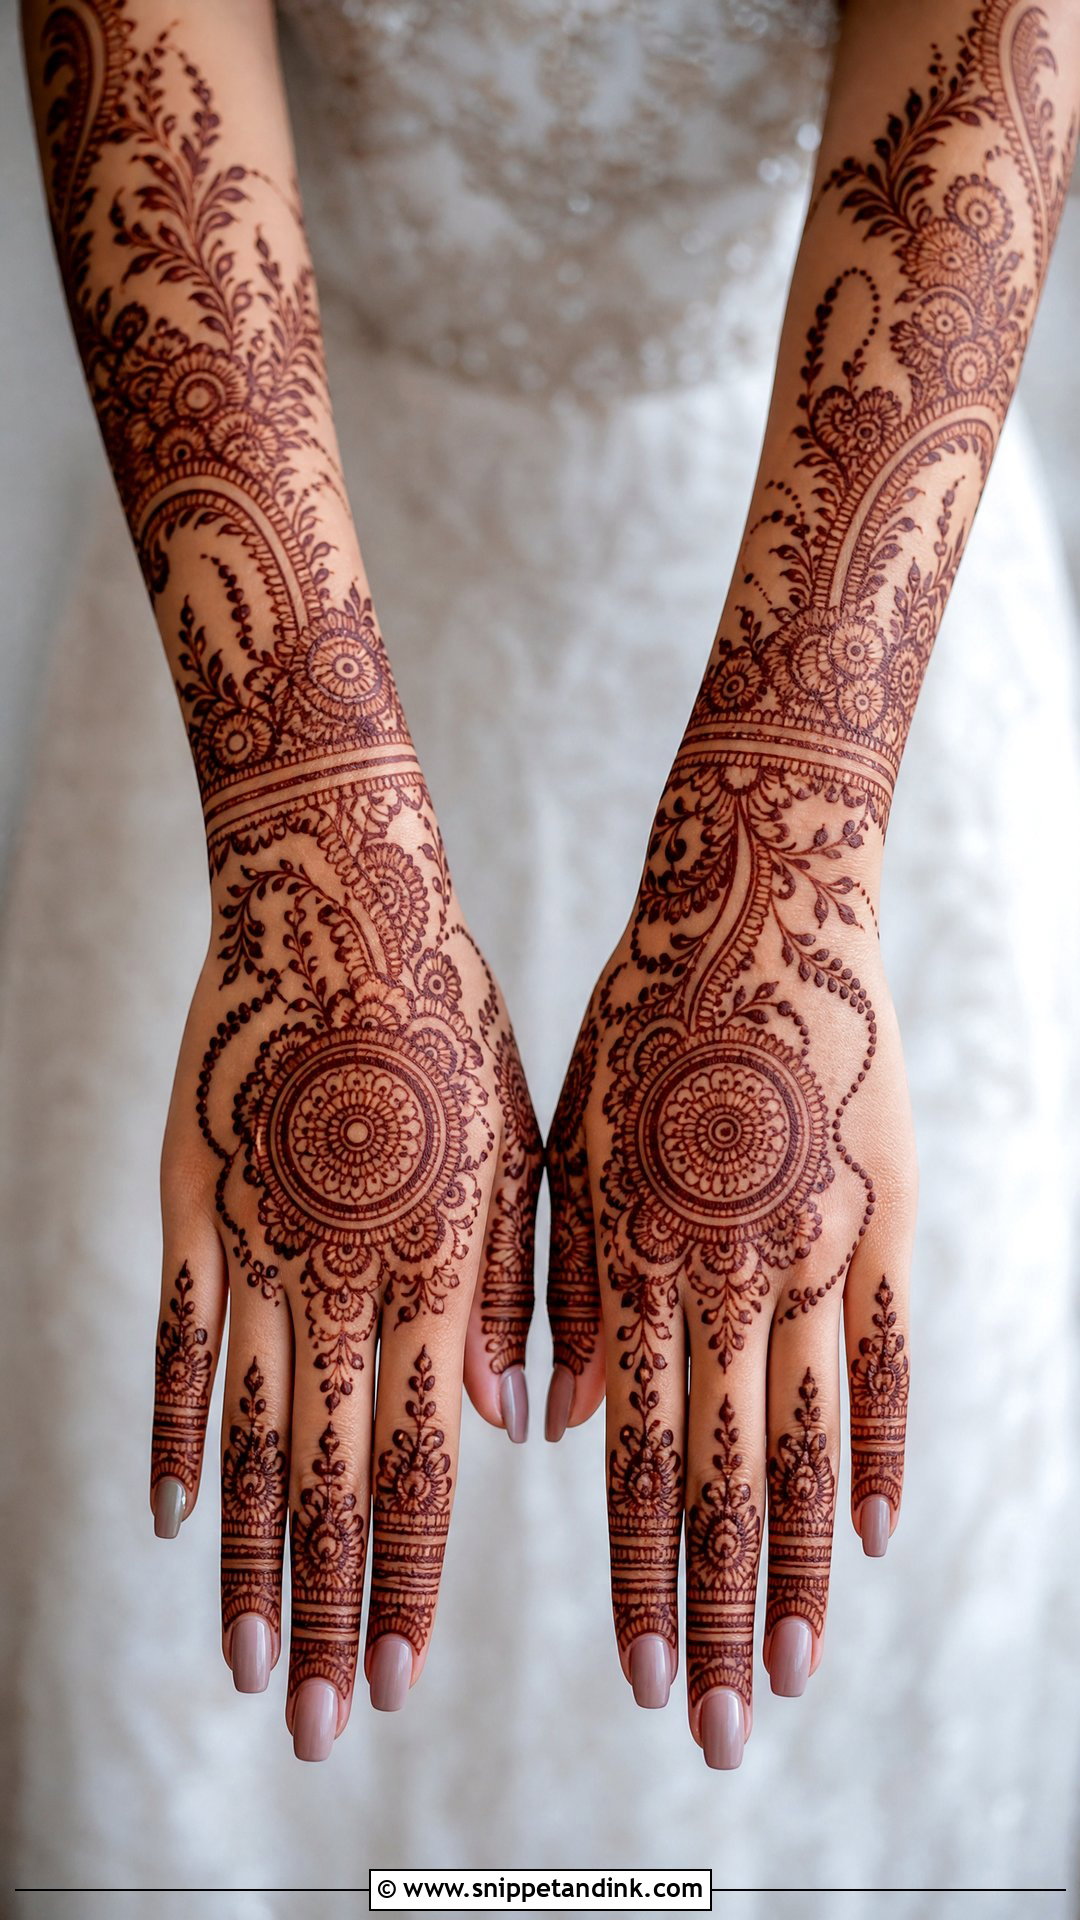
20. Easy Bridal Mehndi Design For Full Arms
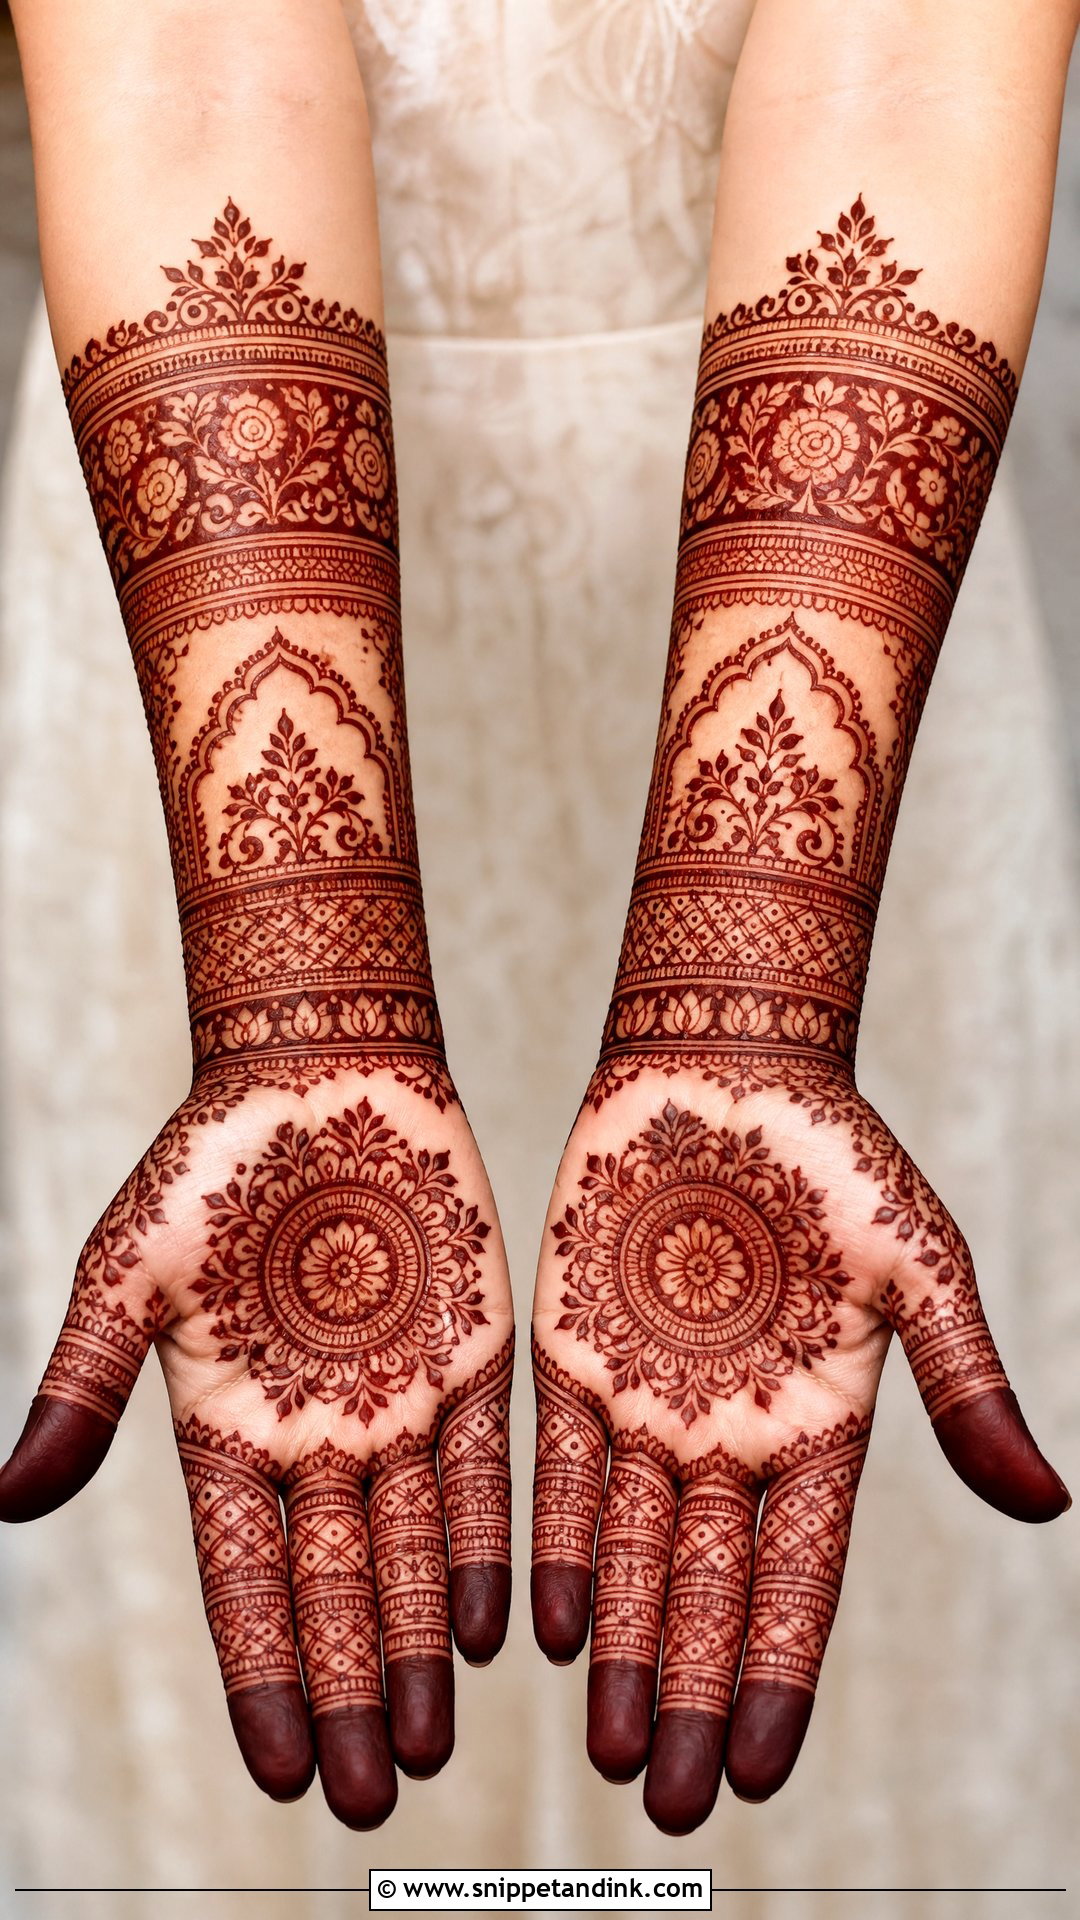
Full arms can still be manageable if the layout is built from large zones and repeated patterns. I start with filled fingertips, then palm mandalas, floral panels, paisley bands and simple forearm cuffs, with clear open gaps between each section. Repetition makes it faster to apply and easier to read. Know that the forearm stains noticeably lighter than the palm, so the colour will fade along the arm; that’s normal and part of how henna looks on skin. Initials, small symbols or simple couple art fit into the panels.
Getting a Deep Stain From a Light Pattern
Natural henna goes on dark green-brown and comes off orange. That’s not a failed stain. It oxidises over the next day or two to reddish brown, and it’s usually at its richest around 48 hours after application. That’s why I like to apply bridal mehndi one to two days before the wedding, not on the morning.
Before the appointment
- Exfoliate gently the day before, and finish any waxing or manicure then too.
- Arrive with clean, dry skin: no lotion, oil or sunscreen on your hands and feet.
- Eat, charge your phone and use the bathroom first. You won’t have free hands for a while.
After the paste is on
- Keep it on as long as you can bear, ideally six to eight hours or overnight with the hands wrapped loosely.
- A light dab of lemon and sugar once the paste is dry helps it stay stuck to the skin.
- Scrape the dried paste off with a blunt edge; don’t wash it off.
- Keep water away for the rest of that day, and stay warm. Cold hands stain lighter.
One firm warning: avoid any cone sold as black henna or promising instant dark colour. Those often contain PPD, a hair-dye chemical that can cause serious skin reactions and scarring. Real henna is never black. If you’ve never worn it, ask your artist for a small patch test a few days ahead, since natural pastes are mixed with essential oils that a few people react to.
Matching the Design to Your Hours, Hands and Outfit
A design suits you when it matches your outfit, your hand shape, your ceremony and how long you can realistically sit still. Arabic trails, mandalas, paisleys, florals, jaali panels, names and minimal patterns all look bridal when placed with care. For a shorter appointment, ask for larger motifs, open spacing and clean finger work. For more tradition, add a peacock, couple art or fuller coverage. Then look after the paste, because a simple design with a deep stain will always look better than an intricate one that came out pale.
You'll Like These Ideas:


Leave a Reply