
Bridal foot mehndi is the part of the bridal session most brides underestimate. Feet are curved, bony at the ankle and constantly moving, so a pattern that looks flat and tidy on a phone screen has to be reworked around toe gaps, the instep and the ankle bone before it sits right. I plan feet differently from hands for that reason. Below are twenty layouts I get asked for, from dense Indian coverage to open Arabic trails, mandala toes, jaali arches and anklet bands, with notes on how each one wears and how it behaves once the paste comes off.

Why Henna on Feet Stains Differently From Your Hands
Henna stains deepest where the skin is thickest. Palms and soles take the richest colour, while the top of the foot has thinner skin and usually comes up a shade or two lighter than your palms, even with the same paste and the same timing. I tell brides this before we pick a design, because it changes what will look good.
On the top of the foot, open designs with confident outlines hold their shape better than very fine fill, which can look faded next to a dark palm. If you want the feet to look as rich as the hands, the paste needs to stay on longer, and the feet need to stay warm.
Colour develops after the paste comes off
When you scrape the dried paste away, the stain is bright orange. It deepens over the next day or two to reddish brown or maroon. That is why I schedule bridal feet one to two days before the main ceremony, so the colour peaks on the day rather than a day later.
1. Full Foot Bridal Mehndi Design
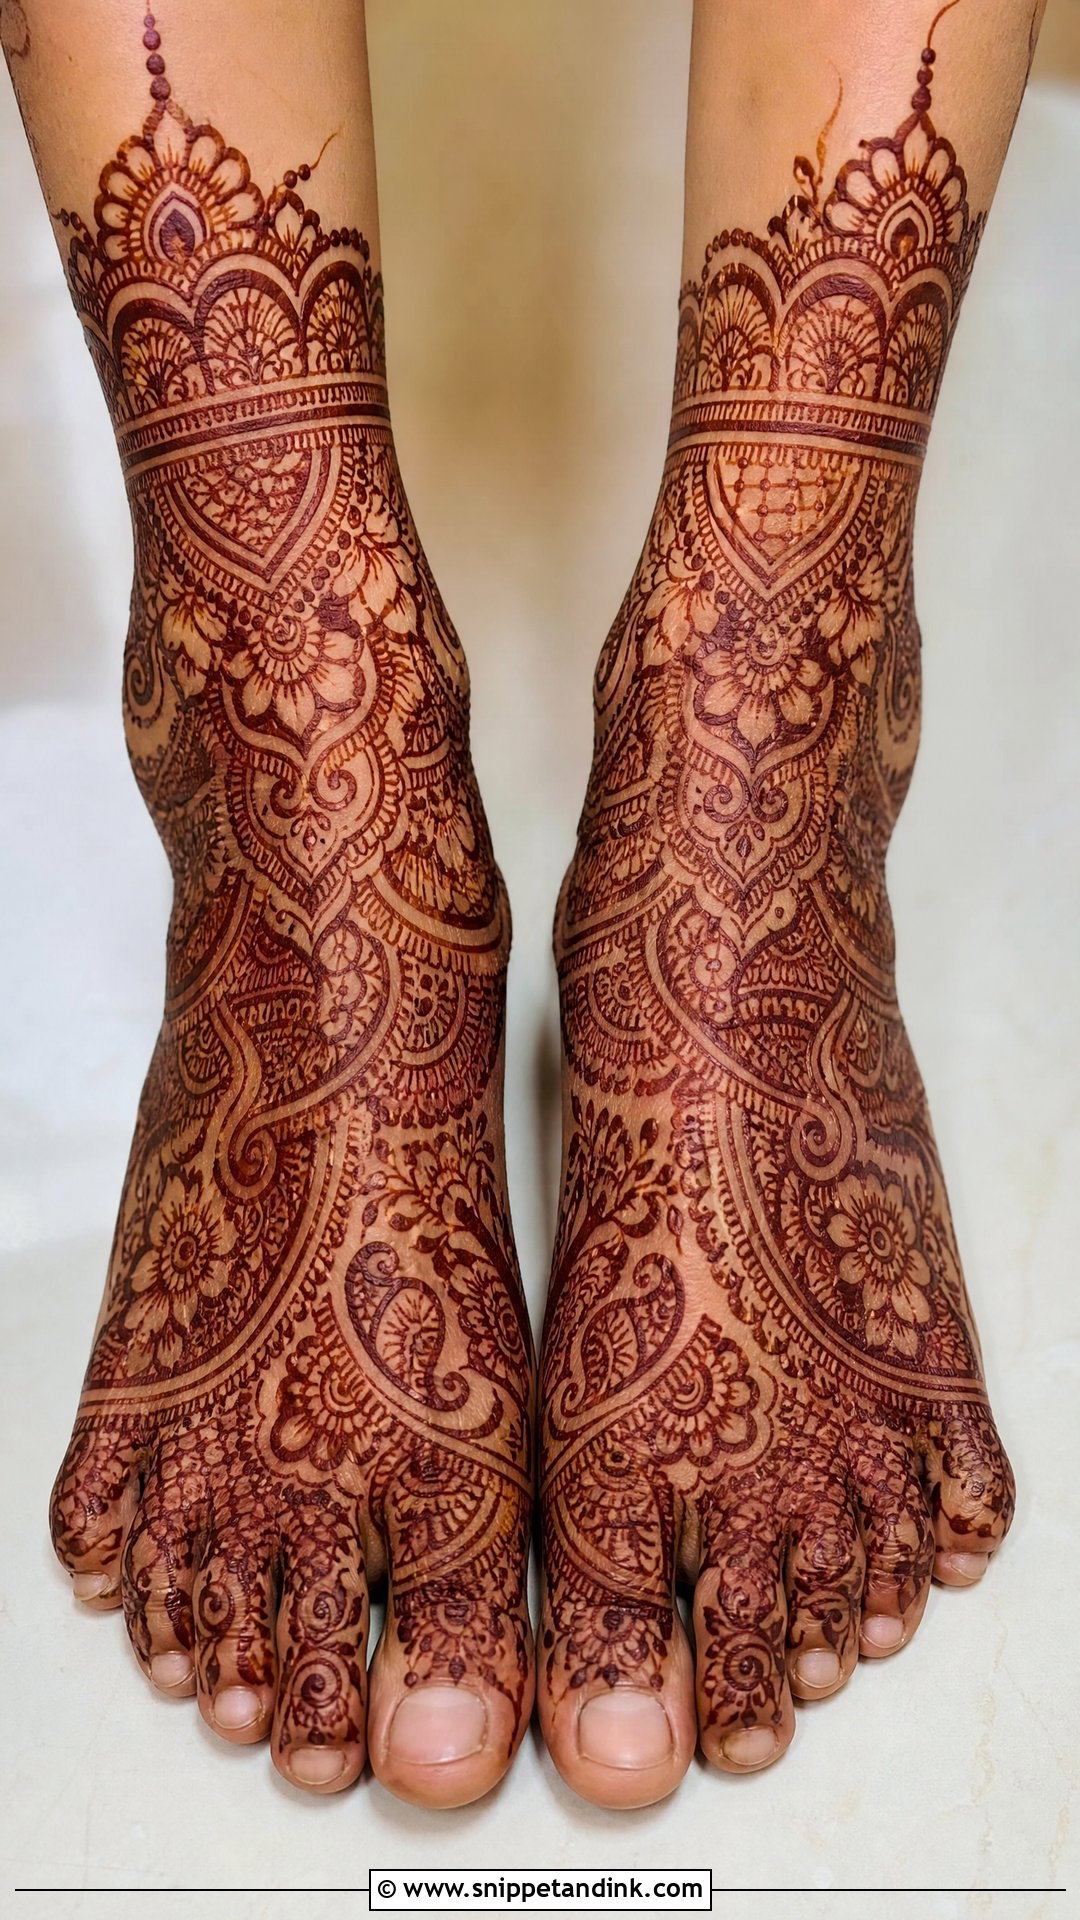
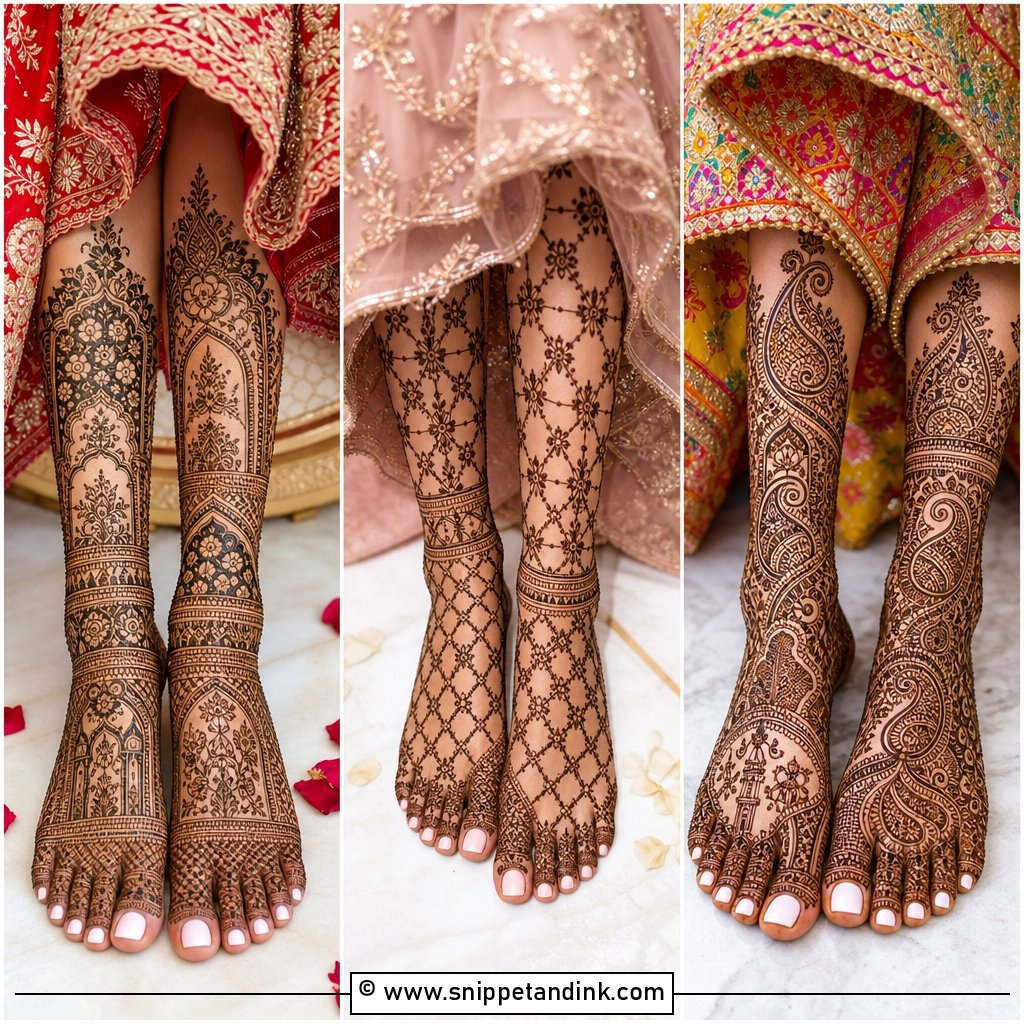
Full coverage runs from the toe tips over the top of the foot, around both sides and up past the ankle, sometimes onto the lower leg. Paisleys, florals, vines and filled bands carry most of the weight. The hard part is symmetry: feet are rarely identical, so I measure the ankle border on both sides before I commit to the first line, otherwise one foot ends up with a thicker cuff. I also leave the centre of the instep slightly cleaner than the edges. Dense work there tends to read as one dark patch from a standing distance.
2. Arabic Bridal Feet Mehndi Design
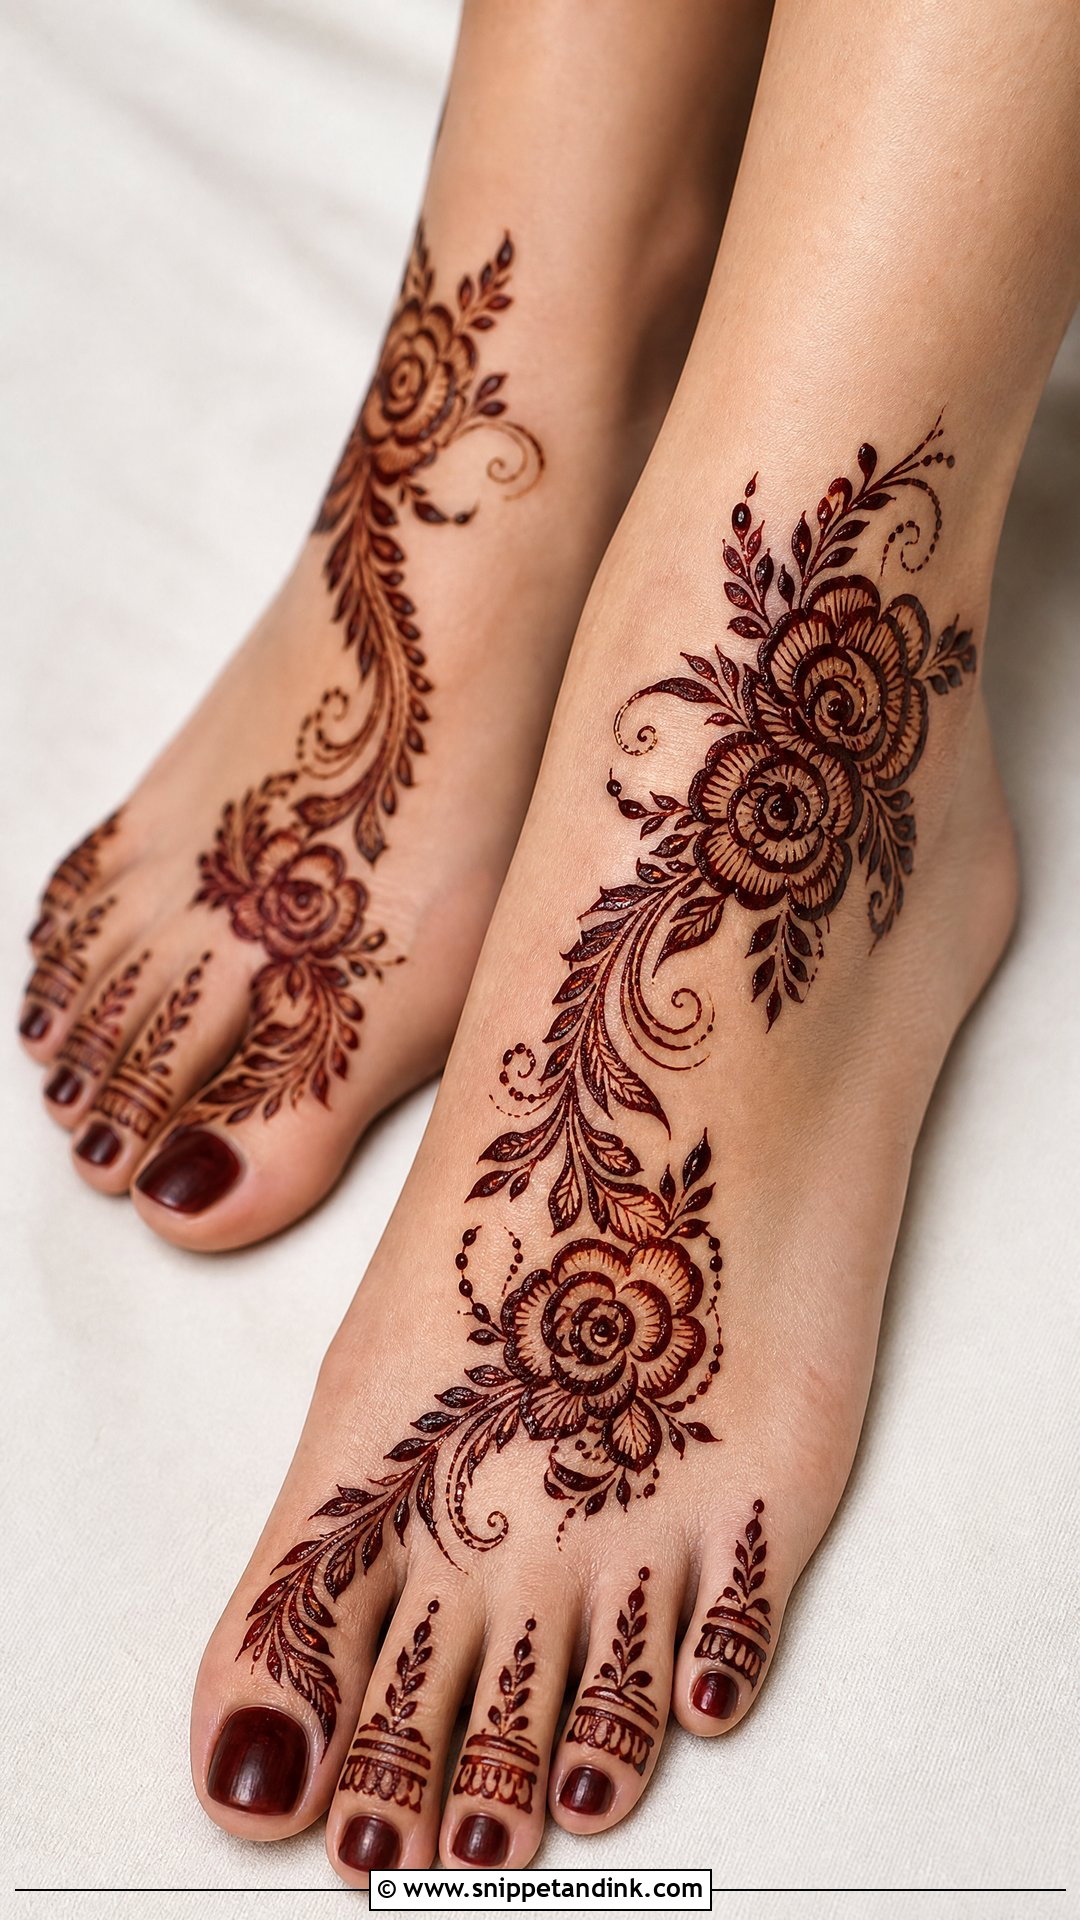
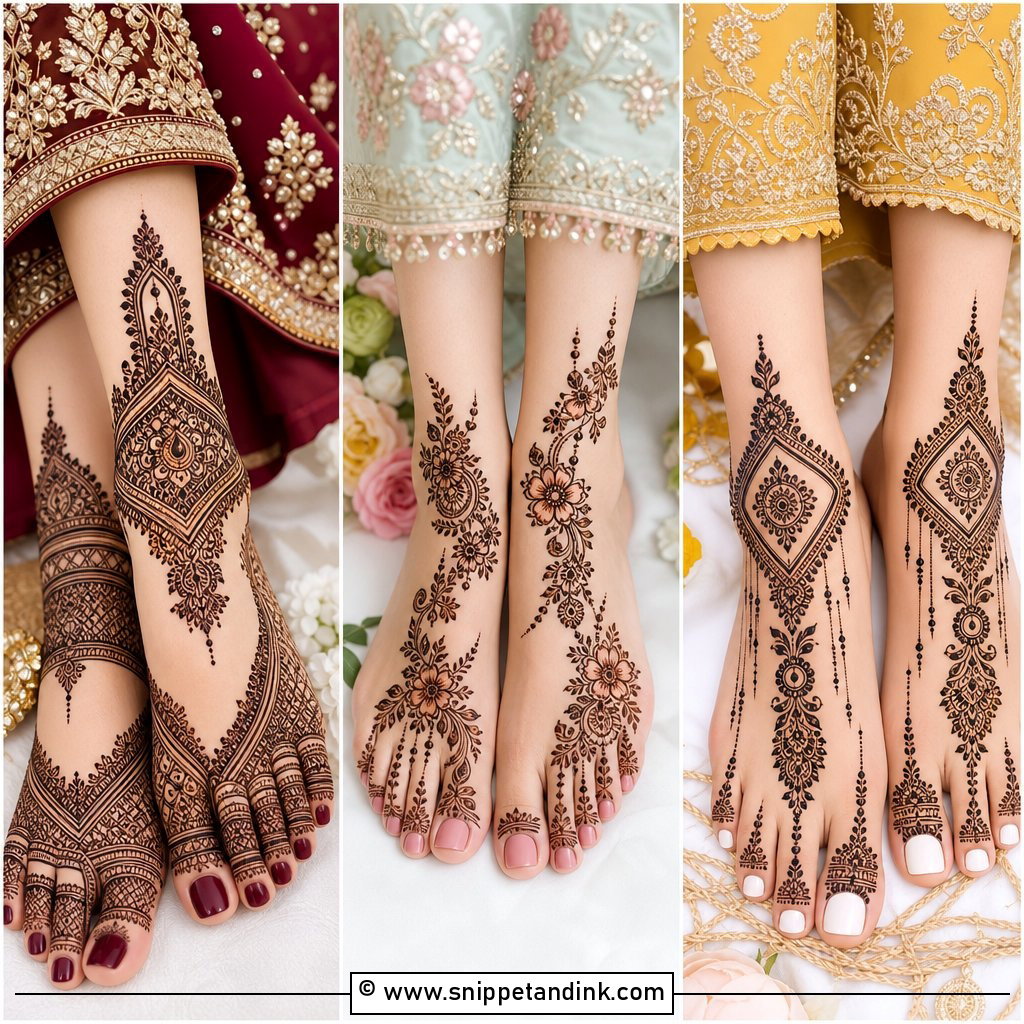
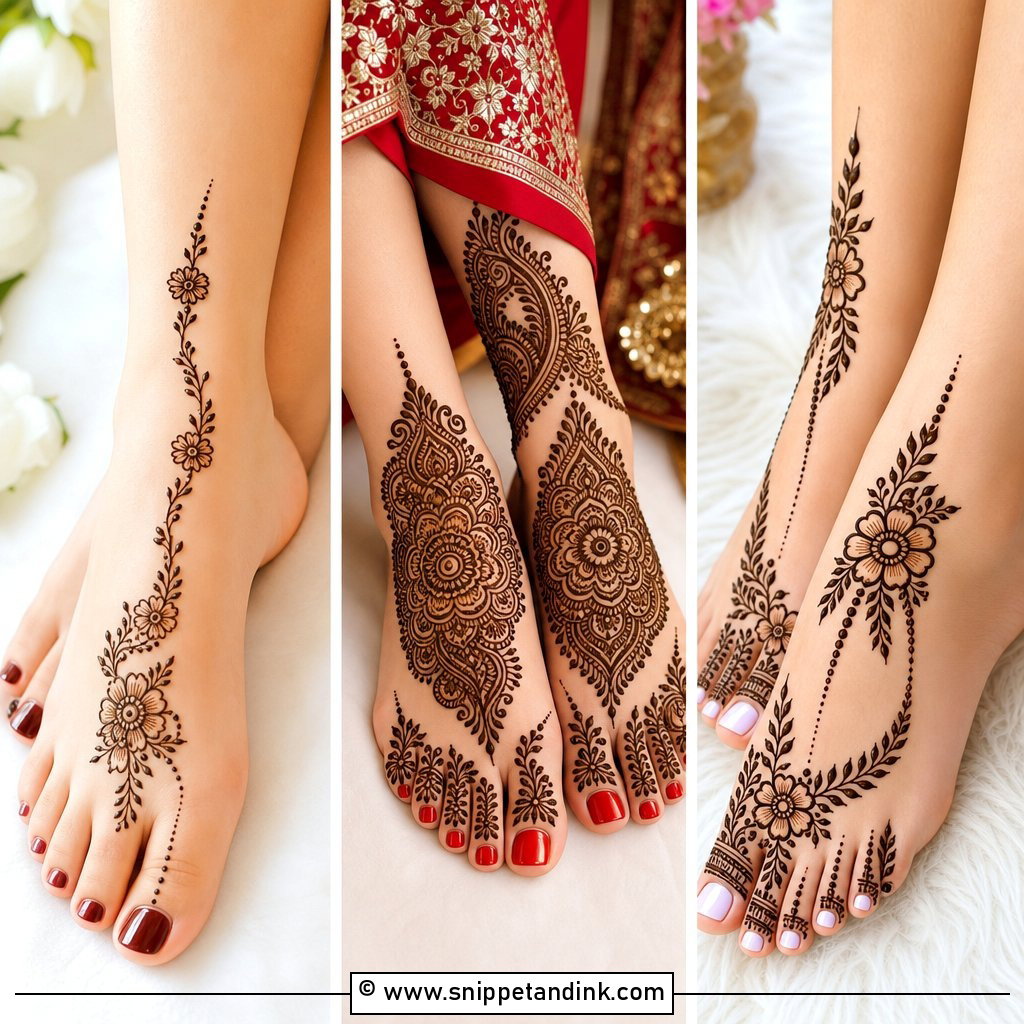
Arabic work on the feet is about direction. Large floral trails and shaded leaves travel diagonally from the big toe toward the outer ankle, which makes the foot look longer, and the open skin between motifs keeps each flower readable once the stain darkens. I shade the petals with a lighter hand than on palms, because the top of the foot stains paler and heavy shading there can look blotchy. It suits open-toe heels and sandals that show the instep, and a small toe detail plus a thin ankle cuff ties the trail together.
3. Indian Bridal Foot Mehndi Design
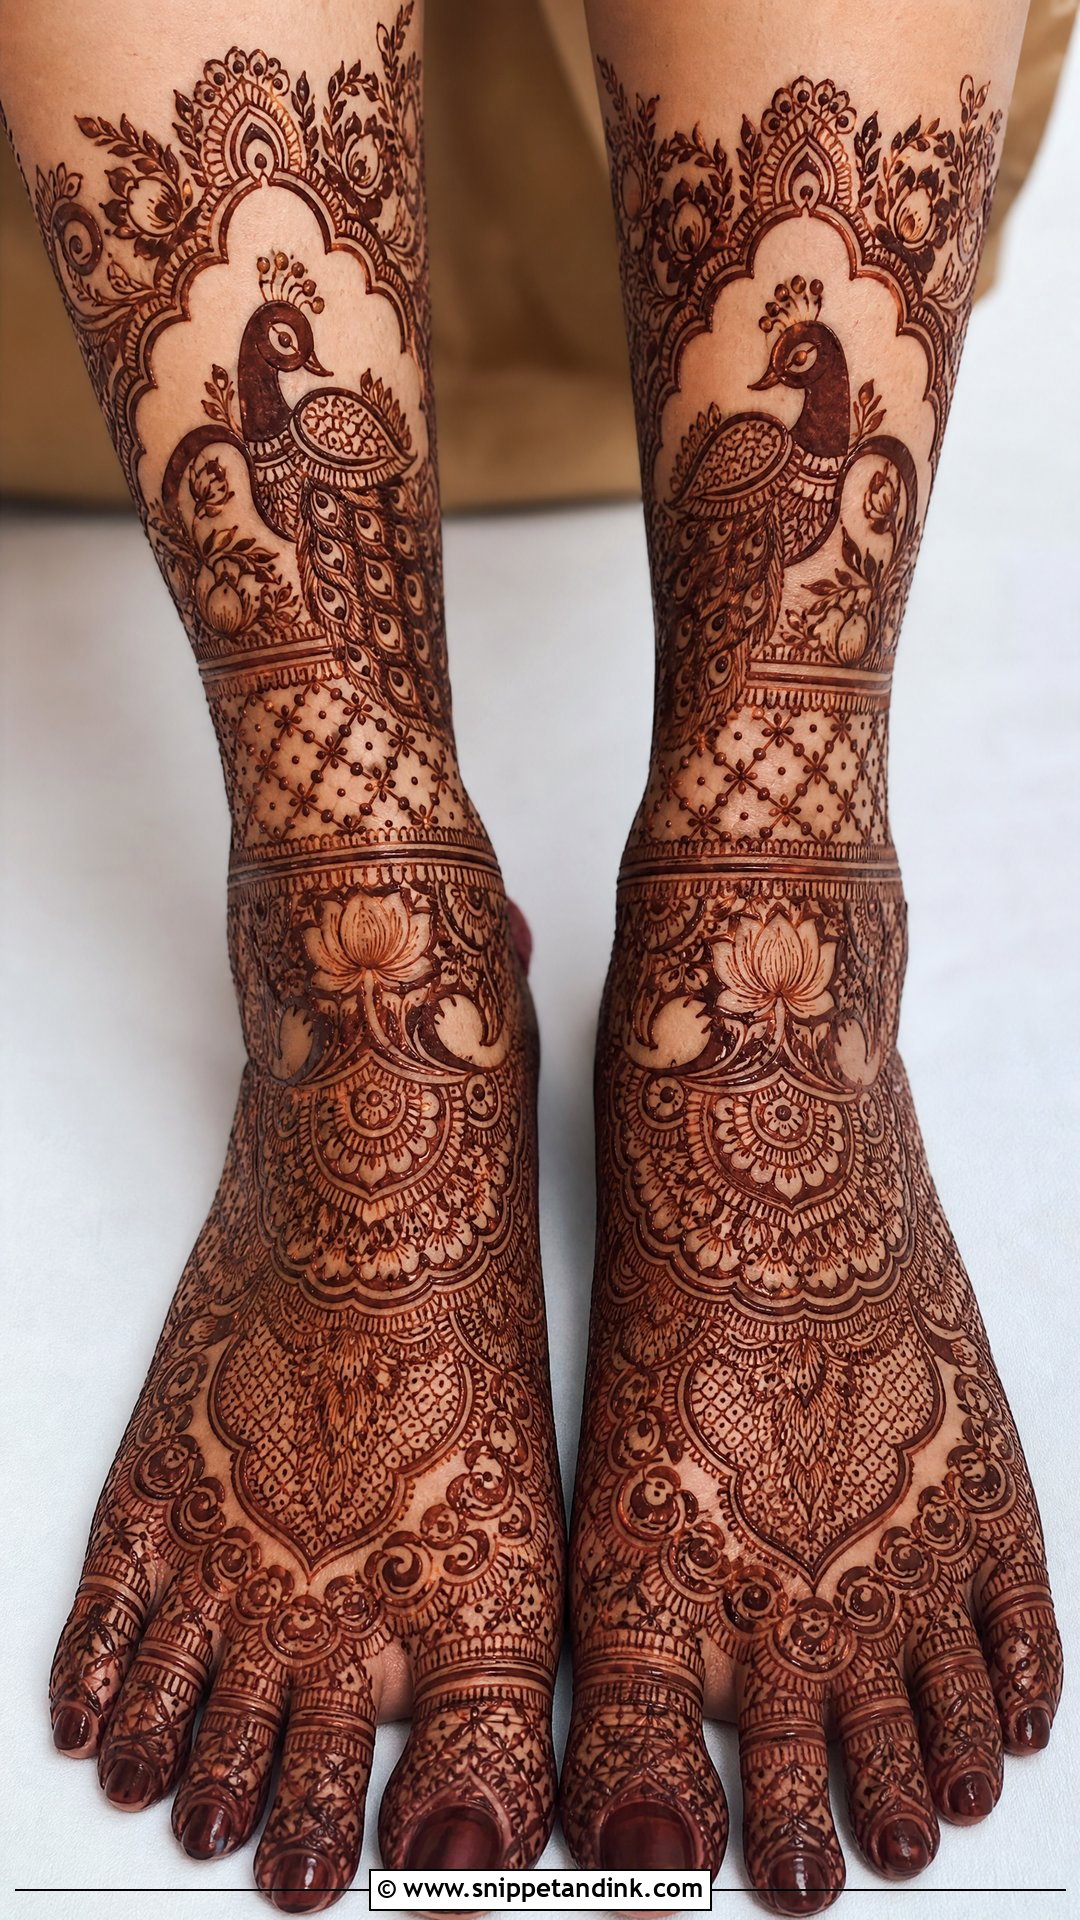
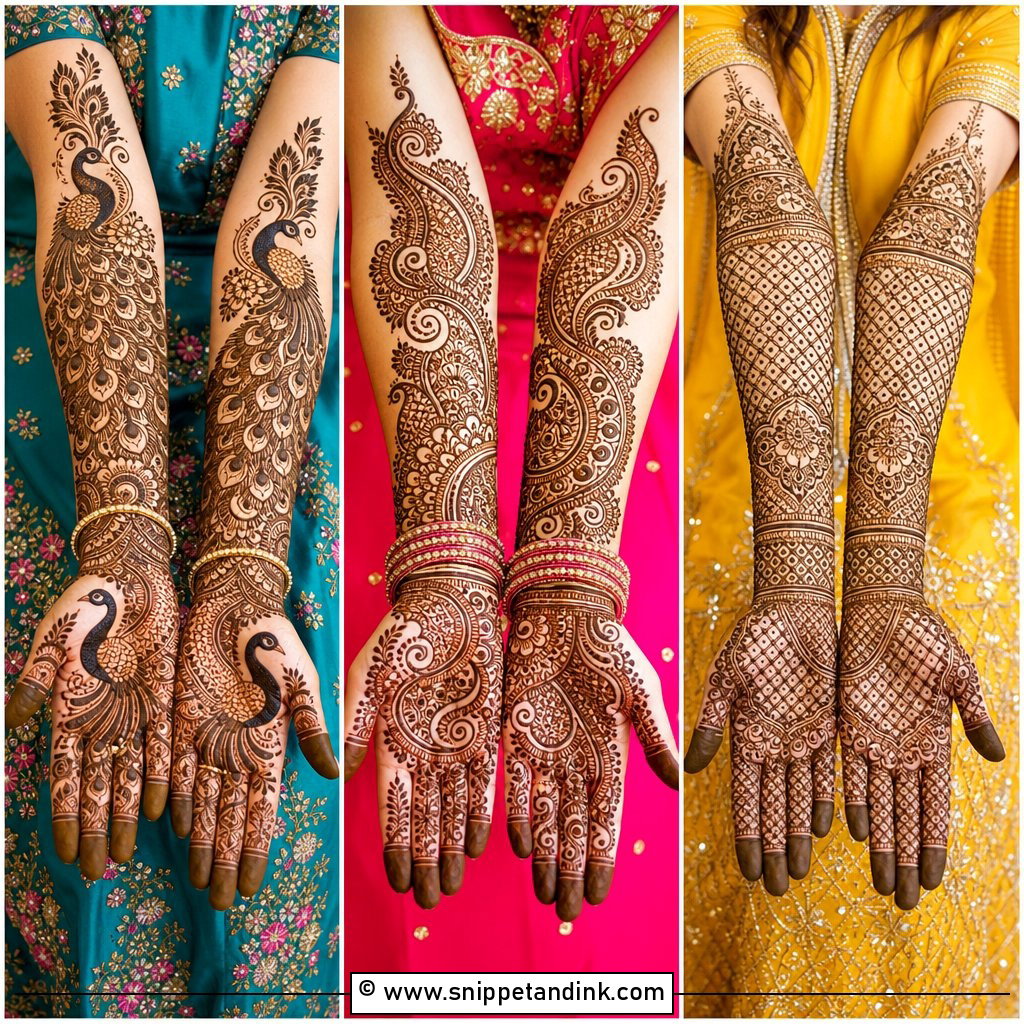
Traditional Indian foot designs are built on fill: peacocks, paisleys, lotus, mandalas and jaali panels packed edge to edge, often running from the toes up the calves. I won’t rush this one. Fine lines on feet need the bride to keep still for a long stretch, and every flex of the toes cracks wet paste, so I book it as its own sitting rather than squeezing it in after the hands. Pair it with a lehenga or saree and heavier jewellery. Initials or the wedding date can hide inside the fill if you’d like something personal to search for later.
4. Simple Bridal Mehndi Design For Feet
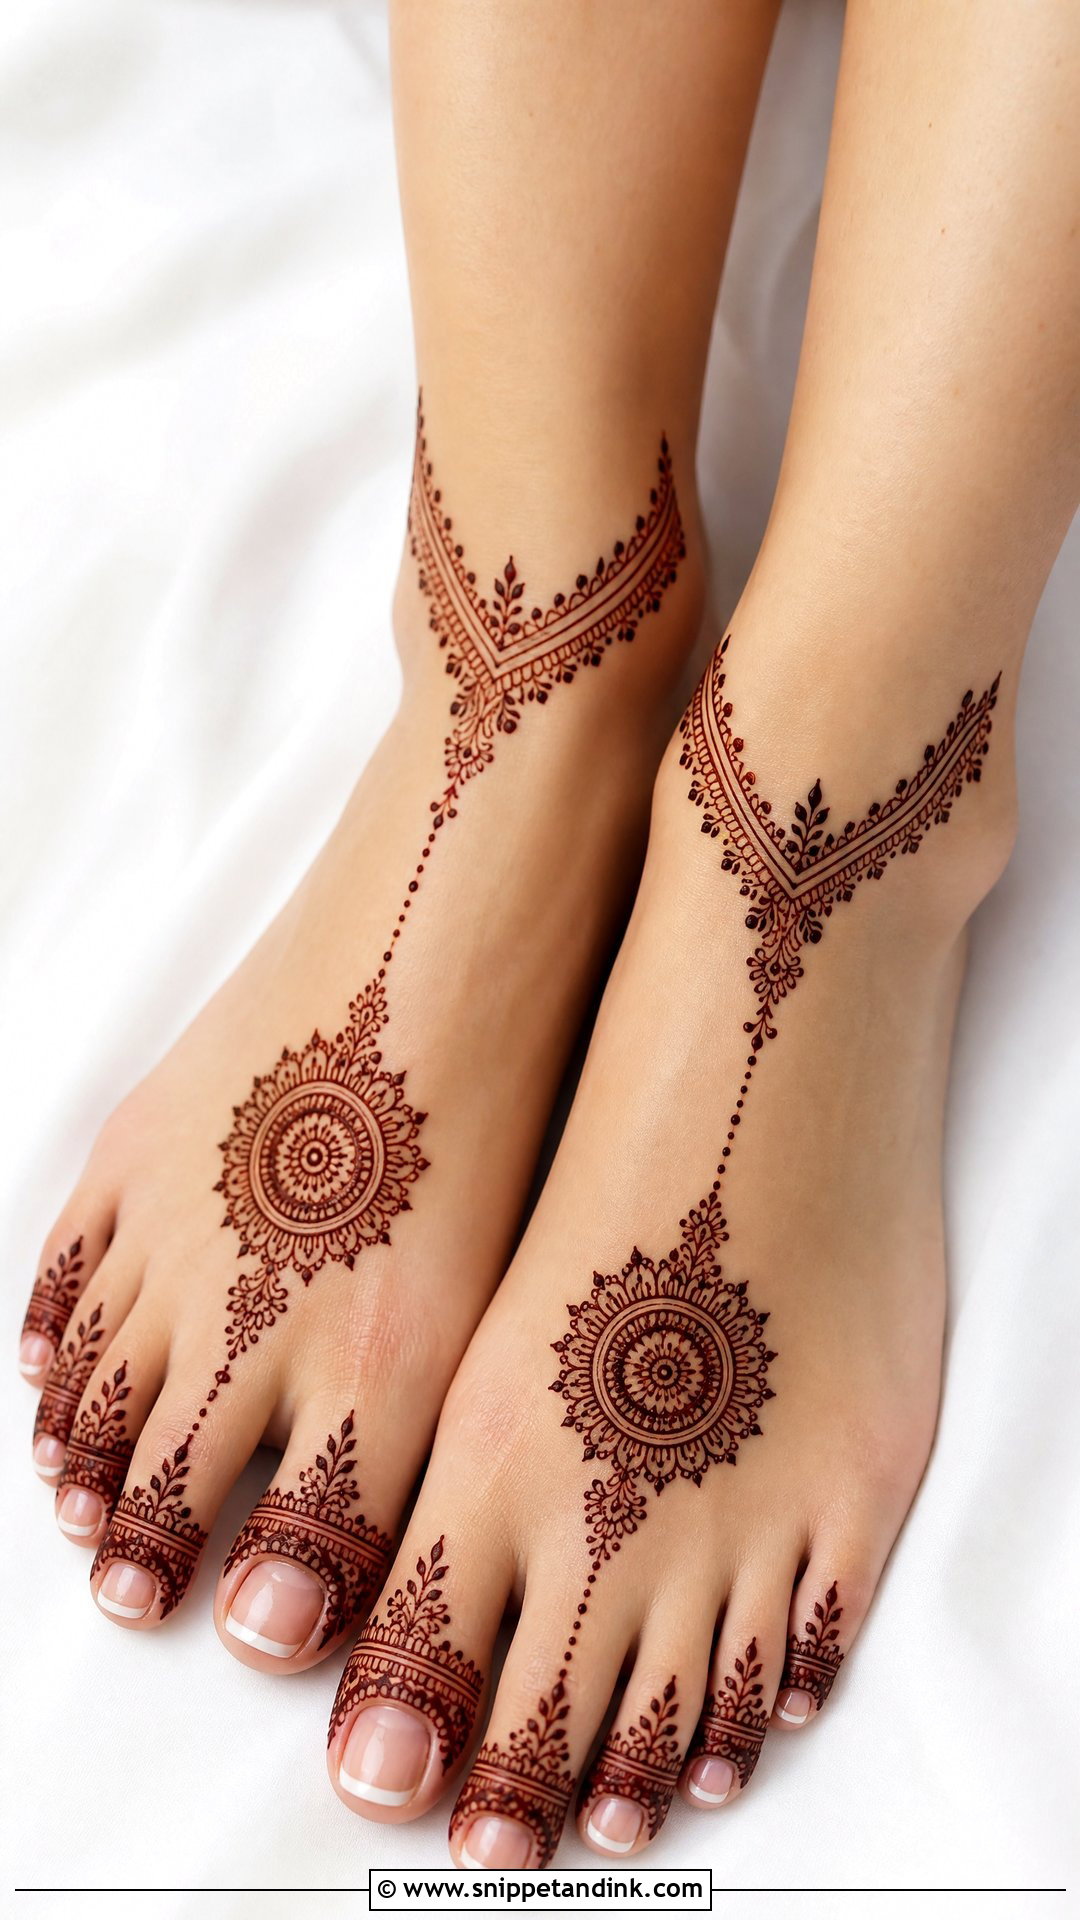
A neat toe pattern, a central motif, light vines and a soft ankle border: that is all a simple design needs. It doesn’t look empty because the spacing is deliberate. I often suggest it for beach or courthouse weddings, and for brides who have to walk around their own mehndi event, since it dries quickly and leaves the sole free. Keep both feet matched and add a couple of filled accents near the toes so it still reads as bridal. A deep maroon stain carries a small design further than people expect.
5. Mandala Bridal Mehndi Design For Feet
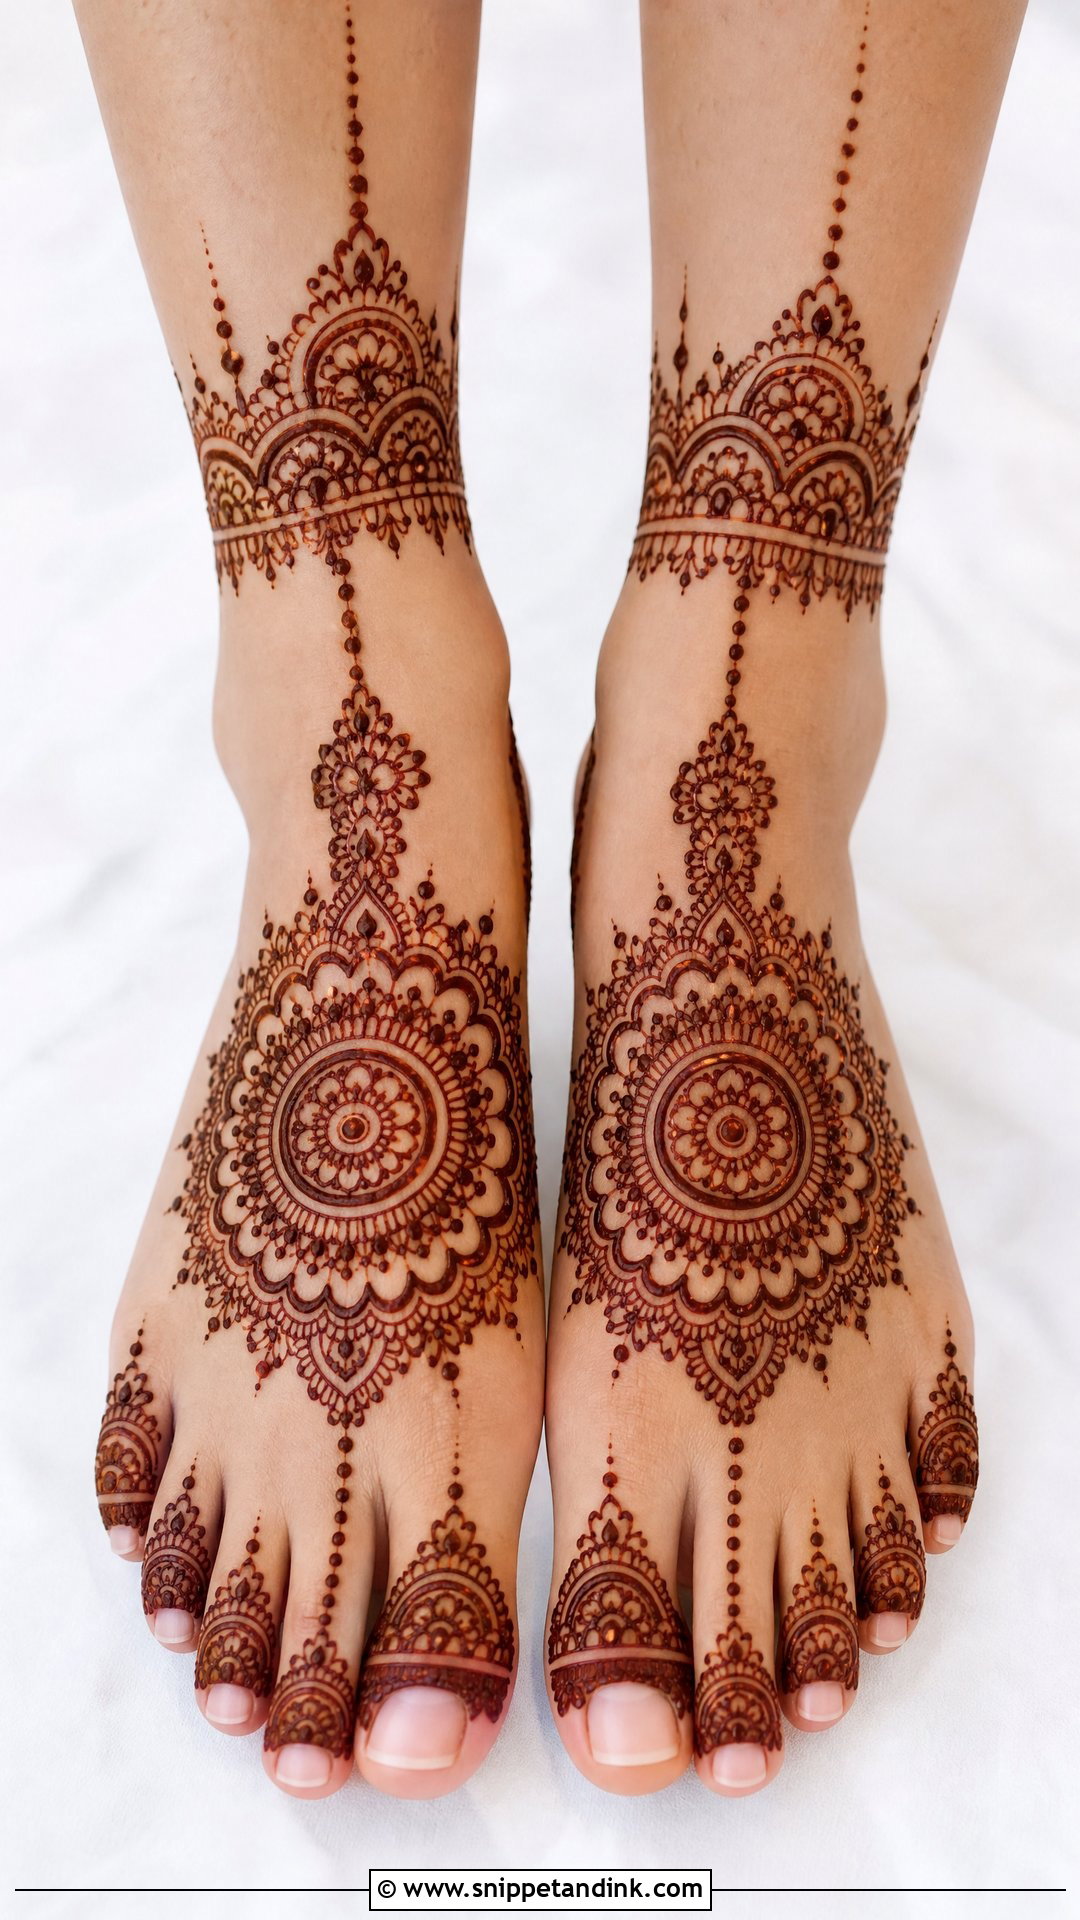
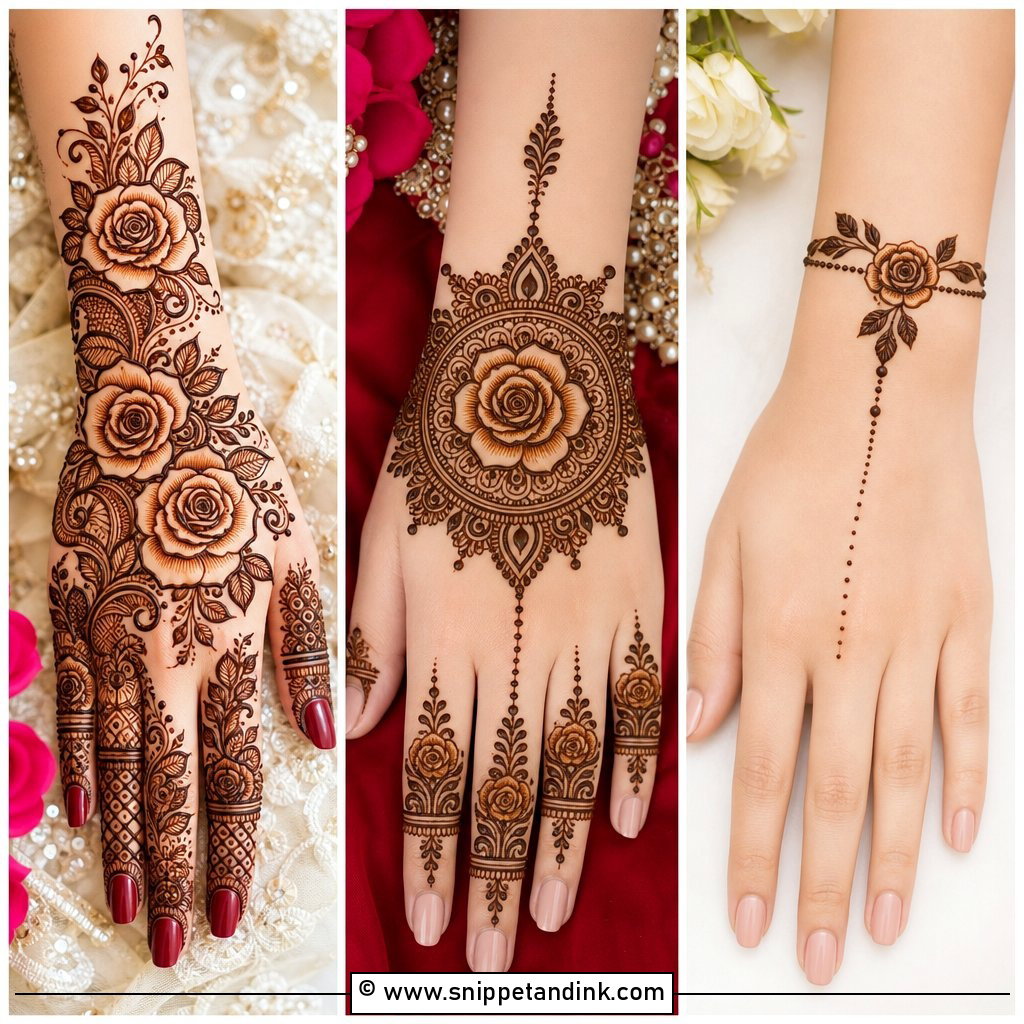
The mandala sits on the highest point of the instep, with matching toe work and fine edging around it. Size is everything here. I draw a guide dot and check it with the bride standing, not seated, because the foot spreads under weight and a circle that looked centred on a raised foot can drift toward the inner side. Petals and dots keep it light, or surround it with paisleys and lace borders for more coverage. Viewed from above, which is how most foot photos are taken, a centred mandala reads cleanly.
6. Peacock Bridal Mehndi Design For Feet
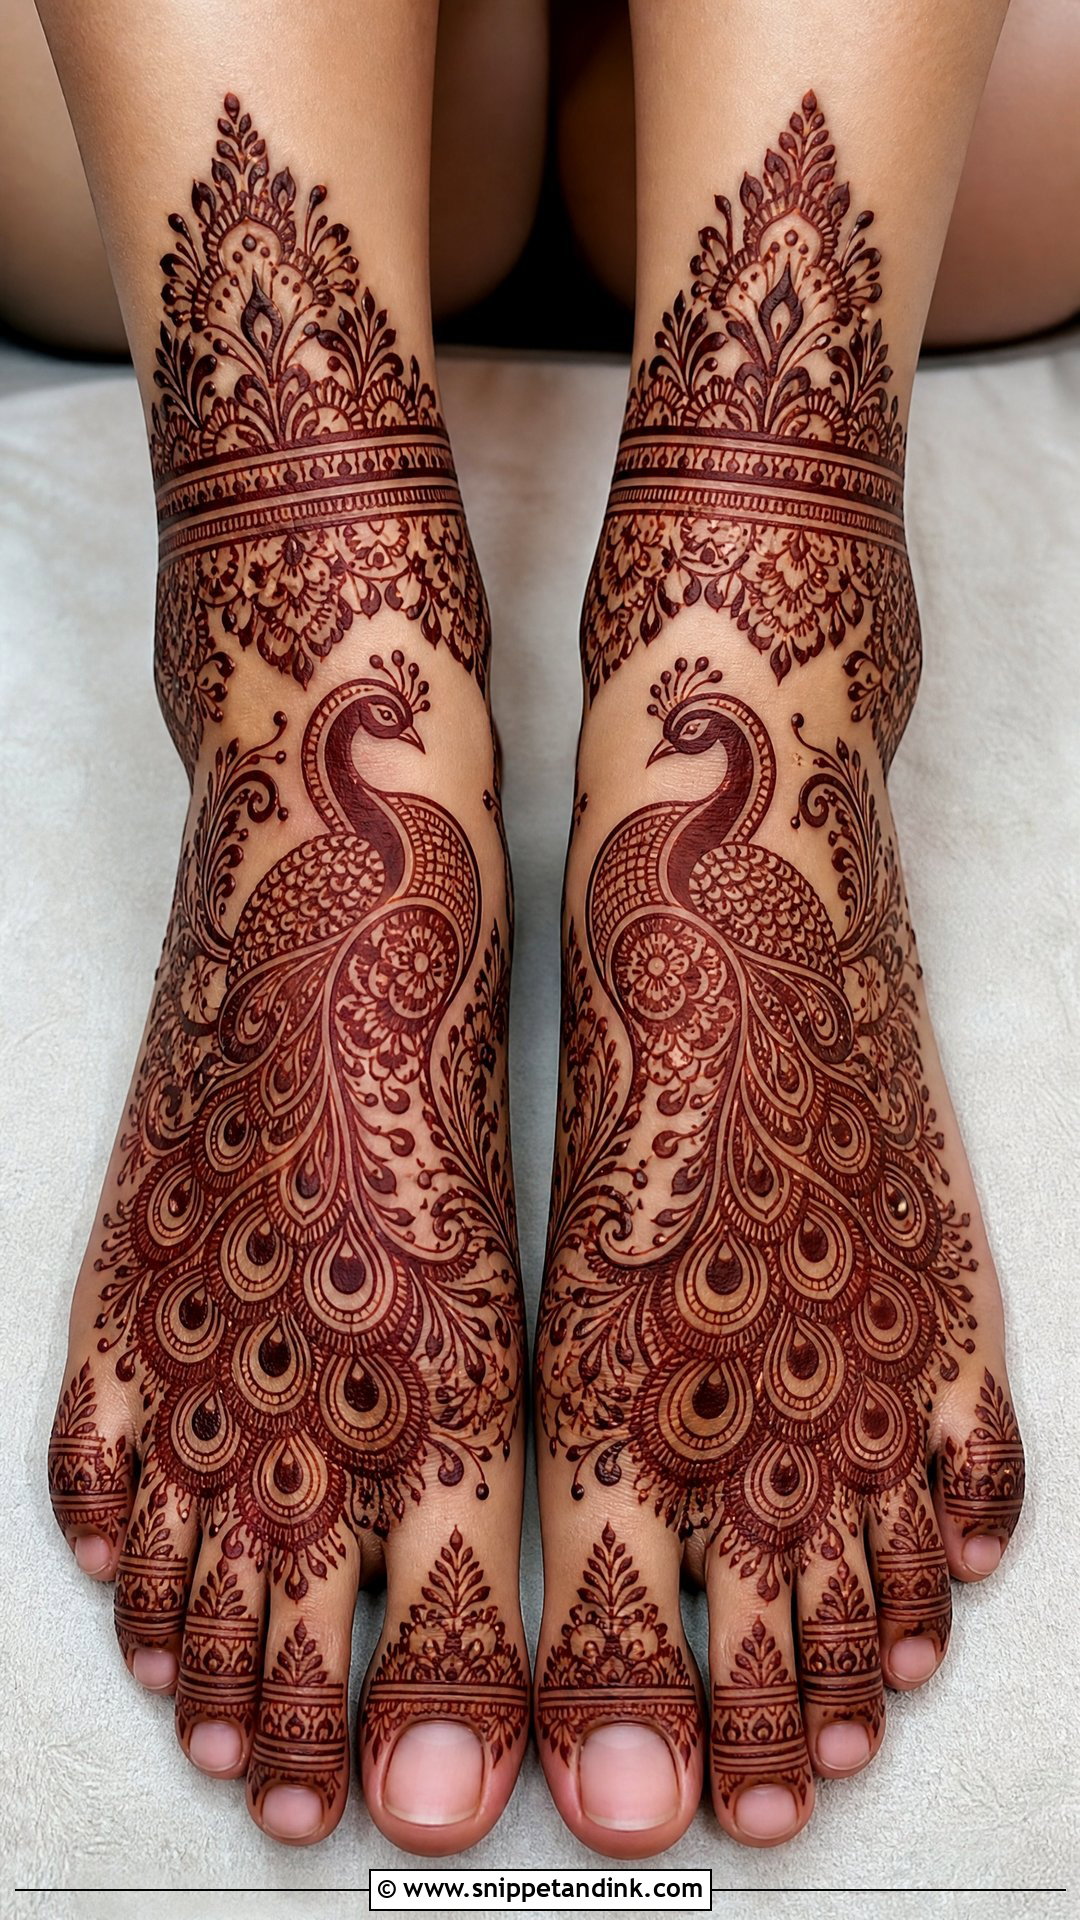
A peacock gives the foot a single focal point, usually placed along the side, curving over the arch or with its tail trailing toward the ankle. The feathers are where the detail goes: fine lines, teardrops and shaded tips. I keep the bird itself bold and the background loose, with light vines or jaali, because a fully packed peacock loses its outline once the stain comes up dark. Matching both feet with mirrored peacock patterns gives the pair a finished, intentional look in ritual close-ups and against a bright lehenga.
7. Lotus Bridal Mehndi Design For Feet
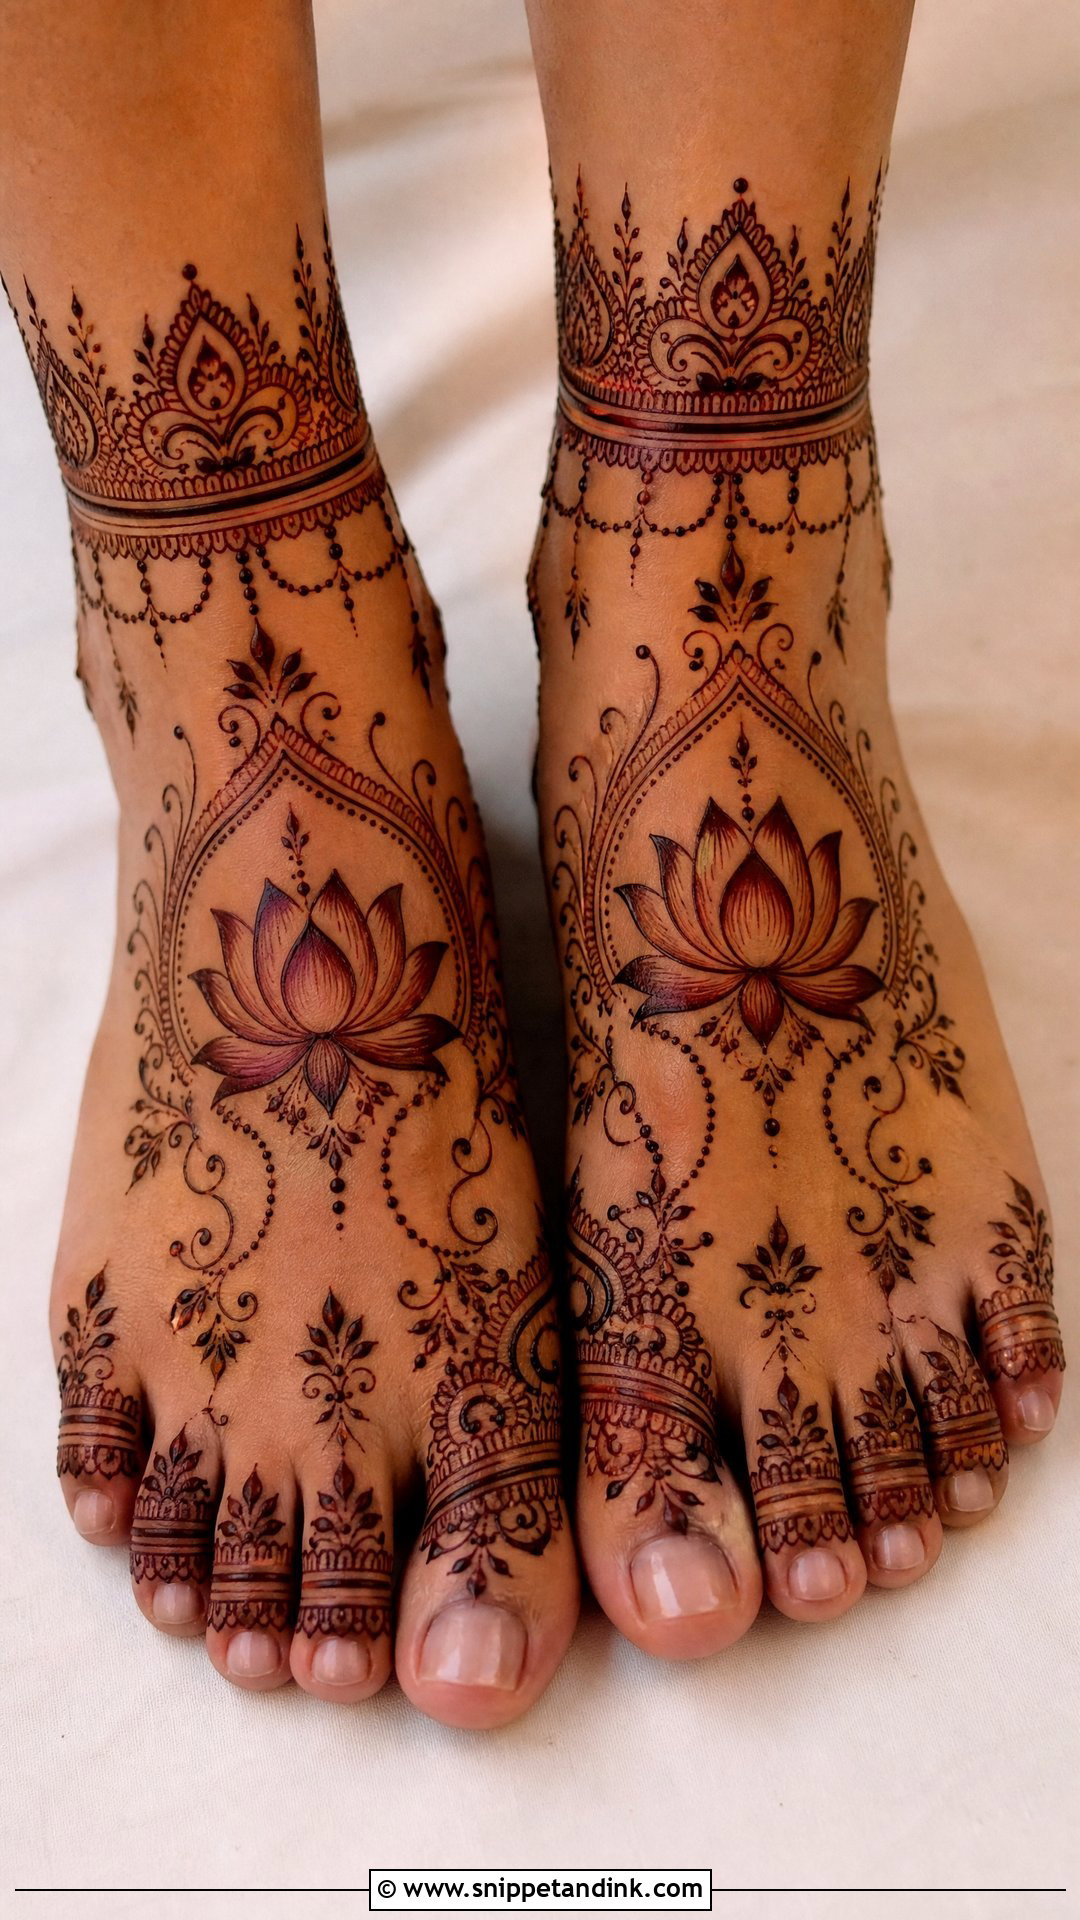
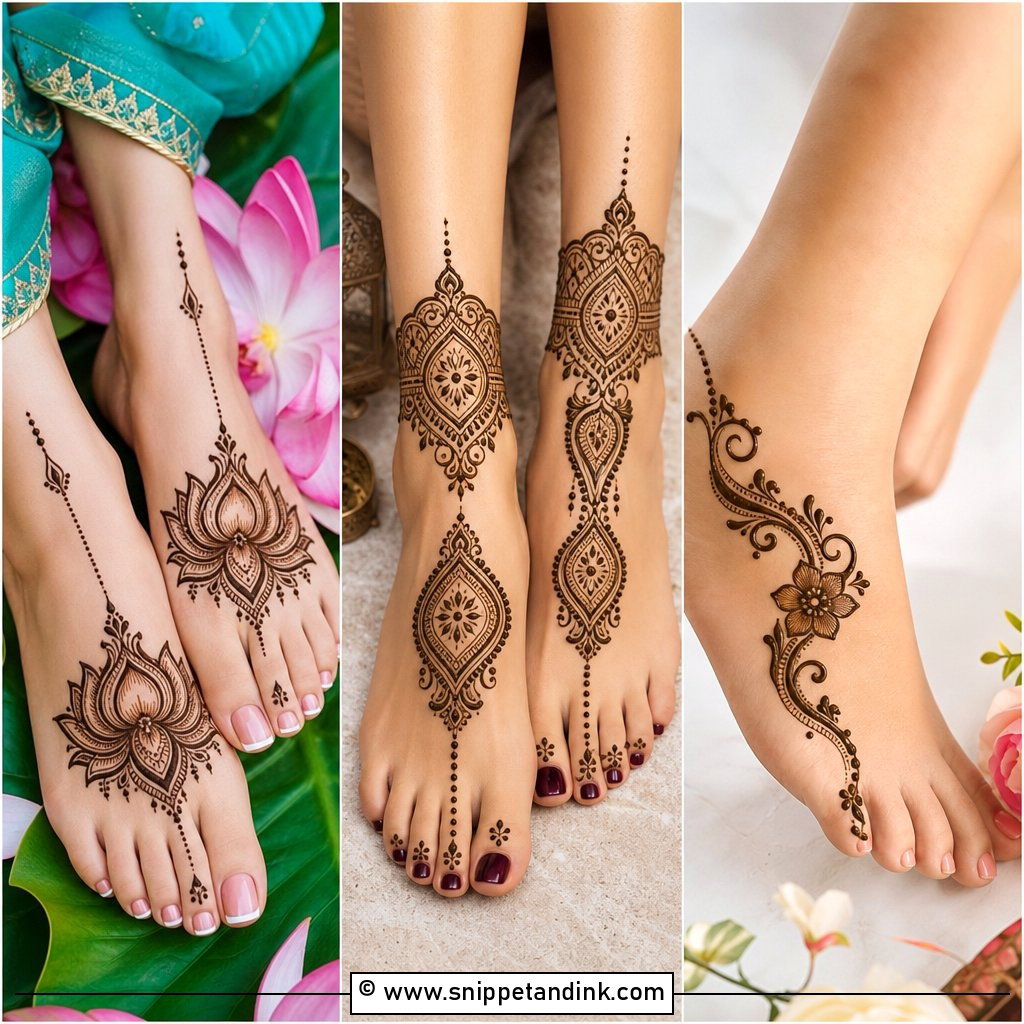
Lotus petals are rounded, so they flatter almost any foot shape and forgive a bony instep. I place them at the toes, in the centre or as a repeating ankle border, and link them with vines, dotted chains or a small mandala. Fill the petals and add fine shading for a heavier look. Leave them open with clean spacing for something lighter. Open lotus work sits well with pastel outfits and fine anklets, where a dense pattern would overpower the jewellery.
8. Jaali Bridal Mehndi Design For Feet
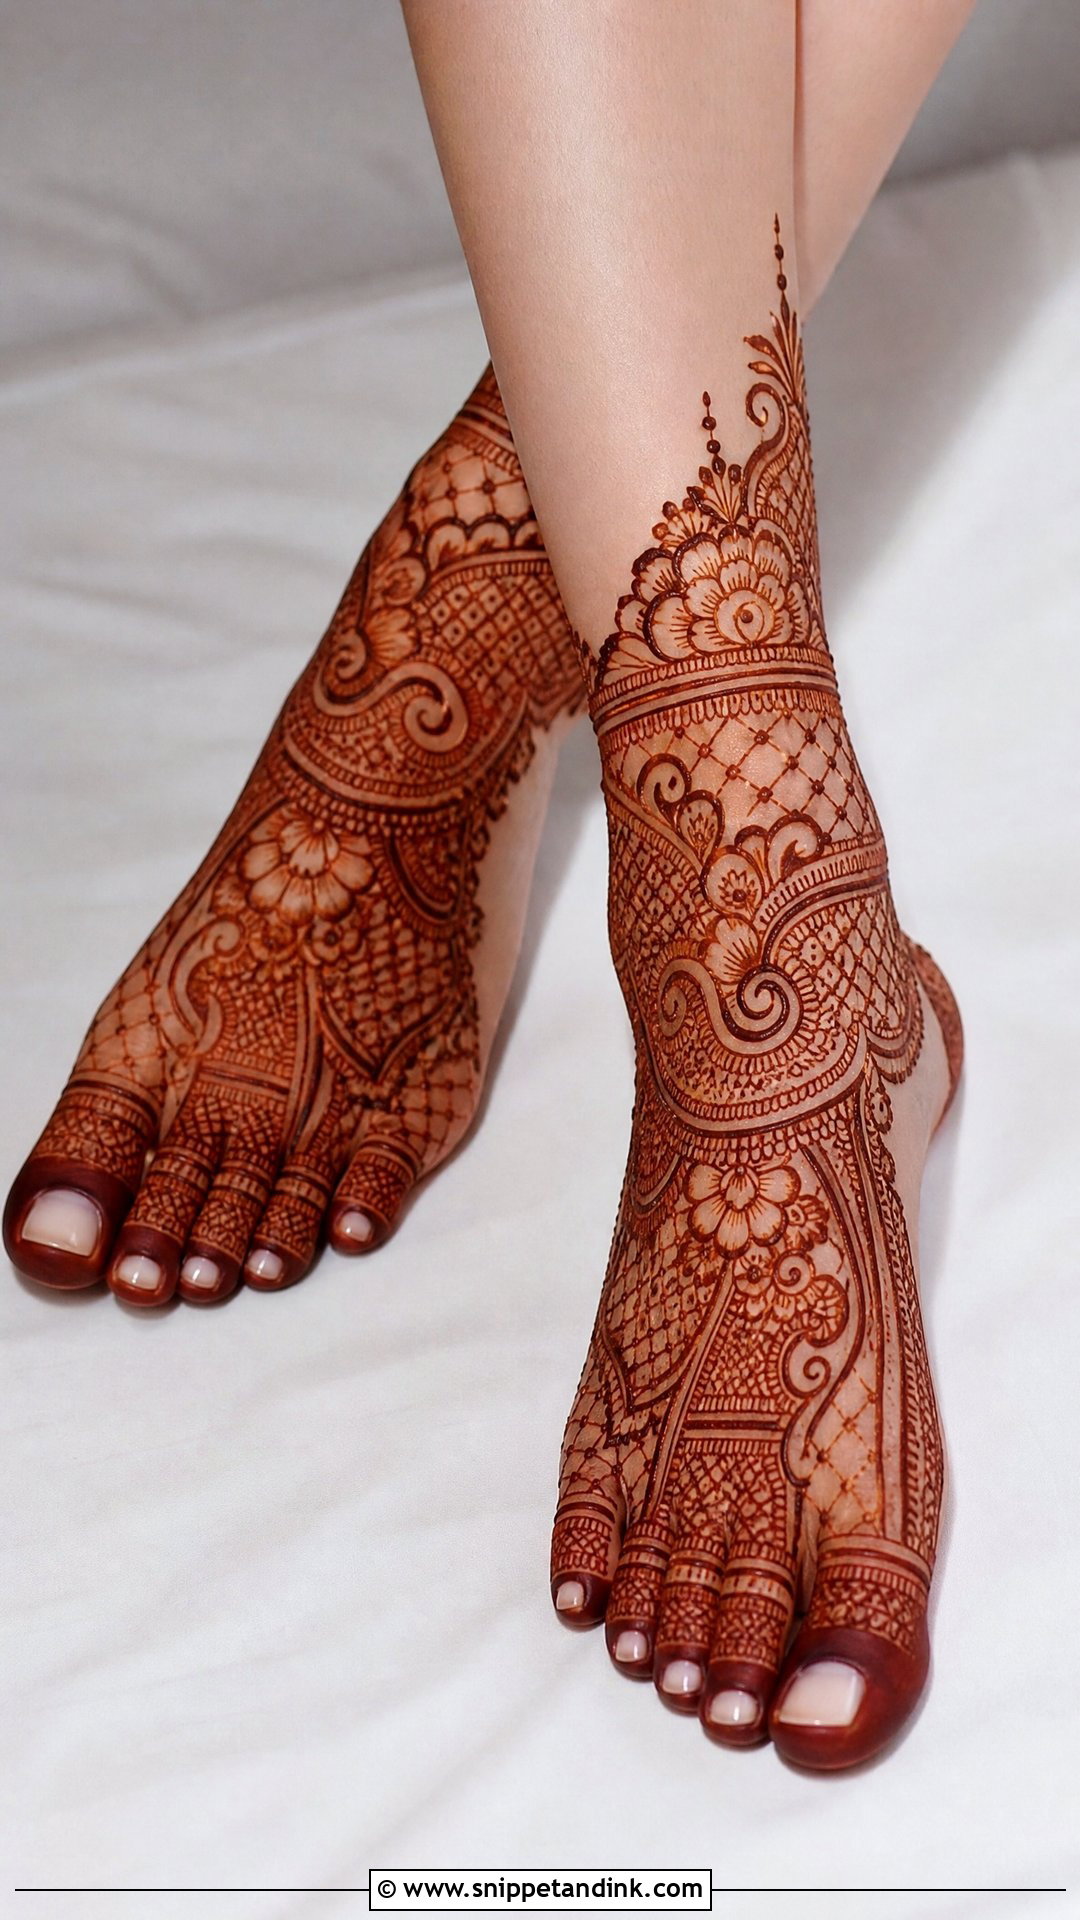
Jaali is a mesh of crossing lines that gives a lace effect, either across the whole top of the foot or as panels between florals and paisleys. It only looks good when the lines are even, and that is harder on feet than on hands because the skin over the toe joints wrinkles as the bride shifts. I keep the grid larger near the toe creases and the front of the ankle, where a tiny mesh smudges and blurs into a dark blob. Finish it with a strong toe border and an ankle cuff.
9. Anklet Bridal Mehndi Design For Feet
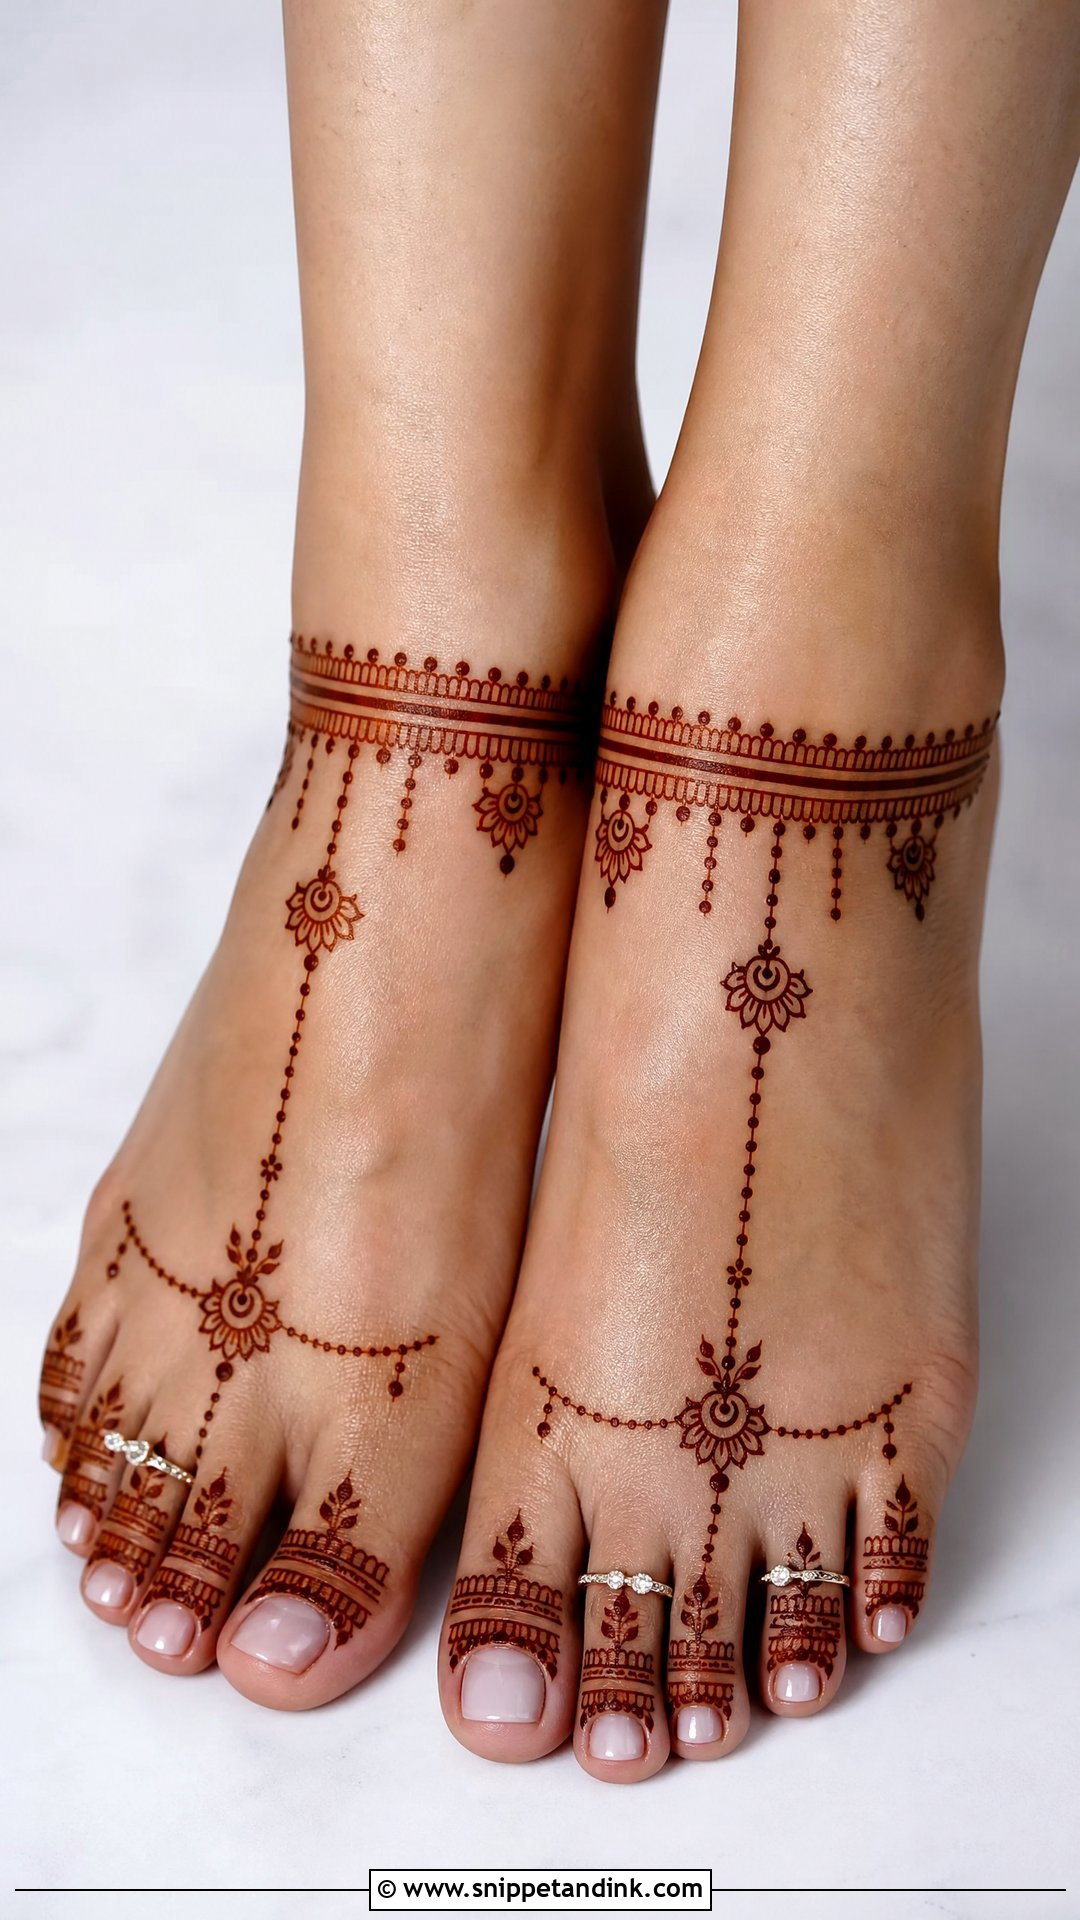
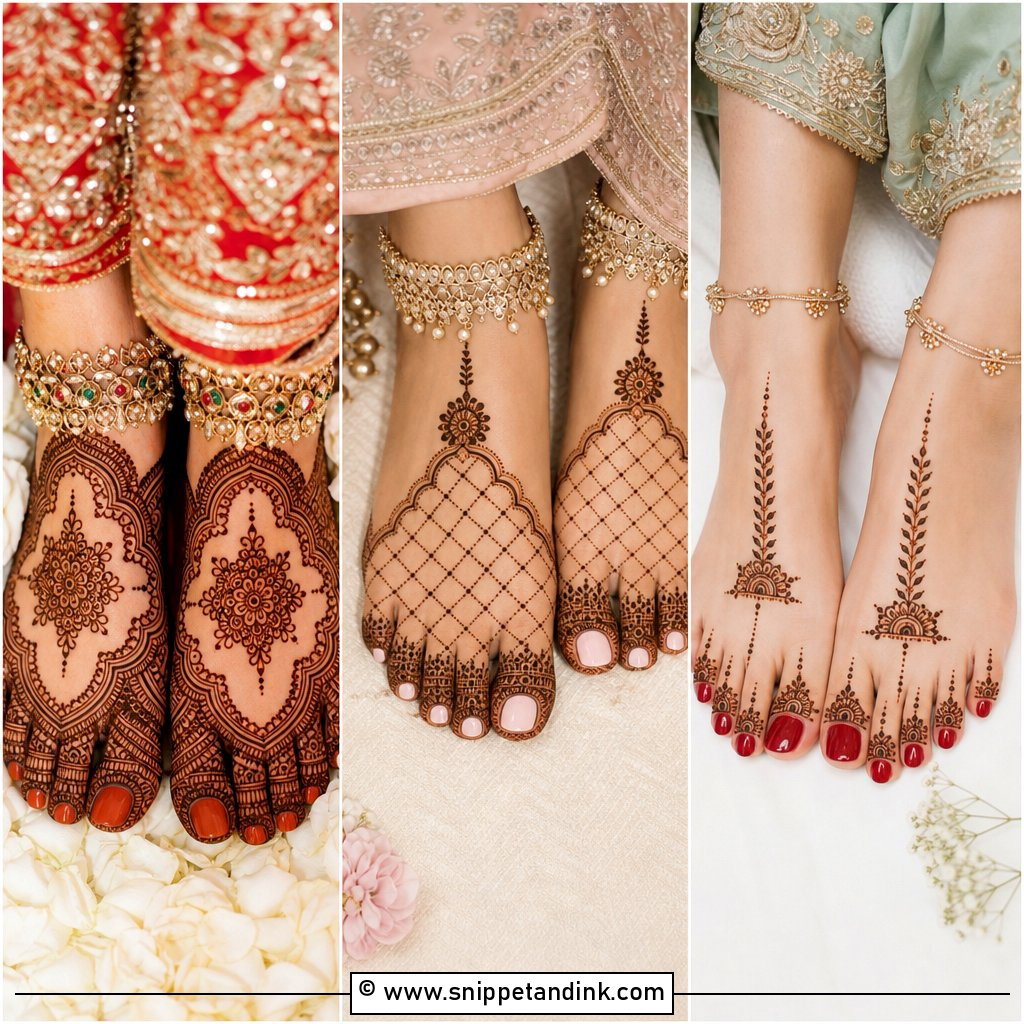
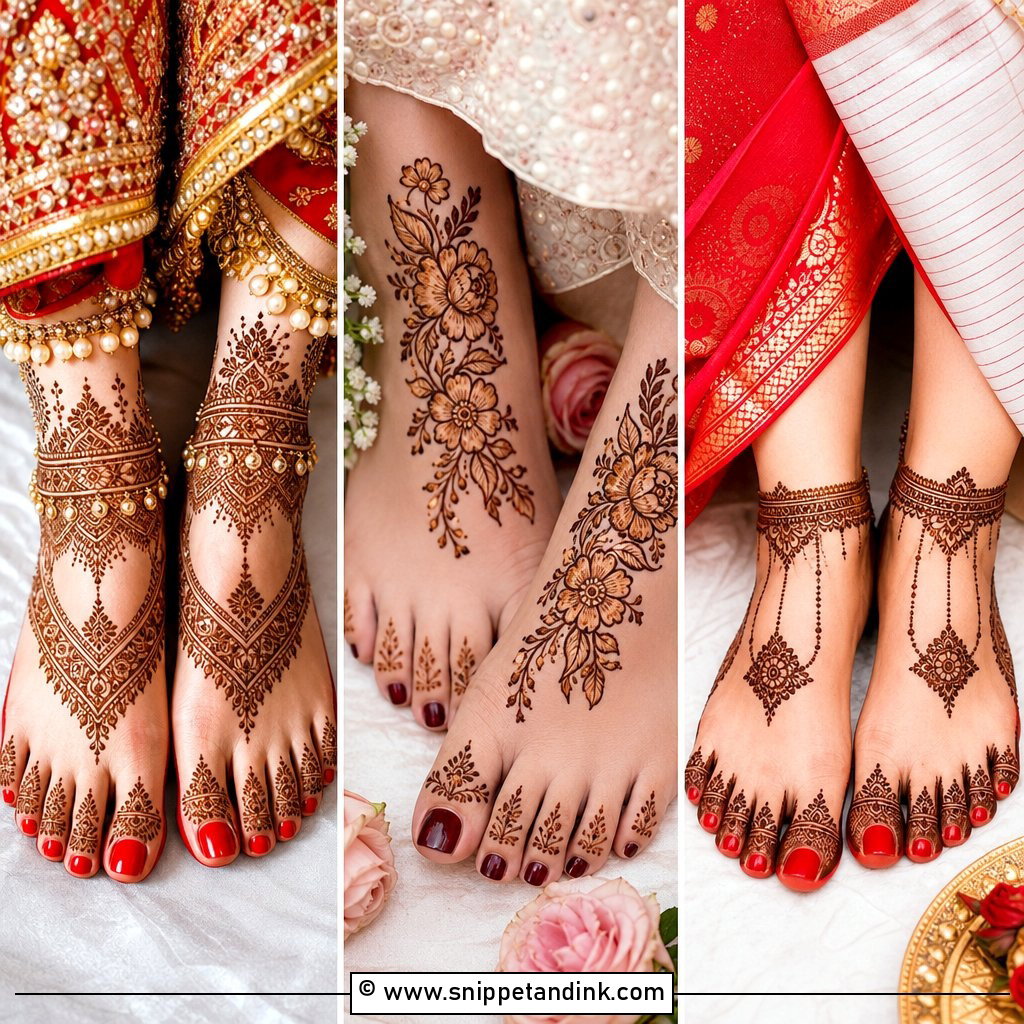
This design is drawn to look like a payal: chains, dots, small florals and hanging drops wrapped around the ankle, with the rest of the foot kept light. It’s the layout I suggest when the bride already owns heavy silver or gold anklets, because the henna fills the gaps around them instead of fighting them. Ask for layered anklet bands with tiny bells or leaf drops if your footwear shows the ankle. I measure the band height on both legs so the two cuffs land at the same level.
10. Toe Bridal Mehndi Design For Feet
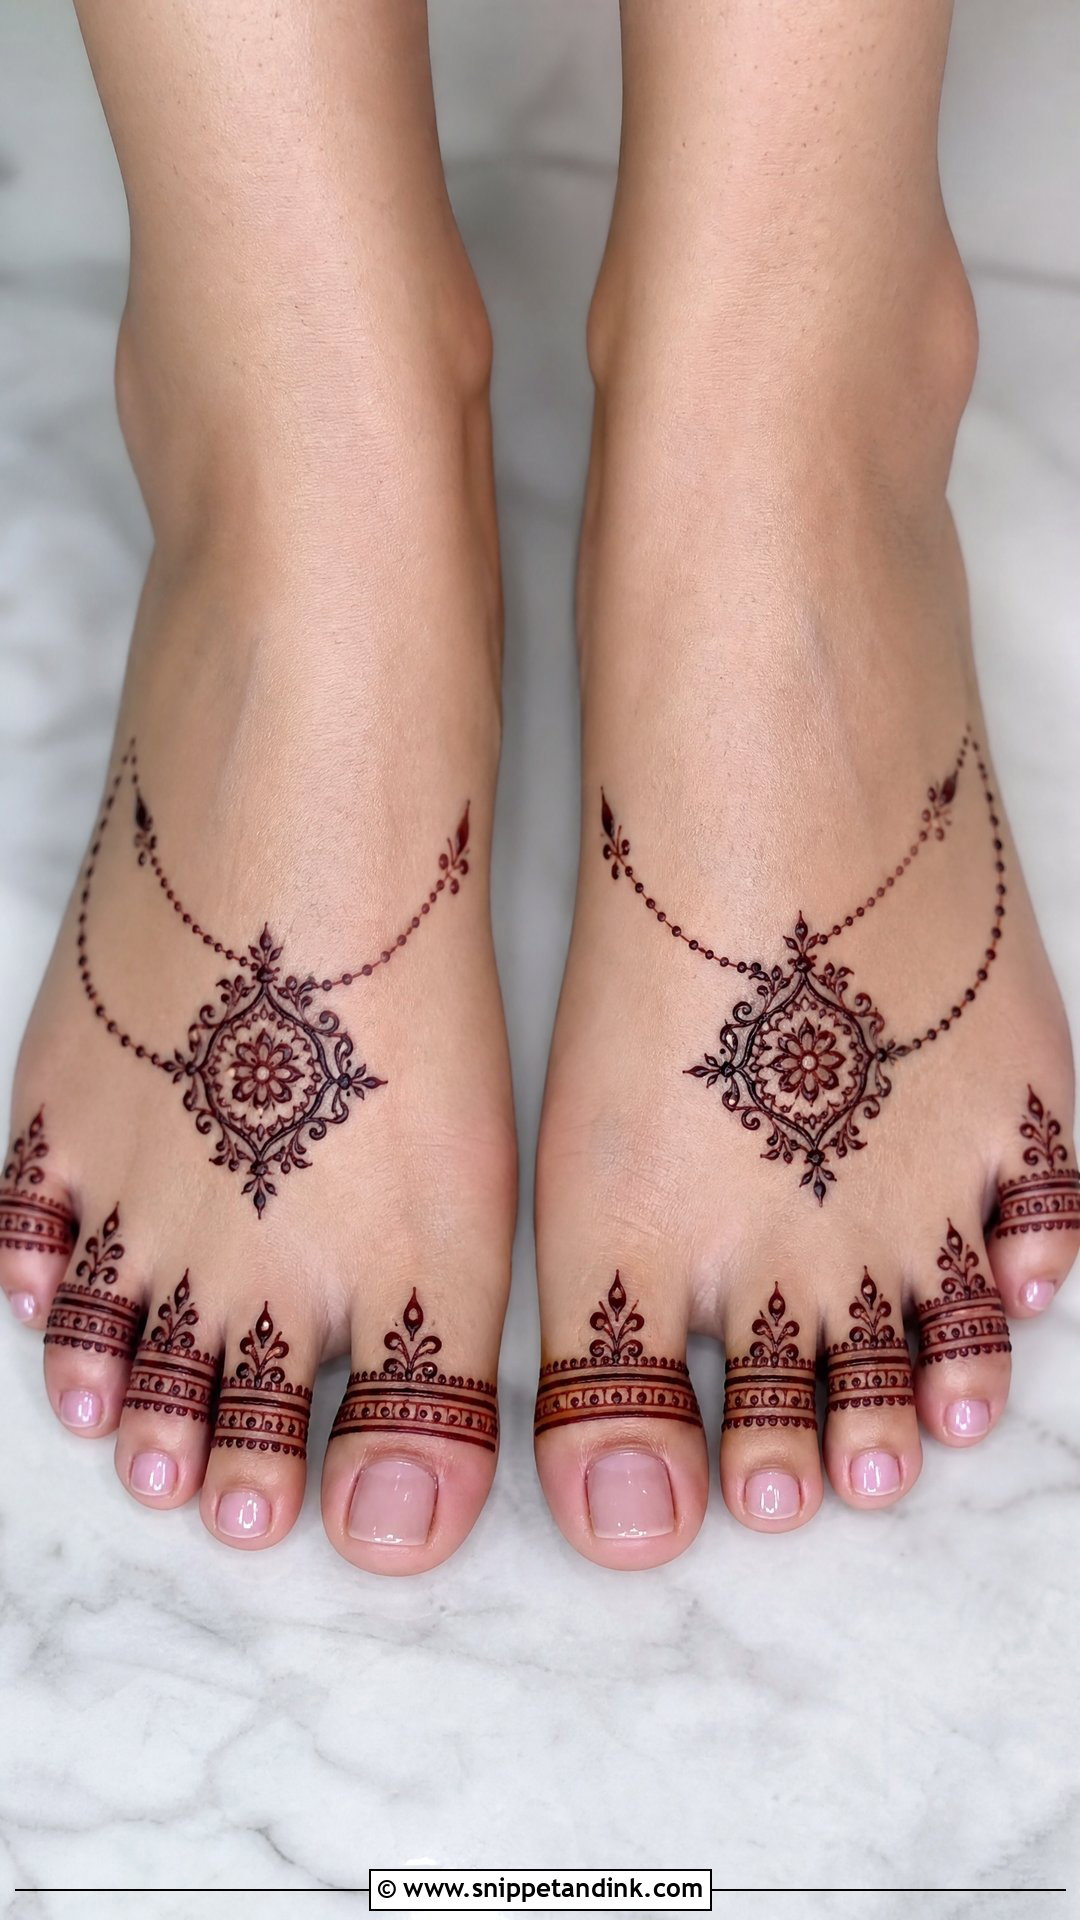
Here the detail lives on the toes: tiny bands, leaves, dots or ring shapes on each one, connected by thin chains to a small motif higher up. Toes are fiddly to work on, so I ask brides to separate them with a rolled tissue while the paste sets, otherwise neighbouring toes touch and print onto each other. Keep the thickness of every toe band the same, then add a small mandala or floral trail above. It pairs naturally with open-toe sandals and heavy toe rings.
11. Indo Arabic Bridal Feet Mehndi Design
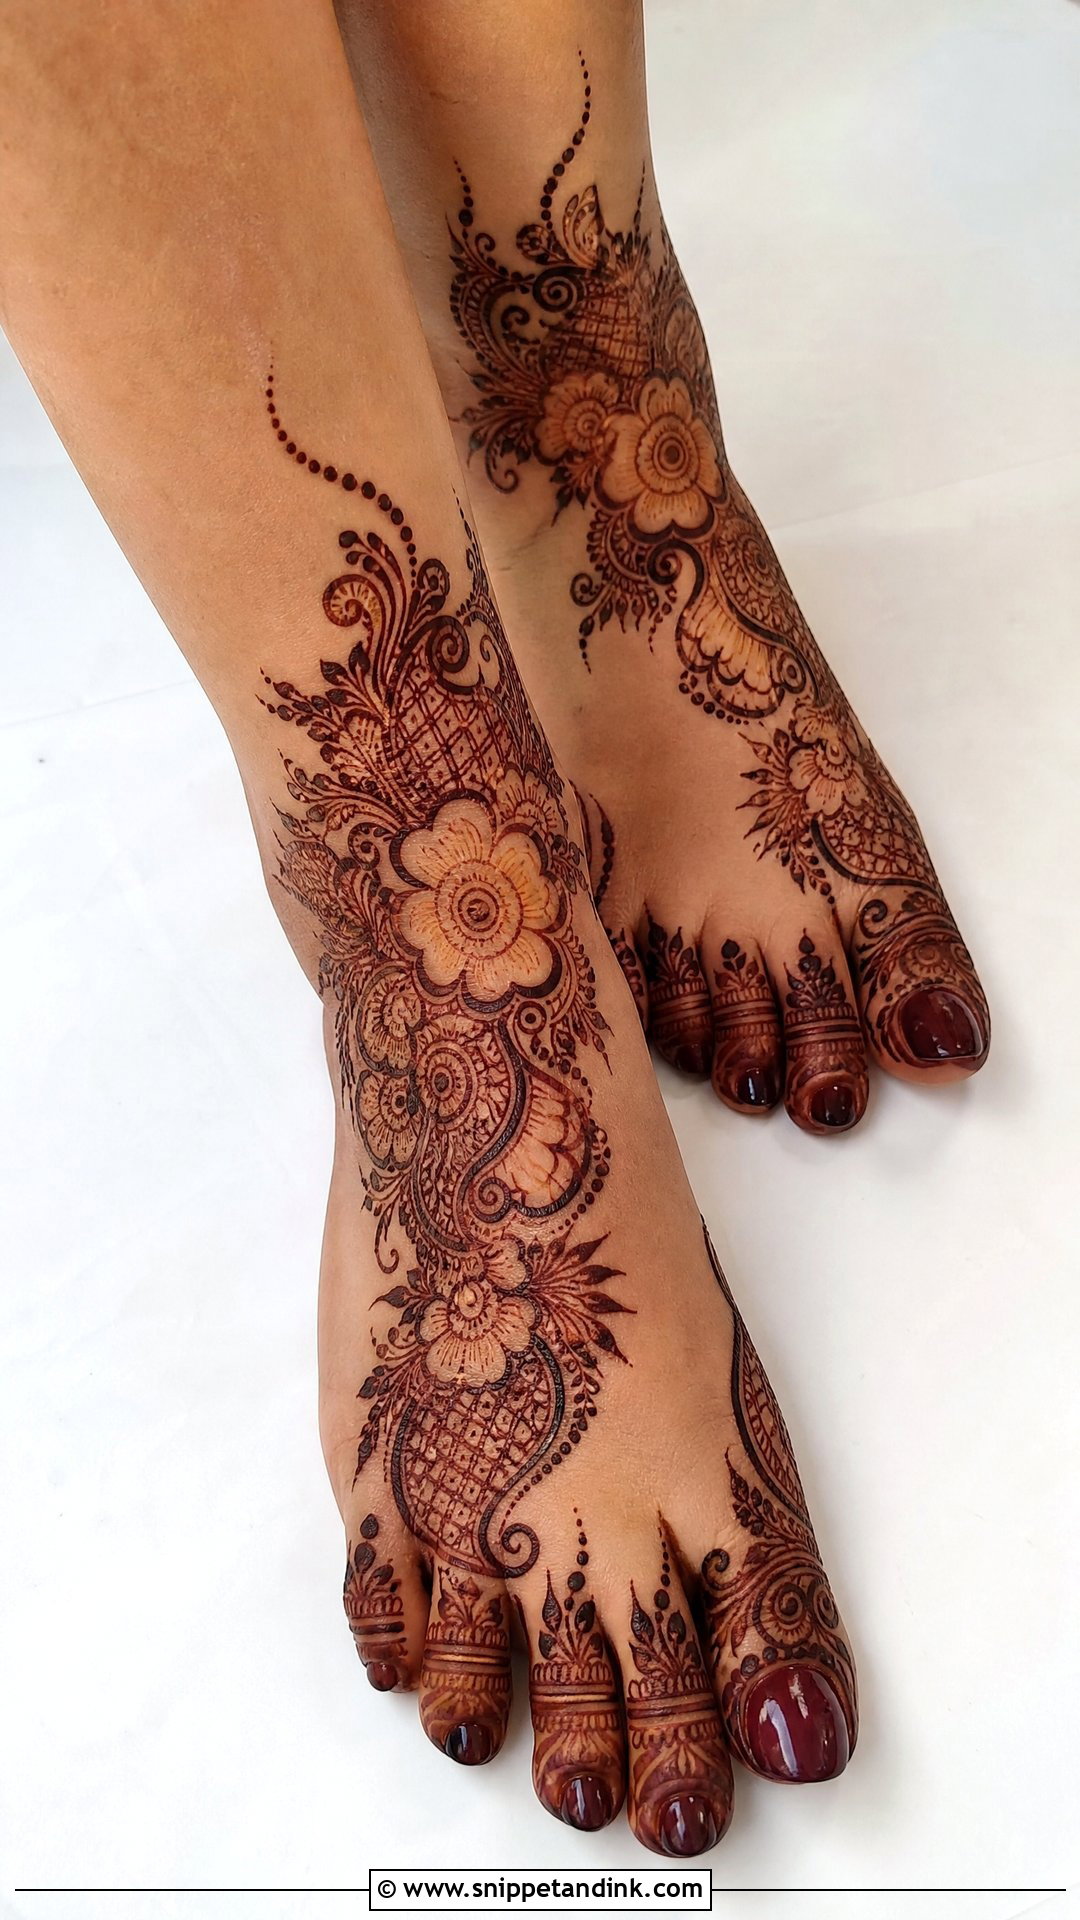
Indo Arabic bridal feet work borrows the bold flow of Arabic layouts and fills its motifs with the fine detail of Indian patterns. Big flowers and shaded leaves form the structure, and smaller filler sits inside them, so the foot looks rich without being solid. I outline the main motifs with a slightly thicker line first, then fill. That order keeps the shape legible even if the inner detail stains unevenly. It sits comfortably between simple and dense, and it suits lehengas and fusion outfits alike.
12. Moroccan Bridal Mehndi Design For Feet
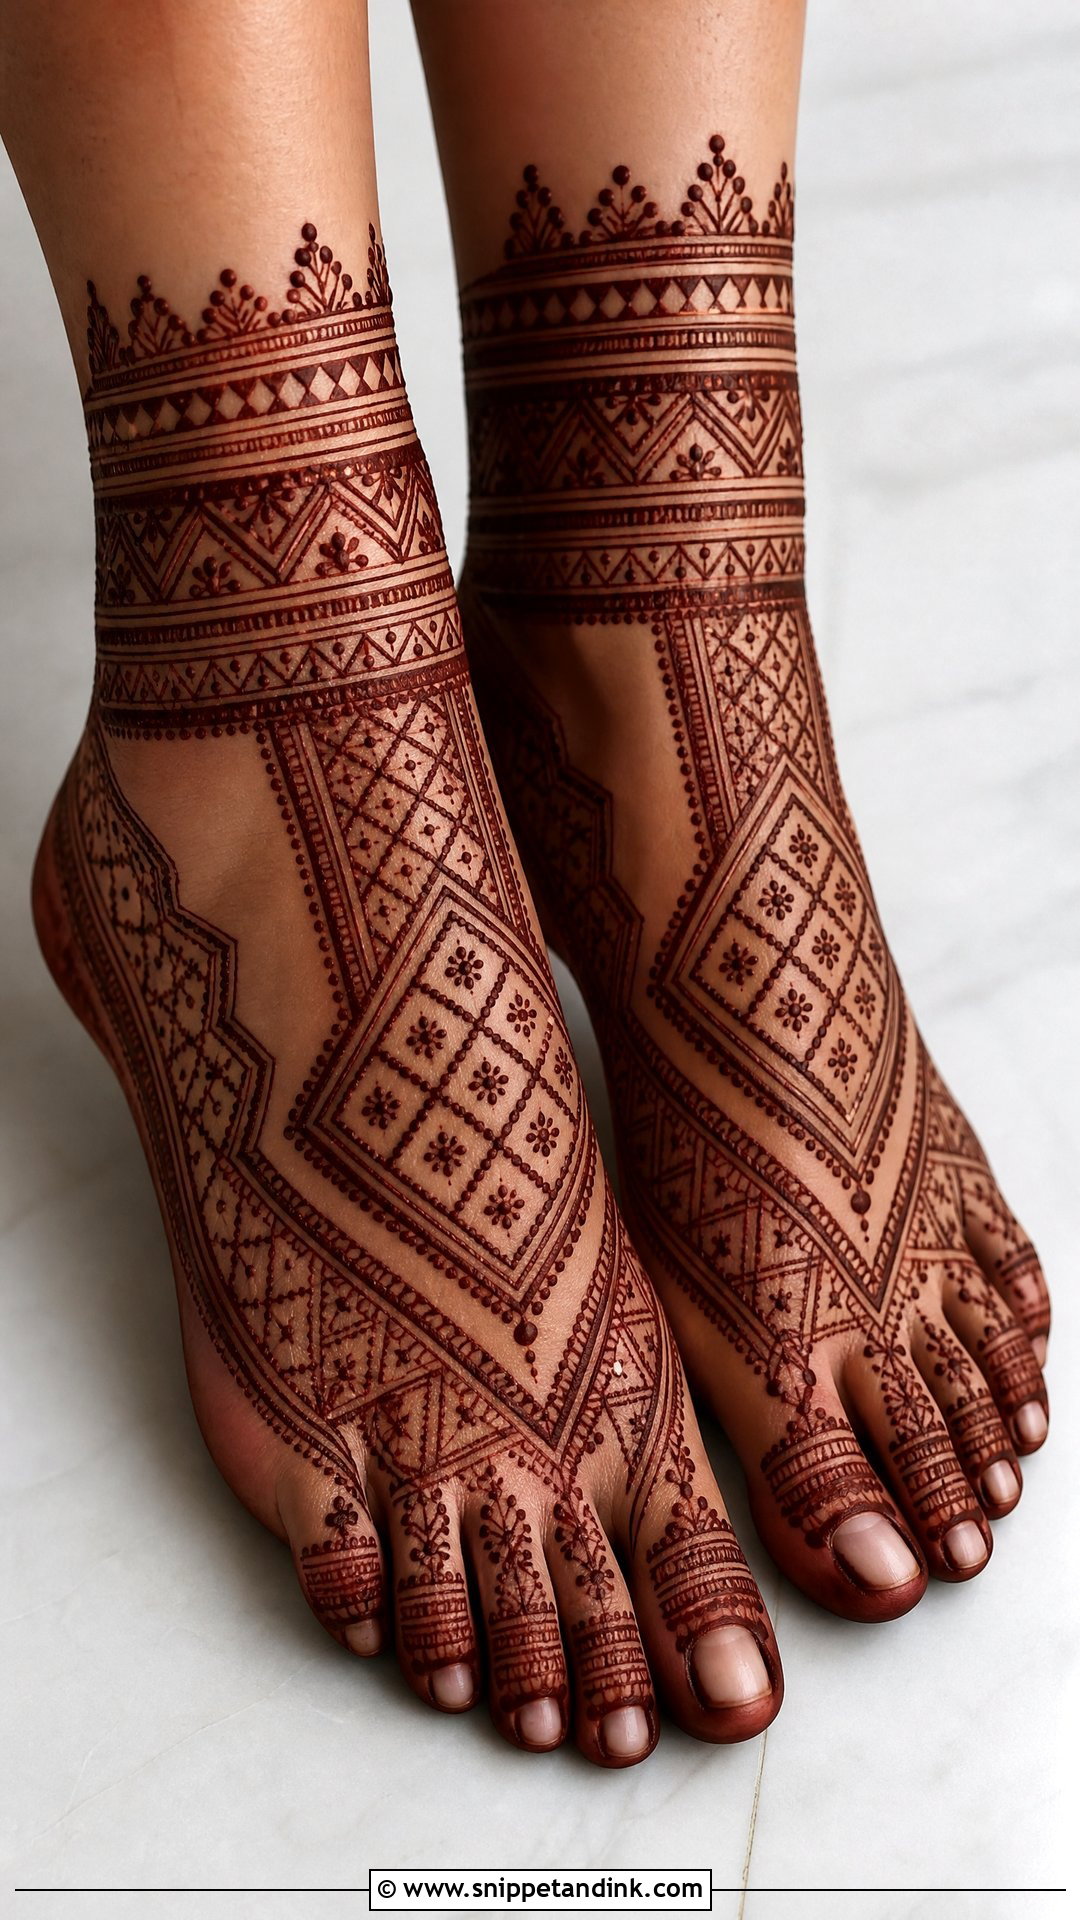
Moroccan-inspired work swaps florals for geometry: diamonds, grids, zigzags and straight borders arranged in neat sections around the ankle, arch and toes. Straight lines are less forgiving than curves on a curved surface. I map them with the foot flexed slightly so the bands don’t bend when the bride stands. Keep the spacing strict, and if the look feels too hard, a few dots or tiny leaves soften it without breaking the structure. It’s a good fit for brides tired of floral-heavy designs.
13. Minimal Bridal Mehndi Design For Feet
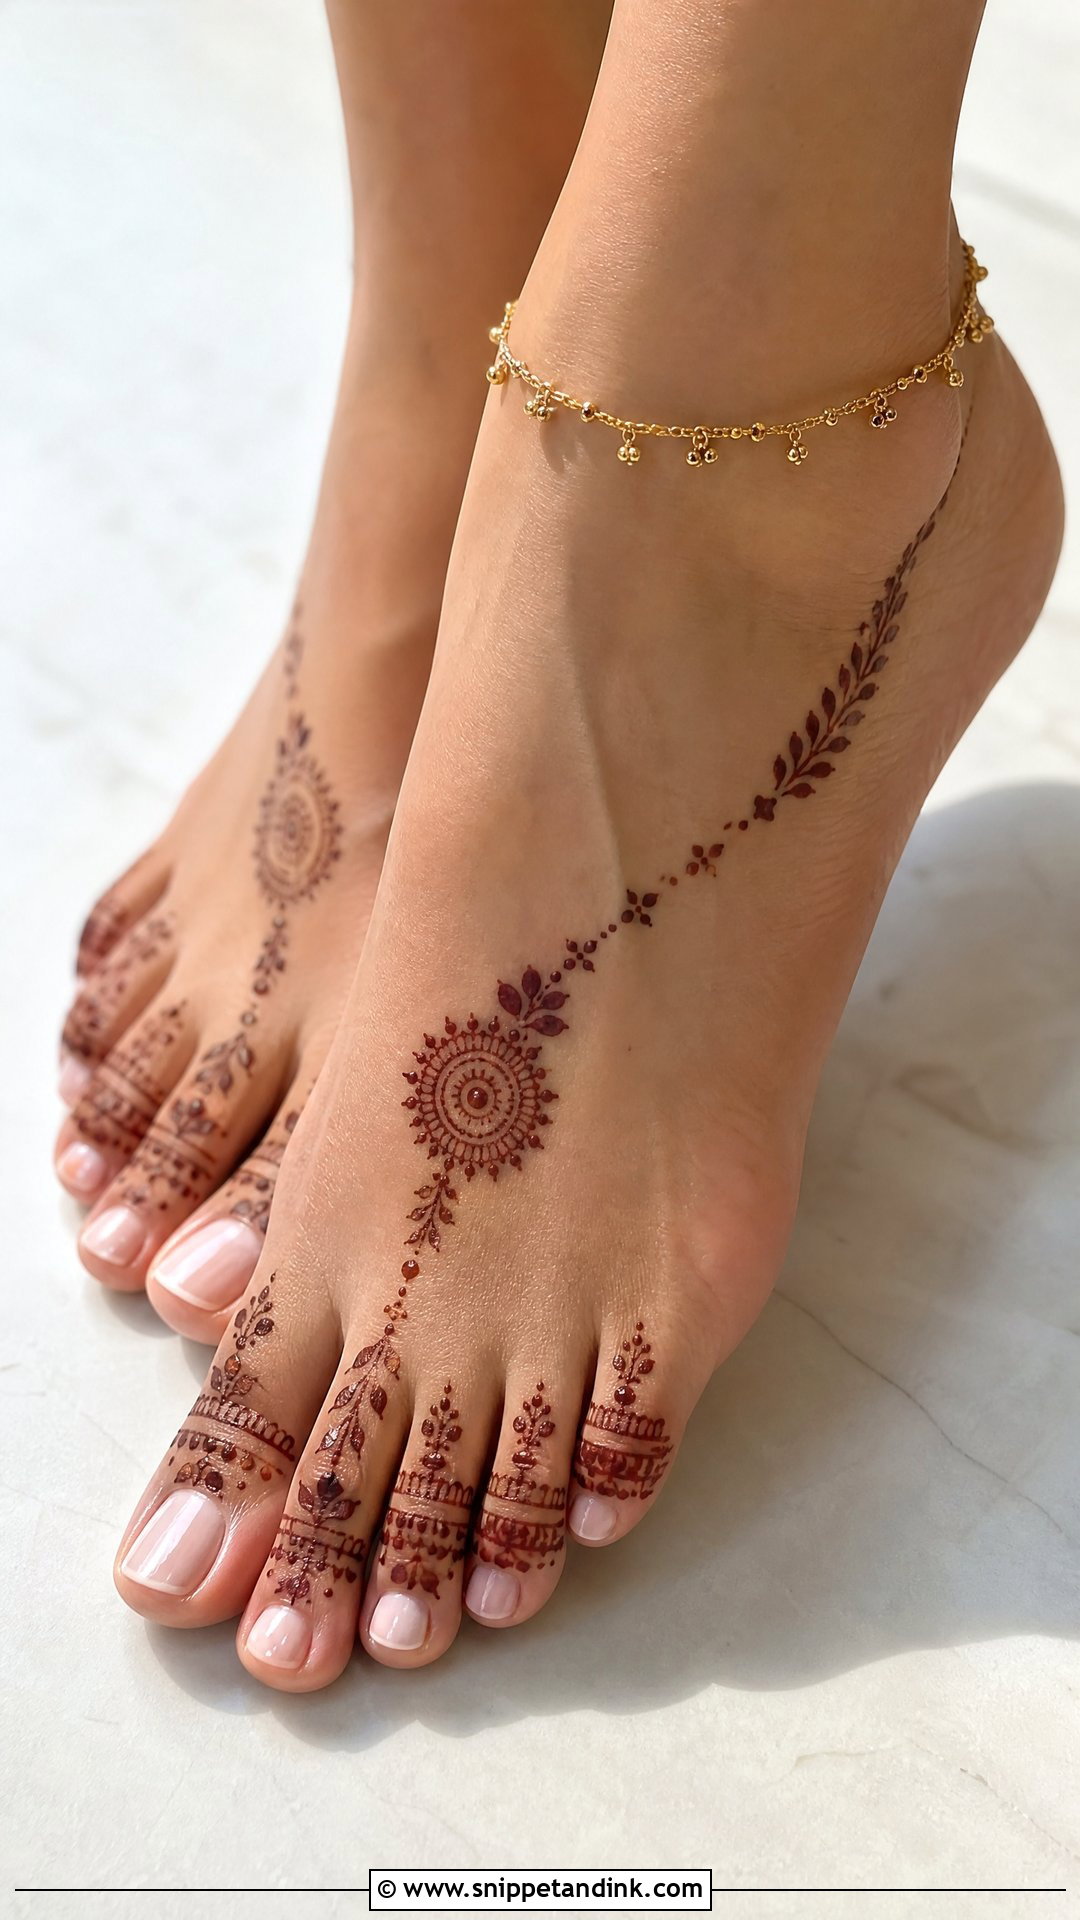
Minimal foot mehndi uses slim toe bands, a small mandala, a leaf trail or a thin ankle chain, with plenty of open skin. Because so little is drawn, every line shows, so I use a finer cone tip and slow down rather than speed up. It dries fast and is easy to manage across busy pre-wedding days, which is why intimate and destination weddings lean toward it. To keep it bridal instead of casual, balance the placement on both feet. A small initial near the ankle bone is a sweet hidden detail.
14. Rajasthani Bridal Foot Mehndi Design
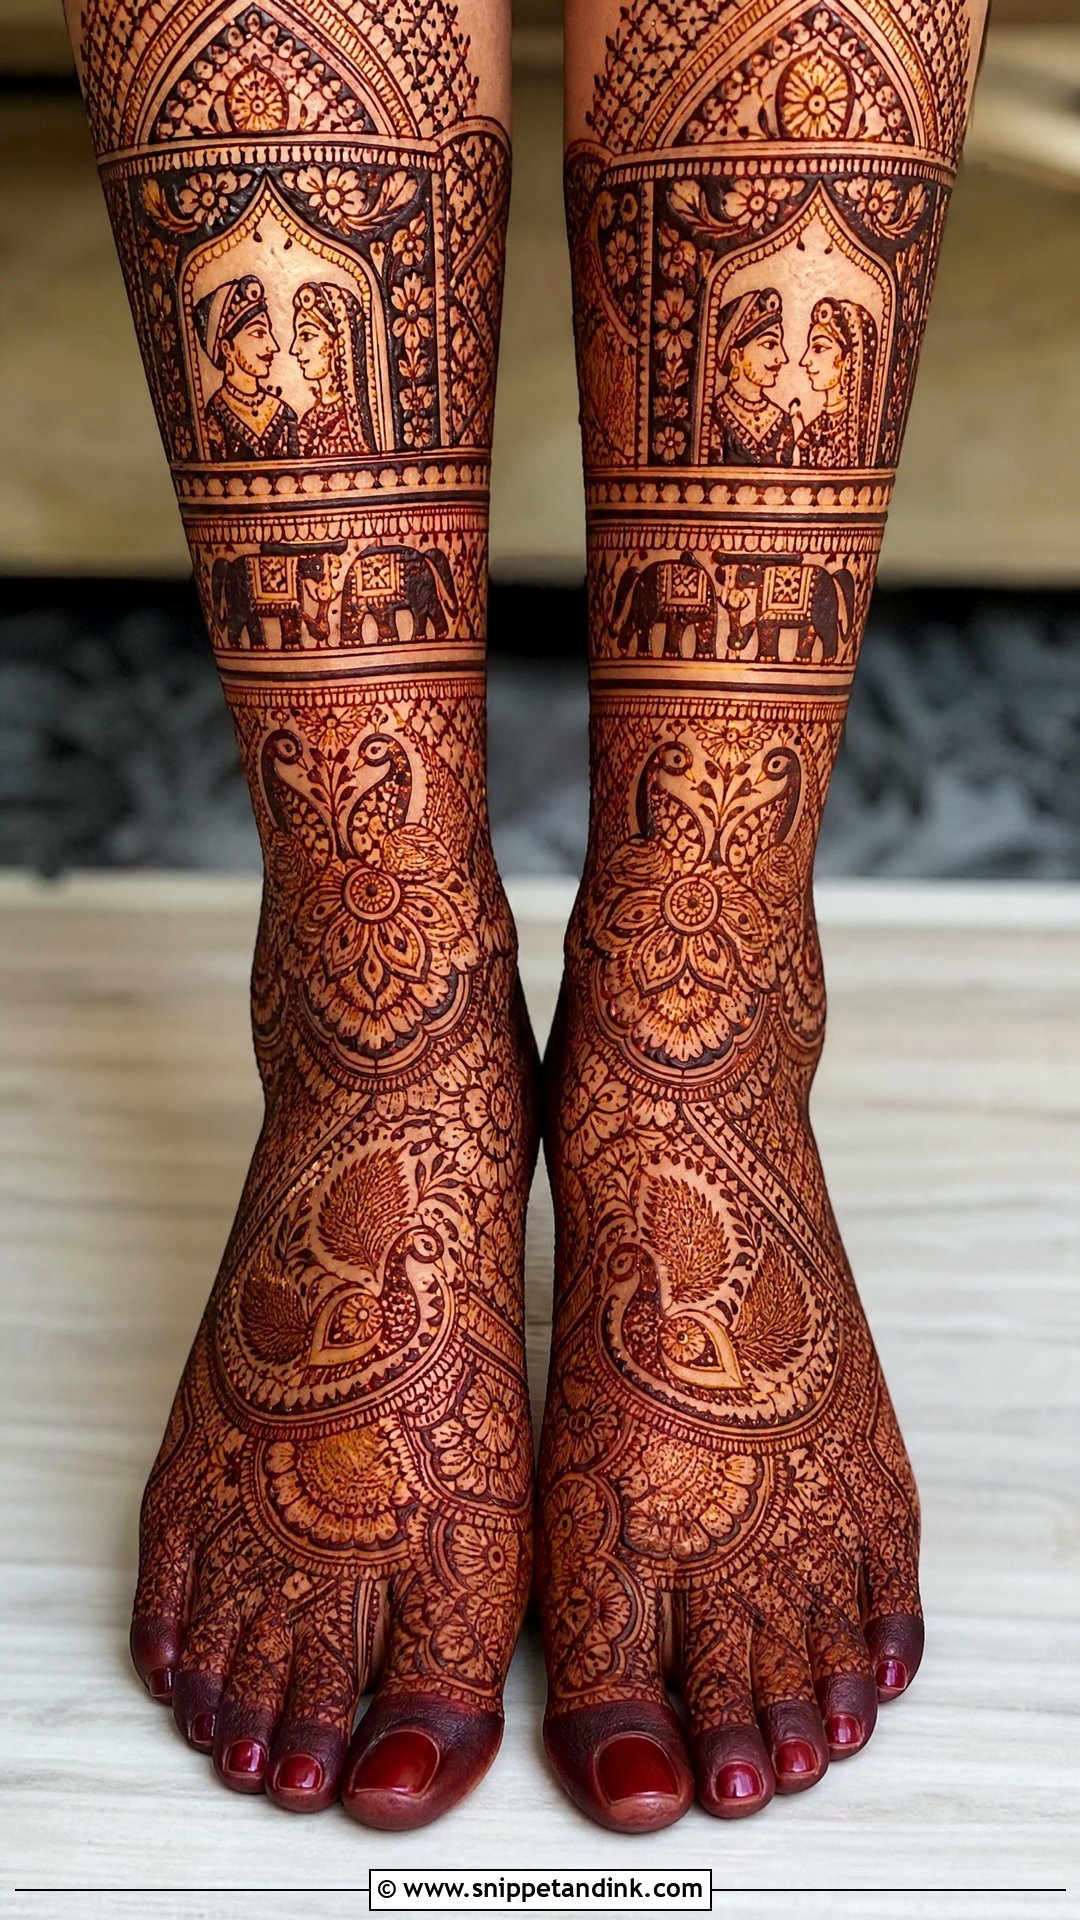
Rajasthani bridal foot mehndi tells a story: bride and groom figures, royal arches, elephants, peacocks and paisleys with dense ornamental filling, usually running from the toes to the ankles or lower legs. It takes the longest of anything on this list, and the figures need steady, unhurried line work. I place the large motifs first and only then add fillers around them, so the story stays readable instead of dissolving into texture. It belongs with heavy lehengas and traditional jewellery.
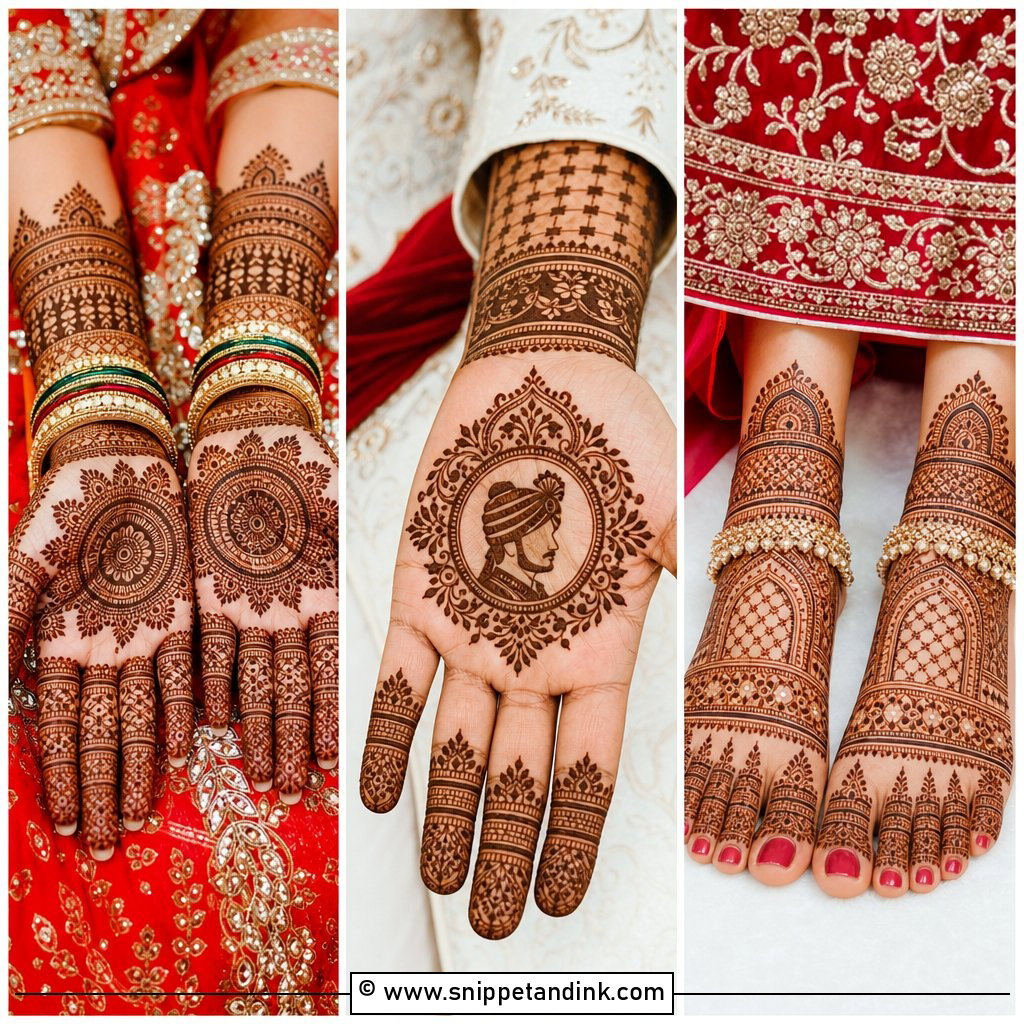
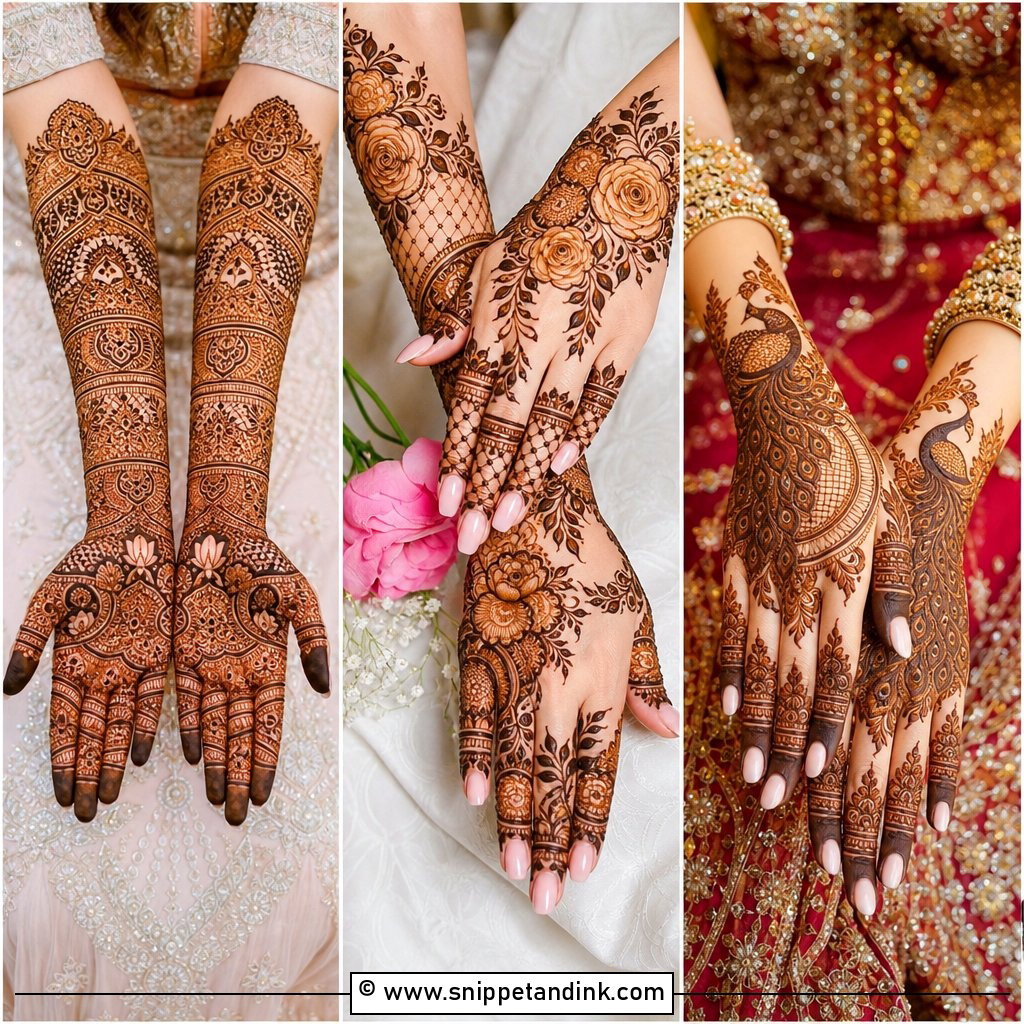
15. Floral Bridal Mehndi Design For Feet
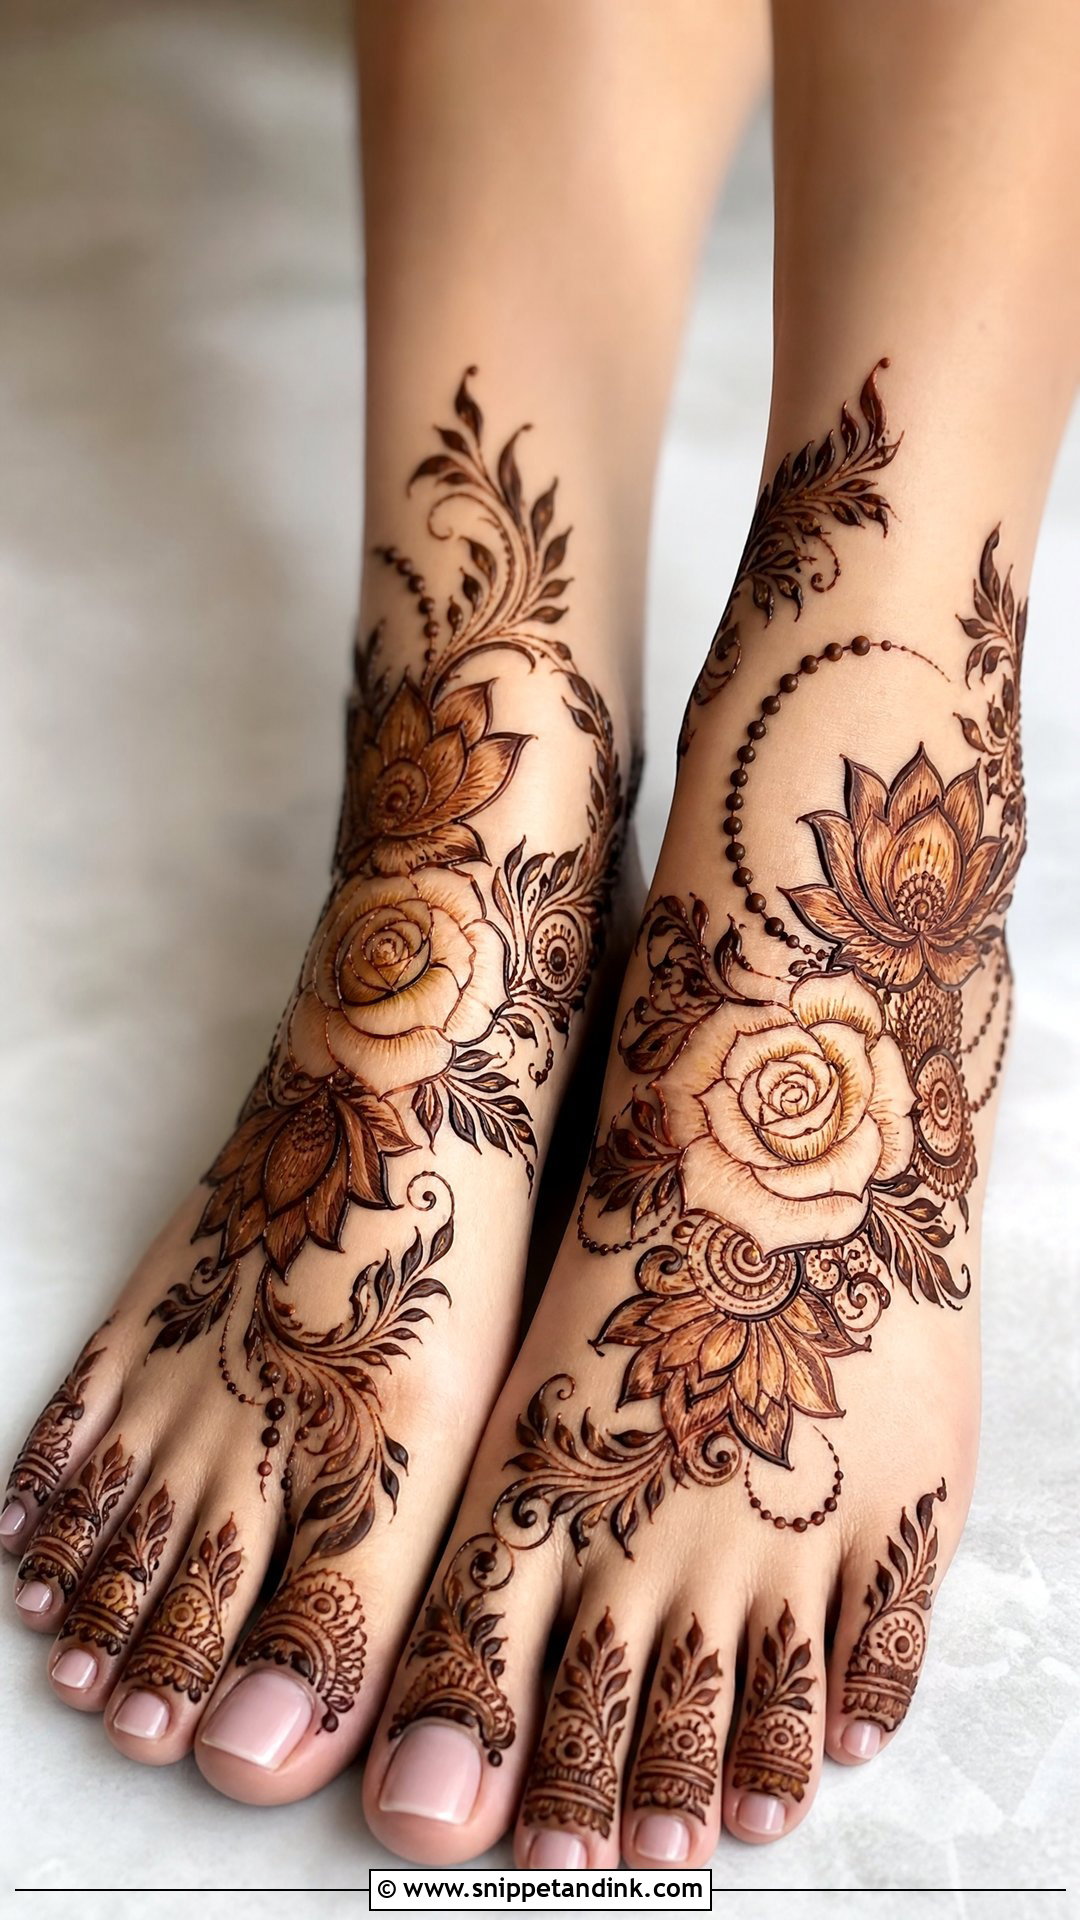
Roses, lotus petals, small blossoms and leafy vines can run as one diagonal trail or as matching clusters on each foot. Curved petals soften the angles of the foot, which is why floral layouts flatter bony or narrow feet so well. I add shaded petals, dotted chains and fine toe detail to make it bridal. Floral work translates into both Indian and Arabic styles, so it adapts to pastel outfits and heavily embroidered ones without much change.
16. Dulhan Feet Mehndi Design
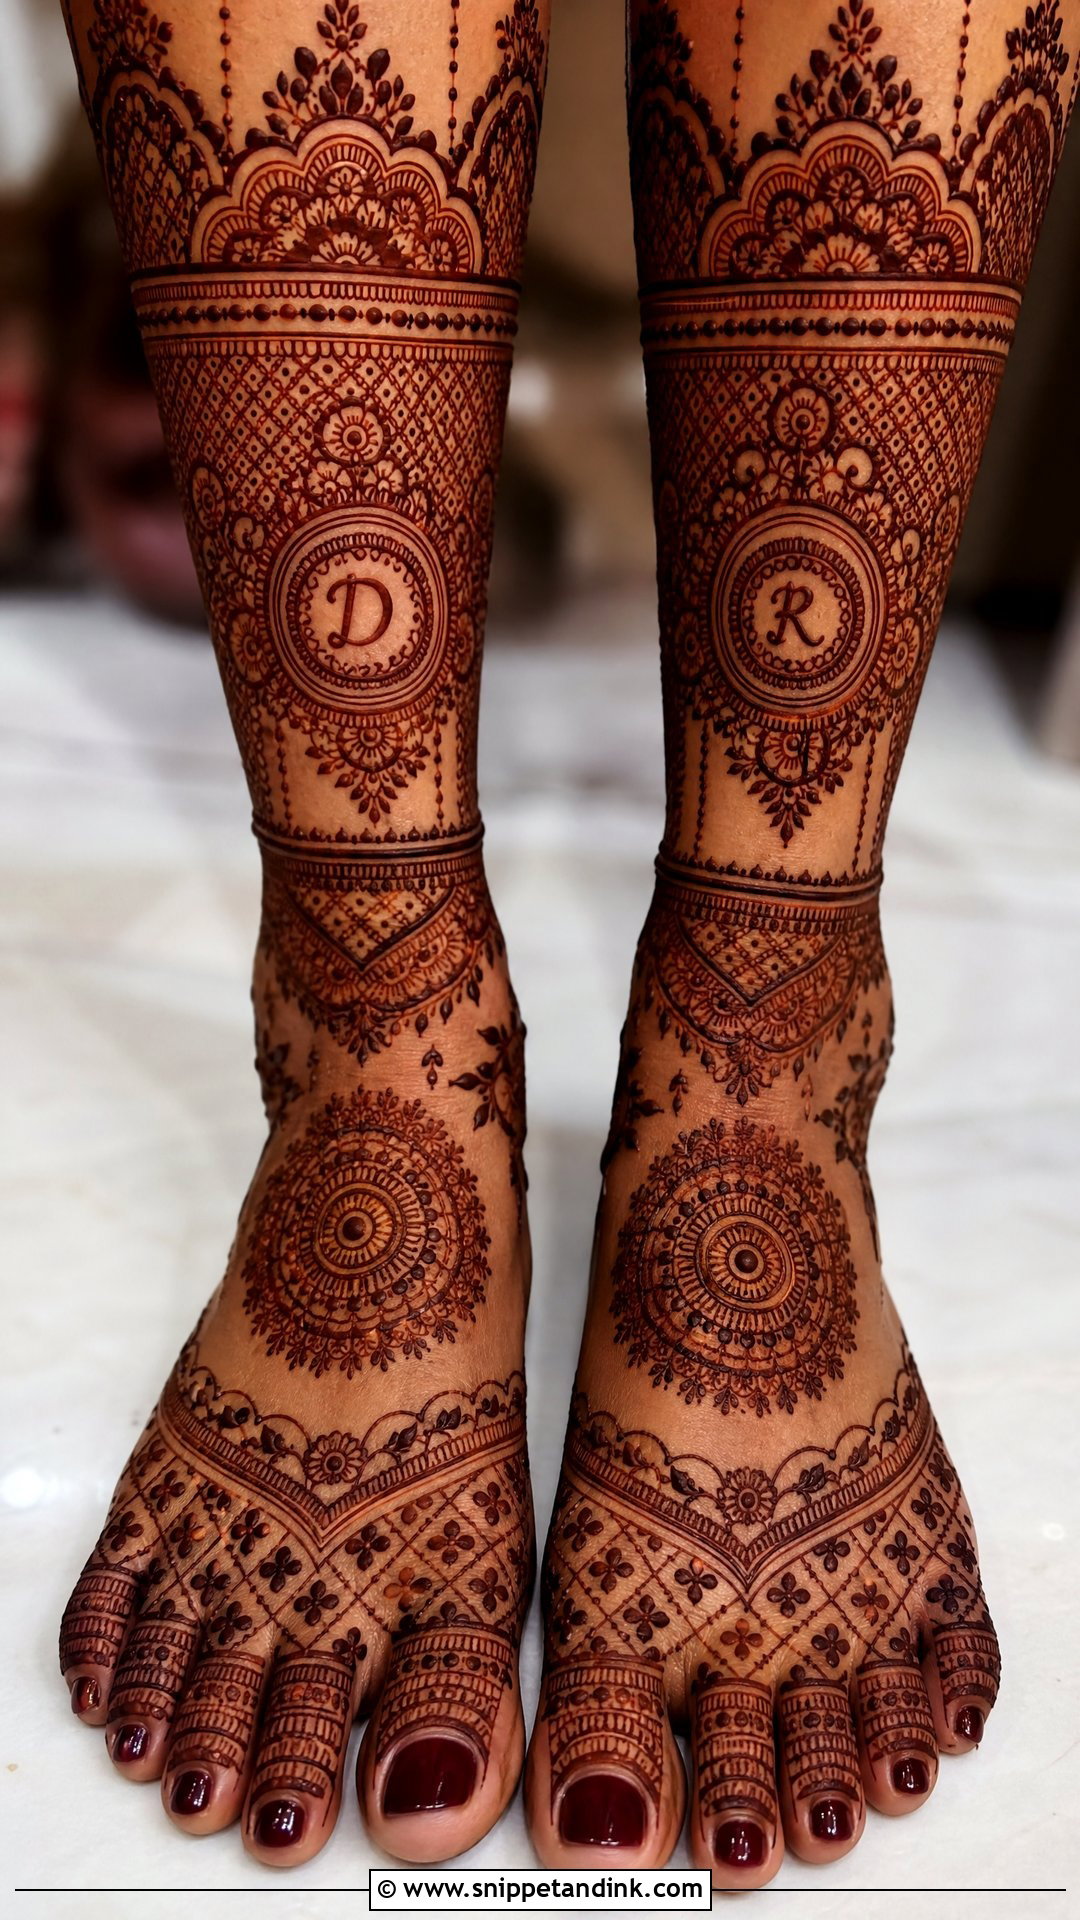
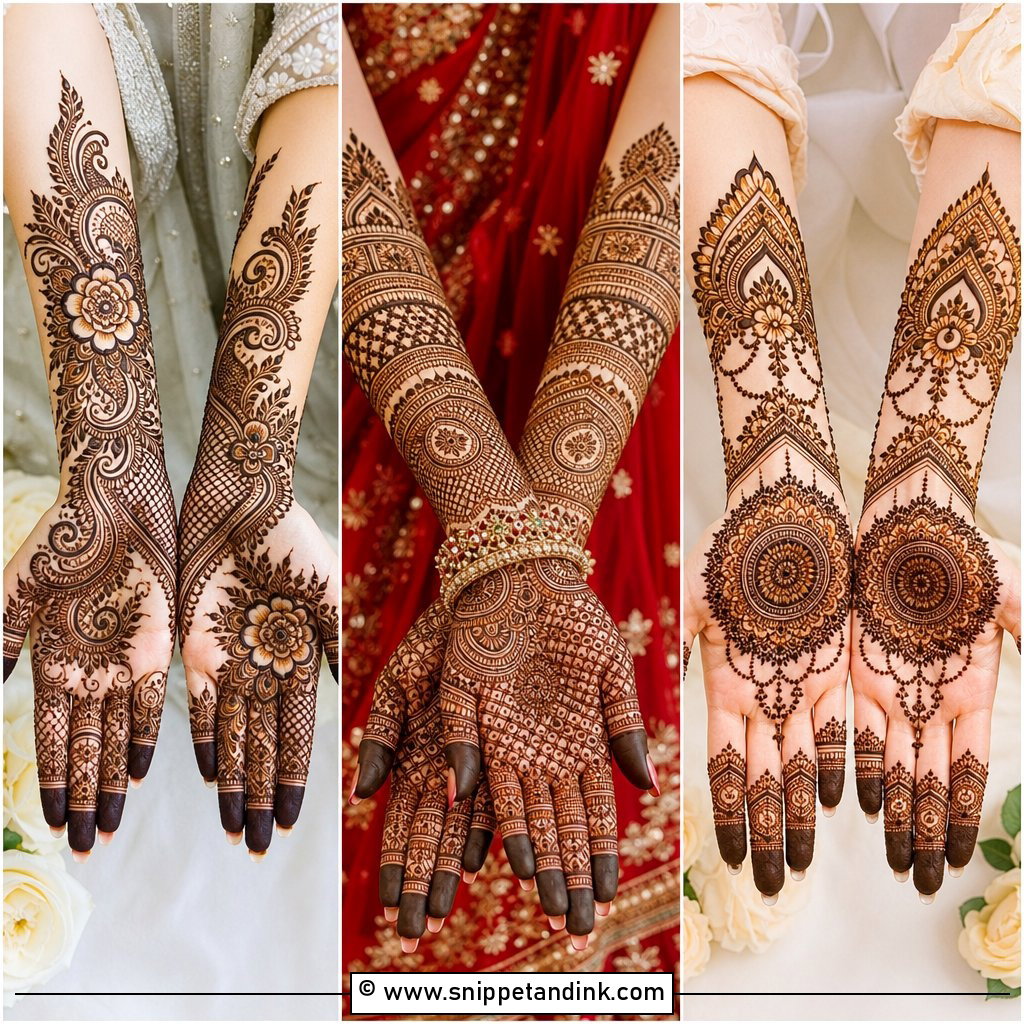
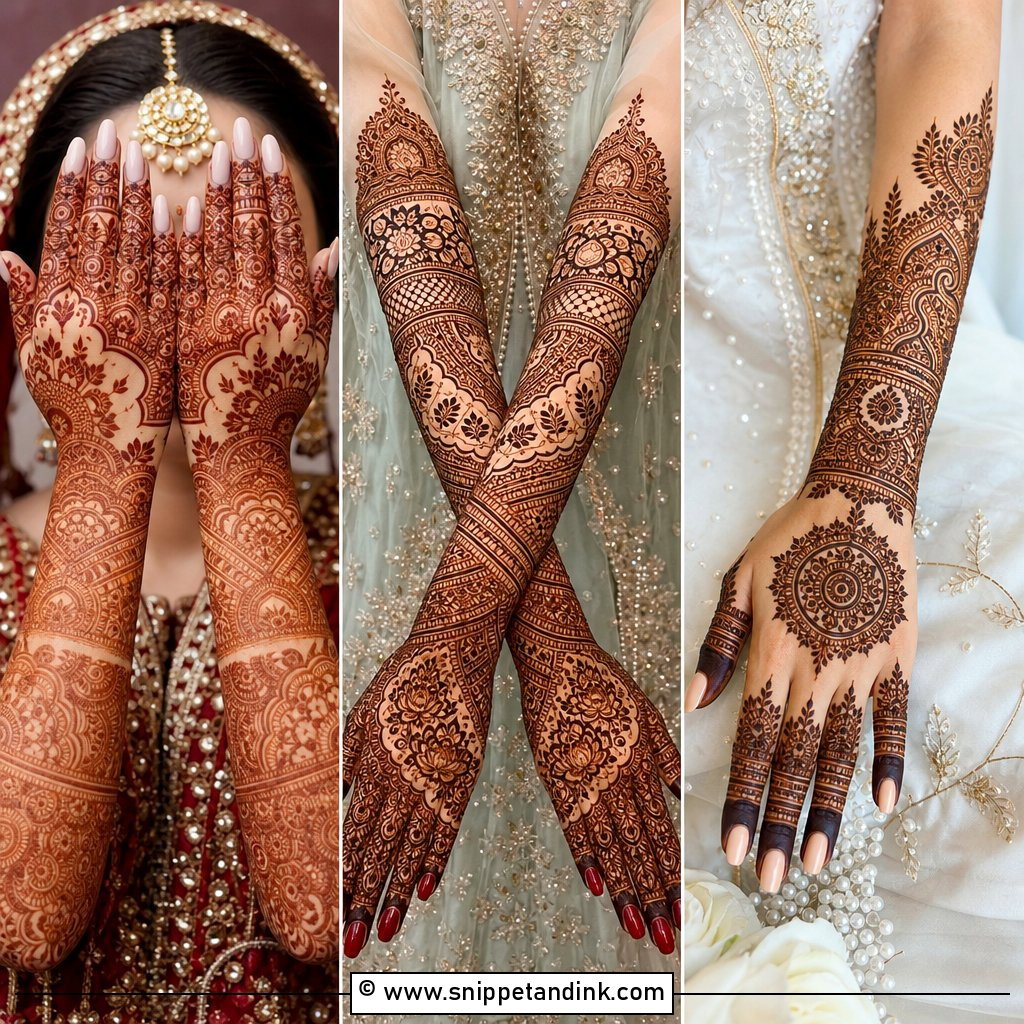
A dulhan foot design is meant to match the weight of the bride’s hand mehndi: full toes, heavy top-of-foot work, ankle borders and often a calf extension, with paisleys, mandalas, florals and jaali. If the hands are dense and the feet are light, the photos look unbalanced during the rituals where your feet are on show. I keep the band across the front of the ankle a touch more open than the rest, because that is the joint that bends most when you walk, and thick paste there cracks first.
17. Modern Bridal Mehndi Design For Feet
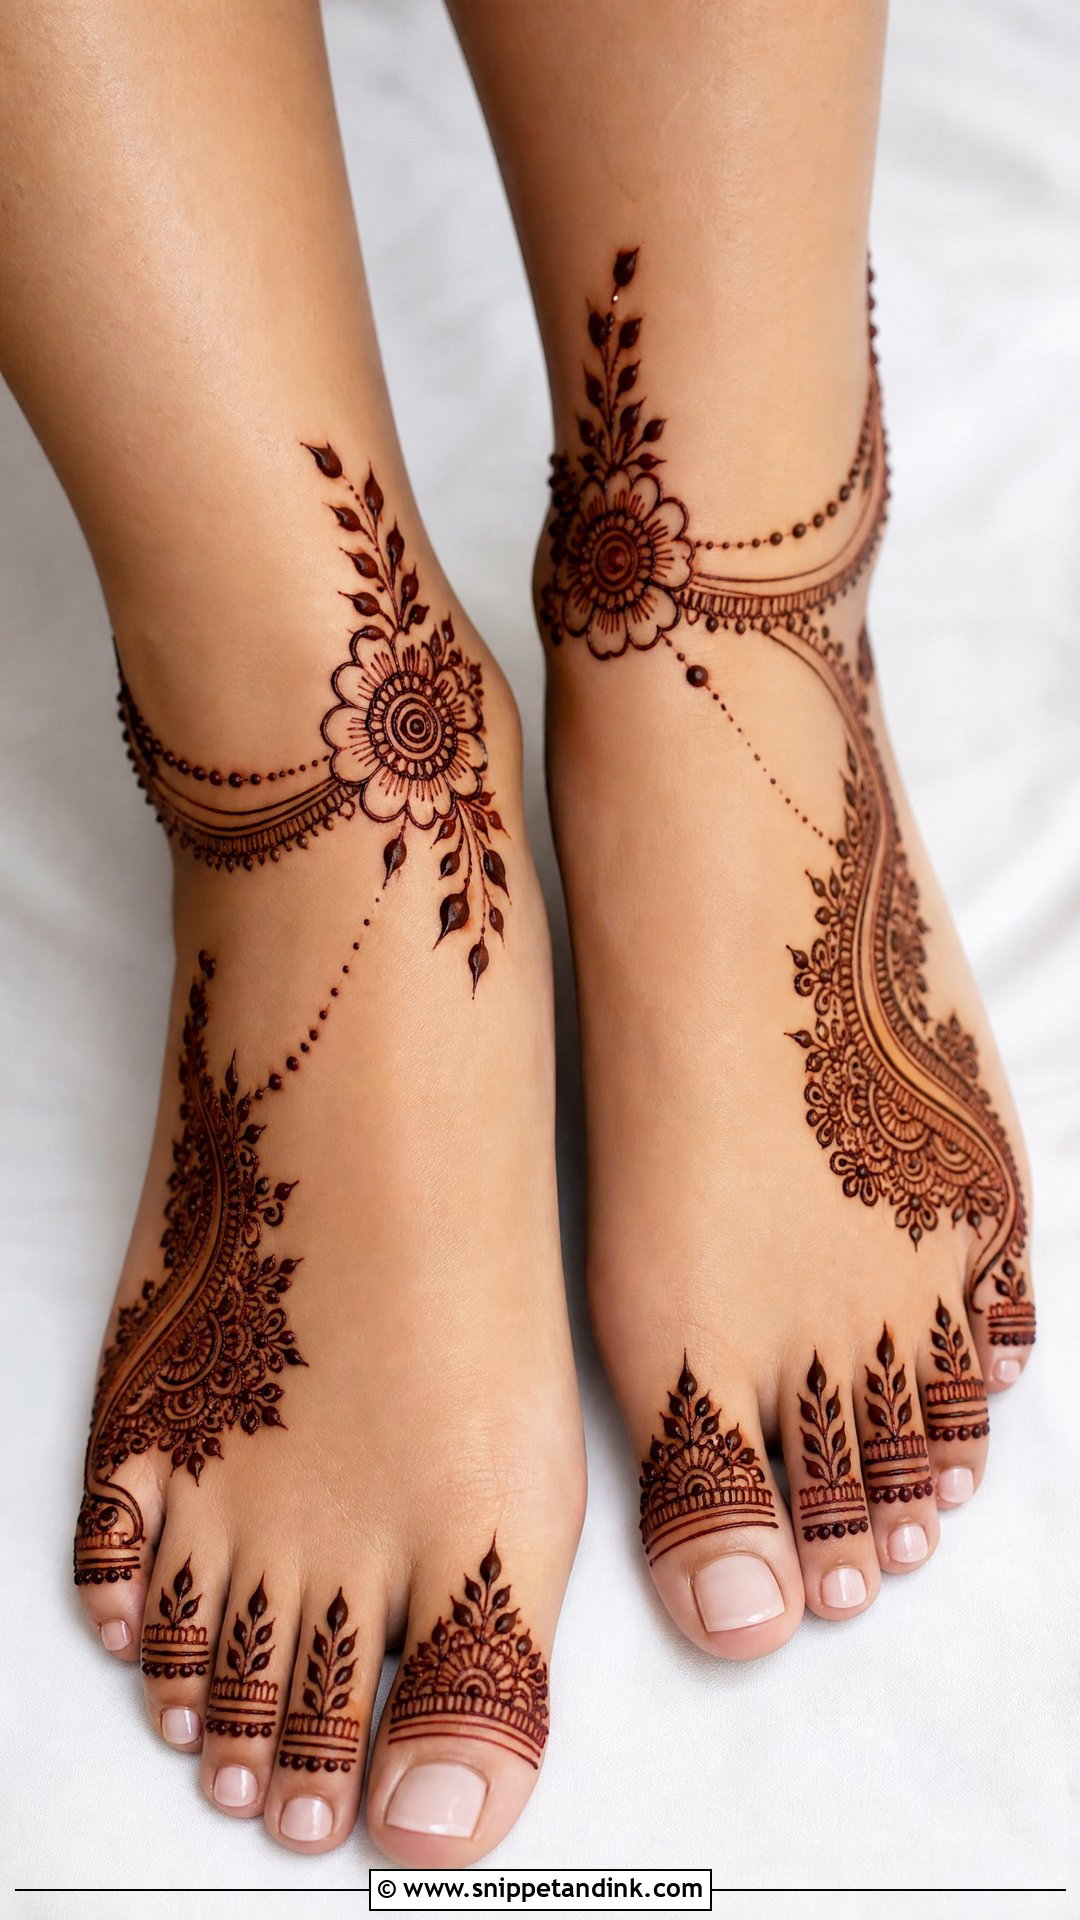
Modern designs work with spacing and placement more than motifs: sleek florals, geometric borders, half-foot layouts and fine anklet lines. The test I use is whether you can still see skin between the main elements from a standing photo distance. If not, it has tipped into traditional. A bold toe section with a bare upper foot, or one clean diagonal with a thin ankle line, suits contemporary lehengas, gowns and fusion outfits.
18. Heavy Bridal Mehndi Design For Feet
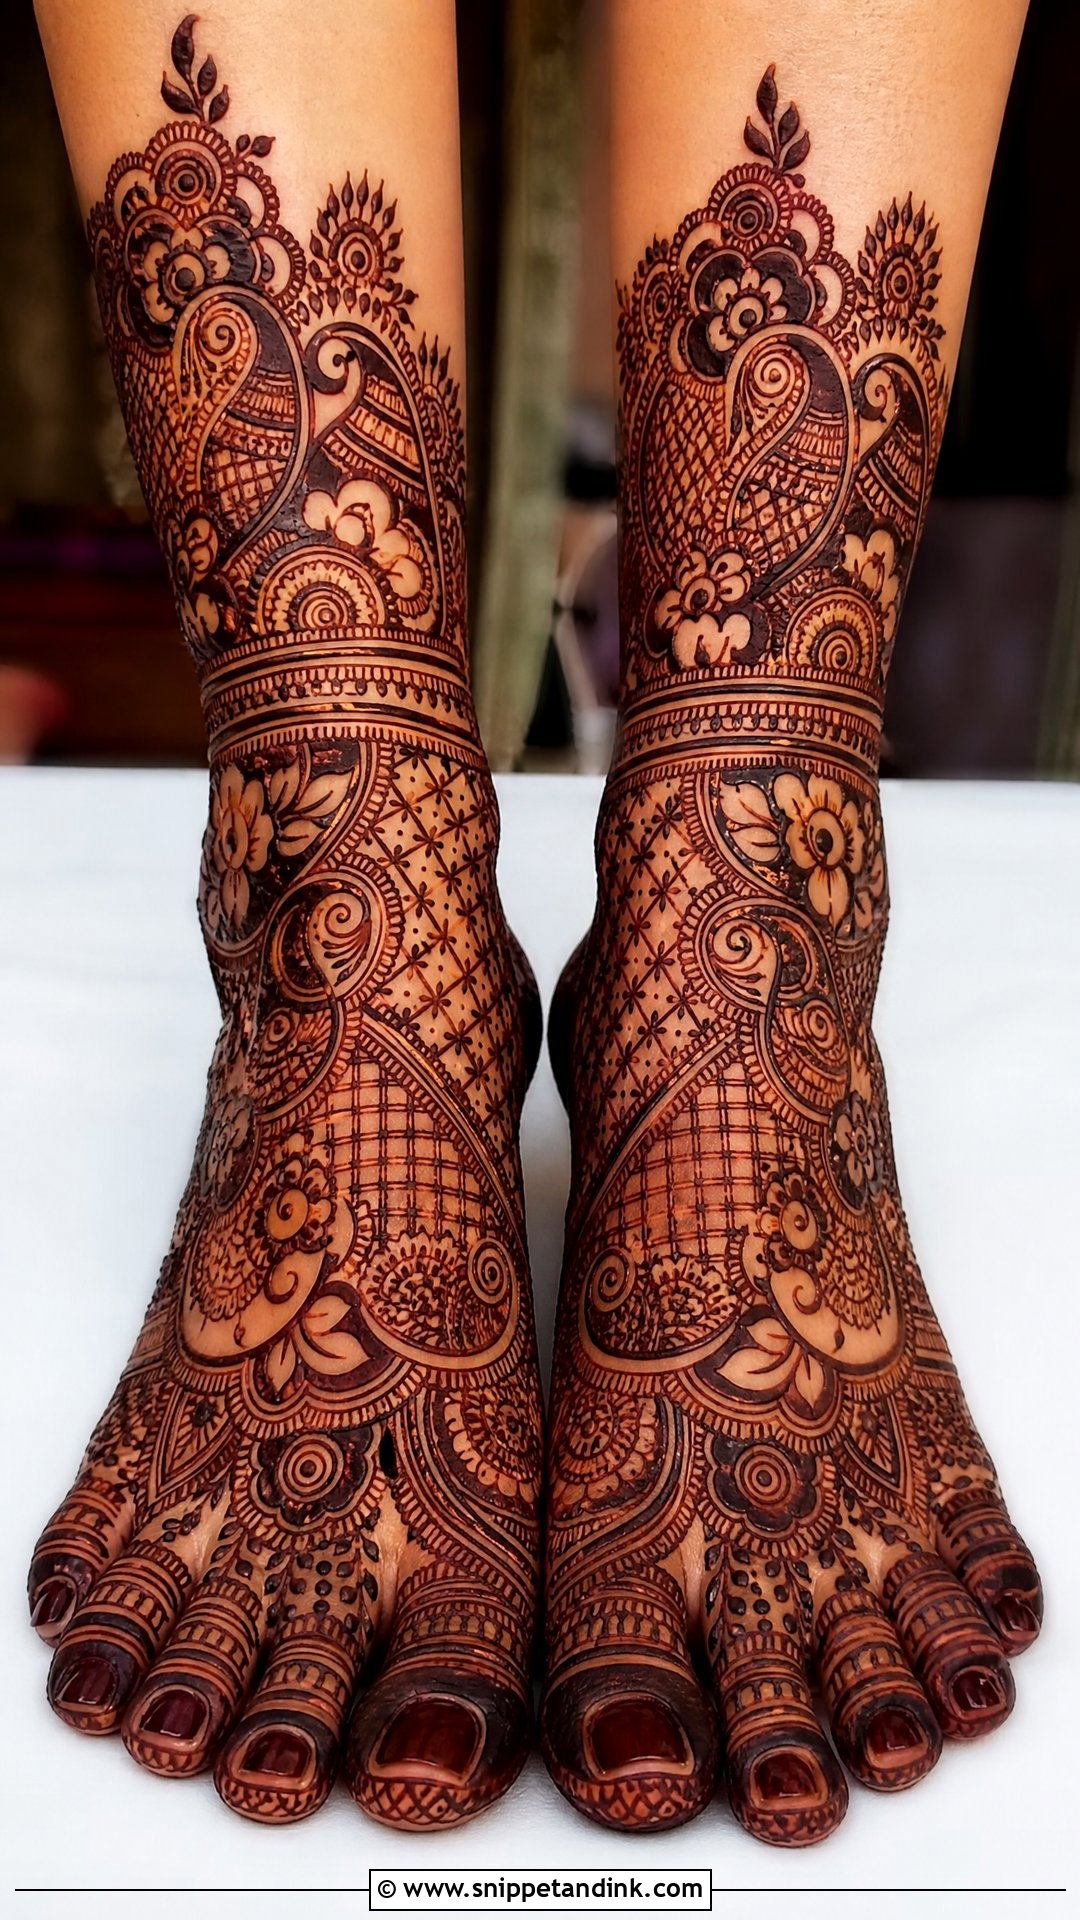
Heavy coverage means layered paisleys, filled florals, peacocks, mandalas and mesh panels across most of the foot, often onto the ankles and calves. With this much fill, uneven lines show immediately, so the artist’s steadiness matters more than the pattern you choose. Ask to see photos of finished stains on feet, not only fresh paste. Keep the toe tips and ankle borders crisp. Heavy foot work also needs the longest drying time on this list, so plan to stay seated well after the last line.
19. Side Feet Bridal Mehndi Design
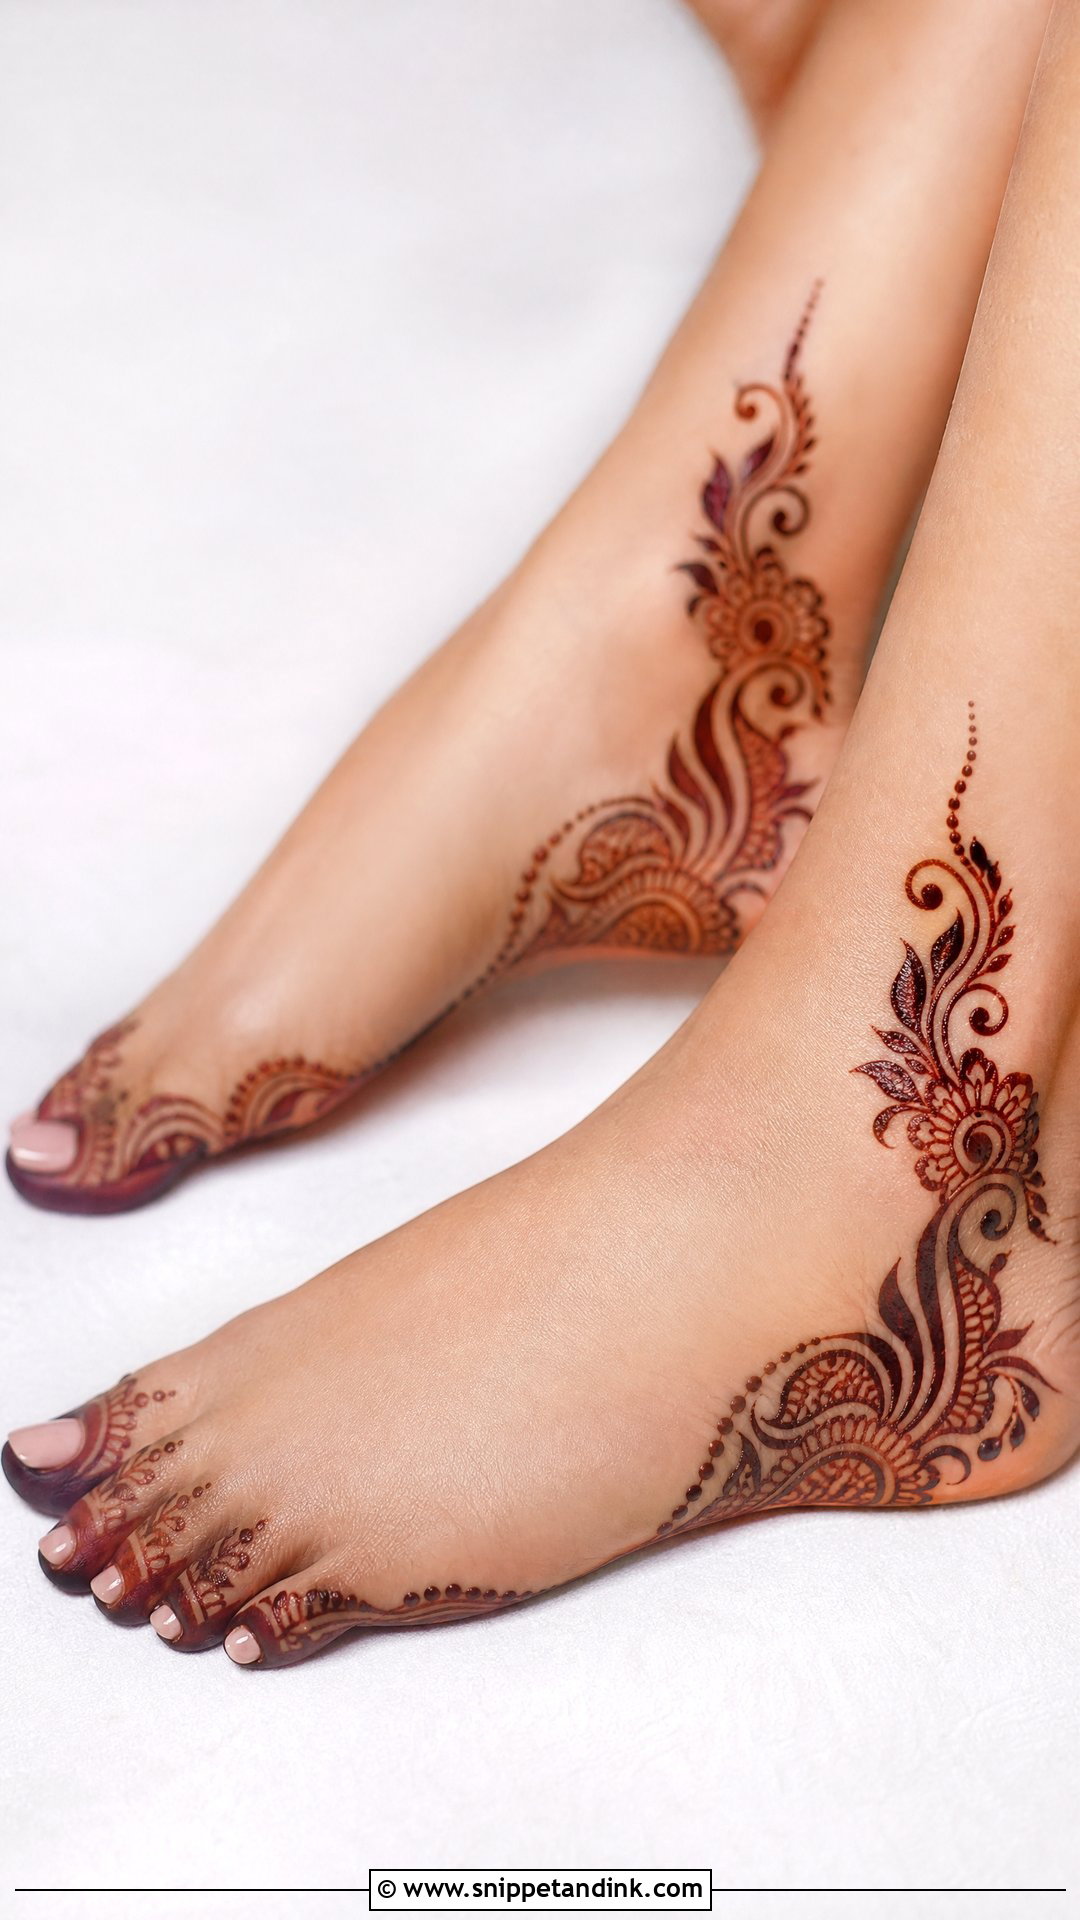
Instead of covering the top of the foot, this pattern flows along the inner or outer edge, from the toes toward the ankle, in vines, florals or slim borders. It suits shoes with cut-out sides or strappy heels that hide the instep. I follow the curve of the arch rather than drawing a straight line, which makes the foot look slimmer. Decorate the toes and add a small ankle detail so the side trail doesn’t look like a fragment.
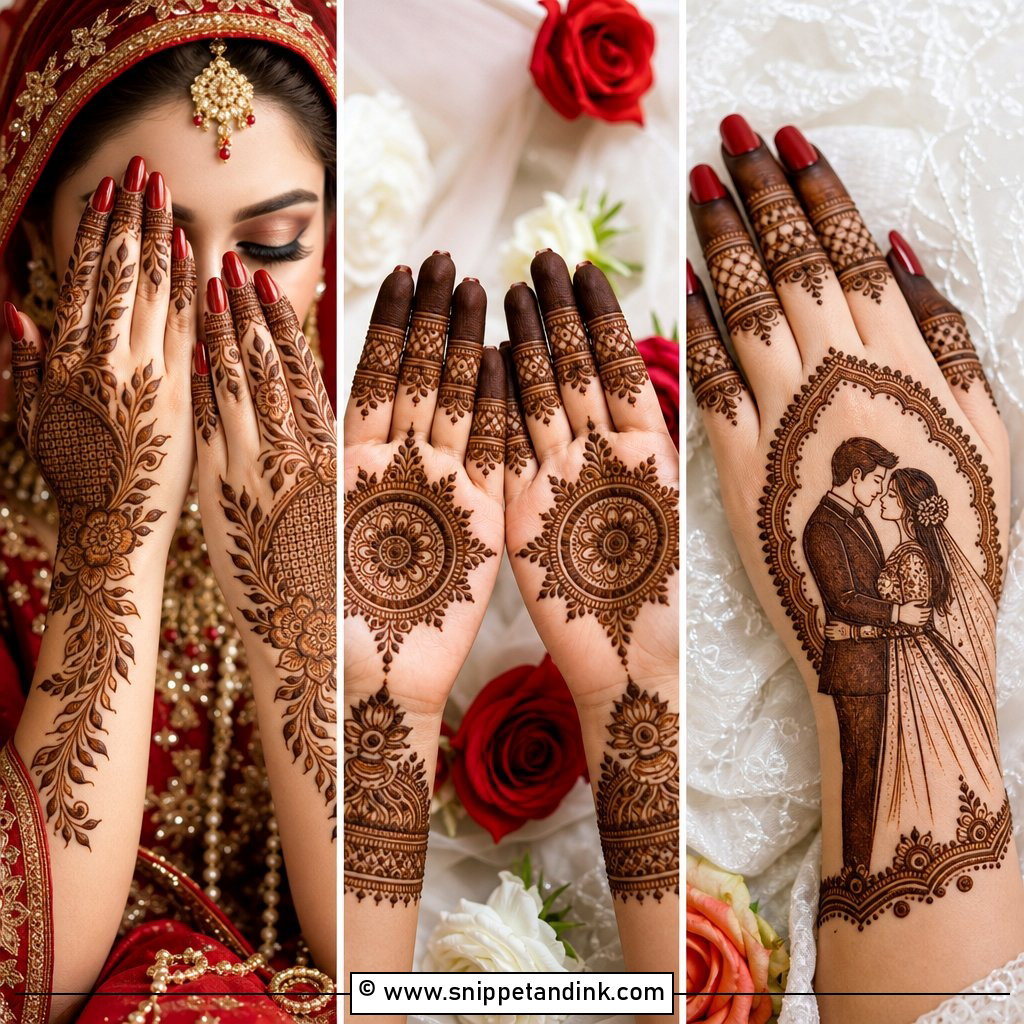
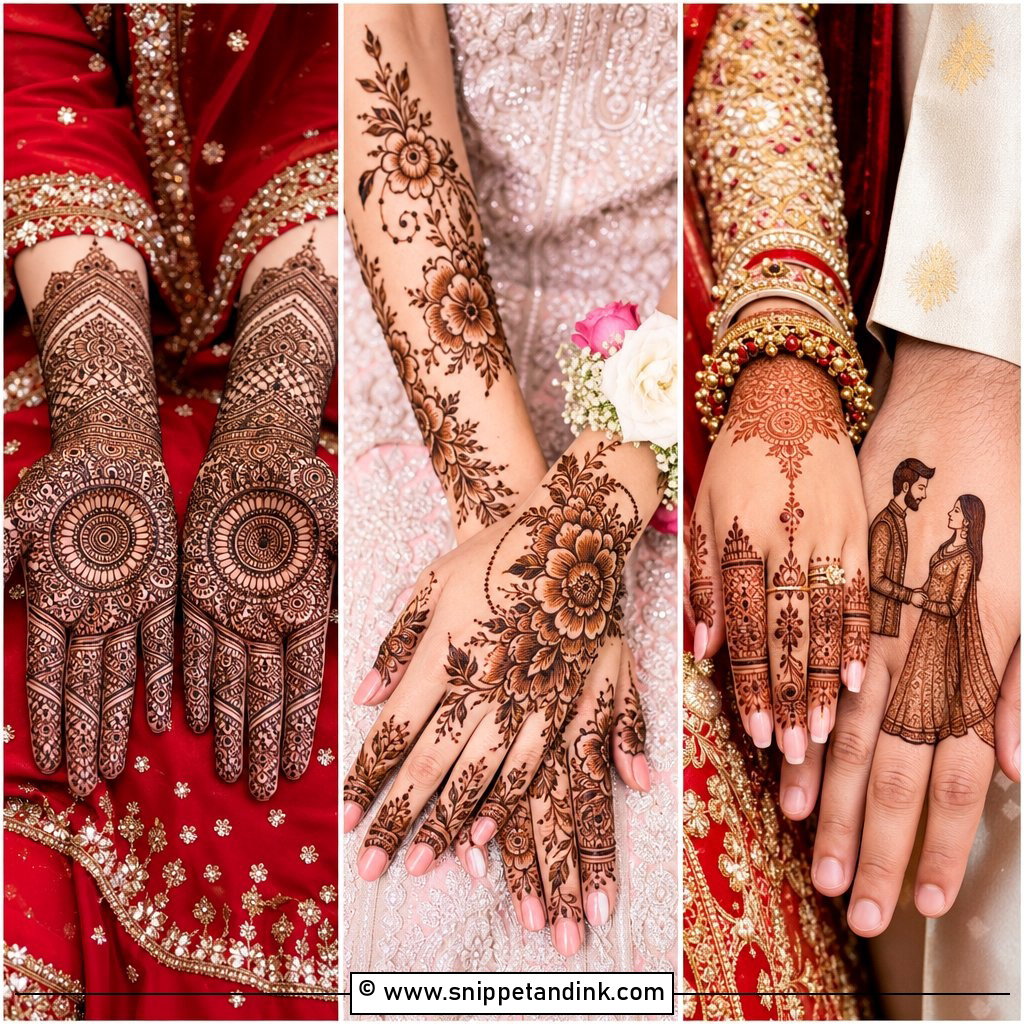
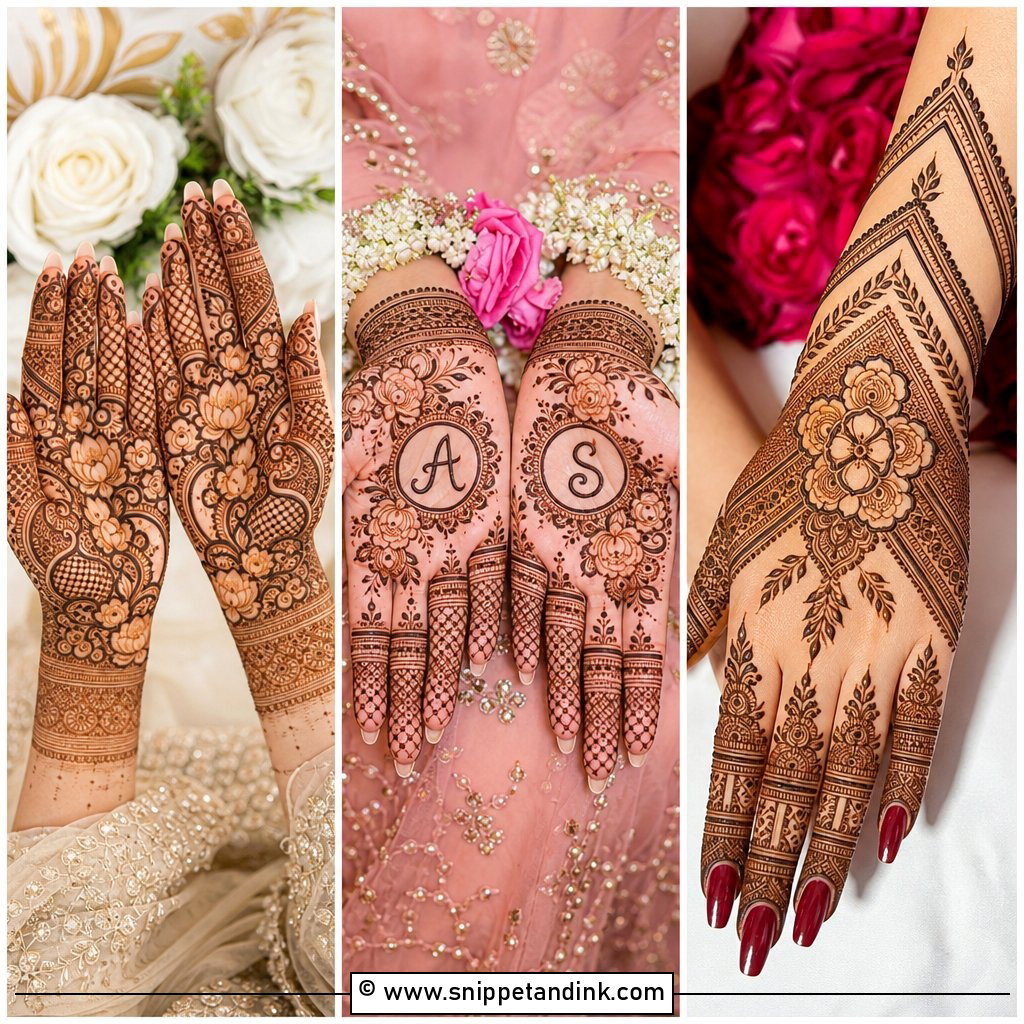
20. Leg And Foot Bridal Mehndi Design
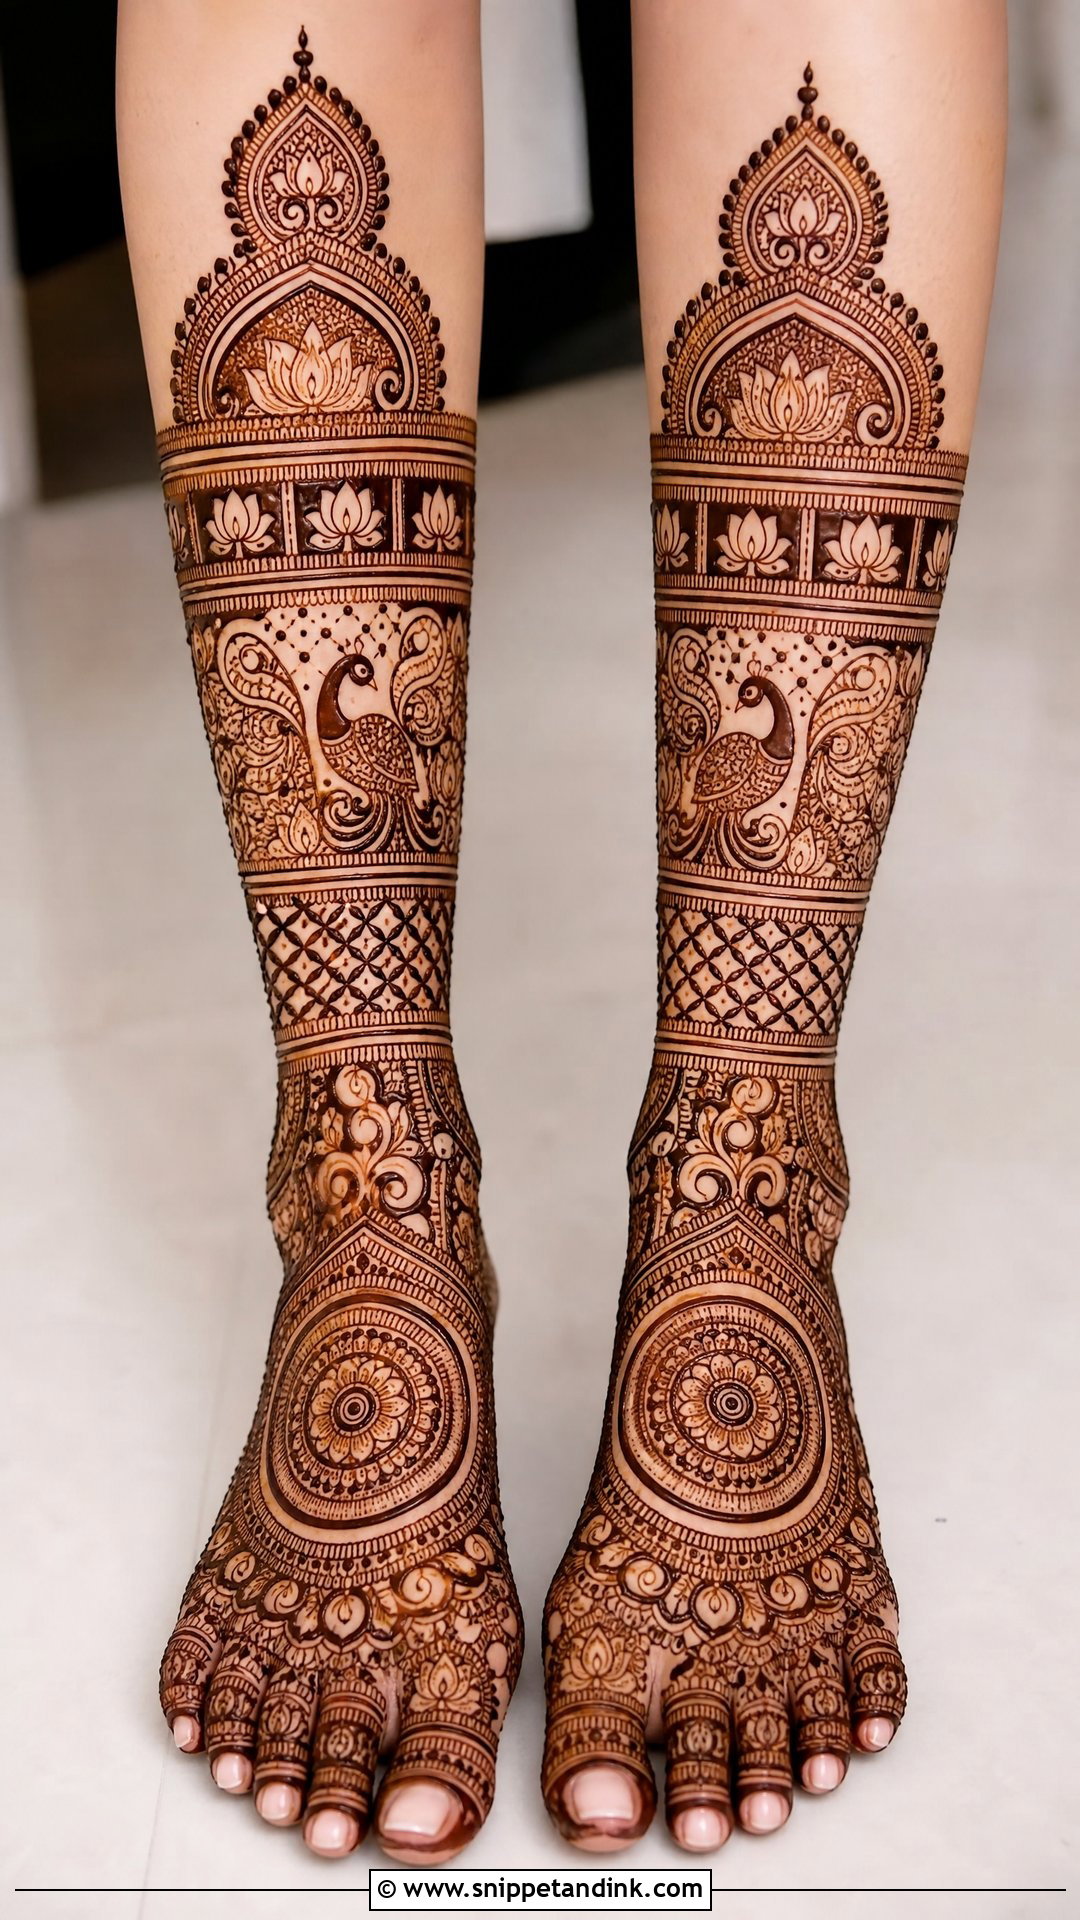
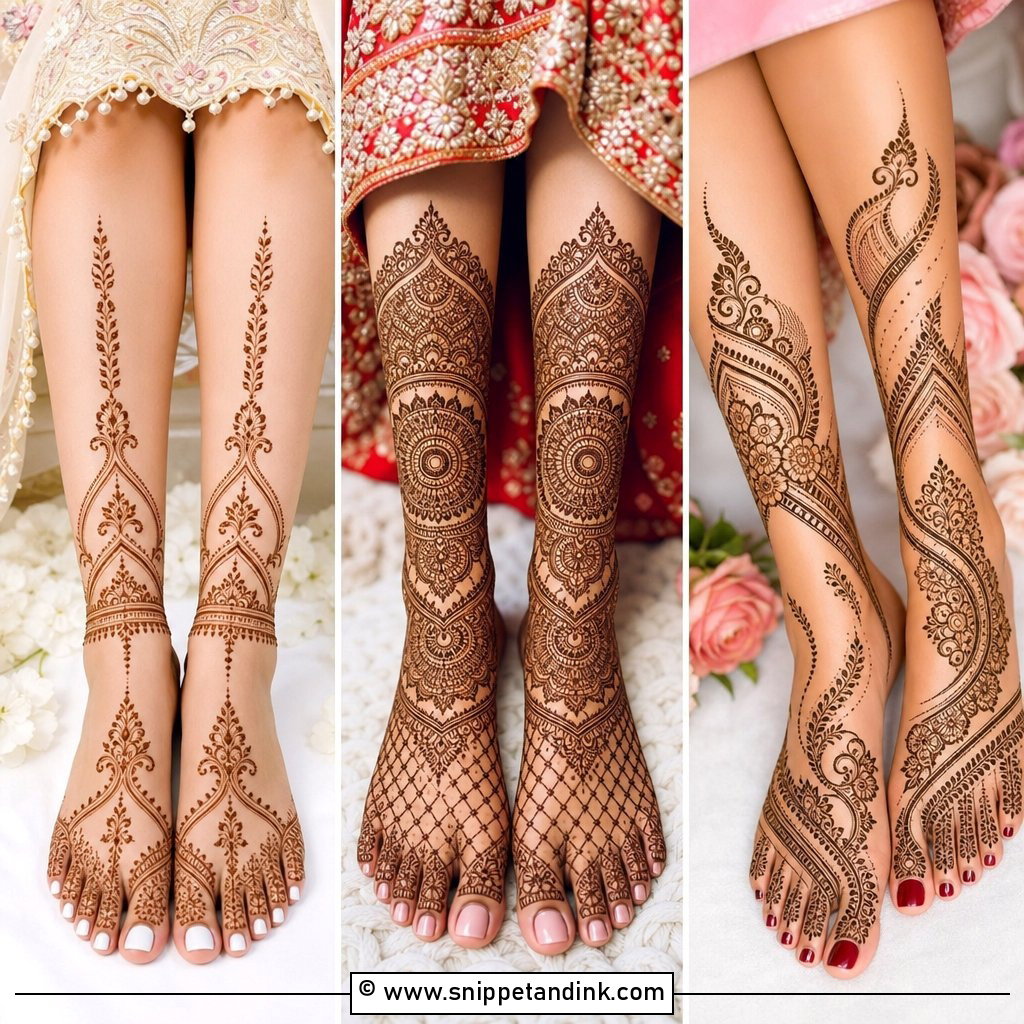
This is the most complete coverage: toes, foot, ankle wrap and lower leg, with mandalas, paisleys, peacocks, jaali and bold borders. Because the area is so large, I break it into clear bands, the foot, the ankle and the shin, rather than filling continuously, which keeps it from looking random and gives the eye places to rest. It’s the right call when your outfit shows the lower leg during the ceremony. Expect a long sitting and a long wait afterward.
Sitting Still, Sleeping and Walking With Fresh Paste on Your Feet
Feet are the hardest part of the session to protect, because you can’t do much without them. A few habits make a real difference to how the stain turns out.
- Book a pedicure and any waxing a few days before, never after. Scrubbing or soaking afterward strips the outer layer of skin that holds the colour.
- Have your feet done after your hands are dry enough to rest, or plan help for eating and the bathroom, since you won’t be able to walk for a while.
- Keep the paste on for as long as you comfortably can, ideally overnight. Wrap the dried paste loosely or wear cotton socks to bed so it doesn’t flake onto the sheets.
- Avoid water on your feet for the first several hours after the paste is removed. Scrape it off with a blunt edge rather than washing it.
- Warmth helps the stain develop, so stay out of cold rooms and don’t stand on cold marble floors barefoot that first evening.
What Fades First and How to Make It Last Through the Celebrations
The toes and the side of the foot that rubs against your shoes fade first, often within the first week, while the ankle and instep hold longer. Tight straps and closed shoes speed that up. If you have several events after the wedding, pick sandals that touch the design as little as possible and moisturise the feet daily with a plain balm or natural oil. Chlorine pools and exfoliating scrubs are the quickest way to lose it.
Feet Finish the Bridal Look, So Give Them Their Own Sitting
Your outfit, how long you’ll be on your feet and how much coverage you can sit still for will decide most of this. Full and heavy designs read grand, while Arabic, minimal and anklet layouts stay lighter. Mandalas, florals, jaali, lotus, peacocks and Moroccan geometry each change the mood. Before you book, save a few clear photos and decide how far you want the design to go across the toes, feet, ankles, and legs. Then protect the drying time, because that is what decides how dark the stain comes up.
You'll Like These Ideas:


Leave a Reply