
Leg mehndi is the part of bridal henna most brides think about last, and it is often the part that shows up most in the photos: on the stage steps, in the seated pheras shots, in every close-up of payal and toe rings. A design on the feet and legs has to sit around jewelry, survive hours of walking and still read clearly from a few feet away. Below are twenty leg designs I’d actually put on a bride, from full Indian coverage to open Arabic trails and small ankle work, with notes on how each one stains, who it suits and where it tends to go wrong.
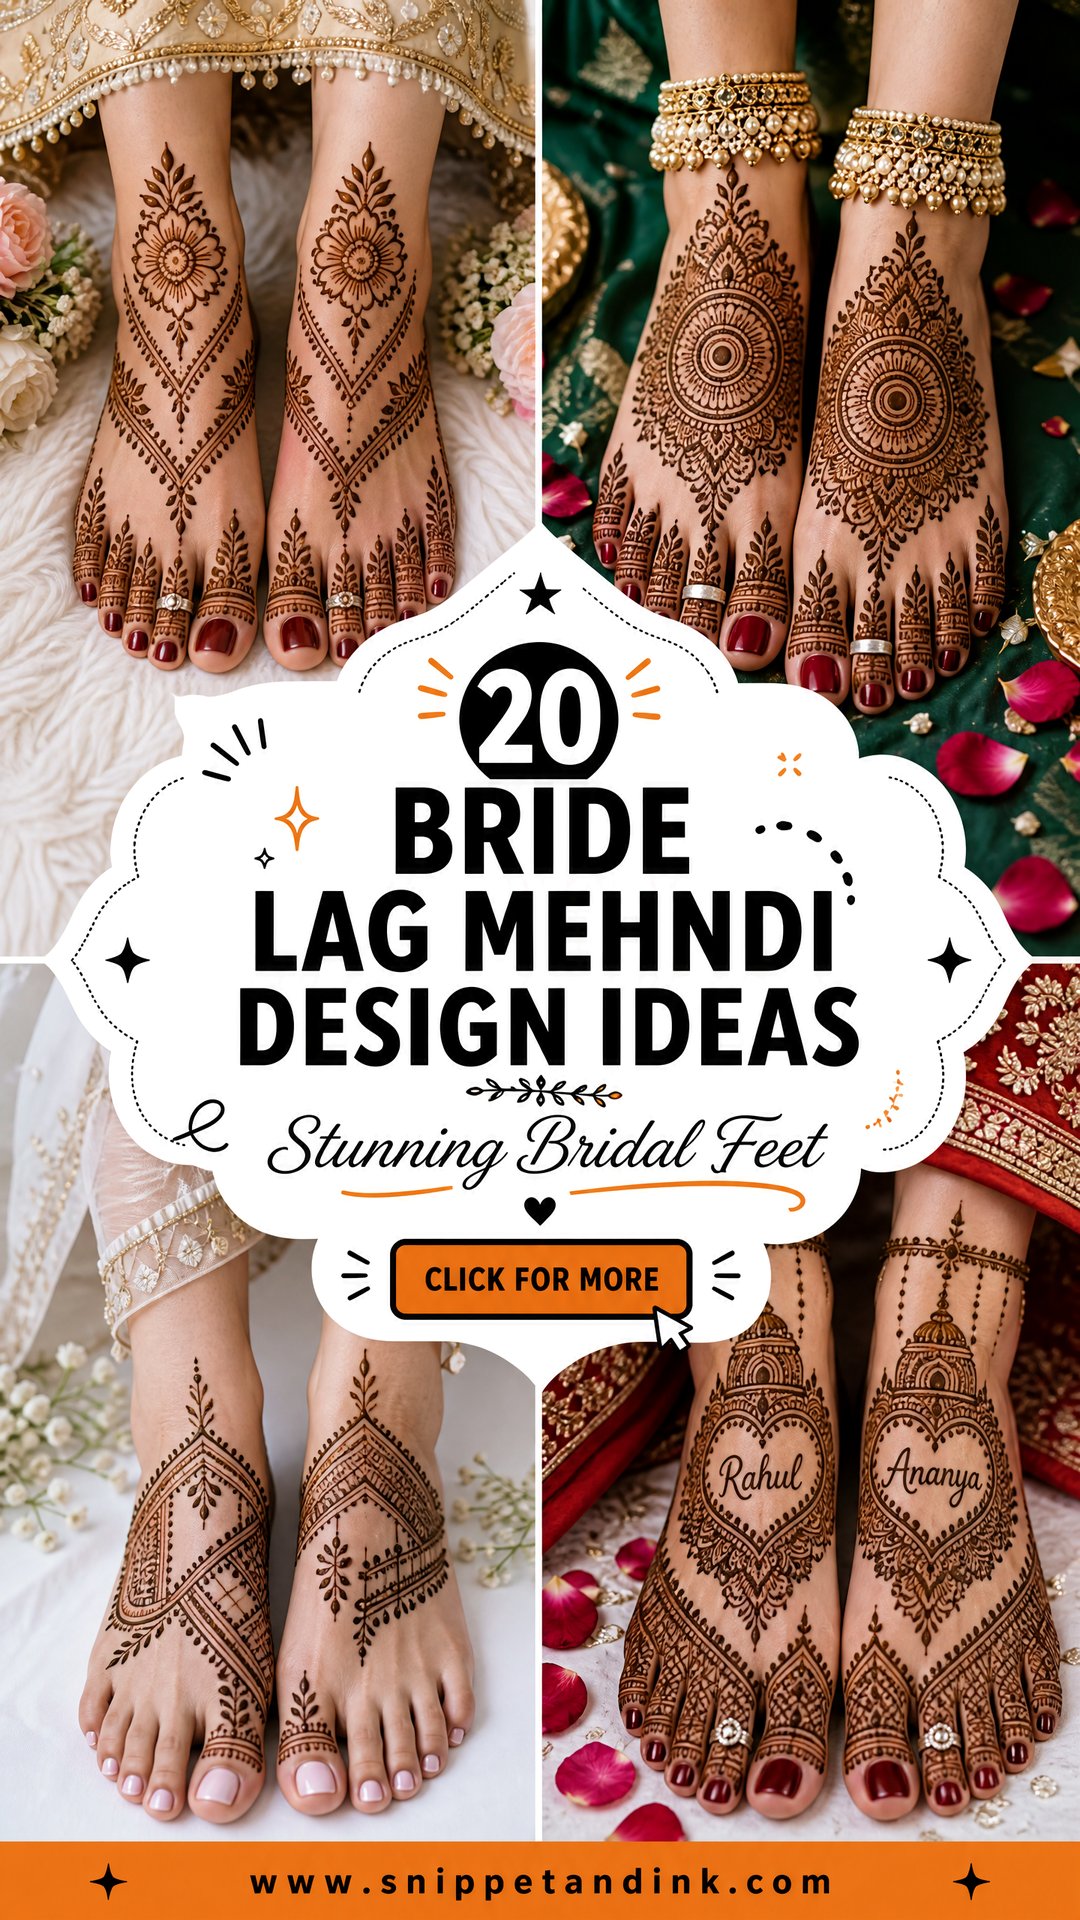
Planning the Leg Mehndi Sitting Around Your Wedding Week
Leg mehndi takes longer than most brides expect. A simple foot and ankle design can be done in under an hour, but full coverage to the knee on both legs is a multi-hour sitting, and it is usually booked alongside the hands. I like the application to happen one to two days before the main ceremony. Henna paste comes off orange and keeps darkening for roughly 24 to 48 hours, so a sitting the night before the wedding often means you walk down the aisle before the colour has peaked.
- Shave or wax your legs a day or two before, never after. Hair removal on a fresh stain lifts colour, and freshly waxed skin can sting under paste.
- Skip lotions and oils on the legs that morning so the paste grips clean skin.
- Wear loose shorts or a long open skirt to the appointment; jeans will smudge the design the moment you stand.
- Plan where you will sleep. Feet move a lot at night, so loosely wrapped cotton socks or a sheet over the paste saves the design.
1. Full Leg Bridal Mehndi Design
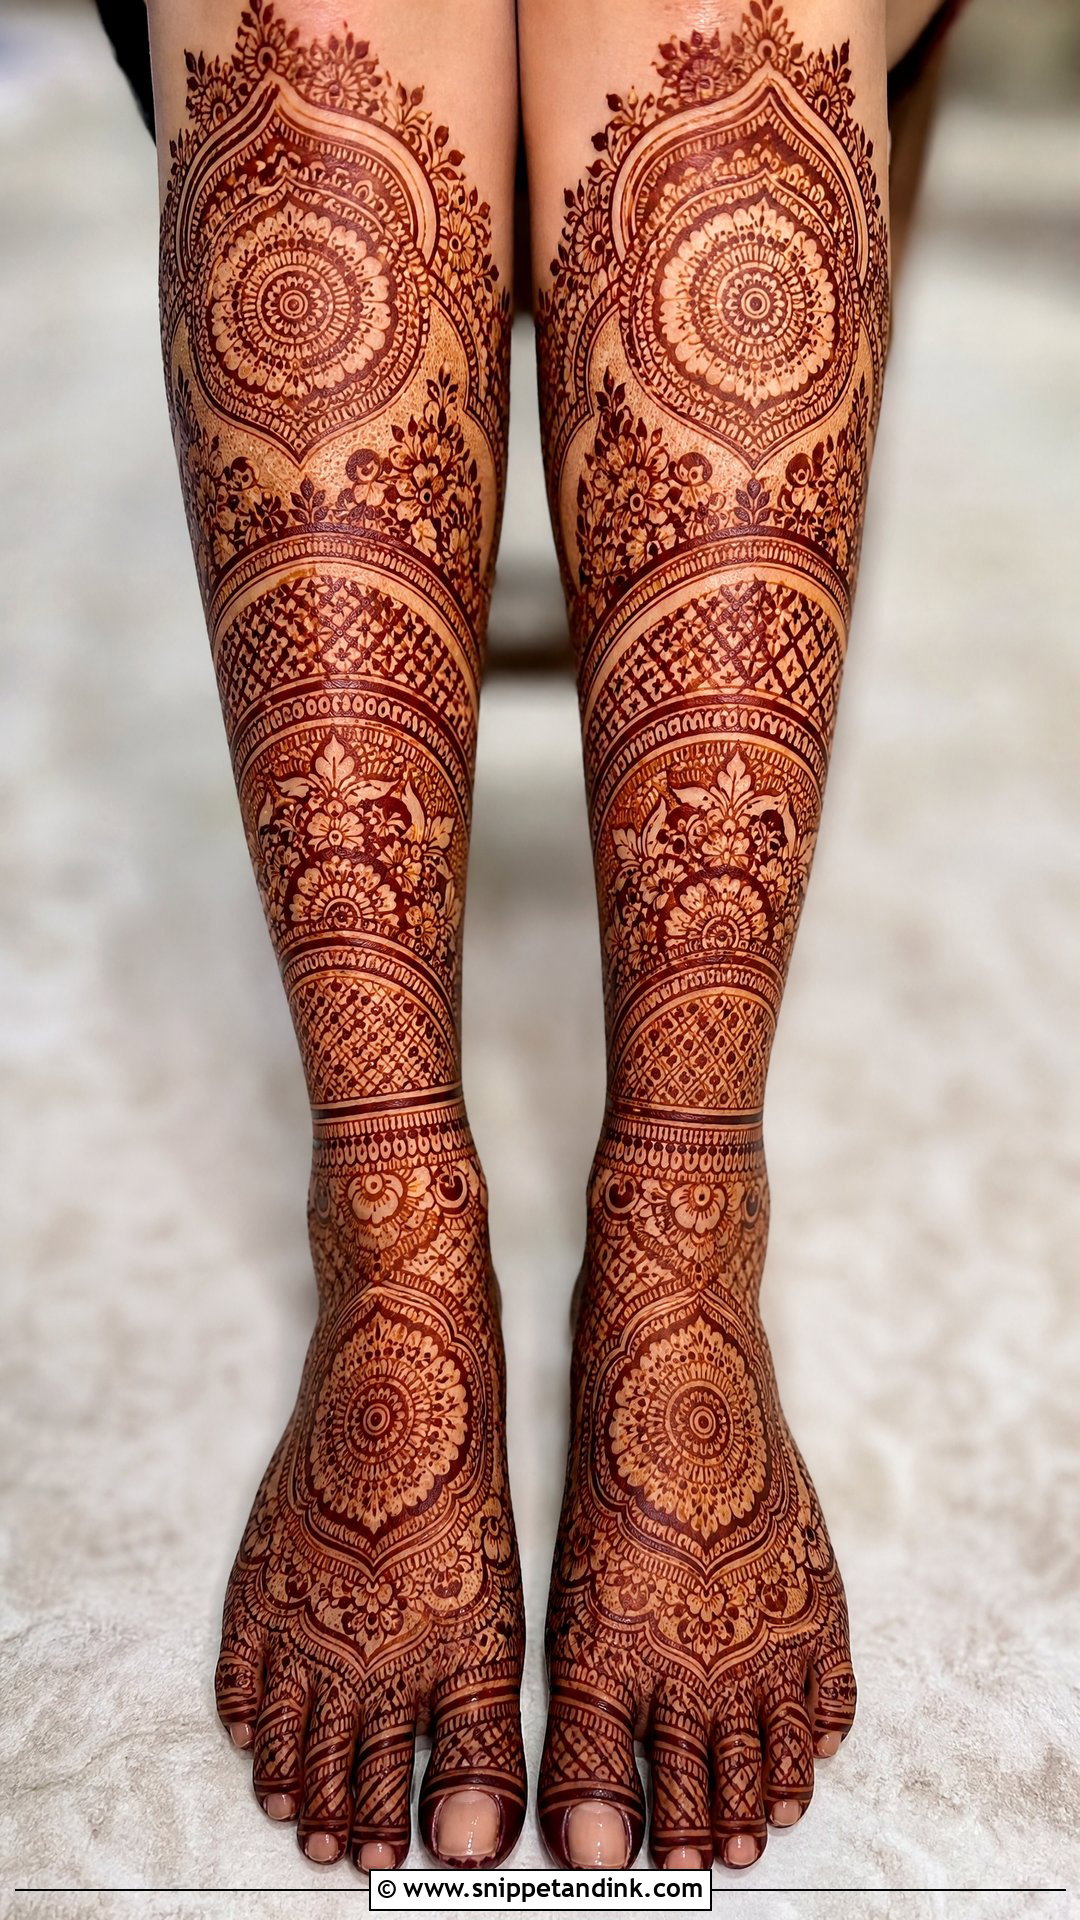
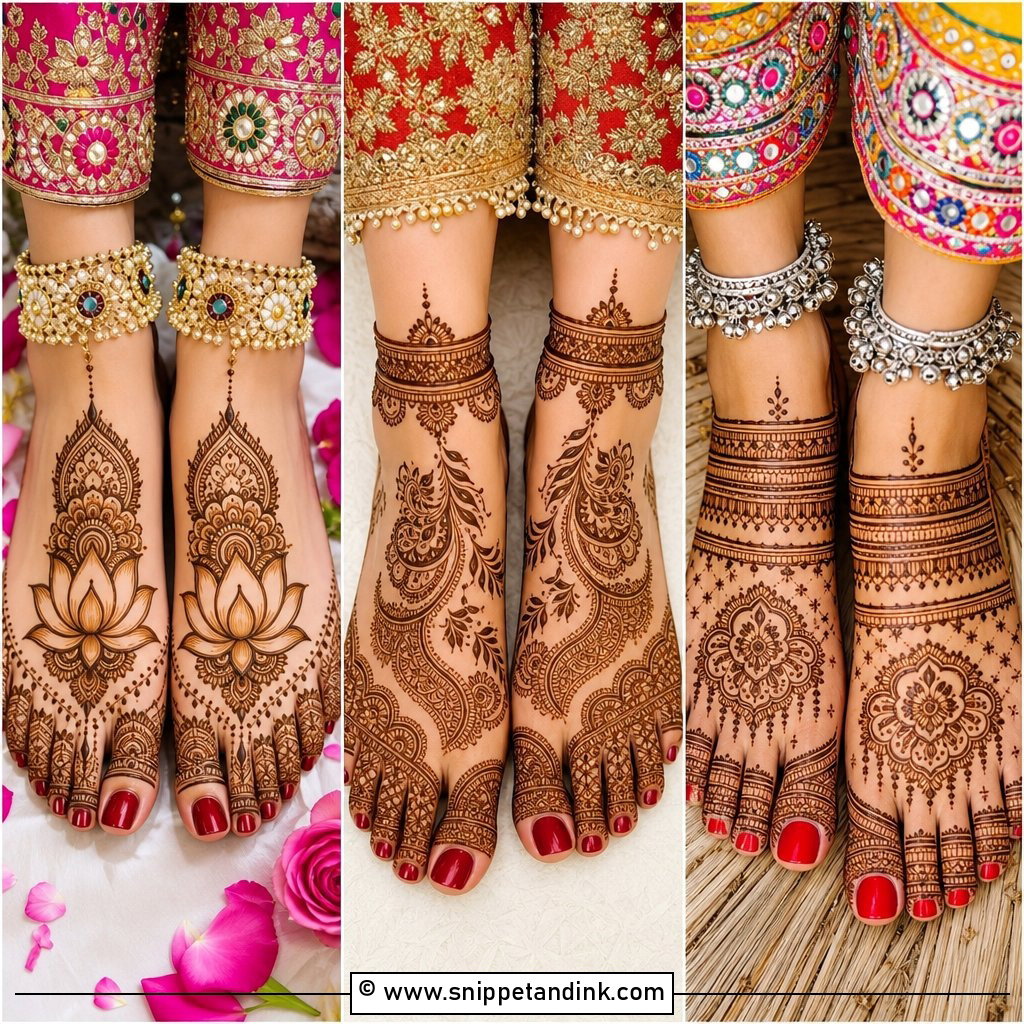
Full coverage runs from the toes over the foot, wraps the ankle and climbs to the calf or the knee. On a full leg I lay out the mandala on the top of the foot first, then the paisley border at the ankle, and only then the jaali on the shin, because if the anchors are placed wrong the fillers can’t save it. Ask your artist to mirror the two legs from the same starting points. A bride who struggles to sit still for long stretches should think twice; this is the slowest design on the list, and smudges from shifting feet are hard to hide.
2. Indian Bridal Leg Mehndi Design
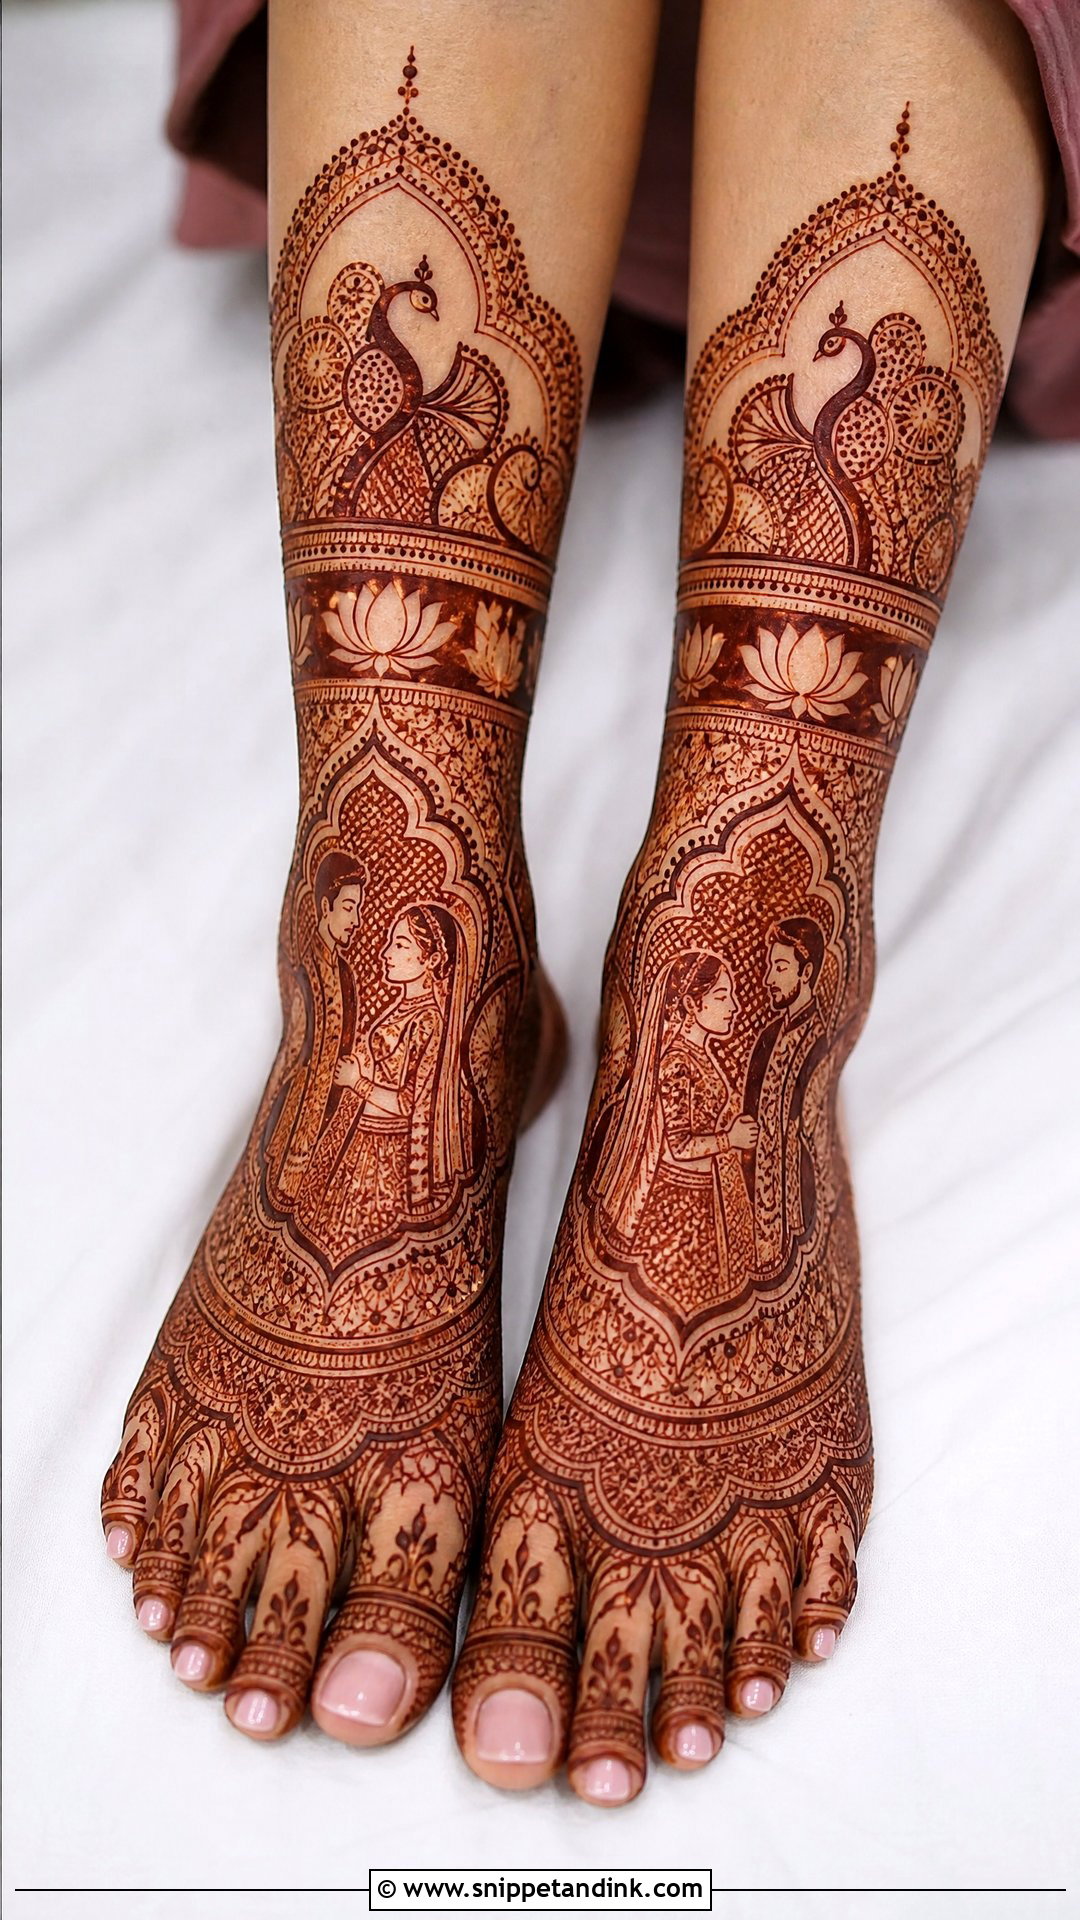
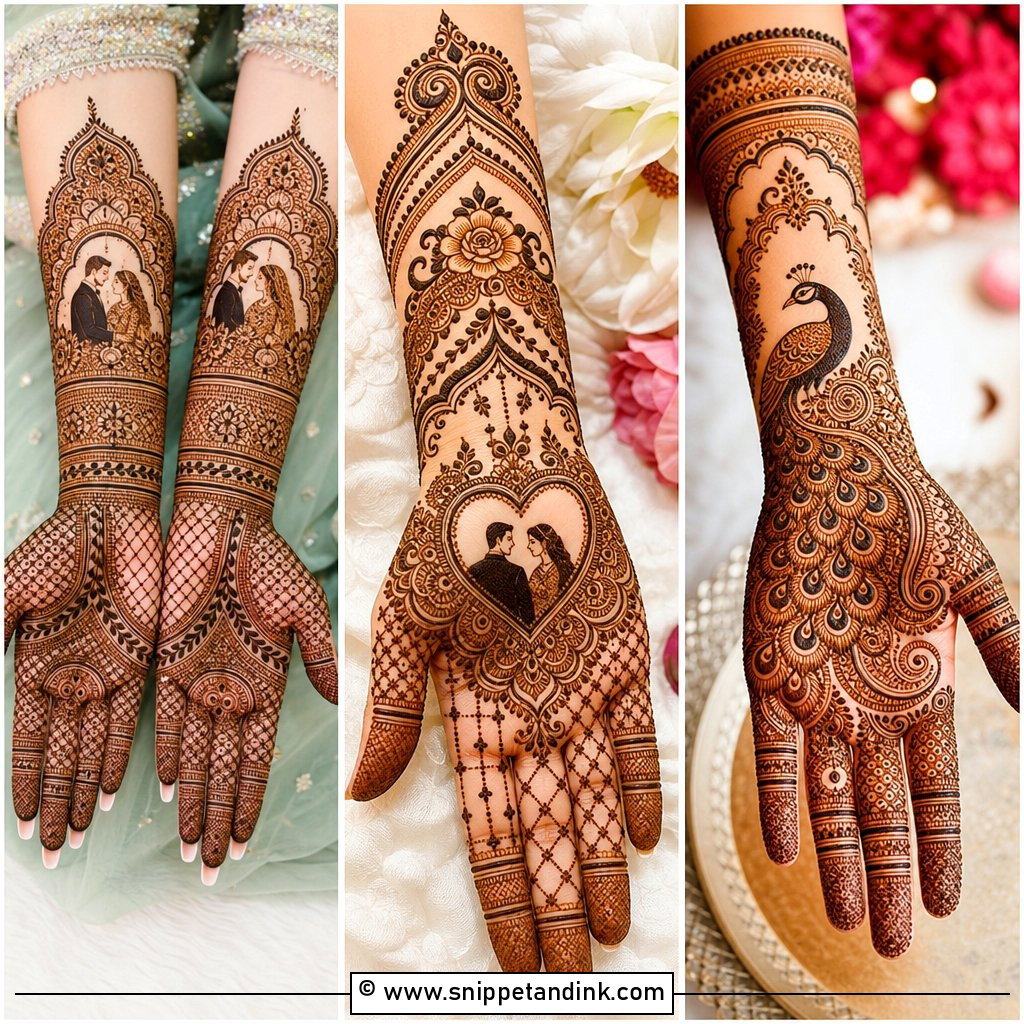
The traditional Indian version is dense and symbolic: peacocks, paisleys, lotus, bells, sometimes a small bride and groom, all tied together with heavy linework. I keep the finest motifs on the feet, where the stain comes out darkest, and put larger panels on the legs so they still read from across a room. The detail that matters most is the hairline gap between heavy sections. Without it, the paste bleeds together as it dries and you get a blotch instead of a pattern. It sits best under red, maroon or green outfits where the deep stain has something rich to answer.
3. Arabic Bridal Leg Mehndi Design
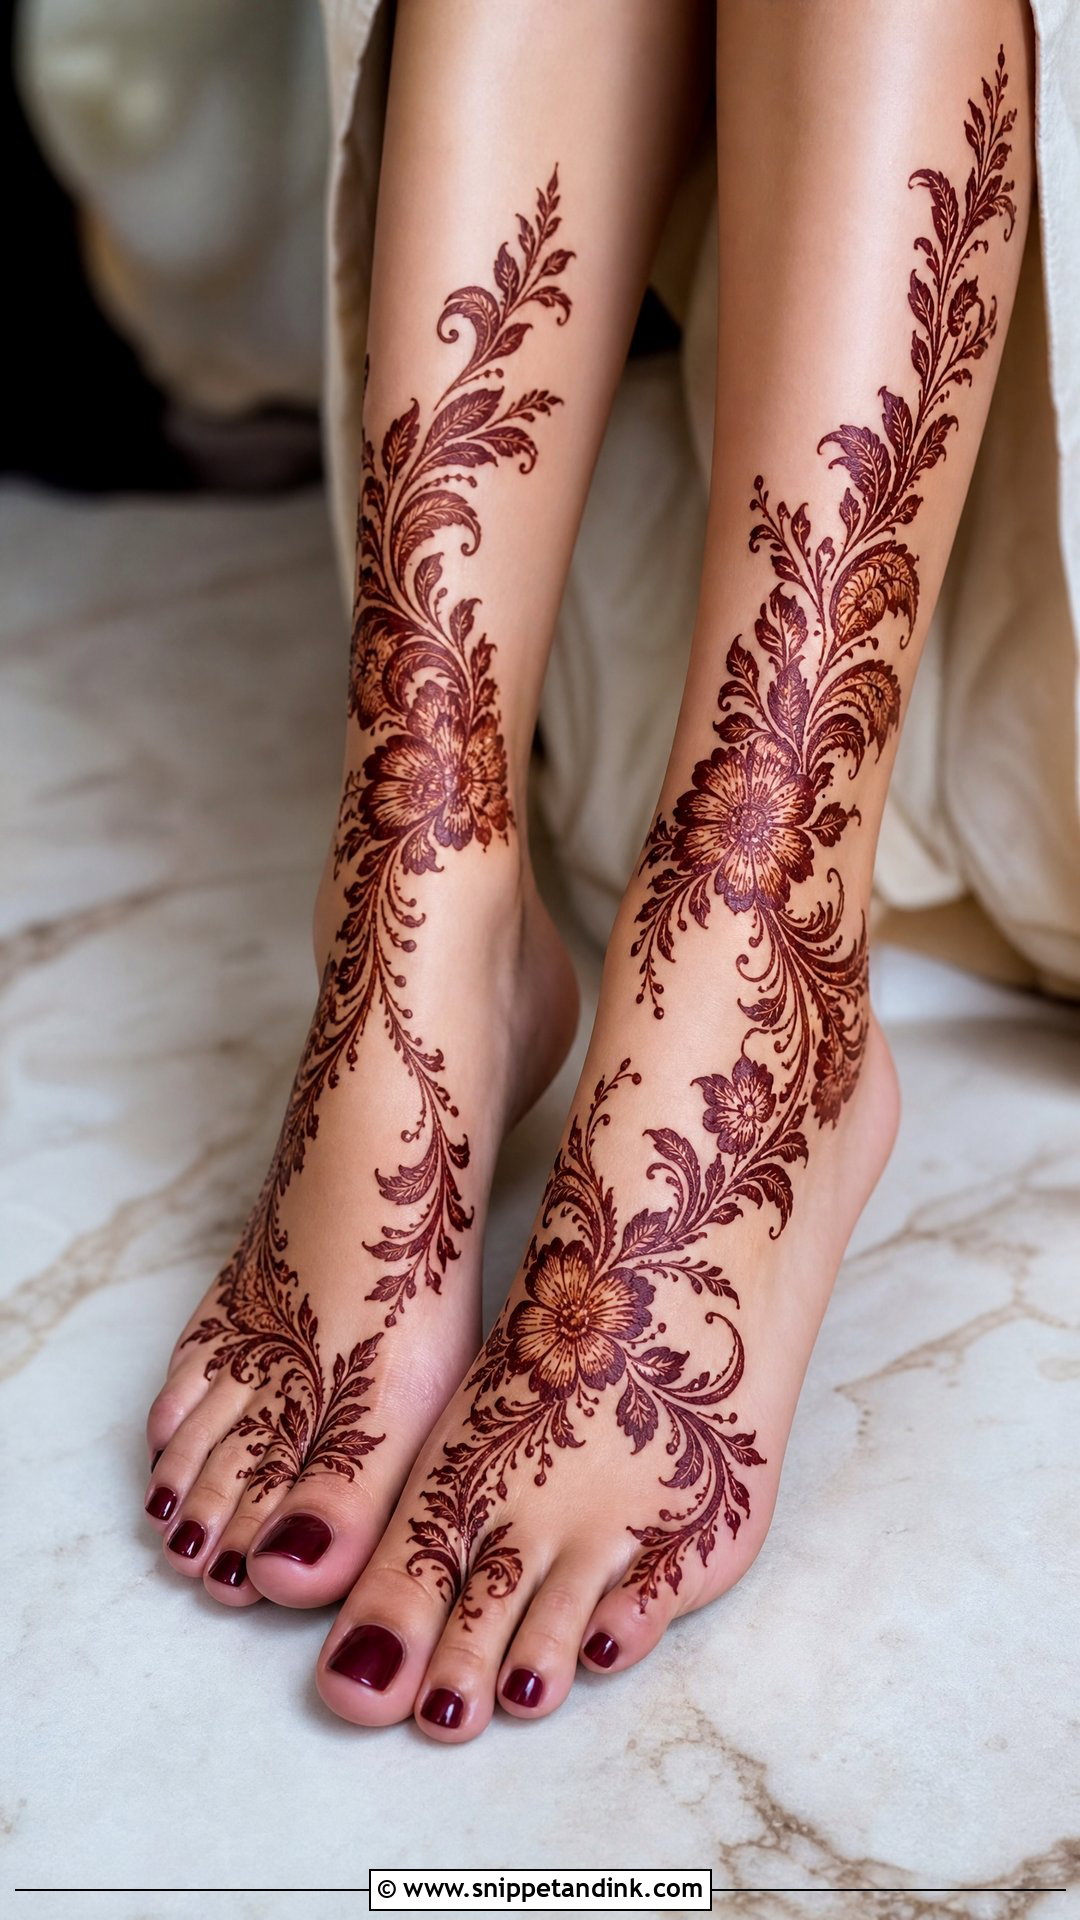
An Arabic bridal leg mehndi design leaves plenty of bare skin on purpose. Thick outlined flowers, leaves and paisley curves start at the toes, cross the foot, circle the ankle and run diagonally up the leg. The open spaces are what make the stain look crisp once it darkens. I often suggest this to brides who have very little time on the day of application, since a confident Arabic trail goes on far faster than packed Indian work. The one thing to watch: thick strokes need a slightly firmer cone so the outline doesn’t spread.
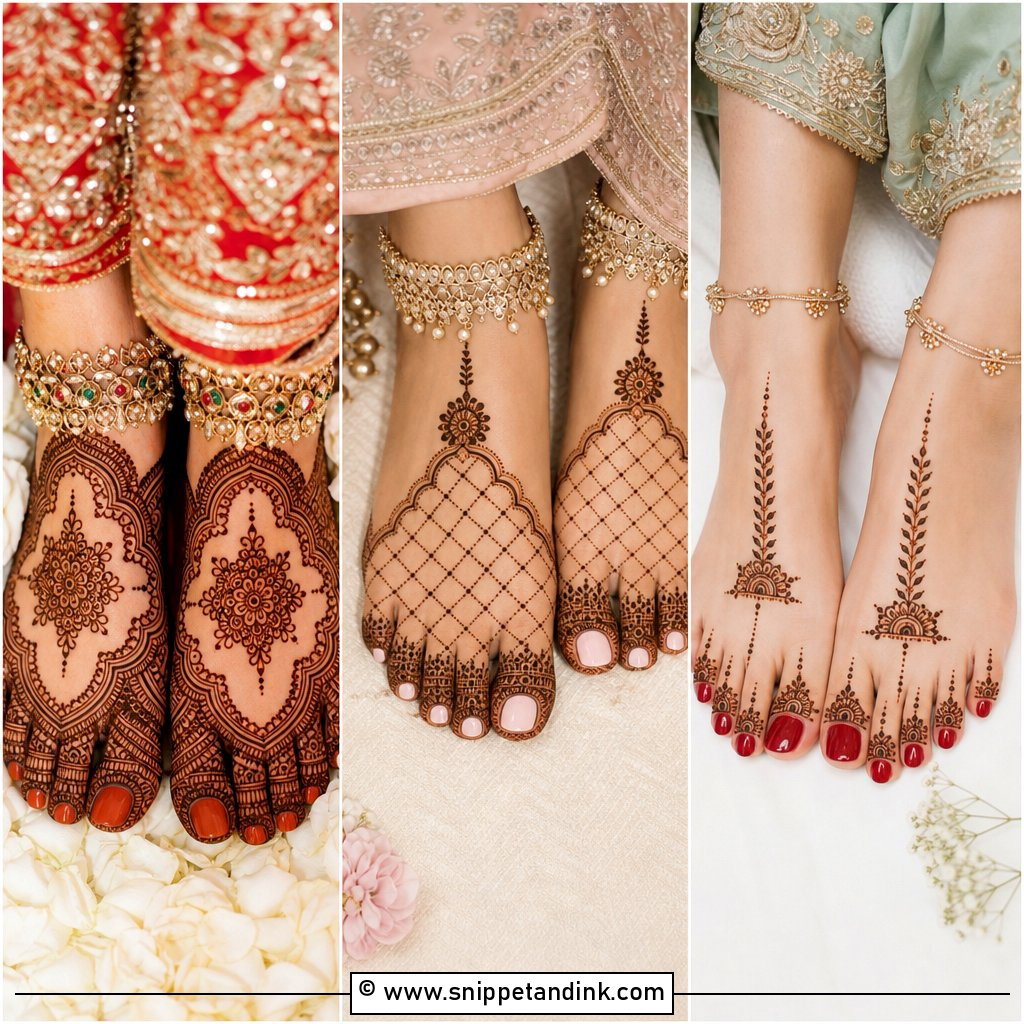
4. Indo Arabic Bridal Leg Mehndi Design
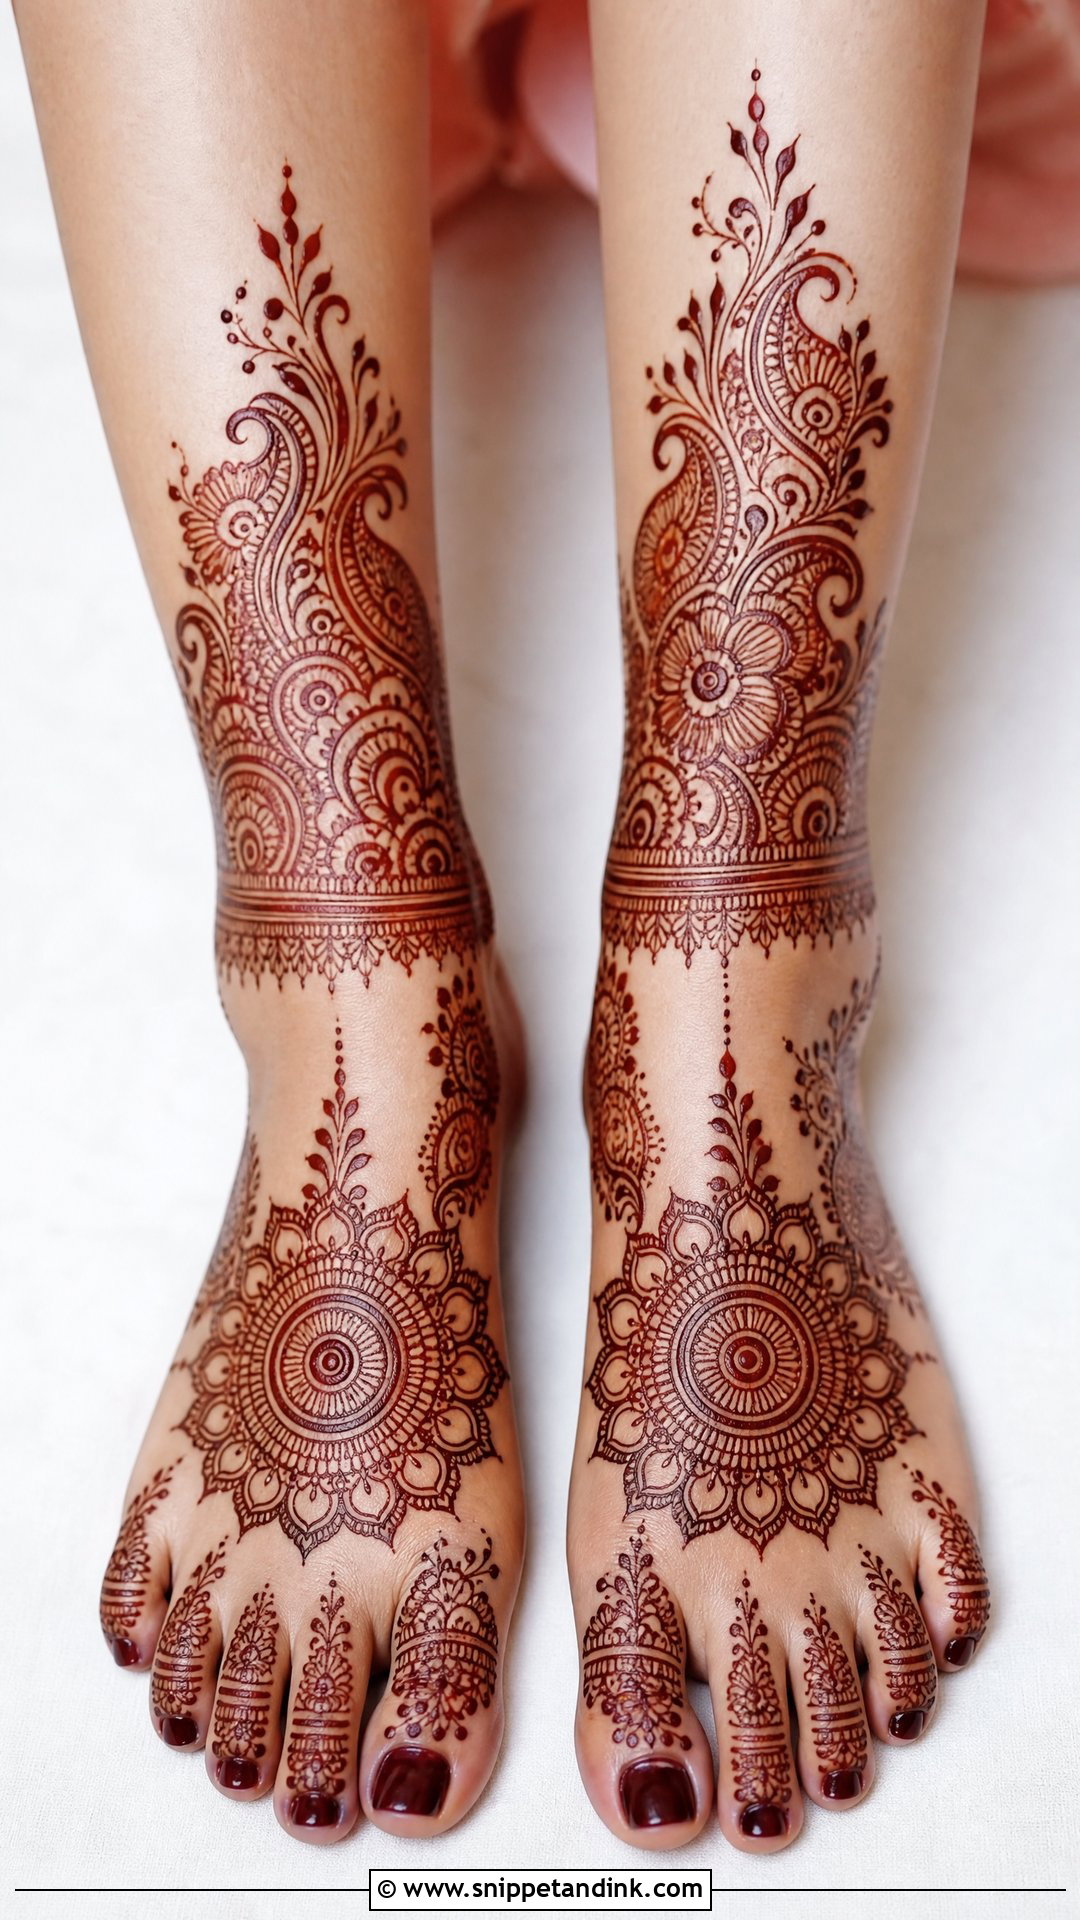
Indo Arabic is my usual answer for a bride who wants detail but hates the packed look. The feet carry the Indian side, with mandalas, dots and paisley fillers, and the legs switch to Arabic floral trails with bold outlines. That contrast between fine and bold reads well in photos. My one rule here is direction: both trails should travel the same way up the leg, otherwise the pair looks like two different artists did them. It works under a lehenga or a sharara equally well.
5. Simple Bridal Leg Mehndi Design
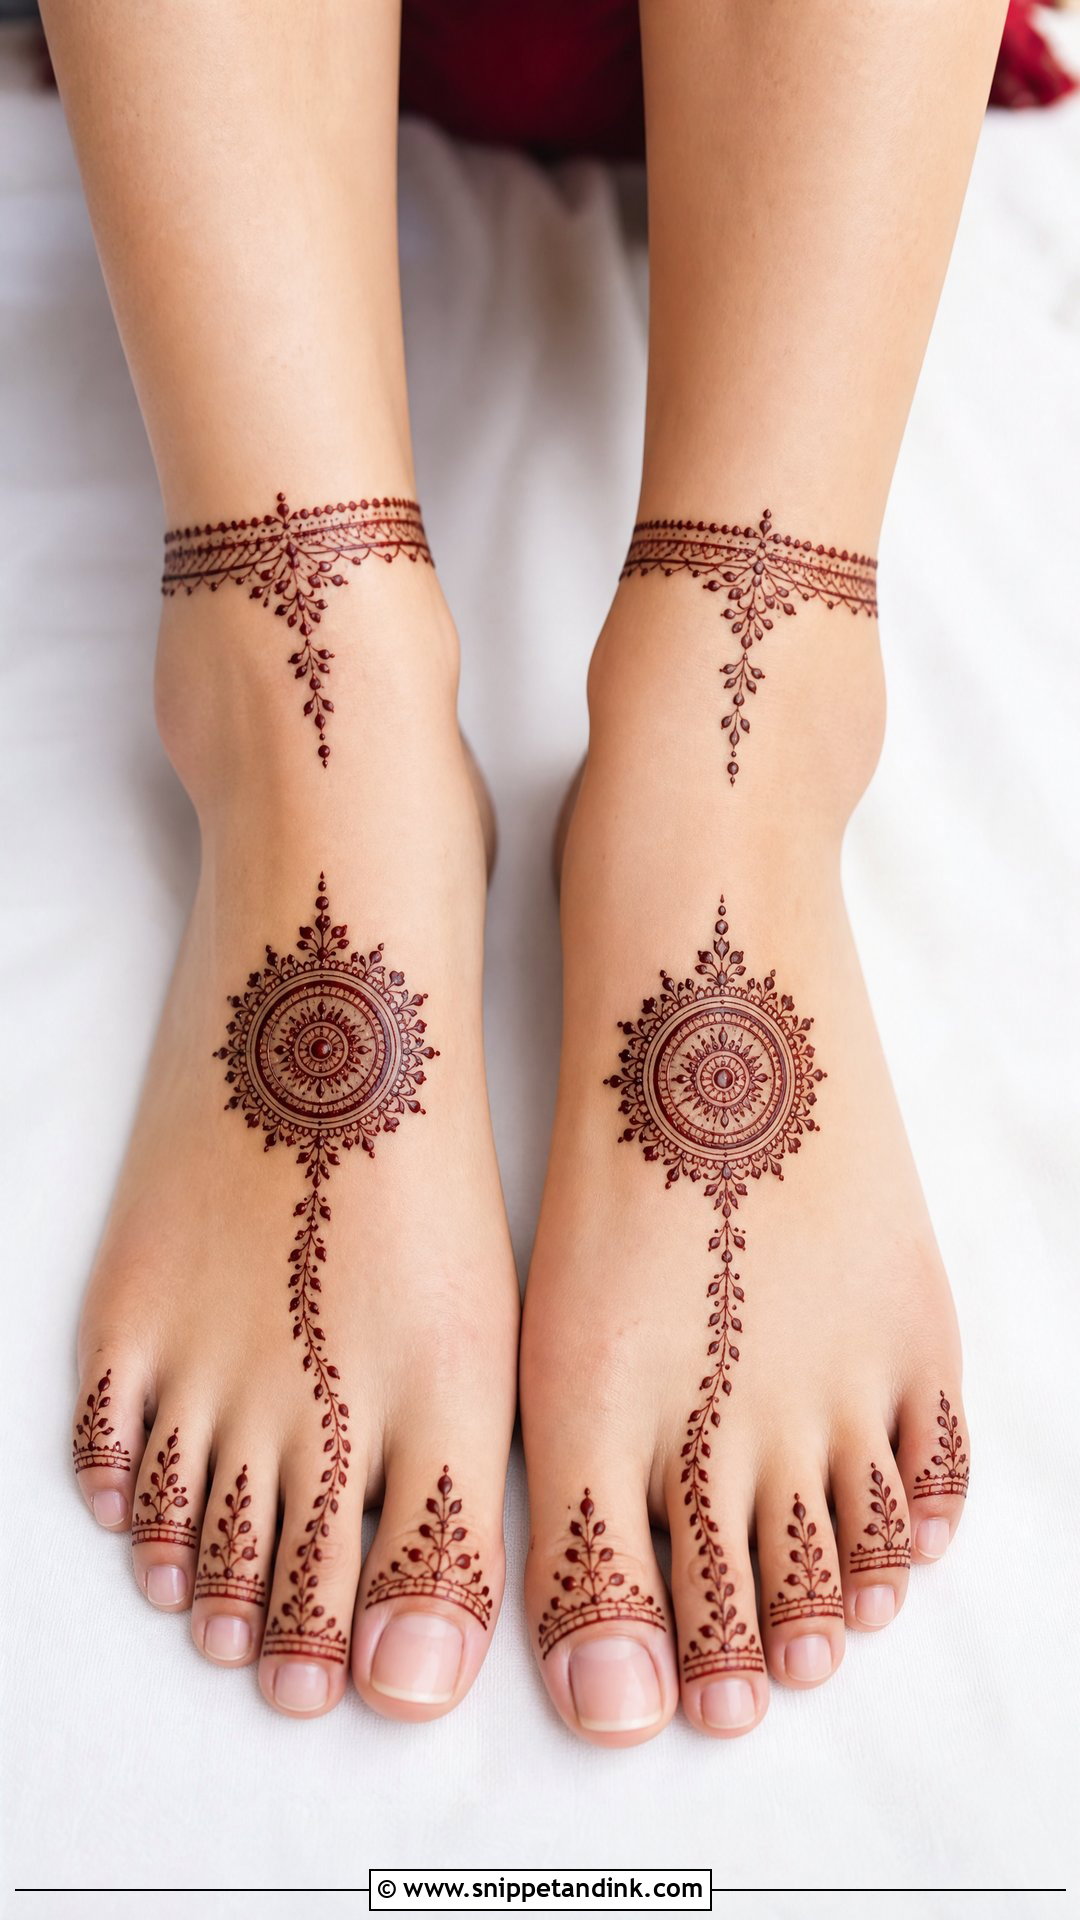
Not every bride wants heavy coverage on her legs. A simple layout might be one round mandala on the top of the foot, leaf detail on the toes, a thin ankle band and a short floral trail. Simple is less forgiving than it looks, though. With so little on the skin, a wobbly line or an uneven gap has nowhere to hide, so I take more care with spacing here than on a heavy design. This suits intimate weddings and second-day functions, and it leaves room for statement payal and sandals.
6. Heavy Bridal Leg Mehndi Design
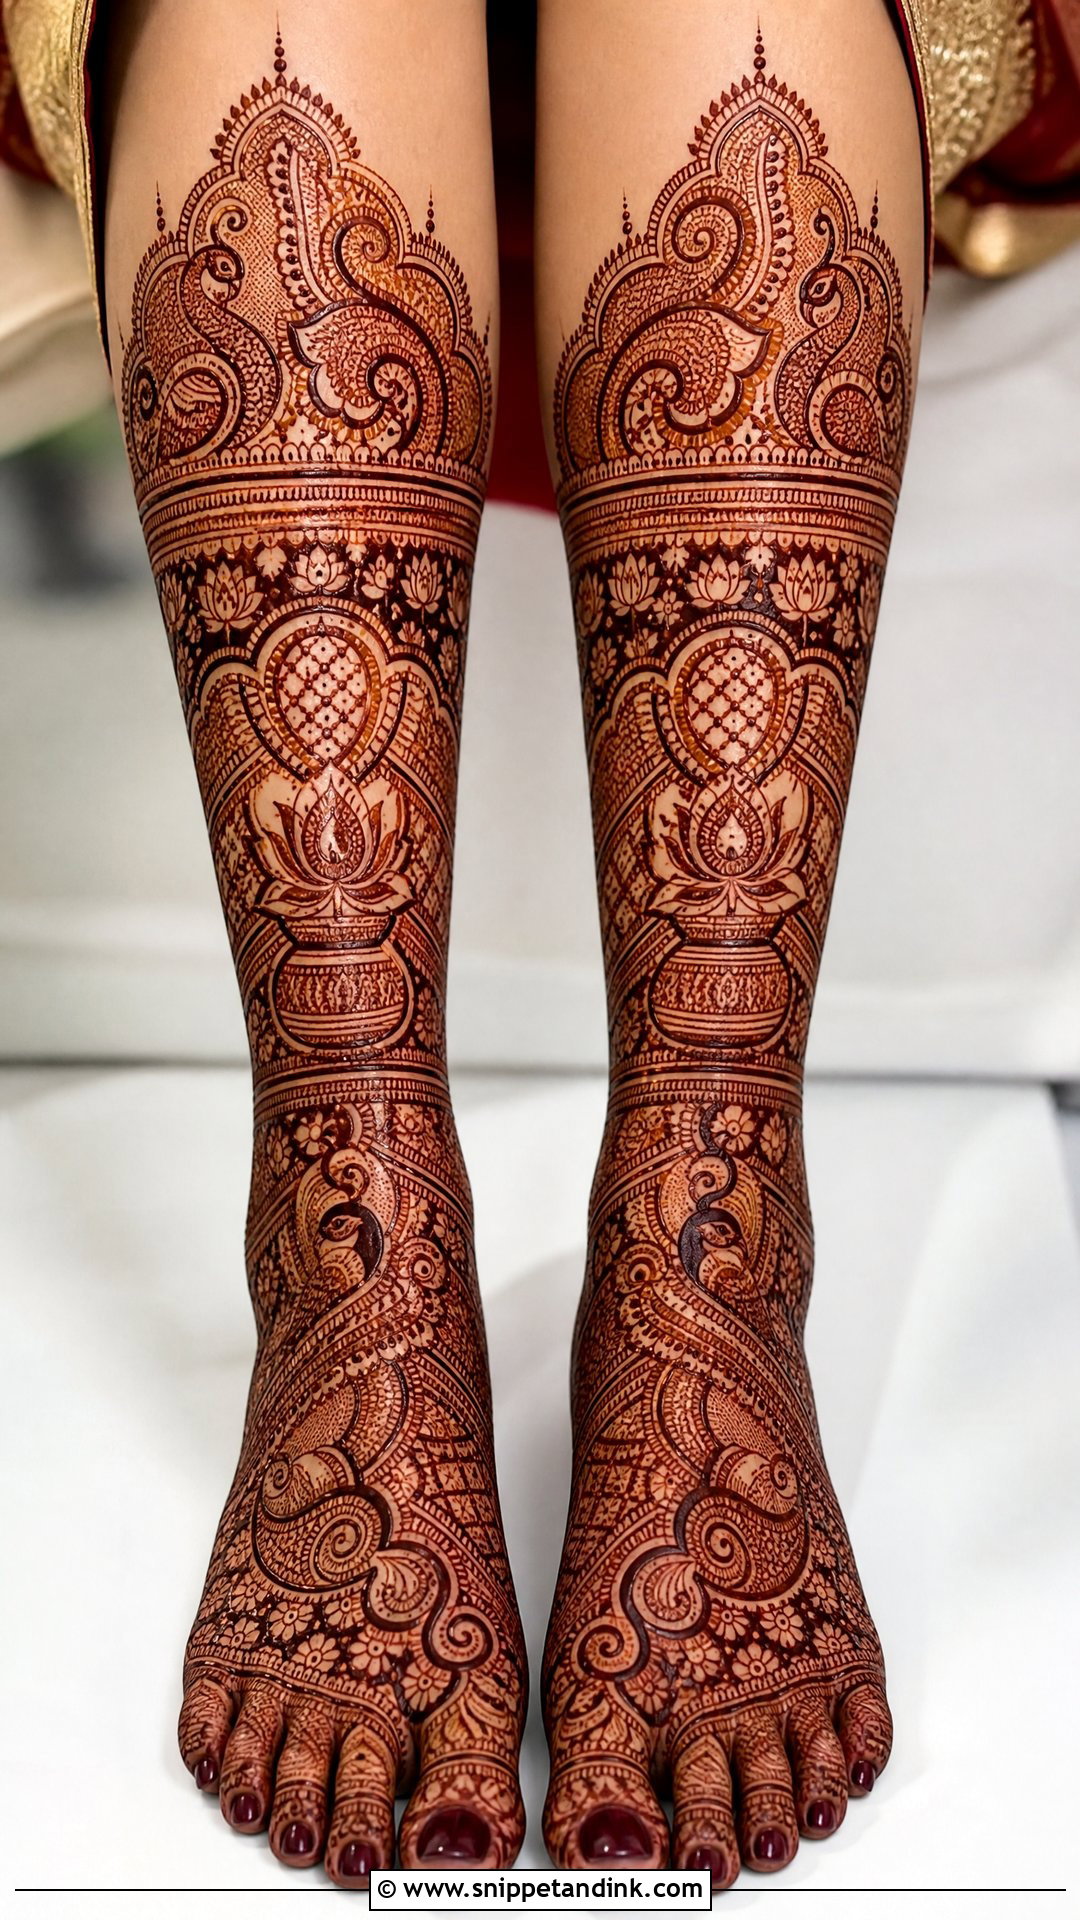
Heavy leg mehndi covers the feet and legs with paisleys, peacocks, lotus chains, jaali and layered borders until the skin looks like embroidered fabric. It takes hours, so I book it a day or two before the main ceremony rather than the morning of, which gives the stain time to deepen to its best colour. The common mistake is filling every gap with equally tiny detail. Big central motifs with fine fillers around them keep a heavy design readable instead of muddy.
7. Rajasthani Bridal Leg Mehndi Design
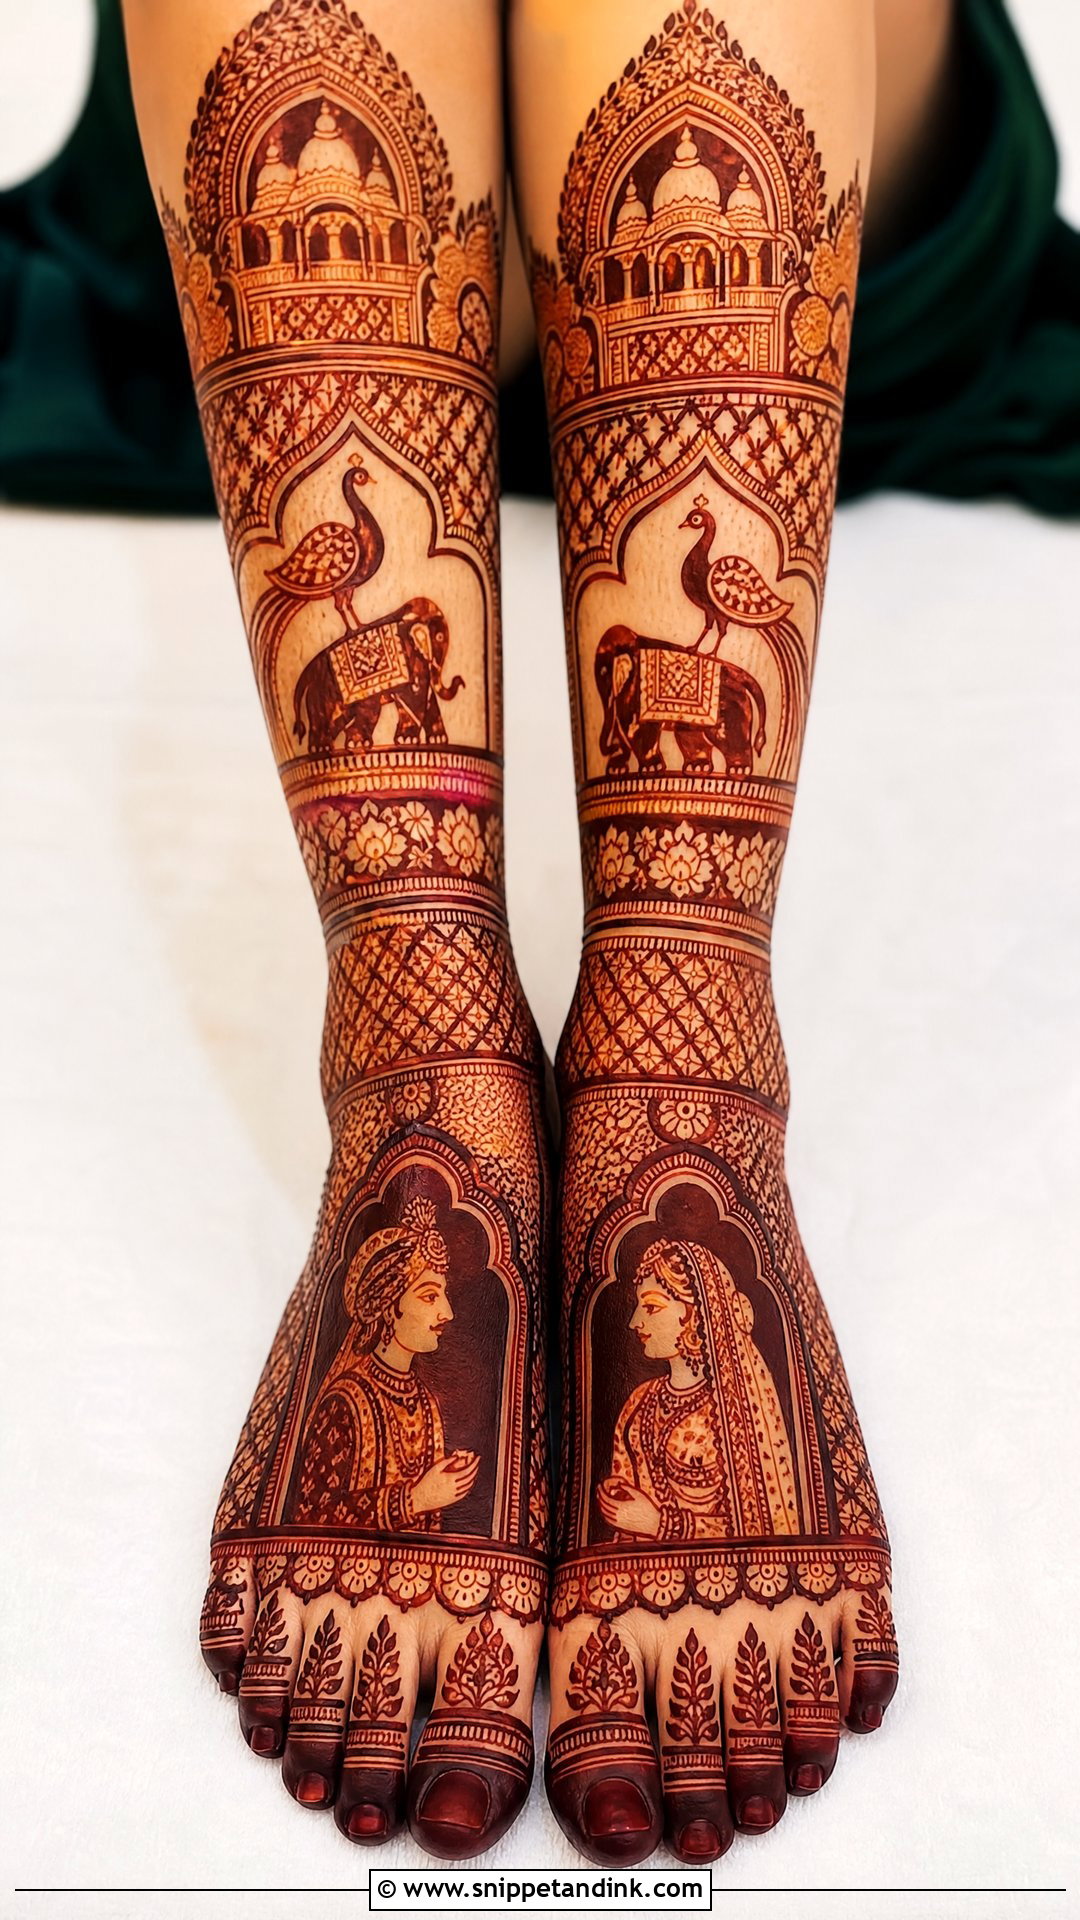
A Rajasthani bridal leg mehndi design tells a story. Royal arches, dulha-dulhan figures, peacocks, elephants and fine lattice all have their place. I build the feet with circular mandalas and toe panels for structure, then save the calf for the larger wedding figures, where there is room for faces and details to stay legible. Both legs should be drawn as matching panels. If your outfit has mirror work or gota, this style picks up that heritage feel directly.
8. Marwari Bridal Leg Mehndi Design
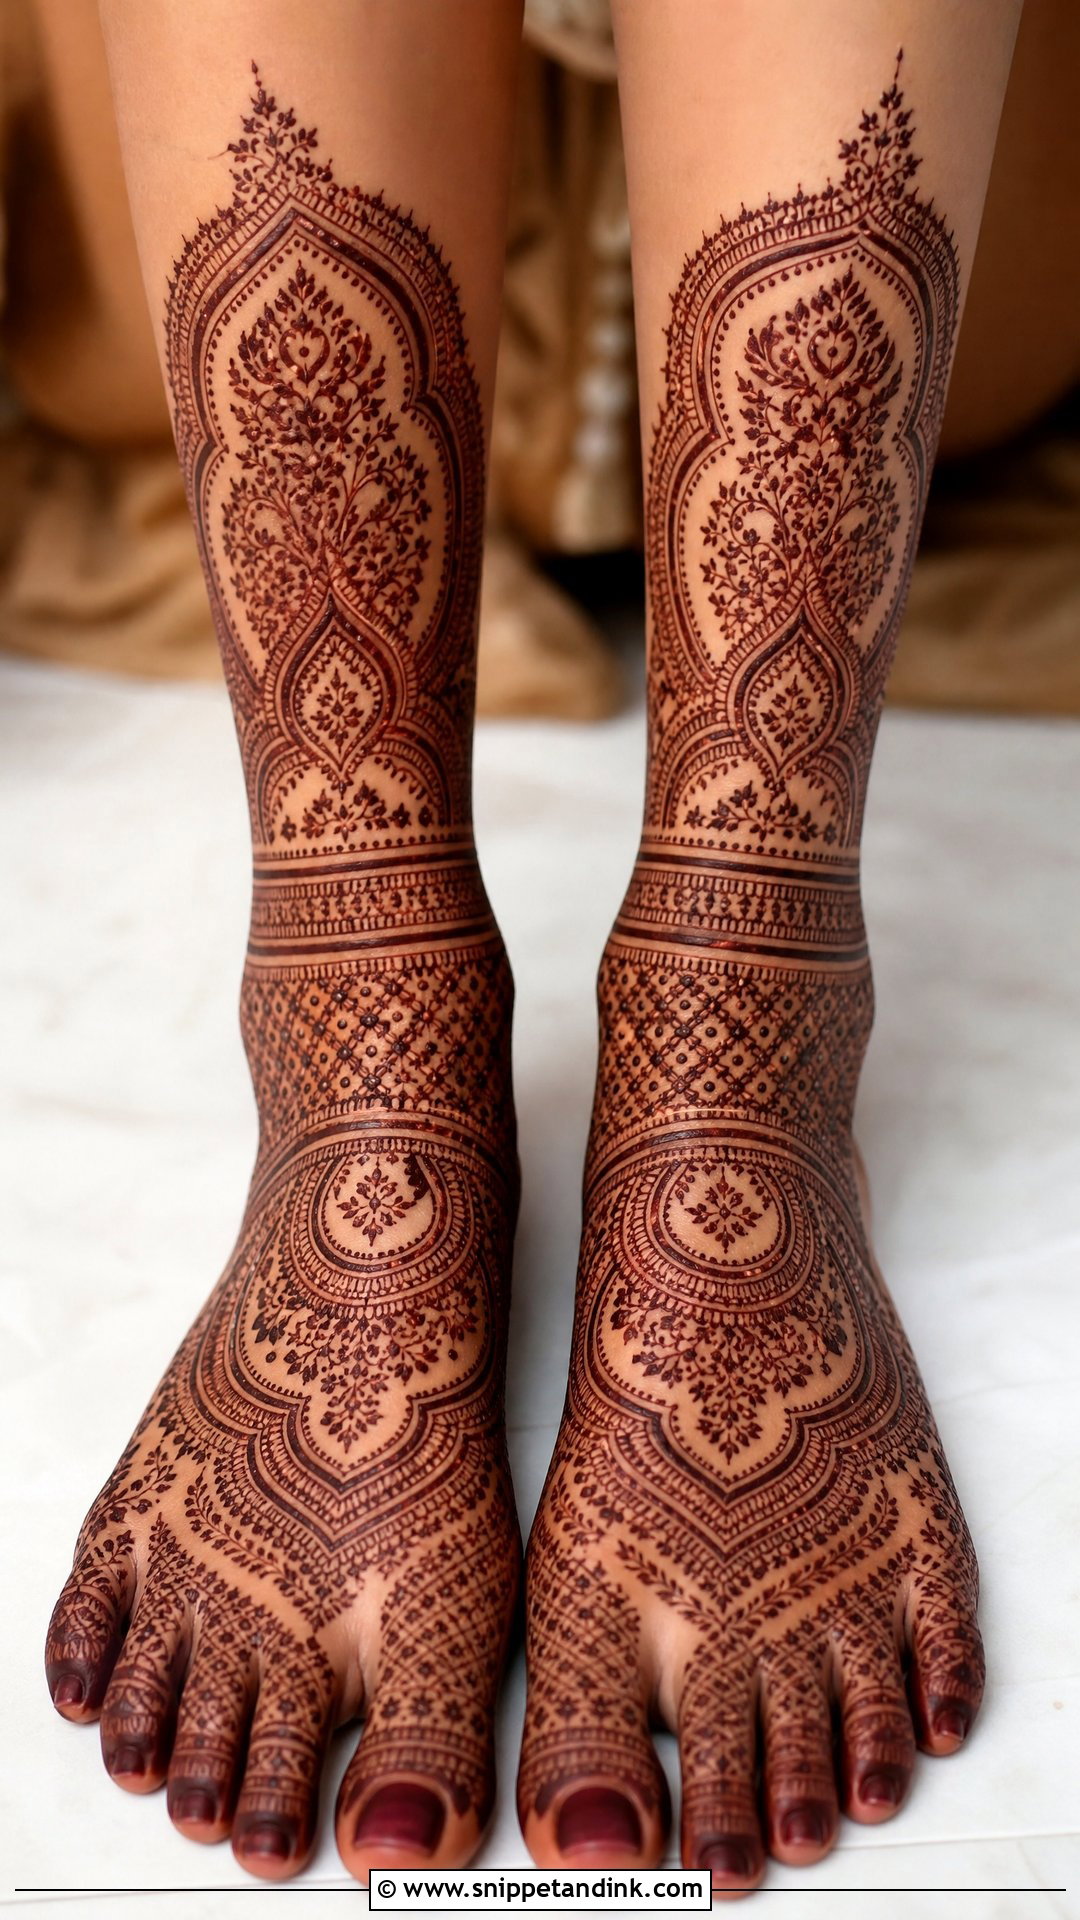
Marwari work is dense, symmetrical and full of fine lines, with paisleys, florals and ornamental bands running from the toes up the leg. It feels heavier than most modern designs, and that is exactly why brides choose it for the main ceremony. I usually start from a strong anklet-style band and detailed foot coverage, then add small kalash or peacock elements for a traditional touch. Because the lines are so fine, it needs a well-stirred, smooth paste; any lumps show as breaks in the stain. It sits naturally with classic payal and toe rings.
9. Peacock Bridal Leg Mehndi Design
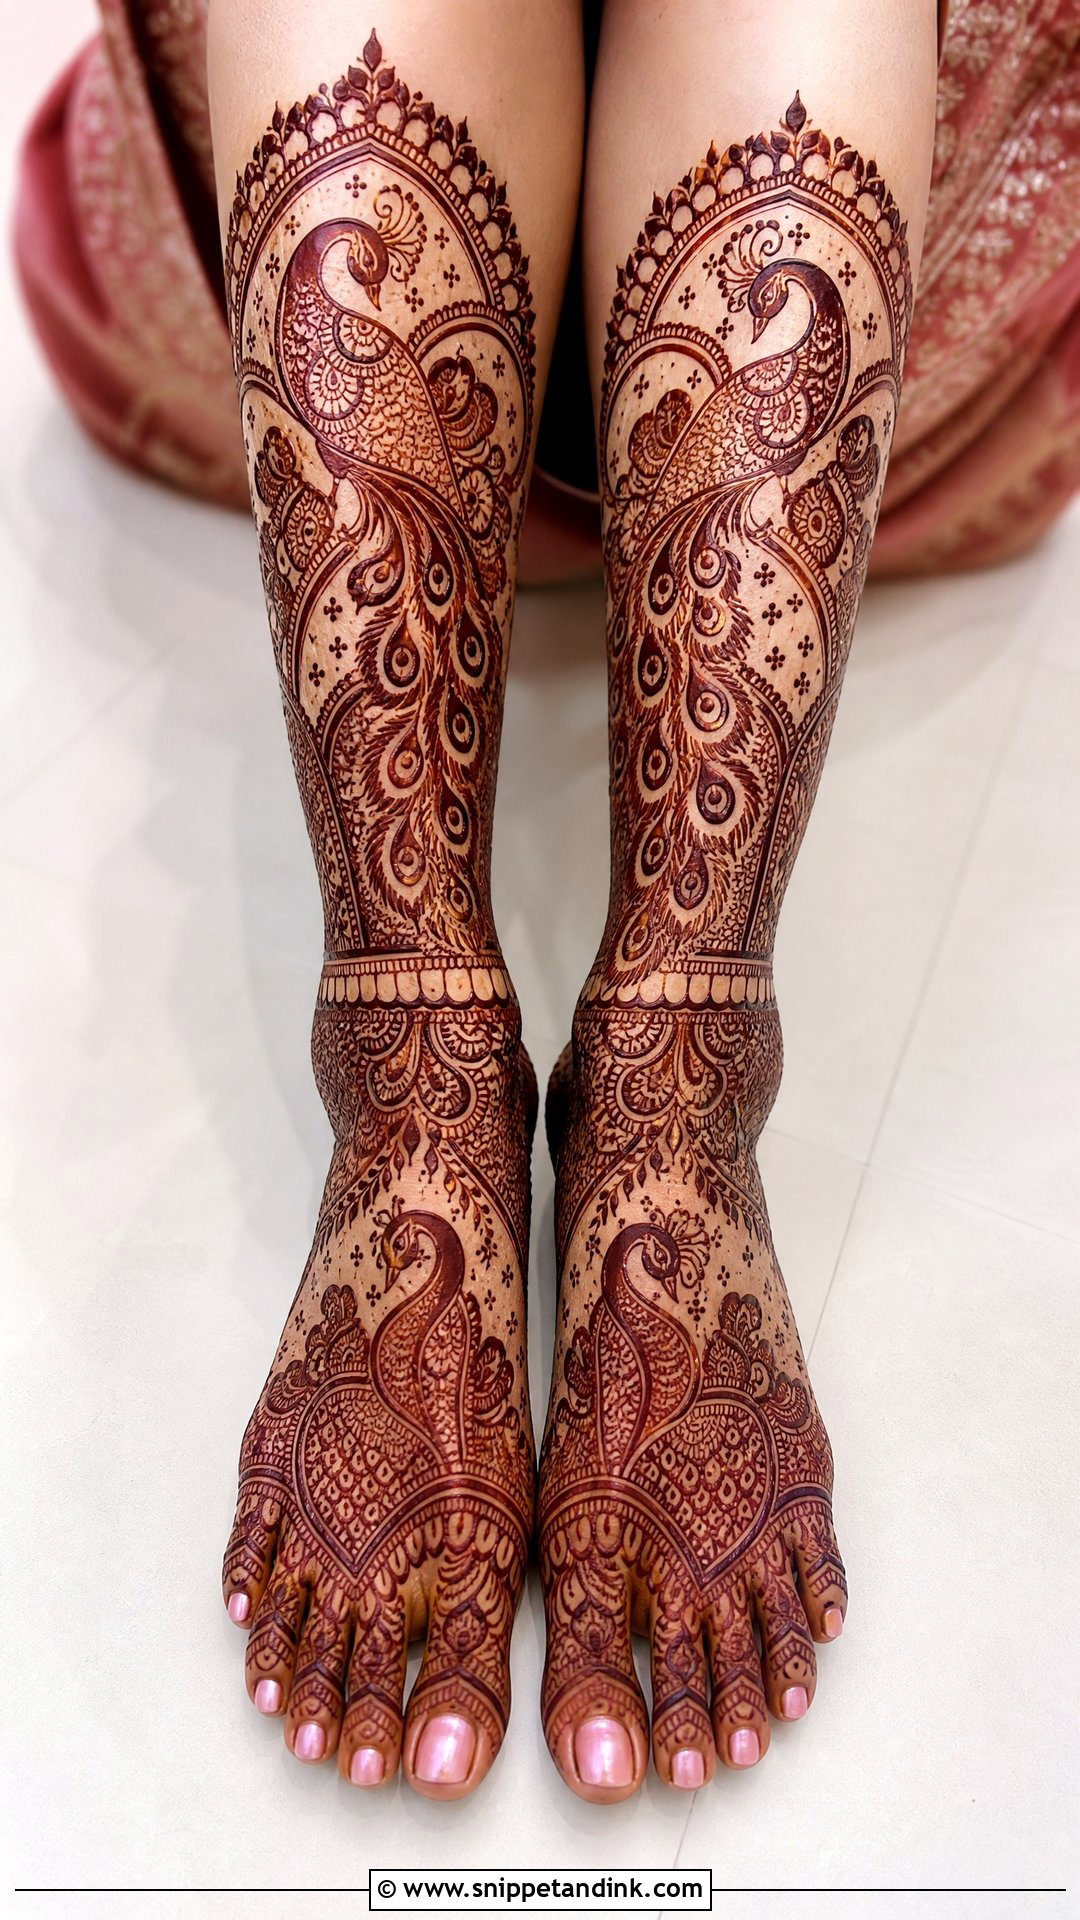
The peacock gives a leg design movement. I place a large bird on the top of the foot and let its feathers sweep toward the ankle and lower leg, with small paisleys, leaves and dots filling the space around it. Where this goes wrong is inside the body of the bird: crowd it with tiny fillers and the shape disappears once the stain develops. Keep the outline clear and the feather eyes distinct, and it is one of the most graceful motifs you can wear on the feet.
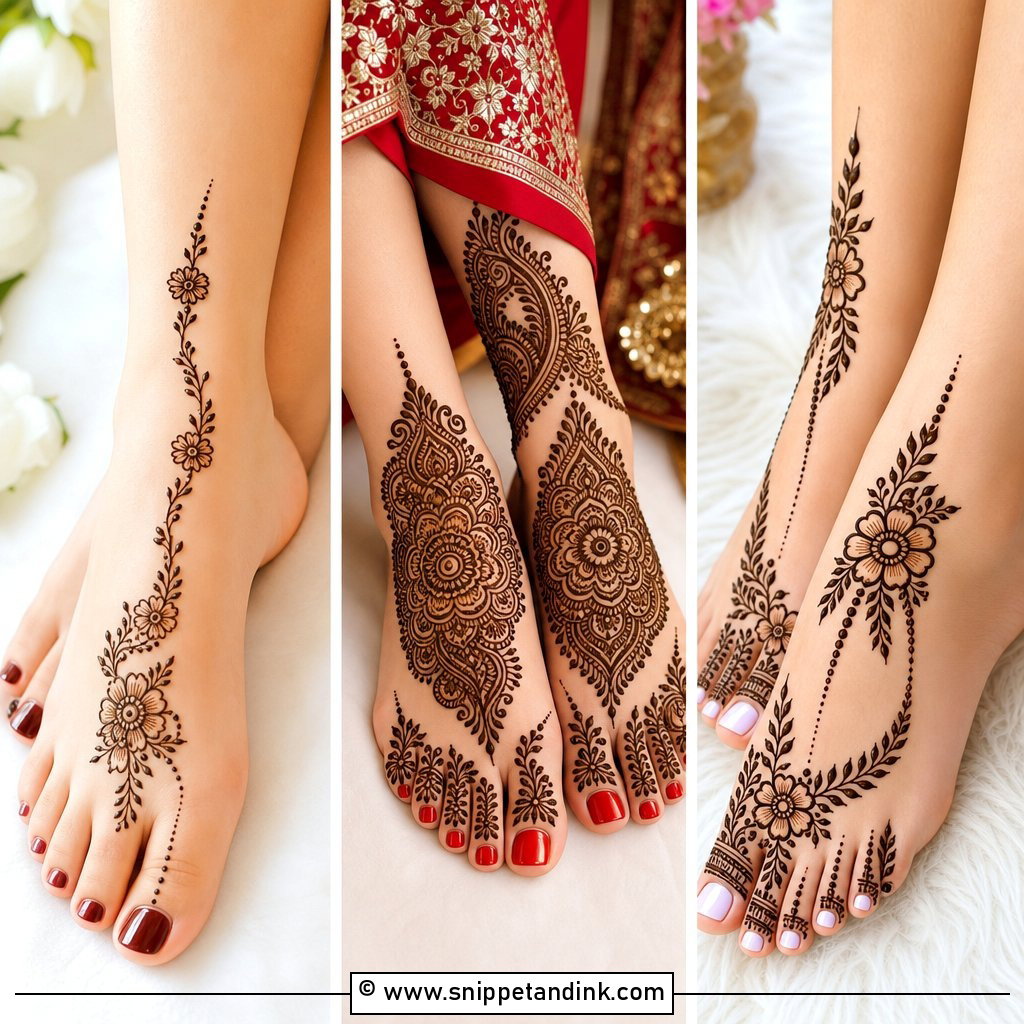
10. Floral Bridal Leg Mehndi Design
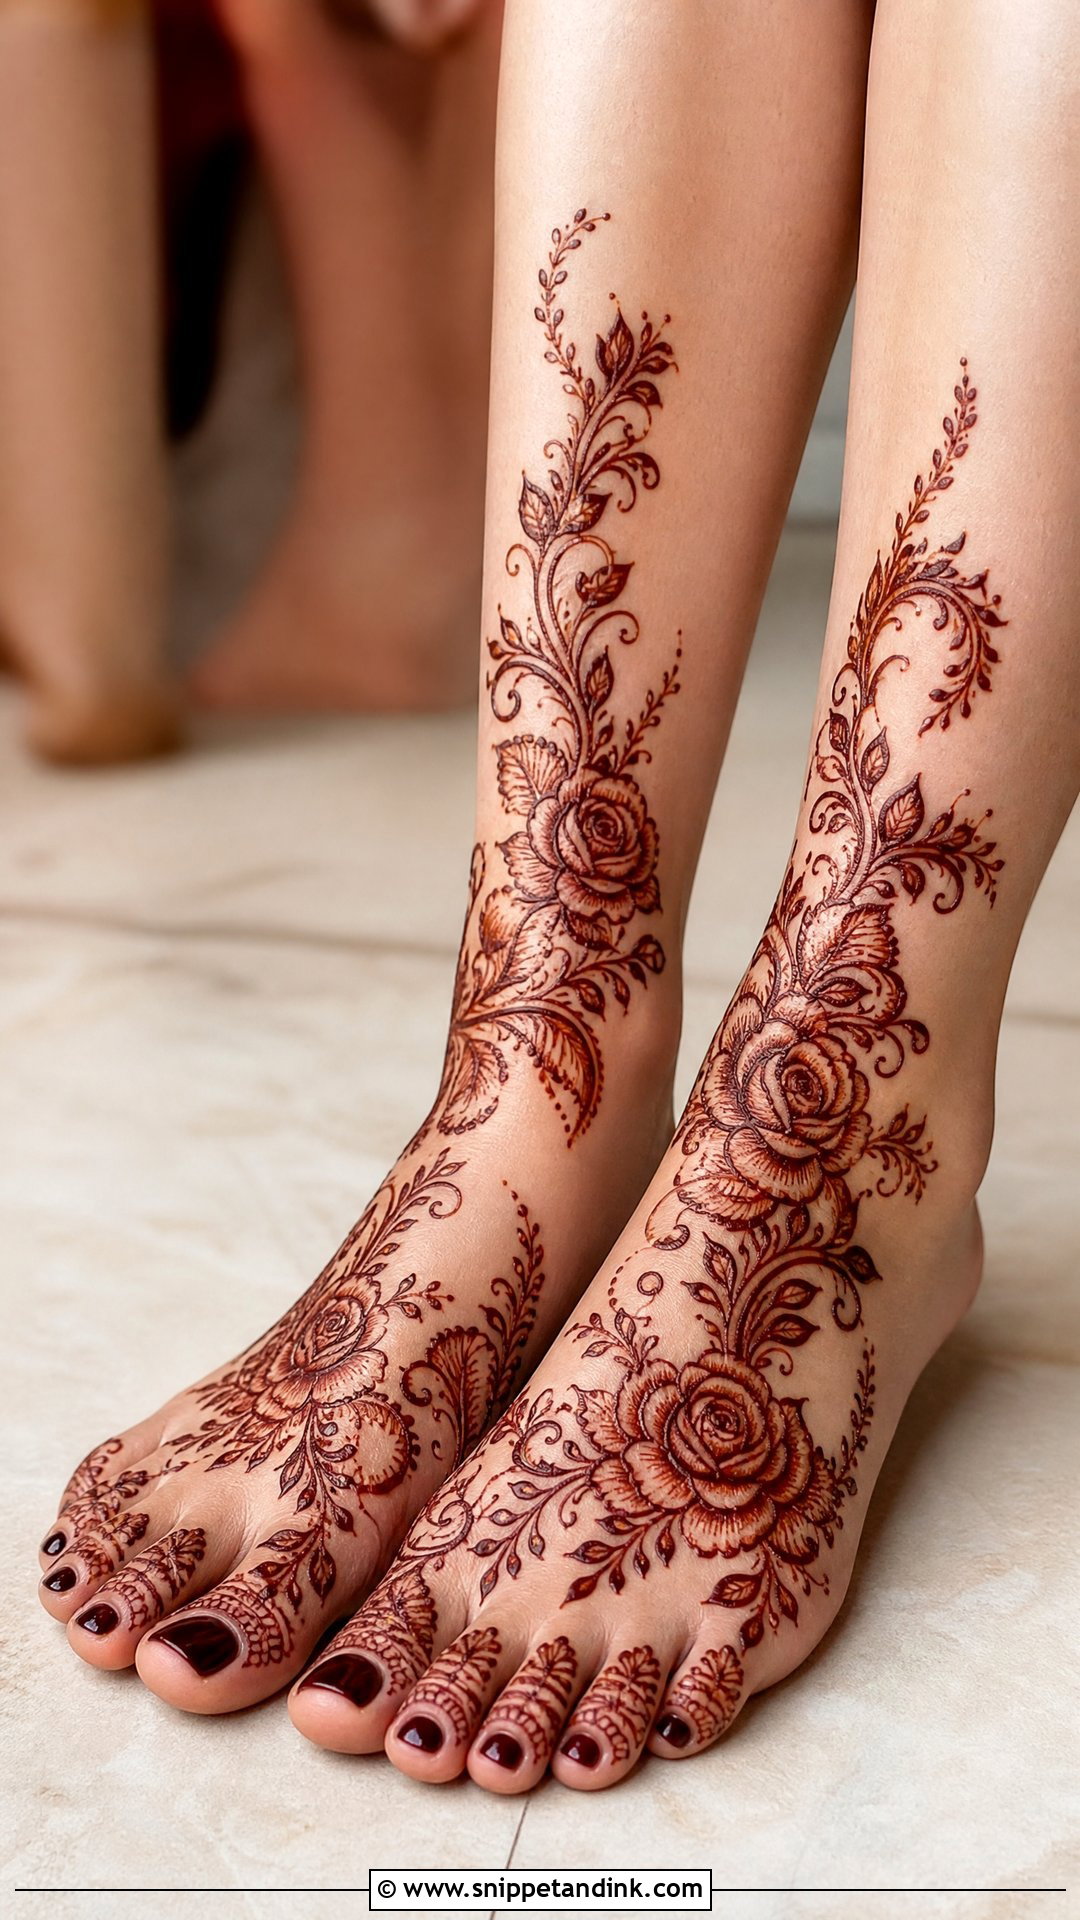
Soft petals and curved vines make the legs look delicate. Roses, lotus, leafy vines and small buds can flow from the toes to the calves, either light with Arabic spacing or heavier with Indian fillers. Flowers are an easy match because they already appear in so much bridal embroidery and jewelry. For a more modern feel I draw larger flowers on the feet and keep only thin trailing vines around the ankle. Petal edges are where a shaky hand shows, so this one rewards an artist with a steady line.
11. Mandala Bridal Leg Mehndi Design
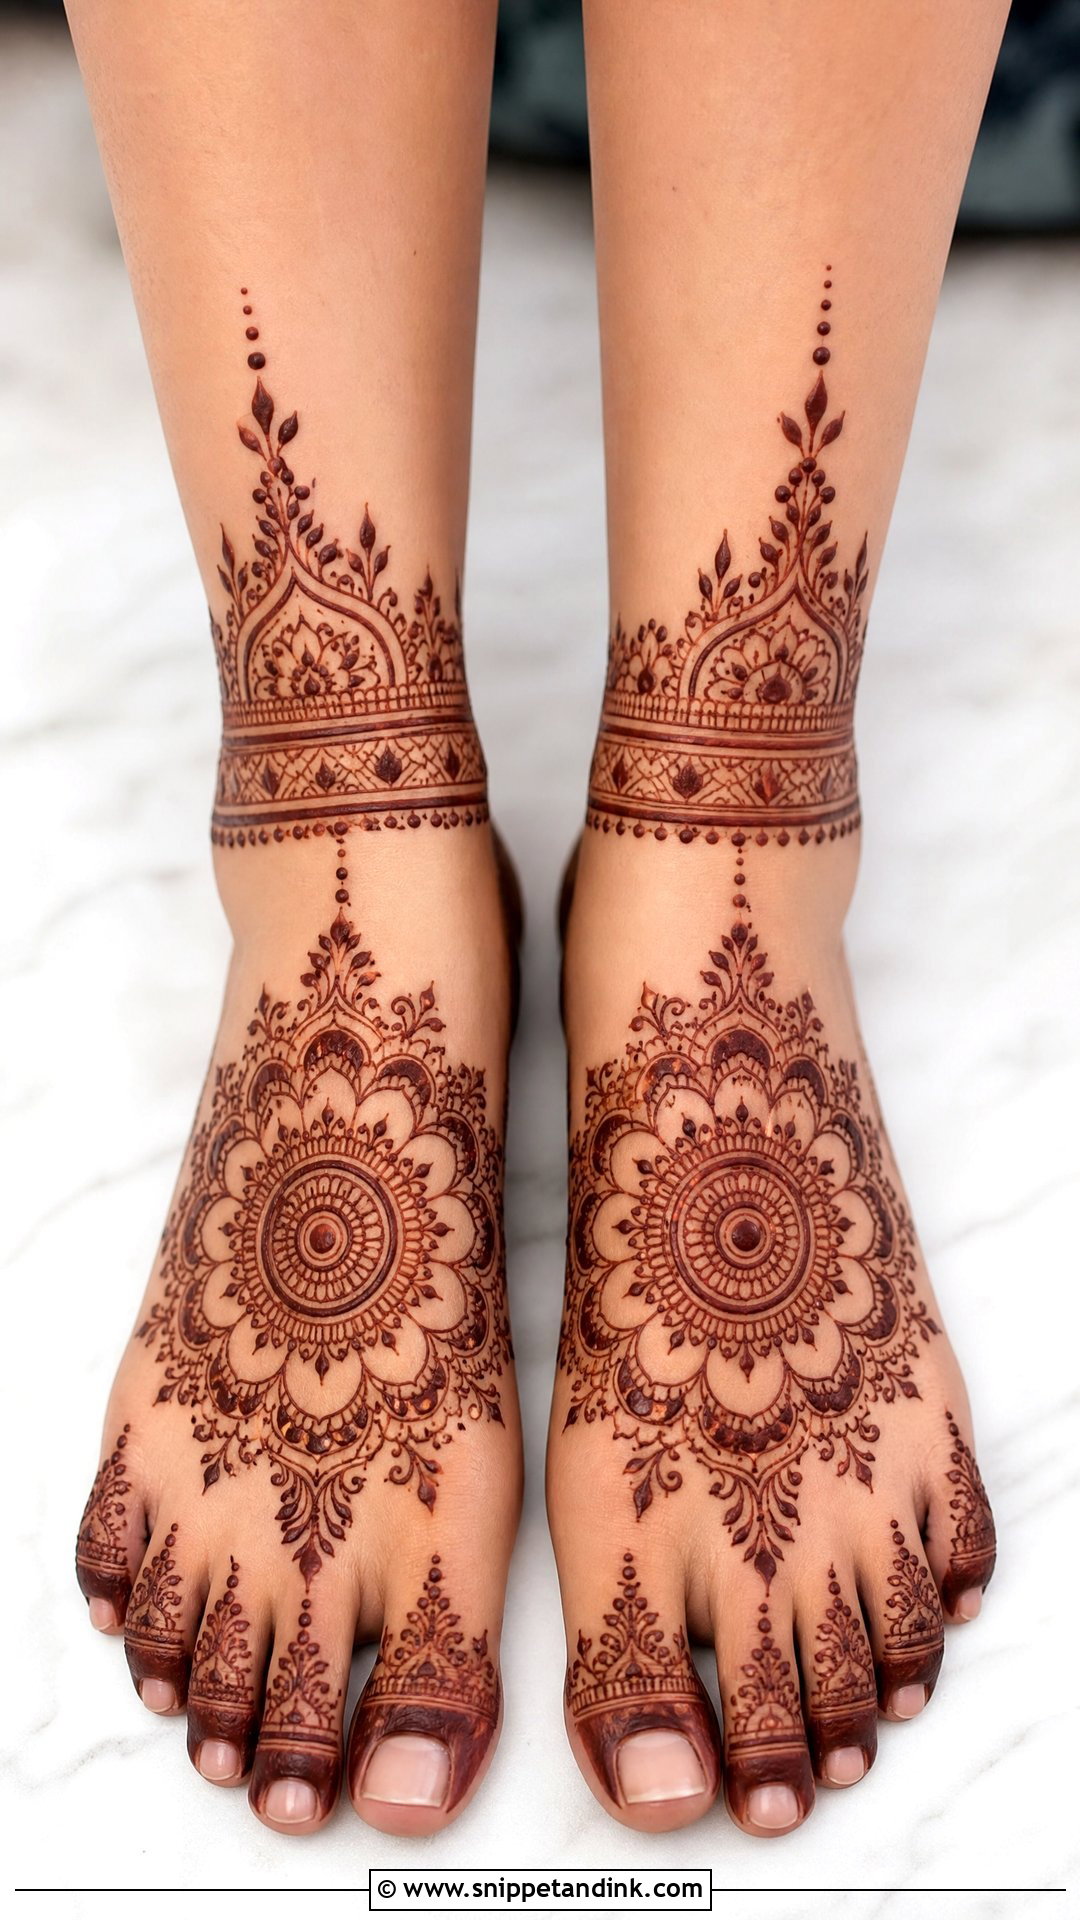
A mandala gives the foot a centre. I place the main circle on the top of the foot or just above the ankle bone, then grow it outward with borders, dots, leaves and fine lines. Getting the circle truly round on a curved foot is harder than on a flat palm, so I check it from straight above before filling. One mandala on each foot creates a mirror effect that looks especially good in seated photos. Add toe detail and a bracelet-style ankle band if you want the foot to feel finished.
12. Jaali Bridal Leg Mehndi Design
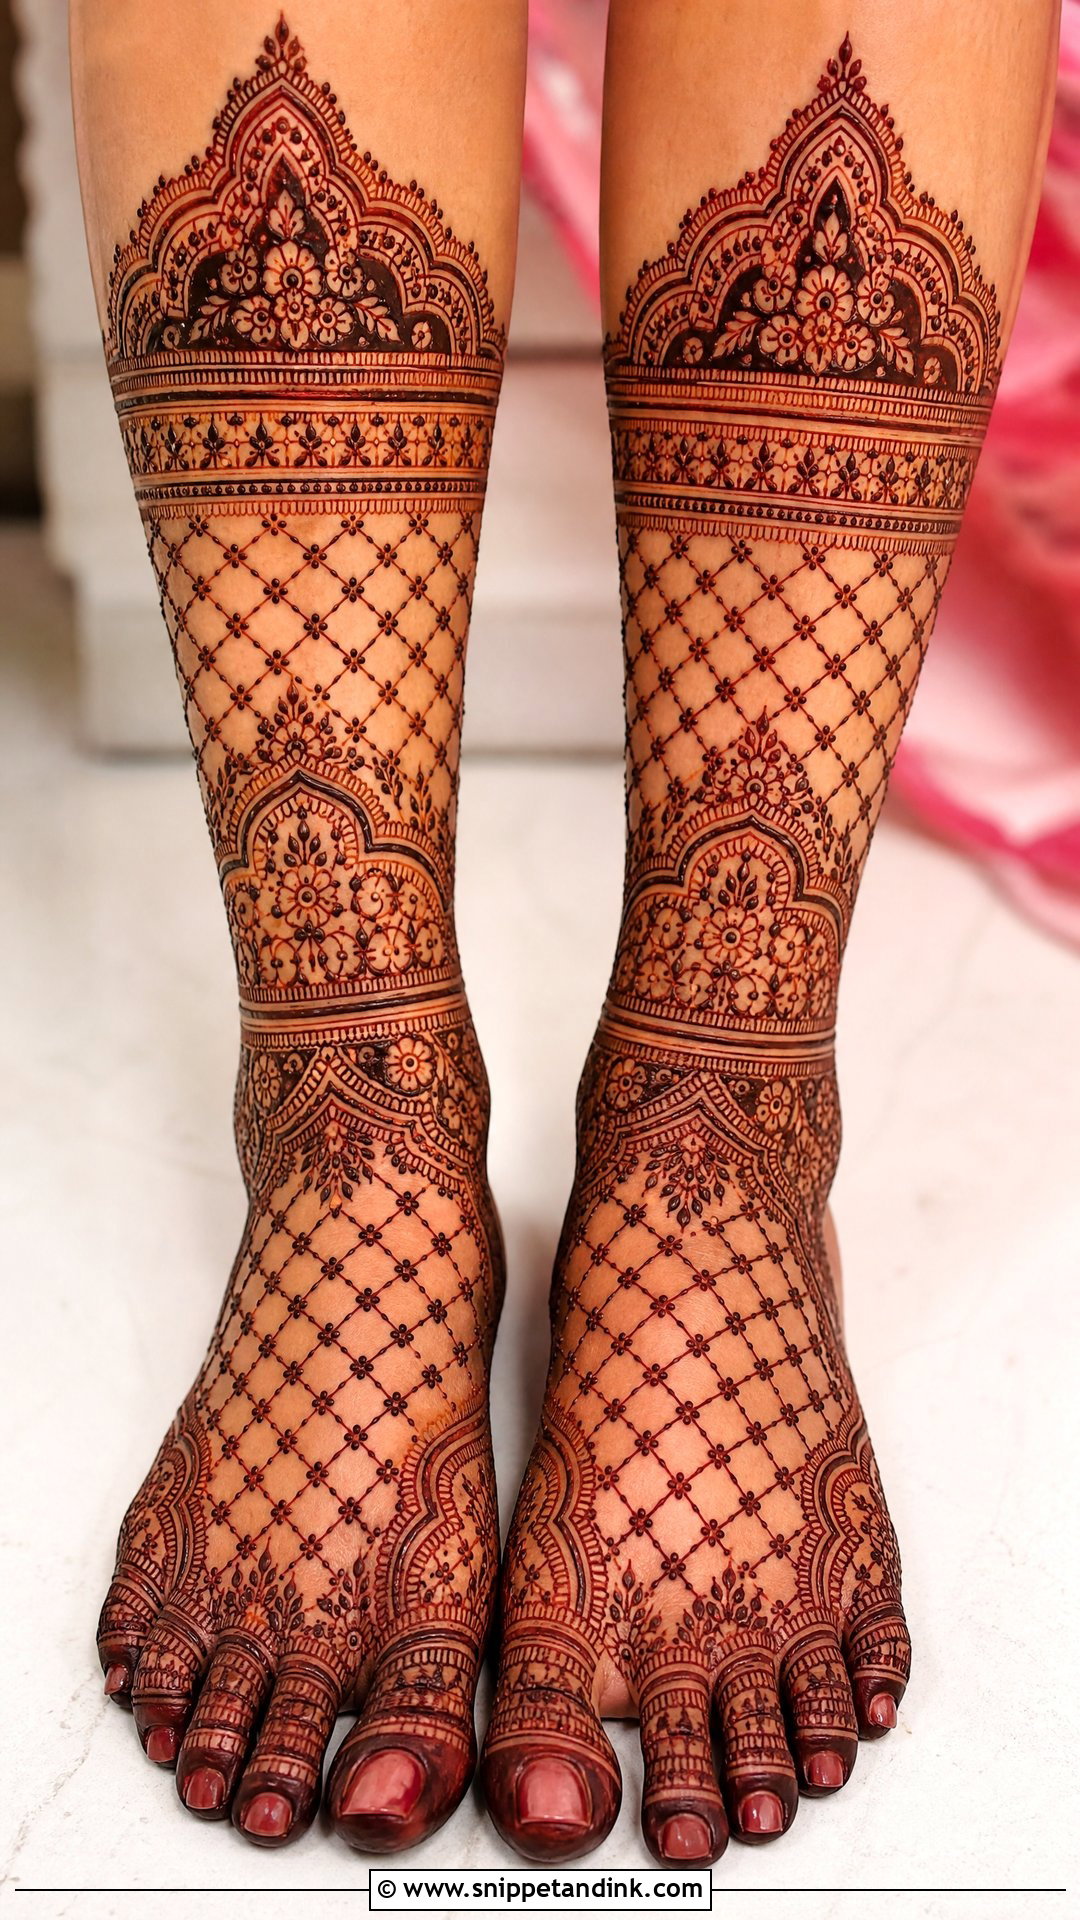
A Jaali bridal leg mehndi design uses a mesh grid over parts of the foot, ankle or calf, softened with florals and paisleys around it. The grid creates strong contrast against the skin, which is why it reads so sharply in photos. Plain jaali on its own can look unfinished on a bride, so I frame it with detailed borders, dotted corners and small floral clusters. Even spacing is everything here; one crooked line in a grid catches the eye immediately. You can cover the full foot or keep the mesh only on the sides of the legs.
13. Anklet Bridal Leg Mehndi Design
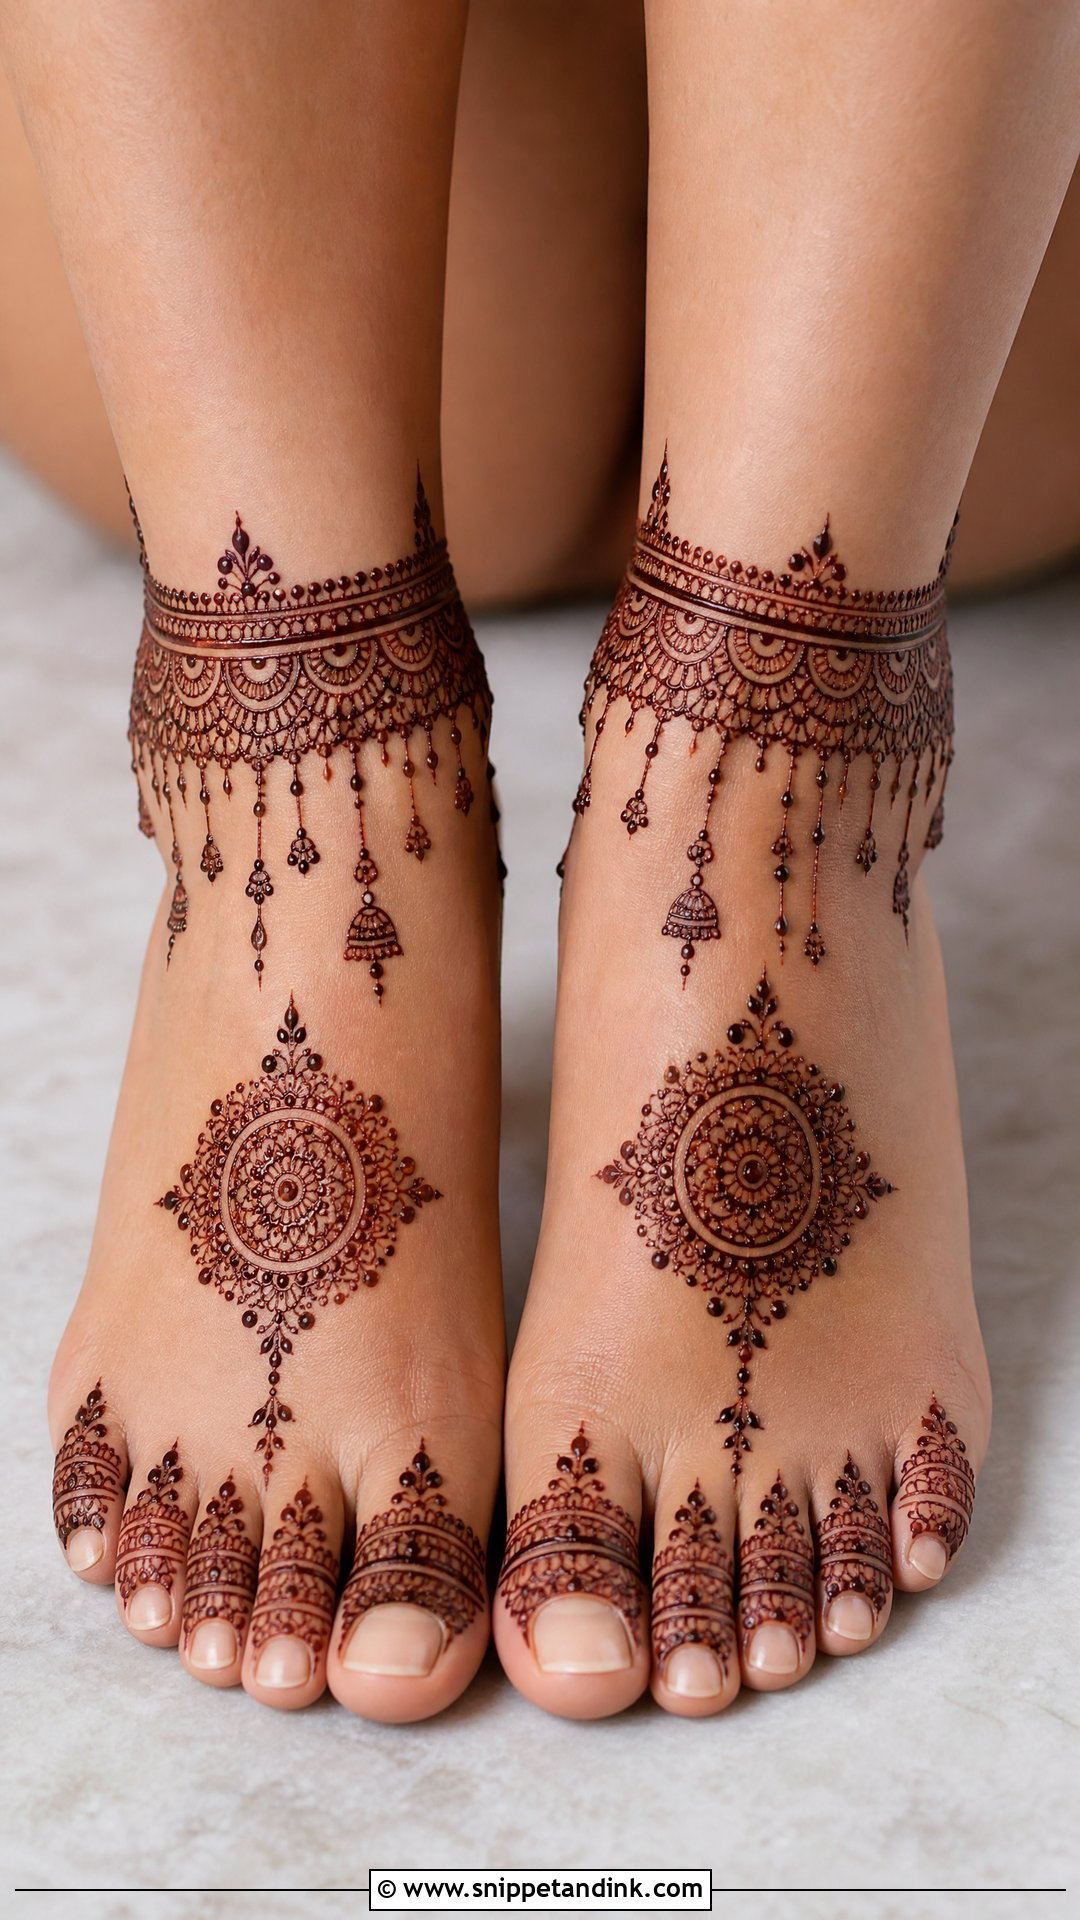
An anklet bridal leg mehndi design is jewelry drawn on the skin: a thick band around the ankle, hanging chains, tiny bells, floral drops and toe detail. It gives you a bridal effect without covering the whole leg, which makes it a practical pick for open sandals. I measure where your real payal will sit before I draw, because a henna band hidden under a heavy silver anklet is wasted work. For more richness, add a mandala on the foot and a short vine climbing from the band.
14. Foot And Ankle Bridal Mehndi Design
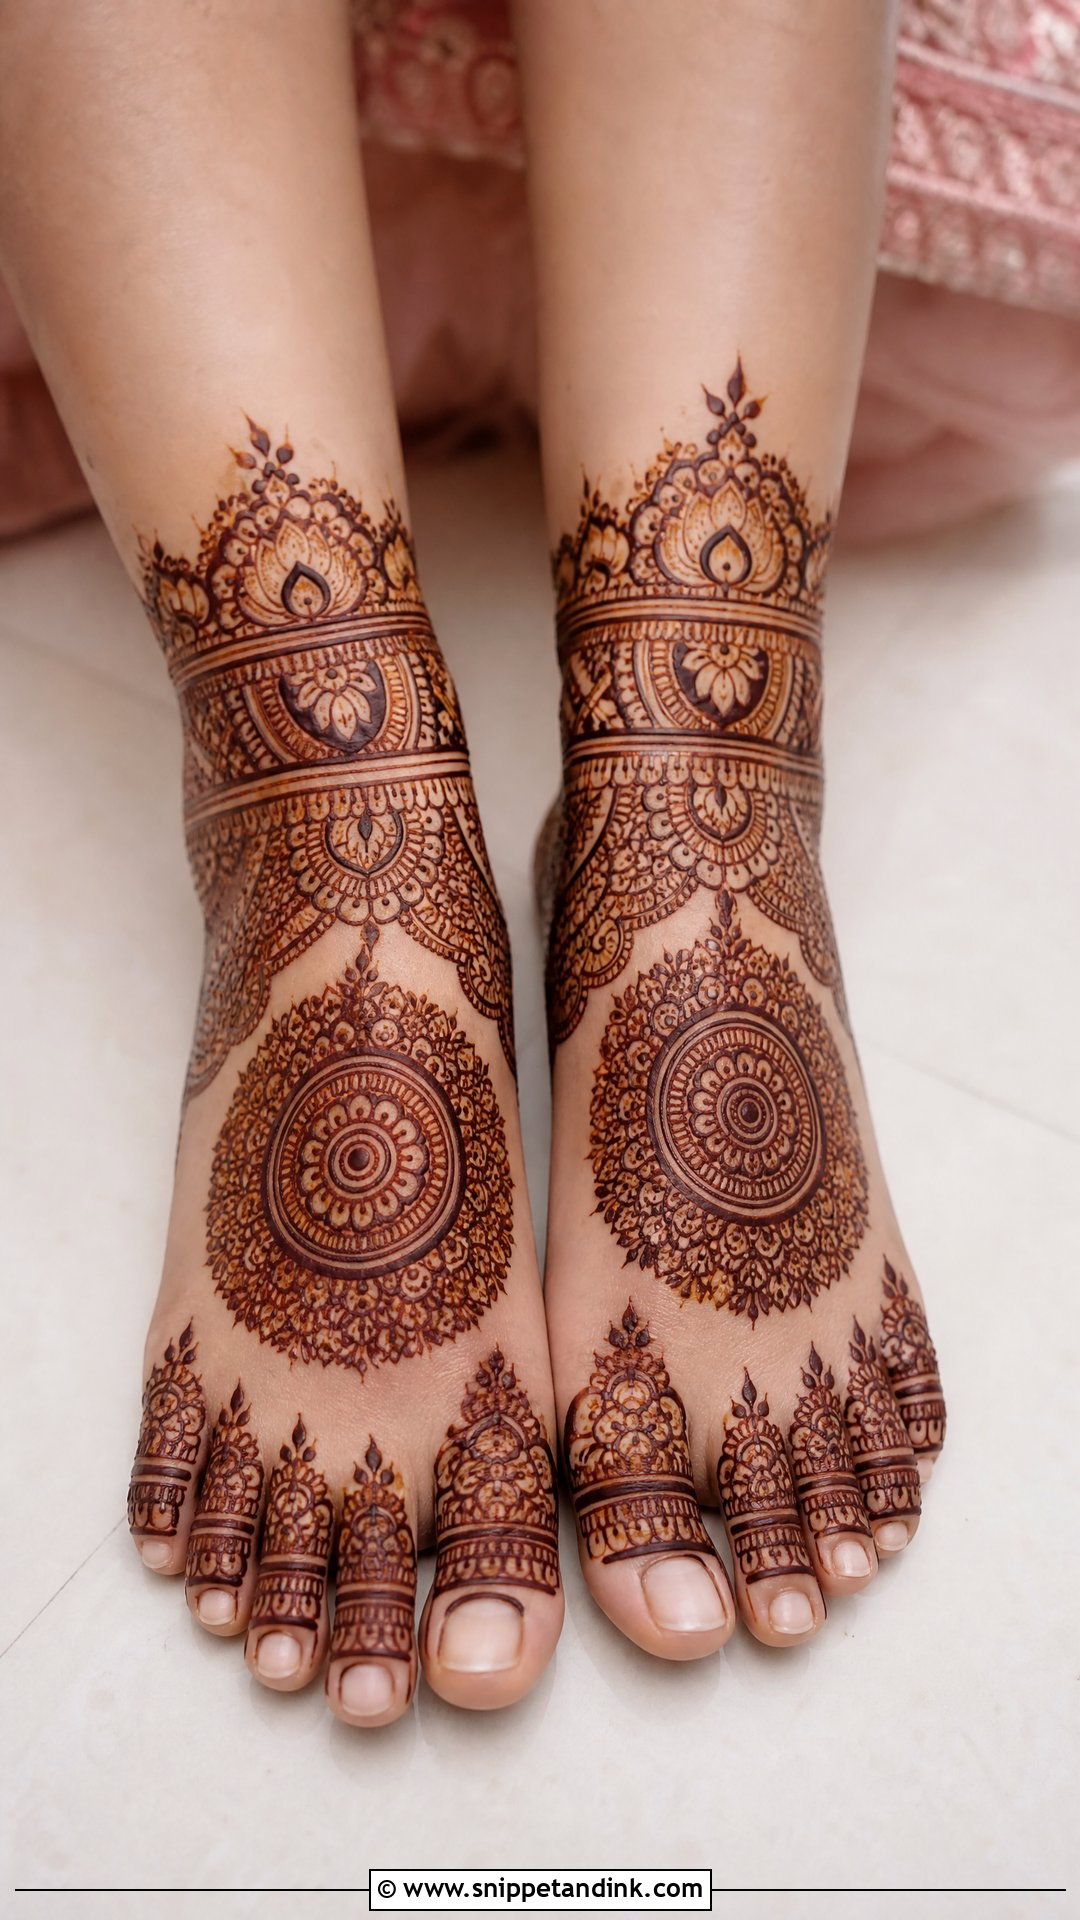
Foot and ankle coverage is the balanced middle option: toes, top of the foot, sides, heels and the ankle, with mandalas, paisleys, flowers, jaali patches and bracelet-style bands. It is comfortable through long events and suits outfits with a slightly longer hemline, since the feet stay visible even when the legs don’t. Ask for strong outlines around the main motifs. Fine-only work tends to vanish under jewelry and straps, while a clear outline holds its shape.
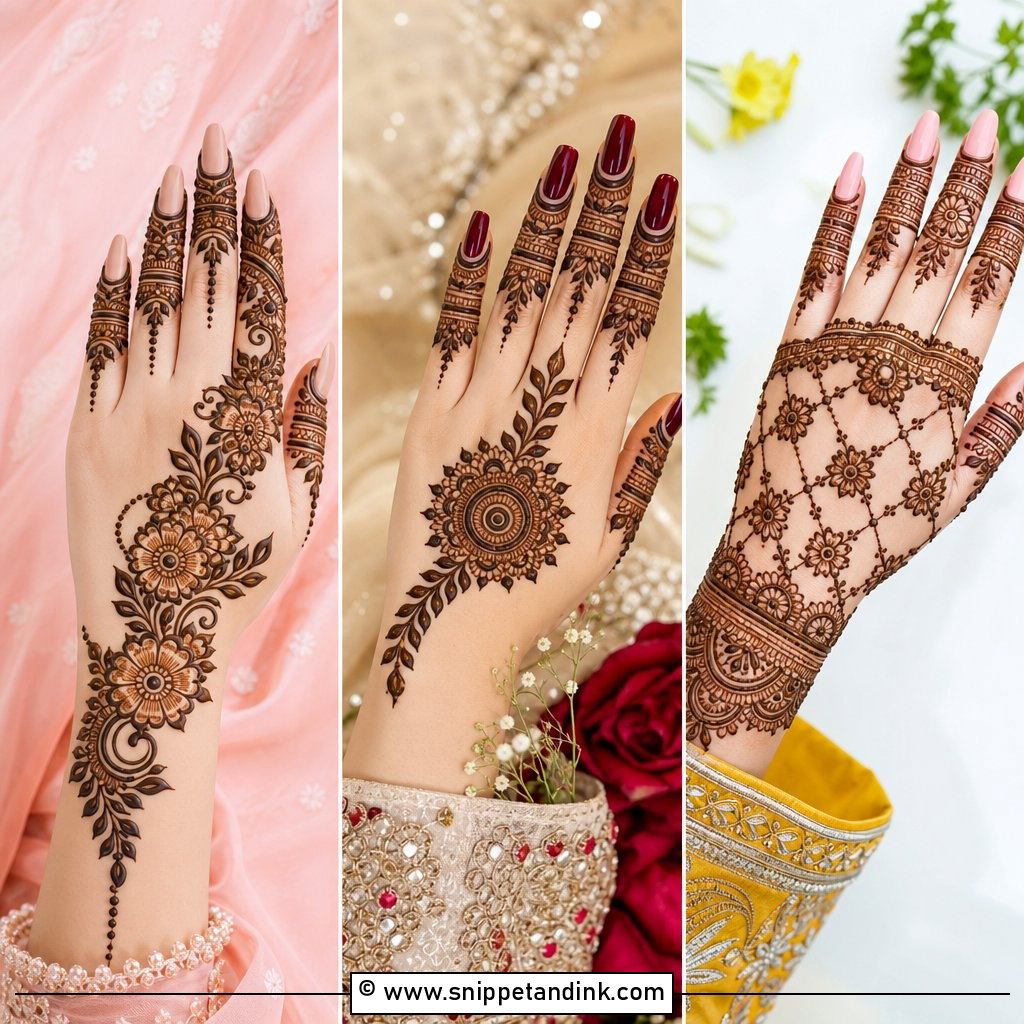
15. Knee Length Bridal Leg Mehndi Design
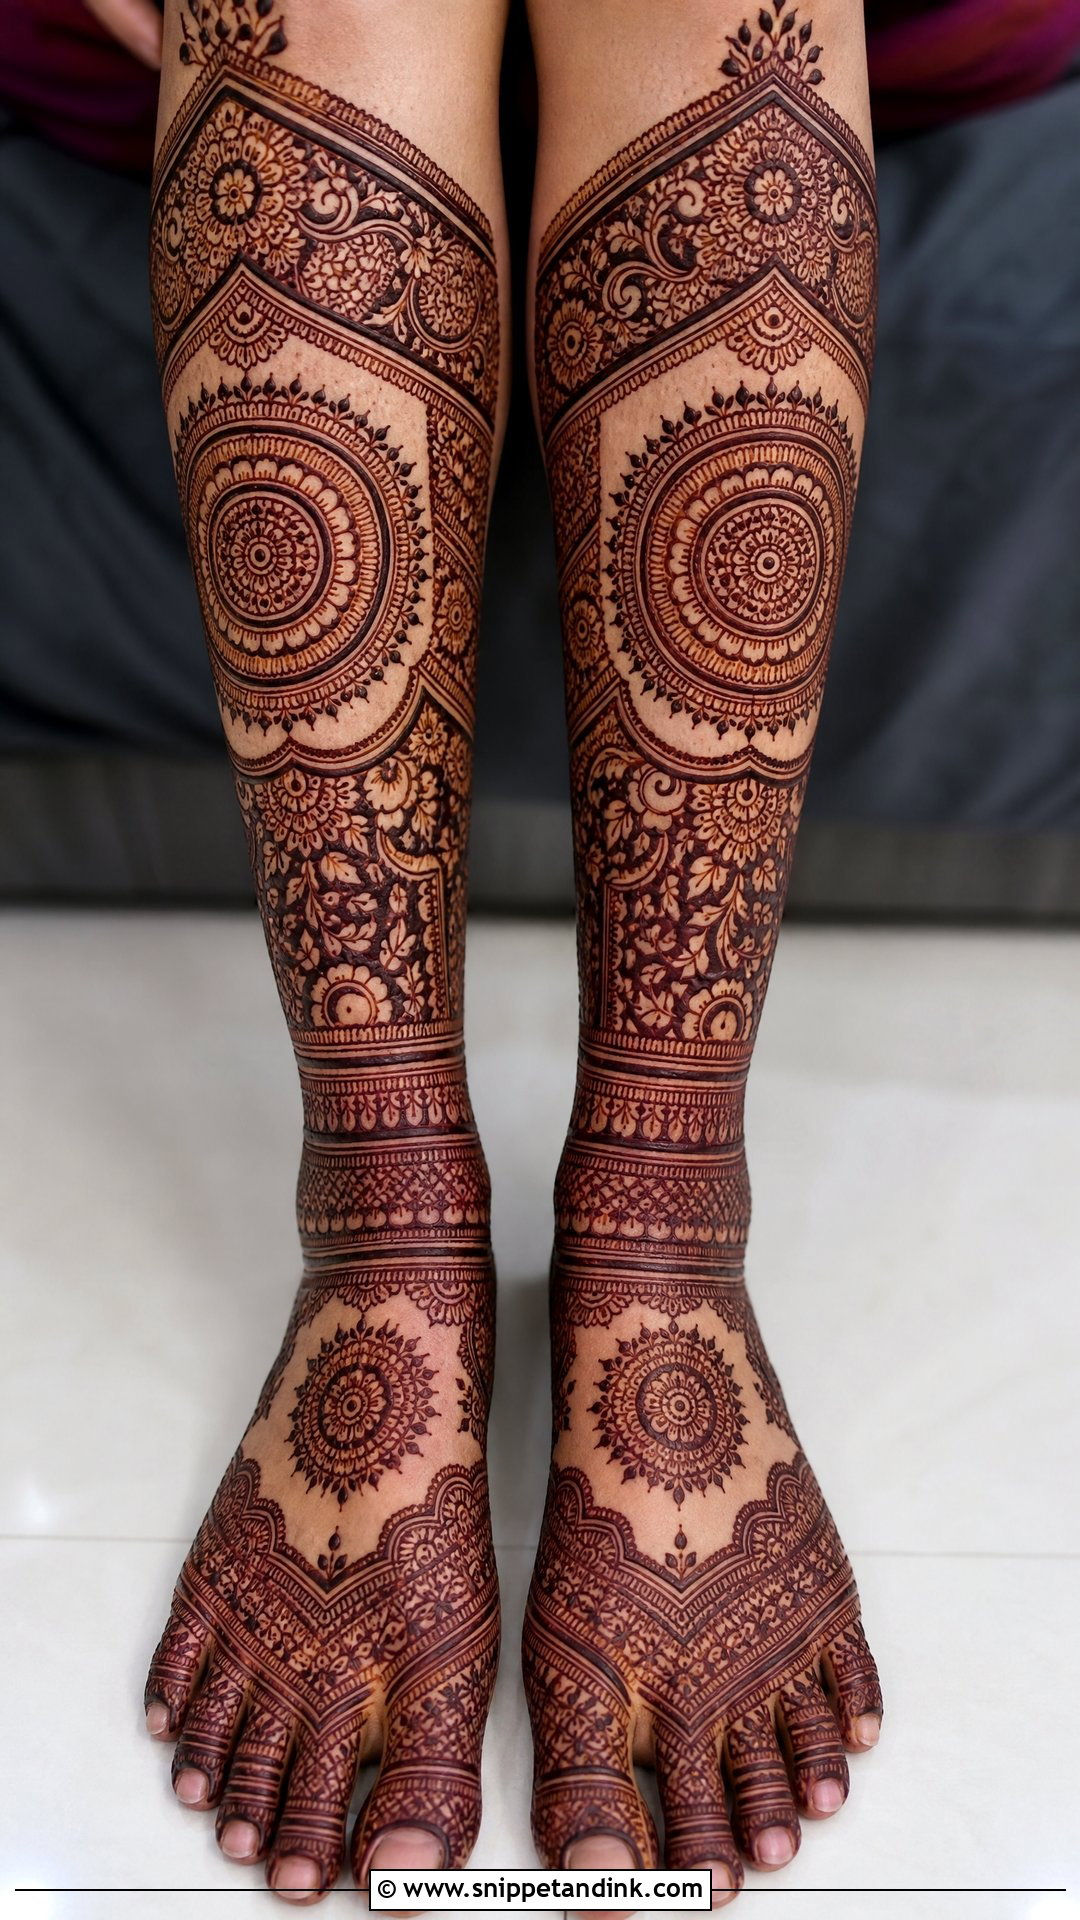
Knee length bridal leg mehndi design covers the feet, ankles and calves and stops close to the knee. That space allows large motifs, layered borders and storytelling panels. Expect the calf to stain lighter than the foot; the skin there is thinner and cooler, so I keep the densest detail low and open the pattern up as it climbs. That gradient looks intentional and stops the upper leg looking faded next to the feet. It is a good choice if your lehenga swings open when you walk.
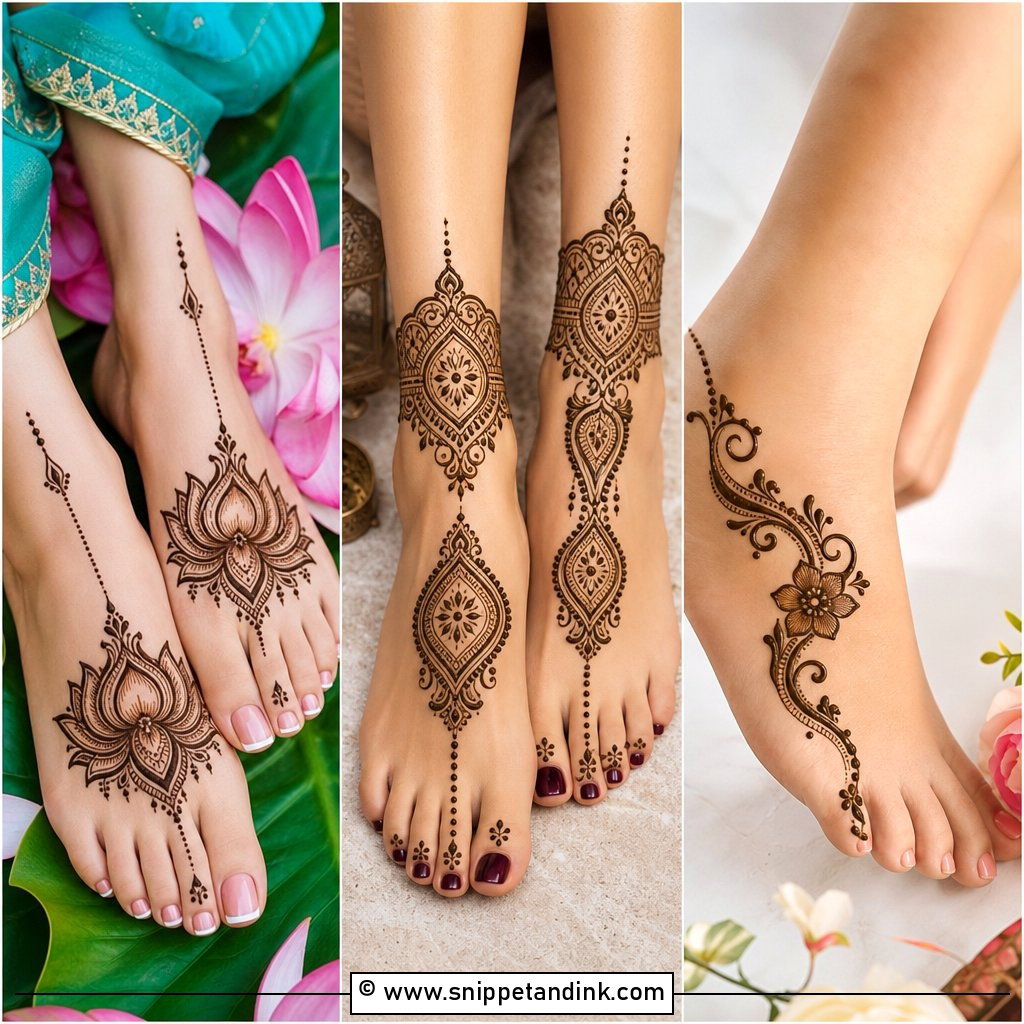
16. Minimal Bridal Leg Mehndi Design
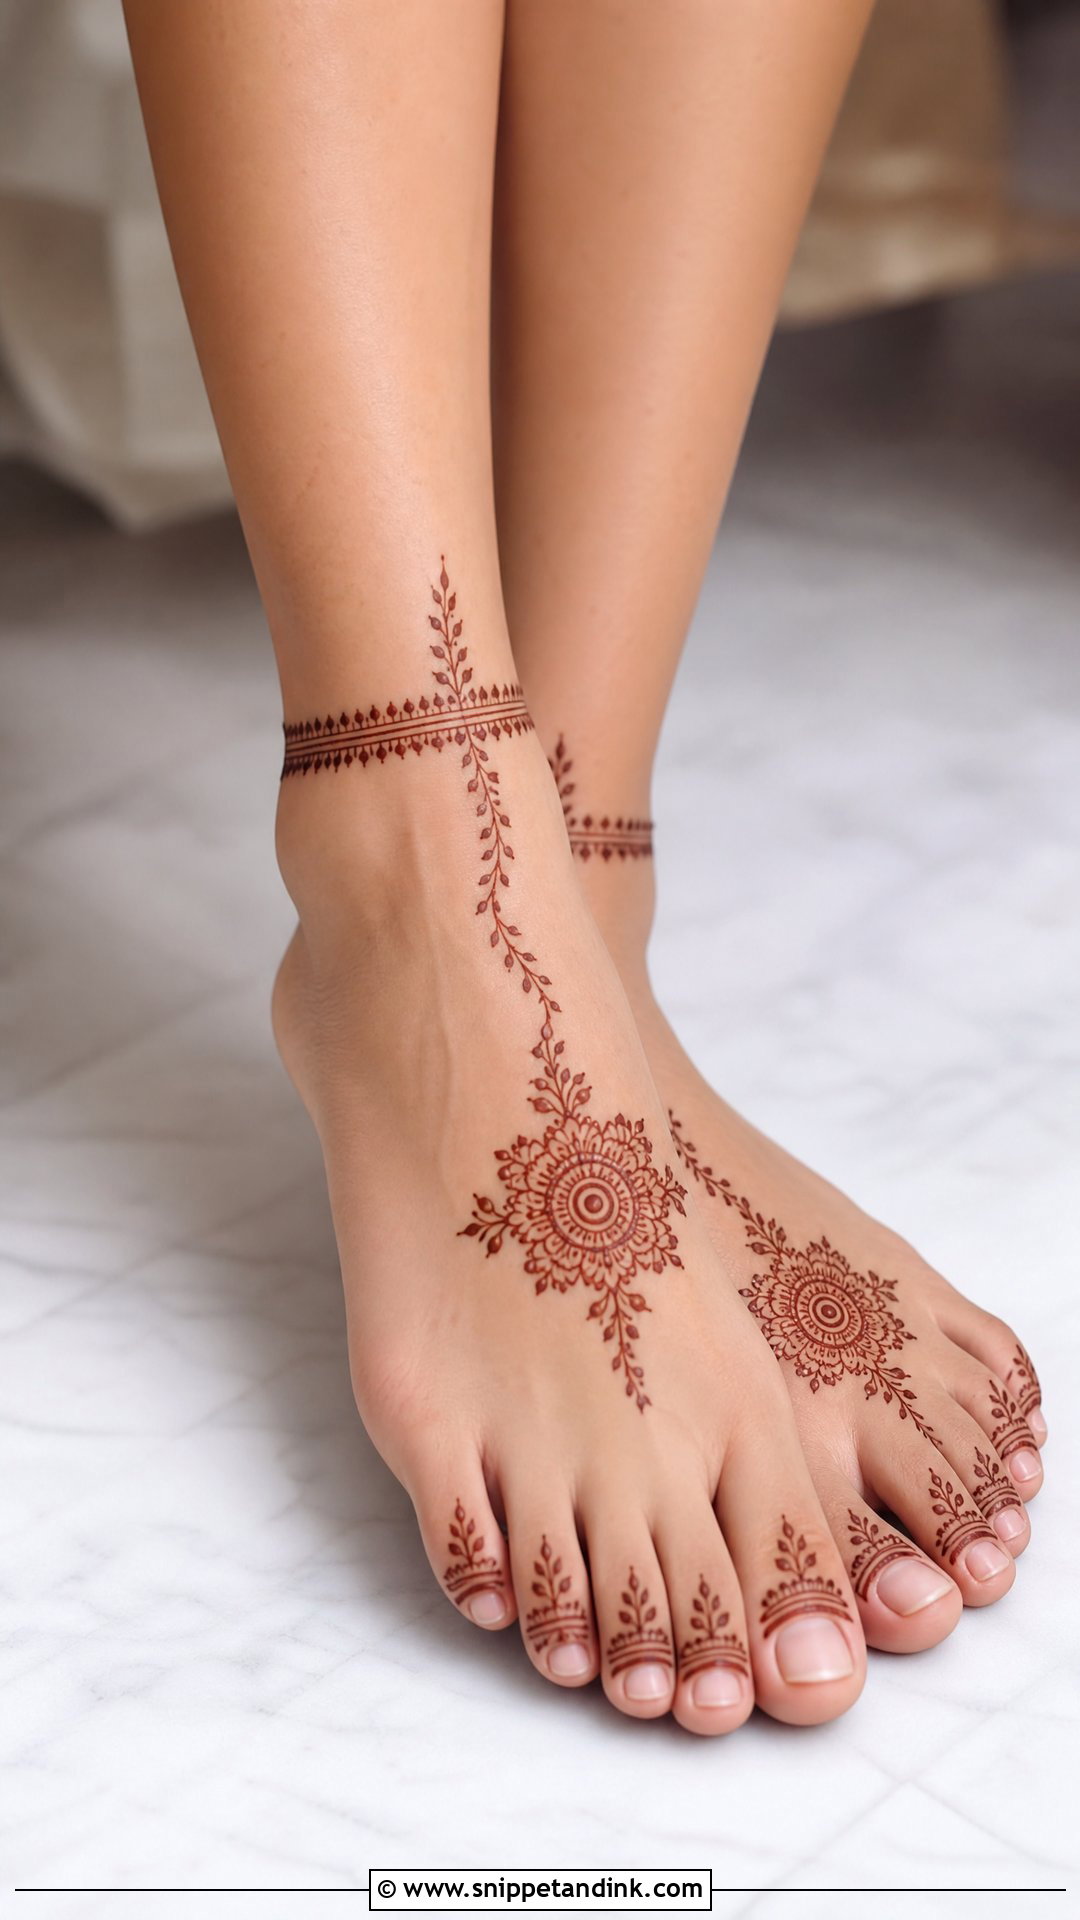
Minimal leg mehndi lets the skin do half the work. A small mandala on each foot, fine toe accents, a narrow ankle band and one slim leafy trail on the side of the leg are enough. It suits beach weddings, daytime ceremonies and pastel outfits. The difference between minimal and unfinished is precision: crisp lines, balanced placement on both feet and spacing that looks planned. I’d rather spend the saved time getting those few lines perfect.
17. Modern Bridal Leg Mehndi Design
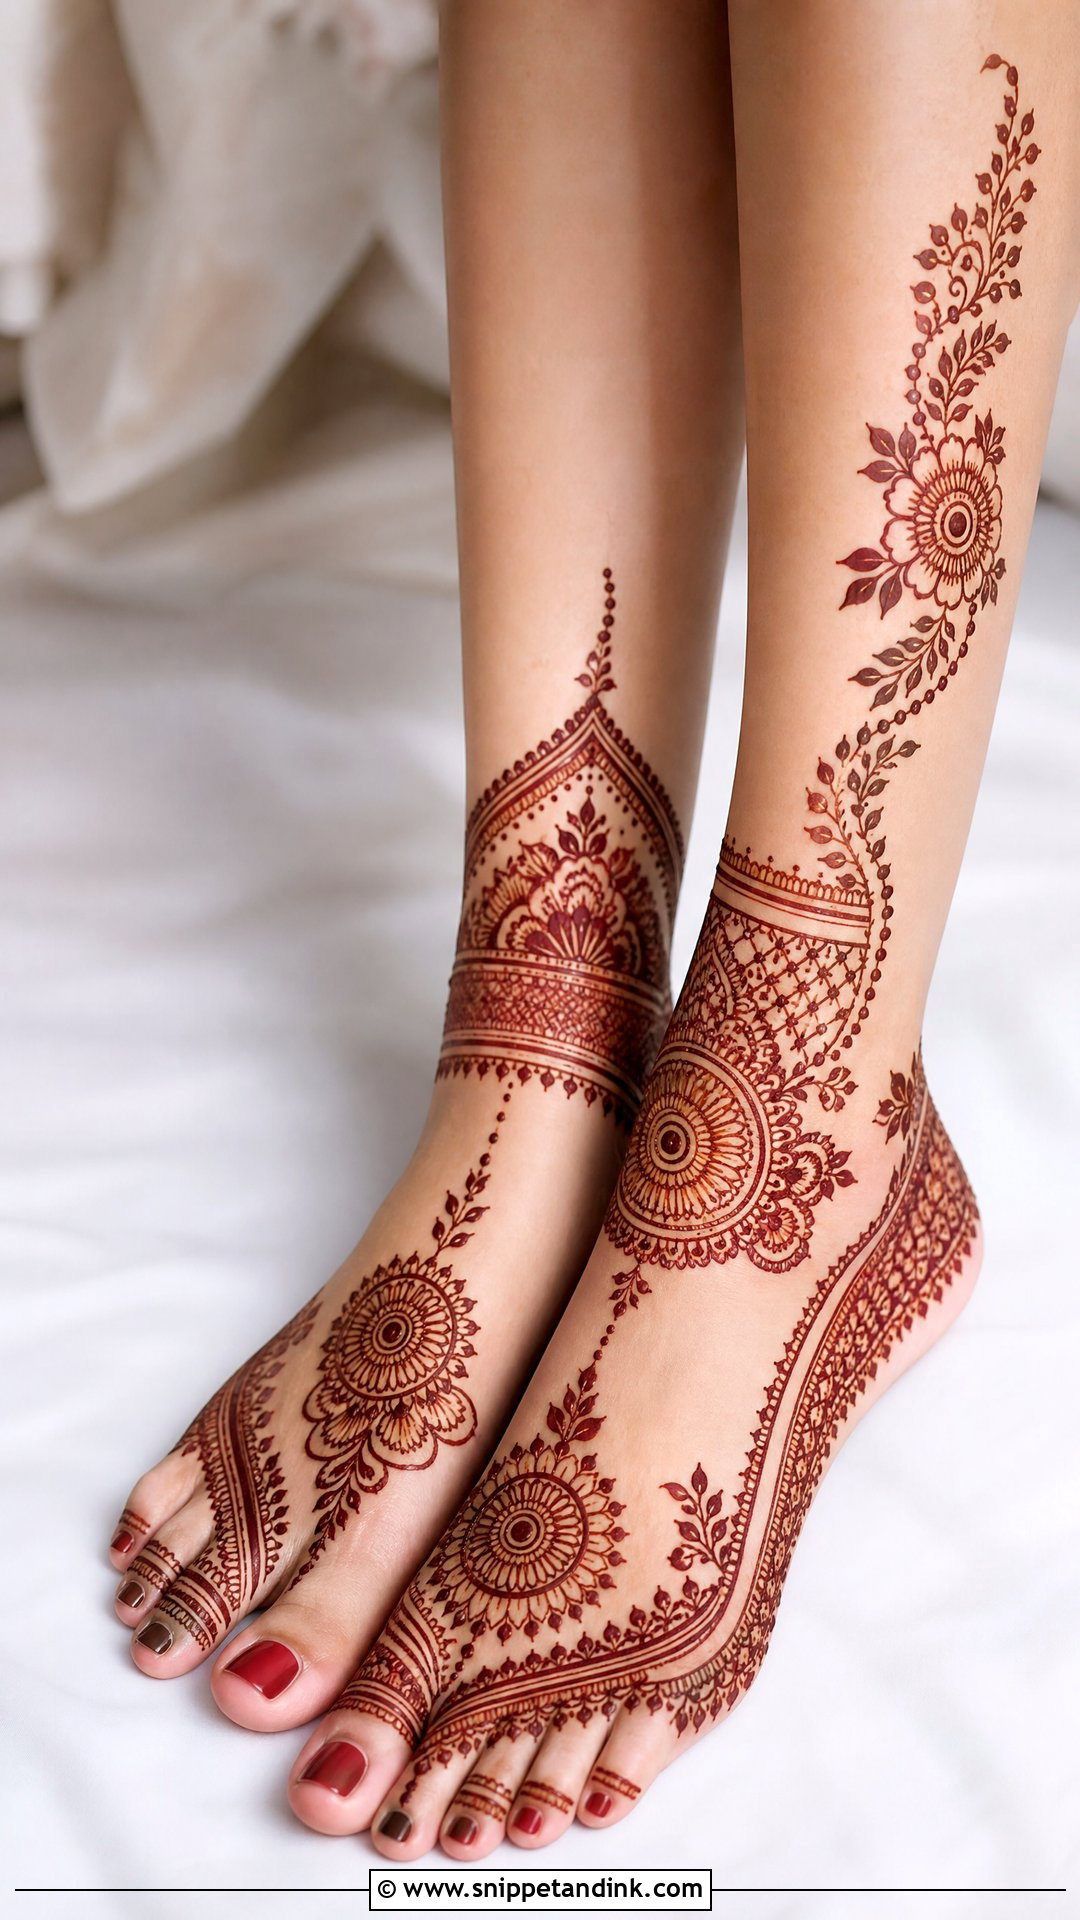
Modern leg designs pick specific spots rather than filling the whole leg: the toes, the centre of the foot, the ankle and the side of the calf. Bold florals, geometric bands, half-foot layouts and asymmetric trails all fit here, and mandalas mix well with leafy lines or jaali blocks with open curves. Asymmetry needs a plan, though. I sketch where each element sits on both legs before I start, so the pair still feels related. It sits naturally with contemporary lehengas, fusion outfits and lighter jewelry.
18. Moroccan Bridal Leg Mehndi Design
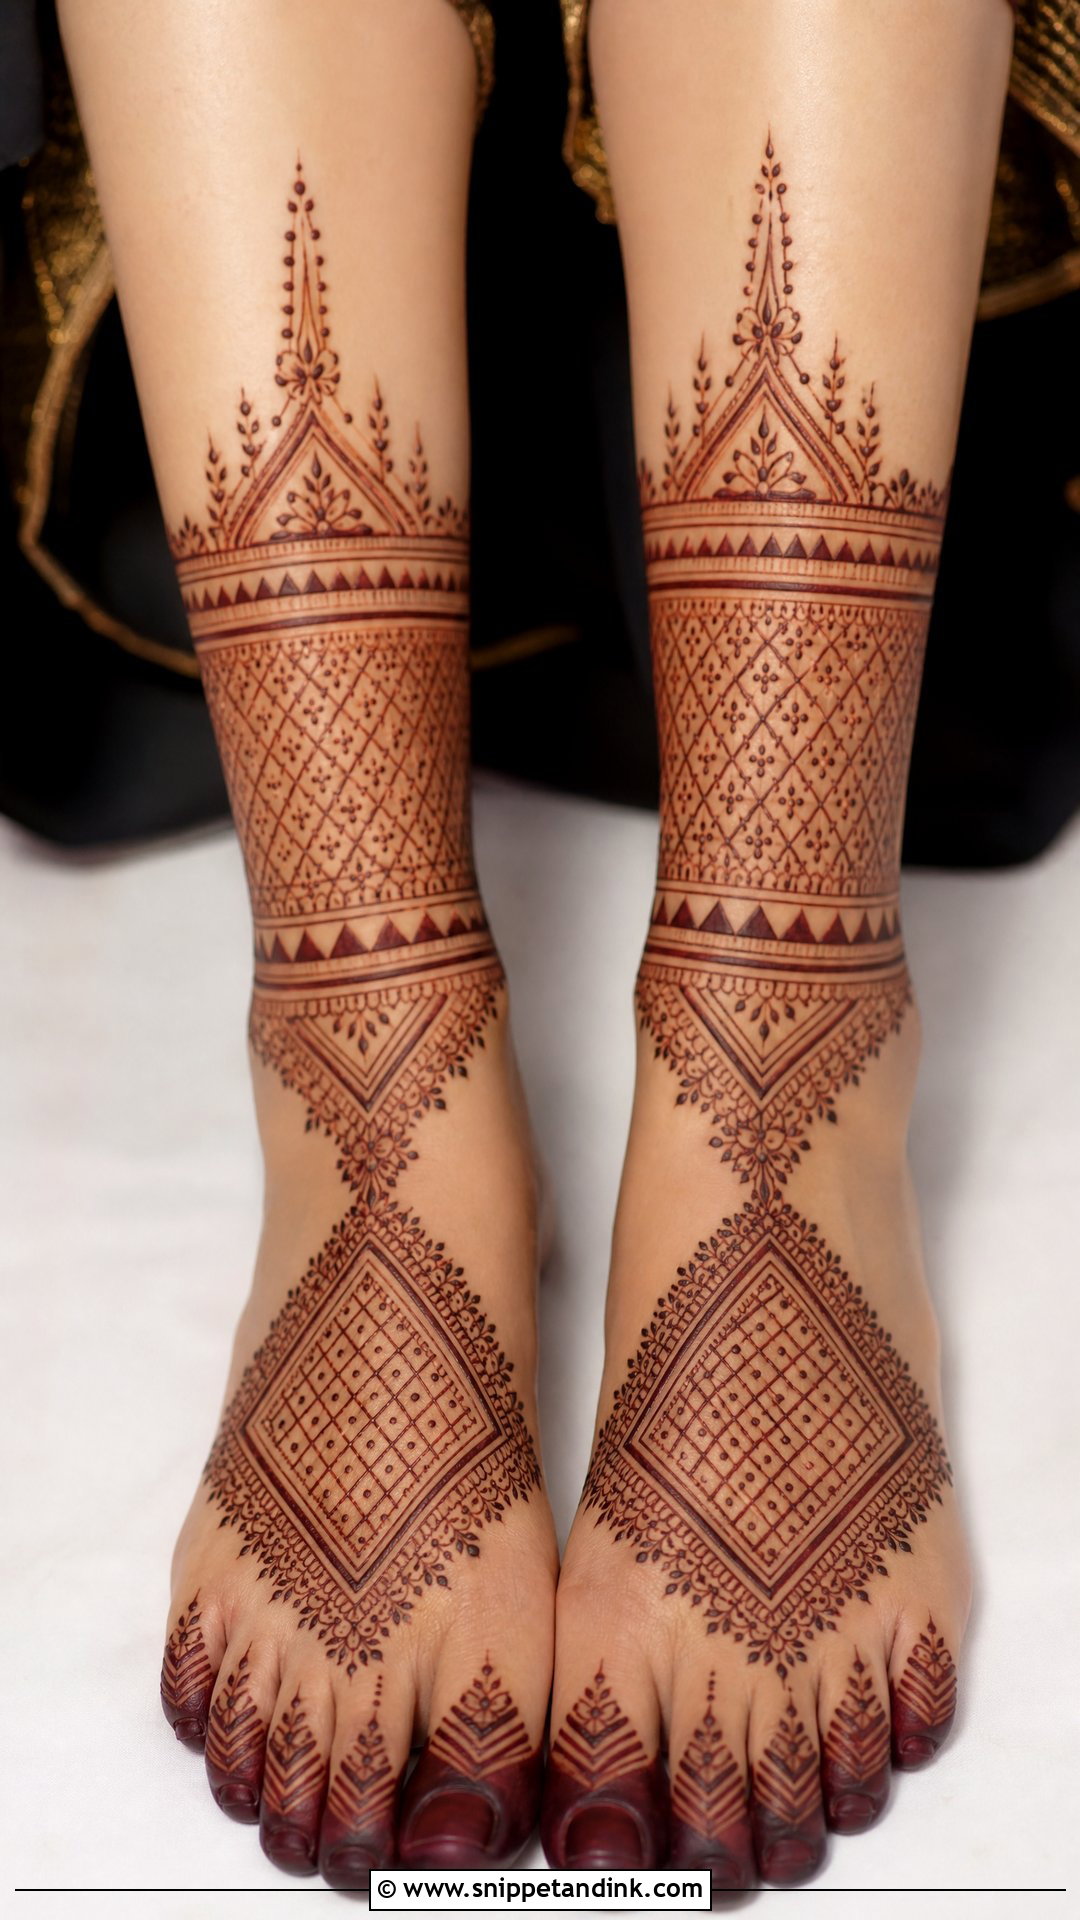
Moroccan work swaps the usual florals for diamonds, triangles, grids, straight lines and bold borders. It can sit on the feet and ankles or climb the calves for more drama. Straight lines are unforgiving on a curved foot, so I work in short sections and turn the foot as I go rather than dragging one long stroke. To soften it for a wedding, add small dots, leafy edges or a few floral accents around the geometric panels. It suits a bride who wants something uncommon with a confident, artistic finish.
19. Gulf Bridal Leg Mehndi Design
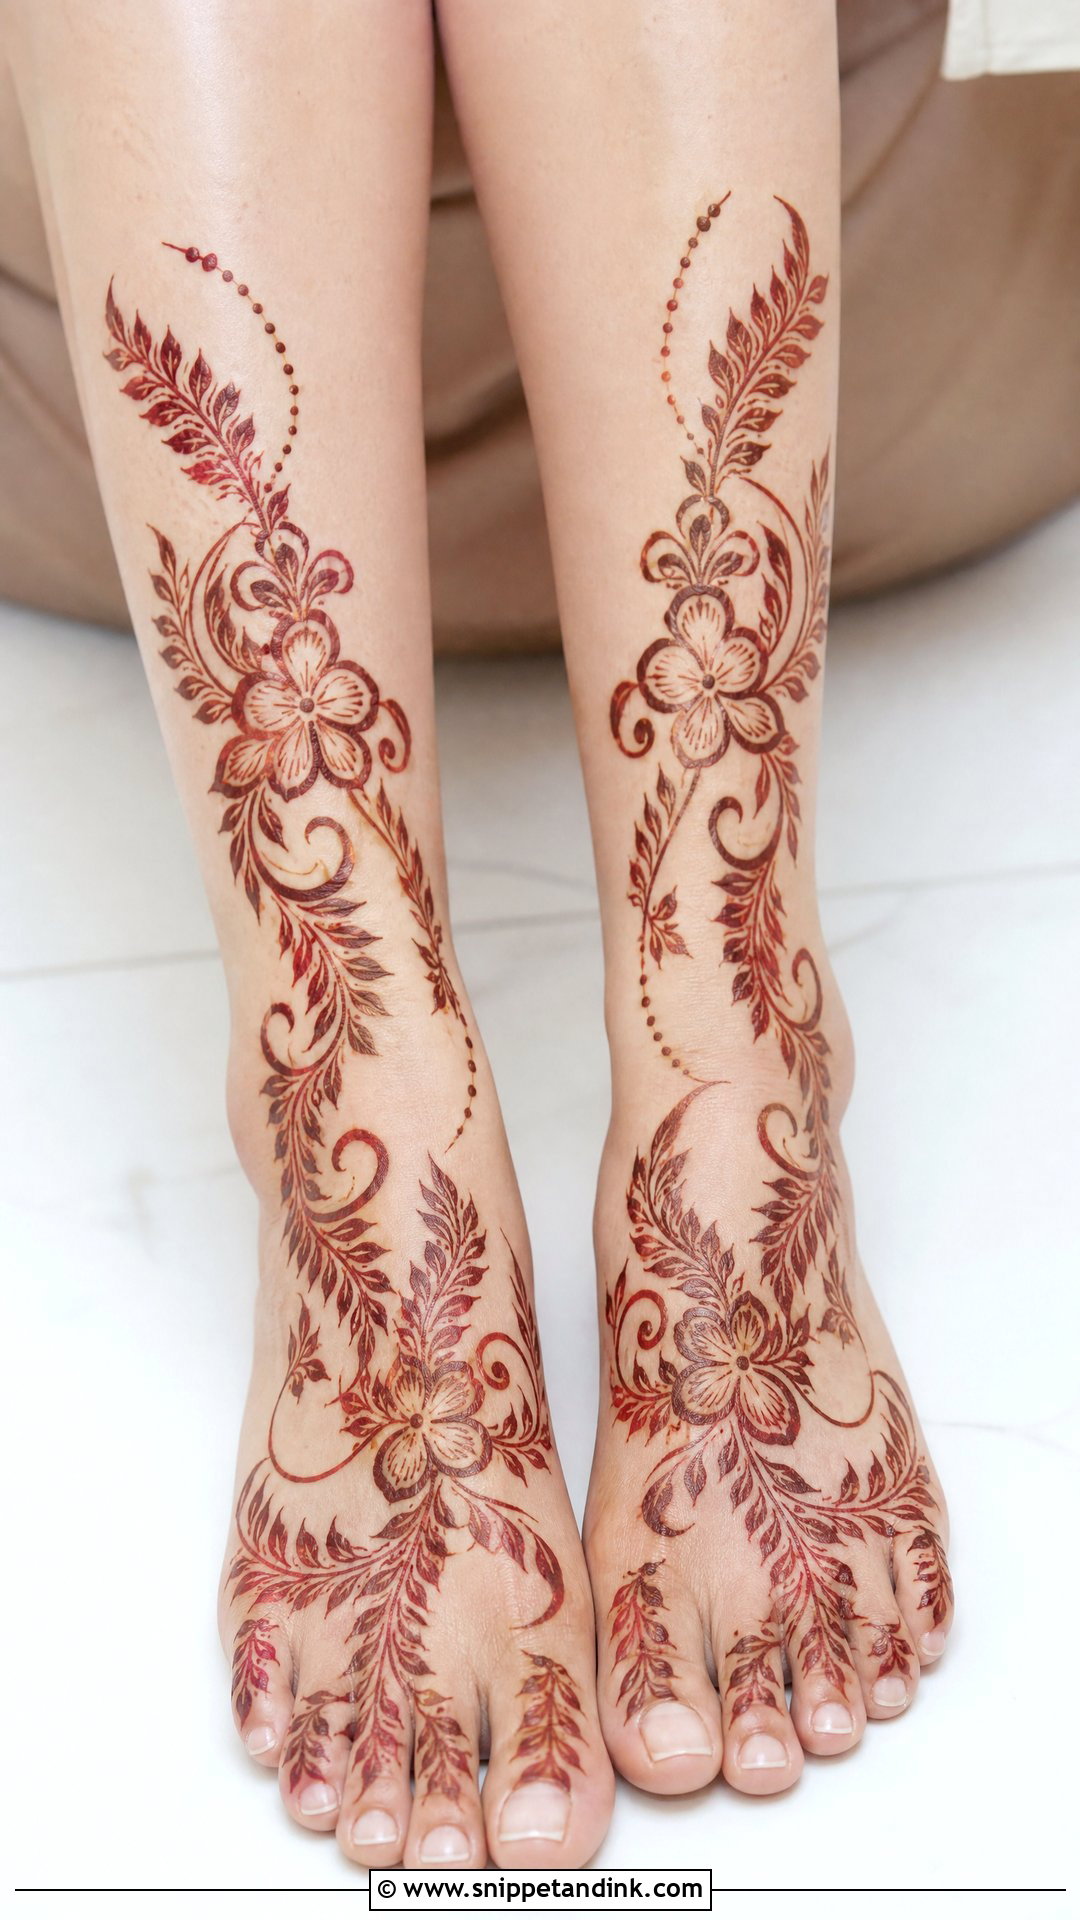
Gulf or Khaleeji-inspired mehndi is bold and flowing: large flowers, leafy strokes, curved vines and wide open spacing. It doesn’t need to cover the whole leg, because the motifs are big enough to stand out clearly once stained. A large floral on the foot can connect to a sweeping vine around the ankle and up the side of the leg. The shading inside the petals is done by thinning the paste stroke, and that gradient is what gives the style its luxurious look. It suits pre-wedding events, nikah ceremonies and modern bridal outfits.
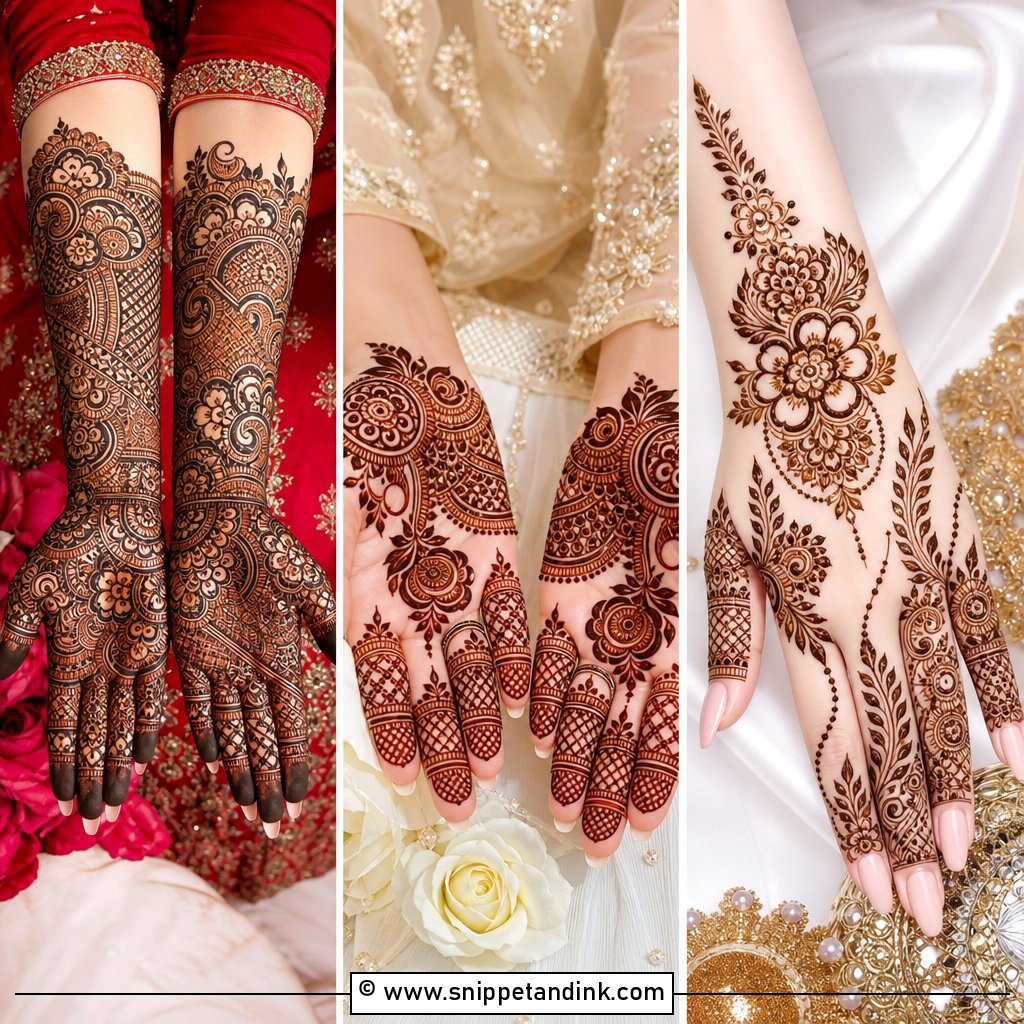
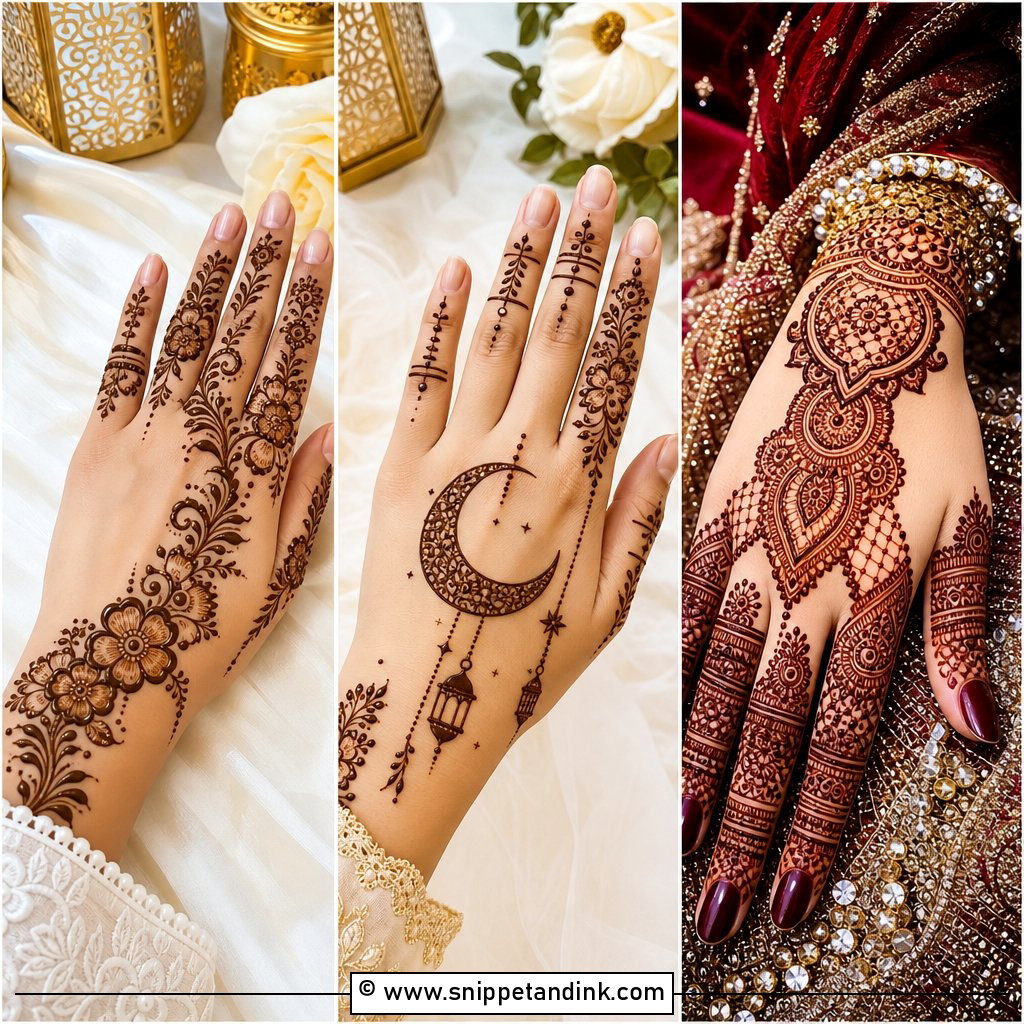
20. Bridal Leg Mehndi With Name
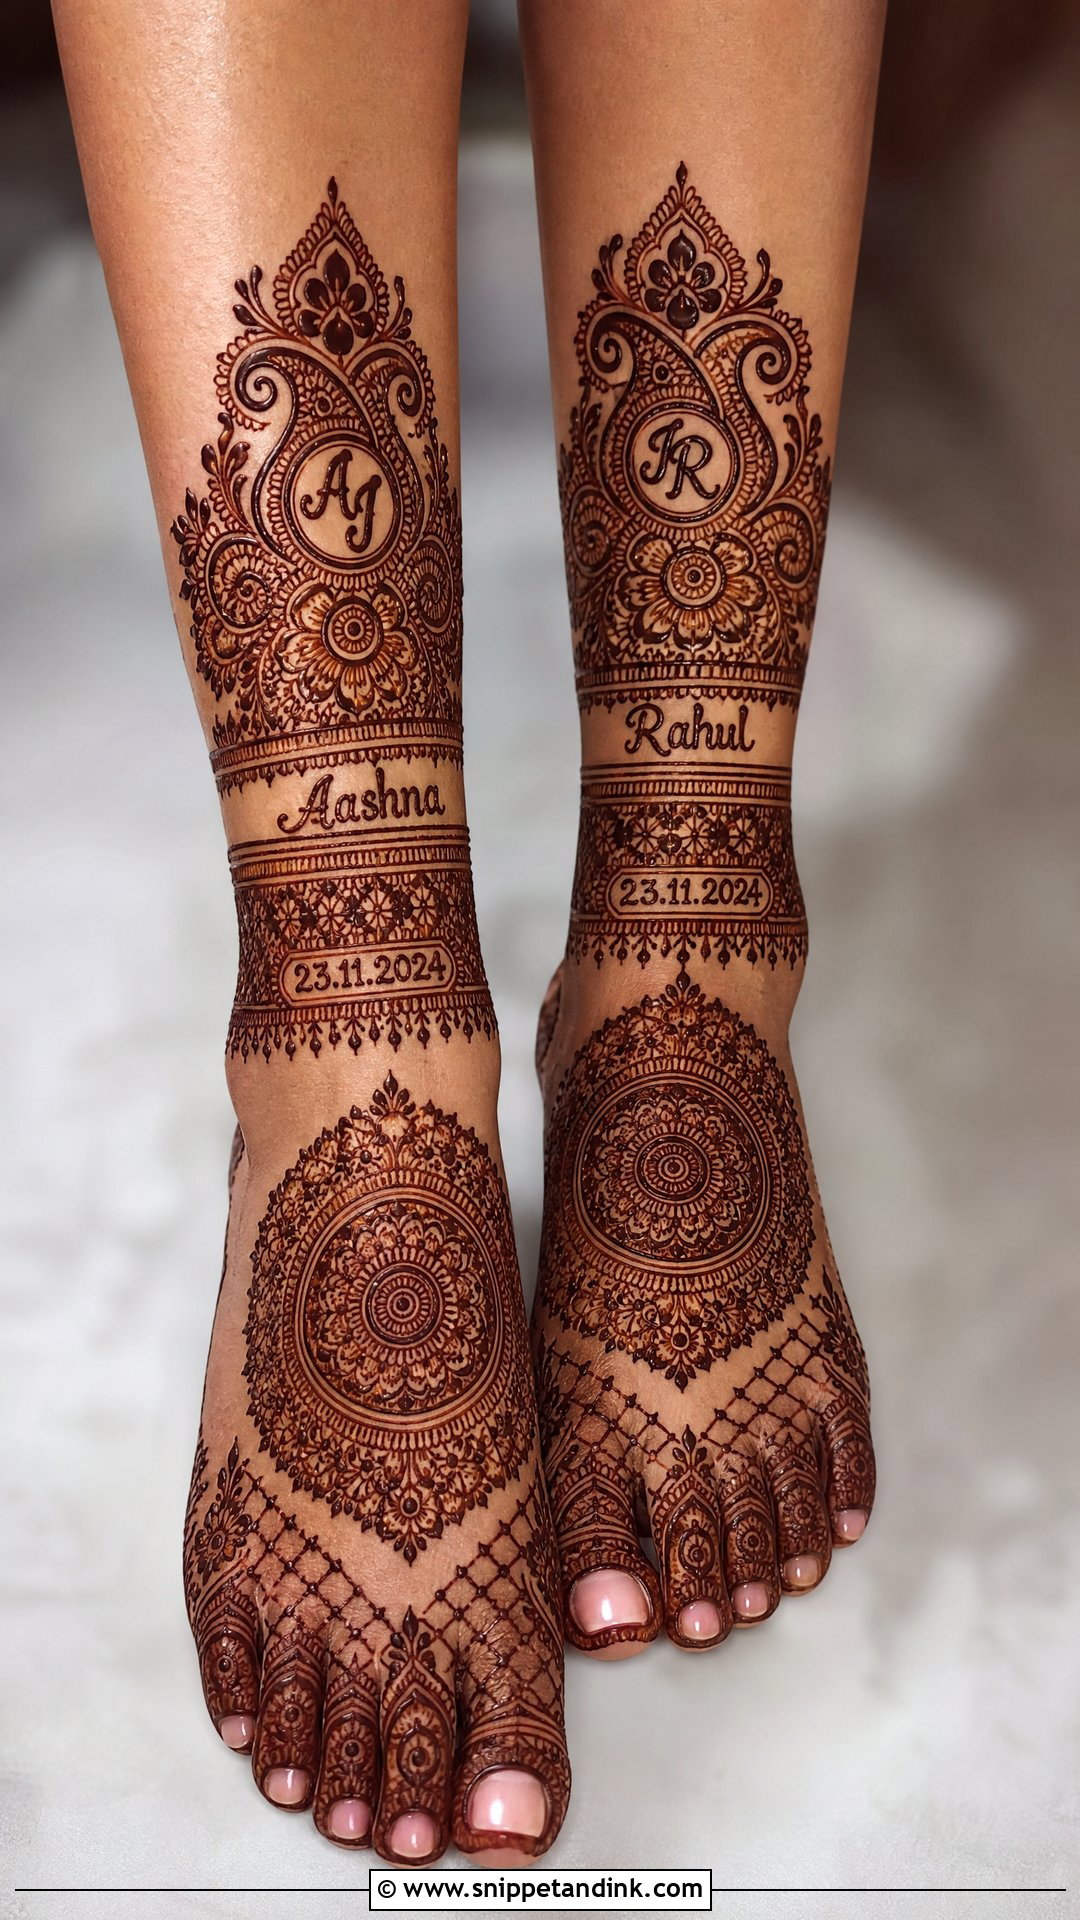
A name in the leg design makes it personal. Many brides add the groom’s name, initials, wedding date, or a small meaningful symbol within the foot or ankle pattern. I hide it inside a paisley, mandala, jaali section or floral curve so the search after the wedding is a real game. For a name that actually stains legibly, I need an open patch of skin, like the side of the foot or the lower calf; letters squeezed into dense fill blur into the pattern around them.
Why the Soles Stain Darker Than the Calves
Henna dye binds to the outer layer of skin, and the thicker and warmer that layer, the deeper the colour. That is why soles, heels and the sides of the feet come up a rich maroon while the shins and calves often settle a few shades lighter. It isn’t a fault in the paste. I plan for it by putting the darkest, finest detail low on the foot and keeping upper-leg motifs bold so they still read when the stain is softer.
Aftercare that protects the colour
Leave the paste on for at least six to eight hours; overnight is better. A light dab of lemon and sugar keeps it stuck to the skin while you sleep. Scrape it off dry instead of washing it, then keep the legs away from water for as long as you can that first day. Pedicures, hot showers, scrubs and swimming pools all fade a leg design quickly, so book anything like that before the henna, not after.
Black Henna Cones Have No Place on a Bride’s Feet
Natural henna never stains black. A cone that promises jet-black colour in an hour usually contains PPD, a hair-dye chemical that can cause blistering and scarring, and the feet are a painful place to find that out. Ask your artist directly whether her paste is made fresh from henna powder with essential oils, and if a ready-made cone smells strongly of chemicals or kerosene, don’t let it touch your skin. A patch test on the inner arm a week or so before is a sensible step if you have sensitive skin.
Let the Hemline and Your Sandals Decide Where the Pattern Stops
The right leg design depends on how much of your legs the outfit will actually show and how long you can sit for application. Full traditional coverage is worth it if your lehenga moves and your photos will catch it; an ankle-focused design is plenty under a long hem. Before you settle, put on the sandals and payal you will wear and look at your feet in a mirror. That simple check tells me more about where the design should begin and end than any reference photo does.
You'll Like These Ideas:


Leave a Reply