
Foot henna is the part of bridal mehndi people forget to plan, and then it shows in every seated ritual photo. Feet behave differently from hands: the skin is thicker, the shape curves away from the camera, and sandal straps and anklets cover part of whatever I draw. So the design has to be planned around the hem of the outfit, the footwear and the payal, not just copied from a palm. Below are twenty foot layouts, from dense Indian work that climbs the calves to light anklet-style patterns, with notes on how each one wears. If you’re still deciding between styles of wedding foot henna, start by checking how much of your foot the hem actually shows when you sit.

Why Feet Stain Differently from Hands
The soles of the feet take henna as deeply as the palms, because the skin there is thick. The top of the foot and the ankle are thinner and usually a shade or two lighter. That’s why a pattern that looks rich on your palm can look faint on your instep, and why I use bolder outlines on the top of the foot than I would on the back of the hand.
Feet are also cooler than hands for most people, and colder skin stains more slowly. Keeping them warm while the paste is on makes a real difference. So does sitting in the right order: I do feet last, once the hands are dry enough that the bride isn’t tempted to reach down and touch anything.
What the hem and the shoes decide
- A lehenga that pools on the floor hides almost everything above the ankle, so full-leg work only pays off if you’ll be seated with the hem lifted for rituals.
- Wide sandal straps cover the middle of the foot. Put the main motif either above or below where the strap sits.
- Heavy payal hides a band of skin around the ankle; draw the ankle border just above it, not under it.
1. Full Leg Bridal Mehndi Design
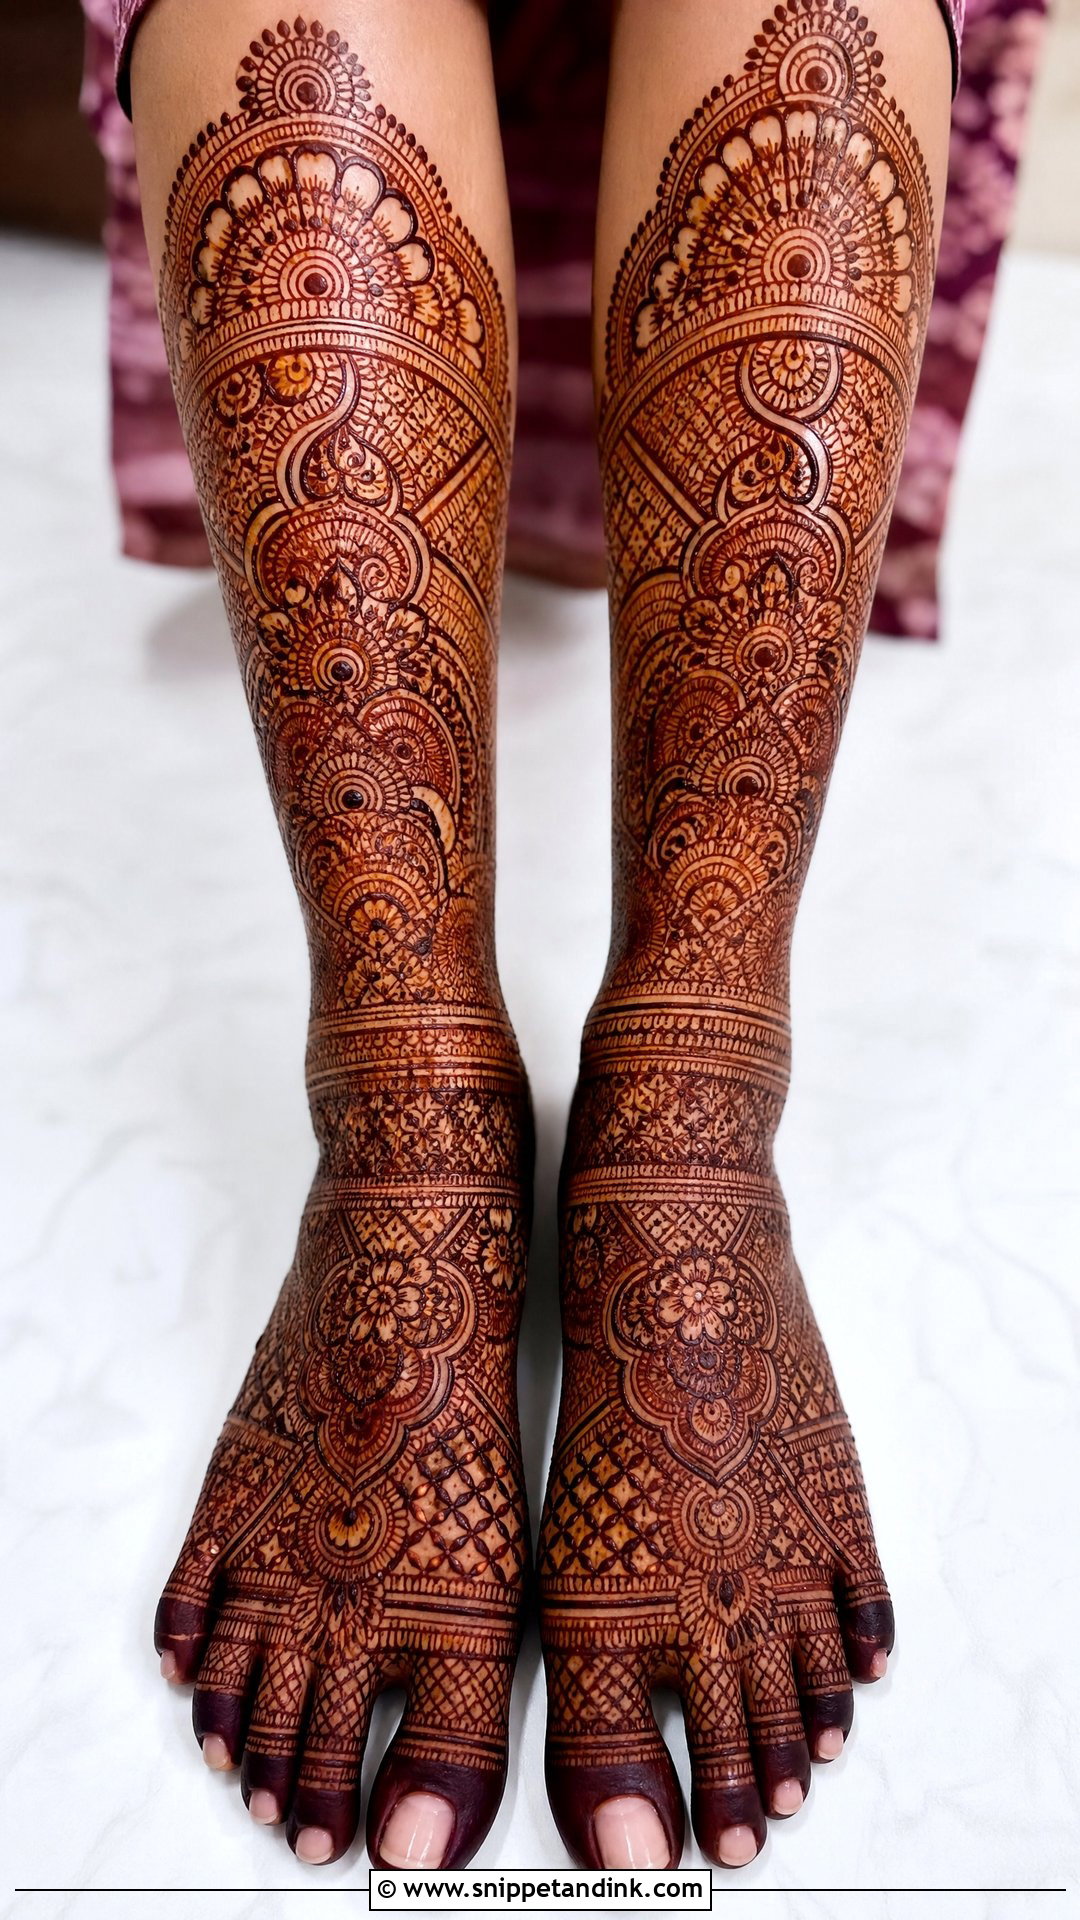
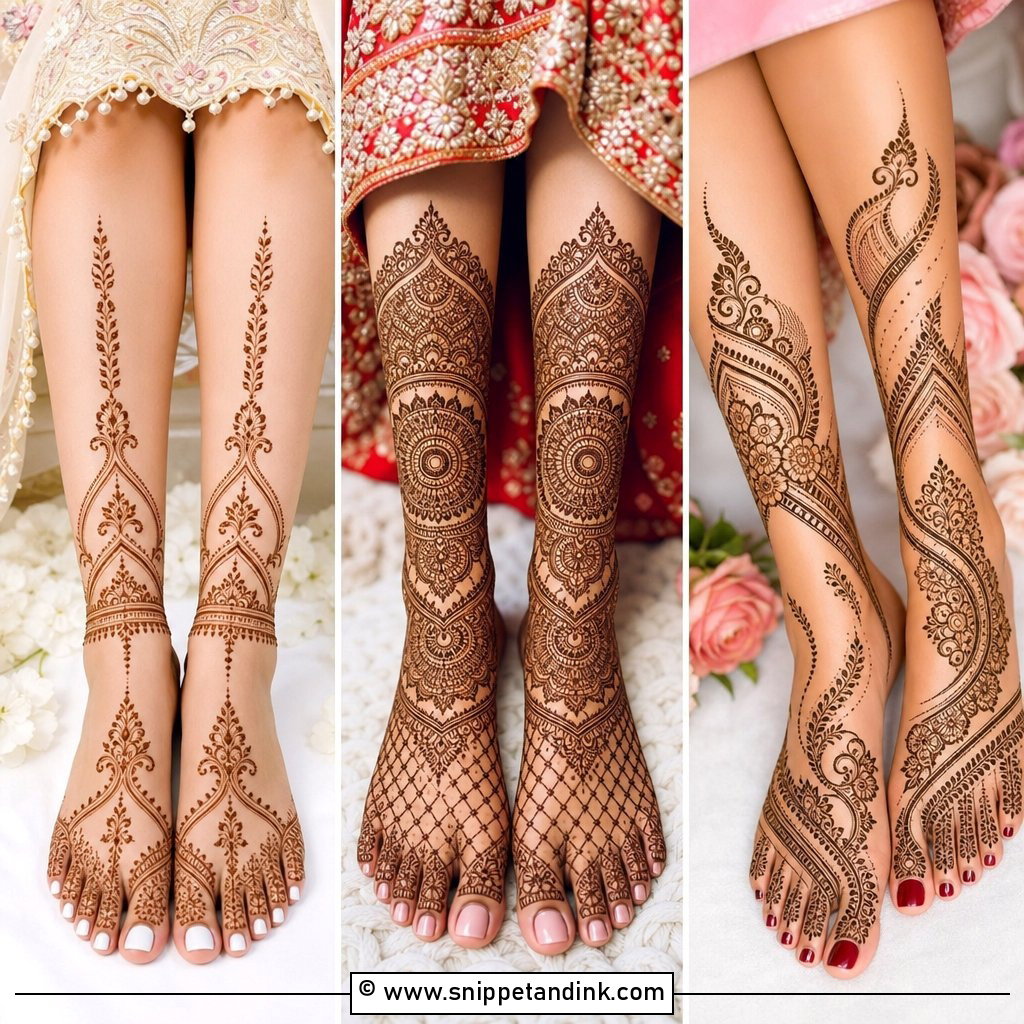
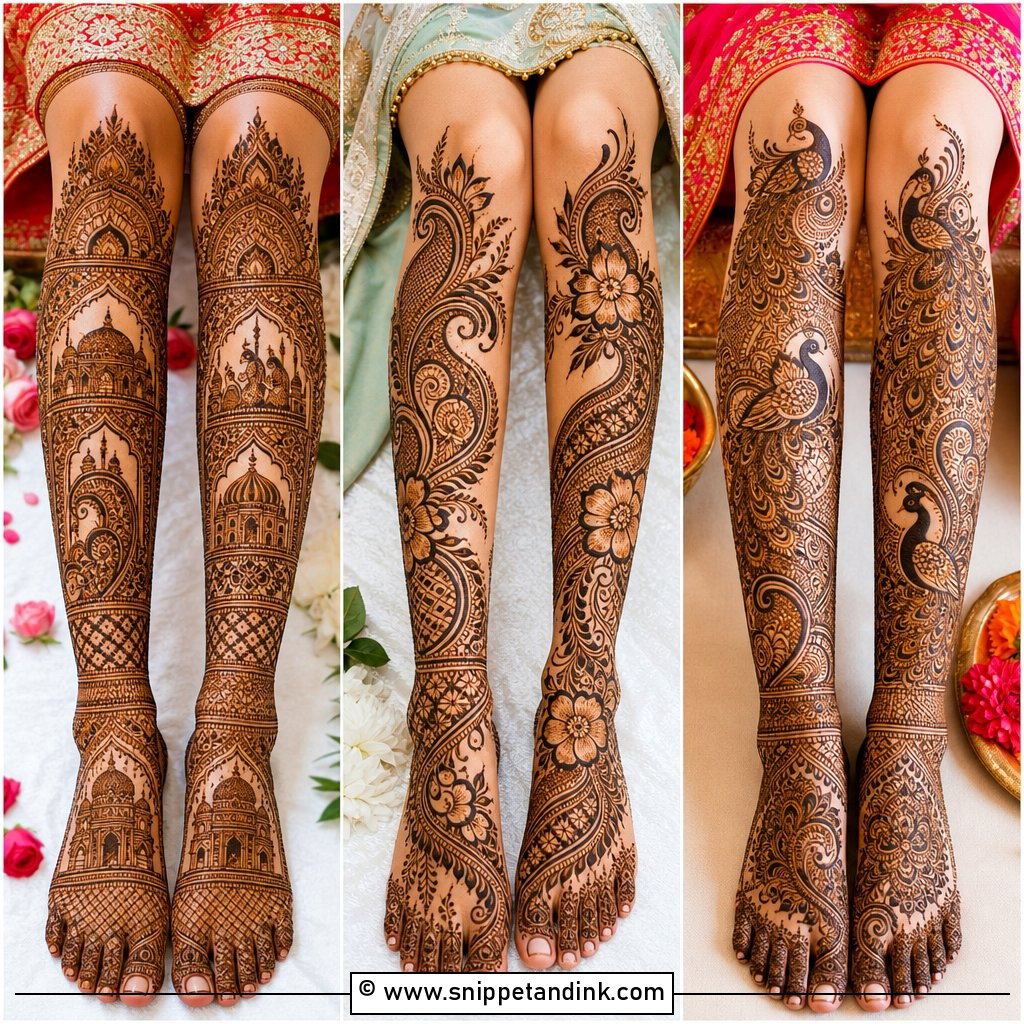
A full leg bridal mehndi design runs from the toes up to the calves in dense filling, paisleys, florals, mandalas and leafy detail. Symmetry is the hard part. When the feet sit together for a ritual photo, the two sides need to read as one design, so I draw the centre line of each foot first and mirror outward from it. Neat toe caps and a strong ankle band frame the whole thing. Plan for a long sitting; legs take as much time as a pair of full hands.
2. Arabic Bridal Foot Mehndi Design
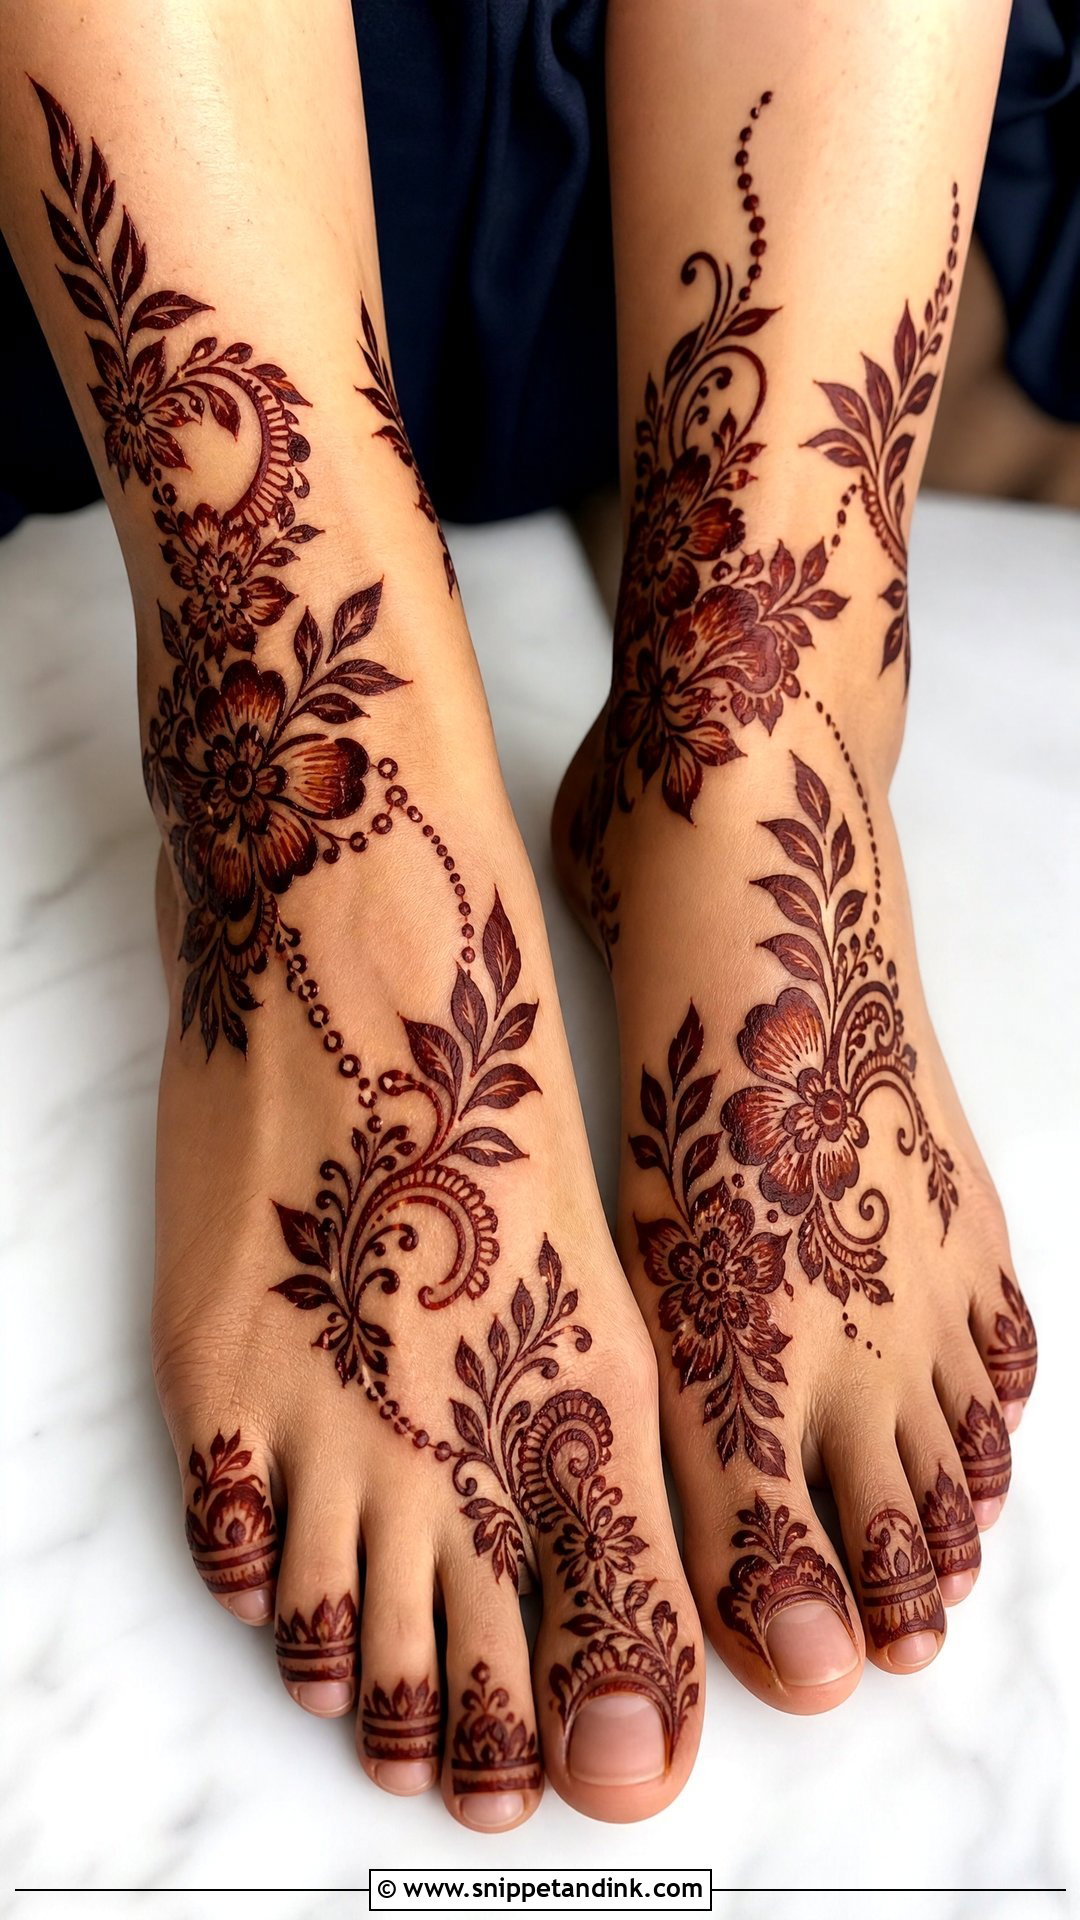
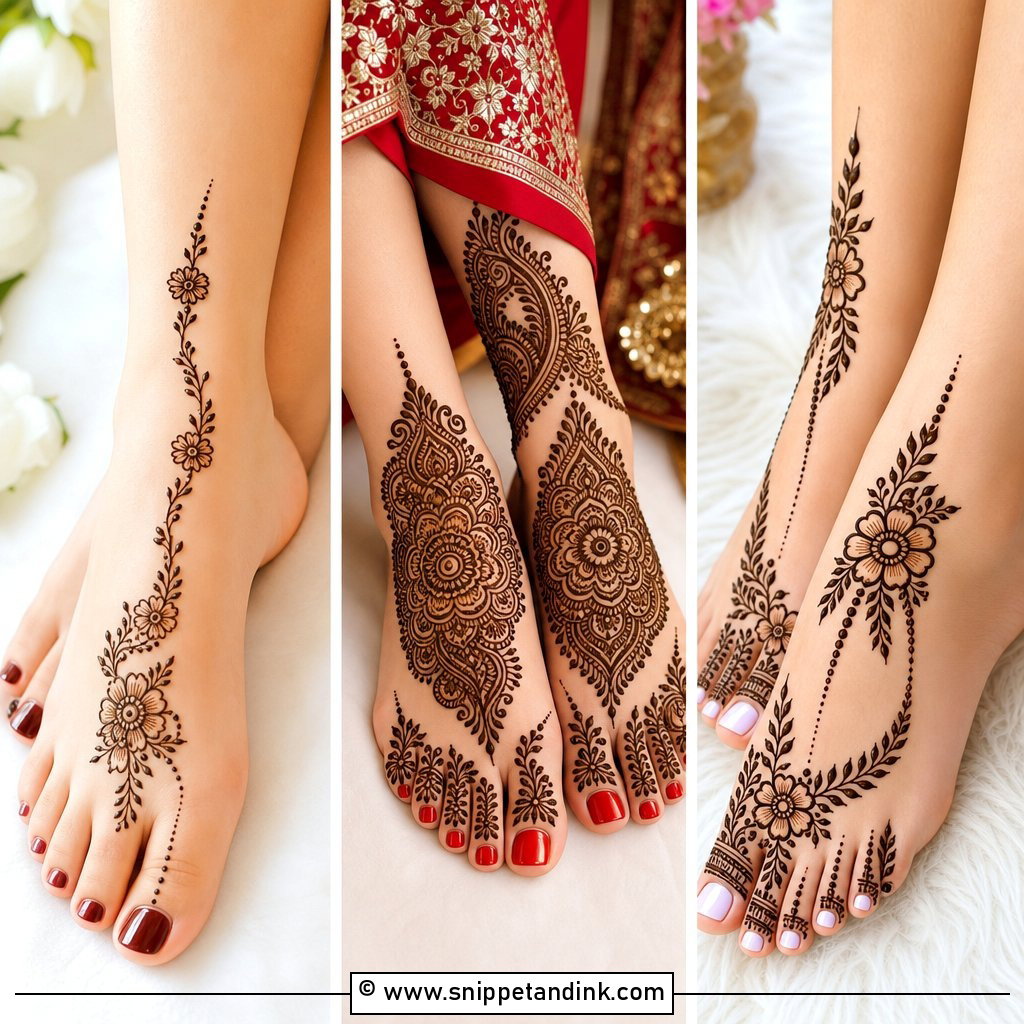
Arabic foot work moves diagonally, usually starting near the big toe, crossing the top of the foot and wrapping round the ankle before climbing a little. Thick outlines and open skin make it legible from across a mandap, which dense filling often isn’t. It’s one of the quicker bridal options to apply, a real advantage if your mehndi night is crowded. Thin anklets and simple sandals leave the bold flowers visible, while wide straps tend to land right on the best part of the trail.
3. Indian Bridal Feet Mehndi Design
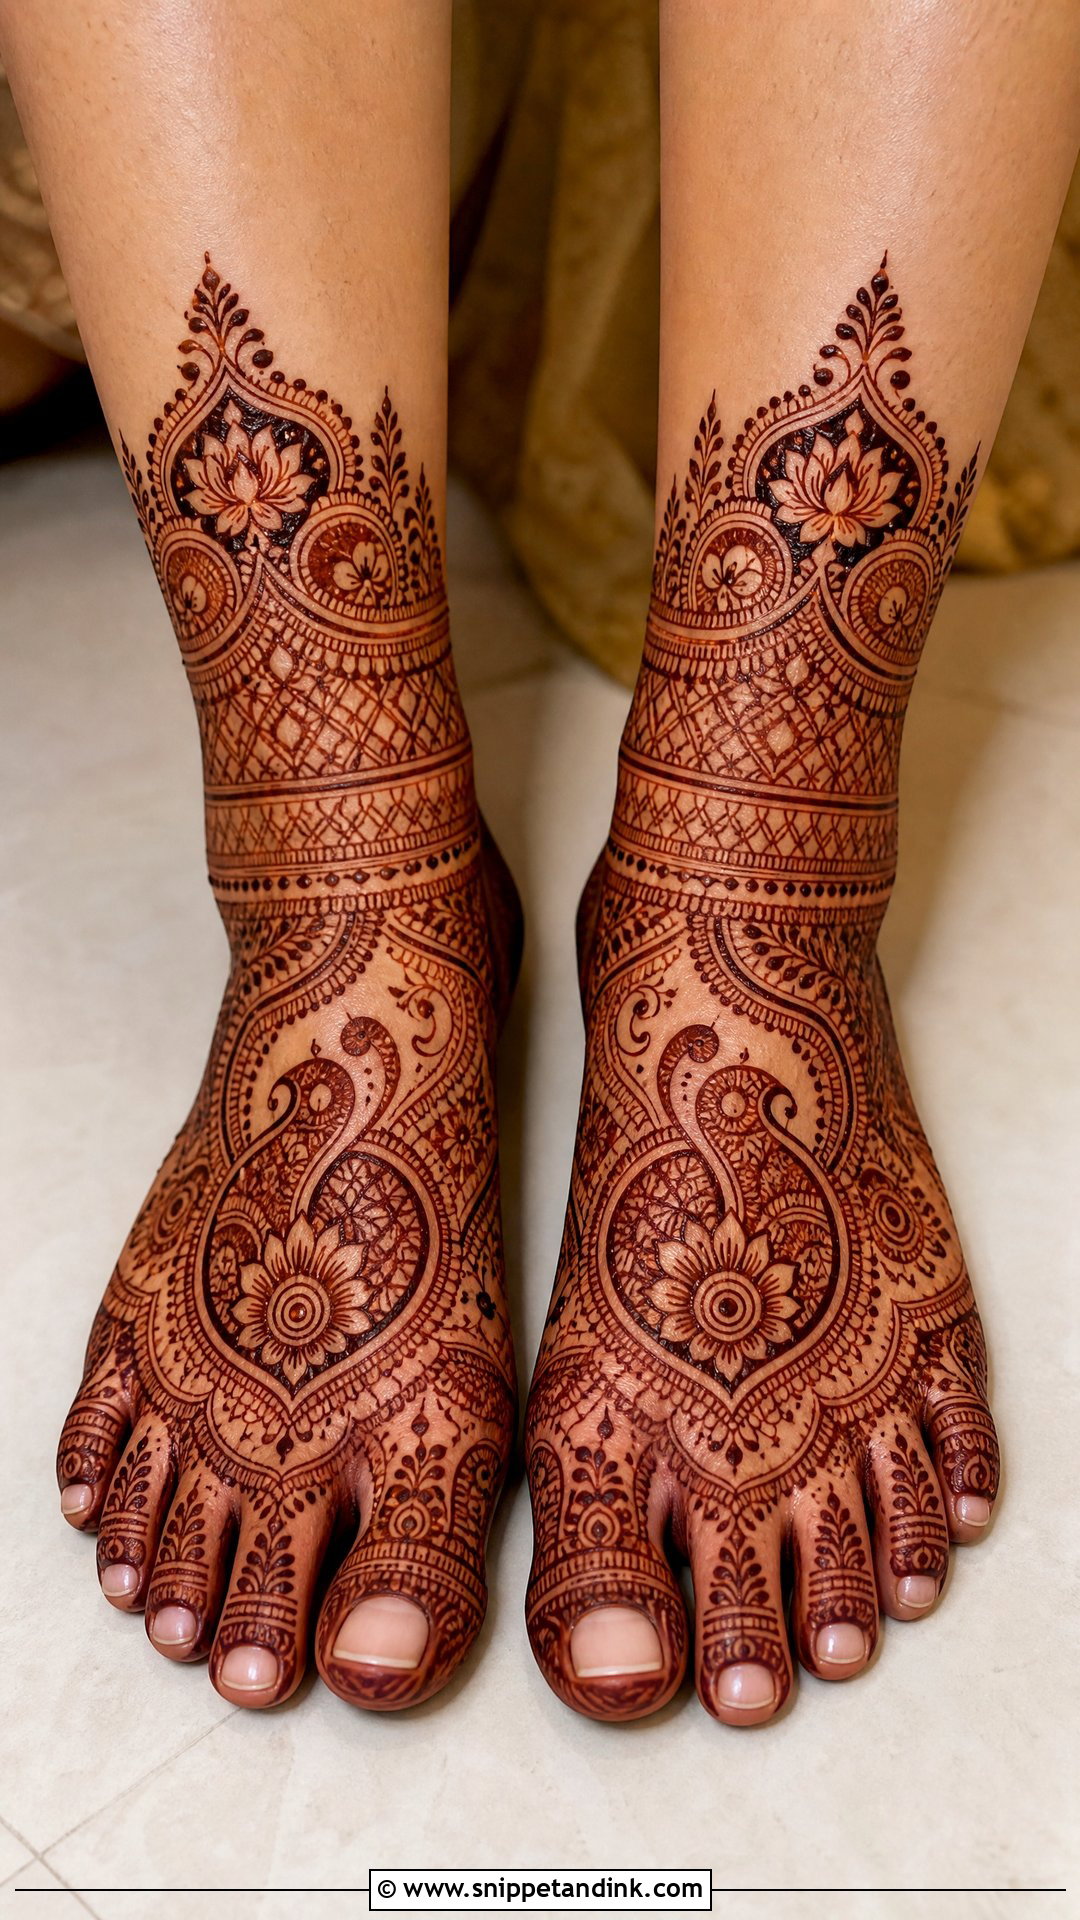
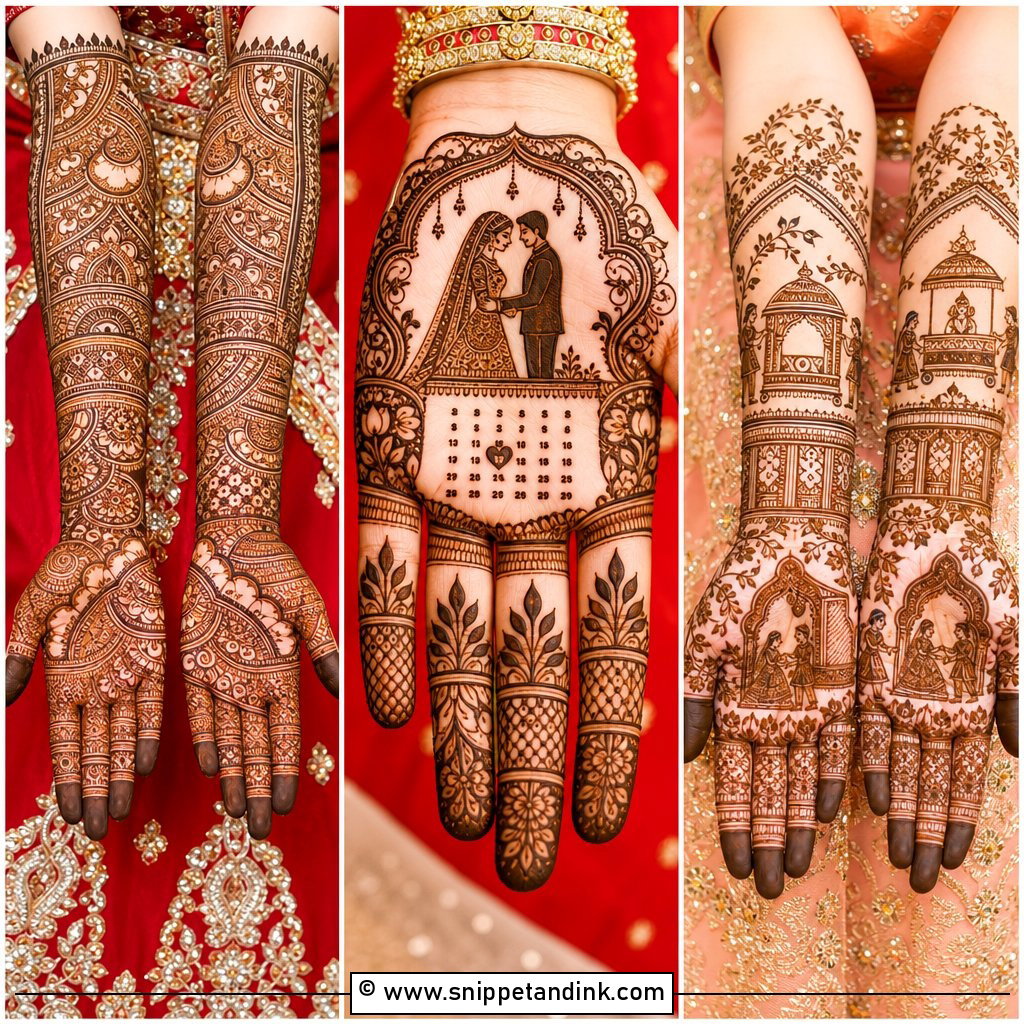
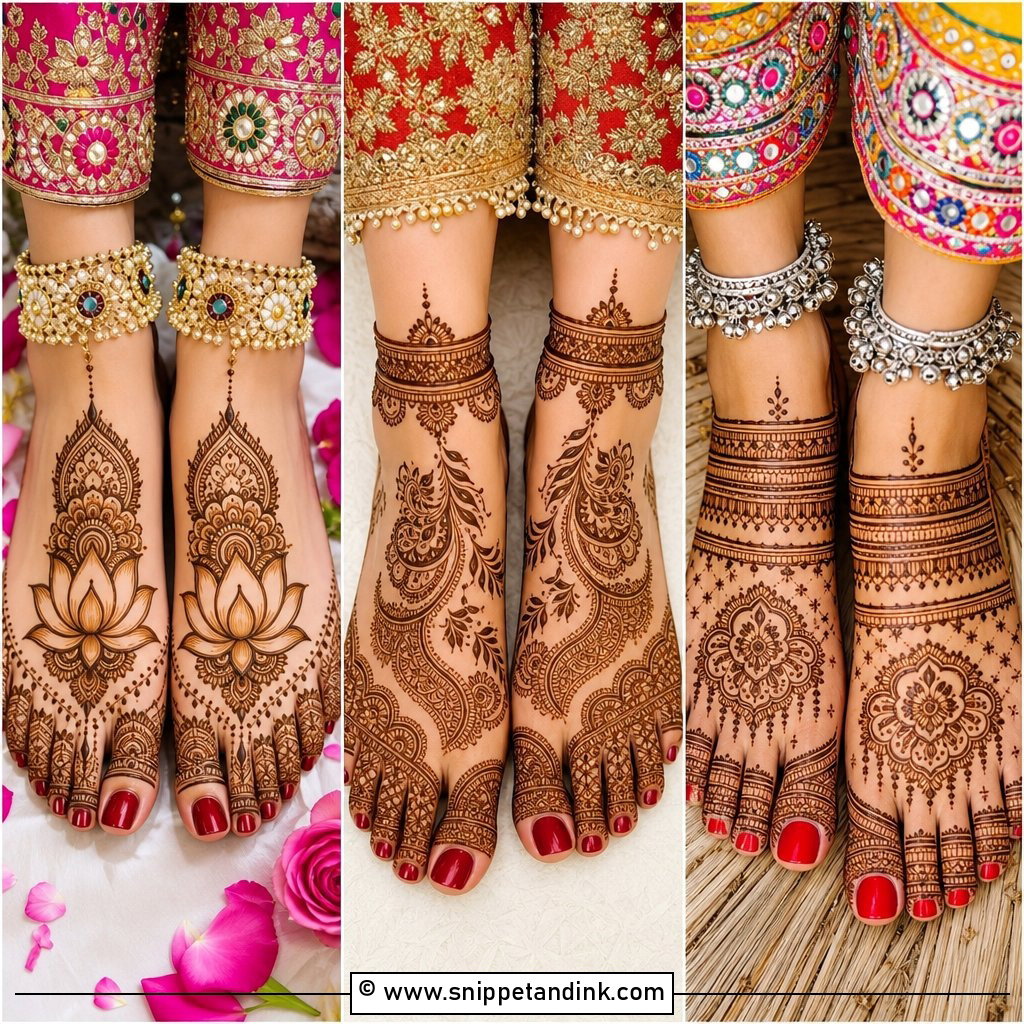
Classic Indian foot work leaves almost no empty skin: tiny flowers, paisleys, dots, curved vines, peacock accents and patterned bands. It suits brides who are already doing full-hand bridal henna in the same style, and it sits naturally beside red, maroon and gold. The detail is so fine that line quality is everything here; a shaky artist shows far more on dense work than on Arabic. I like to repeat one or two motifs from the hands, or a small set of initials, so the feet feel connected to the rest.
4. Simple Bridal Foot Mehndi Design
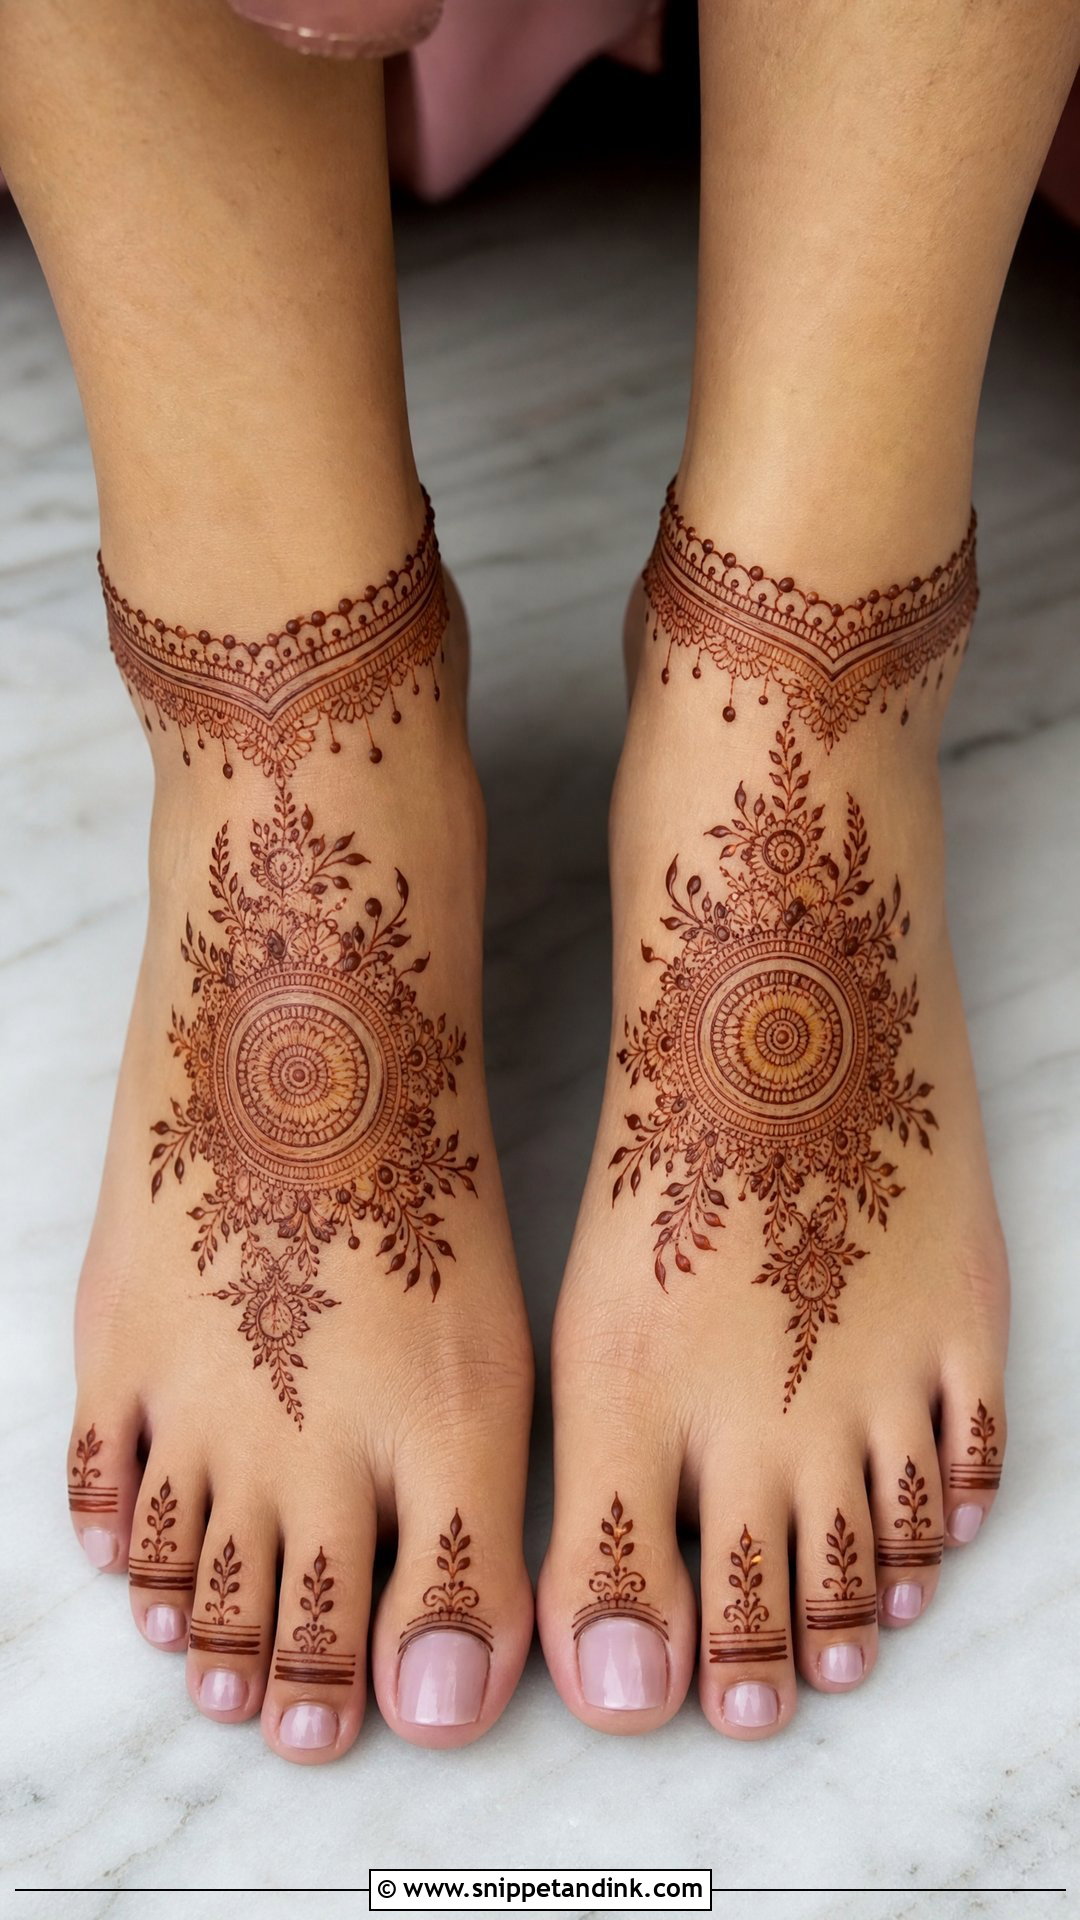
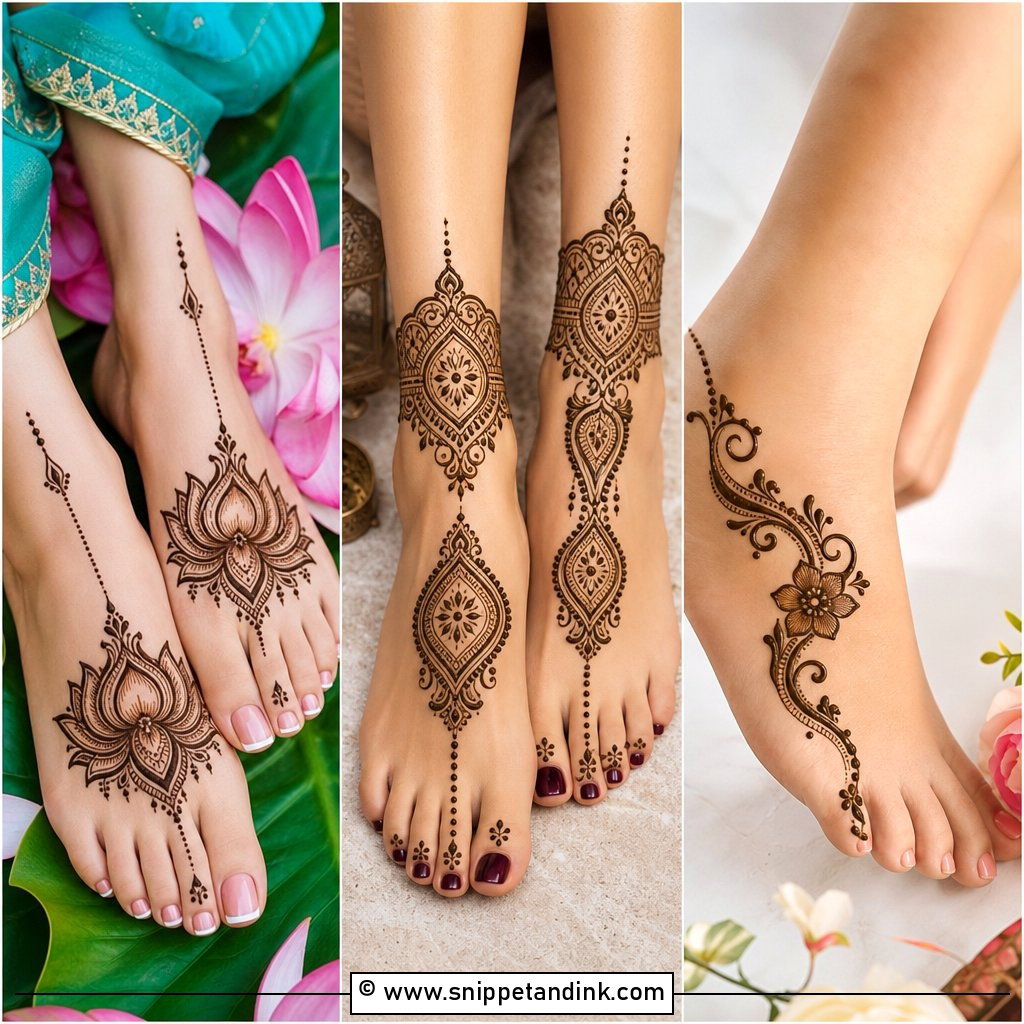
Dense henna from toes to legs isn’t for everyone, and the simple layout gives a cleaner finish that still reads as bridal. A centre mandala, small floral vines, slim toe details and a light ankle border are enough. It suits intimate ceremonies, beach weddings and civil celebrations, where heavy work can look out of place. If your sandals have chunky straps, I keep the ankle light so the design doesn’t fight the shoe.
5. Front Foot Bridal Mehndi Design
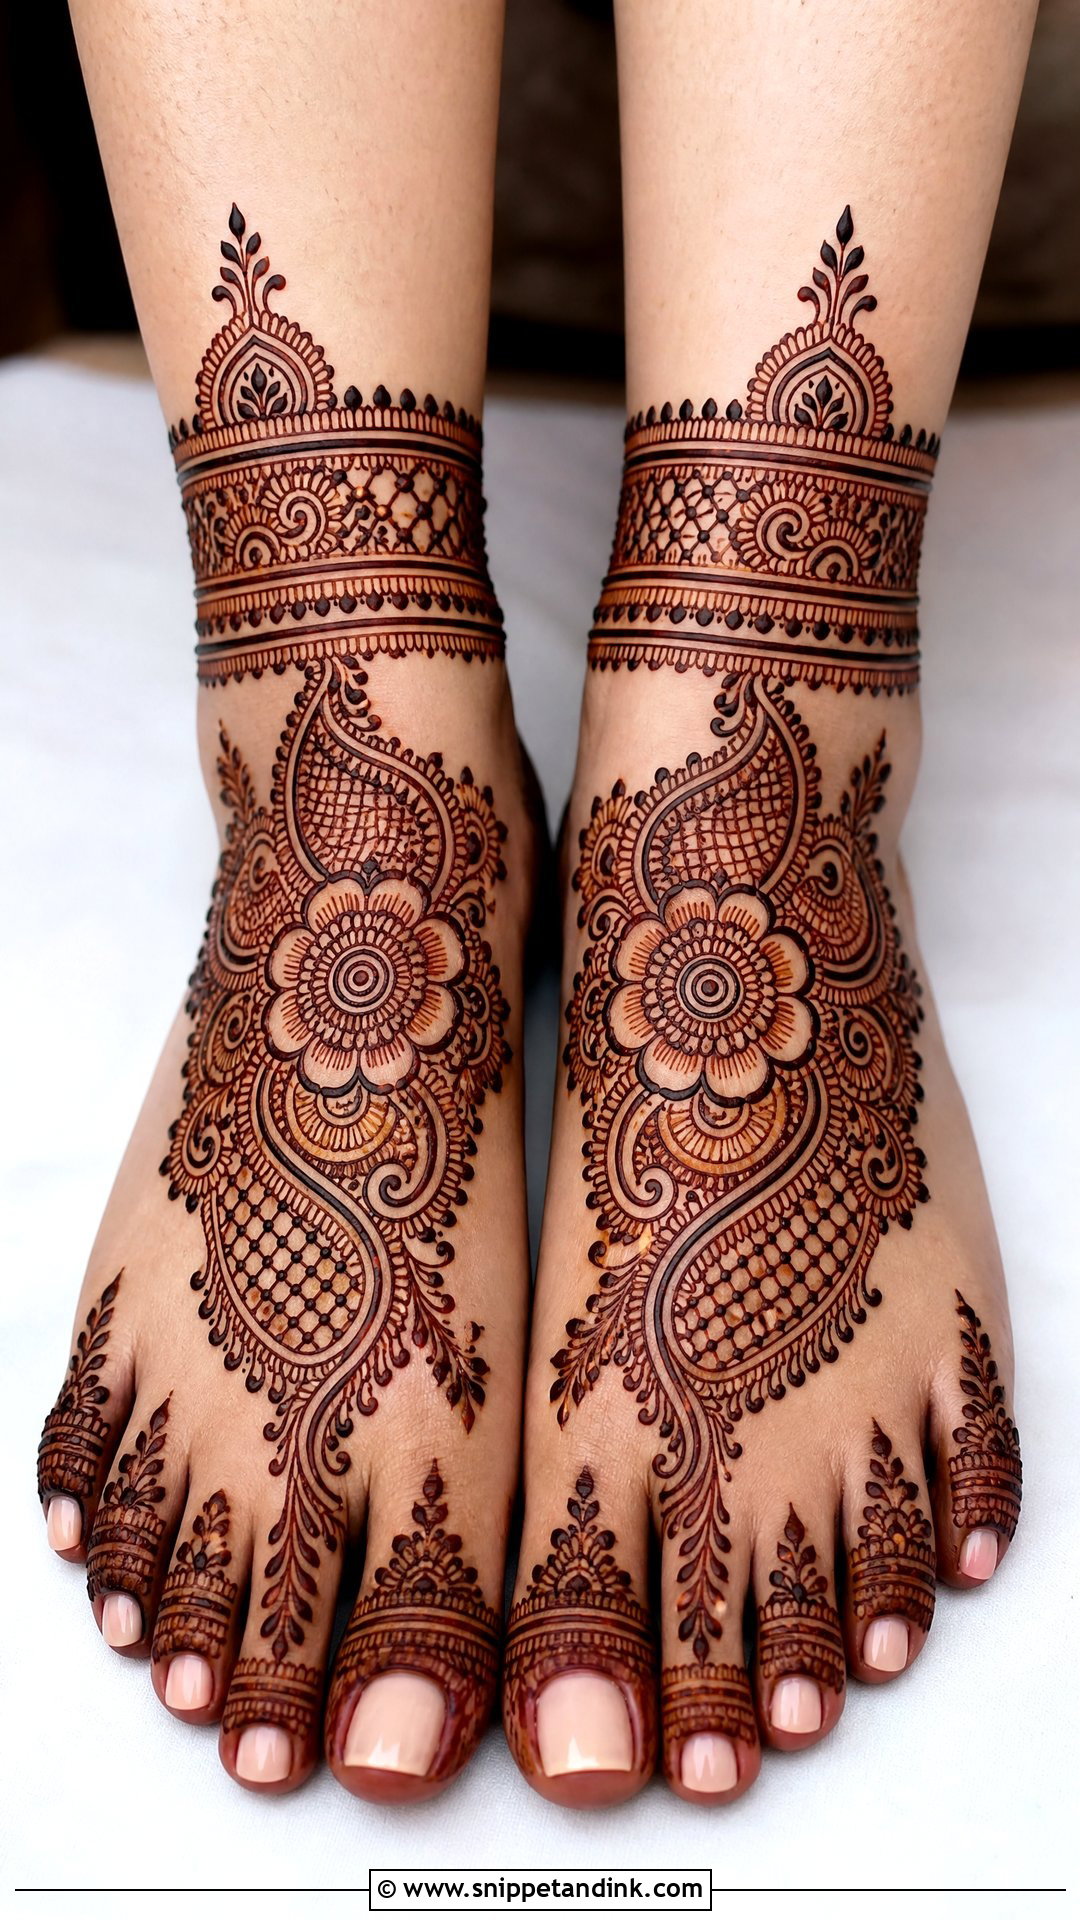
A front foot bridal mehndi design puts everything on the top of the foot, the part that actually shows in sandals and seated portraits. Mirrored florals, jaali, paisley trails and toe detail give it a finished look. The top of the foot stains lighter than the sole, so I keep the central motif bold and let the side fillers stay fine; a design that’s all fine filler can look faint there. It can stop at the ankle or rise a little like an anklet.
6. Back Foot Bridal Mehndi Design
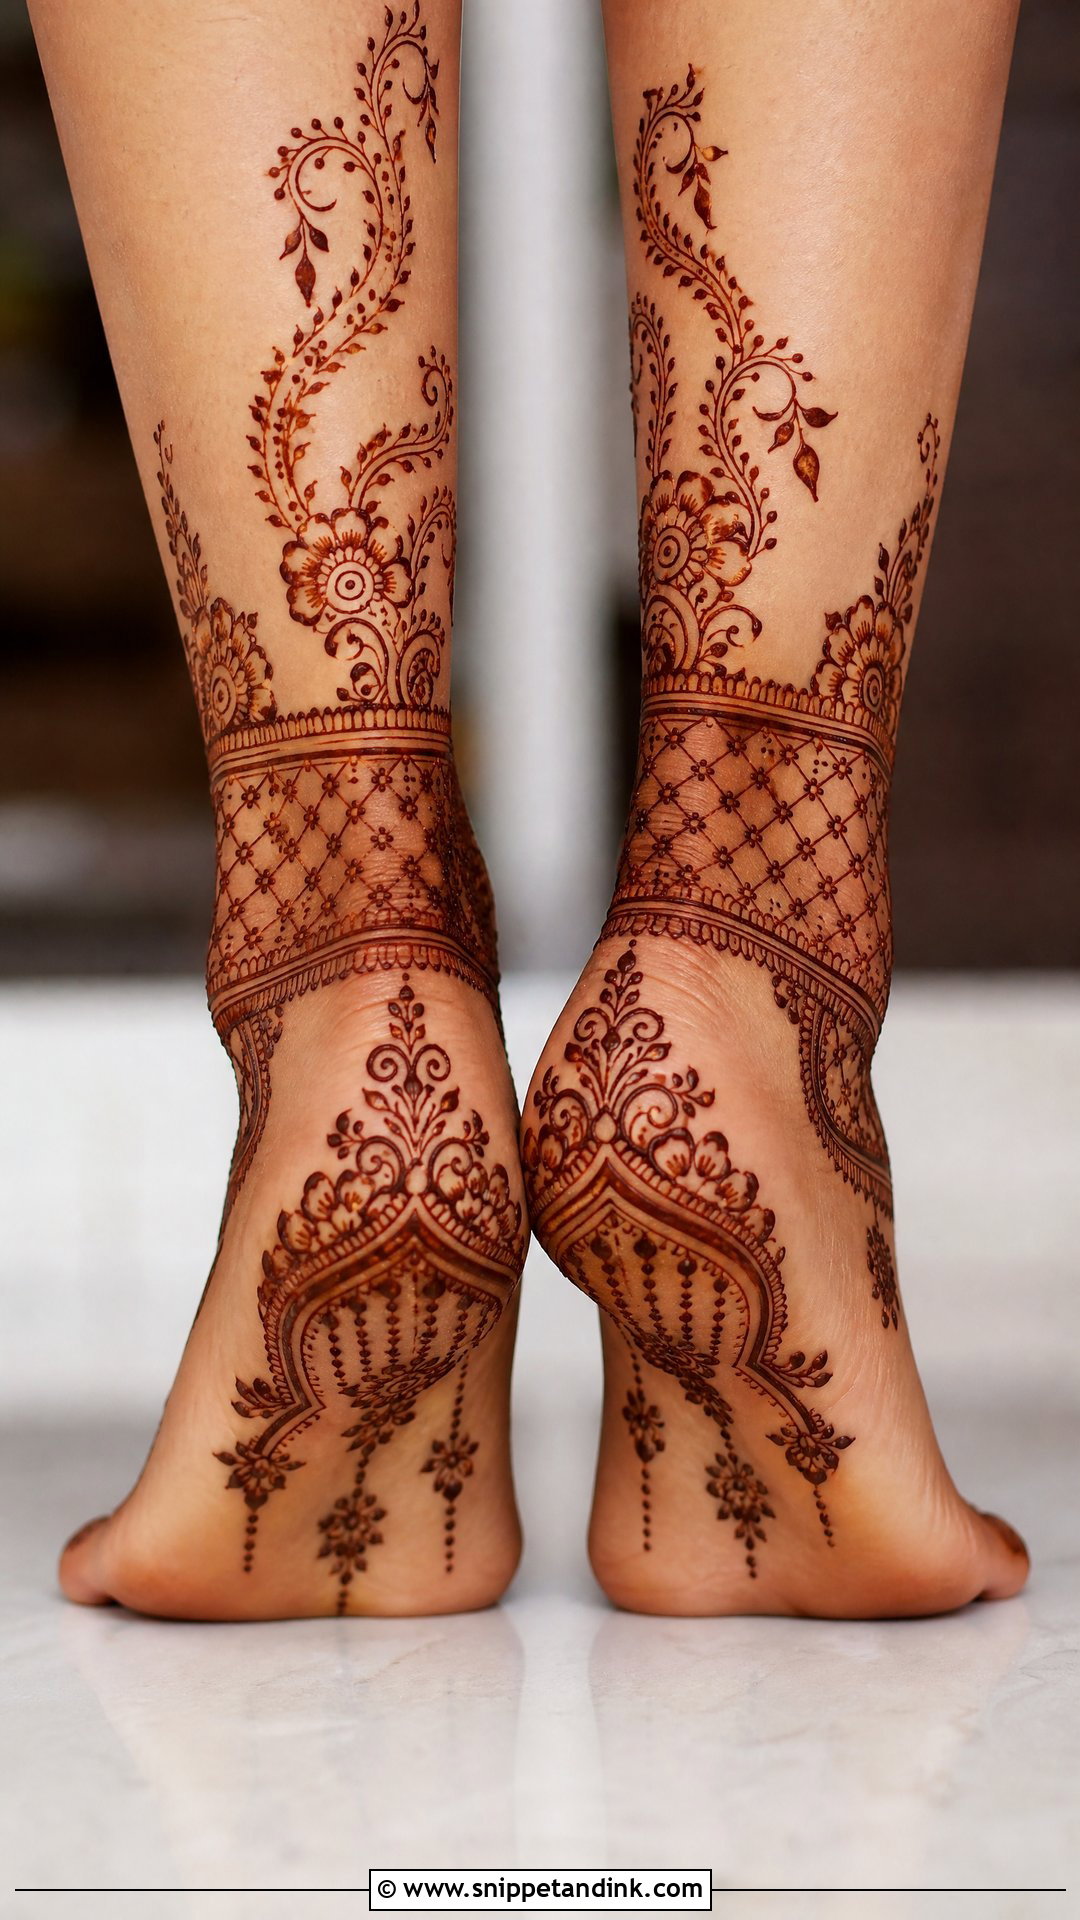
Heel and ankle work is the angle most brides forget, until they see side shots from the pheras or a seated portrait. Ankle cuffs, floral chains, net panels and curved vines frame the heel neatly. It pairs well with a detailed front foot so the design looks complete from every side, and it matters more if your sandals are backless. I keep paste thin over the heel crease. Thick paste there cracks as soon as you flex your foot and smudges the line.
7. Bridal Ankle Mehndi Design
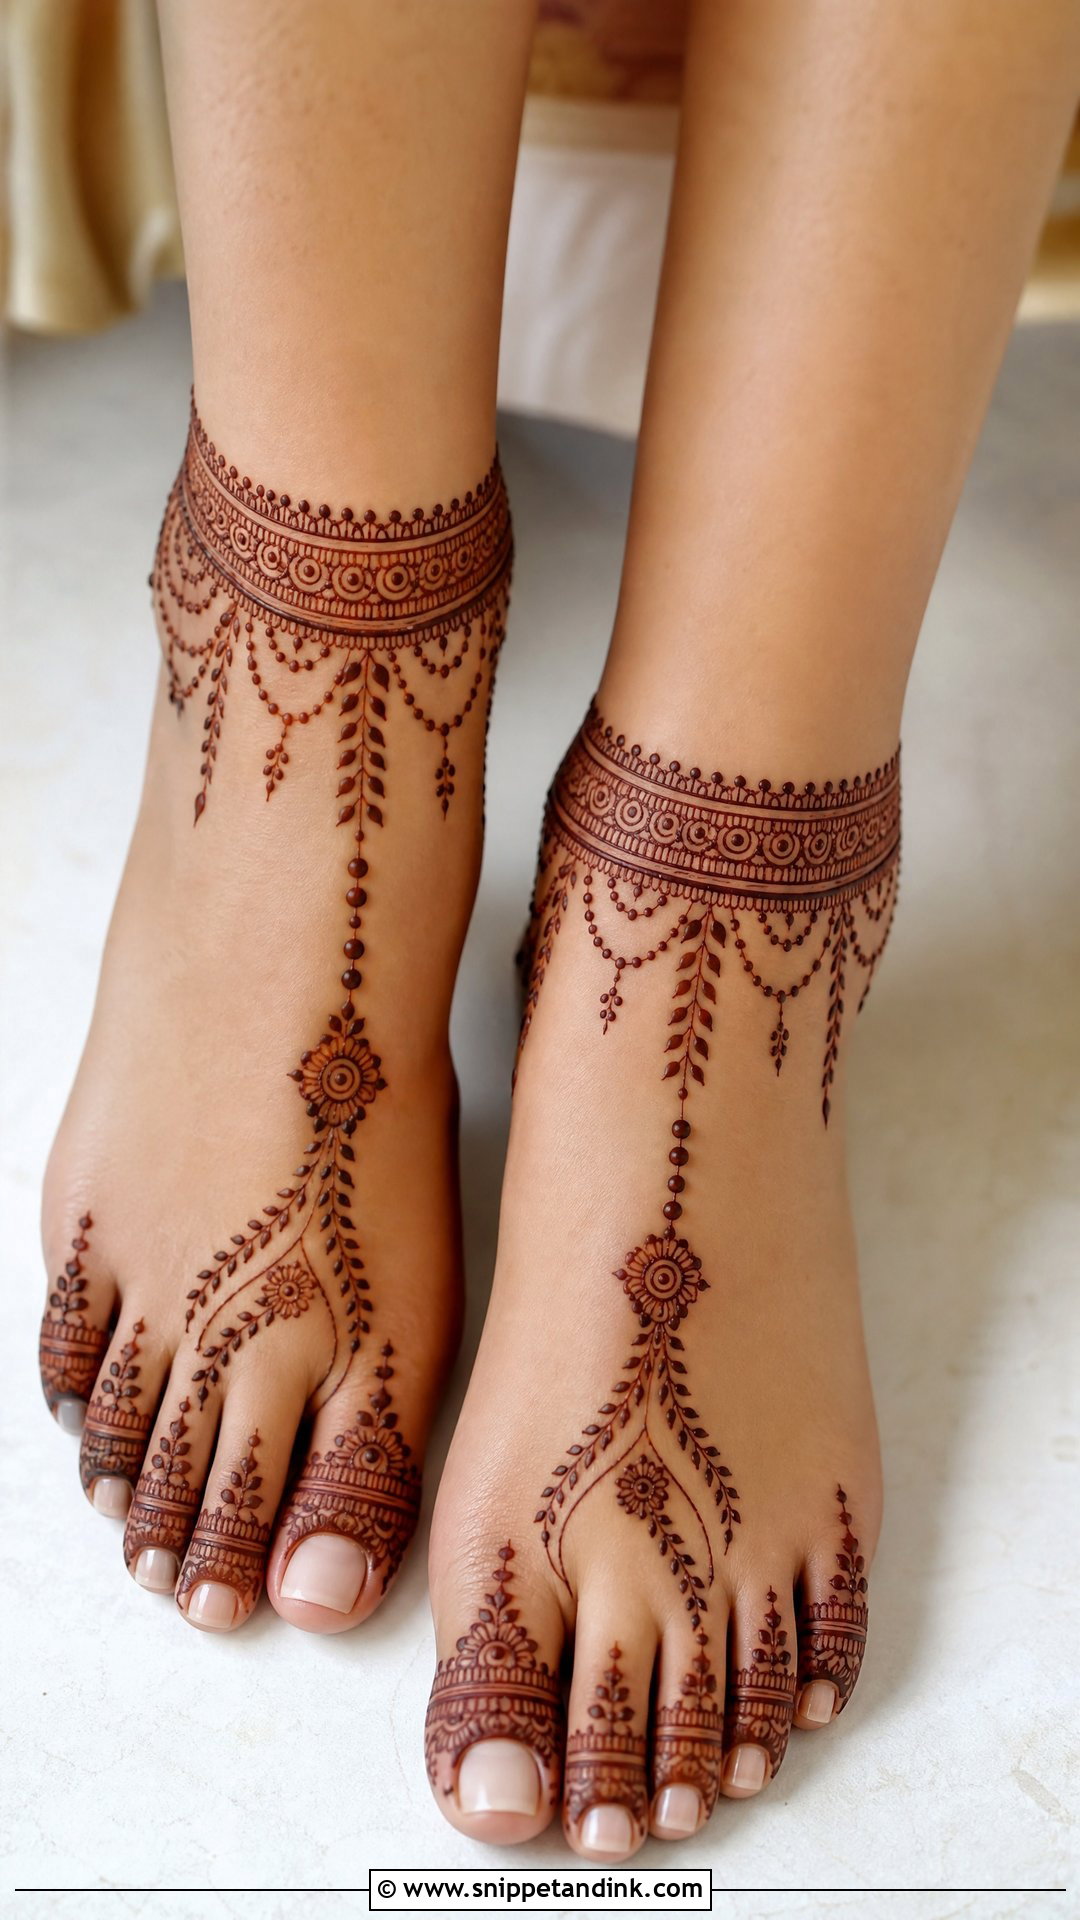
An ankle-focused design reads like jewelry on the skin: an anklet band, hanging dots, small flowers, leafy chains and matching toe detail. The top of the foot stays light, with a mandala or a small floral cluster. It’s comfortable for long ceremonies, and it works with payal and toe rings rather than competing with them. I’d place the band a finger’s width above where your real anklet sits, so the metal doesn’t hide the drawn chain.
8. Bridal Toe Mehndi Design
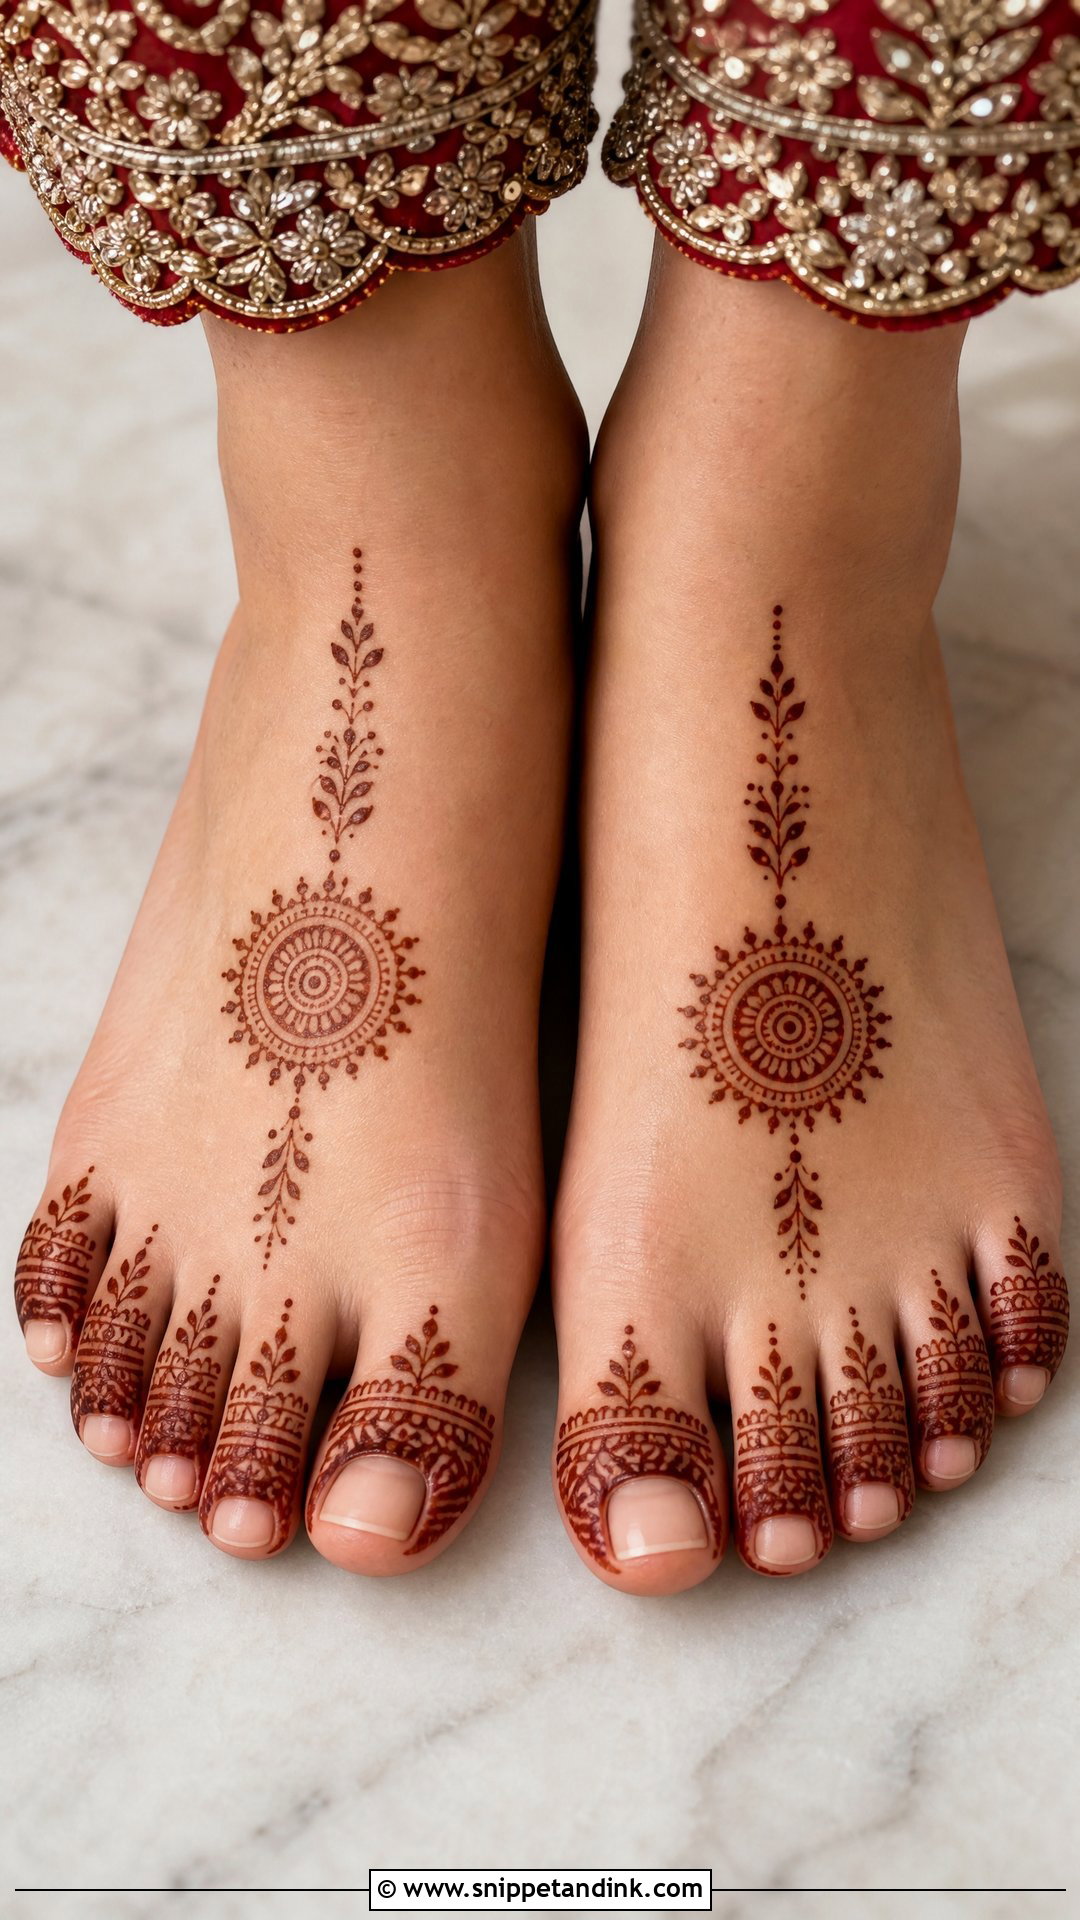
Toe work on its own can look scattered, so I always connect it back into the foot with slim vines, a border or a small central paisley. Each toe gets a cap, leafy detail, dots or a mini flower, kept the same on both feet. It’s the natural choice with open-toe footwear and toe rings. One thing I check first is whether the bride plans a pedicure; polish should go on before the henna, because removing it afterwards with acetone can lift the stain around the nails.
9. Mandala Bridal Foot Mehndi Design
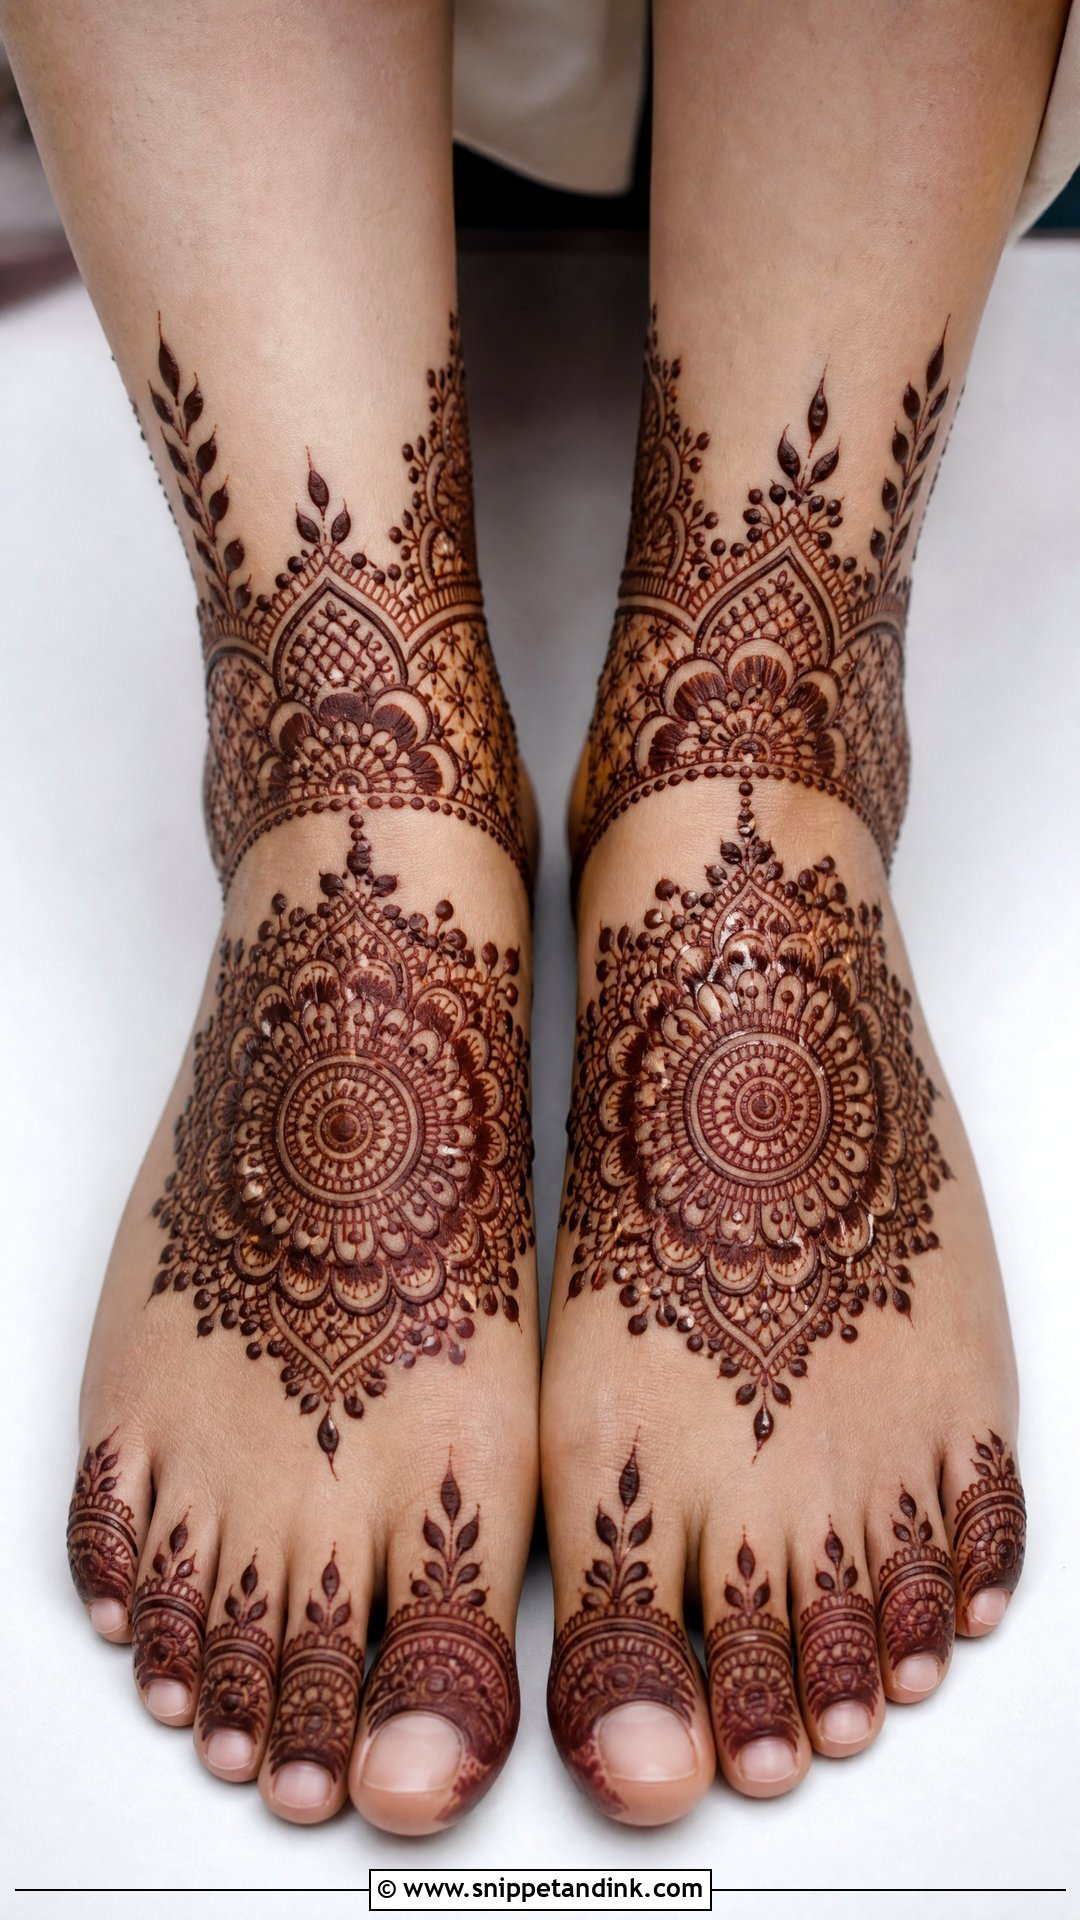
A mandala bridal foot mehndi design gives each foot one calm centre point, usually a round mandala on the top of the foot with petal rings, dots, curved leaves and toe detail around it. Because the top of the foot curves, a perfect circle drawn while the foot is flat can look oval once the bride stands, so I check it from the front before filling it in. It suits heavy lehengas and light fusion outfits alike. Fine jaali on the sides or a small paisley border near the ankle makes it feel more bridal.
10. Peacock Bridal Feet Mehndi Design
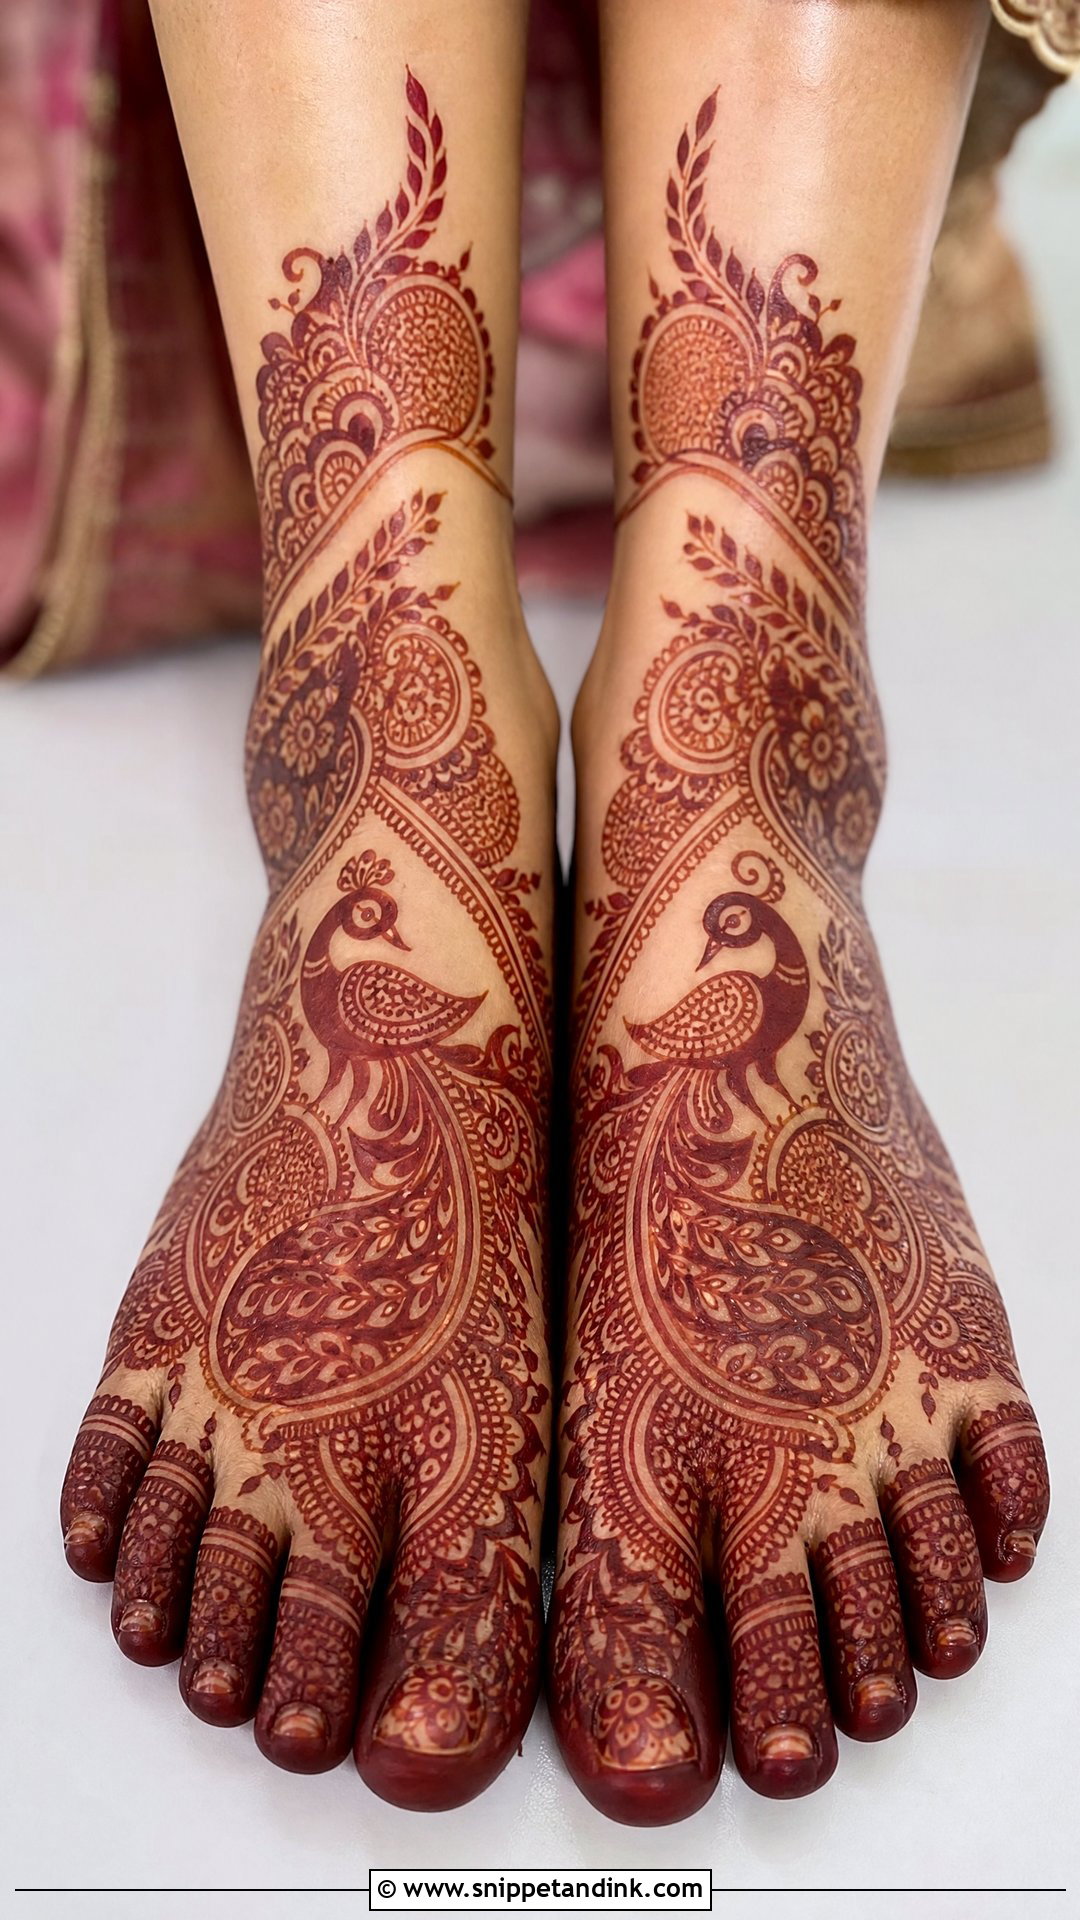
Peacocks need room. Bury the body under too much filler and from a metre away it’s just a dark patch. I place the bird near the ankle or along the outer edge of the foot and let the feathers run into paisleys, vines and dots. One large peacock per foot, mirrored so they face each other when the feet sit together, reads best. It belongs with classic Indian outfits and gold jewelry.
11. Floral Bridal Foot Mehndi Design
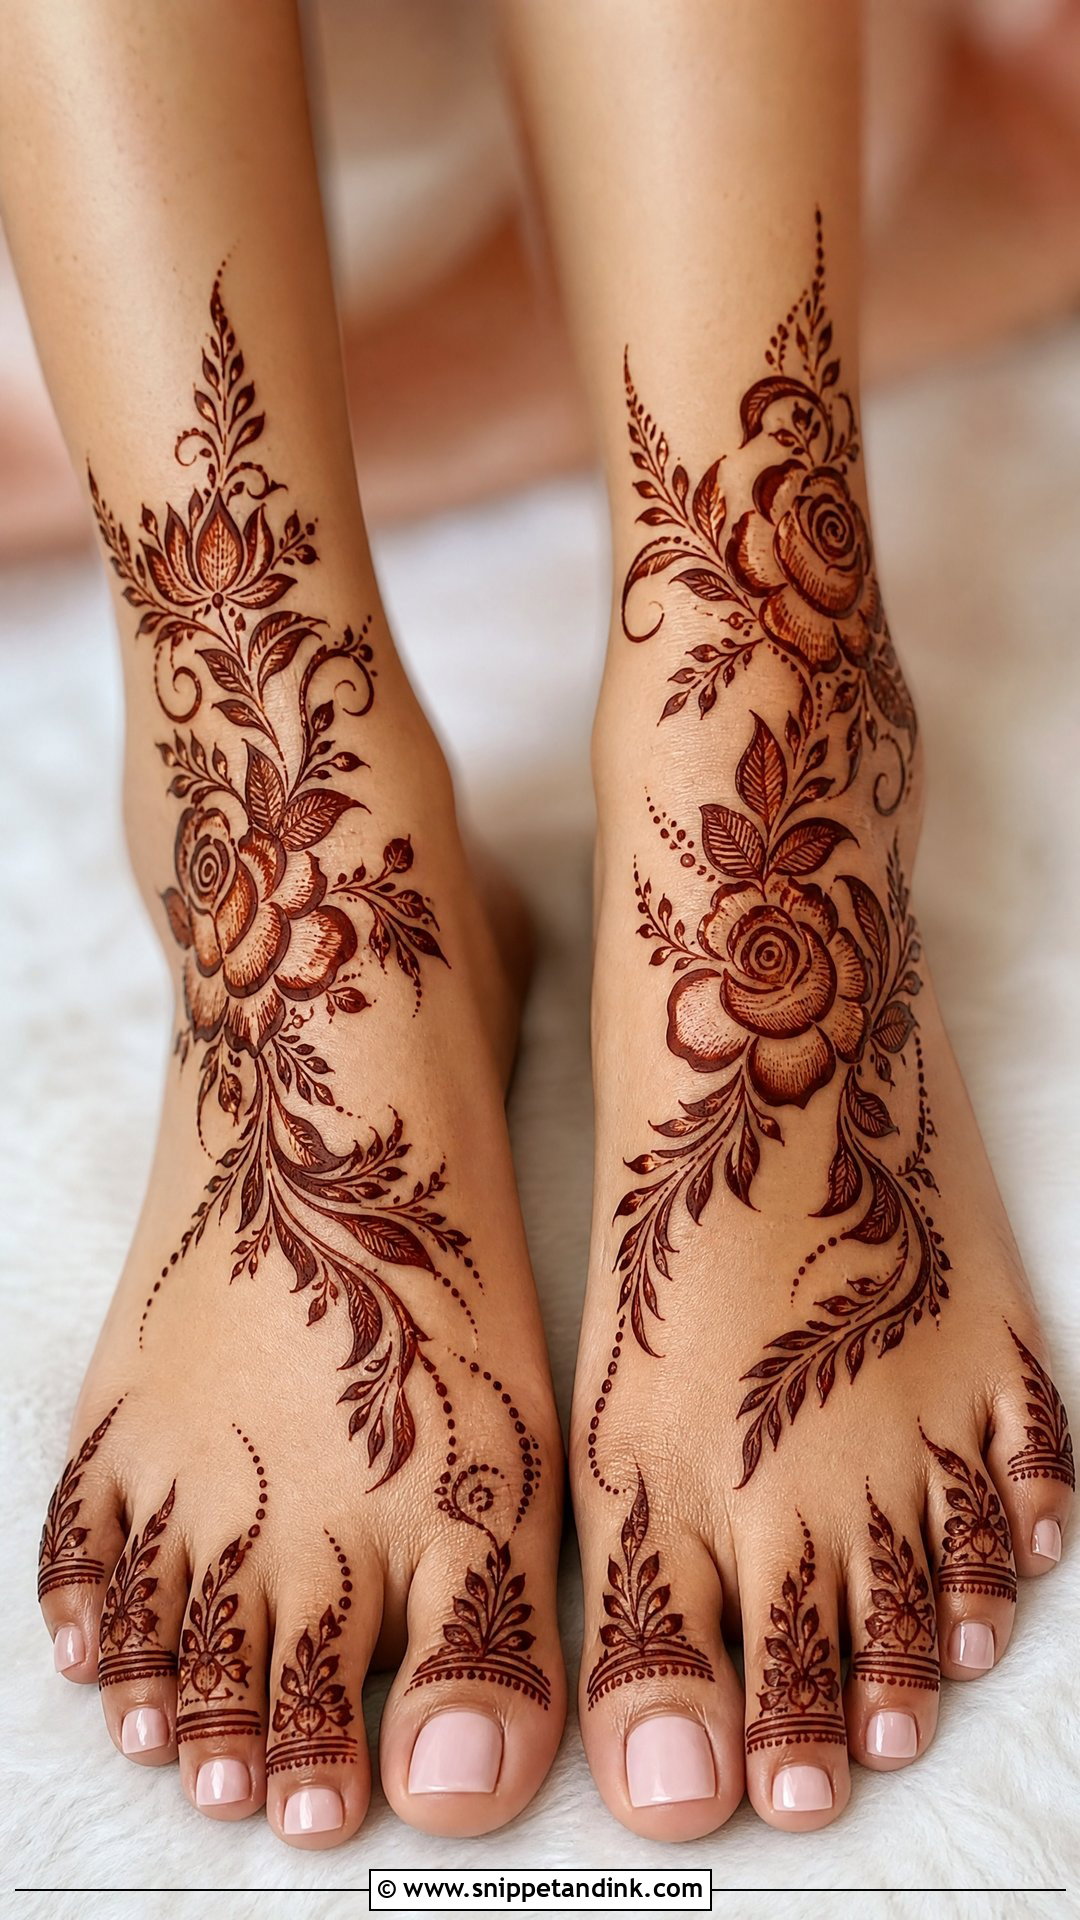
Florals are forgiving on feet because flowers don’t need perfect symmetry to look right. Roses, lotus shapes, small buds, leafy vines and trails can be dense for a traditional bride or airy for a modern one. I start the flowers at the toes, move them across the foot and finish with an ankle border, varying the sizes so it looks grown rather than stamped. Pastel lehengas and garden-themed functions suit this layout well.
12. Paisley Bridal Feet Mehndi Design
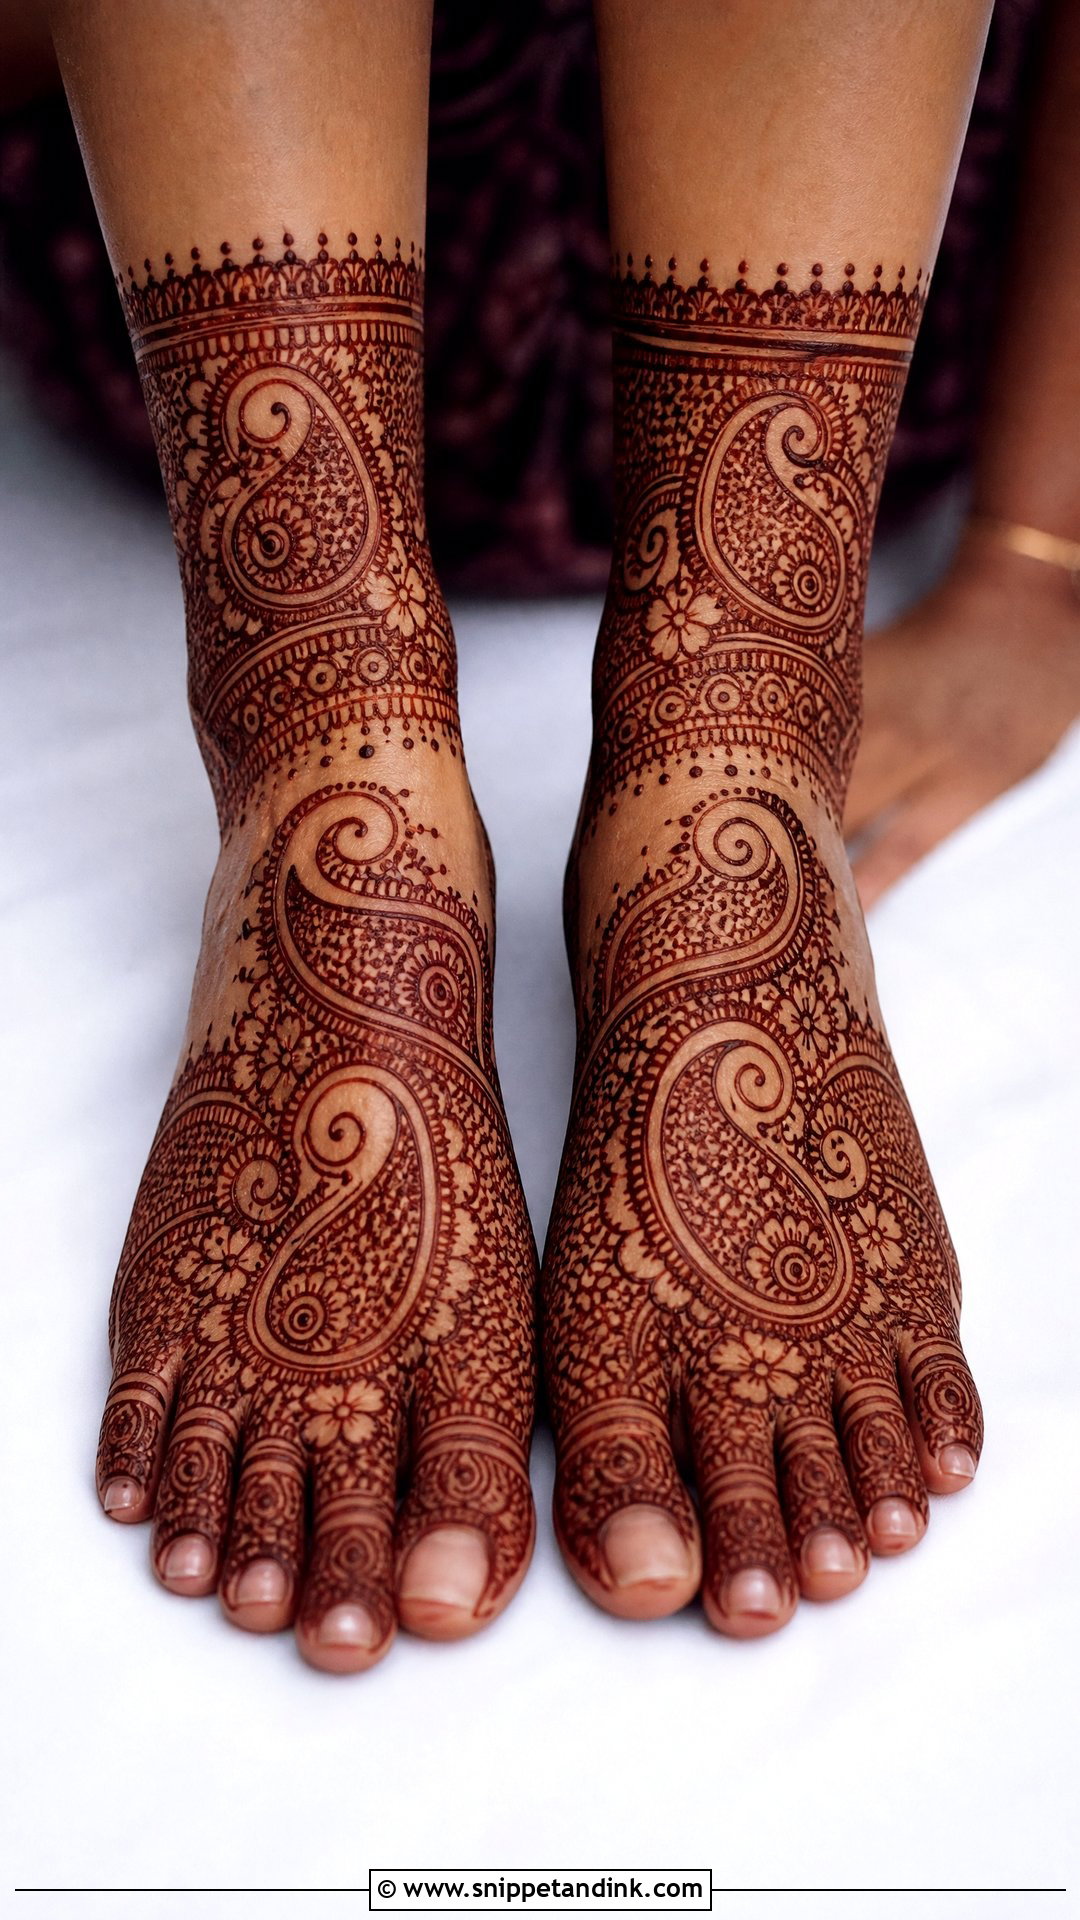
Paisleys follow the curve of the foot naturally, which is why they’ve been a bridal staple for so long. A complete layout puts large paisleys in the centre, smaller ones around the toes and fine fillers near the ankle. If your hands also carry paisley work, the two areas link up without extra effort. Tiny flowers, dots, mesh panels and leafy trails can be woven in for a richer finish, but I keep the outline of each main paisley clear.
13. Jaali Bridal Foot Mehndi Design
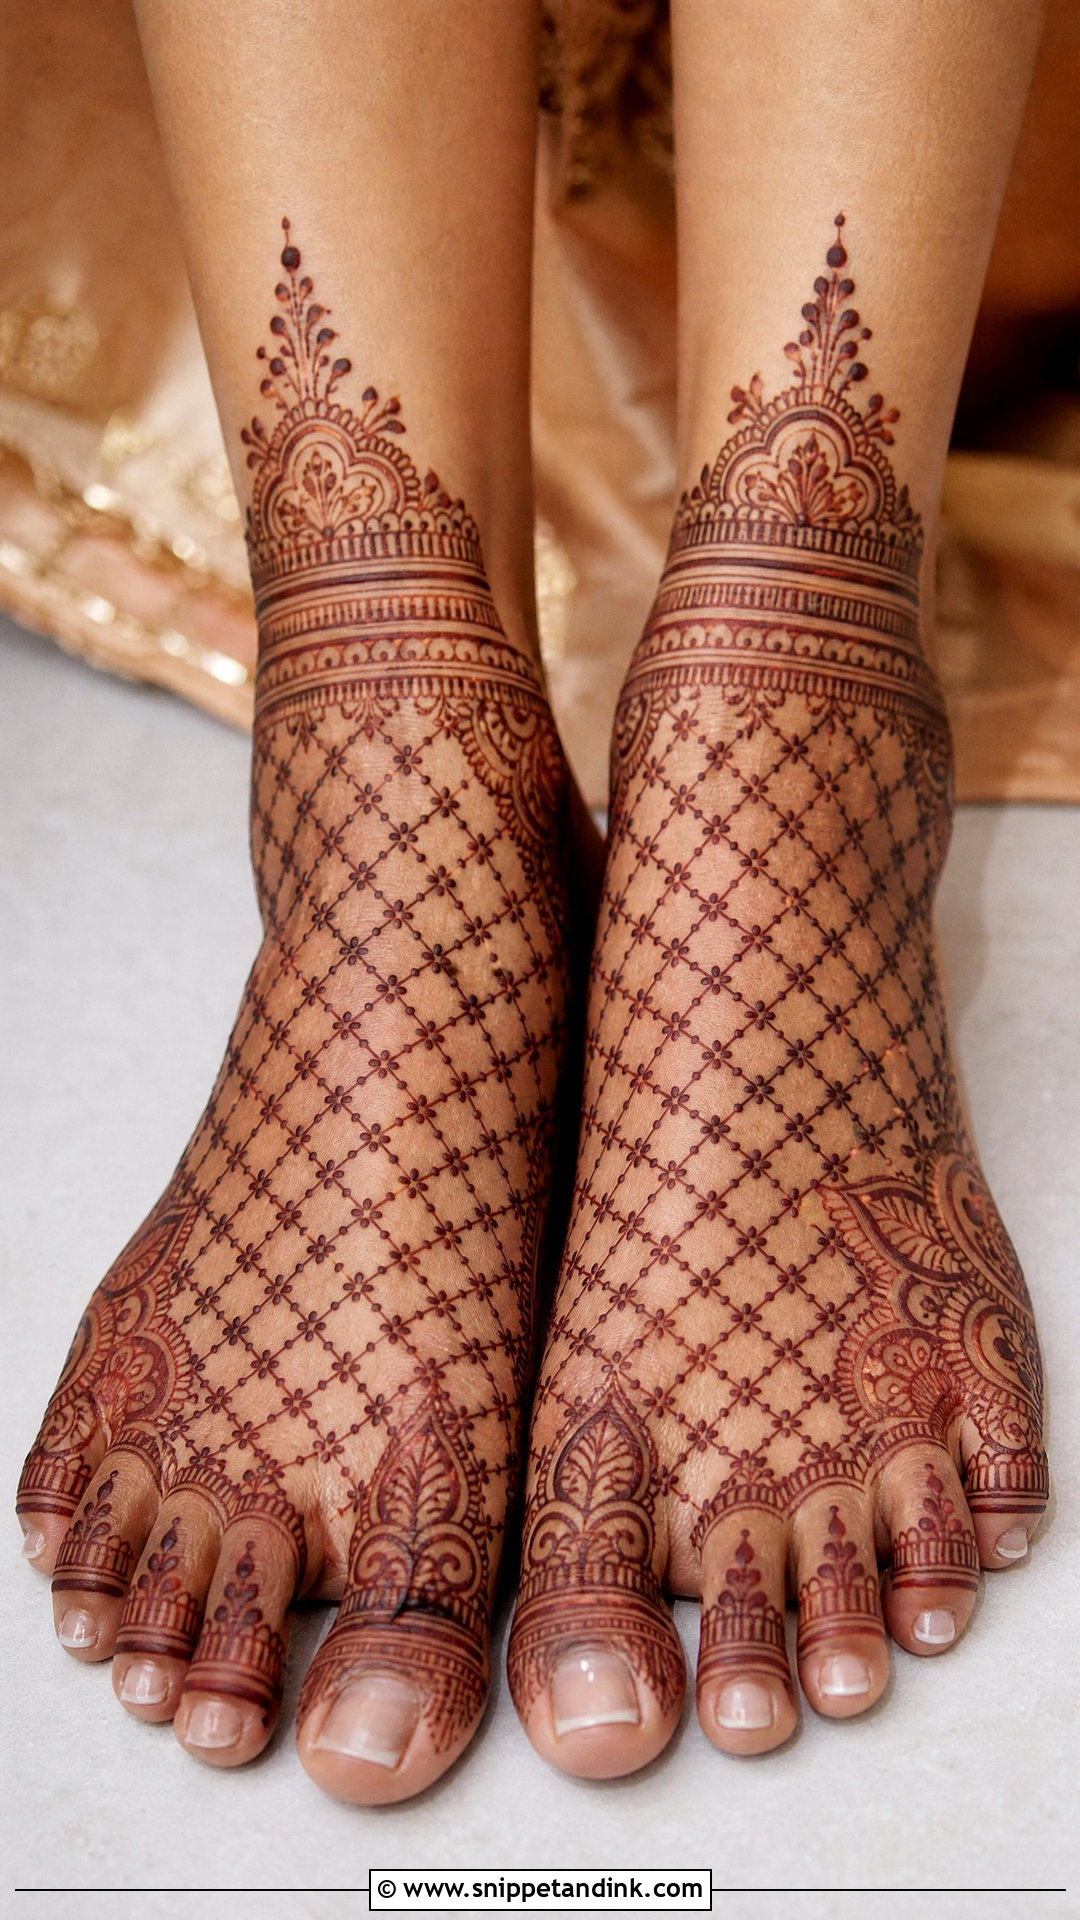
Jaali gives the feet a fabric-like texture, a grid sitting inside borders of flowers and paisleys. The open mesh contrasts with the detailed motifs, so the foot doesn’t look heavy. Grid lines over the curve of the instep are tricky; I draw them slightly wider apart than on the hands because they compress visually as the foot bends. Bold floral corners and matching toe detail keep it bridal, and it pairs well with sheer dupatta borders and fine anklets.
14. Indo Arabic Bridal Foot Mehndi Design
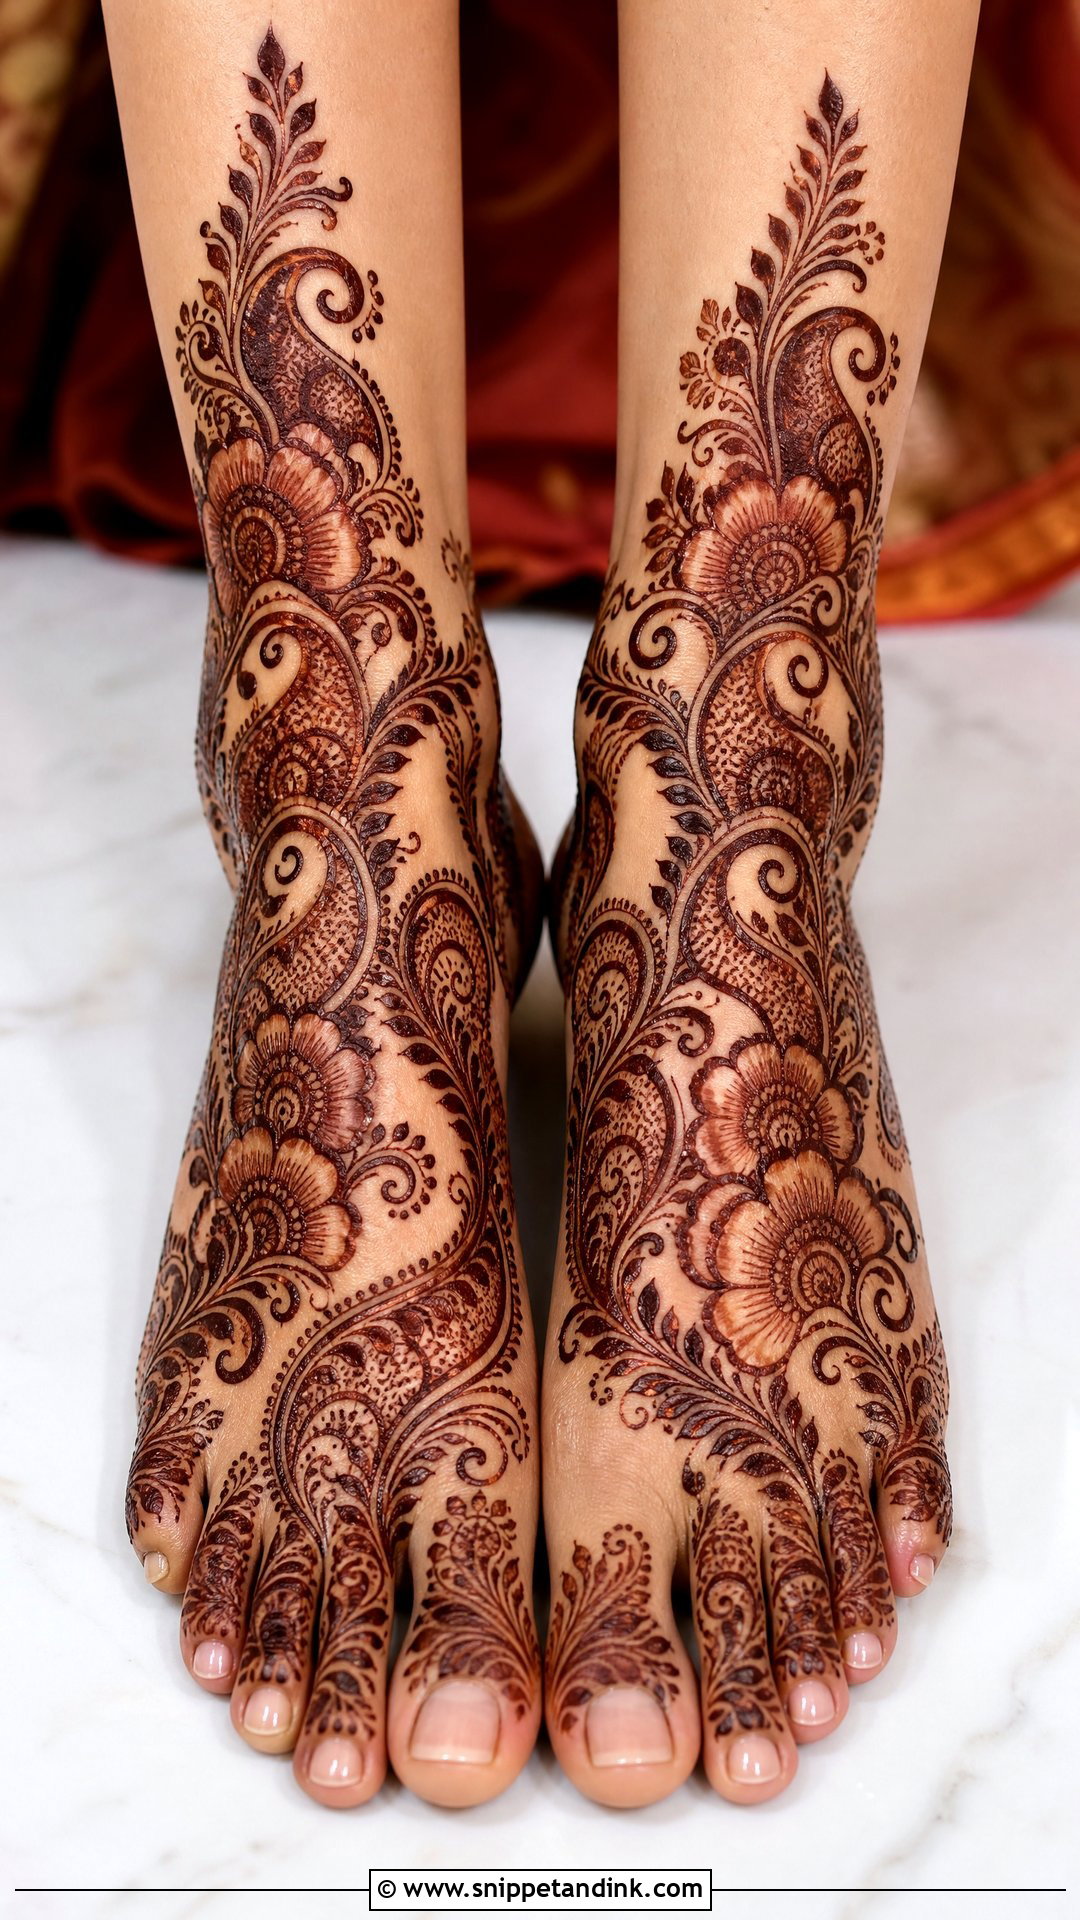
Indo-Arabic foot work borrows Arabic flow and Indian fill: big floral trails and paisley curves, with dotted shading, leafy vines and filled borders between. It’s a sensible middle ground if dense coverage feels like too much but plain Arabic feels too sparse. The trail usually crosses the foot diagonally, then meets a more traditional ankle band. I ask for clean negative space between major motifs, so the bold shapes stand out and the fine fill still looks delicate.
15. Moroccan Bridal Foot Mehndi Design
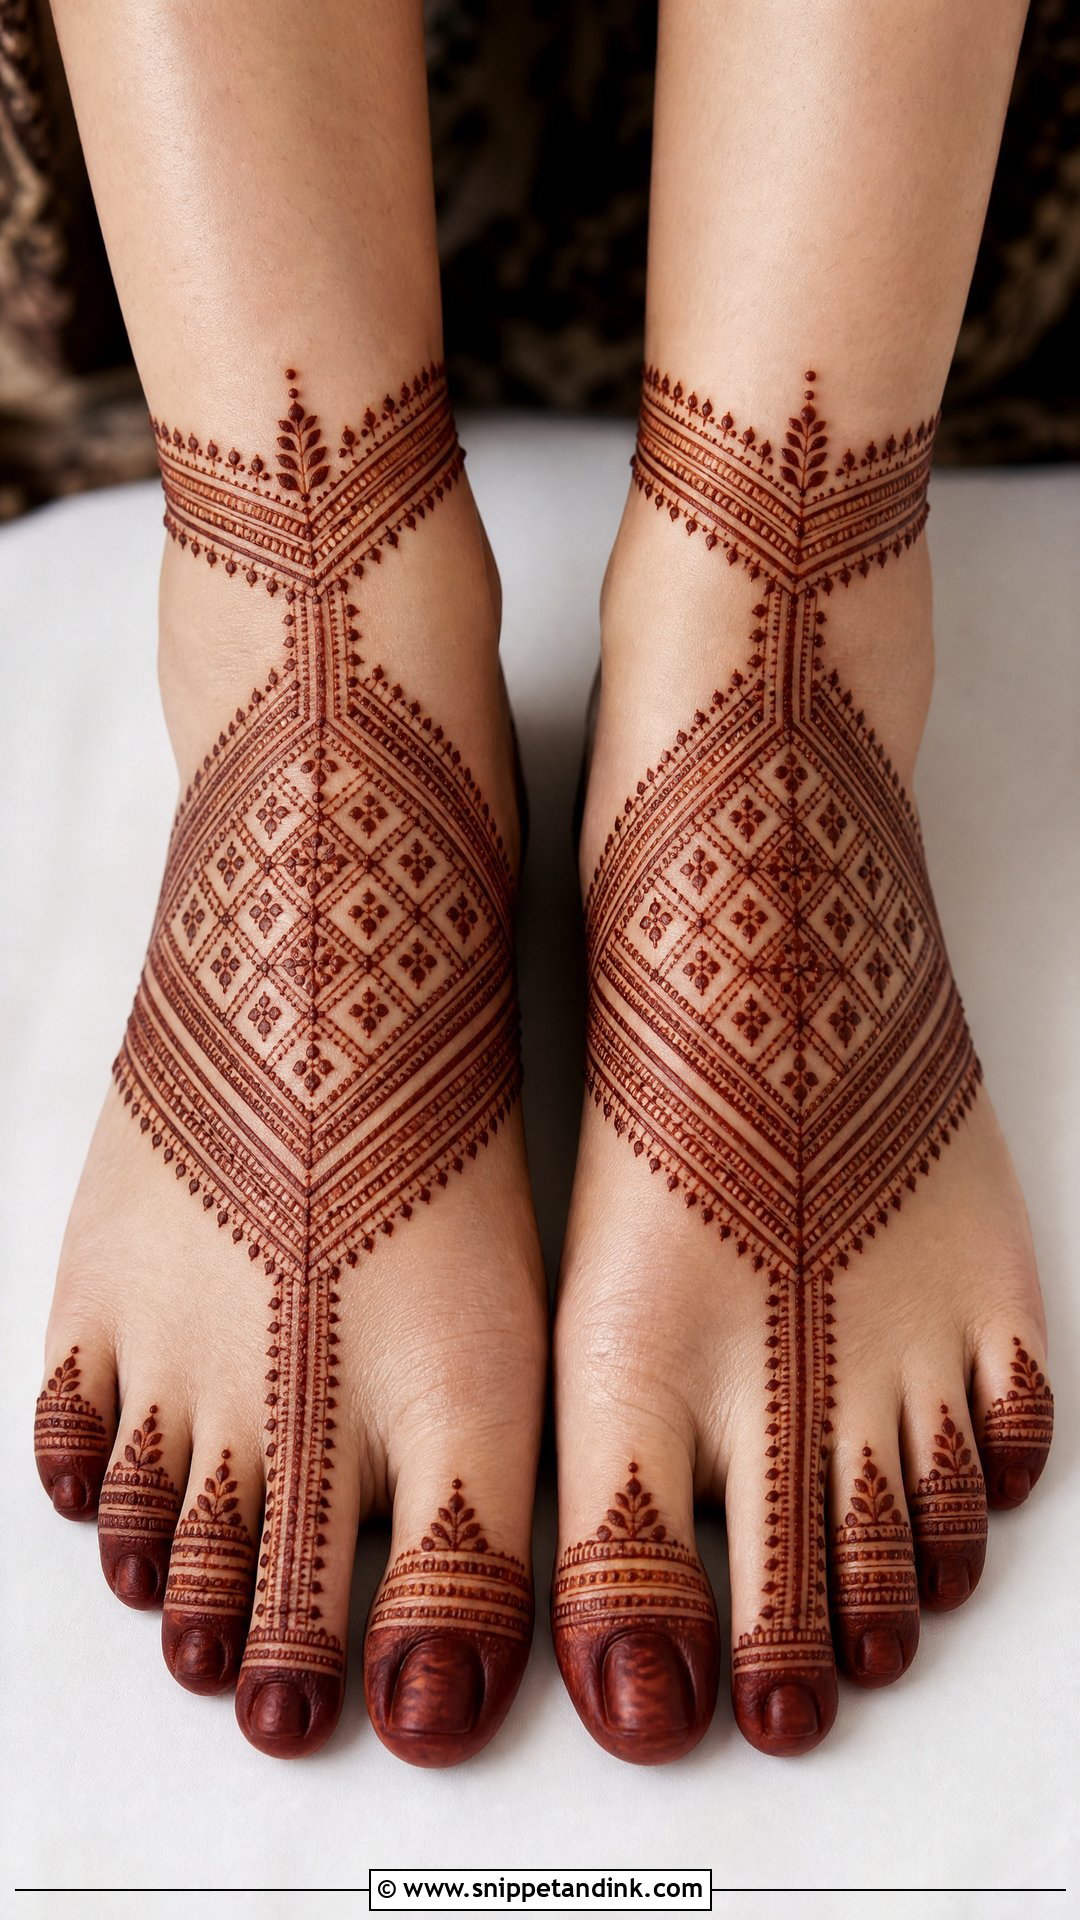
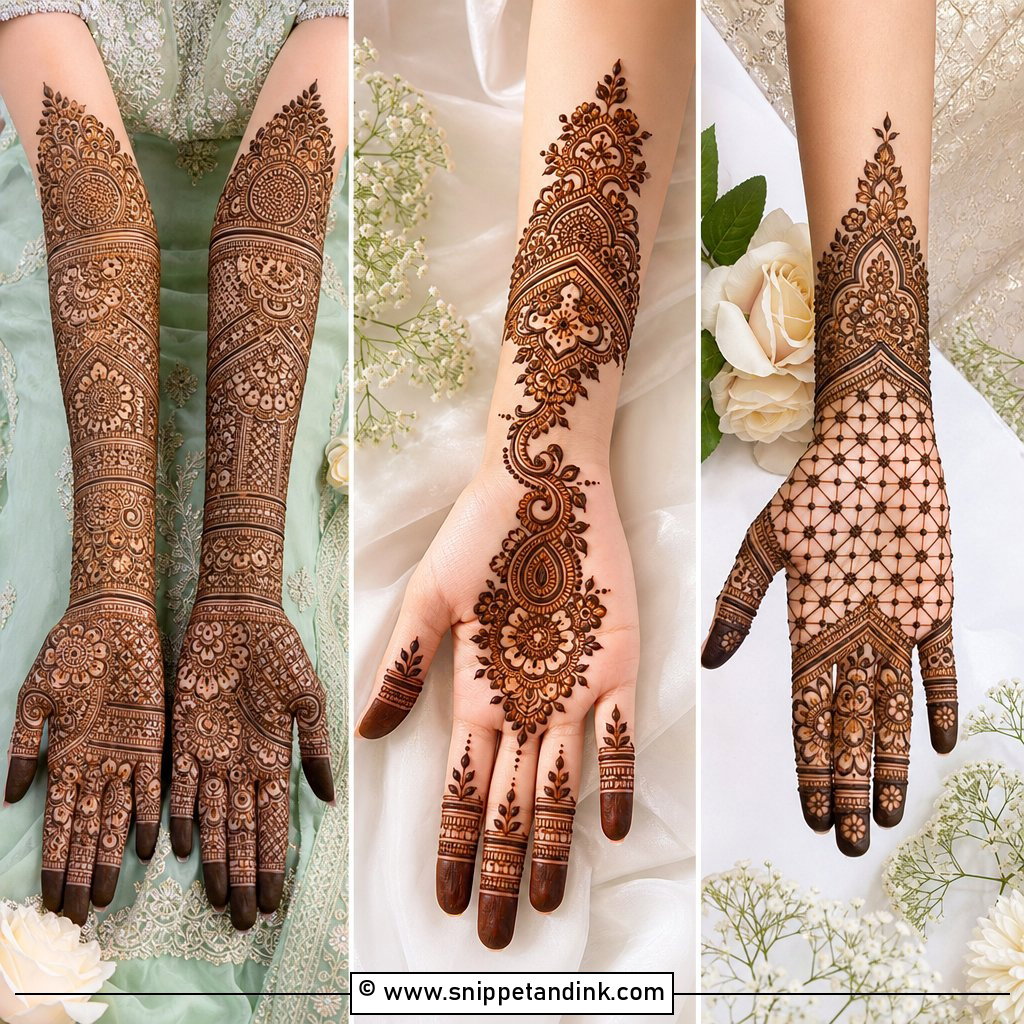
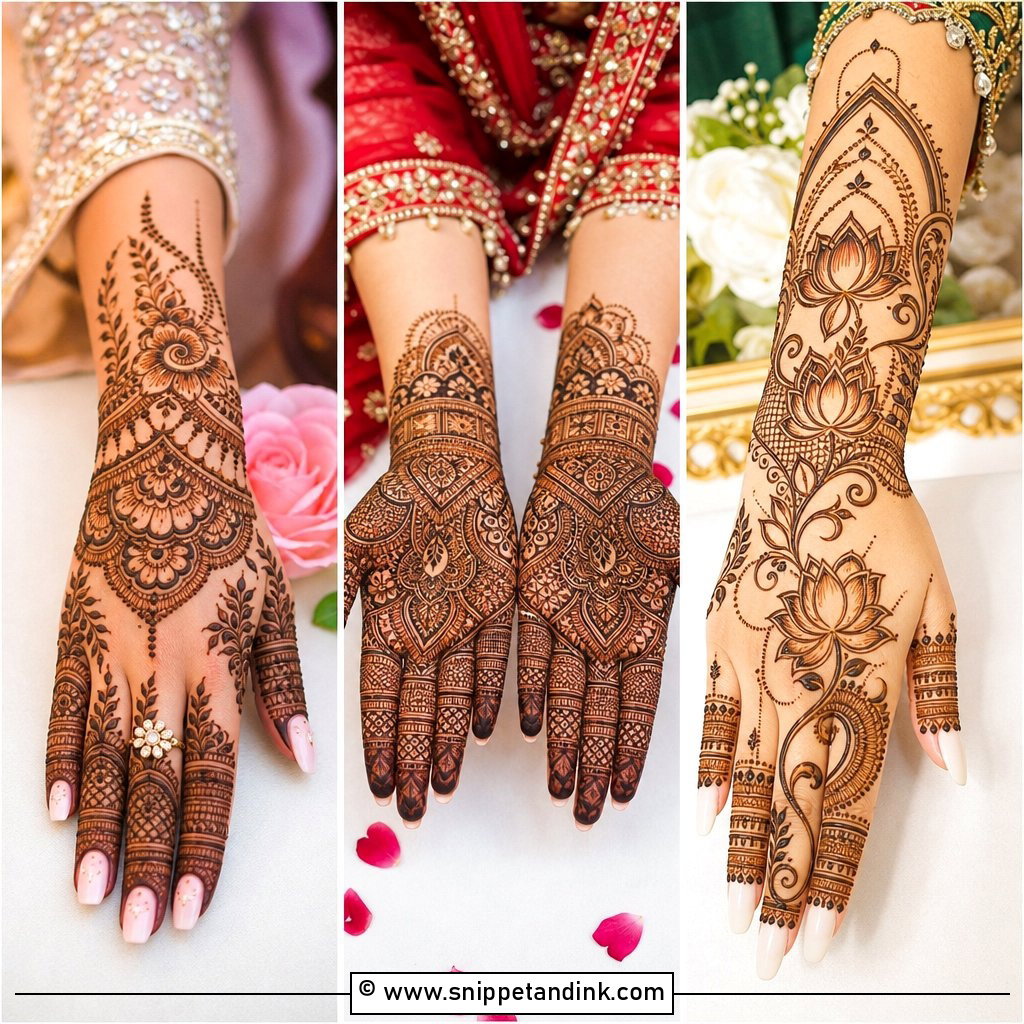
Geometry replaces florals here: diamonds, lines, triangles and grids repeated in a structured pattern over the toes, the top of the foot and sometimes the lower leg. Moroccan-inspired mehndi only works when it’s symmetrical, and straight lines show every wobble, so I mark guide points first. It suits modern bridal outfits and fusion looks, and brides who’ve had enough of paisleys. Small dots, slim leaf accents or a simple ankle band soften the edges.
16. Gulf Bridal Foot Mehndi Design
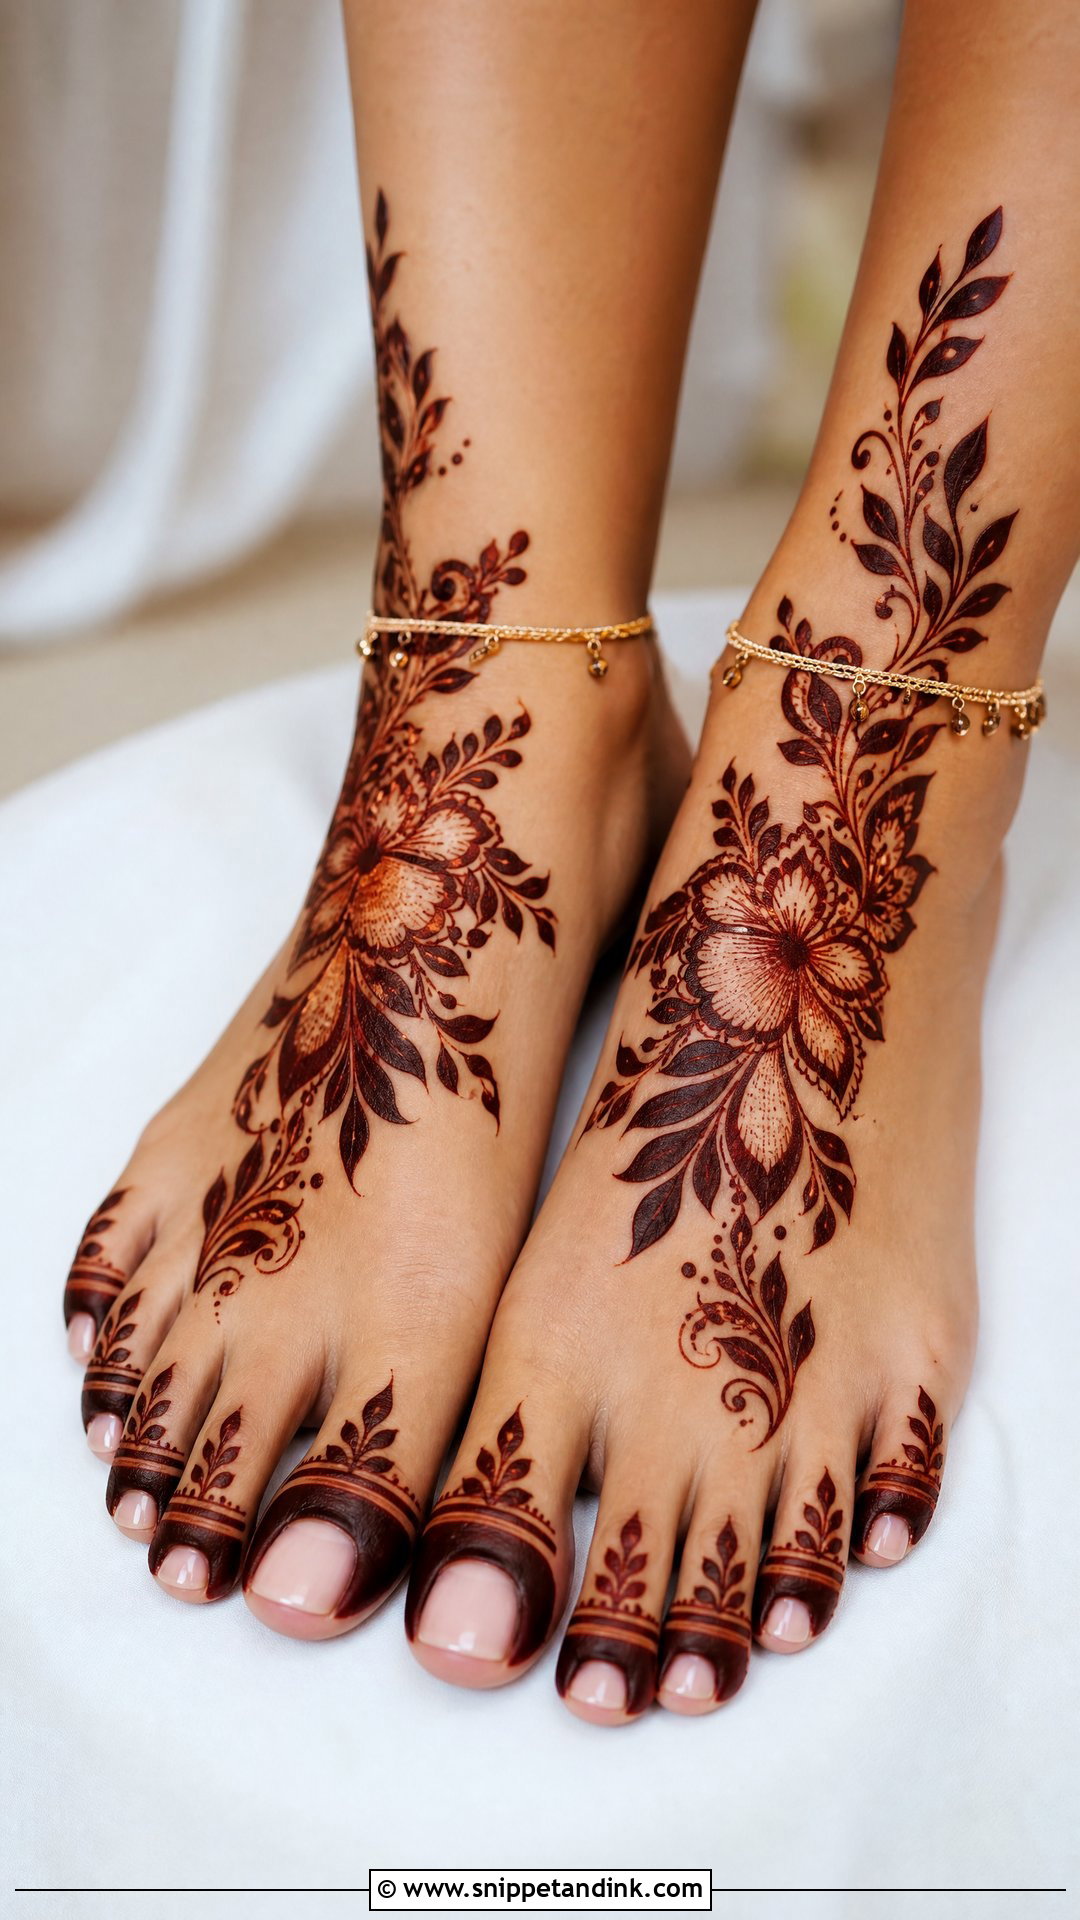
Khaleeji-inspired foot henna uses bold florals, leafy branches, thick outlines and lots of open skin. The vine sweeps across the foot, frames the ankle and leaves space around the centre. Those thick lines are applied with a wider cone opening and stain evenly when the paste is left on long enough. It’s a good counterweight to a heavily embroidered outfit, because it never looks crowded. Matching toe accents and a slim ankle chain finish it.
17. Minimal Bridal Foot Mehndi Design
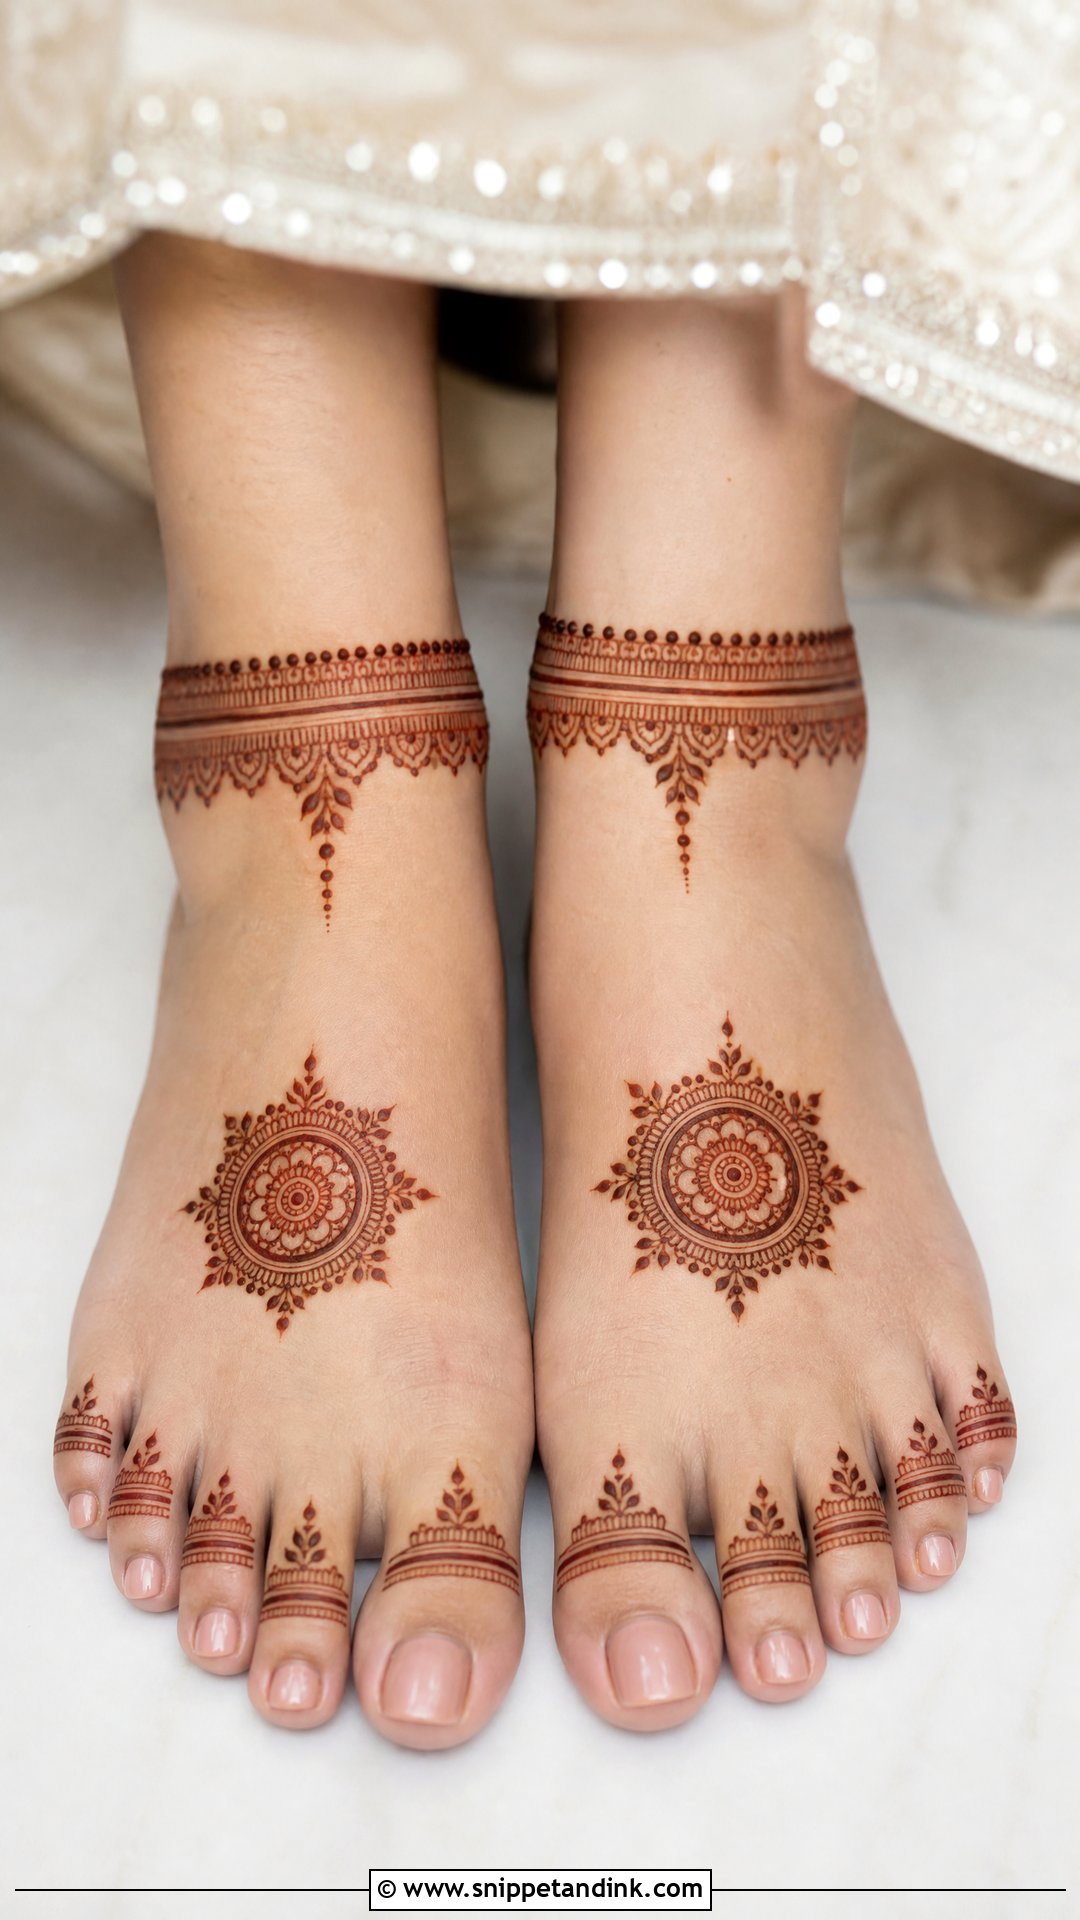
A minimal foot design has to look intentional, so placement matters more than motif. A small mandala on each foot, matching toe lines and a soft ankle finish is usually enough. It suits brides who dislike heavy mehndi, who want their footwear to show, or who are dressing for an engagement or registry wedding. Neat spacing is the whole job.
18. Heavy Bridal Foot Mehndi Design
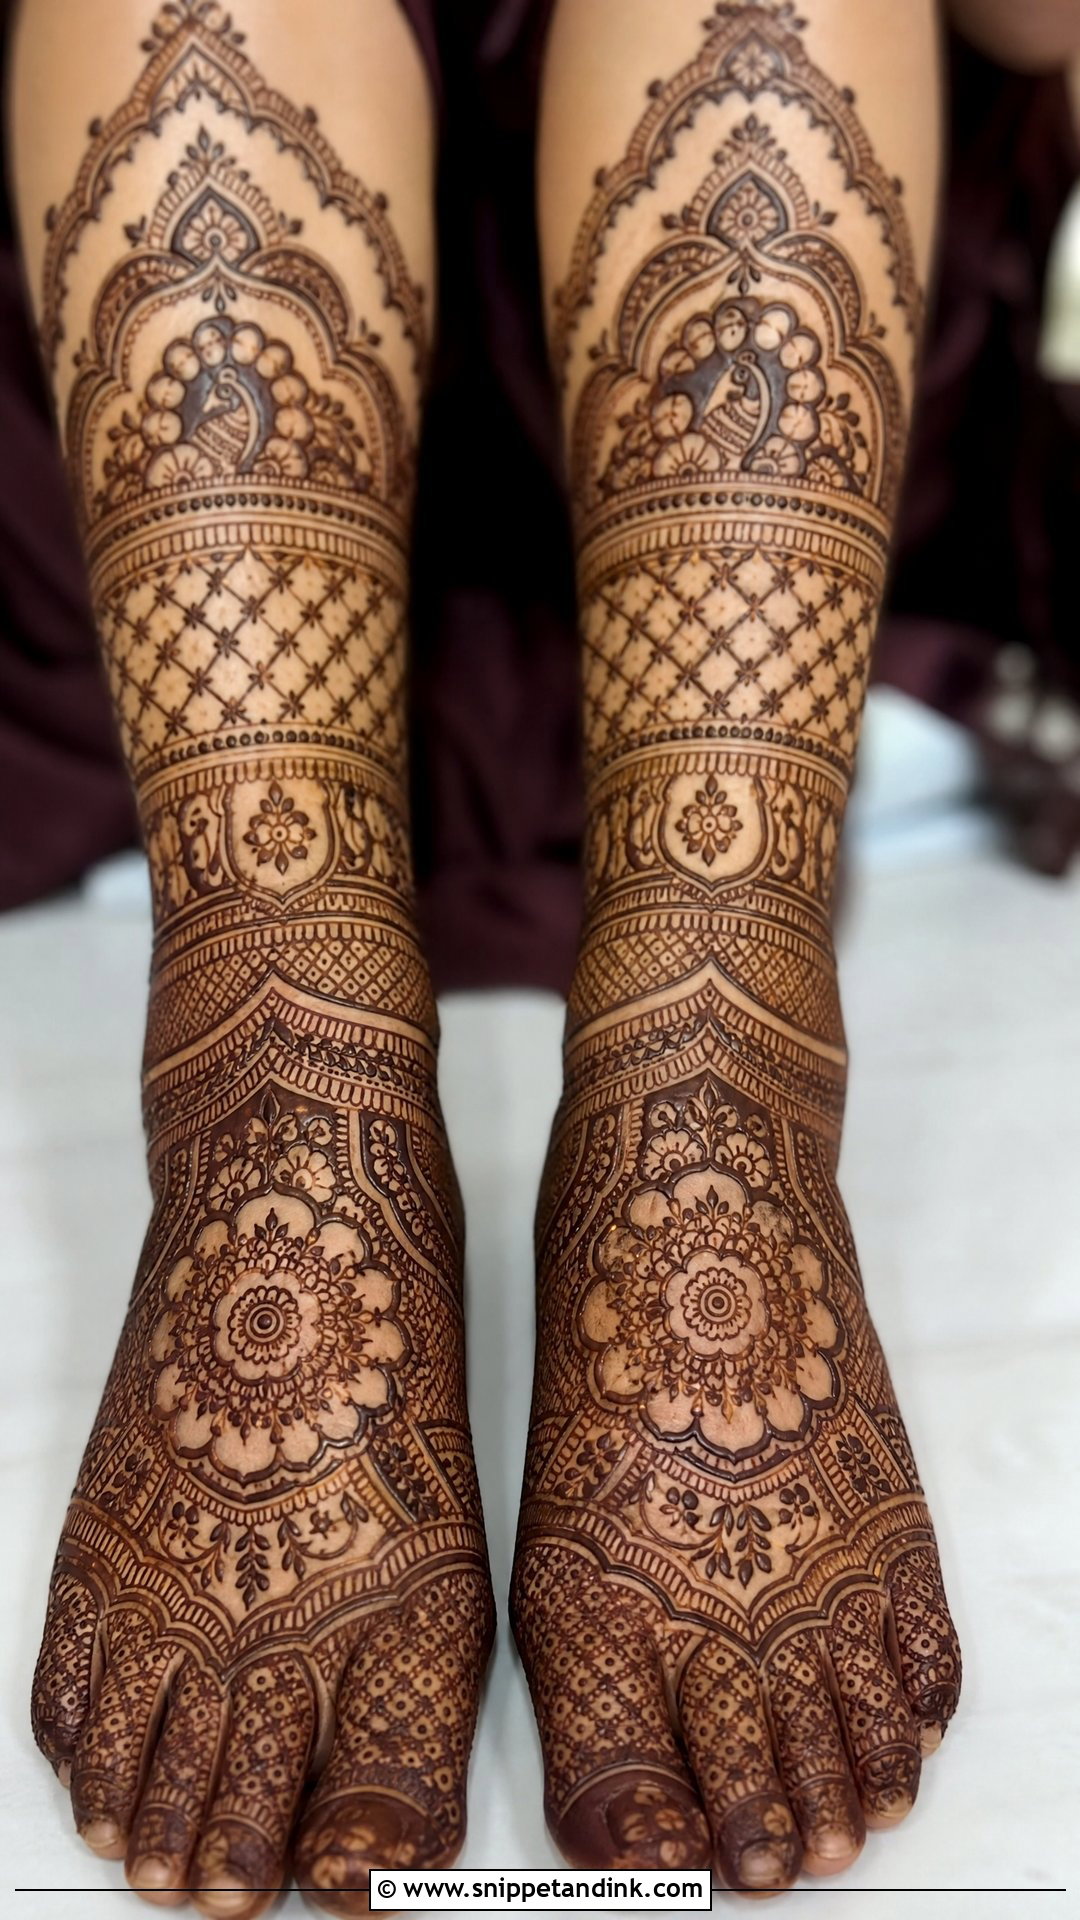
Heavy coverage fills the feet and often climbs above the ankles toward the calves, with mandalas, paisleys, peacocks, jaali, florals, lace-like borders and tiny filler. The risk is that it all merges into one dark mass after staining. I leave small breathing spaces around each main shape and use borders to frame the foot, so the big motifs still read from a distance. Expect a long sitting and a long drying time before you can walk.
19. Rajasthani Bridal Feet Mehndi Design
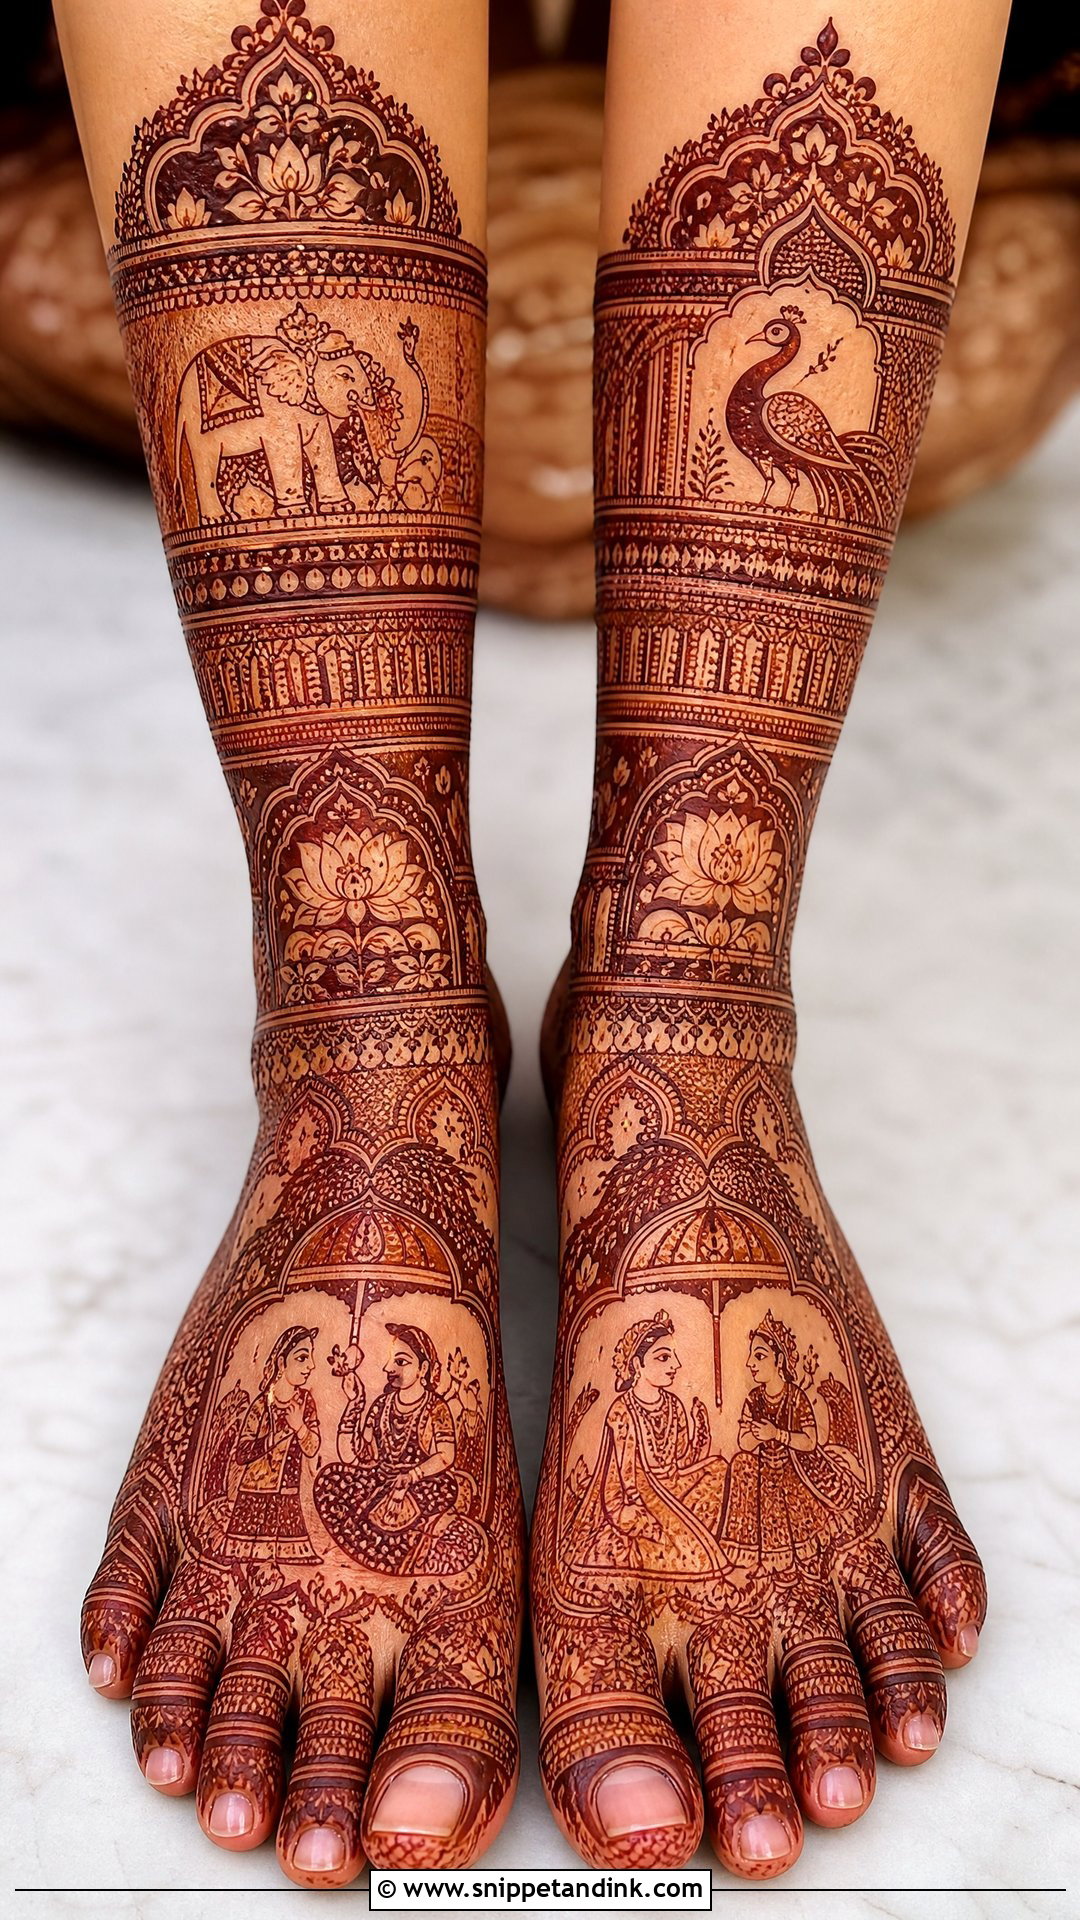
A Rajasthani bridal feet mehndi design tells a story in very fine line: paisleys, royal motifs, elephants, peacocks, lotus shapes, bride and groom symbols and layered borders. It sits naturally beside red, orange, maroon and gold. Because the detail is so fine, the foot needs a clear structure underneath, a central panel, an ankle band and a toe border, or the eye has nowhere to land. Repeating a small motif from your hands ties the two together.
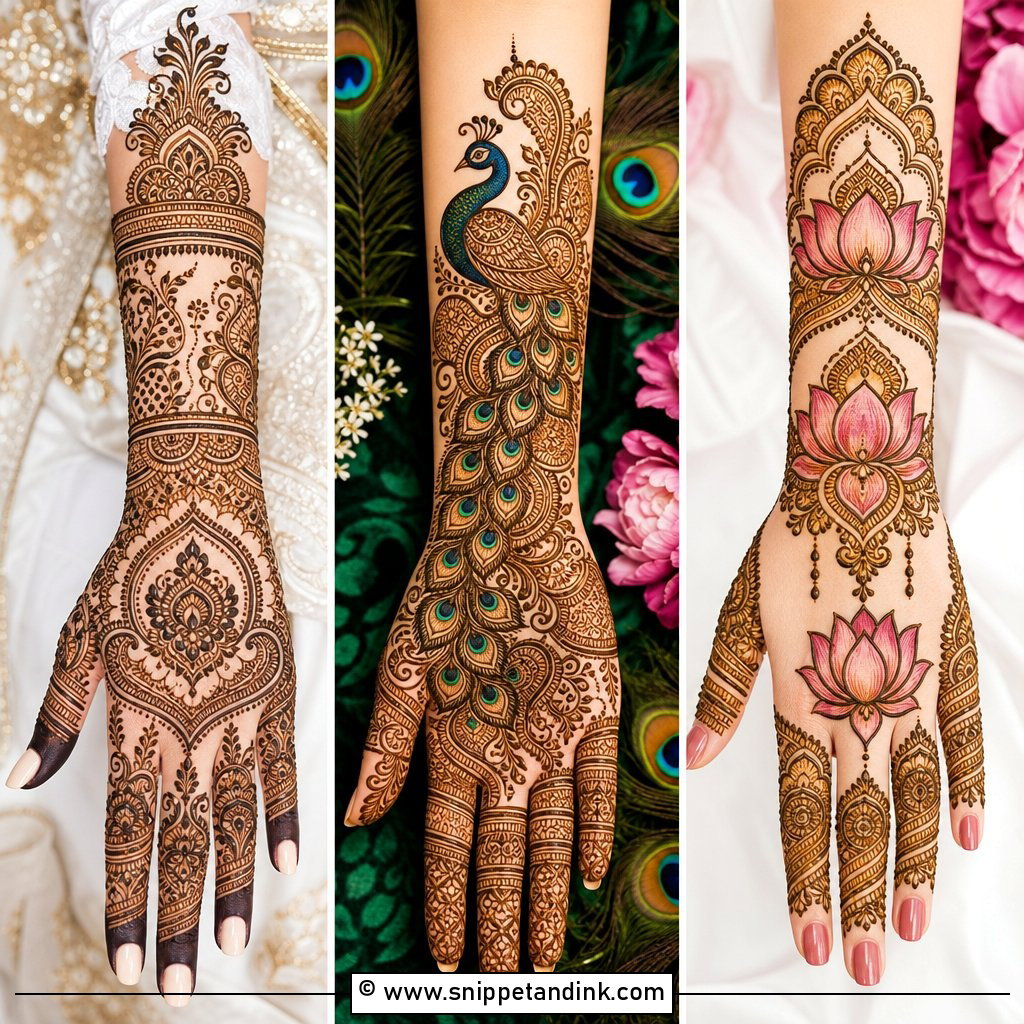
20. Modern Bridal Foot Mehndi Design
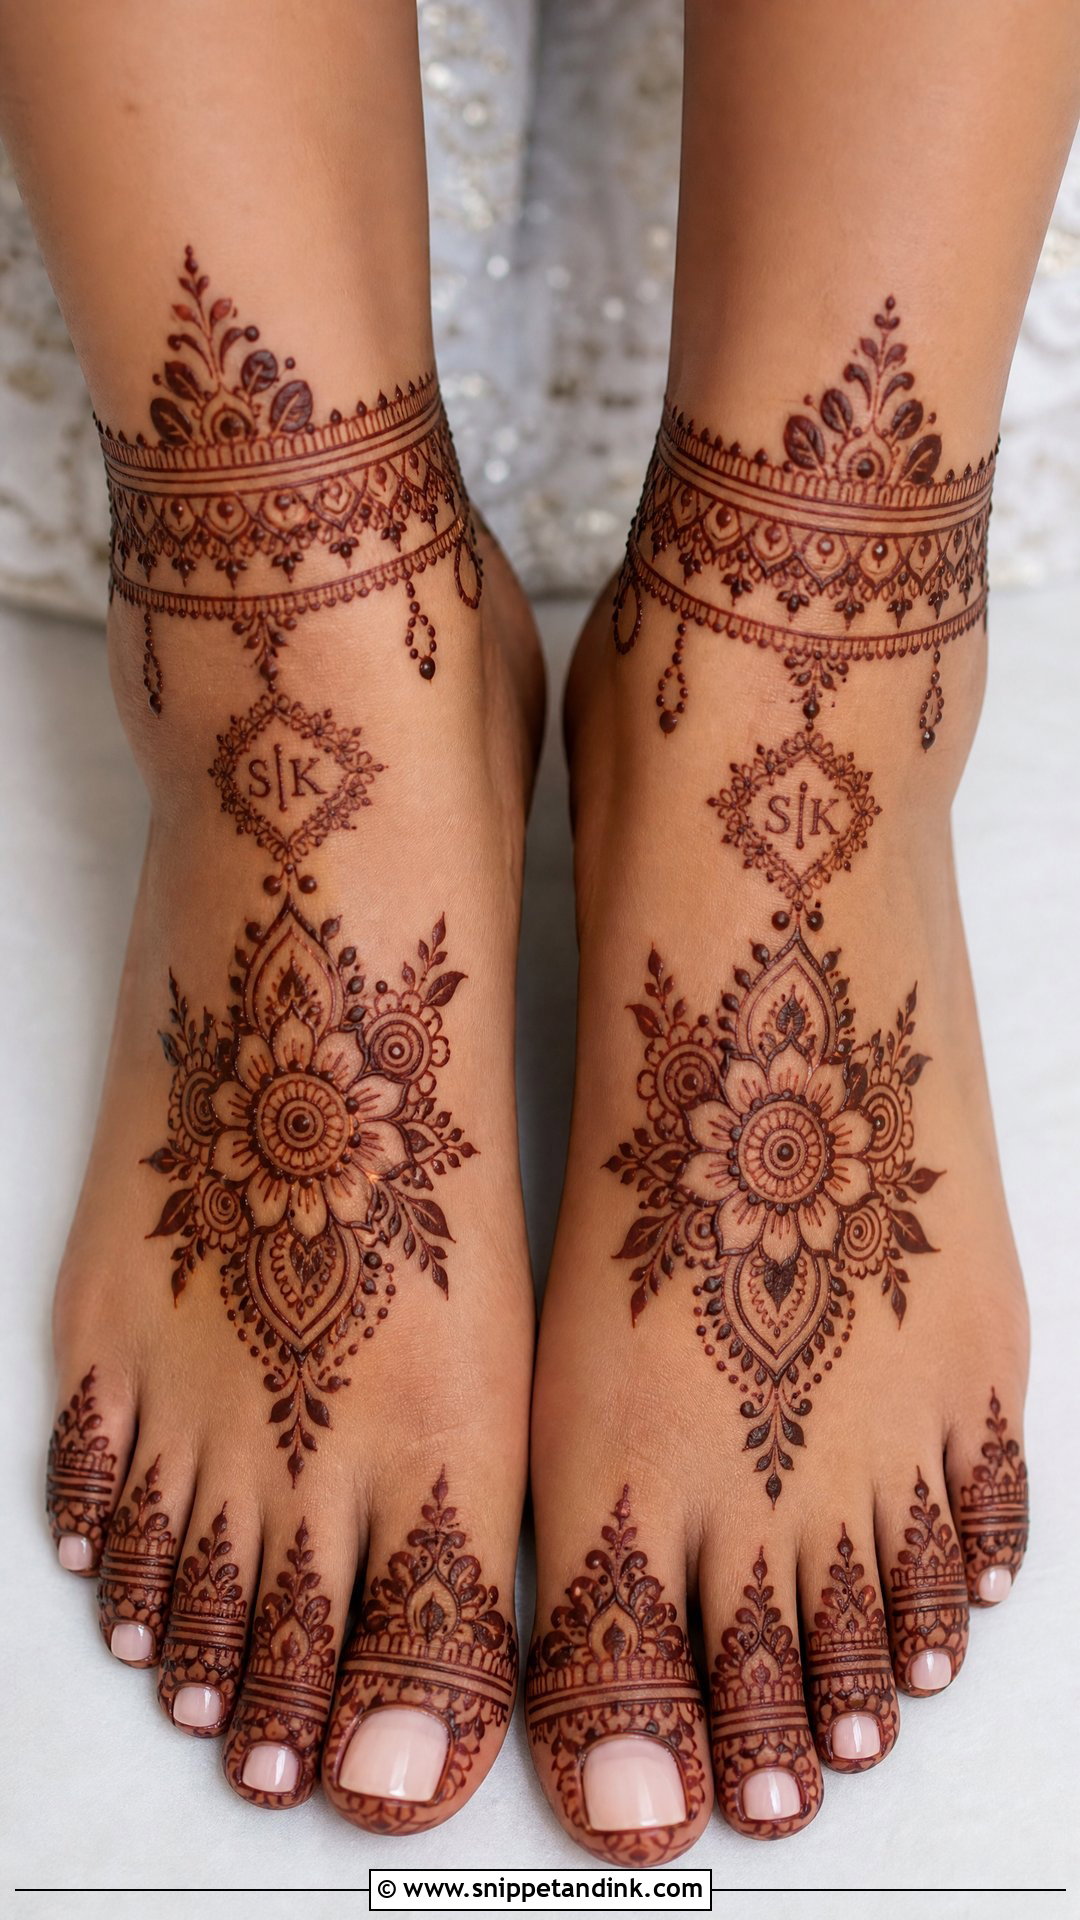
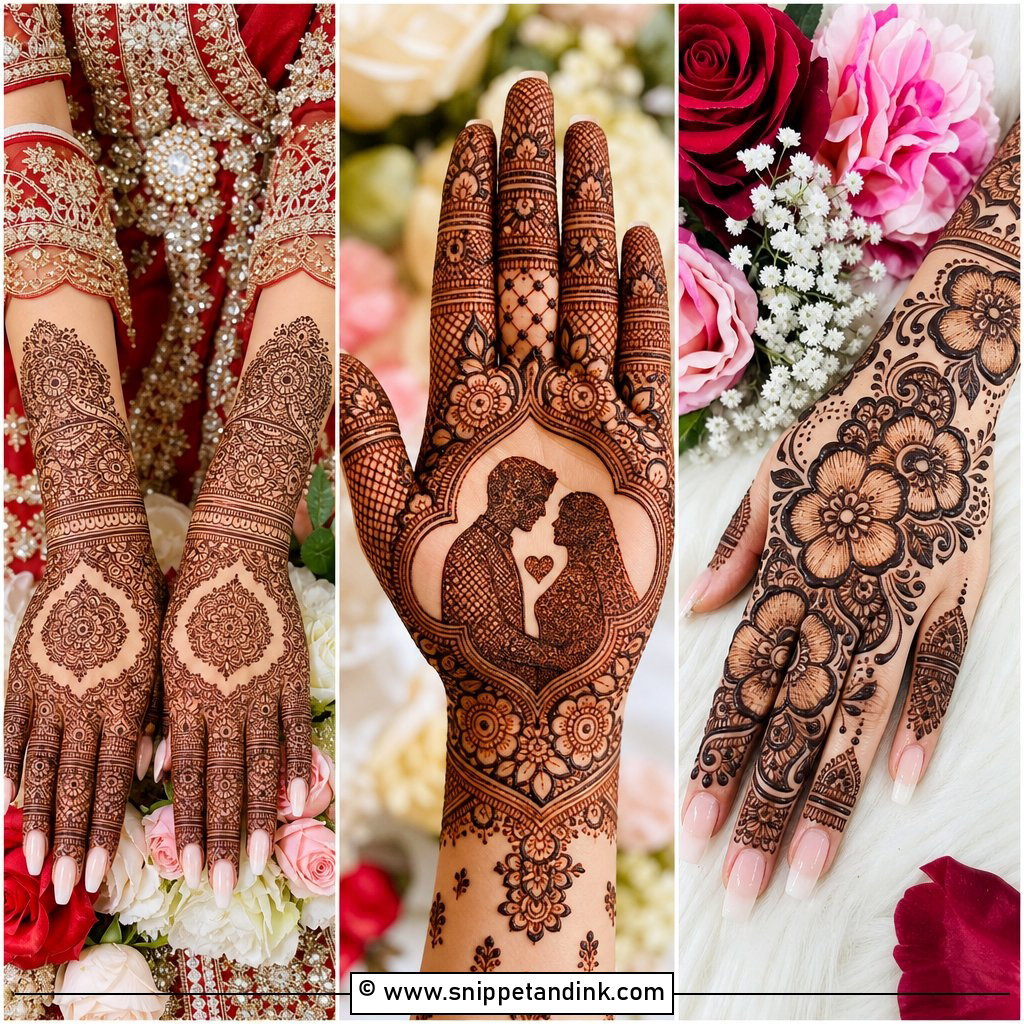
Modern foot henna uses spacing better rather than drawing less. Negative space, slim florals, geometric borders, half-foot layouts, jewelry-inspired ankle bands and neat toe work all fall under it. It suits contemporary lehengas and minimal jewelry. A small set of initials or a date fits easily into the open areas. I sometimes keep the two feet related but not identical, which looks more artistic than a strict mirror.
The First Twelve Hours After Foot Mehndi
Feet are where bridal paste gets ruined most often, mostly because brides have to stand up eventually. Sit with your feet raised on a towel until the paste is fully dry, which takes longer than on the hands. Once it’s set, a little lemon and sugar dabbed over the top keeps it stuck to the skin.
- Wear loose open slippers or nothing at all for the walk to bed. Closed shoes rub the paste off and smear it.
- If you’re sleeping in it, wrap the feet loosely in tissue and slip on old cotton socks you don’t mind staining.
- Scrape the dried paste off in the morning rather than washing it, then keep the feet dry for several hours.
- Book any pedicure before your mehndi appointment, not after. Soaking, scrubbing and polish remover all fade a fresh stain.
The stain will look orange when the paste comes off and deepen to reddish brown over the next day or two. Feet often finish darker than the top of the hands, so don’t panic if they look pale the first morning. Tight new wedding shoes worn for hours can also wear patches of colour away on the toes and heel, so break them in beforehand if you can.
How High Should Your Foot Henna Go?
Foot henna comes down to four things: your outfit’s hem, your footwear, your jewelry, and how long you can sit still. Traditional brides tend toward full leg, Indian, Rajasthani, peacock or heavy layouts; brides dressing more simply lean to Arabic, Moroccan, Gulf, minimal or negative-space work. Leave time in the schedule for application, drying and aftercare, because feet need longer to dry than hands and are much easier to smudge.
You'll Like These Ideas:


Leave a Reply