
Feet and legs often get the darkest stain of the whole bridal mehndi, because the skin there is thicker and holds the dye longer than the arms. That’s one reason I take leg designs as seriously as hands. The options range from full patterns running up to the knee to a simple band around the ankle, in Indian, Arabic, peacock, floral, jaali, jewelry-style or personalized layouts. Below are 20 leg designs I’d draw for a bride, with notes on what each one asks of your time, your outfit and your patience while it dries.

Plan the Leg Sitting Around the Hands, Not After Them
Brides often book hands and feet as one appointment without thinking about the order. Once the hands are covered in wet paste, you can’t adjust your clothes, eat or use your phone, and with the feet done too, you can’t walk anywhere for hours.
- If one artist is doing everything, I usually do the feet first, so they can dry while I work on the hands.
- For heavy or knee-length work, ask for a second artist. Hands and legs can then be done at the same time, cutting the sitting time considerably.
- Book the mehndi one to two days before the wedding. The stain starts orange and darkens over the next 24 to 48 hours, so it’s at its deepest on the day itself.
- Do your pedicure, waxing and any foot scrub before the mehndi, never after. Each of those removes the stained top layer of skin.
- Wear loose clothing you can pull up above the knee, and have a pillow ready to rest your legs on while the paste dries.
Ask your artist what goes into the paste. Natural henna stains orange to brown and never black. A paste that promises an instant jet-black result may contain chemical dyes that can cause serious skin reactions.
1. Full Leg Bridal Mehndi Design
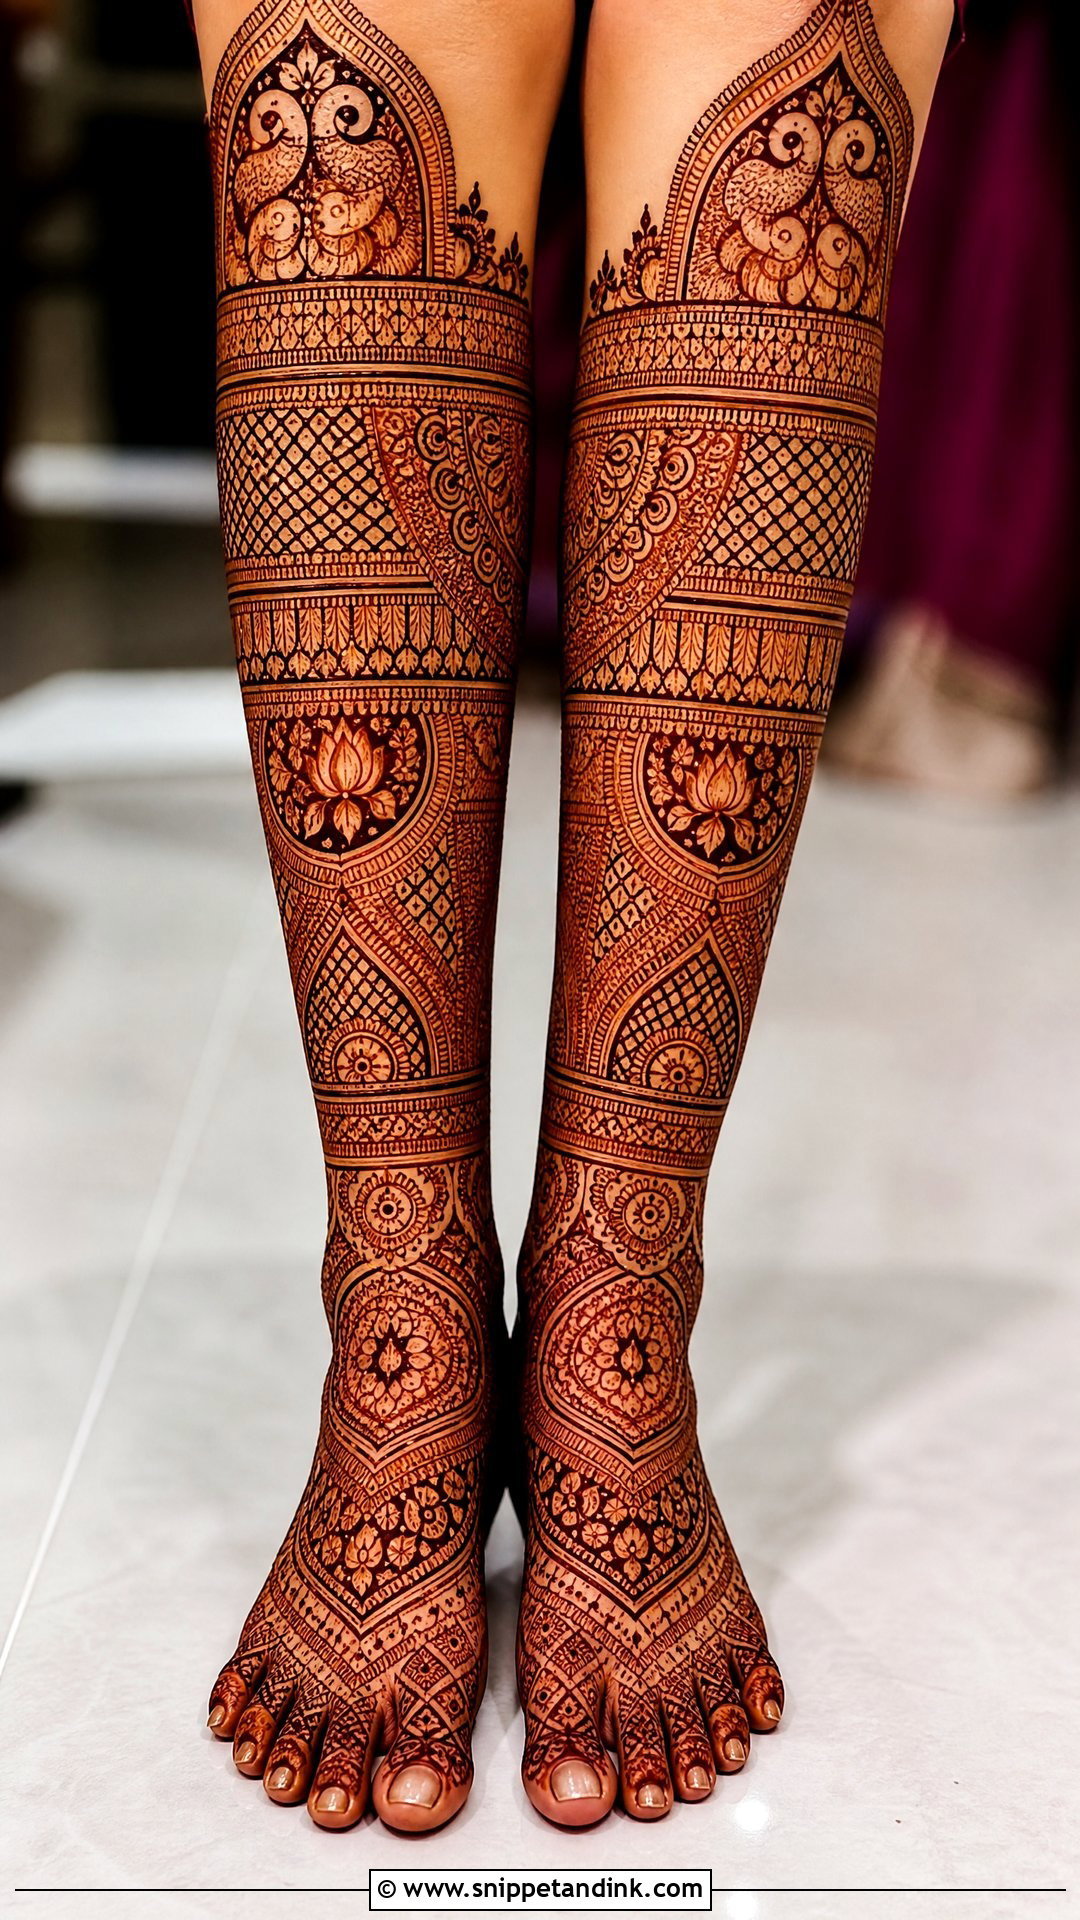
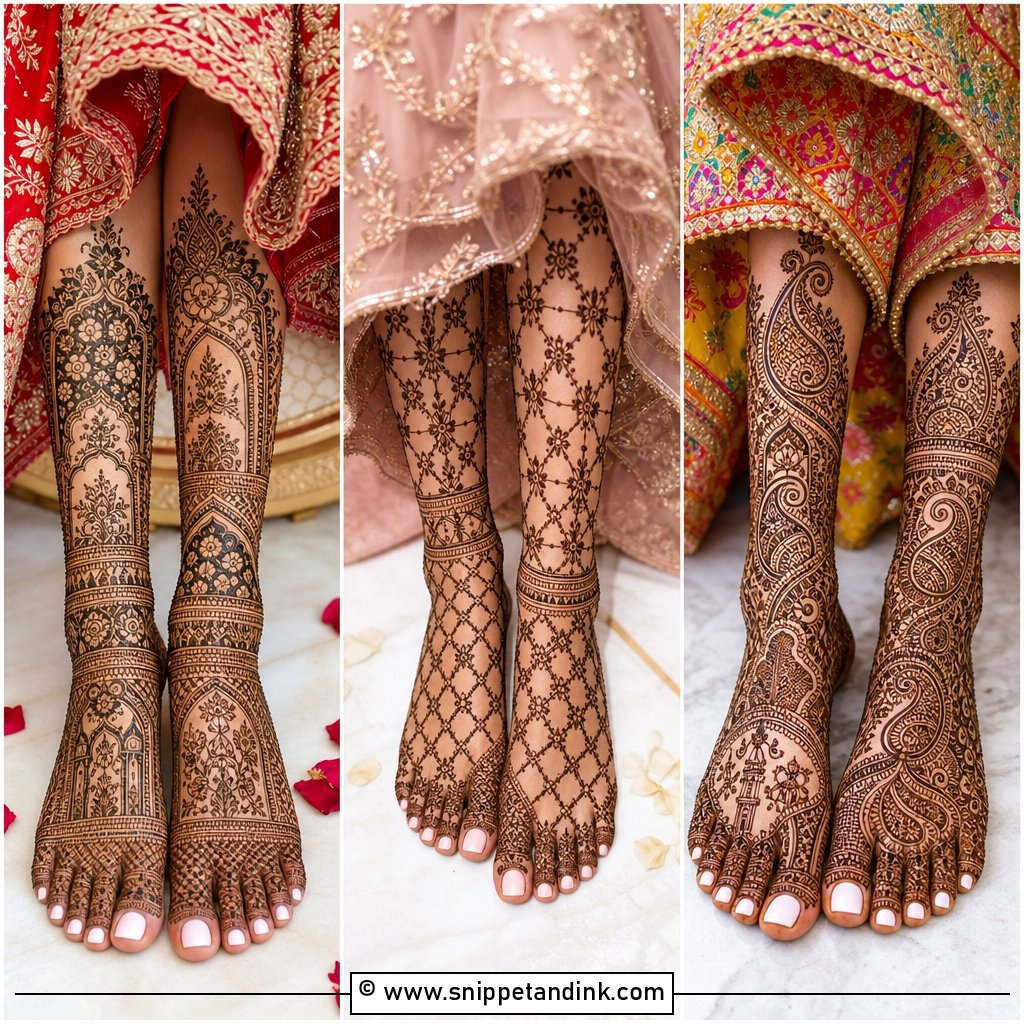
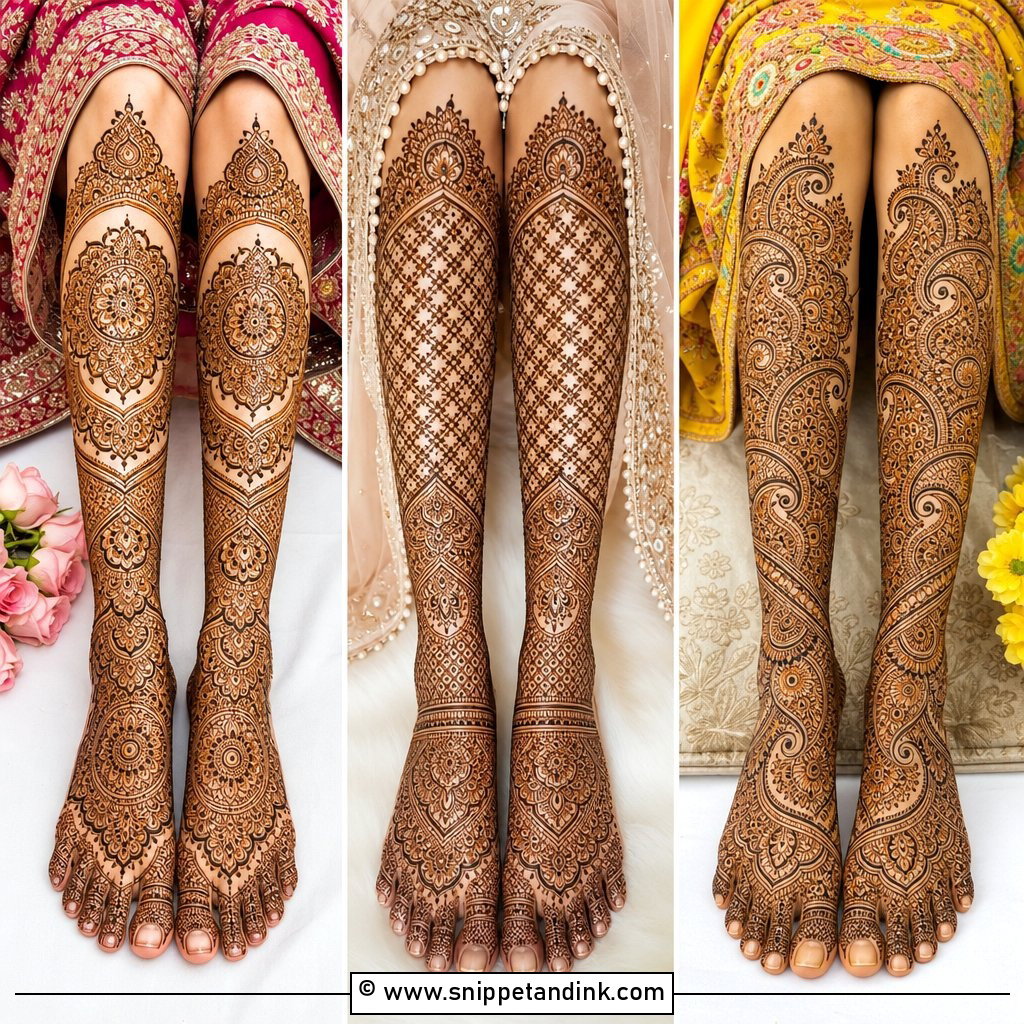
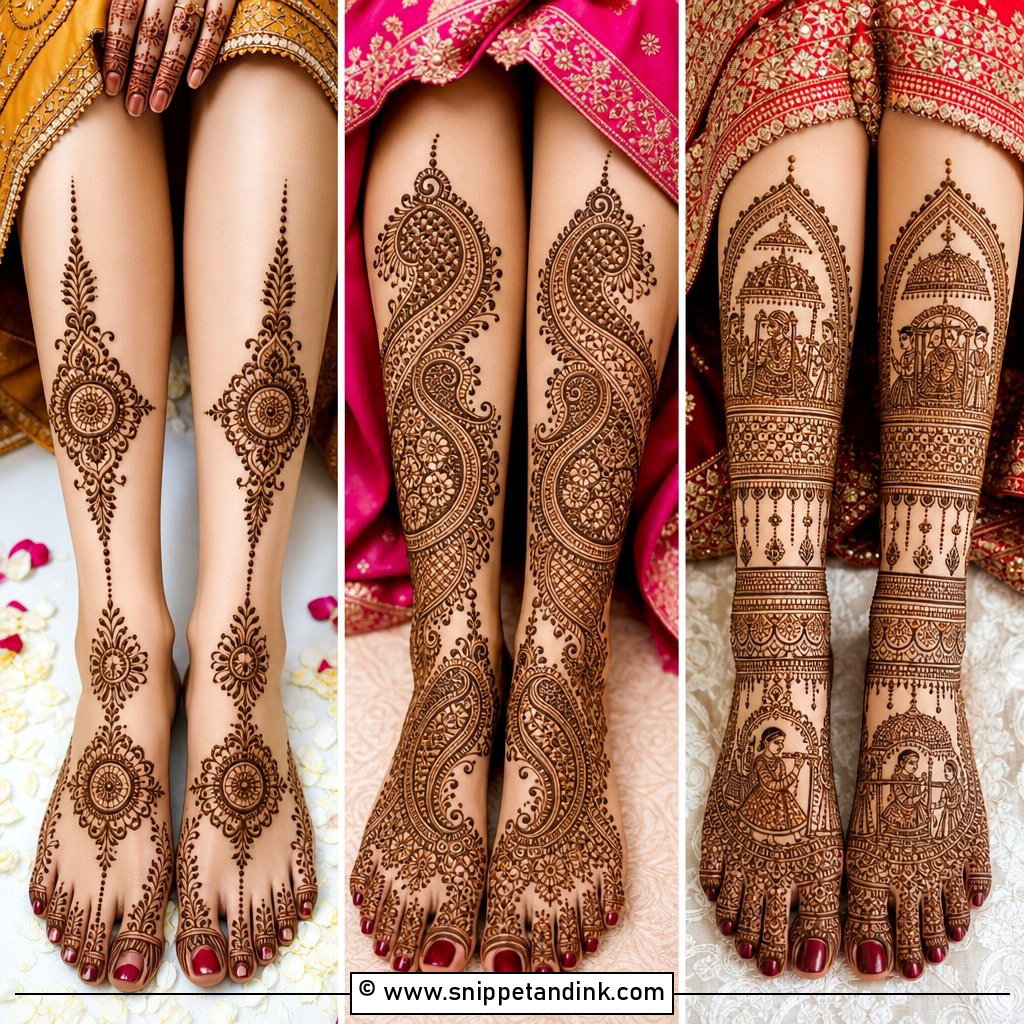
A full leg bridal mehndi design runs from the toes to just below the knee and is the most time-consuming option on this list. I map it before I start: toe caps or small florals, a dense foot panel, an ankle band, then larger motifs on the calves, where the skin is smoother and big shapes read clearly. Paisleys, lotus flowers, mandalas, peacocks, jaali and shaded vines all fit. Expect several hours of sitting still. It suits lehengas, sarees, ghararas and open footwear, and the stain on the feet will come up darker than on the shins.
2. Indian Bridal Leg Mehndi Design
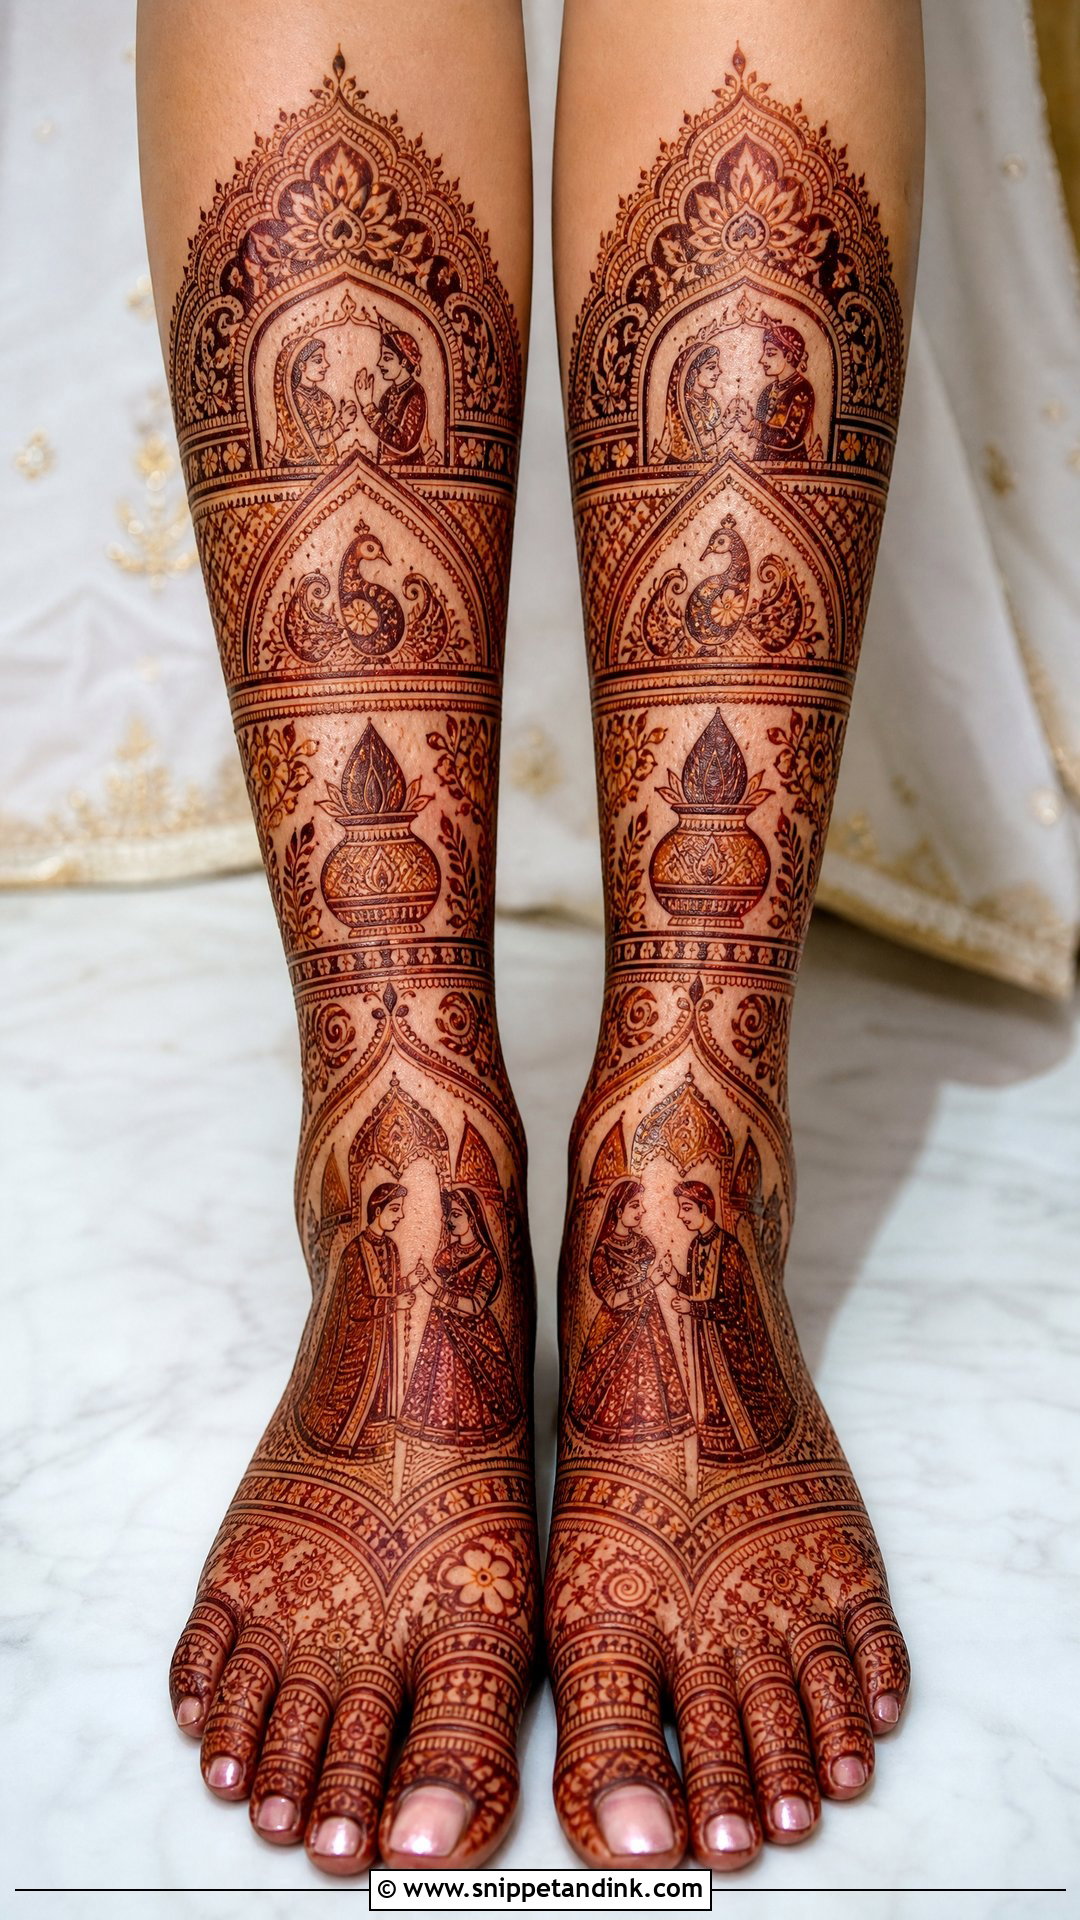
Indian bridal leg mehndi design is all about fine lines and close pattern work, with motifs like peacocks, dulha-dulhan figures, kalash shapes, lotus borders, bells and paisley clusters. I usually start with detailed toes, build a decorated foot panel and then add symmetrical bands up the ankle and calf. The danger with this style is that everything becomes the same size and blurs into texture in photos. I keep the central motifs bigger and use micro-filling only around them, so each figure stays readable from a few feet away.
3. Arabic Bridal Leg Mehndi Design
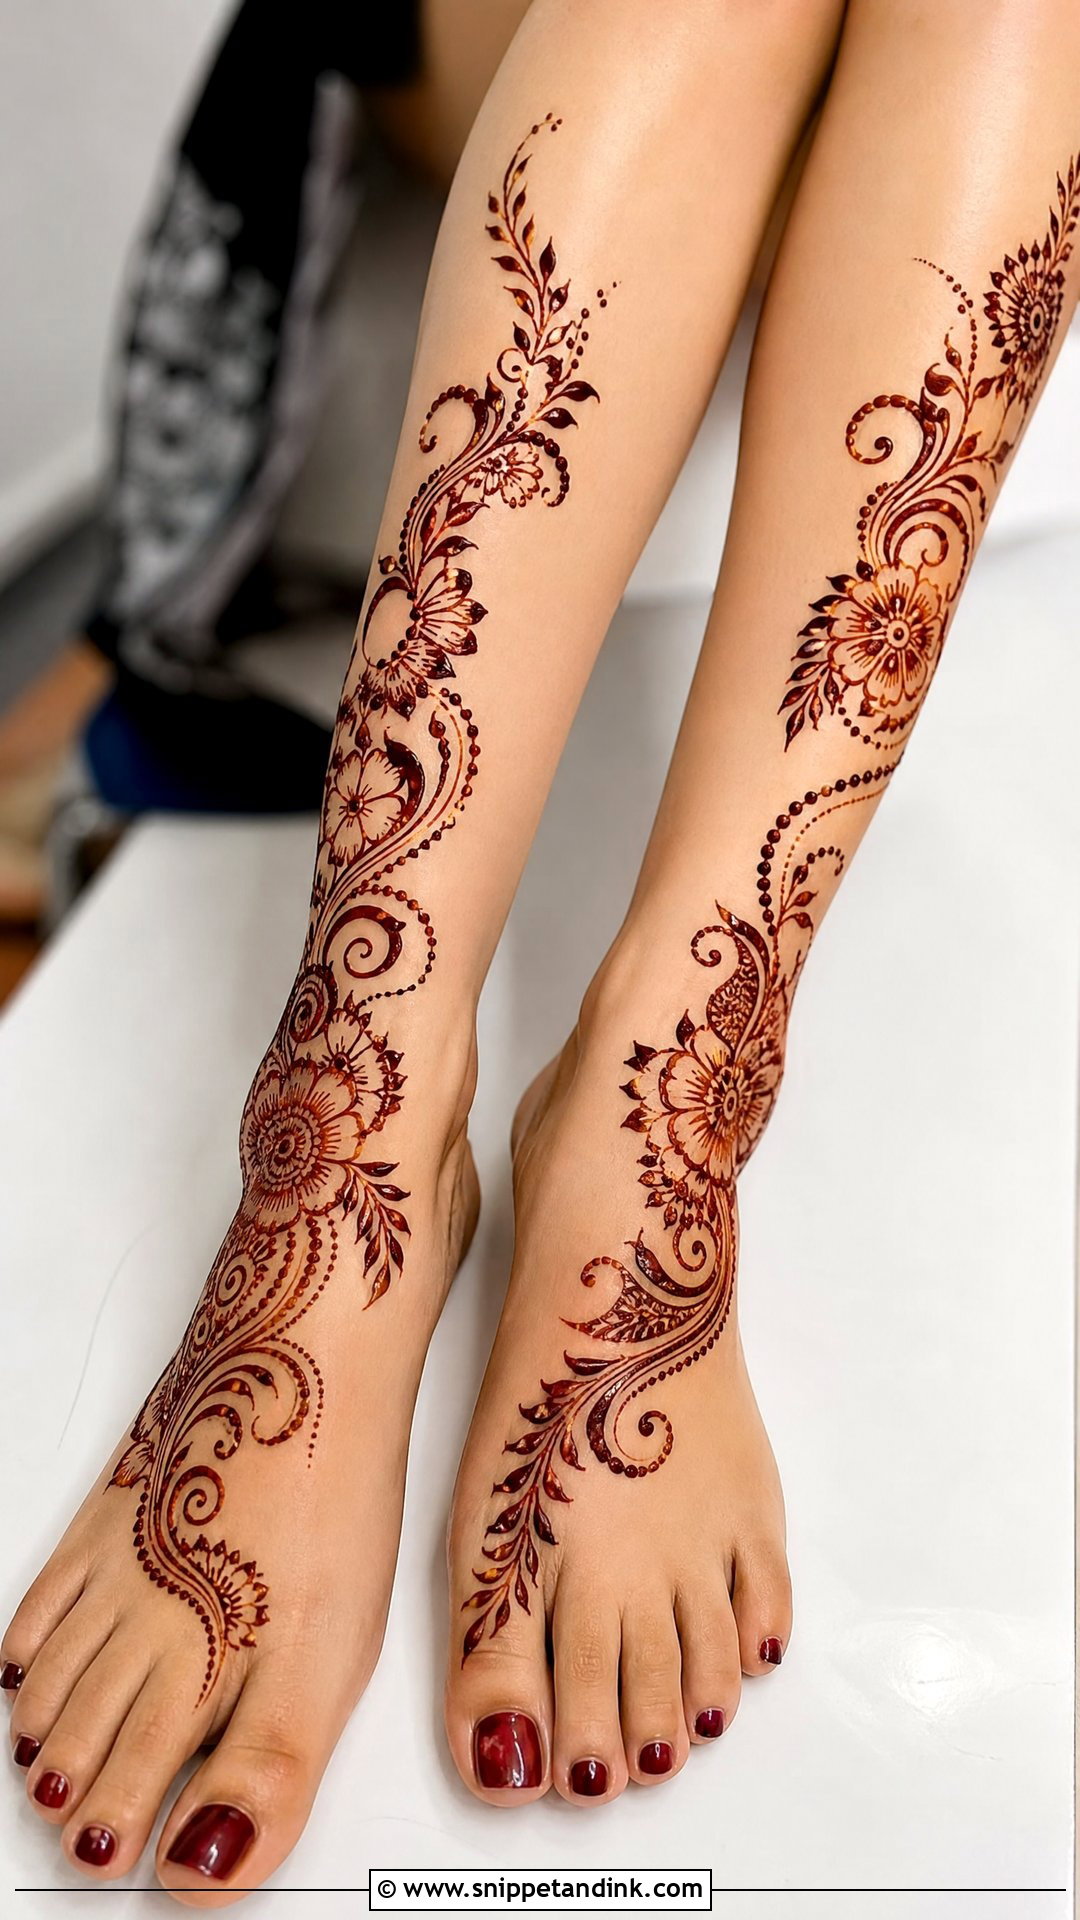
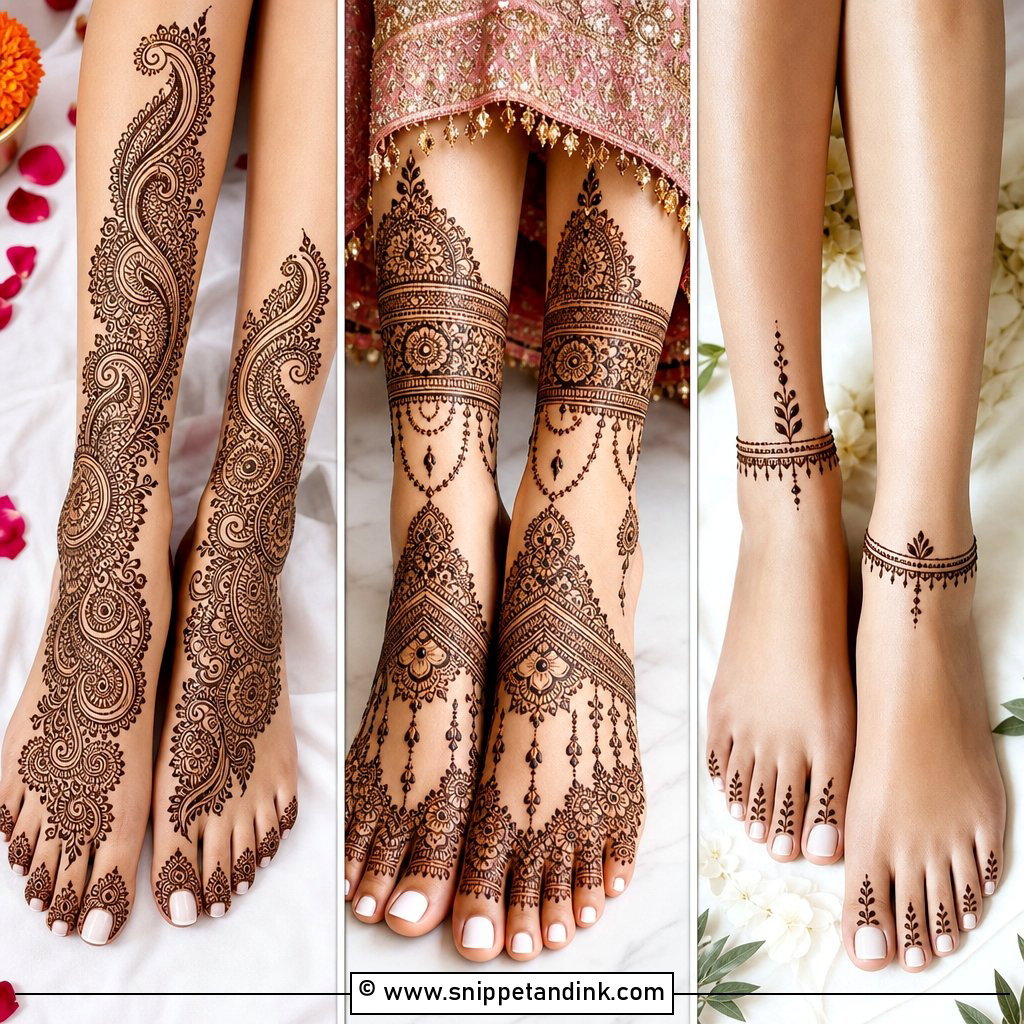
Arabic designs leave plenty of open skin between large flowers, leafy vines and curved paisley trails. I like to start from the outer edge of the foot and run diagonally toward the ankle and calf, which makes the leg look longer. Because the strokes are thicker, the cone needs a slightly looser paste than for fine Indian work. Arabic leg mehndi stays clear from a distance once it stains, which suits outdoor and beach weddings and modern outfits. It’s also faster to apply than dense coverage.
4. Indo-Arabic Bridal Leg Mehndi Design
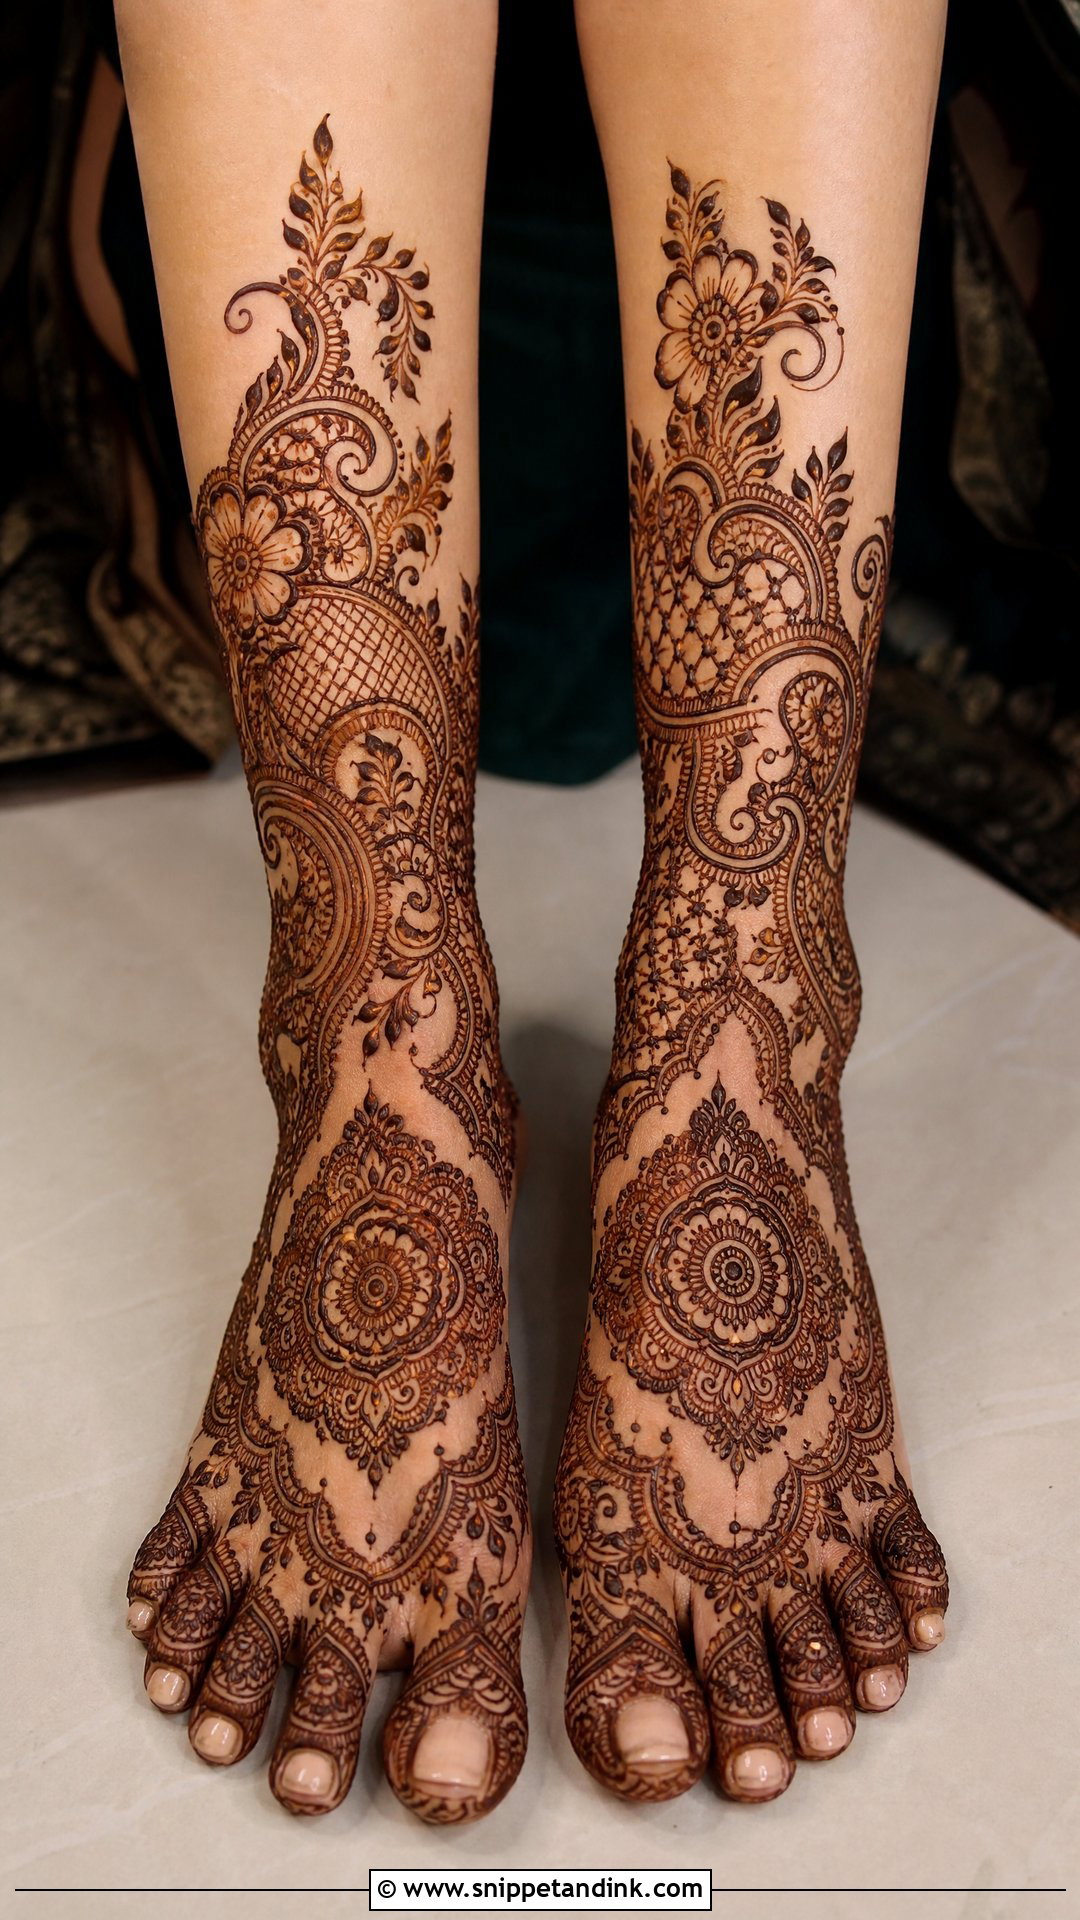
Indo-Arabic mixes dense Indian sections with Arabic flow. On the feet I draw mandalas, jaali patches and detailed toes; on the ankles and lower legs, Arabic floral vines and paisley trails. The skin gaps between the two styles are what keep it from looking crowded. This layout looks good from many angles, especially in seated ritual photos or with open sandals. If you can’t decide between heavy and light, this is usually where I’d point you.
5. Simple Bridal Leg Mehndi Design
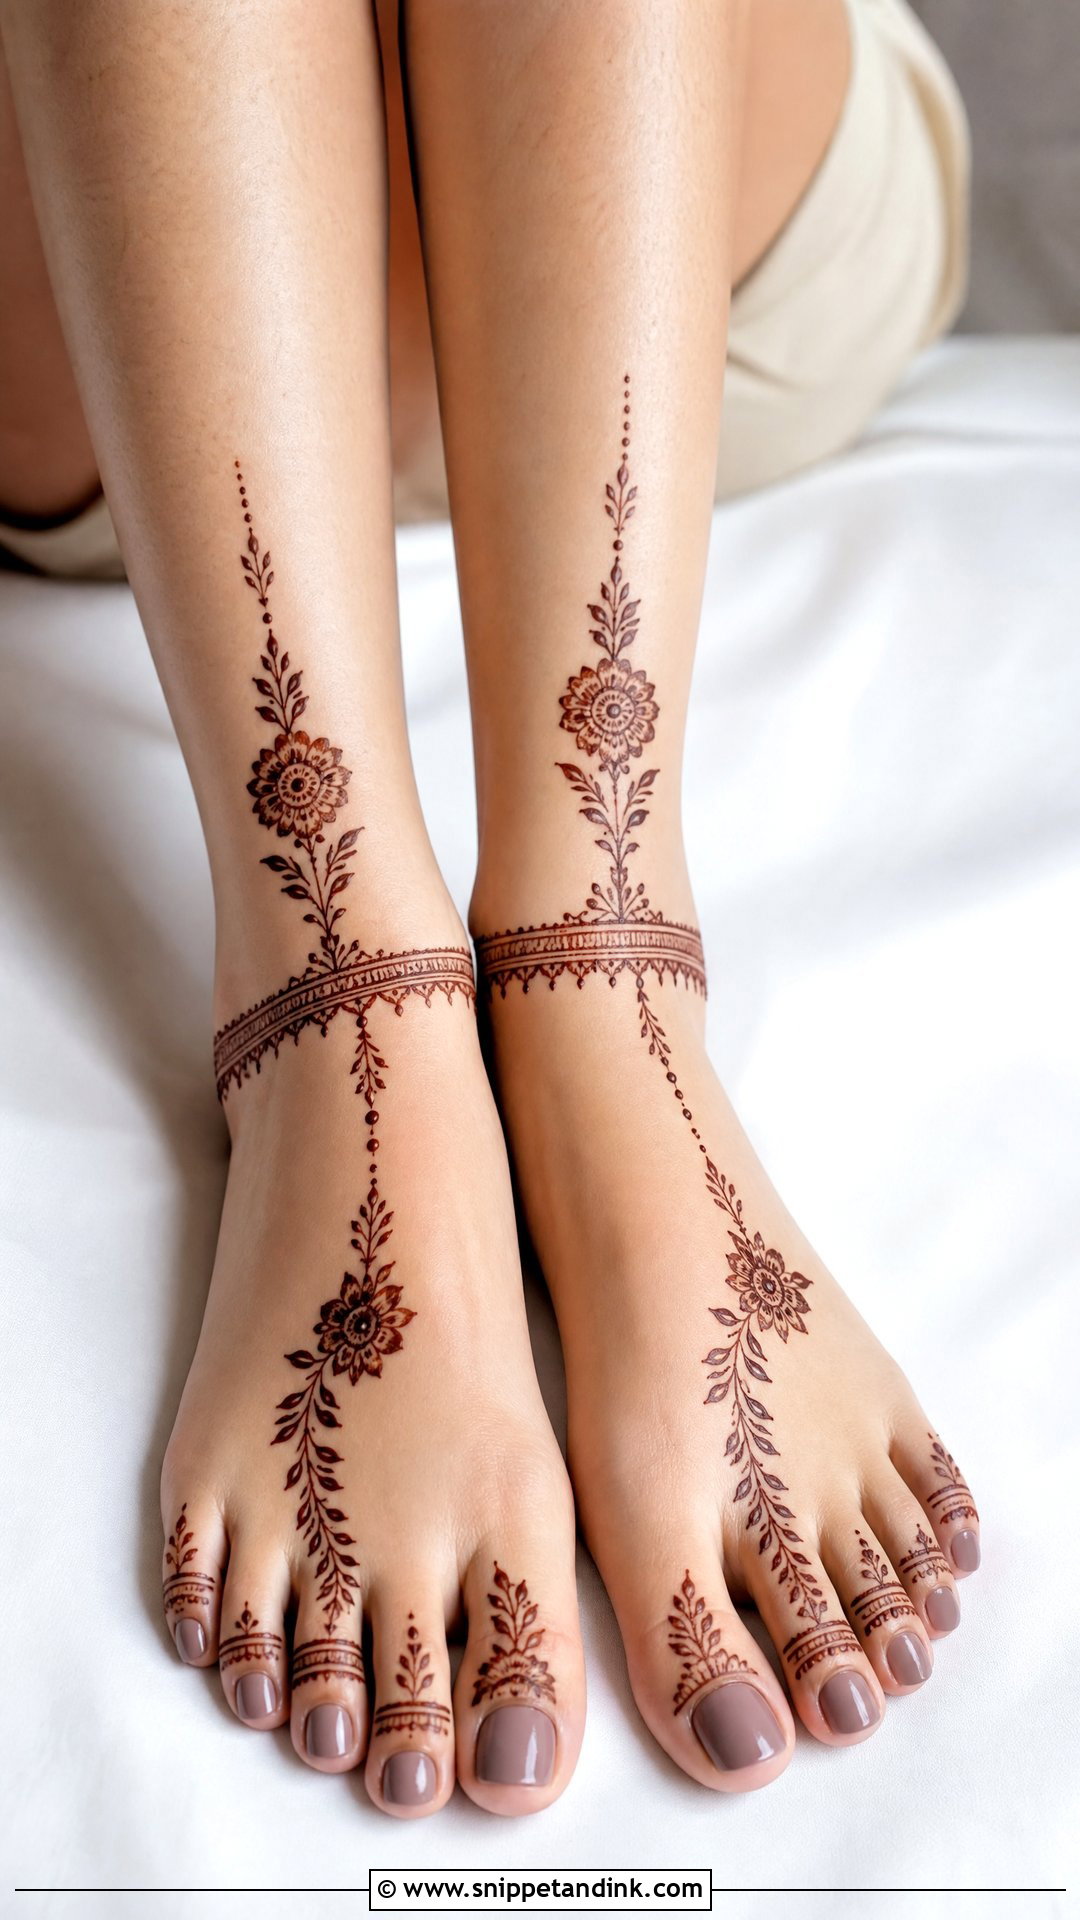
Simple doesn’t mean plain. I’d decorate the toes, add a floral trail across the foot, a neat ankle band and a few spaced motifs on the lower leg. Medium flowers, leafy curves and small dots do the work instead of dense fill. It suits brides who don’t want to sit for hours, intimate weddings and court ceremonies, and bridesmaids looking for a bridal touch. Symmetry matters more on a simple design than a heavy one, since every line is visible, so I mirror each motif on the second foot carefully.
6. Heavy Bridal Leg Mehndi Design
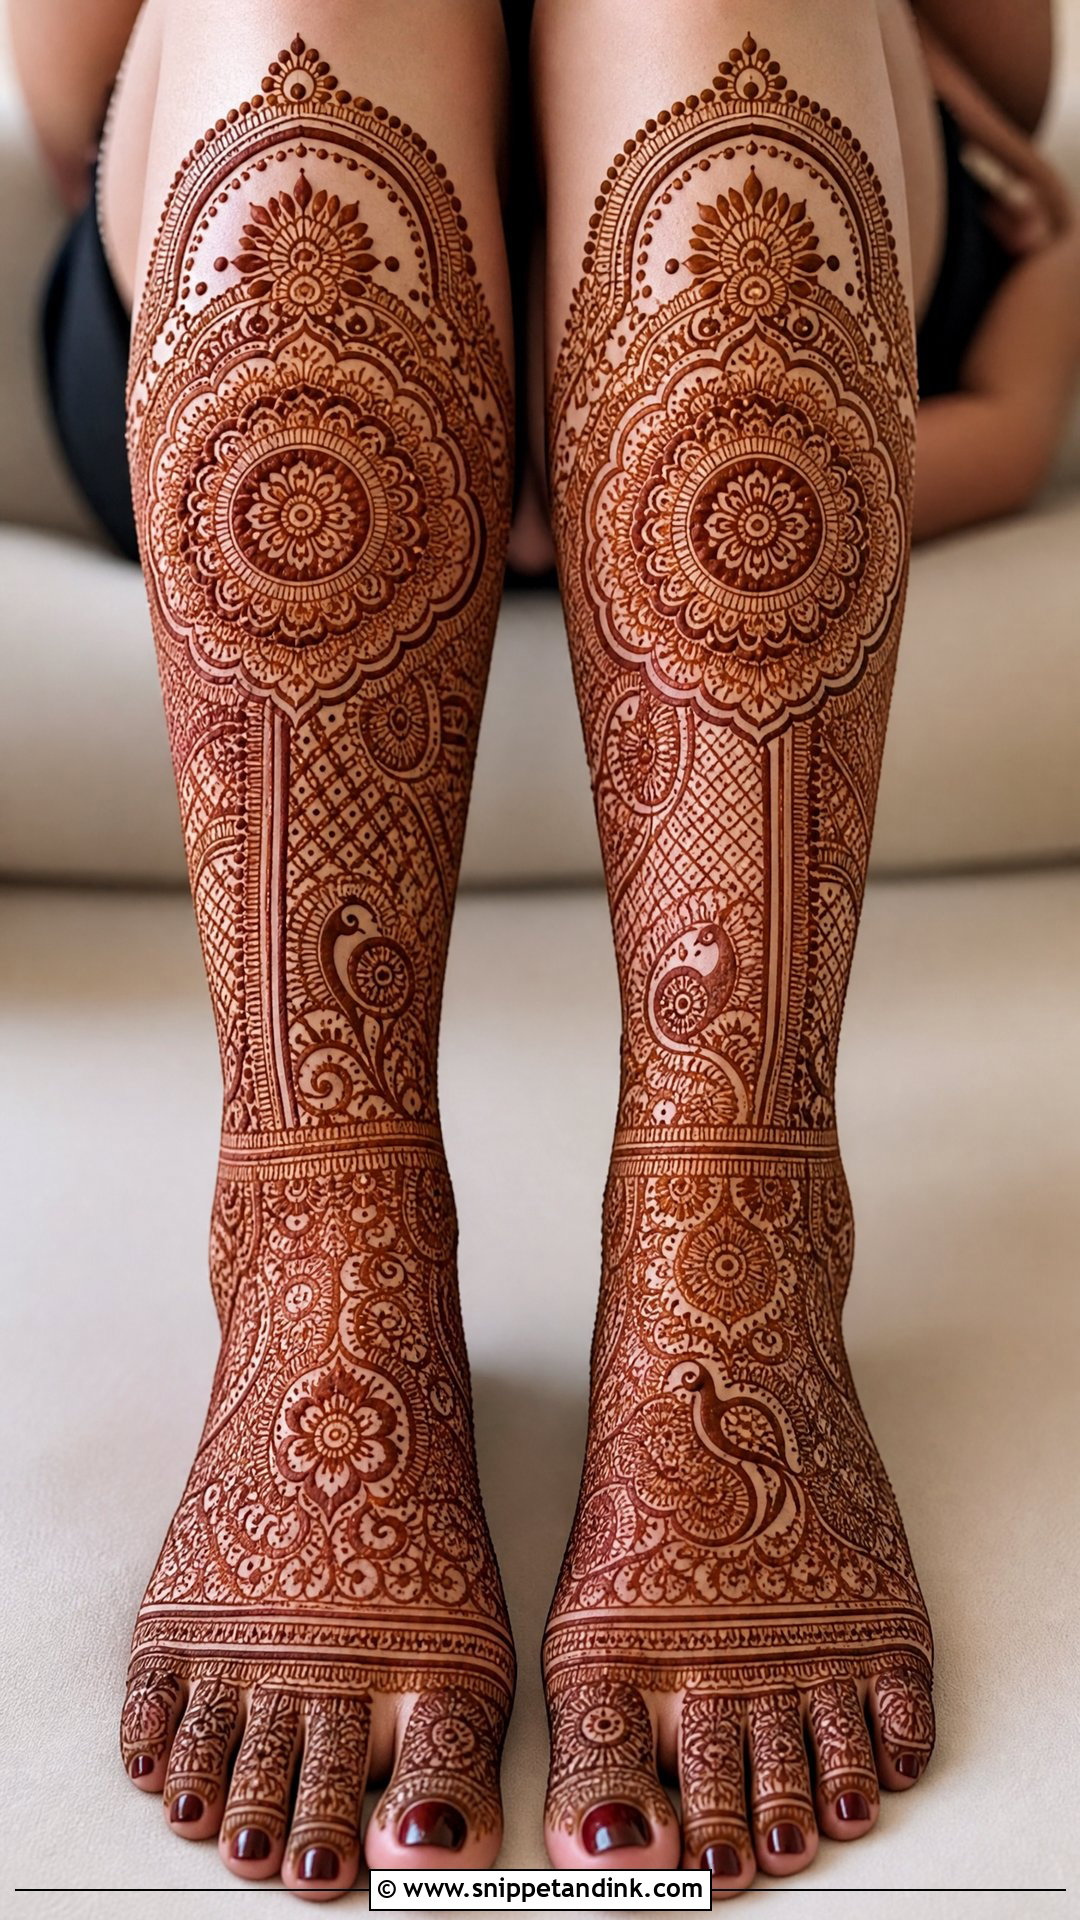
Heavy coverage means dense filling on the feet, layered ankle bands, detailed calf panels and continuous pattern work with peacocks, mandalas, lotus blooms, paisleys, checks, spirals and tiny leaves. Balance is everything here. I place the largest motifs at the center of the foot and calf, then let smaller details fill outward, otherwise the eye has nowhere to rest. Brides who choose this usually want their legs to match heavy hand mehndi. Plan for a long sitting, and make sure someone can feed you and hold your phone.
7. Minimal Bridal Leg Mehndi Design
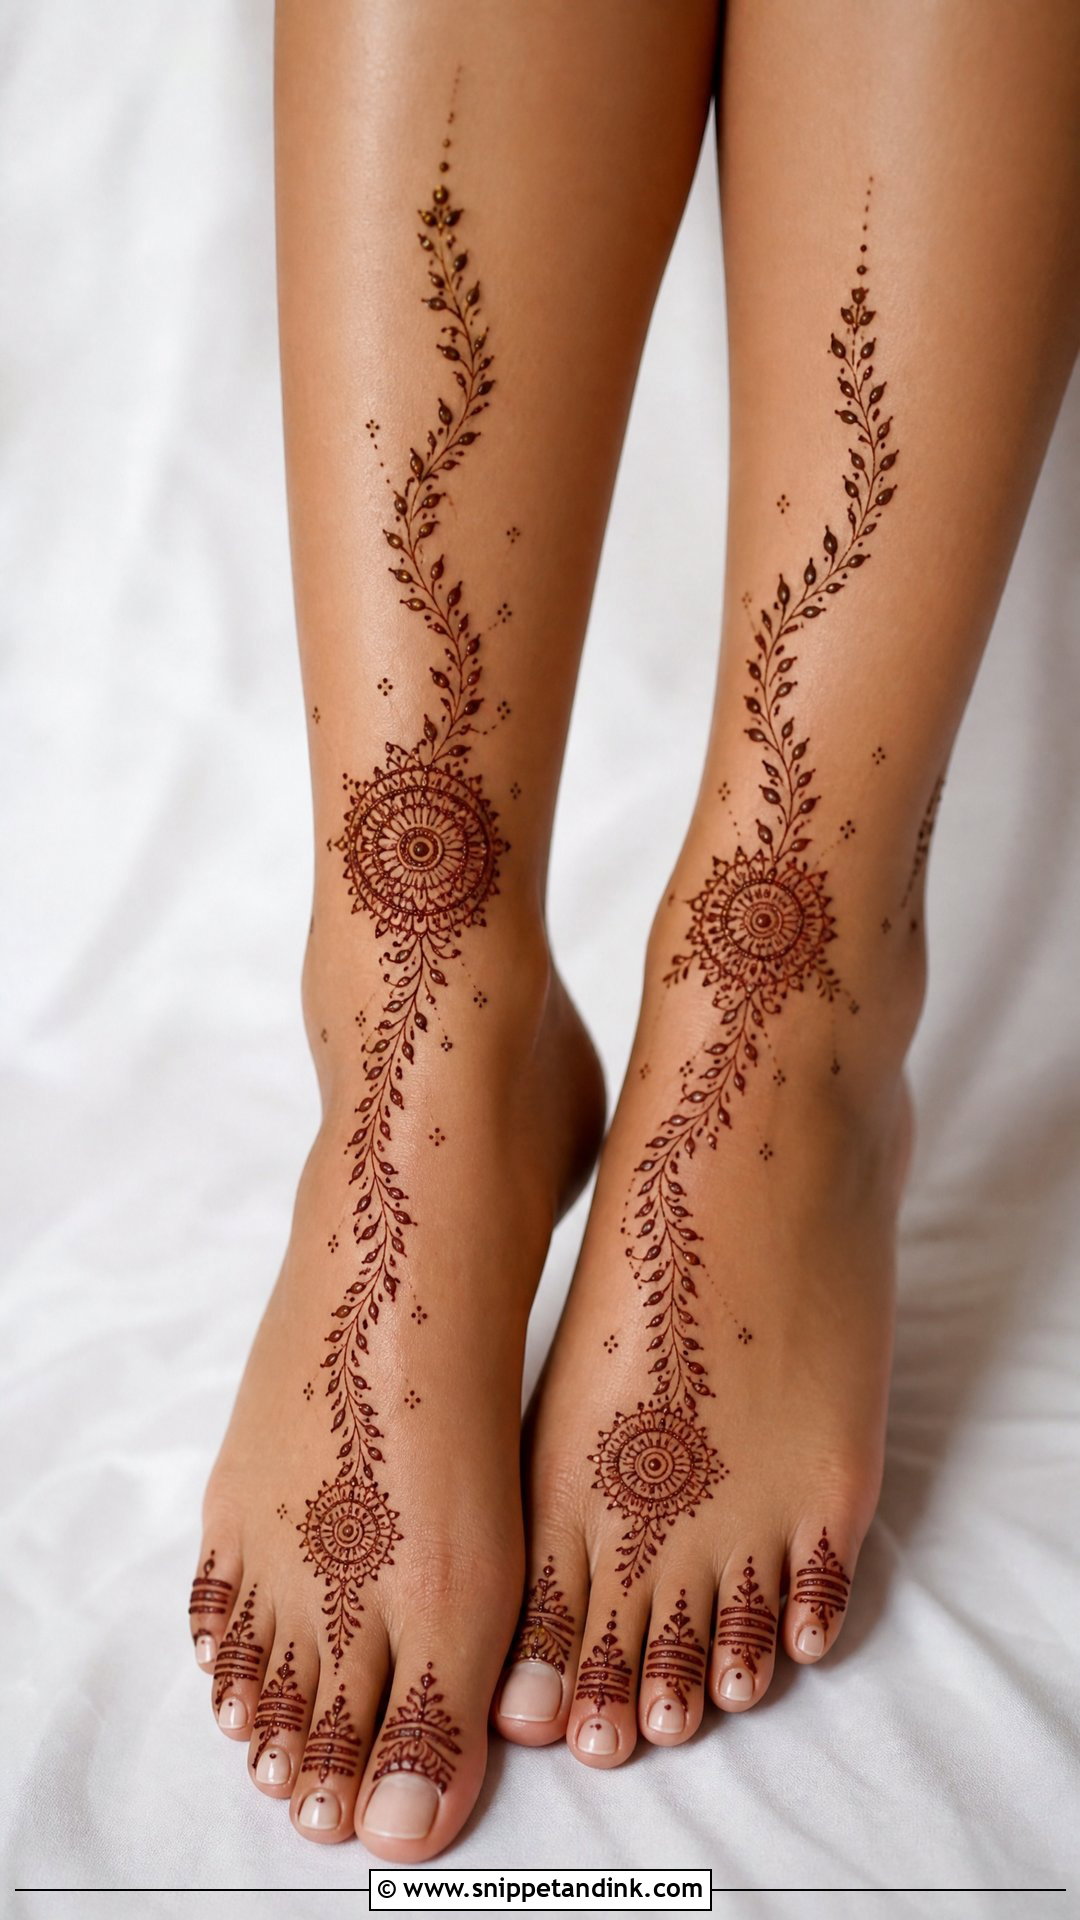
Minimal leg mehndi relies on placement rather than coverage. A small mandala on the top of the foot, thin leafy vines around the ankle and fine details on the toes can be enough, with an optional slim calf trail or a tiny personal motif. Pastel lehengas and light sandals suit it, and it’s comfortable for destination weddings. Every line shows, so the paste has to be smooth and the cone tip fine. Lumpy or shaky lines that would disappear in a heavy design stand out in a minimal one.
8. Floral Bridal Leg Mehndi Design
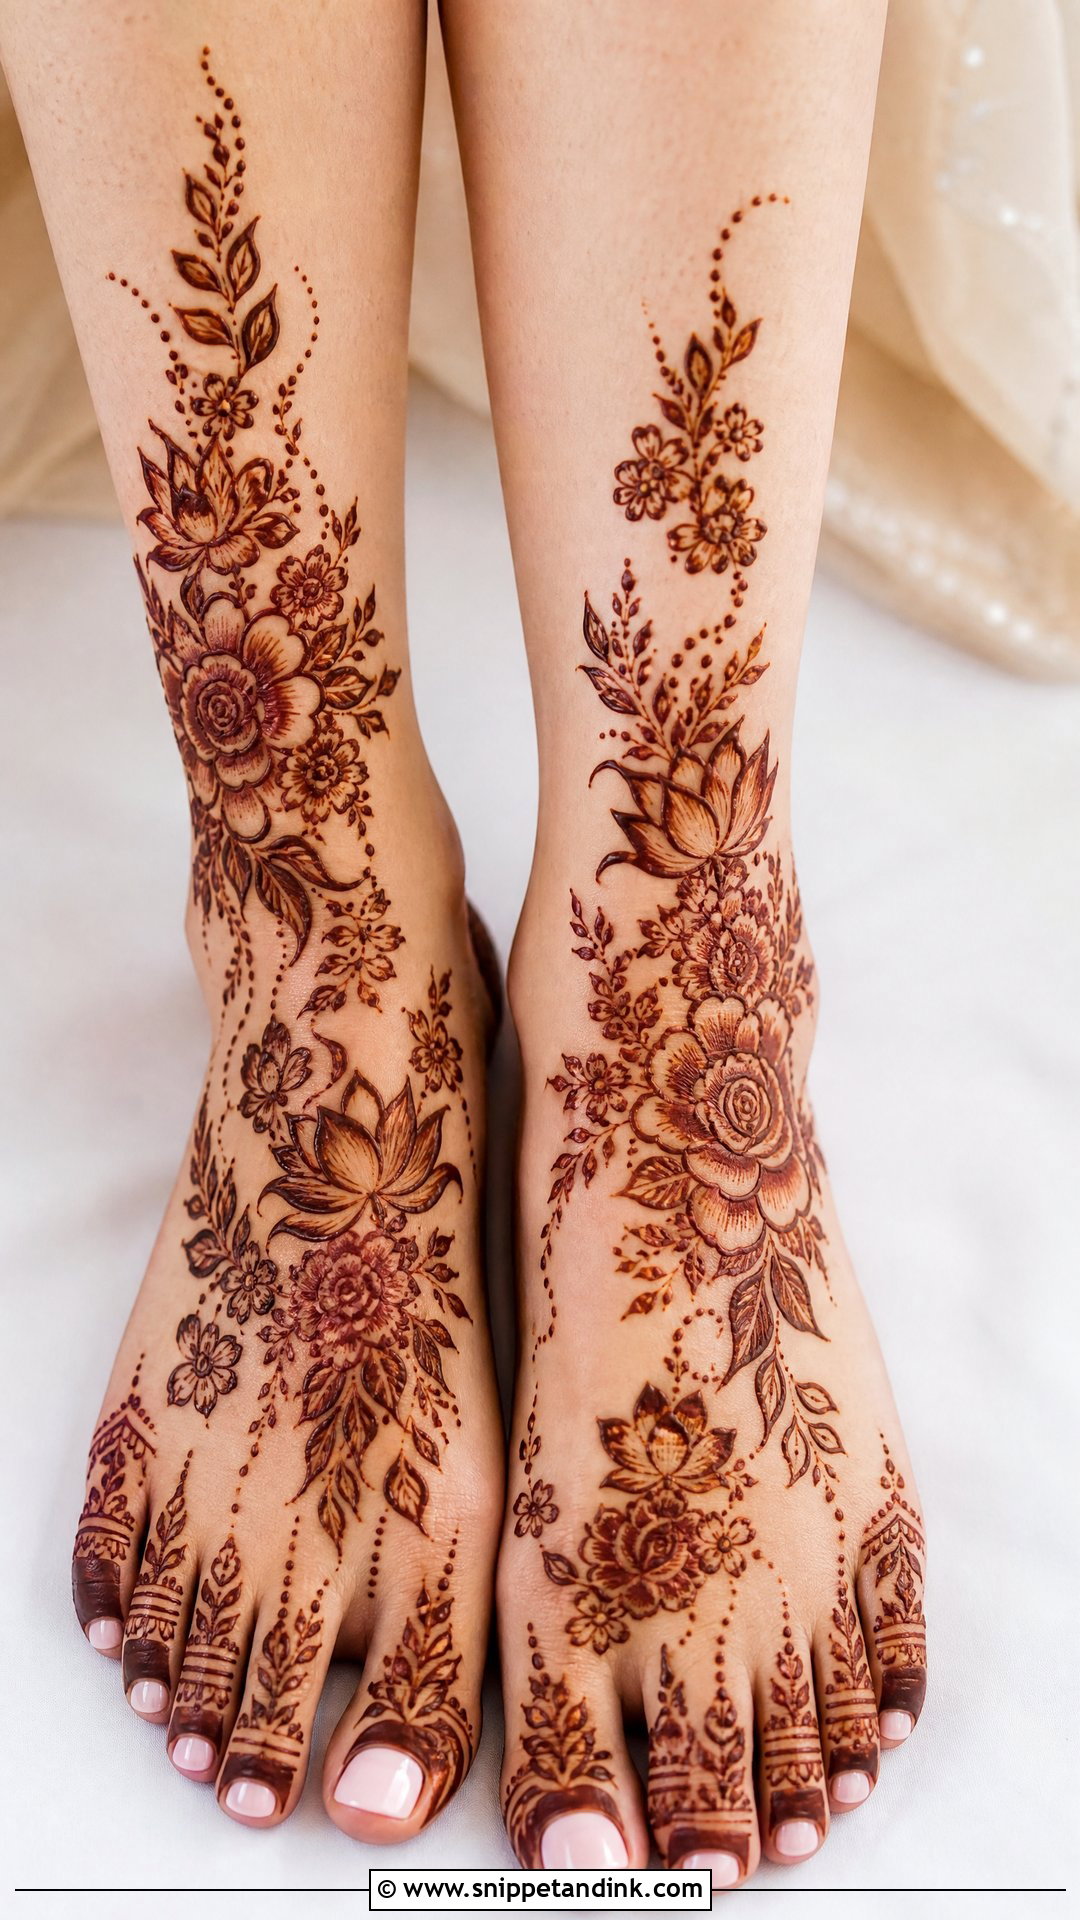
Floral mehndi adapts to almost any outfit. Roses, lotus flowers, small blossoms, leafy vines and shaded petals can run from the toes to the ankle like a garden path or sit in balanced panels for a more traditional look. Flowers work in both Indian and Arabic layouts, which is why so many brides ask for them. I mix bold flowers with fine leaves and tiny dots to give depth. Shading inside the petals, done with a thinner layer of paste, gives a lighter tone that adds dimension once the stain develops.
9. Mandala Bridal Leg Mehndi Design
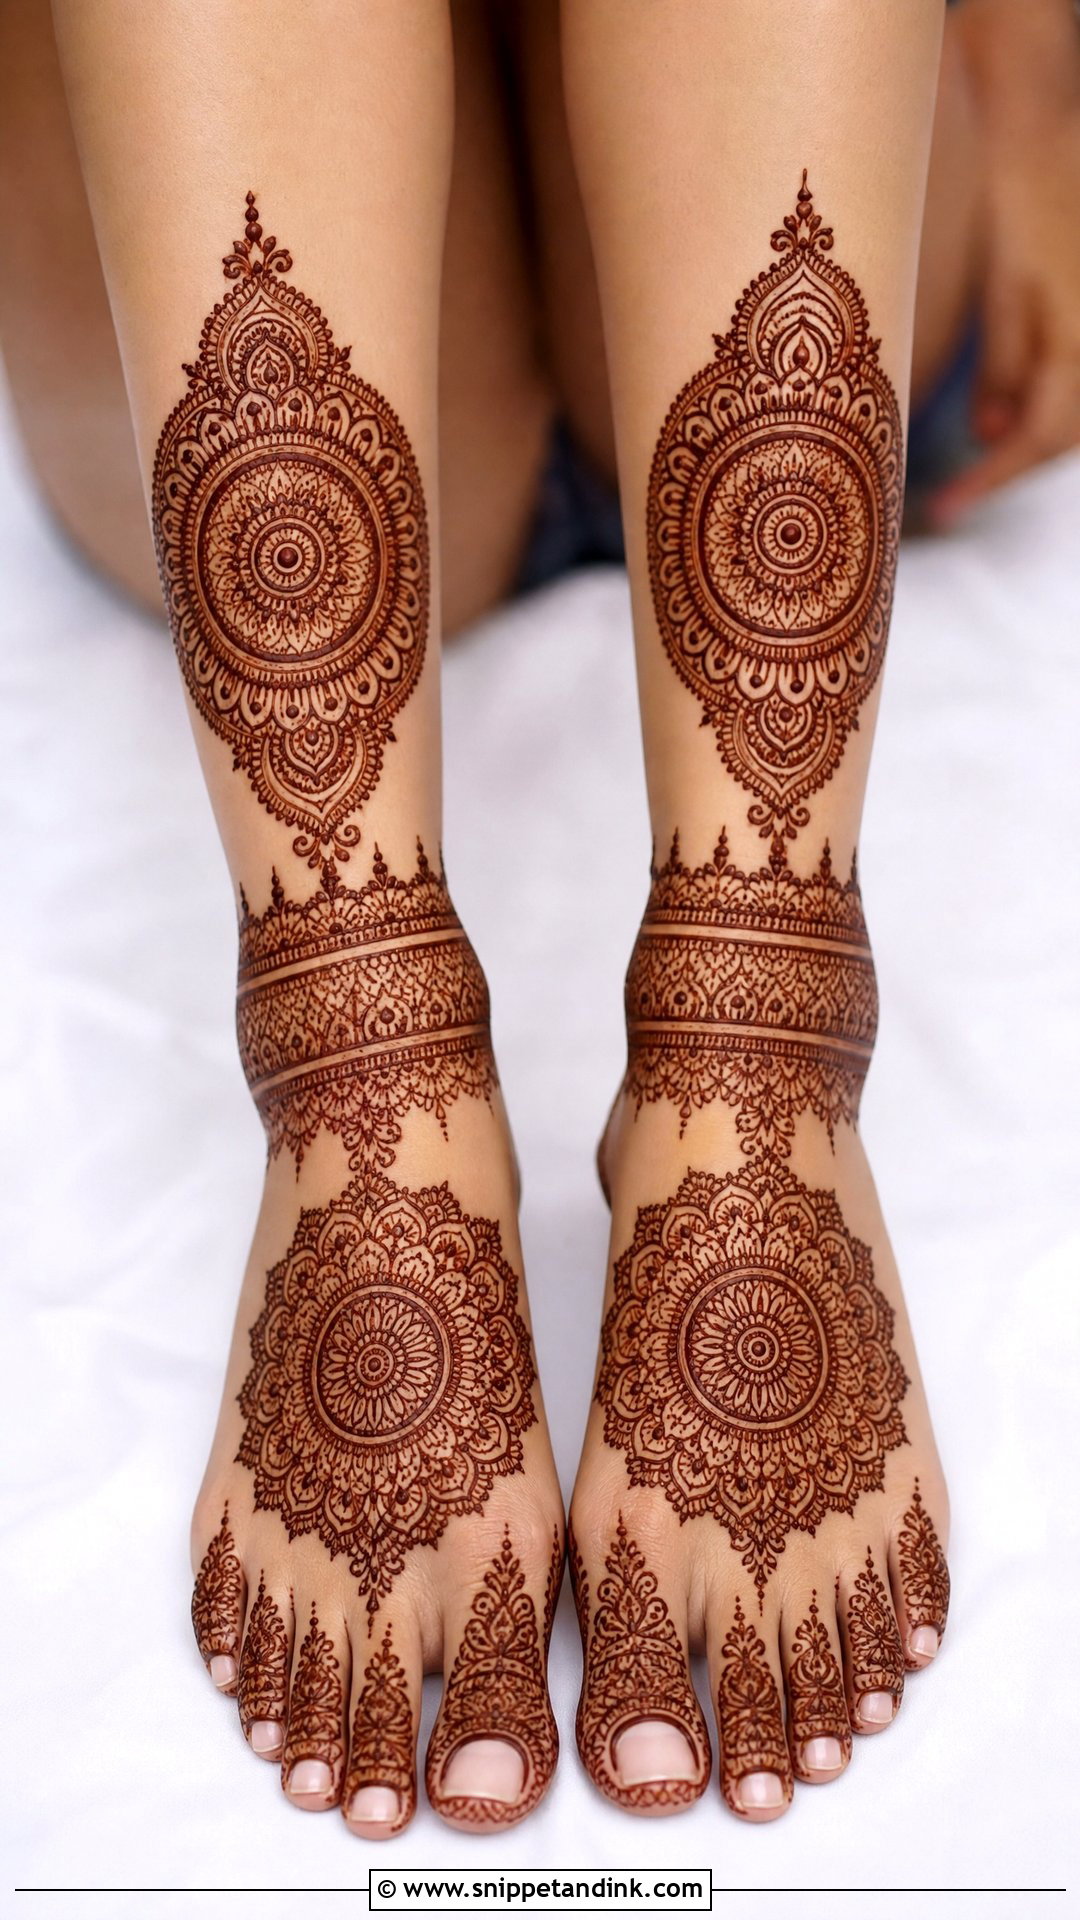
A mandala gives each foot a calm center point. I place the main mandala on the top of the foot, then add smaller circles near the ankles or calves, filled around with petals, dots, paisleys, jaali and bracelet bands. Getting it perfectly round on the curve of the foot takes practice, because the instep slopes away; I draw the center first and build outward ring by ring. Keep the toes rich and connect the mandala to the ankle band for a full bridal finish.
10. Peacock Bridal Leg Mehndi Design
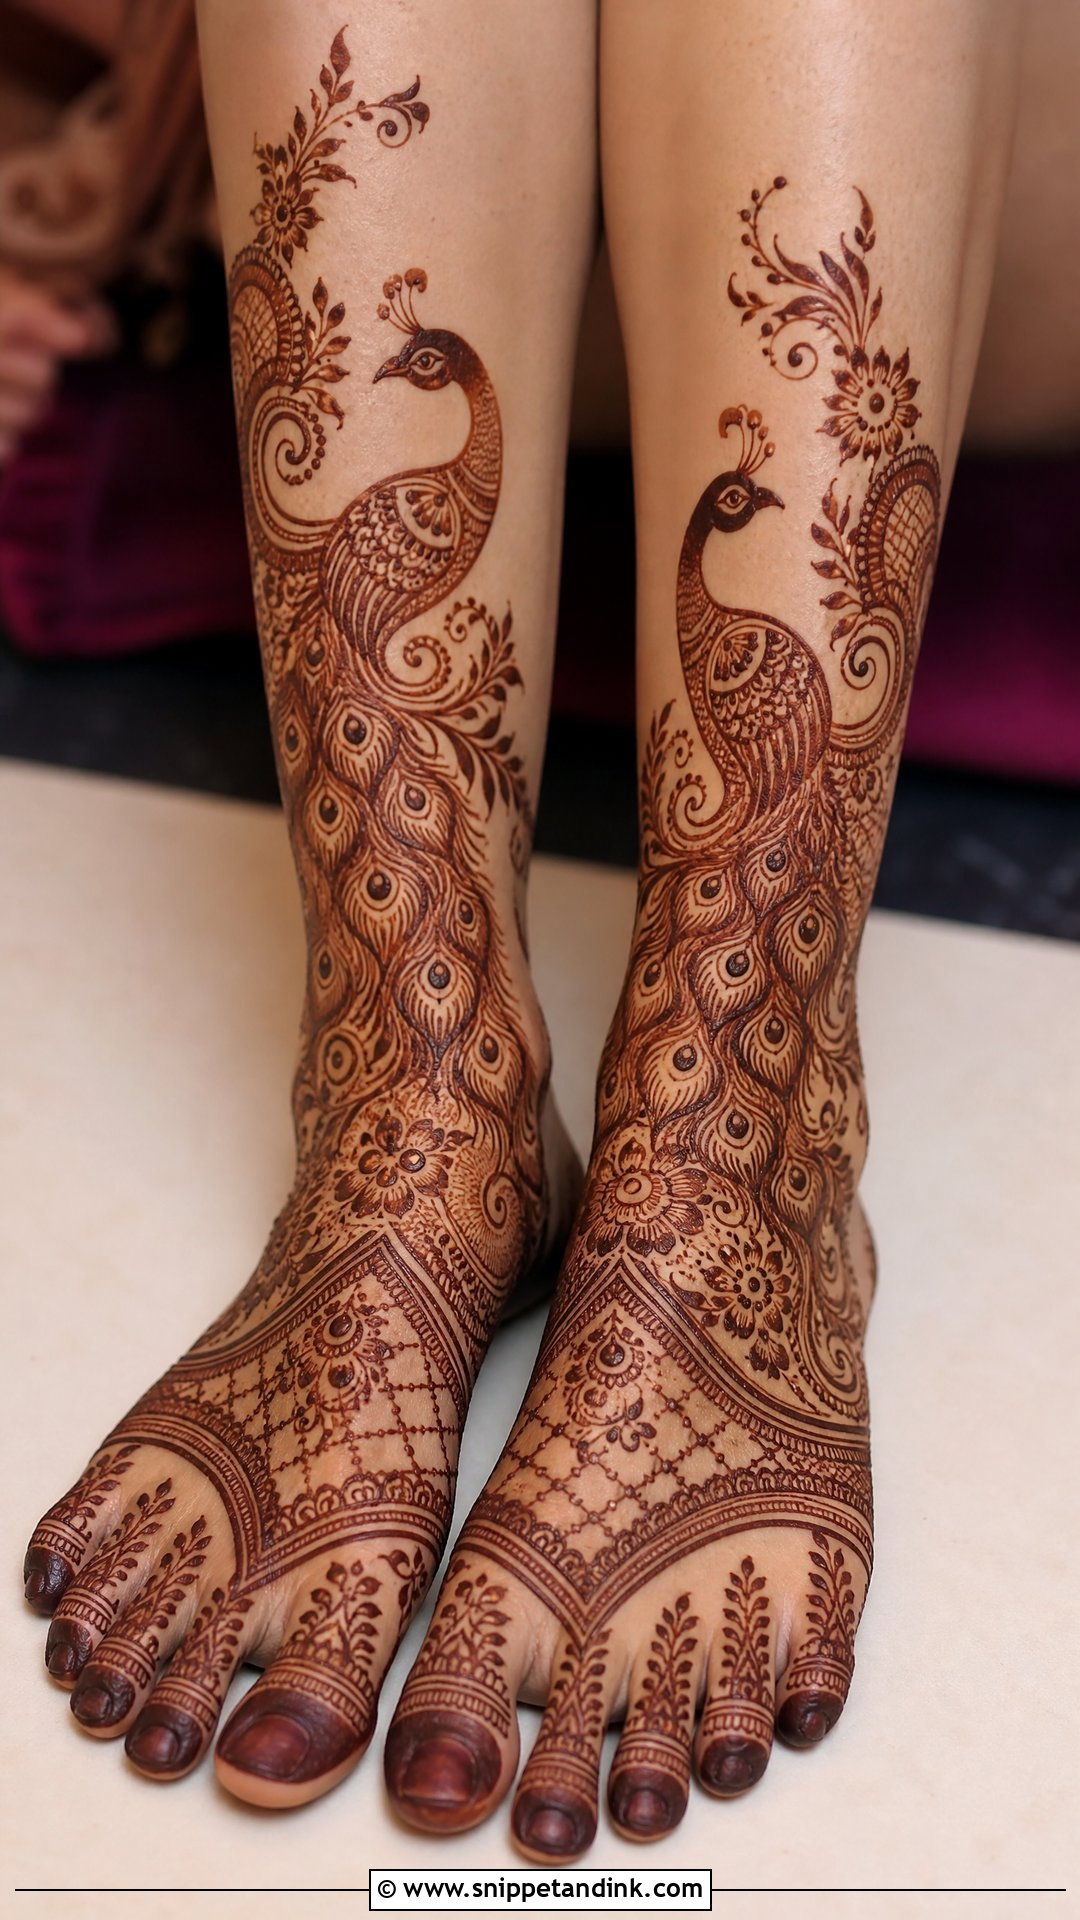
Peacocks are a classic Indian motif and a favorite for the top of the foot, the ankle or a dramatic calf panel. Their feathers can sweep into paisleys, curls, vines and jaali. The bird needs a clear body, a curved neck and a well-spaced feather spread, or it reads as a tangle once stained. One or two strong peacocks per leg look better than five competing ones. If your hands already carry peacocks, I’d often choose a different focal motif for the feet to avoid repetition.
11. Jaali Bridal Leg Mehndi Design
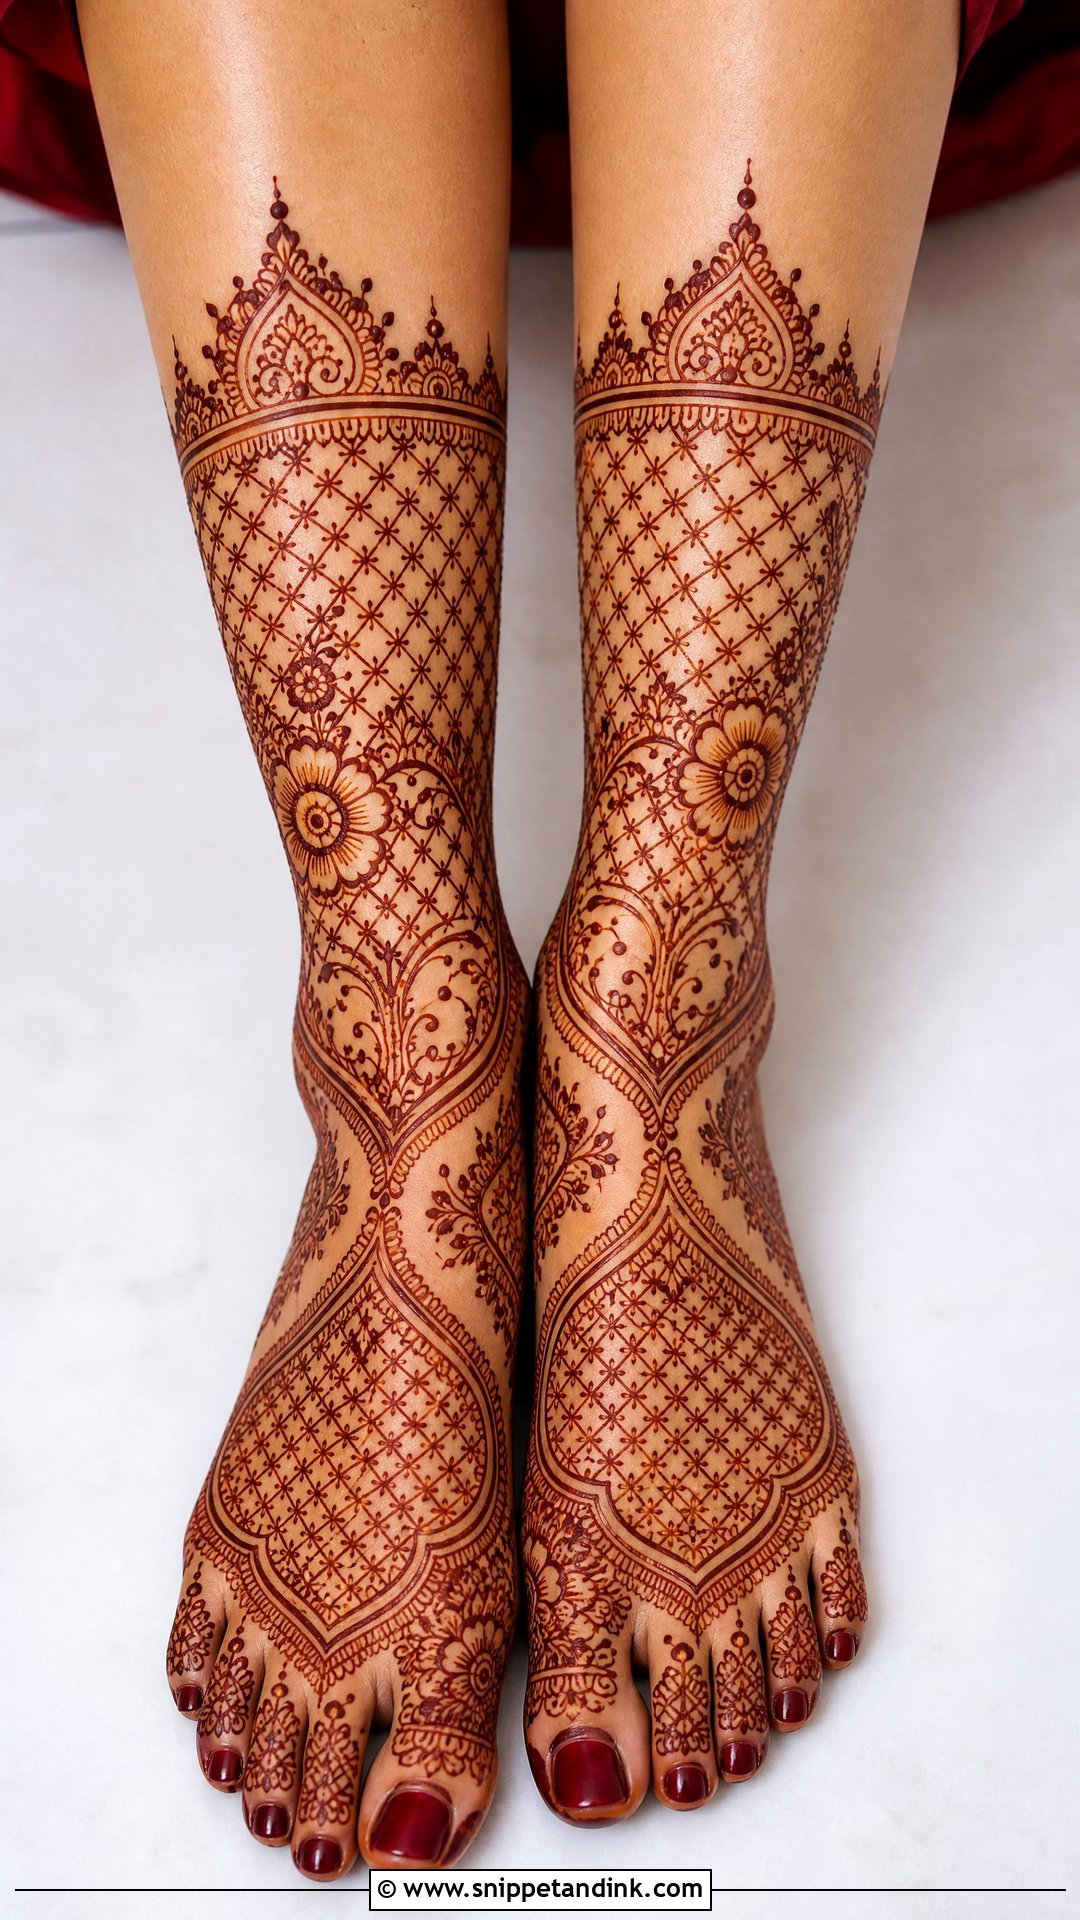
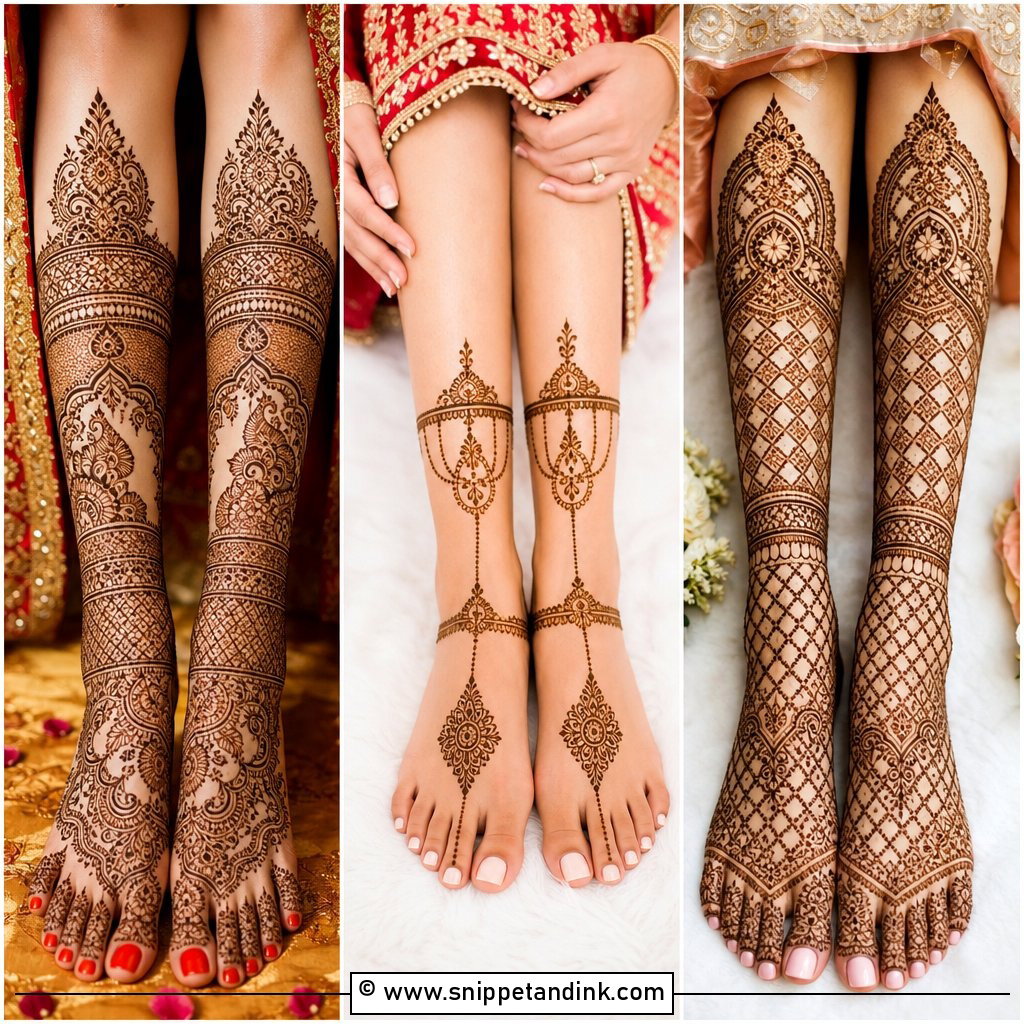
Jaali is mesh work, drawn as diamonds, squares or curved nets, and it gives the feet a lace-like look. It can cover the top of the foot, wrap around the ankle or fill calf panels, often framed by flowers, paisleys, dots and bands. Under anklets it looks almost like jewelry. The lines need to be even and the spacing consistent, which is harder than it looks on a rounded ankle. I add small floral accents in a few of the gaps instead of filling every one.
12. Jewelry Bridal Leg Mehndi Design
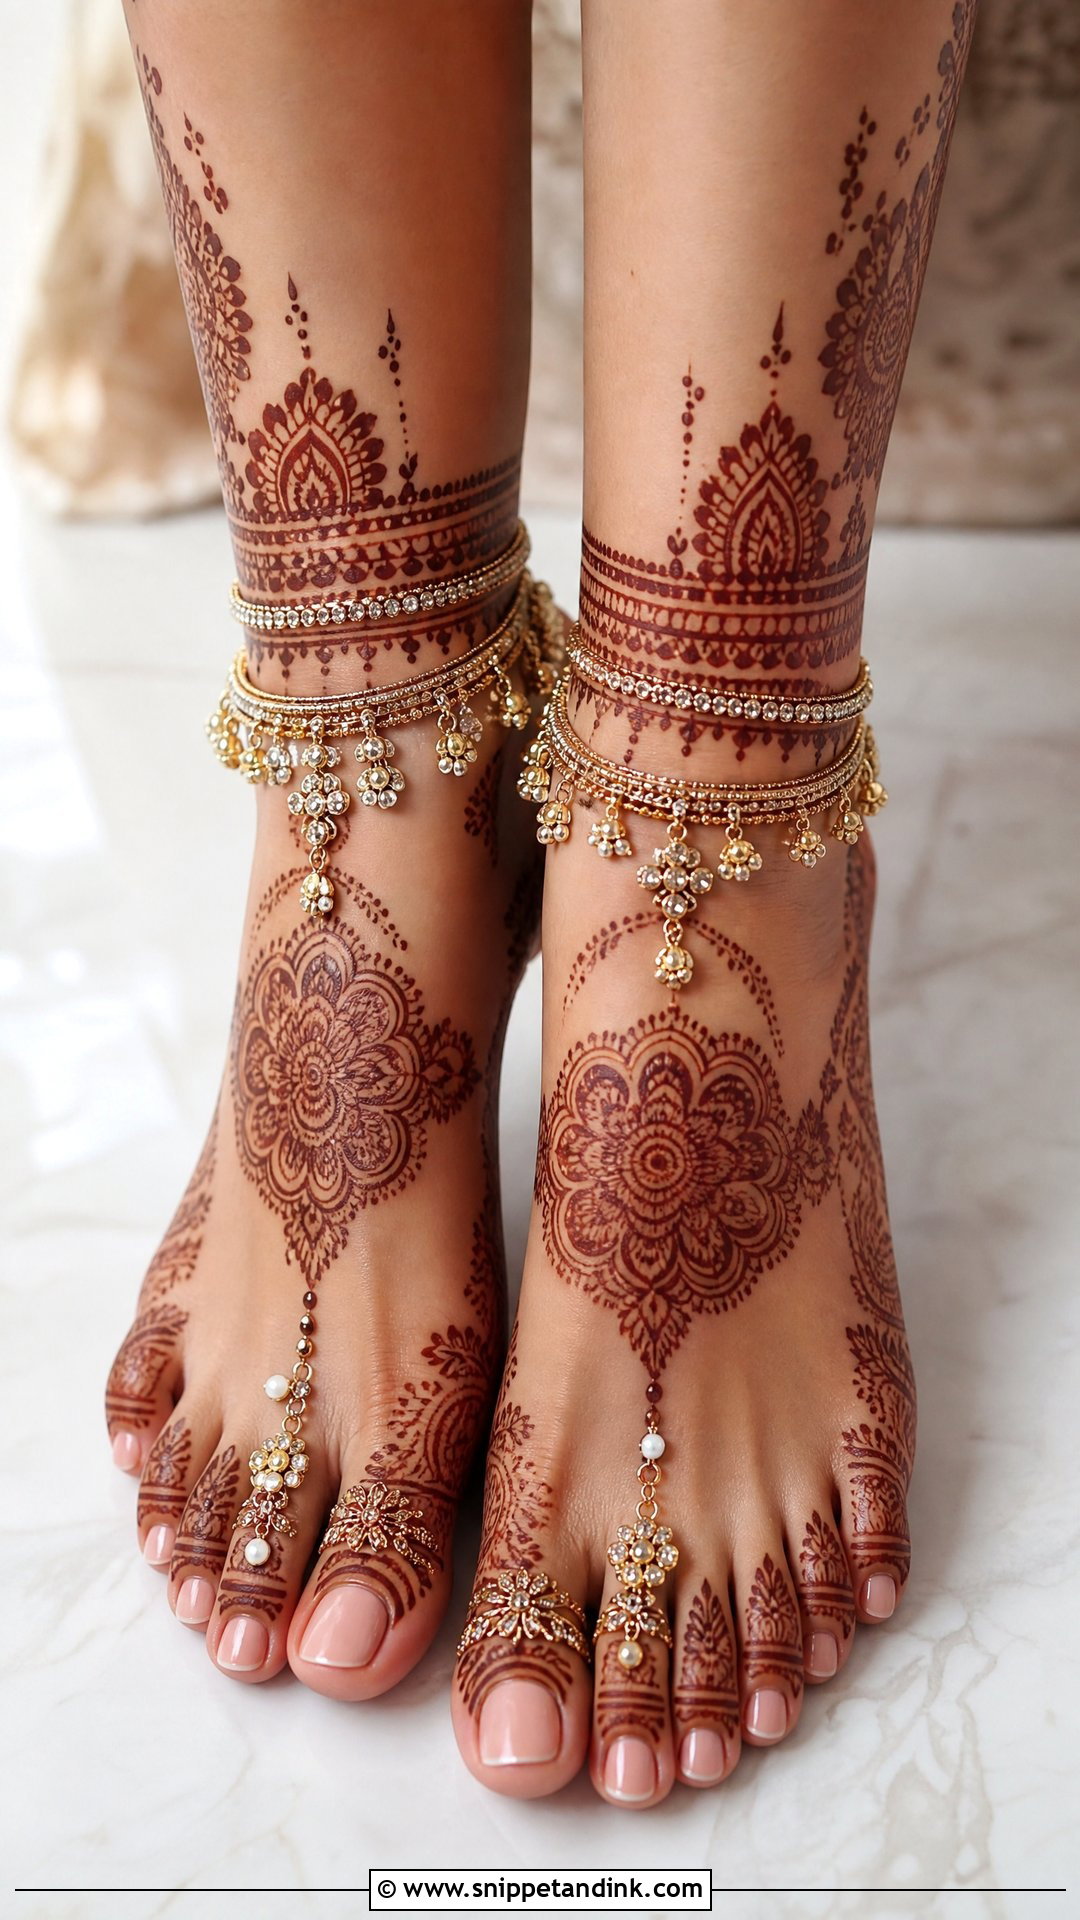
Jewelry mehndi imitates anklets, foot chains, toe rings and payal patterns. I draw chain-like lines from the toes to the ankle, dangling beads, floral anklet bands and fine side trails, using thicker bands at the ankle and finer chains across the foot so the structure stays clear. It’s made for open footwear and barefoot rituals. If you’ll wear real anklets, tell your artist which ones, so the drawn bands sit just above or below them rather than hidden underneath.
13. Front Leg Bridal Mehndi Design
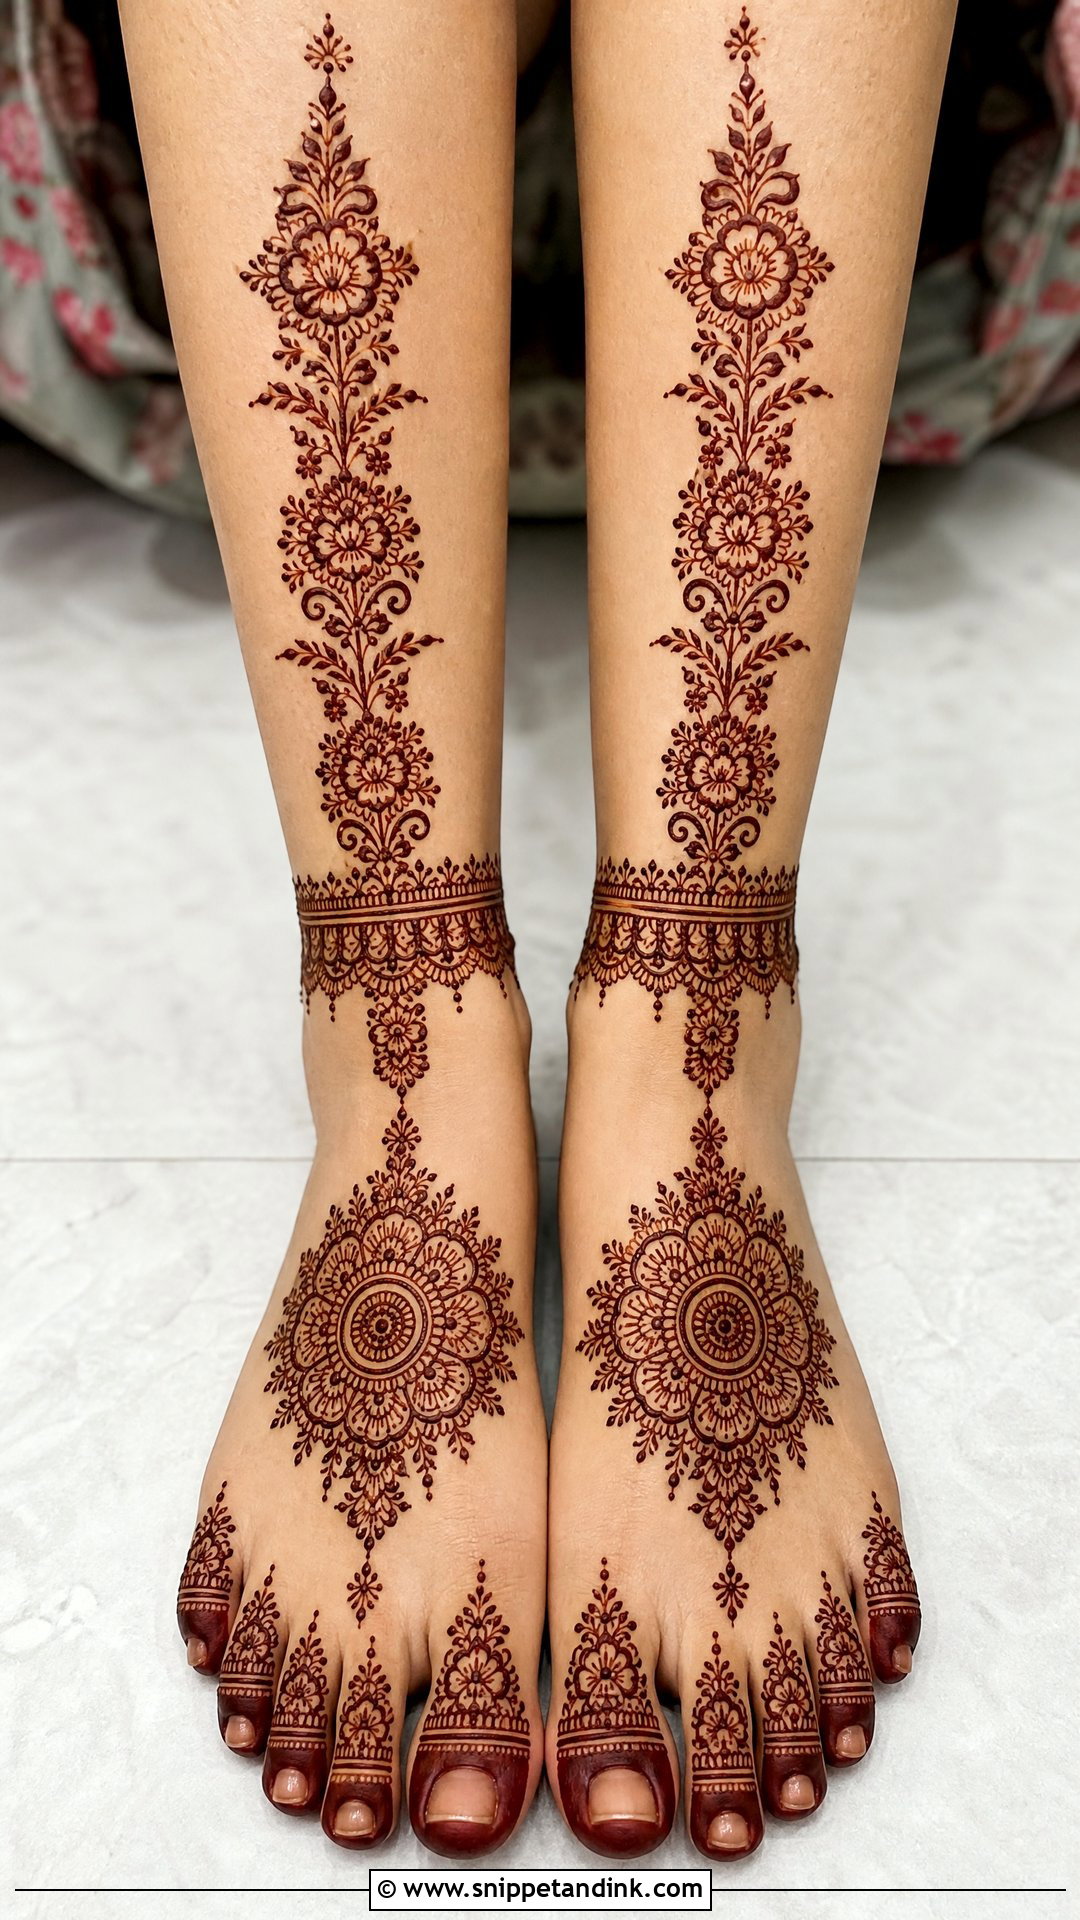
This layout concentrates on the parts that show: the top of the foot, the ankle and the shin. It suits outfits with front slits, shorter hems or footwear that leaves the top of the foot open. A central foot mandala, decorated toes, a slim ankle band and a vertical vine up the shin is a typical layout. I match both legs closely for a clean finish, though small differences can add character. It’s quicker than wraparound coverage, which helps on a tight schedule.
14. Side Leg Bridal Mehndi Design
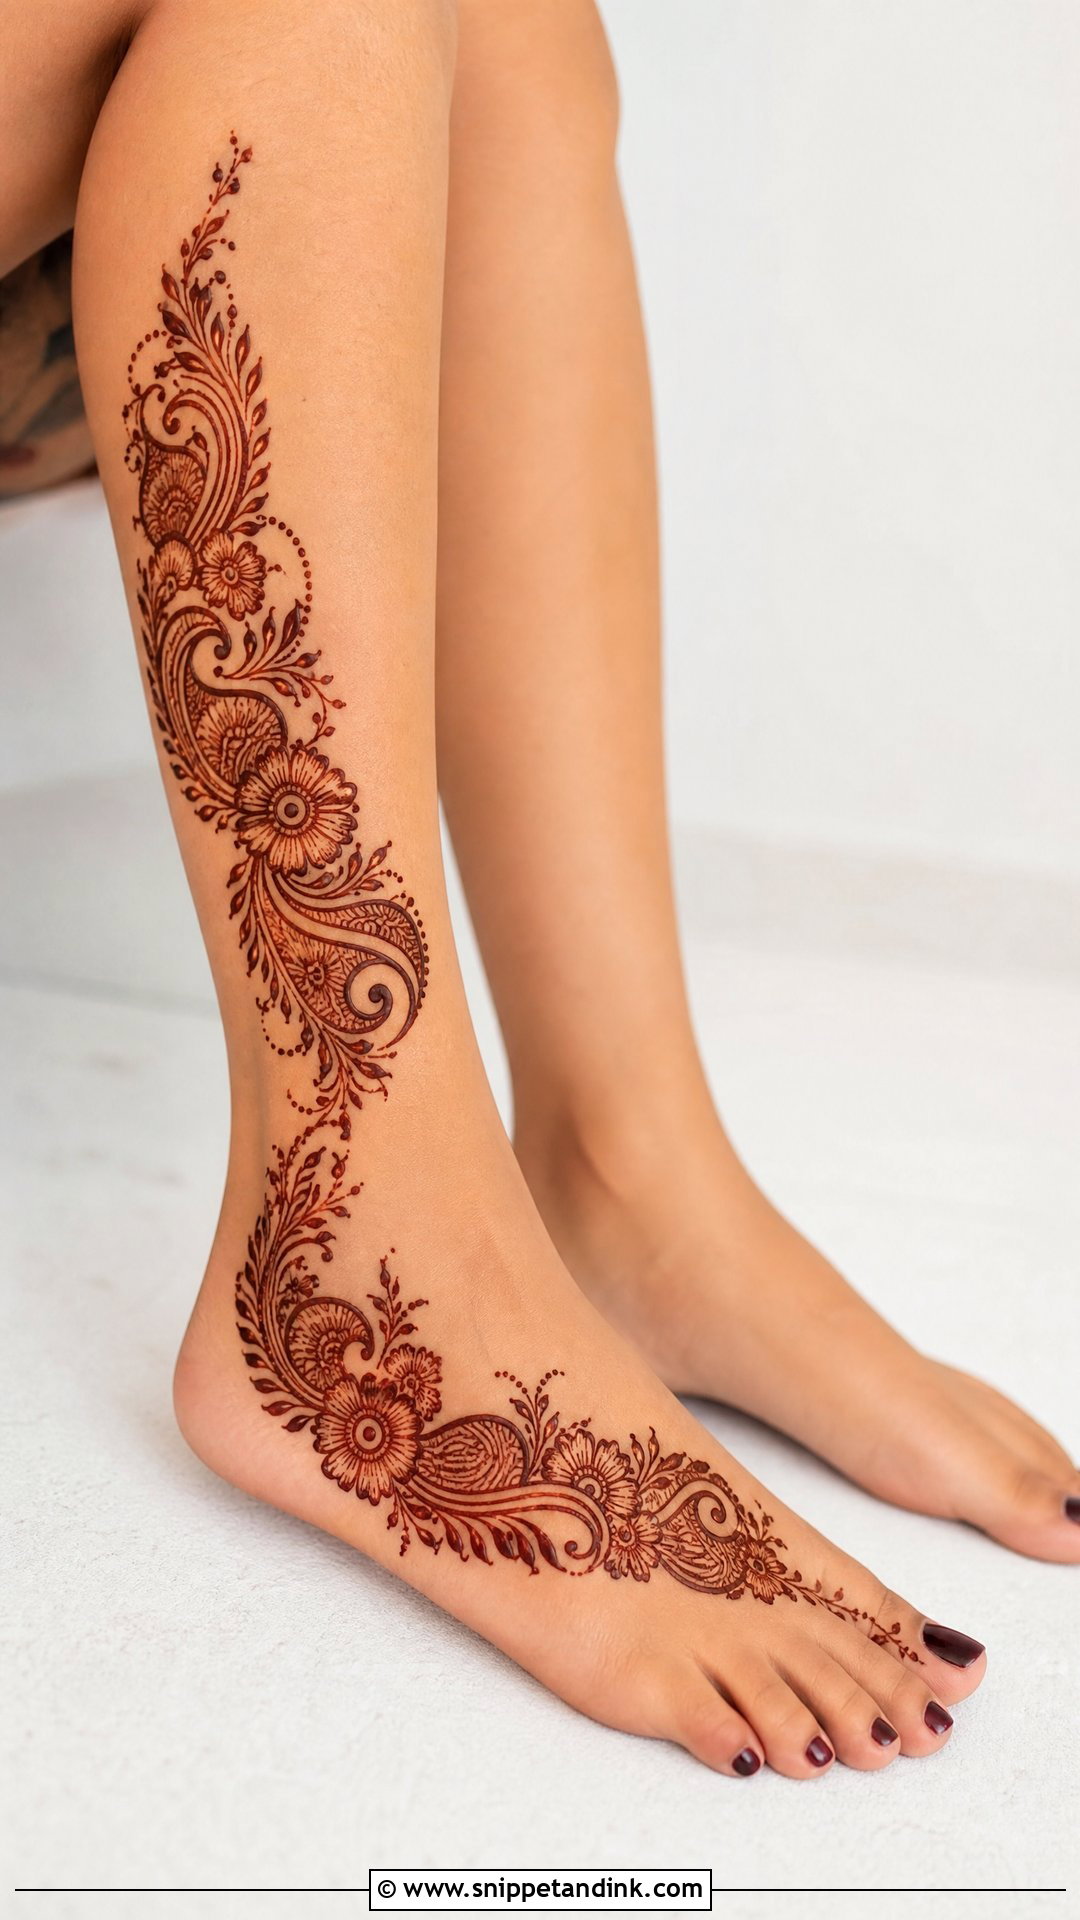
Running the pattern along the outer side of the foot and up the calf draws the eye lengthwise, so the leg looks longer. I start at the toes, curve along the side of the foot, wrap the ankle and continue upward with flowers, paisleys and leafy trails. Arabic and Indo-Arabic patterns follow this shape naturally. Before I start, I ask which side faces the camera in bridal poses, because that’s the side that should carry the design.
15. Knee Length Bridal Leg Mehndi Design
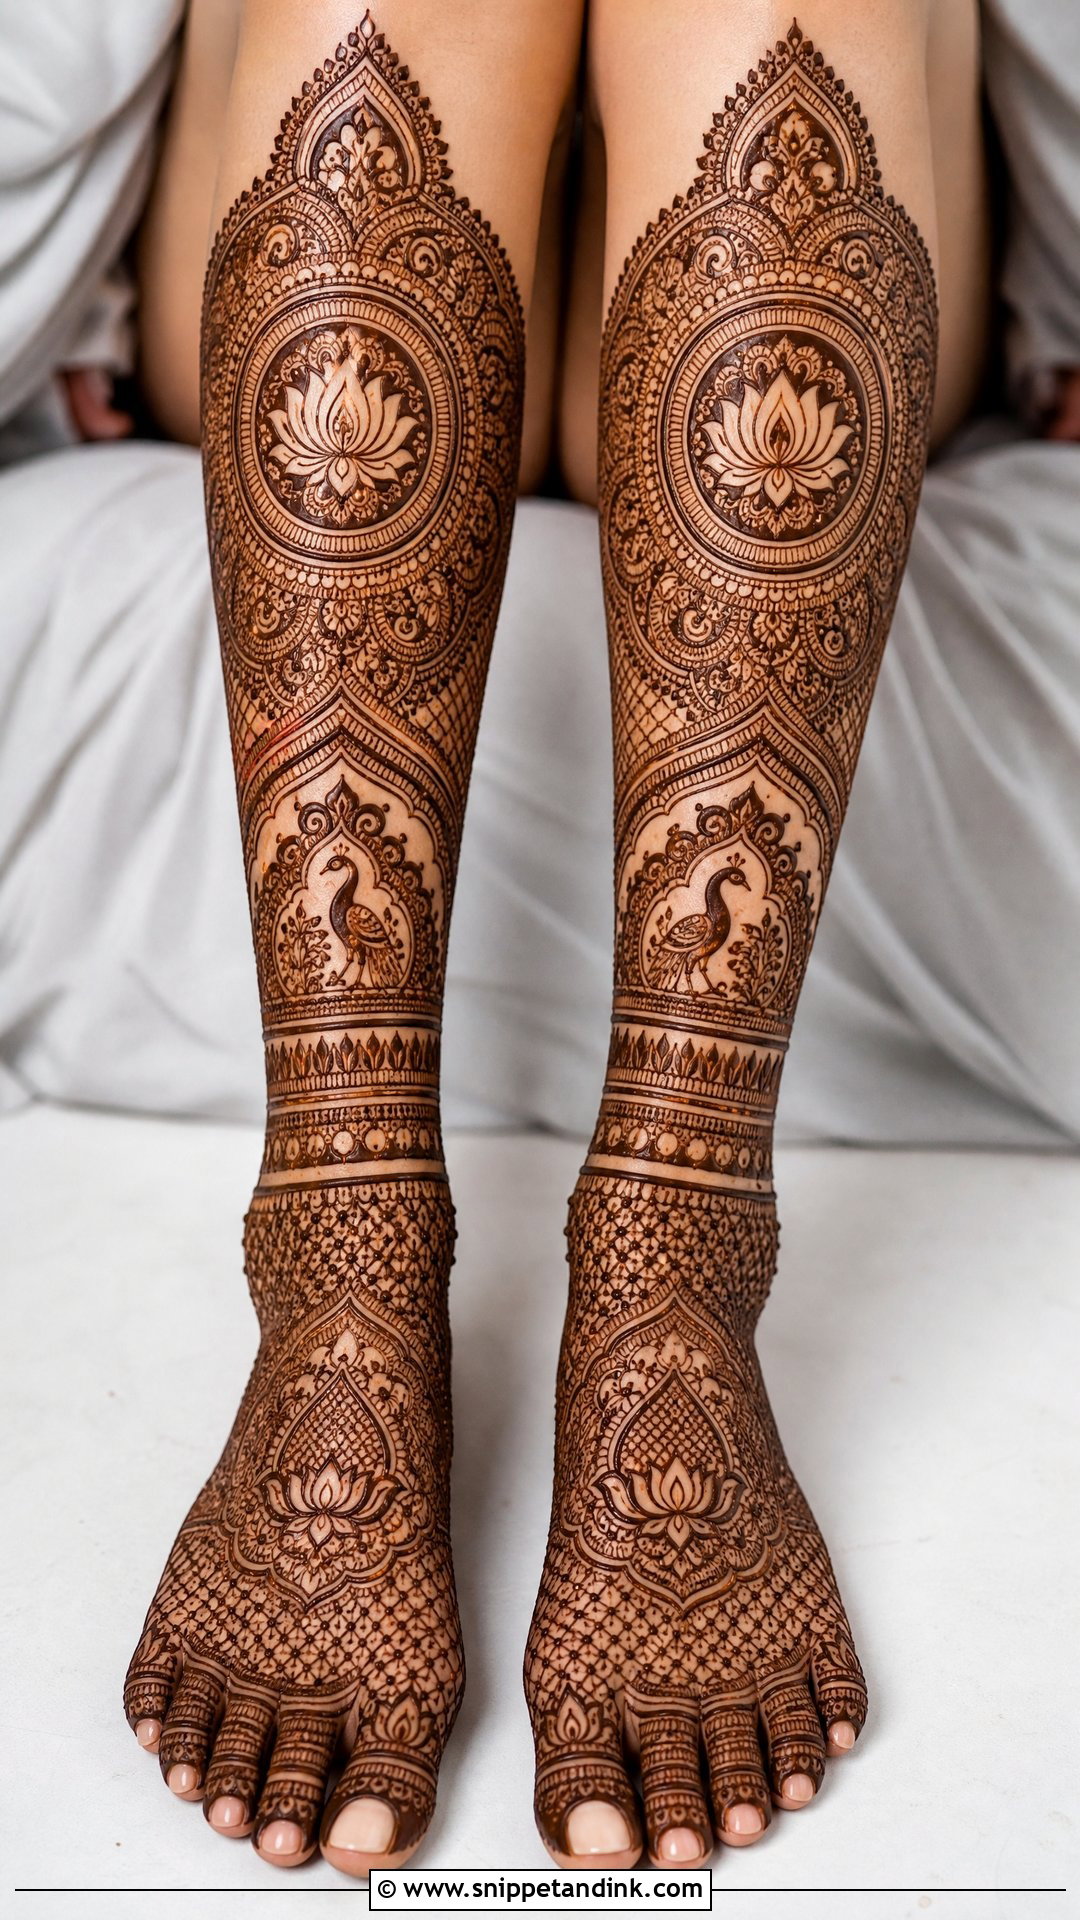
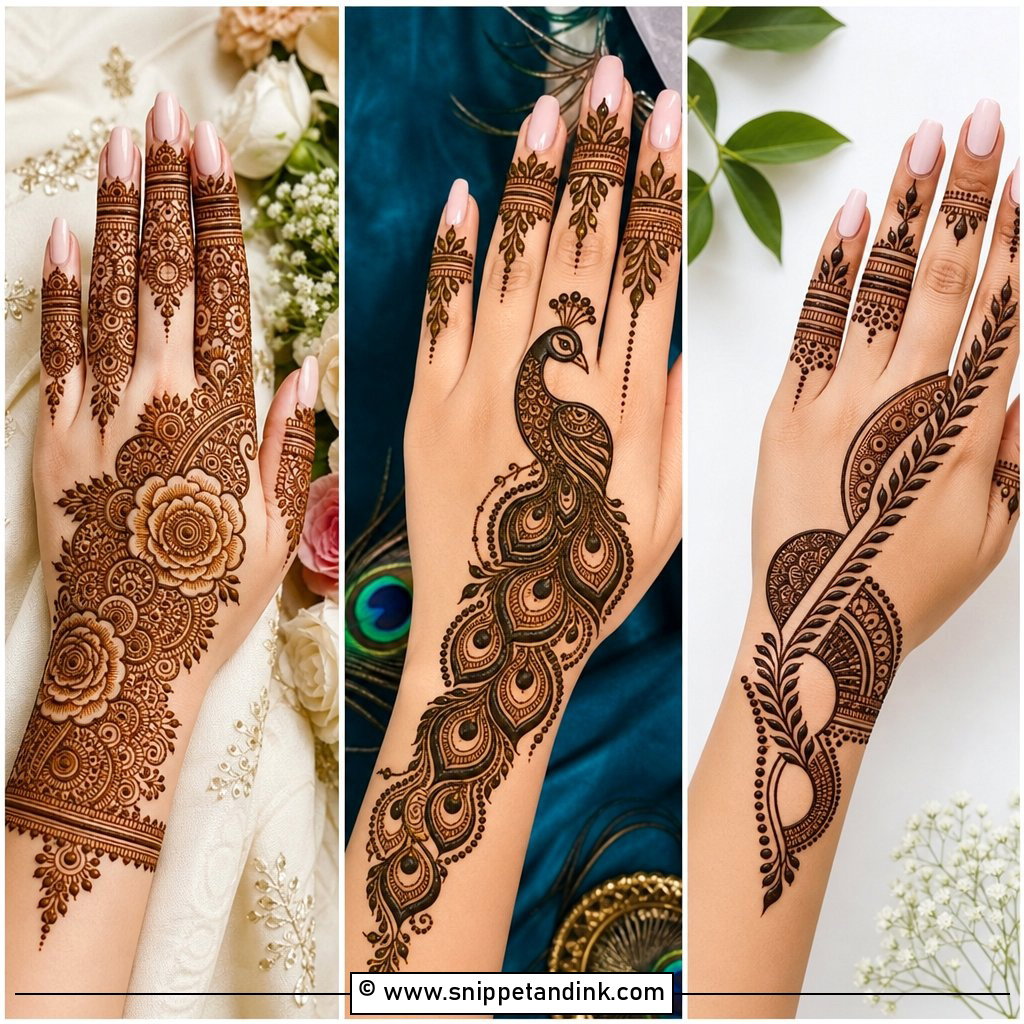
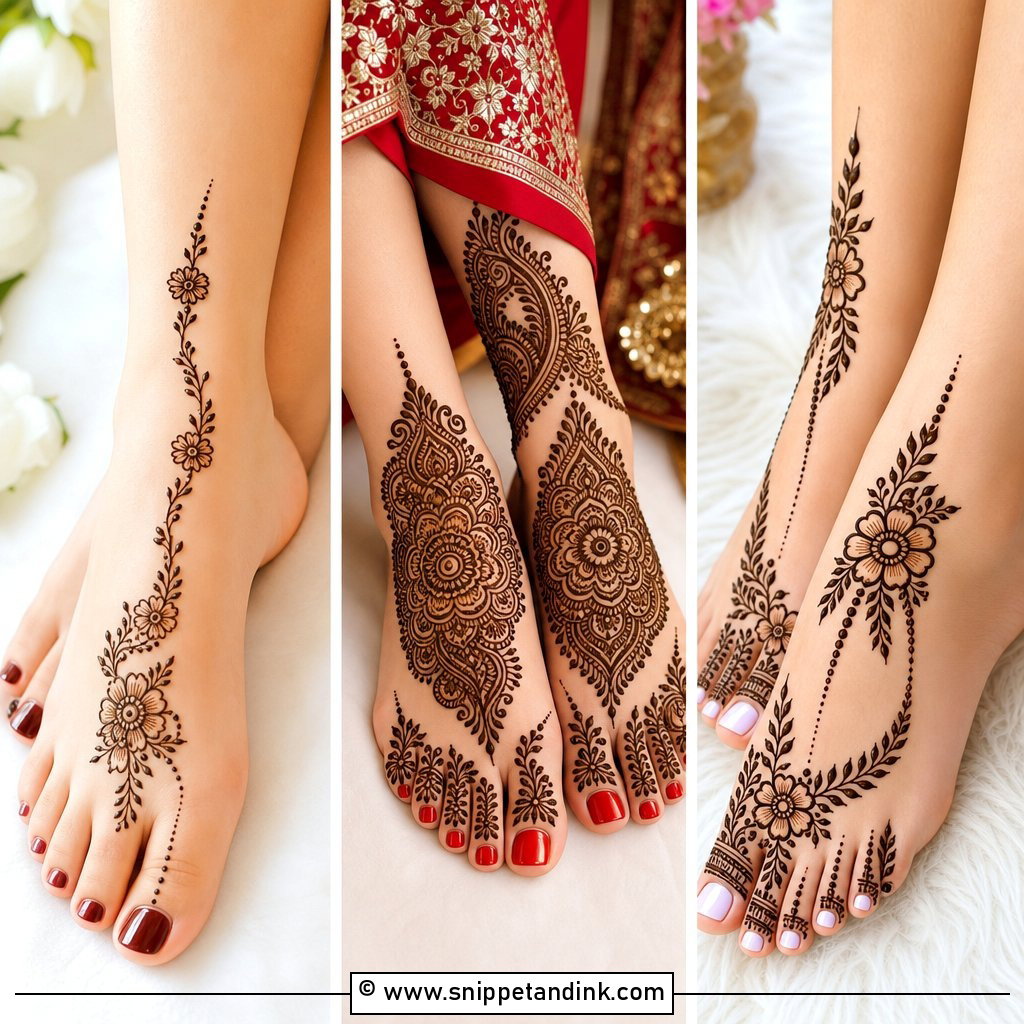
Knee length is the grandest leg option, covering the feet, ankles, calves and lower legs right up to the knee. Large calf mandalas, layered borders, peacocks, lotus panels, jaali and thick anklet bands all have room here. I plan it in sections: dense feet, jewelry-style ankle bands, larger motifs on the calves. It takes many hours, so many brides book a second artist to work on the legs while the first does the hands. Stain on the upper calf will be lighter than on the feet.
16. Ankle Bridal Leg Mehndi Design
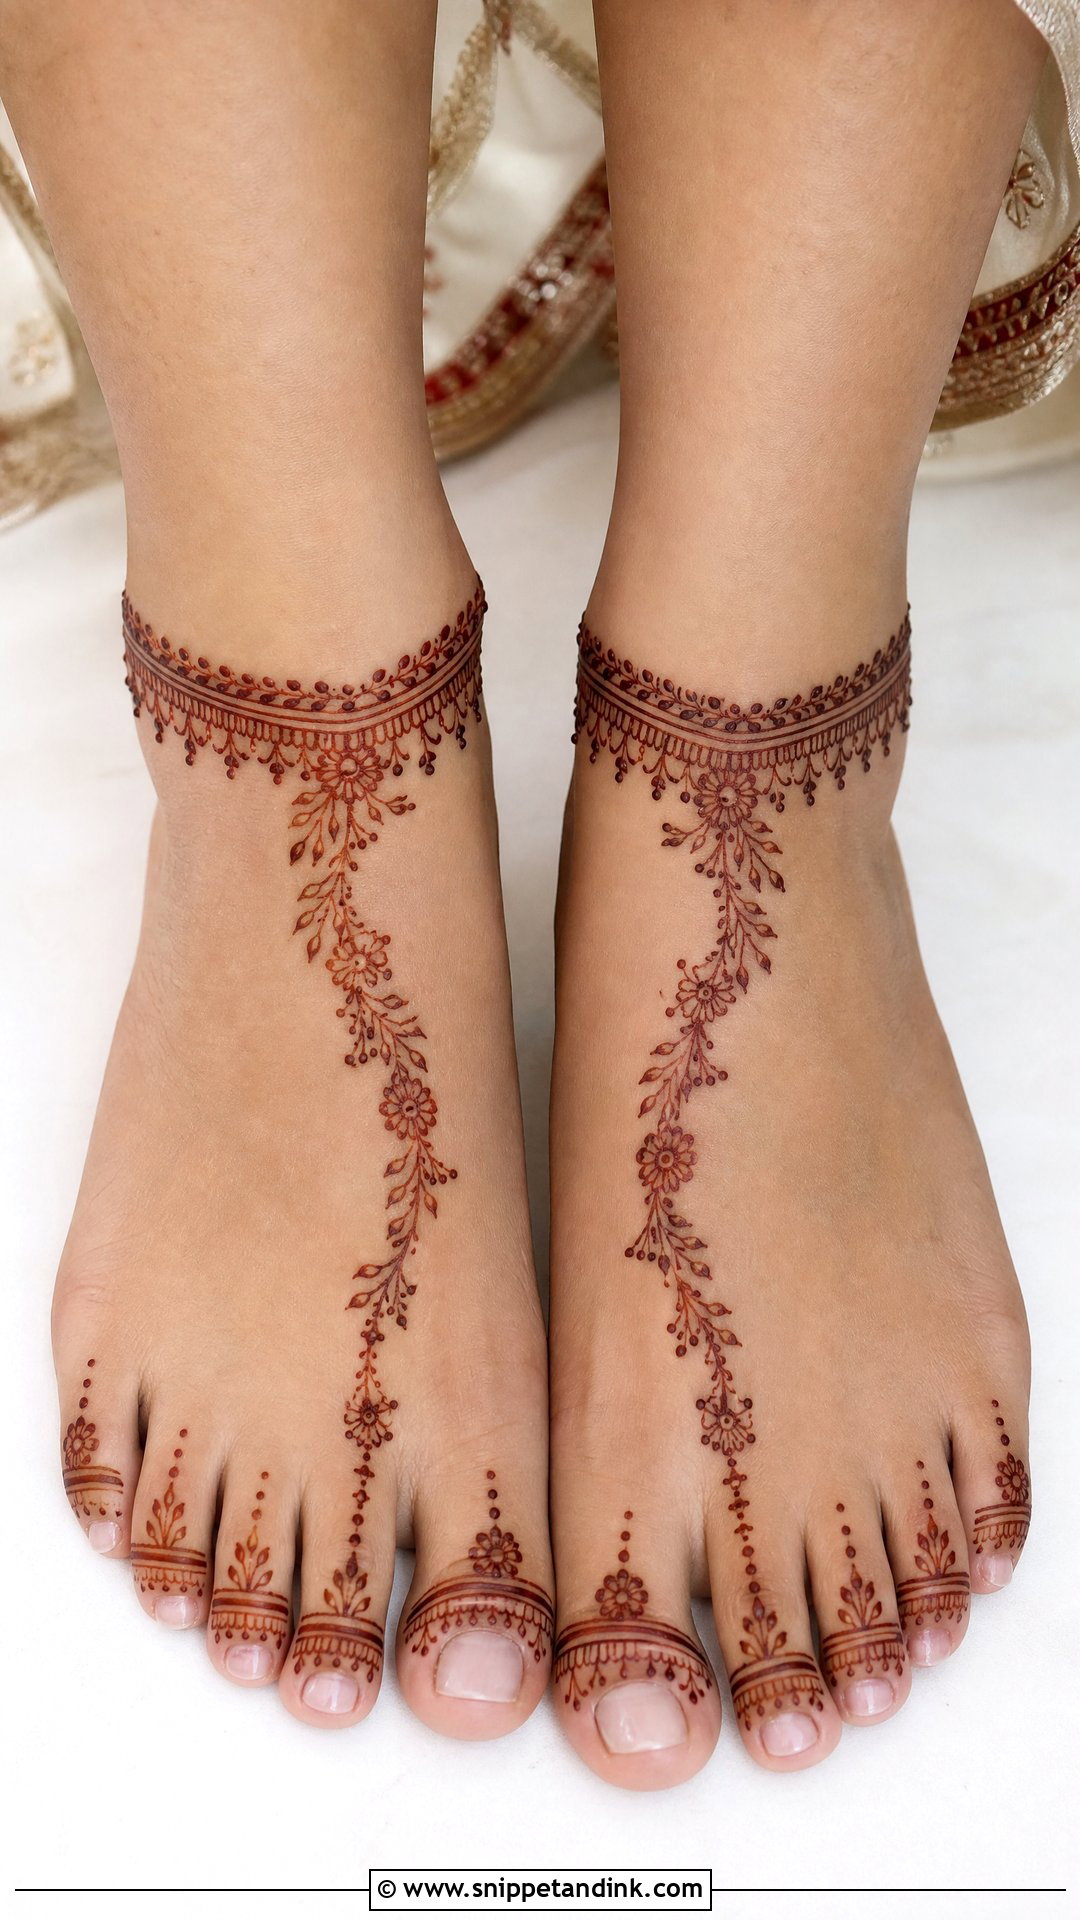
Ankle designs keep the focus on the feet and the payal area: decorated toes, a neat motif on the top of the foot and a detailed band around the ankle, with dangling dots, chains, leaves and tiny flowers. It’s far quicker than full leg work but still reads as bridal when done carefully. Brides wearing heavy anklets or statement sandals often prefer it. I always connect the band to the toes with a small foot trail, since a band with a bare foot below can look unfinished.
17. Foot And Calf Bridal Mehndi Design
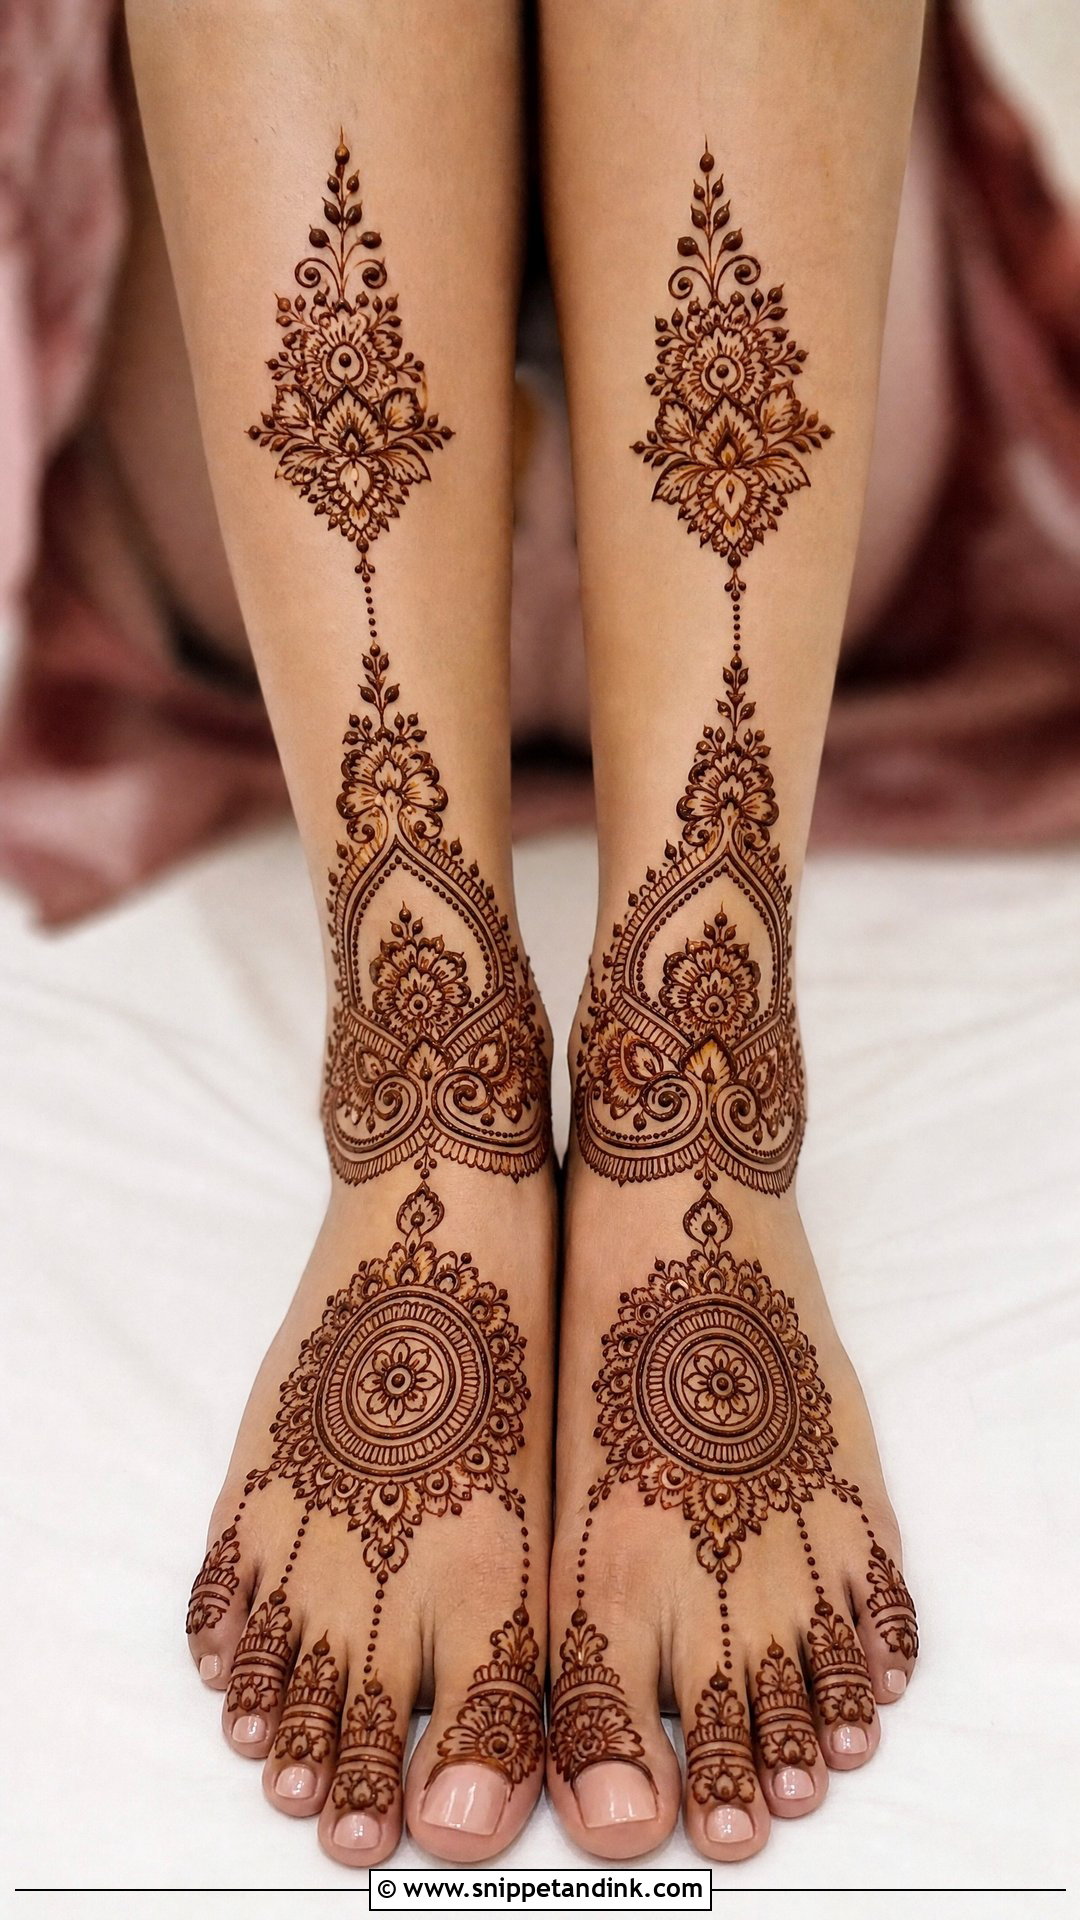
Decorating the feet and calves while leaving the shin partly open gives coverage with structure. The feet carry mandalas, florals and toe patterns; the calves get a matching panel or vertical motif; vines or dotted lines can link the two or the gap can stay clear. Seated photos show both areas well. Larger motifs on the calf also stain more evenly than very tiny full-leg filling, which can look blotchy if the paste dries unevenly.
18. Moroccan Bridal Leg Mehndi Design
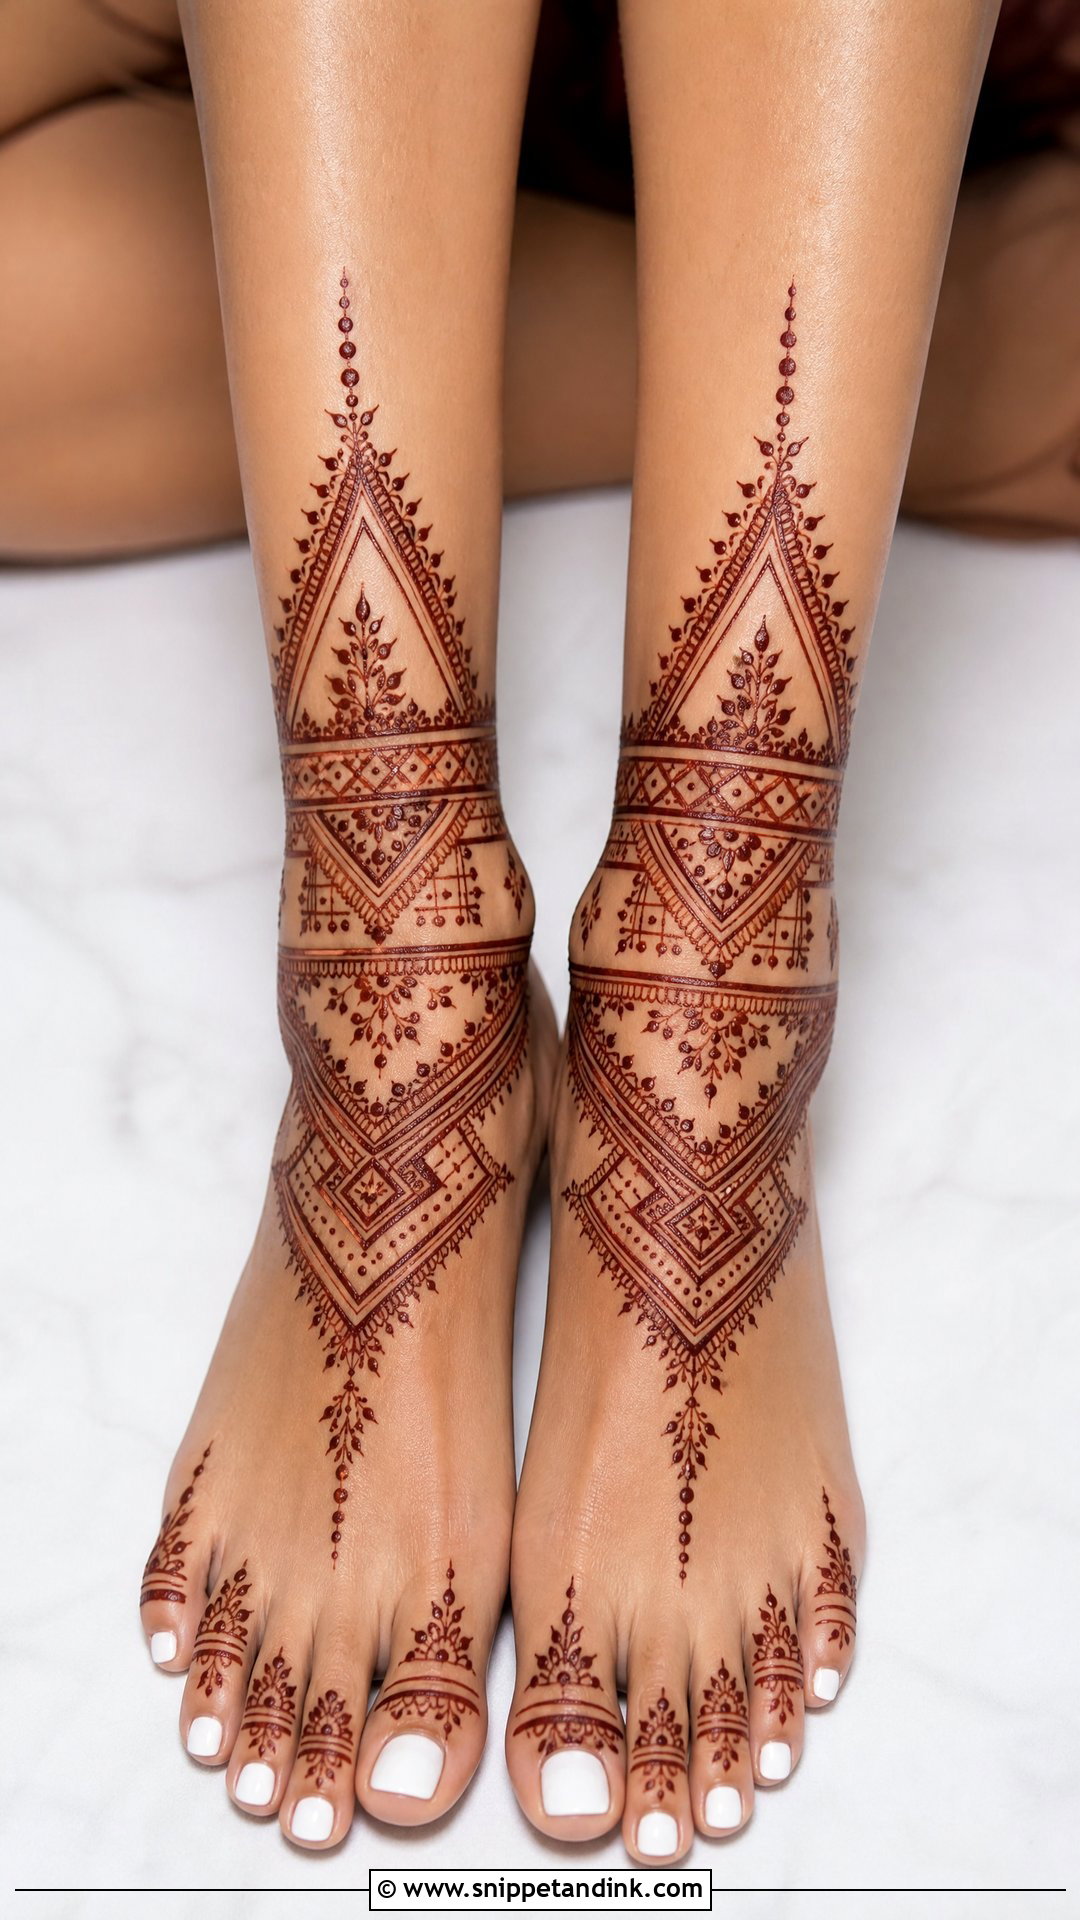
Moroccan-style henna uses geometry: diamonds, lines, triangles, grids, dots and angular bands, in place of soft floral trails. The feet get geometric panels and the ankles and calves repeated shapes and borders. Straight lines on a curved foot are tricky, so I work slowly and keep the cone at a steady angle. It’s a good choice if you want something less common than paisleys. A few small flowers or leafy edges around the geometric sections soften it for a wedding.
19. Gulf Bridal Leg Mehndi Design
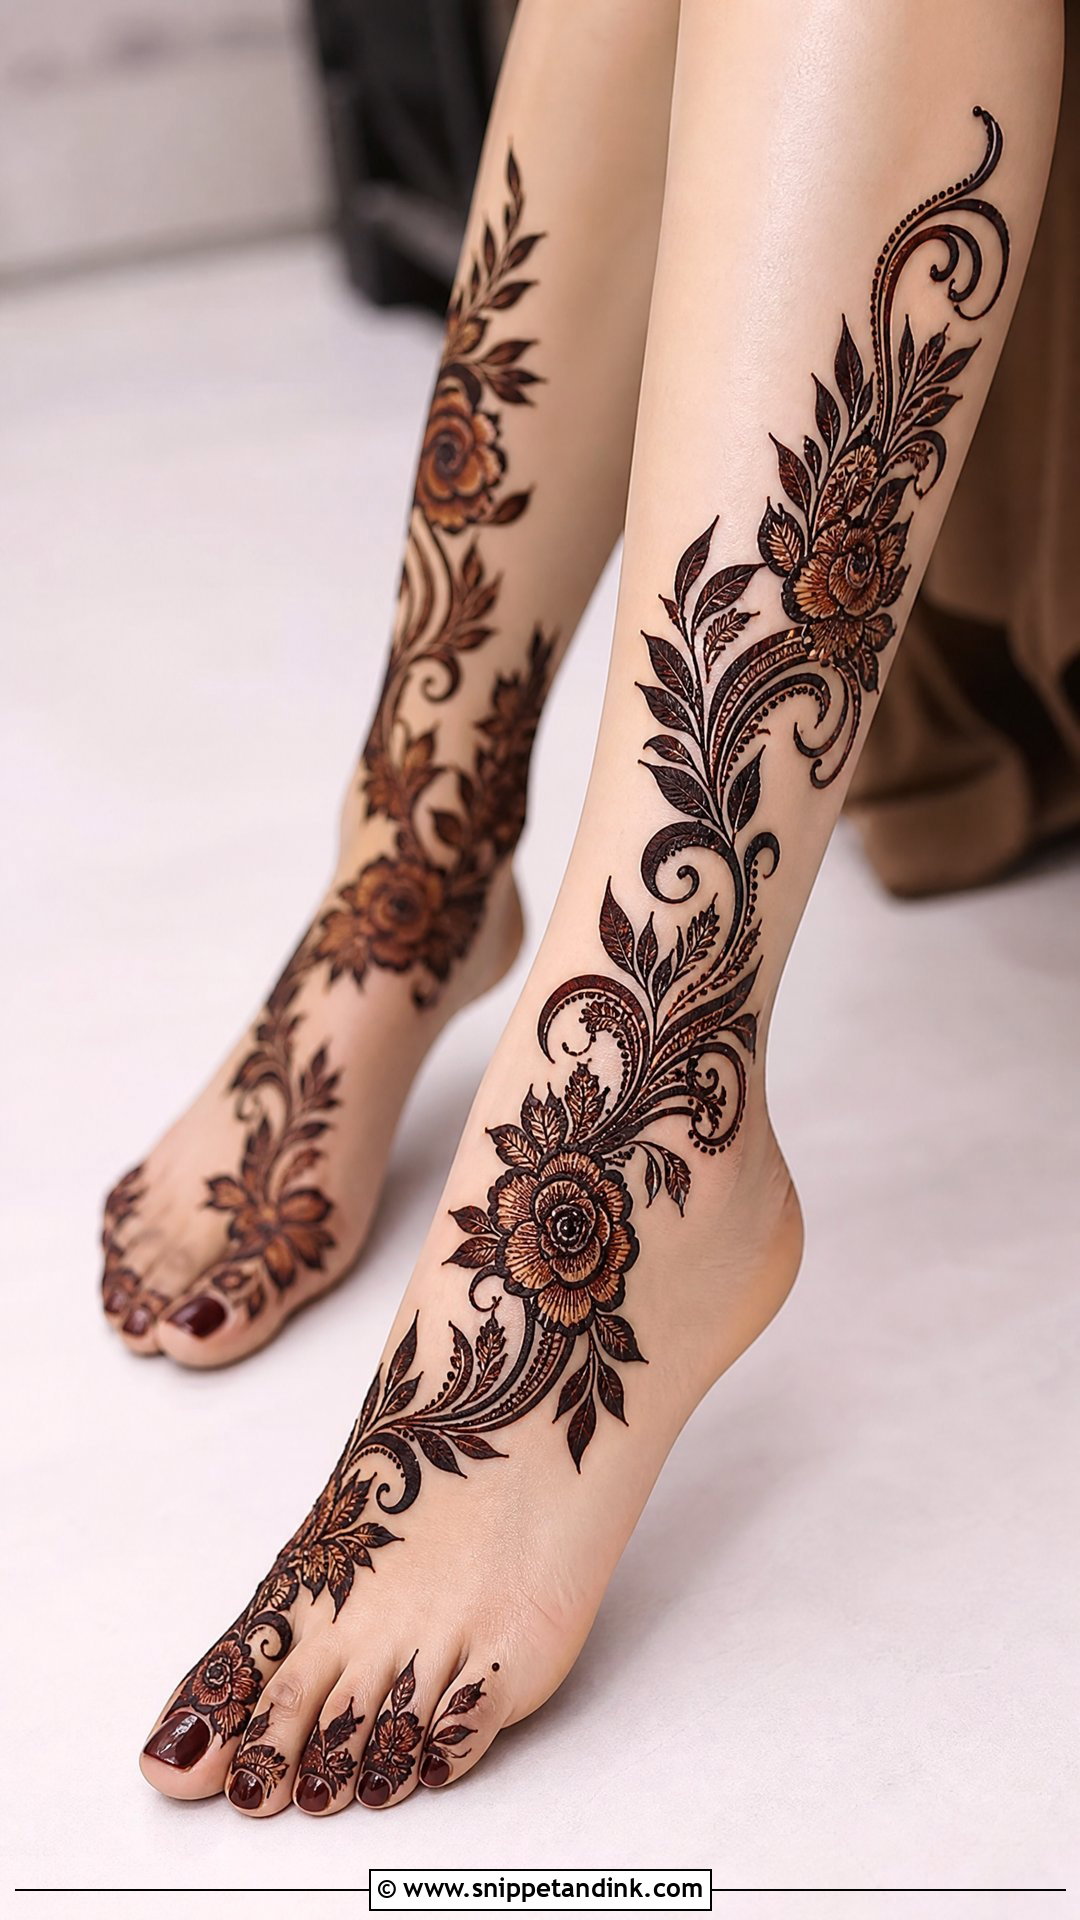
Gulf bridal leg mehndi design, often called Khaleeji-style henna, uses bold florals, flowing leaves, dark outlines and deliberate negative space. The motifs are large and confident, so it feels rich without being crowded. I sweep the pattern across the foot and up toward the ankle or calf. It pairs well with gowns, sarees and fusion outfits. The empty spaces must look planned, and that takes more thought than filling them in.
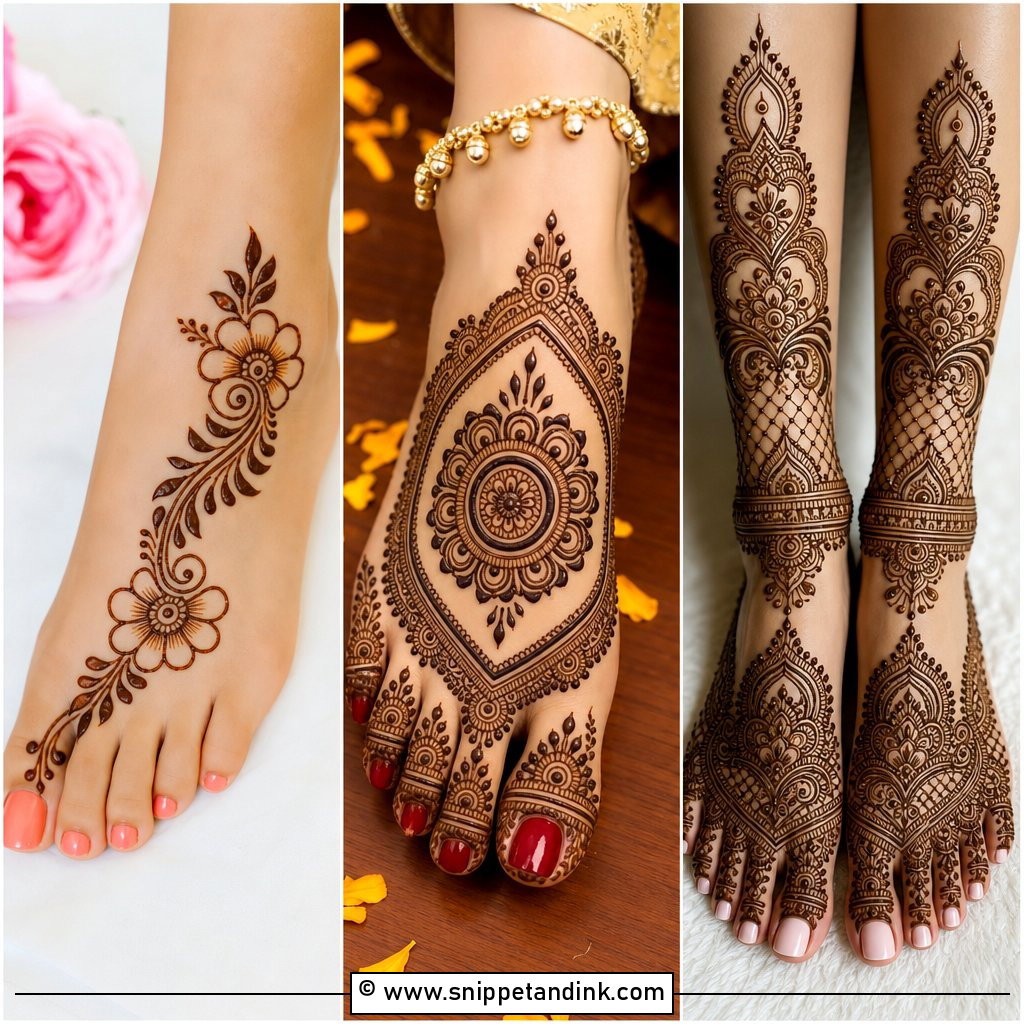
20. Personalized Bridal Leg Mehndi Design
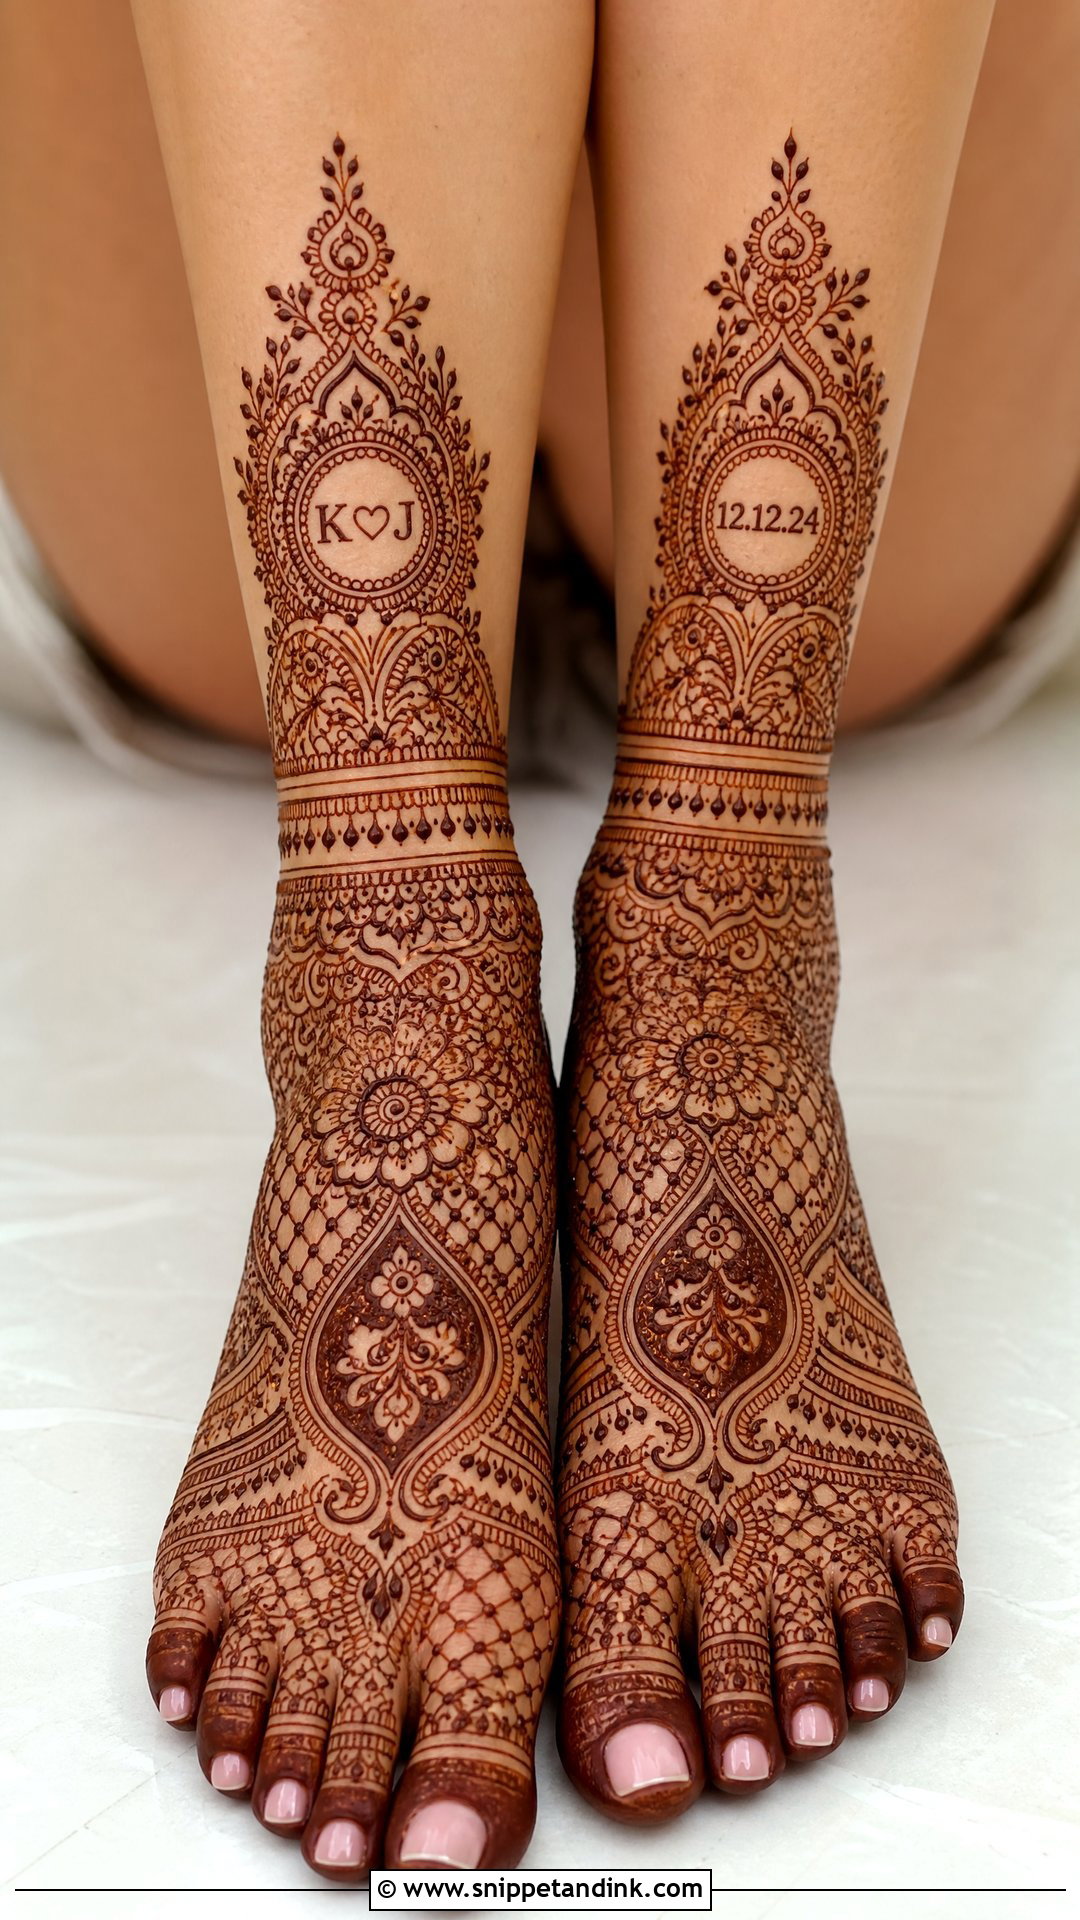
Personal touches can include initials, the wedding date, small couple symbols, favorite flowers or cultural motifs. The skill is hiding them inside the design: initials tucked into a mandala, a date woven into a border, a small symbol near the ankle. If they sit on their own, they look like an afterthought. I keep the main structure bridal, with florals, paisleys, jaali or jewelry bands around the custom details, and I ask the bride for any names in writing so the spelling is right.
Why Foot Stains Fade at the Edges First
The feet take the deepest color, but they also take the most friction. Shoes, sandal straps and walking barefoot on rough floors wear the stain away, usually starting at the sides of the foot and the toes. A little care in the first two days makes a visible difference.
The first night
Leave the dried paste on for as long as you can, ideally six to eight hours or overnight. Wrapping the feet loosely in tissue and an old pair of cotton socks keeps the paste warm and stops it flaking onto the bed. Scrape it off gently with a blunt edge rather than washing it away.
The next few days
- Keep the feet dry for the first 12 to 24 hours after removing the paste.
- Rub on a little natural oil or balm before showering, so water and soap don’t sit directly on the stain.
- Choose soft shoes for the days before the wedding and save stiff new heels for the ceremony itself.
- Avoid swimming pools and hot tubs until after the wedding; chlorine and long soaks fade the color quickly.
Matching Your Feet to Your Hands, Your Outfit and Your Schedule
With 20 layouts to pick from, start with coverage and comfort, then your outfit and the photos you want. Full-leg and knee-length work suits brides who love traditional detail. Arabic, Gulf and Indo-Arabic designs give flow and space. Minimal, ankle and jewelry-style layouts fit lighter outfits and modern looks. Whatever you choose, it should match your hand design in style and leave time for the stain to deepen before the wedding.
You'll Like These Ideas:


Leave a Reply