
Simple finger mehndi is what I reach for when someone has twenty minutes, not two hours, and still wants hands that look dressed for Eid, Diwali or a cousin’s sangeet. Fingers are a small canvas, so every line shows, and that is exactly why spacing matters more here than motif choice. I build most of these from the same handful of strokes: bands, dots, vines, a few petals, a touch of jaali. Some designs below cover every finger; others decorate one or two and let bare skin do the rest. Each one comes with what I’d actually watch for while piping it.
Matching Finger Coverage to How You Use Your Hands
Before I pick a single motif, I ask what your hands will be doing for the next week. Henna on fingers sits right where you grip, type, cook and wash, so coverage should follow your routine as much as the occasion.
- Palm side or back of hand: the palm and fingertips stain darkest because the skin there is thickest, while the back of the fingers gives a lighter, warmer brown. If you want deep colour, put the main detail on the palm side.
- How many fingers: one or two decorated fingers can be done in a few minutes, a full set of five takes far longer, and both hands double it. Book or plan your time accordingly.
- Your rings: tell your artist where you wear them. I leave that band of skin lighter so jewellery doesn’t rub the fresh stain or hide the design.
- Nails: dark polish next to a deep stain can look heavy. Nude or soft pink polish usually sits better with finger henna, and it’s easier to apply polish before the paste goes on.
One more thing I check: whether you need your hands free soon after. If you have to drive, cook or care for a baby within a few hours, choose the back-hand designs and leave the palm open, since you can keep using your palms without ruining wet paste.
1. Simple Finger Mehndi Design For Front Hand
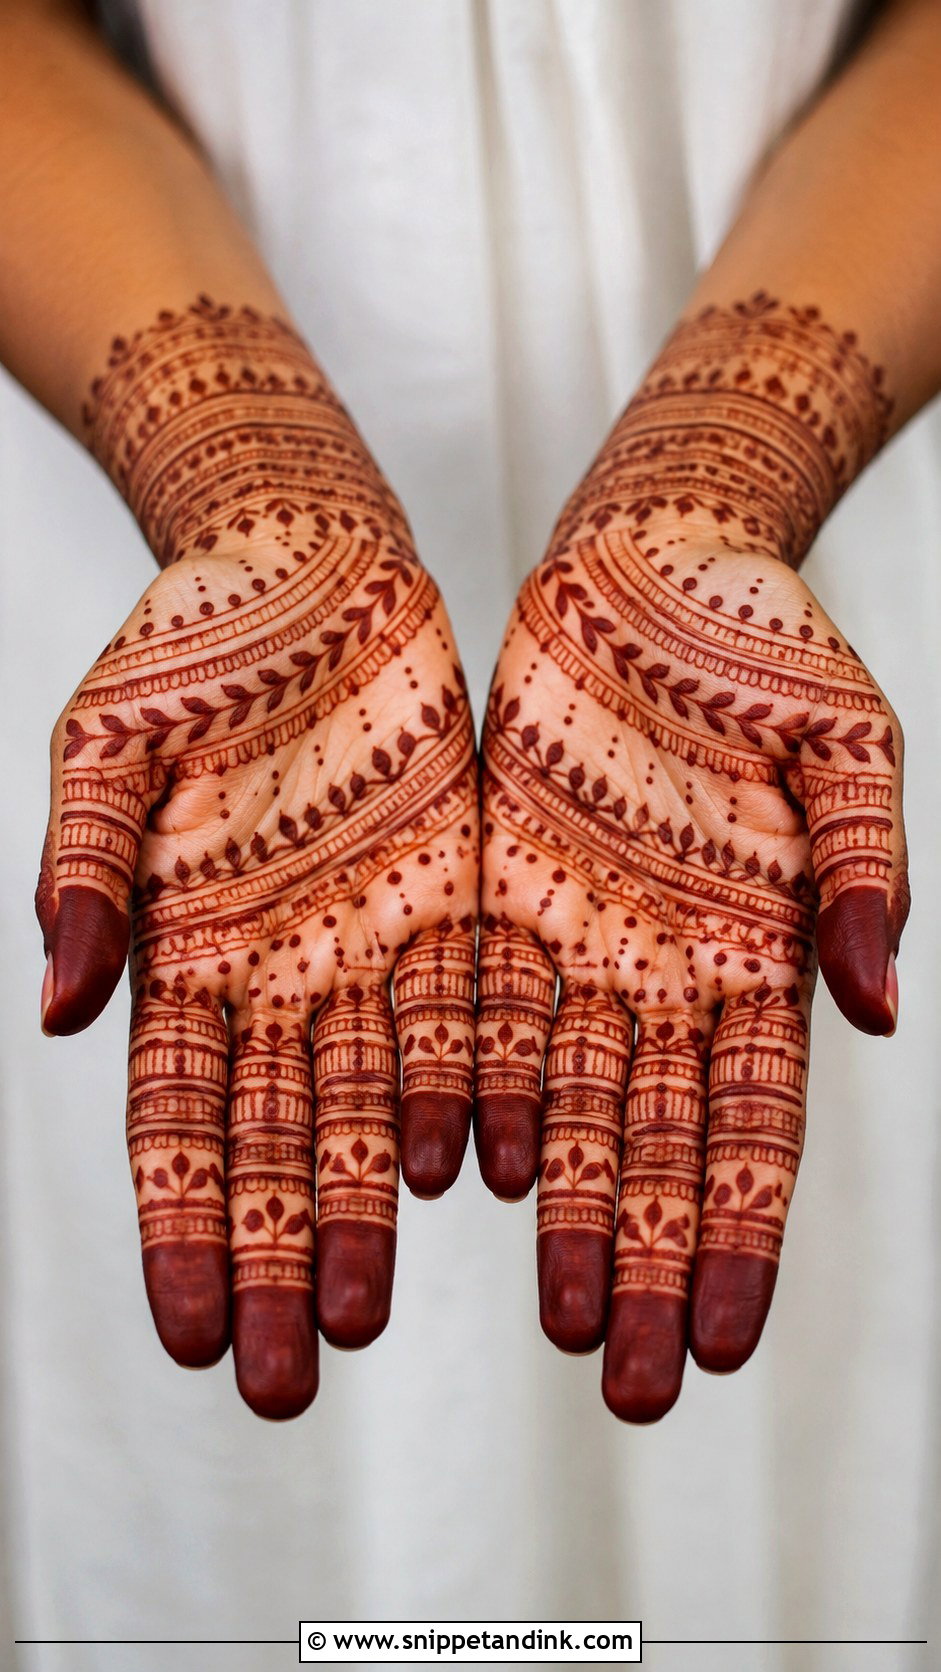
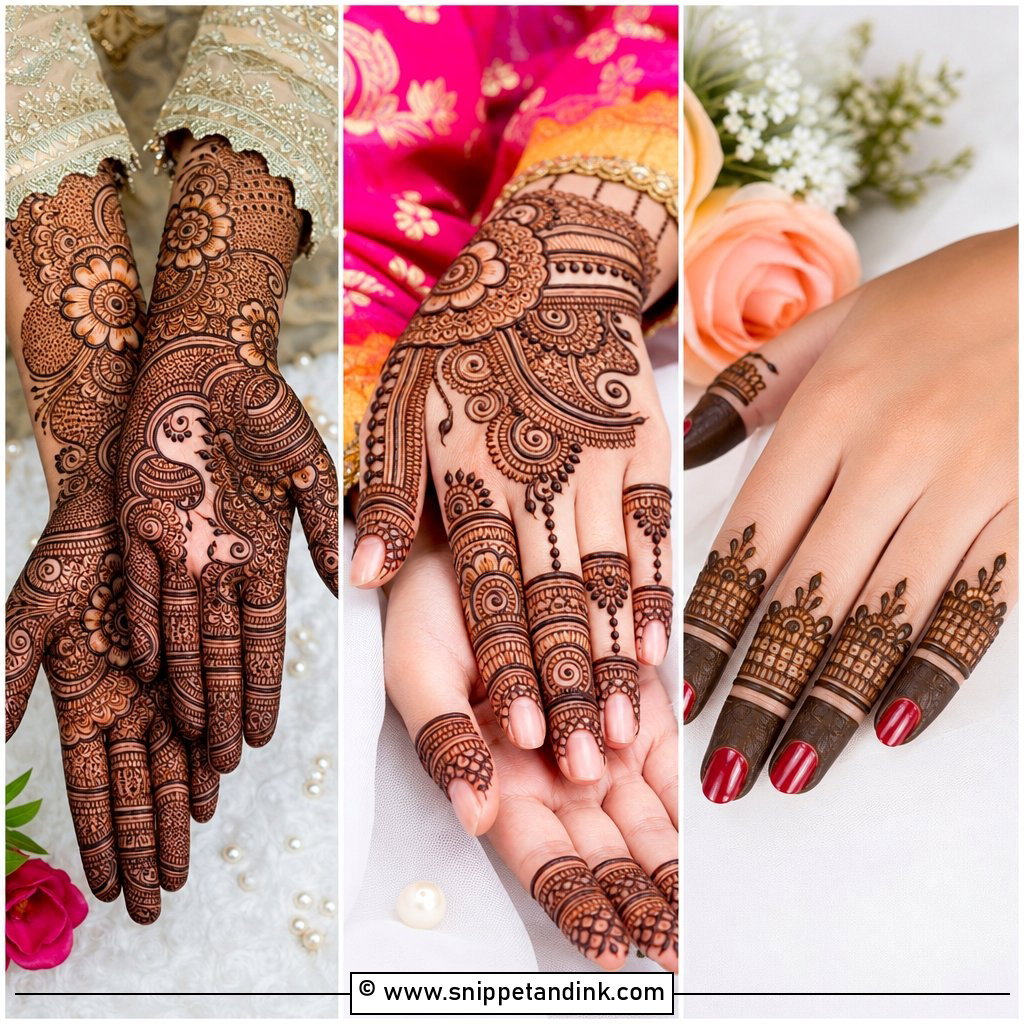
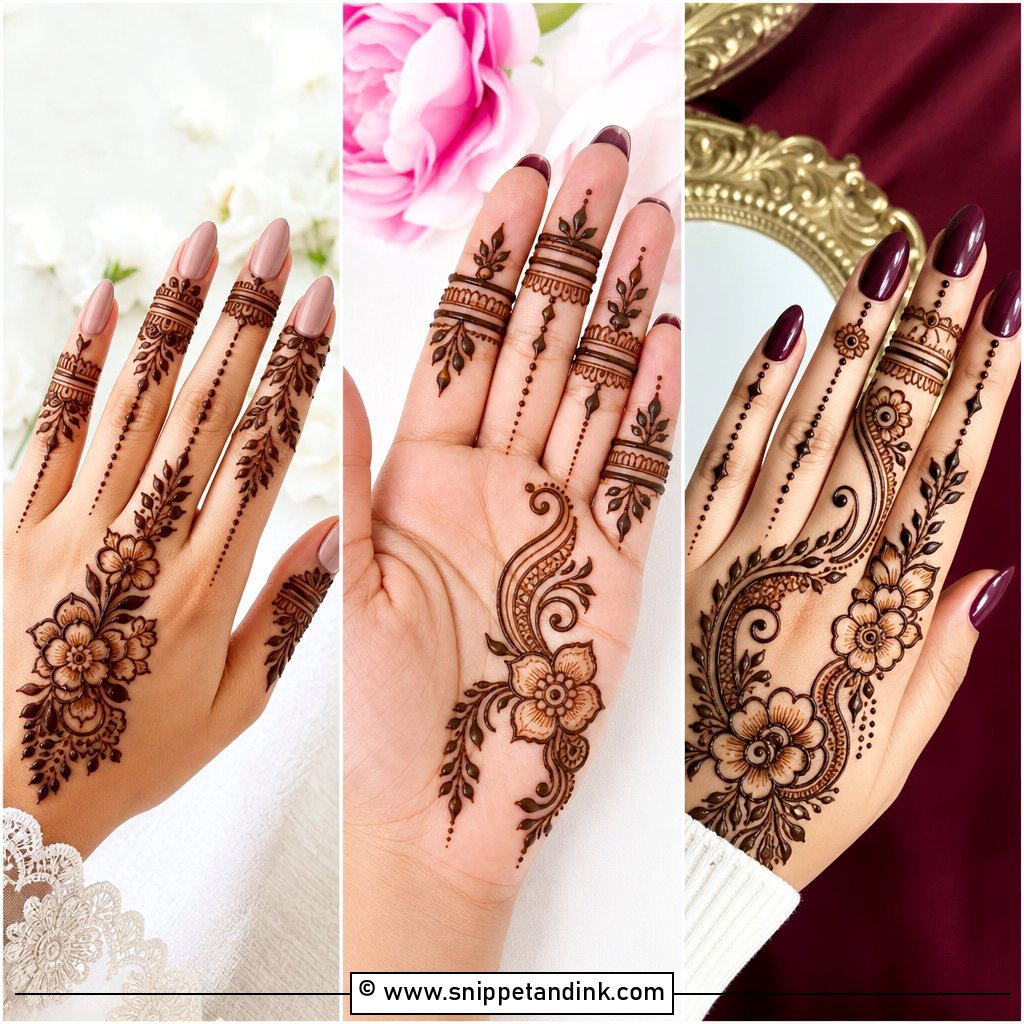
On the palm side I keep the centre of the hand open and let the fingers carry the design: a thin cap at each tip, a couple of slim bands, small leaf strokes tucked between them. The thumb gets one floral curve, and I mirror the line work on the index and ring fingers so the hand reads as balanced. Palm-side skin takes stain deeply, so even this light pattern comes up rich. Keep the gaps between bands even and the fingers look longer.
2. Simple Finger Mehndi Design For Back Hand
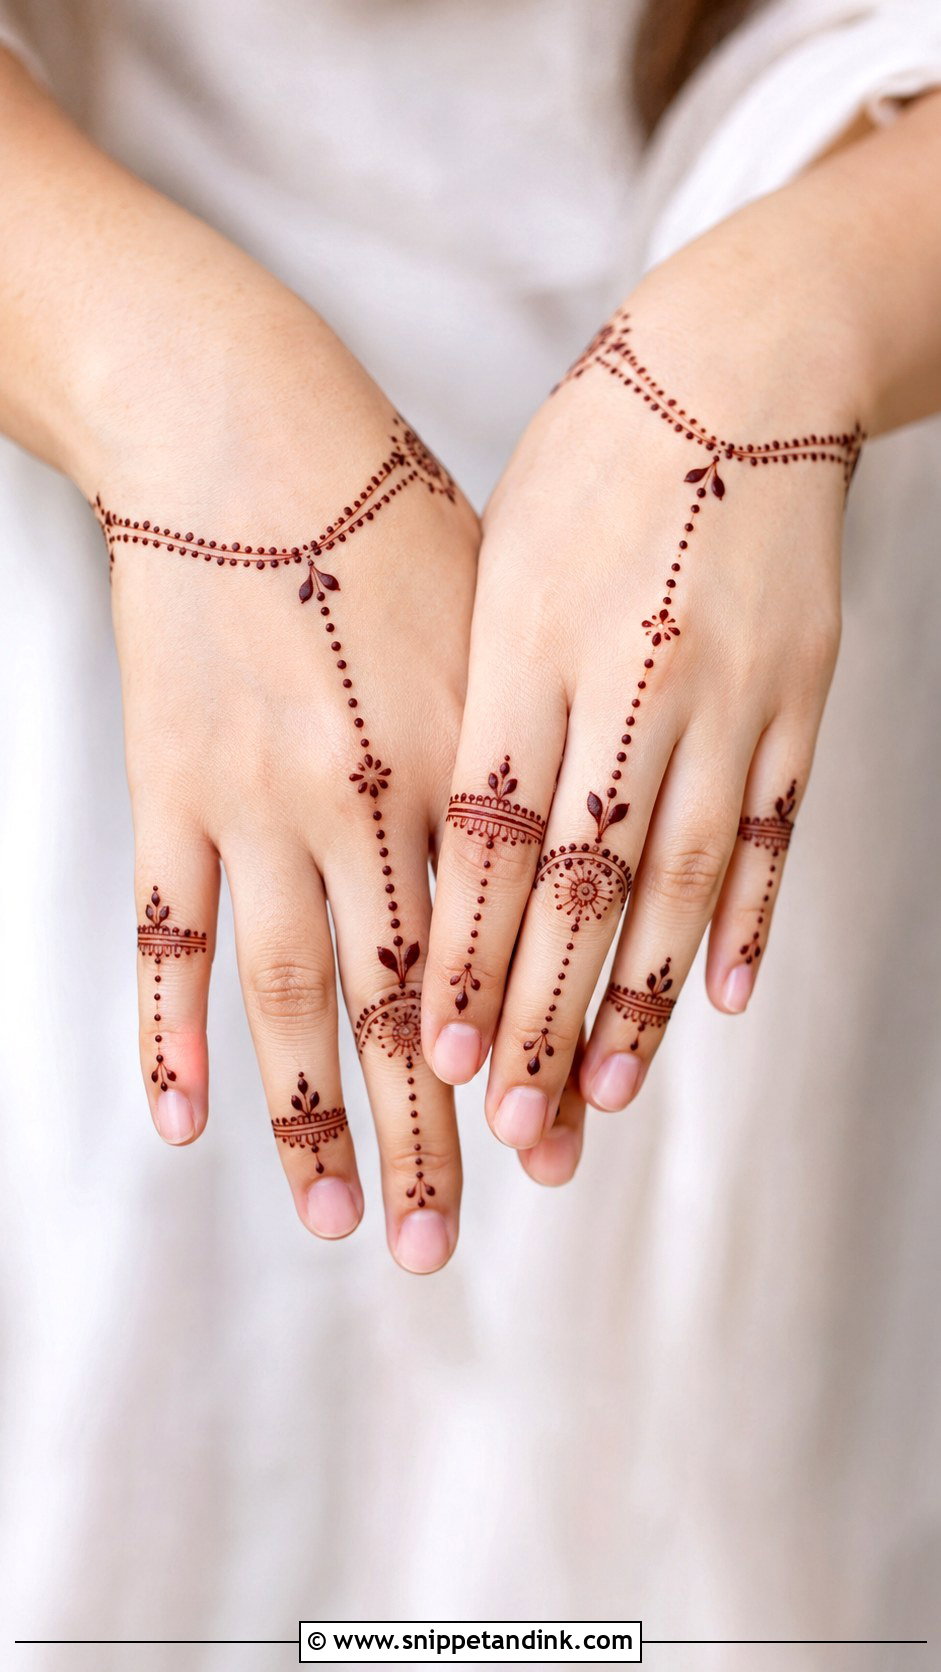
The back of the hand is where people look first, so I start at the nail bed and let the pattern walk toward the knuckles. Fine bands, tiny petals and dots give a jewellery feel, and a small wrist cuff is optional. One thing to know before you pick this: skin on the back of the fingers stains lighter than the palm, usually a warm orange-brown rather than deep maroon. I compensate by keeping lines a touch bolder there and leaving clean negative space so the colour isn’t lost in clutter.
3. Easy Finger Mehndi Design For Beginners
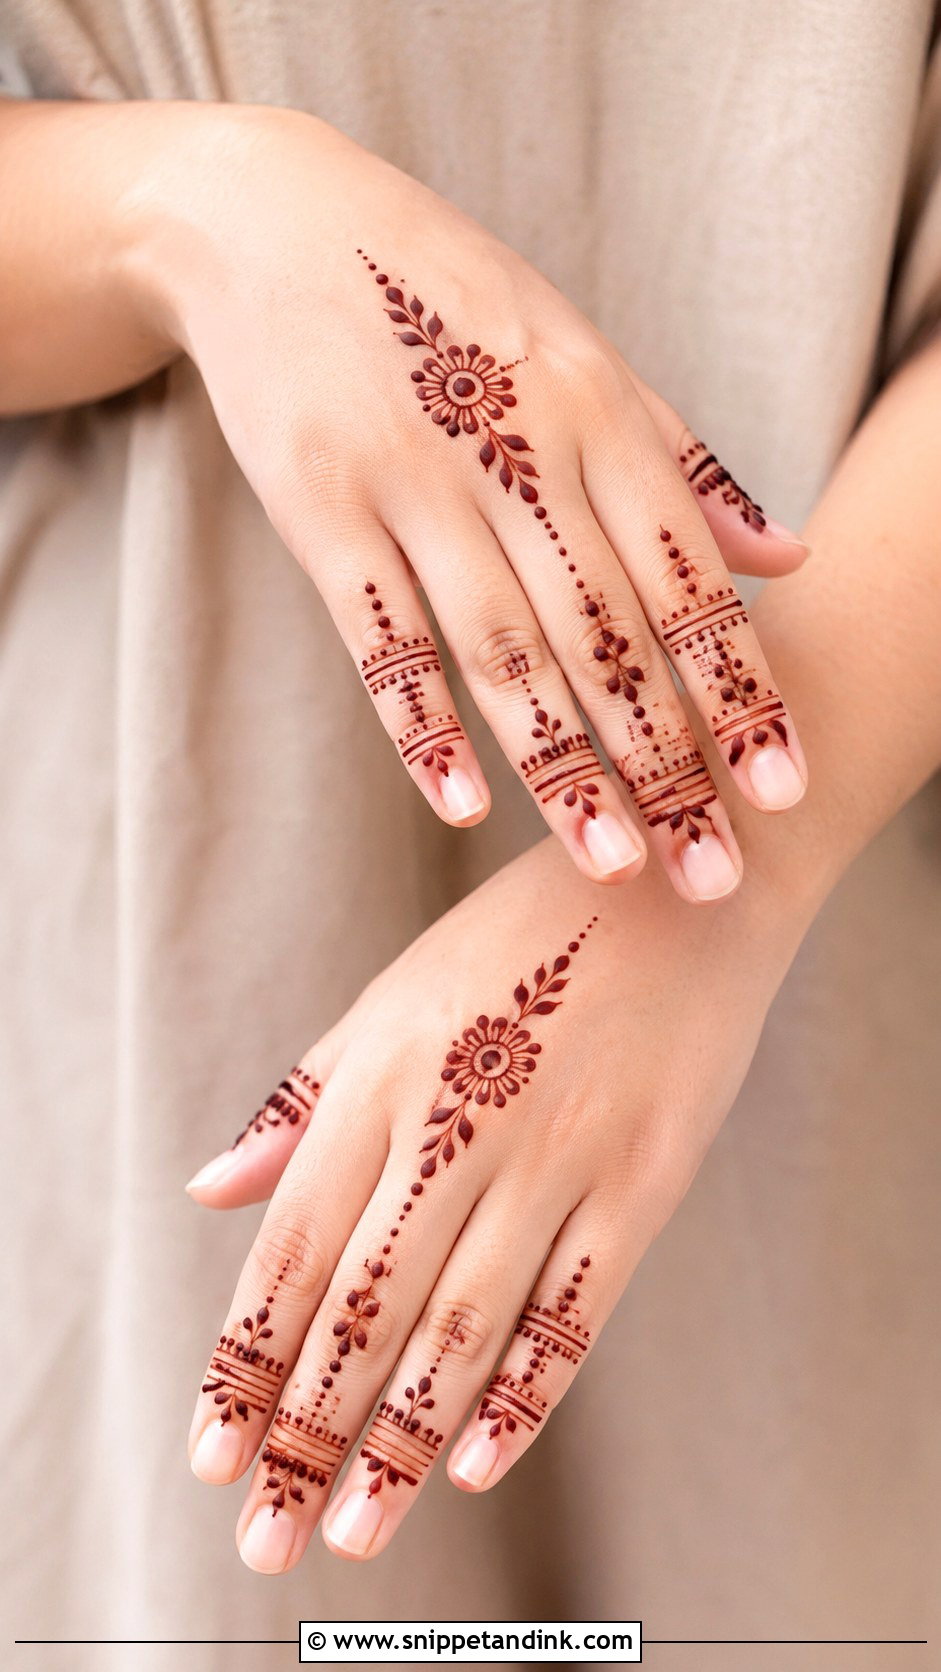
If you’re learning, build from shapes you can repeat without thinking: dots, straight lines, small leaves, half petals. I tell students to finish one finger completely before moving on, because jumping around the hand is how you rest a wrist on wet paste. Three bands per finger with a dotted chain between them is plenty. Leave the fingertips light at first; narrow spaces near the nail are where a heavy hand makes paste bleed together.
4. One Finger Mehndi Design Simple
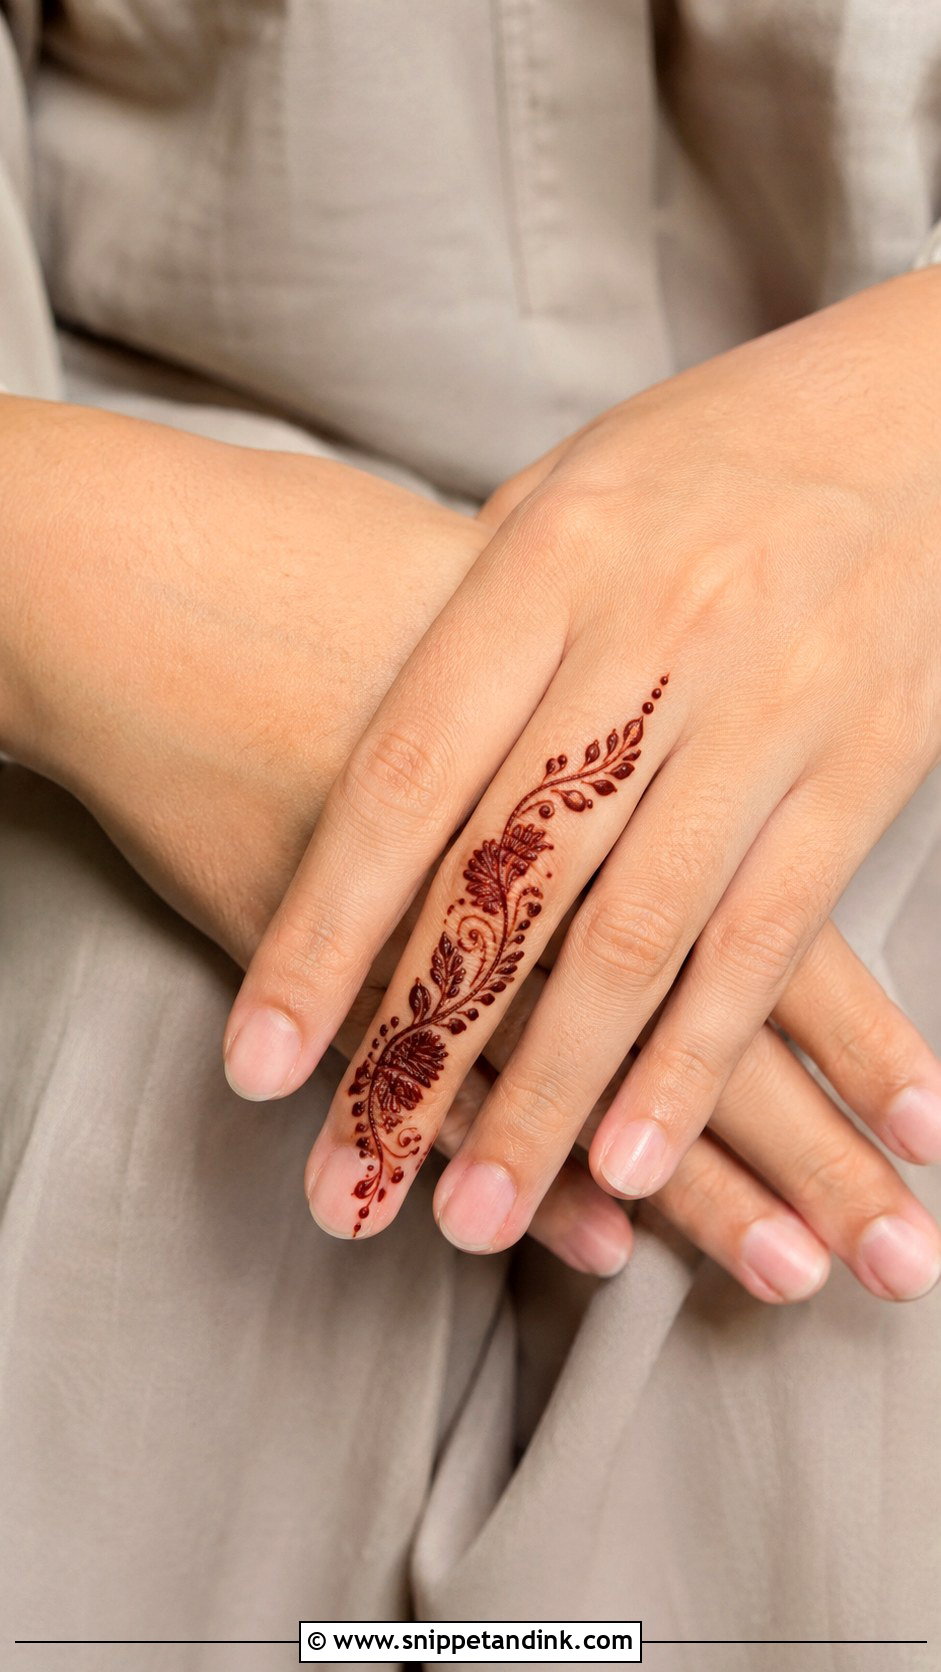
One decorated finger, nail to base, and the rest of the hand left bare. It reads like a henna ring, and it’s the fastest design on this list. I usually put it on the index or ring finger, since those show best when the hand rests on a lap or holds a cup. Arabic leafy curves or a tiny Indian paisley both fit, but pick one style and commit; mixing them on a single finger looks unsure. Crisp lines matter more than anything here because there is nowhere for a wobble to hide.
5. Arabic Finger Mehndi Design Simple
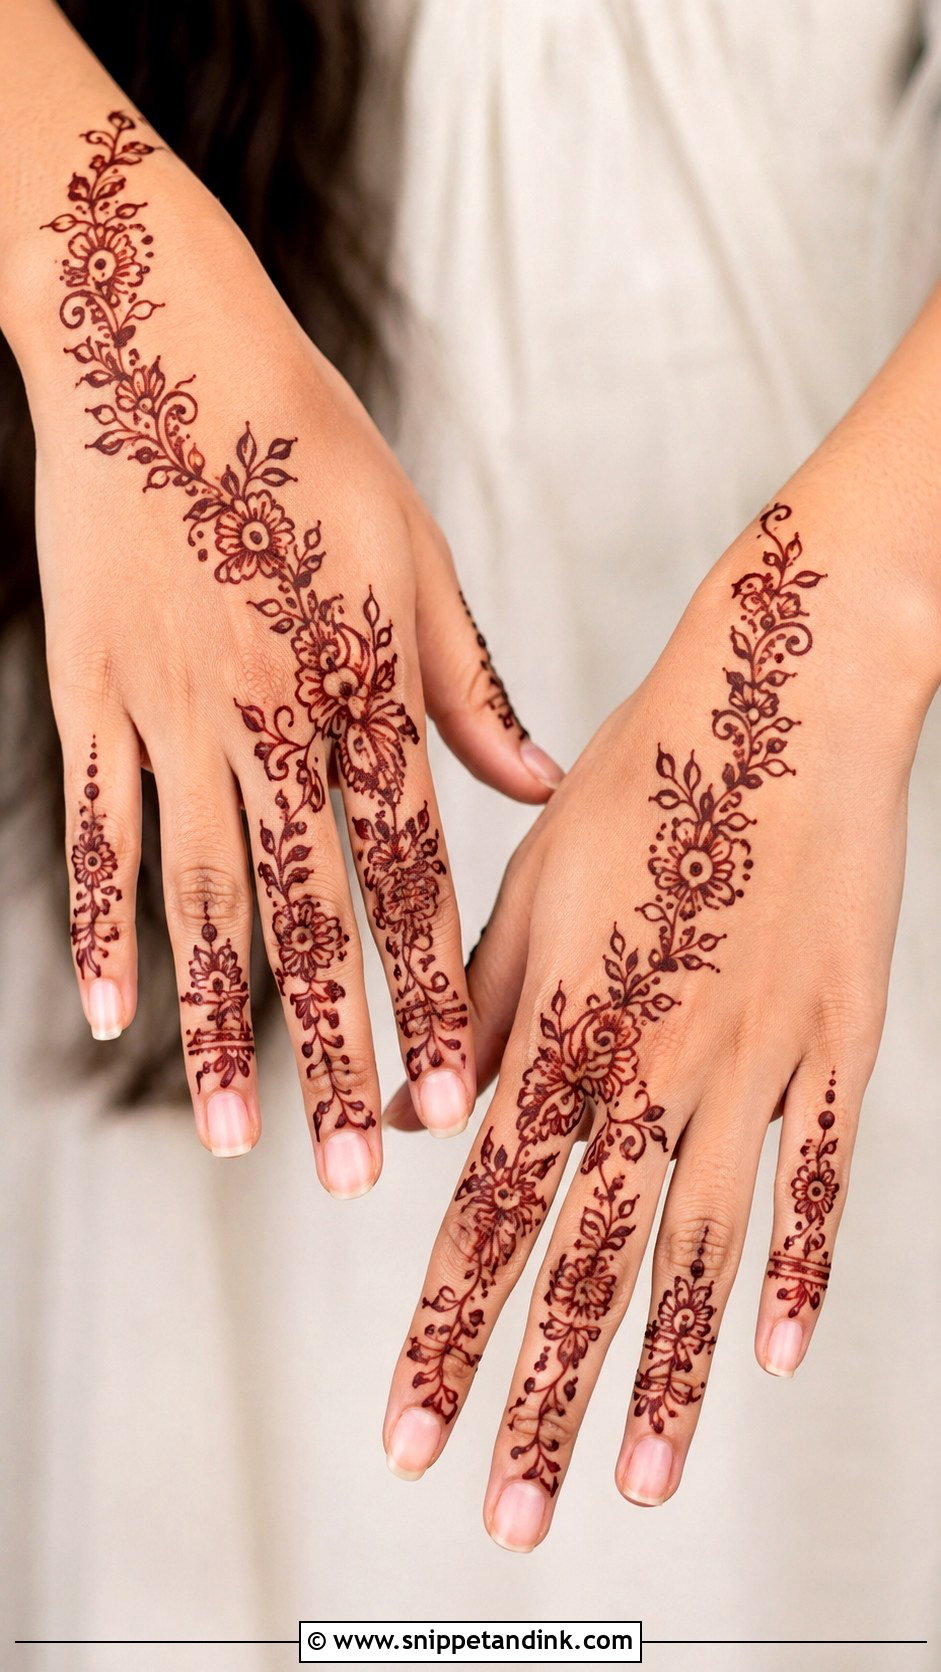
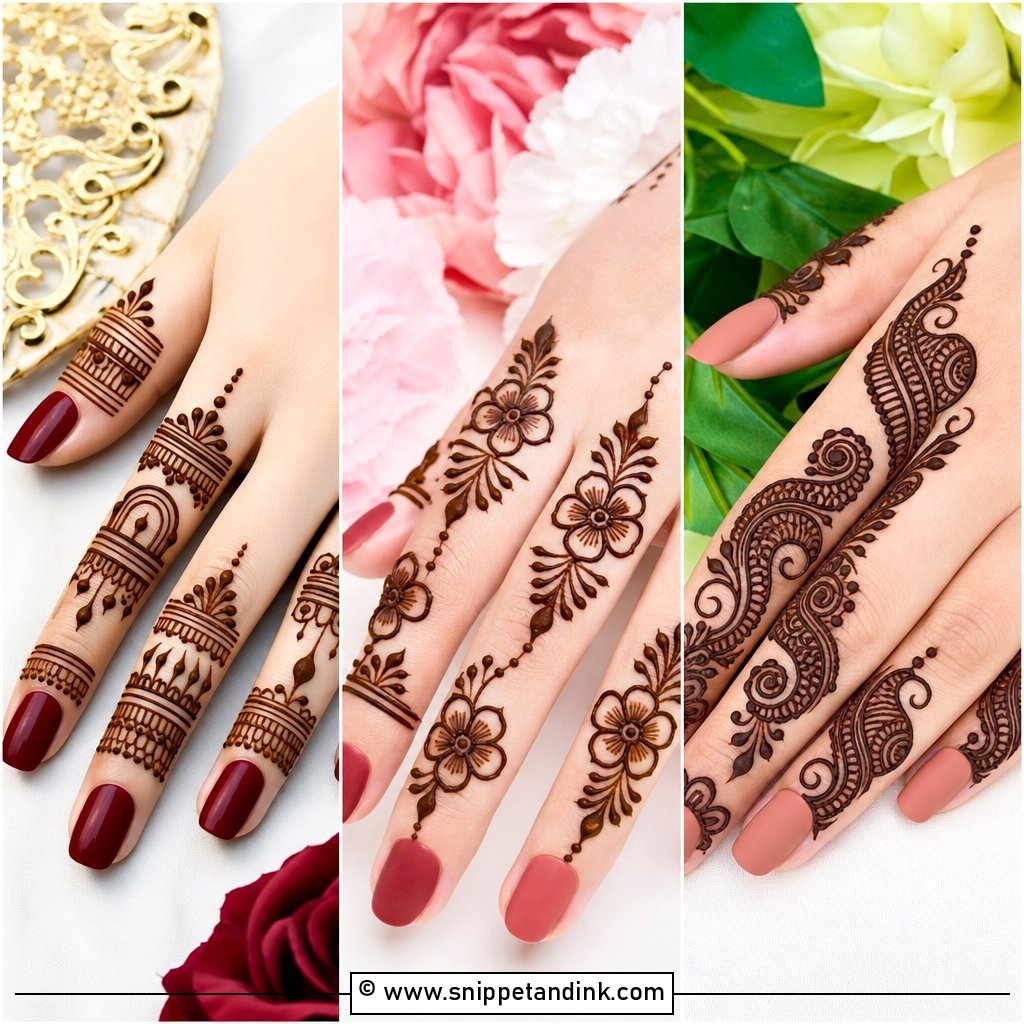
Arabic finger mehndi design simple patterns rely on flow rather than fill. I run the line diagonally across two or three fingers with rounded petals, curved stems and tapered leaves, then give the remaining fingers only dots or a slim band. The diagonal is forgiving: if a stroke drifts, I turn it into another leaf and nobody knows. That makes it my usual recommendation for someone booking a first quick appointment before Eid or an engagement.
6. Indian Finger Mehndi Design Simple
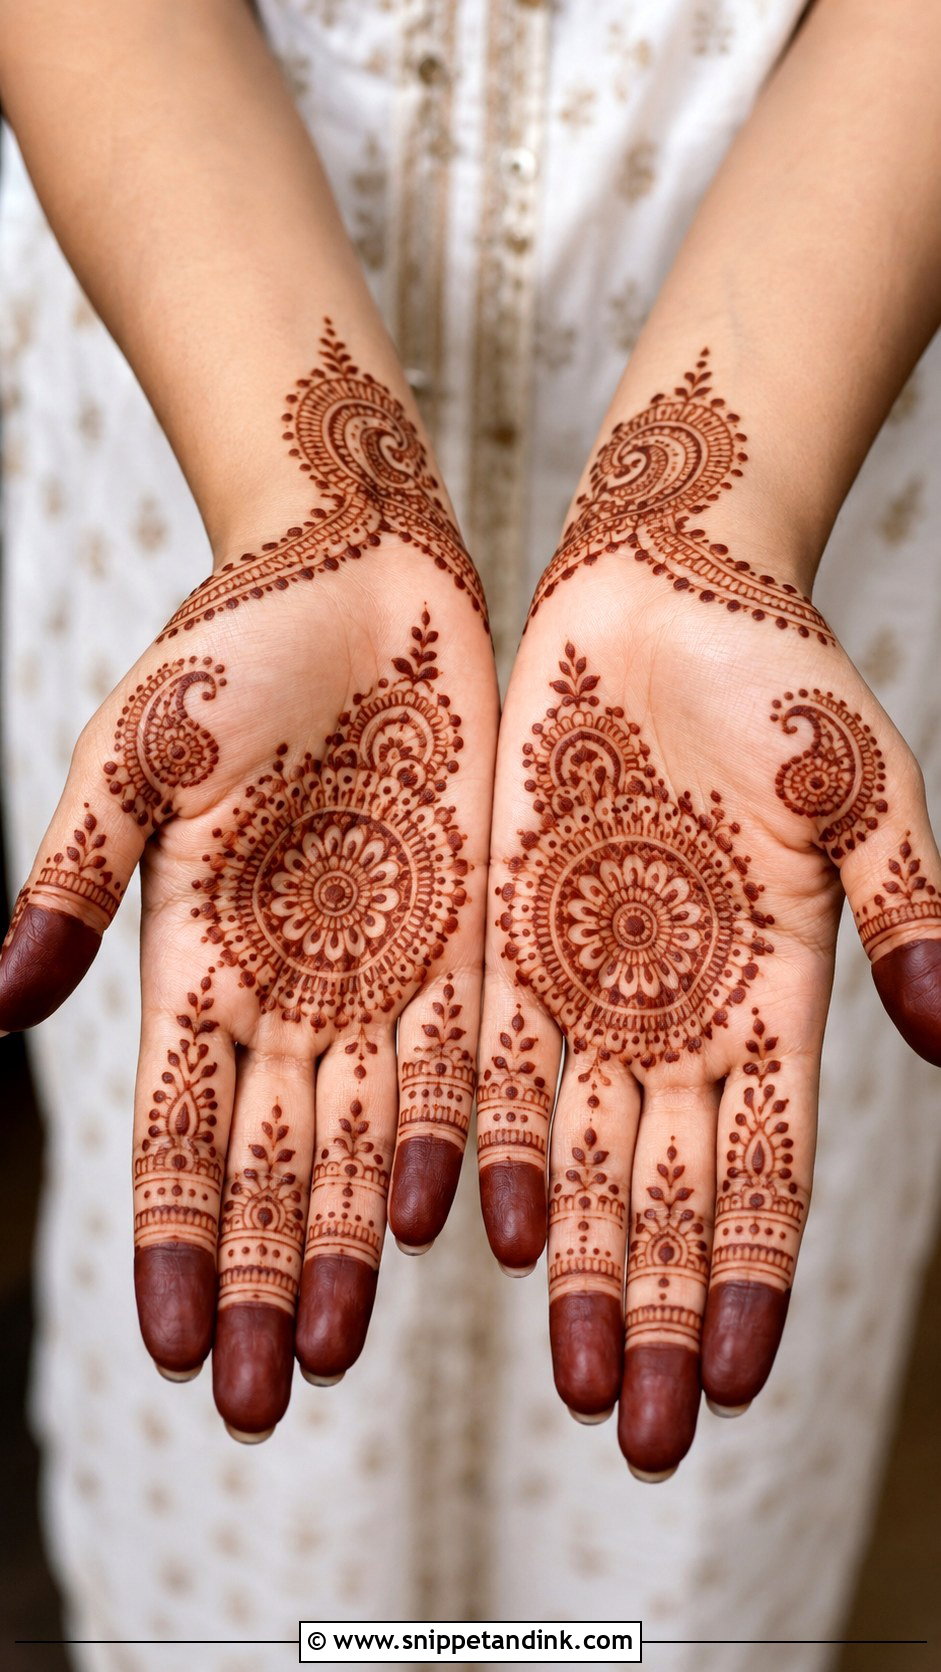
Indian-style finger work is about repetition: fingertip caps, small paisleys, dotted arches and a mini mandala at the base of each finger. I repeat the same pattern on all four fingers rather than drawing five different ideas, which keeps it calm and saves time. The palm stays open, so it suits puja days and family weddings where you want a traditional look without the bridal sitting. When it darkens to maroon on day two, the repeated detail is what makes it look intentional.
7. Minimal Finger Mehndi Design
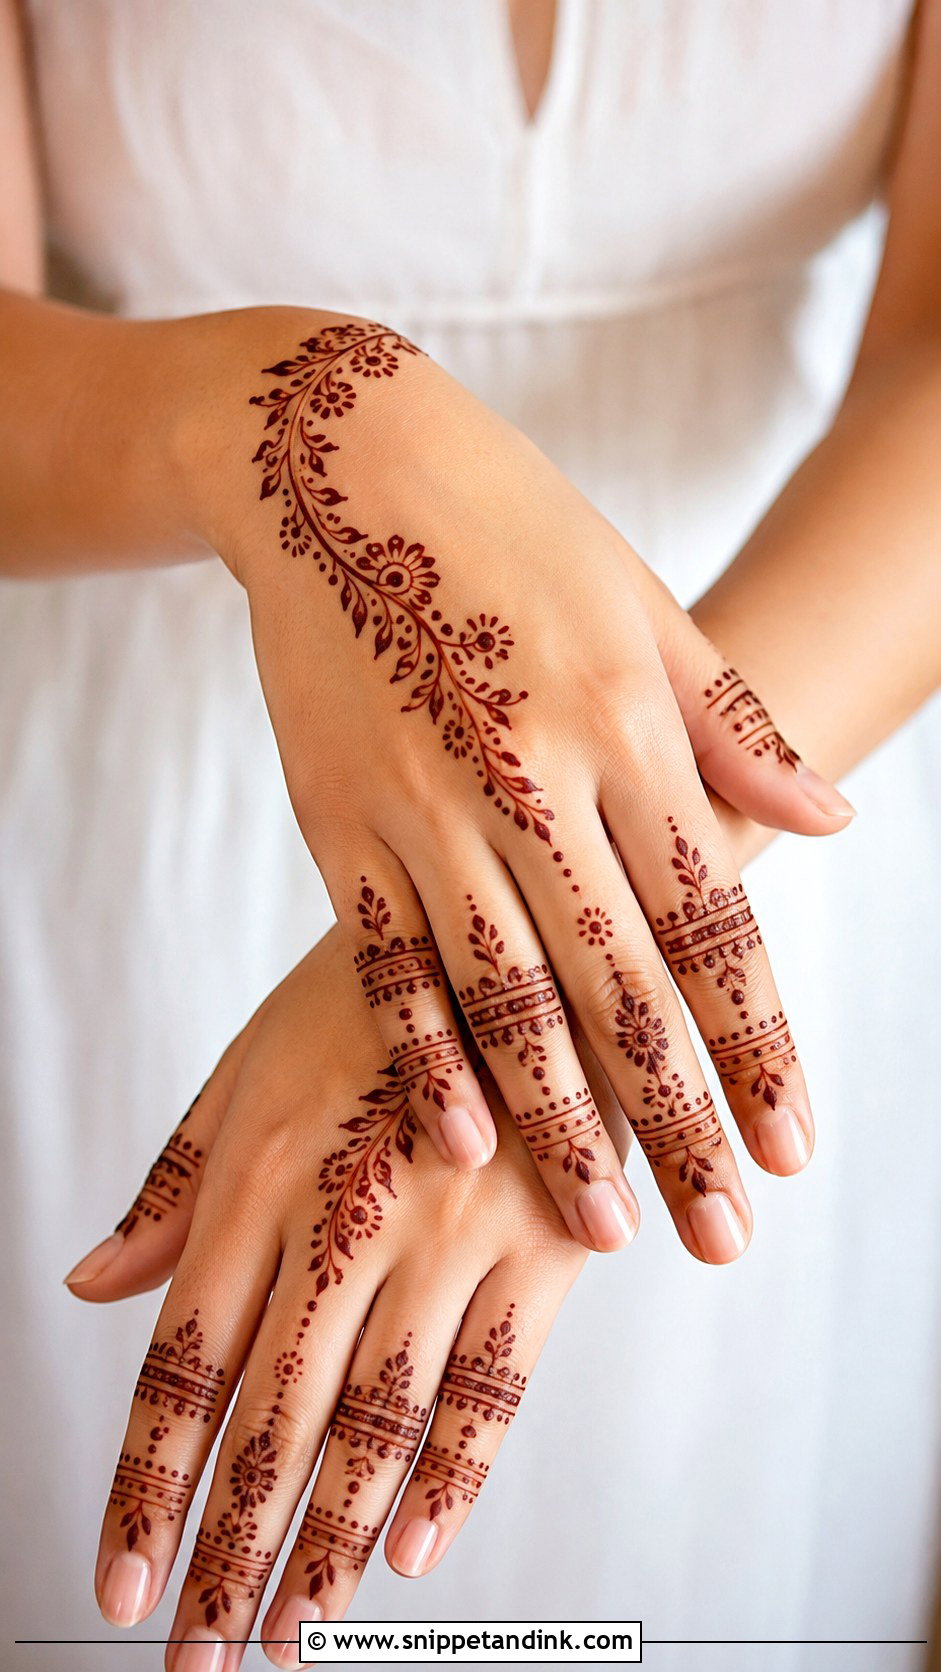
Minimal means I put down fewer strokes and make each one count. Thin rings, a few dots, one tiny vine per hand; fingertips bare or finished with a small crescent near the nail. The common mistake is adding “just one more” detail until it isn’t minimal anymore, so I decide the stroke count before I start. It suits bridesmaids and guests who’ll be in western clothes later in the week, since it looks like fine hand jewellery rather than festival henna.
8. Full Finger Mehndi Design Simple
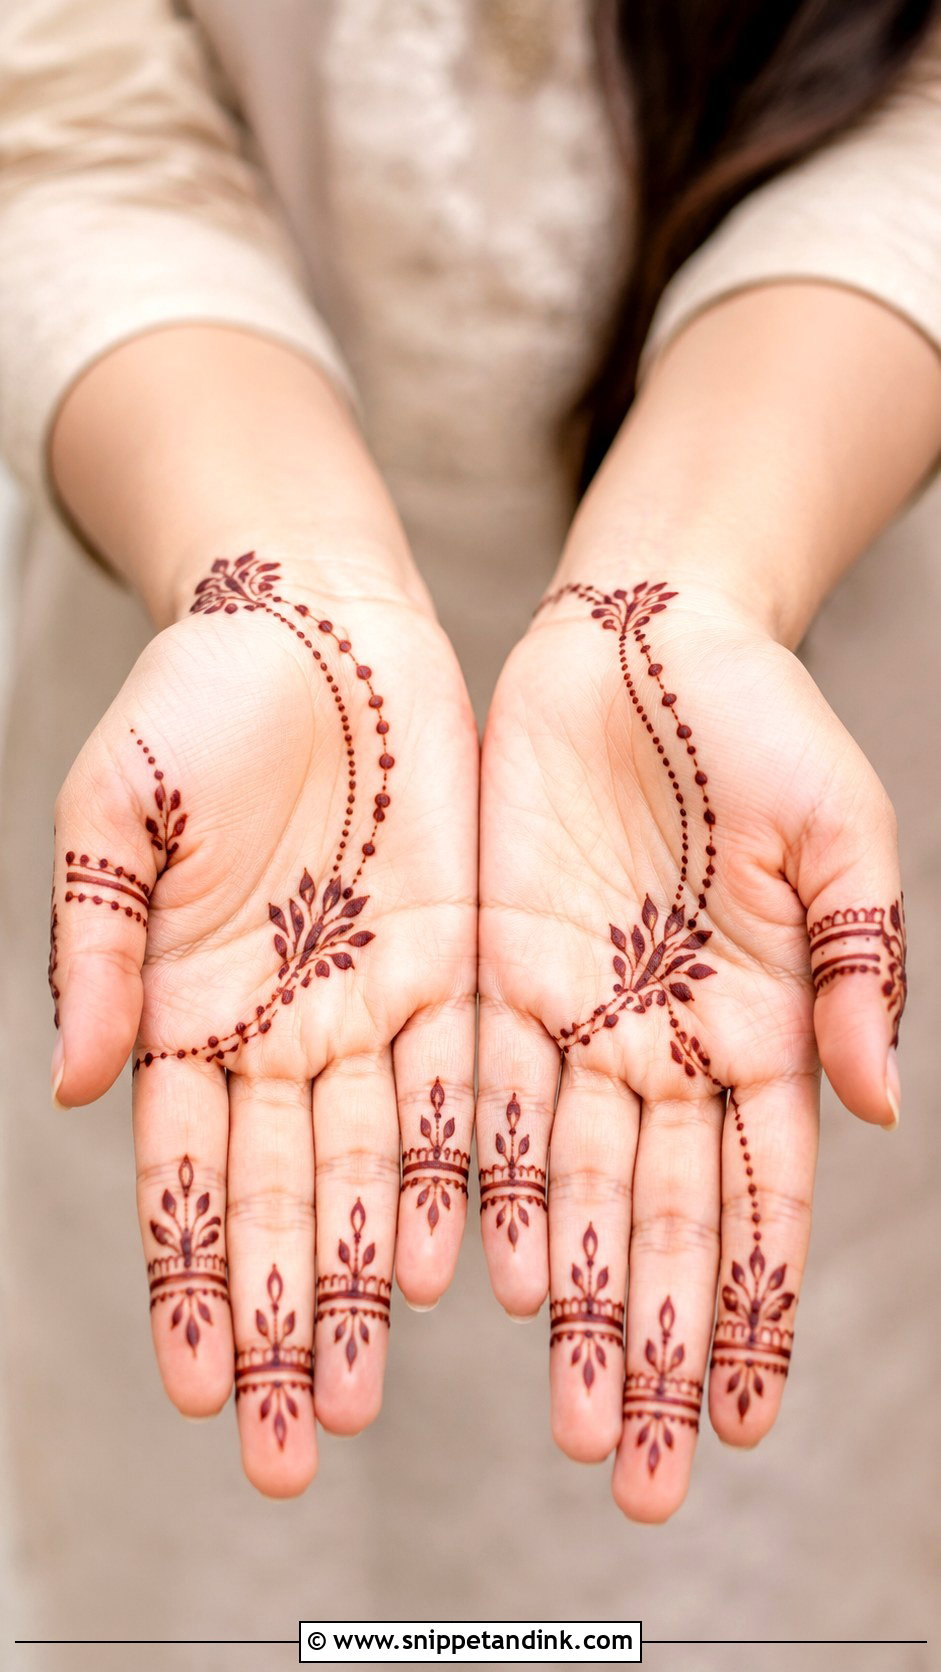
Covering each finger from tip to base sounds heavy, but with repeating bands, leaf chains and dots it stays light. Before filling, I mark each finger into three sections with a faint guide line at the knuckle creases; the design then sits where the finger bends instead of cracking across it. Keep the structure similar on every finger and the hand looks organised. Expect this one to take noticeably longer than the minimal designs above.
9. Finger Mehndi Design With Dots
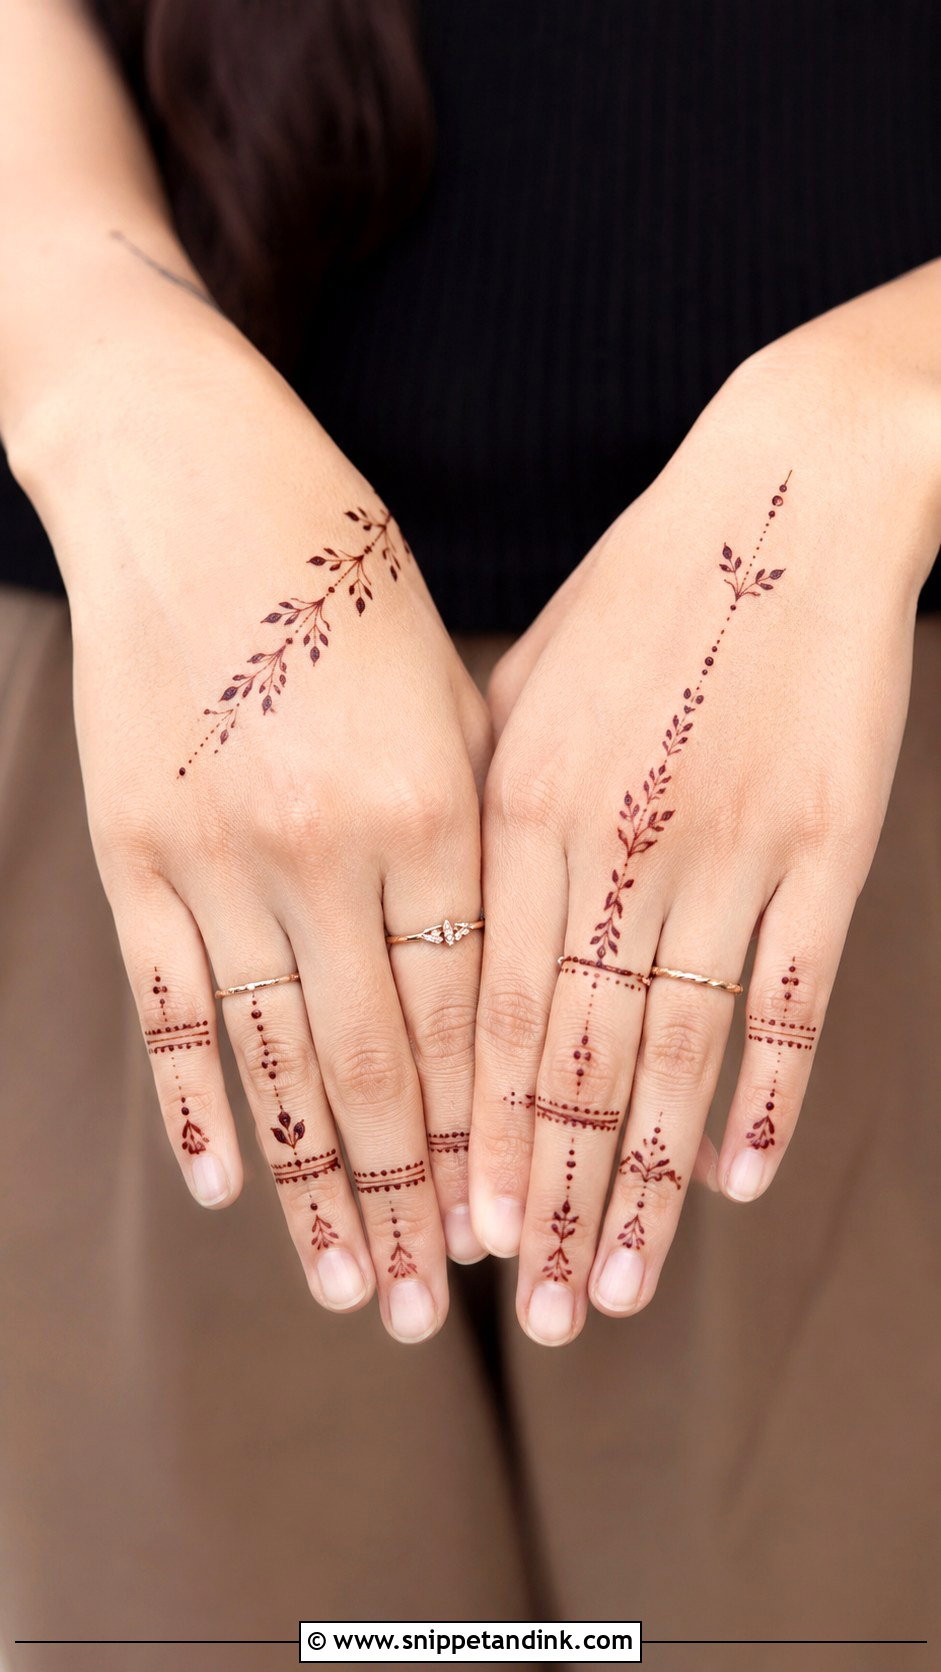
Dots are the quickest way to make a finger design look finished. Draw one slim line around the finger, then set evenly spaced dots above and below it. The trick is pressure: a short squeeze and an immediate lift gives a round dot, while dragging the cone leaves a tail. I vary dot size, larger near the base and smaller toward the tip, which gives depth without any extra motifs. On the back hand the result looks like a strand of tiny beads.
10. Finger Mehndi Design With Lines
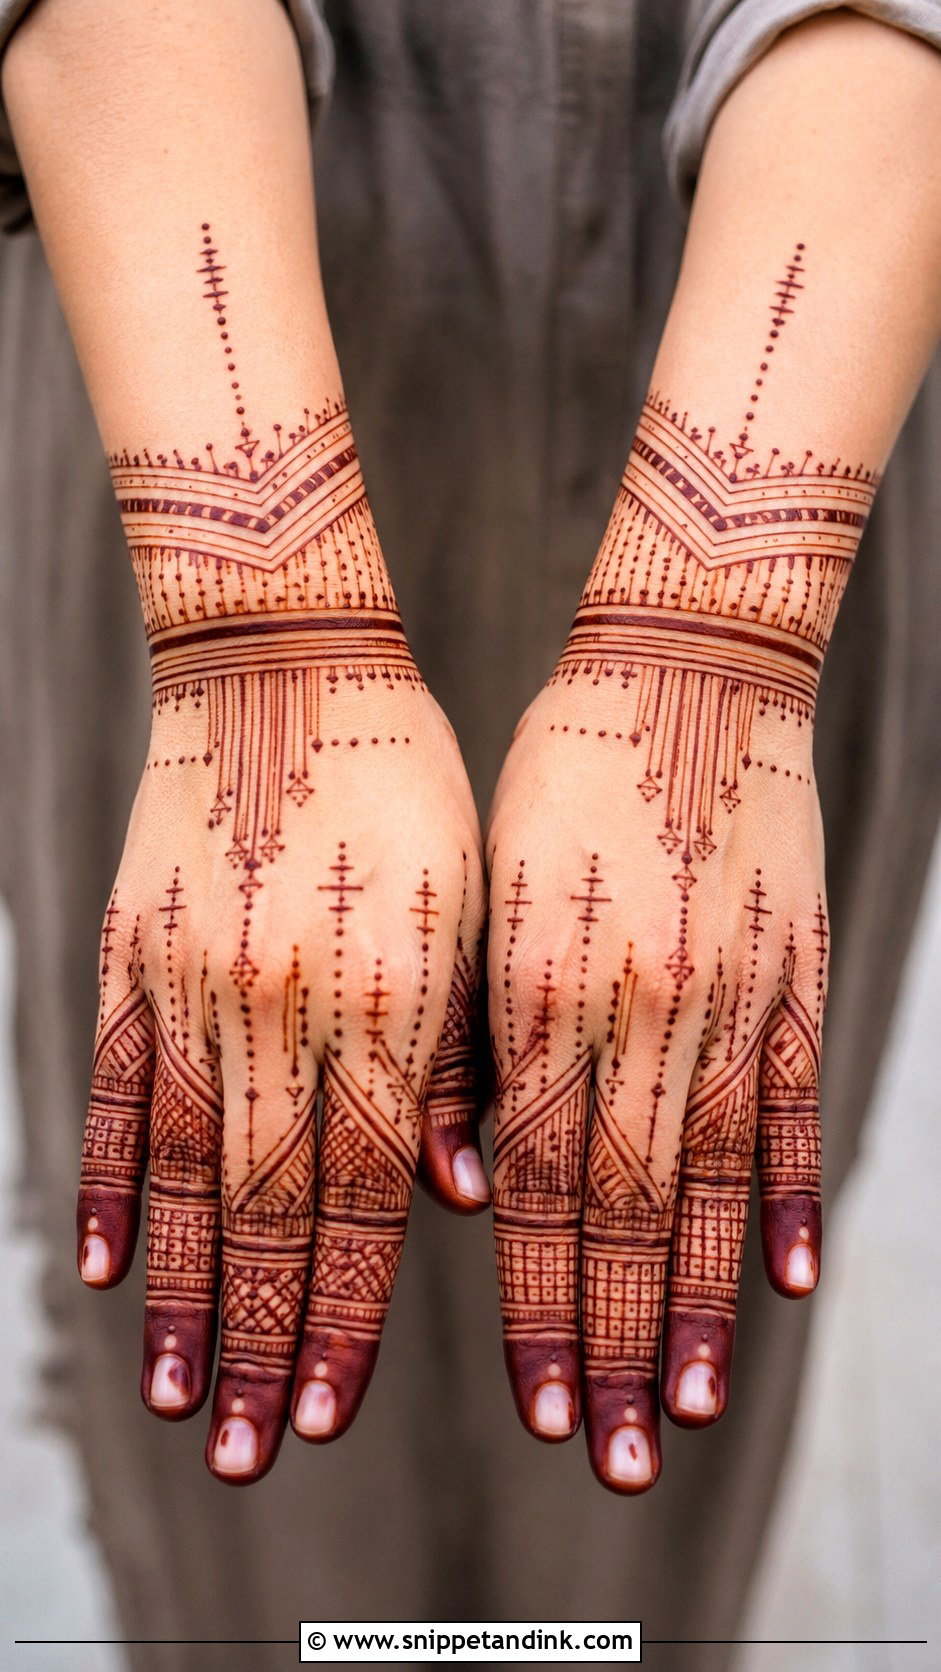
Line work looks modern and needs no advanced motifs. Horizontal bands, a few vertical strokes, maybe a diagonal or a tiny grid. I alternate thick and thin lines; one width everywhere looks flat once the stain sets. Leave a clear gap between sections. With so little filled area it dries fast, and on long fingers with tidy nails it looks sharp. A dot at each line end softens it if you want a slightly traditional note.
11. Finger Mehndi Design With Leaves
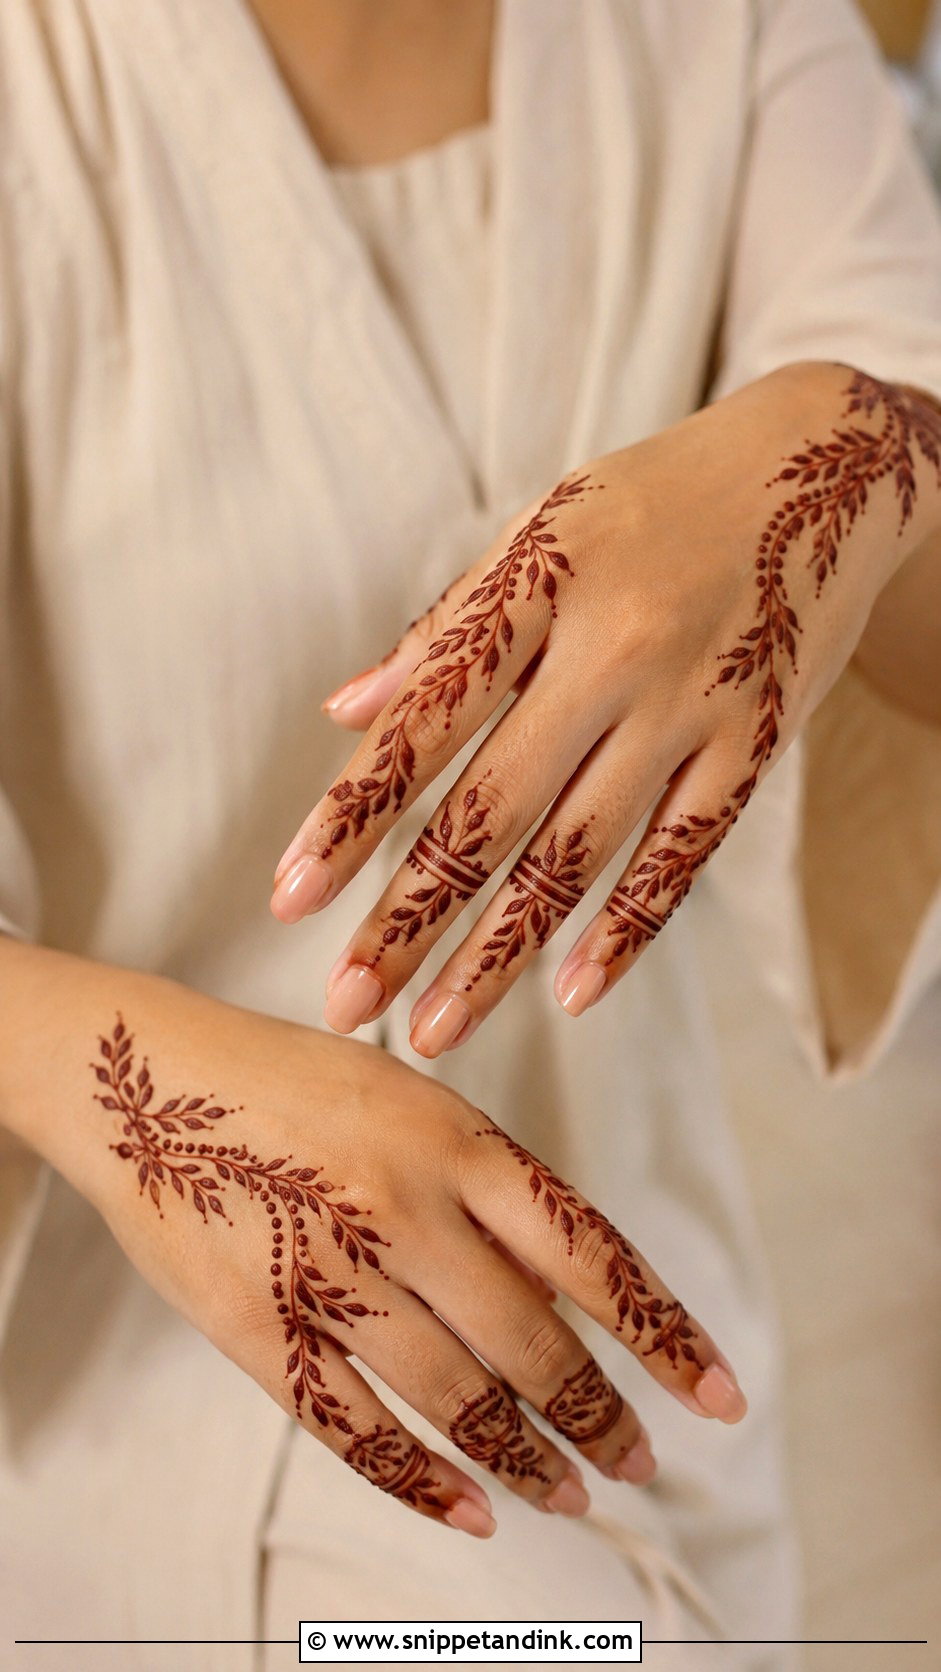
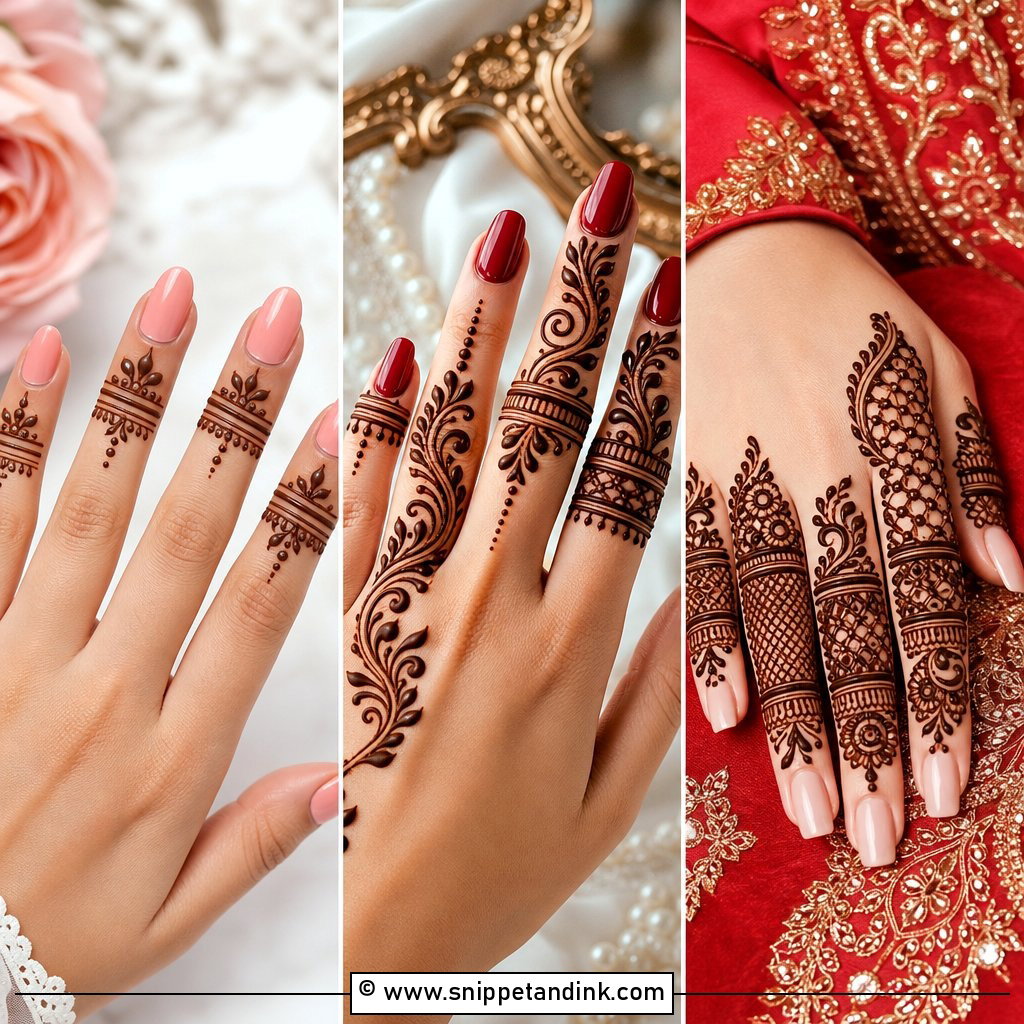
A leafy trail along the side of one finger, or repeated lightly on all of them, keeps the hand fresh for daytime events. I pipe the stem first in one steady curve, then add leaves on alternating sides. Leaf size should follow the finger: smaller near the tip, a little fuller near the knuckle. Most people draw every leaf the same size, and on a narrow finger that crowds the tip. It sits naturally in Arabic and Indo-Arabic work, where empty skin is part of the design.
12. Finger Mehndi Design With Flowers
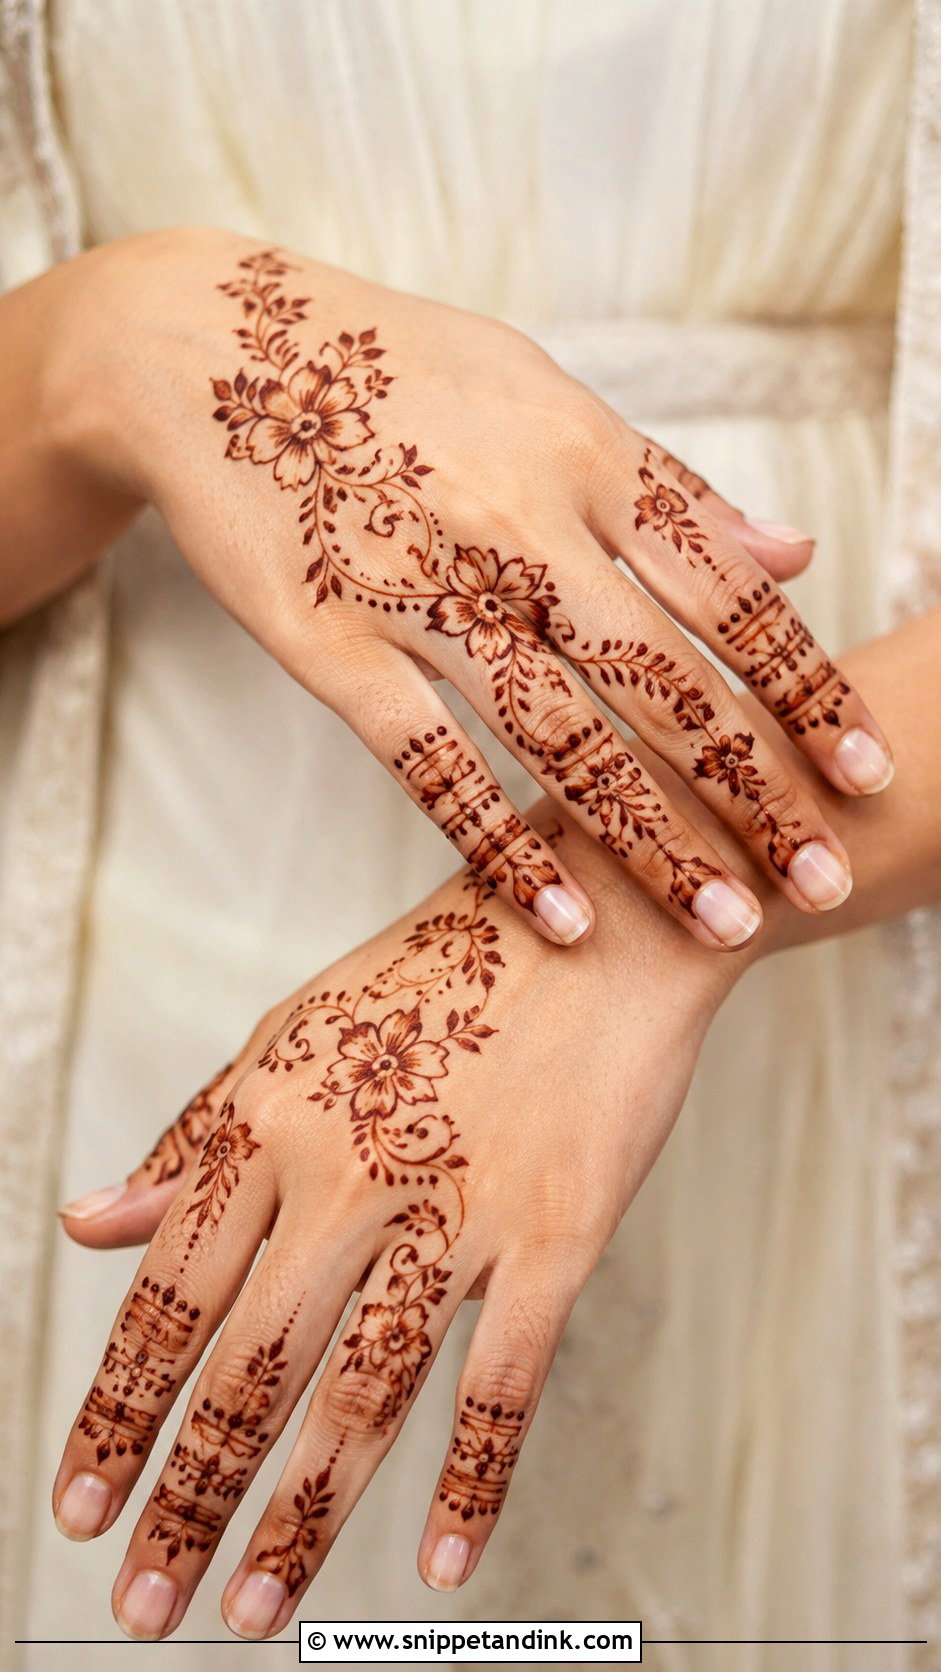
A tiny five-petal flower on each finger, ringed with dots, is the simplest version, and it suits almost any hand. For more interest I place a slightly larger bloom on the ring finger and keep the others lighter. Open petals, outlined rather than filled, keep it airy; filled petals on a small finger often merge into a blob as the paste settles. It’s an easy pick for baby showers, Eid visits and smaller wedding functions.
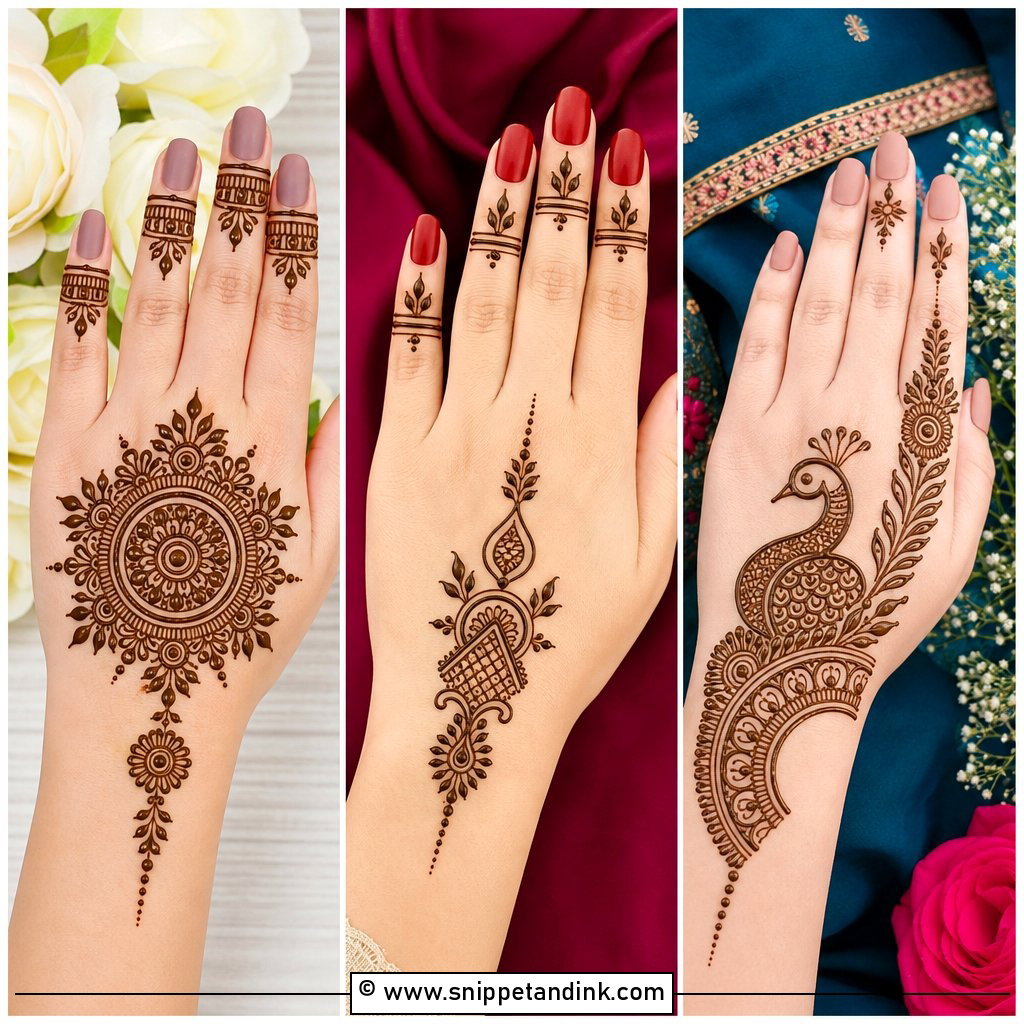
13. Finger Mehndi Design With Mandala
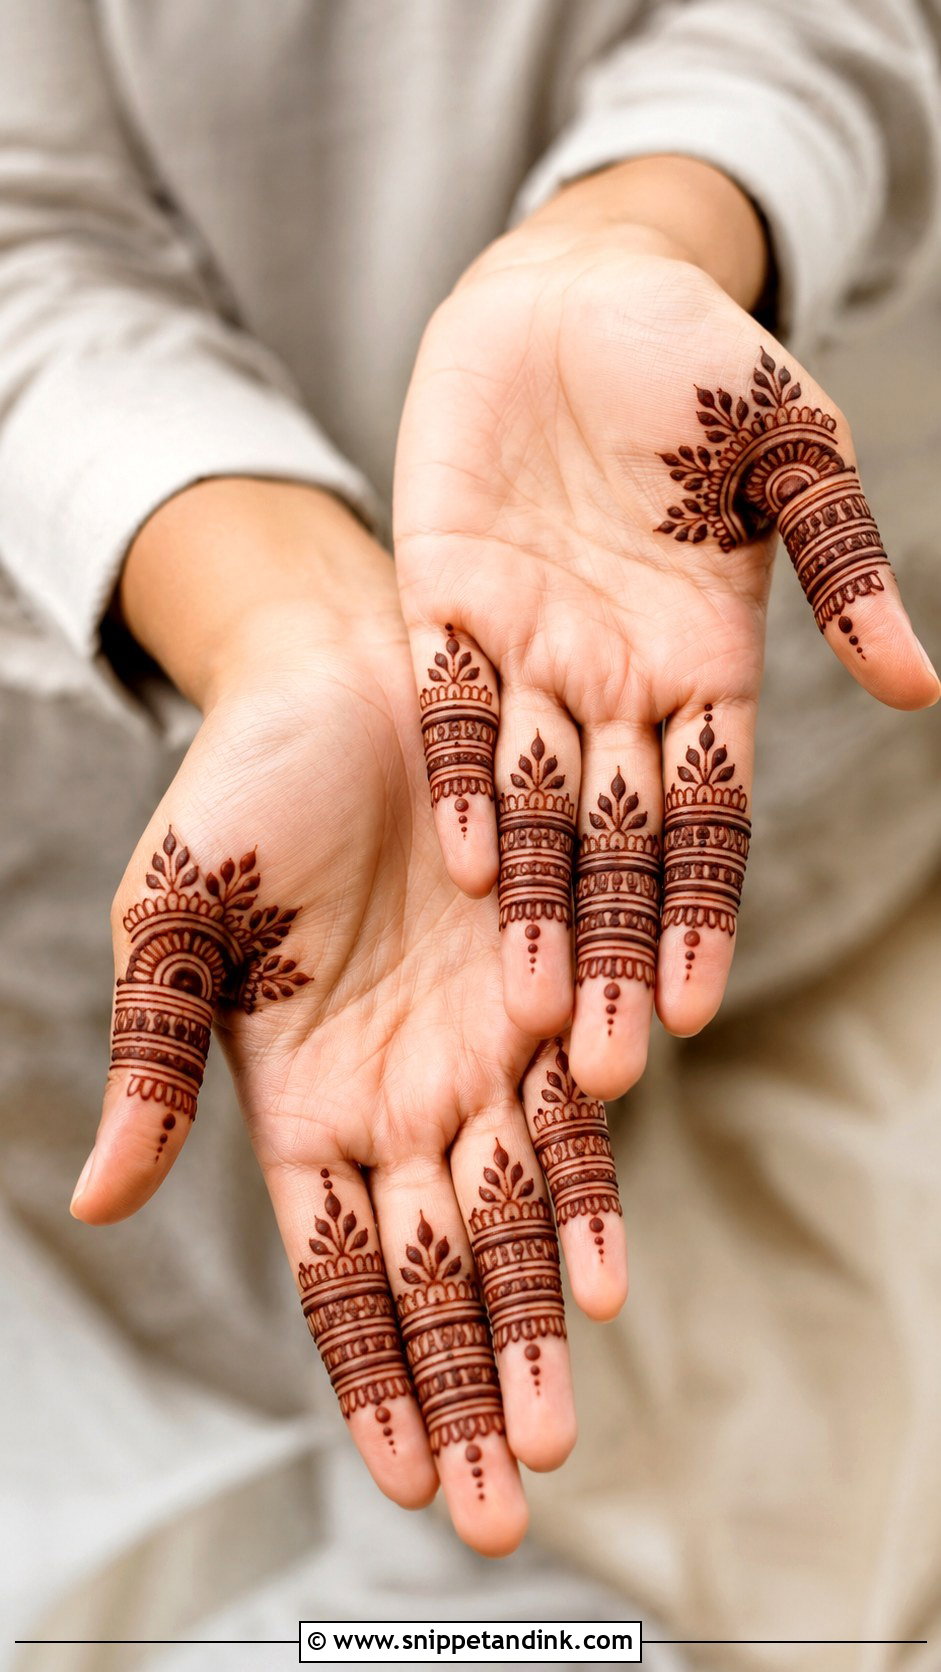
A full mandala belongs on the palm. On fingers I scale it down to half-mandalas at the base or near the knuckles, with slim bands and dots above. Start with a small circle, add petals, finish with a dotted border. The thing I watch most is width: if the mandala spreads past the edges of the finger it wraps around the side and looks lopsided from the front. Keep it centred and modest and it reads as traditional without taking over the hand.
14. Finger Mehndi Design With Jaali
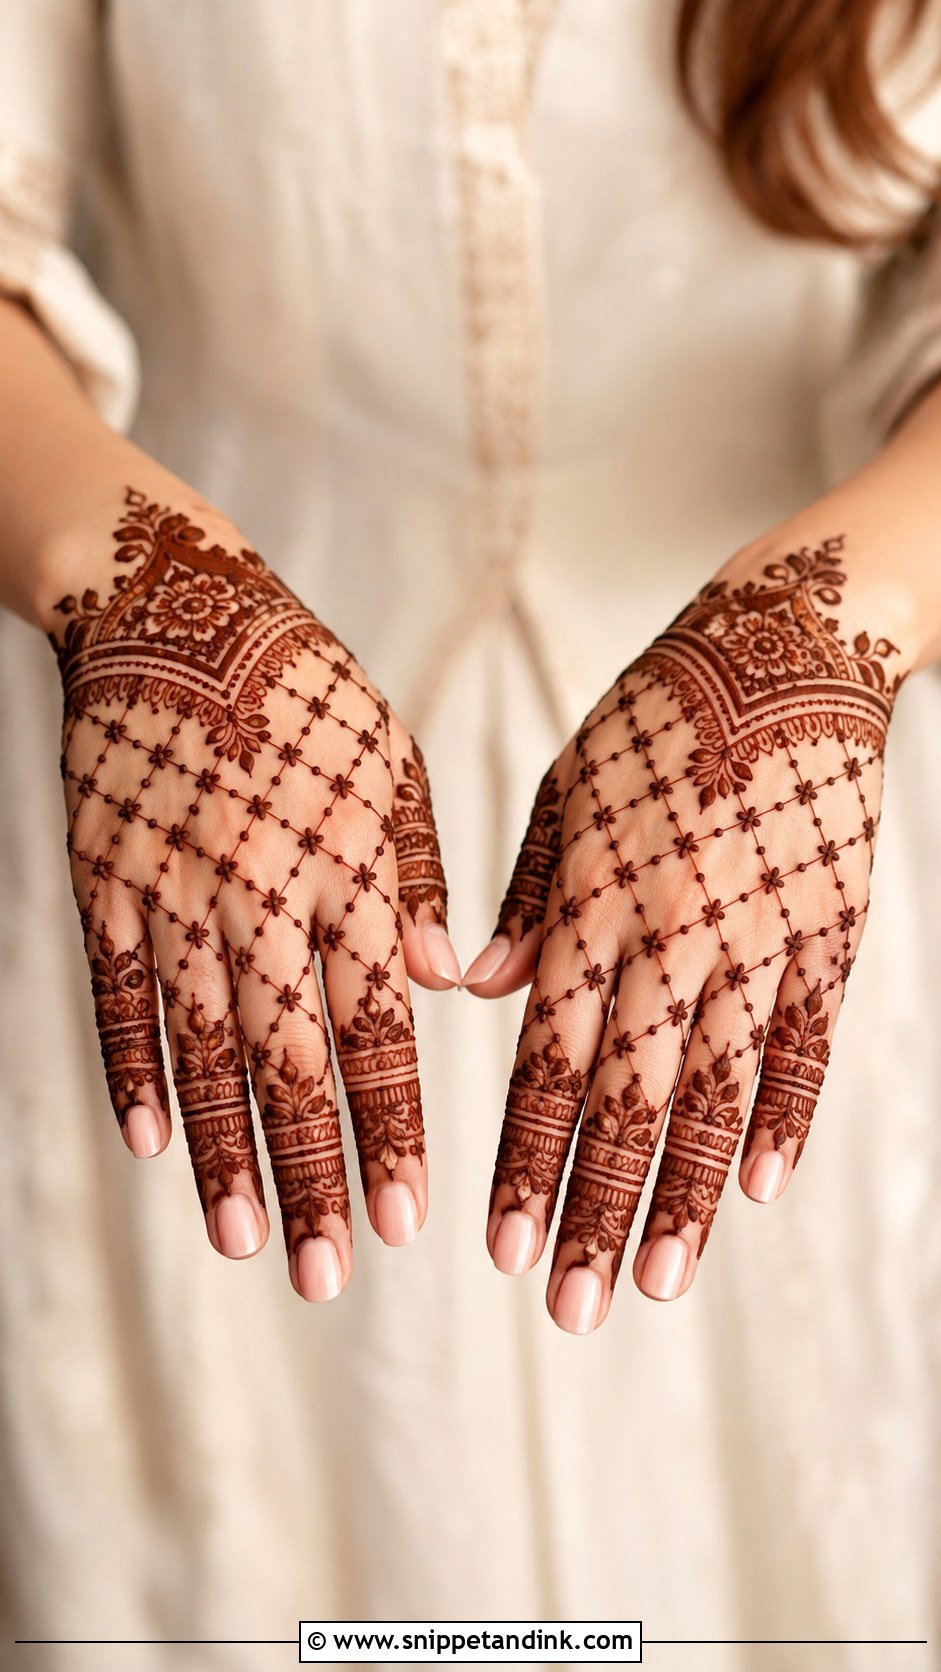
Jaali is a small net of diamonds or squares, and on one or two fingers it gives a lace-glove effect, especially on the back hand. I draw the grid first, then drop a dot on each crossing. Pair it with plain bands on the other fingers so it has contrast. The warning I give everyone: don’t make the cells too tiny. Paste spreads slightly as it settles, and very small cells fill in, leaving a blotch instead of a net.
15. Finger Mehndi Design With Rings
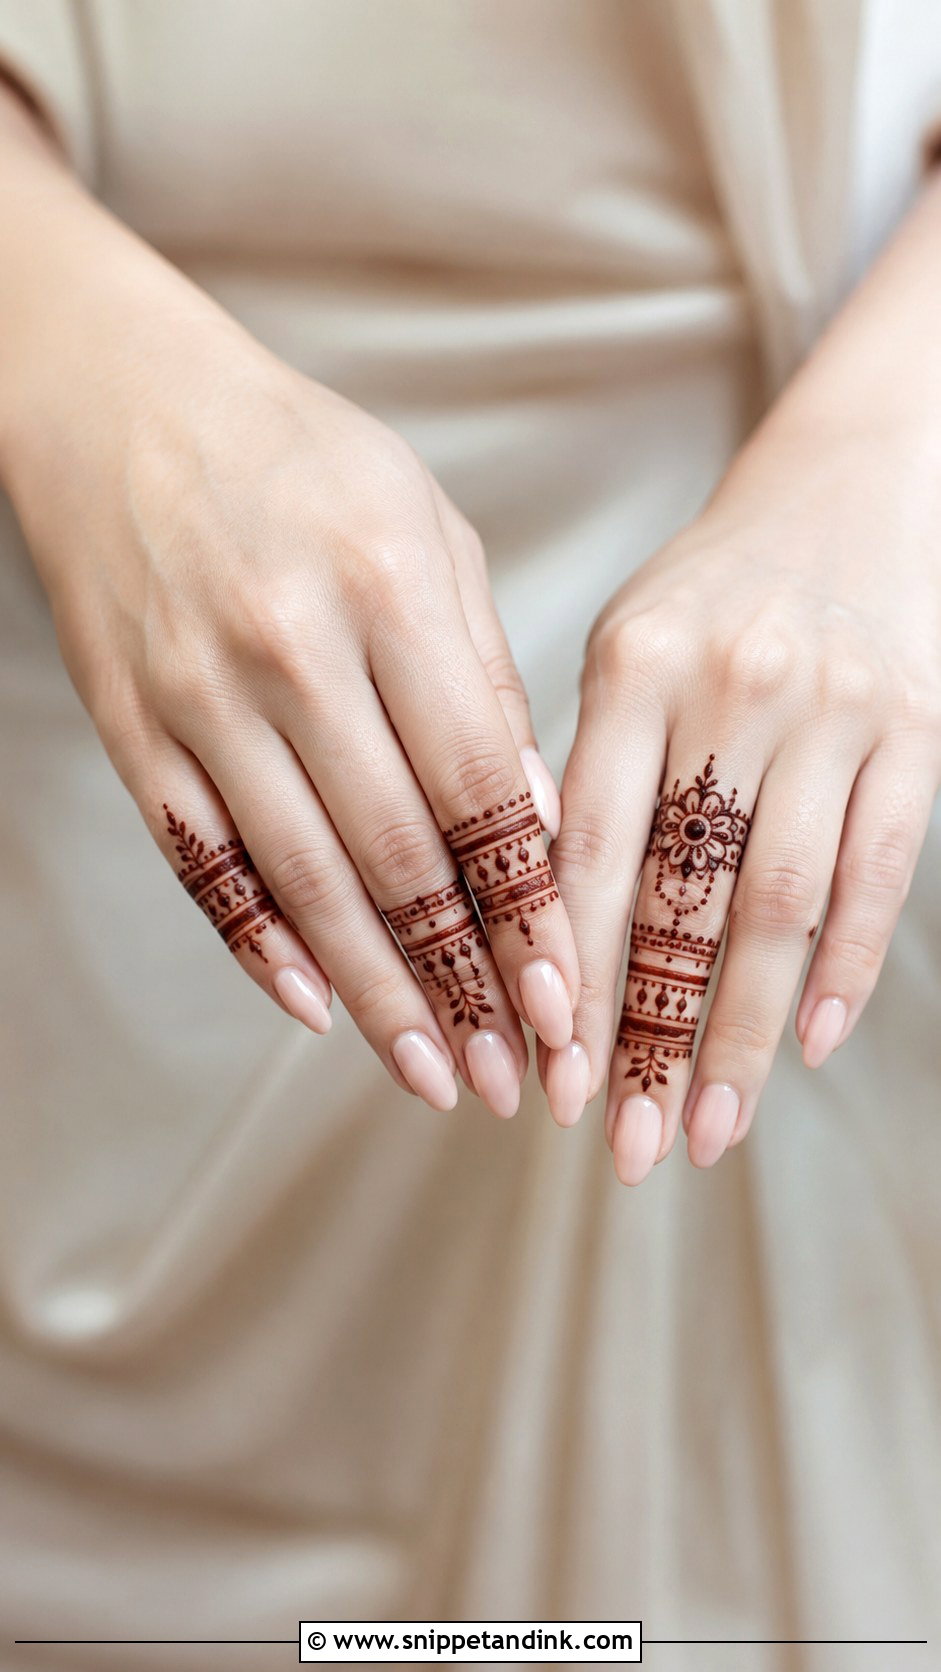
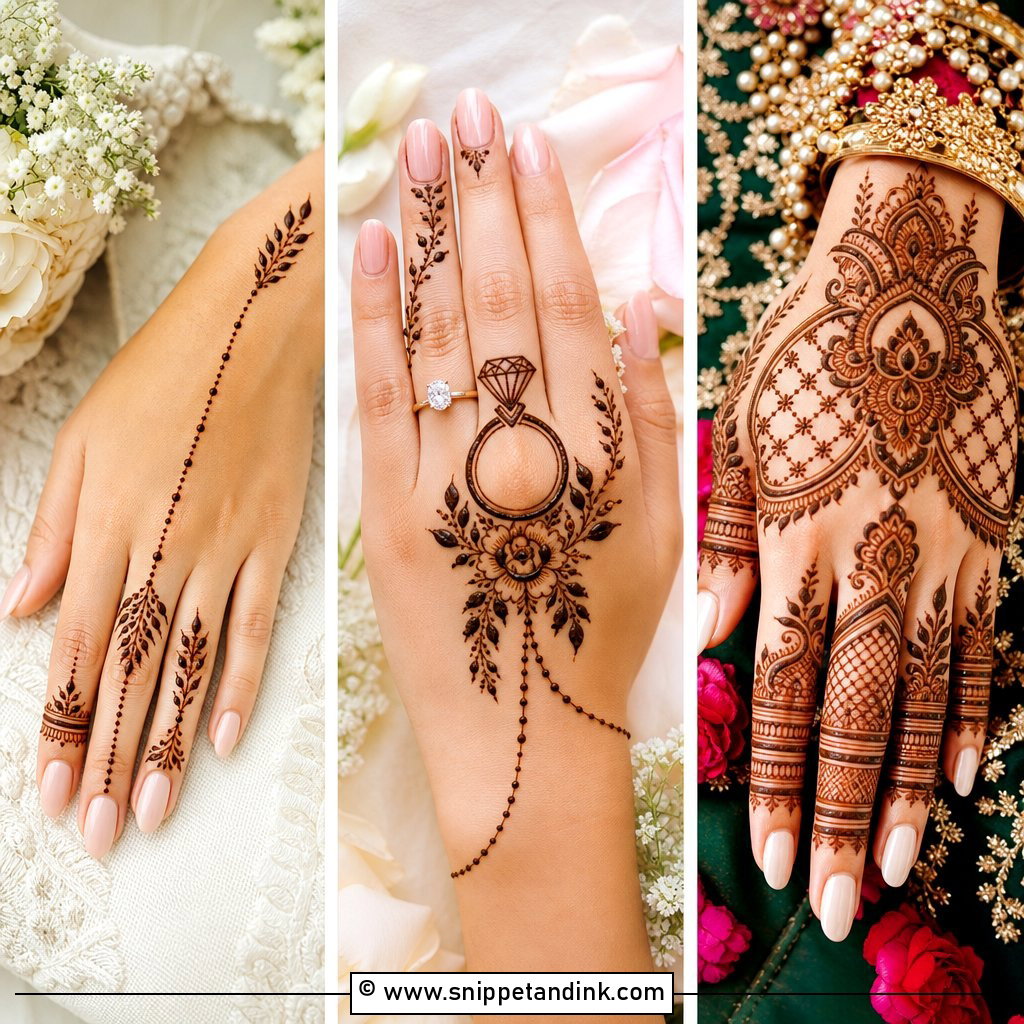
Thin circular bands stacked like rings, decorated with dots, mini leaves or tiny arches, turn henna into jewellery. One finger can take a “statement ring” with a small flower or mandala at the base. I keep these bands a little away from where you’ll wear real rings; metal rubbing on fresh stain in the first day can dull it, and a henna ring under a gold band just disappears. Evenly spaced bands on the index and middle fingers matter most, since those are the ones the eye checks.
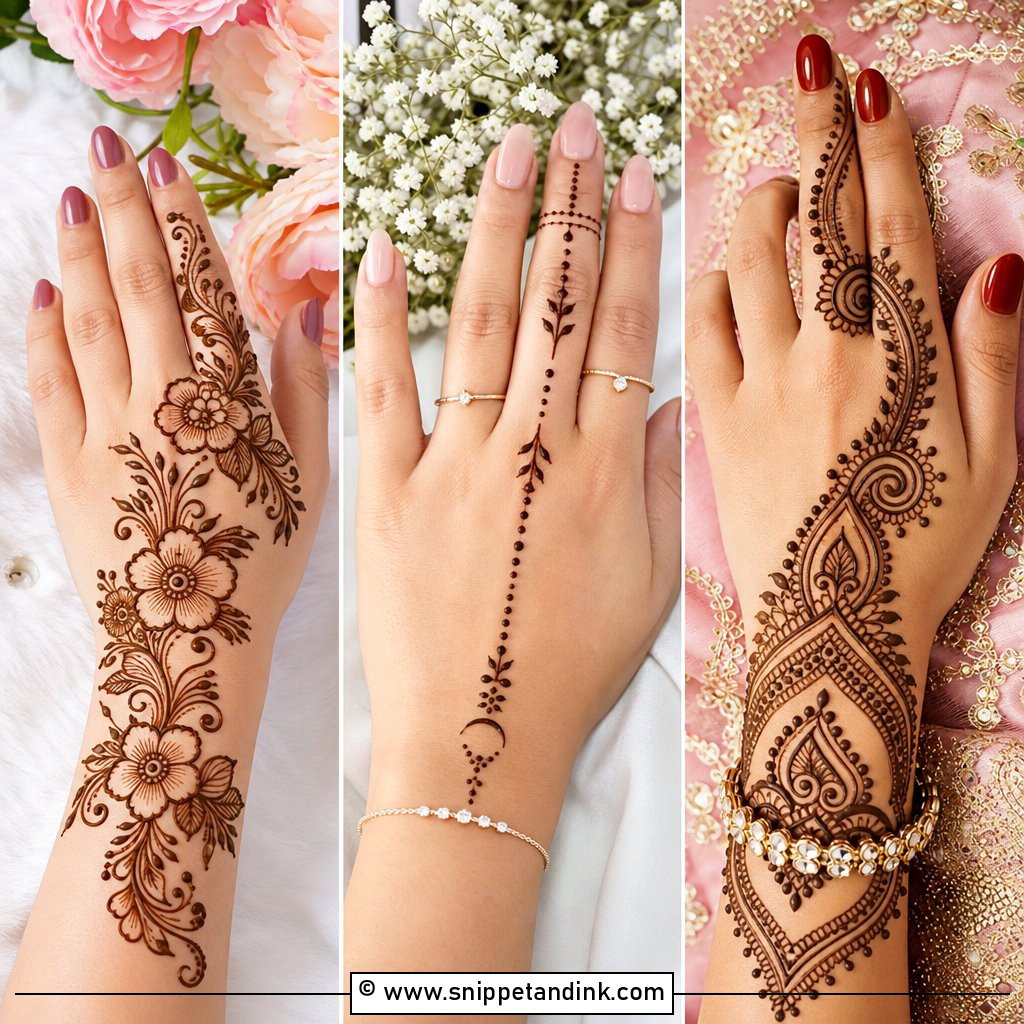
16. Finger Mehndi Design With Bracelet
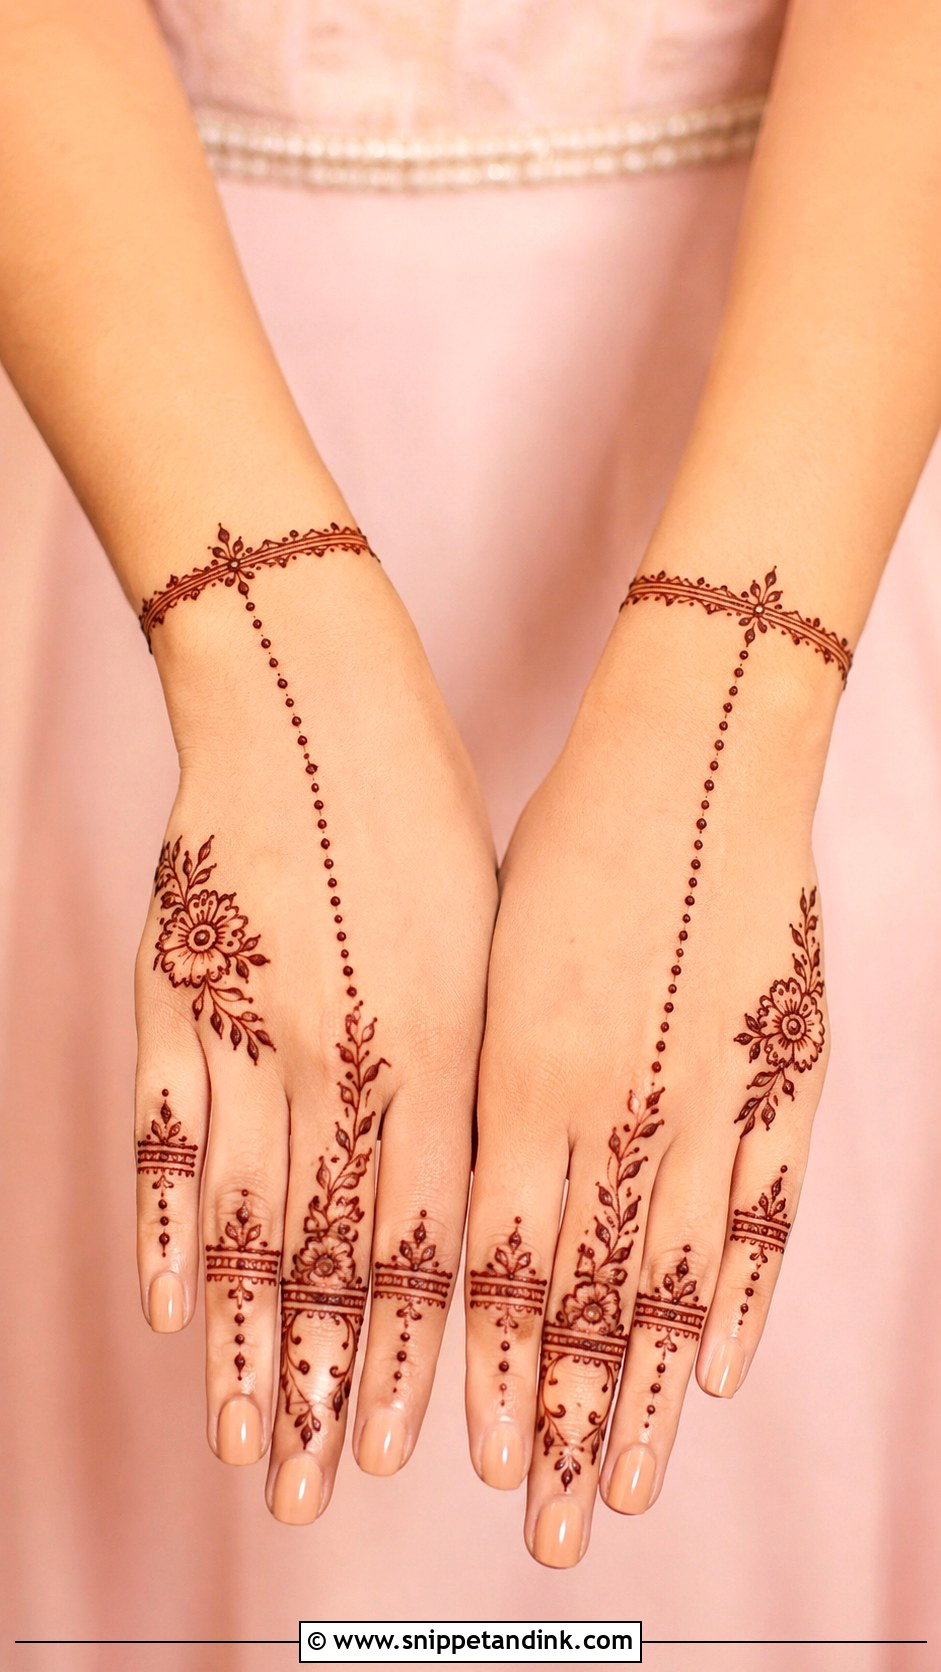
Here a light chain or vine runs from the middle finger down to a slim wrist border, giving a hand-harness effect. The fingers stay simple with bands, dots and leaves. Balance is the whole job: bold fingers need a thin bracelet, and very minimal fingers can take a small floral cuff. I check the chain with the hand relaxed and with the fist closed, because a line that looks straight on a flat hand can kink once the knuckles bend. It’s a favourite for bridesmaids and guests.
17. Finger Mehndi Design For Short Fingers
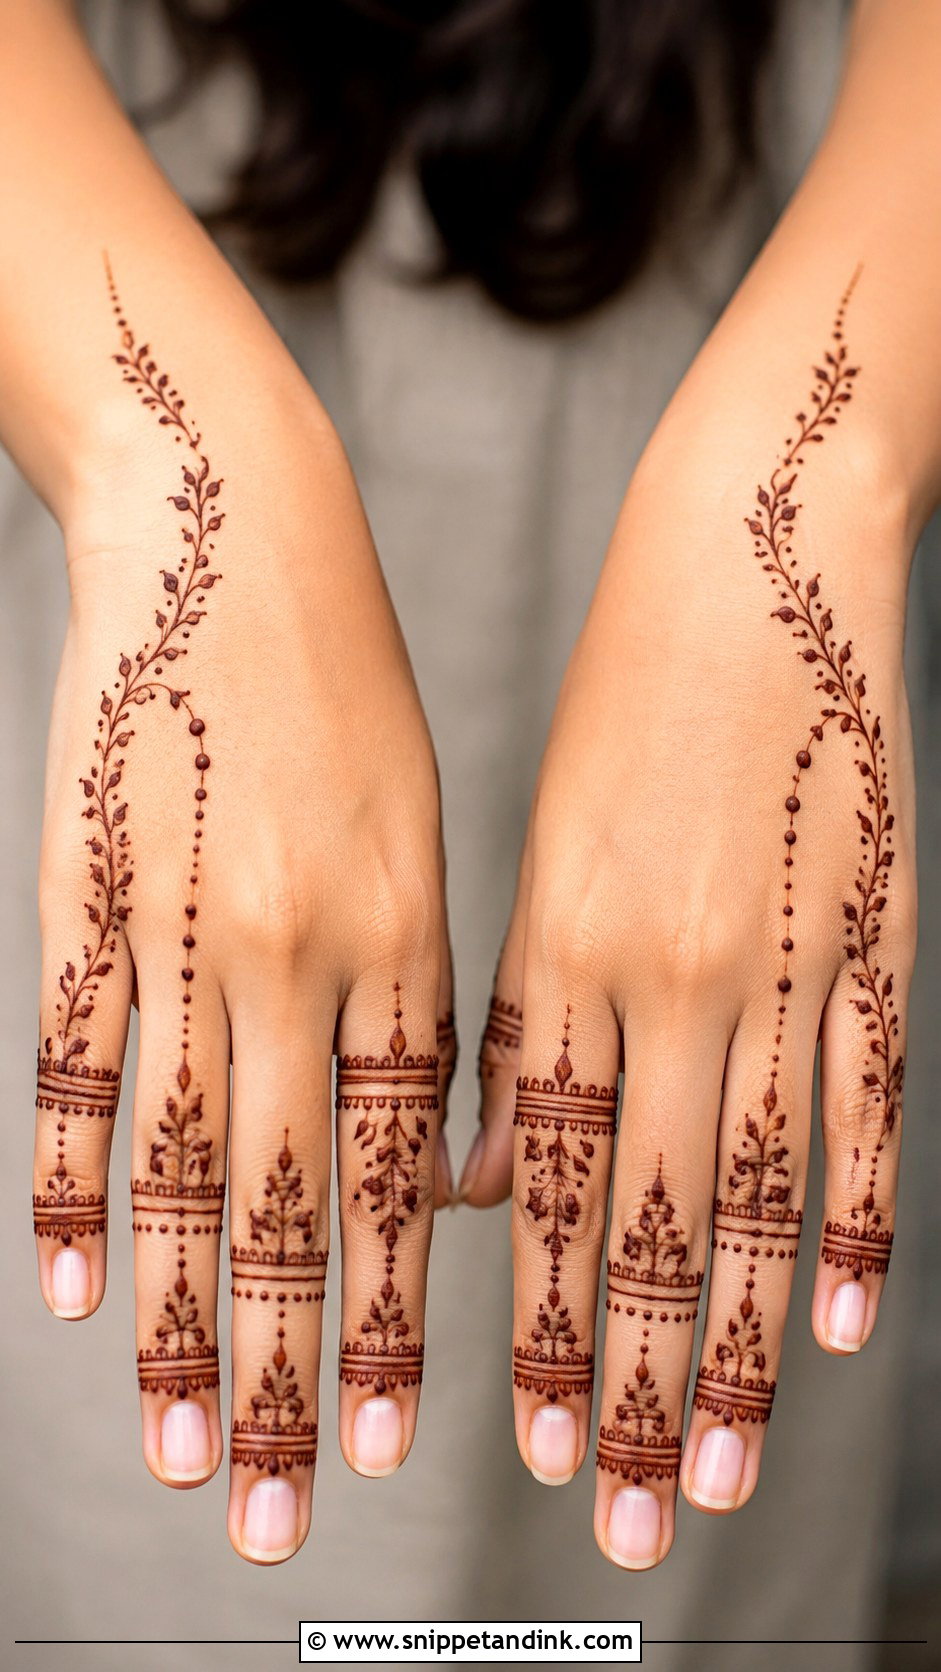
Thick horizontal blocks visually chop short fingers, so for petite hands I switch to vertical vines, slim side trails and narrow bands with gaps between them. A single line running from near the nail toward the knuckle draws the eye lengthwise. I keep fingertip work light and avoid filling every finger. Small leaves, dots and fine curves do the job; the aim is to stretch everything upward.
18. Finger Mehndi Design For Long Fingers
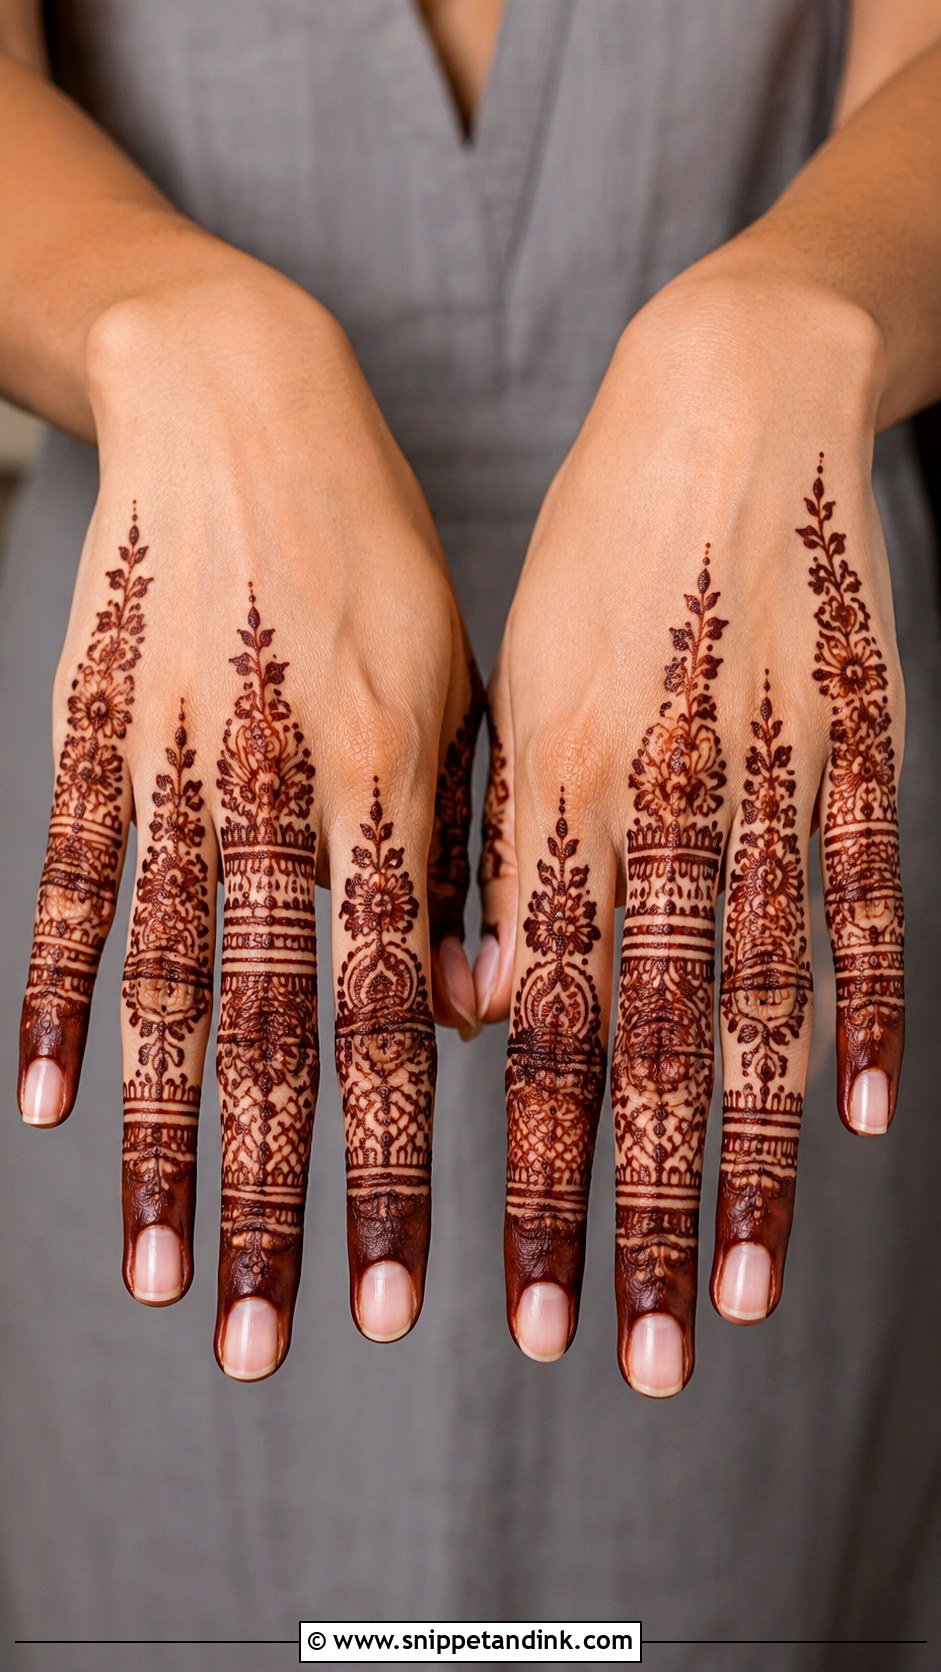
Long fingers can carry more: layered bands, tiny floral chains and dotted sections from tip to base, even a thin jaali panel or a small paisley between bands. I usually give the middle and ring fingers fuller work and keep the thumb and little finger lighter, which creates a natural focal point. Proportion is the catch. Big blank gaps in the middle section of a long finger look unfinished, so I fill that zone with a band or a dotted chain.
19. Finger Mehndi Design For Kids
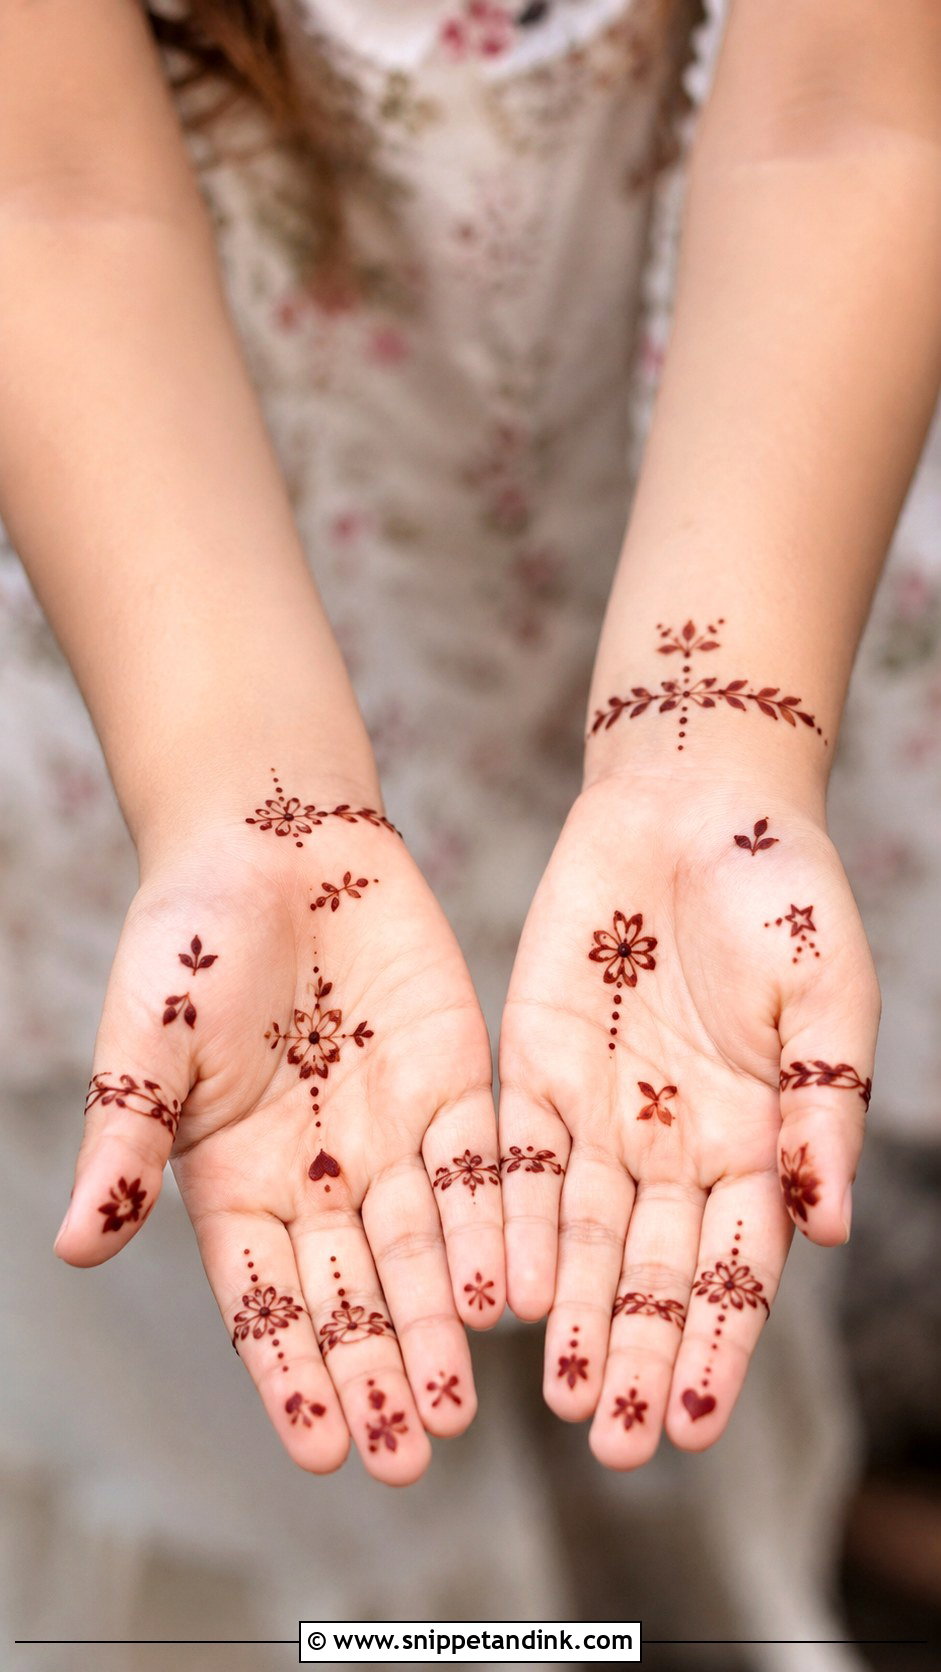
With children I design for the wiggle. They won’t sit still for long, so I use tiny flowers, dots, hearts, stars and leafy rings that go on quickly, cover two or three fingers, and keep the palm almost empty to avoid smudges. Paste near the nails spreads easily on small fingers, so I stay back from the tips. Use only natural henna on kids, never anything sold as “black henna”, and do a small patch first if their skin is sensitive.
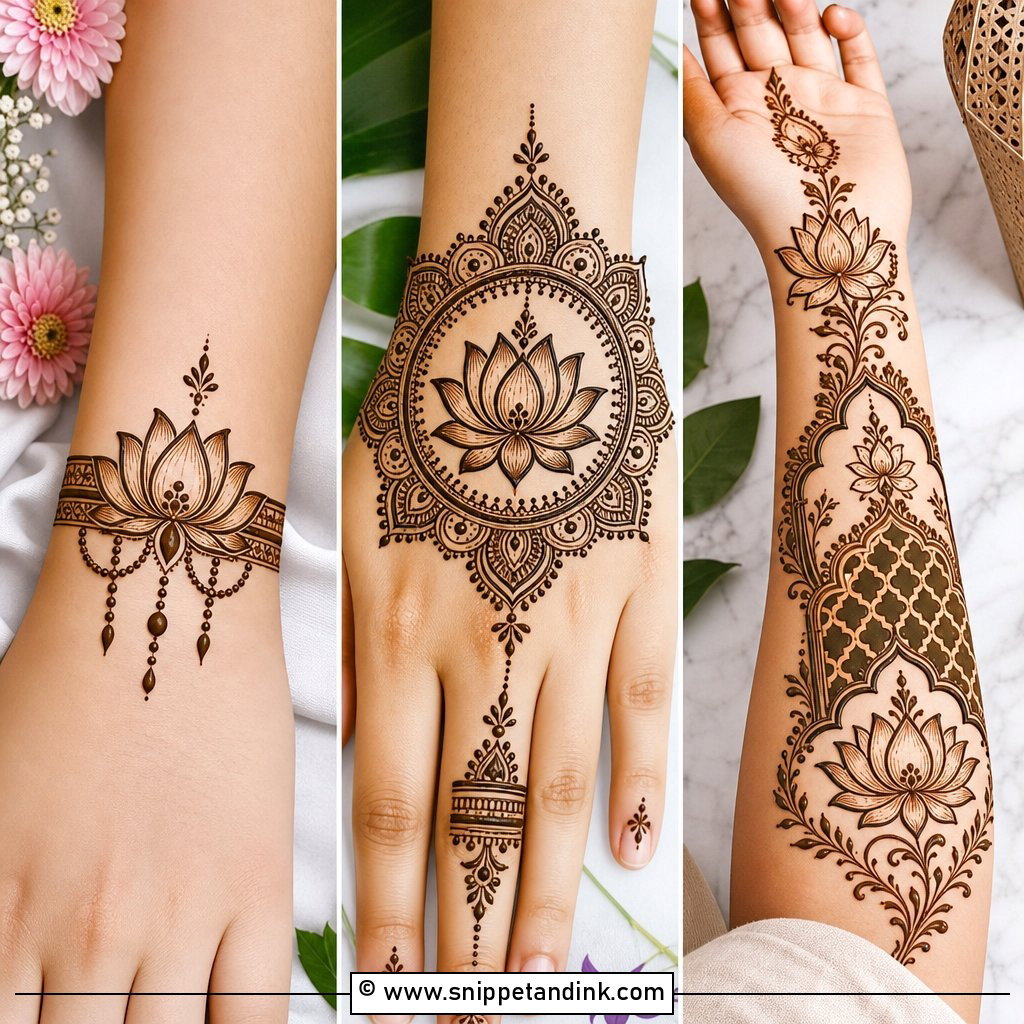
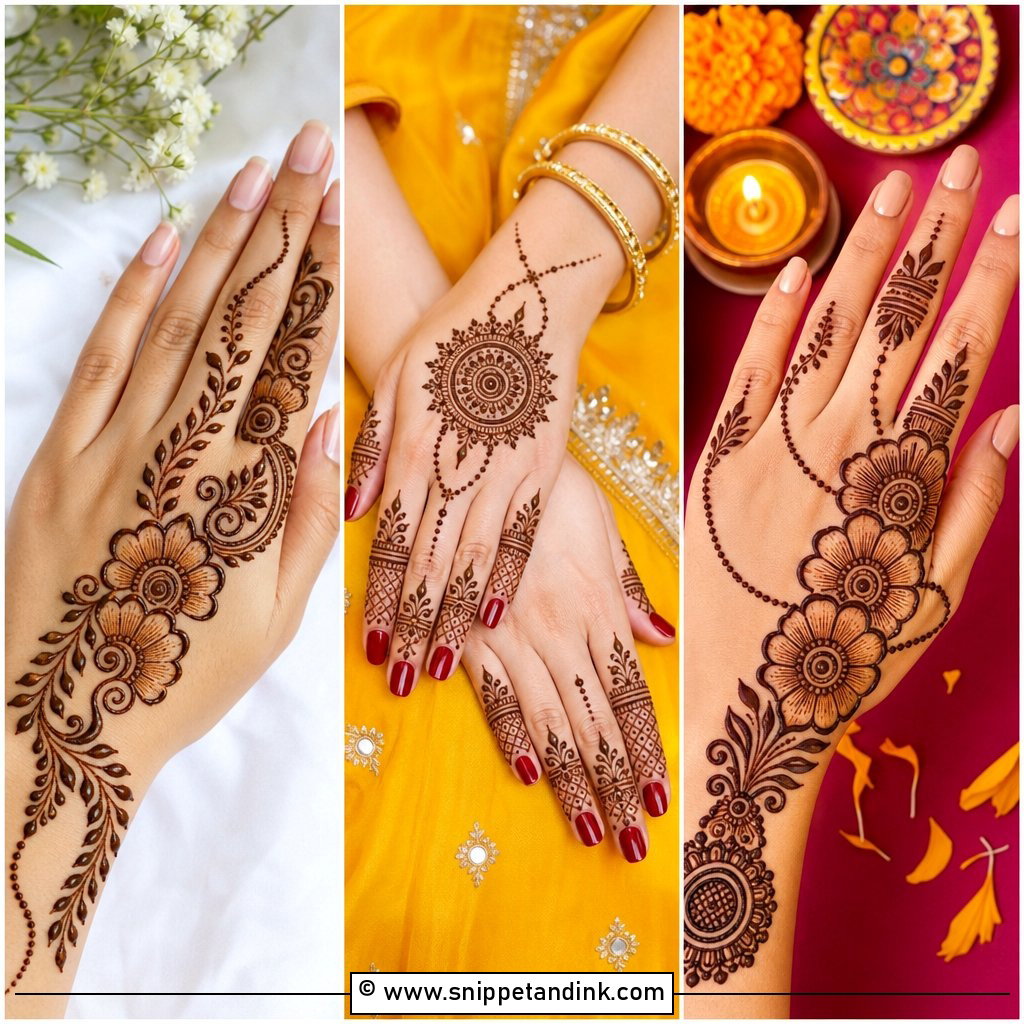
20. Finger Mehndi Design For Eid
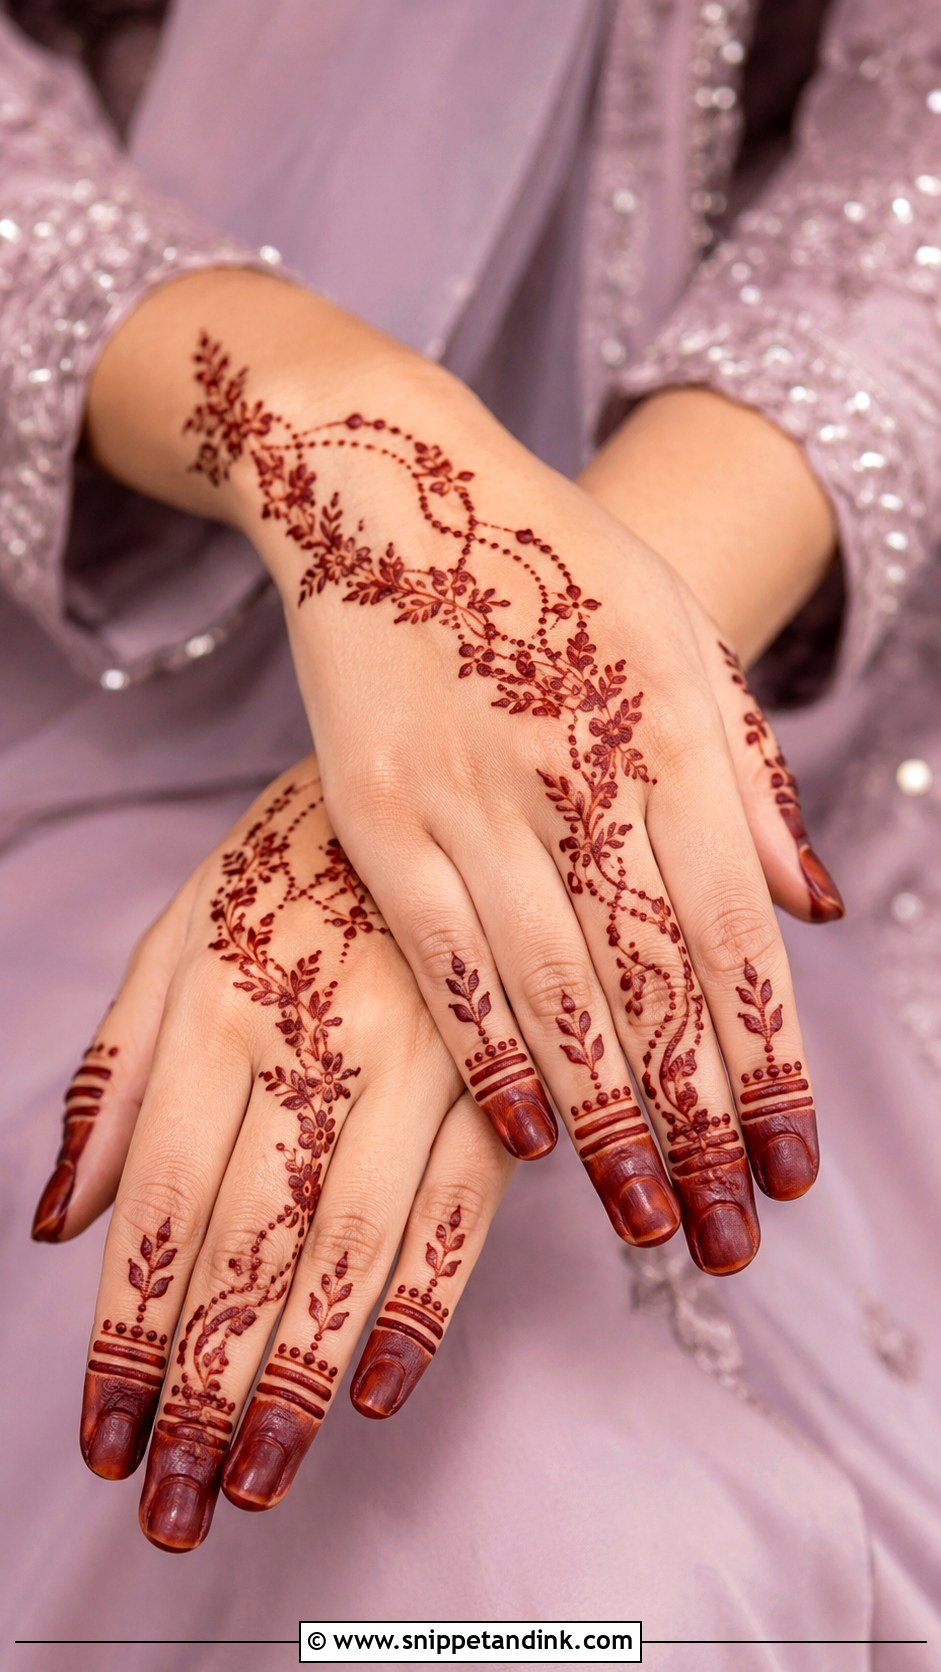
For Eid I go for Arabic-inspired vines, dotted rings and small floral trails across the fingers, with fingertip caps and a leafy band beneath. A small crescent curve near the wrist is a nice nod if you want it. Most Eid appointments happen the night before, so this design is quick on purpose. Clean spaces between motifs let the stain read clearly in the morning, and it sits comfortably with bangles and rings.
21. Finger Mehndi Design For Diwali
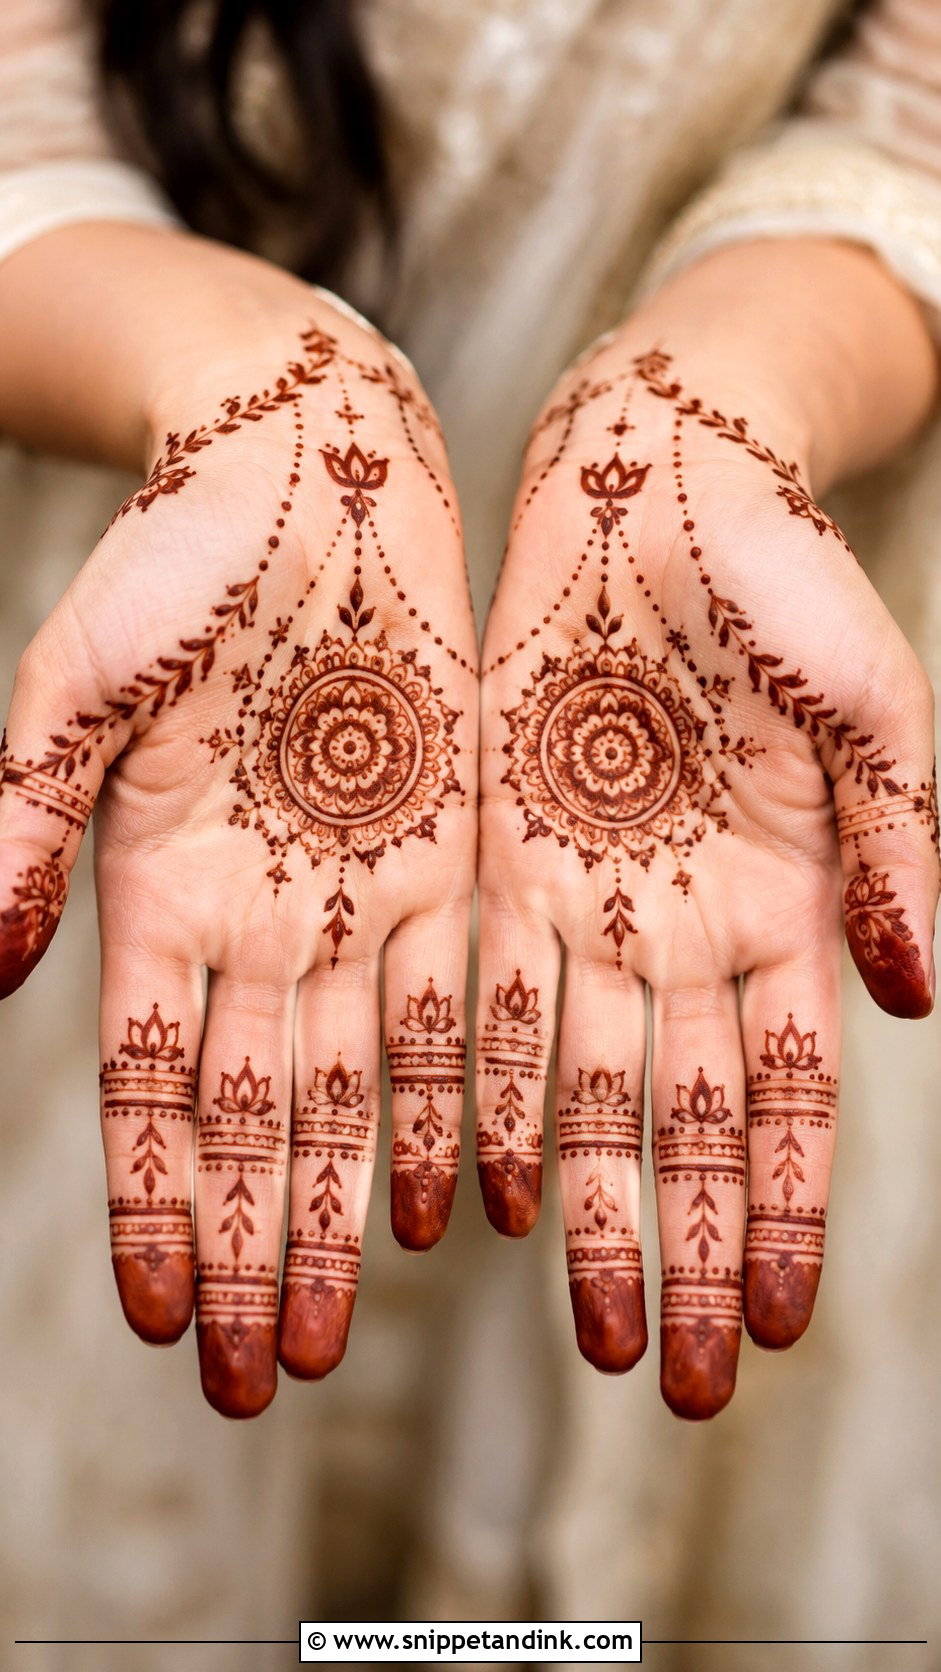
Diwali finger mehndi can take tiny mandalas, dotted chains and leaf trails, with a small diya-shaped curve if you’d like a festival detail. I cover the fingers evenly and leave the palm mostly open, which keeps it clean next to colourful glass bangles. Symmetry matters more than usual because both hands tend to be photographed together over the diyas. If you’re doing your own, repeat one band-and-dot pattern on every finger and it’ll match.
22. Finger Mehndi Design For Wedding Guest
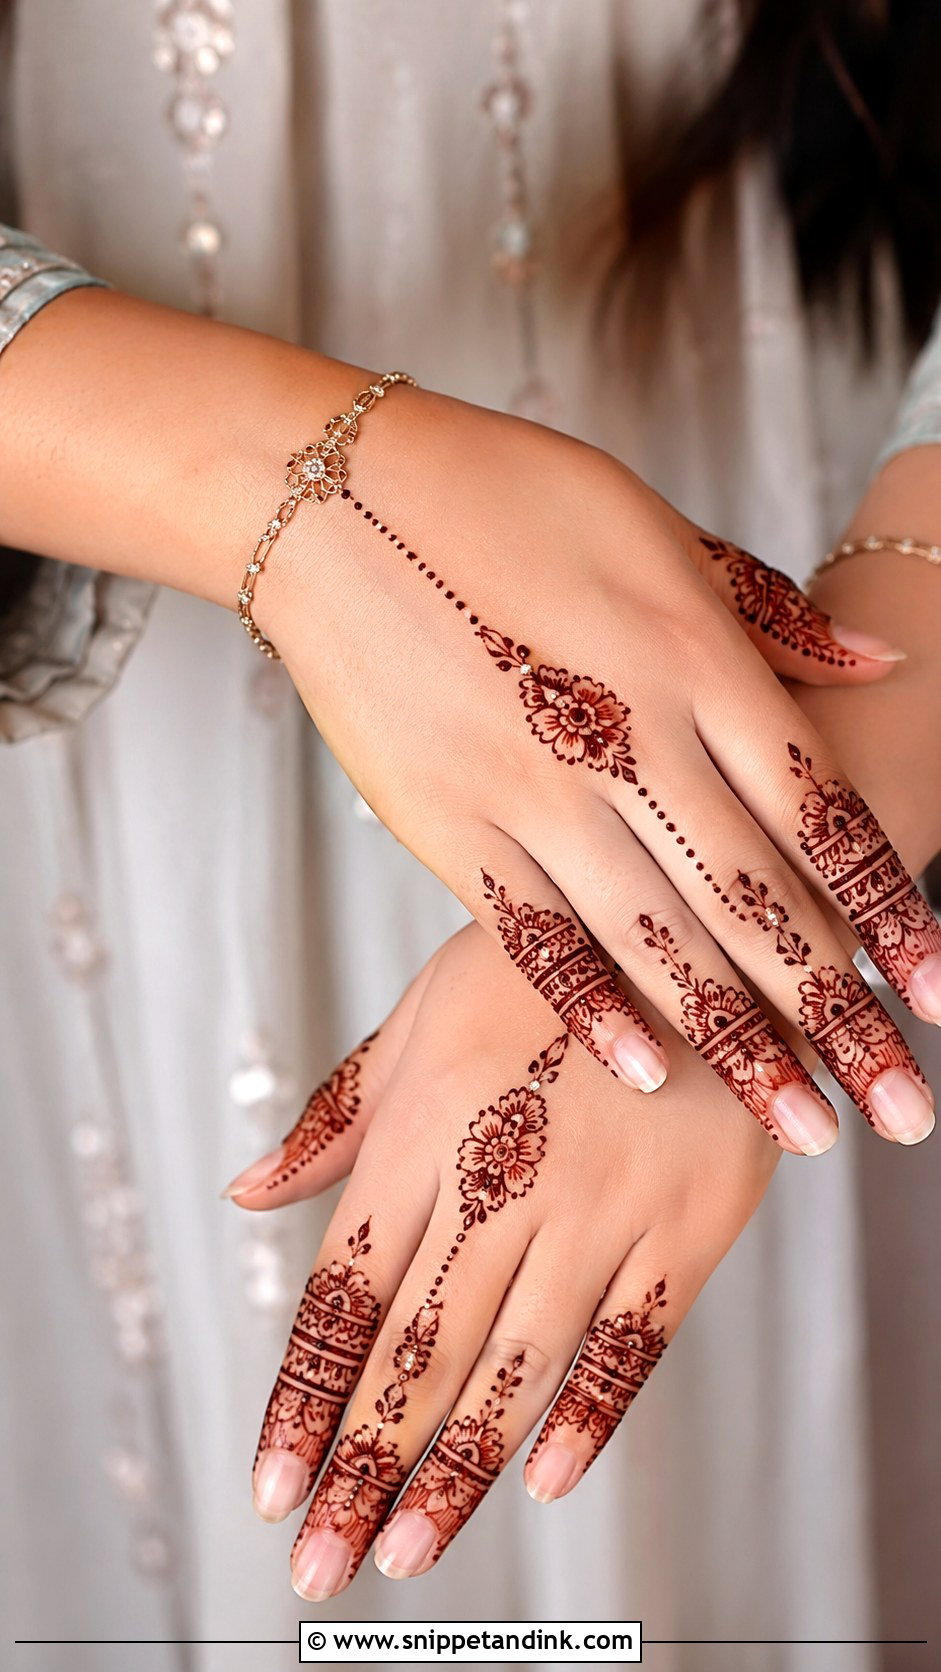
Guest mehndi should look dressed without looking bridal. I usually suggest a back hand layout with decorated fingers, a thin wrist bracelet and a small connecting chain, finished with tiny flowers and leaf strokes. Leaving the palm empty is partly etiquette: in many families the full, dense palm is the bride’s look. A slightly richer ring finger gives you a jewellery effect for sangeet, mehndi night and the reception.
23. Finger Mehndi Design For Bridesmaid
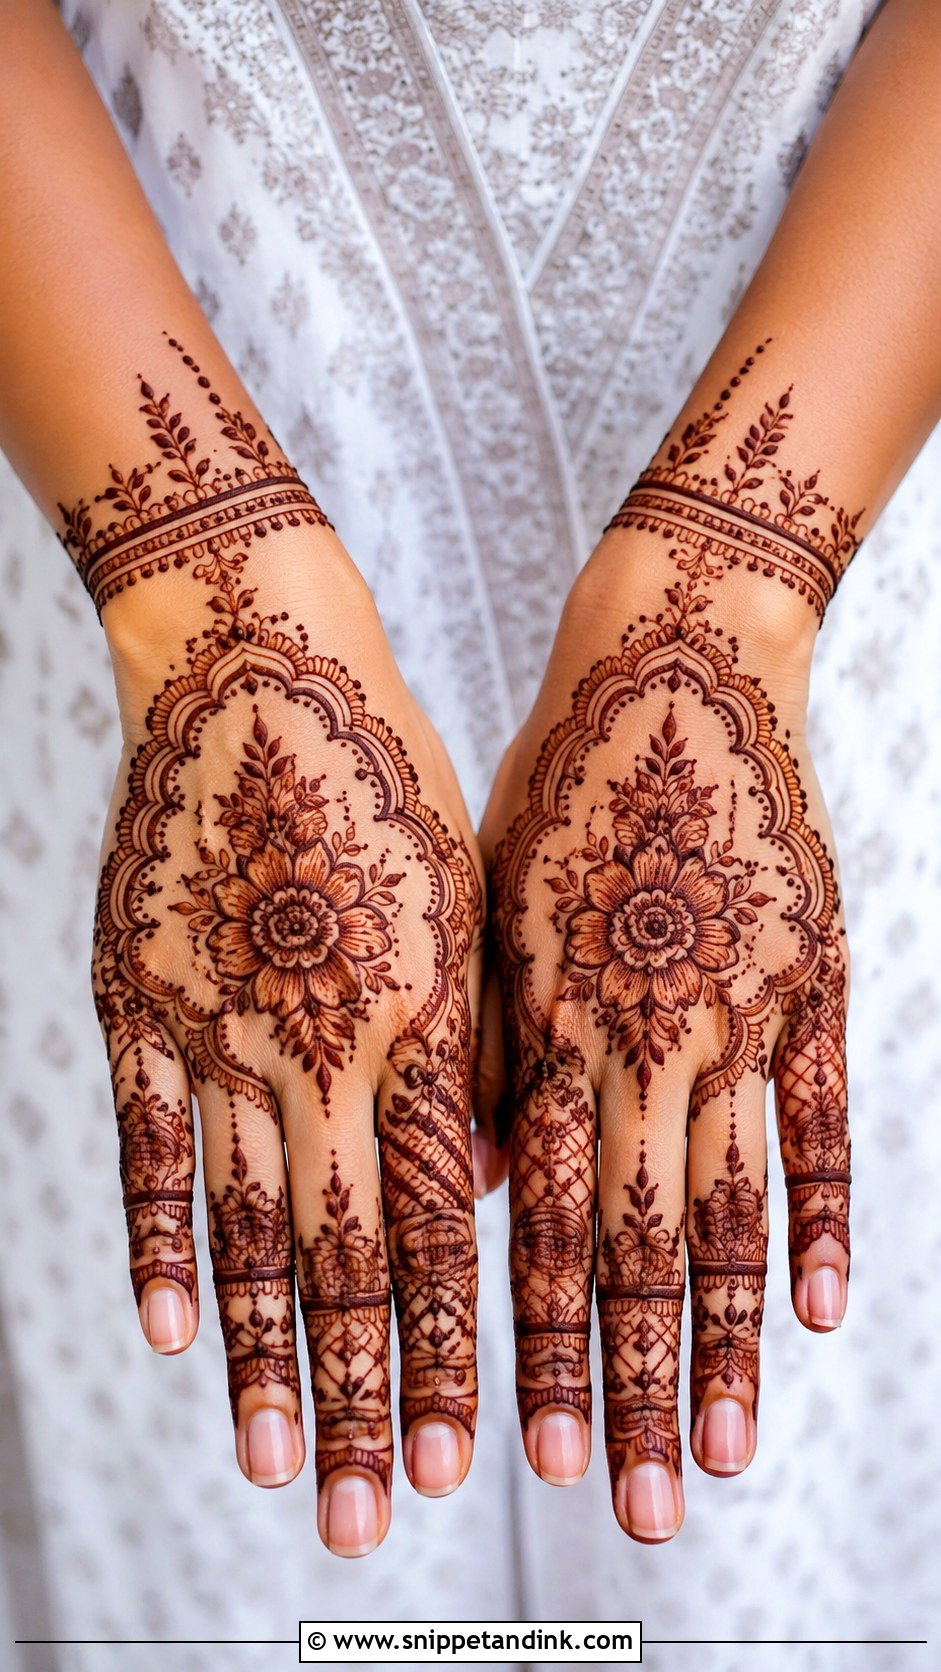
Finger mehndi design for bridesmaid can go a step past a guest look: coordinated bands and floral vines on all fingers, a slim wrist bracelet, and a small mandala at the back of the hand. Bridesmaids are carrying things, pinning dupattas and hugging people all evening, so I keep heavy paste off the palm. When I do a group, I match the layout on both hands and keep motifs consistent across the girls, which makes group photos look planned.
24. Finger Mehndi Design For Engagement
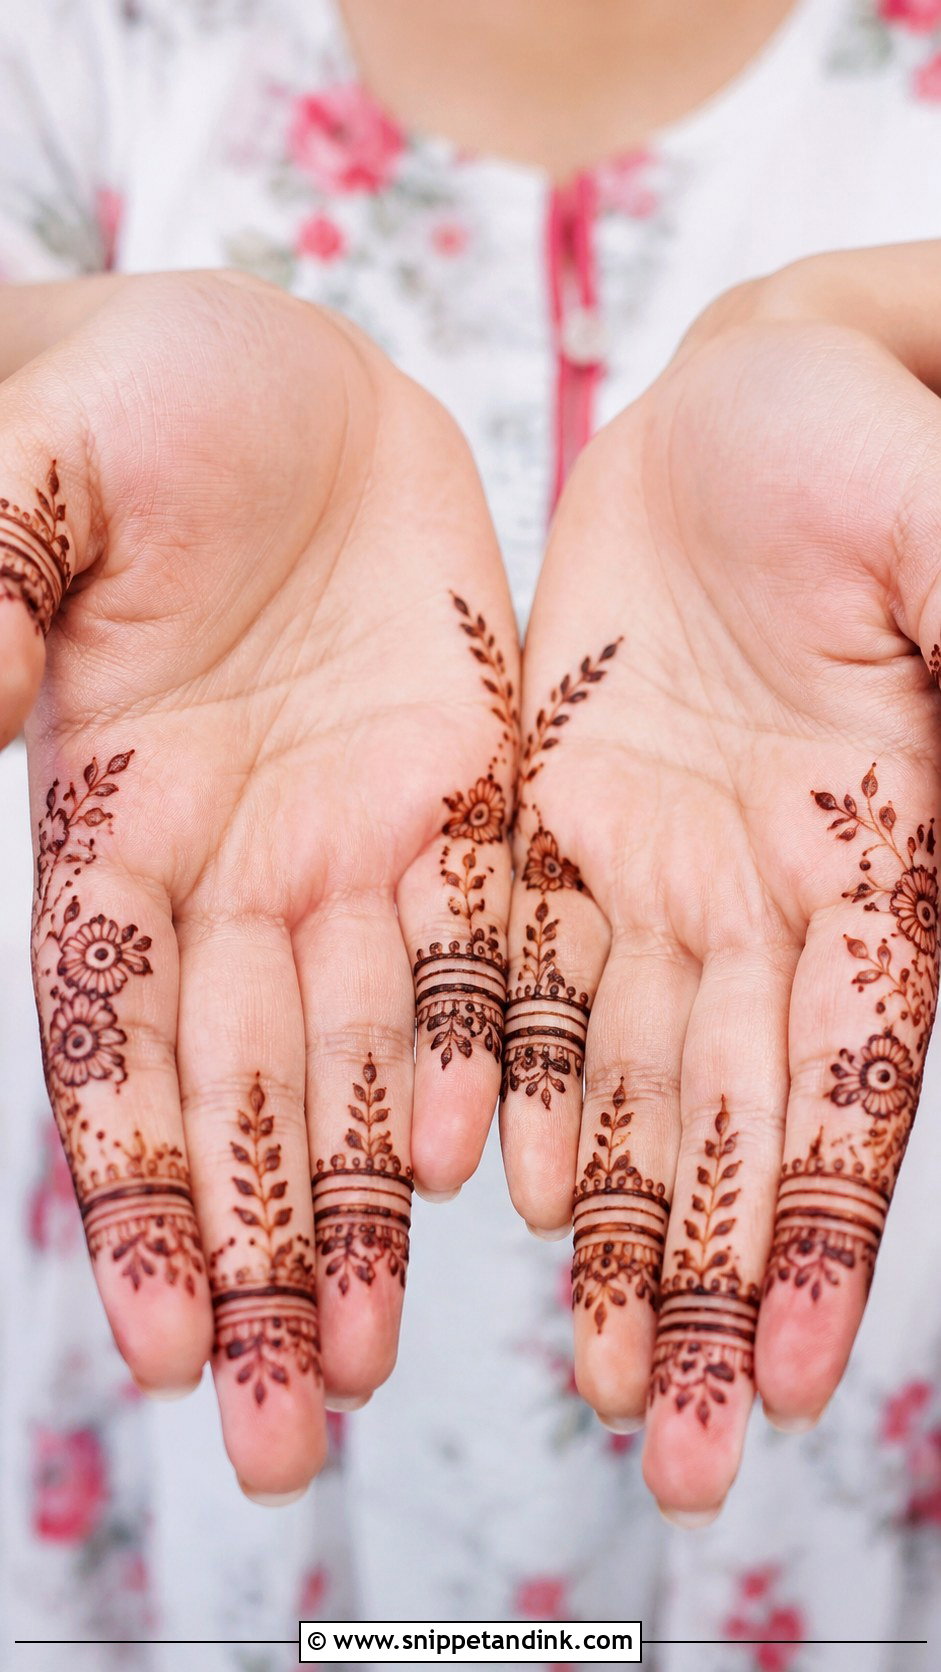
At an engagement, every camera goes to the ring finger. I give it a fine floral band set slightly below where the ring will sit, so the stone is framed rather than covered, and keep the other fingers lighter with dots and slim lines. A small side trail on the back hand balances it. Open, fine detail around that finger photographs much better than dense fill, which can read as a dark smudge next to a diamond.
25. Finger Mehndi Design For School Function
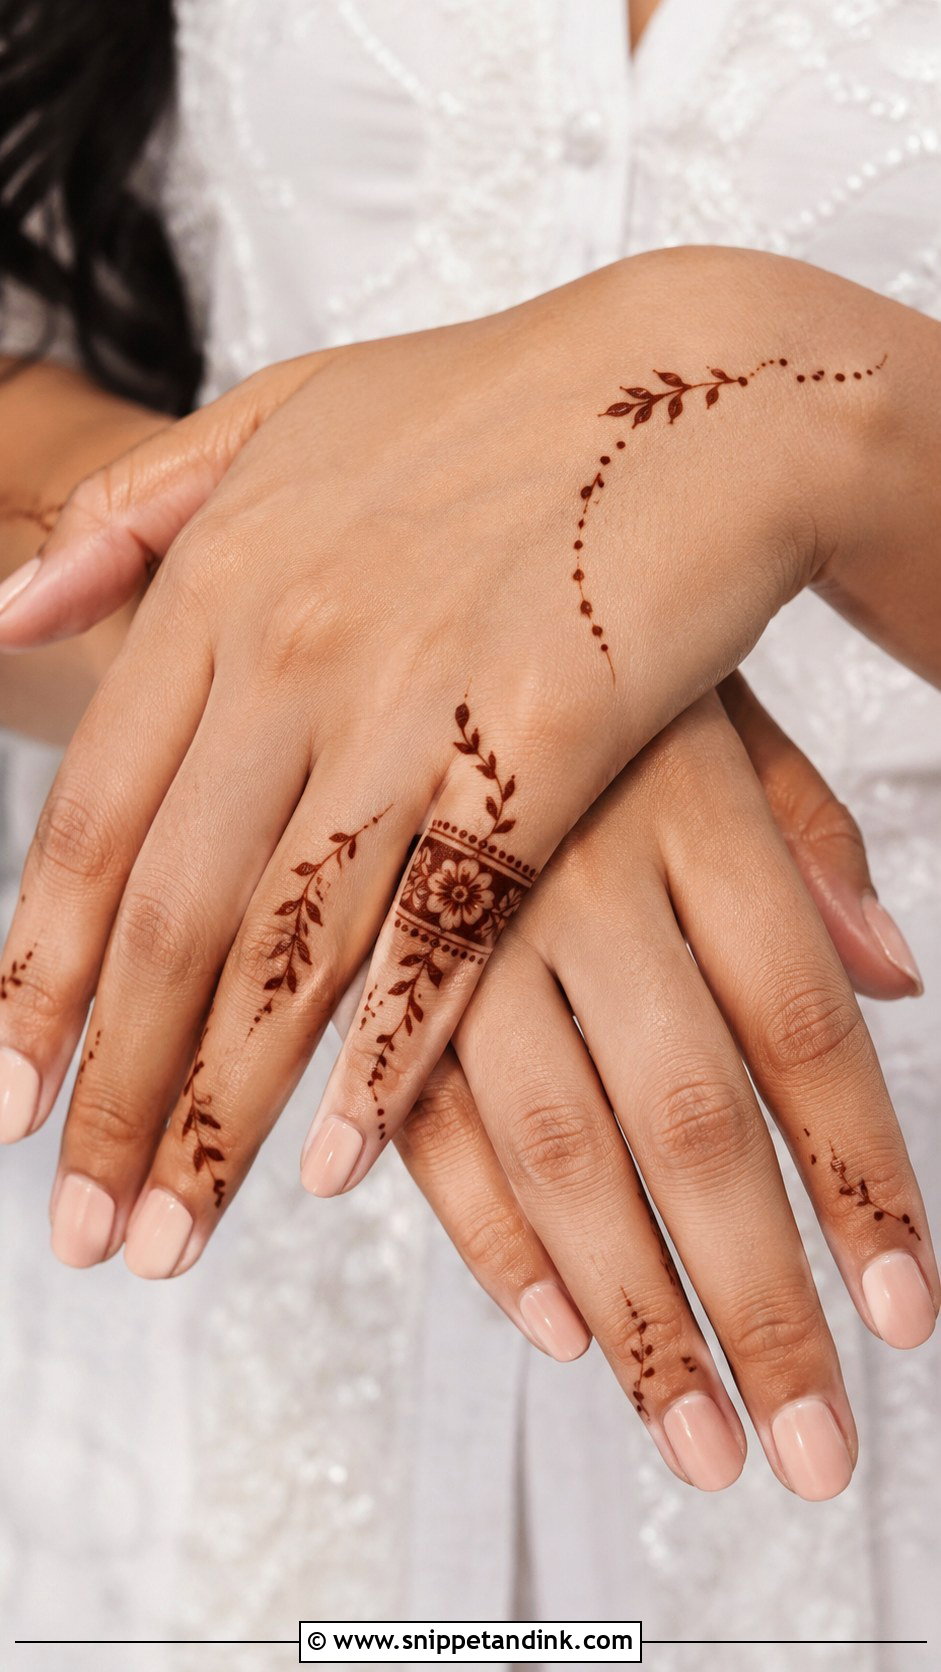
For school functions I keep it modest: dots, slim bands and tiny flowers on two or three fingers, the rest of the hand clean. It’s fast, which helps when a queue of students is waiting. Some schools have rules about visible henna, so I avoid dark, dense fingertips; thin lines fade more gracefully over the following week. Festive enough for a cultural day, quiet enough for a classroom.
26. Finger Mehndi Design For Daily Wear
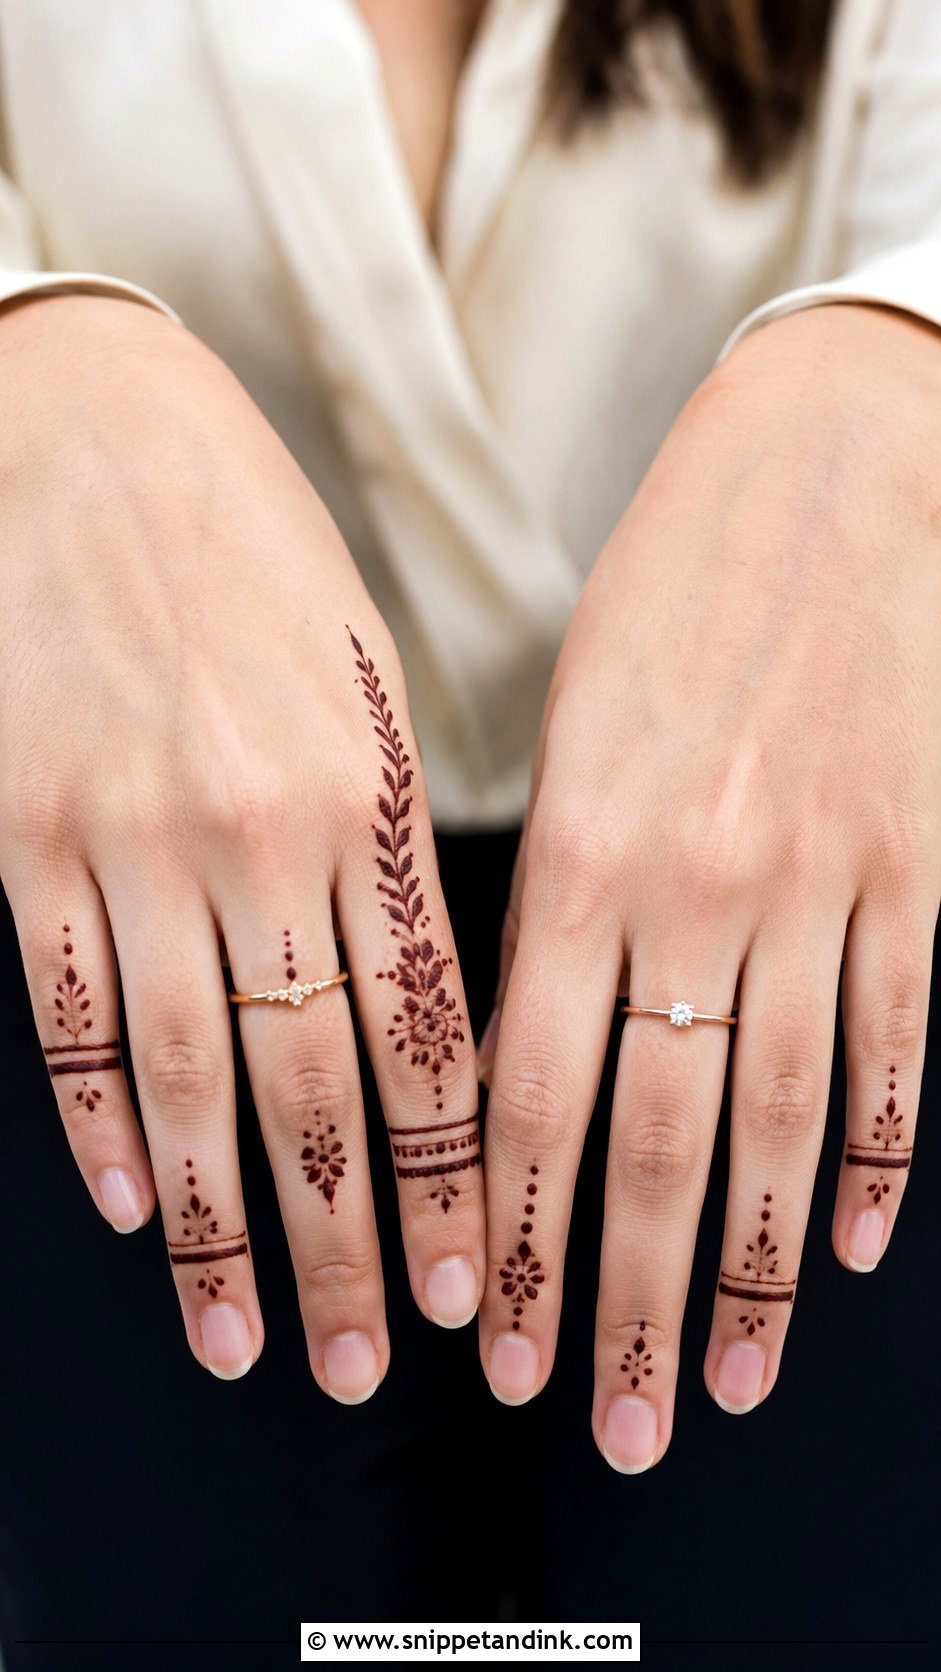
Daily-wear henna has to survive dishes, handwashing and keyboards. One or two fingers with a small vine, a few dots and narrow bands is enough, palm and wrist left bare. I avoid filled areas for this one because solid patches fade unevenly and look patchy by day five, while line work just softens. Kept close to the fingers, it looks more like nail art than a festival design.
27. Finger Mehndi Design For Office
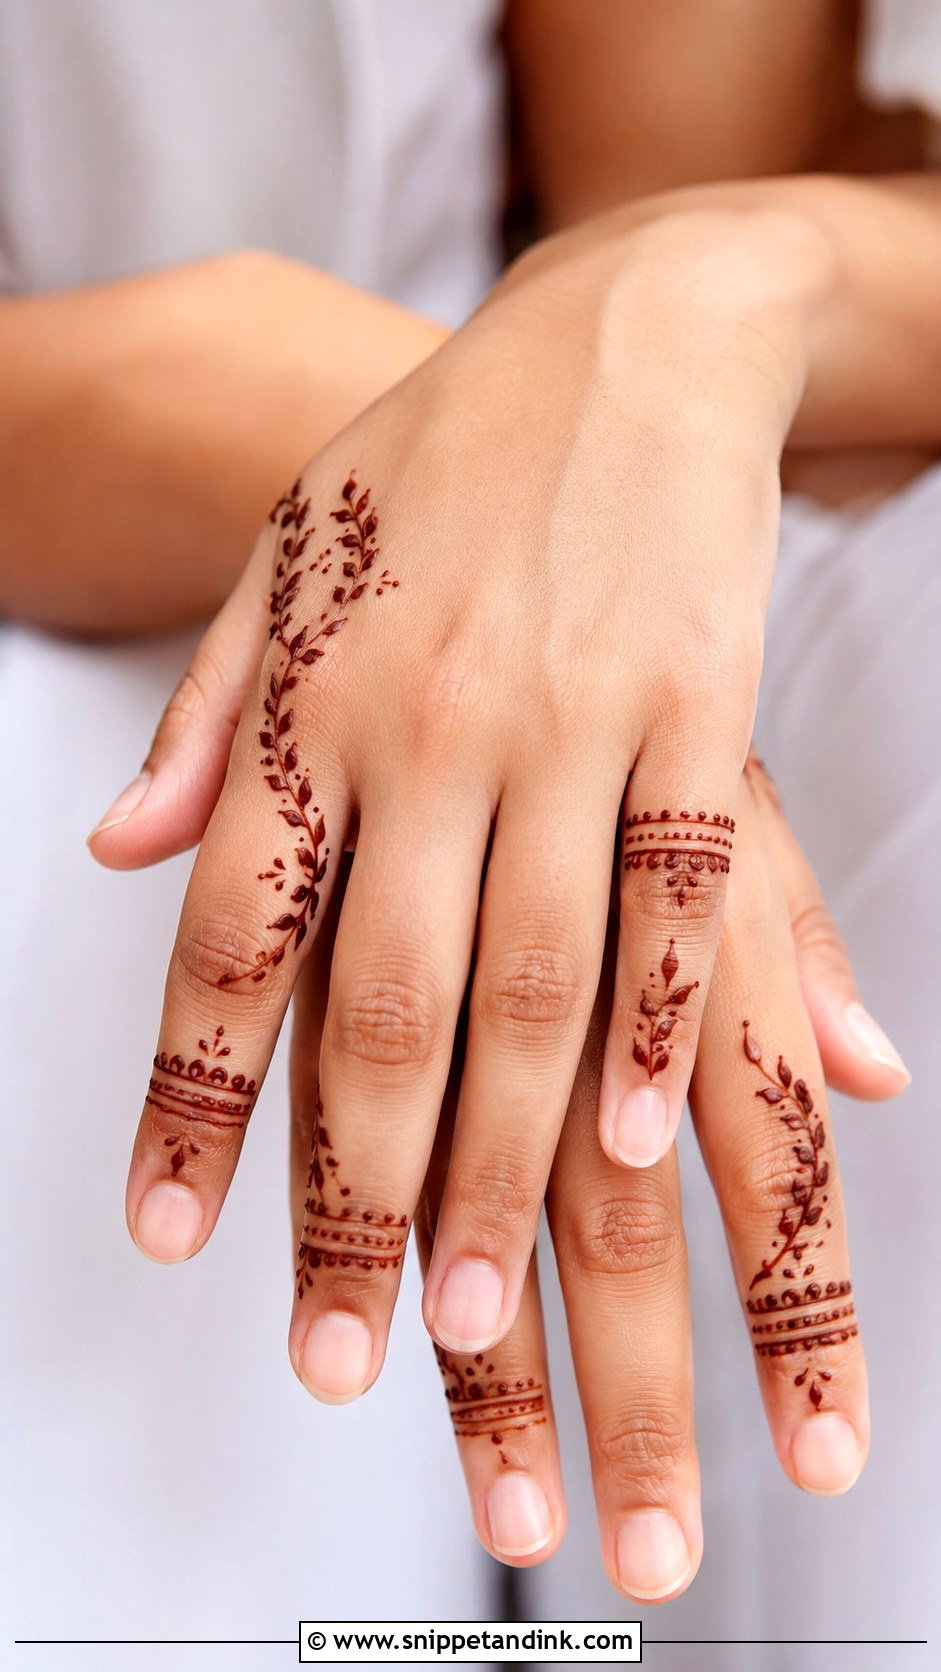
Office henna should be quiet. A minimal back hand pattern with thin finger rings, tiny dots and one slim leafy line is usually all I’d suggest. I keep it off the palm side entirely if you type or handle paper a lot; palm-side paste smudges at the desk, and the palm stain is the darkest and most noticeable. The thumb stays plain while the ring and index fingers carry the design. It works for a Diwali office party without feeling out of place on Monday.
28. Finger Mehndi Design For Festivals
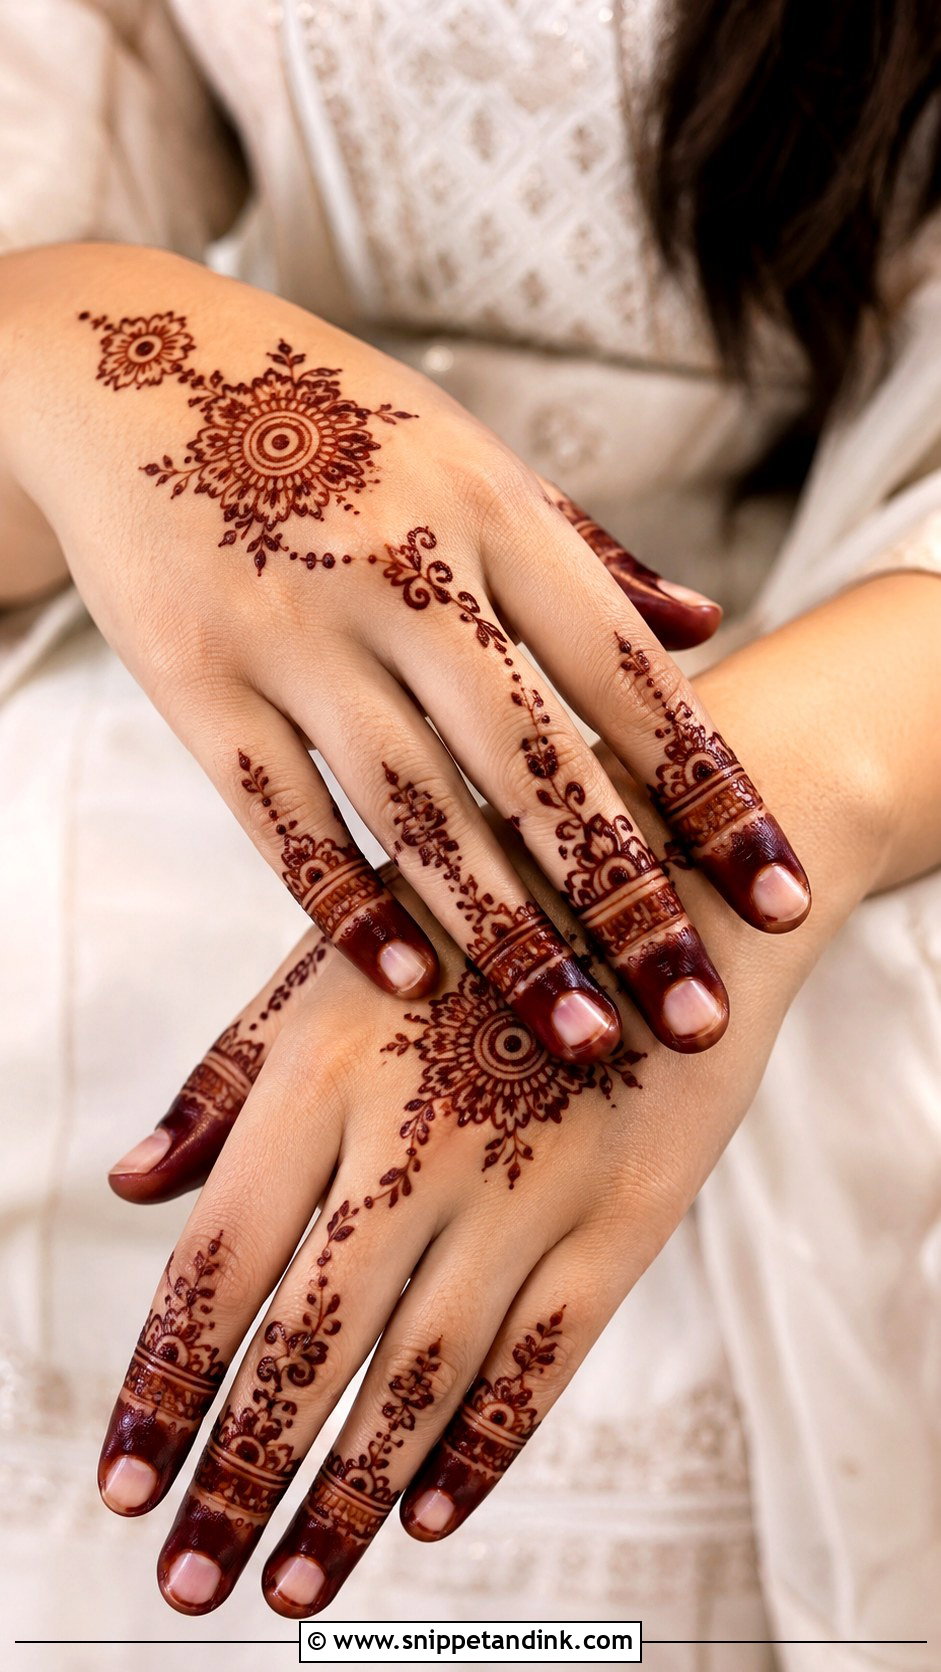
Festival finger henna can be a bit more cheerful: flowers, dots, bands and leafy trails mixed across all the fingers, with an optional small accent on the back of the hand. Indian mandala touches or Arabic vines both suit. I always test it from across the room, because a good festival design reads as complete at a distance. Fingertips matter most; they’re what people see when you’re passing sweets or holding a plate.
29. Finger Mehndi Design With Paisley
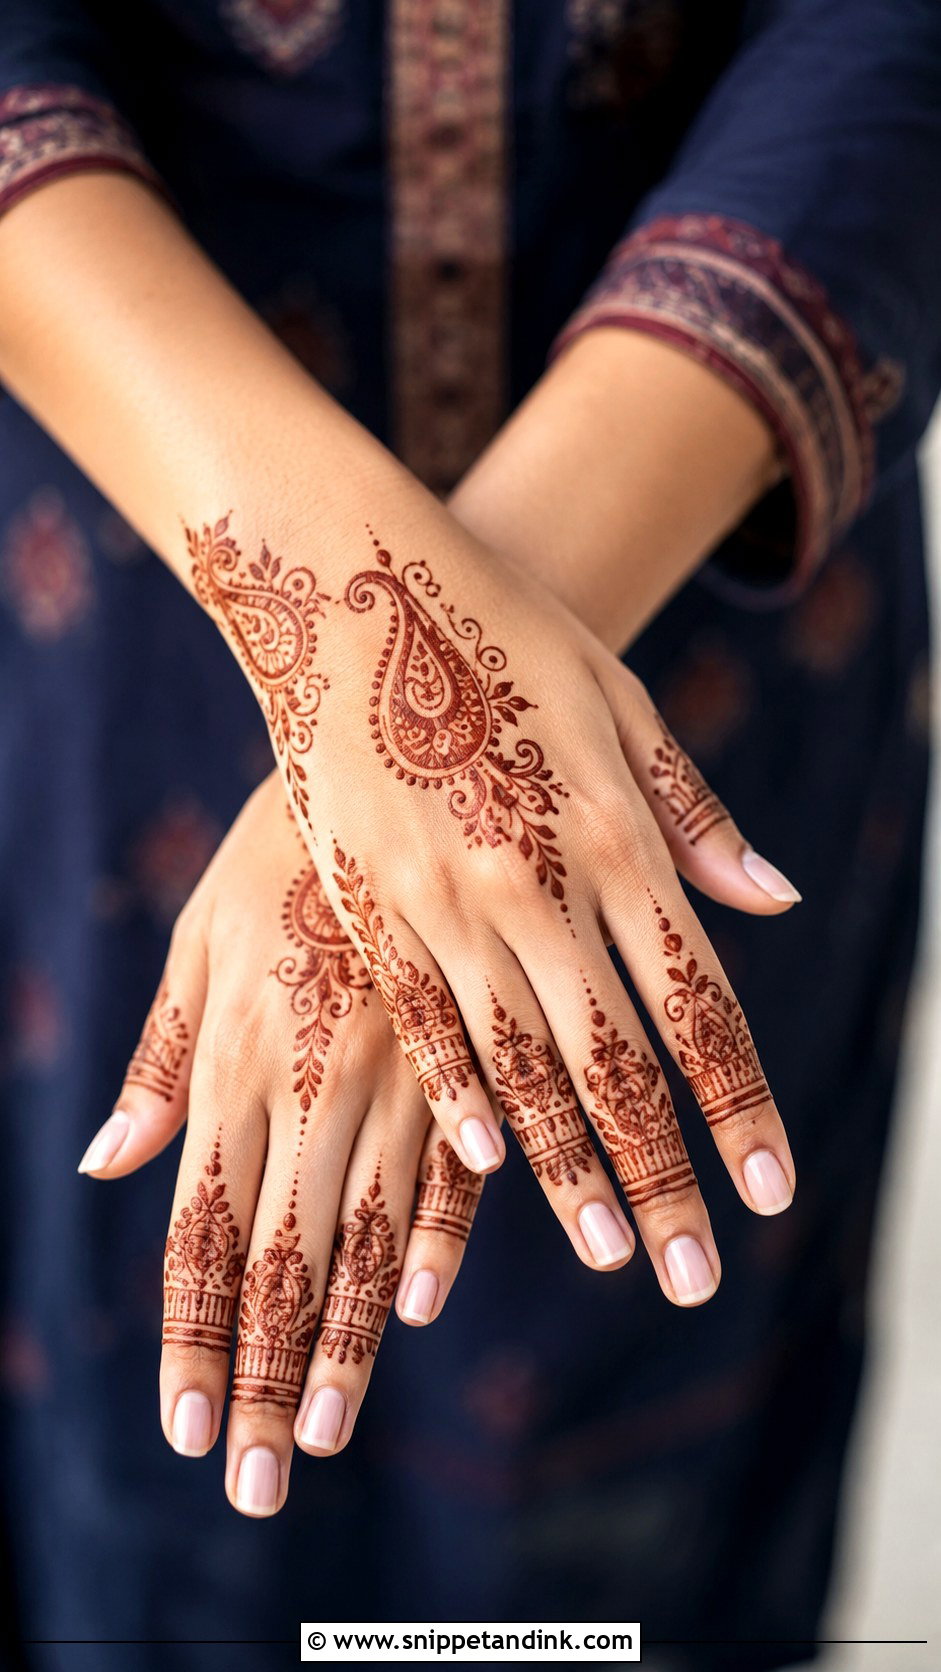
Paisley brings a traditional note into a small space. I tuck tiny paisleys at the finger base or along the side of the index finger and connect them with dots, small leaves and curved lines. Paisleys crowd quickly, so I keep them narrow and limit them to one feature finger, with matching bands on the rest. The curve gives the hand a sense of movement, which straight bands alone don’t.
30. Finger Mehndi Design With Peacock
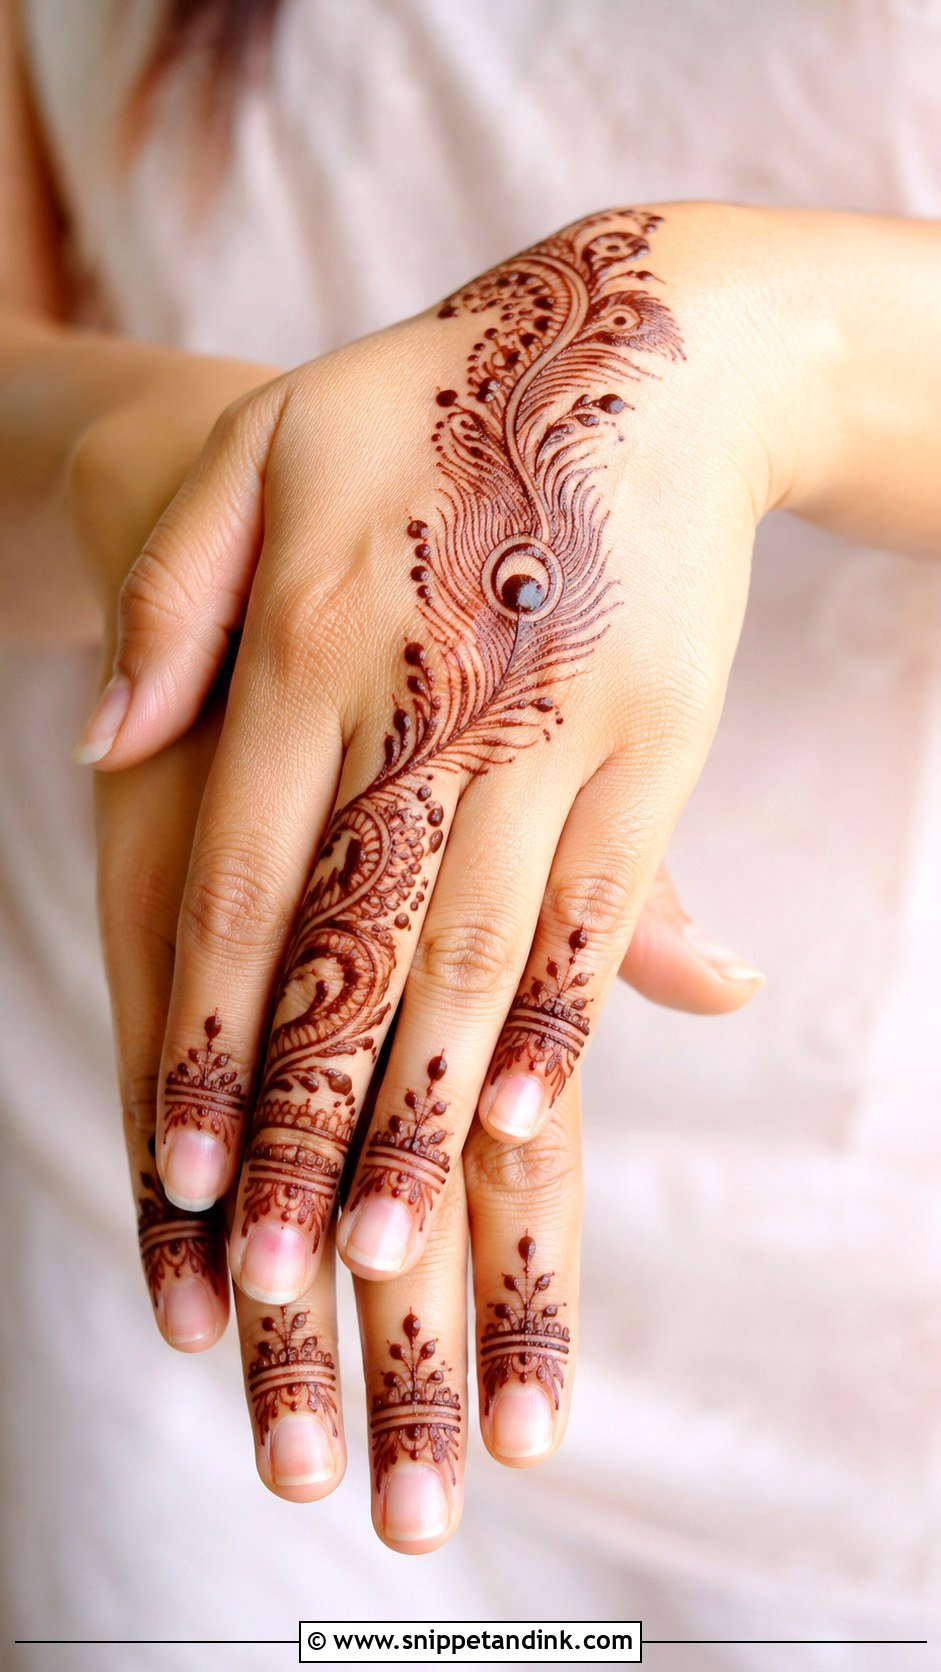
A full peacock won’t fit on a finger, so I use a single feather: one eye-shaped centre with a few fine strokes fanning out, placed on the ring finger. The other fingers get dots and curved bands. I avoid shading inside the feather because on such a small area it just goes solid when it stains. Kept clean, it gives a traditional, festive feel without needing a full-hand design.
31. Finger Mehndi Design With Heart
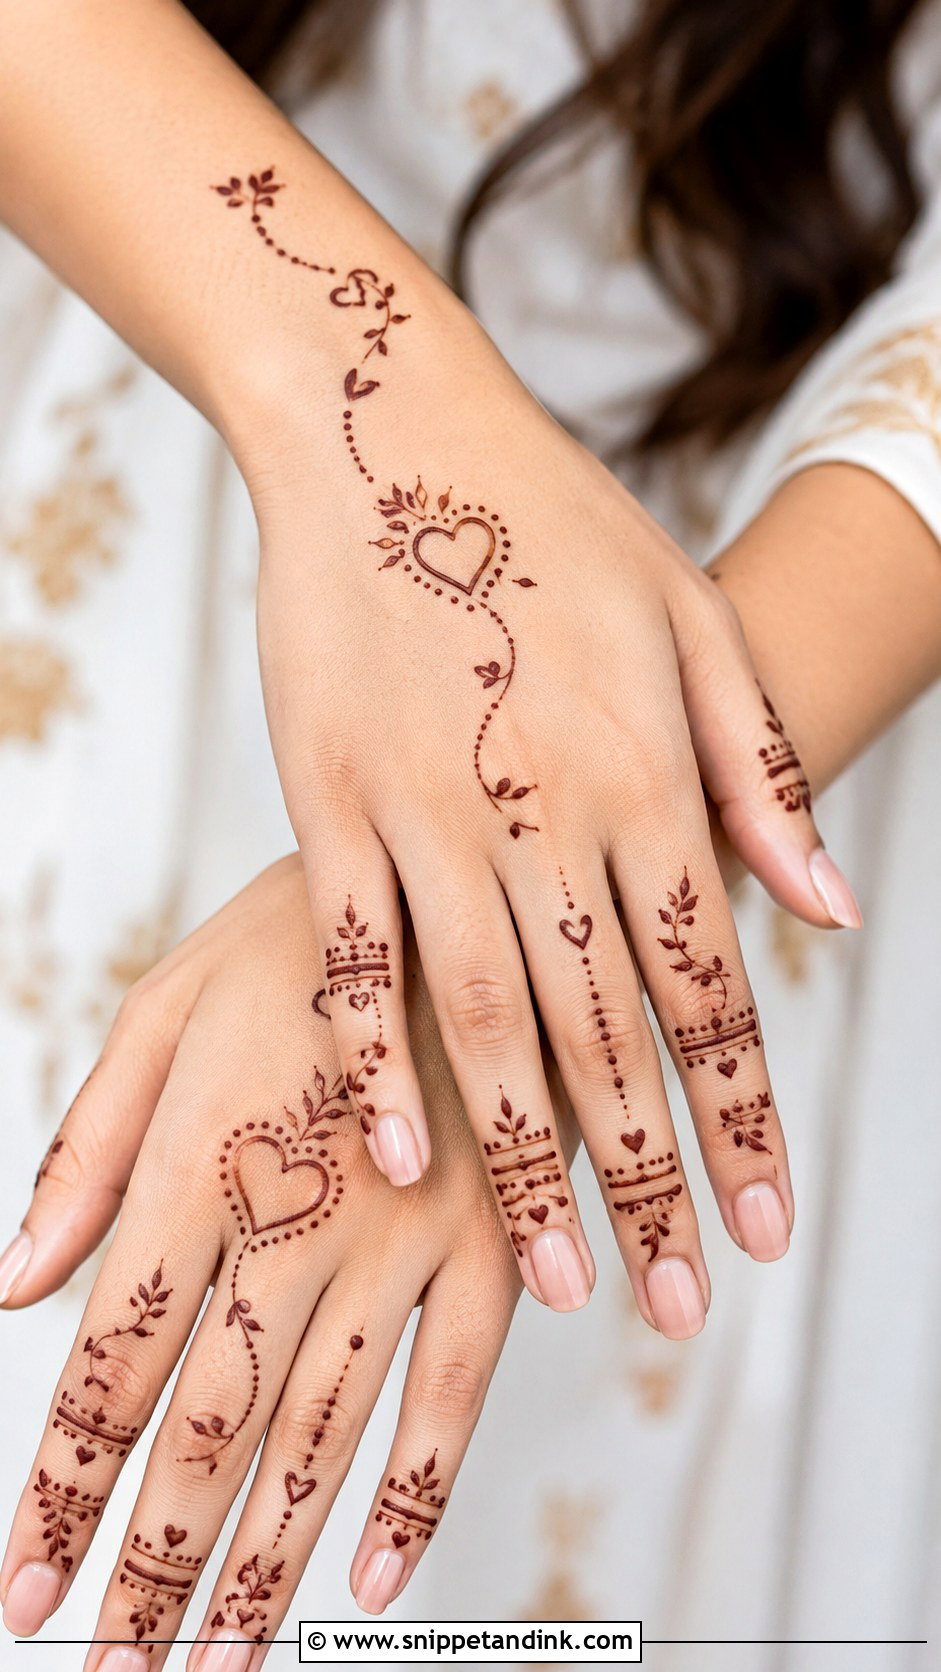
Hearts are quick to draw and very popular with teens. I keep them tiny, near the fingertips, the knuckles or the base of the ring finger, and surround them with dotted bands, small leaves and thin curves so it still looks like mehndi rather than doodling. One heart as the main motif on a single finger, with simple rings on the rest, is often the nicest version.
32. Finger Mehndi Design With Half Mandala
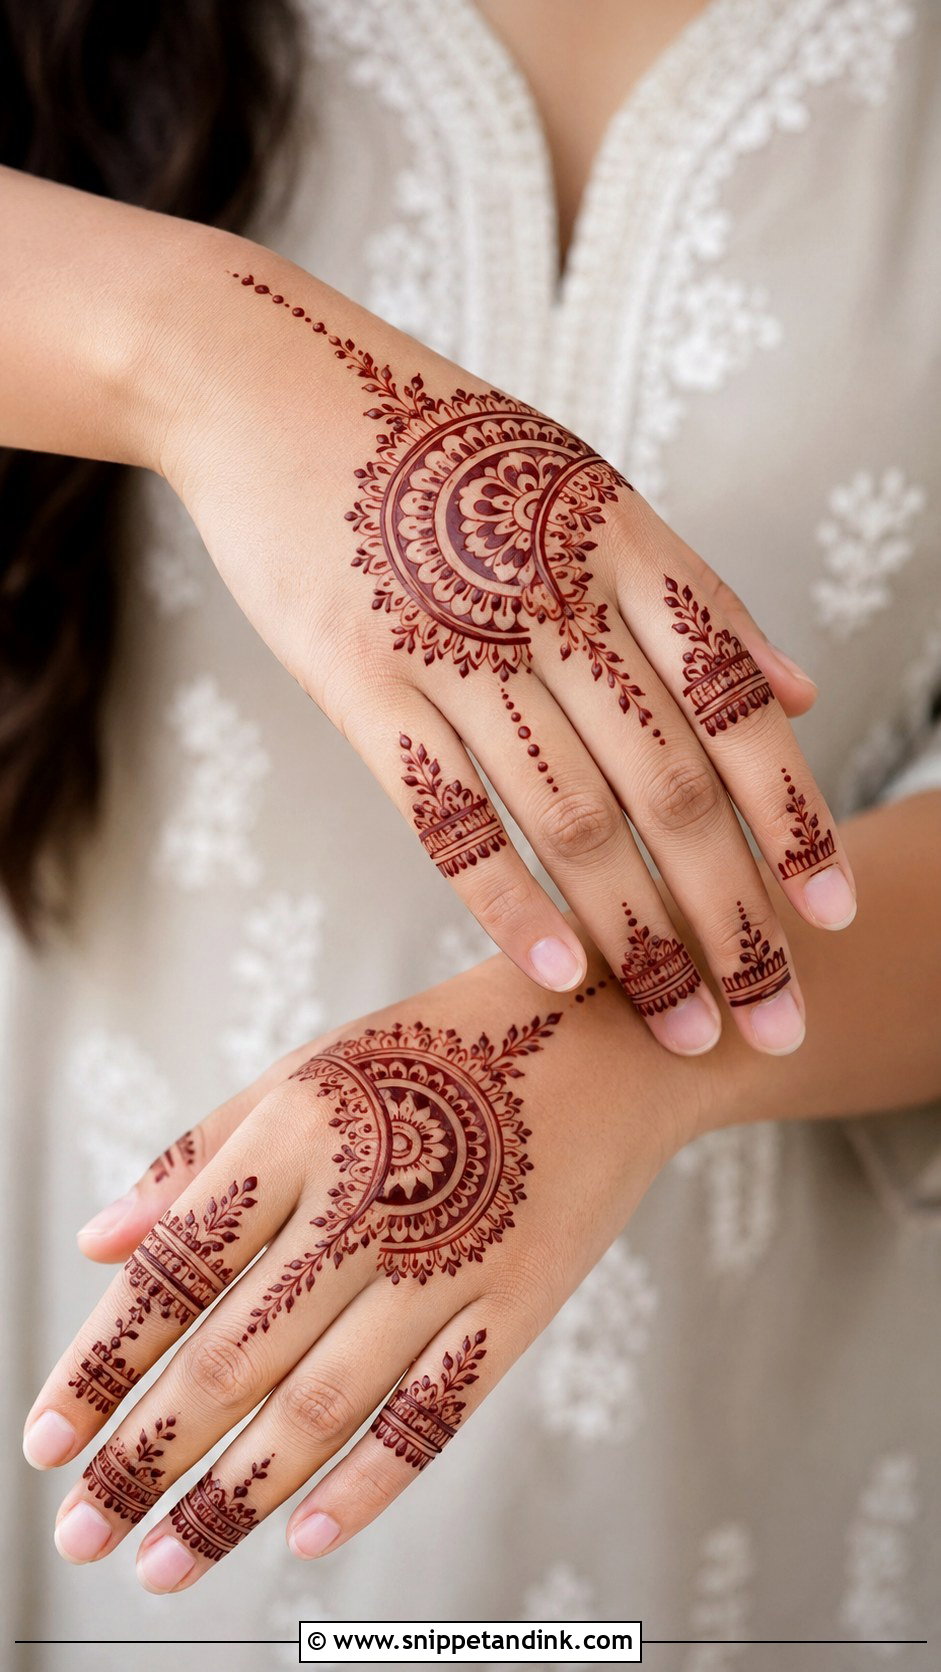
Half-mandala arcs at the base of two or three fingers, with dots and bands climbing upward, create a crown effect. Half mandalas are much easier than full ones: draw the curve, add a row of petals, finish with a dotted edge. I place the arc exactly on the base crease so it moves with the finger instead of folding through the middle of the motif. A single wrist line is optional, and the design suits front or back hand.
33. Finger Mehndi Design With Side Trail
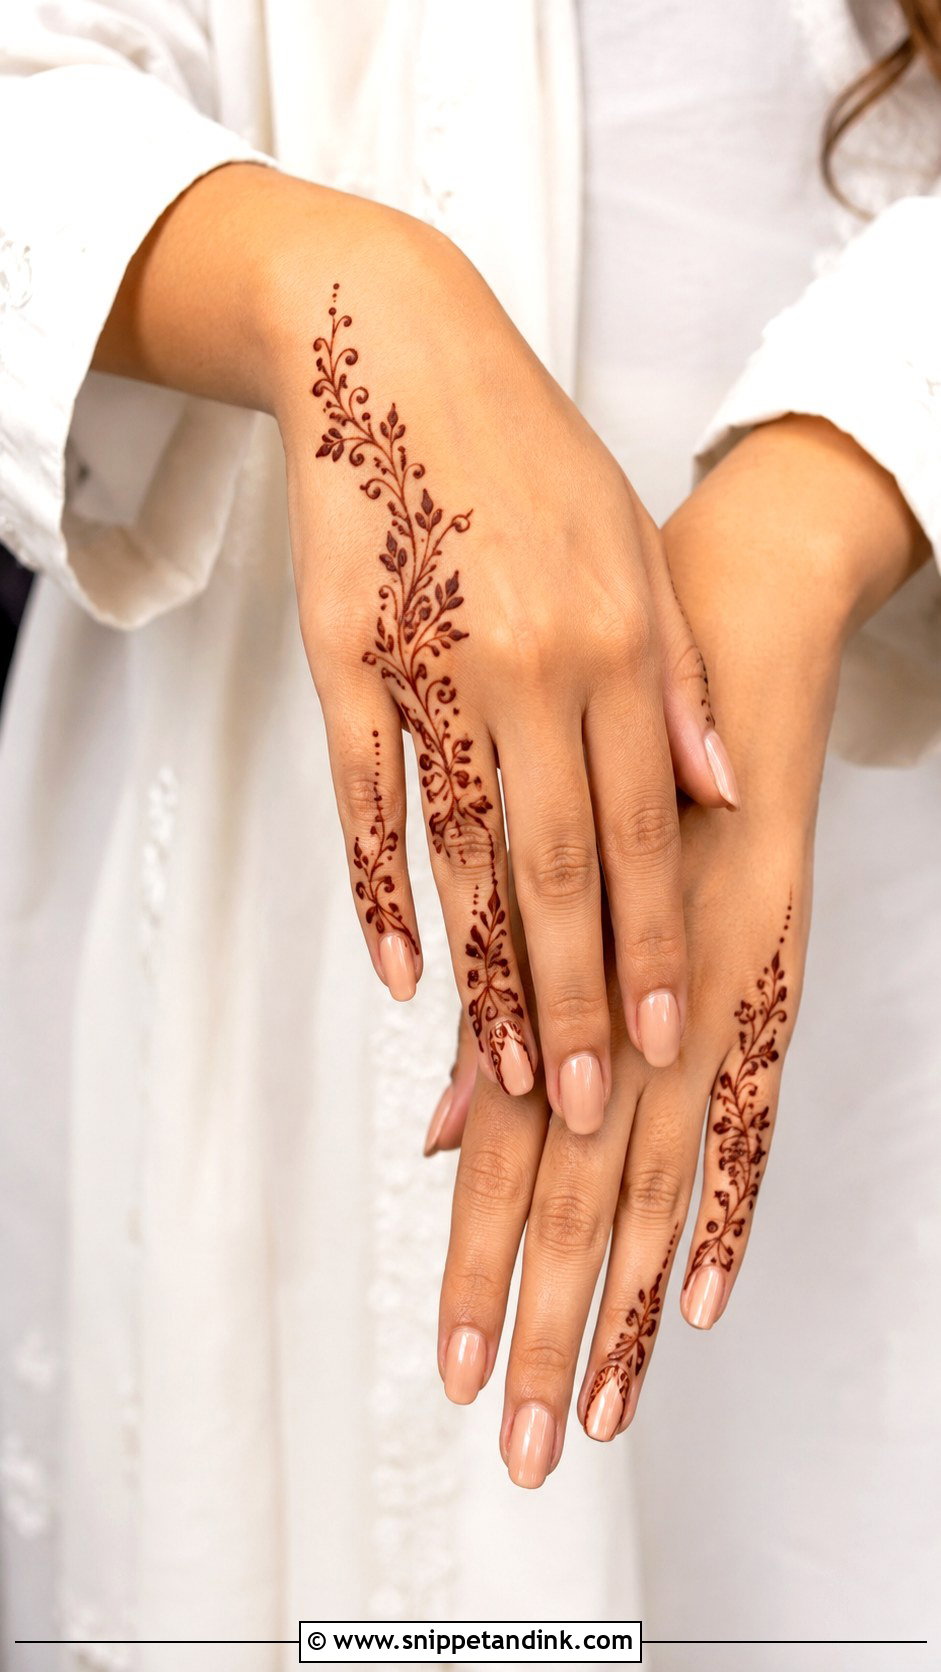
A side trail runs down one edge of each finger, leaving the other side bare. It’s slim and lengthening, which makes it my first suggestion for short fingers or a modern outfit. Tiny leaves, dots and curved strokes build the vine. I put the trail on the outer edge of each finger, the side people see when your hands rest naturally, rather than the inner edge that faces the next finger. Do all fingers or just the index and ring; the back hand shows it best.
34. Finger Mehndi Design With Fingertips
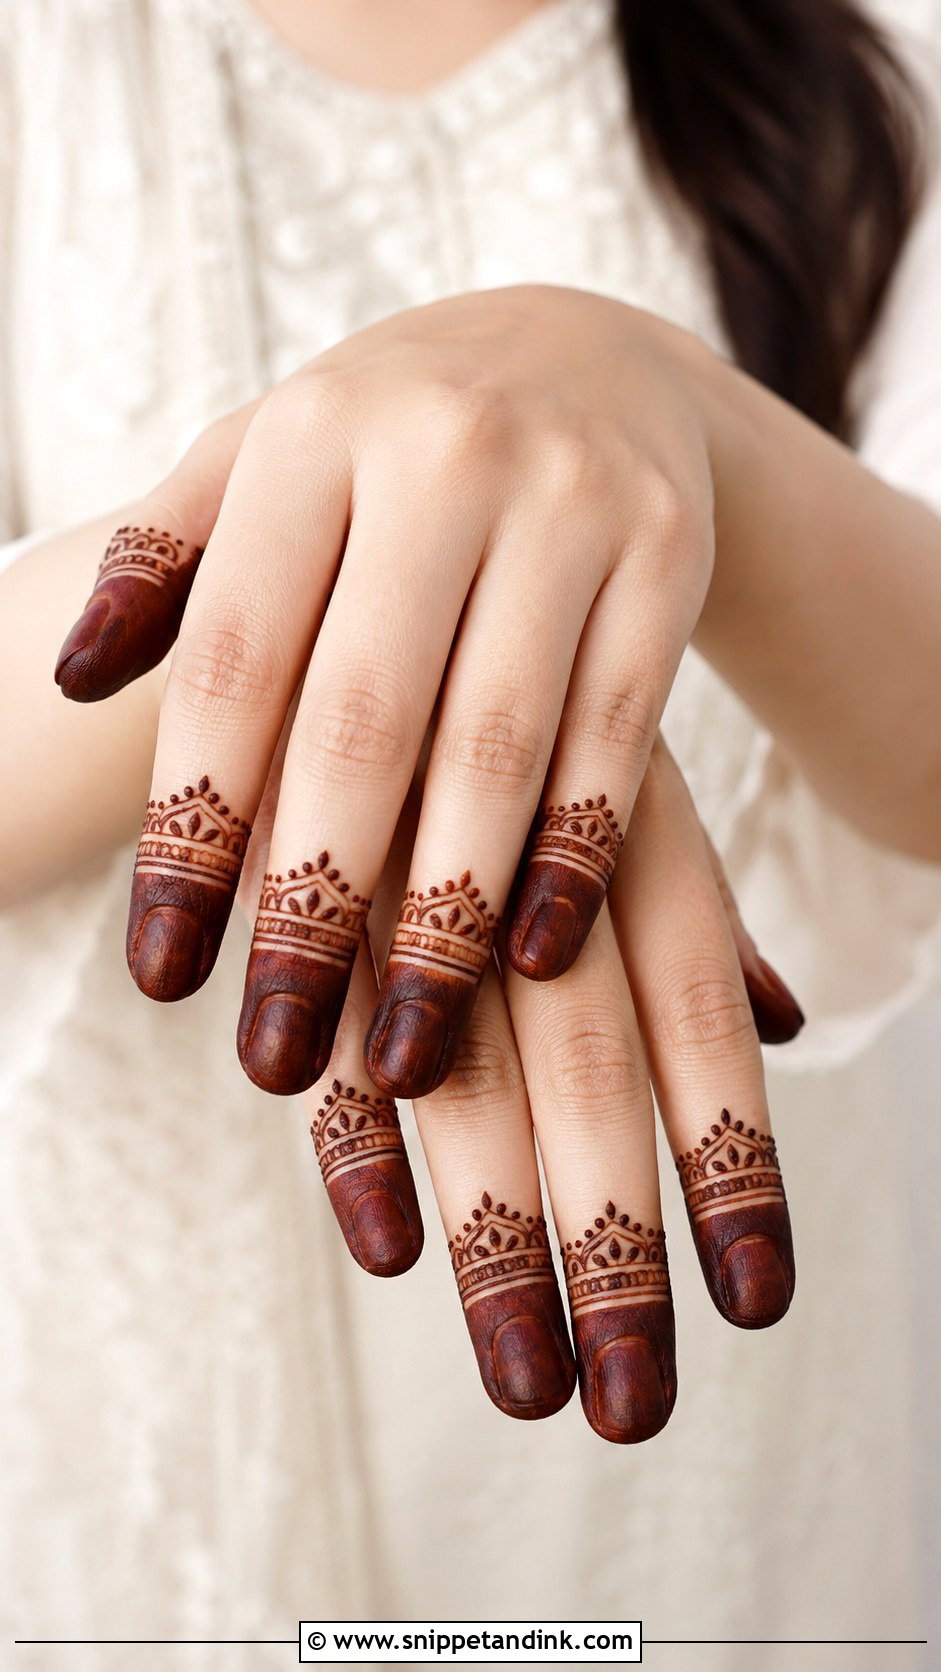
Fingertip caps are the oldest finger design there is. Traditionally they’re solid, but a simple version uses light fill, dots and tiny arches across the top section, with thin bands below. Fingertips stain darker than almost anywhere else on the hand, so even a light cap comes up strongly. Smooth, even filling is essential; a lumpy cap shows every ridge when it darkens. A row of dots under each cap softens the edge.
35. Finger Mehndi Design With Open Space
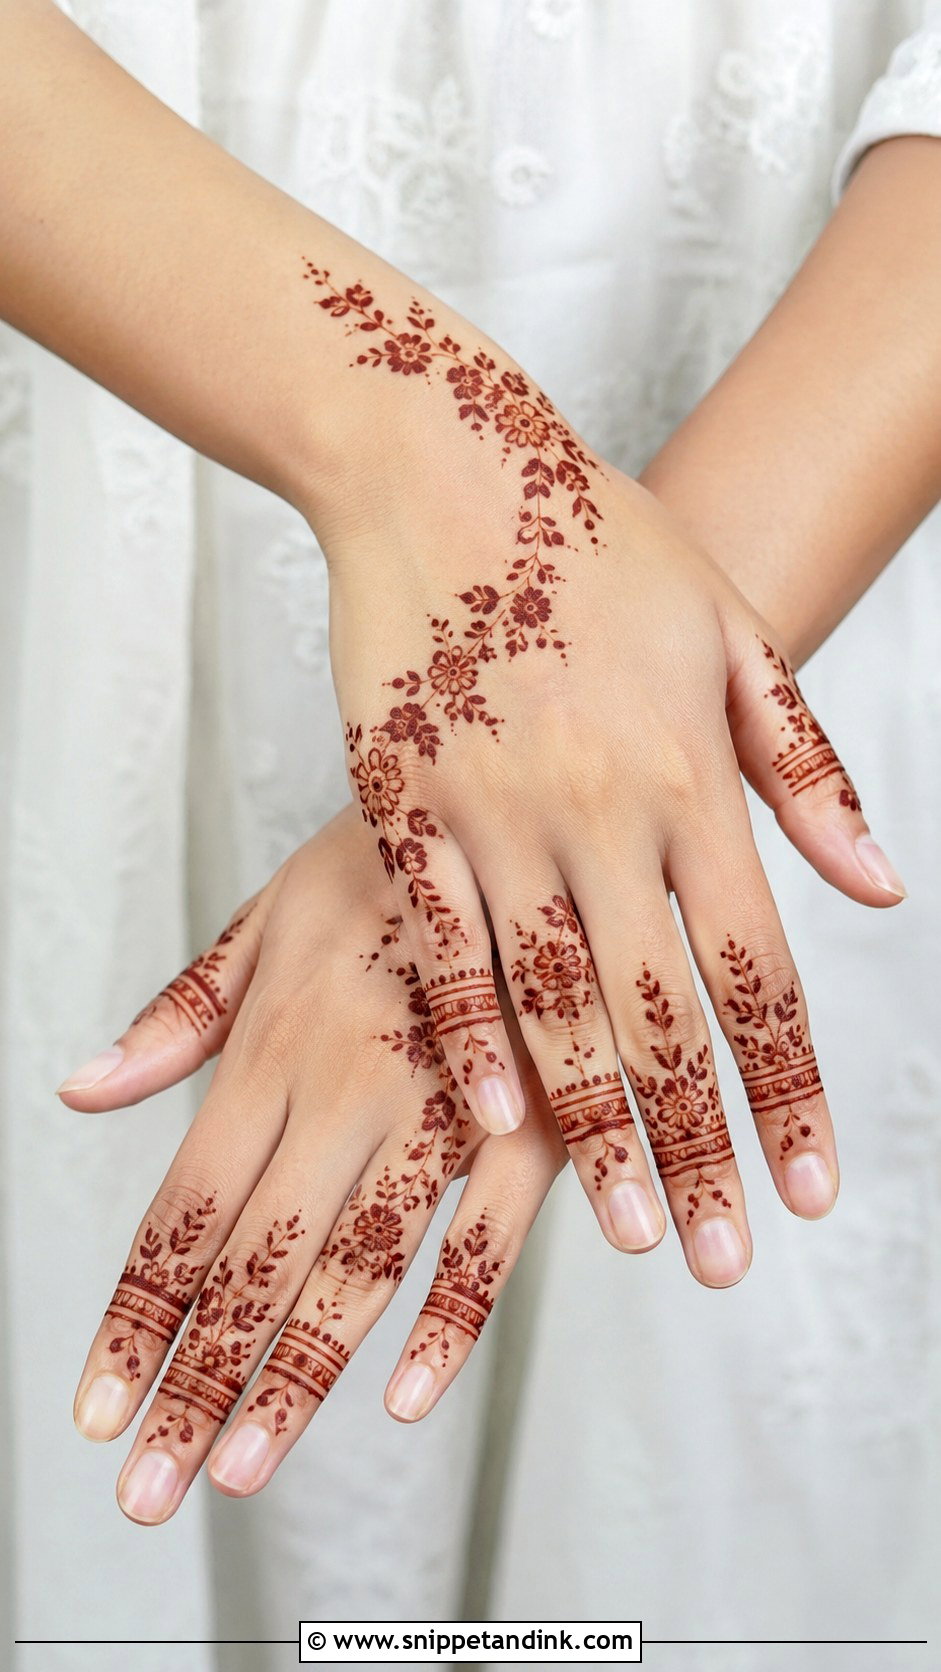
Here the empty skin is part of the design. I leave clear gaps between bands, flowers, leaves and dots so each motif stands on its own. It’s quick, comfortable and kind to beginners, since small mistakes are easier to tidy up when nothing is crowded. Leave space around the knuckles especially, where skin folds and dense work cracks. Use Arabic, Indian or minimal motifs; the open spacing is what makes it modern.
Paste Off, Water Away, Then Two Days of Darkening
Fingers are the hardest place to keep a stain, because they’re the part of you that touches water most. What happens in the first day decides how dark the design gets and how long it lasts.
The first few hours
I ask clients to leave the paste on for as long as they comfortably can, ideally six hours or overnight. A light dab of lemon and sugar once the paste is dry helps it stay stuck to the skin instead of flaking early. Keep the hands warm; cold fingers stain noticeably lighter.
Removing it
Scrape the dried paste off with a blunt edge or rub it away with dry fingers. Don’t wash it off. Then keep your hands away from water for as long as you can, ideally the rest of the day. A thin layer of balm or oil before showering helps protect the stain.
What the colour does next
Fresh stain shows up bright orange, and plenty of people panic at this point. It oxidises over the next 24 to 48 hours into a reddish brown or maroon, darkest on fingertips and palm-side skin. Finger designs usually fade within one to two weeks because of handwashing; wearing gloves for dishes and skipping hand sanitiser on the design helps it last longer.
If a cone or product promises a black stain within an hour, I’d stay away from it. Natural henna never stains black, and those products often contain additives that can cause serious skin reactions.
Small Bands, Clean Gaps and a Dark Fingertip Stain
Finger henna rewards restraint. Dotted bands, leafy trails, half mandalas, jaali, paisley and bracelet patterns all work on a small canvas as long as the spacing is even and the lines are fine. If you’re new, start with lines and dots and add one motif at a time. If you’re booking someone, show them the design you like and tell them where your rings sit. Then leave the paste on, keep it dry, and give it two days to show its true colour.
You'll Like These Ideas:


Leave a Reply