
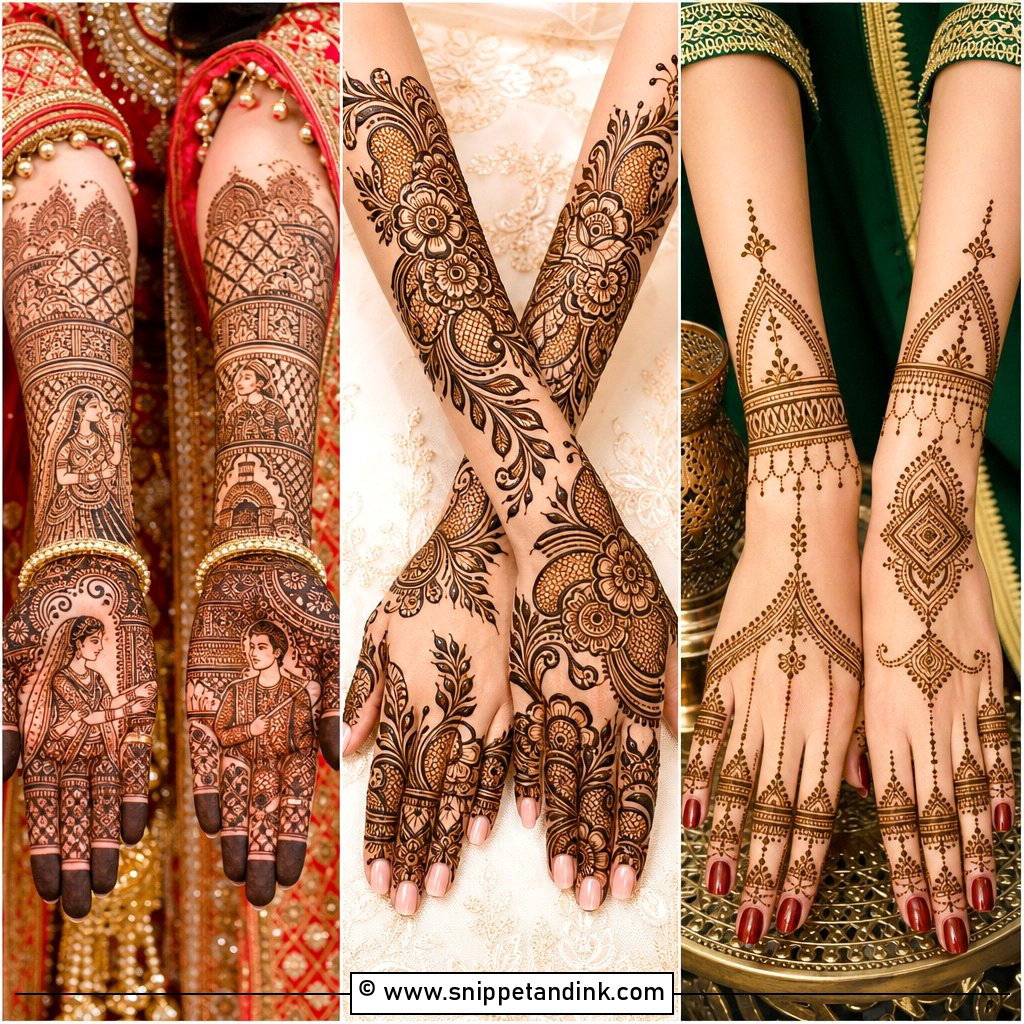
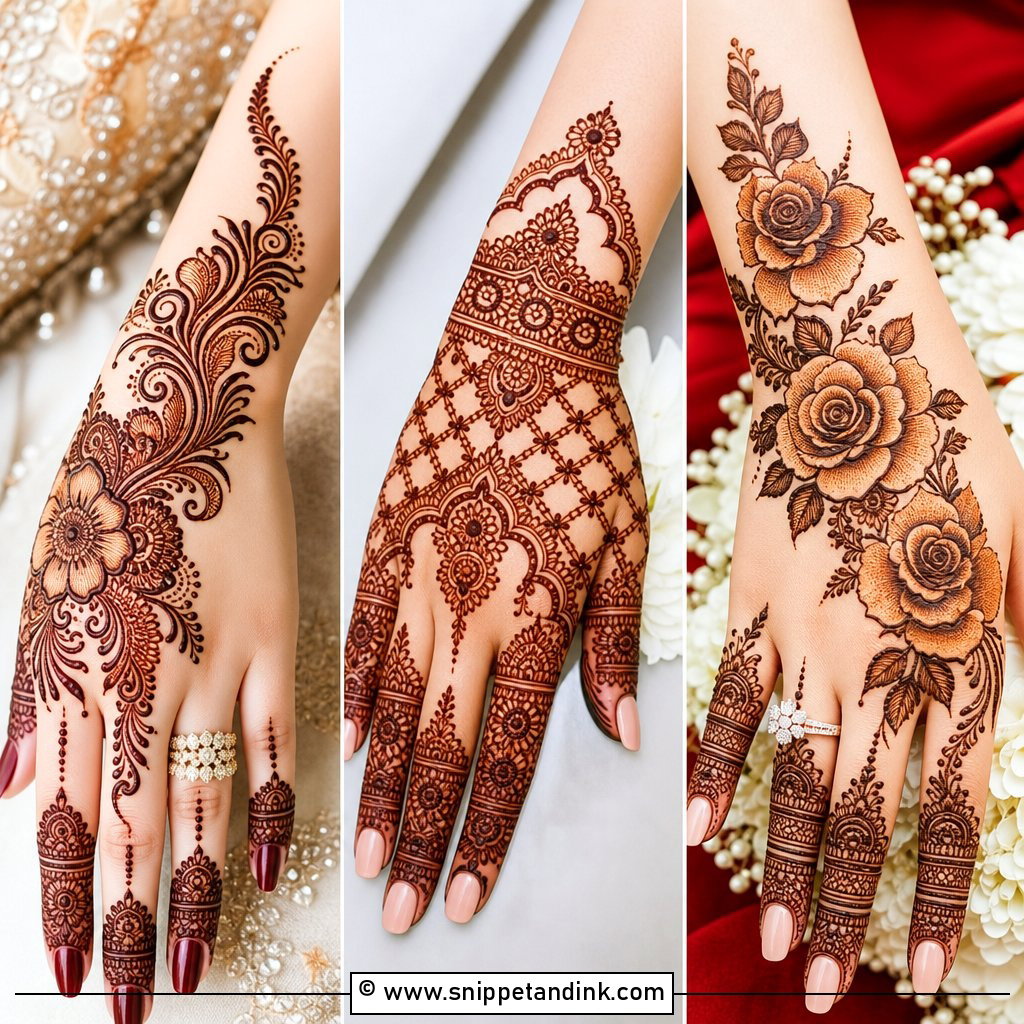
Foot and leg mehndi gets planned last and seen first. It’s in every seated ceremony photo, every sandal close-up and every shot of you stepping onto the stage. When I design for legs, I’m working on skin that stains darkest near the sole and lighter as it climbs the shin, on a canvas that has to stay still for hours while the paste dries. So coverage, from a neat ankle-to-toe pattern up to a full calf, is as much a scheduling decision as a style one. Below are 25 leg layouts across Indian, Arabic, Indo-Arabic and negative space work, with my notes on how each one wears and who should skip it.

Measuring Coverage Against Your Hemline and Sandals
Before we talk motifs, I ask two questions: what’s on your feet, and where does your hem fall? A floor-length lehenga hides almost everything above the ankle once you stand, so full-leg work mostly shows when you sit or lift the skirt. A saree or sharara at ankle height shows the foot and the lower shin. Shorter outfits for the mehndi night or sangeet show the calf.
- Hem at the floor: toe to ankle or full foot. Hours spent on the calf rarely reach the photos.
- Hem at the ankle: full foot plus a band or short trail just above the ankle bone.
- Hem above the ankle, or a sangeet outfit: half leg or calf length is worth the extra time.
- Closed shoes for part of the day: keep the heaviest work on the toes and ankle, where it shows when you change.
Bring your actual sandals to the consultation. Straps sit across the foot, and I’d much rather run a vine between them than have a buckle cut a mandala in half. Also be honest about how long you can sit. Your legs have to stay straight and still while the paste dries, so a full-leg design on the same evening as full hands can turn into a very long night.
1. Full Leg Bridal Mehndi Design
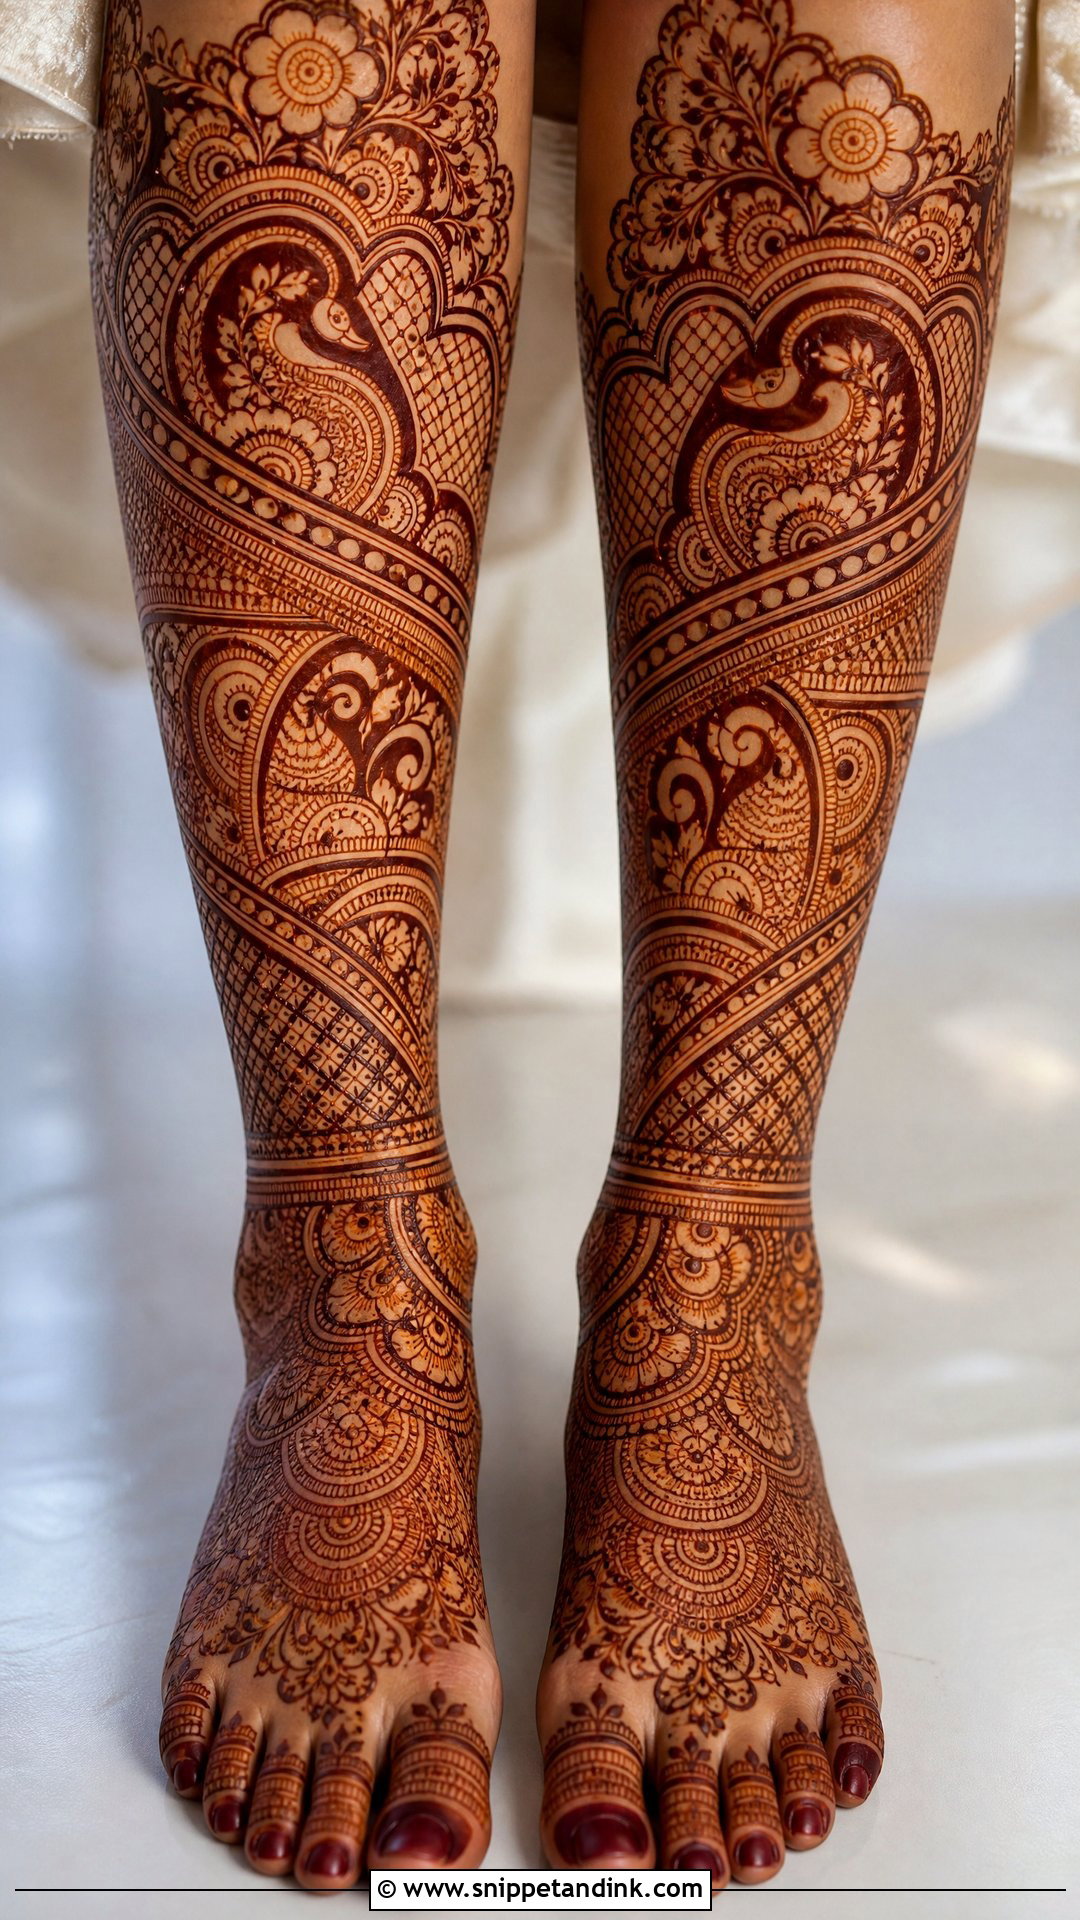
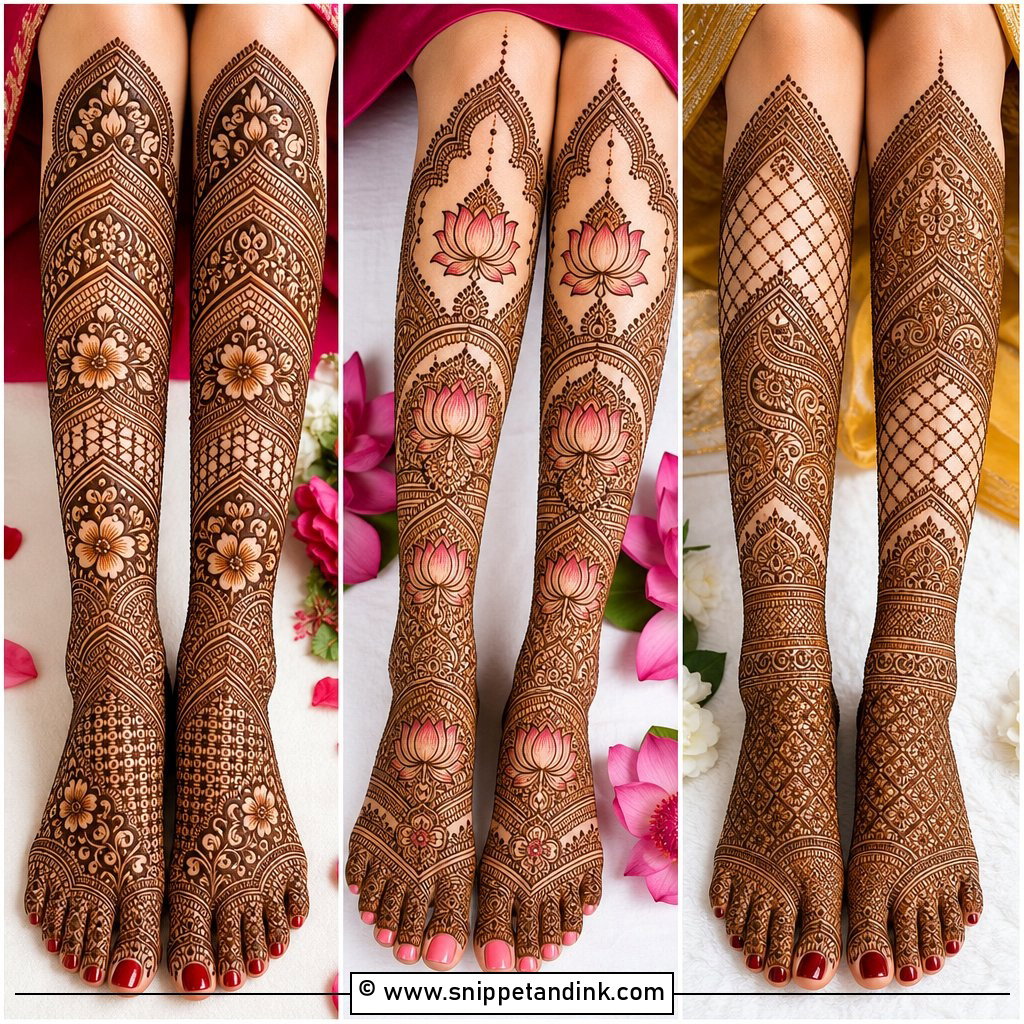
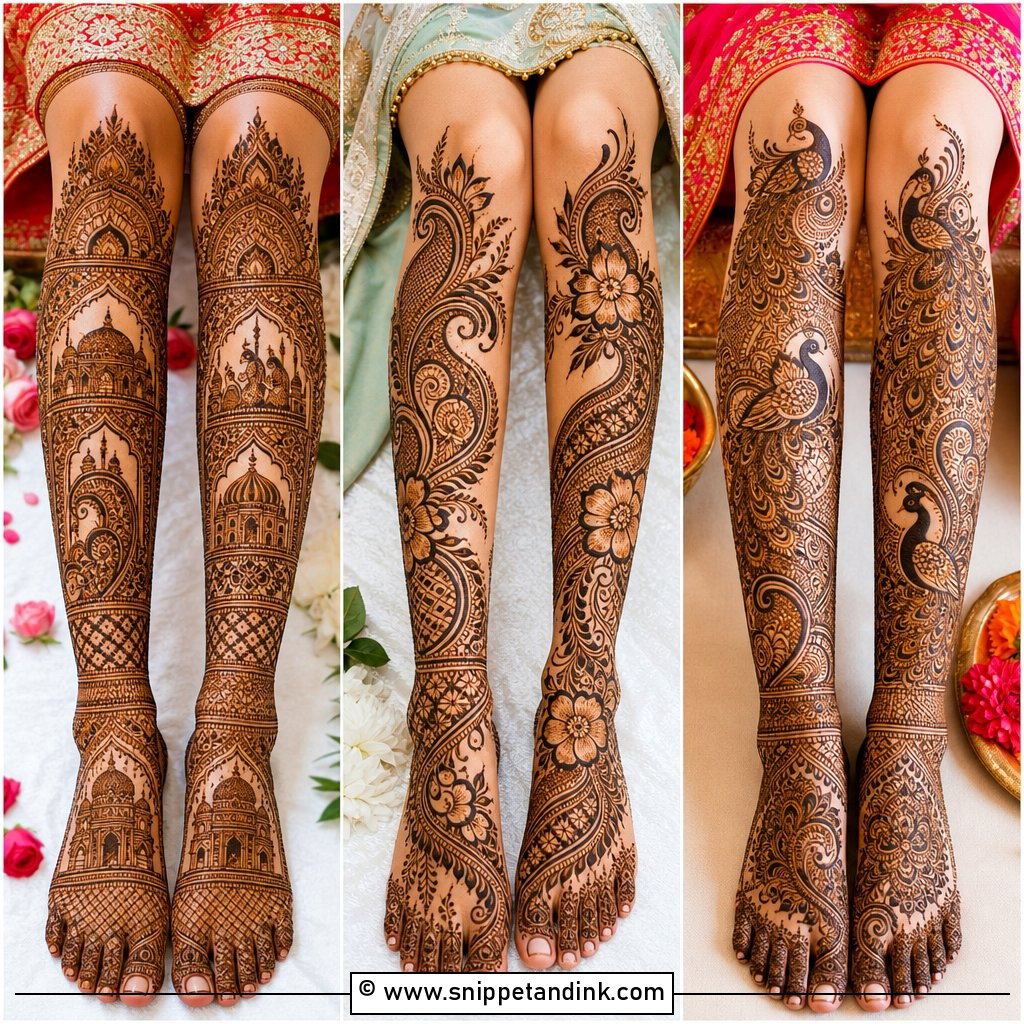
A full leg bridal mehndi design starts at the toes, fills the foot, wraps the ankle and climbs the shin or calf. It’s the most ceremonial coverage there is, and the slowest: on top of the hands, a full leg adds hours of sitting, so I usually suggest a second artist or a separate session. The detail I watch closest is the center line down the front of the shin. If it drifts even slightly on one leg, the mismatch shows in every seated photo. Only plan this length if your outfit actually reveals the leg; under a floor-length lehenga, most of it stays hidden.
2. Indian Bridal Leg Mehndi Design
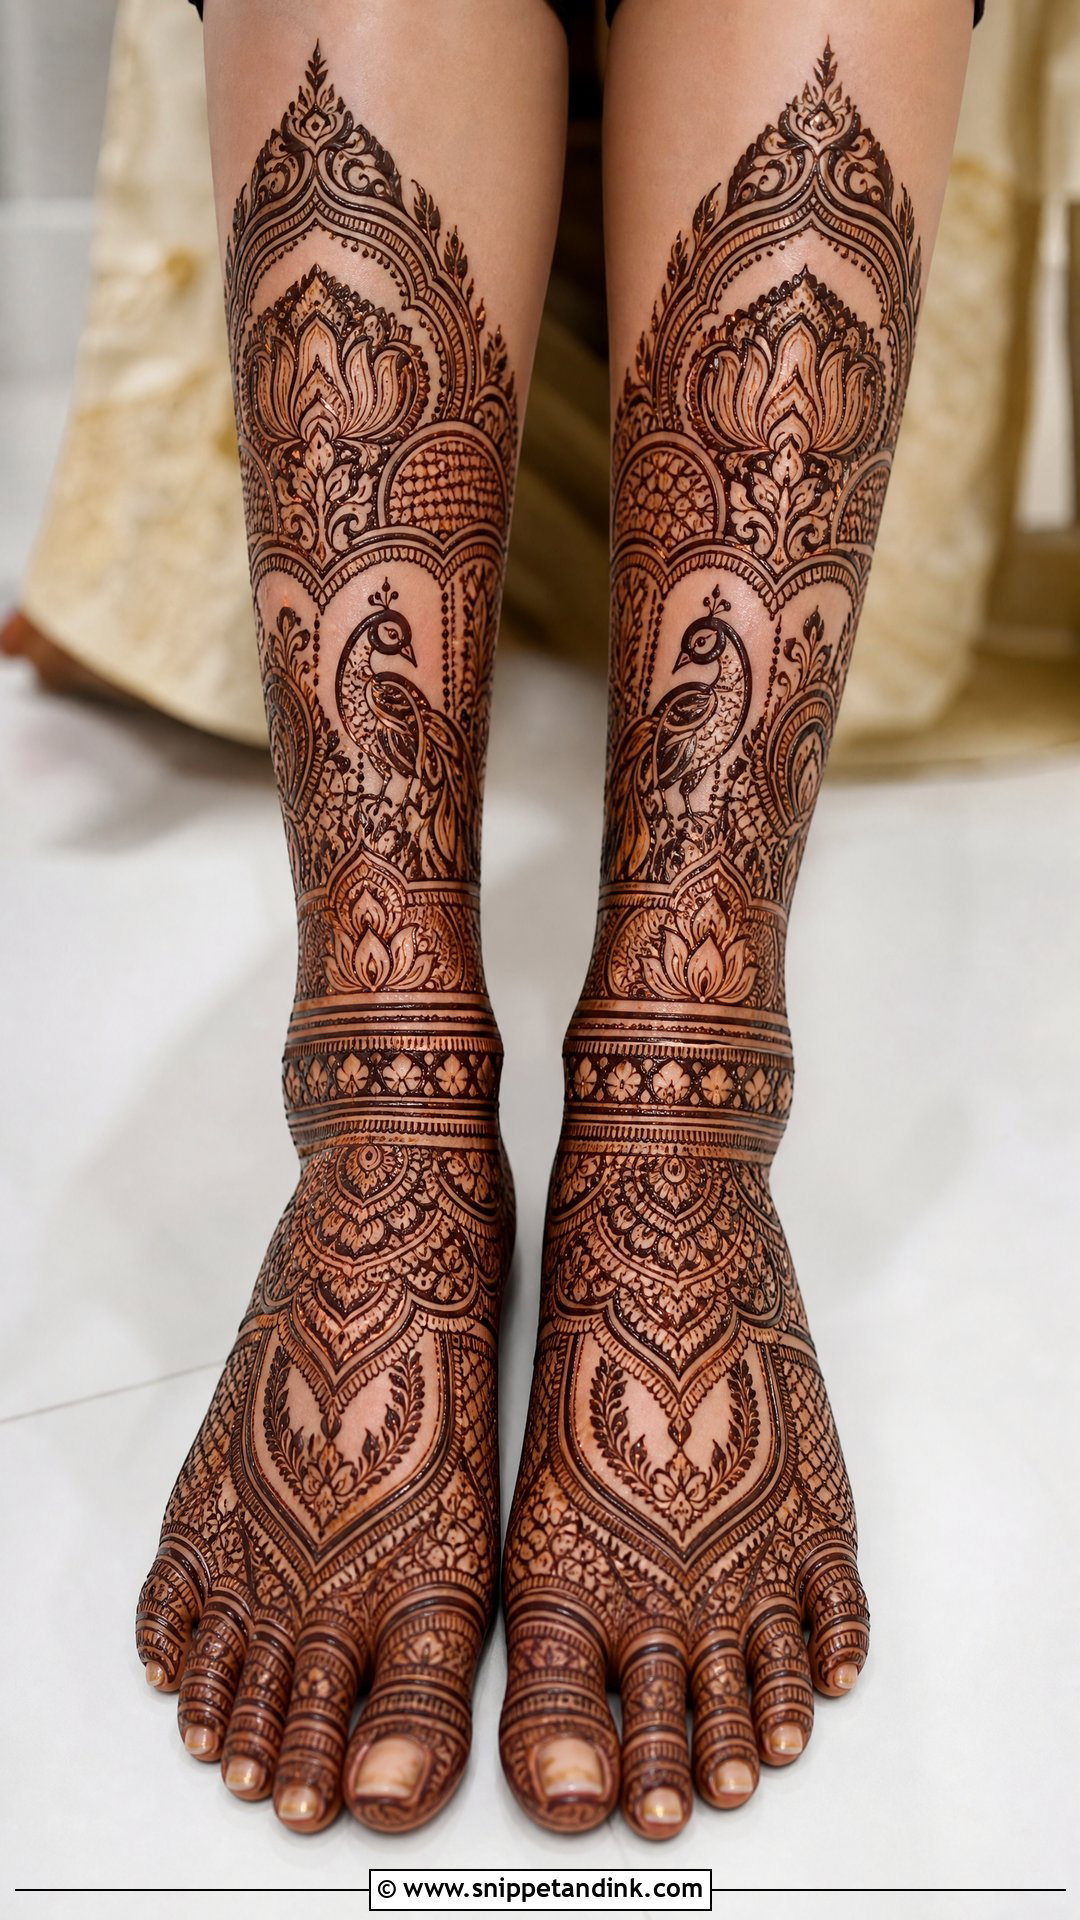
An Indian bridal leg mehndi design is dense work, with lotus, paisley, peacocks, bells and mandalas packed close and stitched together by fine filler lines. Those fine lines give the stain its depth, but they need a thin, smooth cone, because runny paste blurs them into one another. I treat the toes, the ankle and the center of the foot as the three points that must mirror exactly between the legs. Ankle length keeps it comfortable. Calf length is grander, and it roughly doubles the time you spend with your legs held straight.
3. Arabic Bridal Leg Mehndi Design
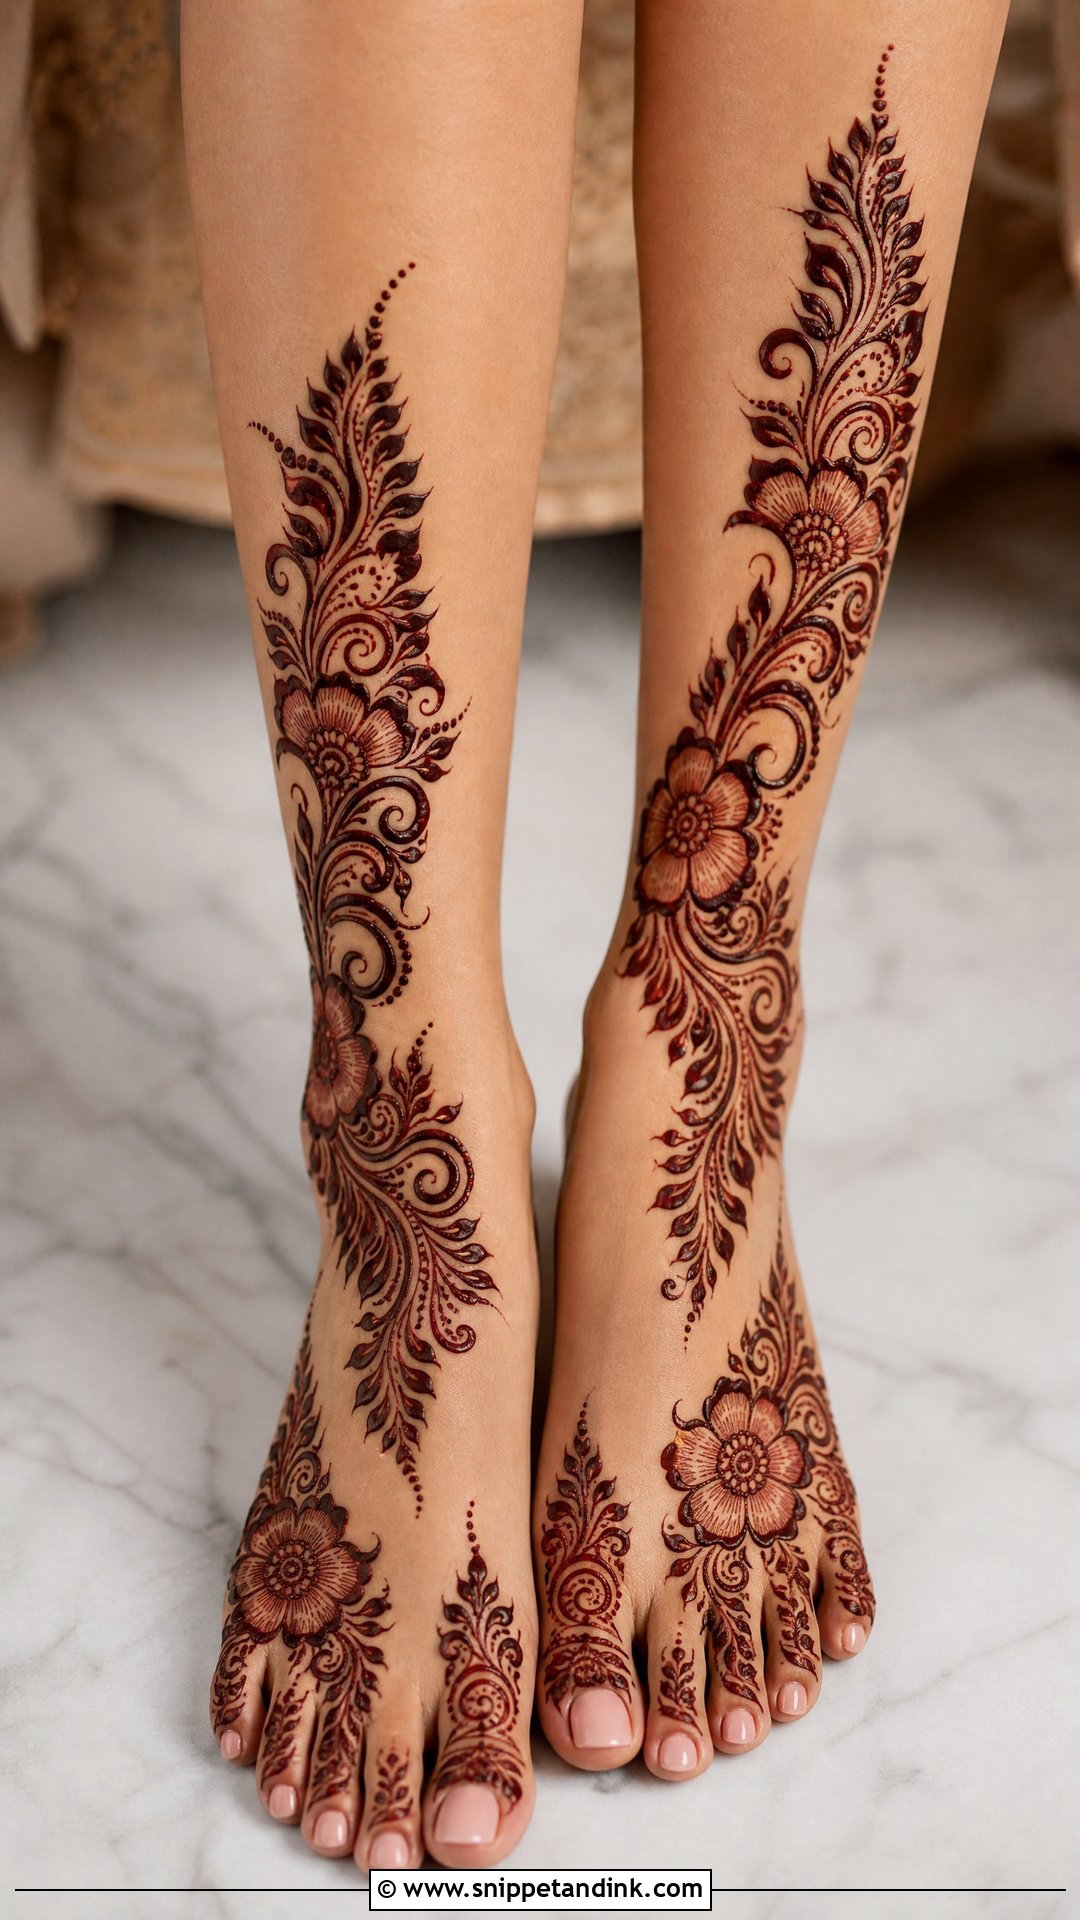
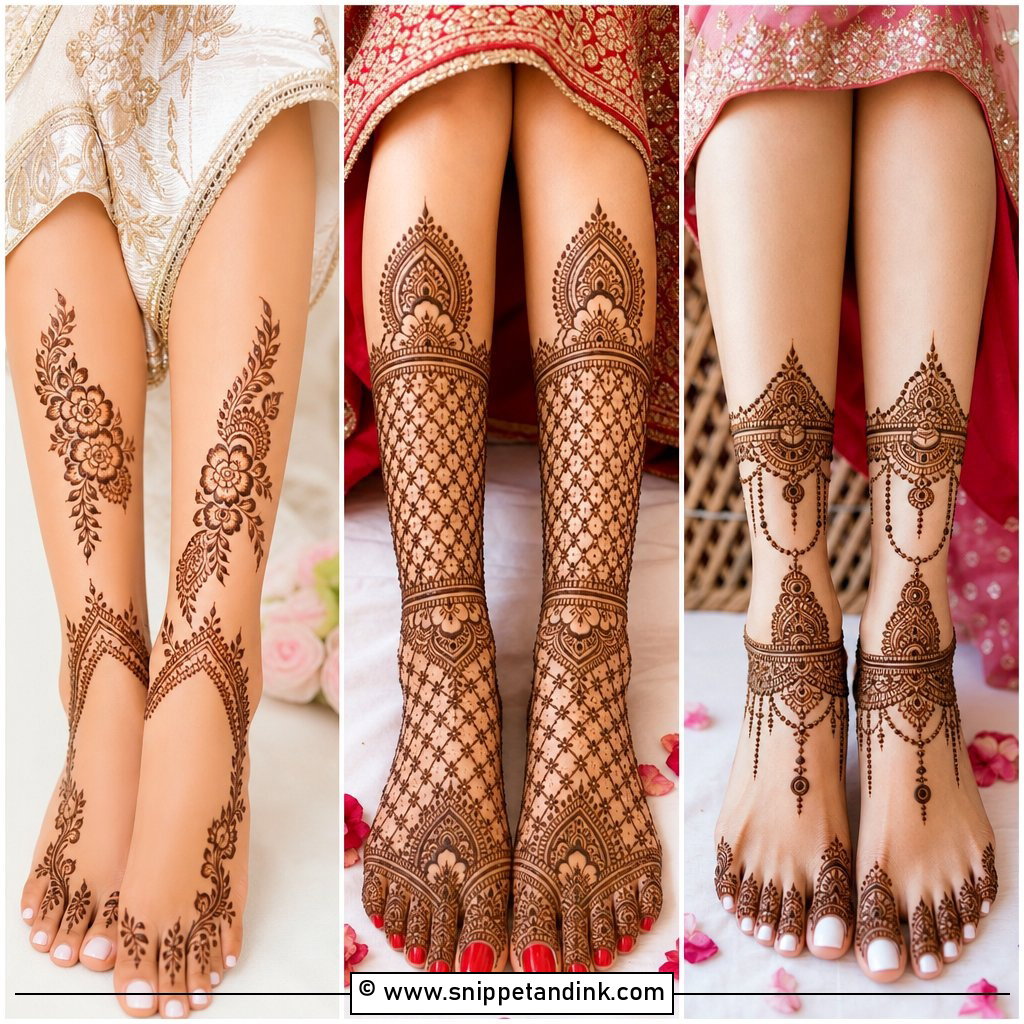
Arabic leg mehndi is my answer for a bride who wants bold work without crowding. The pattern runs as a diagonal trail of large flowers, broad leaves and curving vines, with plenty of bare skin between them. That open space is why it goes on faster than Indian coverage, and why even a slightly lighter stain still reads clearly from across a room. I start the trail at the big toe and angle it toward the outer ankle so it follows the natural line of the foot. With open sandals, the straps should cross the gaps rather than the main flower, so bring your footwear to the appointment.
4. Indo Arabic Leg Mehndi Design
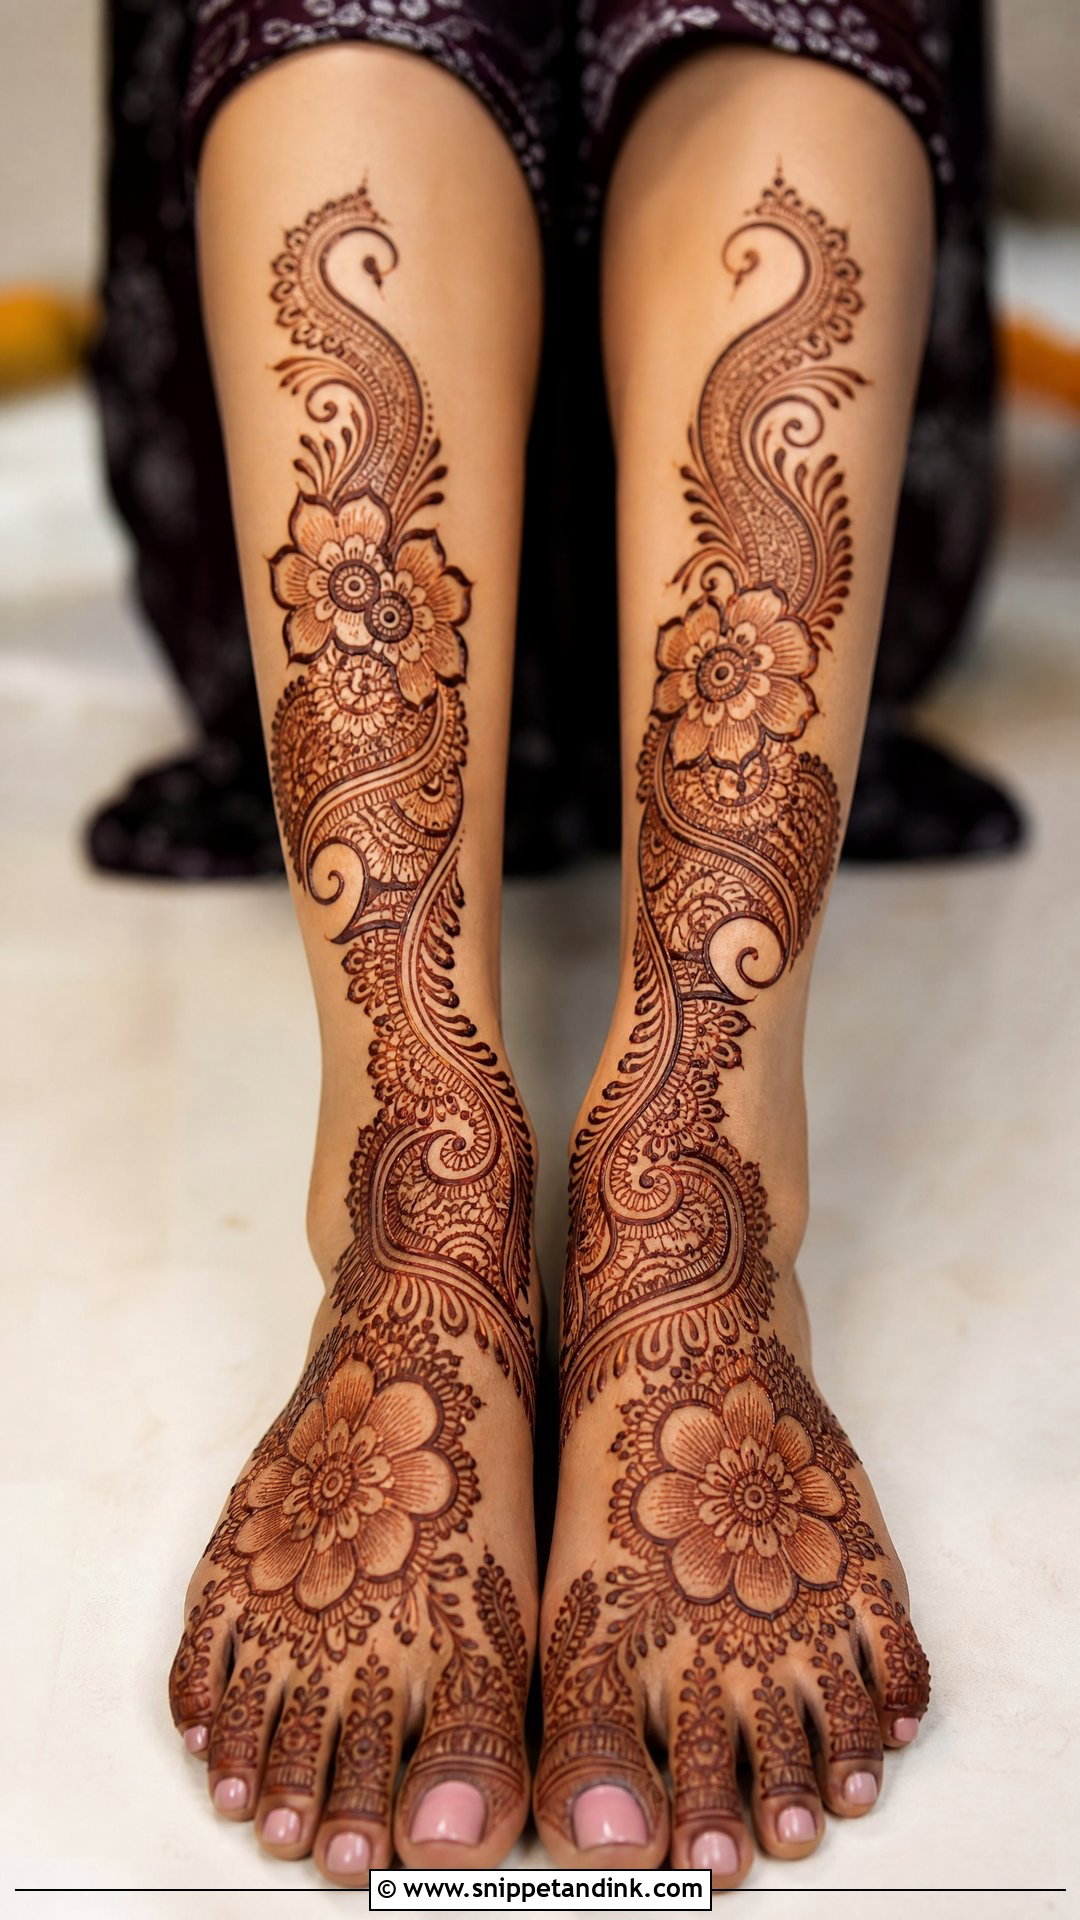
An Indo Arabic leg mehndi design borrows the flow of an Arabic trail and fills chosen parts of it with Indian detail: shaded leaves, a mandala at the ankle, a patch of jaali. The real skill is deciding where to stop filling. I keep the densest work on the top of the foot, where the stain comes out darkest, and let the trail open up as it moves toward the shin. It scales from foot-only to calf length, which is why I suggest it most often to brides torn between the two traditions.
5. Bridal Foot And Leg Mehndi Design
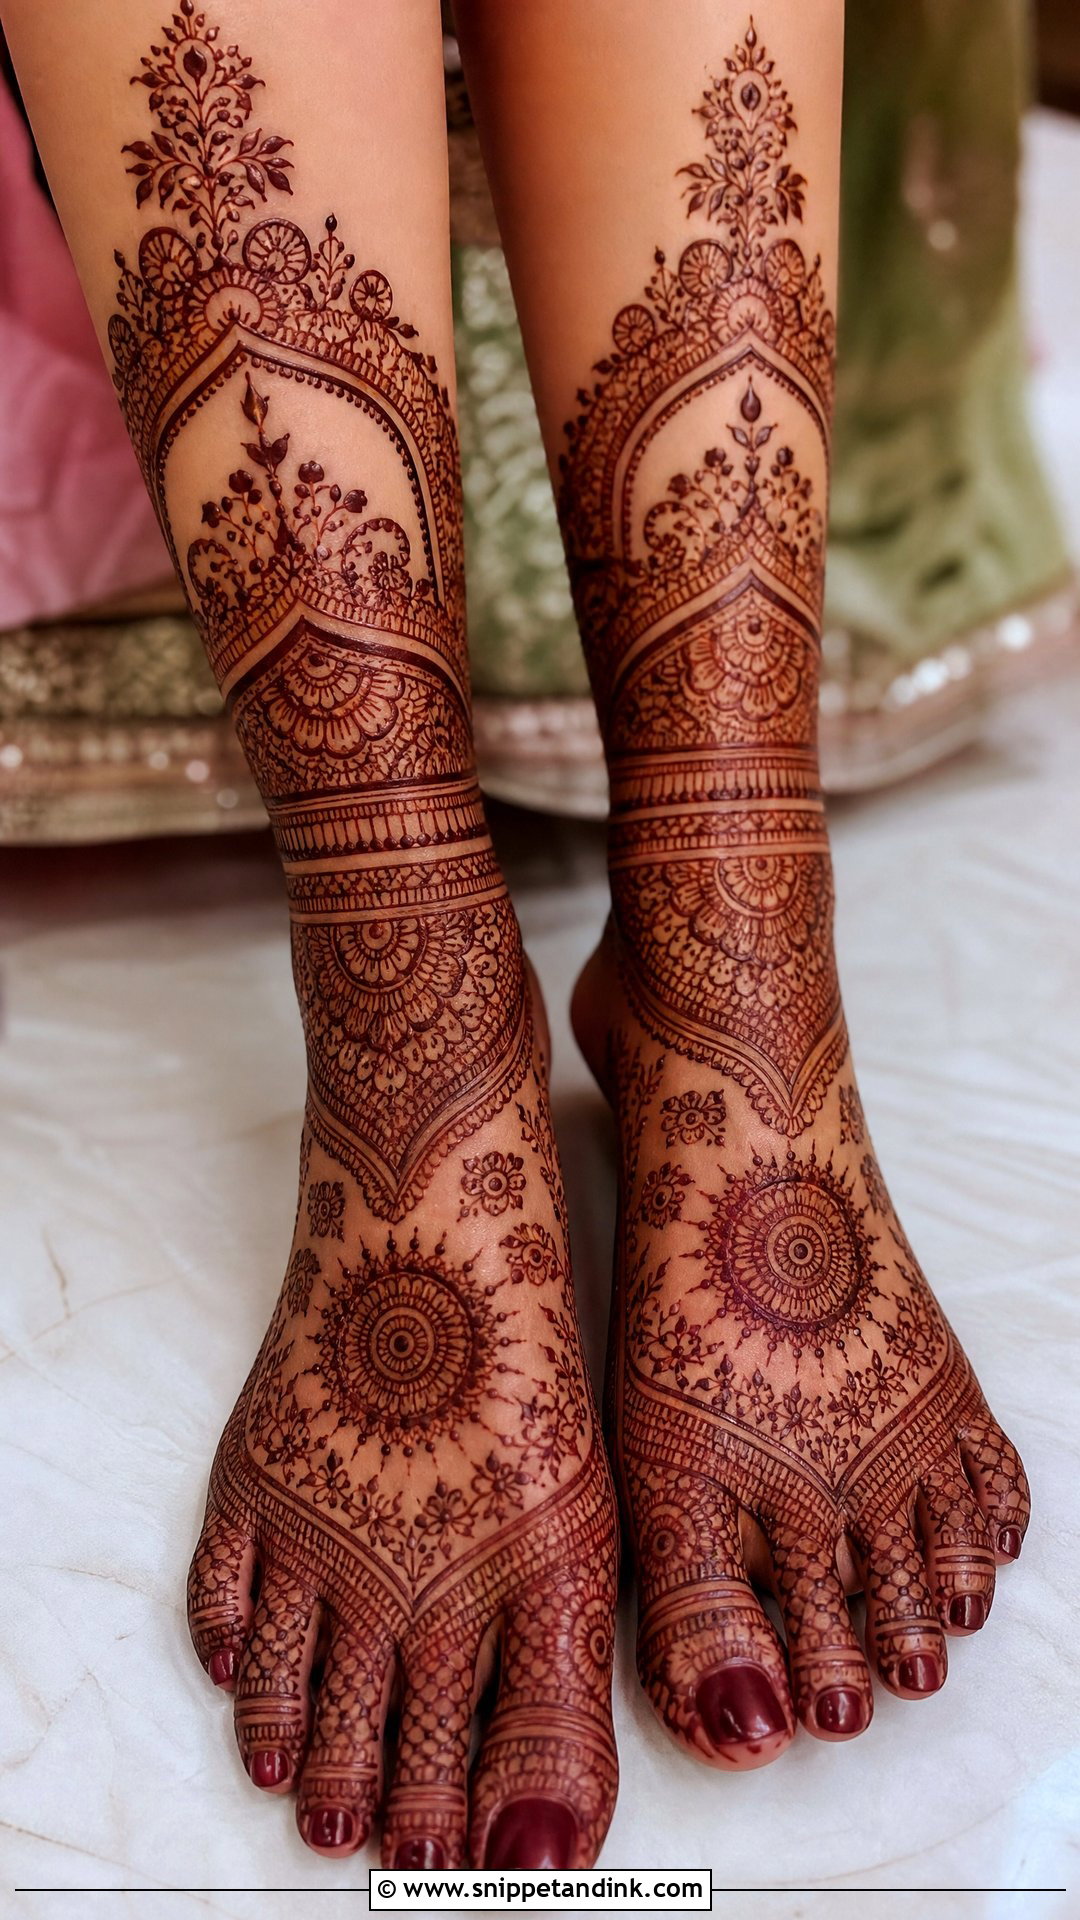
Treating the foot and leg as one piece means the toes, centerpiece, ankle border and upward trail all share motifs, so nothing looks bolted on later. Net patterns and vines do the linking best. Where it usually goes wrong is the ankle. That skin creases every time you flex the foot, and a heavy border placed right on the crease can smudge while it’s wet, so I set the band just above the ankle bone. Wearing toe rings or anklets? Tell your artist, and she can leave a clean channel for the metal.
6. Simple Bridal Leg Mehndi Design
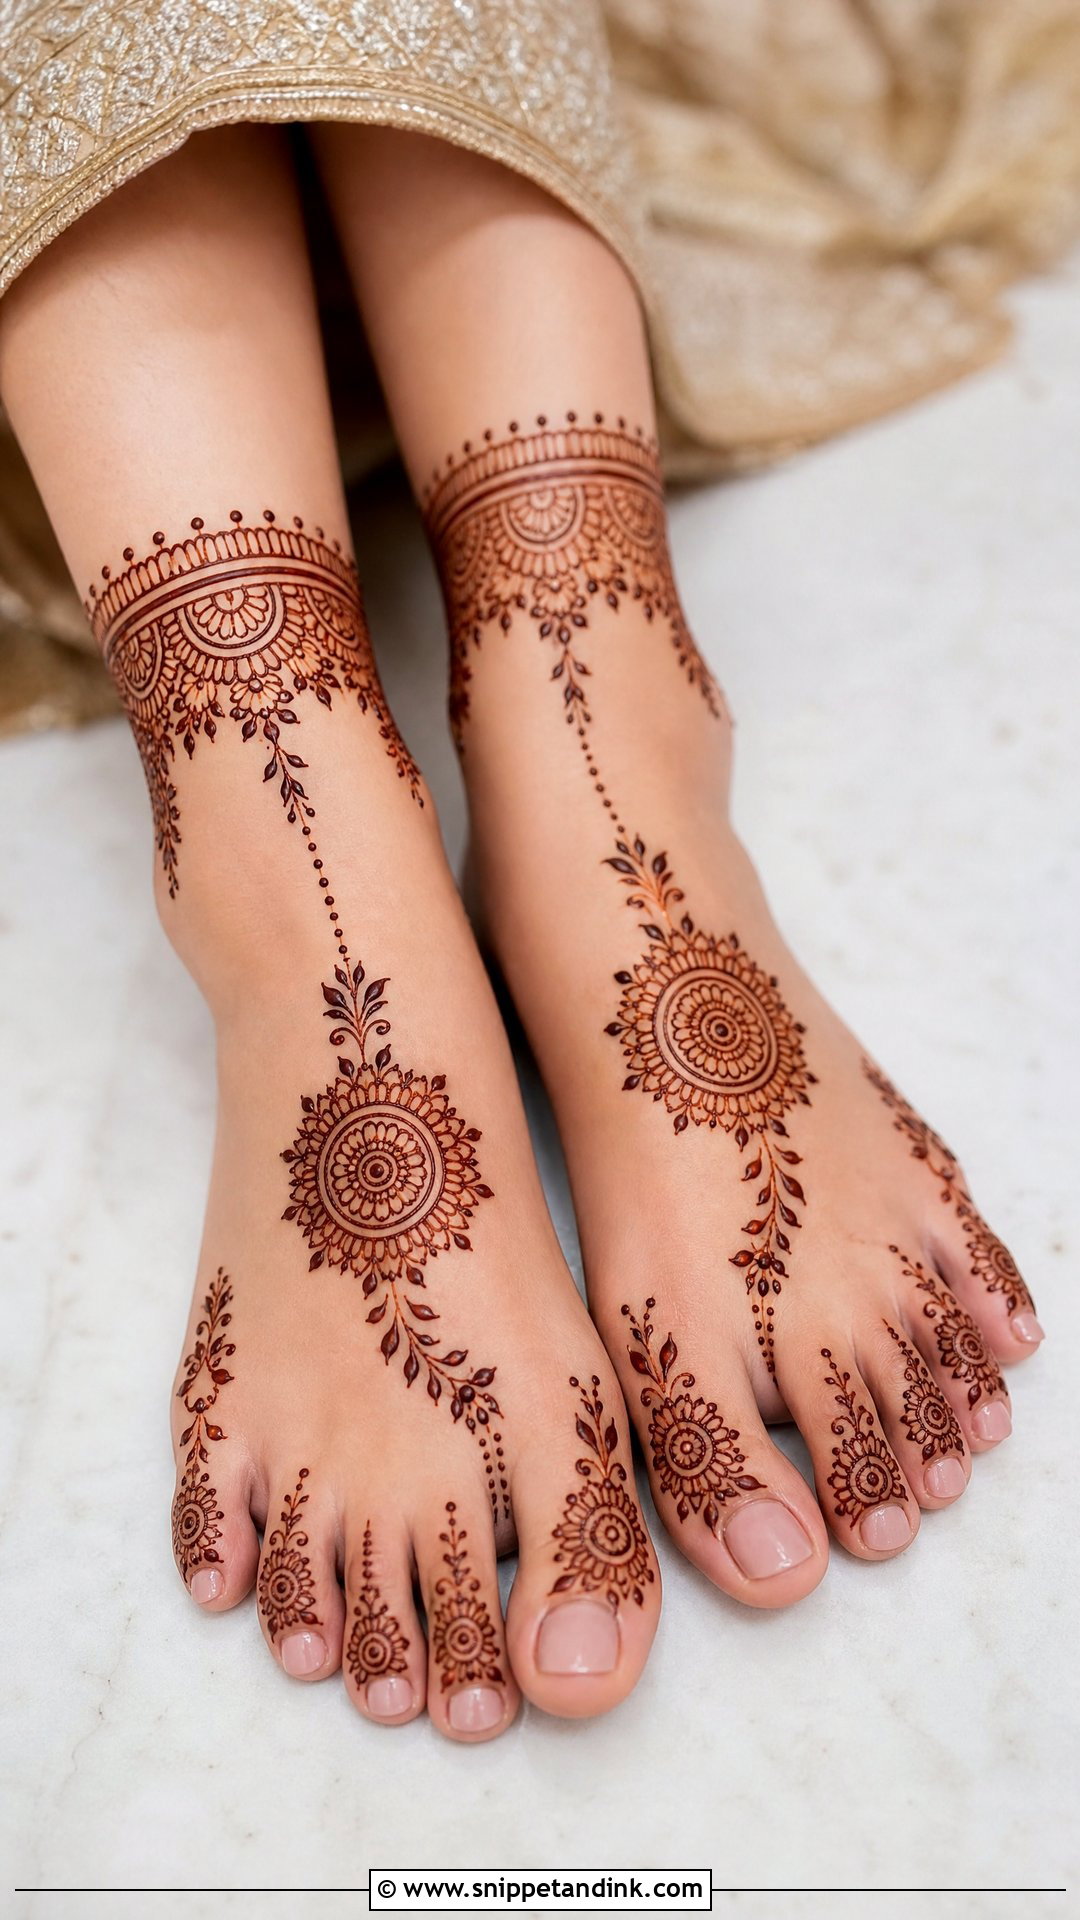
Simple doesn’t mean easy to get right. With a floral trail, one mandala, an anklet band and neat toes, every line is on show, so a wobbly stroke has nowhere to hide. I keep fillers to a minimum and give each motif room to breathe. The short sitting time matters most when your hands are being done the same night. It reads well in photos because nothing competes with the main shapes, and it suits civil ceremonies and smaller weddings.
7. Heavy Bridal Leg Mehndi Design
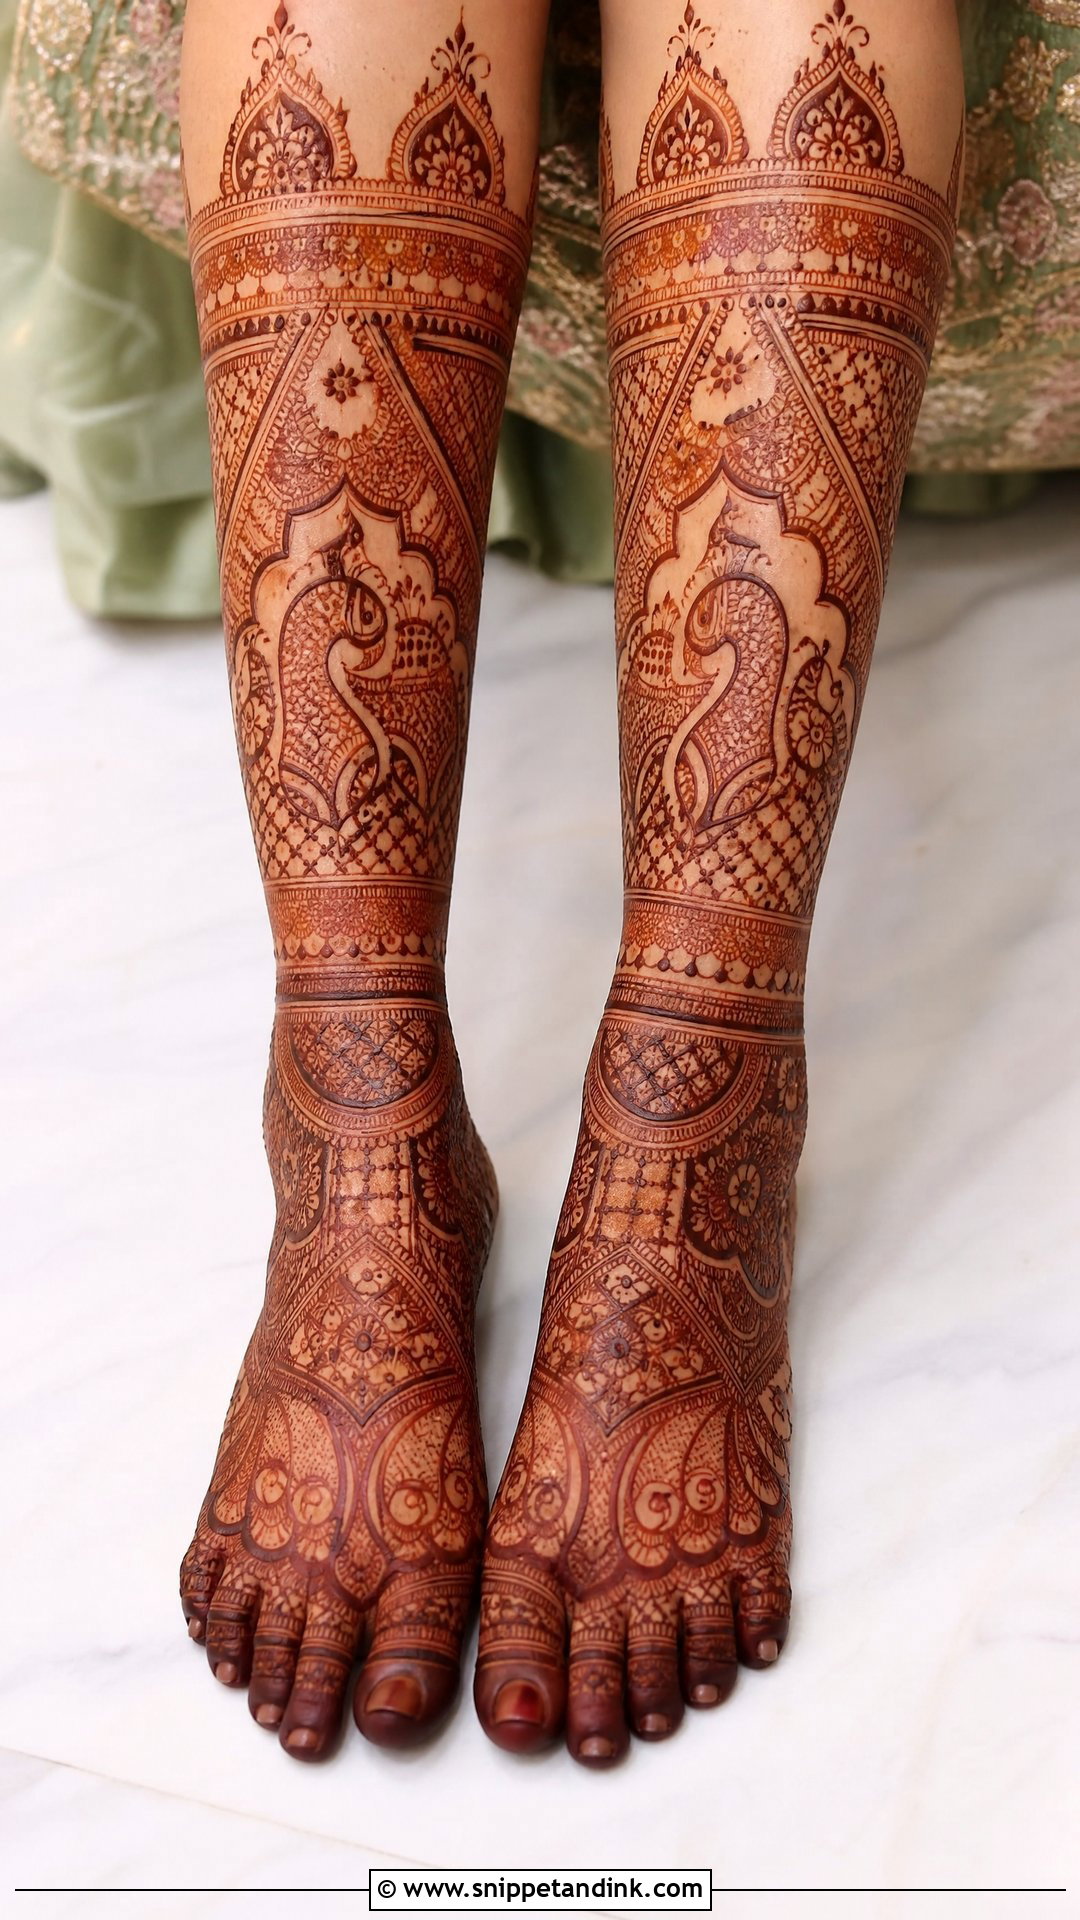
Heavy coverage puts the most paste on the skin, and on the feet that usually means the deepest, most even stain of anything here. Layered bands, peacocks, paisley clusters and jaali run from the toes past the ankle, sometimes to the calf. The risk is fatigue on both sides. The artist’s lines can loosen late in a long session, and the bride gets restless and shifts. I’d only book this with plenty of hours blocked out and food within reach. Under a heavy lehenga, ask honestly how much of it will be seen.
8. Full Foot Bridal Mehndi Design
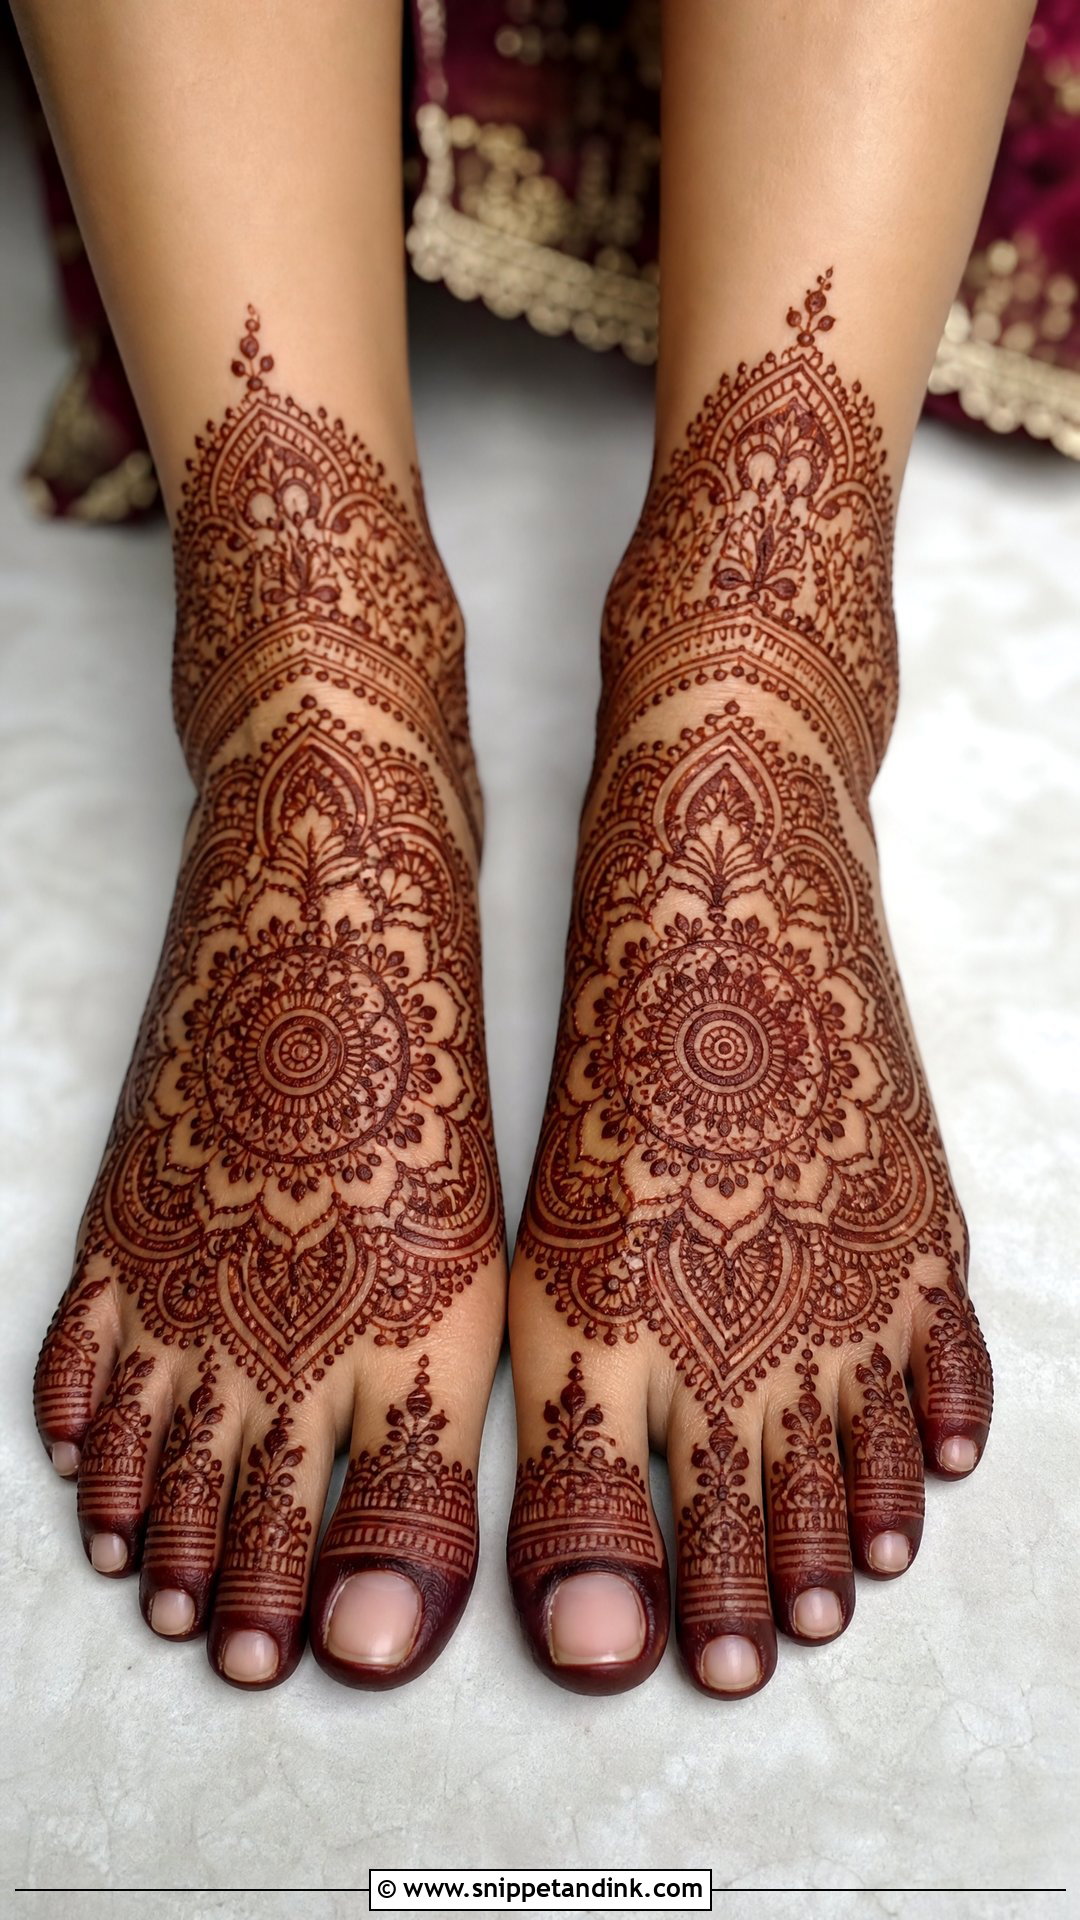
Full foot coverage stops at the ankle, and it’s the most practical bridal length I do. Toes, a central mandala or flower, side paisleys and an ankle border all fit, with room for proper symmetry. The top of the foot takes a dark stain, so the work stays crisp in close-ups. It’s quicker than any calf design and much easier to sit through, and heels or traditional anklets frame it well.
9. Ankle Bridal Mehndi Design
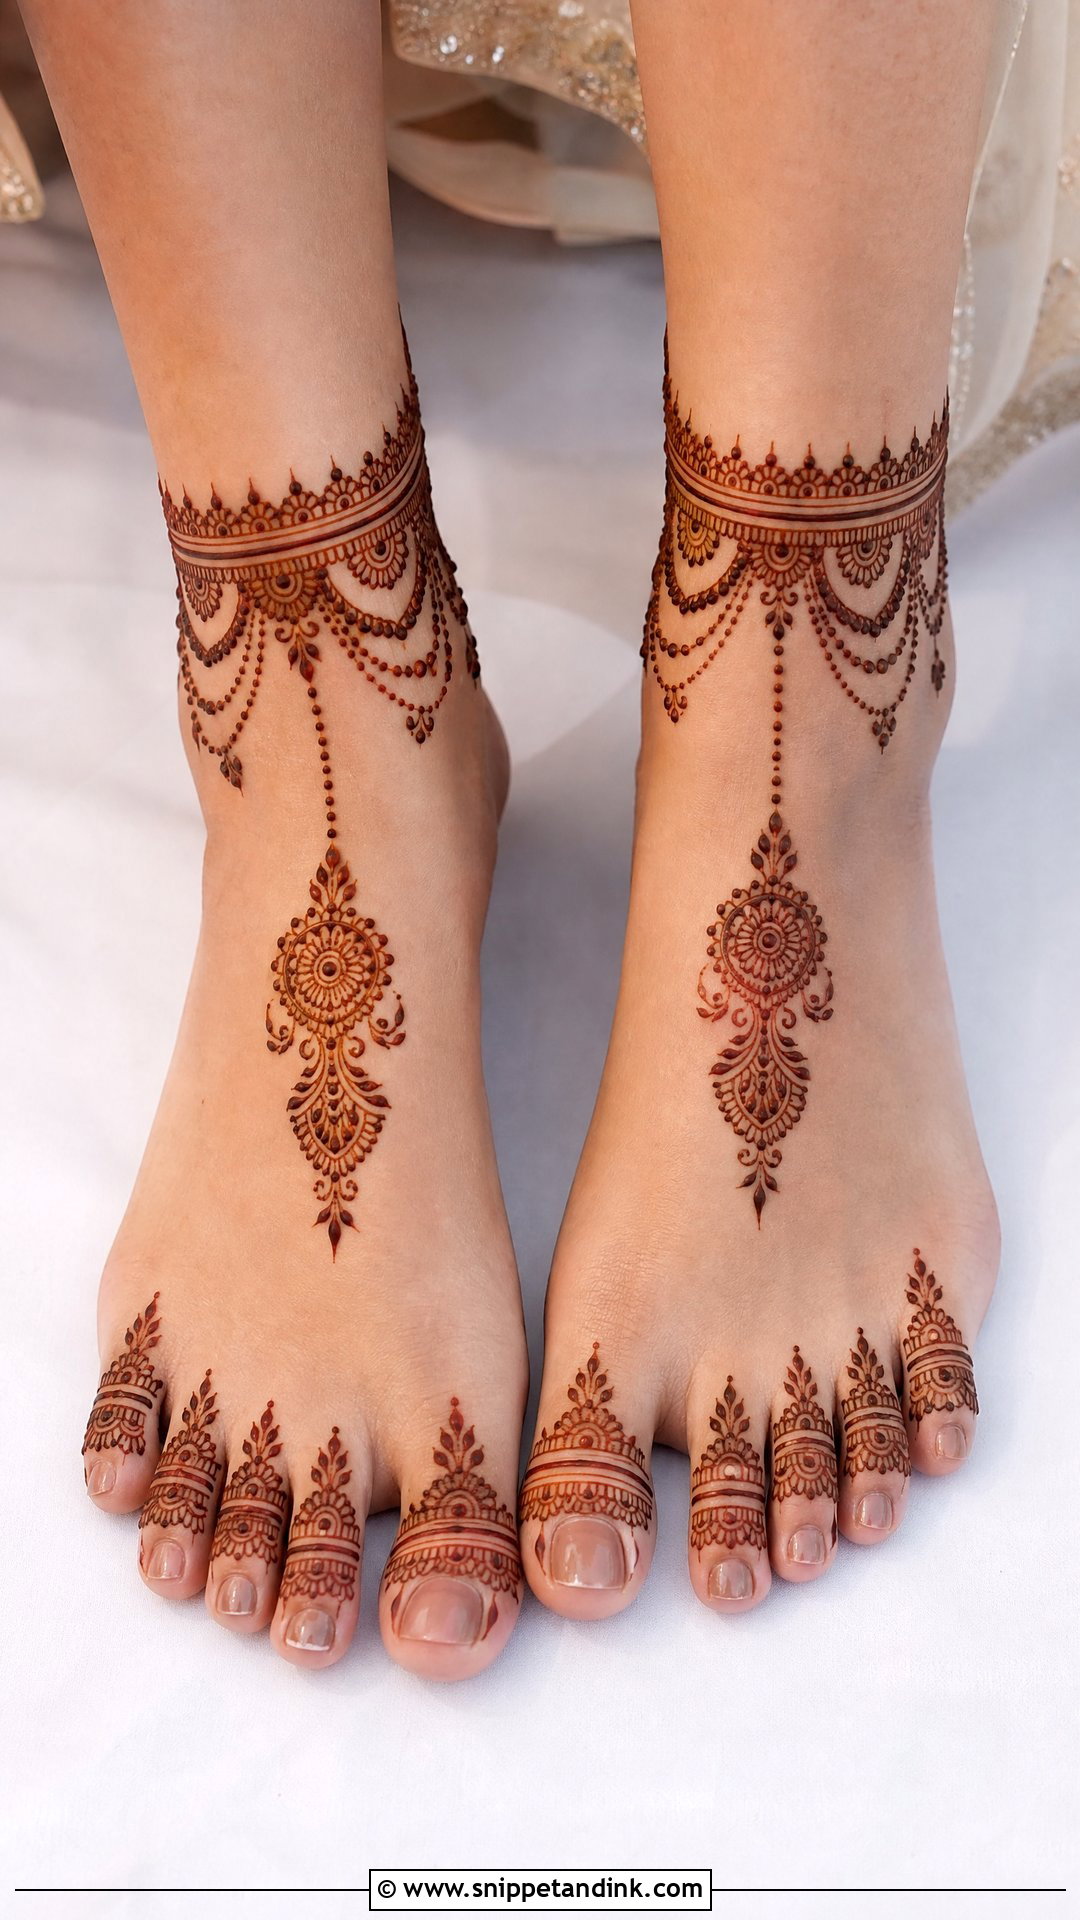
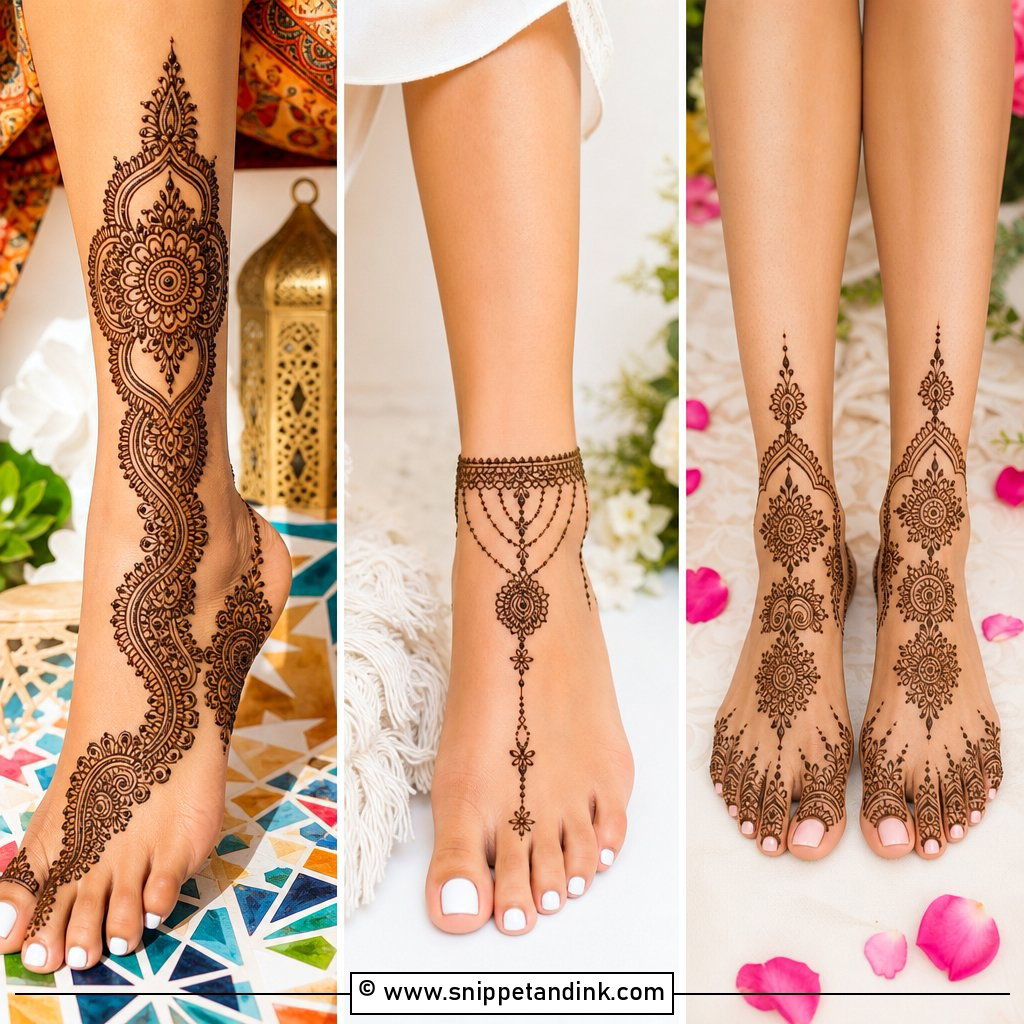
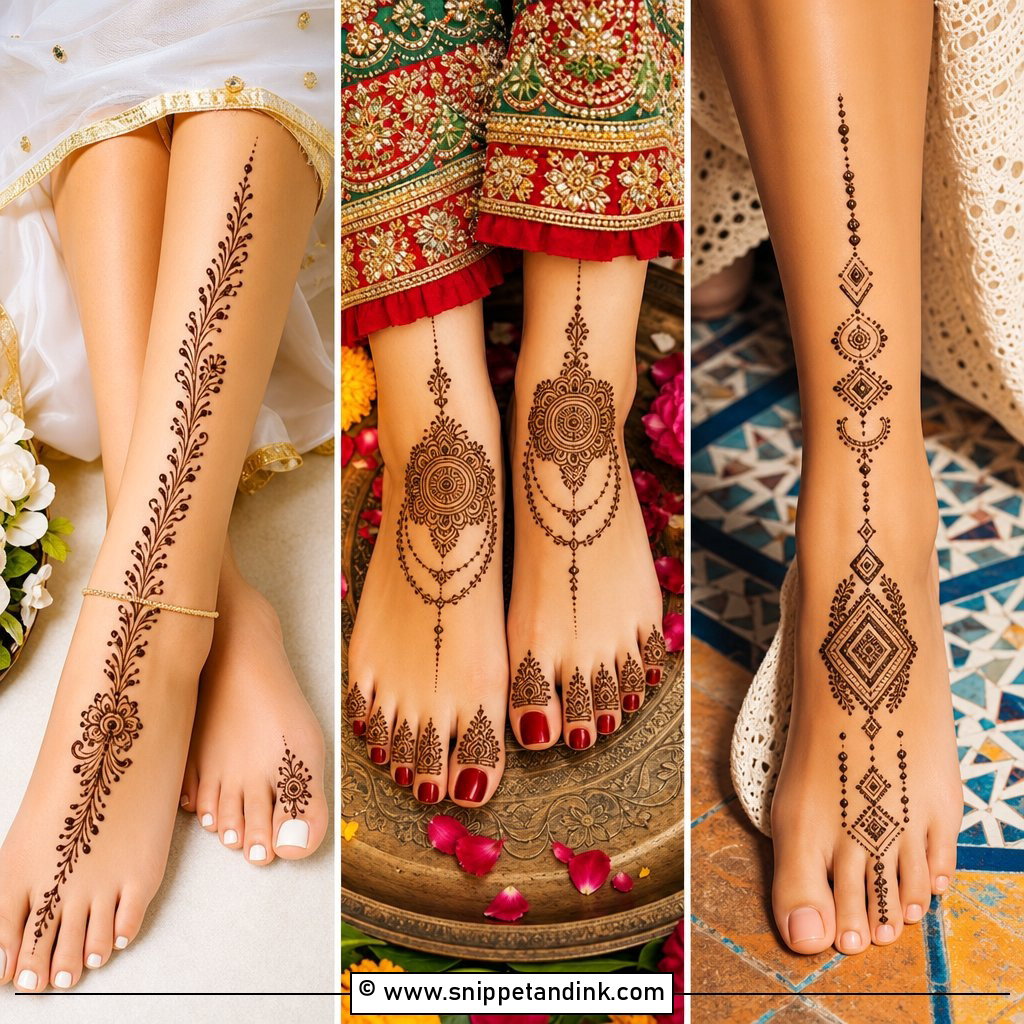
An ankle design wraps the joint like a band and connects down to the foot with chains, vines or small hanging drops. Because the ankle flexes constantly, I keep the band itself slim and put the detail into the drops below it, which survive walking better. Brides drawn to payal-inspired mehndi often start here. Light toe work stops the foot looking empty. It earns its place when your hem is shorter or your footwear is a feature in its own right.
10. Payal Style Bridal Leg Mehndi Design
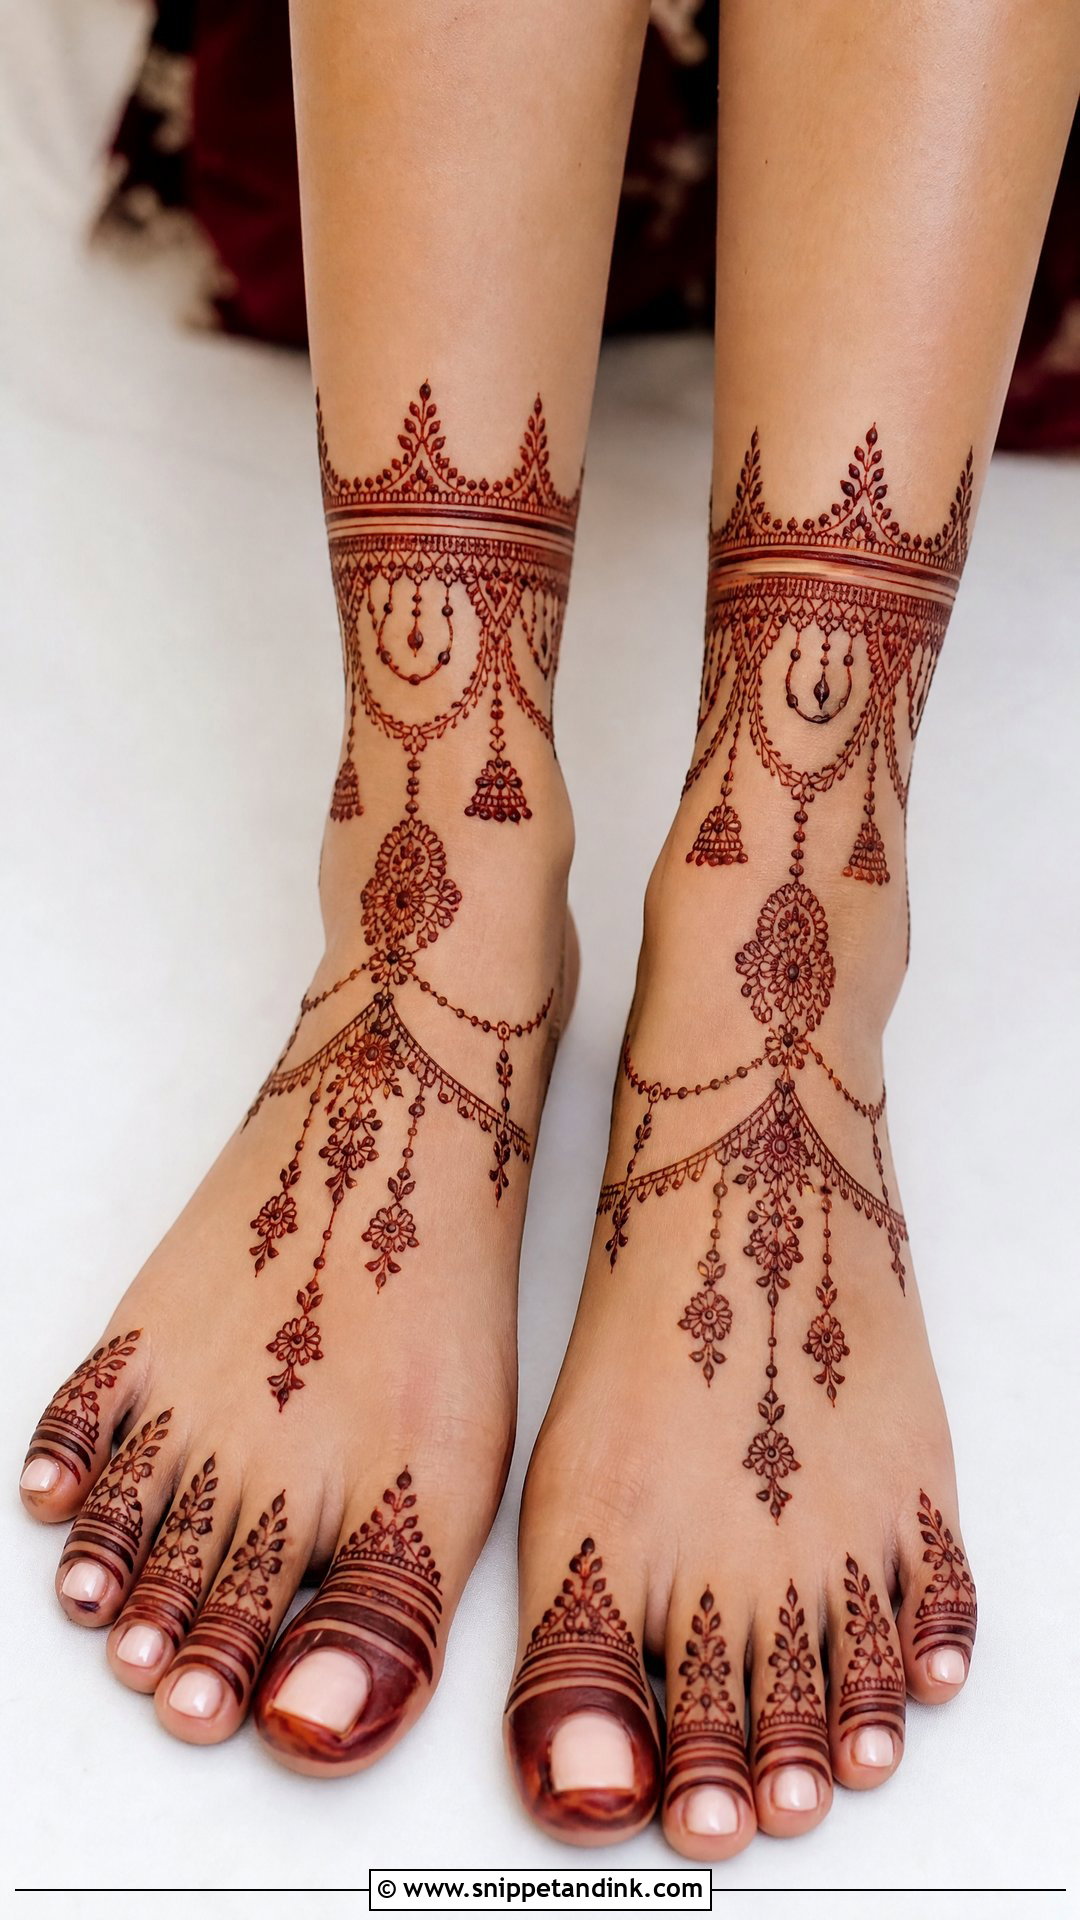
Fine chains, dots and drops turn a payal style bridal leg mehndi design into henna jewelry: anklets around the joint, rings on the toes, charms hanging toward the arch. The lines are very thin, so cone consistency matters more than usual; paste that’s too thick gives clumsy, beaded chains. If you plan to wear real anklets on top, the two layers can fight each other, so I ask brides to pick which one leads and keep the other lighter.
11. Mandala Bridal Leg Mehndi Design
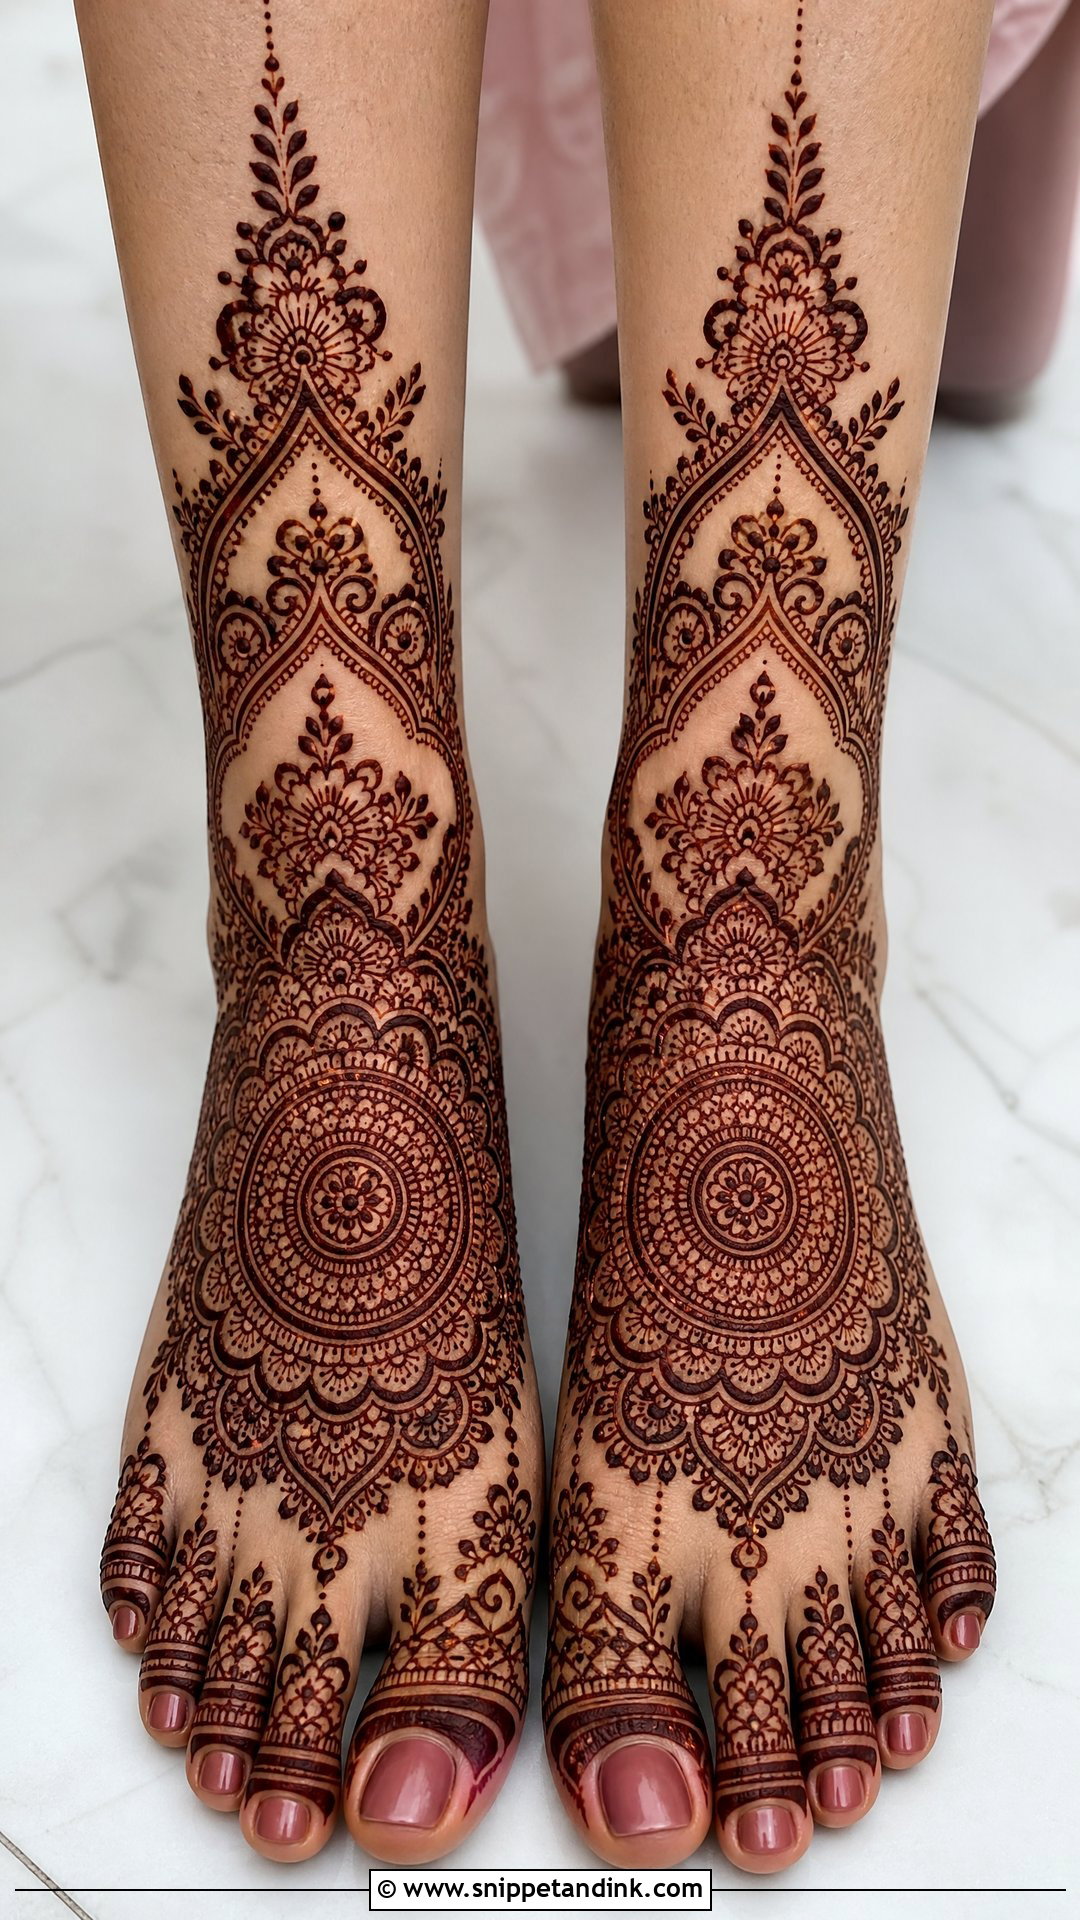
Placement makes or breaks a mandala. On the top of the foot it sits on fairly flat skin and holds its circle; pushed toward the ankle bone, it bends around the curve and looks oval from the front. I usually center it on the foot, then build toe details, side florals and leafy borders around it. It works at any density, which explains why it’s so common. Leave some bare skin around the outer ring so the shape stays readable once the stain darkens.
12. Floral Bridal Leg Mehndi Design
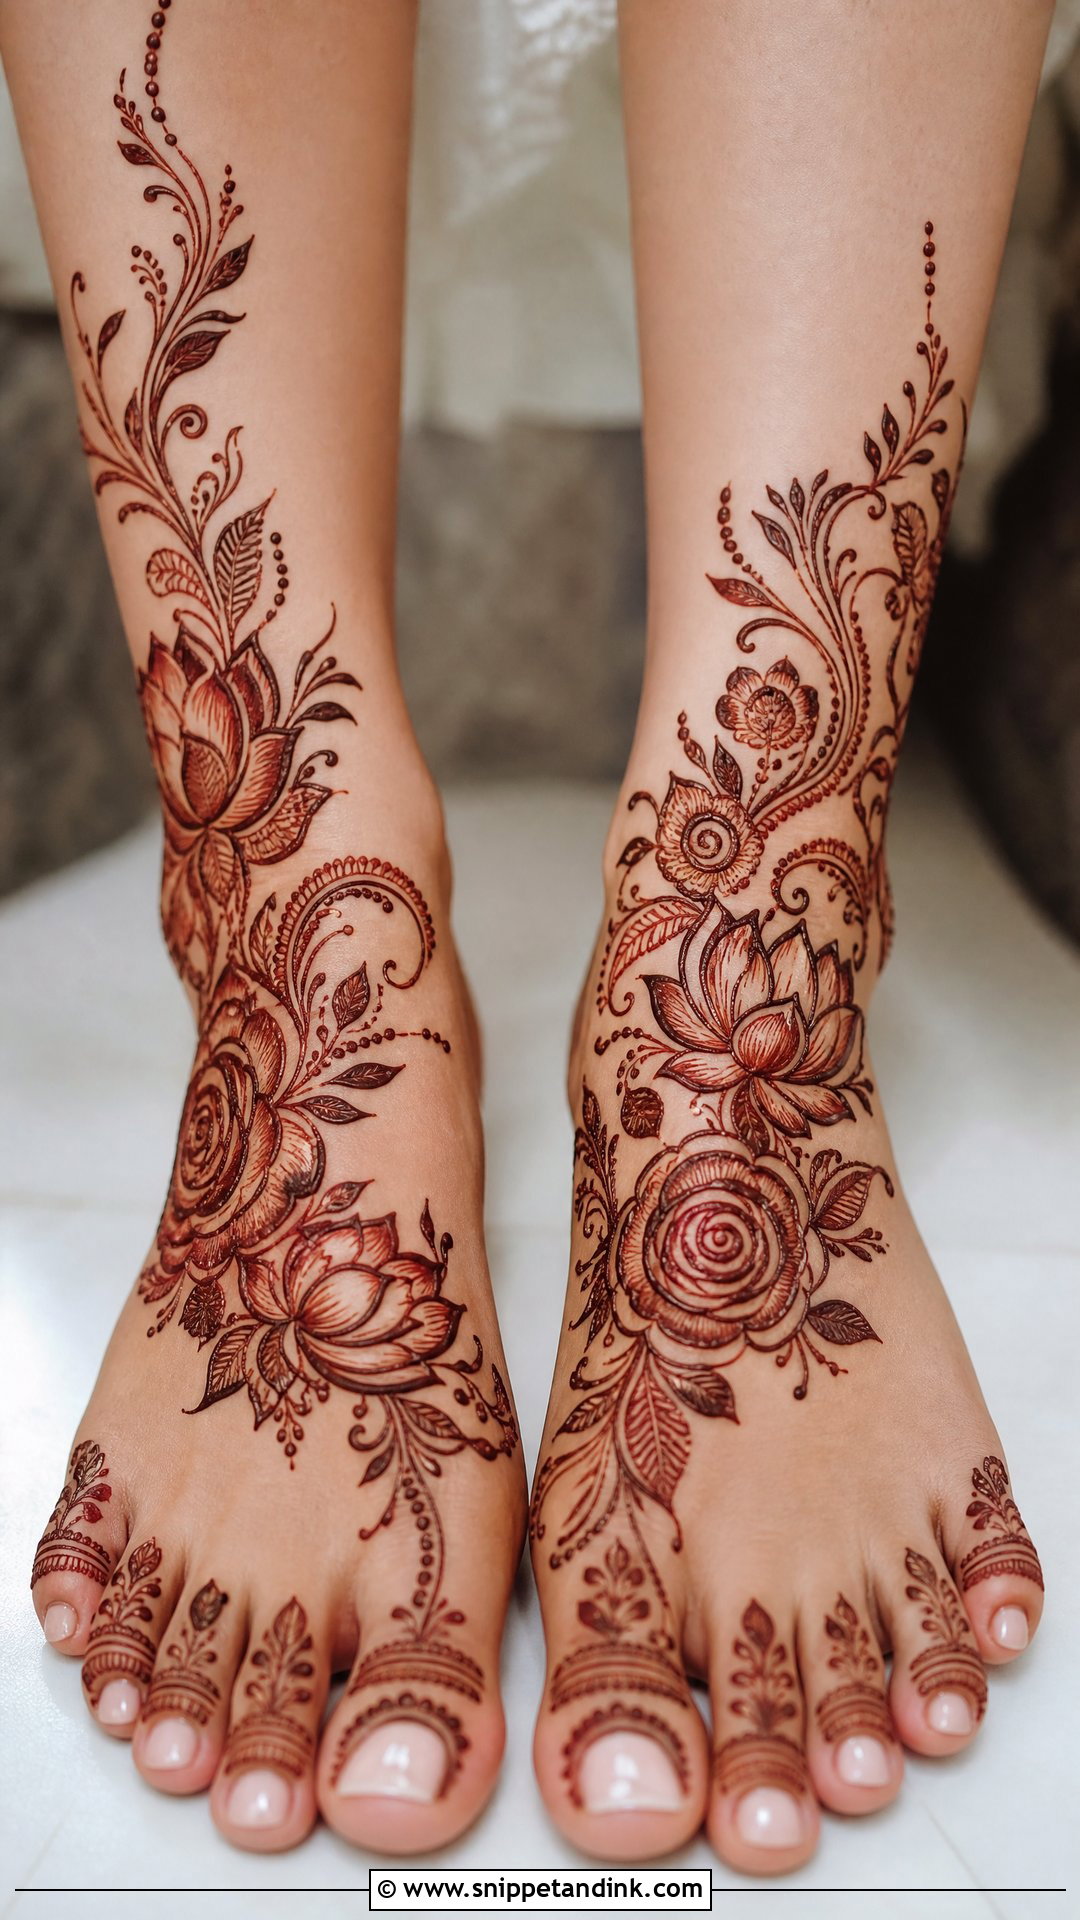
Florals are the most forgiving pattern for feet. Roses, lotus, small blossoms and shaded petals can bend along any curve, so the design moves with the foot instead of fighting it. Large flowers read as modern and tiny blossoms as delicate. Shaded petals need a lighter hand than people expect, because overfilled shading stains as a solid patch. I finish this one with decorated toes, a slim ankle border and a few trailing leaves.
13. Peacock Bridal Leg Mehndi Design
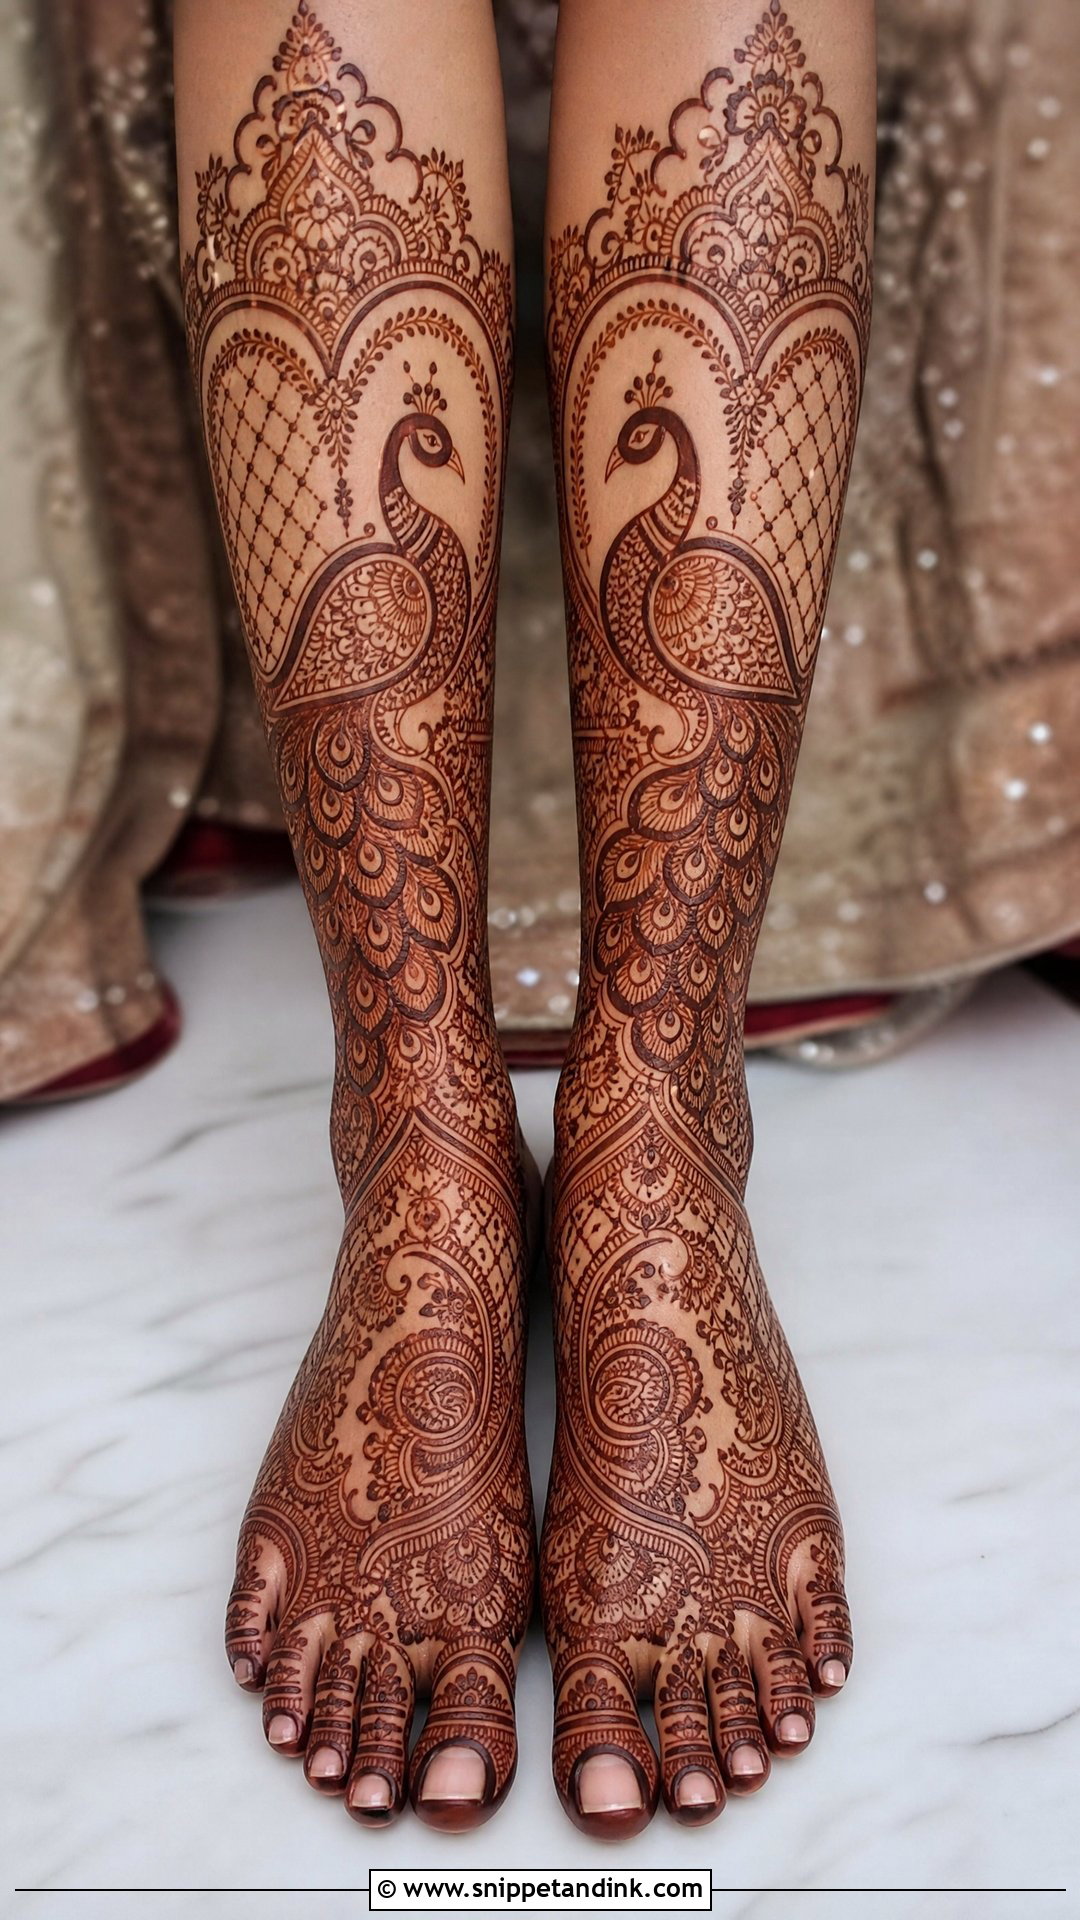
A peacock bridal leg mehndi design puts one festive motif on the foot, ankle or calf, with the feathers trailing into paisleys, leaves and jaali. The bird has to stay recognizable, and on a small foot that means simplifying the body and saving the detail for the feathers. I face the two peacocks inward, toward each other, so the pair reads as a set in seated shots. One peacock per foot with open florals is the softer version; feathers sweeping up the shin is the grand one.
14. Paisley Bridal Leg Mehndi Design
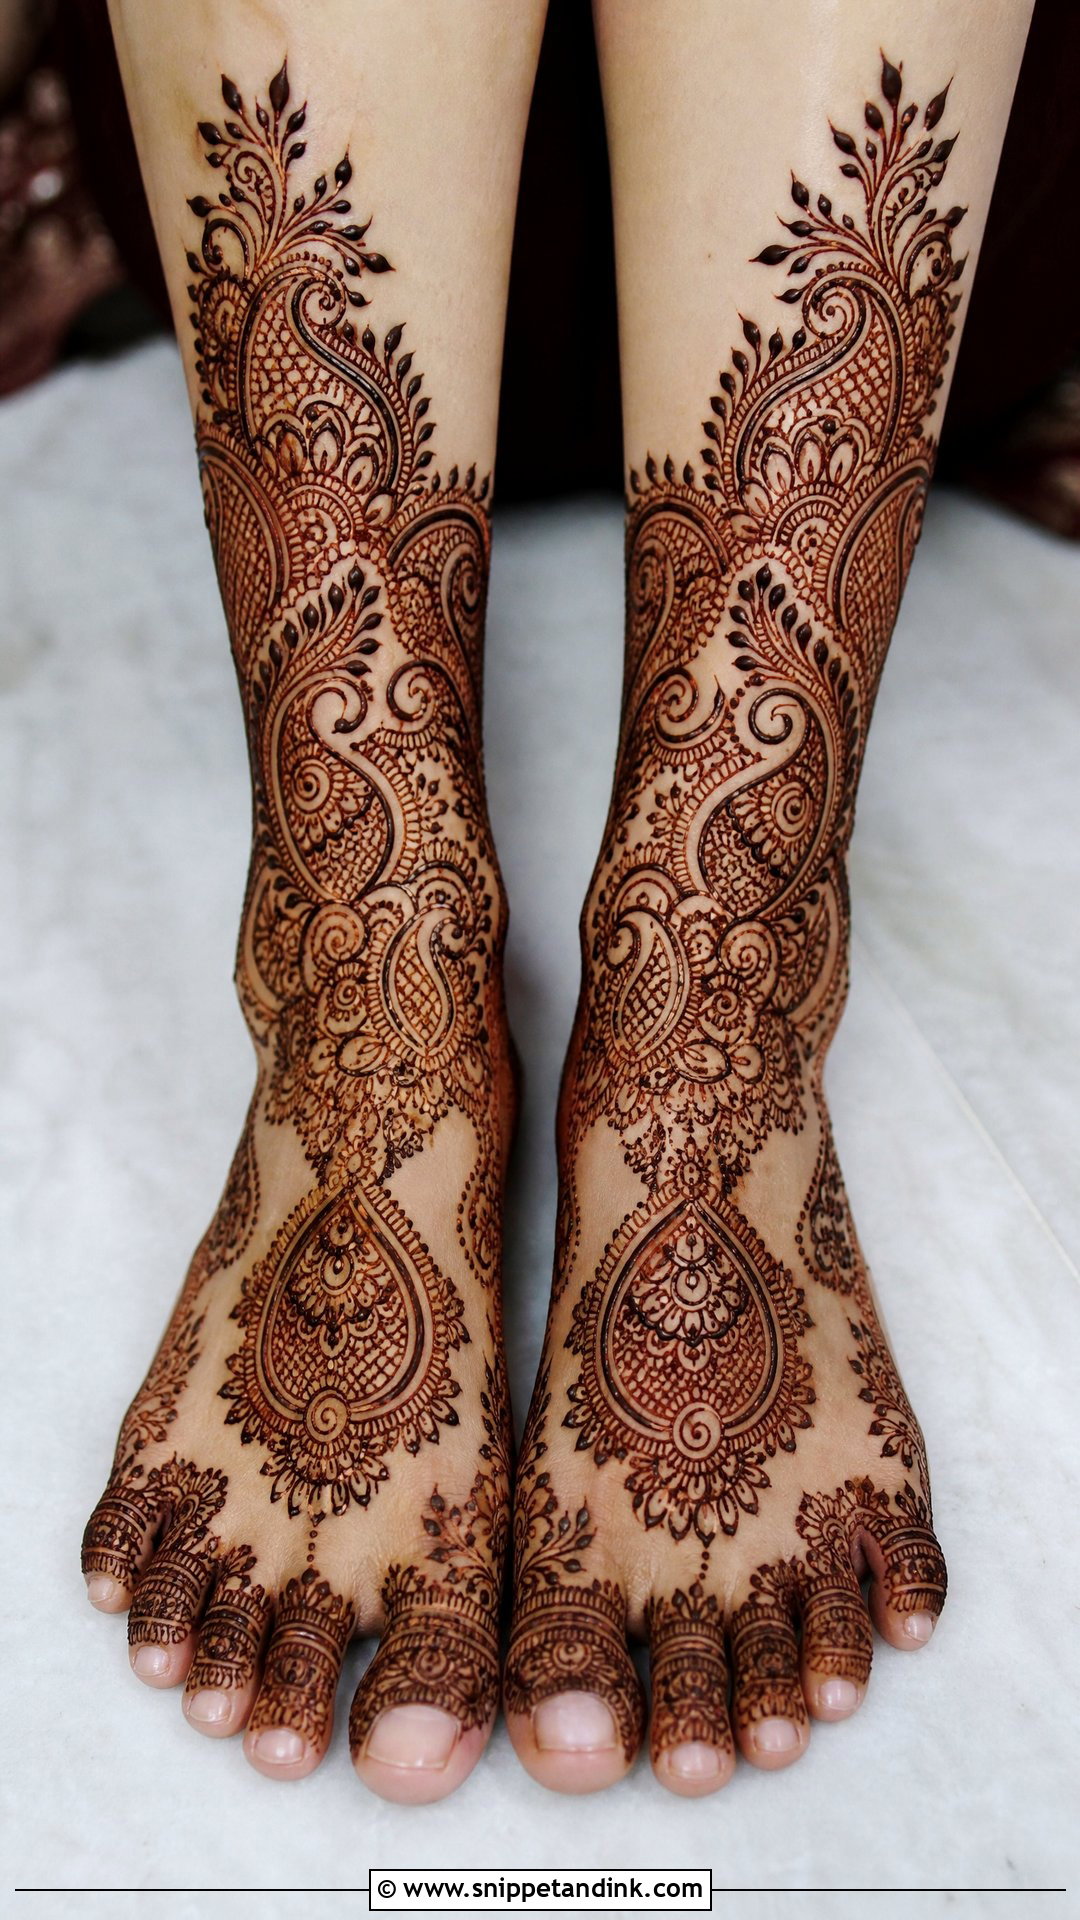
Paisleys follow the curve of the arch and the ankle so naturally that they rarely look forced. I use them as the backbone of a layout and let dots, swirls and small florals fill around them. Dense or open, both work. The mistake I see most is mixing paisley sizes at random, when a repeating chain from toe to ankle reads far more clearly. Add mandalas or jaali if you want more texture.
15. Jaali Bridal Leg Mehndi Design
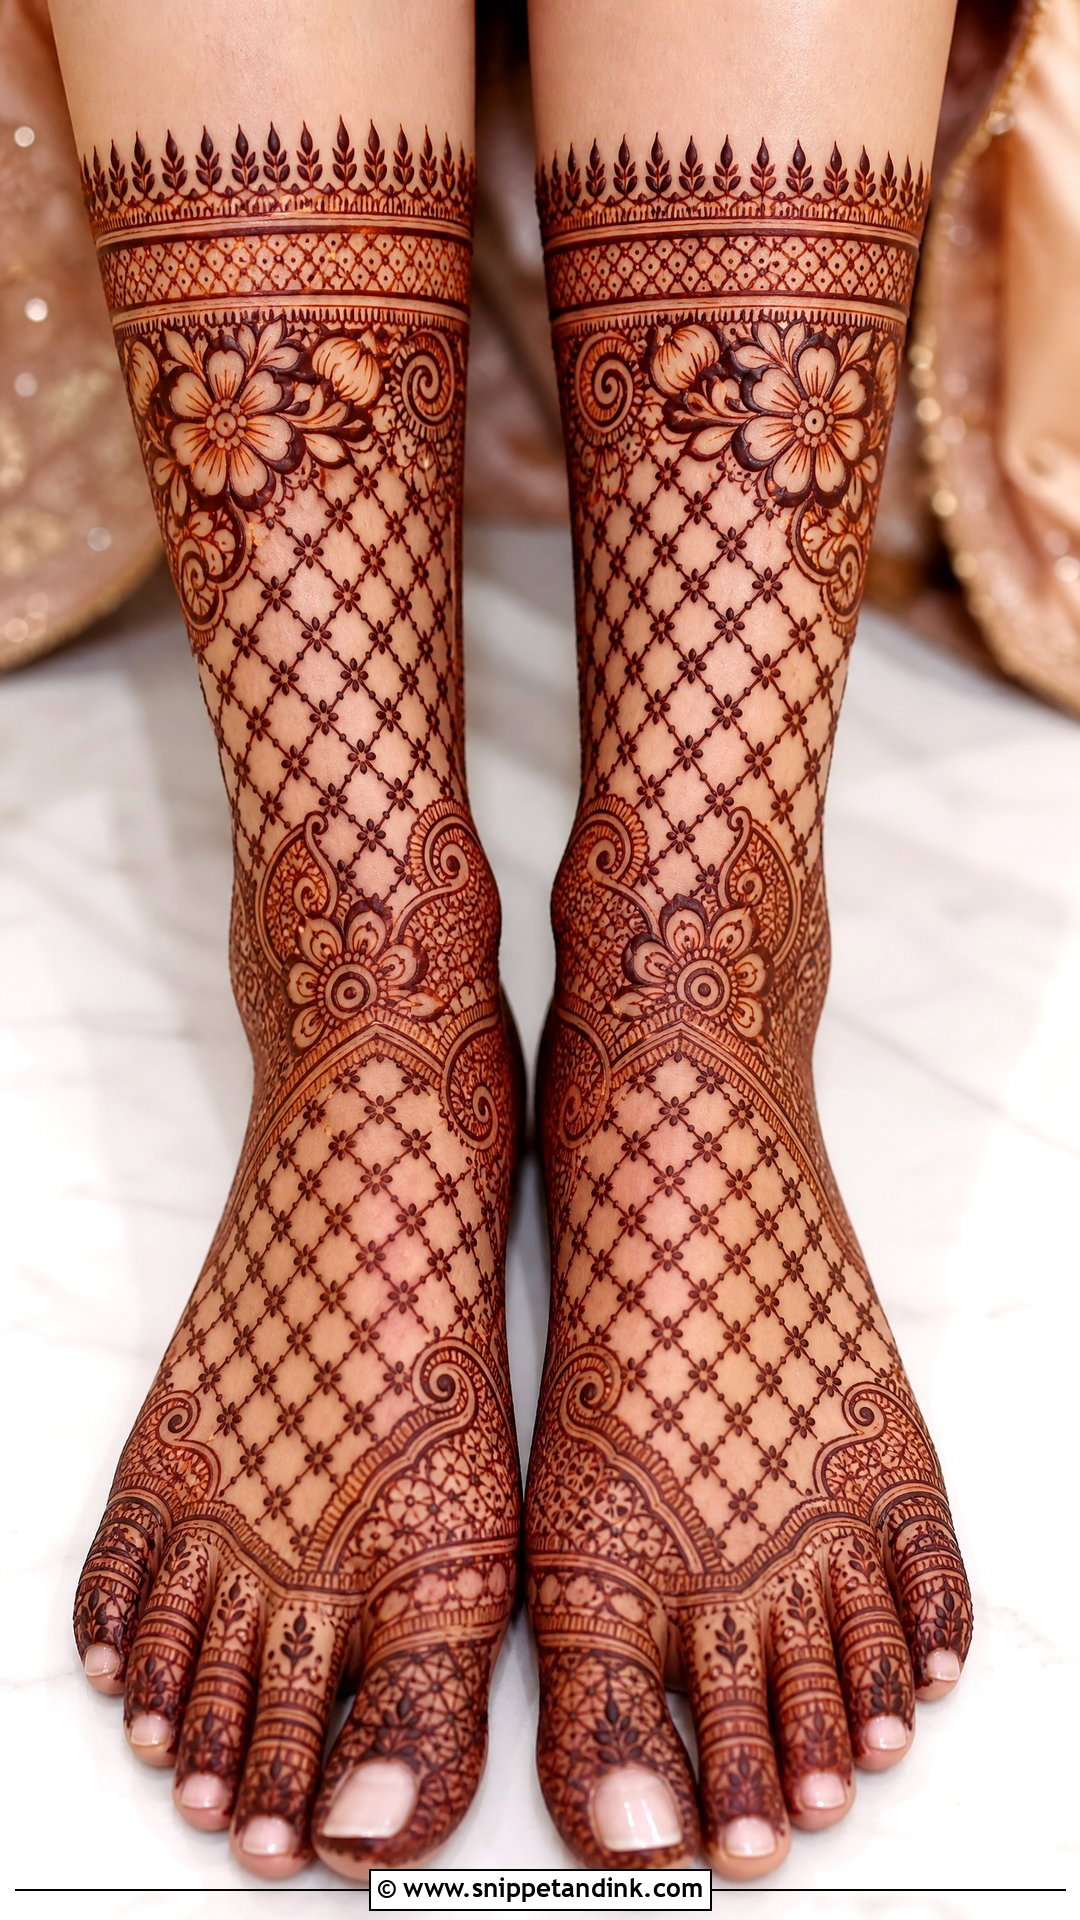
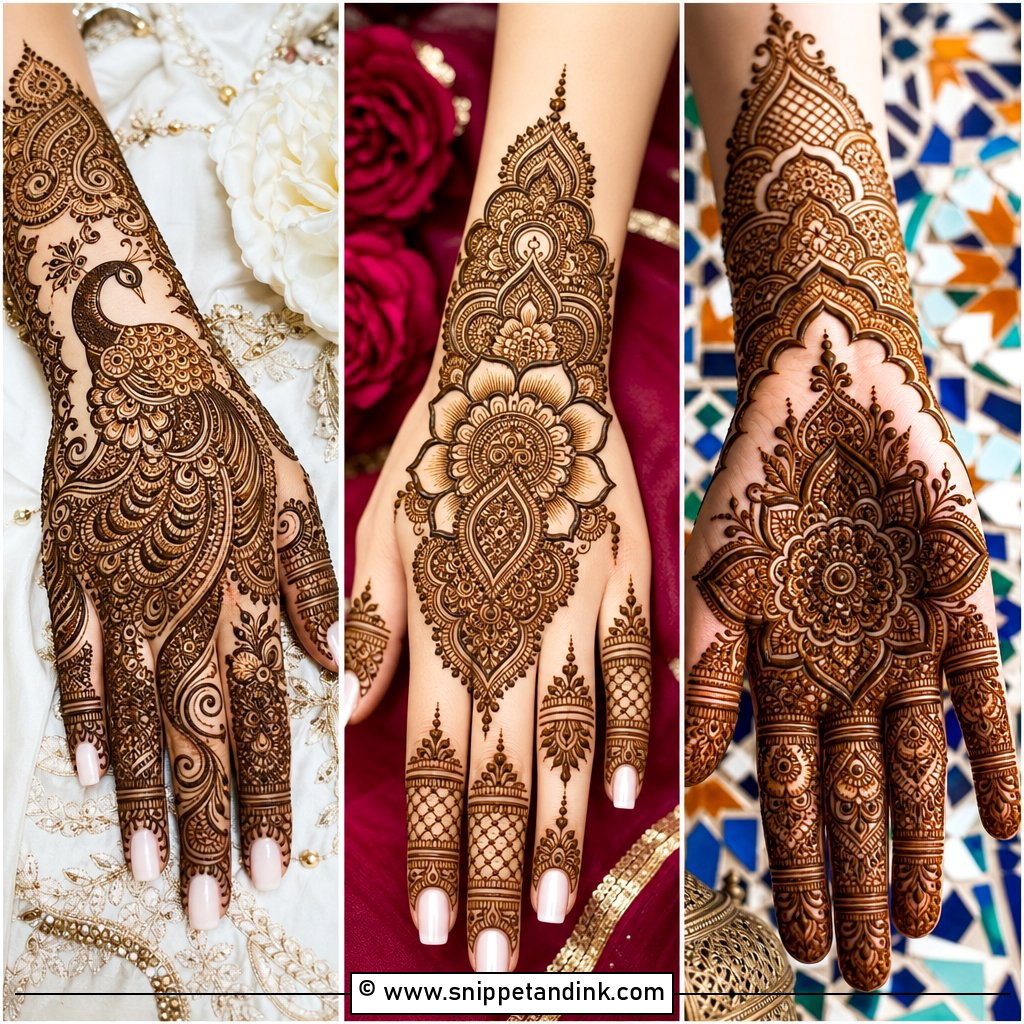
Jaali is a lace grid of crisscross lines, dots and floral corners, used to fill a panel on the foot, a band at the ankle or sections of a longer design. It’s demanding work. The lines must be evenly spaced, and if the paste spreads, the gaps close up and the net turns into a dark smudge. I only put jaali on flat areas like the top of the foot and keep it off the ankle crease. Framed by florals or paisleys, it adds texture without adding new motifs.
16. Moroccan Bridal Leg Mehndi Design
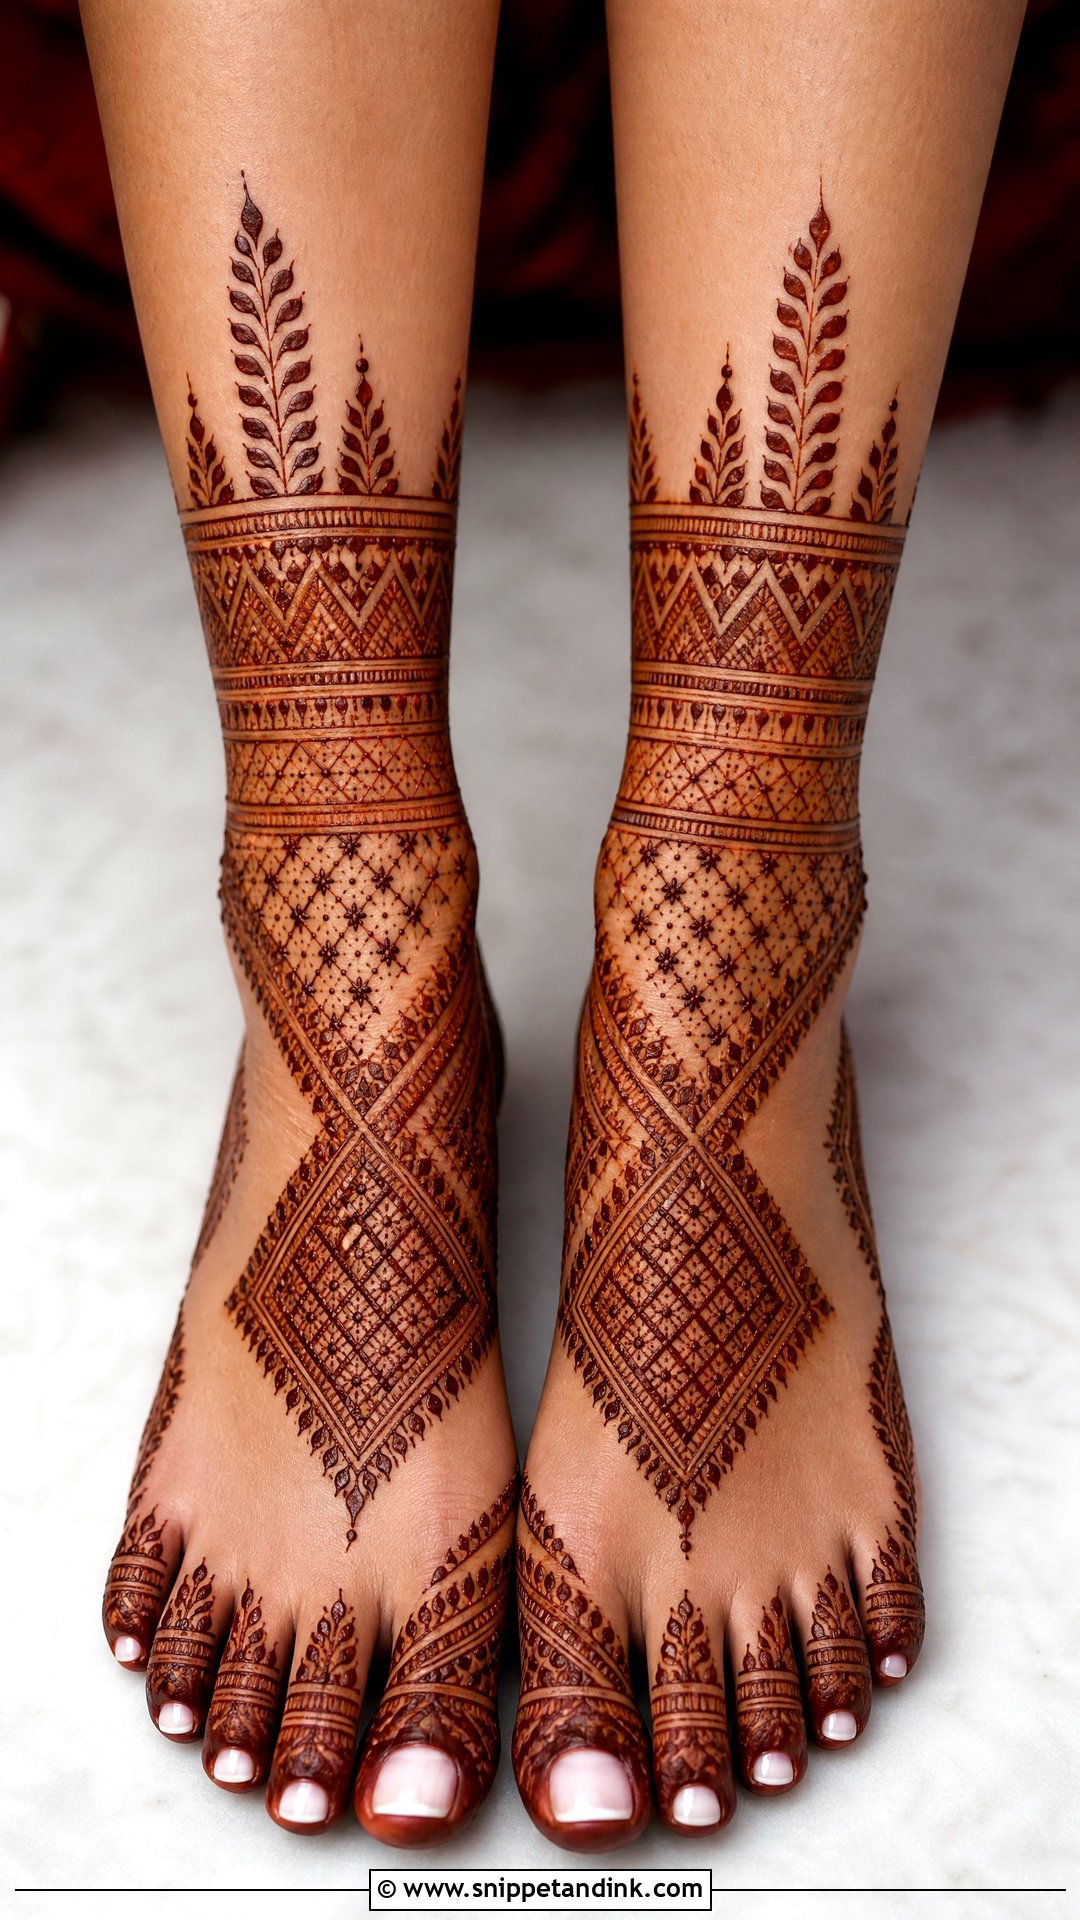
Moroccan leg mehndi swaps vines for geometry: diamonds, grids, triangles, dots and repeated blocks. It’s still uncommon at South Asian weddings, and it looks crisp on feet because straight bands can follow the toes, arch and ankle cleanly. Geometry is unforgiving, though. A crooked grid on one foot shows instantly next to the other, so I mark the key points with tiny dots before drawing a single line. Fine borders and a few small florals keep it bridal.
17. Gulf Bridal Leg Mehndi Design
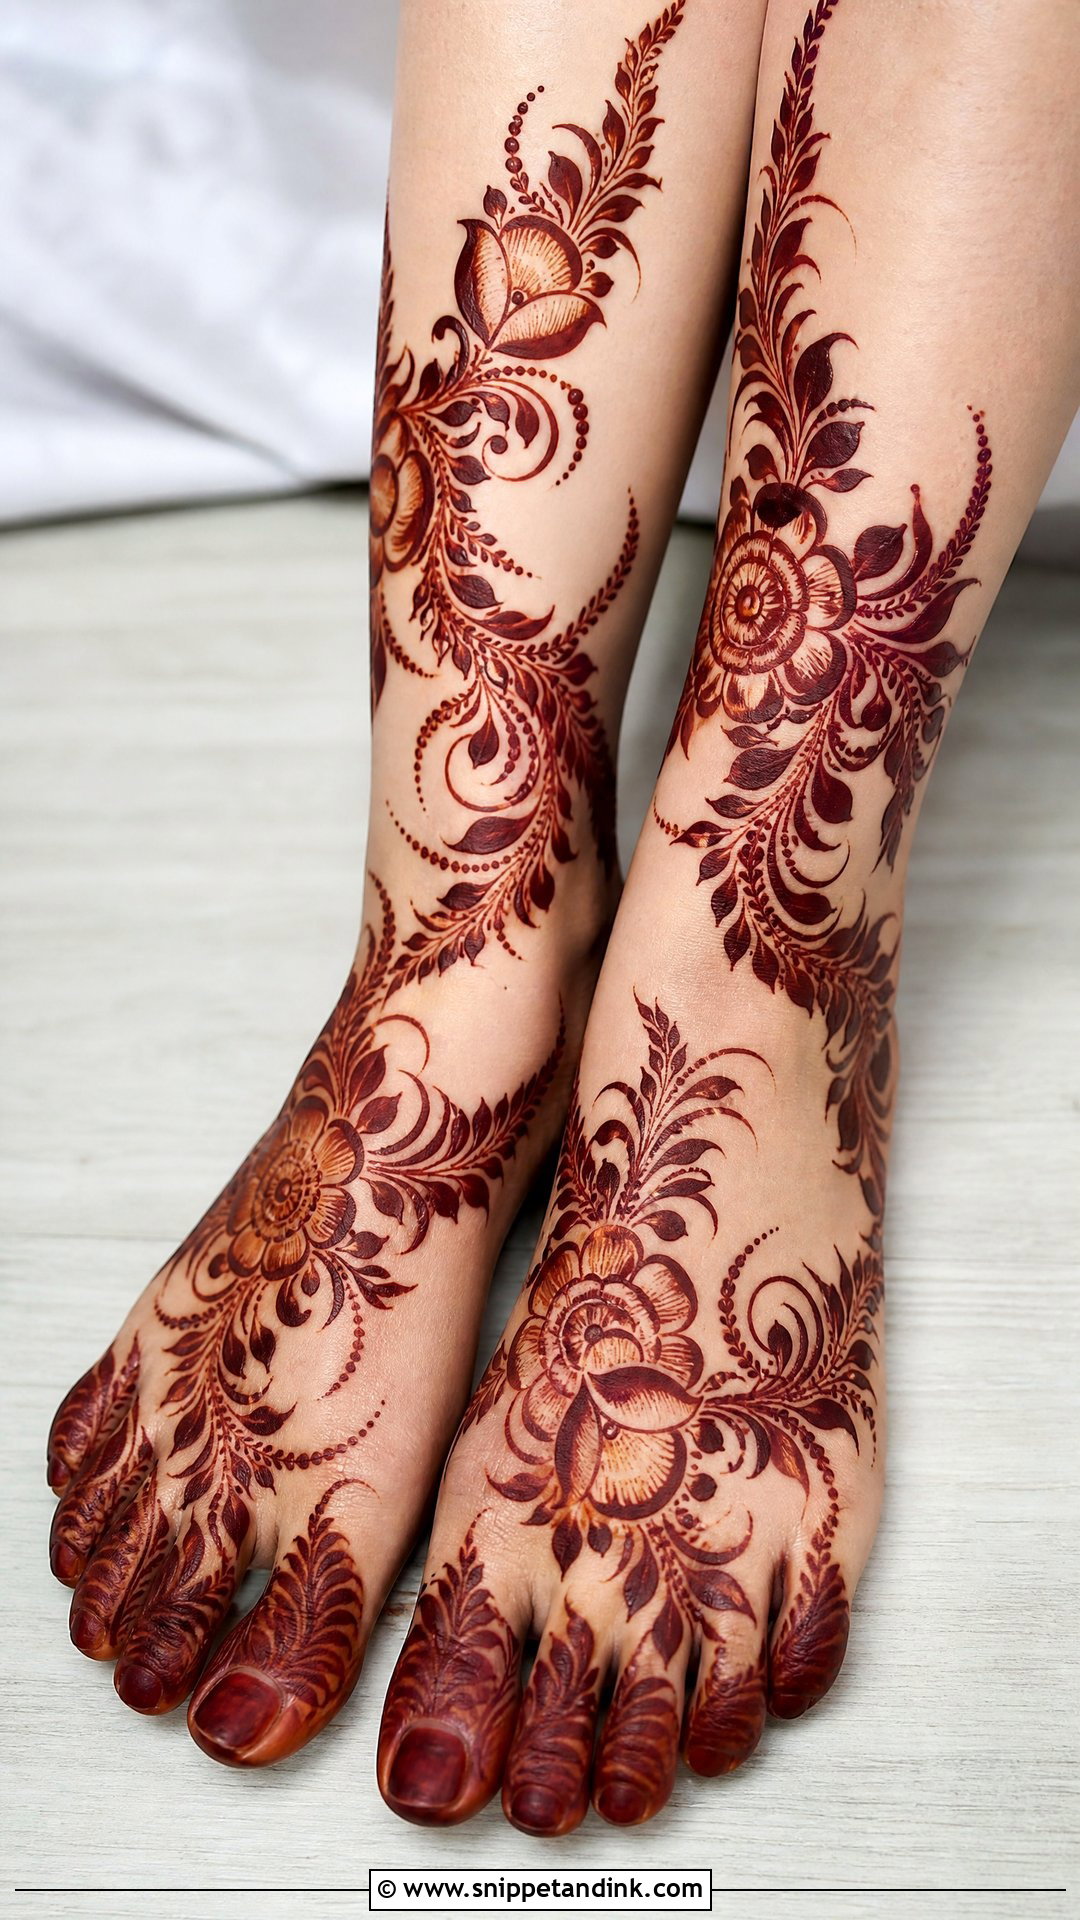
Gulf or Khaleeji-inspired mehndi uses large flowers, leafy trails and thick outlines with wide gaps of skin between. Thick lines carry more paste, so the stain on the feet usually comes out bold and even, which is the whole point of the style. It runs diagonally from the toes to the ankle or curves around the side of the foot. If dense Indian work feels like too much, this is the strongest alternative I know, and it sits comfortably with modern sandals.
18. Minimal Bridal Leg Mehndi Design
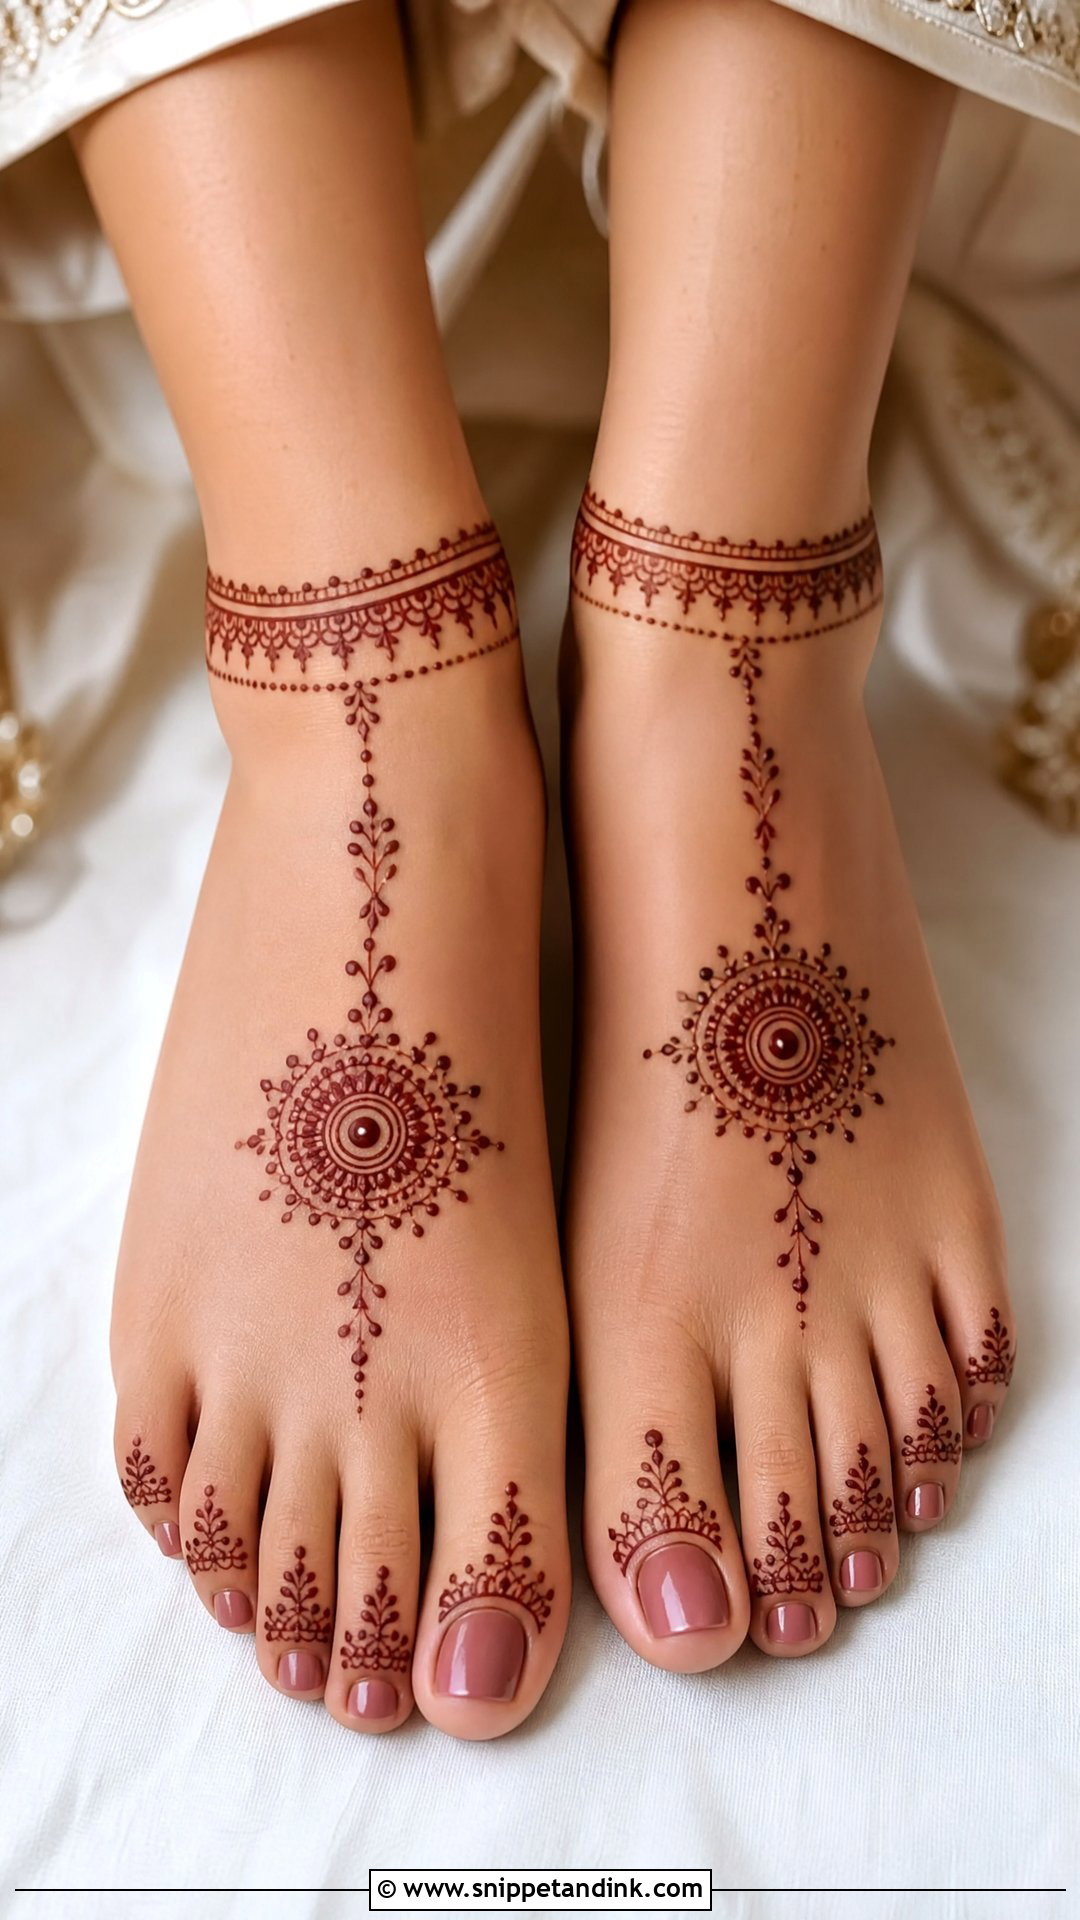
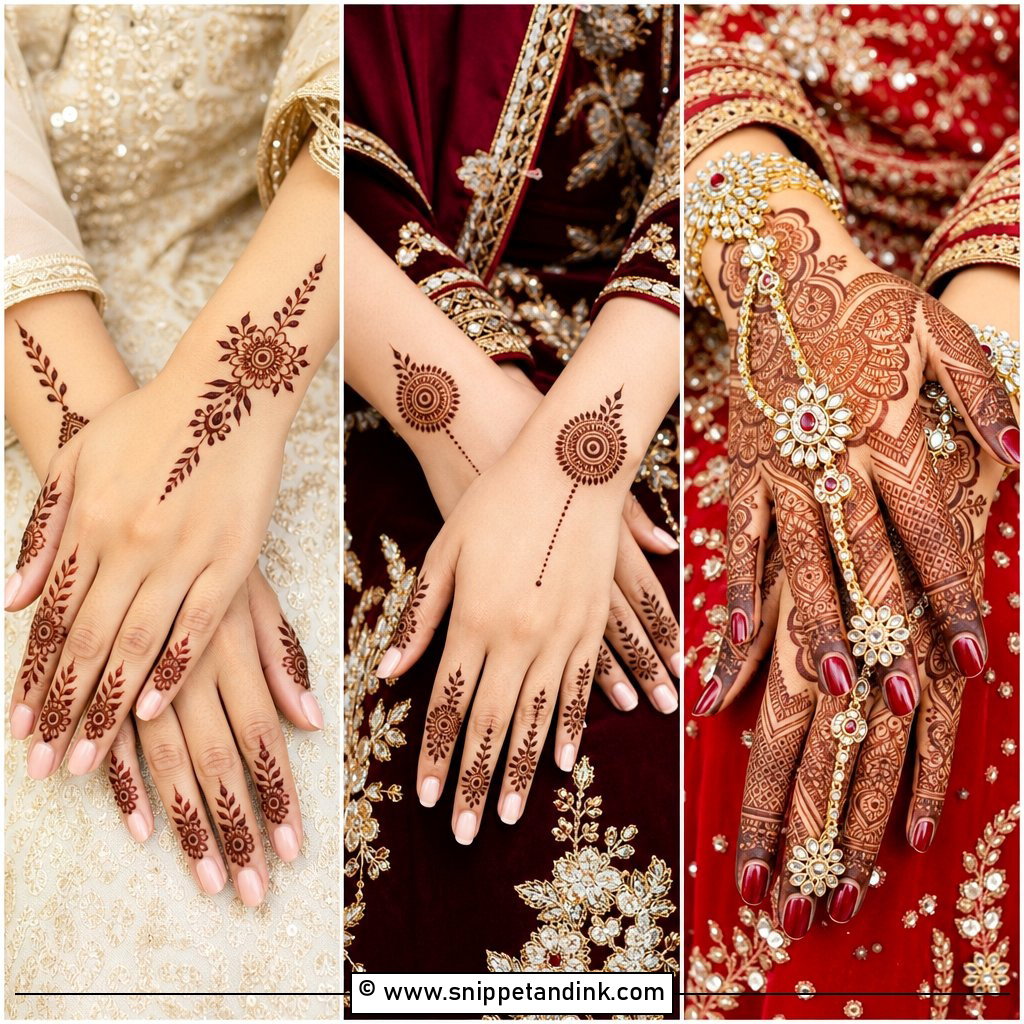
Minimal leg mehndi lives or dies on placement: a small mandala, a thin ankle band, decorated toes and one vine across the foot. With so little on the skin, line quality is everything, so look at an artist’s simple work up close before you book. It’s the most comfortable option, and I suggest it for destination weddings where you’ll be walking on sand or grass. Keep both feet matched and it still looks bridal.
19. Half Leg Bridal Mehndi Design
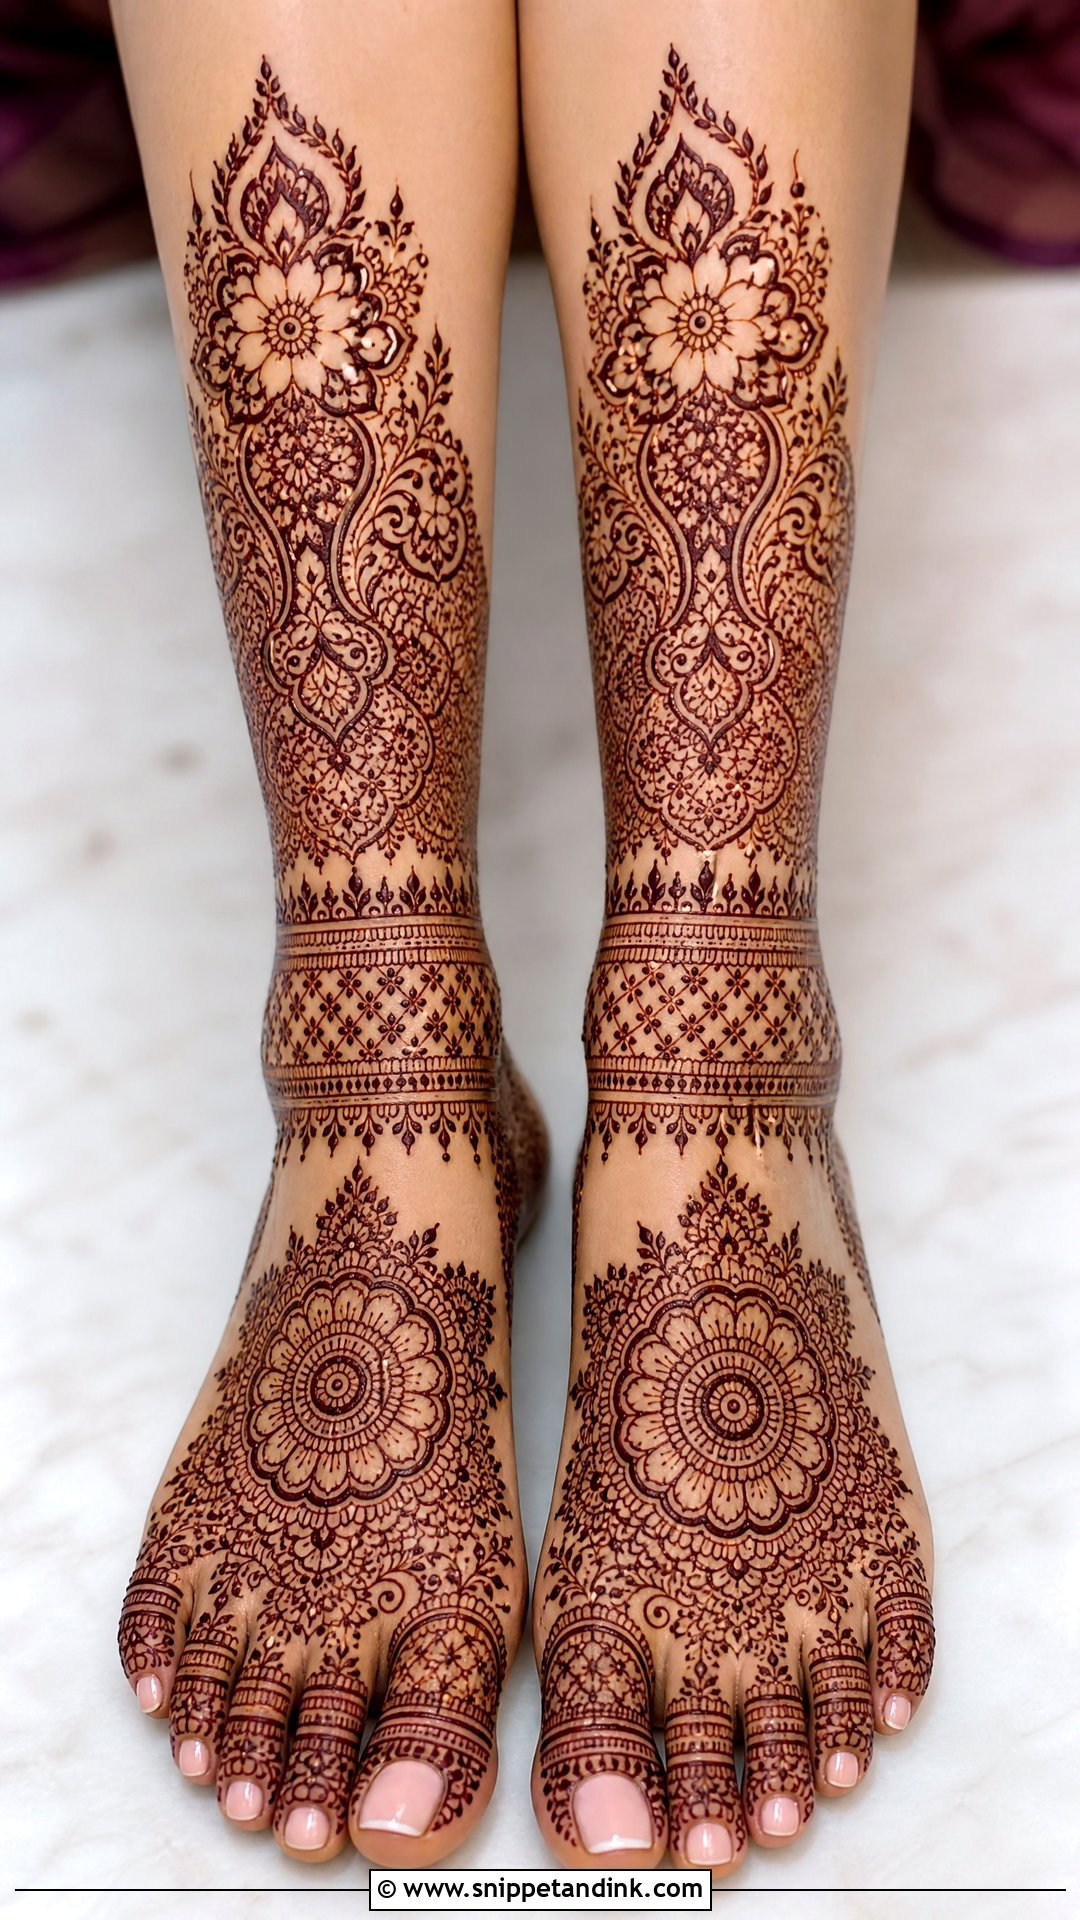
Half leg coverage stops at the lower or mid calf, giving a full bridal feel without the longest sitting time. Mandalas on the feet, layered ankle bands, florals on the shin and paisley fillers are typical. Expect the shin to stain a shade lighter than the foot. That gradient is normal, and I plan for it by keeping the boldest motifs low. You can take it dense and Indian or open and Arabic.
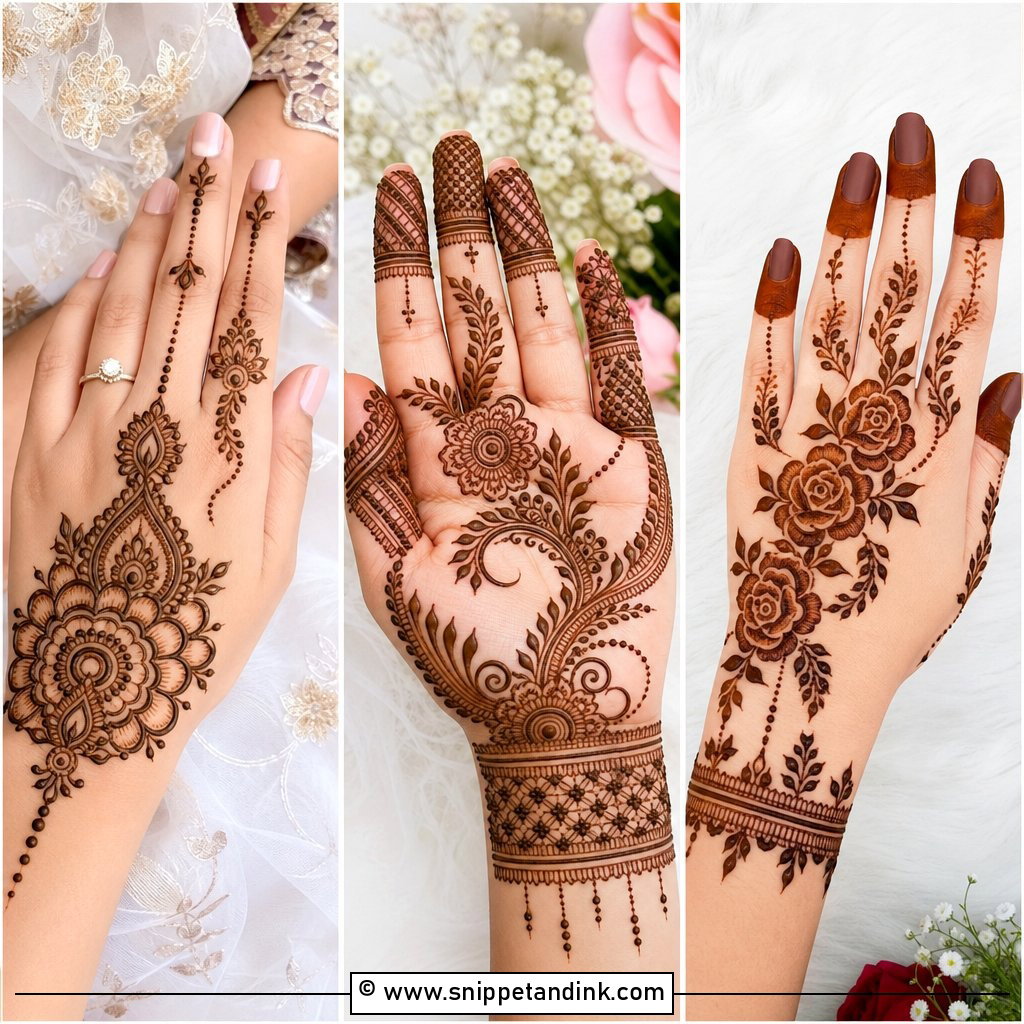
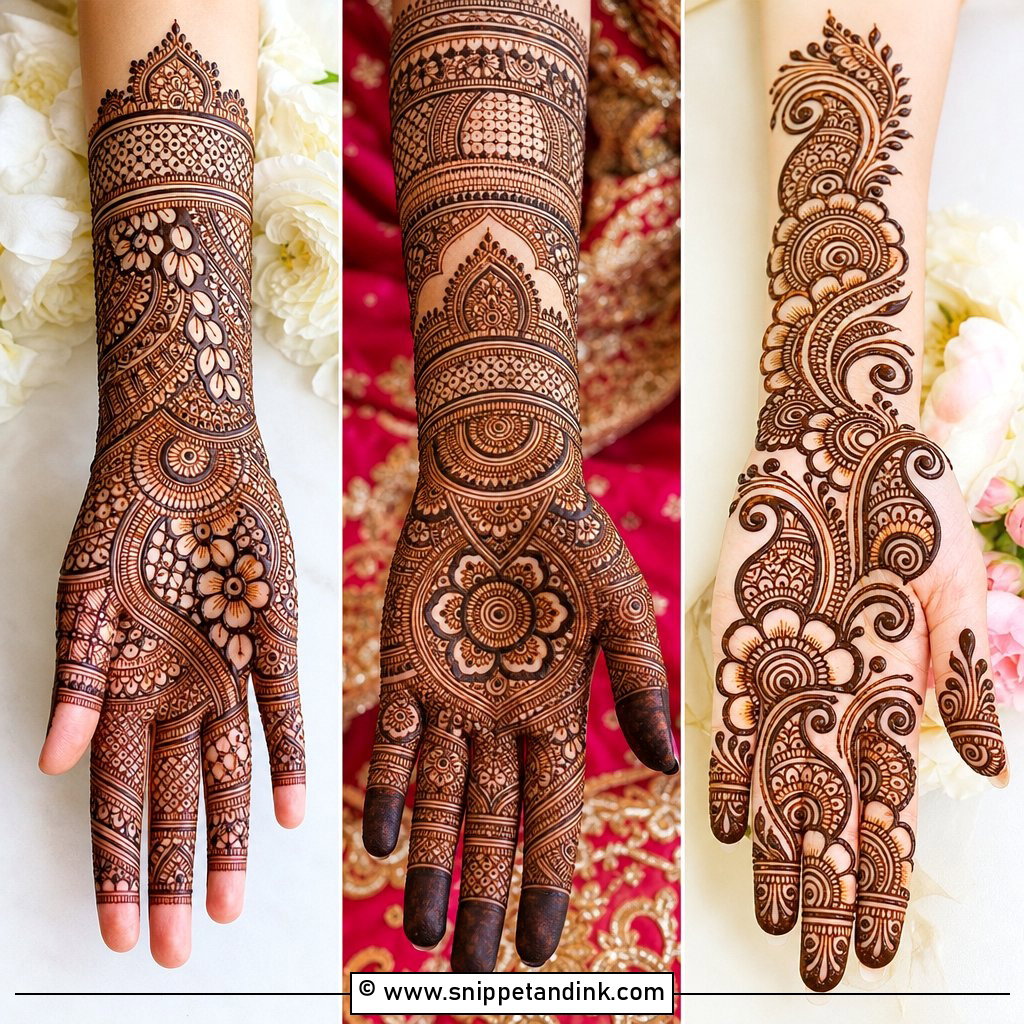
20. Front Leg Bridal Mehndi Design
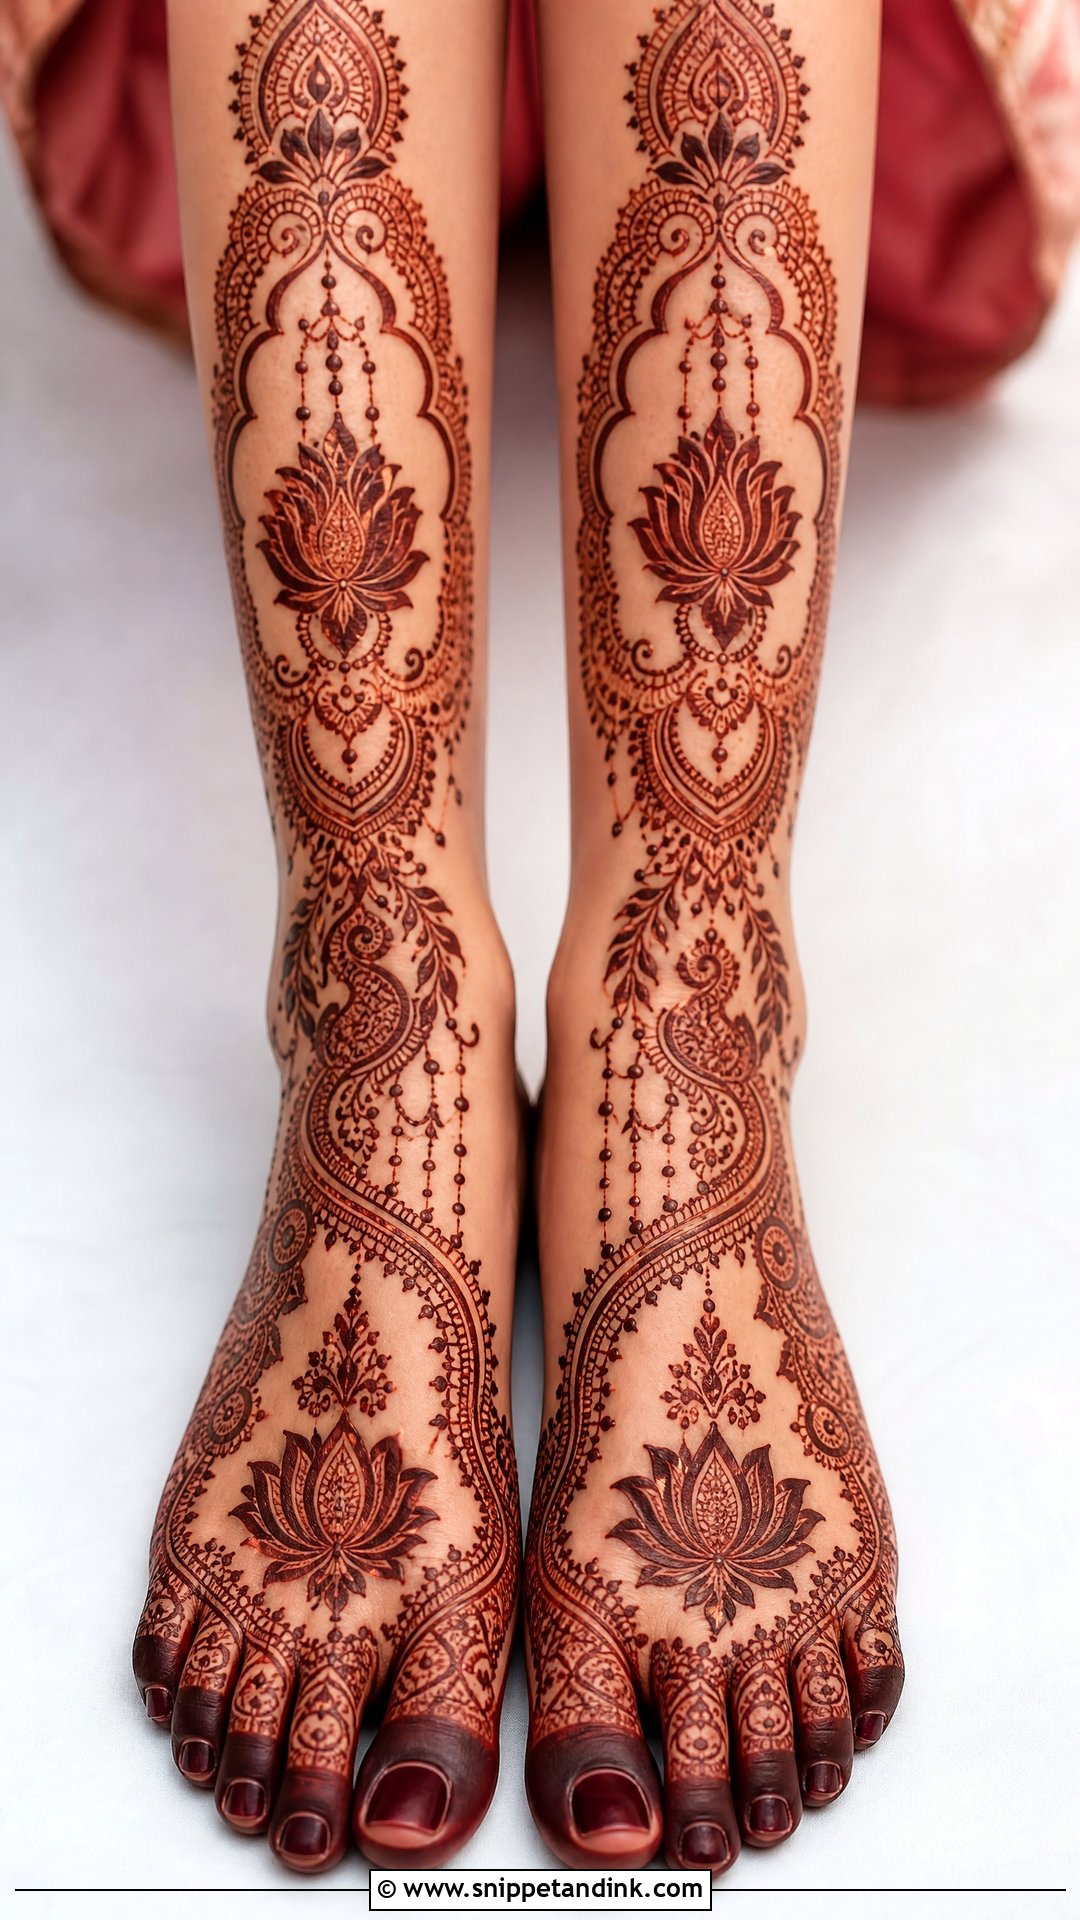
Front leg designs concentrate on the top of the foot, the ankle and the shin, which is exactly what people see when you stand in sandals. The flow is vertical, rising from the toes with mandalas, lotus, paisley trails and hanging chains. The shin is narrow, so I keep the pattern within its front face; letting it spill onto the sides makes the leg read wider than intended. A single center line looks sleek, a fuller panel traditional.
21. Side Leg Bridal Mehndi Design
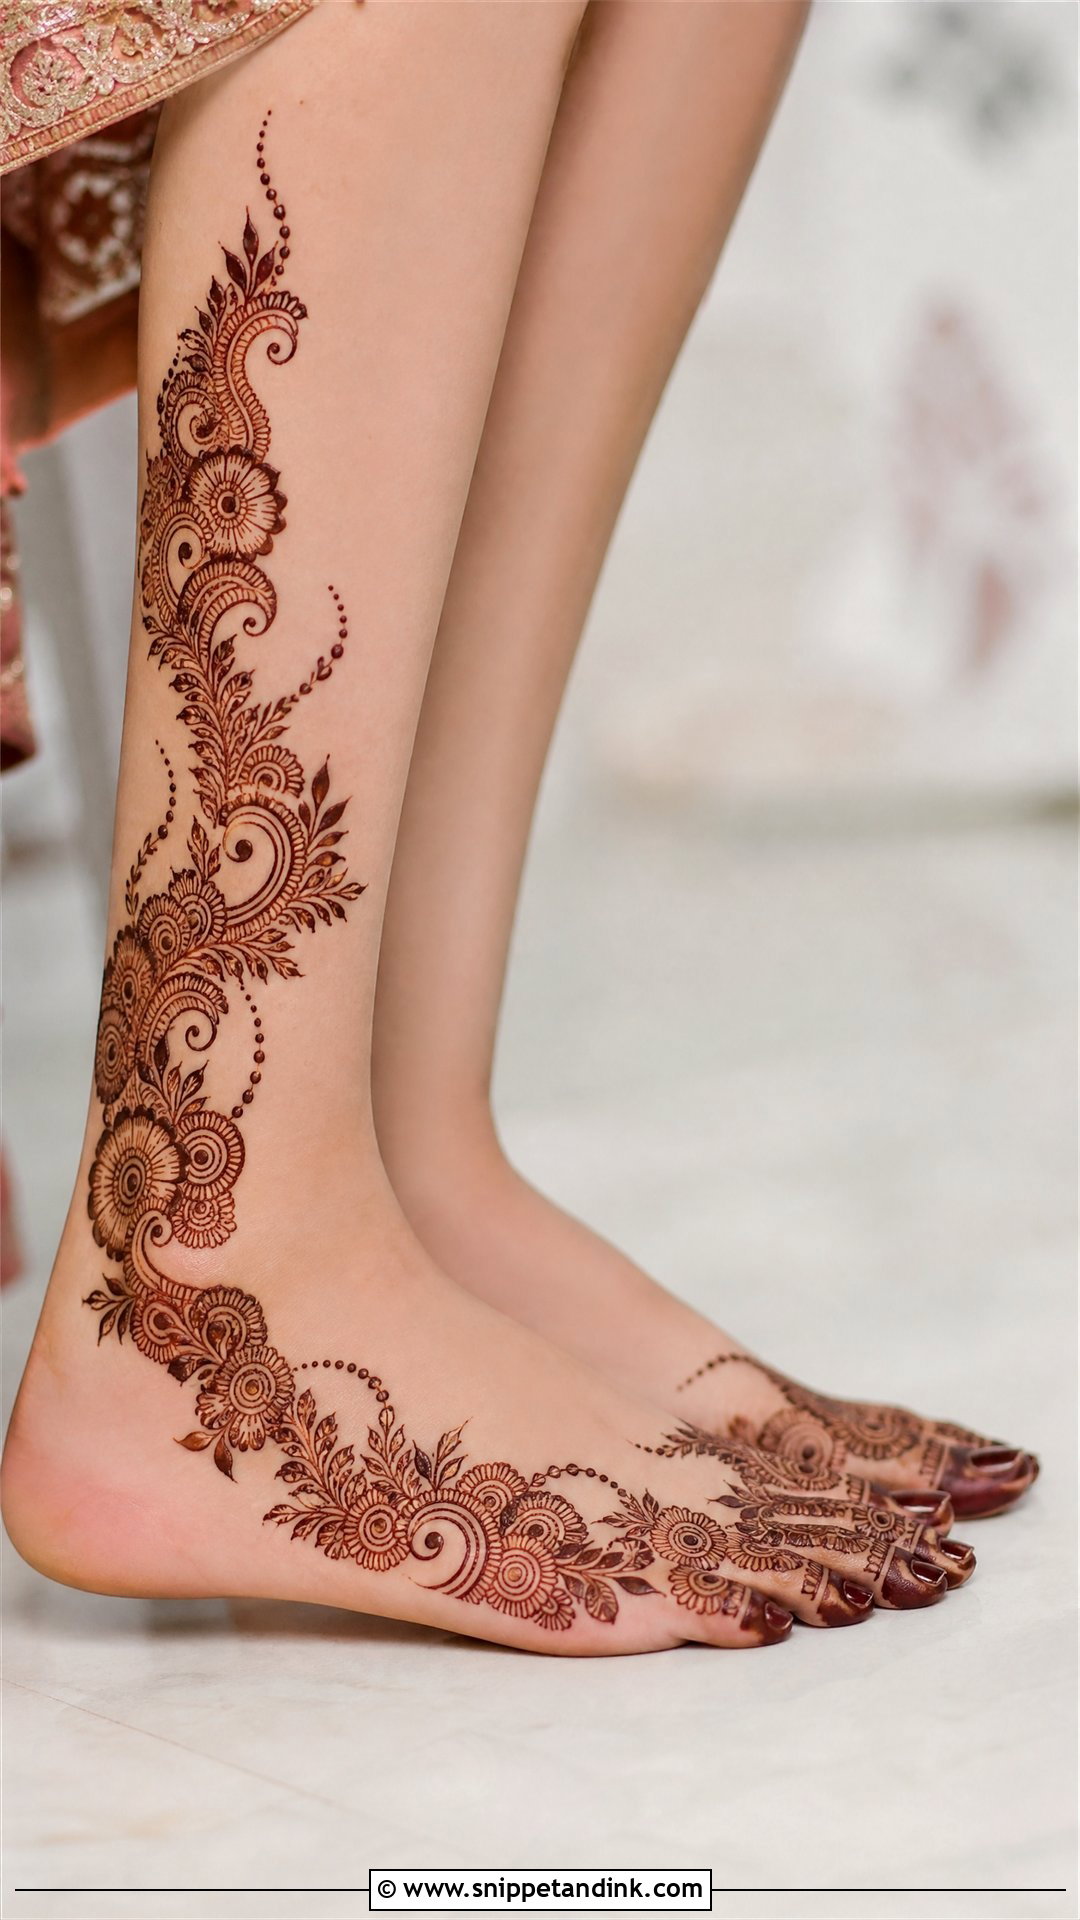
A side leg design is planned for profile. It starts at the outer toes, runs along the edge of the foot, wraps the ankle and climbs the outer calf, which is the side cameras catch when you sit with your legs tucked to one side. Arabic trails, vines, paisley chains and curved bands suit it. Before choosing which side to decorate, find out how you’ll be seated during the ceremony, or simply do both outer edges.
22. Calf Bridal Mehndi Design
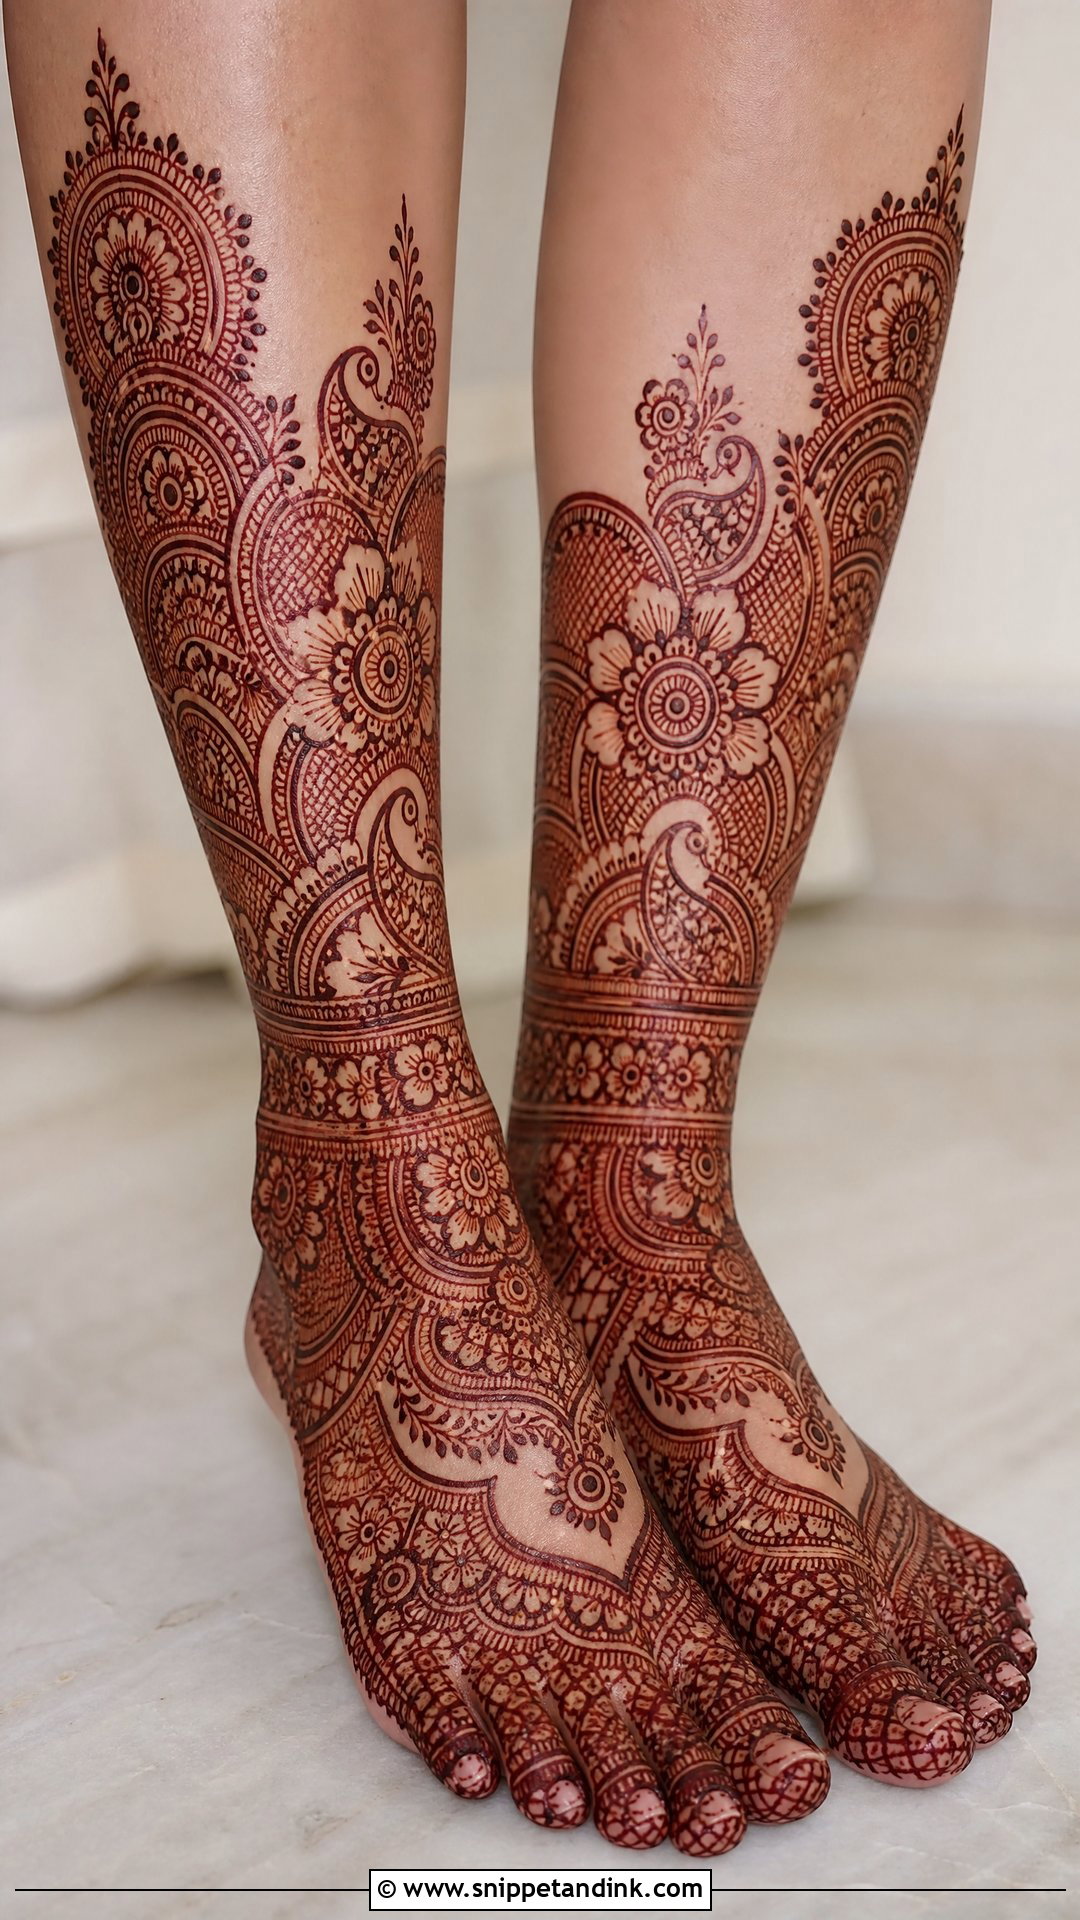
Calf mehndi belongs with outfits that show the lower leg, such as a sangeet look or a shorter skirt for a photo session. It rises from the ankle with florals, mandalas, peacocks, paisleys or geometric panels. The calf usually takes the lightest stain on the leg, so I keep the spacing generous and the motifs bold enough to read from a distance. A vertical trail looks slimmer than a full wrap. Plan it against your hem length and the angles your photographer favors.
23. Toe To Ankle Bridal Mehndi Design
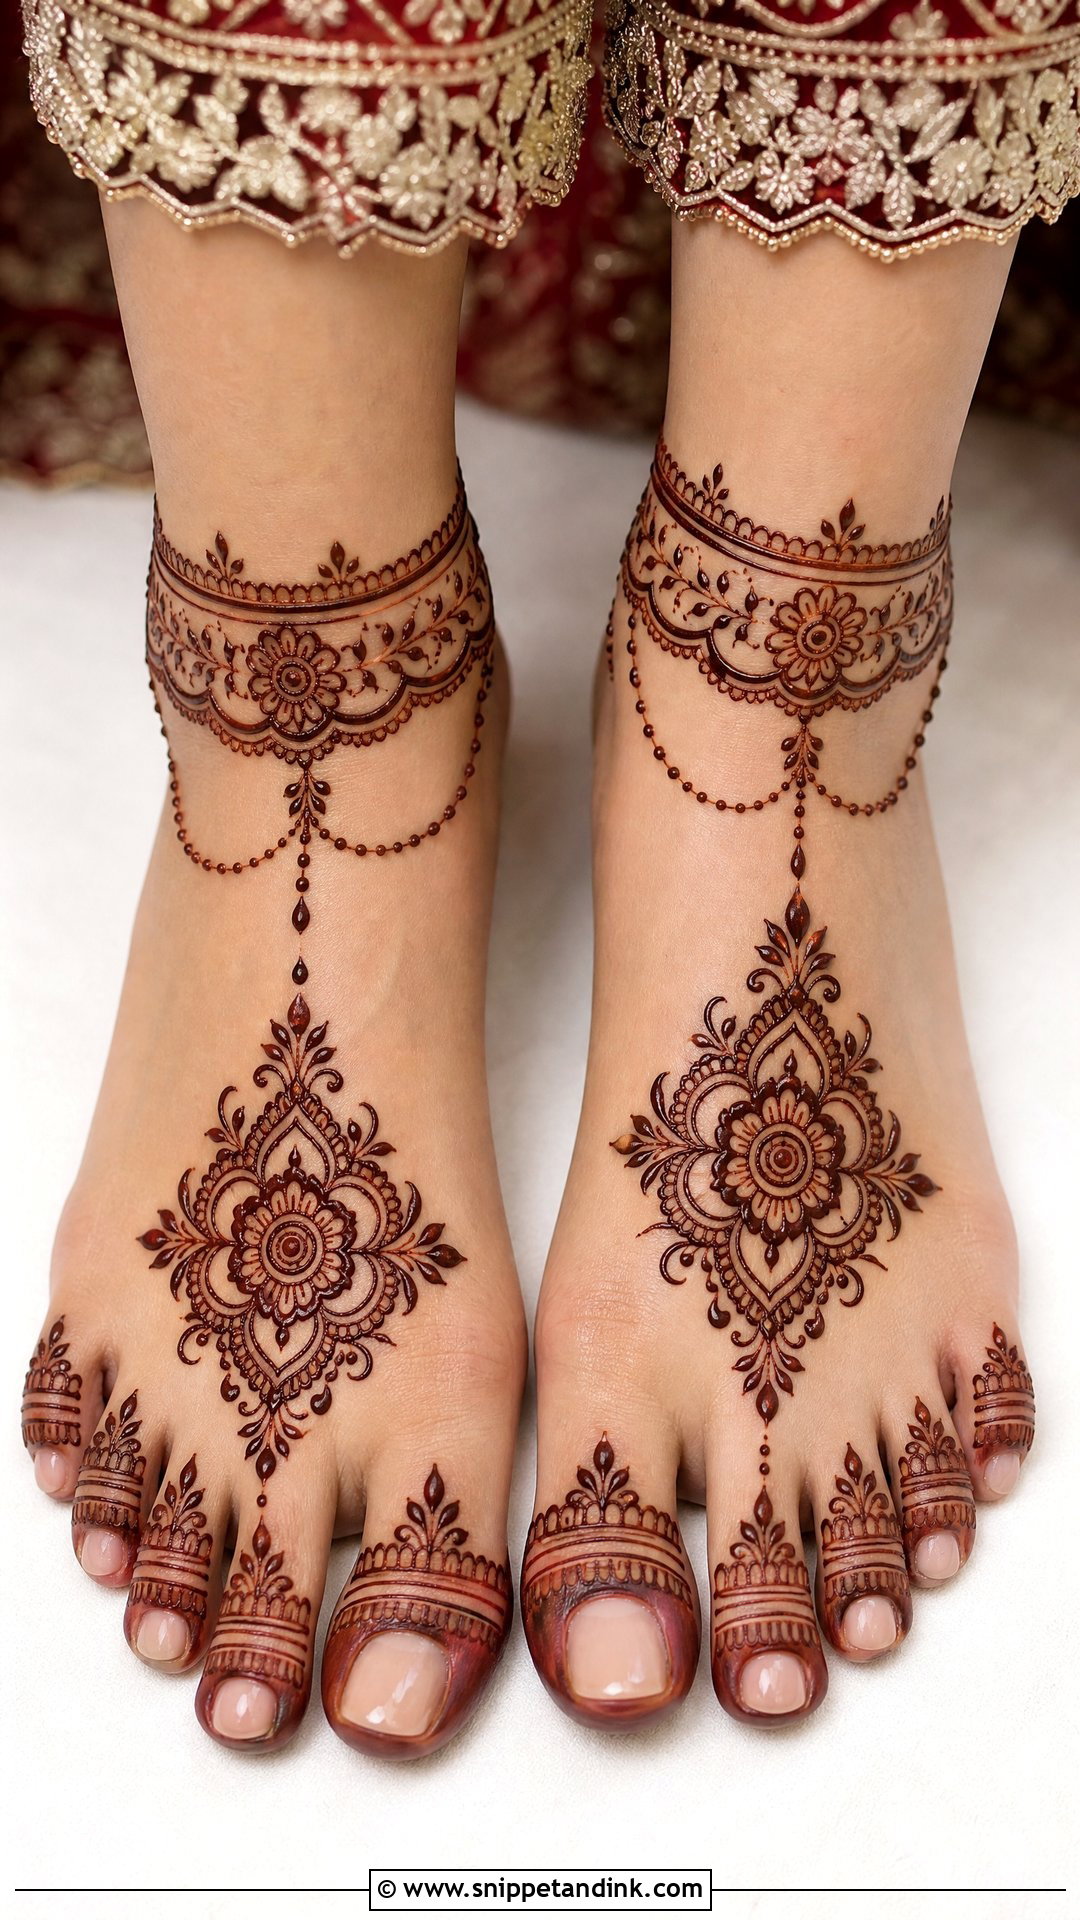
Toe to ankle covers the bridal essentials and stops there: small bands or leafy tips on the toes, the main motif across the top of the foot, a bracelet border at the ankle. It’s my default for brides who are also getting full hands and can’t face a long leg session too. Detailed bridal footwear sits well with it. Tiny chain motifs between the toes and ankle add a festive note for very little extra time.
24. Negative Space Bridal Leg Mehndi Design
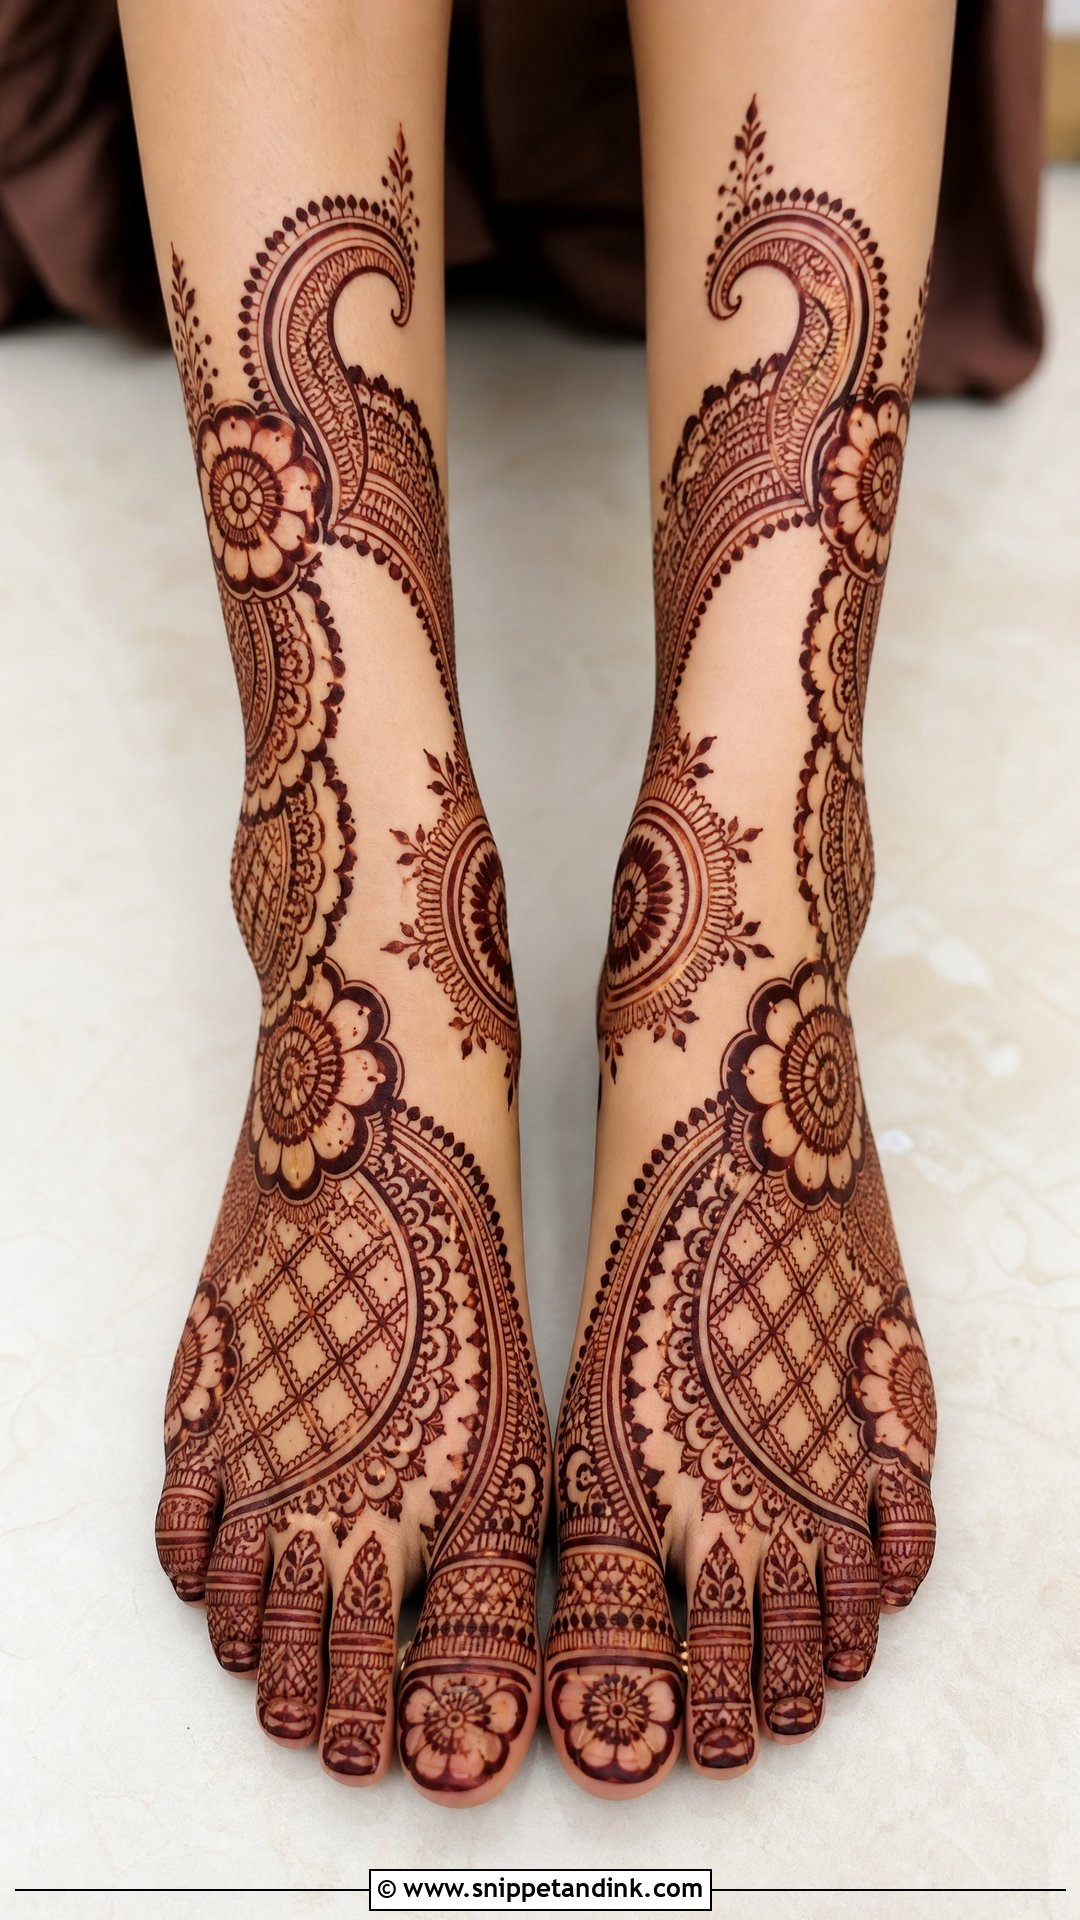
Negative space bridal leg mehndi uses bare skin as part of the pattern, so bold flowers, paisley outlines, mandala centers and jaali blocks sit with clean gaps around them. Those gaps take discipline. Once an artist starts adding fillers out of habit, the effect is gone. It shows off the shape of the foot and ankle well, and it can be light or heavy depending on how much open area you keep. Strong borders, decorated toes and matching legs make it read as bridal rather than casual.
25. Matching Bridal Leg Mehndi Design
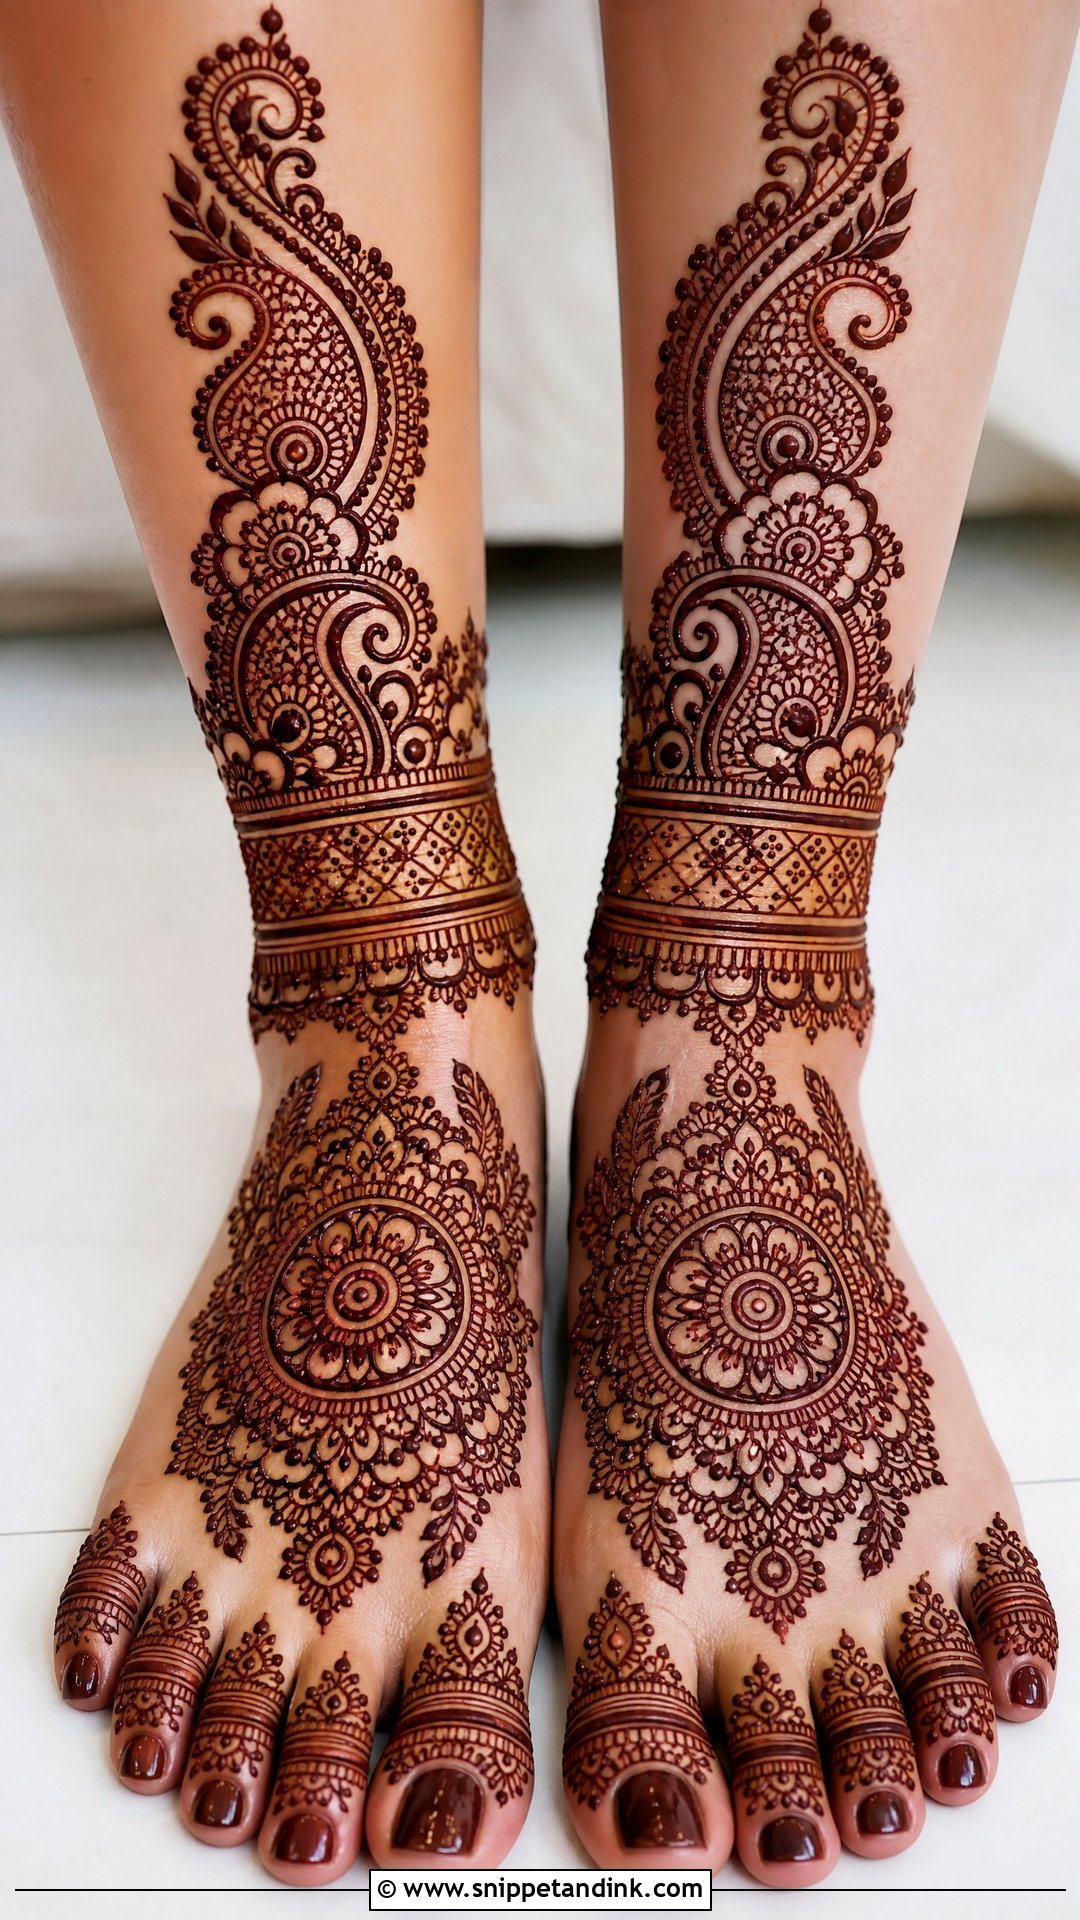
Matching legs means mirrored motifs and equal coverage, not identical strokes. Hand-drawn henna will always differ in tiny details, and that’s fine. What has to match is the outline: where the design stops on each leg, the height of the ankle band, the position of the main motif. Halfway through, I have the bride place both feet side by side so I can check. That side-by-side view is exactly how seated portraits and foot close-ups will show them.
Why the Shin Stains Lighter Than the Sole
Henna stains darkest on the palms and soles, where the skin is thickest, and fades in depth as it moves up the leg. The top of the foot comes out deep, the ankle a little less, the calf noticeably lighter. That isn’t bad paste. A good artist plans for it by keeping bold motifs and dense fill low and giving the shin clean, open shapes that still read in a lighter tone.
Every fresh stain is bright orange when the paste comes off and deepens to its full color over roughly two days. That’s why I like leg mehndi done one to two days before the ceremony, never the morning of.
Aftercare that works on feet
- Keep the paste on as long as you can, ideally overnight. Feet are easier to protect while you sleep than hands are.
- Scrape the dry paste off rather than washing it, and keep water away for the first 12 to 24 hours.
- Wear loose cotton socks to bed so the paste stays warm and doesn’t flake onto the sheets.
- Schedule pedicures, waxing and foot scrubs a day or two before application, not after.
- Refuse anything sold as black henna. Natural henna stains brown to deep maroon; a jet black result in an hour usually means added chemicals that can burn skin.
Coverage, Sitting Time and the Stain You Can Expect
Your leg mehndi has to fit your outfit, your shoes, your schedule and how long you can realistically sit still. Full Indian detailing, Arabic trails, payal bands and a minimal toe-to-ankle pattern are all right for somebody. Talk through coverage, sitting time, stain expectations and footwear with your artist before the booking is confirmed, schedule the application early enough for the color to deepen, and follow the aftercare. A well-placed simple design will always look more bridal than a crowded heavy one.
You'll Like These Ideas:


Leave a Reply