
Most photographs of your hands will catch the right one. It takes the gifts, does the greetings, holds the thali and lands in the ring close-up, which is why I plan it as its own piece rather than a mirror of the left. The ideas below run from Arabic trails and full Indian bridal coverage to mandala palms, jaali, bracelet-style back hands and modern negative-space layouts. Before you pick one, look at your finger length, how long you can sit still and how dark your skin usually takes a stain. Those decide more than the pattern does.
Reading Your Right Hand Before Committing to a Layout
Before I pick up the cone, I look at the hand in three positions: open, relaxed at the side, and holding something. The right hand is rarely still at a wedding. It greets people, takes gifts, holds the thali and goes up for selfies, so a design that only looks right spread flat on a cushion will disappoint you.
Finger length and palm shape
Long fingers can take repeating bands and full fingertip caps. Short fingers look longer with a diagonal trail running off the index finger and tips left partly open. A wide palm suits one large central mandala, while a narrow palm reads better with a vertical motif, such as a lotus or stacked paisleys, than with a circle that touches both edges.
Rings, bangles and sleeves
Tell your artist what jewellery goes on that hand. Heavy fill under a ring is wasted work, and a cuff drawn where bangles will slide just gets scraped while it dries. If your outfit has full sleeves, nobody will see the forearm, and you can save yourself that hour.
These are the questions I ask when someone books a right-hand design:
- Which events will this hand be photographed at, and in what grip?
- Will you be cooking, serving or washing up the next day?
- Does your skin usually stain dark quickly, or do you tend to get orange results?
- Have you reacted to henna before, or to essential oils like eucalyptus or tea tree?
1. Right Hand Arabic Mehndi Design
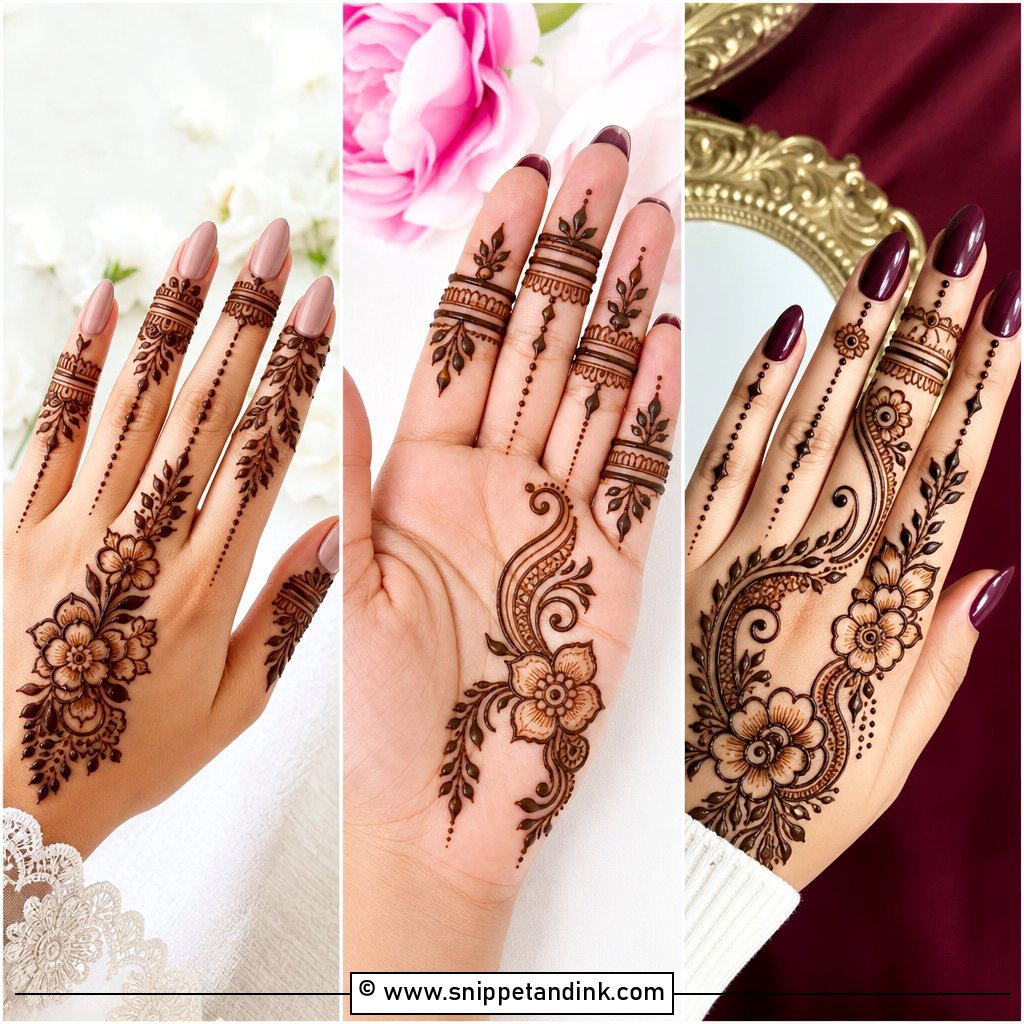
Arabic work is where I’d start anyone who wants detail without a three-hour sitting. The trail usually enters at one side of the palm, runs on a diagonal and exits at the index finger or wrist, with big flowers, leafy vines and dotted borders that read clearly from across a room. On the right hand I tilt the main line a little more steeply than on the left, because a steeper diagonal makes the fingers look longer when you raise your hand to greet someone. Finish the fingertips neatly and leave real skin showing between motifs. Once the gaps fill in, it stops being Arabic and starts looking like unfinished Indian work.
2. Right Hand Front Mehndi Design
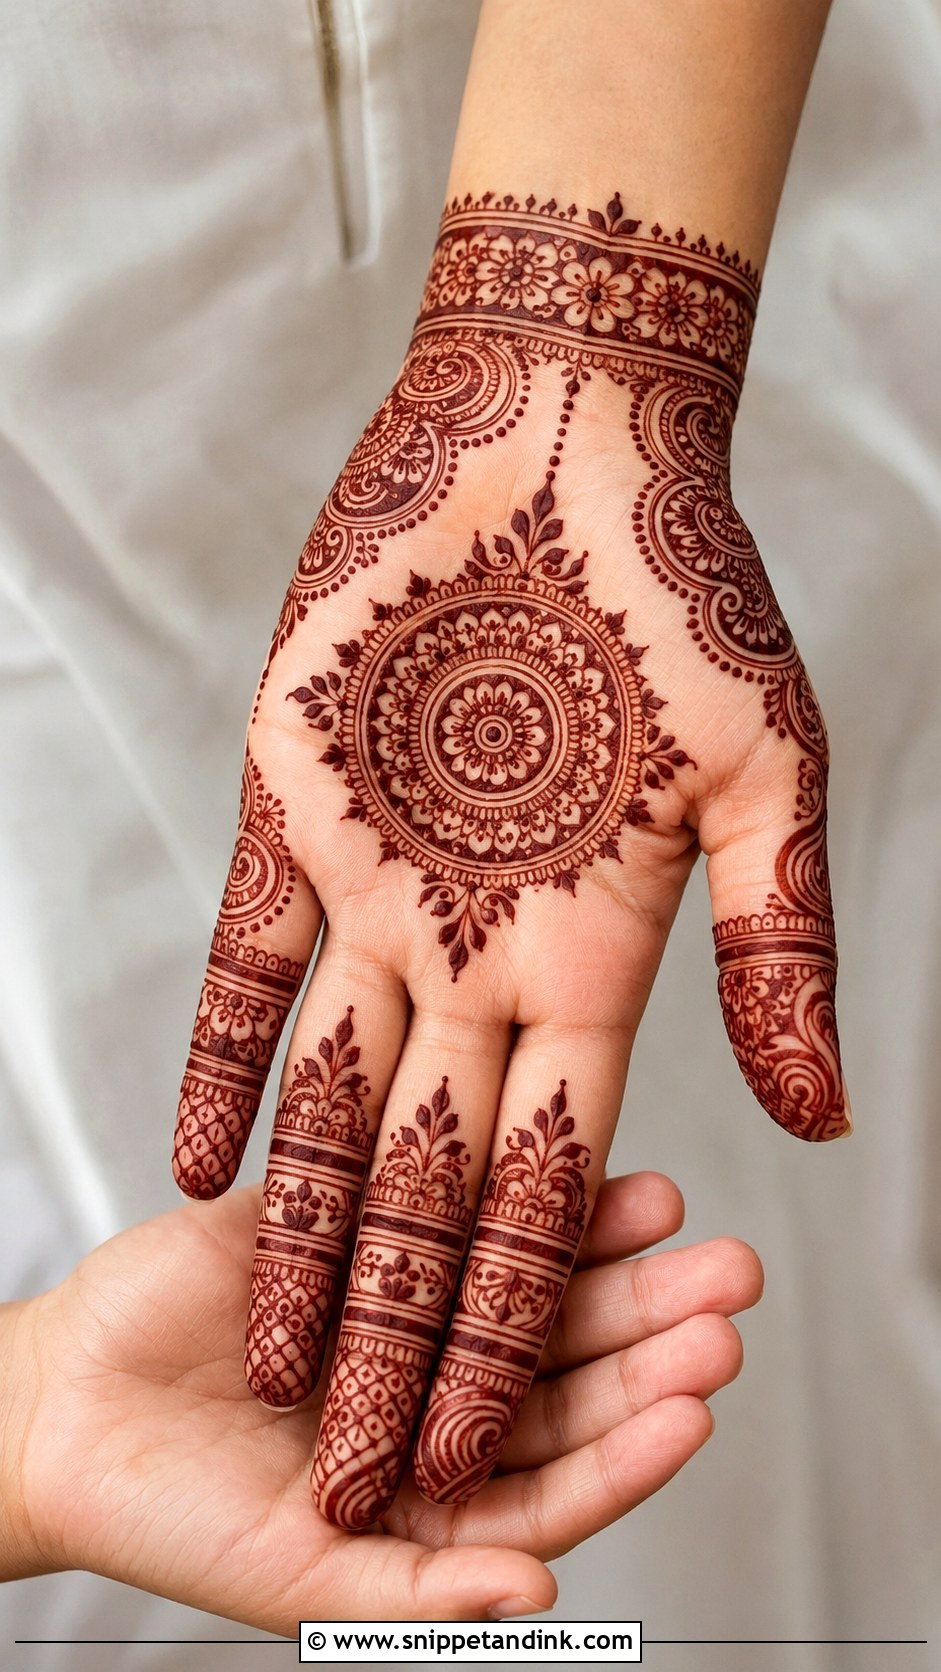
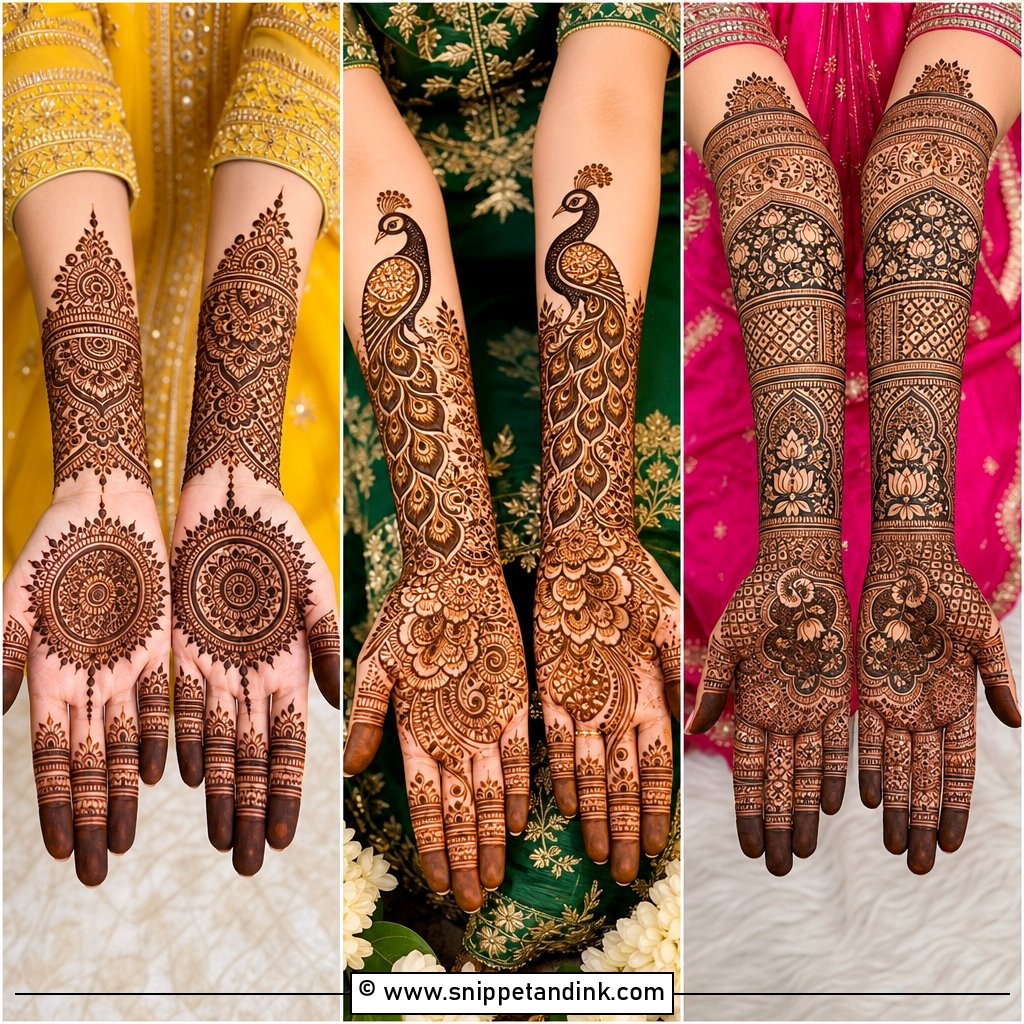
Palm-side designs are the ones guests actually see during rituals, ring shots and greetings, so I design them with the hand open and slightly cupped, not pressed flat on a cushion. A central mandala with paisley corners, floral bands and fine filler around the thumb mound is the classic build. The usual mistake is stacking all the heavy work in one corner; when the palm cups, that corner folds and the motif disappears. Smaller hands carry one circular centre well, while longer palms can take layered motifs and a wrist cuff without crowding.
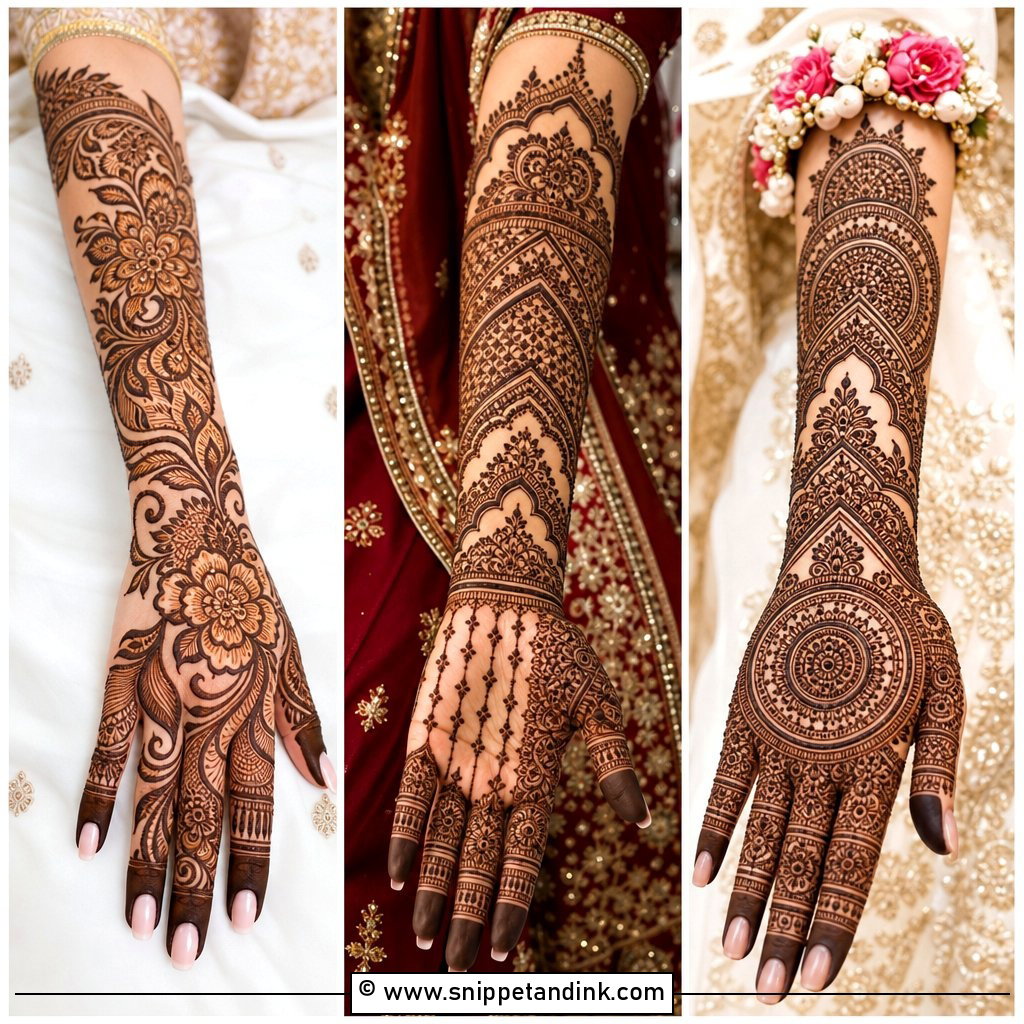
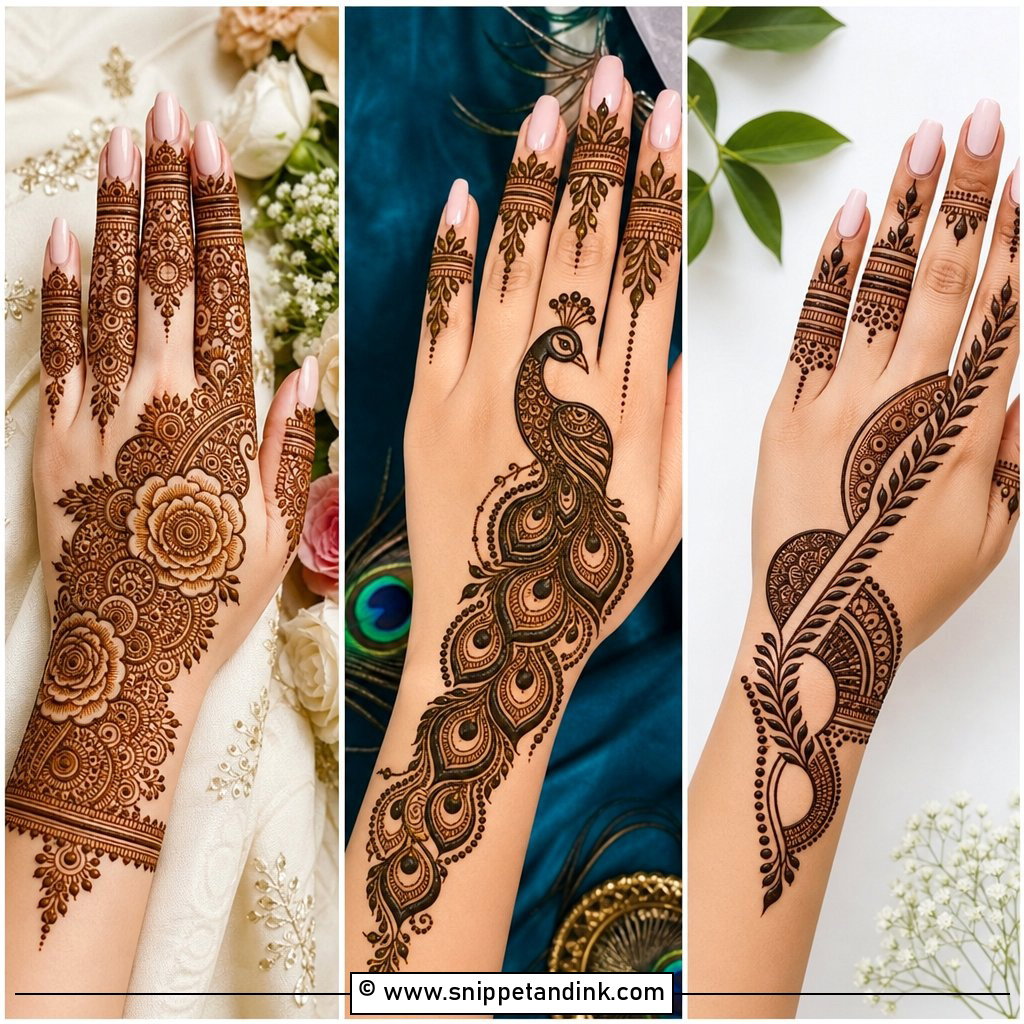
3. Right Hand Back Mehndi Design
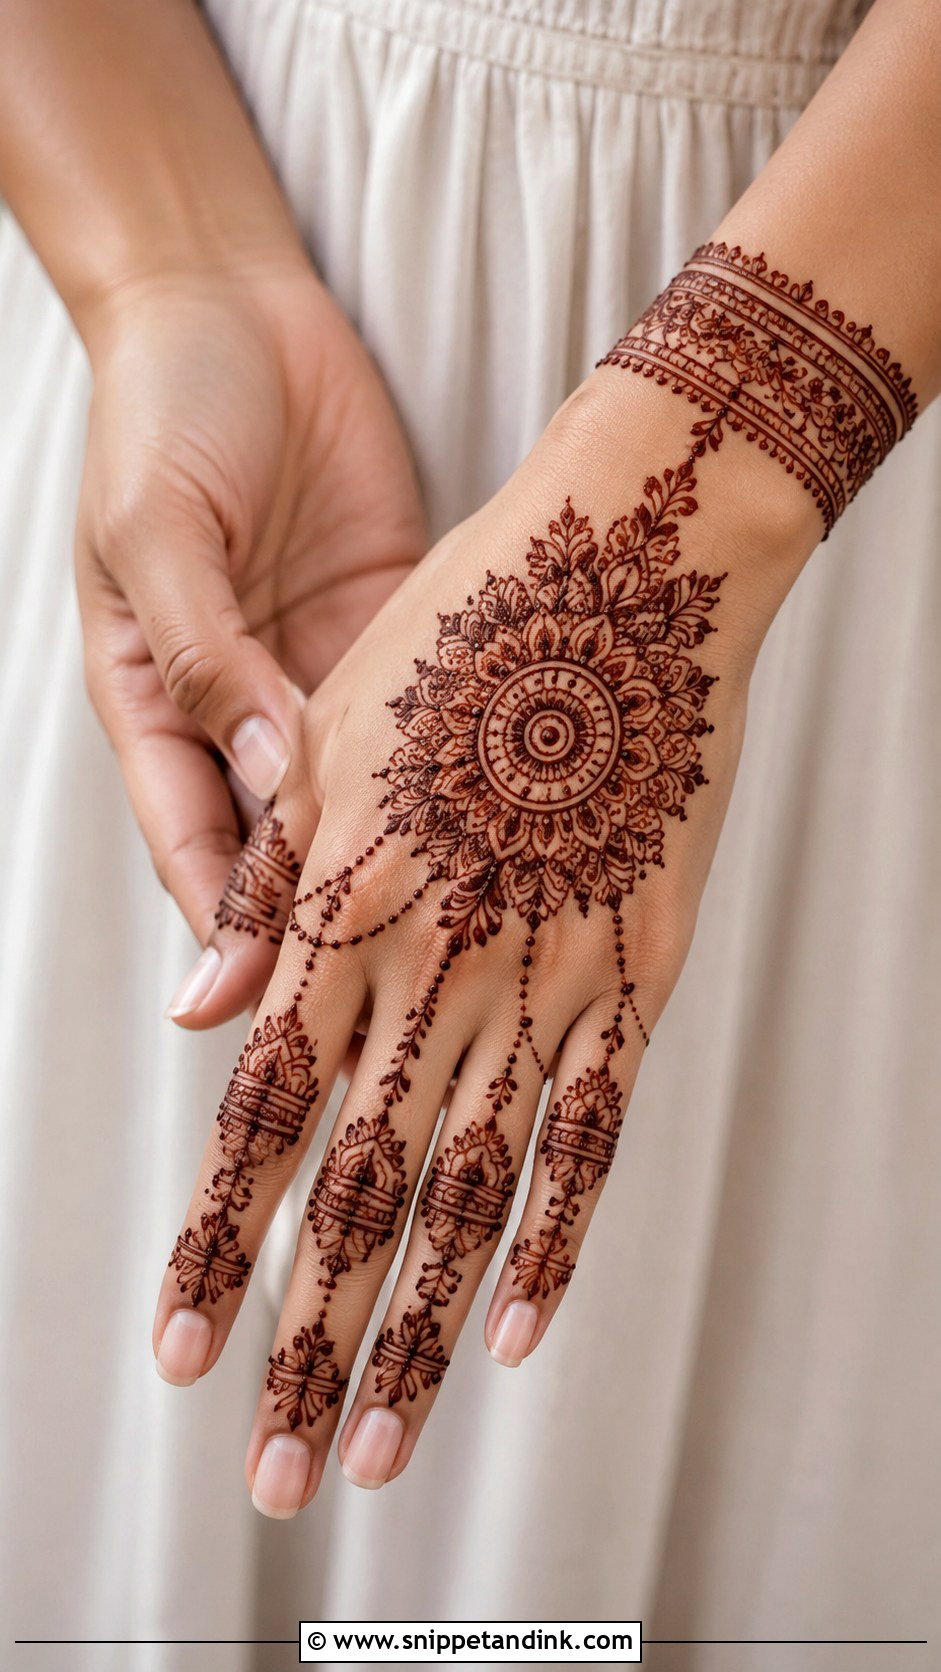
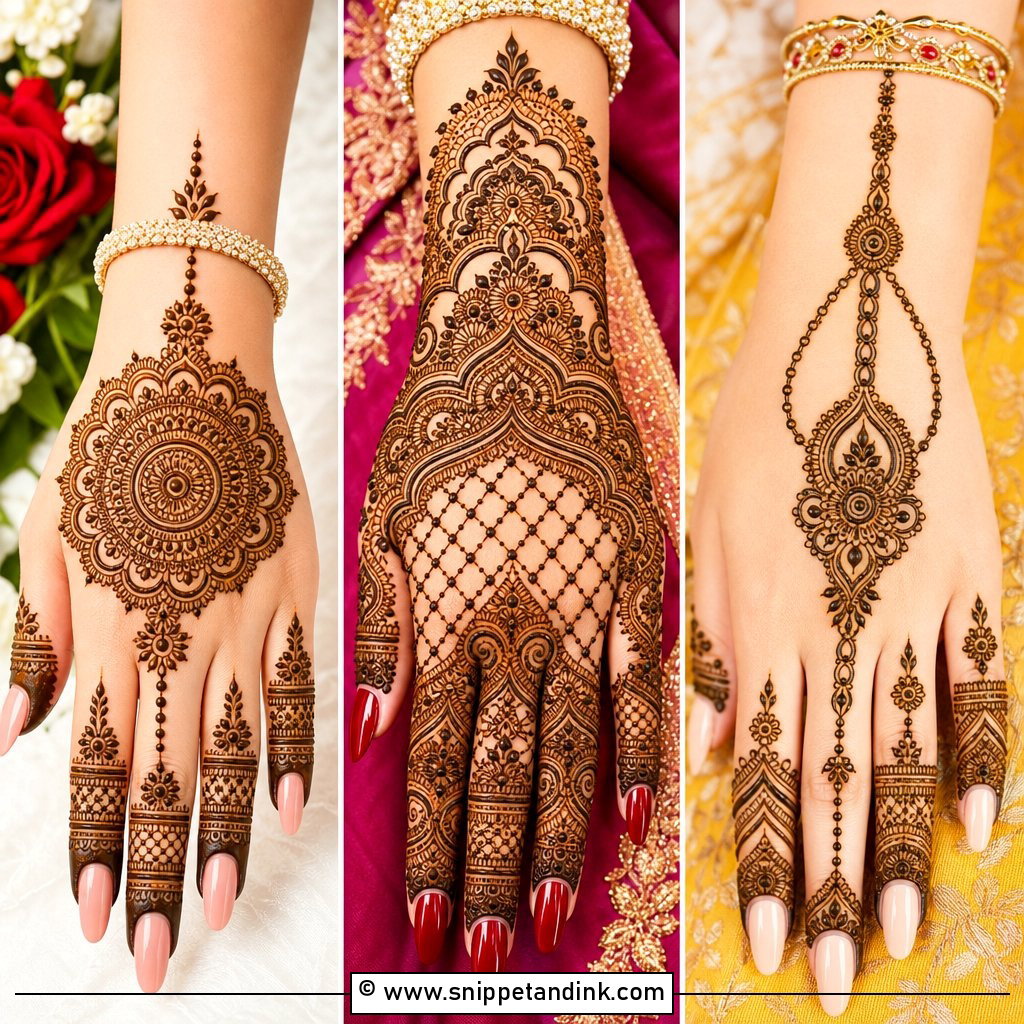
The back of the hand is on show even when your arm is resting, which is why it gets requested so often. Bracelet patterns, finger chains, a central mandala and ring-style details all sit well here. I place the main motif slightly above the middle of the hand, over the flatter bones, and join it to the fingers with fine dotted lines or leafy strands. Skin over the knuckles creases and tends to stain paler, so I keep solid fills off those ridges. A cuff or jaali band at the wrist closes it, and bangles frame the rest.
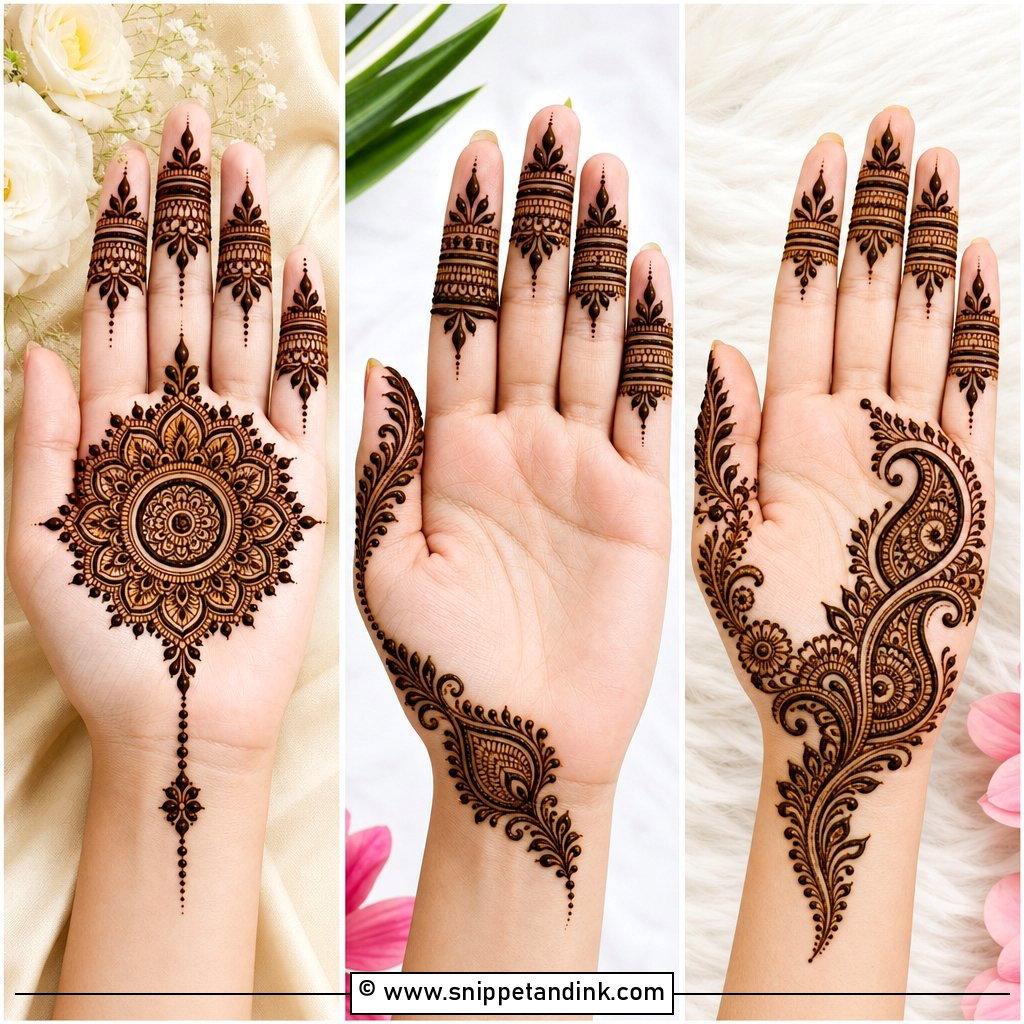
4. Right Hand Simple Mehndi Design
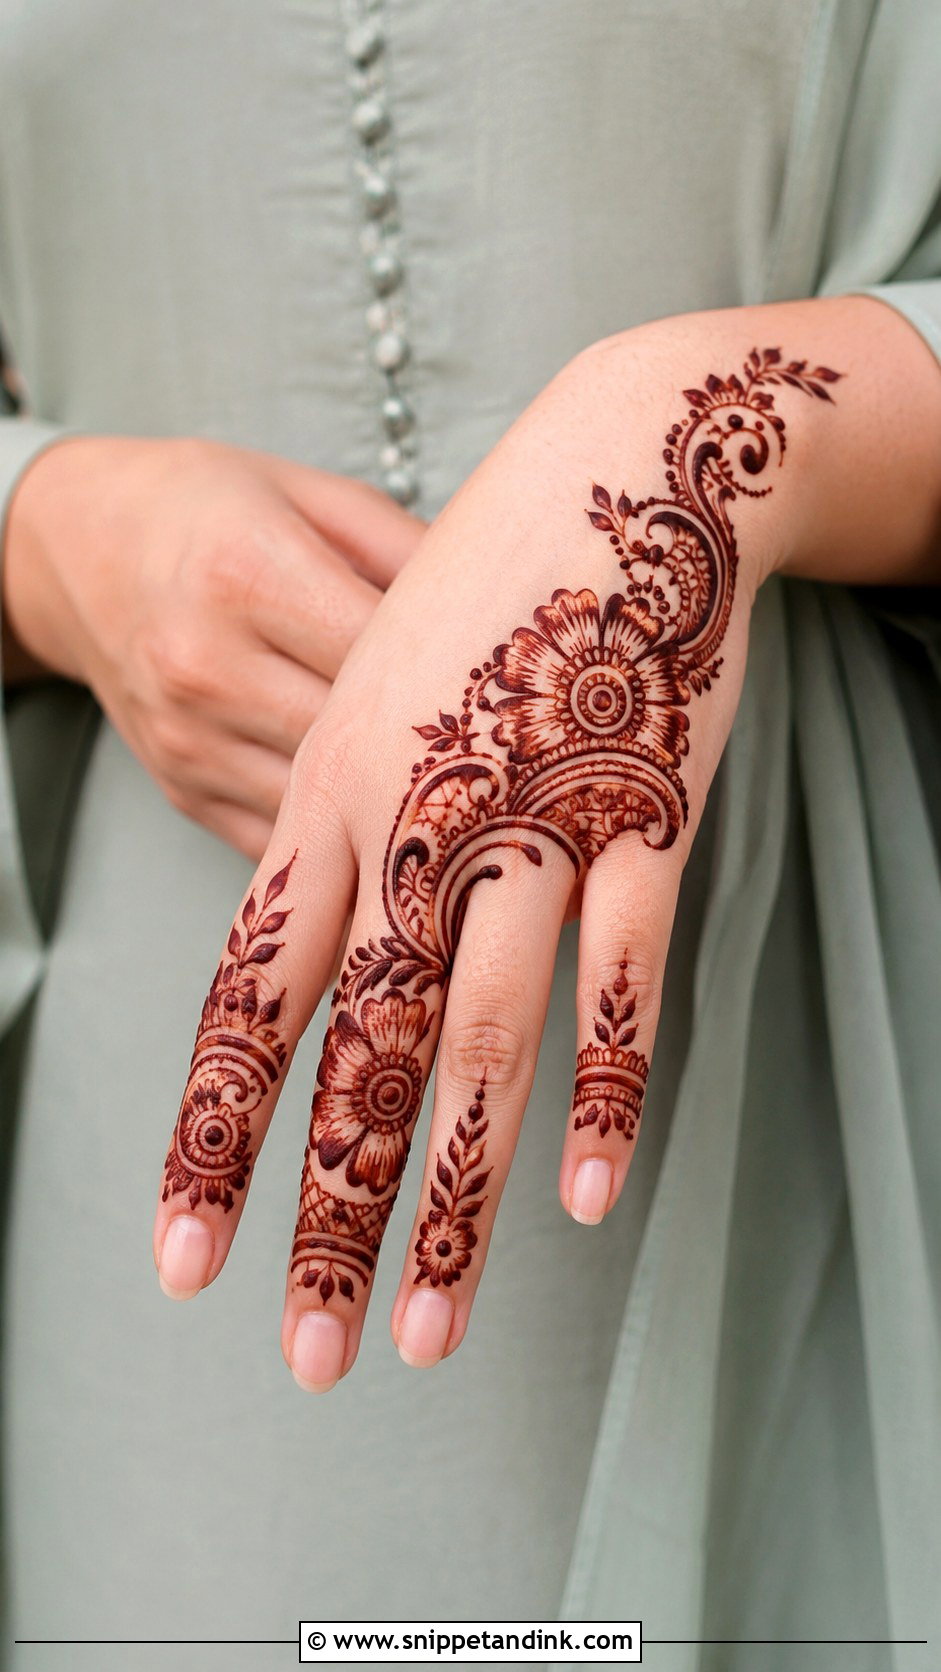
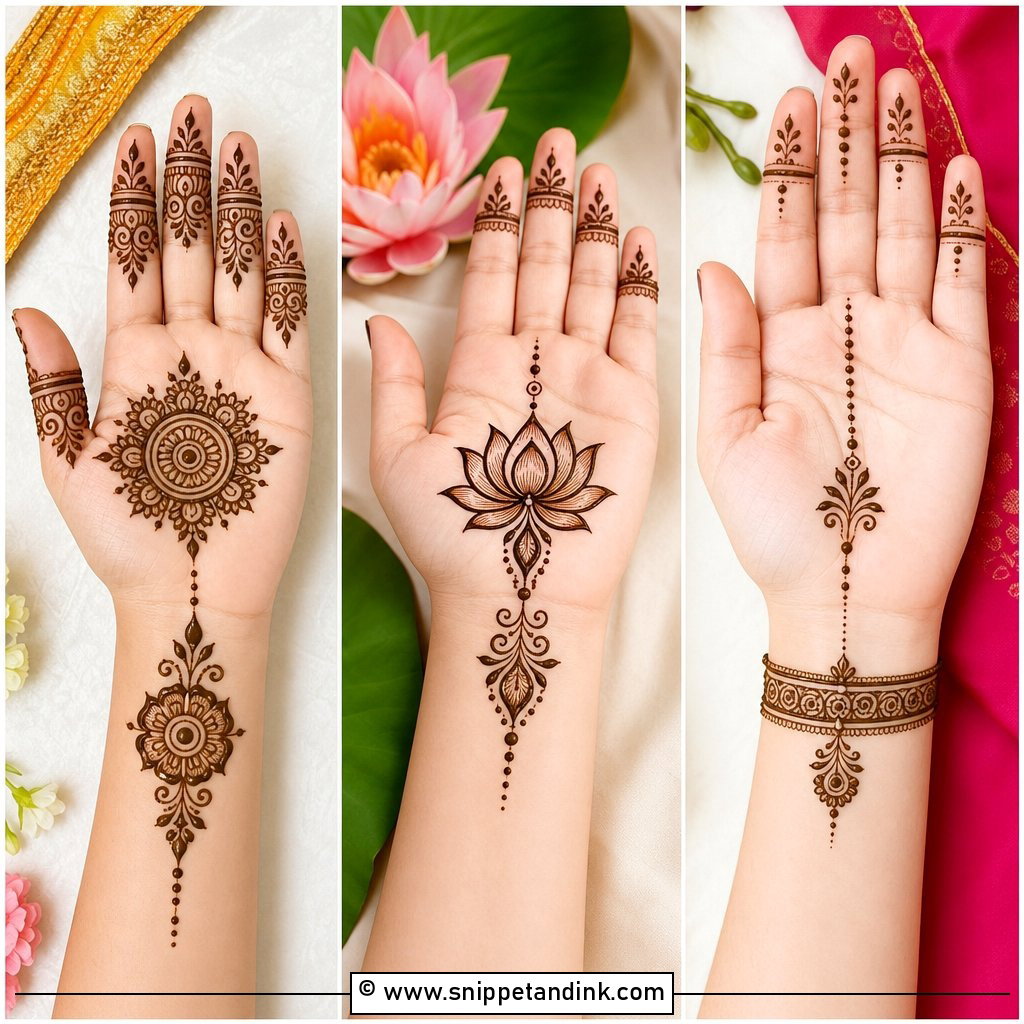
Simple does not mean sparse. One floral trail, some leaves, a few dots and lightly decorated fingertips will look finished as long as there is a clear start and end point. I begin with a small motif on the palm or back hand, connect it to two or three fingers and close it with a thin wrist border. Confident lines matter more here than in any heavy design, because a shaky stroke has nothing to hide behind. This is what I suggest for office celebrations and for anyone who books me with twenty minutes to spare.
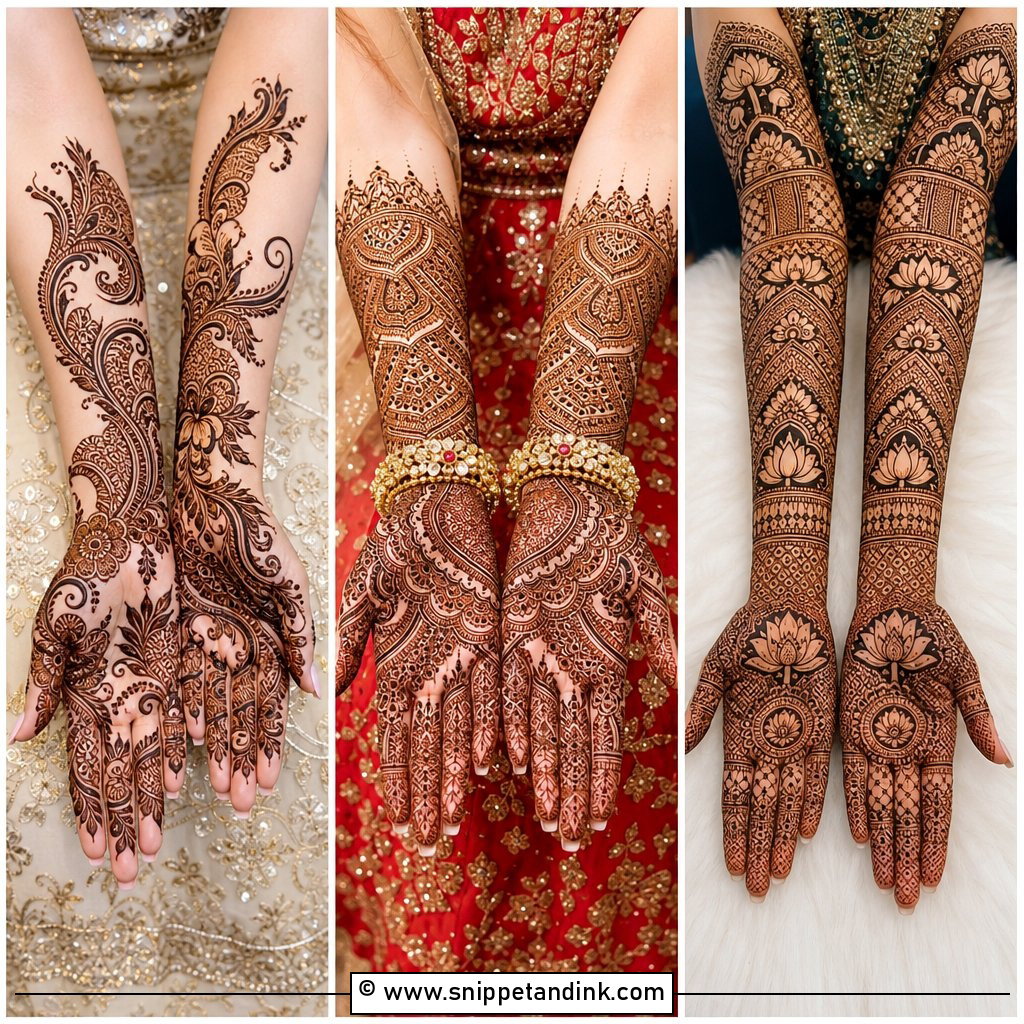
5. Right Hand Bridal Mehndi Design
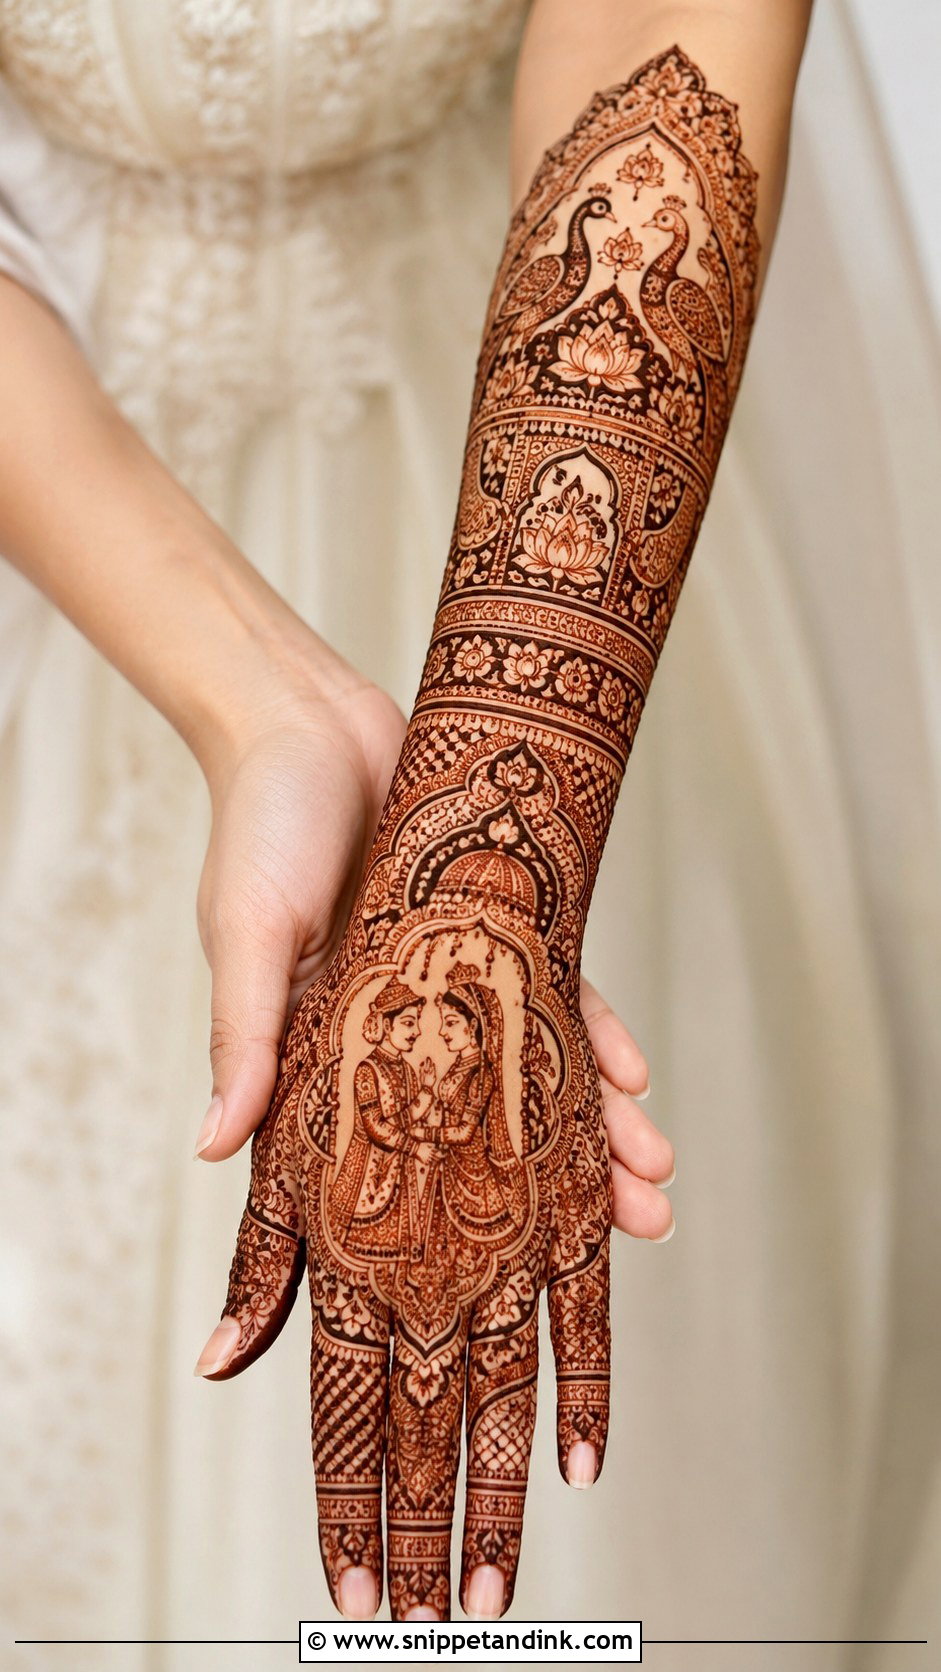
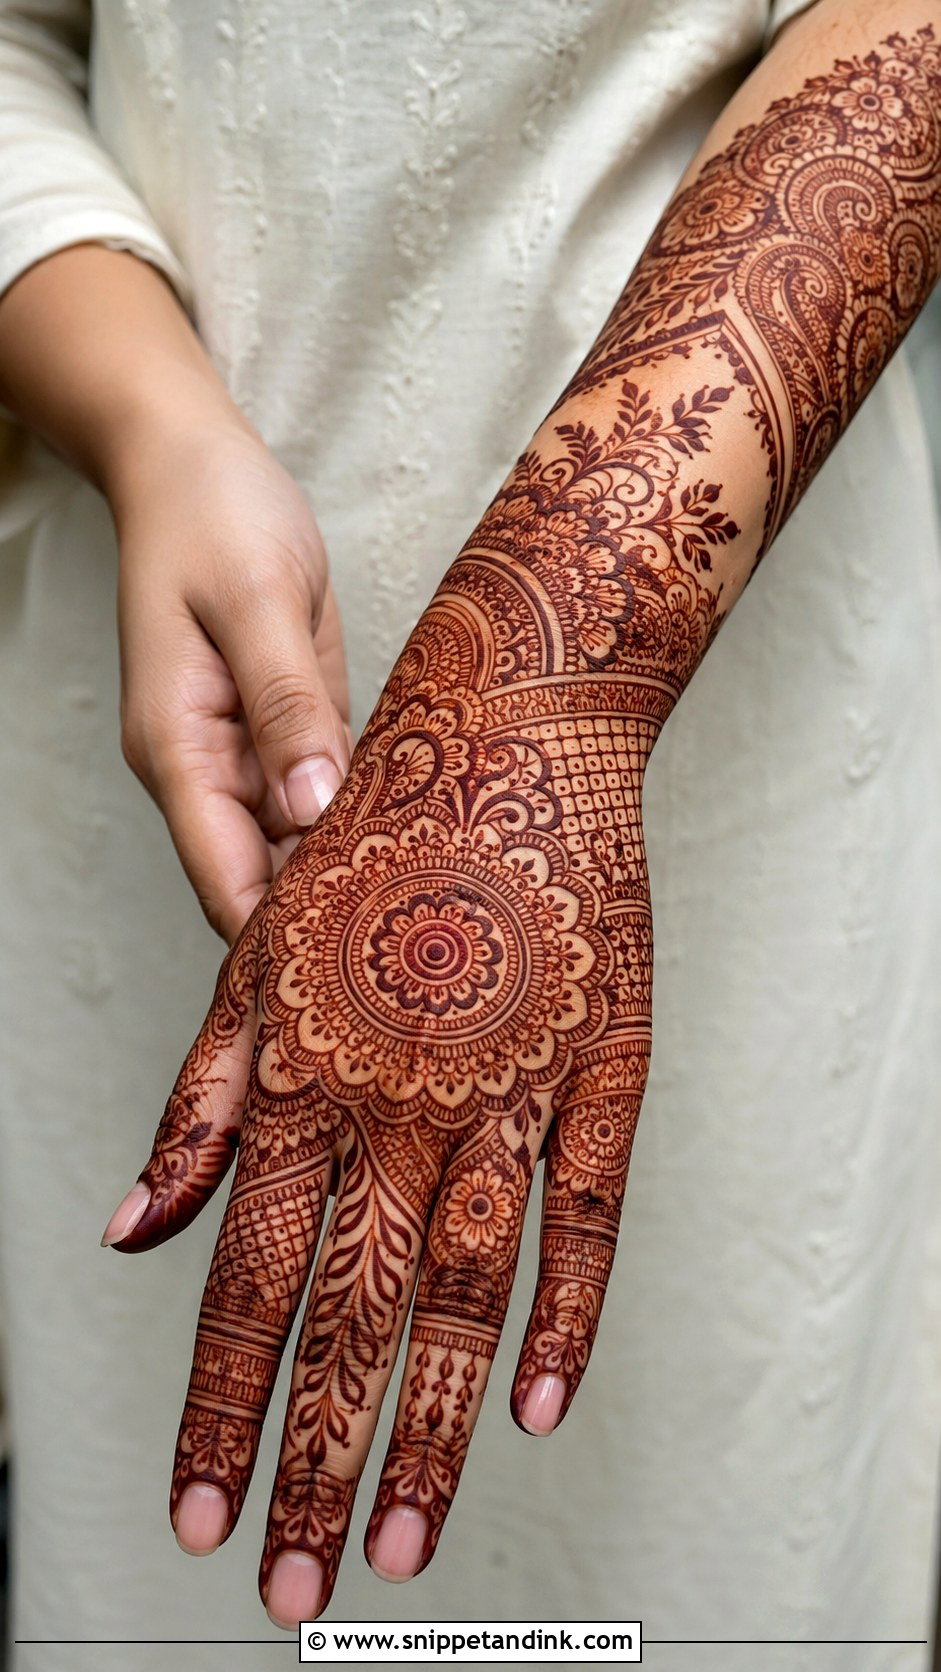
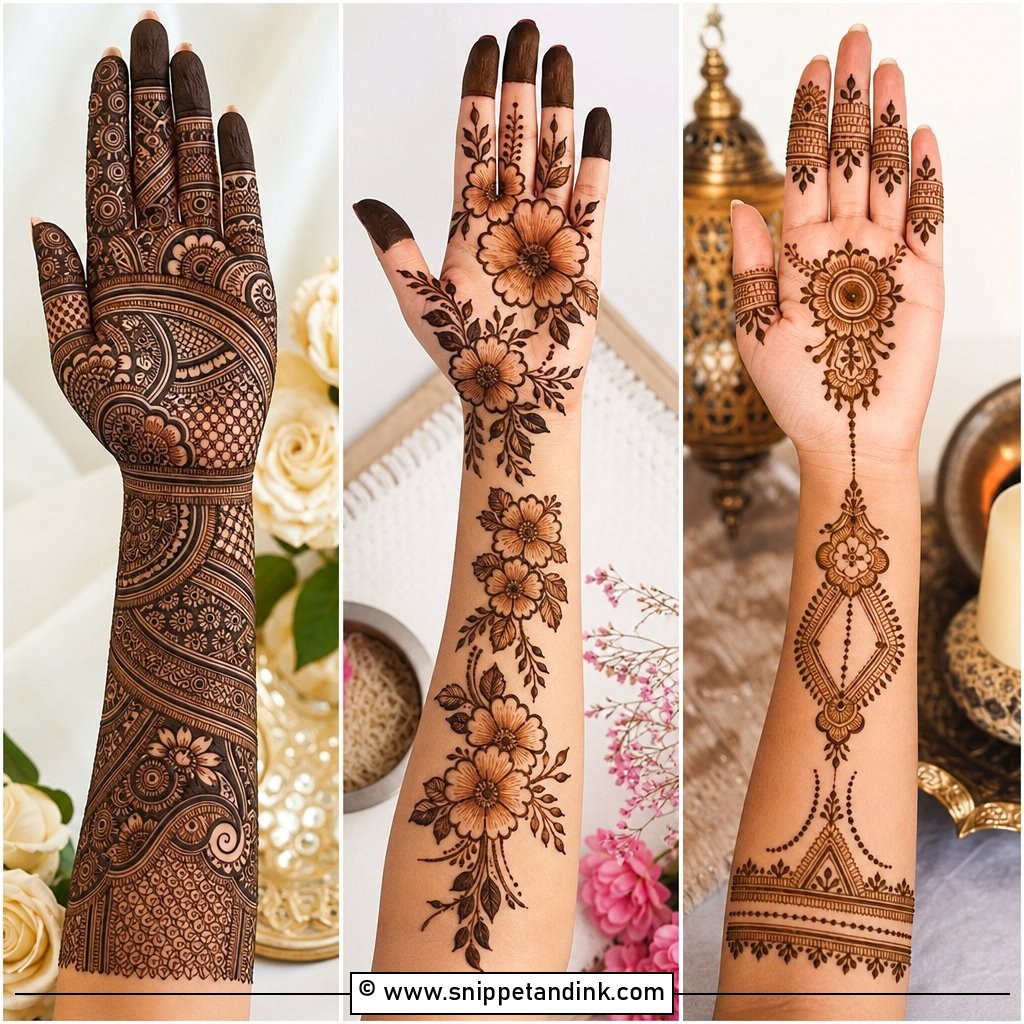
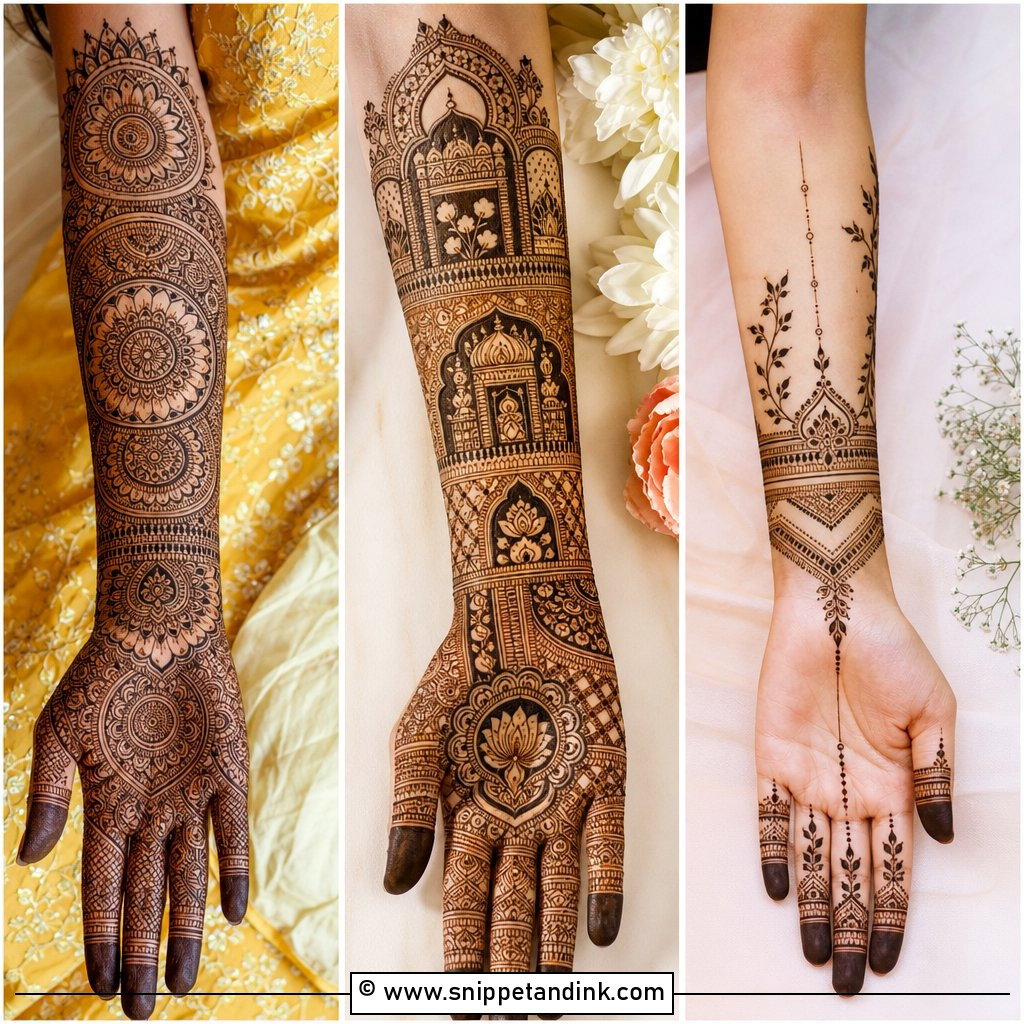
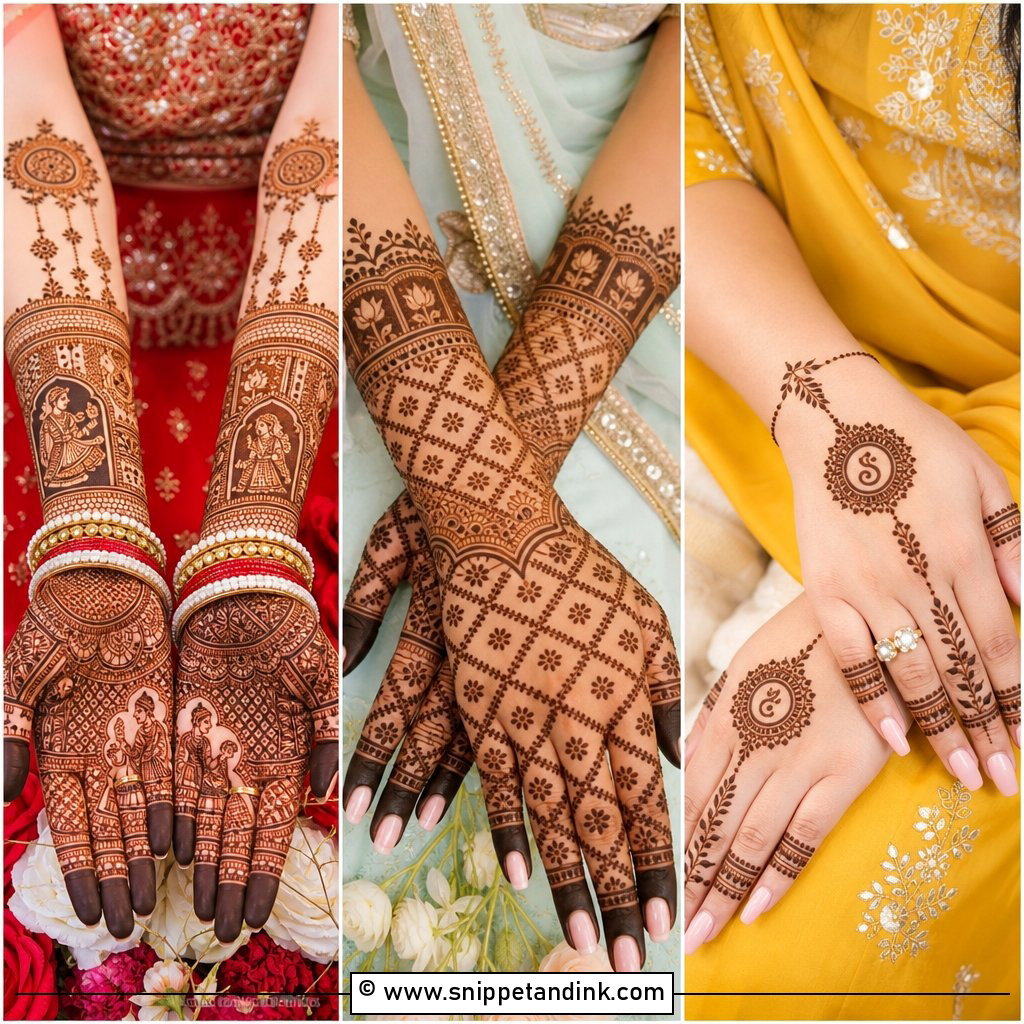
Bridal coverage runs from fingertips past the wrist and often up the forearm, packed with paisleys, peacocks, lotus, jaali panels, kalash motifs, bride and groom figures and hidden initials. Because the right hand does most of the ritual work, I keep the palm centre readable and use heavier outlines to separate each motif, so the stain doesn’t merge into one dark patch. A layered cuff near the wrist gives a strong finish. Plan on several hours for this side alone, and book it a day or two before the wedding so the colour peaks on the day itself.
6. Right Hand Full Hand Mehndi Design
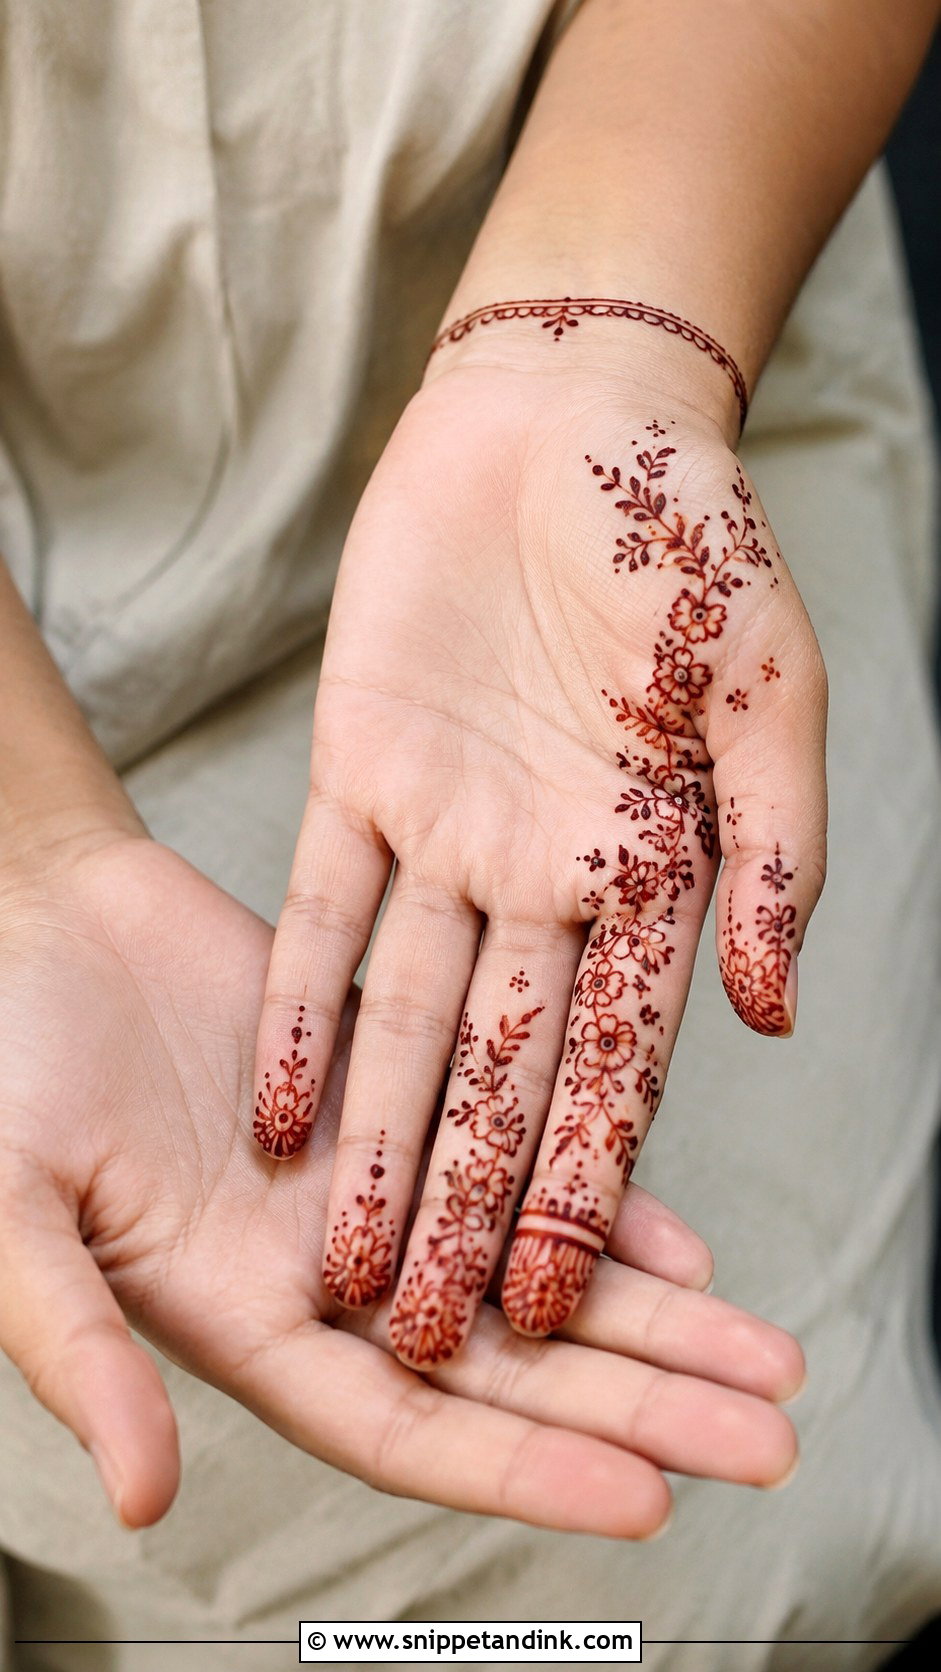
Full coverage takes the design from fingertips to wrist and sometimes up the forearm, mixing mandalas, paisleys, florals, mesh panels and shaded areas. With that much going on, I give every section its own border so the eye can tell where one ends. Without those borders, full hands look muddy the moment the paste comes off. I usually repeat one pattern down the fingers, keep the palm for a single strong centrepiece, then carry the same rhythm up the forearm so it doesn’t look bolted on. It dries slower than anything else here, so plan for a comfortable seat and someone to feed you.
7. Right Hand Half Hand Mehndi Design
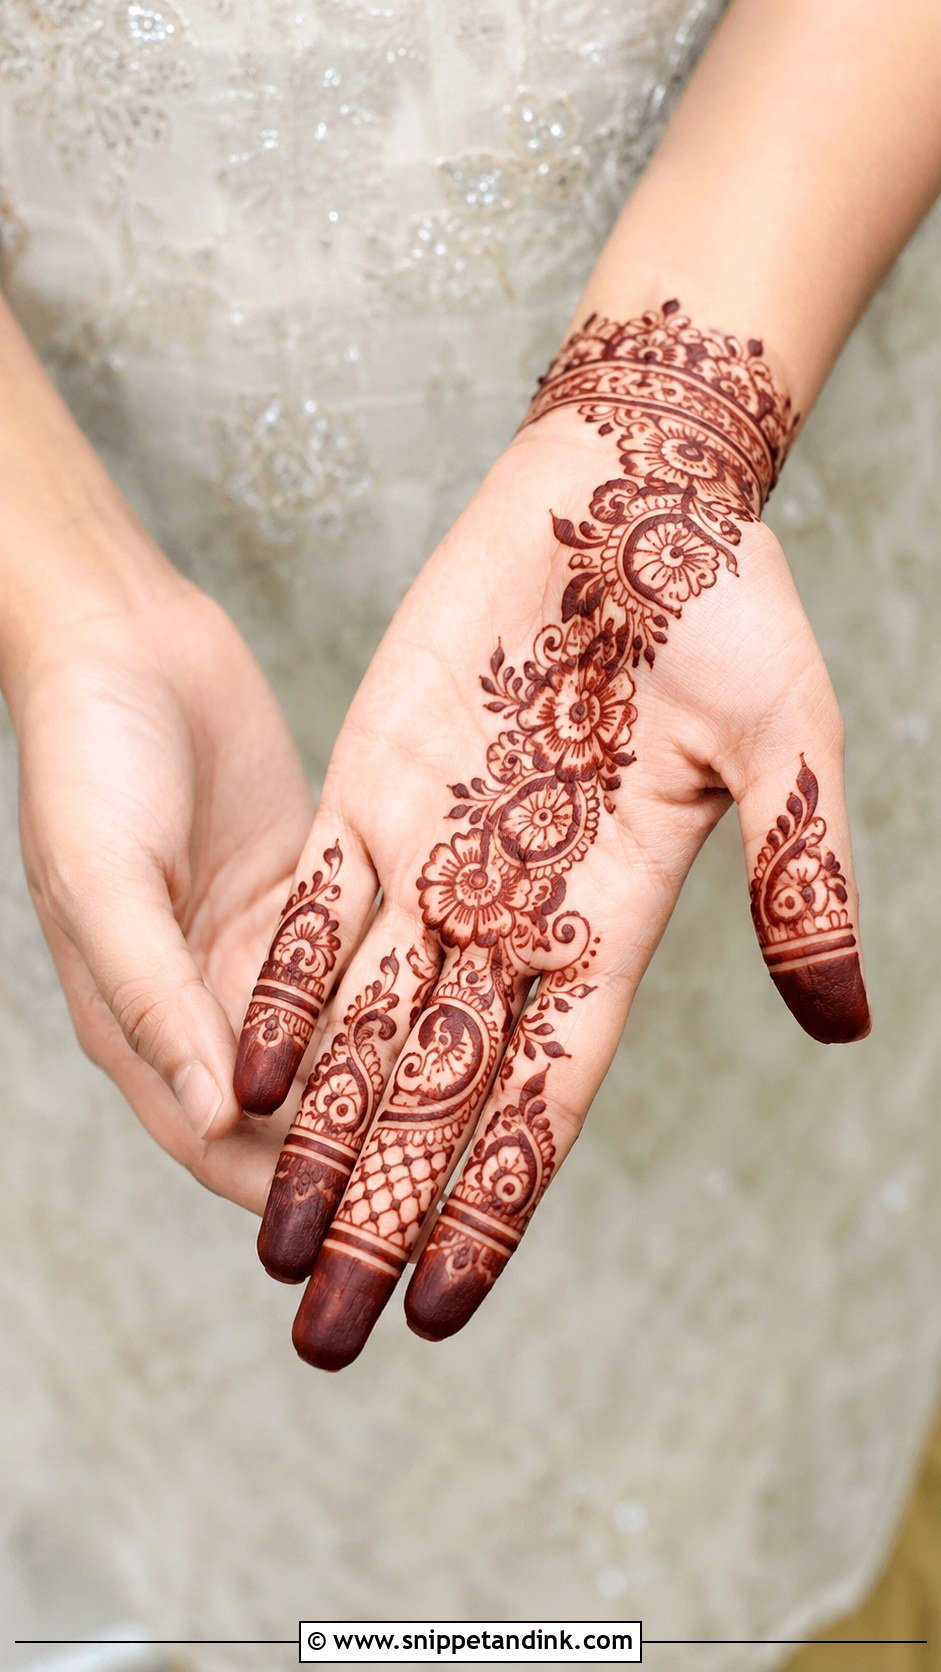
Half-hand sits between minimal and bridal: fingers, palm or back hand, and a little of the wrist. A diagonal Arabic trail, a centred mandala or a floral cuff all fit. I always ask where the hand will be in photos, holding a phone, a clutch or a gift tray, and put the main motif on the side that faces the camera in that grip. It dries fairly quickly, so bridesmaids and guests can get back to helping within the hour.
8. Right Hand Mandala Mehndi Design
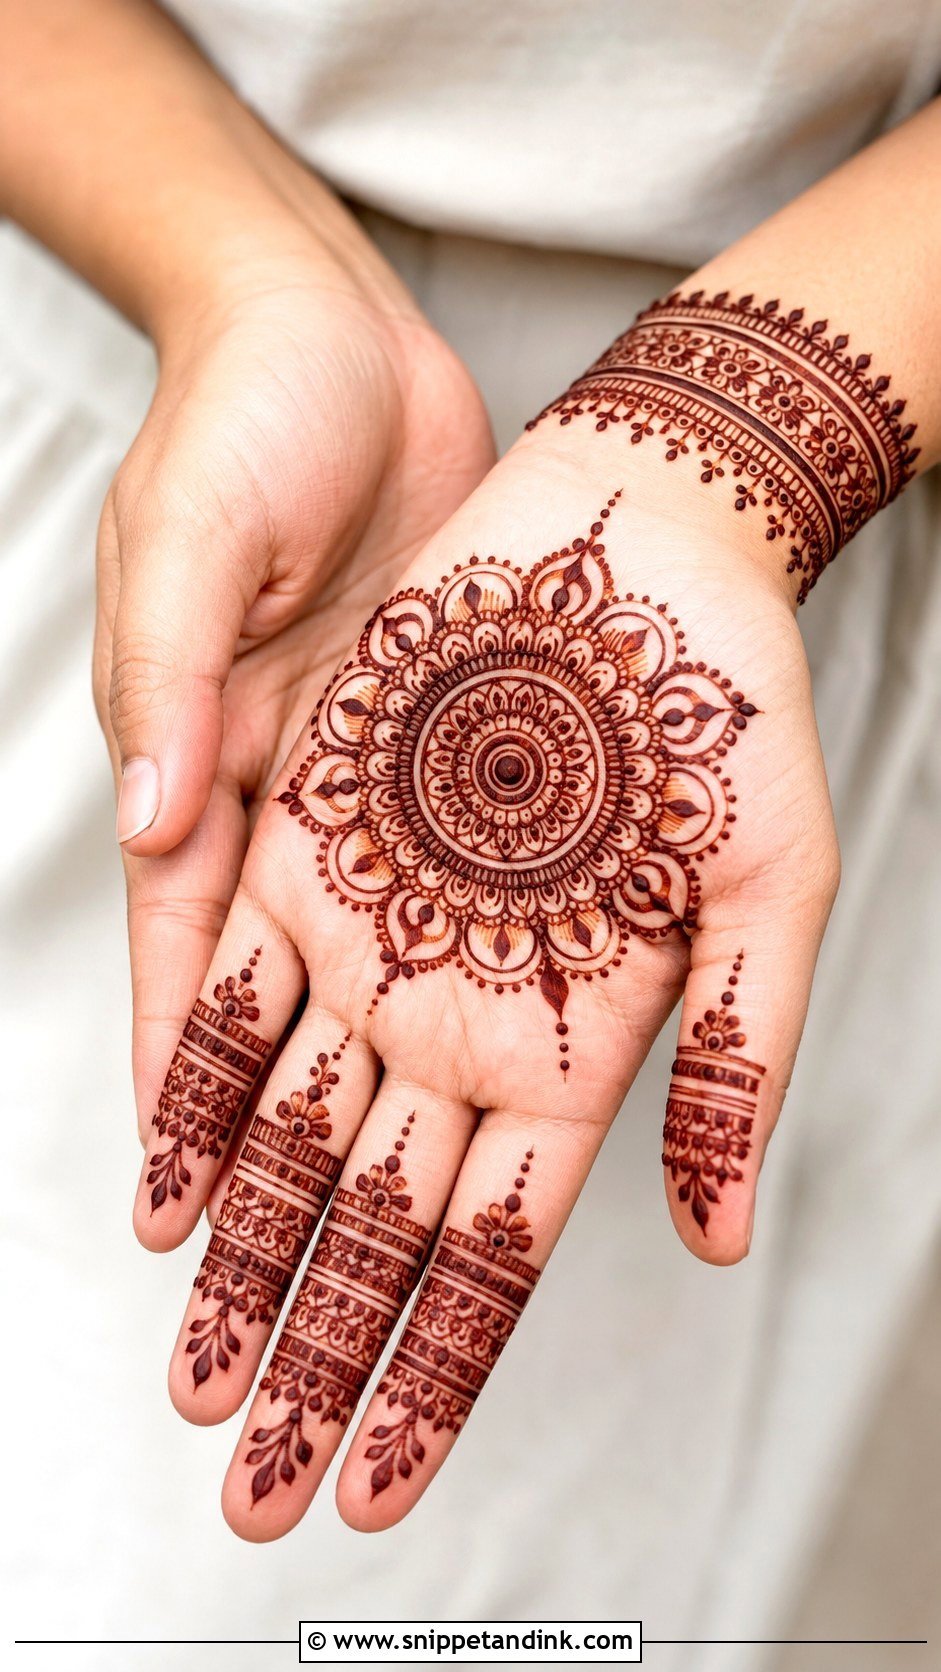
A mandala in the palm feels ceremonial; on the back of the hand it starts to look like a piece of jewellery. I draw it from the centre outward, one ring at a time, and that is exactly why I recommend it to beginners: the circles keep it balanced even when individual lines wobble. The centre dot and first ring are where everyone looks, so that’s where I slow down. Slim finger patterns, half-flower borders and a single wrist band complete it.
9. Right Hand Floral Mehndi Design
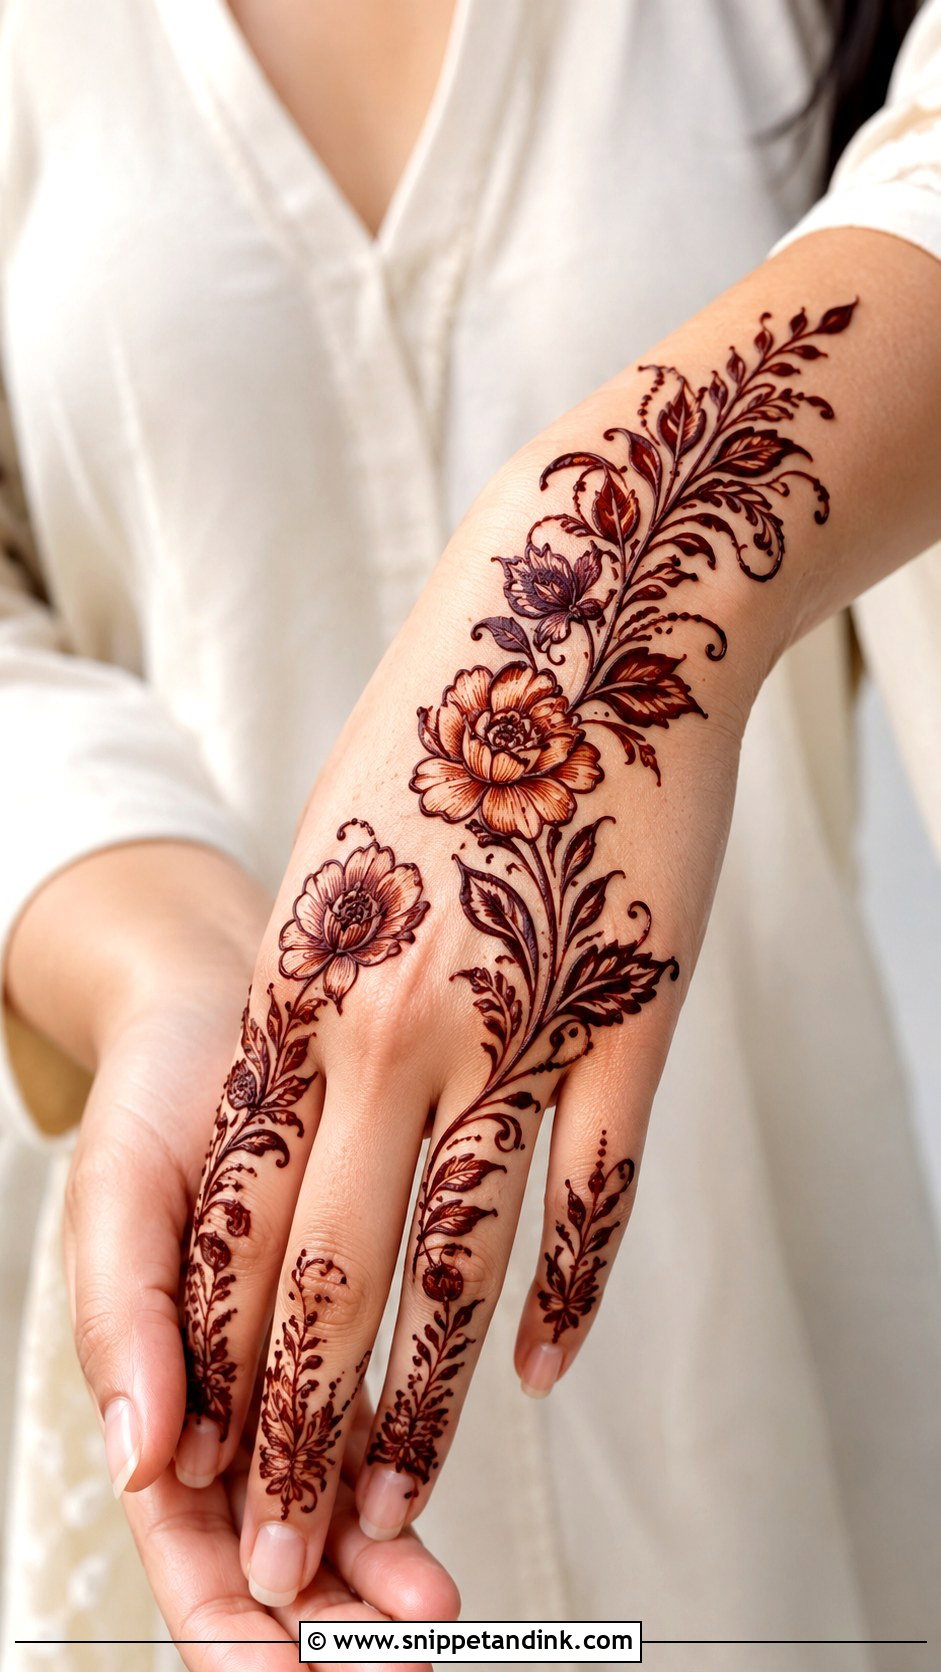
Florals bend to fit any hand, which makes them my default when someone can’t decide. A single flower trail is quick. Layered roses, lotus petals and shaded leaves take longer and need a steadier cone. For a modern read I draw the blooms larger with more open skin around them; for something traditional I fill the petals with fine lines and add a paisley border. On the right hand, run the flowers from the wrist toward the fingers so the design stretches with the hand when it’s extended.
10. Right Hand Paisley Mehndi Design
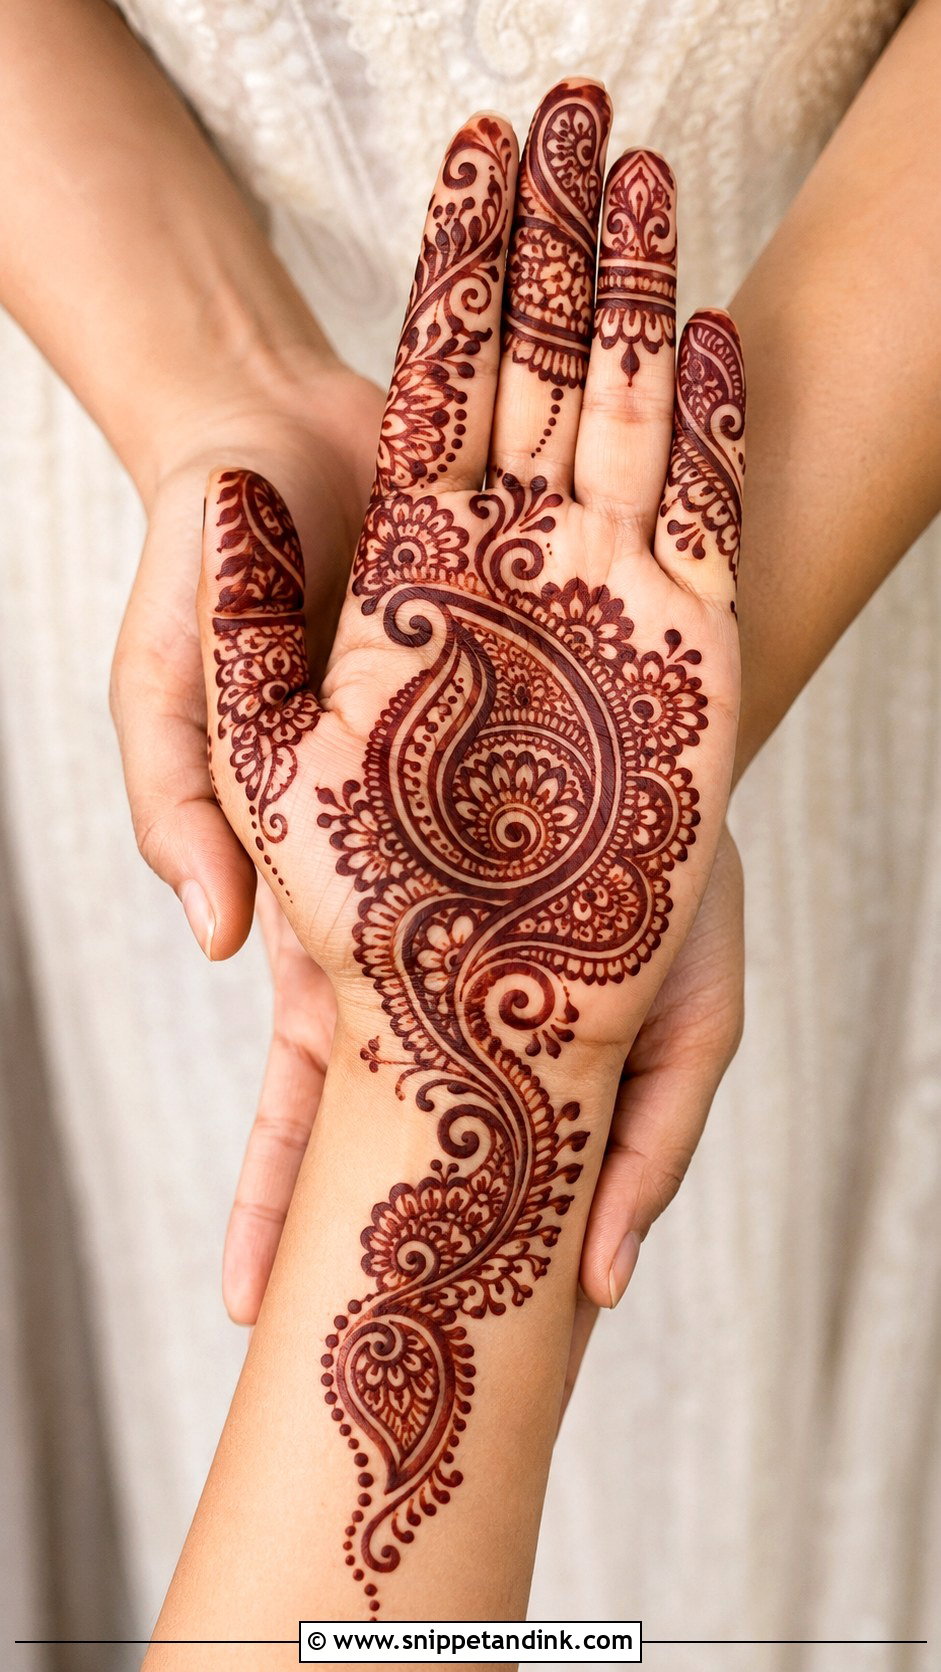
Paisleys are the backbone of classic Indian mehndi, and their curve tucks naturally around the thumb, the wrist and the base of each finger. They can run in a diagonal trail, ring a palm or anchor a full bridal layout for weddings, Karwa Chauth, Teej or Diwali. I like one large paisley near the palm with smaller ones stepping toward the fingertips, filled with petals, dots, spirals or mesh. The one thing I insist on is a thicker outline. Fine paisley edges soften as the stain deepens, and the shape gets lost.
11. Right Hand Peacock Mehndi Design
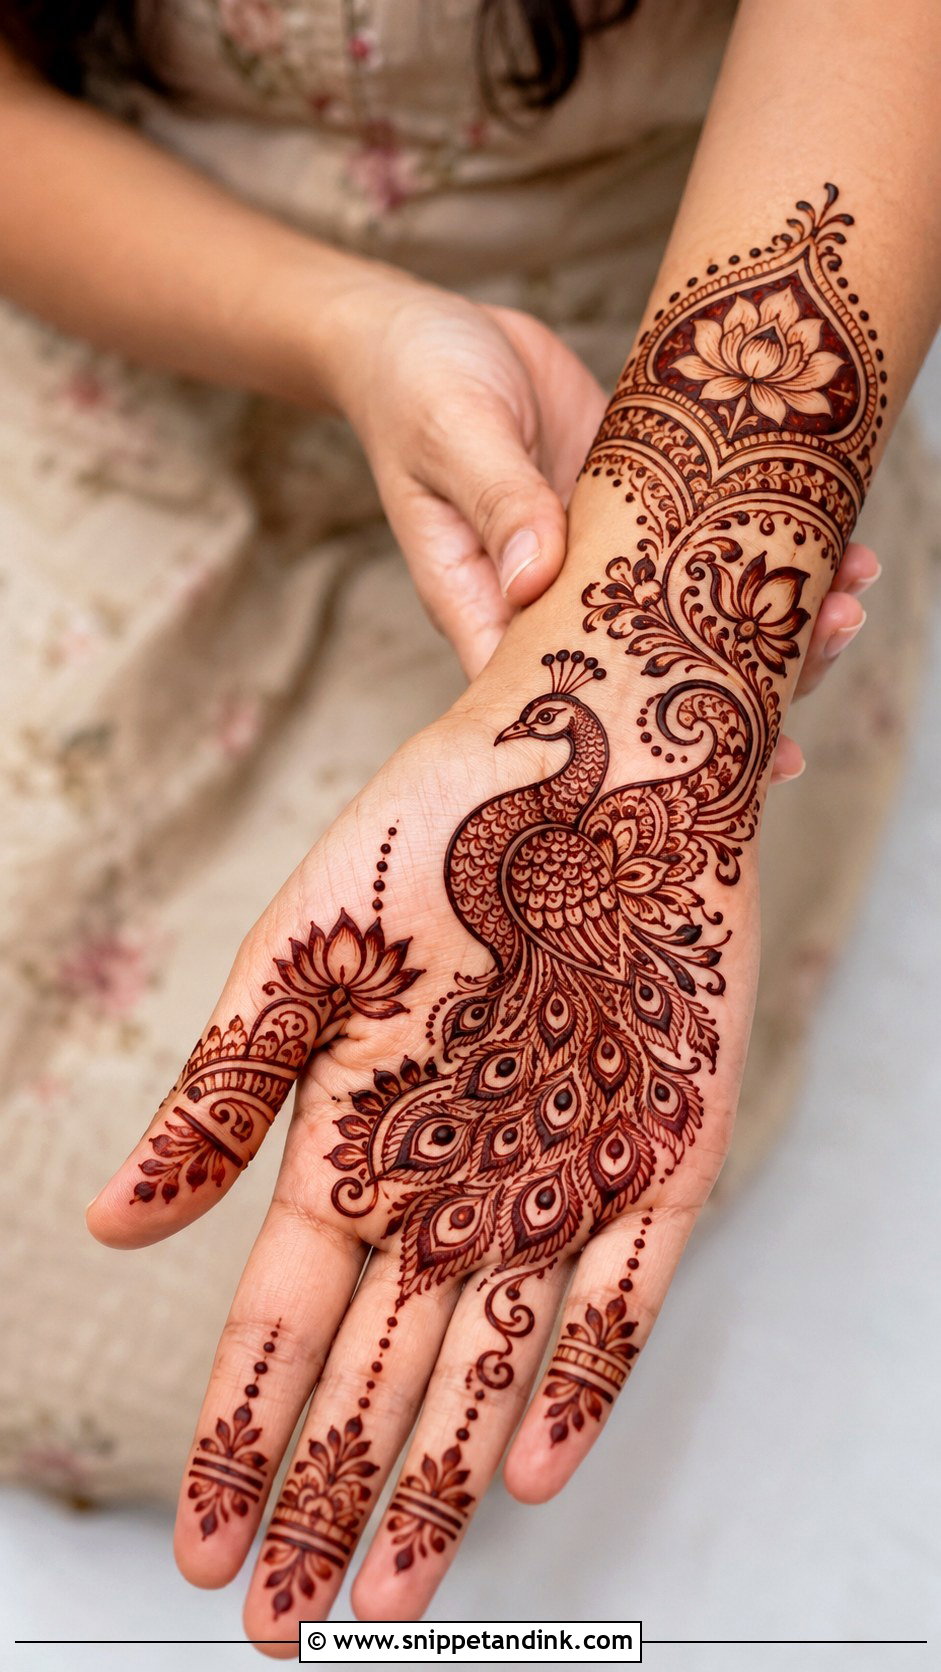
Peacocks carry festive meaning and leave a lot of room for fine work in the feathers. I place the bird in the palm, near the wrist or as one panel of a bridal layout, with its head pointing toward the fingers so it seems to climb the hand. The neck is what goes wrong most often: drawn too thin, it vanishes in the stain and the bird reads as a blob with a tail. Thicken the neck and the outer feather line, then surround it with lotus, paisleys and a wrist band.
12. Right Hand Jaali Mehndi Design
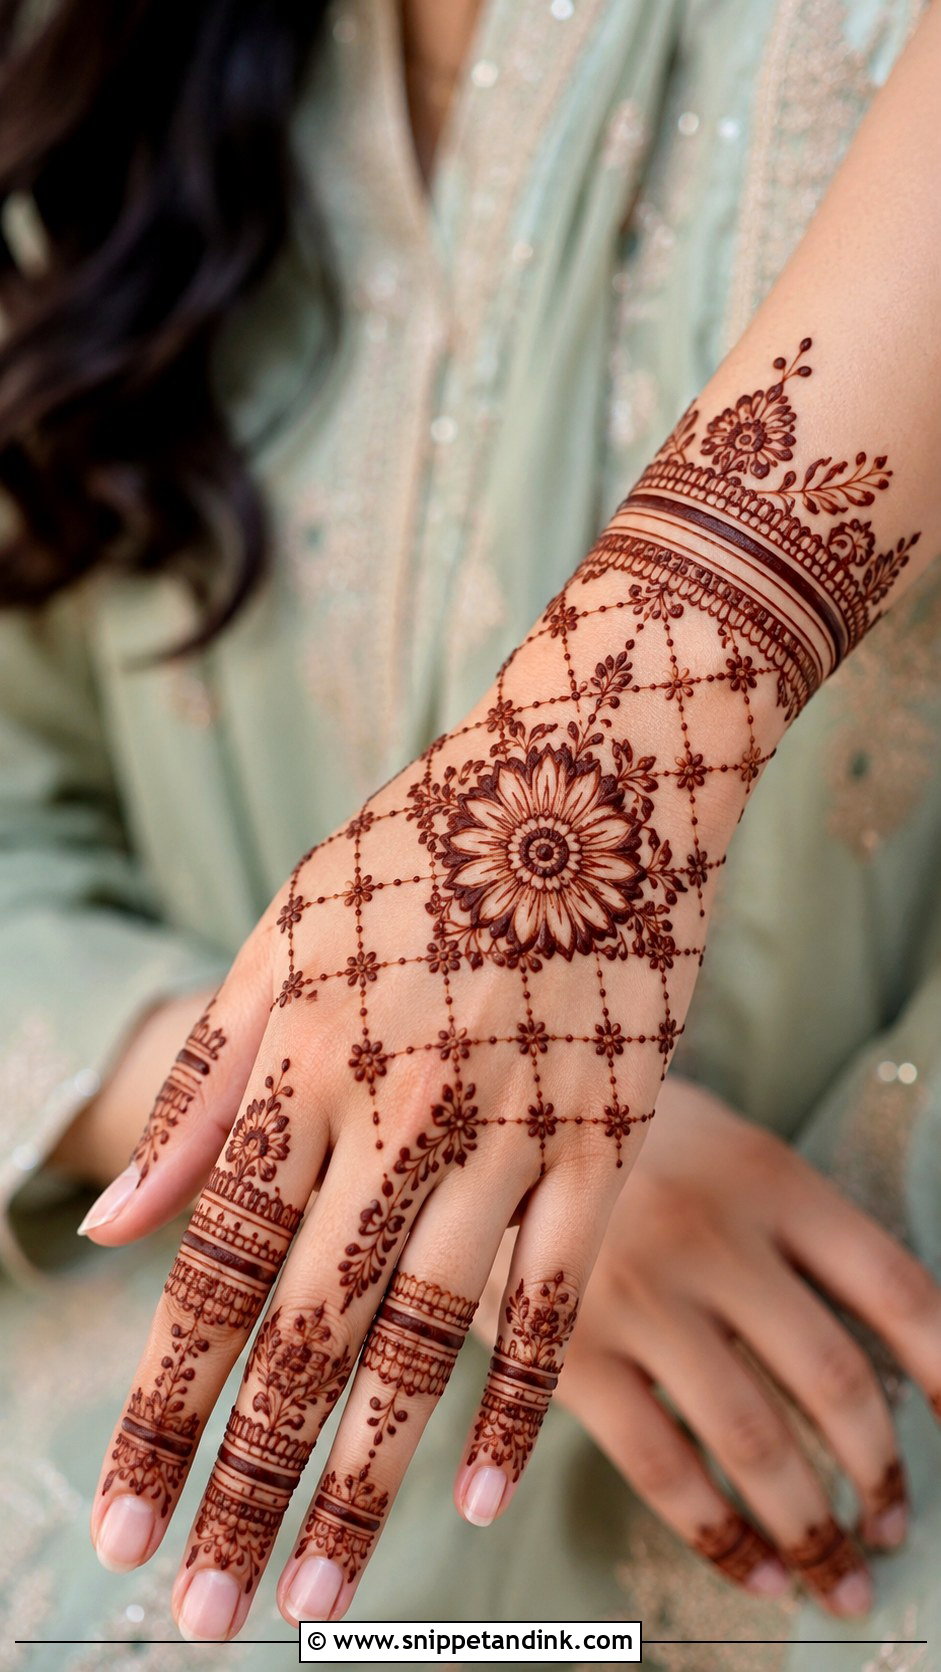
Jaali is a net of diamonds or squares that adds texture without heavy fill. On the back of the hand with a centre motif it reads like a lace glove, and on the palm it gives depth without darkness. The grid has to be even, which is harder than it looks on a curved hand, so I draw the two outer guide lines first and work inward. Don’t fill every cell. A dot in a few chosen diamonds keeps it light.
13. Right Hand Jewelry Mehndi Design
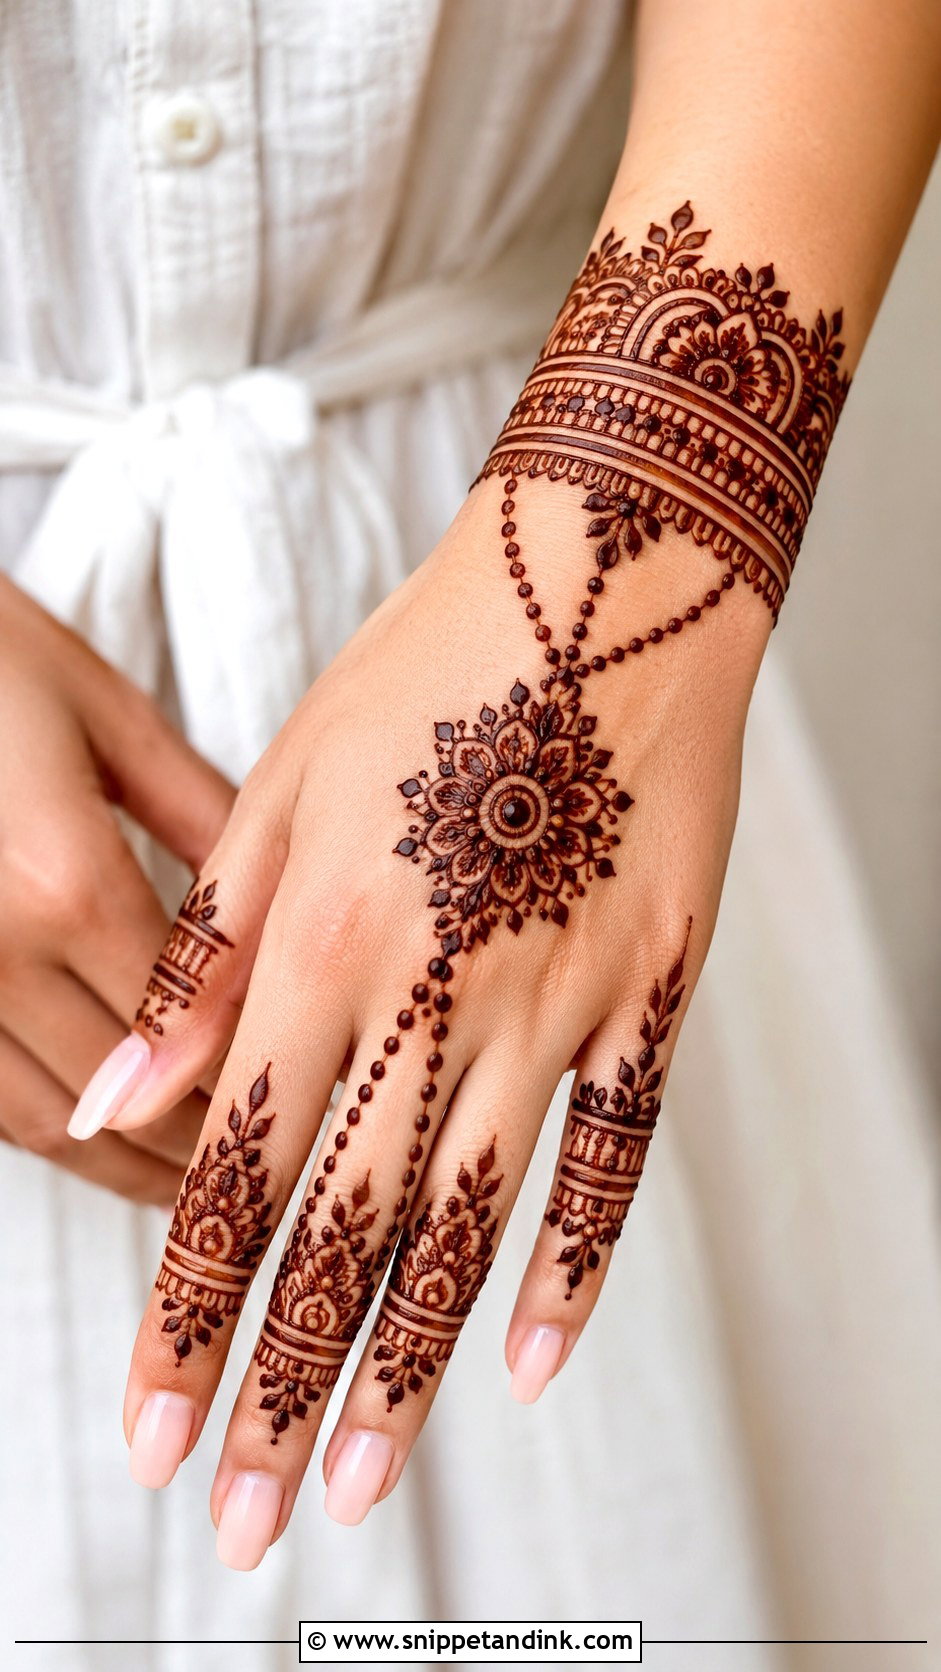
Here the henna imitates jewellery: ring chains, a bracelet cuff, finger bands and fine links across the back of the hand. It really only works on the back, where the drawn pieces sit where real ones would. I start at the wrist bracelet, join it to a centre motif, then run the chains out to each finger, keeping every line thin. If you’ll be wearing real rings as well, tell me which fingers, so I don’t spend time on a band the metal will cover.
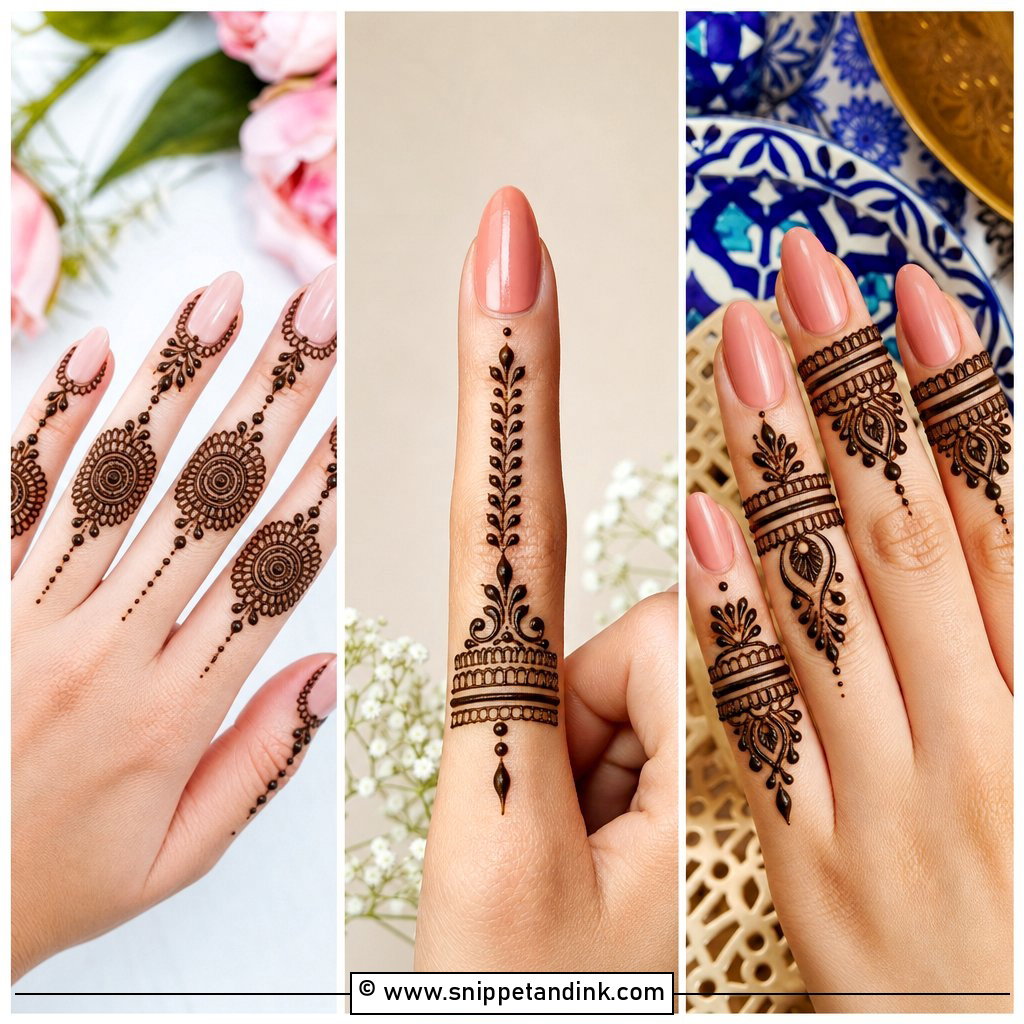
14. Right Hand Finger Mehndi Design
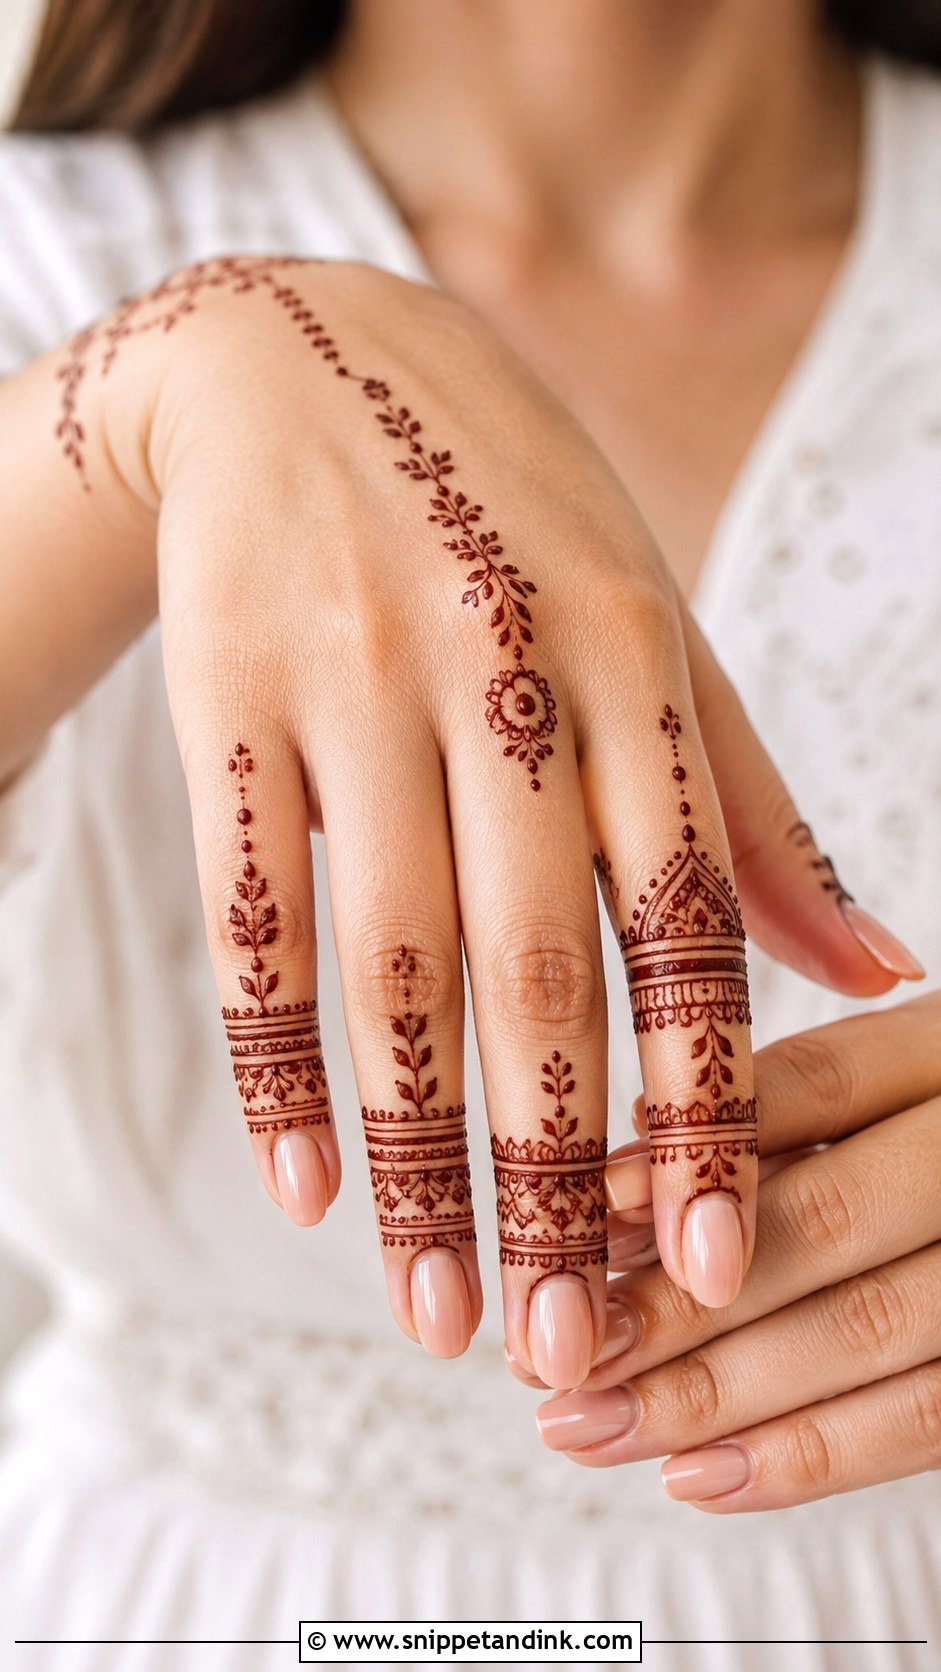
Finger-focused designs leave the palm or back almost bare, so they dry fast and suit anyone who needs her hands the same evening. Each finger gets bands, leaves, dots, tiny florals or geometric tips. I keep the pattern consistent but change one small element from finger to finger, otherwise the hand looks stamped. Fingertips take the darkest stain on the whole hand, so even a light design here shows up well. A small wrist line or a motif at the base of the hand ties it together.
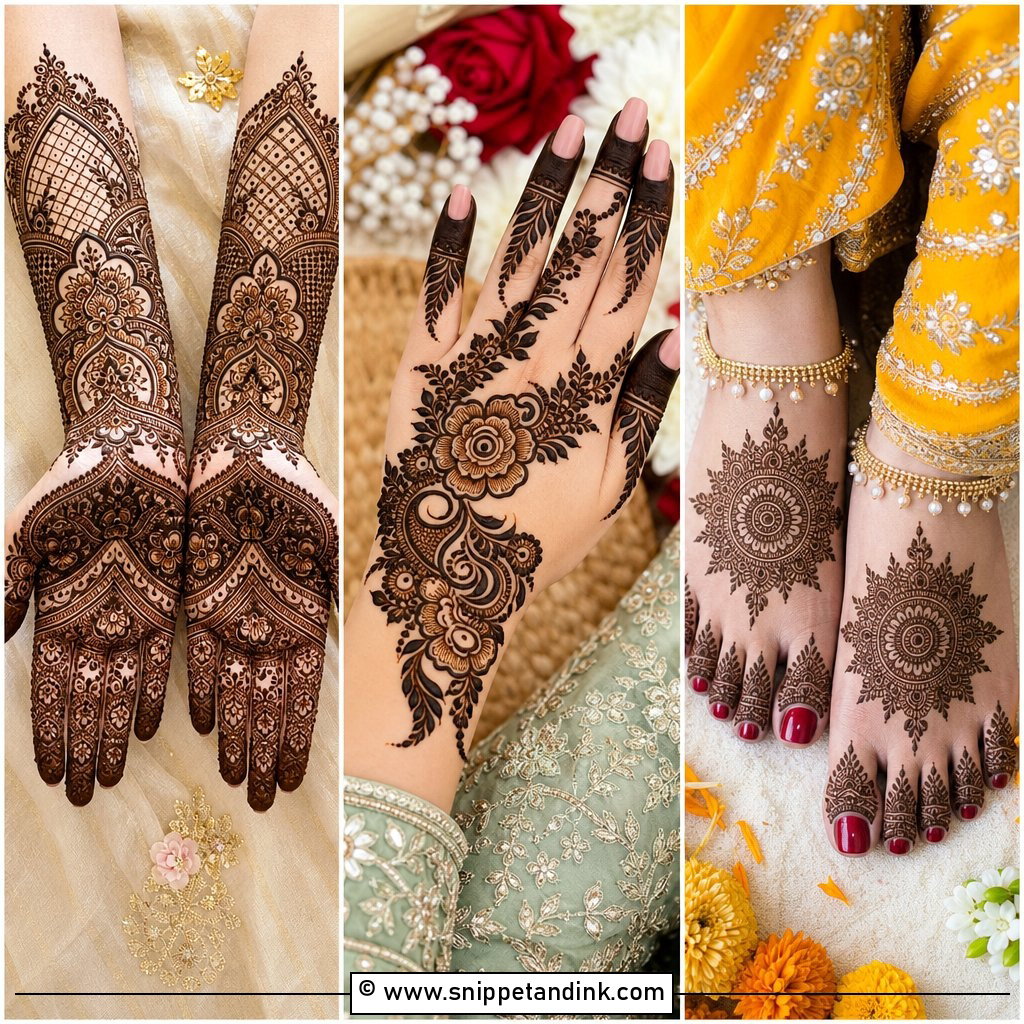
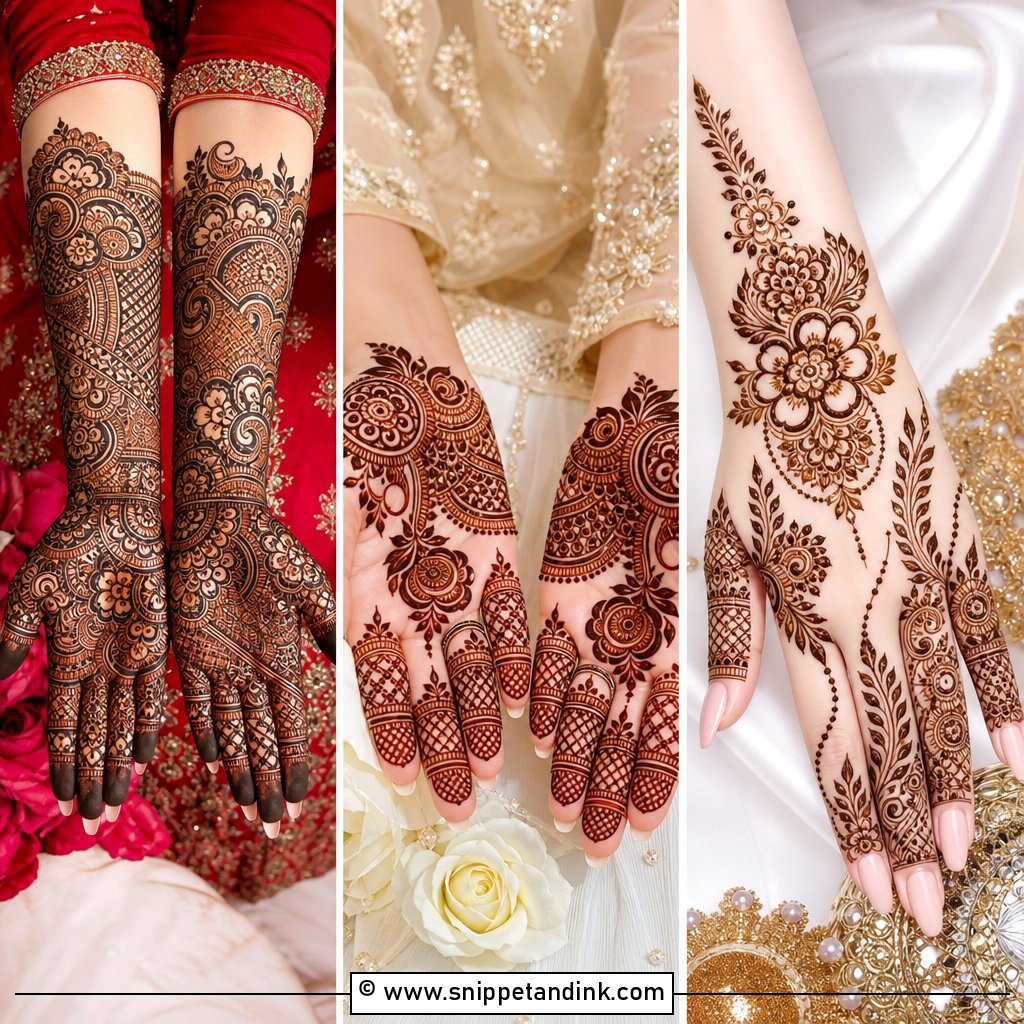
15. Right Hand Wrist Mehndi Design
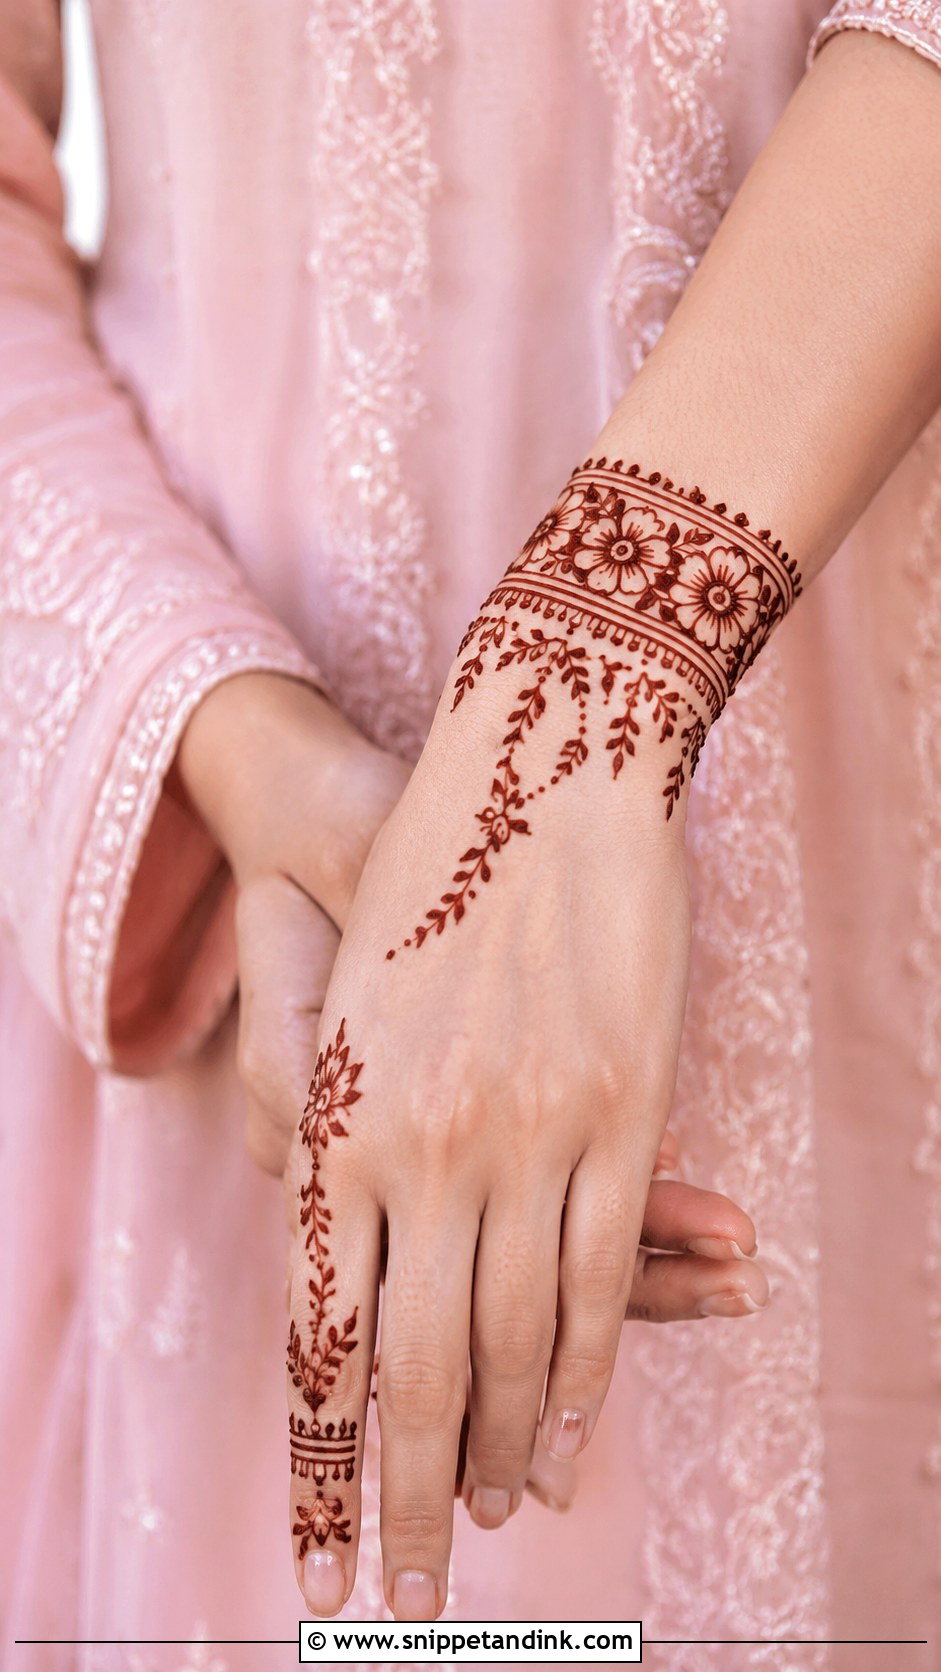
A wrist cuff gives the feel of a henna bracelet with very little time in the chair. Floral cuffs, paisley bands, geometric borders and lace-like lines all suit it. My main concern is the wrist crease: paste laid over a deep crease cracks as soon as you bend, so I sit the band just above or below it. You can let a few vines climb toward the fingers or keep everything at the wrist. It shows best with short sleeves or traditional outfits that leave the wrist bare, and it needs an even band width all the way round.
16. Right Hand Rose Mehndi Design
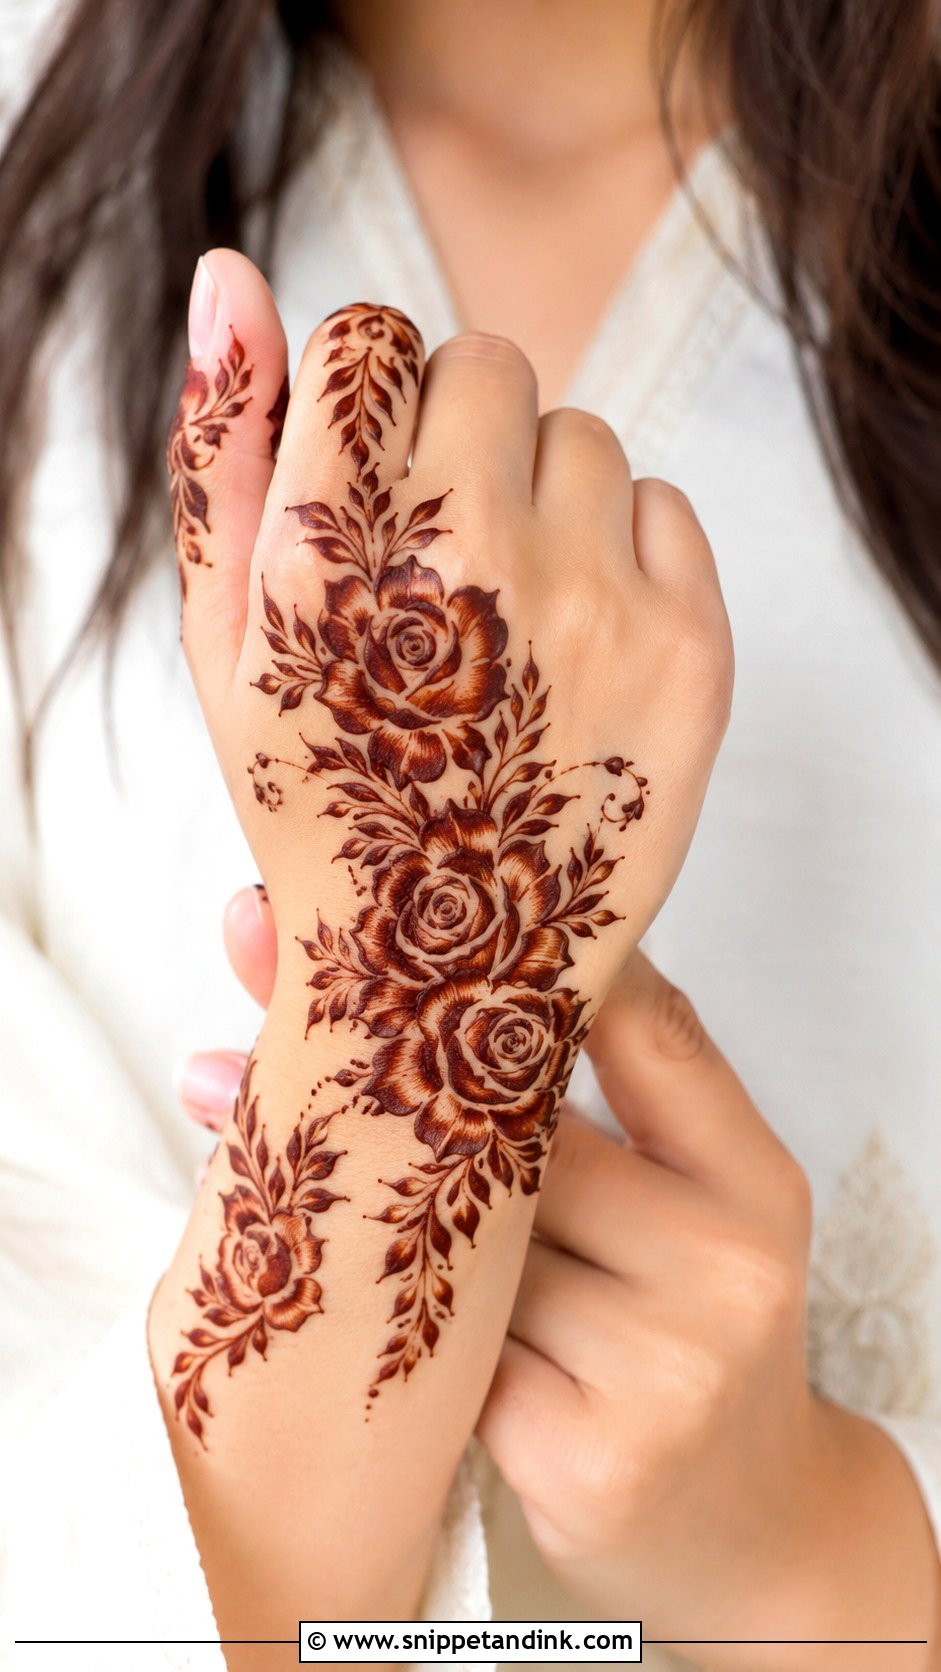
Roses suit Arabic and Indo-Arabic layouts because they need flowing vines and open skin around them. They can be bold outlines, shaded petals or small clusters. I put one large rose at the back-hand centre or a palm corner, run leaves toward the fingers and add a couple of buds near the wrist. Rose petals are drawn close together, so I leave a hairline of bare skin between each one; without it, the petals fill in as the stain develops and the rose turns into a plain circle.
17. Right Hand Lotus Mehndi Design
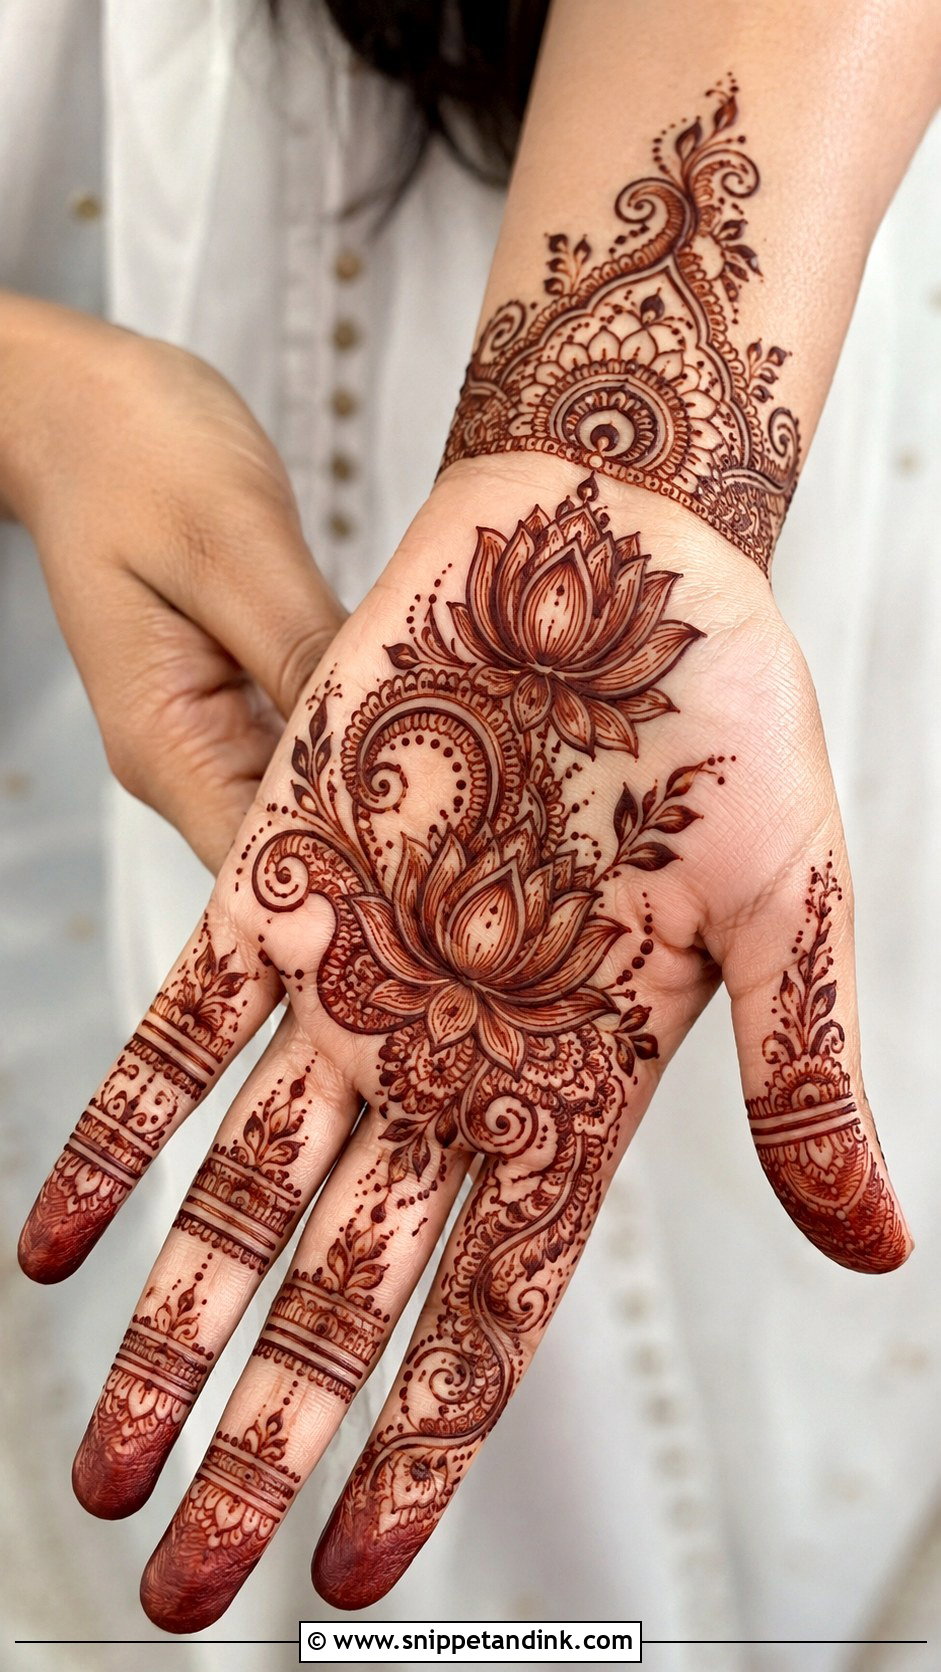
The lotus gives a strong focal point and carries real meaning at pujas, Diwali and weddings. It can sit in the palm centre, near the wrist or within a back-hand bracelet, and it pairs easily with mandalas, paisleys and dot chains. On the right hand I like the lotus stretching upward toward the fingers, since that vertical shape lengthens the hand. Outer petals go bold and inner shading goes fine, which gives the finished stain proper contrast.
18. Right Hand Minimal Mehndi Design
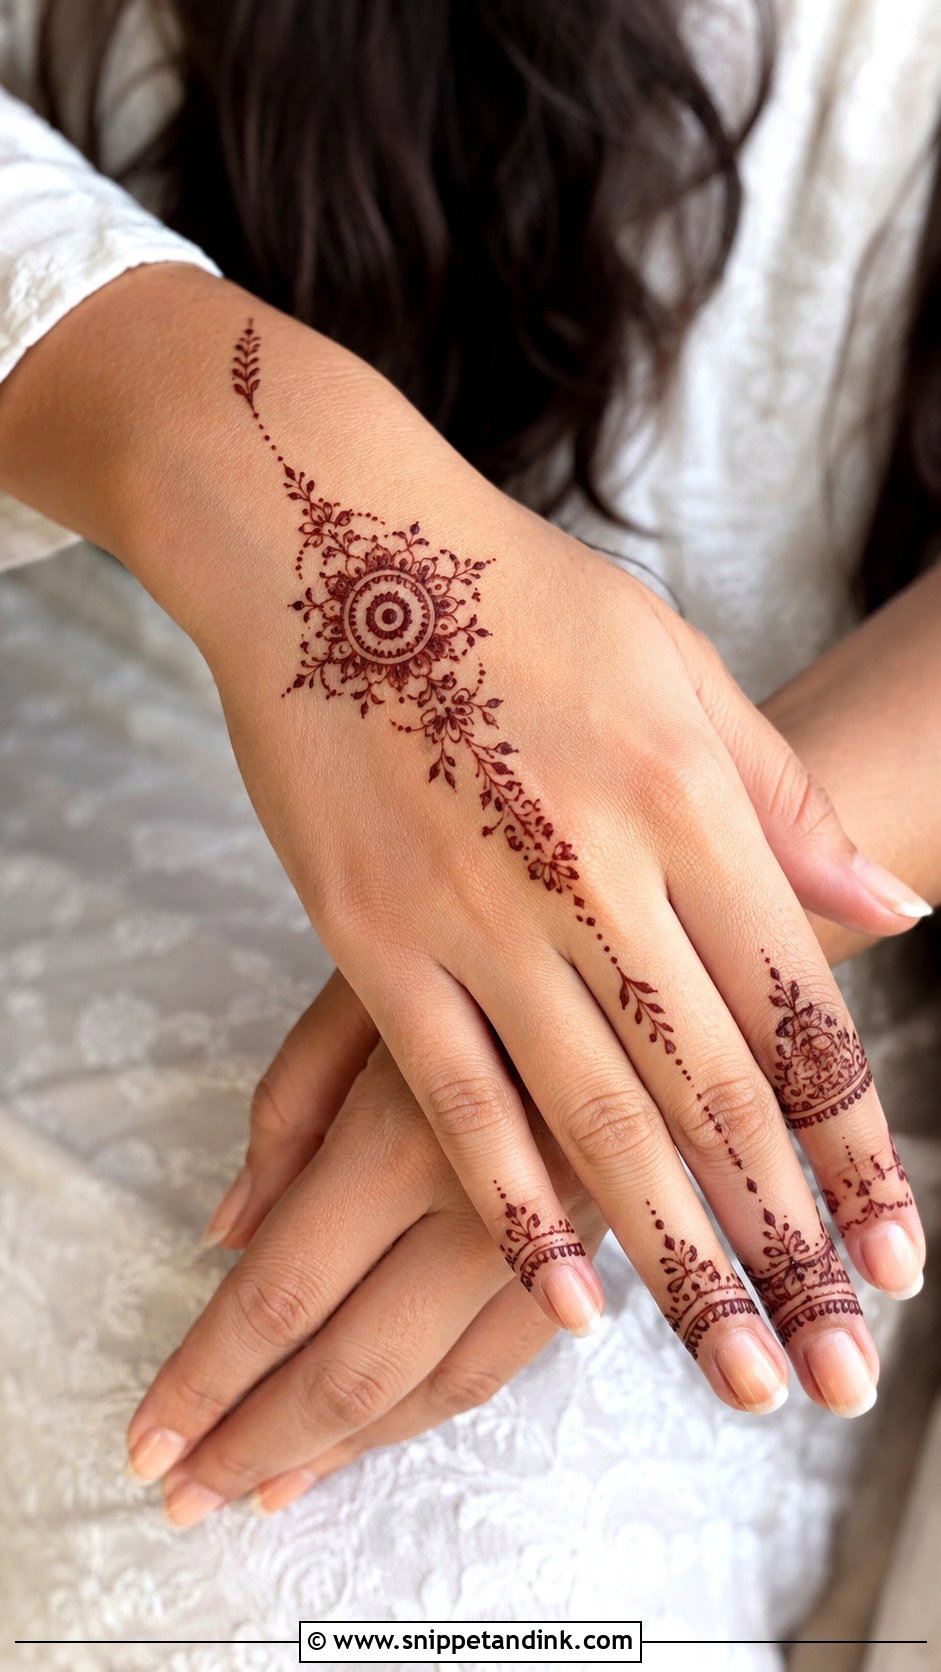
Minimal designs depend entirely on the empty space looking intentional. A tiny mandala, a slim floral trail or a delicate cuff, plus some light finger work, is plenty. What I avoid is scattering small elements around the hand with no relationship to each other. Pick one direction, wrist to finger or centre to fingertip, and keep everything on that line. It’s a sensible choice for office events and college functions where heavy henna would feel out of place.
19. Right Hand Modern Mehndi Design
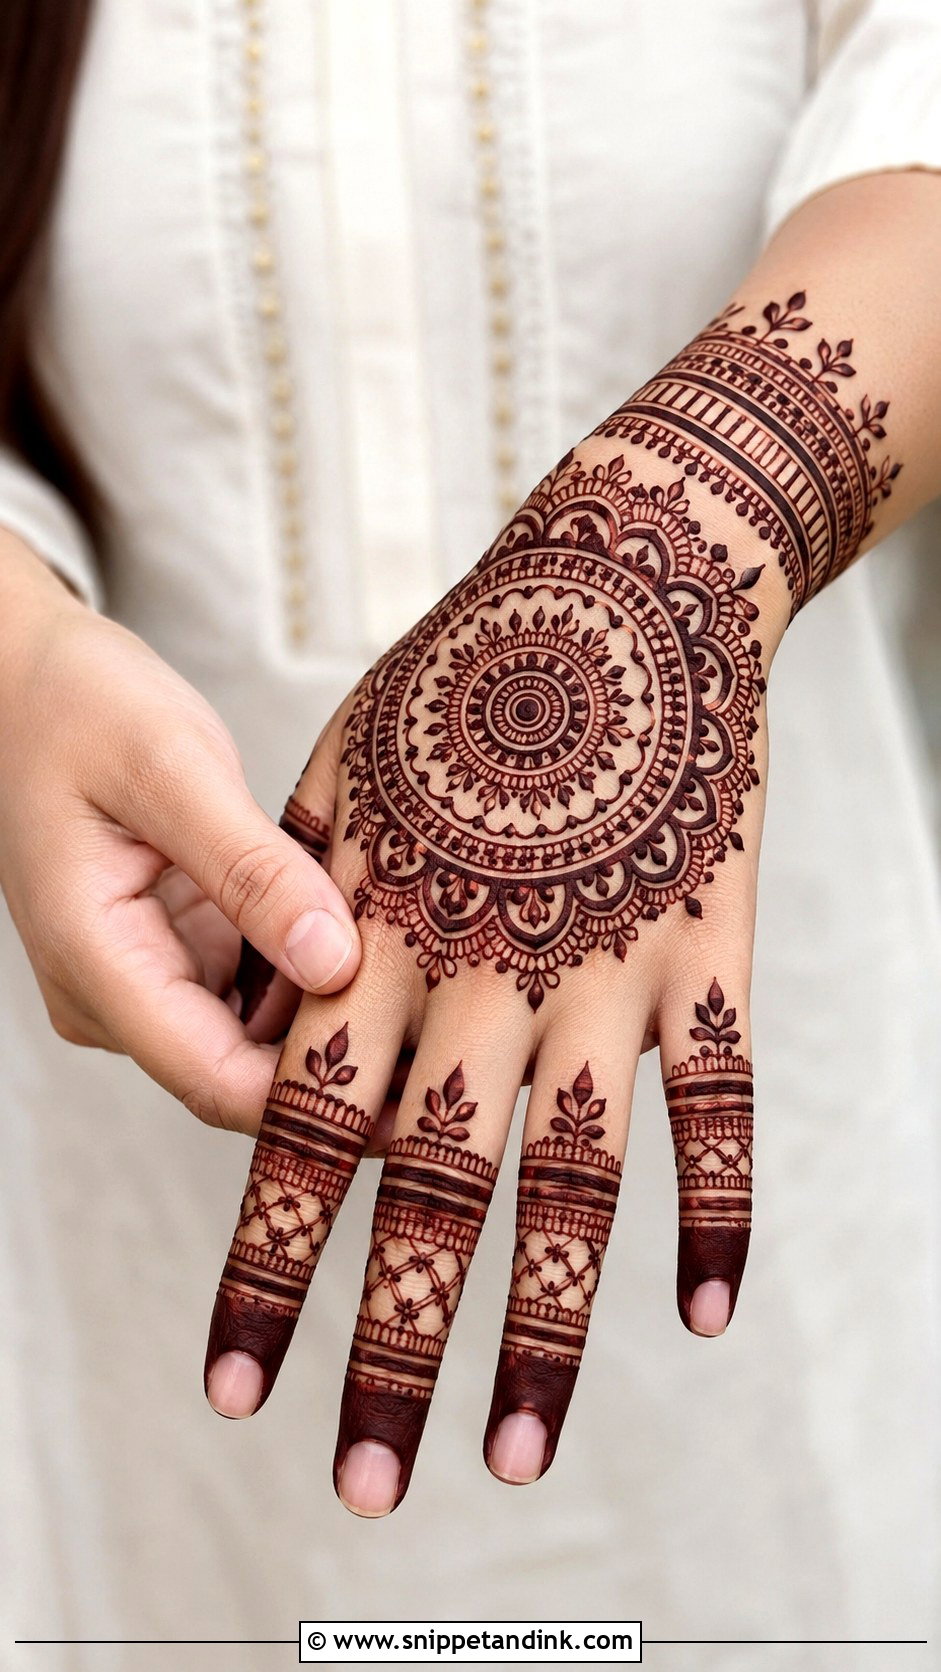
Modern layouts take classic motifs and give them more space, bolder shapes and unexpected placement: half-hand compositions, geometric bands, floral outlines and negative-space trails. I follow the hand’s own shape rather than filling every zone. A bold back-hand mandala with fine finger lines reads sharp, while an open Arabic palm trail reads easy to wear, and both sit well with Indo-western outfits. When someone asks me for modern but busy, I gently push back. Crowding is the fastest way to lose the modern feel.
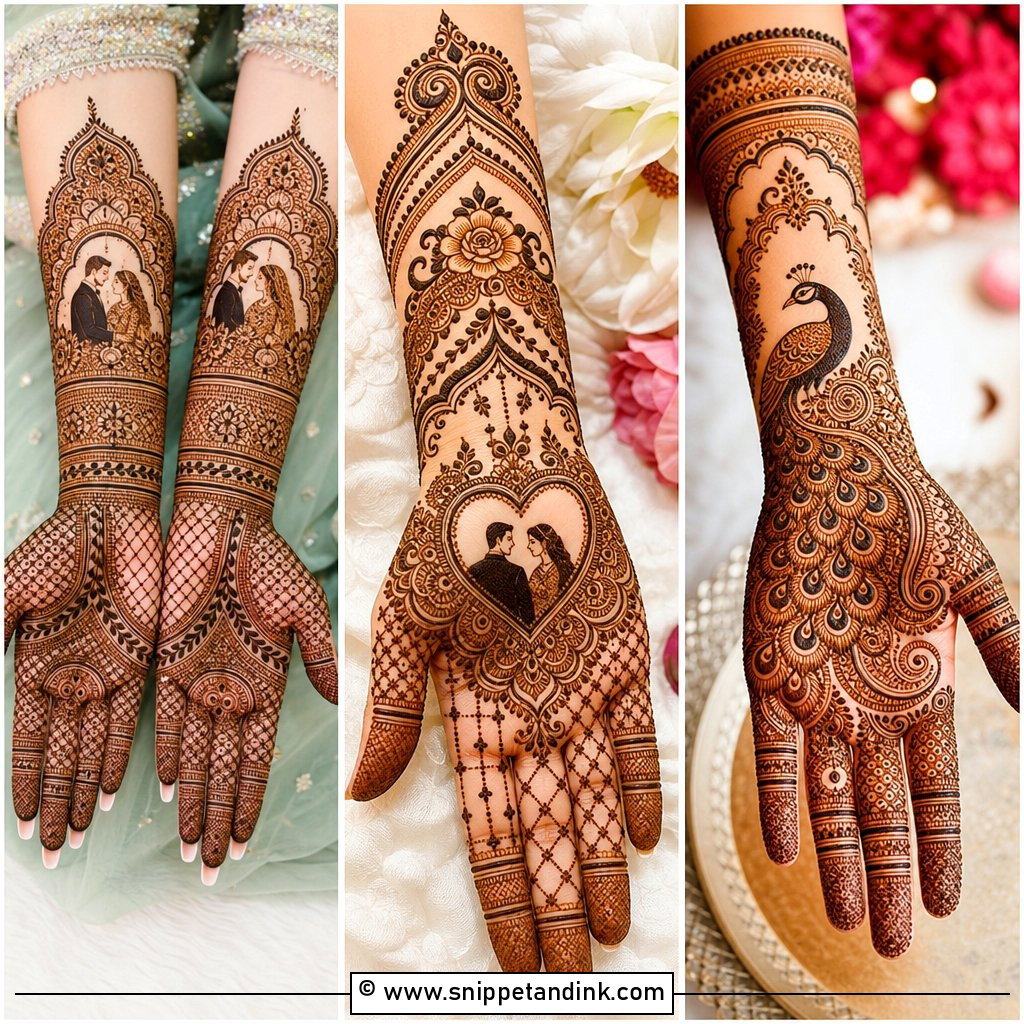
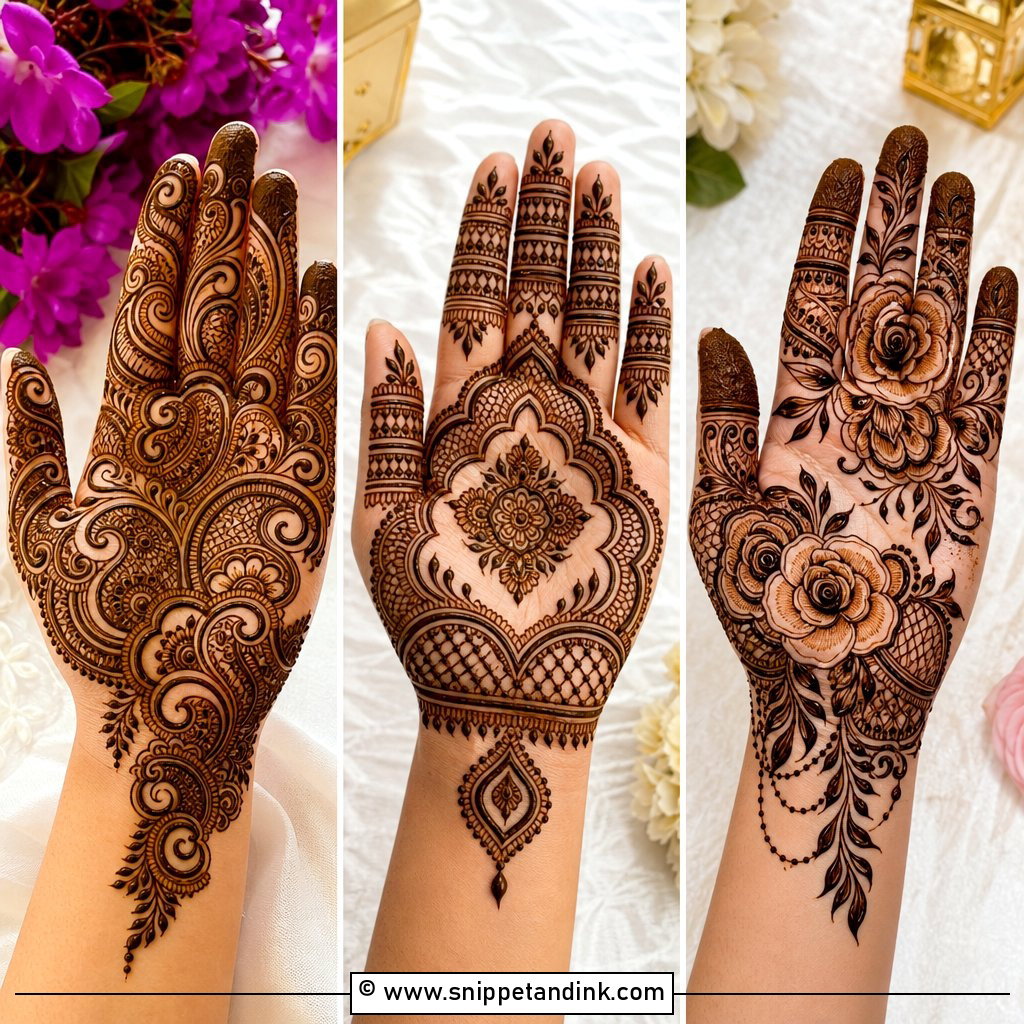
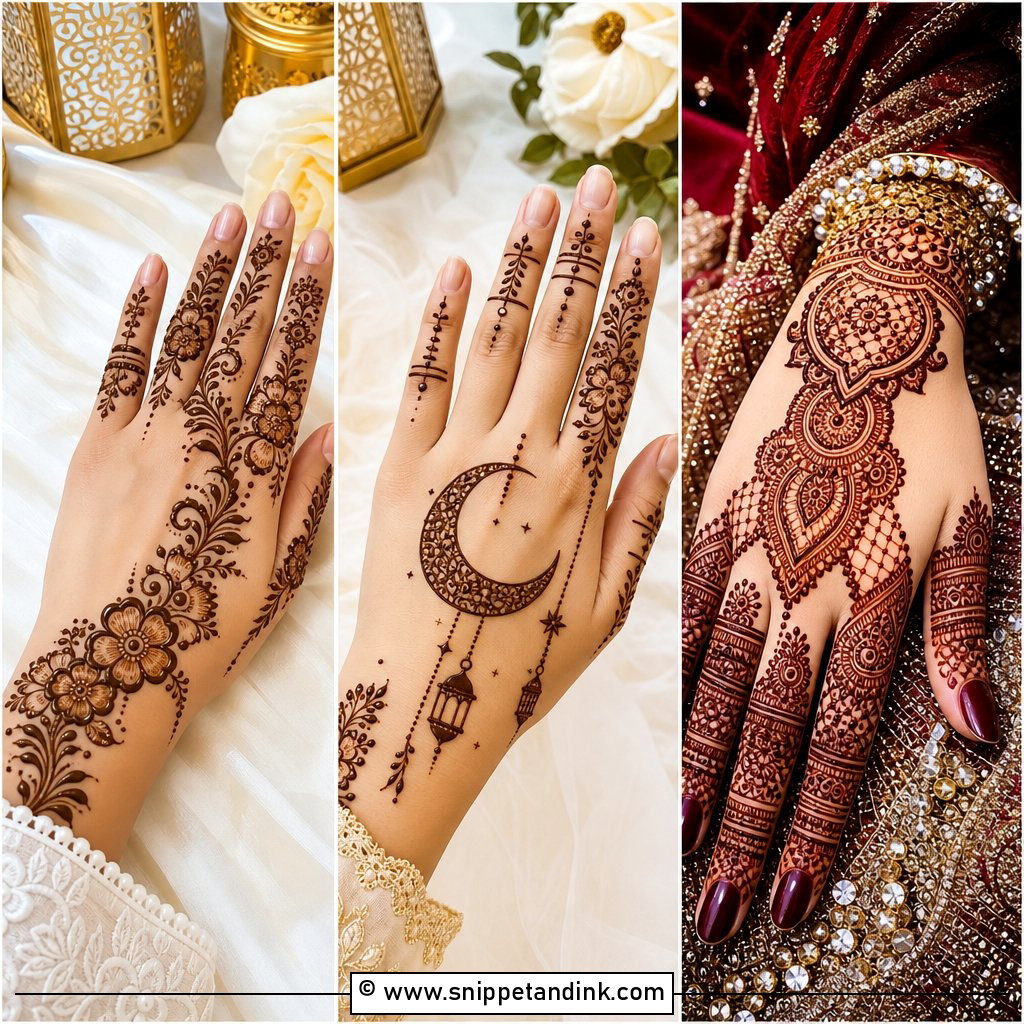
20. Right Hand Indian Mehndi Design
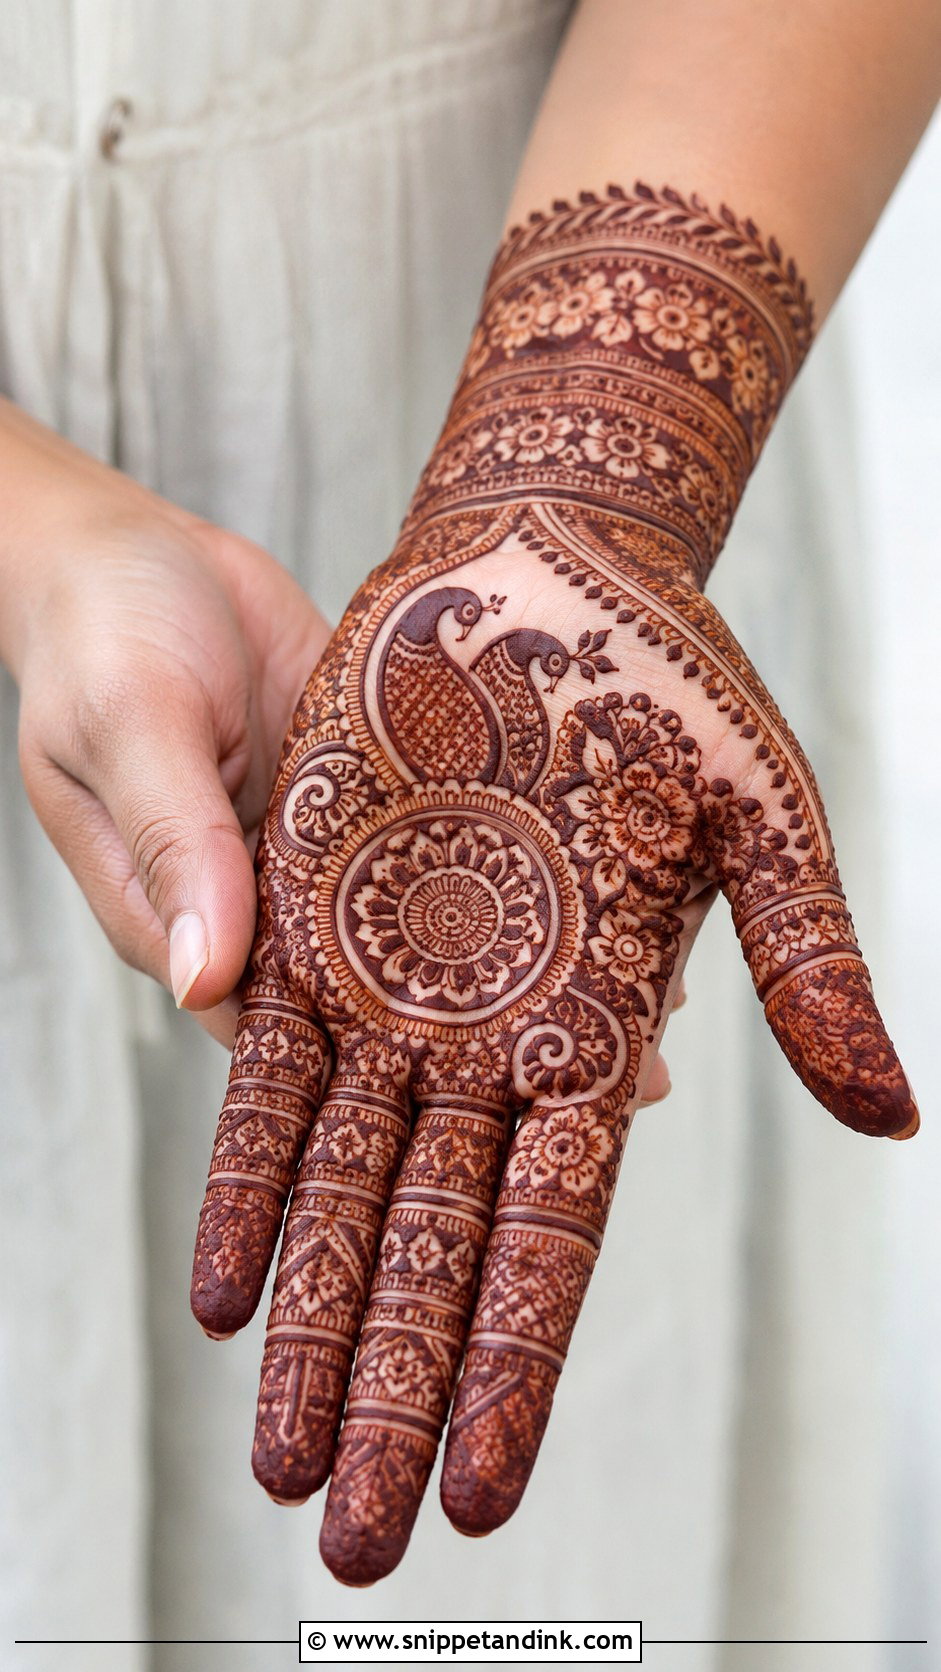
Indian mehndi is dense: paisleys, peacocks, flowers, mandalas, leafy borders and tiny fillers with little bare skin left. That’s the main difference from Arabic, which keeps open space on purpose. I build it from a strong palm centre outward to the fingers and wrist. If you want the same motifs in a lighter version, I widen the gaps rather than drop elements. The detail is so tight that the paste needs to be silky and the lines clean, or the fine work merges once the stain deepens to reddish brown.
21. Right Hand Indo Arabic Mehndi Design
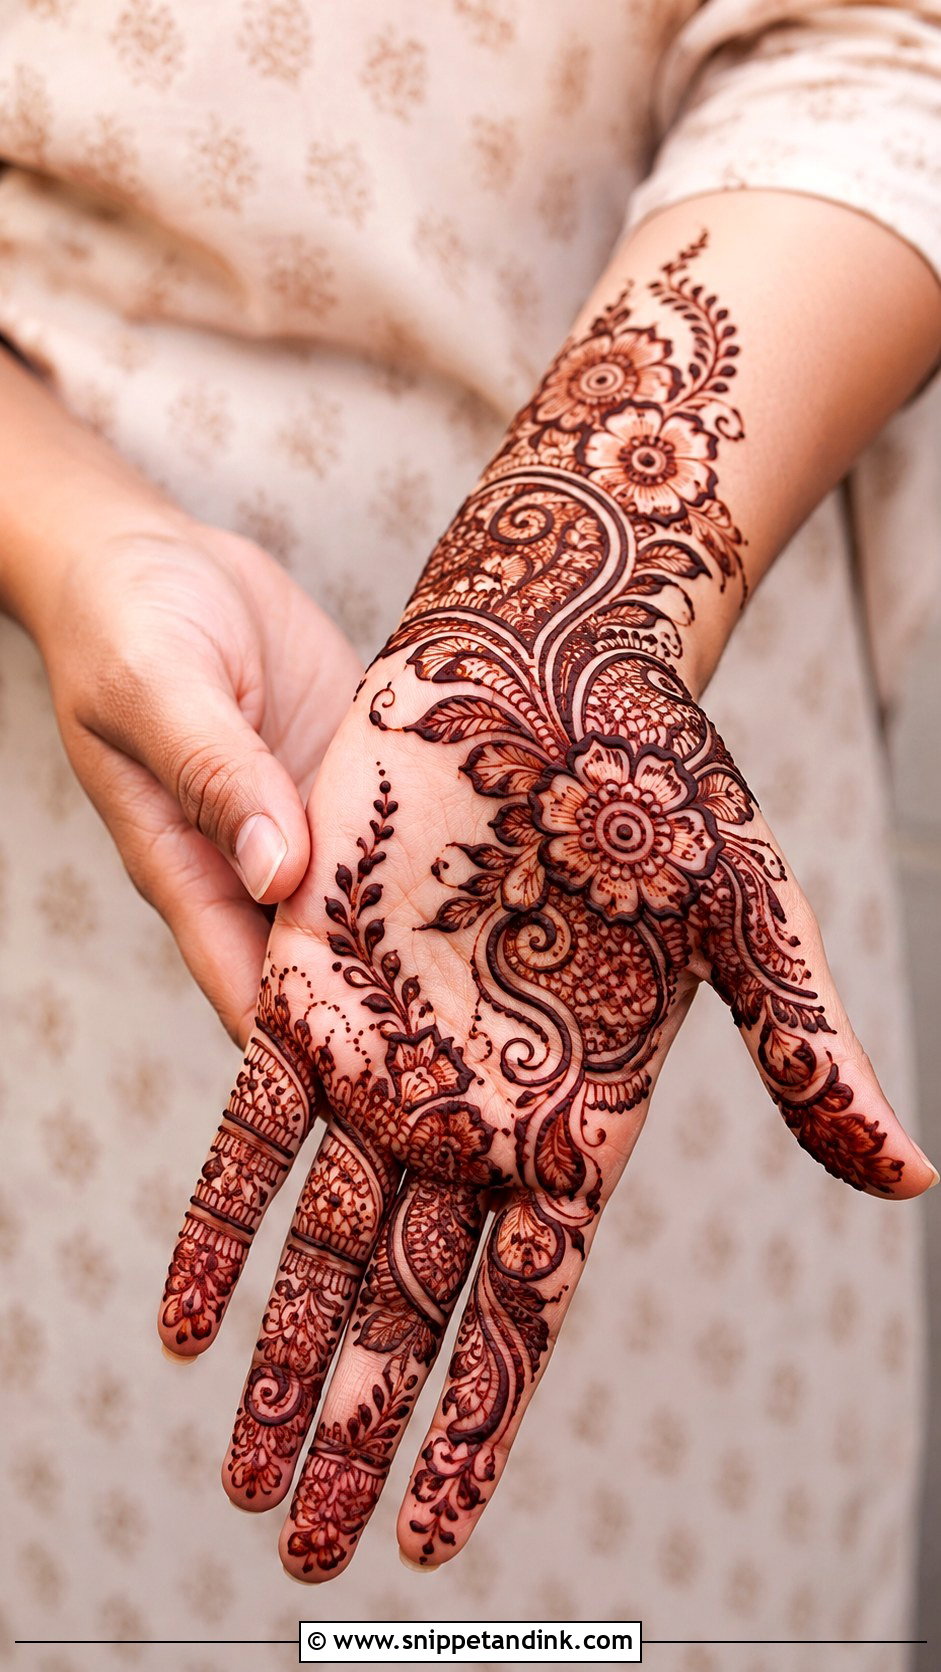
Indo-Arabic borrows the flow of an Arabic trail and fills the flowers and paisleys with Indian detail. On the right hand I run it diagonally from wrist to index finger, which feels graceful without weight. The richness lives inside the motifs, while the space around them stays open so the Arabic character survives. It’s far quicker than a dense bridal pattern, so guests, bridesmaids and semi-bridal functions are where it earns its place.
22. Right Hand Moroccan Mehndi Design
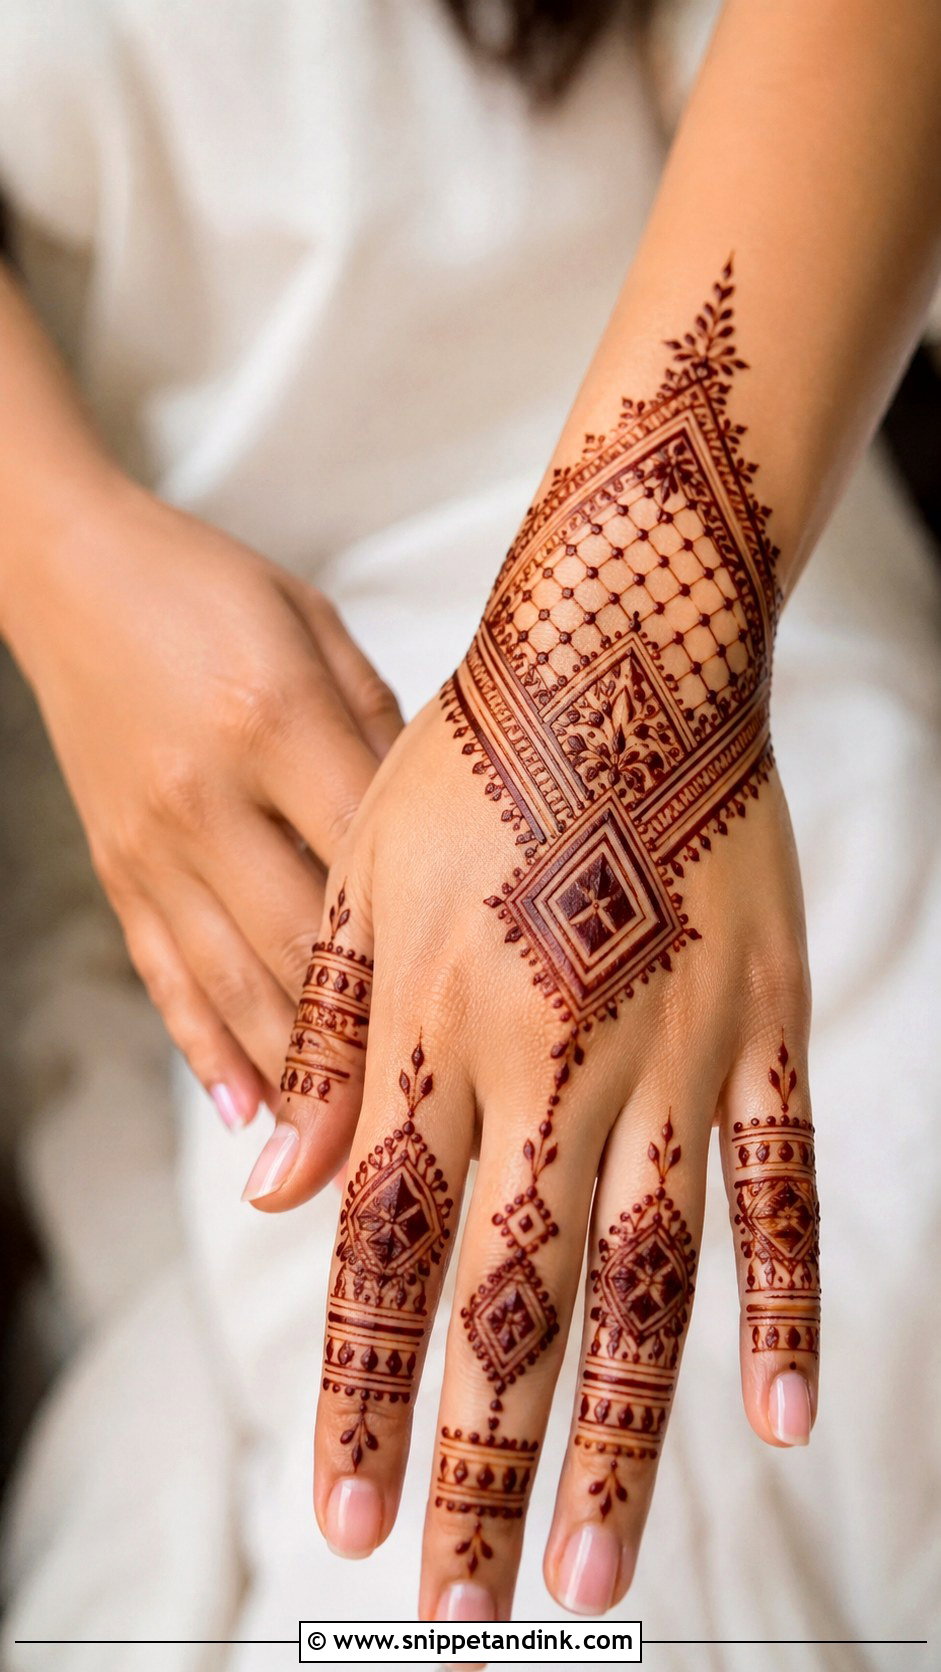
Moroccan work trades florals for lines, triangles, diamonds, grids and angular borders, and it reads very graphic on the back of the hand, fingers and wrist. Try a central diamond with patterned finger bands and a geometric cuff. Be warned that this style is unforgiving. A wobble in a straight line is obvious in a way it never is in a petal, so I draw it with a finer cone tip and a slower hand, and I steer nervous first-timers toward something curved.
23. Right Hand Gulf Mehndi Design
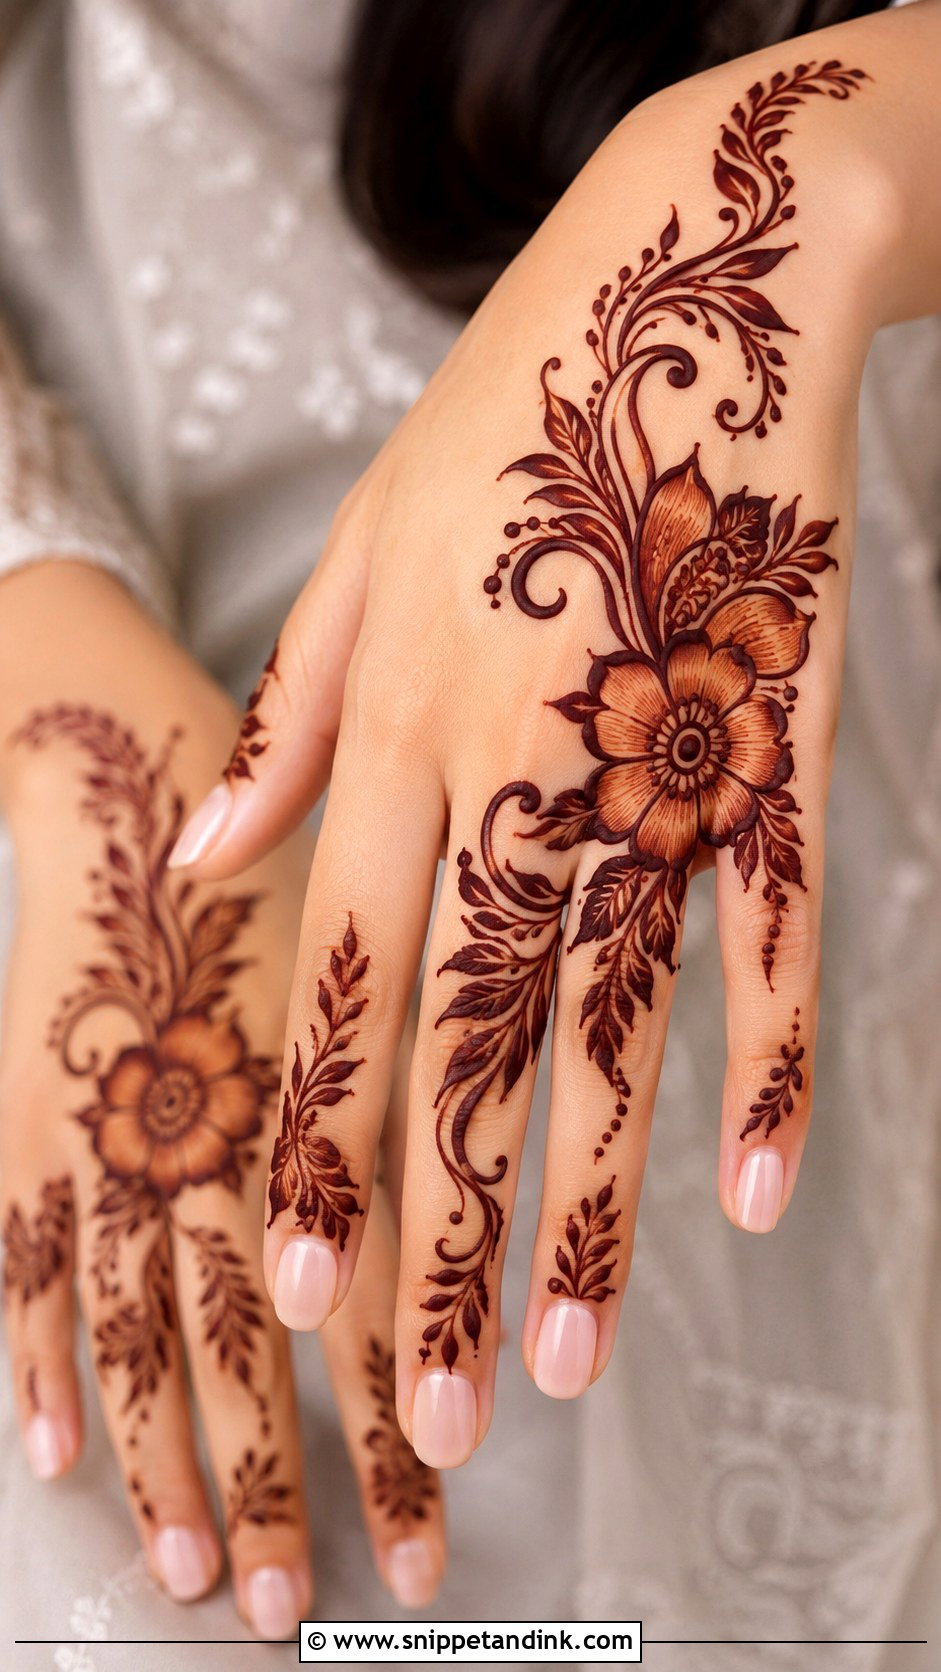
Gulf, or Khaleeji, mehndi is Arabic scaled up: oversized blooms, leafy trails, shaded petals and dramatic gaps. I place the big flowers down one side of the hand and pull leaves toward the fingers, then shade inside the petals while the background stays open. It looks rich in photos without the hours a dense bridal set needs, which makes it popular for Eid and evening functions. Lines have to be smooth and confident, since hesitation shows up as blobs in shaded work.
24. Right Hand Eid Mehndi Design
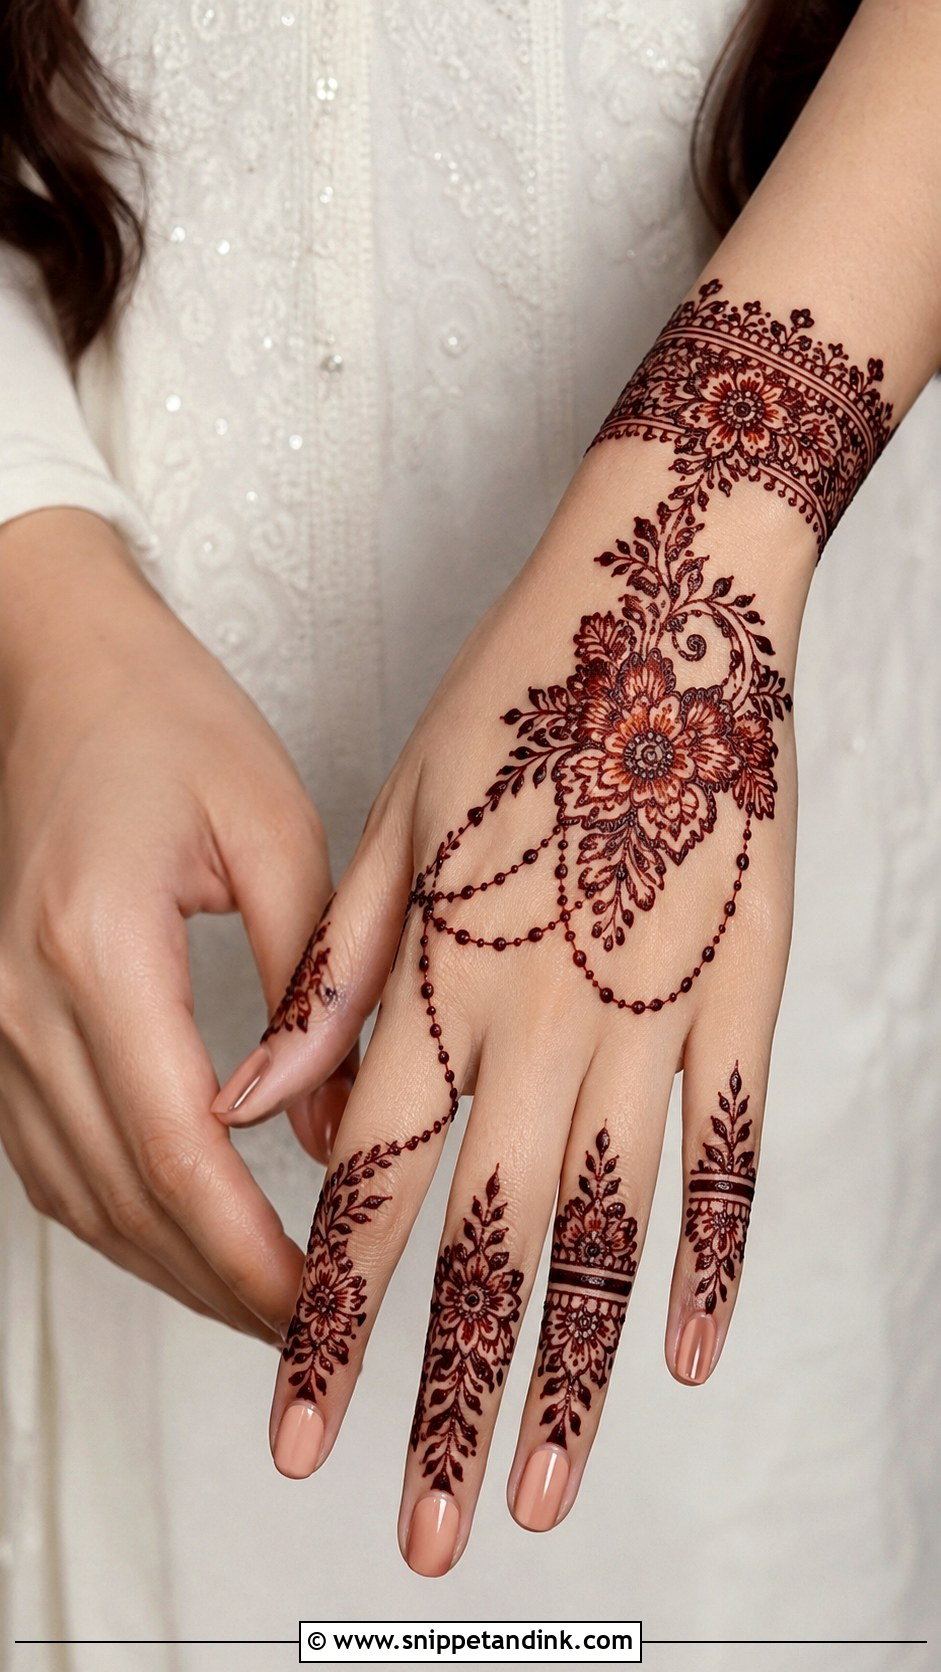
Eid henna has to survive a full day of visiting, cooking and hugging, and it should sit comfortably under rings and bangles. A back-hand floral trail with decorated fingers stays visible during greetings and in photos, while a palm mandala suits anyone after a more traditional feel. Most people book Eid henna for the night before. If you can manage it, I’d rather apply it two evenings ahead so the stain has time to darken fully.
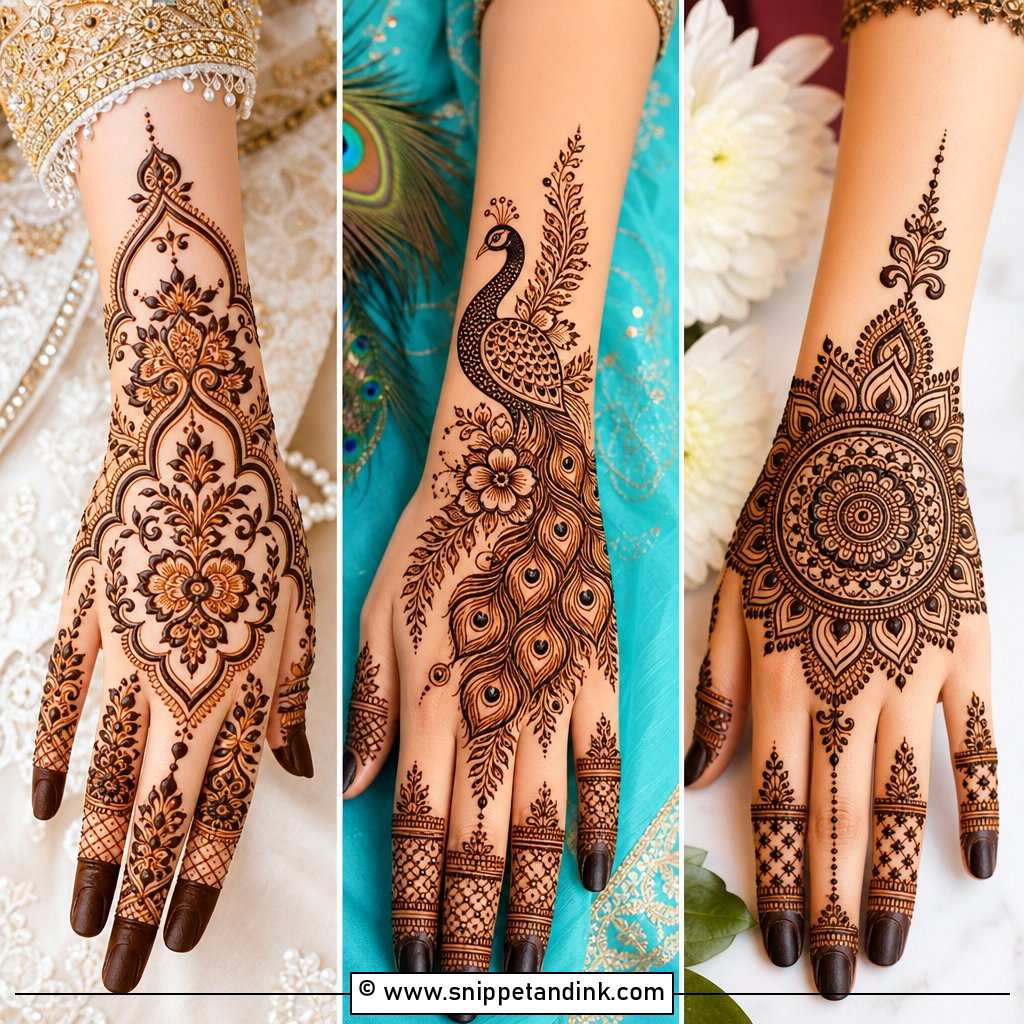
25. Right Hand Diwali Mehndi Design
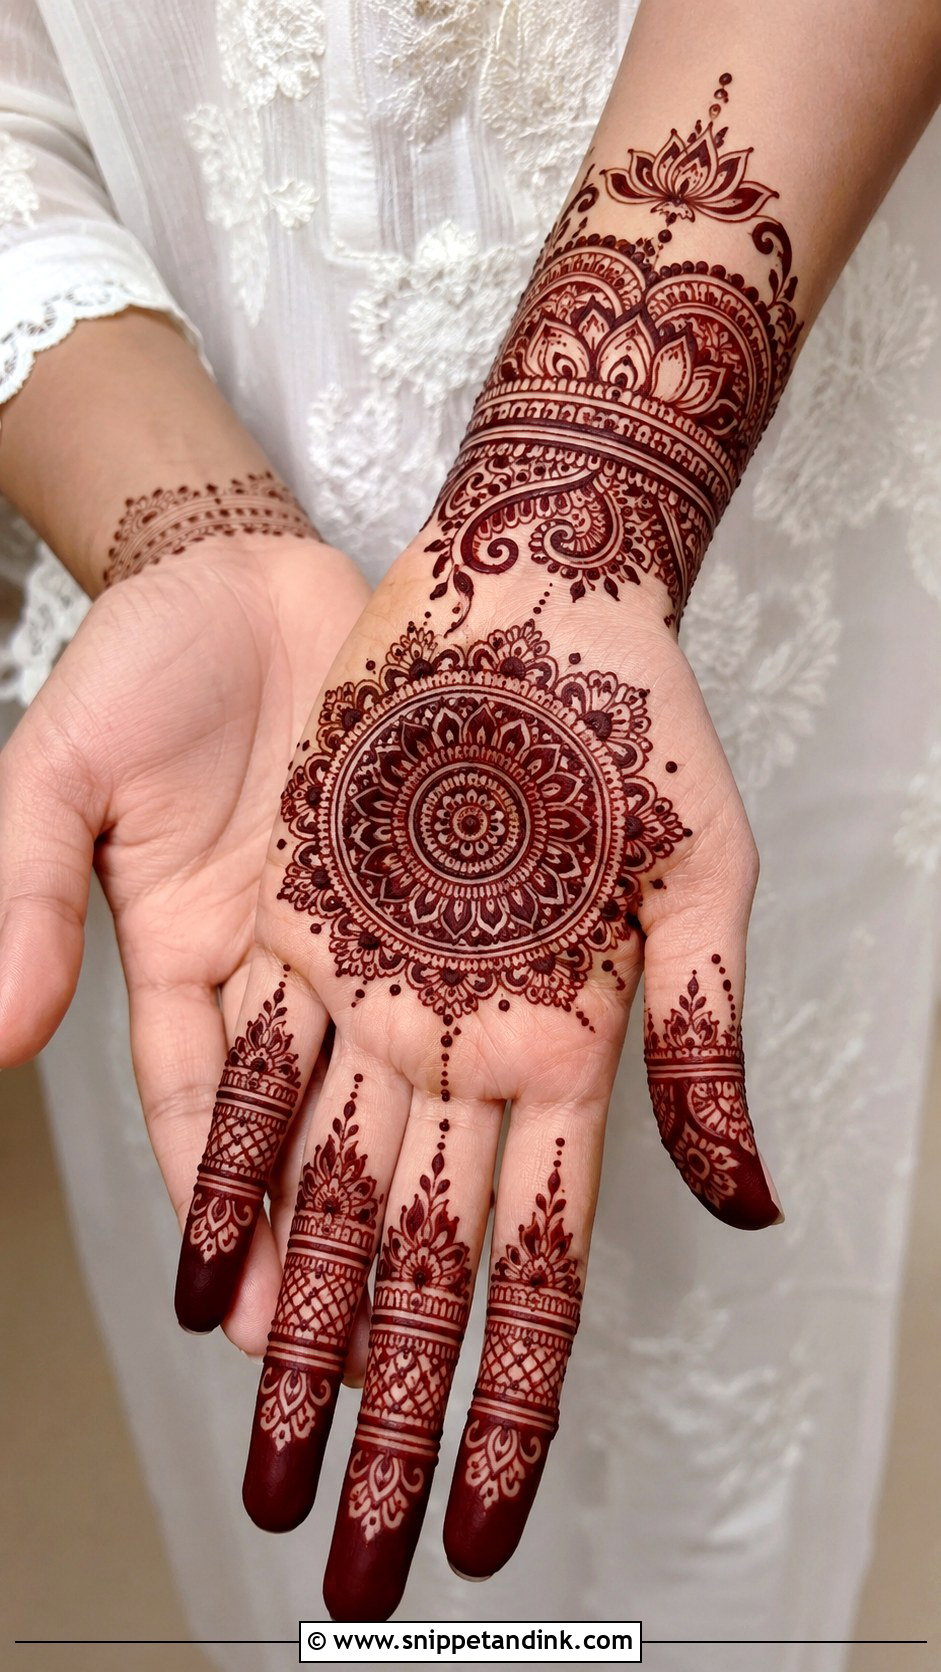
A right hand Diwali mehndi design can be more decorative than everyday henna without tipping into bridal density. I often draw a palm-centred mandala with lotus borders and patterned fingers, or a lighter back-hand floral bracelet for anyone who’ll be busy in the kitchen. Keep the wrist clean so bangles slide on without scraping drying paste. Festival days mean a lot of handwashing, and soap wears a stain faster than anything, so a crisp dark outline matters more than extra filler.
26. Right Hand Karwa Chauth Mehndi Design
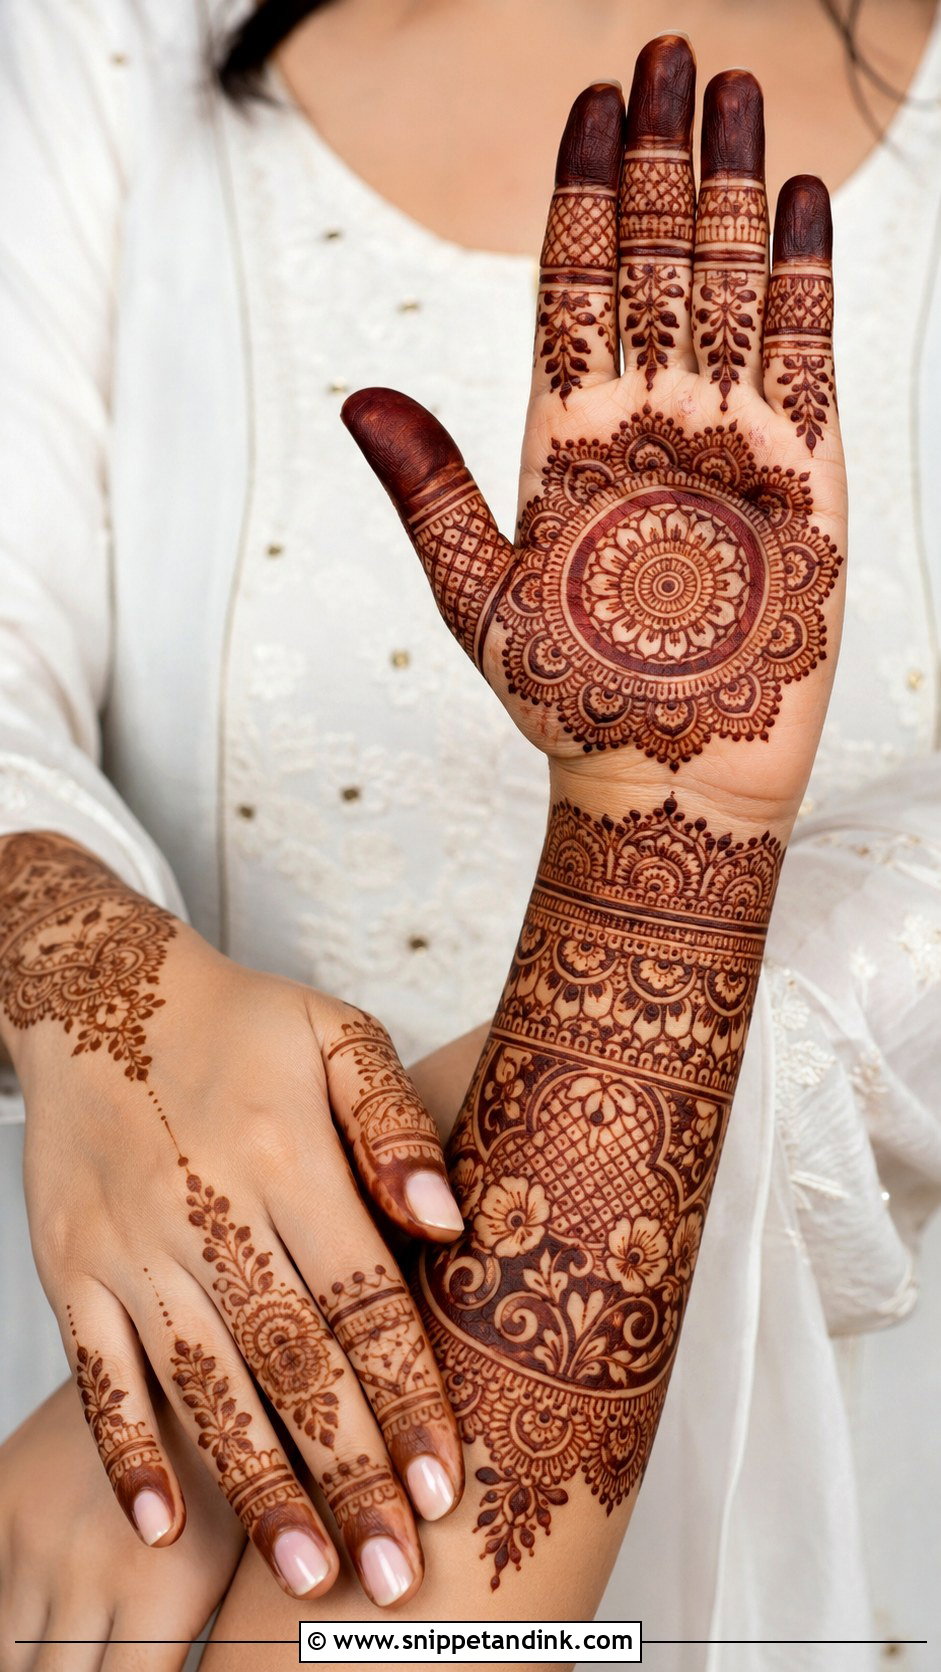
For Karwa Chauth most women want something traditional: full palm patterns, bridal-inspired motifs, jaali, paisleys and wrist-to-forearm coverage. Your hands hold the thali and the sieve during the evening ritual, so I make sure the palm looks complete when it’s open. A mandala centre with paisley borders and fine fingertip work is a dependable layout, and I’m happy to tuck in a small personal symbol if you ask for one. Keep the centre readable rather than packed.
27. Right Hand Engagement Mehndi Design
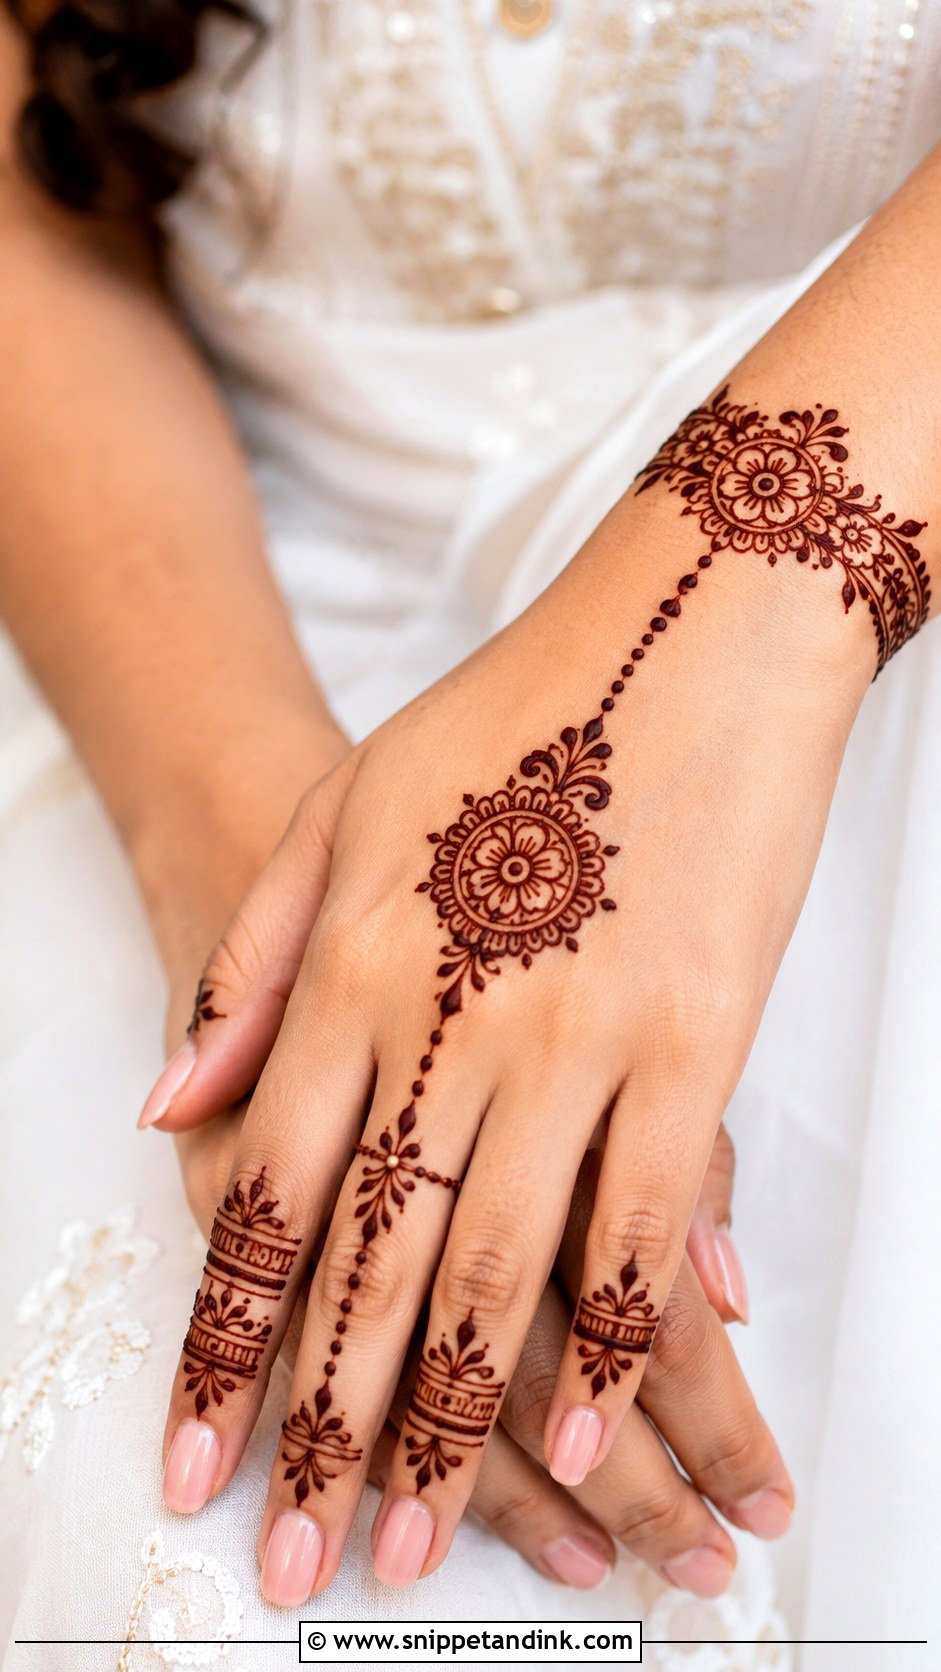
Engagement photos are mostly about one finger, so the henna’s job is to frame it, not compete with it. Back-hand jewellery styles with ring chains, floral cuffs and fine finger bands do that well. I leave the ring finger lighter, often bare between the knuckle and the base, so the band sits on clean skin. On the palm, a small floral mandala or Arabic trail is enough.
28. Right Hand Wedding Guest Mehndi Design
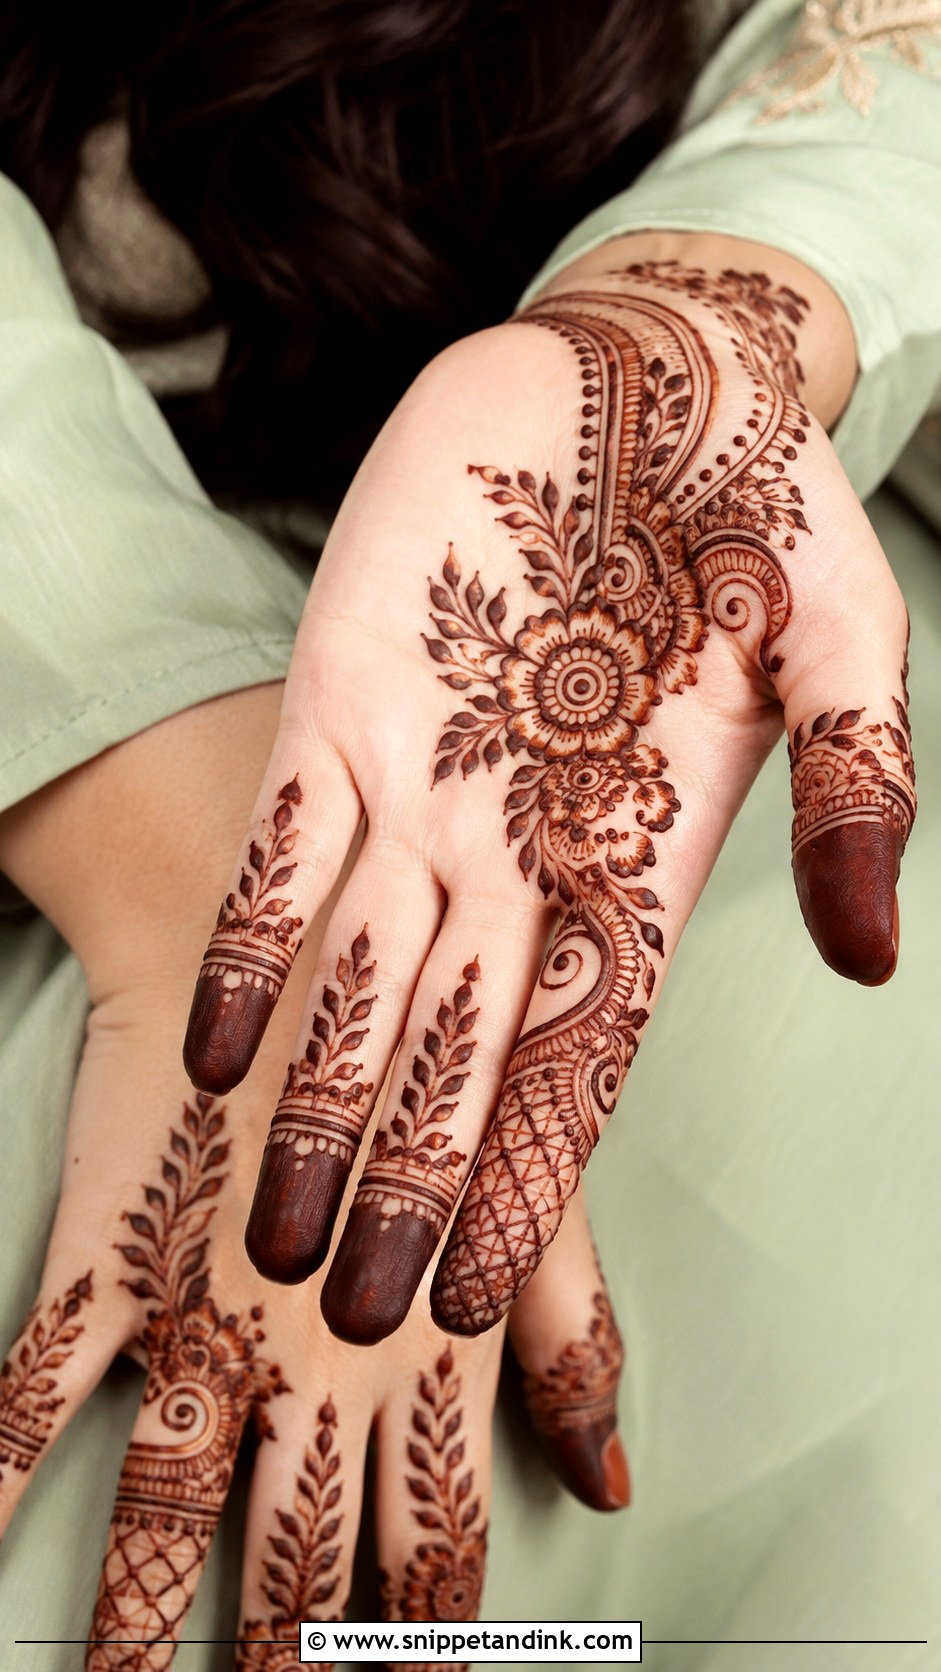
As a guest you want to look dressed up without rivalling the bride or losing the use of your hand for half a day. Arabic florals, Indo-Arabic trails, back-hand mandalas or a simple cuff all fit that brief. My usual suggestion is a diagonal trail from wrist to finger: detailed enough for photos, open enough to dry quickly. Filled fingertips read traditional, light tips read softer. Either sits comfortably with sarees, lehengas, shararas and party wear.
29. Right Hand Bridesmaid Mehndi Design
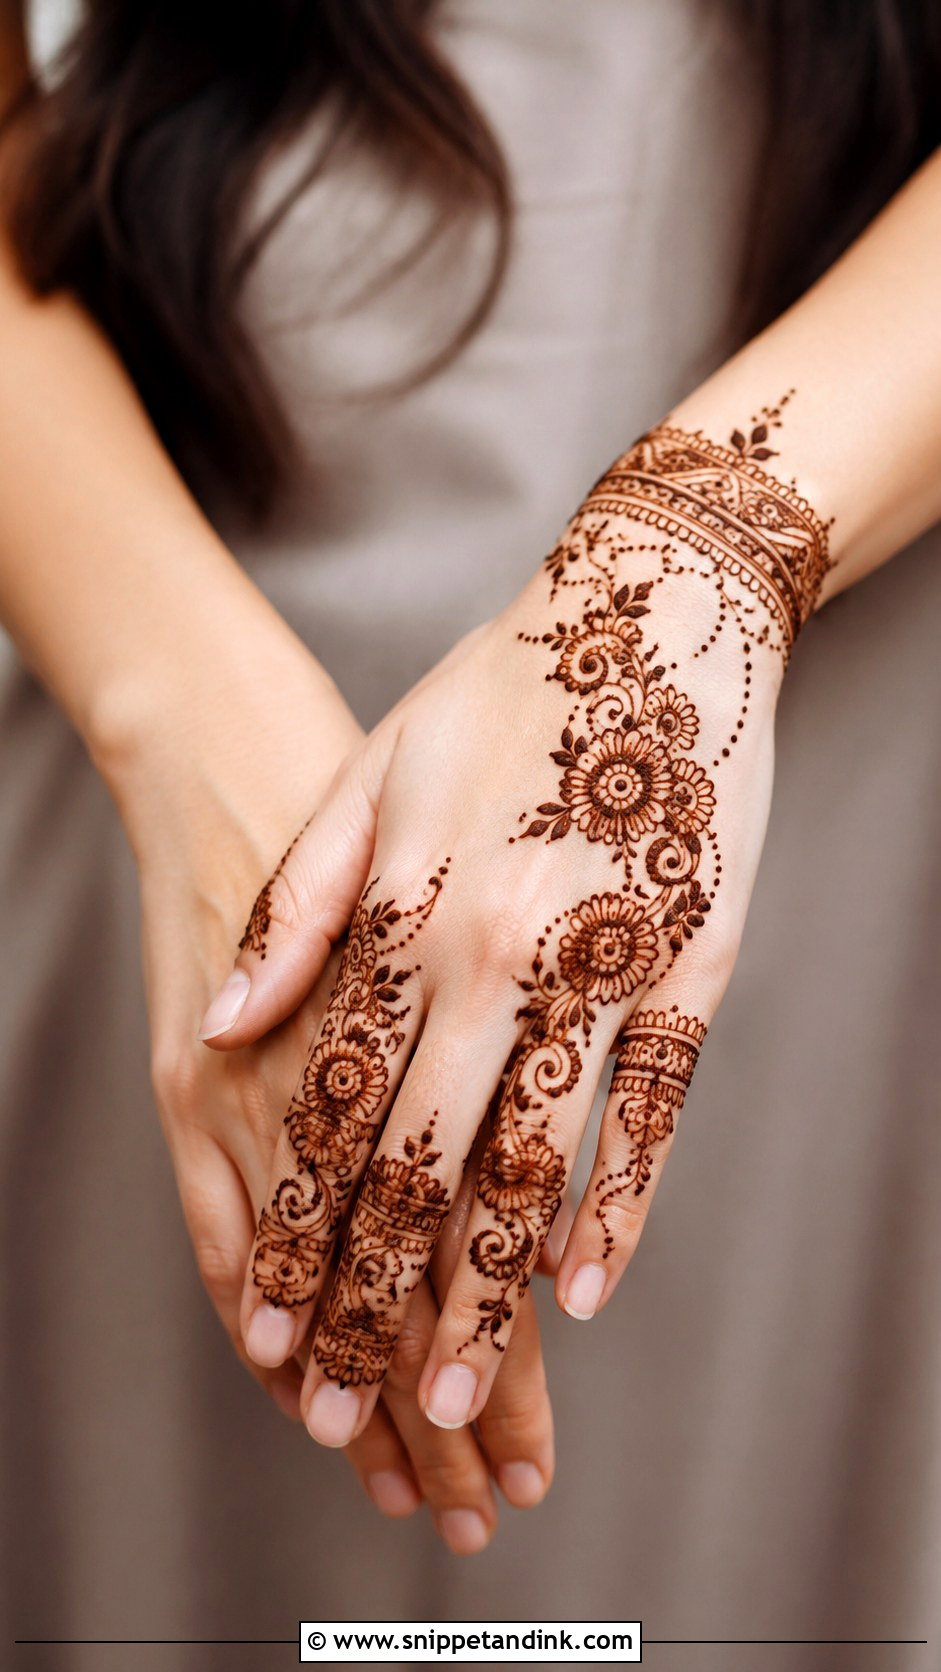
Bridesmaids carry trays, pin dupattas and run errands all day, so I keep their designs quick to dry and lighter than the bride’s. Half-hand Arabic trails, floral back hands, mandala palms and bracelet styles are the usual picks. Think about the group photos where everyone holds a bouquet or a gift and put the detail on the side facing out. A floral trail with finger detailing and a few small paisleys or dots looks festive while leaving the heavy work to the bride.
30. Right Hand Beginner Mehndi Design
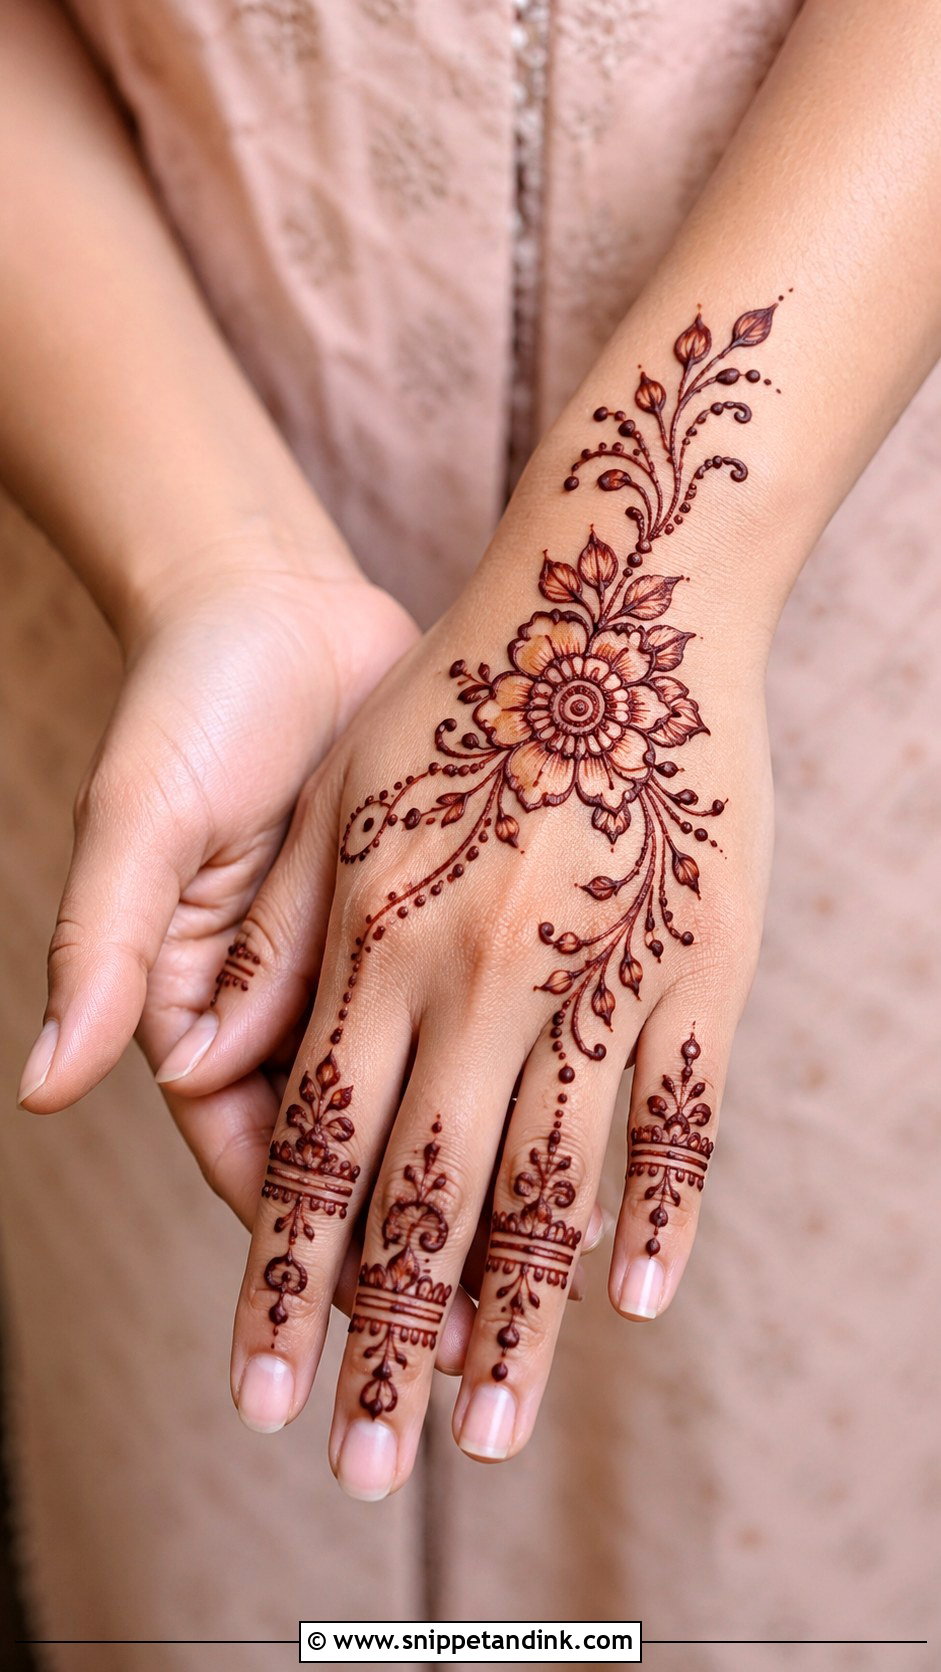
If you’re applying it yourself, use easy shapes that still look complete: a flower, mandala or paisley as the main motif, then leaves, dots, curves and simple finger bands. Skip tiny fillers until your cone control improves. The real catch is that most people are right-handed, so decorating the right hand means drawing with your weaker one, and every tight turn gets harder. A back-hand trail is more forgiving than a full palm because there’s more open skin to work with. One wrist border is plenty.
31. Right Hand Kids Mehndi Design
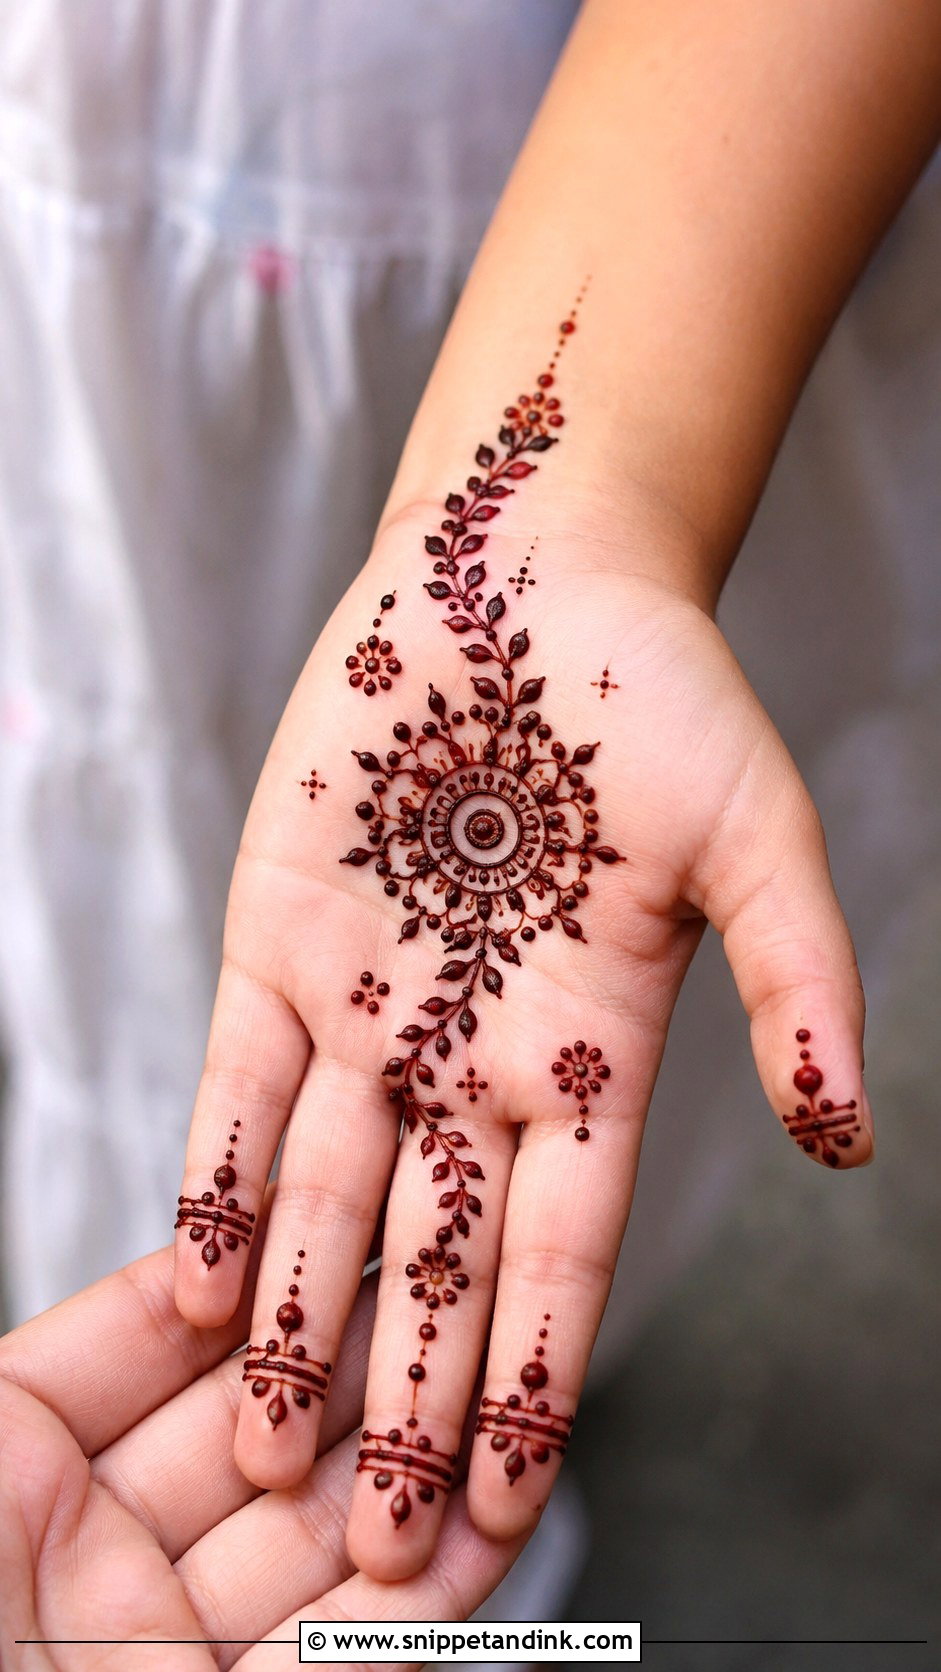
Children rarely sit still for long, so I keep their designs small: simple flowers, a little mandala, a leafy trail, hearts, dots or a bracelet. I limit it to the back of the hand or the palm centre with light fingers, and skip dense fingertip fill because small hands touch everything before it’s dry. Use only plain natural henna on kids. Never let anyone put black or instant henna on a child’s skin, as those products can cause serious reactions.
32. Right Hand Back Finger Mehndi Design
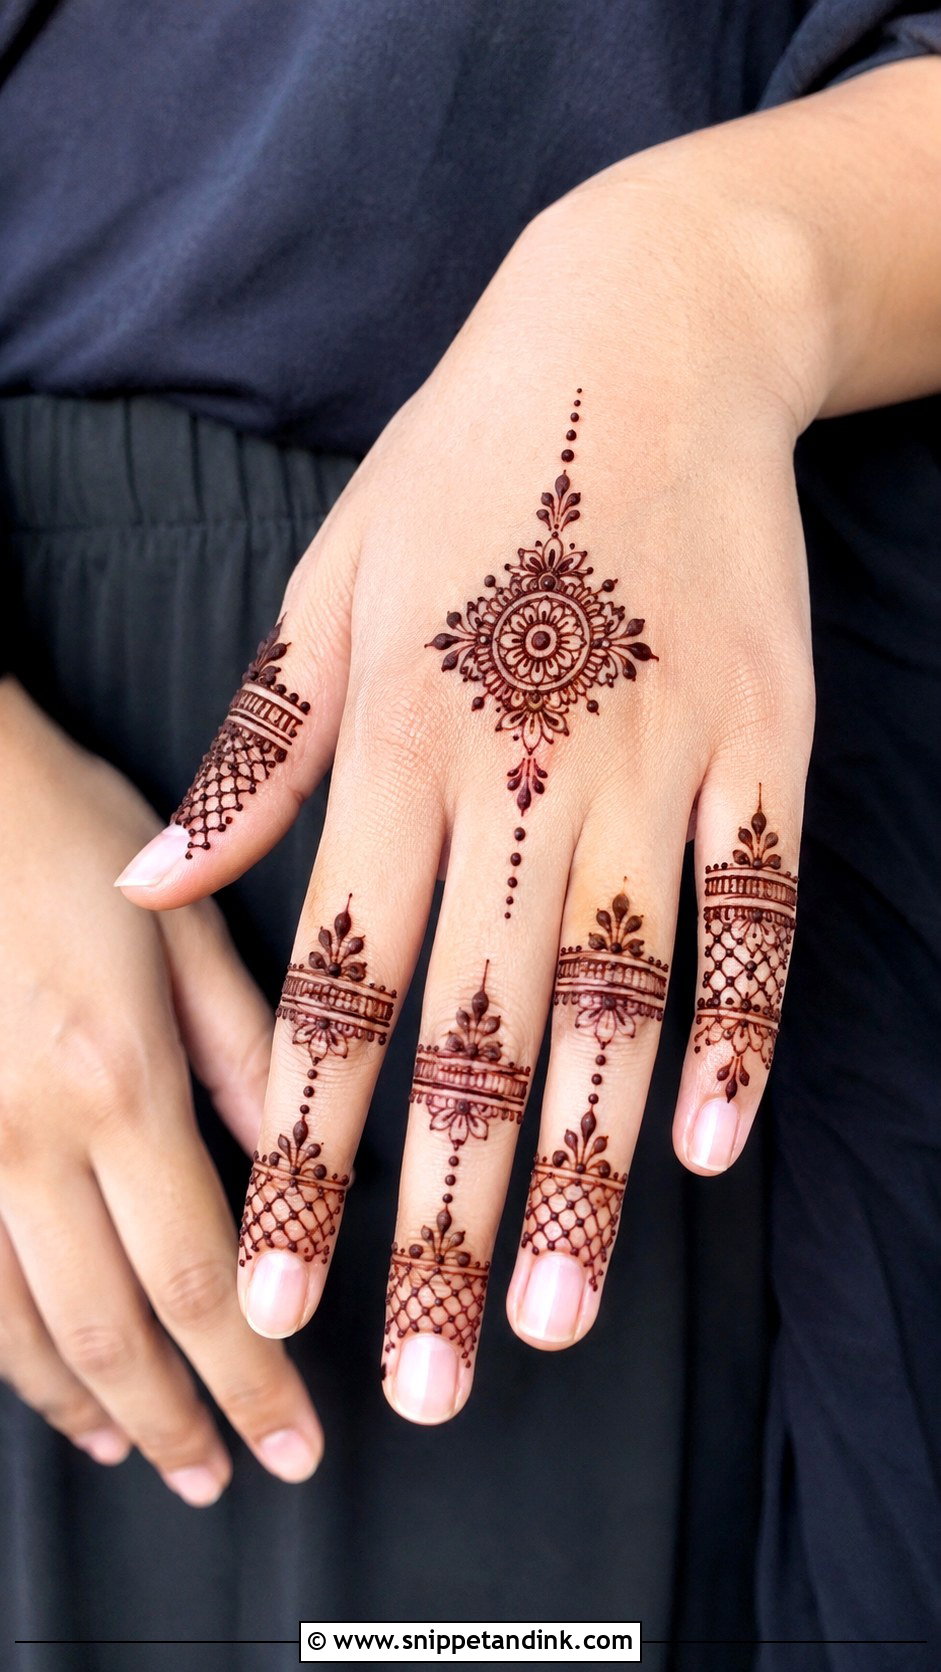
Most of the work here sits on the fingers and upper back hand, with the rest left open. Each finger can carry bands, dots, leaves, tiny florals or mesh, and a small motif near the knuckles ties it together. I draw this layout with rings in mind, because it looks most finished with jewellery on. Thin lines and even spacing keep it light enough for engagement shoots and modern outfits.
33. Right Hand Palm Mehndi Design
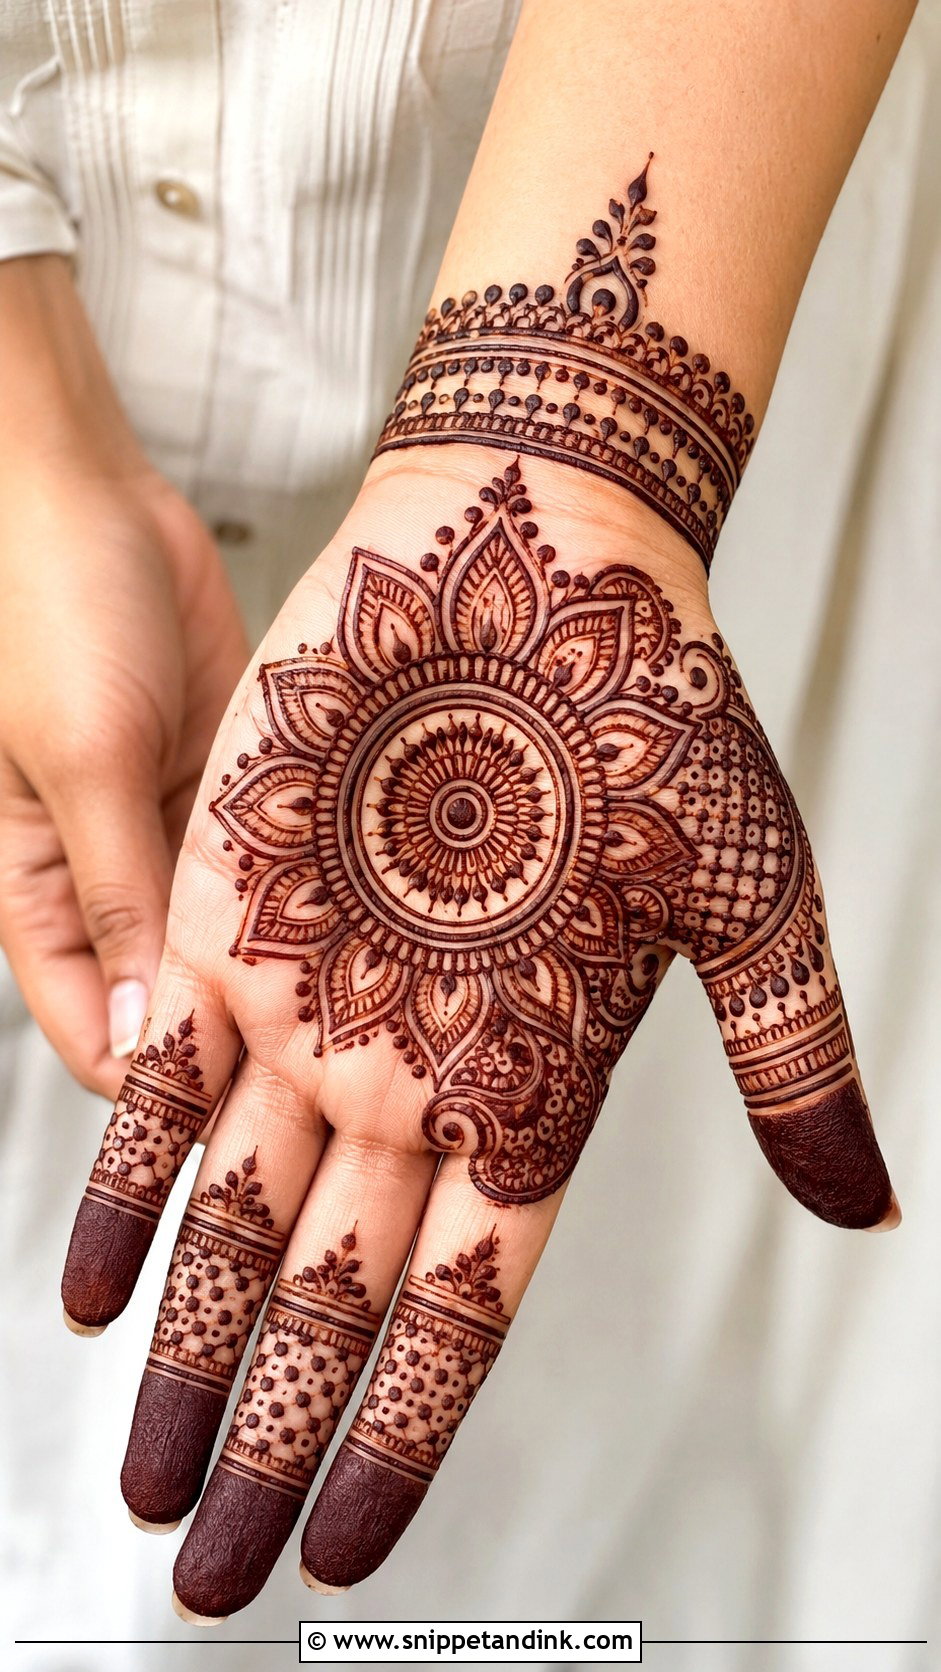
The palm is the clearest canvas on the hand, and it stains darkest too, because the skin there is thicker and holds more dye. A central mandala, lotus, paisley cluster or full circular pattern all sit well, with matching finger bands or fine checks. For a traditional event I extend it to the wrist with a small cuff; for something simpler, keep the centre strong and leave open space around it. That deep palm colour is a big part of why old-school palm designs still look so rich.
34. Right Hand Shaded Mehndi Design
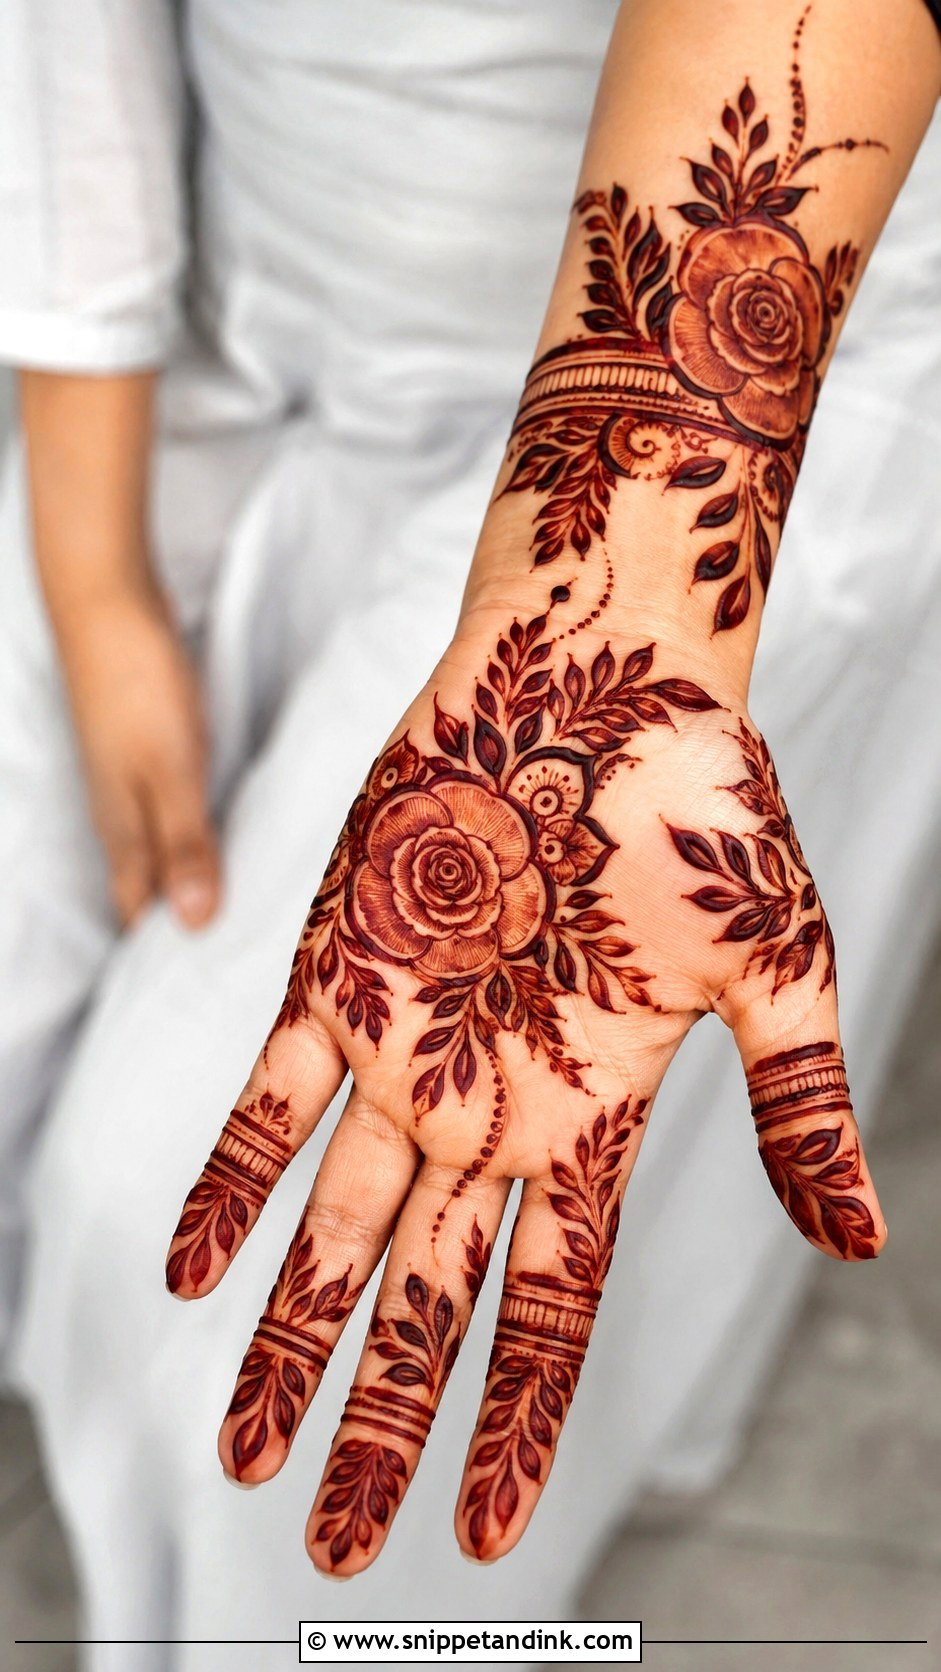
Shading fills petals with graded strokes to create darker and lighter areas, and it’s common in Arabic and Gulf work where big flowers need dimension. In henna, the lighter tones come from thinner layers of paste, and those layers stain unevenly if they’re overworked. Used sparingly, shading makes a simple layout look professional. Overdone, it blurs as the stain develops. I shade roses or lotus along a diagonal trail, keep leaves and borders crisp, and make the outlines bold so the contrast holds up on camera.
35. Right Hand Negative Space Mehndi Design
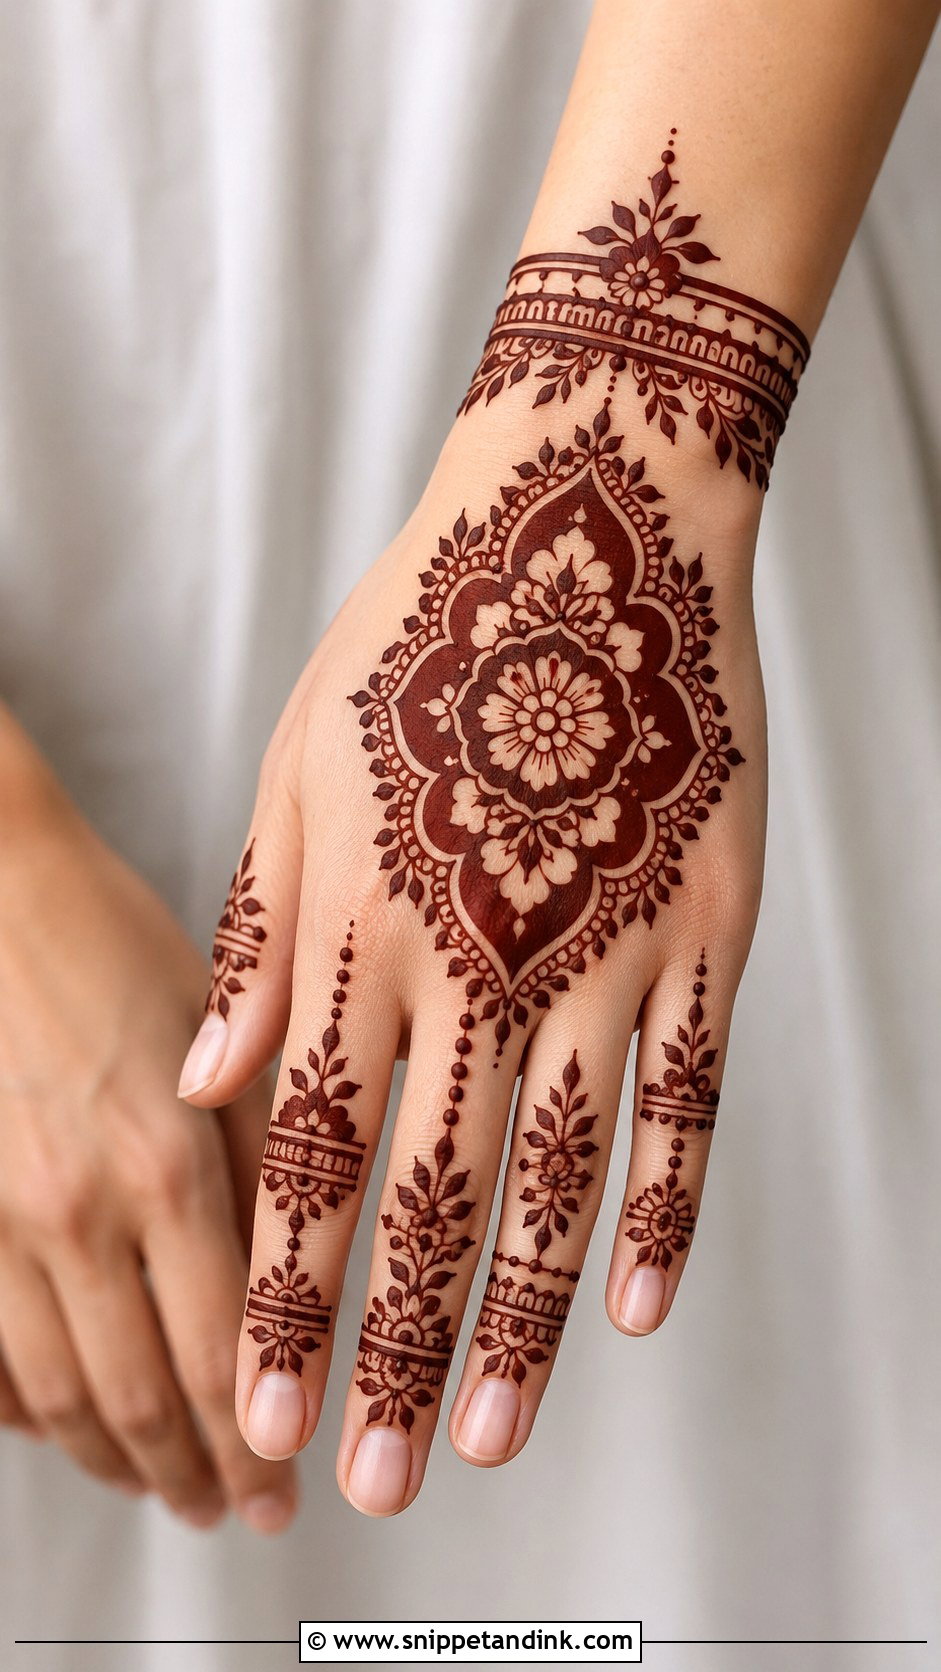
Bare skin is part of the pattern here: the gaps between flowers, mandalas, lines or geometric shapes are planned rather than leftover. A bold central motif with open borders, or a diagonal trail with clear skin around each flower, both suit the format. It dries faster than dense work and feels fresh. When I draw it, I picture the empty shapes before the filled ones. If the gaps aren’t deliberate, the hand simply looks unfinished.
Why the Working Hand Fades Faster, and How to Slow It
For most people the right hand is the busy one, and it shows in the stain. It gets washed more, rubs against more surfaces and is usually the hand that knocks the dried paste off early. Quite often the left hand comes out a shade darker simply because it was left alone.
The first night
Fresh paste lifts to reveal a pale orange stain, and that is normal. Keep the paste on as long as you can, ideally overnight. A light dab of lemon and sugar once it’s dry stops it flaking away too soon, and a loose tissue wrap is kinder for sleeping than plastic. In the morning, scrape or rub the paste off rather than washing it.
The next two days
The colour deepens toward reddish brown over roughly 24 to 48 hours as it oxidises, which is why I apply one to two days before the event. Keep the hand dry for several hours after scraping and keep it warm. A thin layer of balm or coconut oil before any washing protects it, and gloves for dishes help a lot. Chlorine, sanitiser and harsh soap fade it faster than anything else.
If it still looks pale
A light result on day two usually means the paste came off too early or the room was cold. Nothing fixes it on the morning itself. That’s why, for a bride, I’d always rather do a small test patch a week or two ahead and see how her skin takes the colour.
One Hand, Done Properly
If tradition matters most to you, the Indian, bridal, mandala, paisley and palm layouts are where to look. Lighter options are the Arabic, minimal, jewellery, finger and negative-space designs. Eid, Diwali and Karwa Chauth each carry their own mood, and the back-hand and engagement styles do the most work in photos because they frame rings and bangles. Whichever you go for, I’d always take clean lines, honest spacing and a deep stain over one more motif squeezed in.
You'll Like These Ideas:


Leave a Reply