
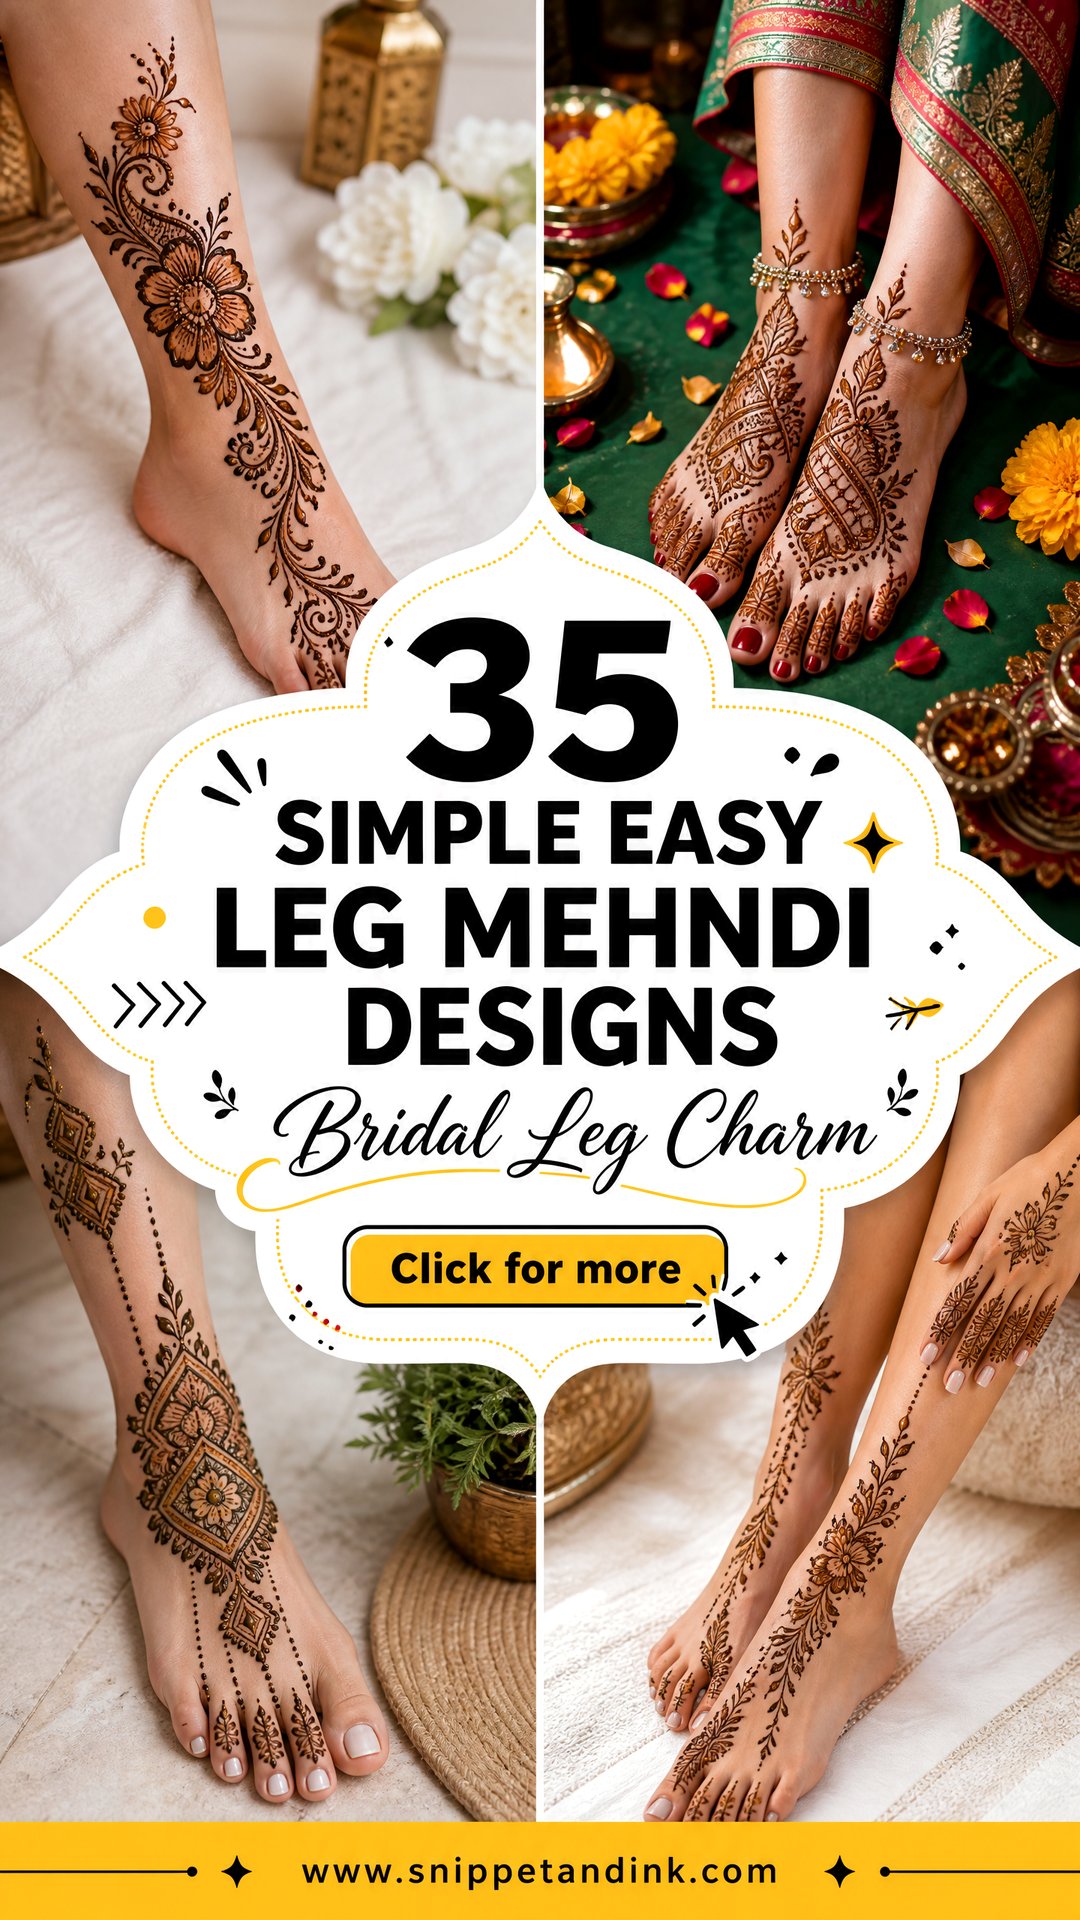
Feet are one of the most rewarding places for henna. The skin on the soles and around the toes takes a deep stain, and a design from toes to ankle reads clearly with sandals, at a sangeet or in a photo of the bride’s feet. You don’t need hours of bridal fill to get there. Most of what I draw on feet for festivals and family weddings relies on clean spacing and a few repeatable shapes: an anklet band, a floral Arabic trail, a mandala on the top of the foot. Below are complete foot and leg looks, not single motifs, so you can see how each one is laid out from toe to ankle and pick one you can sit still for.
Sandal Straps, Toe Rings and Hemlines Decide the Layout
Foot designs are partly hidden by whatever you wear on your feet and legs, so I ask about shoes before I ask about motifs. A design that looks right on a bare foot can disappear under the wrong strap.
- Strappy sandals: bring them, or a photo. I place the main motif between the straps rather than underneath, where it gets rubbed and hidden.
- Toe rings: tell me which toes. I either leave a bare gap for the ring or draw bands that frame it.
- Payal or anklets: real anklets sit low on the ankle and rub the stain. A henna anklet works best a little above them.
- Hem length: a floor-length lehenga or gharara hides almost everything above the ankle, so I spend the time on the top of the foot and toes instead.
- Closed shoes for part of the day: the stain on the toes and top of the foot will fade faster from friction, so keep those areas bolder.
1. Simple Foot Mehndi Design
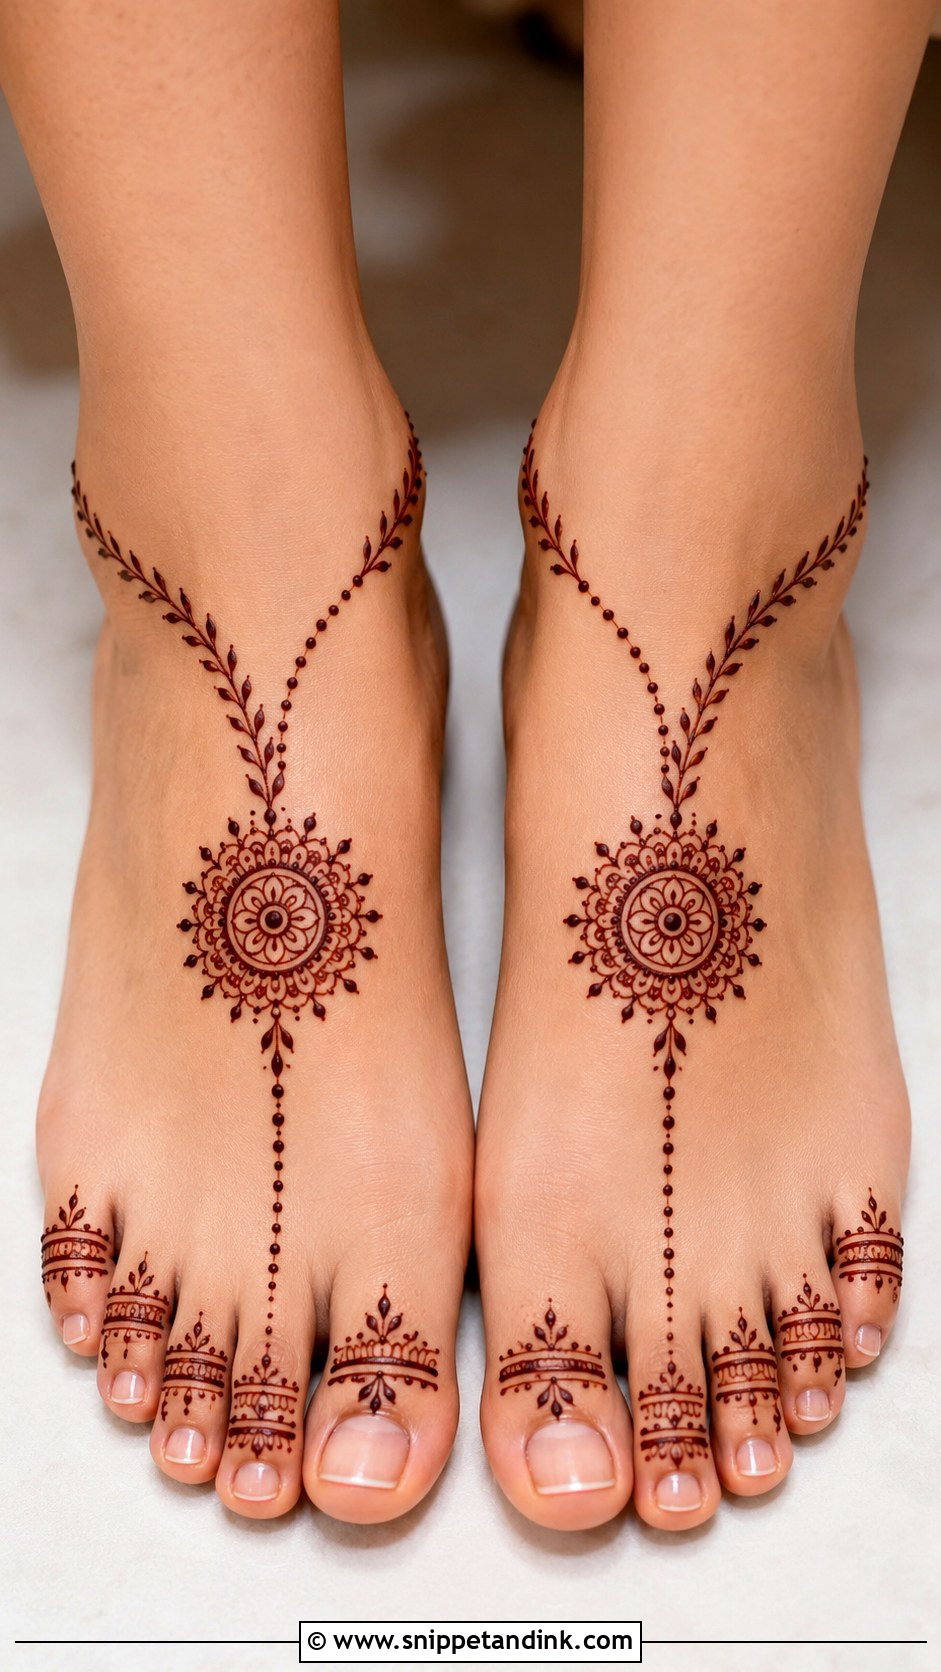
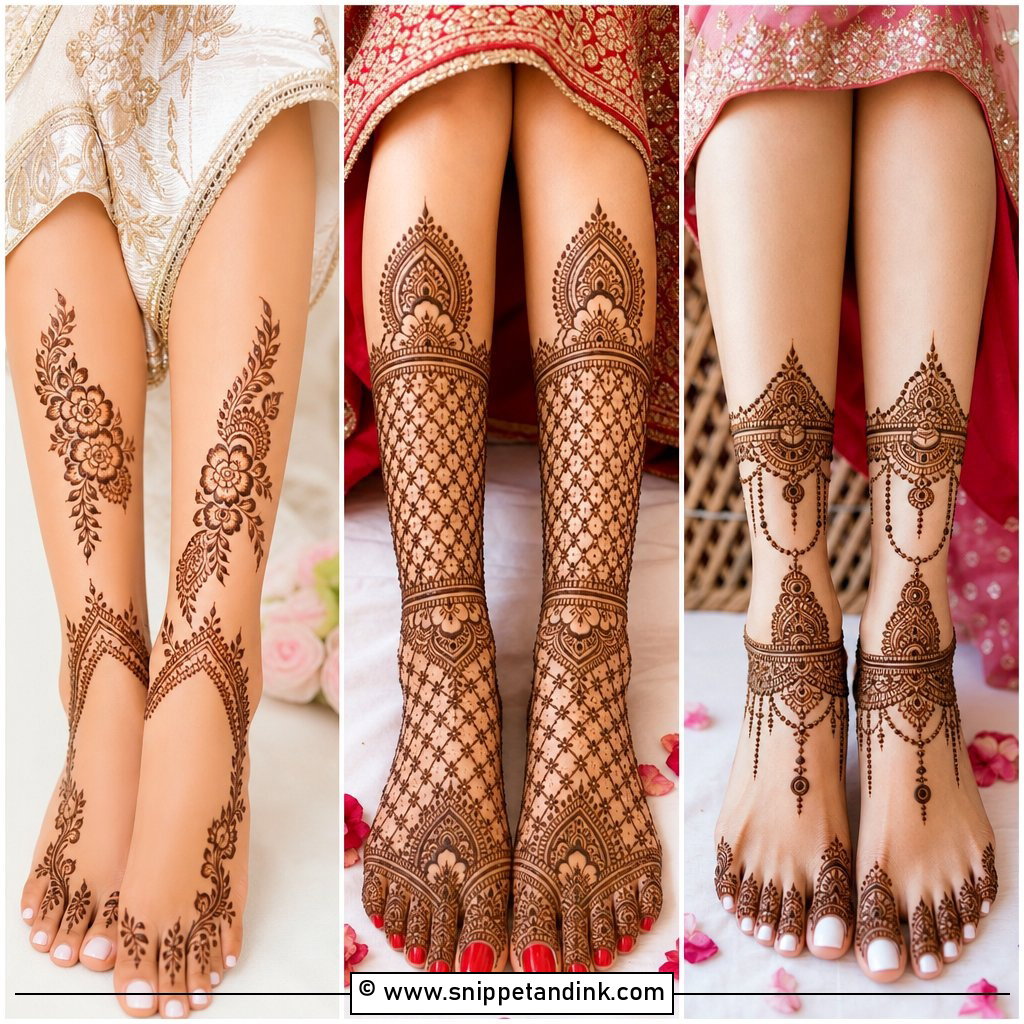
A small floral circle or mandala on the center of the foot, dotted chains or thin leaves running to the toes and tiny bands on each toe: that is the whole design. I keep the sides of the foot open. Neither foot has to mirror the other exactly, which takes pressure off beginners, and a soft curve at the ankle finishes it.
2. Simple Arabic Leg Mehndi Design
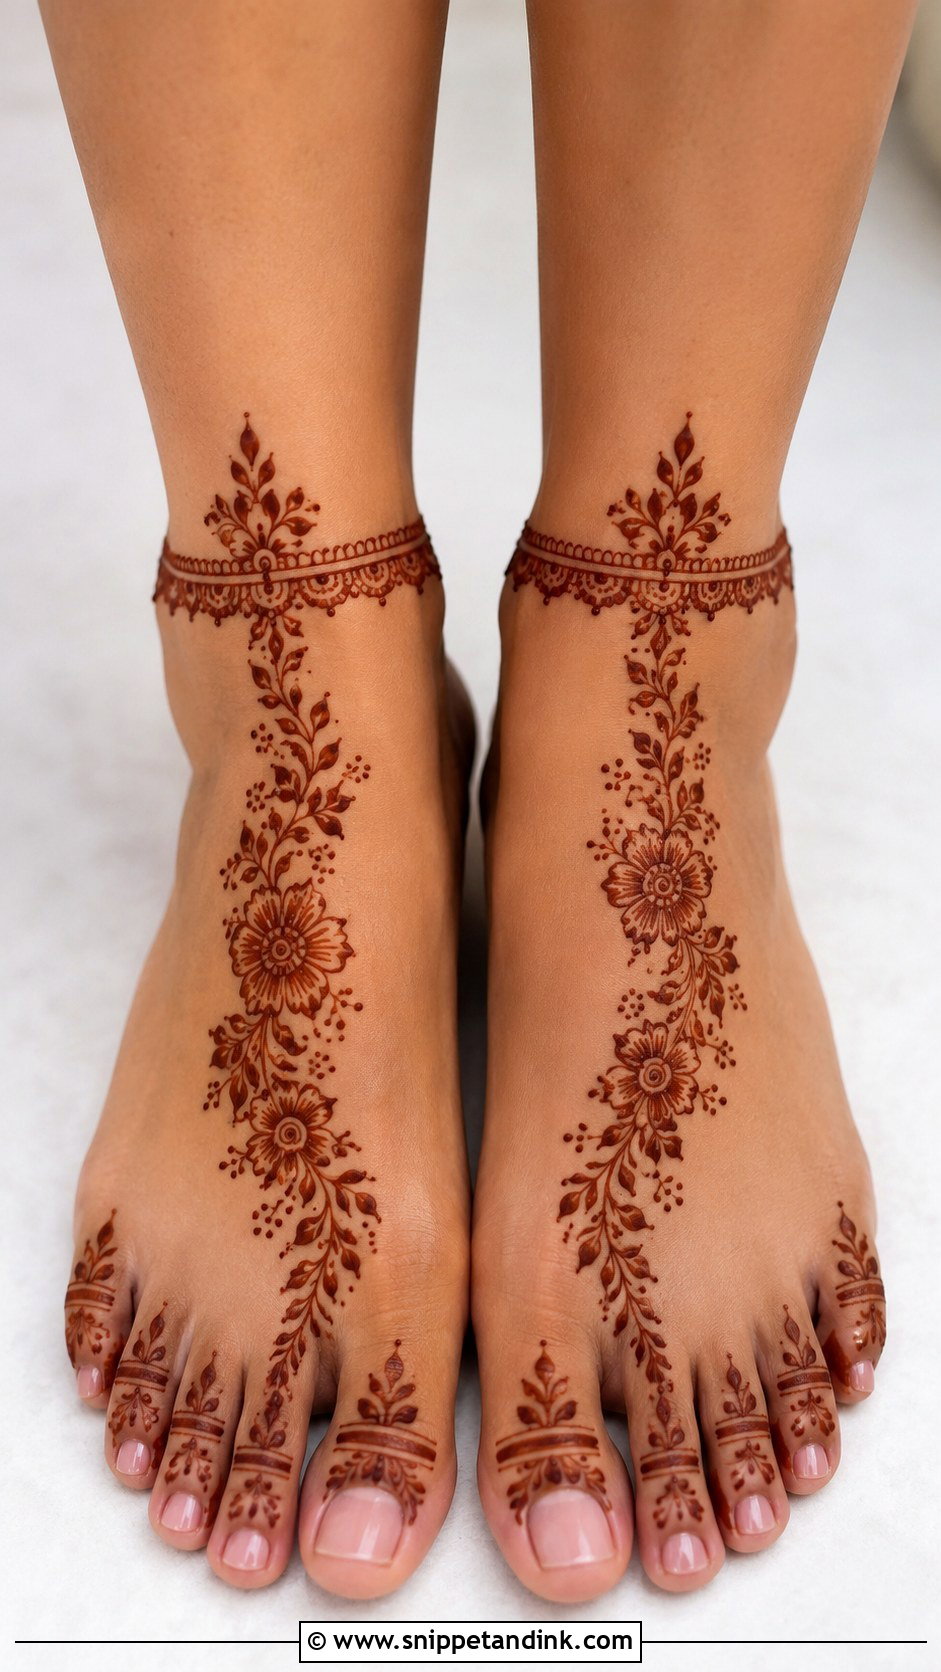
Arabic designs on the foot run on a diagonal, starting at one side of the toes and sweeping up to the ankle in flowers, leaves and curved vines, with a lot of open skin left alone. I shade a few petals and keep the outlines bold. On the toes, small leafy rings or half-flowers are enough. The diagonal line makes the foot look longer, which is why I suggest this one to almost everyone who isn’t sure what suits their feet.
3. Easy Leg Mehndi Design For Beginners
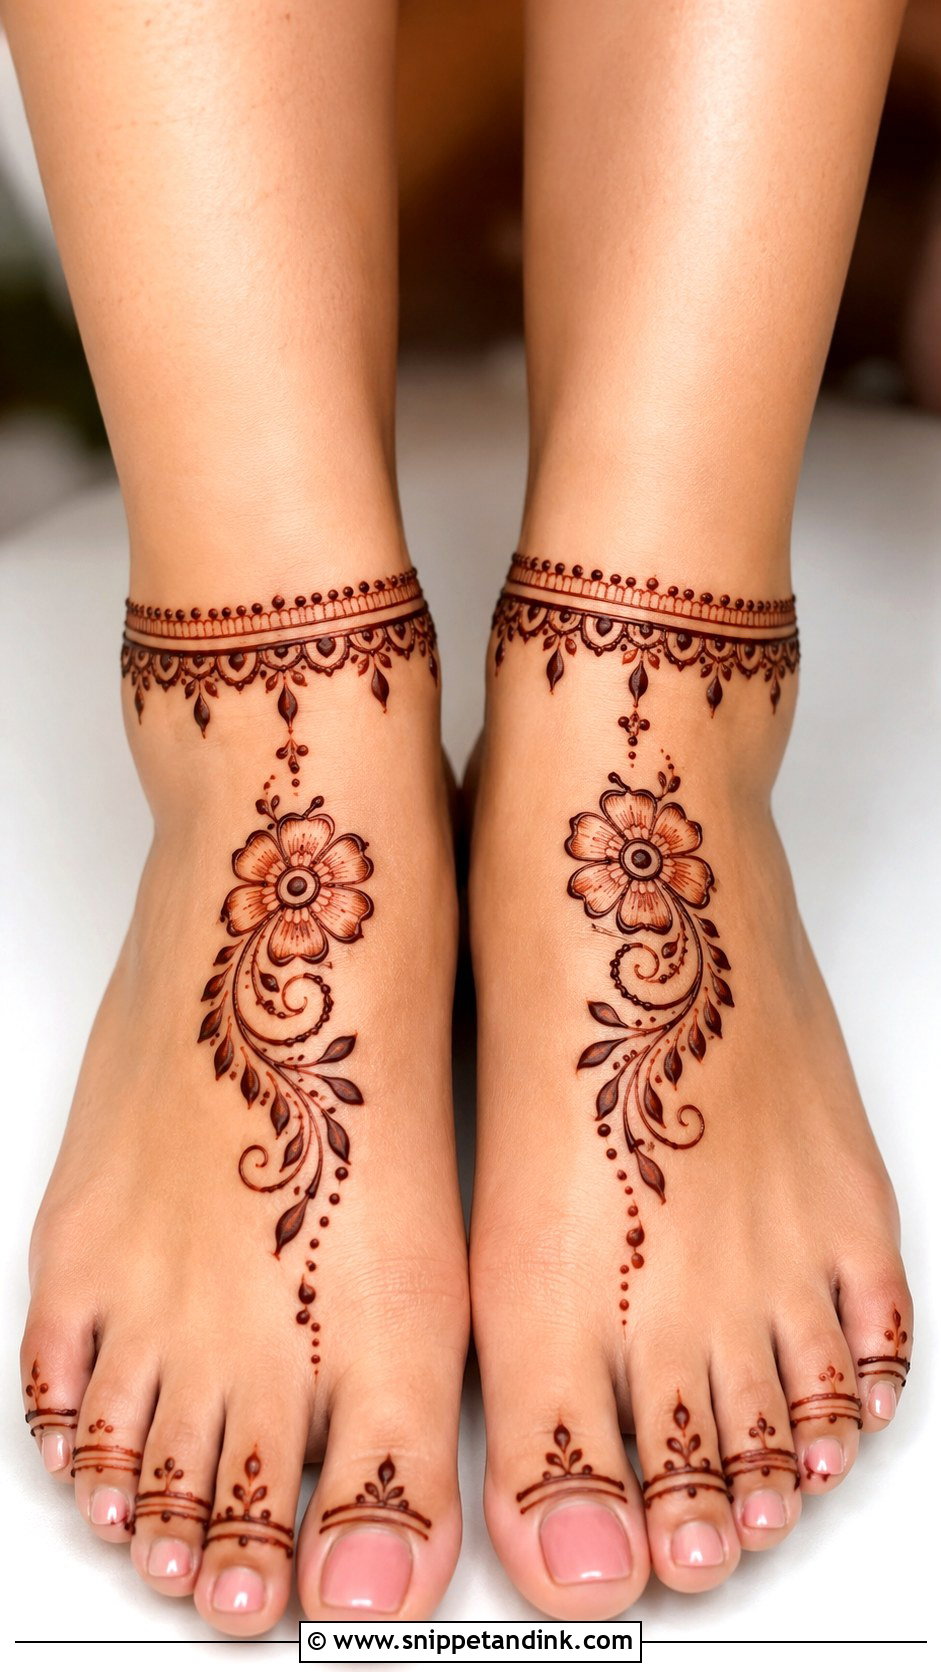
Beginners should start at the ankle. Draw a bracelet-style band there first, because it gives you a fixed edge to work down from, then let a soft trail run toward the middle of the foot with small leaves on each side. Thin lines and dots on the toes are plenty. Leave blank skin between elements; a crowded foot looks messy much faster than a crowded hand. If something wobbles, a dot or a petal will hide it.
4. Front Leg Mehndi Design Simple
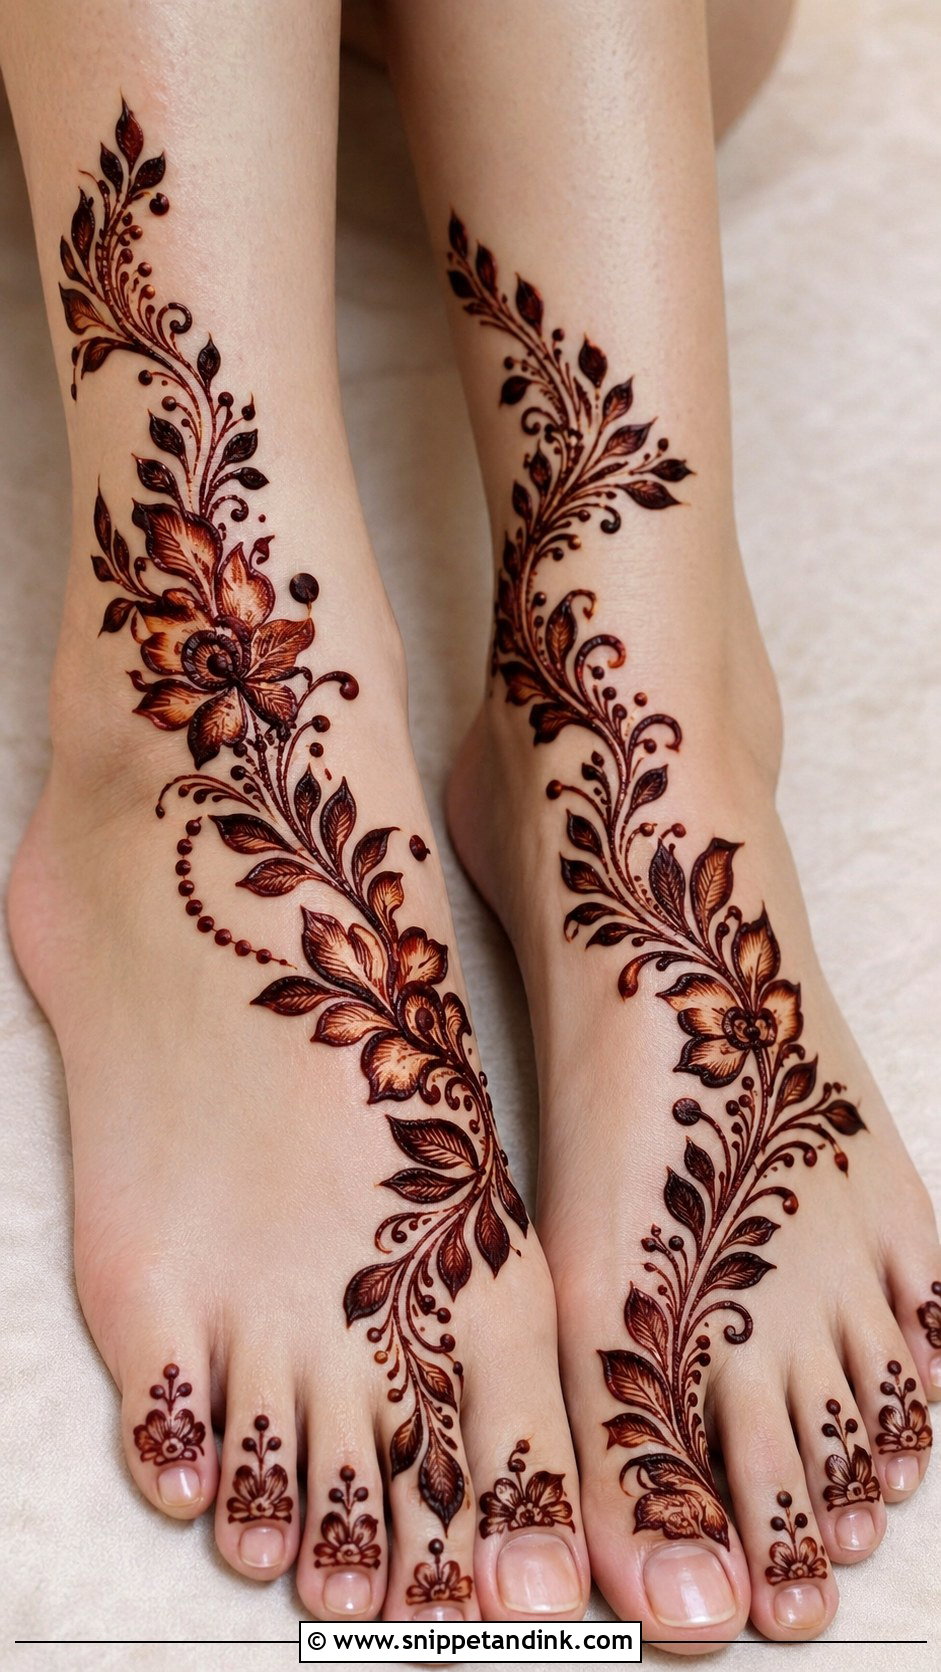
On the front of the foot I follow the line from ankle to toes. A small anklet band, a vertical floral trail down the center, one large flower near the ankle, a few leaves through the middle and a petal cluster near the toes. The outer foot stays empty. This is the layout I recommend with strappy sandals, because the trail sits between the straps rather than under them.
5. Back Leg Mehndi Design Simple
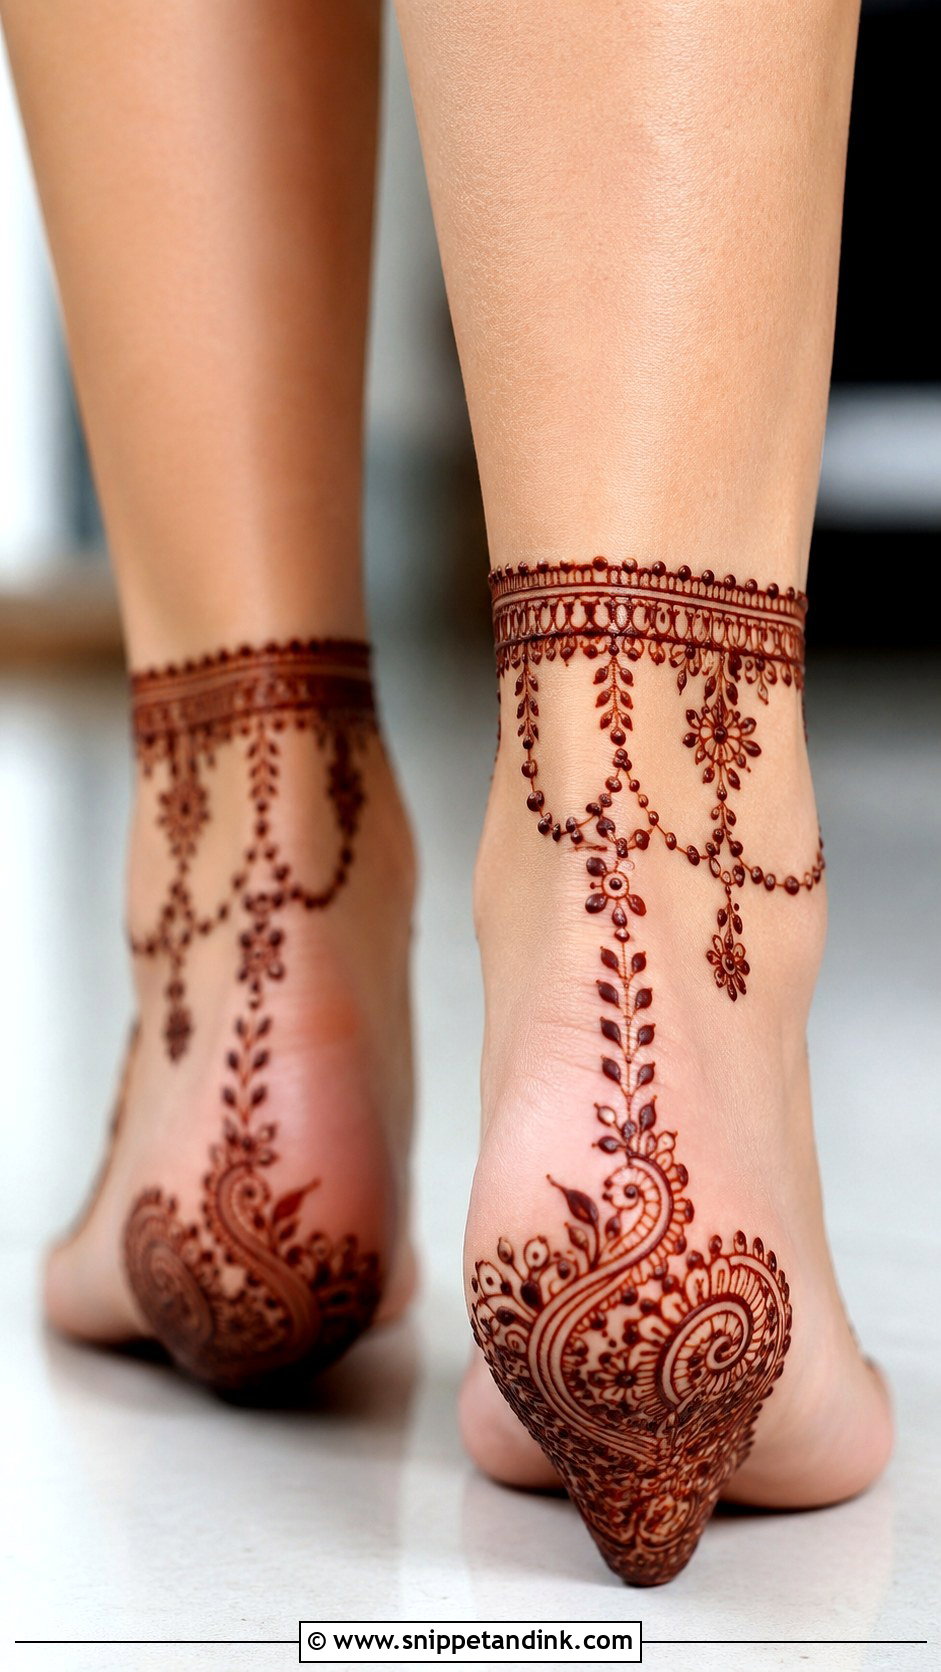
Behind the ankle, I draw a thin band and a floral chain that drops slightly toward the heel, with small dots, leaf sprigs and lace-like curves. The front of the foot stays clean. Shoe backs rub this area all day, so I keep the lines bold rather than fine and tell people the stain here will fade a little sooner than on the top of the foot. With open-back flats or heels, it shows from behind every time you walk.
6. Full Leg Mehndi Design Simple
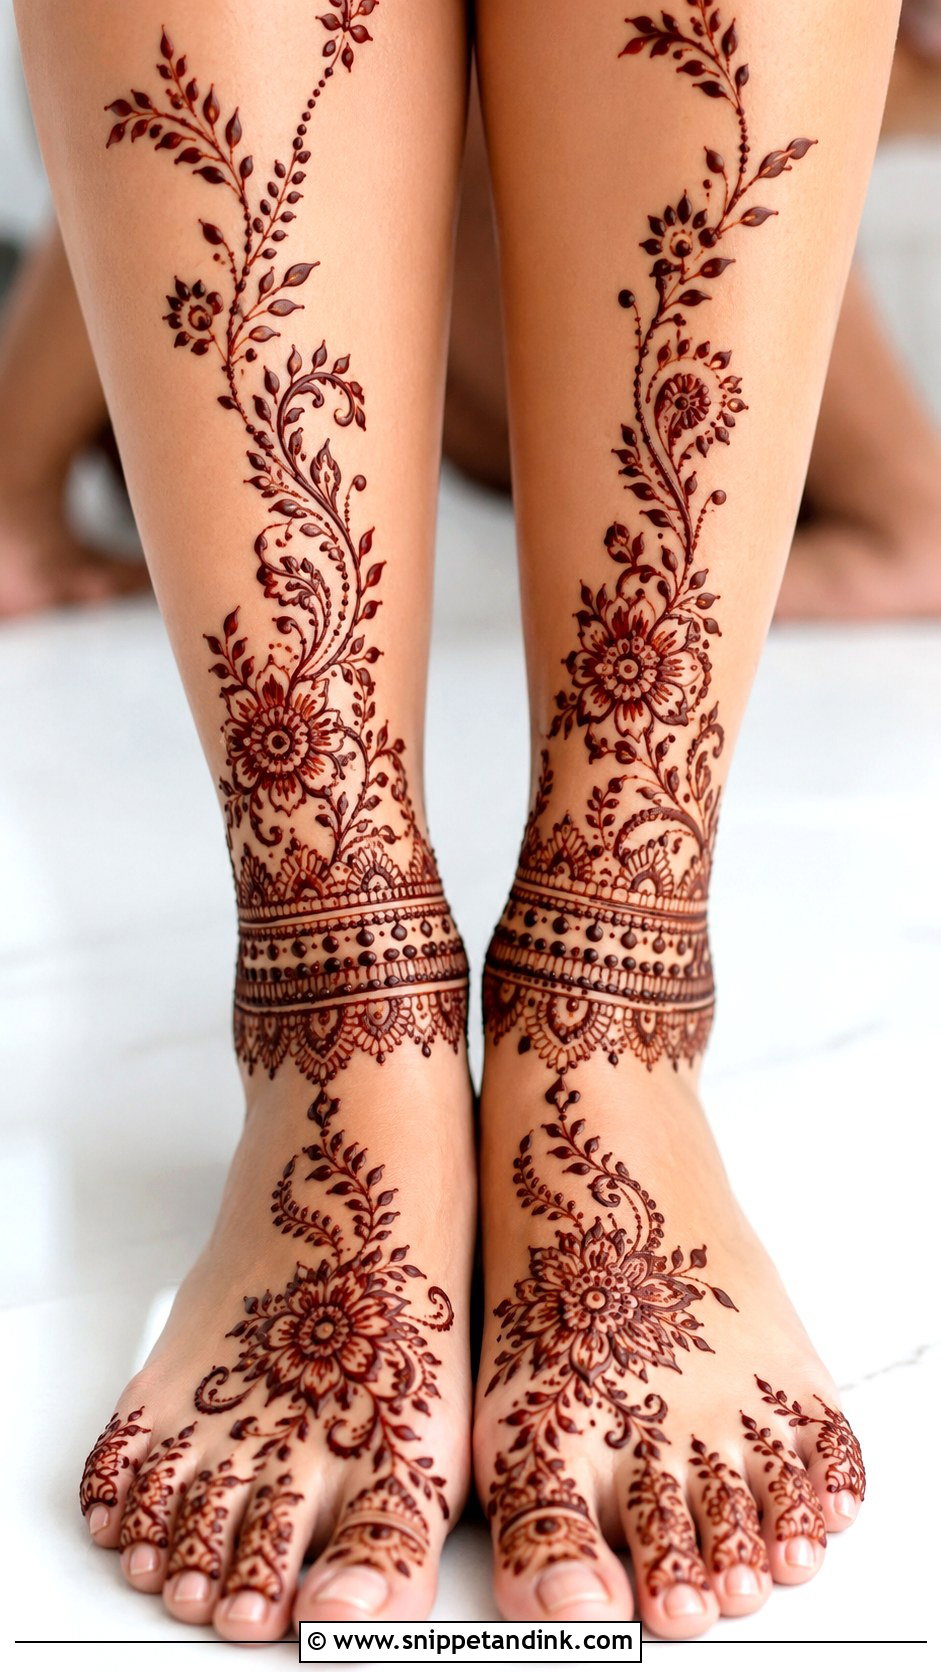
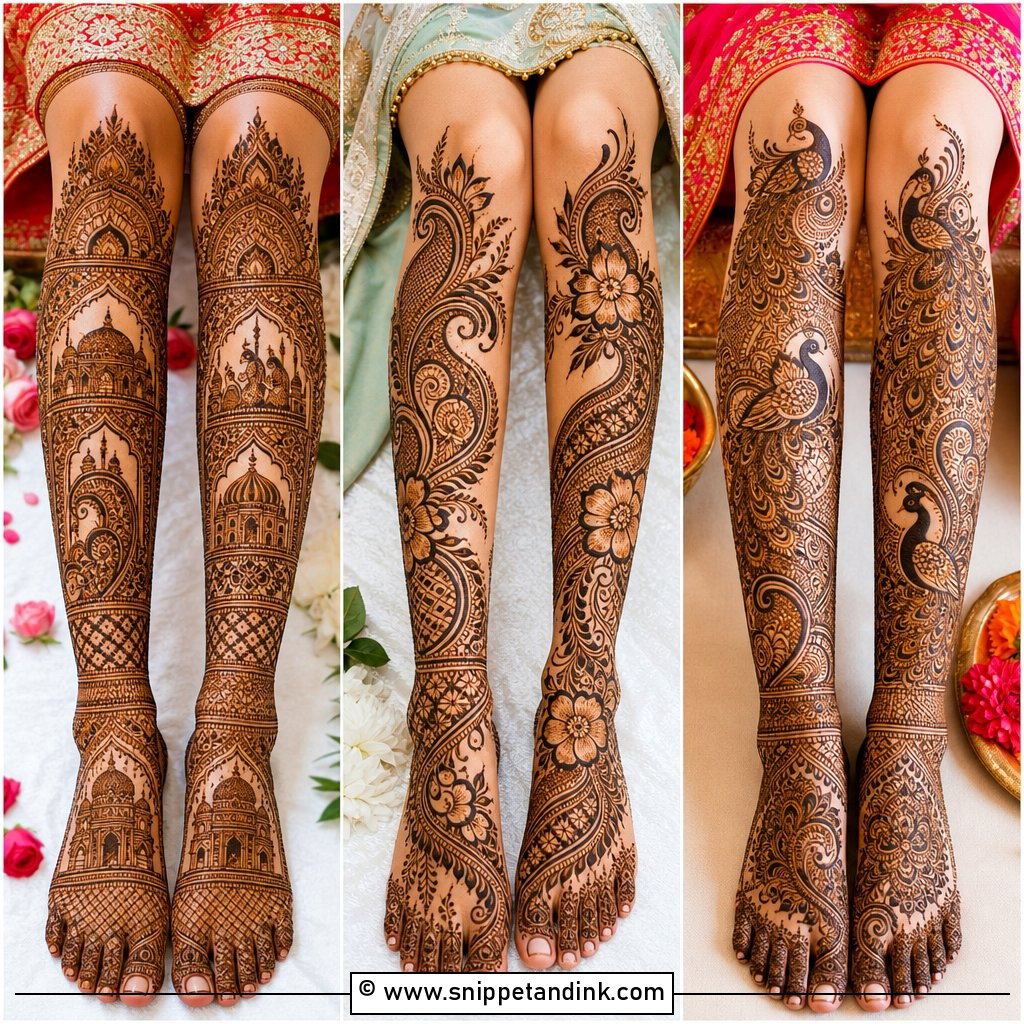
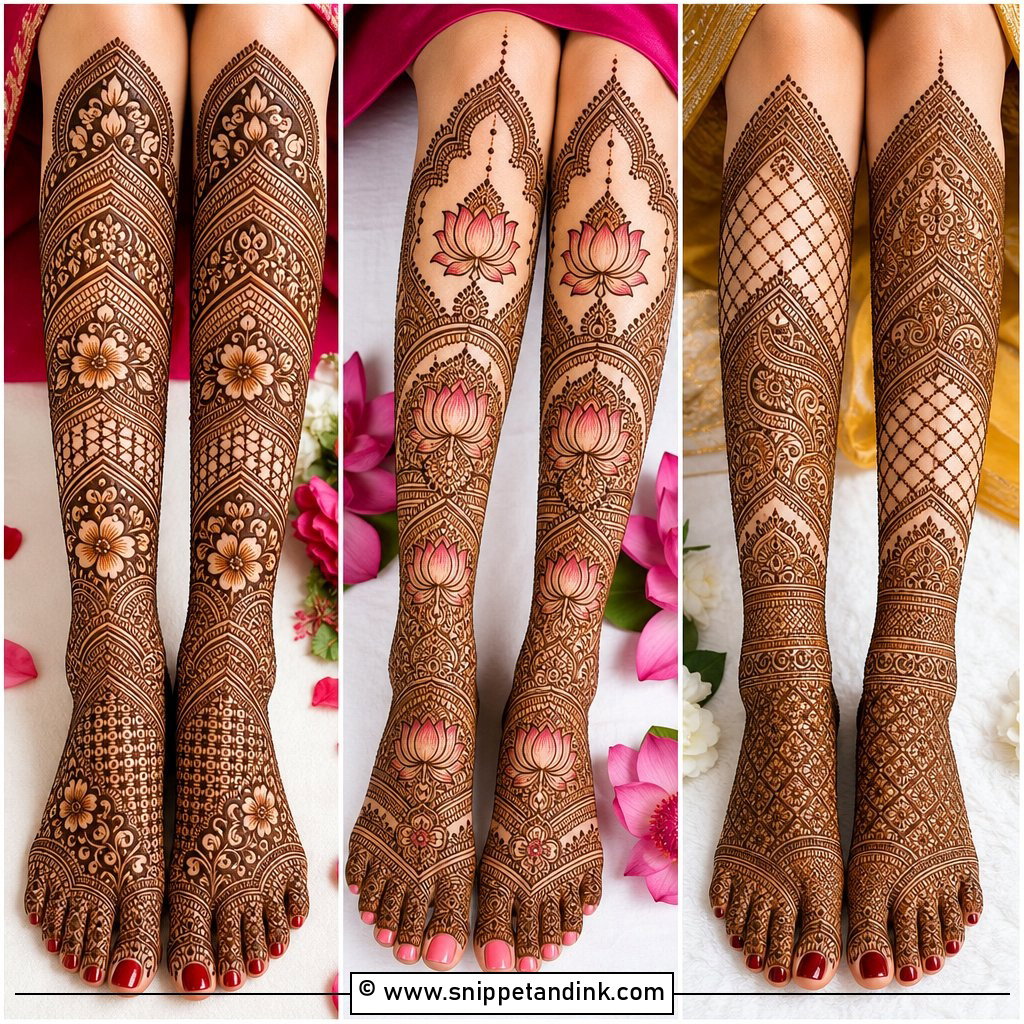
Full leg coverage can stay simple if you repeat a small set of motifs. I start at the toes, trail florals over the foot, wrap the ankle with a band and send spaced vines a short way up the lower leg. Flowers, leaves, dots and curves, in the same rhythm throughout. Gaps between sections keep it breathable. Allow plenty of time though; legs take longer than hands, and you can’t stand up while the paste is wet.
7. Simple Bridal Leg Mehndi Design
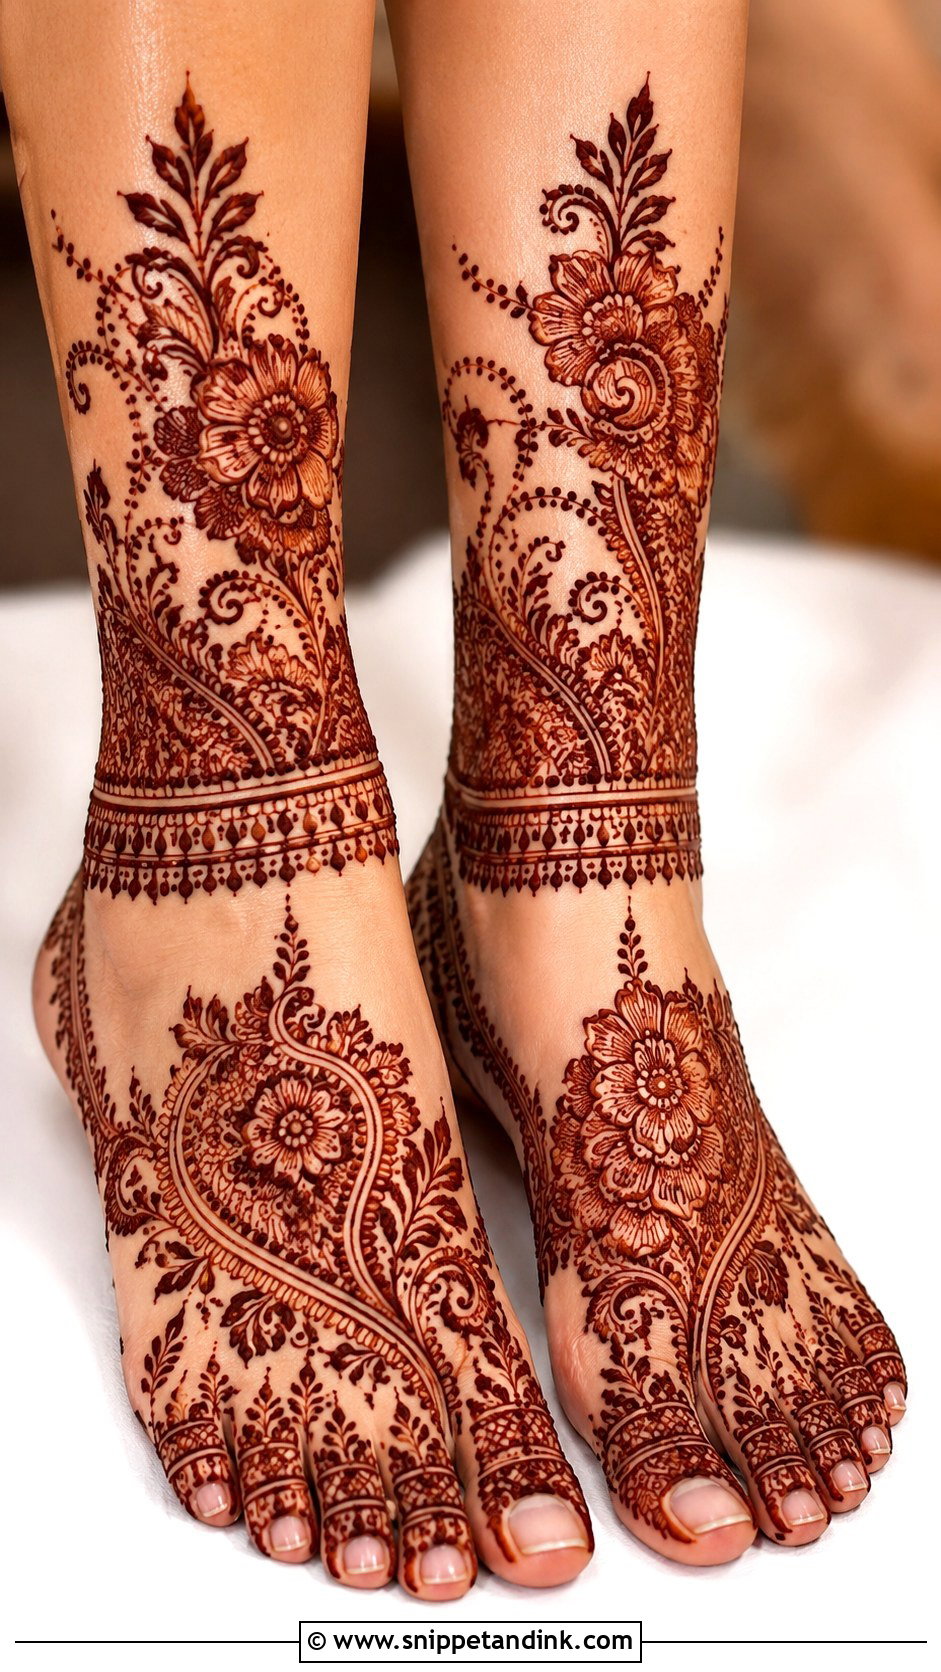
A simple bridal leg mehndi design keeps the detail where it counts: a central mandala on the top of the foot, paisley accents, small floral bands and neat toe work. A slightly thicker anklet border signals bridal, and a few delicate vines can climb the lower leg. Small jaali panels or heart-shaped leaves add richness without full density. I keep the soles light for brides who’ll be on their feet through long functions, since dense work underfoot cracks and wears first.
8. Leg Mehndi Design For Wedding
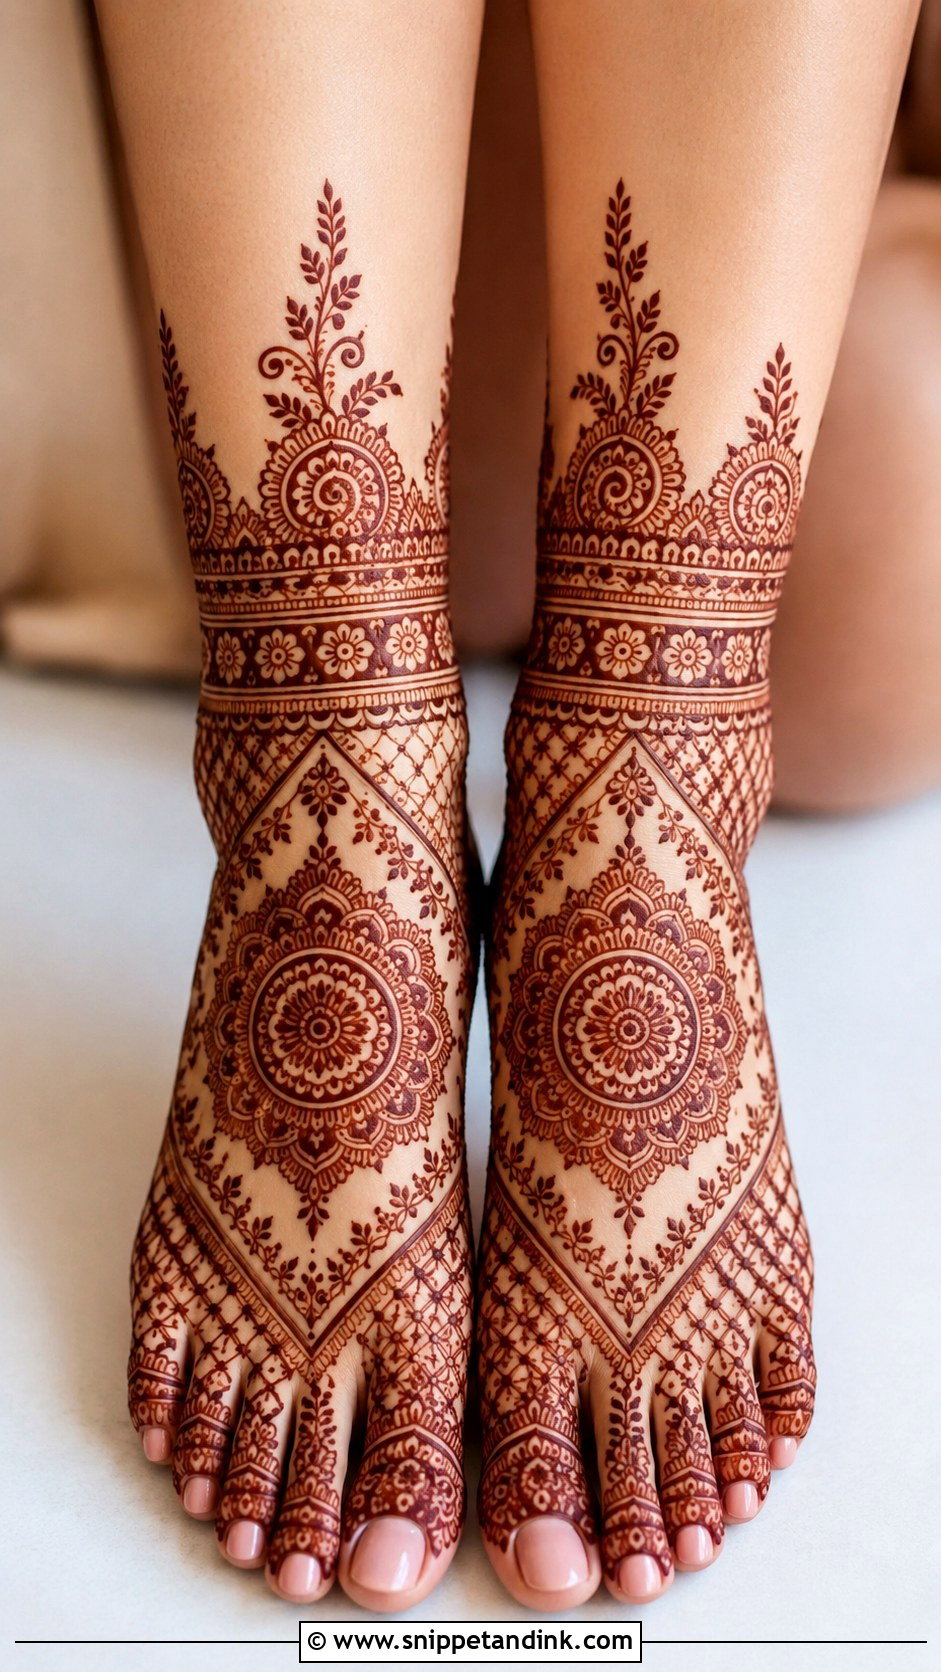
Wedding-guest feet should look festive from the front and the side. Decorated toes, a floral panel on the foot, an anklet band and a short extension above the ankle cover it. I skip tiny fill and use bold flowers with clean outlines, with dots and small curls around them. It suits sisters, cousins and bridesmaids for the mehndi night, sangeet, nikah or reception, and it won’t keep you in the chair all evening.
9. Leg Mehndi Design For Eid
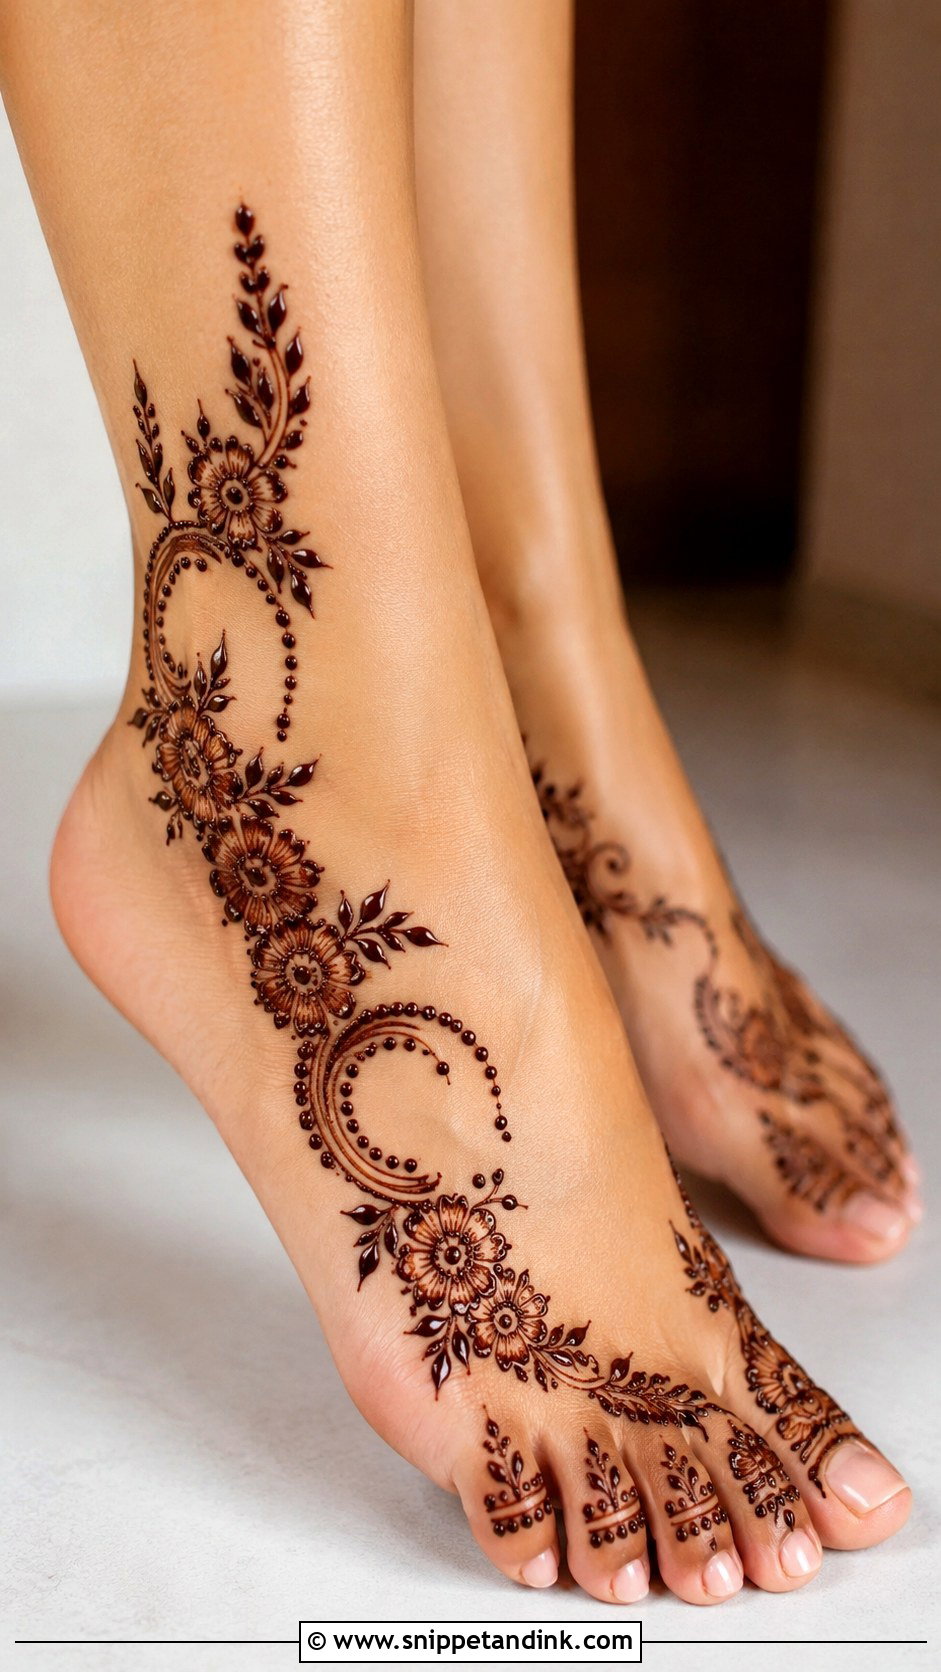
For Eid I like a side trail that starts near the big toe and curves up toward the ankle, with small crescent shapes, leafy sprigs and dotted chains. It stays open, so it looks right with flats, sandals, or traditional footwear, and each toe gets a tiny ring or half-flower cap. Most people want it the night before, so I keep it light enough to dry before bed.
10. Leg Mehndi Design For Diwali
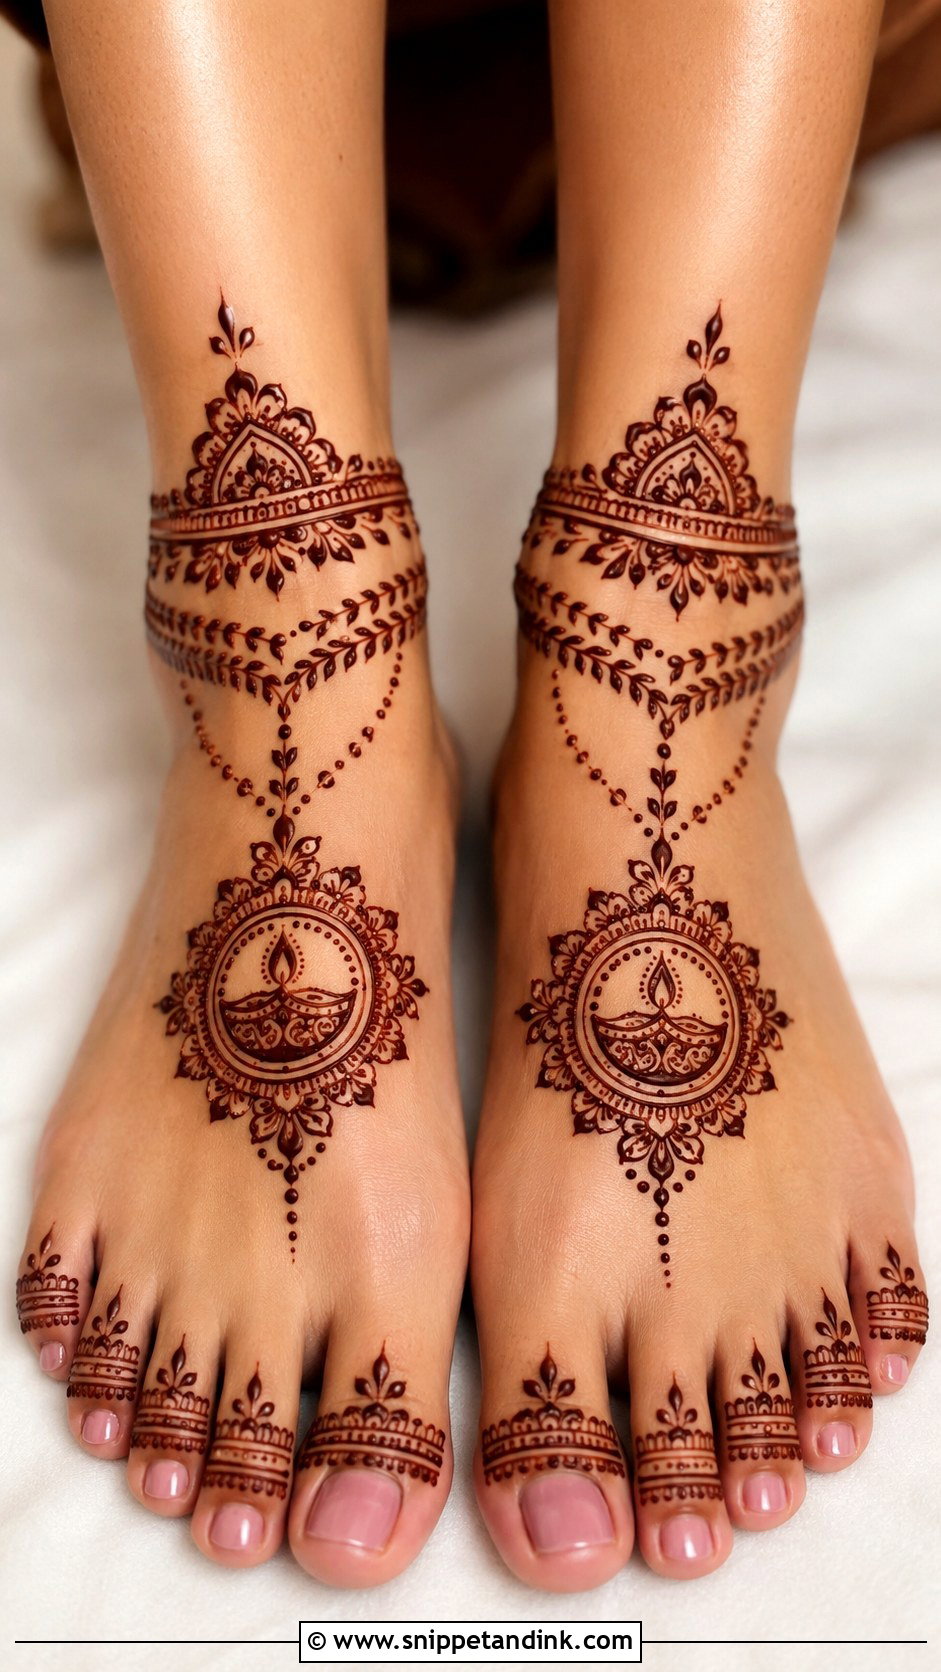
Diwali feet need to survive cooking, visiting and a lot of walking. I’d do a small mandala on the top of the foot with leafy borders and dotted arcs around the ankle, plus thin bands and small petals on the toes, and a few diya shapes if you want them. Keep it symmetrical for a traditional look or move the main pattern to one side for something more modern. The lighter design stains clearly and doesn’t trap you on the sofa for hours.
11. Leg Mehndi Design For Karwa Chauth
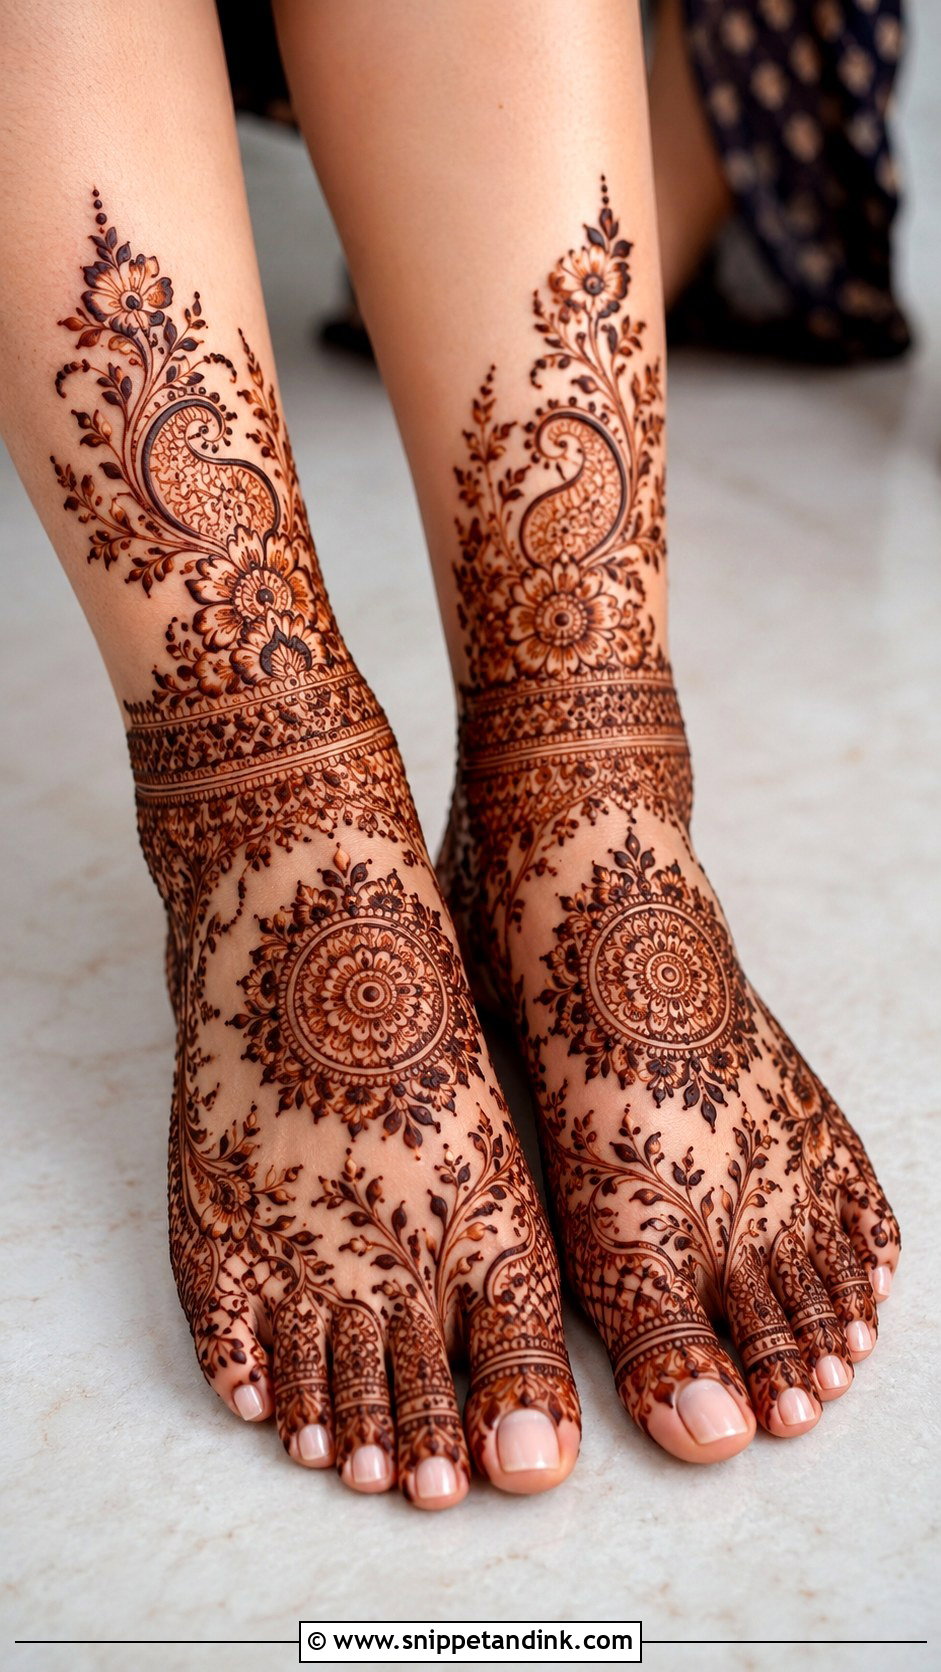
Karwa Chauth mehndi is traditional, but feet can stay simple: a small mandala, a paisley curve and a floral vine running from ankle to foot, finished with a fine anklet border. If you want more, put tiny dots around the mandala and shade a couple of leaves near the toes. It has to look complete from the front and still feel comfortable inside festive footwear, so I keep anything bulky away from where straps sit.
12. Leg Mehndi Design For Teej
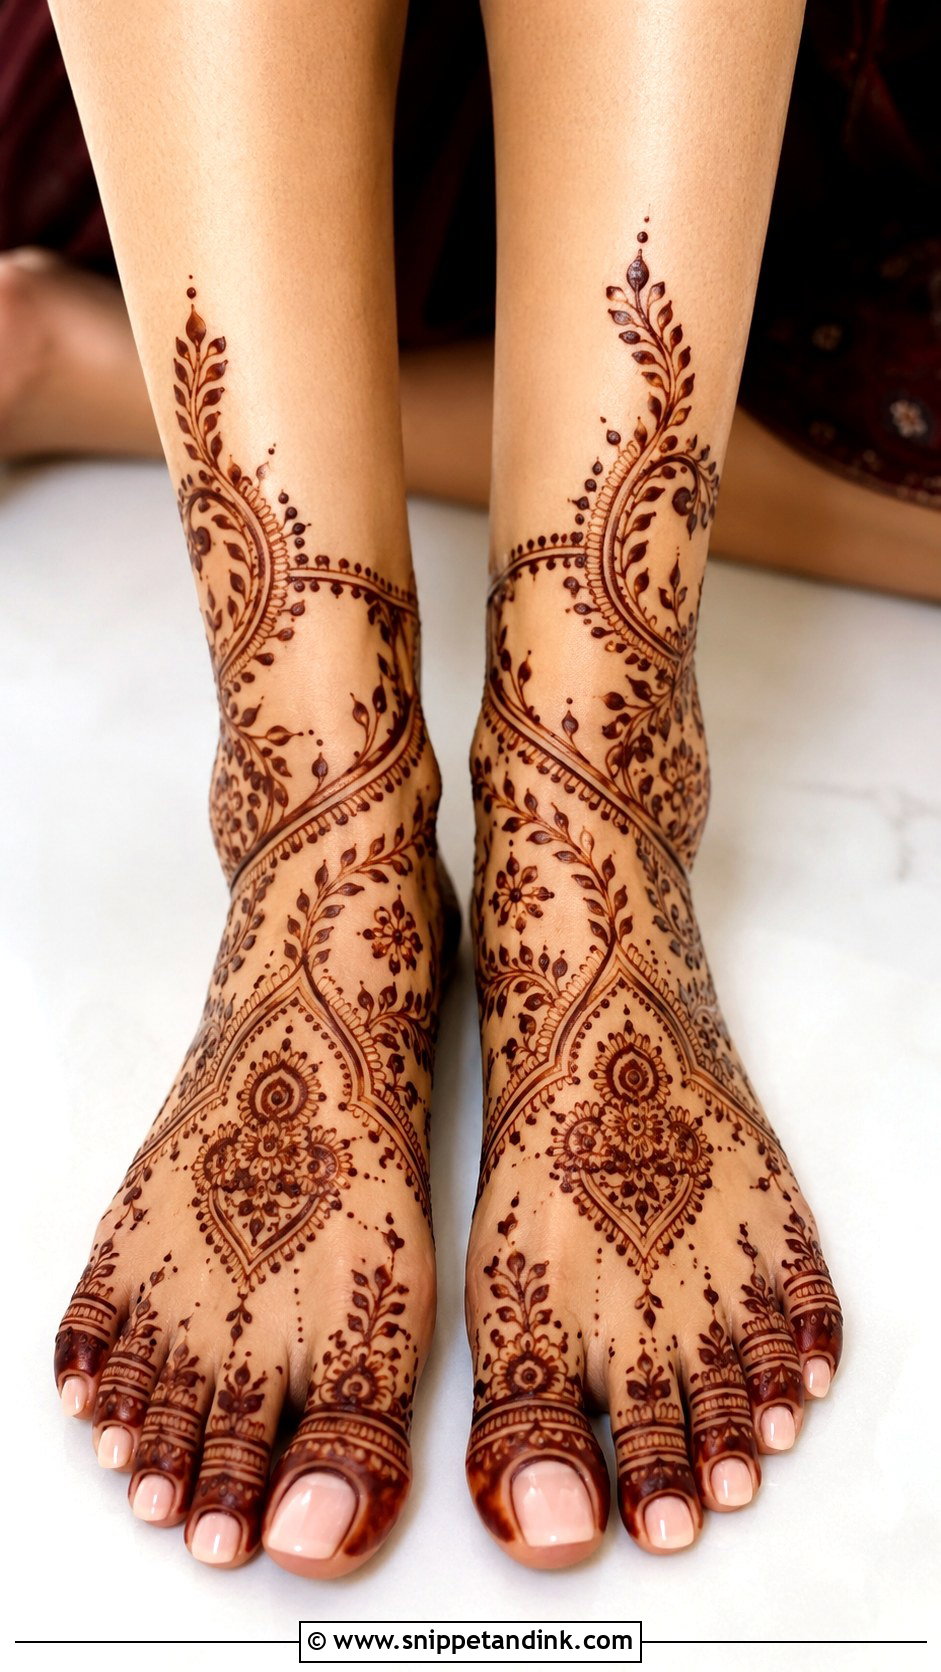
Teej means traditional clothes and plenty of jewelry, so the feet don’t need to compete. A small flower at the ankle with a vine falling diagonally across the foot, dots, tiny leaves and slim bands on the toes and a small circle near the center for balance. It all follows one flowing line, which makes it easy to apply at home. I’d suggest doing the foot you can reach less easily first, while your hands are steadiest.
13. Simple Mandala Leg Mehndi Design
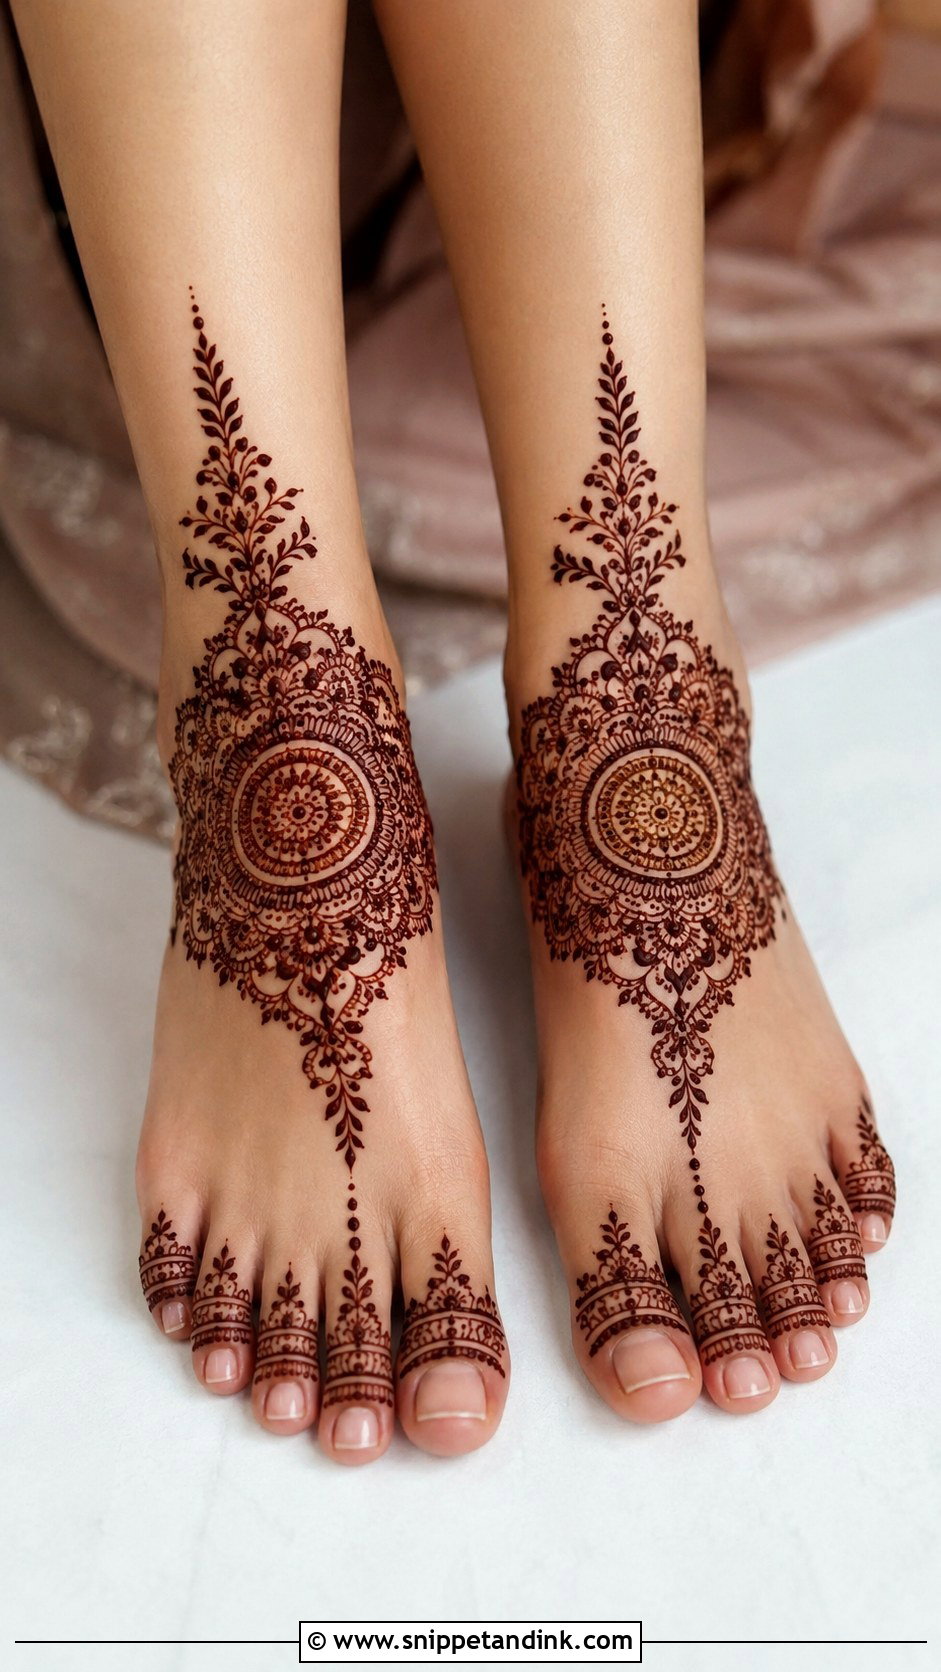
A mandala on the top of the foot gives a clean, centered look. I draw it in layers: center dot, circle, petals, outer border, small accents. Dots, petals and leafy extensions go around it, mini bands on the toes, and the ankle is bare or gets a single thin line. The top of the foot curves more than a palm, so I keep my eye on the circle from above, not from the side, or it ends up oval.
14. Simple Floral Leg Mehndi Design
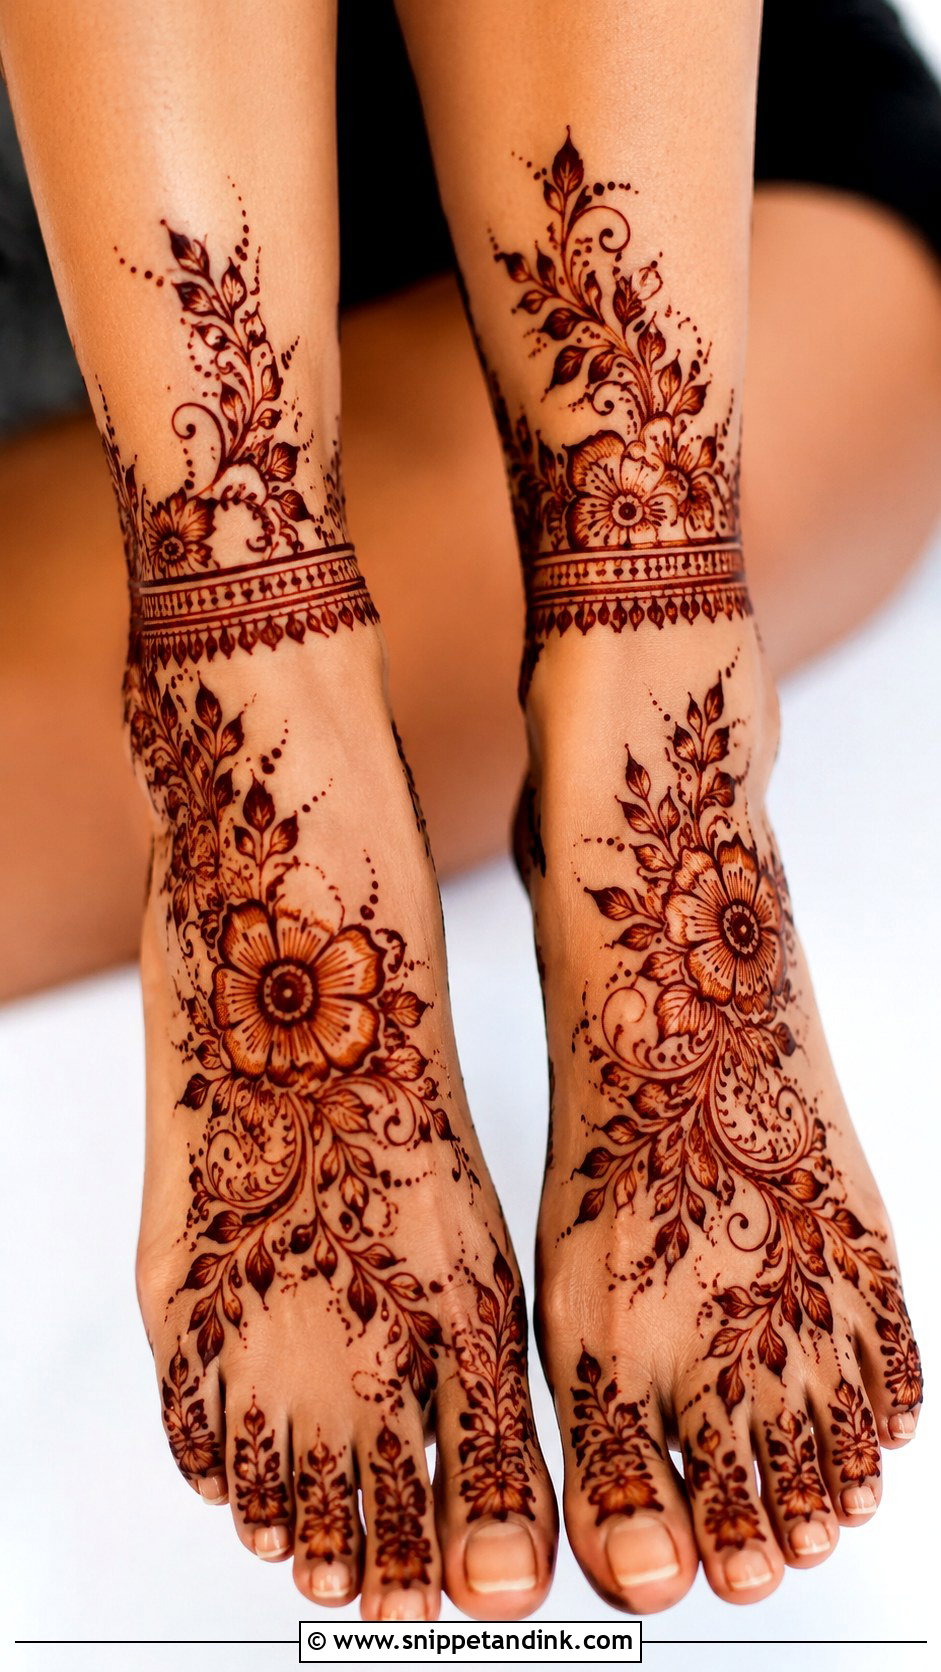
Two or three bold flowers joined by curved stems and leaves cover the foot nicely. I keep petals open and lightly shaded, add a small anklet border and finish the toes with dots or tiny floral caps. For a minimal version, use one flower; for something more festive, extend the vine around the ankle. It suits daytime weddings and all ages.
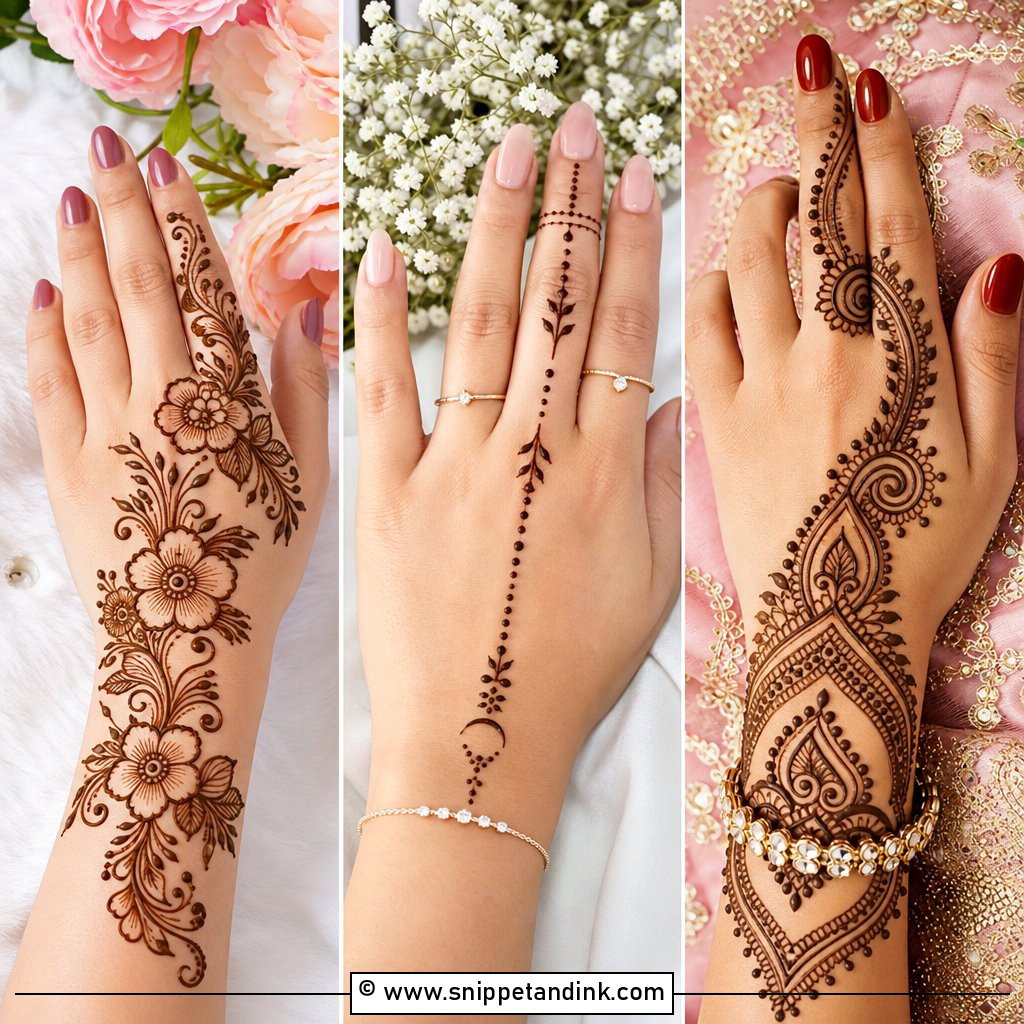
15. Simple Paisley Leg Mehndi Design
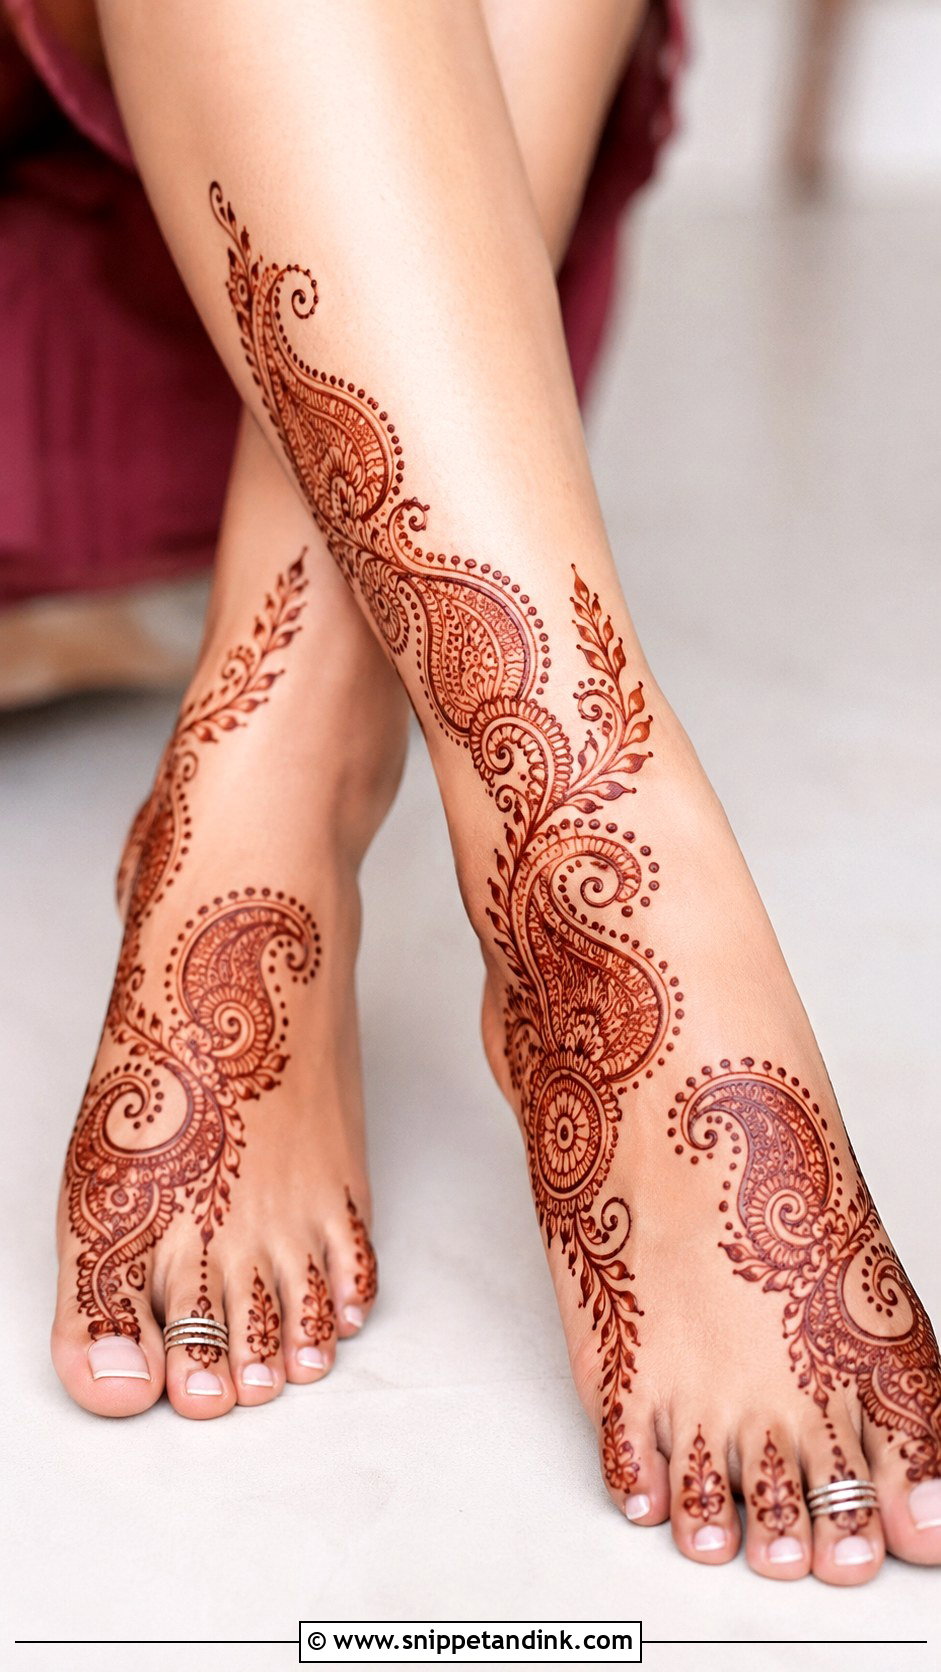
Paisley stays simple when it has room around it. I put one medium paisley on the side of the foot, surround it with small leaves, dots and curves, and let the pattern trail up toward the ankle. Toes get tiny paisley tips or ring bands. The paisley’s curve follows the arch of the foot nicely. Fill it with lines, dots and small petals, nothing denser, and it stays manageable for a beginner.
16. Simple Anklet Leg Mehndi Design
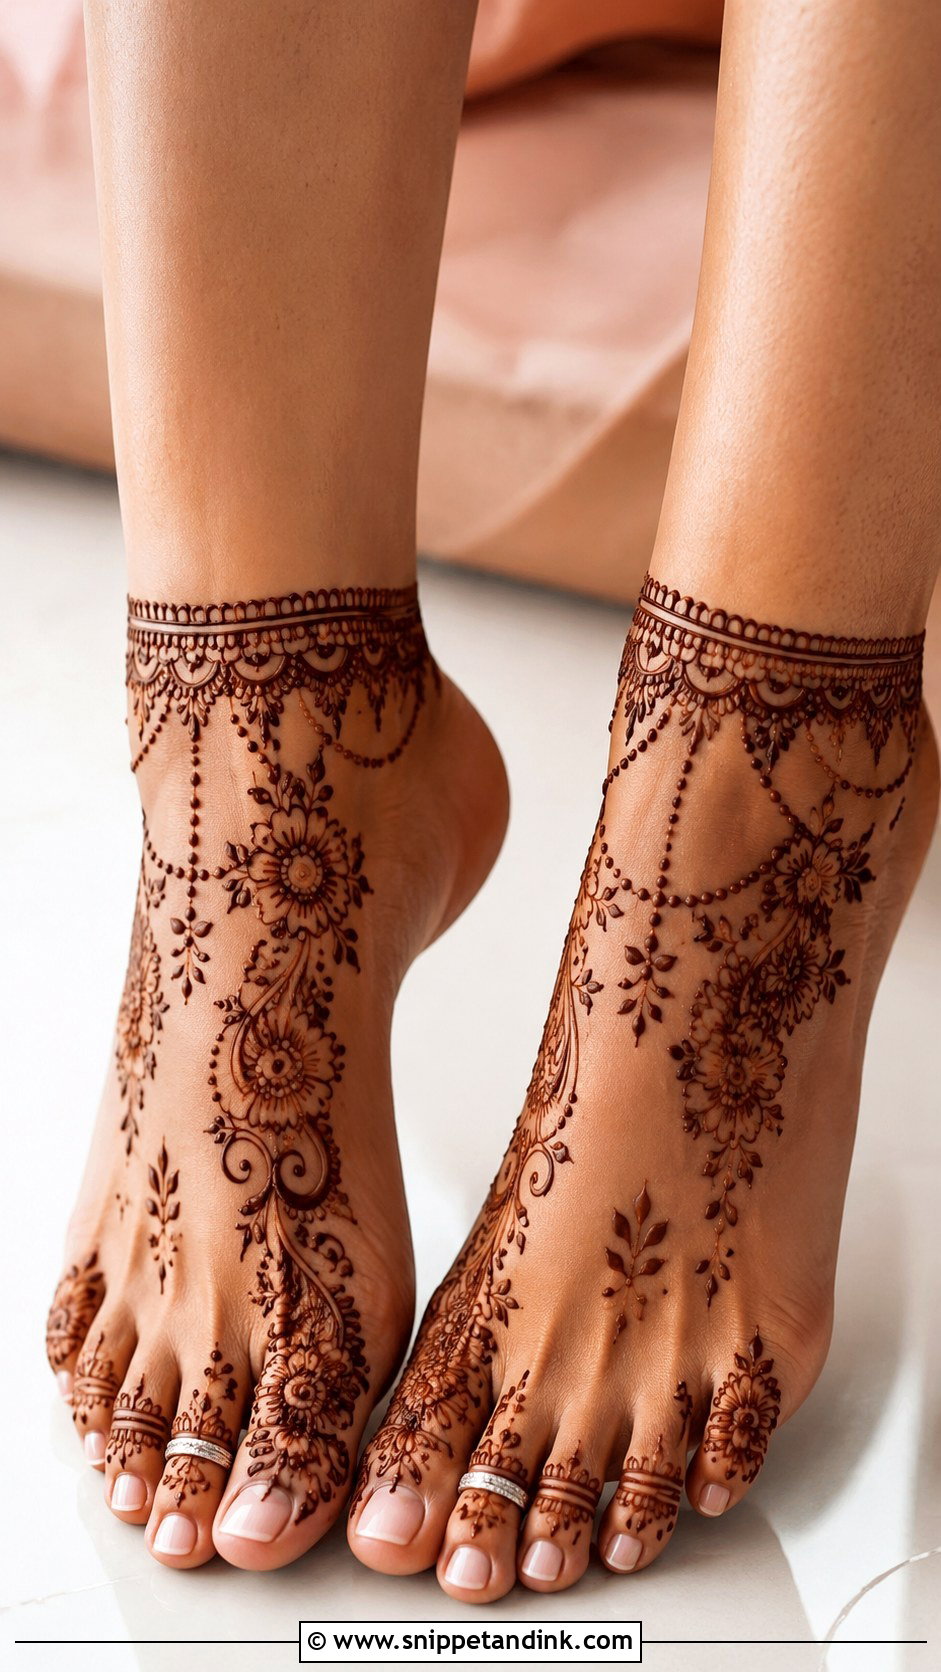
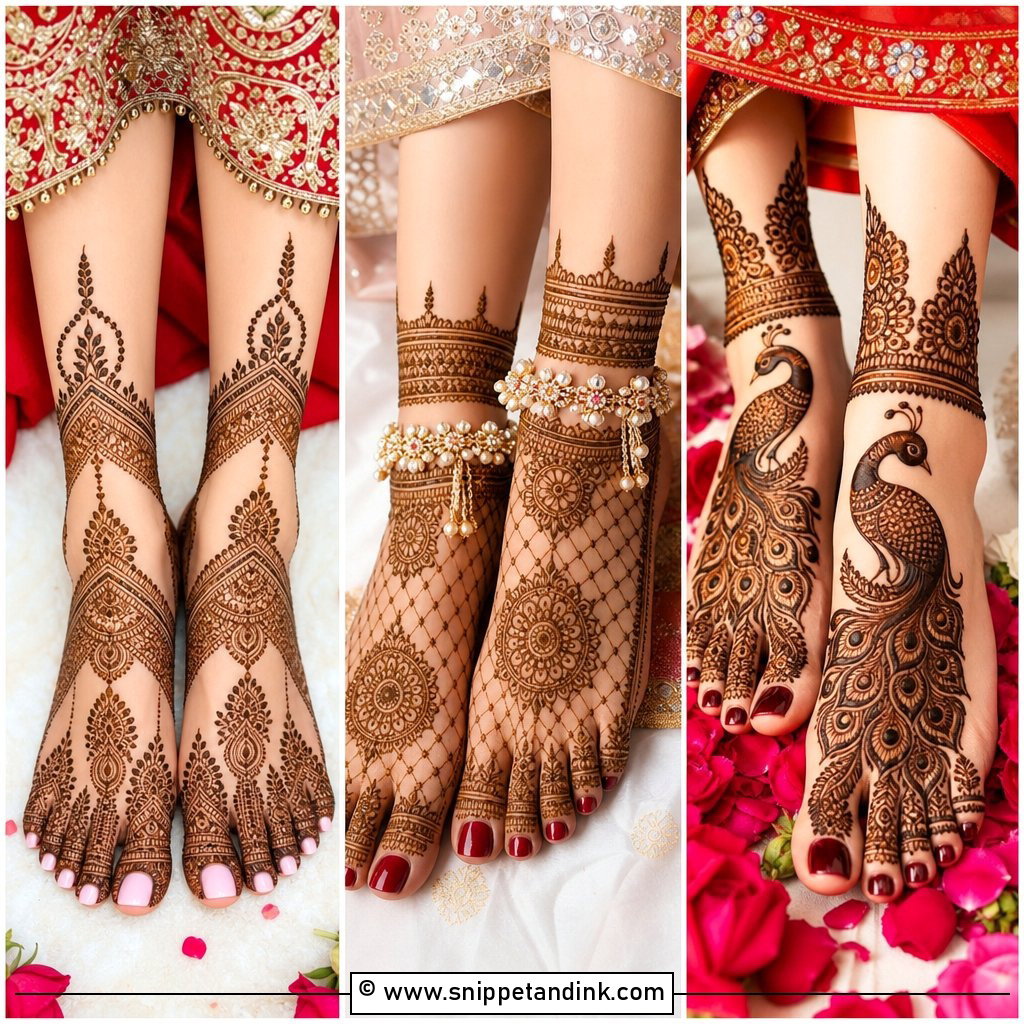
The anklet is the quickest foot design I do. A band around the ankle in dots, leaves, small flowers or scallops, one or two chains hanging down toward the foot and slim rings or dots on the toes. It looks like jewelry and dries fast. I place the band just above the ankle bone, not on it; paste over the bone dries and cracks quickly because the skin there moves so much.
17. Simple Toe Leg Mehndi Design
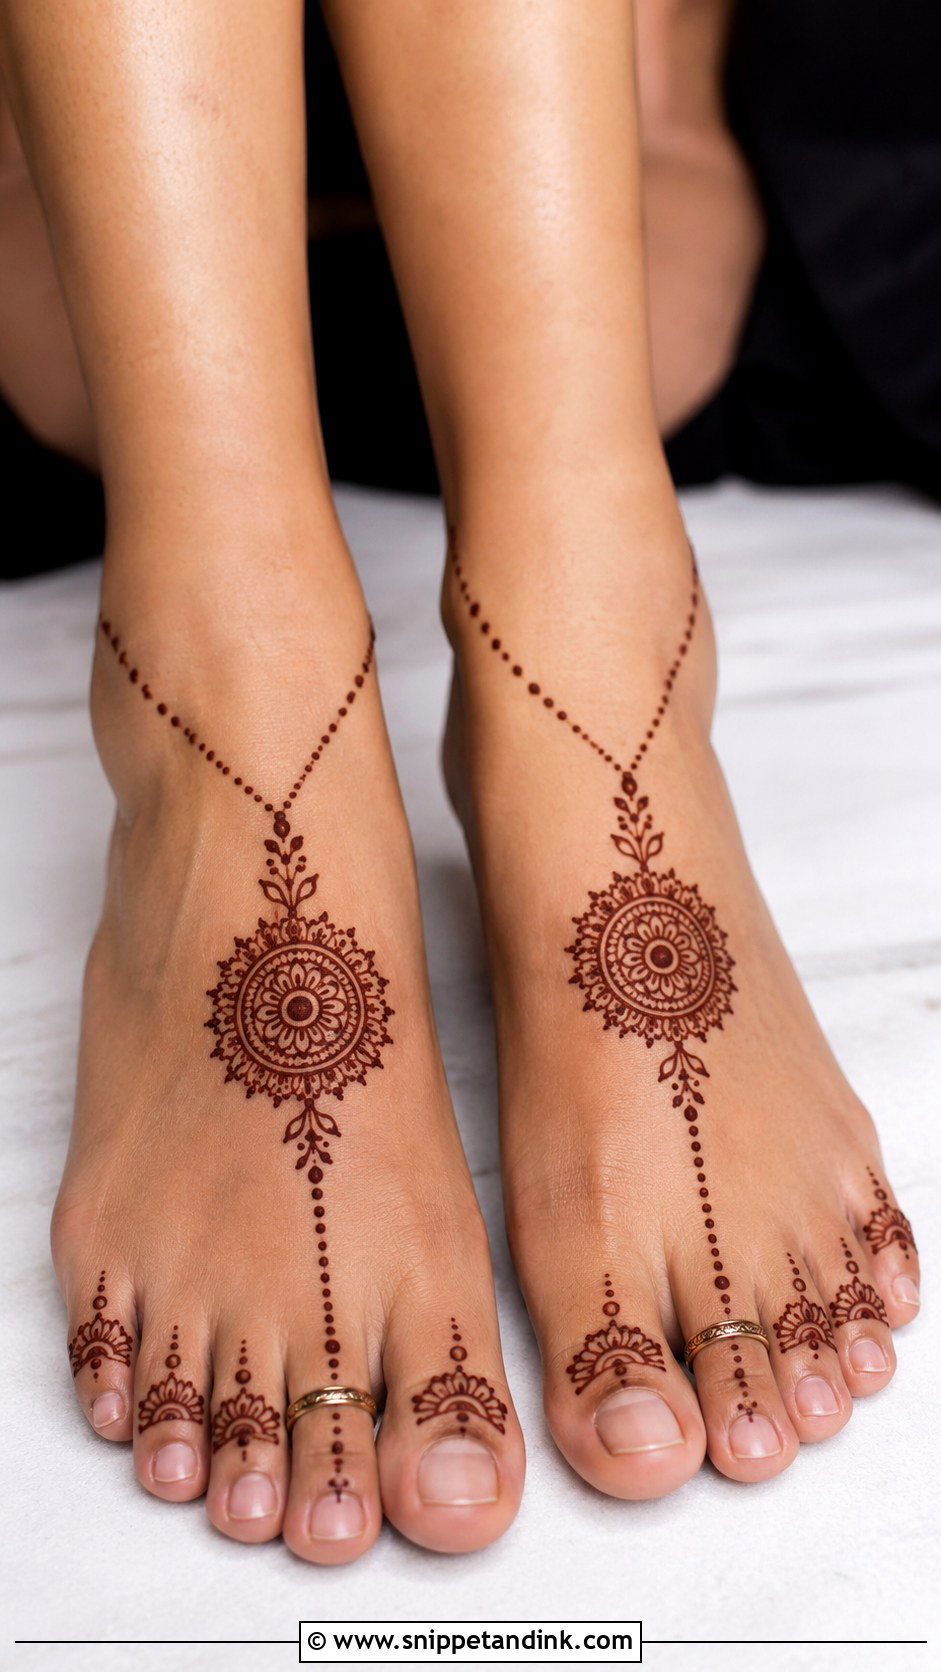
This one sits on the toes and upper foot only. Thin ring bands, dots and petal caps on each toe, then one light chain from the big toe to a small flower or mini mandala on the foot. Nothing on the ankle. It’s what I suggest for casual wear and for anyone who wants henna to fade quietly in a week.
18. Simple Side Leg Mehndi Design
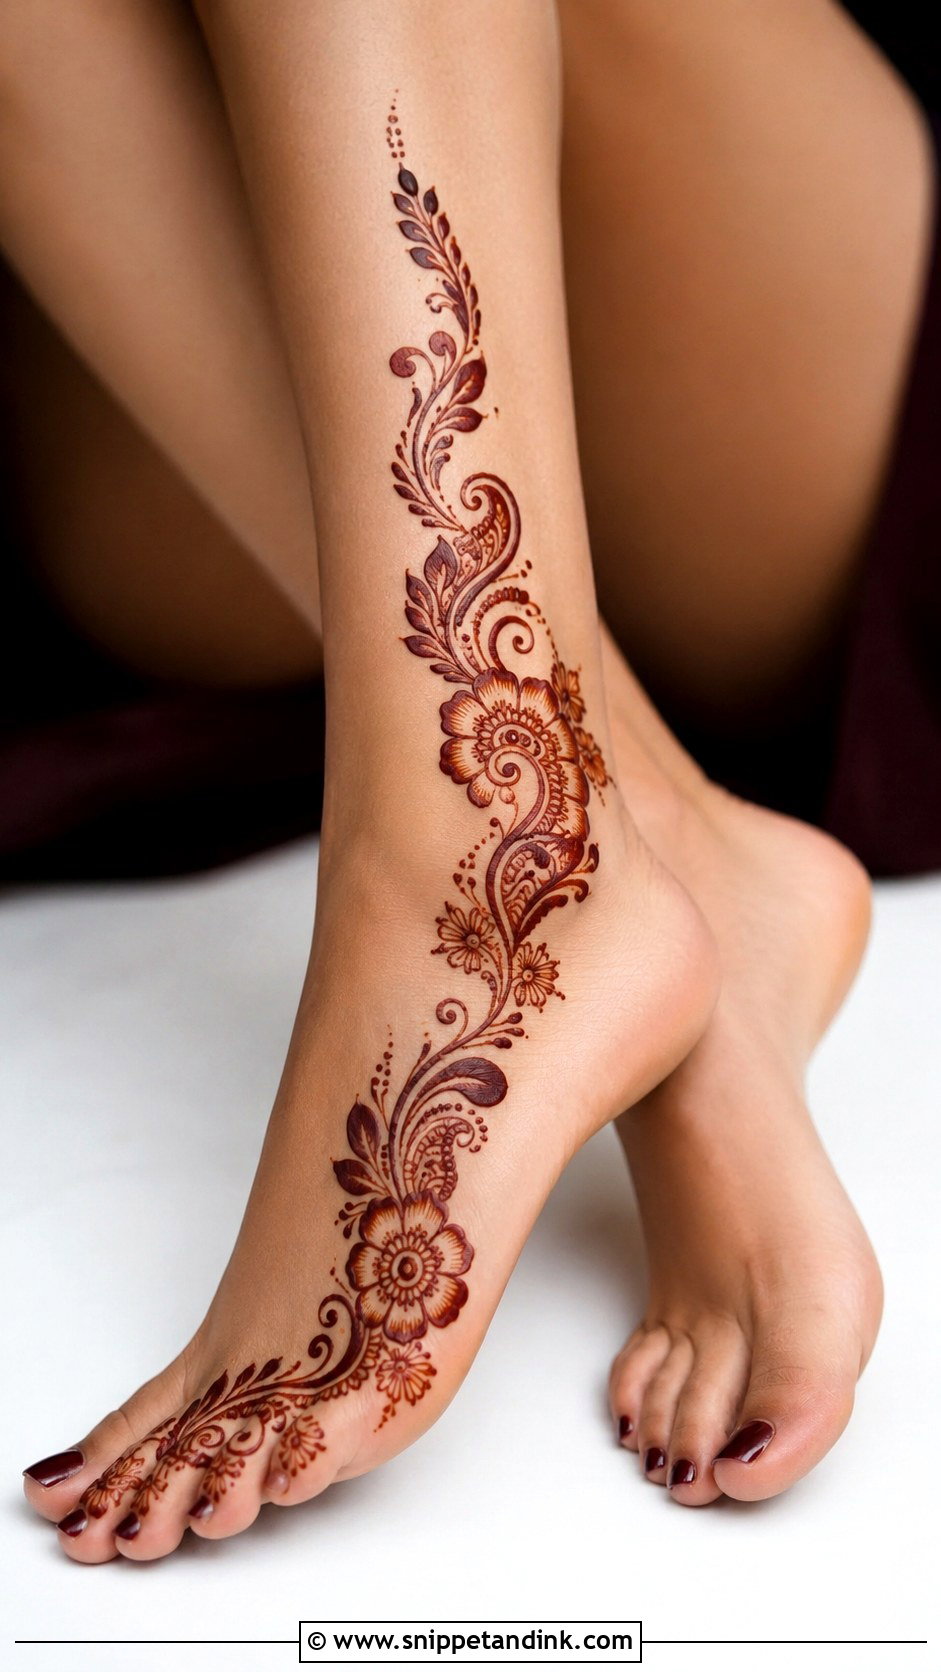
Running the design along the outer edge of the foot is an Arabic-inspired trick that looks graceful with very little work. I start near the little toe and draw a floral vine up the outside of the foot, wrapping slightly around the ankle, and leave the inner foot bare. Flowers, leaves, dots and a small paisley or two complete it. It follows the natural line of the leg, so it flatters most feet.
19. Simple Heel Mehndi Design
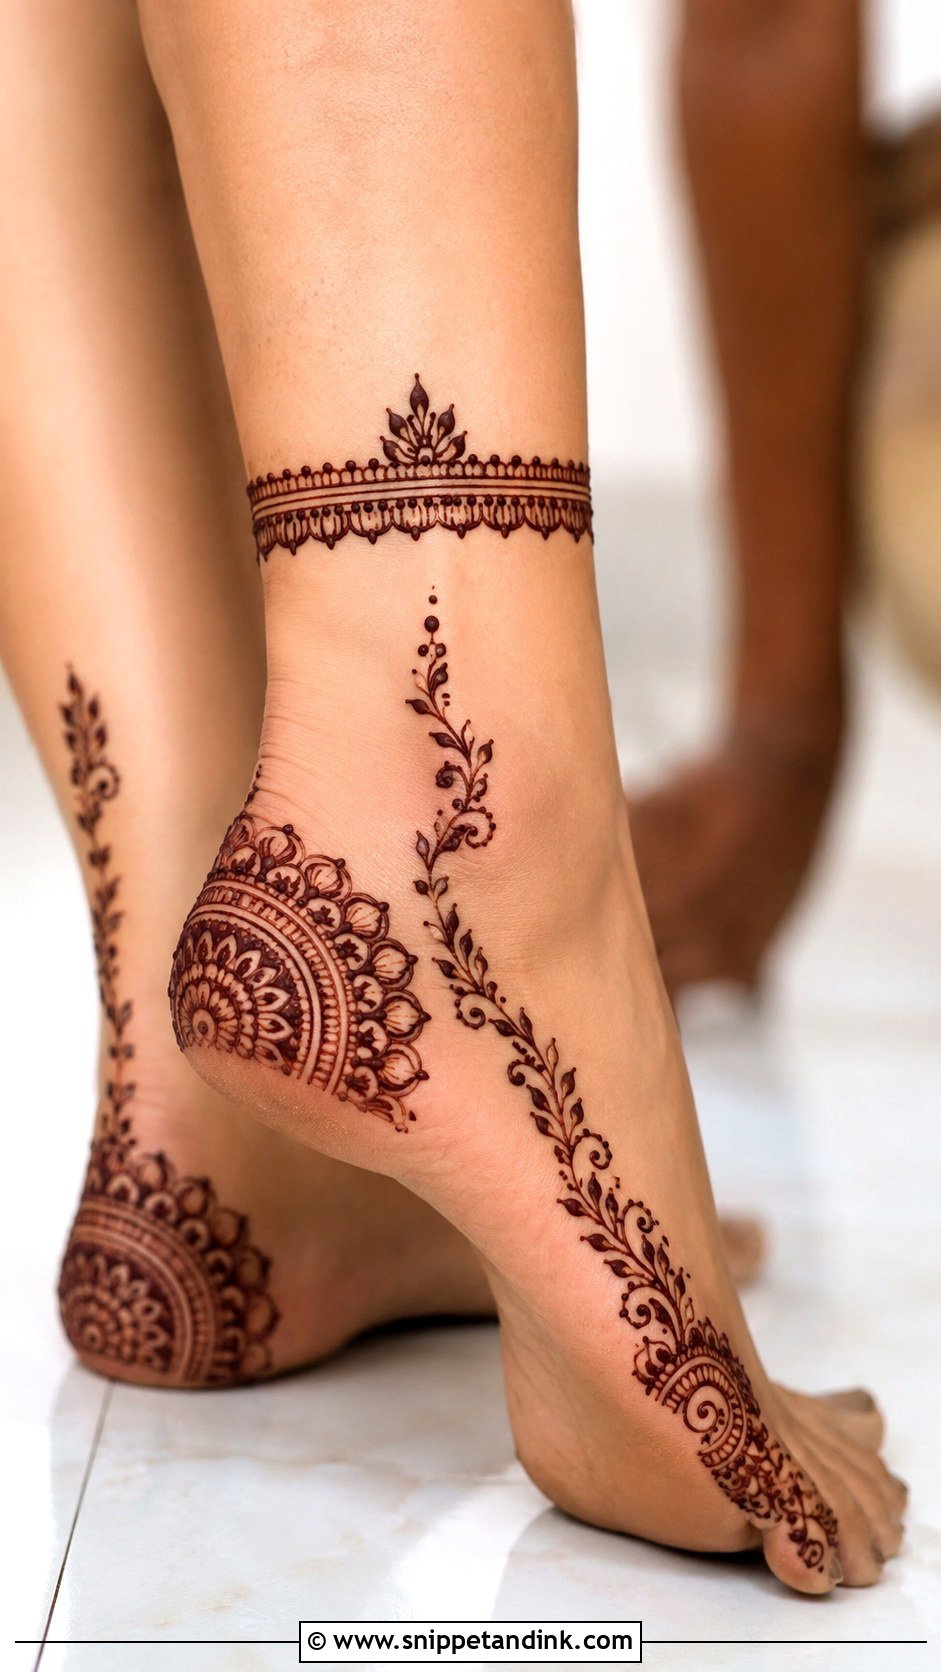
The heel is often left plain, which is why decorating it looks unusual. I focus on the back of the ankle, the heel curve and the side edges, with a small anklet band and a half-mandala or floral curve around the heel softened with dots and leaves. I keep the underside of the heel clear: it’s thick skin that gets constant friction, so detail there wears off in days. Bold motifs work better than fine lines on such a curved surface.
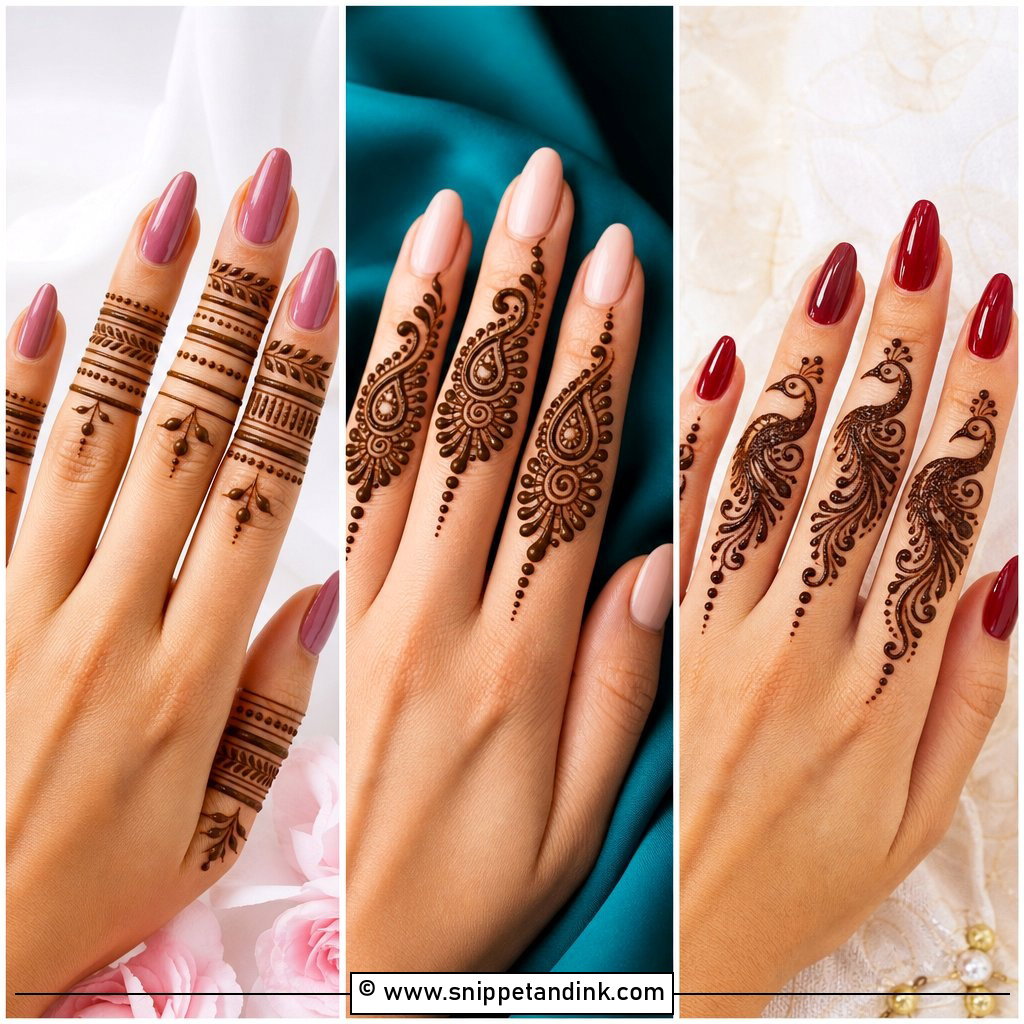
20. Simple Ankle Mehndi Design
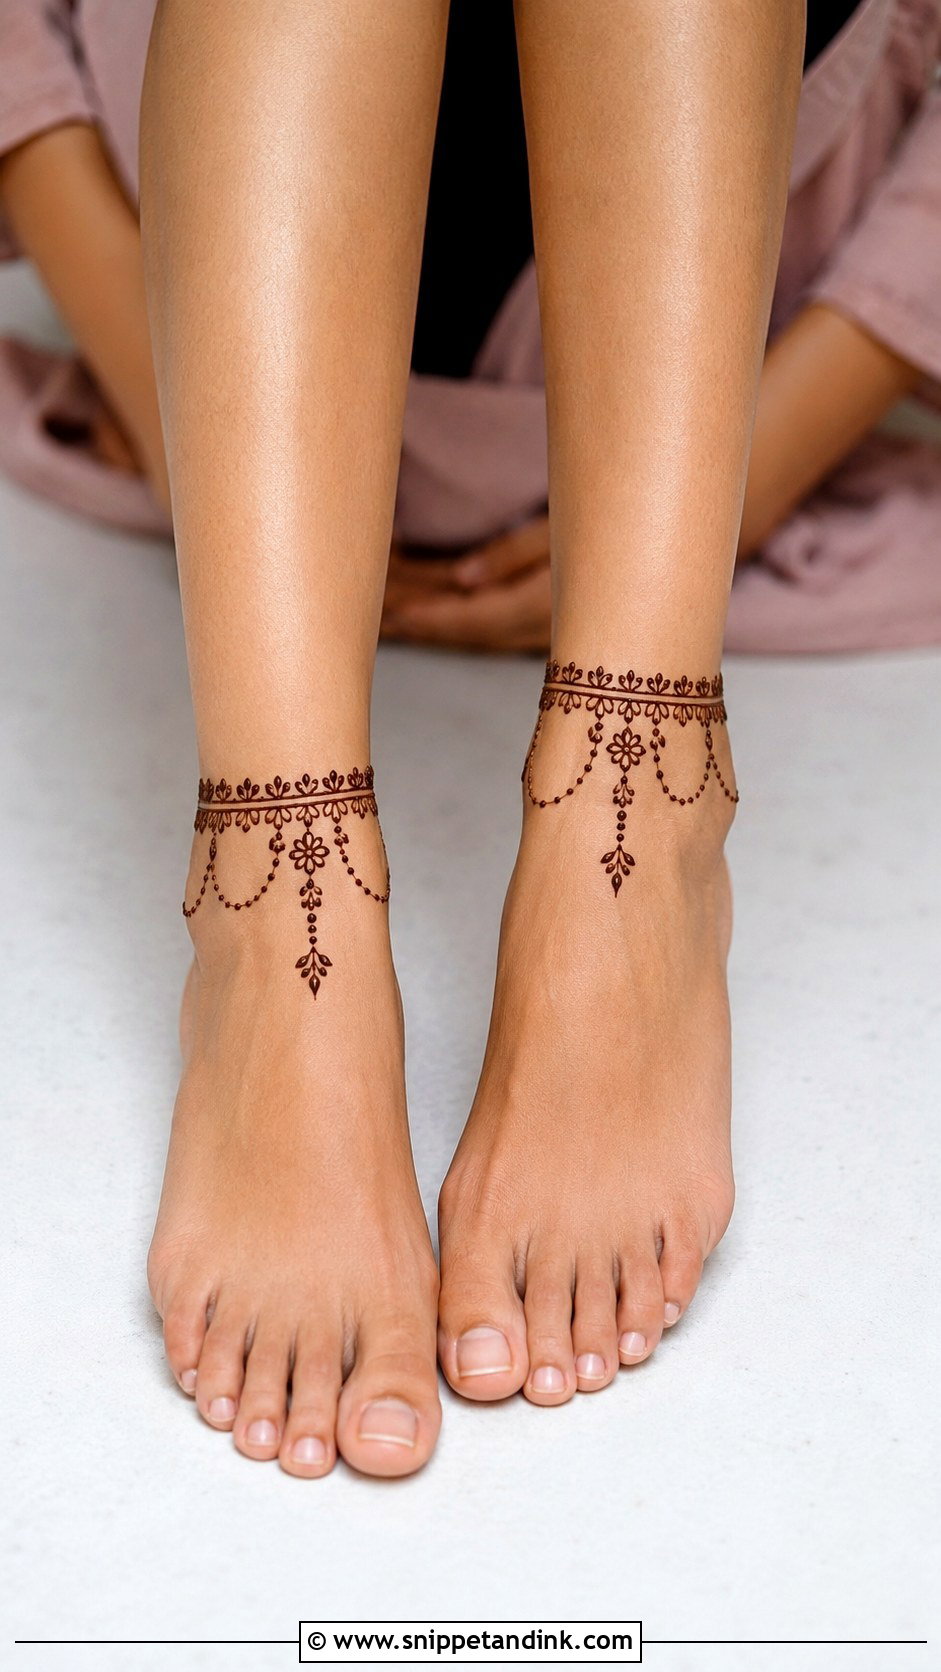
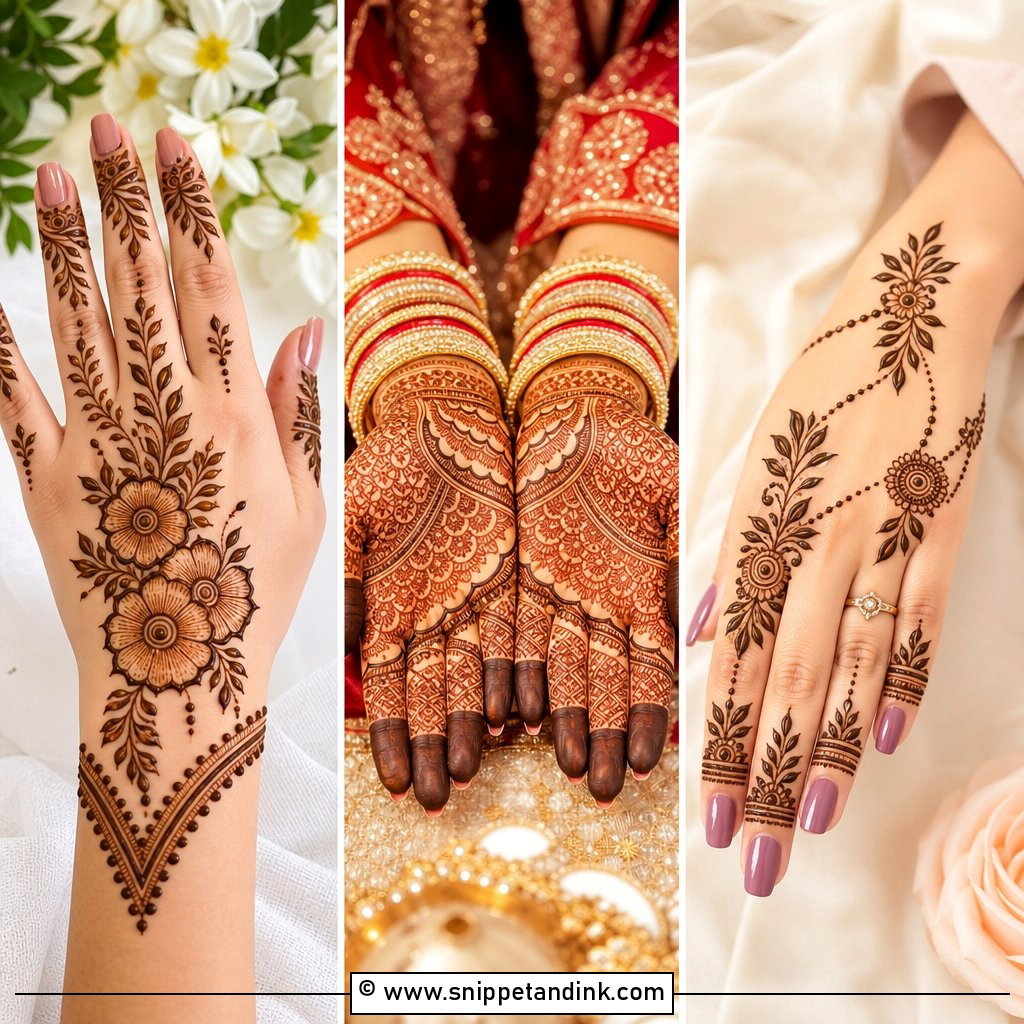
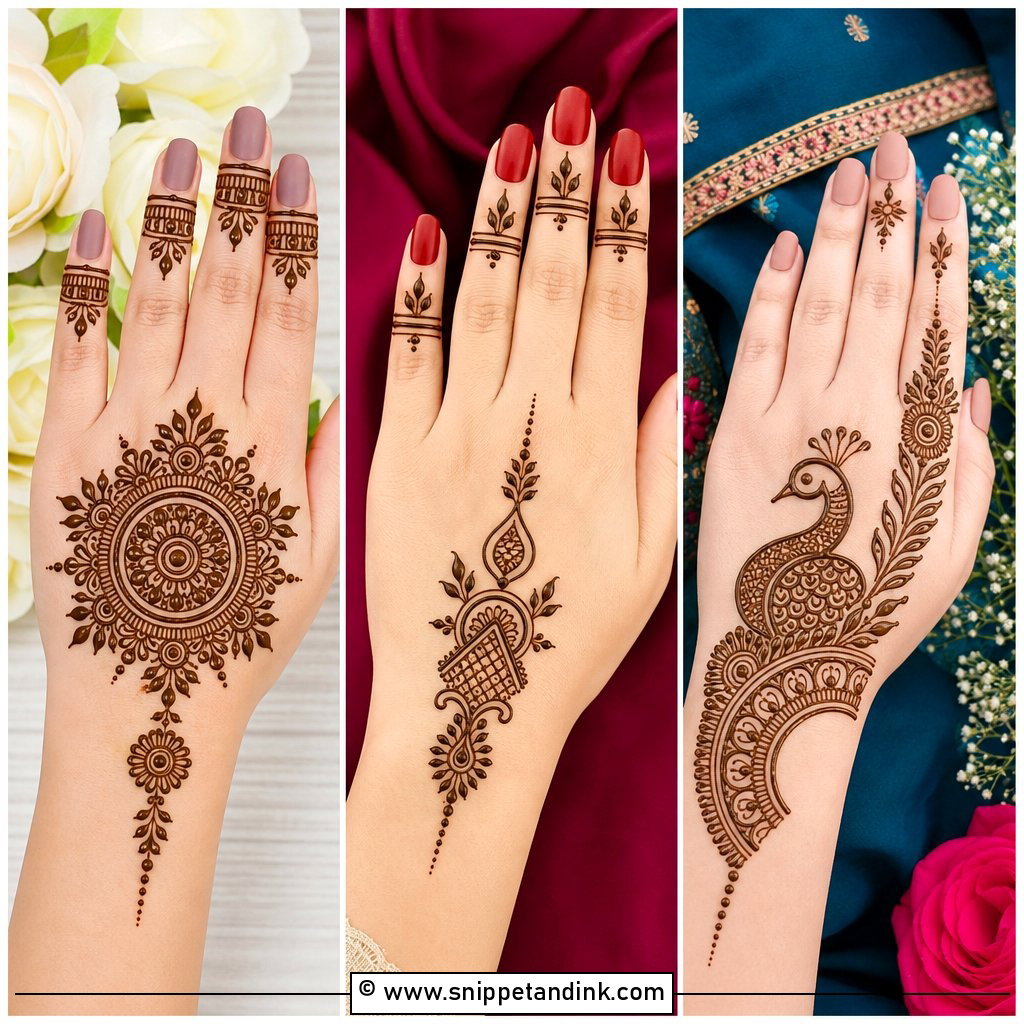
A neat band around the ankle in small flowers, dots, leaves or chain-like curves, with a tiny hanging motif on the foot. Toes bare or very lightly lined. It’s compact, so it dries quickly and suits everyday wear and holidays. If you wear a real anklet, I put the henna band slightly above or below it so the metal doesn’t rub the stain away.
21. Simple Minimal Leg Mehndi Design
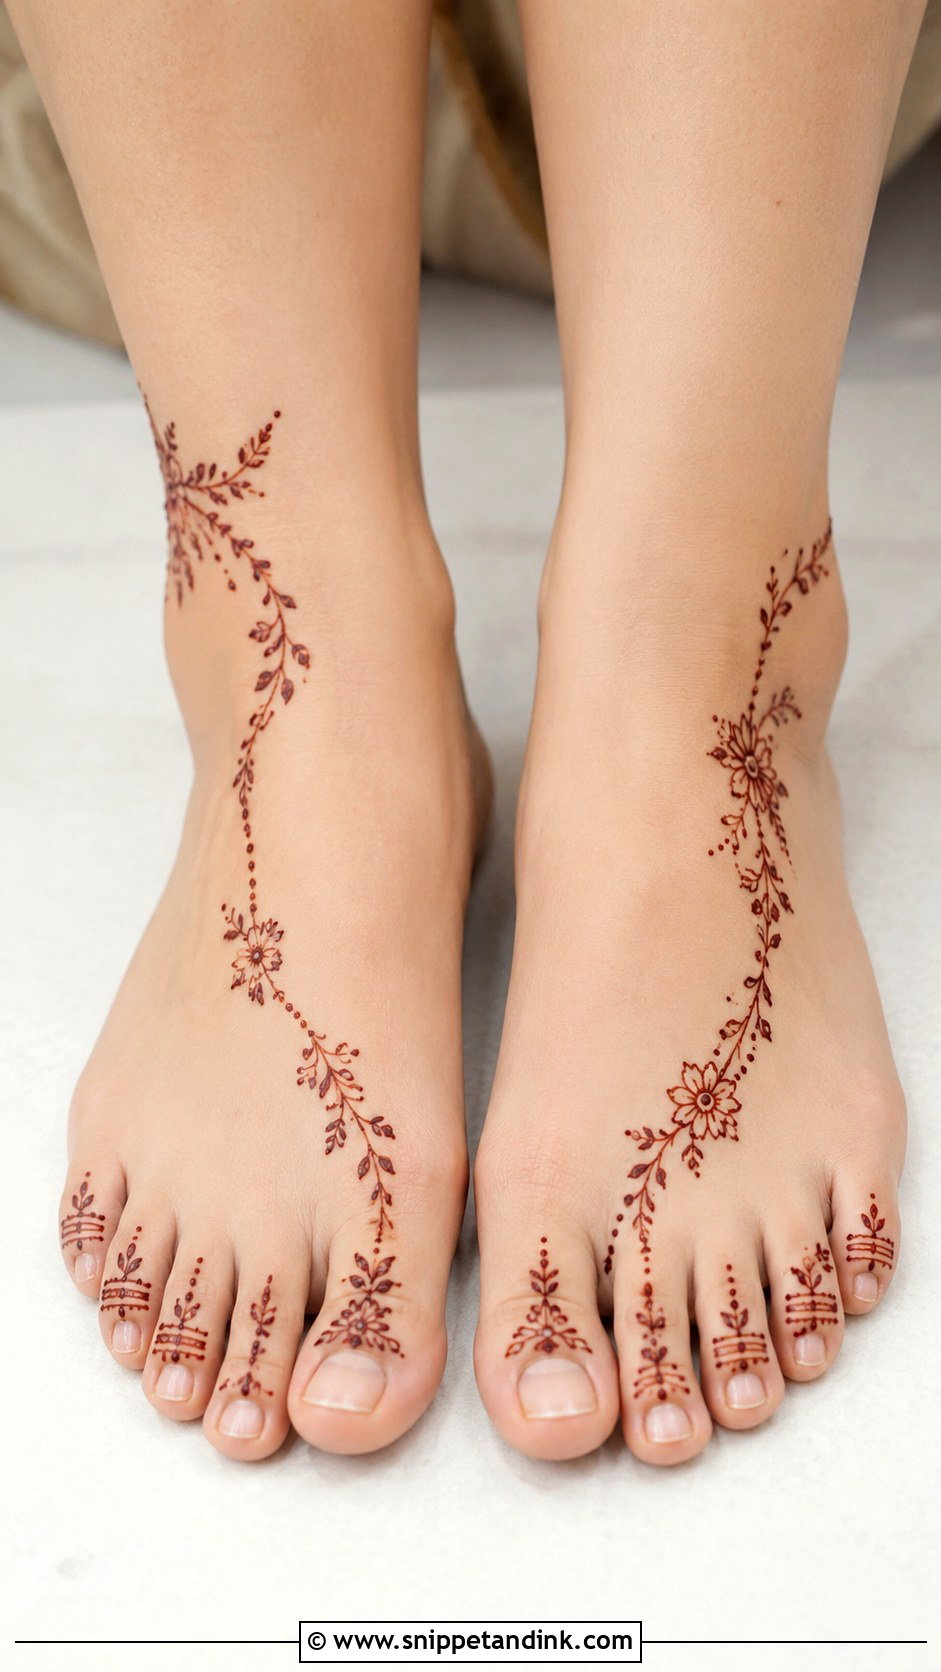
Minimal leg mehndi means one small motif on the foot, a thin vine toward the ankle and a few dots on the toes. No heavy shading, no thick fill, no stack of borders. A tiny mandala, a small flower or a single paisley becomes the focus. Small designs also fade gracefully, which matters if you have work or school the following week.
22. Simple Modern Leg Mehndi Design
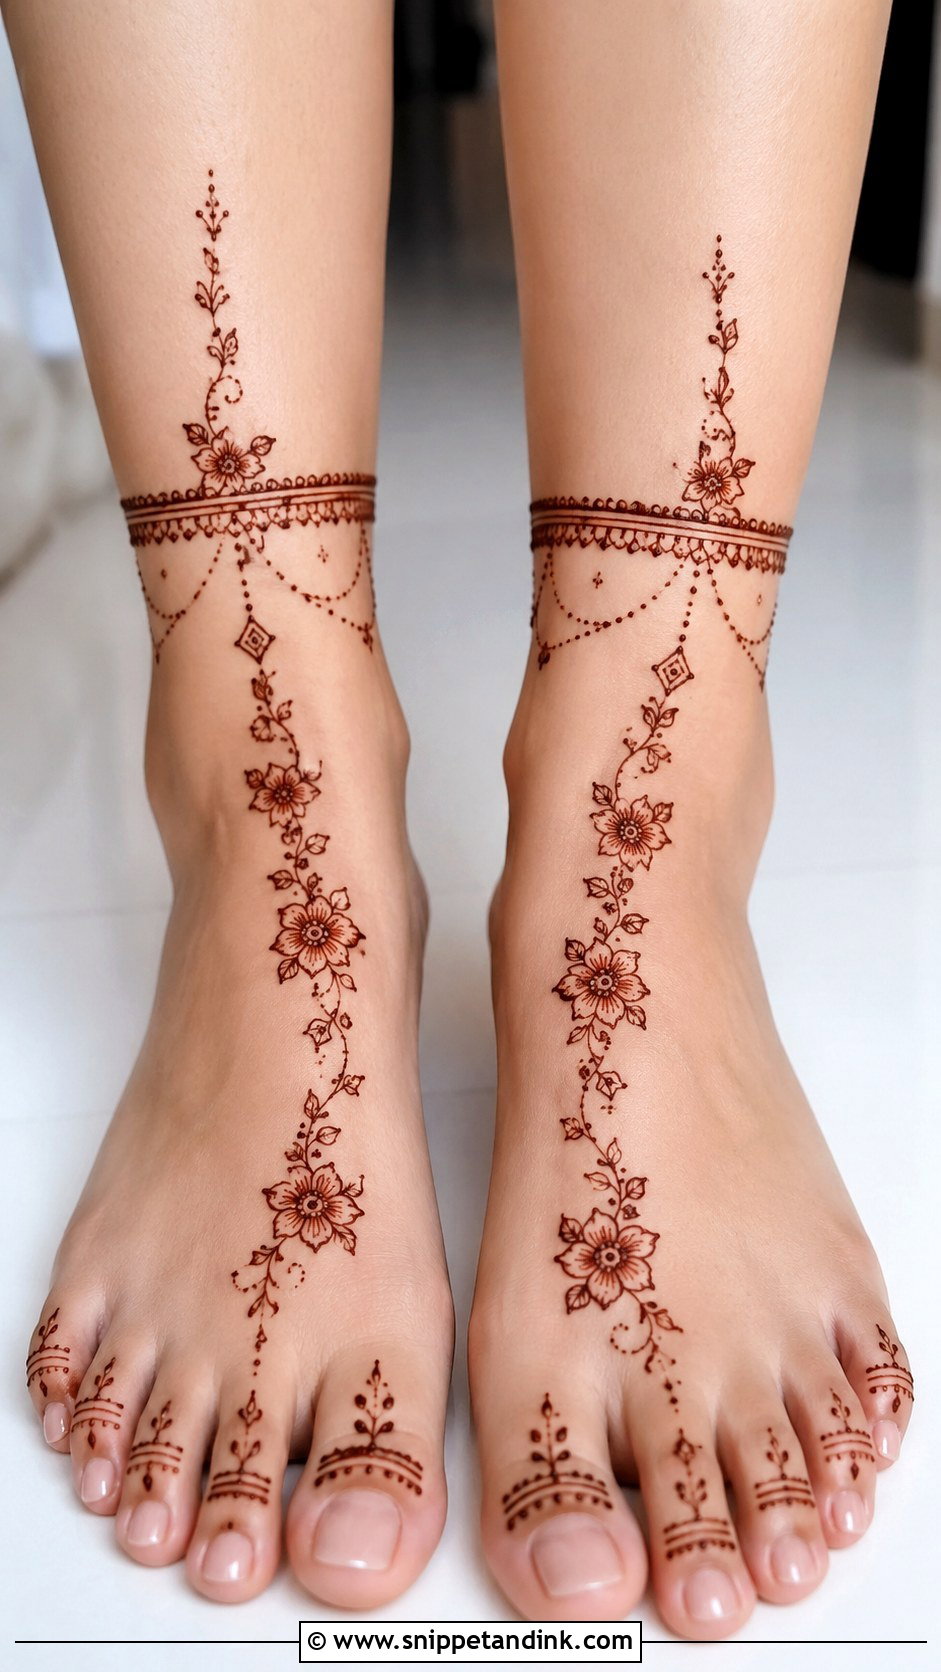
Modern foot designs use traditional motifs in a cleaner layout: thin ankle bands, spaced floral trails, dotted chains and a few small geometric accents arranged in a path from toes to ankle, with negative space between them. I make the motifs a little larger than usual and the details fewer. It sits well with Indo-western outfits and simple sandals. The modern feel comes from balance, not from adding anything new.
23. Simple Indian Leg Mehndi Design
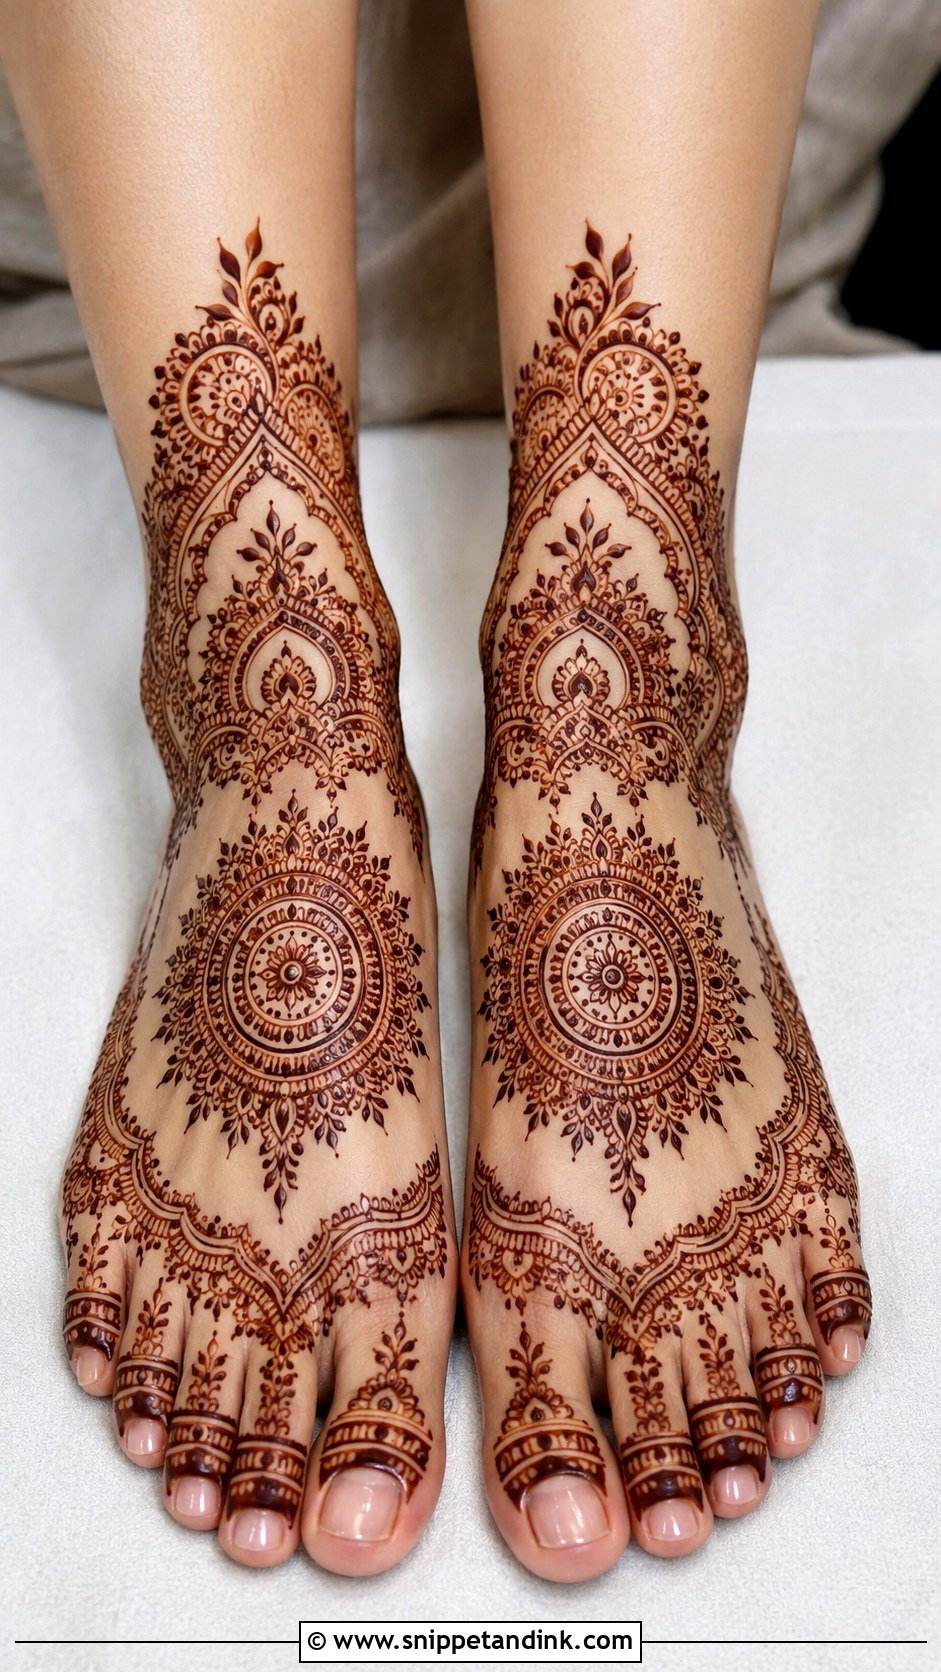
Indian-style feet are more symmetrical and detailed than Arabic ones, but they can still be easy. A central mandala on the foot, paisley or floral corners, a neat ankle border, and dots, small leaves and curved fillers to connect everything, with matching bands and petals on the toes. With open footwear, I check both feet side by side before finishing, because a mismatch is more obvious on feet than on hands.
24. Simple Indo Arabic Leg Mehndi Design
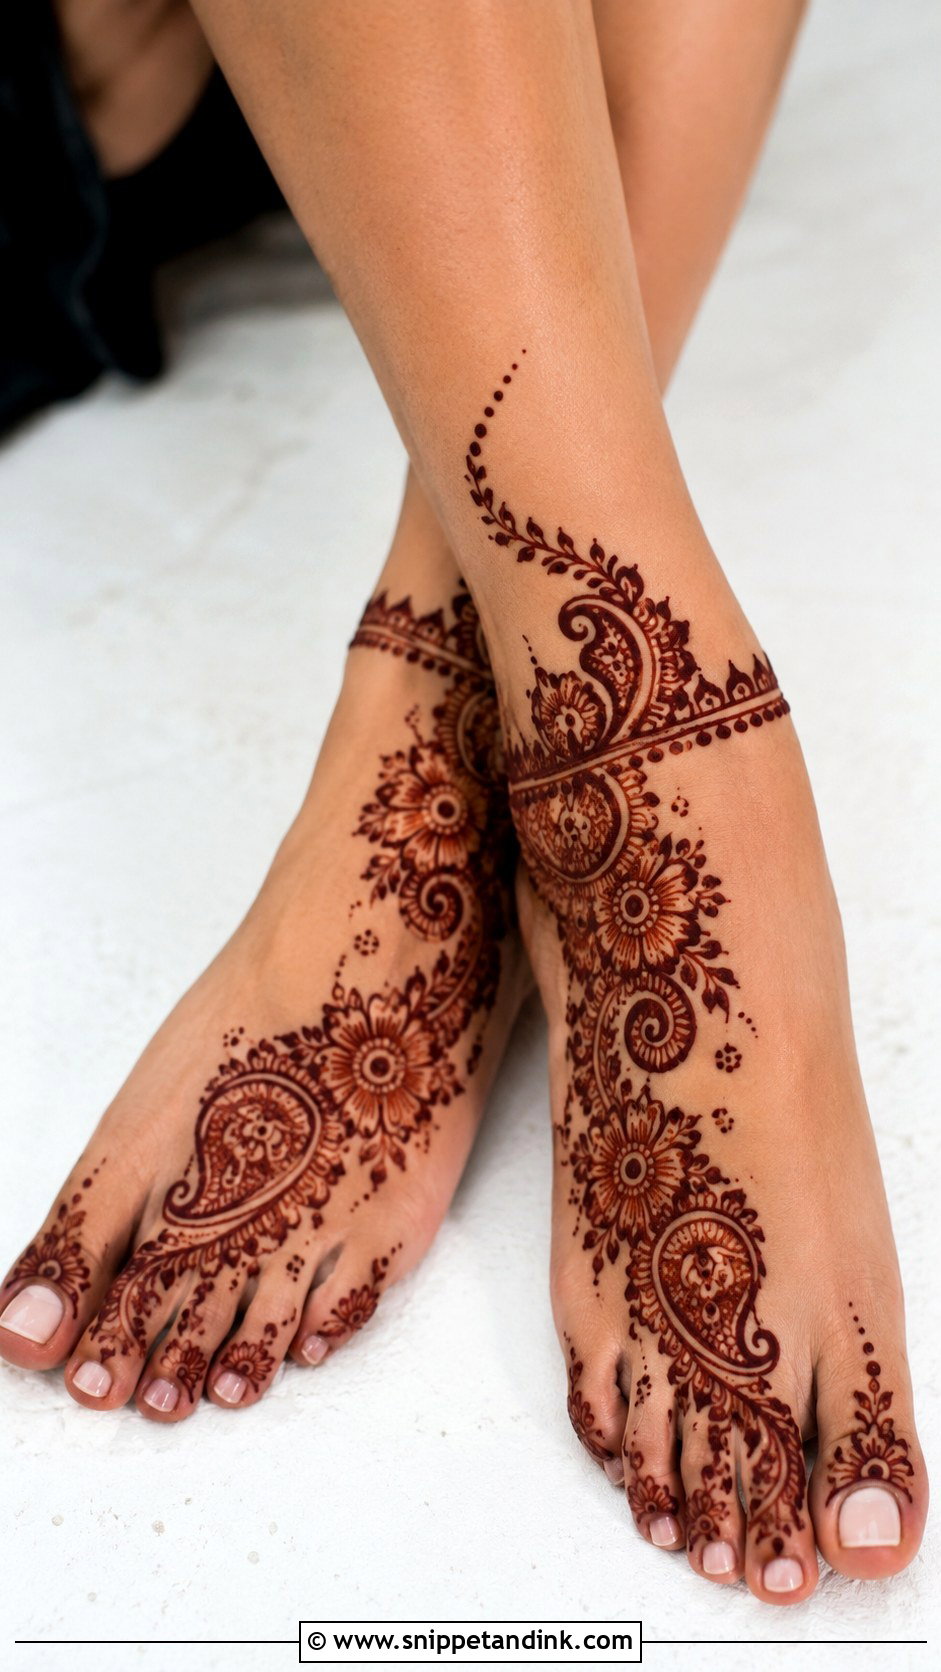
Indo Arabic leg mehndi uses an Arabic diagonal as the frame and tucks small Indian elements into it: dots, paisleys and fine borders. The background stays open. A thin anklet band and light toe detailing complete it. The bold Arabic outlines are what show up from a distance, so I draw those first and add the finer Indian work last, once I can see how much room is left.
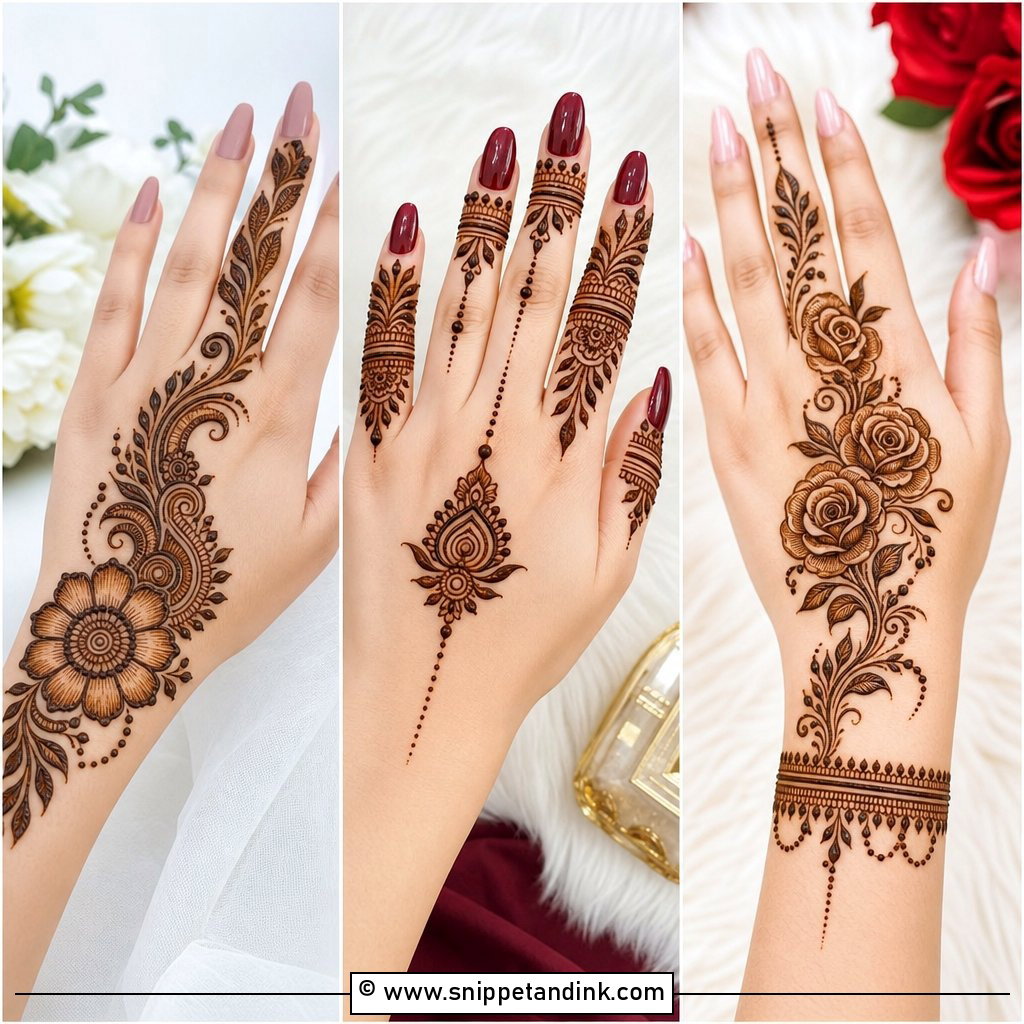
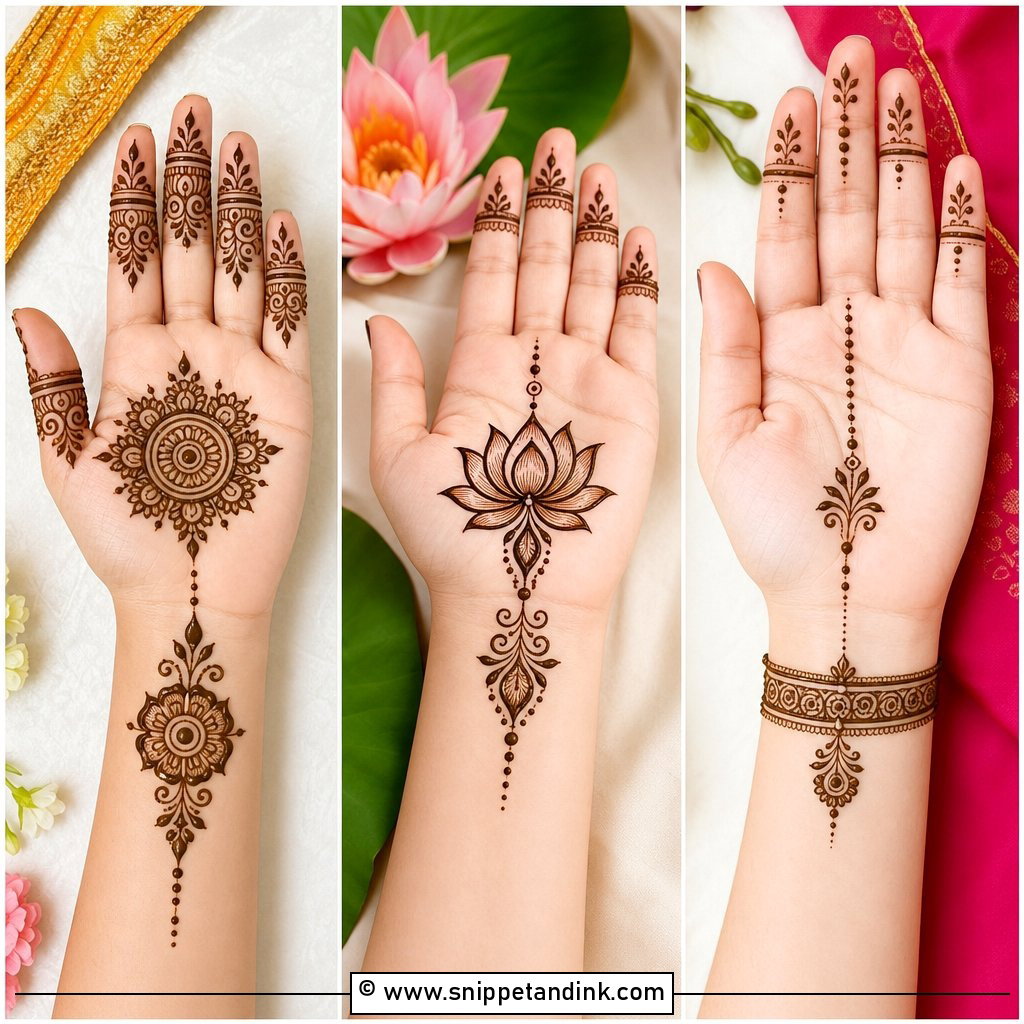
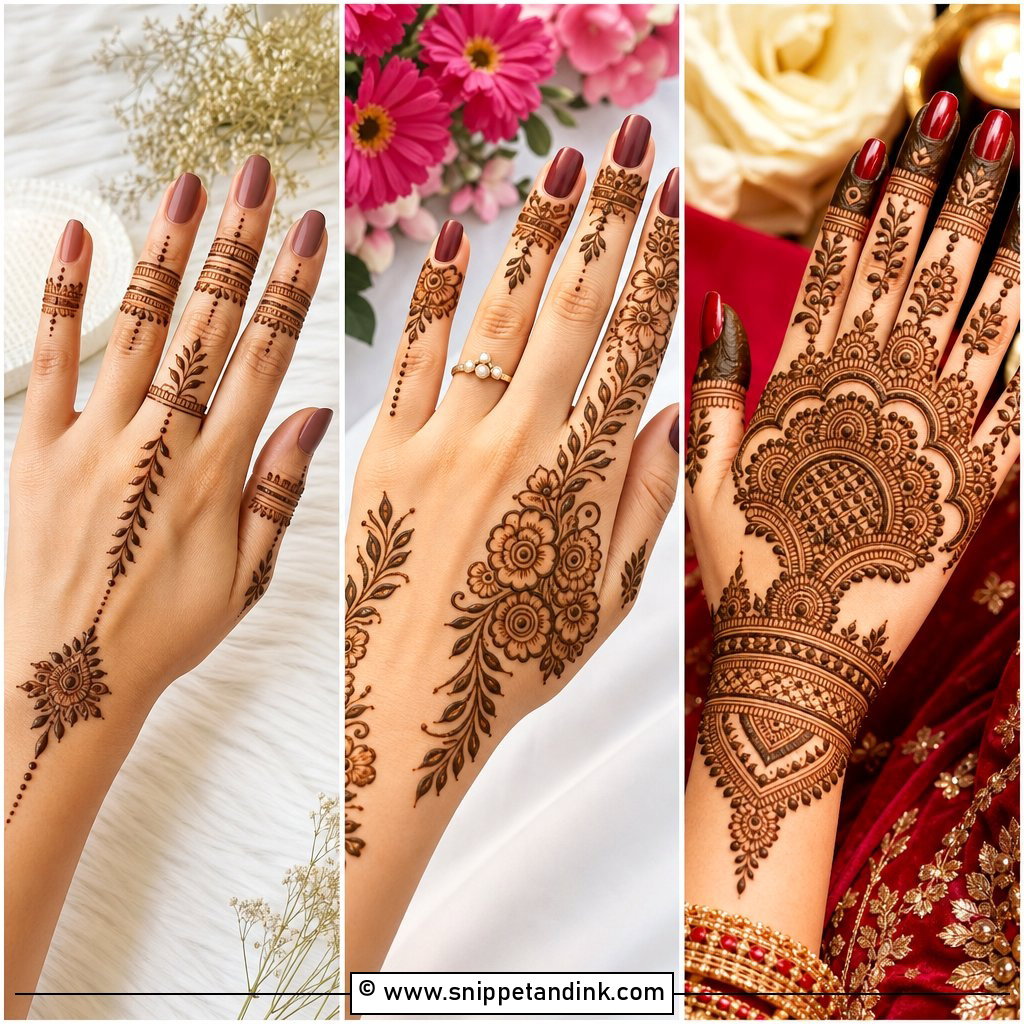
25. Simple Moroccan Leg Mehndi Design
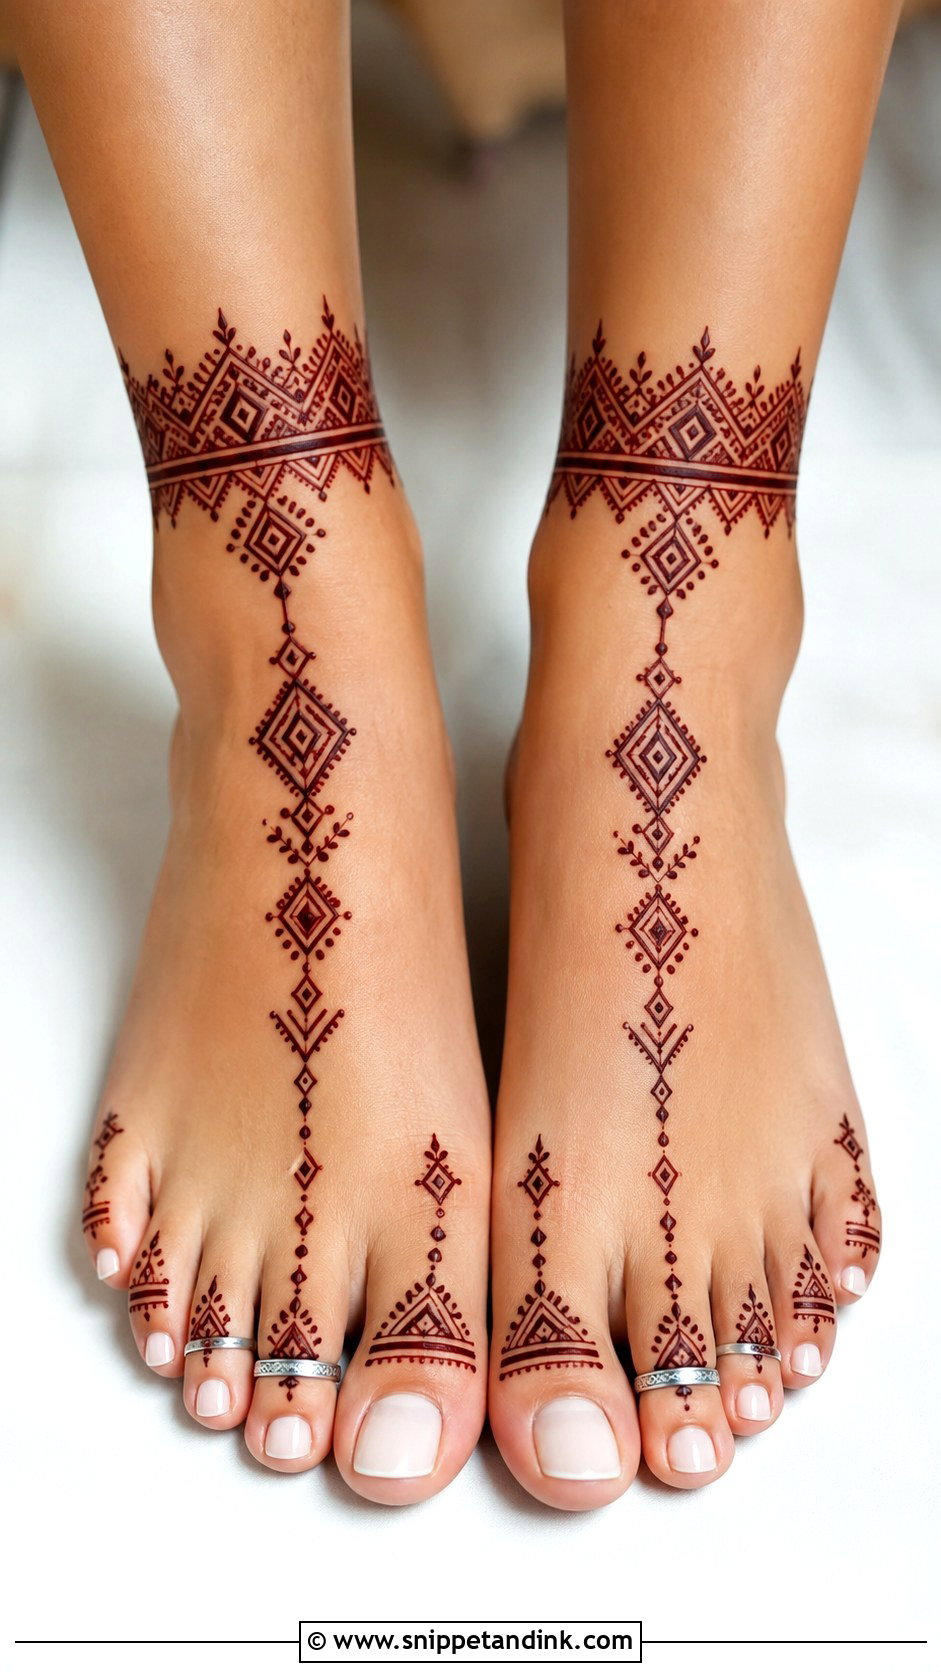
Moroccan-inspired feet trade flowers for diamonds, straight lines, dots, triangles and small grids. I put a band around the ankle and extend a geometric panel down the foot, with line rings or dot clusters on the toes. Straight lines are harder on a curved foot than on a flat palm, so I mark guide dots first. Once the grid is in, the repeated shapes make it quicker than it looks.
26. Simple Gulf Leg Mehndi Design
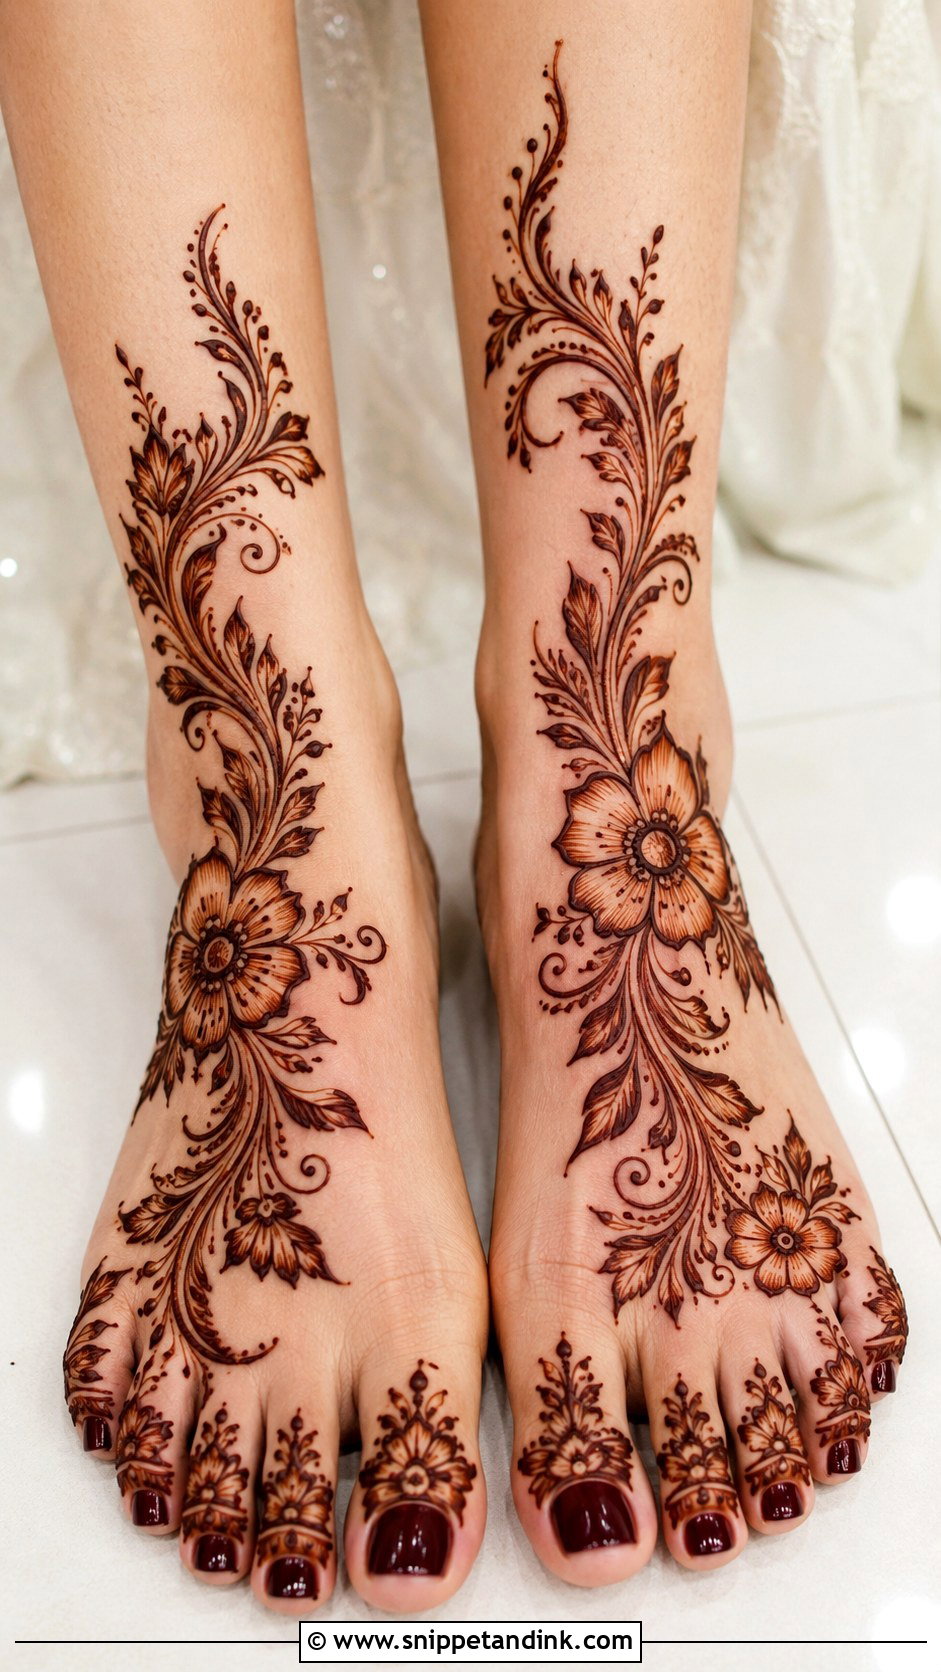
Gulf-style feet use large flowers, curved leaves and sweeping vines from toes to ankle, with thick outlines, soft inner shading and a lot of open skin. Toes get floral caps or line bands. The flowers need space between them; that is what keeps the style bold rather than crowded, and it is also why it goes on quickly. After the stain darkens, the big shapes read from across a room.
27. Simple Jaali Leg Mehndi Design
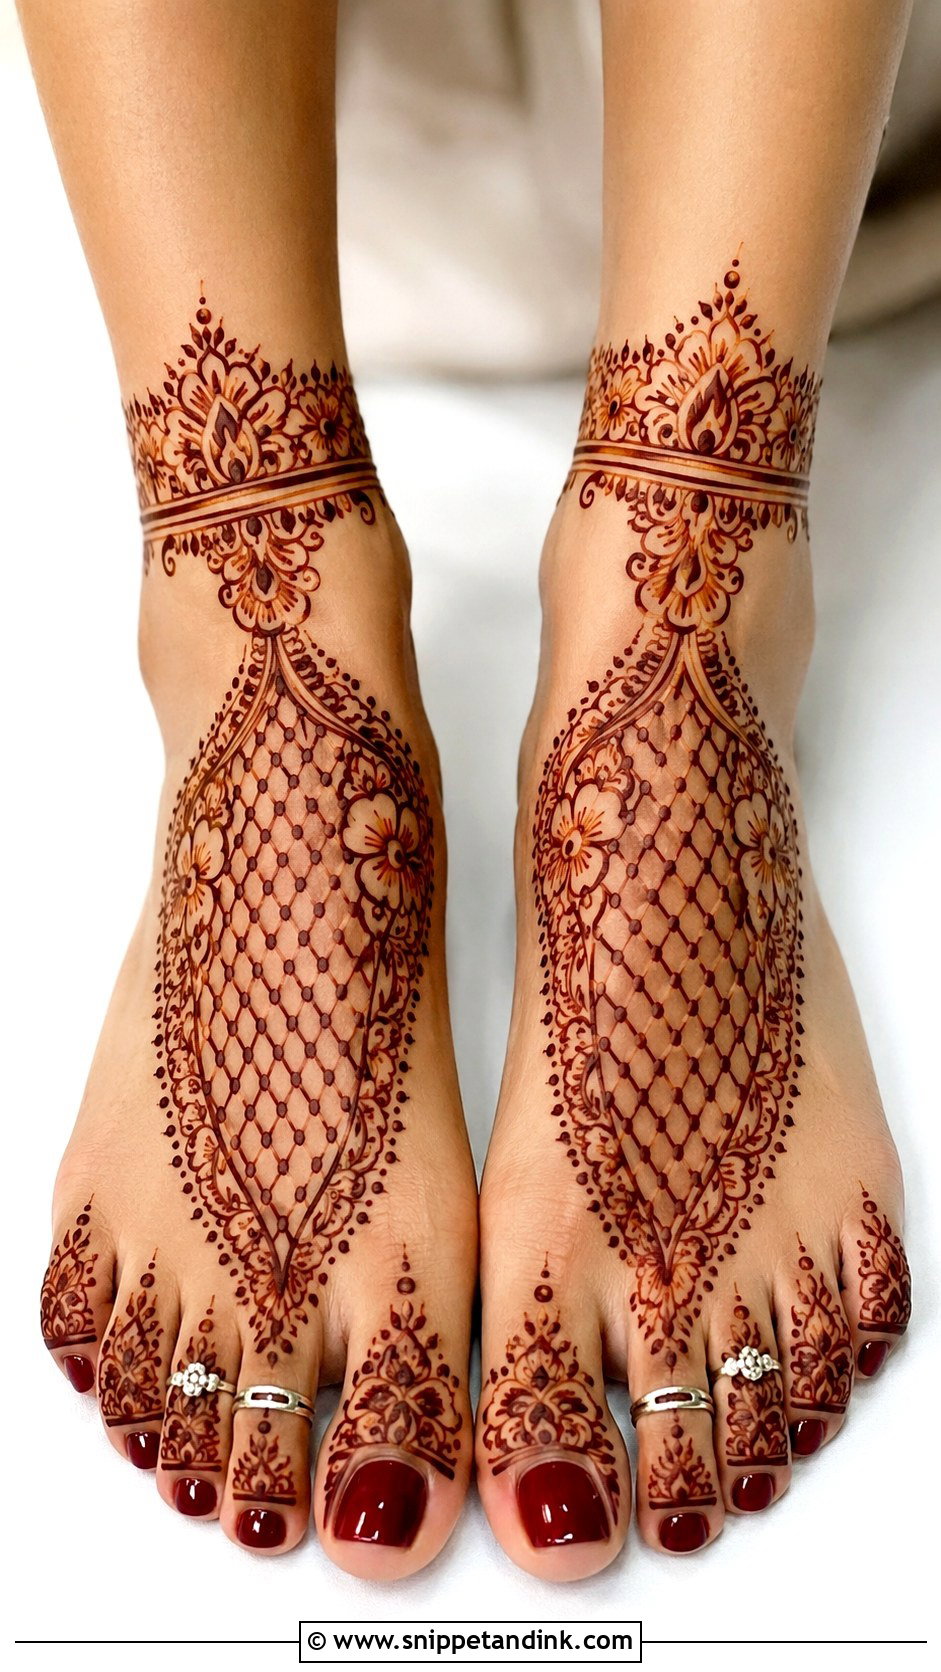
Jaali on the feet works as a small panel, not a full sock. I place a mesh section on the side or center of the foot and frame it with flowers, leaves or a curved border, then add a thin anklet band and simple toe rings. Beginners can draw larger diamonds instead of a tight grid. Feet stain very dark, so fine mesh can close up completely; larger openings stay readable.
28. Simple Leaf Leg Mehndi Design
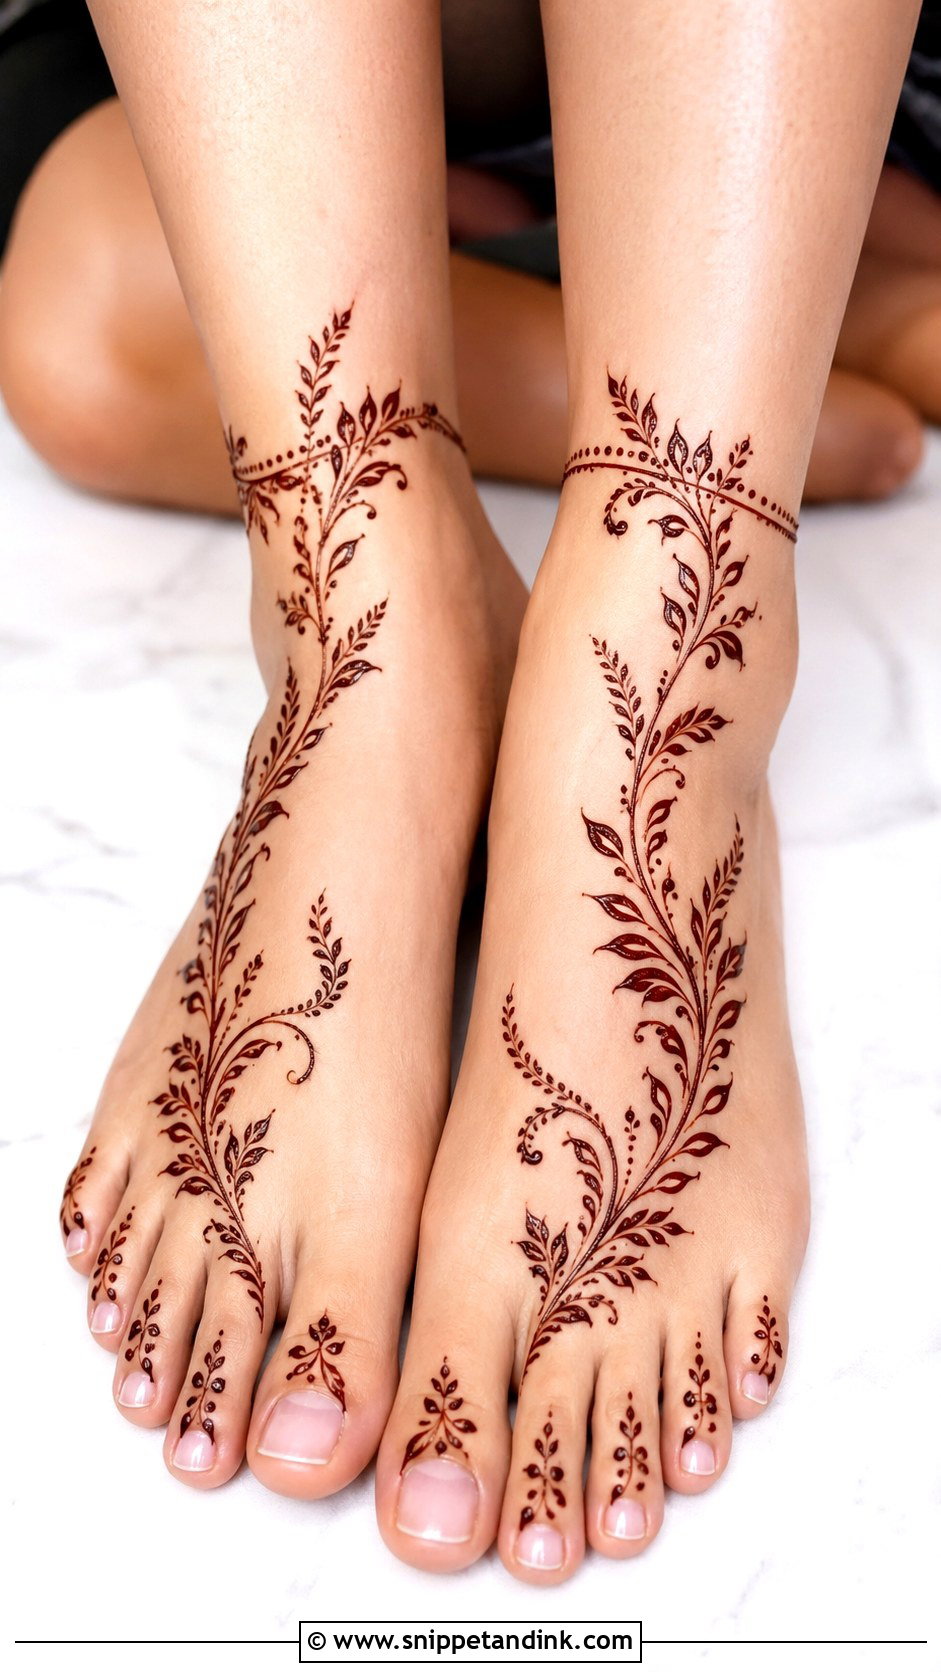
A curved vine from ankle to toes, leaves on both sides and a few dots between them. The ankle gets a thin leafy bracelet or a half-wrap. Leaves don’t need symmetry, which is why I give this one to people trying foot henna for the first time. It’s light enough for a festive morning and doesn’t take long.
29. Simple Rose Leg Mehndi Design
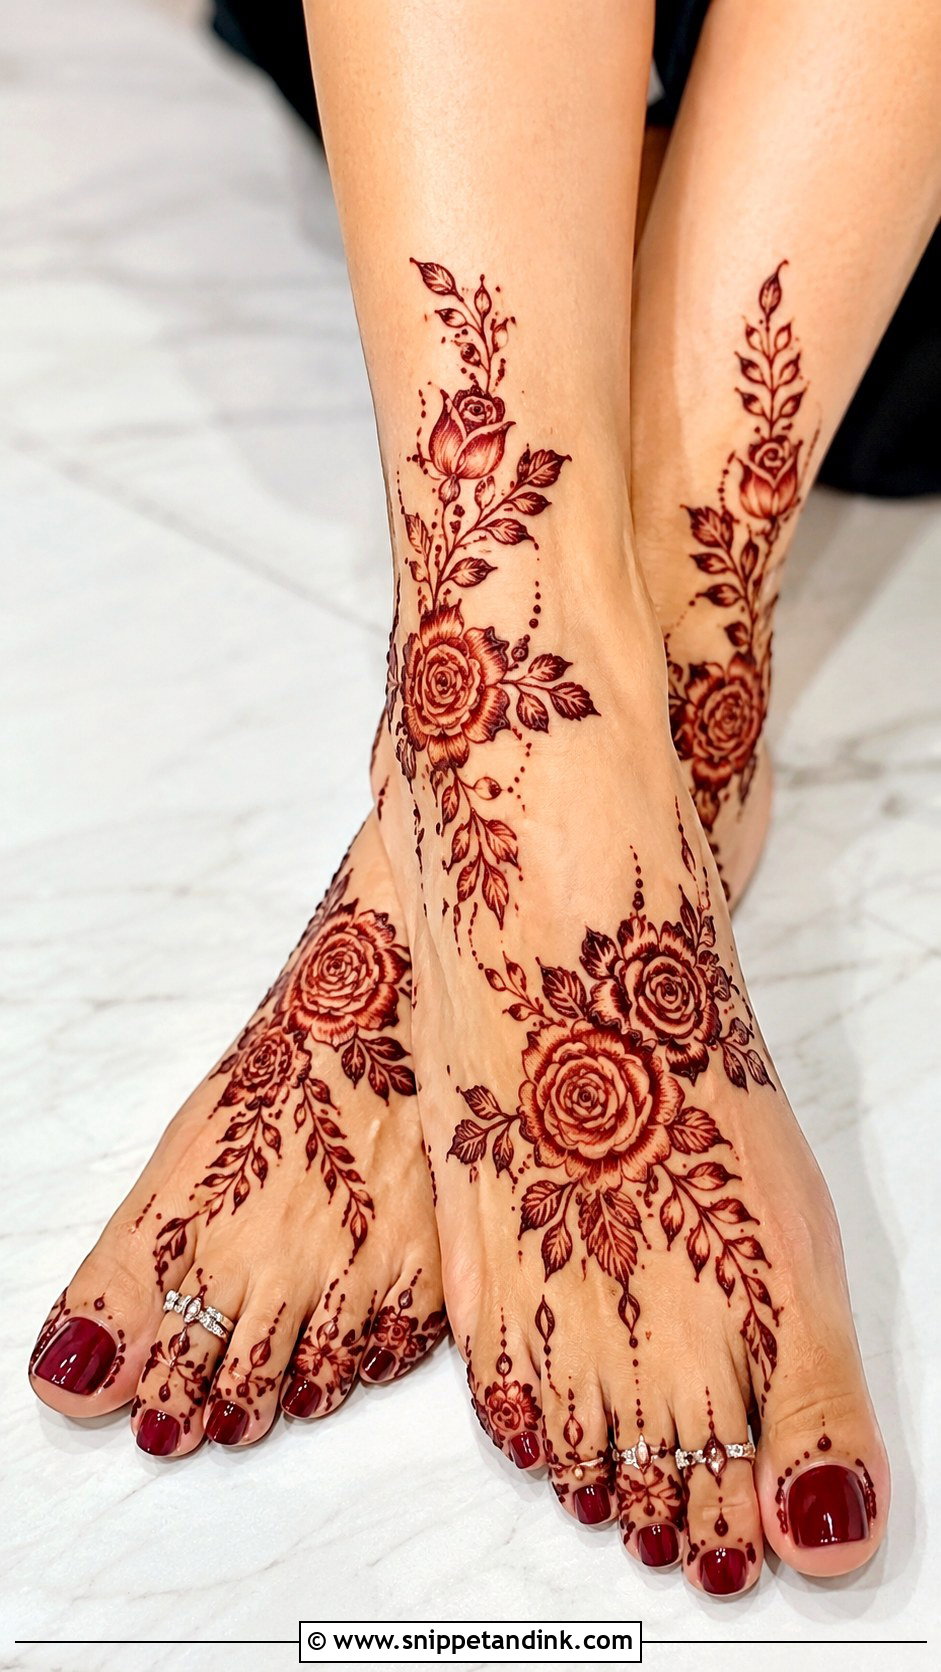
Roses work best bold and uncluttered. One medium rose on the top of the foot, a curved leafy trail up to the ankle and smaller buds near the toes or along the side, with open petals and light shading instead of fill. Thin rings and dots finish the toes. On feet the stain often goes deep maroon, which suits a rose; too much shading inside the petals, though, and it turns into one dark shape.
30. Simple Peacock Leg Mehndi Design
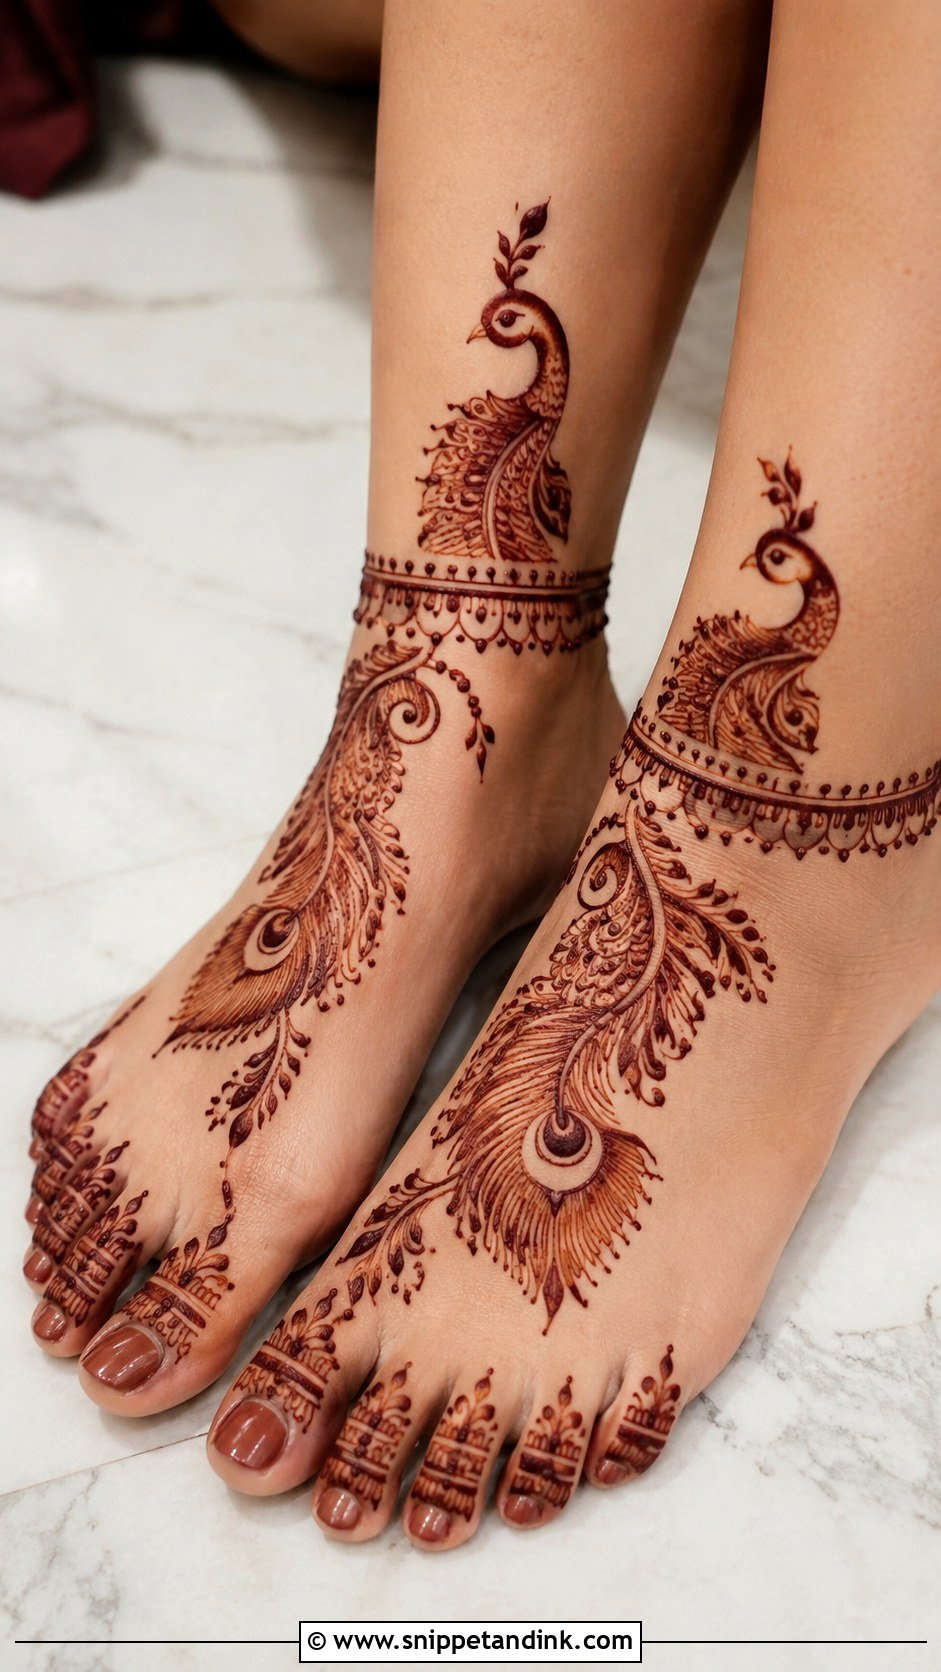
A simple peacock leg mehndi design puts a small peacock on the side of the foot or near the ankle and lets the feathers turn into curved paisley and leaf shapes. I keep the feather work open with dots and short lines. A slim anklet border and simple toe details balance it. The peacock has to be the only focus; if the rest of the foot gets busy, the bird gets lost.
31. Simple Lotus Leg Mehndi Design
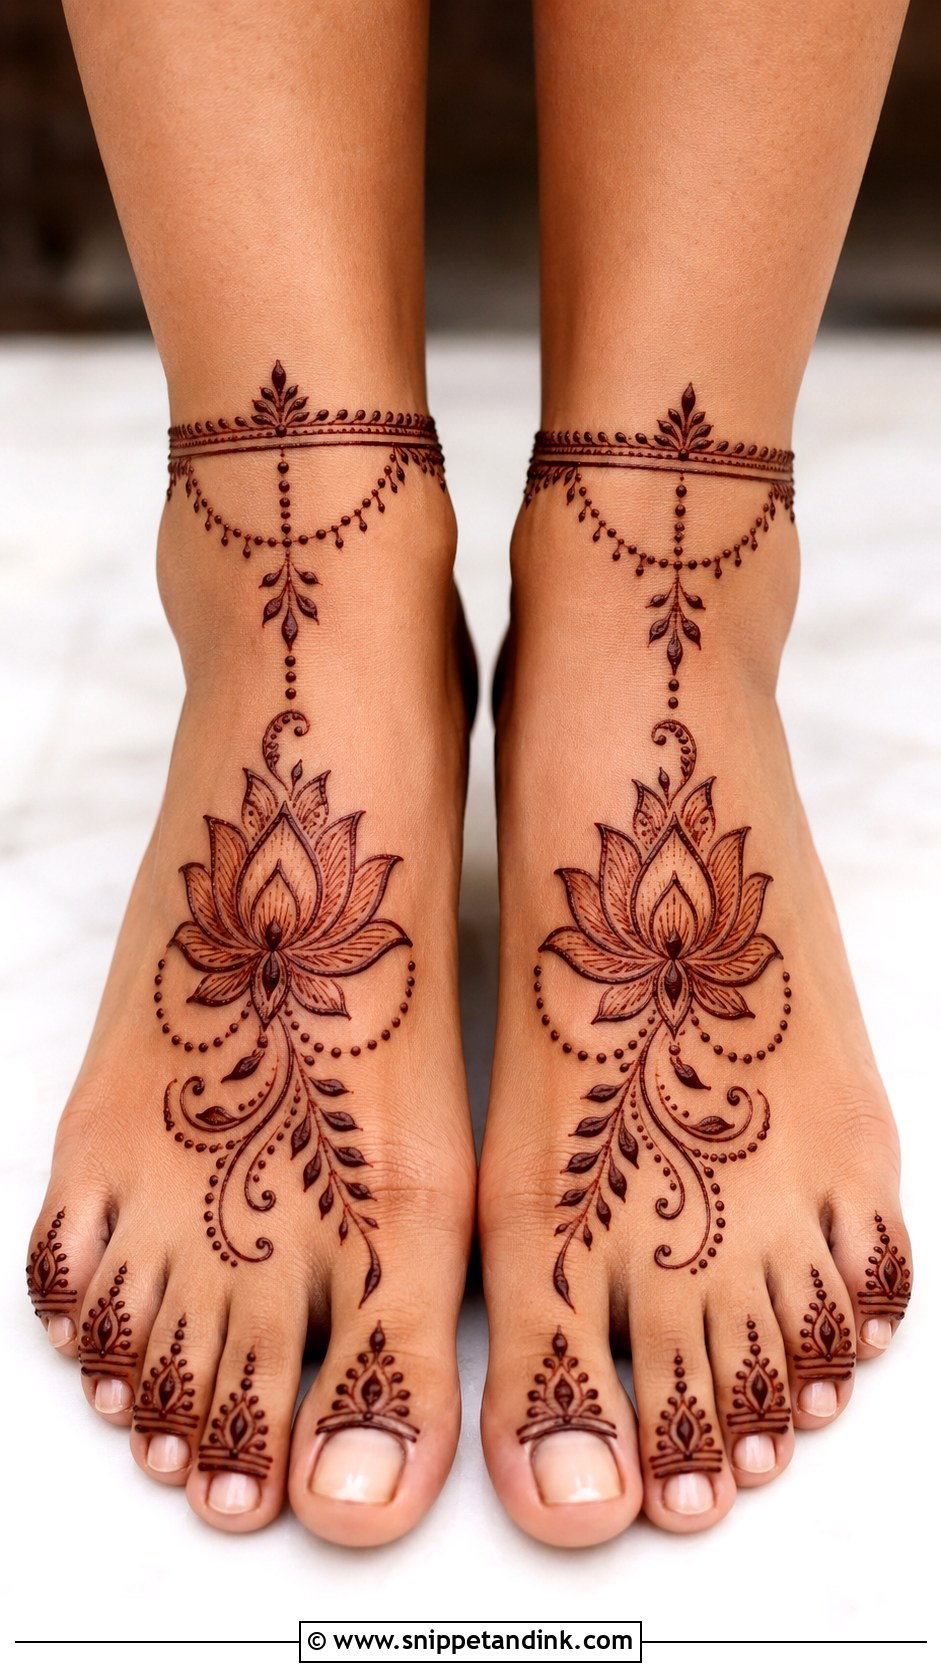
A lotus on the center of the foot or near the ankle, with curved leaves and dotted arcs, a thin ankle band and small dots, rings or petal tips on the toes. Layered petals make it easy to build. I leave clear space around the flower so it stands out, and it suits pujas and festivals as well as weddings.
32. Simple Chain Leg Mehndi Design
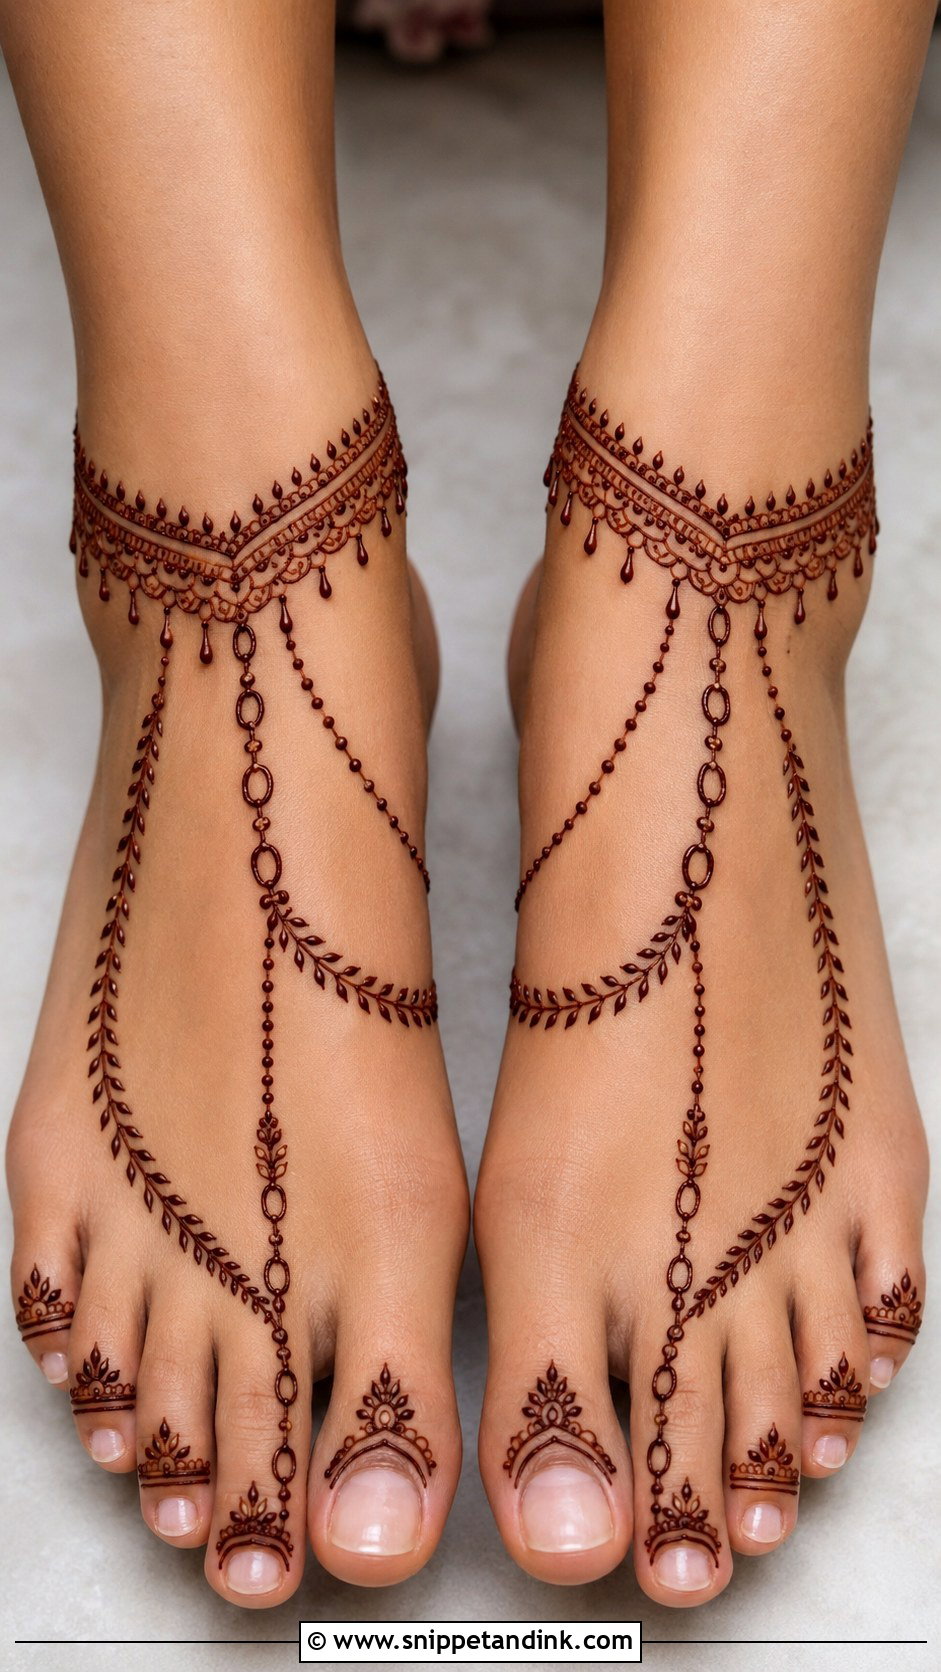
Chain designs imitate foot jewelry. I start with a small motif near the big toe and connect it to an ankle band using dotted chains, curved links or tiny leaf strings, then add a few drops hanging from the band. The rest of the foot stays open. The chain can be straight, diagonal or gently curved, and I usually choose by looking at how long the foot is; a curve suits a short foot better than a straight line.
33. Simple Finger To Leg Mehndi Design
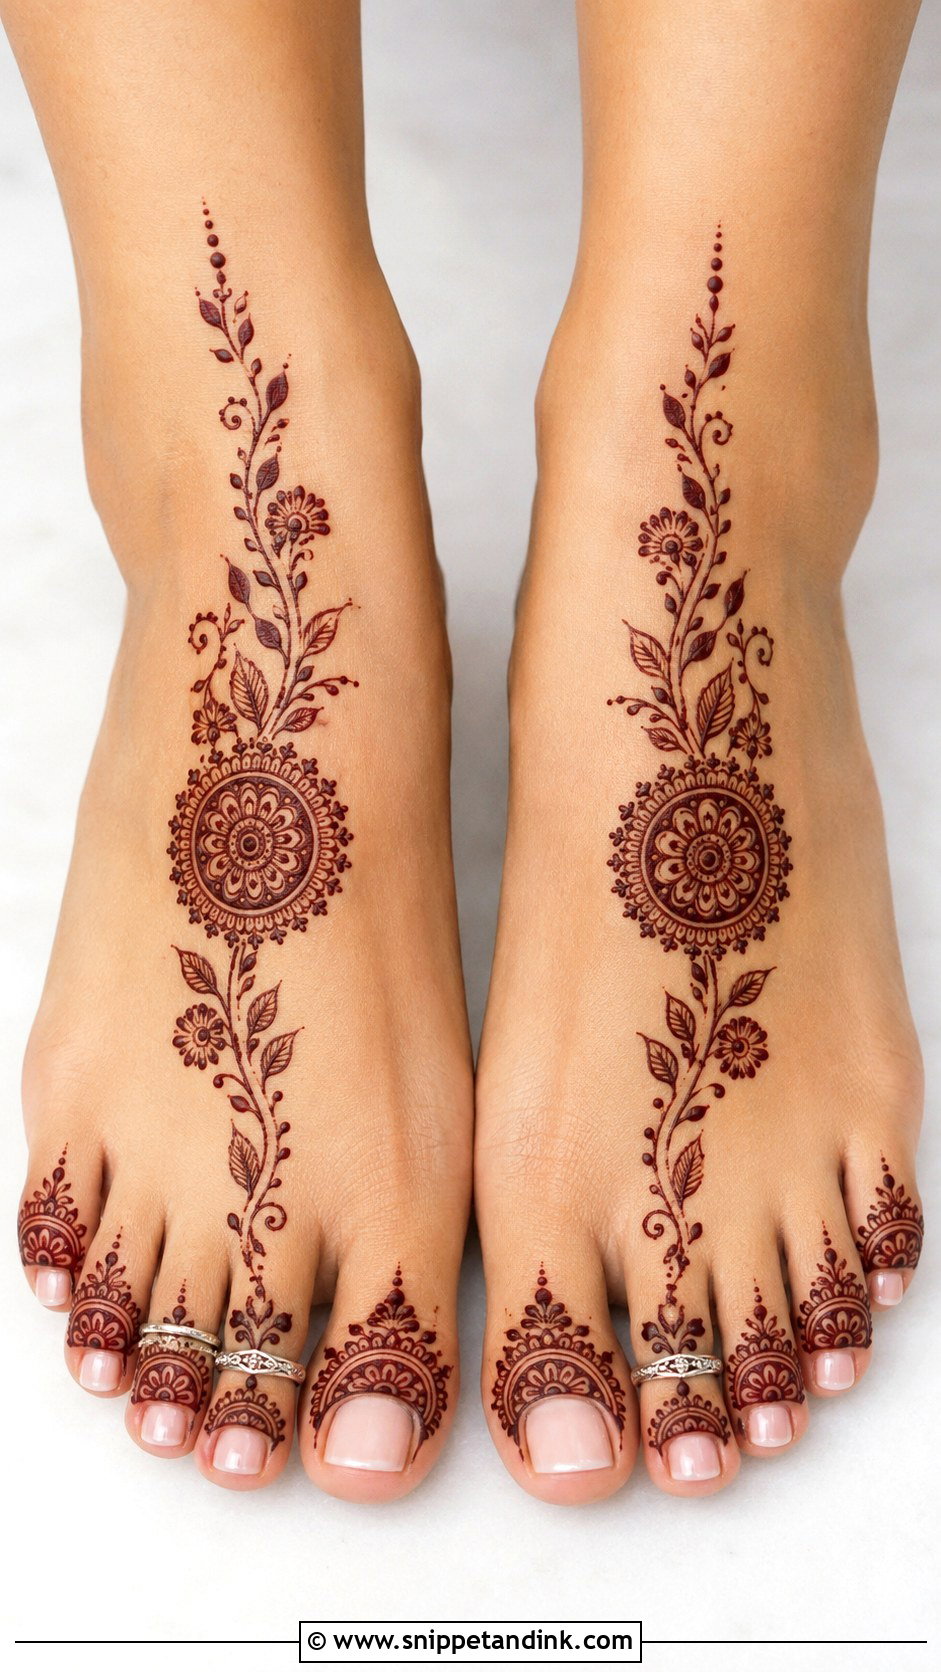
Toe-to-ankle designs follow one clear path, which makes them easy to plan. Small rings, dots and petal caps on the toes connect to a central vine or mandala on the foot, and the line continues up to the ankle in leaves or tiny flowers. Keep it narrow for a minimal look or add side leaves to widen it. Guests and beginners both manage this one well.
34. Simple Lower Leg Mehndi Design
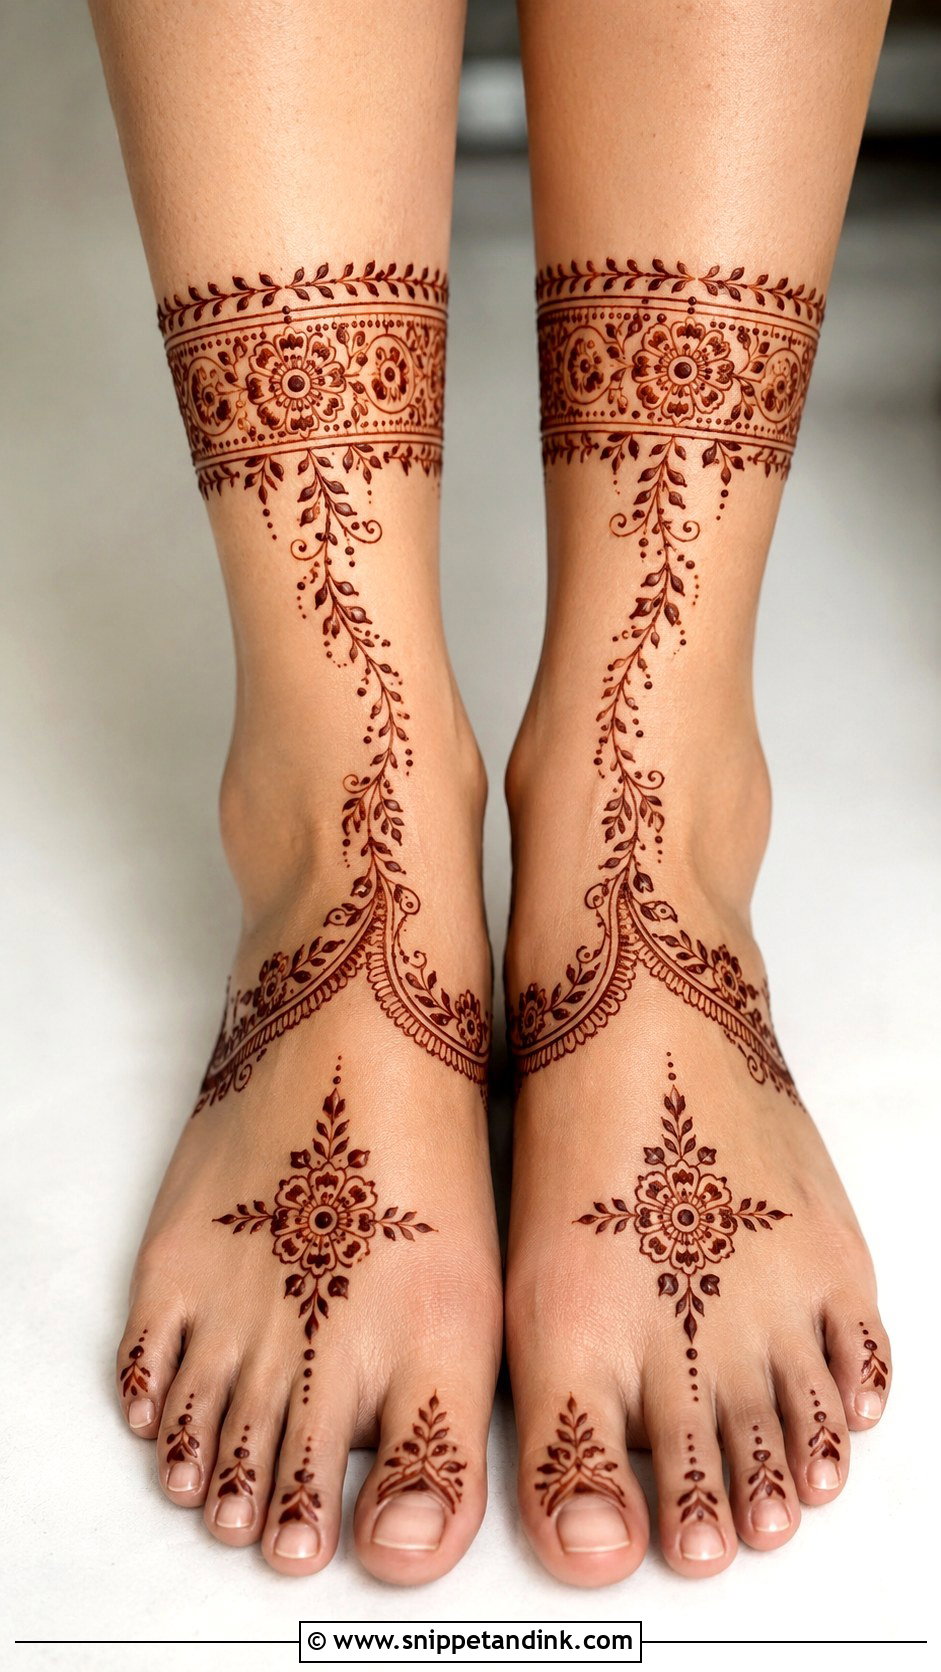
A simple lower leg mehndi design moves the focus above the ankle: a slim floral band around the lower leg with a few vines falling toward the ankle and a small motif on the foot to connect it. Medium-sized motifs keep it visible from a distance, which matters for dance functions. Shin skin is thinner than the sole, so expect a lighter brown there than on the foot itself.
35. Simple Pairi Mehndi Design
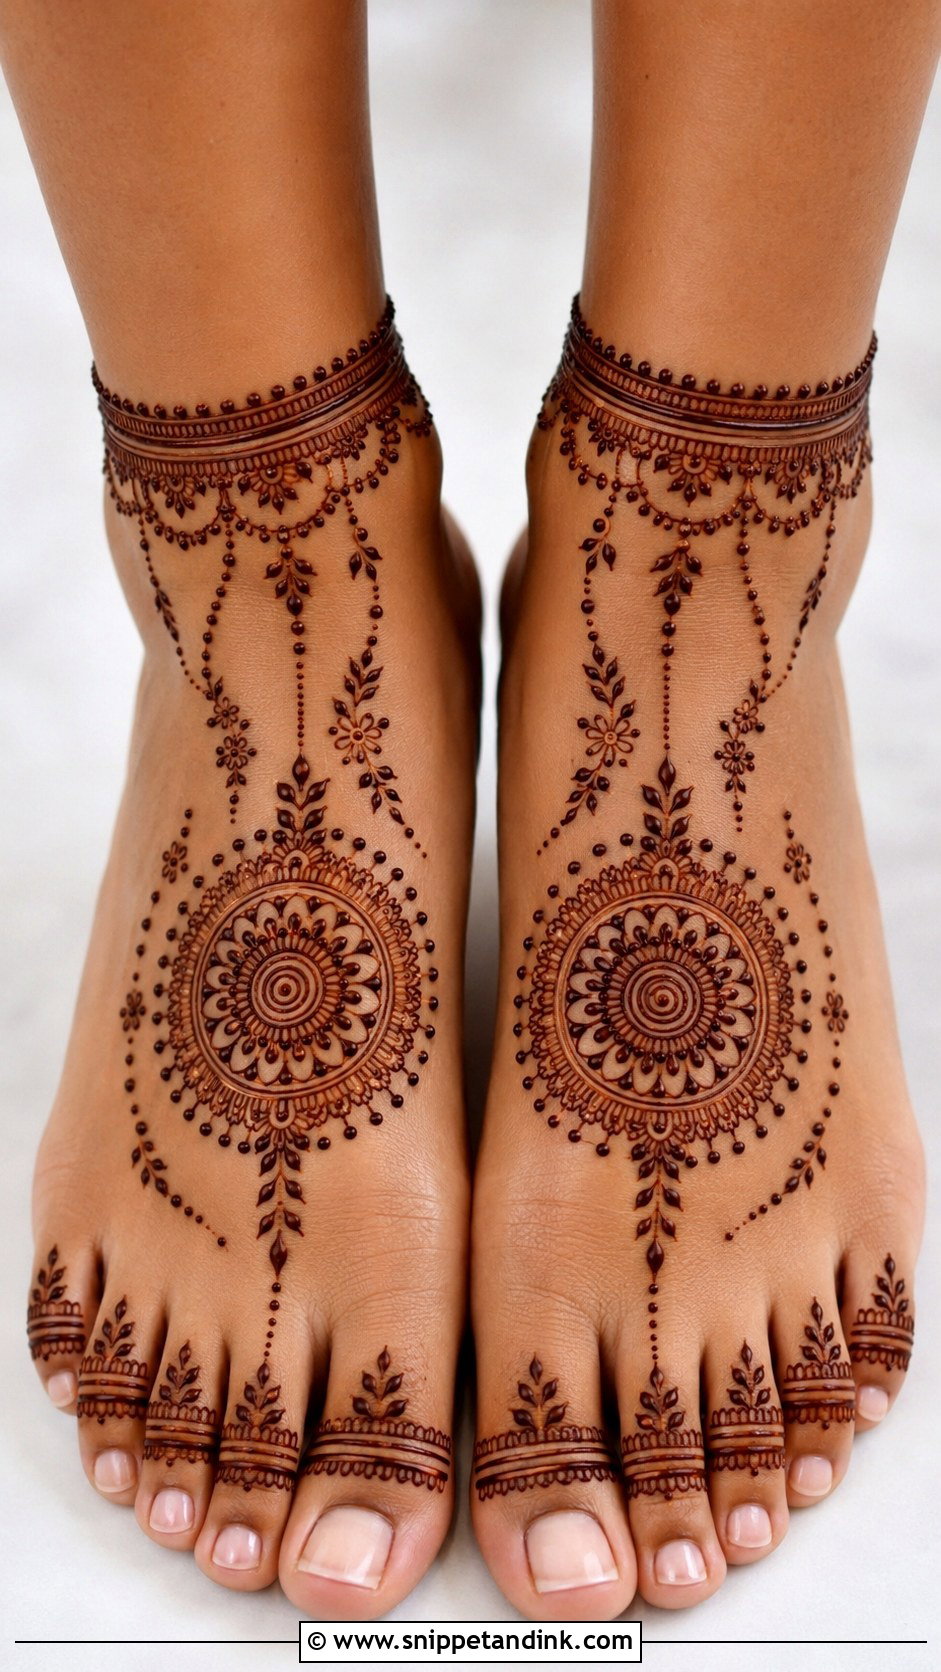
Pairi mehndi decorates both feet as a matched pair: matching mandalas, toe bands, anklet borders and small floral trails, with a round motif on each foot connected to the toes by dotted chains. I finish one element on both feet before moving to the next, rather than completing one foot first. That’s the easiest way to keep spacing even and stop the second foot drifting from the first.
Why Feet Need a Whole Evening, Not Just an Hour
Henna on the feet dries more slowly than on the hands, and it takes longer for the stain to set. You also can’t walk on wet paste. I plan foot appointments for the evening, when the client can sit with their feet up and then sleep with the paste on.
Do the pedicure and waxing first?
Yes, a day or two before. Scrubbing, exfoliating and waxing after henna strip the stained layer of skin and fade it quickly. Freshly waxed skin can also be sensitive, so I don’t like applying the same day either.
How do I keep the paste on overnight?
Once it is dry to the touch, dab on a little lemon and sugar, let that dry, then wrap each foot loosely in tissue and pull on old cotton socks. Lie on your back with a towel under your feet. Some paste will flake in the bed; that’s normal.
Why are my feet still orange in the morning?
Every henna stain starts orange. Scrape the paste off, avoid water for as long as you reasonably can, and keep your feet warm. Over the next day or two the color deepens to brown or maroon, and on the soles it often goes darker than anywhere else on the body. Rub in a little balm before each shower for the first few days to slow fading.
Start Small at the Ankle, Then Build Toward the Toes
Leg and foot mehndi gives you a finished, festive look without heavy coverage or expert skill. Arabic trails, anklets, mandalas, jaali panels, paisleys and toe-only designs all have a place, and the easiest ones lean on open space, bold outlines, dots and clean vines. If you’re new to it, start with one motif on the top of the foot and a soft ankle border, then add more once you know how long you can sit still. With a little practice, a basic foot design can look as polished as anything on the hands.
You'll Like These Ideas:


Leave a Reply