
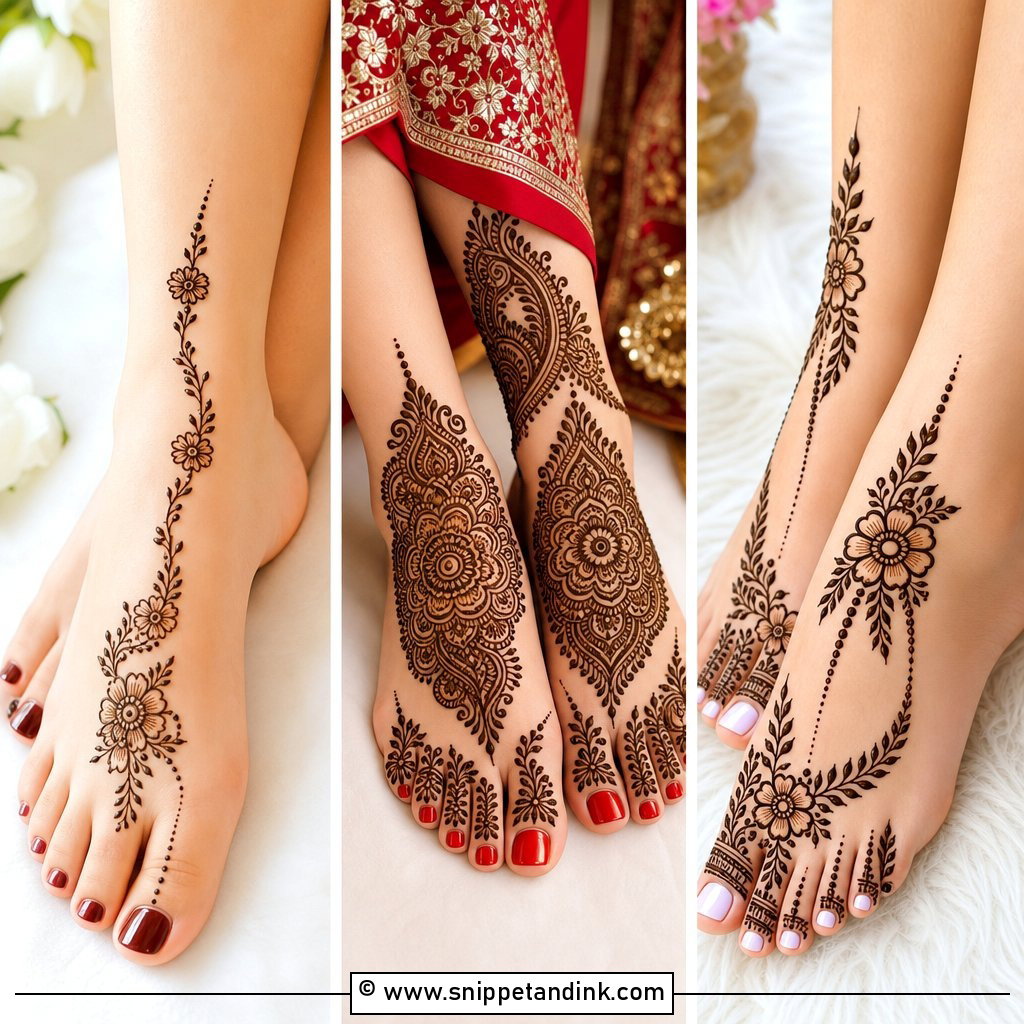
Feet are my favorite part of a bridal booking and the part brides think about last. Foot mehndi designs sit on skin that stains deeper than most of the hand, they’re seen every time you step out of the mandap or lift your lehenga, and they have to be planned around sandals, anklets and toe rings. Below are 35 layouts I draw for weddings, Eid, Karwa Chauth, sangeet nights and smaller family functions, from heavy Rajasthani coverage to a single Arabic trail. For each one I’ve noted what works on a real foot, where the stain lands darkest and what tends to go wrong.
Plan the Pattern Around Your Sandals and Payal
Before I draw anything on a foot, I ask to see the footwear and jewelry. A sandal strap that crosses the top of the foot will sit exactly where many central motifs go, and a heavy payal can hide a delicate ankle band. If the shoes are closed juttis, most of the design will only show when you sit, so I put the effort into the toes and ankle.
- Strappy sandals: plan the motifs between the straps, and keep a clear line where the strap lies so the design doesn’t look cut in half.
- Toe rings (bichiya): leave the second toe a little lighter, since the ring covers the base of it.
- Heavy anklets: draw the henna band slightly above or below where the payal will rest, not under it.
- Lehenga length: if the hem touches the floor, the lower leg is rarely seen and you can save time there.
Feet also need a plan for sitting still. Foot mehndi takes longer to dry than hand work because the paste is often heavier and you can’t wave your feet in the air. I usually do feet first or on a separate sitting, so the bride isn’t trapped with both hands and both feet wet at once.
1. Simple Foot Mehndi Design
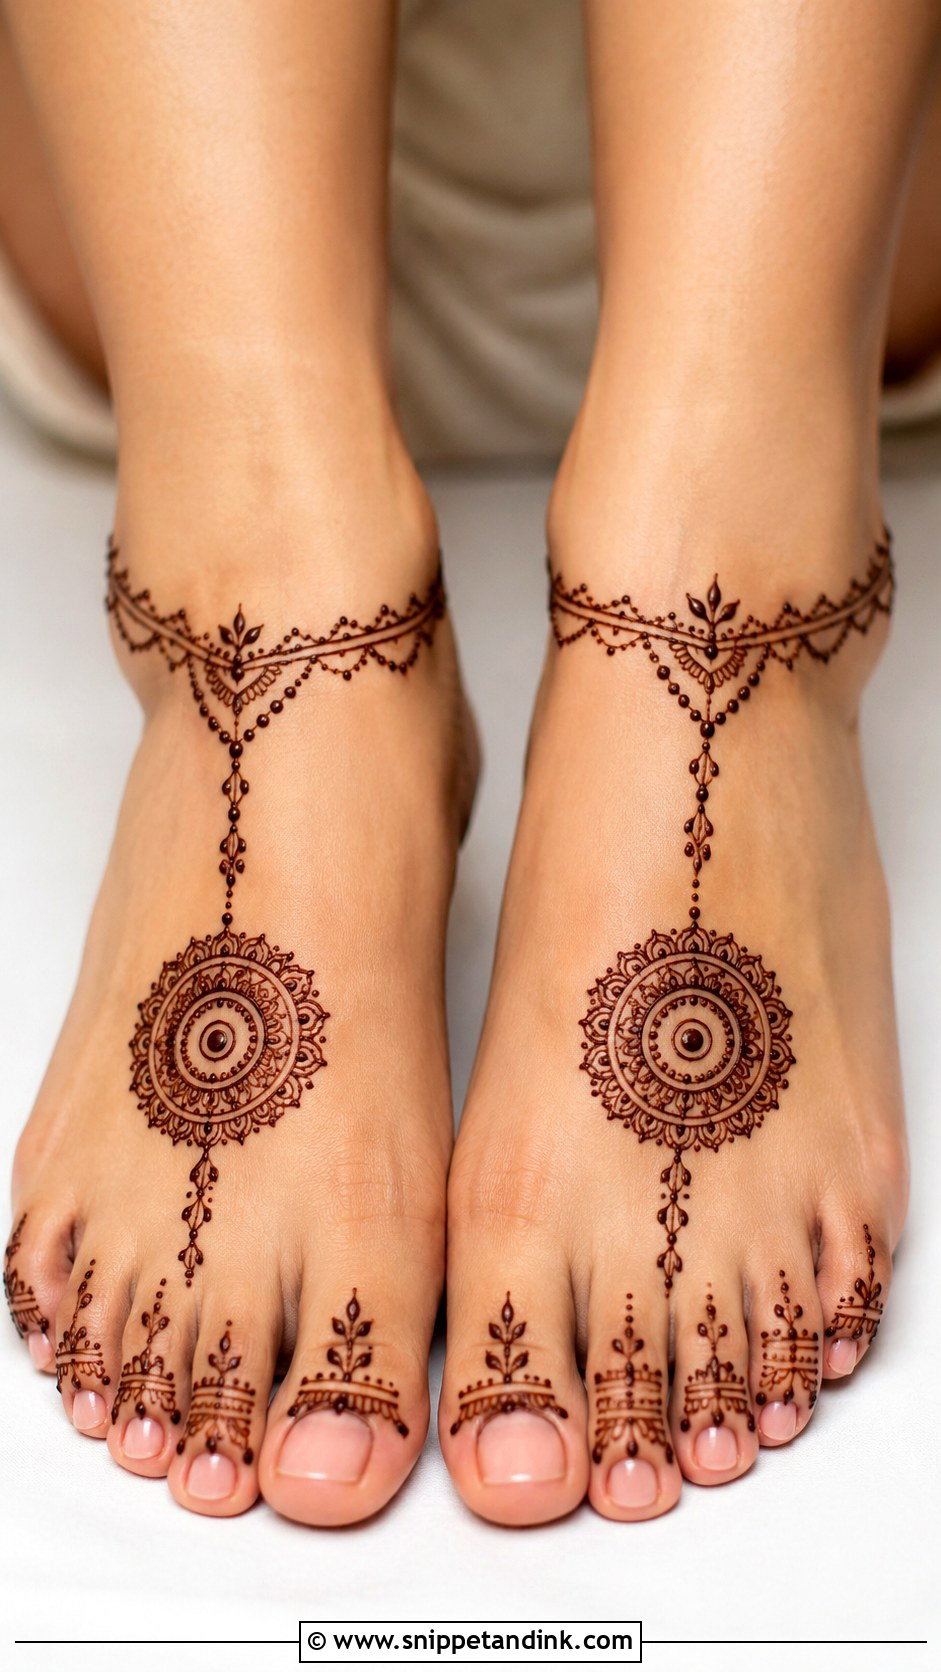
A simple design usually starts with a small flower or mandala at the center of the foot, a few leaves and dots toward the toes, and an open ankle or a thin band. I suggest it a lot for bridesmaids and for anyone sitting for mehndi in a busy household, because it takes a fraction of the time and you can walk sooner. Open space also helps small feet, where a dense pattern quickly looks cramped. Keep the toe decoration light so the foot reads as one piece.
2. Bridal Foot Mehndi Design
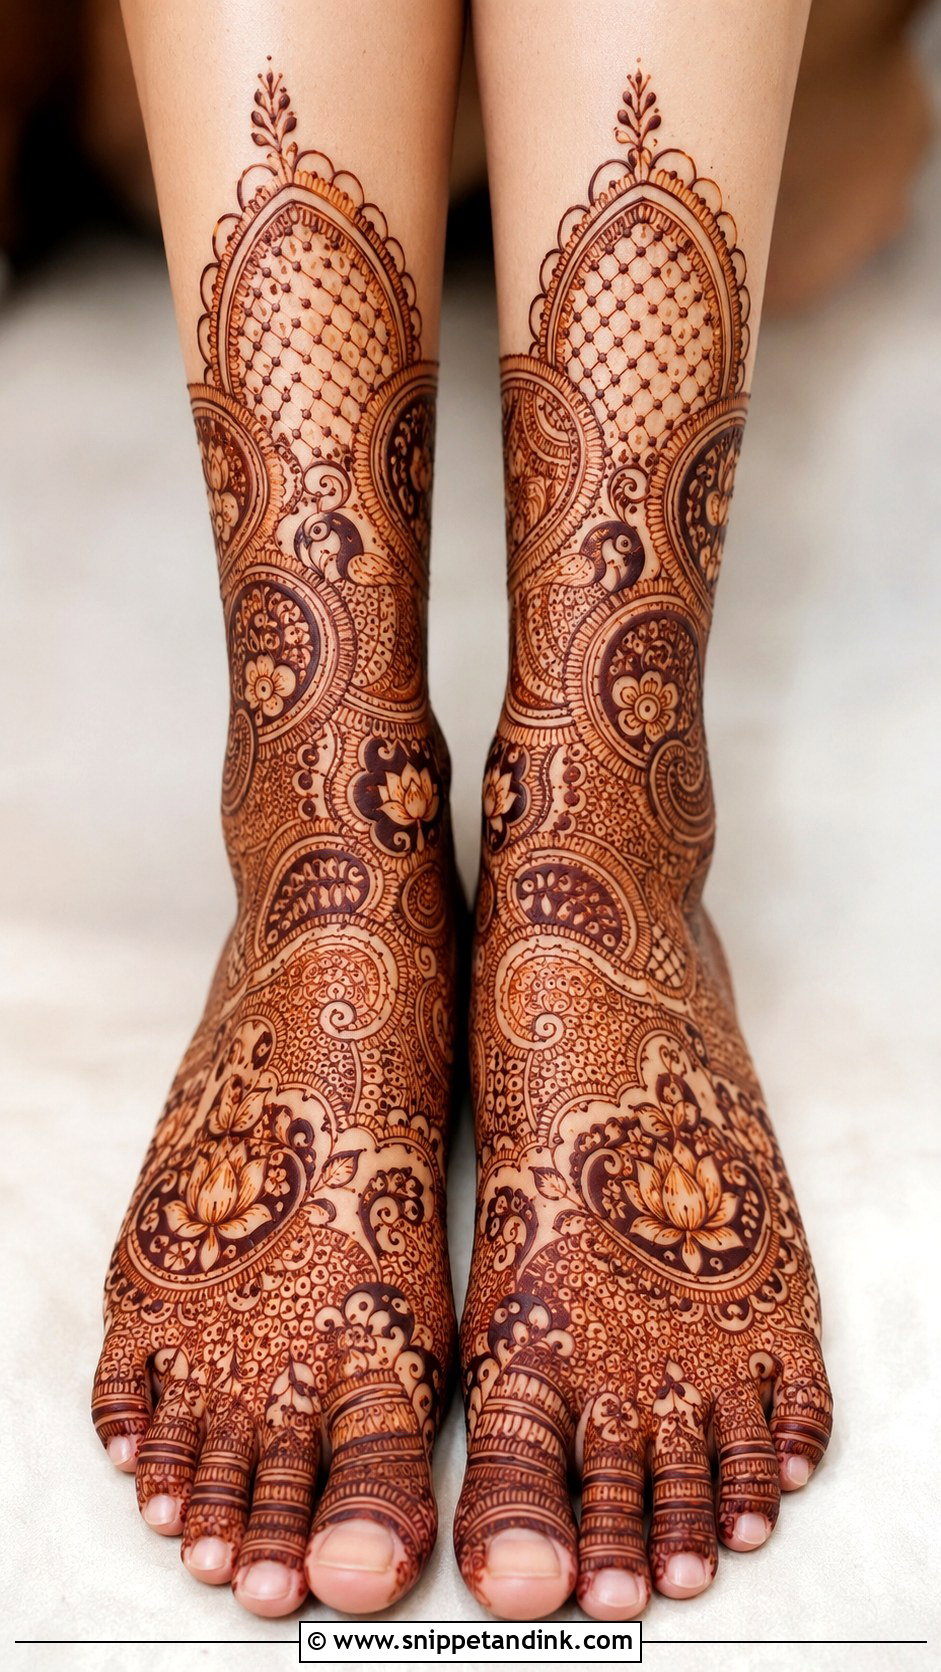
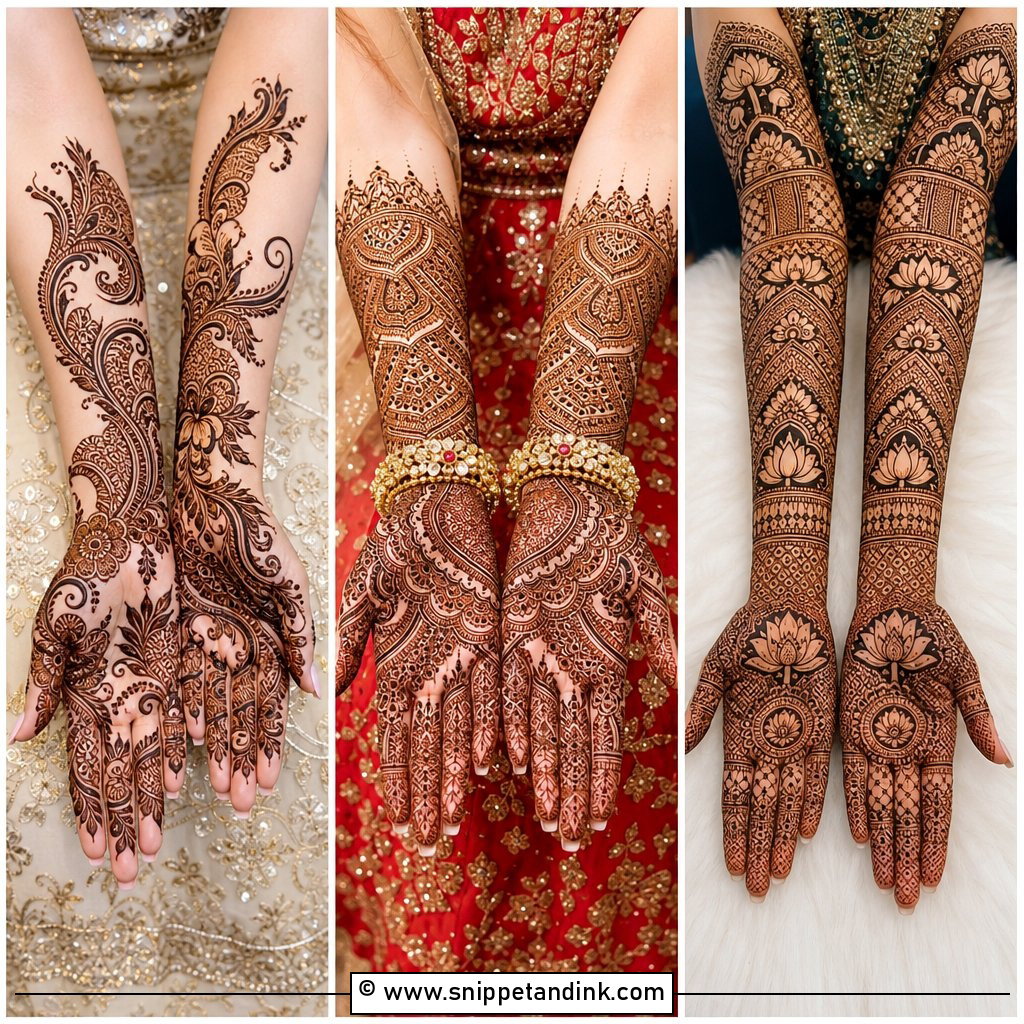
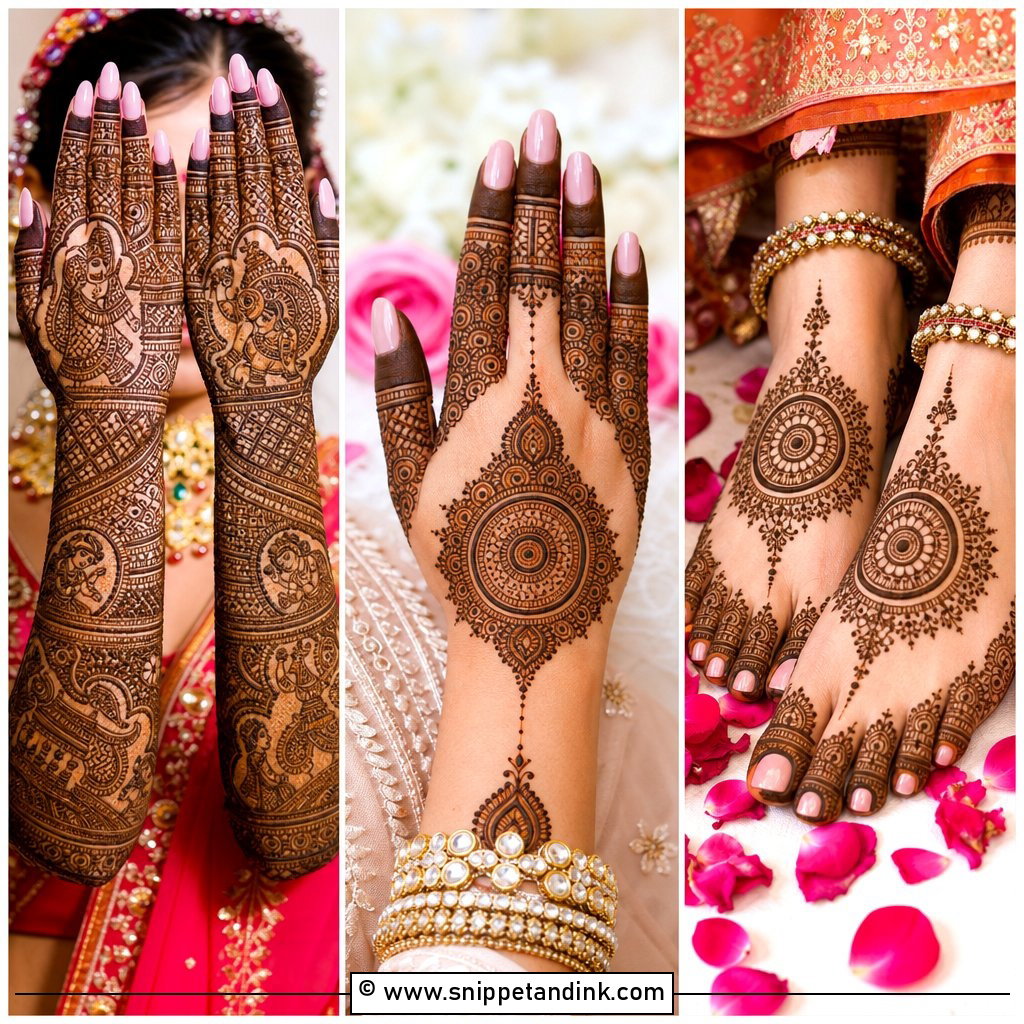
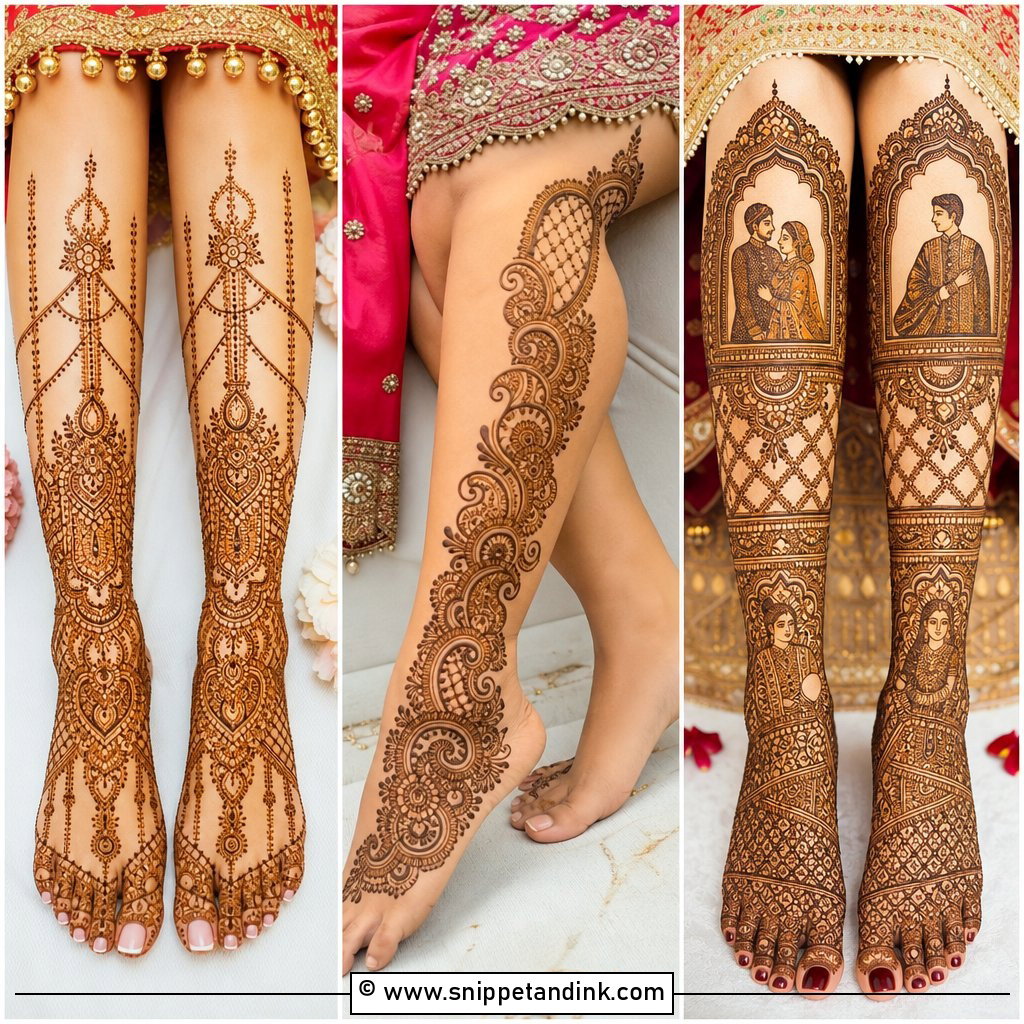
Full bridal coverage runs over the toes, the top and sides of the foot, the ankle and often up the shin. Paisleys, peacocks, lotus flowers, leafy borders and jaali fill it. The thing I spend most time on is symmetry: when the bride sits with her feet together for photos, any mismatch between left and right is obvious, so I sketch guide lines on both feet before filling either one. Tiny breathing gaps between motifs matter too. Without them the stain merges into a dark blur by the second day. Initials or a small story element can be hidden inside, if the bride wants a detail for the groom to look for.
3. Arabic Foot Mehndi Design
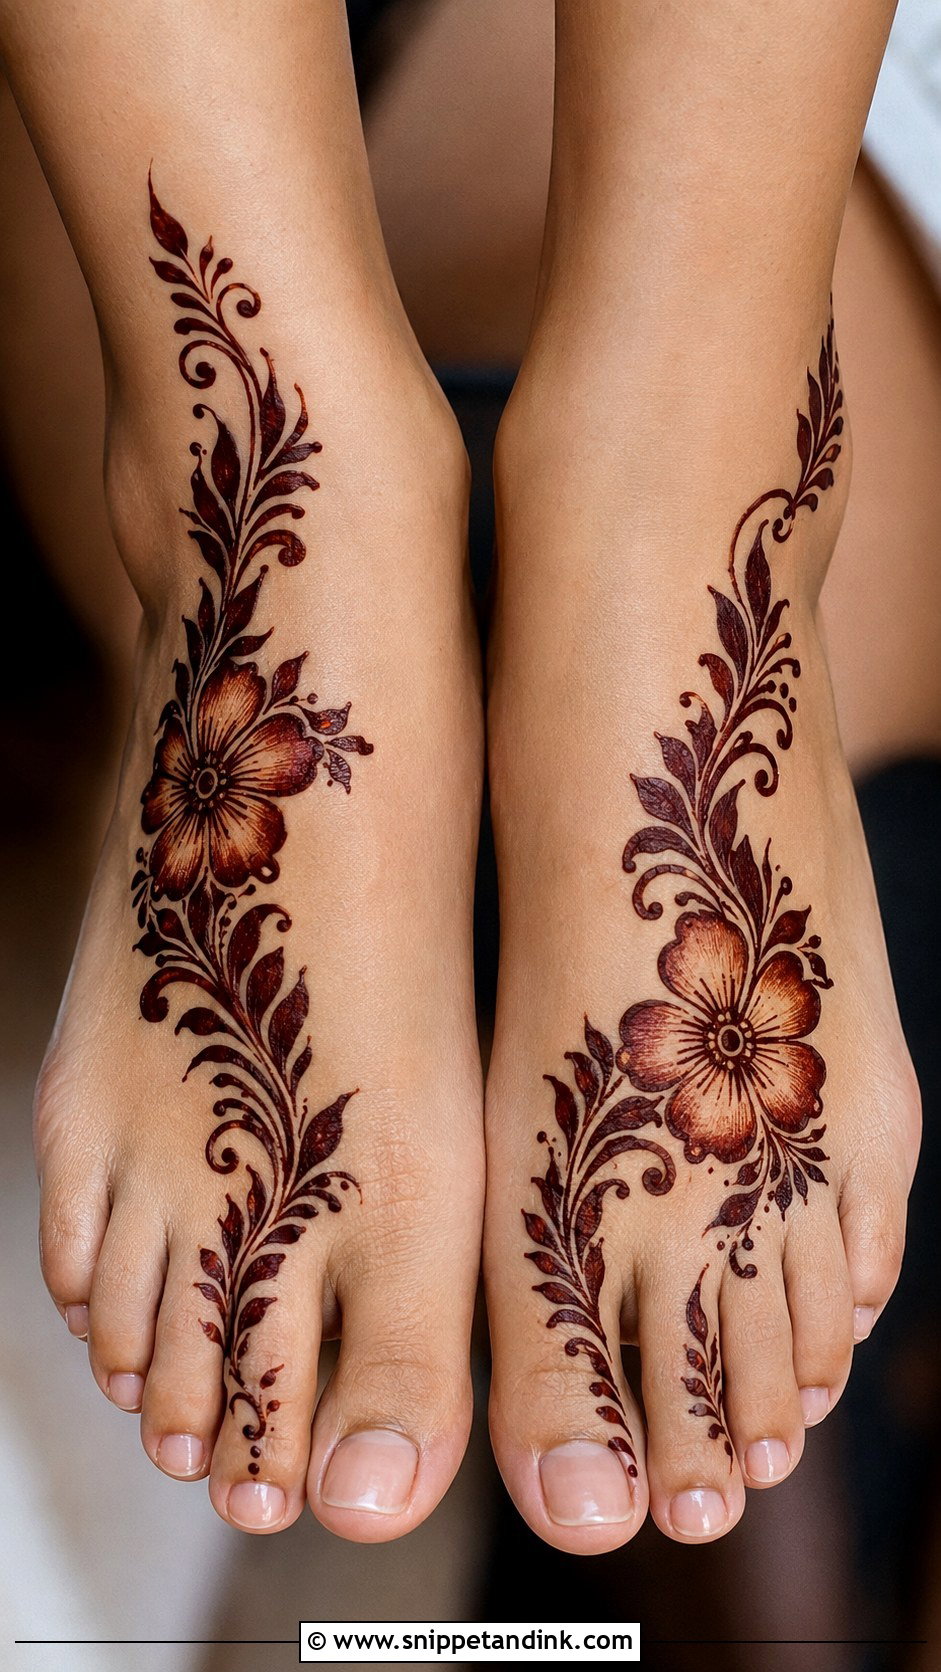
Arabic work runs diagonally from the toes toward the ankle in a trail of large flowers, leaves and shaded petals, leaving plenty of bare skin. The lines are thicker than Indian work, so they hold more paste and stain dark and clean. It’s quick, which is why I reach for it at Eid and engagement parties. The one thing to protect is the empty space: a stray smudge in an open area is far more visible than in a filled design, so I clean slips immediately with a cotton bud before the paste sets.
4. Indian Foot Mehndi Design
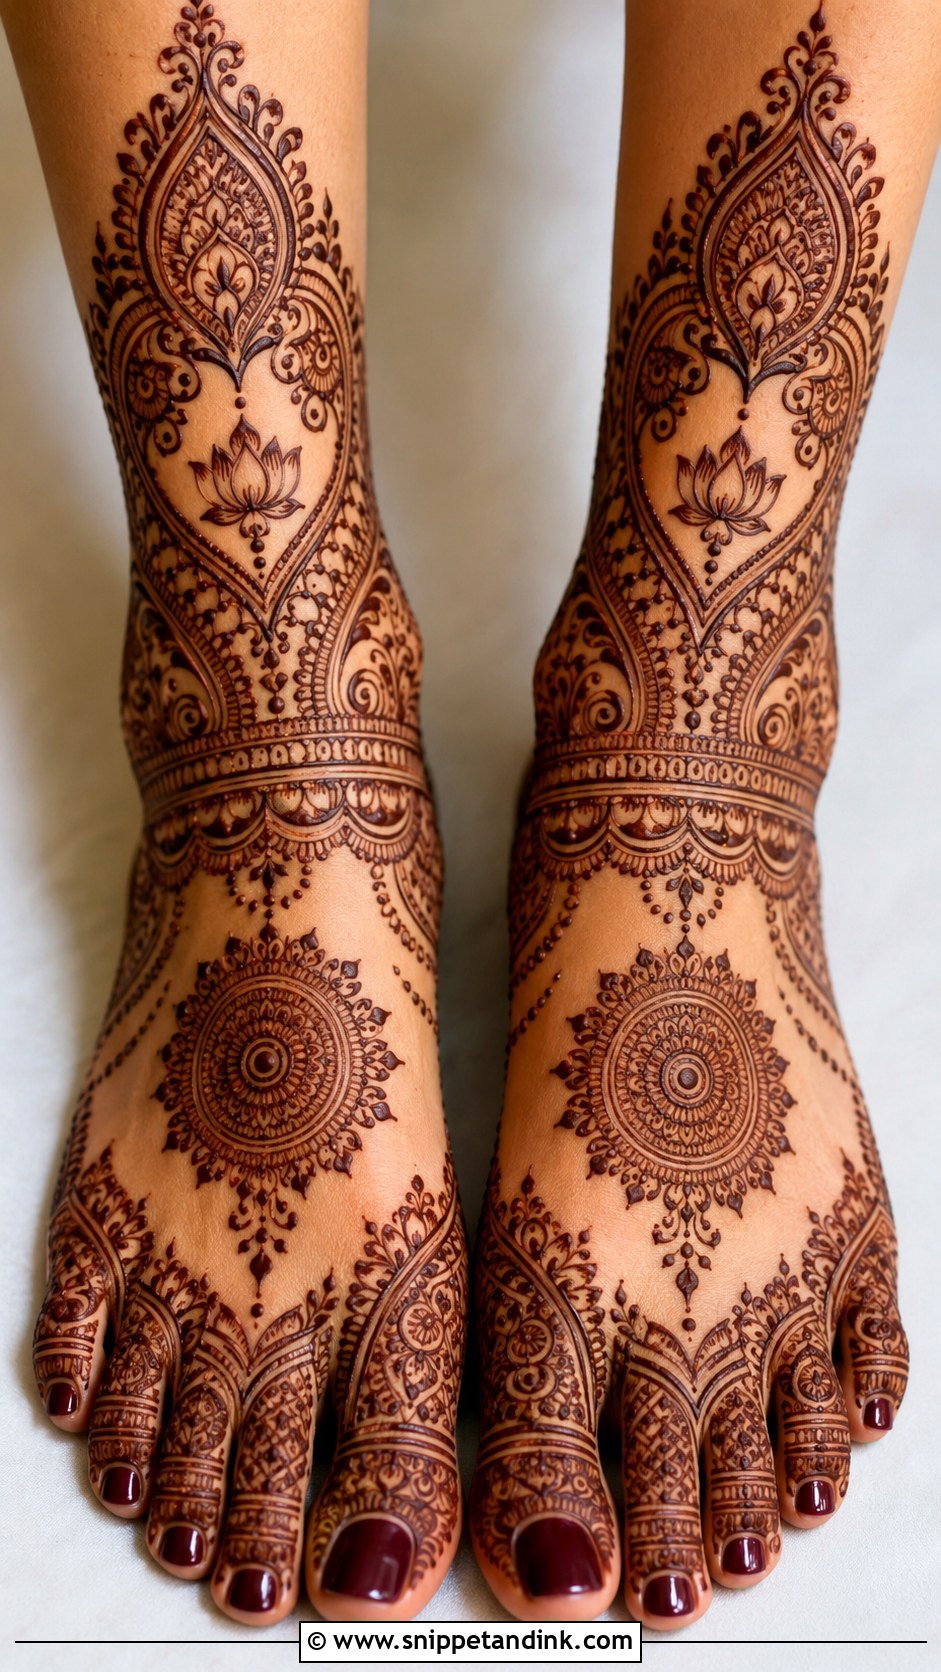
Indian foot work packs small motifs close together: paisleys, lotus shapes, mandalas, dots, scalloped borders and fine leaf fill. Toes get layered caps or ring bands, and the ankle often carries a border that reads like jewelry. The finer the lines, the more the paste consistency matters. I use a smooth, slightly thinner paste and a fine cone tip here, because thick paste blobs into the gaps and the detail disappears once it stains. Repeating the same motifs on both feet keeps a dense design from looking chaotic.
5. Indo Arabic Foot Mehndi Design
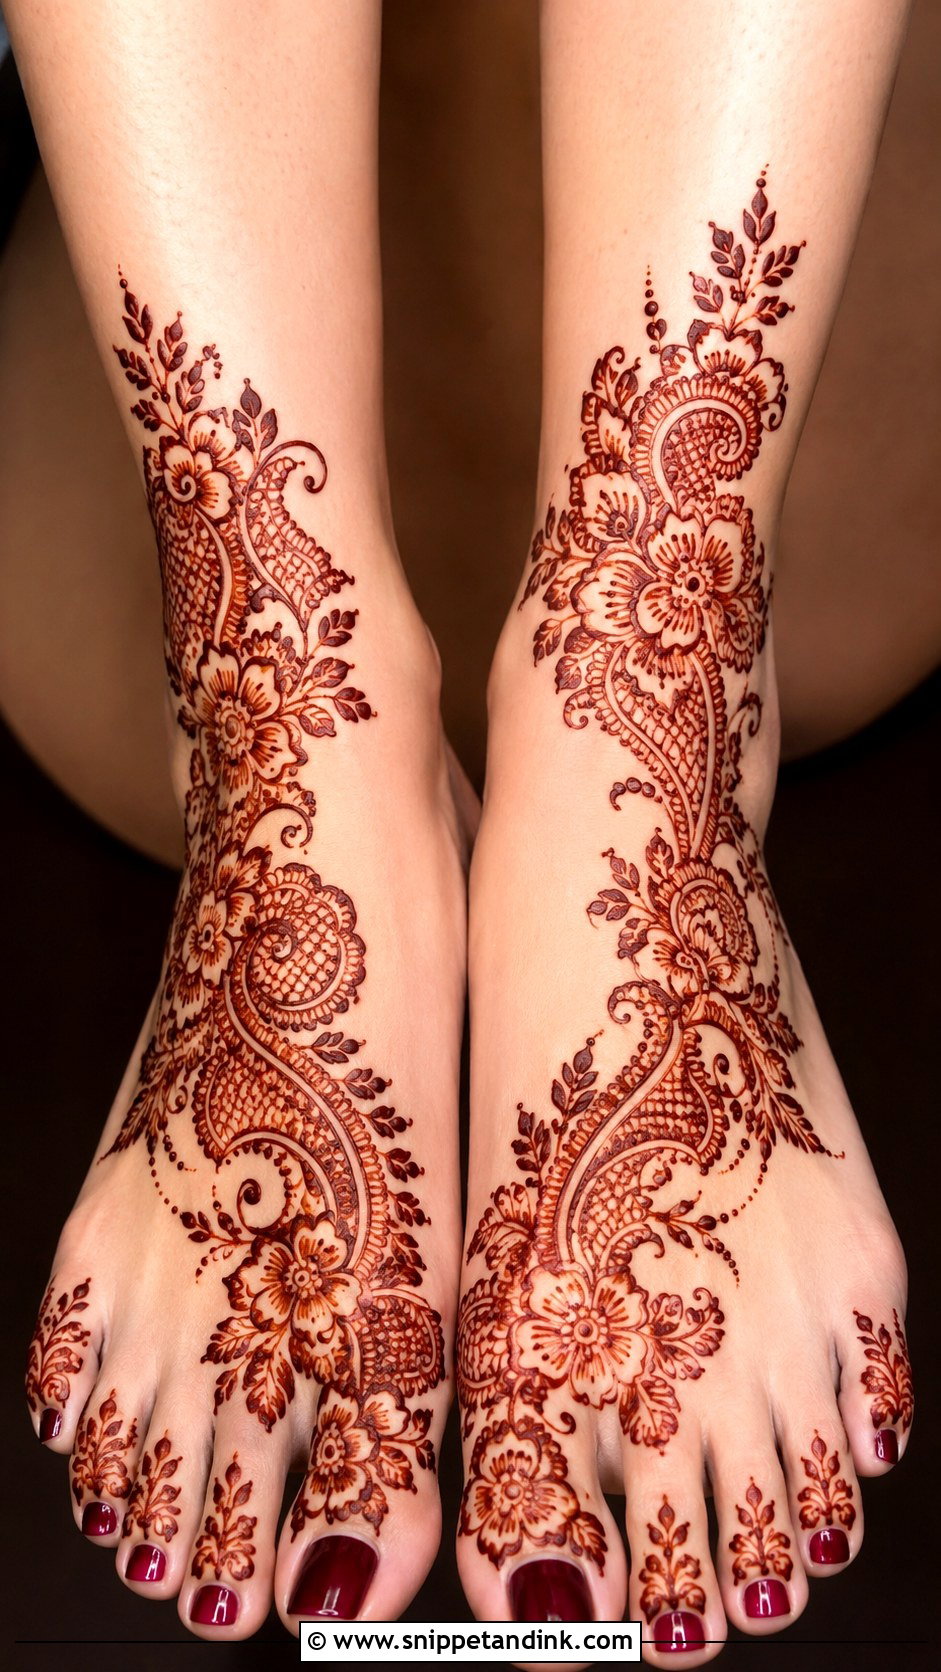
Indo Arabic foot mehndi design borrows the bold trail of Arabic work and fills it with Indian detail: a big floral path down one side, with paisley, jaali, dots and leaves inside the shapes. It’s the layout I suggest most to bridesmaids who want more than a plain trail but can’t sit for hours. The contrast is what makes it work. I outline the main flowers with a thicker line and switch to a fine tip for the inner fill.
6. Full Foot Mehndi Design
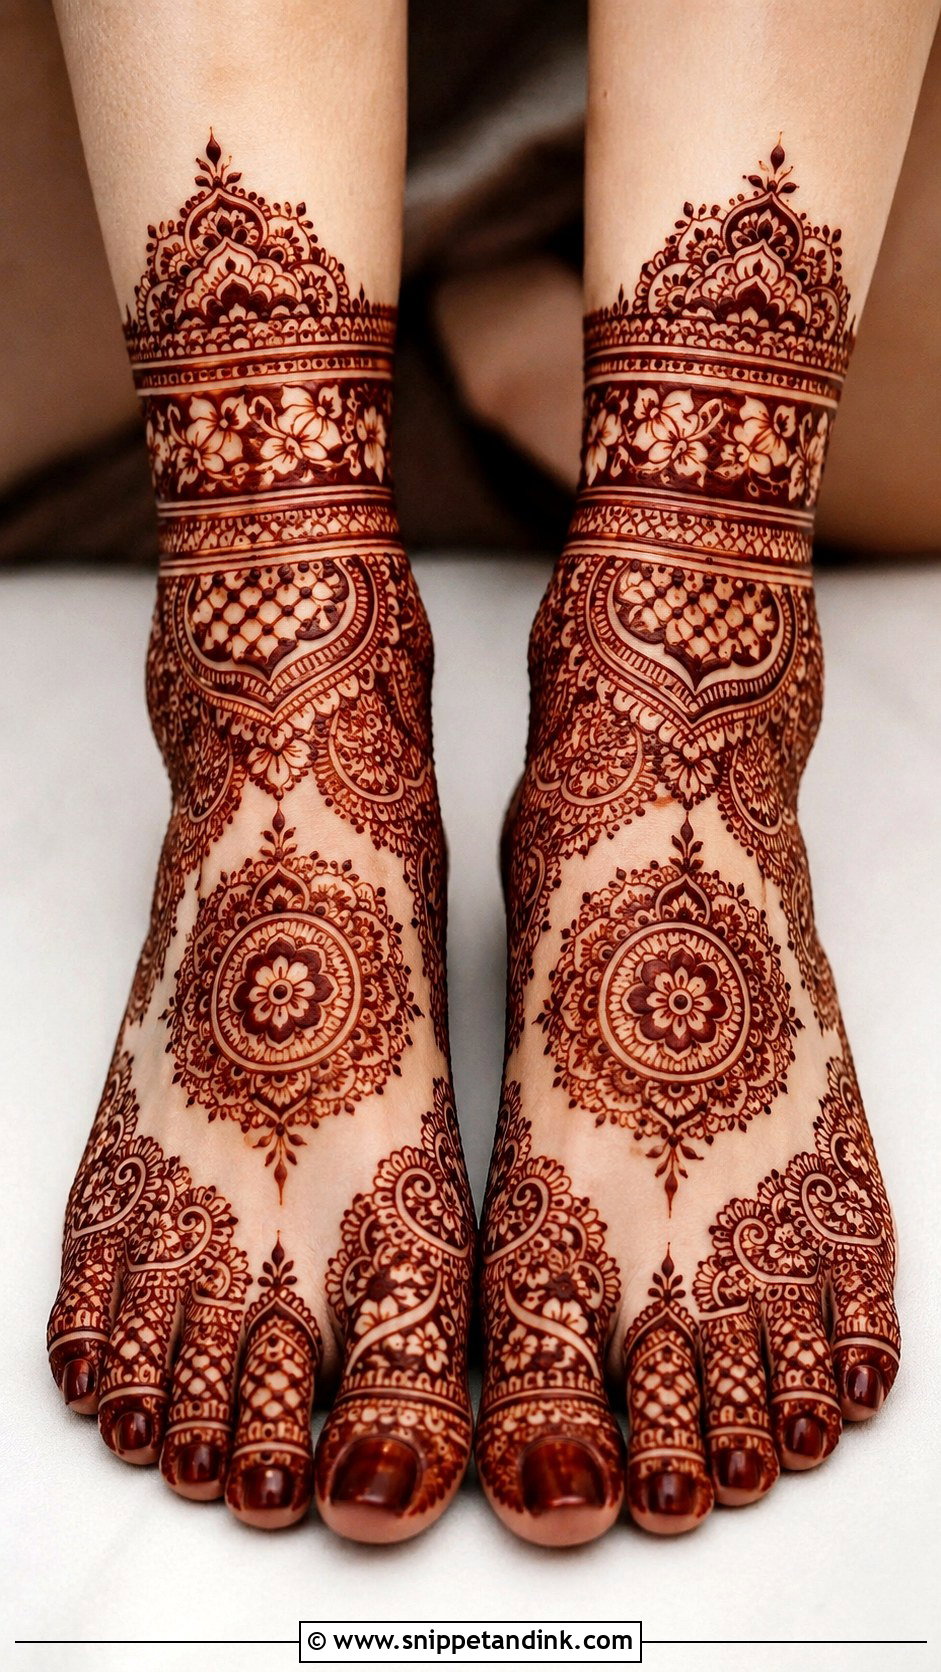
Full coverage takes the design over almost every visible part of the foot, toes to ankle and sometimes beyond: center mandalas, paisley chains, floral panels, jaali and layered ankle borders. On feet this is a long sitting, often longer than people budget for, and the bride can’t walk until the paste has dried enough not to smear. Spacing does the heavy lifting here, since each motif needs a margin of bare skin to stay readable once it darkens. If you love intricate work and can give it the time, it photographs as one finished surface.
7. Back Foot Mehndi Design
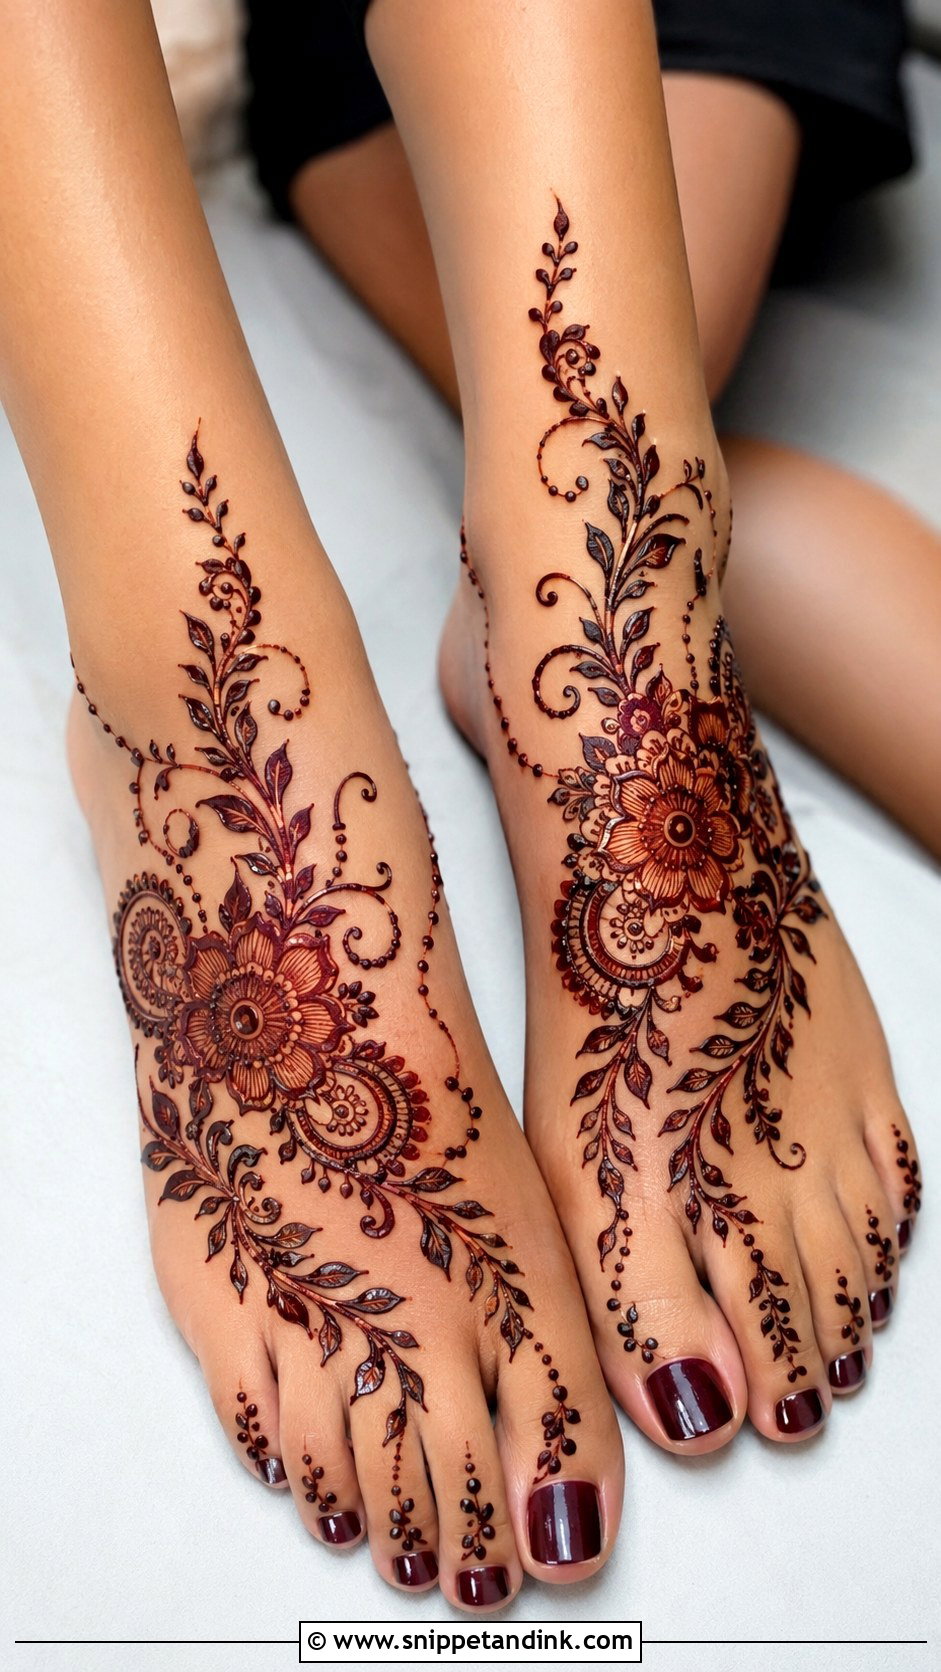
This layout covers the top of the foot, the part that shows in sandals, and leaves the sole plain. I like it for practical reasons: the sole stains darkest but also fades fastest from walking, and an unpainted sole means you can stand sooner. Florals, vines and a mandala spread from the toes across the upper foot, with a light band at the ankle if you want a finish. For a cleaner look, I keep the center of the foot open.
8. Front Foot Mehndi Design
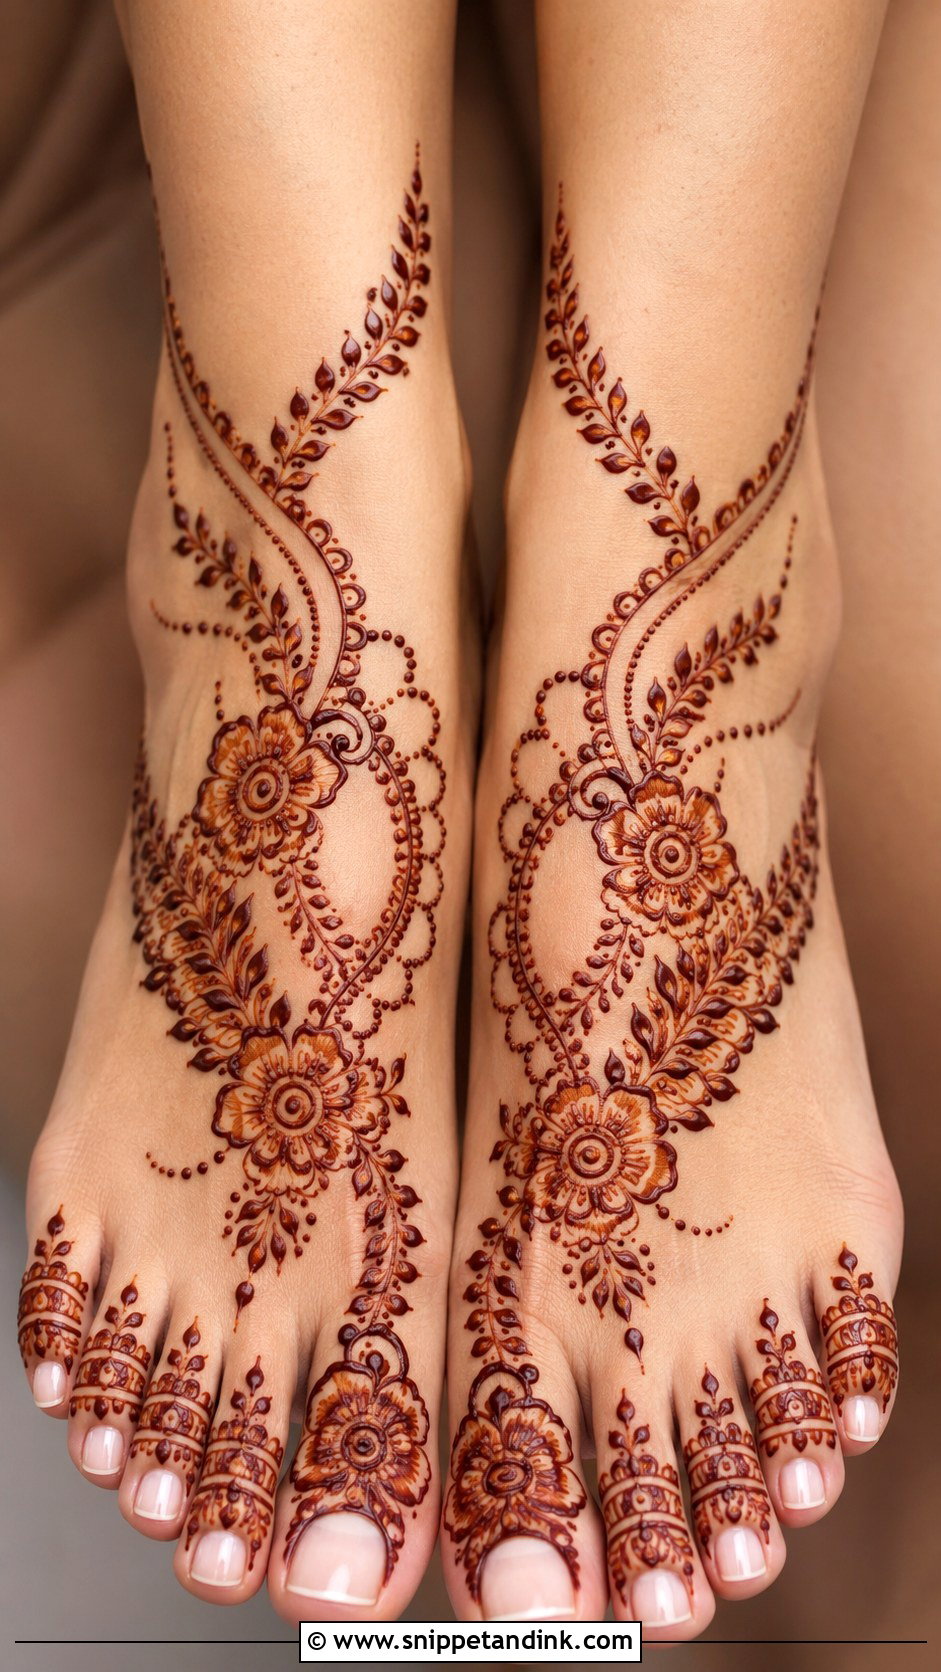
The front layout concentrates on the toes, the upper foot and the area just below the ankle, so it shows clearly in juttis, heels or sandals. Henna toe rings, toe caps, leafy chains and a central flower are typical. A V-shape pointing up toward the ankle lengthens the foot visually, which suits shorter or wider feet. Matching toe patterns on both sides matter more than anything; dotted connectors help tie the toes to the main motif.
9. Leg And Foot Mehndi Design
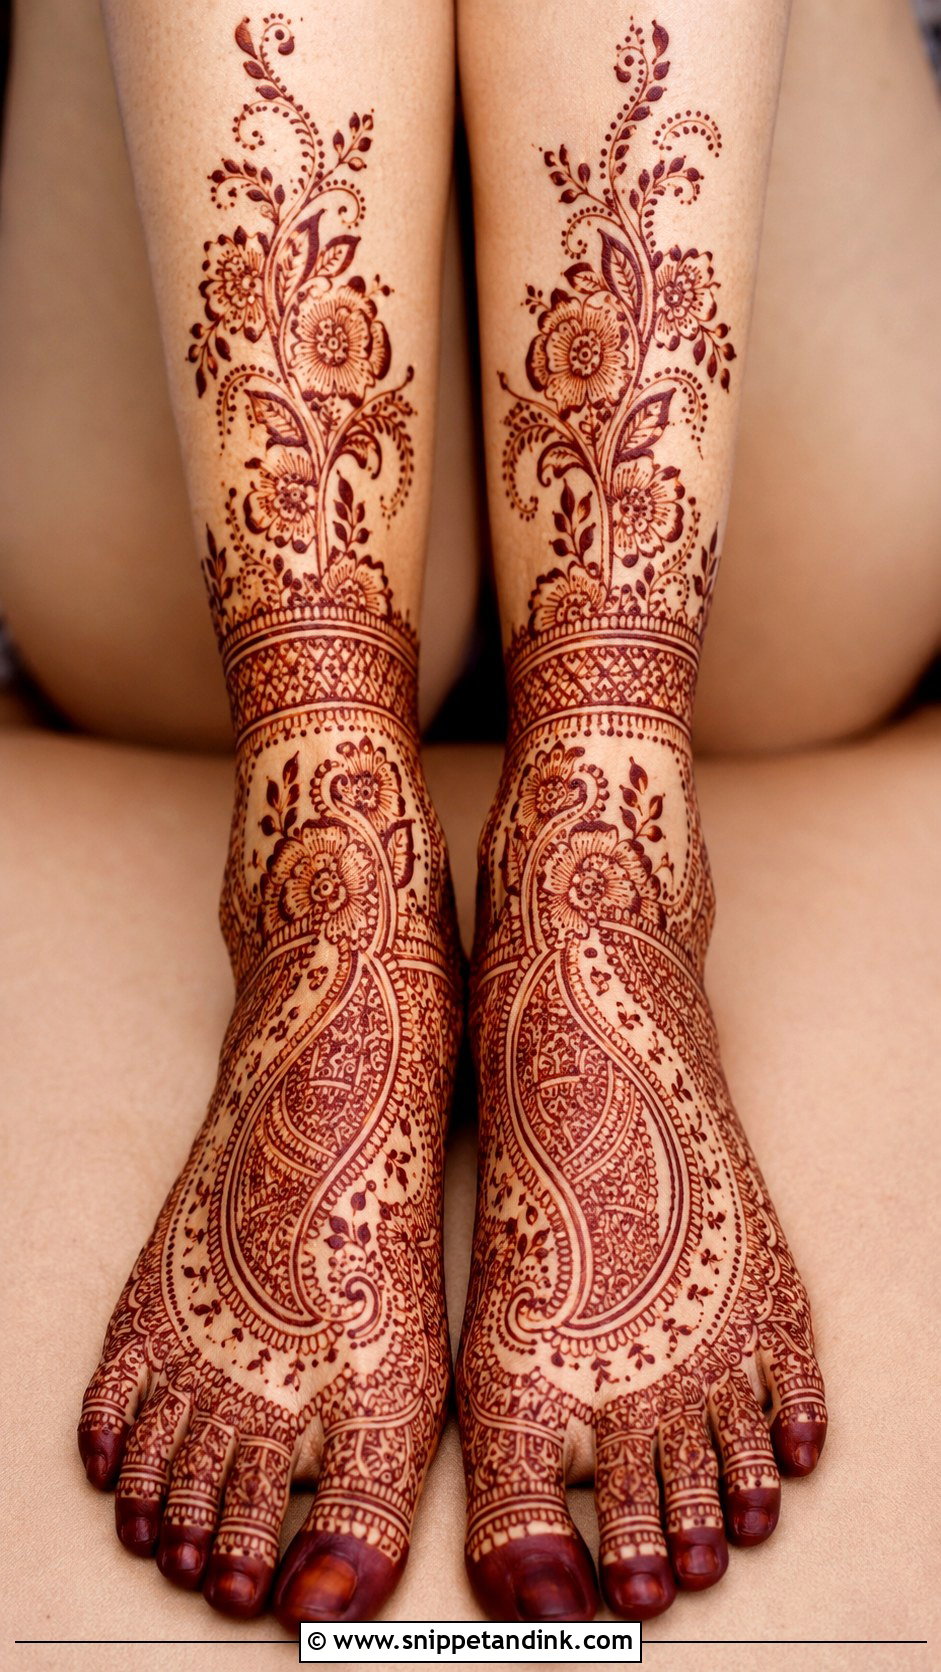
Extending the design up the leg connects the foot to vines, vertical panels or anklet borders on the shin. Shin skin stains noticeably lighter than the top of the foot, so I make the leg section a little bolder in line weight to keep it from fading into a pale orange next to a deep foot. Follow the curve of the leg rather than drawing straight columns. And balance it: a crowded shin over a light foot looks top-heavy. Save this for outfits that actually show the ankle and lower leg.
10. Ankle Foot Mehndi Design
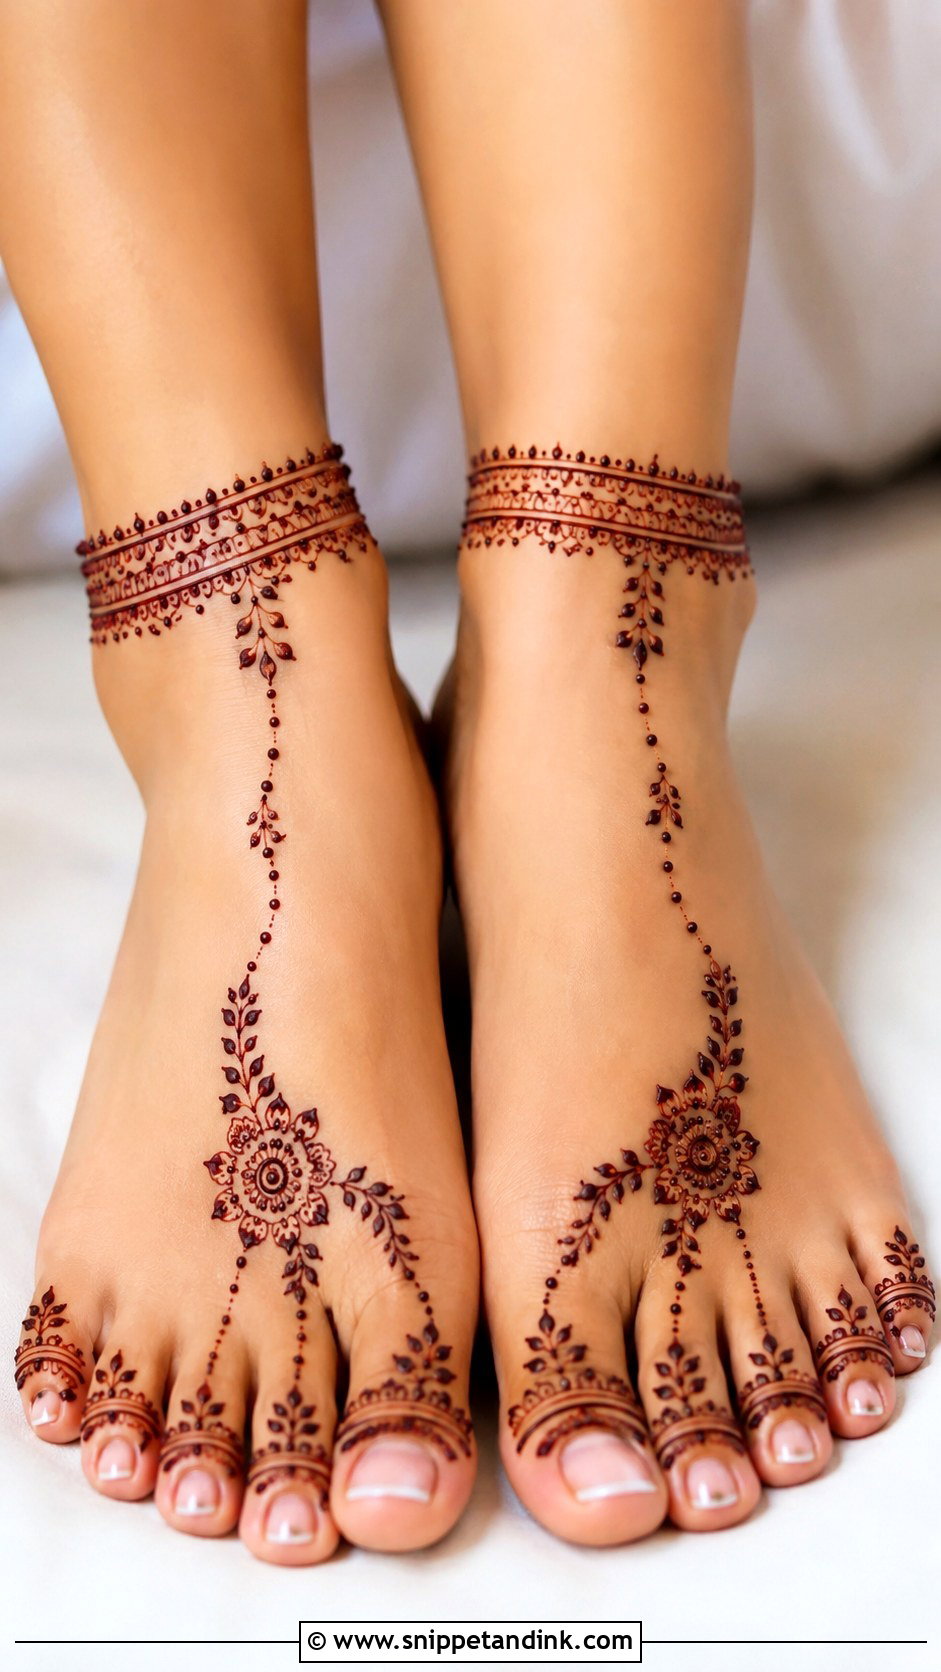
Ankle designs draw jewelry in henna: a bracelet-like band at the ankle bone, linked to the toes with chains, dots or tiny flowers. I measure the band against the anklet or payal the bride will wear, since real jewelry sitting on top of a thick band hides it completely. A delicate band usually looks more refined than a heavy one. The top of the foot can stay bare or carry a small mandala.
11. Mandala Foot Mehndi Design
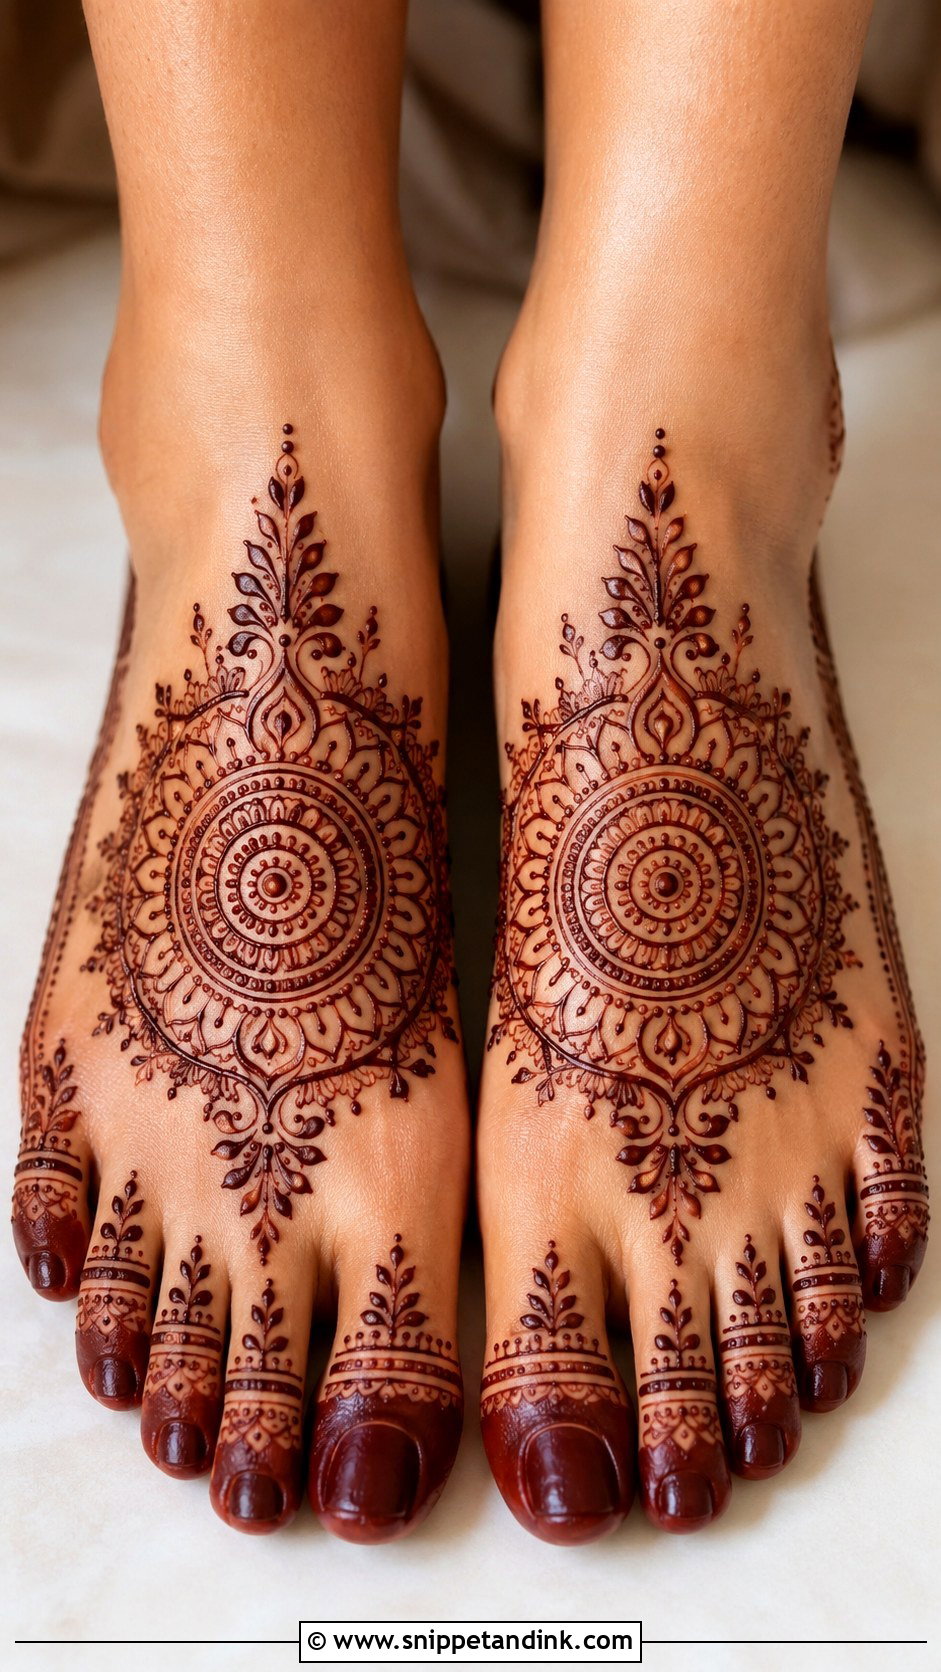
A mandala is centered on the top of the foot, with details radiating toward the toes and ankle. It scales well: a small one reads minimal, while a larger one ringed with petals and dots can carry a bridal look. I map the circle with a few dots first, because a mandala drawn freehand on a curved foot tends to come out oval. Matching toe bands finish it, and it’s one of the easiest layouts to repeat evenly on both feet.
12. Floral Foot Mehndi Design
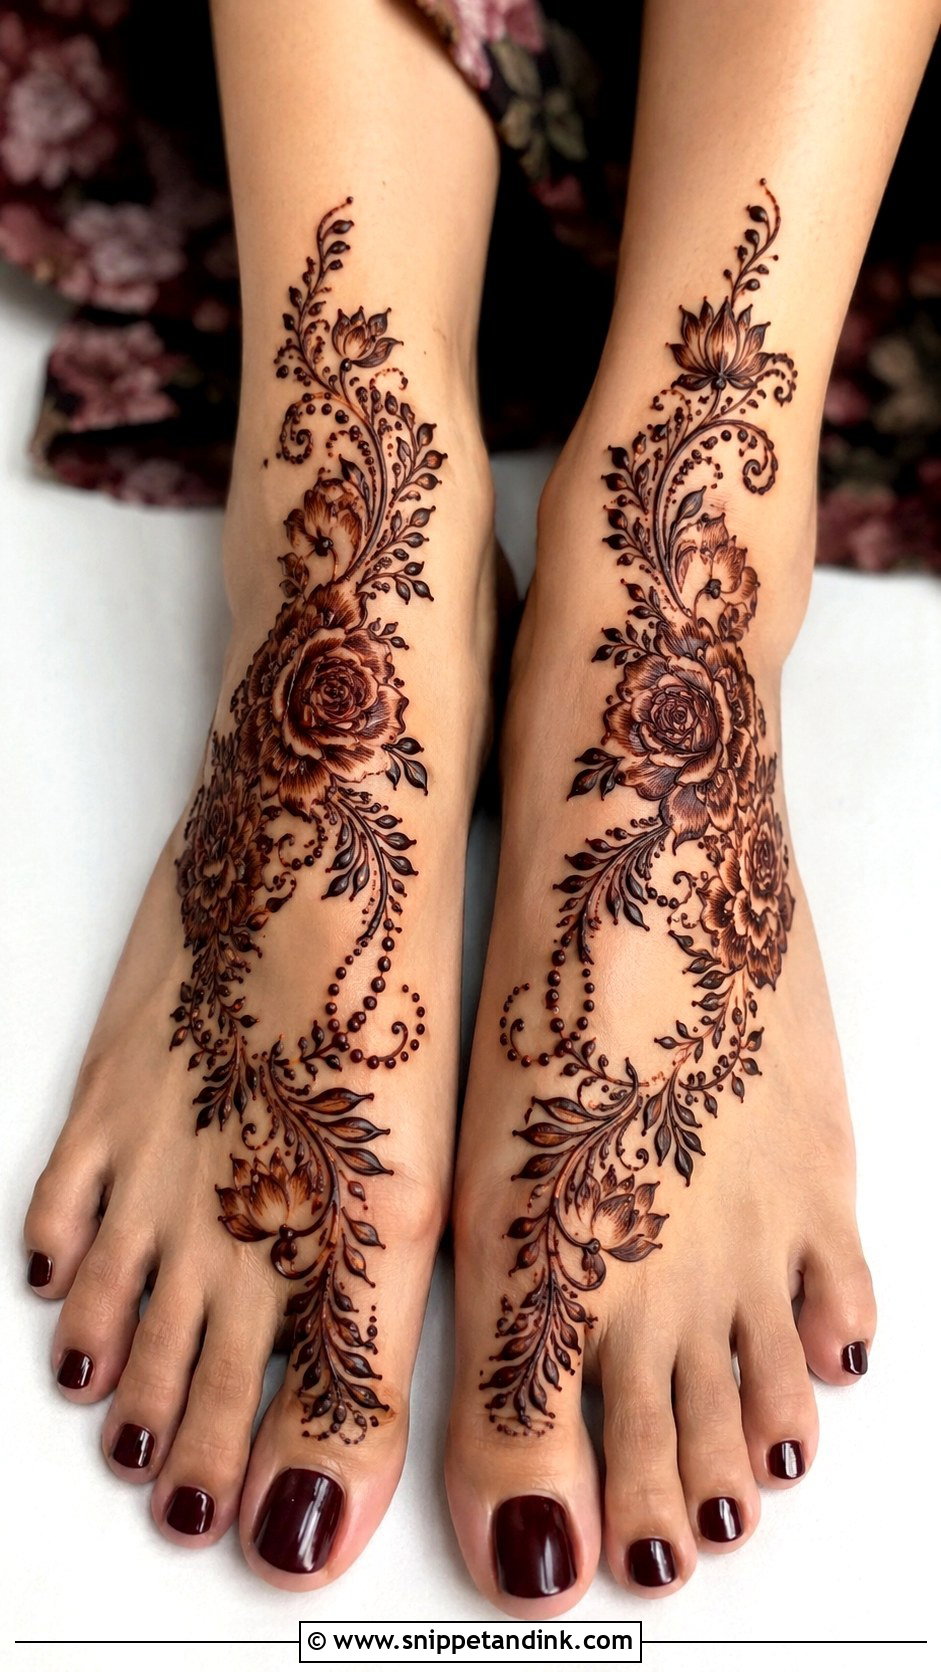
Flowers are the most flexible foot motif I draw. Roses, lotus shapes and five-petal blooms can trail diagonally from the big toe to the ankle, or one large flower can sit at the center with smaller ones around it. Shading inside the petals gives depth, and I keep the outer line slightly thicker so the flower reads from a distance. Open the spacing for a light Eid look or fill it for a wedding.
13. Paisley Foot Mehndi Design
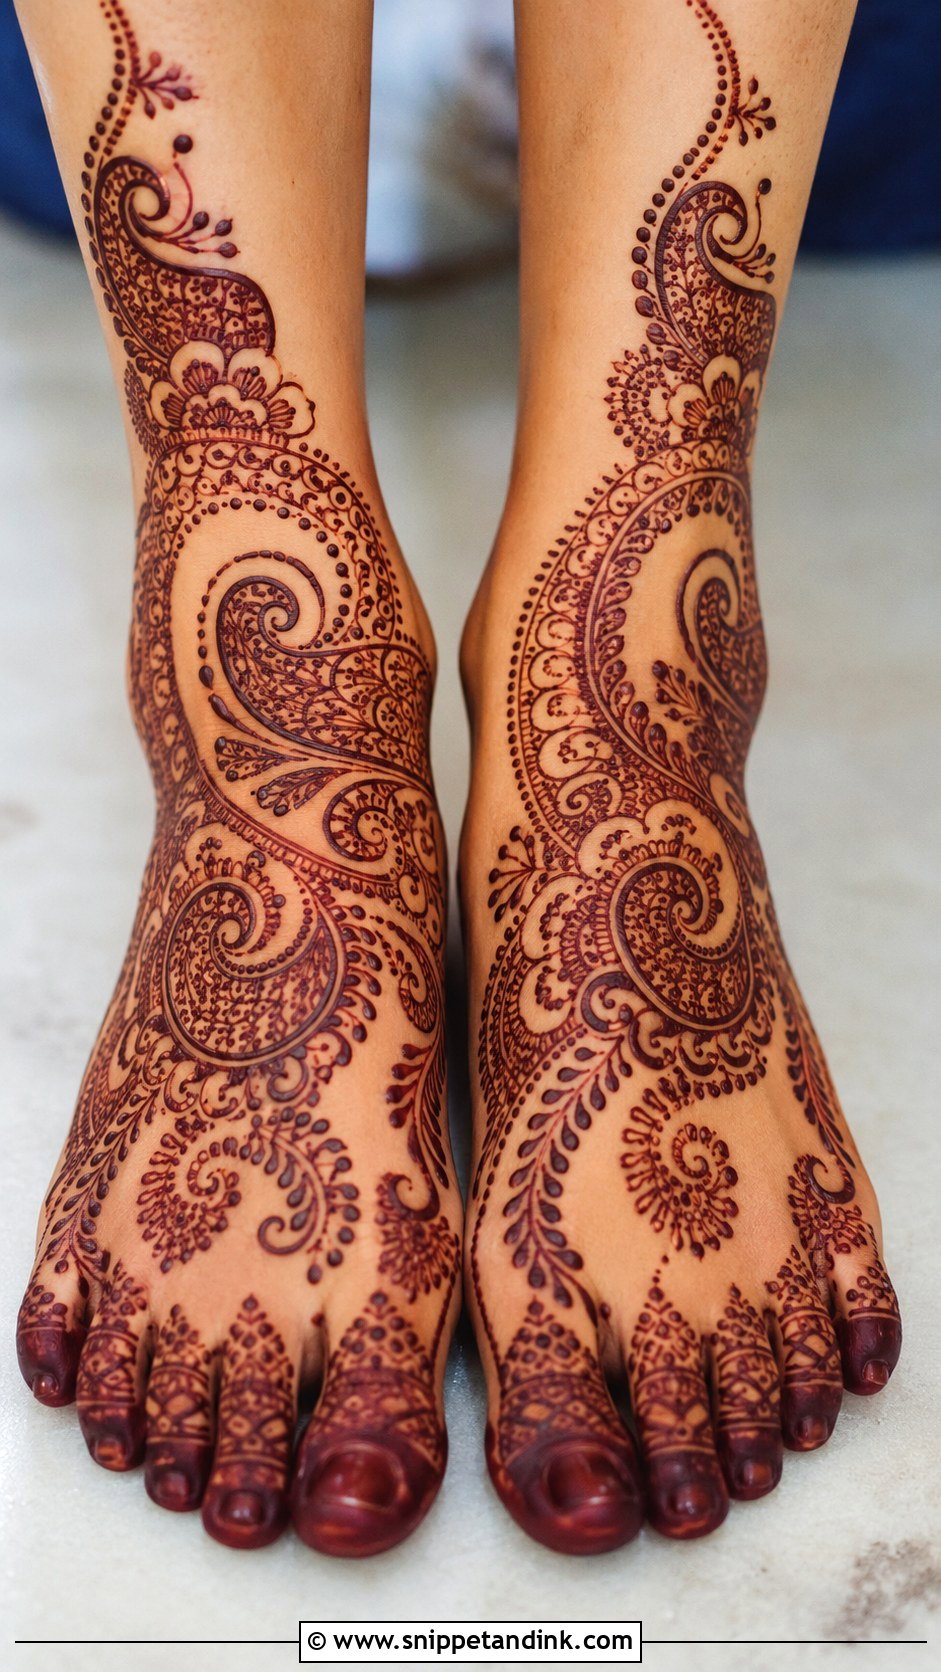
Paisleys suit feet because their curve follows the arch and the side of the foot naturally. Usually one large paisley sits near the ankle or along the side, with smaller ones, vines and leaves around it. The same motif becomes Indian, Arabic or Indo-Arabic depending on how much fill I put inside. Smooth outlines matter most. A wobbly paisley edge shows more than a wobbly leaf, so I draw the outer curve in one continuous stroke.
14. Jaali Foot Mehndi Design
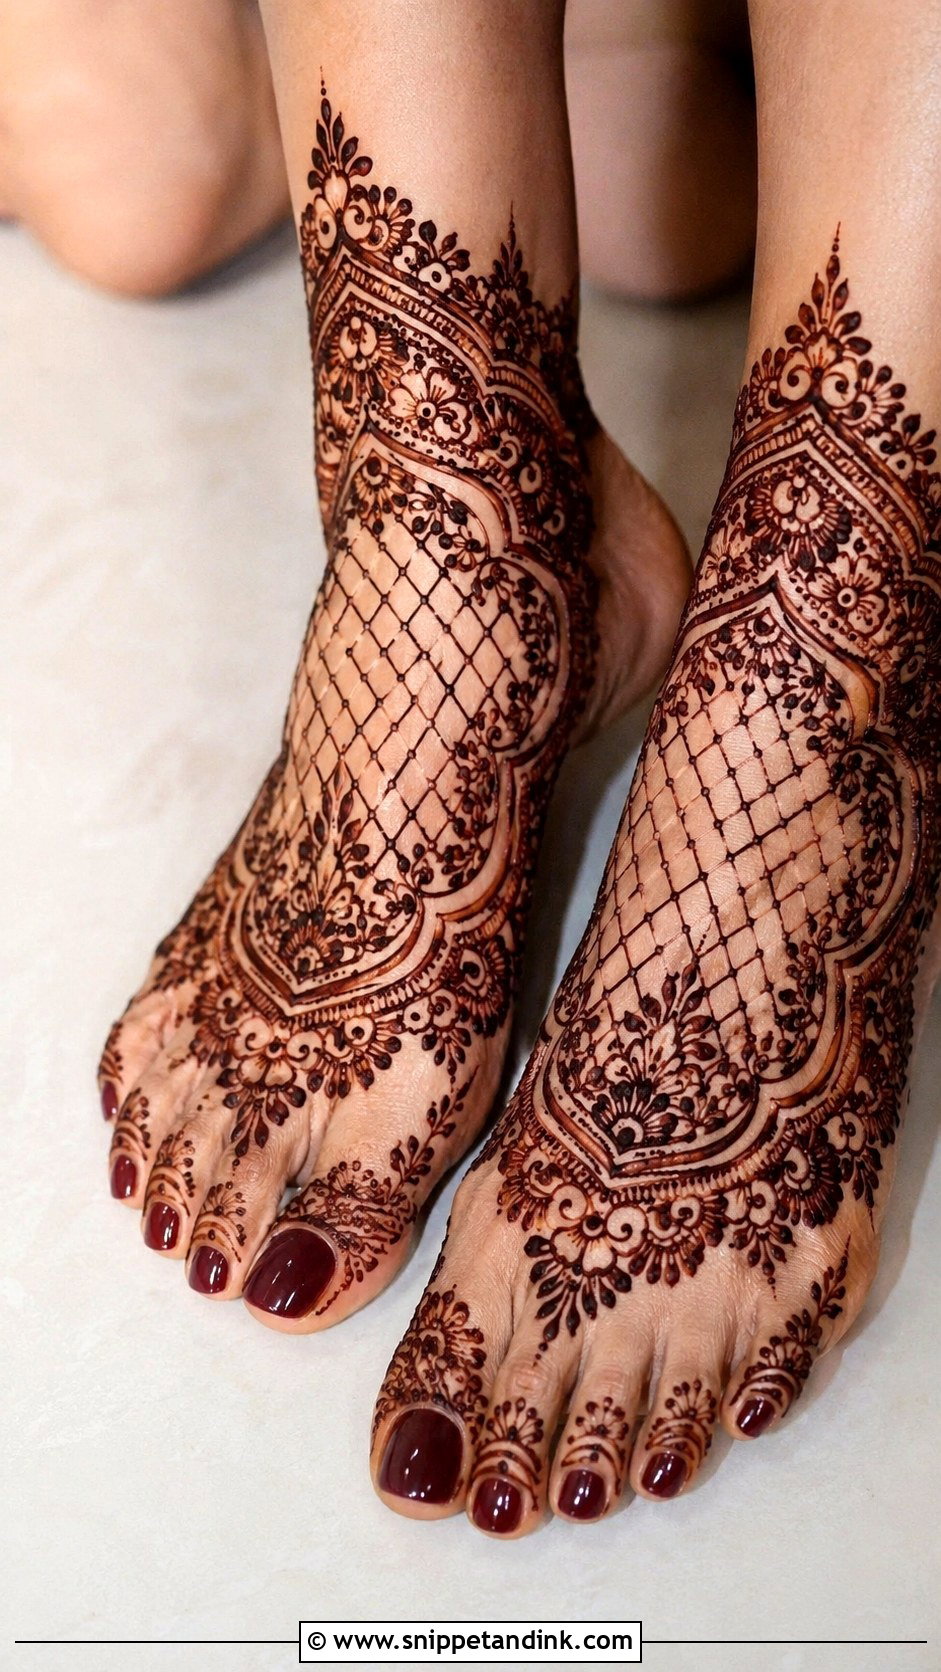
Jaali is a net pattern that gives a lace effect over the center of the foot, the sides, the toes or the ankle. It needs flowers, paisleys or scalloped borders around it, or it can look flat. Everything depends on line consistency. If the grid spacing drifts, the eye catches it at once, so I work the net in one direction first and then cross it. Leave open skin around each jaali panel so it reads as a section, not a stain.
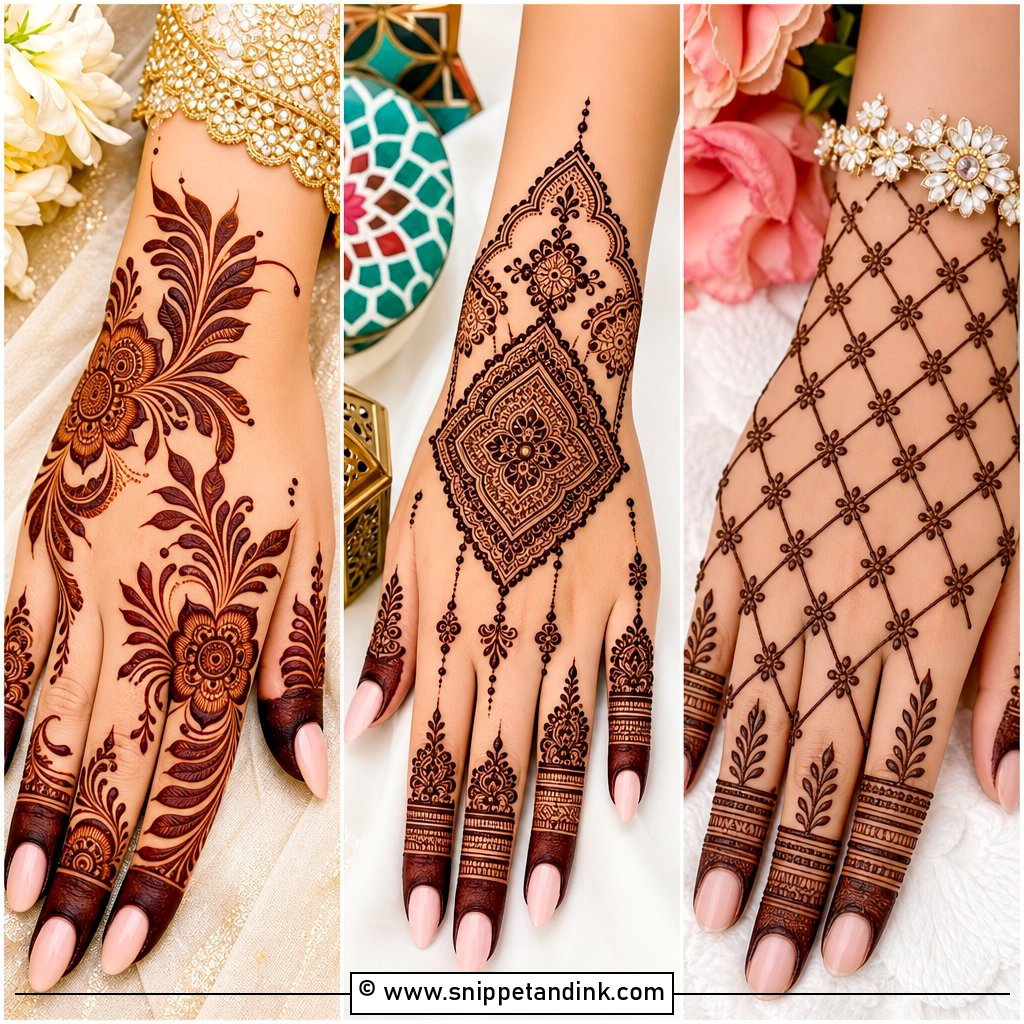
15. Toe Foot Mehndi Design
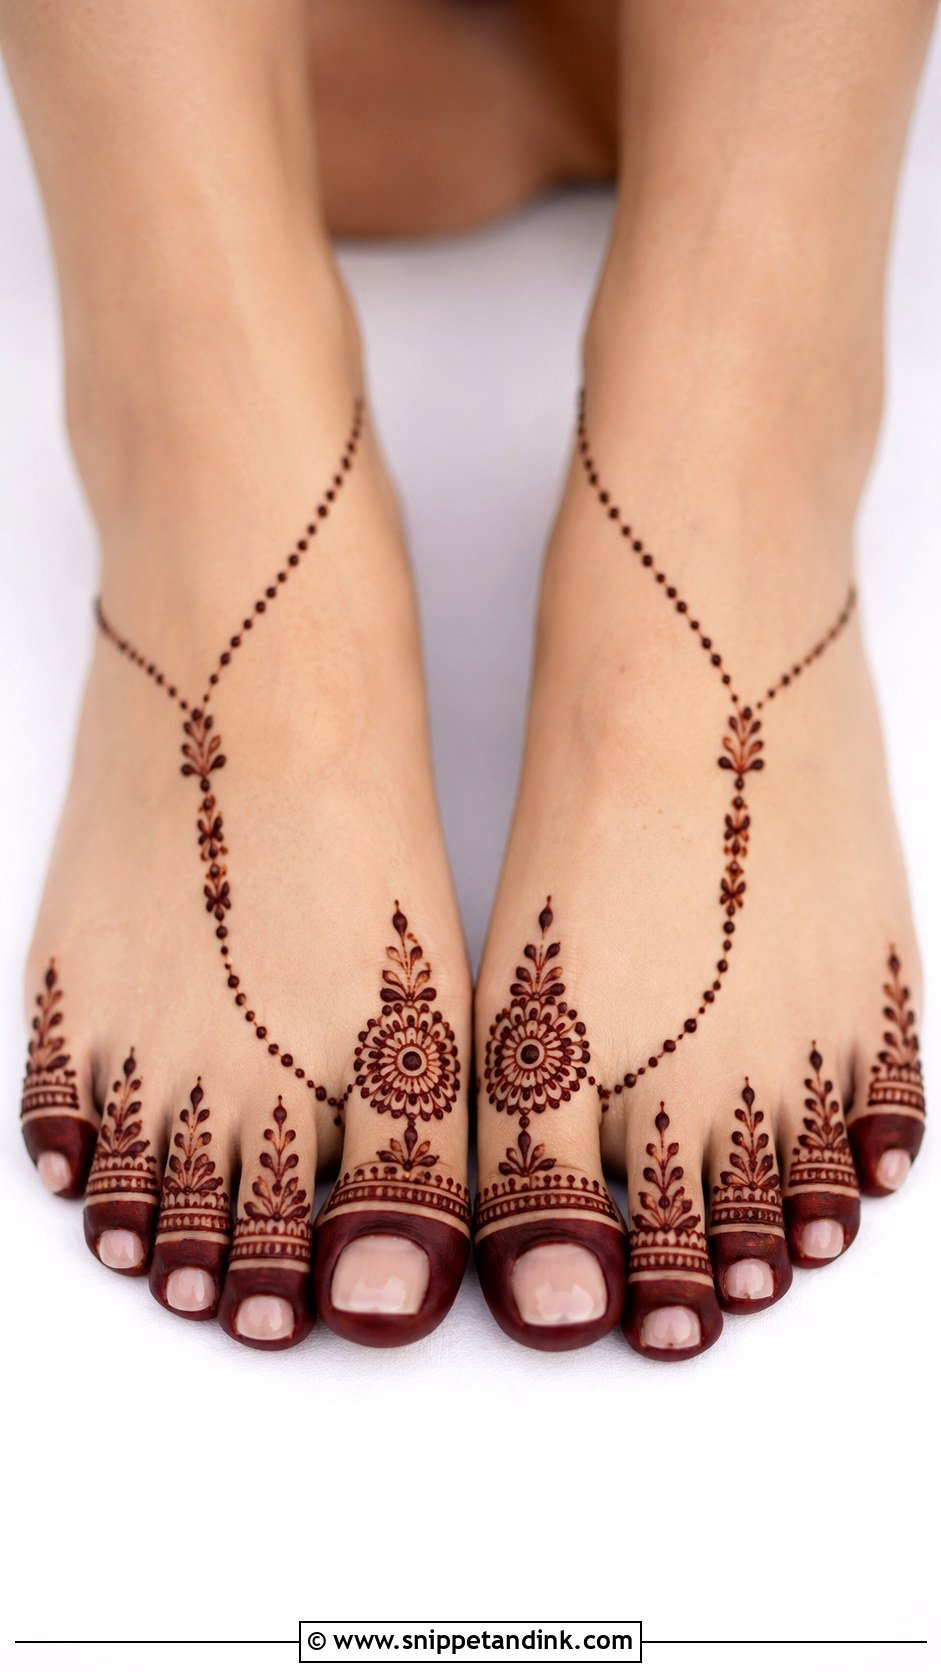
Toe designs treat the toes as the main feature: a tiny cap, a ring band, a leaf line or a small flower on each, with a bigger motif on the big toe to anchor the set. It’s fast, so it suits guests and anyone who wants something minimal. Toe tips are among the darkest-staining spots on the body, so I keep caps neat and thin; a thick cap goes almost black. A dotted chain or slim border along the front of the foot links the toes together.
16. Side Foot Mehndi Design
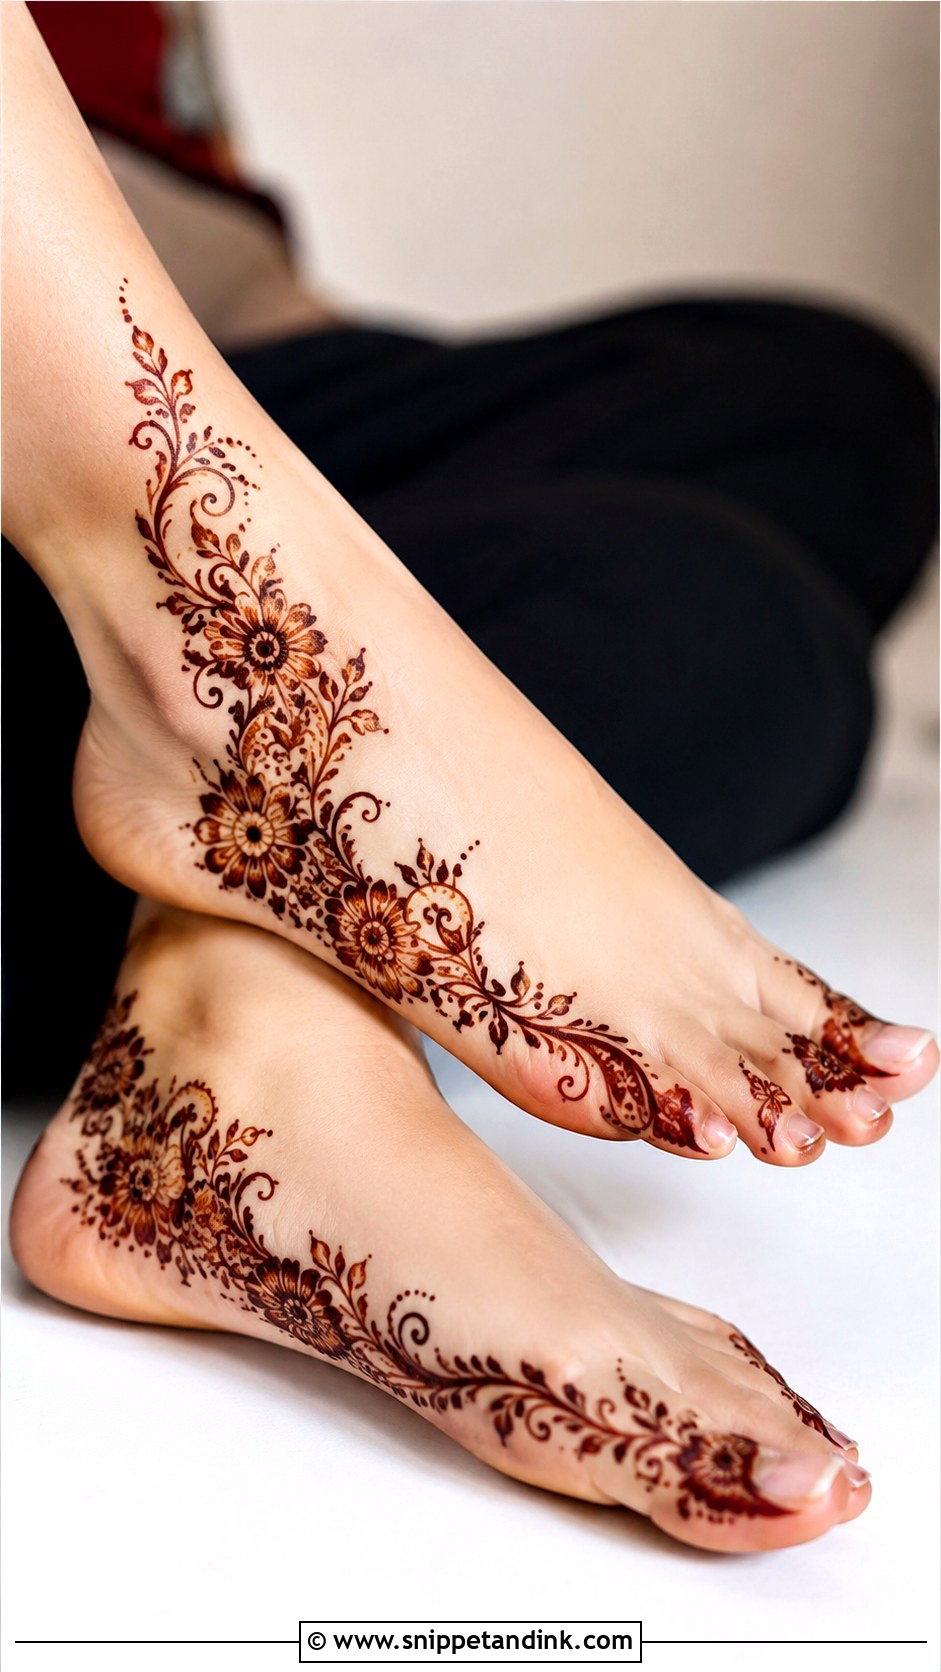
Side designs run along the inner or outer edge of the foot from heel to toes, with Arabic flowers, vines, paisleys and curved lines, while the center stays open. It peeks out of sandals in a way I find very wearable. I usually draw the outer edge, because the inner edge rubs against the other foot when you sit cross-legged and smudges before the paste dries. Mirror the flow on both feet.
17. Minimal Foot Mehndi Design
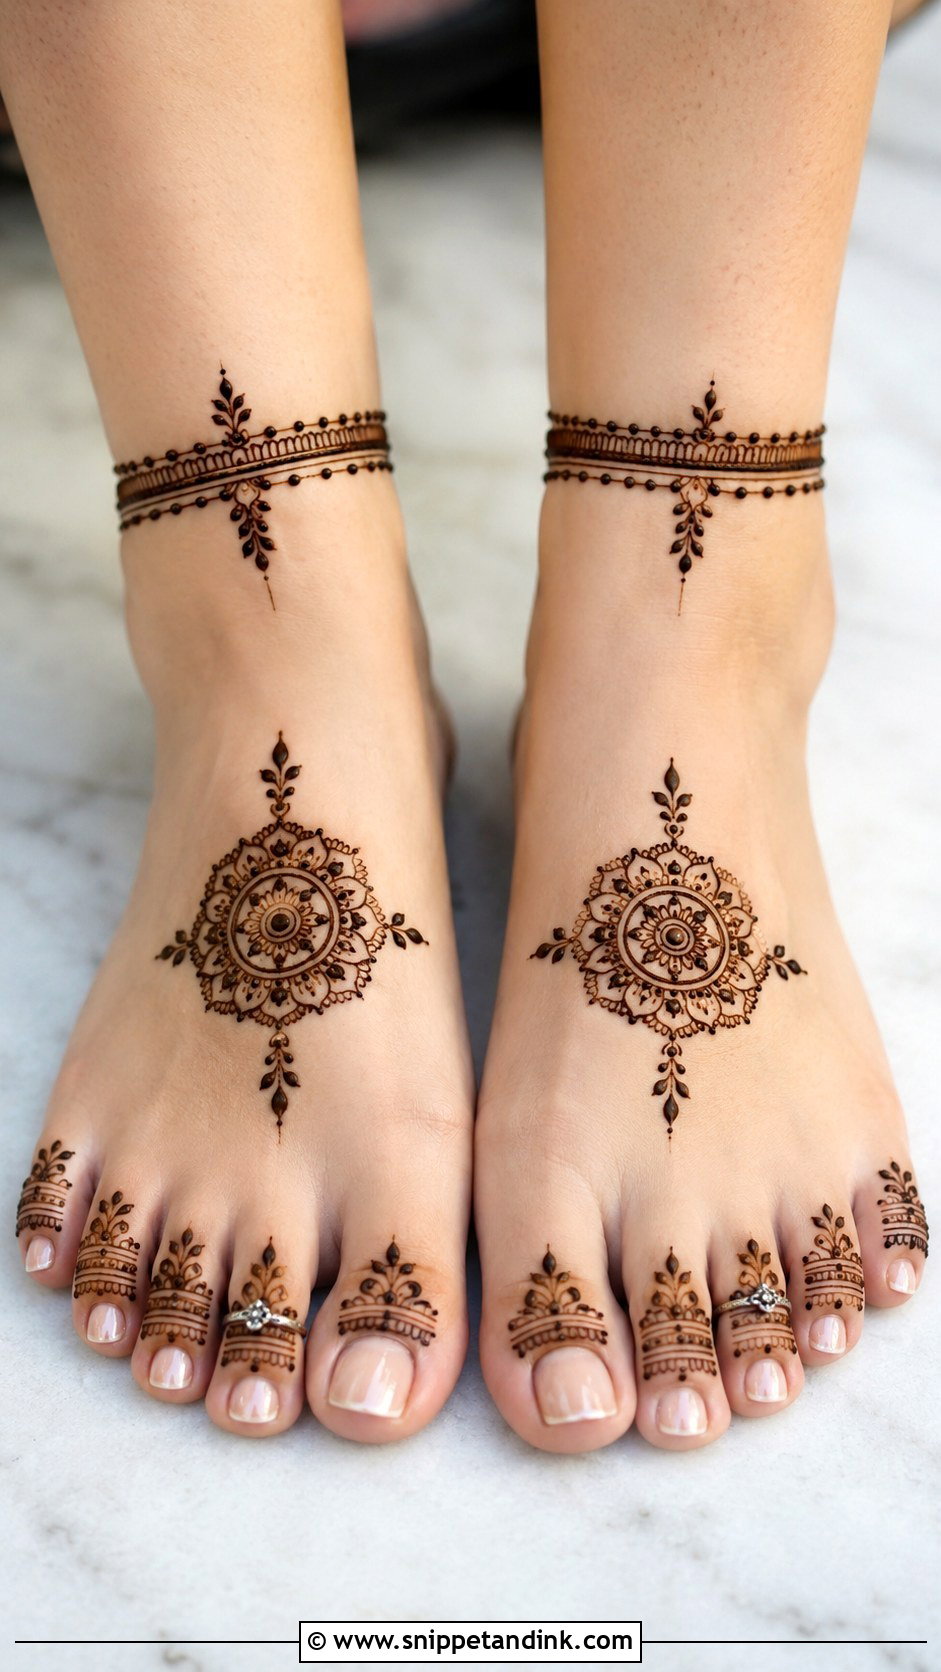
Minimal foot mehndi design leans on space and precision: a small mandala, a thin anklet band, tiny toe rings or a single floral chain. Bridesmaids and festival guests often prefer it, and it fades more gracefully over the following week because there’s less of it to go patchy. With so few elements, every line has to be confident. I choose one main feature and keep everything else quiet.
18. Modern Foot Mehndi Design
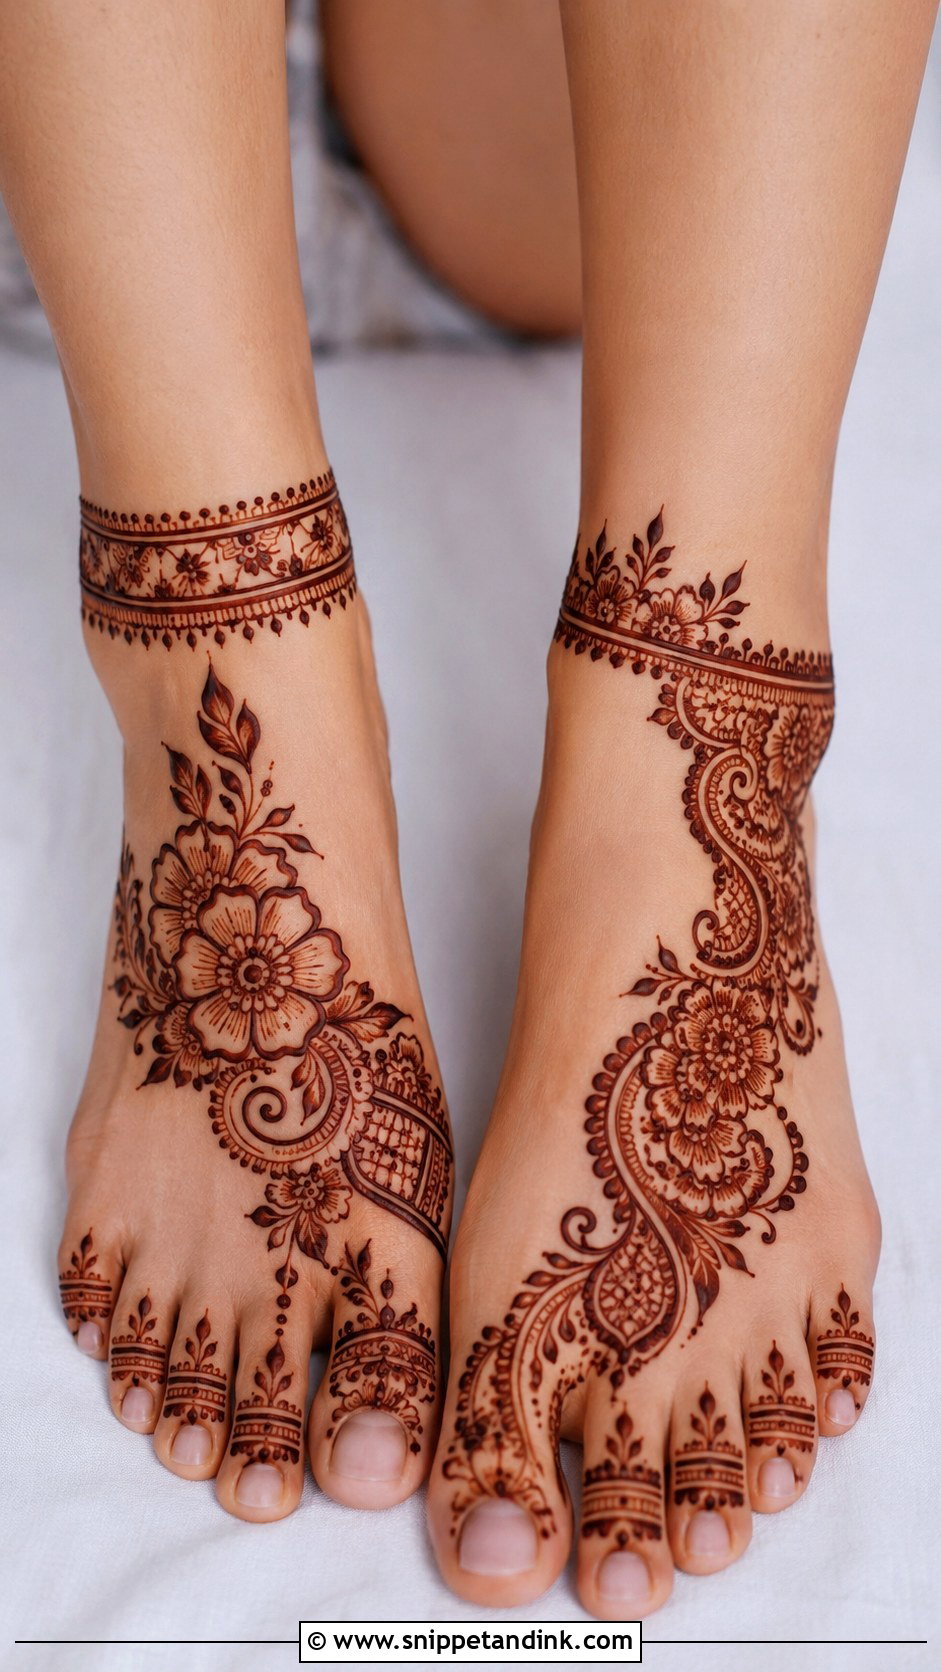
Modern foot work uses negative space, bold floral outlines, ankle bands, geometric touches and asymmetric trails. One side of the foot, or a slim vertical line from toes to ankle, can be the whole design. It sits well with fusion wear and simpler festive outfits. The mistake is adding fillers out of habit; I let the bare skin do part of the work, so the design looks crisp when the stain matures.
19. Easy Foot Mehndi Design
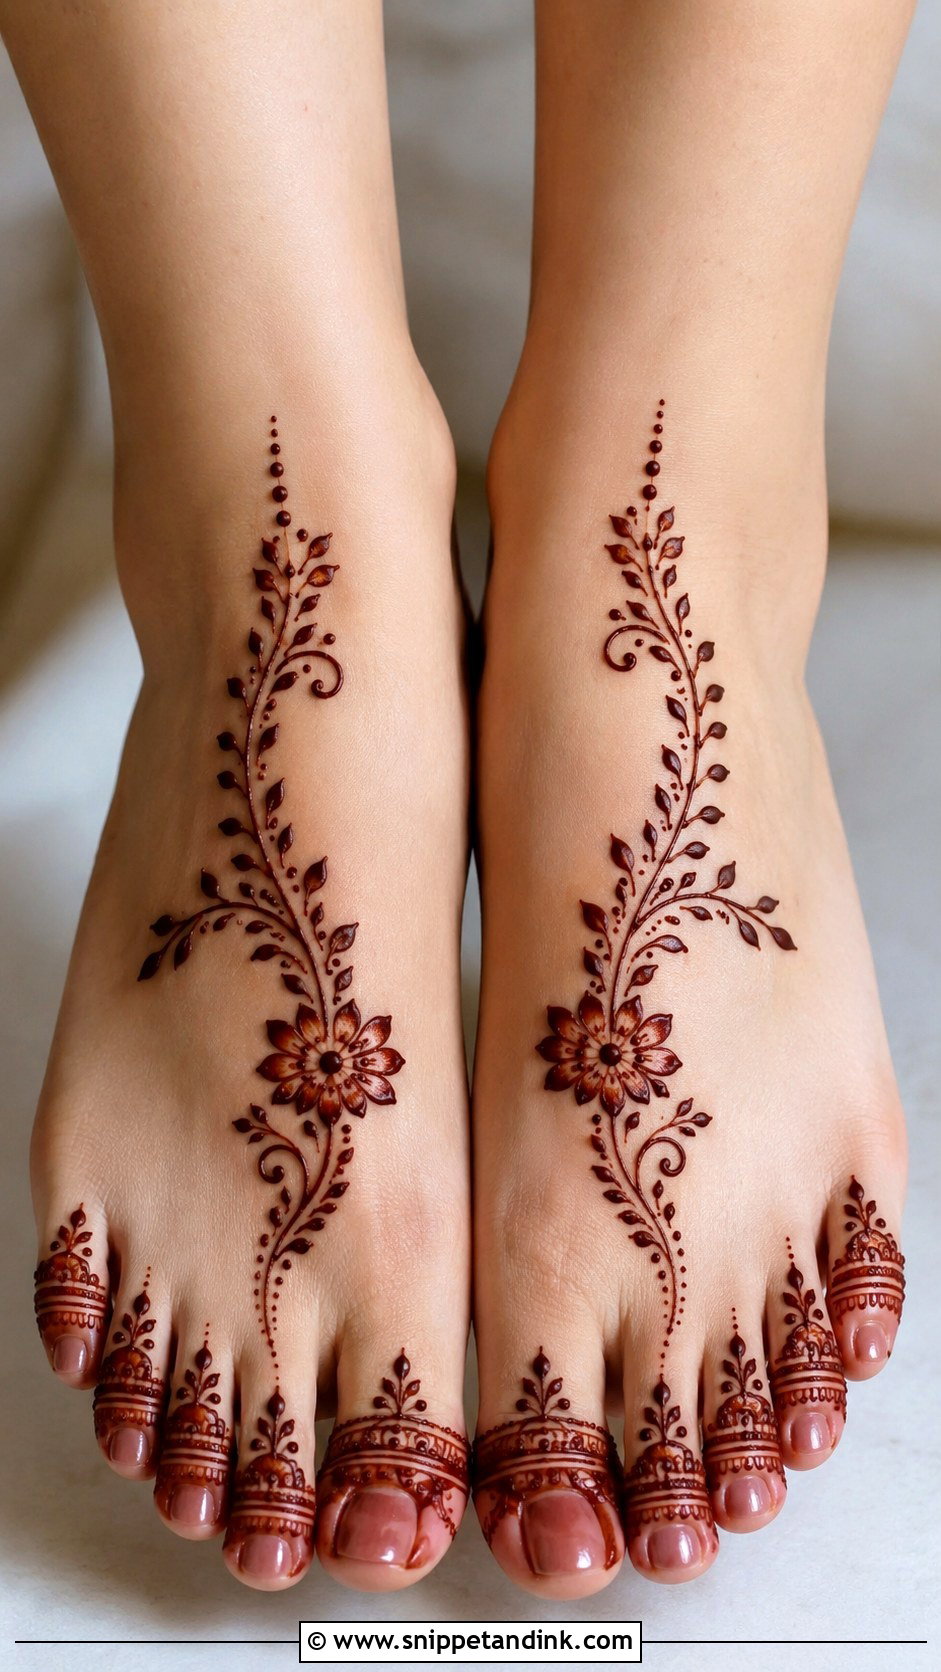
Easy designs are the ones I teach to people doing mehndi at home: one center flower, a few curved vines, toe bands and a dotted line toward the ankle. Repeated petals and leaves are far easier than fine bridal fillers. Both feet should look alike but don’t need to match exactly. Start with the main motif and build outward, and do the foot you’ll need to stand on last, so you aren’t walking on wet paste.
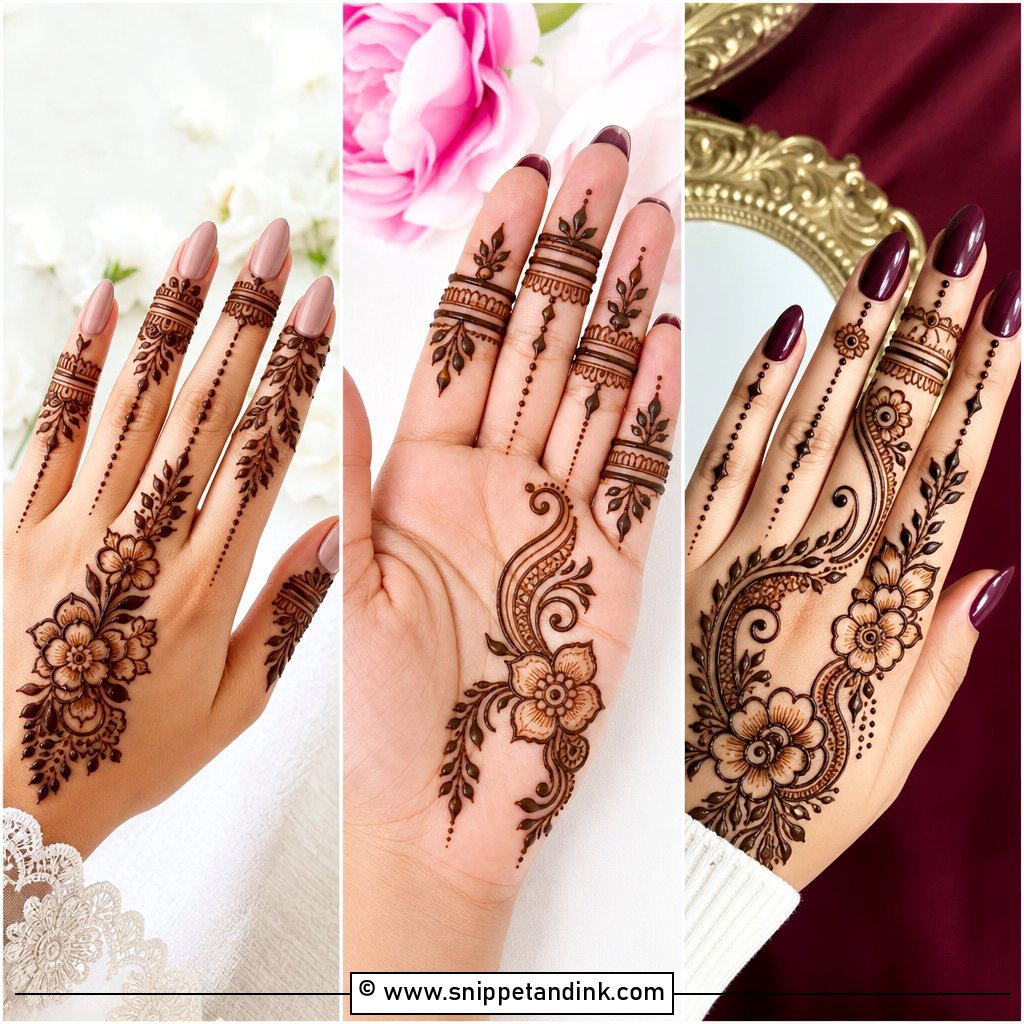
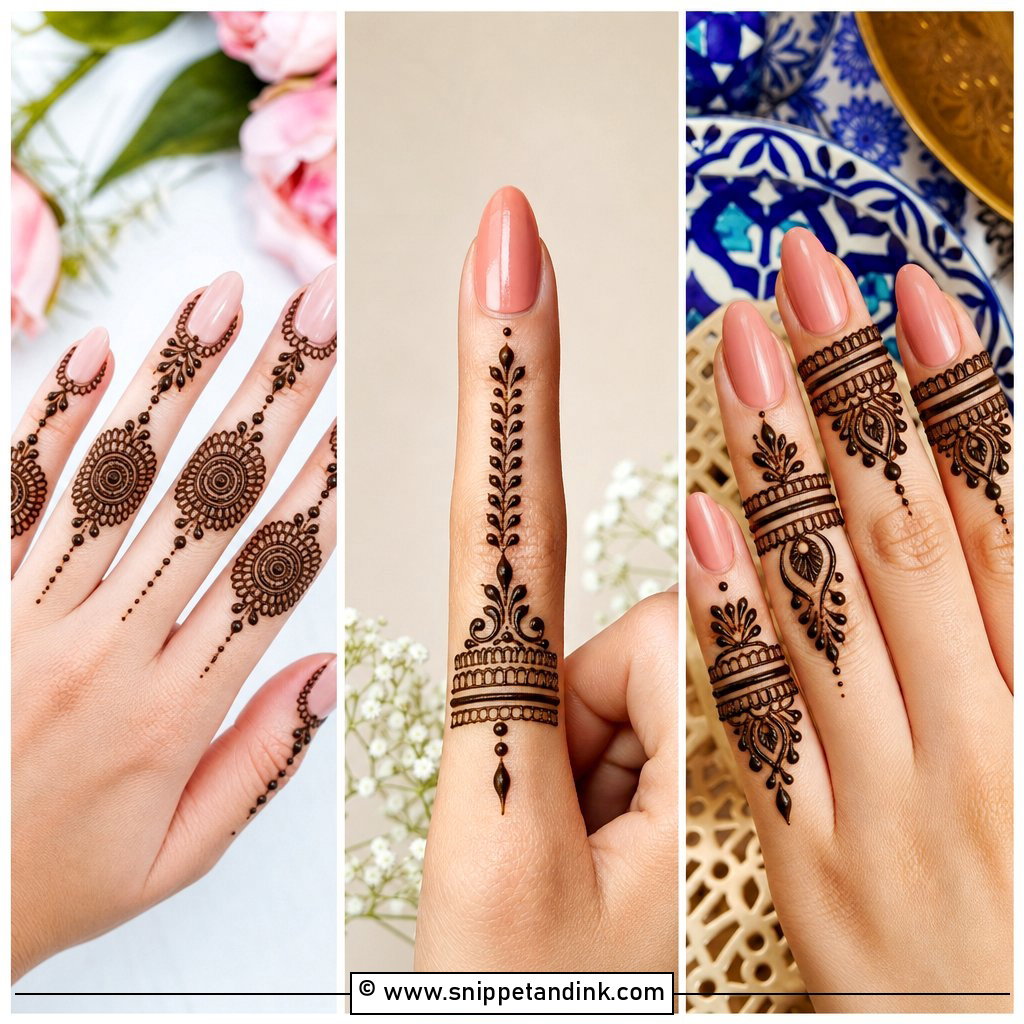
20. Stylish Foot Mehndi Design
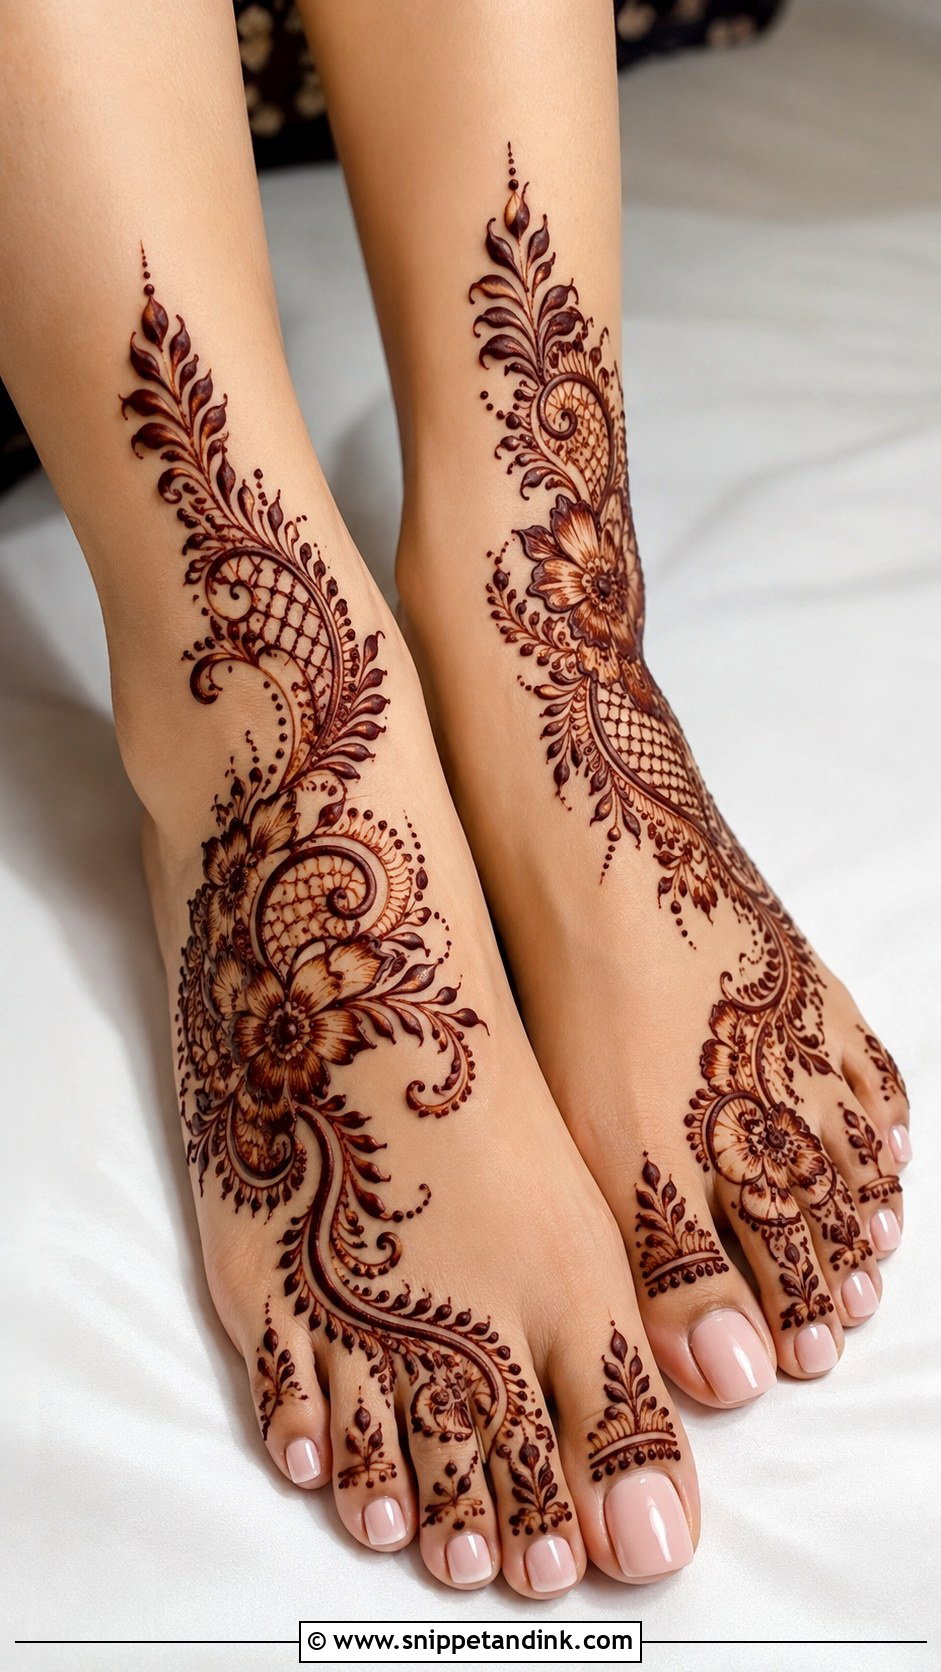
A stylish layout is defined by one strong shape, such as a diagonal trail, an ankle chain or a bold central motif, built from shaded flowers, curved leaves, small jaali patches and clean space. It suits engagement parties and photoshoots where the feet are in close-ups. Pick a direction and commit to it. A flowing line from the toes to the ankle almost always looks better than three unrelated motifs sitting side by side.
21. Dulhan Foot Mehndi Design
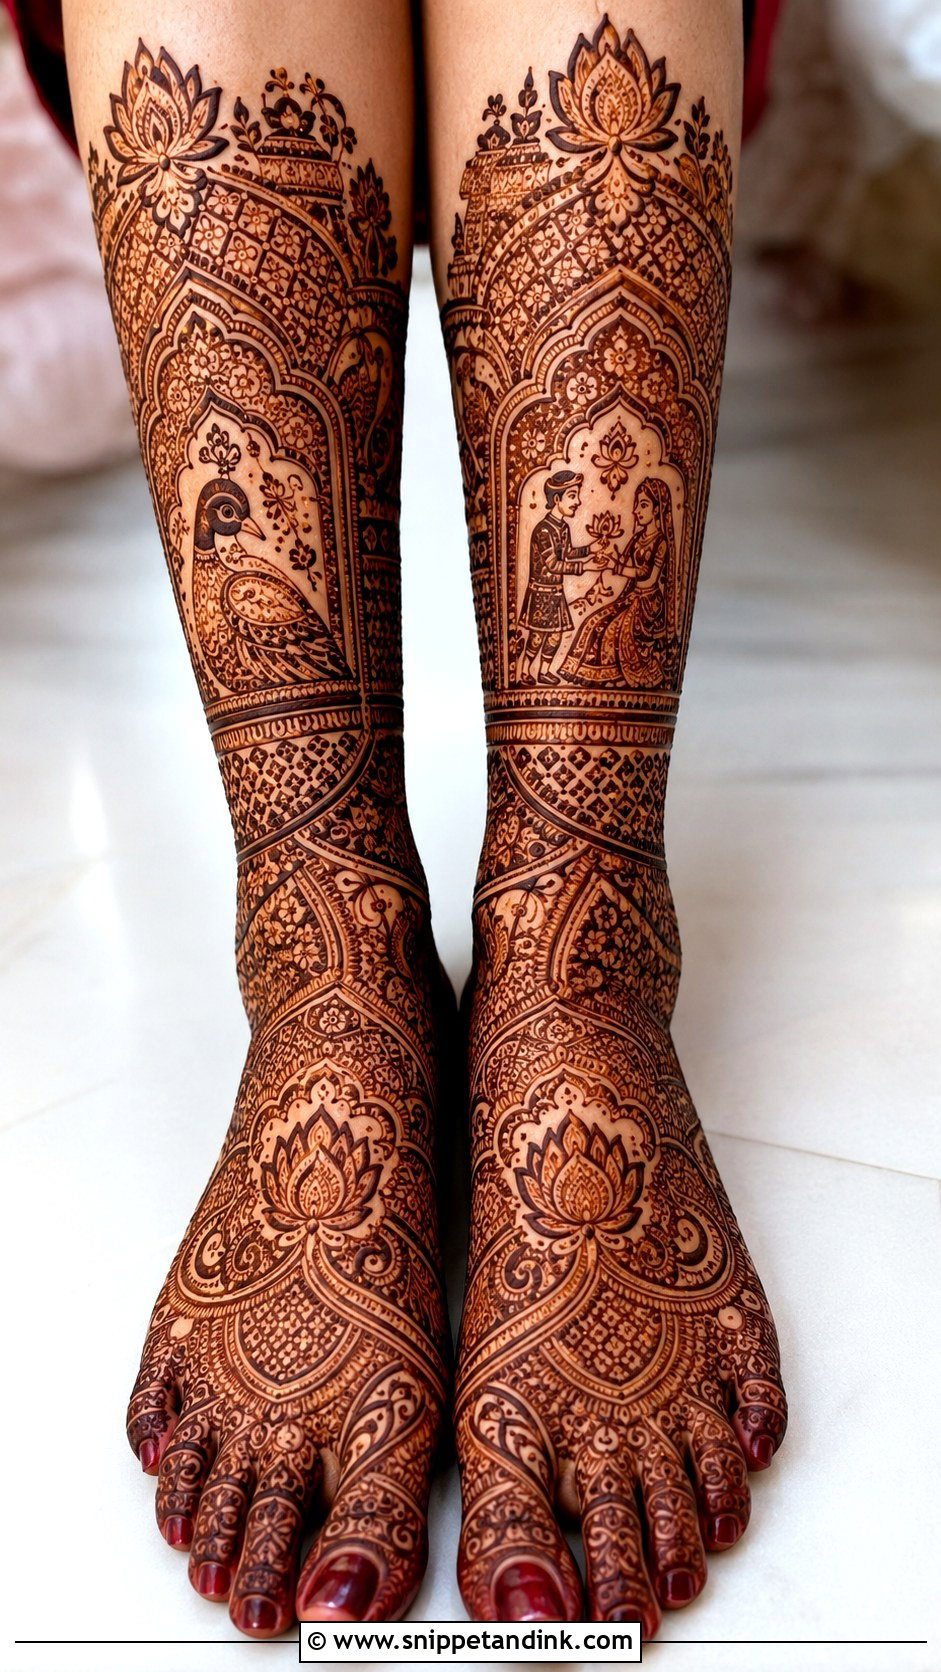
Dulhan foot mehndi design is the full traditional bridal set: heavy coverage, lotus flowers, paisleys, peacocks, a bride and groom pair, jaali, anklet borders and fine fill, connecting the feet with the lower legs. It has to hold up in close-ups and read from across a room. I plan the whole layout before any paste goes on, and I match the ankle and toe areas at every stage rather than finishing one foot first. Speed is the last priority on a bridal foot.
22. Pakistani Foot Mehndi Design
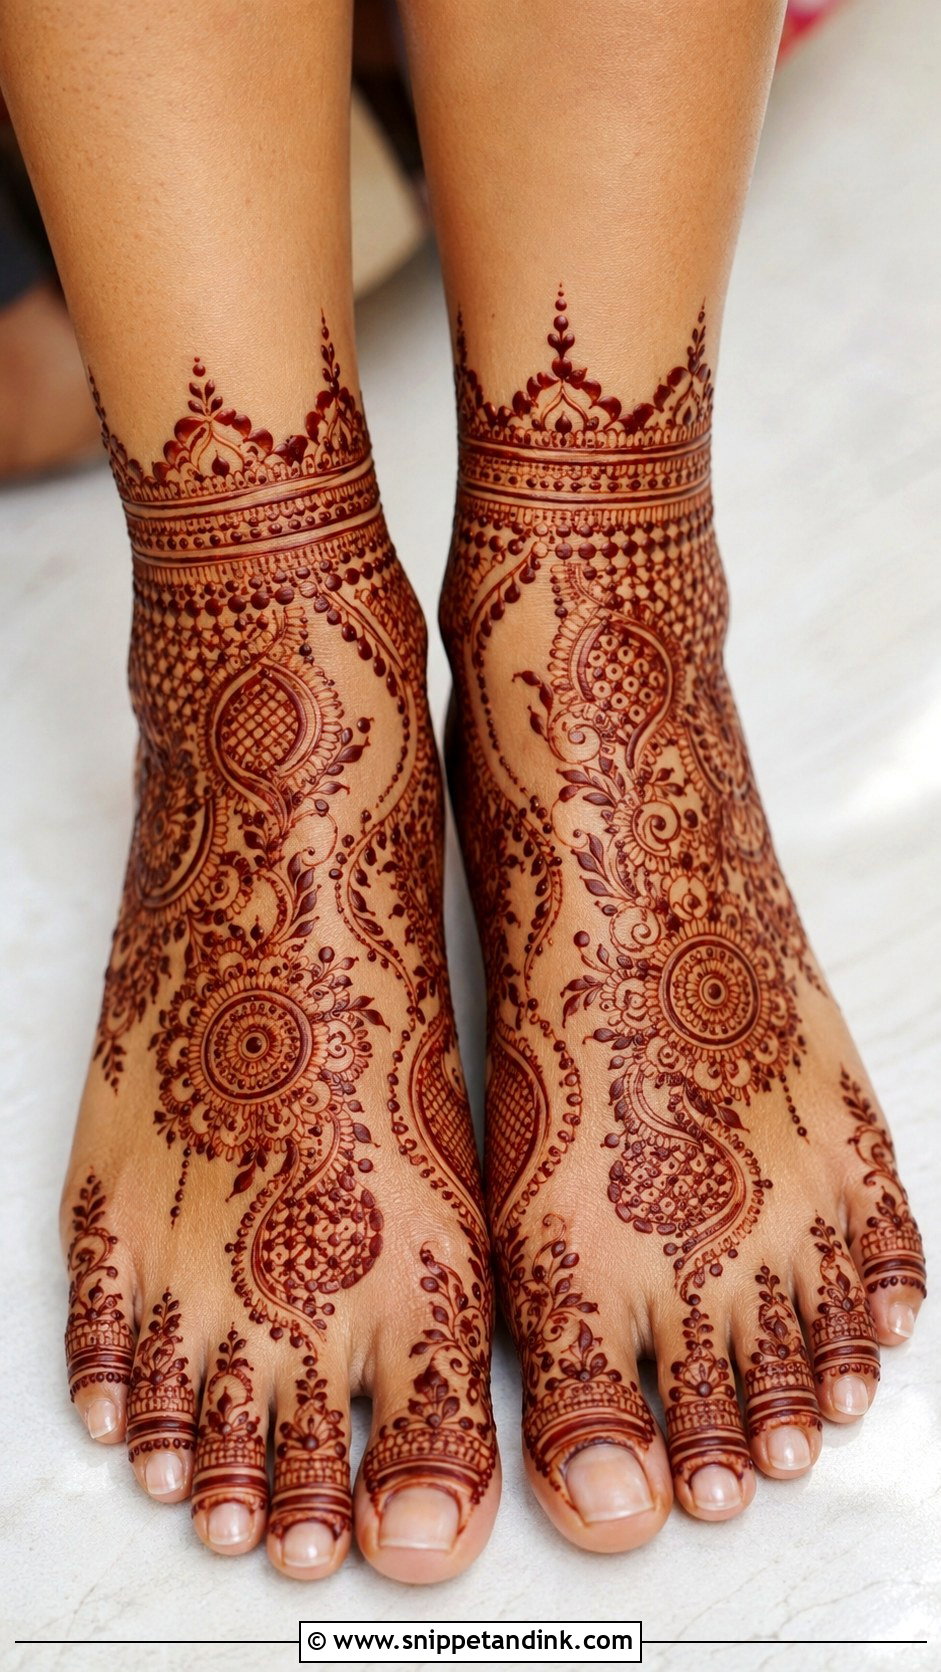
Pakistani foot work tends to pair fine traditional detail with a bolder, flowing structure: floral vines, paisleys, circles, delicate mesh and ornamental ankle bands. A common layout goes decorated toes, floral center, ankle border. It can be heavy for a bride or medium for Eid and family events. The balance I aim for is rich without being packed, with fine fillers and slightly thicker outlines so the motifs stay visible under a gharara or sharara hem.
23. Moroccan Foot Mehndi Design
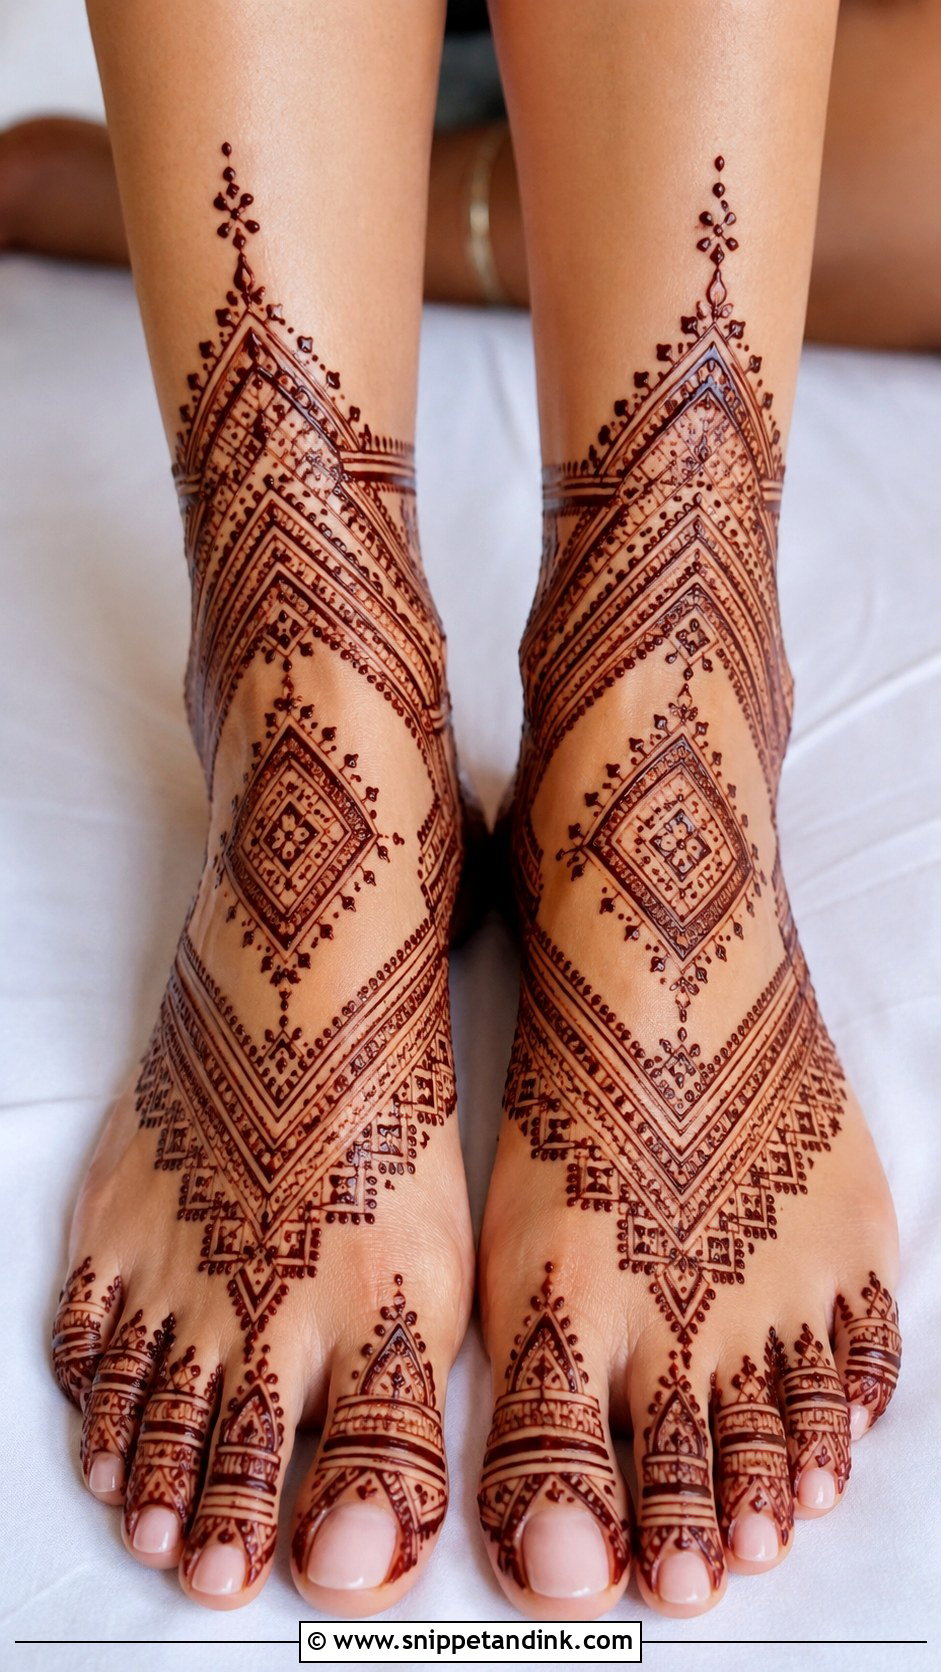
Moroccan-style work swaps floral trails for geometry: diamonds, triangles, lines, grids and repeated blocks across the top of the foot or in a strong ankle-to-toe column. I’d pick it for someone who likes clean symmetry more than dense florals. It depends on straight lines, which are hard on a curved surface, so I keep my hand braced on the foot and work in short strokes. Small dots or leaf details between sections can soften it.
24. Gulf Foot Mehndi Design
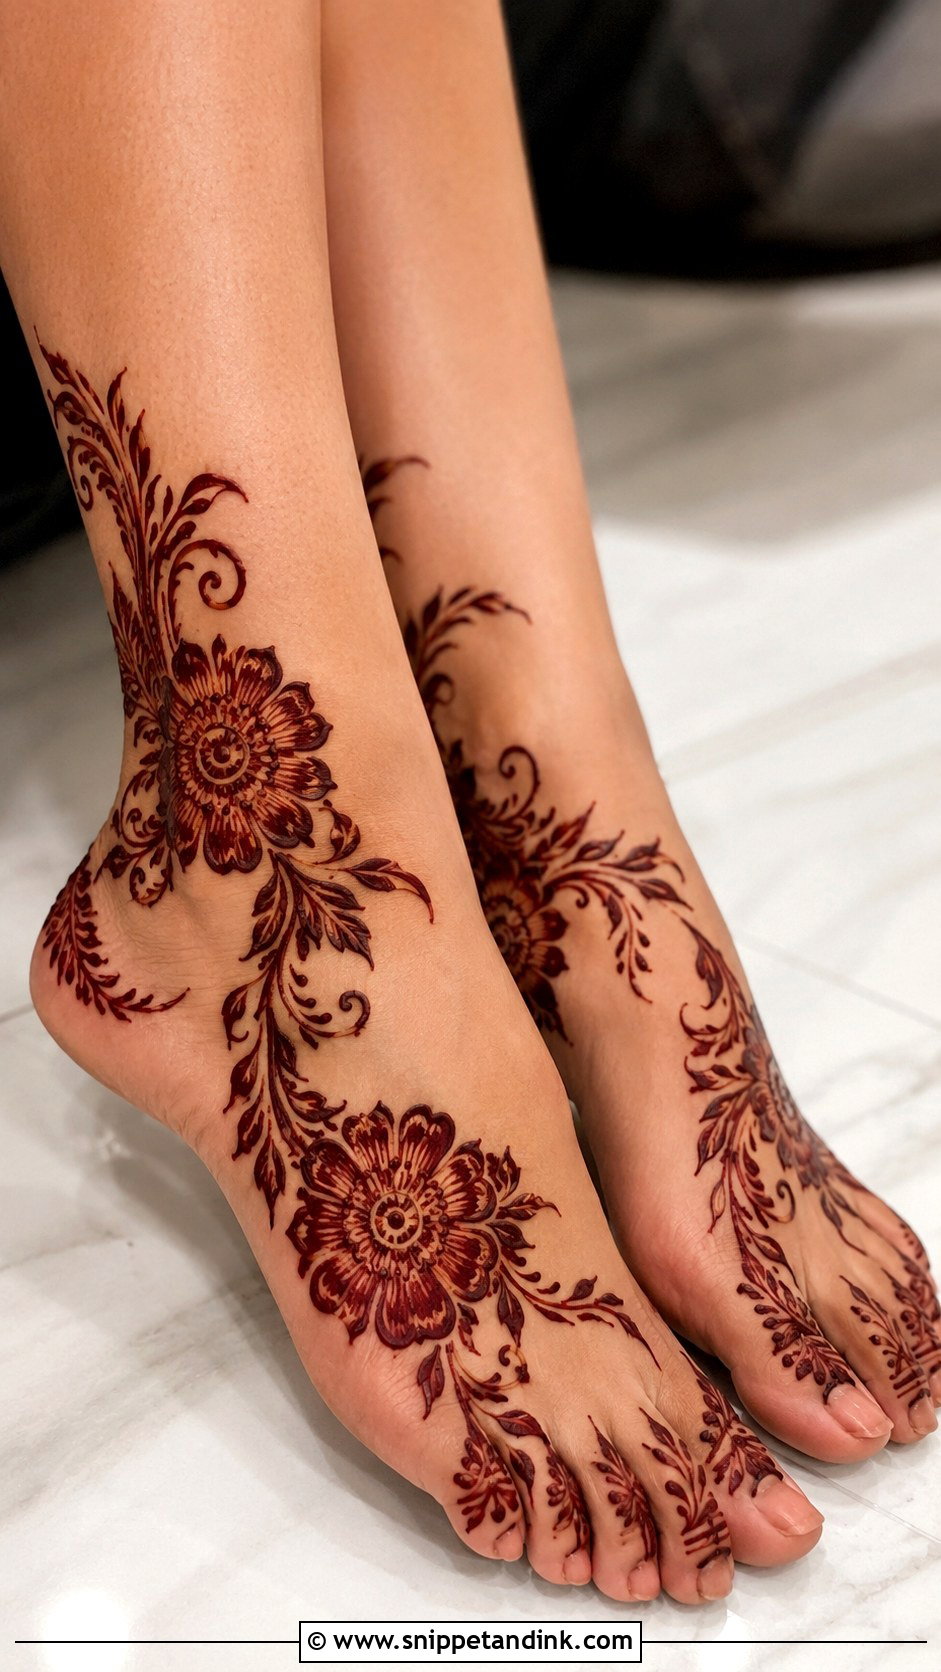
Gulf foot mehndi design, often called Khaleeji, is bold and spacious: large flowers, flowing leaves, thick outlines and plenty of bare skin, sweeping from the toes to the ankle or down one side. Thick lines hold more paste and stain strongly, which is why this style ages so well over the week. I keep petals large and smooth, and add dots or small vines only where there’s an awkward gap.
25. Rajasthani Foot Mehndi Design
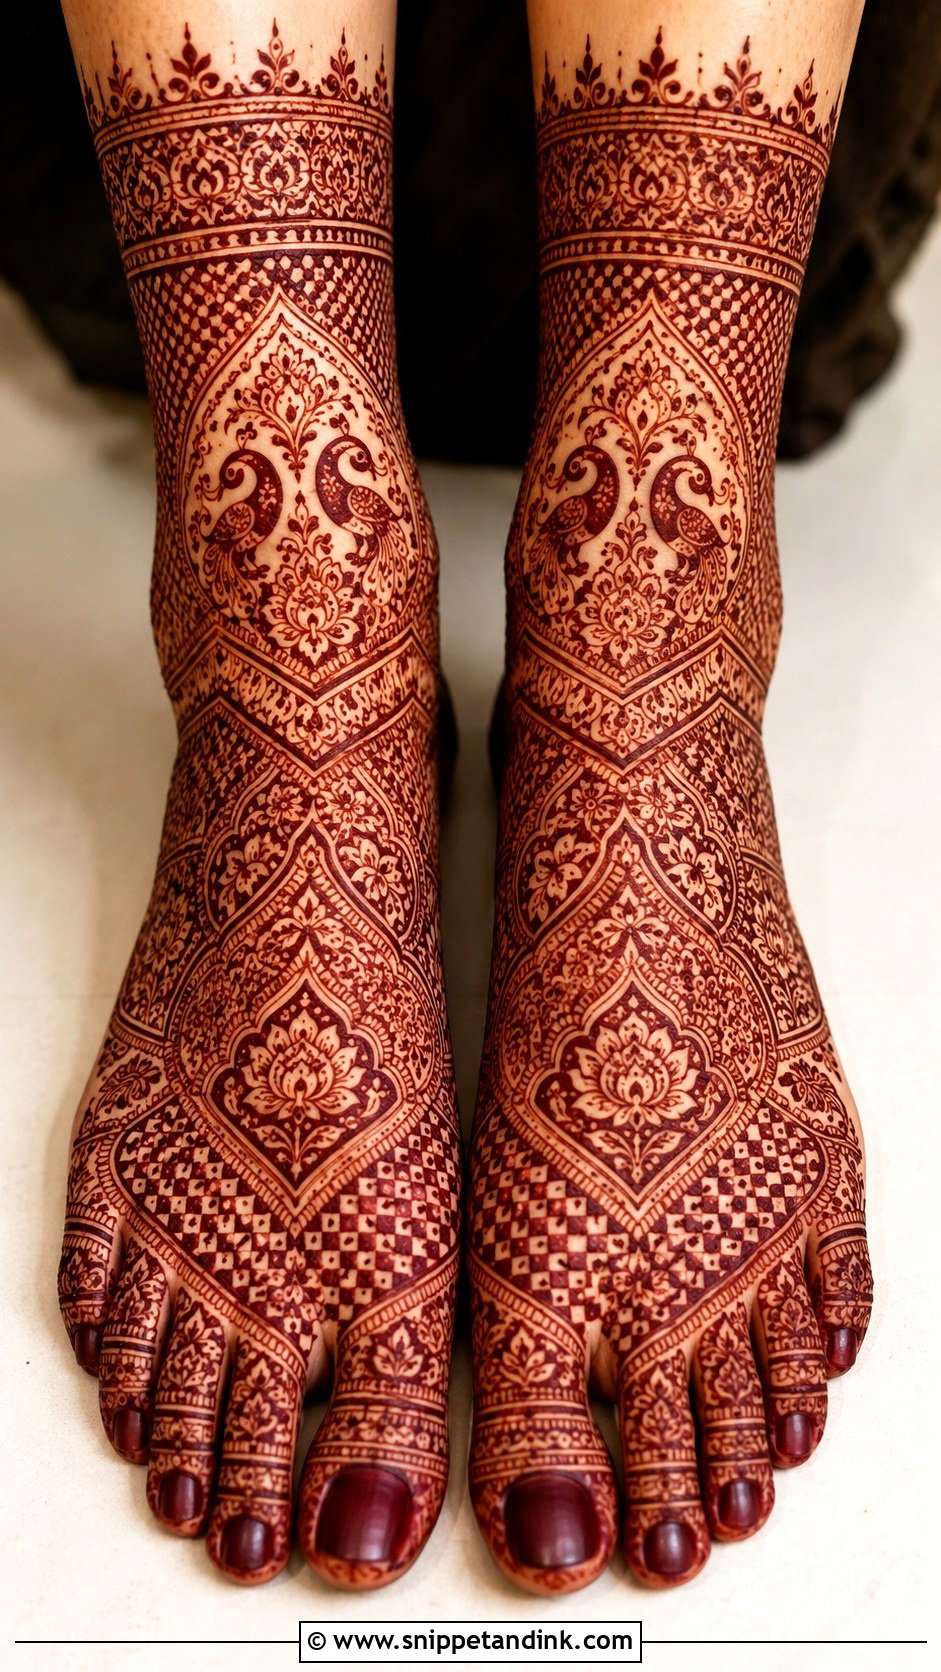
Rajasthani work is intricate: peacocks, paisleys, bride and groom figures, checks, lotus motifs and fine ornamental fill, often running up the lower leg in symmetrical panels. It takes patience and a steady cone. The trap is making the main motifs too small, so they get lost once the fill around them stains. I size the peacocks and figures first, then let the fill support them rather than bury them. It suits a lehenga with heavy anklets and bridal jewelry.
26. Marwari Foot Mehndi Design
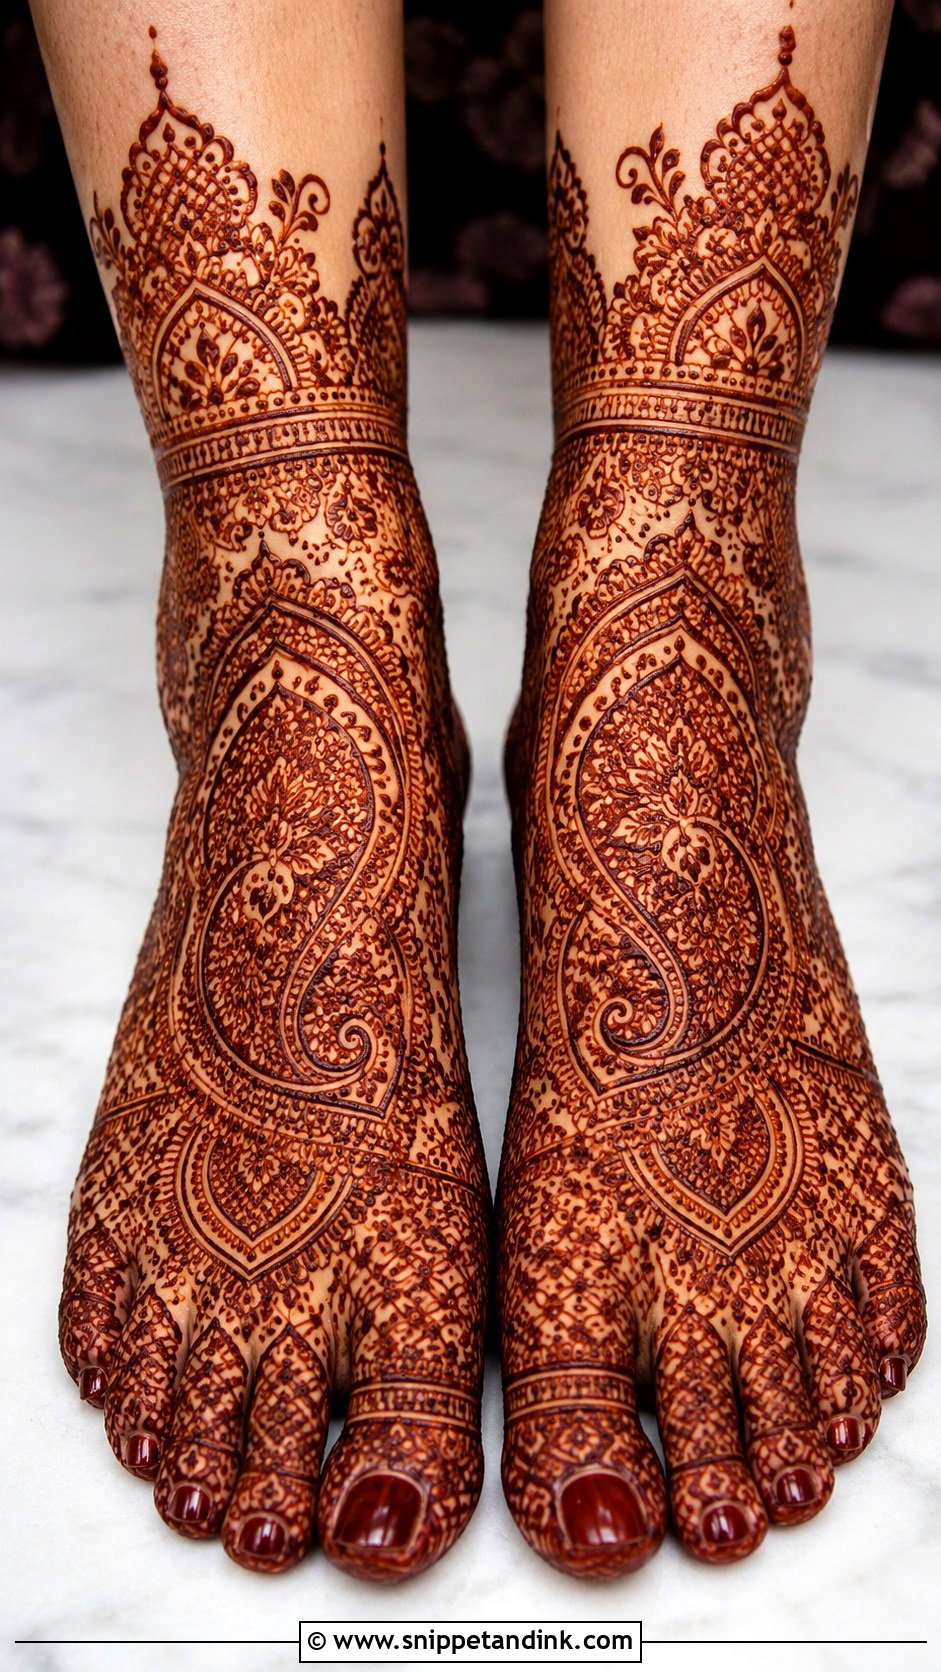
Marwari foot mehndi design is dense and ornamental: layered paisleys, small flowers, curved borders, fine dots and symmetrical panels around the feet and ankles, sometimes extended up the leg for a bride. It works when patterns sit close but stay separated. Lines drawn too tightly bleed together as the stain deepens and the whole area reads as one dark patch. Toe details and an ankle border complete it.
27. Peacock Foot Mehndi Design
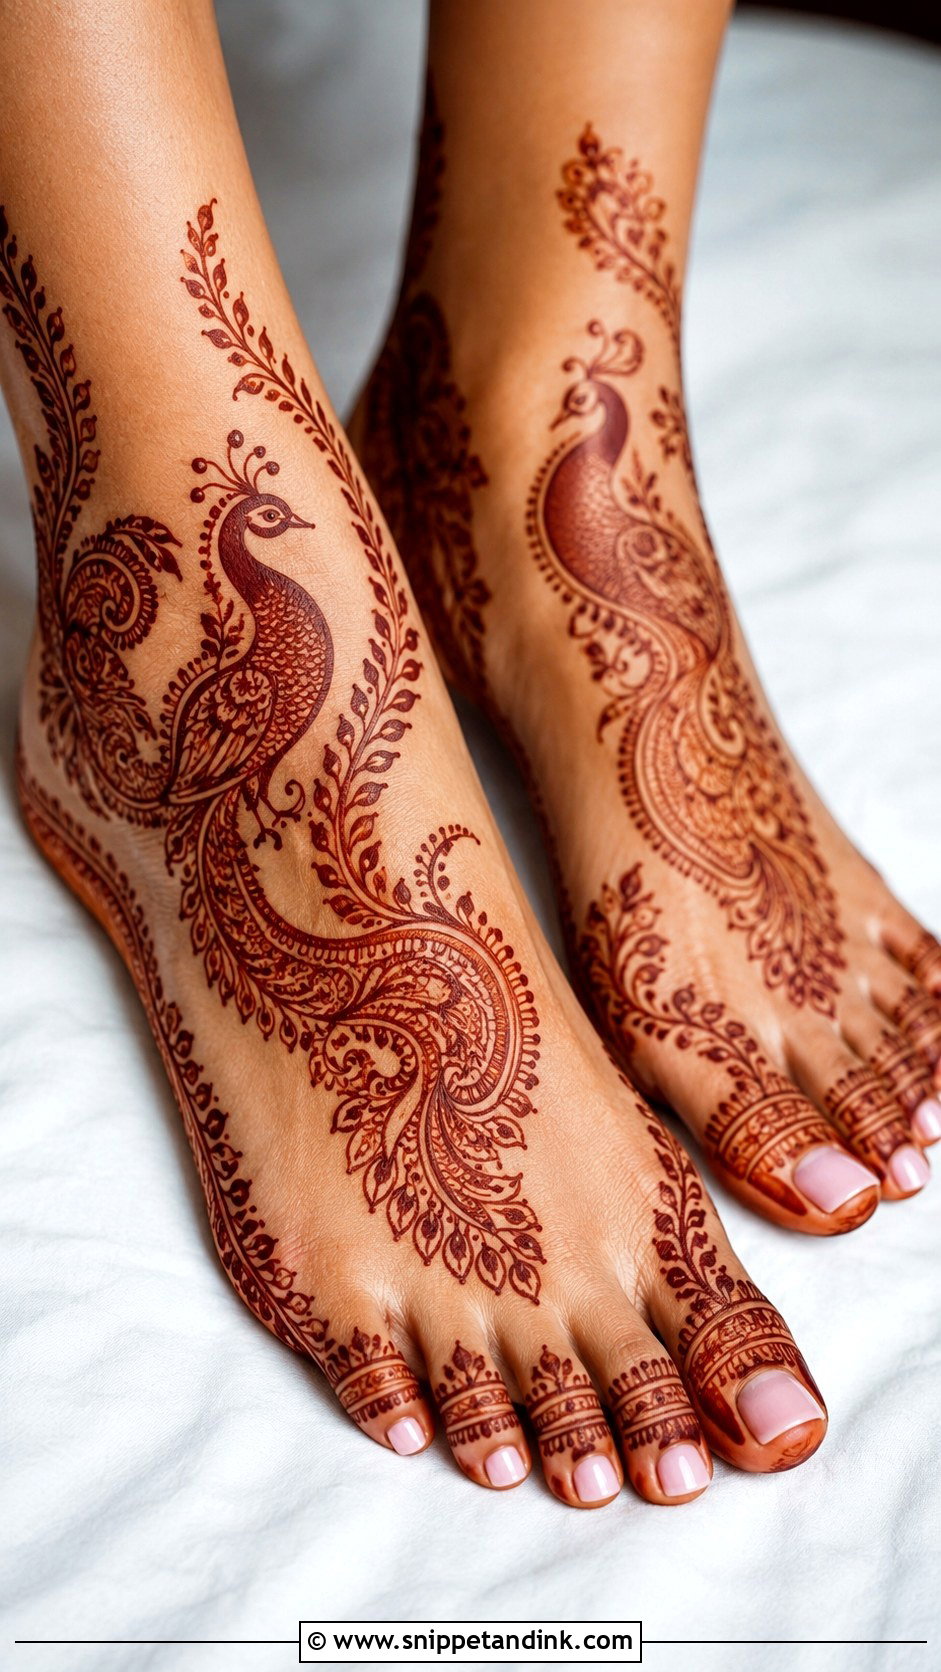
A peacock can sit near the ankle, along the side or on top of the foot, with its feathers opening into paisleys, curves and leaves. I always draw the bird’s body and neck first and make sure the shape is clear before adding any fill, because an overfilled peacock turns into an unreadable blob. The feathers should follow the foot’s curve. Toe bands and a light ankle border balance it.
28. Lotus Foot Mehndi Design
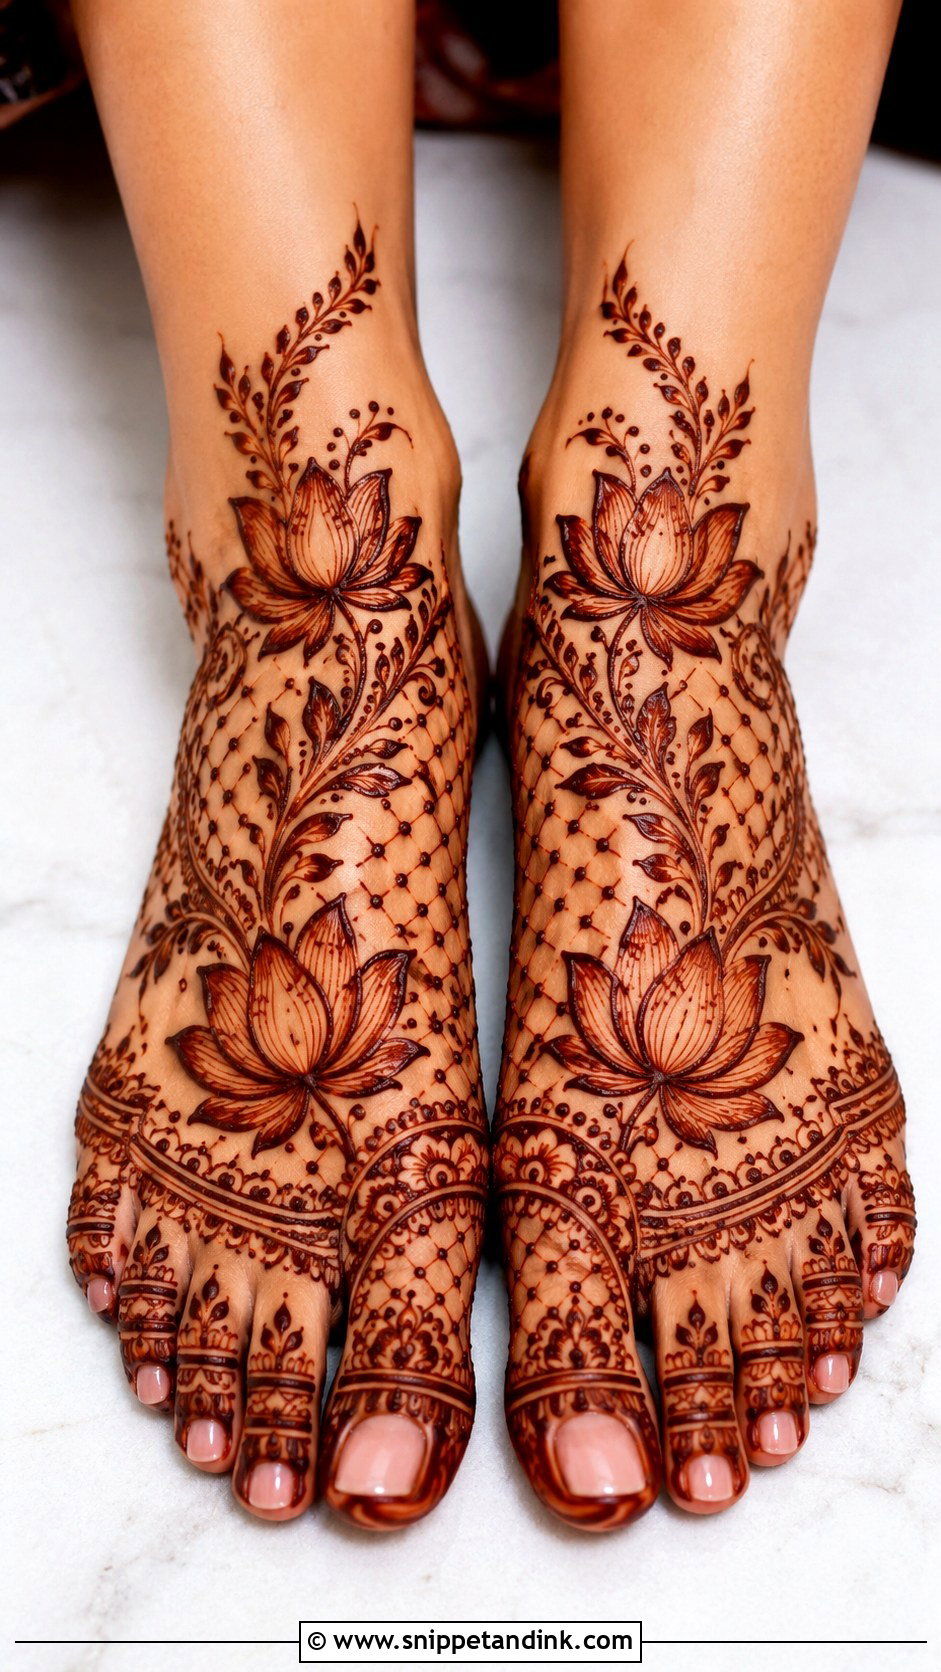
The lotus works at the center of the foot, near the ankle or inside a larger bridal layout, with shaded petals, dots and leafy stems. It’s a natural fit for poojas and classical outfits. Petals drawn too narrow vanish as the stain darkens and the lines thicken slightly, so I give each one more width than looks necessary on the day. One lotus per foot is enough for a simple version; add jaali and paisley fill for a bride.
29. Rose Foot Mehndi Design
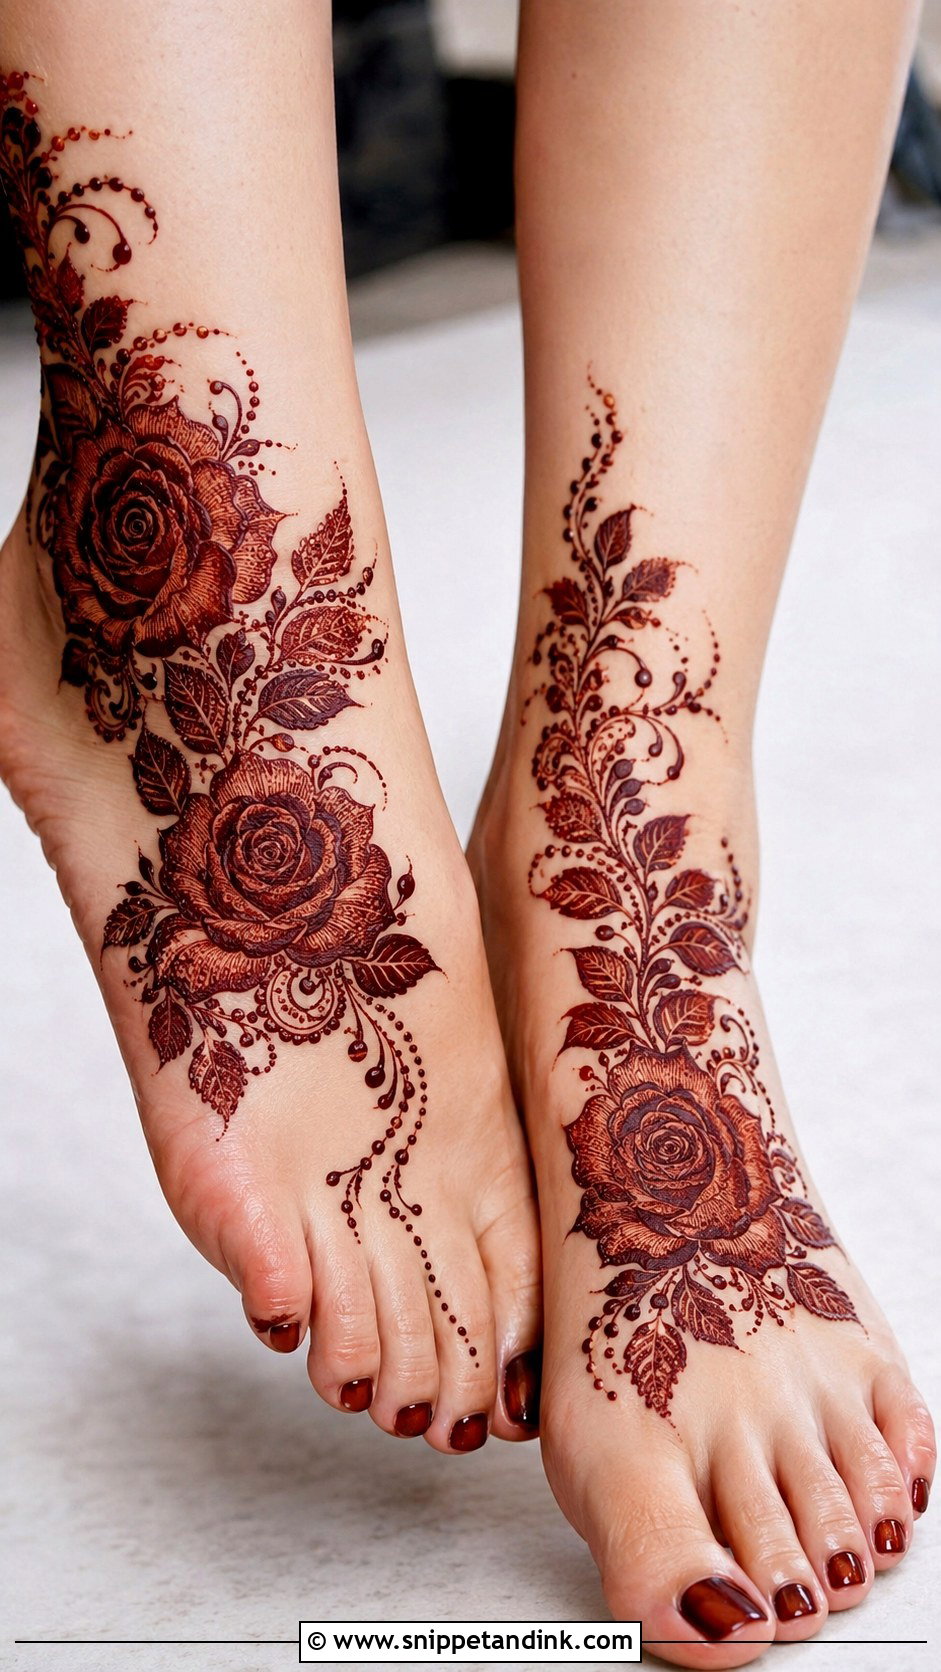
Roses sit well on the side of the foot, at the center or within an Arabic trail. Shaded petals give depth, and leaves carry the flow toward the toes and ankle. I draw the outer petals in a strong line and curve the inner ones tightly, which is what makes a henna rose read as a rose rather than a spiral. It suits bridesmaids and engagement ceremonies, and a few dots around it keep it light.
30. Vine Foot Mehndi Design
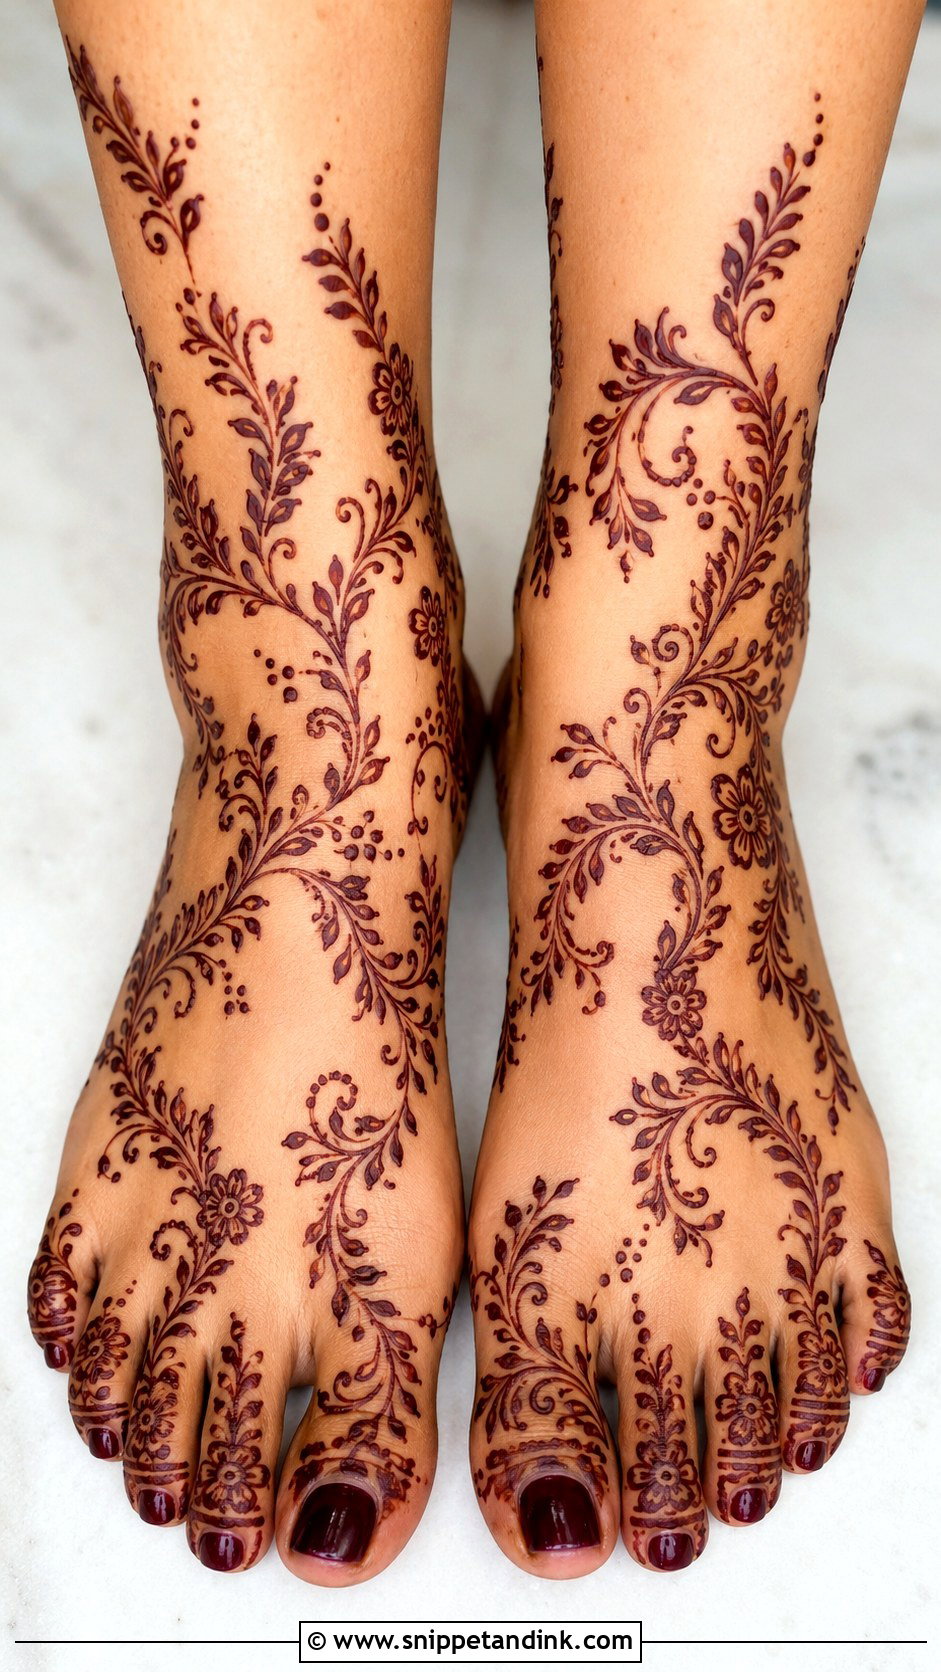
A vine is the quickest way I know to give a foot shape. It starts at the big toe, travels across the foot and ends near the ankle, with leaves, tiny flowers and dots along the way. It lengthens the foot without covering much skin, so it’s good at short notice. Keep the stem continuous; breaks in the line are what make a vine look amateur.
31. Anklet Foot Mehndi Design
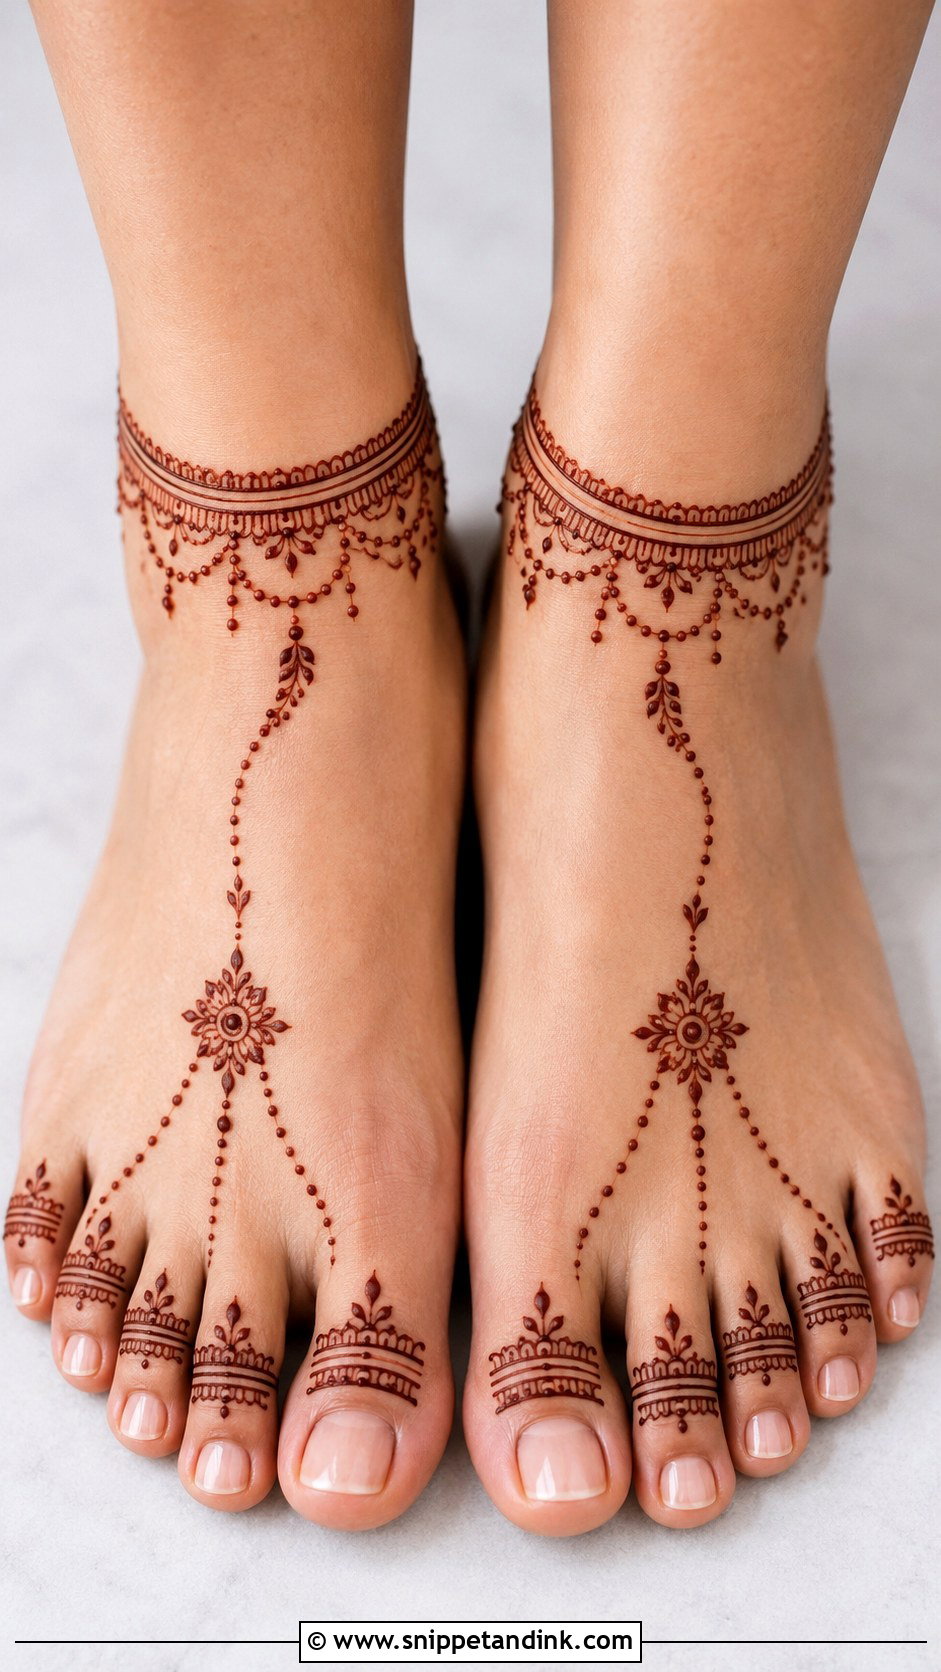
Anklet designs turn the ankle into jewelry: a simple, floral, beaded or layered band, linked to the toes with thin chains or a small motif. I add tiny drops hanging under the band to give a payal effect. The band has to sit at the same height on both ankles, which I check with the bride standing, not sitting, because the skin shifts. It’s minimal enough for a festival and can be built up for a wedding.
32. Half Foot Mehndi Design
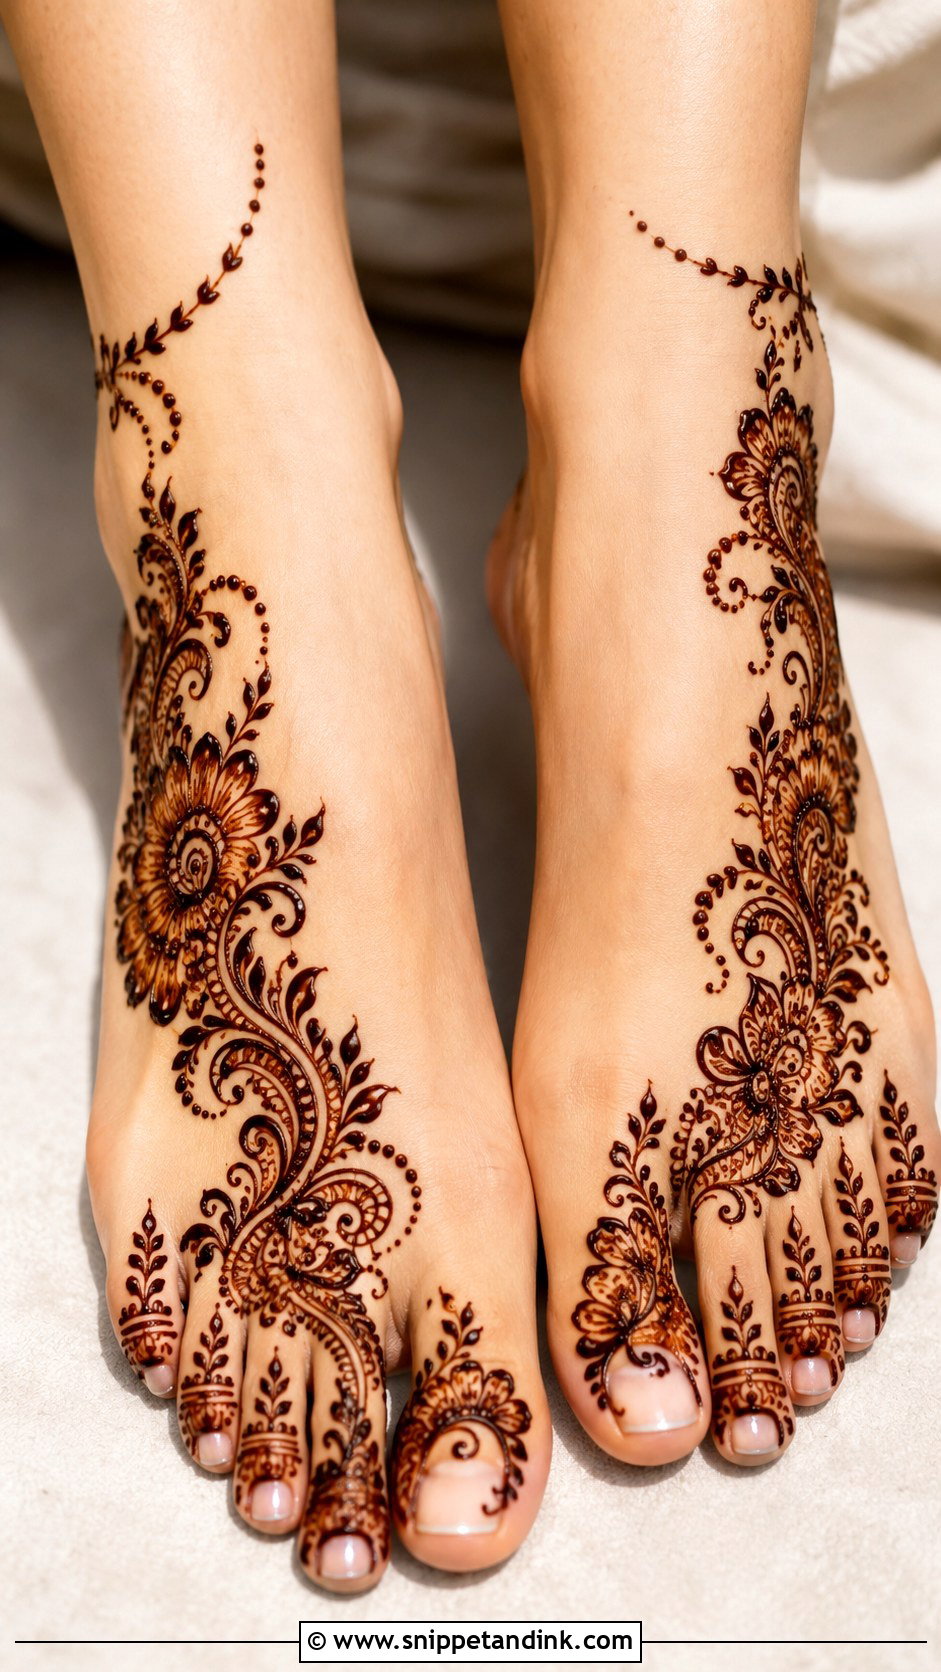
Half designs cover one clear part of the foot, the toes and one side, or the ankle and upper foot, in Arabic, floral, geometric or mandala style. They’re quicker to apply and dry faster, so they work for bridesmaids and family gatherings. To look intentional, the chosen section should be fully decorated. Small motifs scattered all over the foot look unfinished rather than light.
33. Heavy Foot Mehndi Design
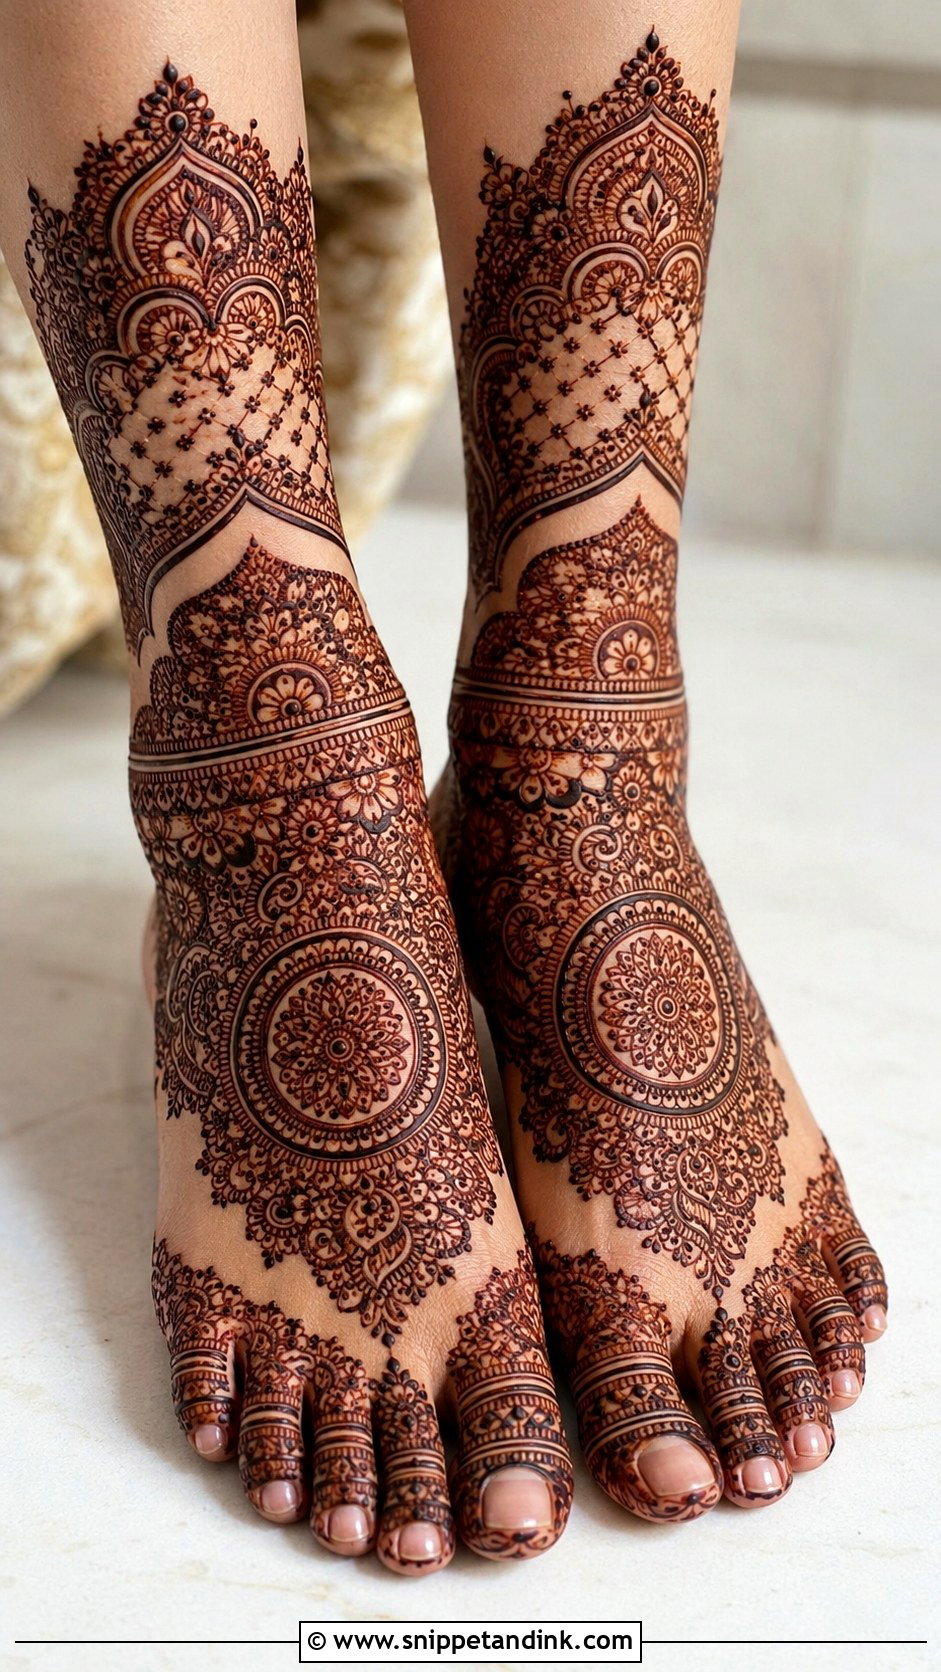
Heavy work covers the toes, top, sides, ankle and lower leg with paisleys, florals, jaali, mandalas, scalloped borders, peacocks and fine fill. I organize it in sections separated by borders, because without that structure dense work looks crowded rather than rich. It’s a long sitting, and the stain on a heavy foot can be very deep after two days, especially on the toes and around the ankle bone. For a bride who loves a bold traditional look, it gives a complete finish from toe to ankle.
34. Festival Foot Mehndi Design
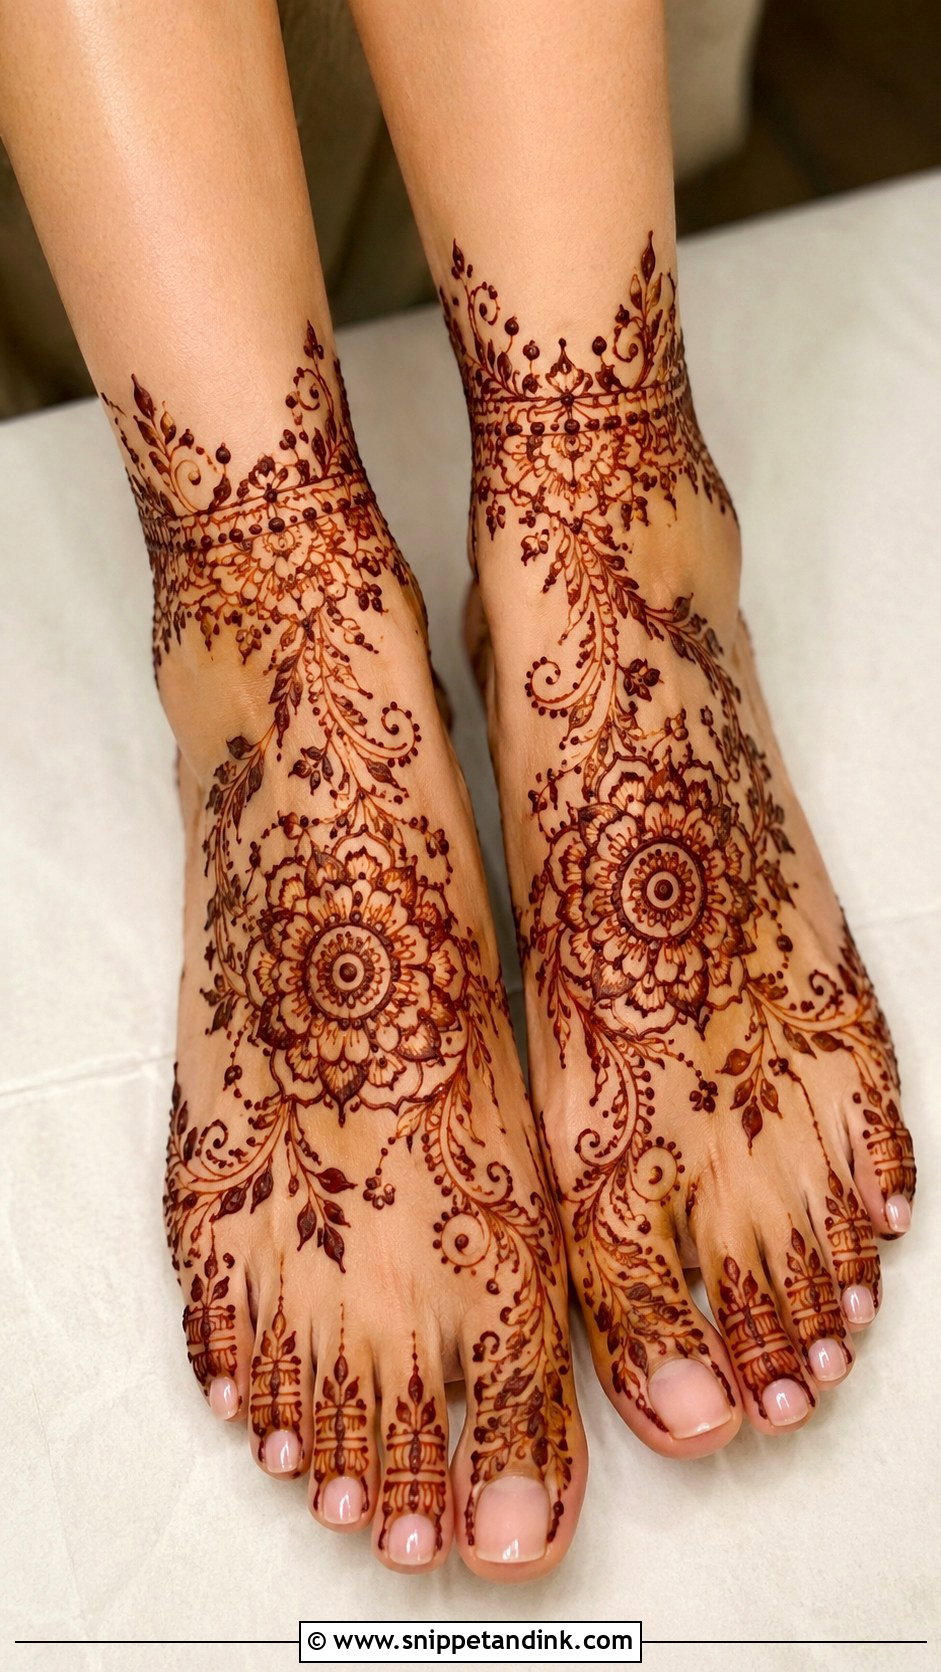
Festival designs are medium coverage, with flowers, vines, mandalas, toe bands and ankle details, for Eid, Diwali, Karwa Chauth, Teej, Raksha Bandhan and family gatherings. They have to survive daily life, which means walking, cooking and washing, so I keep lines clean and avoid fine fill that fades into patches. If you’re applying at home, a simple version is fine; a professional can give you more detail.
35. Wedding Foot Mehndi Design
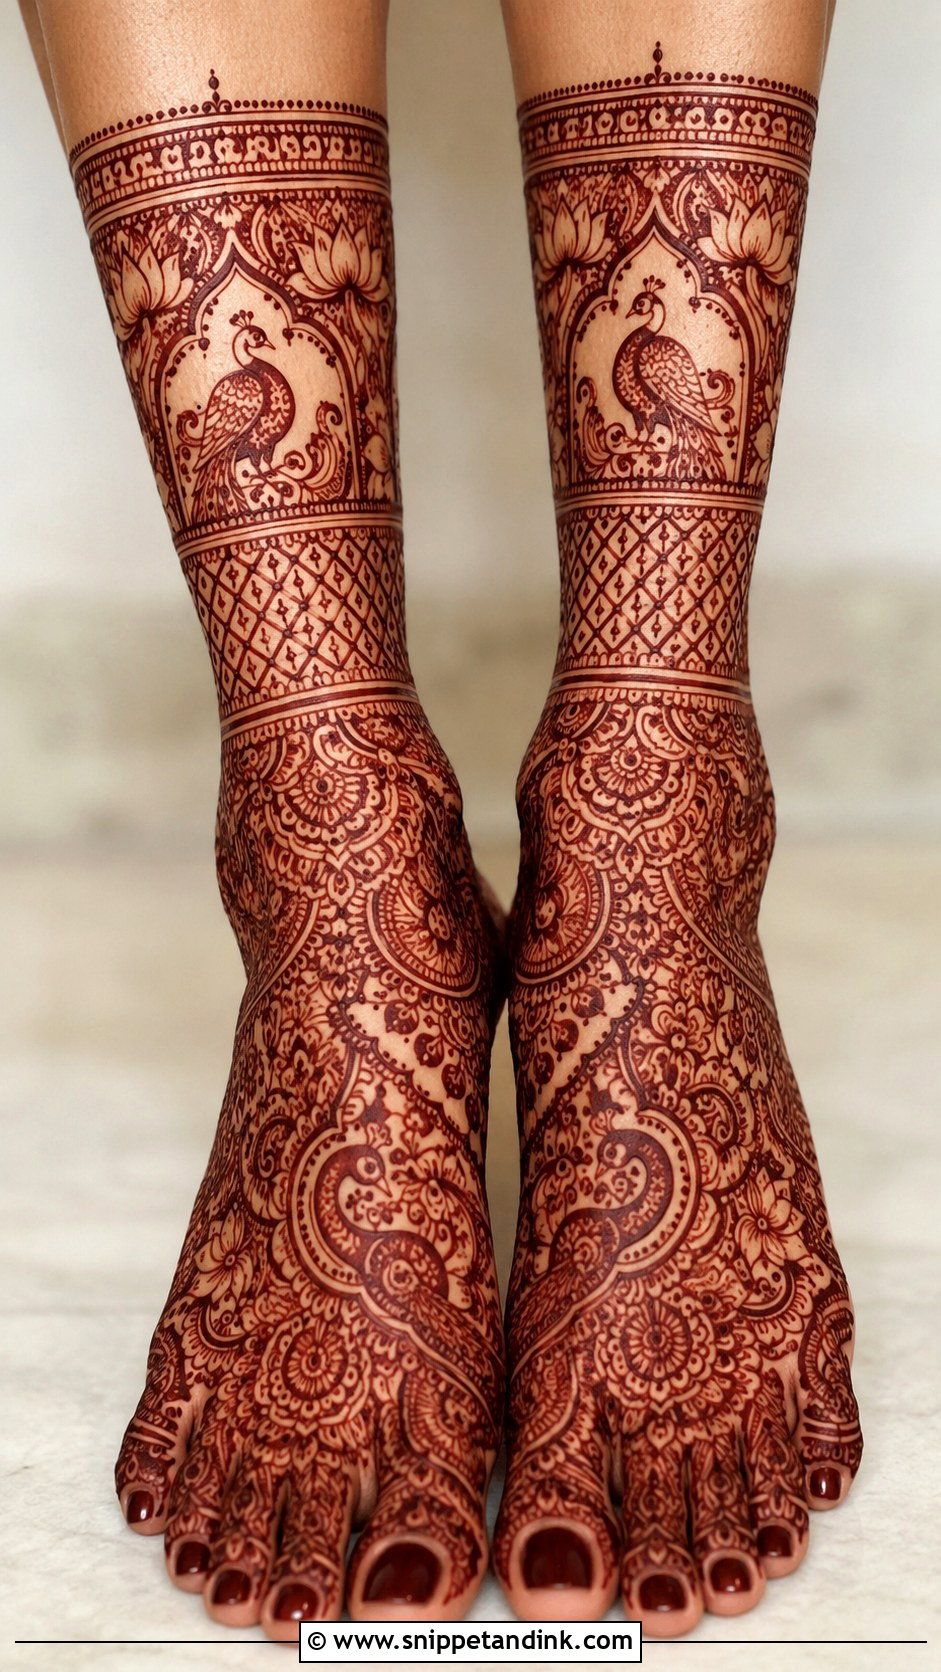
On a wedding day the foot design should agree with the hands, the outfit and the jewelry. A bride can wear full traditional coverage with paisleys, lotus, jaali, peacocks and a leg extension, while guests and bridesmaids usually do better with Arabic trails, mandalas or anklet patterns. I look at the lehenga before I decide. A heavily embroidered hem pairs well with a cleaner Indo-Arabic foot, while a plain one can carry a dense full design.
Why Feet Stain Darker, and How to Keep the Color
The thick skin on the soles, toes and heels takes up more dye than most other skin, and feet are warm, so a foot design usually ends up deeper than the inner arm or shin. The stain starts bright orange when the paste comes off and darkens over the next 24 to 48 hours. That’s why I schedule bridal mehndi one or two days before the wedding, so the color peaks on the day.
The first day after the paste
- Leave the paste on for as long as you comfortably can, ideally overnight. Dab a little lemon and sugar mix on it once it’s dry to keep it stuck to the skin.
- Wear loose cotton socks to bed over a layer of tissue so the paste stays warm and doesn’t flake onto the sheets.
- Scrape the dried paste off rather than washing it, and keep water away from the design for as long as you can after that.
- Avoid scrubs, waxing and pedicures from the day of application onward. Book any foot treatments before your mehndi, not after.
Expect the sole and the toe pads to fade first, because walking wears that skin away fastest. The top of the foot holds its color longest. And only ever let anyone apply natural henna to your feet. Dark paste that promises a black stain within an hour often contains PPD, a chemical dye that can cause serious skin reactions.
Which Foot Design Fits Your Day
Start from the occasion, then your footwear and how long you can sit. Full bridal patterns suit a wedding, and trails, mandalas, anklet designs and vines suit festivals and family events. Whatever coverage you pick from the 35 above, ask for clean spacing and clear motifs, and give the paste time on the skin. Those two things decide how the stain looks on the day far more than the choice of pattern.
You'll Like These Ideas:


Leave a Reply