
Engagement mehndi has a different job from the wedding set. It needs to look finished in close-up ring photos, sit comfortably under the outfit you’ve chosen, and fade in time for the heavier bridal mehndi that may come only weeks later. When a bride books me for an engagement, the first thing I look at is her ring hand, because that is where every camera ends up. Sleeve length, bangles and the time of the ceremony shape the layout more than any trend does. Below are 20 Unique Engagement Mehndi Designs for Bride, from dense Indian palms to open Arabic trails, with notes on how each one actually behaves on the skin.
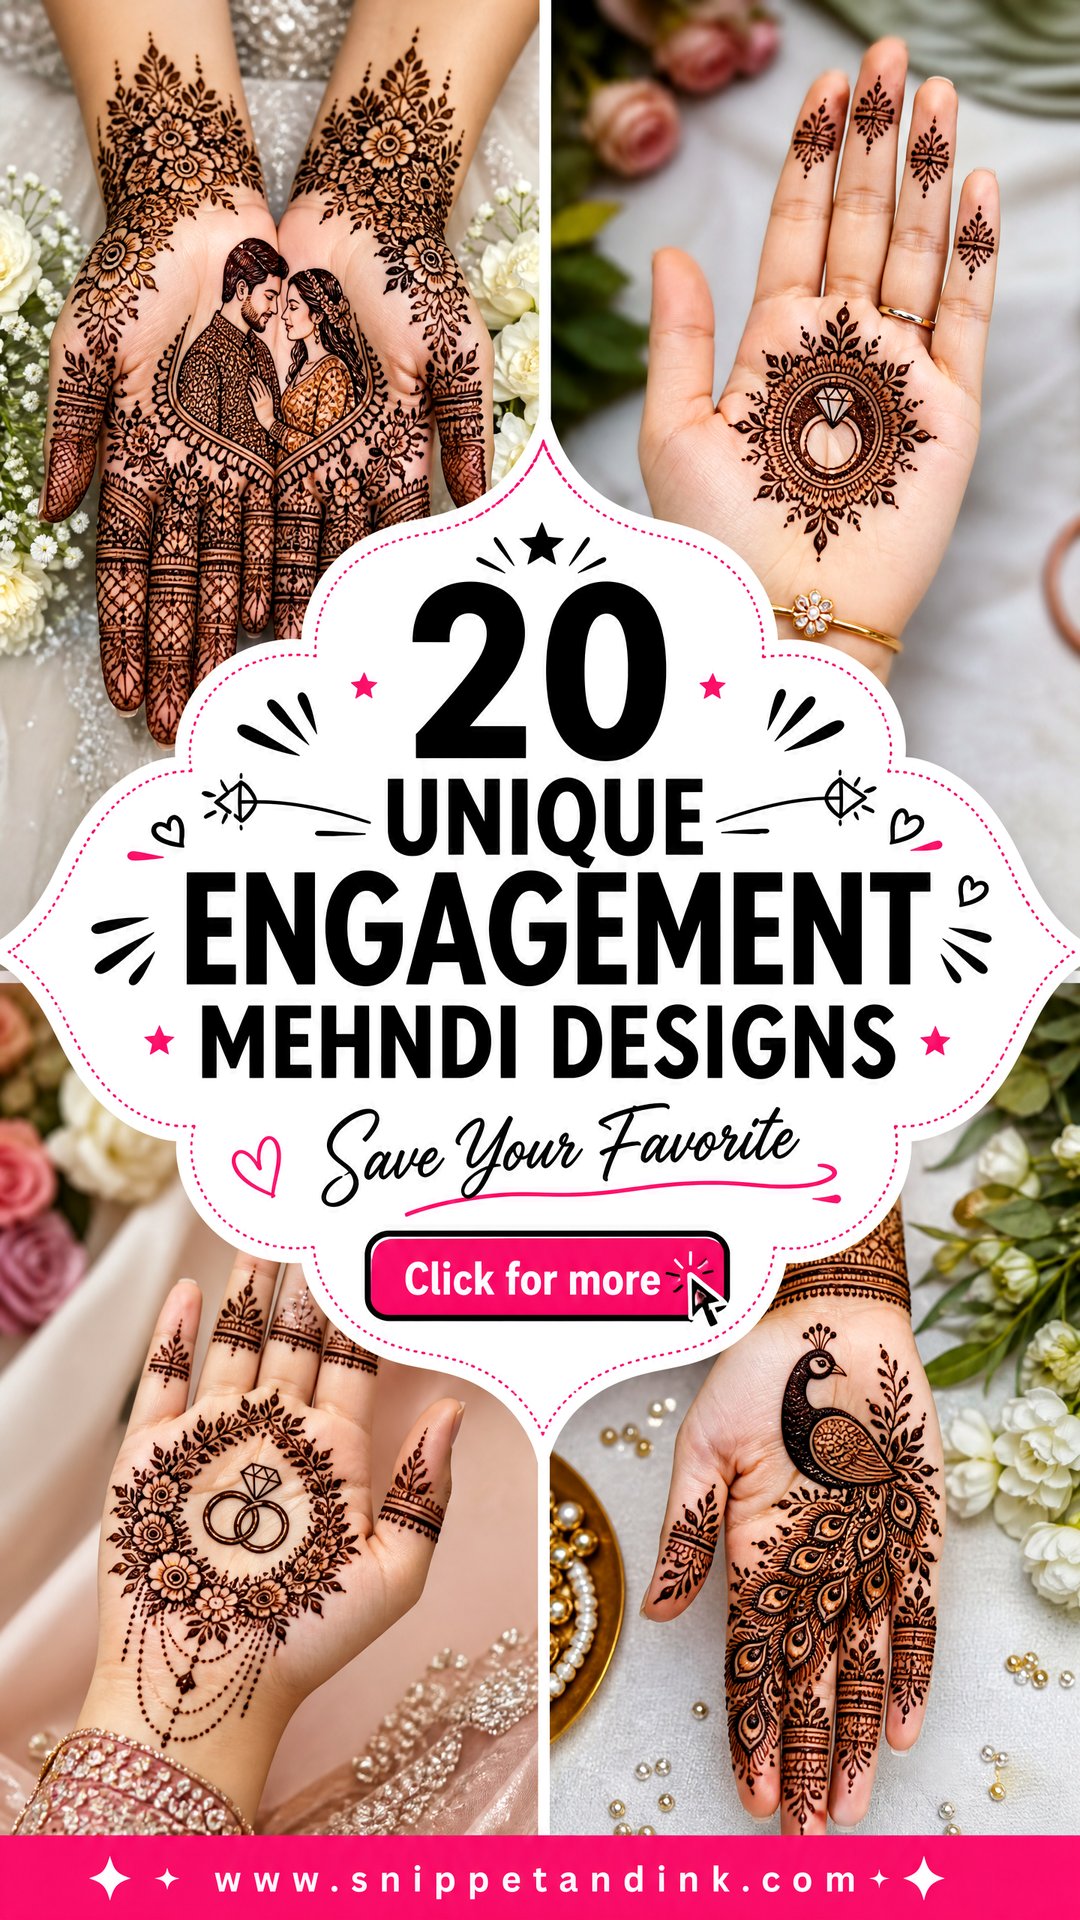
Two Days Out: Giving Engagement Henna Time to Darken
Natural henna doesn’t come off the skin at its final colour. When the dried paste is scraped away, the stain underneath is a bright orange, and it oxidises toward reddish brown over the next 24 to 48 hours. That is why I ask engagement brides to book their mehndi one to two days before the ceremony, not the morning of. Applied on the day, the ring photos will catch the orange stage.
Palms and fingertips darken most; the back of the hand and the forearm come up a shade or two lighter on almost everyone. If the ceremony is in the evening, a late-morning appointment the day before usually lands the stain near its peak. If your wedding mehndi is close behind, count backwards too: a stain fades over one to three weeks, so a heavy engagement set less than two weeks before the wedding can leave a ghost pattern under the bridal one.
What I Want to See Before I Draw a Single Line
A good layout is planned around you, not copied from a photo. Send your artist these things ahead of the appointment and the sitting goes faster:
- A photo of the outfit’s sleeve, so the design ends where the fabric starts rather than vanishing under it.
- The ring, or a picture of it on your finger. A wide band or a tall setting changes where I leave bare skin.
- Any bangles or a kada you’ll wear, because a design that stops exactly at the bangle line looks intentional.
- Whether you’ve had a reaction to henna before. Natural henna is rarely a problem, but I still do a small patch test for anyone unsure.
One firm request: insist on natural henna. So-called black henna and fast-stain cones can contain chemical dyes that cause blistering and lasting skin damage. Real henna paste smells earthy, often of essential oils like eucalyptus or cajeput, and never stains black within minutes.
1. Full Hand Engagement Mehndi Design
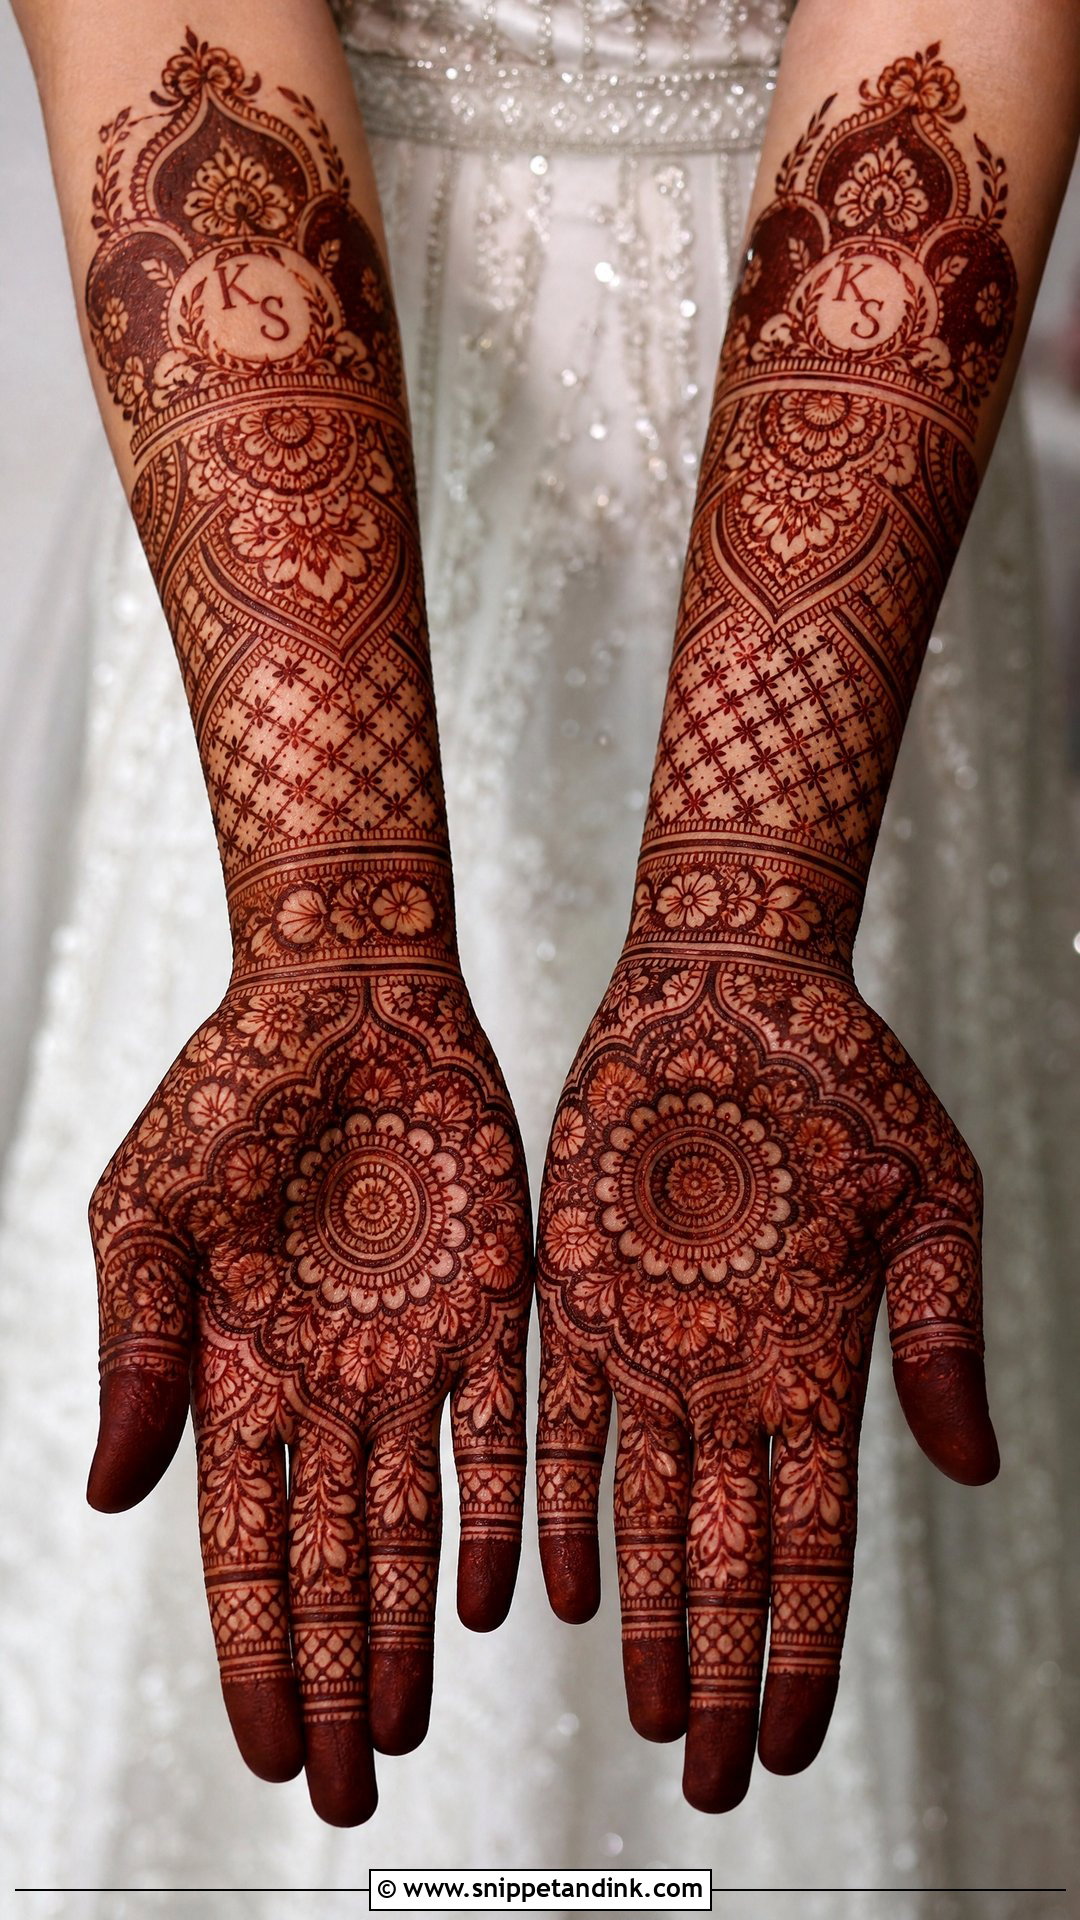
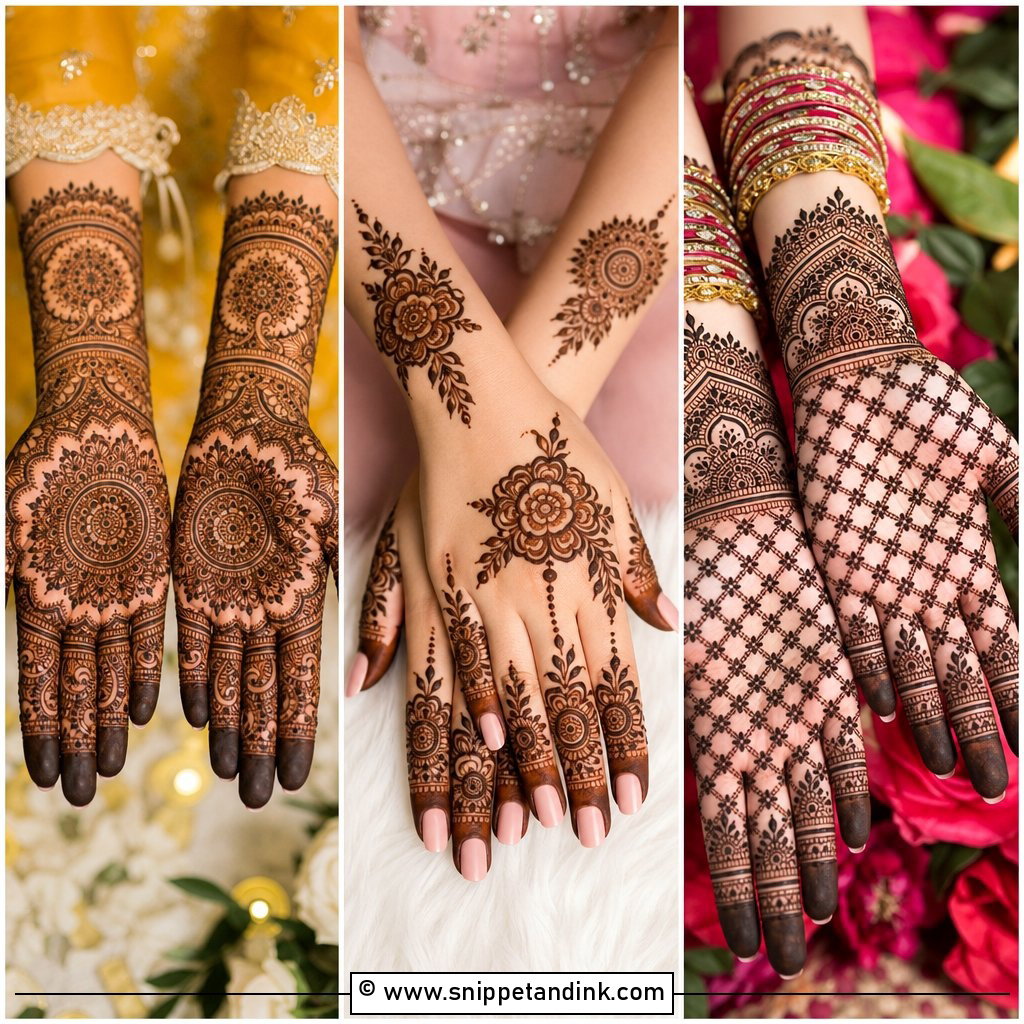
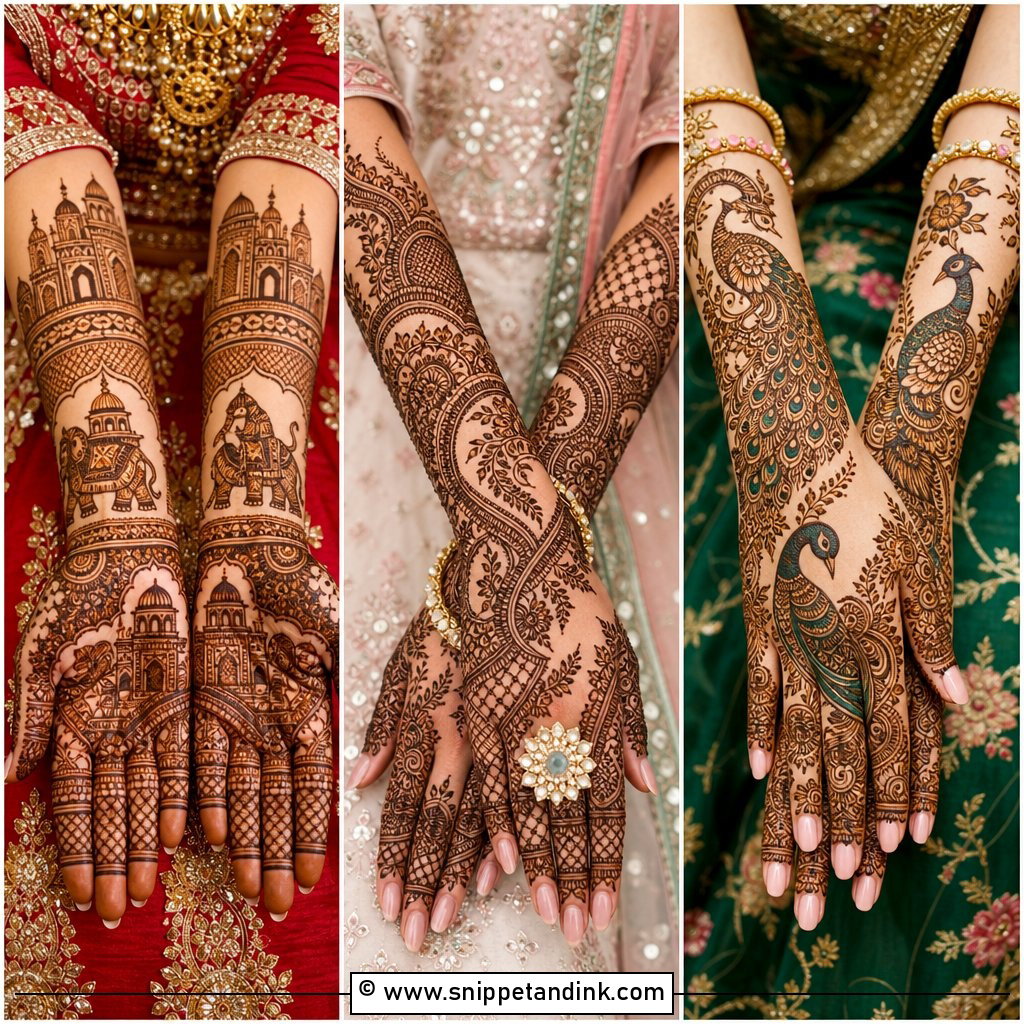
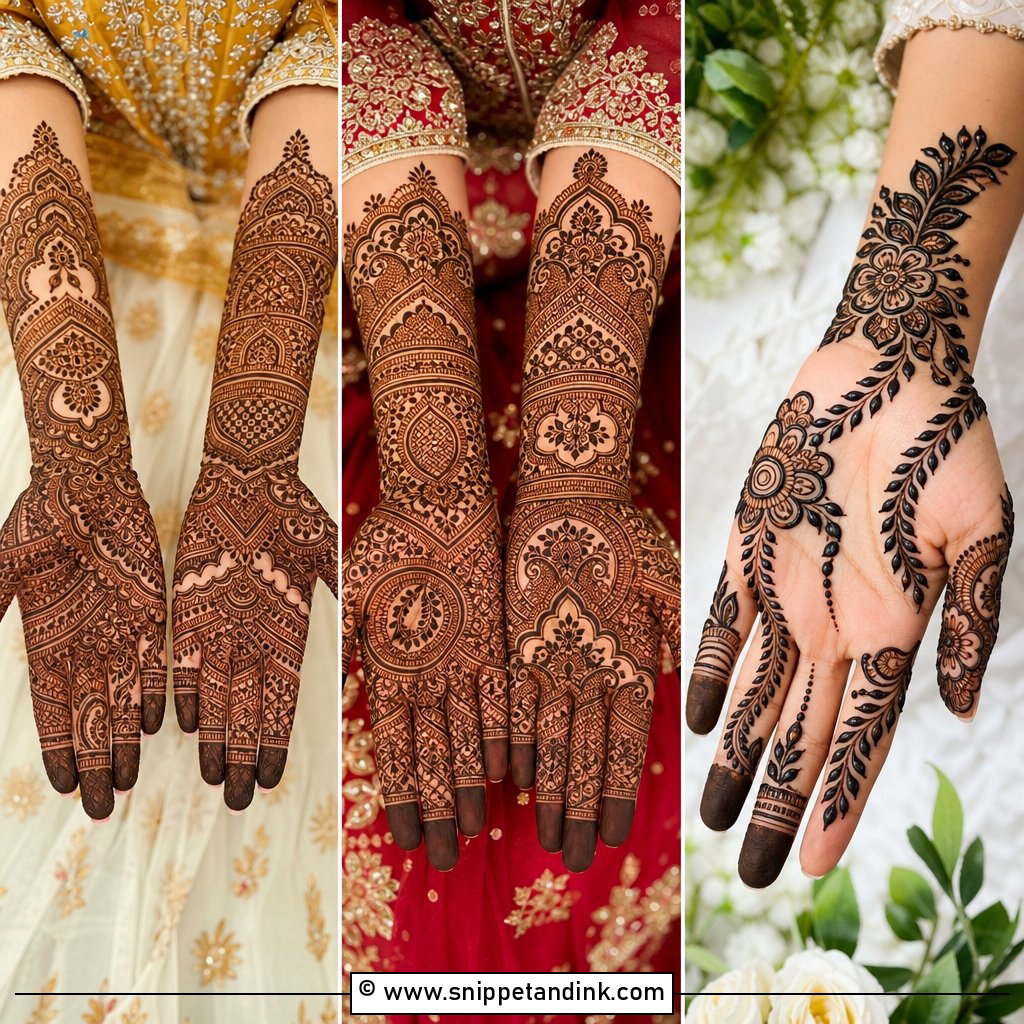
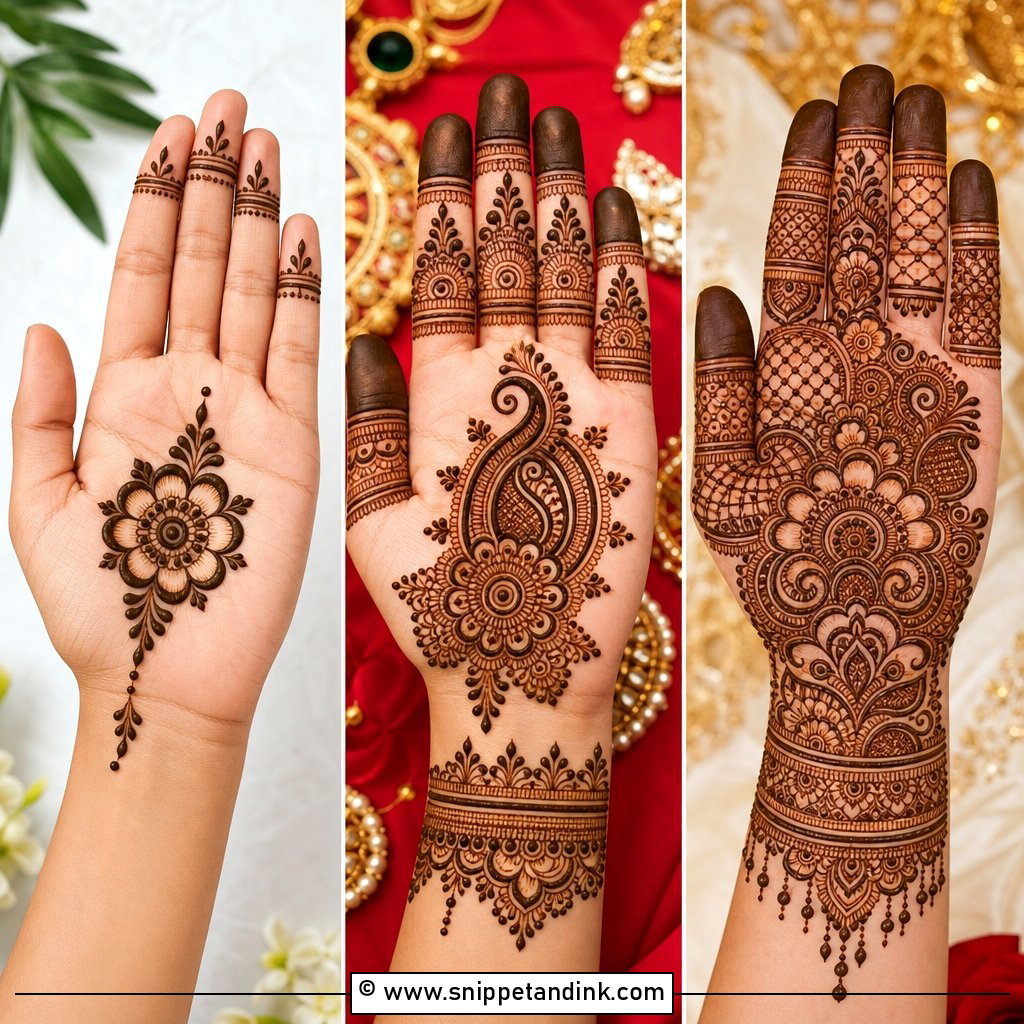
A full hand engagement mehndi design covers palm, fingers, wrist and the lower forearm with florals, paisleys and jaali filler. It takes me roughly twice as long as a back-hand layout, so plan for a long sitting and a long drying time after it. For an engagement I deliberately leave small pockets of bare skin around the central motifs; on the wedding day you can go solid, but here the gaps keep the hand from reading as one dark blur in photos. Initials or the date tucked near the wrist bone are easy to add and easy to find later.
2. Back Hand Engagement Mehndi Design
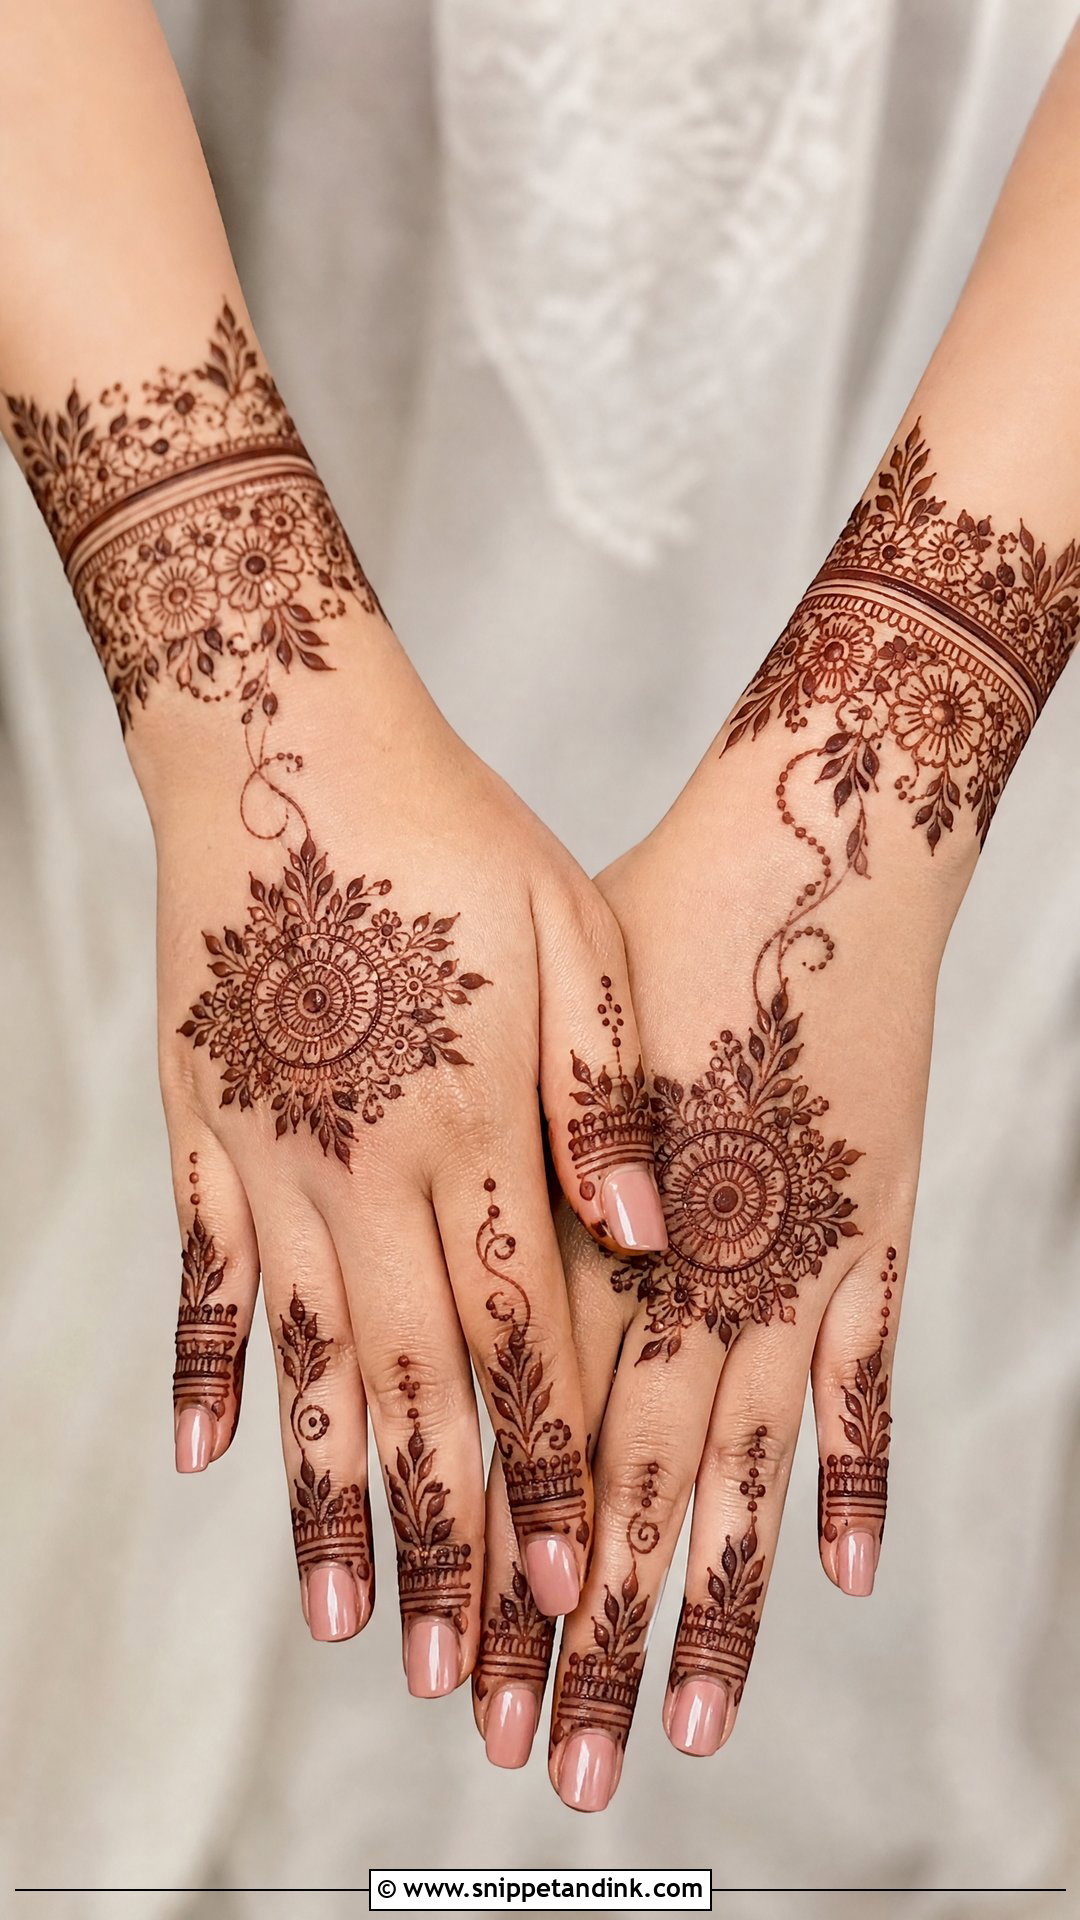
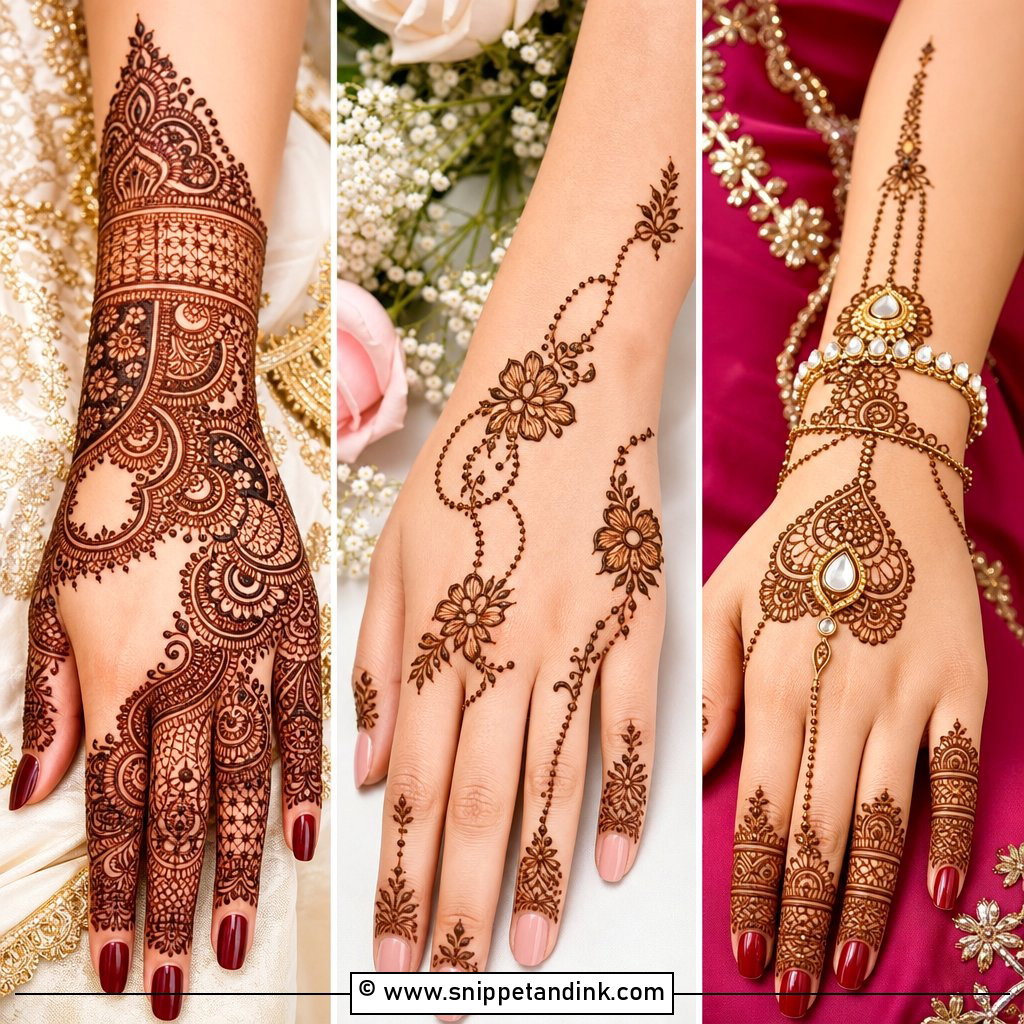
The back hand is where the ring sits, which is why Back hand engagement mehndi design is the layout I’m asked for most. My usual build is a floral bracelet at the wrist, a vine running toward the knuckles, then thin bands on the fingers. One thing brides don’t expect: the back of the hand stains lighter than the palm because the skin there is thinner and drier, so I use bolder outlines here than I would inside the palm. On the ring finger itself I stop the band just below the knuckle, leaving clean skin where the ring will rest.
3. Front Hand Engagement Mehndi Design
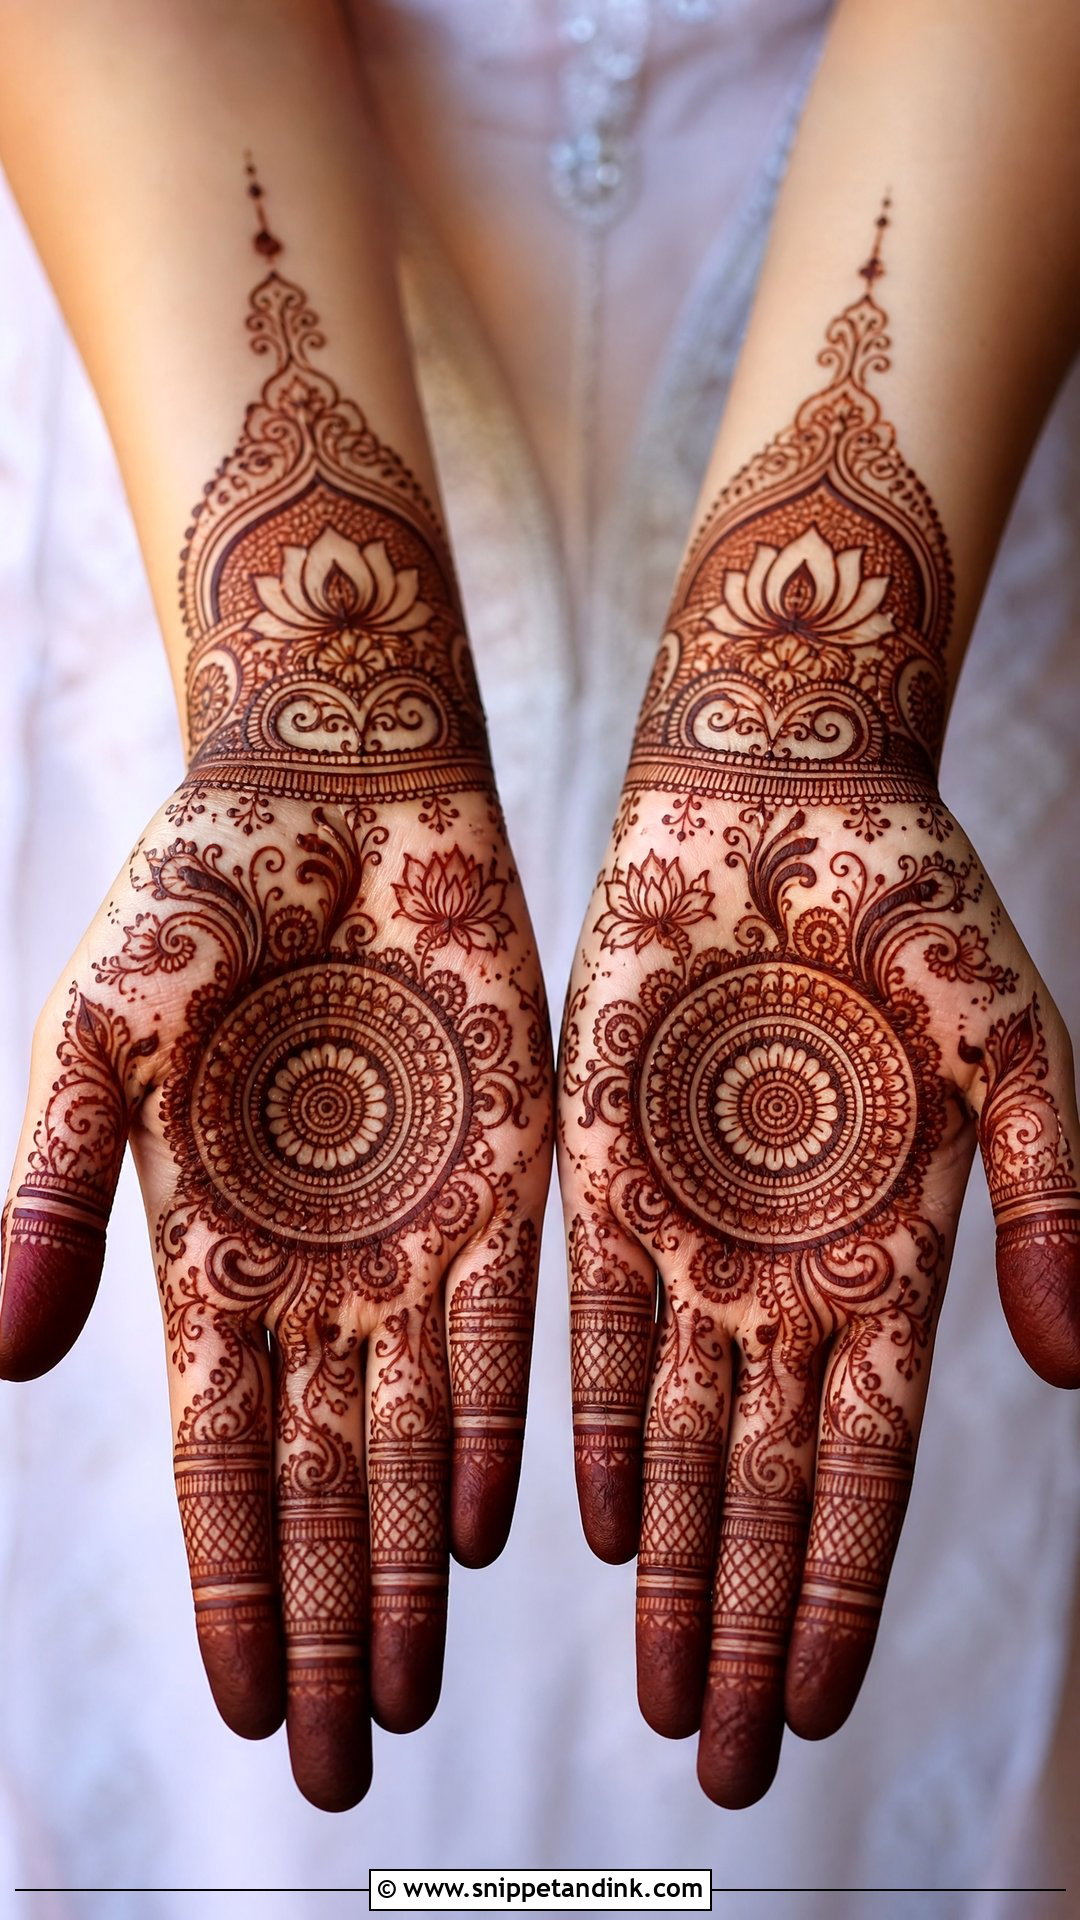
Palms take the darkest stain on the body, so Front hand engagement mehndi design gives you the richest colour for the least paste. I usually anchor it with one central motif, a lotus or a mandala, and work vines and dot lace outward from there. The trap is filling every gap. Palms crease when you hold a bouquet or clasp hands, and dense filler in the creases smudges before it sets. I keep the fold lines lighter so the pattern survives the first few hours of normal hand use.
4. Simple Engagement Mehndi Design
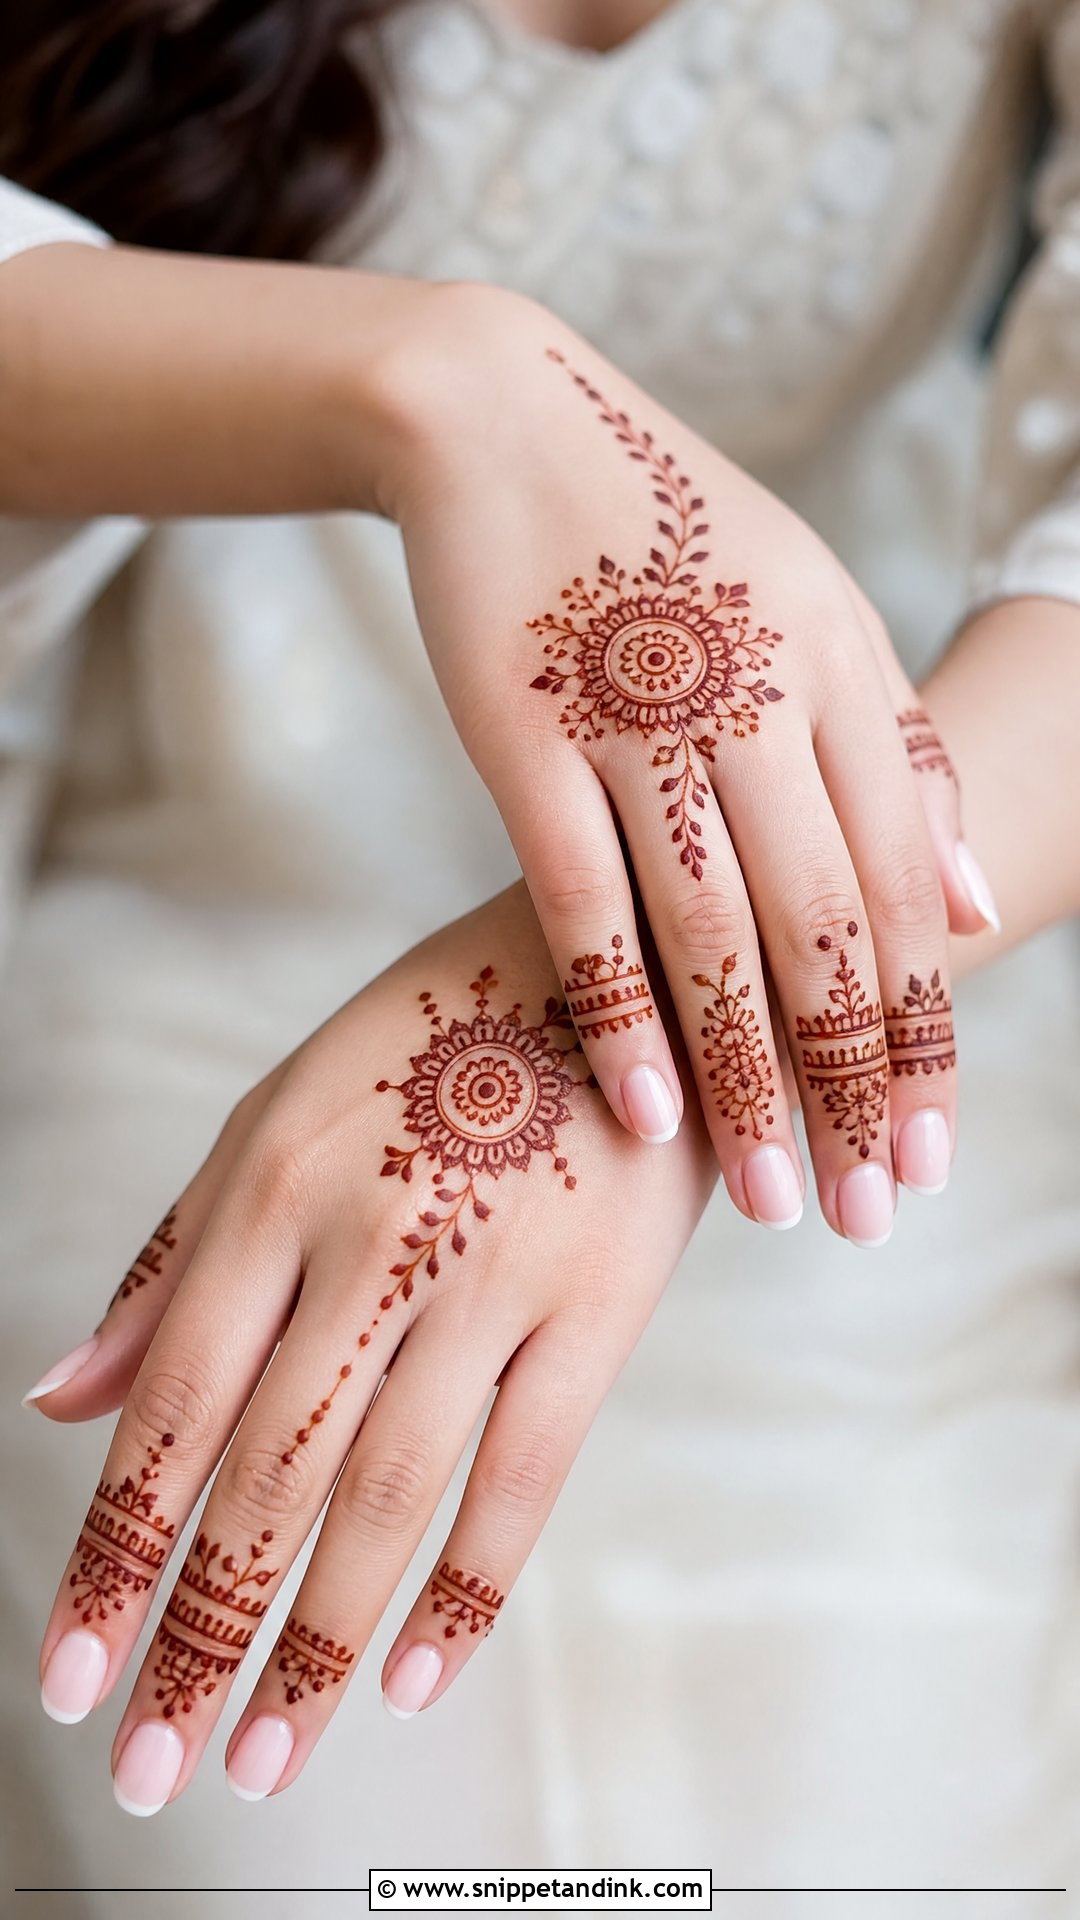
A simple layout lives or dies on line quality. With only a small palm mandala, a light wrist border and slim finger patterns, there is nothing to hide a wobble, so I use a fine cone tip and a slower hand. The upside is time: a simple set takes a fraction of a full-hand sitting and dries faster, which matters when you have hair and makeup booked the same afternoon. It sits well beside a delicate solitaire because nothing competes with the stone.
5. Arabic Engagement Mehndi Design
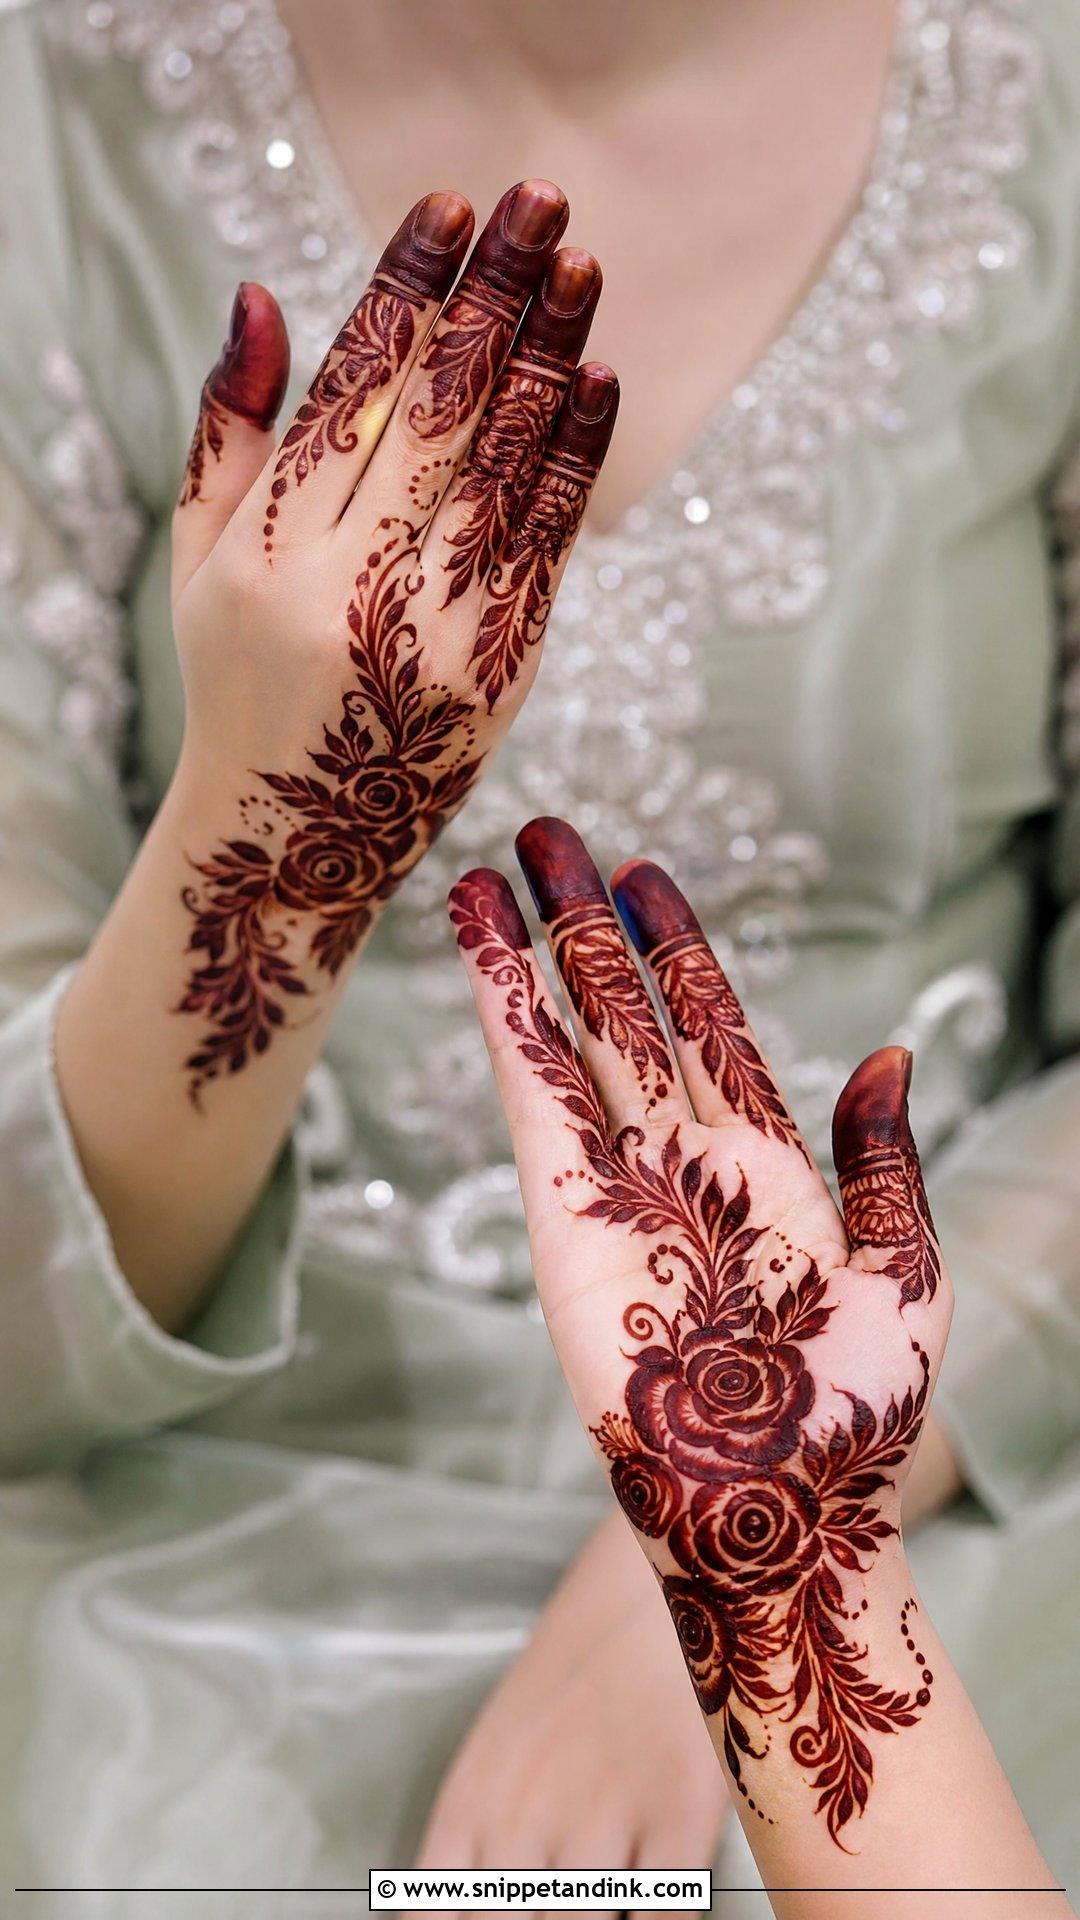
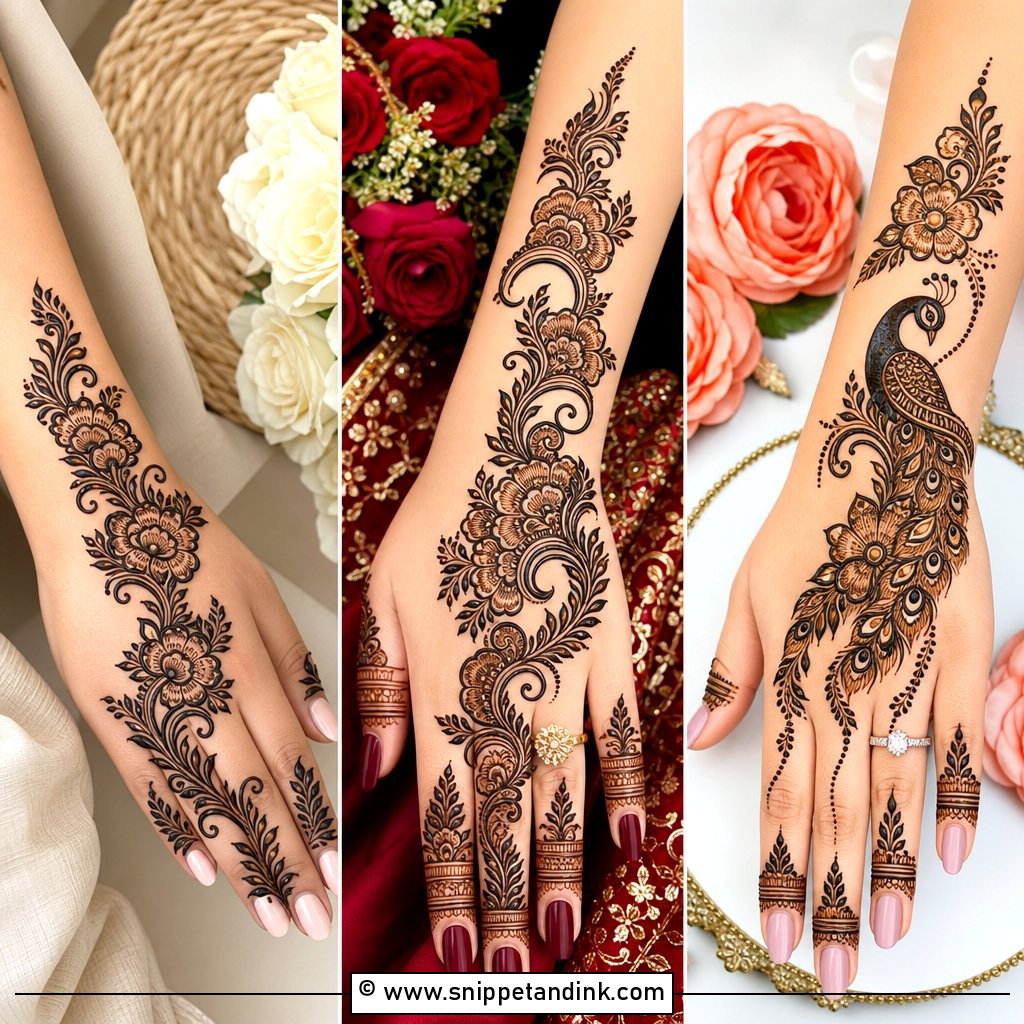
Arabic work runs on a diagonal, usually from the outer wrist toward the index finger, with large shaded blooms and plenty of open skin. The bold strokes carry more paste than fine Indian lines, so the stain tends to come up clearer and last a little longer. For a ring ceremony I bend the trail so it ends near the ring finger instead of the index, which pulls the eye straight to the ring in close-ups. It isn’t the right pick if you want full coverage; the whole point is the space.
6. Indo Arabic Engagement Mehndi Design
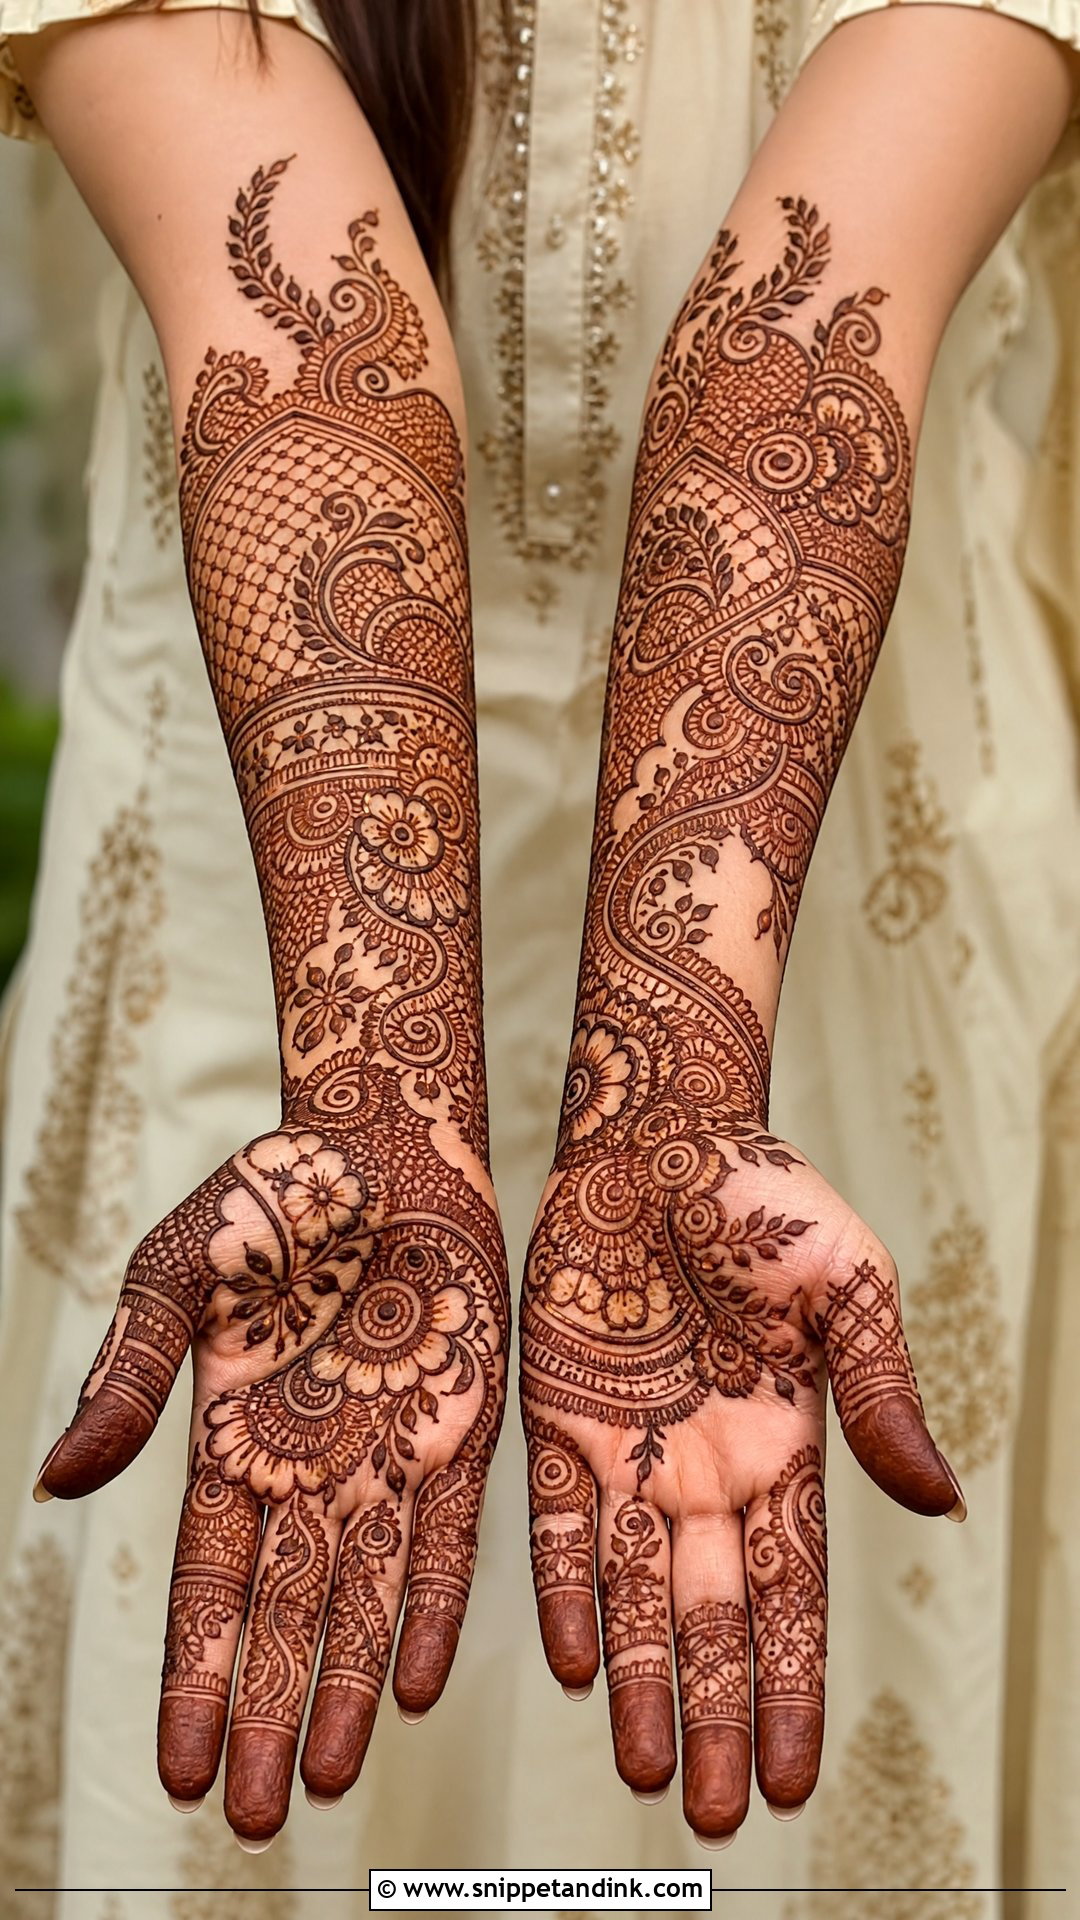
Indo-Arabic is the compromise I suggest when a bride keeps switching between two reference photos. The Arabic flow sets the structure, then I fill only selected petals or paisleys with Indian lace and mesh. If I fill every motif, the airy quality is gone and you’ve paid for a dense design that took twice as long. It reads well with embroidered outfits because the filled sections echo the needlework.
7. Floral Engagement Mehndi Design
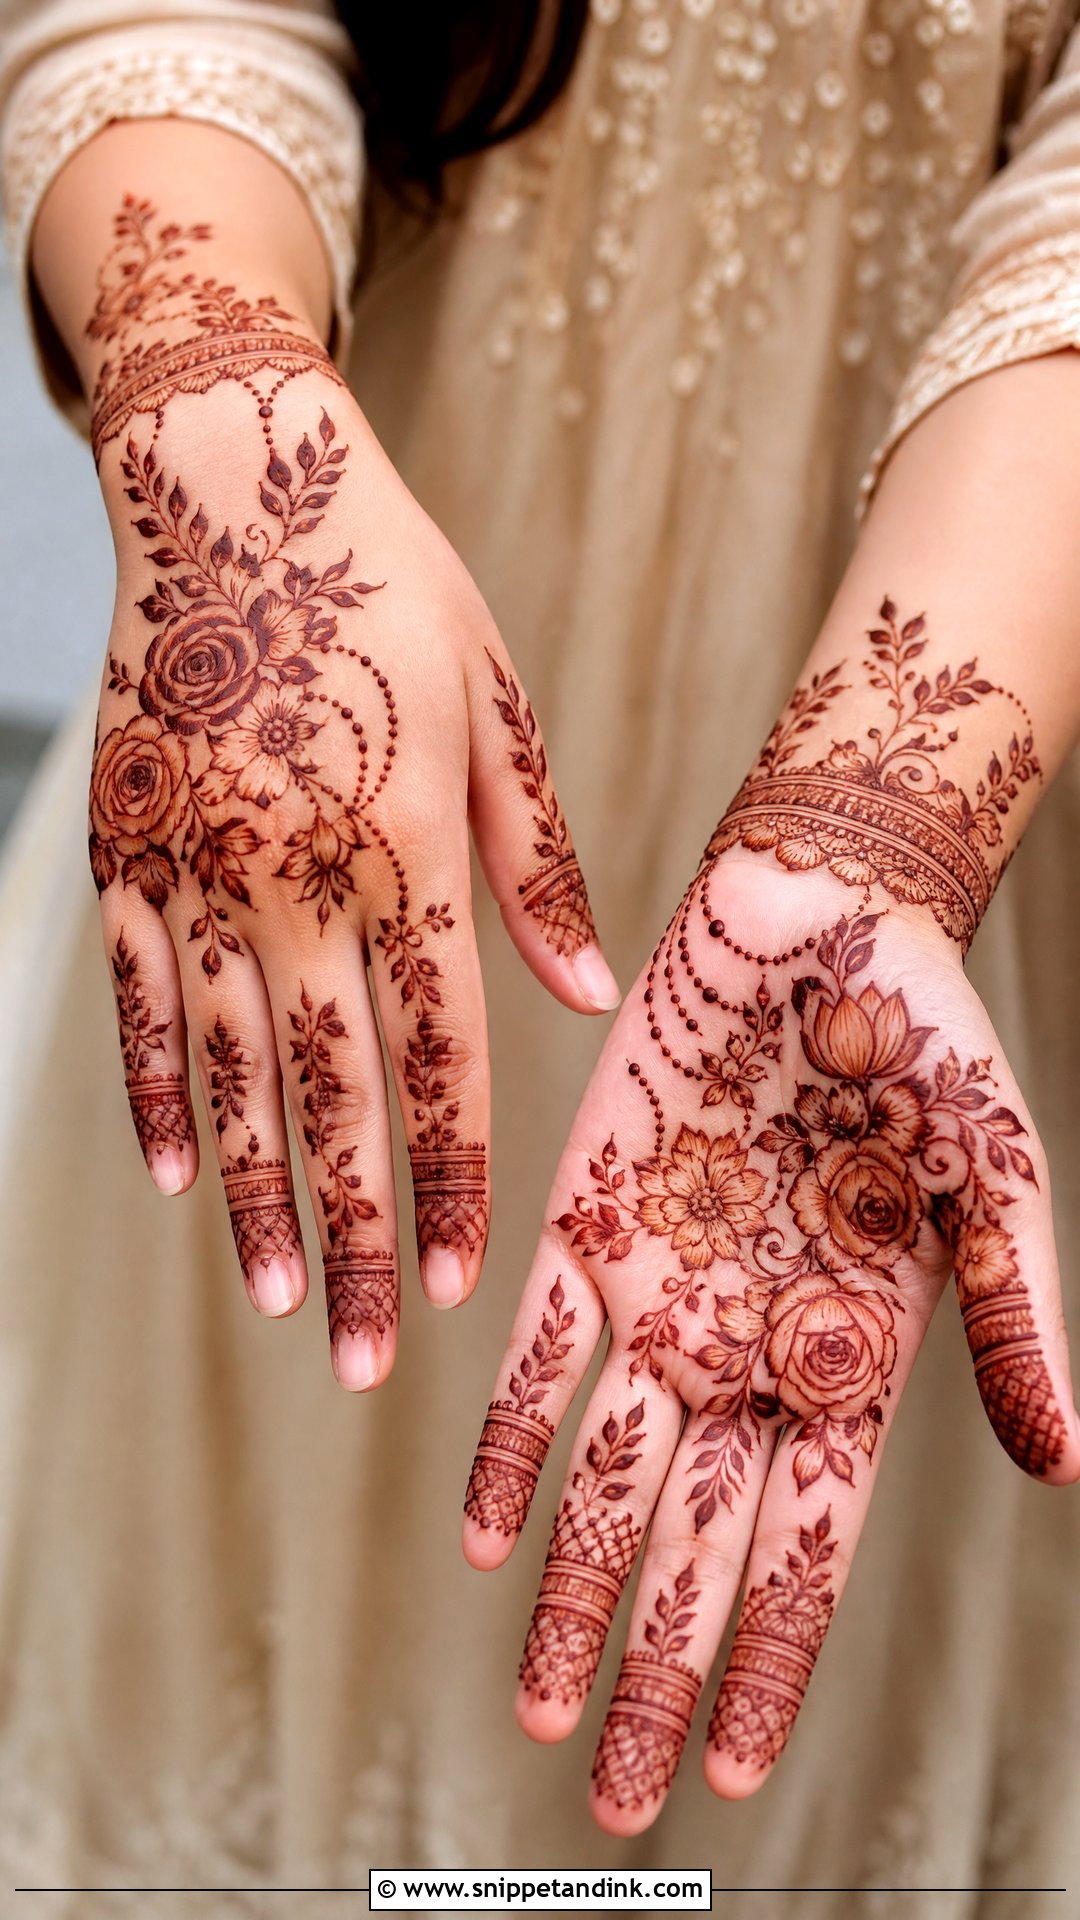
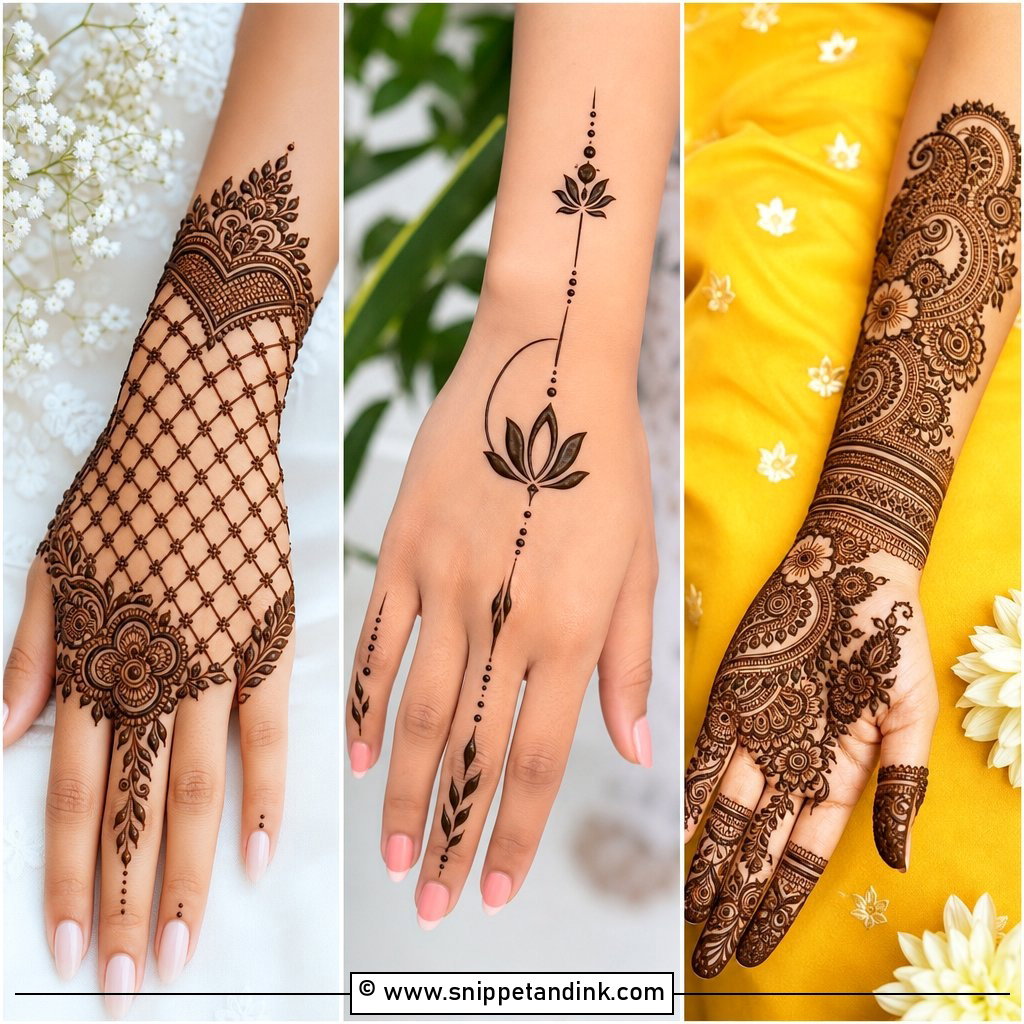
Roses, lotuses and small vine clusters adapt to almost any hand, which is why floral layouts are my safest recommendation for a first-time client. I can stretch a vine vertically to lengthen shorter fingers or widen a bloom to balance a broad palm. Shading inside the petals adds depth, but shading is thin paste, and thin paste stains paler. If you want the flowers to look crisp a day later, ask for outlined petals with only a little shading.
8. Mandala Engagement Mehndi Design
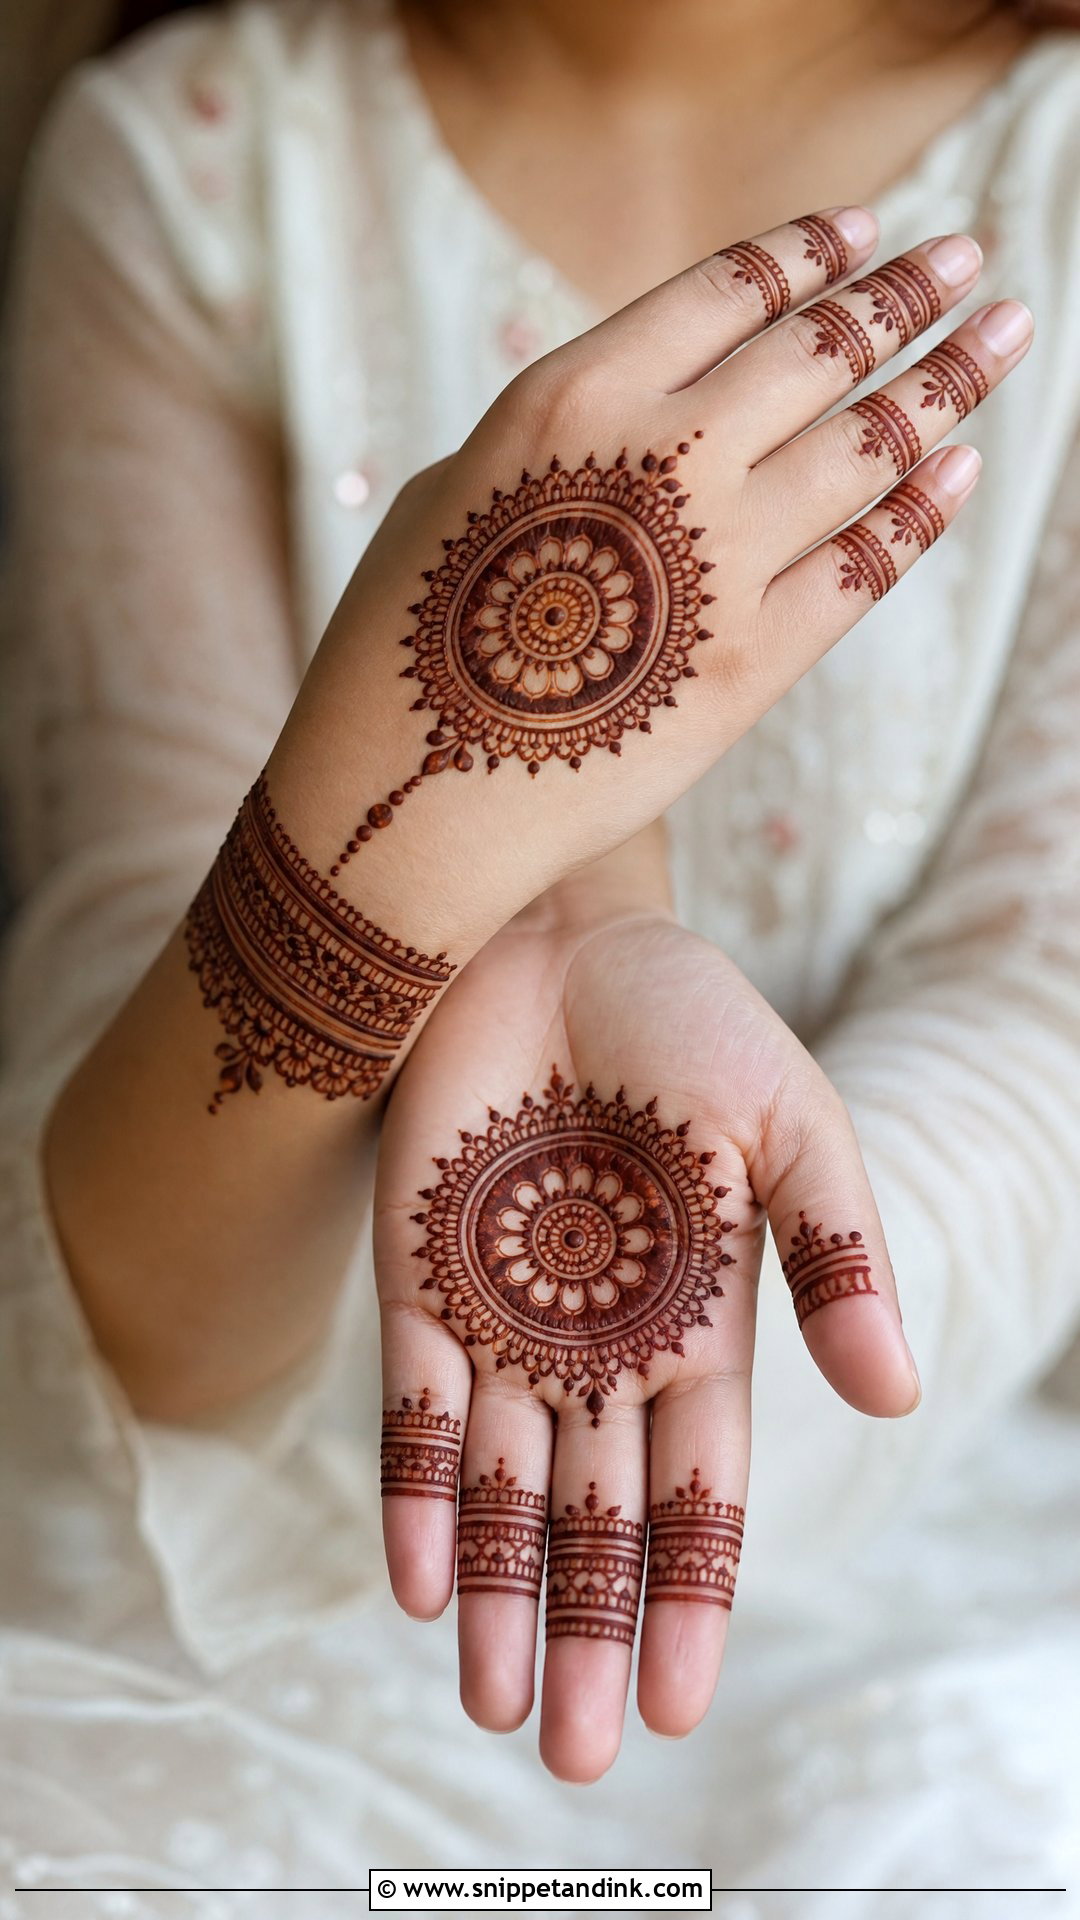
Mandalas are less forgiving than they look. A circular motif has to be truly round on a surface that isn’t flat, so on the back hand I place the centre slightly toward the thumb side where the skin is smoother. The finished piece is usually the mandala, neat finger detailing and a slim wrist band. Because everything radiates from one point, any lopsided ring shows instantly in a zoomed ring photo, so this is one to give an artist who draws circles confidently.
9. Ring Ceremony Mehndi Design
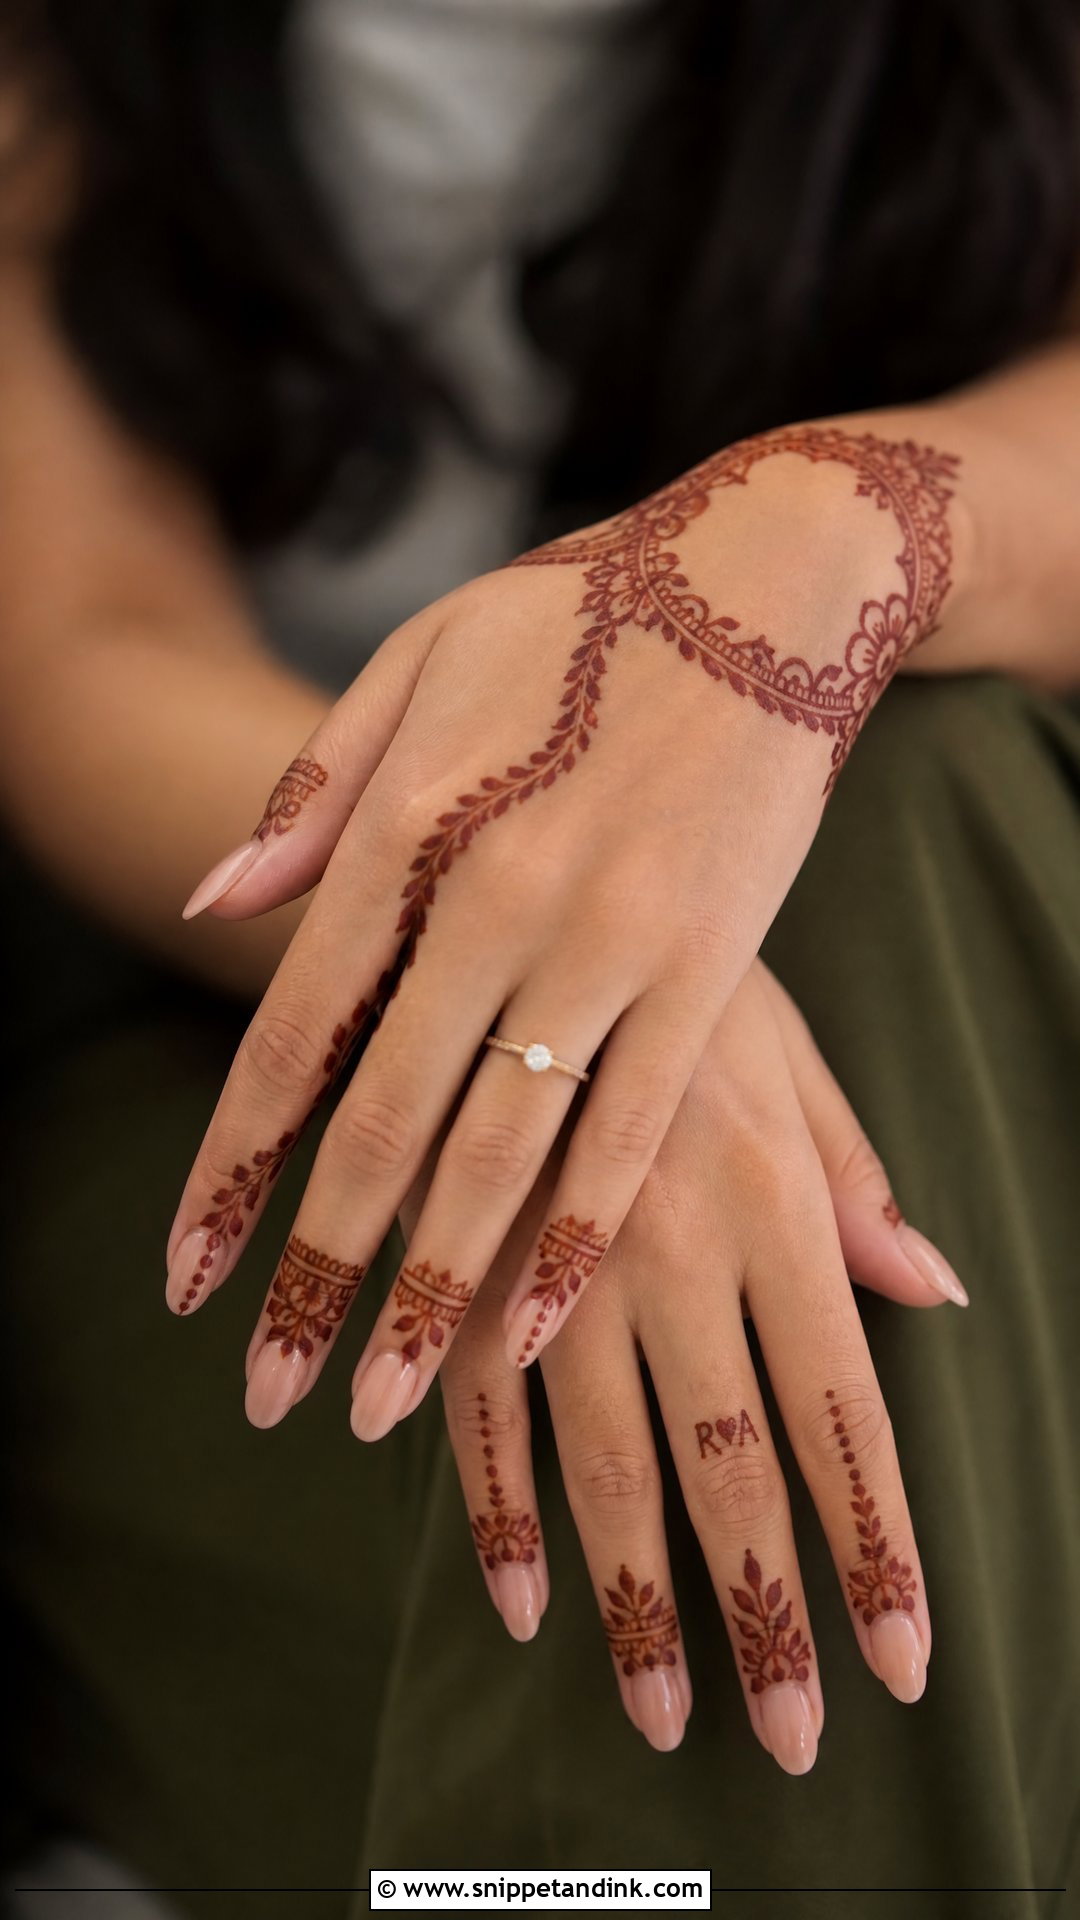
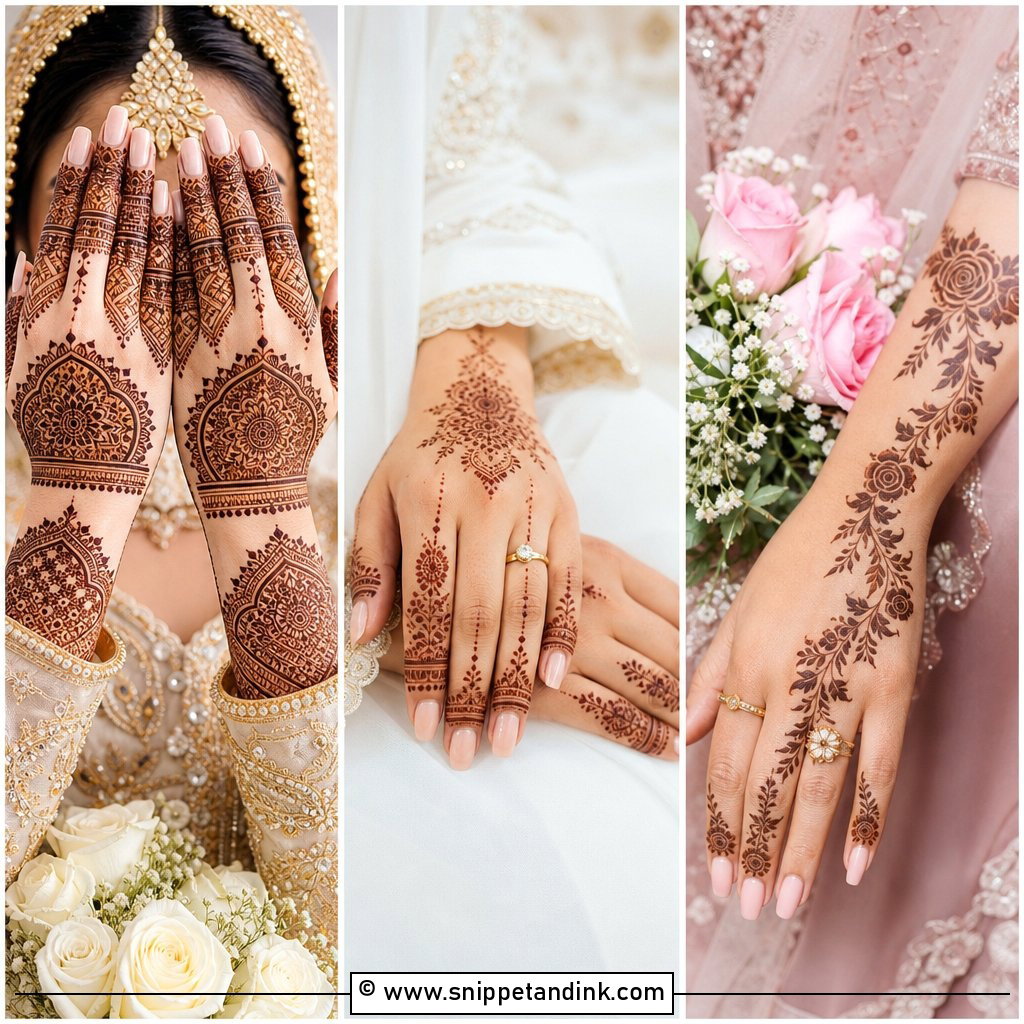
Here the ring finger leads the plan. I draw a chain-style vine from the wrist up to the ring finger, almost like hand jewellery, and leave a clear band of skin where the actual ring will sit. That bare band matters more than people think: a stone set against dark stain loses its sparkle on camera, while a stone against skin keeps it. Tiny initials near the knuckle fit naturally into this layout.
10. Bridal Engagement Mehndi Design
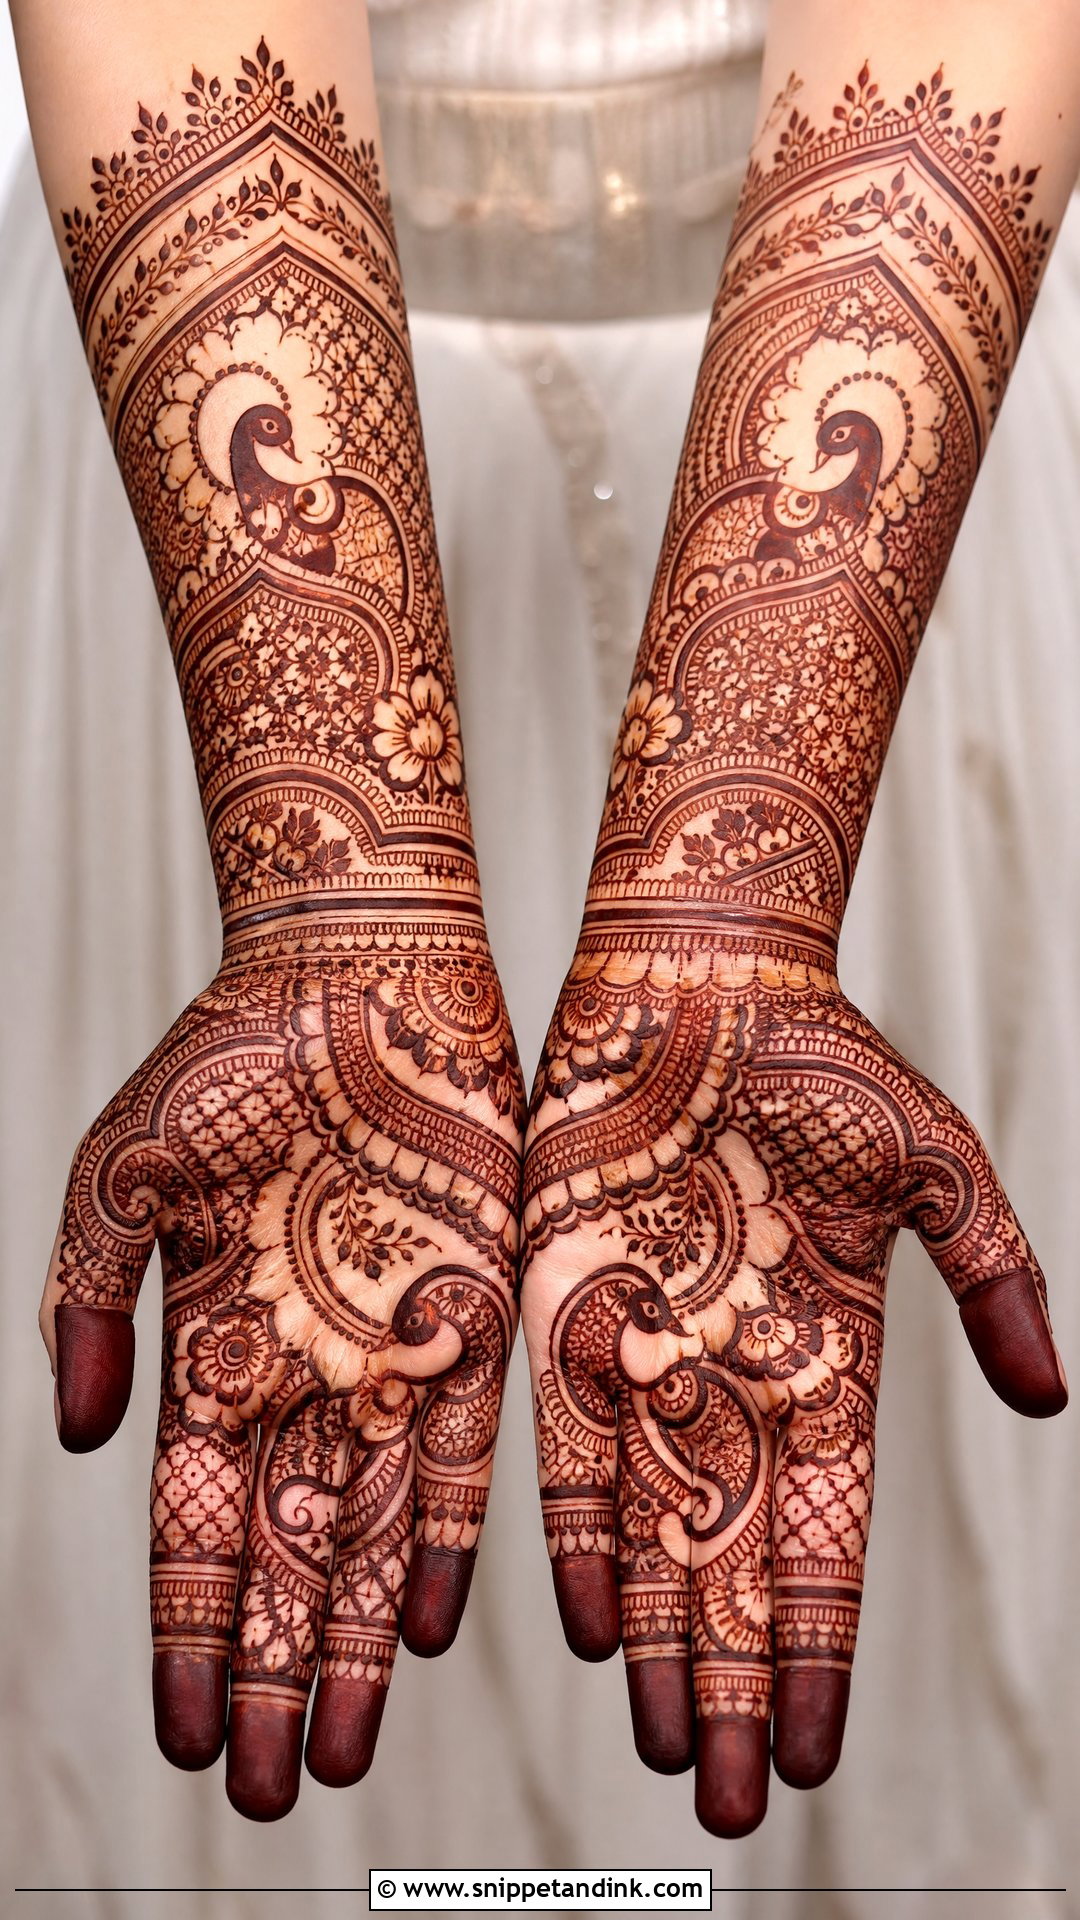
This sits between party henna and full wedding mehndi: decorated palms and fingers, a wrist cuff and a short forearm extension, with peacocks or paisleys used sparingly. If your wedding mehndi is only a few weeks away, I’d keep this version lighter on purpose. Henna fades over one to three weeks, and a strong engagement stain under fresh bridal paste can look patchy. Borrowing a shape from your outfit embroidery, like a scalloped border or a lotus, ties the hands to the clothes in a way guests notice.
11. Minimal Engagement Mehndi Design
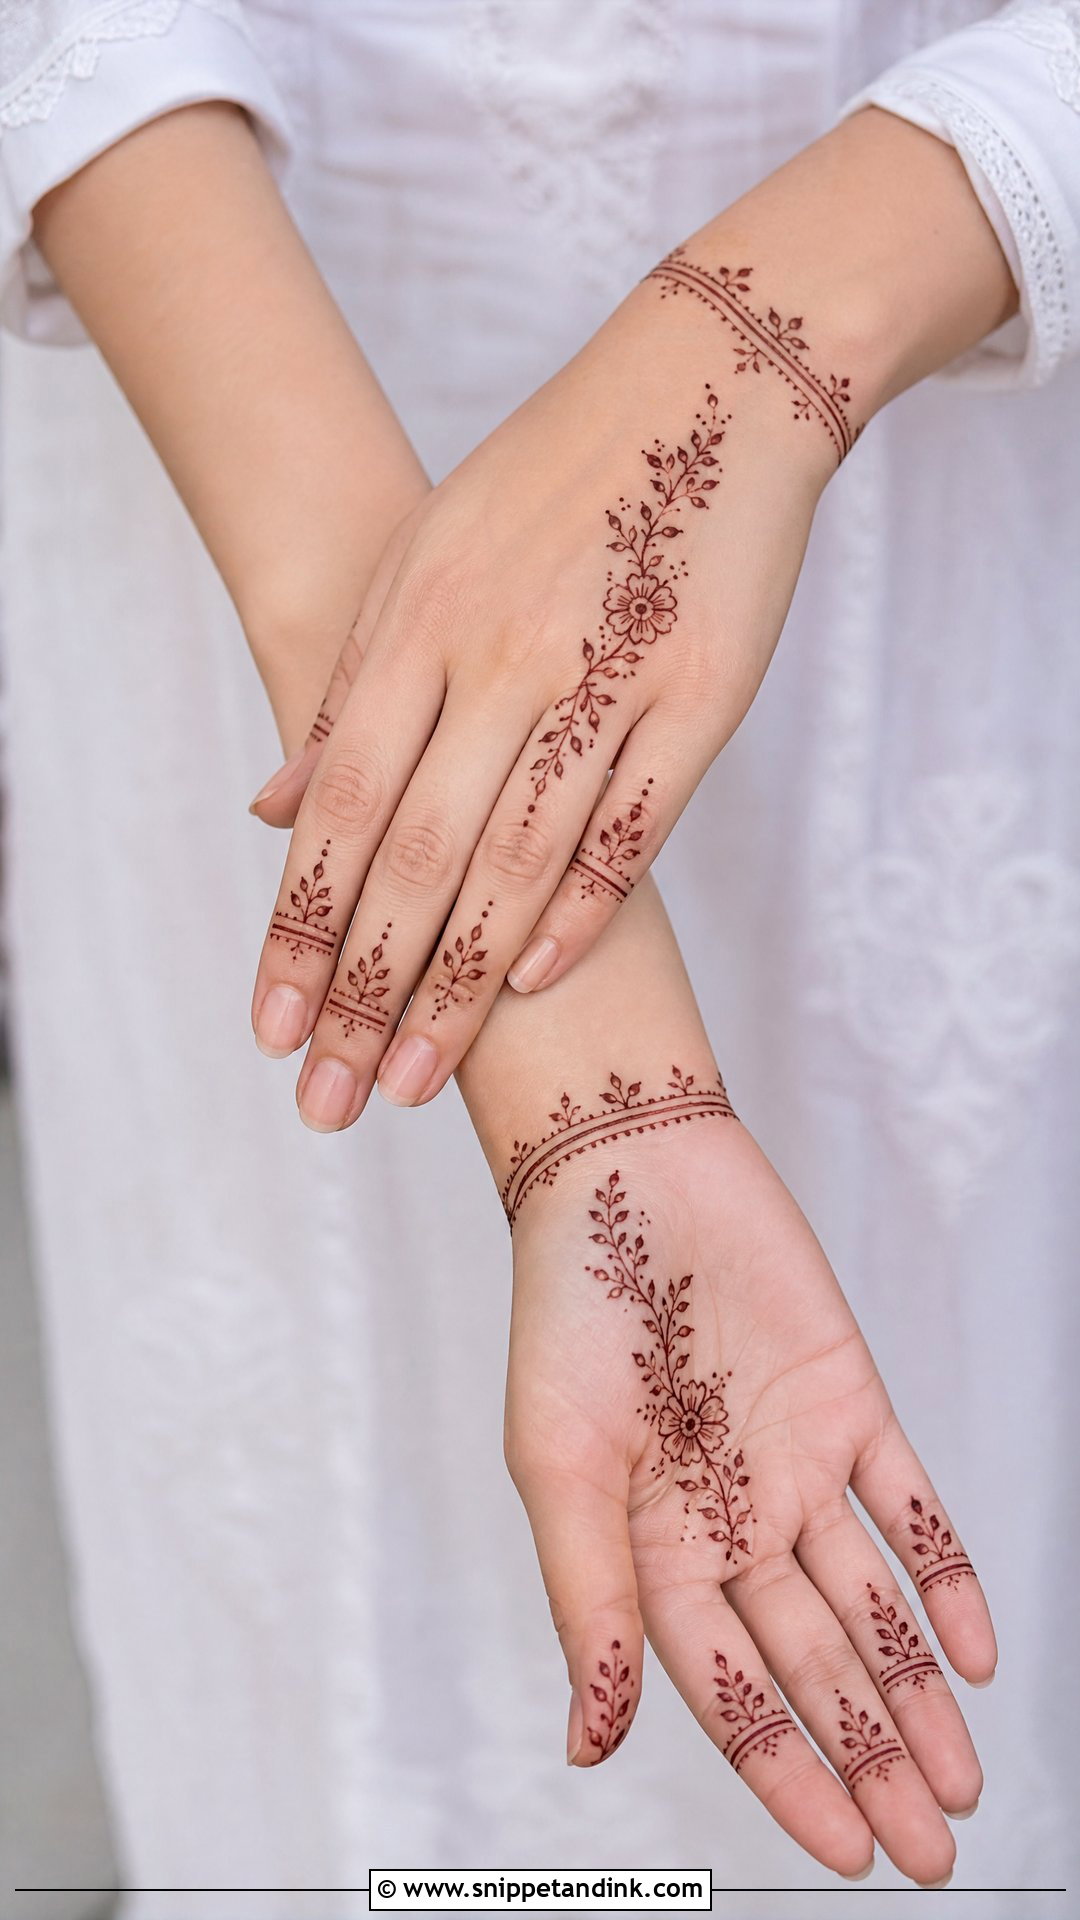
Minimal mehndi asks for precision rather than quantity. Fine finger bands, a tiny floral and a leafy wrist trail leave most of the skin visible, so each dot and line is seen up close. I’d suggest it when another event follows soon after or when you work somewhere a heavy stain feels out of place. It reads well beside pearls and pastel satin. The one risk is that a very fine line can stain faintly, so I trace minimal designs with a slightly firmer pressure to lay down enough paste.
12. Modern Engagement Mehndi Design
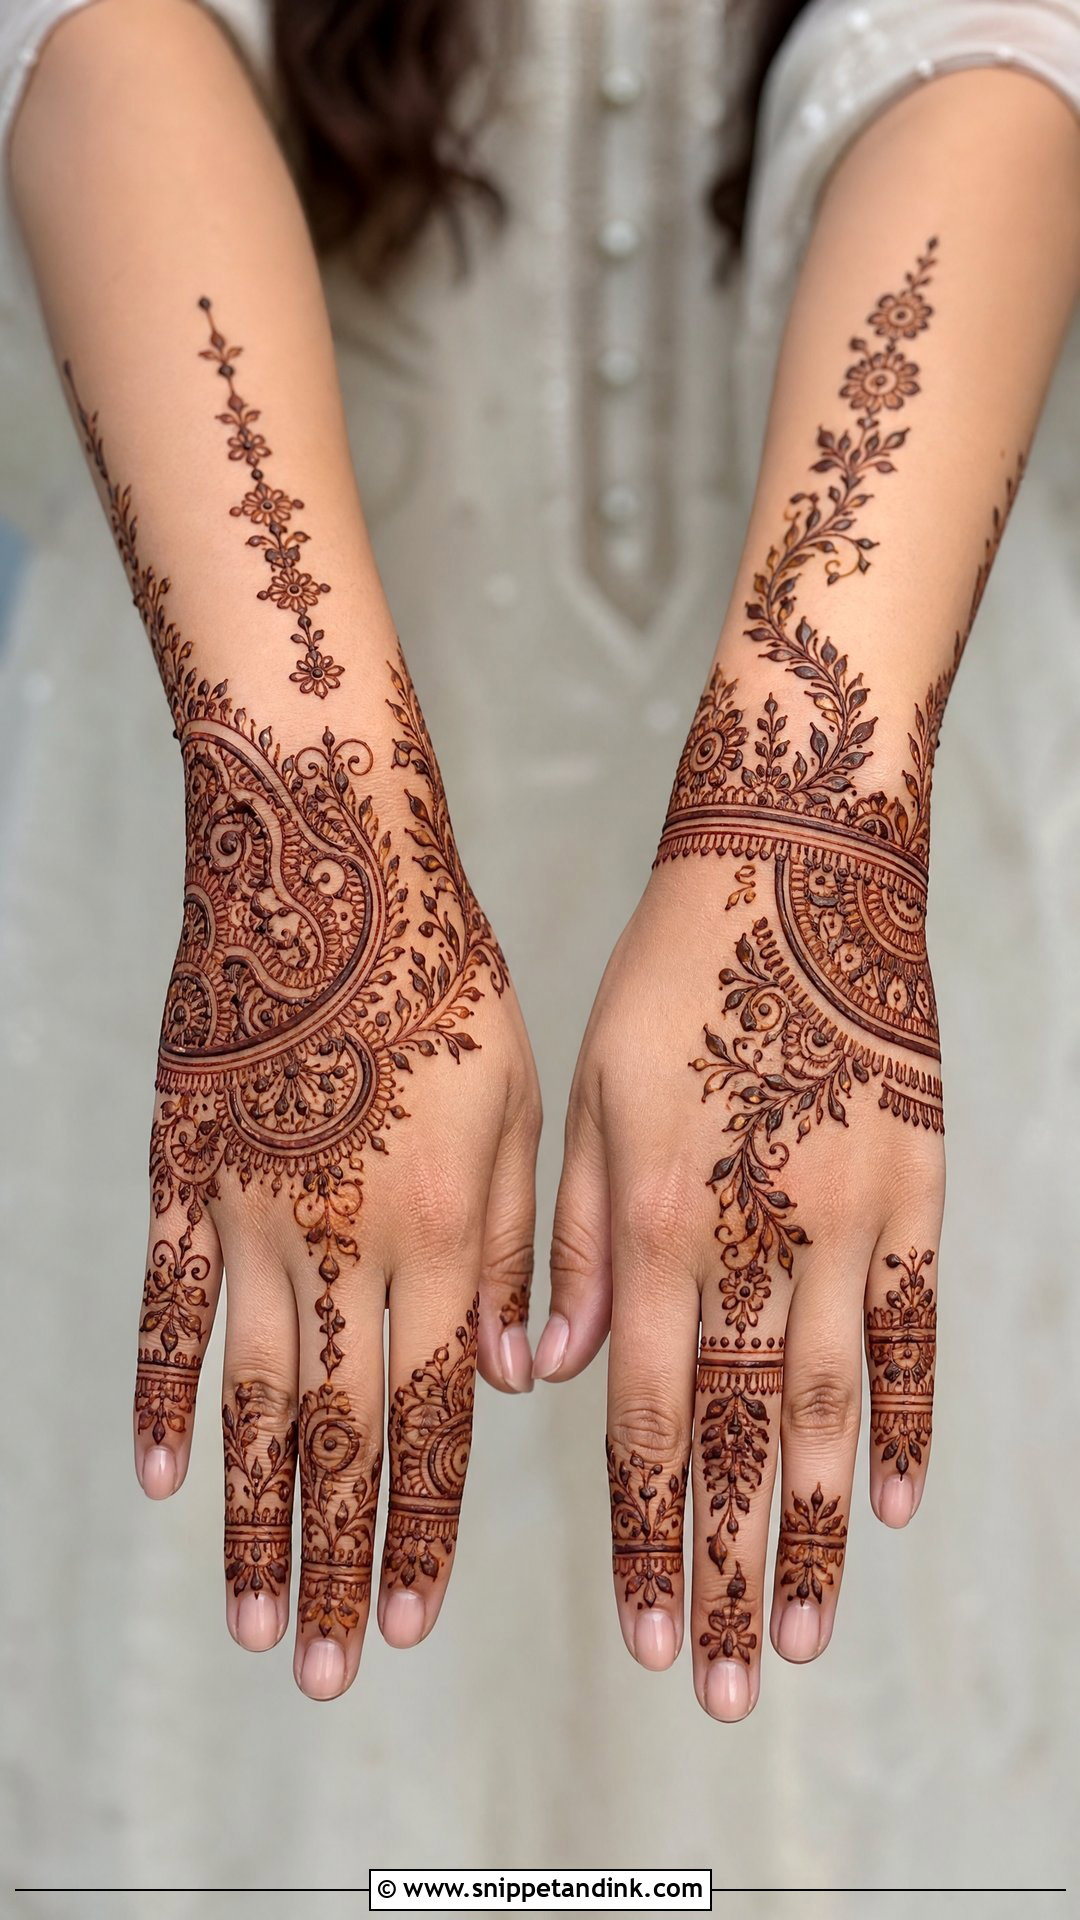
Modern layouts break symmetry on purpose: an asymmetric trail on one hand, a cuff and finger jewellery on the other, perhaps a half mandala or a curved grid. Clean gaps make them photograph crisply against fusion outfits and gowns. My one rule is to keep a single dense area, usually the wrist cuff or the ring finger, because a design that is all gaps starts to look like casual festival henna rather than something a bride wears.
13. Peacock Engagement Mehndi Design
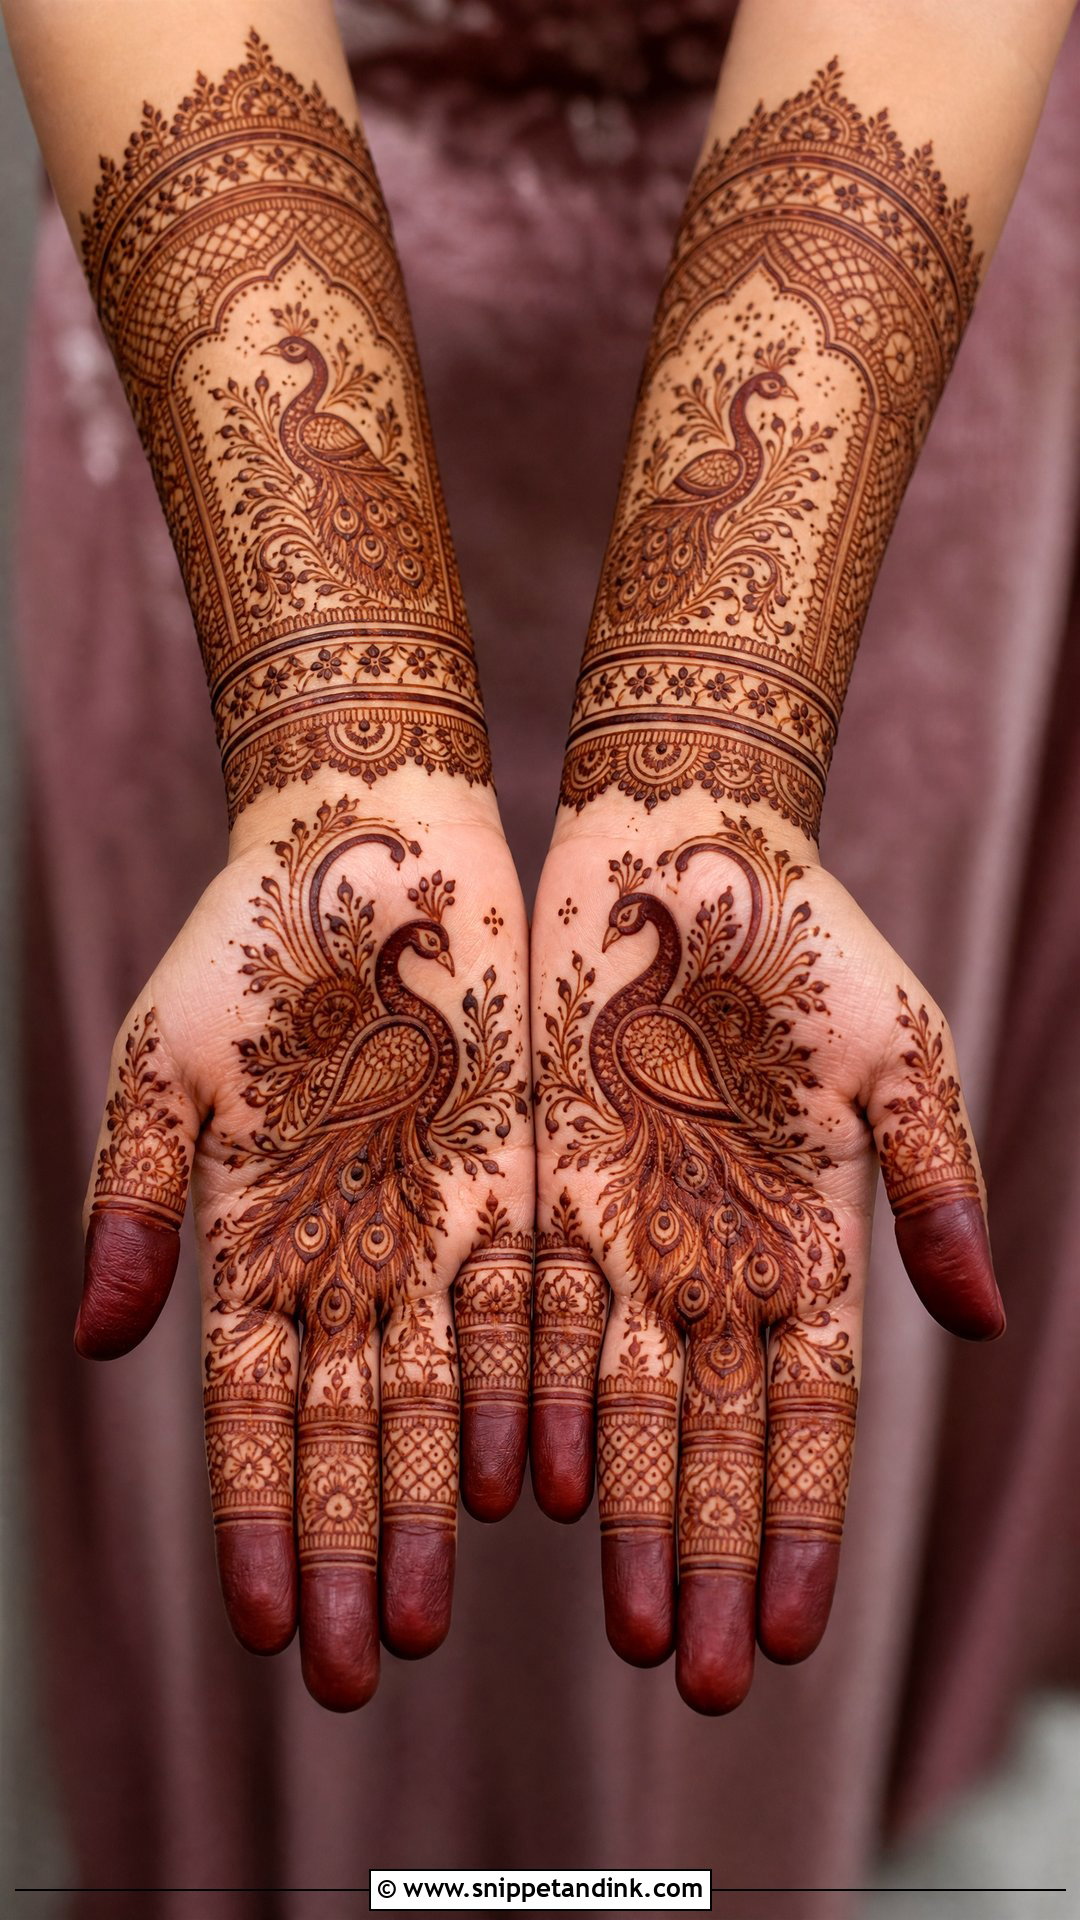
A peacock needs room for its feathers, so I usually place it across the palm with the tail sweeping toward the wrist, or as a mirrored pair on both hands. For an engagement I keep the bird medium-sized and surround it with florals rather than letting it take the whole palm. The fine mesh inside the feathers is where cheap or old paste lets you down; it should flow without breaking, which needs fresh, well-strained henna. Jewel-tone outfits and heavy embroidery suit it best.
14. Paisley Engagement Mehndi Design
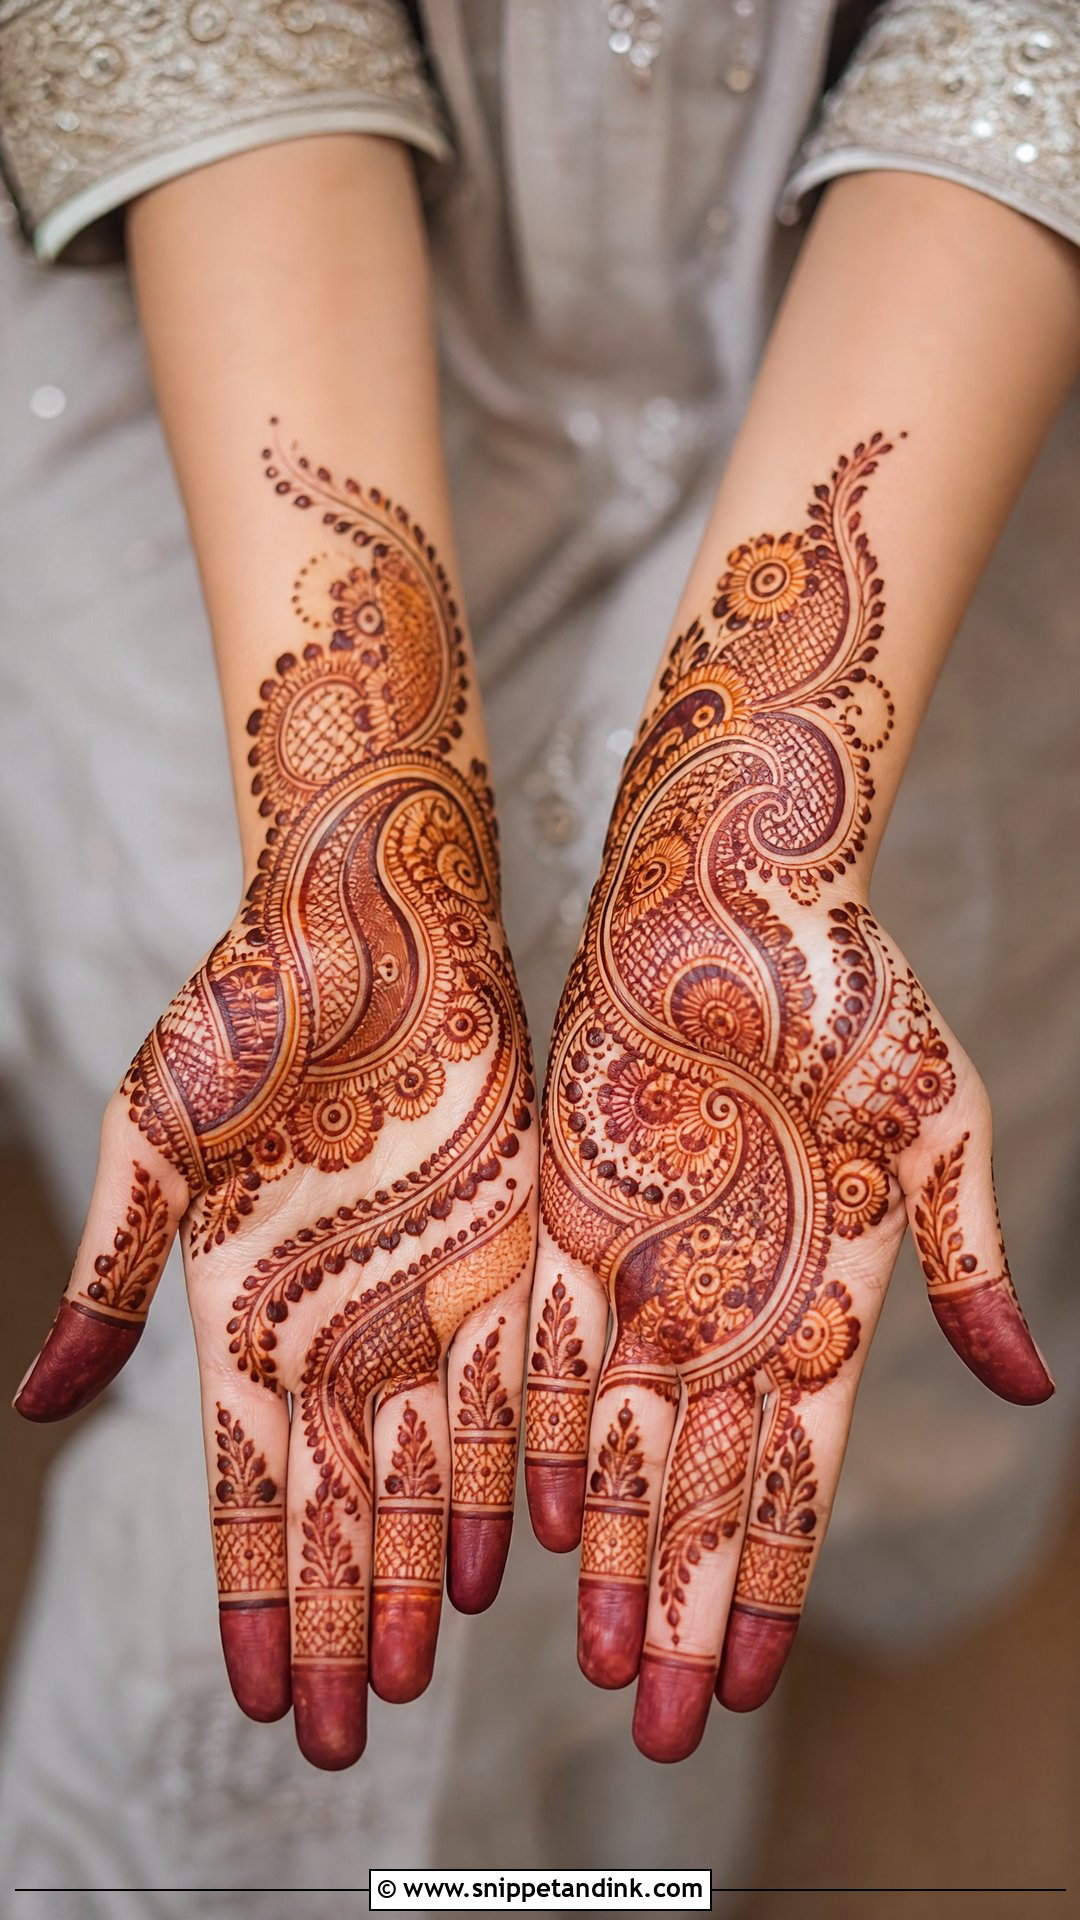
Paisleys follow the natural curve of the hand, which is why they flatter almost everyone. I set clusters on the palm, curved trails along the back and slim patterned fingers to finish. The detail that lifts it above a stock pattern is varying the size: a large paisley at the base, smaller ones as the trail climbs. Repeating one identical shape everywhere is what makes paisley work look machine-made.
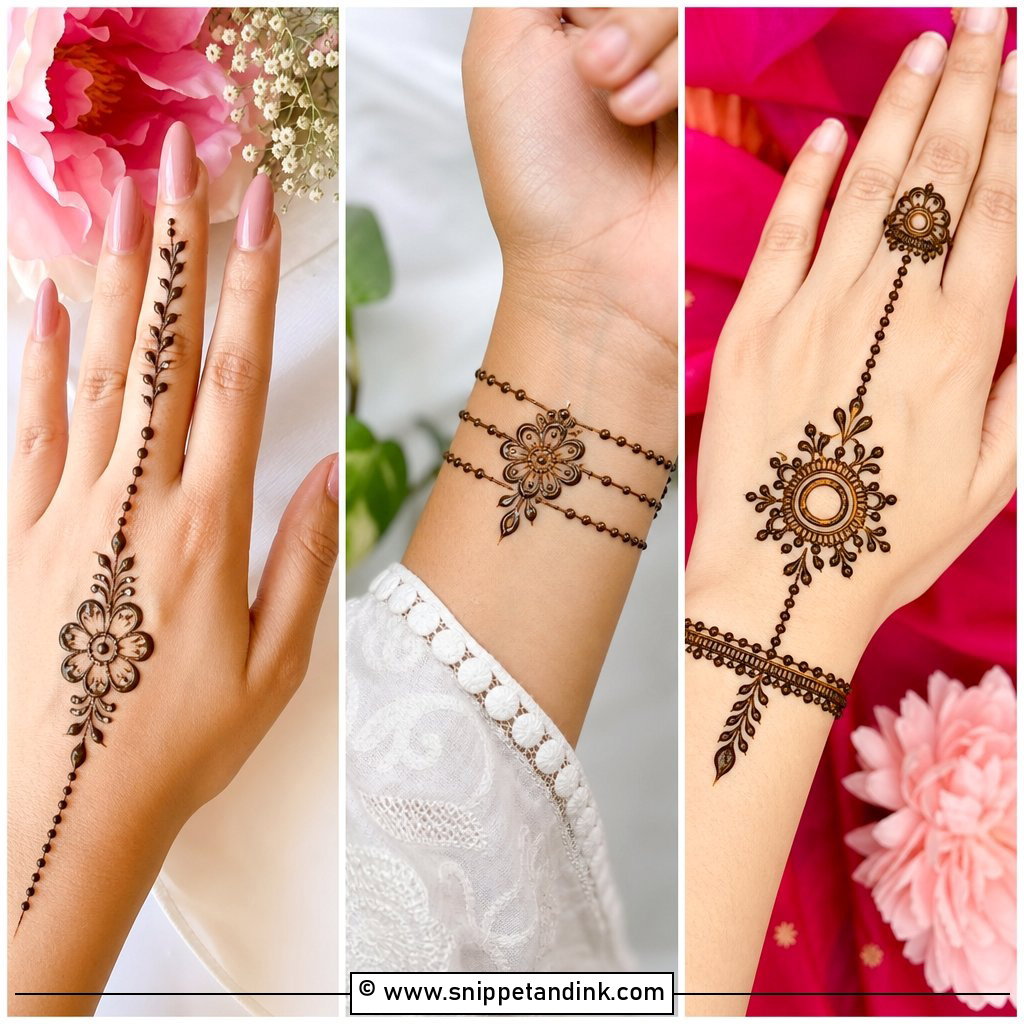
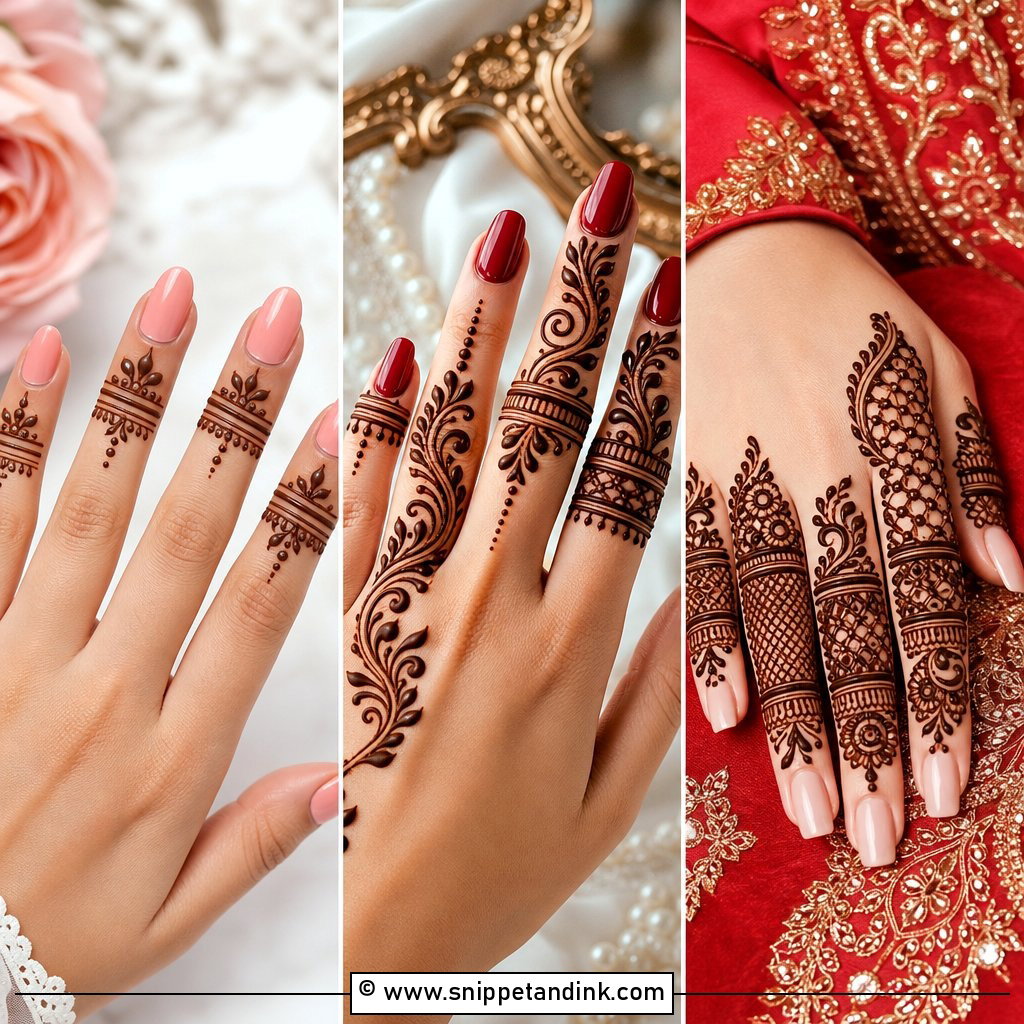
15. Jaali Engagement Mehndi Design
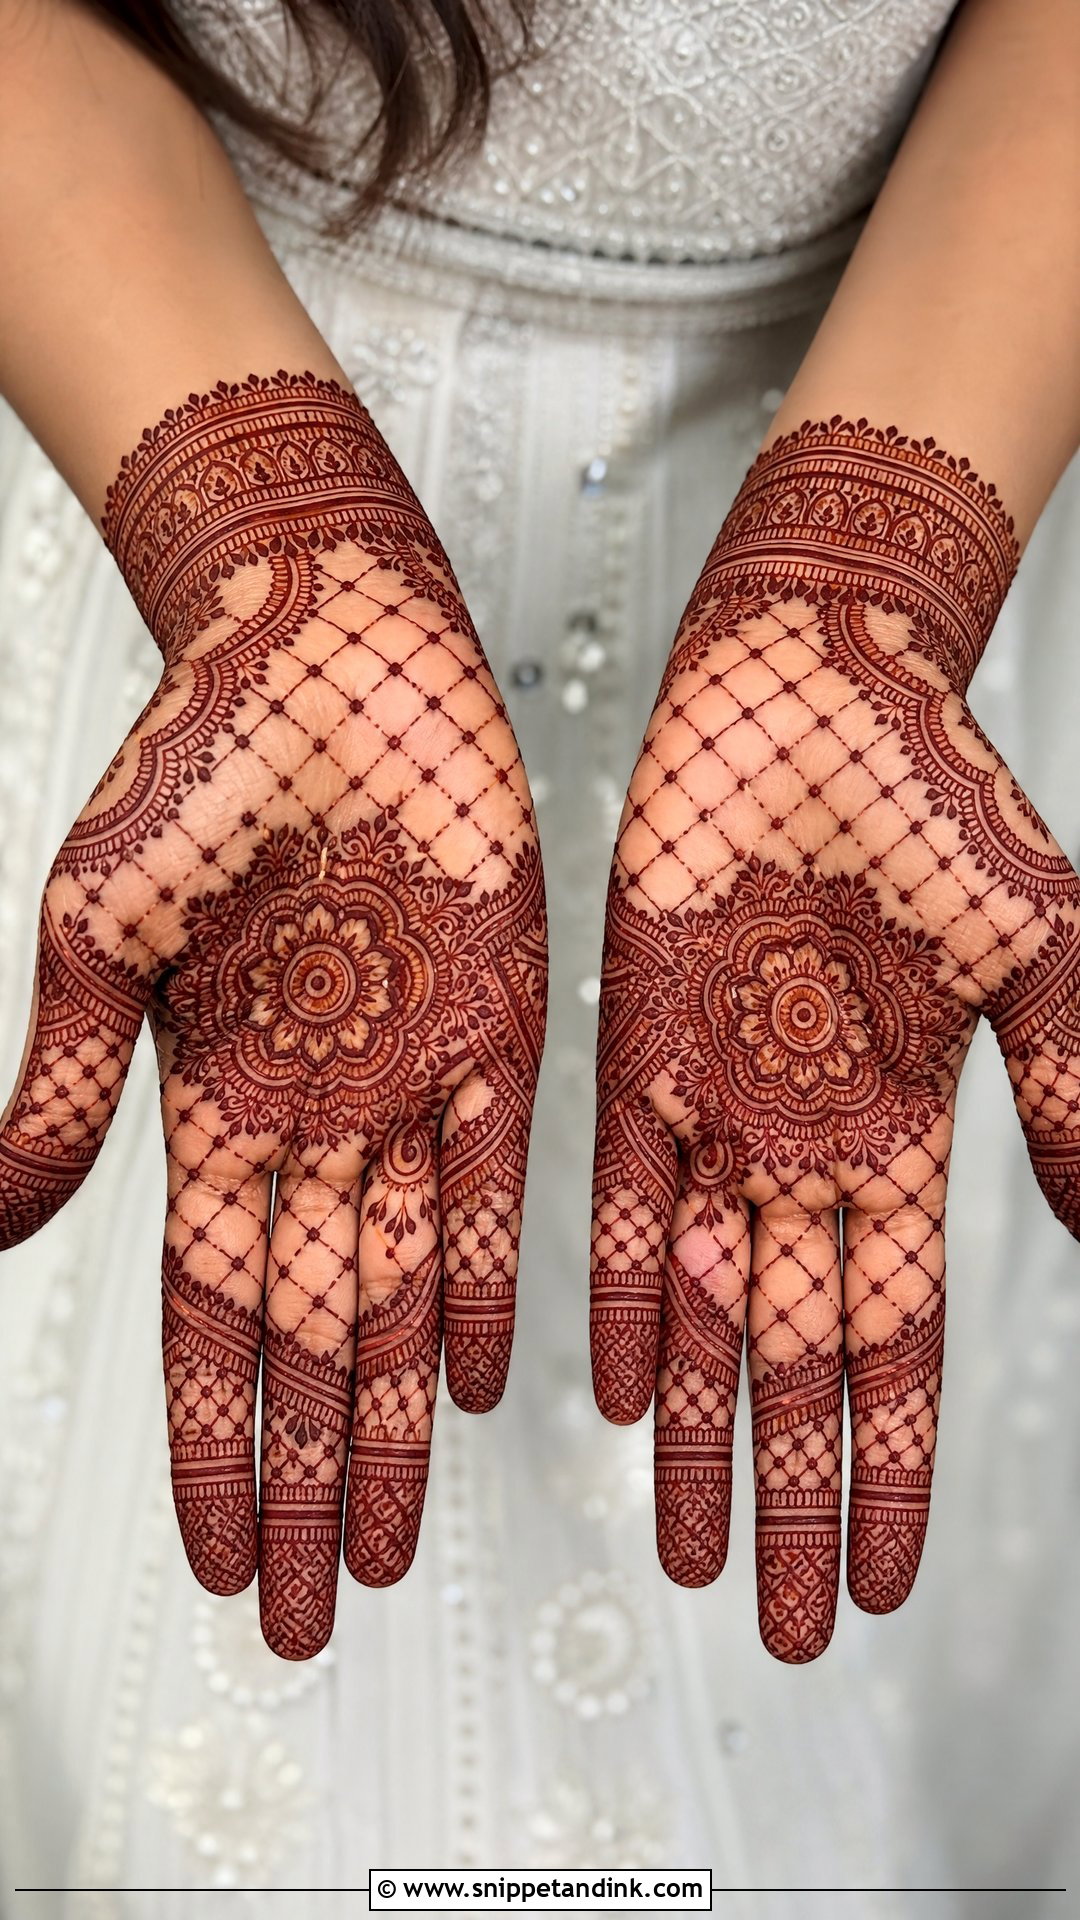
Jaali is a lace-like mesh, and spacing is everything. Too tight and the lines bleed into each other as the paste dries and the stain spreads slightly; too loose and it stops reading as lace. I work the grid on the back hand or fingers, put tiny dots at the intersections, and frame it with a floral edge so the mesh has a border to stop against. It sits right next to a ring without fighting it.
16. Portrait Engagement Mehndi Design
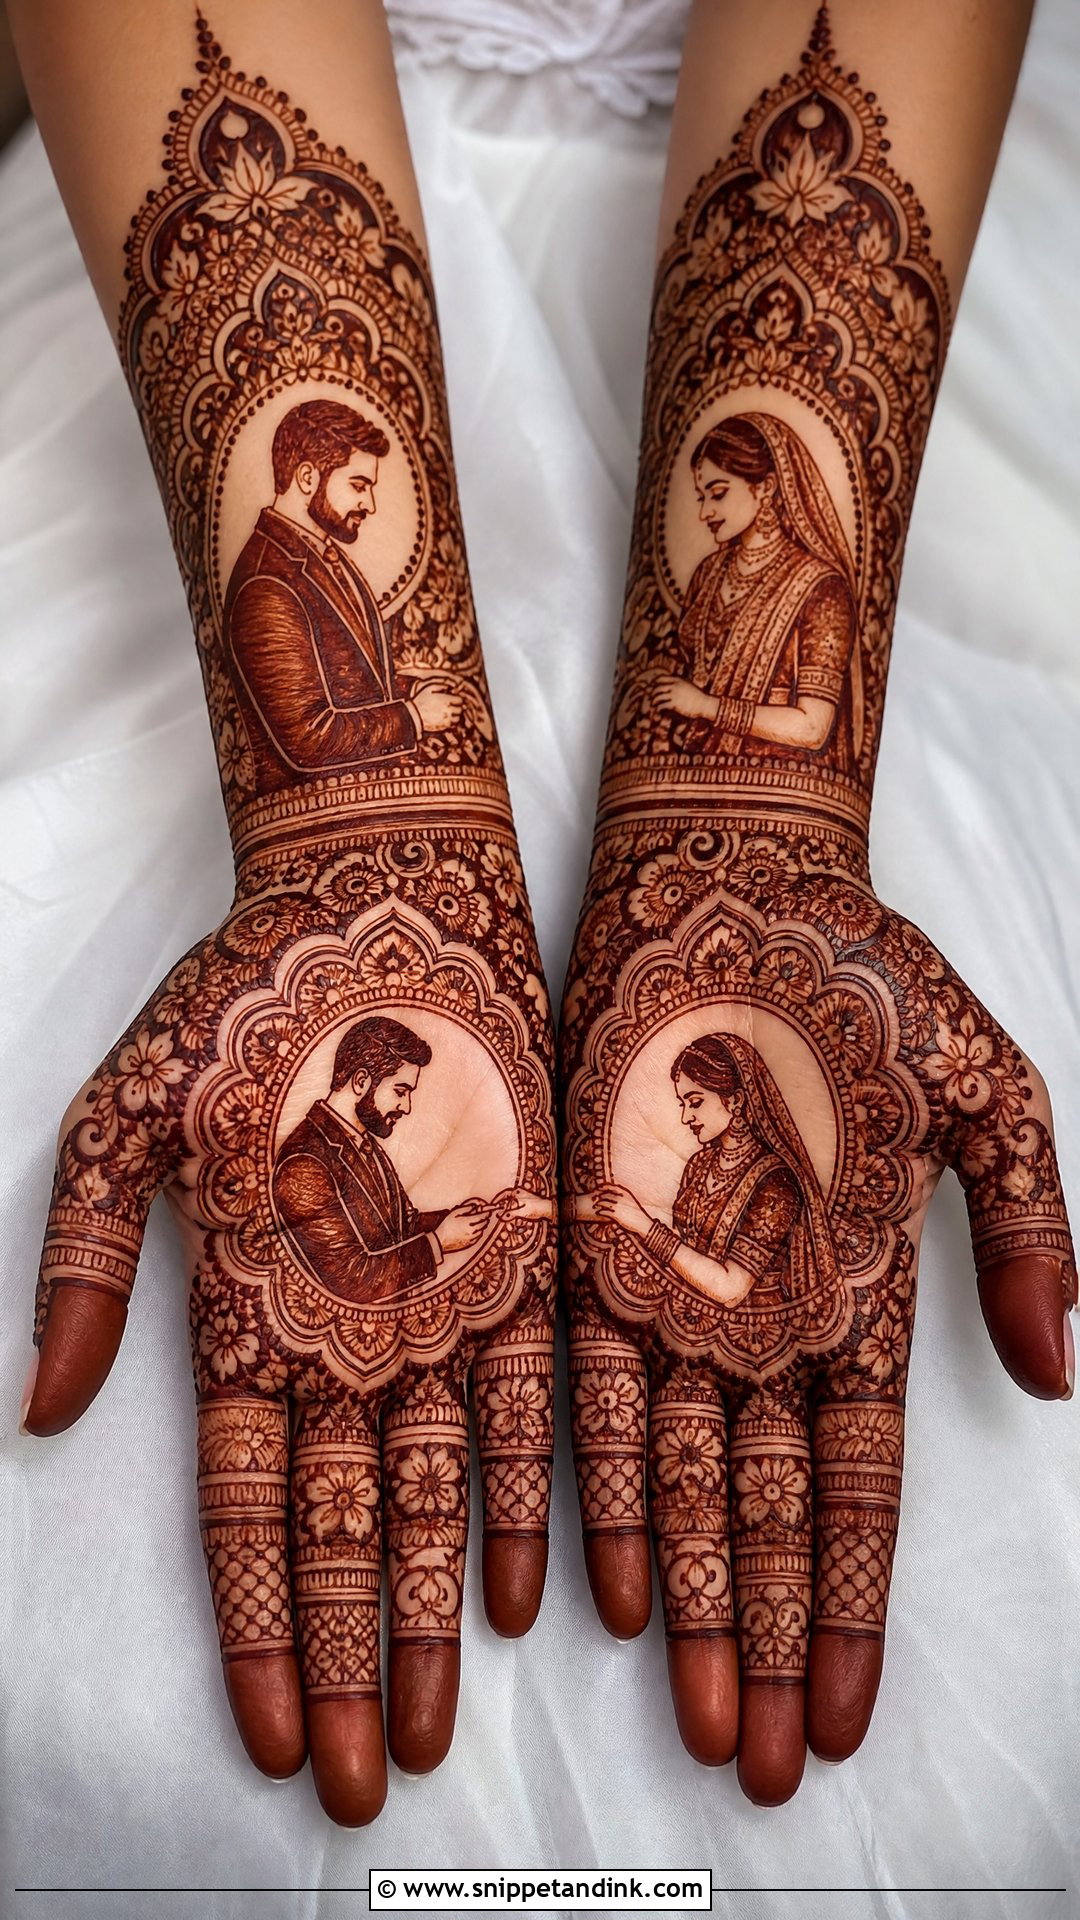
Portrait work is a specialist skill, and I’d only book it with an artist whose own portrait photos you’ve seen up close. A small bride-and-groom figure, a proposal scene or a ring-exchange moment goes on one palm, while the other carries a mandala or initials so the pair feels balanced. Faces need steady lines and controlled shading, and shading stains lighter, so expressions can soften as the colour develops. Keep the scene small for an engagement; a large portrait is better saved for the wedding set.
17. Initials Engagement Mehndi Design
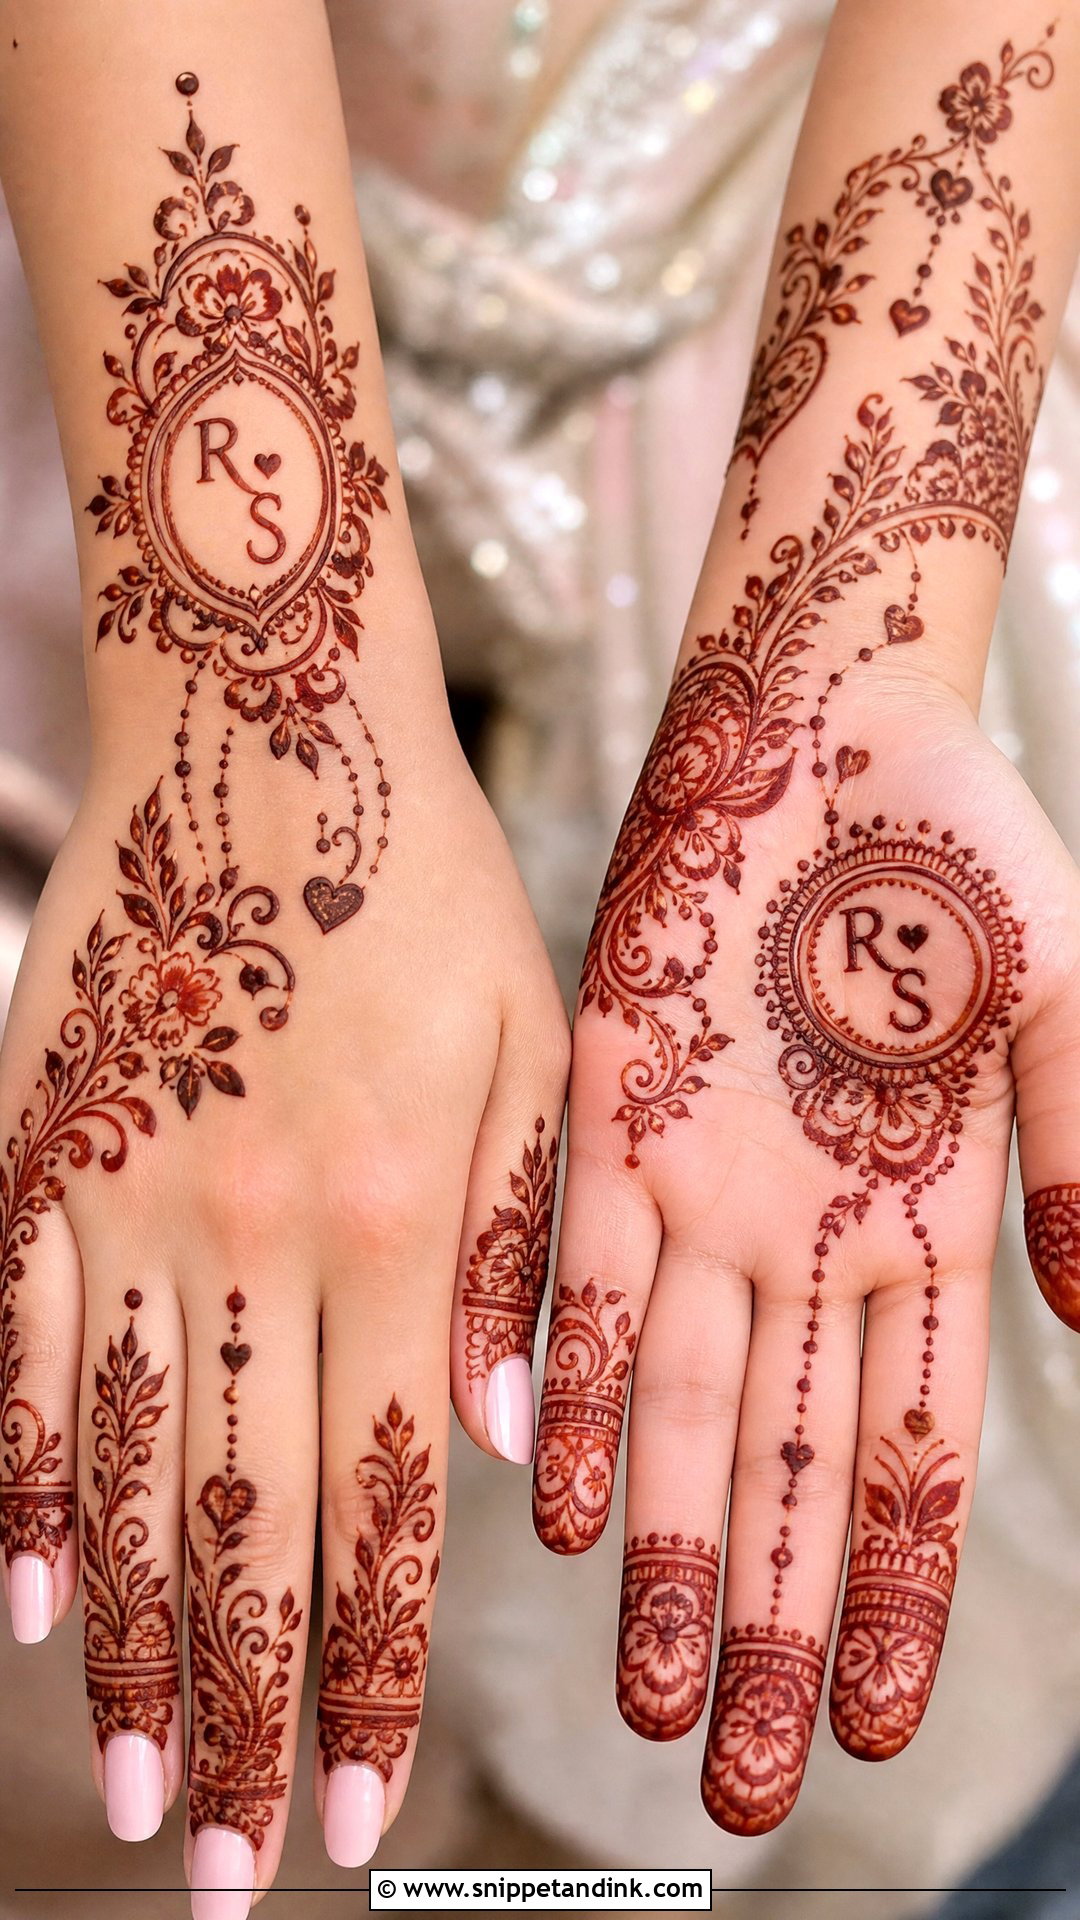
Initials are the most requested hidden detail I draw. I tuck them inside a paisley, along a finger band or near the wrist, sized so the couple can find them but guests have to look twice. Thin letters are the first thing to blur if the paste is touched before it sets, so I outline them a fraction thicker than the surrounding filler. They fit into almost any style, full-hand or light.
18. Heart Engagement Mehndi Design
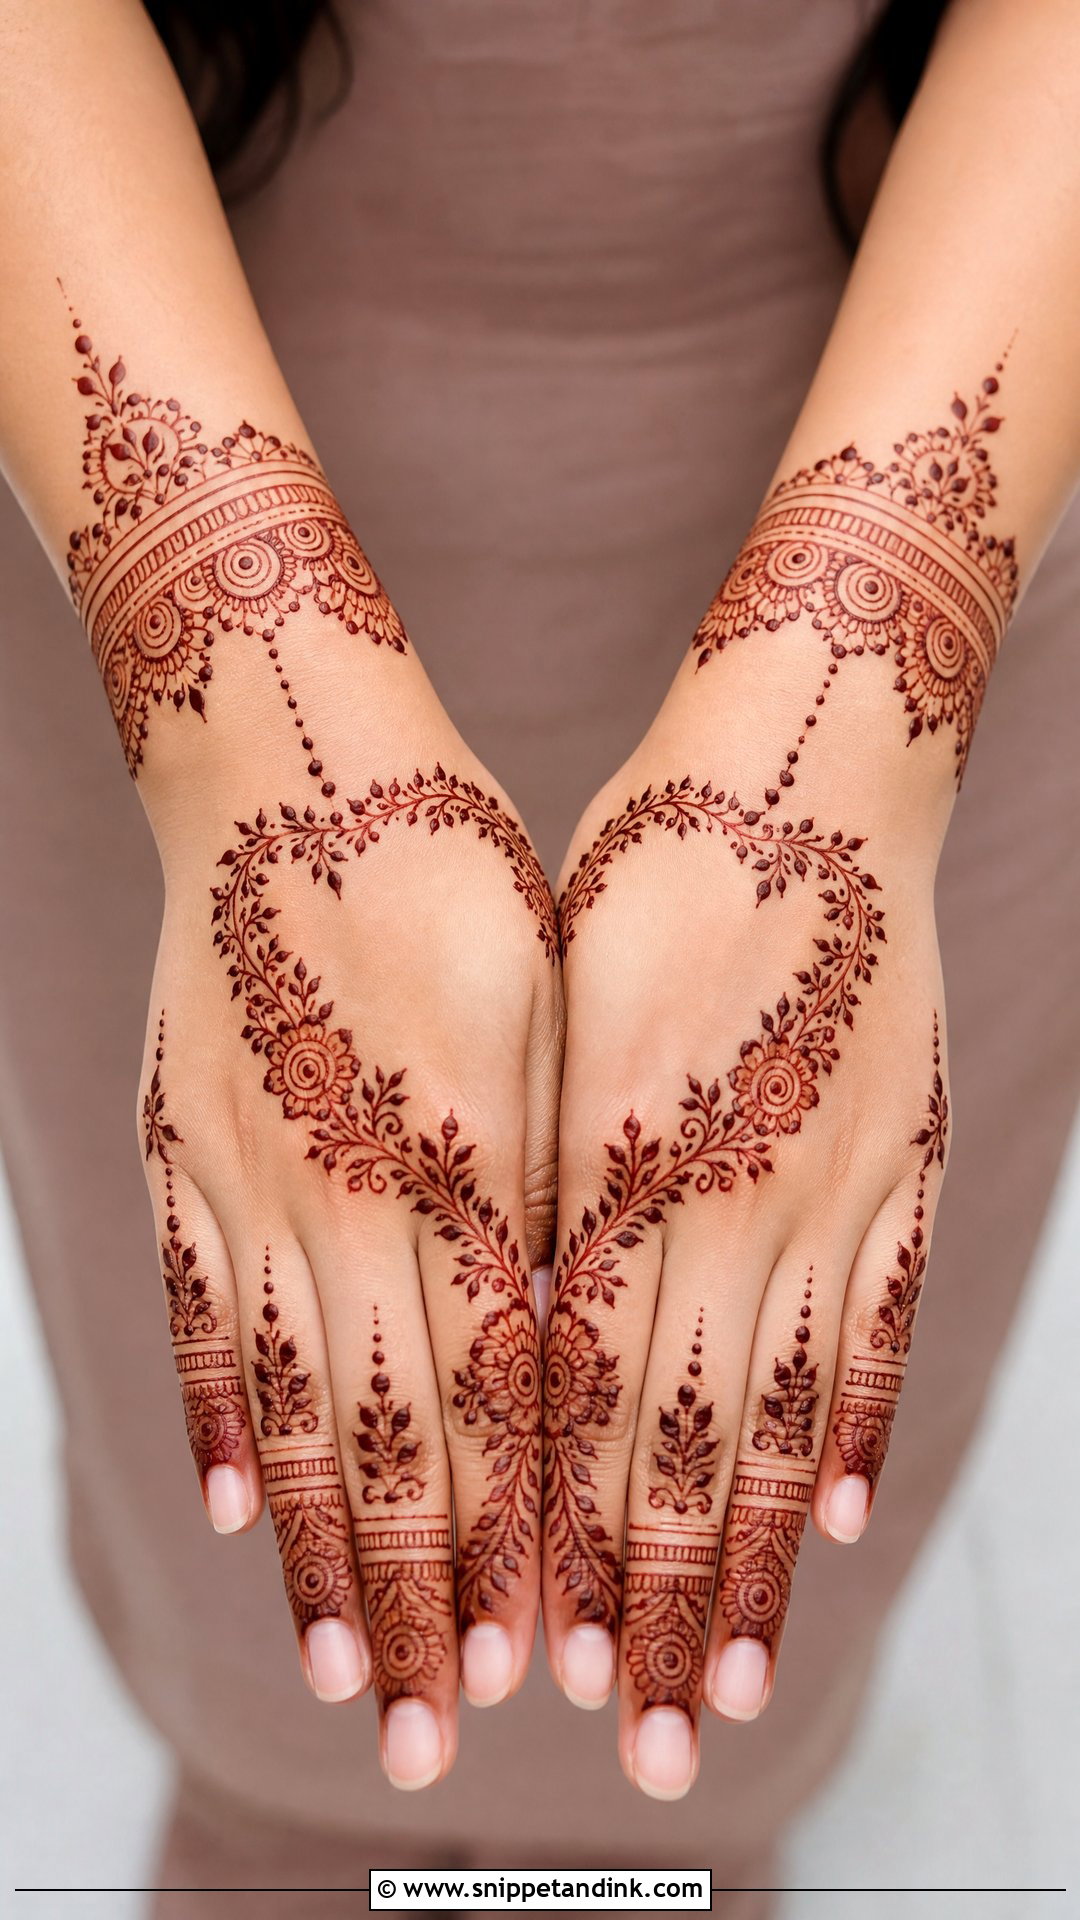
A heart doesn’t have to look childish. I shape it from vines, fill it with small florals, or draw half on each palm so it completes when your hands come together for a photo. That two-hand version needs careful measuring: hands aren’t identical, so I sketch both halves with the hands held side by side before I fill anything. Paired with mandala borders it reads as grown-up rather than cute.
19. Moroccan Engagement Mehndi Design
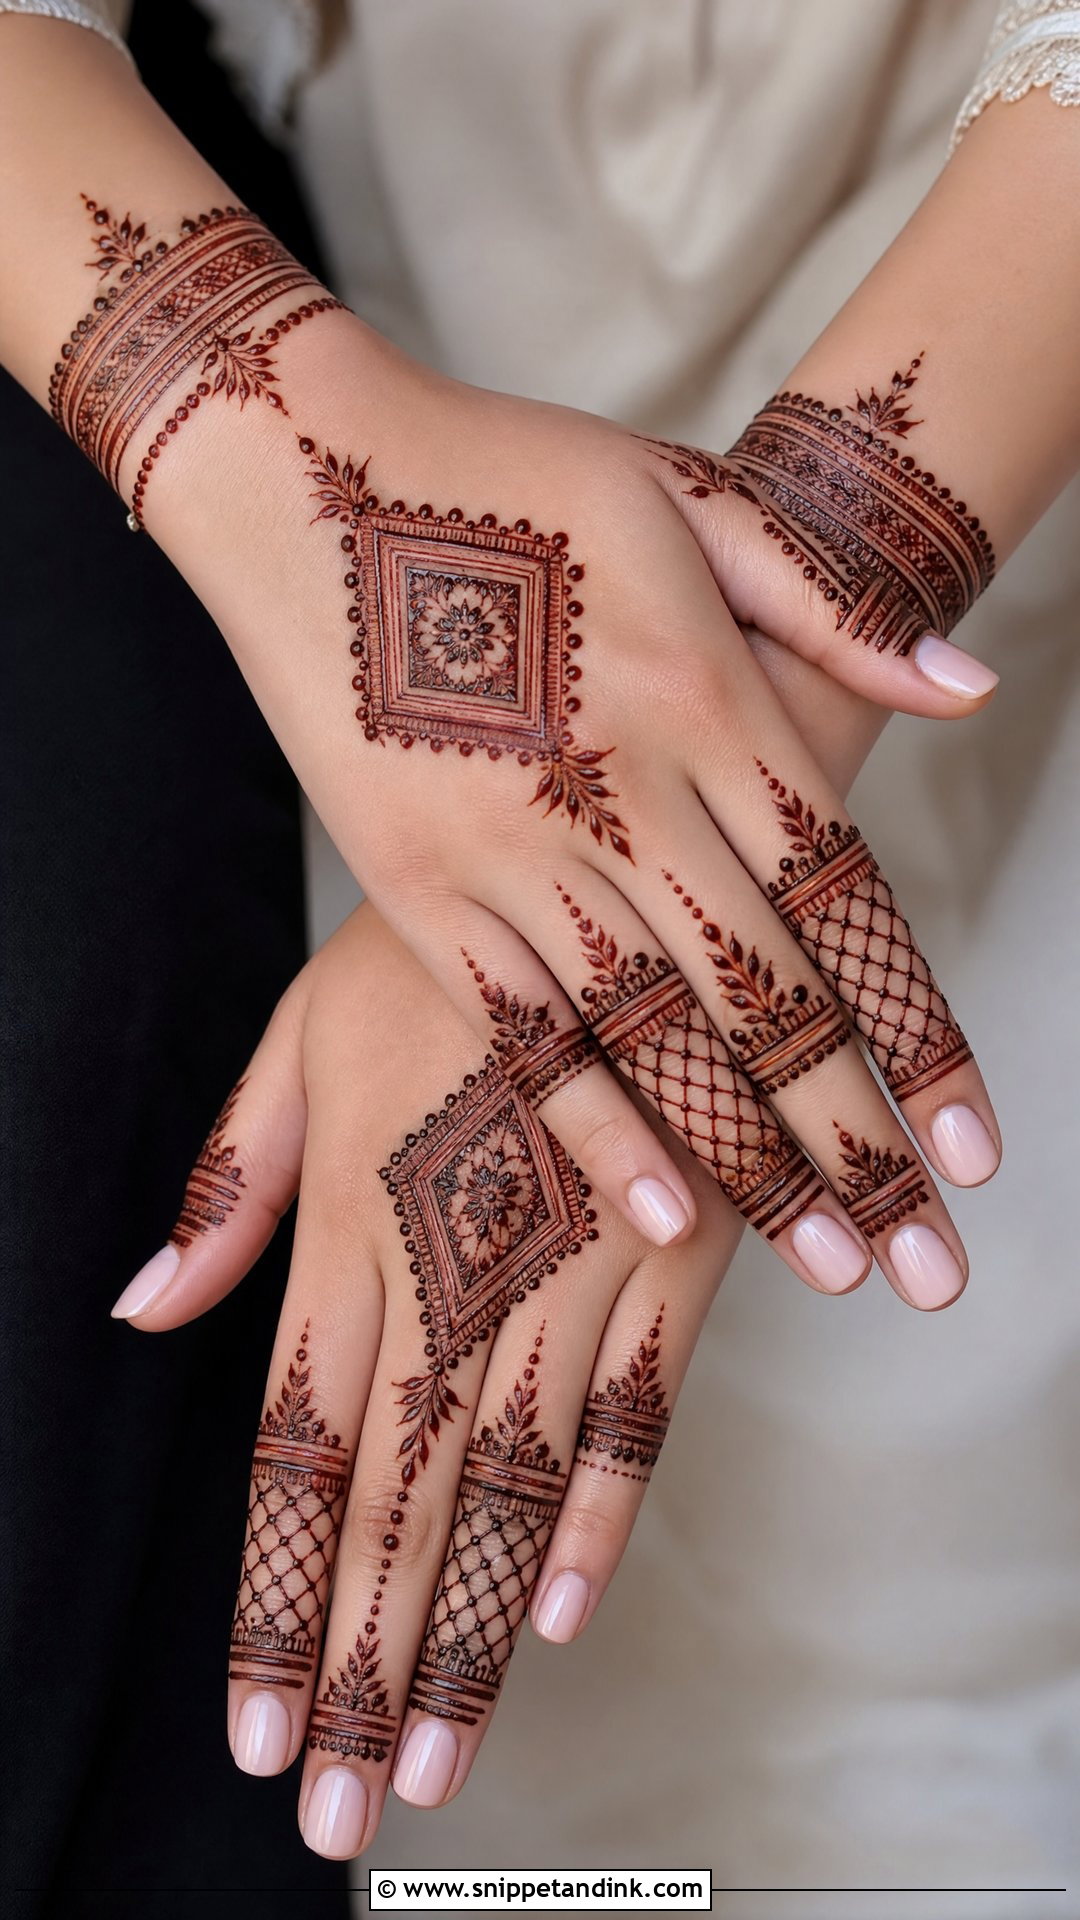
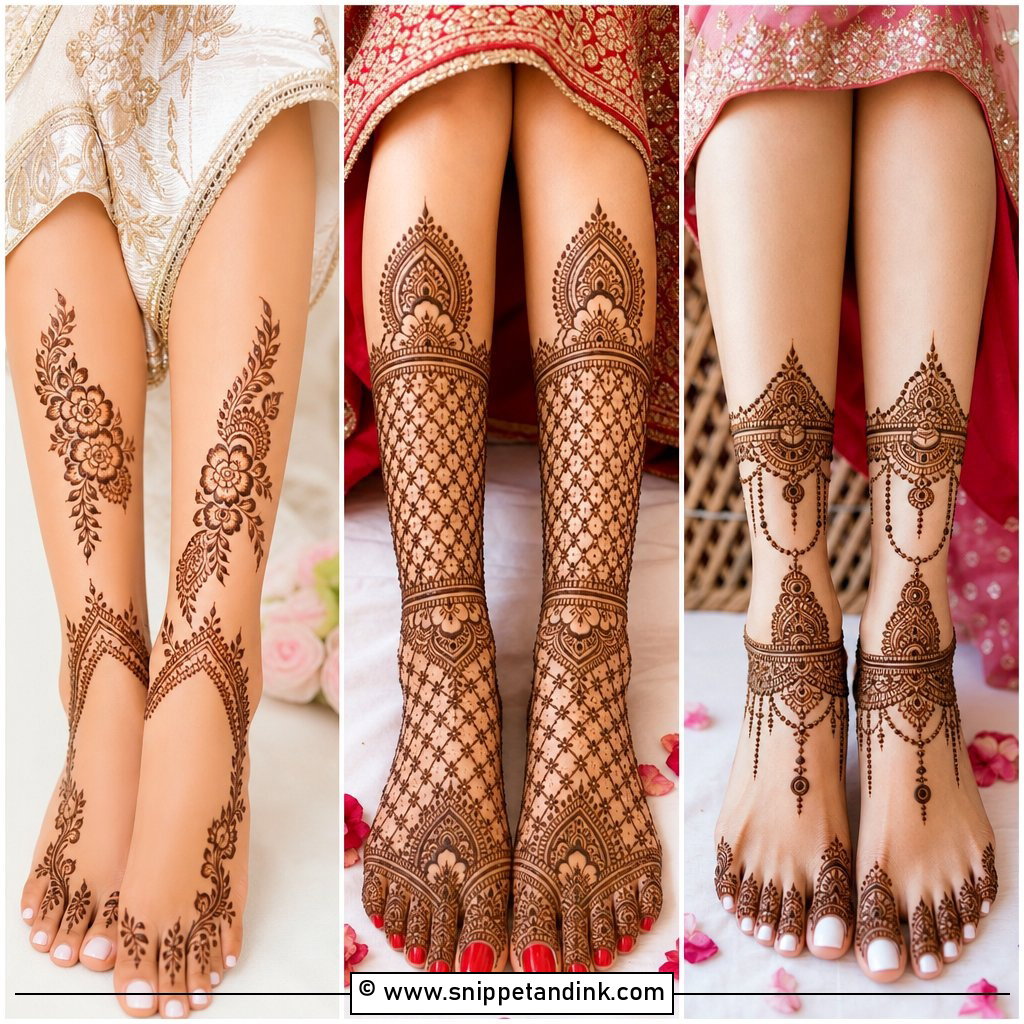
Moroccan henna swaps florals for geometry: diamonds, chevrons, grids and straight repeated lines. Straight lines are harder to draw on a curved hand than flowers, so a steady artist matters here. I usually run it as a structured bracelet on the back hand or as a band from wrist to middle finger, sometimes with one small flower to soften it. Bold geometric lines keep their edges as the stain deepens, which is why the pattern stays legible a week later.
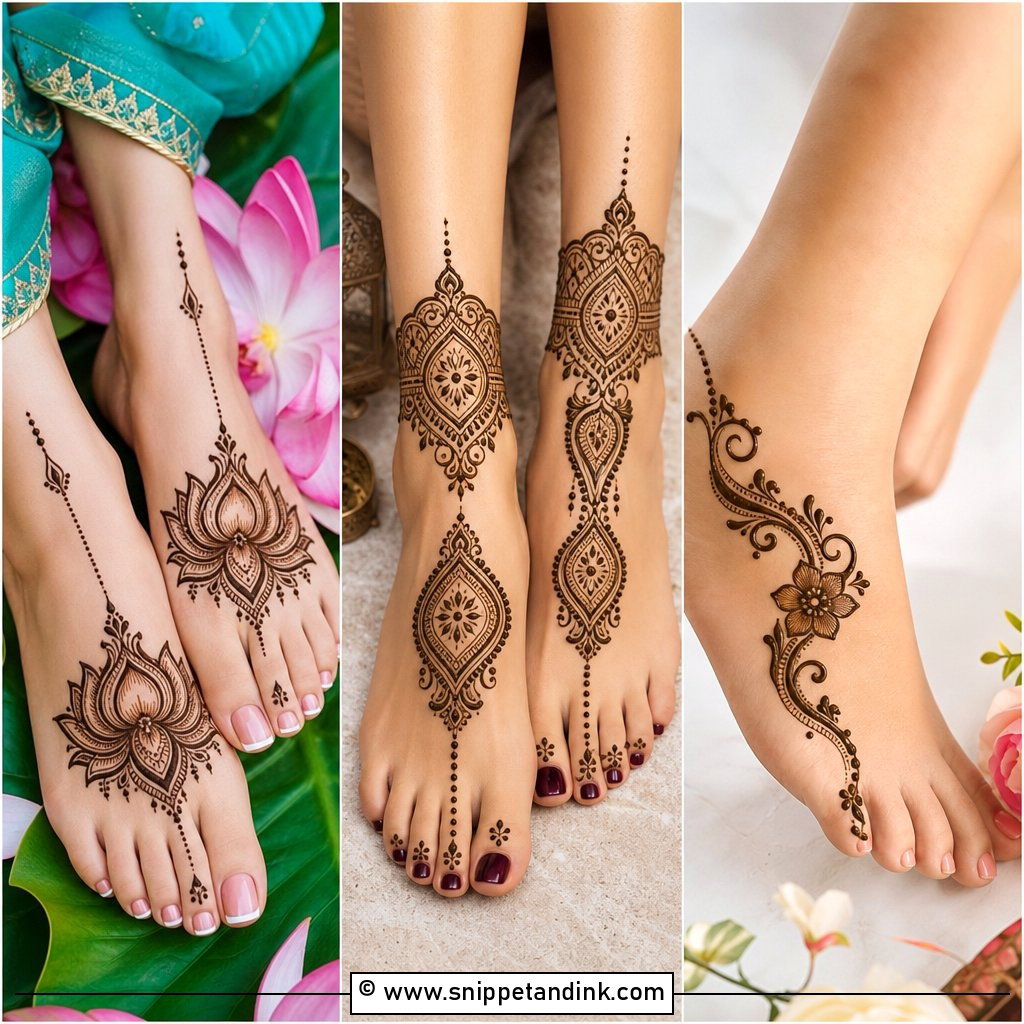
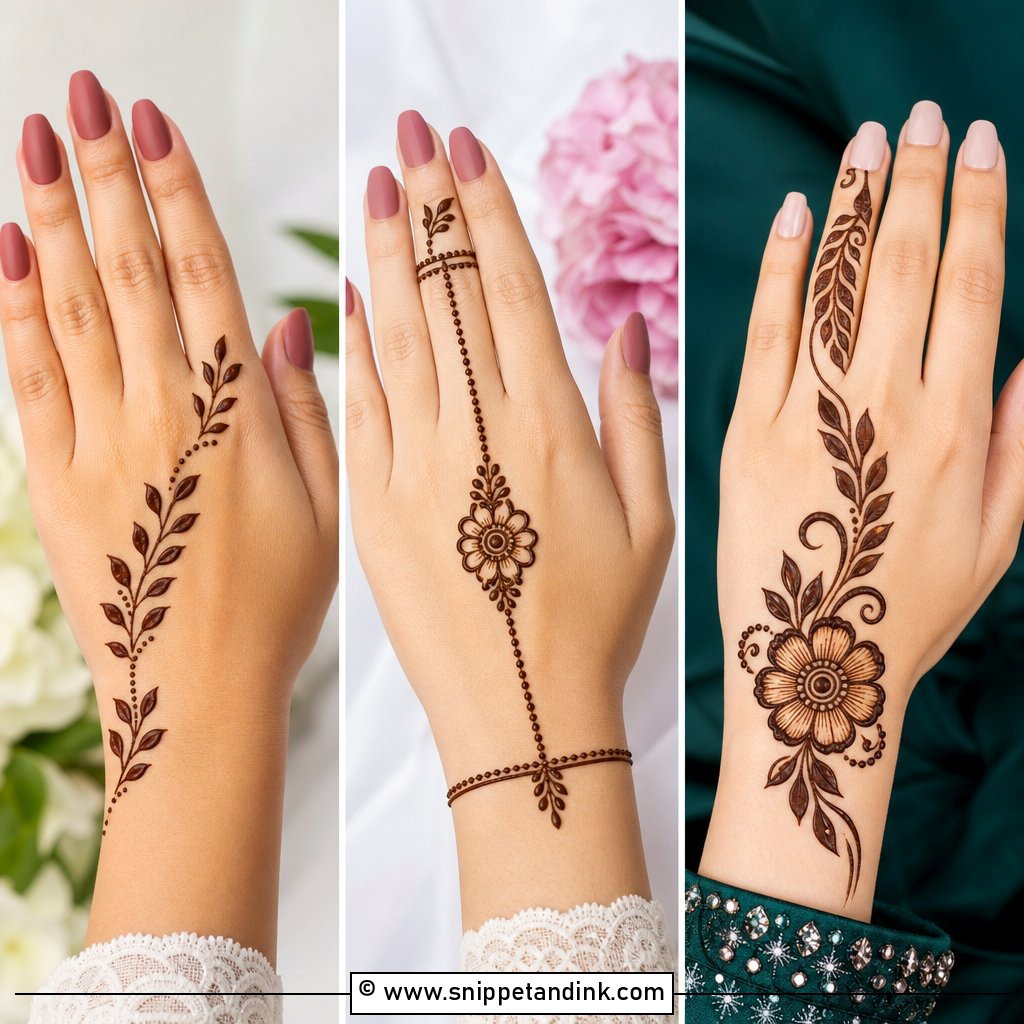
20. Gulf Engagement Mehndi Design
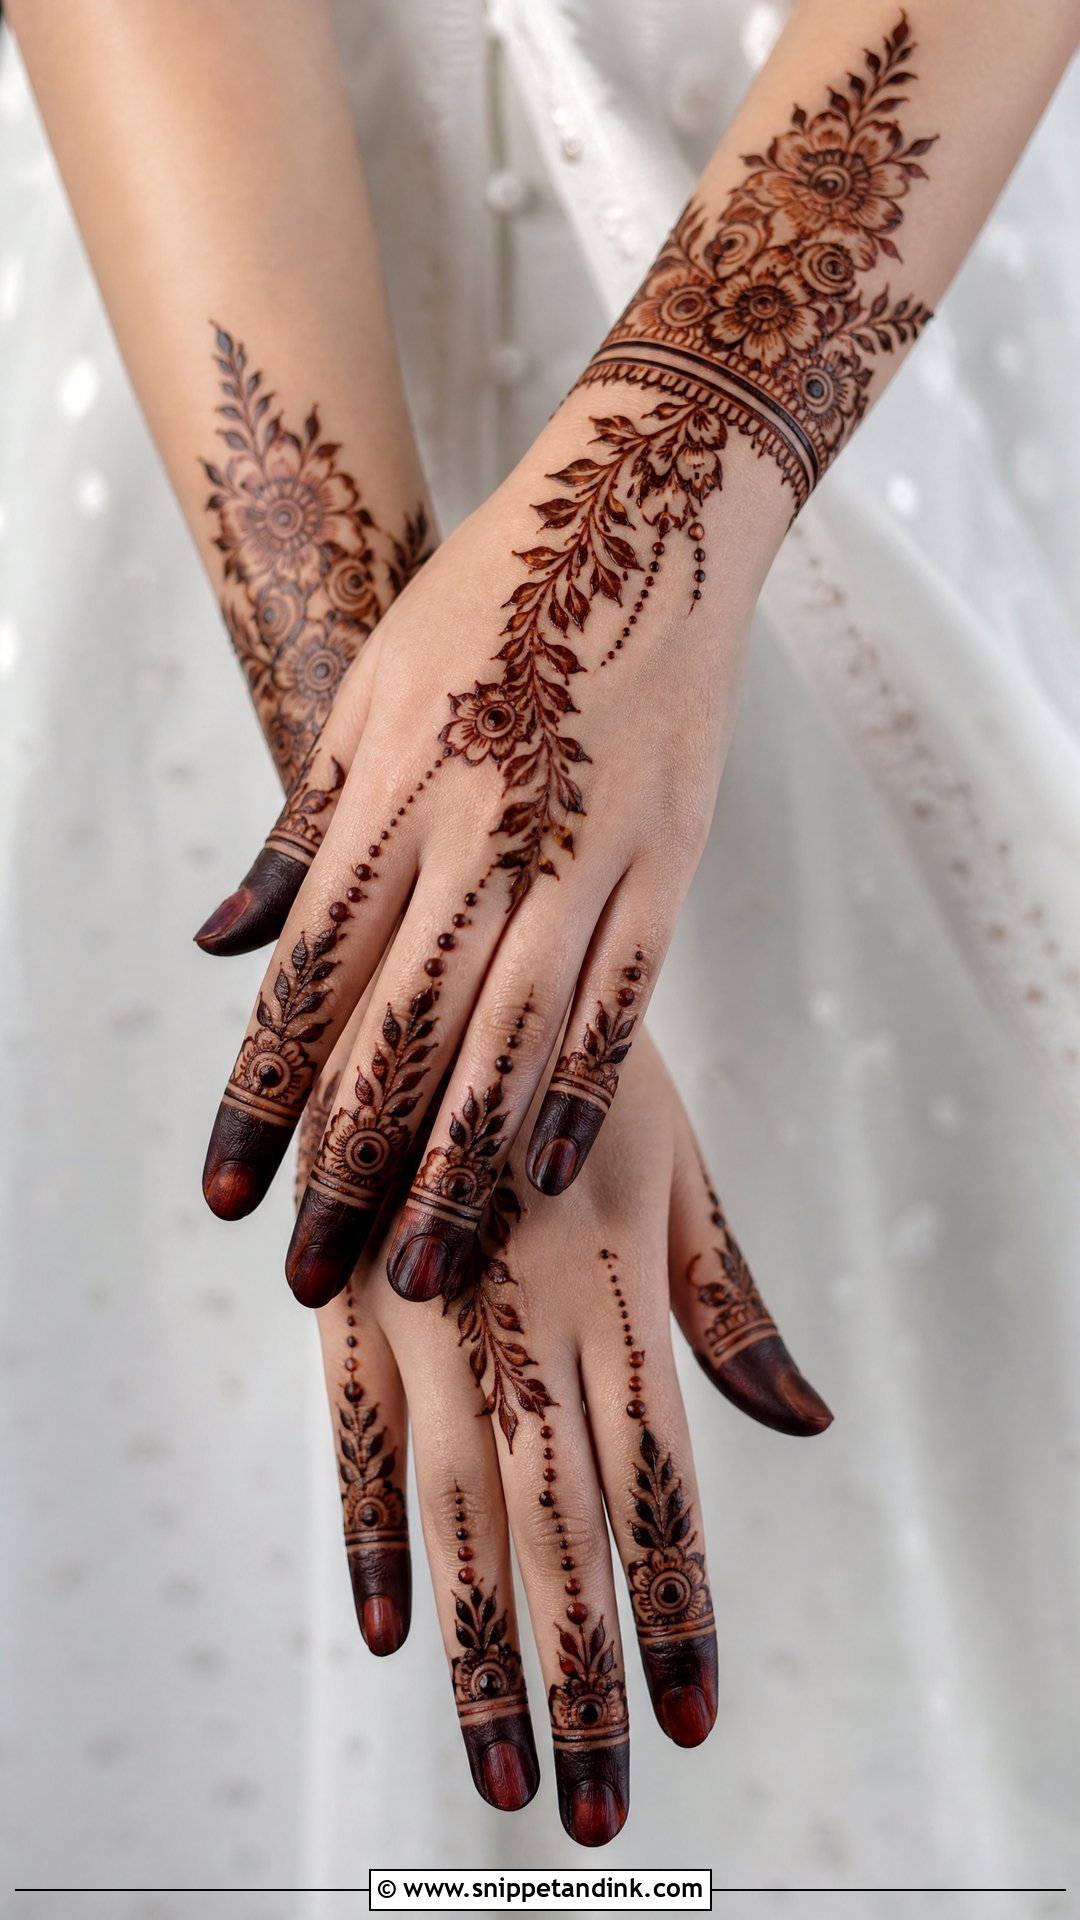
Khaleeji or Gulf-style work uses large blooms, long leafy vines and lots of negative space, with heavily patterned fingertips to finish. Big petals are filled with plenty of paste, so the colour on them is usually deep and even. I place the main flower near the wrist or the centre of the back hand and let leaves trail toward the fingers. For a more bridal version, add a fine dot chain or a wrist cuff. It suits a bride who wants presence without the hours of a full Indian set.
From Wet Paste to the Ring Photo: Aftercare That Decides the Colour
Most pale stains I see aren’t the artist’s fault or the paste’s. They come from the first twelve hours. Here is the routine I give every engagement bride as she leaves my chair.
While the paste is on
Keep it on for six to eight hours if you can; overnight is better. Once the surface is dry, I dab on a little lemon juice mixed with sugar, which helps the paste stick to the skin instead of flaking off early. Stay warm. Cold hands stain weaker, so sitting in a chilly air-conditioned room with paste on is working against you. Wrapping the hands loosely in tissue before bed protects the sheets and the design.
When it comes off
Scrape the dried paste away with a blunt butter knife or rub it off with your fingers. Don’t rinse it off. Then keep water away from the hands for as long as you reasonably can, ideally twelve to twenty-four hours, because water stops the oxidation that darkens the colour. A thin layer of natural balm or coconut oil before washing up helps protect the stain.
Through the ceremony
Skip hand sanitiser, bleach-based cleaners and long hot showers in the days before. Chlorinated pools and exfoliating scrubs fade it quickly too. If a section came up lighter than the rest, don’t panic: by the next day it has usually caught up, and the ring photos are taken at a distance where small differences disappear.
Let the Ring Hand Lead the Design
Start with the hand that will hold the ring and decide how much skin you want showing around it. From there the style choice gets easier: dense Indian for a traditional set, open Arabic or Gulf work for something lighter, minimal or modern if another event follows soon. Bring your outfit sleeve and jewellery to the appointment so the layout can stop in the right place. Then protect the paste for the first few hours, because the best design in the world won’t save a stain that was washed off too early.
You'll Like These Ideas:


Leave a Reply