
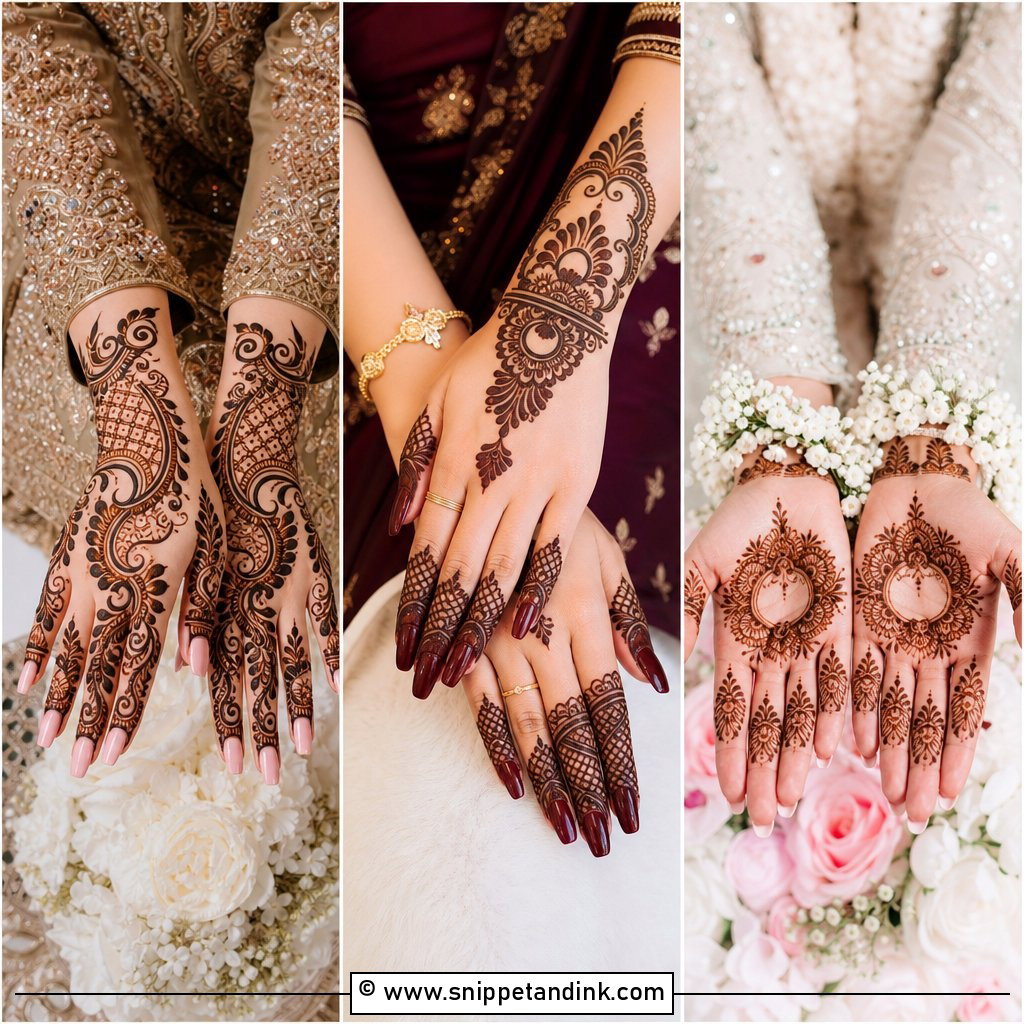
The back of the hand is the side everyone sees: resting on a lap, holding a glass, framed by bangles in nearly every photo. That’s why so many guests and bridesmaids ask me to put their henna there and leave the palm alone. A good back-hand design balances clean spacing and neat motifs across the hand, fingers and wrist, and the simple versions below are easy enough for a beginner yet still right for Eid, Diwali, weddings and family functions. You’ll find floral trails, mandalas, bracelets, Arabic vines, jaali and modern finger-focused layouts, with notes on how each one behaves on this part of the hand.
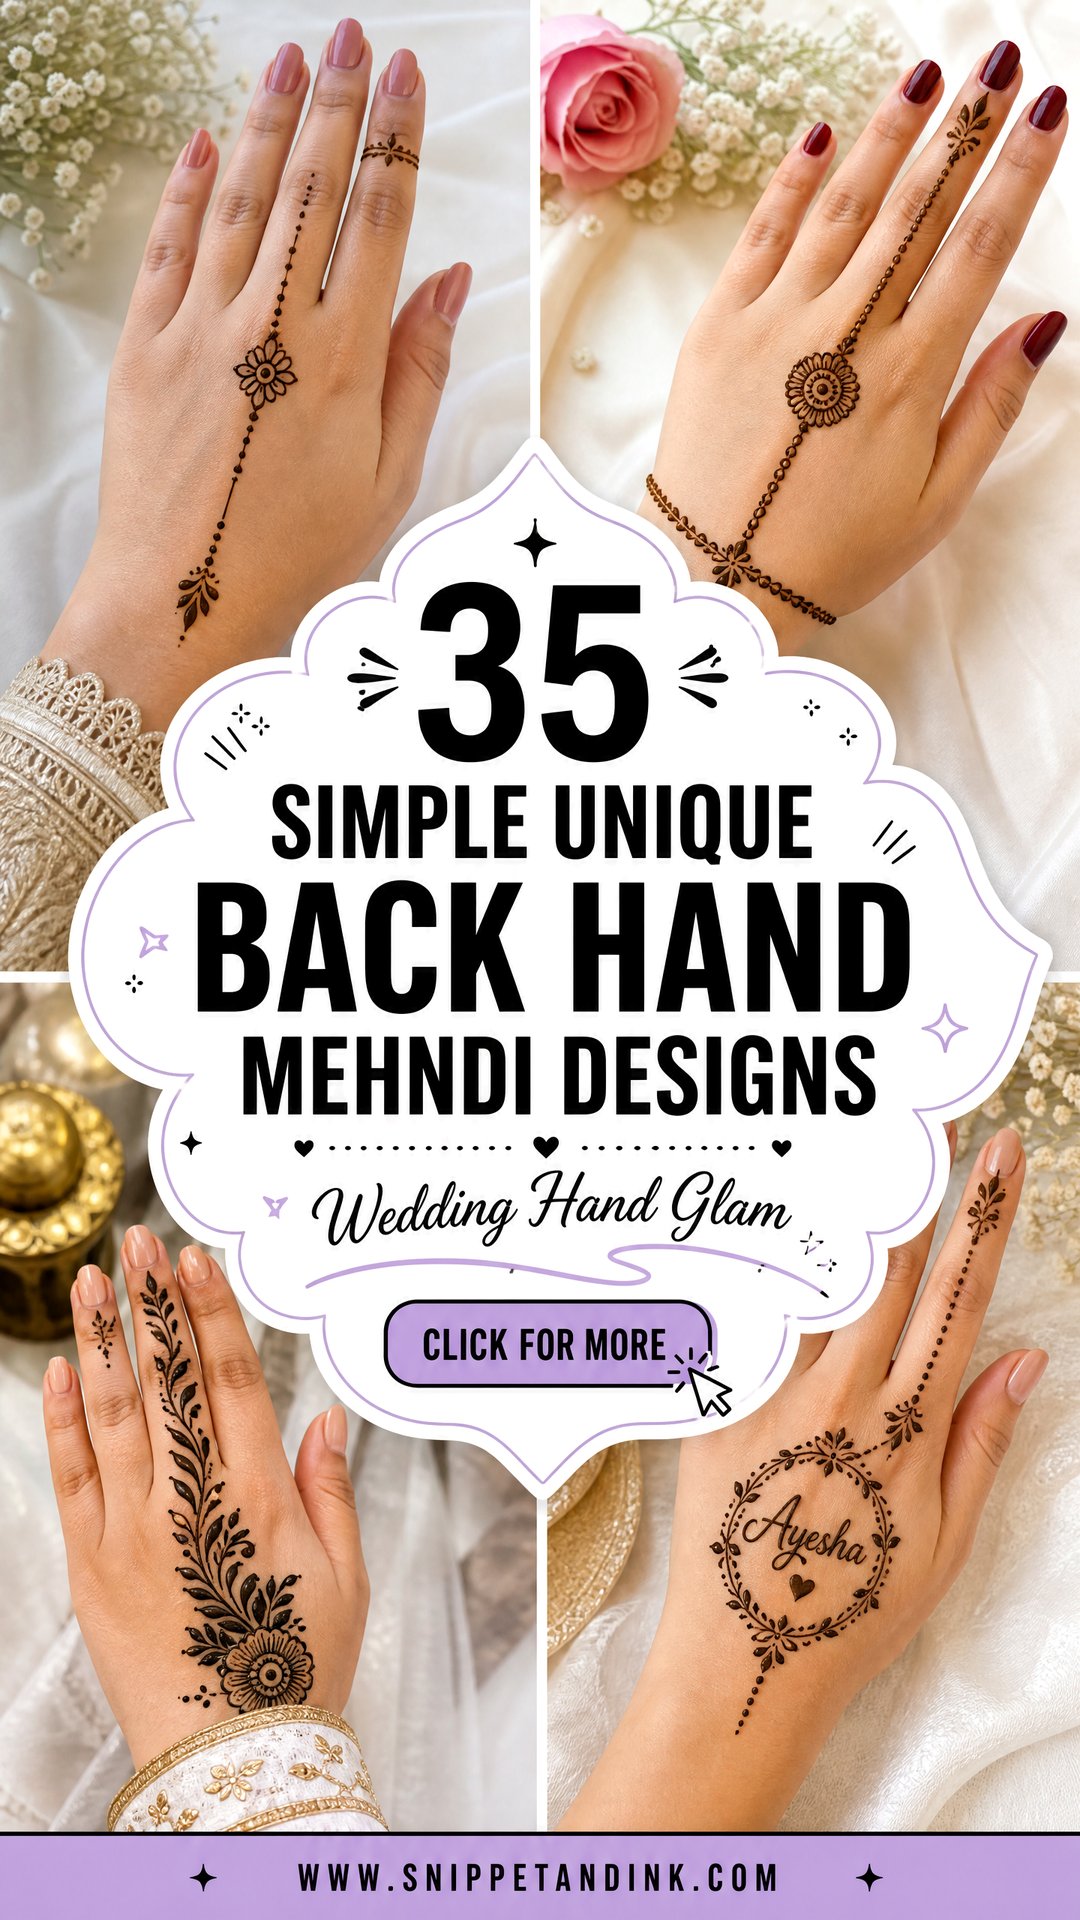
The Back of the Hand Behaves Differently From the Palm
Henna dye binds to the outer layer of skin, and on the back of the hand that layer is thinner than on the palm. The result is a stain that is usually a shade or two lighter, and that fades a little sooner. I plan for it in three ways: slightly bolder outlines, more time with the paste on, and fewer ultra-fine fillers that would barely show.
The surface also moves. Knuckles bend, tendons rise when you grip, and the wrist creases every time you lift a cup. Lines drawn across those spots crack before they stain. So I seat clients with the hand resting flat on a cushion, fingers slightly apart, and I place motifs on the flat areas between the joints.
If you’re drawing your own
- Do the non-dominant hand first while you’re freshest, then ask someone else for your dominant hand if possible.
- Rest the hand flat and rotate the cushion instead of twisting your wrist.
- Start the design near the wrist and work toward the fingers, so you’re not leaning over wet paste.
- Keep a cotton bud nearby to lift mistakes in the first few seconds.
1. Simple Arabic Back Hand Mehndi Design
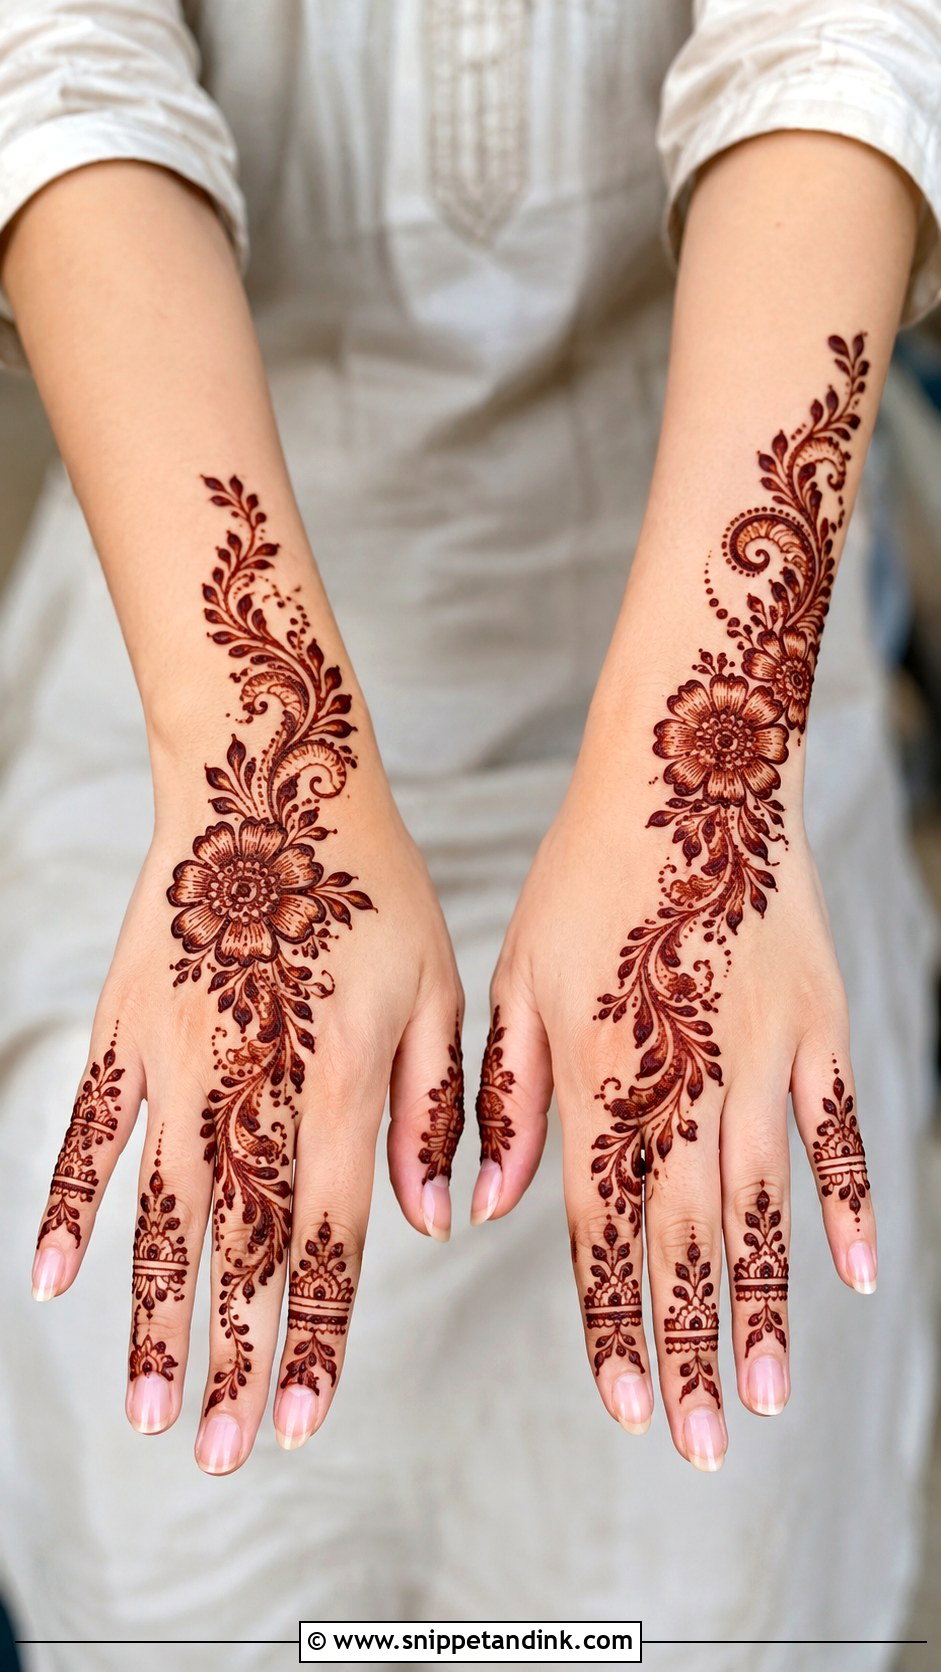
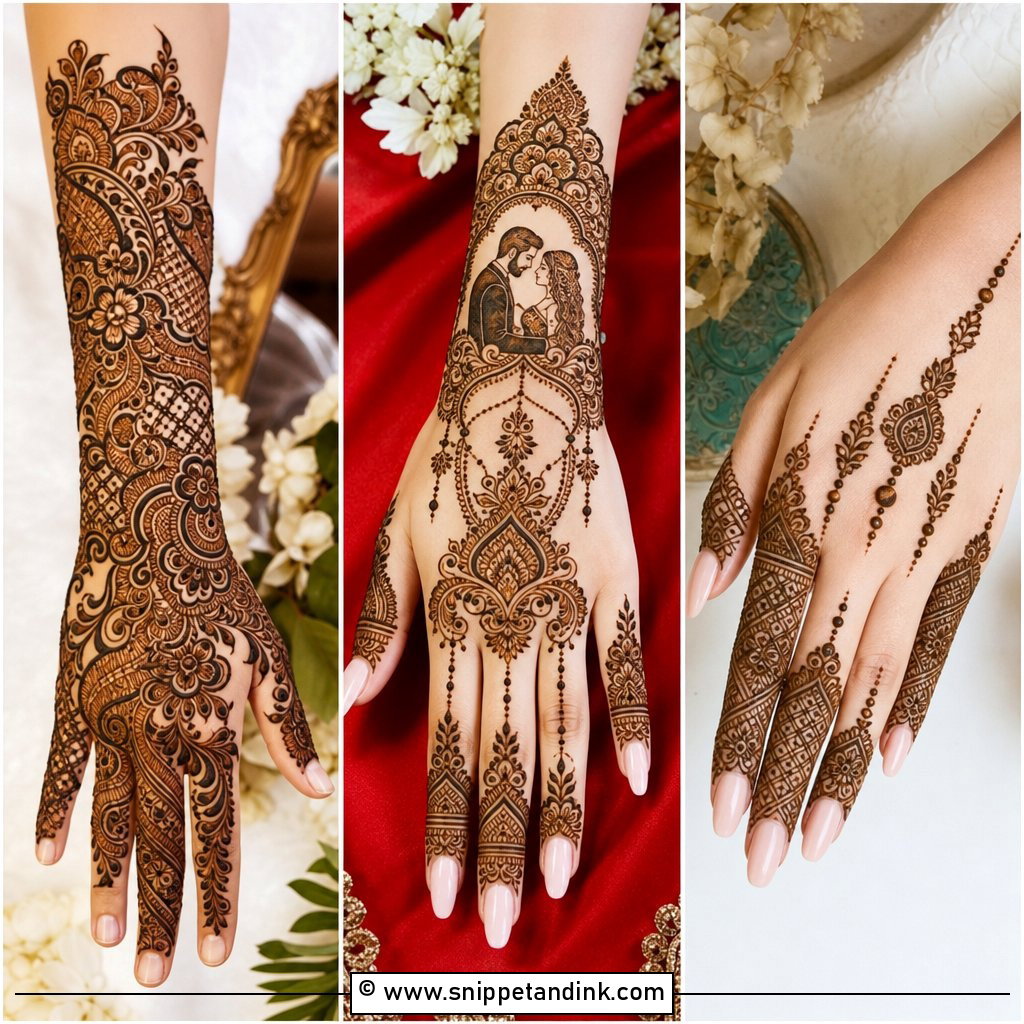
Arabic layouts suit the back of the hand better than almost any other style, because the diagonal runs along the bones of the hand rather than across them. I start near the wrist and flow toward the index or middle finger with large flowers, leafy vines, curved paisleys and dotted gaps. To make it feel less standard, I set the main floral trail slightly off-center and decorate only two or three fingers. The larger shapes are easier to control, which makes it a kind first design for beginners.
2. Simple Mandala Back Hand Mehndi Design
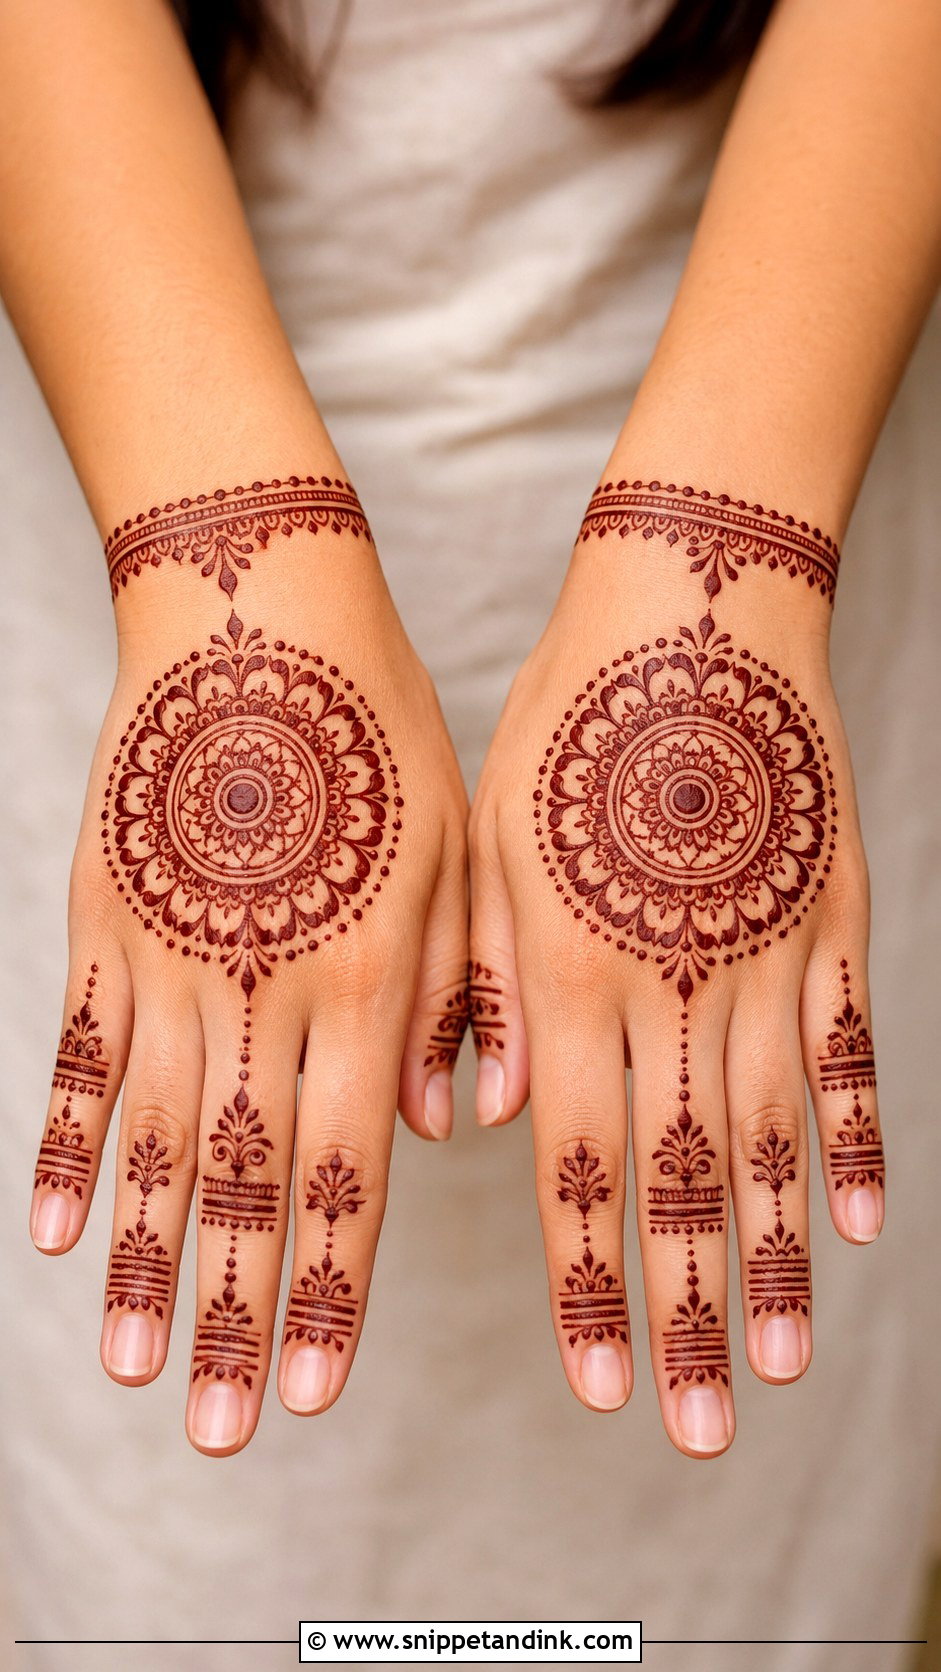
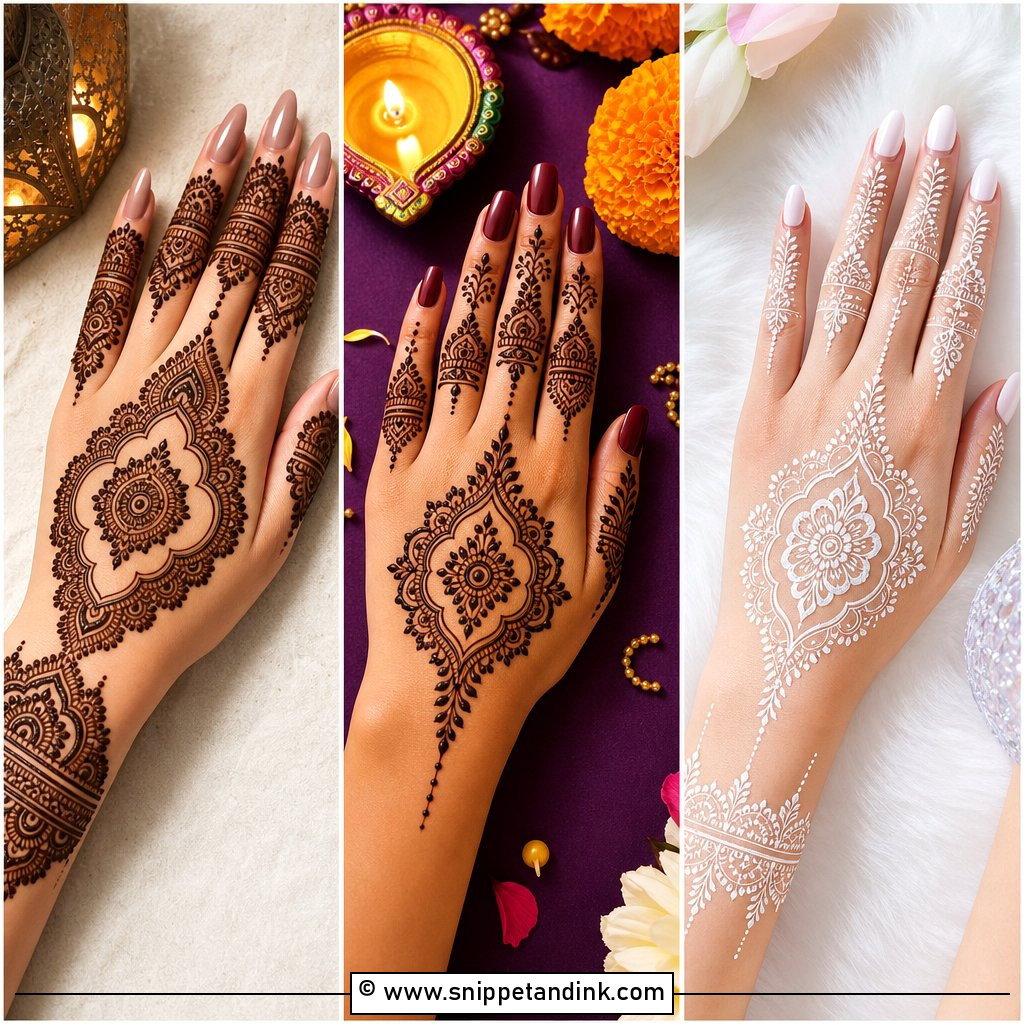
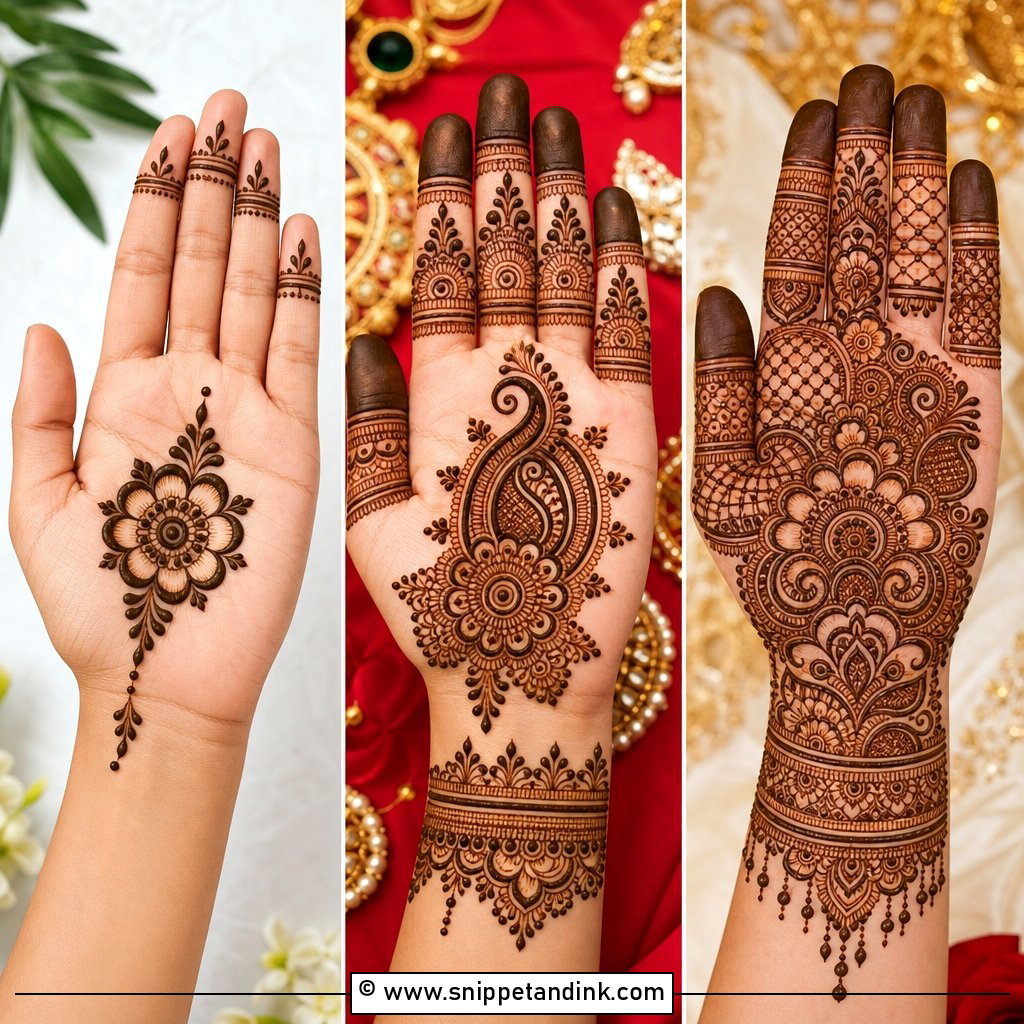
A mandala in the middle of the back hand gives a neat, centered, traditional look. I surround the circle with petals, dots, small curves and fine rings, then add clean fingertip bands and a few leaves near the knuckles; the wrist stays plain or gets a slim line. On short hands, the circle gives balance. The trick on this side is to center the mandala on the flat area between the knuckles and the wrist bone, not on the visual middle, because the tendons lift when you grip and stretch anything placed over them.
3. Simple Floral Back Hand Mehndi Design
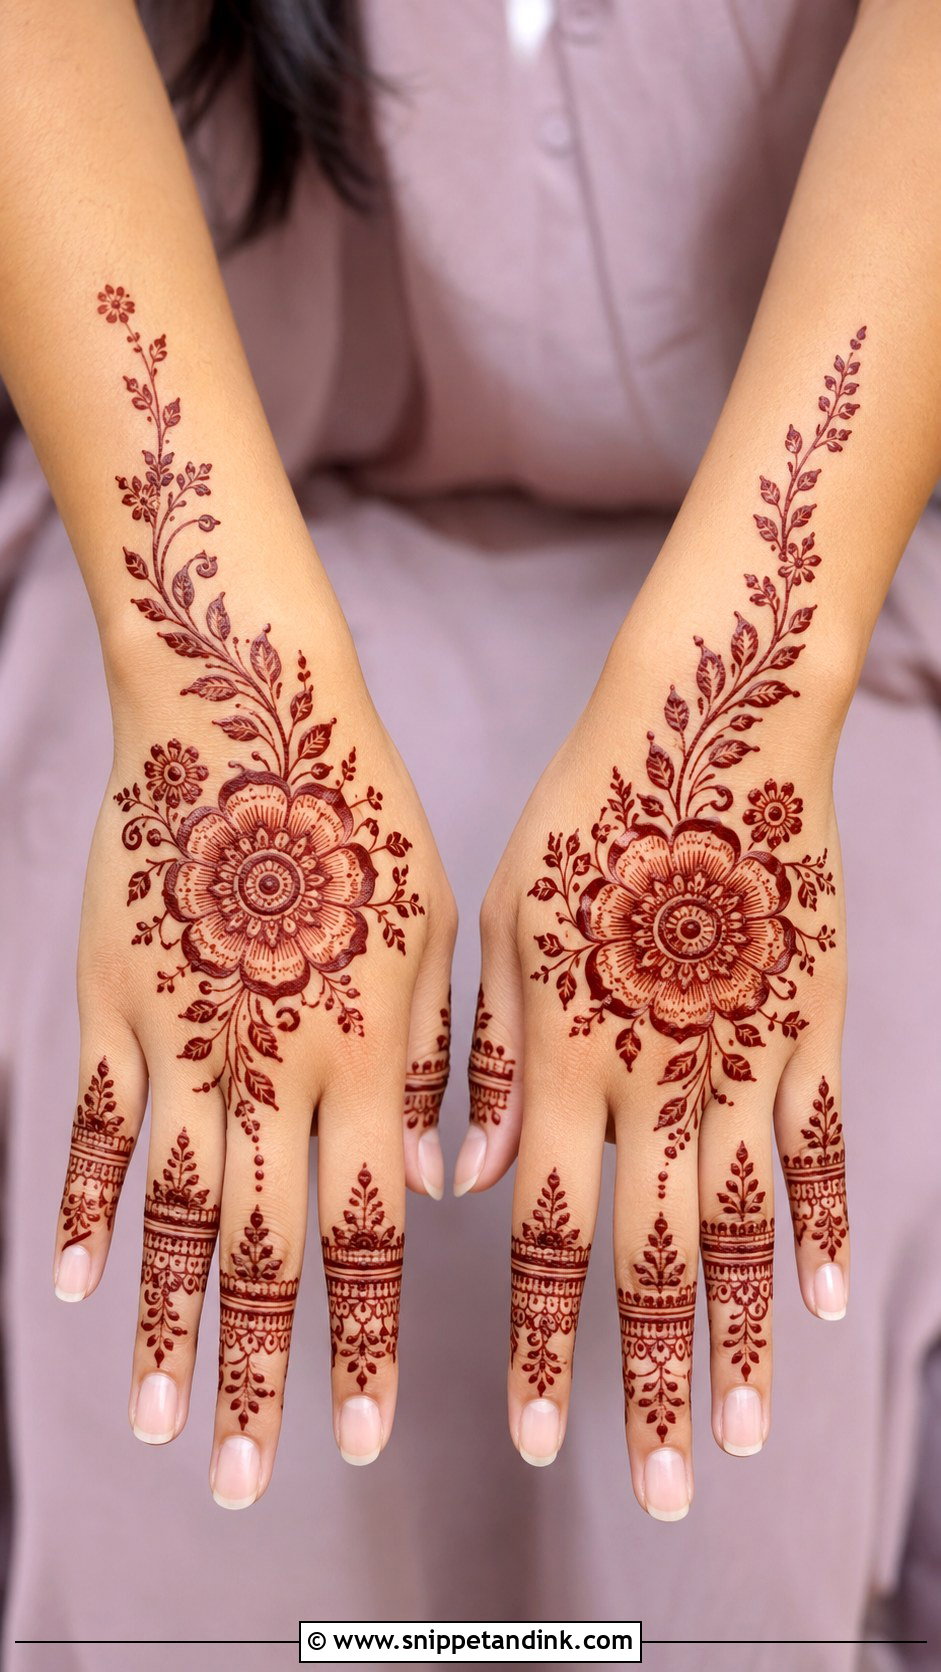
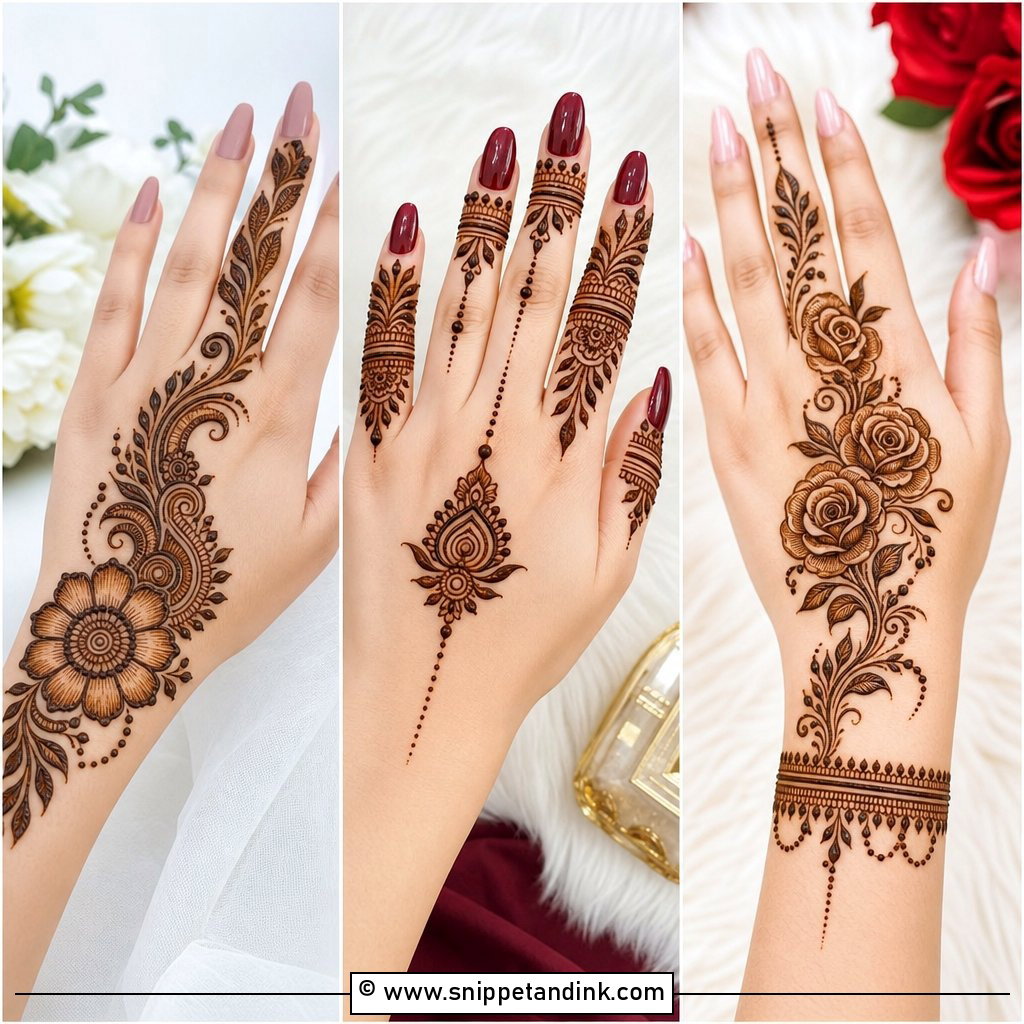
One main flower near the center of the back hand, smaller blooms flowing toward the fingers, and leaves to create movement: that’s the whole formula. Tiny petals, dotted lines and leafy tips on the fingers match it. I leave a little skin between each flower, partly for looks and partly because thick neighboring petals on this thinner skin can blur into one shape as the stain develops. Bridesmaids and young girls pick this one often, and it suits almost any occasion.
4. Simple Bracelet Back Hand Mehndi Design
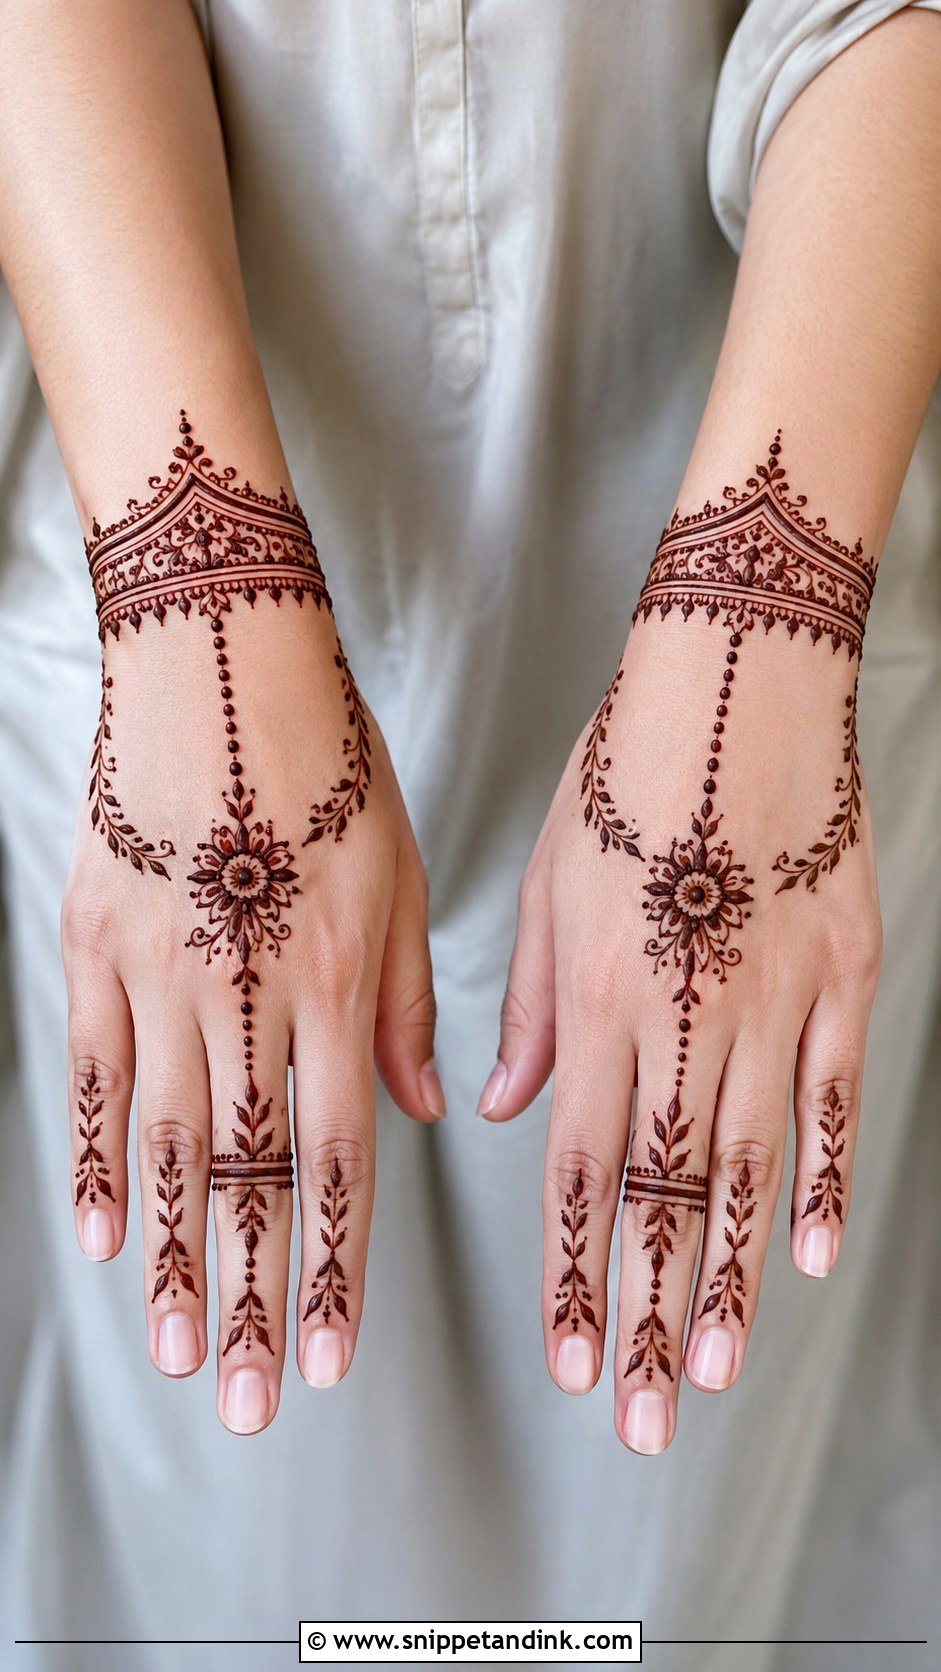
Bracelet designs start with a band around the wrist and connect to one finger through chains, dots, vines or small floral links, leaving the center of the hand mostly open. A small mandala or flower where the chain meets the hand gives it a focal point. It pairs well with rings and bangles. Keep the bracelet lines even, which means drawing the band with the wrist straight and flat; draw it with the wrist bent and it will look crooked when you straighten up.
5. Simple Finger Back Hand Mehndi Design
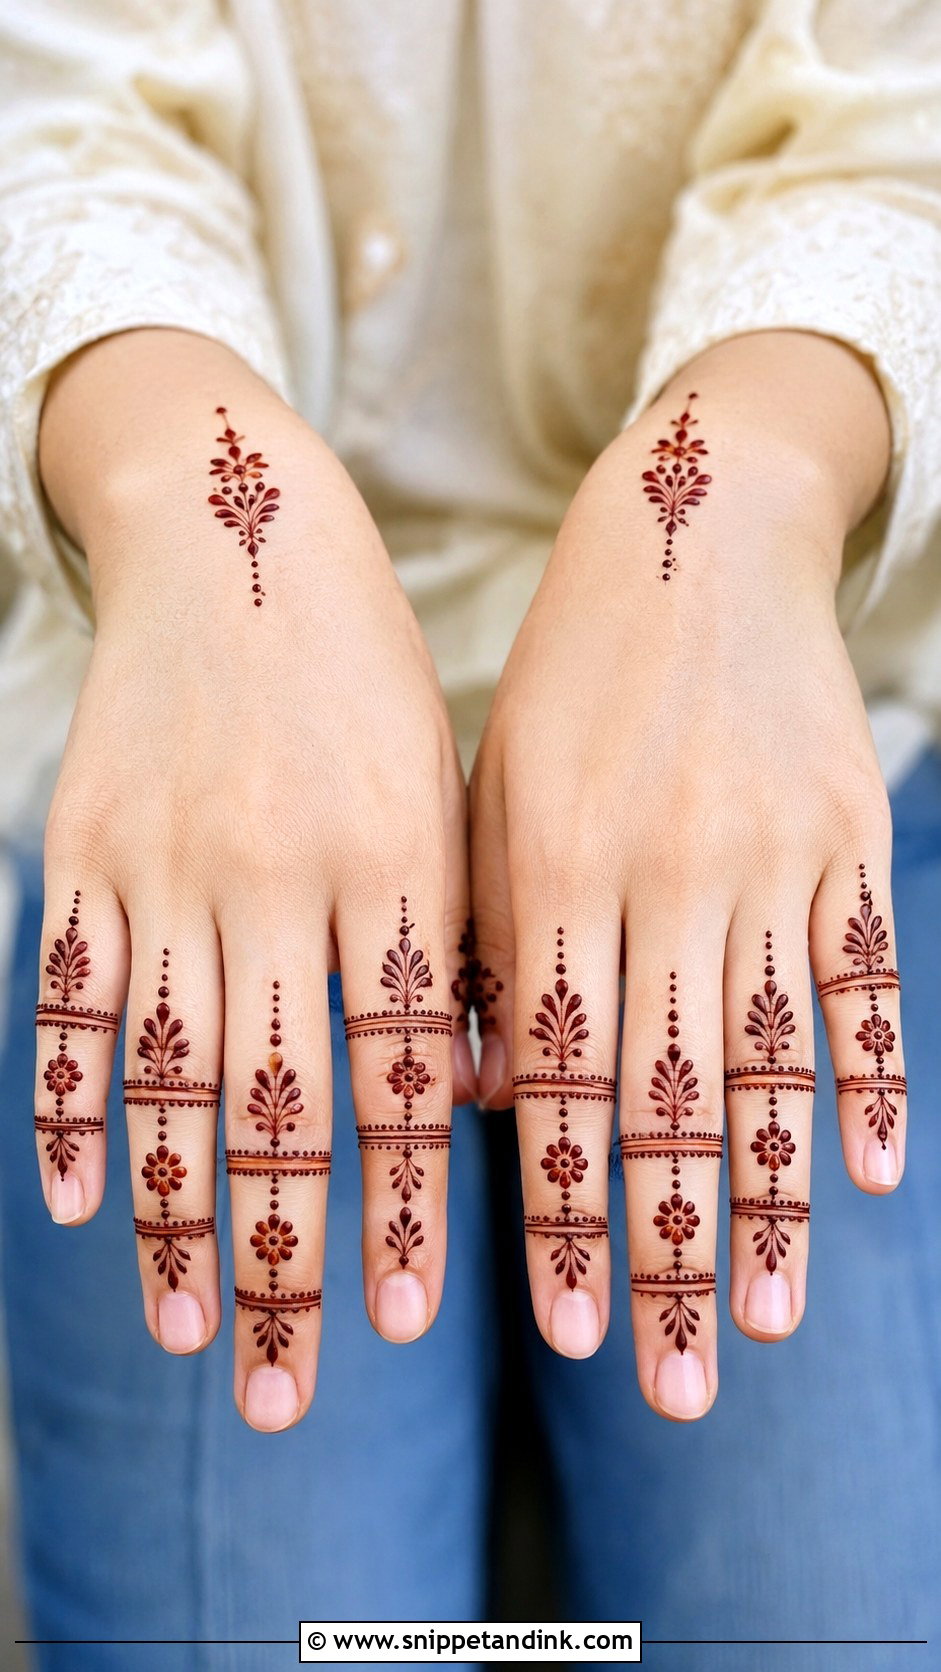
Finger-focused designs keep the center of the hand clean and put the decoration on the fingers: leafy lines, tiny flowers, checks, dots and thin bands, different on each finger but related. A small motif near the wrist or a delicate chain across the back hand completes it. Slim lines matter here, because chunky bands on every finger look heavy fast. Office parties, college events and casual gatherings are where I draw it most.
6. Simple Jaali Back Hand Mehndi Design
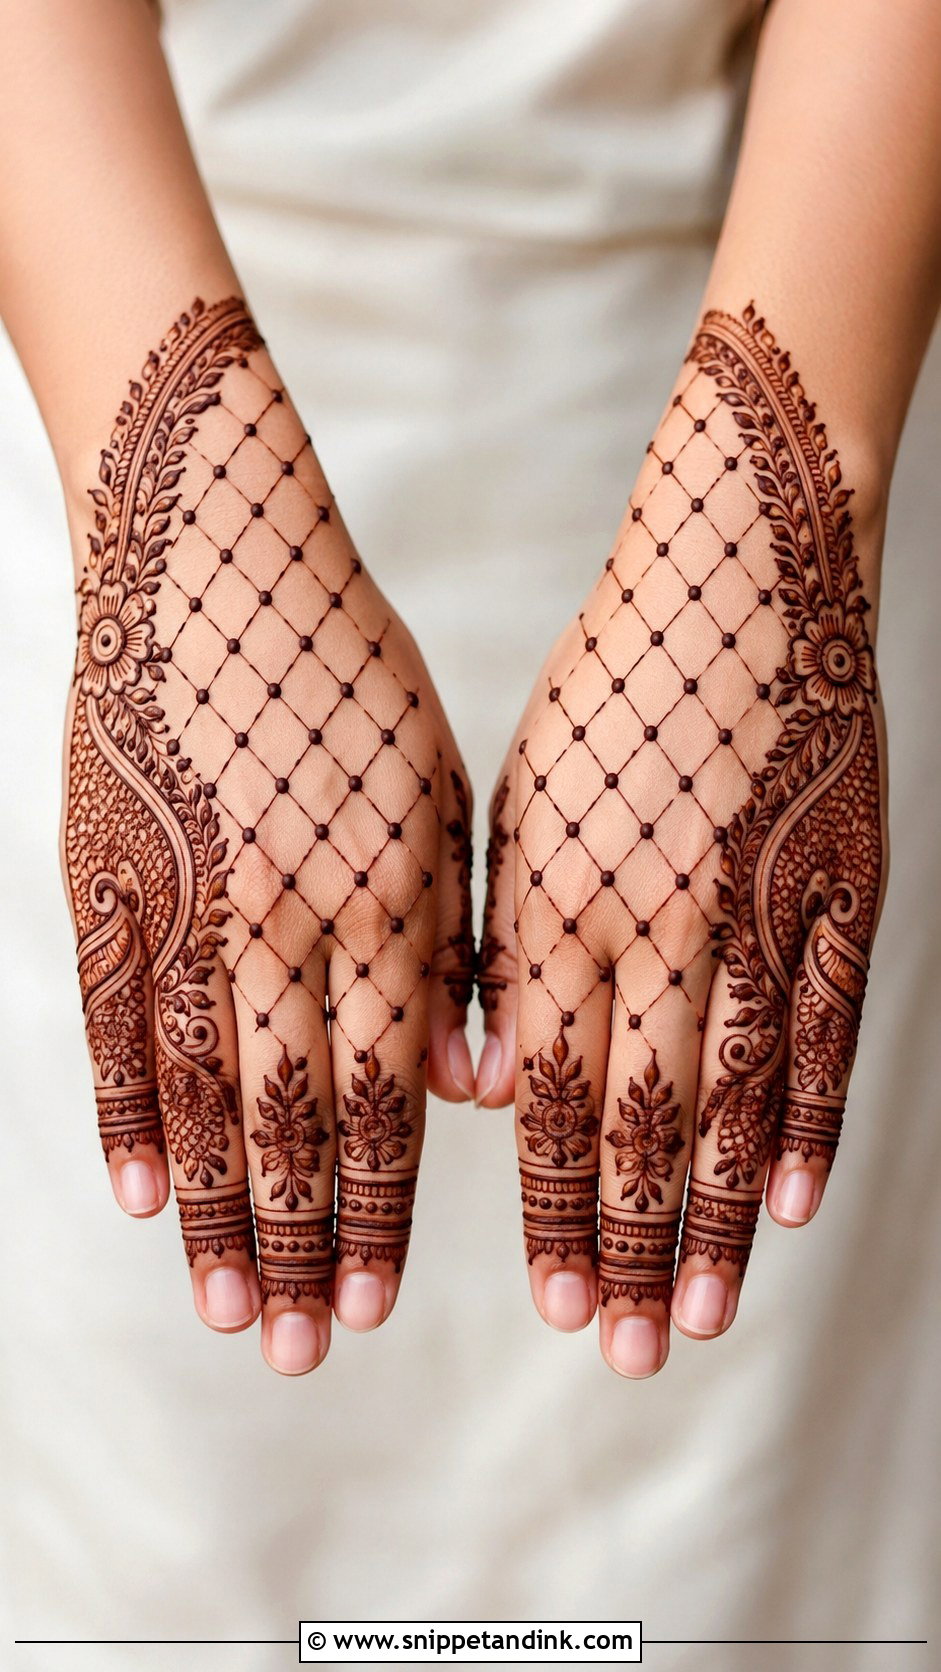
Jaali adds a mesh that looks detailed but is really just patient line work. I place it on one side of the back hand, near the wrist, or inside a large paisley, with small dots at the crossing points to finish the grid. A flower, leafy border or finger bands completes the hand. The lines create structure, which suits mature hands very well. Draw one direction of lines first and let them firm before crossing, or the second set drags the first.
7. Simple Rose Back Hand Mehndi Design
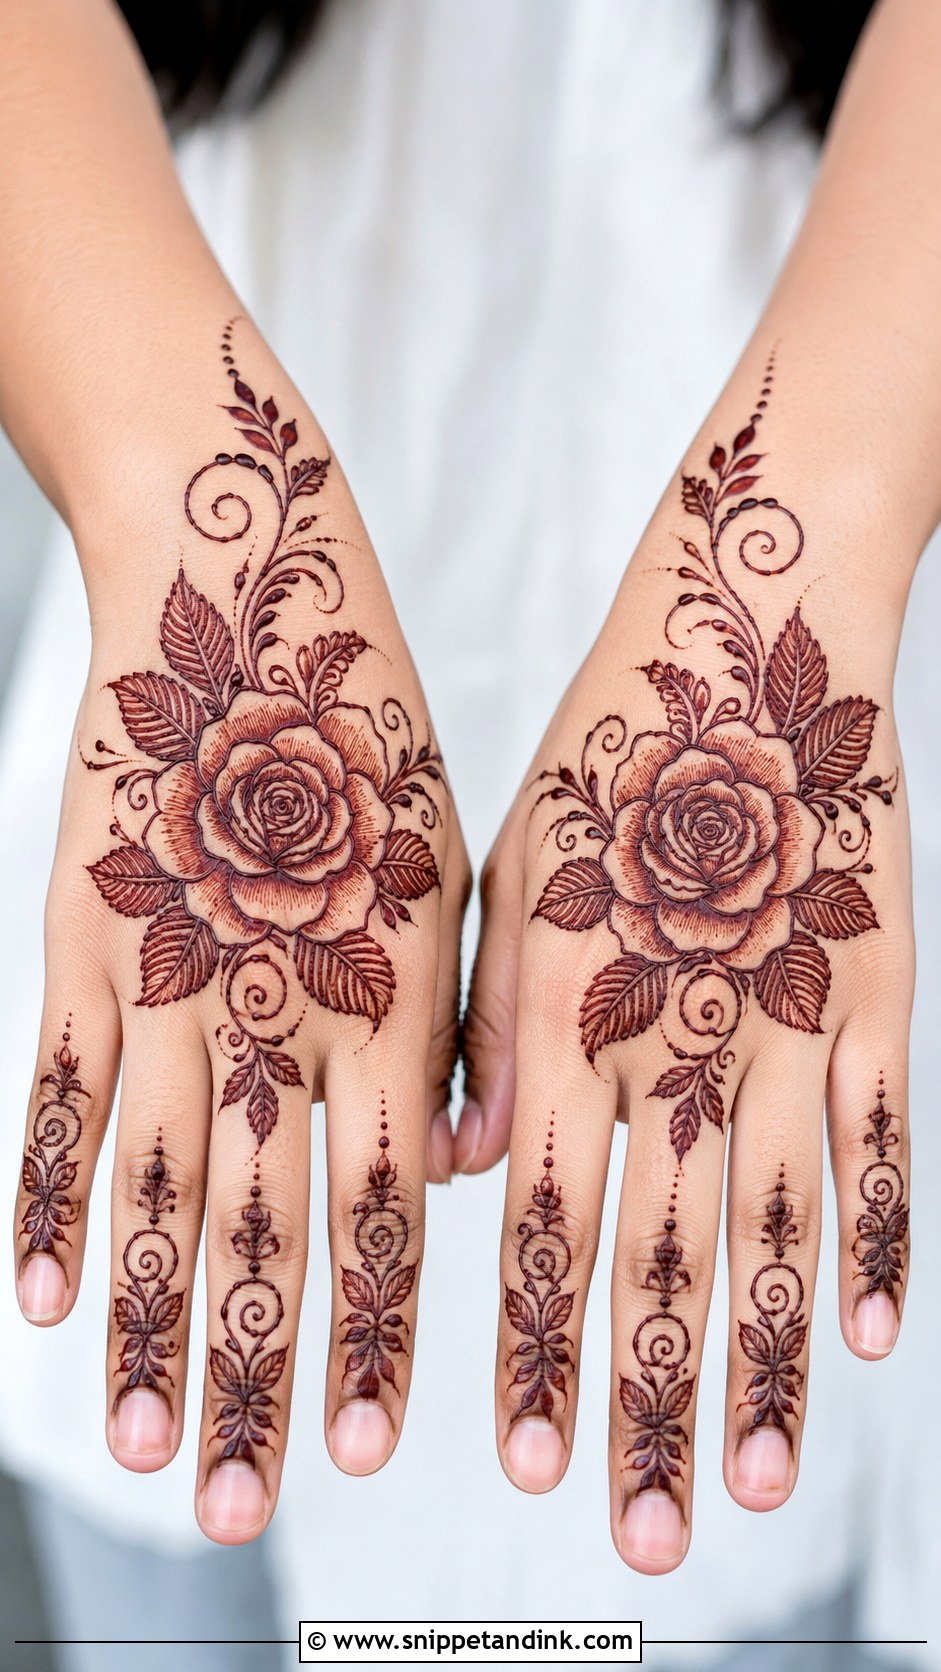
A rose can sit at the center or slightly to one side, with curved leaves moving toward the wrist and fingers. I use spiral petals, shaded edges and thin vine lines, and give the fingers small rosebuds or leafy bands. Hold back on fillers around the rose; the flower should be the only thing competing for attention. Spirals are the hard part, so if you’re drawing your own, practice the swirl on paper until it closes without a gap.
8. Simple Peacock Back Hand Mehndi Design
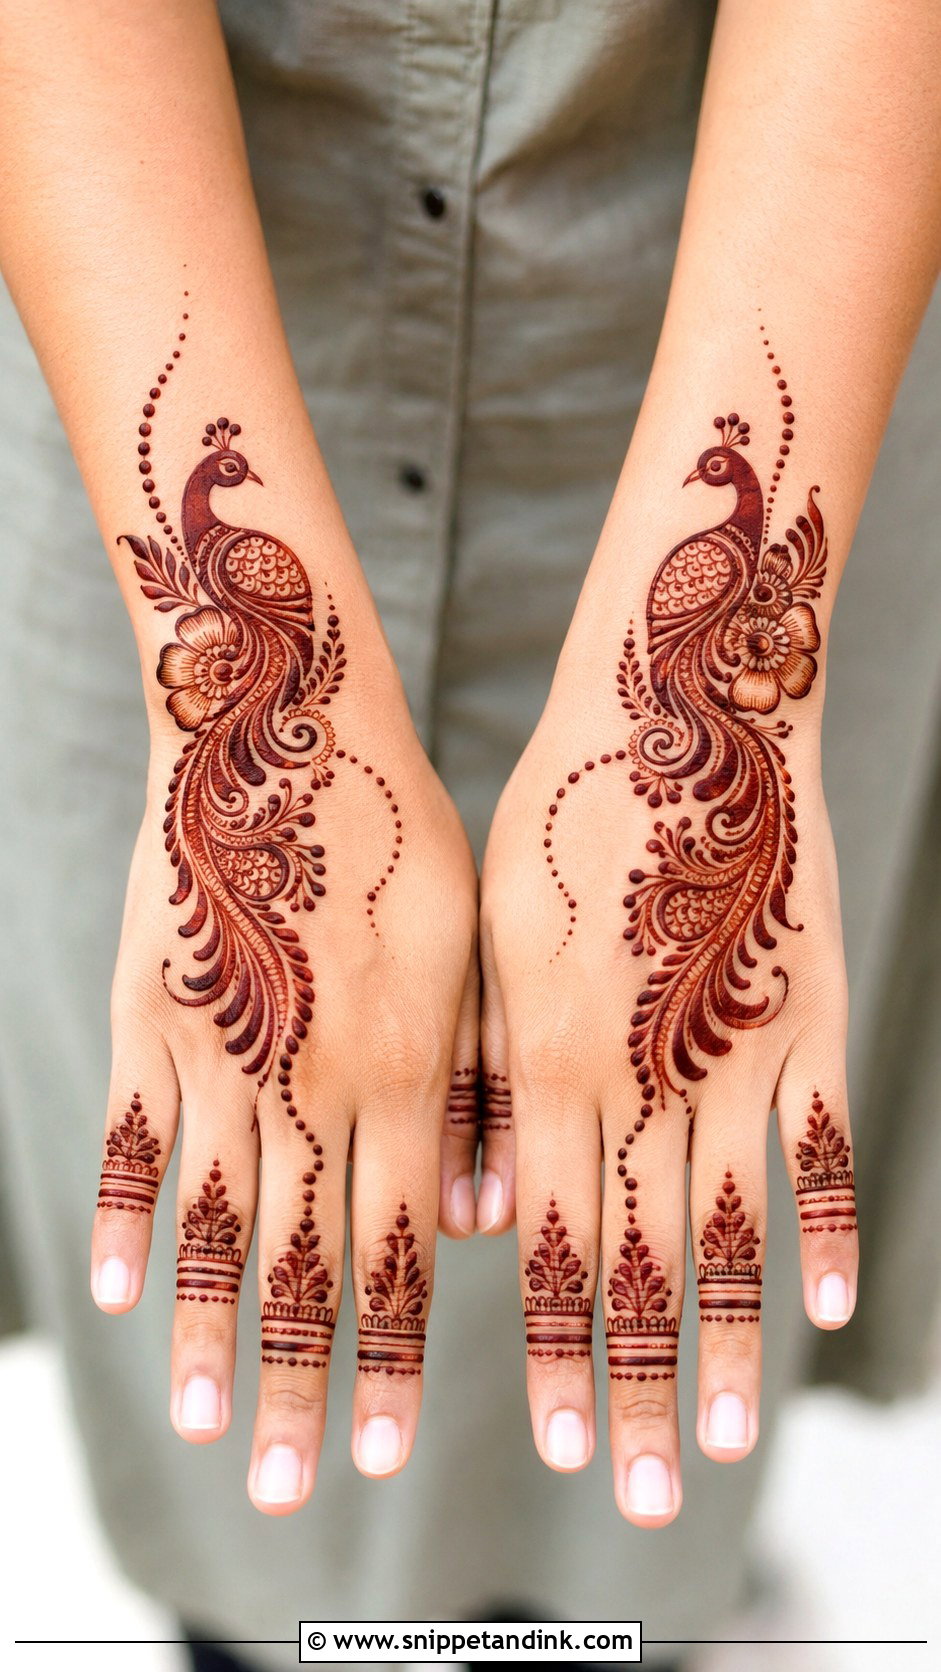
Instead of a detailed peacock, I draw a small curved body near the side of the hand and let the feathers spread as flowing lines, petals and dots, trailing toward the wrist. Fingers get slim bands or feather-inspired lines. The bird’s outline needs to be smooth and the feathers airy, otherwise it turns into a dark cluster on the back hand. Weddings, sangeet functions and cultural events are its natural setting.
9. Simple Paisley Back Hand Mehndi Design
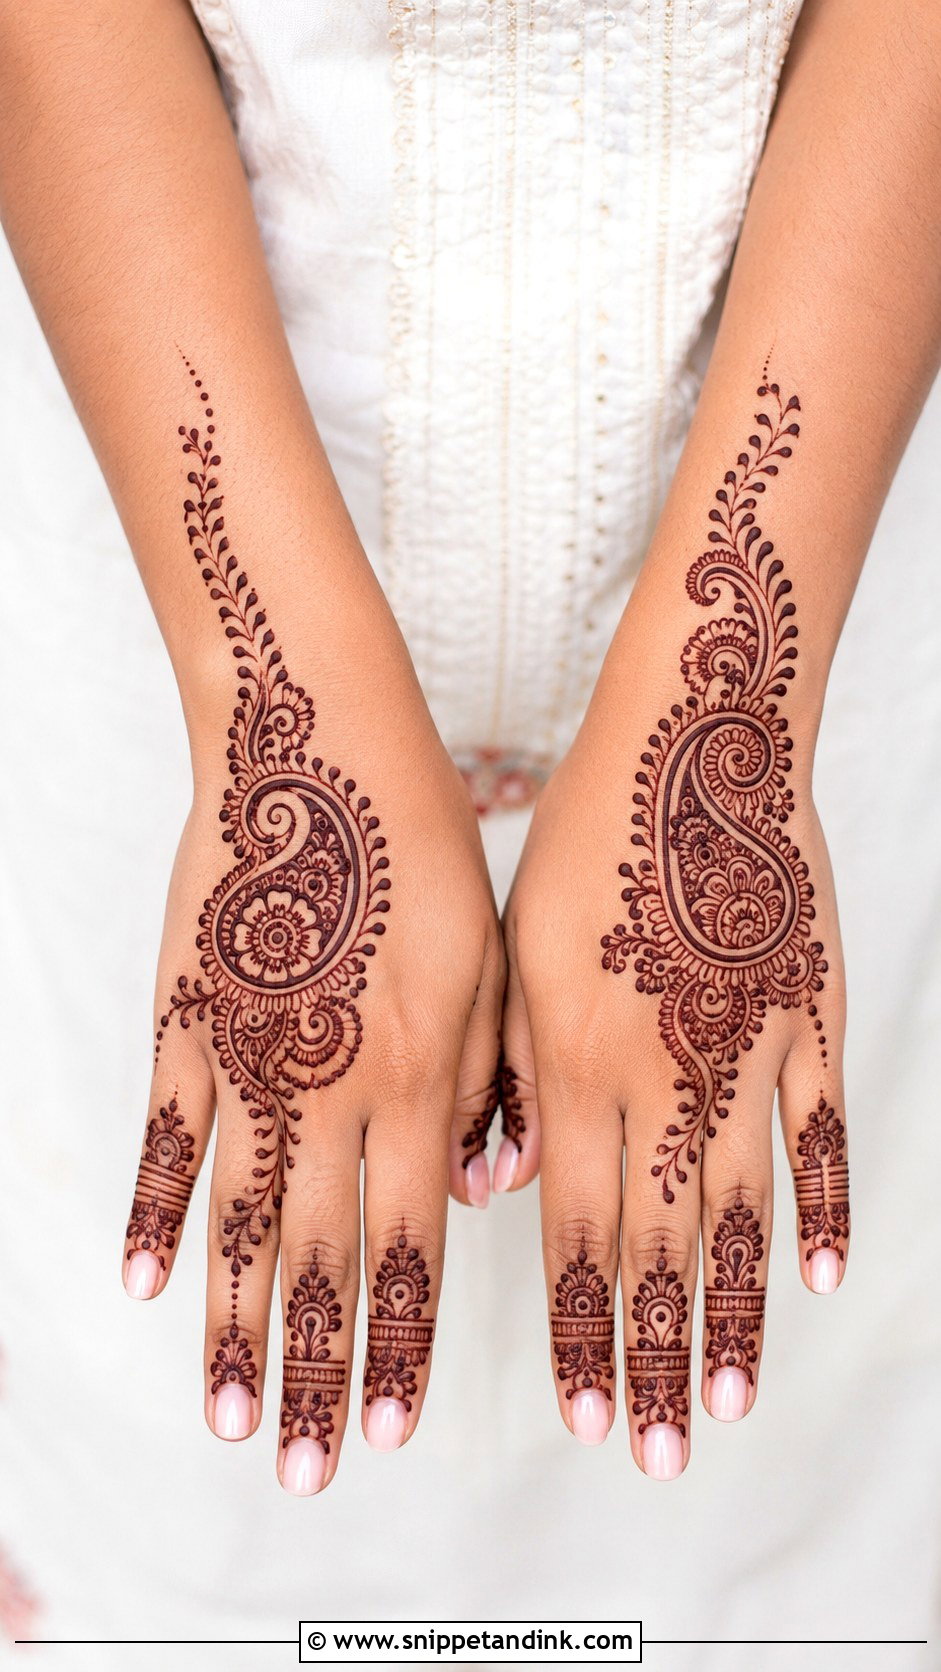
Paisley fills space efficiently, which makes it especially useful on the back of the hand. One large paisley near the wrist or center, filled with small flowers, dots and curved lines, with a leafy trail toward the fingers. Mini paisleys or thin bands on the fingers match it. It adjusts easily to hand size. I leave a few blank spaces inside the paisley, which keeps it from going dark and solid once the stain matures.
10. Simple Indo Arabic Back Hand Mehndi Design
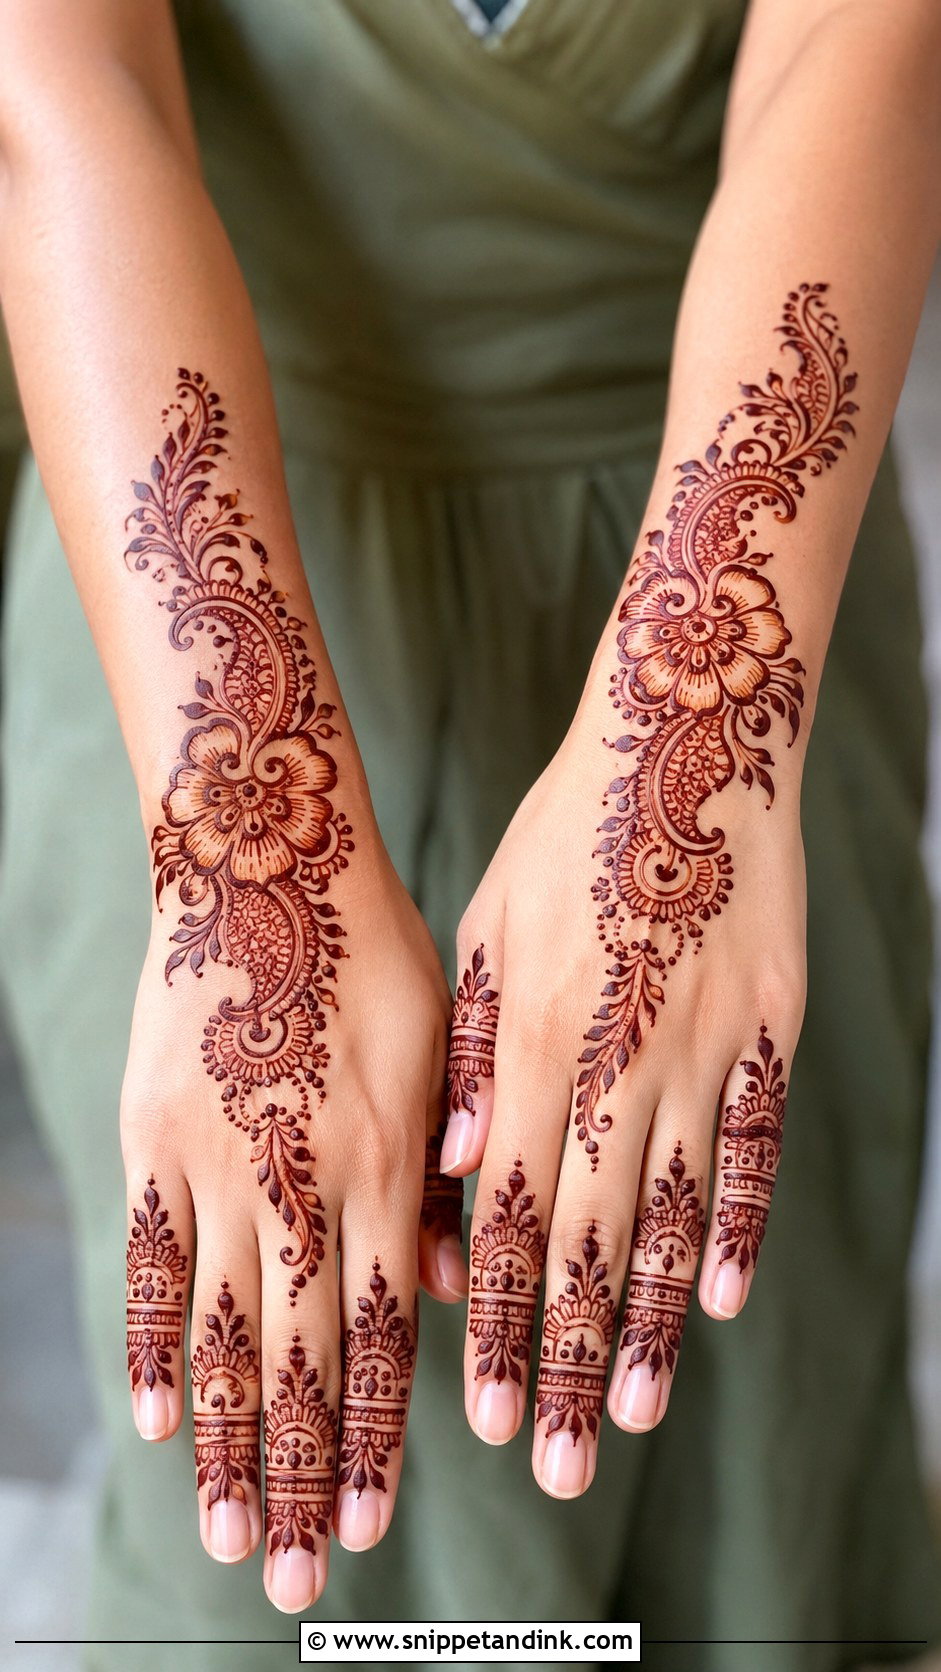
Indo-Arabic on the back hand means a diagonal floral trail with Indian detail added: small paisleys, dots, scalloped borders and tiny filler lines, while one side of the hand stays open. Fingers can have half-filled tips, leafy bands or simple net work. Bold outlines with fine inner detail give the best result, since the back of the hand stains more lightly and fine-only work can look faint. It’s richer than minimal henna and lighter than bridal.
11. Simple Half Back Hand Mehndi Design
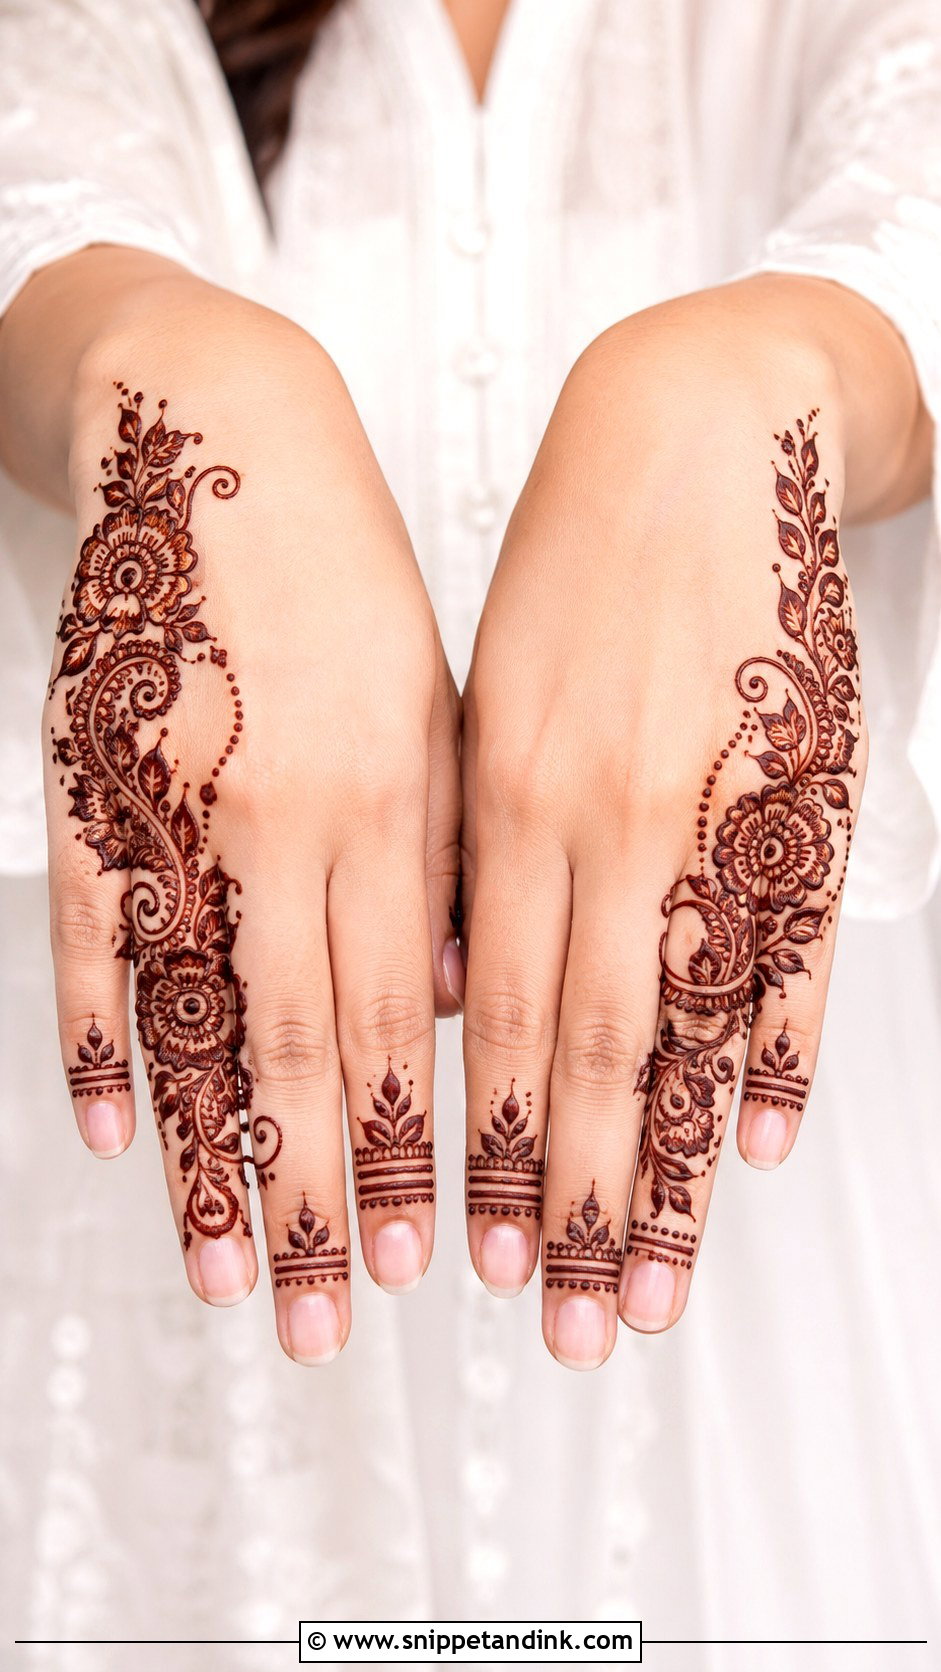
Half back hand designs cover only one portion, usually from the wrist up one side of the fingers, leaving plenty of bare skin. Flowers, leaves, paisleys or curved Arabic lines build the pattern, and the chosen fingers get matching bands and dots while the other side stays clean. Beginners find it easier because there’s no need to fill the whole hand evenly. Decide which side the design will run on based on how you hold your hand in photos, usually the thumb side faces the camera.
12. Simple Round Tikki Back Hand Mehndi Design
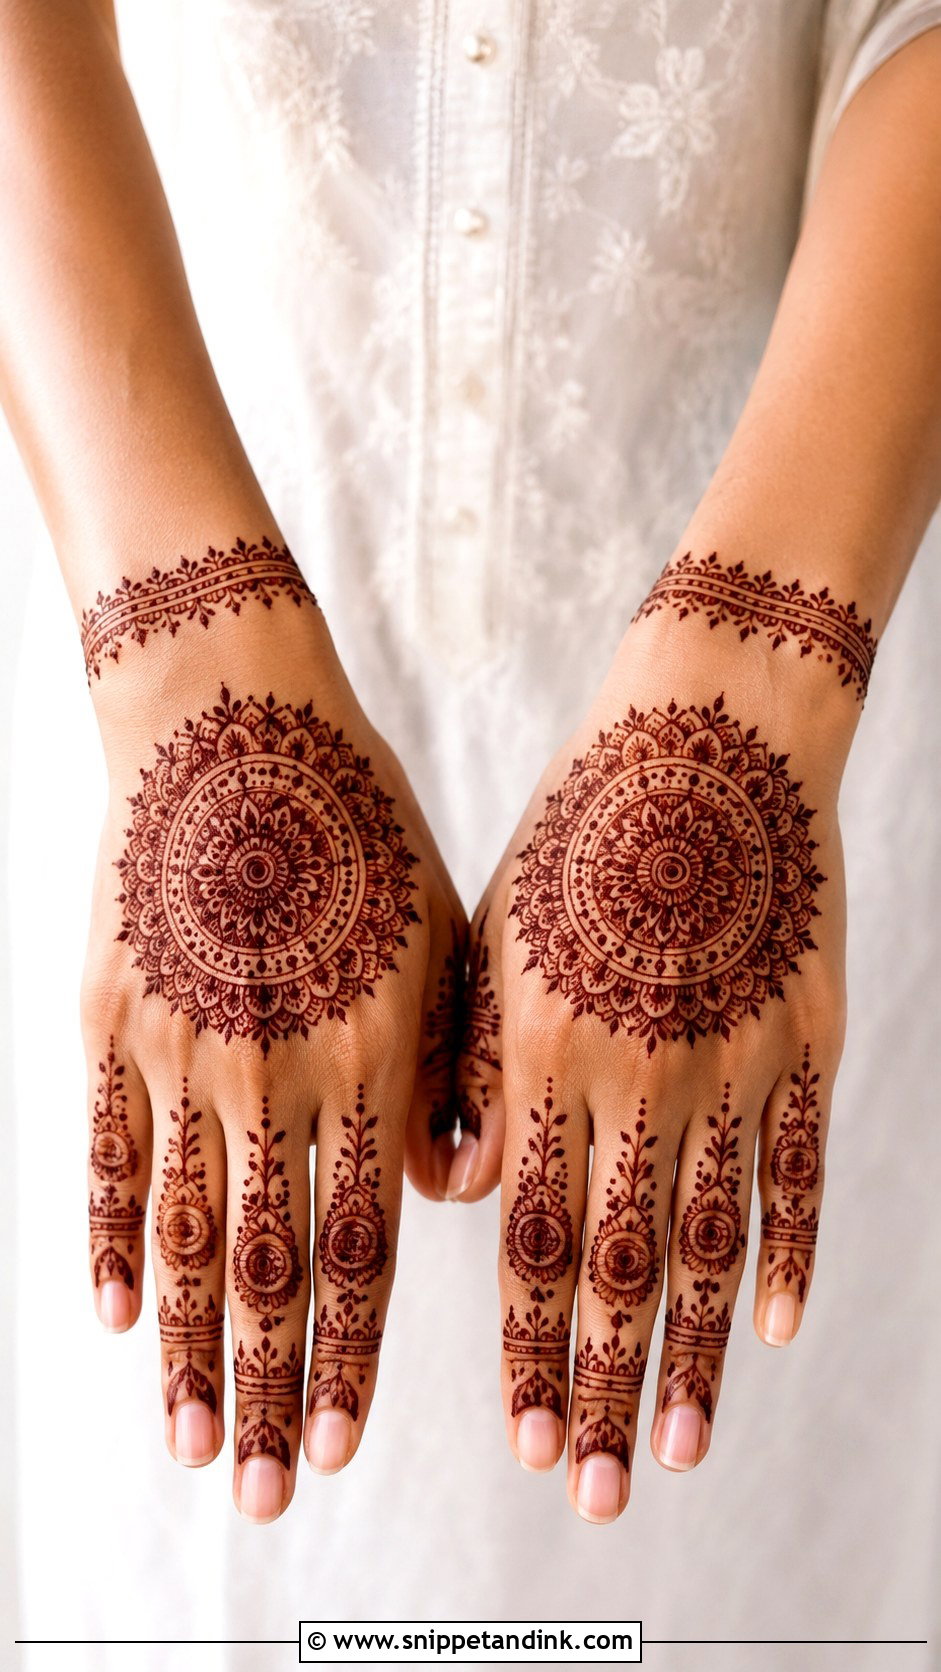
The tikki is a bold round motif in the middle of the back hand with petals, dots and circular borders. Slim vines connecting it to the wrist and fingers, and small matching circles on the fingers, make it a little more personal. It’s quick before festivals and suits children, teens and women who like neat traditional henna. Keep the tikki bold; on the back hand, a strong solid center stains far more evenly than a delicate one. A small wrist border finishes it.
13. Simple Leaf Back Hand Mehndi Design
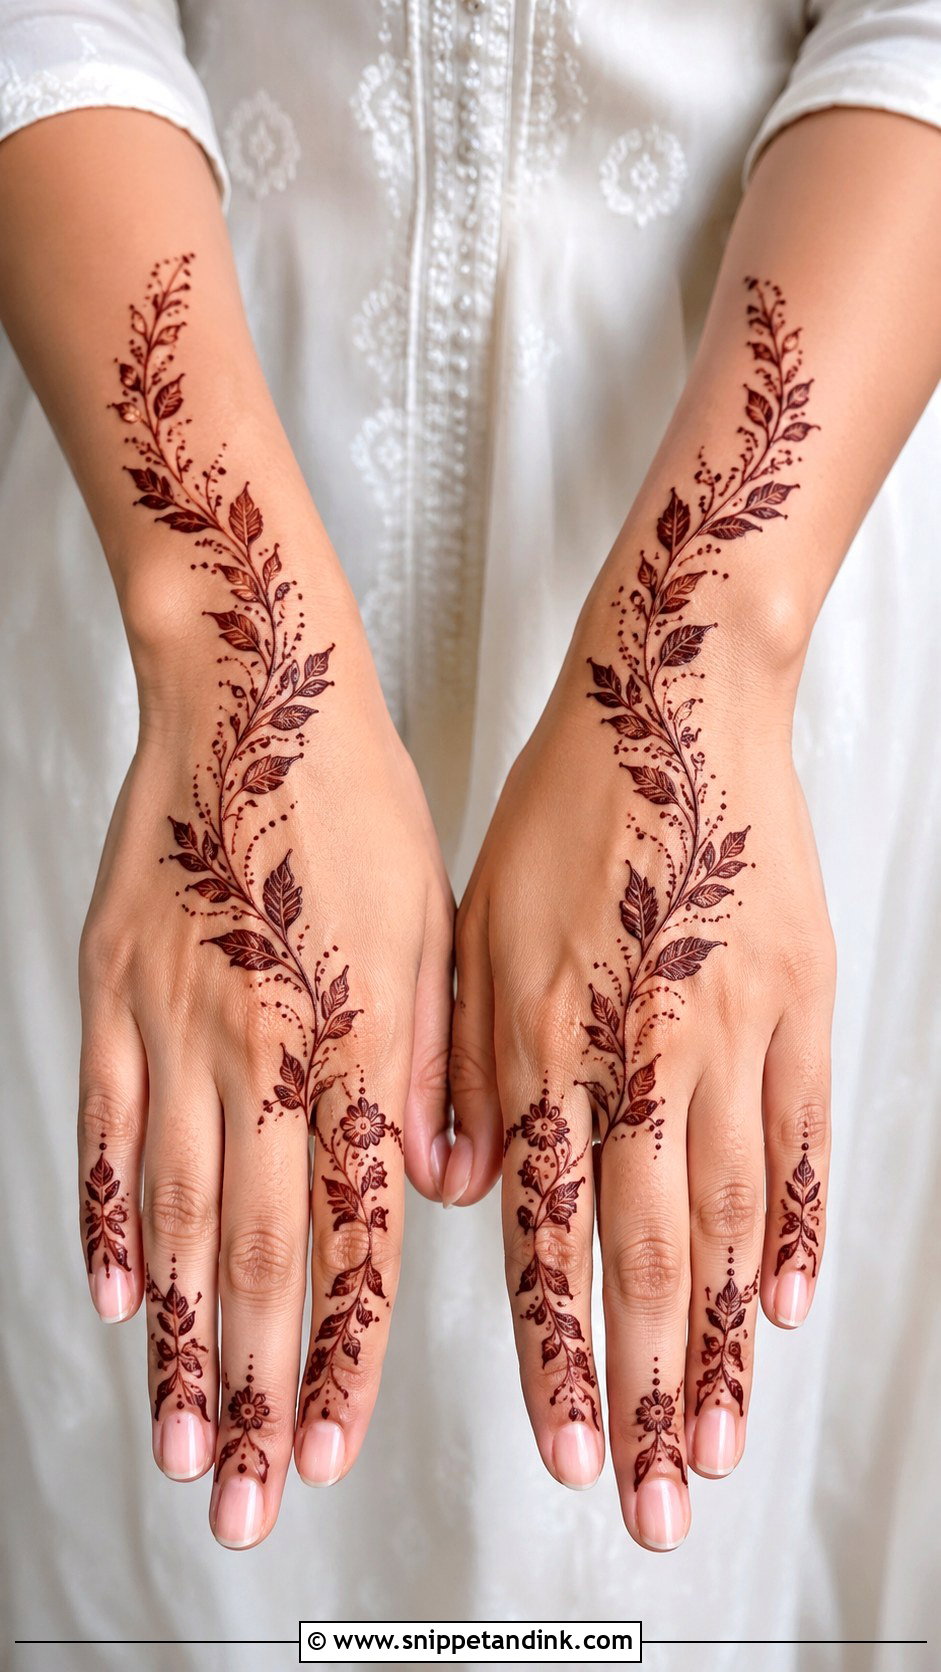
A single vine travelling from the wrist to the fingers, with leaves drawn on alternating sides, gives natural movement. Dots, tiny flowers or curved borders complete it. On narrow hands the long line lengthens the hand nicely. I vary the leaf sizes, bigger near the wrist and smaller toward the fingers, which makes the vine look like it’s growing rather than stamped on. Keep the spacing airy.
14. Simple Modern Back Hand Mehndi Design
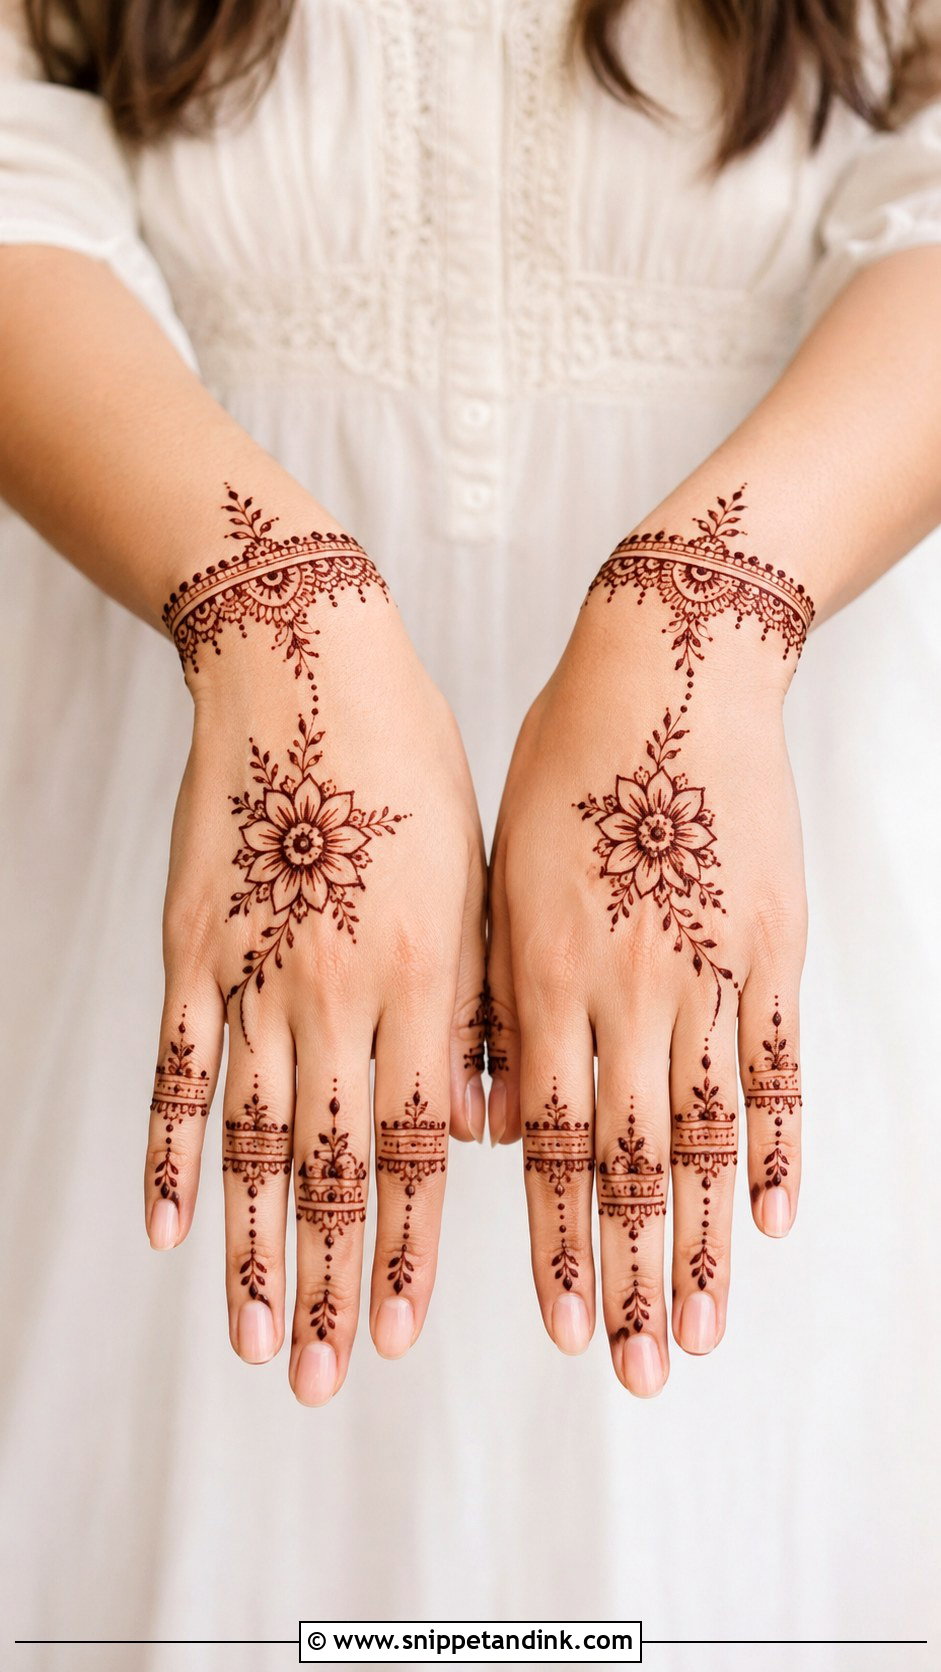
Modern back hand henna uses clean lines, open spaces and minimal motifs instead of traditional fill: a small center flower, finger bands, tiny dots and a bracelet-like wrist detail. My favorite way to make it distinctive is asymmetry. I set the main motif to one side and let fine lines connect it to the fingers. Every line has to be controlled, because there’s nothing else to look at. It matches modern outfits and small parties.
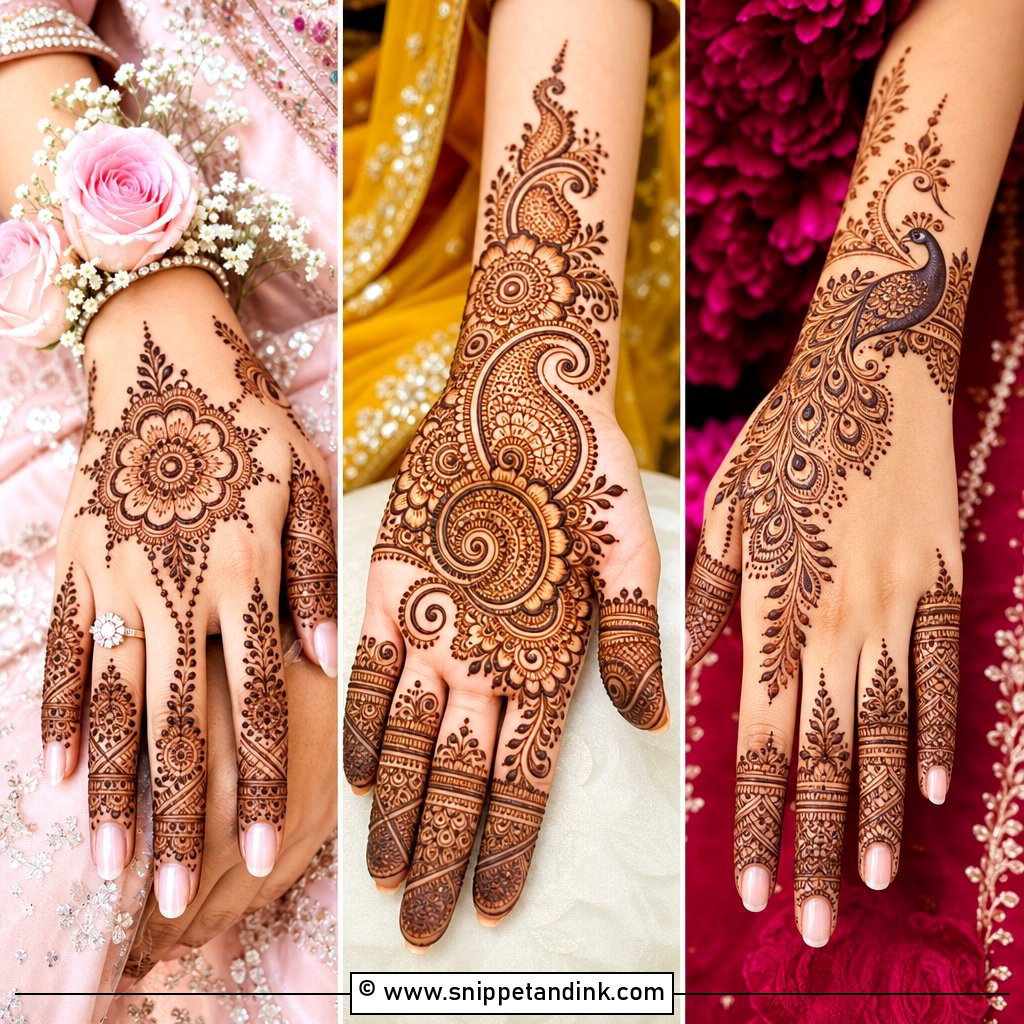
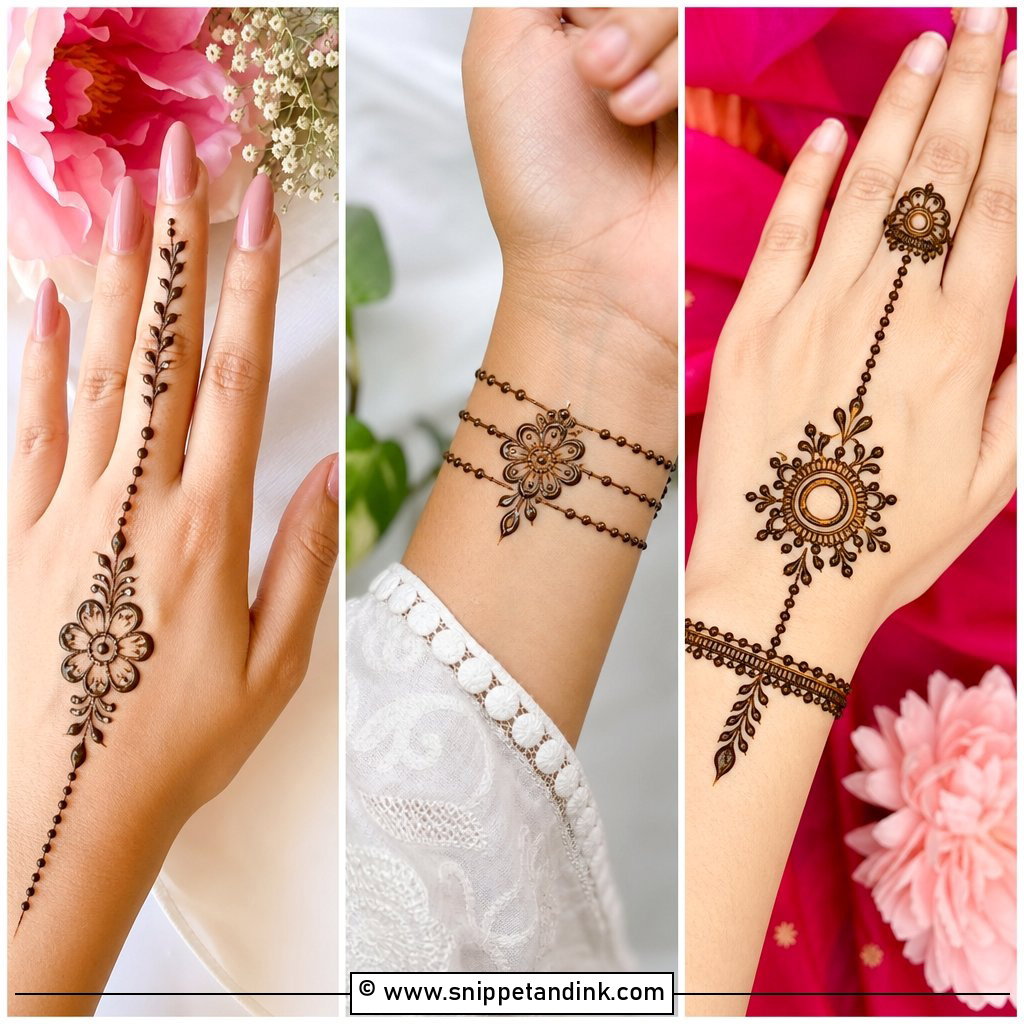
15. Simple Minimal Back Hand Mehndi Design
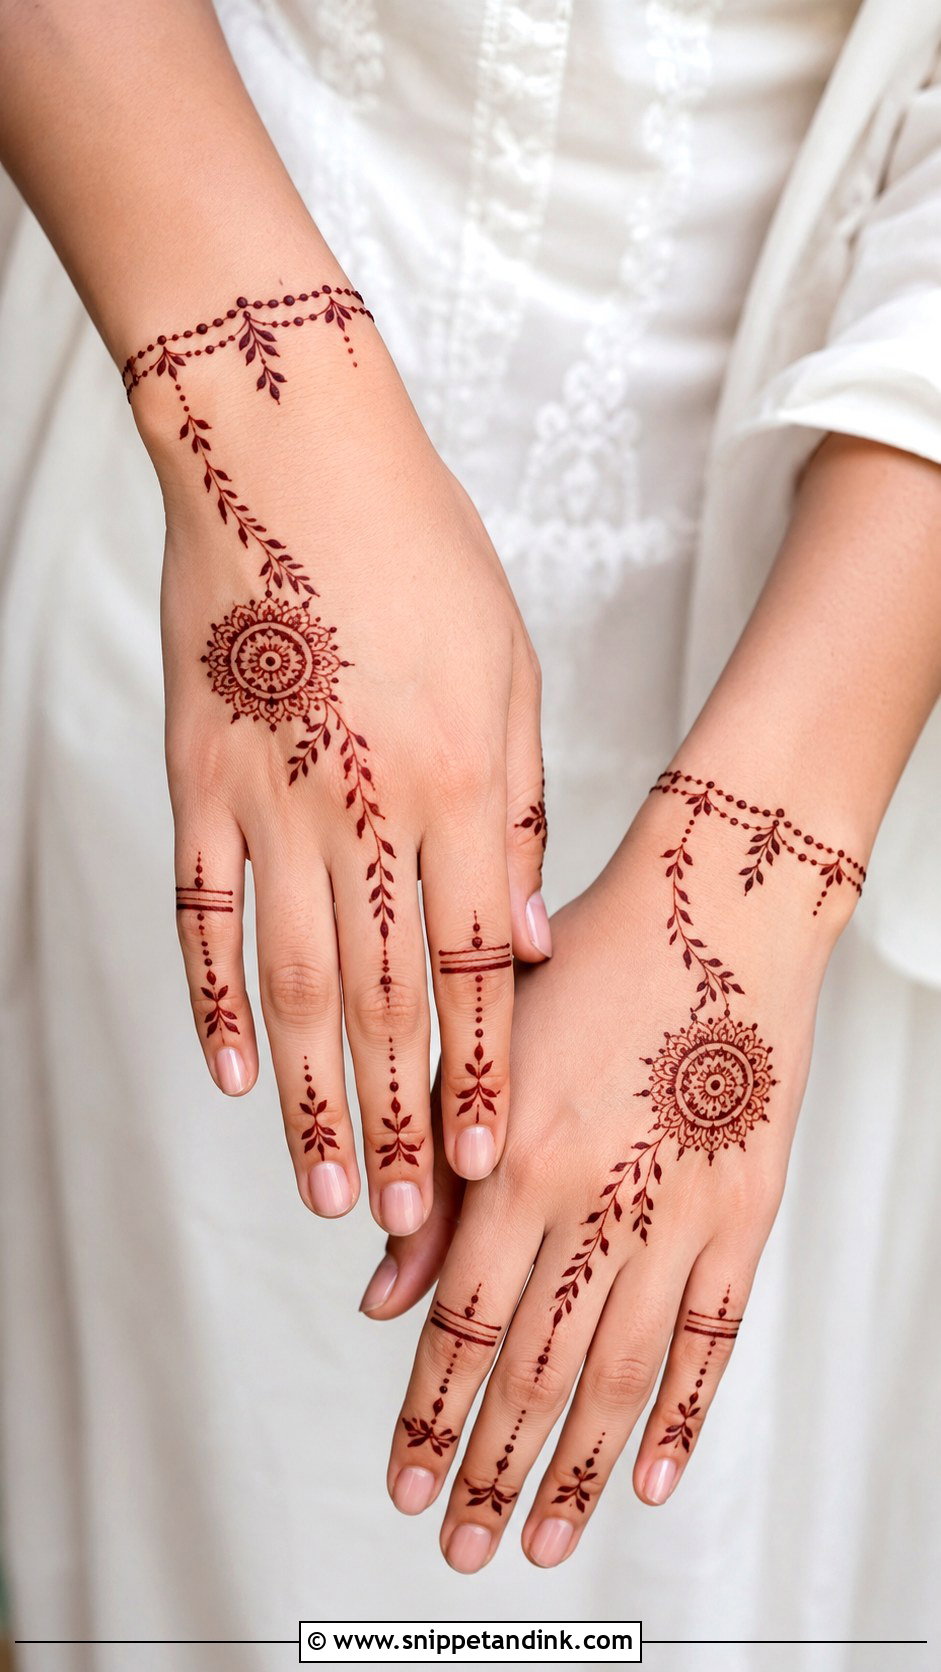
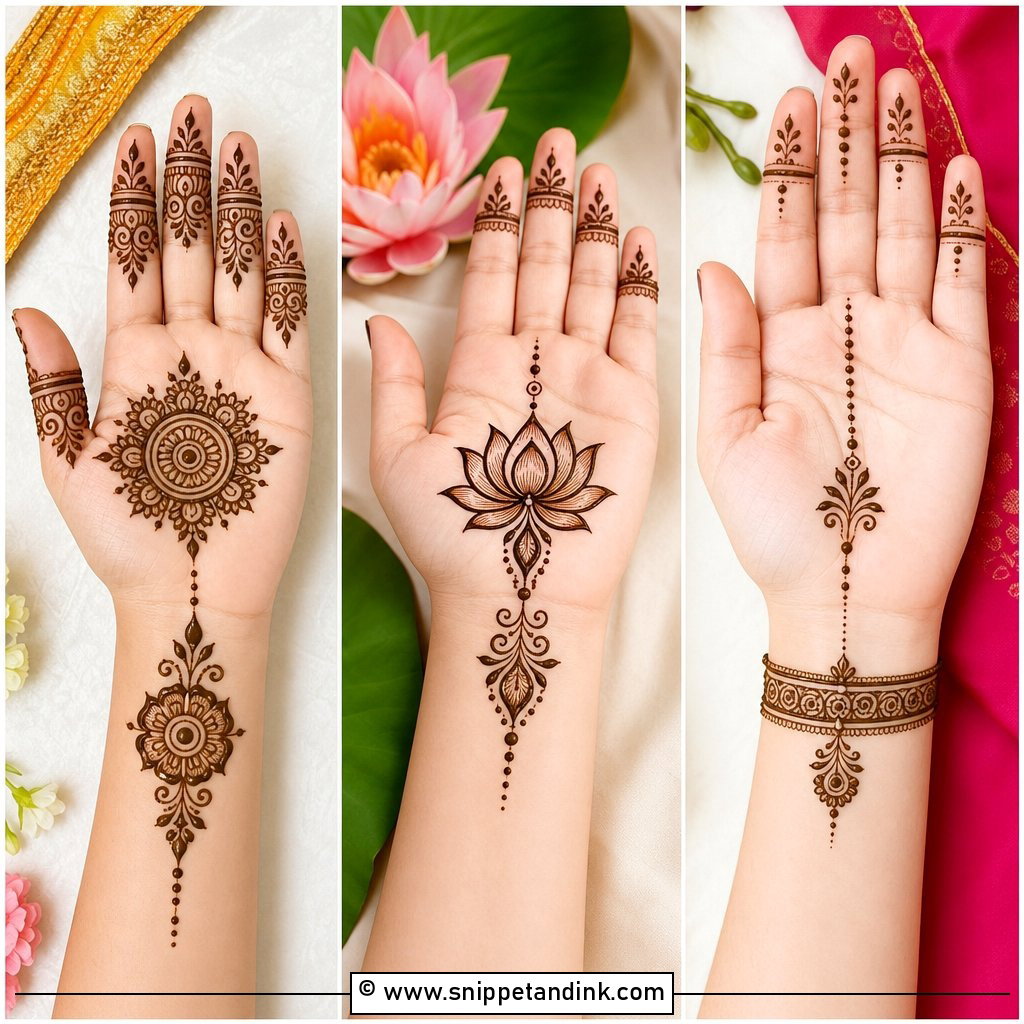
A tiny mandala, one leafy trail, clean finger lines and a delicate wrist band: minimal designs leave most of the back hand bare but still look complete. It’s the option I’d suggest if you need something quick or subtle for school, college or work. Keep the motifs small and evenly spaced. A practical bonus is that light work on the back of the hand fades sooner than palm henna, so it disappears quickly if you need it to.
16. Simple Bridal Back Hand Mehndi Design
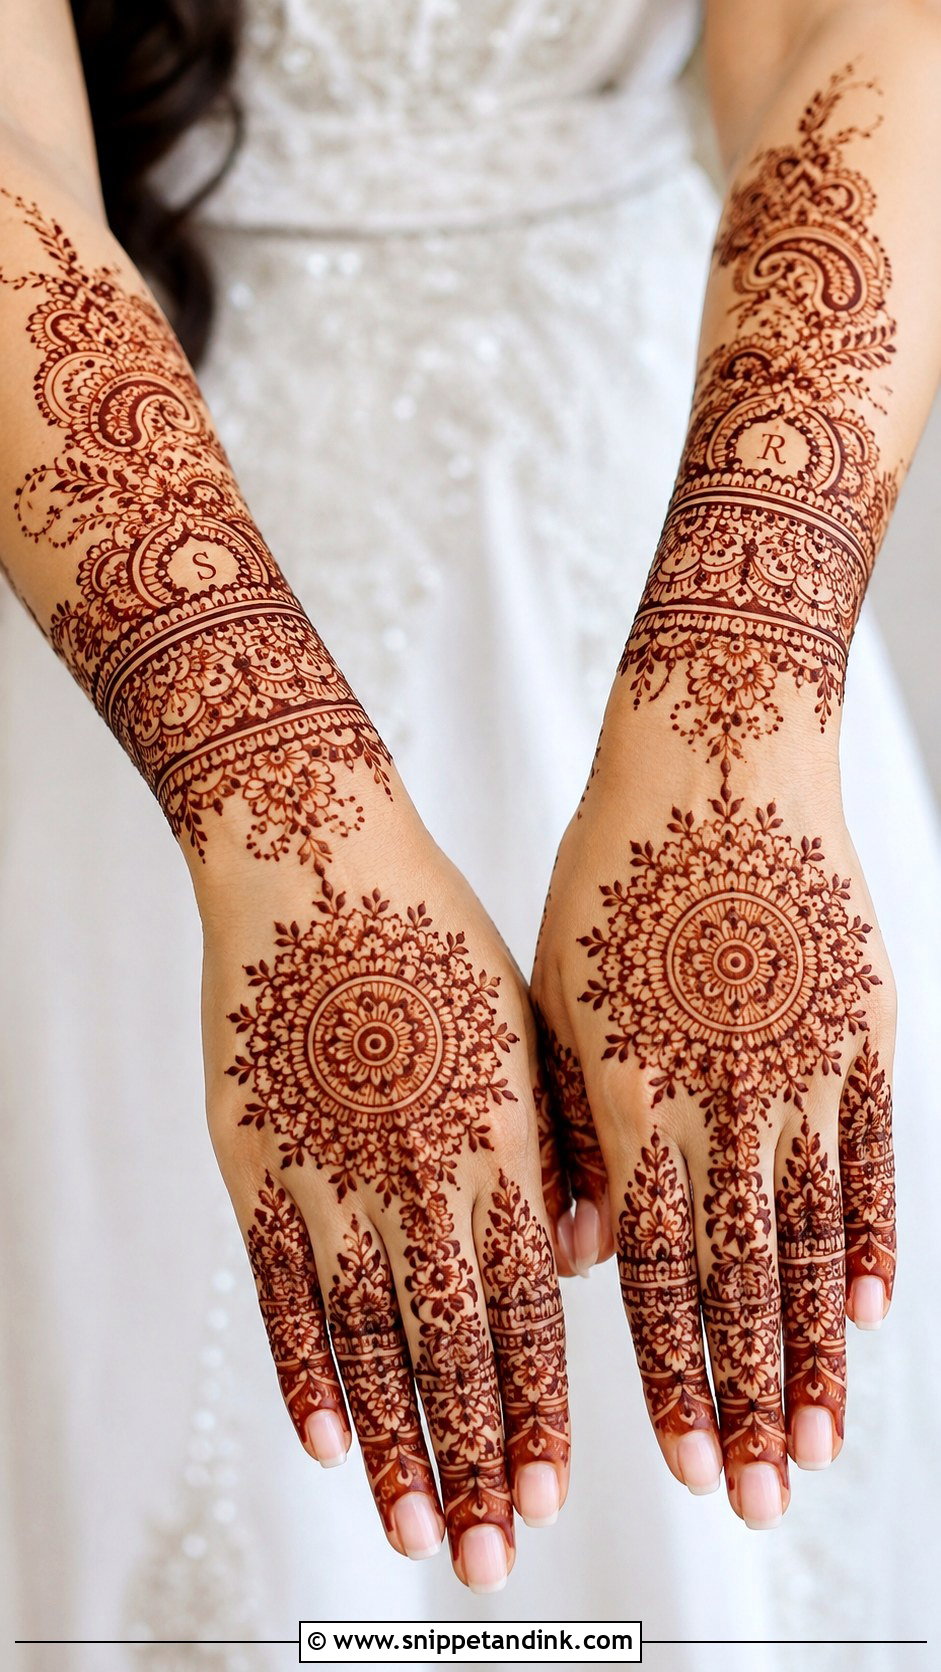
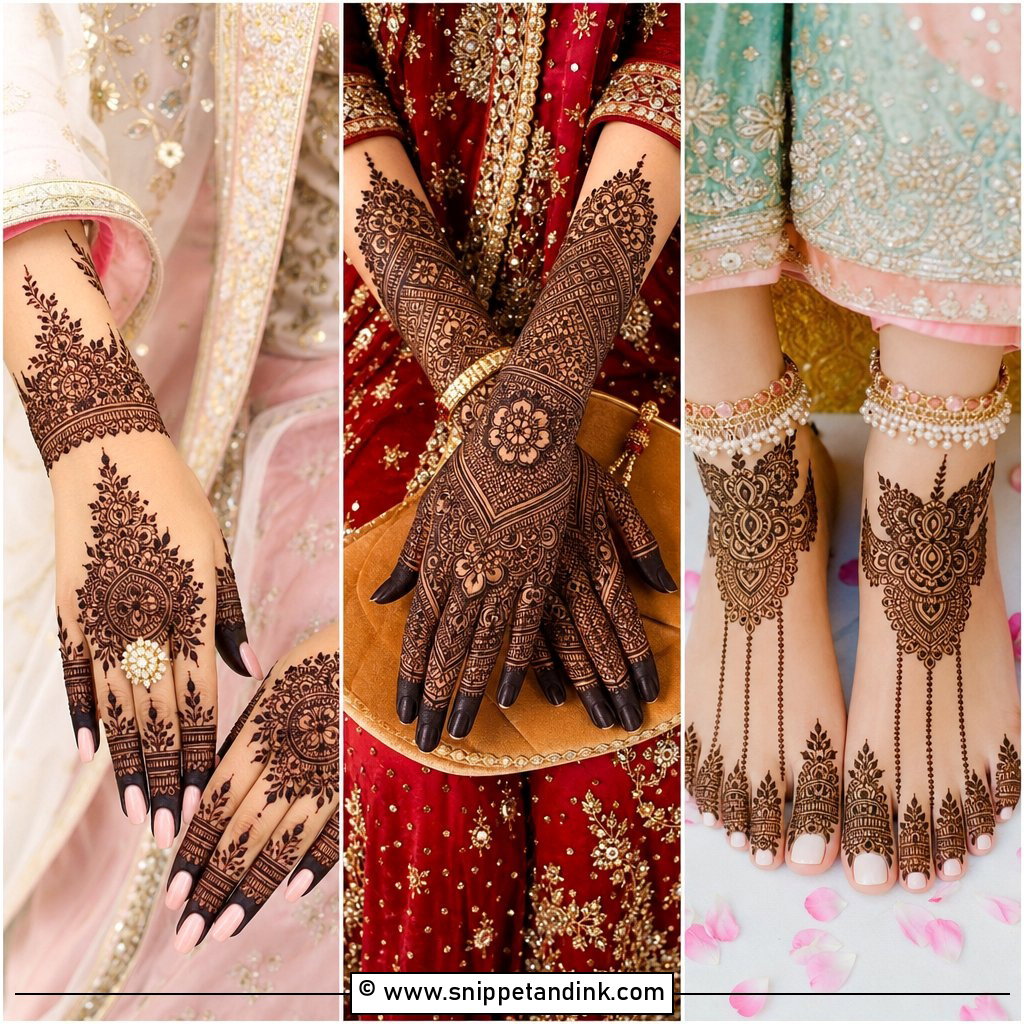
A bridal back hand mehndi design can feel wedding-ready without dense full-hand coverage. A central mandala, paisley borders, floral vines and neat finger patterns, with a bracelet or cuff at the wrist so the hand looks dressed. Initials, tiny hearts or a symbolic motif can be hidden inside. It works for brides who like simplicity, for pre-wedding events like haldi and engagement, and for bridesmaids. Keep it symmetrical enough to look formal, with open spaces so it stays light.
17. Simple Eid Back Hand Mehndi Design
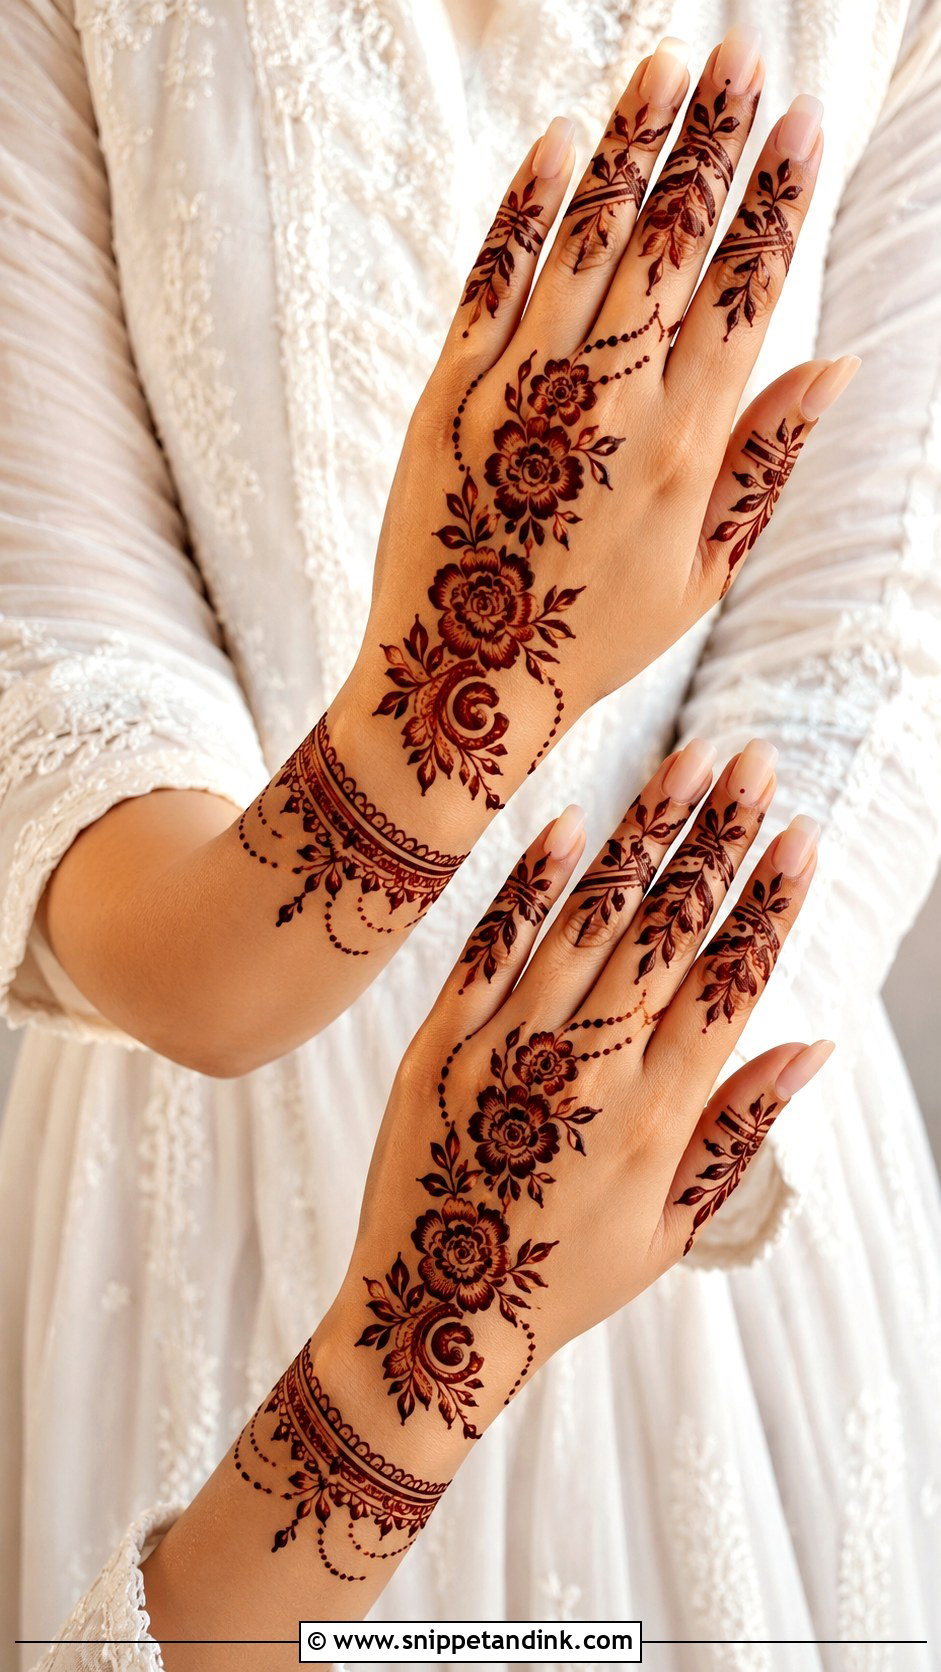
For Eid I draw a bold floral trail, dotted chains, leafy fingers and a slim wrist border, quick enough for the night before. Arabic and Indo-Arabic layouts suit it because they leave breathing room between motifs. A small crescent curve can go in without making it theme-heavy. My little twist is to decorate one finger fully and keep the others lighter, which gives the hand a focal point. Get the paste on early in the evening so it has the whole night to stain.
18. Simple Diwali Back Hand Mehndi Design
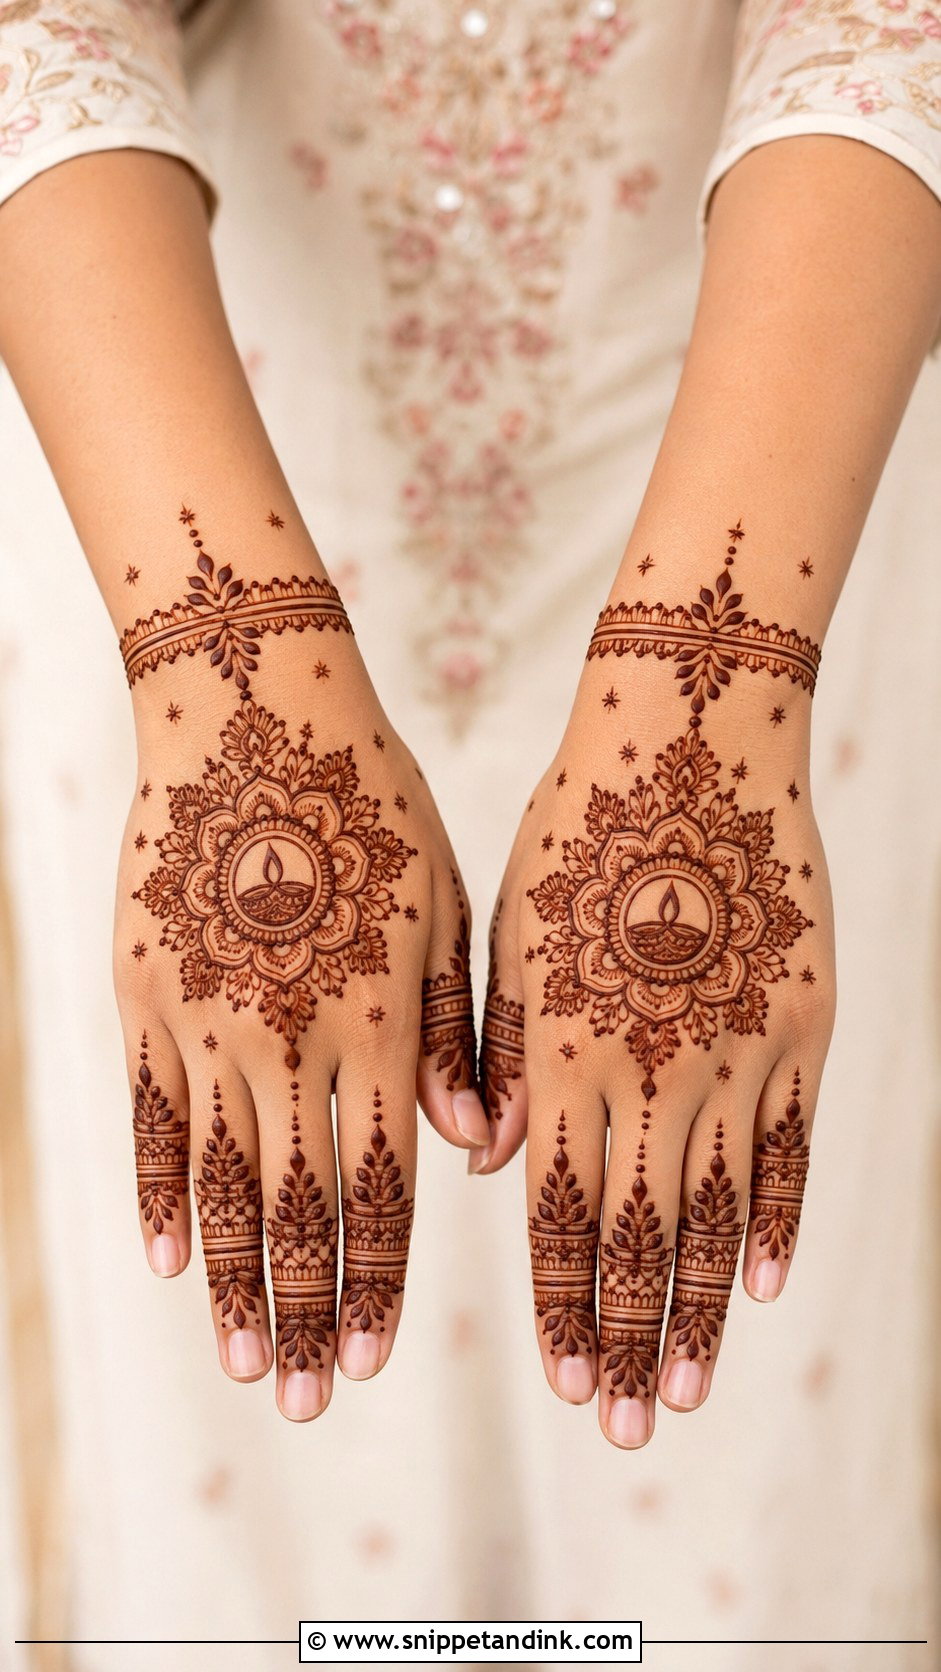
A central flower or mandala with small diya-inspired curves, dotted chains and leafy borders makes a festive Diwali back hand. The wrist gets a thin bracelet, the fingers tiny petals and clean bands. It sits well with bangles, ethnic outfits and festive nail colors, and it doesn’t need heavy filling. A ring of small star-like dots around the main motif adds sparkle. Apply it a day or two before so the color has deepened by Lakshmi puja.
19. Simple Wedding Guest Back Hand Mehndi Design
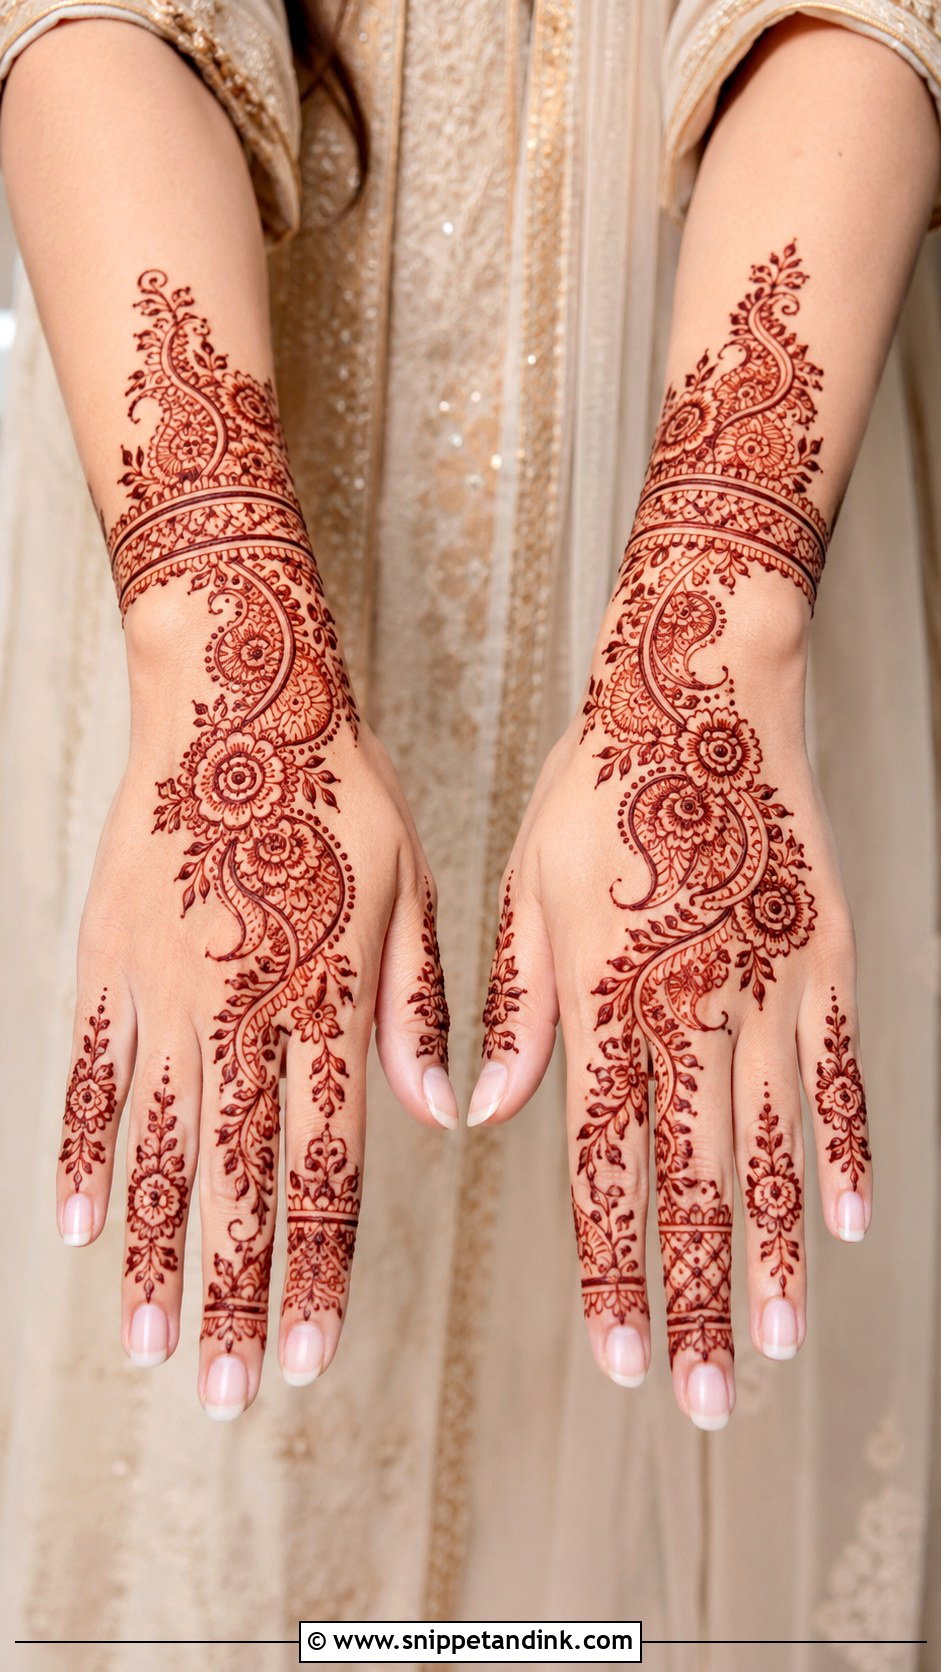
Wedding guests need henna that looks polished but stays clearly lighter than the bride’s. I draw diagonal florals, paisley accents, finger detailing and a neat wrist cuff, leaving part of the hand open. It works with lehengas, sarees, salwar suits and modern outfits. Decorating the ring finger a little more than the others gives a jewelry-like effect. Bold outlines and small fillers make it look rich without crossing into bridal territory.
20. Simple Engagement Back Hand Mehndi Design
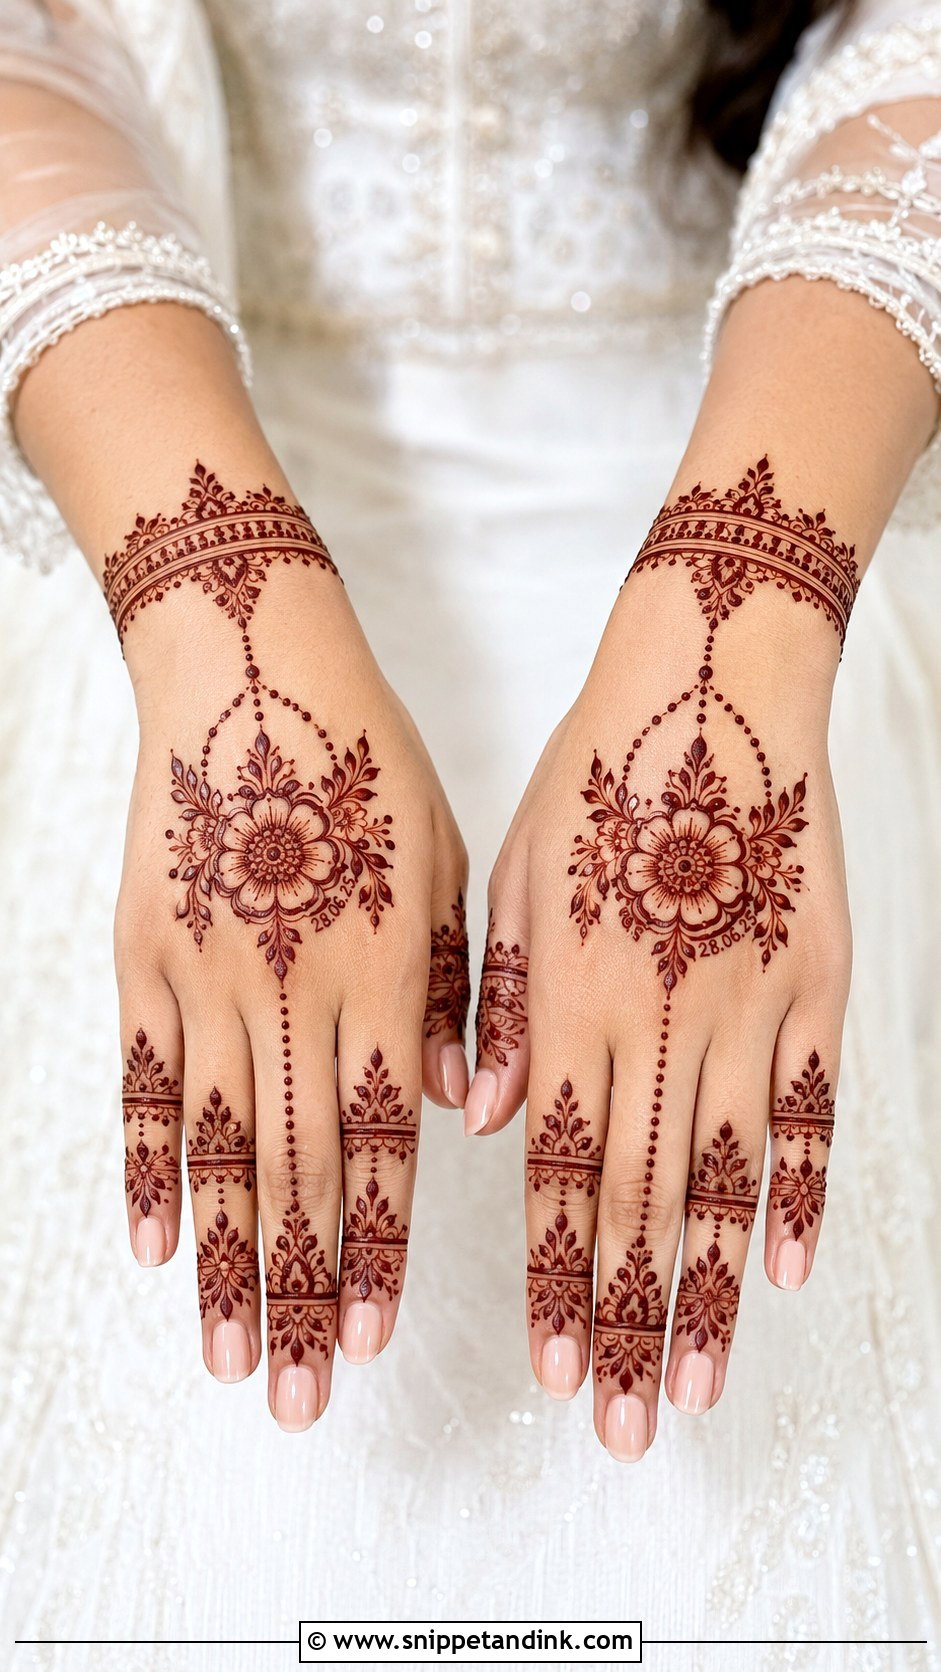
An engagement back hand mehndi design is made for close-up hand photos. I draw a ring-style finger pattern connected to a central flower or mandala with dotted chains, and a bracelet detail at the wrist. Initials or a tiny date can hide inside a petal or circle, but write them larger than feels natural; small numbers blur as the stain deepens. Keep the base of the ring finger clear so the actual ring sits on skin.
21. Simple Chain Back Hand Mehndi Design
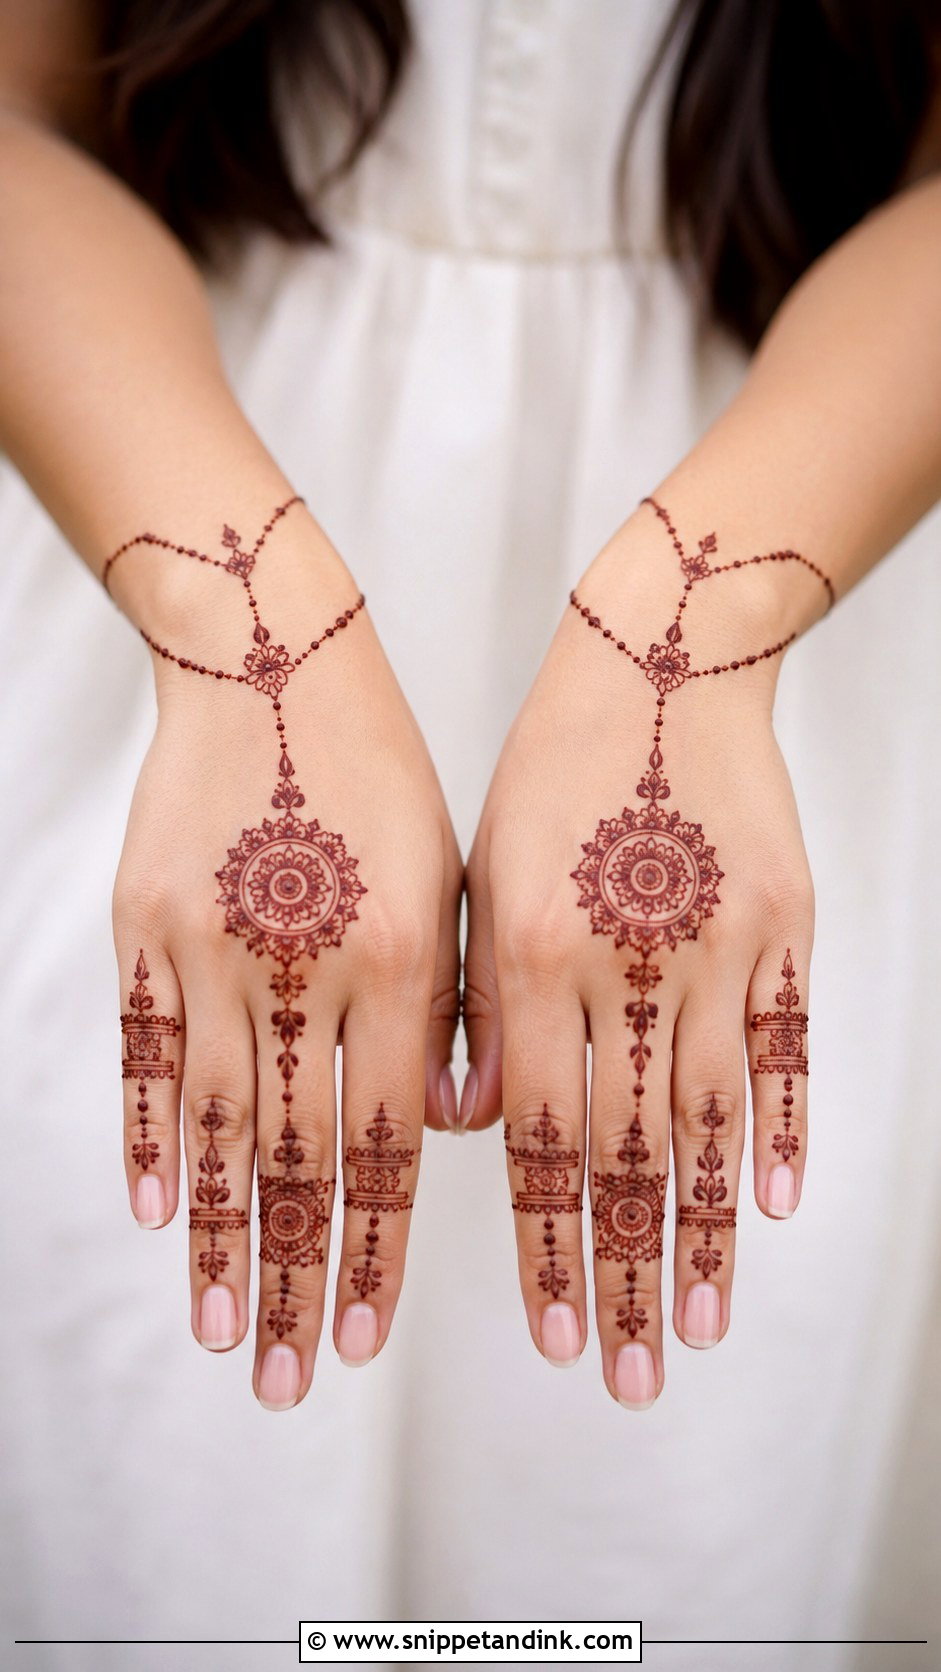
Chain designs look like delicate hand jewelry, linking the wrist to one or more fingers with dotted lines, curved chains, flowers and tiny circles, around a small mandala or floral motif at the center. They’re quick and easy to adjust: straight chains suit long hands, slightly curved or diagonal ones flatter short, wide hands. Keep other motifs away from the chain so the jewelry effect stays clear.
22. Simple Ring Back Hand Mehndi Design
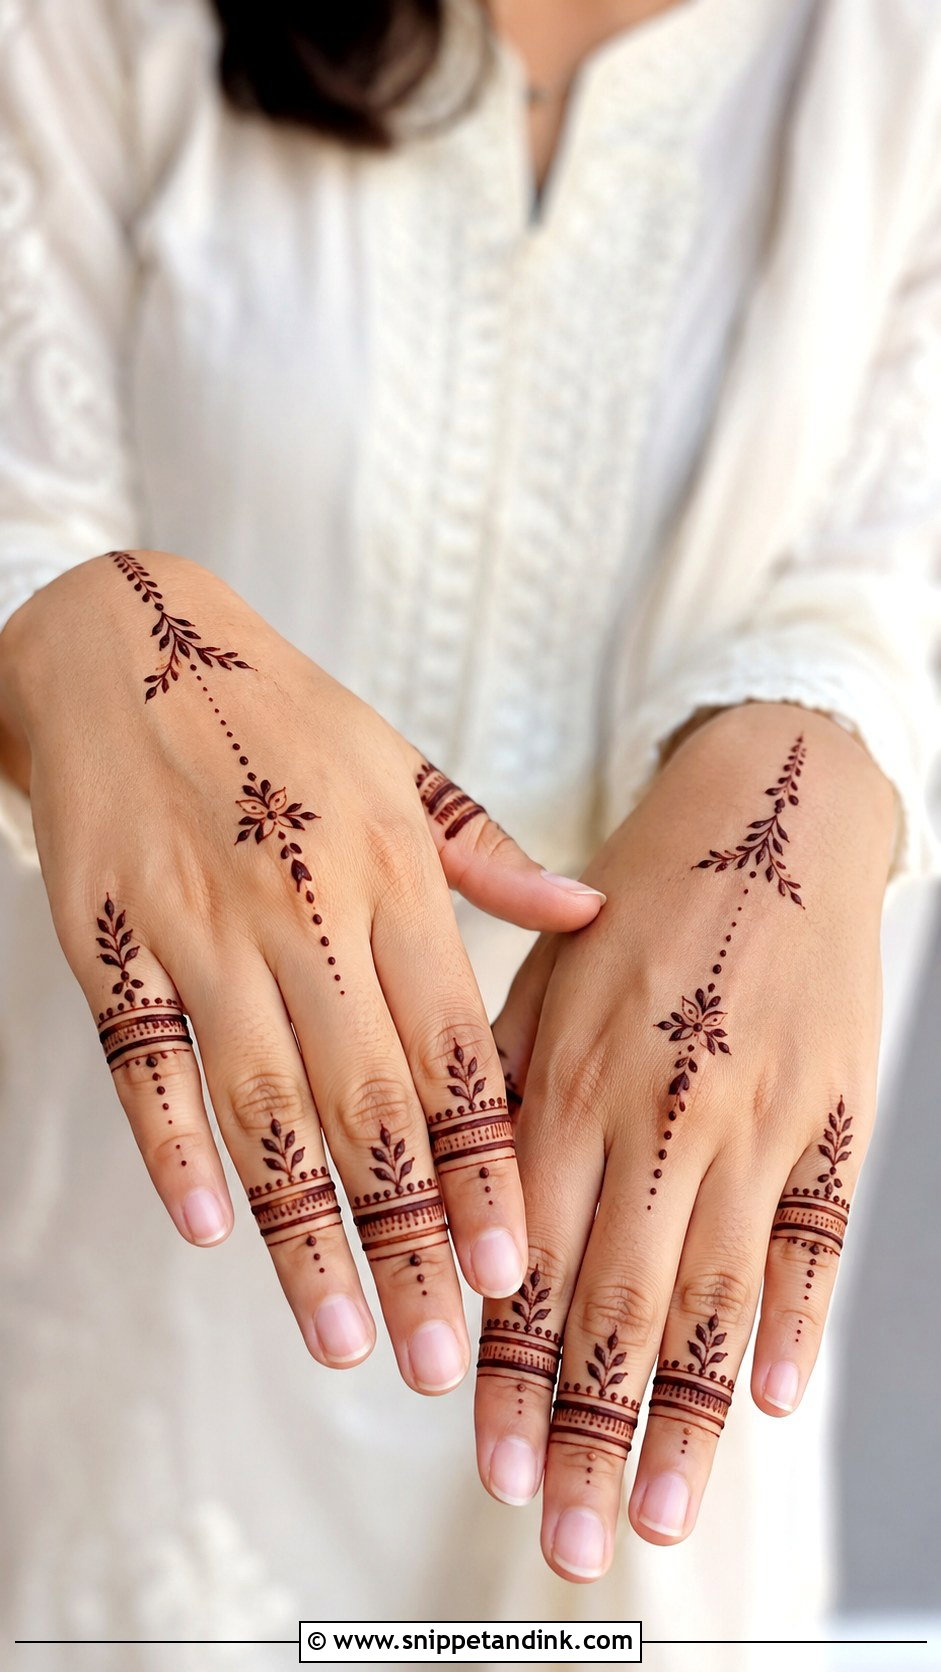
Ring designs focus on the fingers and knuckles, so it looks as if you’re wearing henna rings. Each finger gets a slim band, tiny dots, leafy details or a small floral top, and one chain from the middle finger leads to a small motif on the back hand. Make each ring slightly different but keep the thickness consistent. I place the bands on the flat sections between knuckles, never across the joint crease, where bending breaks the paste.
23. Simple Wrist Back Hand Mehndi Design
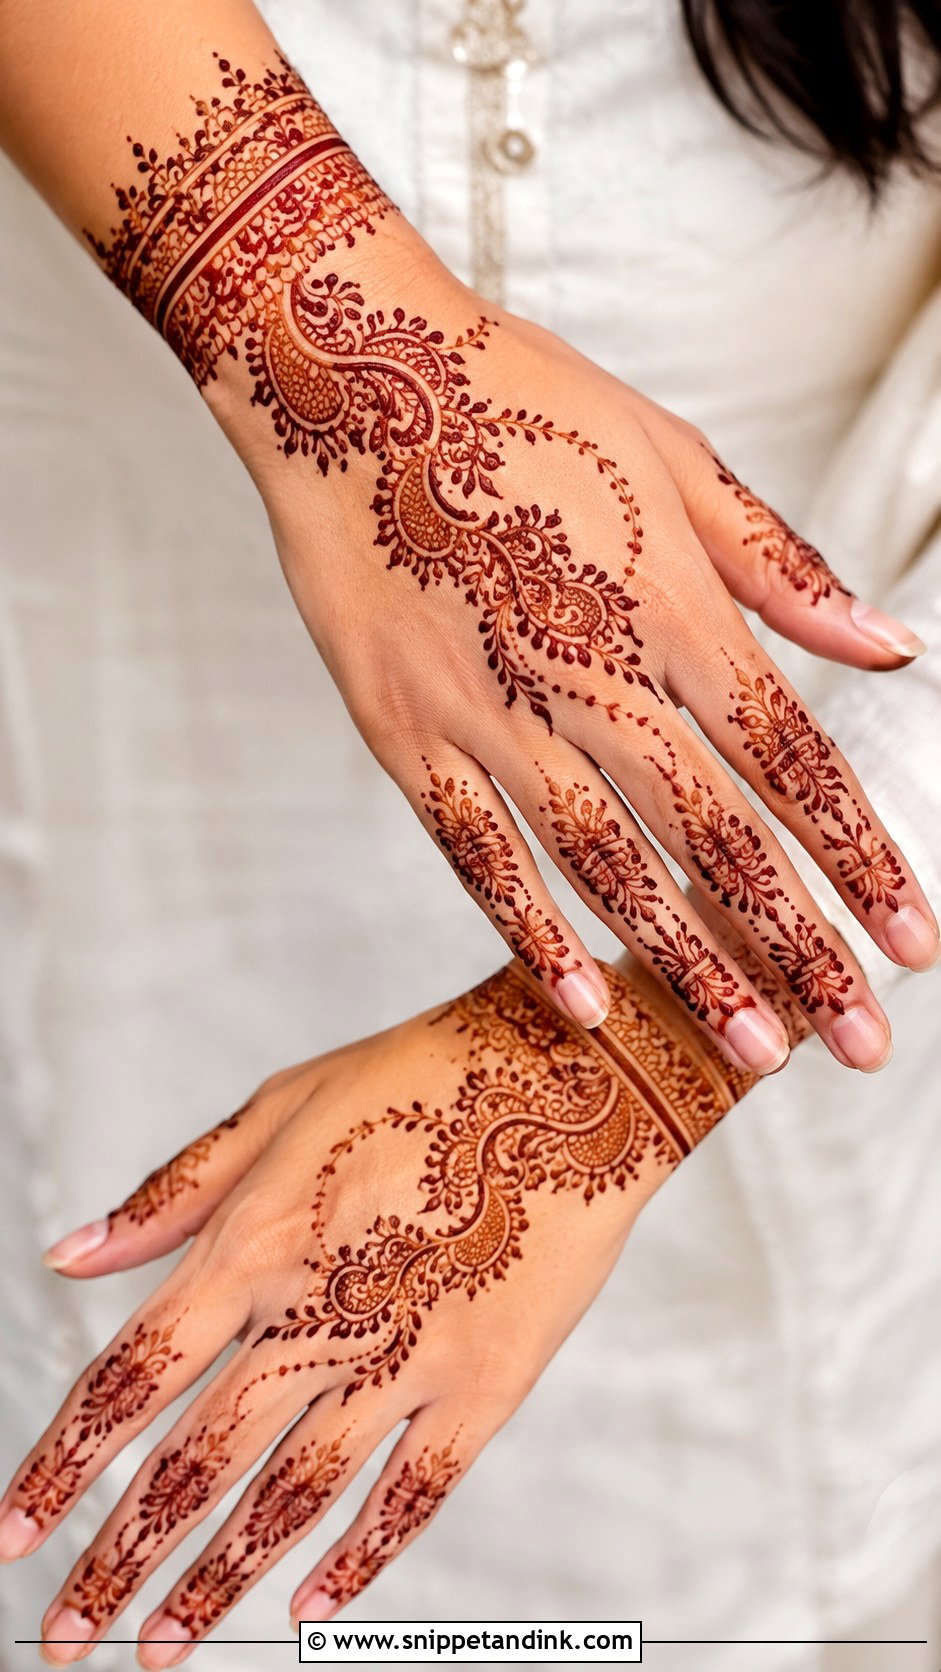
Wrist-led designs start with a strong cuff and move lightly onto the hand. The wrist section can carry scallops, flowers, small paisleys or jaali, with a few vines or dotted chains reaching toward the fingers. It stays visible below most sleeves, which is useful in cooler months. Instead of one thick block, I layer two or three thin borders; they look finer and stain more evenly than a wide band.
24. Simple Moroccan Back Hand Mehndi Design
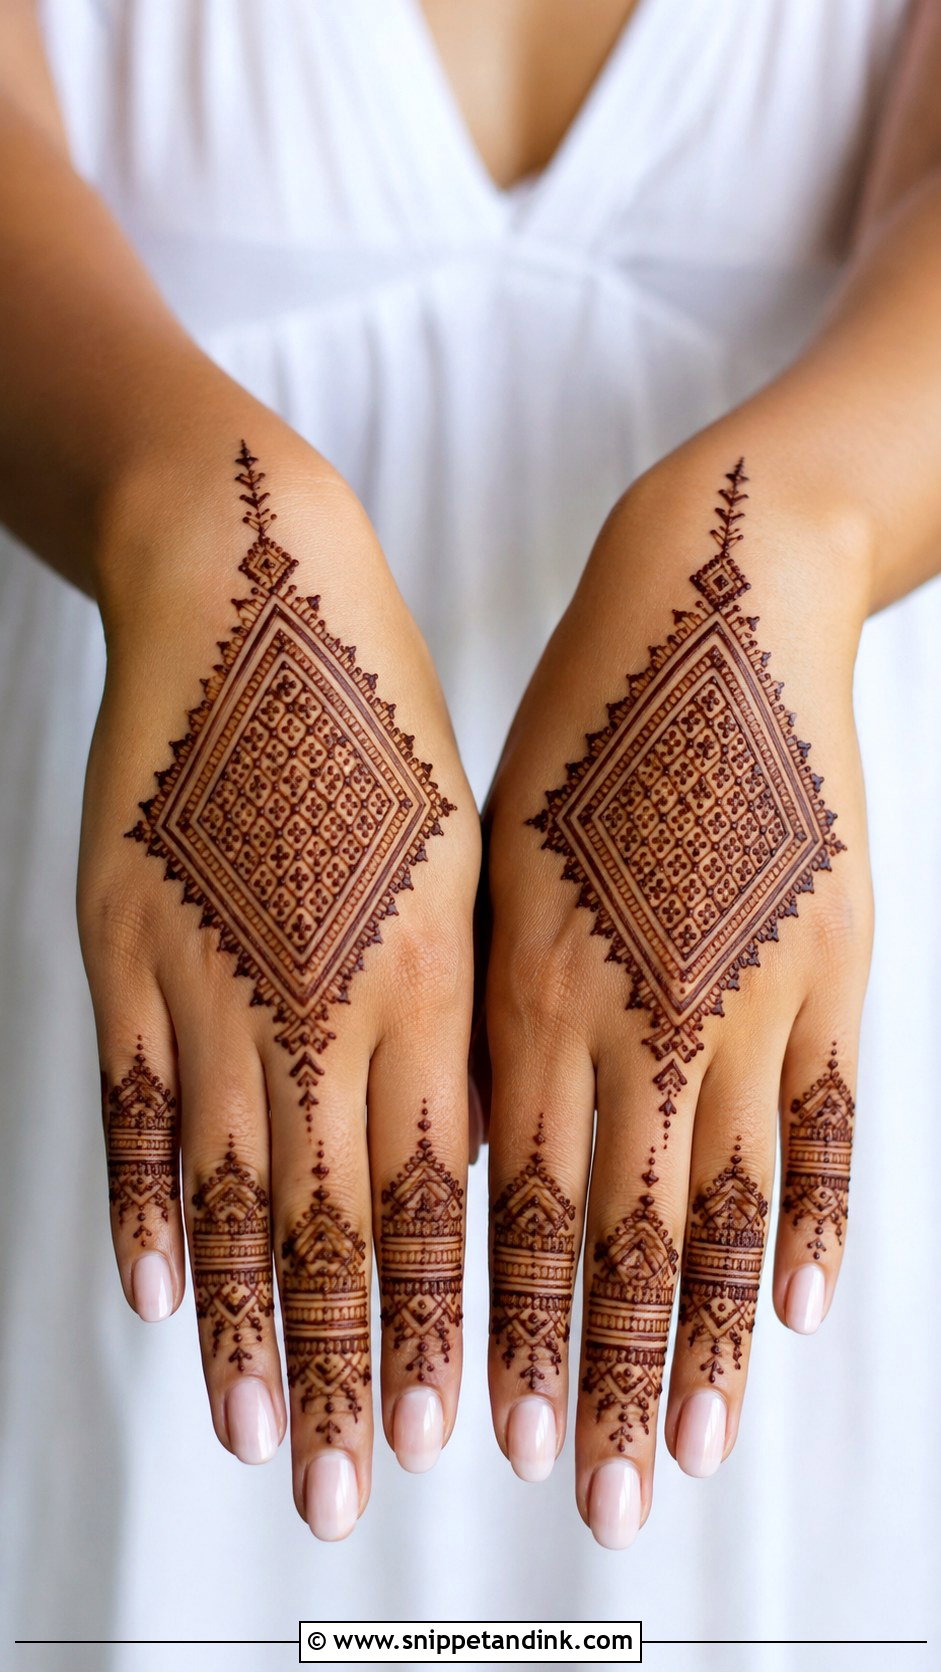
A Moroccan back hand mehndi design uses geometric shapes, clean lines, diamonds, triangles and repeating borders, which sets it apart from floral Indian or Arabic work. I start with a central diamond or grid and extend straight-line details toward the wrist and fingers, with small bands and angular patterns on the fingers. The flat back of the hand is the right surface for geometry. Consistent spacing is everything; I set a few guide dots before drawing.
25. Simple Gulf Back Hand Mehndi Design
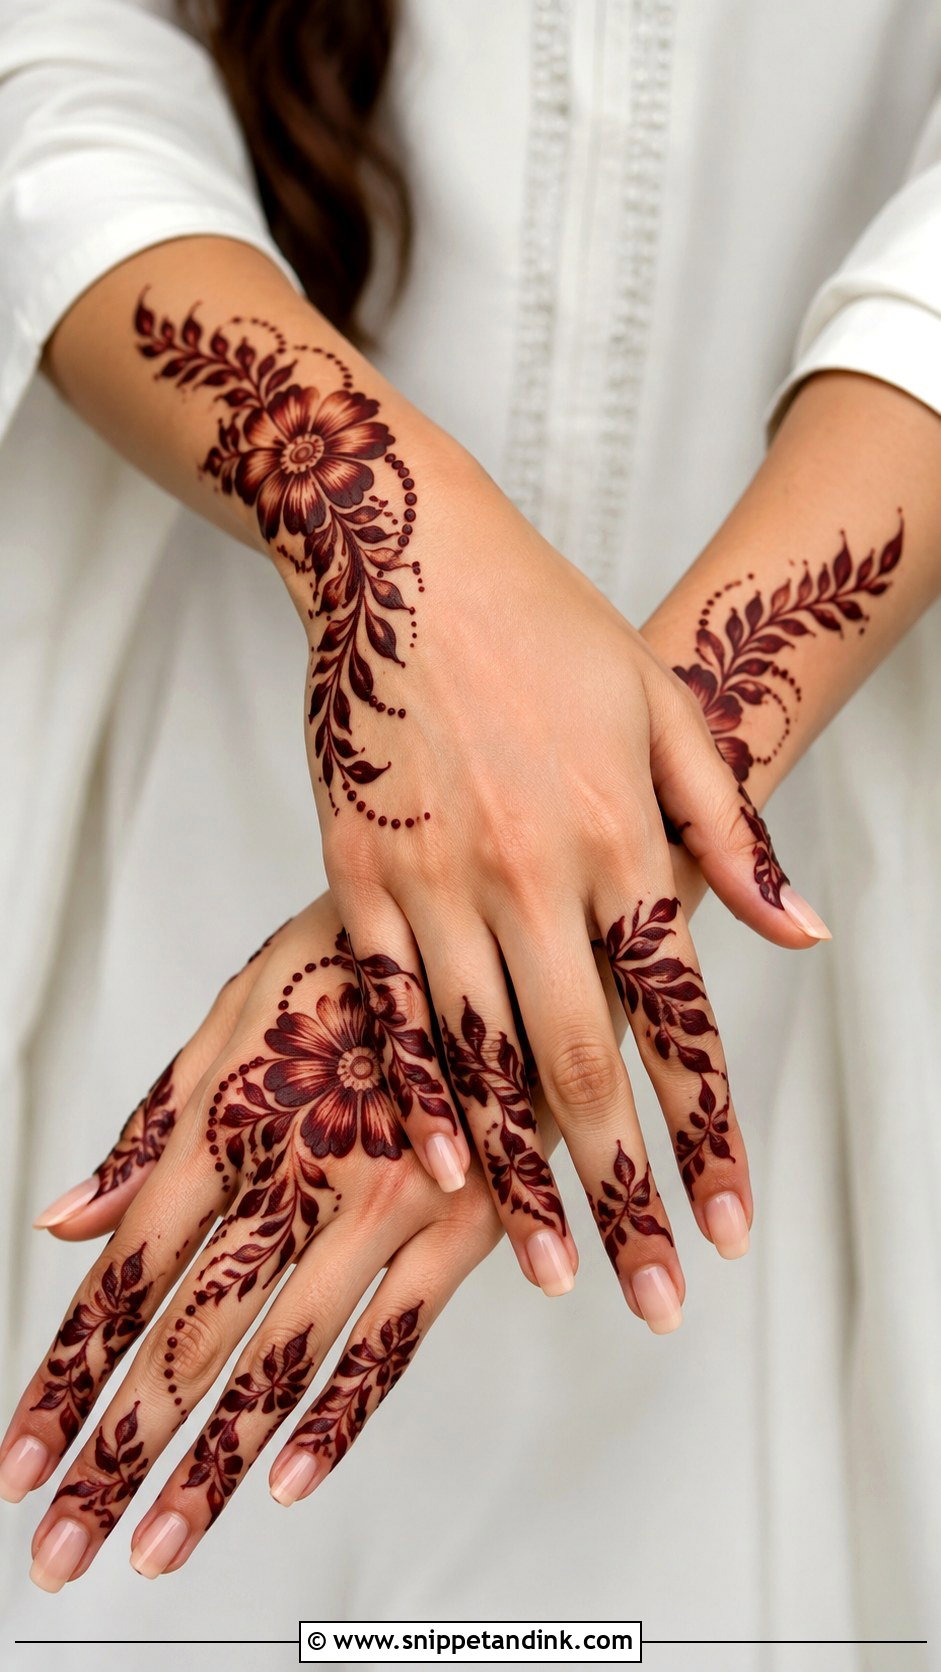
Gulf-style henna uses bold floral shapes, flowing vines and open spacing, with larger motifs that are easy to see and quick to apply. One big flower near the wrist, leaves and curves moving toward the fingers, and dots, bands or small leafy trails on some fingers. Shaded petals or thicker outlines add drama while the background stays open. I widen the cone tip slightly for these outlines, because a thin line looks weak inside such big shapes.
26. Simple Full Back Hand Mehndi Design
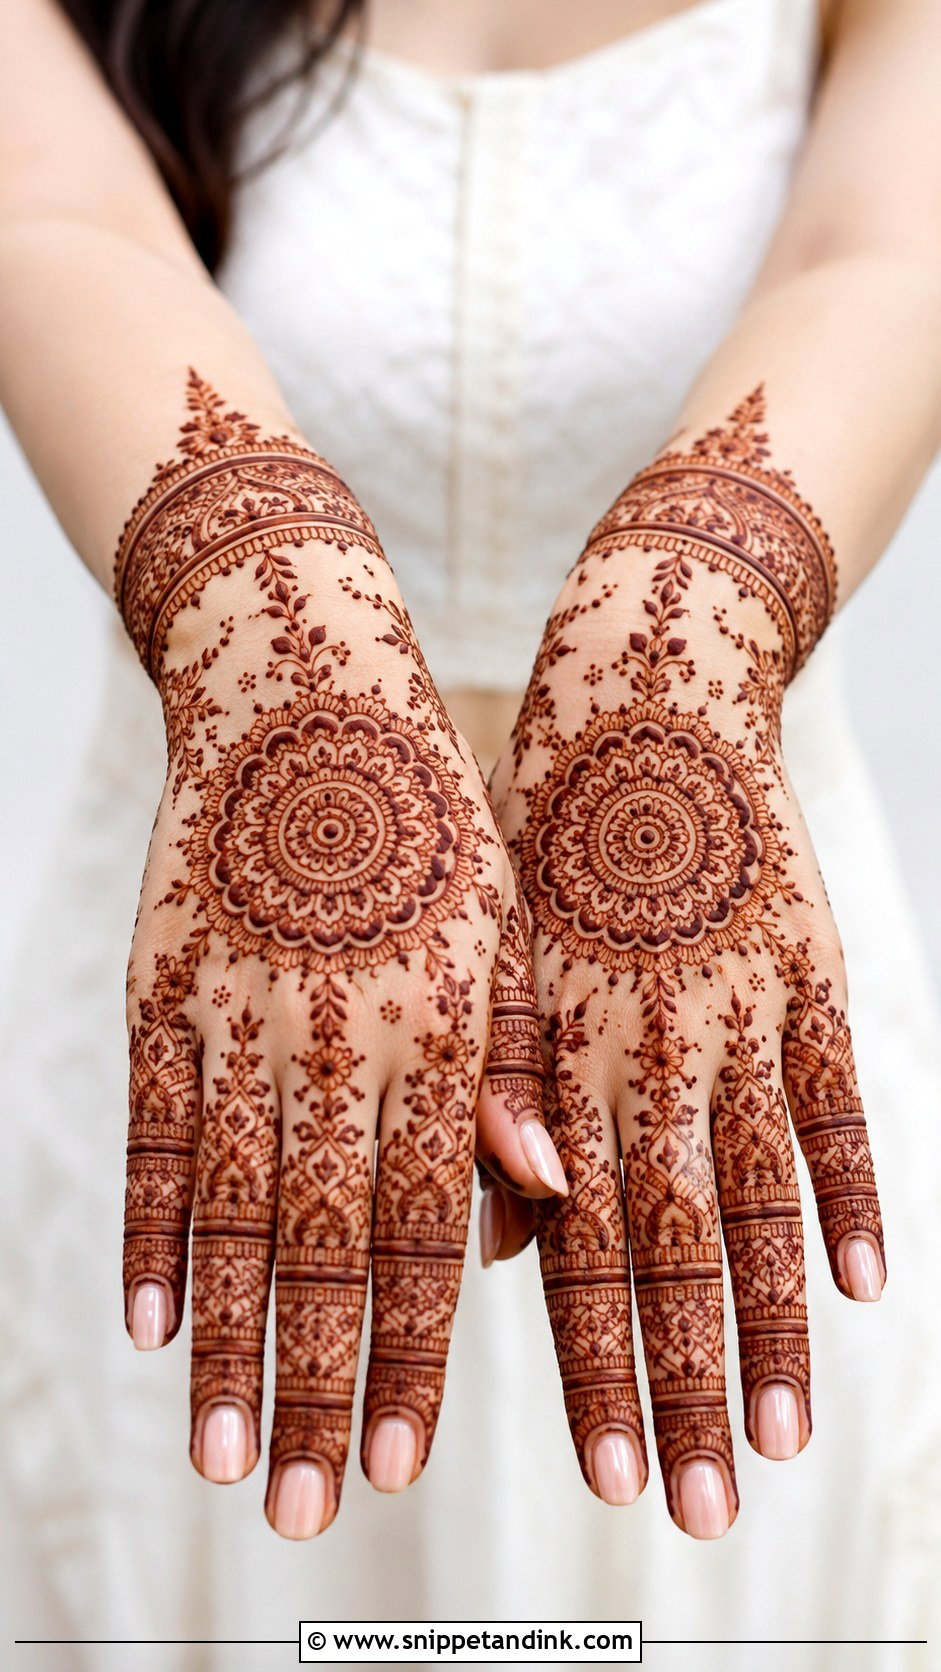
Full back hand coverage can still breathe if you mix a mandala, florals, vines, dots and finger bands instead of dense fill everywhere. I start with the center motif, build borders around it, and then connect to the wrist and fingers. Combining one traditional motif with modern open spacing keeps it fresh. Keep the fingers detailed but not solid-dark, since fingers stain deeper than the back of the hand and can overpower it.
27. Simple Back Hand Mehndi Design For Beginners
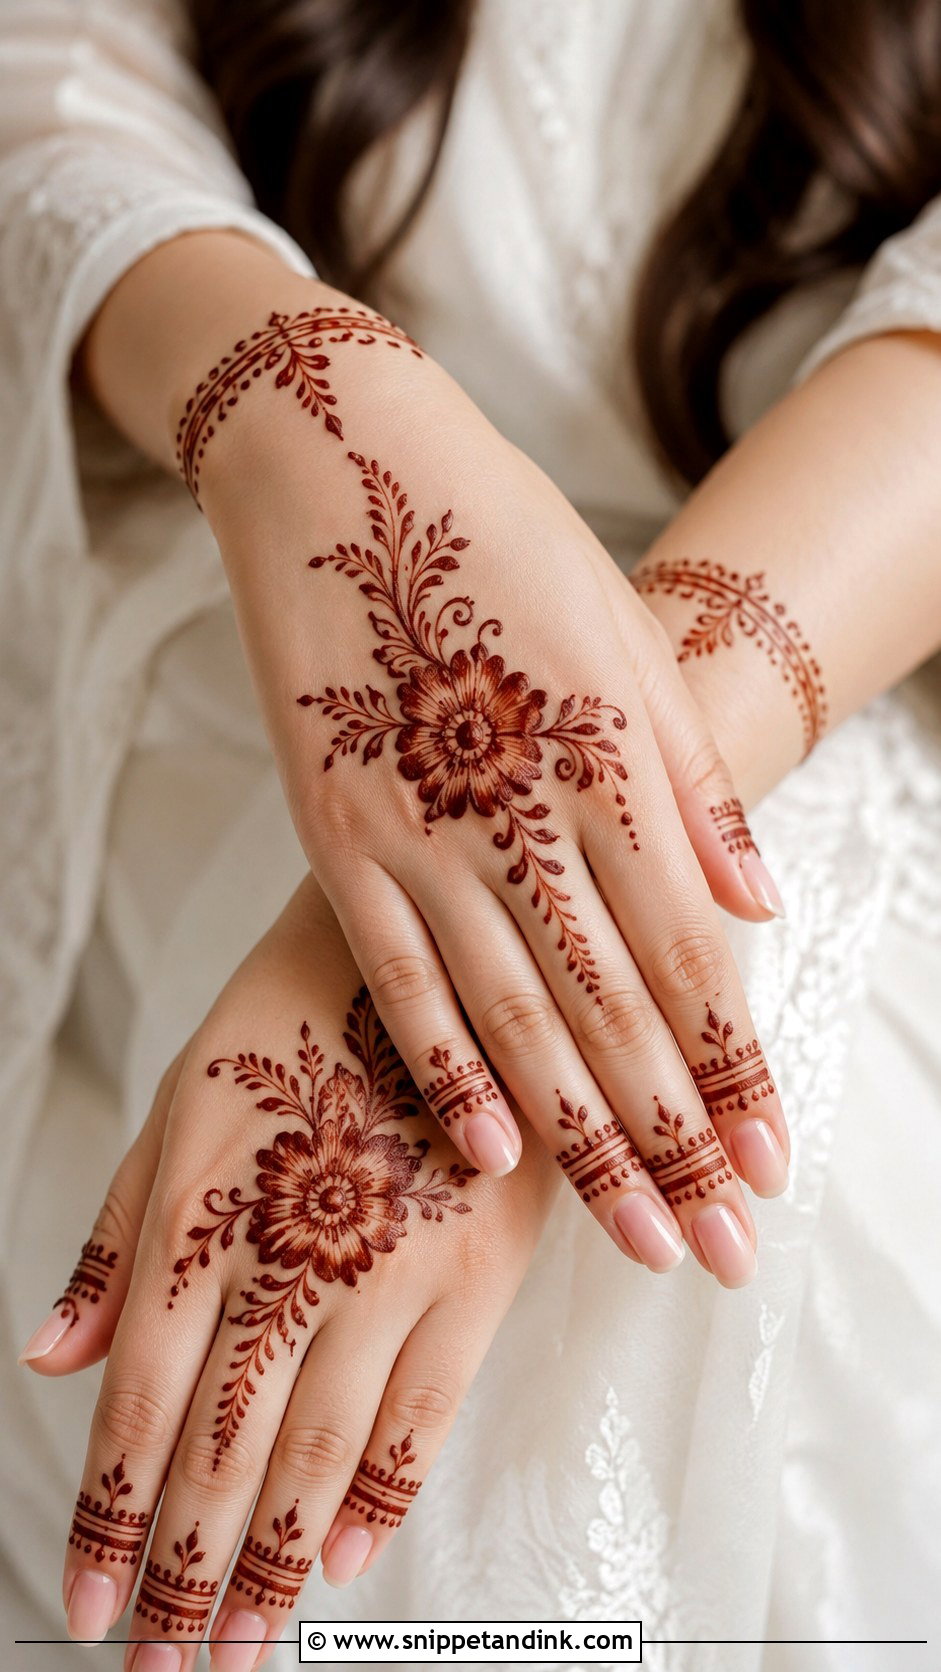
For beginners, I recommend a small flower or mandala in the center, then leaves, dots, curved lines and simple finger bands, finished with a small wrist bracelet. Skip tiny fillers until you have better cone control. This layout teaches spacing, flow and balance. If you’re doing it on your own non-dominant hand, rest that hand flat on a cushion and turn the cushion rather than twisting your arm.
28. Simple Back Hand Mehndi Design For Kids
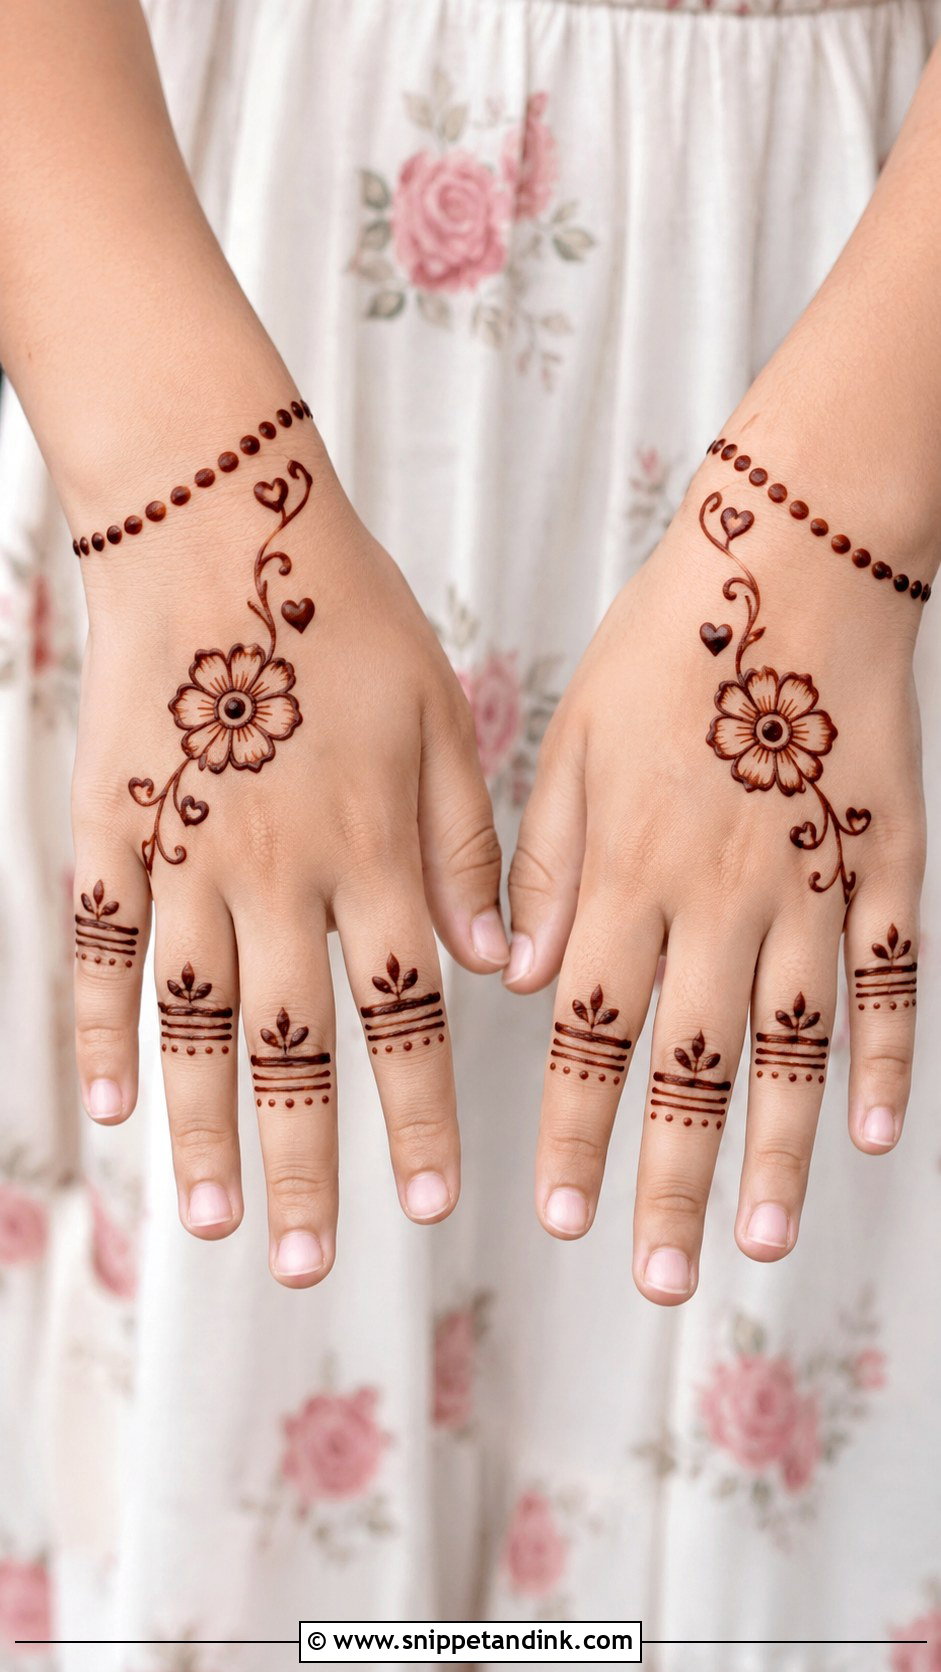
Children rarely sit still, so a mehndi design for kids on the back hand should use larger motifs with fewer details: a small flower, butterfly-like shape, round tikki, leafy vine or dotted bracelet. Fingers get dots or small bands. Tiny hearts or star-like dots around the main motif make it fun. Use natural henna only, never black henna, and keep it small enough to dry quickly before little hands touch everything.
29. Simple Back Hand Mehndi Design For Short Hands
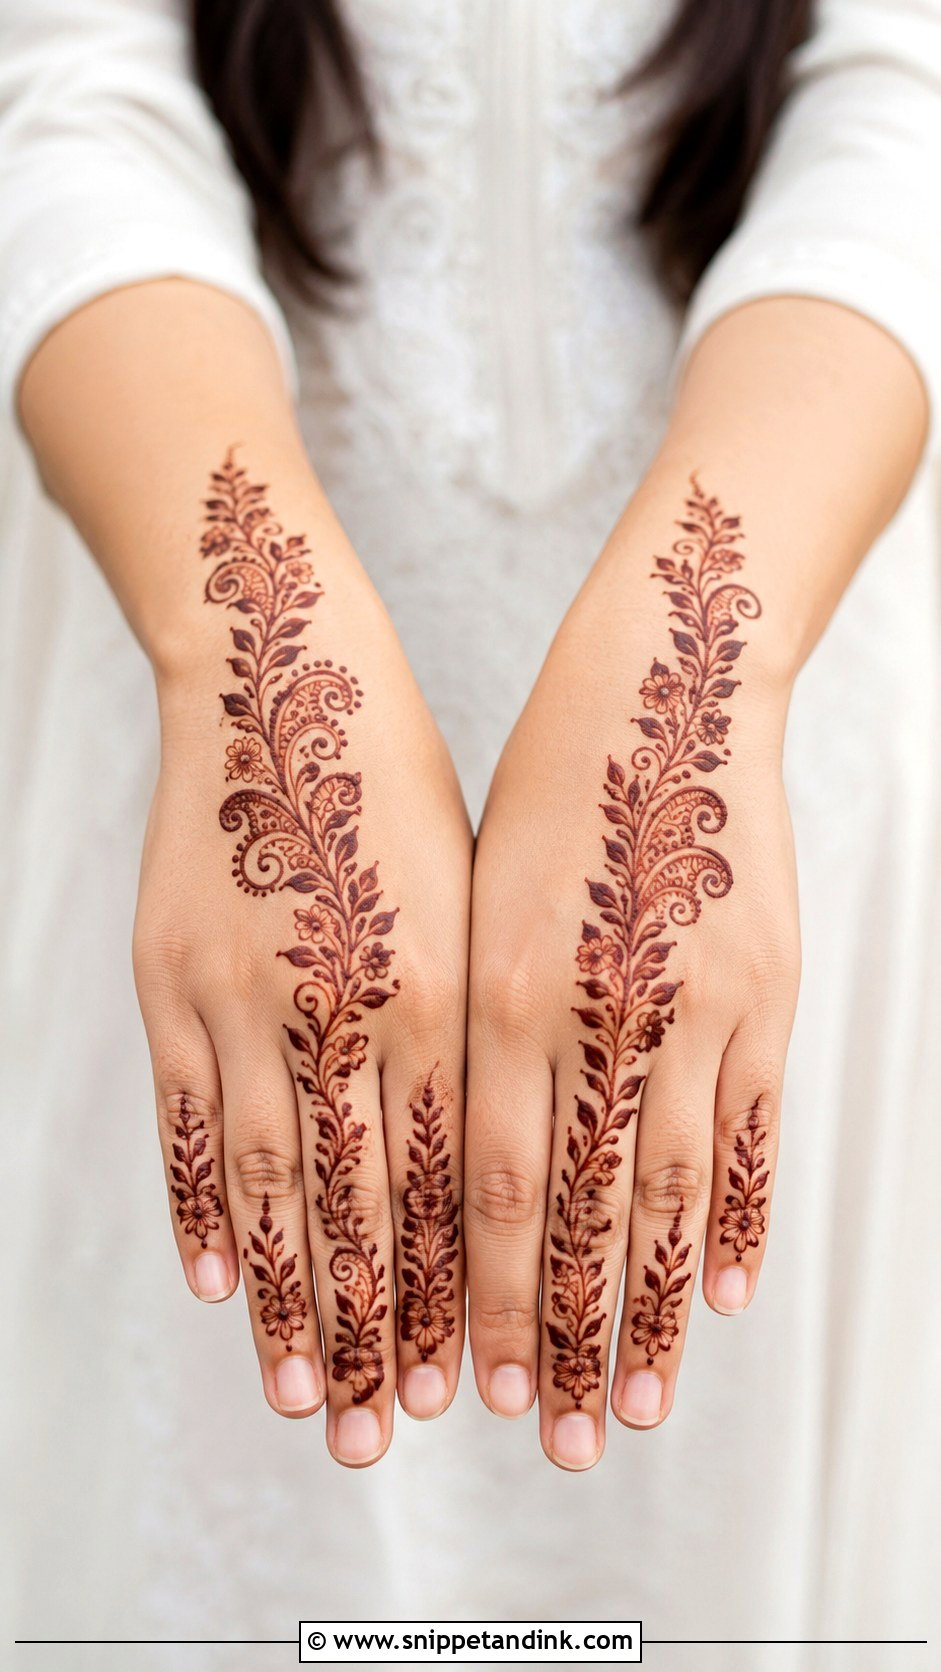
Short hands look longer with designs that run lengthwise: a vertical vine, a diagonal Arabic trail or a slim mandala chain from wrist to finger. Wide motifs across the hand make it look shorter, so choose narrow flowers, small paisleys and thin finger details. Leave space on both sides of the main design. I decorate the middle finger slightly more than the others, which draws the eye upward and adds visual length.
30. Simple Back Hand Mehndi Design For Long Fingers
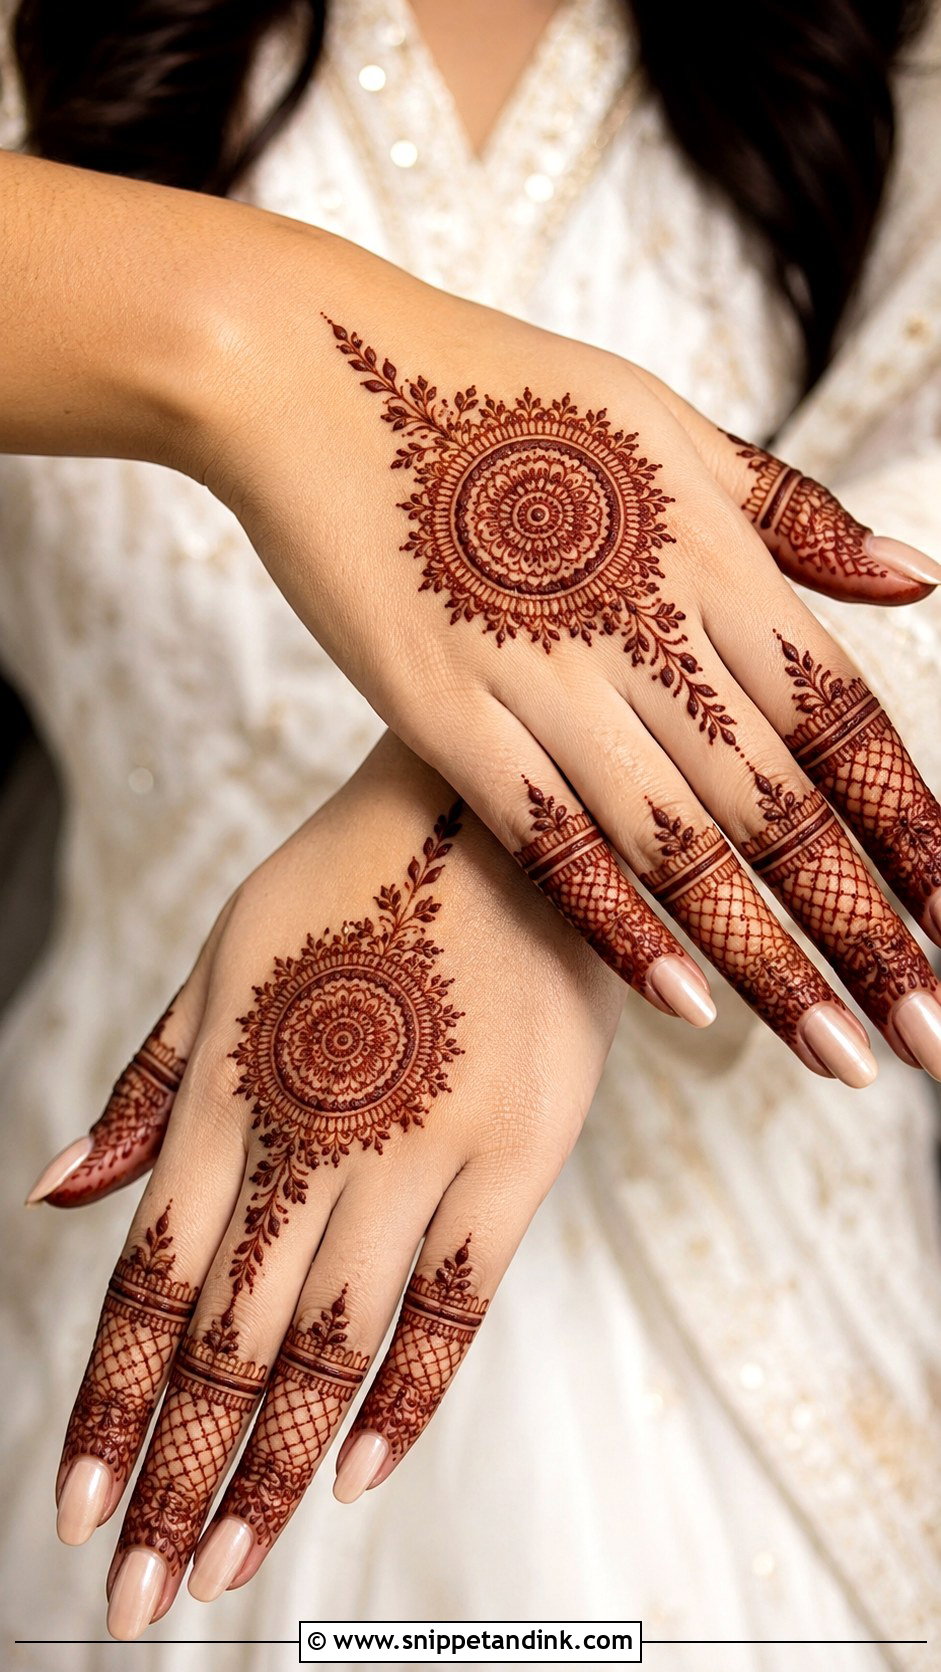
Long fingers give room for stacked bands, leafy tips, fine jaali panels and slim floral trails. Balance them with a mandala, flower or small paisley cluster in the center of the back hand, or the design looks finger-heavy. Ring-style henna and chains sit especially well on long fingers. Different patterns on each finger, tied together with the same dots or borders, show off the length without looking busy.
31. Simple Back Hand Mehndi Design With Dots
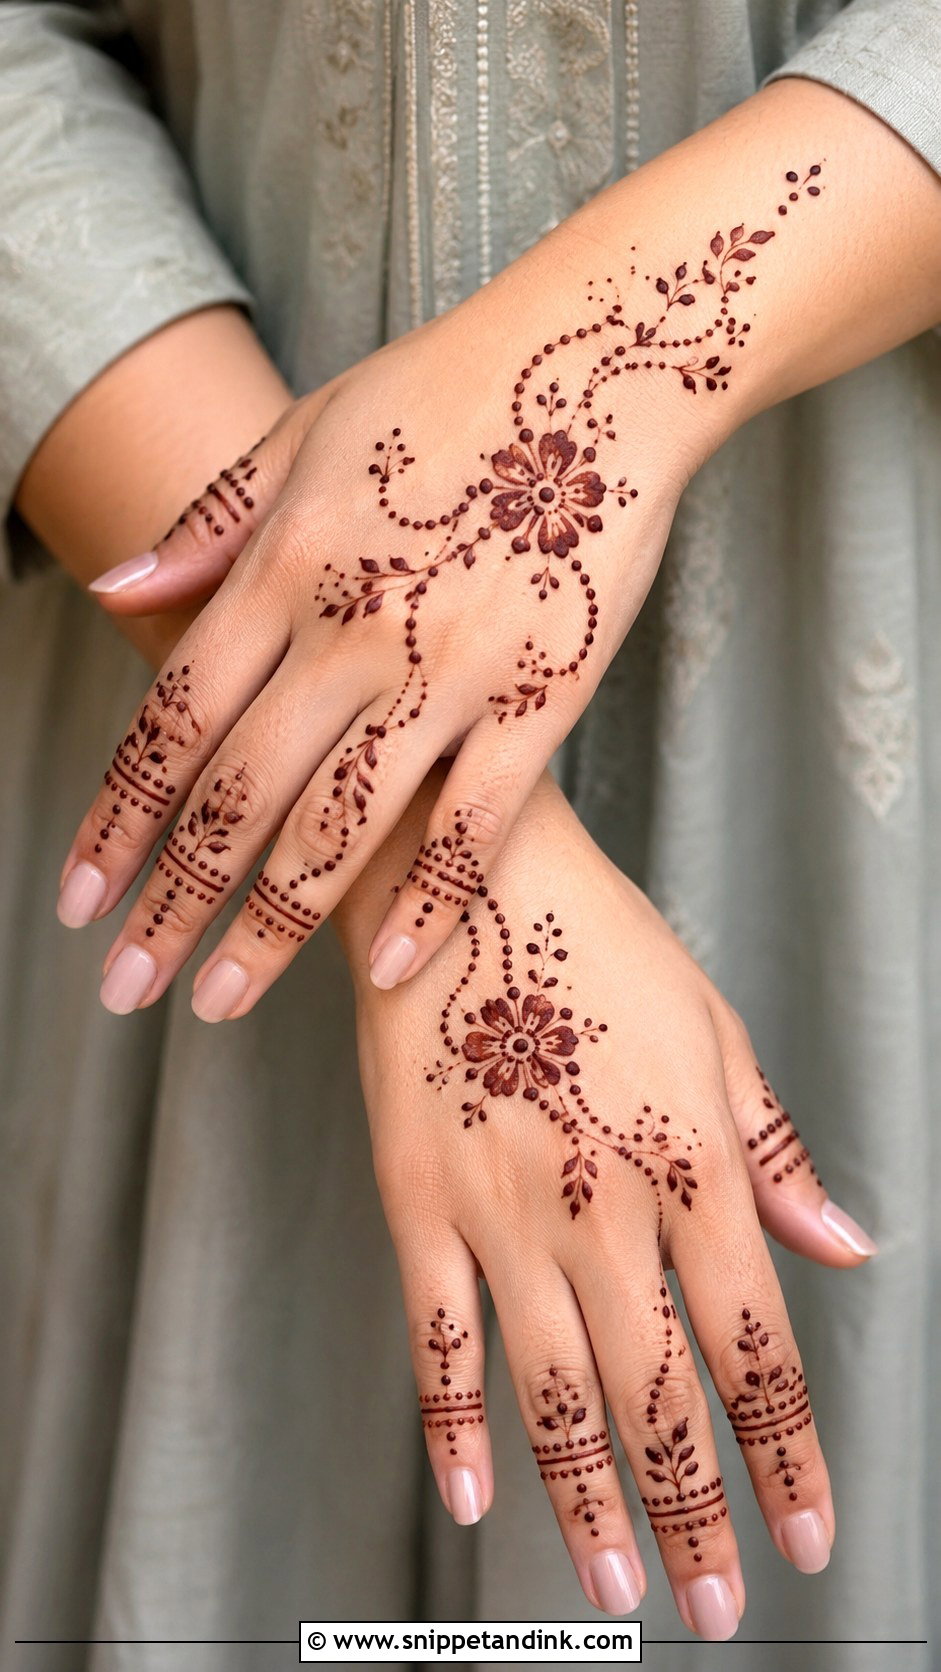
Dots turn a plain design into something finished. A central flower, curved vines, dotted chains and finger bands make the base, and dots connect the empty spaces without adding weight. They’re the beginner’s best friend because they hide small spacing errors. I grade them by size, larger near the main motif and smaller toward the fingers. Touch the cone lightly and lift straight up; dragging turns a dot into a tadpole.
32. Simple Back Hand Mehndi Design With Shading
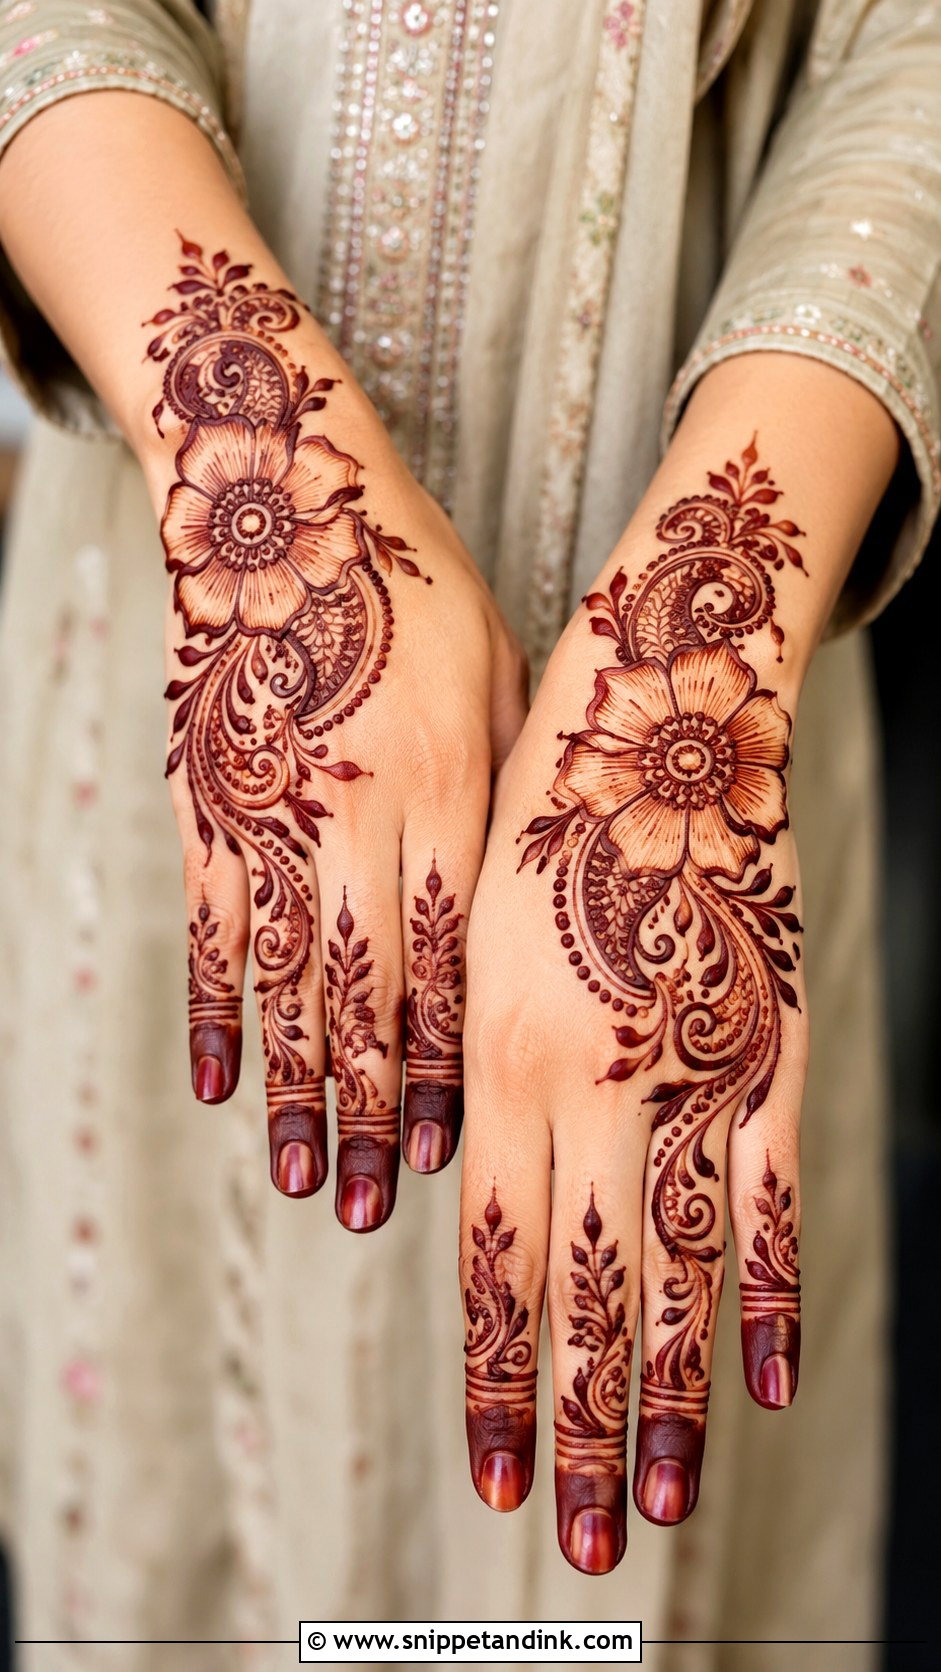
Shading adds depth without new motifs. One or two large flowers with petals shaded lightly, by thin lines or a soft filled edge, and maybe a shaded paisley, leaf or wrist border. The rest of the hand stays open so the shaded areas stand out. Combining bold outlines with soft inner shading gives contrast. On the back of the hand, I shade with a thin smear of paste rather than solid fill, because heavy fill here cracks and flakes as the hand flexes.
33. Simple Back Hand Mehndi Design With Empty Space
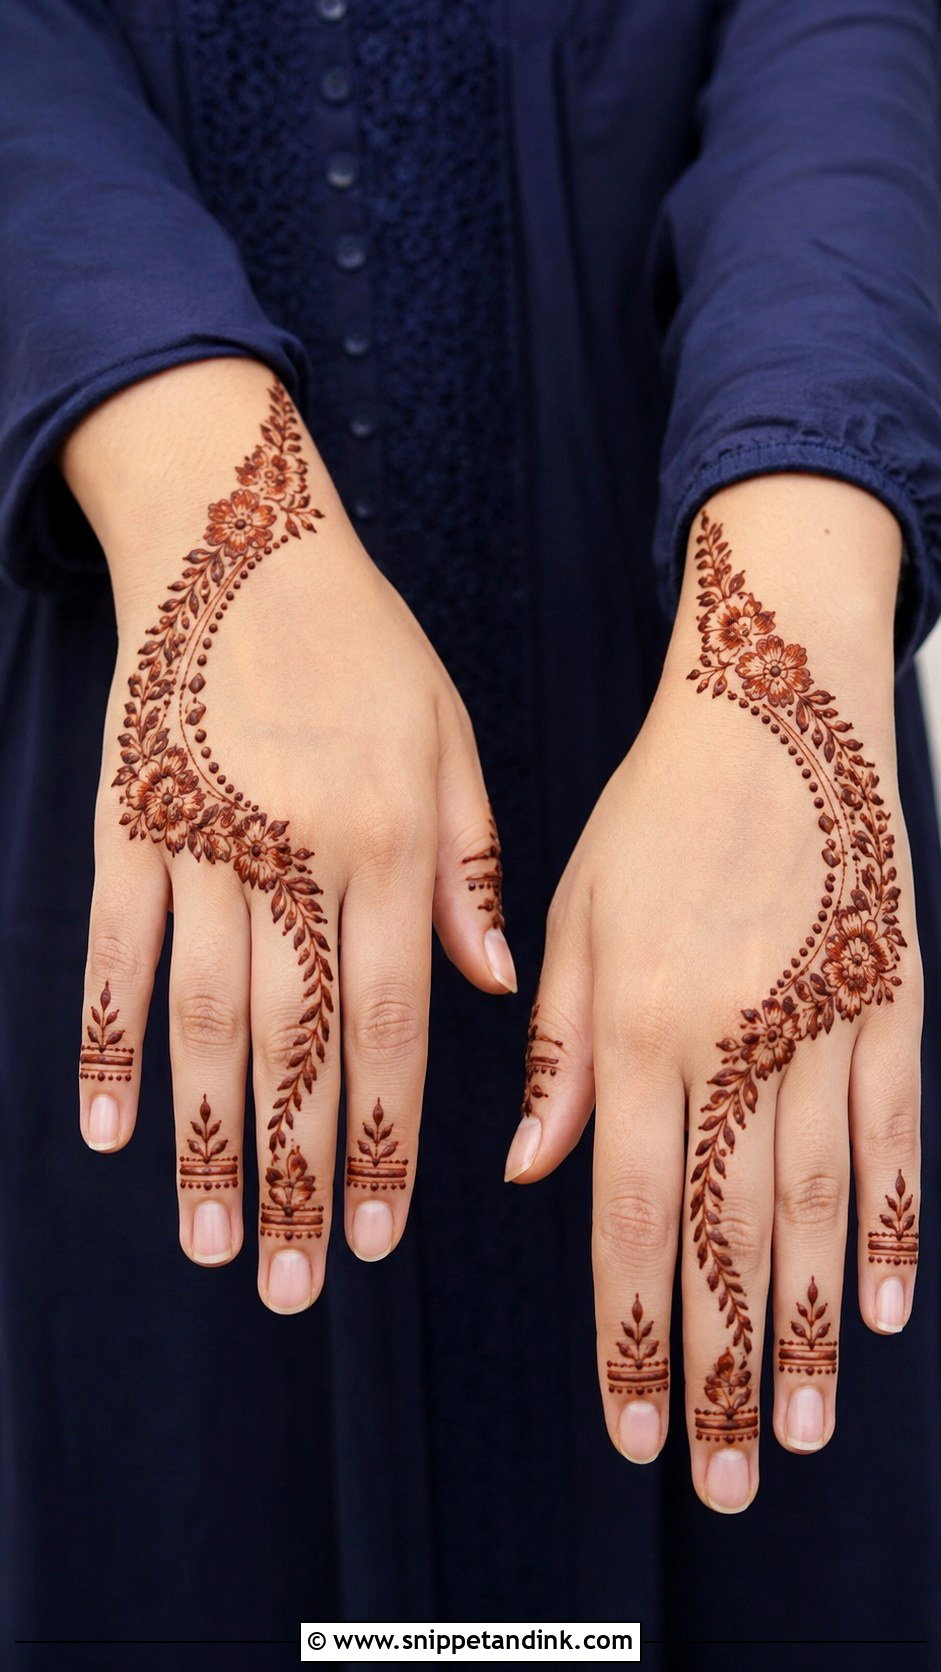
Empty space is the quickest route to a modern back hand. A diagonal flower trail, half-hand layout or center mandala with open borders lets each motif be seen. The shapes don’t blur together in photos. For something different, I leave a clean curve of bare skin running through the middle of the hand and place motifs along both sides of it. Plan that empty curve first, before drawing any motif.
34. Simple Back Hand Mehndi Design With Name
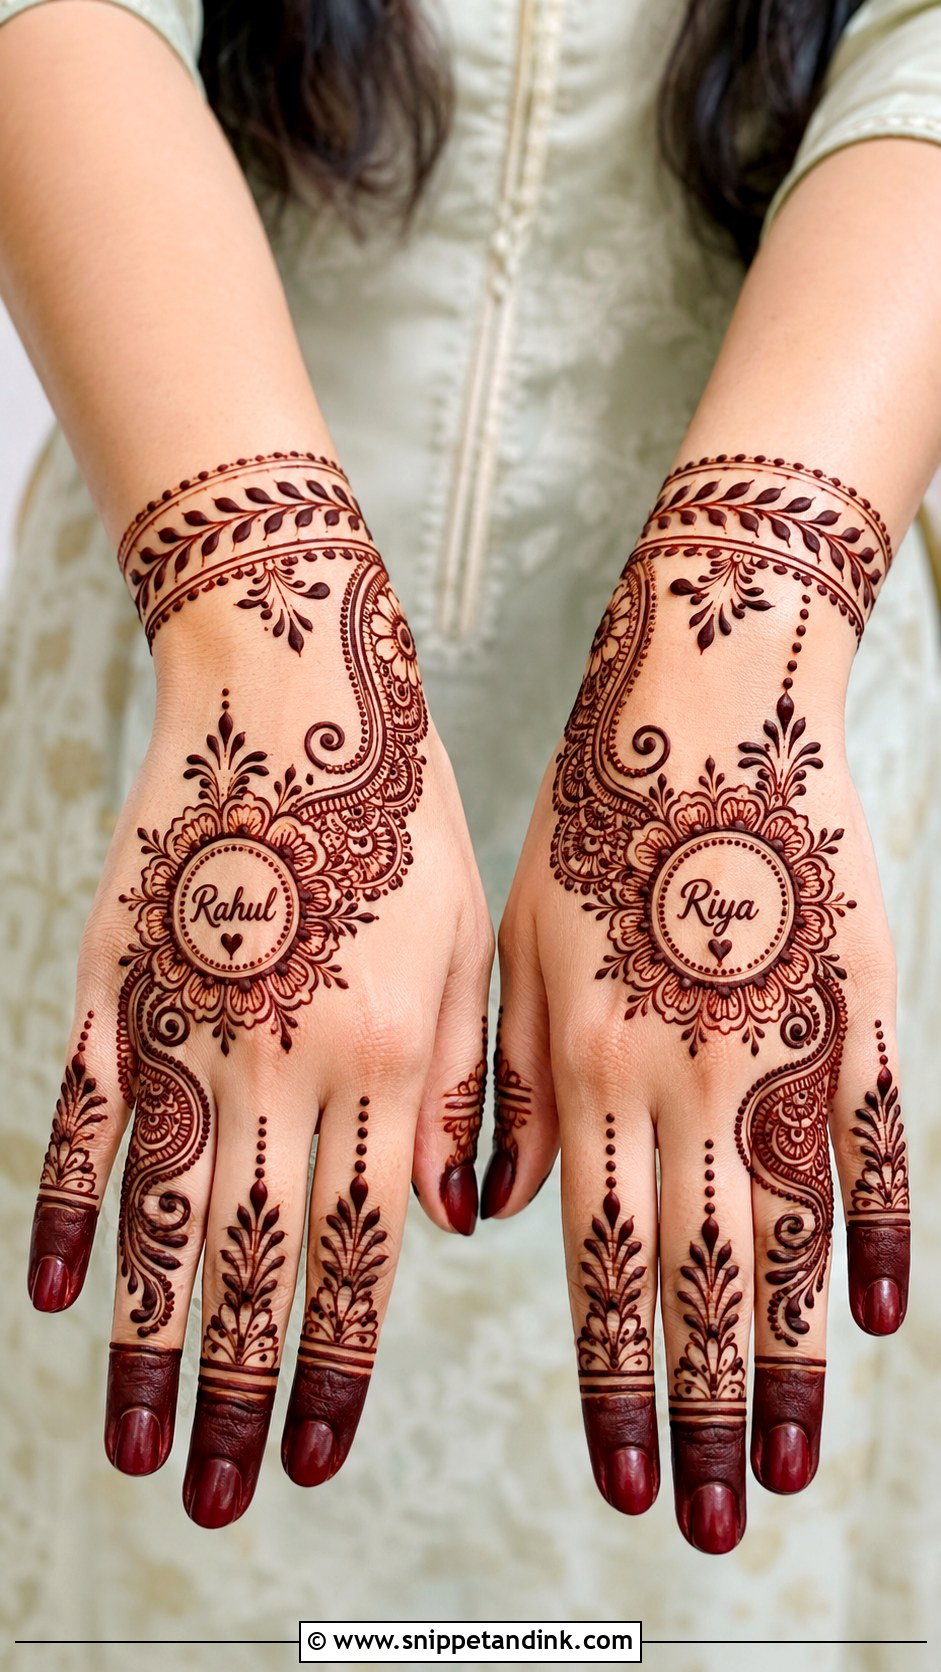
A name in the design feels personal without being bridal. It can sit inside a petal, along a vine, near the wrist band or hidden in a paisley. Keep everything else simple, with leaves, dots and finger bands, so the name stays readable, and frame it with a soft border of dots or petals. Avoid areas where the skin folds, like the knuckles or the wrist crease, because letters there distort. Engagements, anniversaries and festive moments all suit it.
35. Simple Unique Back Hand Mehndi Design
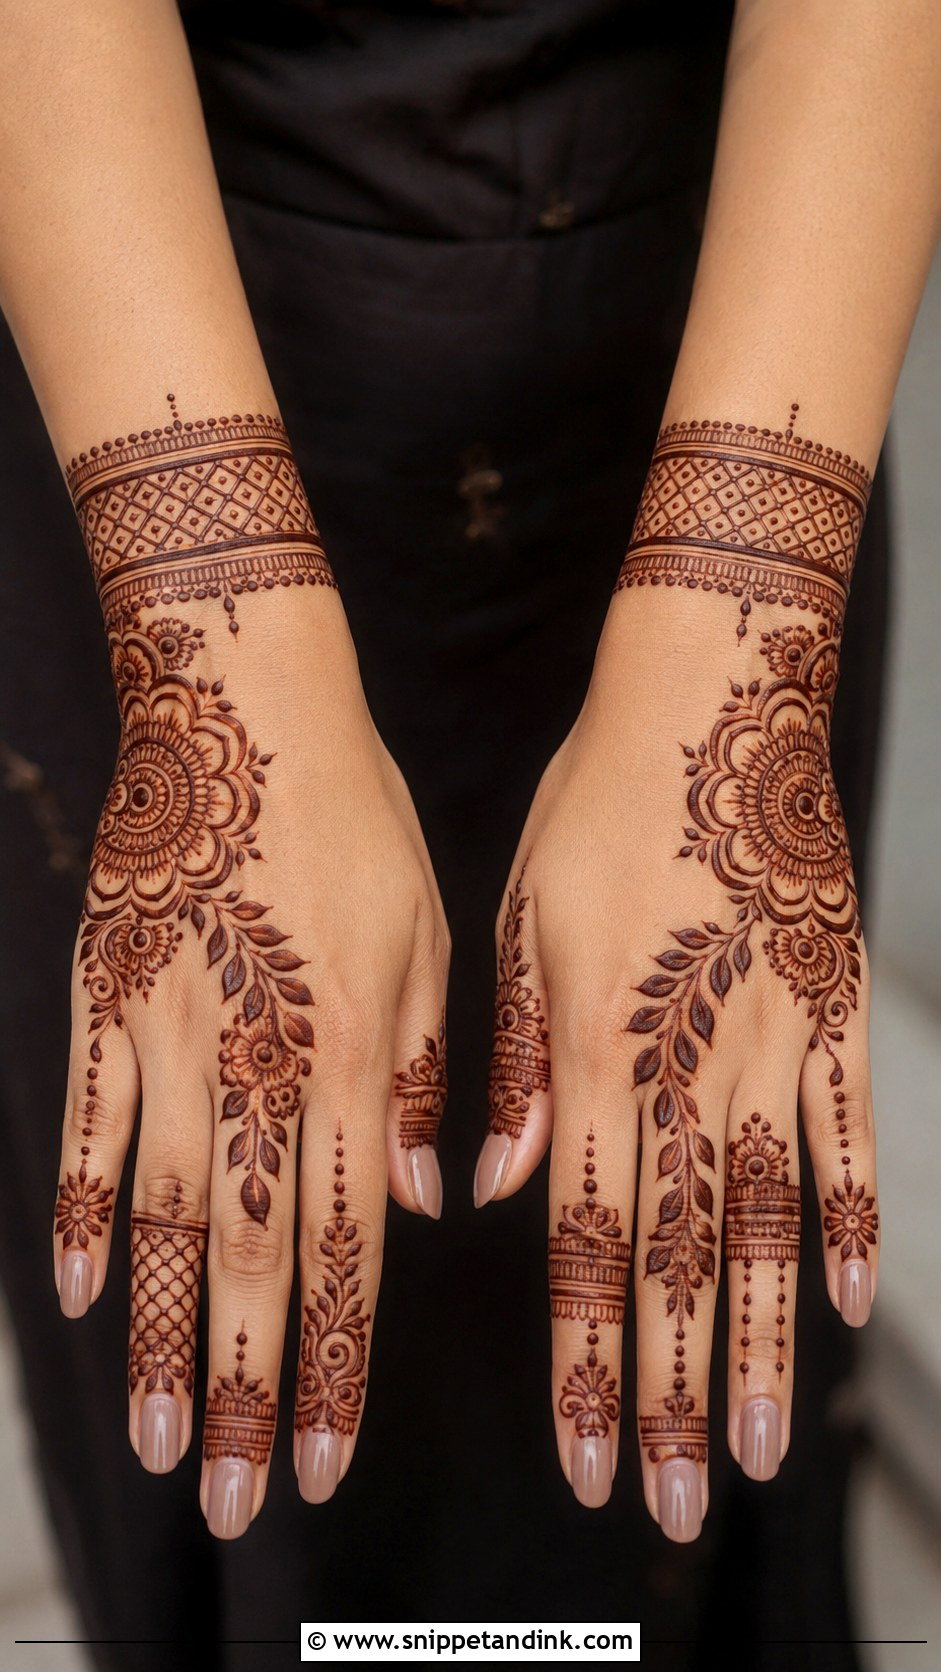
A design feels unique when familiar elements land in an unexpected layout: a side mandala, a split floral trail, a geometric wrist band or an uneven finger pattern. Flowers, jaali, leaves, dots and chains can all appear, as long as the spacing stays clean. Try combining Arabic flow with a modern bracelet, or Moroccan lines with soft florals. Unique doesn’t mean complicated; it usually means one placement decision nobody else made.
Hiding Initials and Names So They Stay Readable
Several designs above leave room for a name, initials or a date, and it is the detail I see go wrong most often. Lines spread slightly as the paste settles and the stain darkens, so small letters close up and loops fill in.
- Make each letter at least as tall as your fingernail is wide.
- Use simple block or open script lettering; tight cursive closes up.
- Place letters on the flat middle of the back hand, never across a knuckle or the wrist crease.
- Leave a gap of skin around the name before adding dots or petals as a frame.
- Ask your artist to show you the lettering upright before she continues, since she will be writing it upside down from her side.
At a wedding, the groom finding his initials is a fun tradition, and it works best when the letters are tucked into a petal or paisley rather than displayed in the open. Keep them readable, though, or the game turns into a hunt that nobody can win.
Your Hand Shape Decides More Than the Motif Does
From Arabic trails and mandalas to bracelets, jaali, florals and modern minimal layouts, the right back-hand design depends on the occasion, your hand shape, your outfit and how much time you have. Beginners should start with flowers, dots, vines and wrist bands. For something more festive, try Indo-Arabic, shaded or full back hand designs with open spacing. For a personal touch, add initials, a name or a small meaningful motif. Clean layout and balanced detail are what make any of these memorable.
You'll Like These Ideas:


Leave a Reply