
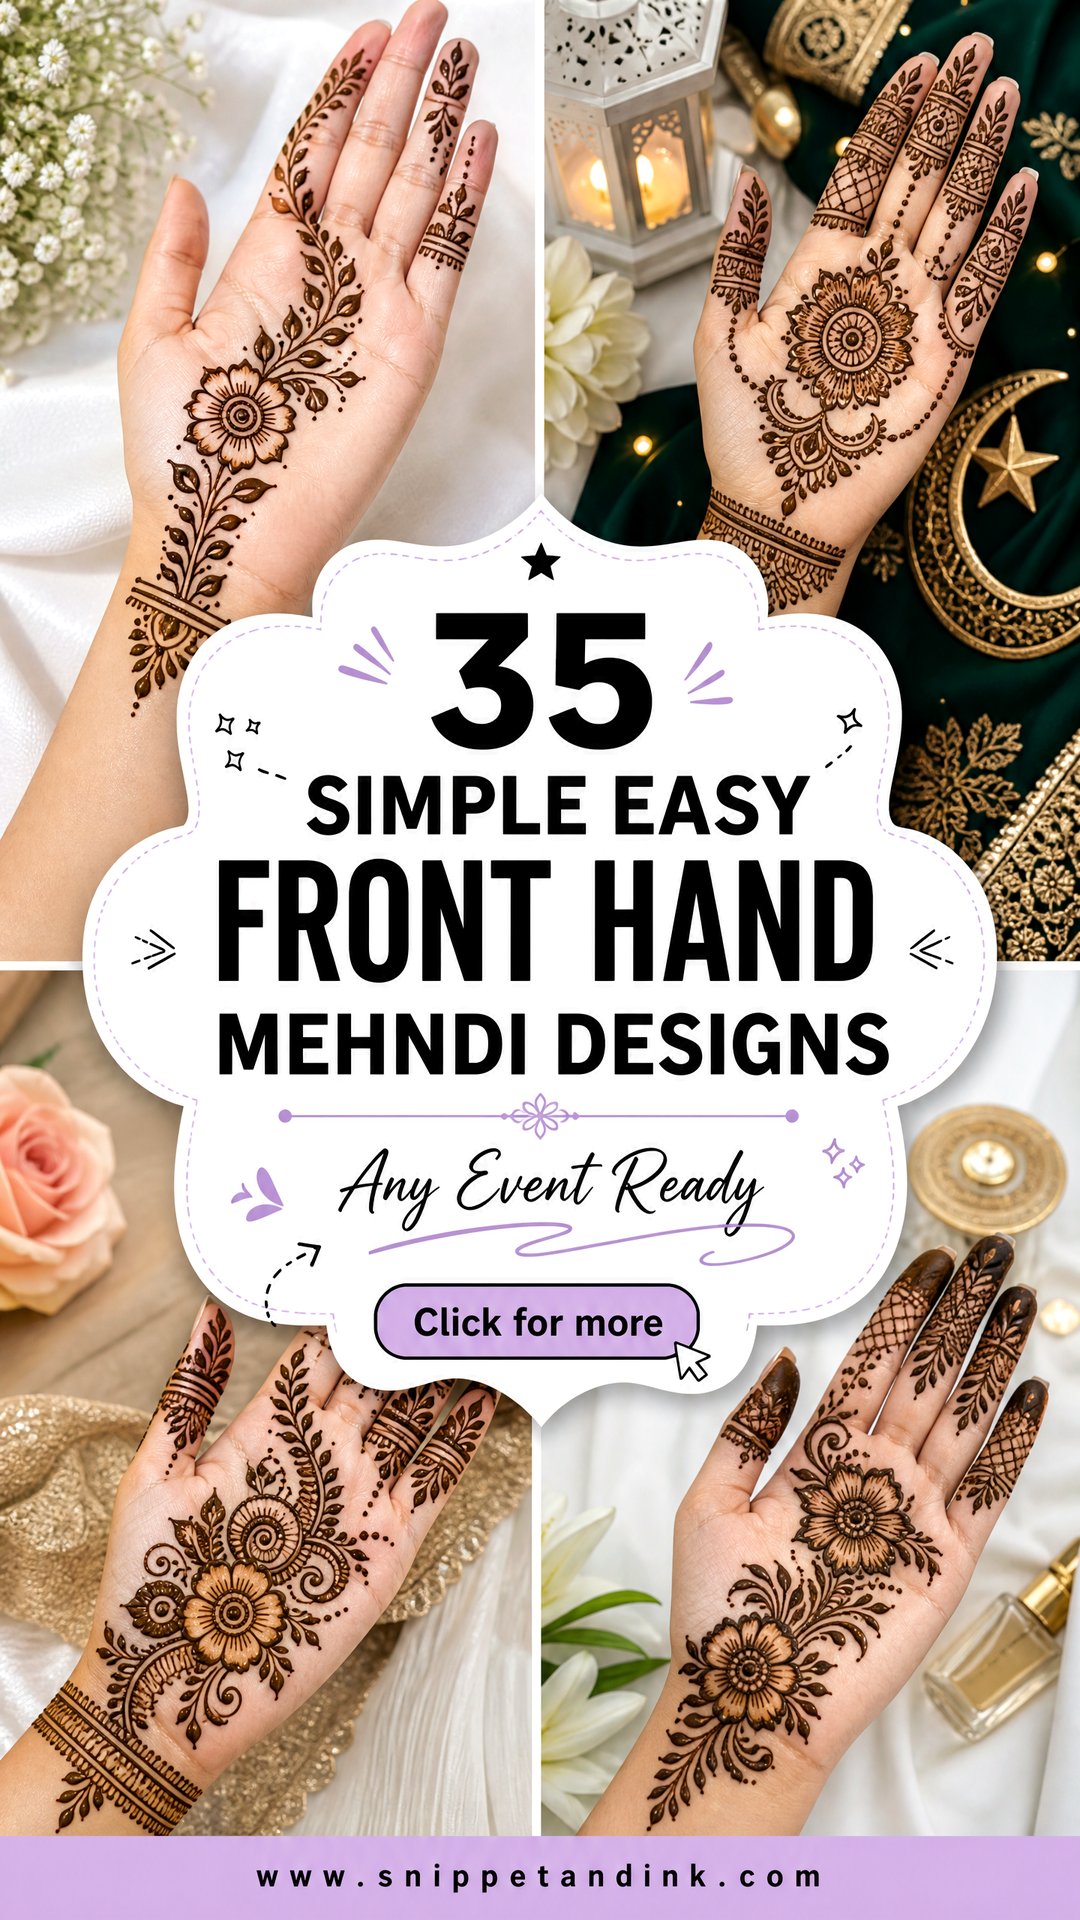
The palm is where henna stains darkest, which is good news if you want a simple design to look finished. You don’t need hours of fine fill on the inside of the hand; a clean center motif, tidy fingers and enough bare skin between them will read clearly and photograph well. Most of what I draw for family functions, Eid and school events is exactly this kind of work: mandalas, flowers, vines, paisleys, bracelet bands and Arabic trails, done with confident strokes rather than tiny detail. Below are 35 front-hand designs I’d happily put on a beginner, a teenager or a guest who has twenty minutes before the car leaves.
Drawing With the Palm’s Creases Instead of Against Them
A palm is not a flat page. It has deep creases, a hollow in the middle and soft pads at the base of each finger and under the thumb. Before I plan a front-hand design, I ask the person to cup their hand a little and then relax it, because that shows me where paste will fold and where it will stay put.
The main creases
Long lines that run across a crease tend to crack as you move. I either place motifs between the creases or let a vine run along one, so the movement follows the design.
The center hollow
This is where palms stain darkest and where wet paste spreads most if the hand closes. It’s the right spot for a mandala, but not for fine jaali.
Finger pads and joints
Bands look neatest when they sit between the finger joints, not on them. On the fingertips I either fill the whole tip or leave it completely bare. A half-filled tip tends to look like it has smudged.
1. Simple Front Hand Mehndi Design
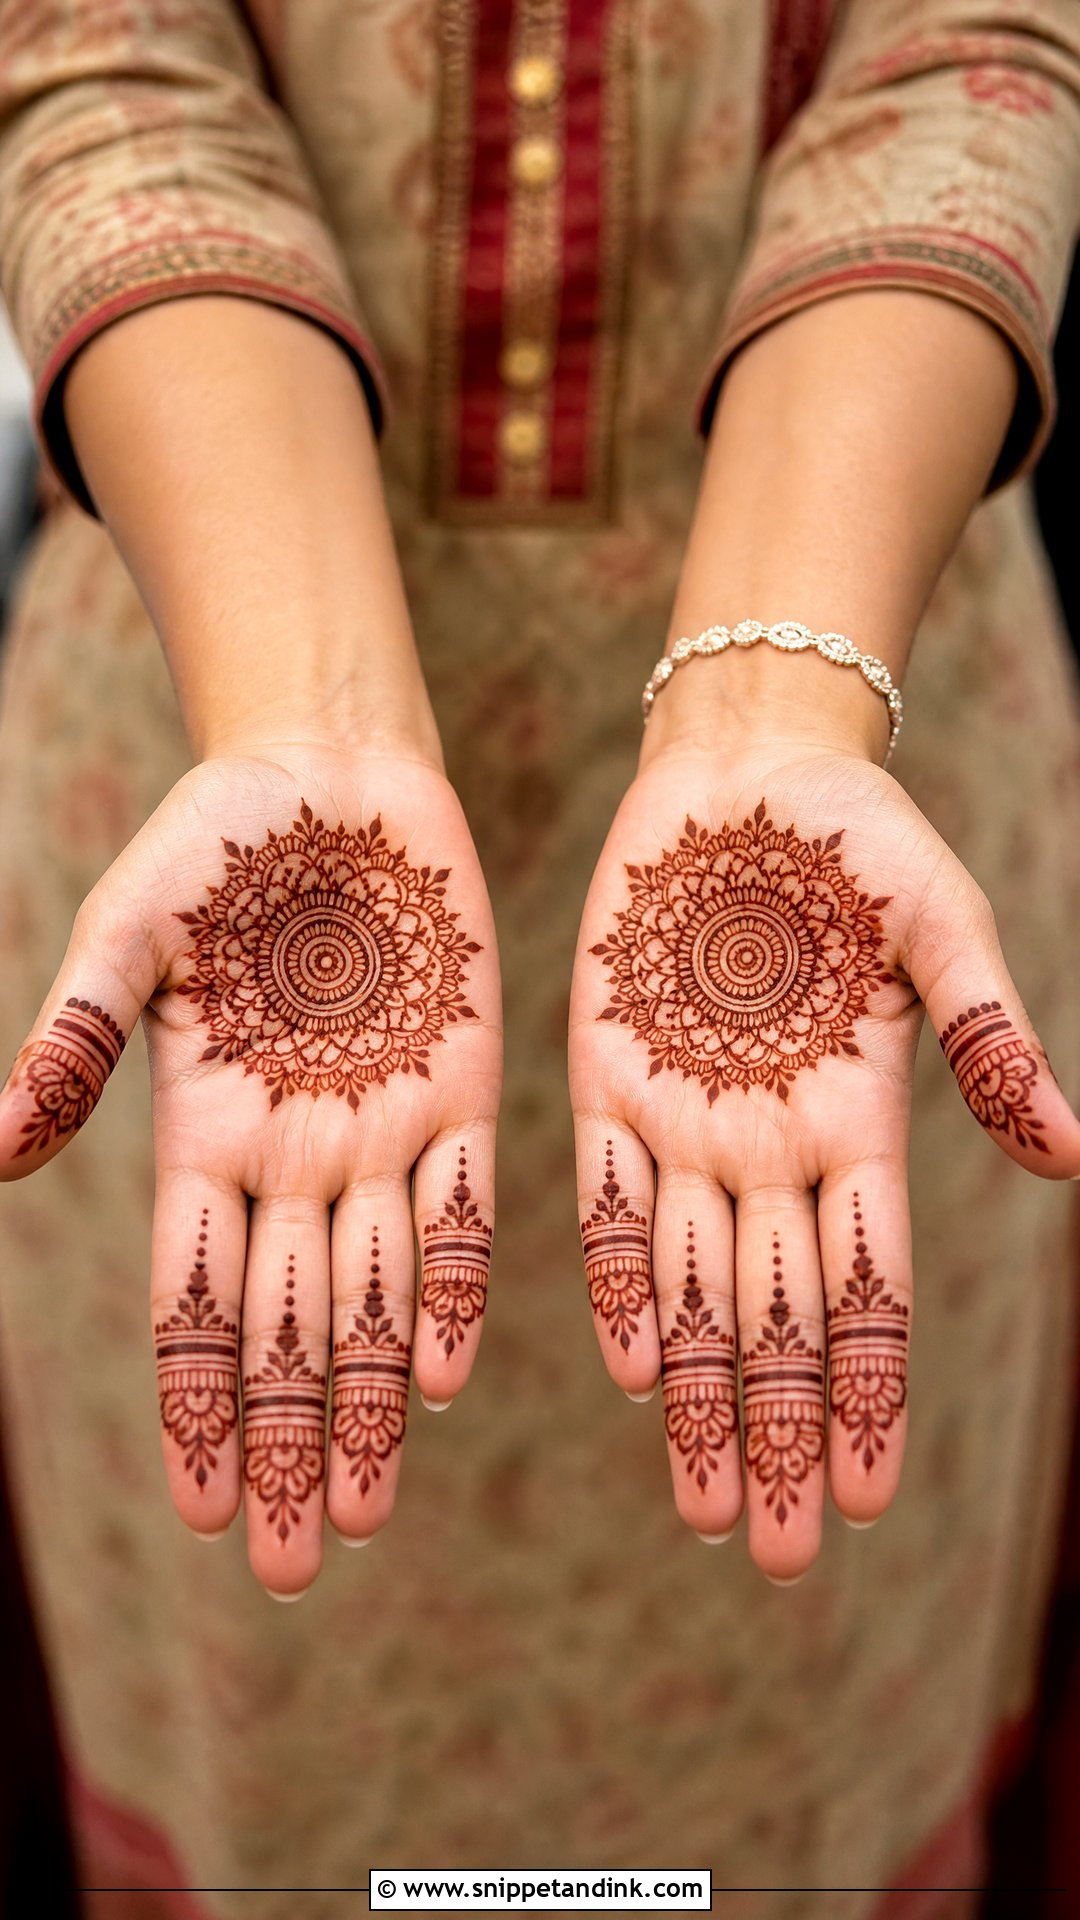
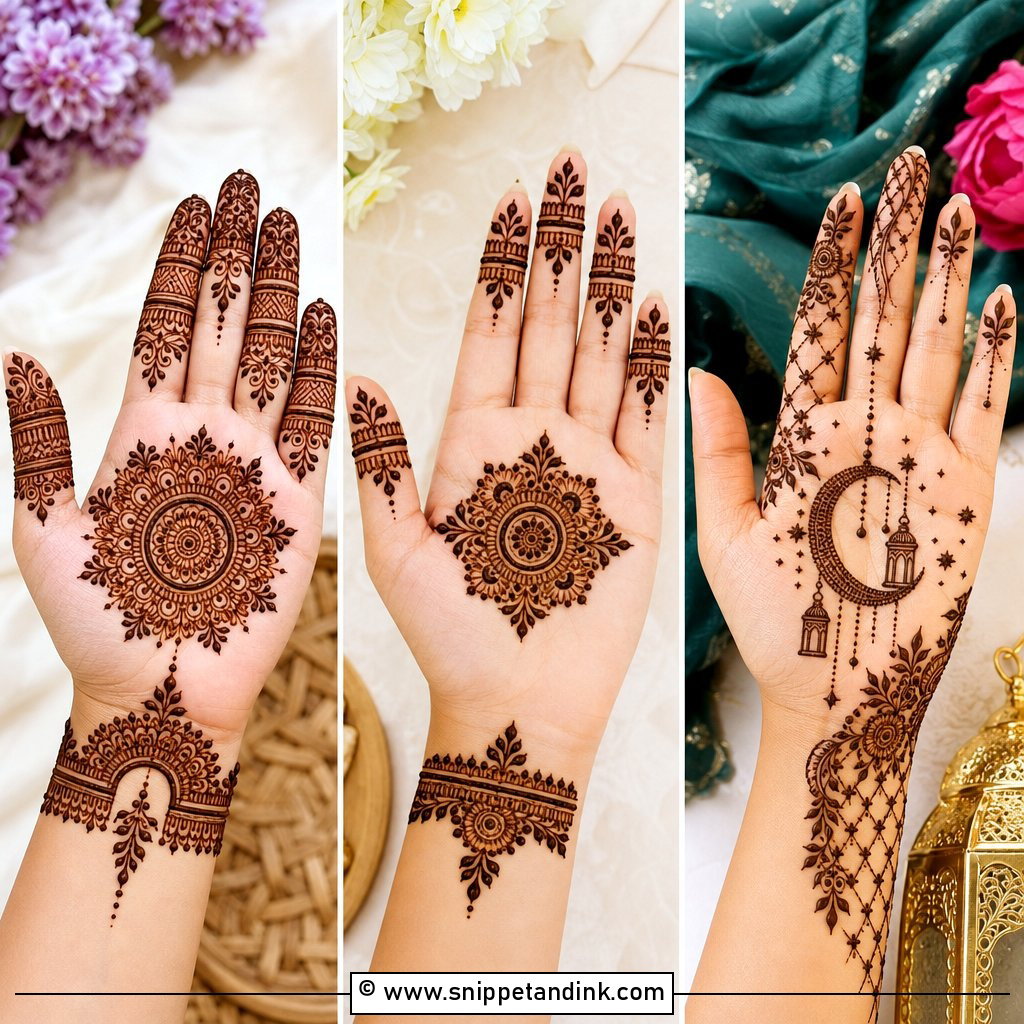
Start with one focus point. A small round mandala in the center of the palm does that job, with tiny petals around it and dots or short vines leading to the fingers. I keep the wrist light: one bracelet band or a pair of leafy curves. If a petal goes wrong, a dot or a small leaf covers it, which is why this is the first design I teach.
2. Easy Front Hand Mehndi Design
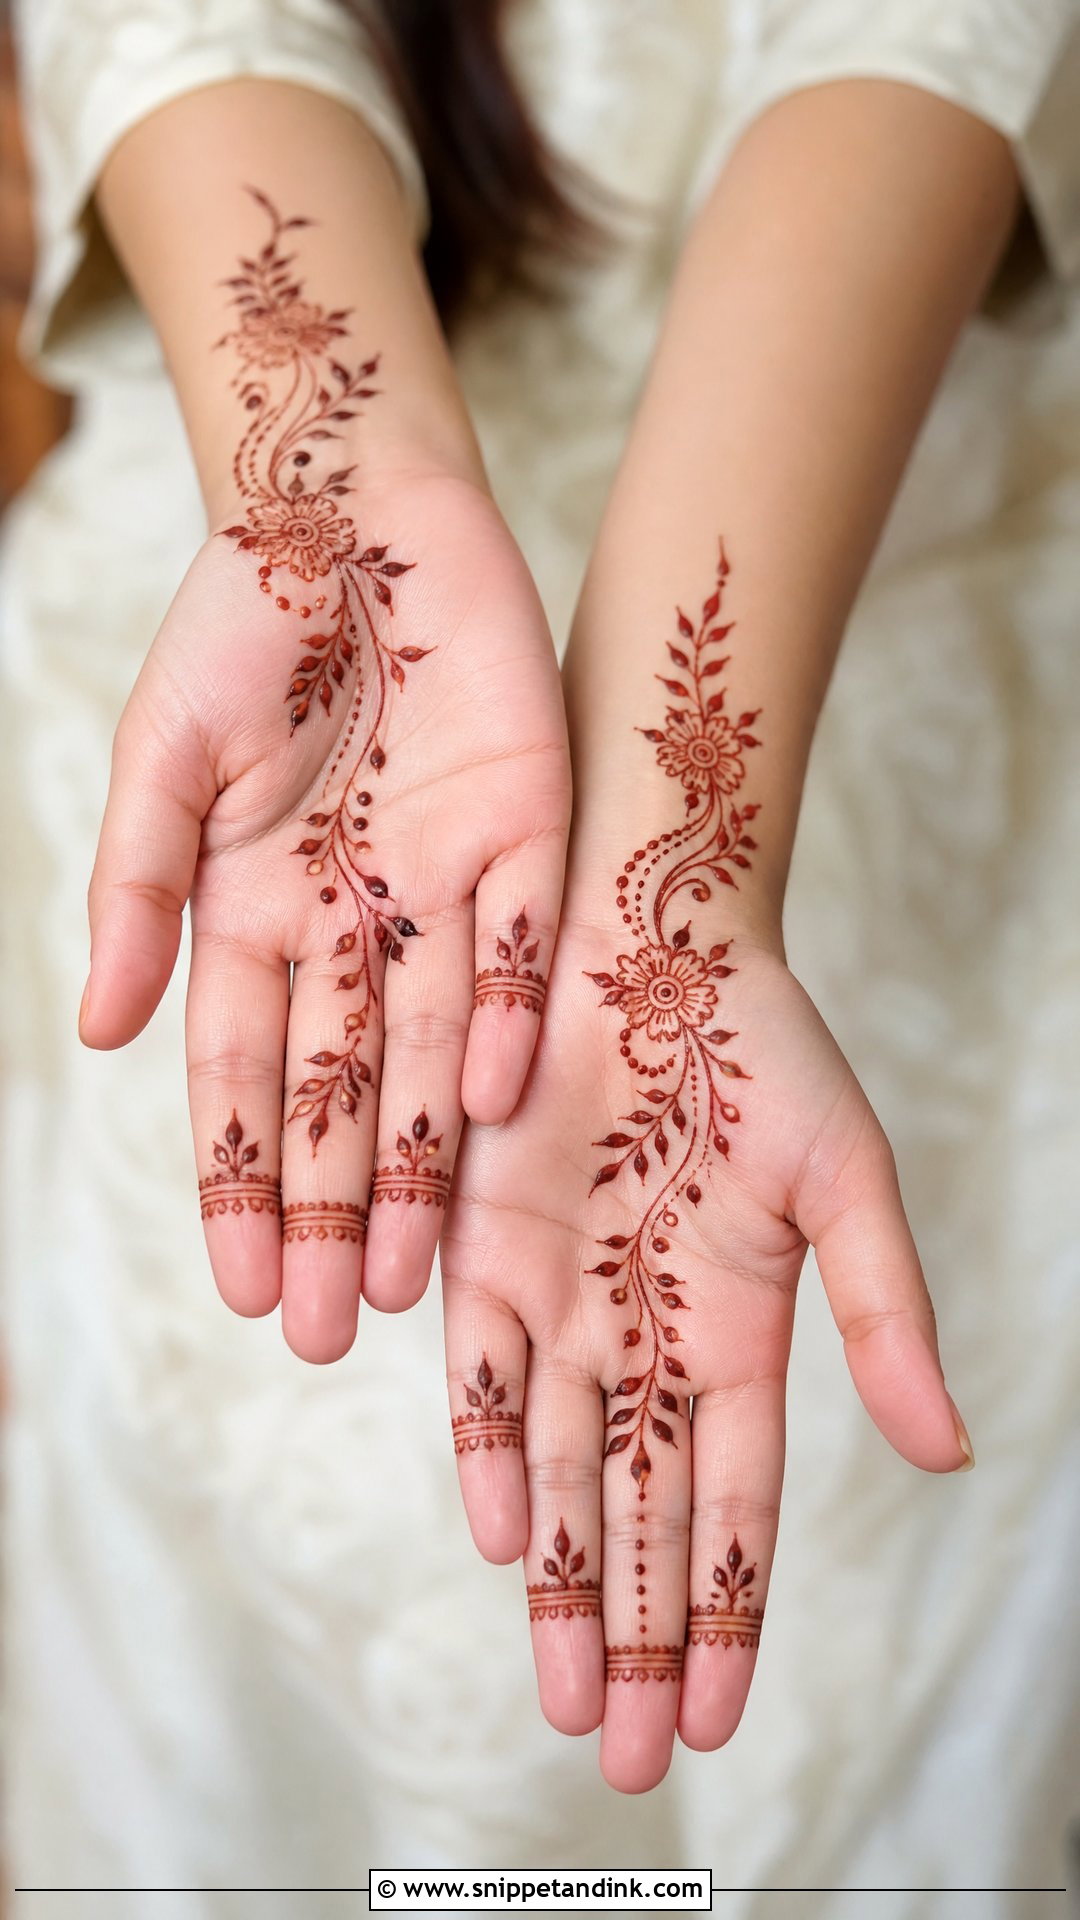
Balance is what makes a palm design look easy rather than unfinished. I place a medium flower low on the palm, curve a vine up toward the index or middle finger and fill it with small leaves, dots and half flowers. The other fingers get diagonal lines or fingertip caps. Bare skin on the far side of the palm is intentional here, and it is also what makes this faster to apply than a full hand.
3. Front Hand Mehndi Design For Beginners
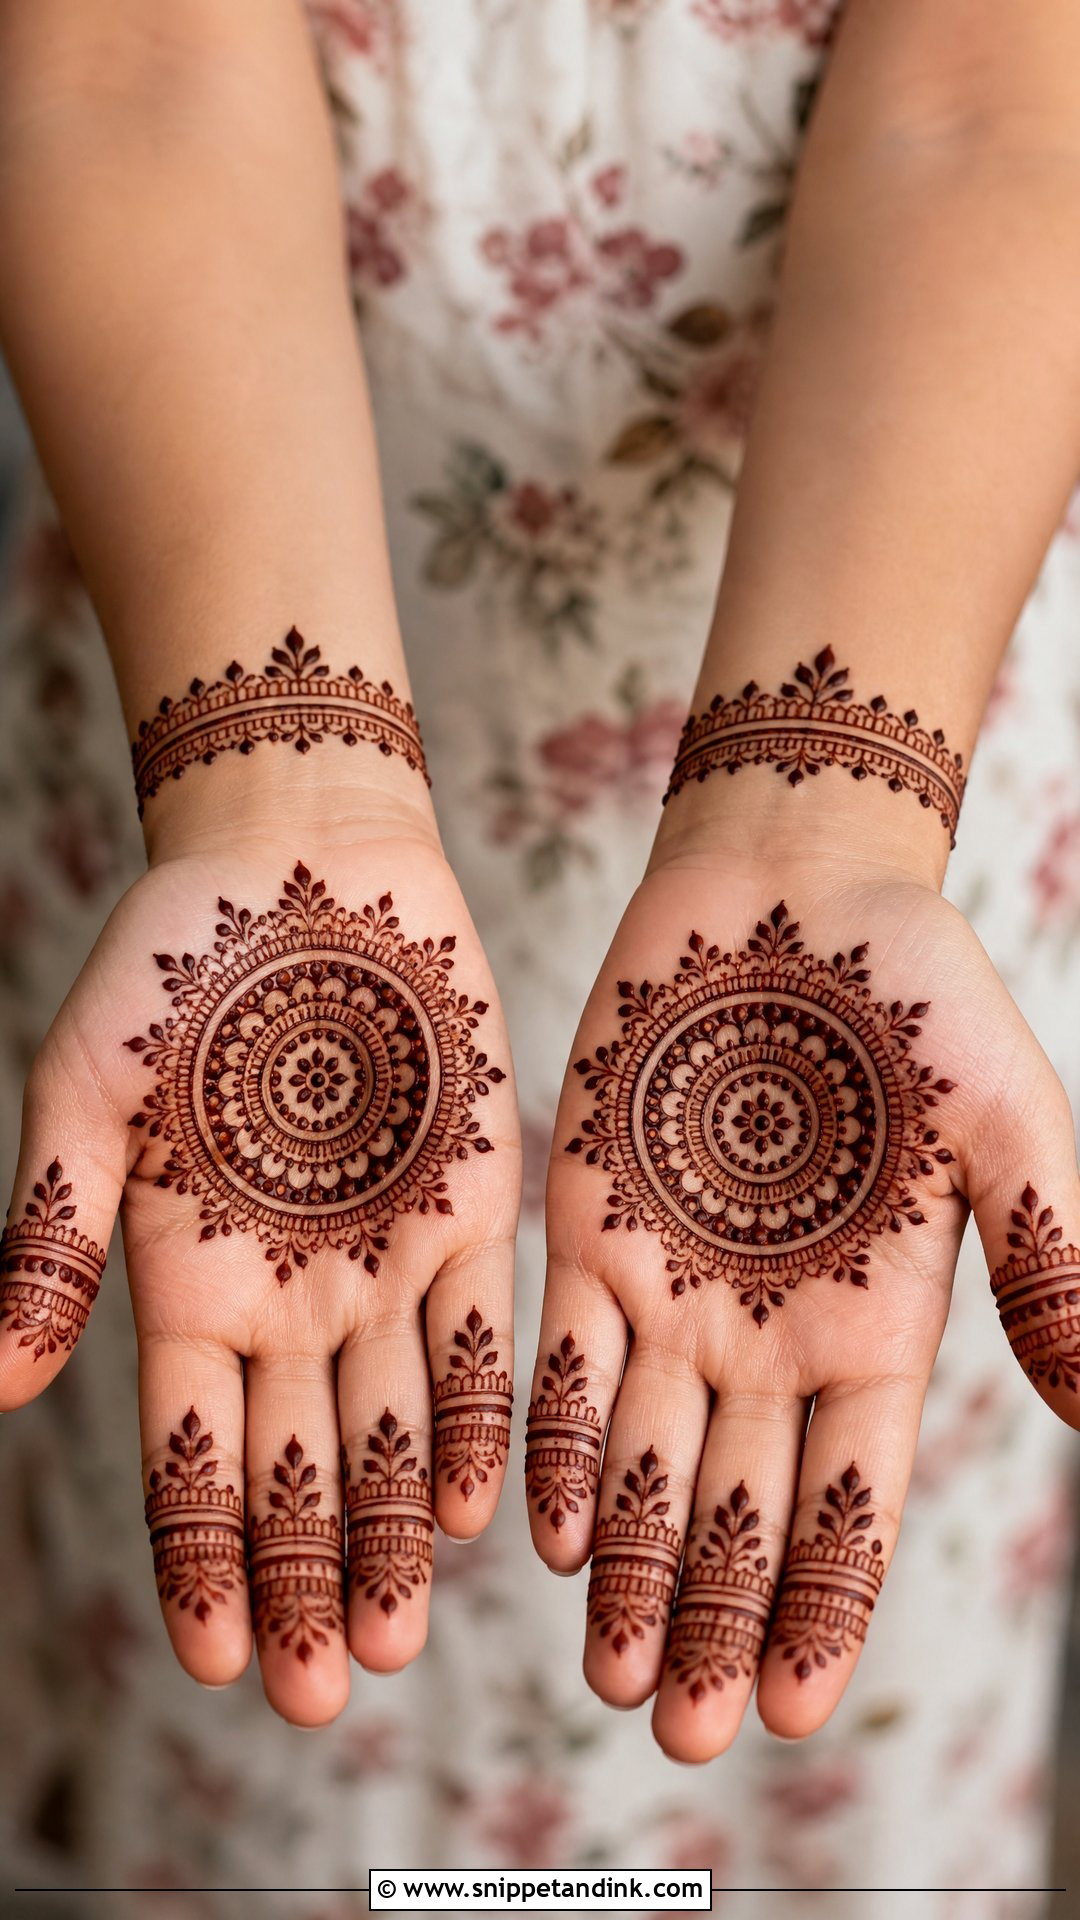
For a first attempt I’d use only repeatable shapes: a central circle, two rings of petals, a ring of dots. Fingers get straight lines, scallops and leafy tips; the wrist gets one narrow band with dots above and below it. Use medium-thick lines. Very fine lines need steady pressure on the cone that most beginners haven’t built yet, and they also stain faintly. Every part of this design follows a pattern you can see, so it comes out looking planned.
4. Simple Arabic Front Hand Mehndi Design
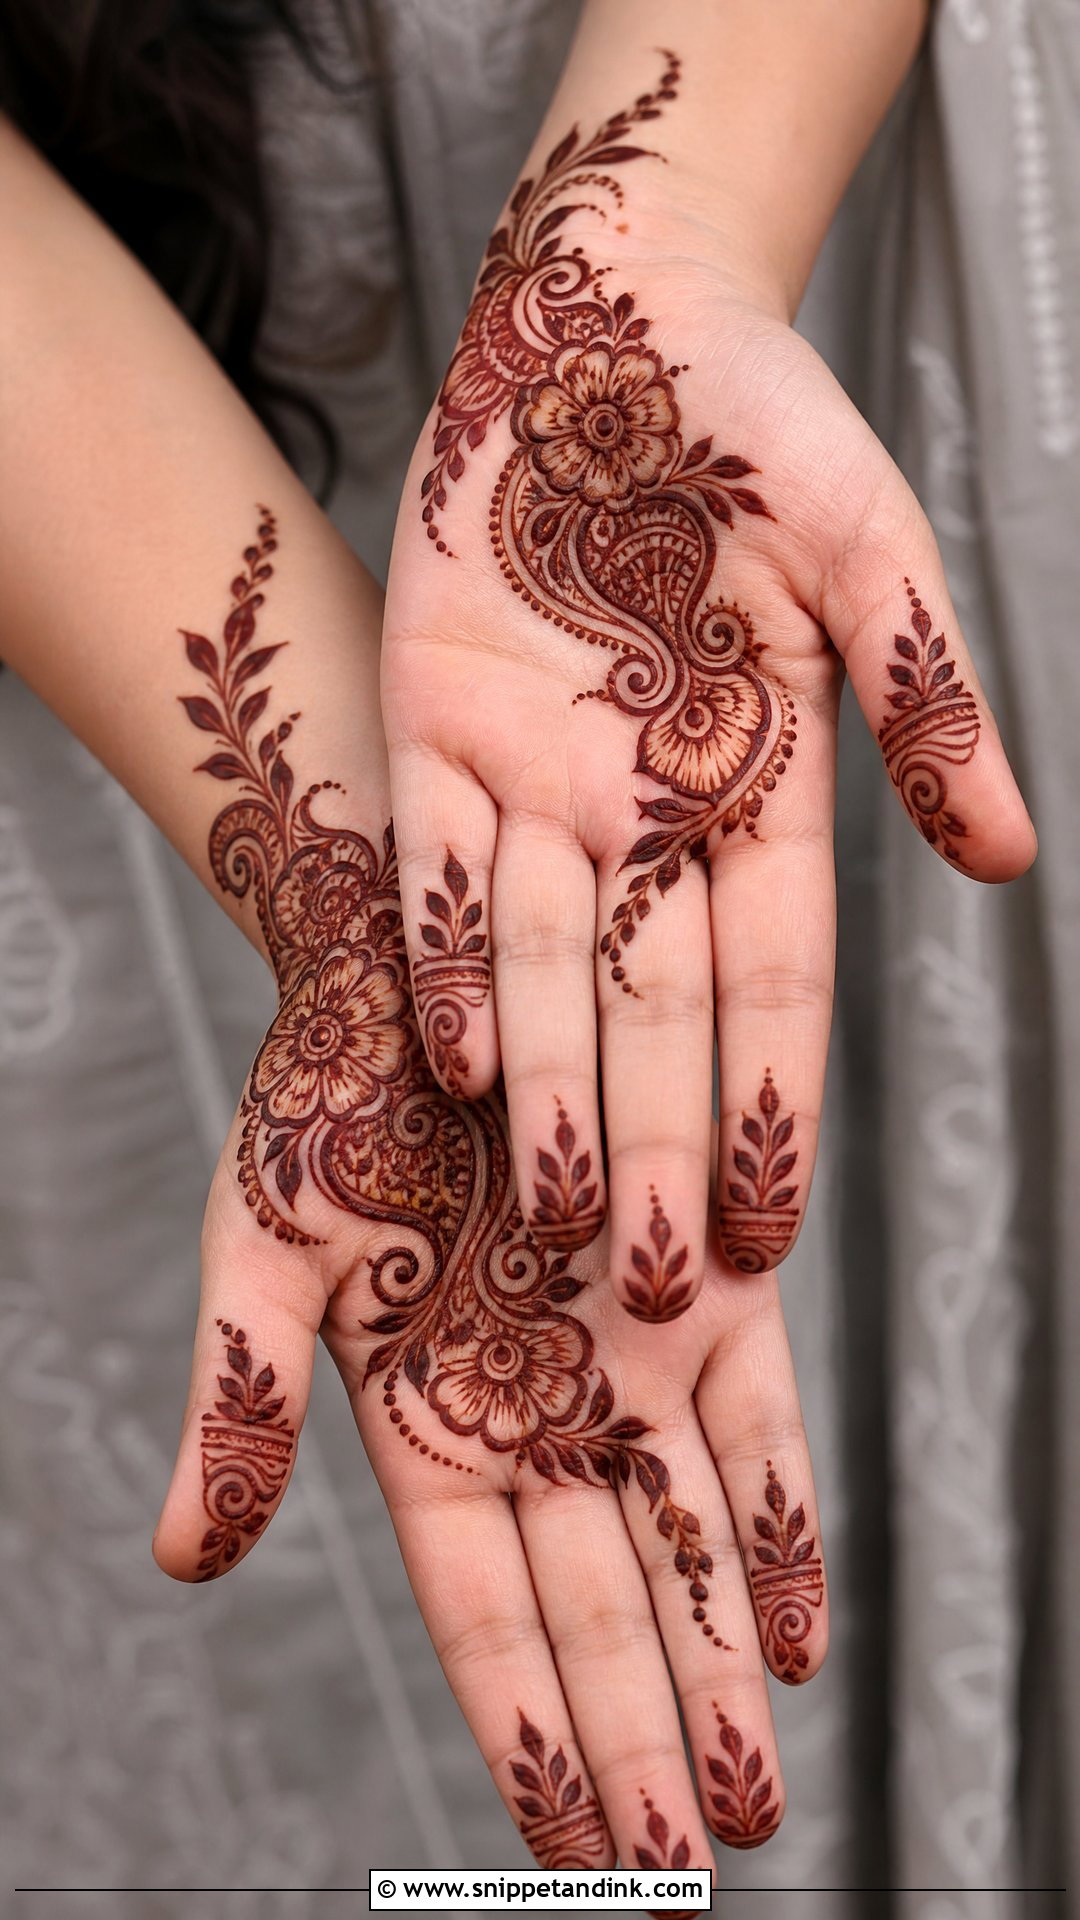
Arabic work leaves most of the palm open. I draw a diagonal trail from the wrist to one finger in bold flowers, paisleys, leaves and dotted curves, then leave the rest alone. Matching leafy lines or small floral tips on the fingers tie it together. Bigger motifs mean fewer tiny details, so it is quick, and the open skin means your palm can actually breathe while it dries.
5. Simple Mandala Front Hand Mehndi Design
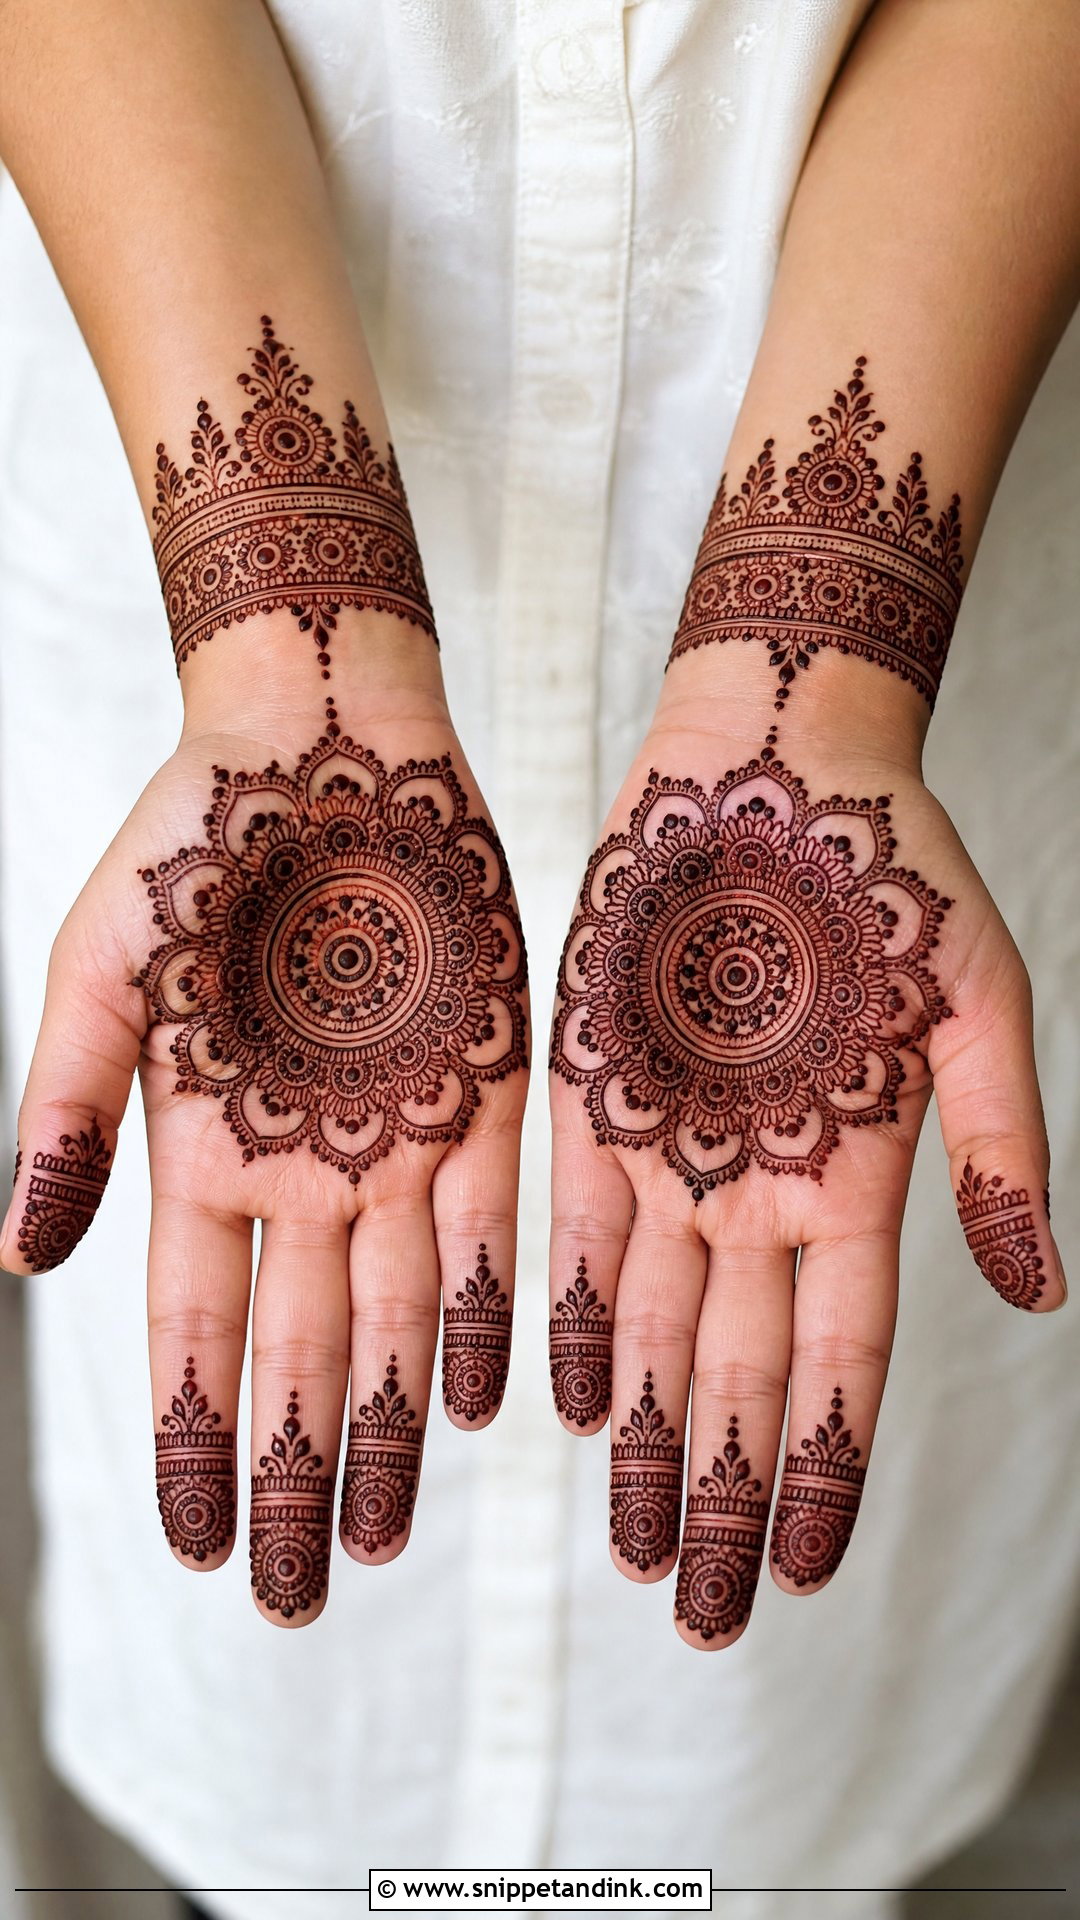
A round mandala in the middle of the palm is the classic. I build it ring by ring, petals then dots then small curved strokes, checking symmetry each time I turn the hand. Fingers stay quiet with slim bands or leafy chains that don’t compete, and a small cuff of arches finishes the wrist. The center of the palm takes stain very well, so this is one of the best designs for a dark, even result.
6. Easy Flower Front Hand Mehndi Design
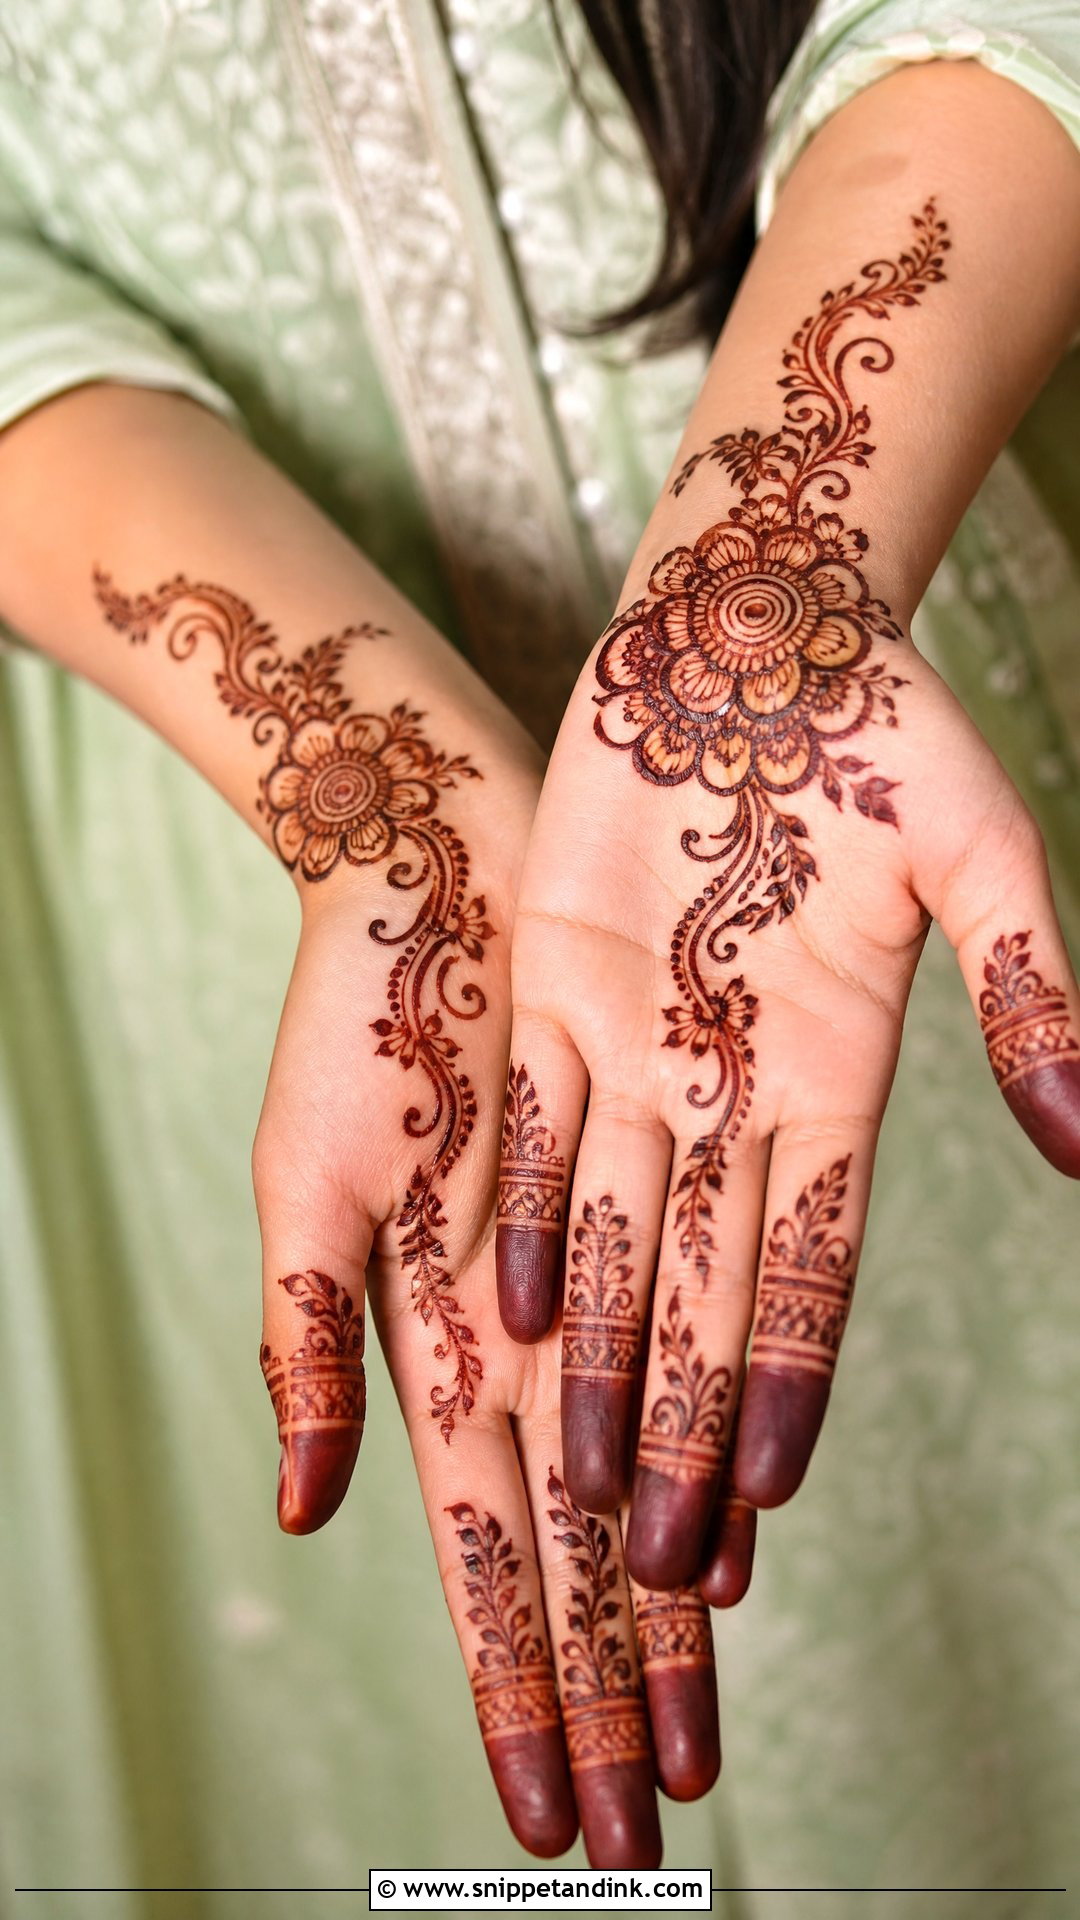
Flowers are forgiving; an uneven petal still looks like a petal. I put a large one near the base of the palm and step smaller ones up toward the fingers, linked by curved stems and tiny leaves. Fingertips get dots or single petals and the wrist a thin floral bracelet. It suits daytime events and anyone who wants something sweet rather than bridal.
7. Simple Finger Front Hand Mehndi Design
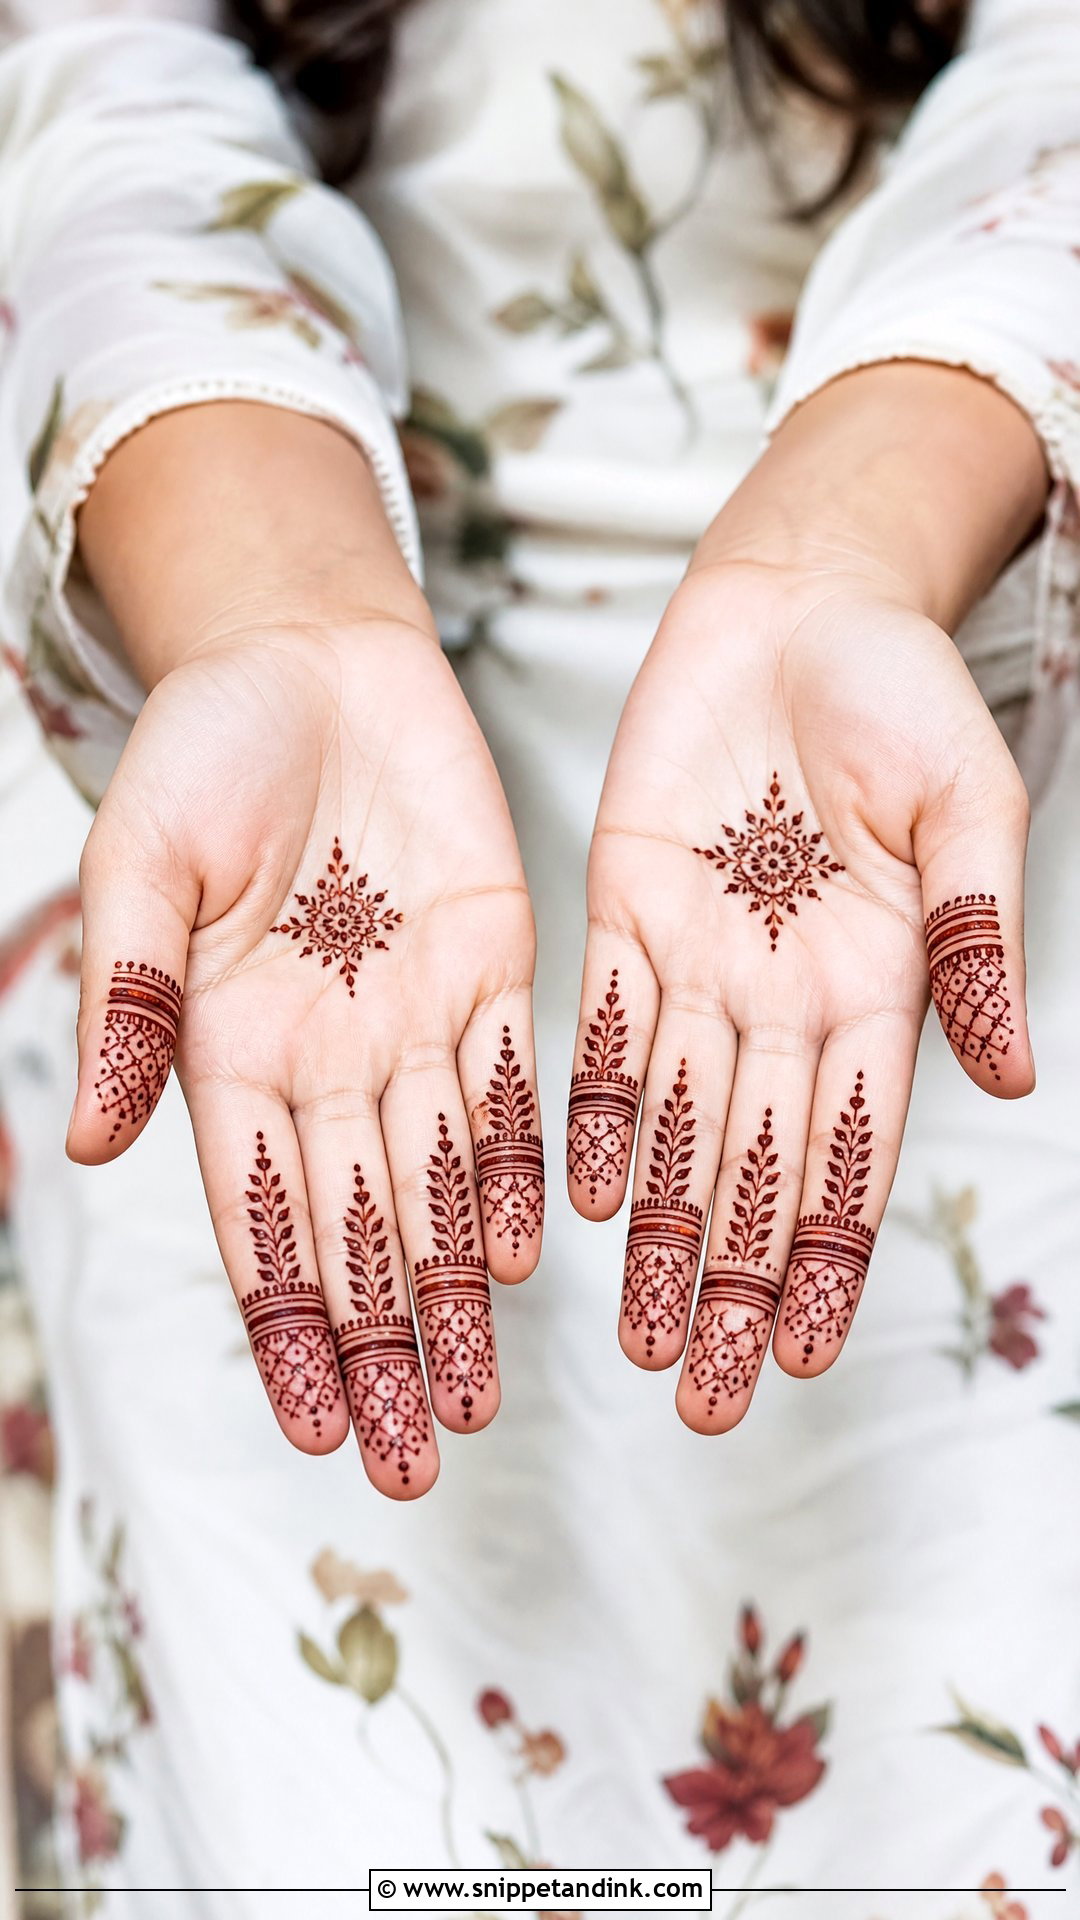
Here the fingers carry the detail and the palm stays almost empty, with just a dot circle or mini flower in the middle. Each finger gets bands, leaves, small checks or curves. I usually give the index and ring fingers a little more, because those are the ones that show when you hold something. Less coverage means less time and a quieter result.
8. Easy Palm Front Hand Mehndi Design
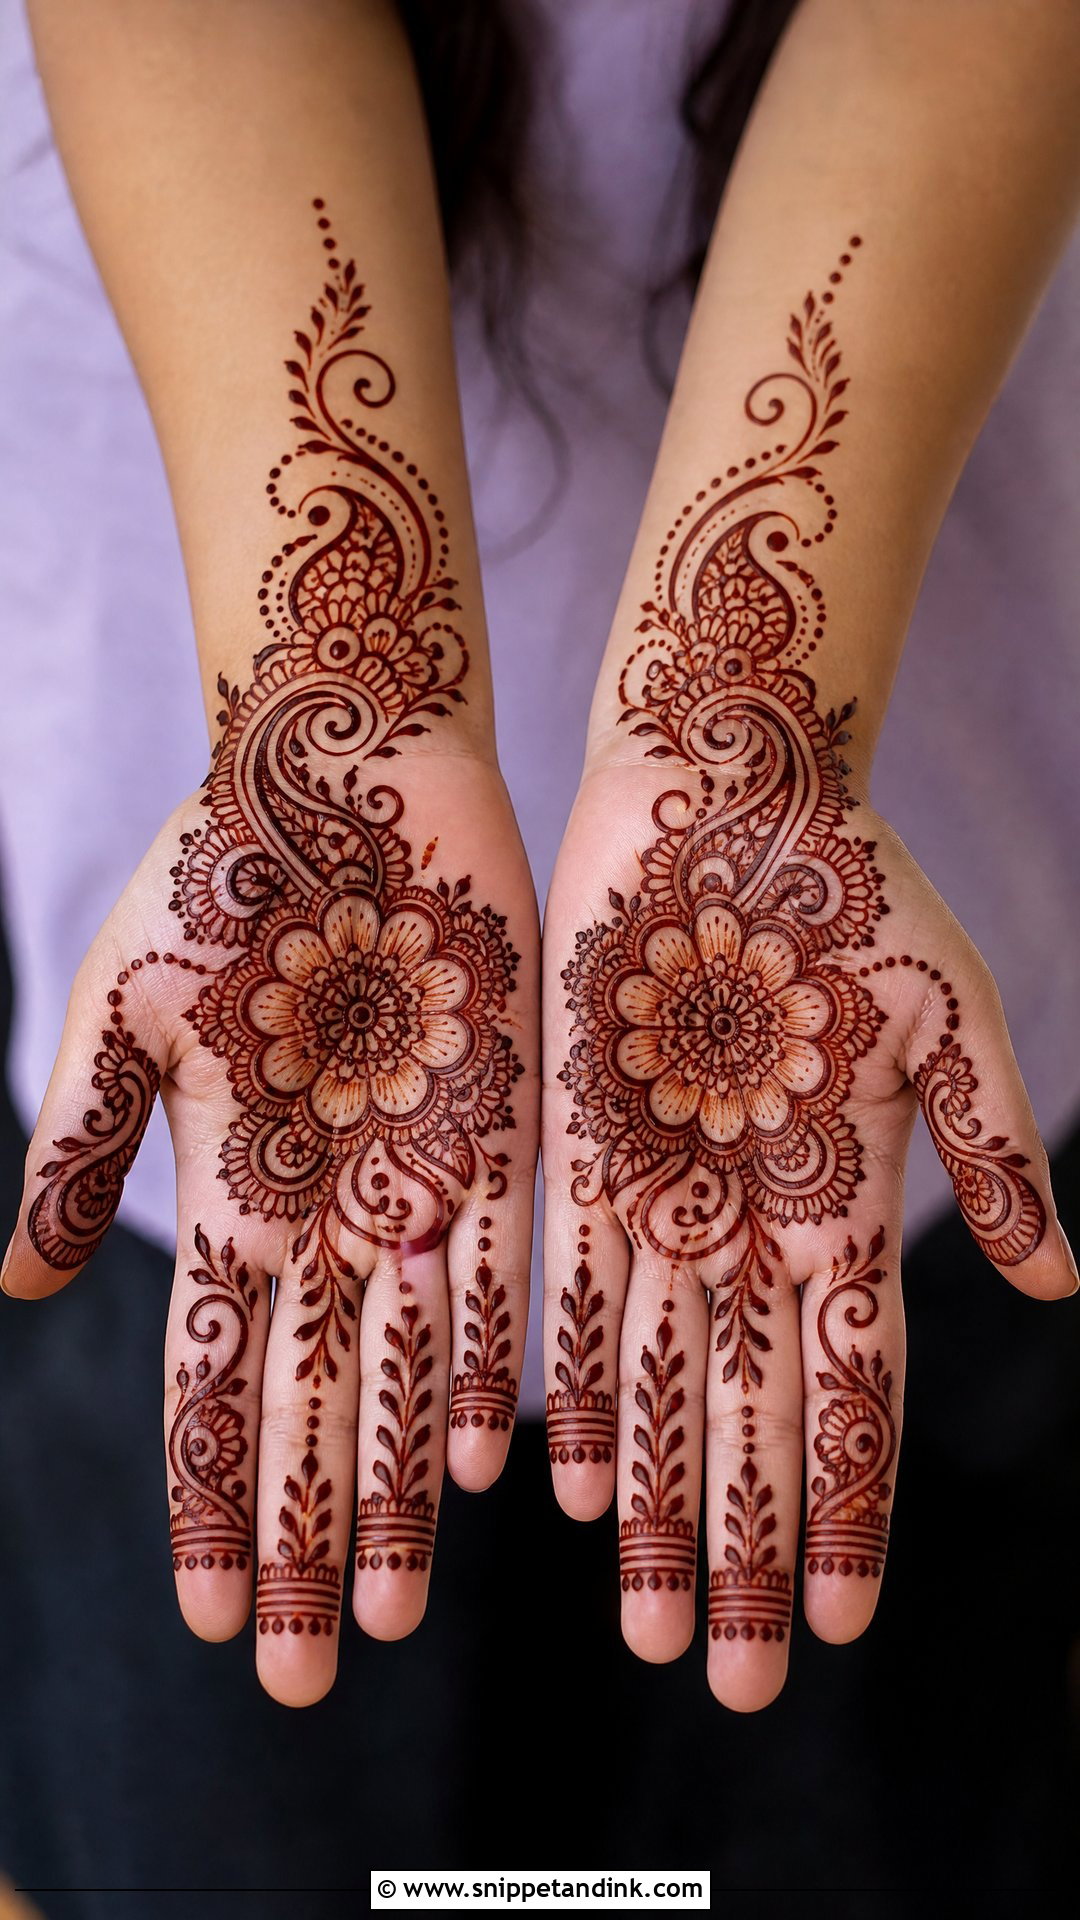
This one fills the center of the palm without getting dense. A round flower or mandala, curved paisleys on either side, a few sections filled with lines and dots, then small gaps left between motifs. Fingers get vines or bands; the wrist can stay plain. The thing I watch for is the deep hollow in the middle of the palm. Paste collects there as the hand relaxes, so I keep lines a touch thinner in that spot to stop them blurring.
9. Simple Full Front Hand Mehndi Design
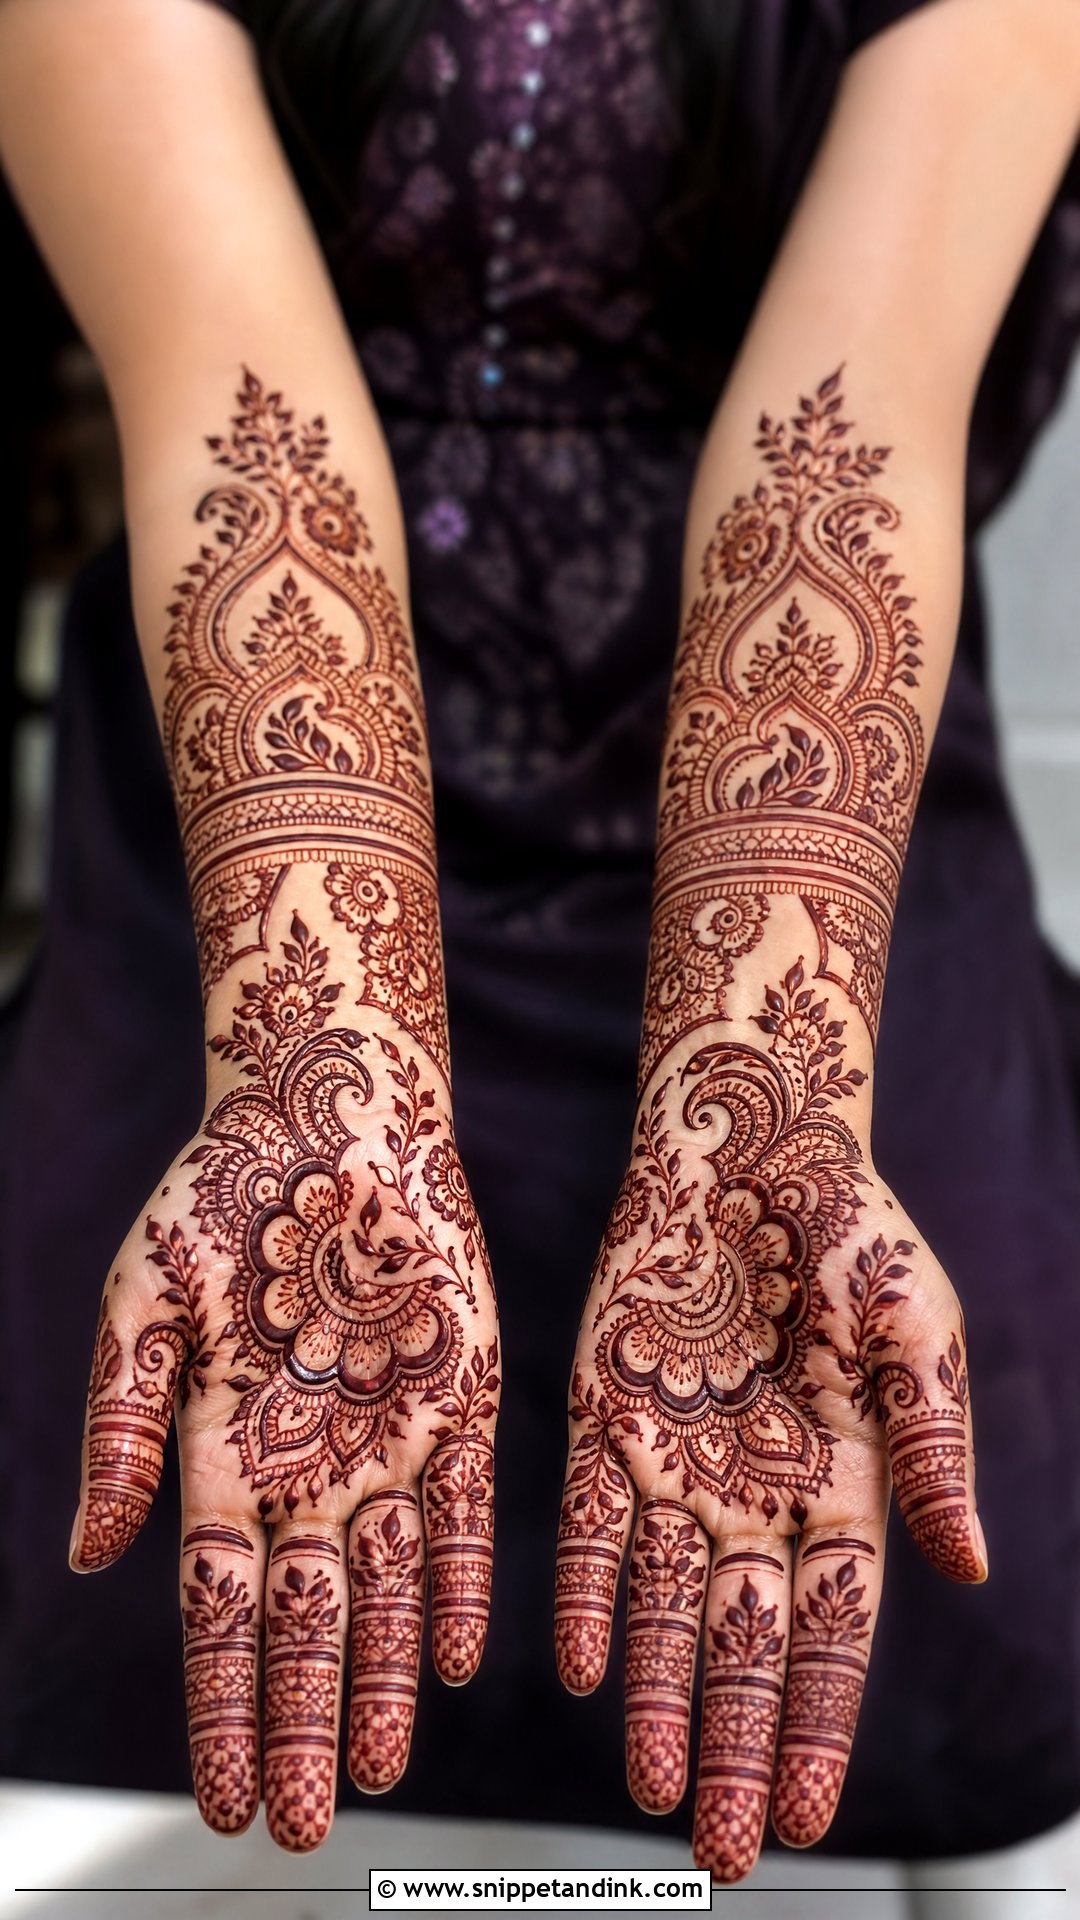
Full coverage, simple strokes. A central palm motif, finger bands and a wrist bracelet, all joined by vines and dots, with bold flowers, half circles and leafy curves instead of tiny fill. Skin should still show between sections. I like this for engagement functions and family weddings, and it is excellent practice, because it uses every element you’ll later refine. Expect to sit for a good while, and to keep your hands still afterwards.
10. Simple Front Hand Bridal Mehndi Design
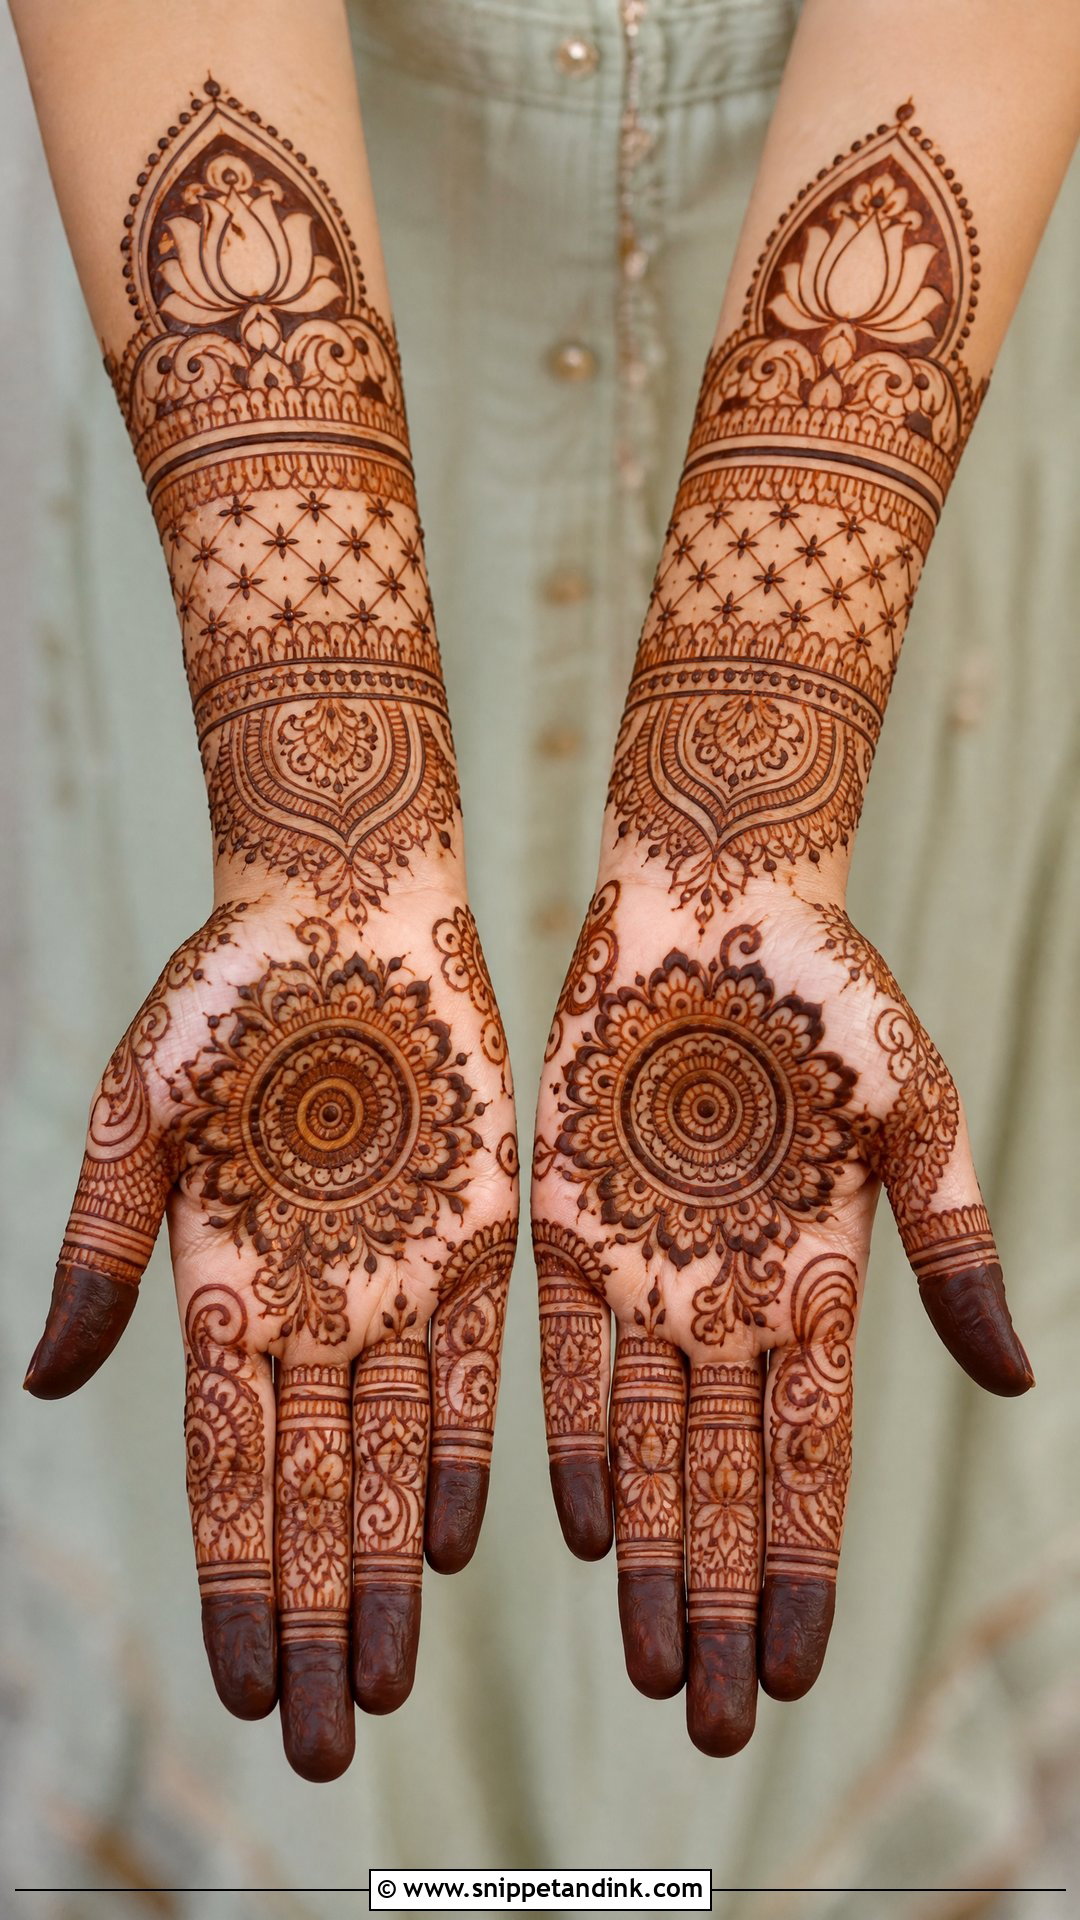
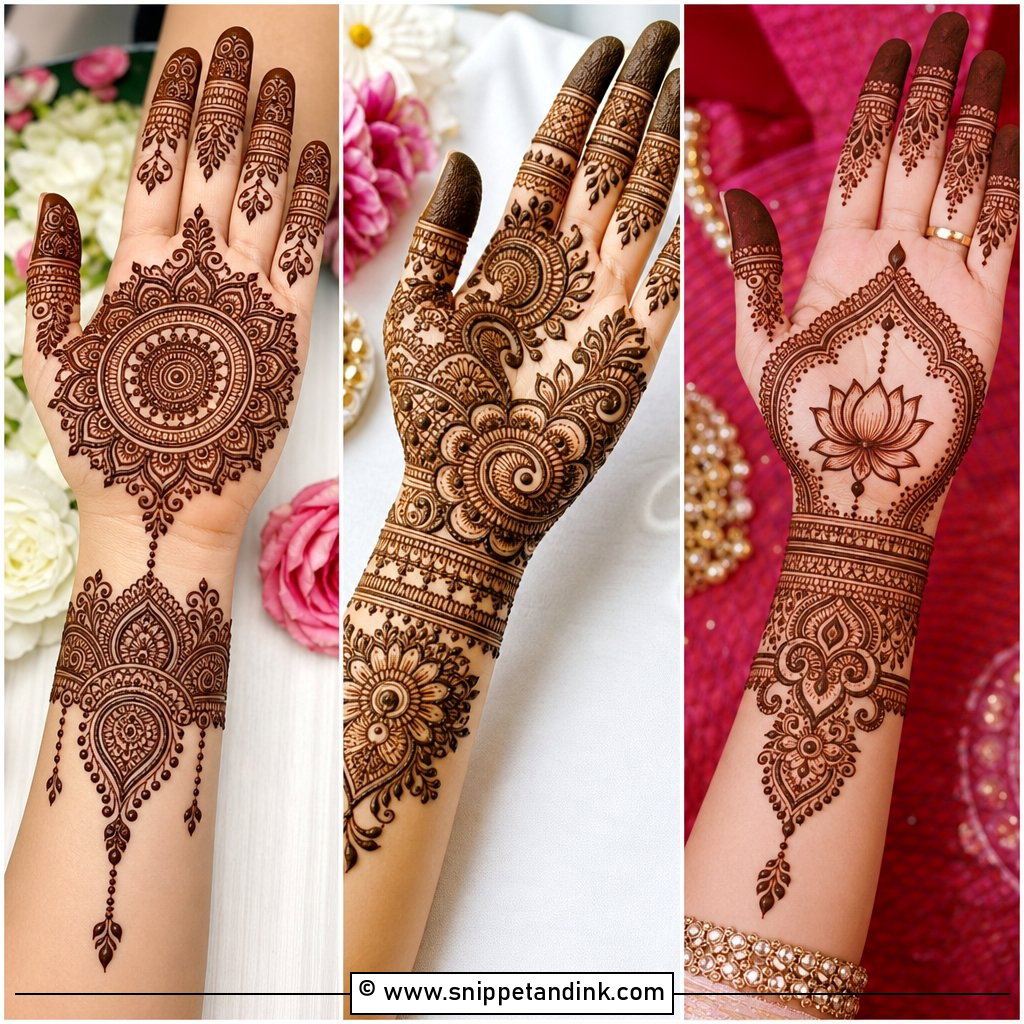
Not every bride wants full bridal coverage. For a lighter look, I’d use a large mandala or floral center, paisleys and a little jaali, soft finger fill and a forearm kept airy with bracelet bands, vines or small lotus motifs. Bold outlines and tiny dots around the main shapes give it the polish people expect from bridal work. It suits intimate weddings and engagement ceremonies, and bridesmaids can wear a pared-back version of the same layout.
11. Easy Eid Front Hand Mehndi Design
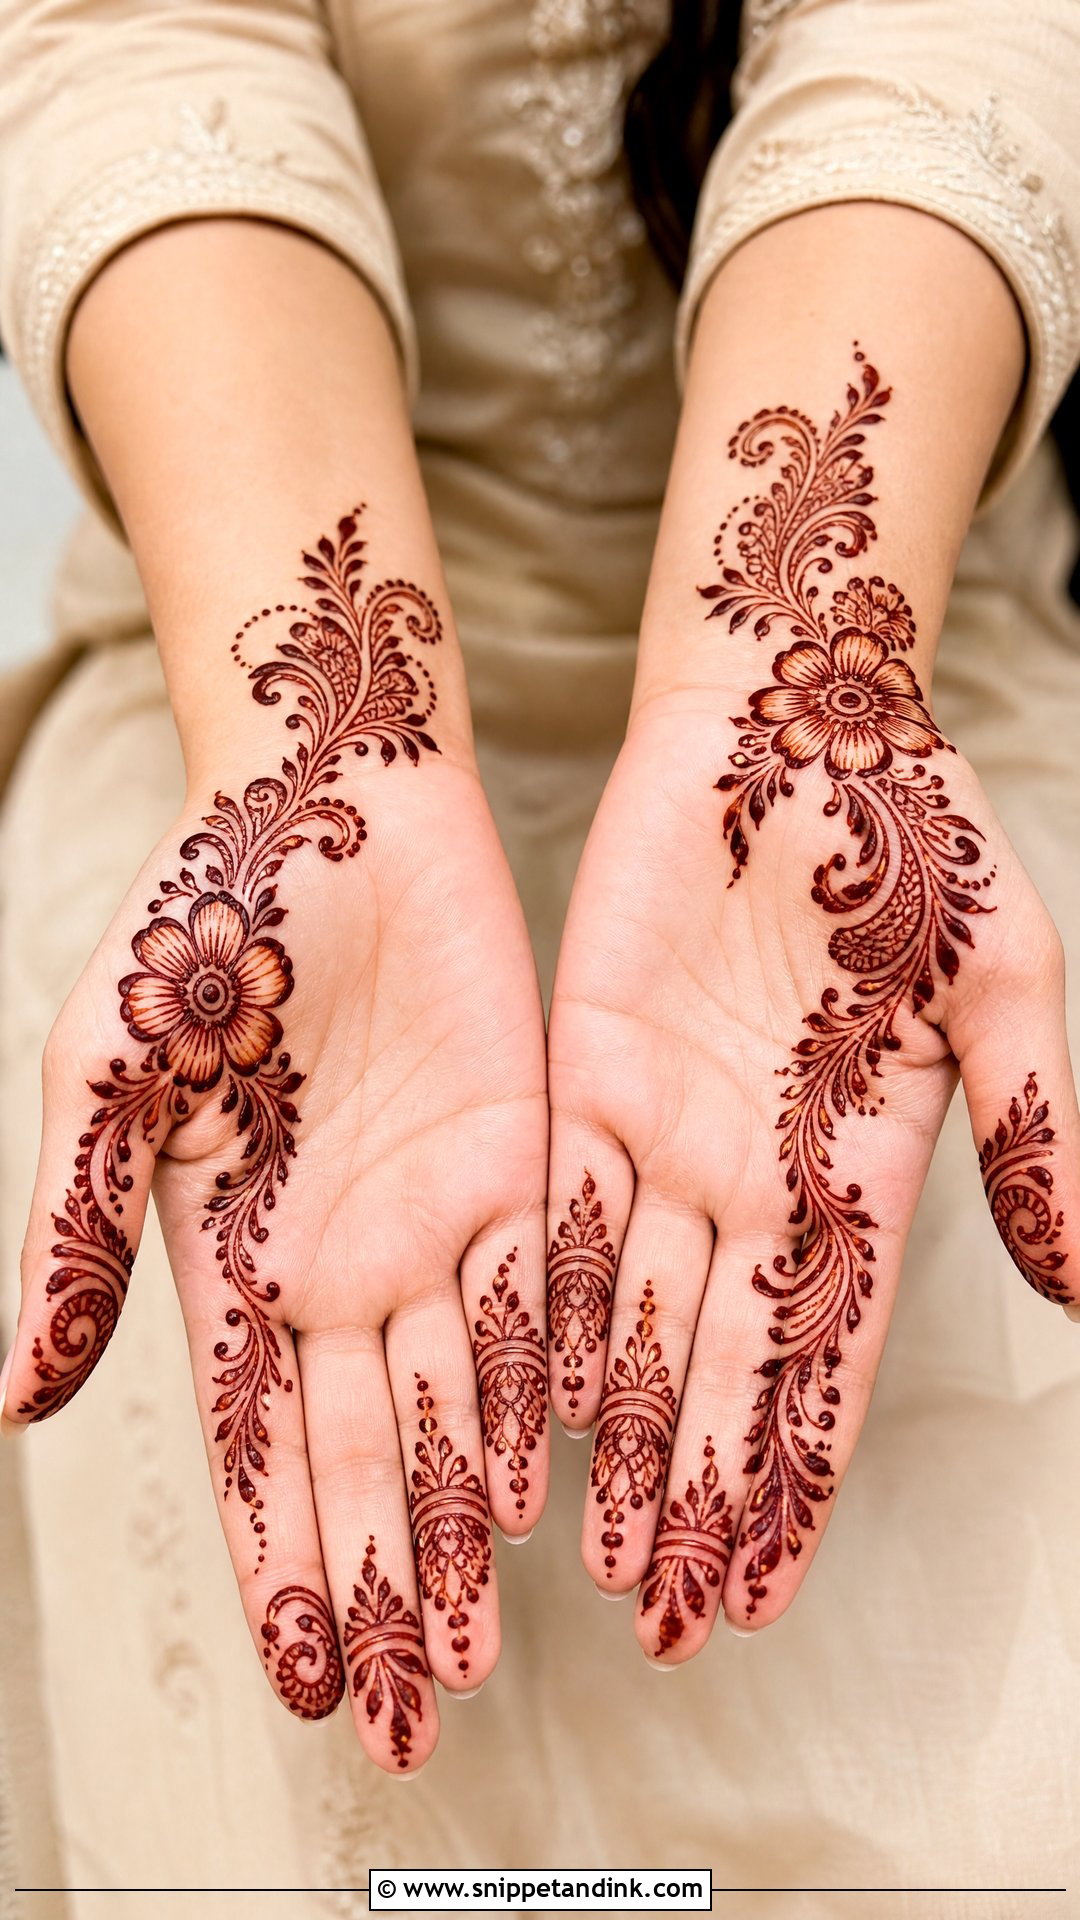
Eid usually means a whole family queuing on the same evening, so speed matters. An Arabic floral trail starting at the wrist with a cluster of flowers, curving across the palm and ending near one finger, with leaves, dots and a paisley or two, can be done quickly and still looks festive. The remaining fingers get bands or leafy tips. It sits nicely with bangles and leaves enough palm free that you can still eat sweets without smudging it.
12. Simple Diwali Front Hand Mehndi Design
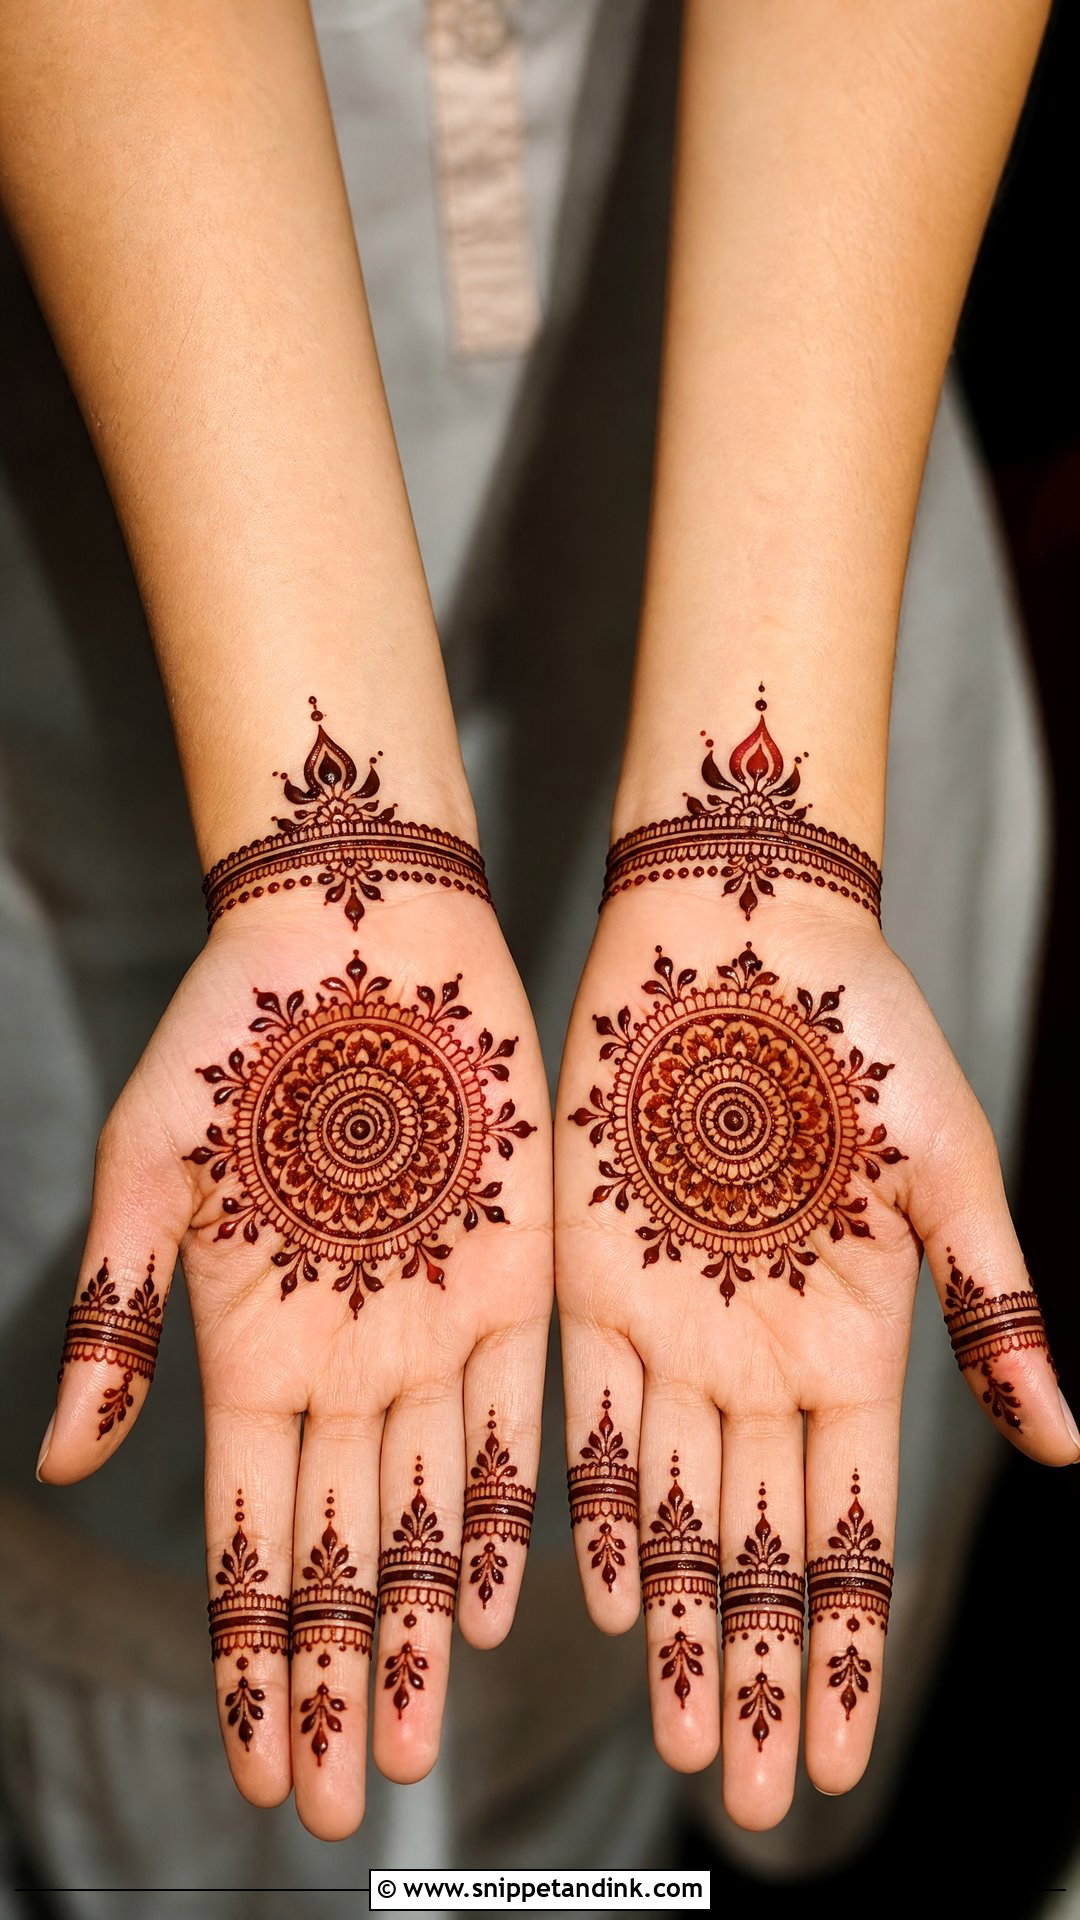
For Diwali I center a rounded mandala on the palm with petal arcs and dotted borders, slim bands across the fingers and a small bracelet. A few diya-shaped curves can go in, but keep them subtle; too many and the design turns busy. Clear spacing helps here more than anywhere, because the stain darkens over the following day or two and close lines can merge just as the celebrations begin.
13. Simple Indo Arabic Front Hand Mehndi Design
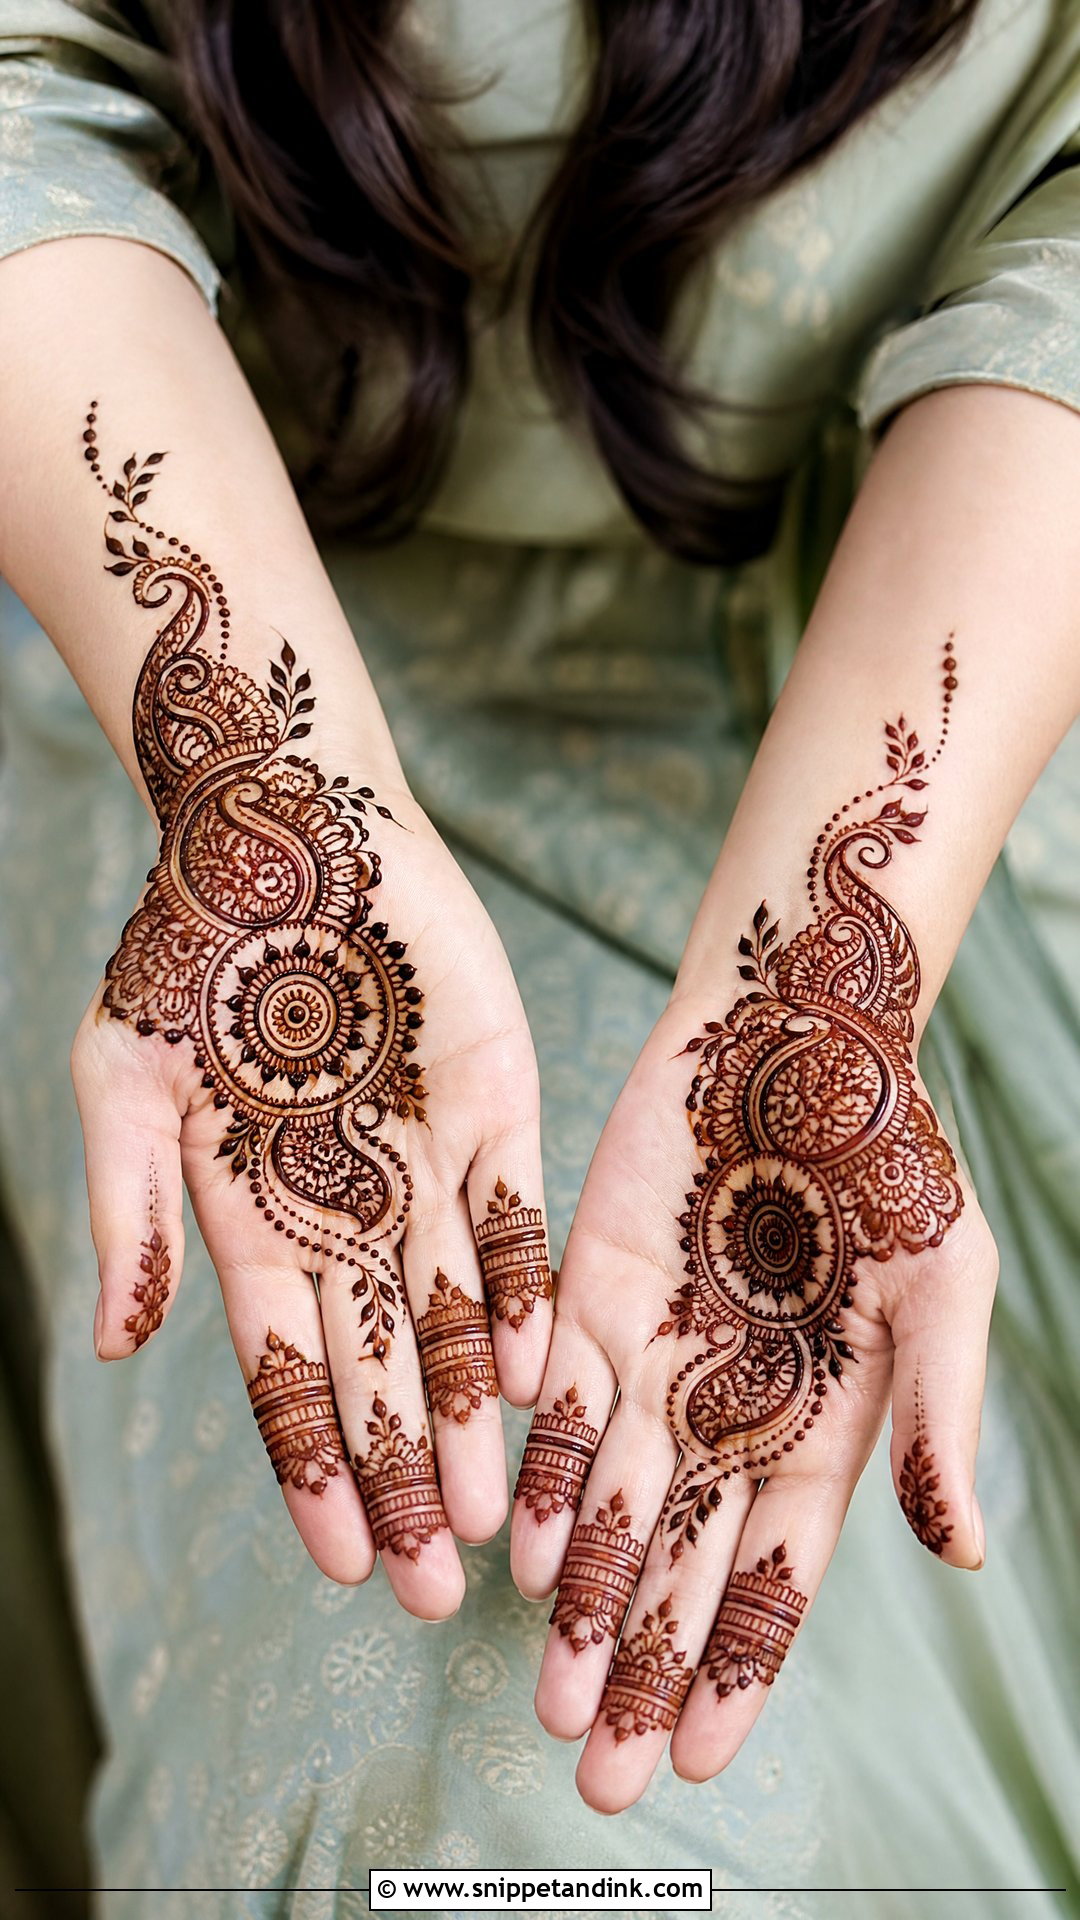
Indo-Arabic gives you an Arabic diagonal for structure with a small mandala or paisley cluster tucked inside the palm for richness. Dots, leaves and small curls connect the two, and the fingers carry slim bands and leafy chains. I draw the diagonal first, so I know exactly how much space the Indian detail has. It is a step up from basic mehndi without being hard.
14. Simple Modern Front Hand Mehndi Design
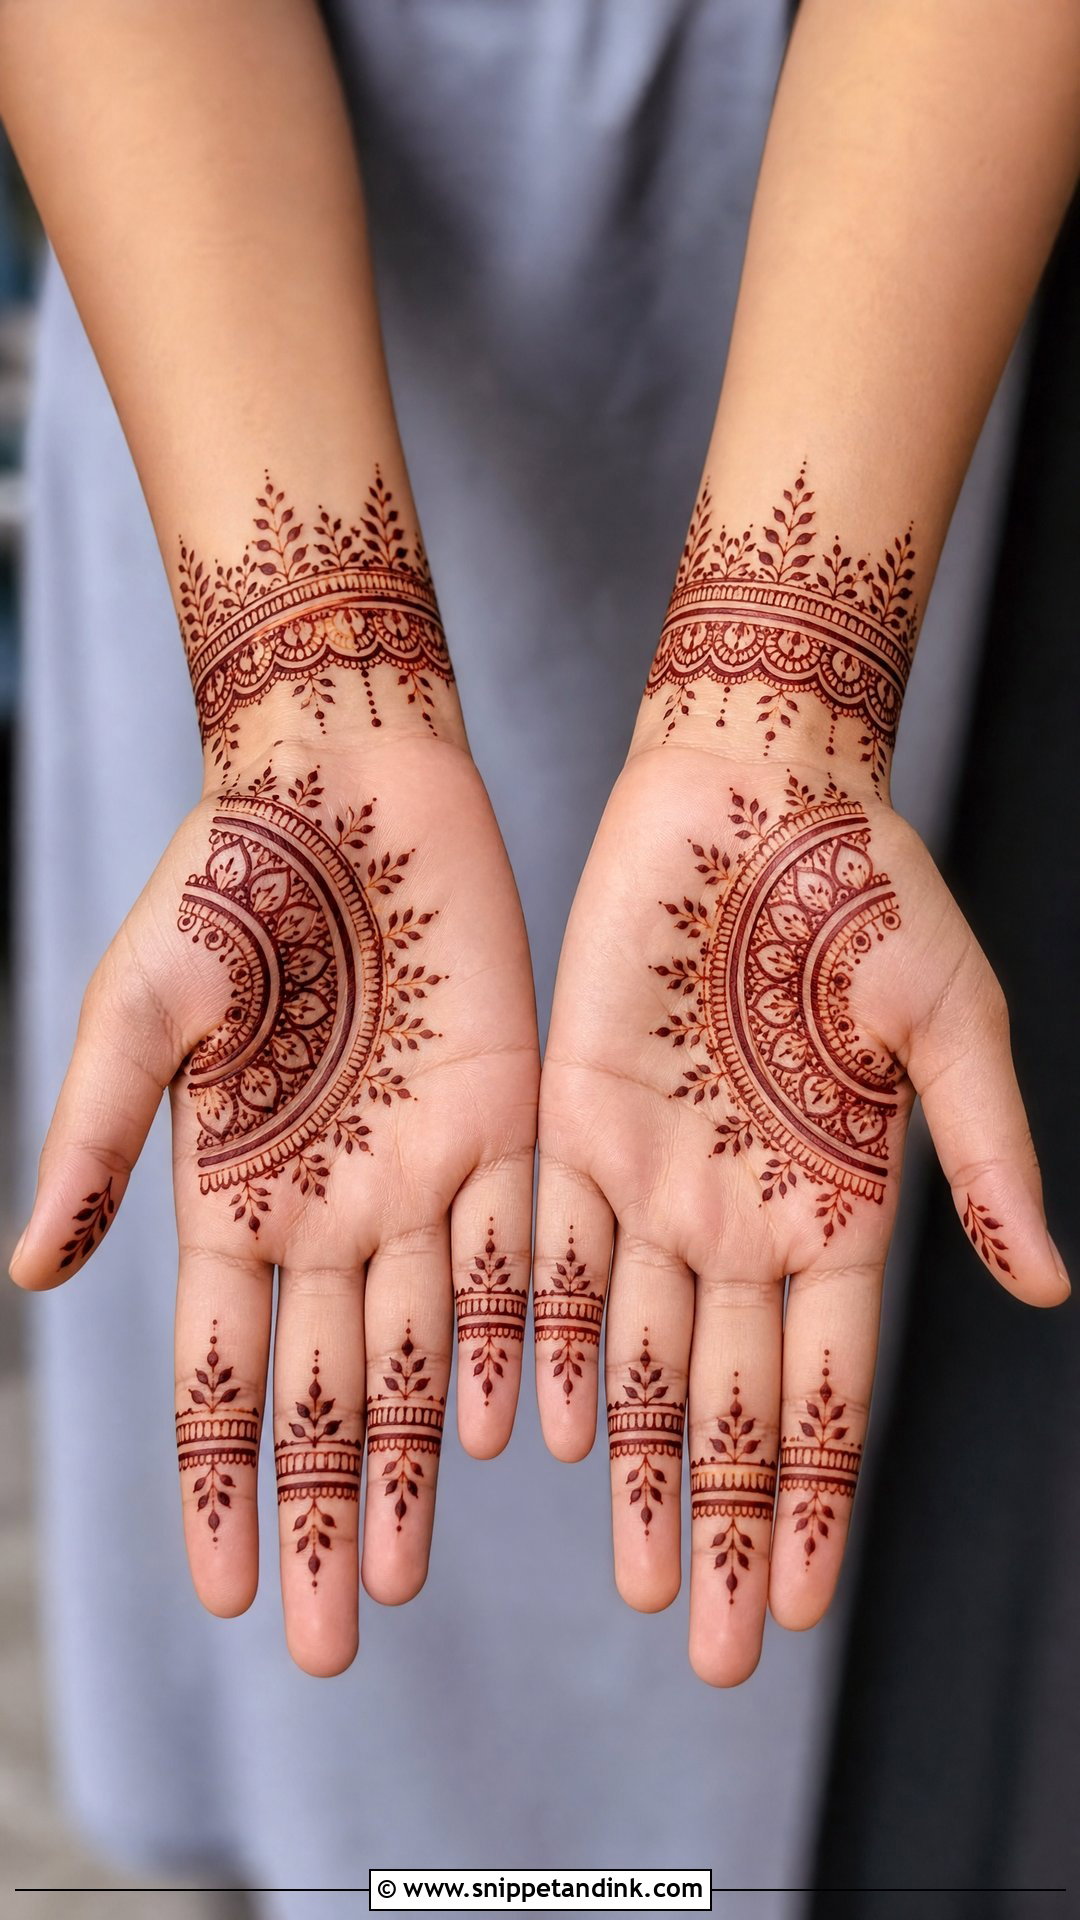
Modern palm work is mostly about placement. I set a half mandala against one side of the palm, add thin finger bands and tiny leaf trails, and leave empty skin around the main motif. A delicate cuff replaces a heavy bracelet. It reads as current because it doesn’t fill, and it suits people who keep their jewelry minimal too.
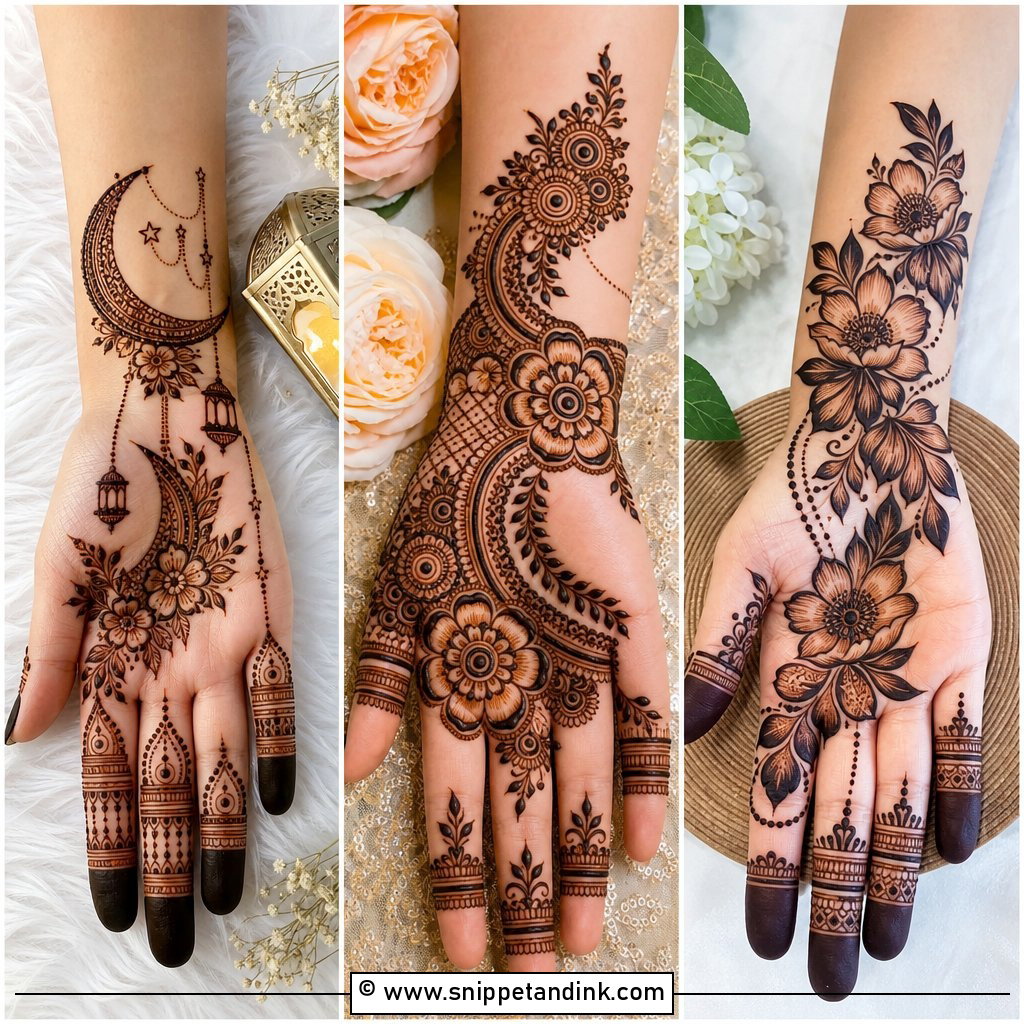
15. Easy Minimal Front Hand Mehndi Design
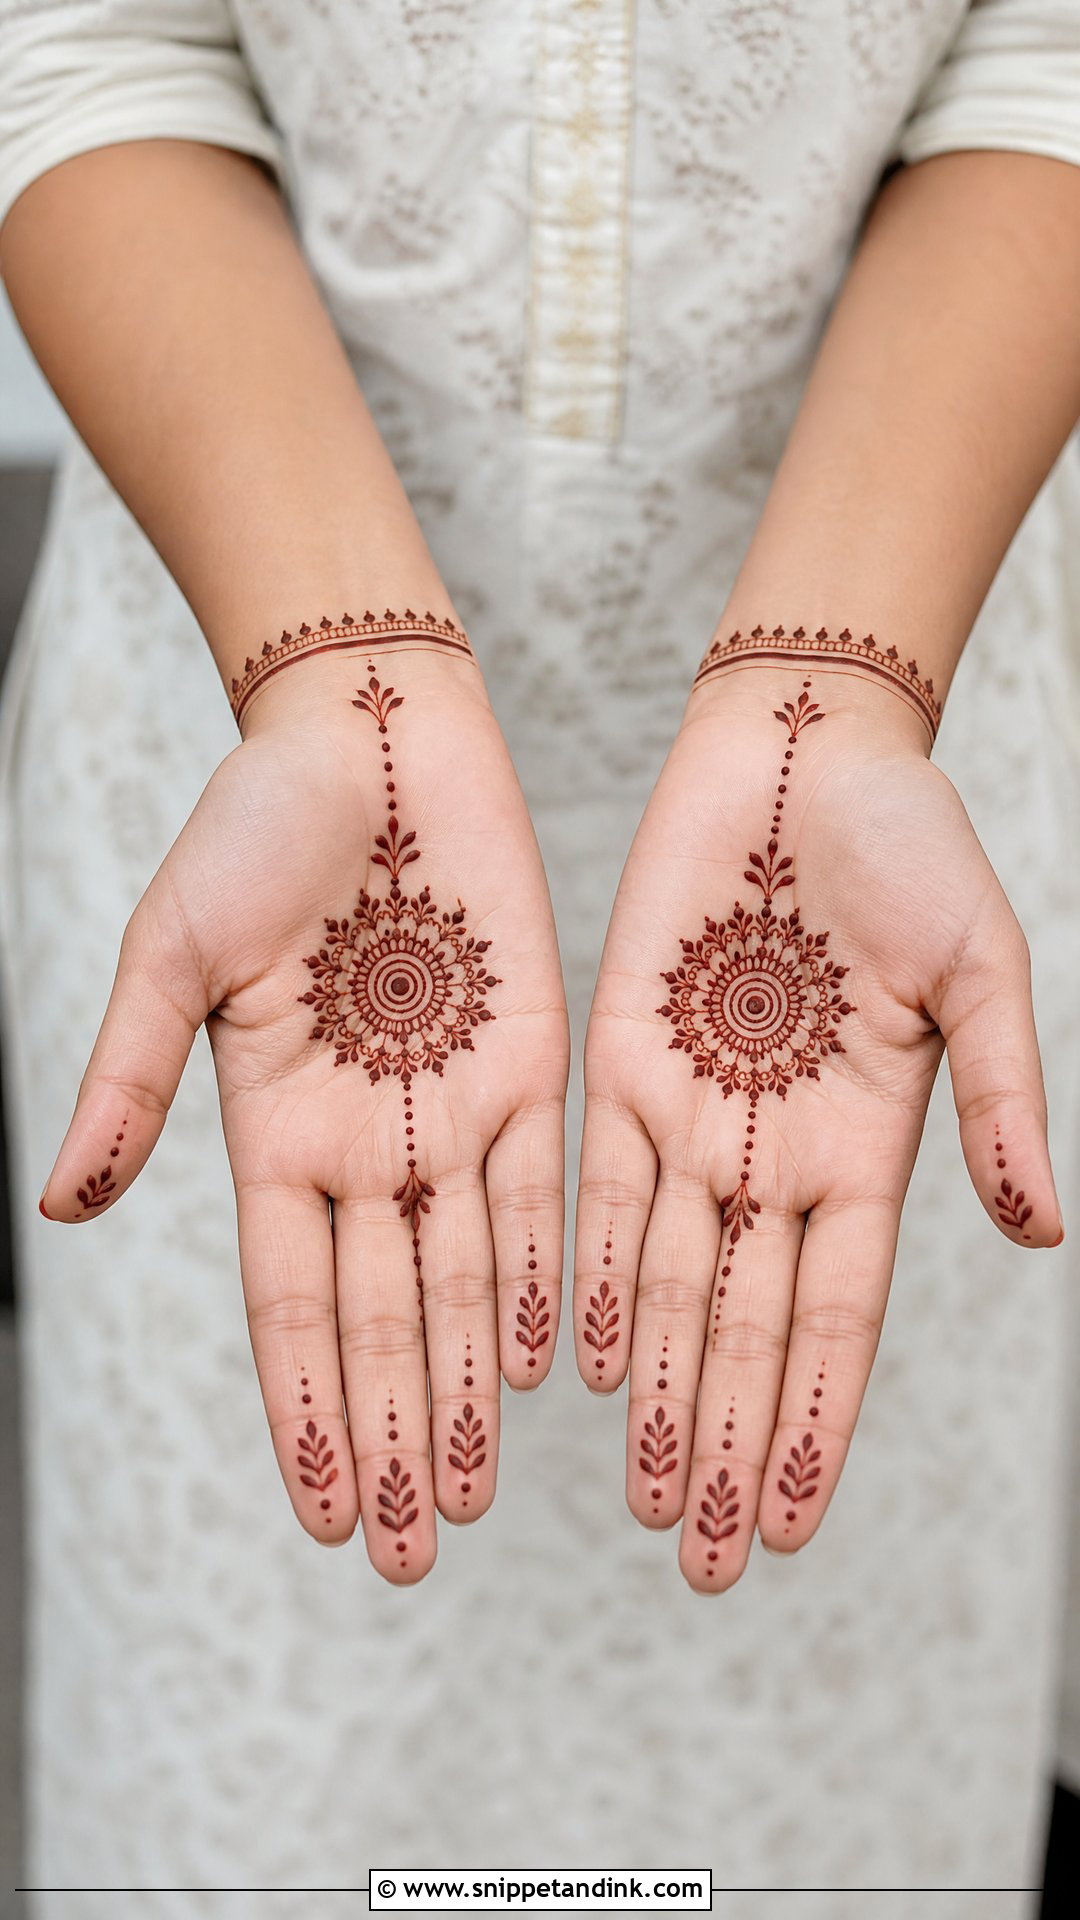
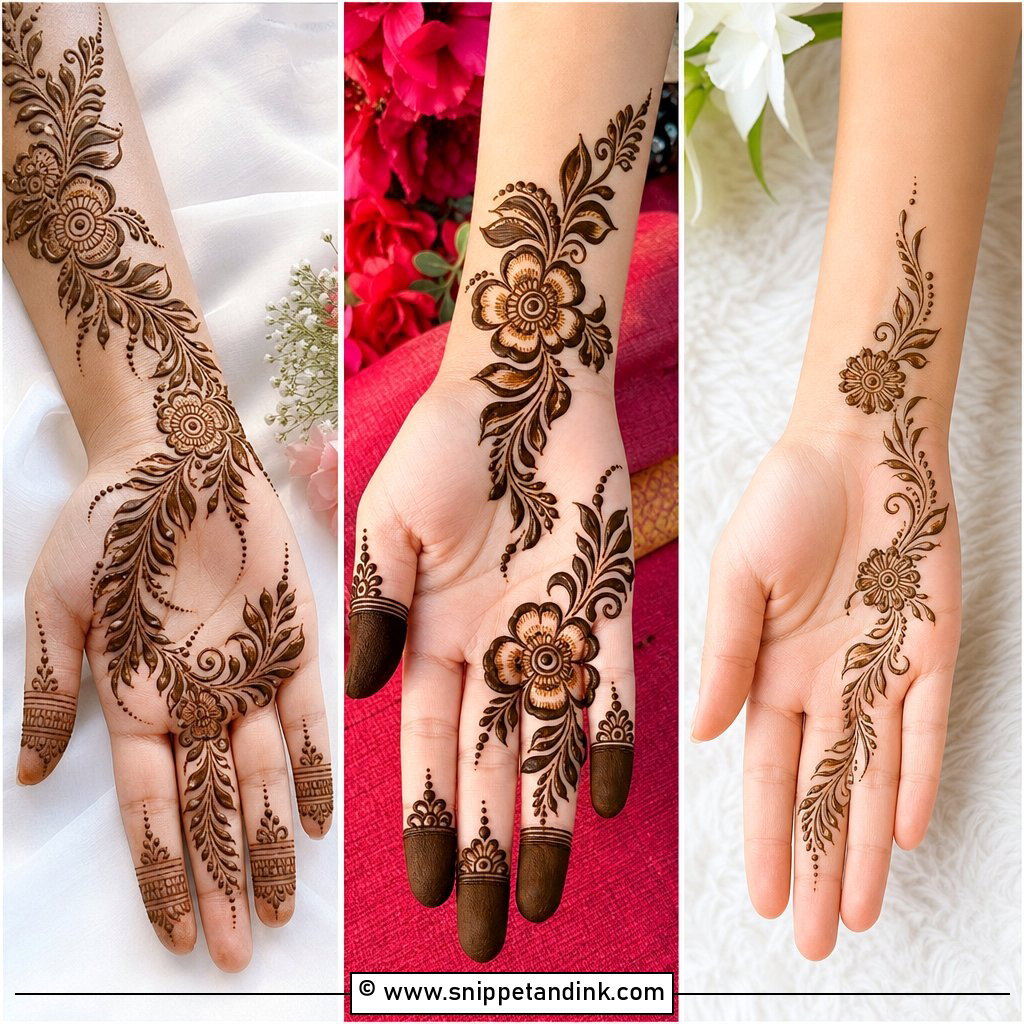
Minimal palm work is about restraint. One tiny mandala or floral circle, one thin dotted chain toward the middle finger, small bands or tip dots, maybe a light wrist line. That is the whole design. I recommend it for anyone heading back to work after a festival, since a small stain fades without looking blotchy.
16. Simple Paisley Front Hand Mehndi Design
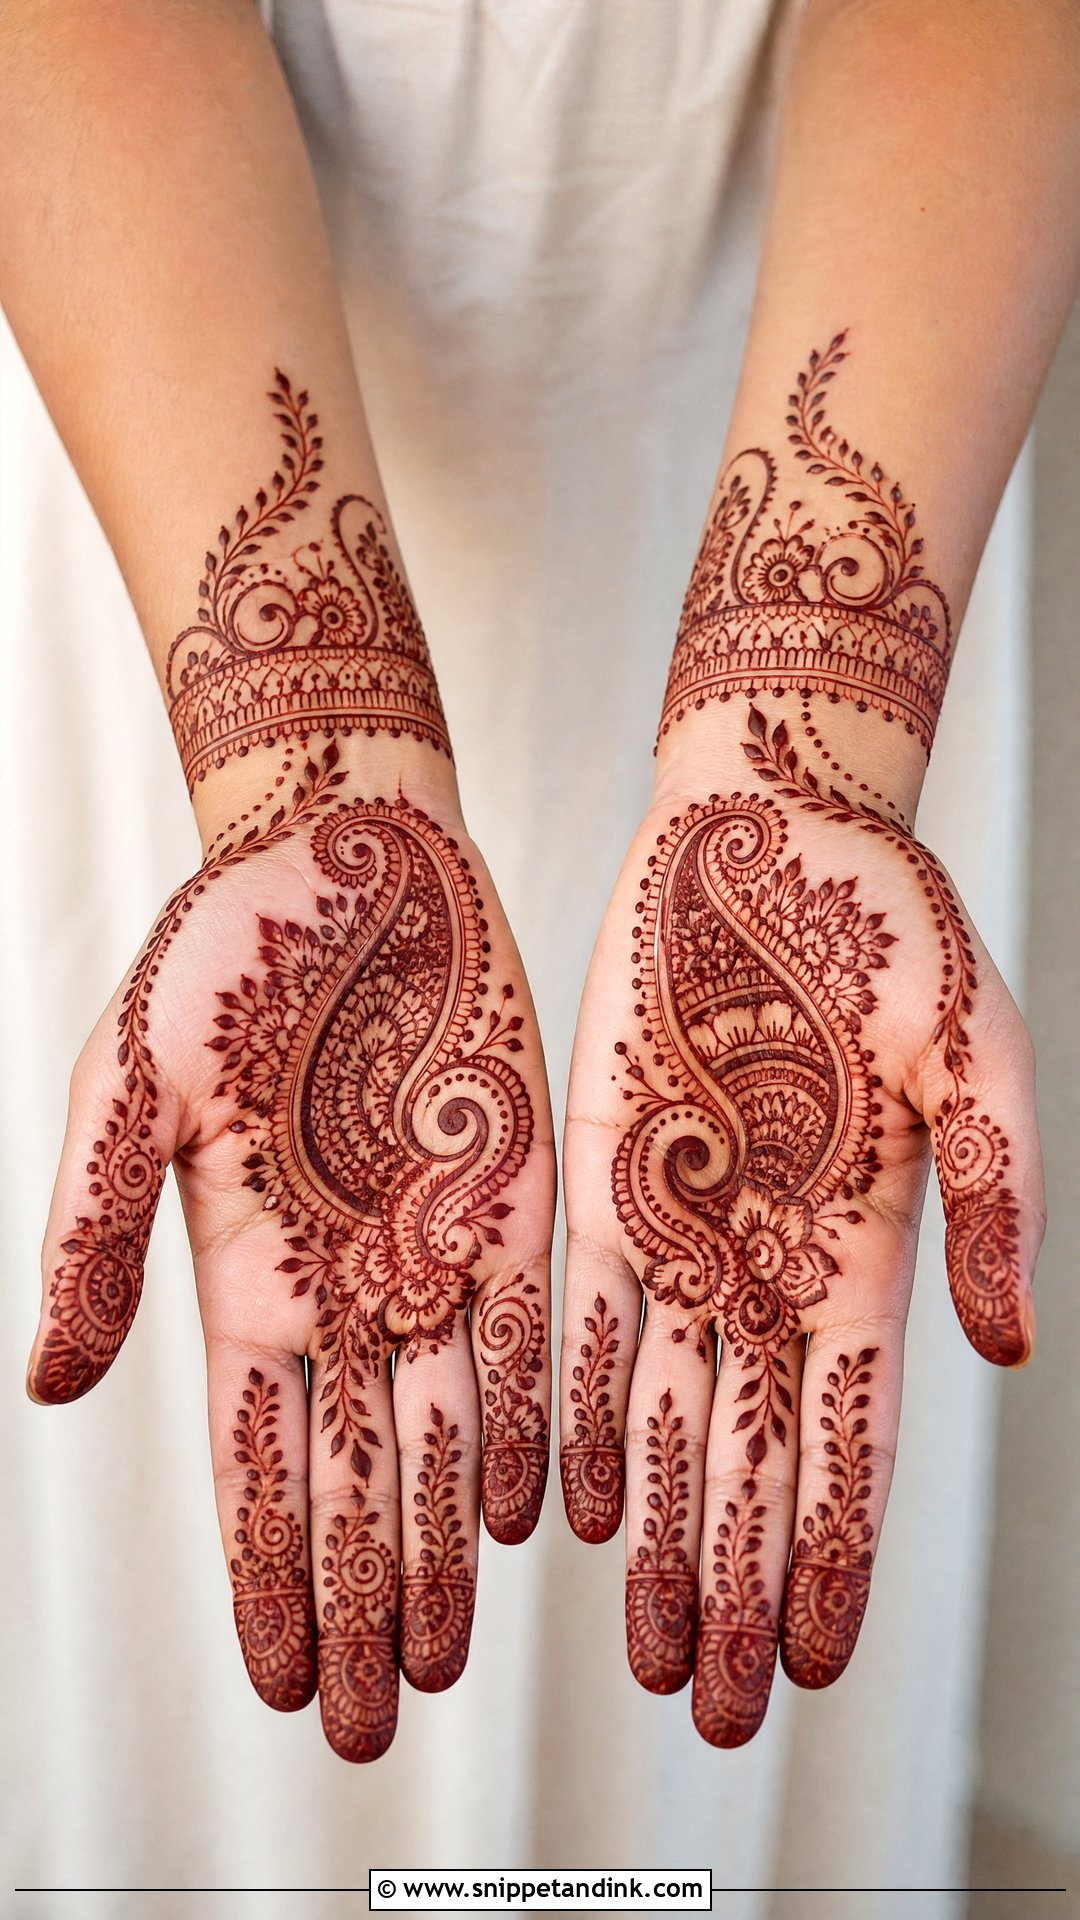
One large paisley on the palm, surrounded by leaves, dots and small flowers, with curved vines running toward the fingers and a thin paisley or dotted border at the wrist. Paisleys can be filled lightly or left mostly open, so the same layout works for a nervous beginner and an experienced hand. I tilt the paisley so its tip points toward the thumb; it follows the natural lines of the palm better that way.
17. Easy Leaf Front Hand Mehndi Design
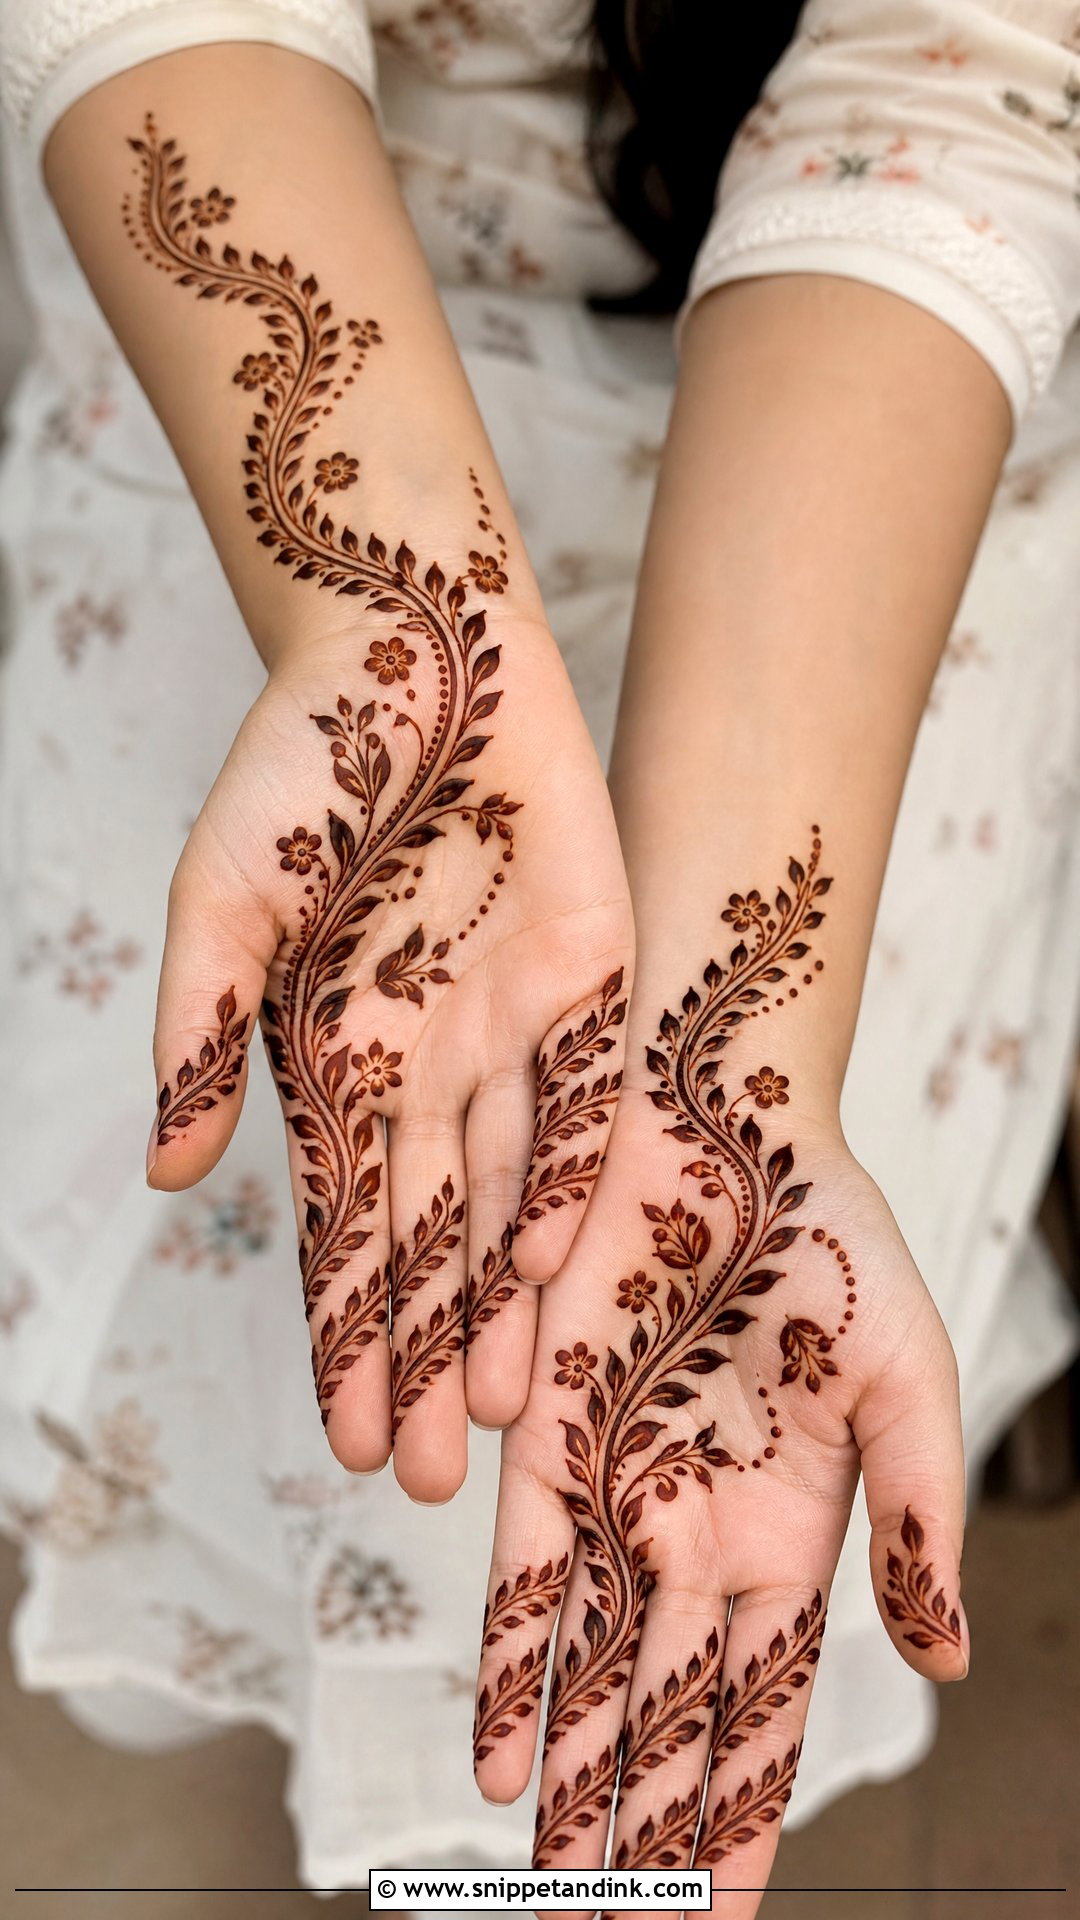
Leaves come in pairs, and pairs are quick. A leafy vine starts at the wrist and curves across the palm toward the ring finger, with small flowers or dots between the leaves and matching leaf chains on the fingers. Because nothing has to be symmetrical, it’s very forgiving. The open palm around the vine also keeps the design light enough for a hot day.
18. Simple Bracelet Front Hand Mehndi Design
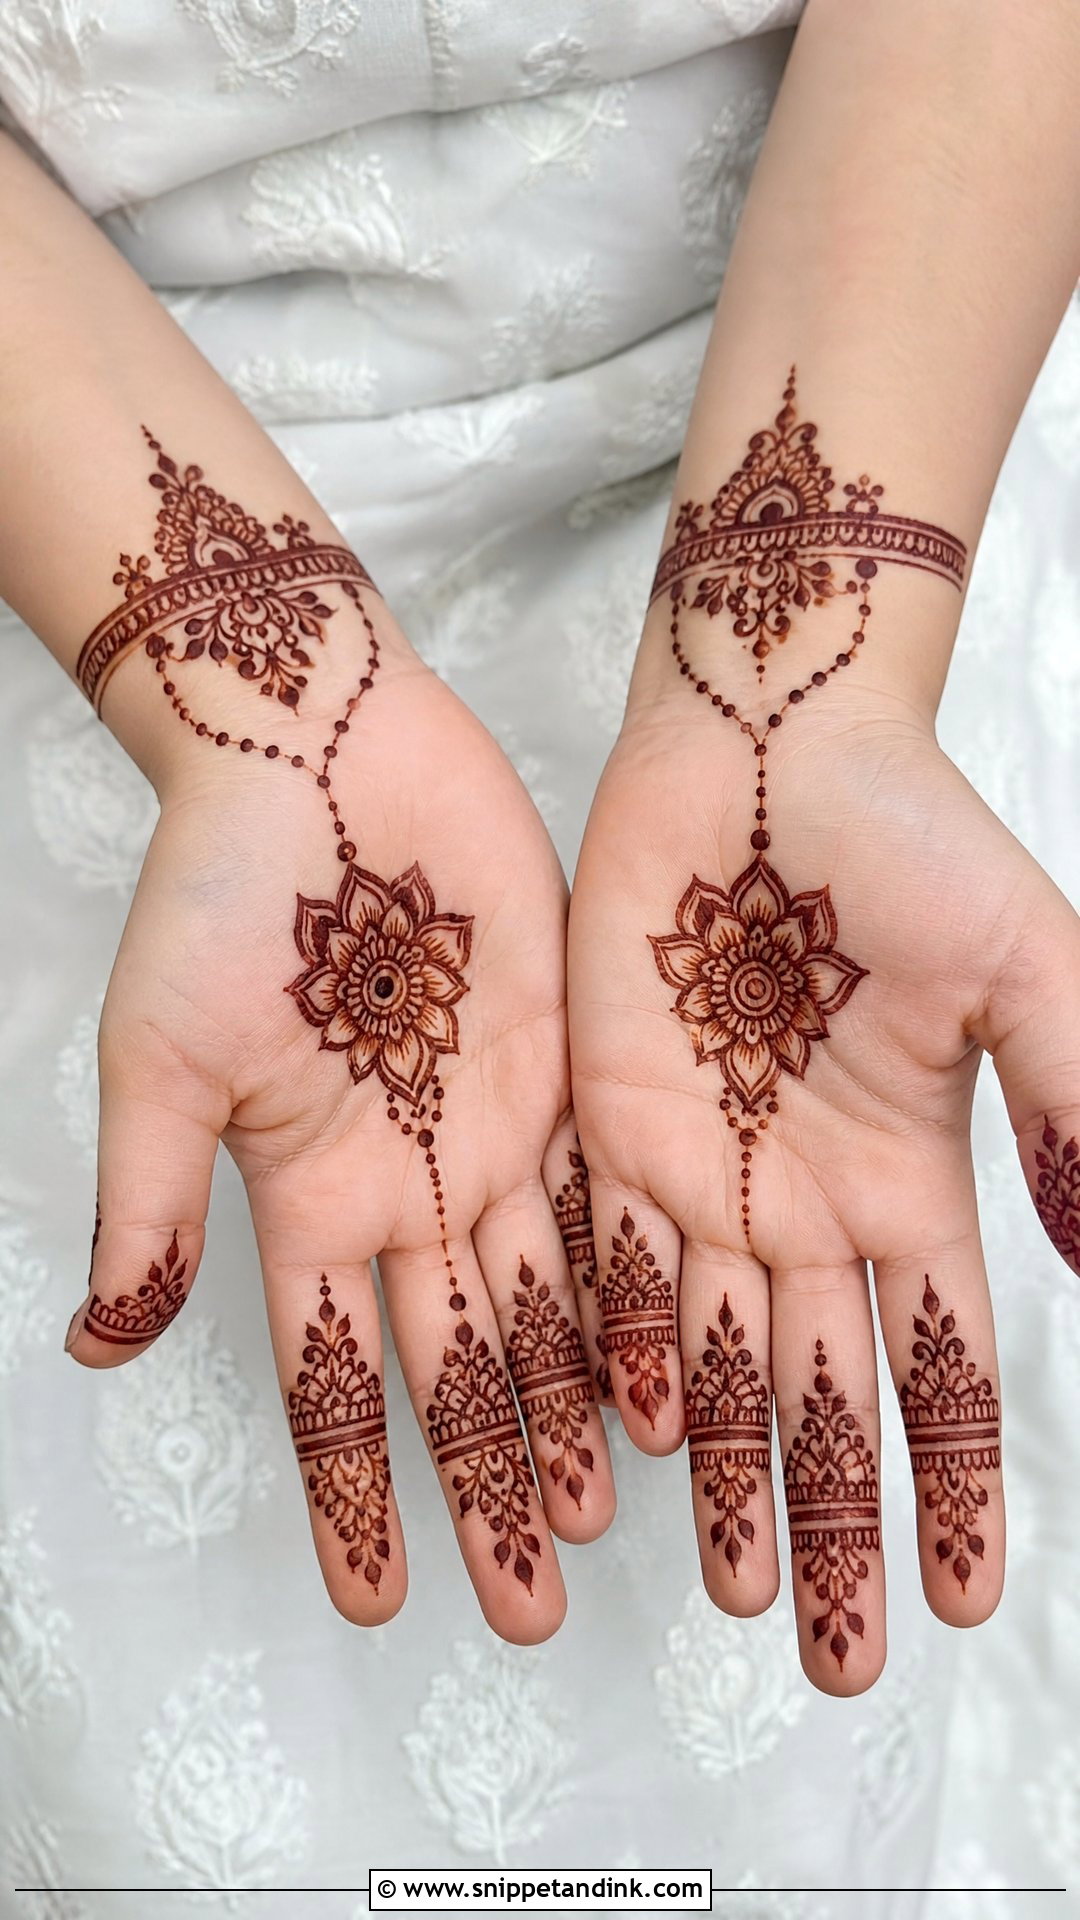
A bracelet design looks like jewelry. I begin at the wrist with parallel lines, dots, arches and tiny petals, then draw a chain up to a palm mandala or flower and on to one or two fingers with dotted strings. The other fingers get light patterns for balance. The chains are thin, so I go slowly on those; a broken chain is very noticeable once stained.
19. Easy Ring Front Hand Mehndi Design
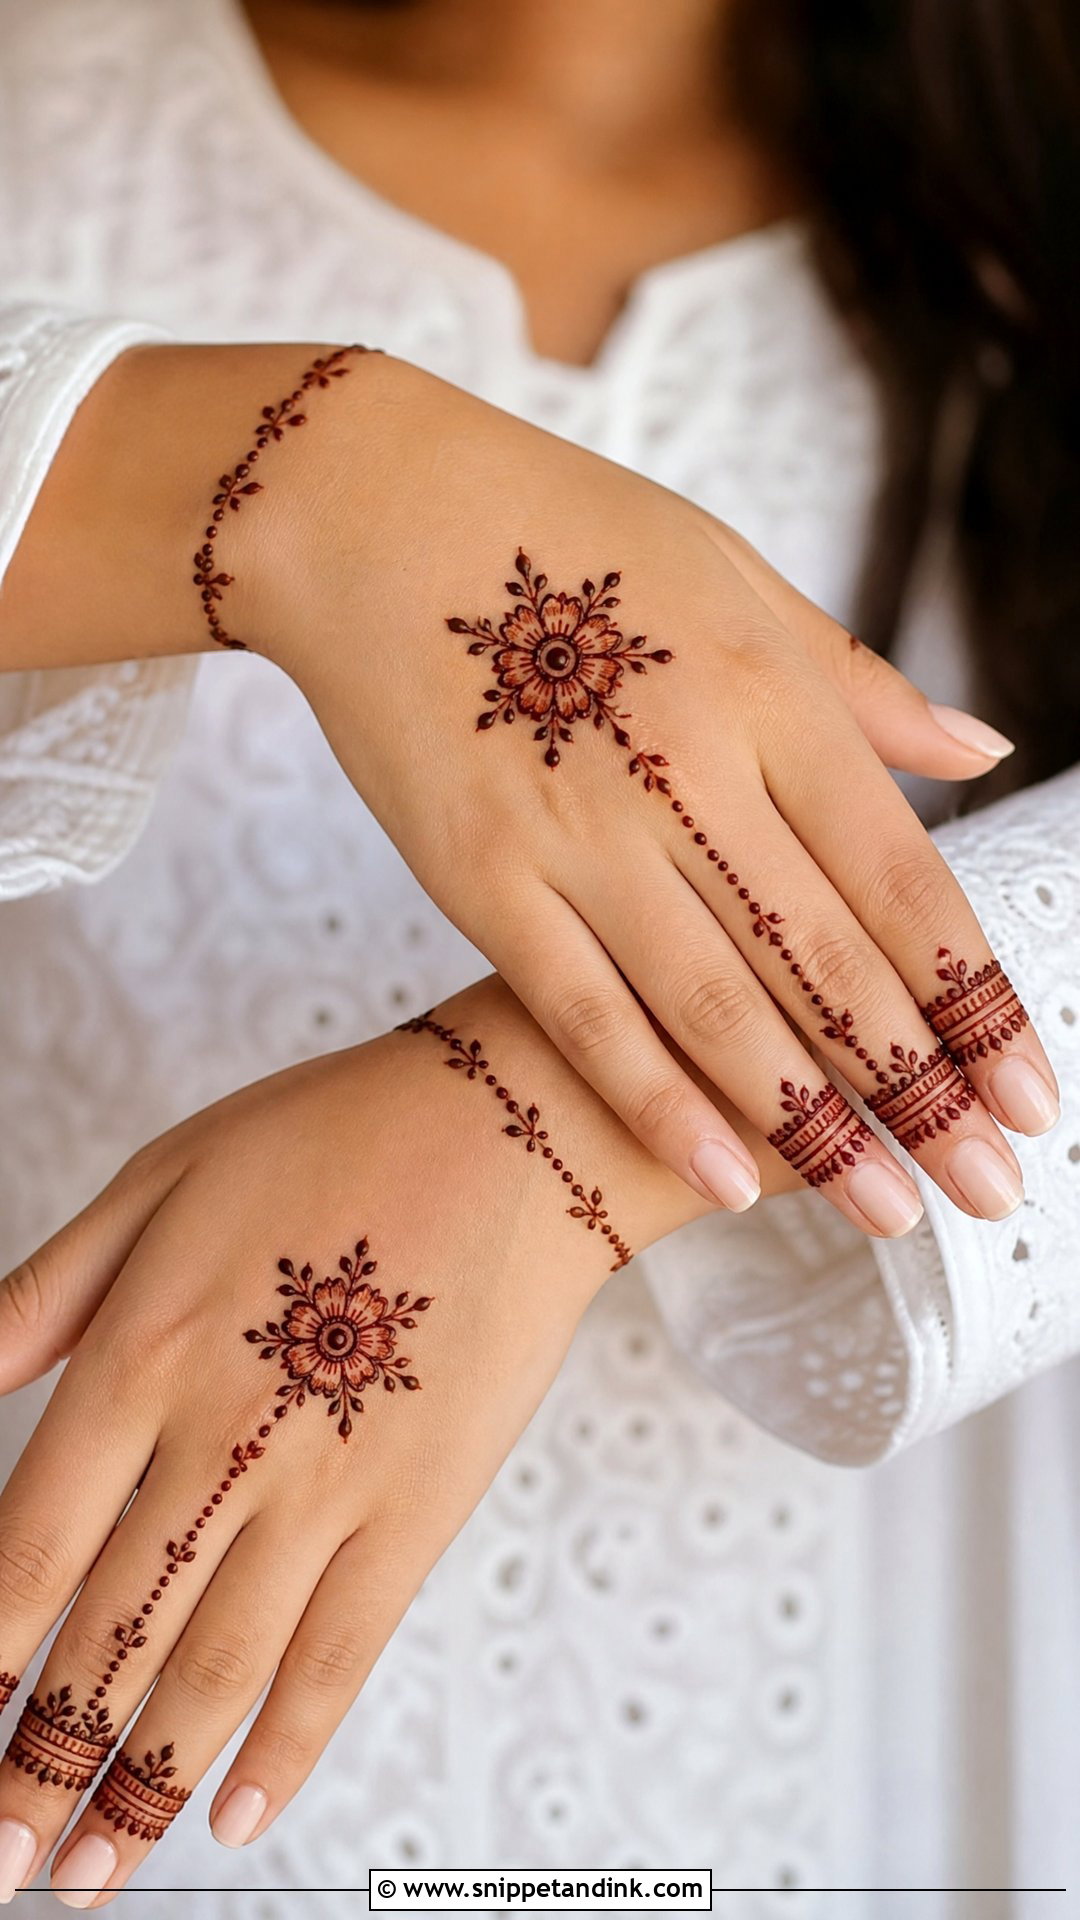
Ring bands on each finger, a central palm flower and dotted chains joining them give you henna jewelry. Link the ring finger to a wrist bracelet and you have a haath phool effect. Keep every line thin so the jewelry shapes stay readable. I check the finger bases first, since that is where real rings sit, and I place the henna bands just above that line so you can still wear your own.
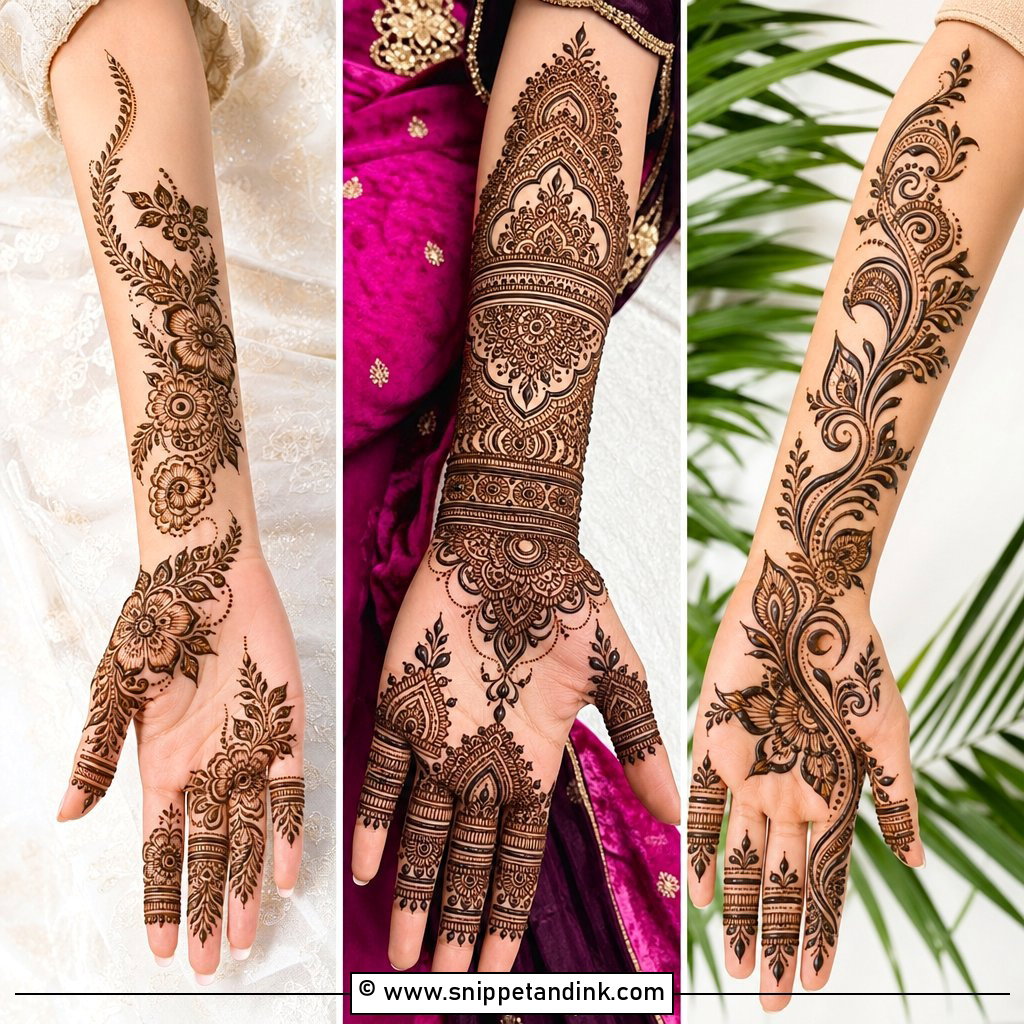
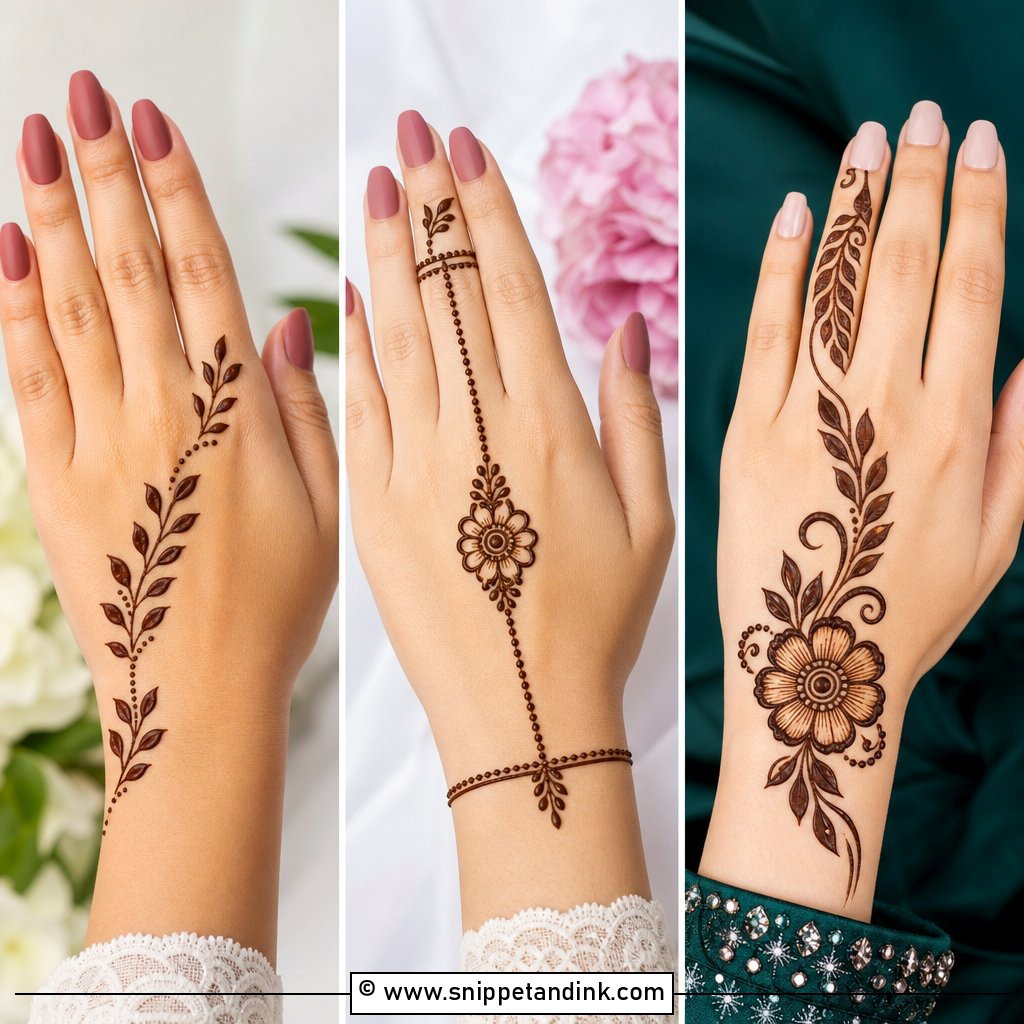
20. Simple Jaali Front Hand Mehndi Design
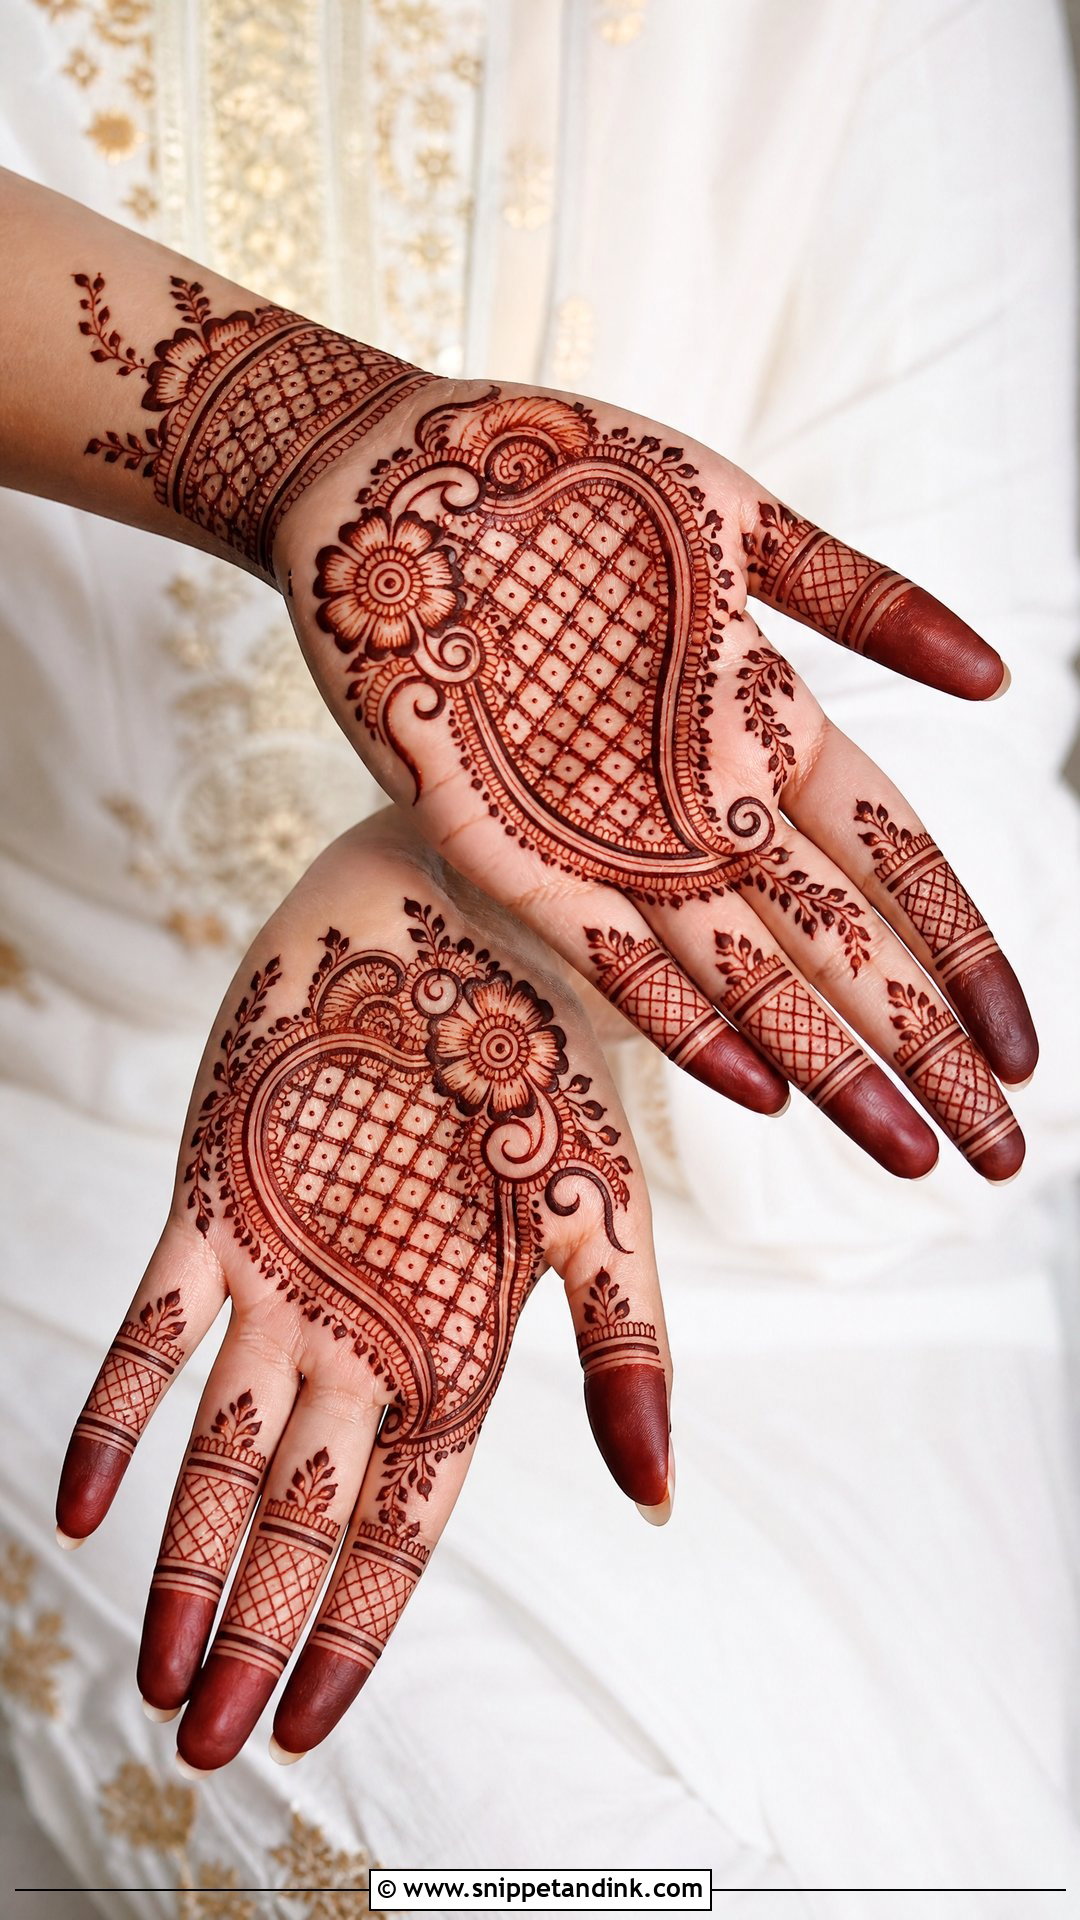
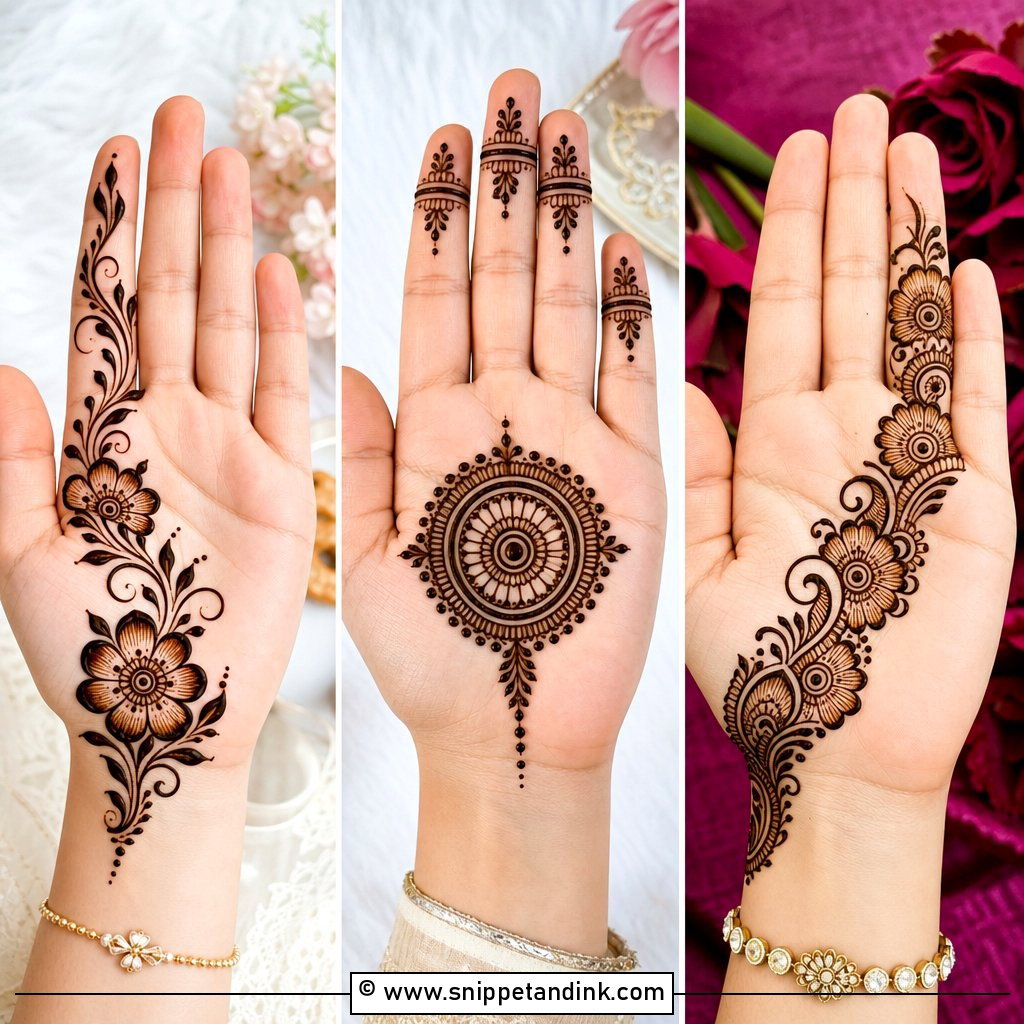
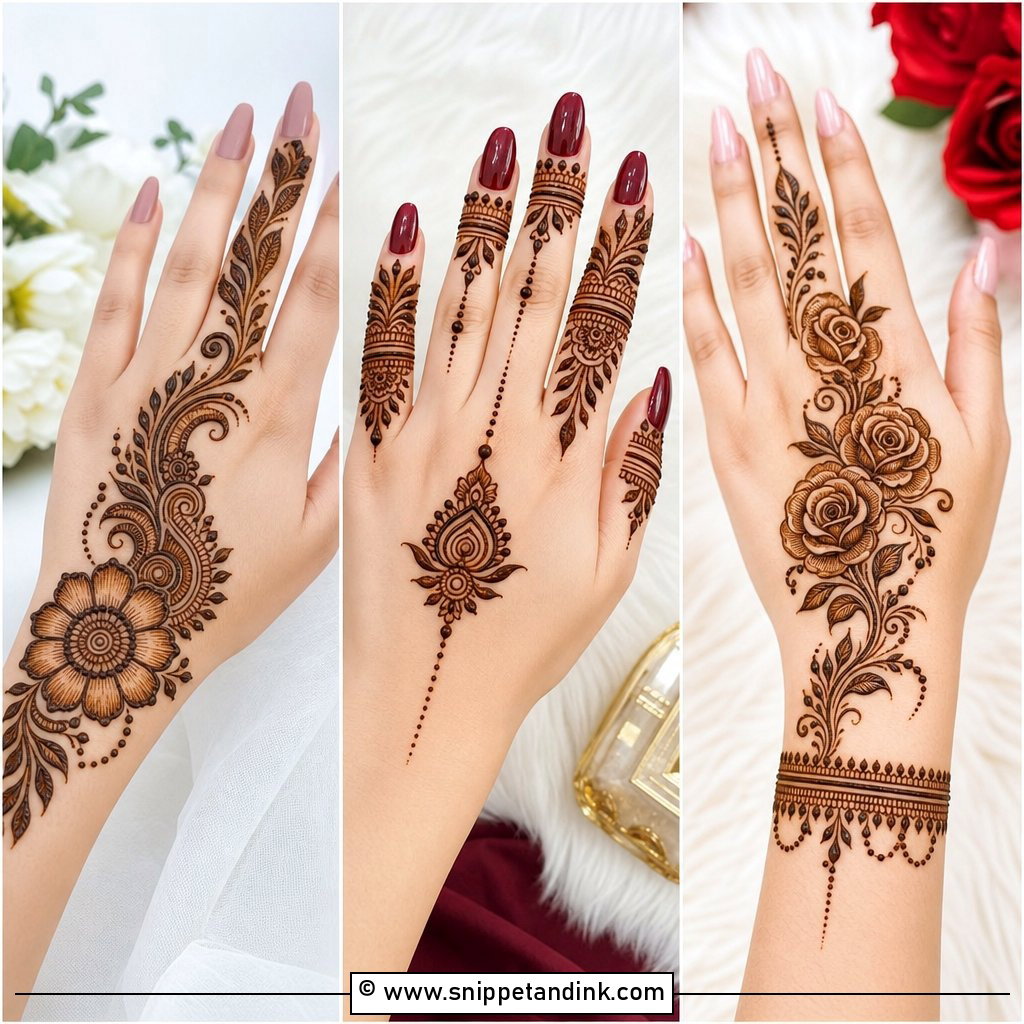
Jaali on the palm works best in a small, contained patch: one side of the palm, or inside a paisley, softened with flowers, dots and leaves around it. Fingers can carry tiny checks or simple bands. The mesh has to be evenly spaced, and I keep the squares a little larger than they look on paper, since paste spreads slightly and palms stain dark enough to close small gaps.
21. Easy Round Front Hand Mehndi Design
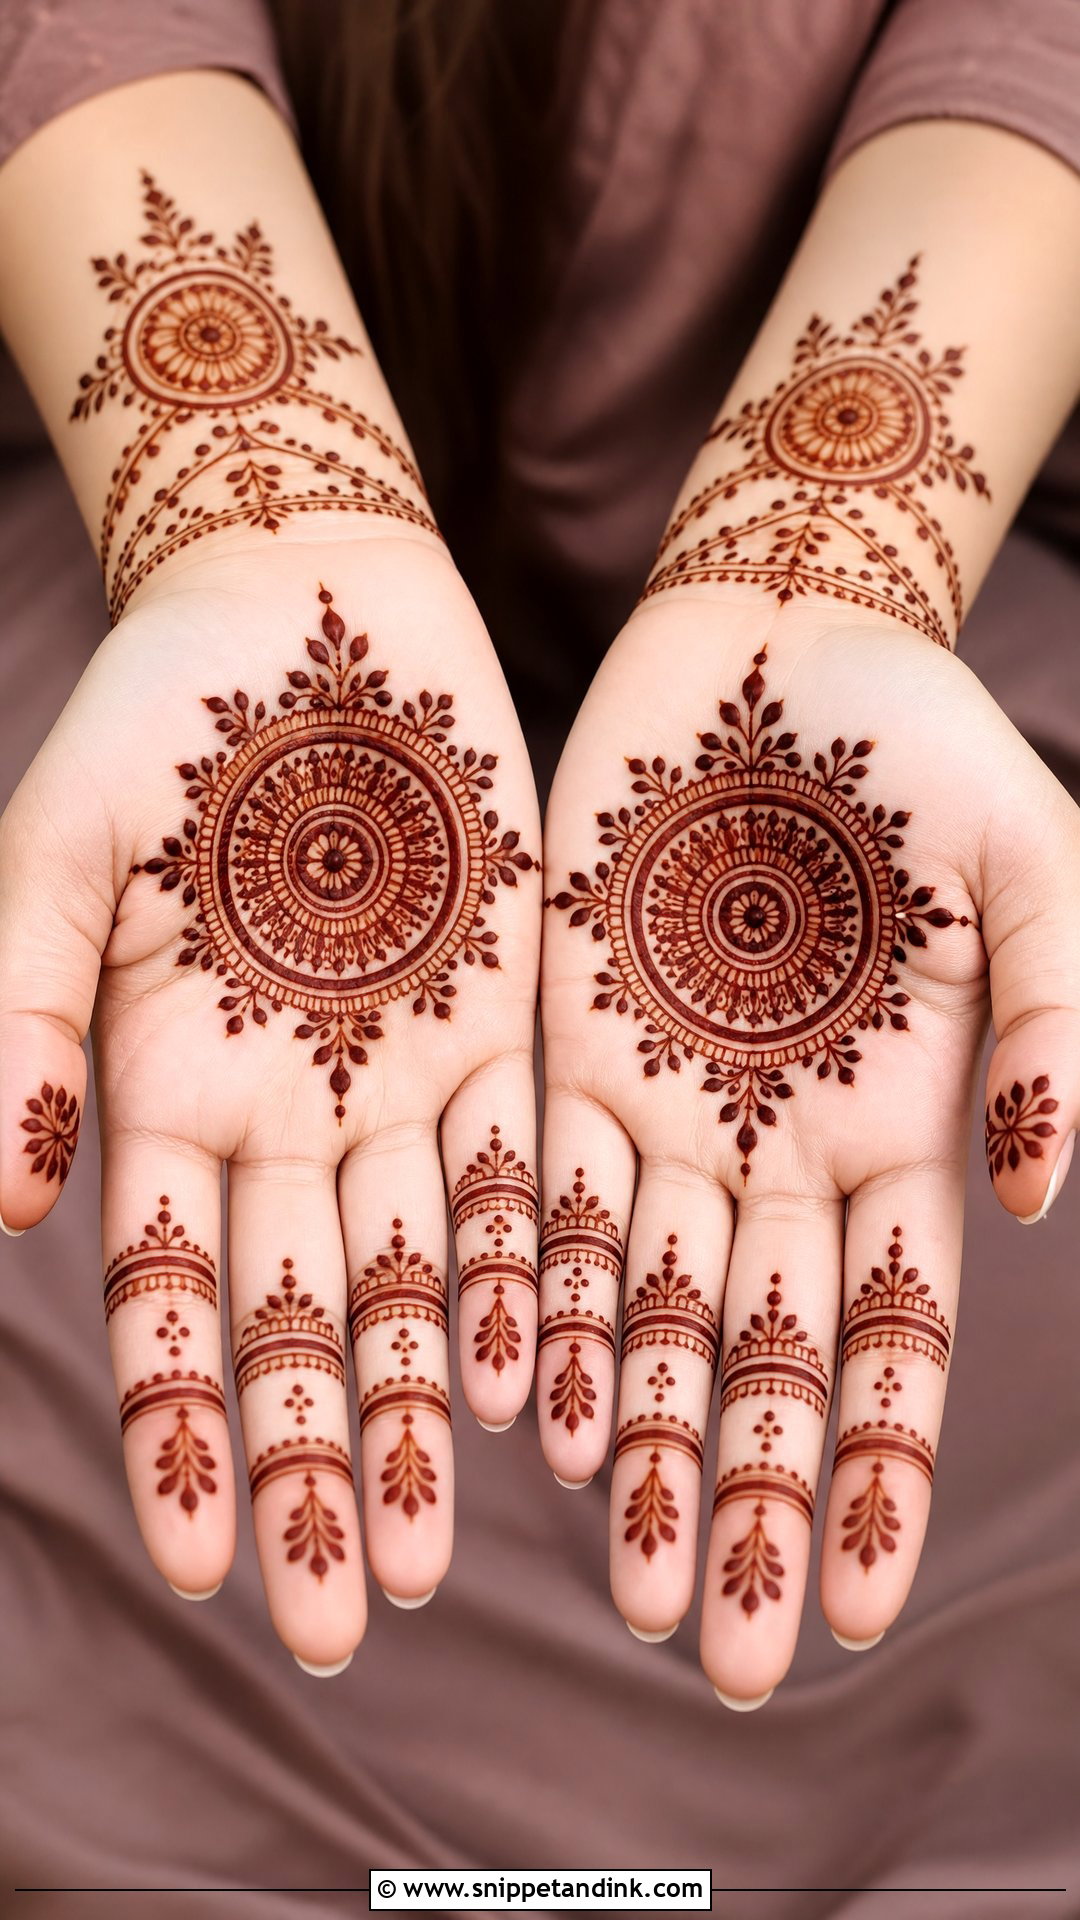
Circles give instant balance, which is why round layouts suit almost any hand. A large circular motif in the palm, smaller ones at the wrist and finger bases, joined by dots, leaves and curved lines, with ring bands and fingertip petals. Centering the big circle is the one step I measure by eye twice, because a palm motif that drifts to one side is obvious once the stain darkens.
22. Simple Half Hand Front Mehndi Design
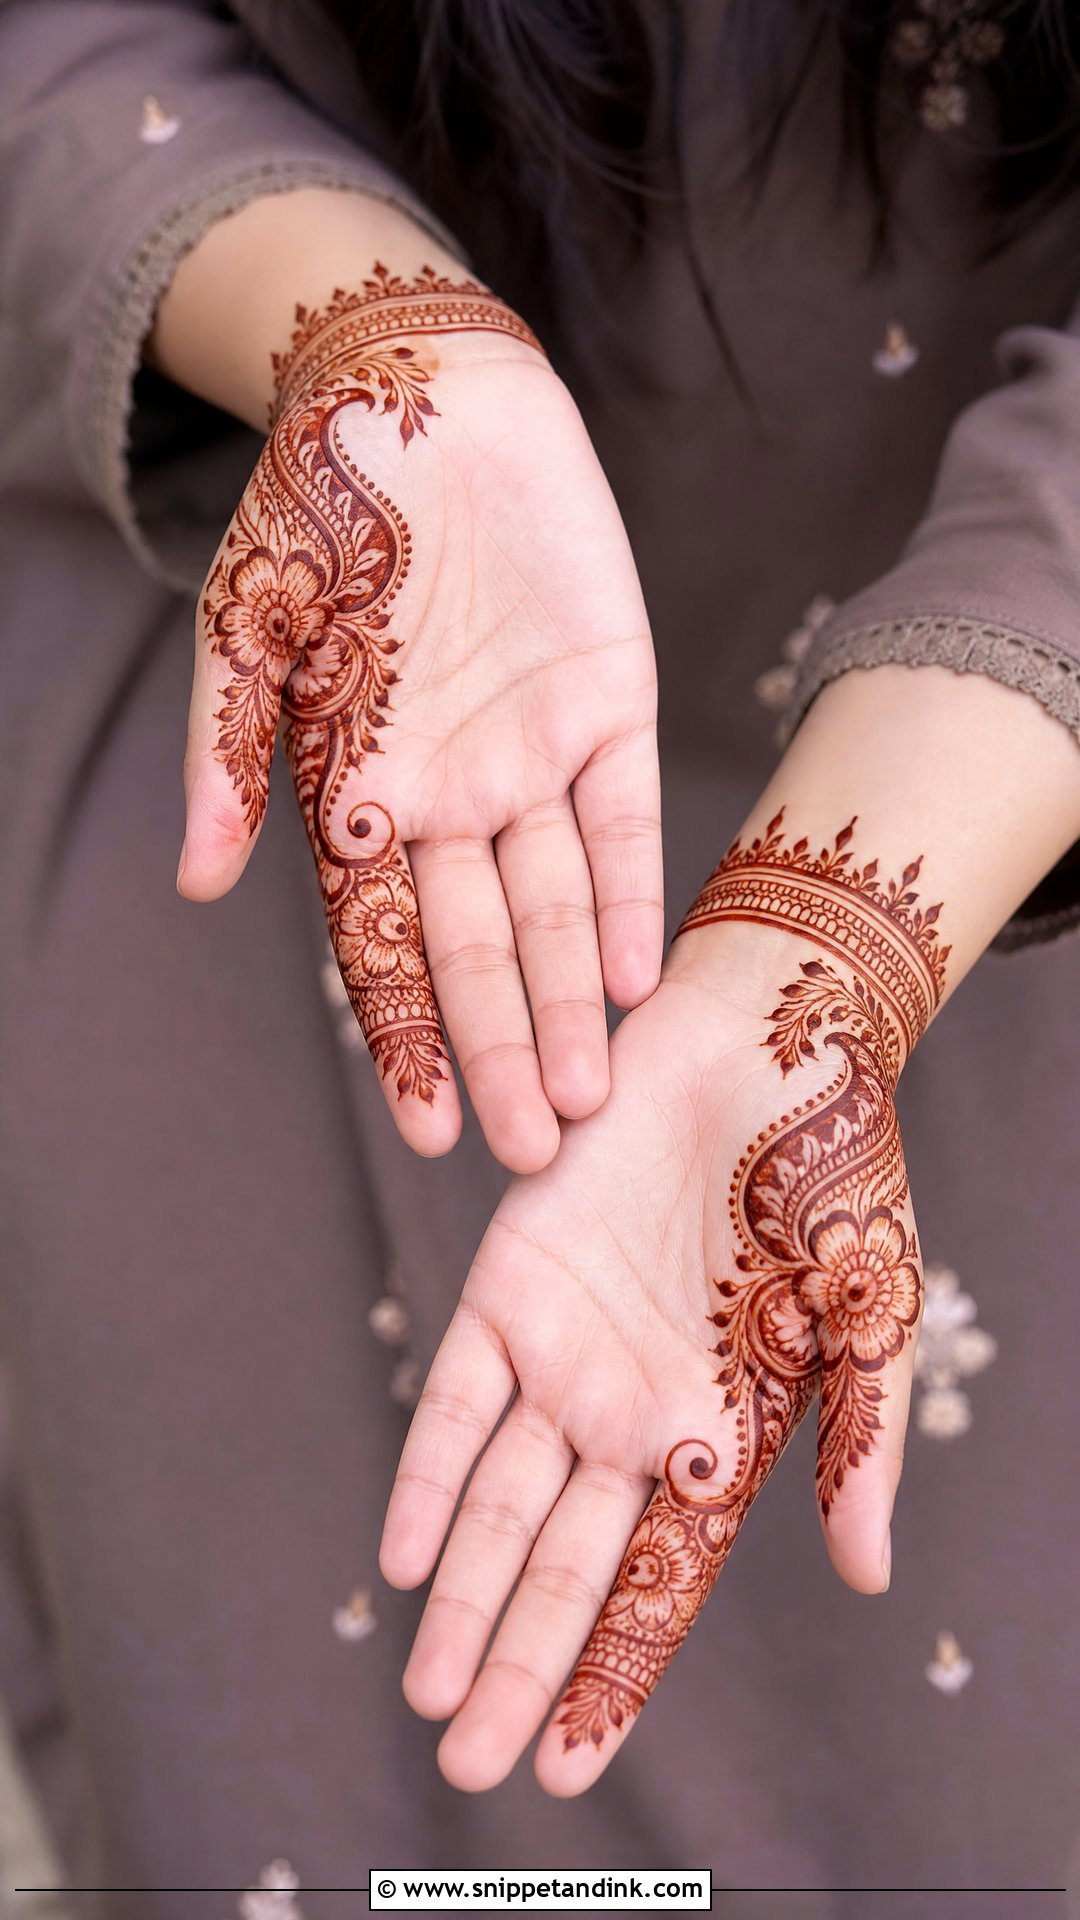
Half-hand designs put the pattern on one side of the palm, perhaps a floral trail or a paisley curve, and let it run to two fingers and a small wrist band. The other side stays empty. It’s asymmetrical, quick and light to wear. I usually place the pattern on the thumb side; it is what people see when you hold your palms up for a photo.
23. Easy Front Hand Mehndi Design For Kids
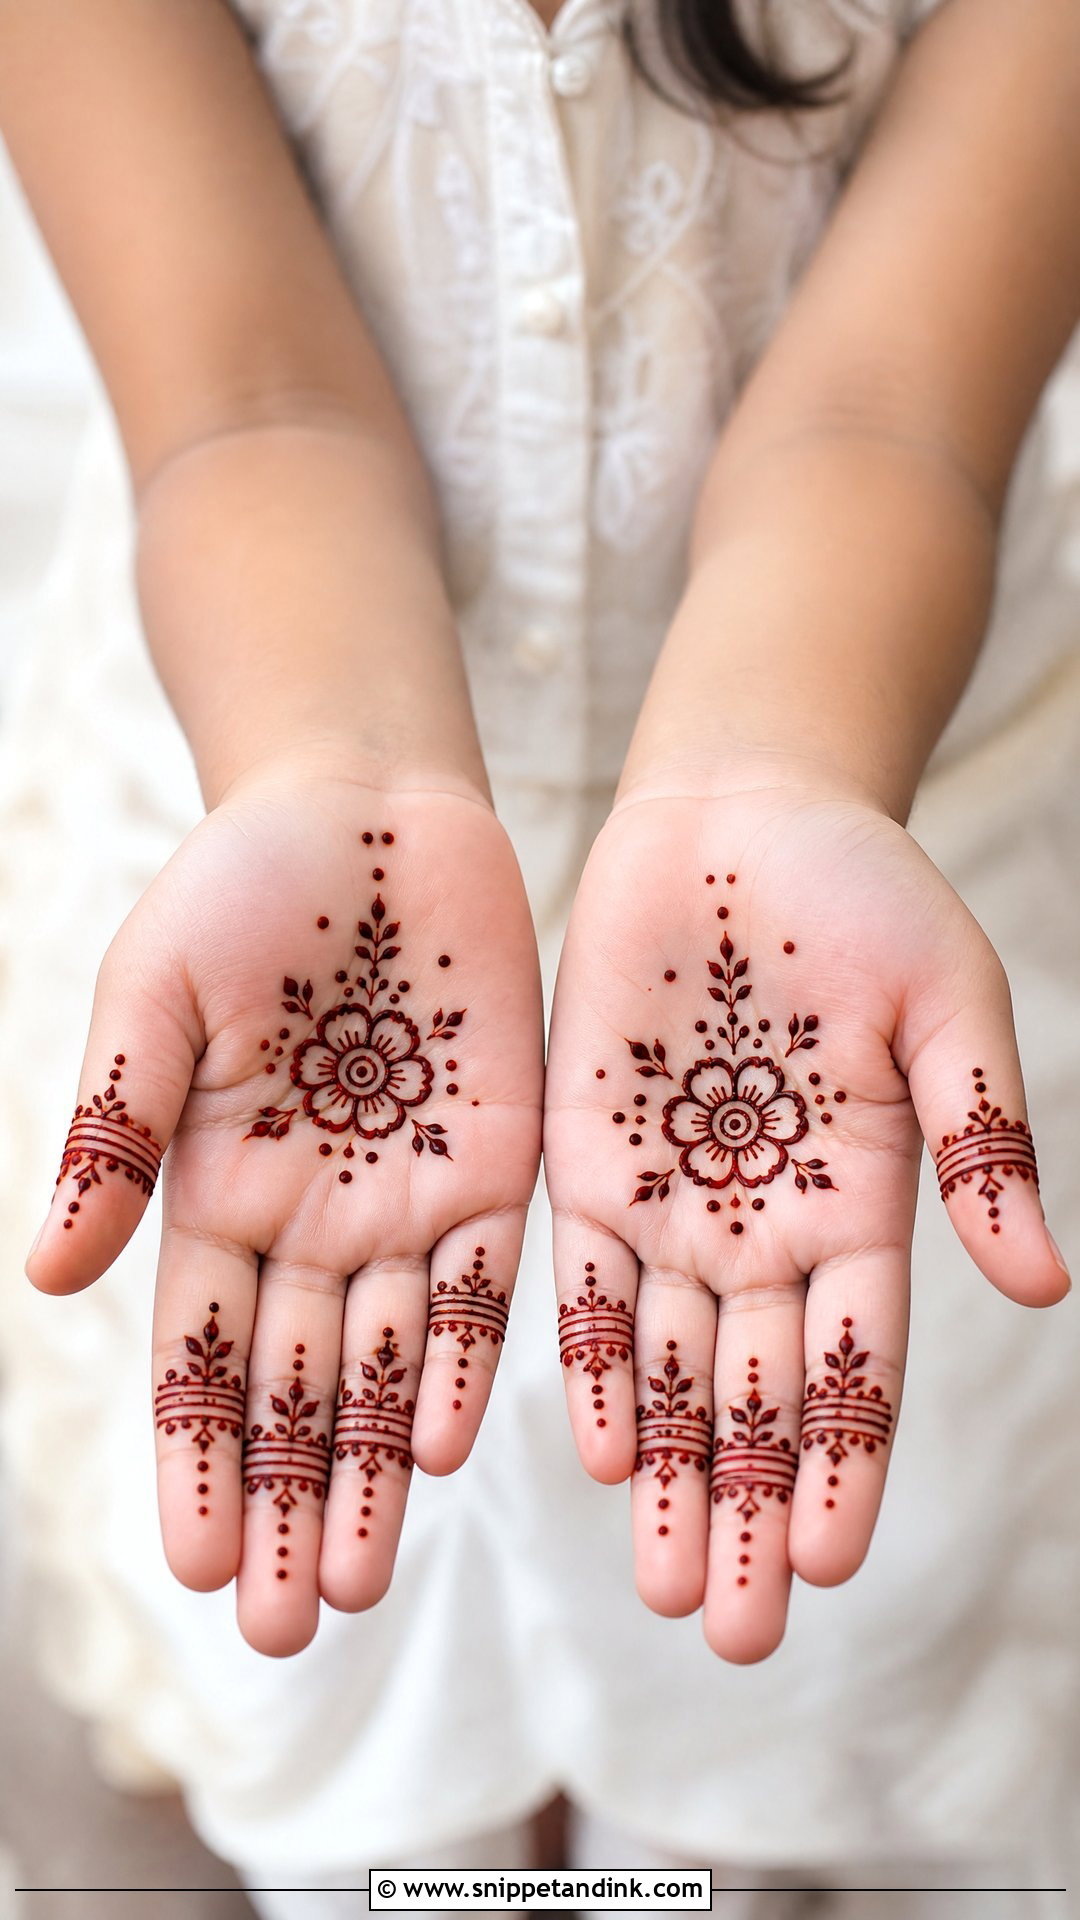
Children need something they can sit through. I draw a small flower, a heart-shaped cluster of petals or a mini mandala, a few dots, and tiny leaves or bands on the fingers, and skip the wrist because little ones rub it straight away. Slightly thicker lines keep it readable. Before I start, I make sure the paste is plain natural henna. So-called black henna can contain a chemical dye that causes nasty skin reactions, and it has no place on a child’s hand.
24. Simple Front Hand Mehndi Design For Teens
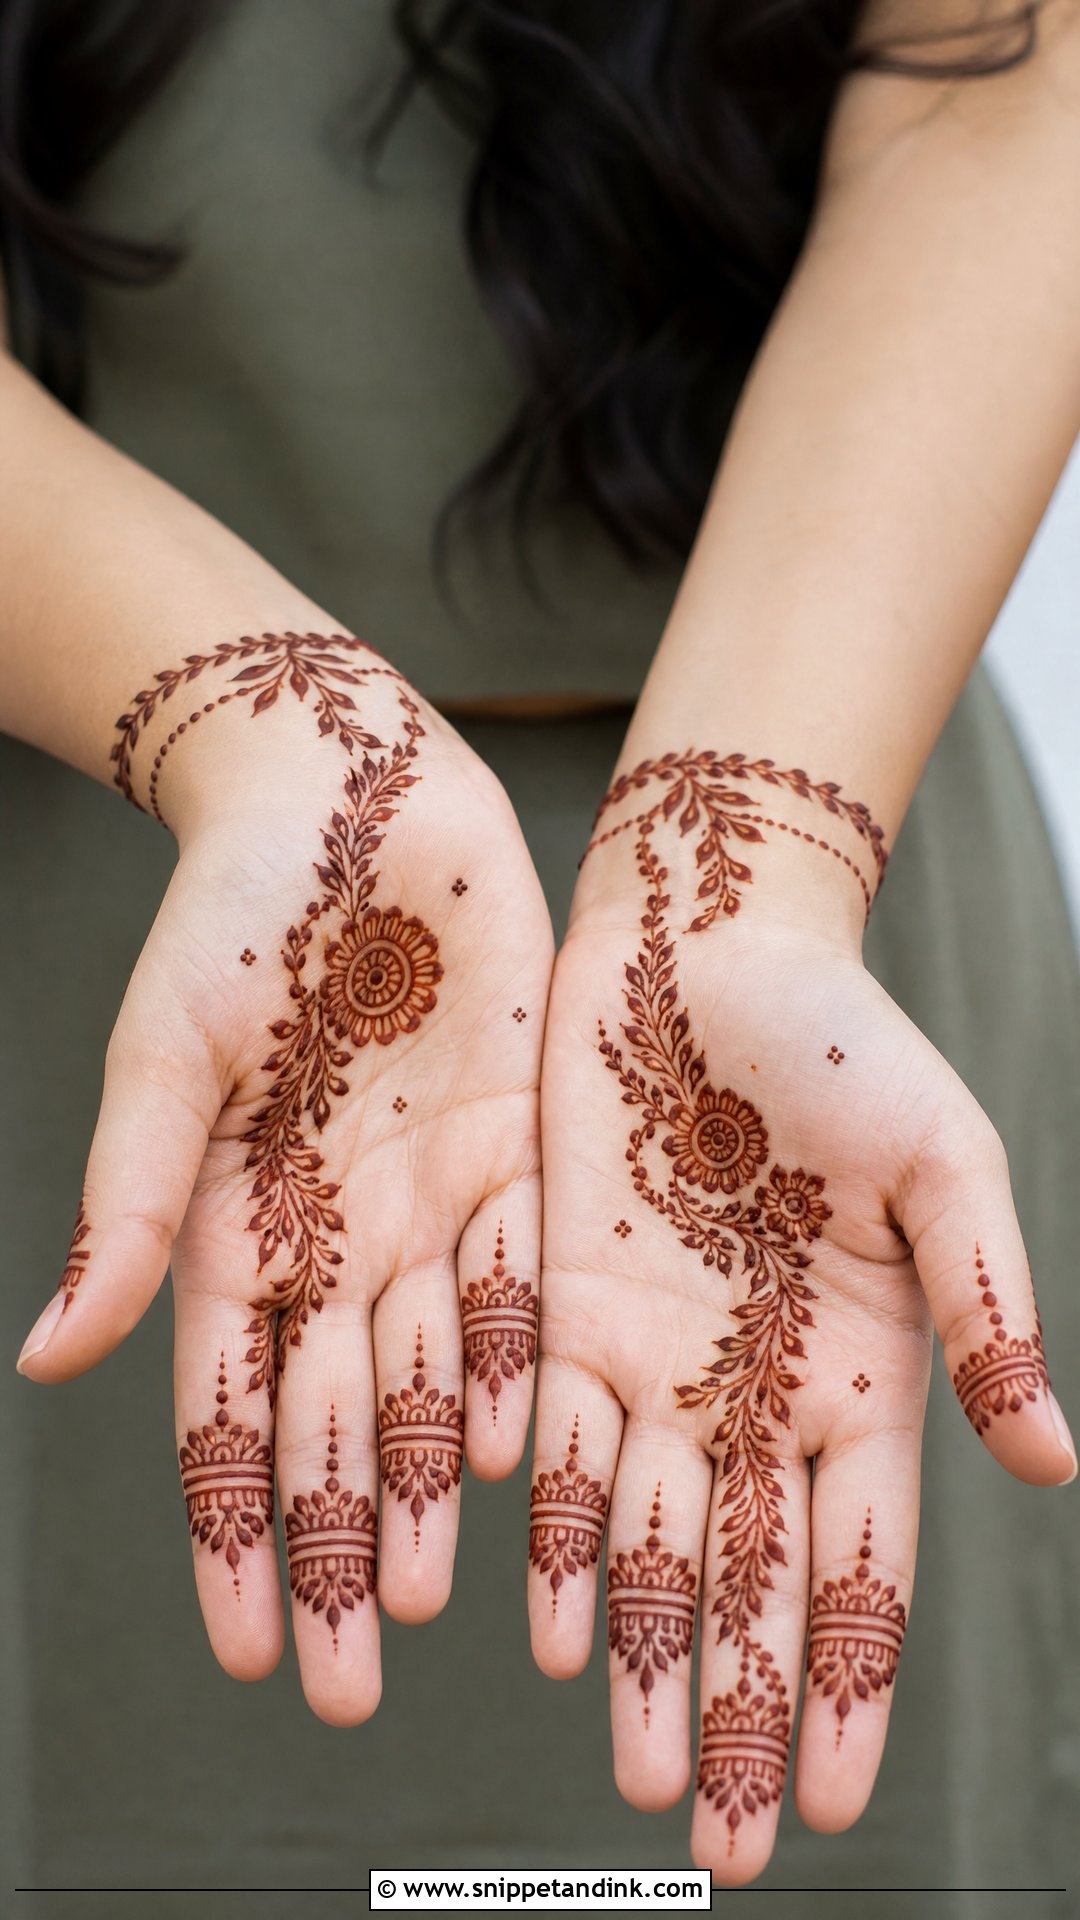
Teenagers usually want something that looks good in photos but doesn’t cover every inch. A diagonal floral vine with small mandala accents, slim finger bands and a few dots or leafy chains near the wrist does that. I keep the palm open. It wears well through school functions and family weddings, and it suits teens who would rather not look overdone.
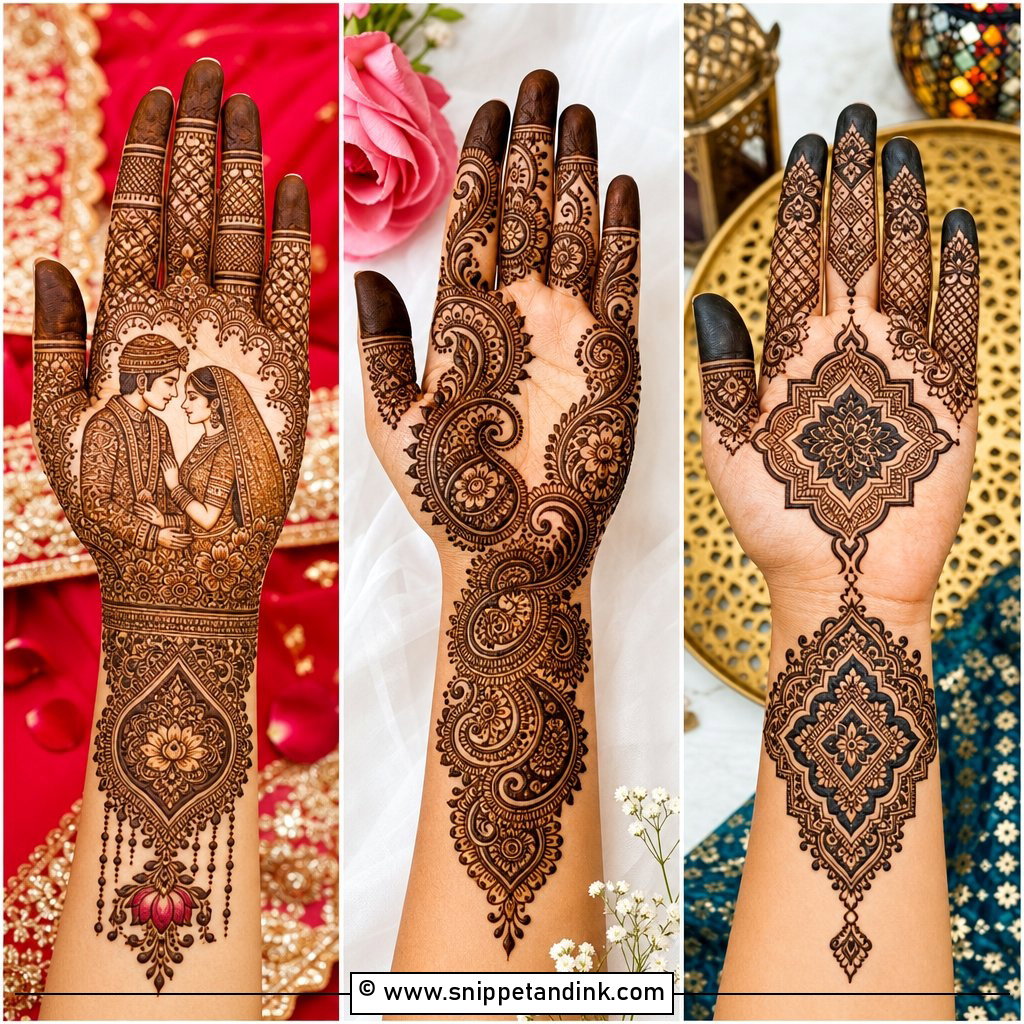
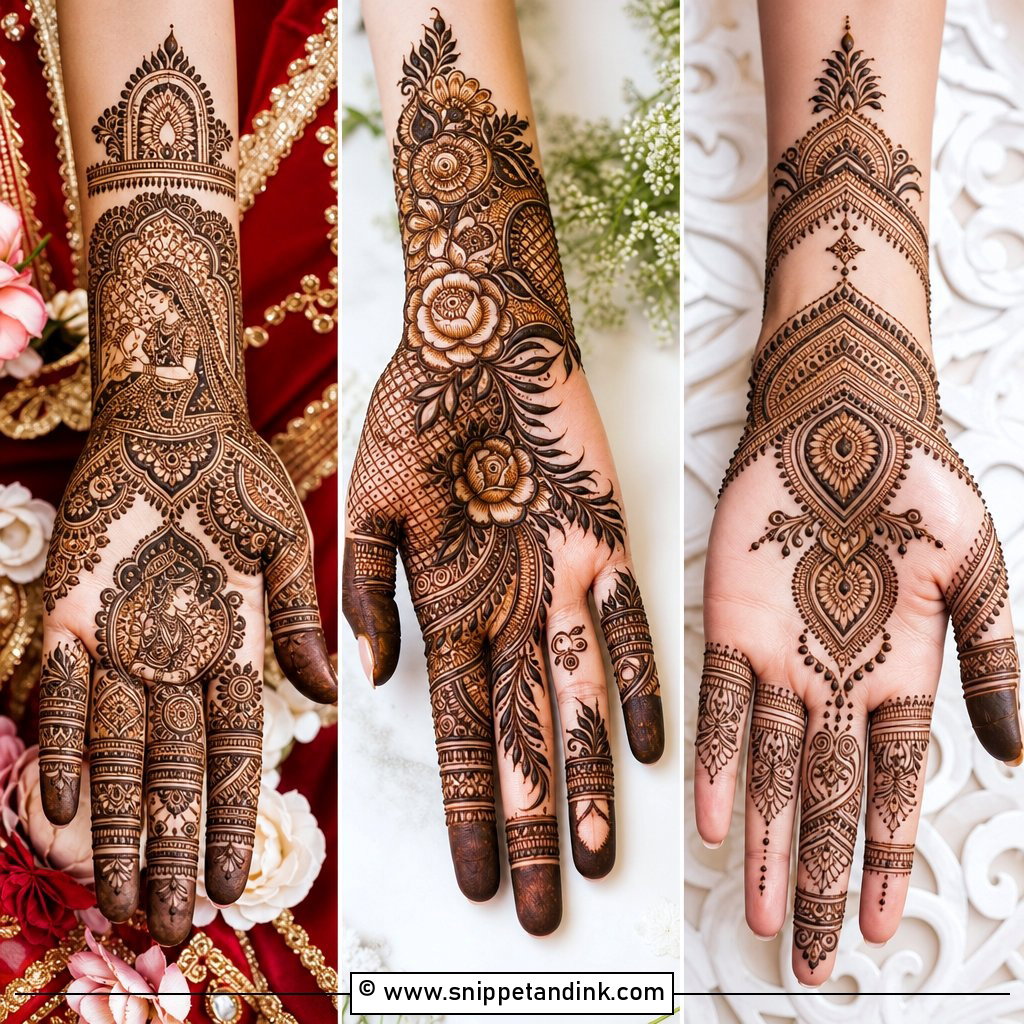
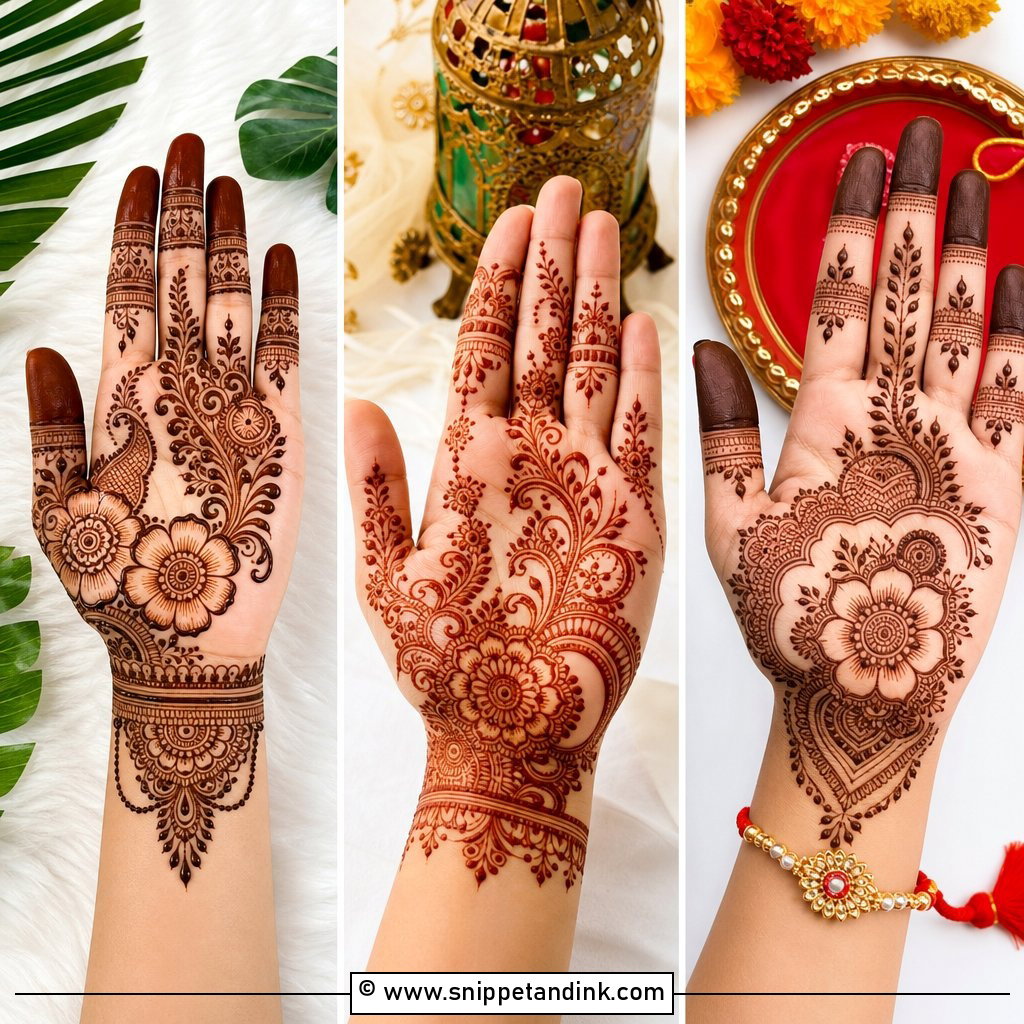
25. Simple Front Hand Mehndi Design For Wedding
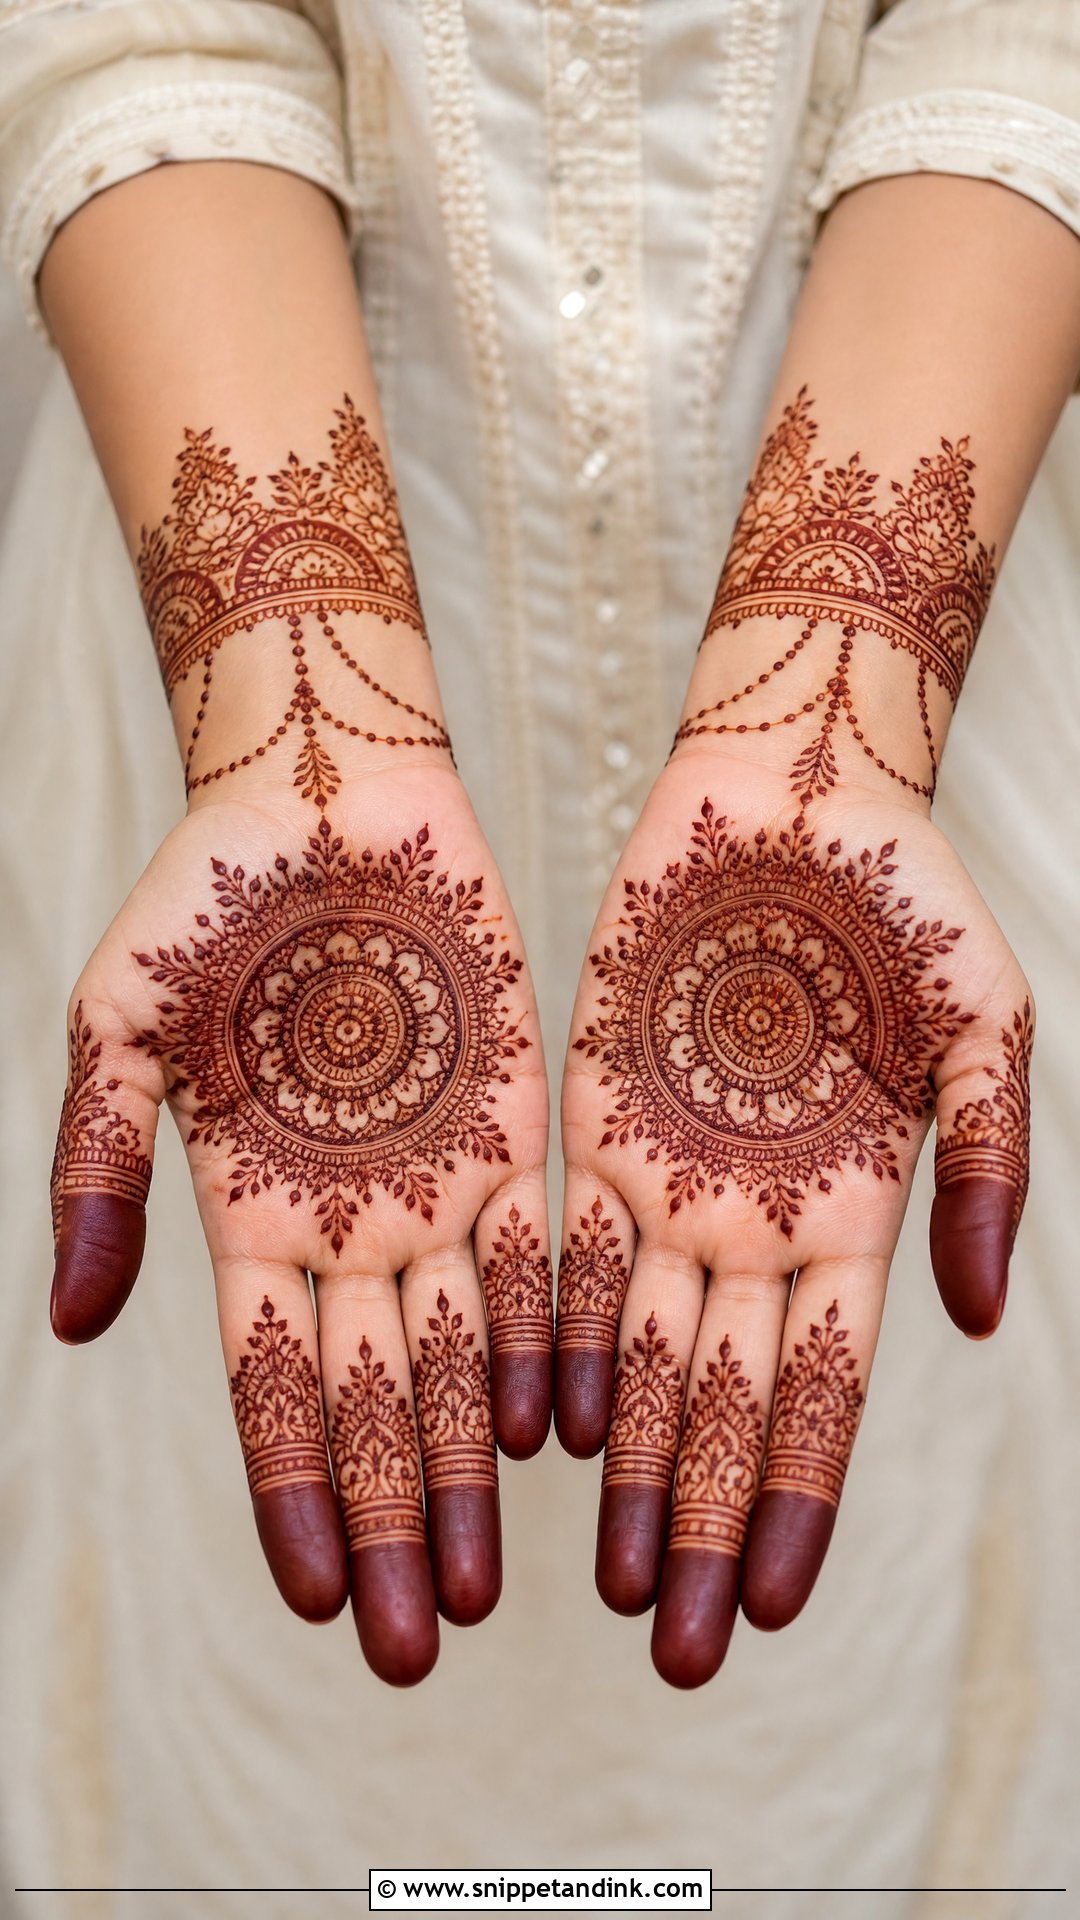
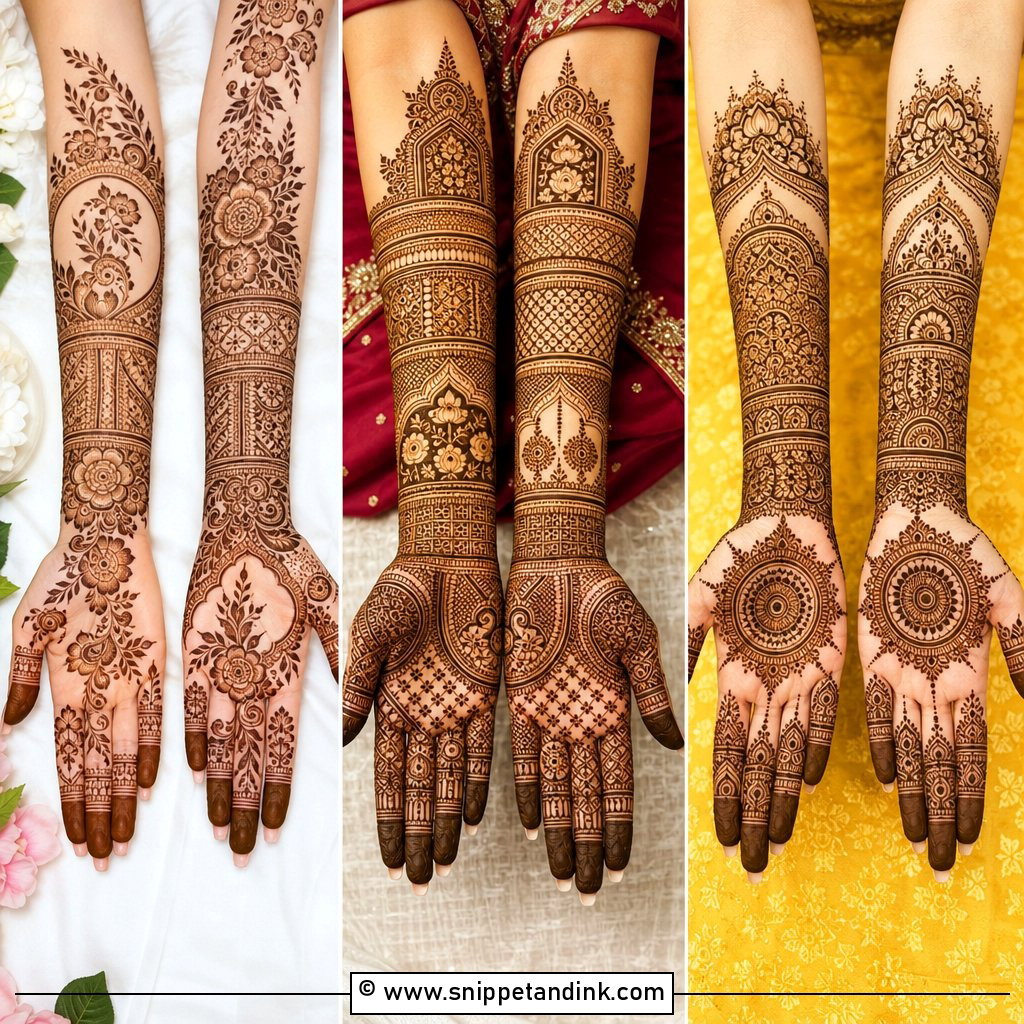
Wedding guests want polish without full bridal coverage. I use a palm mandala, paisley accents and filled fingertips, then add a bracelet band of small flowers and dotted chains. The gaps between motifs stay clean. Sisters, cousins and bridesmaids can all wear it, and it pairs easily with bangles. Do check with the bride first; most prefer guests to stay a notch lighter than their own hands.
26. Easy Front Hand Mehndi Design For Engagement
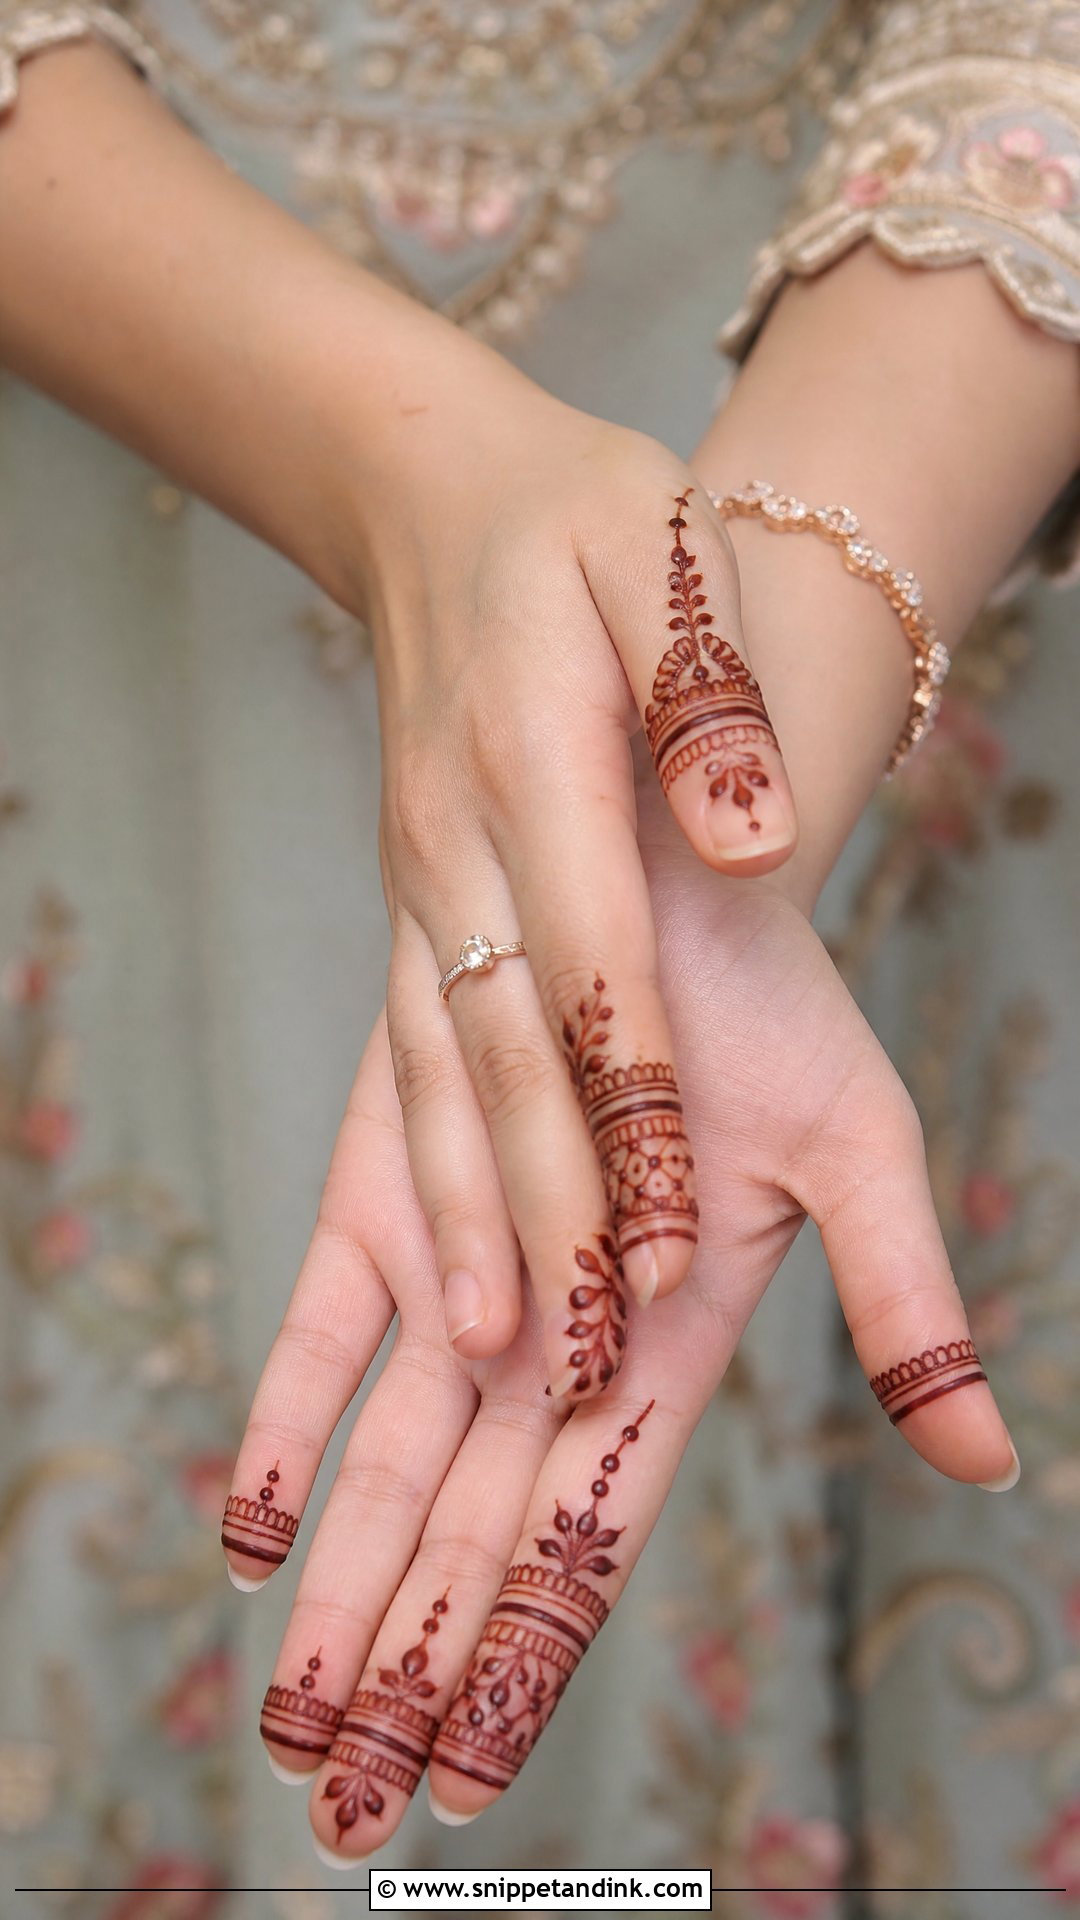
An easy mehndi design for engagement can center on the ring finger itself. I draw a ring-shaped band there, connect it to a palm flower with dotted chains, add a slim wrist bracelet and keep the other fingers neat. No names, no portraits, no dense fill. The ring finger is going to be photographed close up, so I make that band the cleanest line on the hand and leave room for the actual ring to slide on.
27. Simple Front Hand Mehndi Design For Karwa Chauth
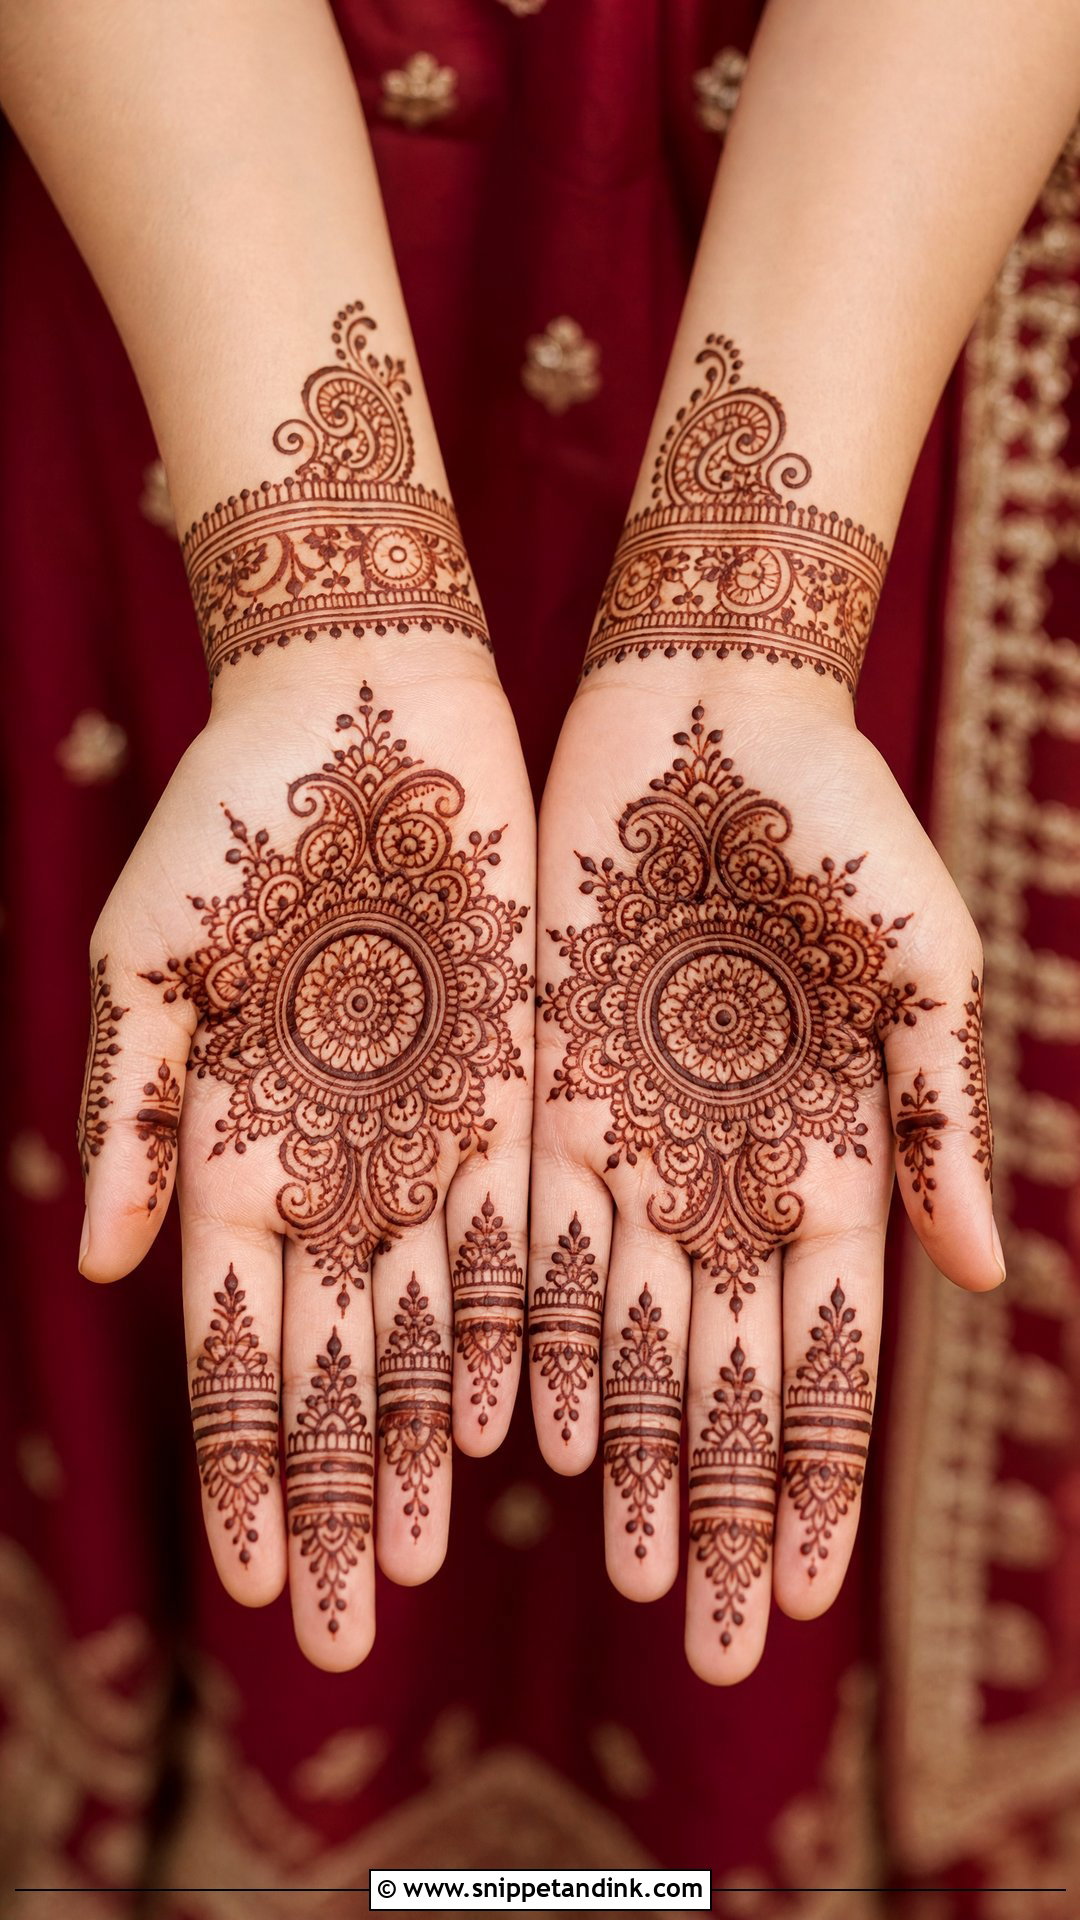
Karwa Chauth calls for something traditional. A centered mandala with floral edges, small paisleys and dotted trails toward the fingers, plus a bracelet band, gives you that. Fingers stay simple with lines, scallops and small leaves. Because the mehndi often goes on the day before, I keep the coverage moderate so it is dry and scraped off in time for an early start.
28. Simple Front Hand Mehndi Design For Raksha Bandhan
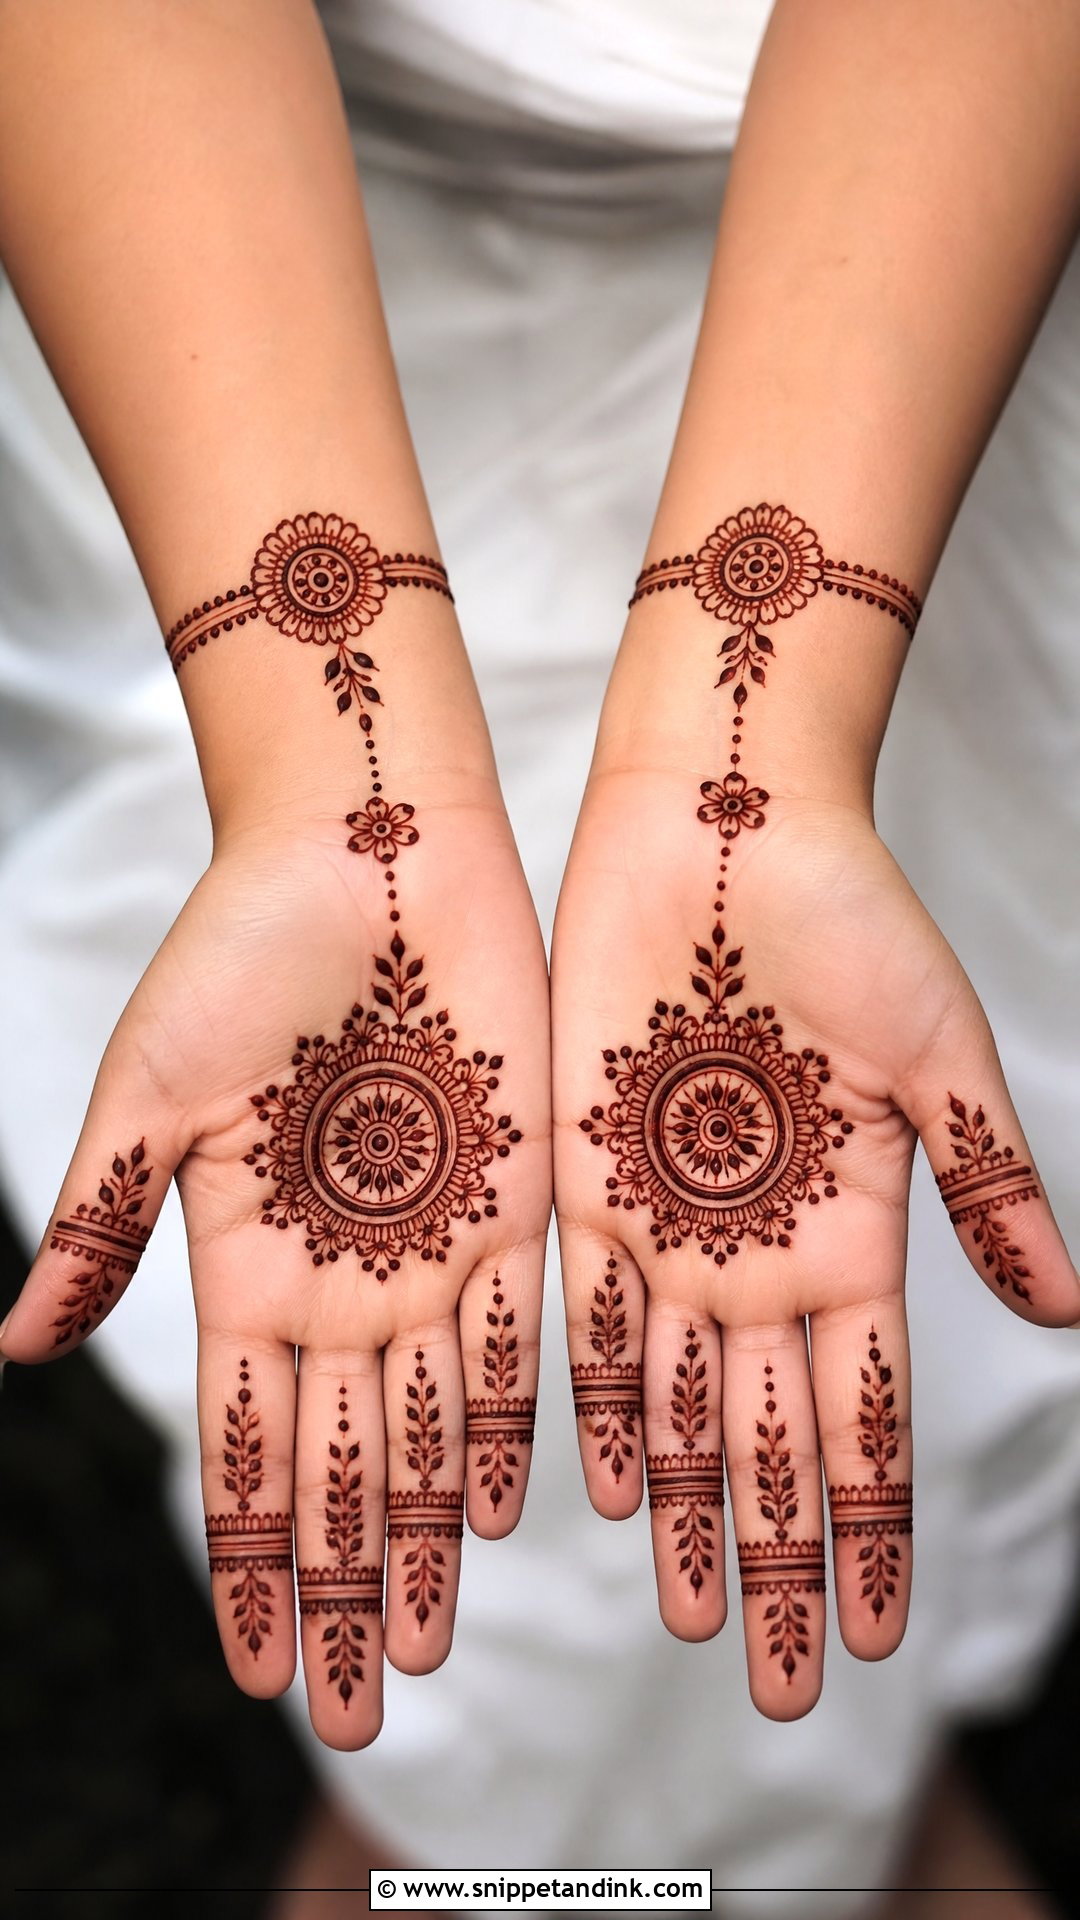
For Raksha Bandhan I like a wrist band drawn to look like a rakhi thread, with a small palm mandala above it. Dotted chains, tiny flowers and leaves link them, and the fingers get slim bands or petal tips. It is light and quick to draw, so it suits home celebrations. The rakhi detail is the part people notice, so I give it the boldest line.
29. Simple Gulf Front Hand Mehndi Design
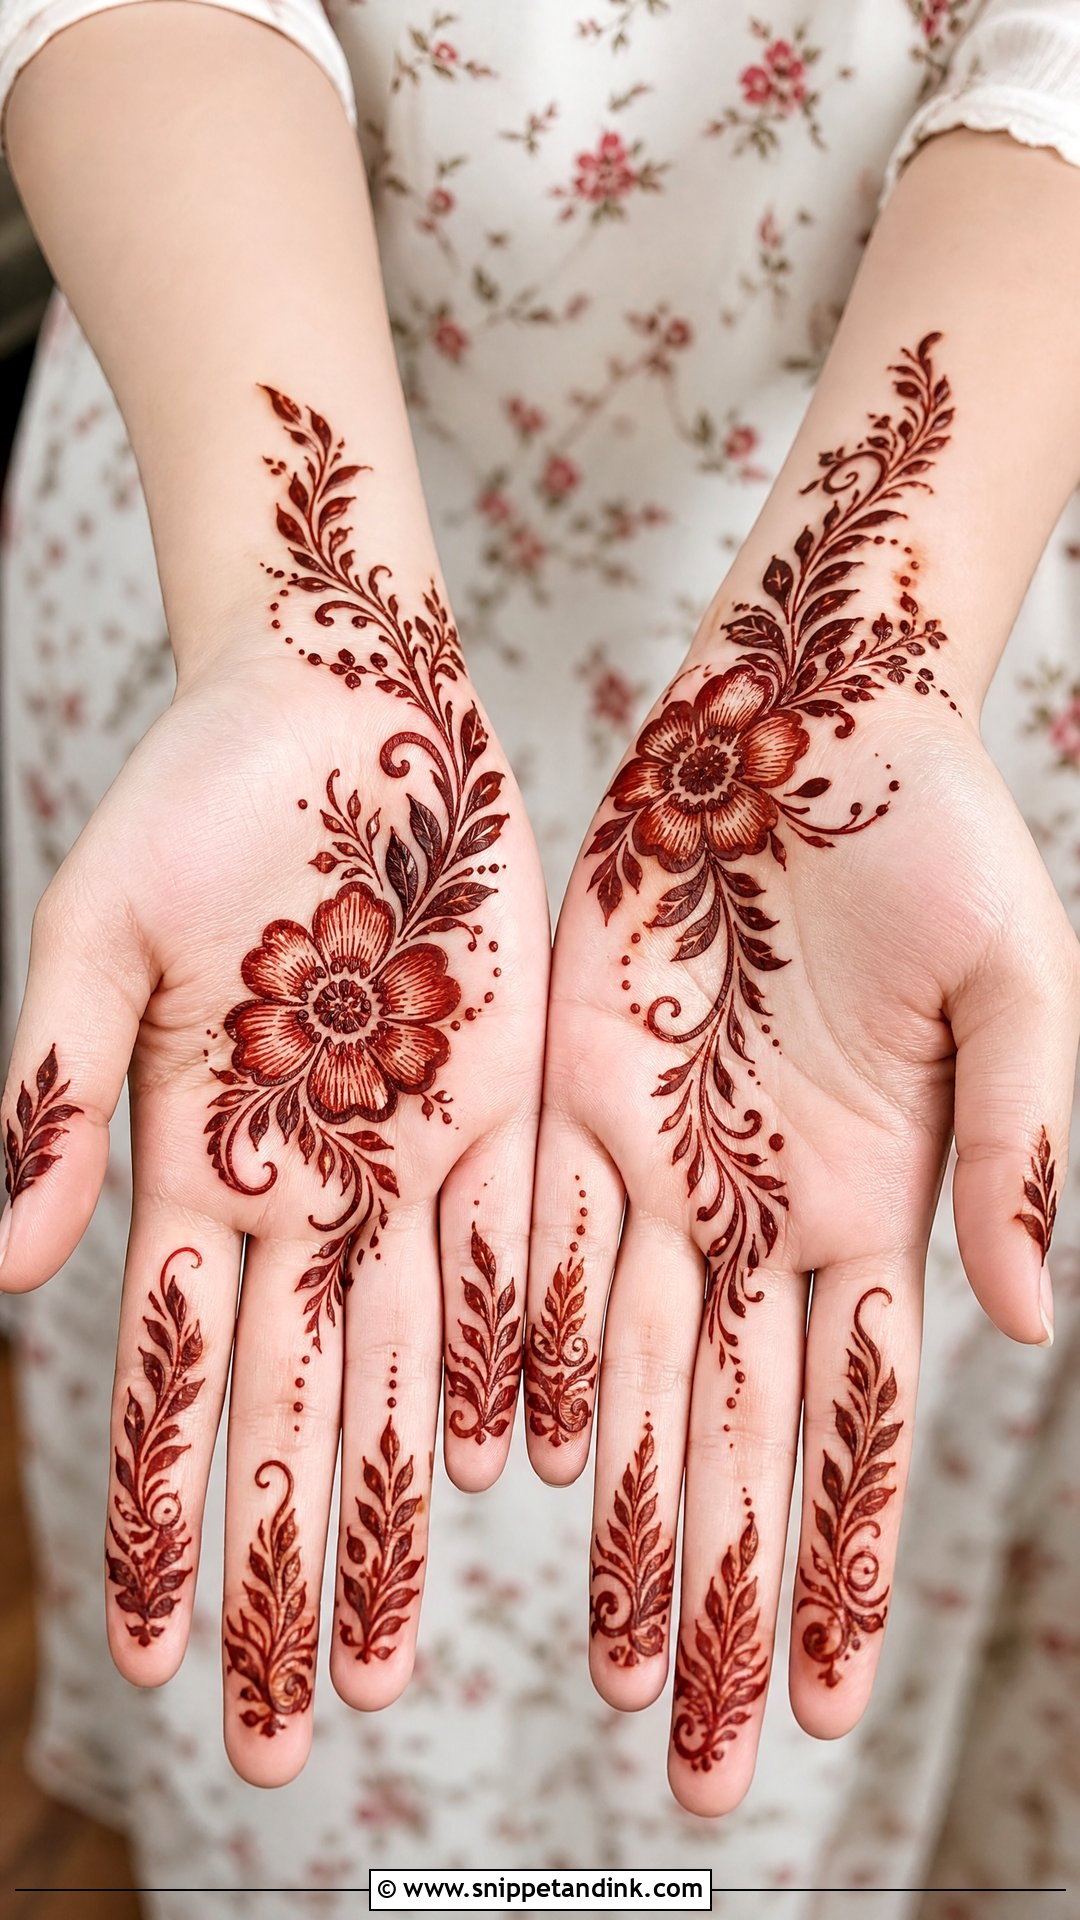
Gulf-style henna on the palm is big and open: a large flower cluster on one side, traveling toward the fingers, with leaves, dots and curved lines around it. The rest of the palm stays bare. Fingers get floral tips or diagonal leaves. Large shapes are quick and stain strongly, so I reach for this style for evening events when time is short.
30. Easy Moroccan Front Hand Mehndi Design
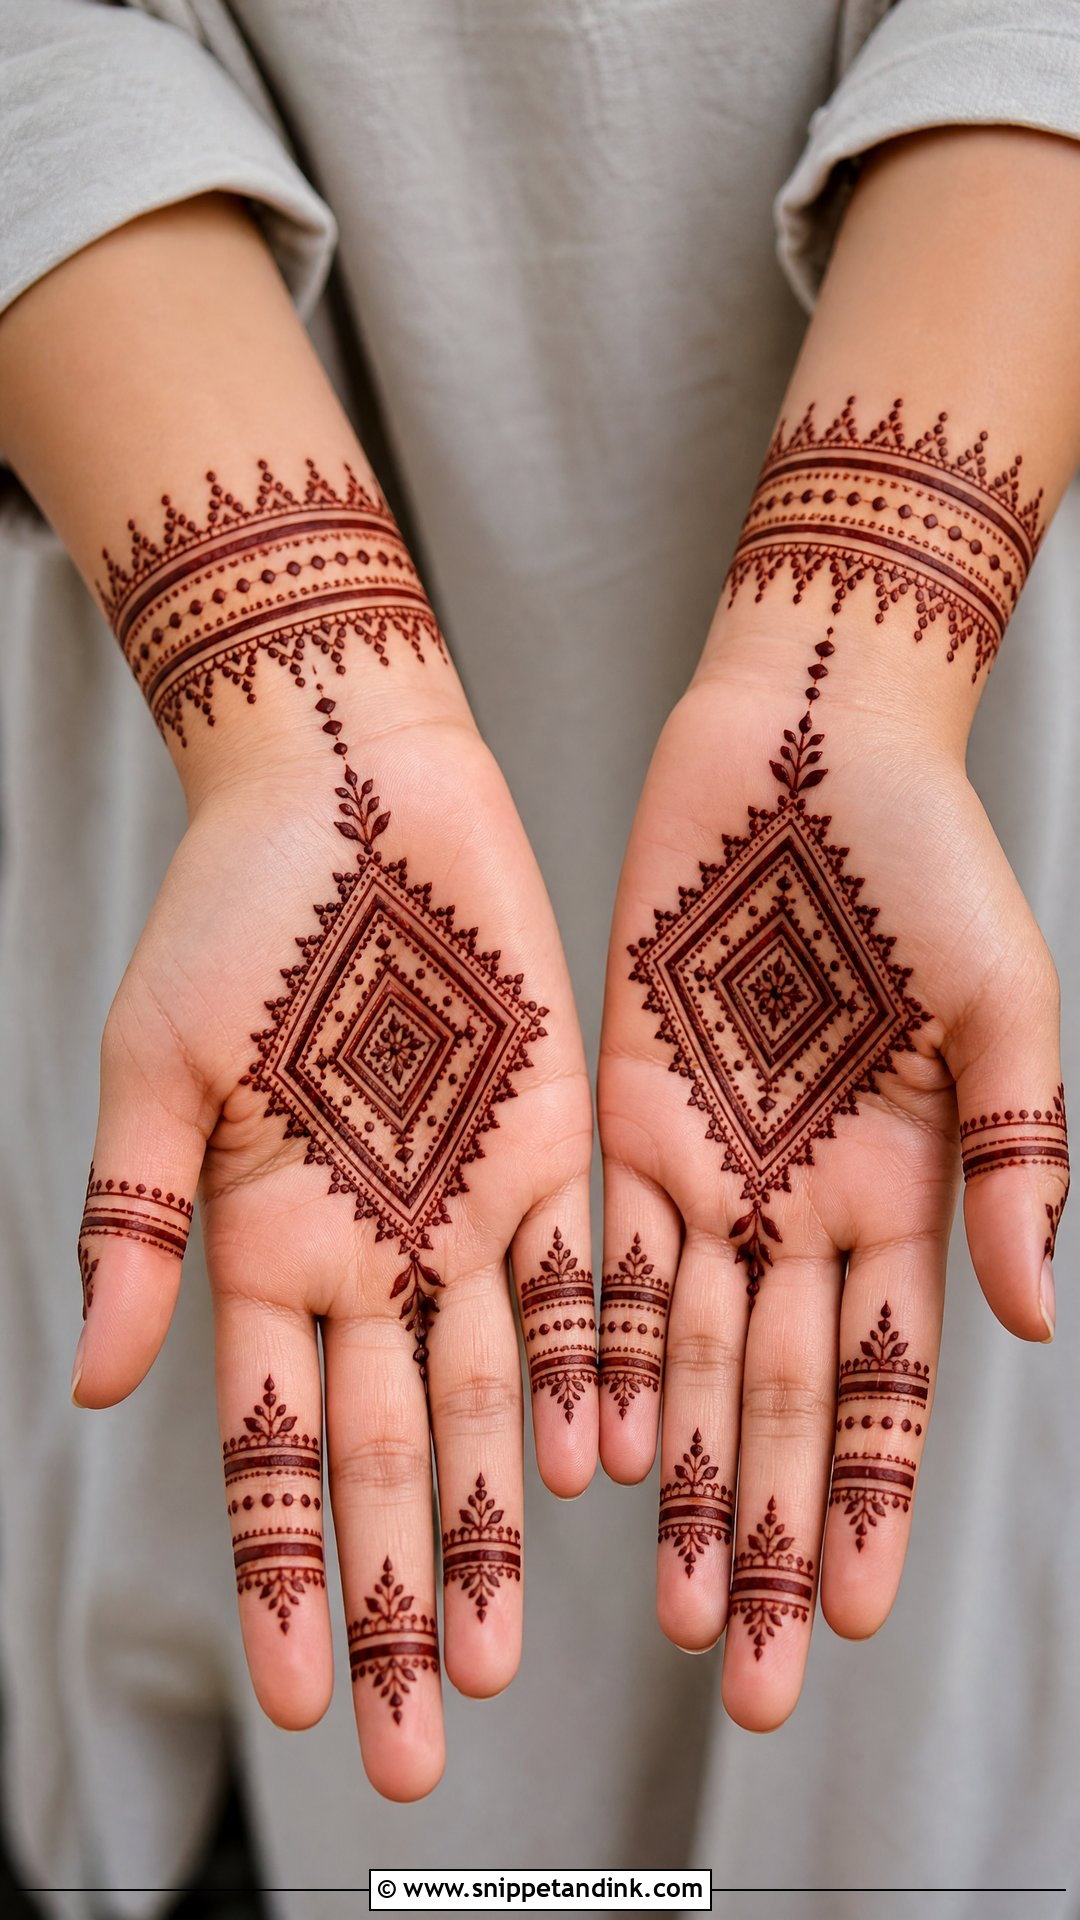
Geometry changes the mood completely. I start with a diamond or square in the center of the palm, then add dots, straight lines, small triangles and clean finger bands, finished with a geometric bracelet. Straight lines show every wobble, so I place a few guide dots first and connect them. Keep the shapes medium-sized and it stays beginner-friendly.
31. Simple Lotus Front Hand Mehndi Design
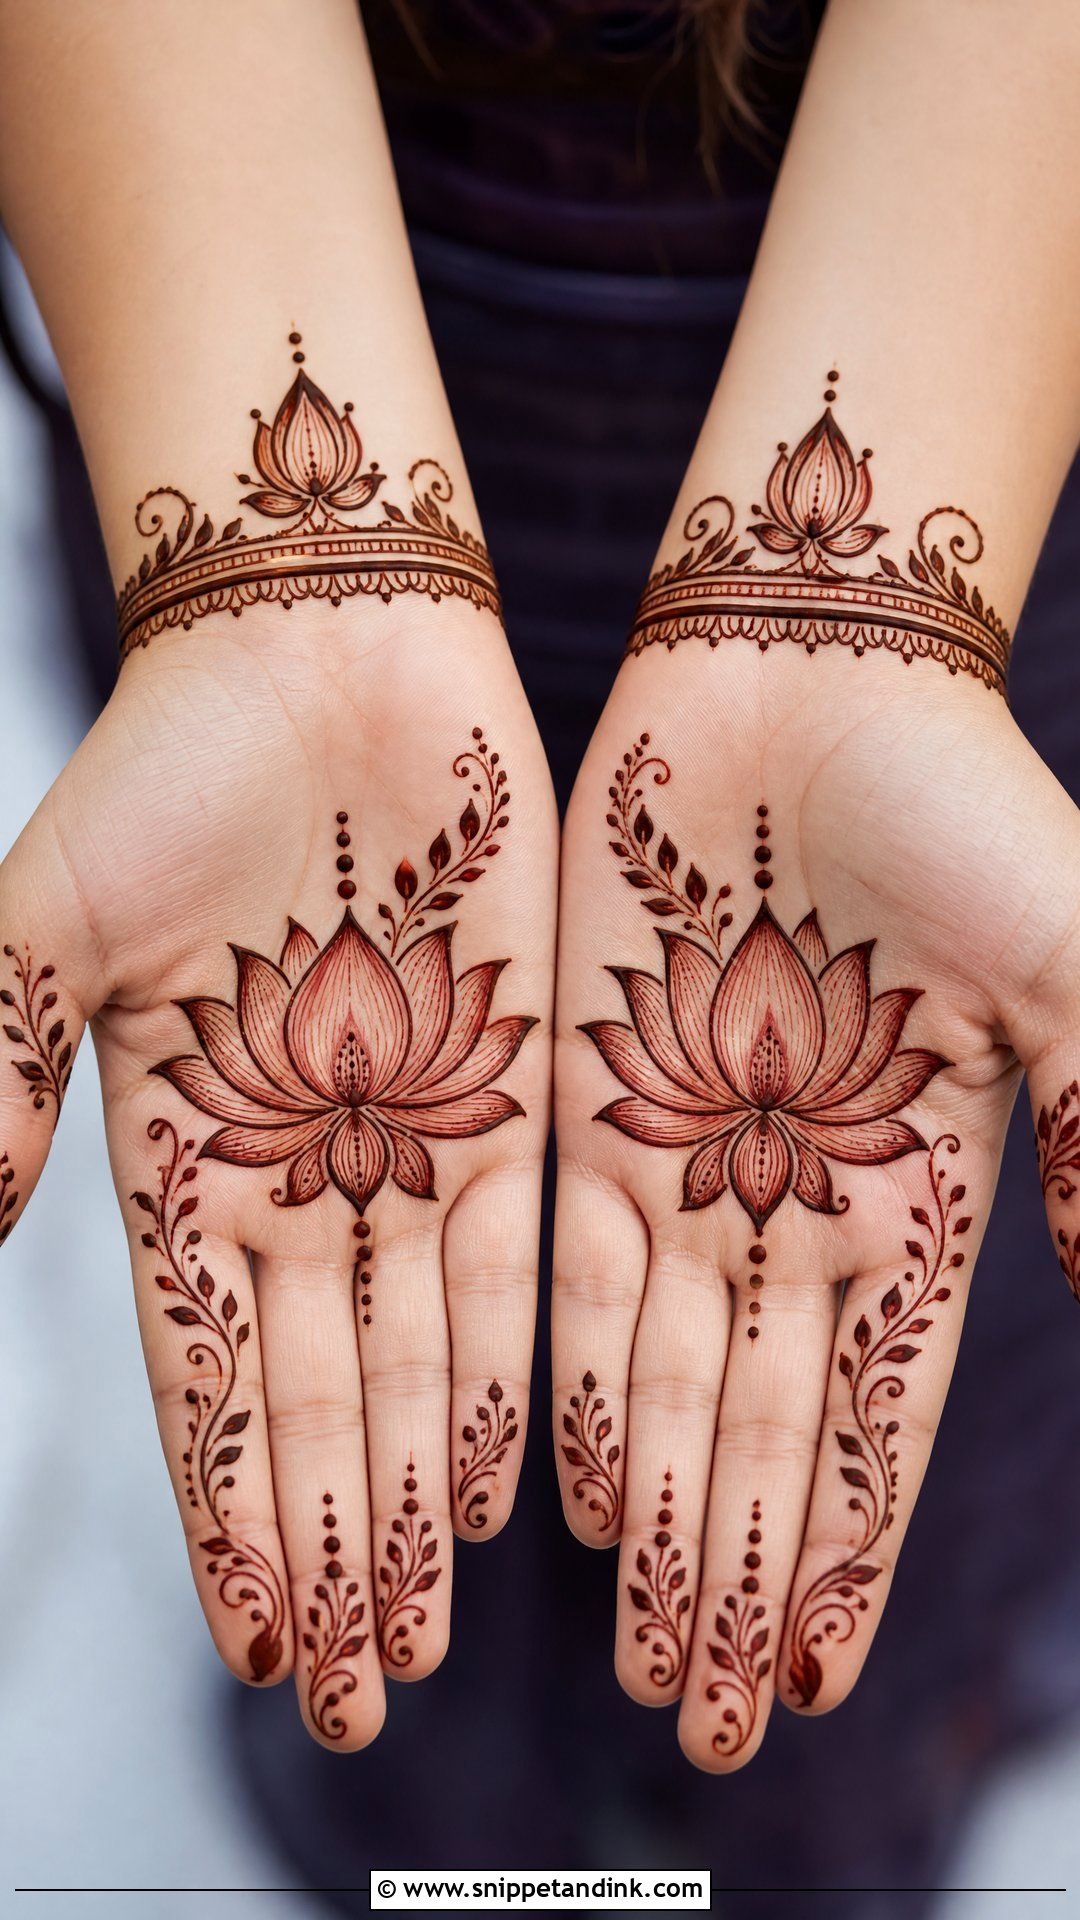
The lotus is easier than it looks because its petals are just layered ovals. I draw it in the center or lower palm, add curved leaves and dots, extend thin vines and petals toward the fingers, and sometimes finish the wrist with lotus buds. It suits pujas and festivals well. Leave open space around the flower and the shape reads cleanly even after the stain deepens.
32. Easy Peacock Front Hand Mehndi Design
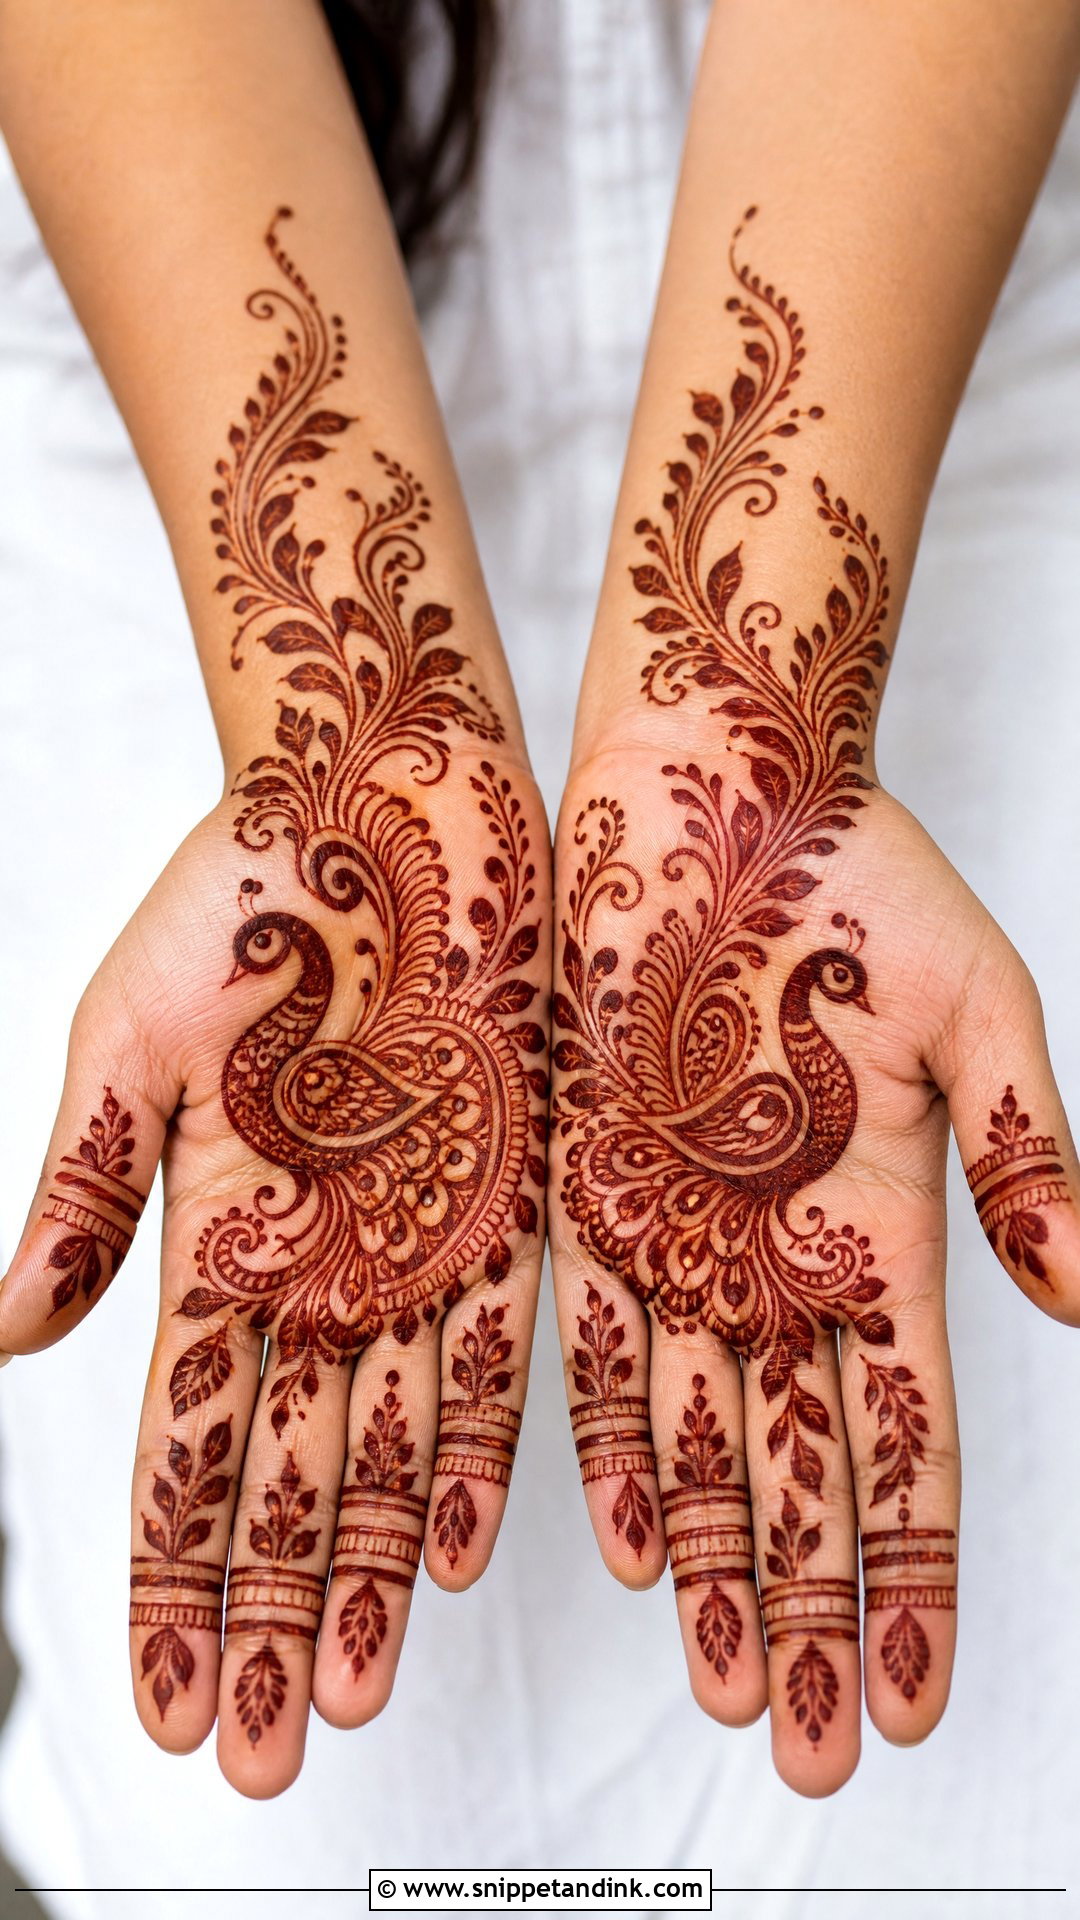
A peacock sounds complicated, but the simple version is a curved body on one side of the palm with teardrop feathers, dots and a few leafy extensions. Keep the body bold and clean rather than filling it. Feather curves and slim bands on the fingers and a small wrist vine finish it. The common error is drawing the bird too big; I keep it to one side so the hand doesn’t look crowded.
33. Simple Shaded Front Hand Mehndi Design
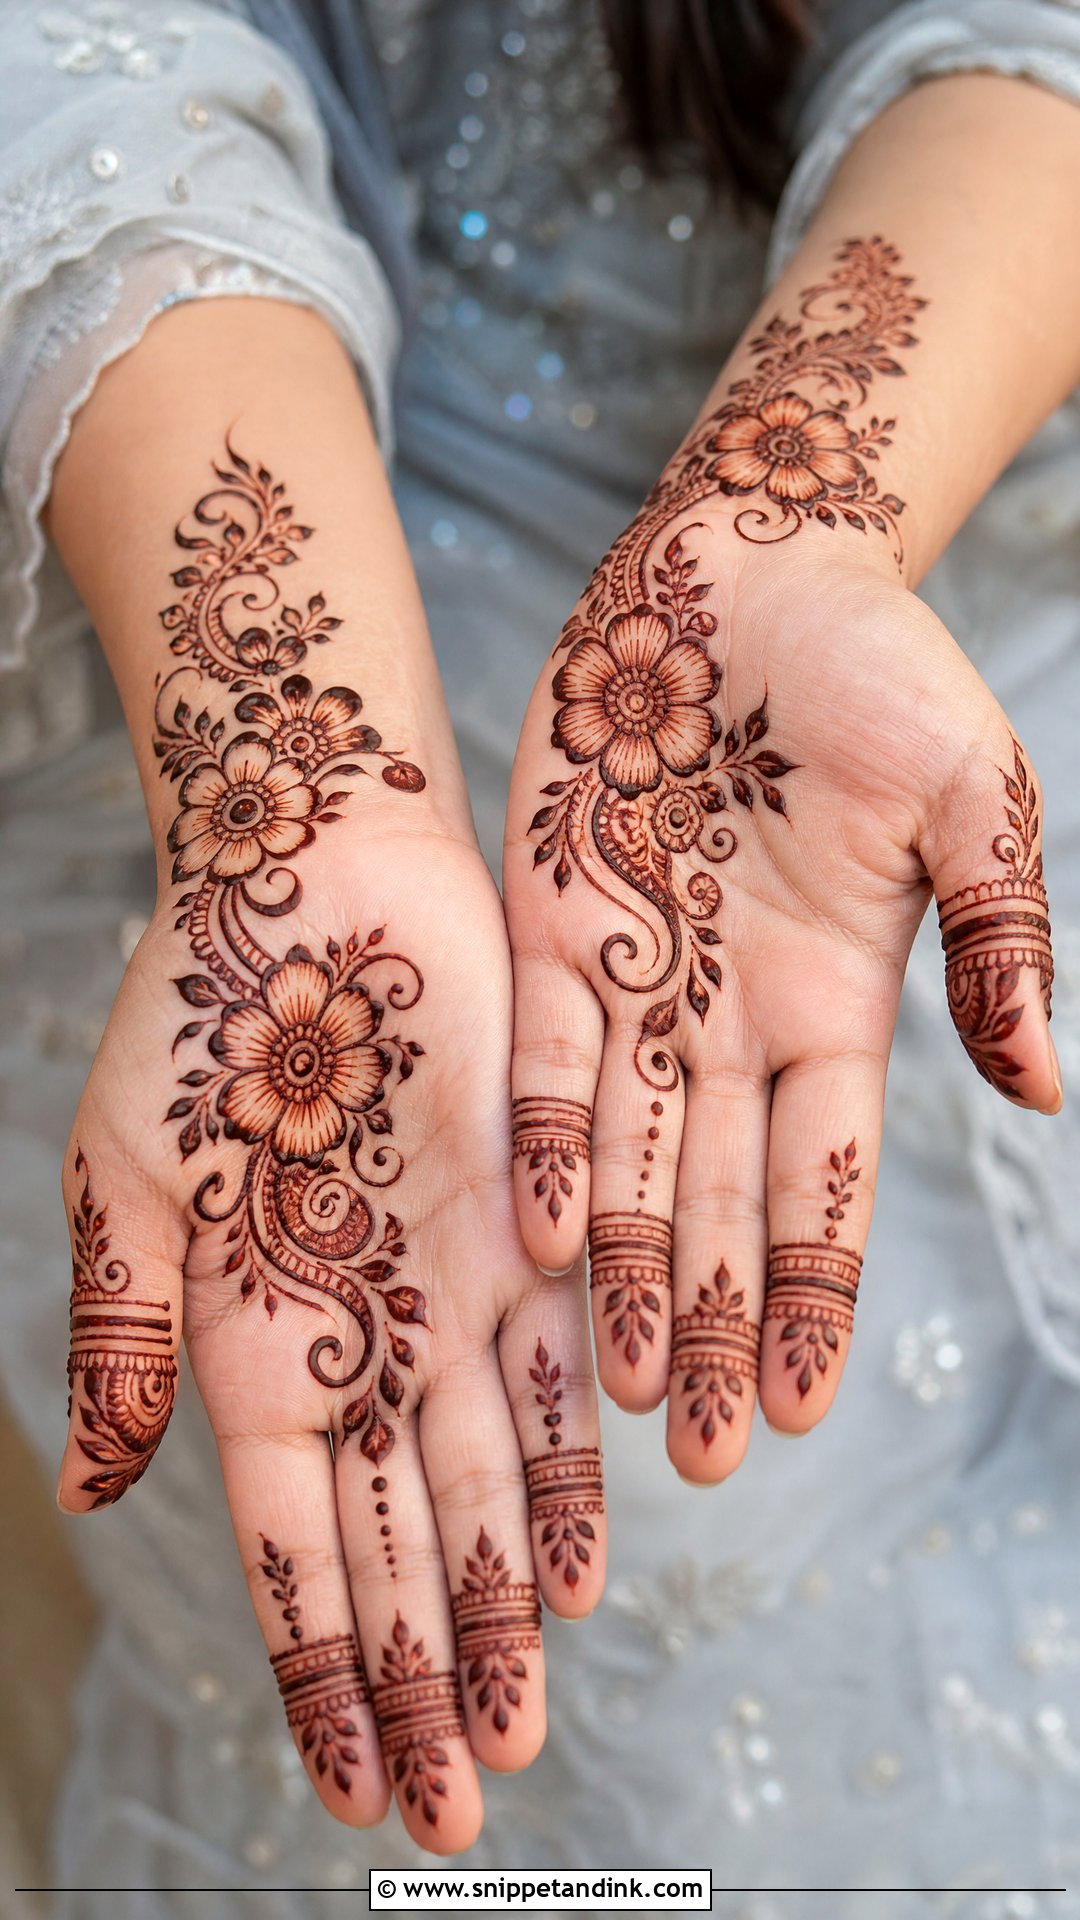
Shading adds depth with very little effort. I lay a floral trail across the palm, shade the petals lightly with thin lines or soft strokes, and add paisleys, dots and simple finger bands. Shading also disguises small wobbles, which helps beginners. Keep it controlled; on the palm, a heavily shaded petal can stain almost solid and lose its shape.
34. Easy Front Hand Mehndi Design With Dots
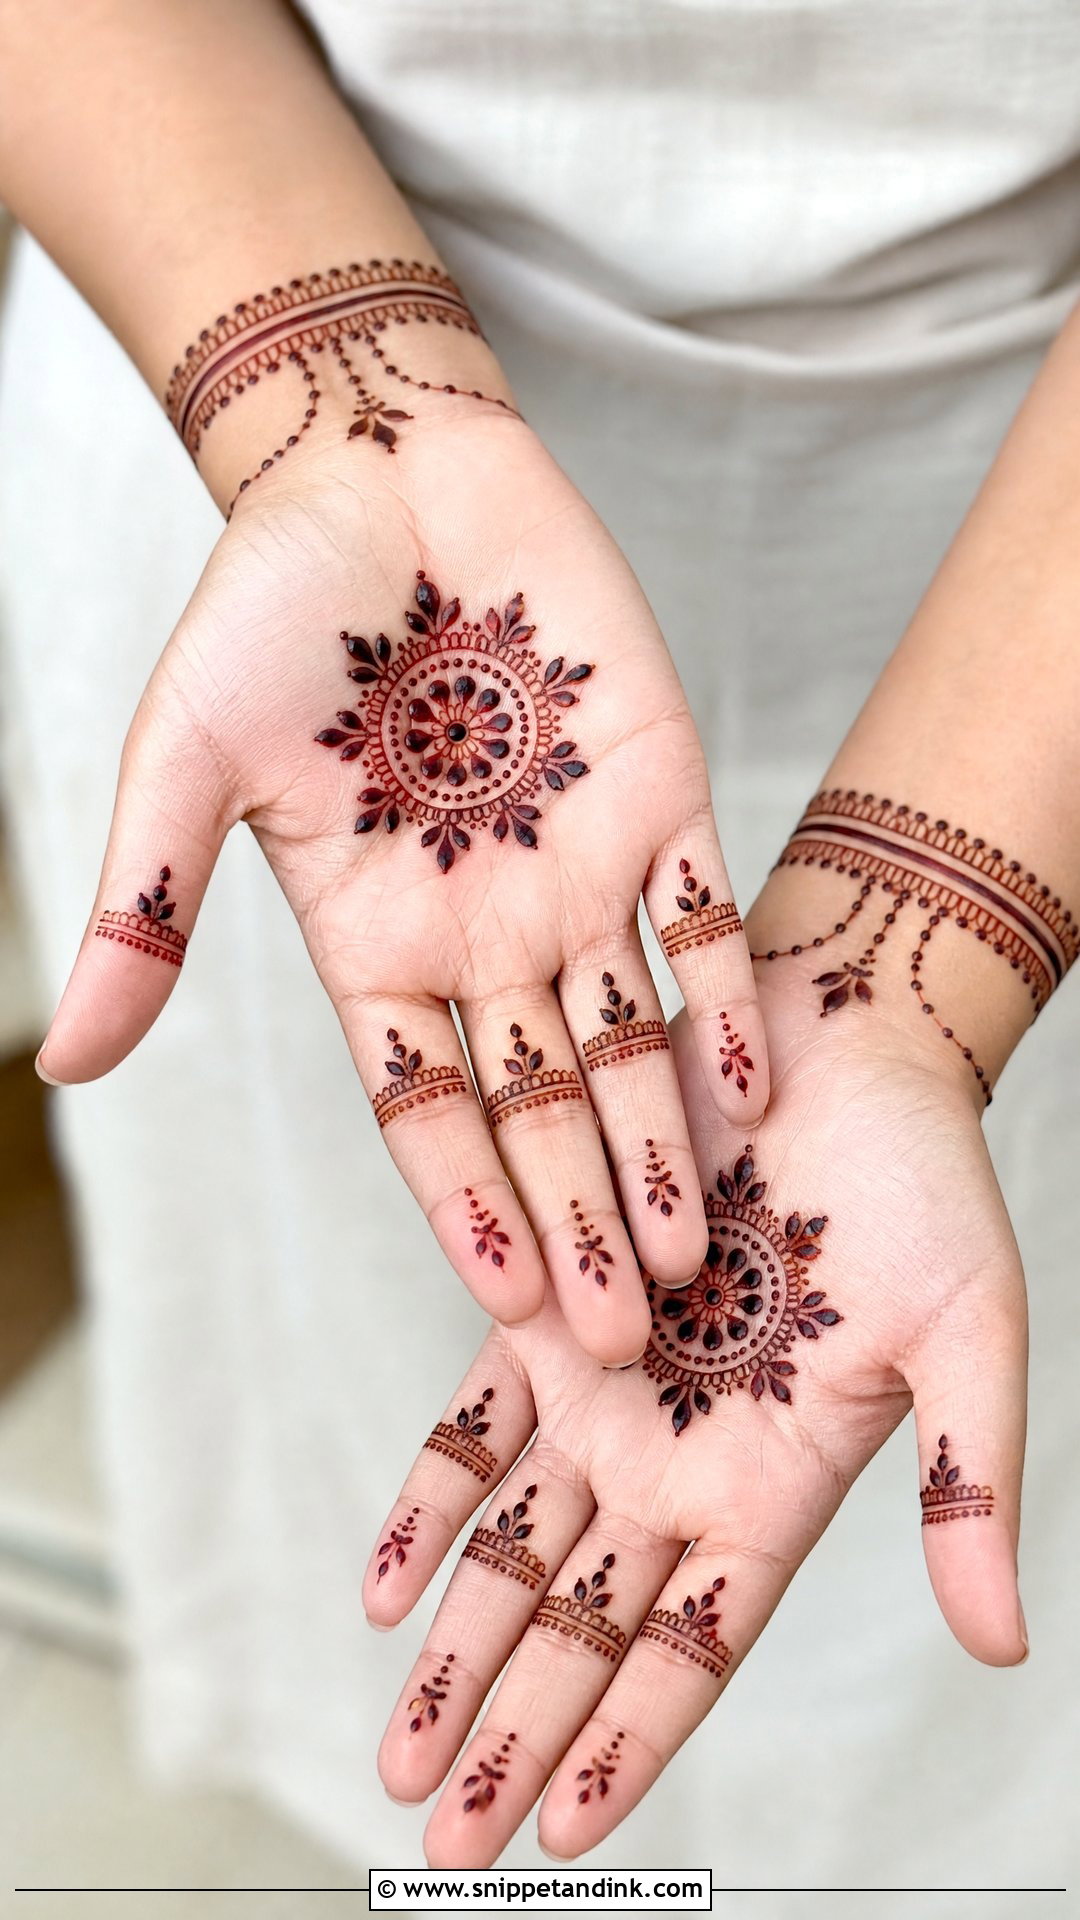
Dots are the quickest way to make a little look like a lot. A small palm flower or mandala, dotted rings and dotted chains around it, finger bands with dot borders and a bracelet of dots and lines. They fill gaps and join motifs without any hard drawing. The only rule I’m strict about is size: keep each row of dots the same, or it looks accidental.
35. Simple Front Hand Mehndi Design With Vines
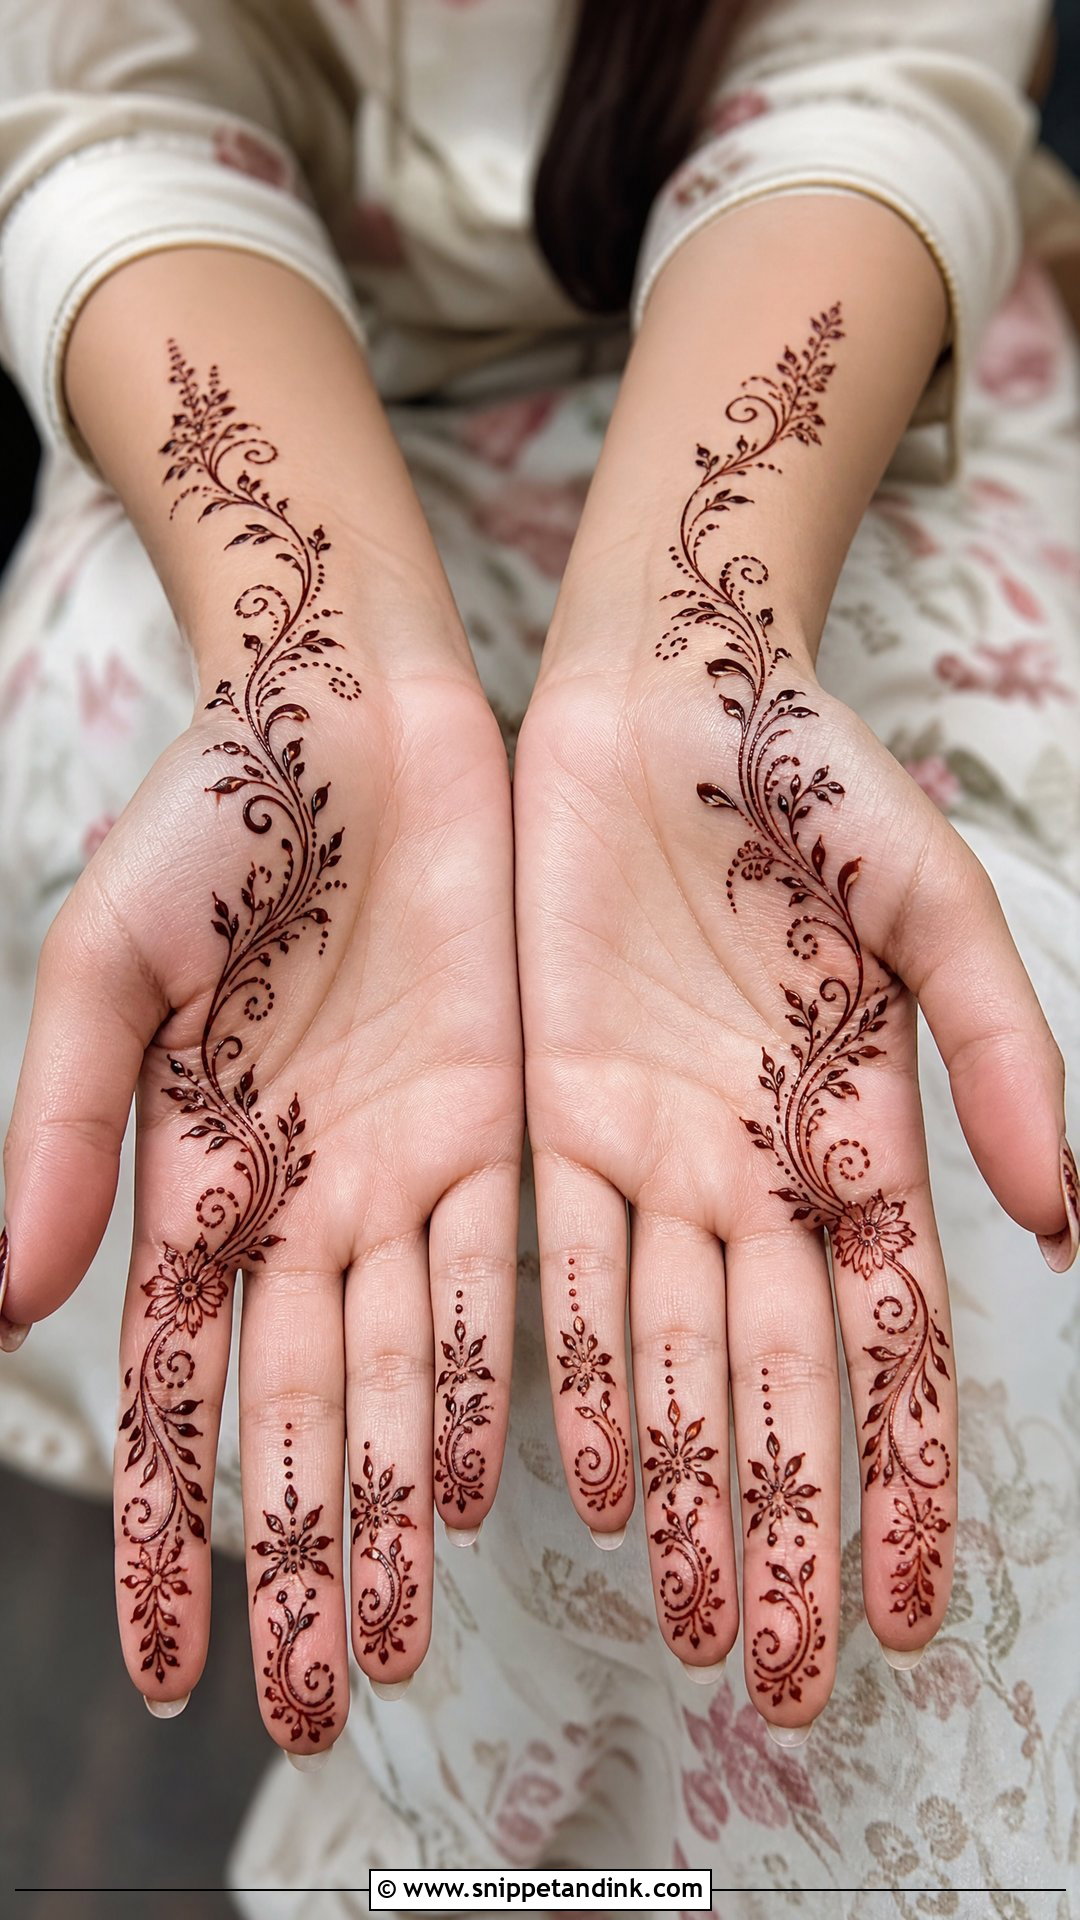
A vine is the most natural shape on a palm, because it can follow the hand’s own lines. I start at the wrist and curve it across toward the index or middle finger, leaves on both sides and tiny flowers along it, with matching leafy trails or thin bands on the other fingers. It needs no symmetry at all, which makes it ideal for a first try at Eid or Diwali.
Hands Out of Action: Planning the Hours After Palm Henna
Back-hand designs let you carry on with your day. Palm designs don’t. Until the paste is dry and ideally for several hours after that, your palms can’t open a door, scroll a phone or hold a fork without smudging something. I warn every client about this, because it’s what spoils more designs than shaky lines do.
- Eat and use the bathroom before you sit down. You’ll thank yourself an hour later.
- Do one hand completely before the other if you need a hand free, or have someone with you to help.
- Sit in a warm room. Cold air slows the stain, and you’ll get a deeper color if your hands stay warm.
- Once the paste feels dry, a light dab of lemon and sugar keeps it attached. Don’t soak it.
- If you’re keeping it on overnight, wrap the hands loosely in tissue and cotton or wear old cotton gloves, then sleep on your back.
- In the morning, scrape the paste off rather than washing it, and try to keep water off for as long as you can.
What I Check in a Cone Before It Touches Anyone’s Palm
With several people in a row, the paste matters more than the design. Fresh natural henna smells earthy, slightly grassy, and goes on as a smooth brown-green line. Leftover paste that smells of chemicals, looks jet black or promises a stain in minutes is not something I’d use. Fresh paste loses strength within days at room temperature, so I keep spare cones in the freezer and thaw one at a time. If anyone has sensitive skin, I do a small patch on the inner wrist first. It also helps to warn people that the palm will look bright orange when the paste comes off. That is the start of the stain, and it darkens over the next day or two.
Start With a Circle and a Few Dots
Front-hand mehndi gives you plenty of ways to decorate without anything heavy or difficult. Mandalas, flowers, Arabic trails, vines, paisleys, bracelets and finger-only designs can all be scaled to your skill and the occasion. If you are new to the cone, begin with dots, leaves, circles and simple bands. When you want more, add a wrist cuff, shaded petals or a small jaali patch. Clean spacing will do more for the result than extra detail, and with practice even the simplest mehndi looks polished.
You'll Like These Ideas:


Leave a Reply