
A check pattern is the most structured thing you can put on the back of a hand. Call it jaali, grid, mesh or lattice; it is a set of crossing lines, and it gives a design the order that flowers and paisleys on their own don’t have. That is also why it is less forgiving than it looks. One line drifting off its angle shows straight away. I use checks in everything from a five-minute festival patch to full wedding hands, and they sit comfortably in Indian, Arabic, Indo-Arabic, Moroccan and Gulf-inspired henna. Below are thirty ways to use them, with notes on grid size, fills and where each one tends to go wrong.
Drawing a Grid That Stays Even on a Curved Hand
The back of the hand isn’t flat. It rises over the knuckles and dips between the tendons, so a grid that looks perfect with the hand stretched can look crooked once it relaxes. Here is how I lay one out, and it is the same method I’d give anyone practising at home.
- Rest the hand relaxed on a cushion, fingers slightly apart, not stretched flat. That is how it will be seen and photographed.
- Draw the border of the grid area first. A clean edge gives every line a place to start and stop.
- Draw all the lines in one direction, spacing them by eye against the border, then let them set for a minute.
- Only then draw the crossing lines. Crossing wet lines straight away tends to drag paste and leave blobs at each intersection.
- Add dots or fills last, in alternate boxes, and step back to check the balance before filling more.
Paste consistency matters more for checks than for florals. It should flow from the cone like soft toothpaste and hold a thin, raised line. Paste that’s too runny spreads and closes up the boxes; paste that’s too stiff breaks into dashes. Test a few lines on paper or your own forearm before starting on the hand.
1. Simple Back Hand Check Mehndi Design
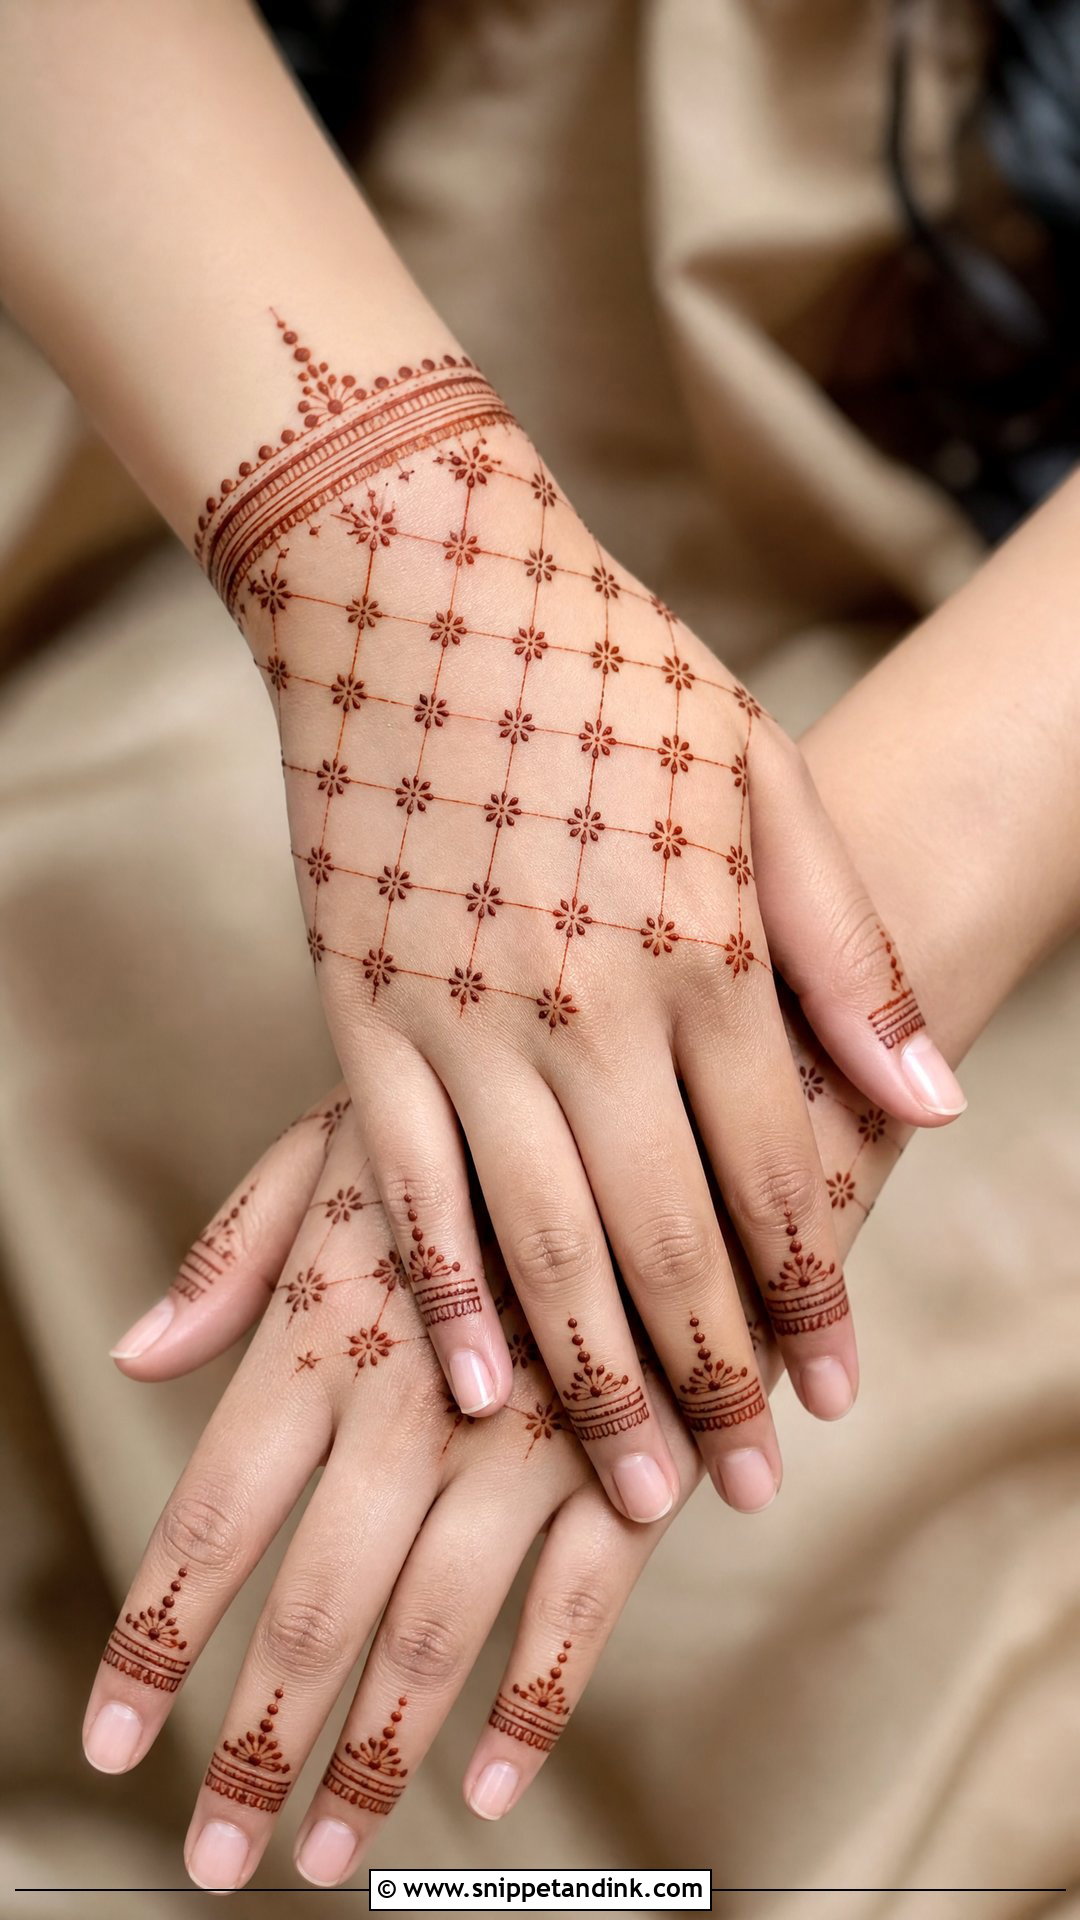
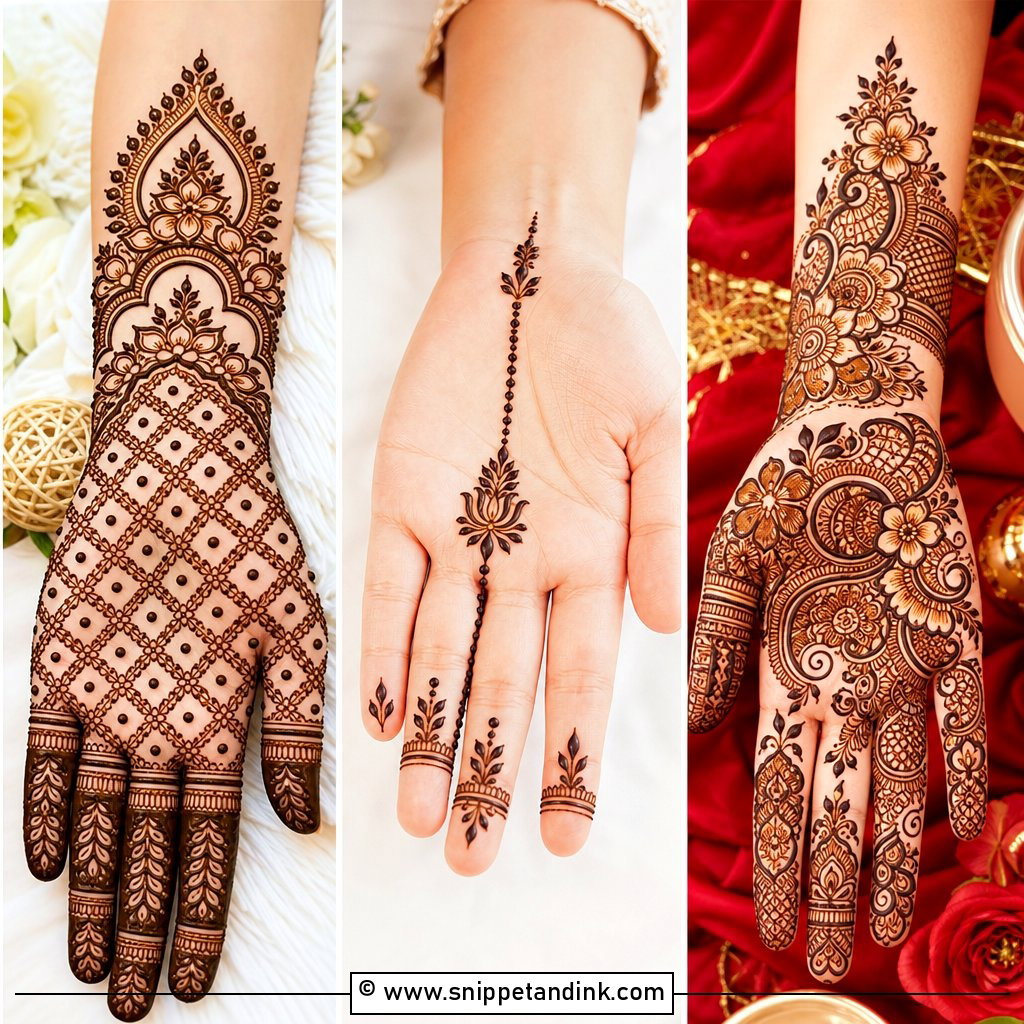
Start small. A little check patch across the centre of the back of the hand, framed with tiny dots and slim lines, plus light finger work and one thin bracelet band at the wrist, is enough. Square checks look modern; diamonds feel more traditional. This is the design I give people who are nervous about mehndi or short on time, because a small grid hides small wobbles. It works for casual functions, college events and anyone who wants a quick, tidy result.
2. Full Back Hand Check Mehndi Design
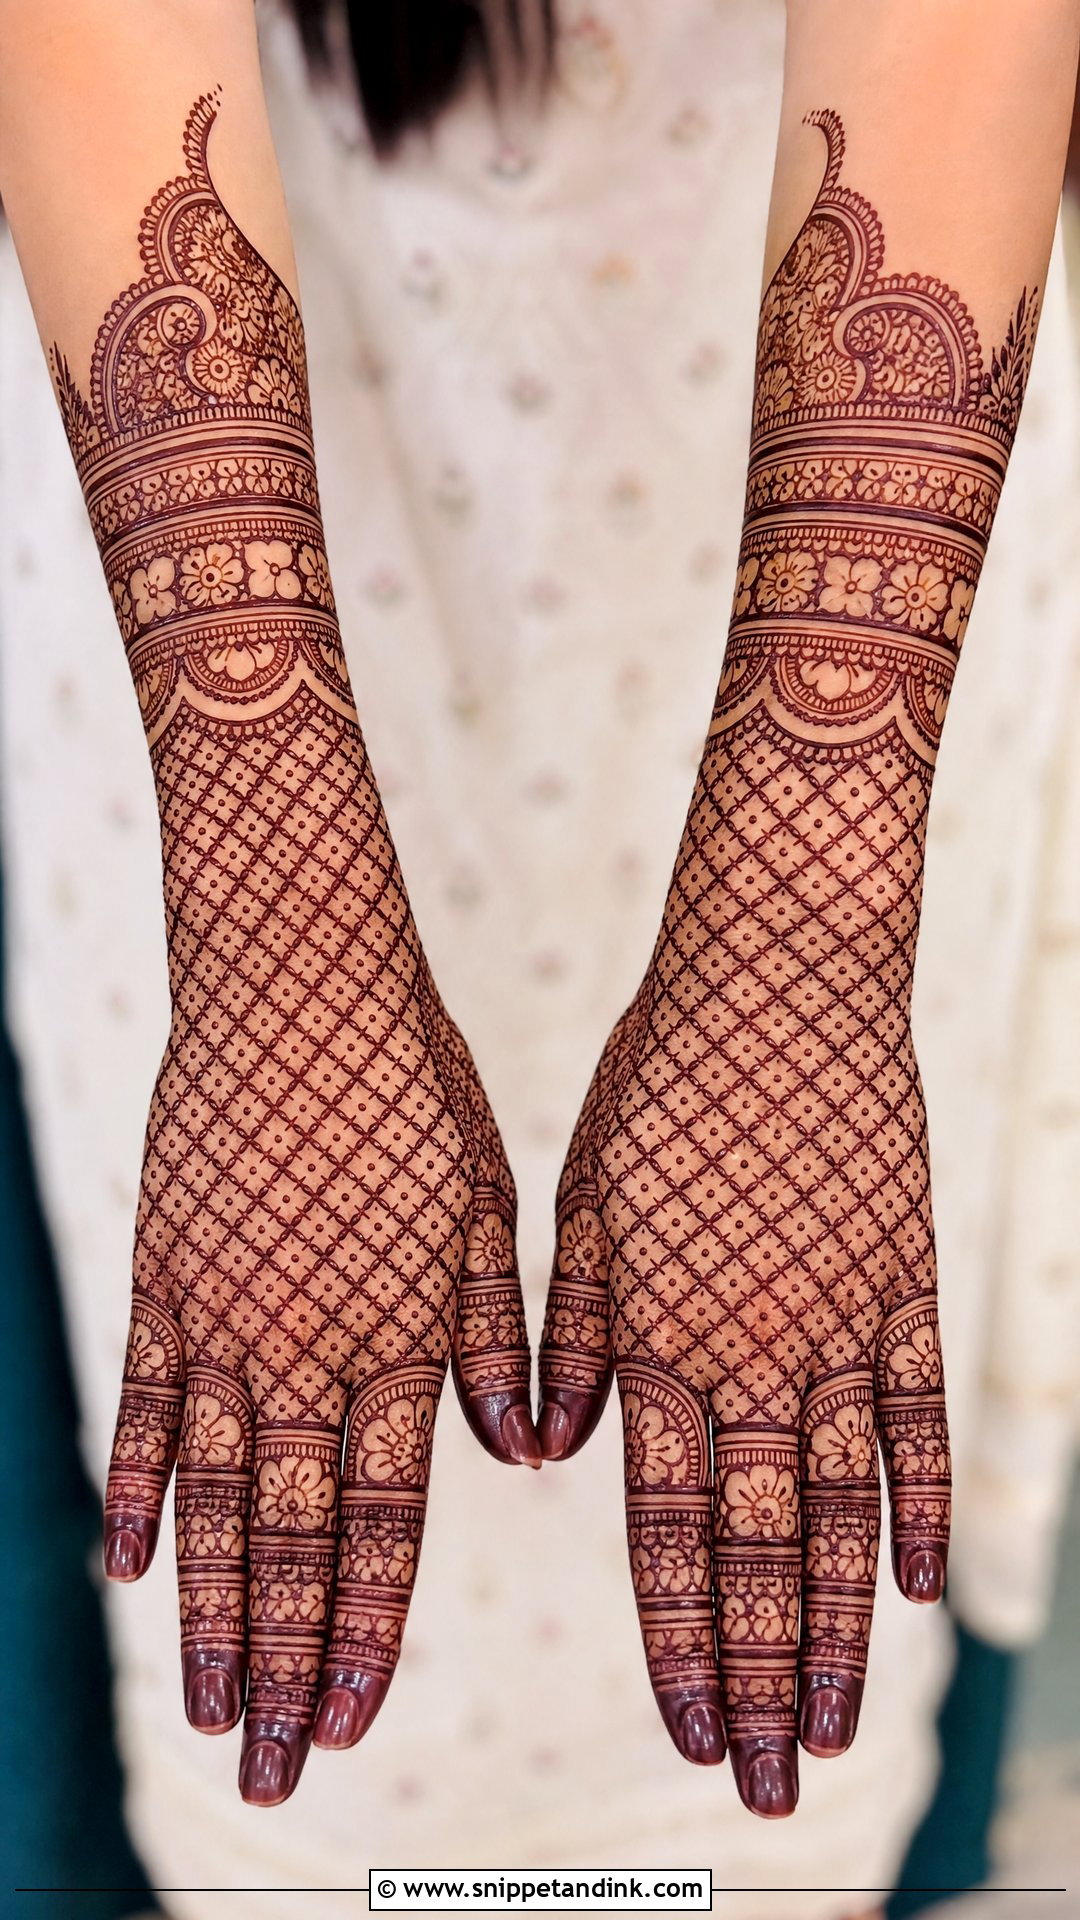
Full coverage spreads the grid across the centre of the hand and surrounds it with floral borders, paisley corners and leafy finger trails, finishing in stacked bands at the wrist. Filling alternate boxes with dots, tiny petals or leaf strokes gives depth; filling every box makes it look flat and dark once stained. Even spacing matters more here than anywhere else, since a large grid magnifies any unevenness. It suits weddings, Eid, Diwali and family photos.
3. Arabic Back Hand Check Mehndi Design
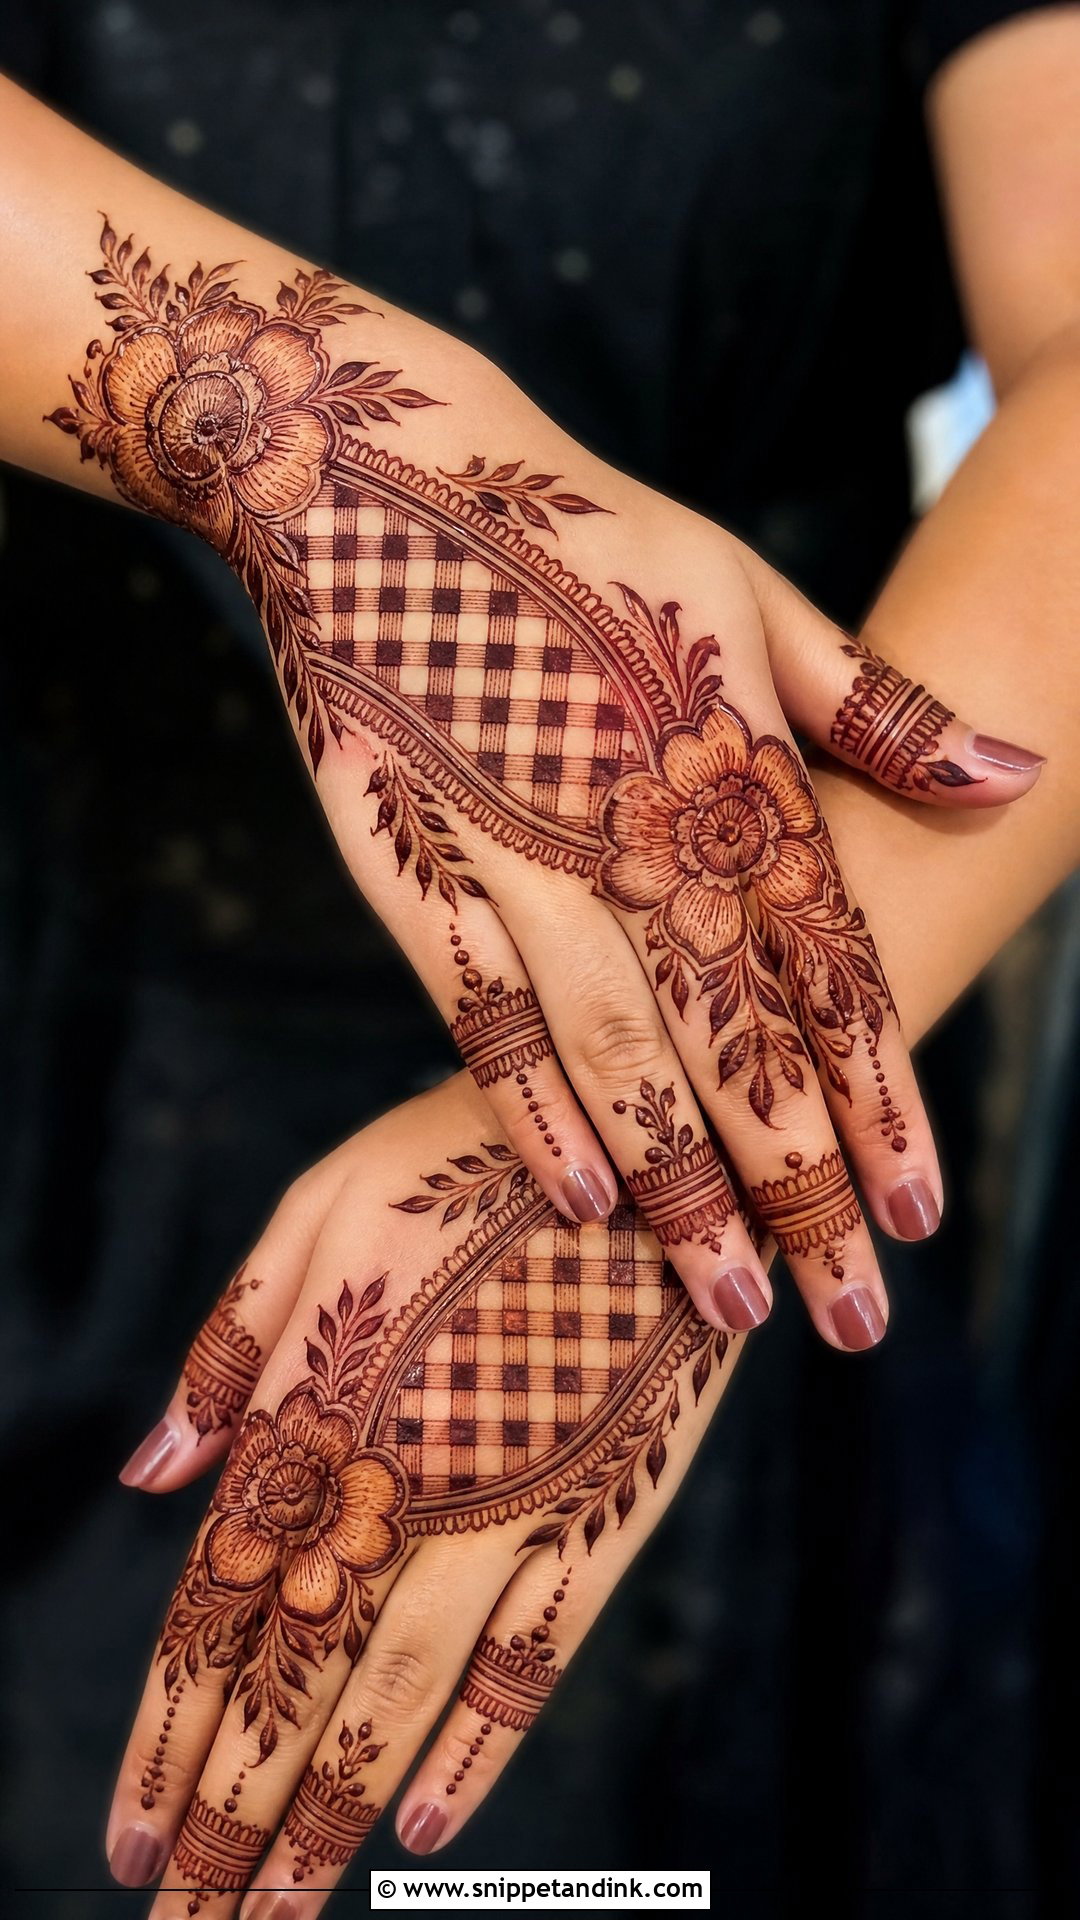
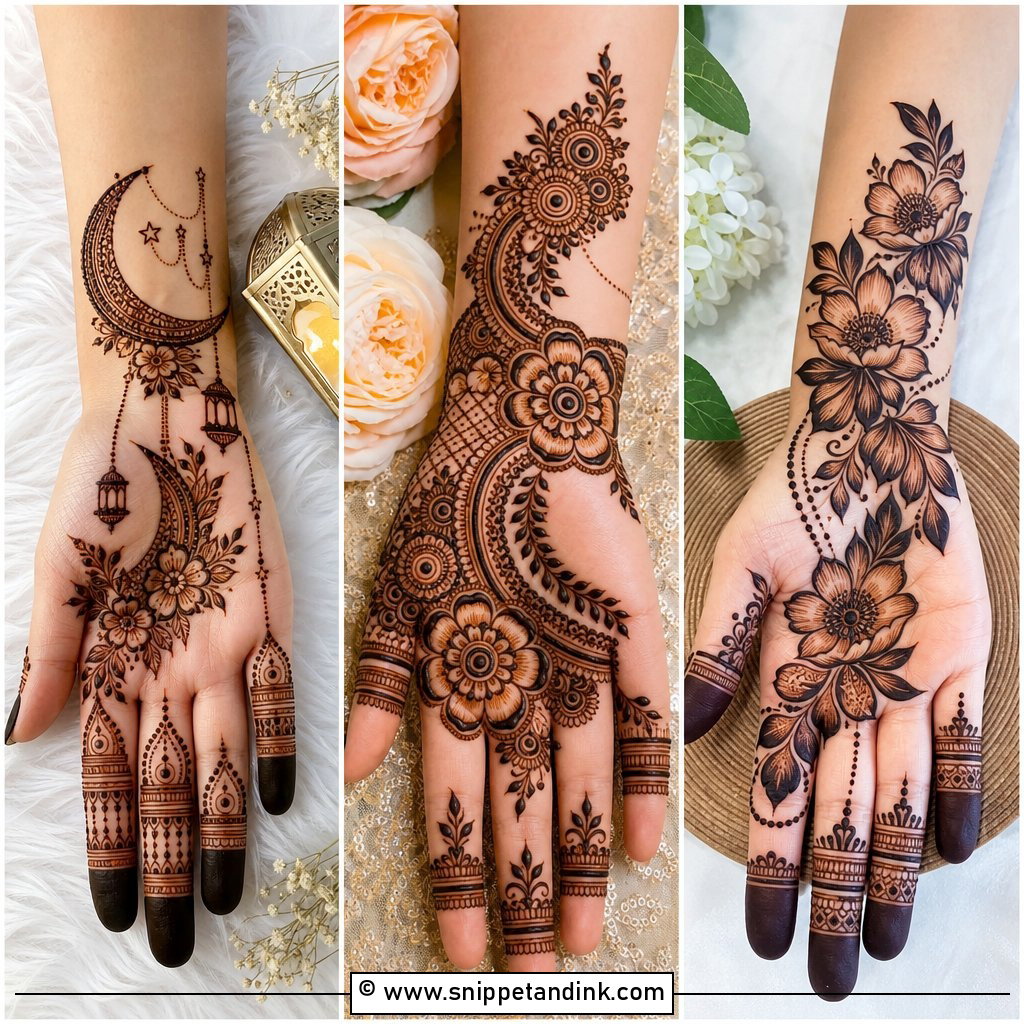
In Arabic work the check panel becomes a diagonal band running from the wrist toward one finger, with large flowers, shaded leaves and curved vines on either side and plenty of bare skin around it. The diagonal makes the hand look longer. I’d keep the grid inside the band fairly open; a tight mesh fighting bold Arabic flowers looks busy. Slim finger bands, small leaves and dotted tips finish it. It is fast to apply and goes with most festive outfits.
4. Indian Back Hand Check Mehndi Design
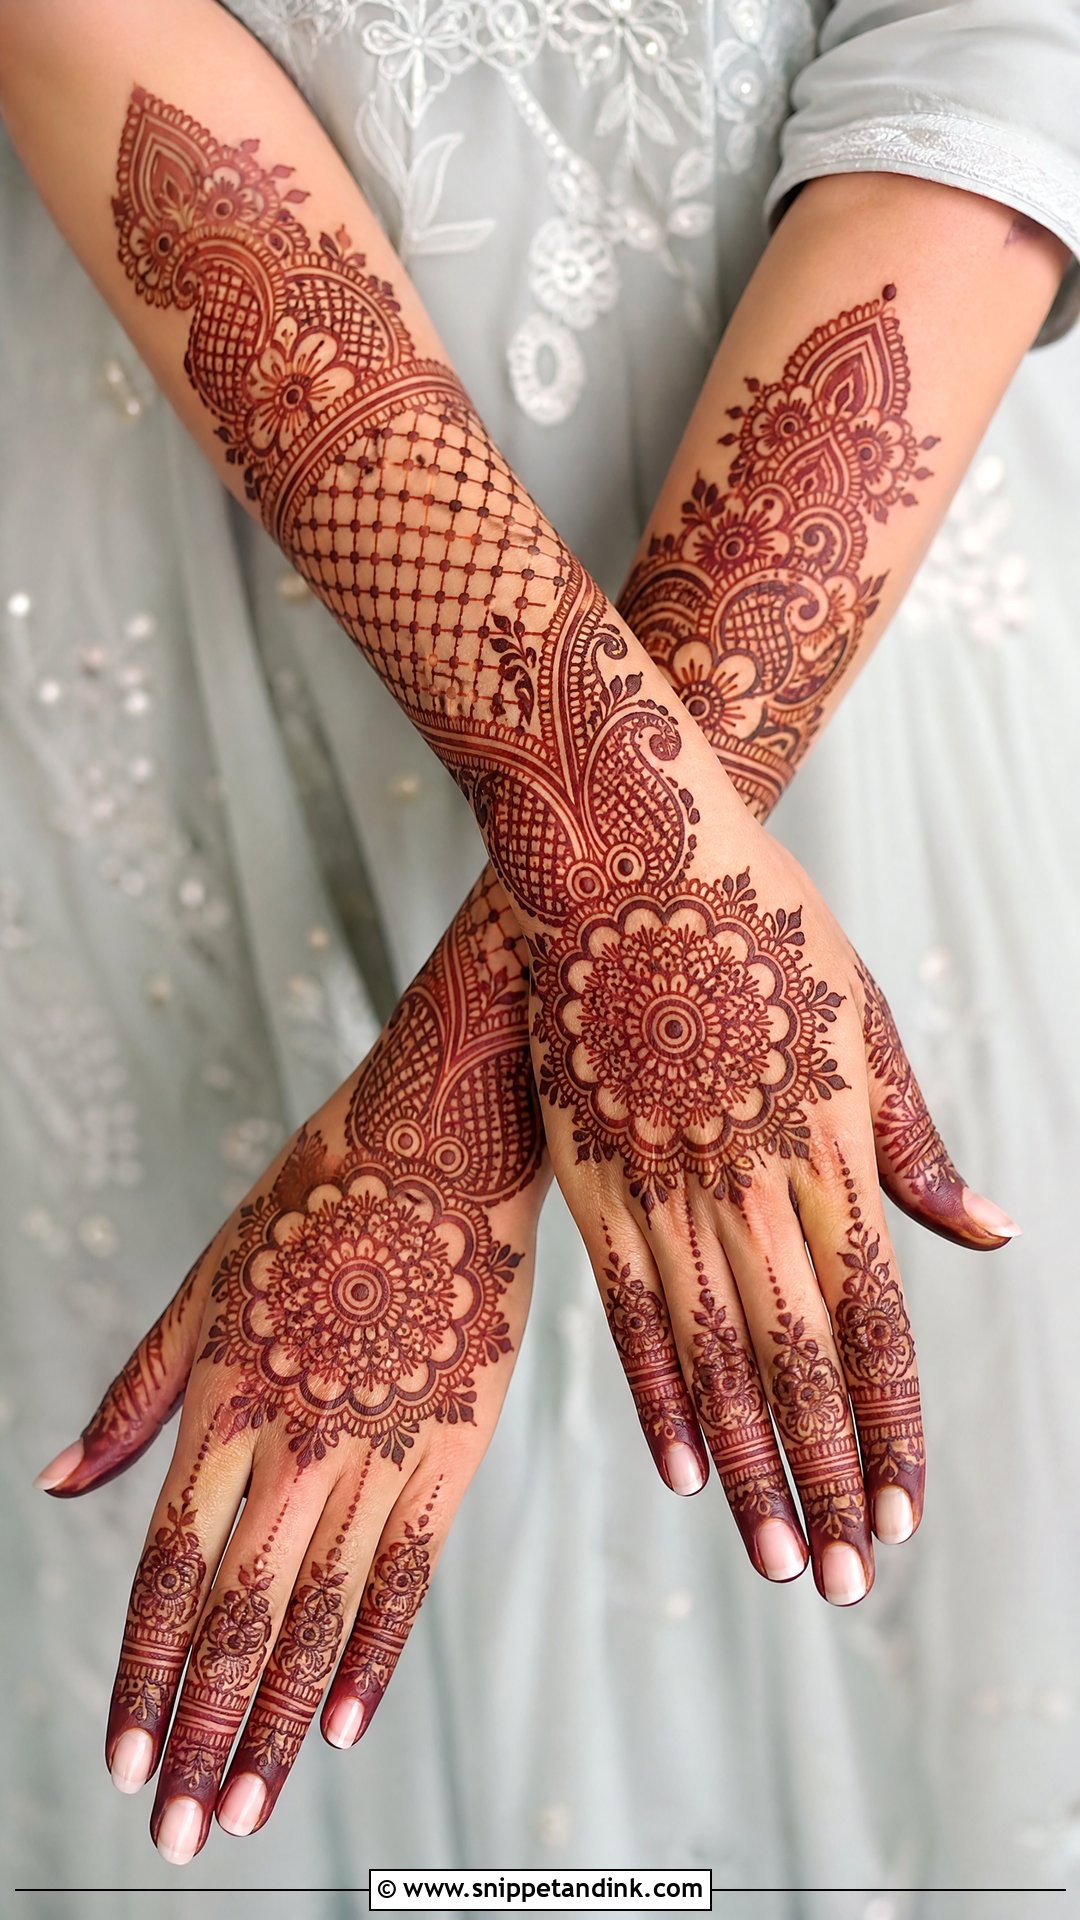
Indian layouts tuck the checks inside a bigger composition. My classic version puts a round mandala at the centre of the back of the hand with check sections on both sides, small dots inside the boxes, leafy lines and petal tips on the fingers and a cuff border at the wrist. Here the grid works as texture behind the main motifs rather than as the star. It suits weddings, pujas and traditional outfits.
5. Indo Arabic Back Hand Check Mehndi Design
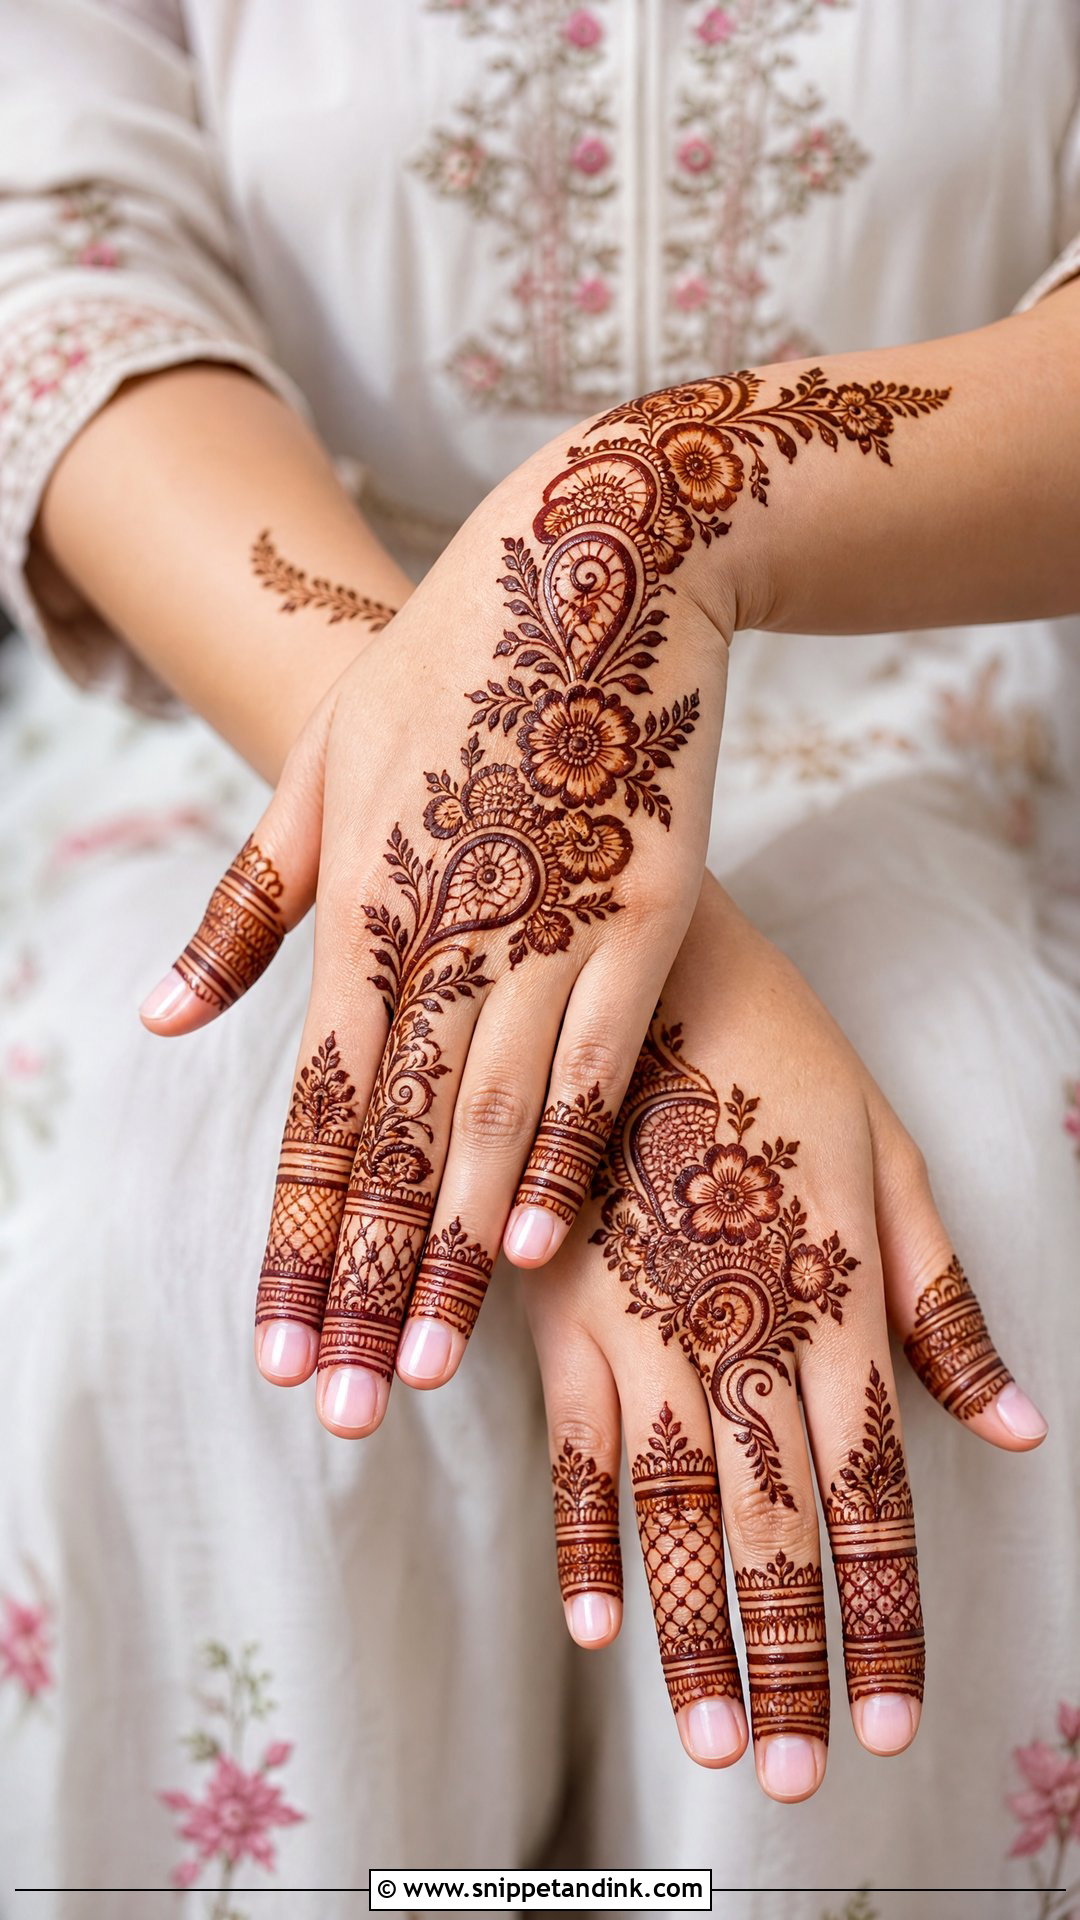
Indo-Arabic gives you bold flowers and open flow from the Arabic side with fine checks, dots, paisleys and finger fillers from the Indian side. A good layout runs a floral trail across the hand and lets a check panel fill one side, with mixed bands, leaves and small mesh patches on the fingers. It looks festive without a long sitting, which is why I suggest it for bridesmaids, engagement guests and festival wear.
6. Bridal Back Hand Check Mehndi Design
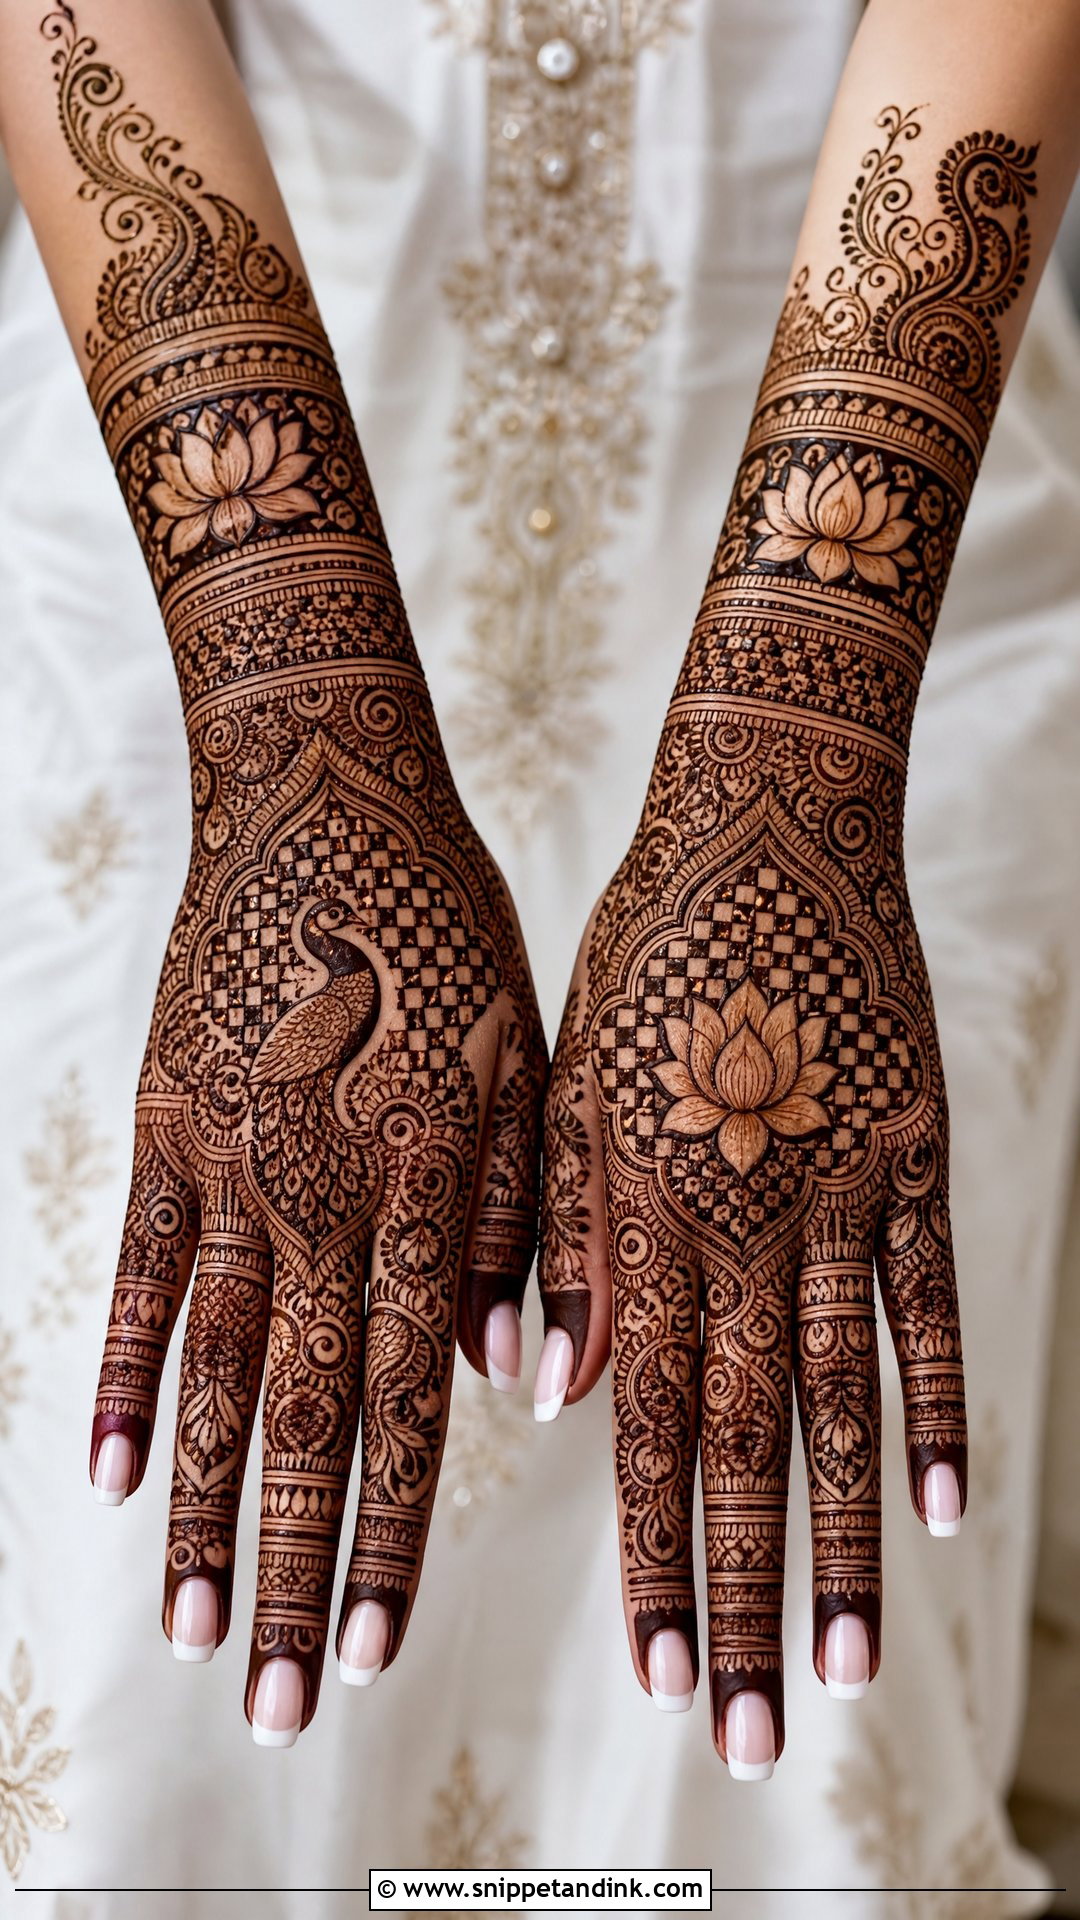
For a bride, the grid becomes a background behind paisleys, lotus flowers, peacocks or figures, running from fingertips to forearm with layered cuffs and full finger coverage. I fill some boxes with dots and leave others empty, otherwise the background competes with the motifs in front of it. Arches, florals and shaded bands up the forearm complete it. On a wedding hand I draw the grid lines a fraction finer than the motif outlines, so the eye reads the motifs first.
7. Minimal Back Hand Check Mehndi Design
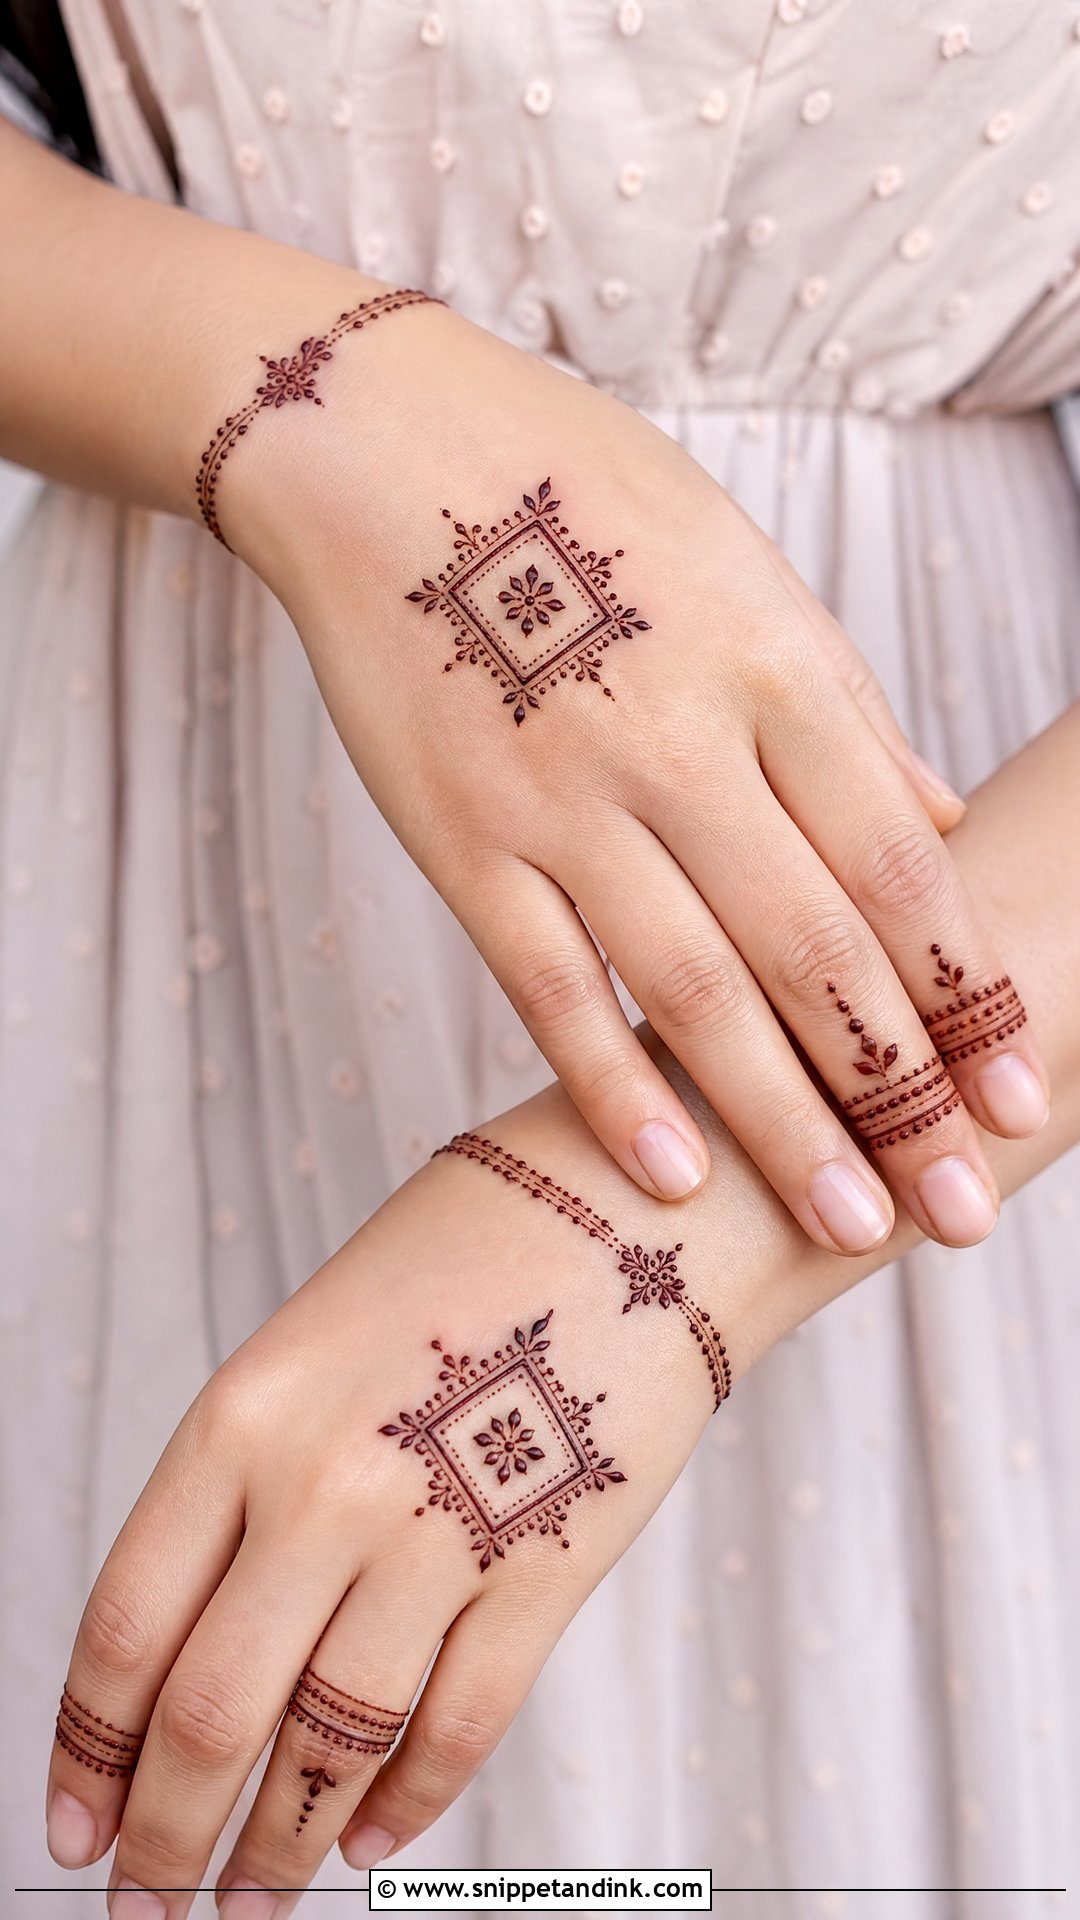
Minimal check work is a small patch near the centre of the hand, a thin ring detail on one finger and a delicate bracelet line at the wrist, with most of the skin left open. A tiny dot at each corner of the checks makes the patch look finished. Office events, small gatherings and first-timers all suit it, and it sits happily with jeans as well as a kurta.
8. Modern Back Hand Check Mehndi Design
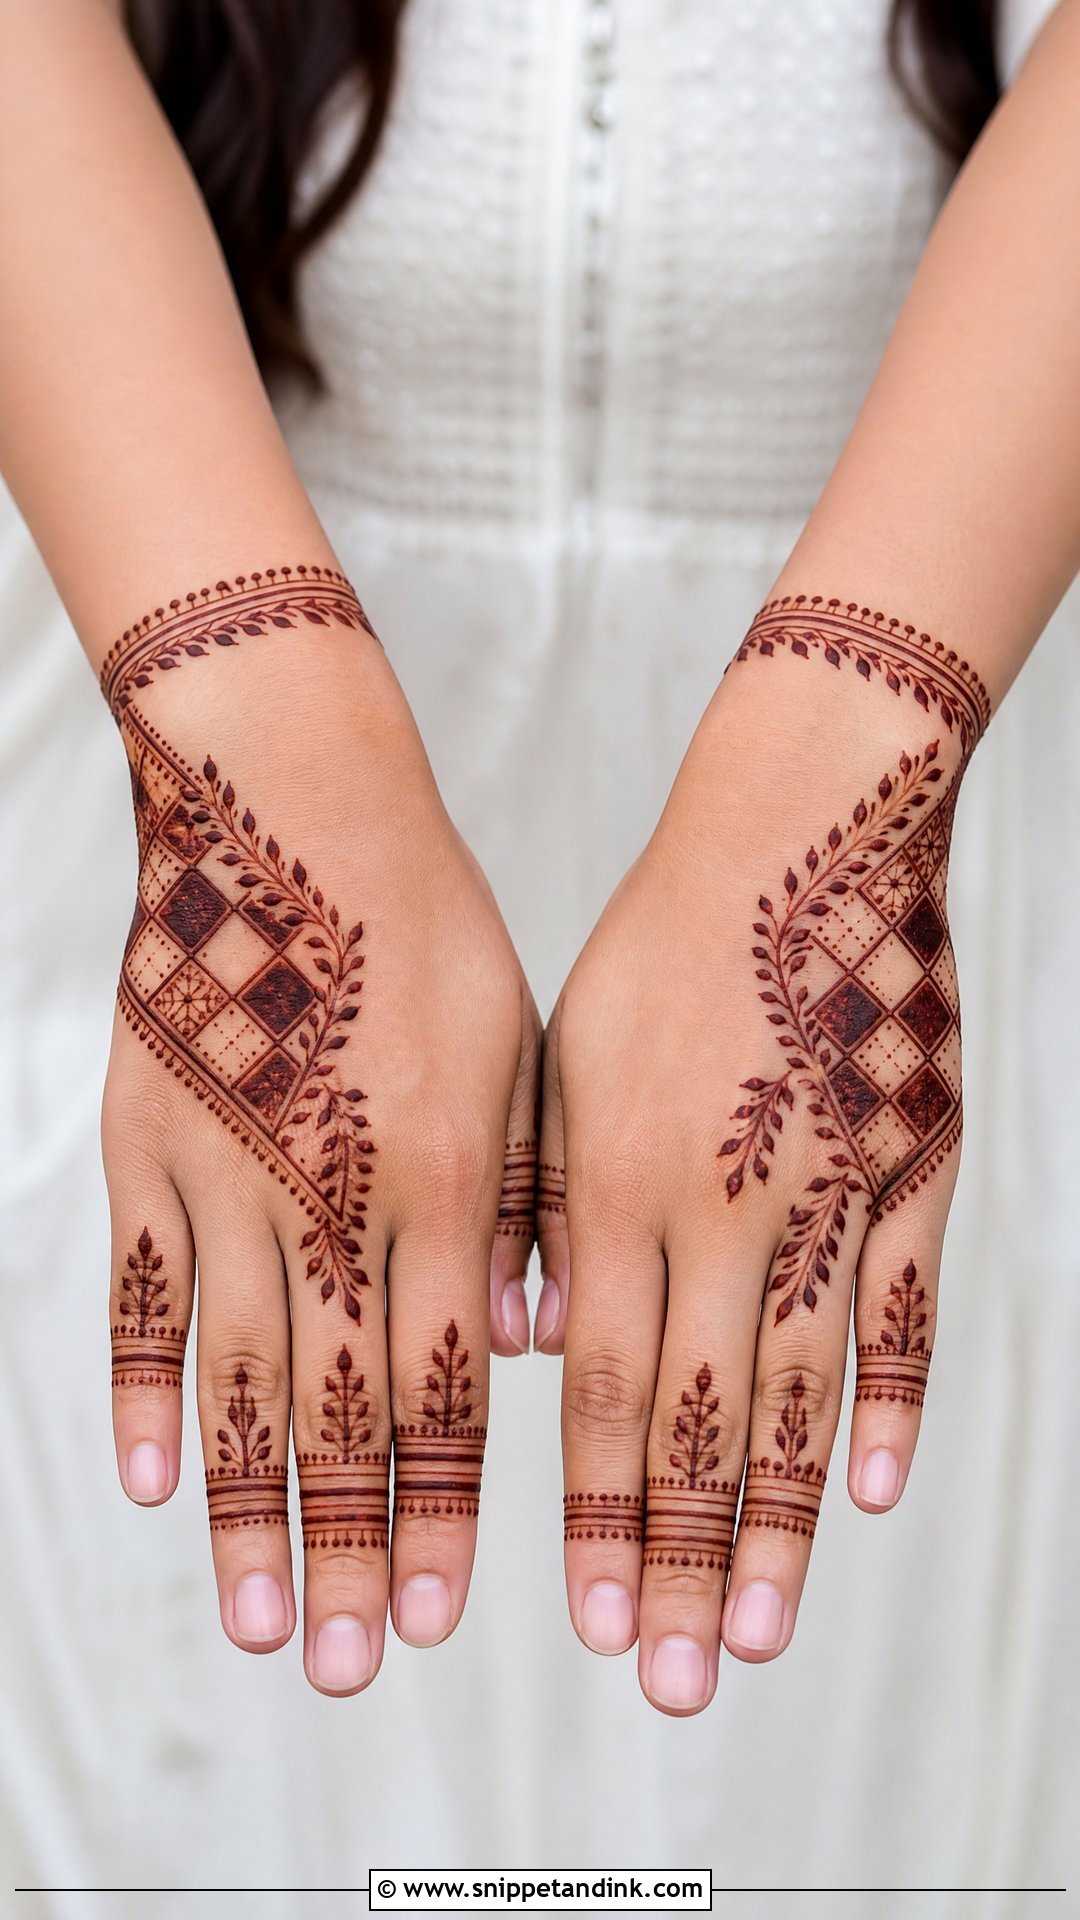
Modern check designs are about placement. An asymmetrical panel on one side of the hand, sleek finger bands and a simple wrist cuff, with small geometric accents and thin leafy strokes instead of heavy florals. It should feel light but deliberate. Precision is everything, because there is nothing to hide a crooked line behind; I’d only choose this one if your artist’s straight lines are reliably straight. It suits engagement parties and modern ethnic outfits.
9. Stylish Back Hand Check Mehndi Design
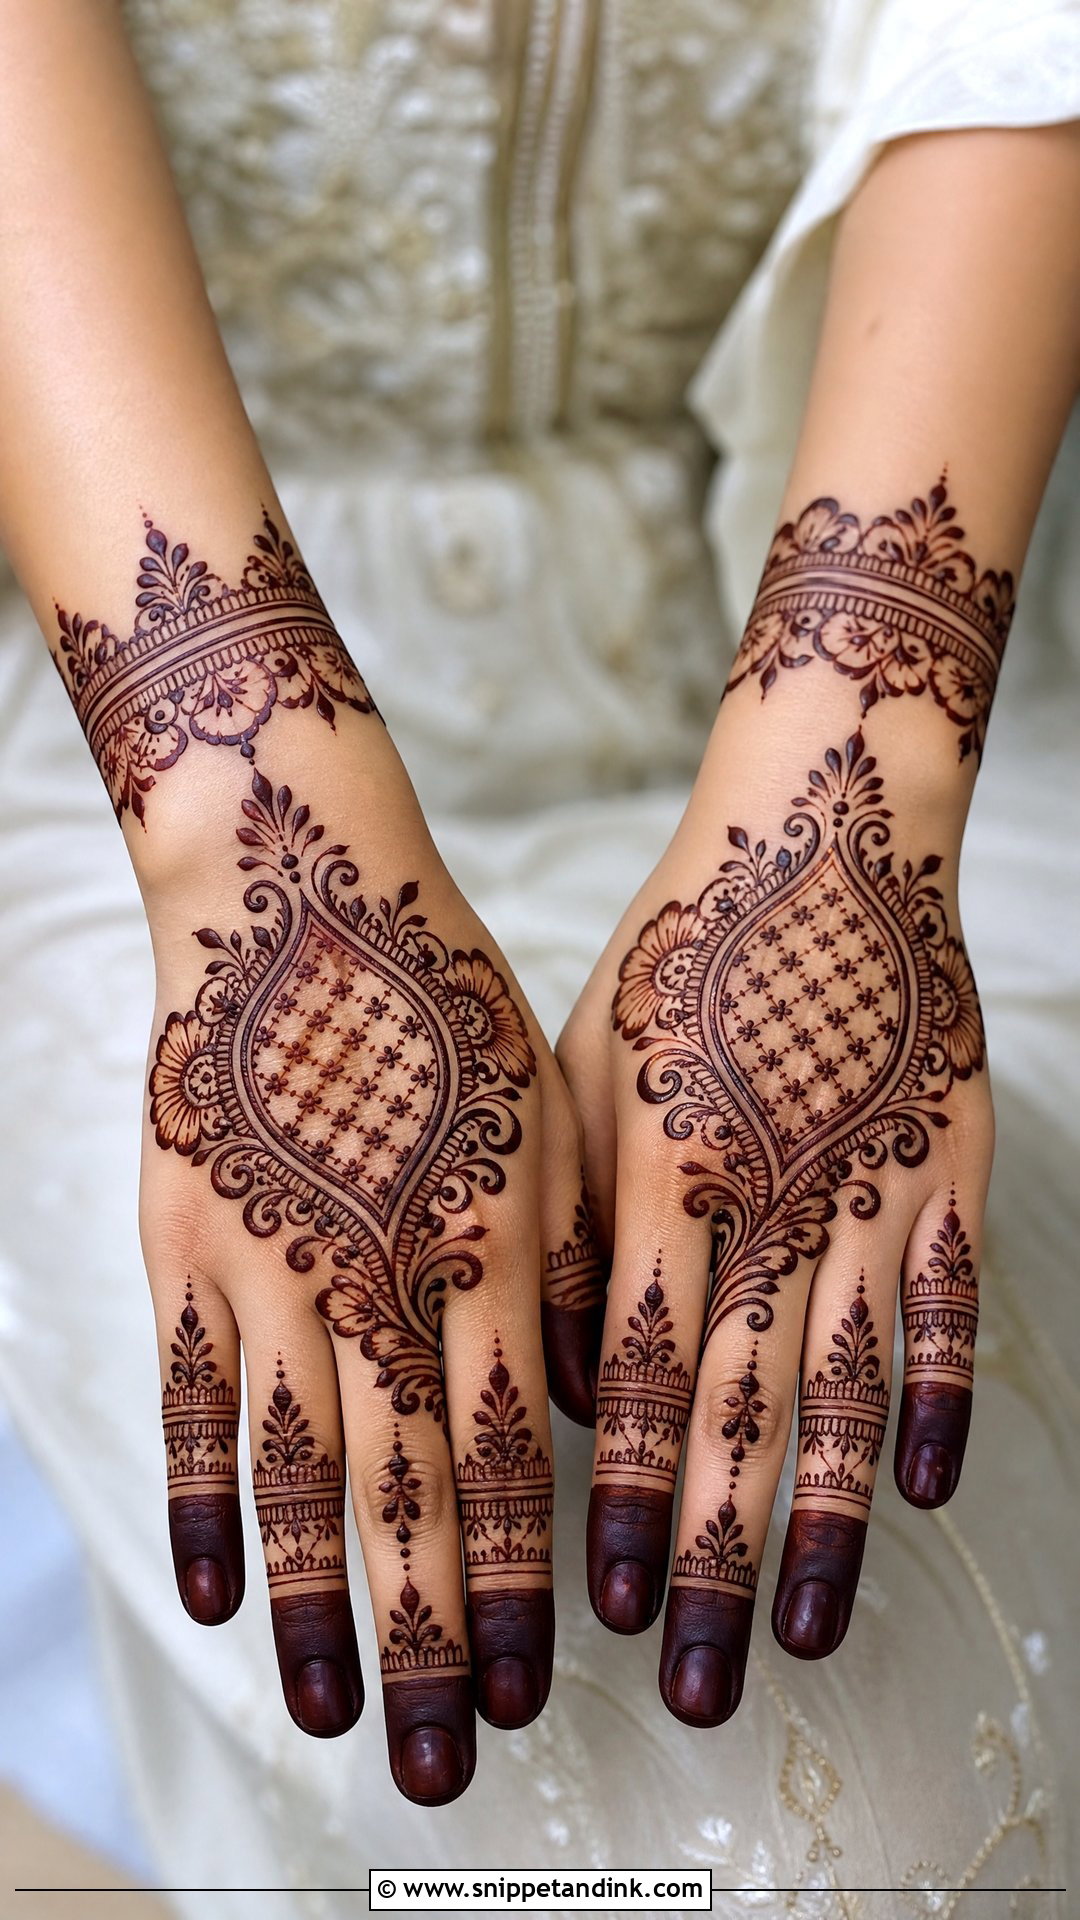
Tilting the grid onto a diagonal is the quickest way to make a check design look fashionable. Frame a bold central grid with curved vines, half flowers and finger chains, add darker fingertips or shaded petals for contrast, and finish with a bracelet-style border. A diagonal grid is also more flattering than a straight one on broad hands. Good for sangeet nights, Eid gatherings and parties.
10. Easy Back Hand Check Mehndi Design
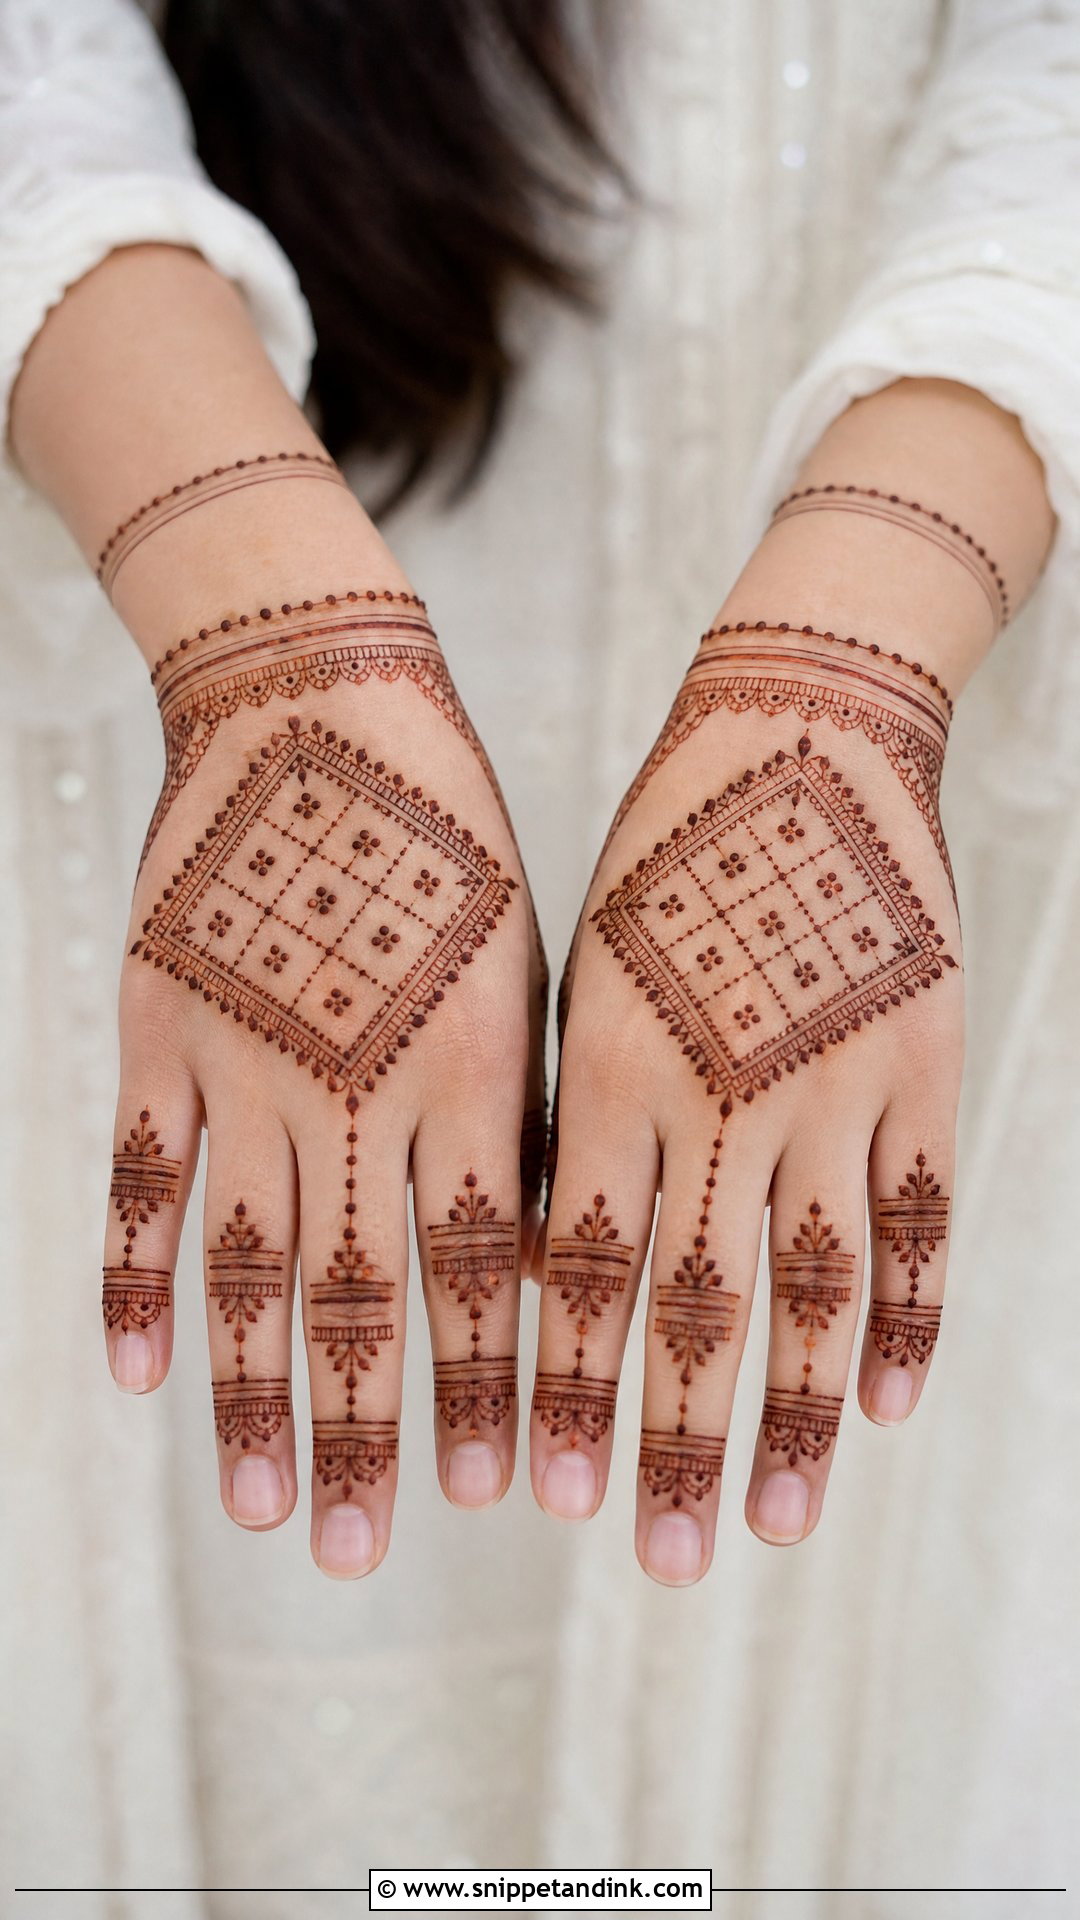
If you are drawing on yourself, this is where to begin. Draw a small diamond grid on the back of the hand, two curved borders around it and a dot in each diamond. Simple horizontal bands and a few leaf marks go on the fingers, and one or two thin lines at the wrist make a bracelet. The borders do a lot of the work, because they give the grid a clean edge even if the lines inside aren’t perfect. Use it for last-minute plans or as a practice piece at home.
11. Front To Back Hand Check Mehndi Design
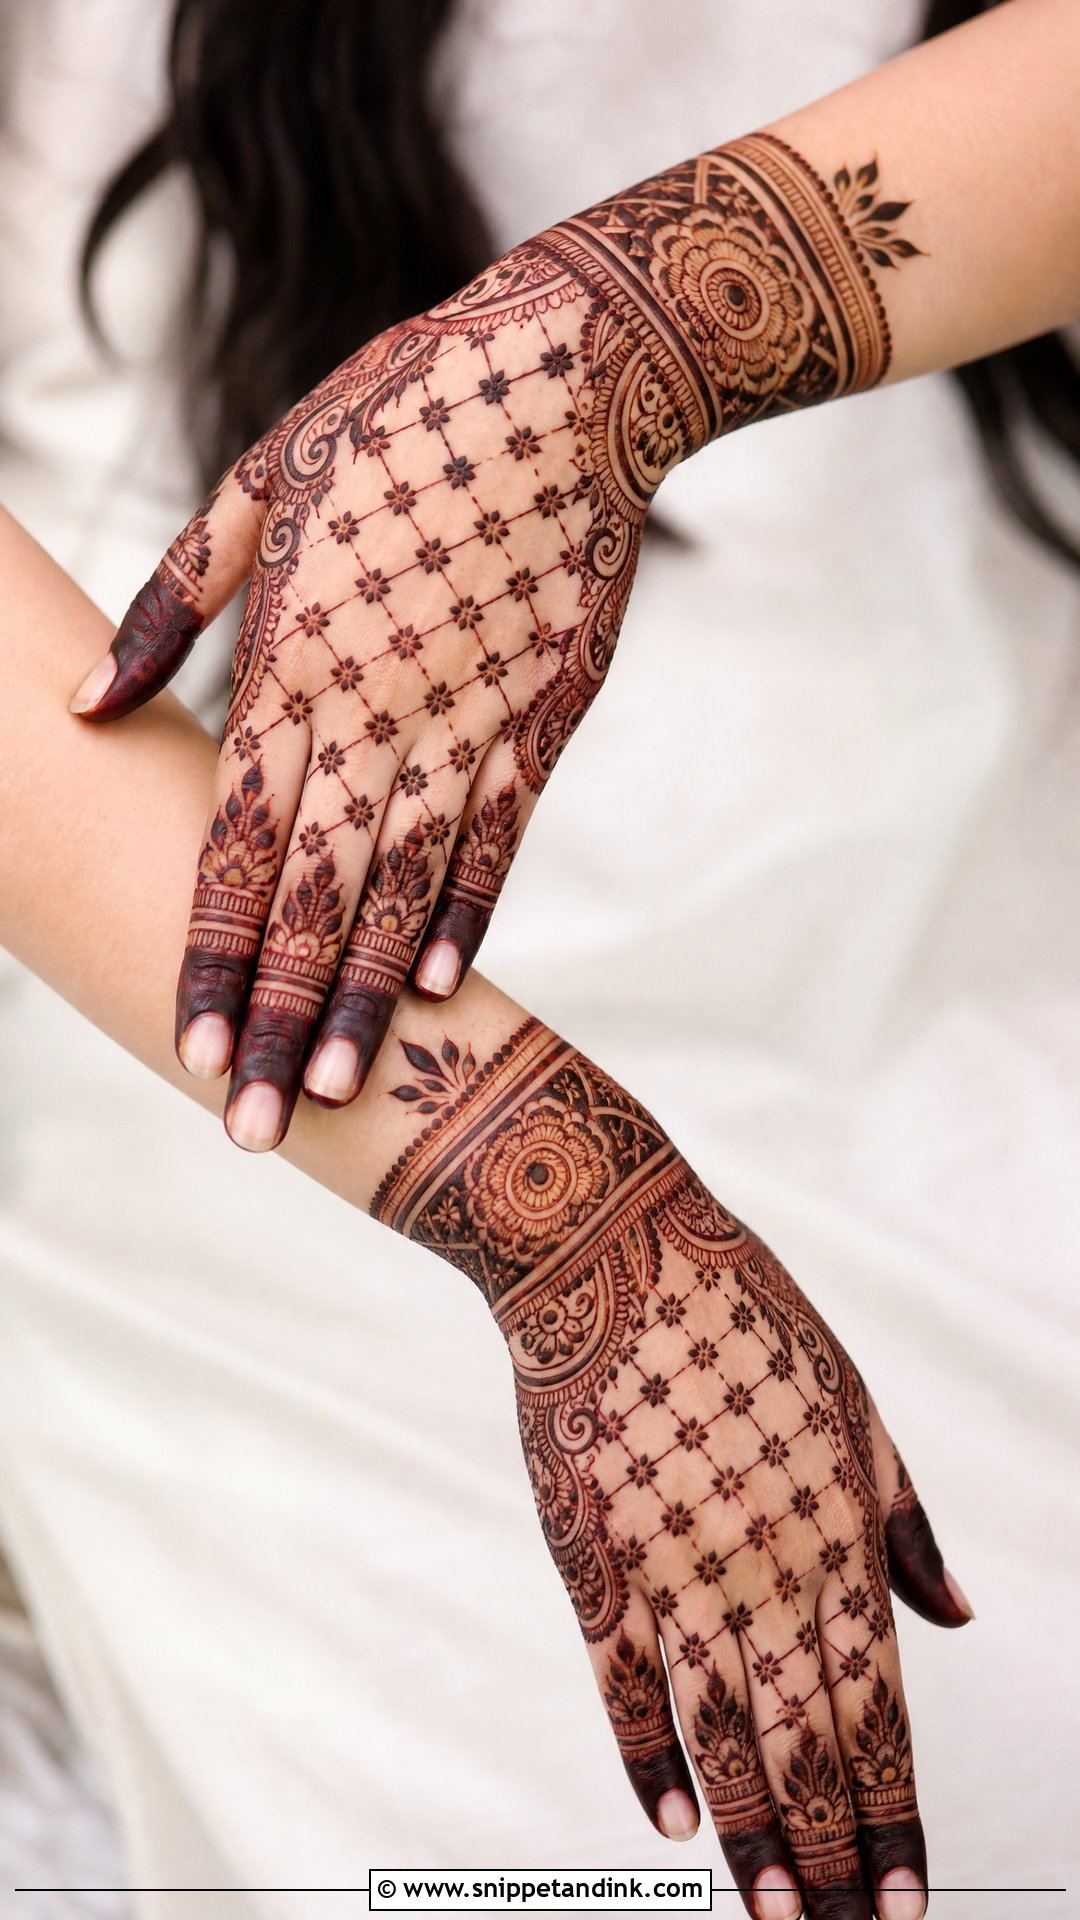
Some ceremonies show both sides of the hand, during gift exchanges or rituals, so it helps if the two sides feel connected. I keep the main grid on the back, carry a small matching detail onto the fingers and palm side, and let a wrist band wrap slightly around. The back stays more detailed and the palm simpler. Floral borders or paisley corners link the checks with the rest. Remember the palm stains darker than the back, so I keep palm lines slightly finer to balance the colour.
12. Finger Back Hand Check Mehndi Design
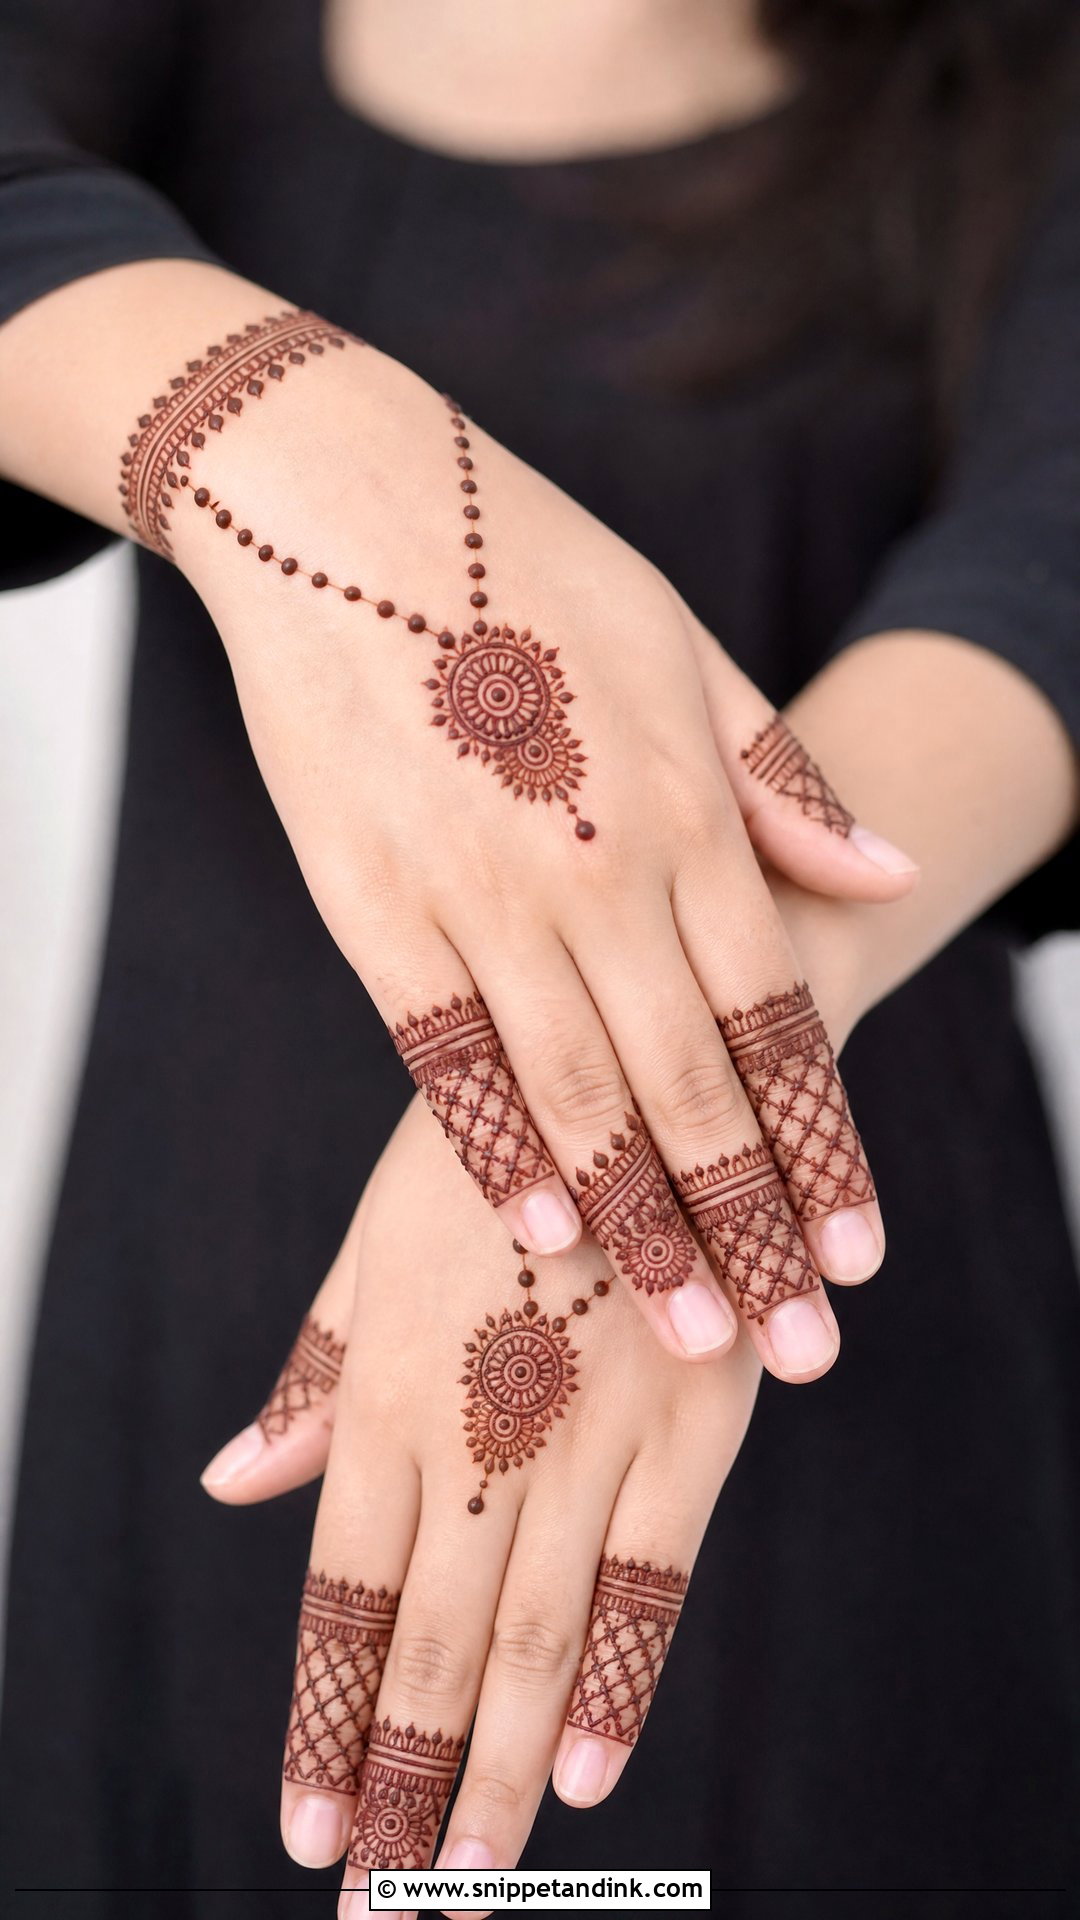
Here the fingers carry most of the detail, each a little different, with tiny grids, leaf bands, dotted chains and slim curves. The centre of the hand stays largely open, with only a small mandala or a light mesh patch near the knuckles. Grids on fingers need to be tiny, two or three boxes across at most, or they look crowded on such a narrow surface. It suits anyone who wants something delicate for everyday events and festivals.
13. Bracelet Back Hand Check Mehndi Design
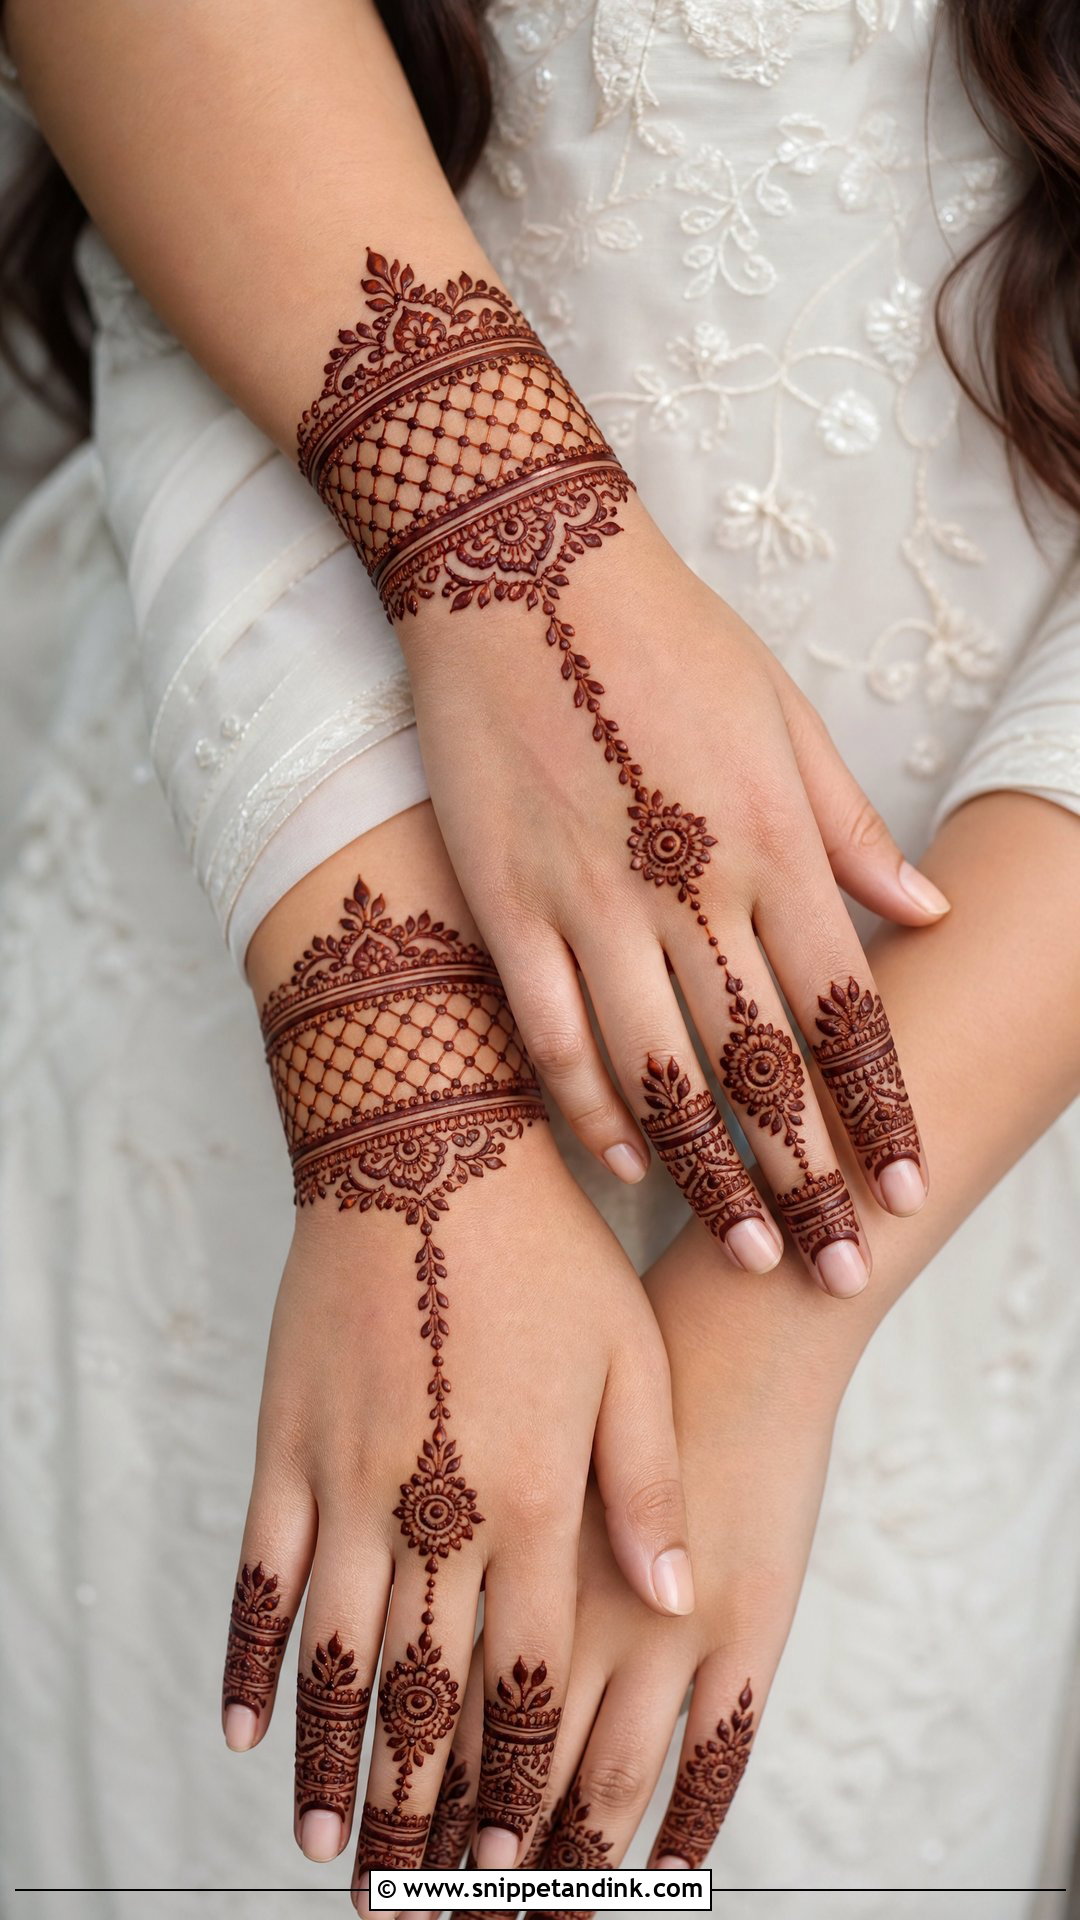
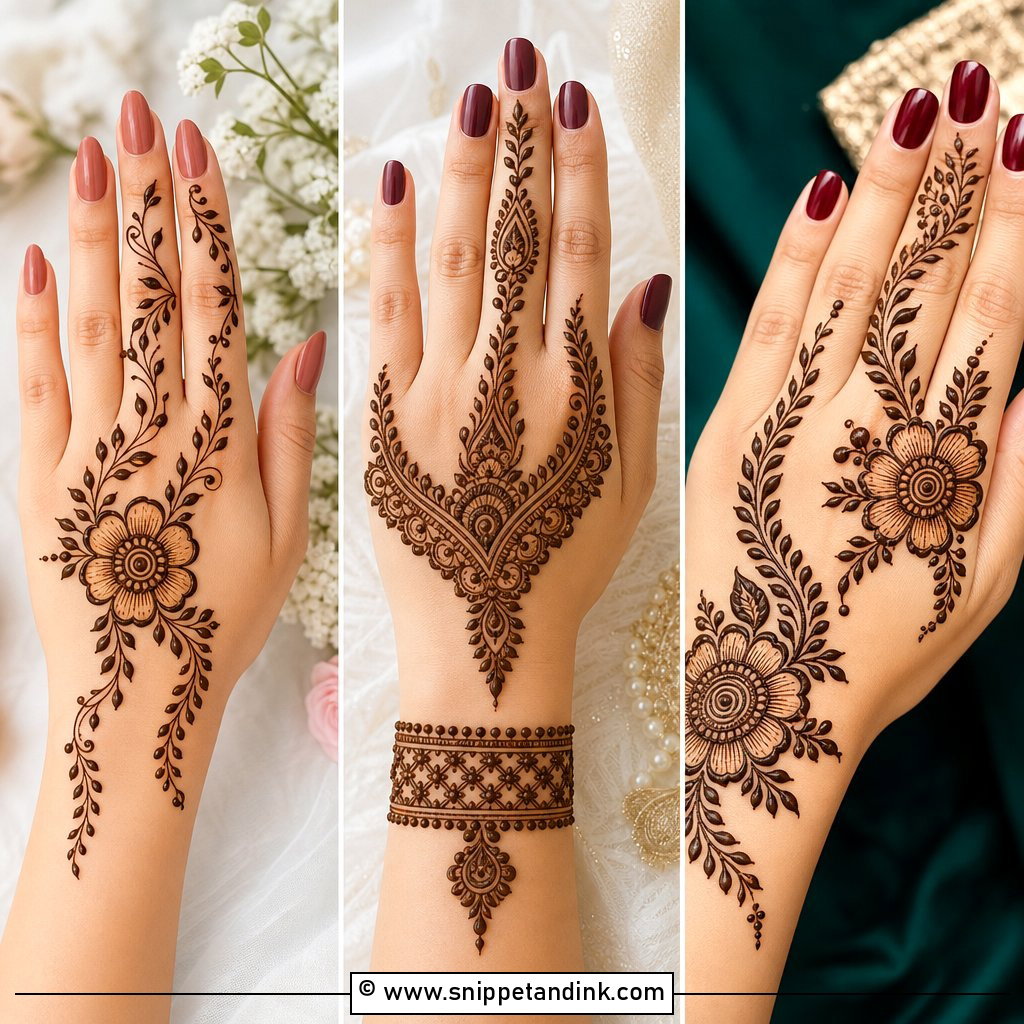
Jewellery-style check work centres on a cuff or bracelet band filled with tiny checks, dots and fine borders. A chain line runs from it toward the middle finger, ending in a flower, mandala or small paisley, and the back of the hand stays mostly open. A narrow band only fits a few checks across, so I draw the band’s borders first and then count how many even boxes will fit before starting the grid. It works well for engagement guests and bridesmaids wearing bangles.
14. Mandala Back Hand Check Mehndi Design
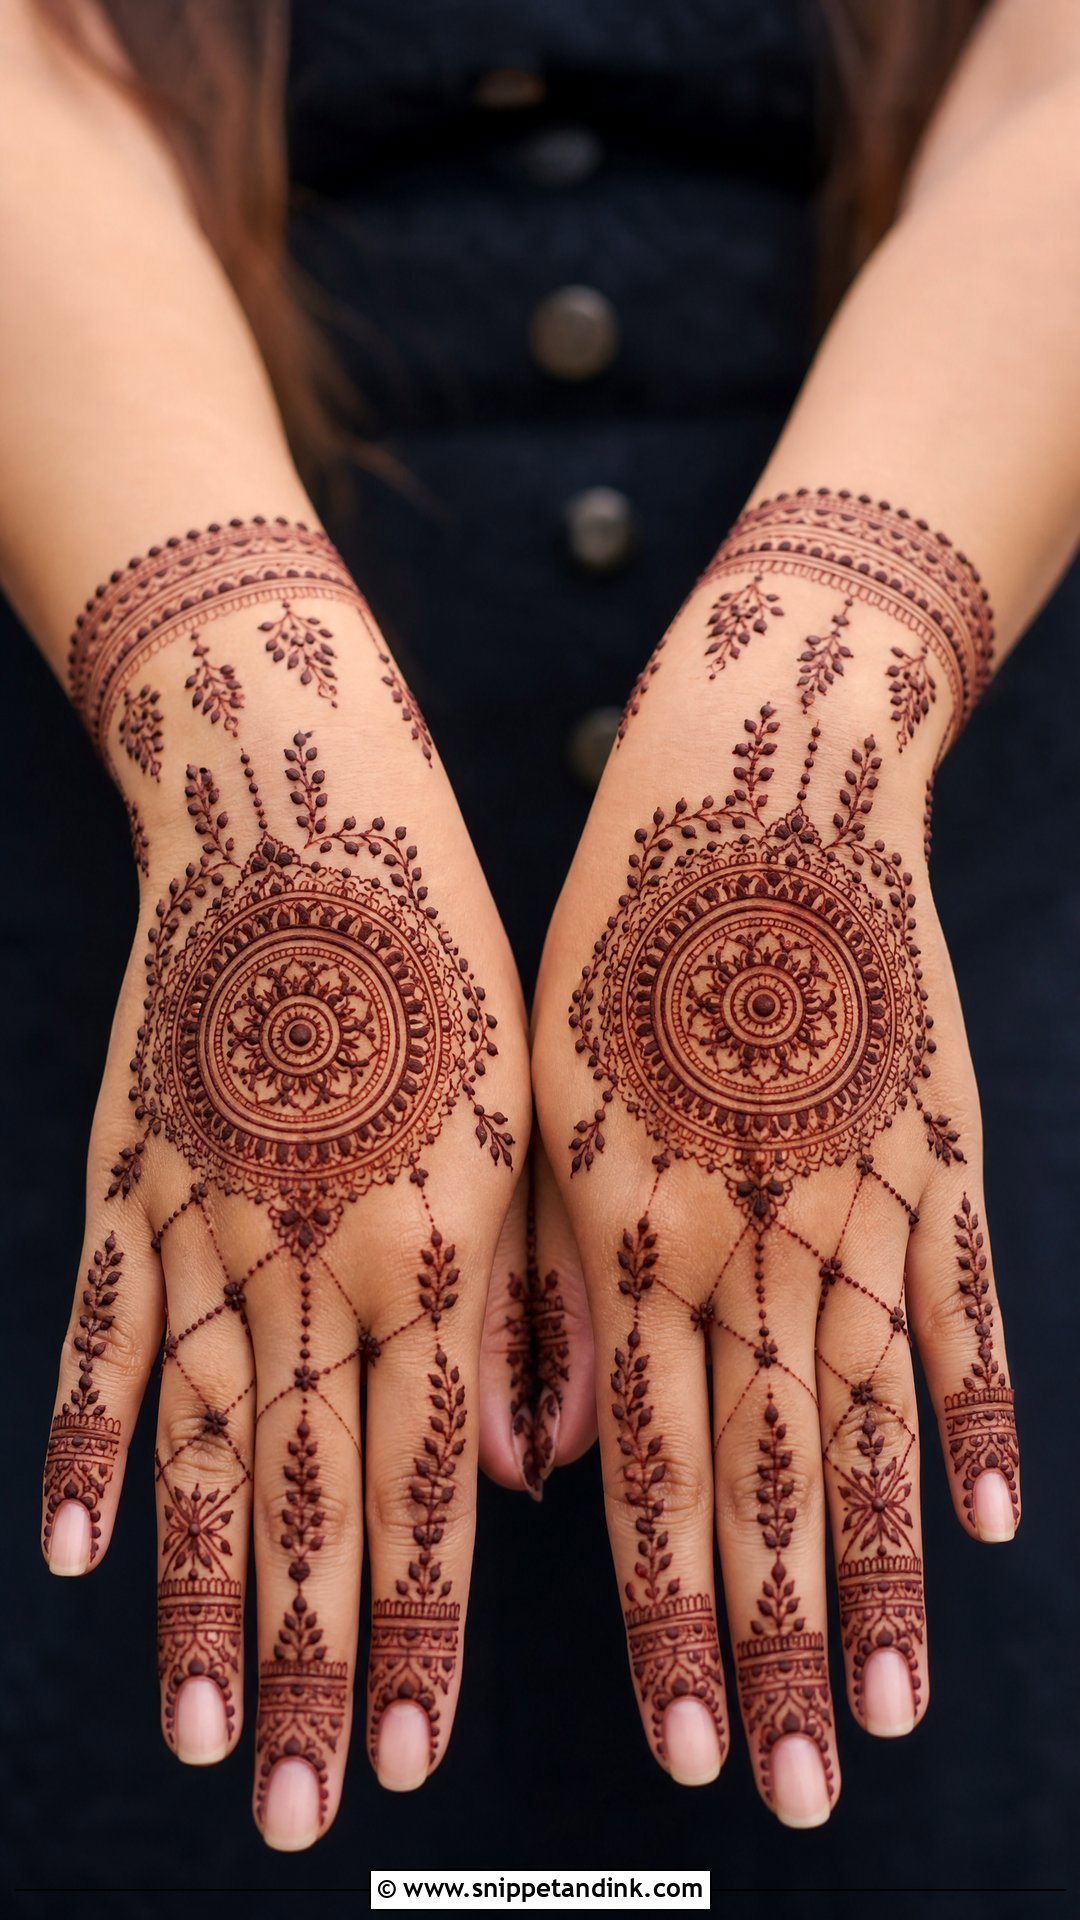
Put a round mandala at the centre and let check sections frame it, perhaps diamonds on one side and floral vines on the other for a less predictable layout. Slim lines, dots or petal chains connect the fingers to the mandala so the whole hand reads as one design, and the wrist gets a simple border or small cuff. The mandala gives calm symmetry; the checks bring texture. It suits festivals and traditional clothing.
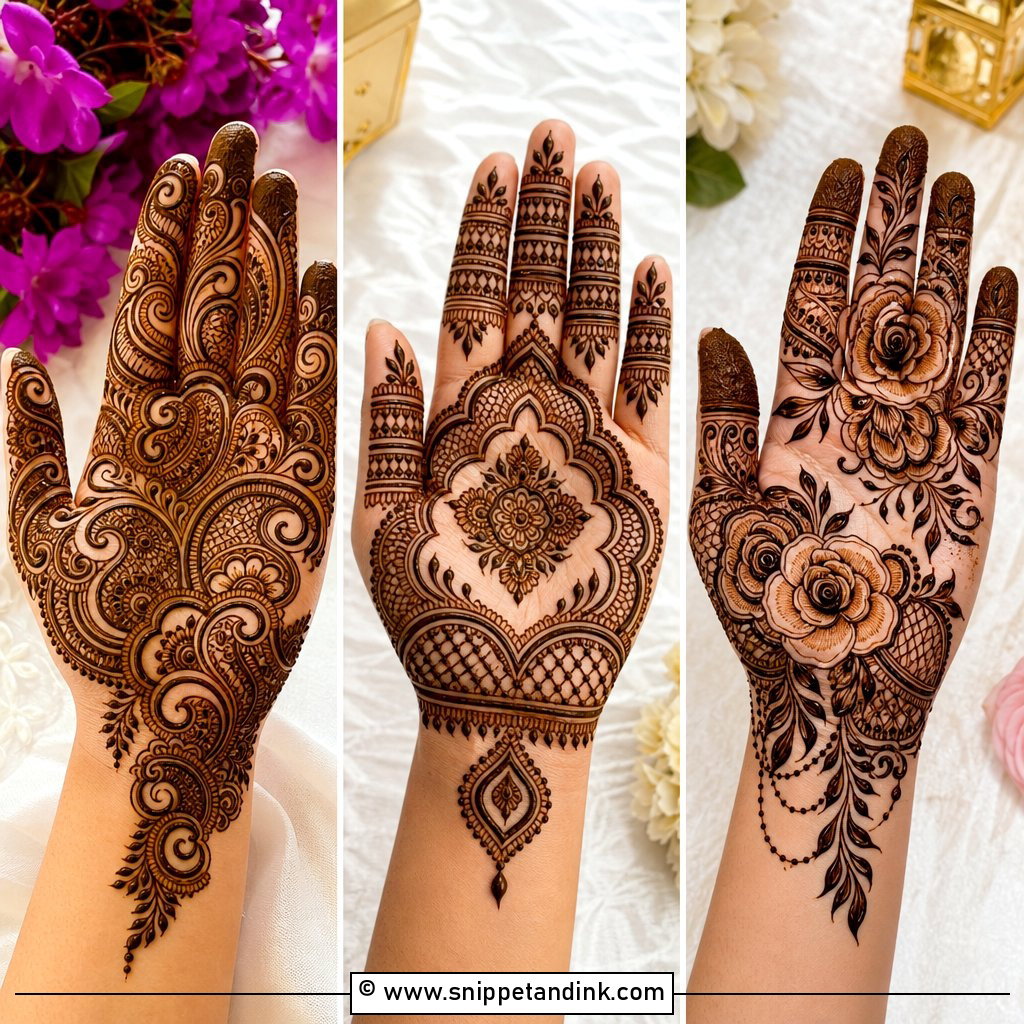
15. Floral Back Hand Check Mehndi Design
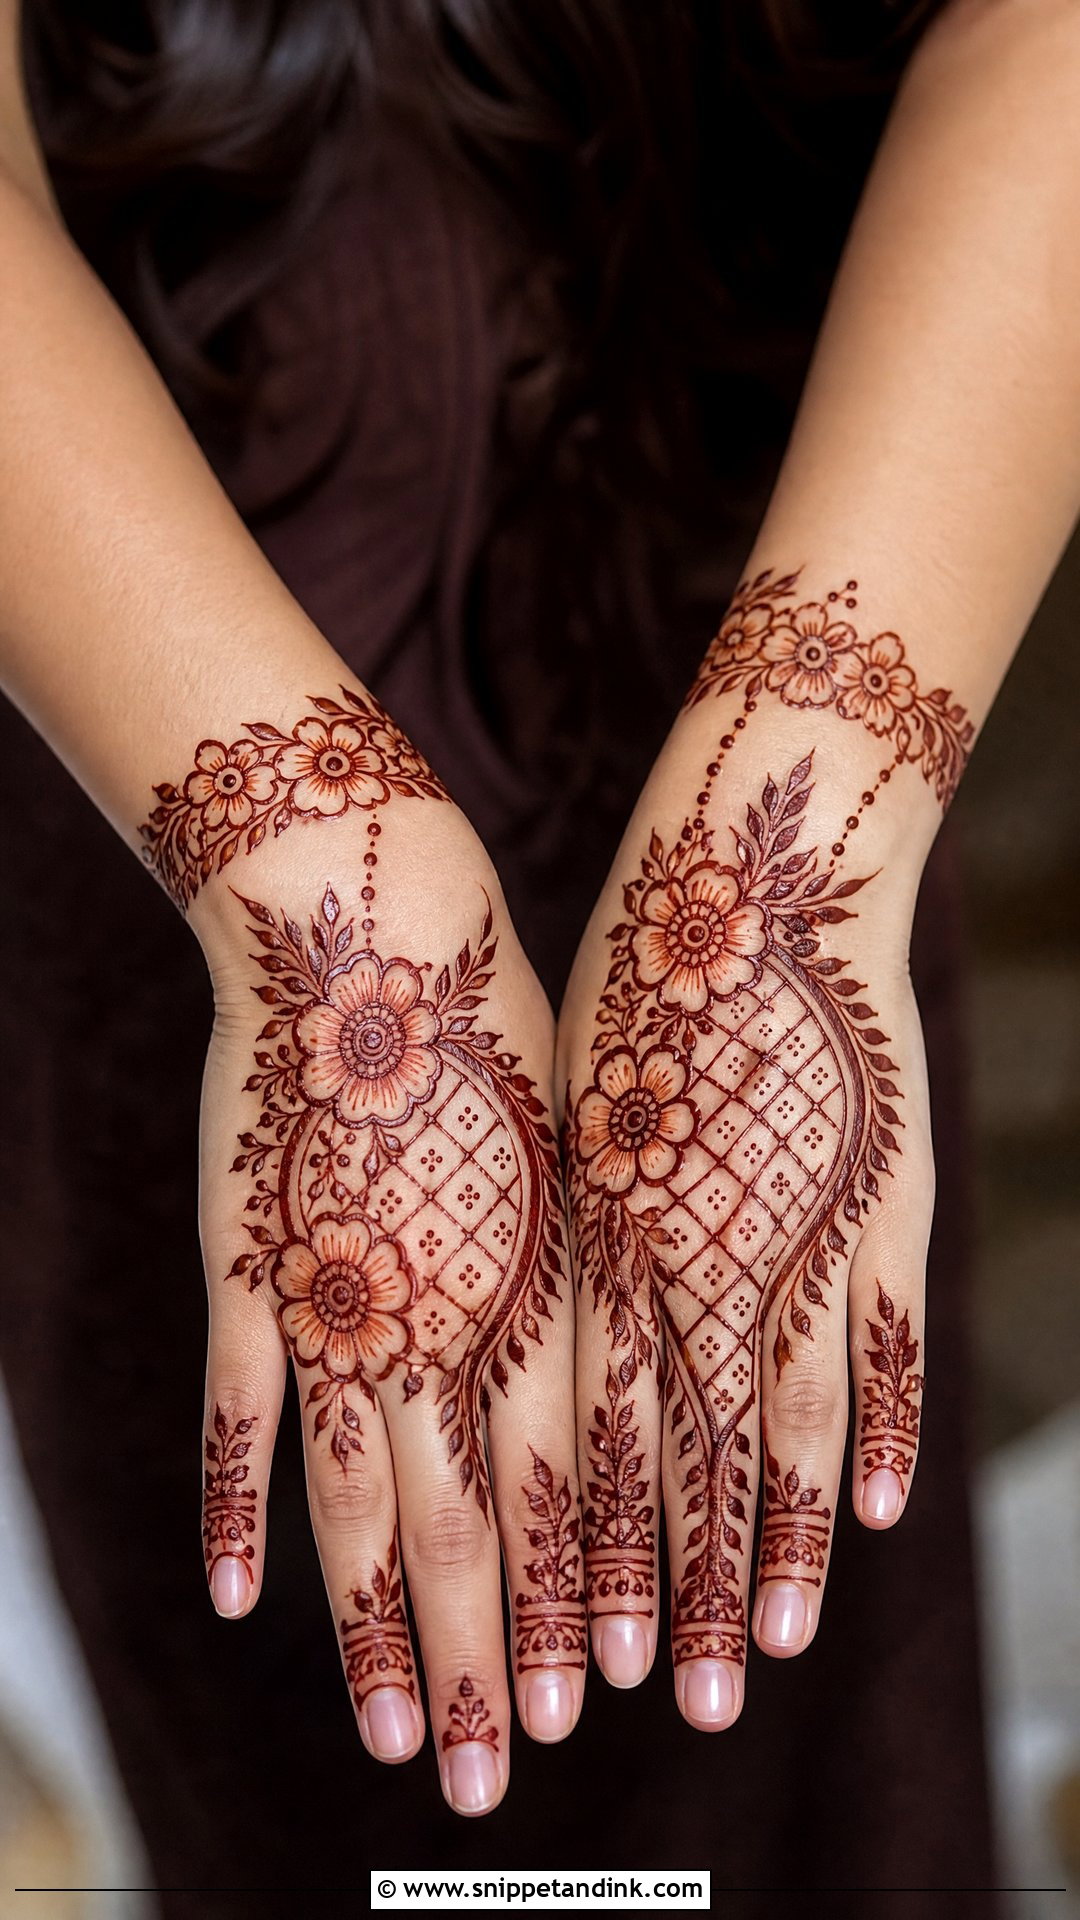
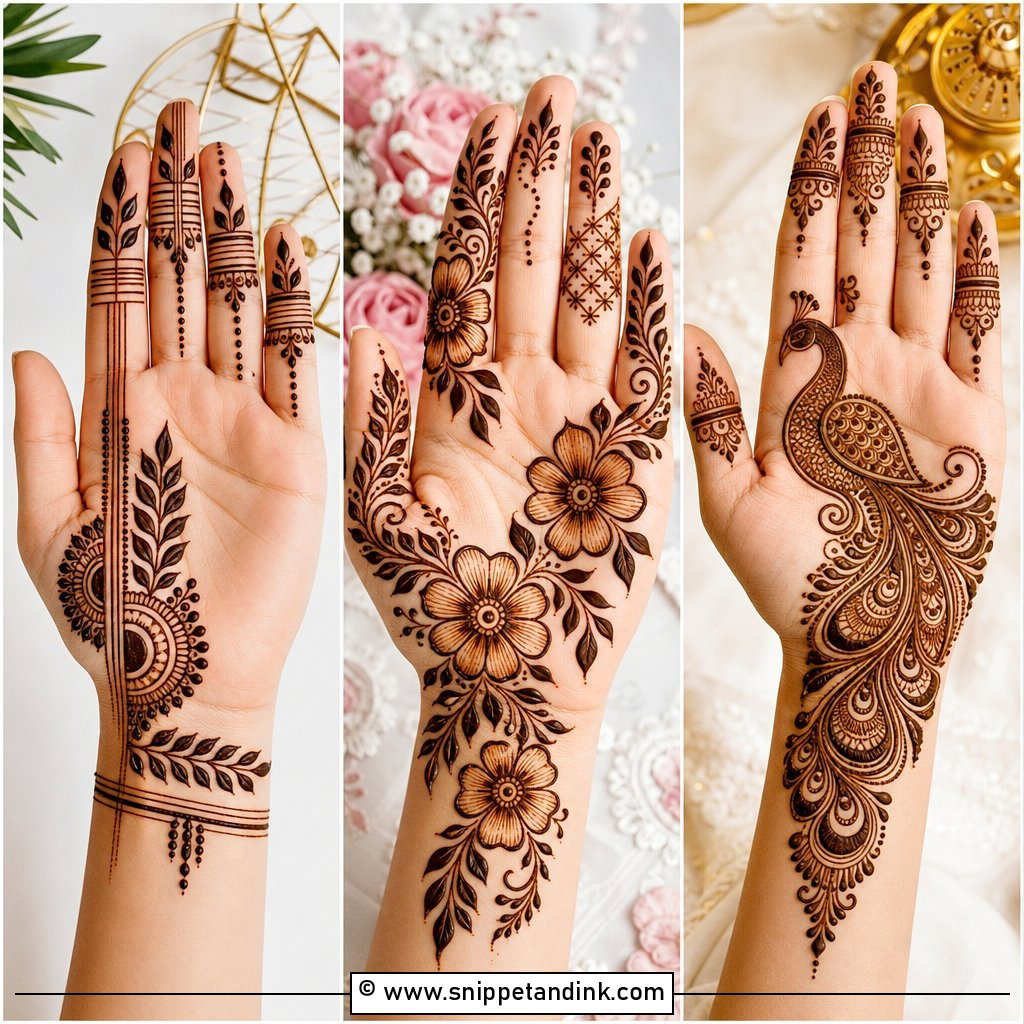
Florals soften the hard edges of a grid. The checks can sit behind one large flower or run beside a flowing floral trail, with dots in some boxes and small leaves along the border. Leave open skin between flower and grid for a lighter version; fill the wrist and fingers with matching floral bands for a festive one. I always draw the flower first and fit the grid around it, never the reverse, otherwise petals end up cut off at odd angles by the lines.
16. Paisley Back Hand Check Mehndi Design
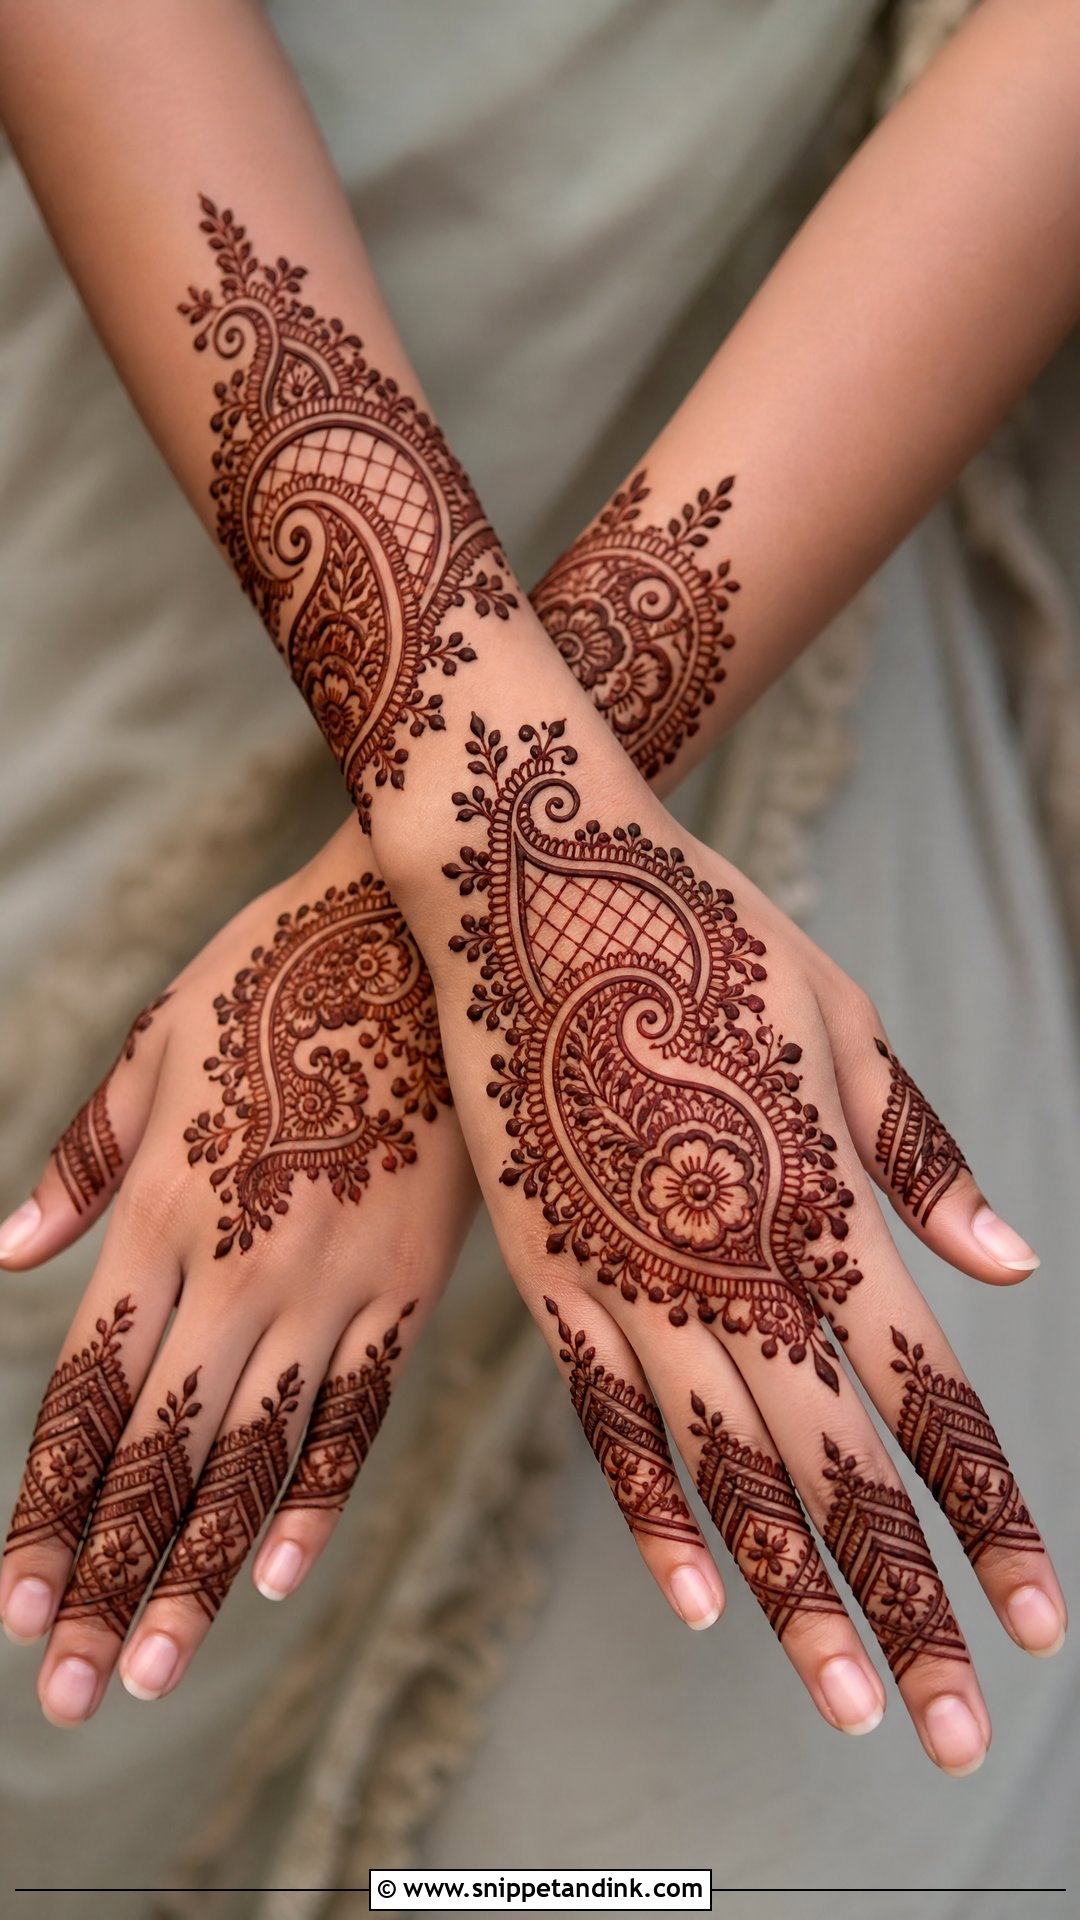
Curved paisley against straight checks is a good contrast. I place the paisley near the wrist or centre, fill it with tiny flowers, dots and leaf strokes, and let the grid fill the space around it. Slim diagonal bands with small mesh details on the fingers tie it together. Where the grid meets the paisley’s curve, the boxes get cut into odd shapes; I close each partial box neatly rather than leaving open ends, which is what makes this design look finished.
17. Peacock Back Hand Check Mehndi Design
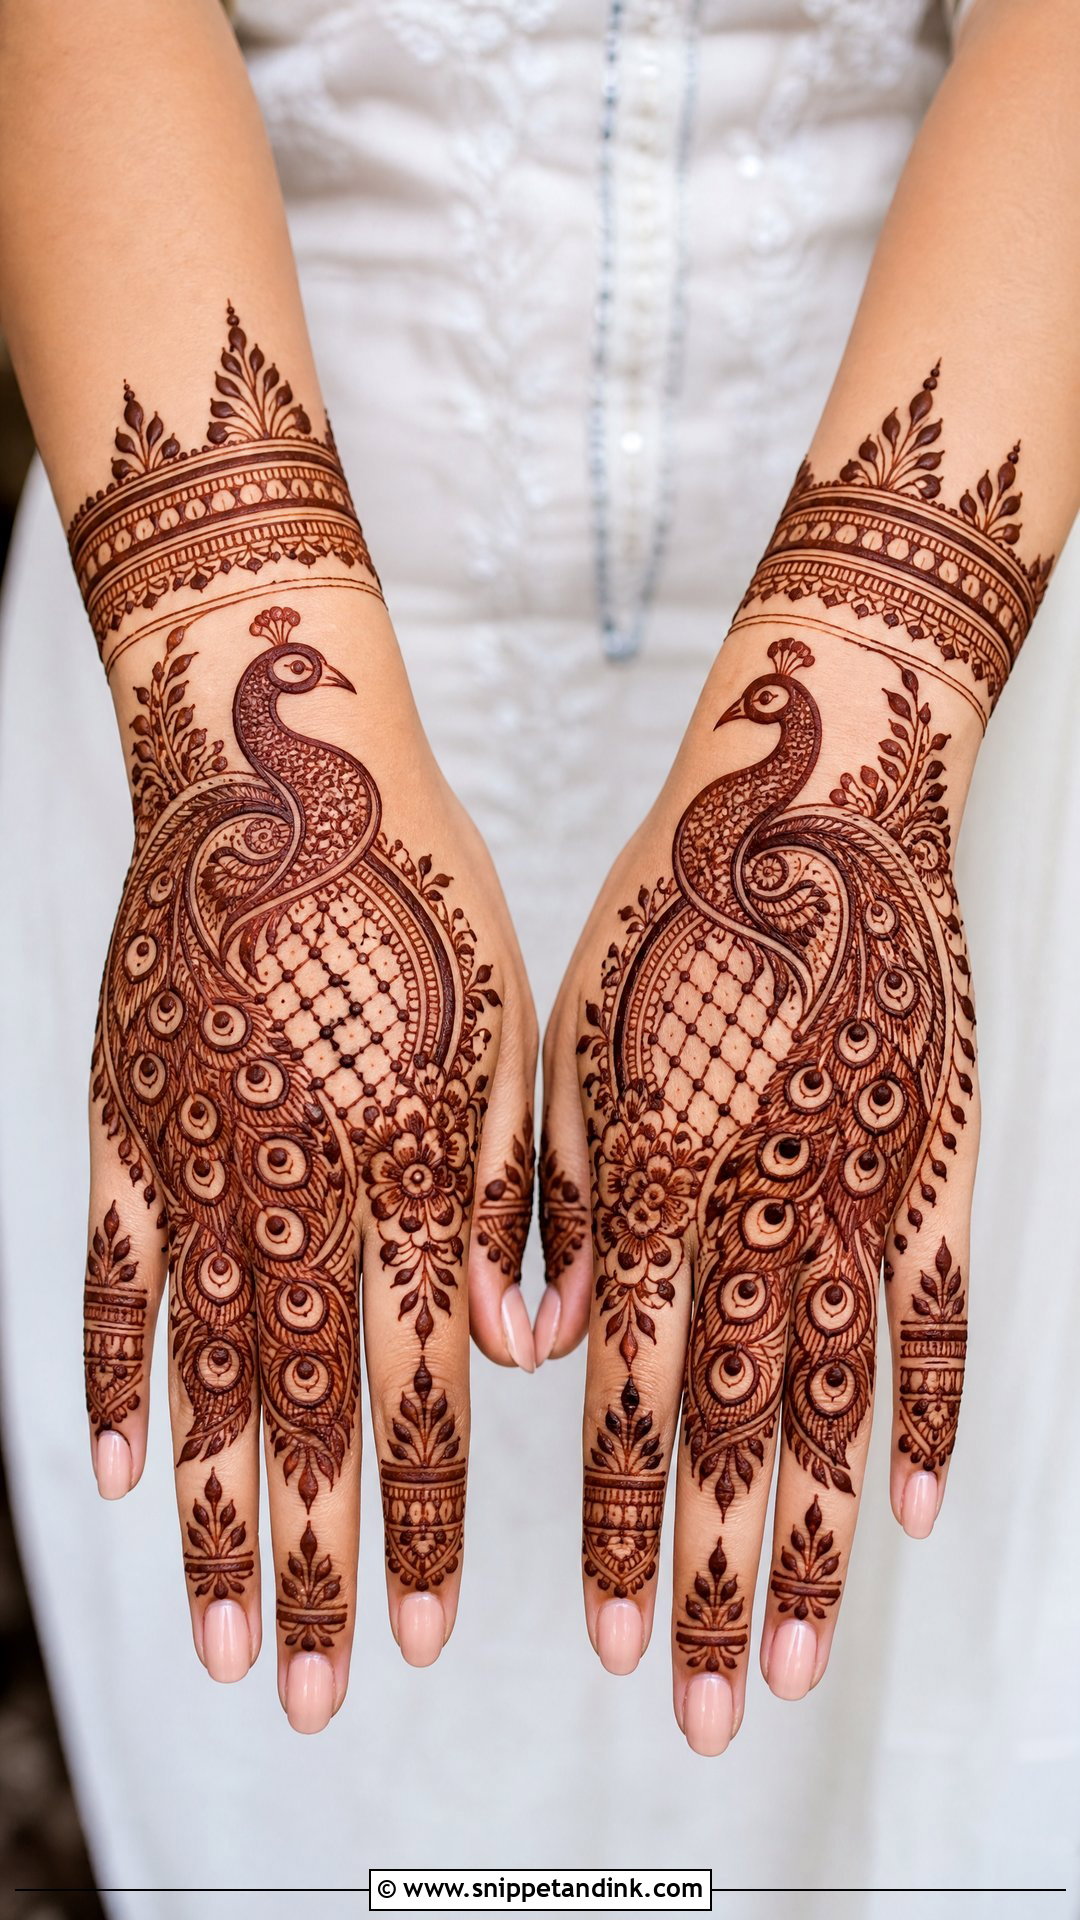
A peacock on one side of the hand with a neat grid on the other, or over the wrist, gives a royal feel with structure. Curved feathers, small dots and fine lines link the bird to the grid, and the fingers carry feather strokes, slim bands and tiny flowers. The grid keeps the layout disciplined while the peacock brings the drama. It is a good fit for sangeet and bridal events where you want the hands to be noticed.
18. Lotus Back Hand Check Mehndi Design
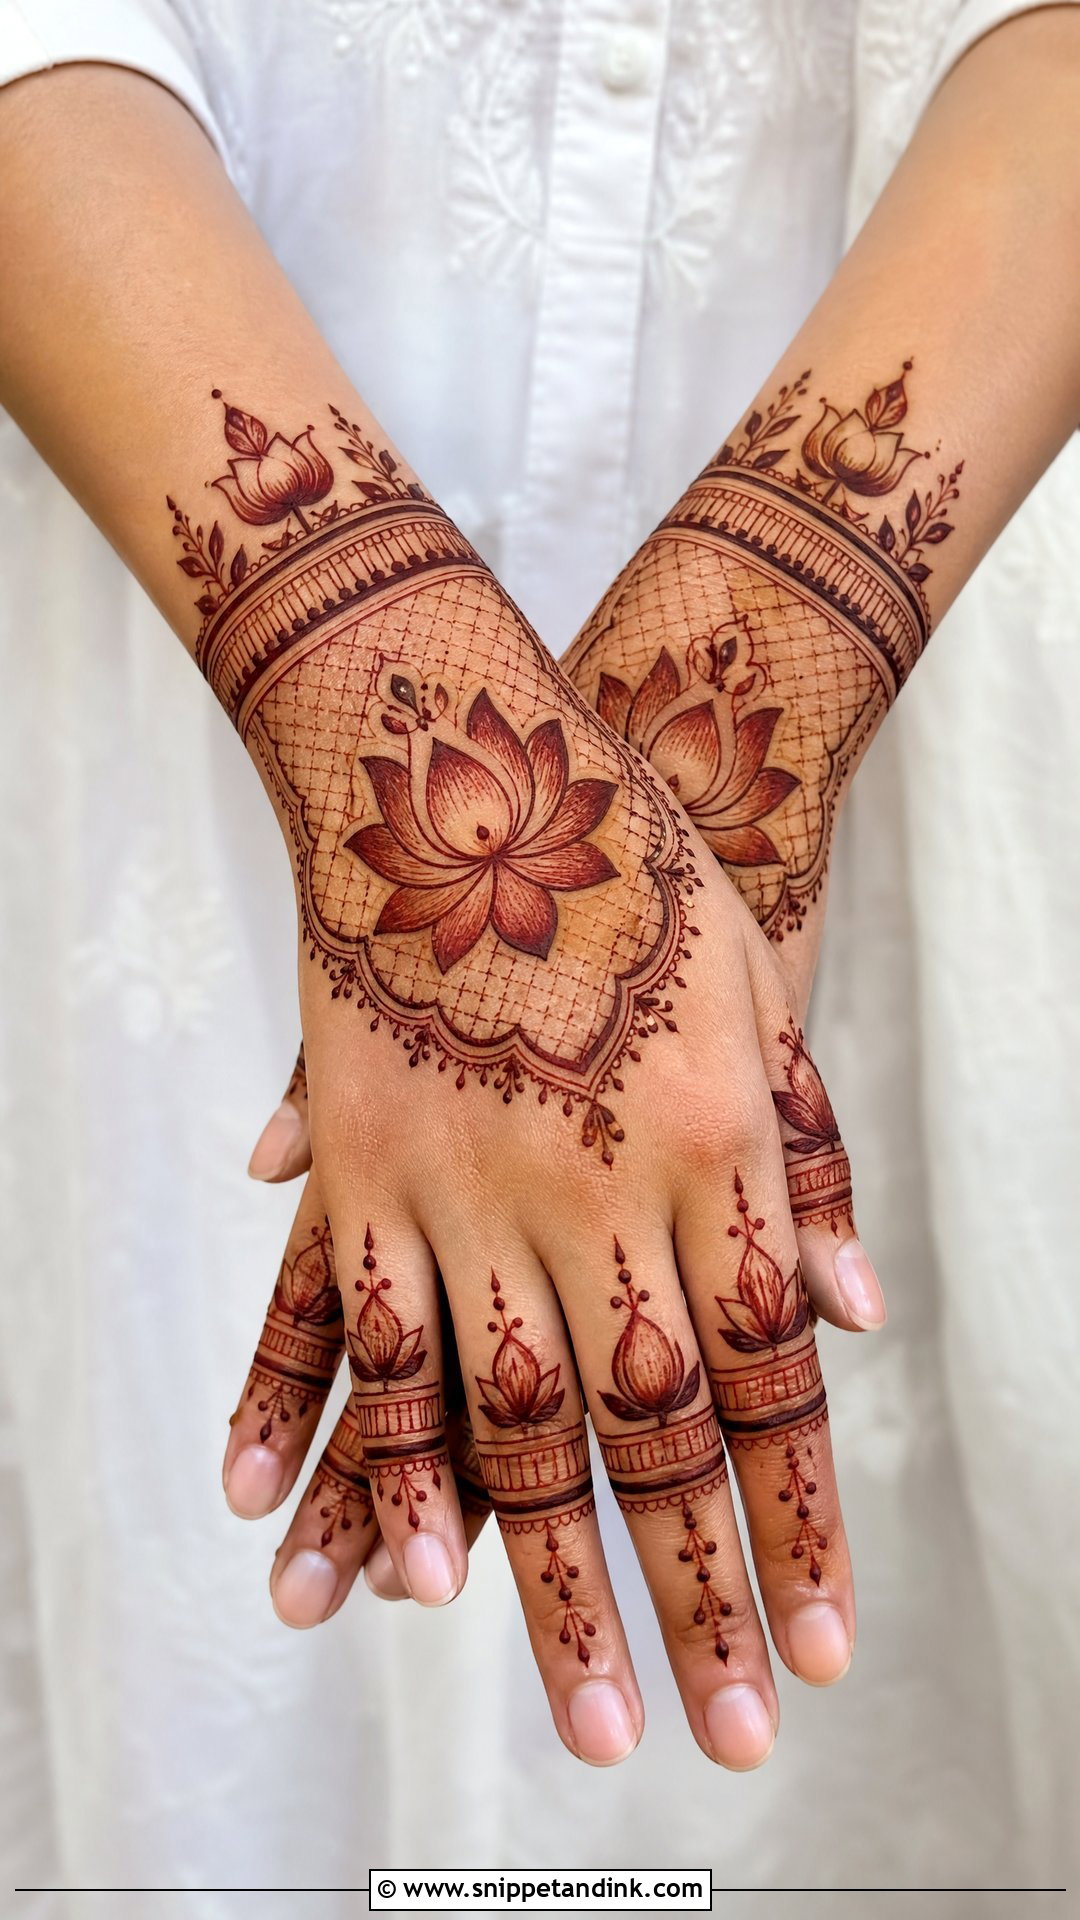
A lotus at the centre with a check background spreading around it reads calm and traditional. Fine dots inside the checks and shaded lotus petals give contrast; a curved wrist band with small buds and petal chains on the fingers complete it. Placing the grid on a diagonal makes long and oval hands look slimmer still. It suits weddings, festivals and religious occasions without feeling heavy.
19. Rose Back Hand Check Mehndi Design
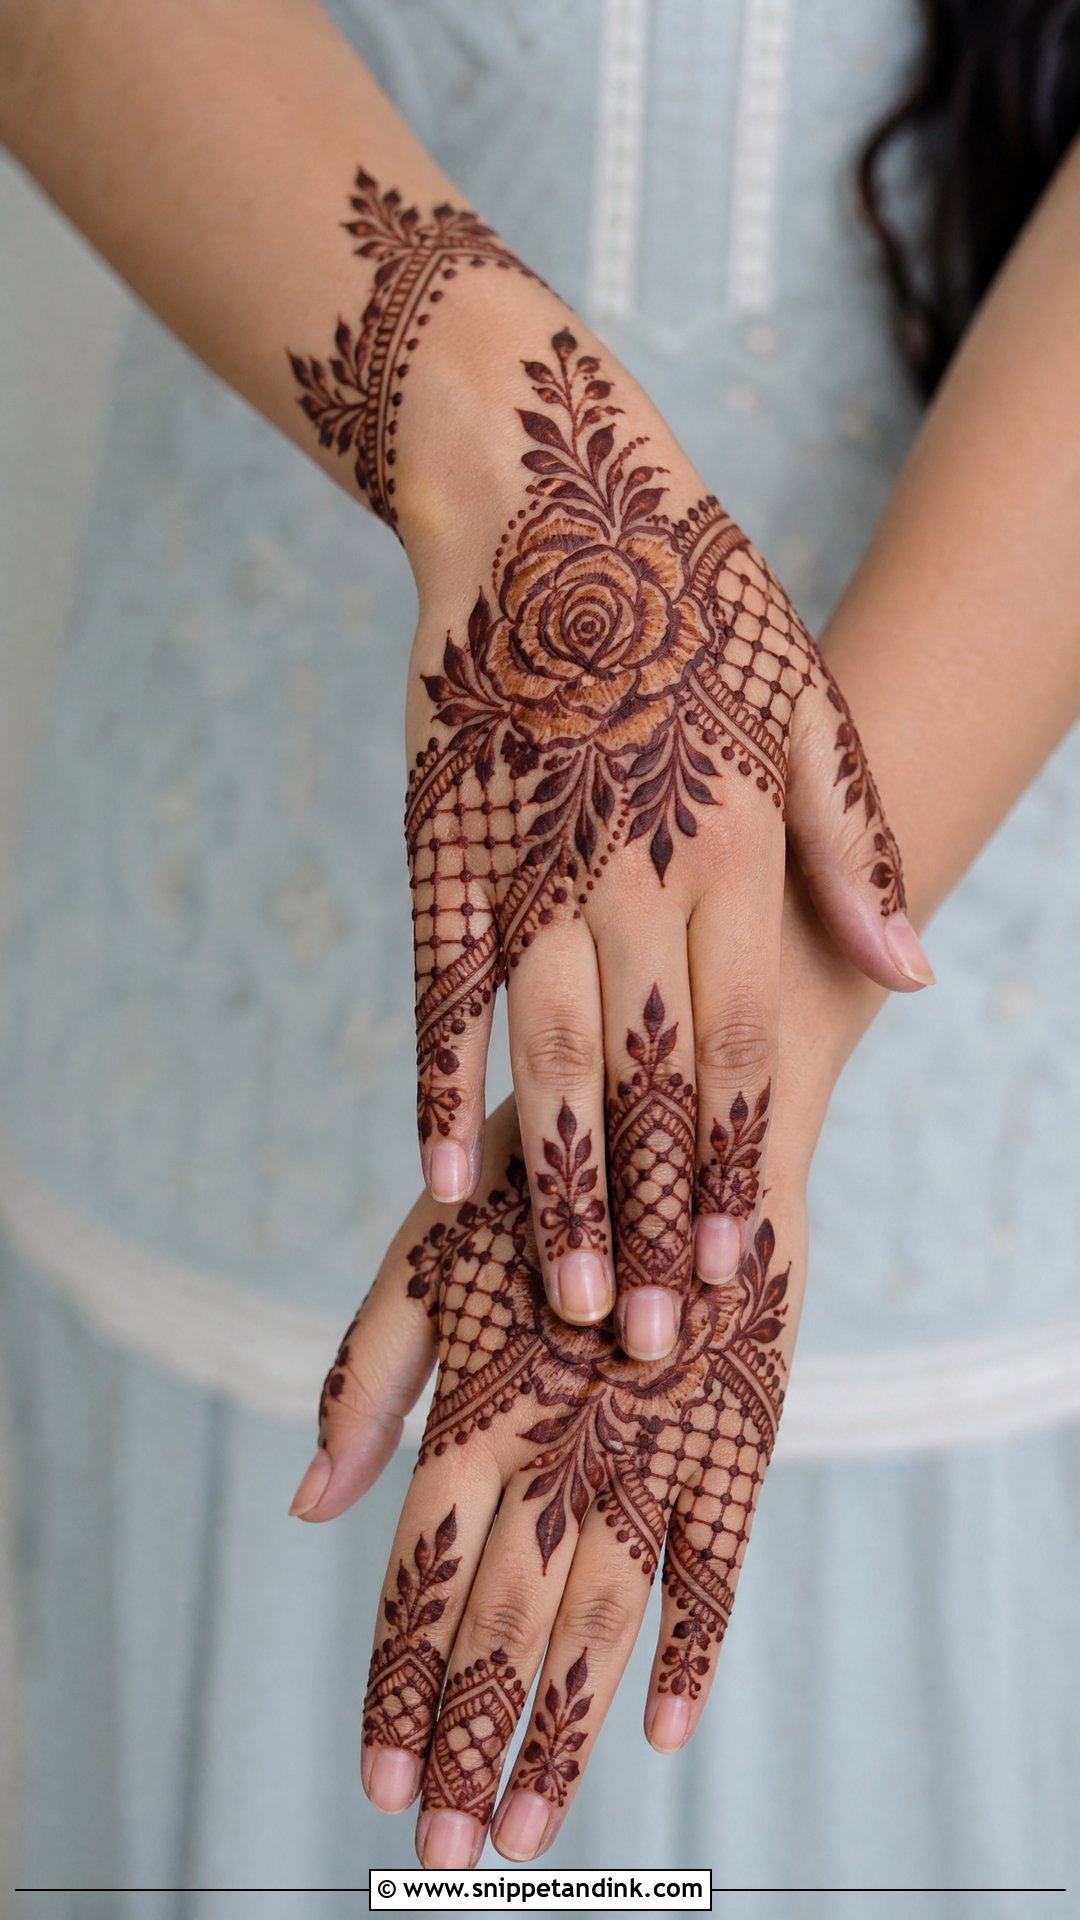
One large rose near the centre or side of the back of the hand, with checks around the wrist, fingers or side panels. Shade the petals lightly, just enough to separate them from the grid; heavy shading next to a dense grid turns into one dark patch. Small leaves and dotted borders finish it. It brings a romantic flower into a cleaner, more modern layout, and it works for engagements and family parties.
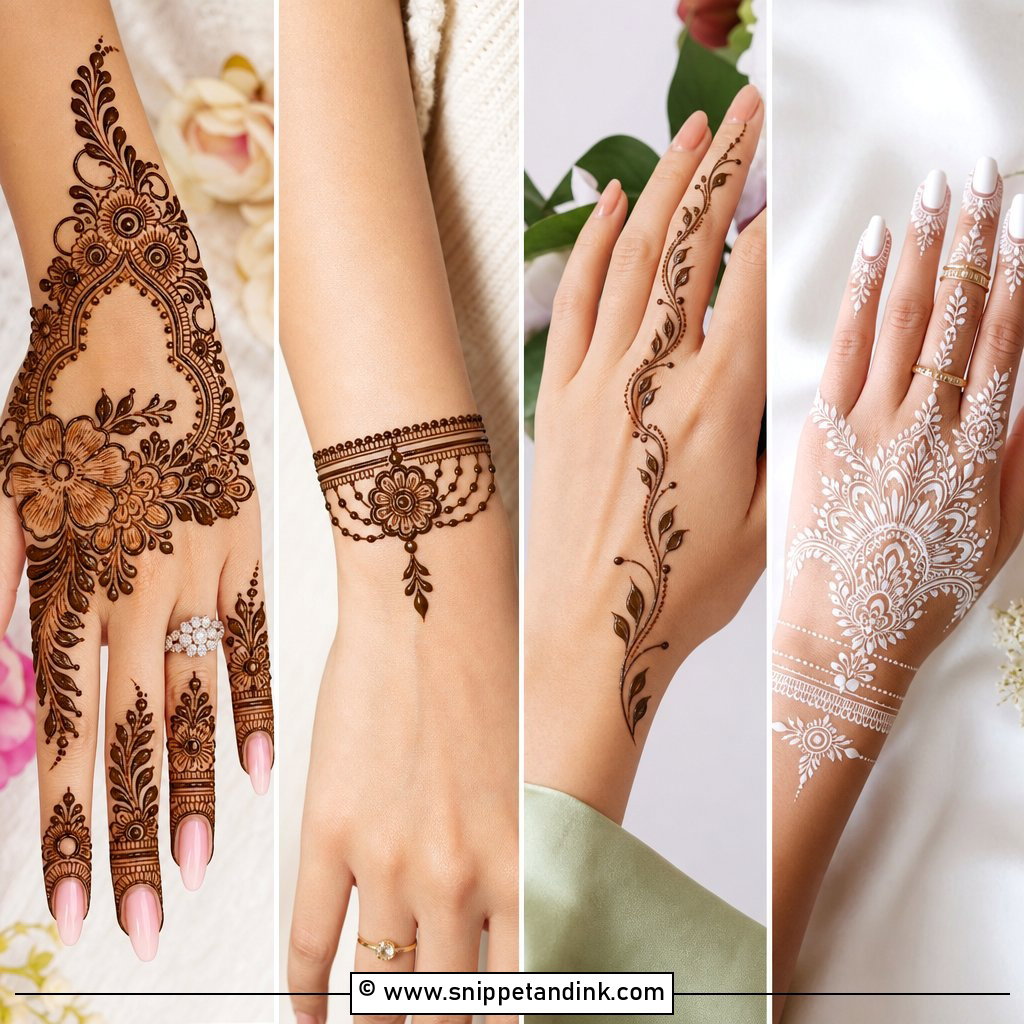
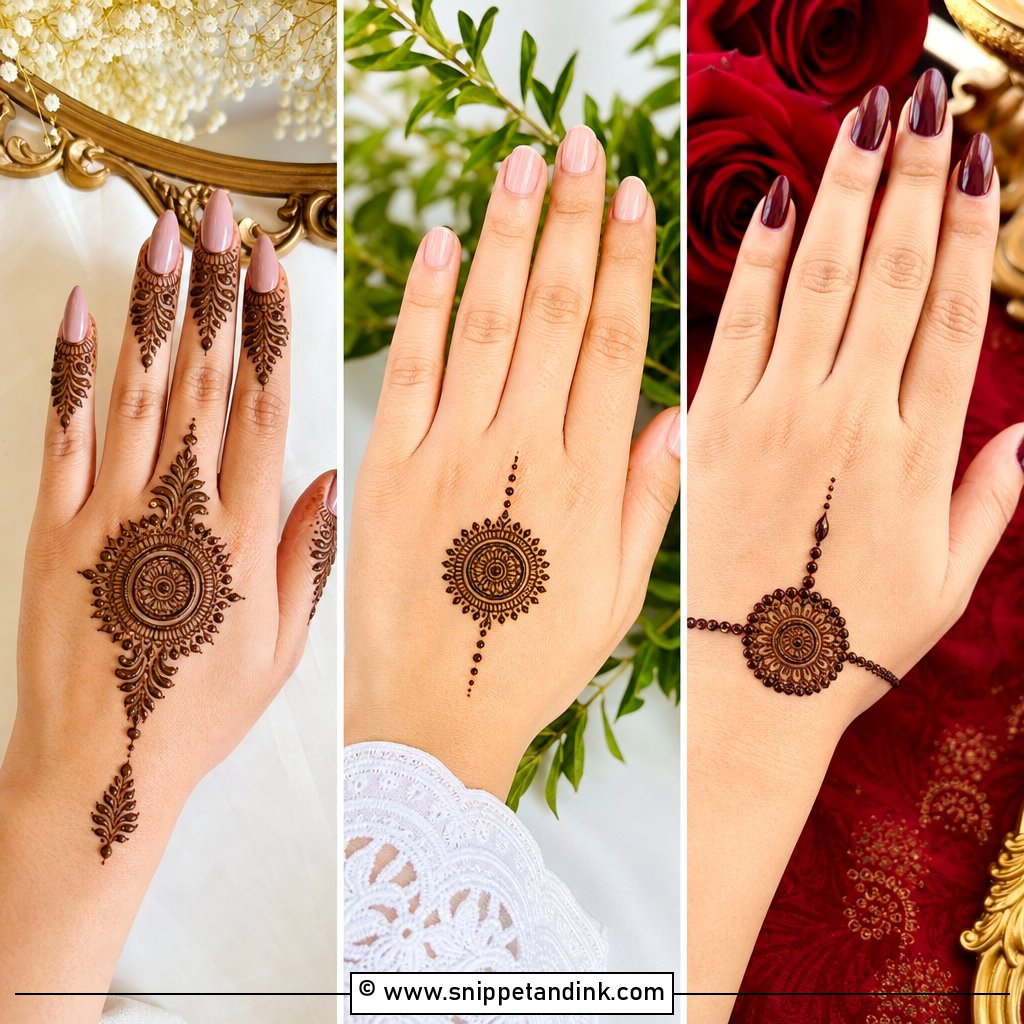
20. Diagonal Back Hand Check Mehndi Design
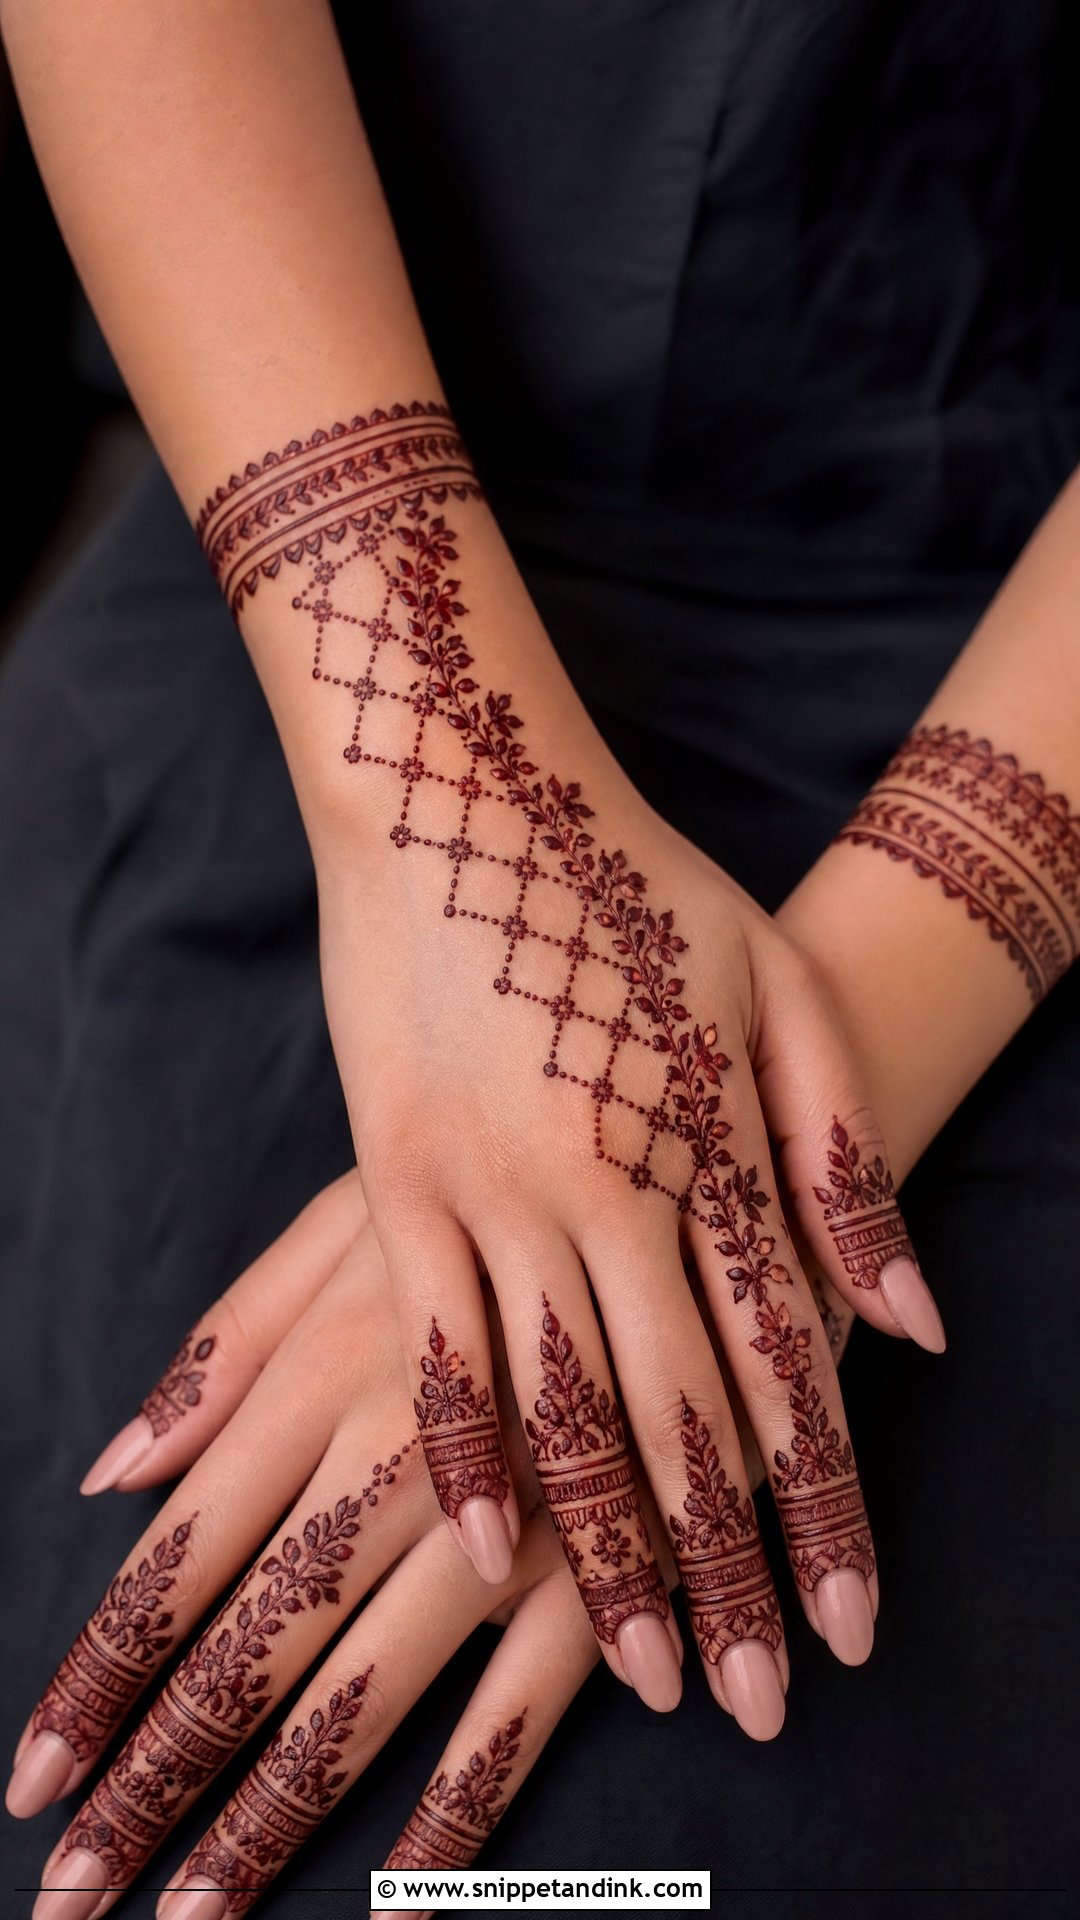
Of all the grid layouts, the diagonal panel flatters the most hands. The check band runs from the wrist across the back of the hand toward the index or middle finger, which visually lengthens it. Floral borders on both sides soften the band; open skin around it gives a modern Arabic feel. Thin bracelet bands at the wrist and simple finger lines are enough. I angle the band to follow the bones of the hand rather than a fixed angle, so it looks natural when the hand is relaxed.
21. Half Hand Check Mehndi Design
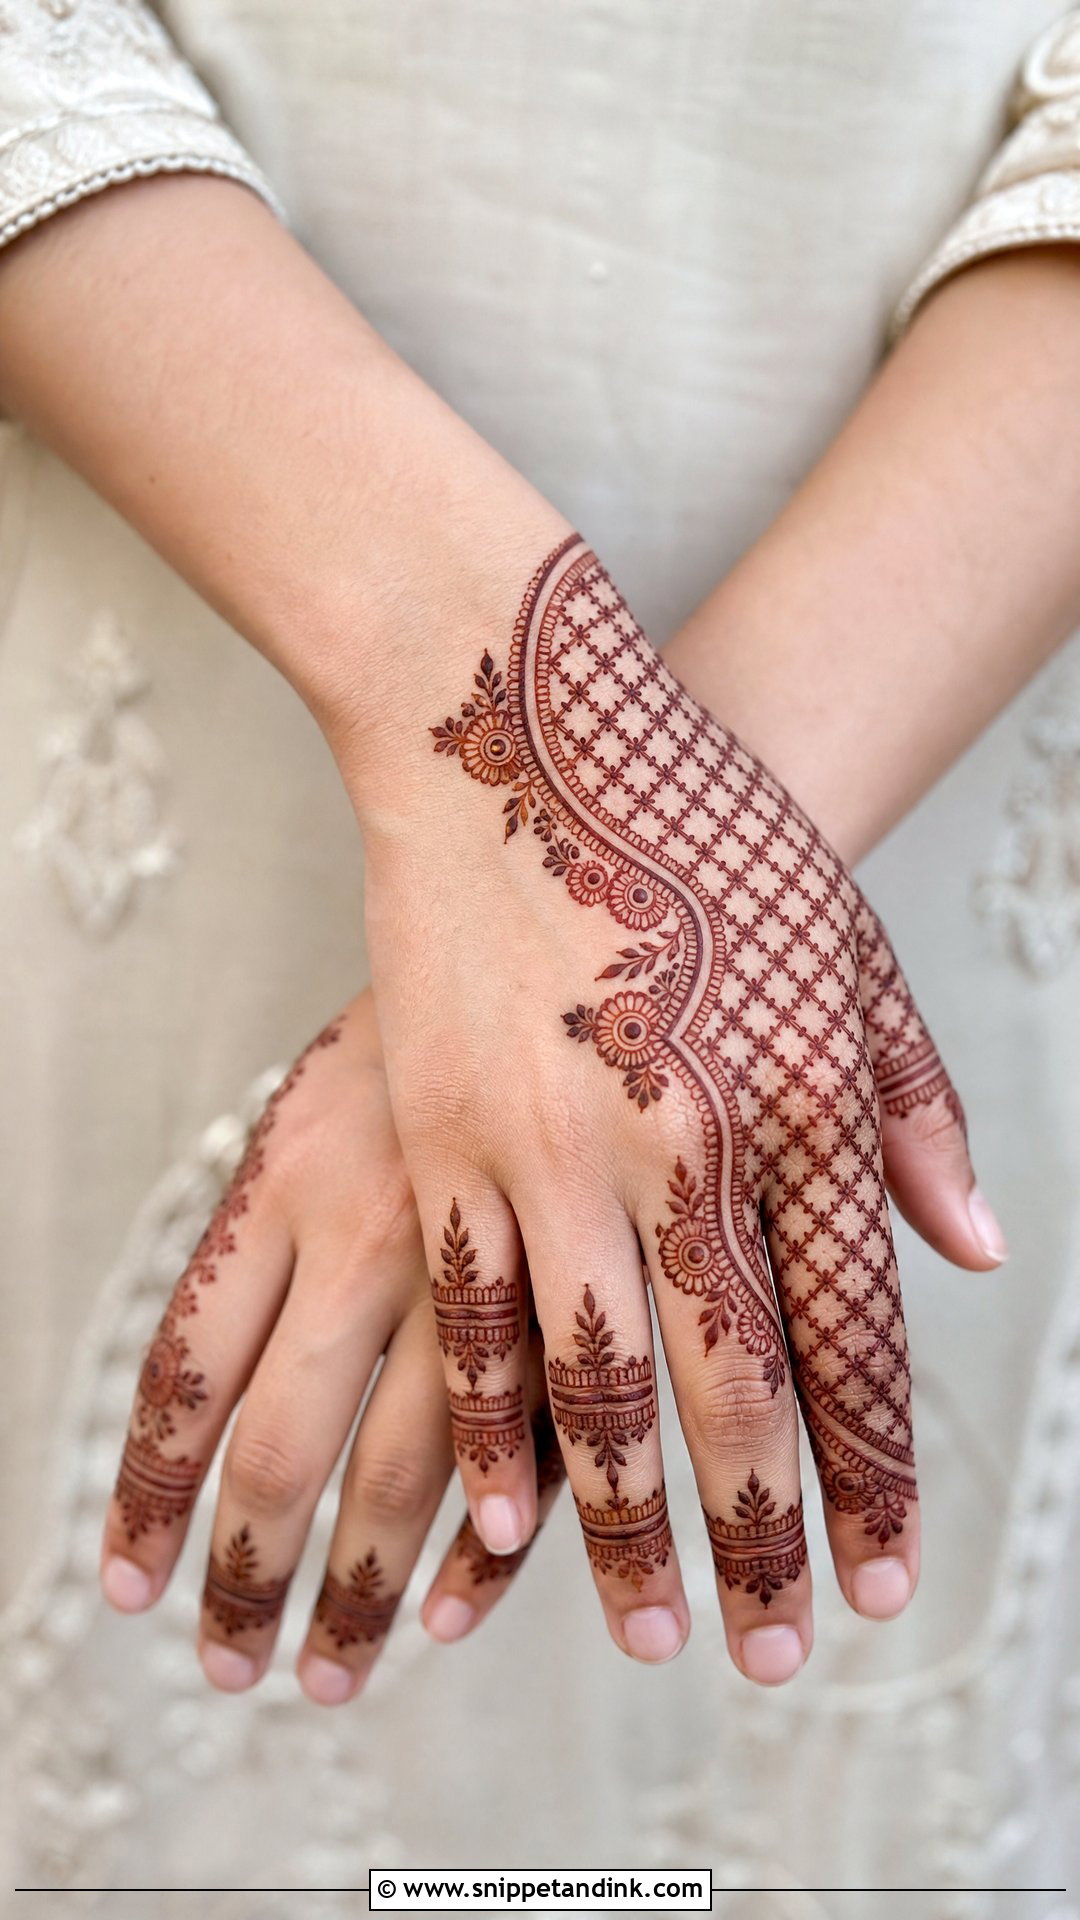
Split the back of the hand in two: checks on one half, open skin or light florals on the other, divided by a curved border. Finger detailing goes on the same side as the grid so the design feels connected, and a small wrist band finishes it. The curve of the dividing border matters most. A straight divide looks like a mistake; a confident S-curve looks deliberate. Good for casual and semi-formal days.
22. Heavy Back Hand Check Mehndi Design
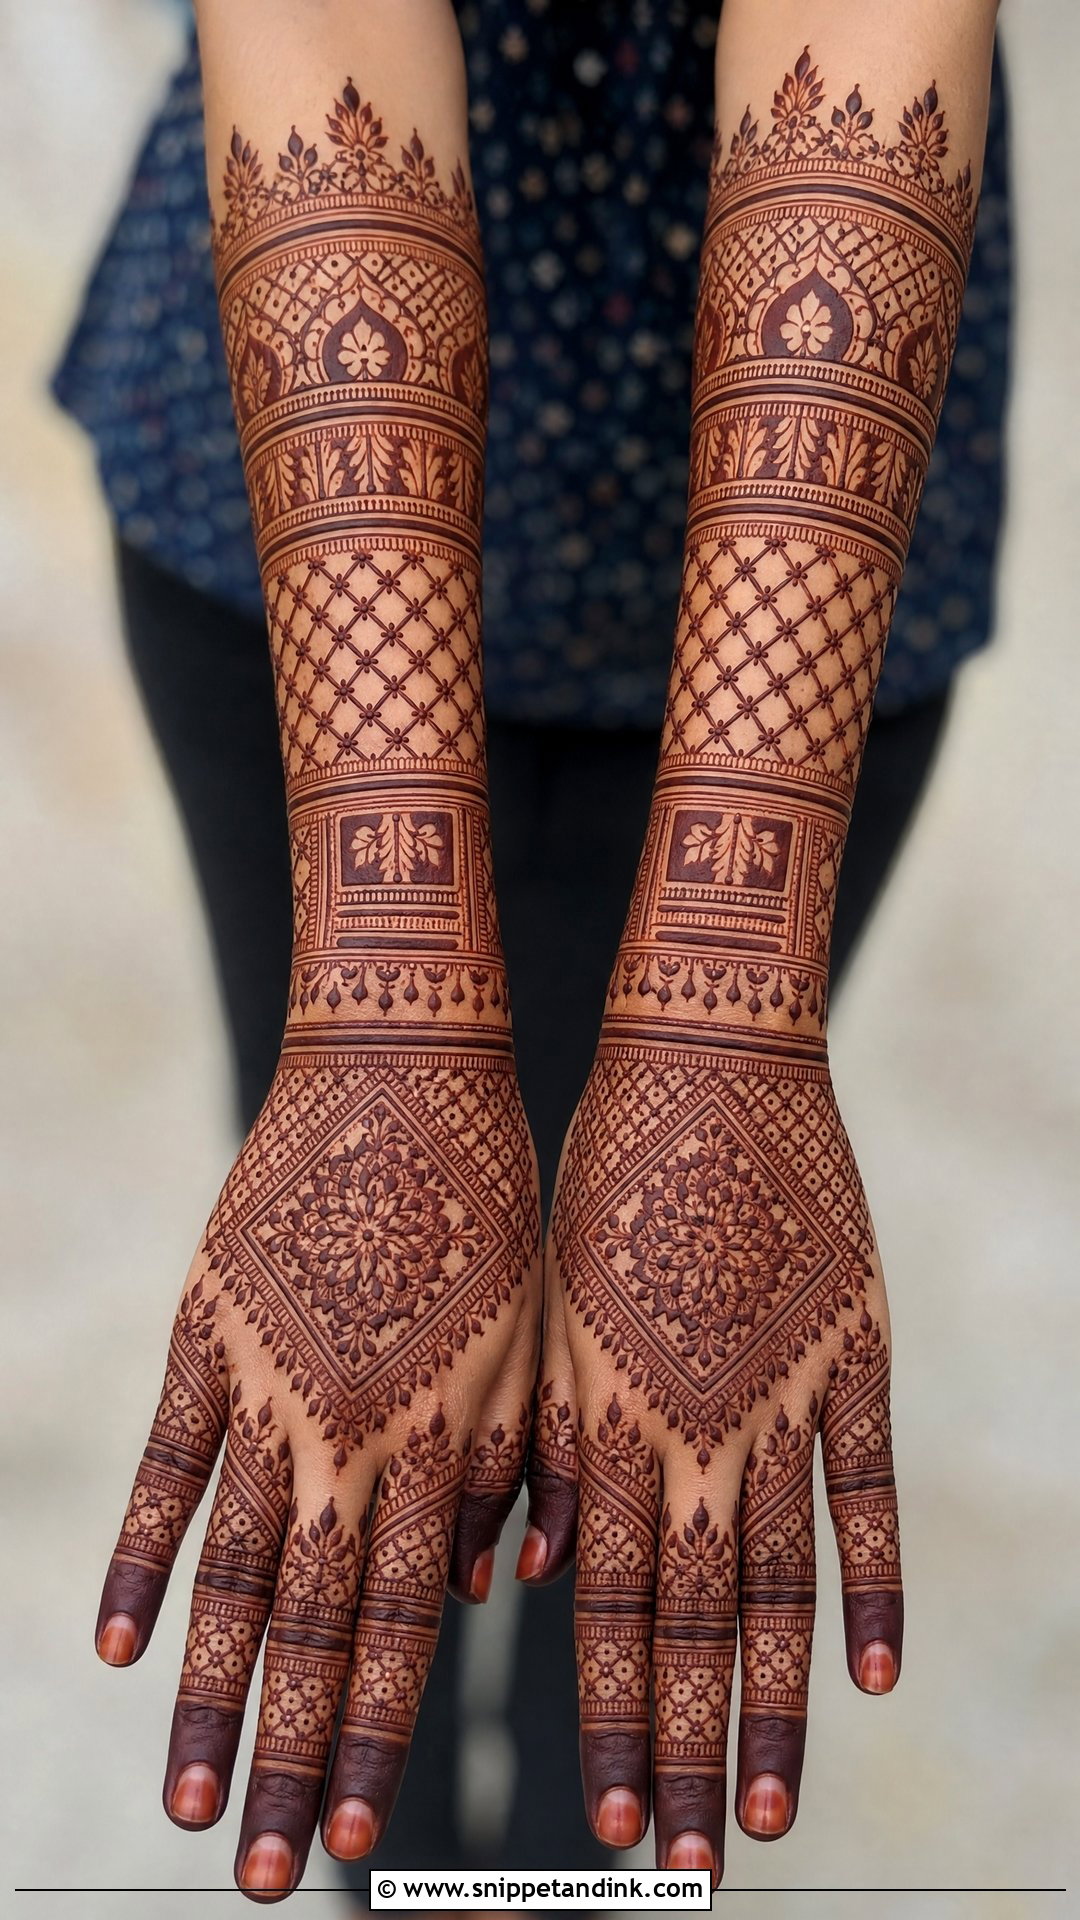
Heavy check work covers most of the back of the hand with a grid whose boxes are filled with dots, petals, mini leaves or tiny curls. Bold borders around the main grid stop it merging into the rest of the design, and the fingers are fully decorated with bands, mesh and shaded tips, sometimes extending into a cuff or forearm pattern. Fully filled grids take a long time and need a steady hand, so allow for a proper sitting. It suits brides, close family and big festive events.
23. Light Back Hand Check Mehndi Design
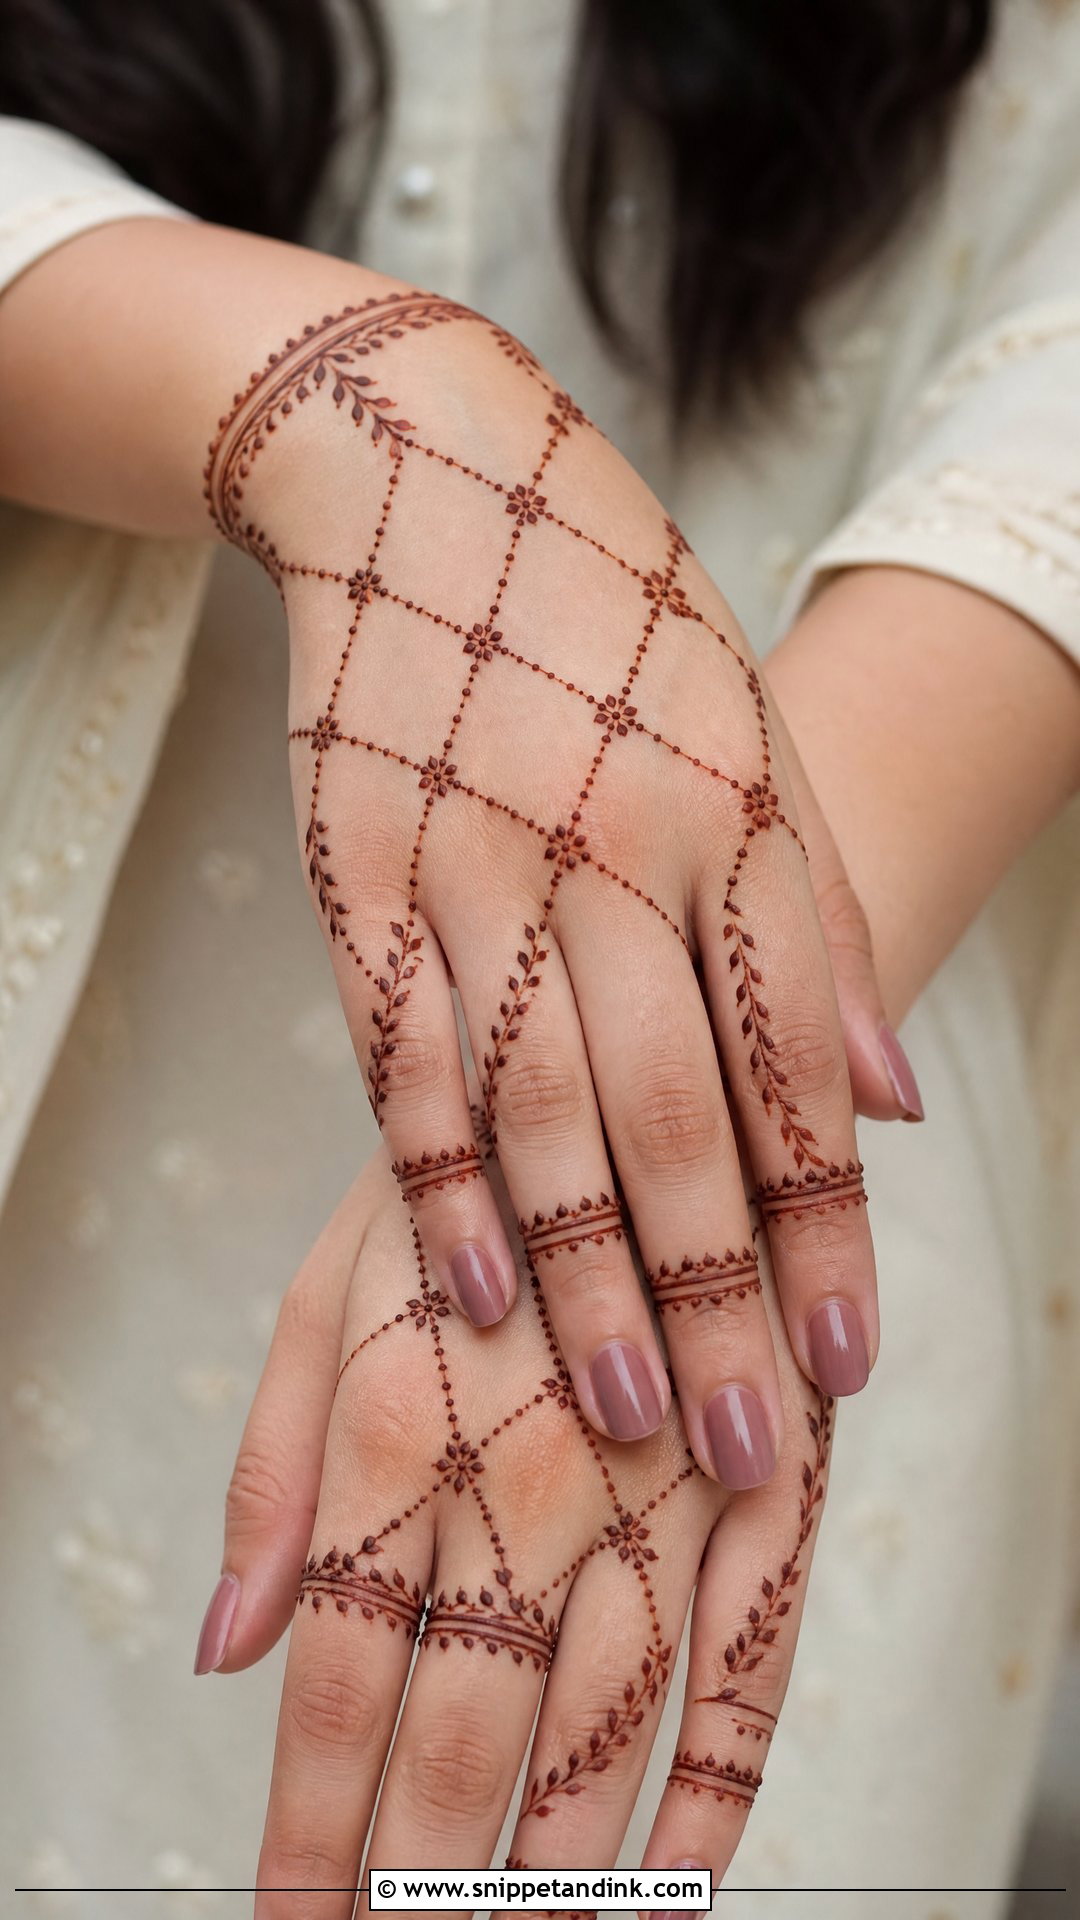
Light check work uses thin lines for a small grid with tiny dots at the crossing points. The fingers get one or two bands and a few leafy accents; the wrist gets a delicate bracelet line instead of a thick cuff. Small hands carry it well because the open space keeps it from looking cramped. Fine lines do stain lighter, so if you want this to show clearly, ask for the lines just a touch thicker than hairline. Good for summer events and casual wear.
24. Moroccan Back Hand Check Mehndi Design
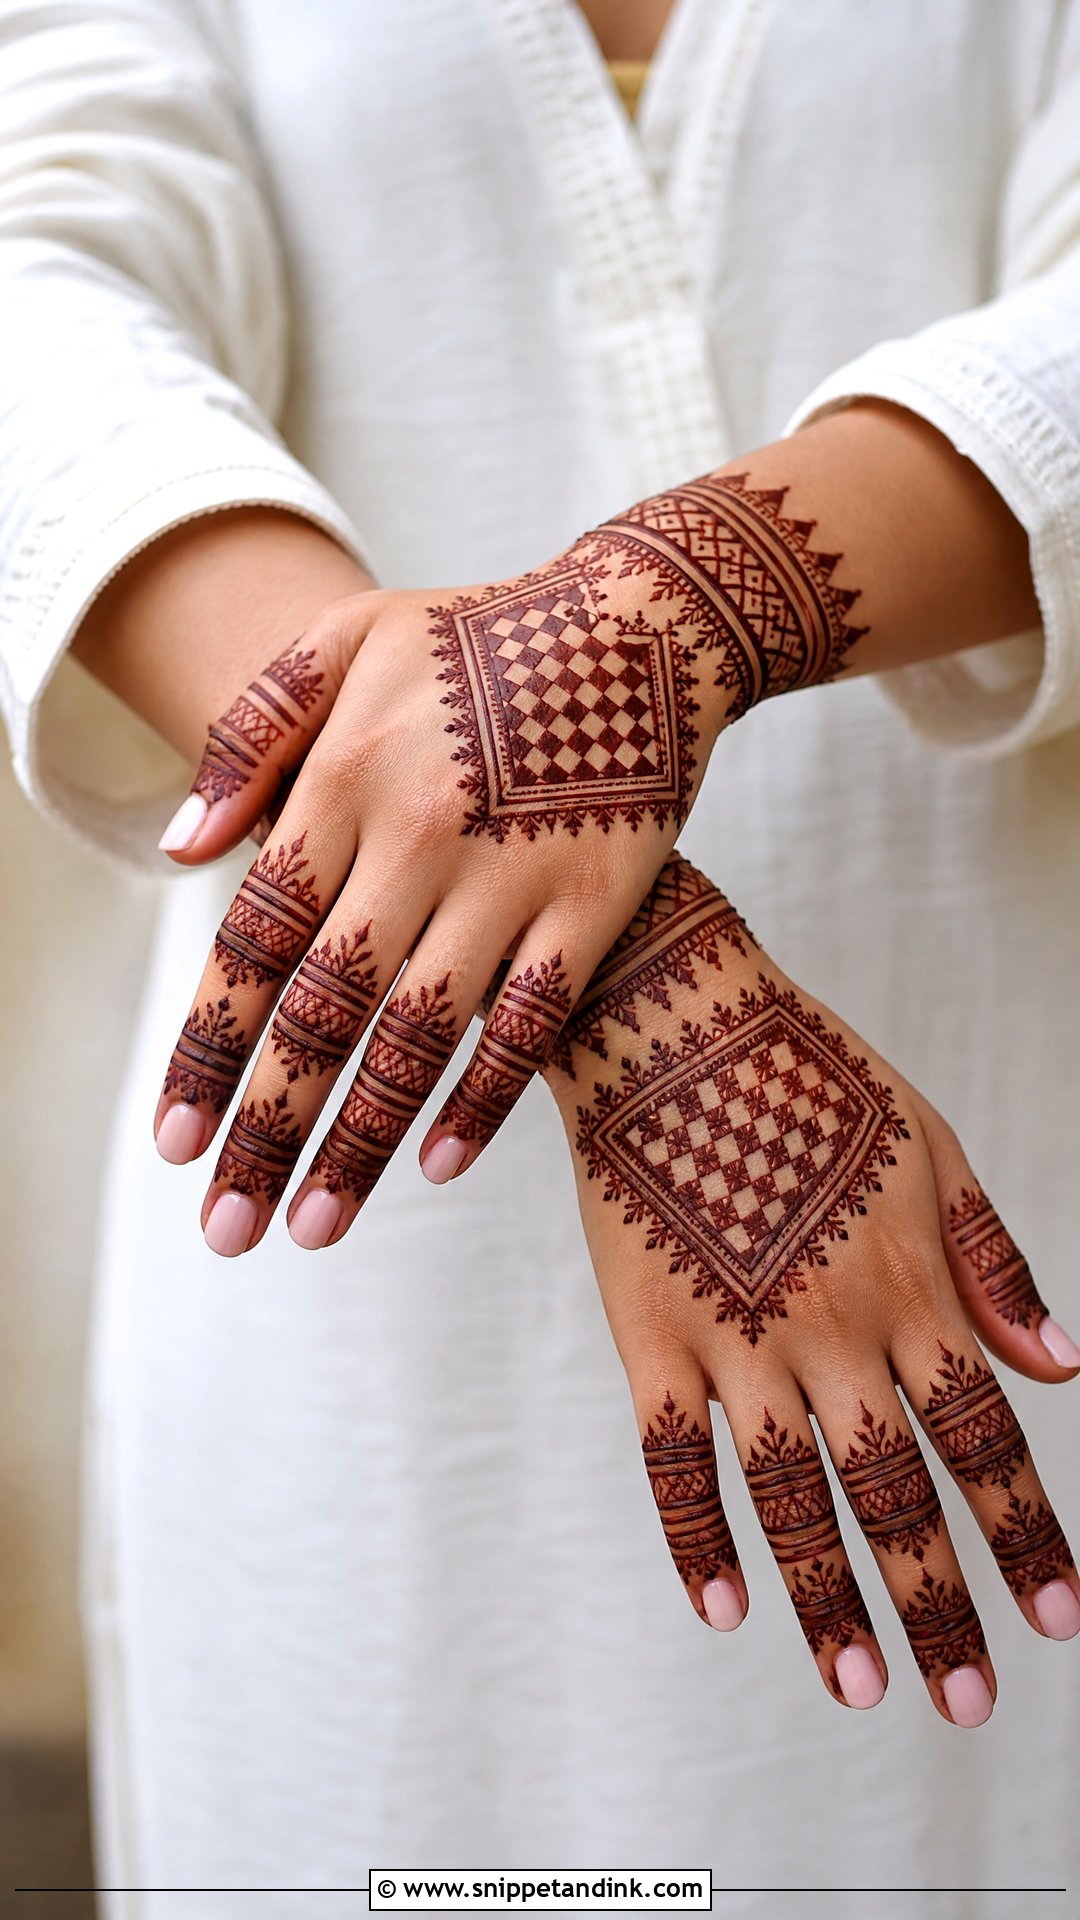
Moroccan-inspired checks drop the floral trails altogether in favour of straight lines, triangles, diamonds and square grids. The main grid sits in a strong central panel with angular borders around the wrist and fingers. Curves are kept to a minimum. This is the most exacting style on the list, since sharp structure is its entire appeal; I draw it with the hand resting flat on a cushion so the skin doesn’t shift between strokes. It suits parties and fashion-forward outfits.
25. Gulf Back Hand Check Mehndi Design
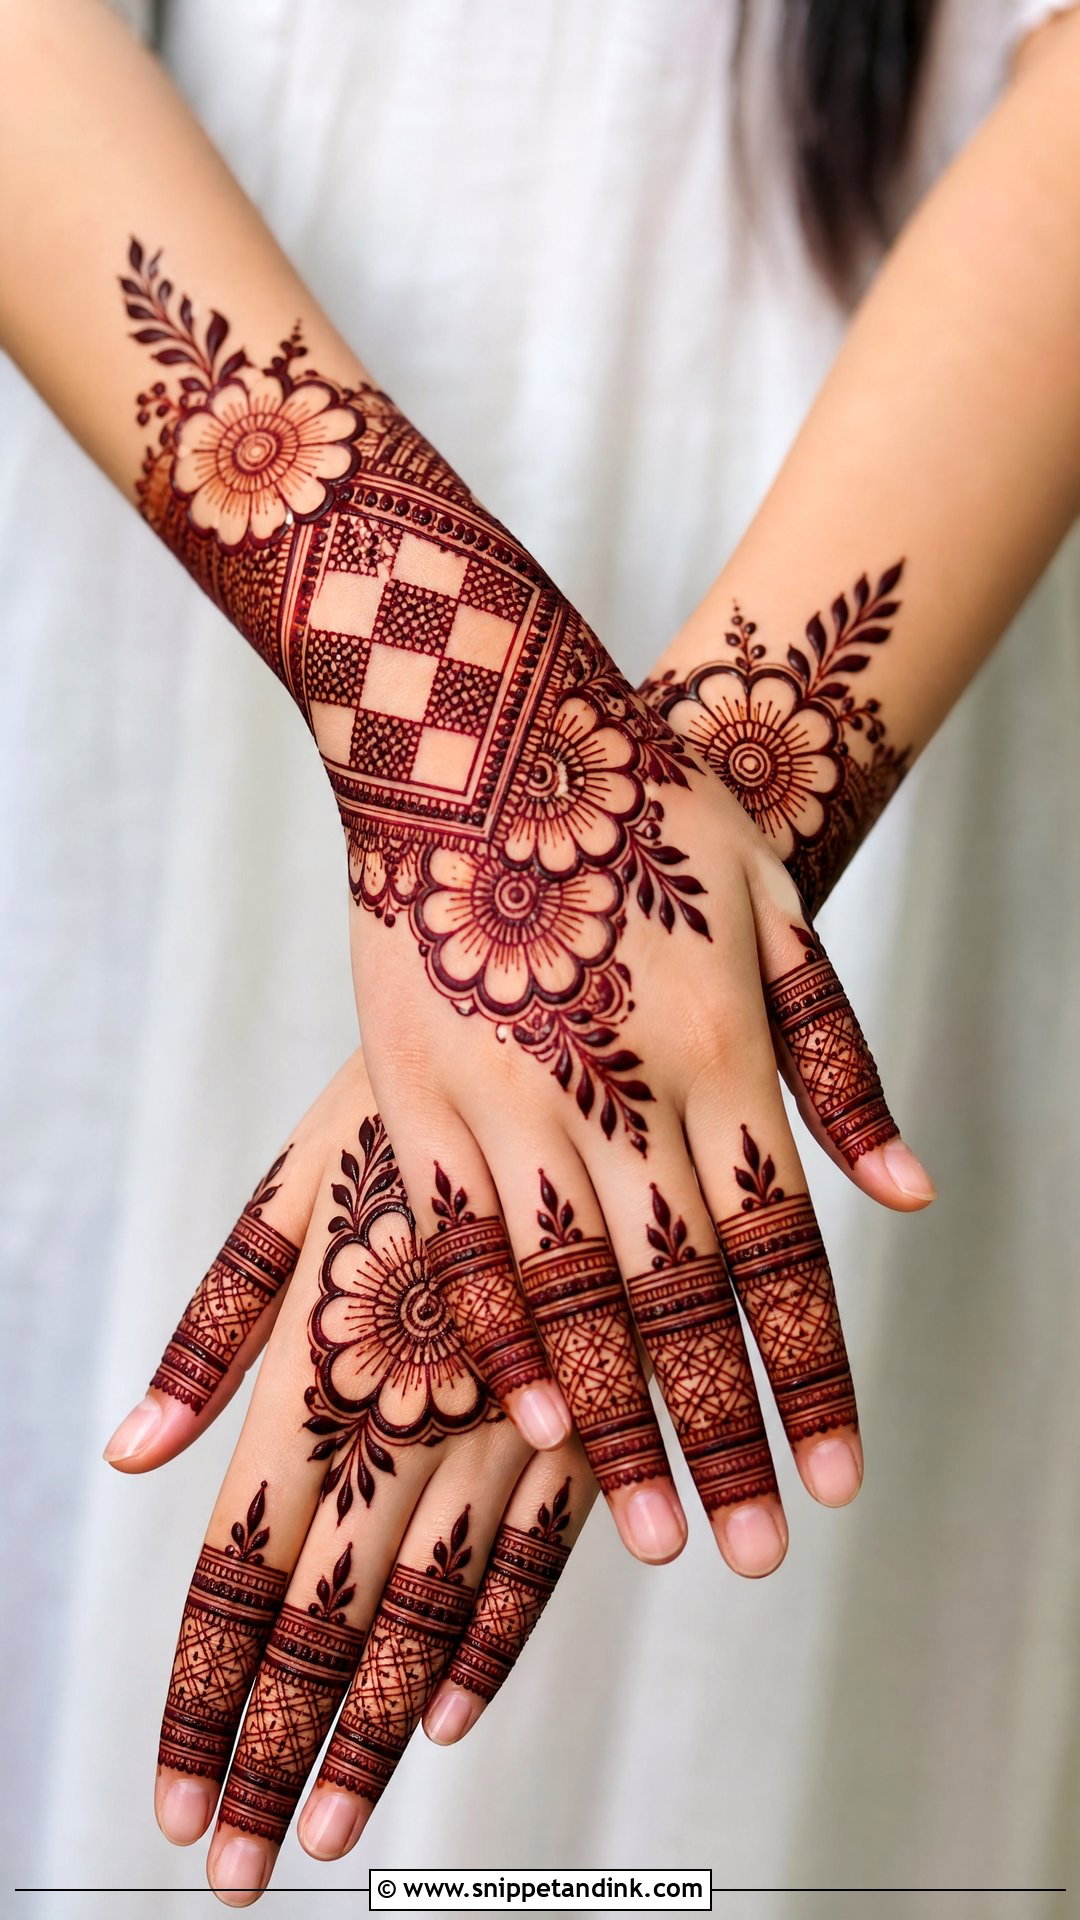
Gulf-inspired check work is bold and open: large floral shapes, thick leafy strokes and a wide check panel across the back of the hand. Unlike dense Indian designs, it leaves plenty of room around each motif. The checks are larger and cleaner, with dots or small flowers in alternate boxes, and the fingers get bold rings, leafy tips and simple mesh bands. Thick lines and open skin give the deepest-looking stain on the back of the hand. It is a favourite for Eid, weddings and evening events.
26. Jewellery Back Hand Check Mehndi Design
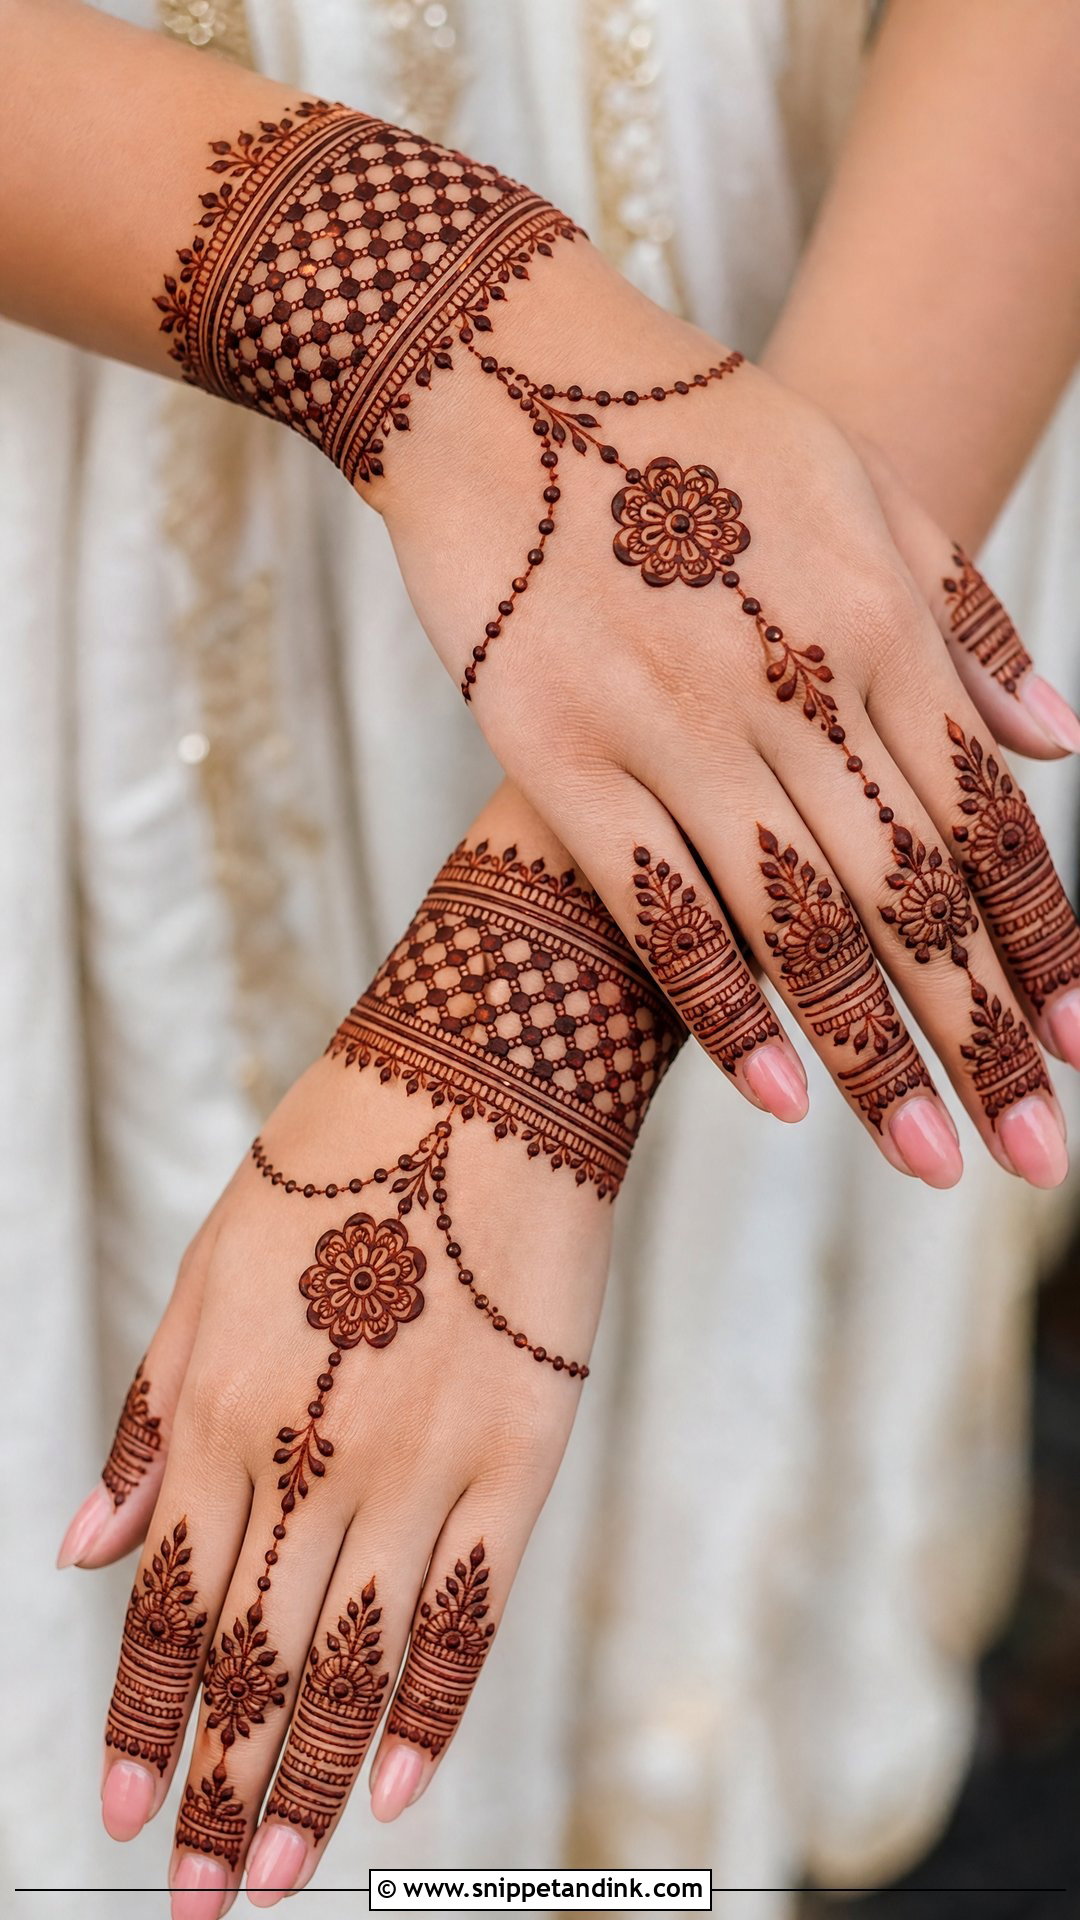
Jewellery layouts draw a bracelet at the wrist, chain lines across the hand and ring details on the fingers, with a small grid inside the bracelet or at the centre for texture. A floral charm or mandala sits where the chain meets the fingers. It looks dressed up without being full, which is why bridesmaids and engagement guests often pick it. The real bangles sit over the drawn bracelet, so I keep the drawn one just below the wrist bone where bangles don’t cover it.
27. Eid Back Hand Check Mehndi Design
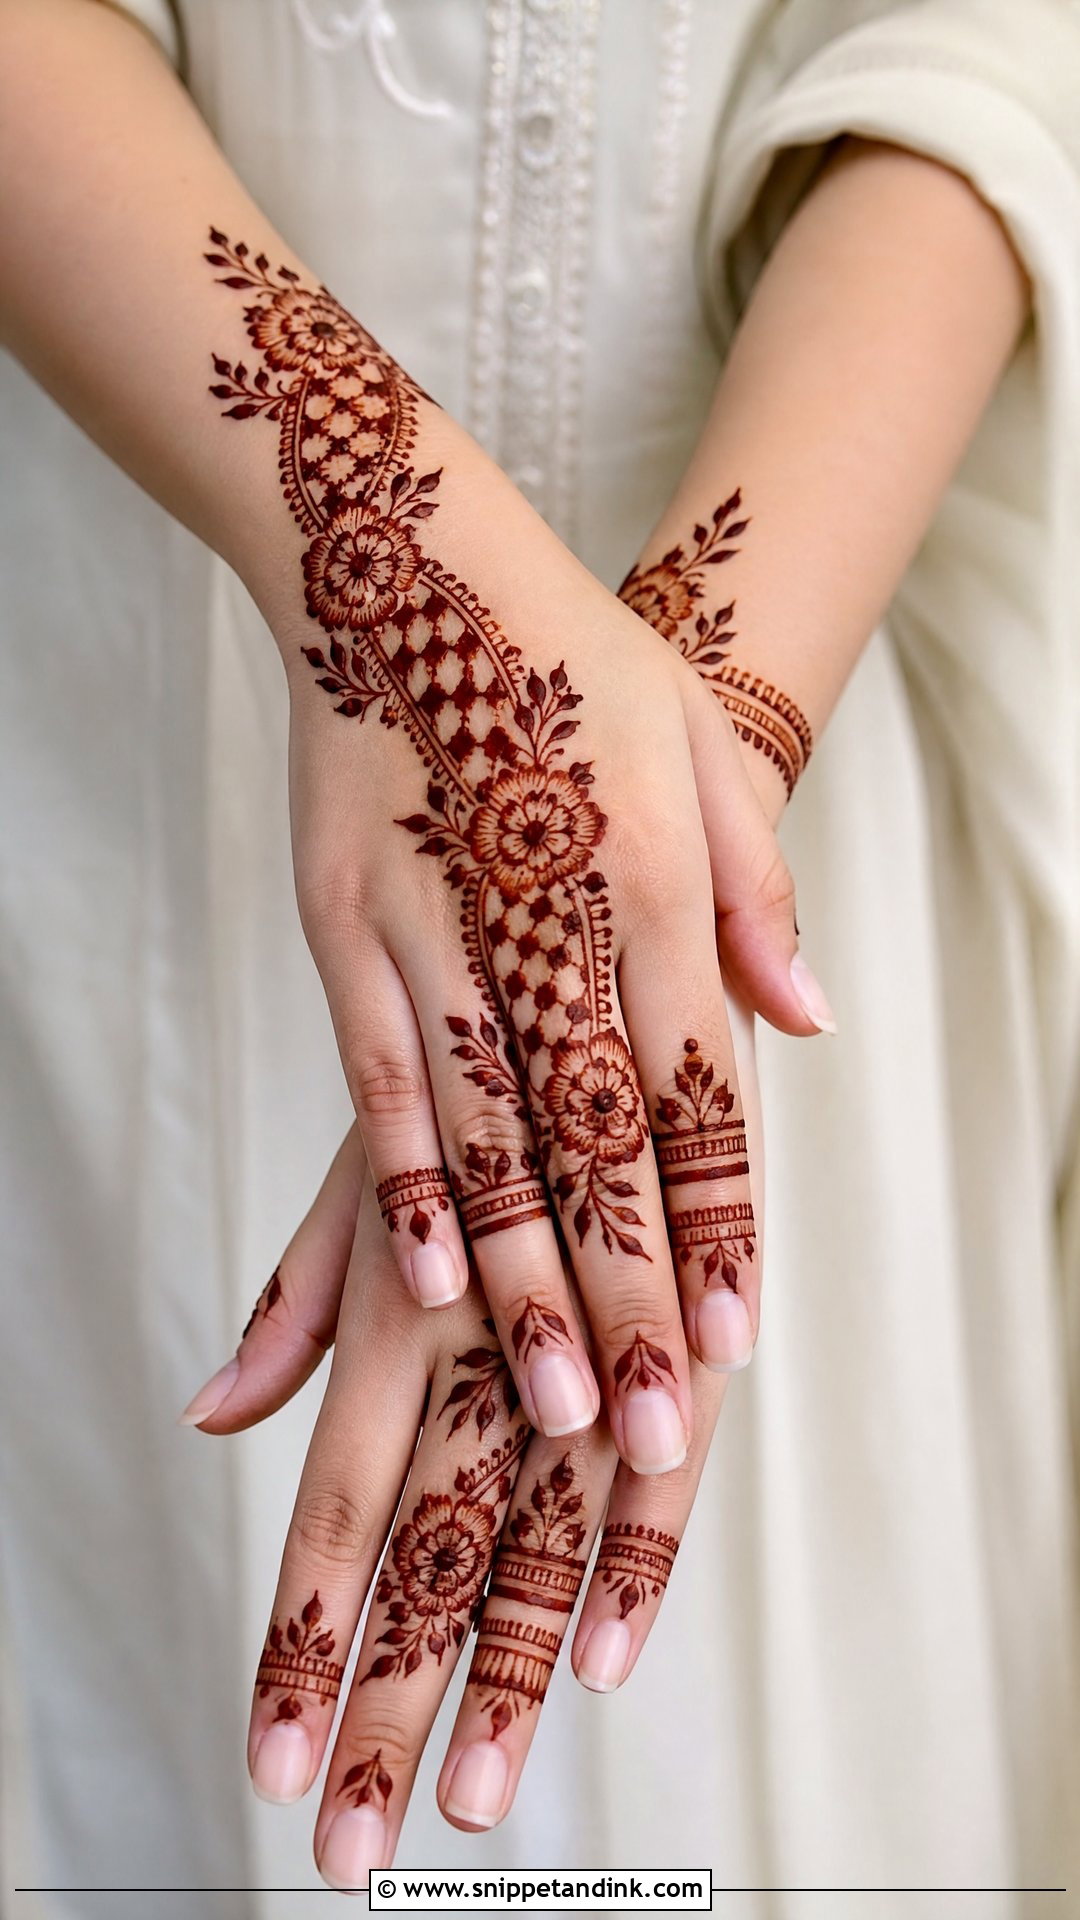
For Eid, a diagonal check trail with flowers and leafy edges, neat finger bands and a bracelet cuff near the wrist is my usual go-to. Dots inside the checks make it fuller; open space around it keeps it light. It suits simple and formal Eid outfits alike. Chaand raat queues are long, and this layout fits a shorter slot without looking rushed, so I keep it ready for last-minute bookings.
28. Wedding Back Hand Check Mehndi Design
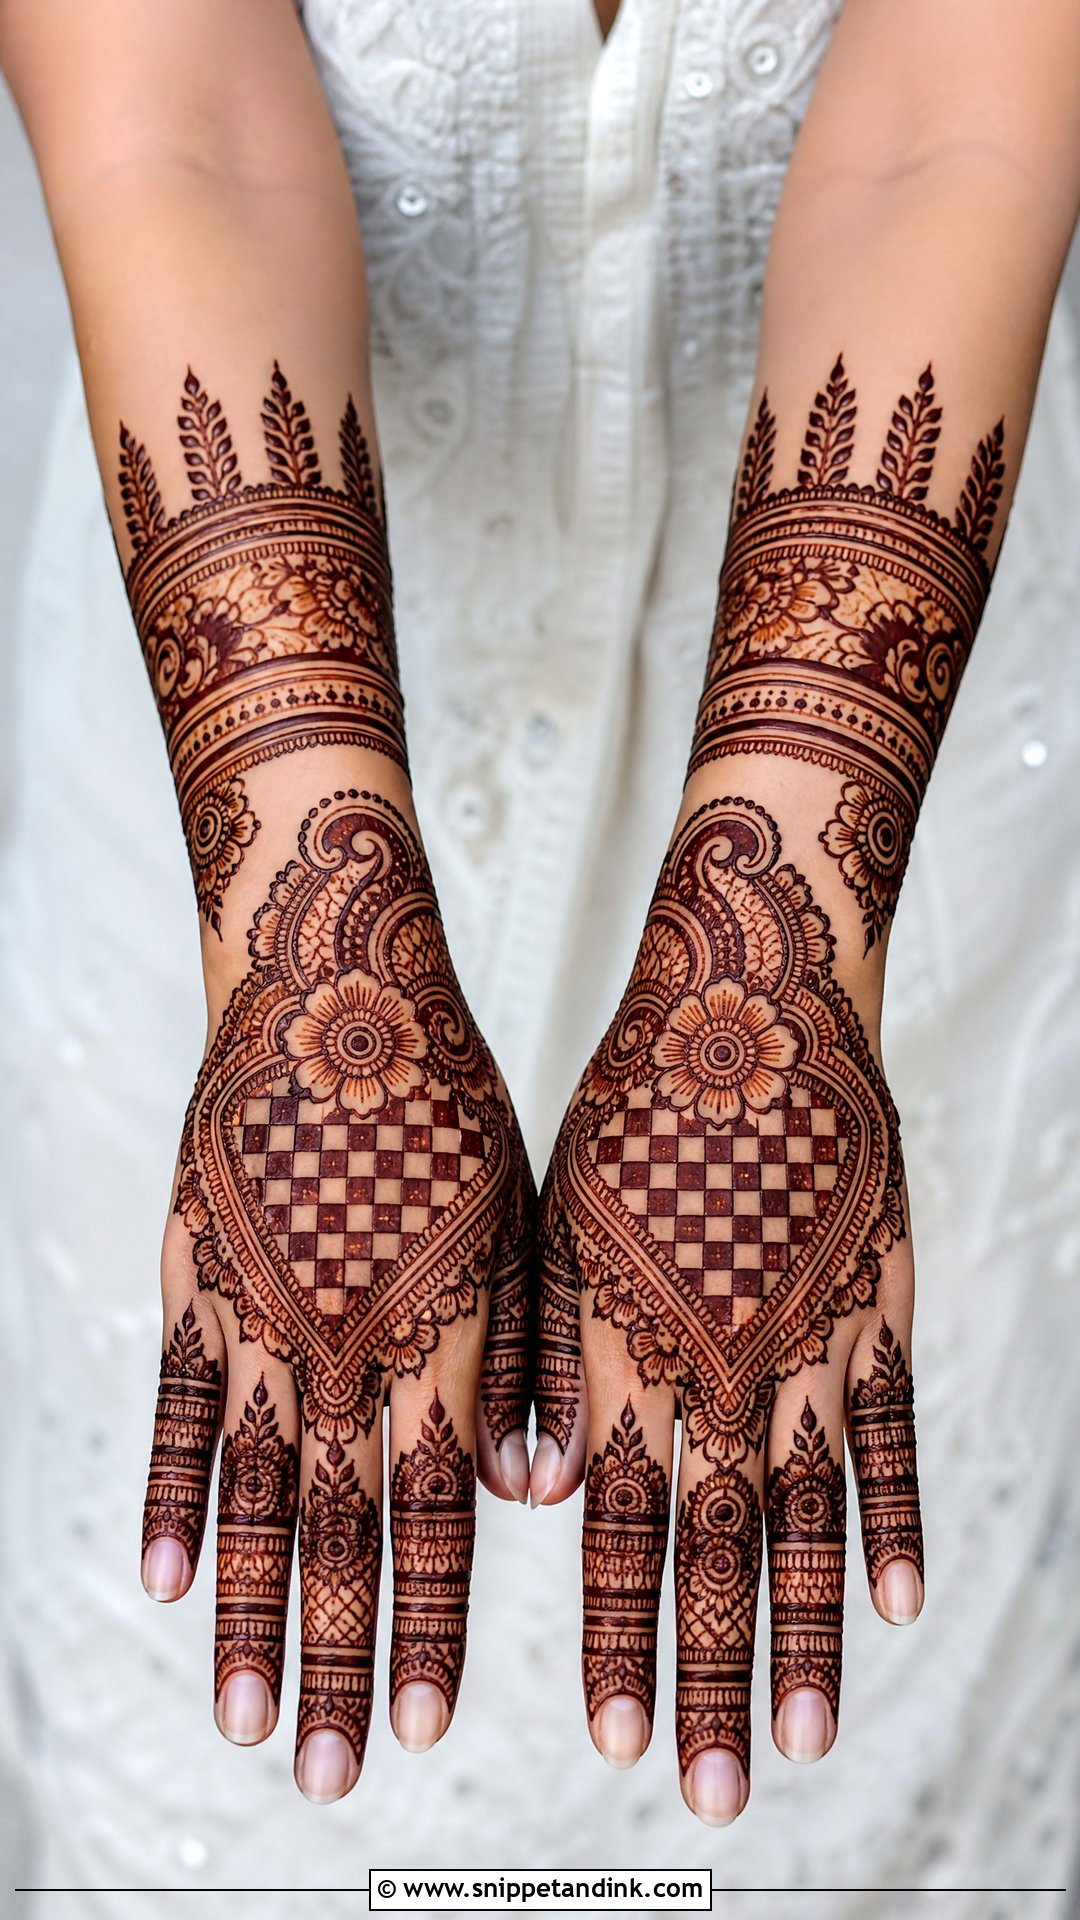
A wedding-guest version can be detailed without crowding: a full-hand layout with a central grid, floral borders, paisley edges and decorated fingers, with small dots and tiny petals in the boxes. Layered wrist bands look like bangles, and matching vines or arches can climb the forearm. It suits sisters of the bride, bridesmaids and close family wearing lehengas, sarees or shararas. Keep it a step lighter than the bride’s own mehndi so she still stands out.
29. Engagement Back Hand Check Mehndi Design
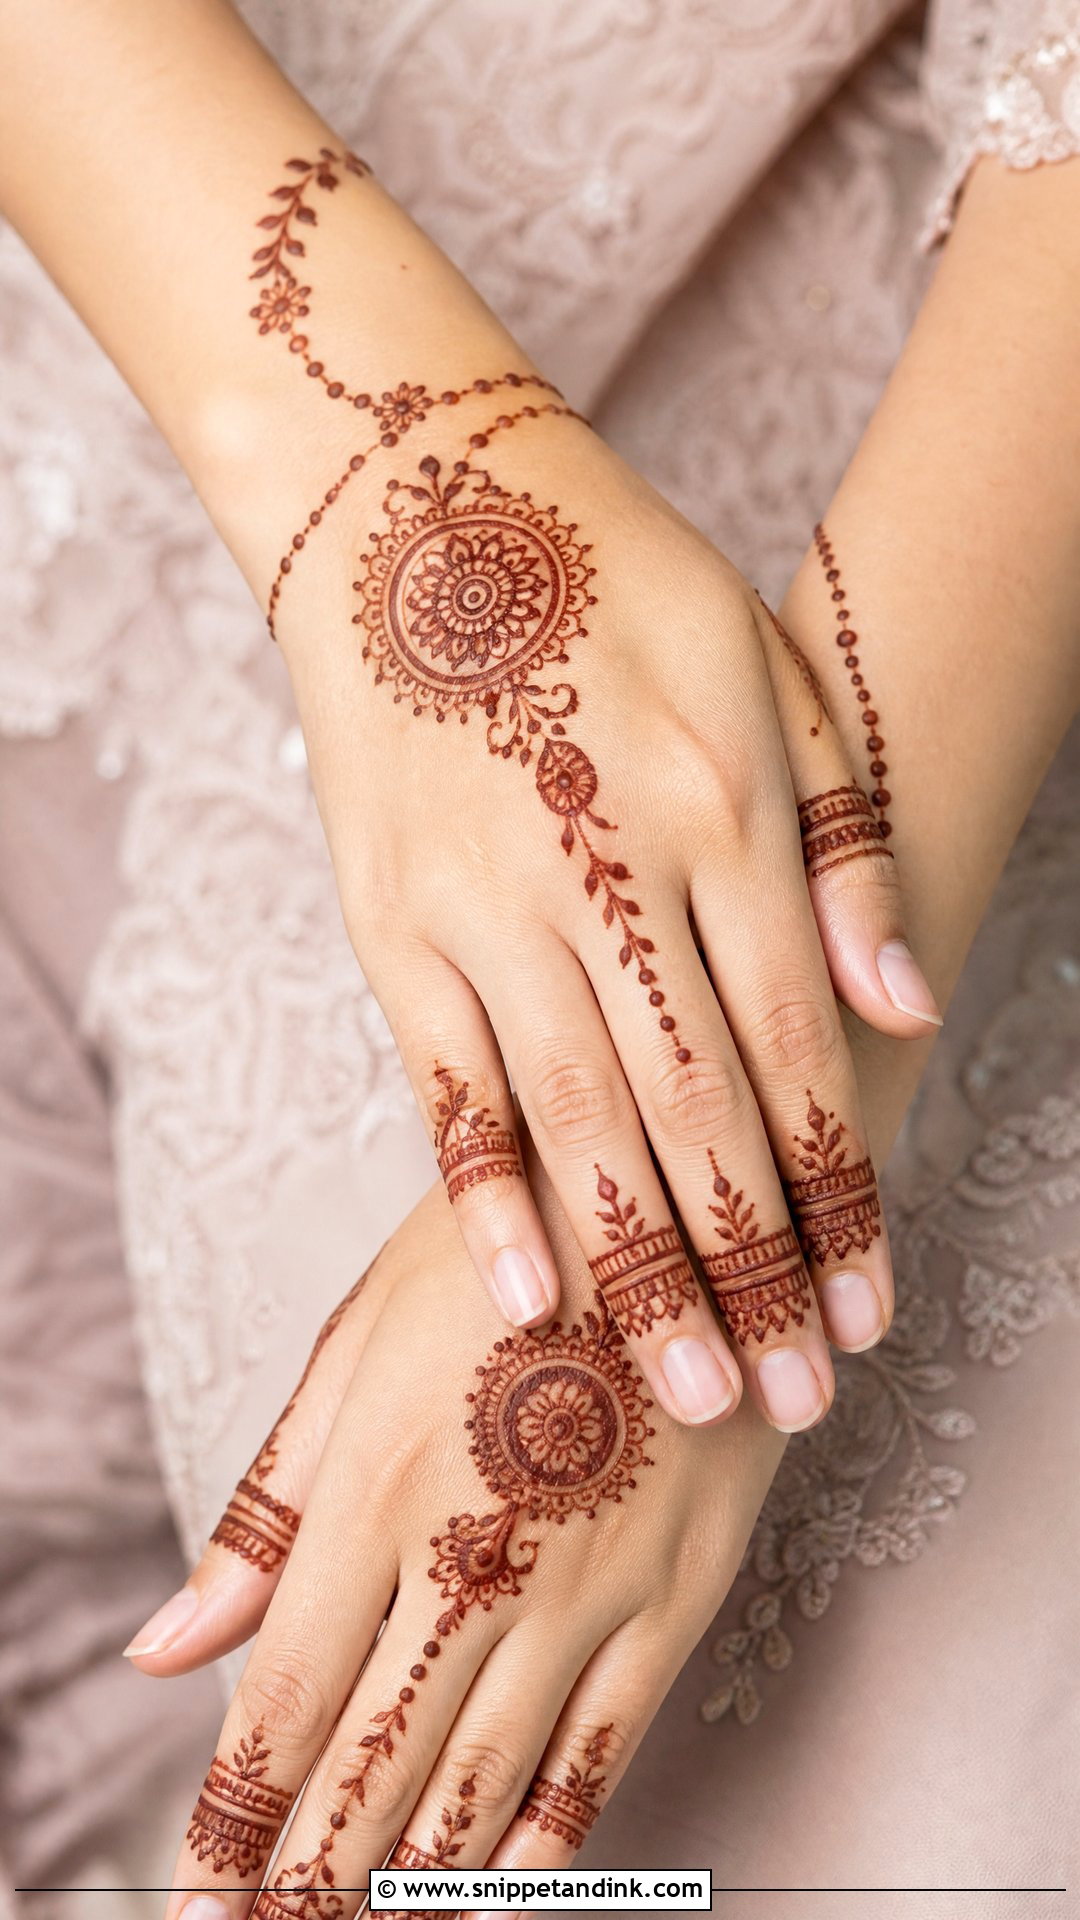
Engagement back hand check mehndi design works best kept light: a bracelet layout with a small check mandala at the centre, slim chains toward the fingers and tiny florals near the wrist. Ring-like bands and delicate dots keep the fingers neat and frame the engagement ring without hiding it. Initials can hide inside a small paisley or floral charm. I’d leave the base of the ring finger bare, since a ring slid over fresh paste will smear the lines.
30. Latest Back Hand Check Mehndi Design
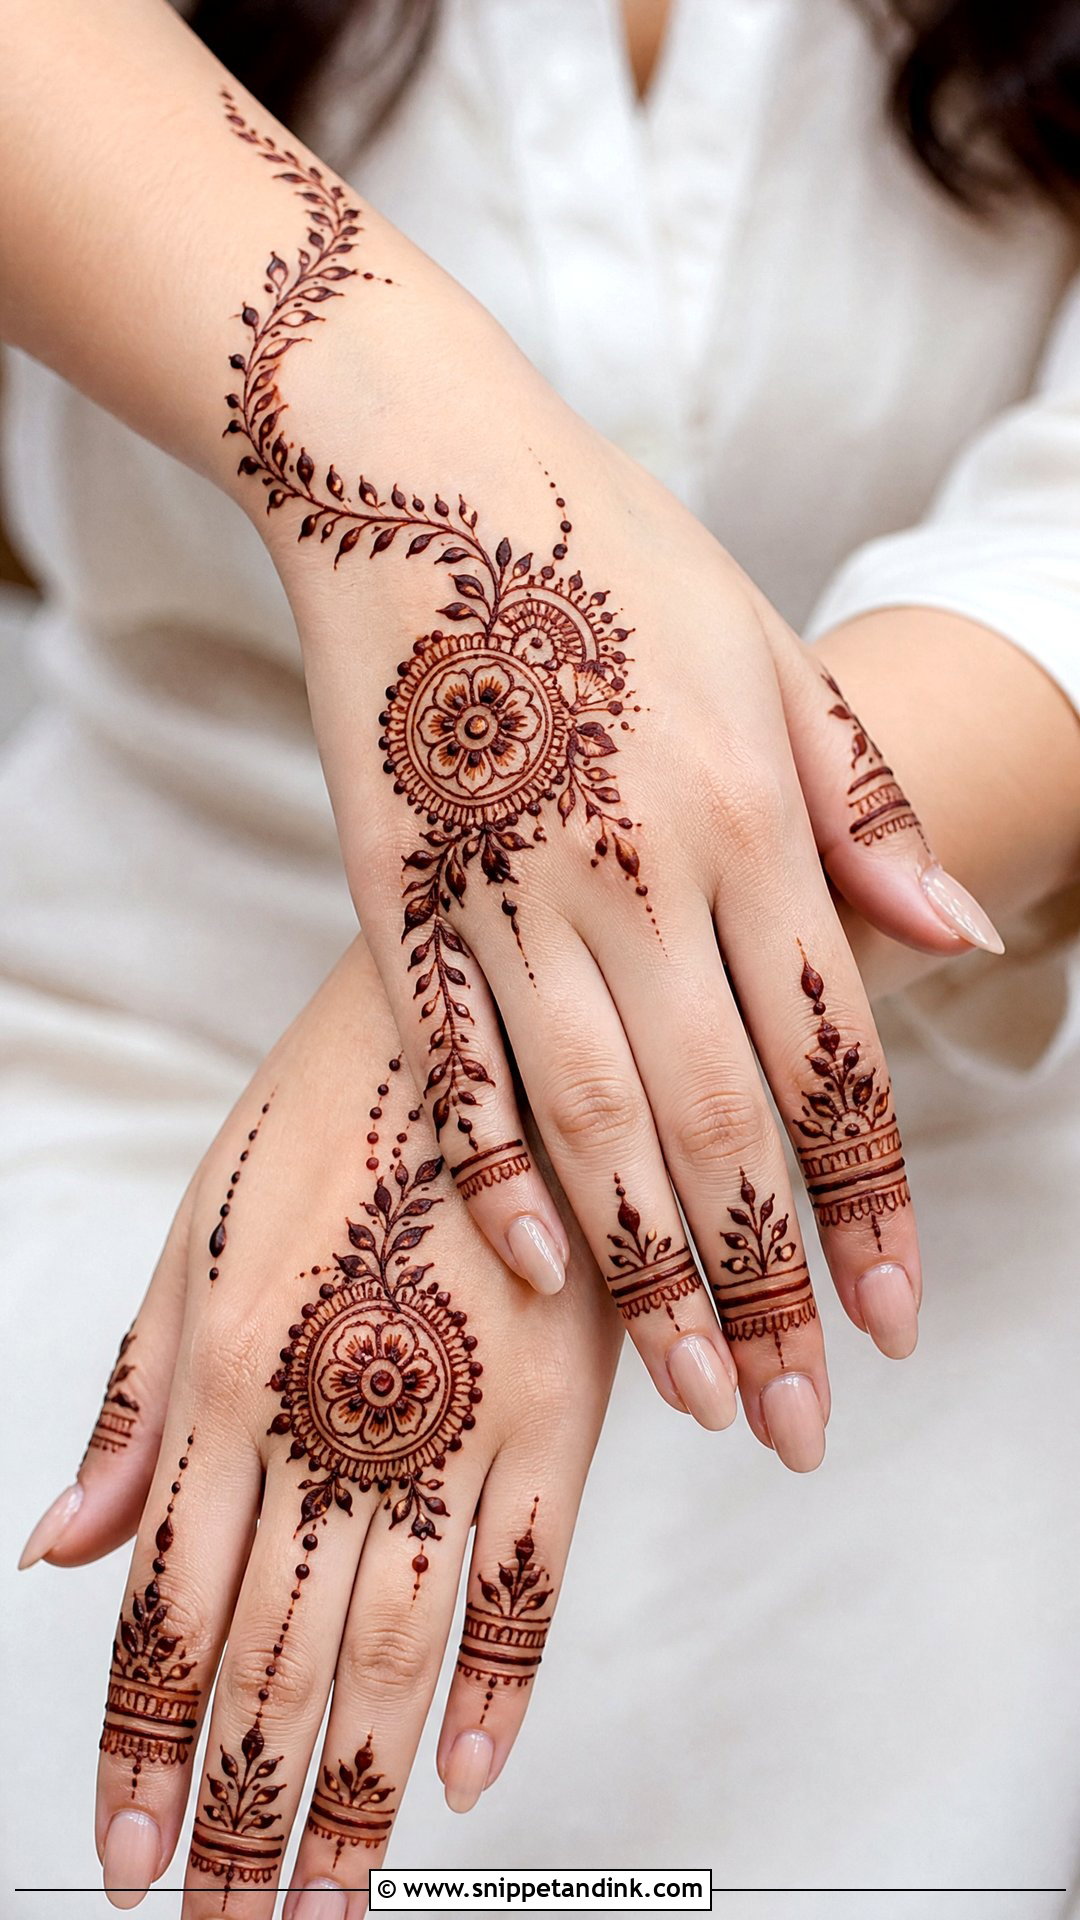
Latest back hand check mehndi design trends mix the grid with other elements instead of using one plain block: check panels beside mandalas, floral trails, bracelet details and finger-focused work. A half-hand grid with open skin on one side and detailed fingers on the other is the version I’m asked for most at the moment. Keep the lines crisp, resist filling every space and add dots only where they improve the balance.
Why Check Lines Blur, Merge or Break, and What Helps
Most problems with grid designs show up a day later, once the stain has developed. These are the ones I see most often.
Boxes That Fill In
If the grid is drawn too tight, the stain spreads slightly at every line and the small boxes close up into a solid patch. On the back of the hand I keep boxes no smaller than a grain of rice, and larger on broad hands.
Smudged Intersections
These usually come from crossing lines while the first set is still wet, or from the hand moving before the paste sets. Keep the hand still for the first several minutes, and don’t let anyone hold your fingers to admire it.
Broken or Faint Lines
A line that broke on the cone or dried too thin stains as dashes. Once the paste has dried I sometimes go back over a faint section with a little fresh paste. Leaving the paste on for several hours and keeping the hands warm gives fine grid lines their best chance to stain evenly.
A Grid Is Only as Good as the Space Around It
Check patterns pair neat geometry with traditional detail, and they adapt to simple, bridal, floral, Arabic, Indian, Moroccan and Gulf layouts. Whatever the style, the grid needs borders, finger work and enough open skin around it to look intentional. If you are new to mehndi, a small check patch is the easiest place to start. For weddings, full-hand checks with paisleys, florals and cuffs carry the extra detail. Pick the occasion first, then decide how much of the hand the grid should take.
You'll Like These Ideas:


Leave a Reply