
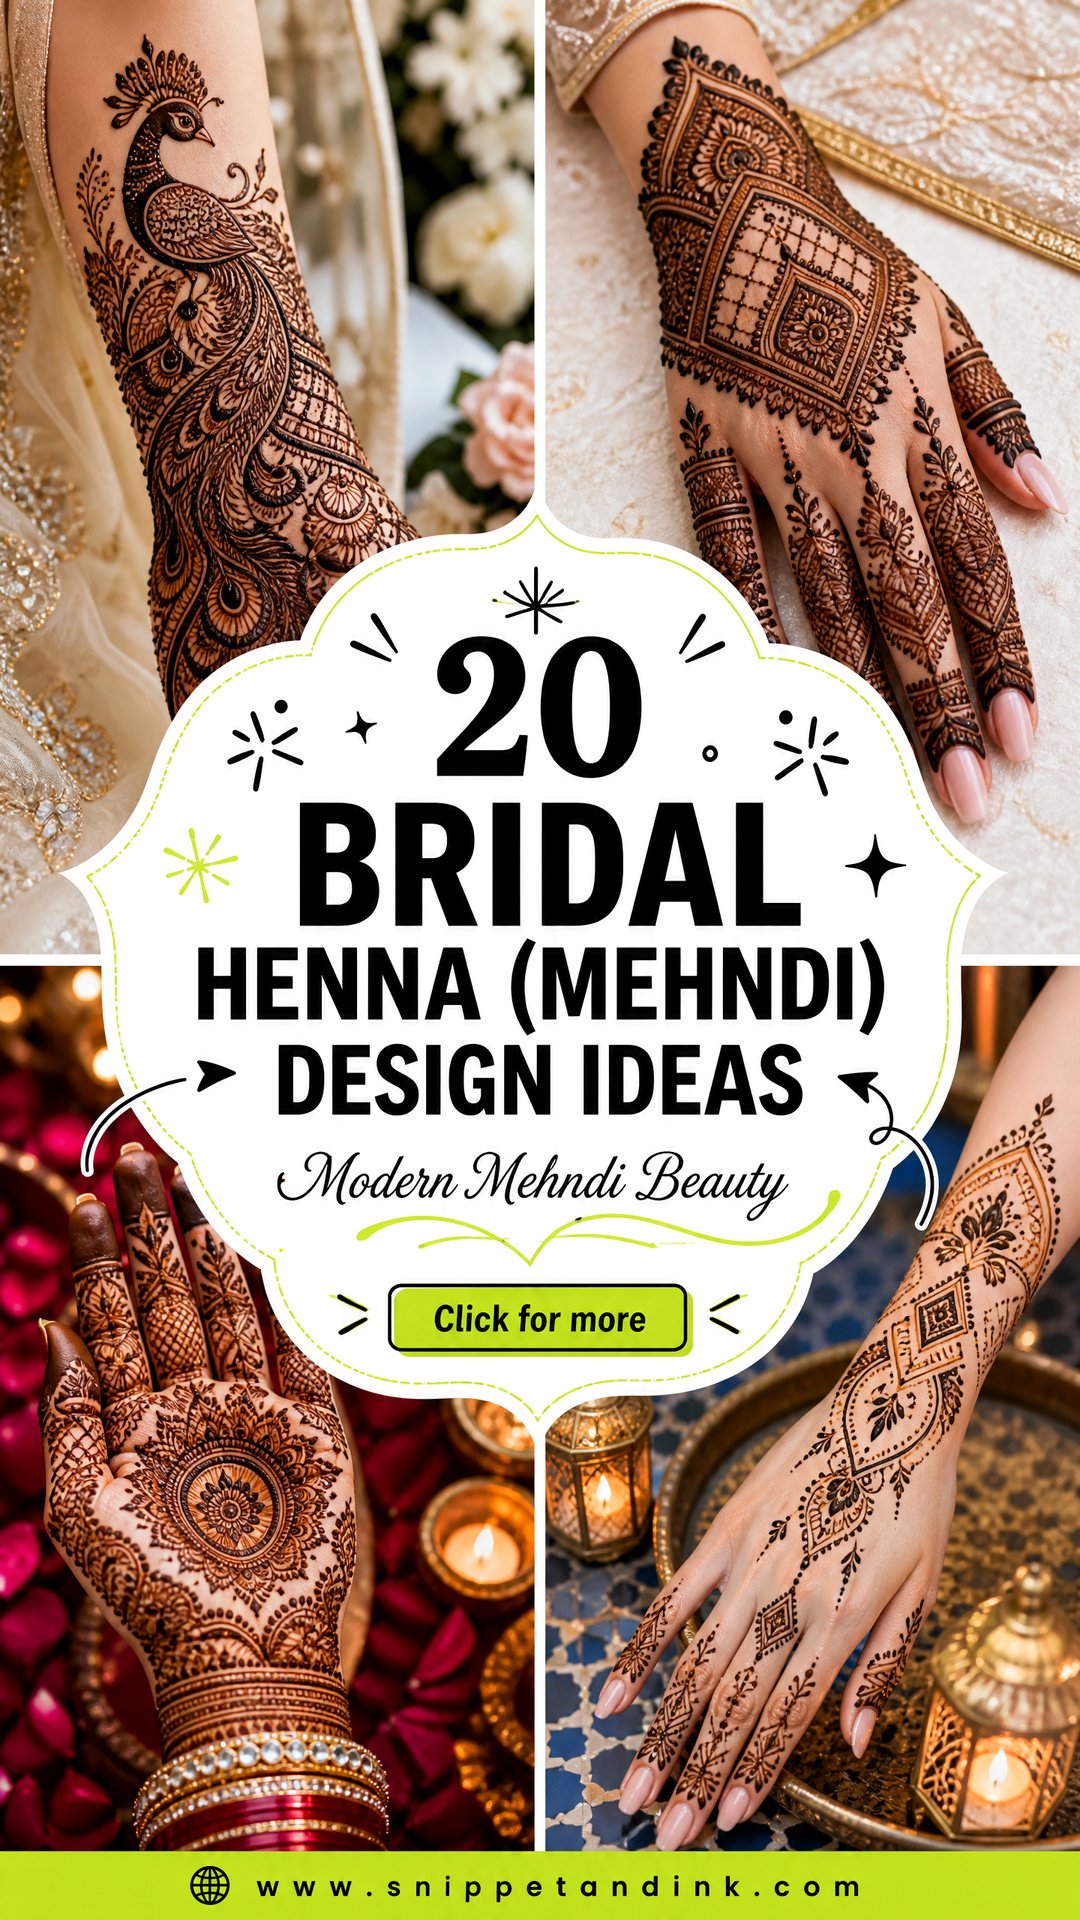
Bridal mehndi used to mean one thing: dense Indian coverage to the elbow. Brides who sit with me now ask for airy Arabic trails, negative-space palms, portraits of the couple, geometric Moroccan cuffs and matched hand-and-foot layouts. The design I’d draw for you depends on your outfit and jewelry, how long you can sit still, and which photos matter most. A good bridal layout also thinks about things you can’t see in a reference picture, like where the wrist bends, how the fingers read when your hands are folded, and how dark the stain will go on your skin. Here are twenty directions, with what I watch for in each.
Why the Stain Needs Two Days Before the Wedding
Natural henna doesn’t come off the skin at its best color. When the dried paste is scraped away, the stain underneath is bright orange. It darkens through reddish brown toward deep maroon over the next day or two, and usually reaches its darkest around 48 hours. That’s why I book most brides one to two days before the wedding, not the morning of.
- Full bridal designs to the elbow can take many hours, sometimes most of a day. Arabic or minimal designs are much quicker. Ask your artist for her estimate for your design.
- Palms, fingertips and feet stain darkest. Forearms and the backs of the hands stay lighter, because the skin is thinner and cooler there.
- Wax, tan and do your manicure before the mehndi. After it’s on, those treatments can fade or scratch the stain.
- Only use natural henna. So-called black henna can contain PPD, a hair-dye chemical that can cause serious skin reactions. If you have sensitive skin, ask for a small patch test a few days ahead.
Eat, go to the bathroom and get comfortable before the application starts. Once both hands are covered, you’ll need someone else to do almost everything for you until the paste dries.
1. Full Hand Bridal Mehndi Design
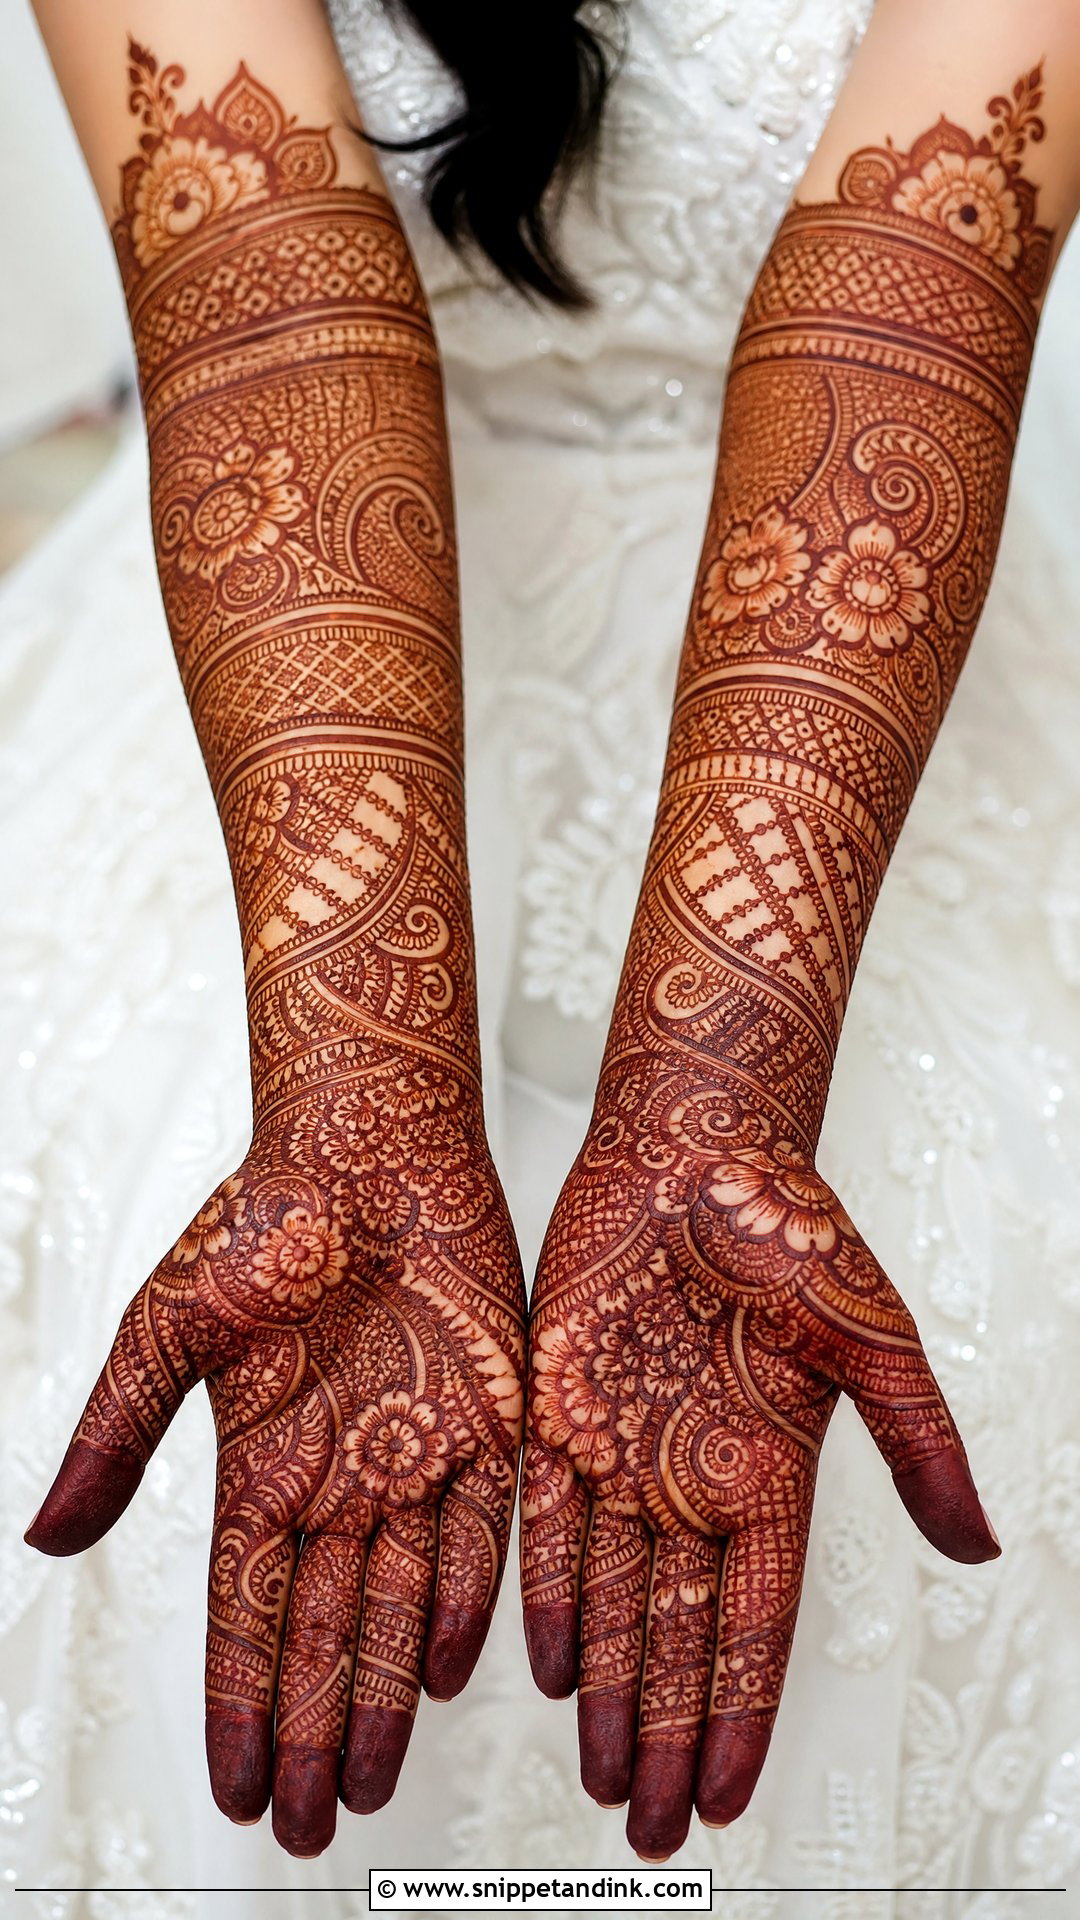
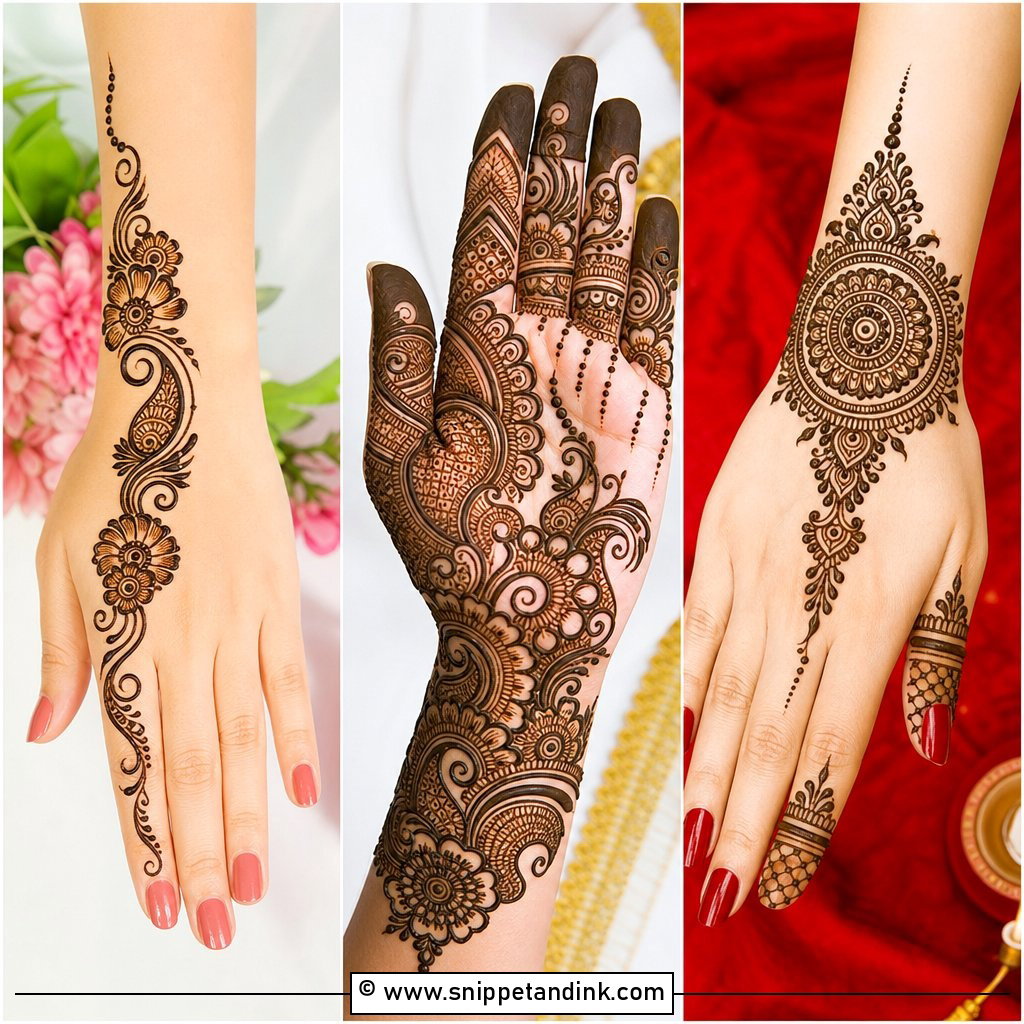
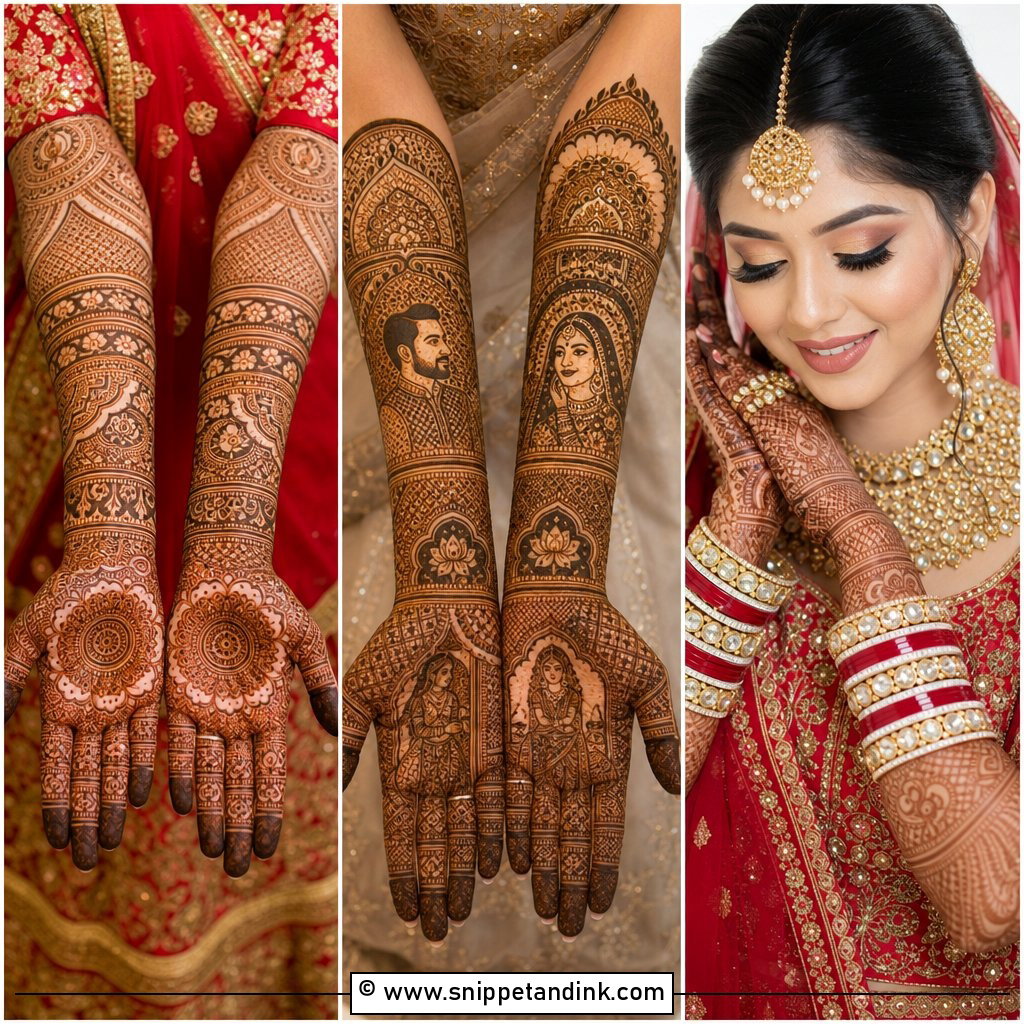
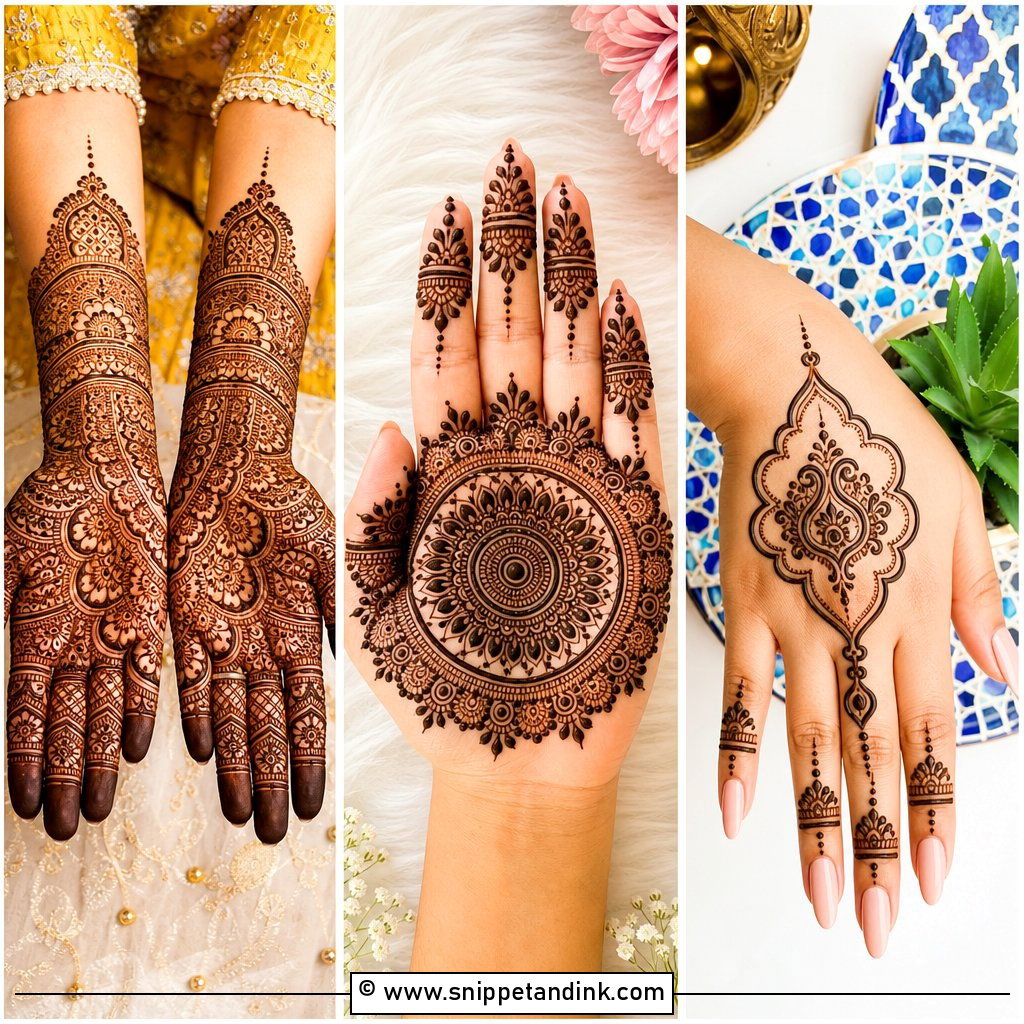
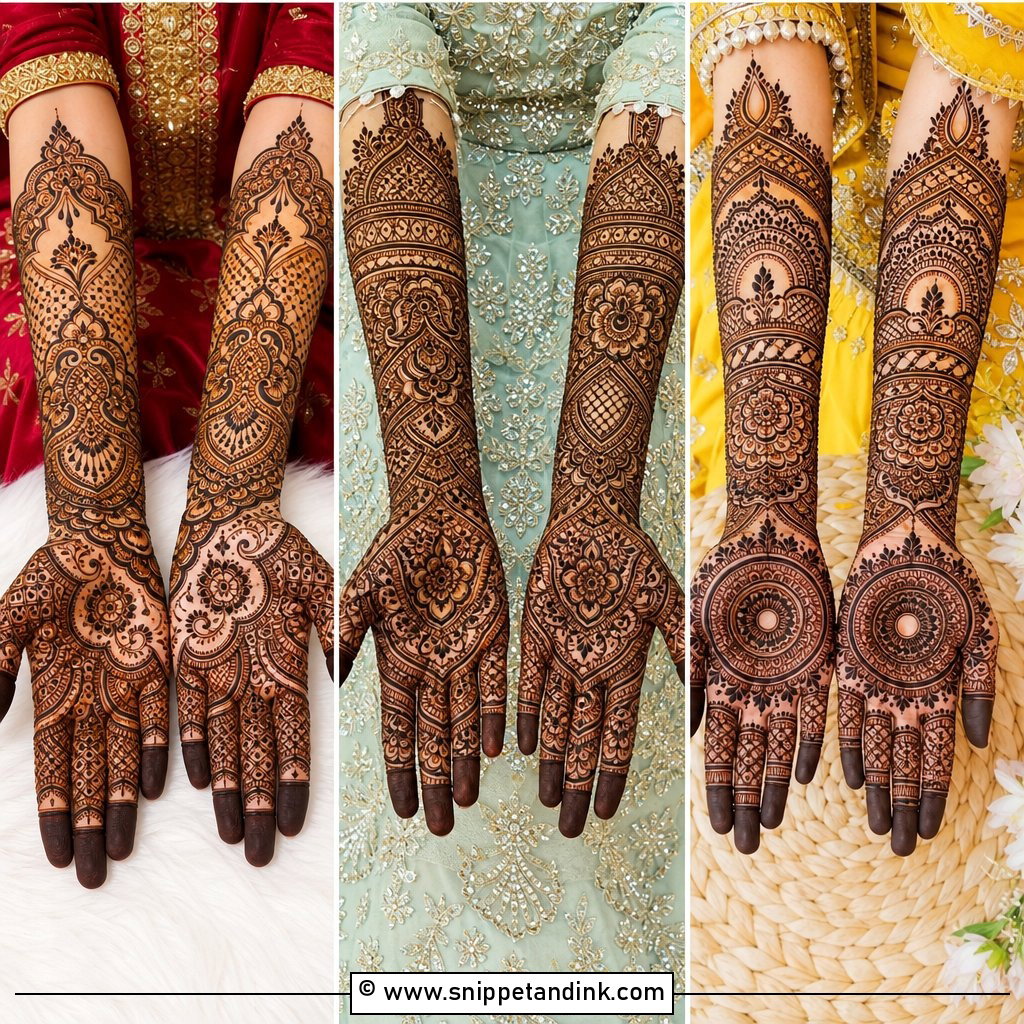
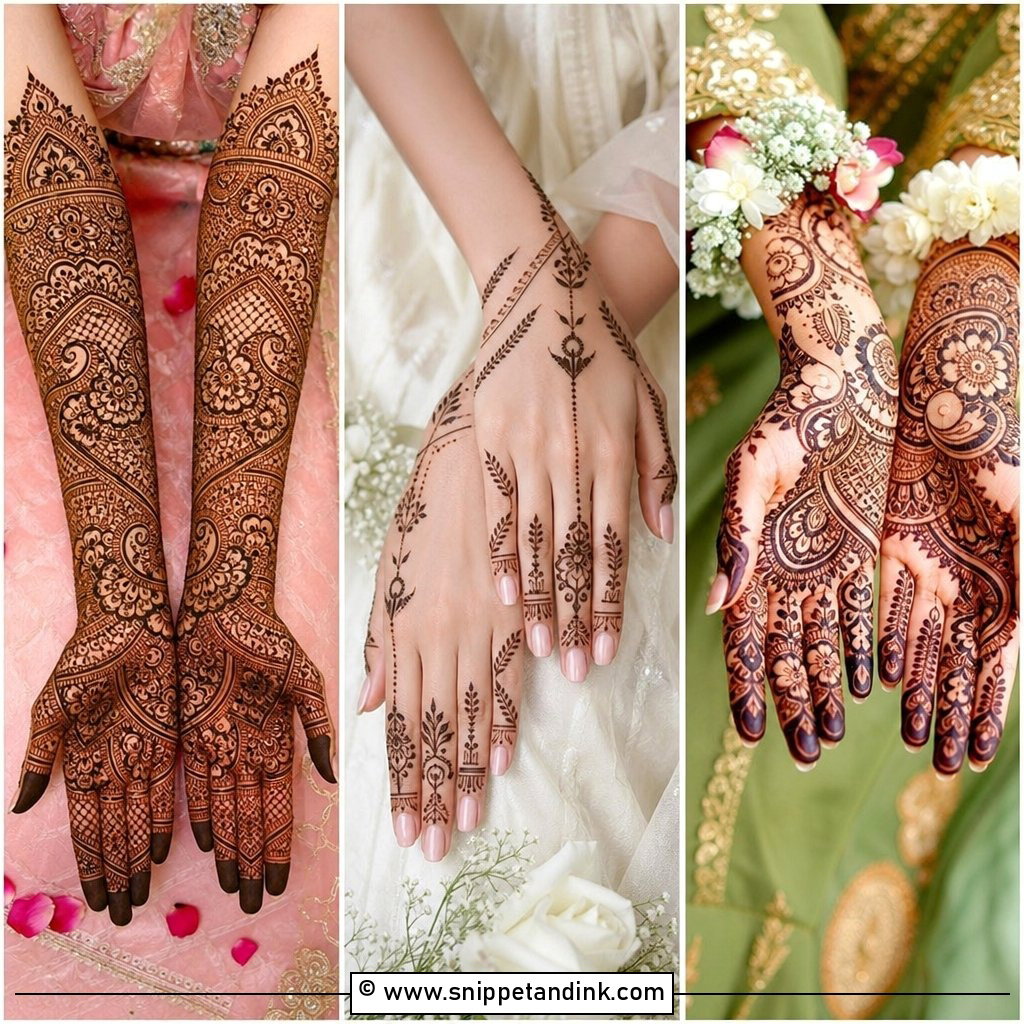
A full hand bridal mehndi design runs from the fingertips past the wrist, packed with florals, paisleys, jaali grids, vines and tiny filler strokes. I treat the wrist as a cuff, because that’s where the bangles will sit, and I design it so the pattern looks finished whether the bangles are on or off. The risk with full coverage is mud. If every inch is filled with the same density, the stain reads as a dark blur in photos, so I leave a few small gaps around the main motifs. Set aside most of a day for this one.
2. Indian Bridal Mehndi Design
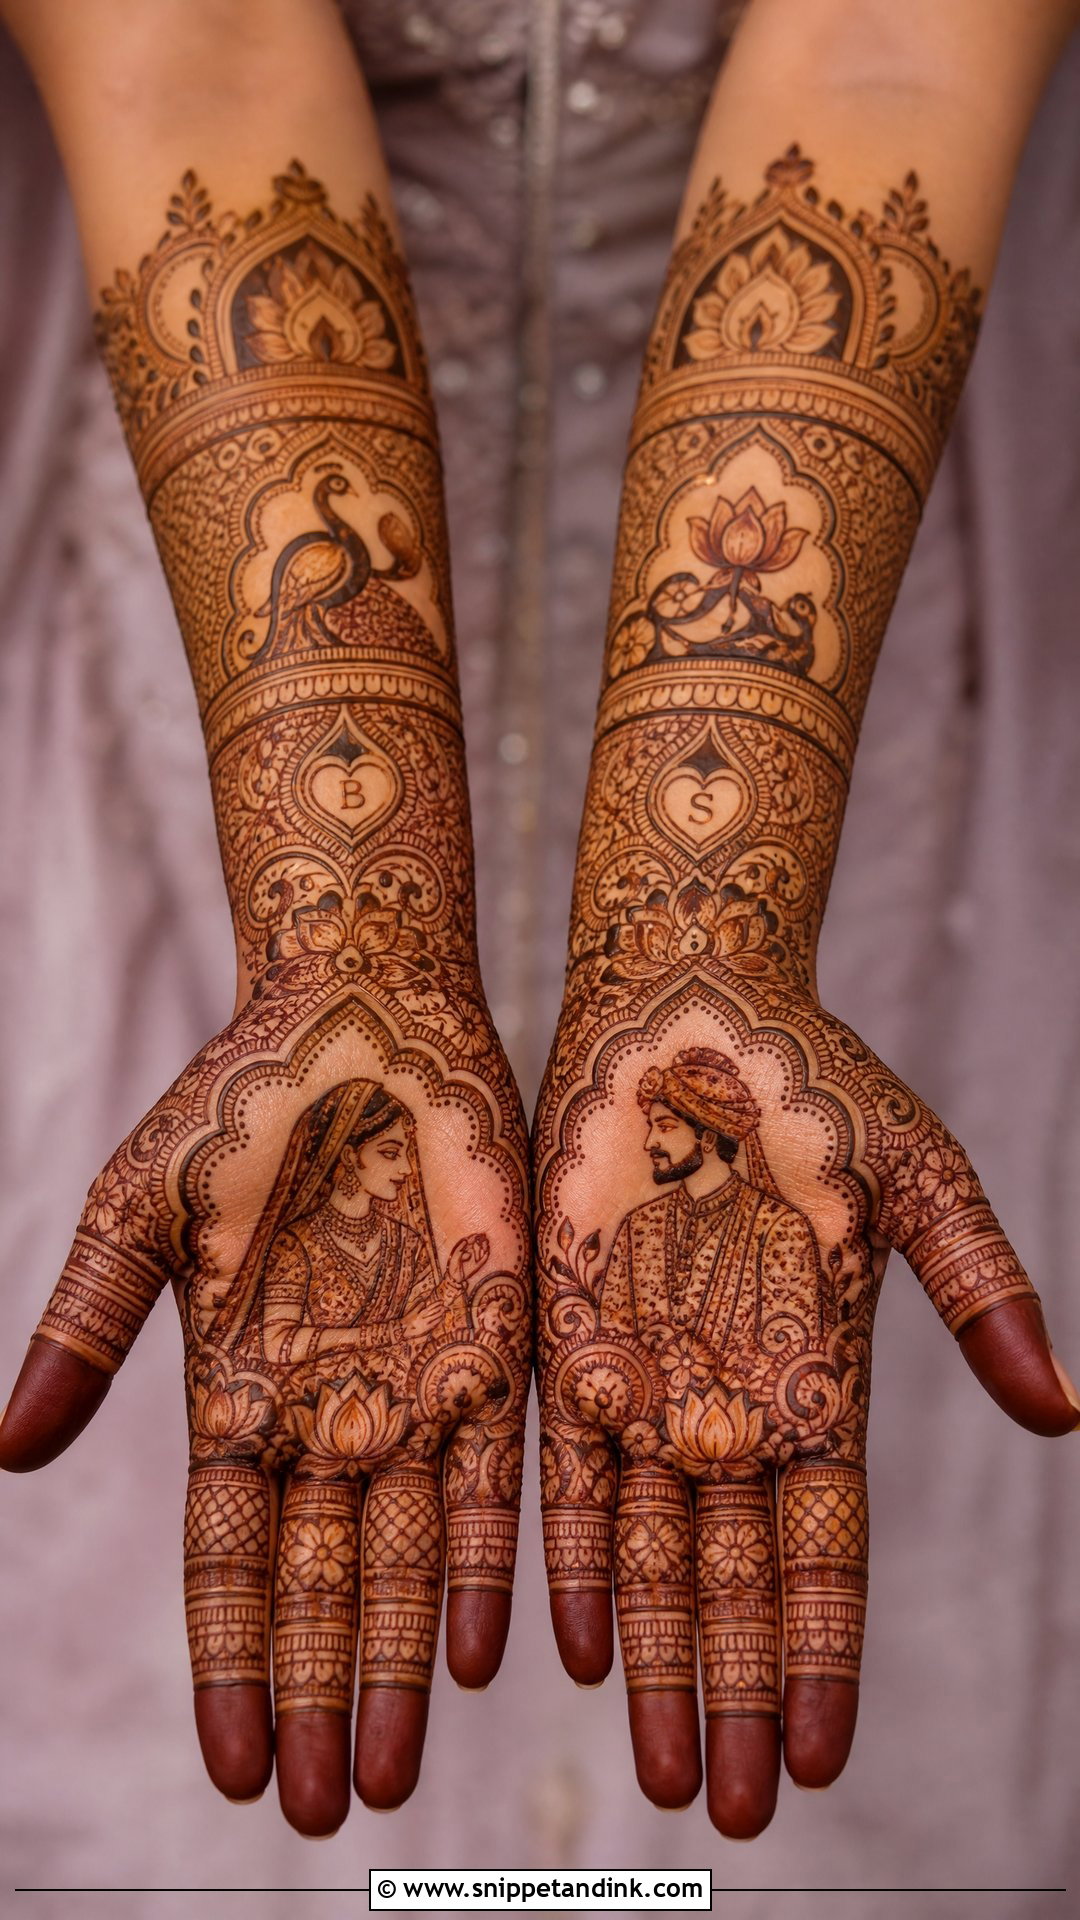
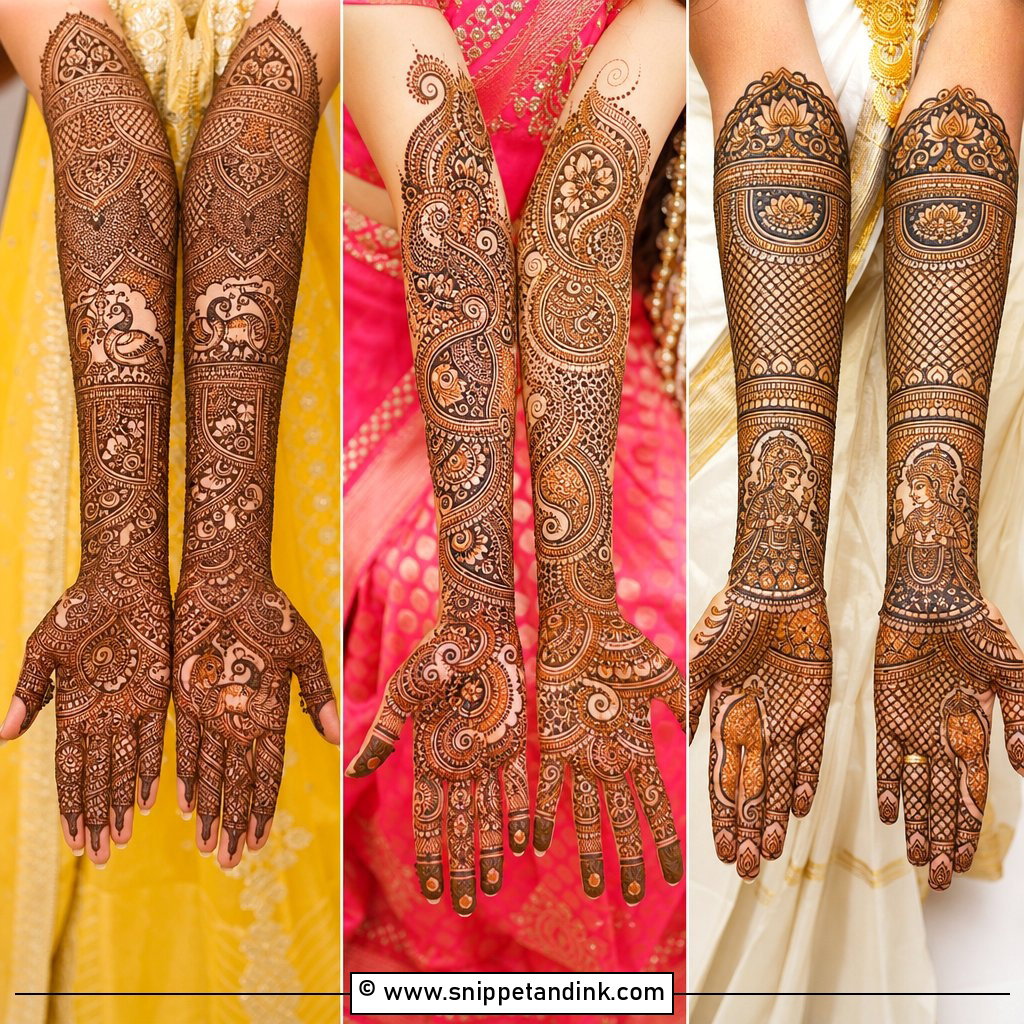
Indian bridal designs tell a story. On the palm I might draw the bride and groom, a dhol, a kalash, a mandap, a peacock or a lotus, with initials hidden somewhere in the fill. Fingers are fully worked and the arms carry layered borders. The design needs one clear center, and I plan that before I draw a single line. It belongs with lehengas, sarees, ghararas and heavy embroidery, and with families who expect the mehndi to carry the ritual meaning. Fine lines need fine paste, so ask your artist whether she mixes her own cones fresh.
3. Arabic Bridal Mehndi Design
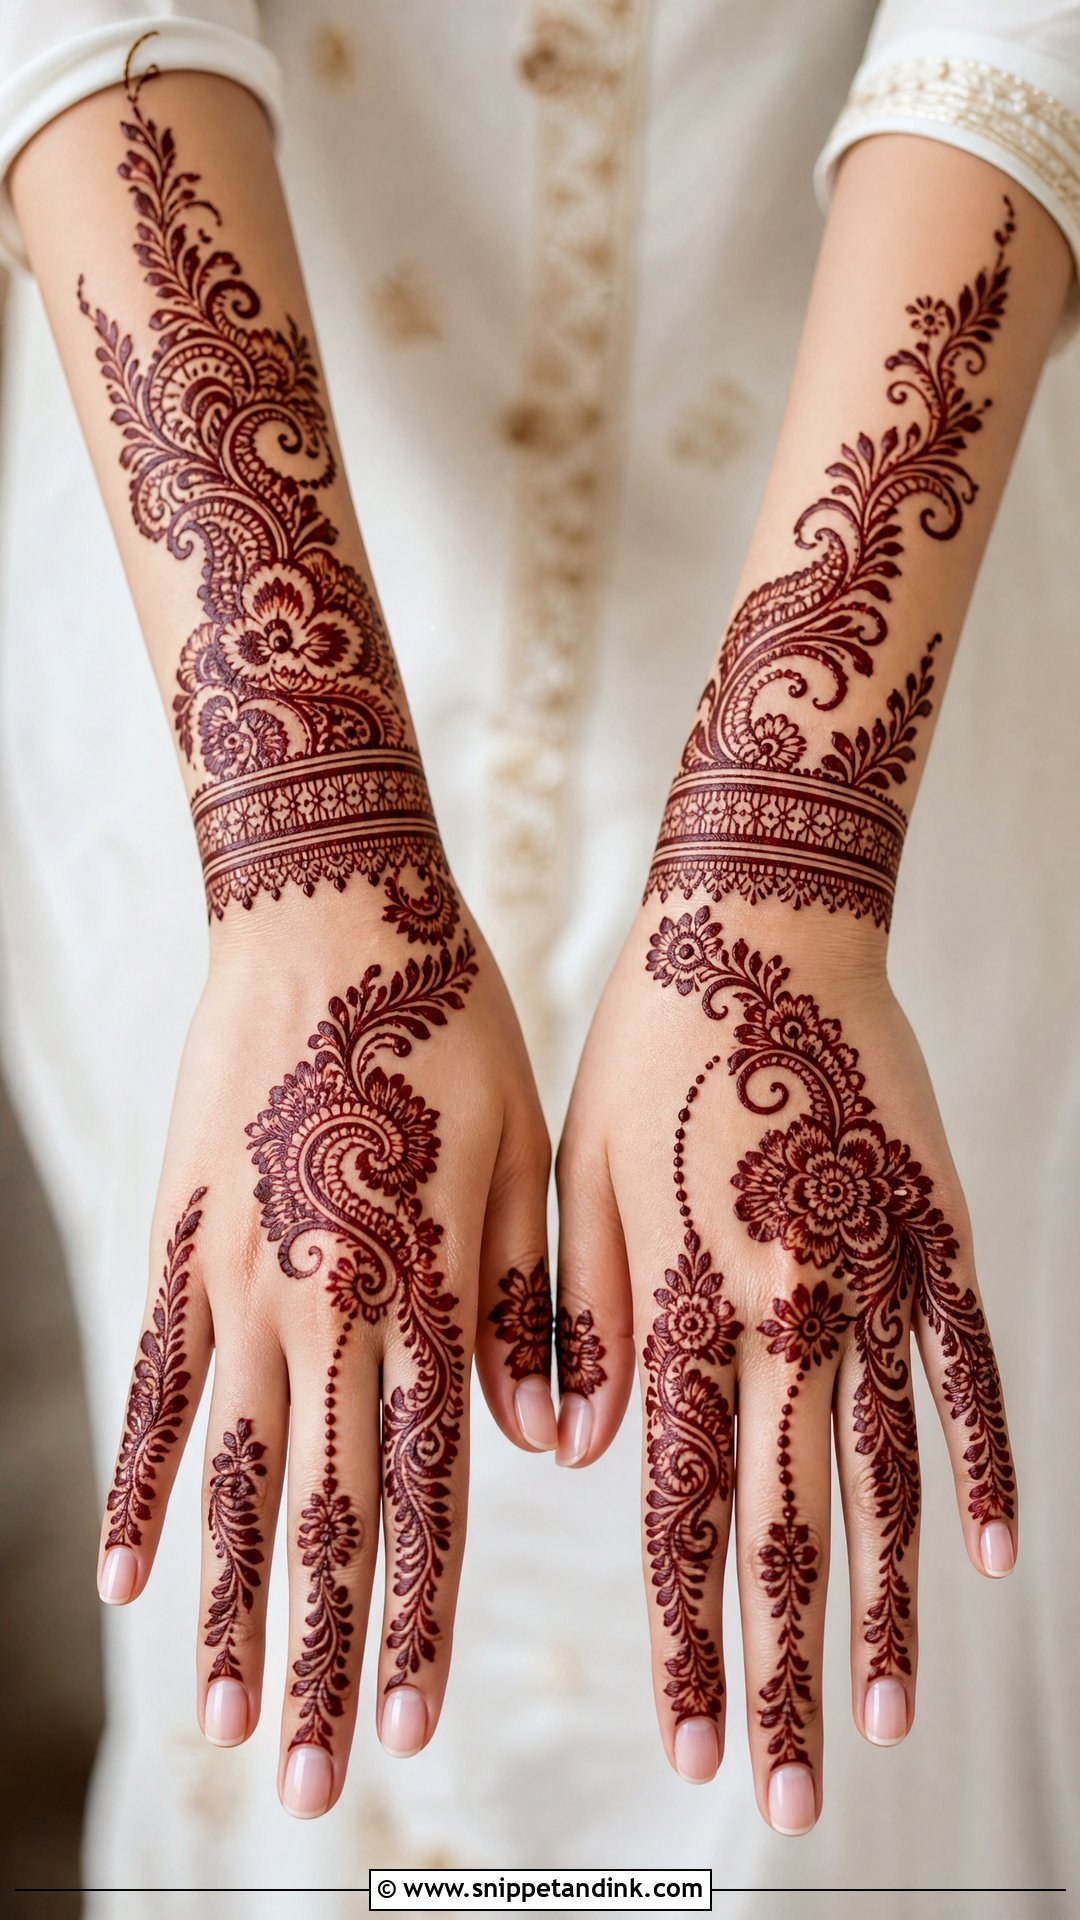
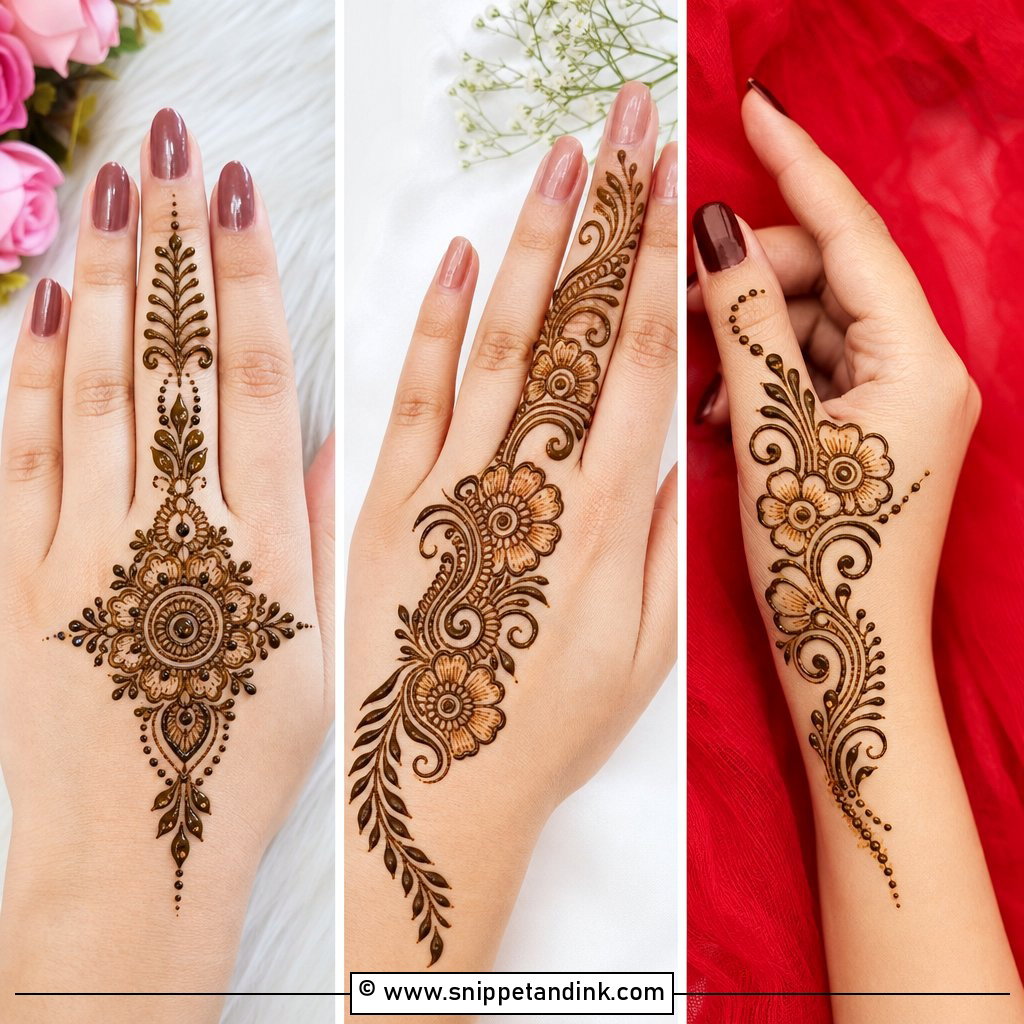
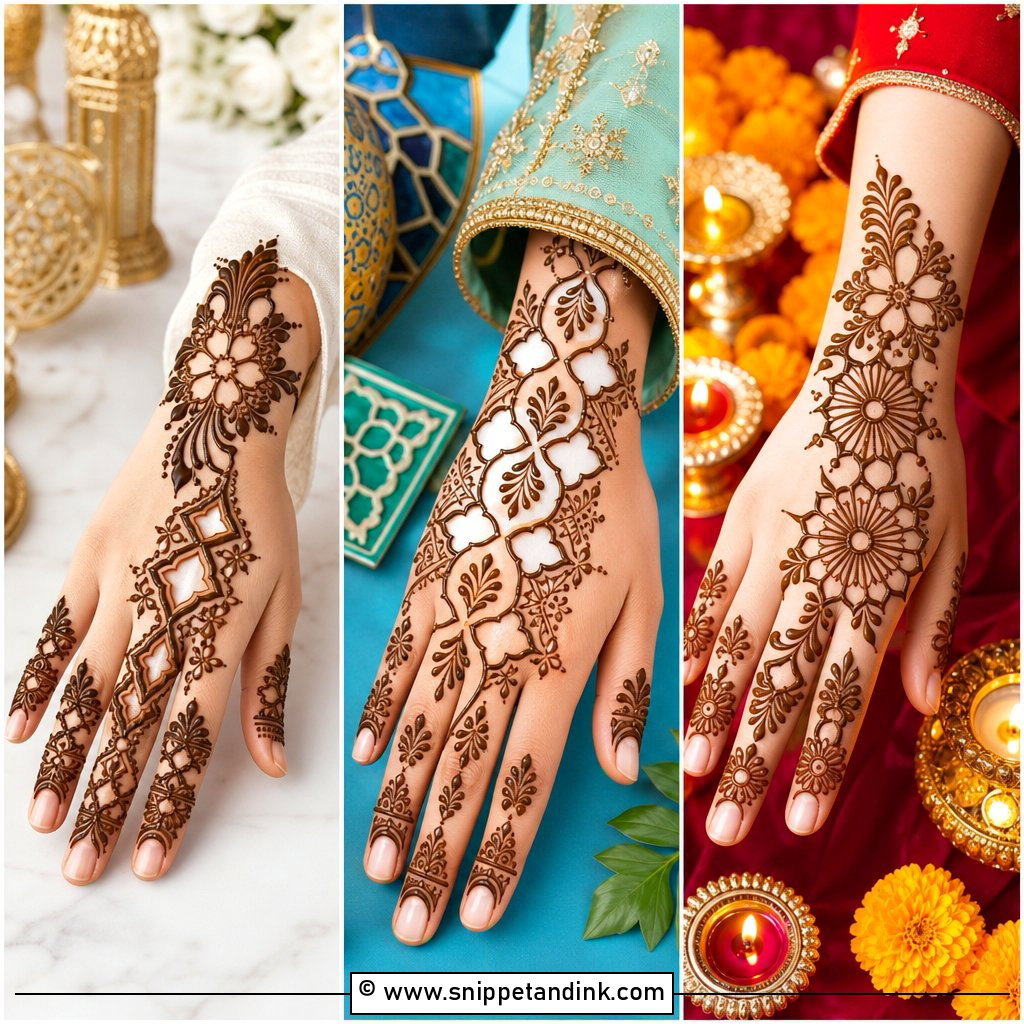
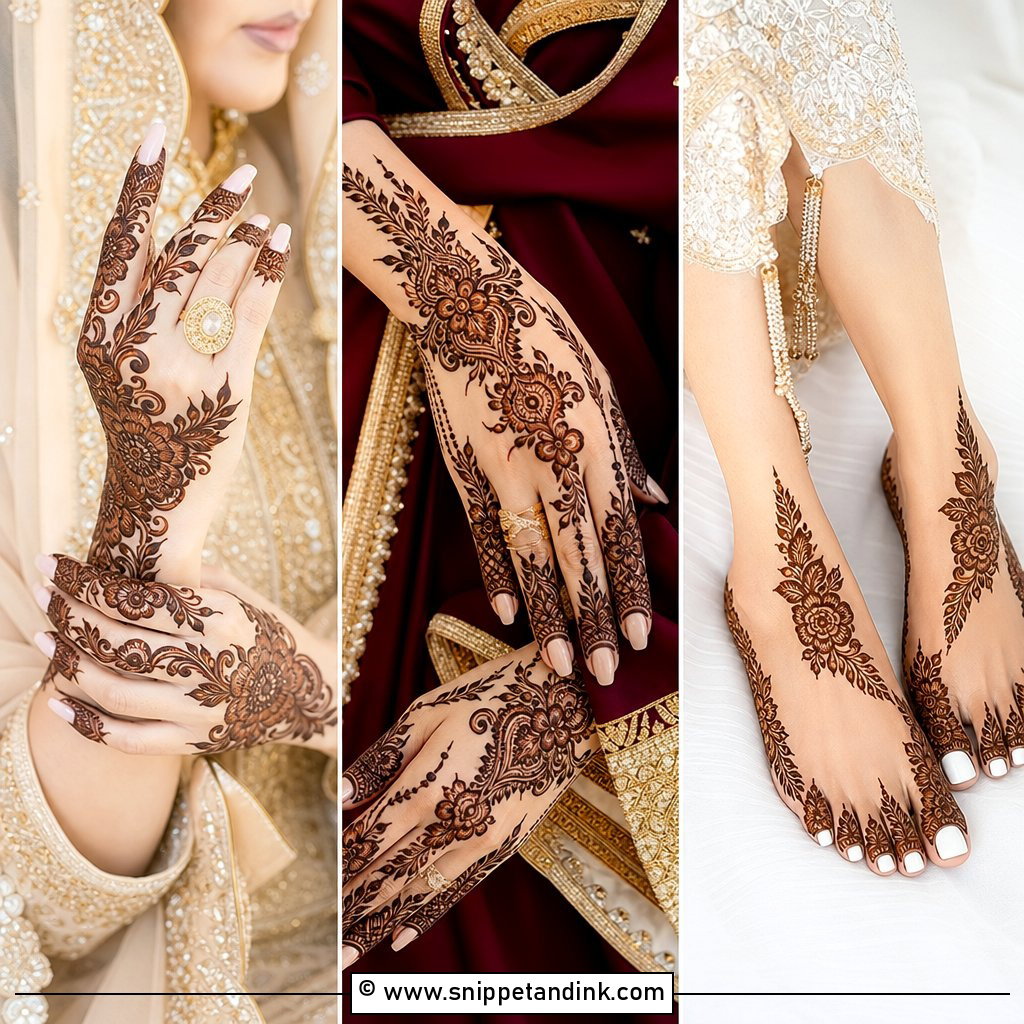
Arabic bridal mehndi runs diagonally across the hand in bold flowers, leafy vines and curved paisleys, with plenty of open skin between them. That open skin is what makes it so clear in photos. It’s faster to apply and feels lighter, which suits brides who can’t sit for hours. On the back of the hand, I let the trail follow the line of the fingers toward the wrist. To make it bridal rather than a guest design, ask for fuller finger work, a bracelet band at the wrist and a trail that carries up the forearm.
4. Indo Arabic Bridal Mehndi Design
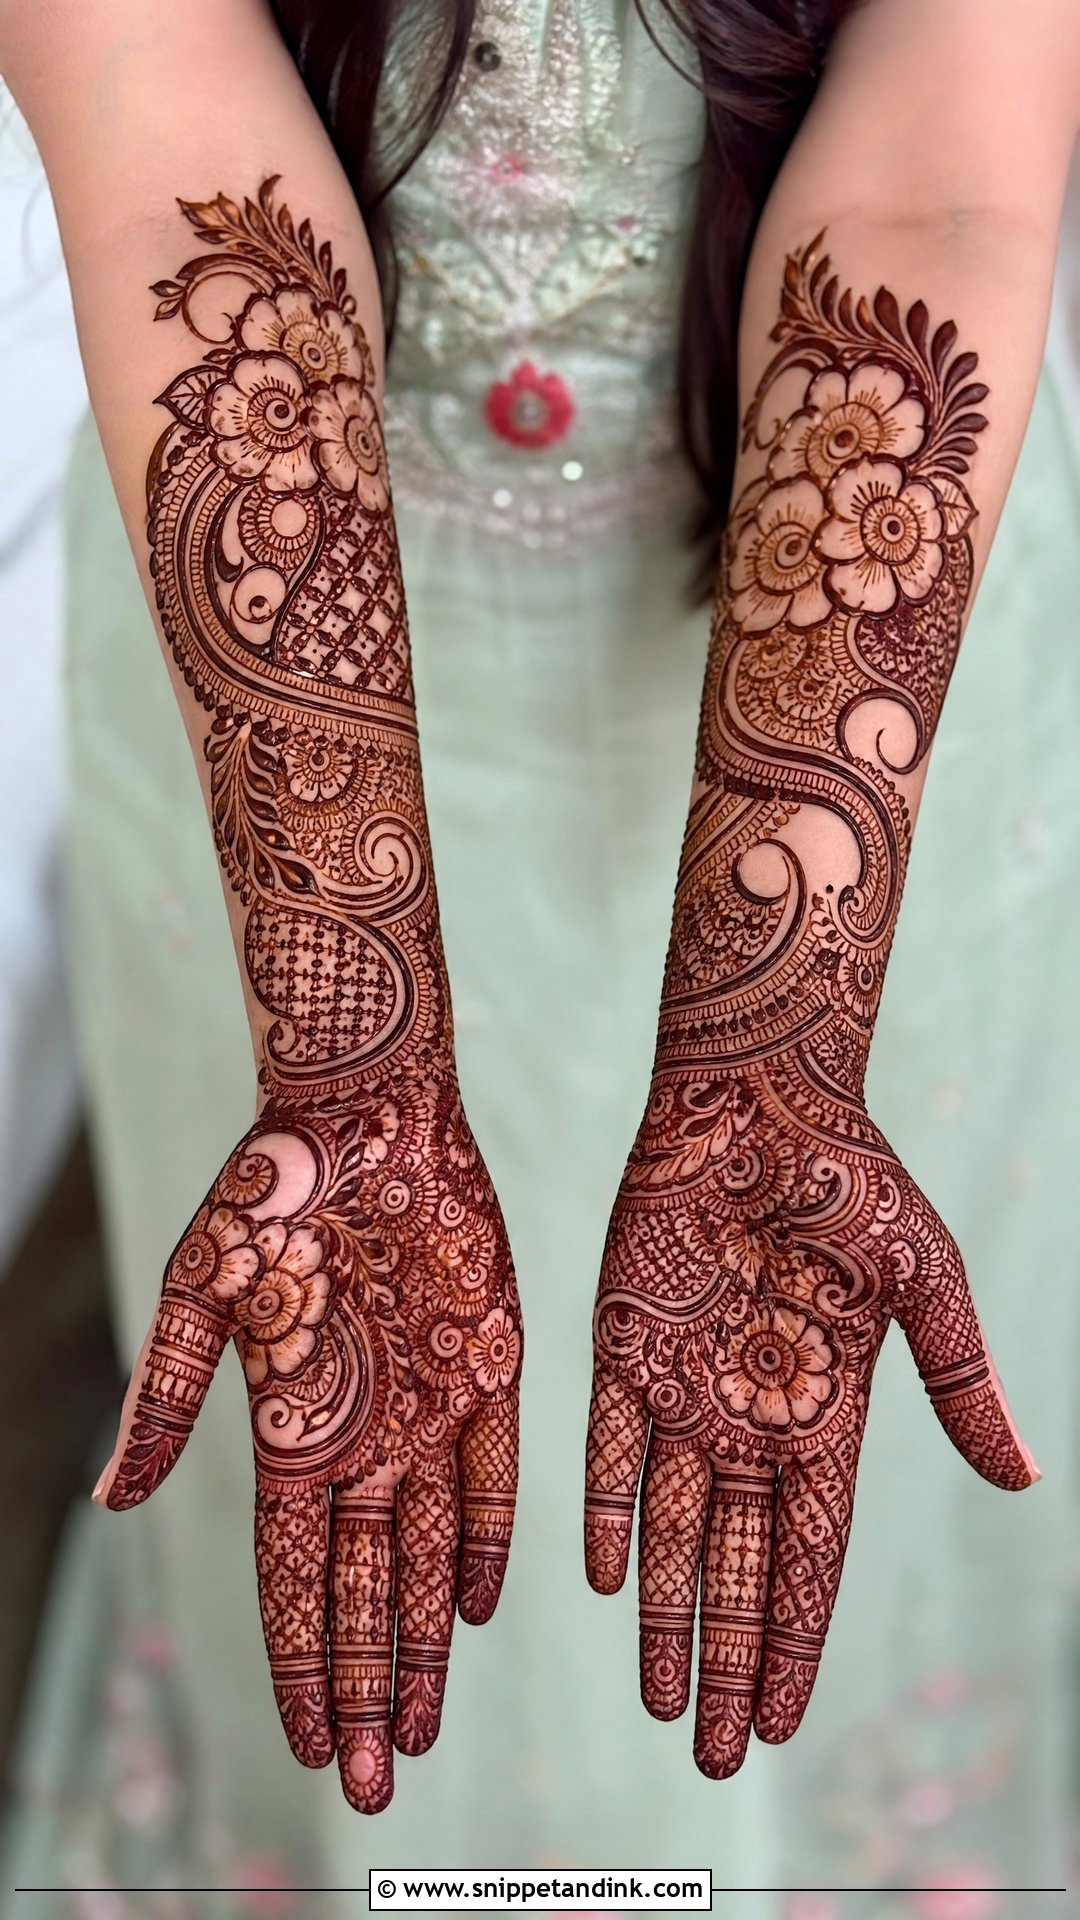
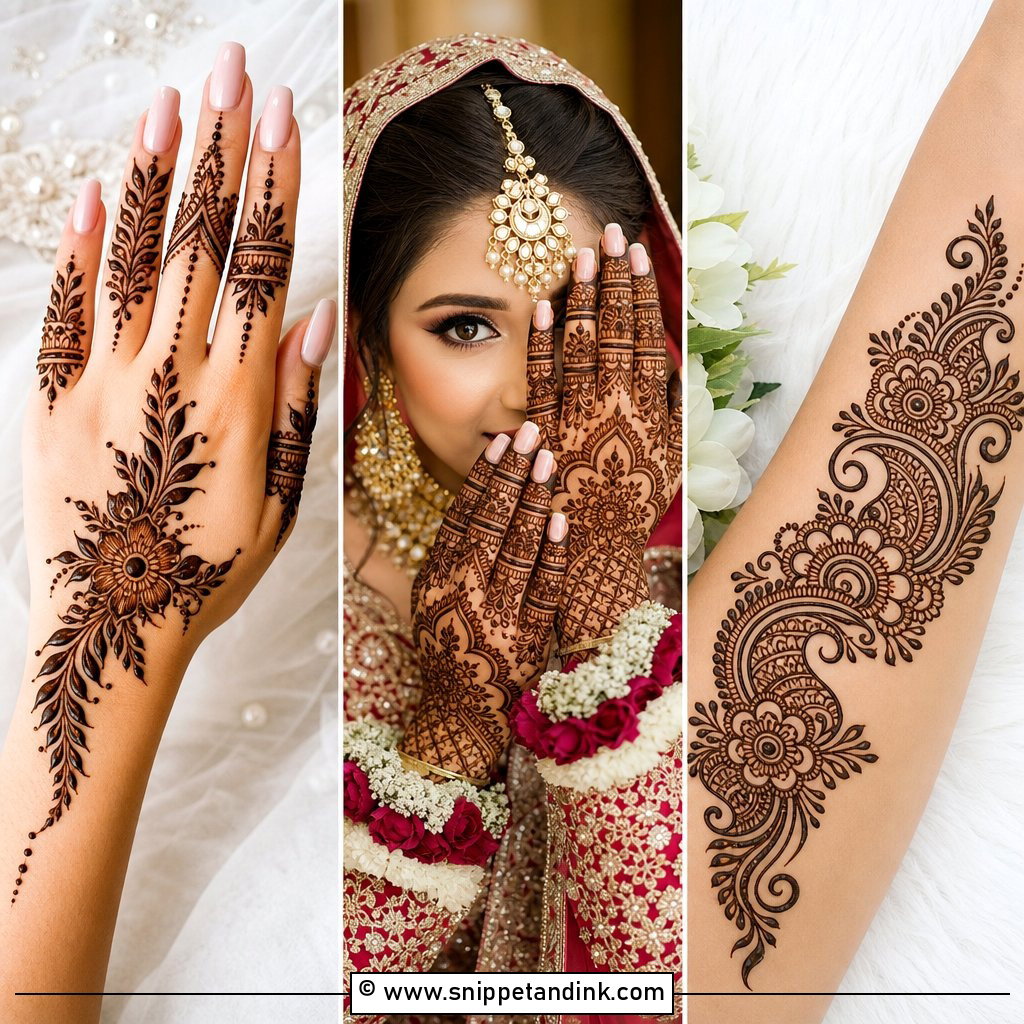
Indo-Arabic takes the bold flow of Arabic work and fills the big shapes with Indian detail: shaded leaves, mandala centers, fine netting inside a large paisley. It’s the design I suggest most often to brides who like skin showing but think pure Arabic looks too sparse for a wedding. The big outlines read from across the room, and the fill rewards a close-up. It works on palms and backs alike. Fills inside large shapes take patience to dry without smudging, so plan to keep your hands still for a while.
5. Bridal Mandala Mehndi Design
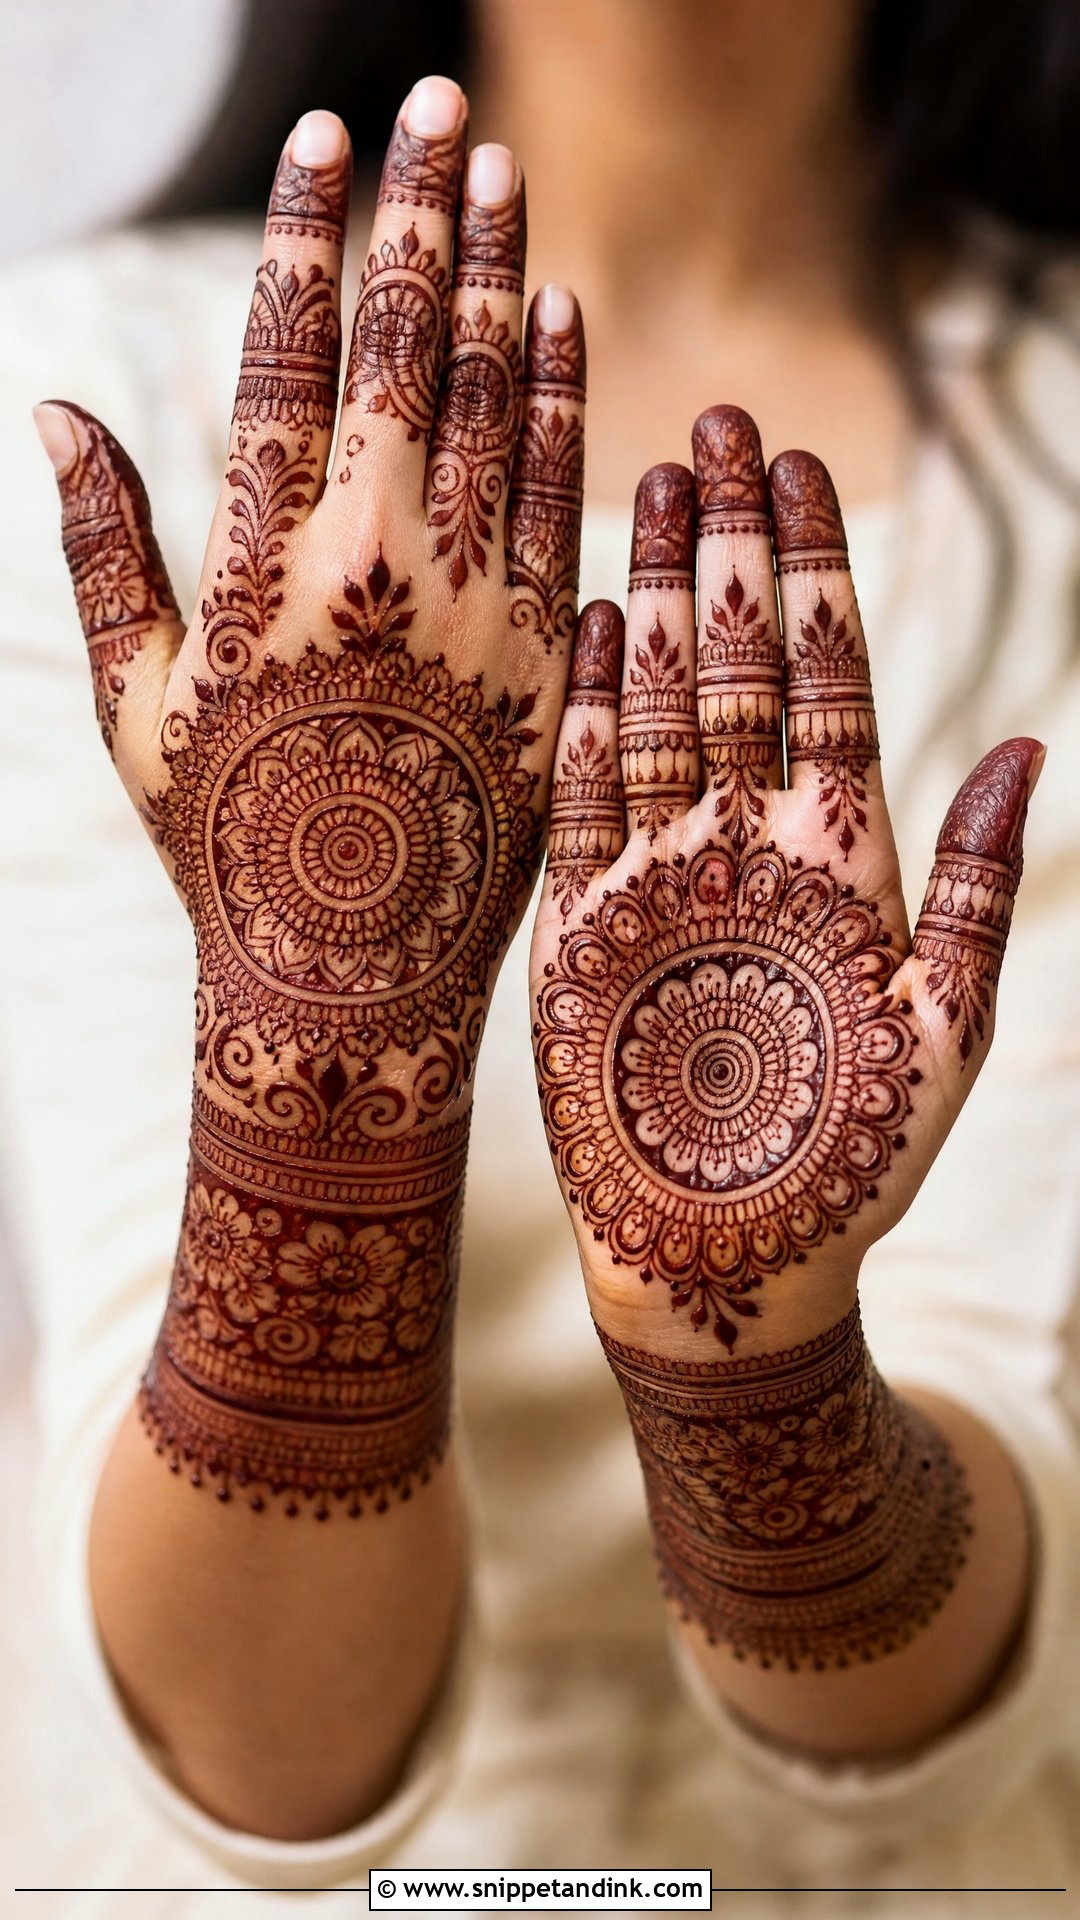
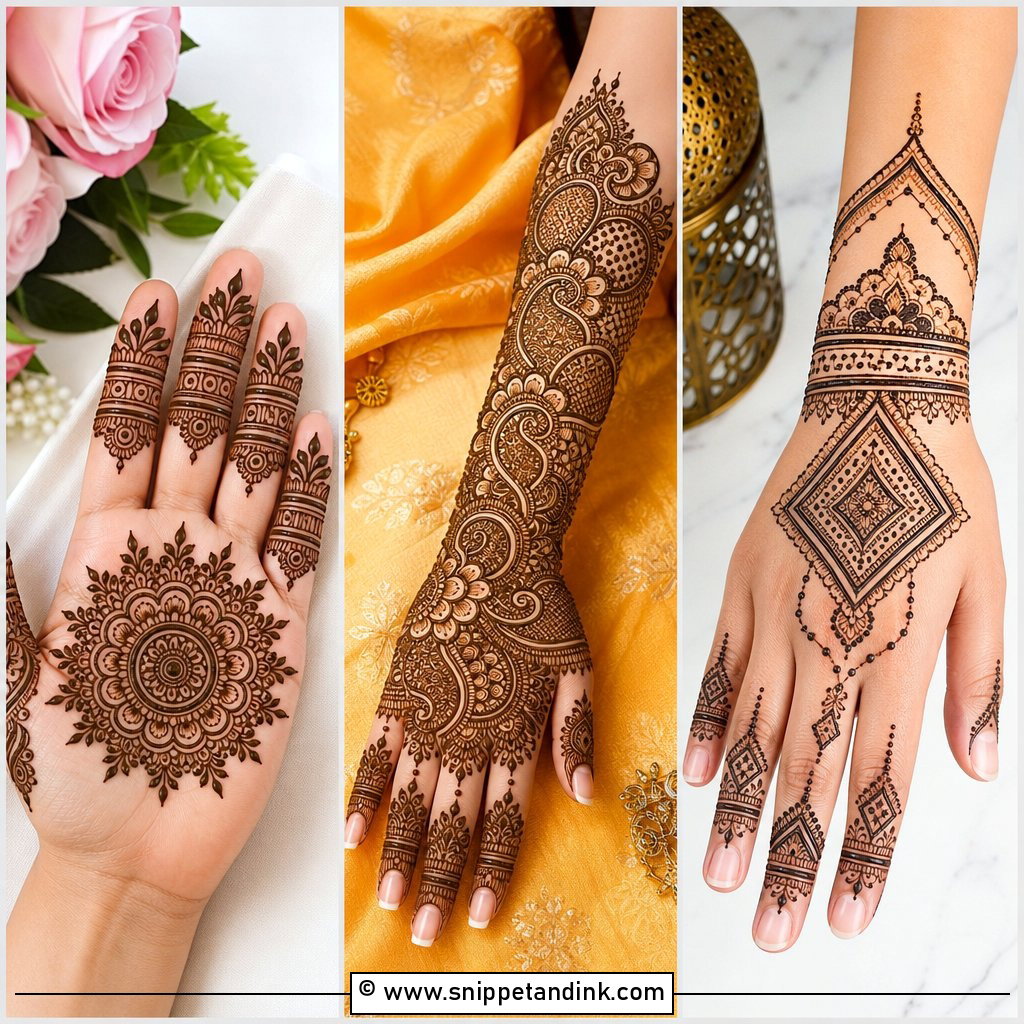
A mandala in the center of the palm or back of the hand gives the whole design a fixed point. I build outward from it with petal rings, paisleys and lace-like fills, then add finger detailing and a wrist band that echo its shapes. Symmetry is unforgiving, though. If the circle is even slightly off-center on the palm, it shows in every flat-hand photo, so I mark the center with a tiny dot first. It suits brides who prefer structure to a crowded layout.
6. Bridal Floral Mehndi Design
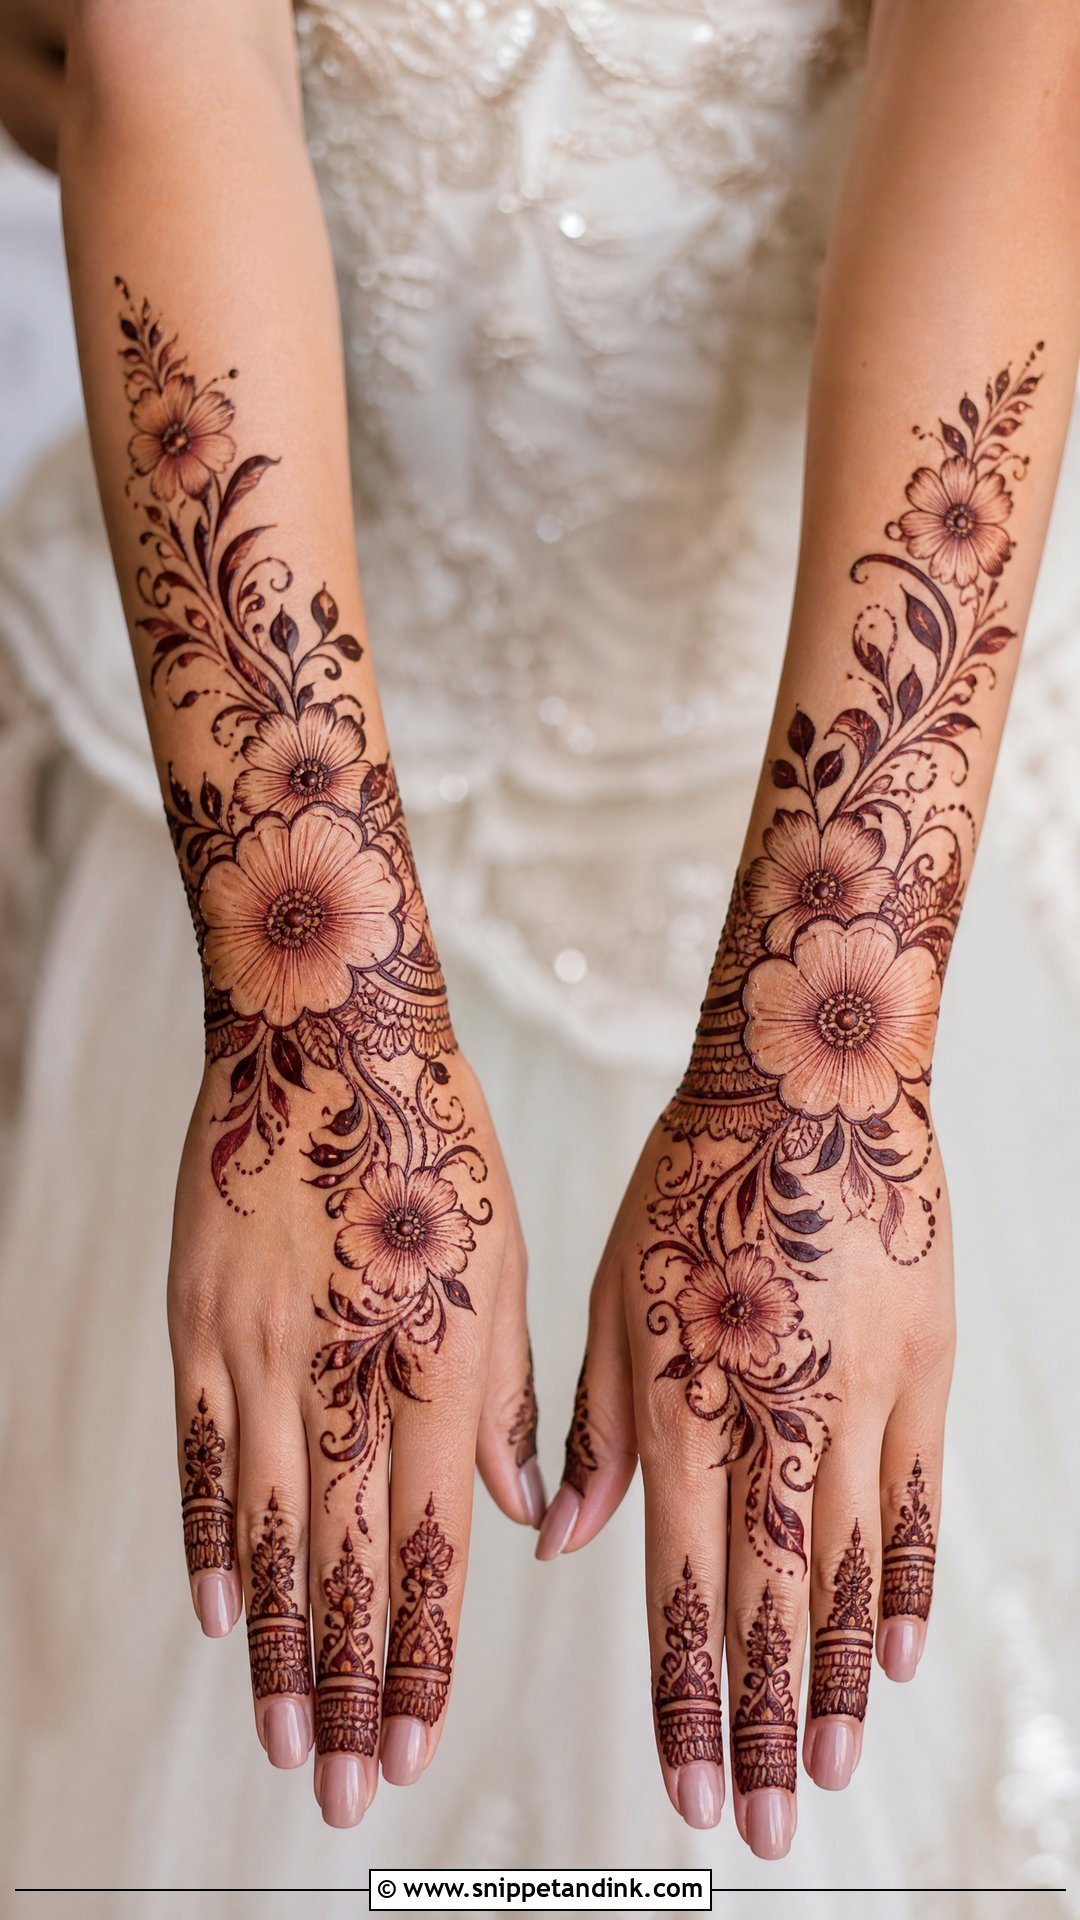
Floral mehndi suits almost any outfit, from pastel lehengas to deep red bridal wear, which is why it’s so often requested. It works as a full-hand pattern, an Arabic trail or a back-hand cluster around the wrist. The craft is in varying the sizes. Large blooms anchor the eye; small flowers and leaves fill gaps without making it messy. When every flower is the same size, the design looks like wallpaper. Floral work also pairs naturally with haath phool jewelry, since the chains follow the same lines.
7. Bridal Peacock Mehndi Design
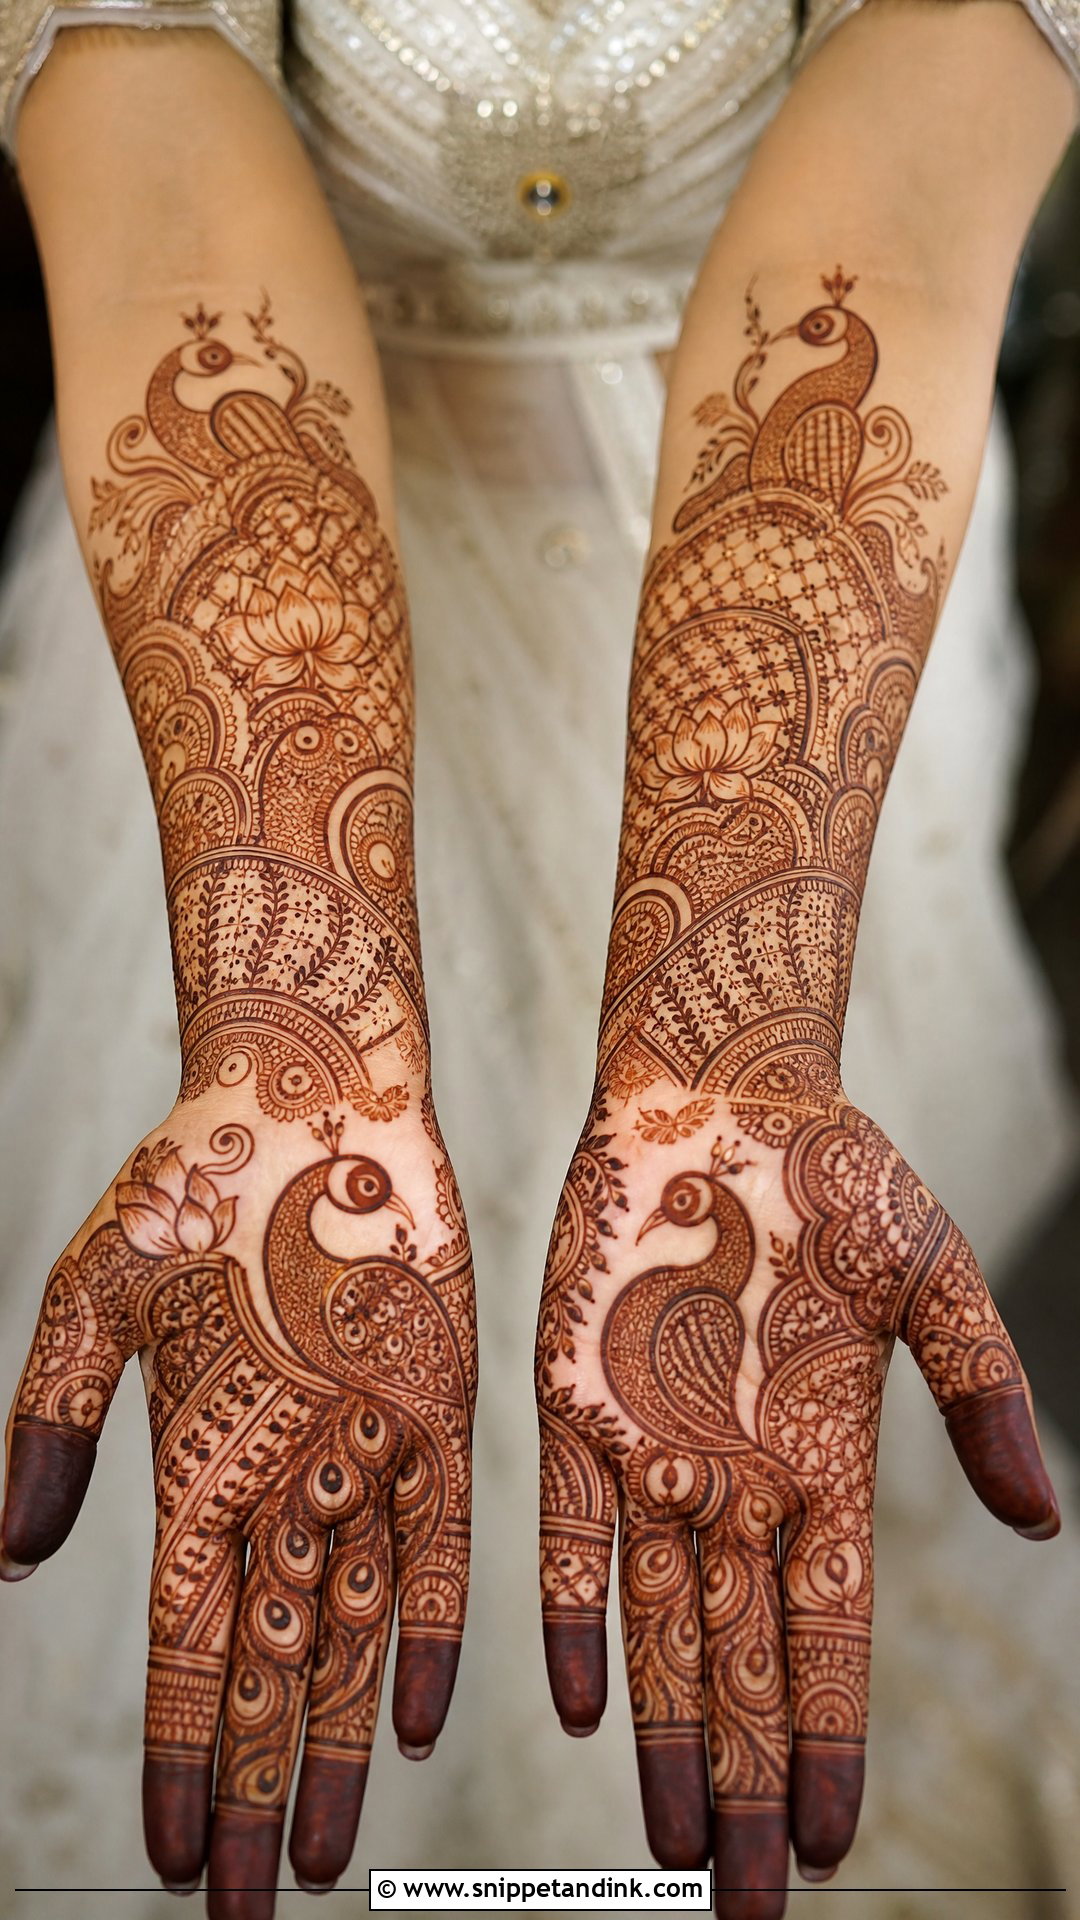
A peacock gives the design an instantly recognizable focal point. I place it on the palm, wrist or forearm and let its tail open into paisleys, curls and fine feather lines. The feather shading is the hardest part: thin lines spaced evenly, with no blobs, or the tail turns into a dark smear once the stain develops. Lotus flowers and jaali panels sit naturally beside it. One large peacock on each hand, mirrored, gives the best balance, and it reads well in close-ups with Indian bridal wear.
8. Bridal Portrait Mehndi Design
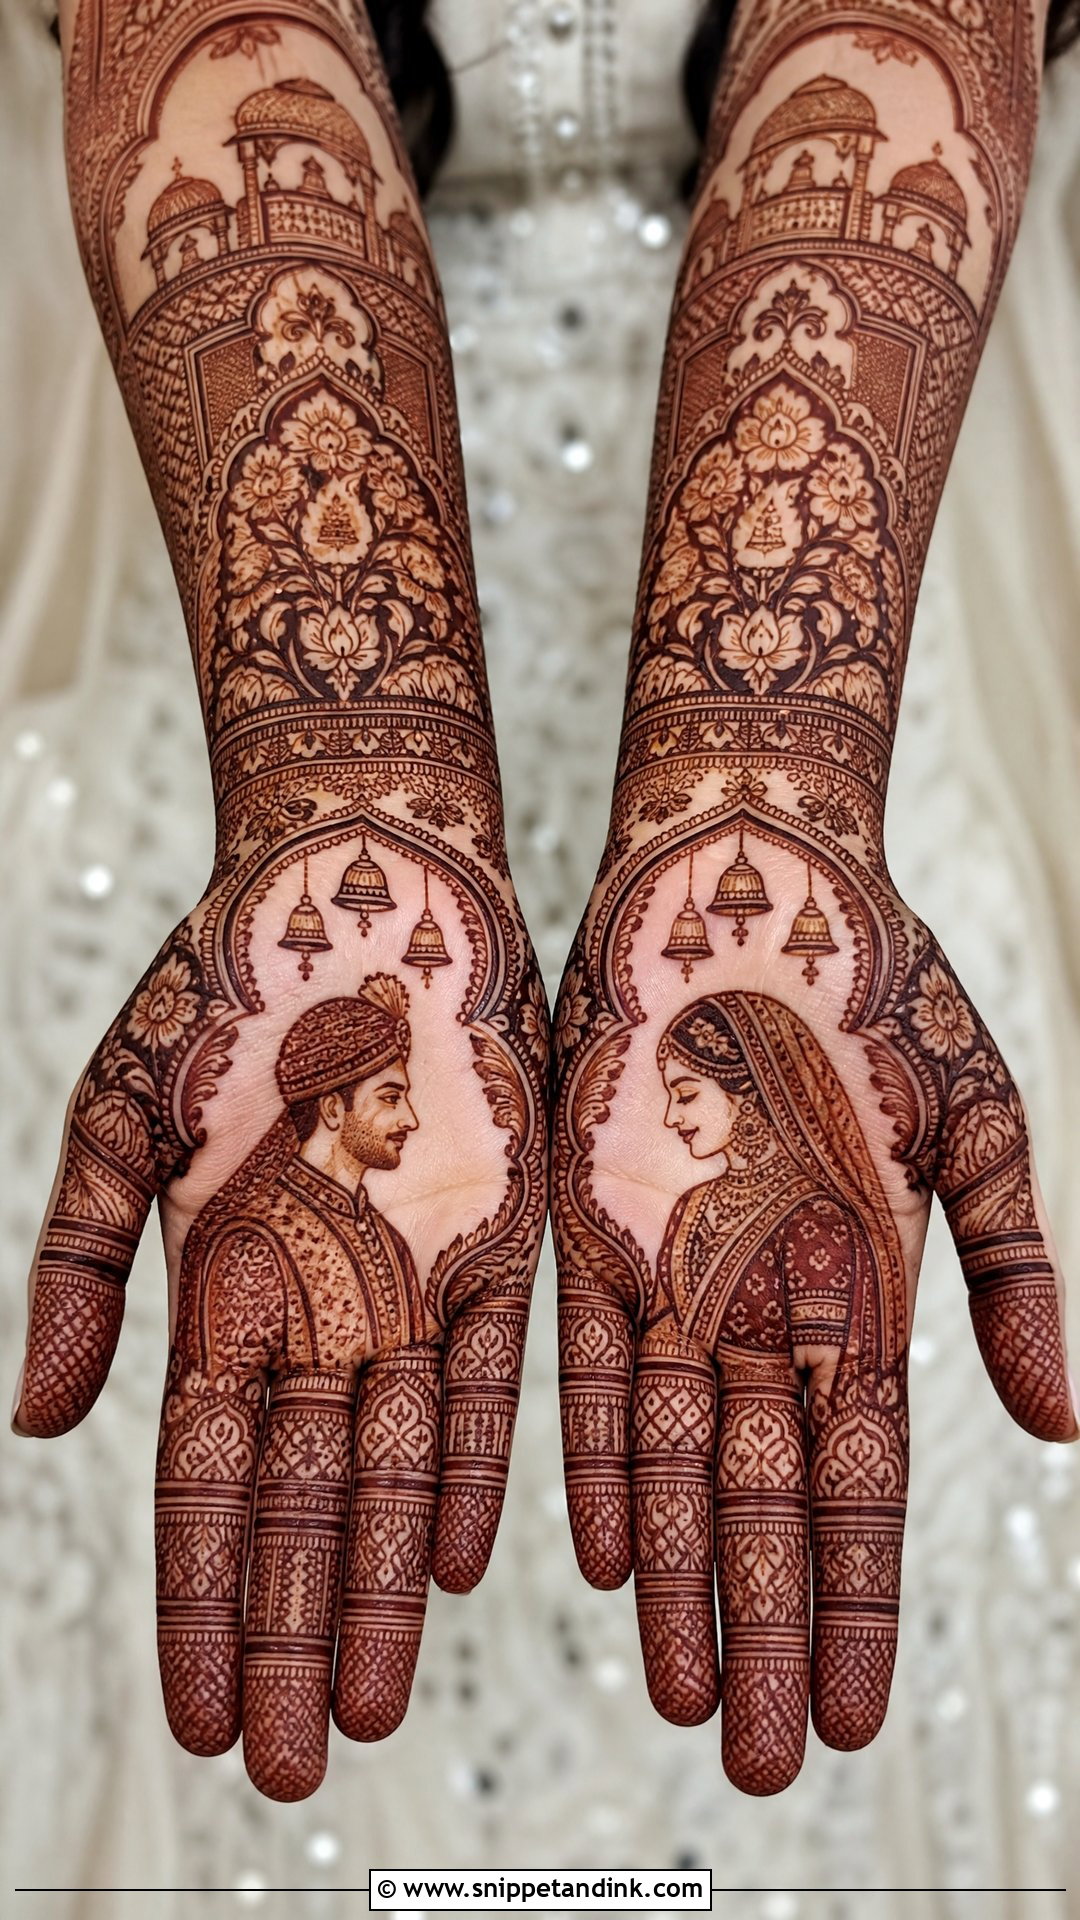
Portrait mehndi turns your hands into a wedding scene: the bride on one palm and the groom on the other, or a varmala, a doli or the mandap. This is specialist work, and I’d look at a portrait artist’s past faces before booking her, since a face is where an unsteady hand shows most. Faces need clean outlines and open skin around them; dark fill crowding a face makes it unreadable once the stain is deep. Paisleys, bells or arched borders frame the rest. It suits brides who want their mehndi to be about the two of them.
9. Bridal Name Mehndi Design
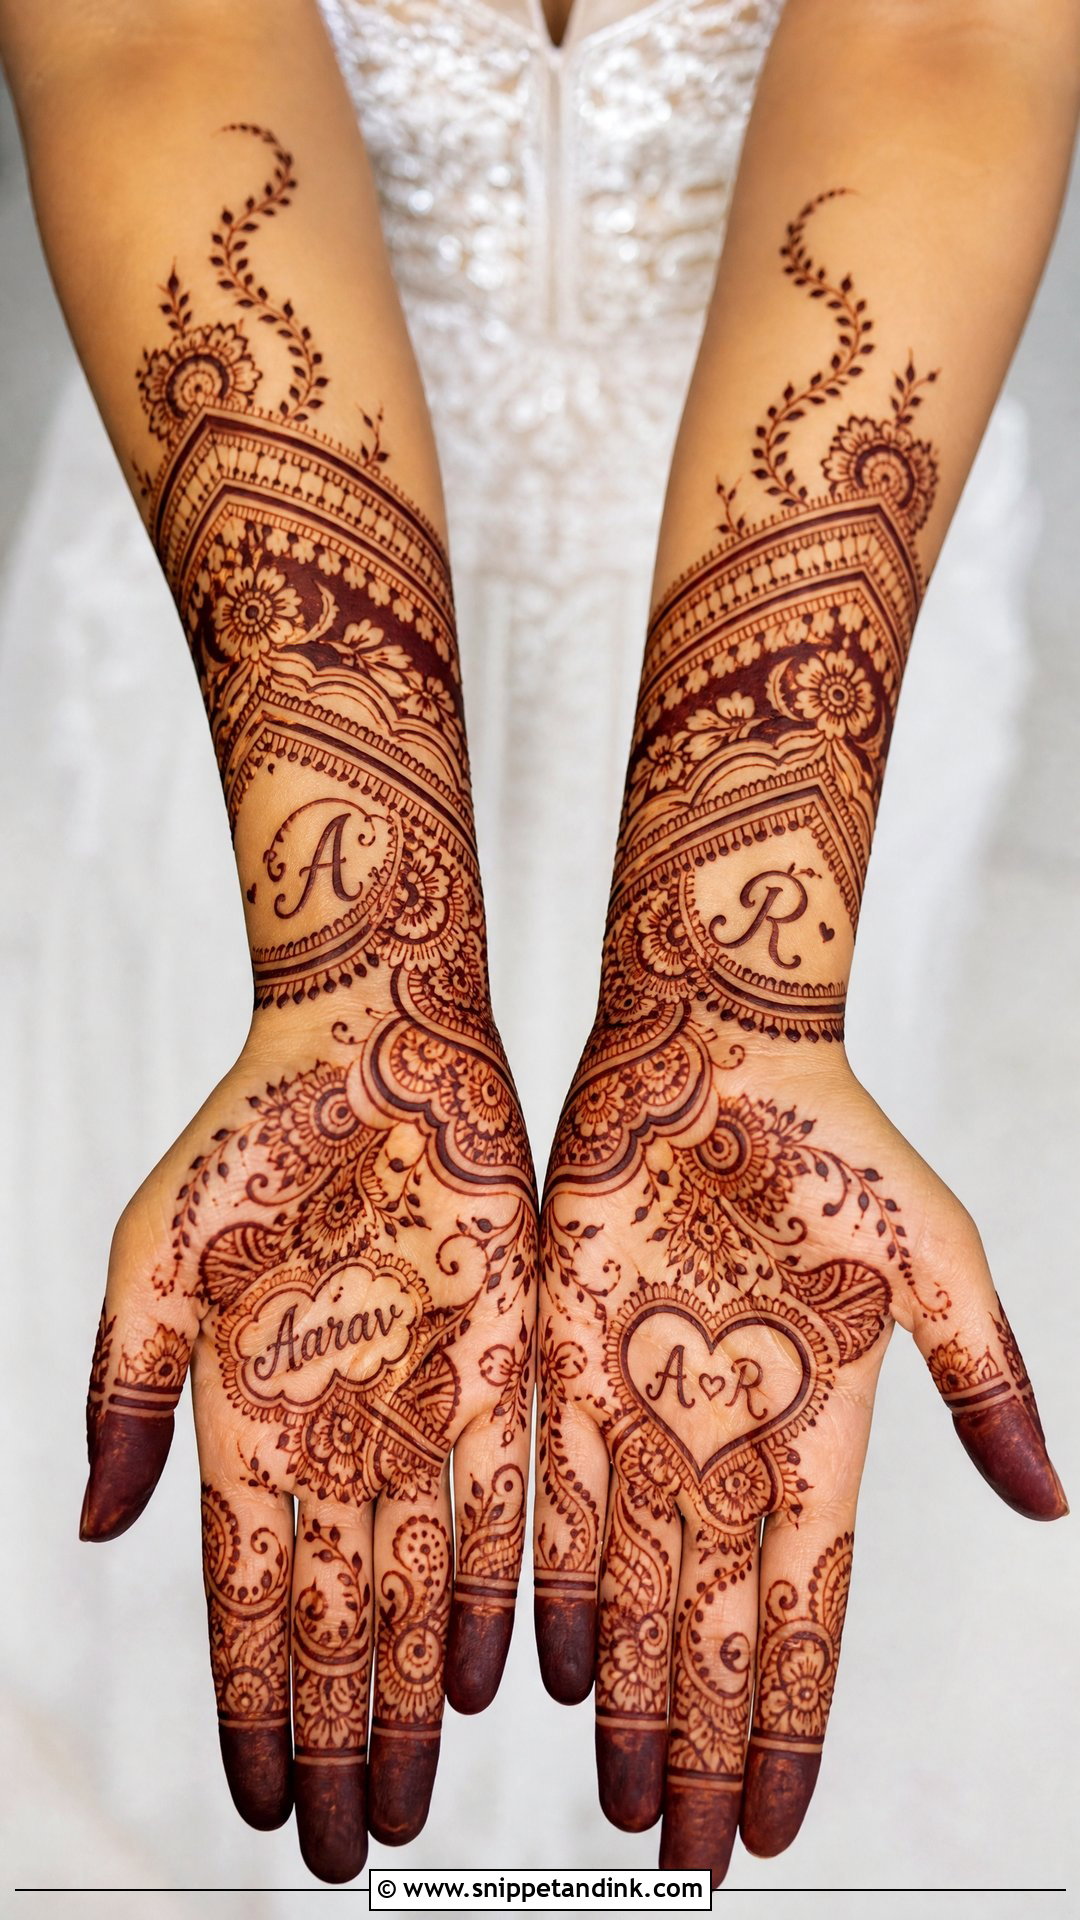
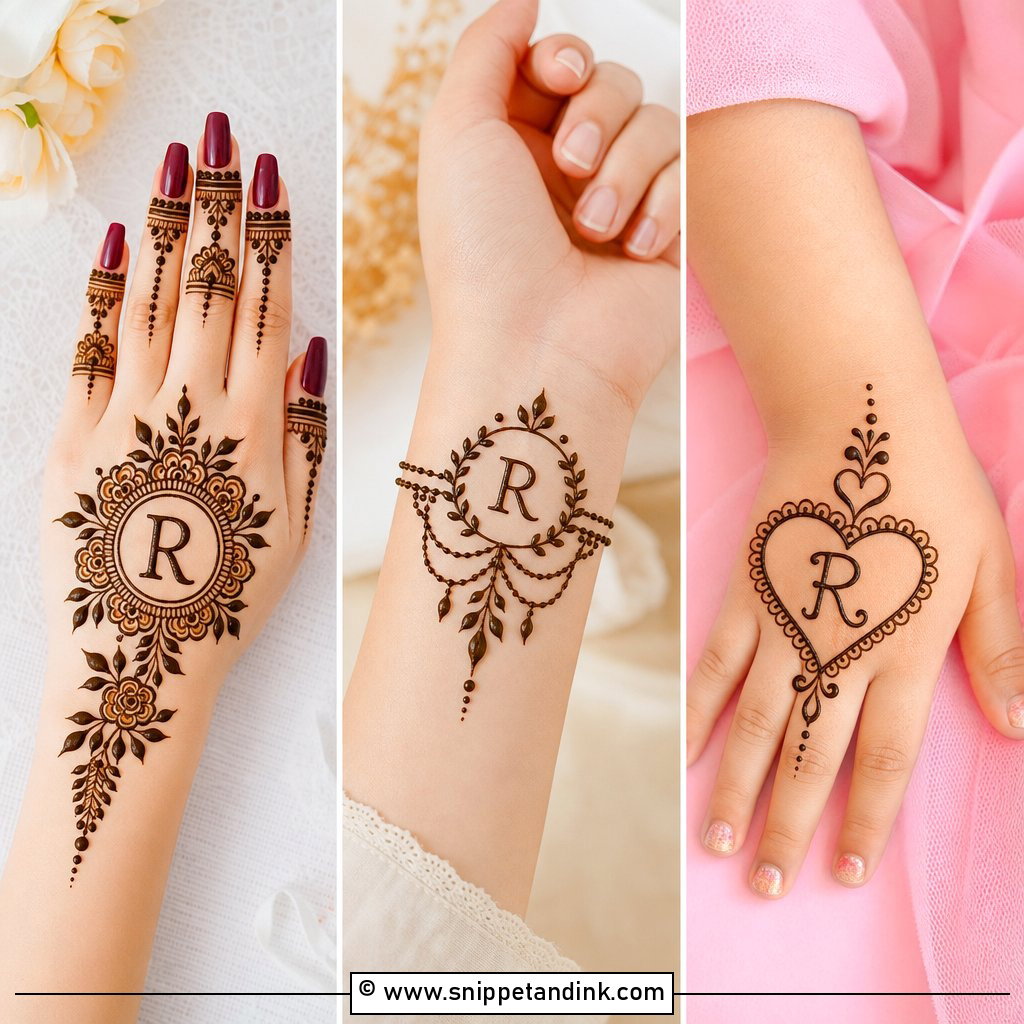
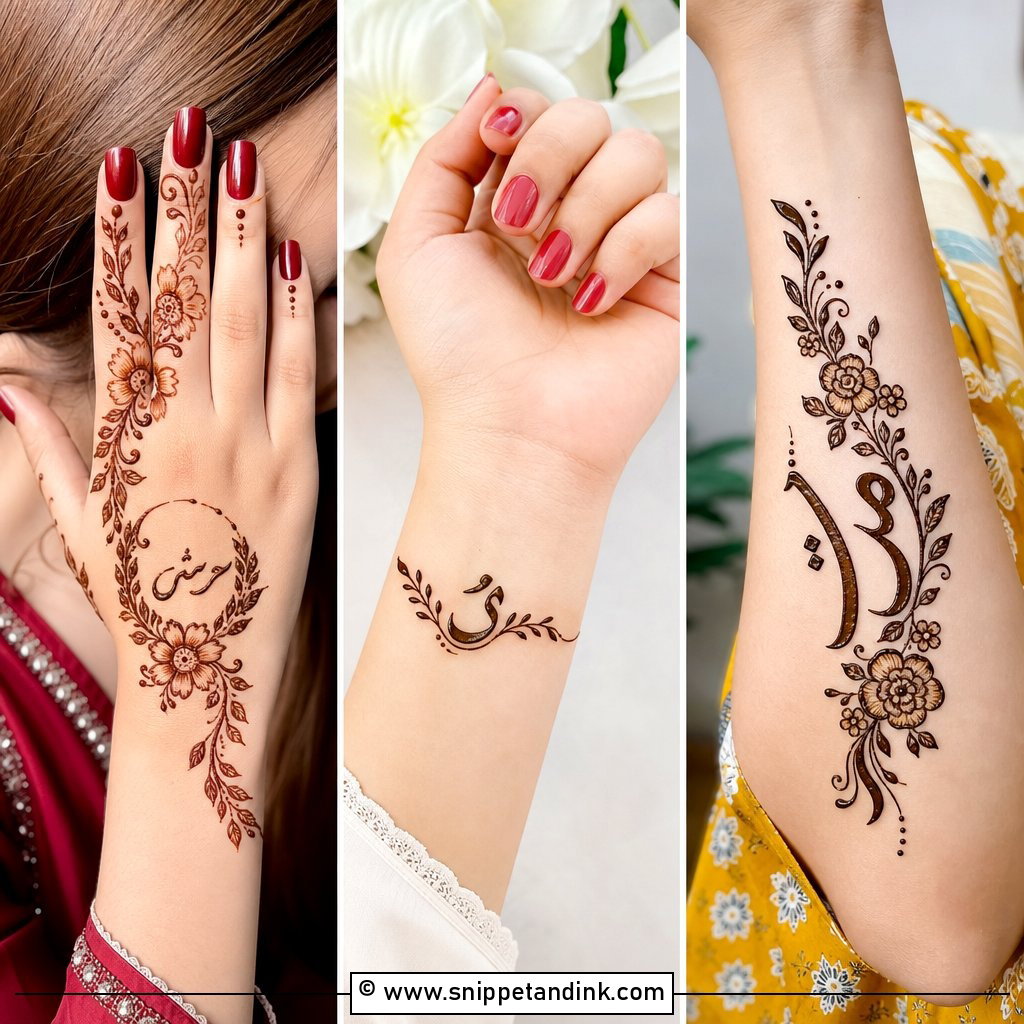
Hiding the groom’s name is a tradition guests love. A bridal name mehndi design can tuck his name, initials, your wedding date or a single word into a paisley, a vine, a wrist band or a finger. I hide it well enough to make him search, but not so deep in the fill that nobody can ever find it, which defeats the game. Script choice matters too. Urdu, Hindi and English letters each sit differently inside a motif, so tell your artist which you want ahead of time.
10. Minimal Bridal Mehndi Design
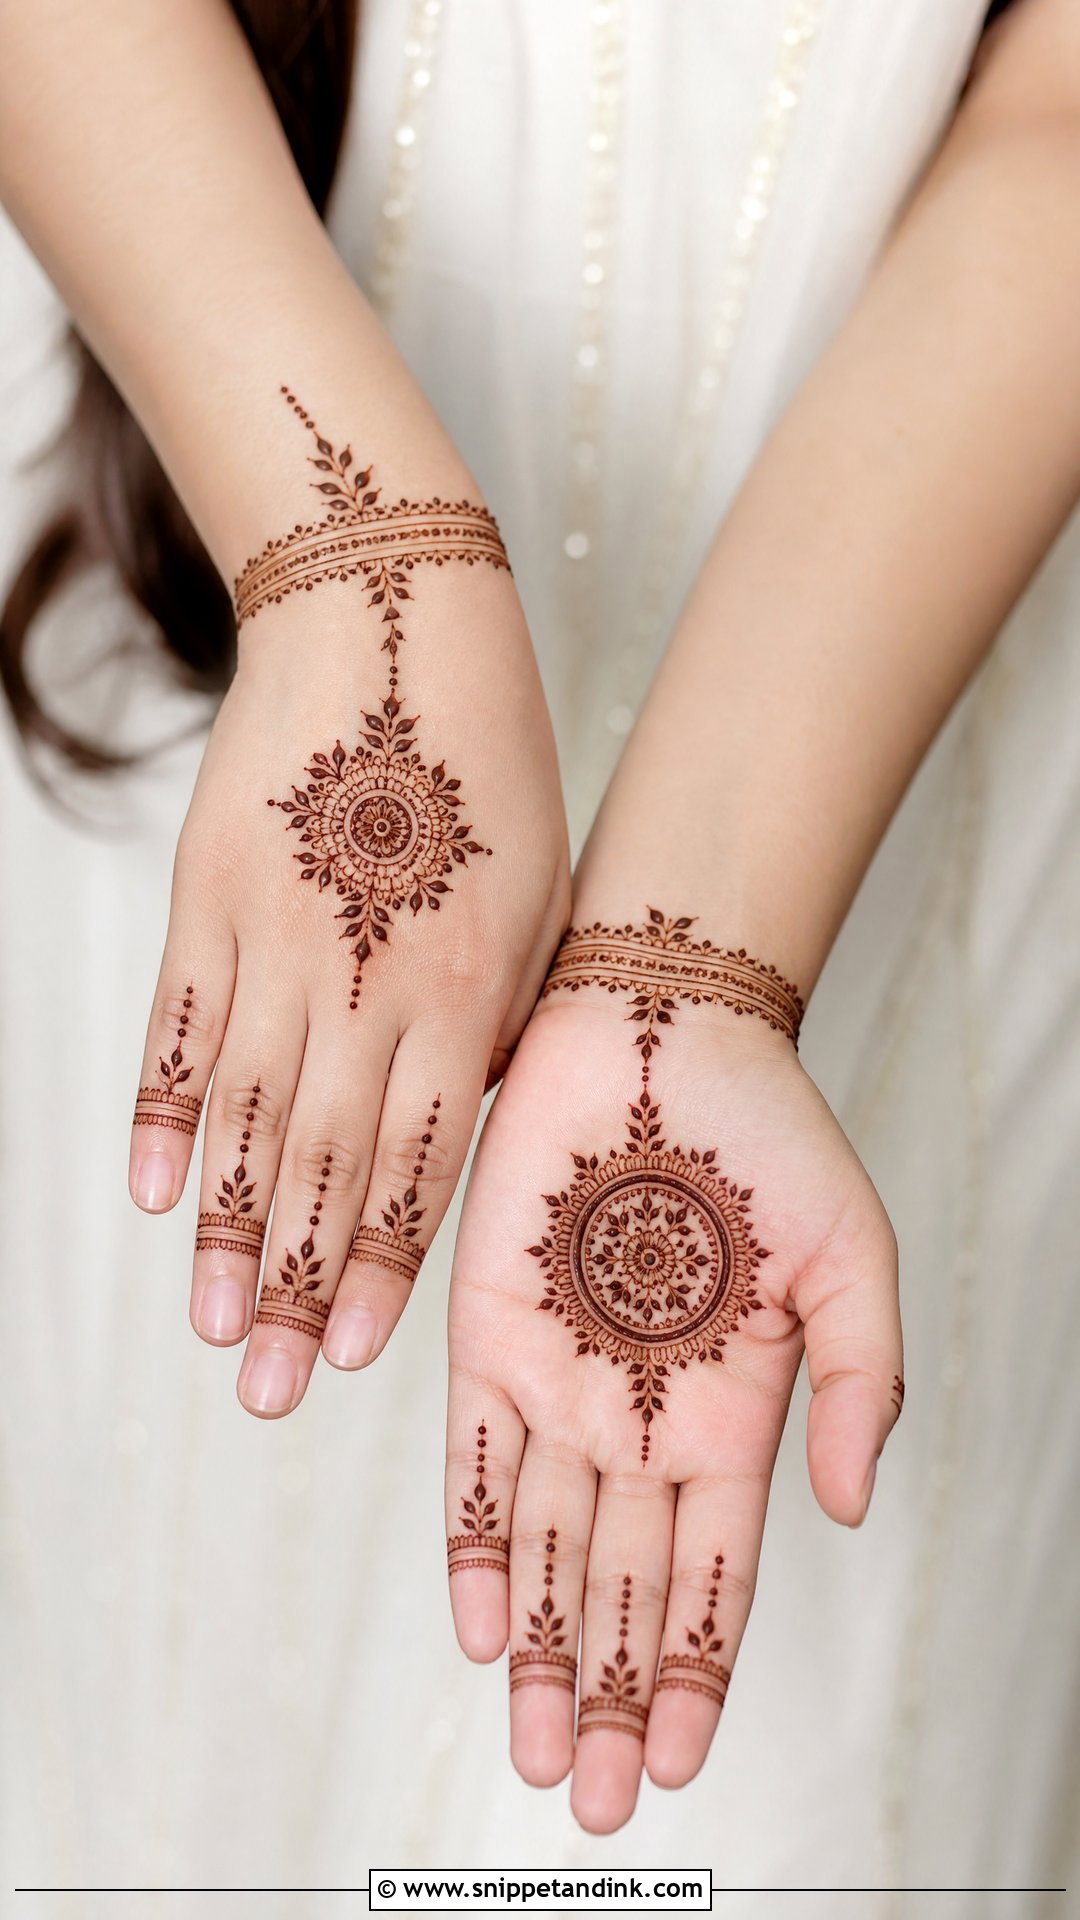
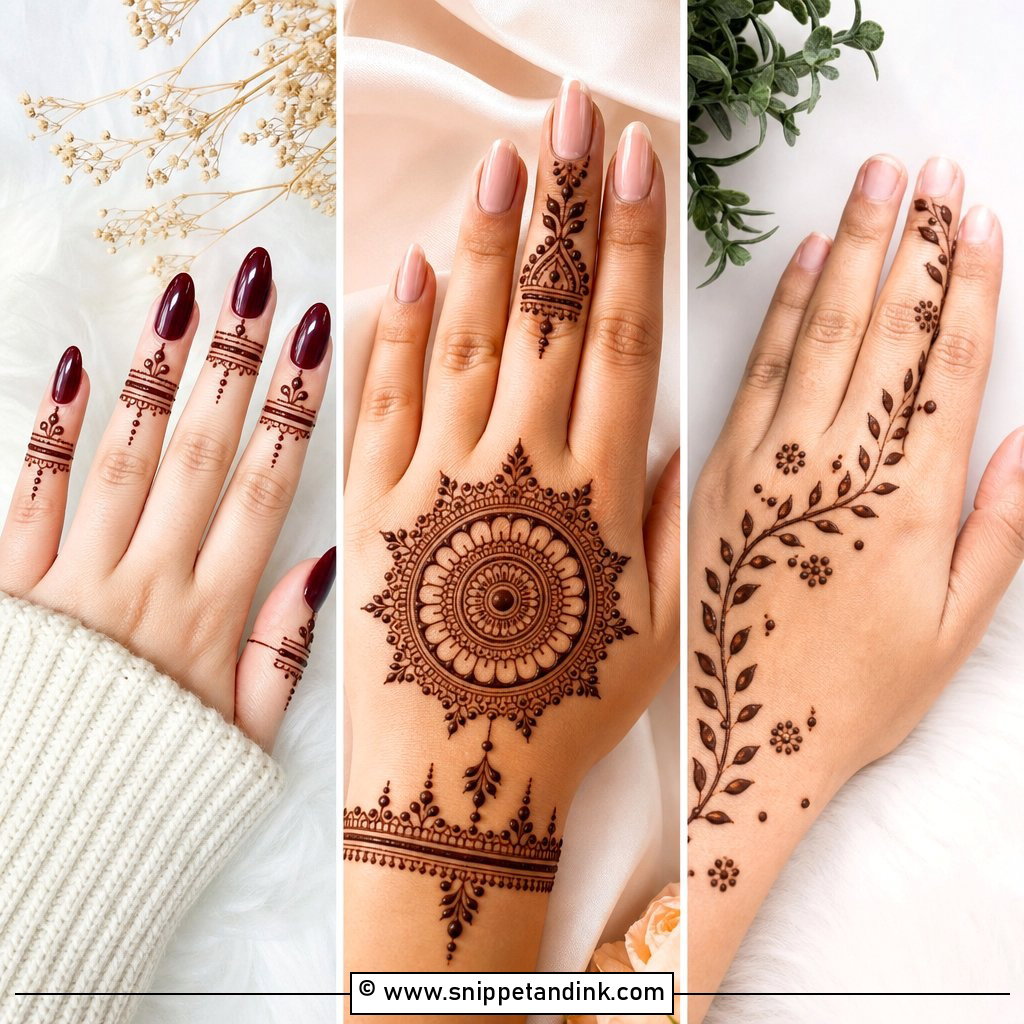
Minimal bridal mehndi uses placement instead of coverage: a small mandala, a fine leaf trail, thin bracelet bands or a few finger designs, with most of the hand left bare. It suits intimate weddings, courthouse ceremonies and destination weddings, and it lets rings and nail color show. Because there’s less henna, every line is visible, so line quality matters more here than in a full design. I keep both hands balanced so they look like a pair when you hold them together.
11. Modern Bridal Mehndi Design
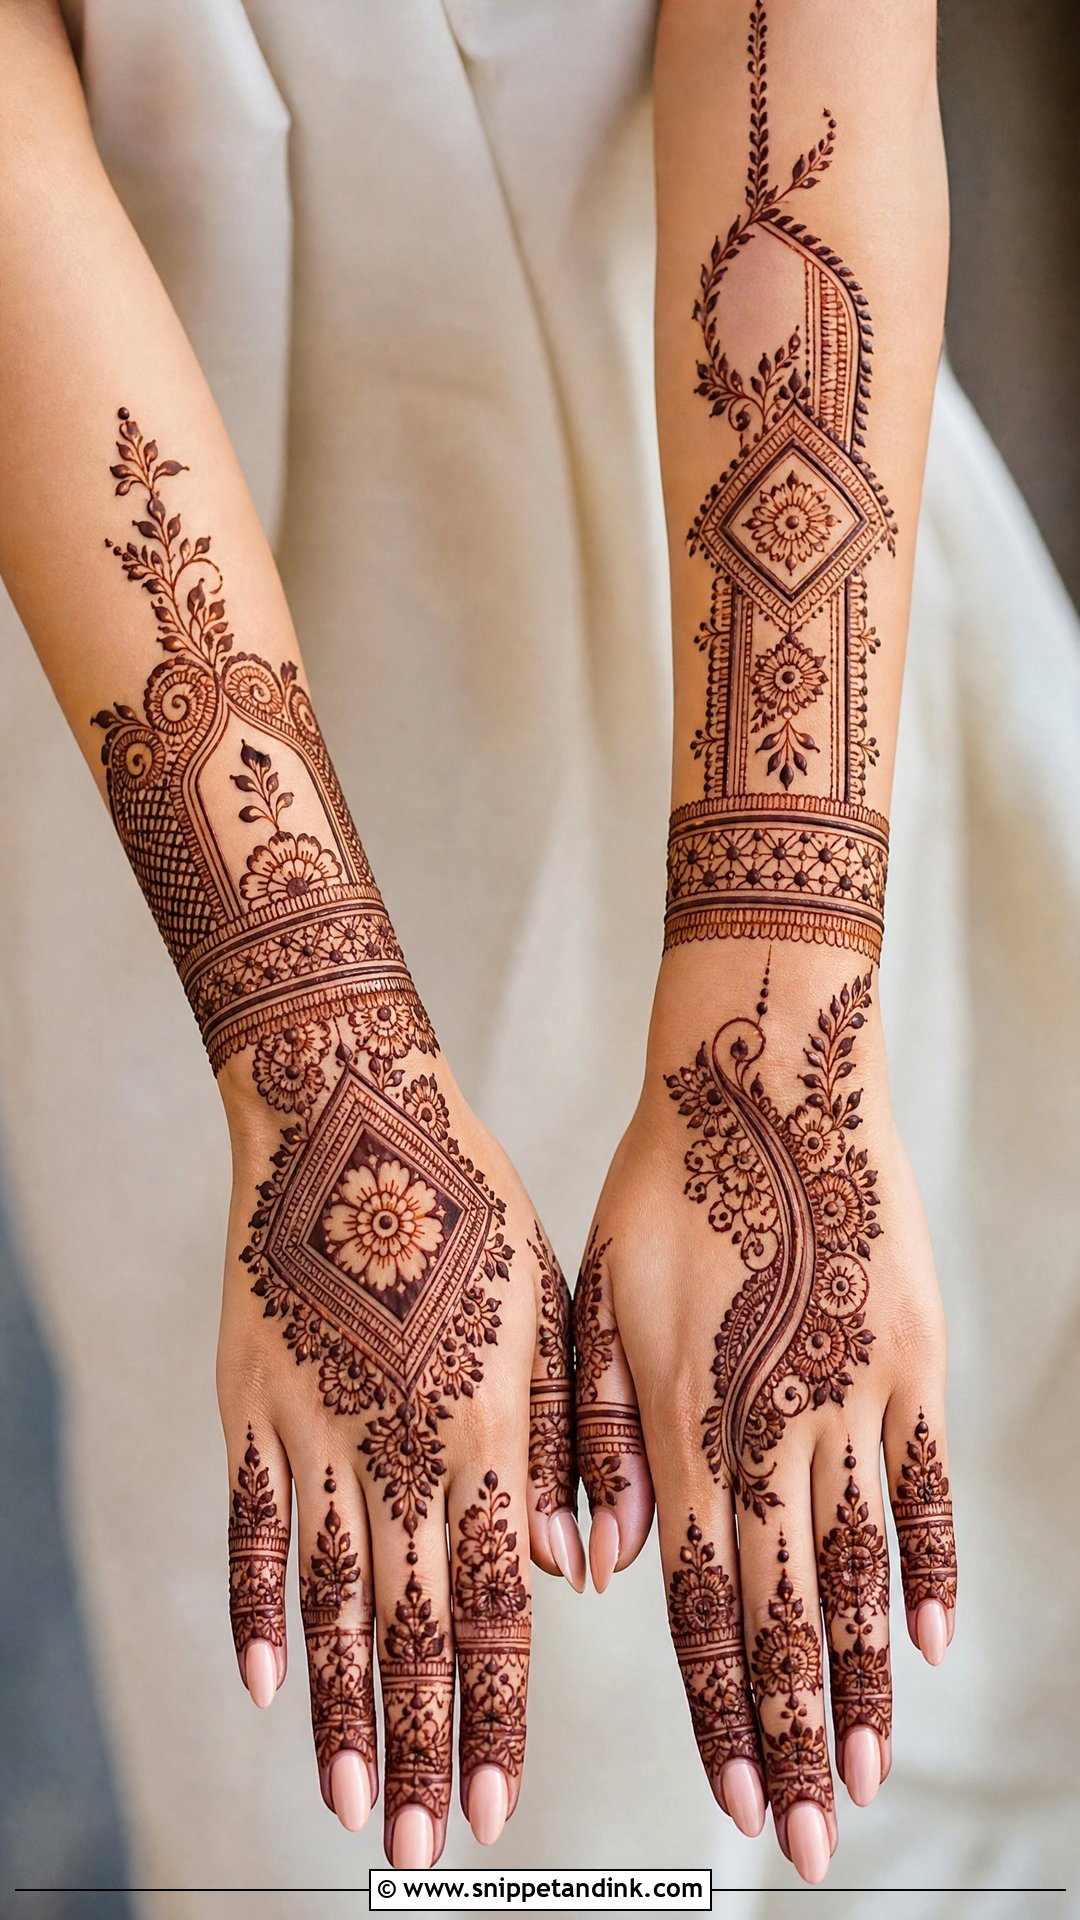
Modern bridal designs are organized around one clear idea: geometric panels, open skin, structured cuffs, half-hand layouts or deliberate asymmetry. I ask brides to pick a theme, florals with geometry or a mandala with negative space, because a modern design with no theme just looks random. It sits well with contemporary lehengas, fusion outfits and pearl jewelry. If your family expects full traditional coverage, talk about it before the appointment rather than in the chair.
12. Back Hand Bridal Mehndi Design
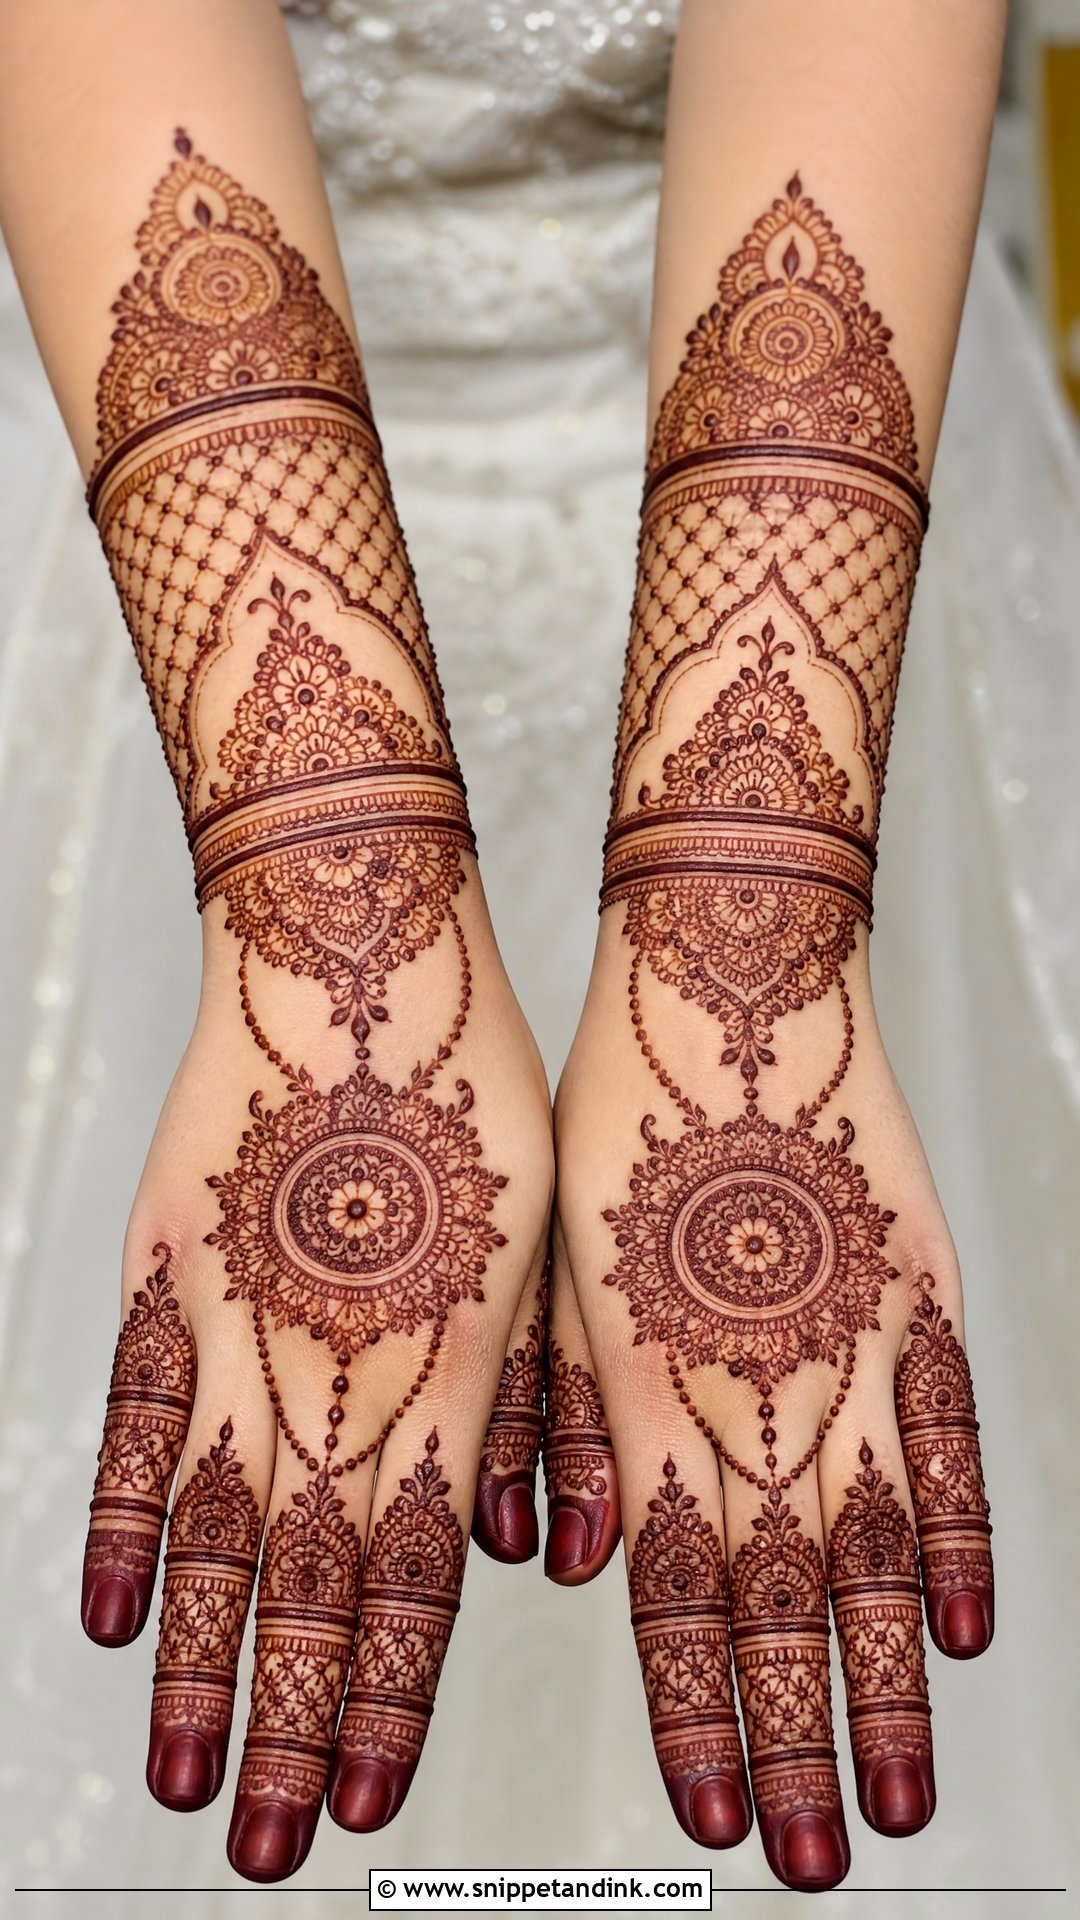
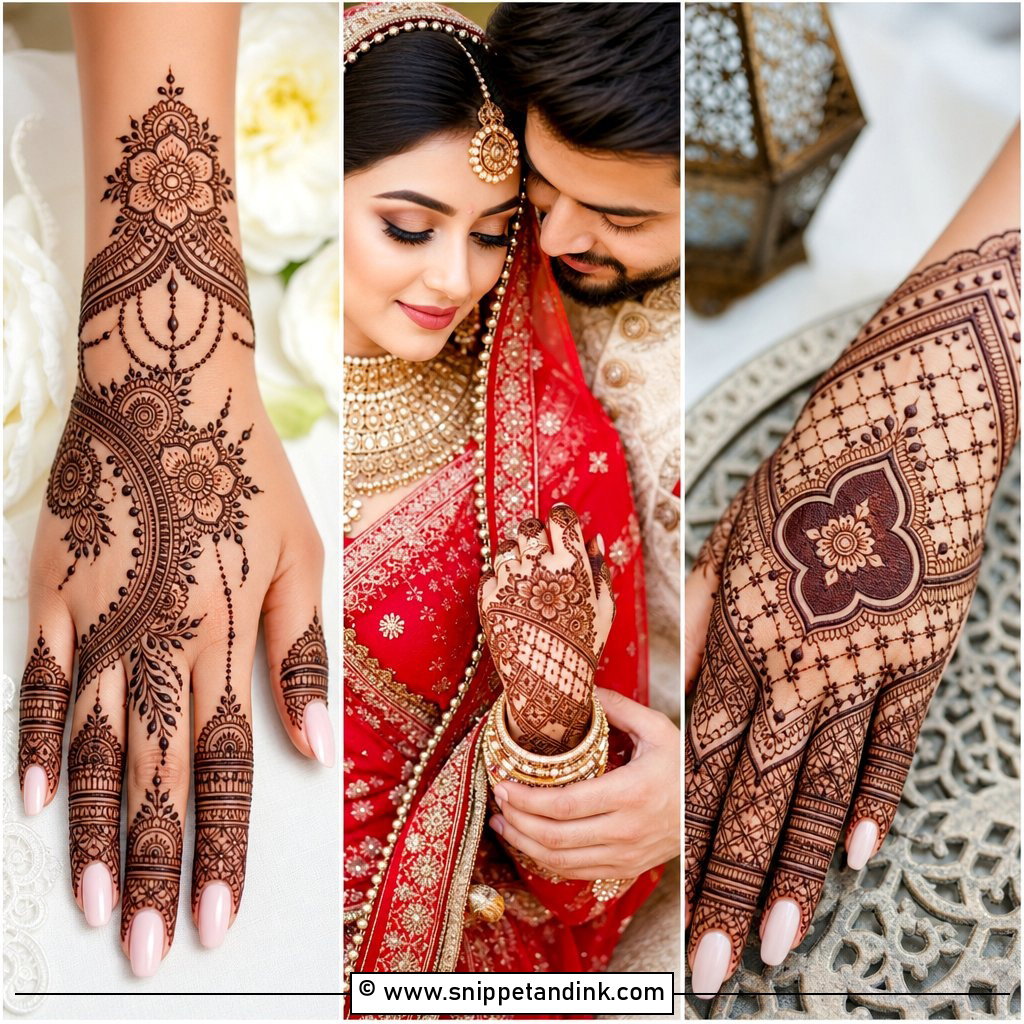
The back of the hand appears in more photos than the palm: rings, bouquet, bangles and every candid where your hands are in your lap. I give it a central mandala or floral trail, finger caps and a bracelet band, and I make sure it flows from fingers to wrist as one piece rather than separate stamps. Dense jaali and floral cuffs look traditional; open vines and finger detailing look more current. The stain on the back is usually lighter than on the palm, which keeps detail clear.
13. Palm Bridal Mehndi Design
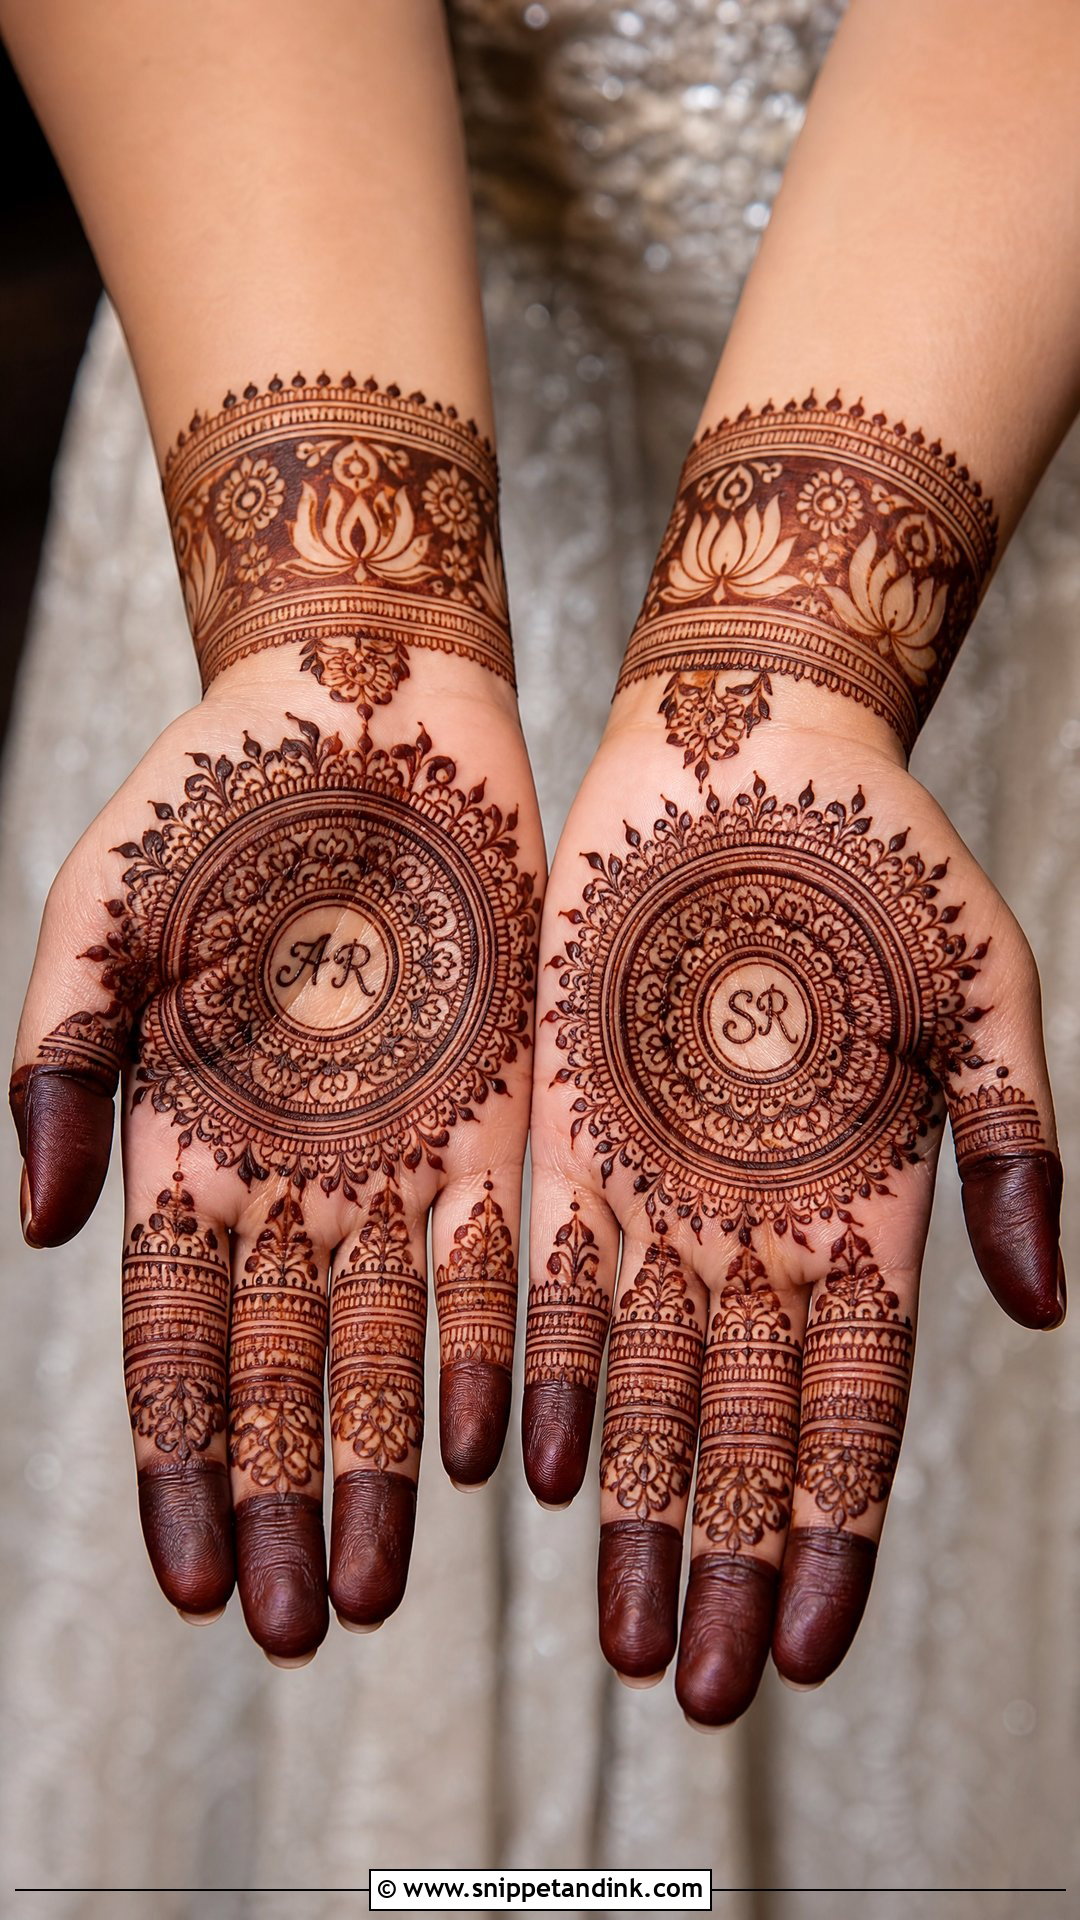
The palm is where henna stains darkest, because its skin is thicker and holds the dye well, so it’s where I put the most important motifs: a mandala, a portrait, a lotus or the hidden name. A strong palm design needs a clear center and detailed borders. Filling the whole palm with tiny same-size patterns hides the main motif. Mirrored palms look formal; a story that continues from one palm to the other is more personal. Palms are shown during several ceremonies, so this is where I spend the most time.
14. Finger Bridal Mehndi Design
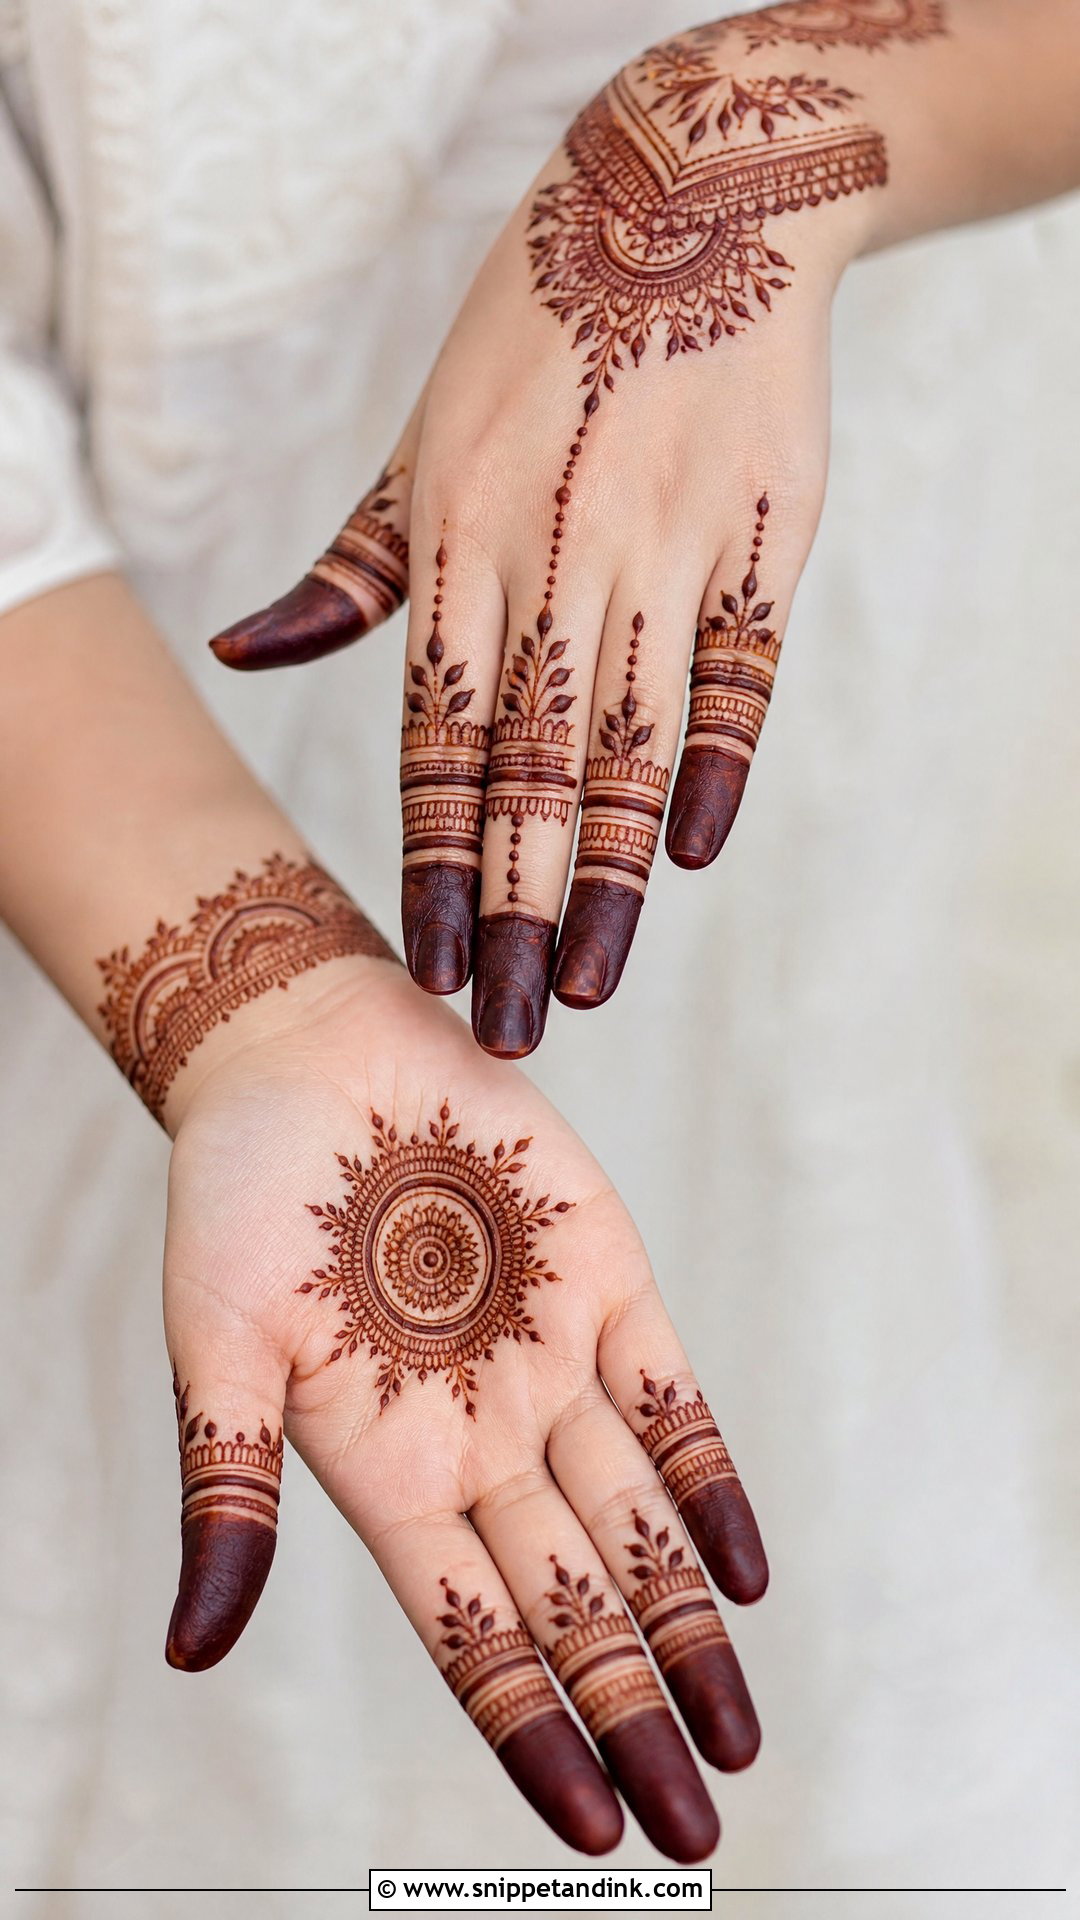
A finger bridal mehndi design puts the detail on the fingers and leaves the palm lighter: filled tips, ring-style bands, lace panels, dots or small floral chains. It flatters brides with statement rings, nail art or haath phool. Fingertips stain very dark, so filled tips read strongly in photos. I keep the patterns the same on both hands, because uneven fingers are the first thing a bride notices when she holds her hands side by side.
15. Bridal Jaali Mehndi Design
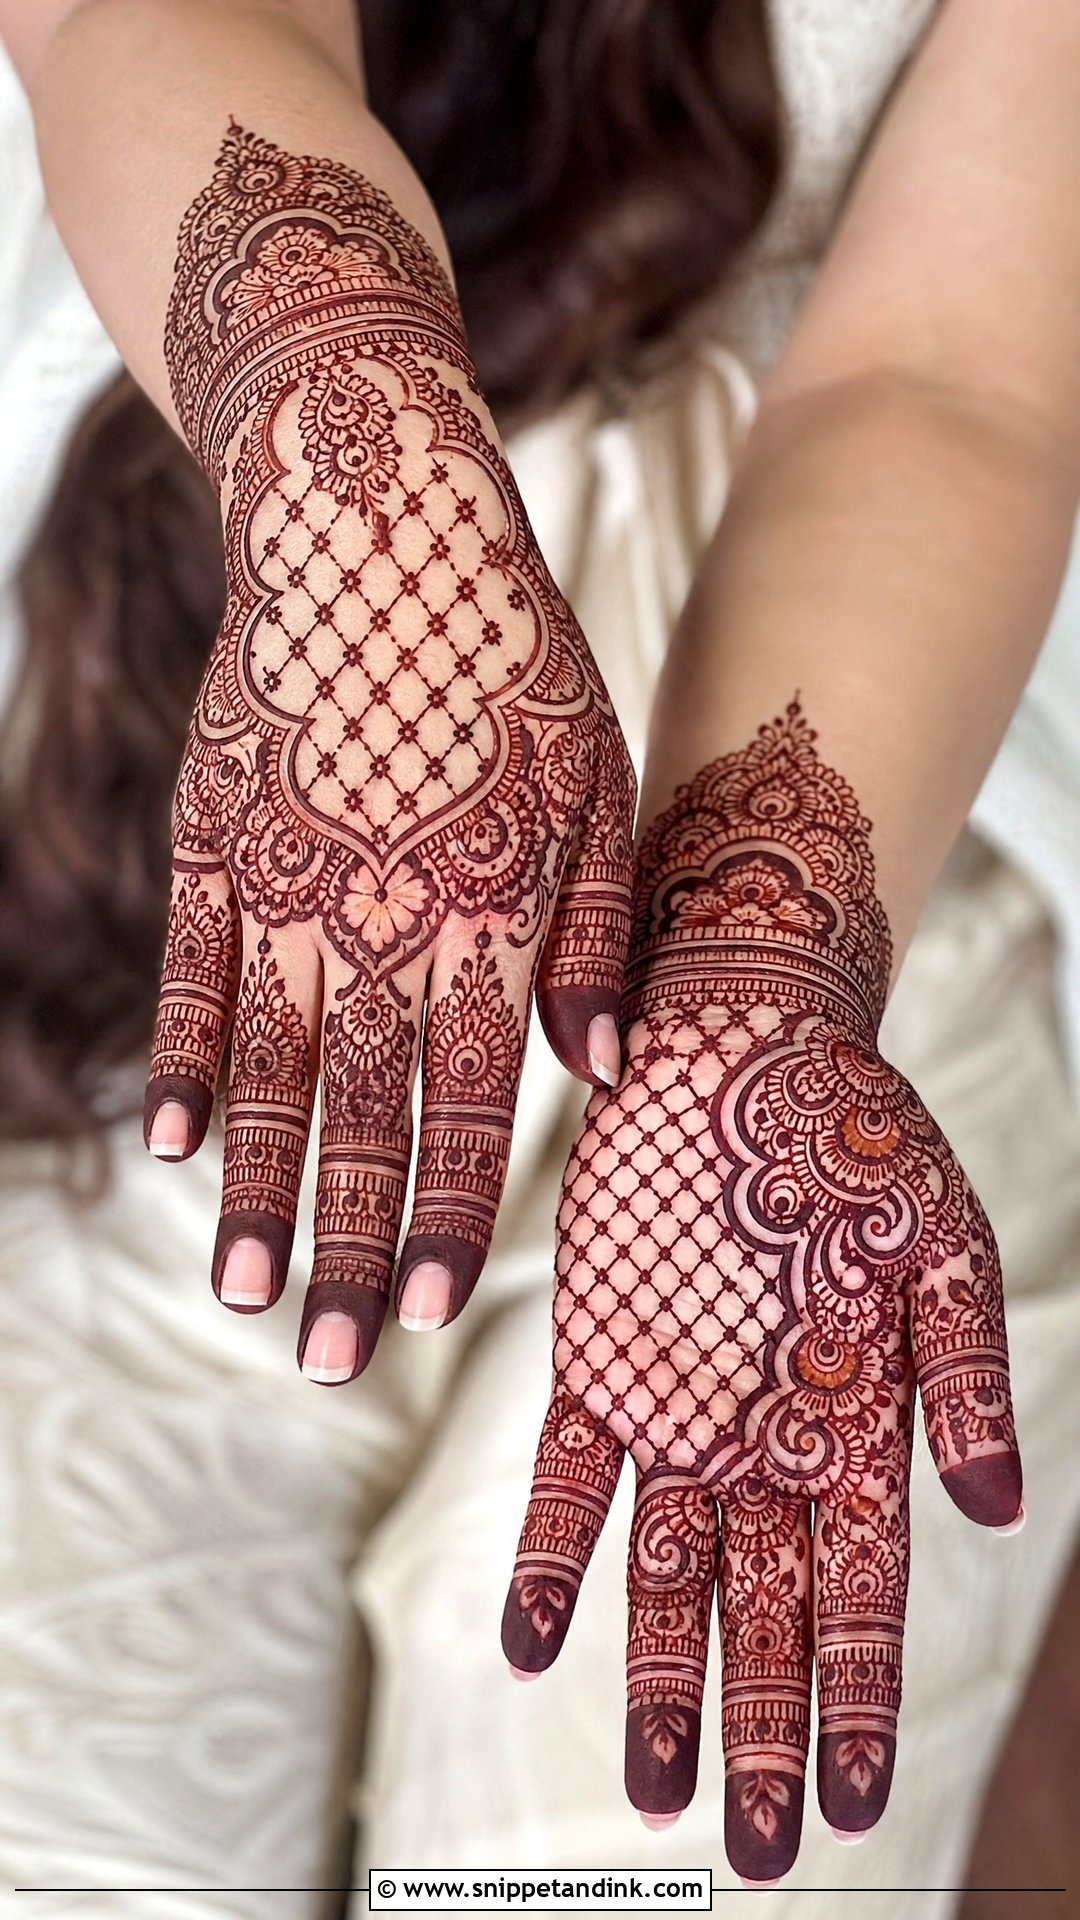
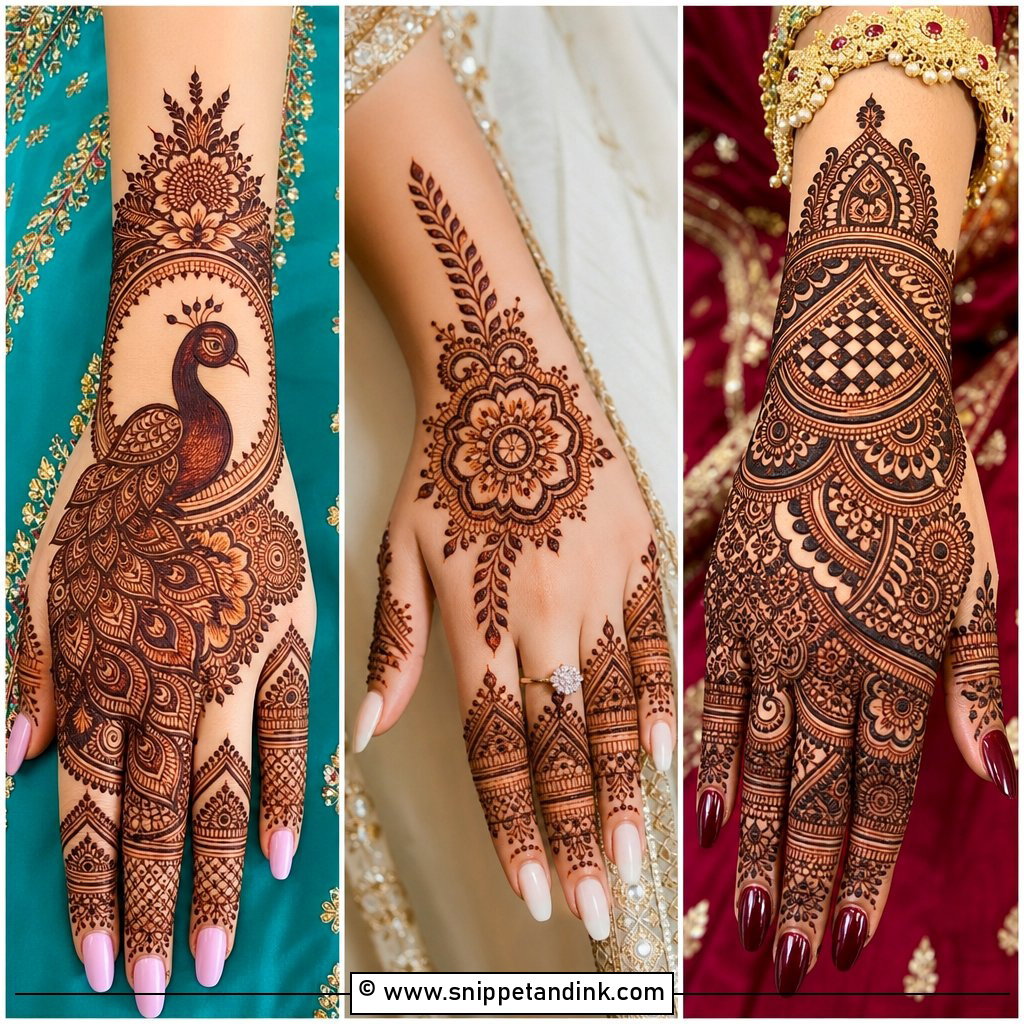
Jaali is net-like grid work that gives a lace effect on the back of the hand, the palm corners, the wrist or the forearm. It needs very even spacing; if the lines drift, the grid looks wobbly and the stain exaggerates it. I use it as a supporting fill between flowers and paisleys rather than covering a whole hand in mesh, which looks flat. Bold outlines around the jaali keep it crisp. It suits brides who want texture without heavy dark coverage.
16. Moroccan Bridal Mehndi Design
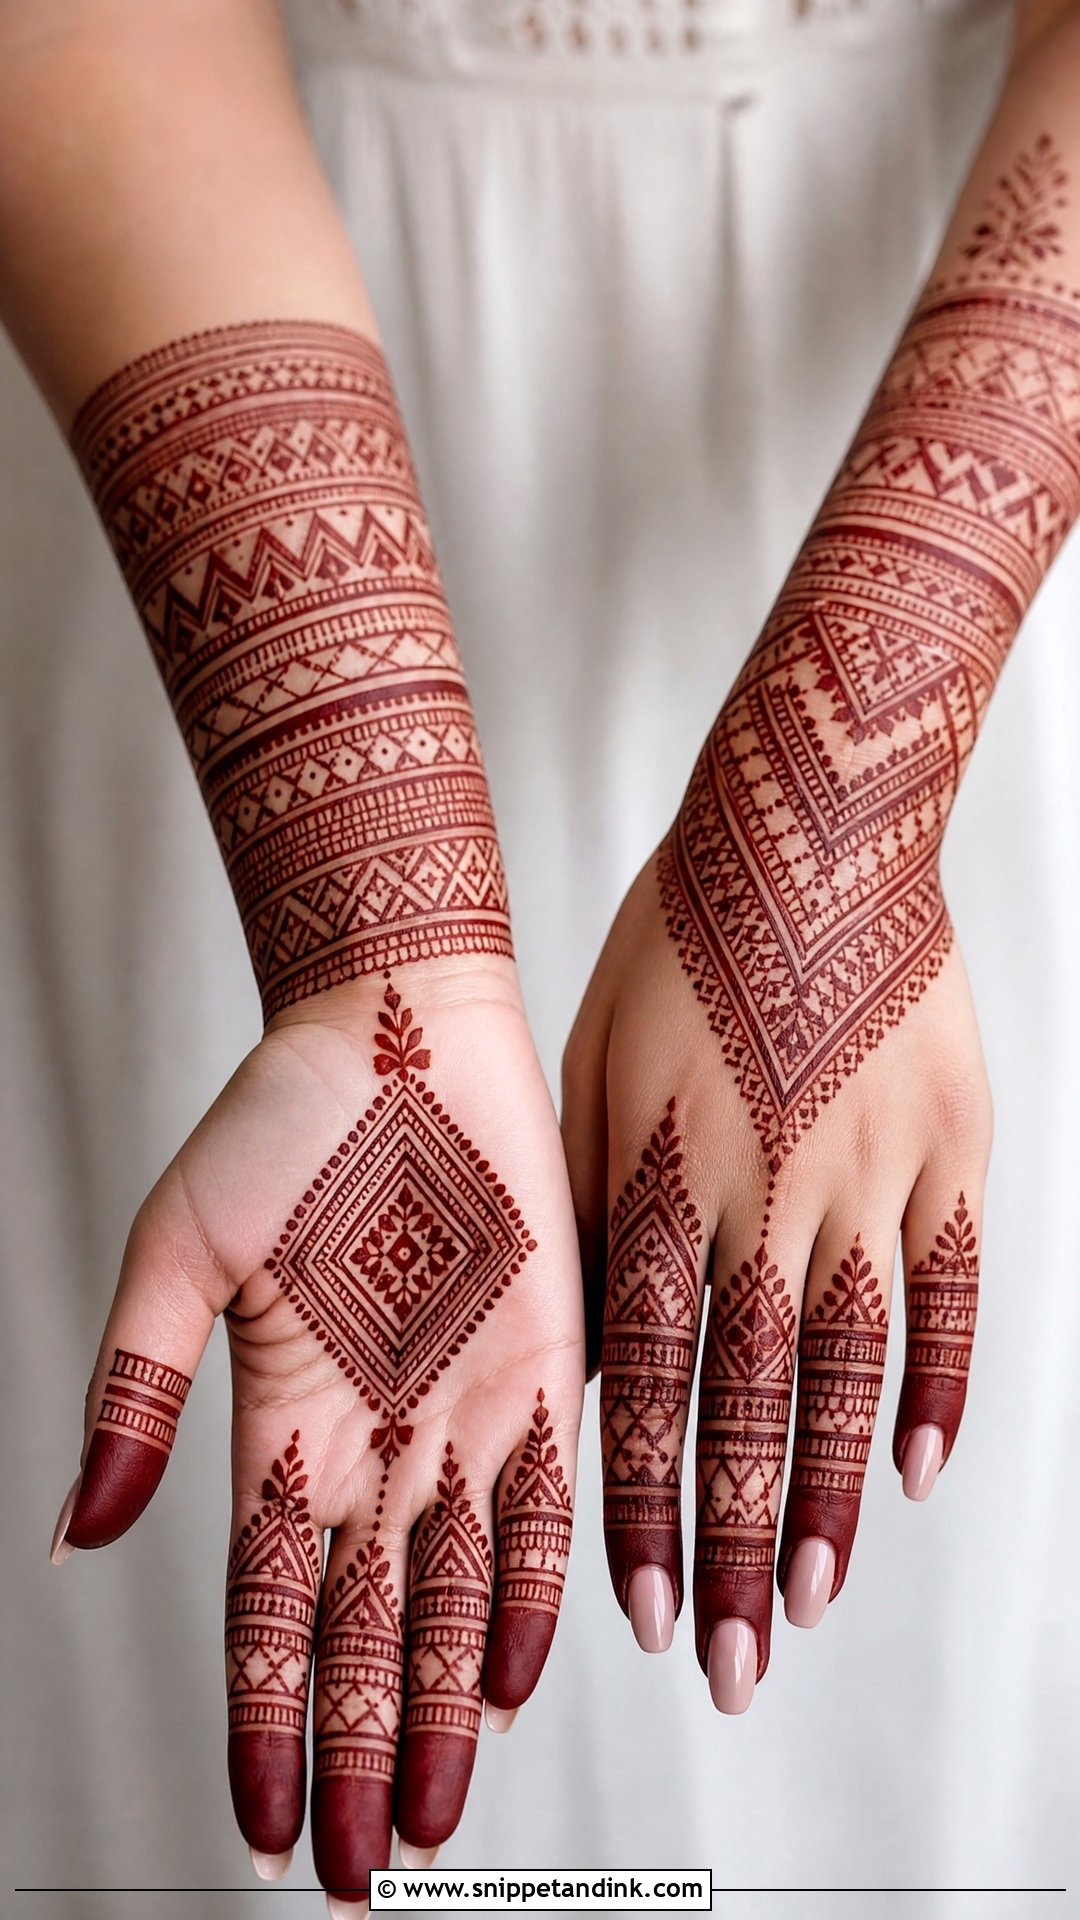
Moroccan designs use geometry instead of flowers: diamonds, triangles, straight lines, grids, chevrons and symmetrical bands. They look sharp and distinctly different from Indian bridal mehndi. To carry a wedding look, I extend the pattern from fingers to forearm with decorative cuffs and balanced palm panels. Straight lines have no curves to hide a wobble in, so I work slowly and steady my hand on the bride’s arm. It suits modern, minimal or fusion outfits, and a deep maroon stain makes the geometry crisp.
17. Gulf Bridal Mehndi Design
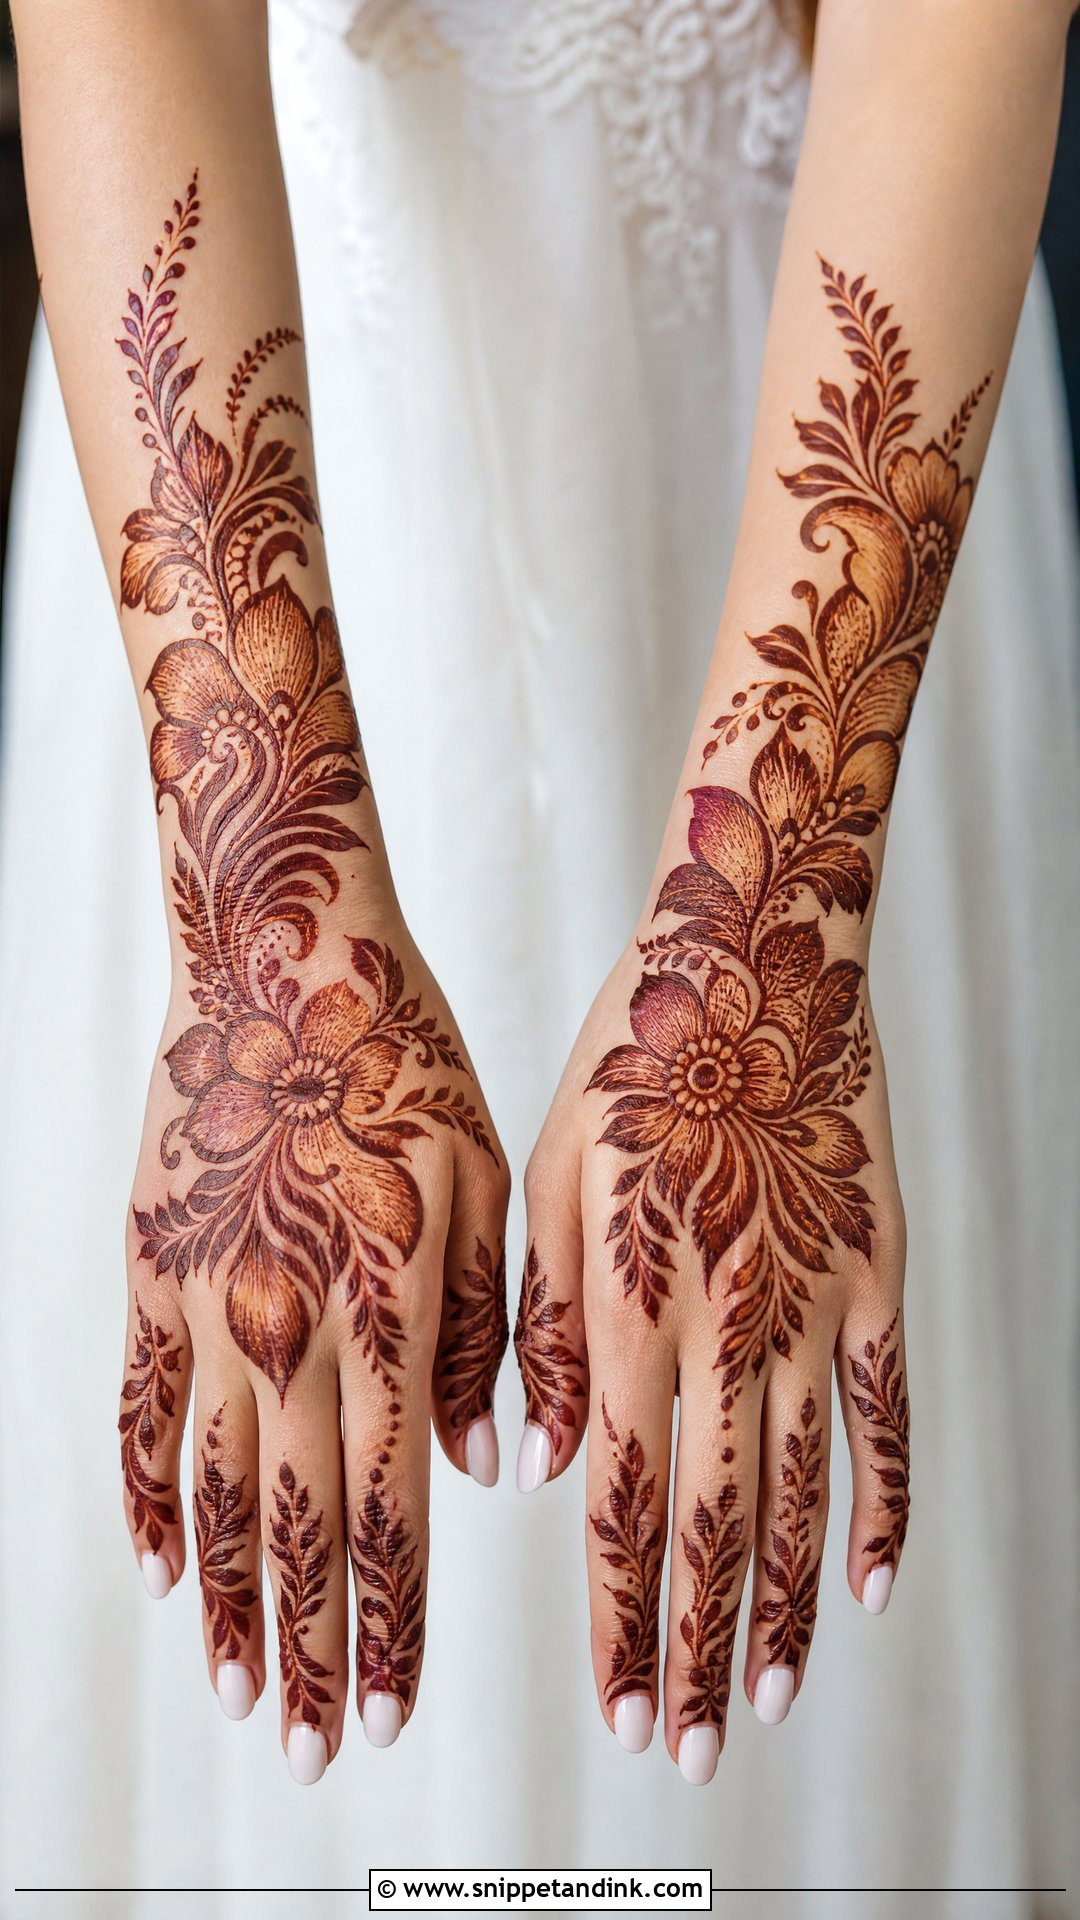
A Gulf bridal mehndi design, often called Khaleeji, uses bold flowers and leaves sweeping across the hand in a curve, with plenty of open skin. Large motifs are outlined clearly and filled with fine strokes, shading, dots or small leaves. It looks especially good on the back of the hand and forearm. For a bride, I add detailed finger work and carry the design from wrist to arm. Thick, bold outlines need a slightly firmer paste, and I let them dry fully before adding the fine fill inside.
18. Bridal Feet Mehndi Design
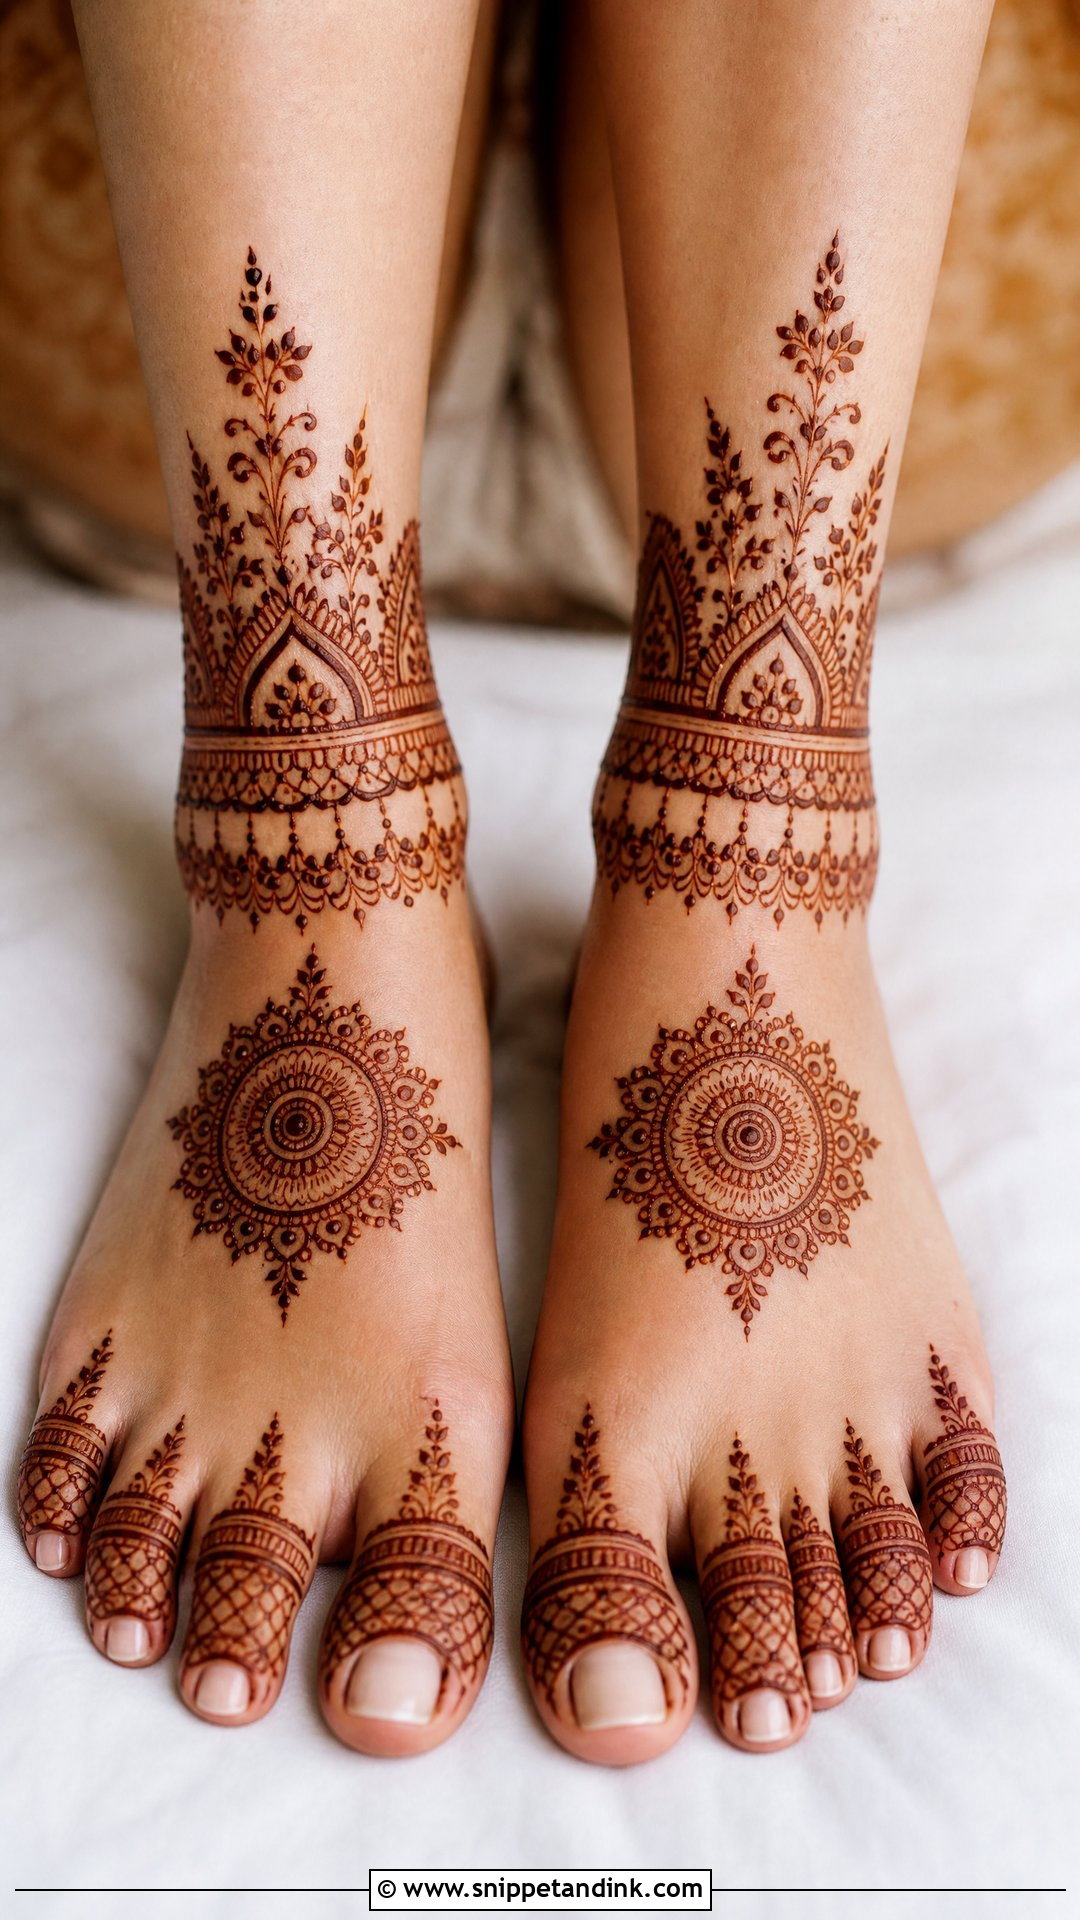
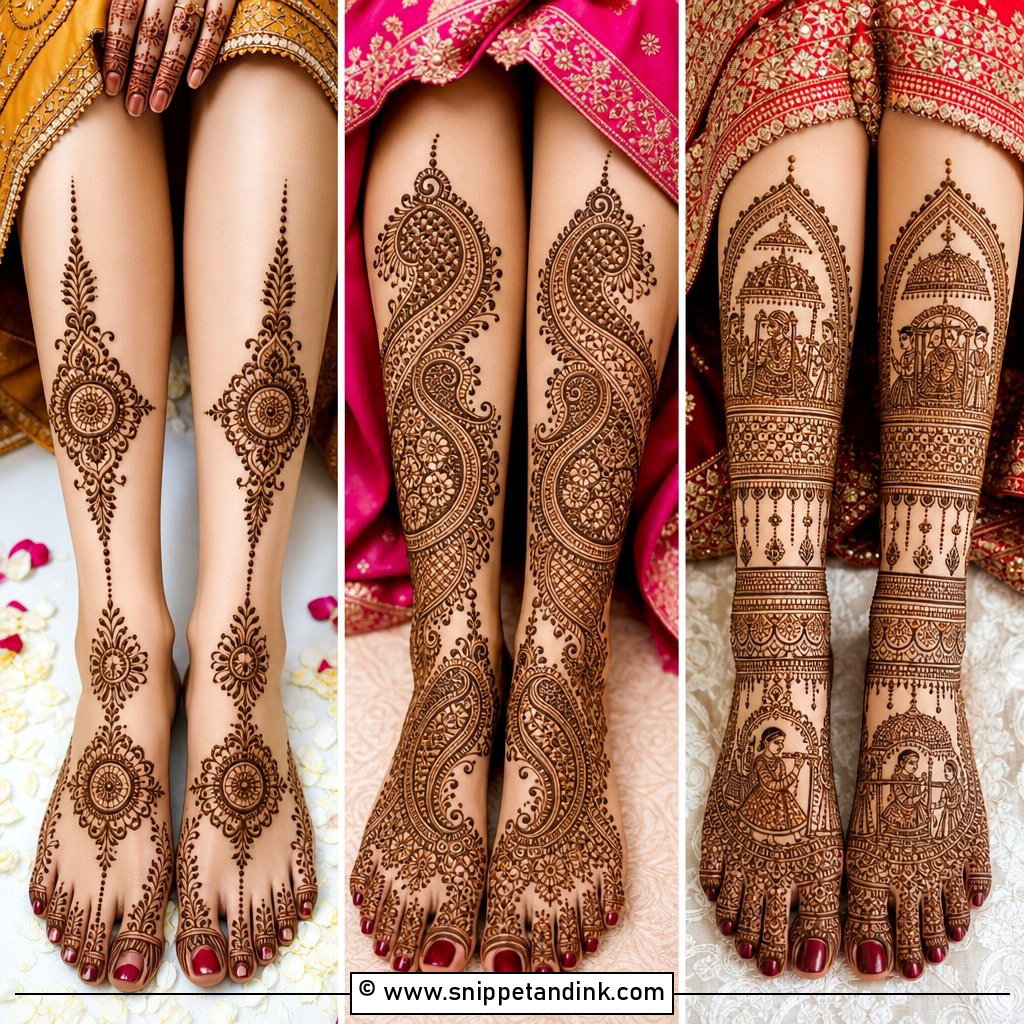
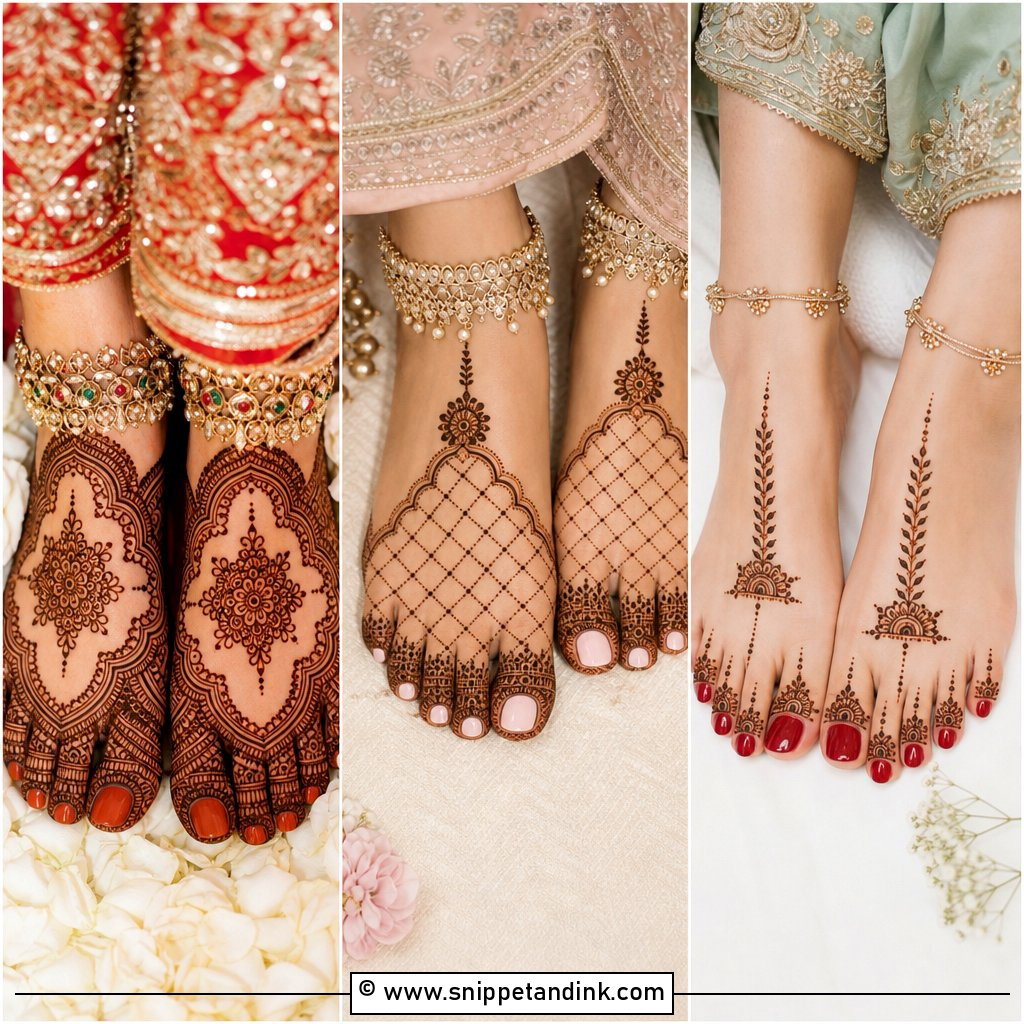
A bridal feet mehndi design completes the look, especially with anklets and open sandals. I place a mandala on the top of the foot, paisley borders along the sides, toe detailing and an anklet band, sometimes with a trail toward the shin. It should relate to the hands without copying them, and many brides prefer it a little lighter. Feet stain very dark, often darker than the hands. Keep very fine detail off the areas that rub in shoes, since friction fades the stain there first. Feet are usually done after the hands, and you can’t walk while they dry, so plan that time.
19. Simple Bridal Mehndi Design
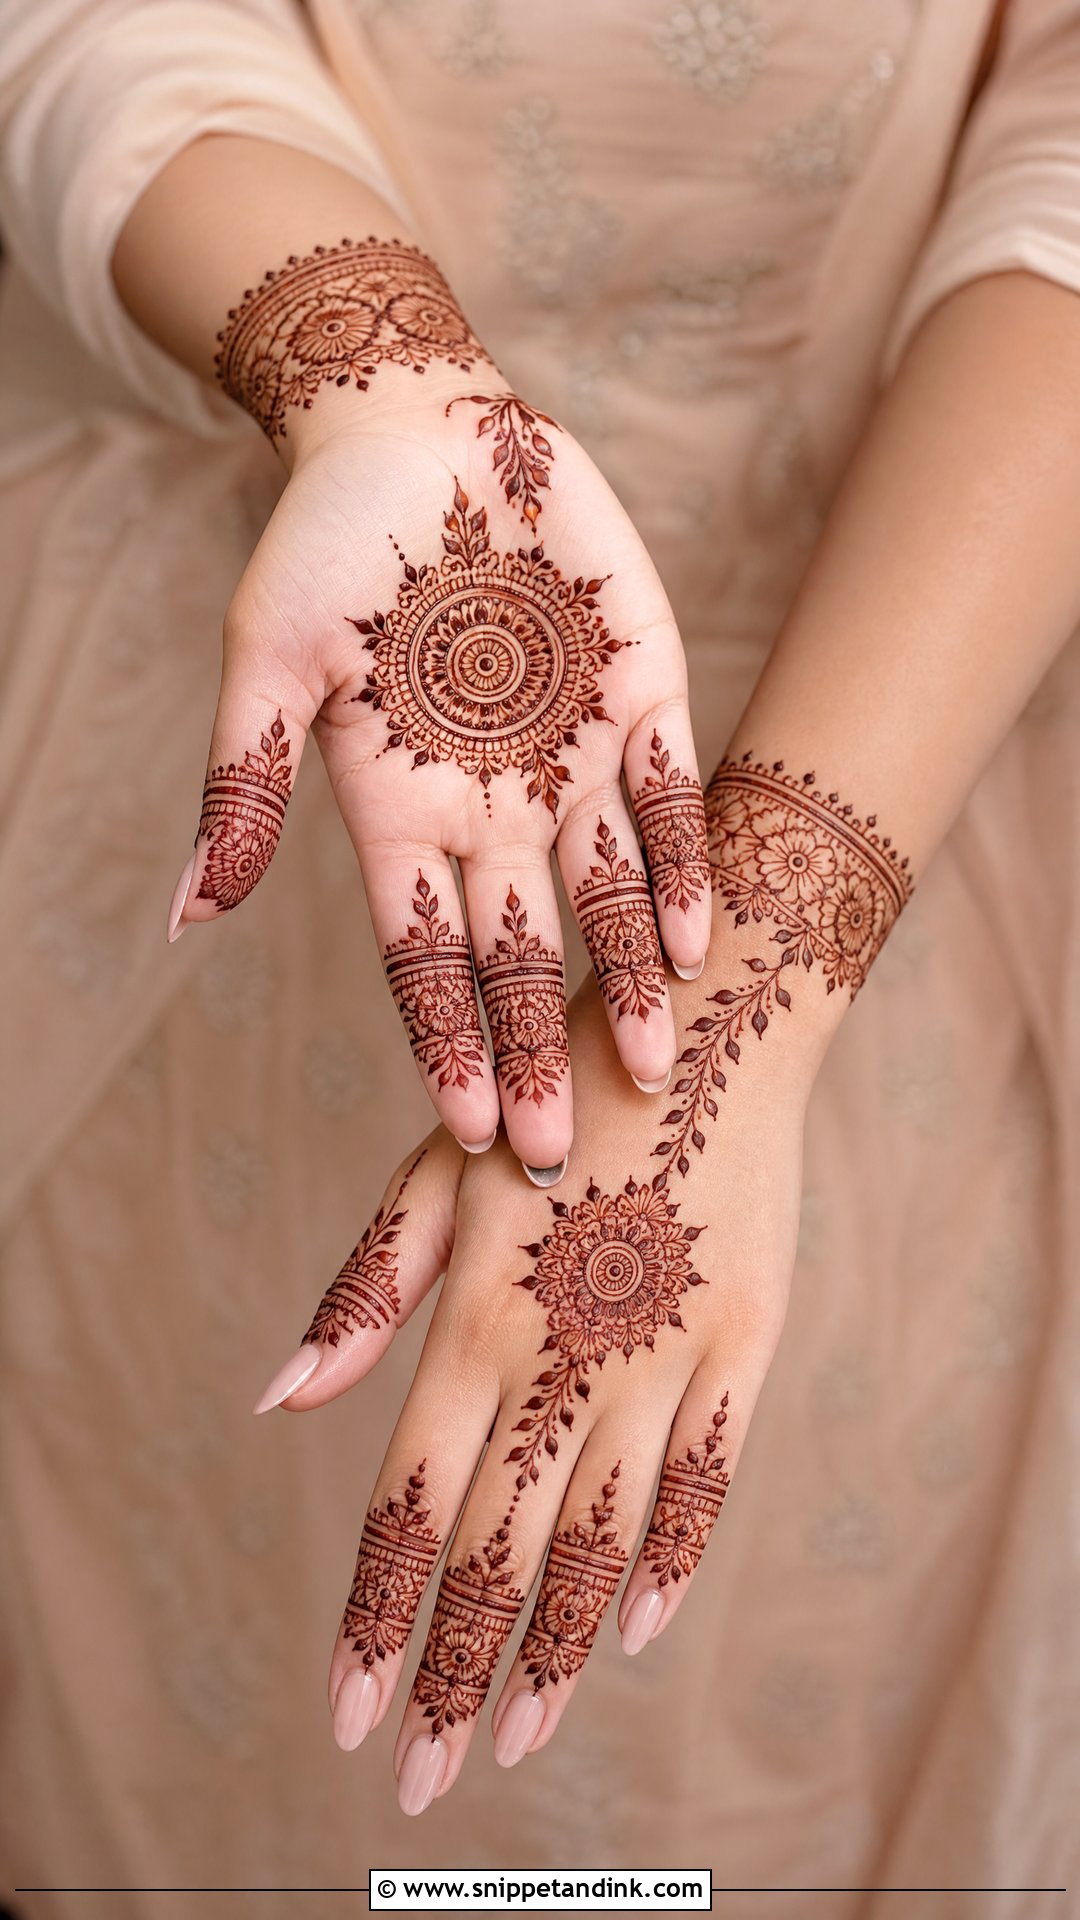
Simple doesn’t mean plain. It means breathing space, clean lines and fewer crowded fills. A neat mandala, a floral wrist cuff, a leafy back-hand trail or lightly filled palms with detailed fingers. It’s ideal if you dislike heavy henna, need a quicker application, or want the outfit and jewelry to lead. It also works for pre-wedding shoots and small ceremonies. My advice is to choose one strong feature and support it with soft borders and finger details.
20. Royal Bridal Mehndi Design
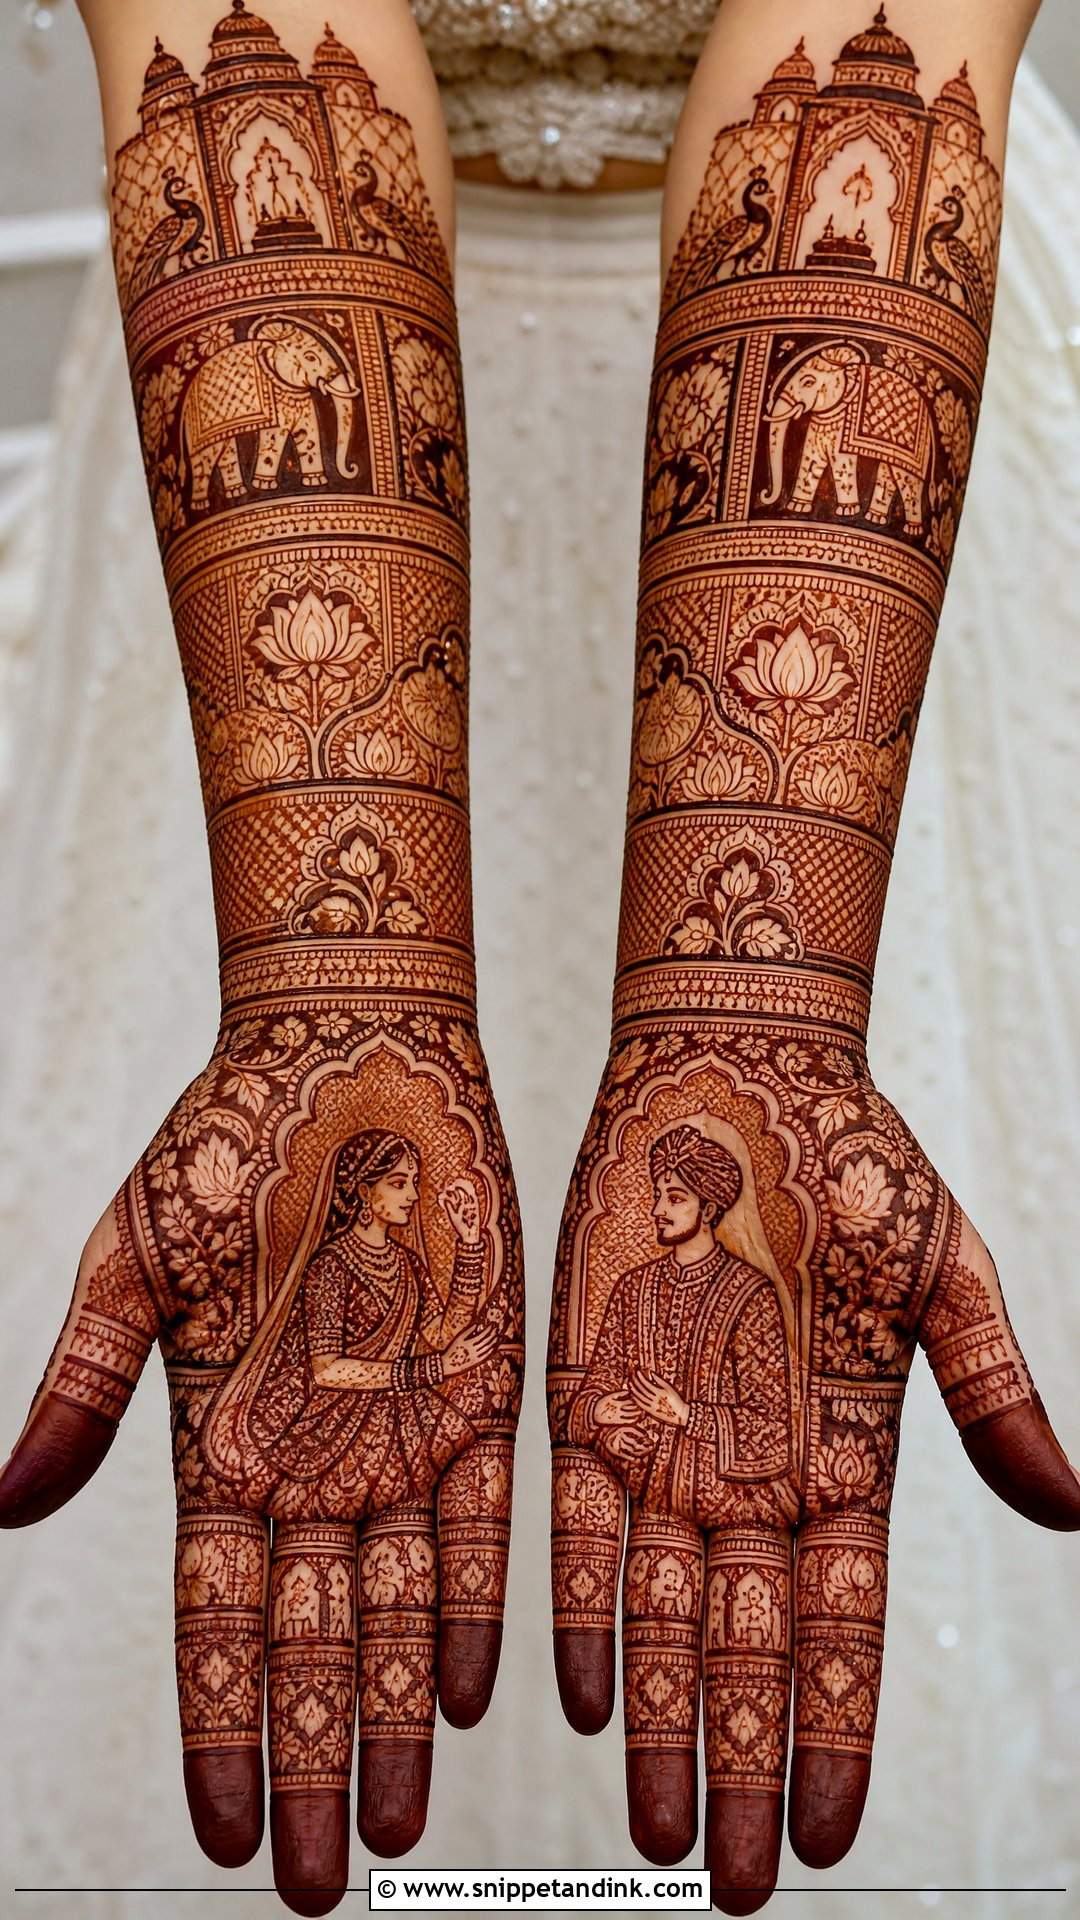
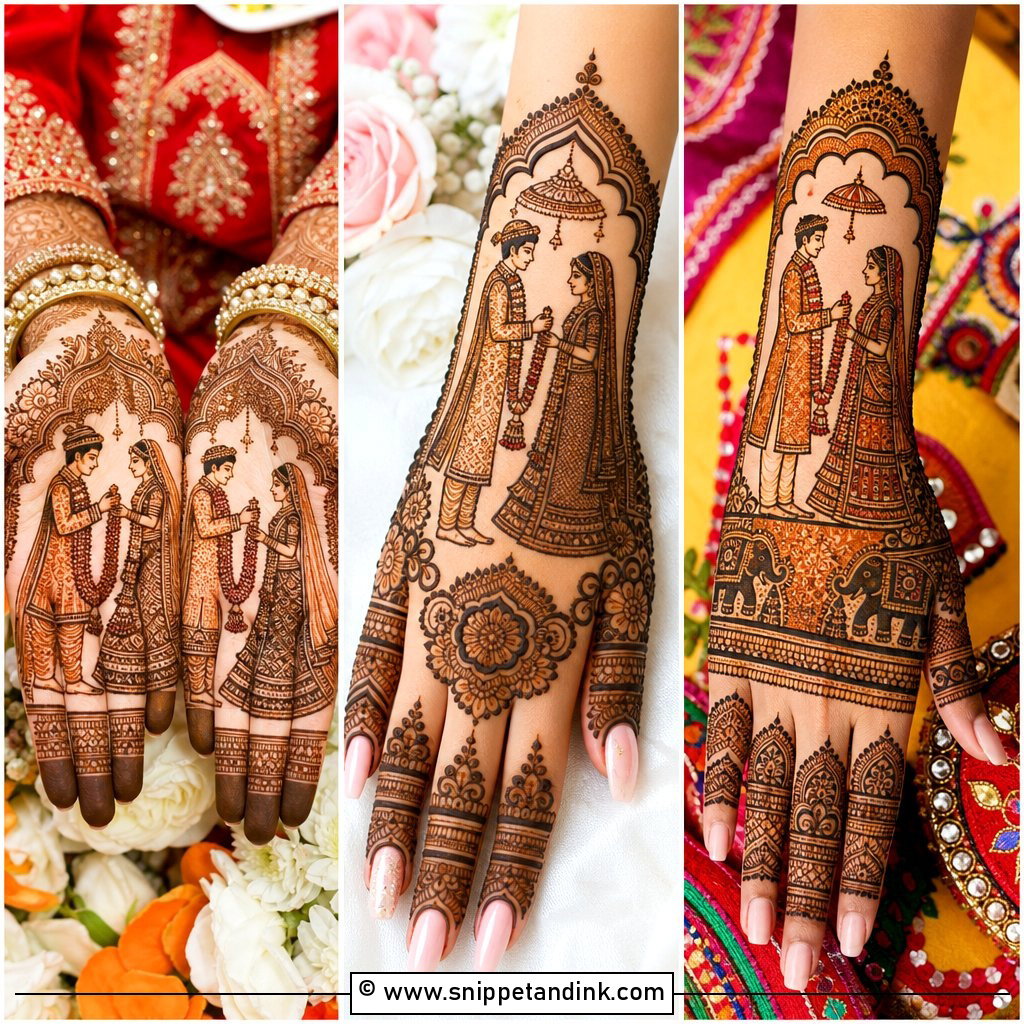
Royal bridal mehndi is the most ambitious design here: peacocks, elephants, palace arches, lotus flowers, bride and groom figures, layered cuffs and heavy forearm coverage. It suits traditional red, maroon, gold and jewel tones. Rich has to stay organized, so I divide it into clear sections, with the palm, wrist and forearm each getting its own focus, and when both hands form one scene I sketch the layout first. Expect a long sitting, and plan meals and breaks around it.
The First Twelve Hours Decide How Dark It Gets
How you treat the paste after I leave matters as much as the cone I used. This is the aftercare I give every bride.
- Leave the paste on for as long as you can, ideally six to twelve hours or overnight. Longer contact means a deeper stain.
- Dab a little lemon and sugar mixture over the dried paste with cotton. It keeps the paste stuck to the skin so it doesn’t flake off early.
- Keep your hands warm. A warm room helps the dye release; cold hands stain lighter.
- Scrape the paste off with a blunt edge or rub it off dry. Don’t wash it off with soap and water.
- Keep water off the design for as long as possible after removal, ideally until the next day. Then rub in a little balm or natural oil.
- Avoid chlorine, harsh soaps, hand sanitizer and scrubbing until after the wedding. All of them fade the stain.
A bridal stain usually lasts one to three weeks, fading from the most-washed areas first. If yours comes out lighter than you hoped, don’t panic on the first day. Give it the full 48 hours before judging it.
Look at Your Artist’s Stains, Not Just Her Fresh Paste
The right bridal mehndi fits your outfit, ceremony, comfort and personality, not just a reference photo. Full Indian coverage feels traditional, Arabic and Gulf work feels lighter, and mandalas, portraits, jaali, peacocks, hidden names and feet designs each bring their own character. Before booking, ask to see photos of finished stains a day or two after application, not just fresh paste, and decide how much coverage you truly want. That conversation saves more disappointment than any design choice.
You'll Like These Ideas:


Leave a Reply