
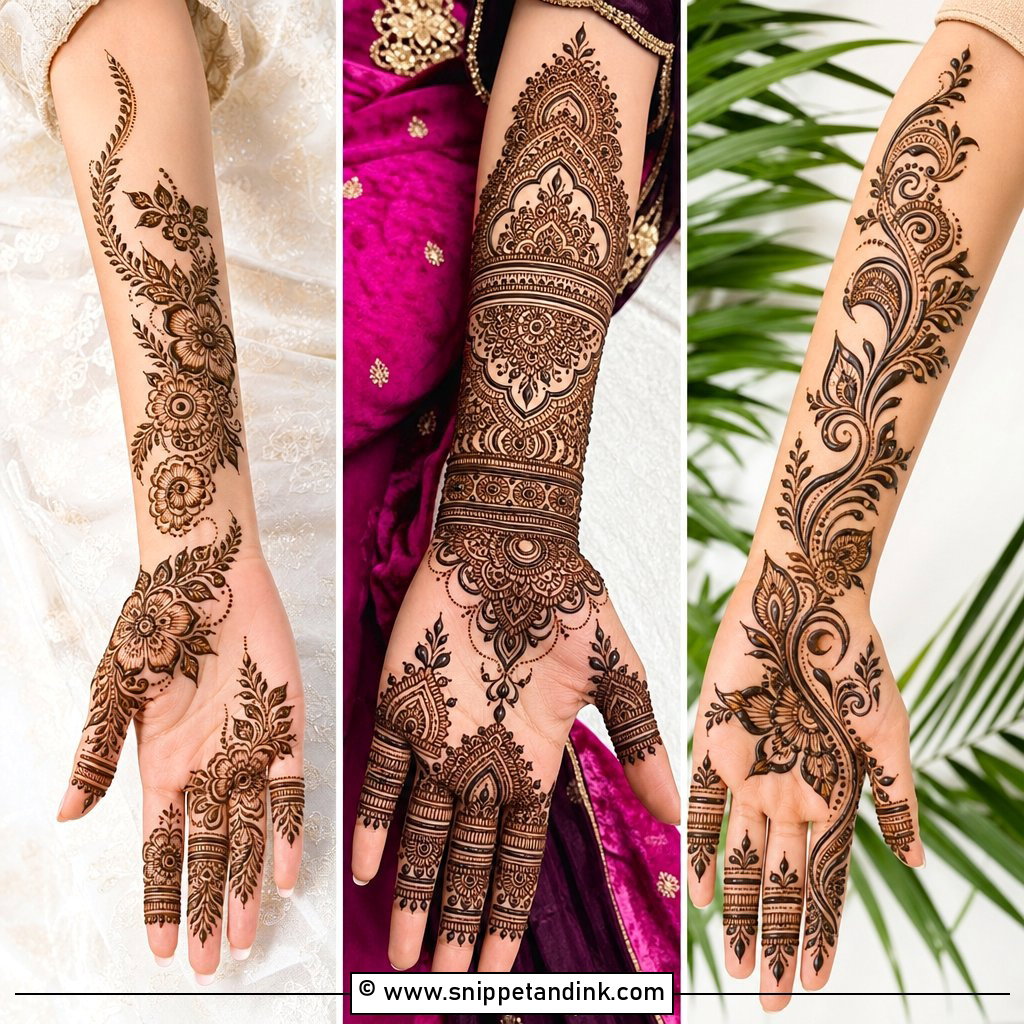
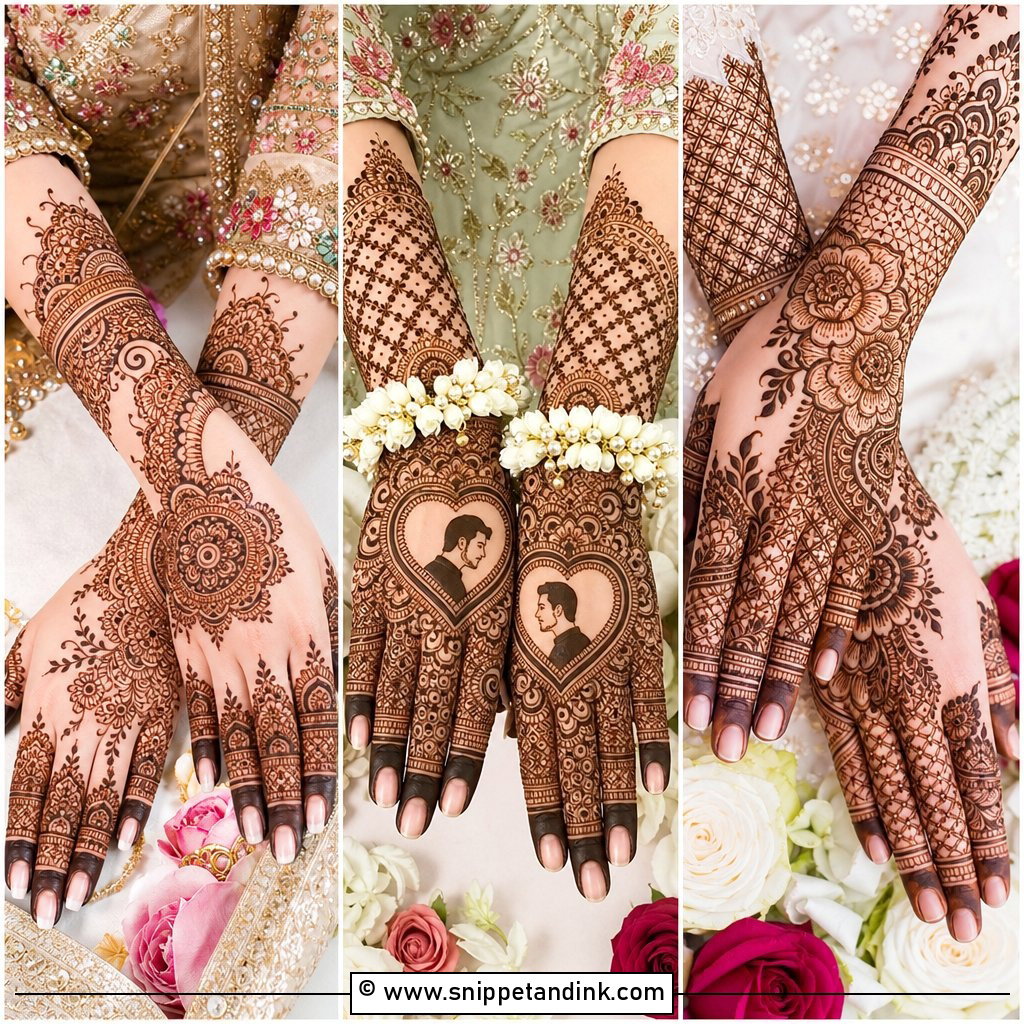
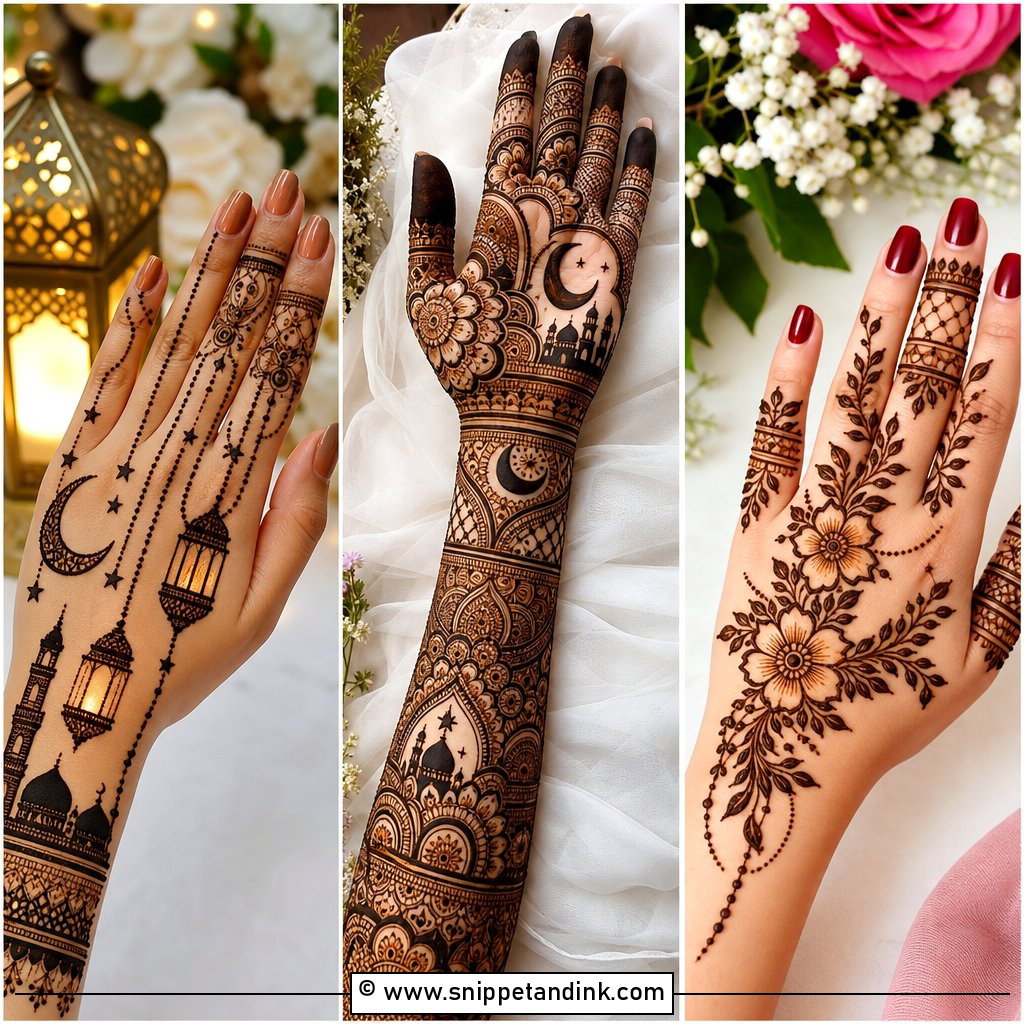
The back of the hand is what people actually see. It’s in every photo of a hand holding a glass, resting on a lap or adjusting a dupatta, and it’s flatter and easier to draw on than the palm. Most of my lighter work goes here: mandalas, Arabic trails, leafy vines, jaali panels, bracelet cuffs and designs that lean on bare skin. Below are the layouts I’d suggest for Eid, Diwali, a wedding or an ordinary family gathering. For each, I’ve noted how it sits on the hand, how long it takes and where it tends to go wrong.
Sizing a Design to the Back of Your Hand
The same design can look delicate on one hand and cramped on another. Before I pick up a cone, I look at the hand rather than the reference picture, because the picture was drawn on someone else’s.
- The knuckle line. Make a loose fist and look where the skin stretches over the knuckles. Heavy motifs there crack and stain unevenly, so I keep that strip for thin lines or leave it bare.
- The wrist bone. A cuff drawn over the bony bump on the little-finger side never sits flat. I place bands just above or just below it.
- Broad or narrow. A broad hand can carry a large central mandala; a narrow one looks better with a diagonal trail that leads the eye lengthways.
- Finger length. On short fingers I use one band per finger, or none; three stacked bands chop them up visually.
If you’re showing an artist a photo, ask them to adjust it to your hand rather than copy it exactly. A good artist will do that anyway, but it helps to say so.
1. Simple Mandala Back Hand Mehndi Design
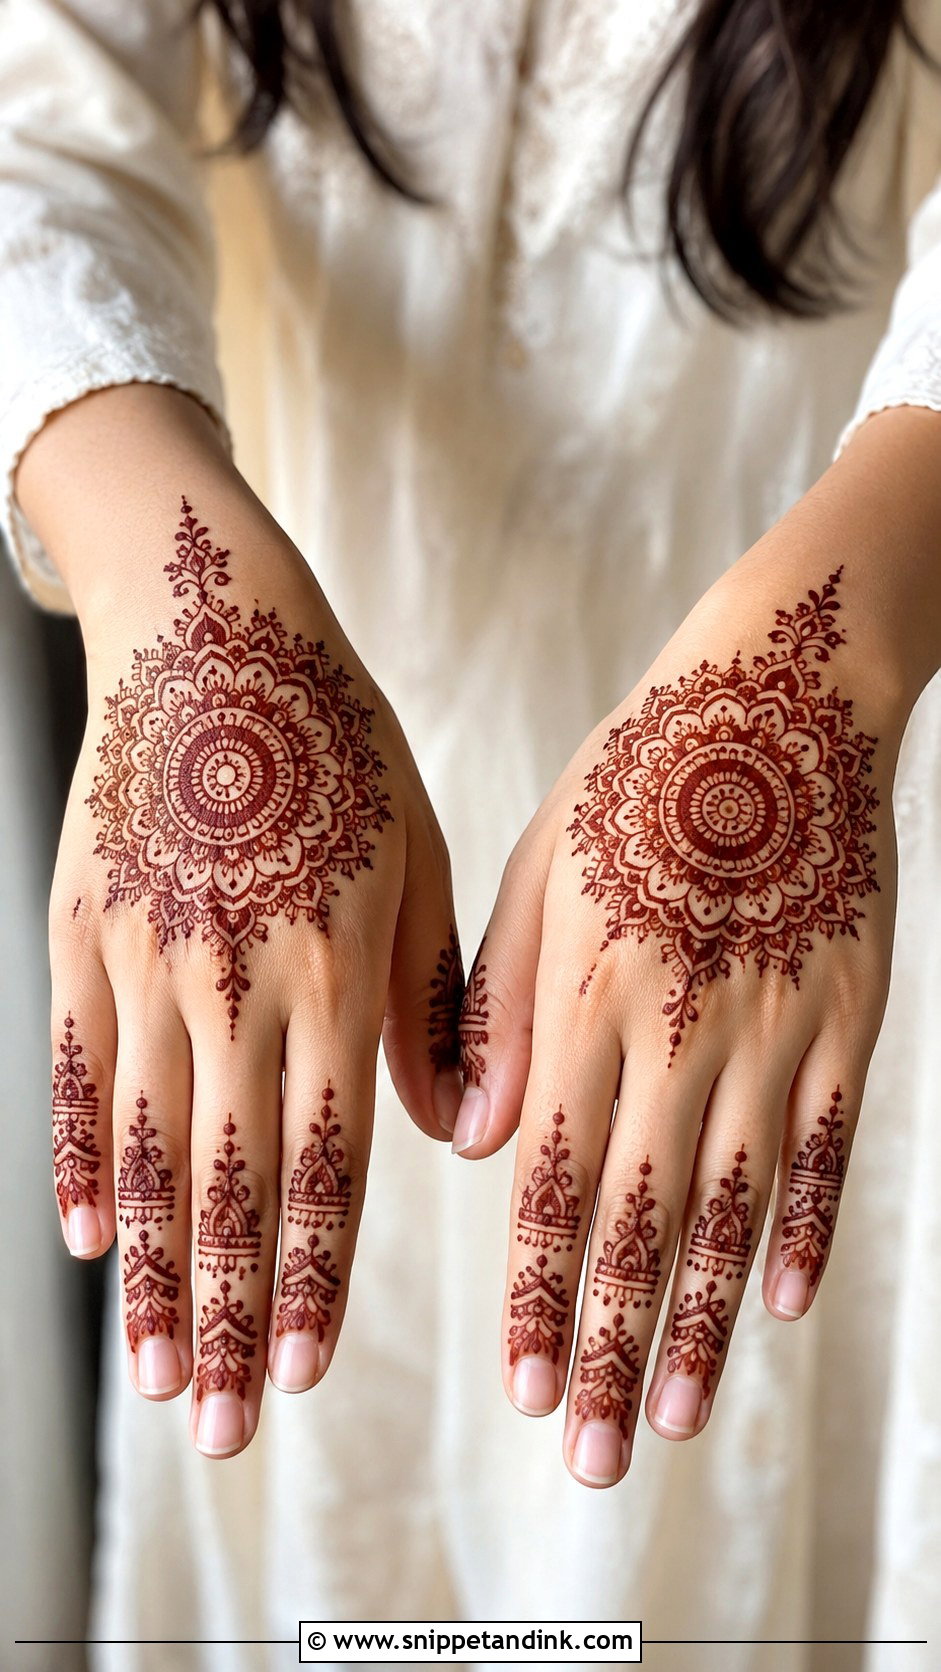
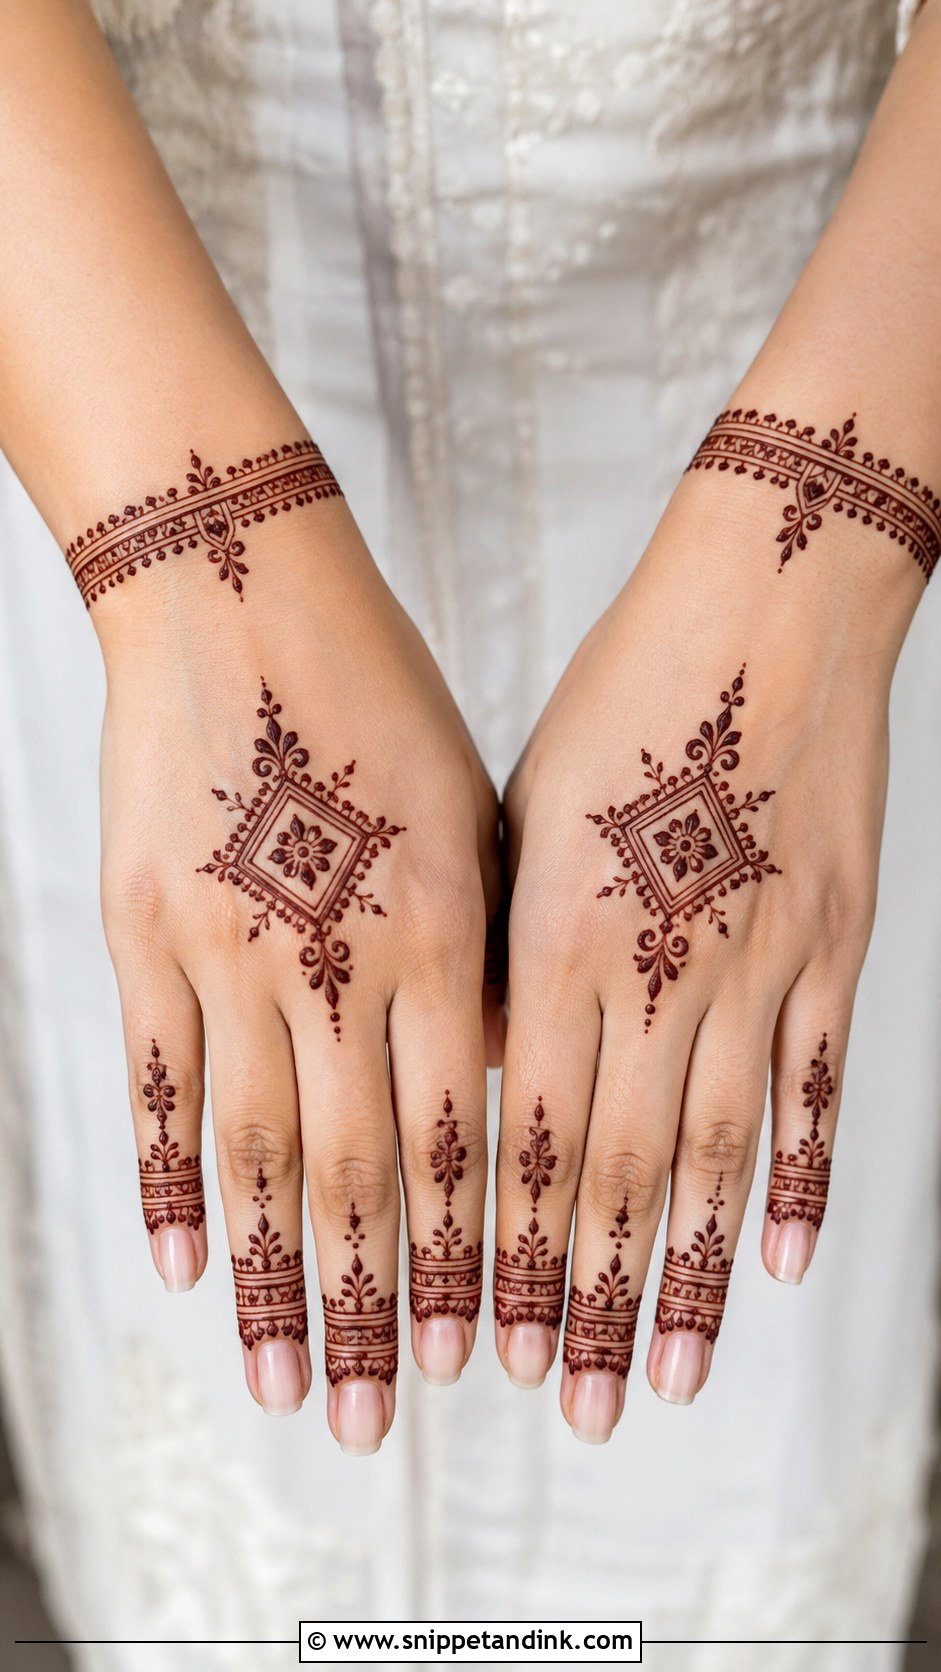
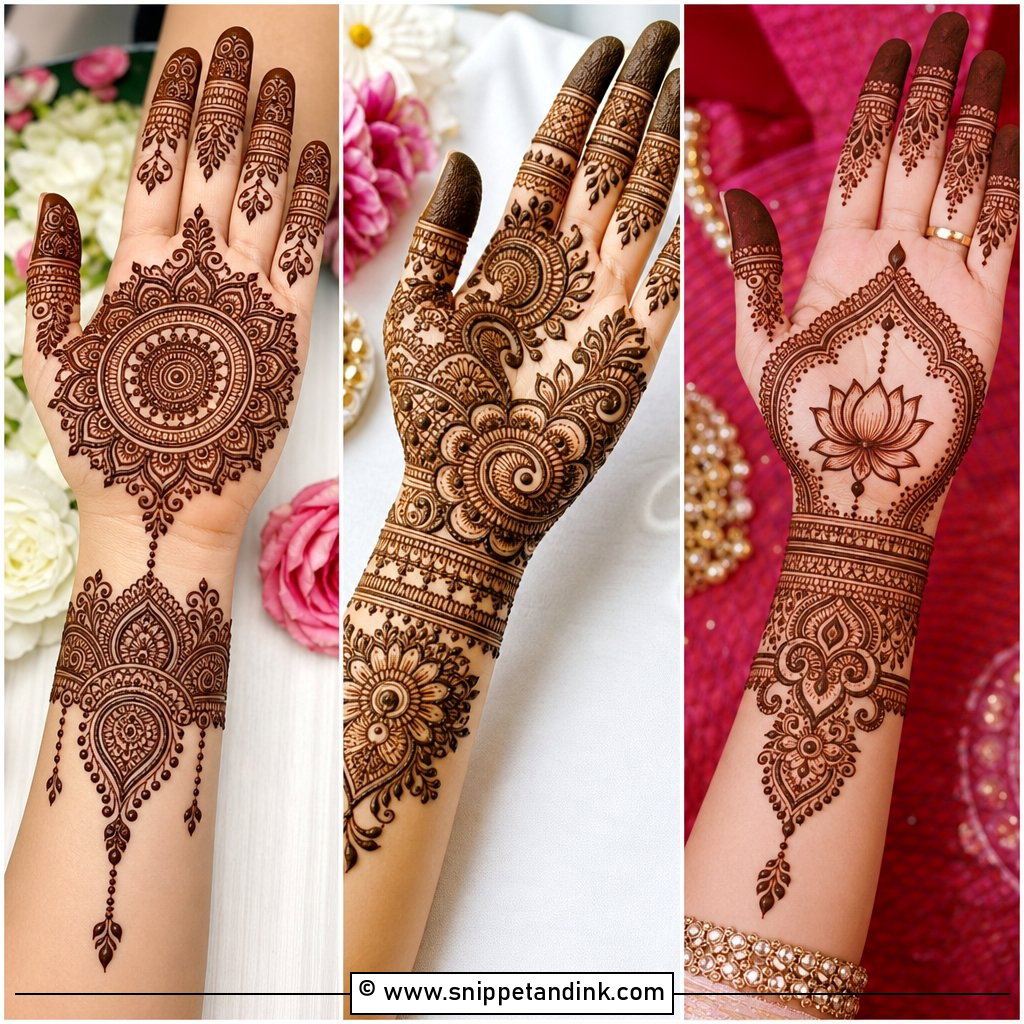
A circle in the centre of the back of the hand, one or two rings of petals, a border of tiny dots and slim lines on the fingers. Even with little coverage it looks finished, because the eye reads a circle as complete. I place the mandala slightly below the knuckles rather than in the exact middle, so it doesn’t crease when the hand makes a fist. Scale it down for children or up for adults, and leave the wrist bare or add one thin line.
2. Arabic Floral Back Hand Mehndi Design
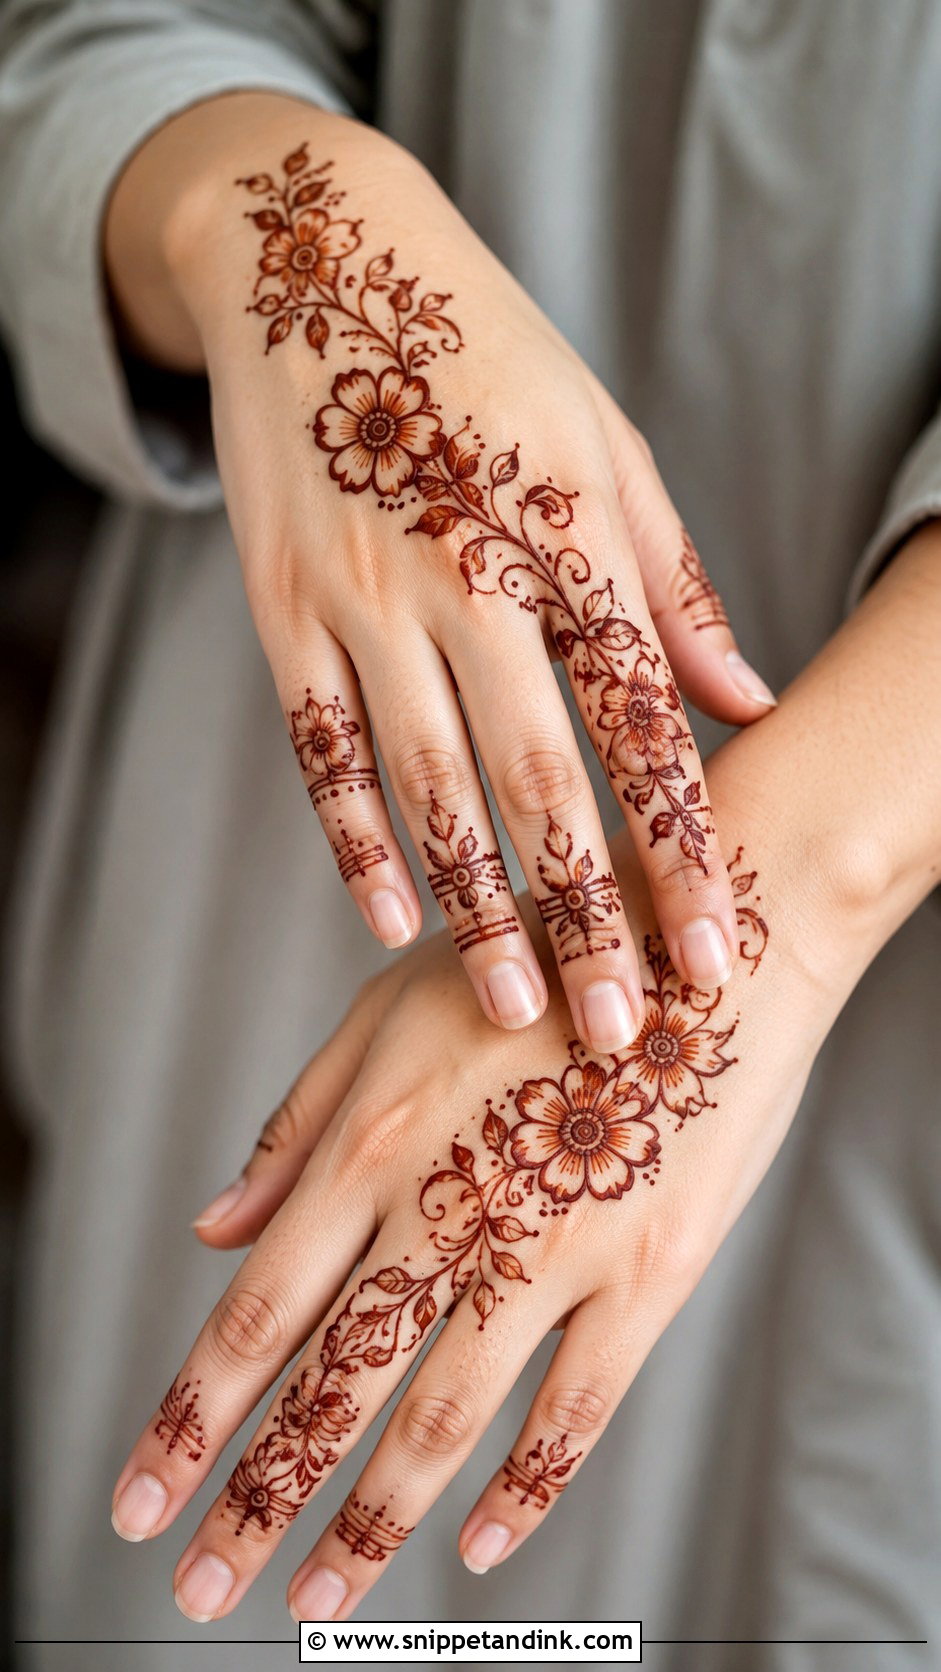
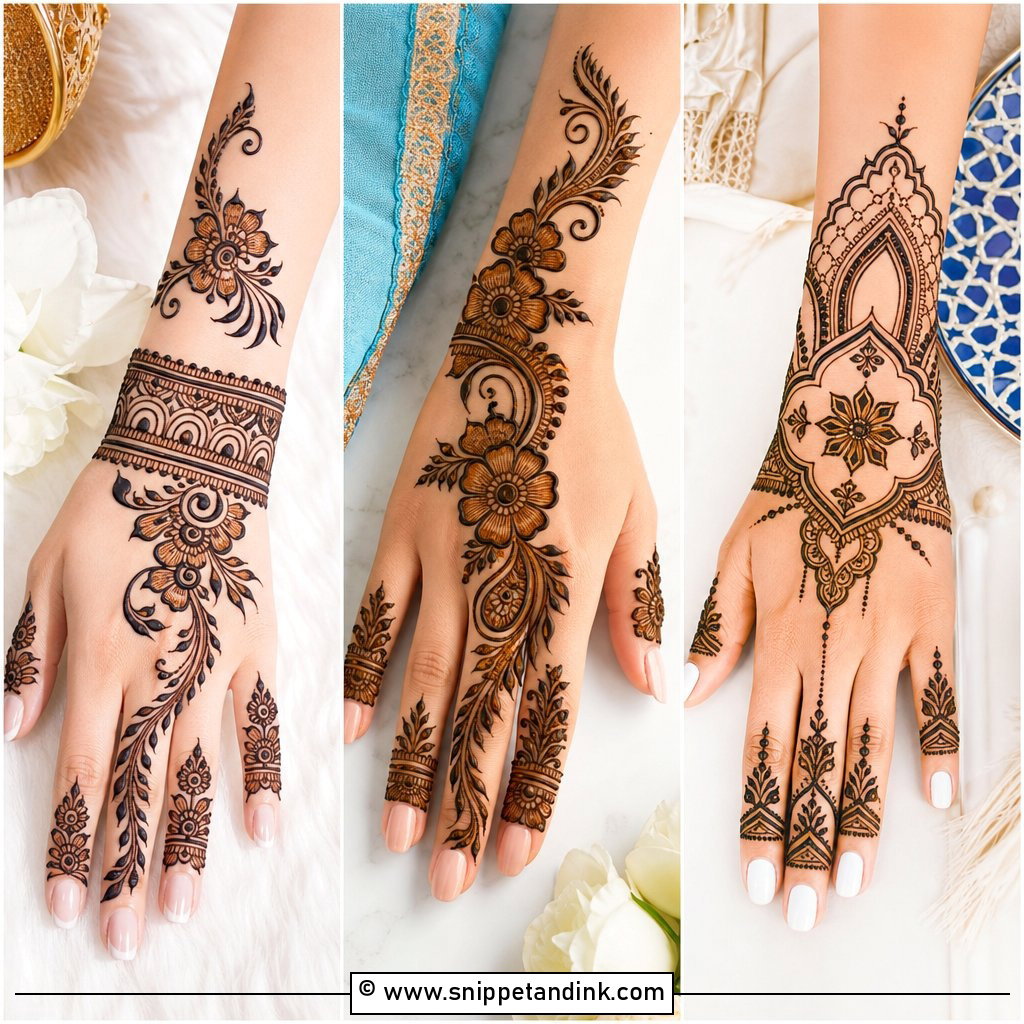
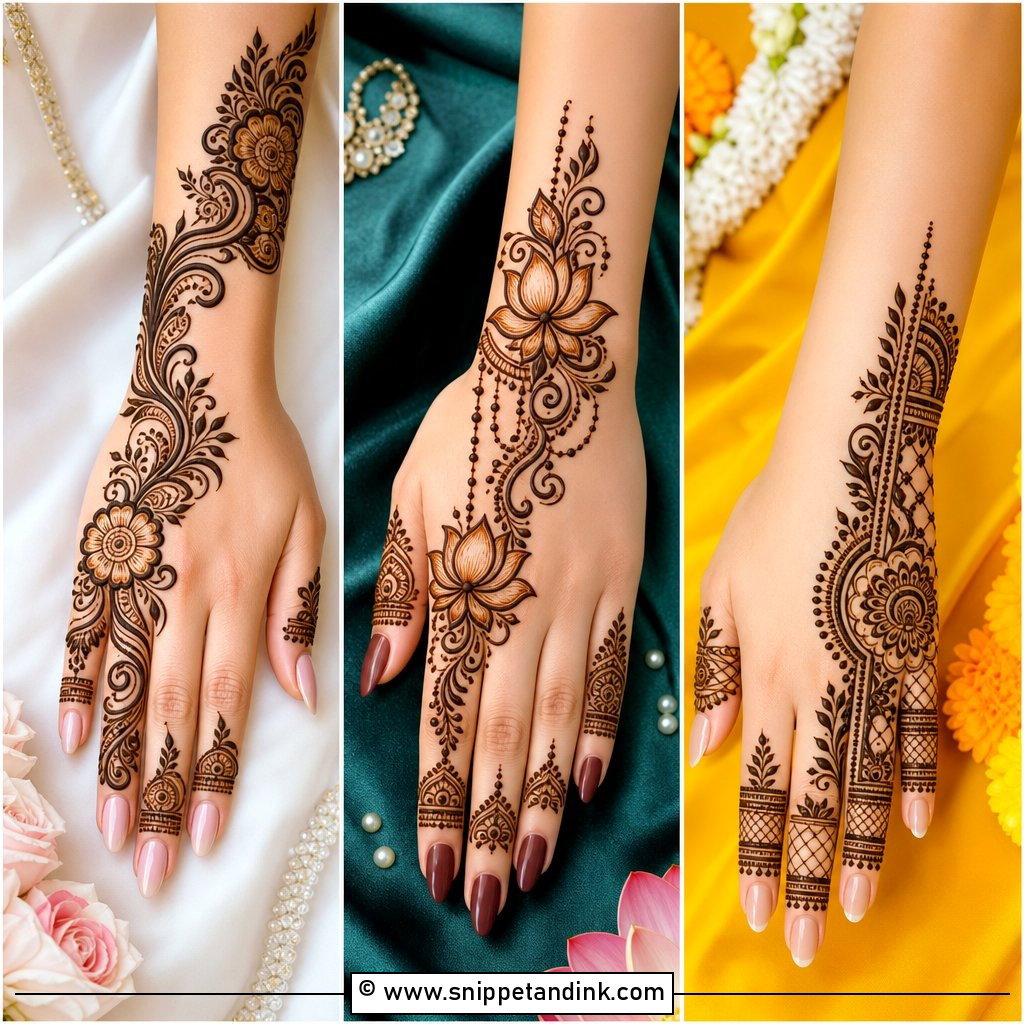
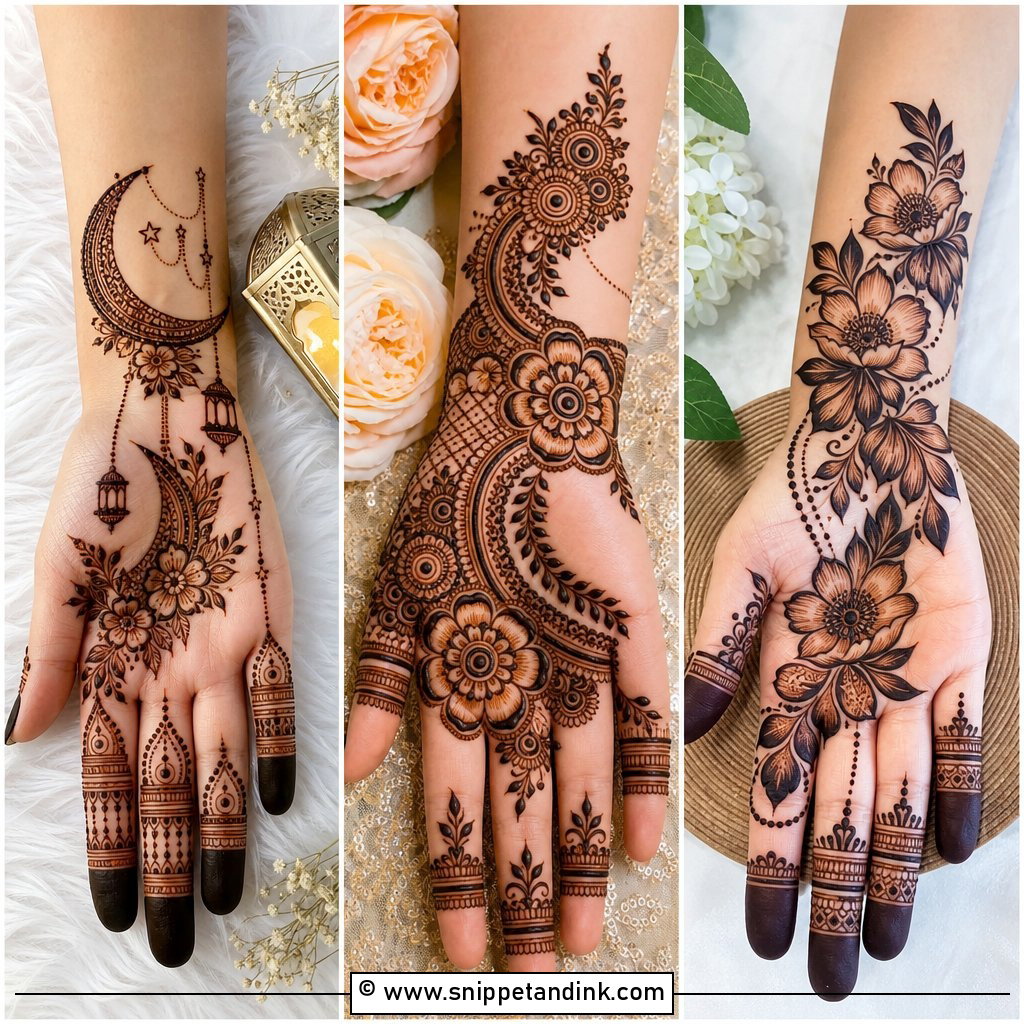
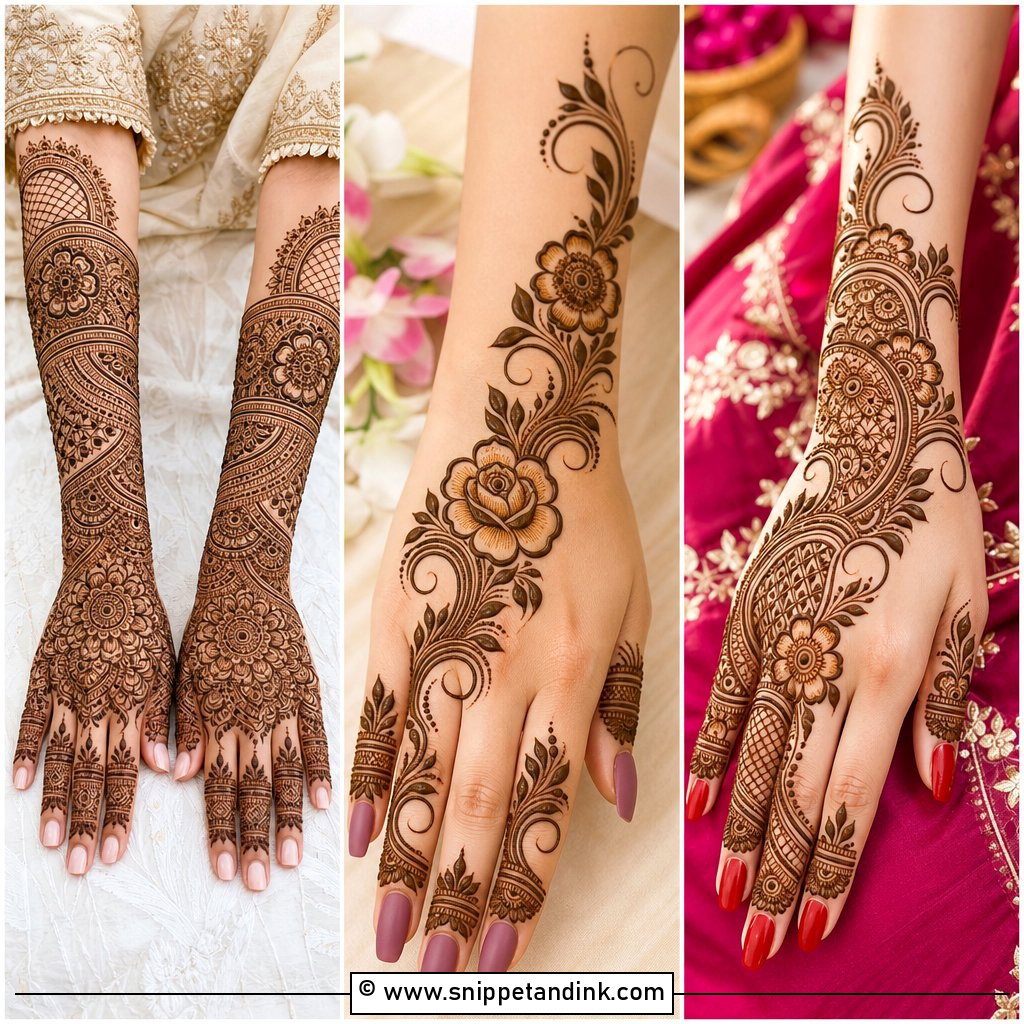
Arabic florals move diagonally from the wrist or one side of the hand to the index finger, with large flowers, curved vines and open gaps. Those gaps are where the design gets its clarity; each flower sits on its own patch of skin. Fingertips can stay simple with dots, leaf tips or half flowers. It reads bold without the weight of a full pattern, which is why so many guests ask for it.
3. Simple Flower Back Hand Mehndi Design
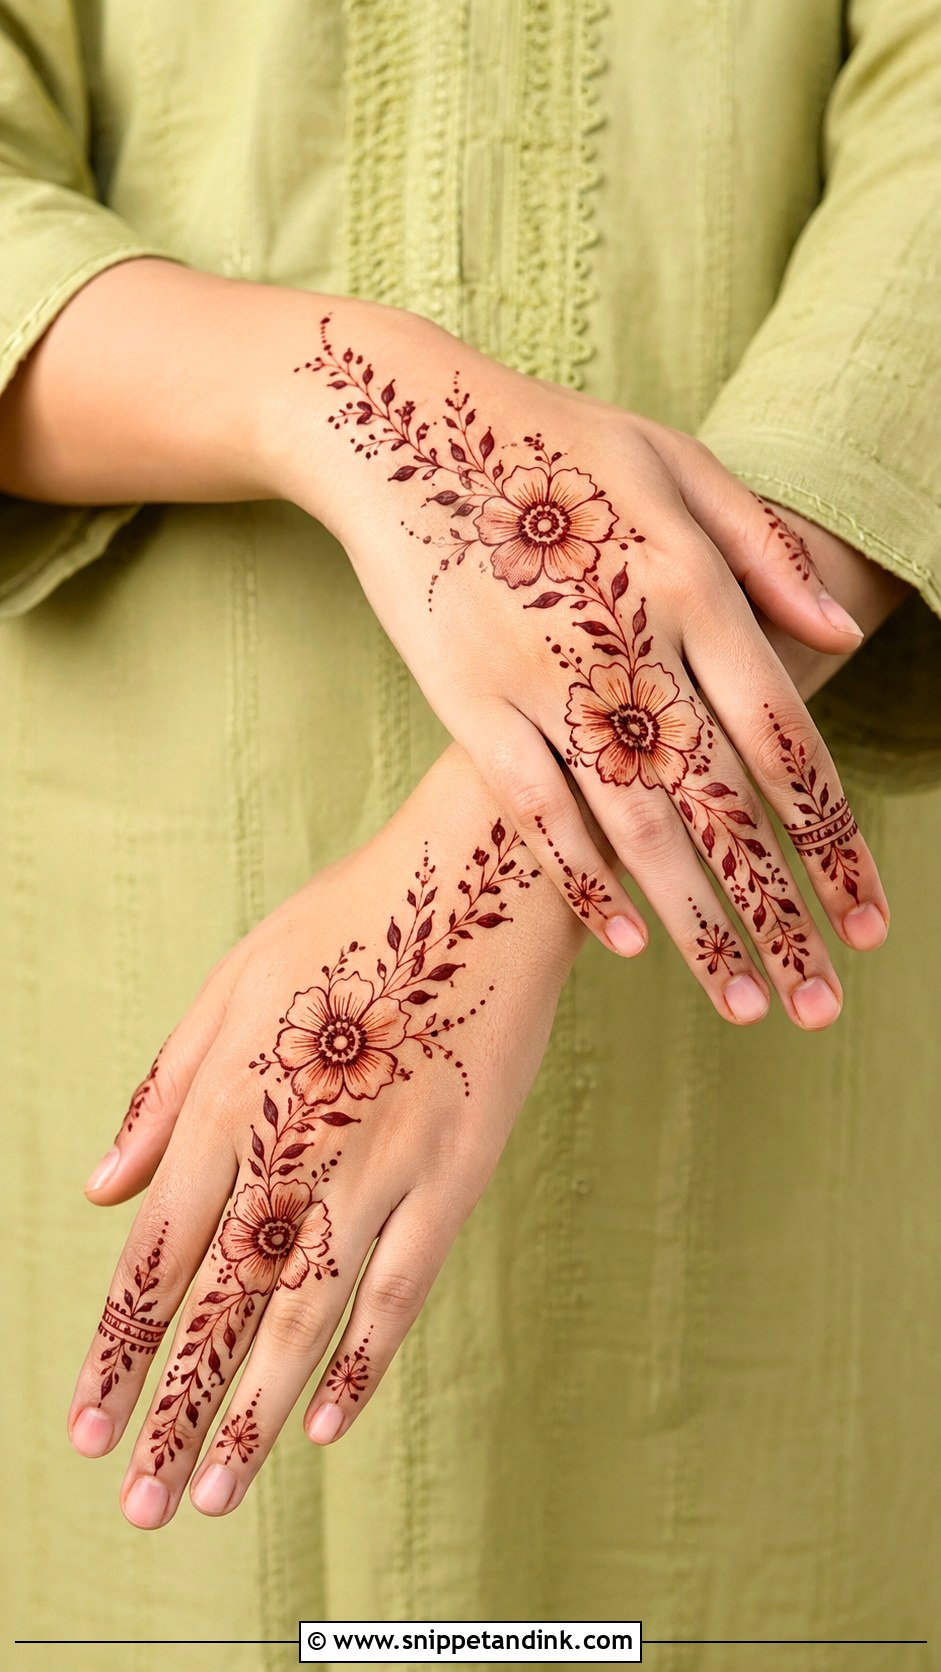
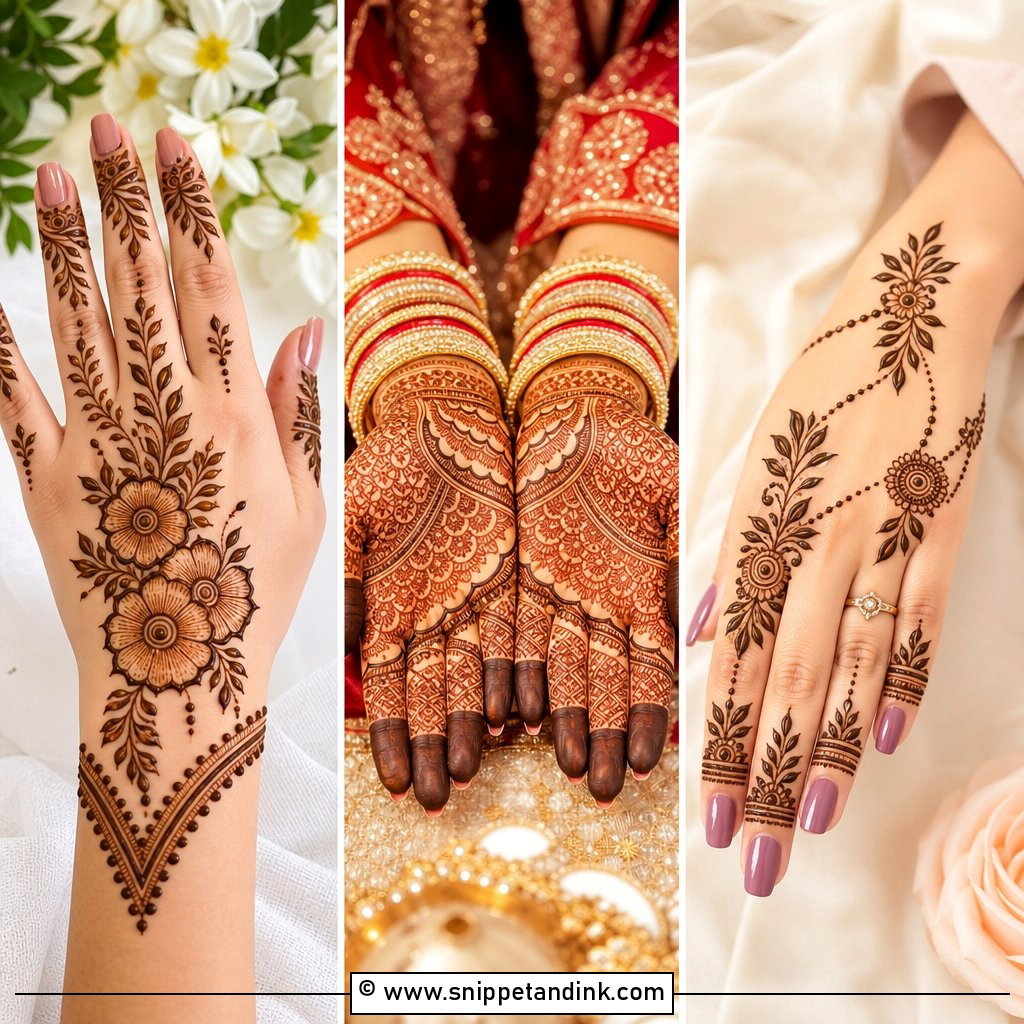
Two or three medium flowers spread across the back of the hand and joined by curved stems, with small leaves near the fingers and wrist. Round or five-petal flowers are easiest; shaded ones need more control. I outline the petals thickly and leave the insides mostly open. It’s quick, and with clean fingertips it looks neat from wrist to nail.
4. Minimal Finger Back Hand Mehndi Design
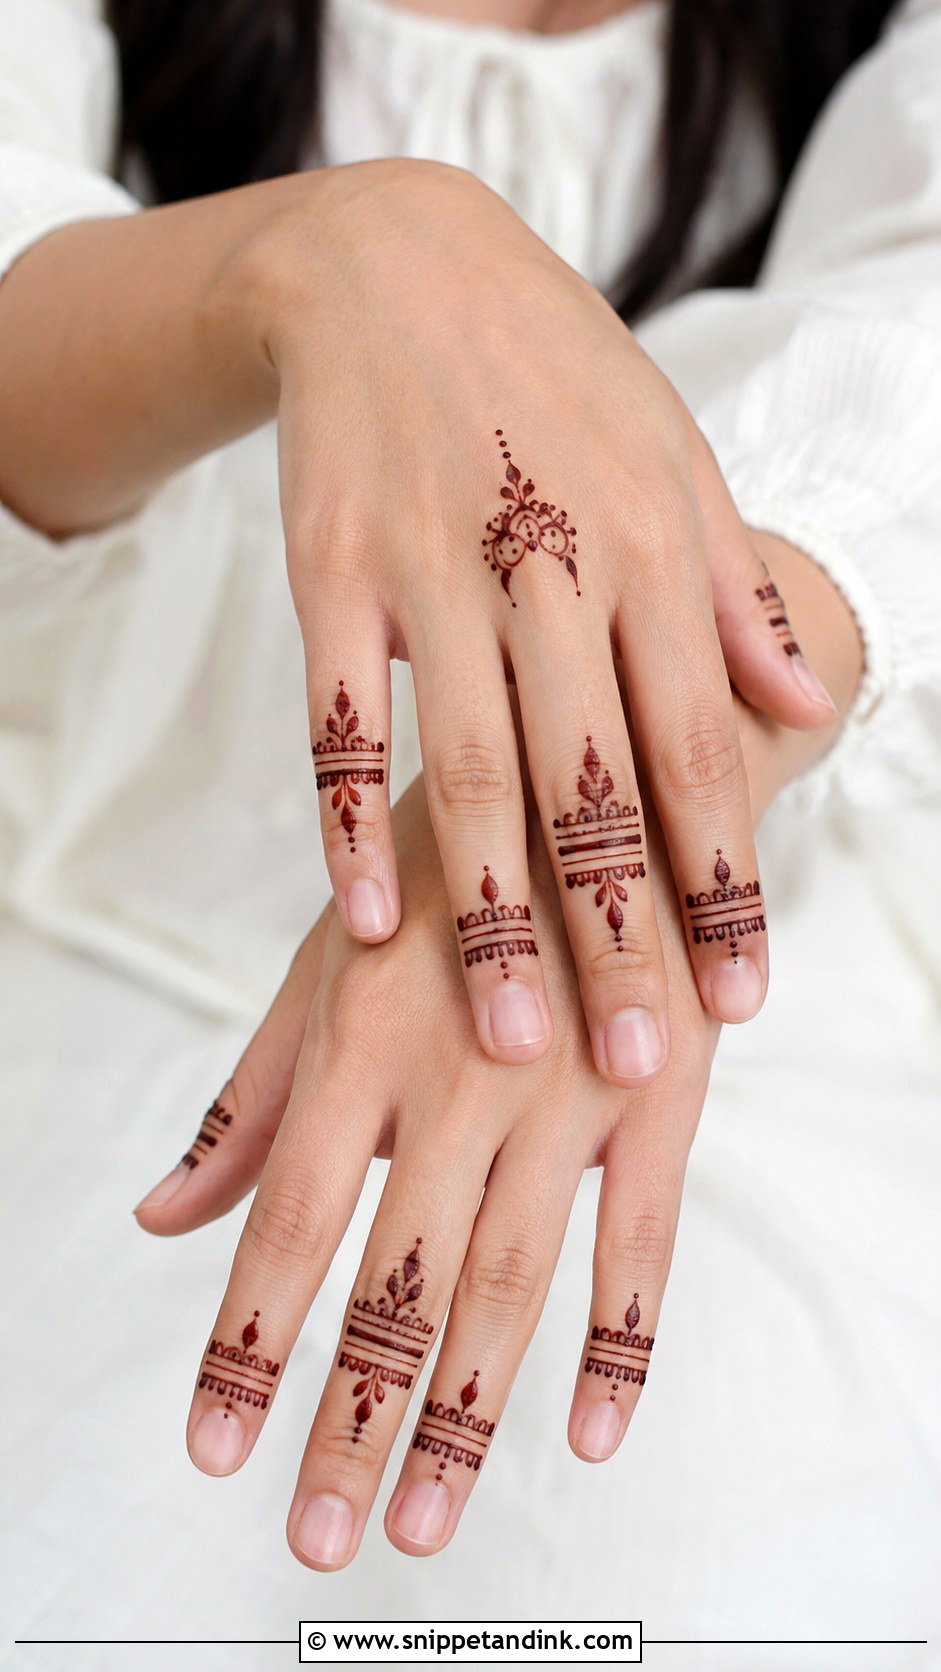
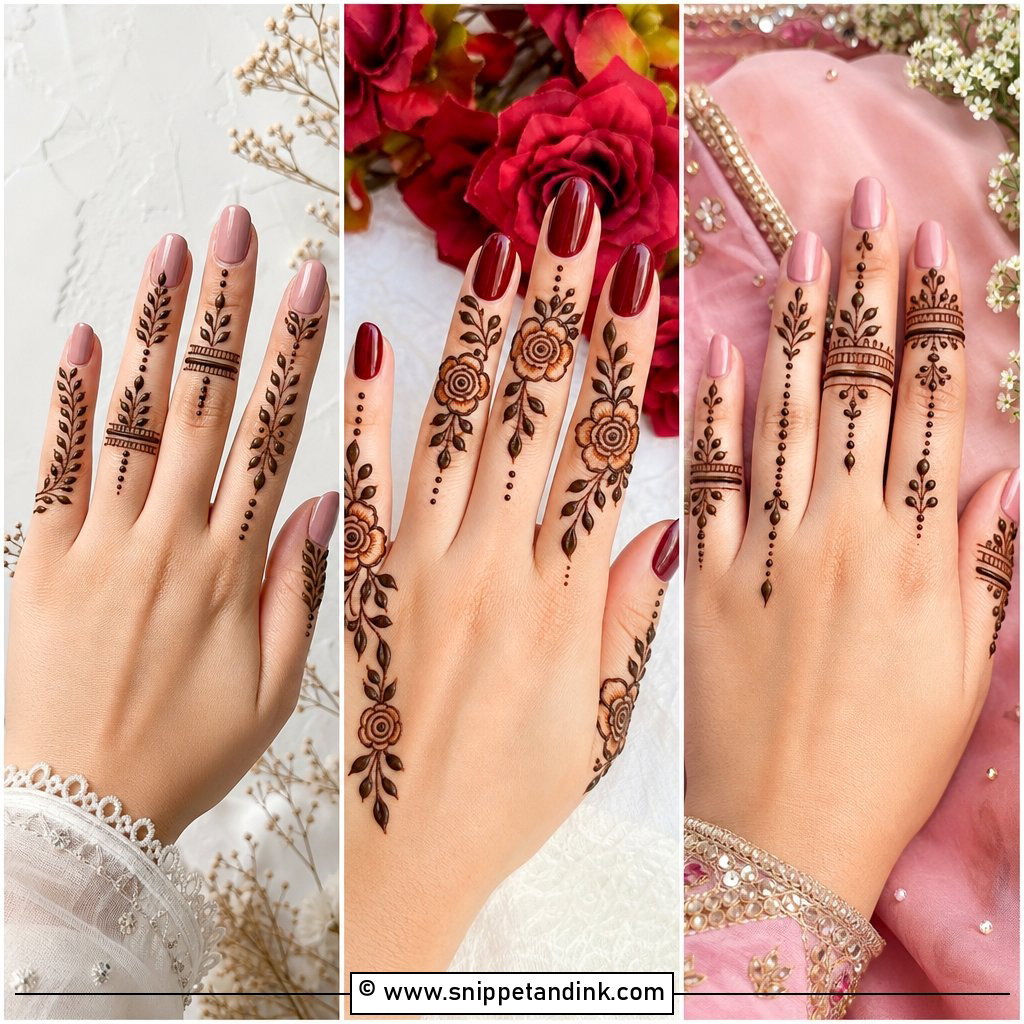
Light coverage, finger-first. Each finger gets dots, leafy bands, slim lines or a small floral tip, and one small motif at the base of the middle finger links them. The rest of the back stays clean. It dries fast and passes at work. The thing I watch is balance: if one finger is busier than the others, the whole hand looks lopsided, so I plan all five before I start.
5. Bracelet Back Hand Mehndi Design
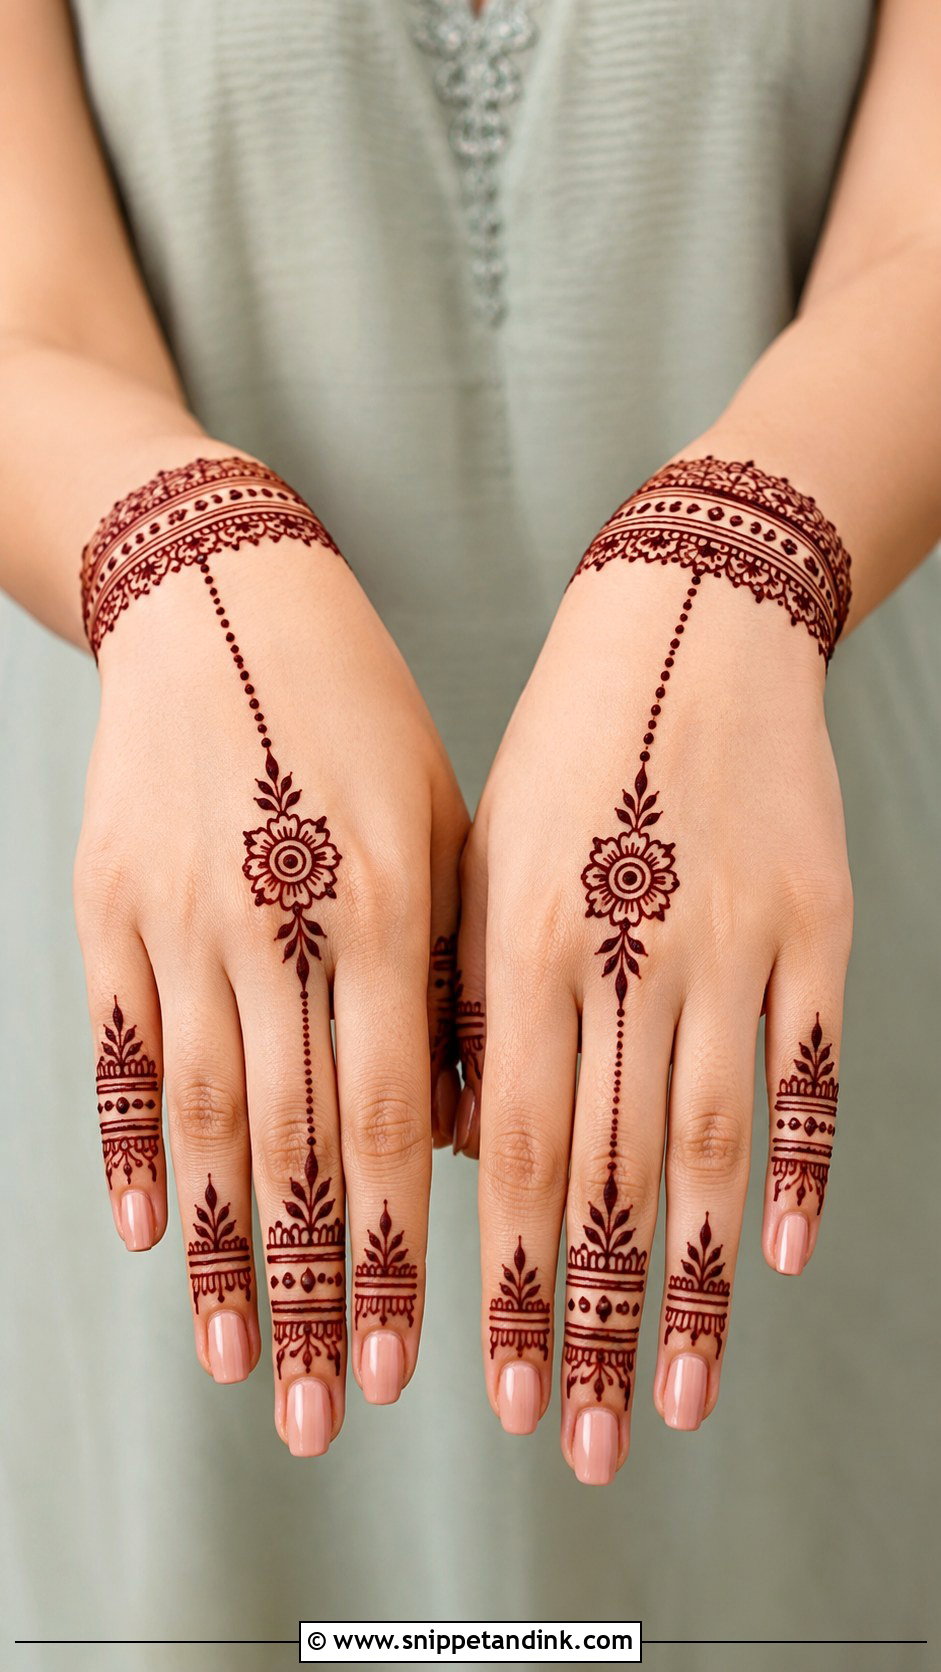
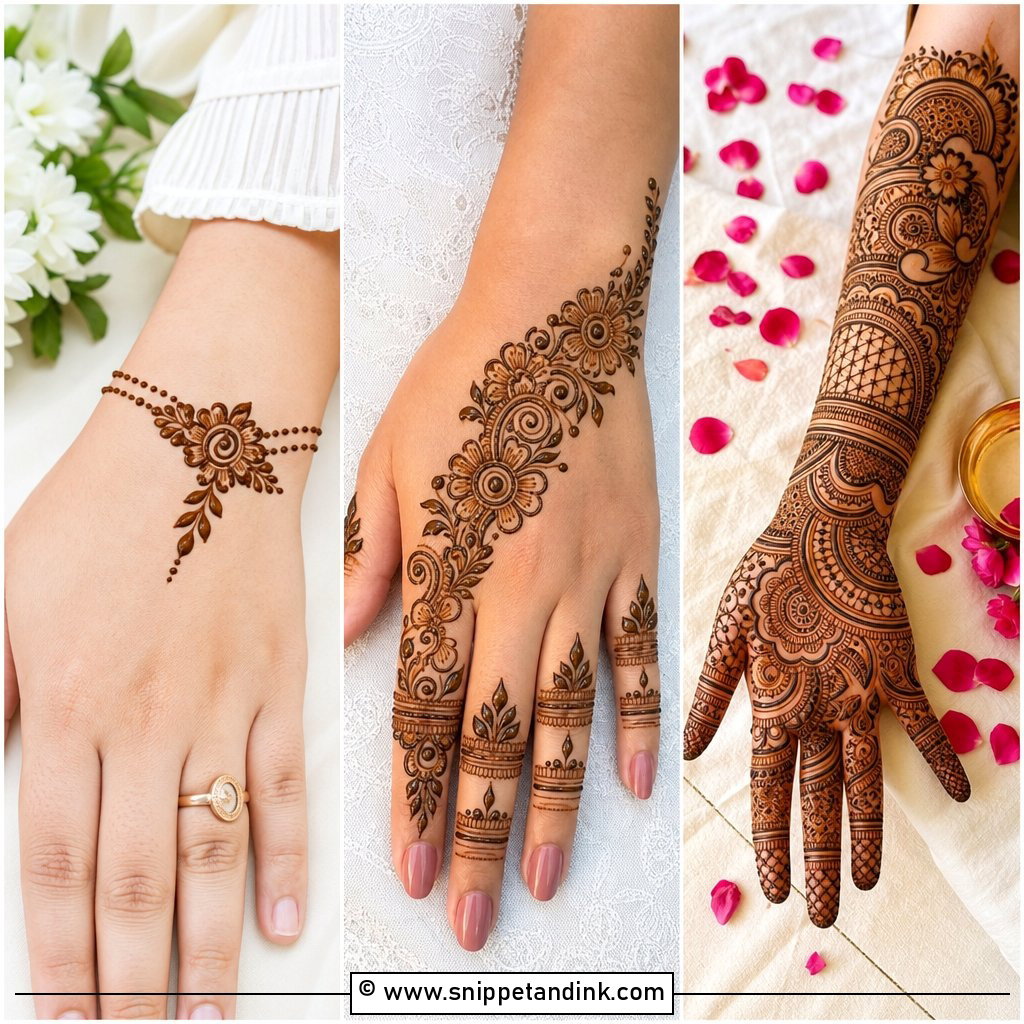
A bracelet design begins at the wrist with one or two cuff-like bands, then runs a chain of dots or fine lines up to a small centre motif such as a mandala, a flower or a diamond. The fingers stay light with small rings or leafy tips. Draw the wrist bands slowly; a band that drifts off level is the first thing anyone notices. I keep the chain thin so it reads as jewellery rather than a stripe.
6. Jaali Back Hand Mehndi Design
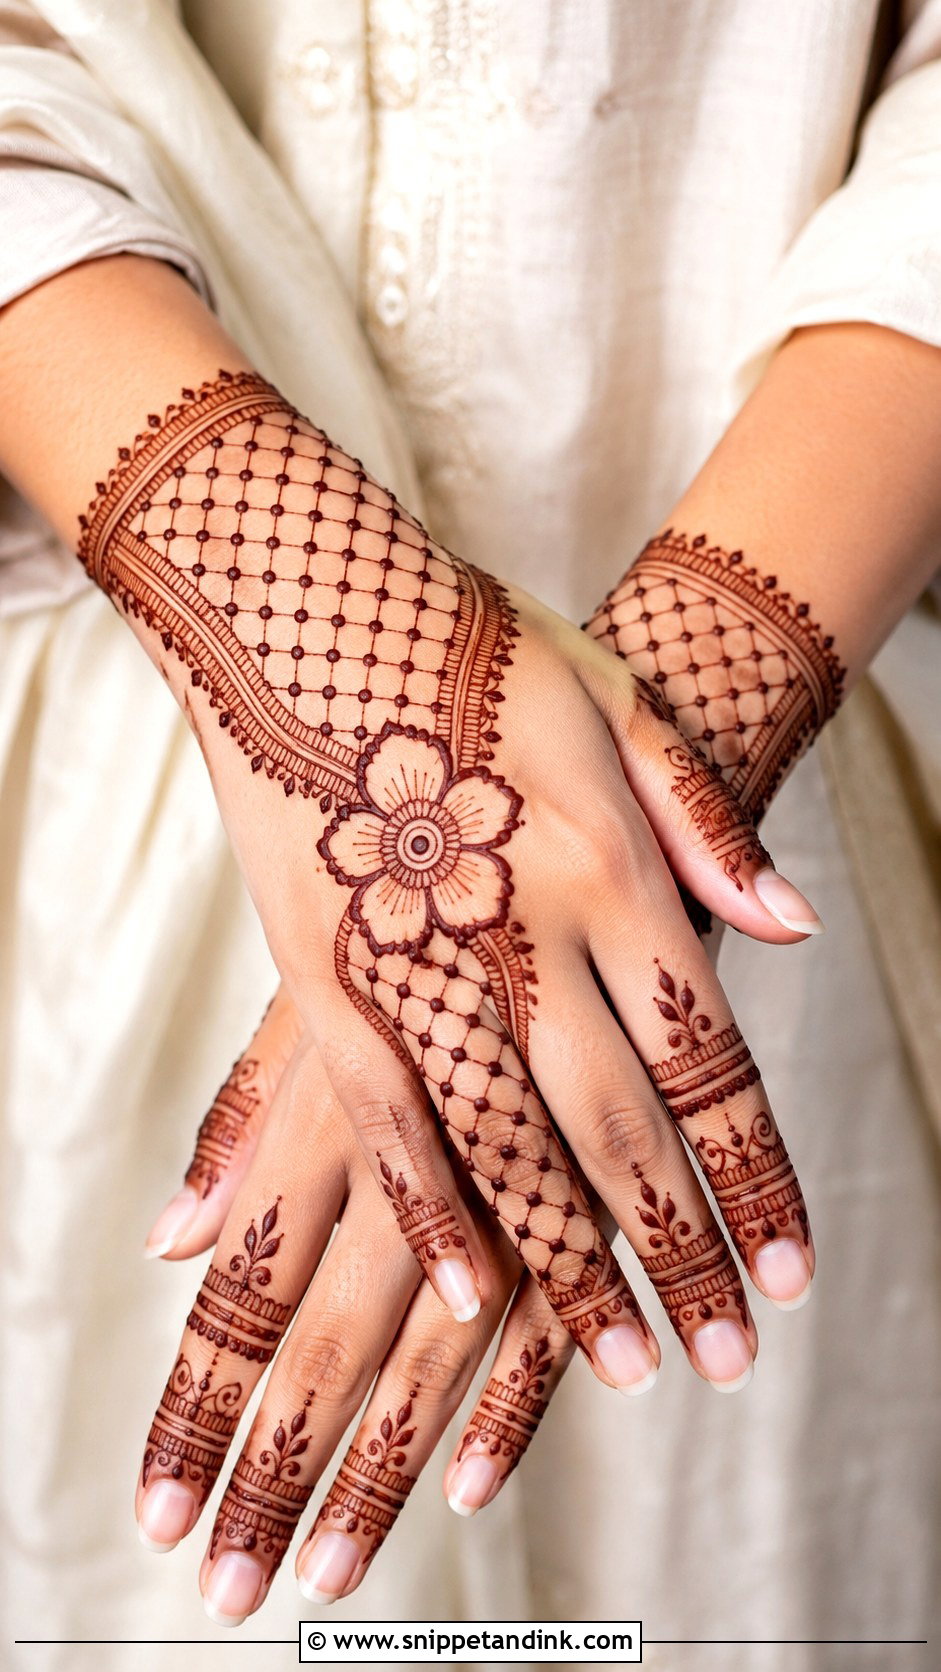
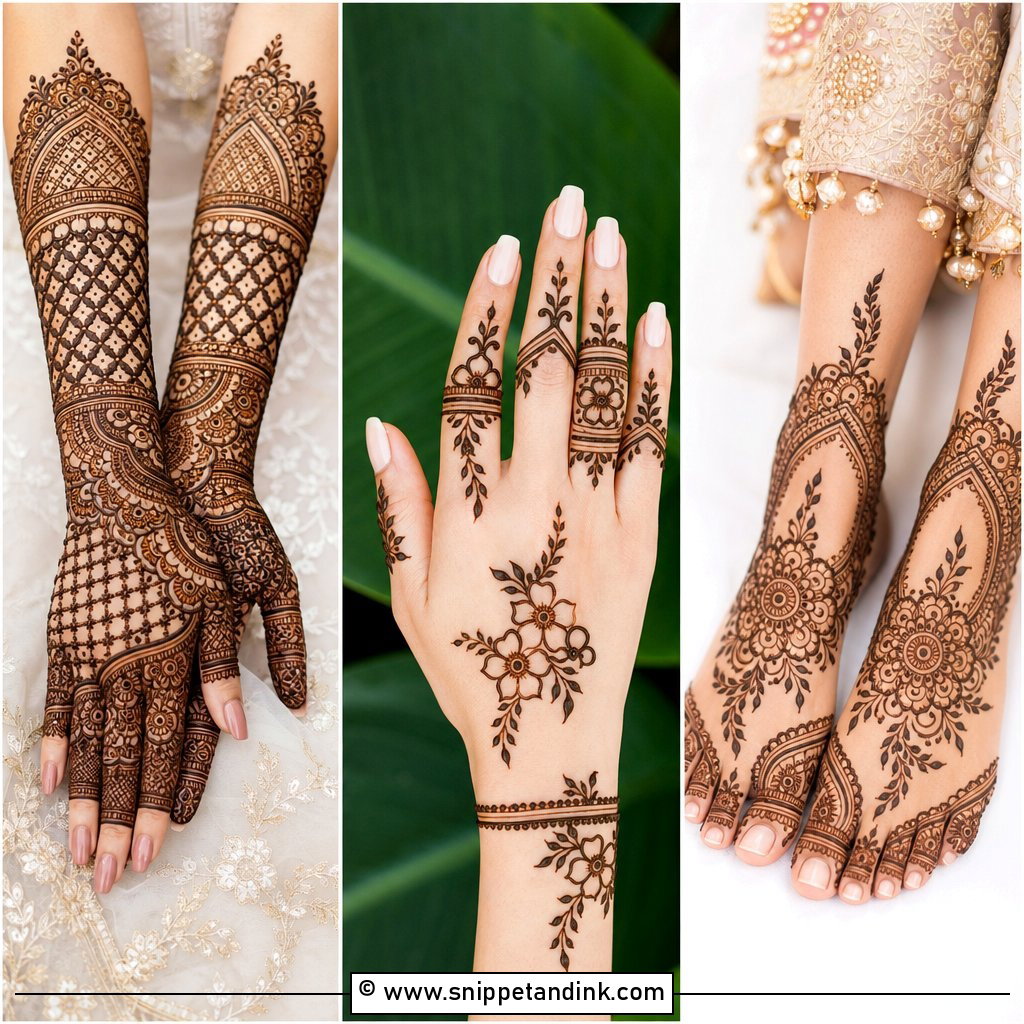
Jaali brings texture without needing lots of motifs. The mesh can sit along one side, near the wrist or as a panel across the centre, with dots inside the diamonds. I pair it with one bold flower or a small mandala instead of adding more detail. Clean borders matter most: a ragged edge around a jaali panel makes the whole thing look unfinished.
7. Vine Back Hand Mehndi Design
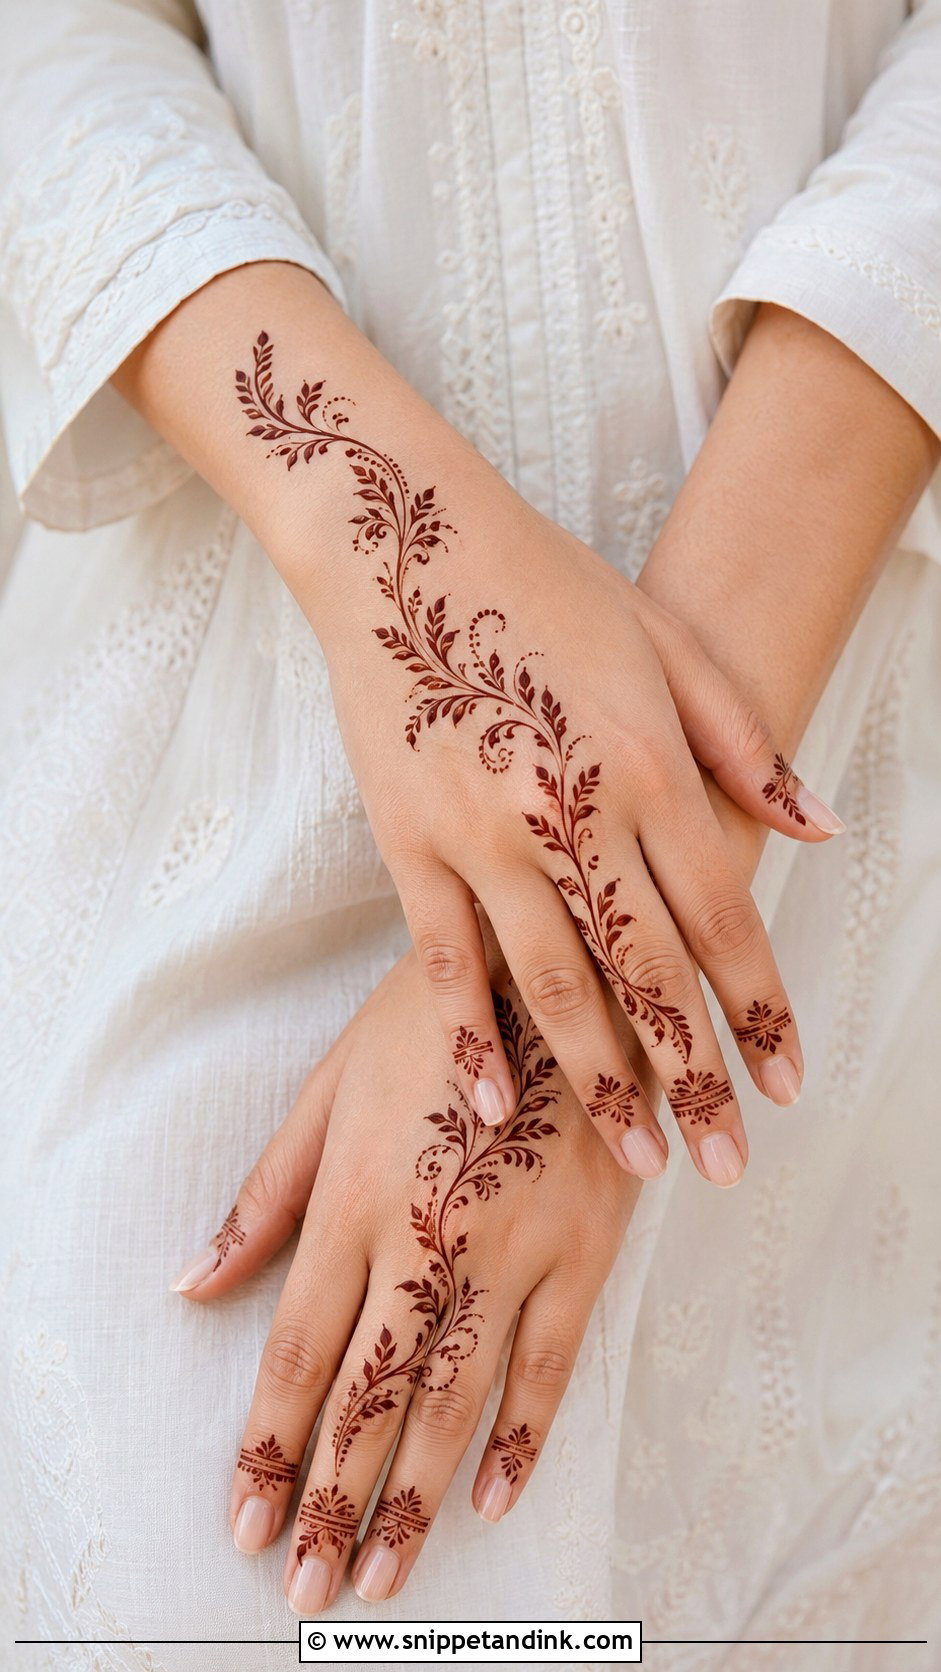
One curved line from the wrist to a finger, leaves sprouting from both sides, with a few buds, dots or tiny flowers added as you go. It’s very forgiving, because a vine doesn’t need symmetry, and it adapts to long, short, slim or broad hands simply by changing its length. Thin vines look delicate; bolder leaves are easier to see from a distance. Either way, the bare skin around it does half the work.
8. Ring Back Hand Mehndi Design
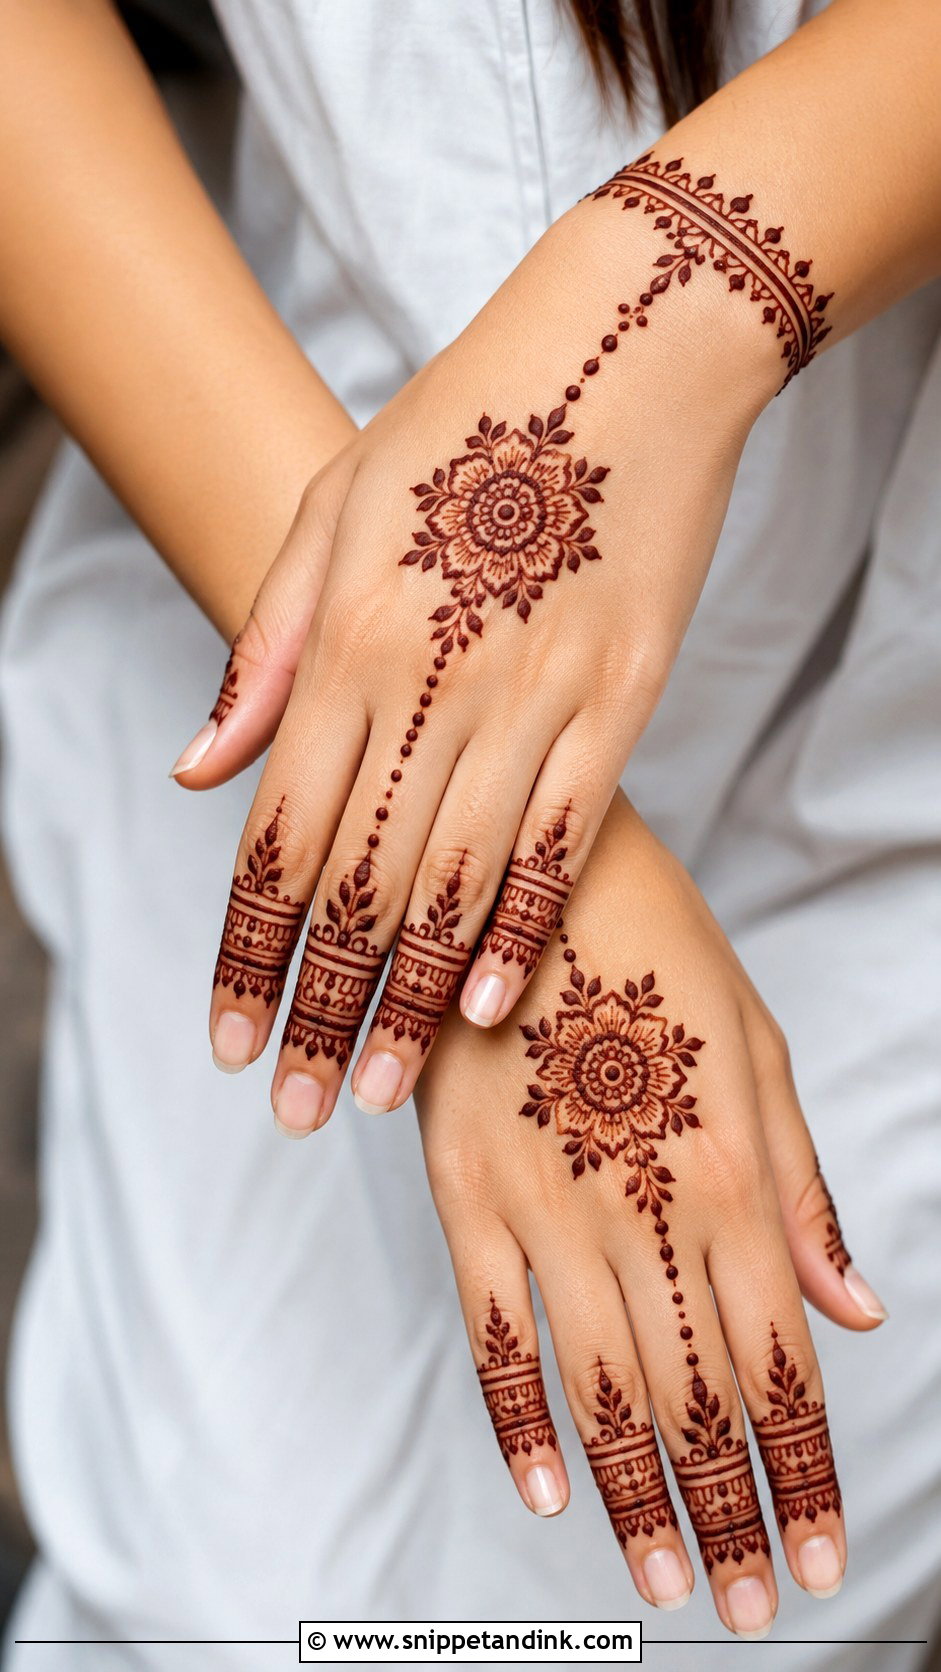
Ring bands around one or more fingers, joined by dotted chains to a central motif such as a flower, small mandala, leaf cluster or paisley. The index and middle fingers suit it best because the chains follow the long bones of the hand. Keep lines thin and the chains evenly spaced, and add a small wrist band if you want the full jewellery effect. I place the ring bands between knuckles so they don’t crack when the fingers bend.
9. Simple Paisley Back Hand Mehndi Design
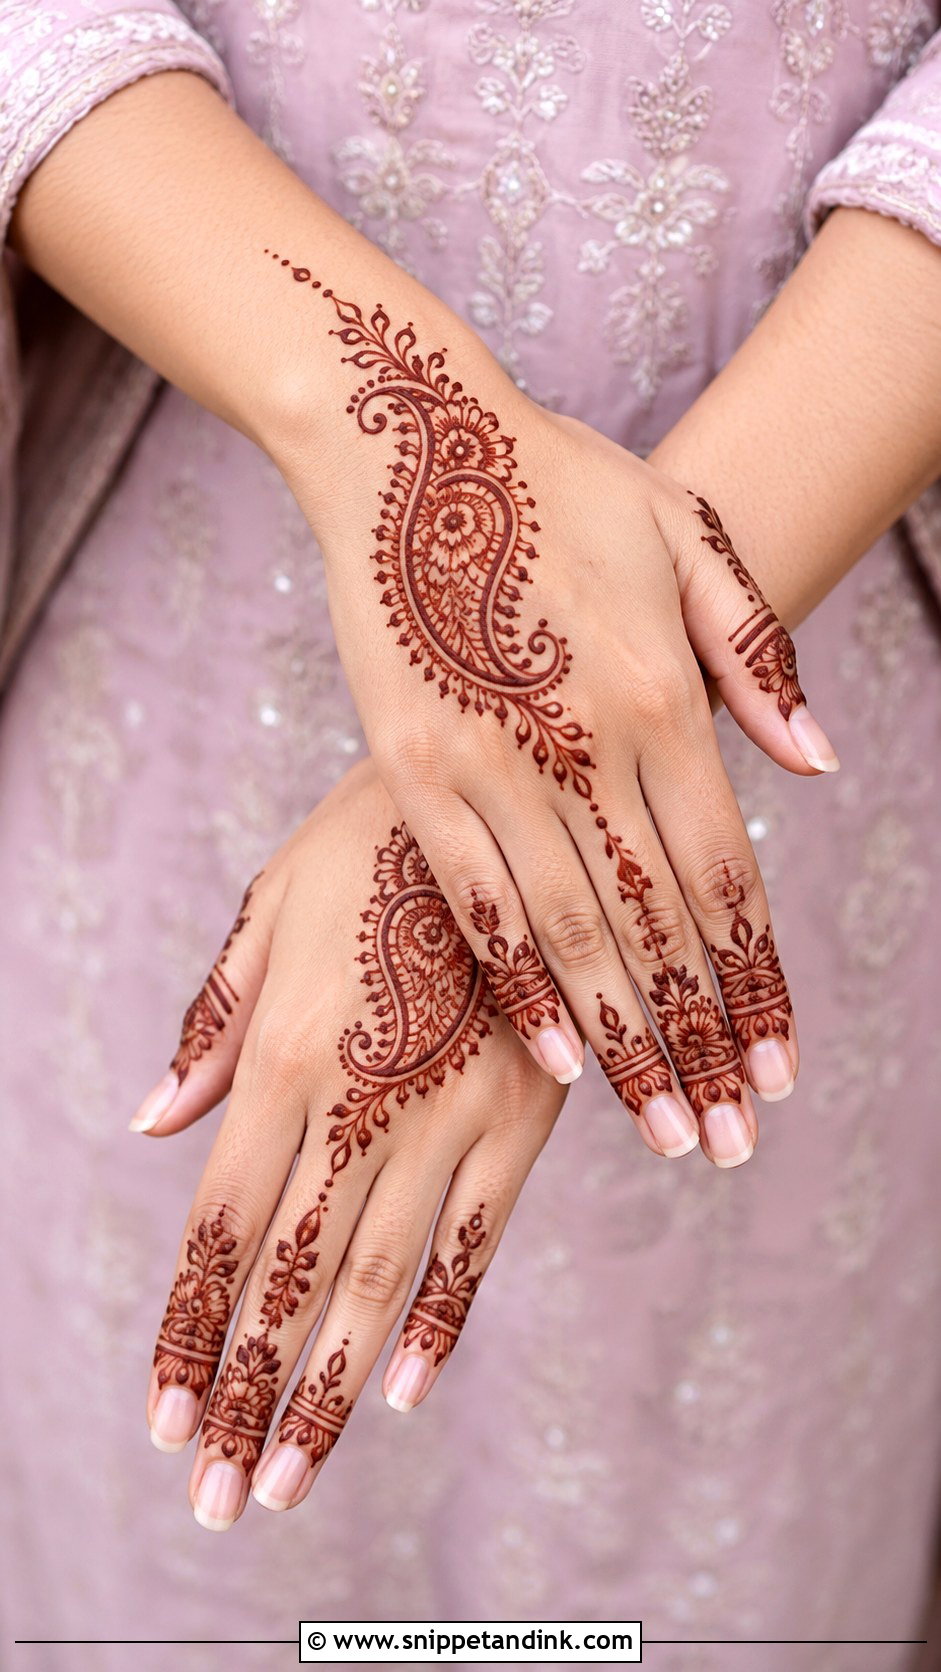
One medium paisley near the centre or side of the back of the hand, with leaves, dots and small curved lines around it, and a single swirl or a few fine strokes inside. The paisley fills space by its shape alone. A thin vine to the wrist and light fingertips complete it for a wedding or a festival. I make the outline fuller than the inner strokes so the shape still reads after the stain darkens.
10. Half Hand Back Hand Mehndi Design
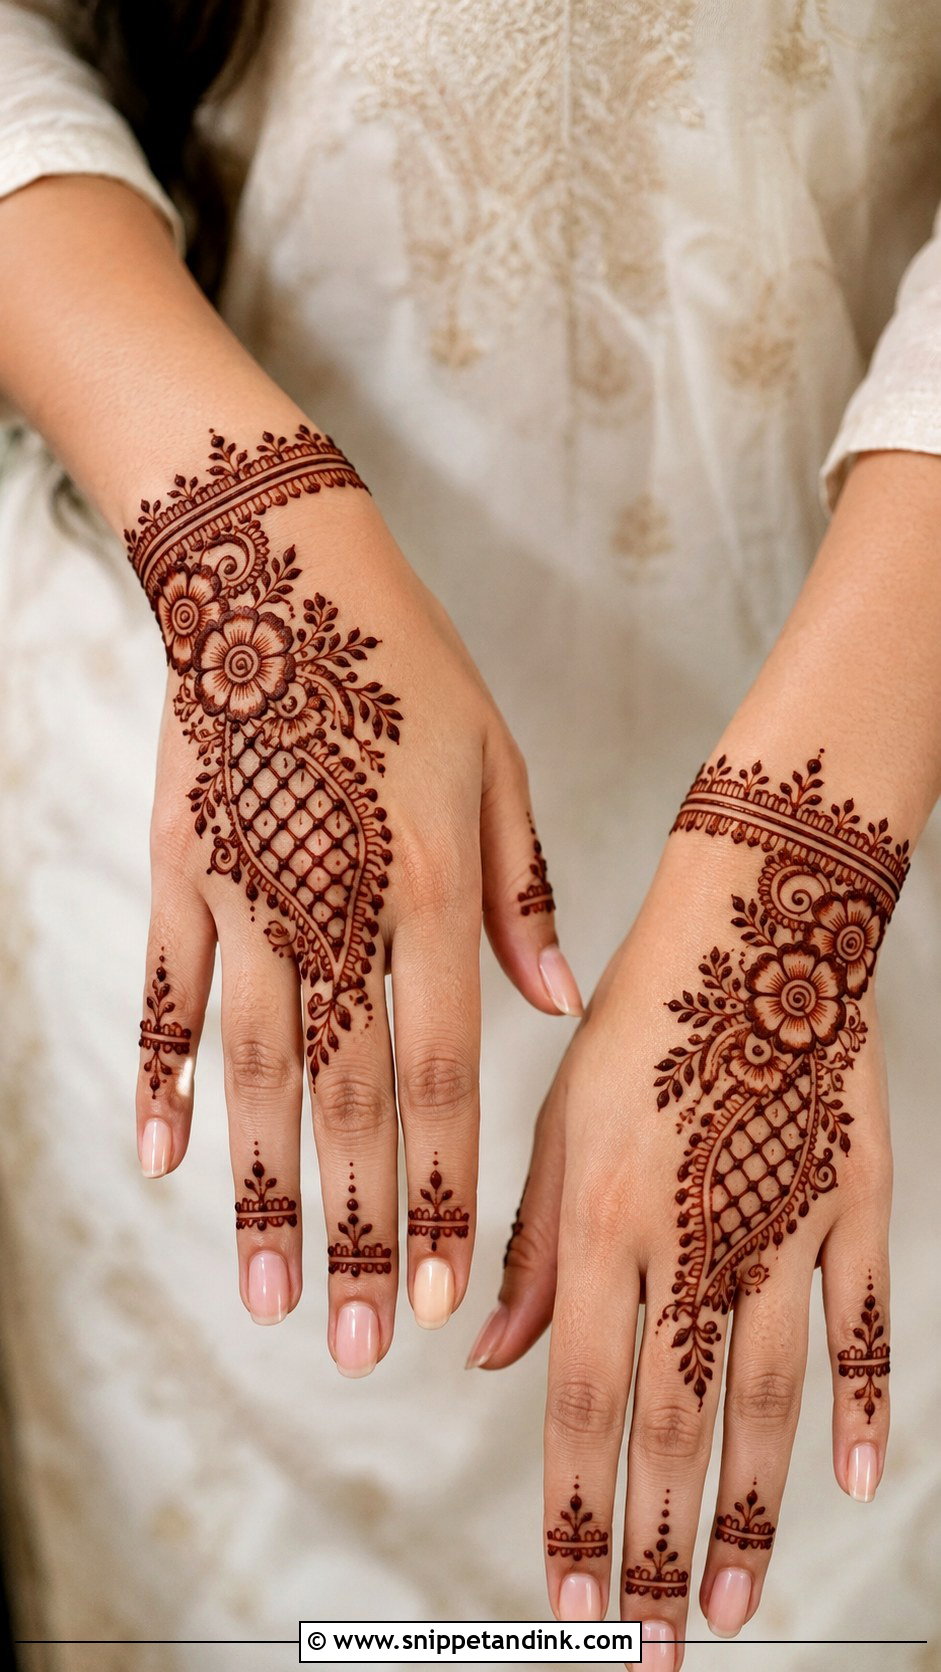
Half coverage runs from the wrist to the middle of the hand, or from one side across to the fingers. A floral trail, a jaali panel or a mandala cluster carries it. Leave enough empty space that it looks deliberate, and close the design with a thin border where it stops; without that edge, half a design can look like an unfinished one. It’s comfortable for daily wear.
11. Back Hand Mehndi Design With Dots
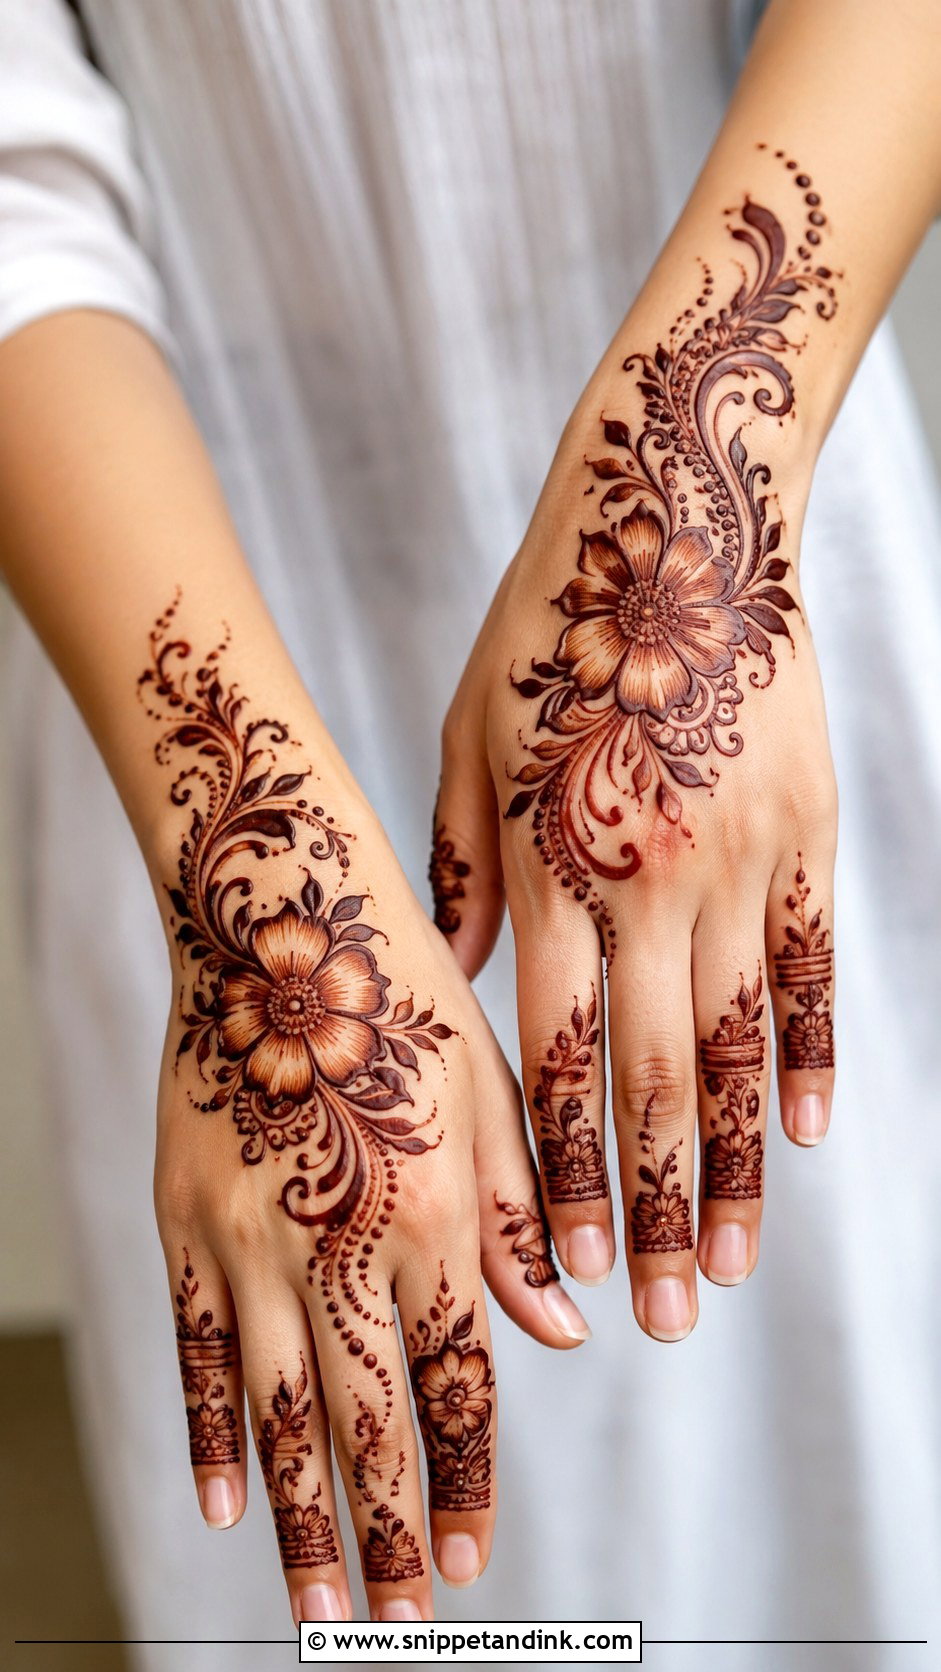
Dots do more than people give them credit for. They link motifs, outline leaves and petals, and form chains to the fingers and wrist without adding weight. Start with a small flower or mandala in the centre and build outward in dotted lines. Consistent dot size is what makes it look skilled, and it takes steady, even pressure on the cone. It dries quickly, which helps with children.
12. Leaf Back Hand Mehndi Design
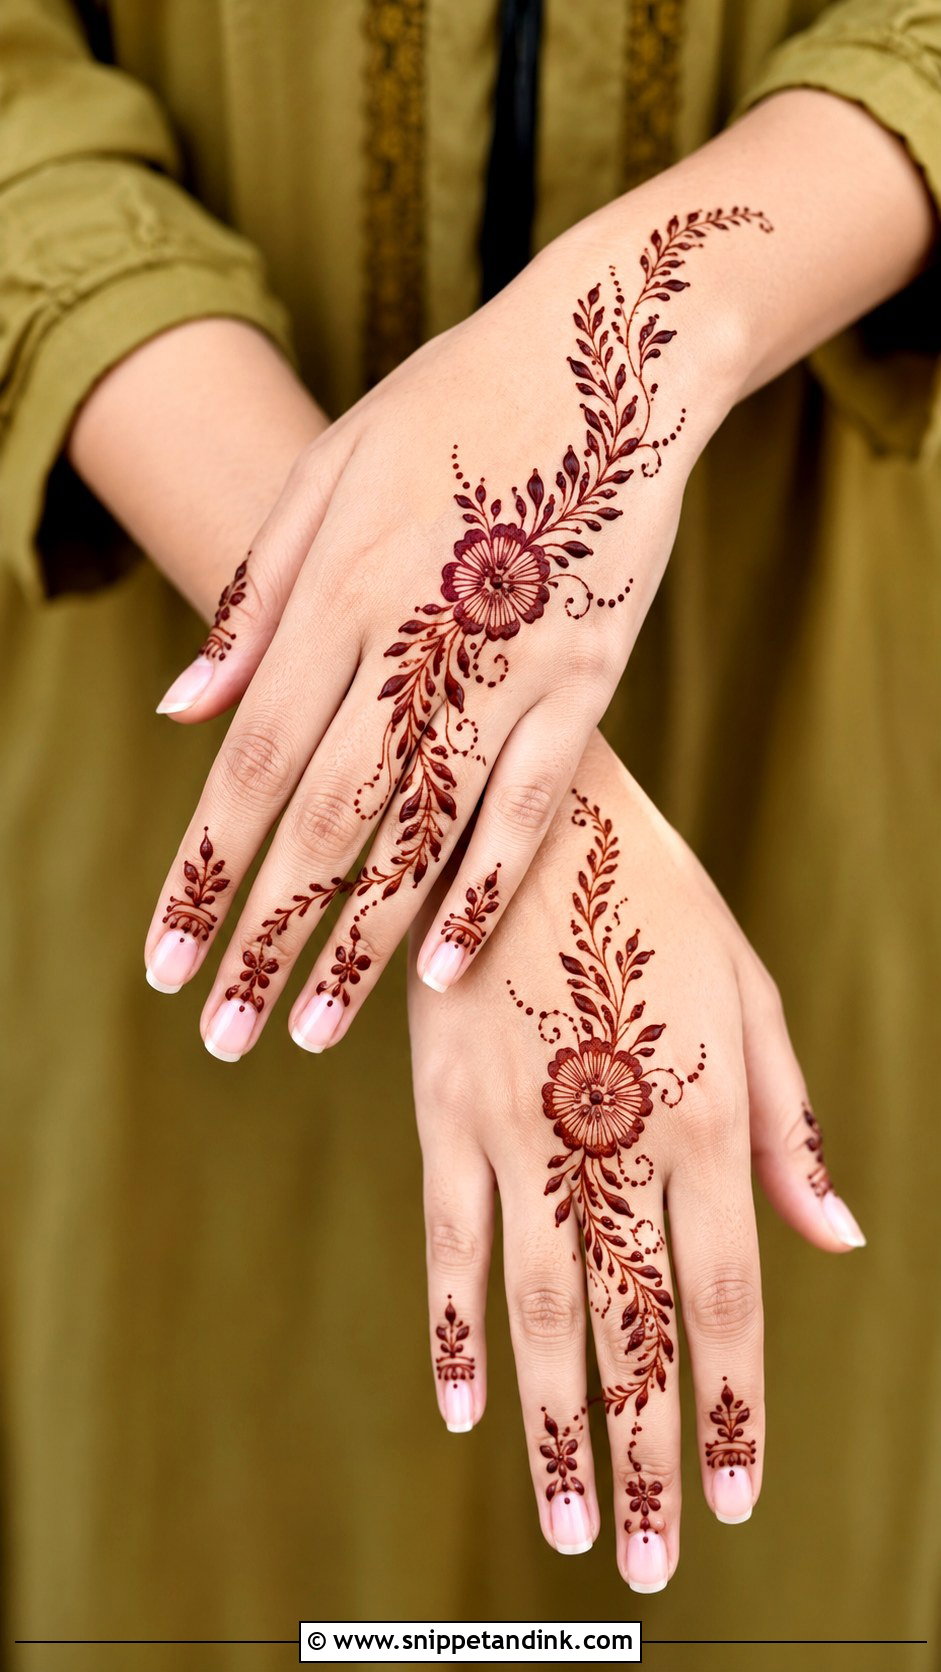
Built entirely from leafy vines, small branches and curved stems, laid diagonally across the hand or wrapped as a slim bracelet. Leaves can be hollow, lined or shaded on one side. Anyone who finds large flowers too traditional tends to like this, and the vine’s length adjusts to small or broad hands. A few dots near the fingertips finish it.
13. Modern Back Hand Mehndi Design
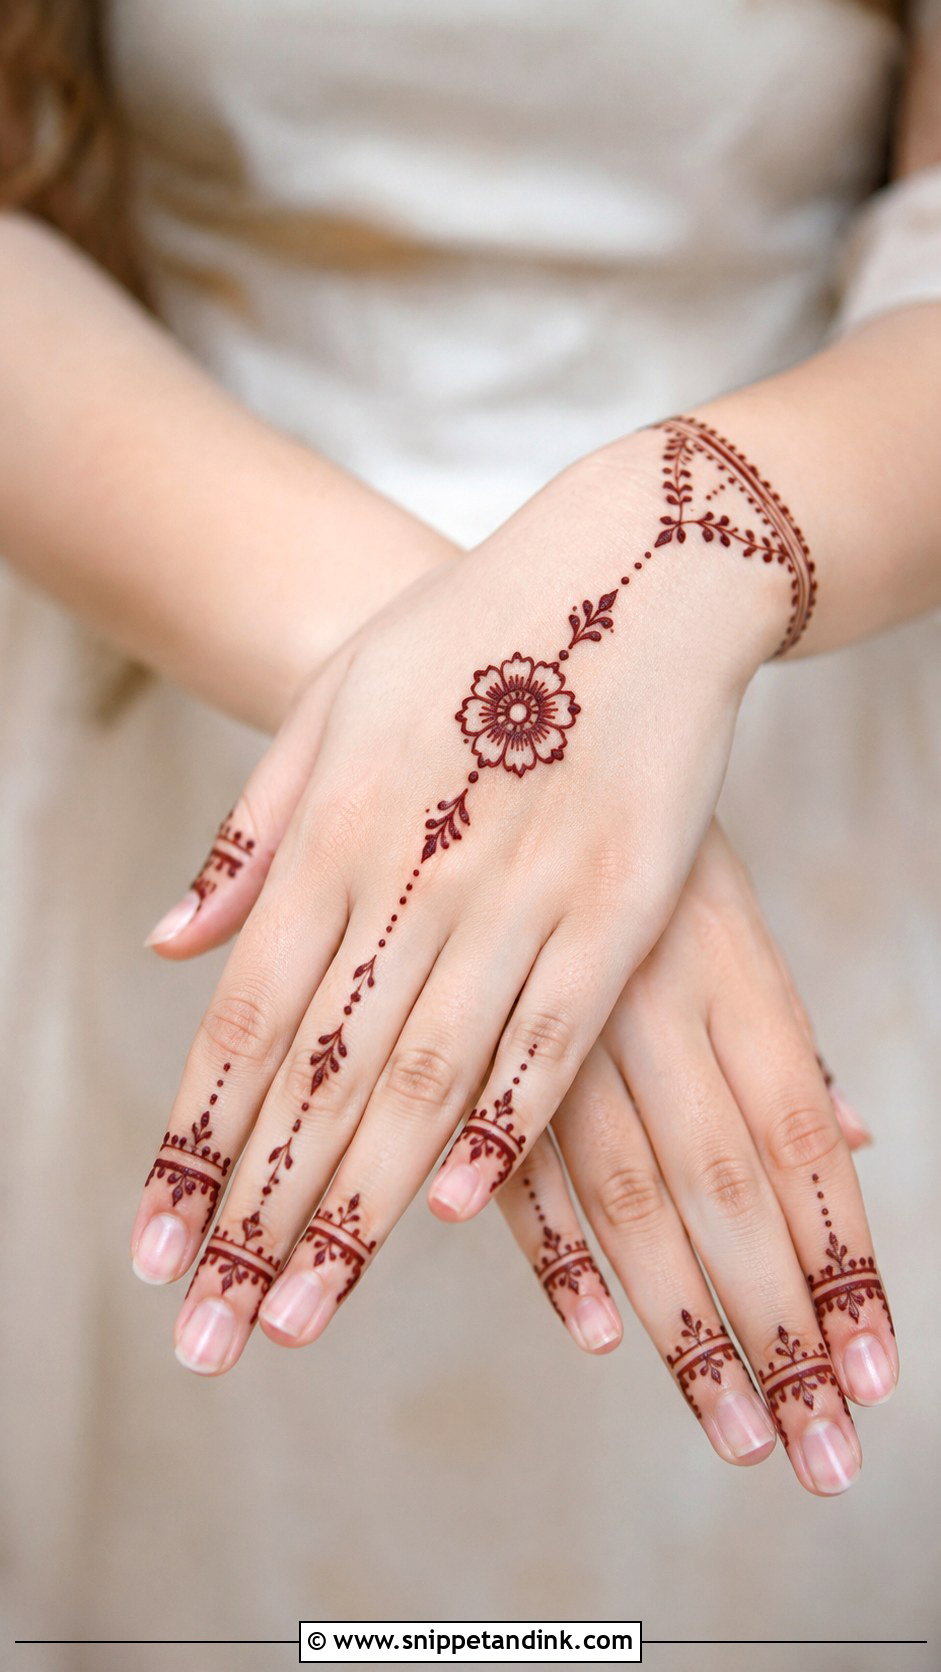
Modern layouts swap traditional filling for slim lines, small florals, a few geometric accents and generous skin. A common version is one centre motif, one wrist band and decorated fingers. Choose two or three elements and repeat them neatly; more than that starts to feel busy. It suits Indo-western outfits as much as traditional ones. Light and intentional is the aim, never empty or rushed.
14. Easy Back Hand Mehndi Design For Beginners
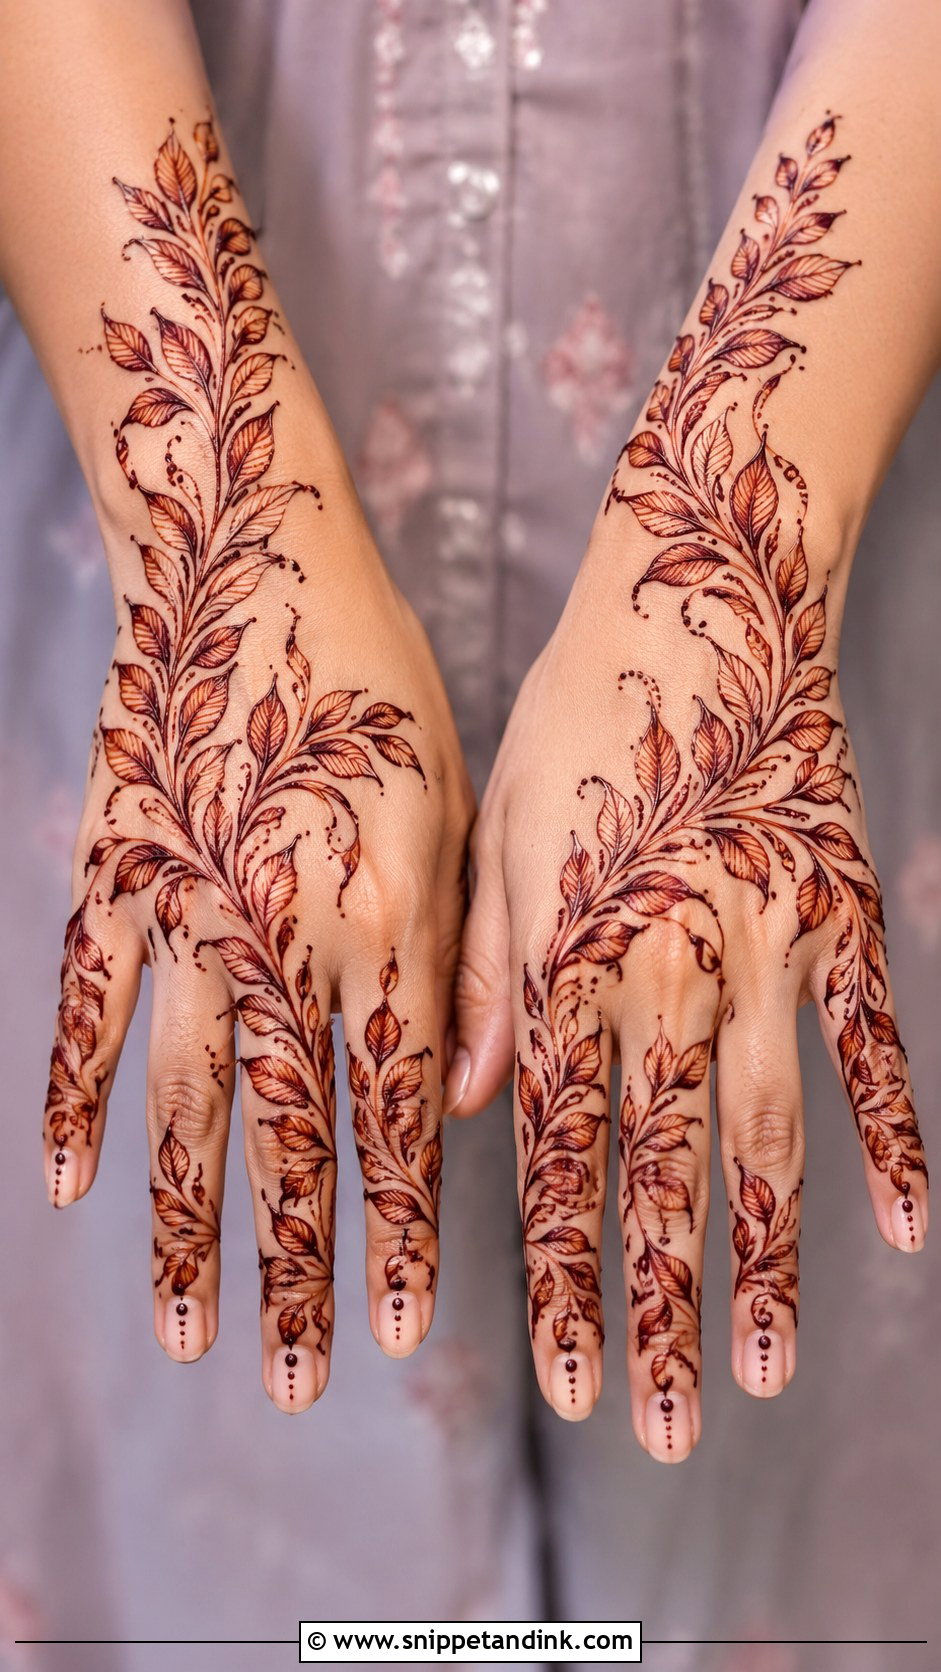
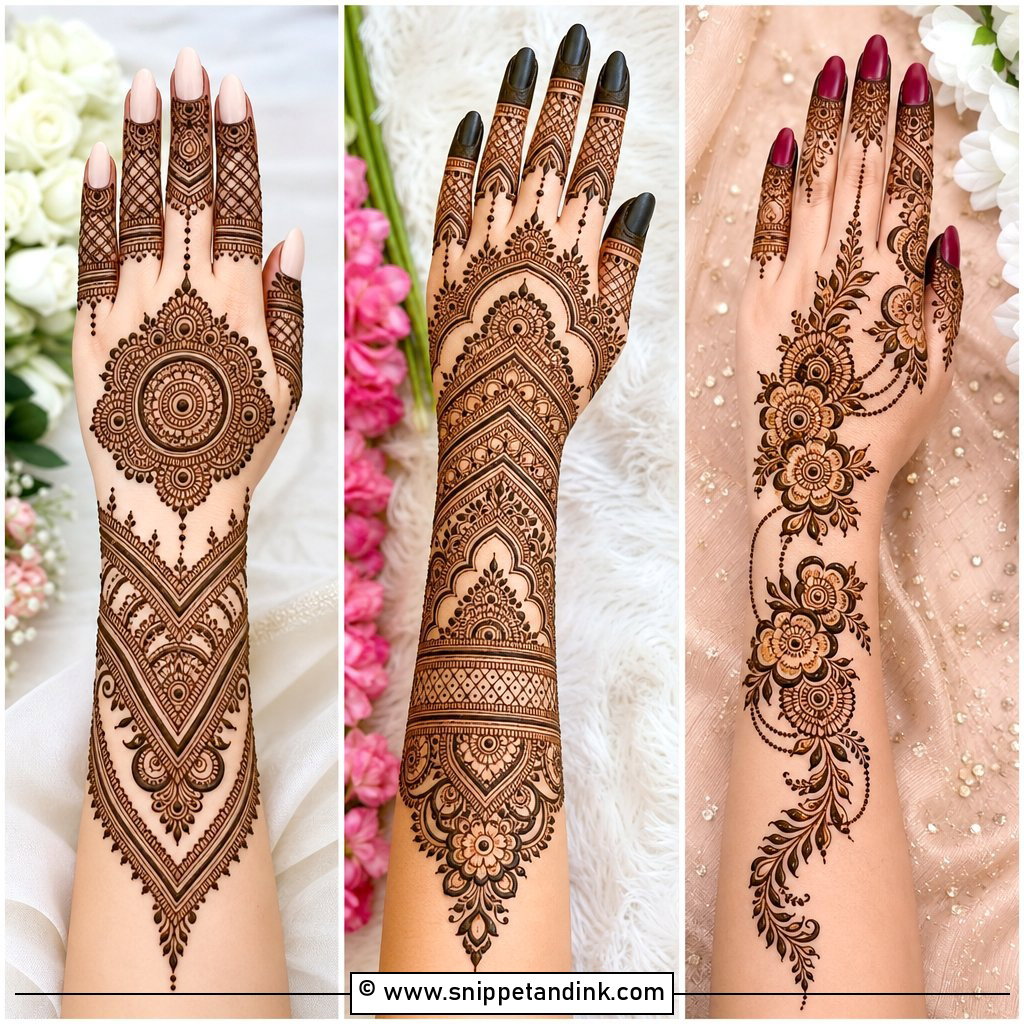
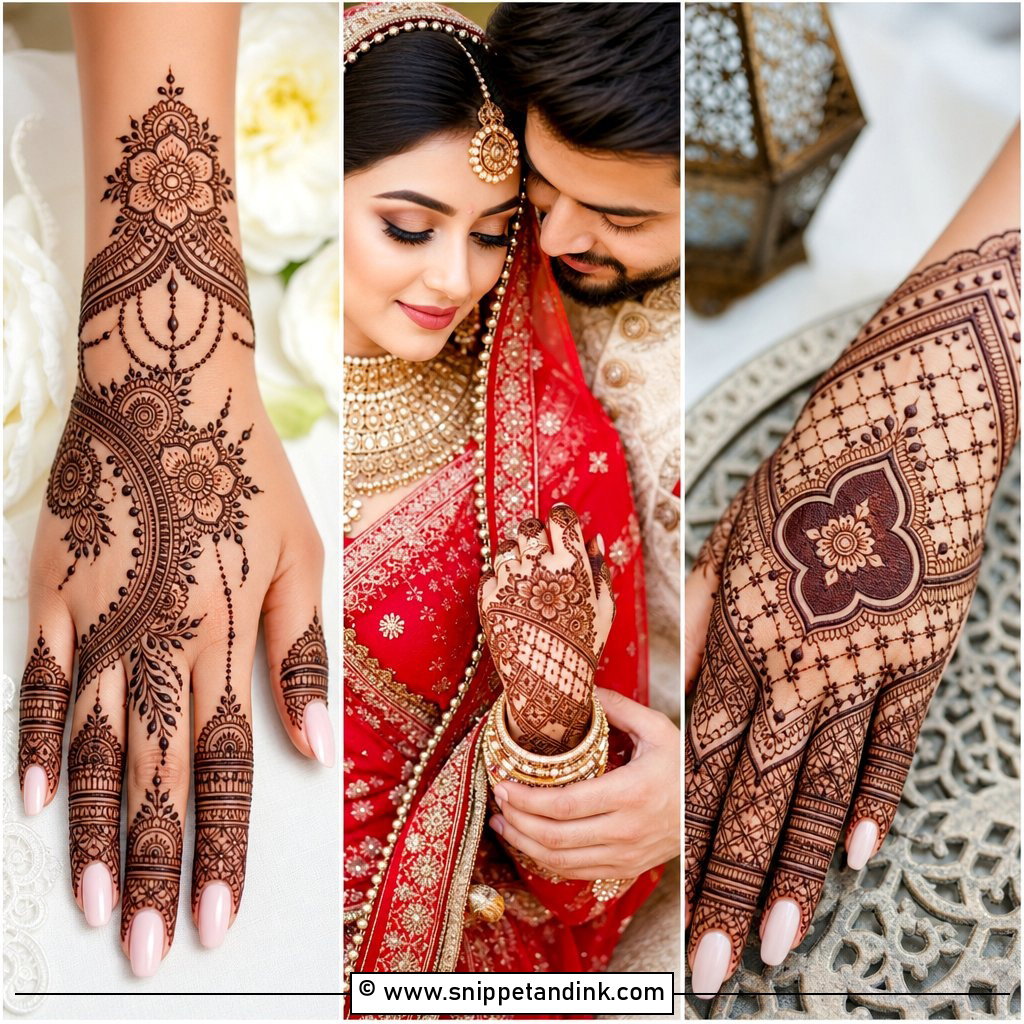
The back of the hand is the best place to practise. It’s flatter than the palm, and you can see it clearly as you work. Start with a small centre flower, add curved vines on each side and finish with dots near the fingers. Bracelet bands and leafy trails are forgiving too. If one side comes out uneven, a few extra dots or leaves will balance it. Confident lines matter more than fine filling at this stage.
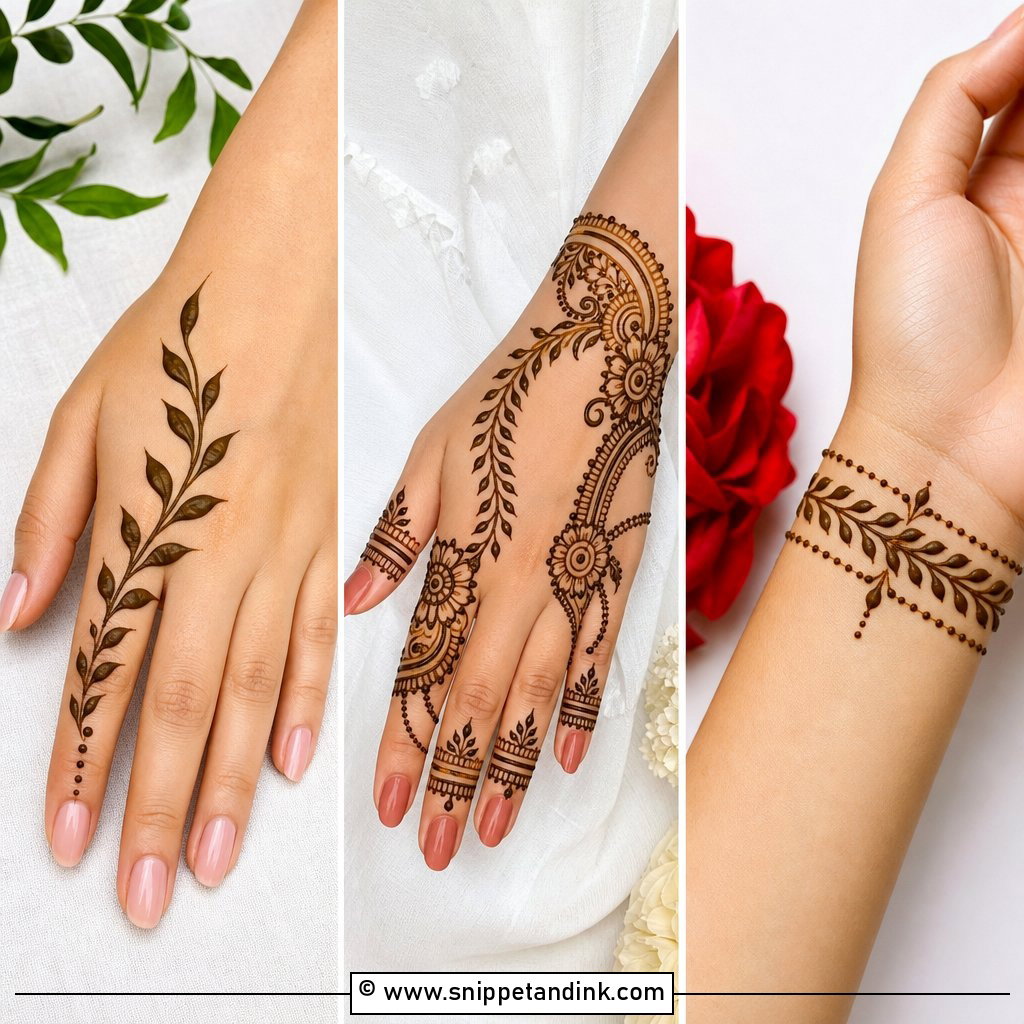
15. Simple Back Hand Mehndi Design For Kids
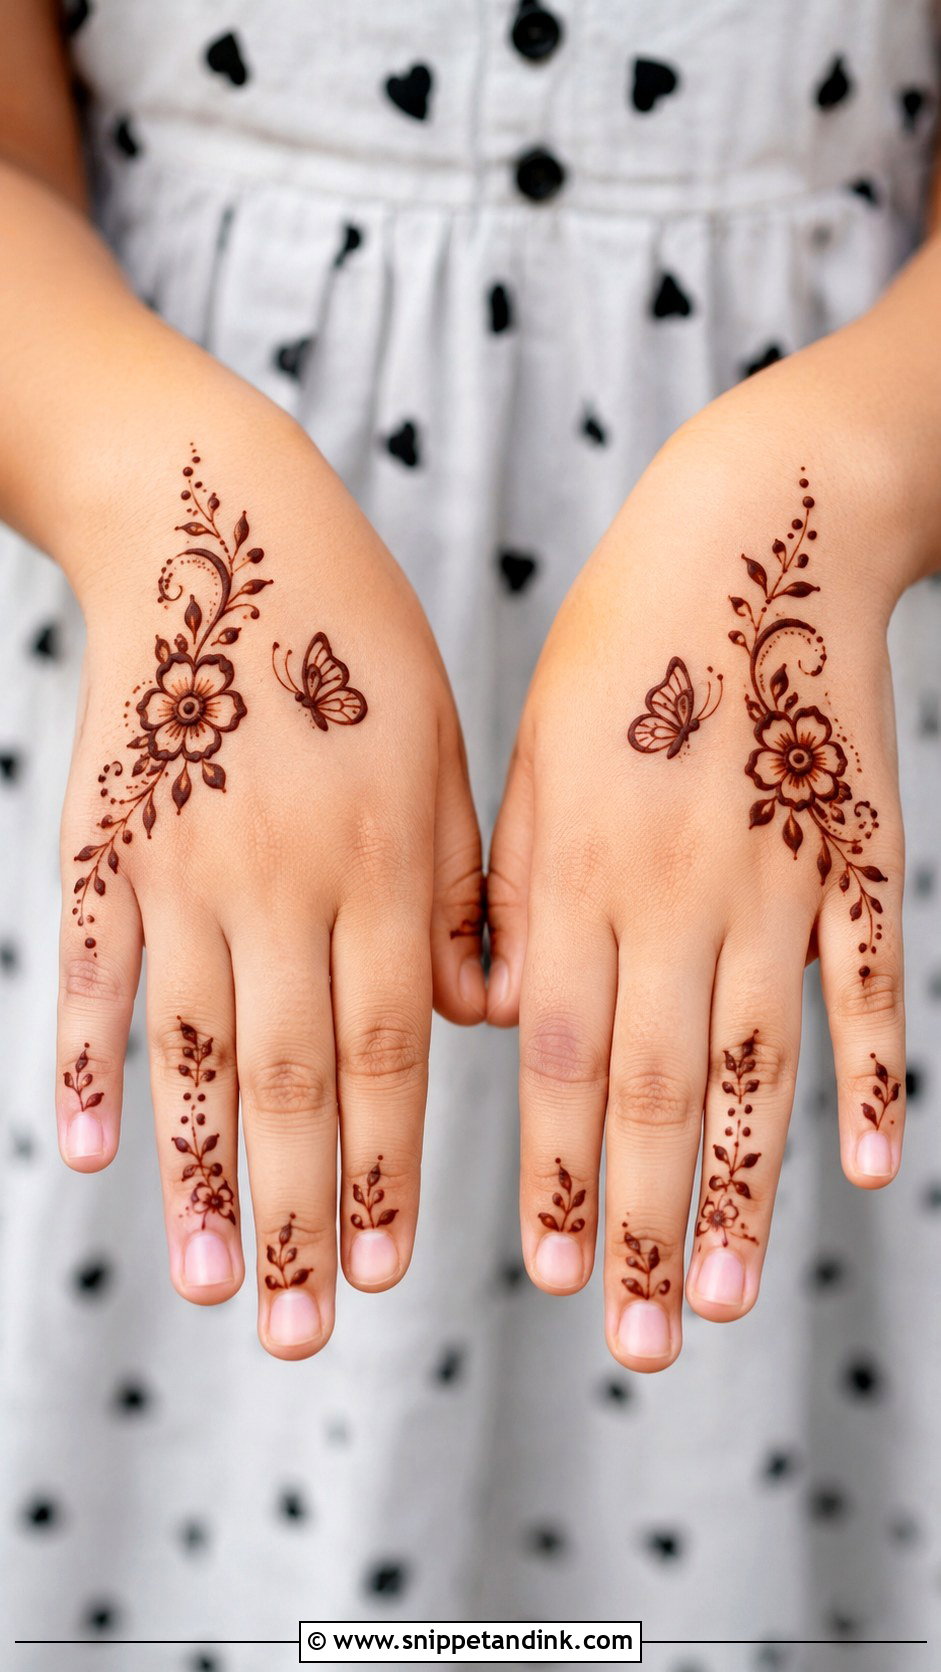
Small flowers, hearts, stars, butterflies or a tiny mandala, with dots and short vines, and very little on the wrist and fingers. A single centre motif with decorated fingertips is plenty. Bold outlines and open shapes survive a fidgety child better than fine detail. I only use natural henna on children. Any product sold as black henna that stains instantly can contain a dye linked to serious skin reactions, so avoid it completely.
16. Back Hand Mehndi Design With Wrist Band
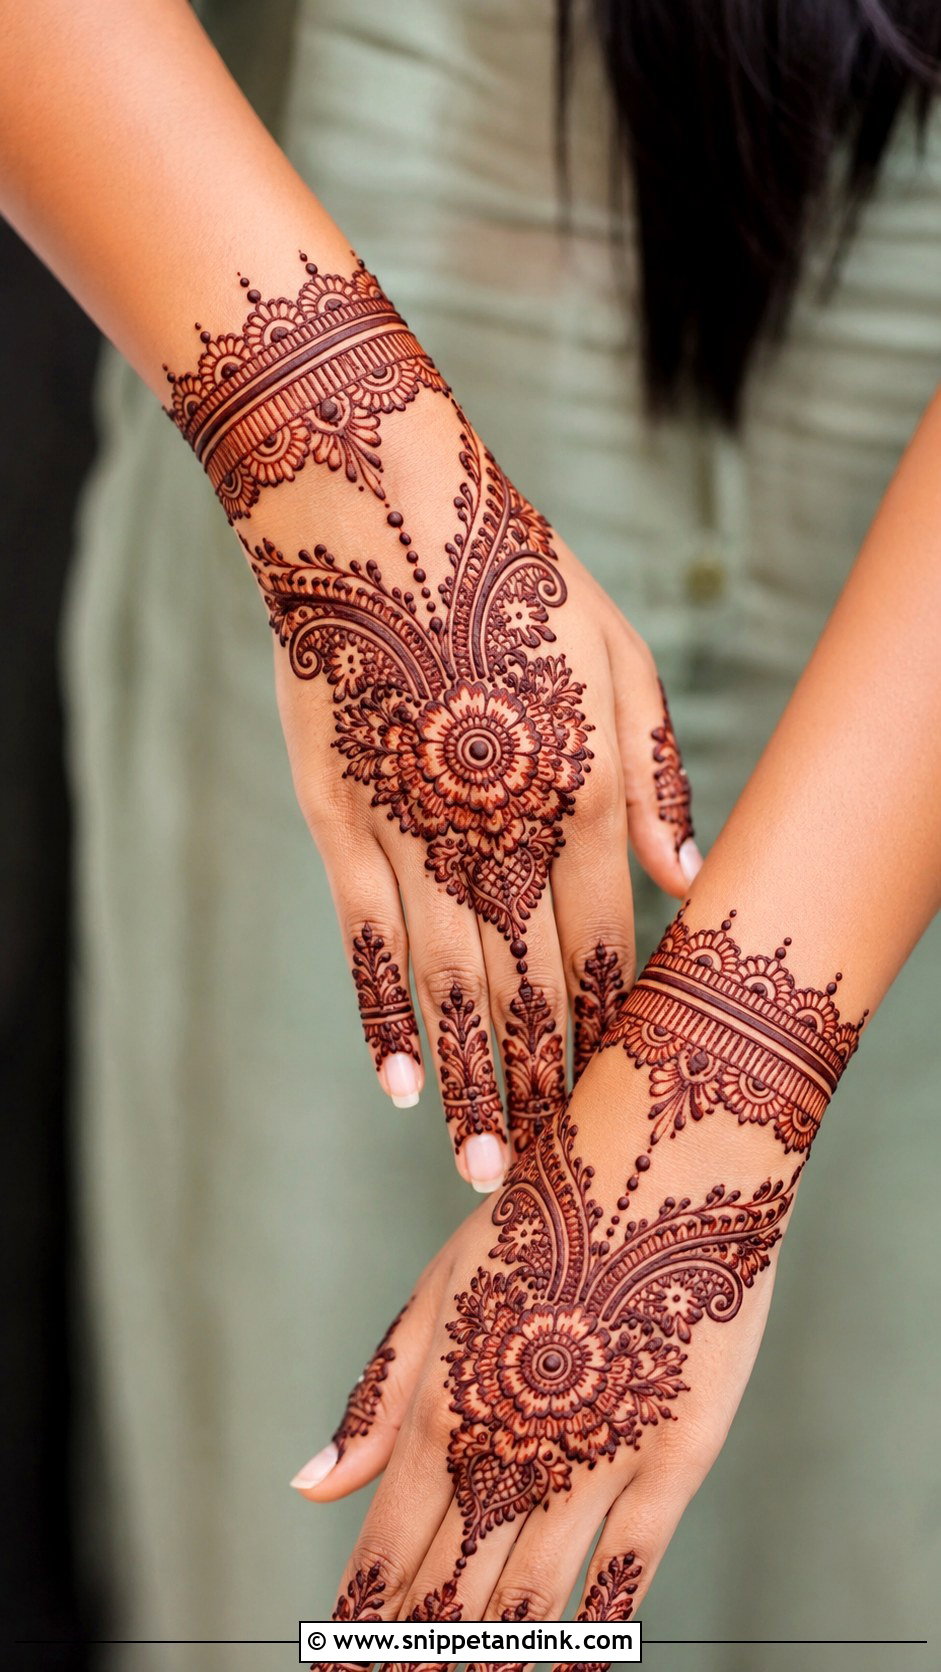
One bold band around the wrist, filled with thin parallel lines, dots, leaves or small scallops, and a chain or vine rising from its centre to a flower on the back of the hand. That band frames the whole hand, so the design looks complete even if the fingers are light. It’s a good guest option at weddings. Keep the band straight and even, and stick to one main motif above it.
17. Back Hand Mehndi Design With Shaded Flowers
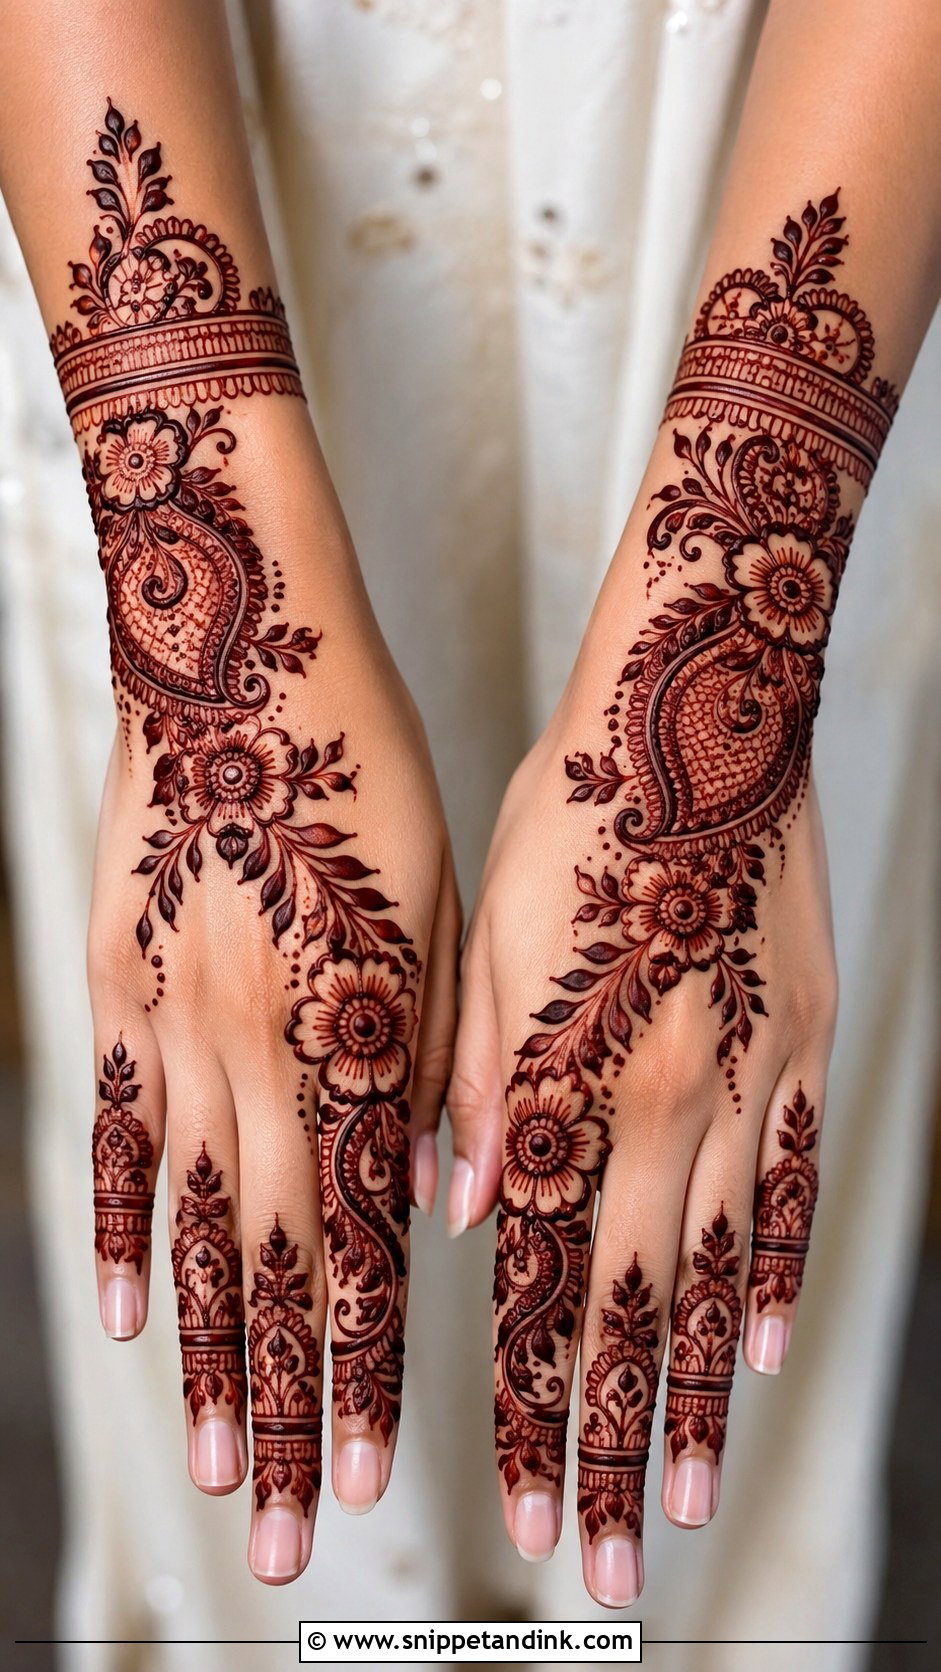
Shading thickens the look without adding motifs. One or two large flowers sit on the side of the hand with their petals shaded in thin strokes, and leaves and dots trail away in an Arabic flow. The rest stays open so the shaded flowers hold attention. Shading on the back of the hand helps, since the skin here stains lighter; the extra paste deepens the colour where it matters.
18. Back Hand Mehndi Design With Chain Pattern
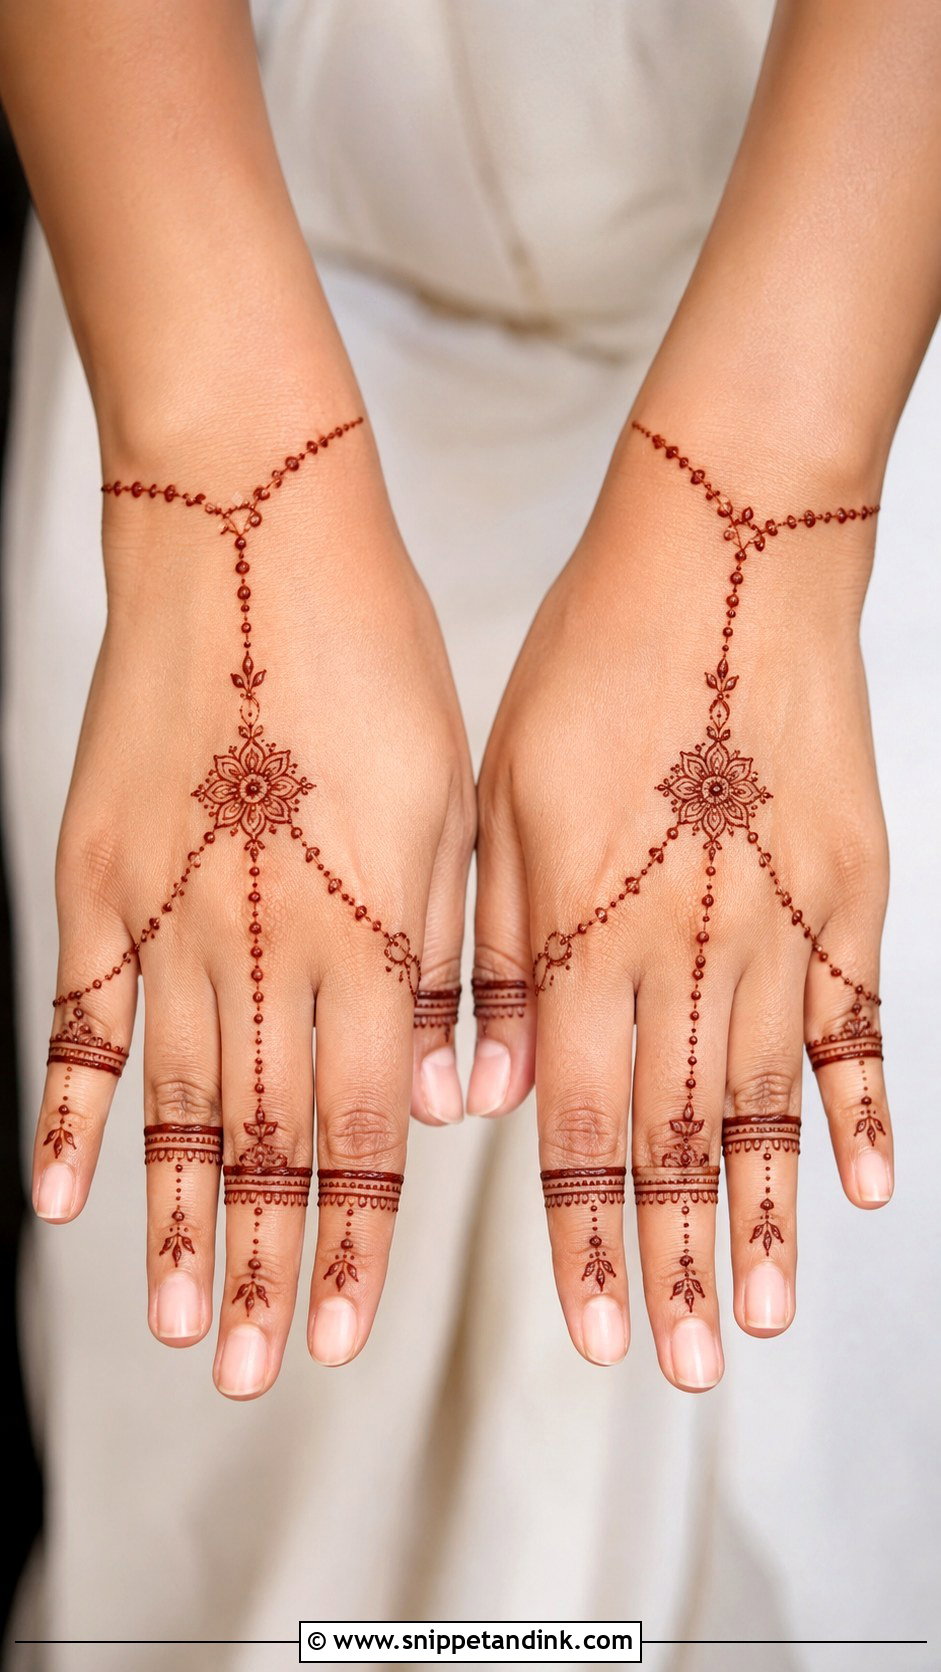
A chain can run from the wrist to a centre motif, or from a finger ring down onto the back of the hand. Dots, tiny leaves, loops or small diamonds form the links. Because it follows the length of the hand, it lengthens rather than widens. Keep the centre motif small, a flower, circle or paisley, and the chains thin. Thick chains look heavy and smudge easily against sleeves.
19. Back Hand Mehndi Design With Negative Space
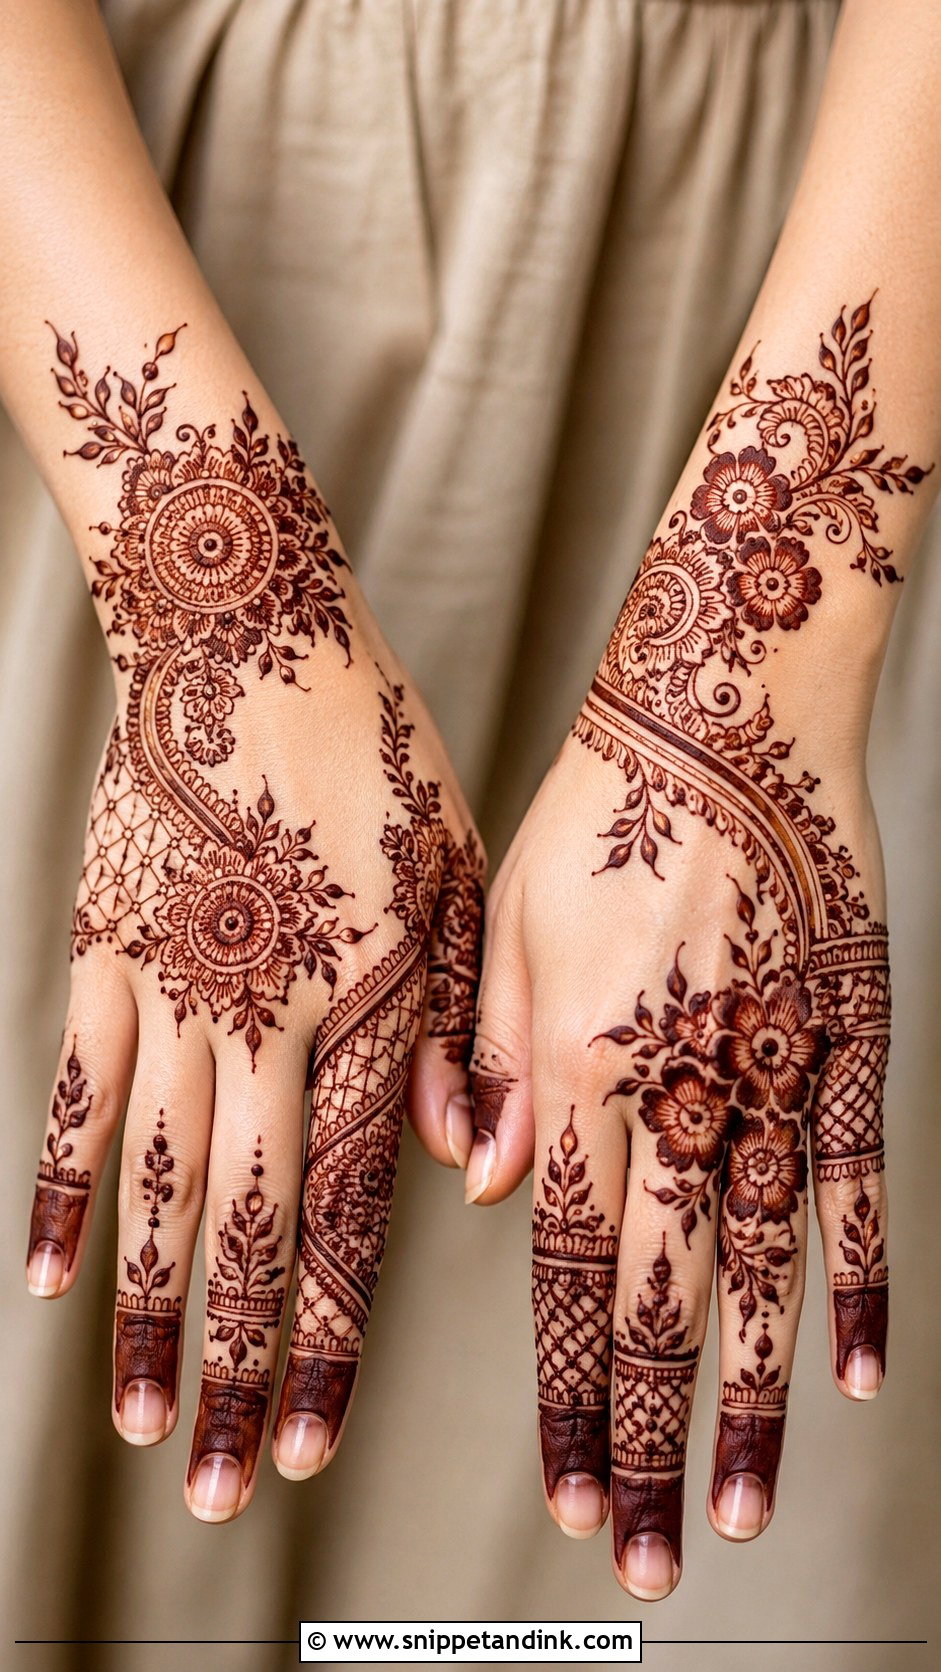
Here the empty skin is part of the pattern. Motifs sit with clear breathing room between them: a diagonal floral trail, an open mandala or a jaali panel split into sections. The bare areas make the stain look sharper by contrast. It goes quickly because less area needs filling, but only works with bold outlines and neat borders. Scattered motifs without a plan just look sparse.
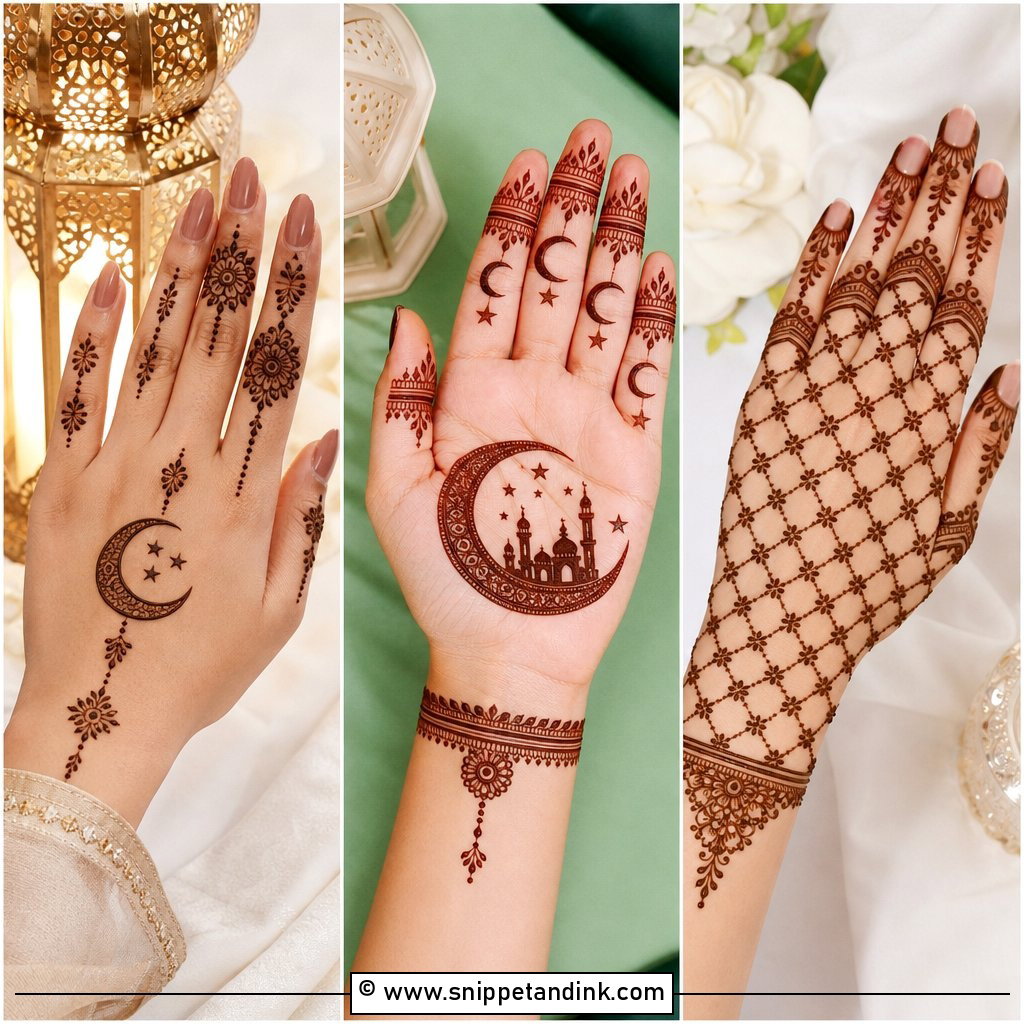
20. Indo Arabic Back Hand Mehndi Design
Indian detail set into an Arabic flow: bold flowers and vines on a diagonal, with smaller dots, paisleys and fine filler lines added in selected spots. That gives a festive look without bridal density. Start with a large flower or paisley and add leafy curves toward the fingers. It’s my go-to for sangeet nights, Eid, Diwali and wedding guests because it adapts to almost any hand.
21. Moroccan Back Hand Mehndi Design
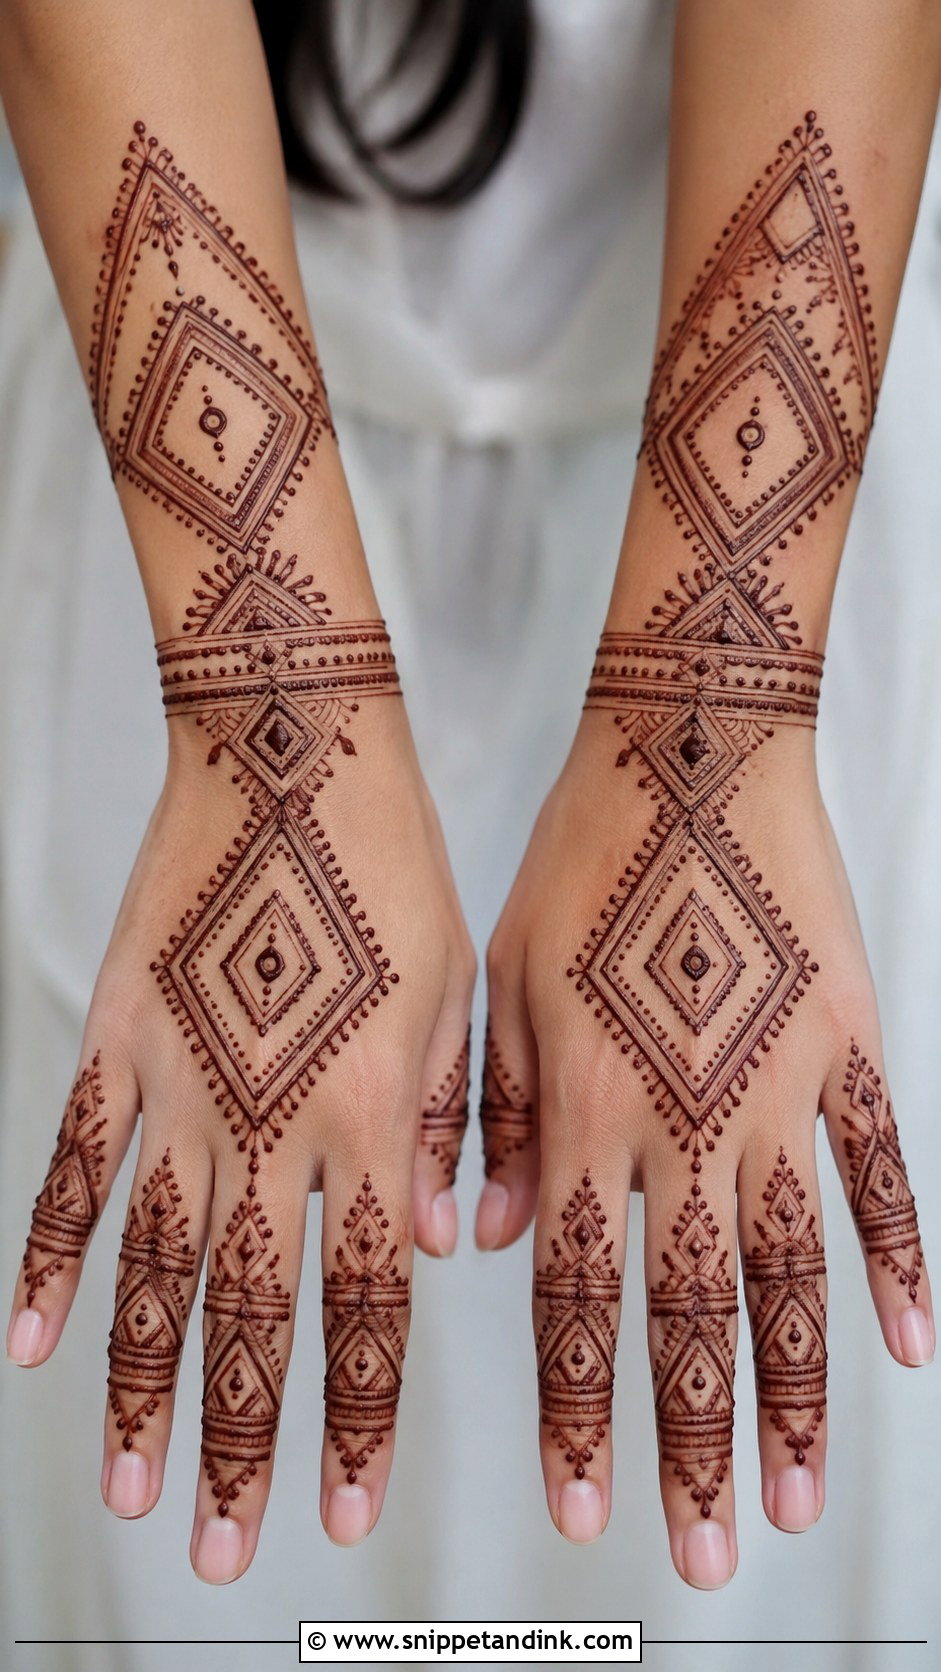
Diamonds, triangles, straight lines and dots in small panels, either as a cuff across the back of the hand or as a vertical strip from wrist to finger. With few curves, it feels modern and graphic, and the repetition builds detail without complex drawing. The difficulty is keeping lines straight over the knuckle bones. I work in short strokes and keep a few dots inside the diamonds for texture.
22. Gulf Back Hand Mehndi Design
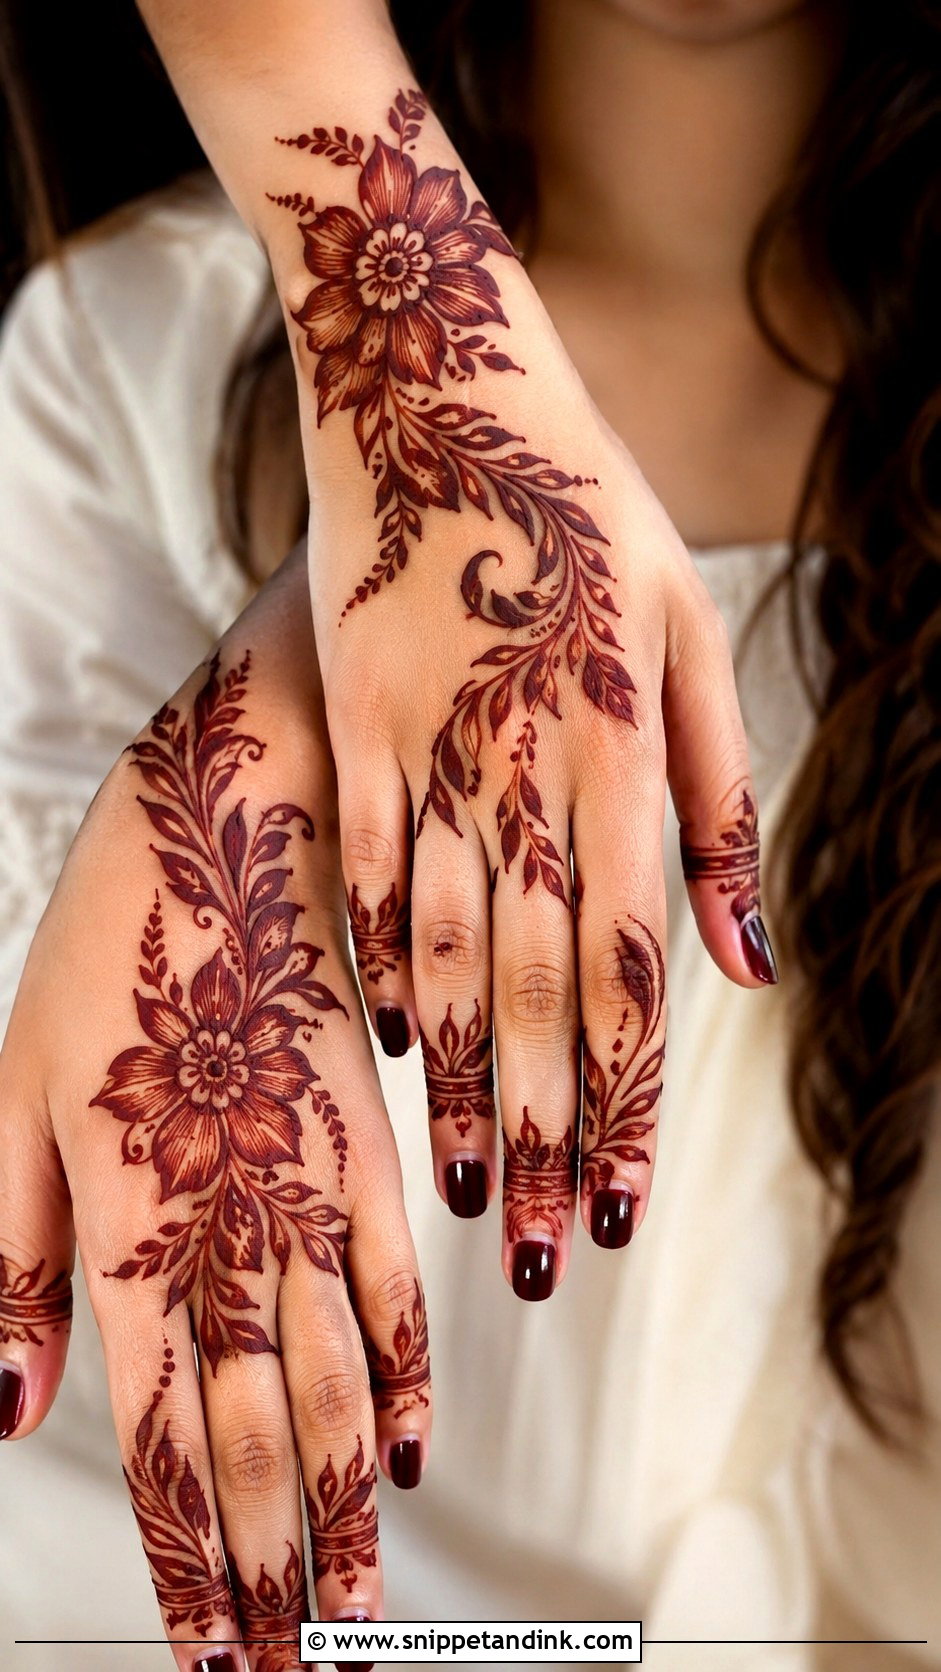
Khaleeji-style henna relies on big flowers, open spacing and relaxed curves. For a simple version, one large flower near the wrist with a leafy trail to the fingers is enough. Confident strokes and clean surrounding skin are the whole point; this style doesn’t depend on tiny filling. Light finger bands or dots balance the hand without crowding it.
23. Back Hand Mehndi Design With Peacock Motif
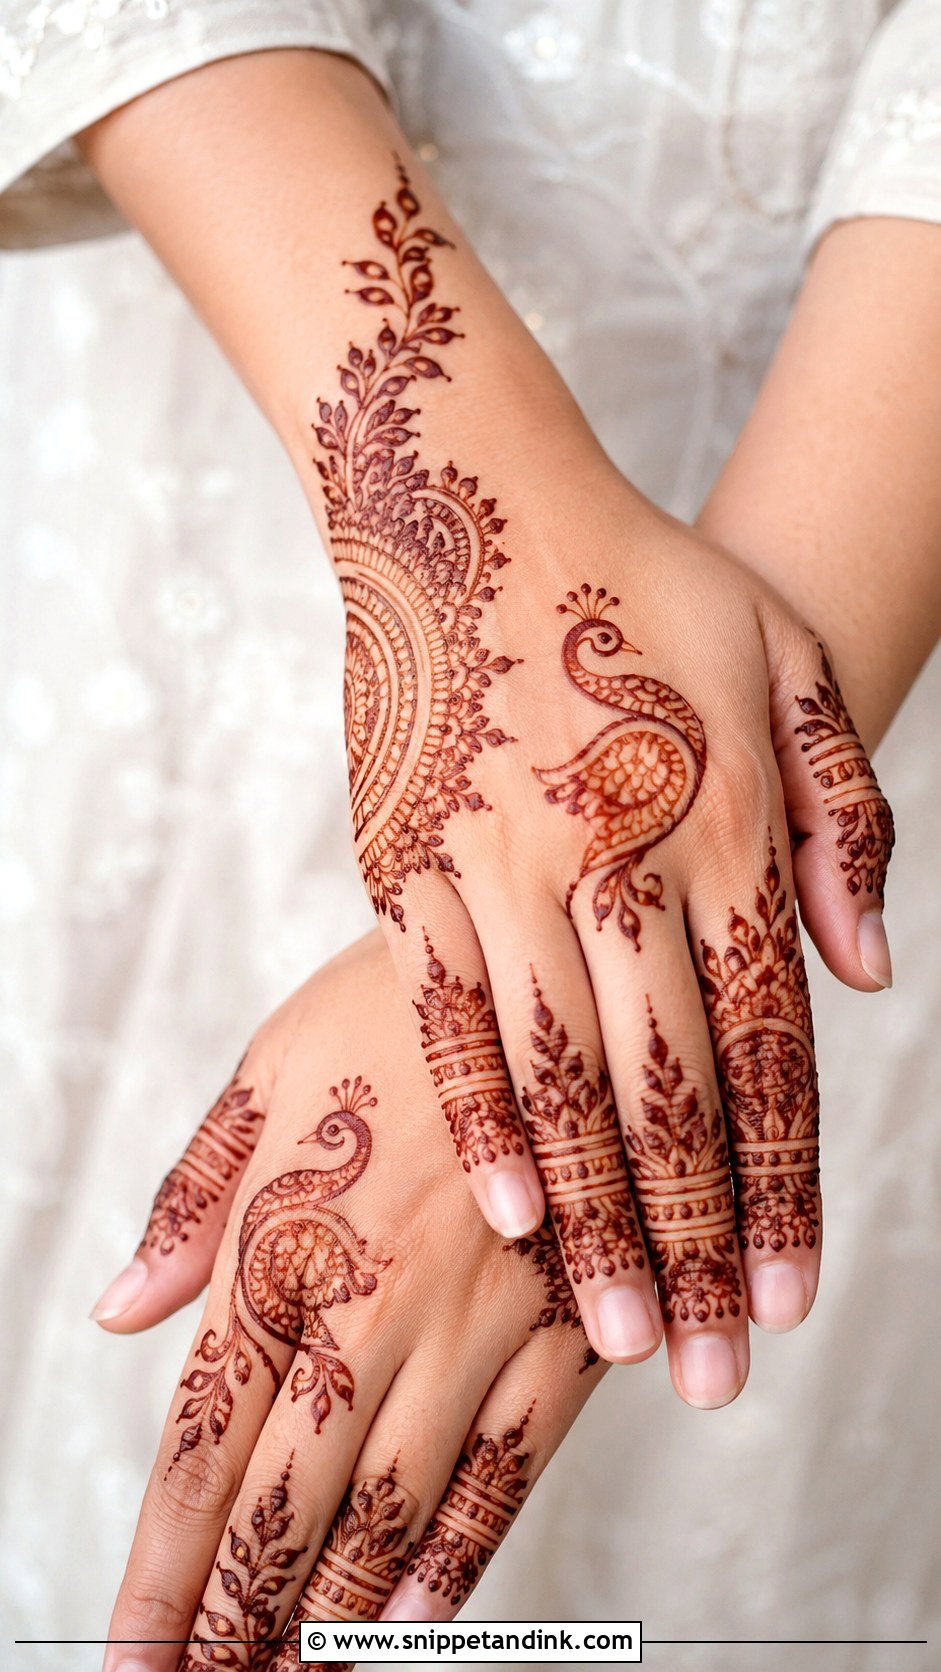
A small peacock near the centre or wrist side, with a curved neck, simple feather lines and dots defining the body, surrounded by leaves or a half mandala. The bird should be the clear focus, with the rest of the hand lighter. One or two fingers can carry thin vines upward. I spend most of my time on the neck curve; get that wrong and the shape stops reading as a peacock.
24. Back Hand Mehndi Design With Rose Pattern
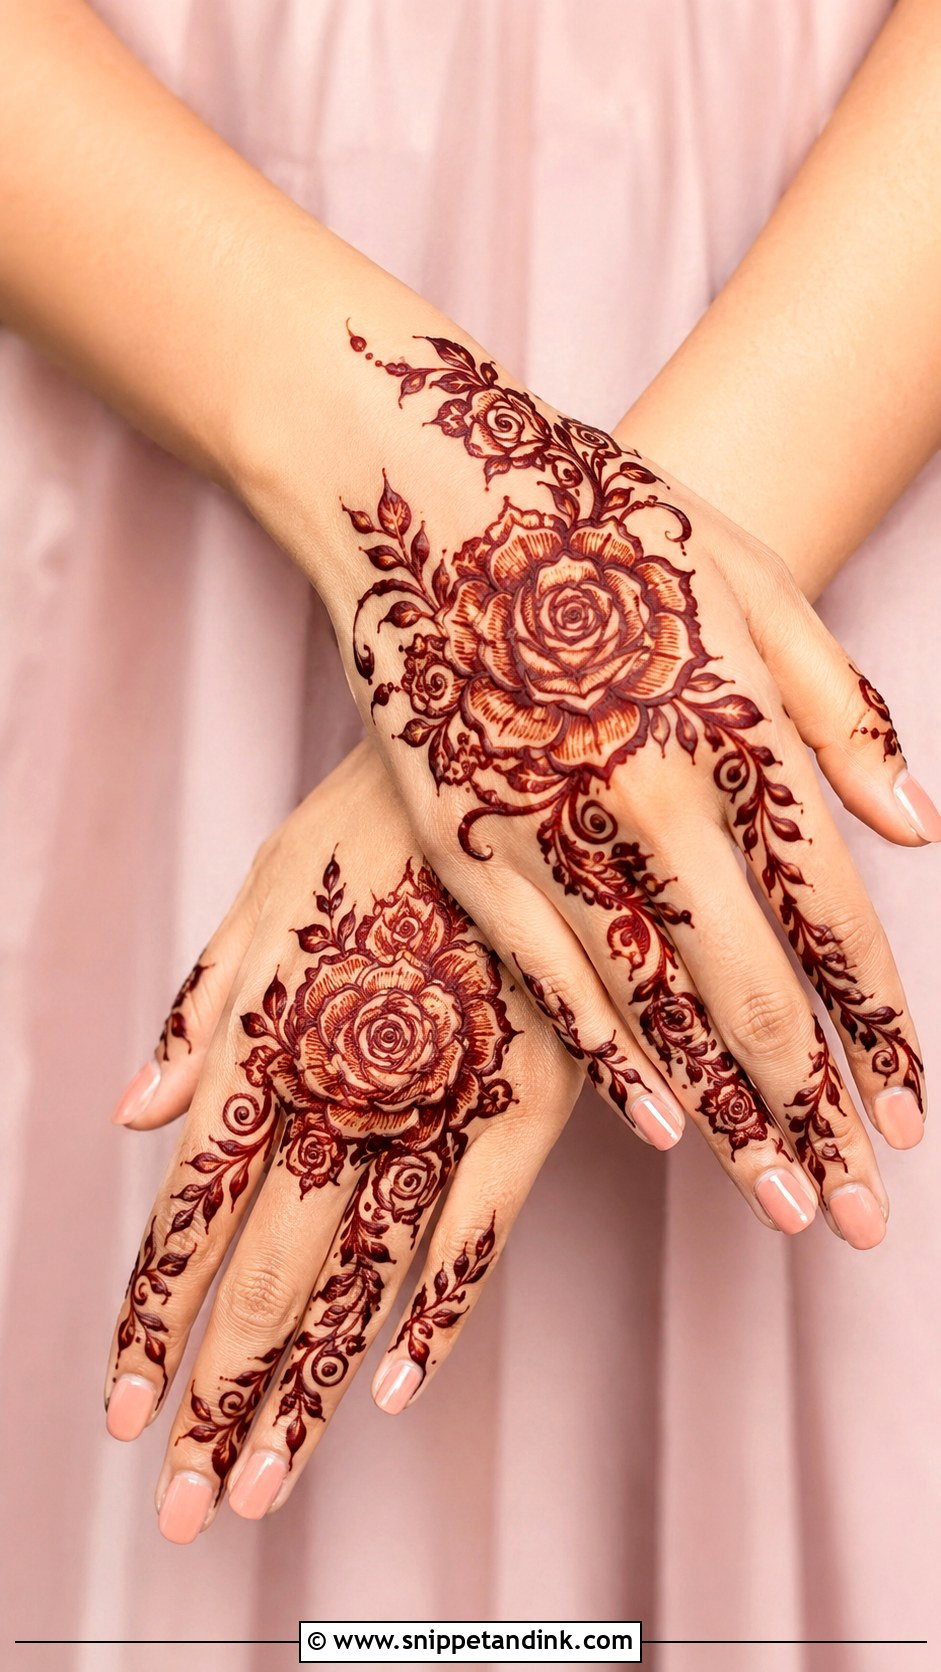
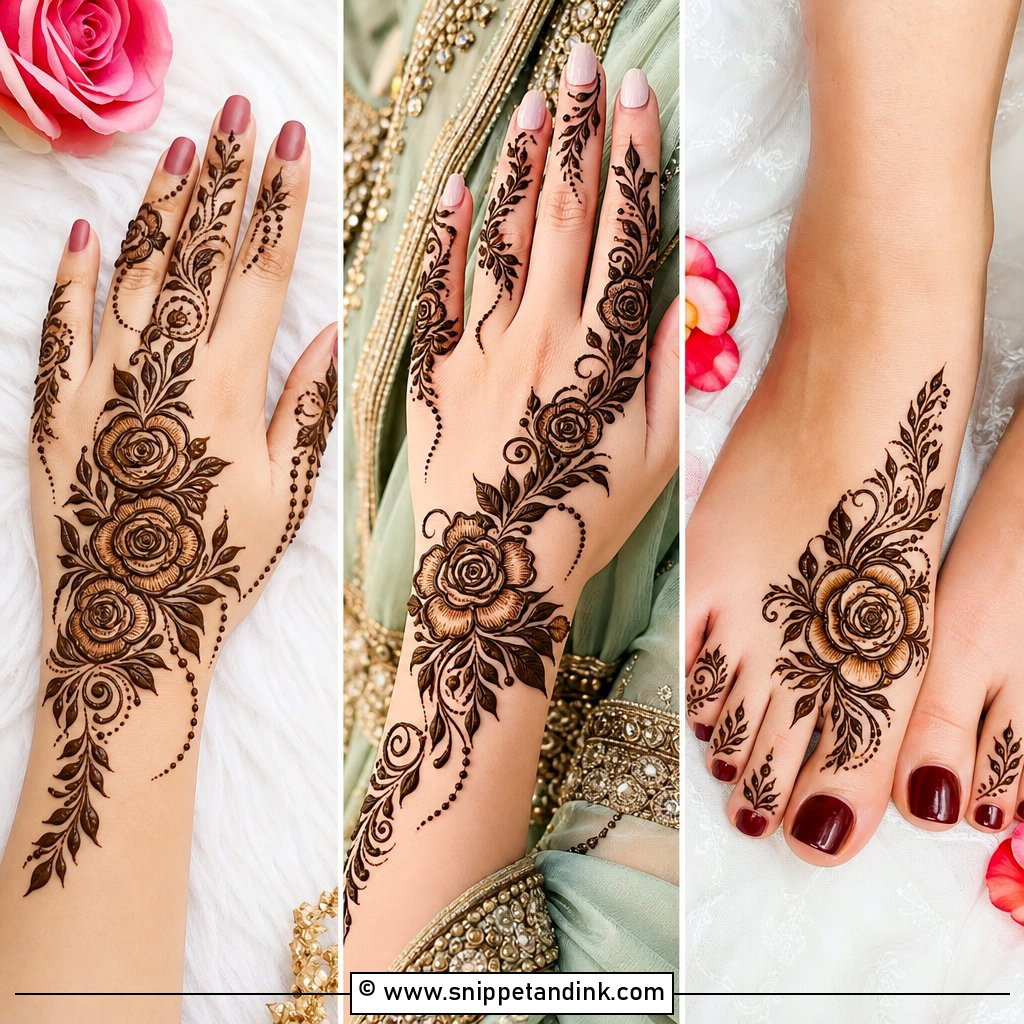
One large rose near the side of the hand, two smaller buds, spiral lines at the centre and curved petals outside, joined by leafy vines to the wrist and fingers. Roses sit well in Arabic and Indo-Arabic layouts because they like open space. Keep the fingers simple. The common slip is too many spiral lines in the centre, which merge into a dark dot once stained.
25. Back Hand Mehndi Design With Butterfly Motif
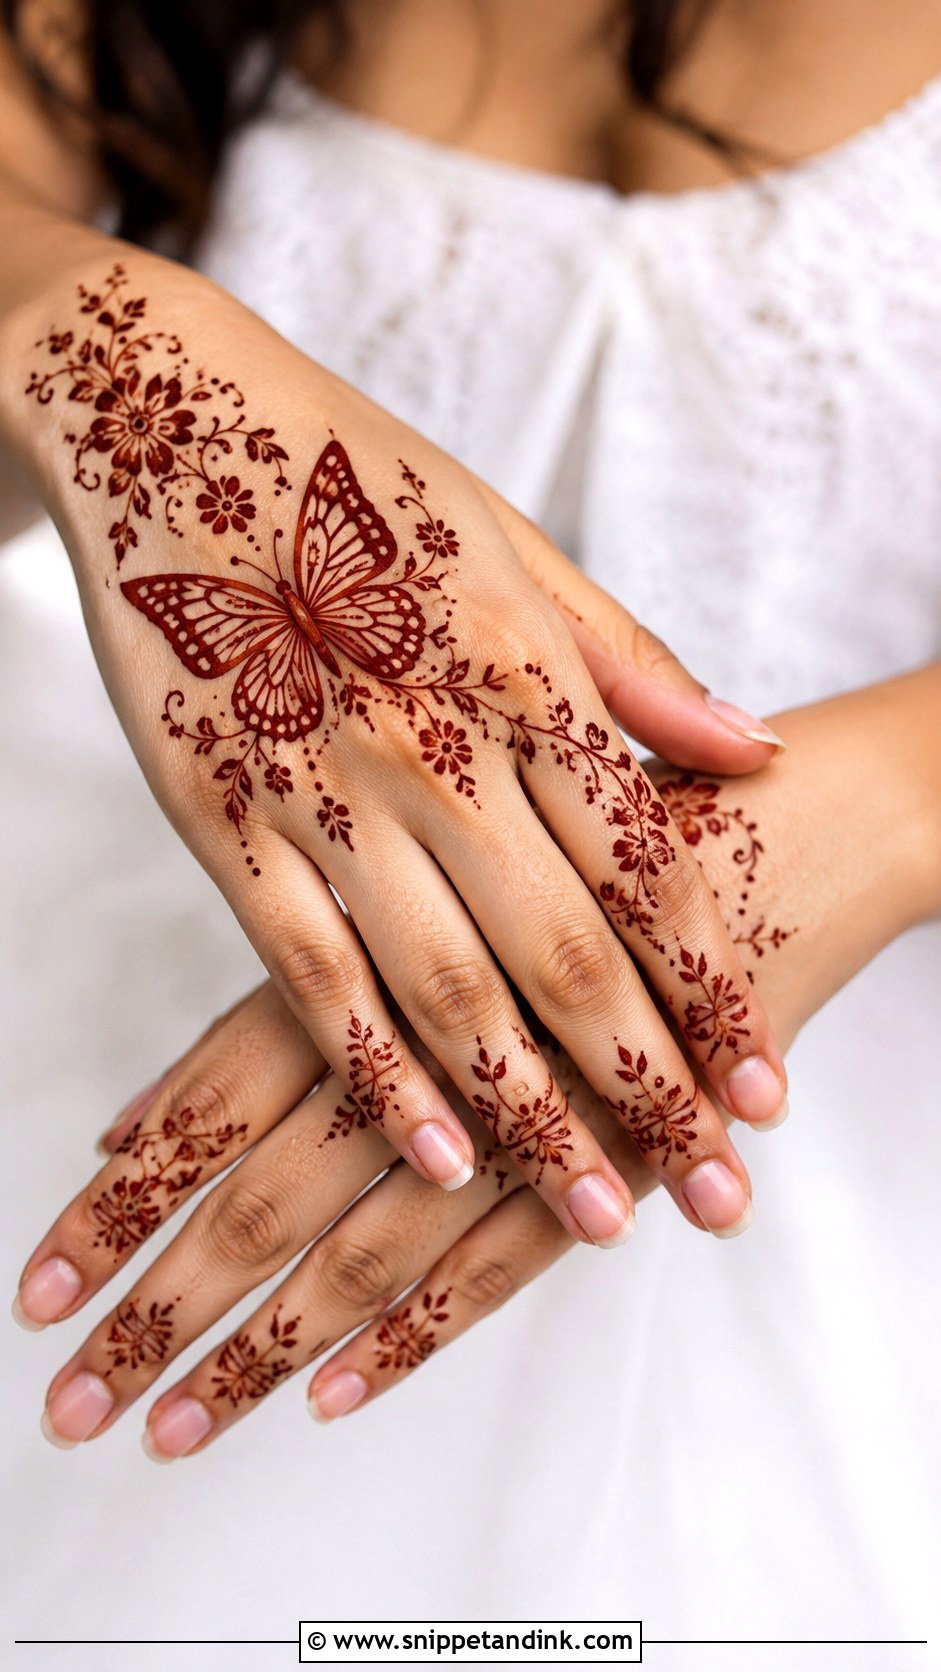
A small butterfly in the centre or near the thumb side, wings open and simple, with flowers, dots and soft vines around it. Younger wearers love it. To stop it looking childish on an adult hand, I keep the surrounding pattern neat and traditional. The butterfly’s outline has to be crisp, since its shape is the whole charm.
26. Back Hand Mehndi Design With Heart Pattern
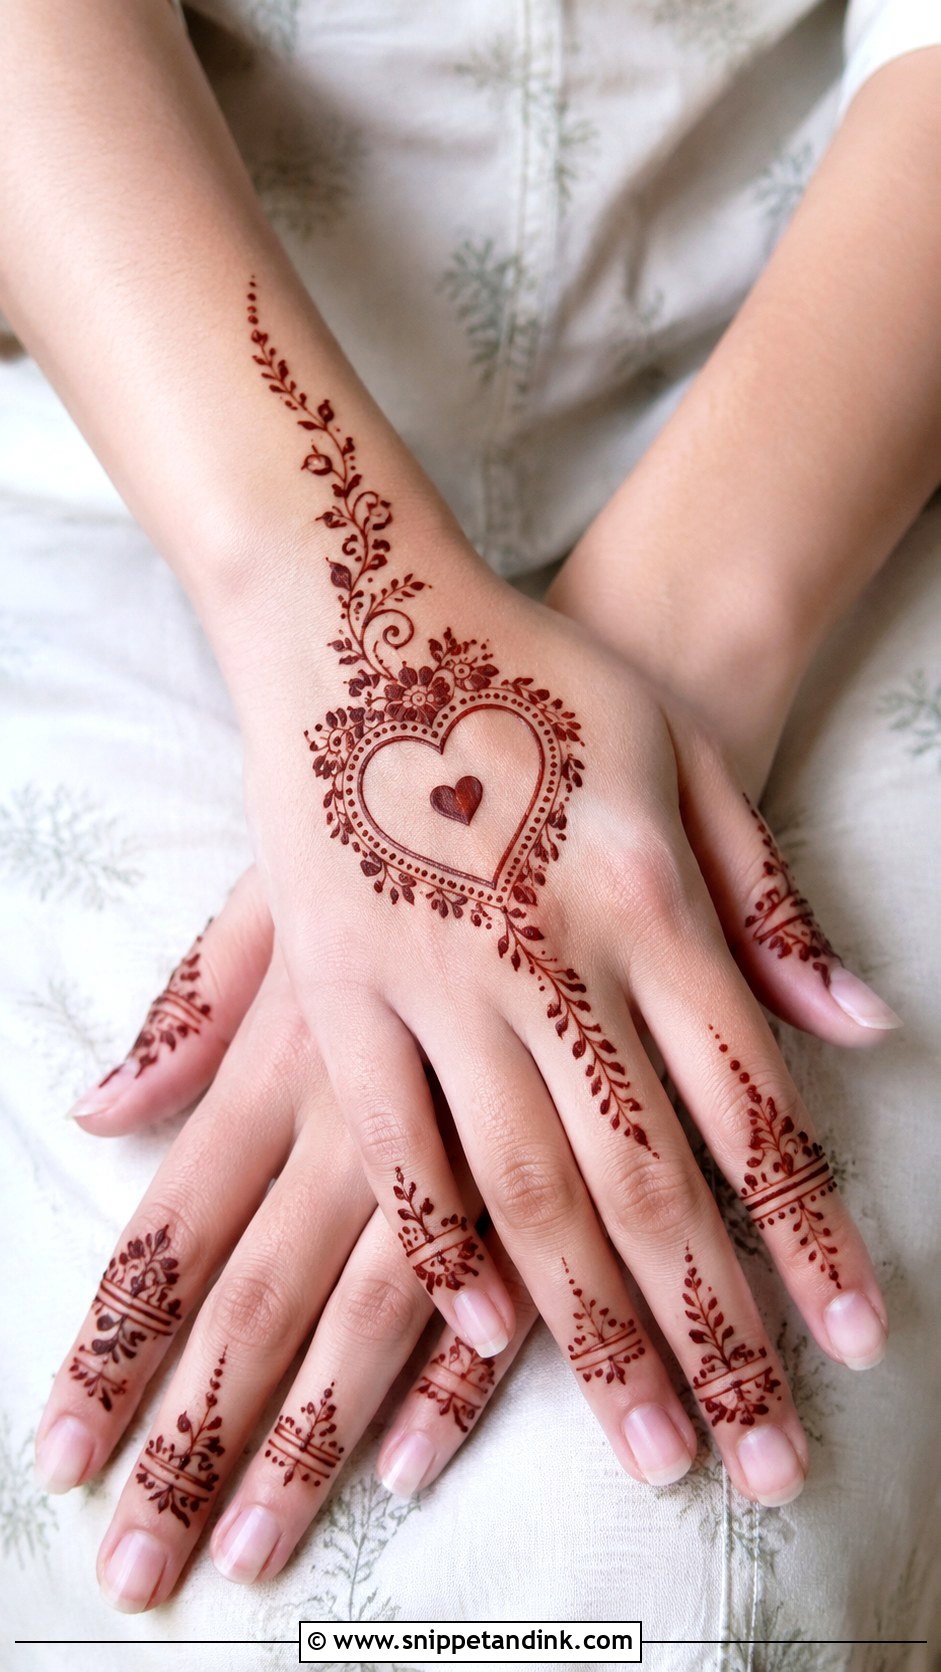
One small heart as the centre motif, or tiny hearts worked into a bracelet chain, rather than a hand full of them. Dots, vines and flowers around it keep it reading as henna. A smooth outline and a few strokes inside are all it needs. It’s a sweet choice for an engagement or anniversary, and balanced with traditional motifs it looks personal rather than gimmicky.
27. Back Hand Mehndi Design With Geometric Lines
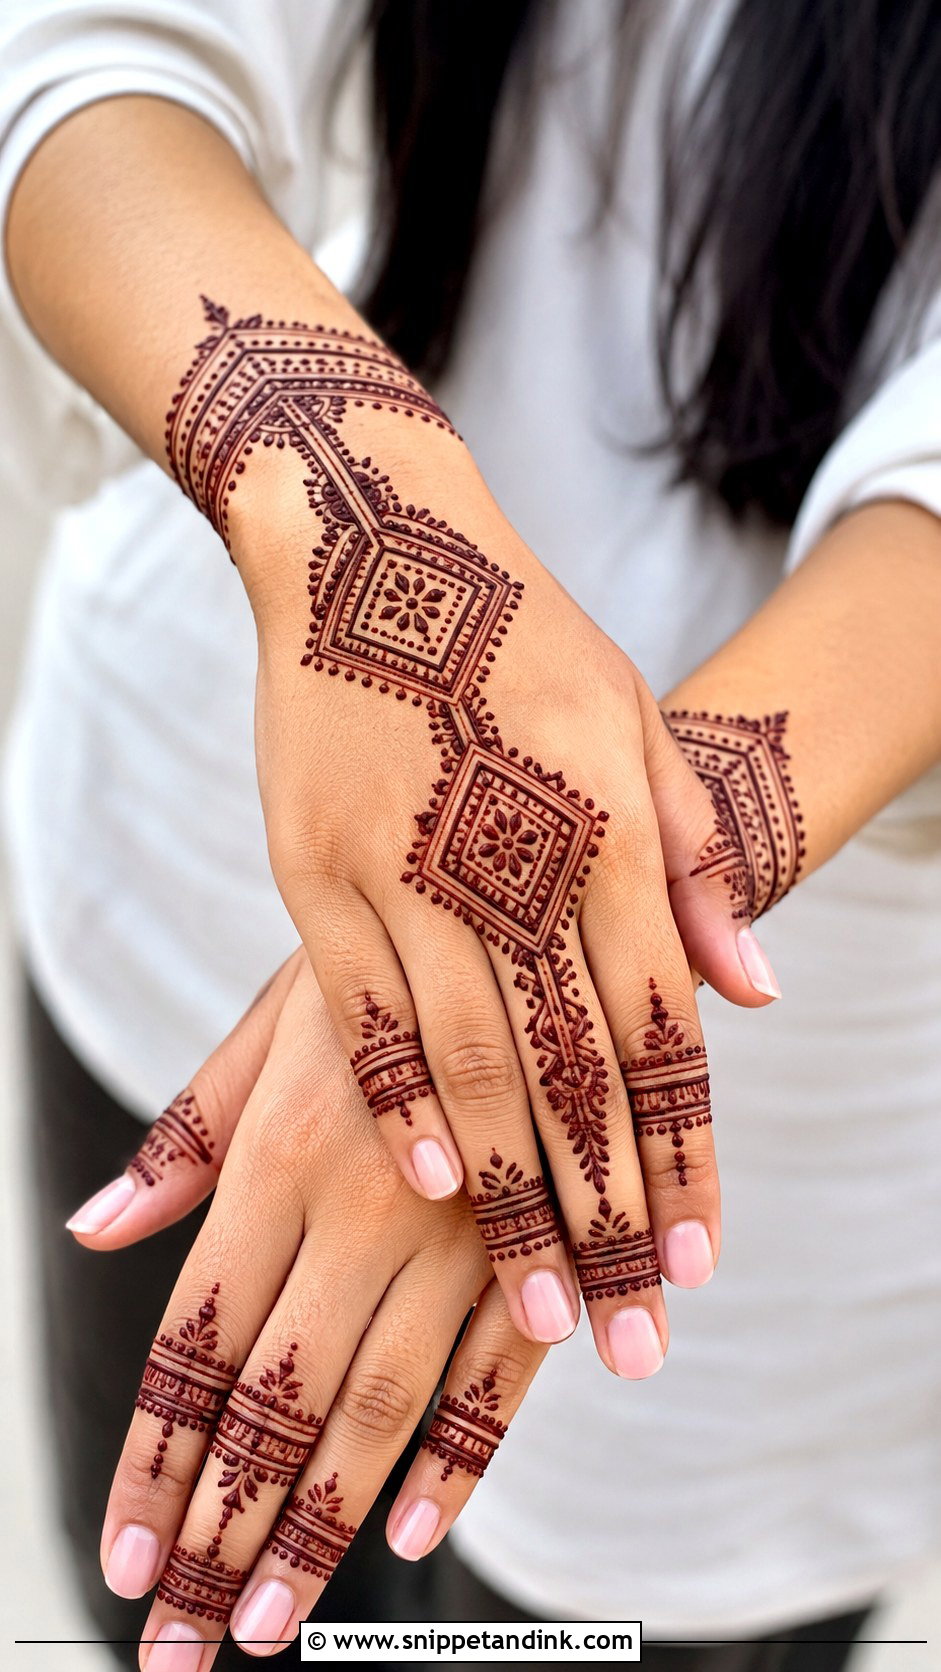
Straight lines, triangles, diamonds and small boxes arranged as a vertical strip from wrist to middle finger, or as an angled panel across the hand. Repeated shapes do the work instead of florals. Dots at the line crossings soften it, and slim bands or tiny diamonds on the fingers balance it. It’s bold and minimal, and it still connects to traditional henna through the repetition.
28. Back Hand Mehndi Design With Floral Trail
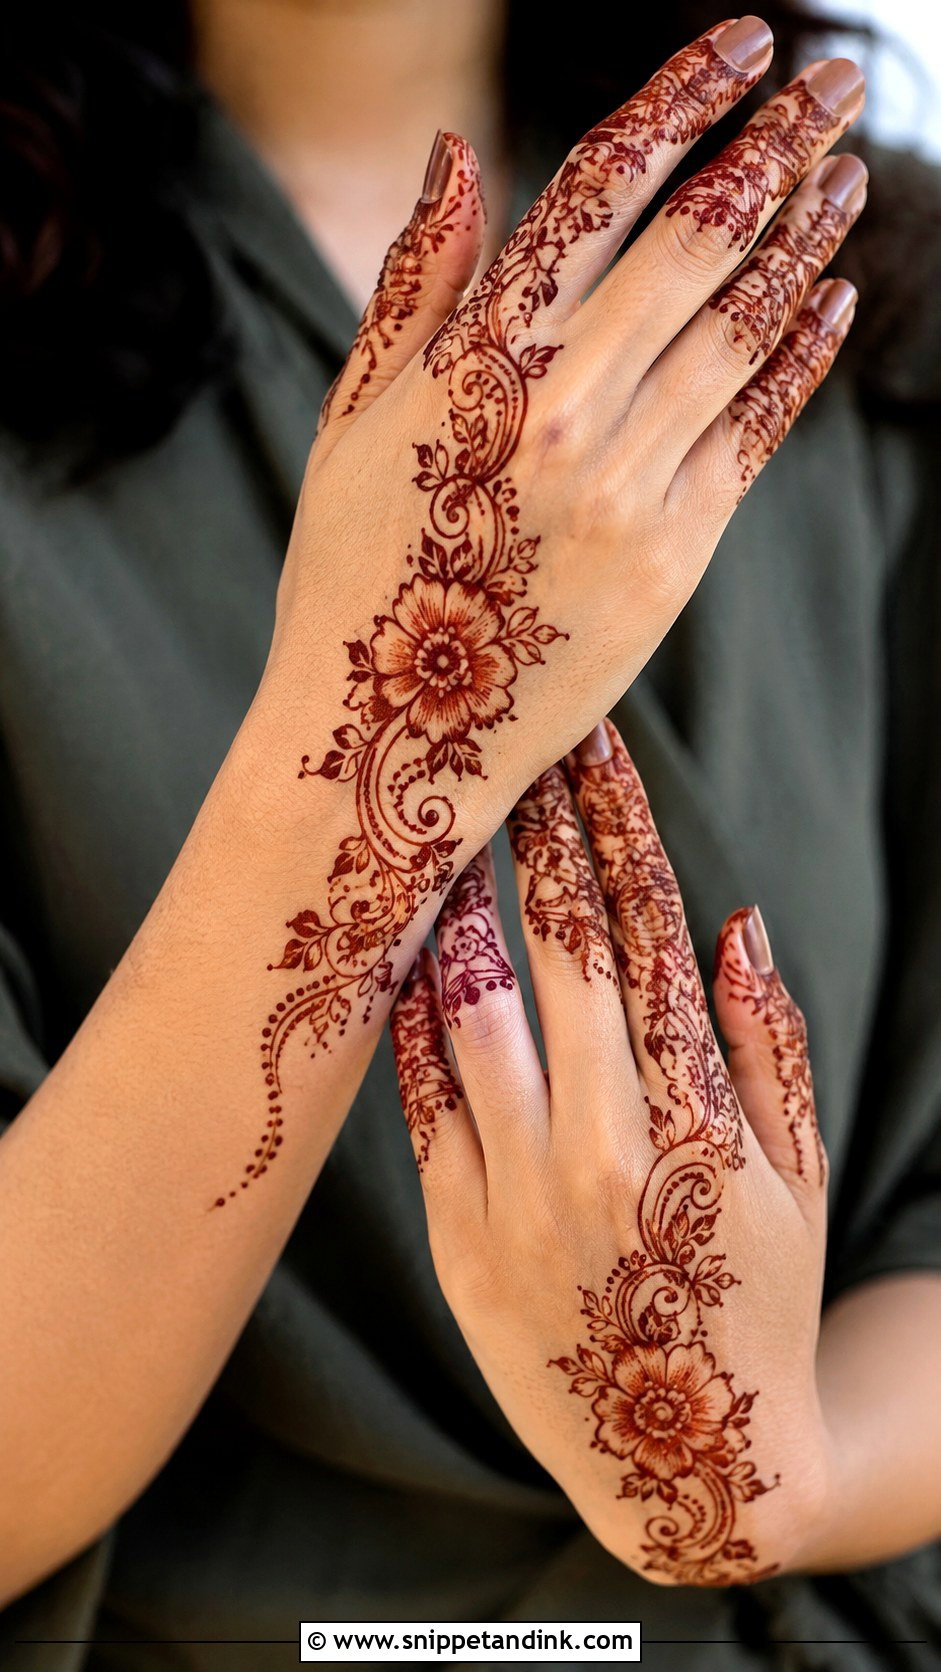
The trail starts at the wrist, crosses the back of the hand and ends near one finger, built from medium flowers, small leaves and dotted curves. It lengthens the hand and leaves plenty of skin, which is why it’s so widely loved. Keep it light for casual wear or shade the petals for a festival. The flow should curve naturally; a trail drawn as a stiff straight line looks mechanical.
29. Back Hand Mehndi Design With Thumb Side Pattern
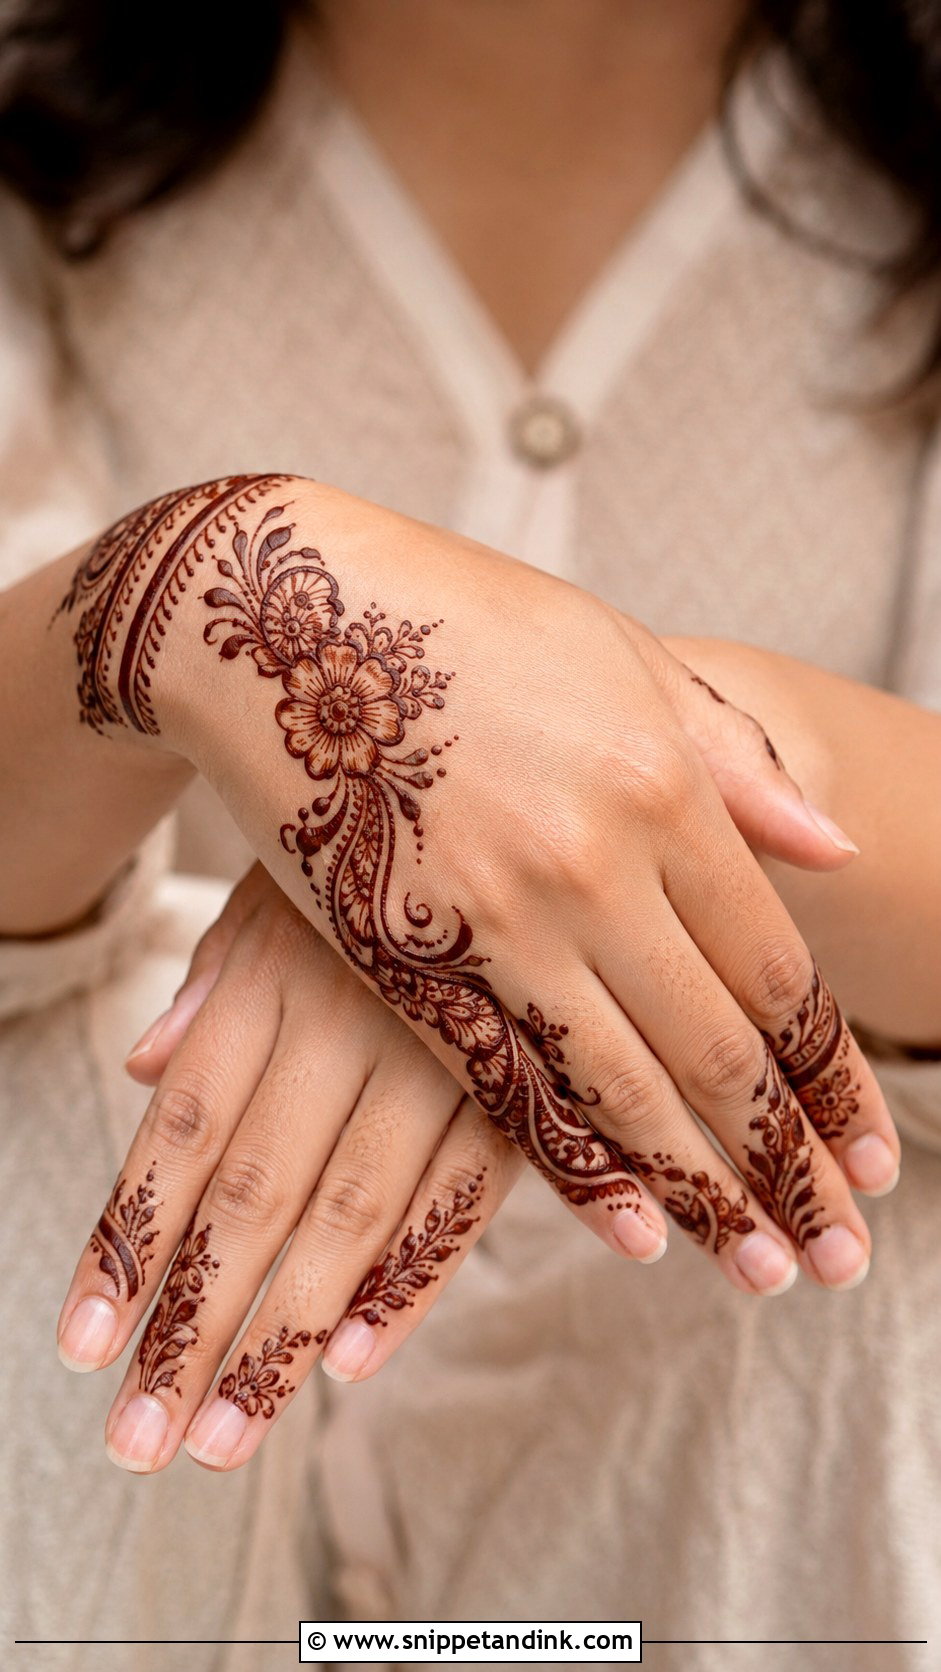
Instead of the centre, the main flowers, leaves or paisleys run along the thumb side of the hand, with the rest left open. It frames the hand in photos rather than covering it. A thin wrist border and simple fingertip dots balance the empty space. Because the thumb side carries everything, it has to be neat, and that edge also brushes against things more than you’d expect while drying.
30. Back Hand Mehndi Design With Index Finger Trail
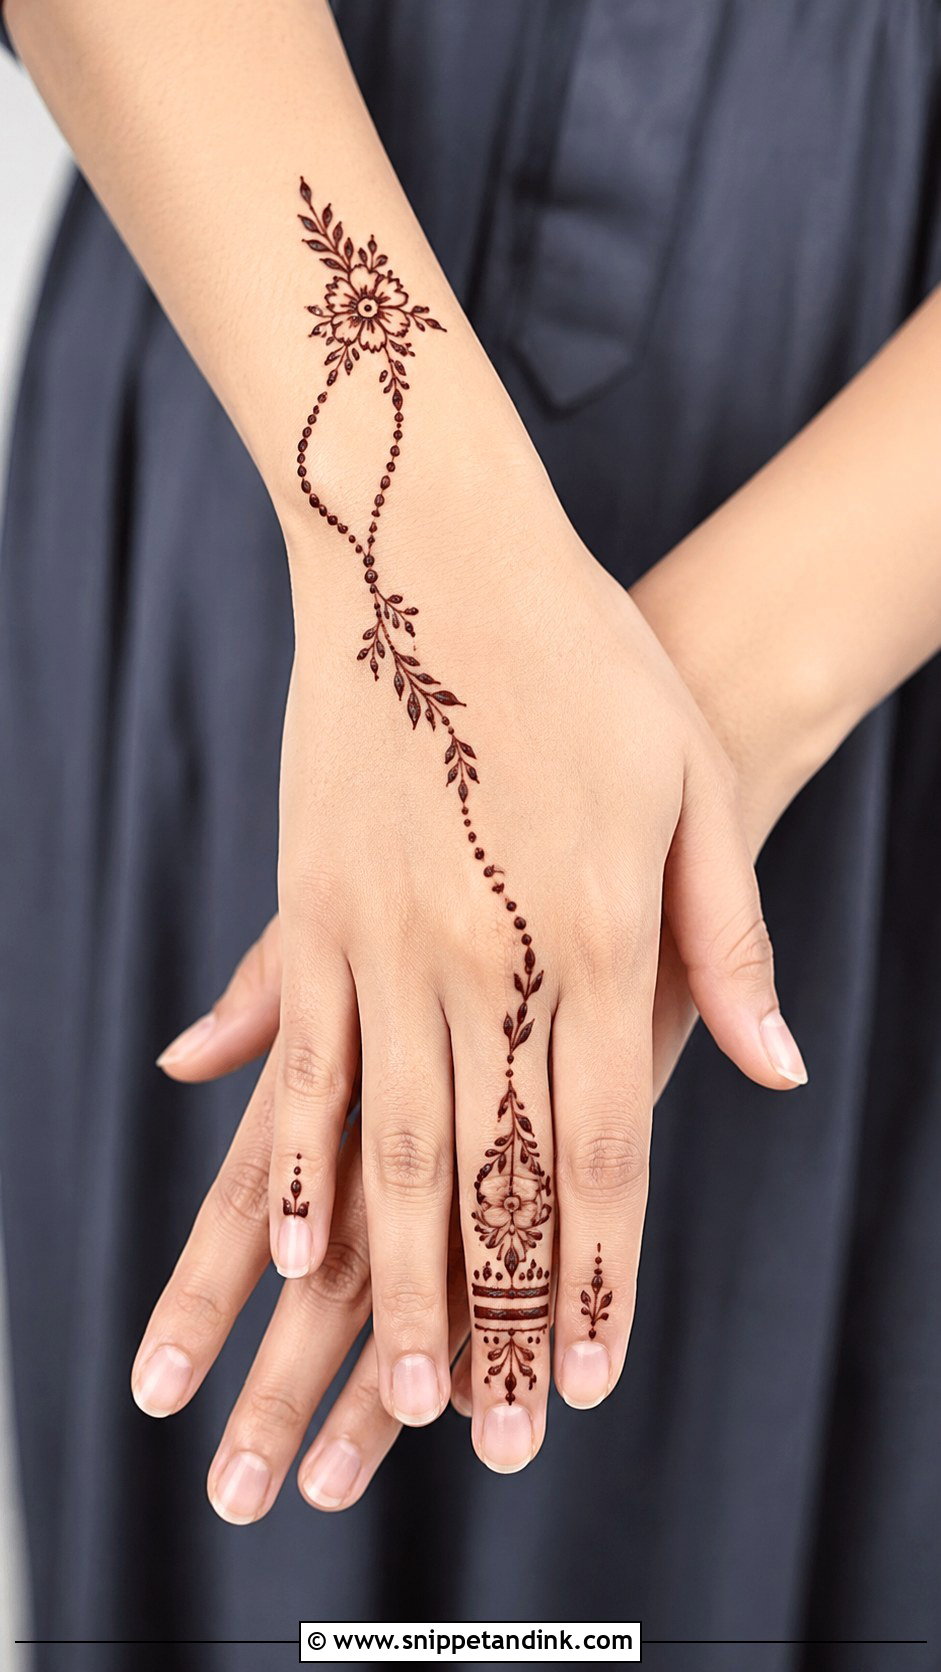
A small motif near the wrist or centre, then a vine or dotted chain straight up to the index finger, which gets more decoration than the others. One clear direction makes it easy to plan, which helps beginners. Flowers, leaves, tiny paisleys or geometric dots can all fill the trail. It’s pretty for casual events without any weight.
31. Back Hand Mehndi Design With Middle Finger Pattern
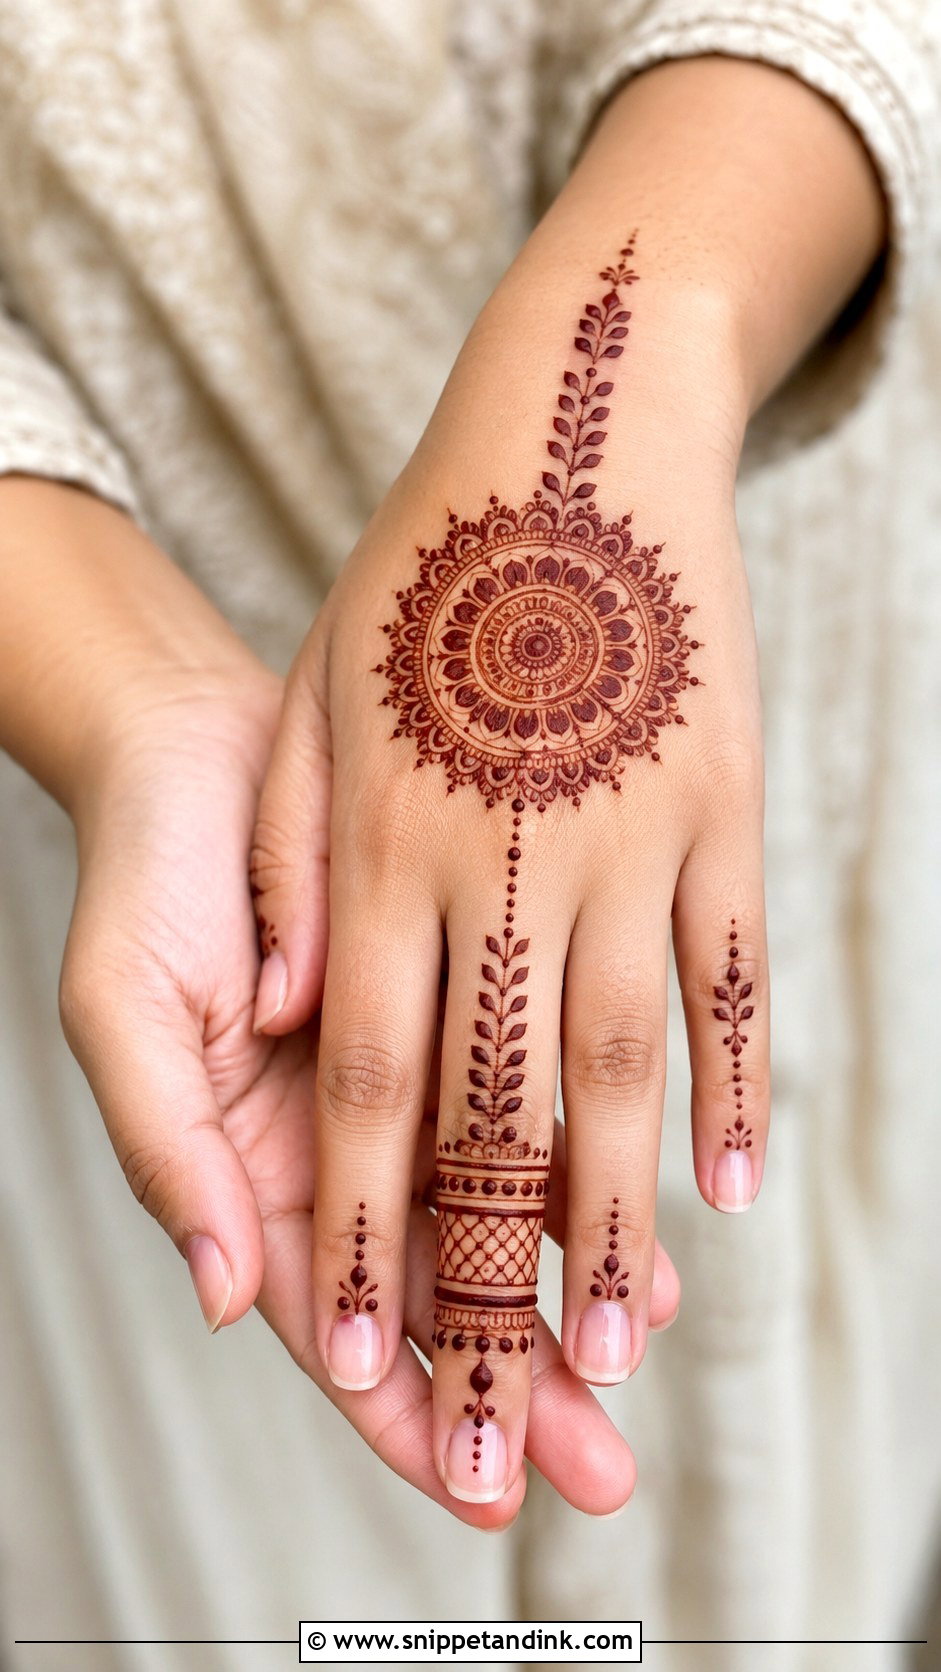
Built along the centre line of the hand: a mandala, flower or small paisley in the middle of the back, a dotted chain or leafy line rising to the middle finger, and that finger dressed in bands, dots and tiny leaves. The other fingers stay light so the line stays clear. Because it follows the hand’s own axis, it suits almost every shape. A slim wrist band completes it.
32. Back Hand Mehndi Design With Full Fingers
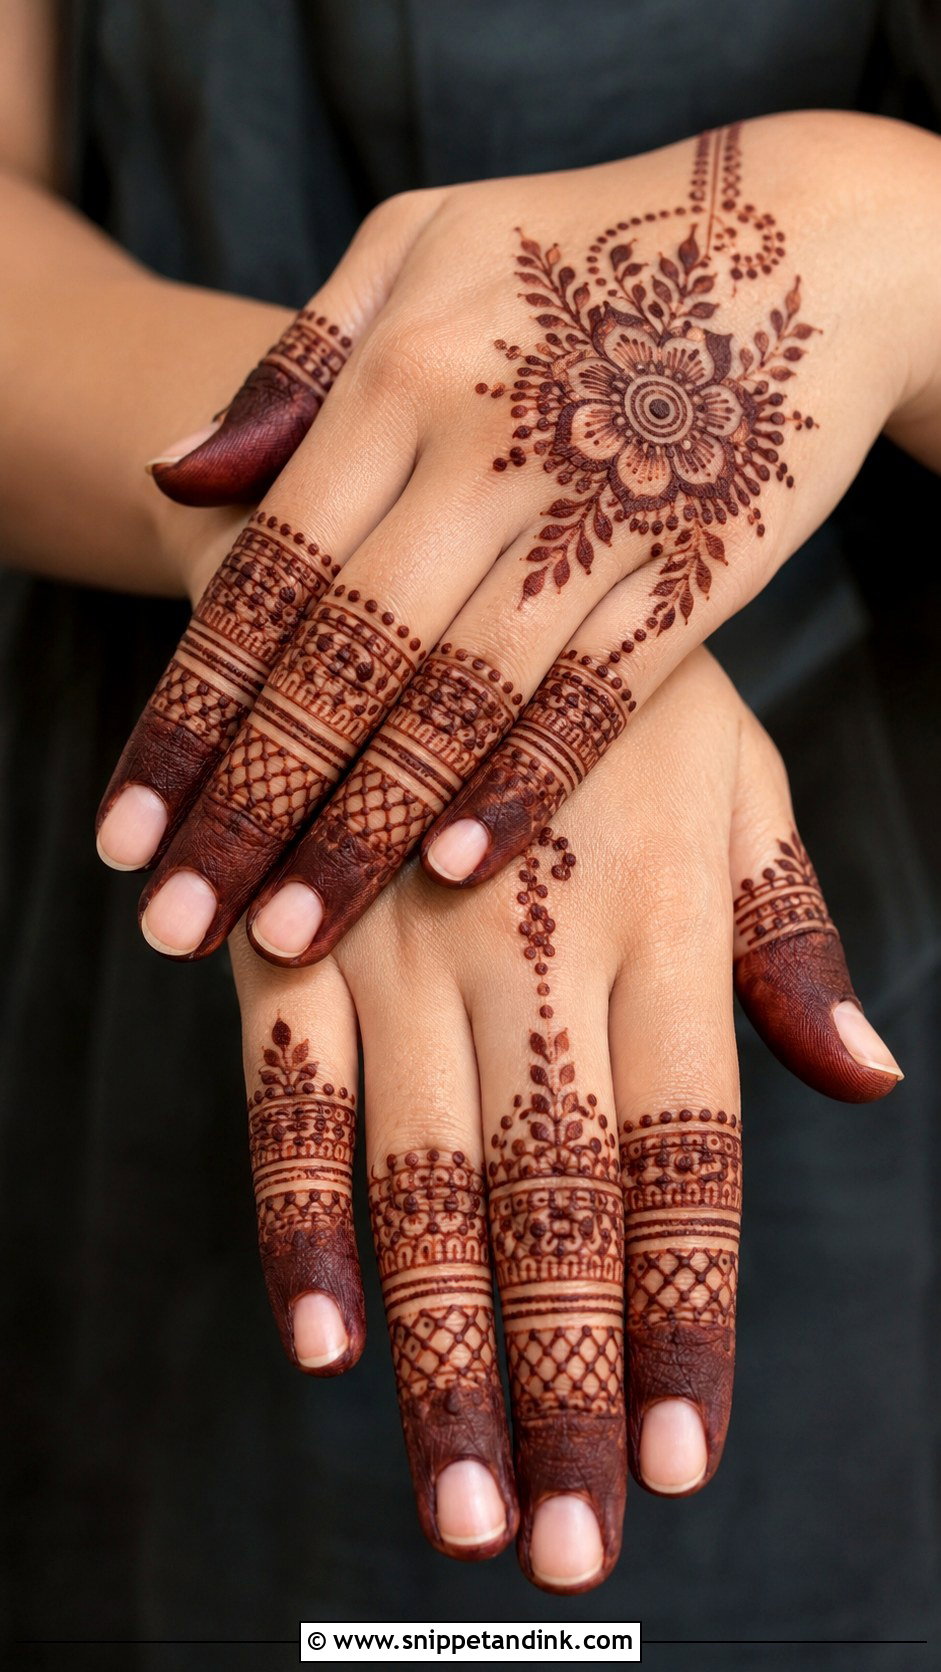
A small flower, mandala or vine on the back of the hand, then every finger decorated with bands, dots, leaves and small checks. The detail lands where it’s most visible, and fingers stain darker than the back of the hand, so it looks rich for little effort. Make the finger patterns related, either the same band on each or matching tips, so it reads as one design.
33. Back Hand Mehndi Design With Minimal Wrist
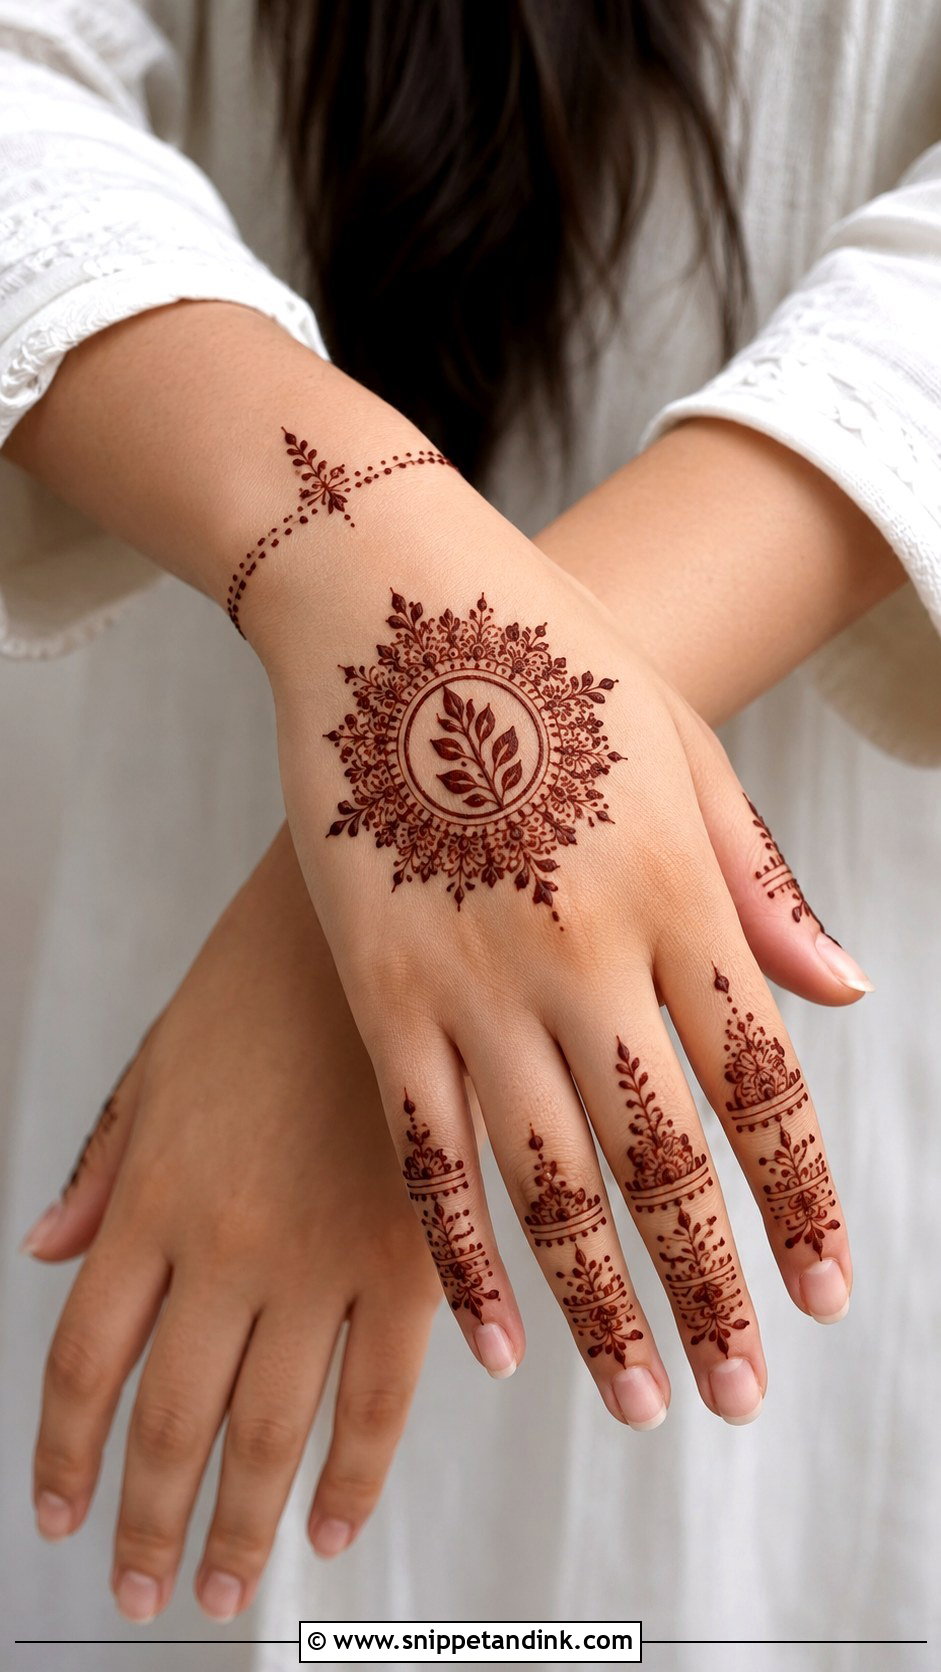
A back hand mehndi design with minimal wrist puts the decoration on the hand and fingers and leaves the wrist with a thin line, a few dots or nothing at all. It’s practical if you wear a watch, bangles or long sleeves, since anything on the wrist would rub before it stains. A small mandala, a floral trail or a leafy centre does the decorating, with delicate finger accents for balance. It also dries faster.
34. Back Hand Mehndi Design For Wedding Guest
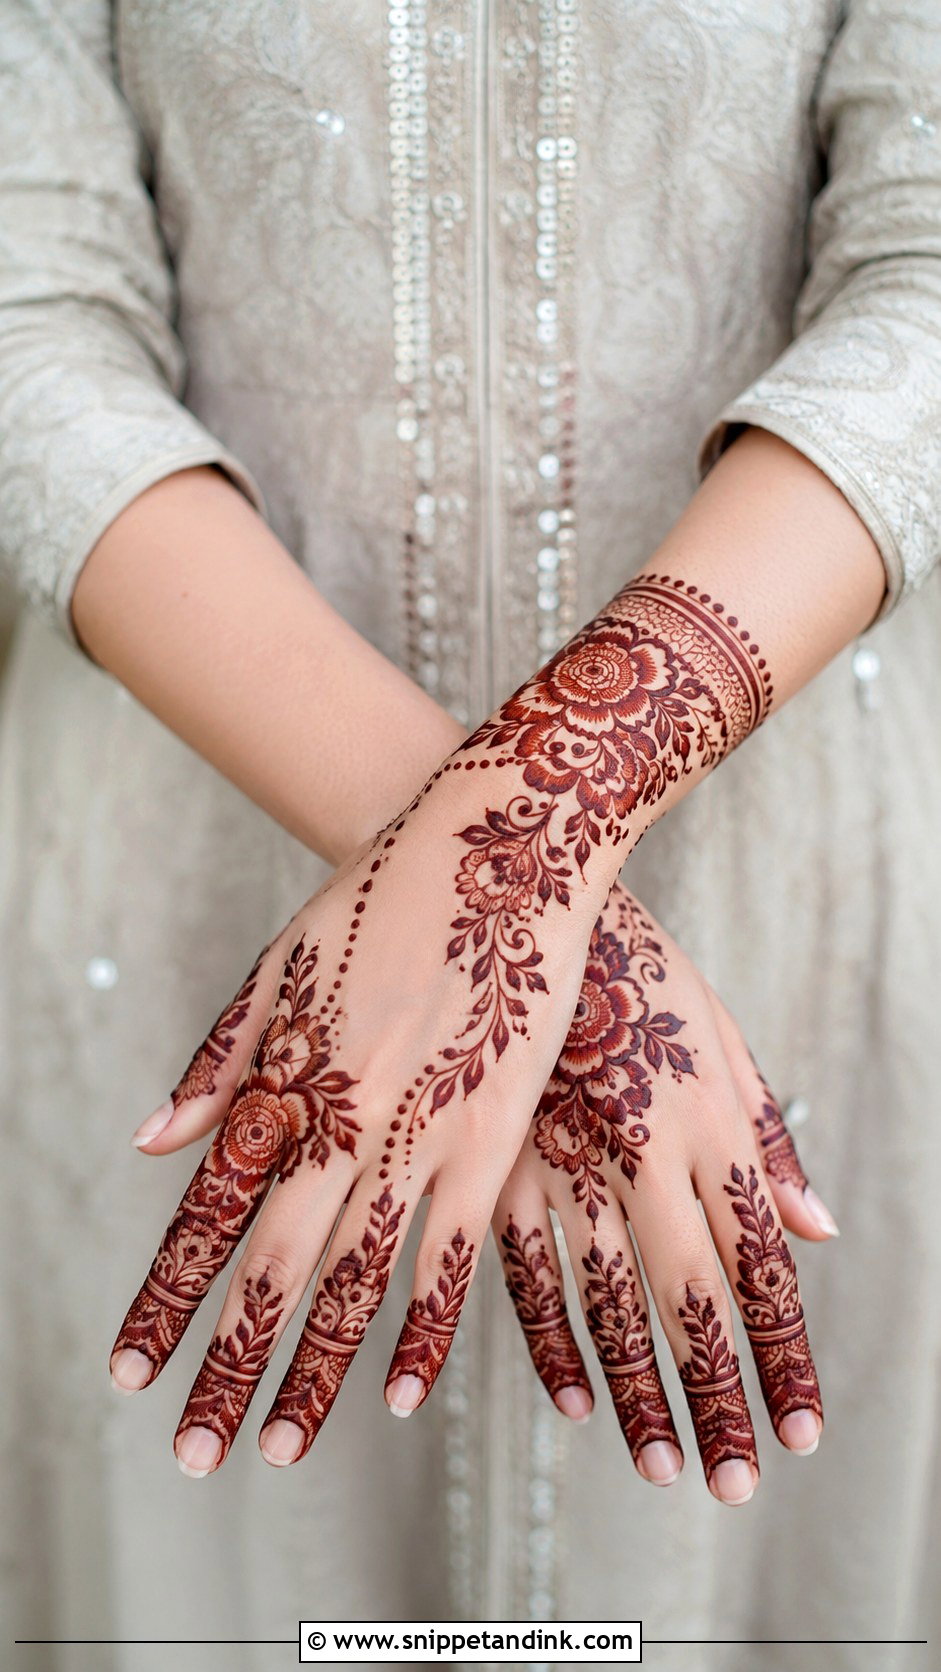
Guests should look festive but stay clearly lighter than the bride. A clean Arabic trail, a mandala with finger details or a bracelet-style design with leafy accents, with a little shading, a dotted border and a neat wrist band. Dense filling is best kept for close family. It needs to dry quickly and look tidy in photos, and it sits well with a lehenga, a saree or a fusion outfit.
35. Back Hand Mehndi Design For Festivals
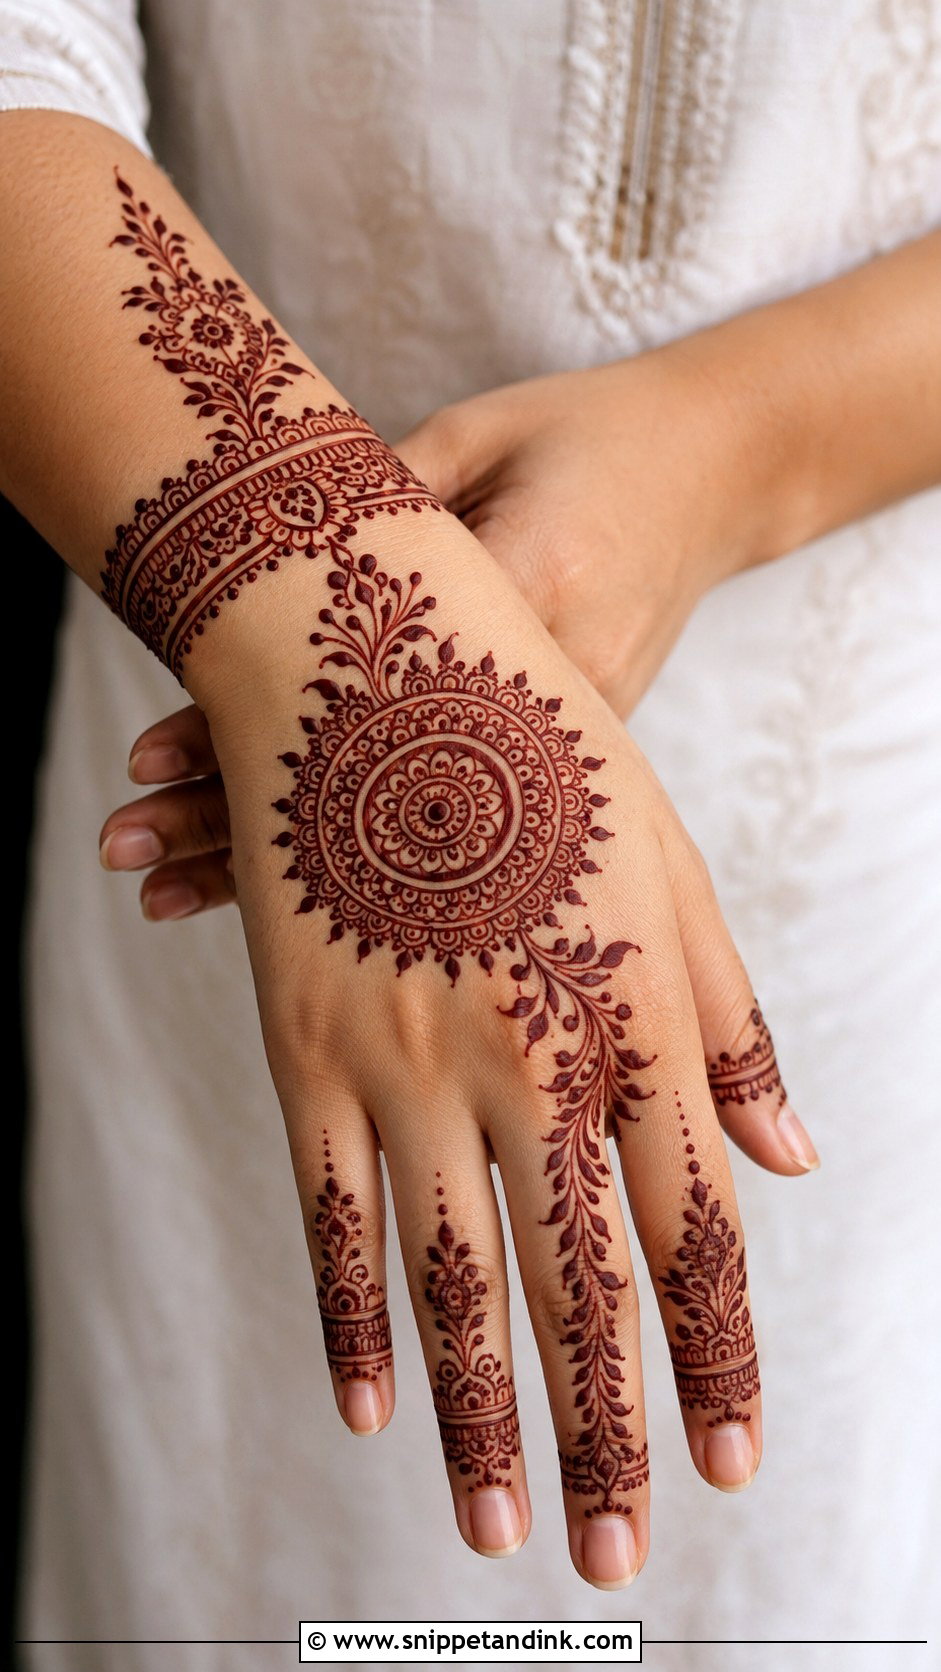
Festival henna usually happens in a rush, so match the design to the time you have. Short on time: a centre flower and finger dots. More time: add a wrist band and a leafy trail. Mandalas, floral trails, vines and bracelet cuffs all suit Eid, Diwali, Karwa Chauth and Teej. Clear and balanced beats crowded every time. Then leave the paste on and let the stain develop before the celebration starts.
Smudged It While the Paste Was Still Wet?
It happens to everyone: a sleeve brushes past, a child grabs your hand, you reach for your phone without thinking. The back of the hand is especially exposed because it’s the side that touches bags, tables and car doors. Wet henna can usually be rescued if you act straight away.
- Don’t wipe. Wiping spreads paste over clean skin and leaves an orange smear.
- Lift the smudged paste off gently with the tip of a cotton bud or a toothpick, working away from the design.
- Dab the spot with a cotton bud dipped in a little water to take off the last trace, then dry it at once.
- Ask your artist to redraw the missing line, or leave it if it’s small; a gap usually shows less than a smear.
If the smudge has already dried, leave it alone. A faint stray mark often fades within a few days, and the back of the hand is also where henna fades first overall, since that skin is washed and rubbed more than the palm. Expect a simple design here to look its best for about a week.
Open Skin Is Part of the Design
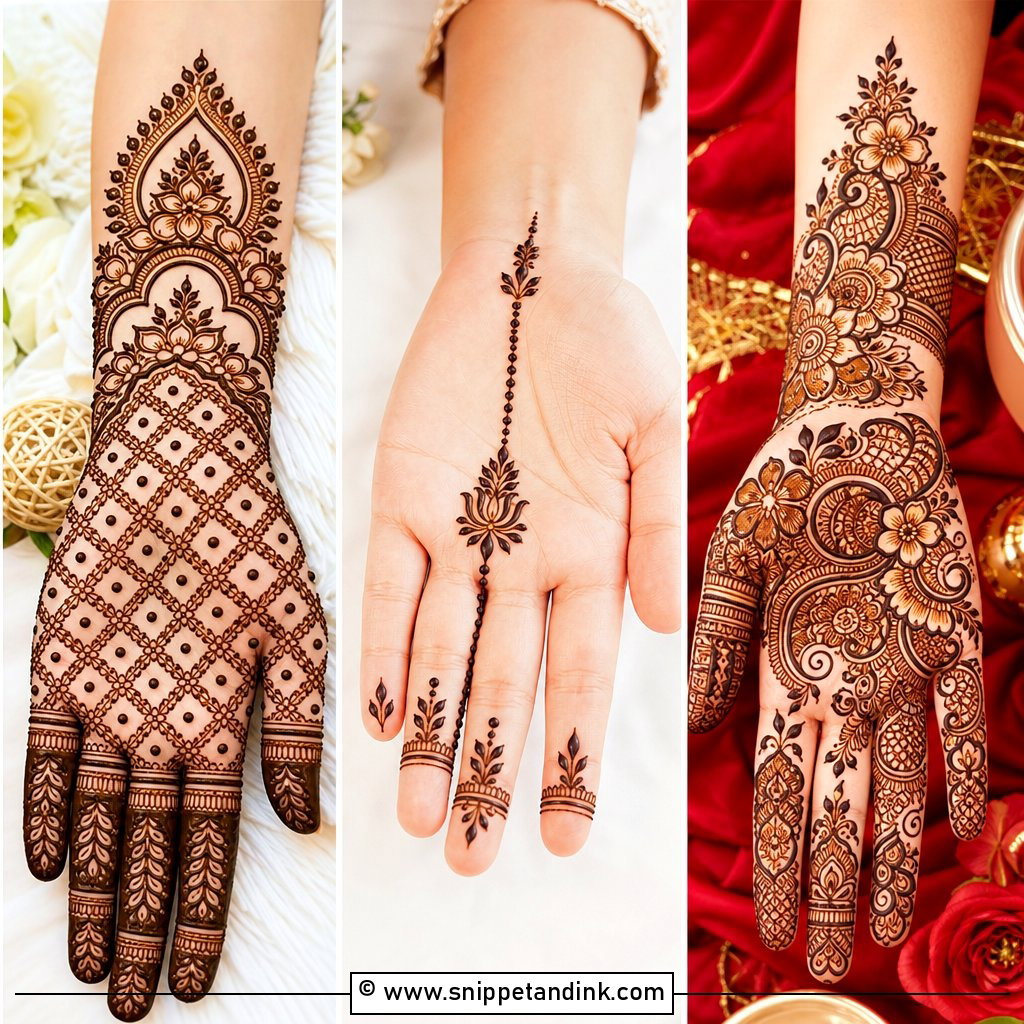
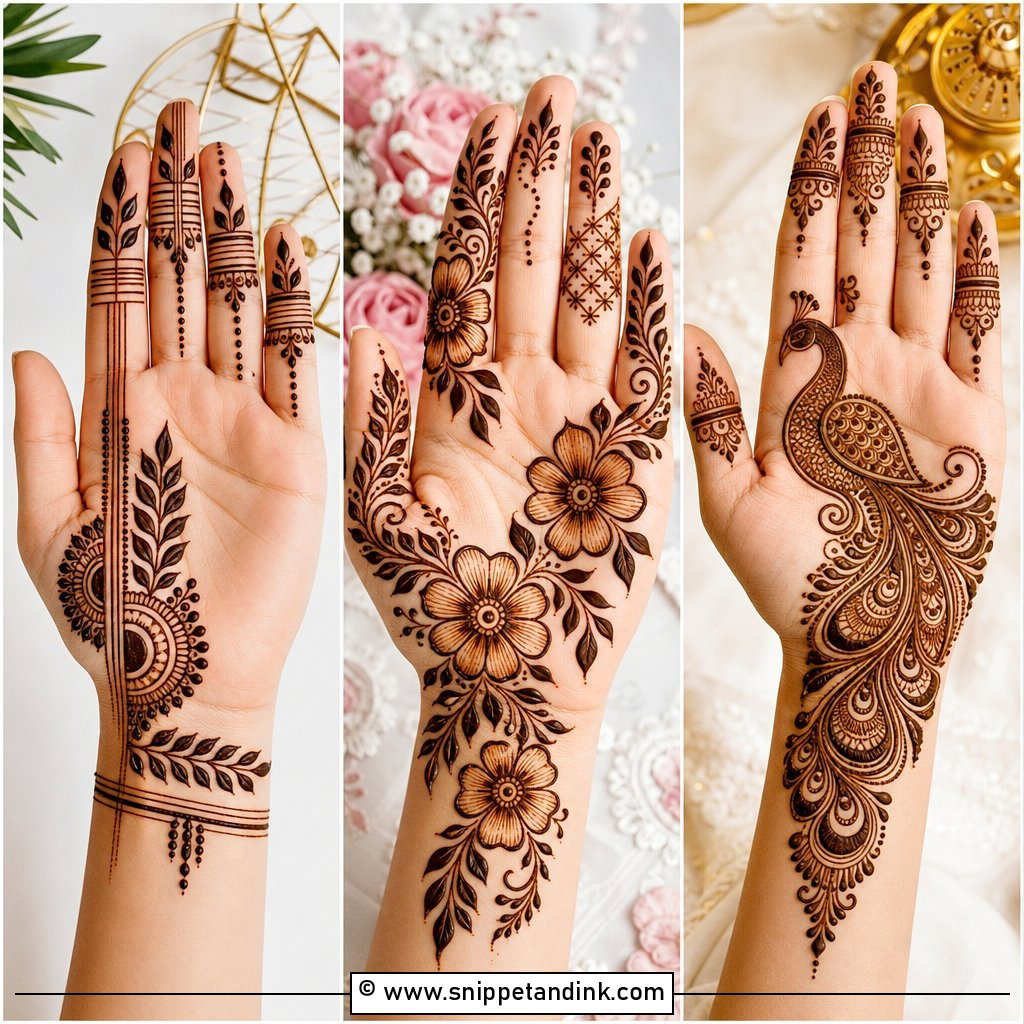
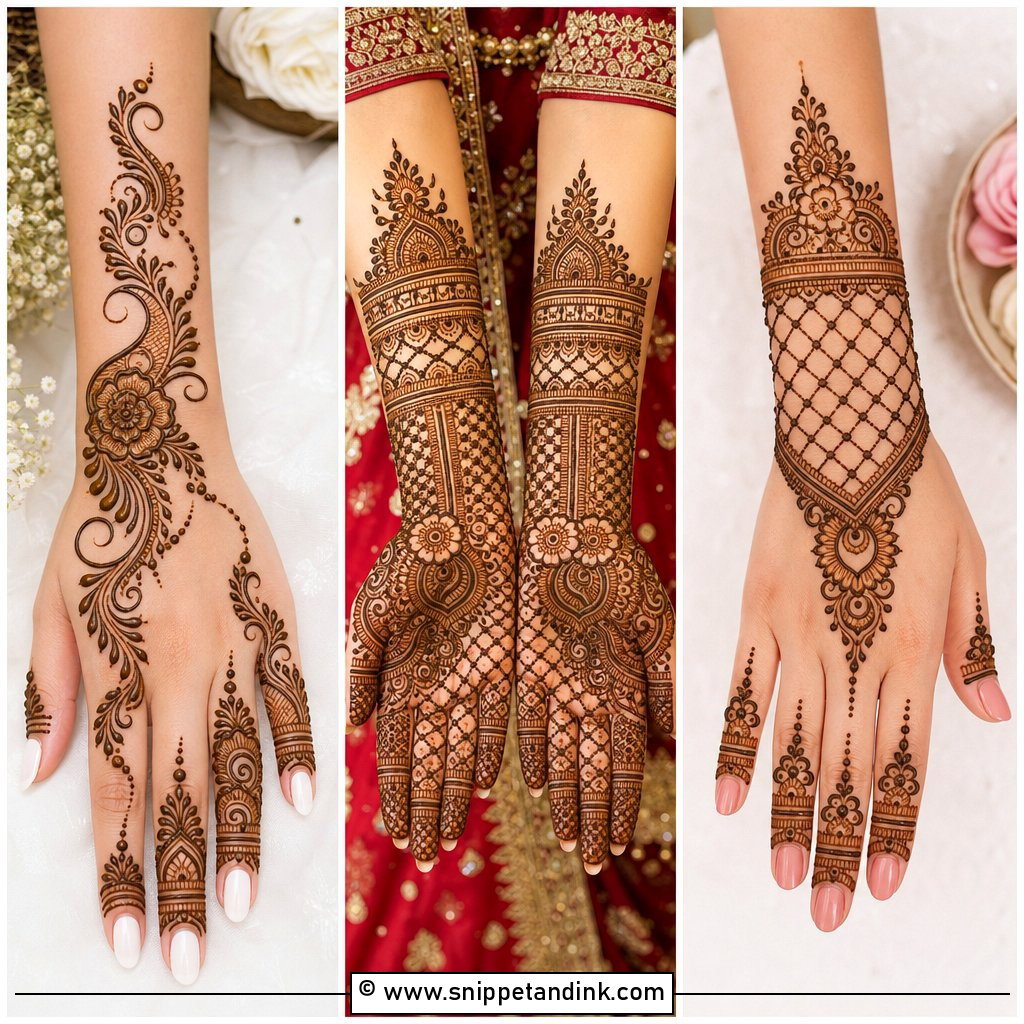
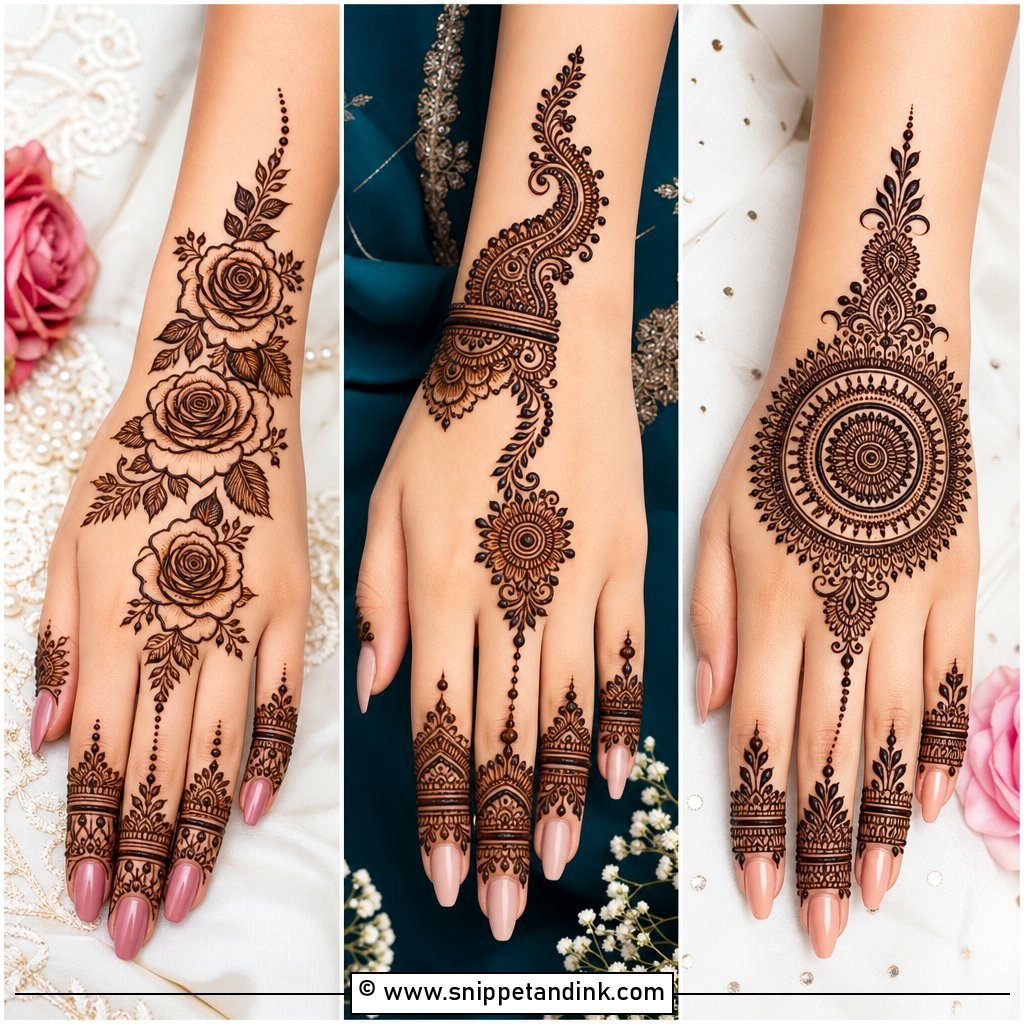
Clean lines, open space and balanced motifs carry the back of the hand; a full pattern isn’t necessary. A small mandala, a floral trail, a bracelet cuff, a jaali panel or busy fingers can each look complete on their own. Go lighter for casual days and add shading or wrist details for weddings and festivals. If you’re learning, master vines, dots and simple flowers before moving on to detailed motifs. Get the spacing right and the lines steady, and any of these designs suits any age.
You'll Like These Ideas:


Leave a Reply