
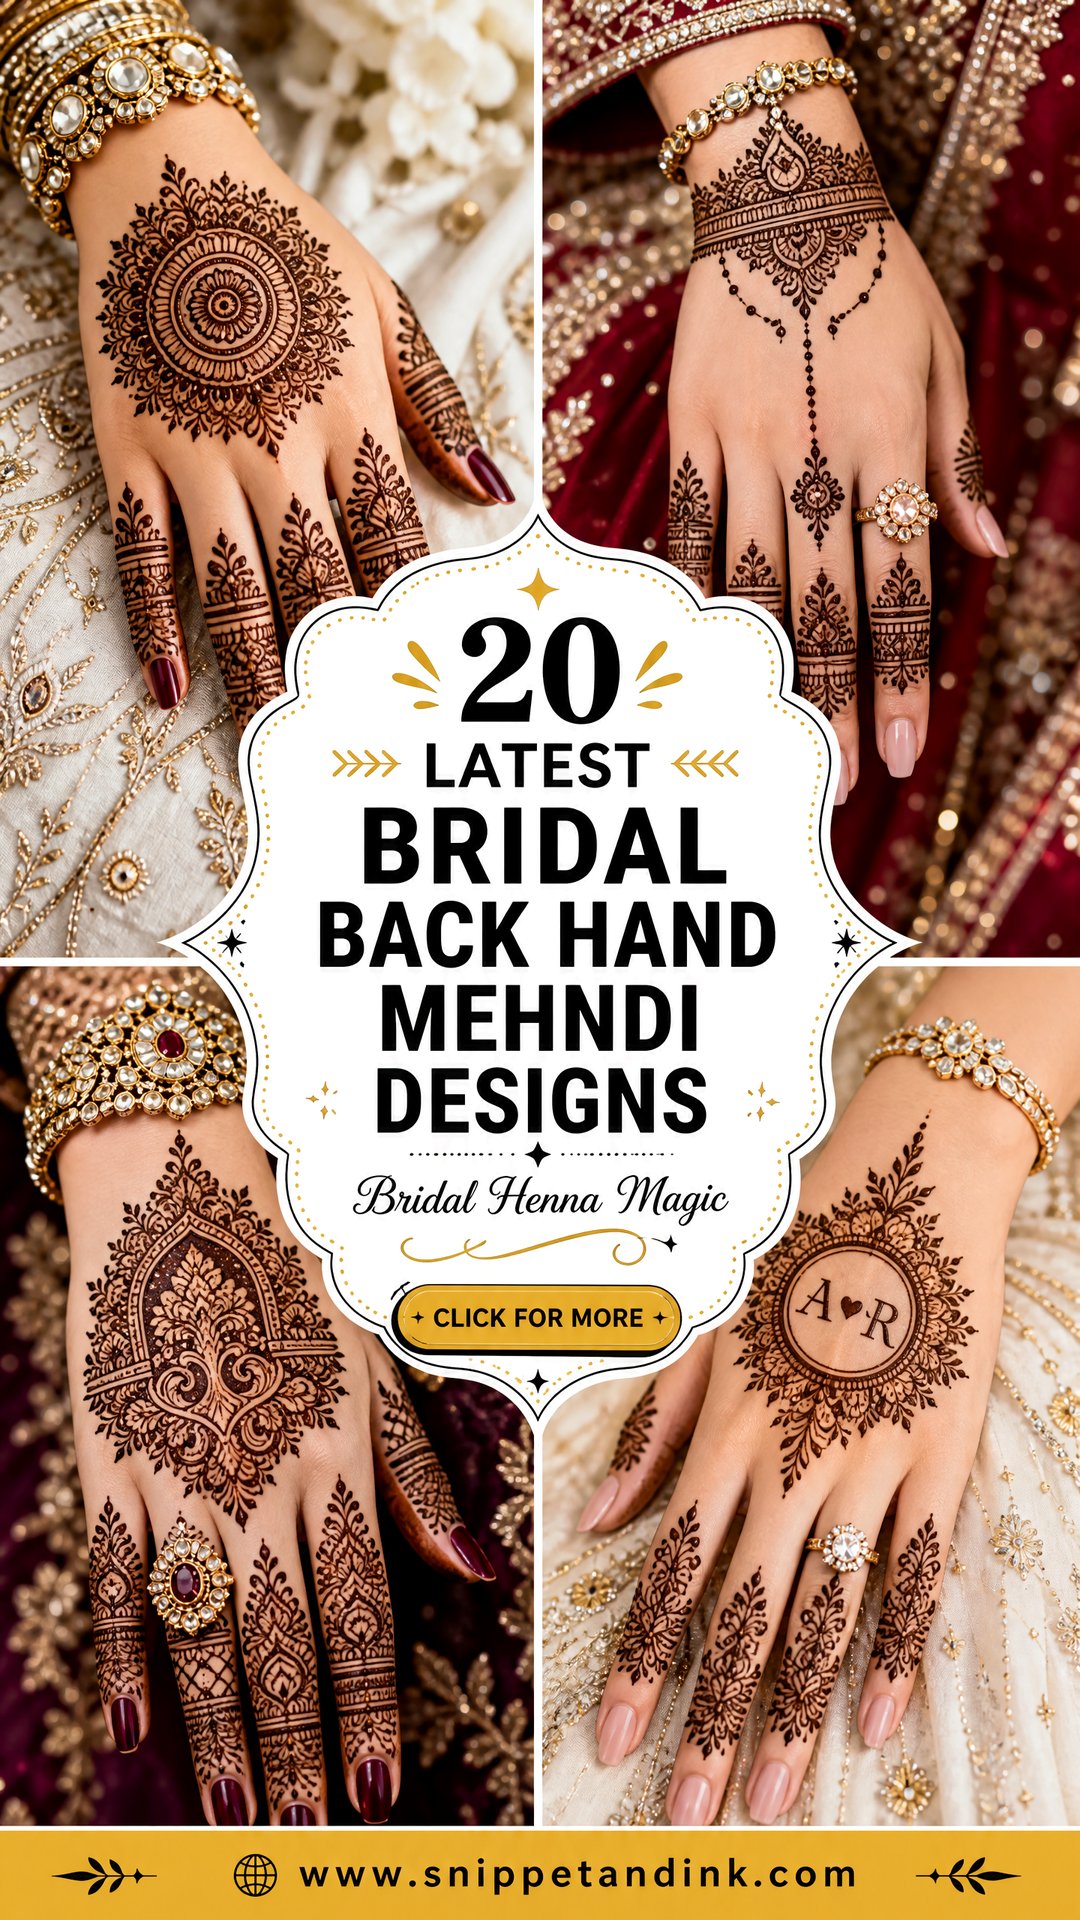
The back of the hand is the side everyone photographs. It’s in the ring shots, the chooda close-ups, the dupatta poses and every frame where your hands rest in your lap, so I plan it as carefully as the palm. Current bridal work tends toward cleaner spacing, though dense Indian coverage, bold Arabic florals, mandalas, jaali grids, portraits and hidden initials all still have their place. A good back-hand design also leaves room for bangles, rings and nail colour instead of fighting them. Below are twenty directions I’d talk a bride through, from full forearm work to light modern patterns, with notes on what each one needs from your artist.
Why the Back of Your Hand Stains Lighter Than the Palm
Brides are sometimes disappointed that the back of the hand comes out a shade or two lighter than the palm. That’s normal. Henna stains the outer layer of skin, and palms and fingertips have the thickest layer, so they take the deepest colour. The back of the hand, and the forearm even more so, has thinner skin and ends up more orange-brown. A good artist designs around this rather than pretending it won’t happen.
- Bold outlines and filled shapes hold colour better on the back of the hand than very fine hairlines.
- Fingers stain darker than the hand itself, so heavier finger work balances a lighter-looking back.
- The stain starts orange and darkens over the next day or two, so time your application one or two days before the wedding, not the morning of.
- Warm hands stain darker than cold ones. Sit somewhere warm while the paste is on.
Natural henna paste is brown or green when applied and stains to a reddish brown. If anyone offers you instant black henna, refuse it. That colour usually comes from a chemical dye that can cause serious skin reactions, and a wedding week is the worst time to find out.
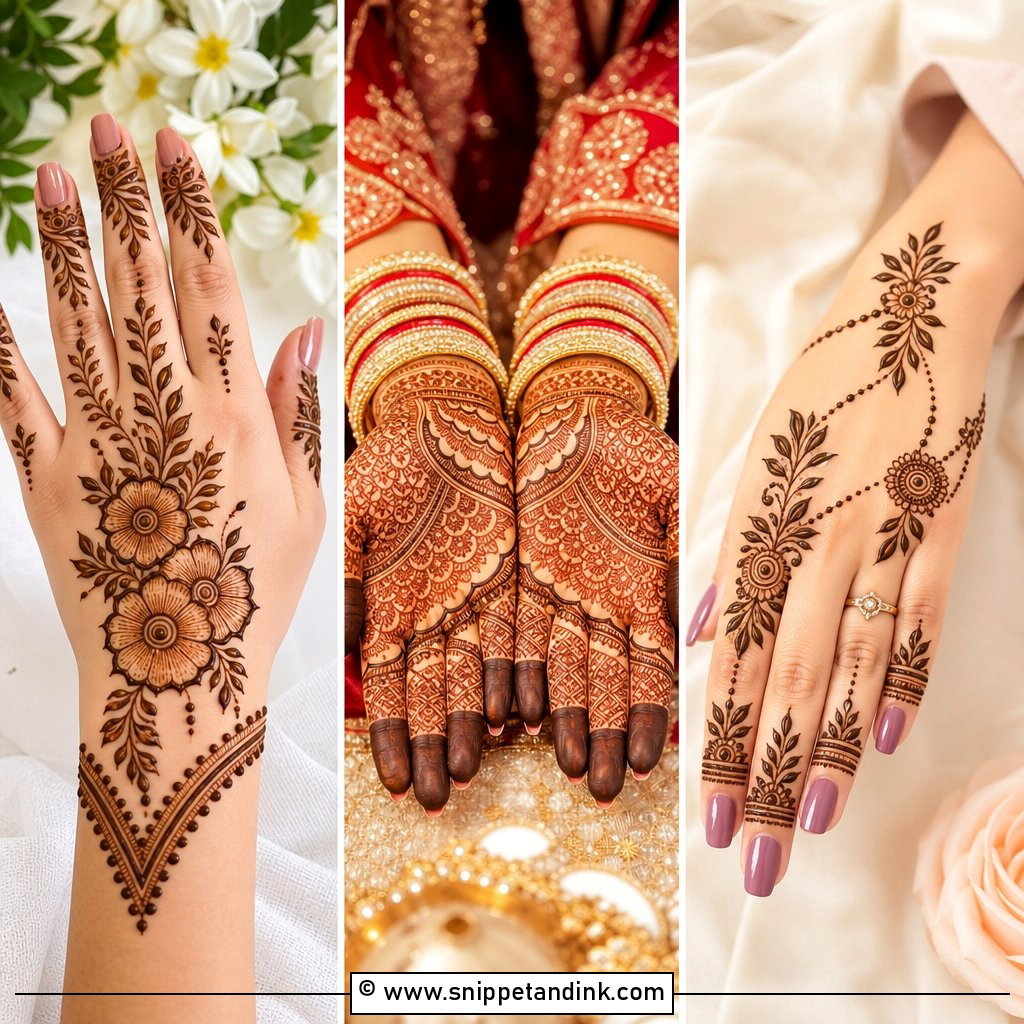
1. Full Hand Bridal Back Hand Mehndi Design
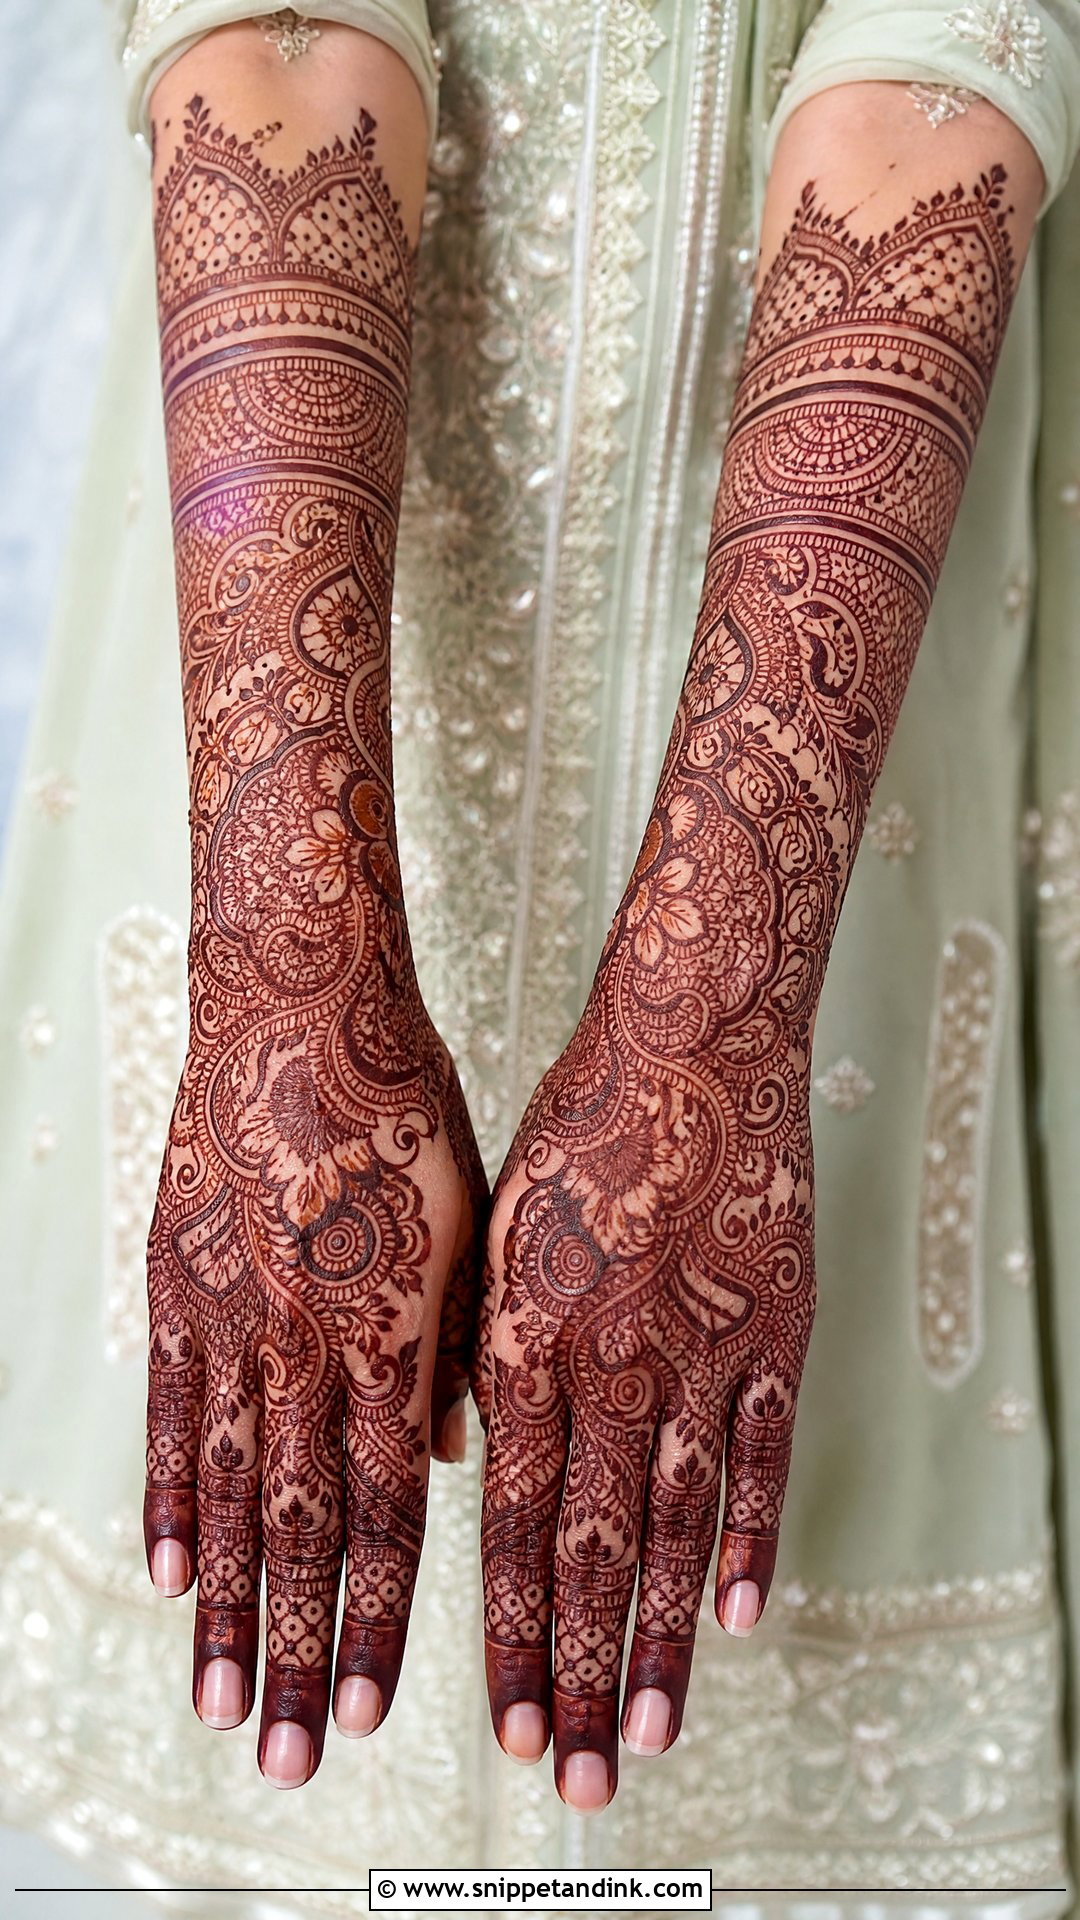
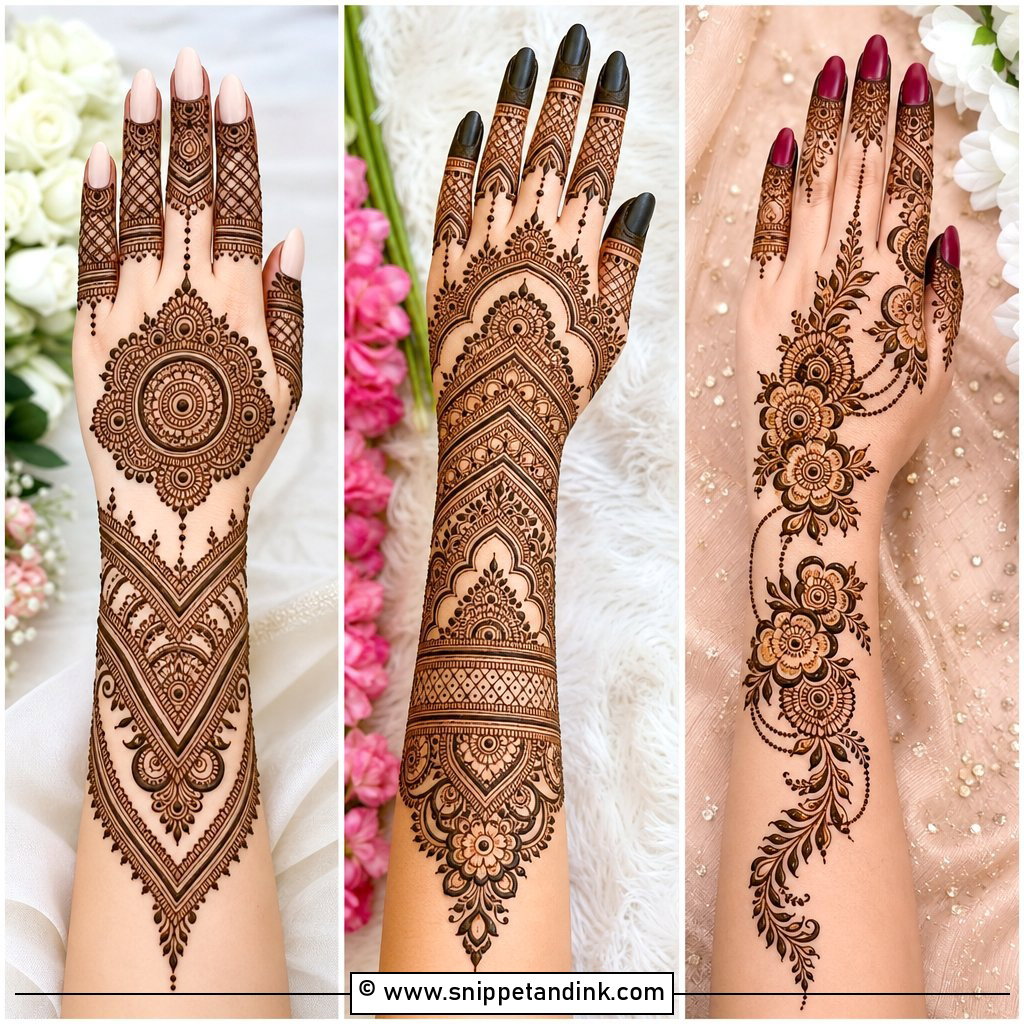
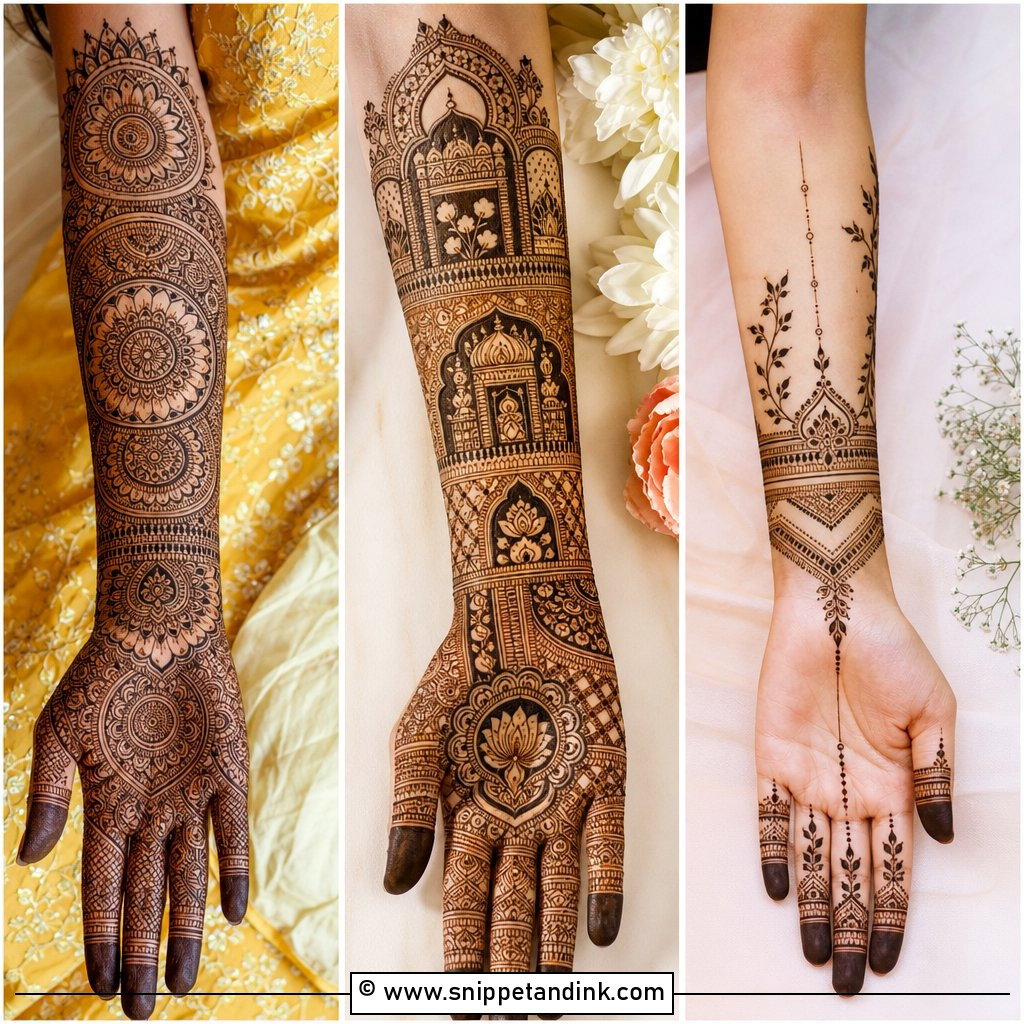
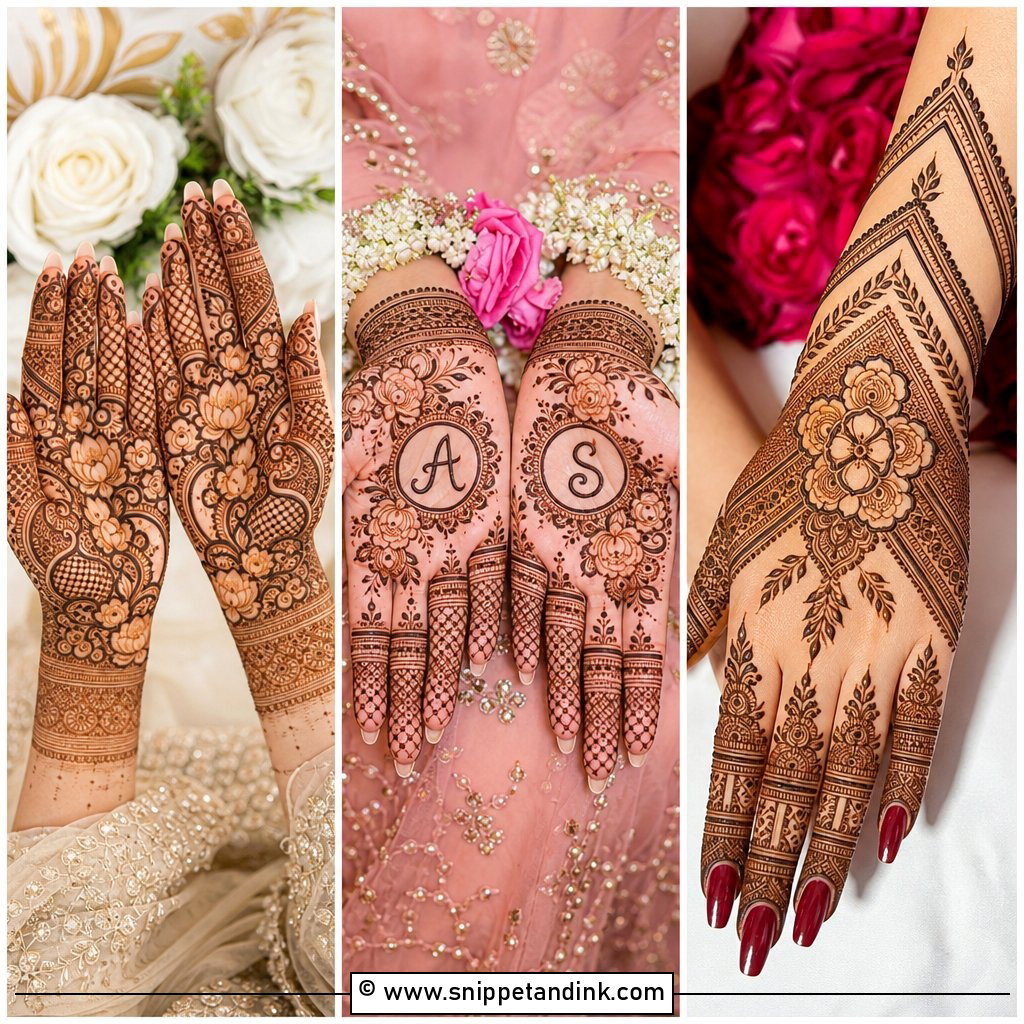
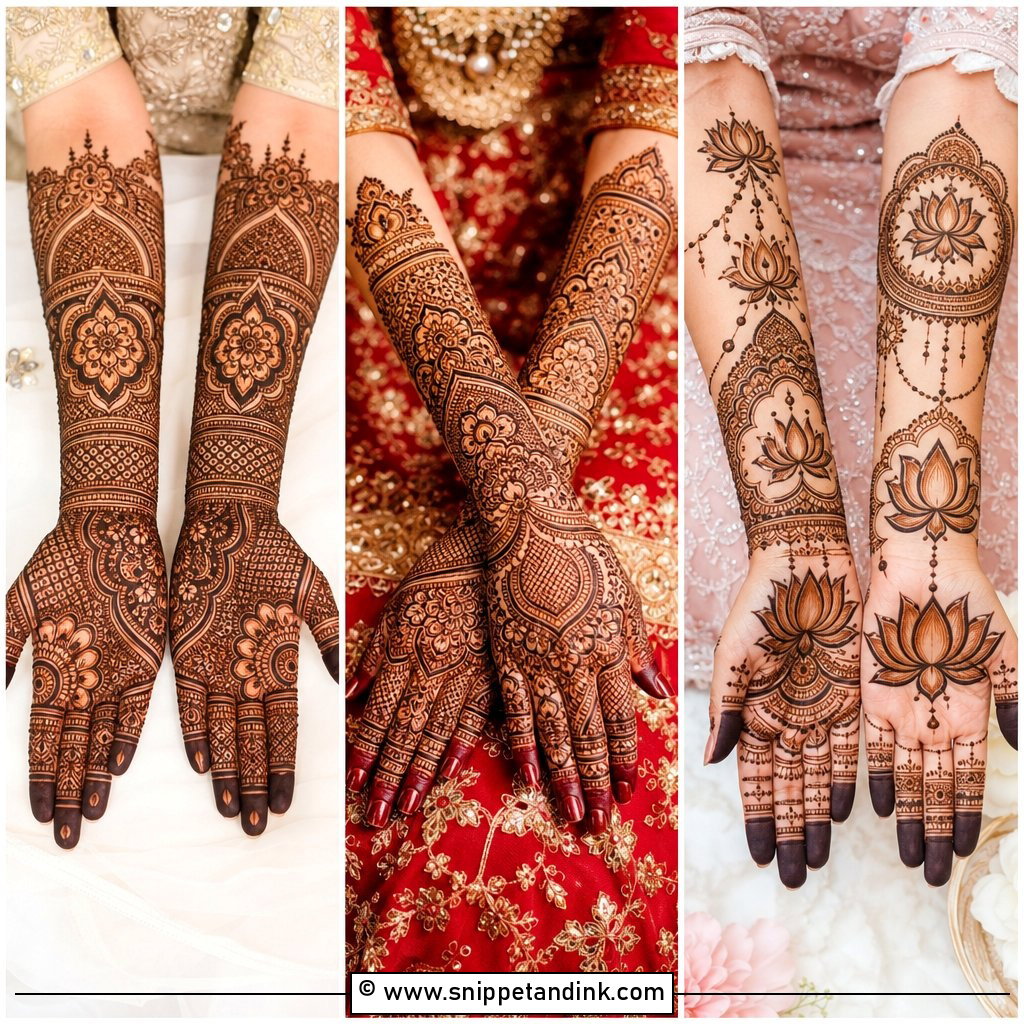
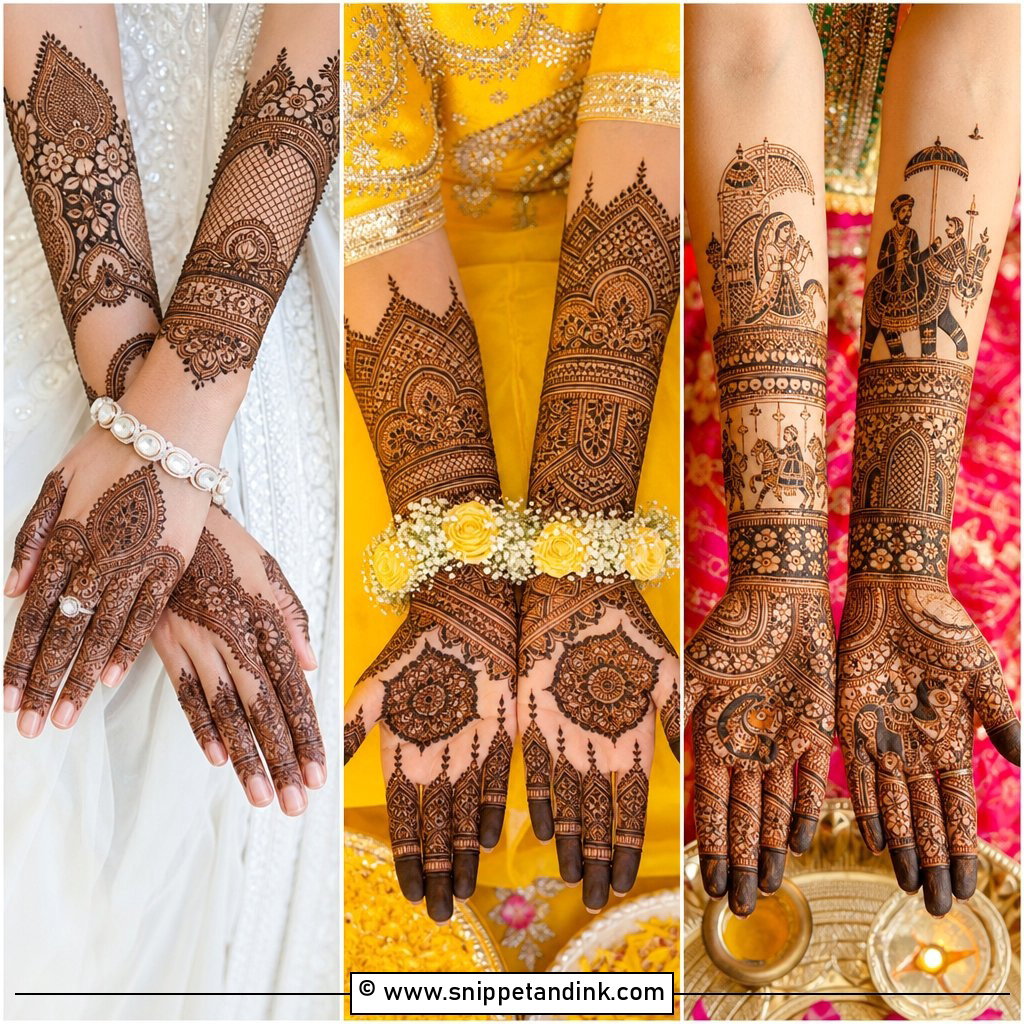
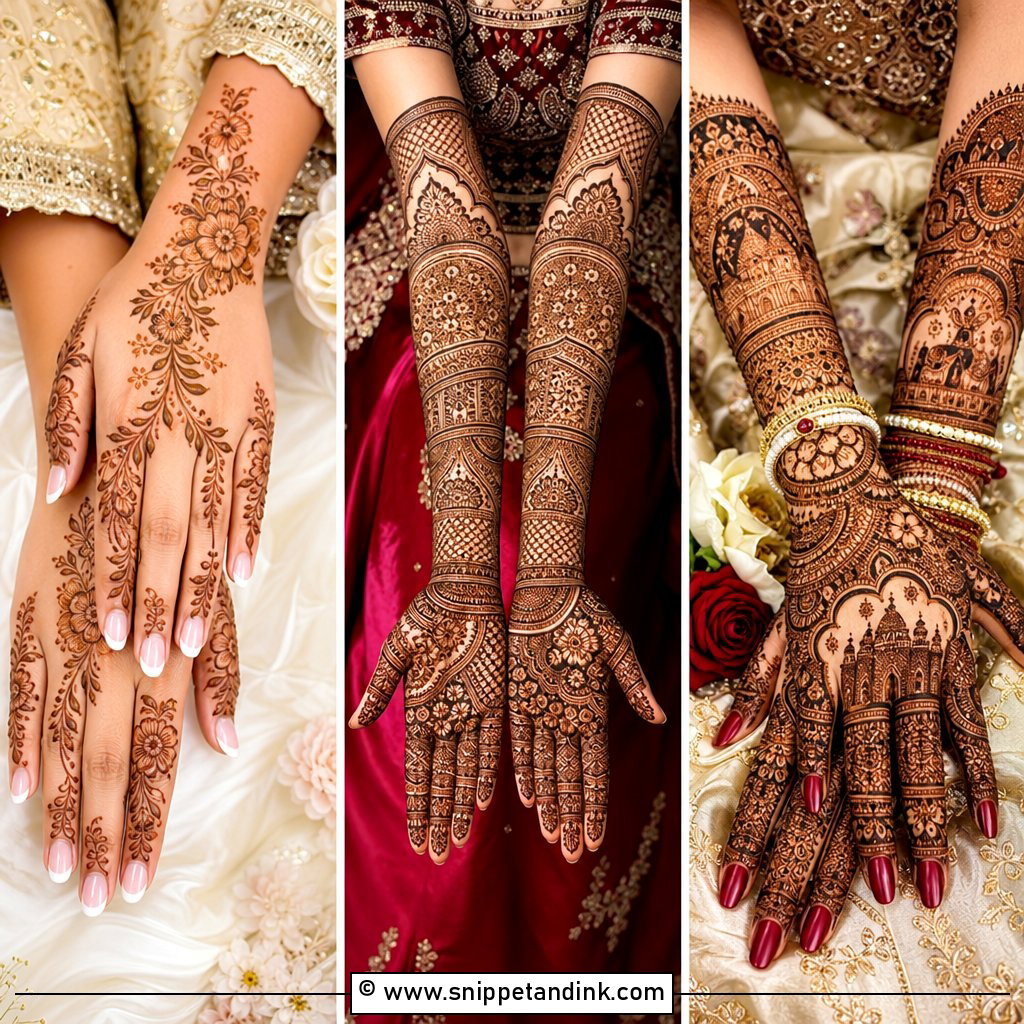
Full coverage runs from fingertips to forearm: dense finger bands, florals and paisleys packed with fine filler across the back of the hand, then a wrist cuff or forearm panel. It’s the traditional bridal hand and it glows against red, maroon, gold or ivory. The risk is mud. When every gap is filled, the design can read as one dark patch in photos, so I always anchor the hand with a clear central motif and let the filler support it. Expect a long sitting for both hands, and plan breaks.
2. Arabic Bridal Back Hand Mehndi Design
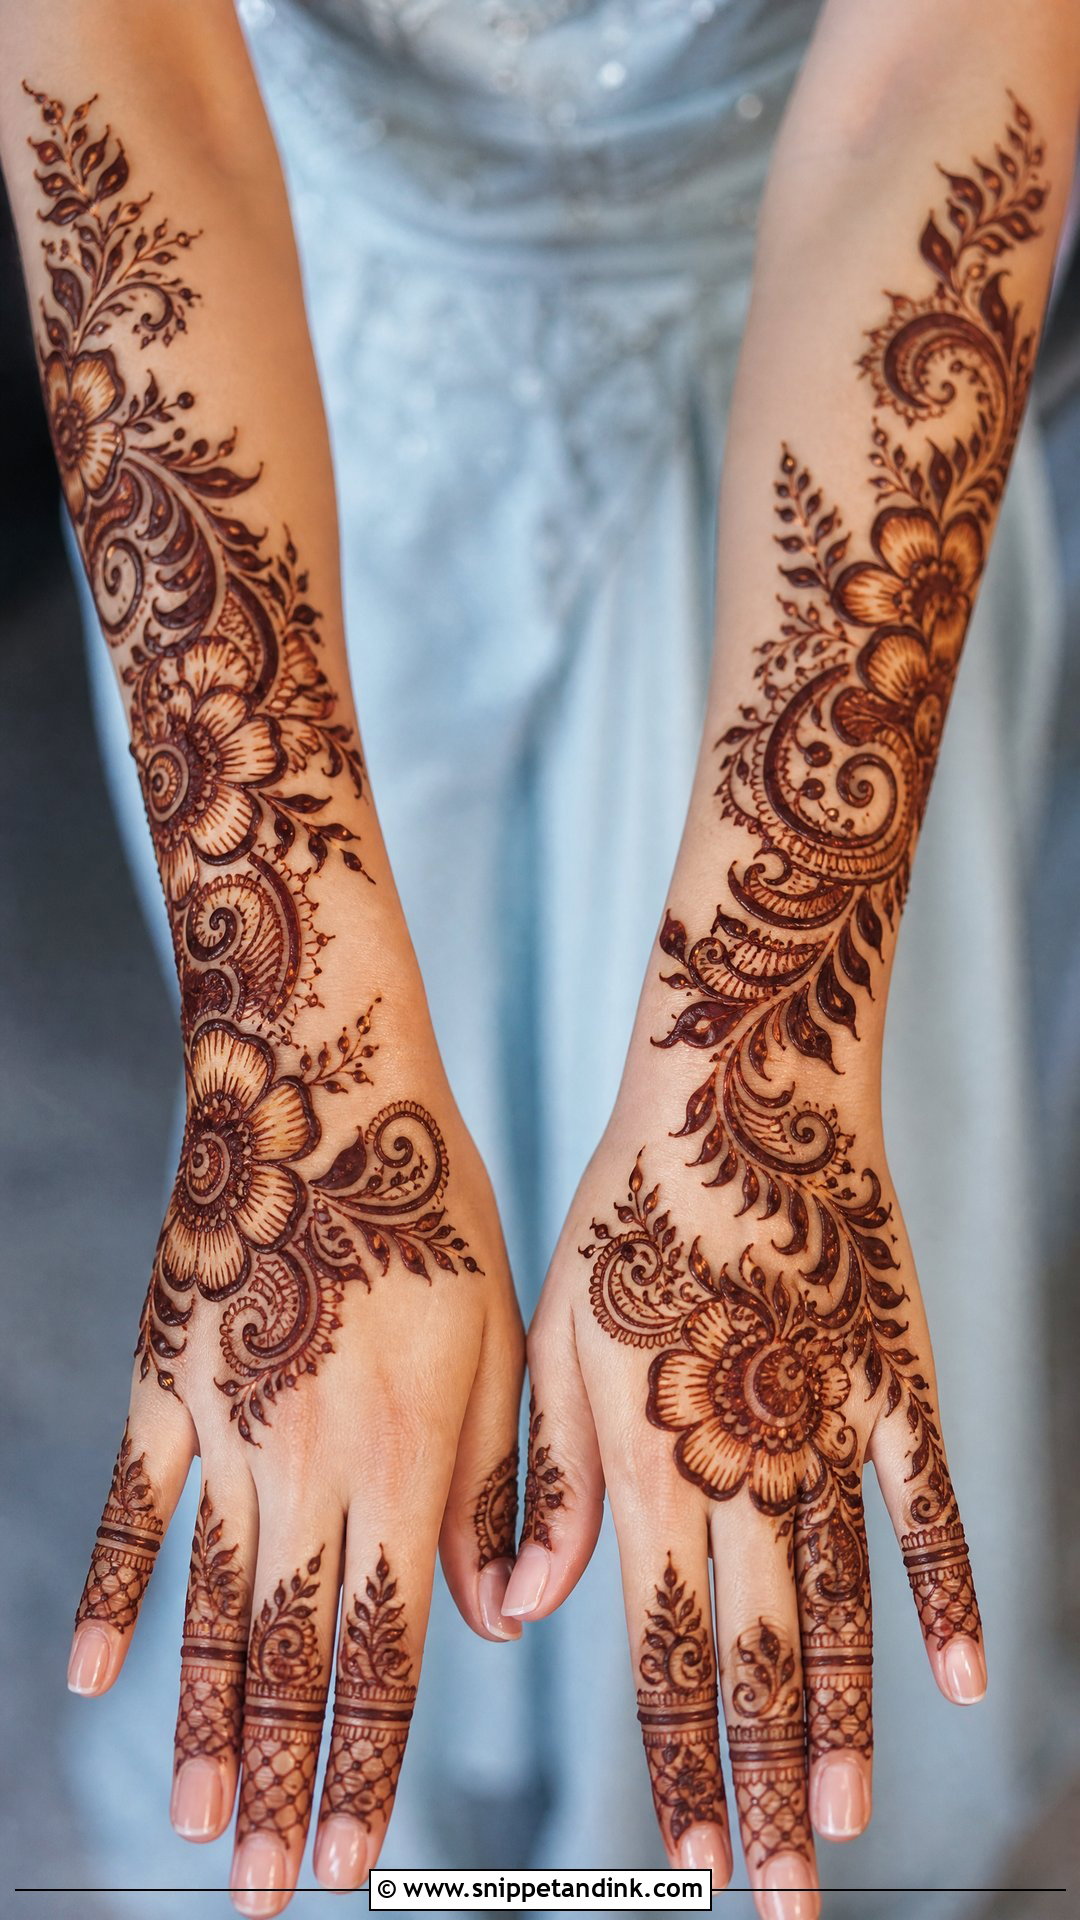
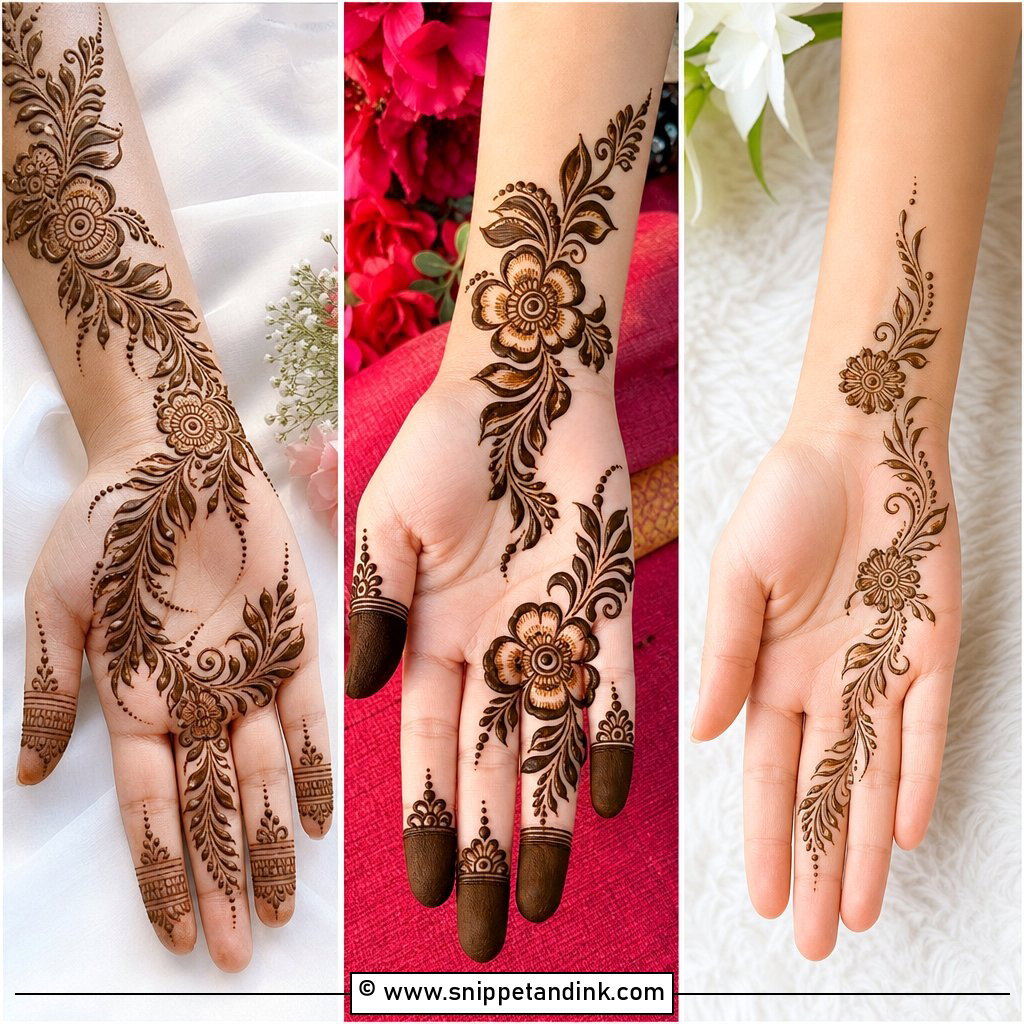
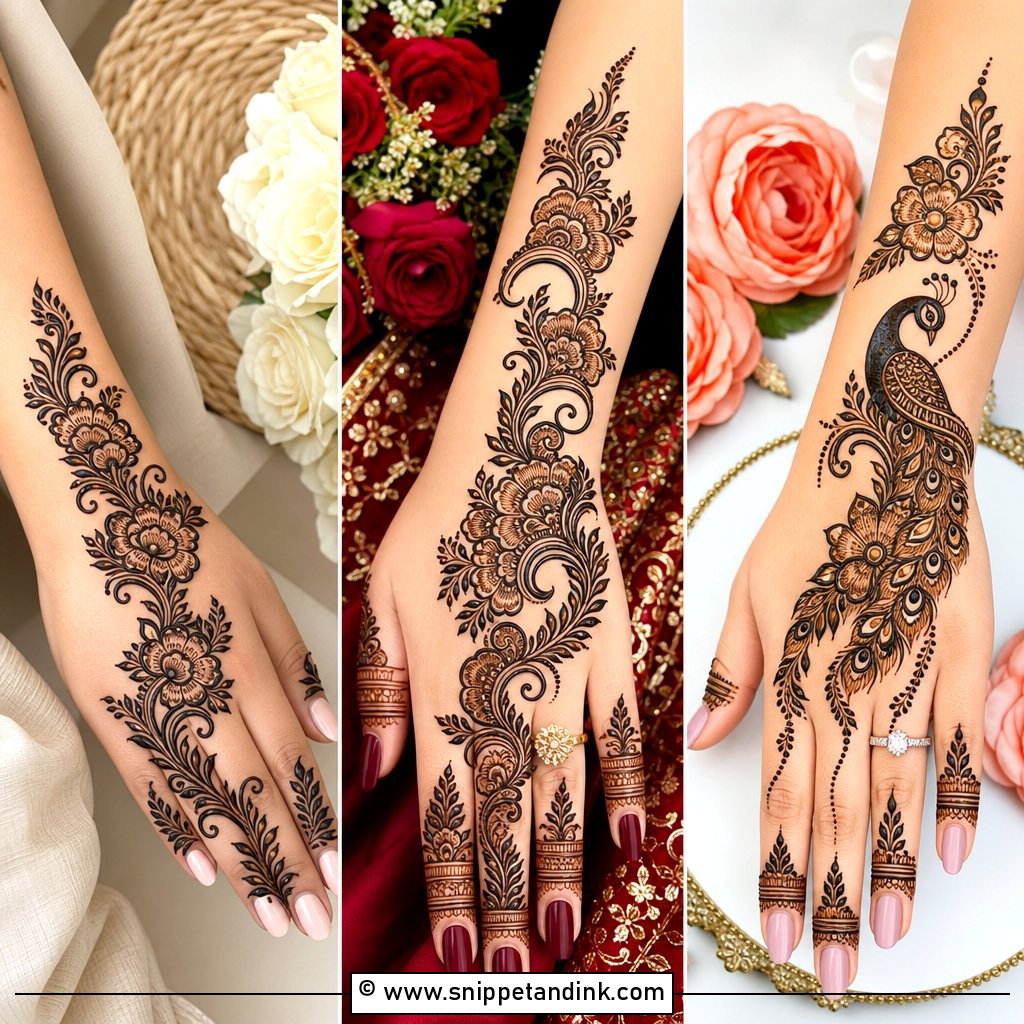
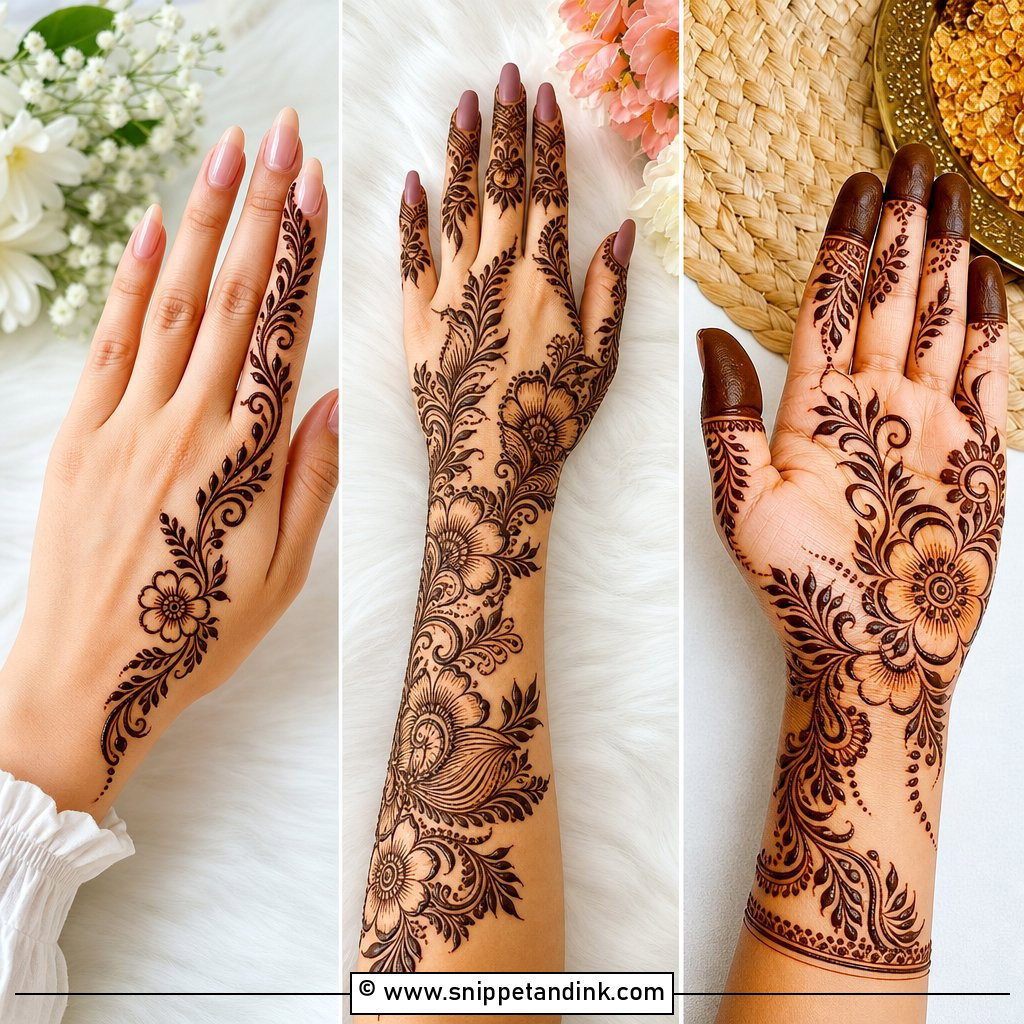
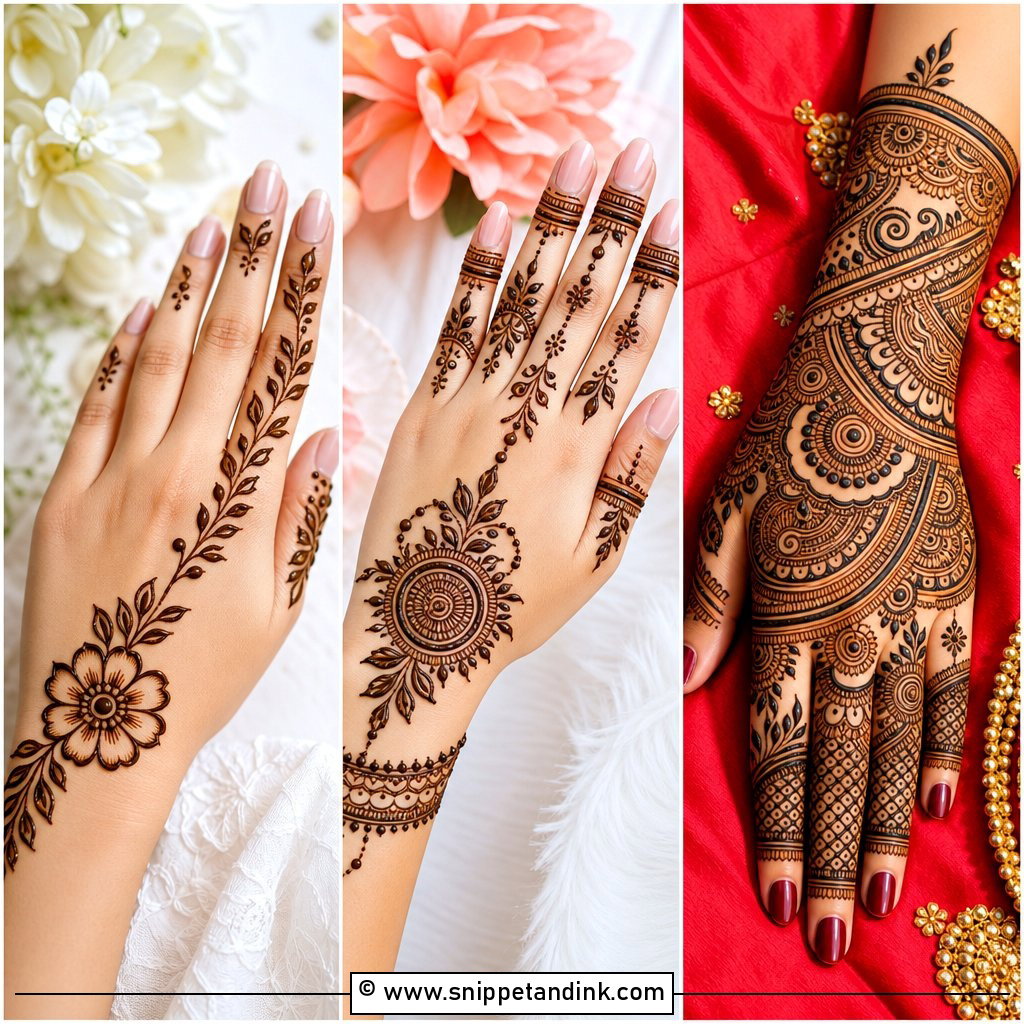
Arabic work is about the skin you leave bare. The pattern usually runs diagonally from wrist to fingers in large flowers, leafy vines, curved paisleys and shaded petals, and the open space between them is part of the design. Shading is done by thinning the paste line rather than adding more, which is why a confident hand matters here. A diagonal trail visually lengthens shorter fingers, and the style suits engagement functions and nikah ceremonies as well as the wedding itself.
3. Indo Arabic Bridal Back Hand Mehndi Design
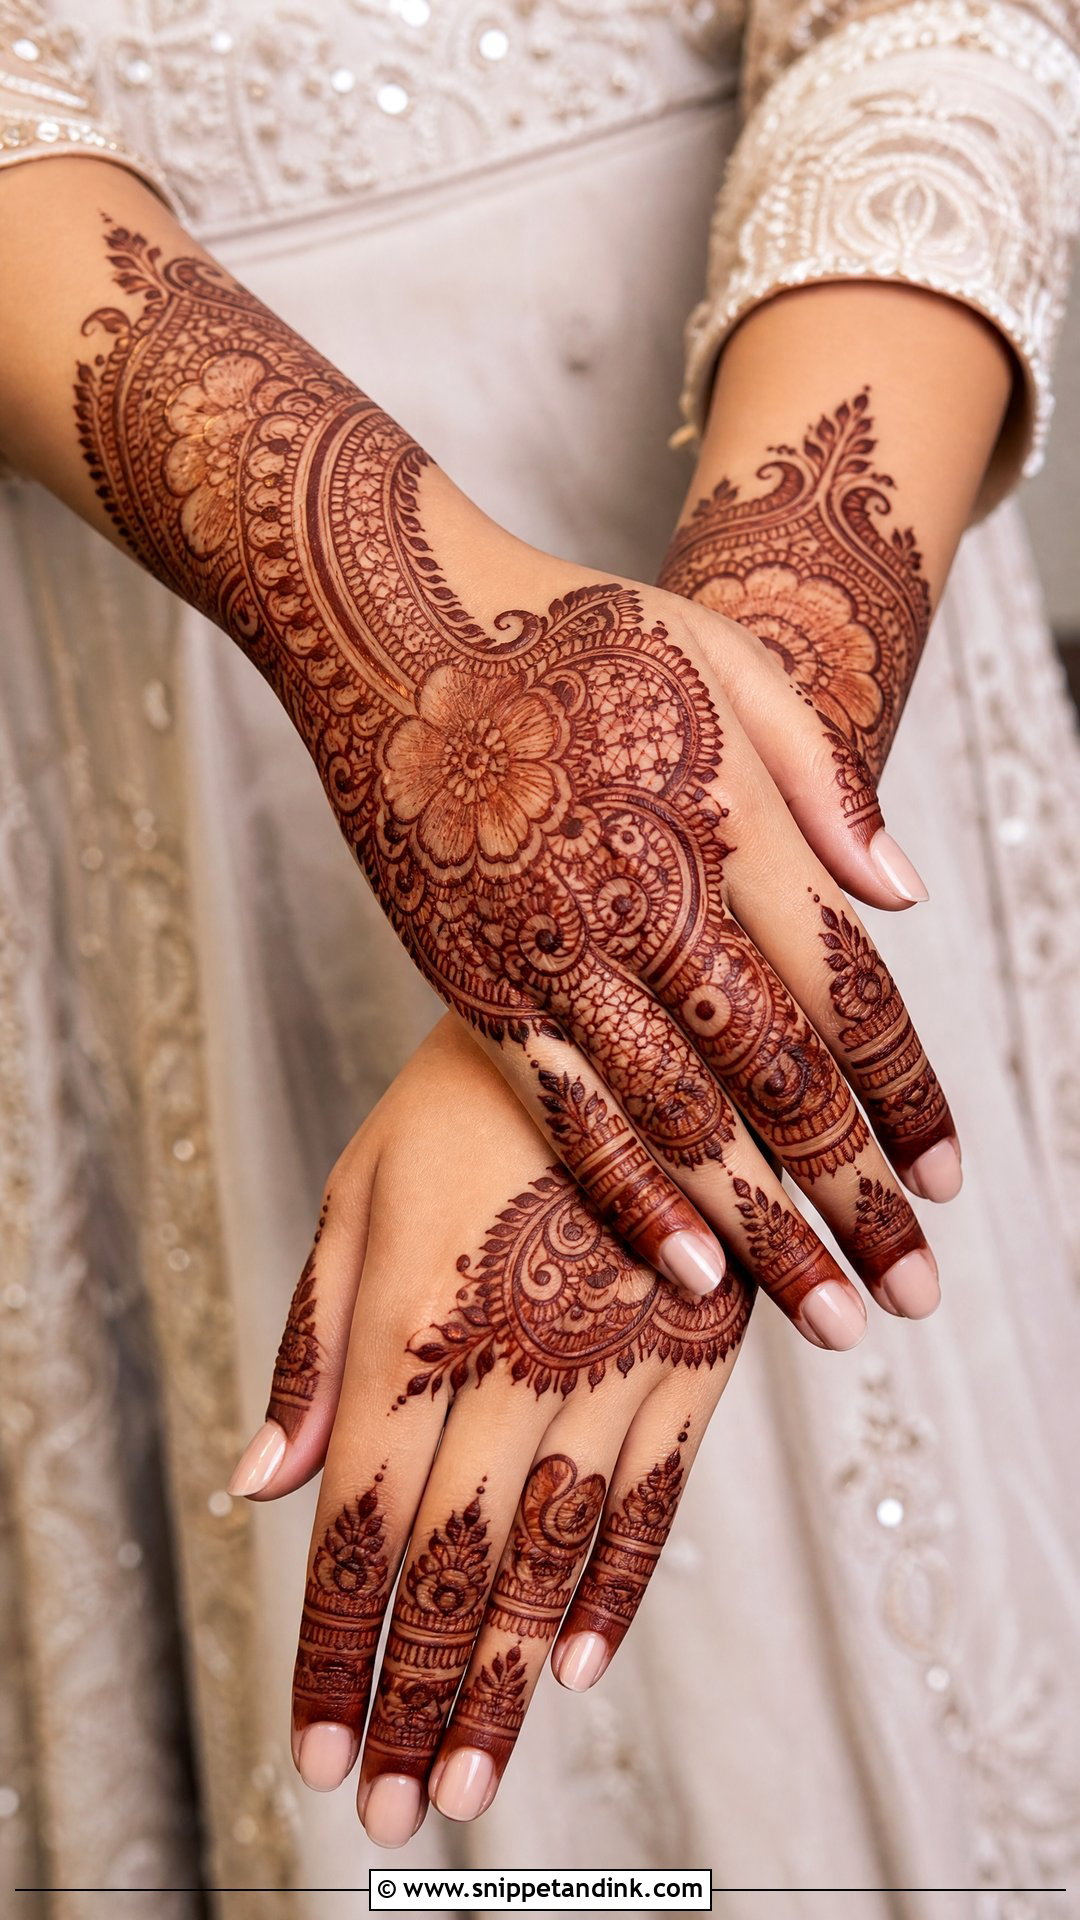
Indo-Arabic takes the bold flow of Arabic work and fills parts of it with the fine detail of Indian bridal mehndi. Expect a diagonal flower trail with filled paisleys, small leaf clusters, netted sections and detailed finger caps. It’s my usual suggestion for a bride who finds full coverage too heavy but worries Arabic alone looks too casual. I make both hands related rather than mirrored, because exact mirror images look stiff when the hands are photographed side by side.
4. Mandala Bridal Back Hand Mehndi Design
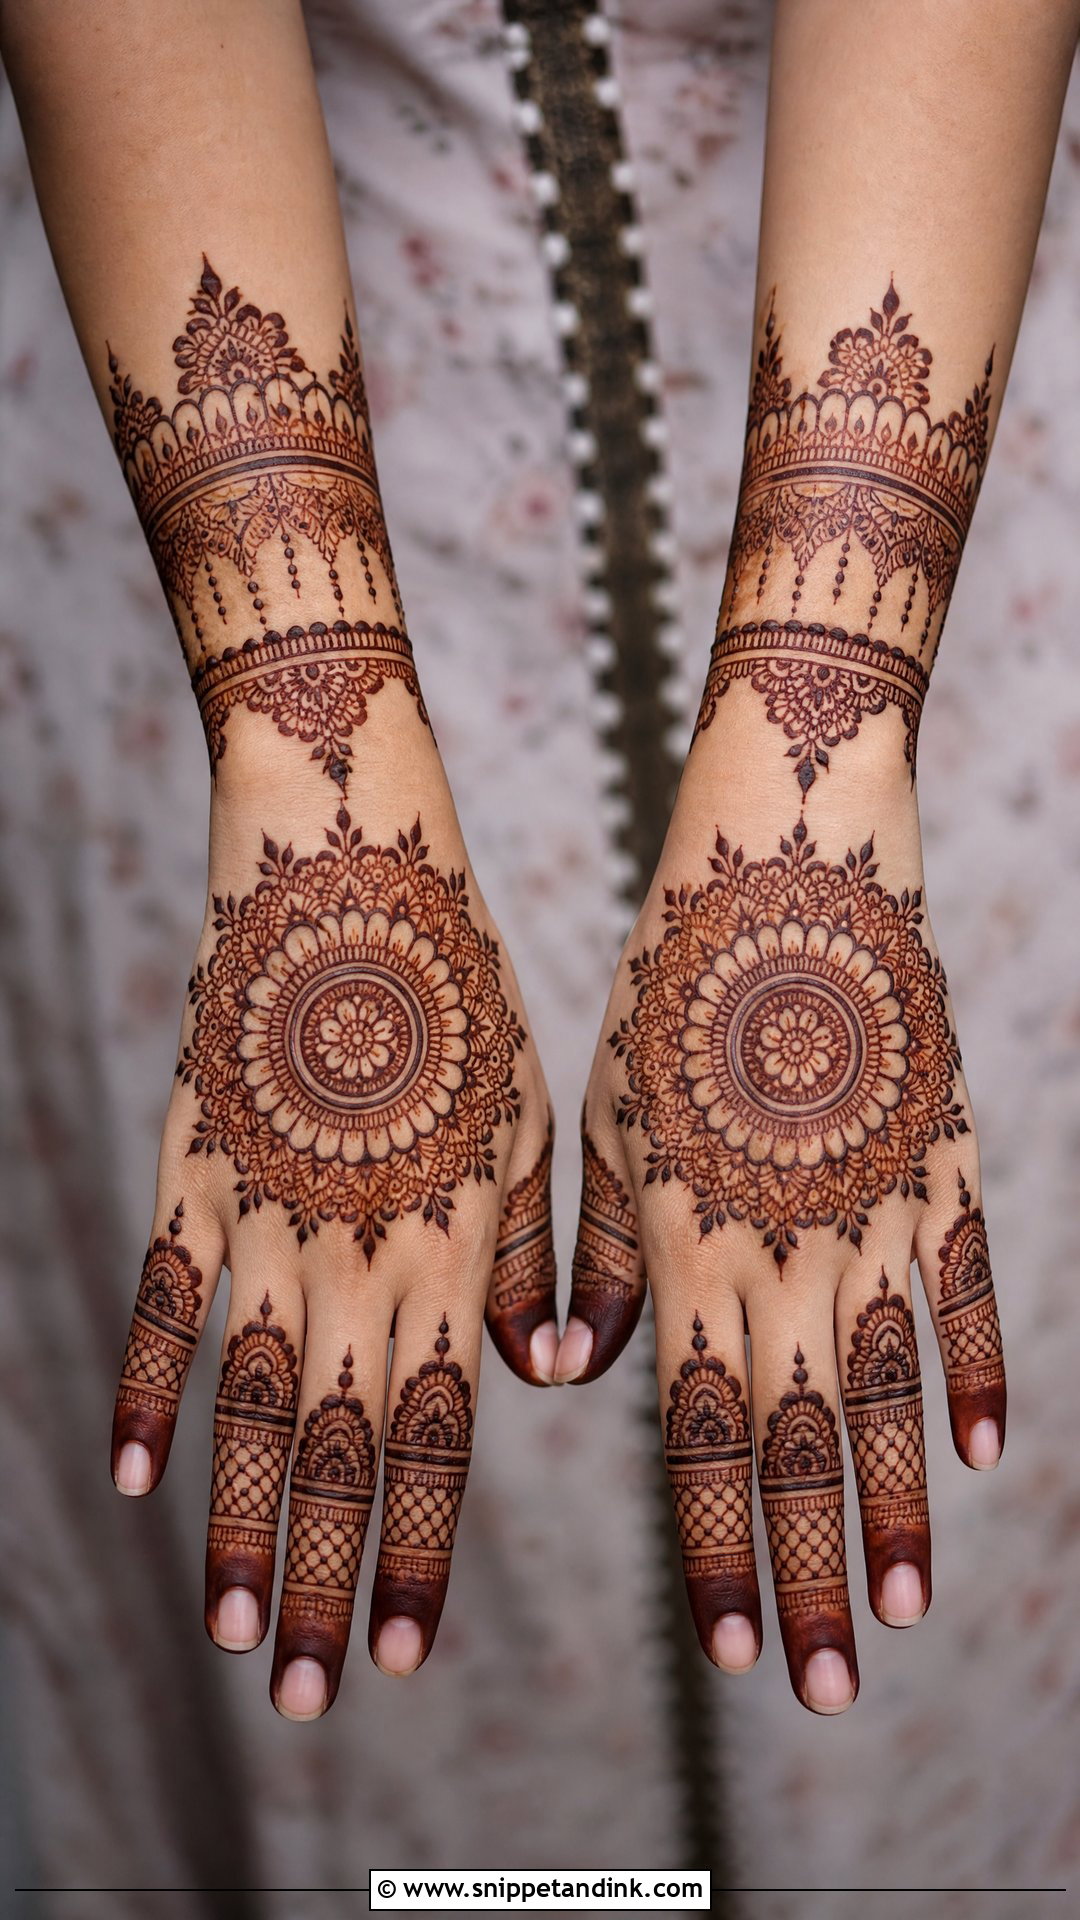
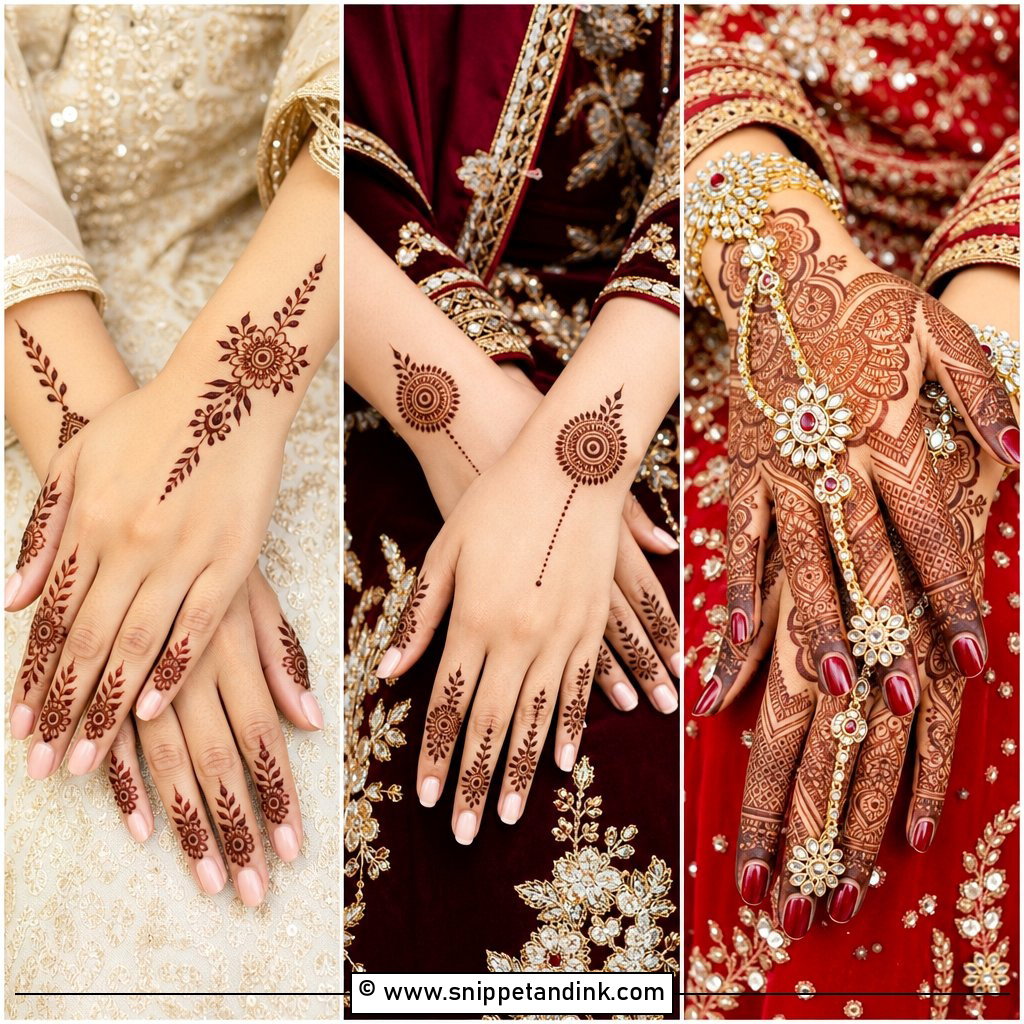
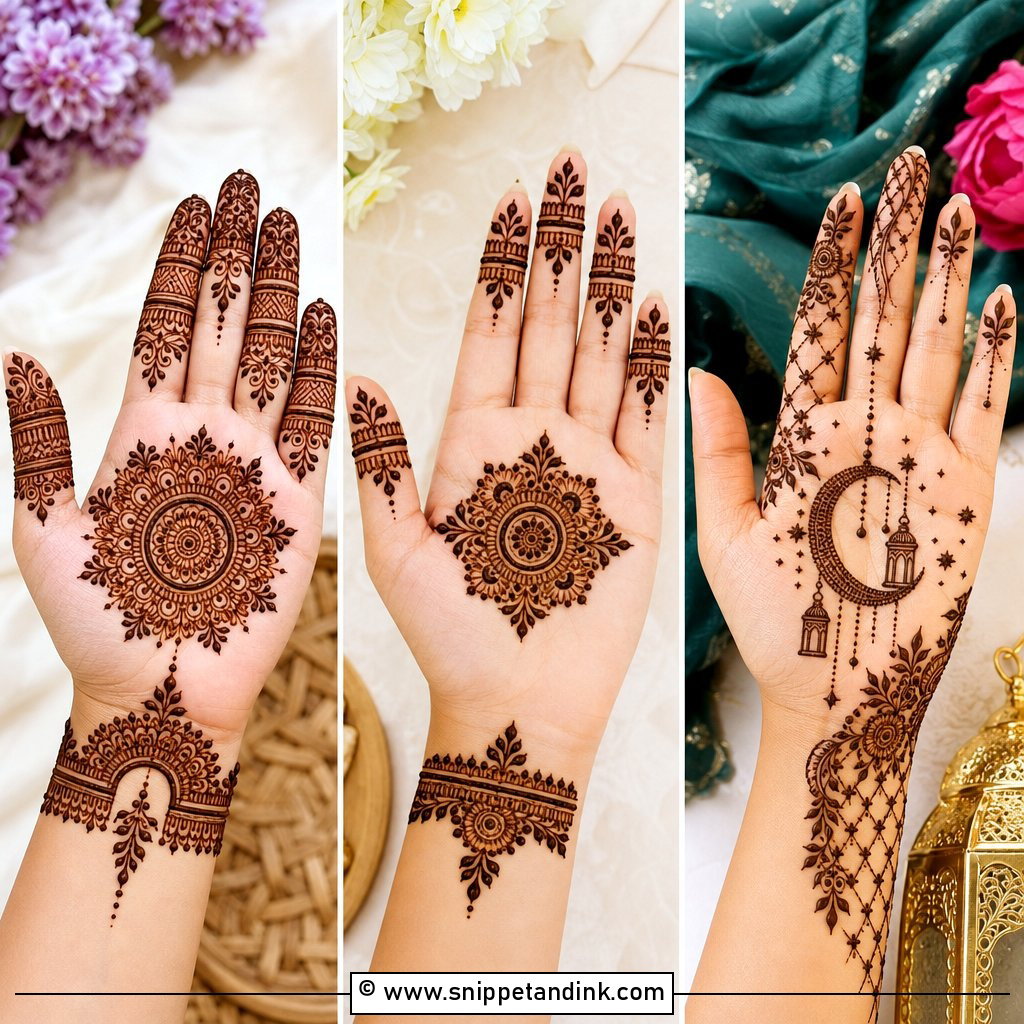
Symmetry lovers ask for mandalas, and the circle needs to sit right. I centre it slightly toward the knuckles rather than mid-hand, because the back of the hand tapers toward the wrist and a dead-centre circle can look like it’s sliding off. Petals, dots and lace borders radiate out, with finger patterns and a wrist cuff to finish. On its own a mandala reads as party mehndi, so for a bride I extend it with filled fingertips and a forearm trail. It sits well under a haath phool.
5. Jaali Bridal Back Hand Mehndi Design
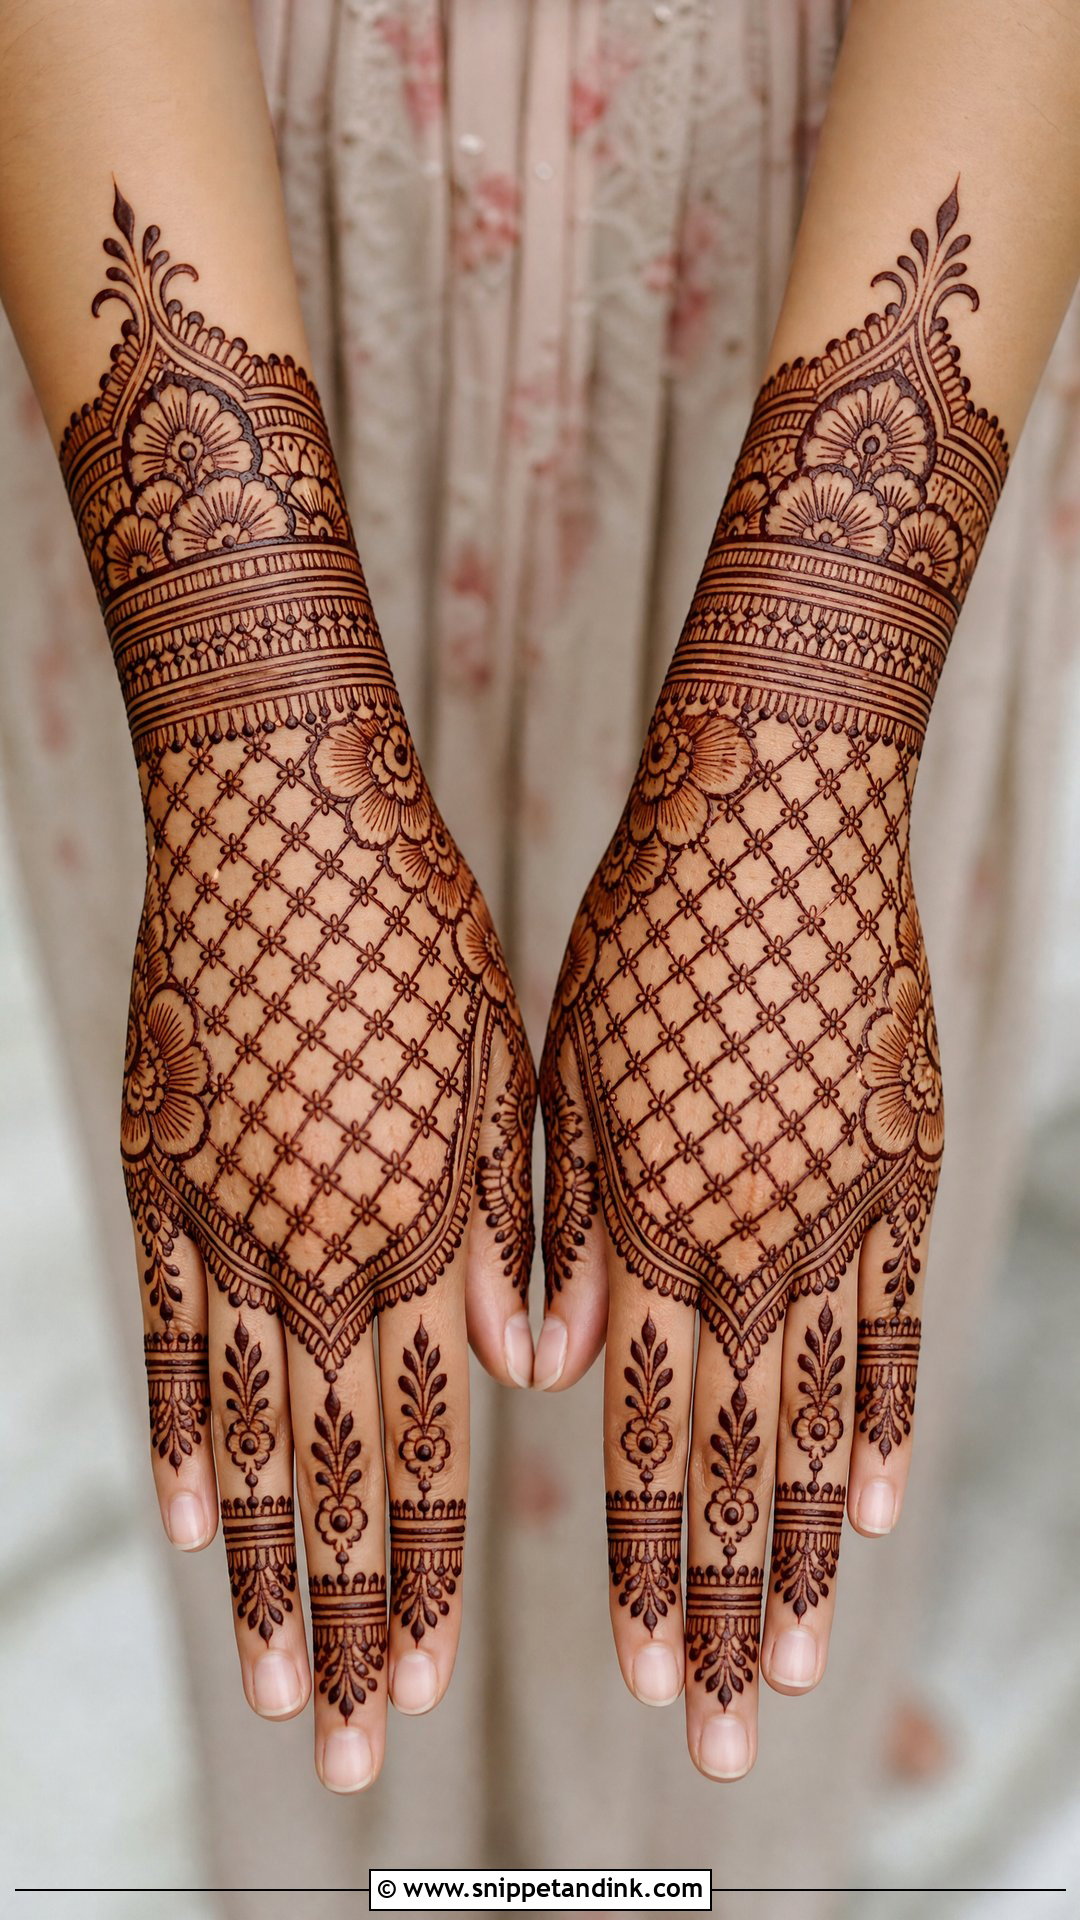
Jaali gives the lace effect: a fine mesh of crossing lines combined with flowers, dots and scalloped borders. It covers a lot of skin without darkening the whole hand, which is useful for a bride who wants coverage but not a heavy look. It’s also the least forgiving pattern I draw. Mesh lines have to be even in thickness and spacing, and a wobbly grid shows instantly in a close-up, so this is a style to judge from your artist’s real photos, not a reference picture.
6. Peacock Bridal Back Hand Mehndi Design
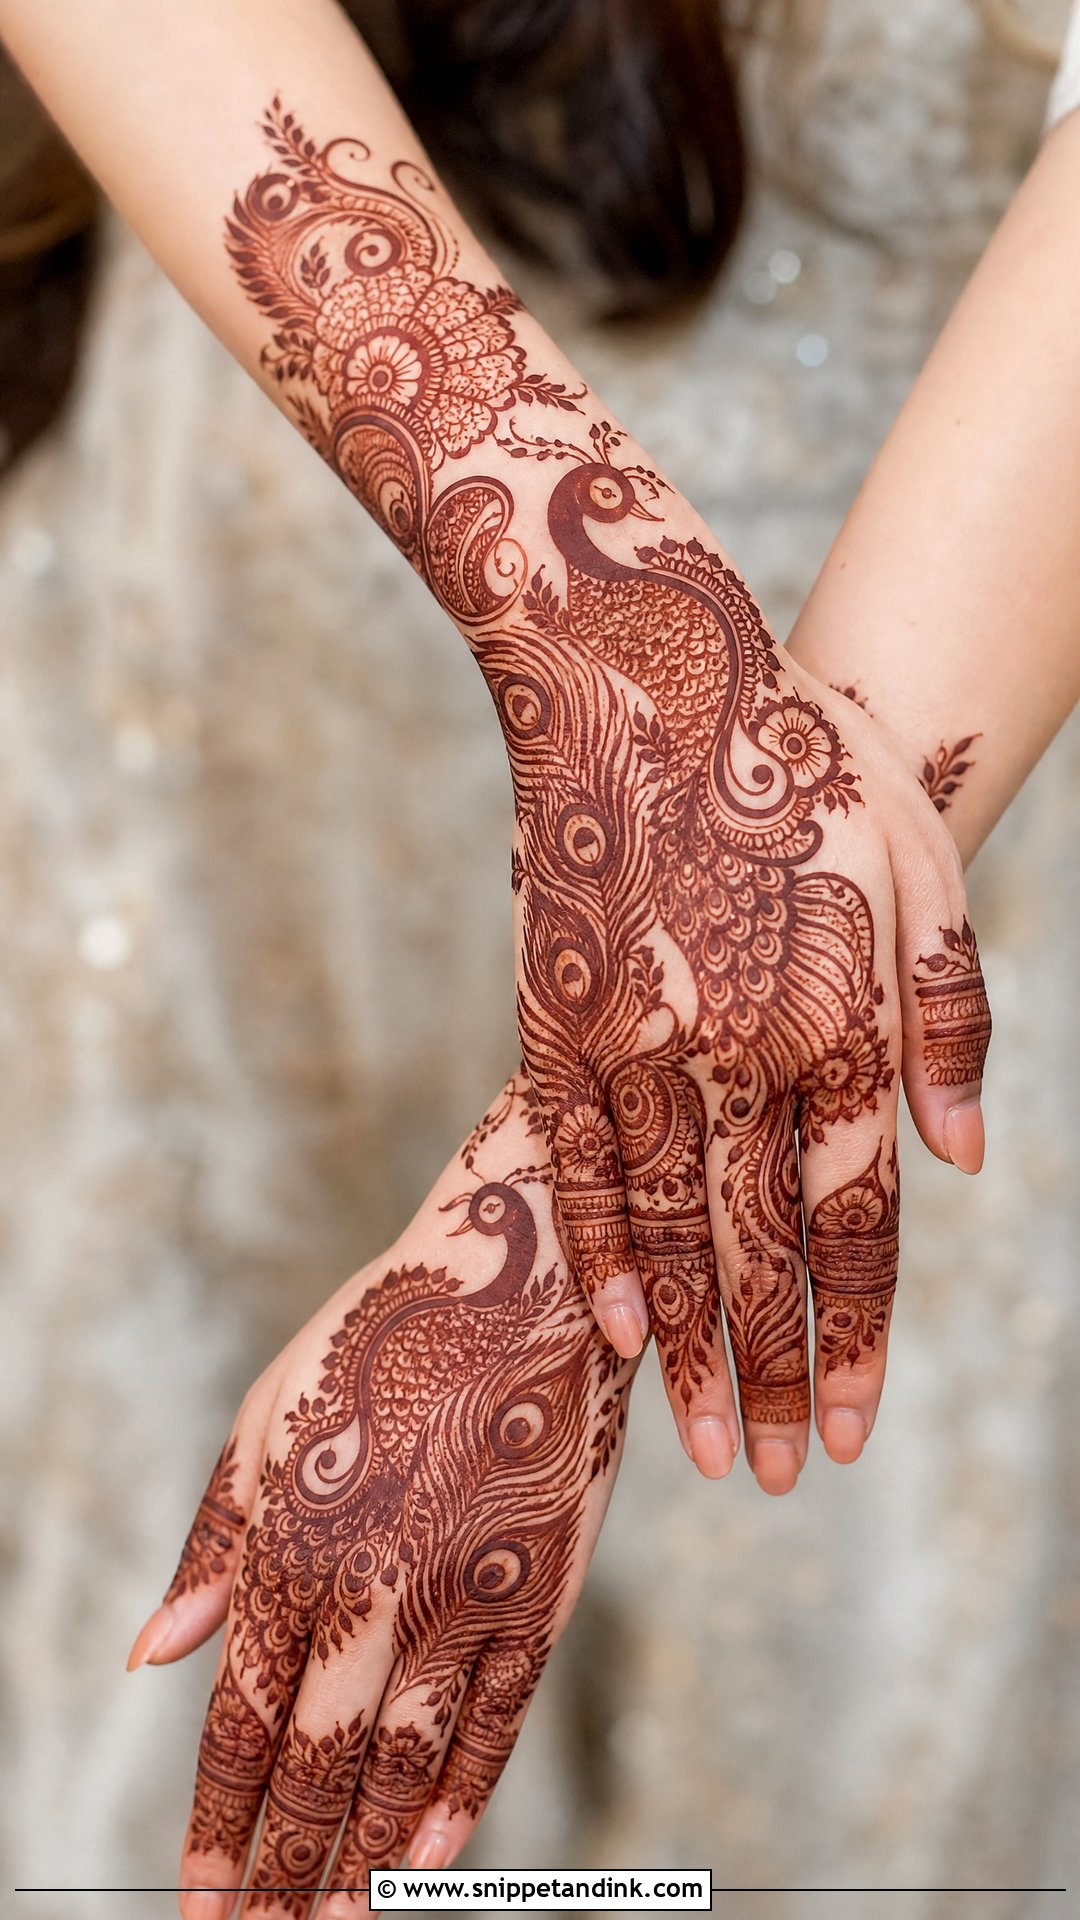
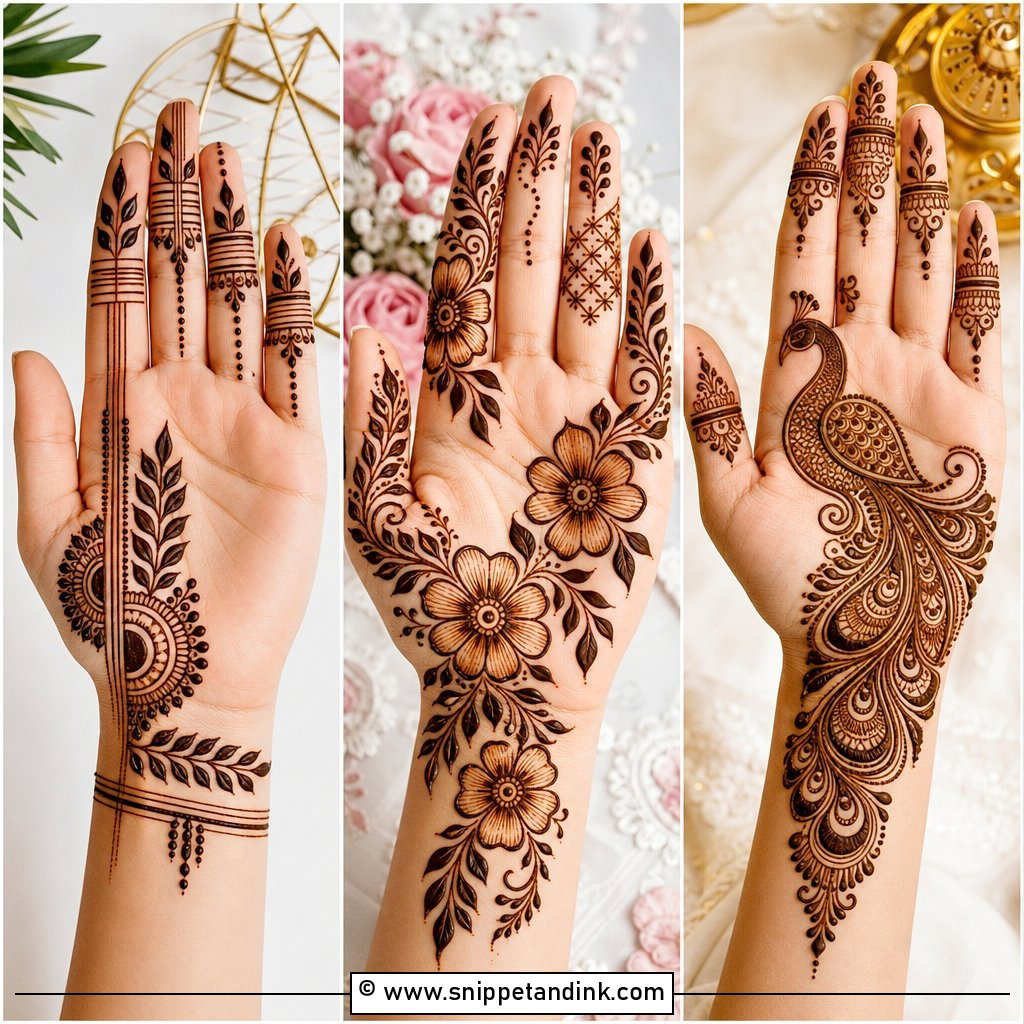
Peacocks belong to traditional bridal mehndi, placed near the wrist, mid-hand or on the forearm with feathers trailing into paisleys and flowers. Feather work is where detail turns into mess: each eye of the feather needs a clear outline and a bit of space, or it smudges into a blob once the paste dries and cracks. The motif suits silk sarees, embroidered lehengas and temple jewellery. Pairing it with clean finger patterns and a light jaali background keeps the hand from feeling crowded.
7. Paisley Bridal Back Hand Mehndi Design
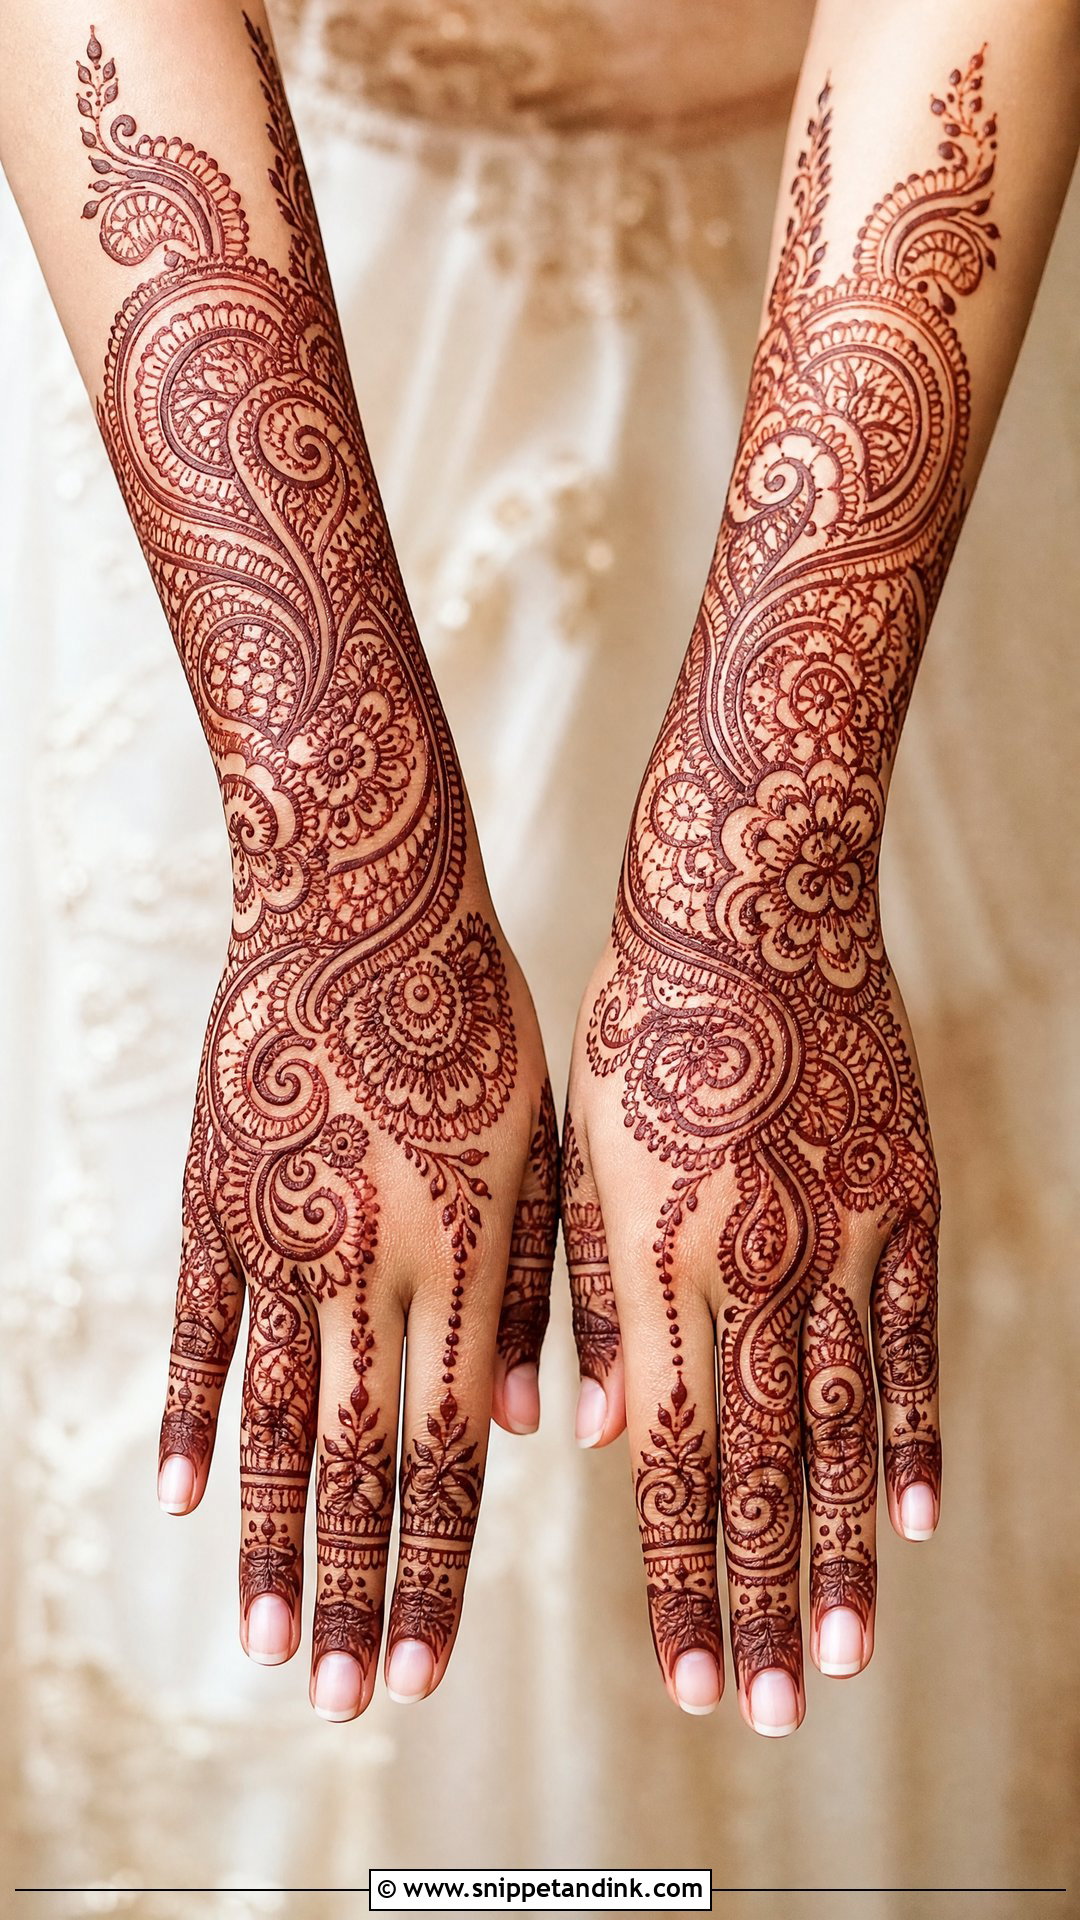
Paisley is the safest motif I know. Its curve follows the natural shape of the hand, so it looks graceful from almost any angle, and it scales from a single bold shape to a trail of small connected ones. Bridal versions layer paisleys with floral filling, curling vines and detailed wrist bands. The open centre of a large paisley is also my favourite hiding place for initials or a date.
8. Floral Bridal Back Hand Mehndi Design
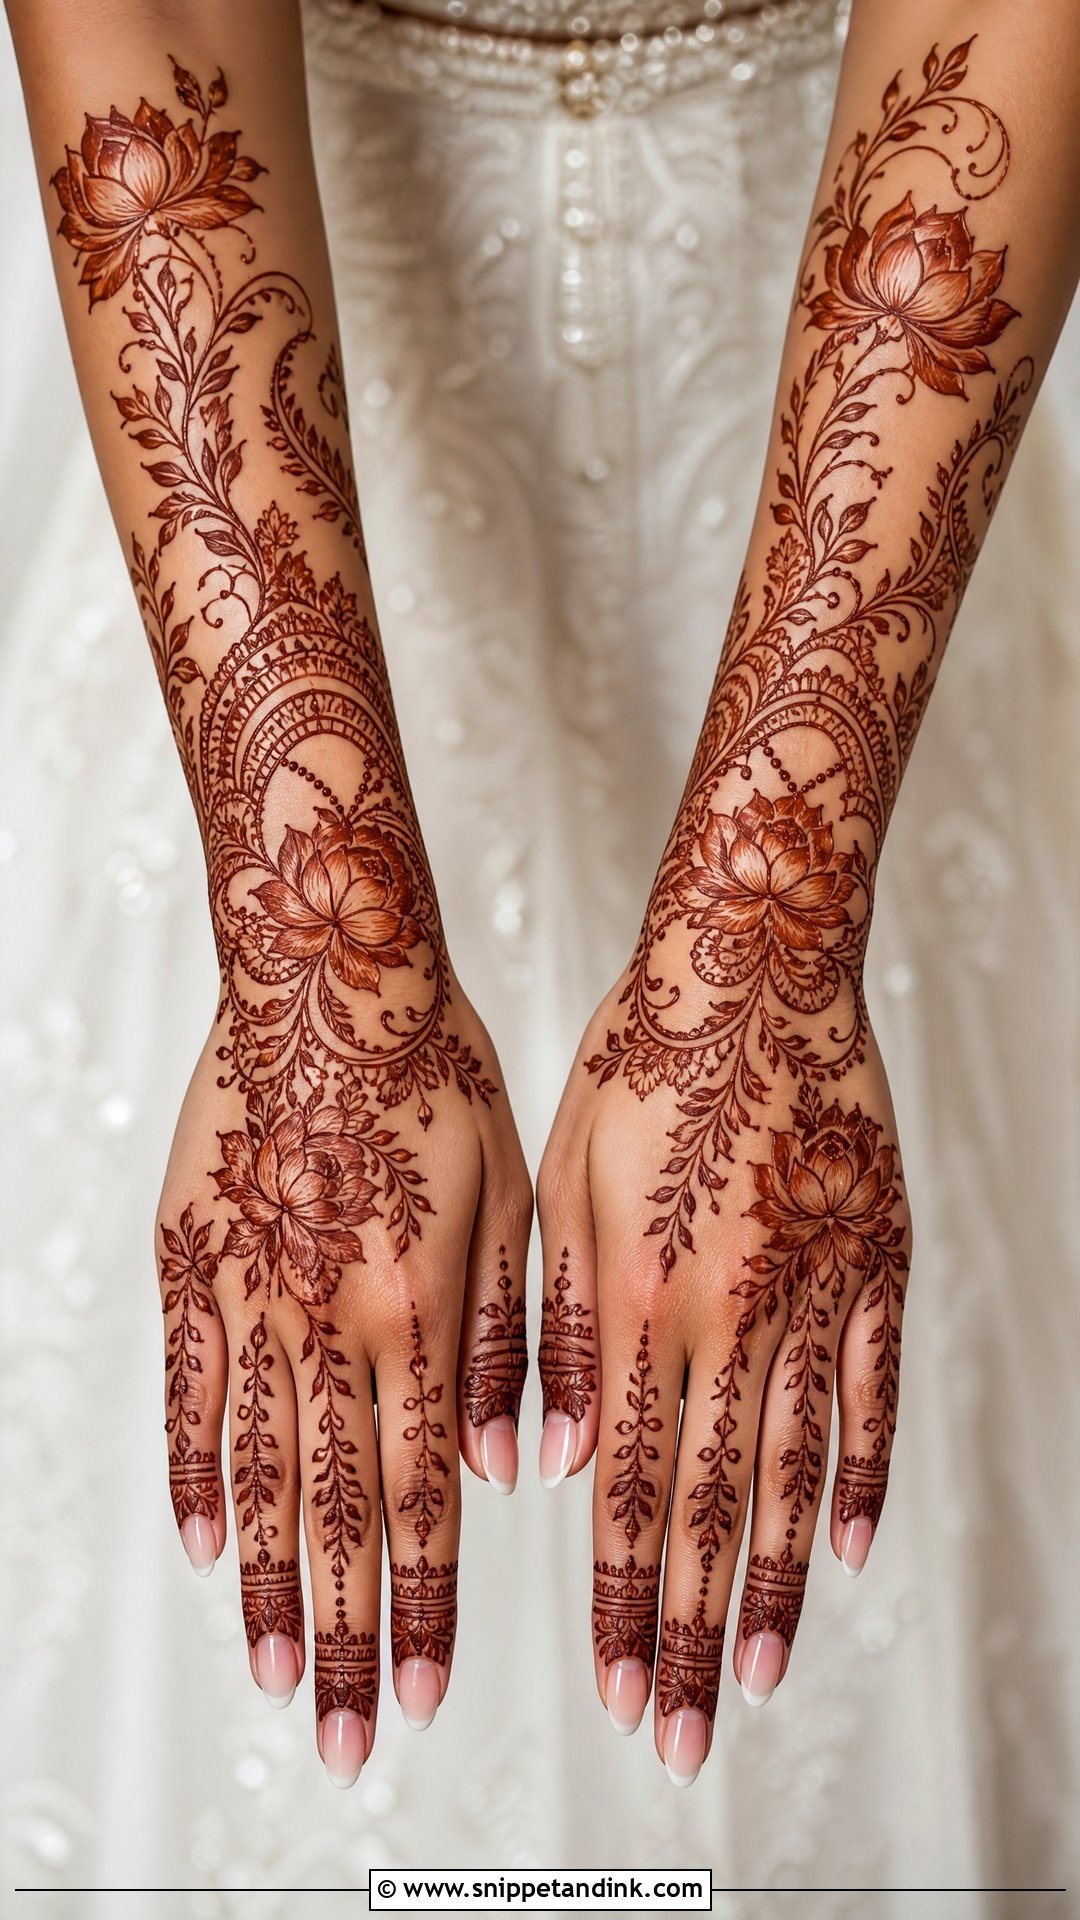
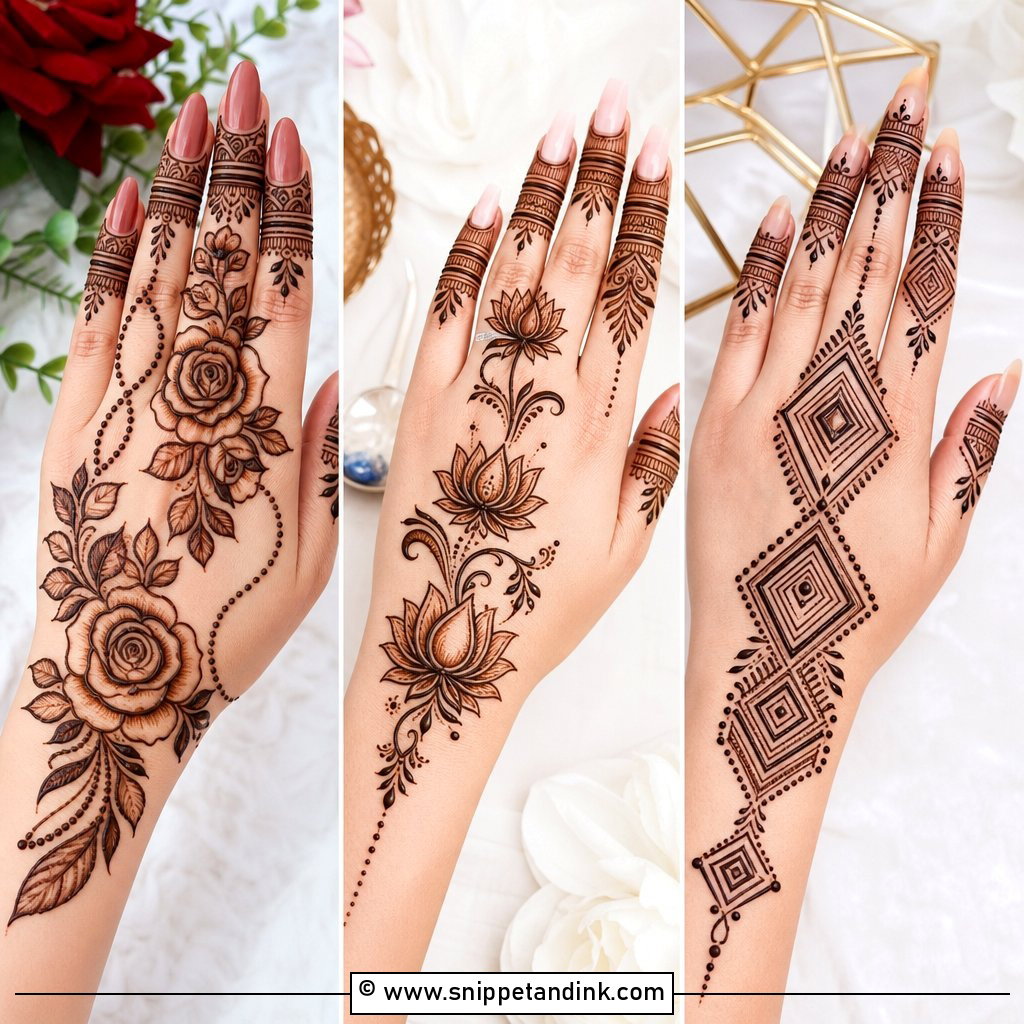
Floral designs can be as light or heavy as you like, depending on how much detail surrounds the blooms. Roses, lotuses, small buds and shaded petals are the common choices, usually spreading from the wrist toward the fingers. I adjust the flower size to the hand: very large blooms swamp a small hand, and tiny ones disappear on a broad one. For daytime functions and pastel outfits it works well as is. For the wedding I add filled fingertips and a bangle-style wrist border so it reads as bridal.
9. Bracelet Bridal Back Hand Mehndi Design
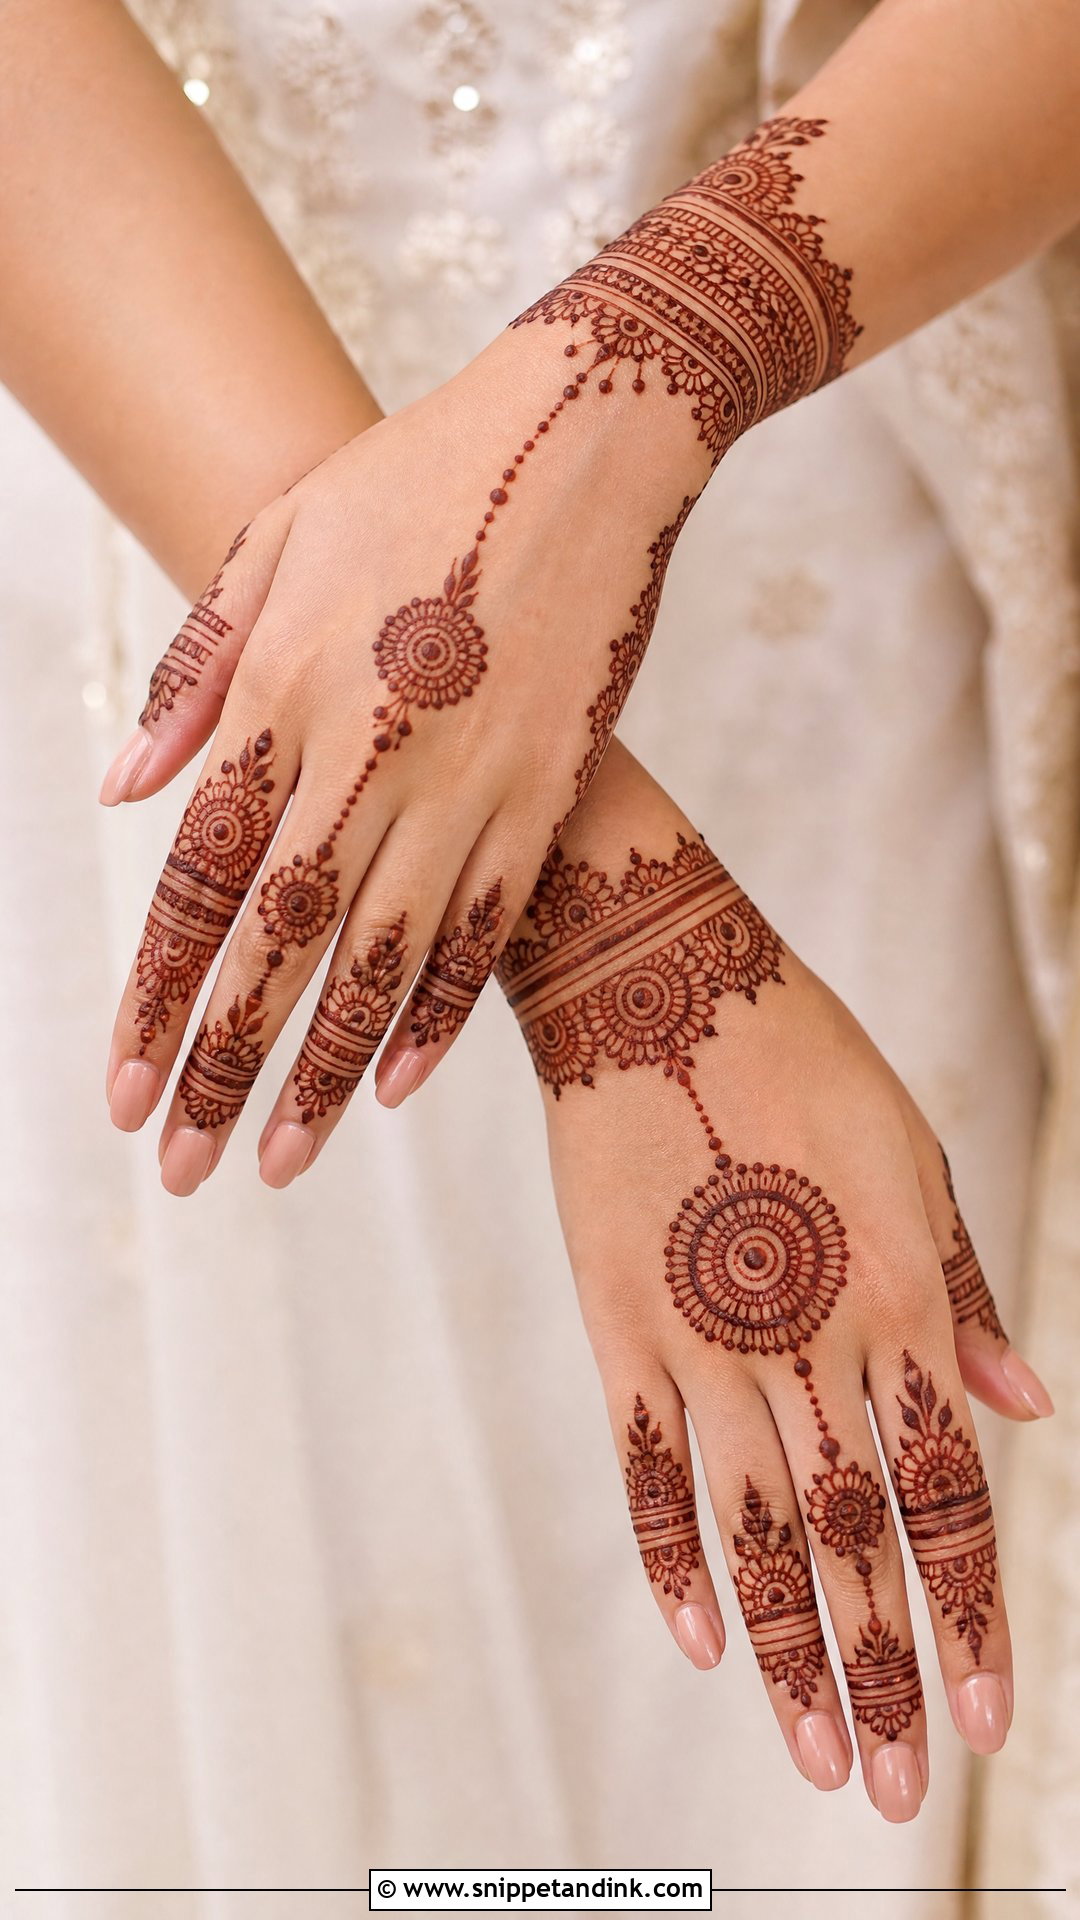
Bracelet designs mimic jewellery: a wrist cuff, chain-like lines running to ring patterns on the fingers, much like a haath phool. The rest of the hand stays fairly open, so it never feels crowded. If you’re wearing a real hand harness, tell your artist, because drawn chains and real chains on top of each other look confused. Floral centres, small mandalas and dotted chains finish it. Brides tend to find it comfortable since the joints are mostly left clear.
10. Finger Heavy Bridal Back Hand Mehndi Design
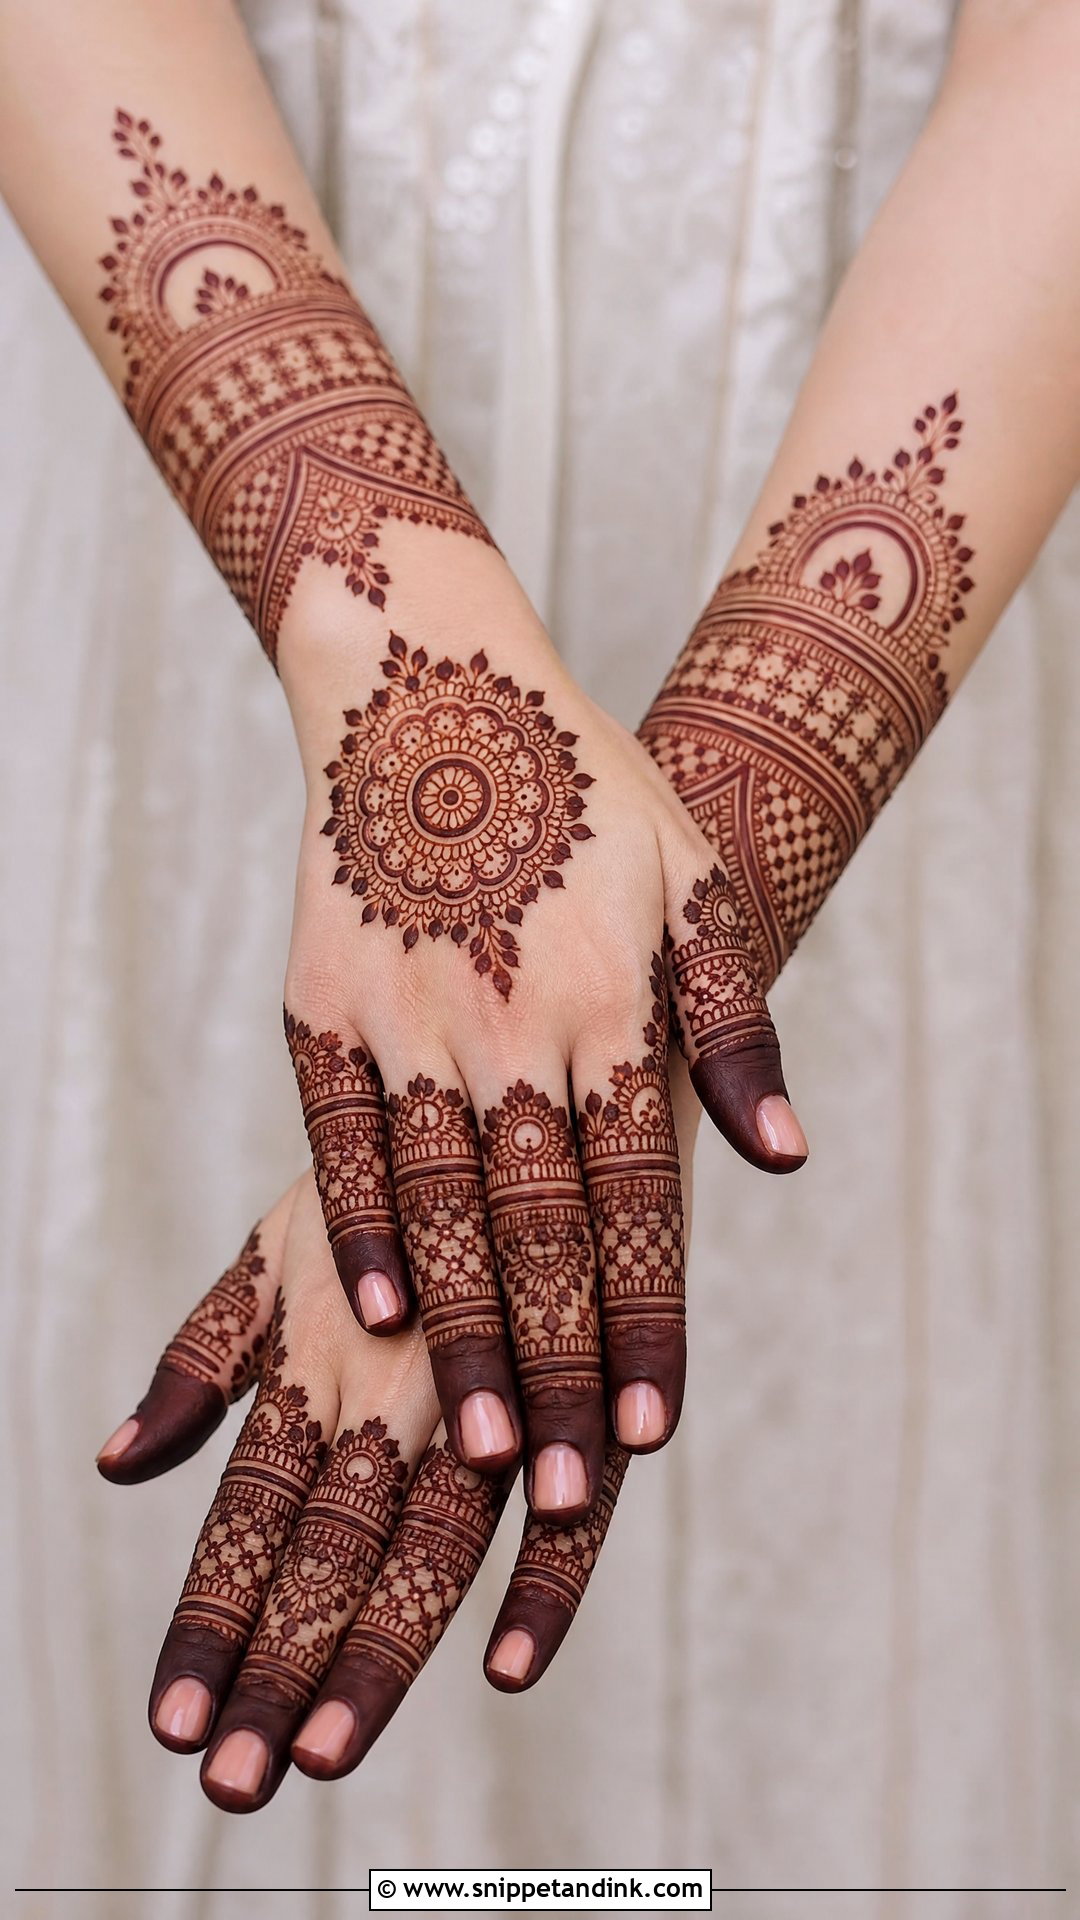
Fingers carry this design: bands, leafy strips, checks, tiny flowers and filled tips, with a mandala, floral trail or paisley cluster holding the centre of the hand. It’s the one I suggest for brides who care most about detailed fingers in ring shots. Finger skin stains darker than the back of the hand, so it shows strongly even when the hand itself is lighter. Long nails or nail art need a word in advance, since I need to work right up to the cuticle and gel needs to be done before the henna.
11. Minimal Bridal Back Hand Mehndi Design
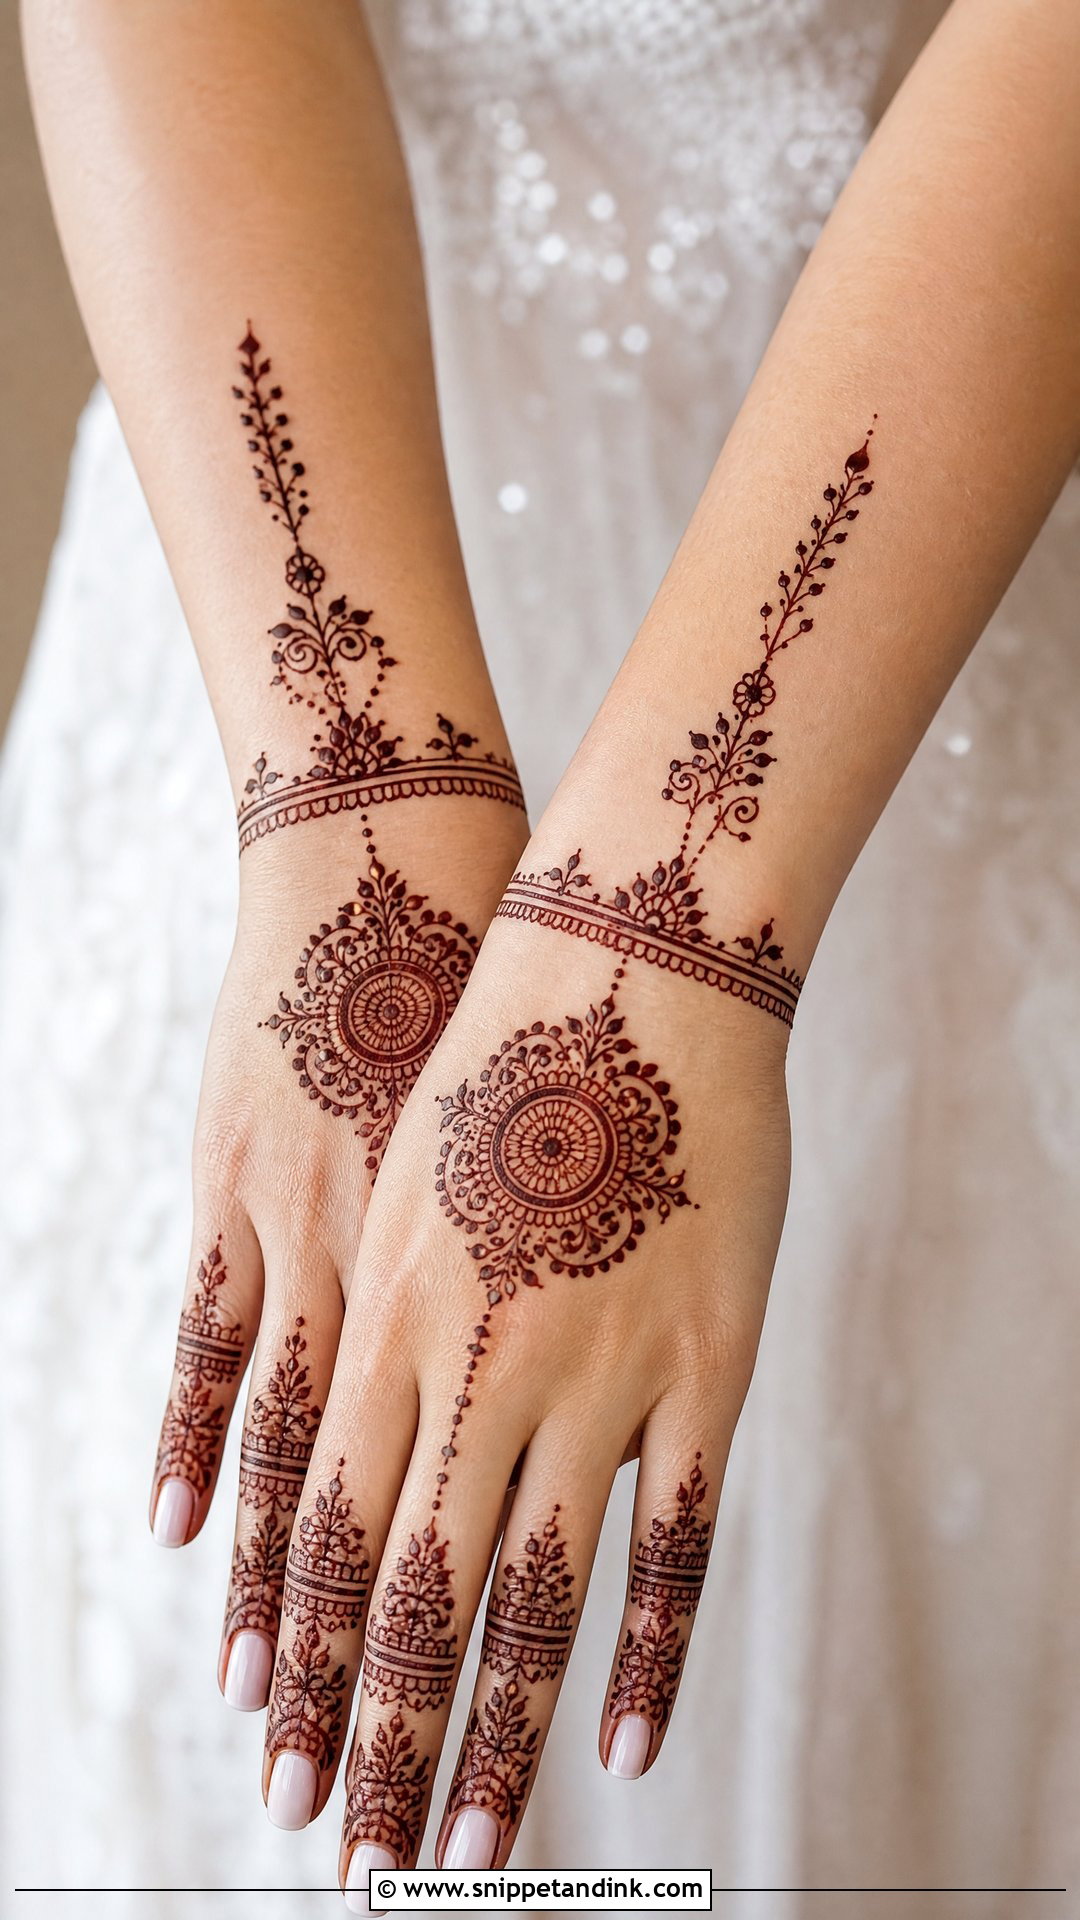
Minimal bridal mehndi is harder than it looks. With only a small mandala, a few vines, fine finger bands and a clean wrist detail, every line is visible, so placement matters more than quantity. It suits intimate weddings, civil ceremonies and brides who dislike heavy coverage, and it pairs well with pearls and pastel nails. What I avoid is scattering unrelated small motifs; one connected layout always looks more deliberate.
12. Royal Bridal Back Hand Mehndi Design
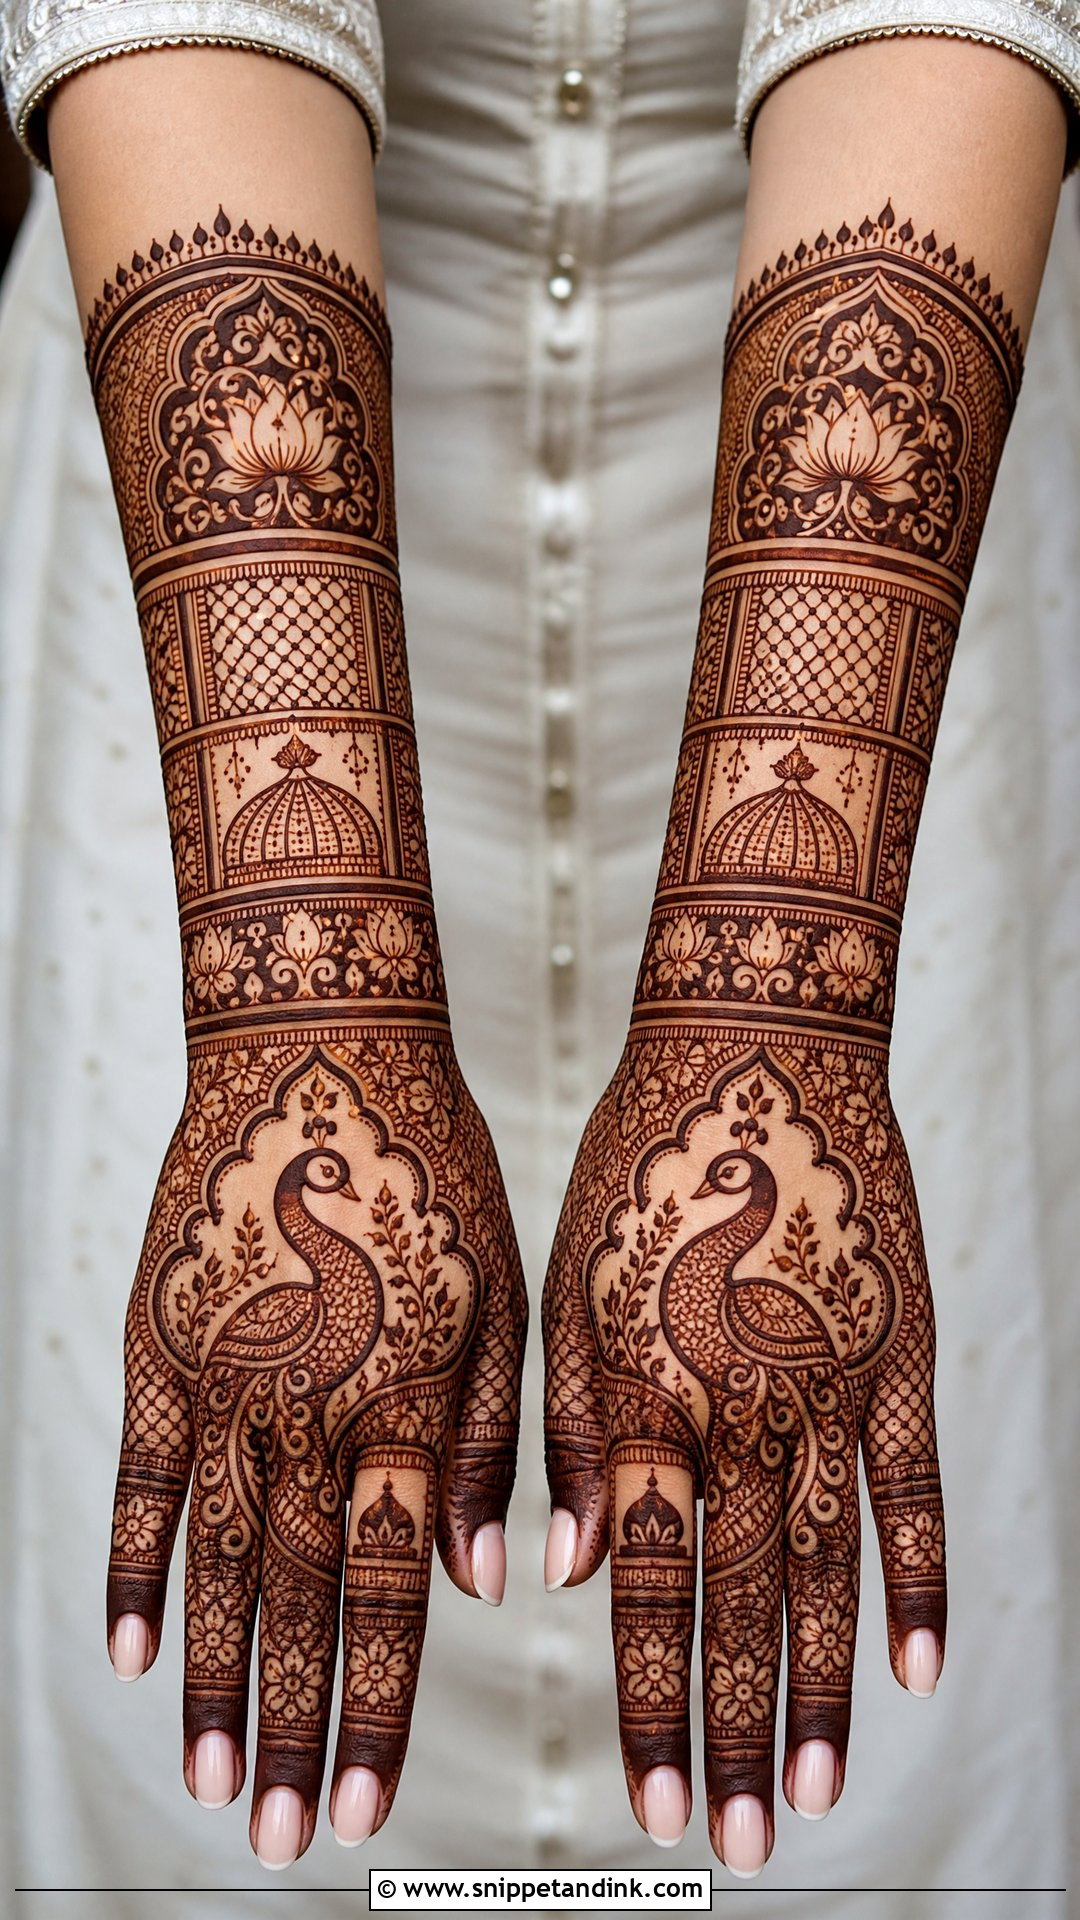
Royal designs use strong symmetry and rich coverage, with peacocks, paisleys, lotuses, domes, jaali panels and thick cuffs, often treating the back hand as one ornament connected to the wrist and forearm. It holds its own next to heavy bridal jewellery and traditional outfits. Because so much is going on, I insist on one focal point per hand. Without it, the eye has nowhere to land and the design just looks busy.
13. Modern Bridal Back Hand Mehndi Design
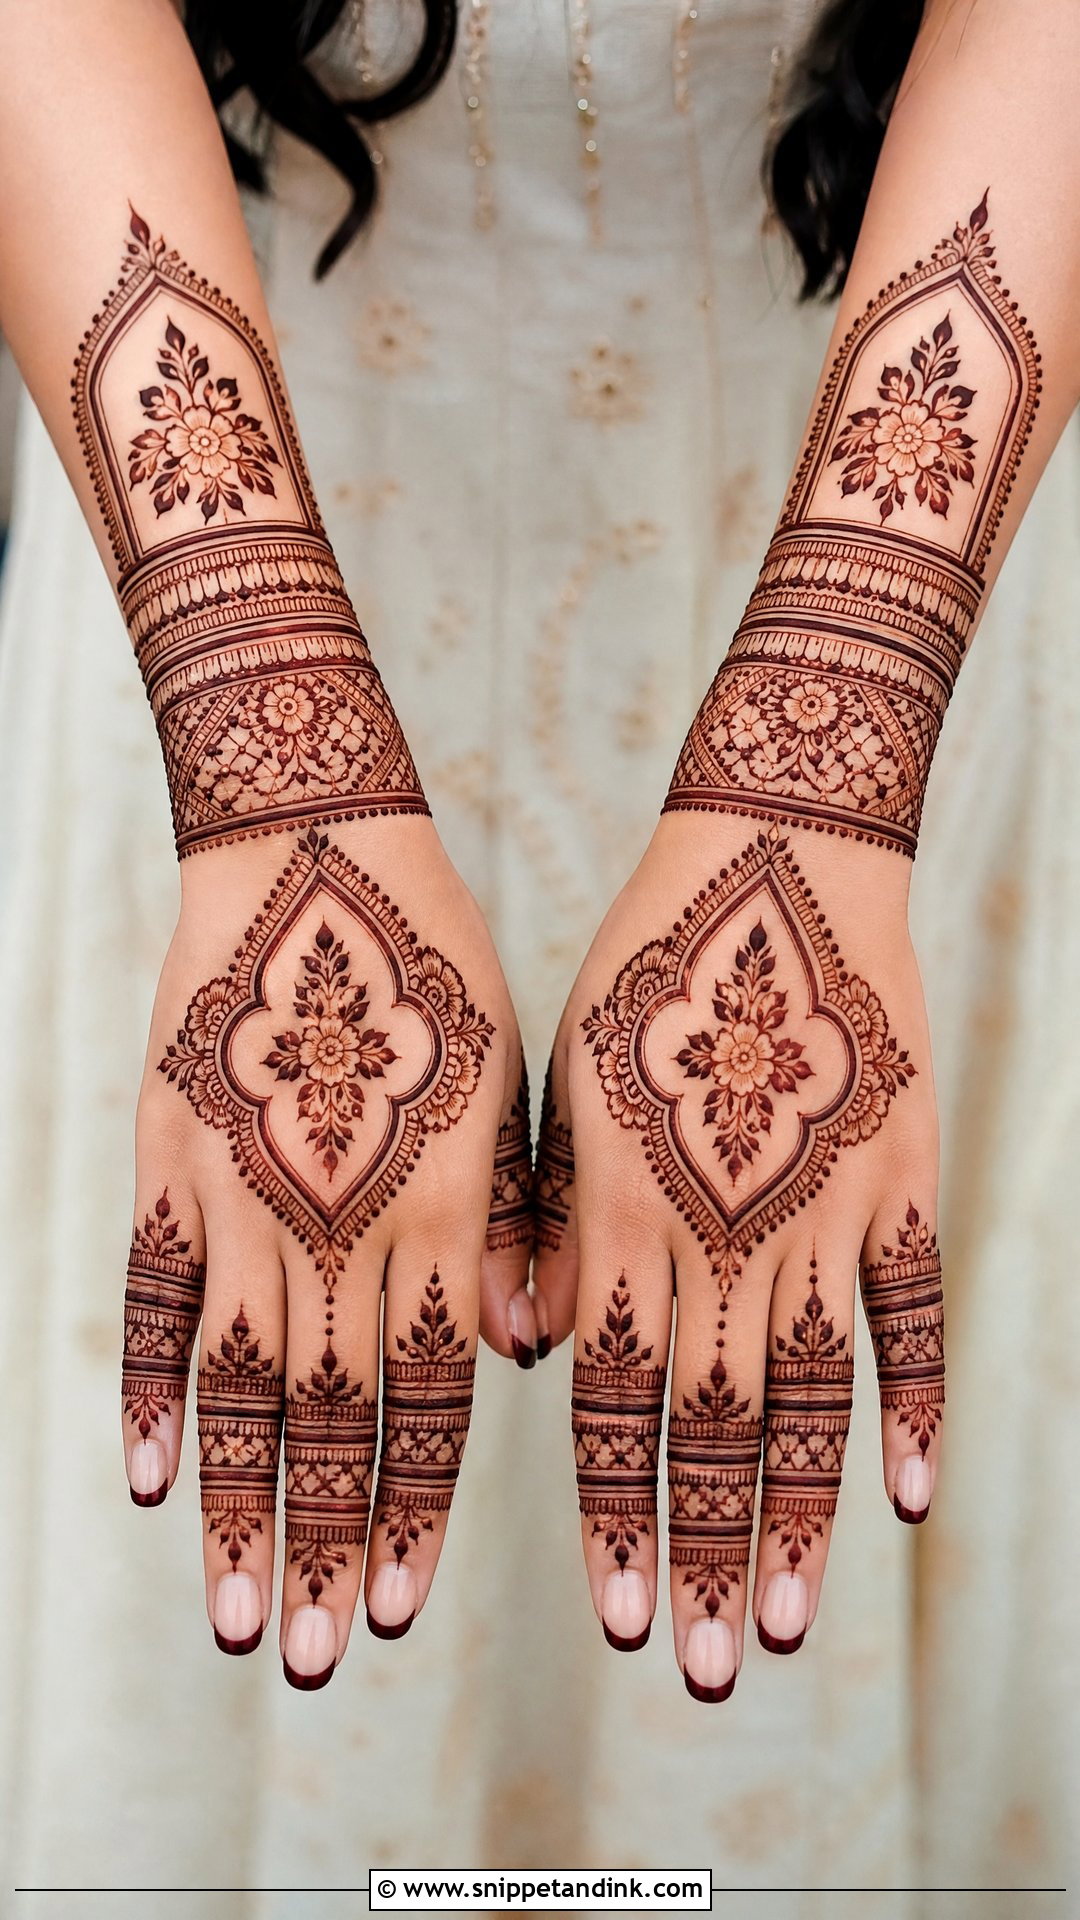
Modern bridal work relies on negative space, bold outlines, neat florals and geometric panels. Every element has room, which makes it read clearly in close-ups, and it’s the easiest style to personalise with initials, a date or a small symbol. I ask modern brides to pick one theme, such as florals with geometry or a mandala with finger bands, rather than sampling everything. It suits destination weddings and contemporary lehengas.
14. Moroccan Bridal Back Hand Mehndi Design
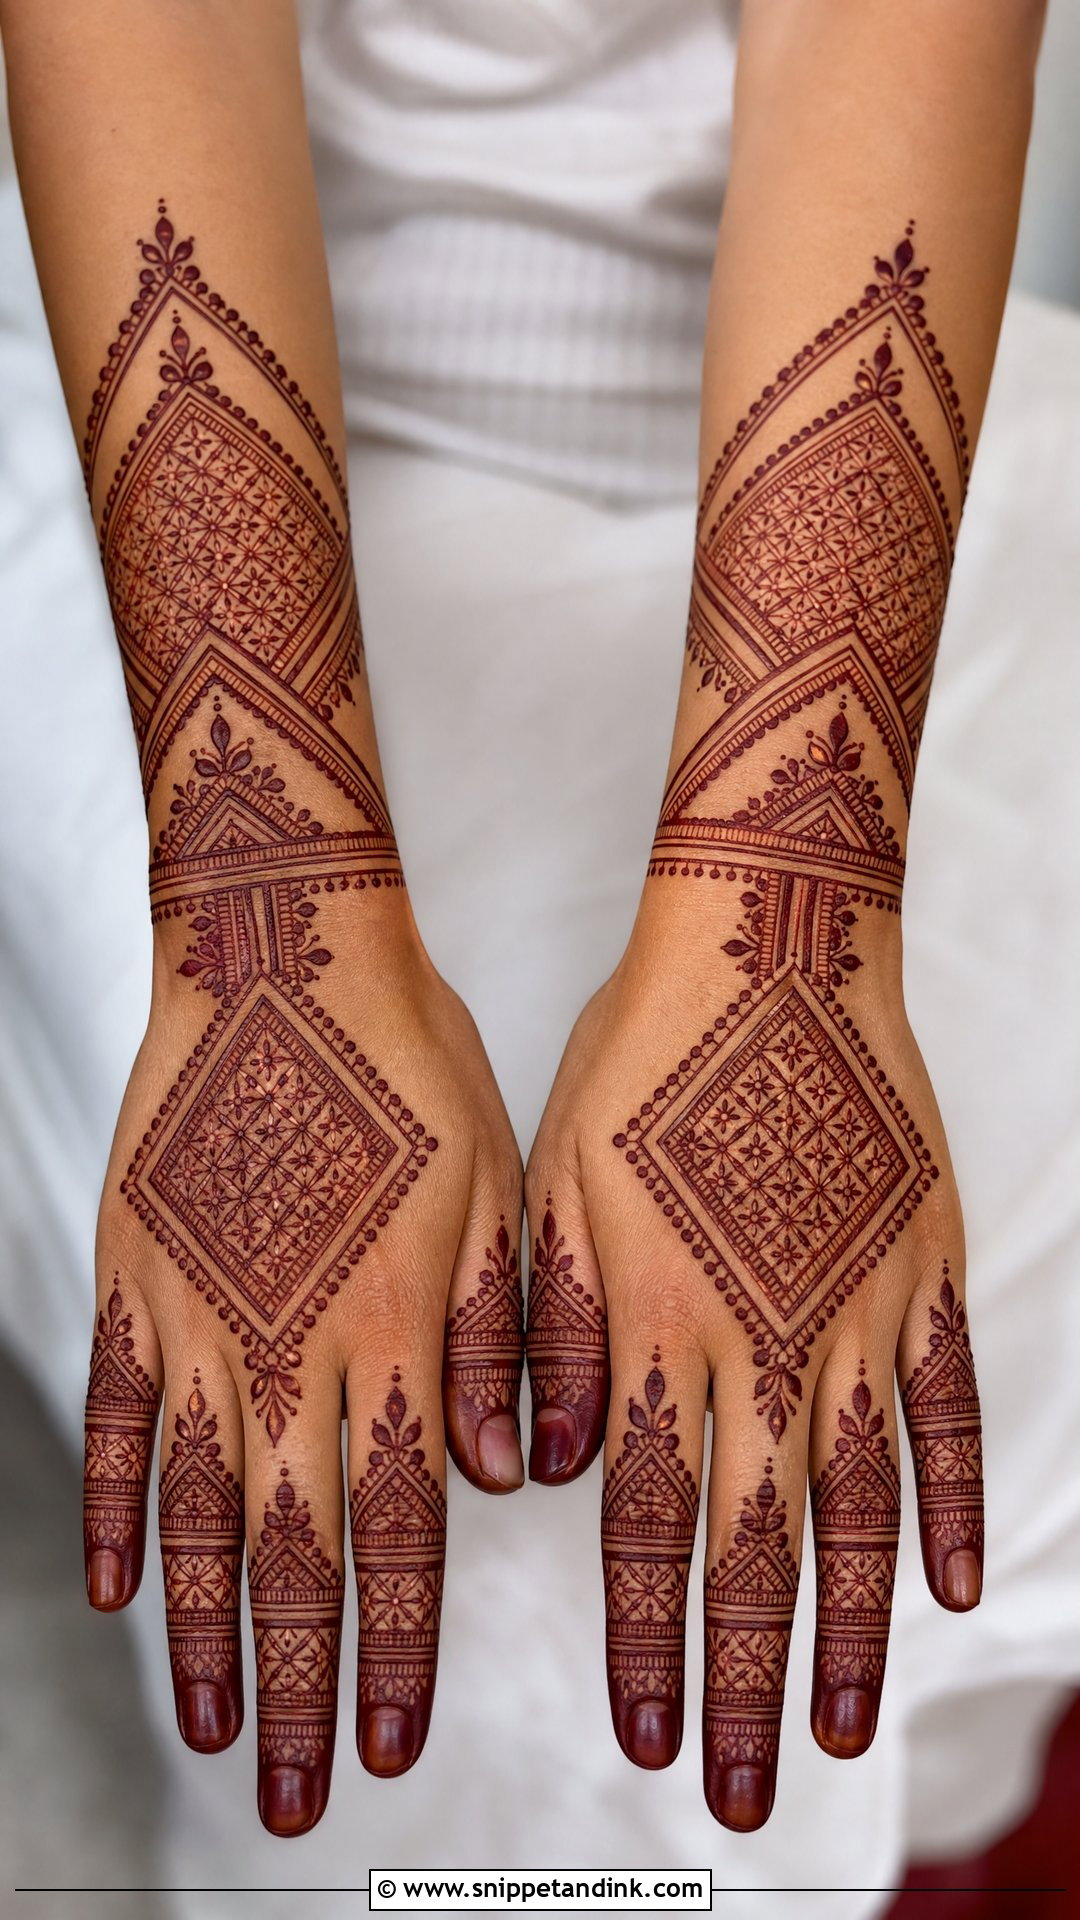
Moroccan patterns swap florals for geometry: diamond grids, straight lines, dots and bold borders. A bridal version might start with a wrist cuff, move into a geometric centre panel and end in detailed finger bands. Straight lines expose every wobble, and the back of the hand isn’t flat, so I draw them while the bride keeps her hand still and slightly flexed. It pairs well with Indo-western outfits and metallic jewellery.
15. Gulf Bridal Back Hand Mehndi Design
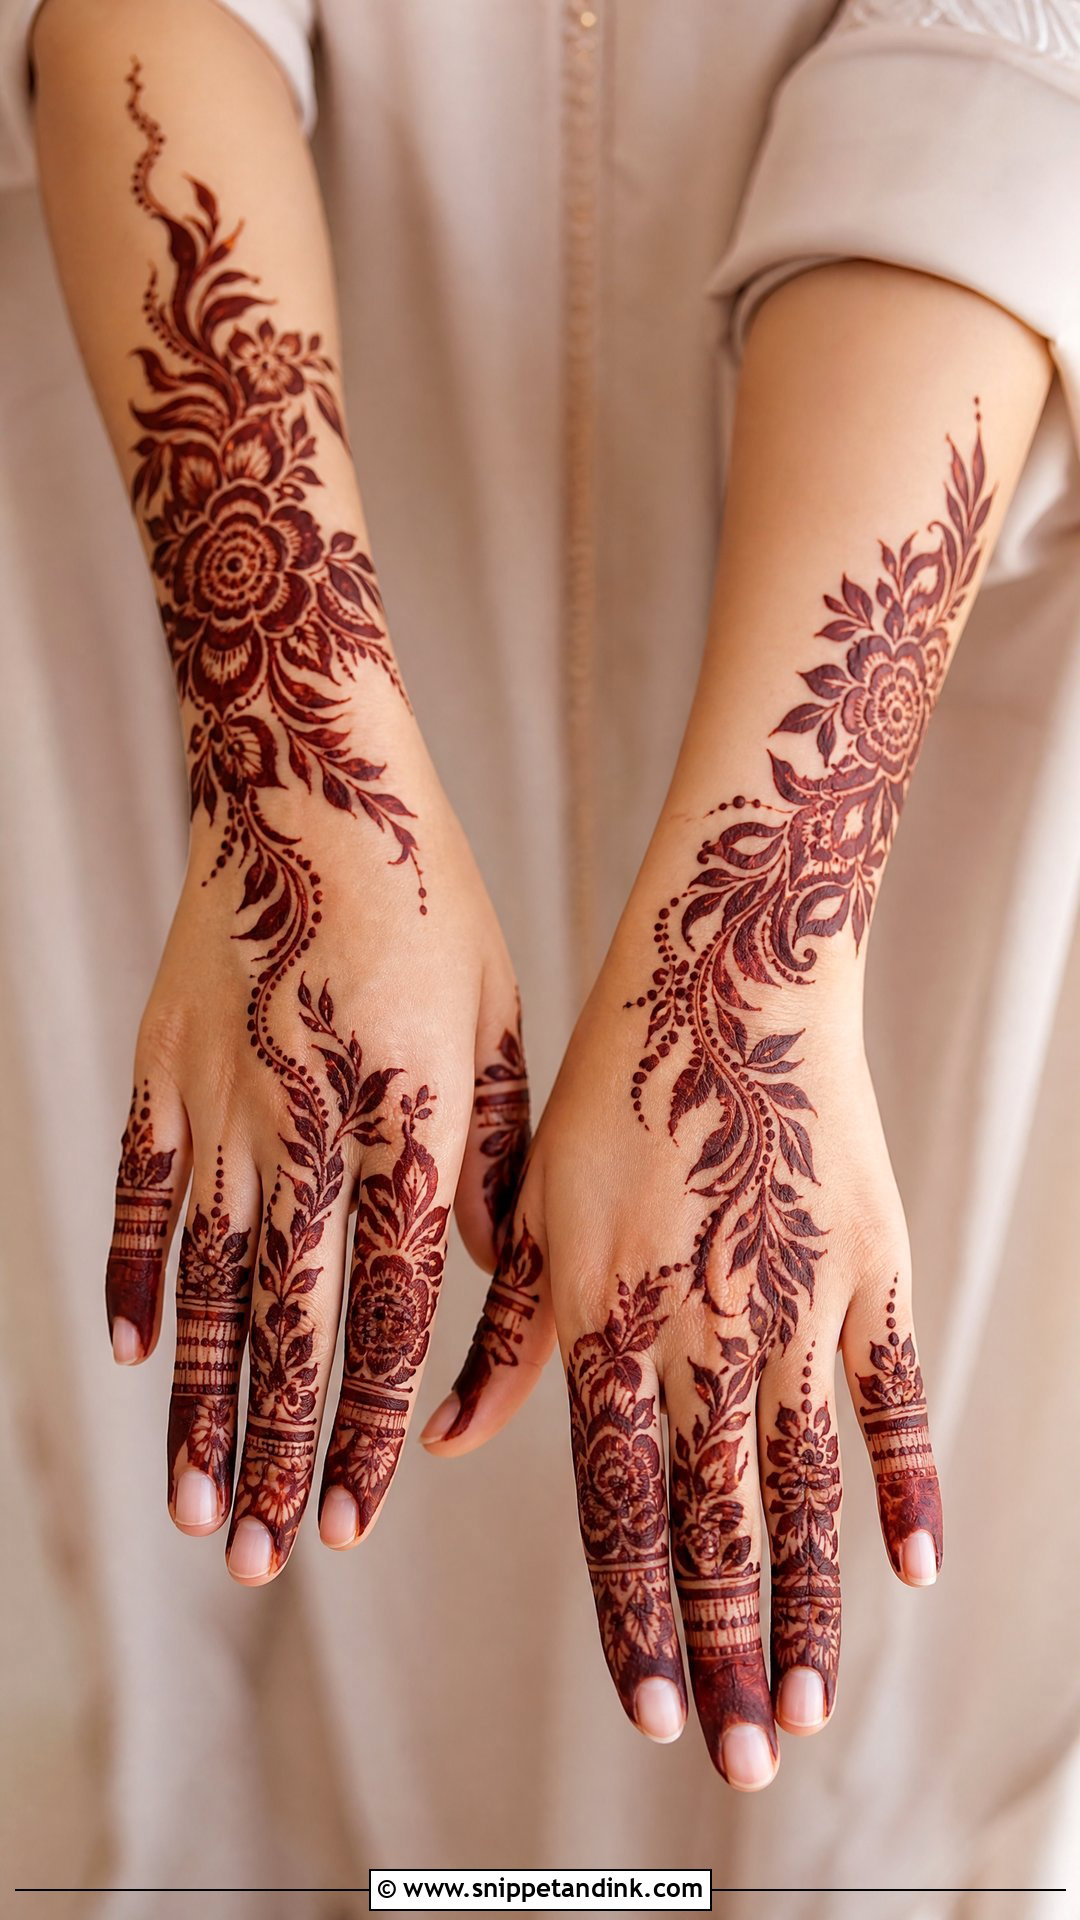
Gulf or Khaleeji-inspired work uses bold florals, leafy sprays, thick outlines and generous open space, usually flowing in a diagonal from one side of the wrist across the hand. Thick outlines matter because they hold a deep maroon stain well even on the back of the hand, where stains are naturally lighter. To make it bridal, I add fine filler inside the larger flowers and keep the fingertips detailed but open. Glossy nails finish it nicely.
16. Rose Bridal Back Hand Mehndi Design
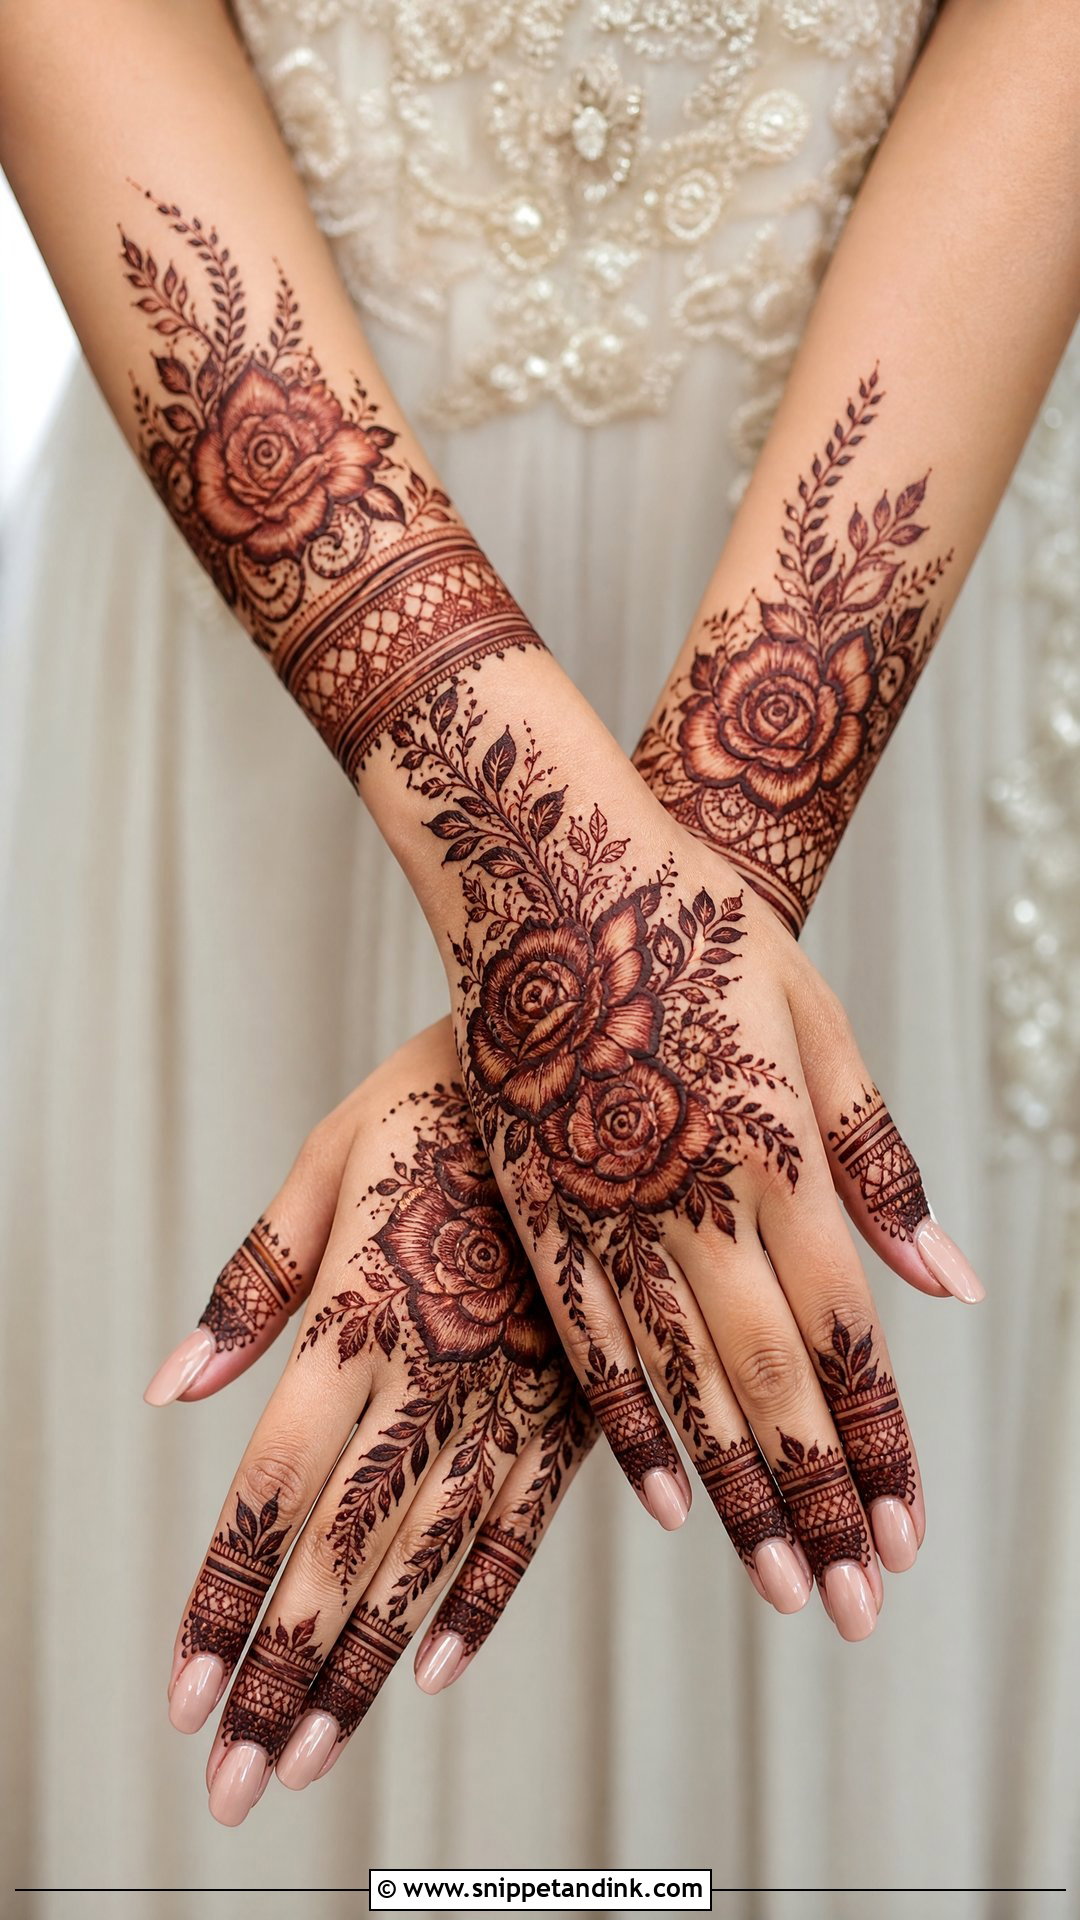
Large roses can sit at the centre of the hand, near the wrist or along a diagonal trail, with shaded petals for depth and leaves, dots and lace borders around them. Rose petals rely on fine shading, so the paste needs to be smooth and fresh; old paste with lumps leaves blotchy petals. The motif suits pastel, blush, ivory or red outfits and works for engagement or reception too. For the wedding I carry the trail into a wrist cuff and add fuller finger work.
17. Lotus Bridal Back Hand Mehndi Design
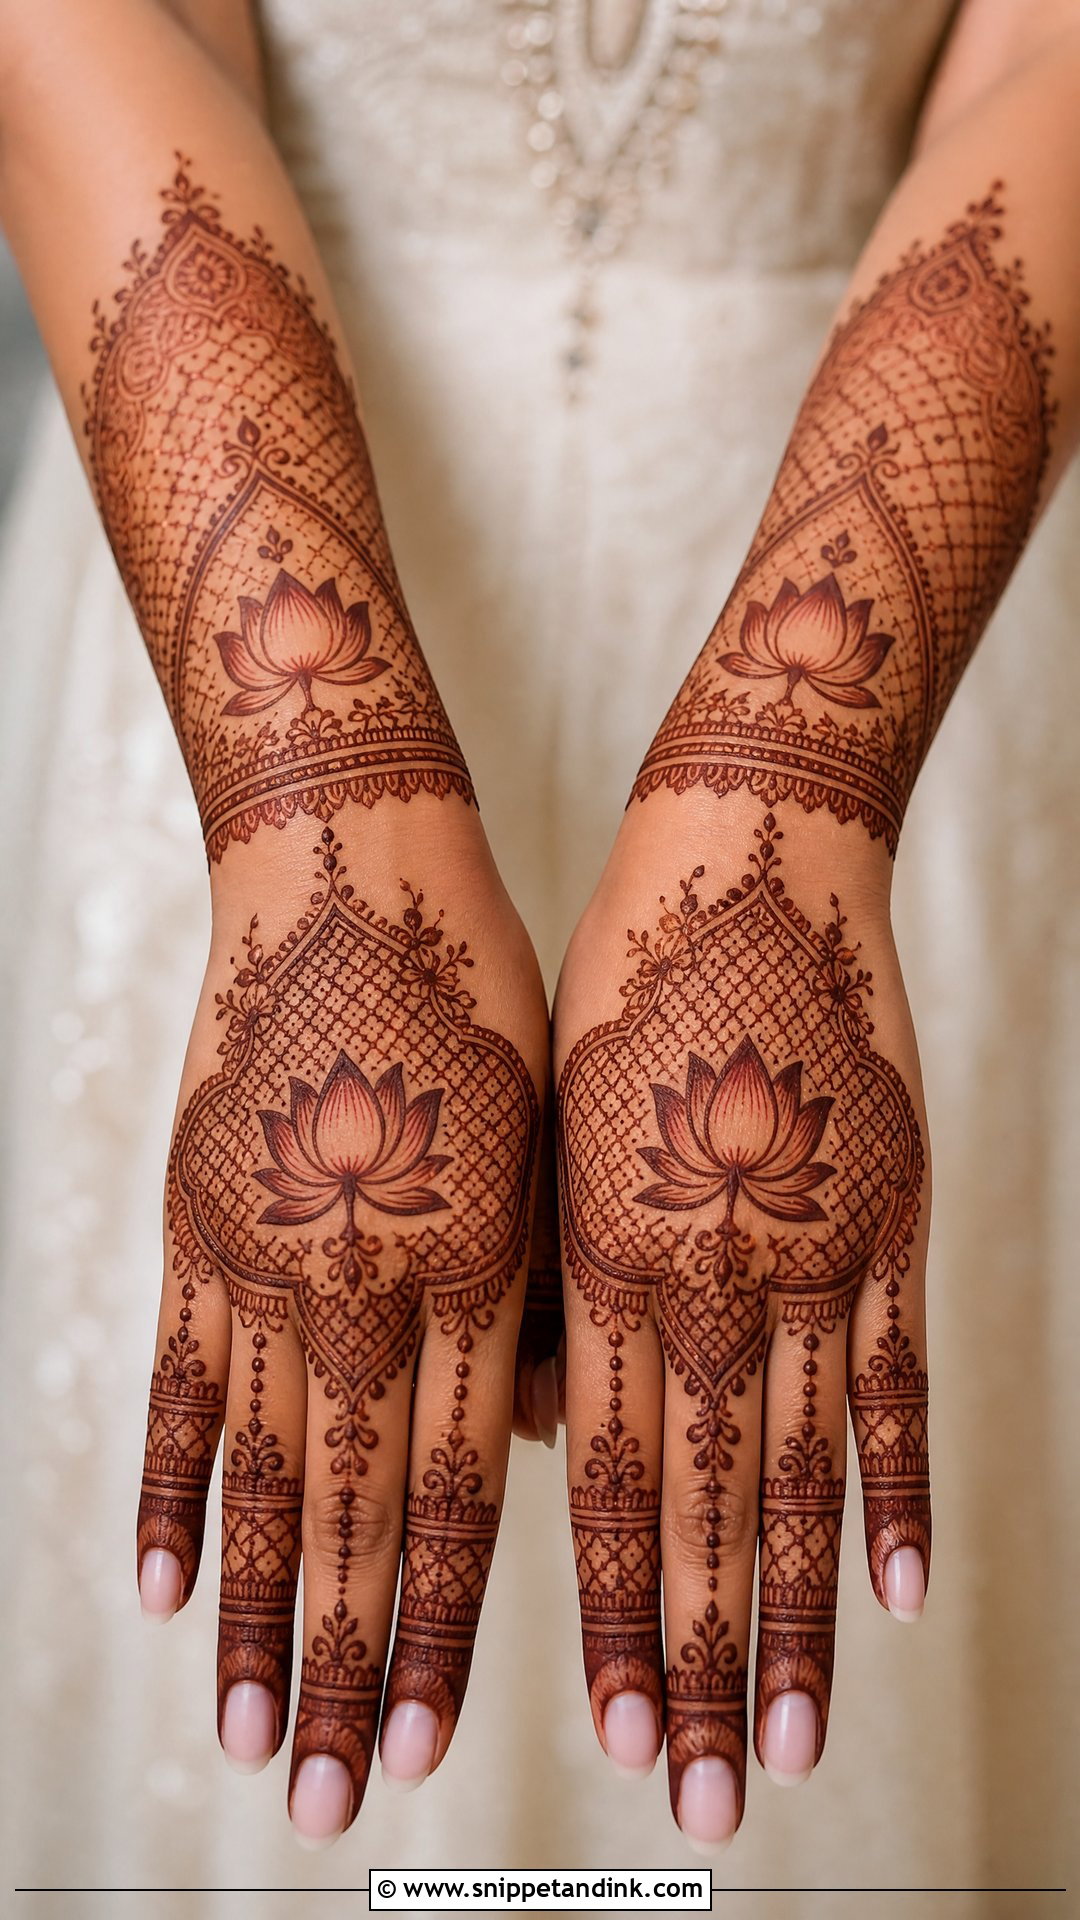
Lotus motifs carry cultural meaning for many brides and work as a centrepiece, a repeated border or a wrist-to-forearm pattern. Broad petals make an easy focal point, and fine lines inside them add the bridal detail. Keep the lotus outline clear and surround it lightly with dots, vines and jaali so it stays recognisable when the stain darkens. Temple jewellery, silk sarees and classic lehengas suit it.
18. Personalized Bridal Back Hand Mehndi Design
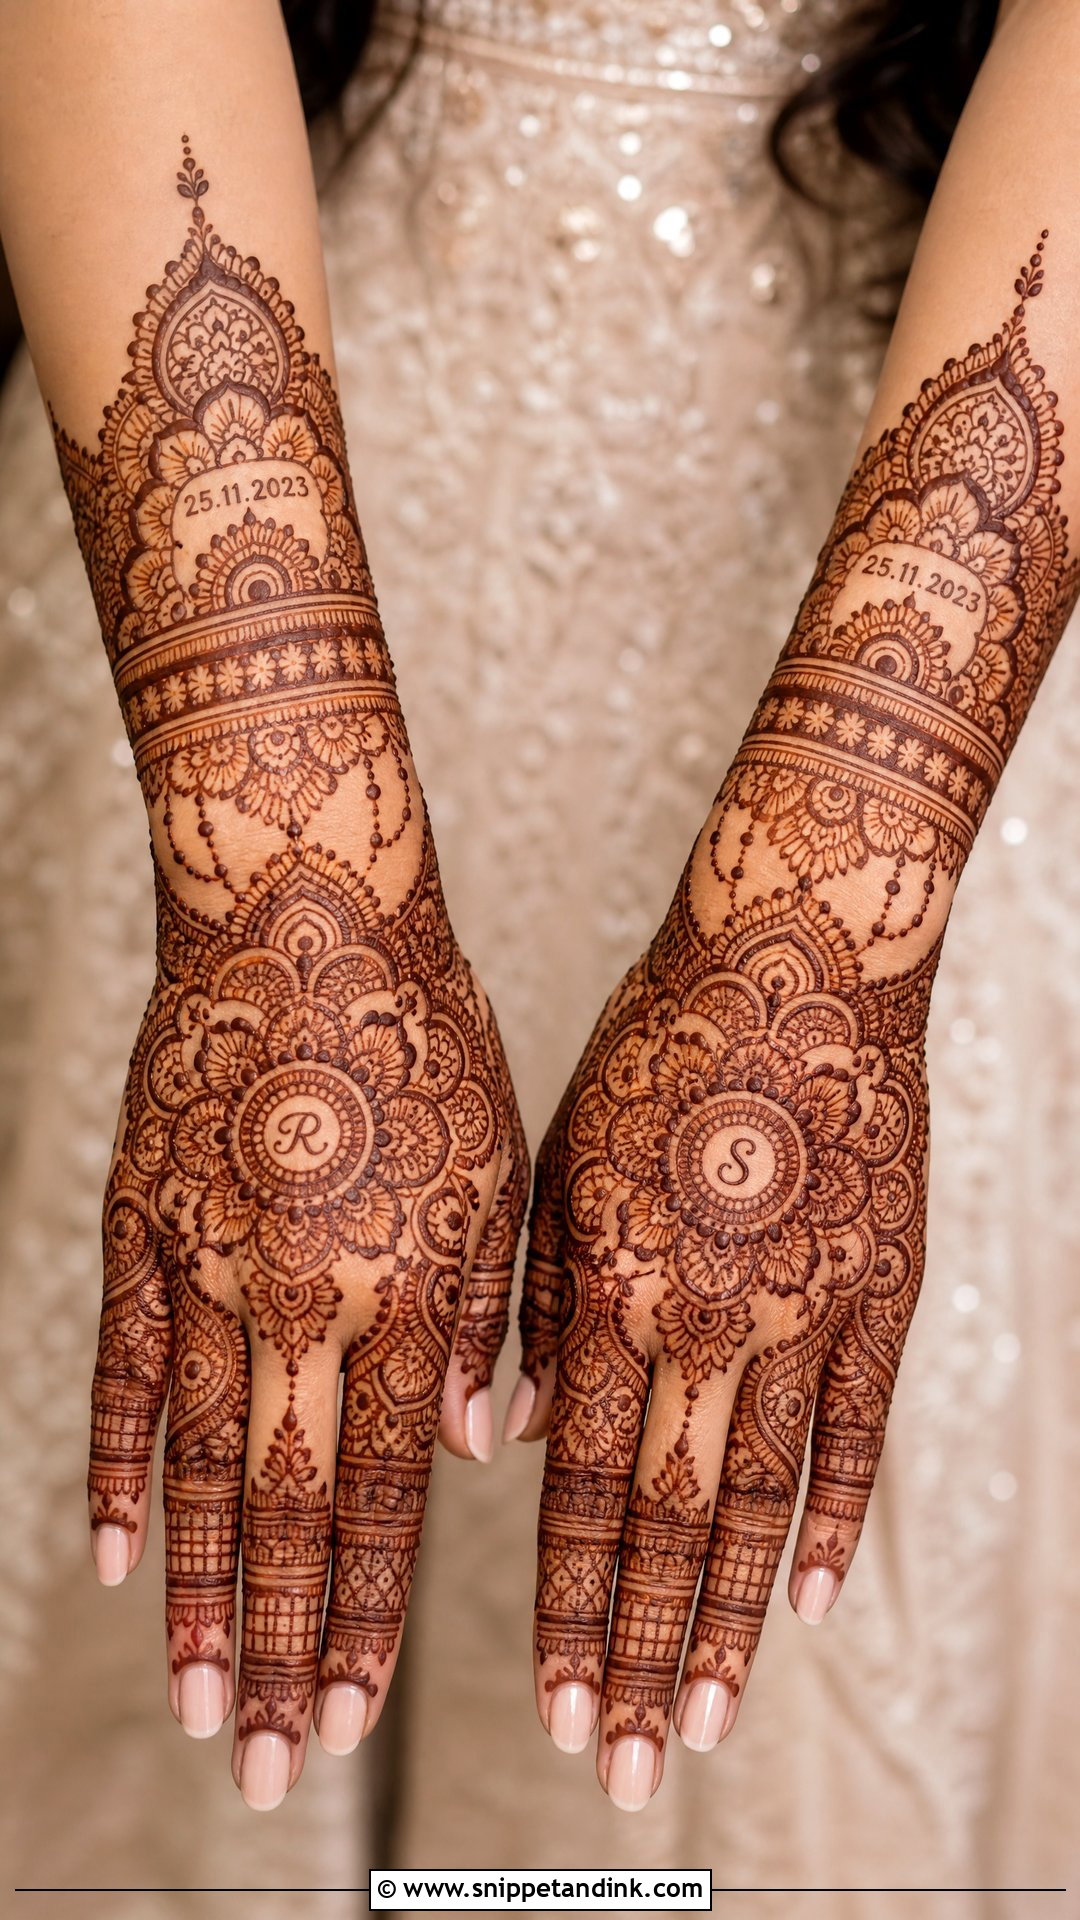
Personal details turn the design into a small story: initials, a date, a symbol from your culture or something tied to the two of you, tucked into paisleys, floral centres, wrist bands or mandala borders. The hidden-name game at the wedding works best when the name is hidden, but not impossibly. I write custom elements slightly larger than you’d expect, because fine lettering blurs as the stain spreads a little in the skin. They should blend into the full pattern rather than sit alone.
19. Back Hand Mehndi Design With Bride Groom Art
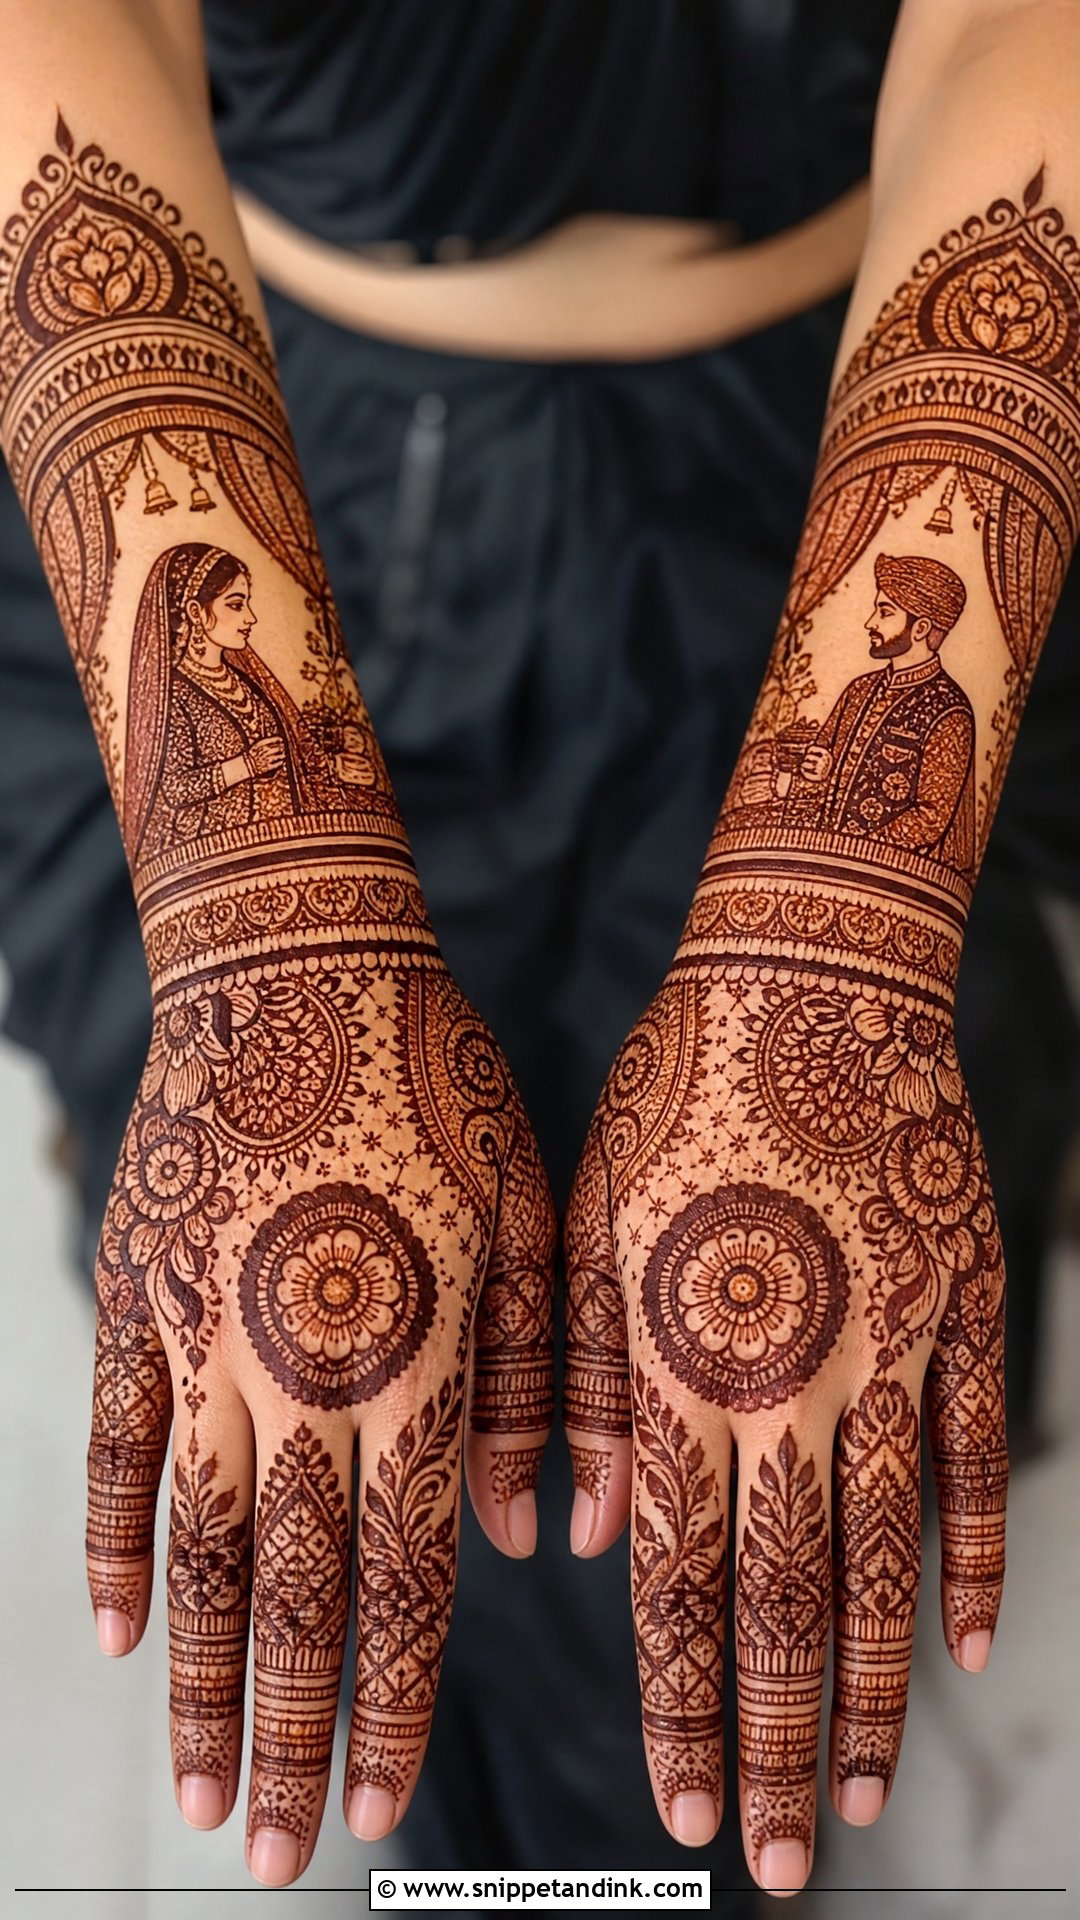
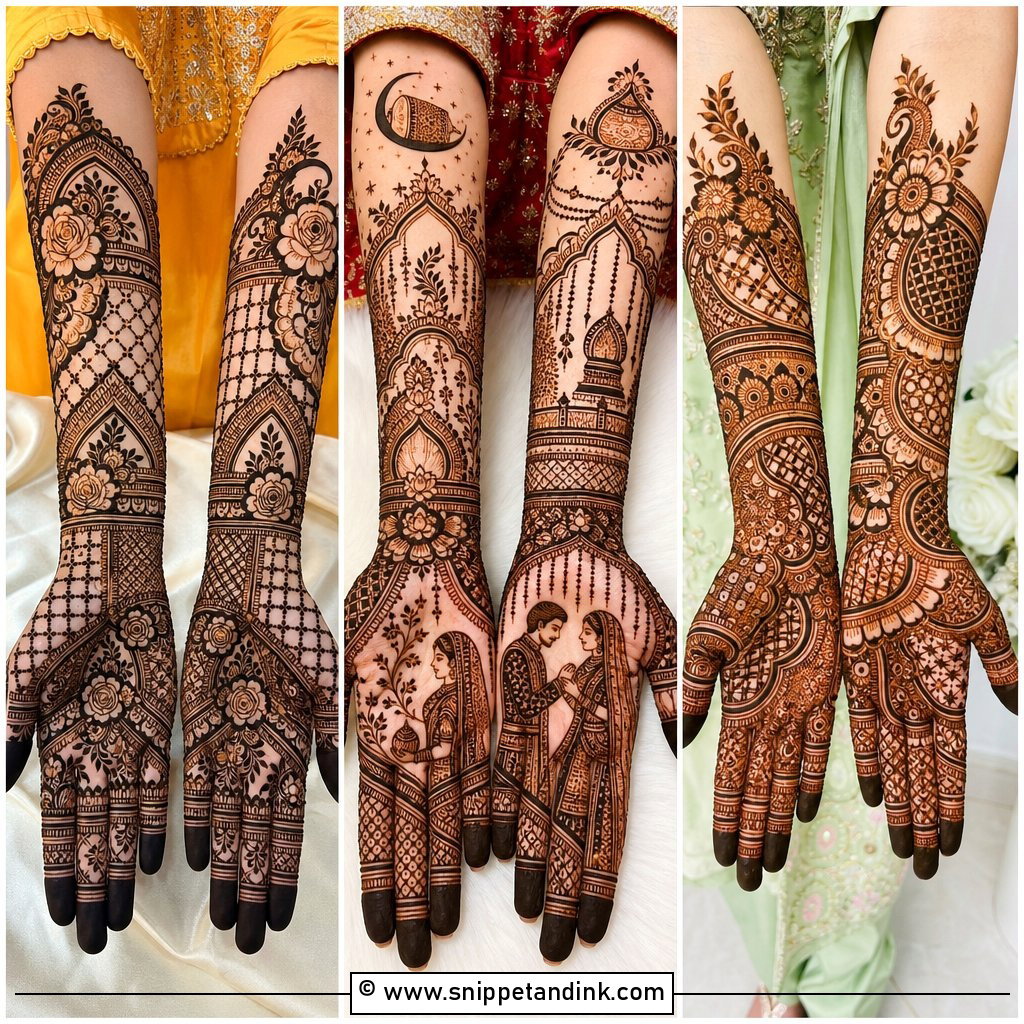
Bride and groom figures are usually drawn one on each hand, framed by mandap details, florals and fillers. The back of the hand has less flat space than the palm and bends at the knuckles, so I keep the figures small and simple, with clear faces and minimal shading, and leave the elaborate scenes for the palms. Detailed wrists and fingers complete the look, and the pair reads best with both hands side by side.
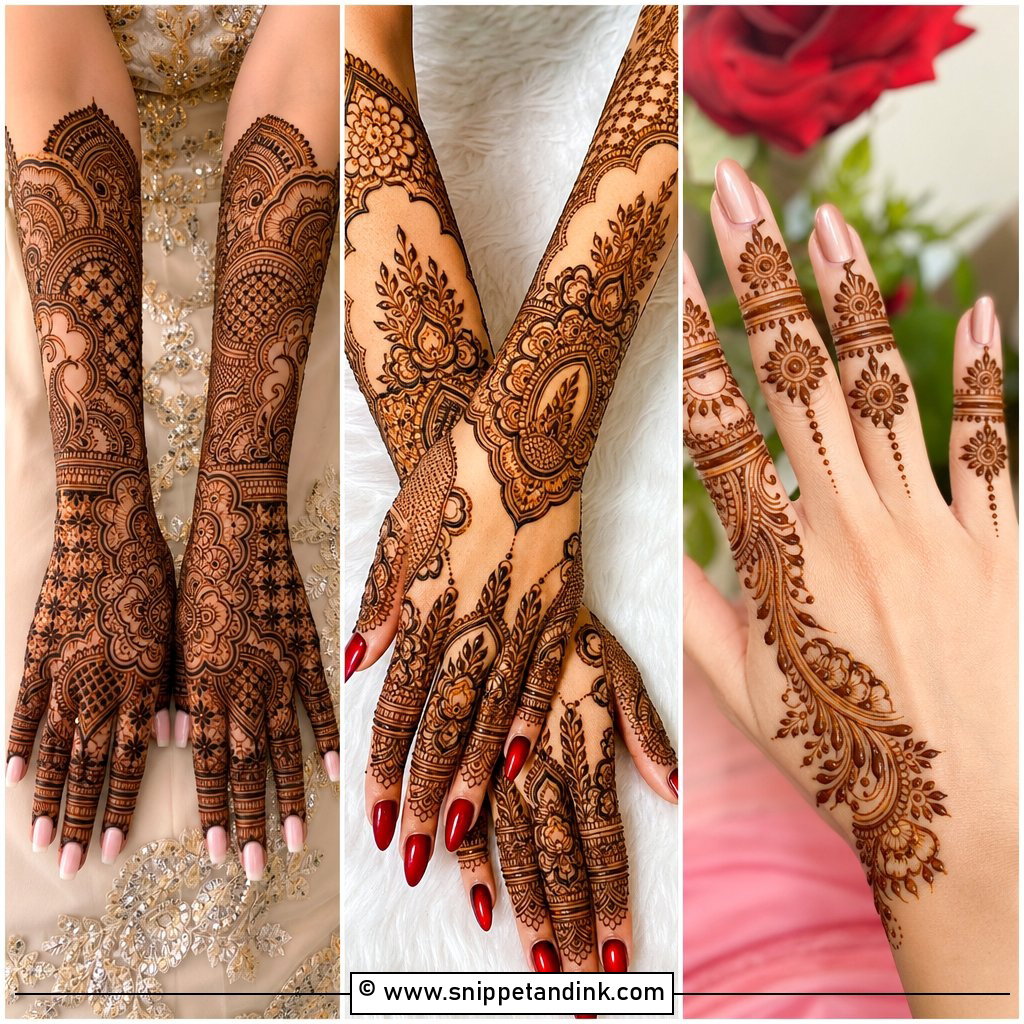
20. Simple Bridal Back Hand Mehndi Design
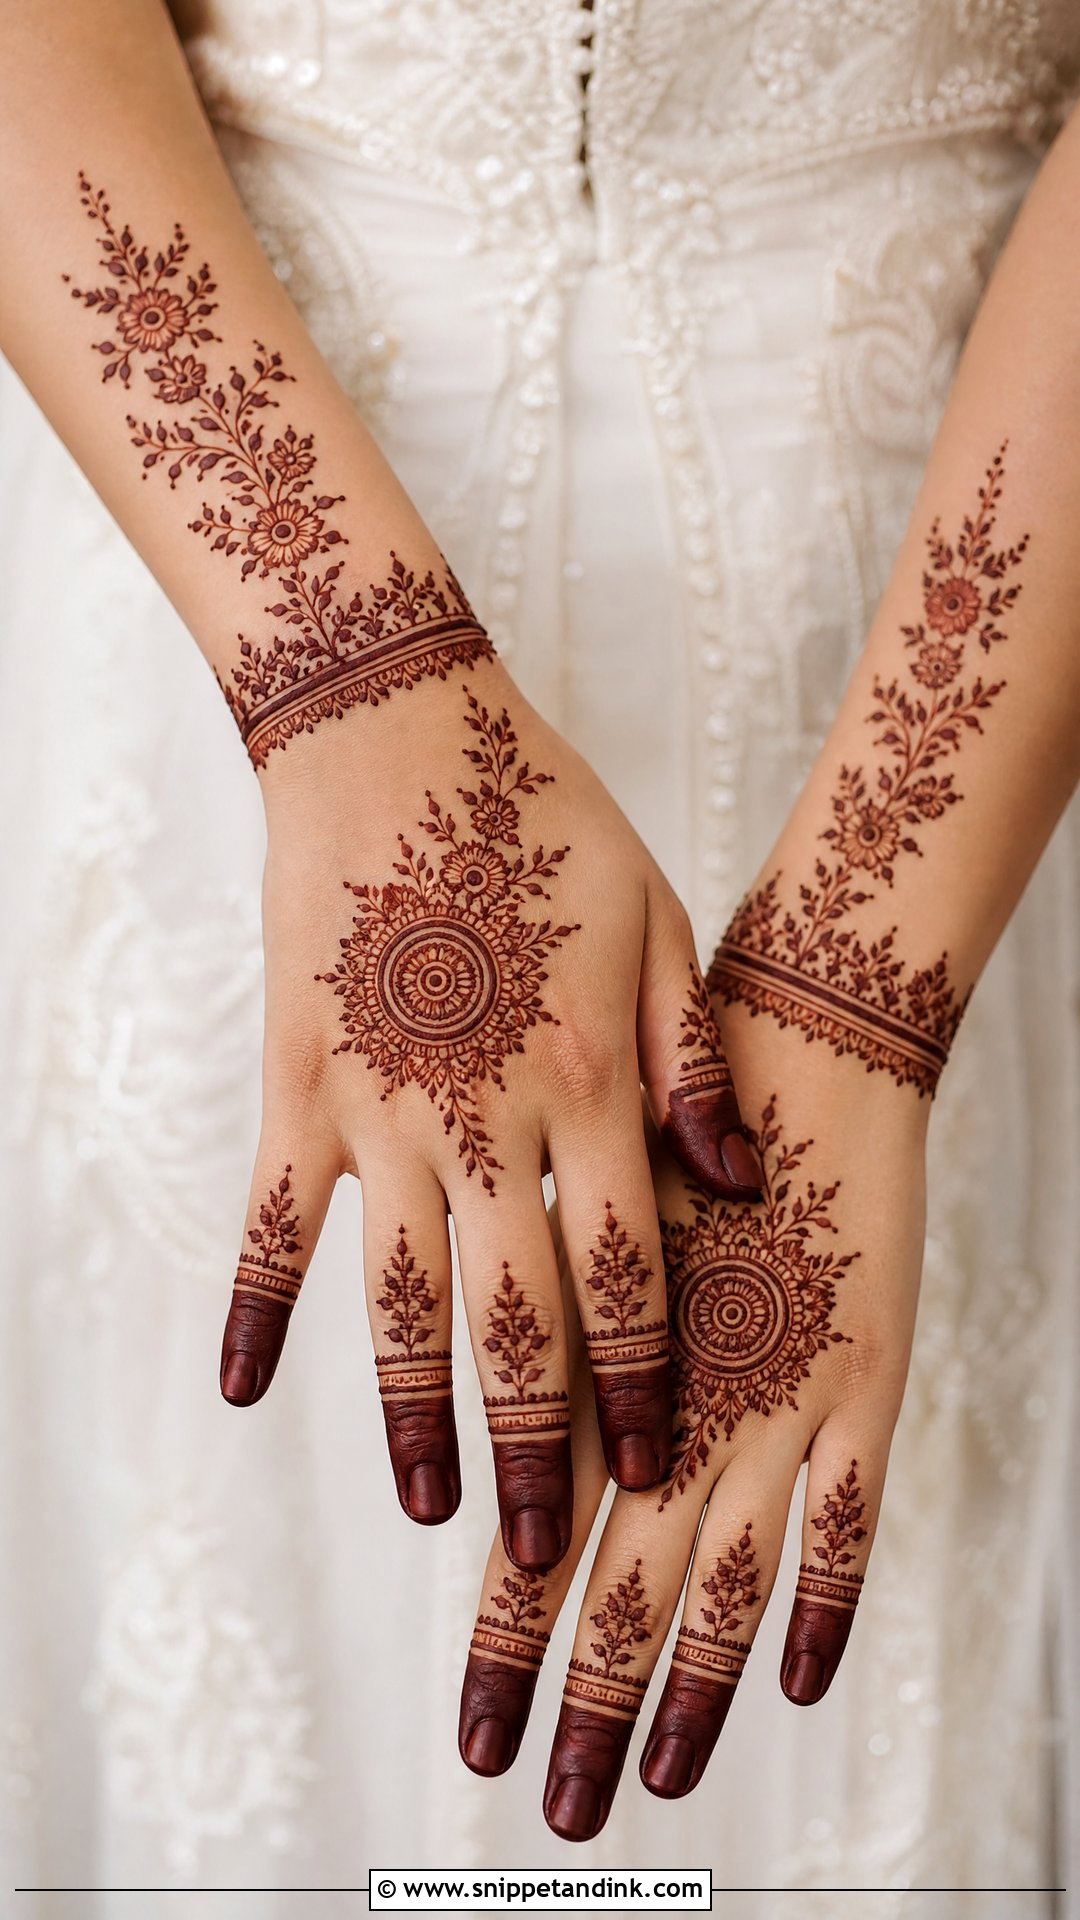
Simple bridal mehndi uses a floral trail, a mandala centre, light finger bands and a small wrist border, avoiding dense filling. It suits brides with several pre-wedding events who don’t want to sit for hours each time, and it works for sisters and bridesmaids too. It also dries faster, which matters on a busy day. Filled fingertips, tiny dots and balanced wrist extensions keep it bridal. Neat lines matter more here than anywhere.
Caring for the Paste and the Stain Afterward
How you treat the first day decides most of the colour. The paste needs time on the skin, so I ask brides to keep it on for several hours at least, ideally overnight, and to plan dinner and the bathroom before we start.
Once it’s dry
- Dab a little lemon and sugar mixture over the dry paste so it stays stuck to the skin and doesn’t flake early.
- Wrap loosely for sleep if you like, but don’t seal the hands in plastic so tightly that they sweat and smudge.
- Scrape the dried paste off with a blunt edge or rub it away. Don’t wash it off.
- Keep water off the design for as long as you can after removal, and skip soap, scrubs and hand sanitiser on it for the first day.
- A thin layer of natural balm or oil before showering helps protect the stain.
Manicures, waxing and anything with harsh chemicals should happen before the henna goes on, never after. And if you’ll wear heavy bangles from day one, expect a little fading where they rub the wrist; it’s a fair trade.
Deciding How Far Up the Wrist to Go
The right back-hand design comes down to your outfit, jewellery, hand shape, ceremony and how long you’re happy to sit. Heavy Indian work feels traditional and rich; Arabic, Indo-Arabic, Gulf and Moroccan patterns give cleaner spacing and flow; mandalas, jaali, florals, peacocks, paisleys and personal details each set a different mood. Before you book, ask to see your artist’s healed stain photos, not just fresh paste, and decide how far up the wrist and forearm you want to go. Use these ideas as your starting point for that conversation.
You'll Like These Ideas:


Leave a Reply