
Cut work is the style I reach for when someone tells me they want to see the design, not just a dark hand. The pattern is built around planned gaps of bare skin, so the florals, paisleys, jaali and bracelet shapes sit inside clear frames instead of melting into one another. I use it for brides and bridesmaids, but just as often for Eid, Diwali, Karwa Chauth, engagement evenings and simple festive days when a full hand would be too much. The open spaces are the hard part, honestly. Every gap has to be drawn on purpose, because a gap that is just left over looks unfinished once the paste comes off. The ideas below run from light Arabic trails to heavy bridal layouts, with notes on how each one behaves on real skin.
Why Some Gaps Close Up Before the Stain Even Develops
The open spaces in a cut work design are fragile. Henna paste spreads slightly as it settles, and the dye moves a little into neighbouring skin while it sits. A gap I draw at the width of a pencil line can be nearly gone by the next morning. So when I plan cut work, I leave each gap a touch wider than it needs to look in the finished photo.
Paste consistency matters just as much. I want it like thick toothpaste: firm enough to sit on the skin as a raised line, loose enough to flow from the cone without dragging. Runny paste pools at the end of every stroke, and that pooling is exactly what fills a jaali square or blurs a petal edge. If your artist mixes on the spot, it’s fair to ask how long the paste has rested, since freshly mixed paste often has not released enough dye yet.
What helps on your side
- Arrive with clean, dry skin and no lotion or oil on your hands; oil stops the dye from taking and makes the edges fuzzy.
- Skip waxing or scrubbing the area on the same day, since freshly exfoliated skin can stain unevenly.
- Sit still for the first ten minutes after each hand is done. Most smudged gaps happen when someone reaches for a phone.
- Tell me if your hands run warm or sweat easily. I’ll leave more space, because damp skin softens the paste and widens every line.
1. Cut Work Arabic Back Hand Mehndi Design
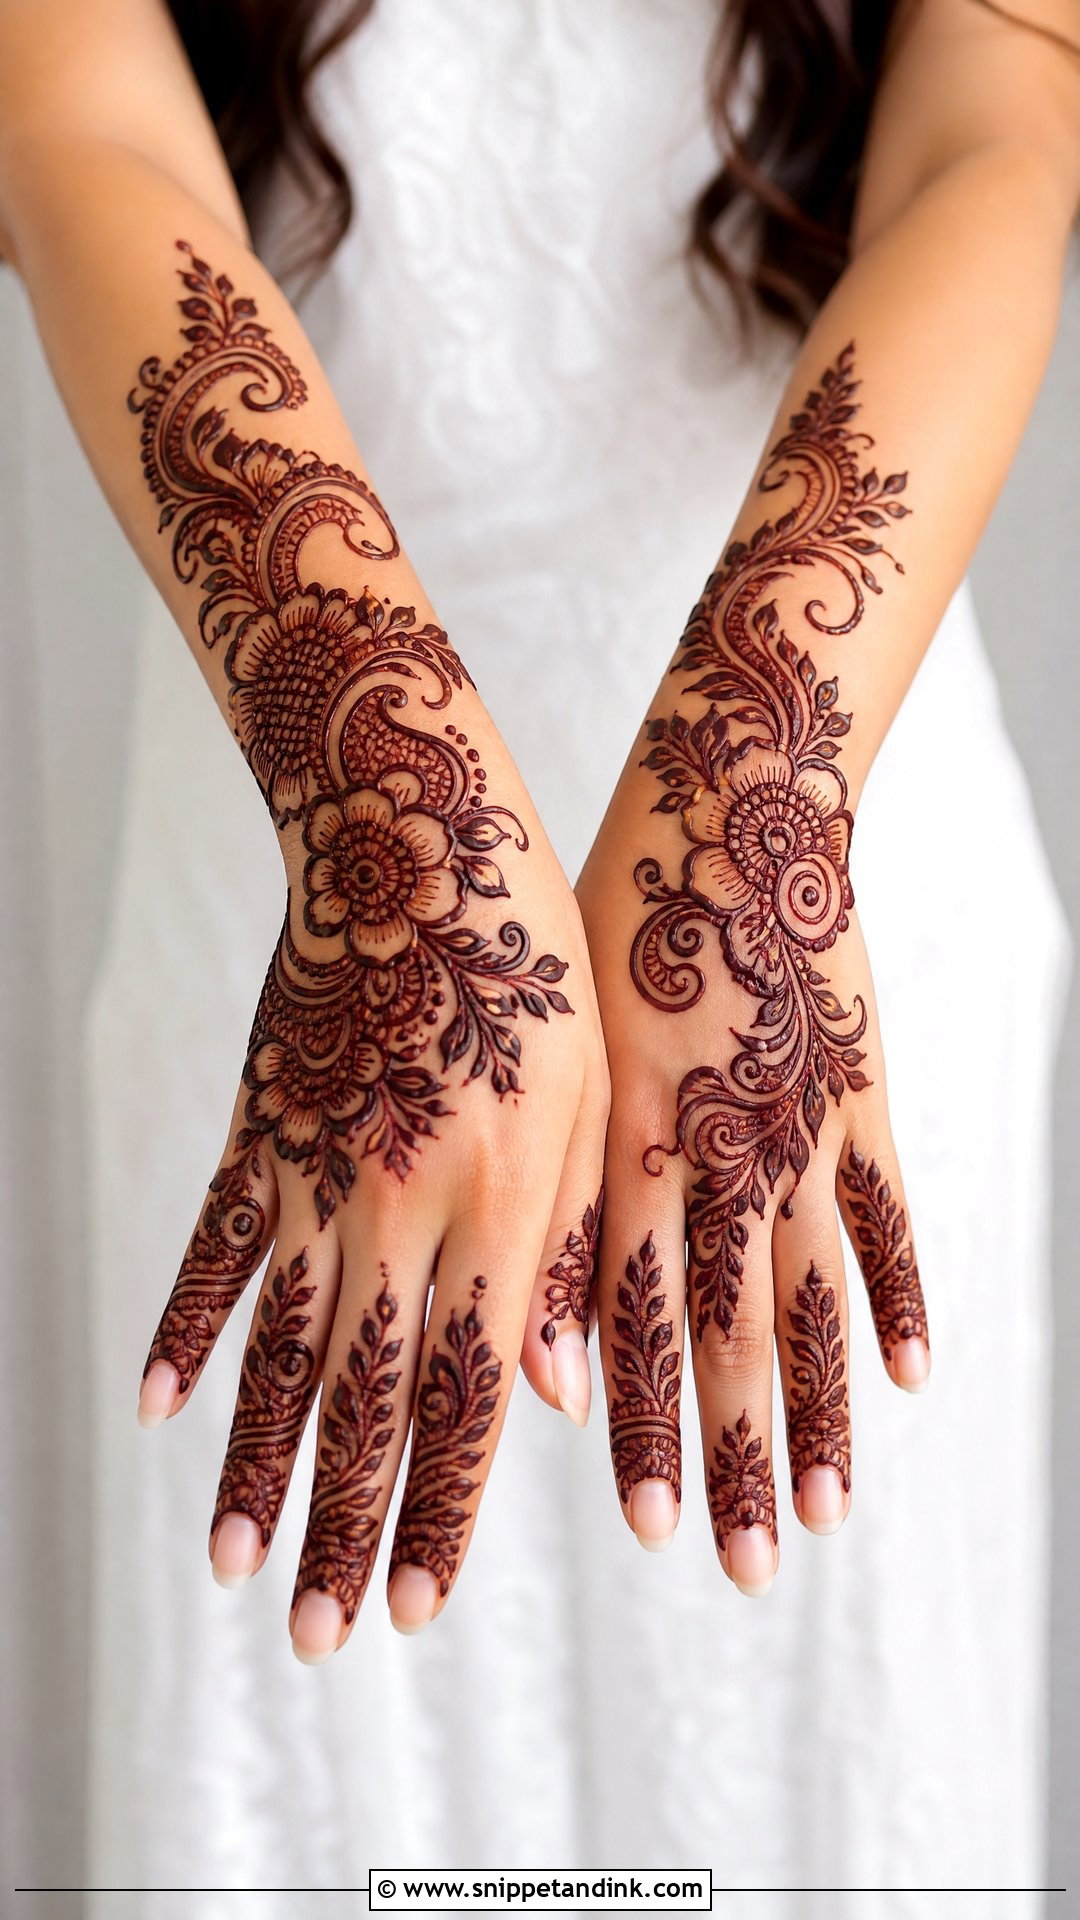
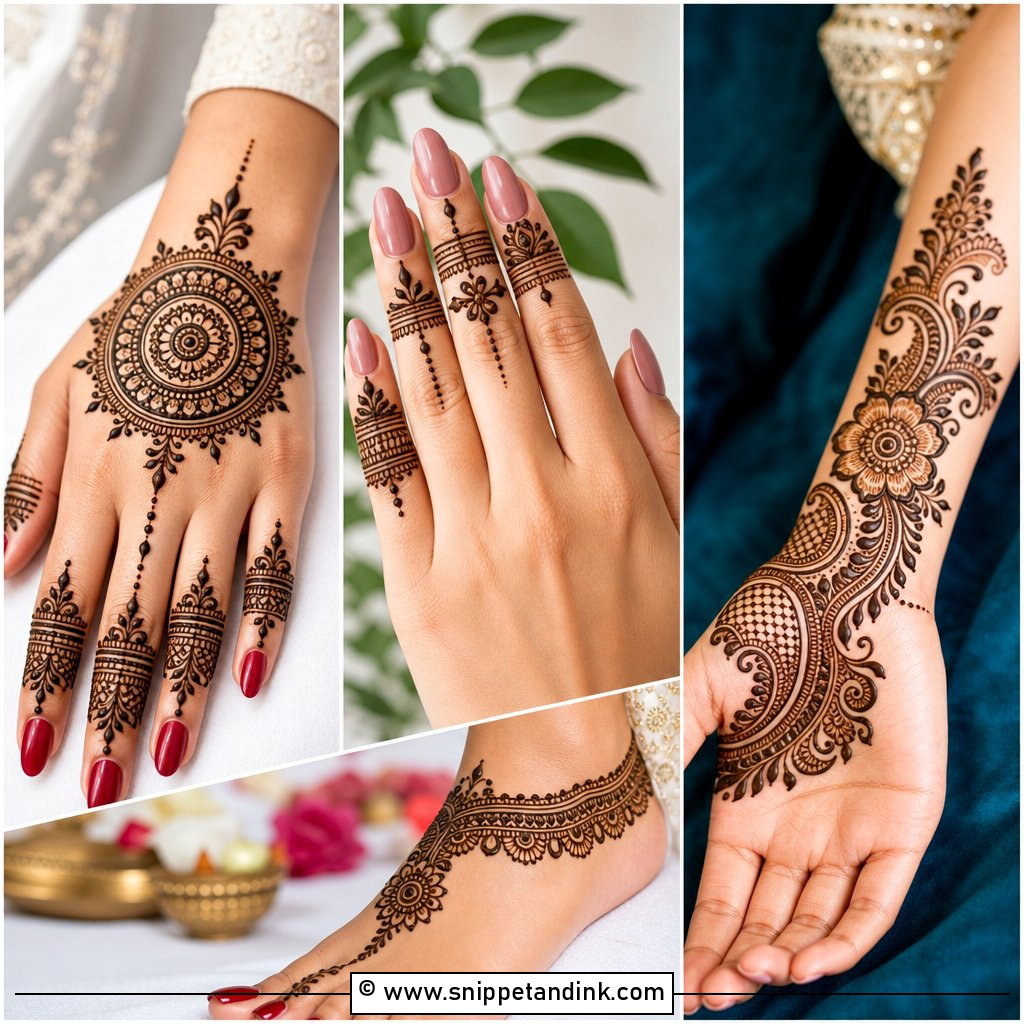
I start this one at the outer wrist bone and pull the trail diagonally toward the index or middle finger, because that line follows the natural angle of the hand when it rests on a lap. Big flowers, leafy vines and paisleys carry the structure, and the bare skin between them does the rest. The thing I watch is the gap width: anything narrower than a grain of rice tends to close up when the paste spreads, so I leave a little more room than looks necessary while I’m drawing. Lightly filled fingertips and a few dots around the open areas finish it. It’s comfortable enough to cook, hug and dance in at an Eid lunch or a cousin’s wedding.
2. Cut Work Bridal Full Hand Mehndi Design
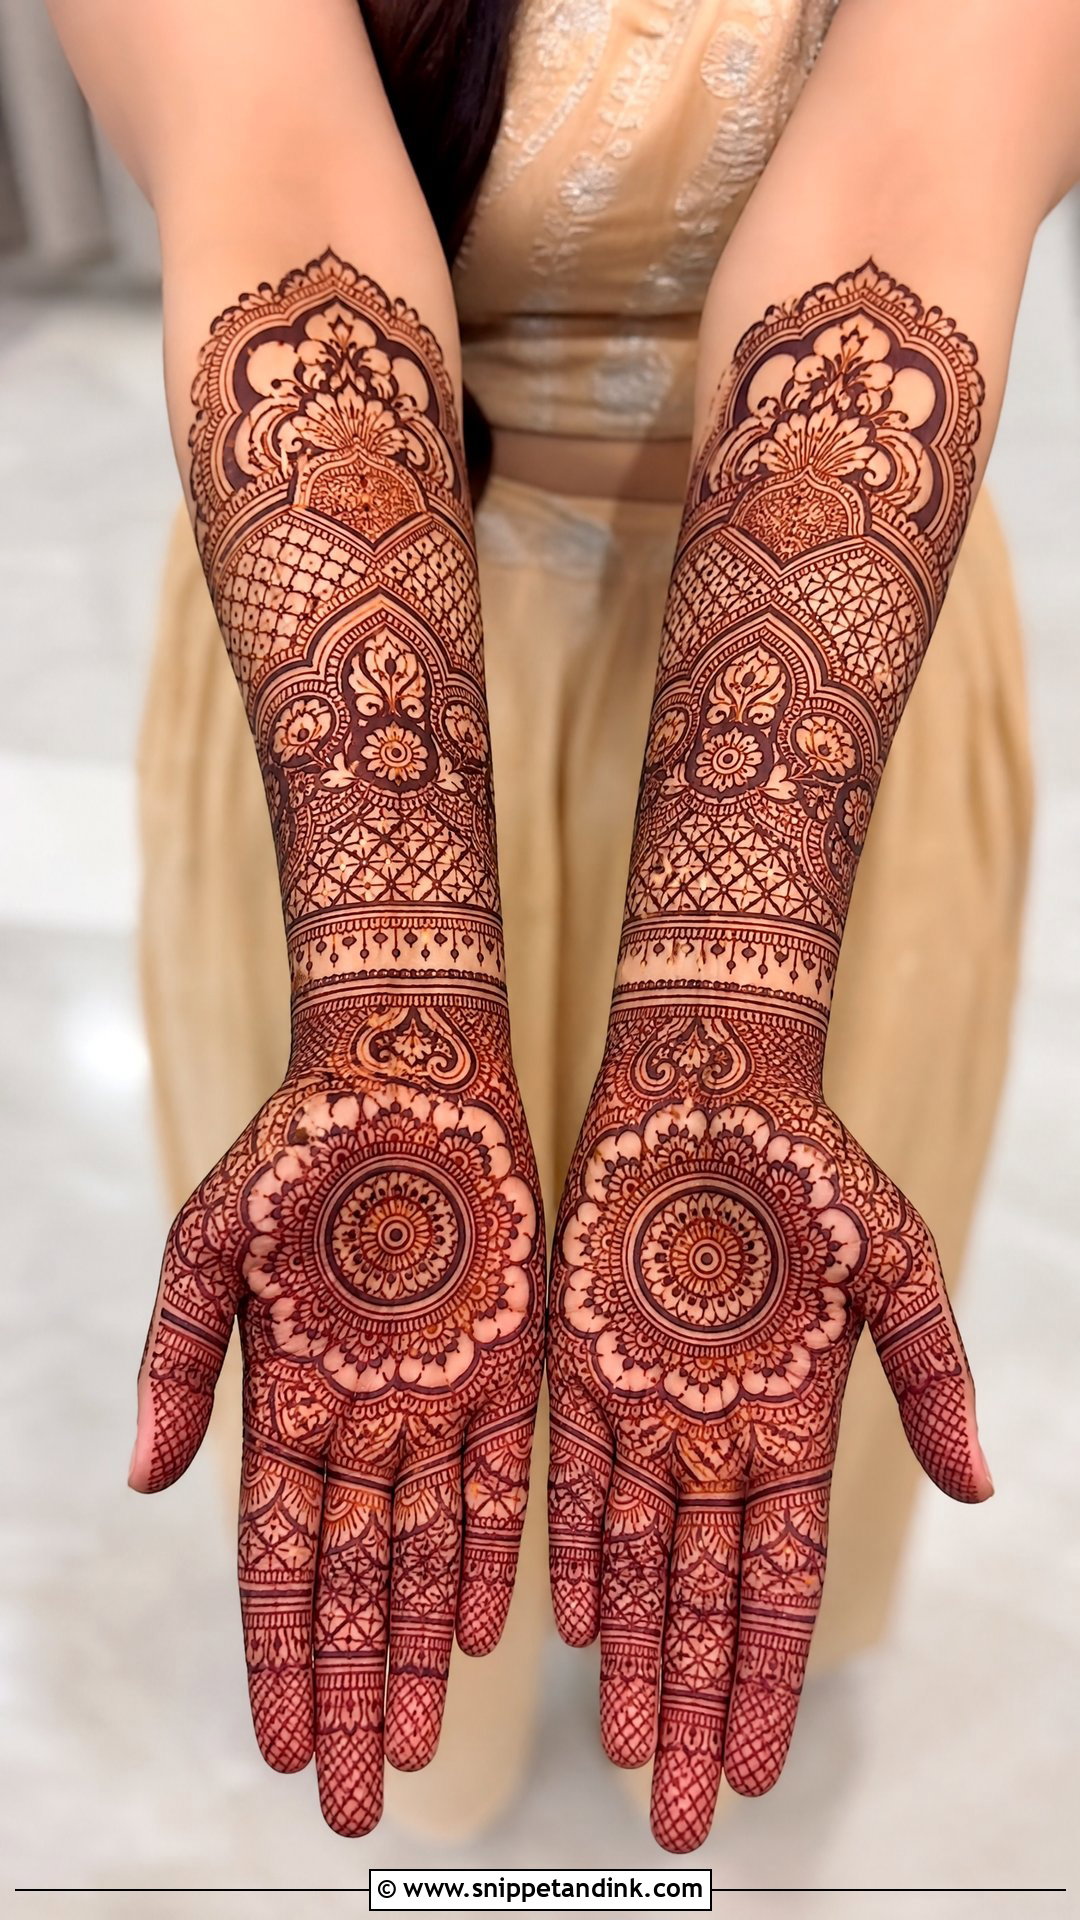
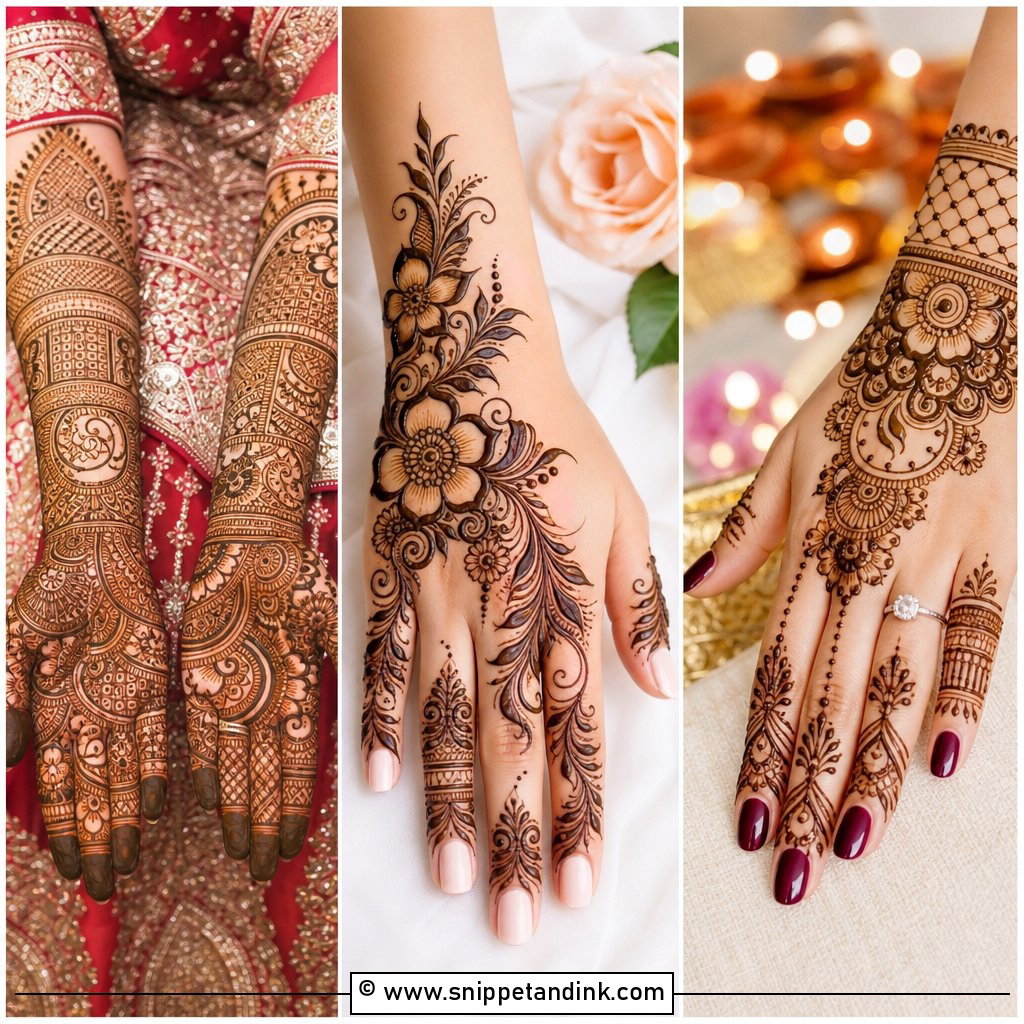
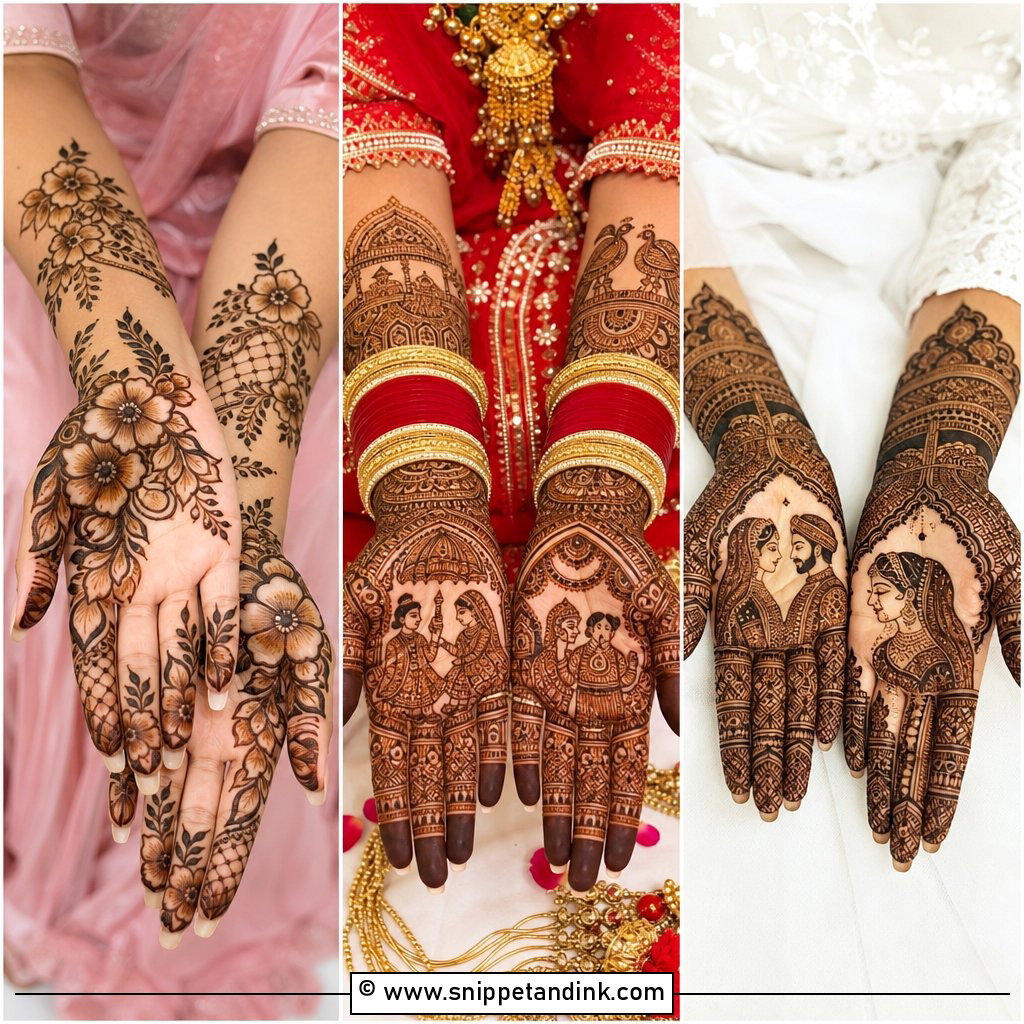
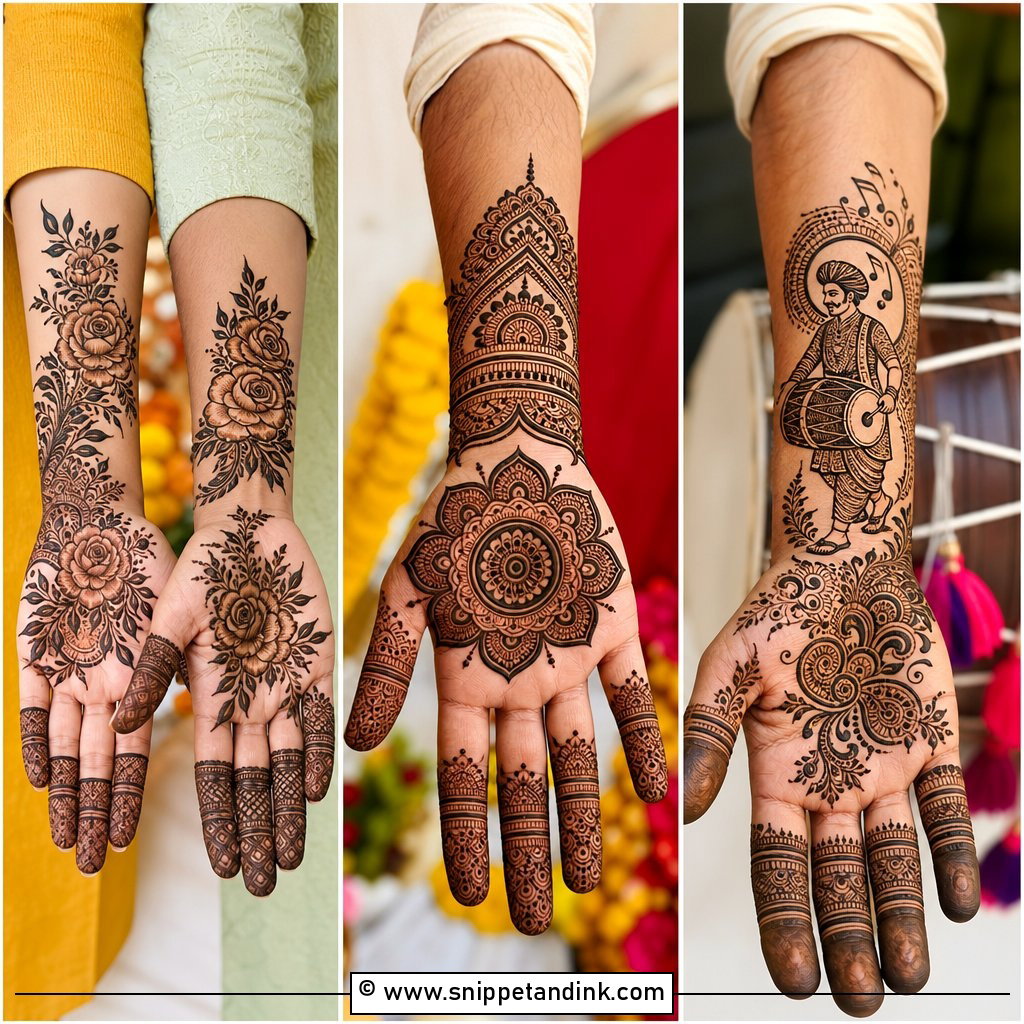
For a bride who wants heavy coverage but hates the muddy look of tiny filling everywhere, this is my usual answer. I divide the hand into bold panels with clear borders, then let detail live inside some panels and keep others open. The palm takes the anchor motif, often a mandala, a paisley cluster, a floral centre or bride and groom figures, while the forearm carries alternating cut work bands and jaali. Because palms stain darker than forearms, I keep the forearm lines slightly bolder so the two areas read as one design on the wedding day. Bangles and nail colour show up far better against those open panels than against solid fill.
3. Cut Work Front Hand Mehndi Design
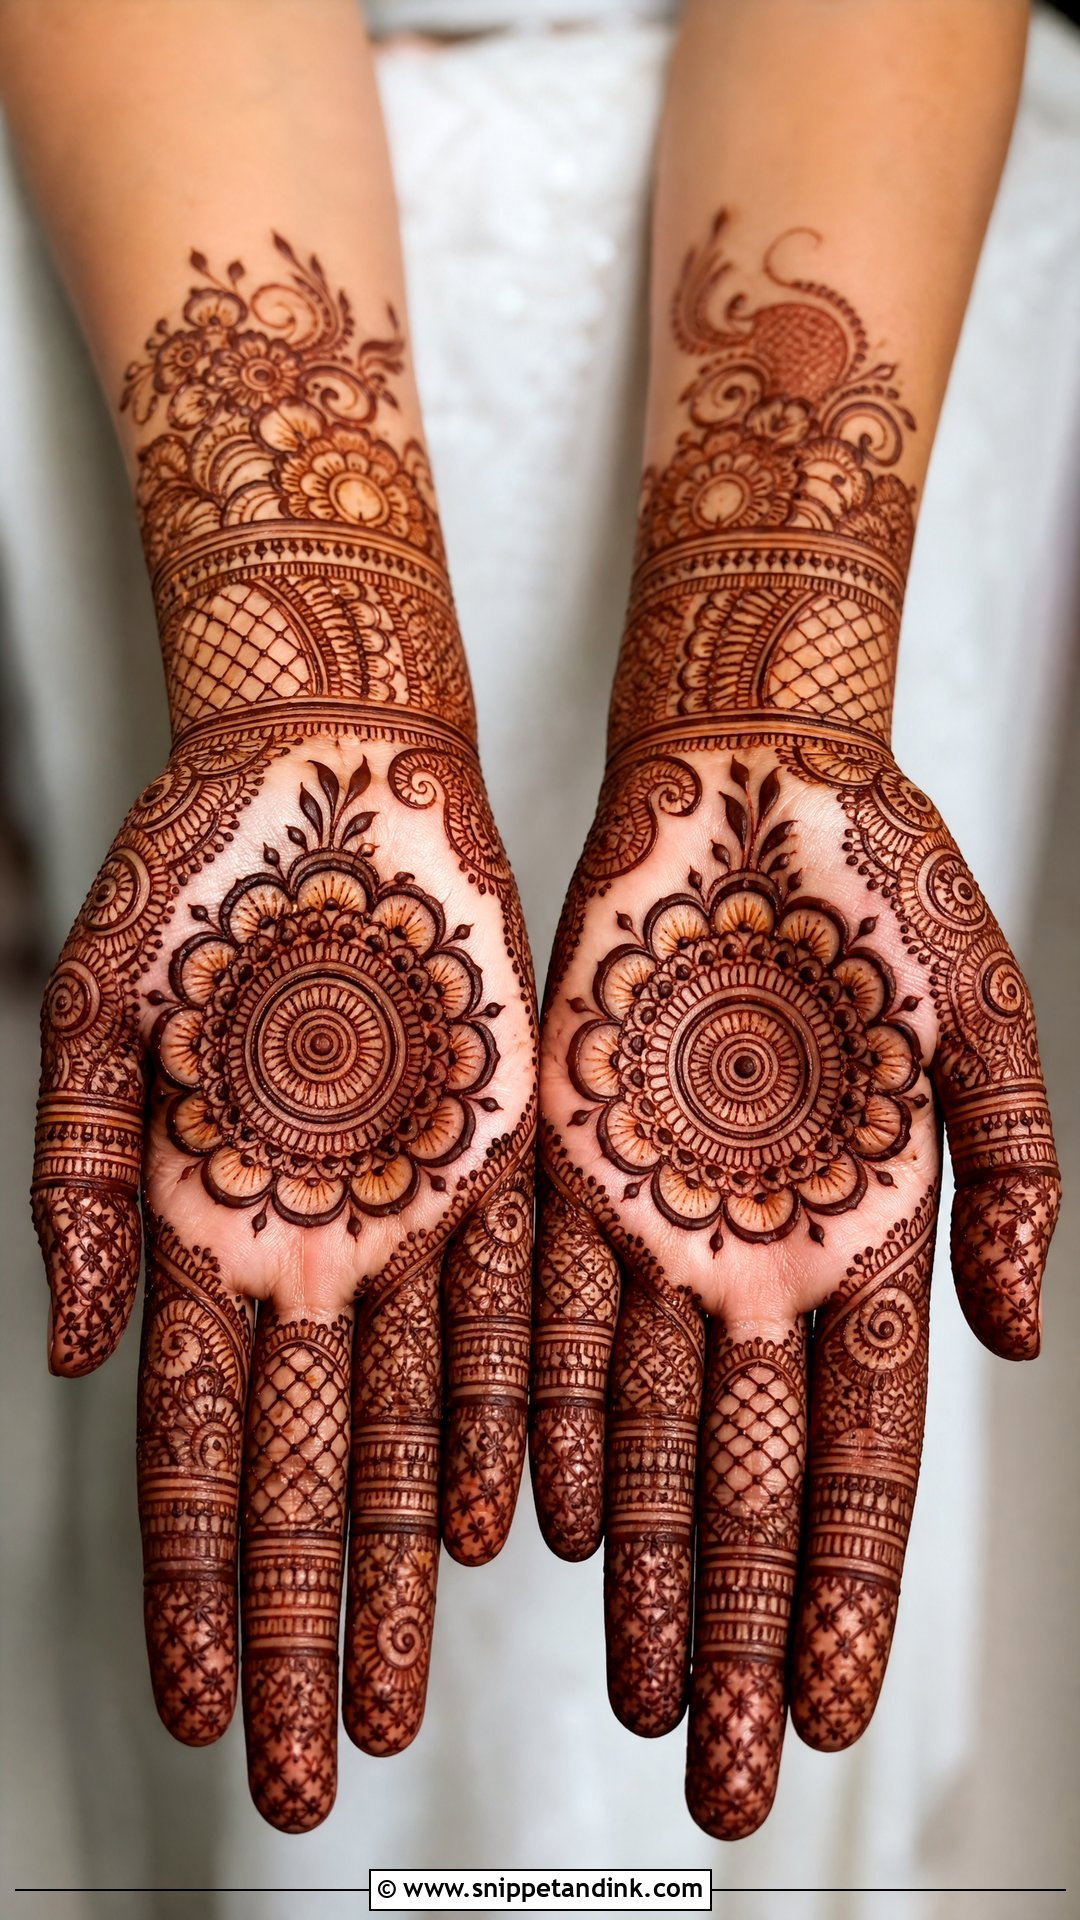
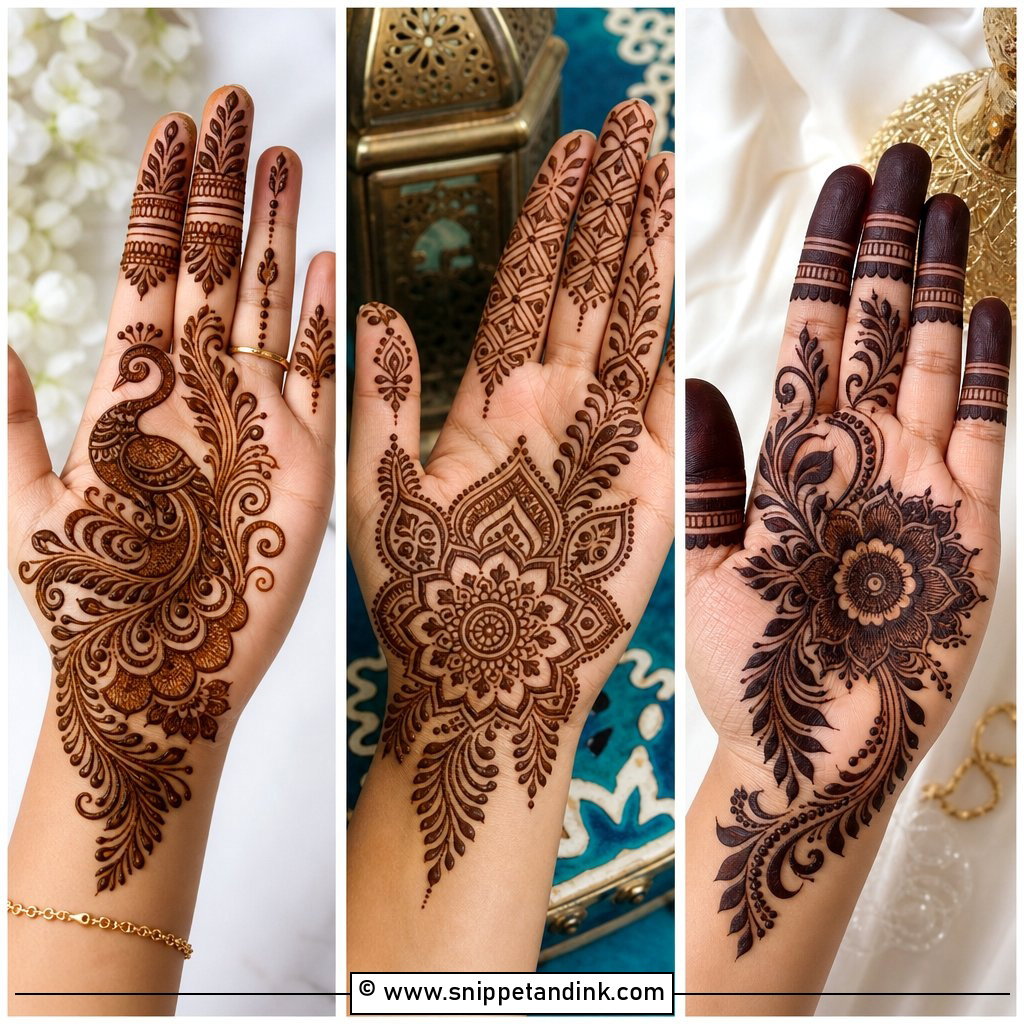
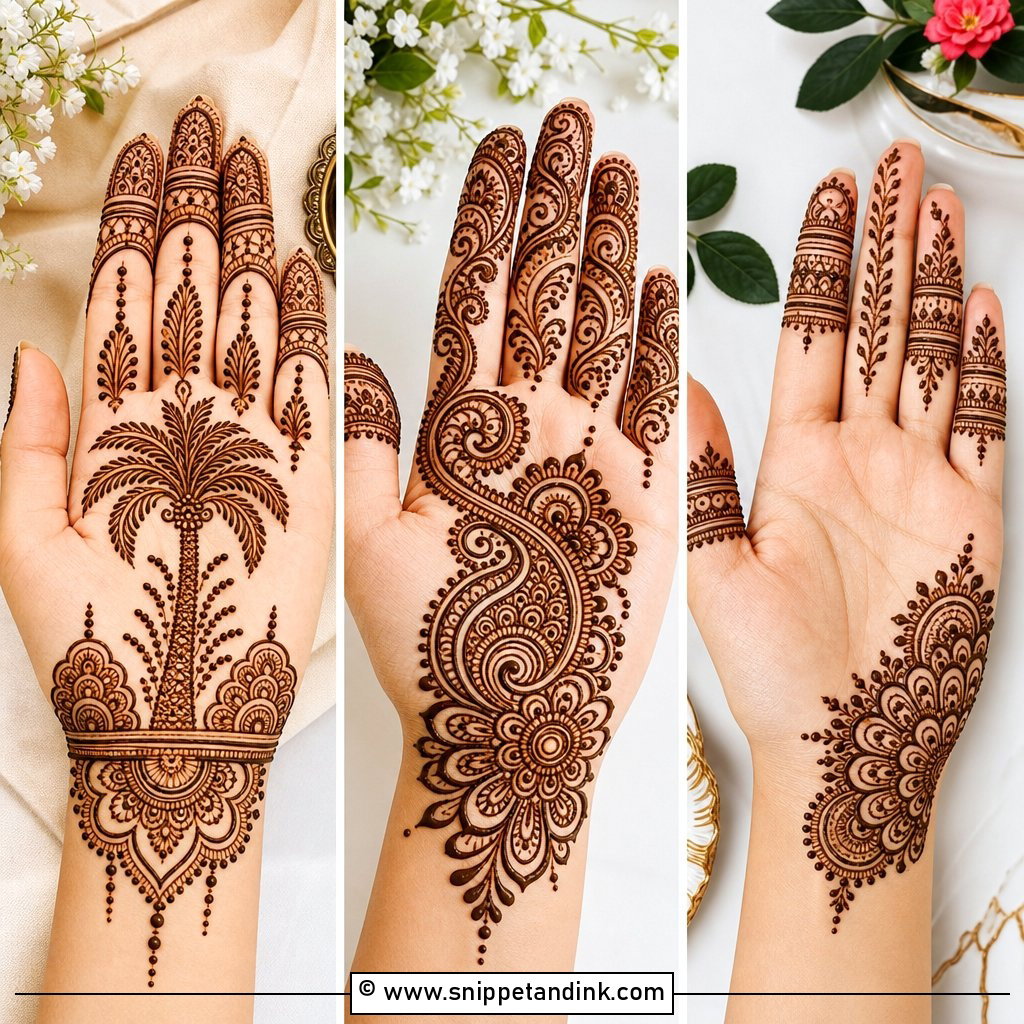
Front hand cut work lives or dies on the palm crease. I avoid running a fine line straight along the life line, because the skin folds there and the paste cracks off early, leaving a broken stain. The usual layout is a central mandala, curved floral corners, shaded paisleys and decorated fingers, each with a clean ring of skin around it. For a traditional feel I’ll add fine jaali on one side of the palm and a bold wrist border. For something more modern, I keep the palm lighter and push the detail onto the fingers instead. Either version is quick enough for a pre-wedding function.
4. Cut Work Simple Mehndi Design
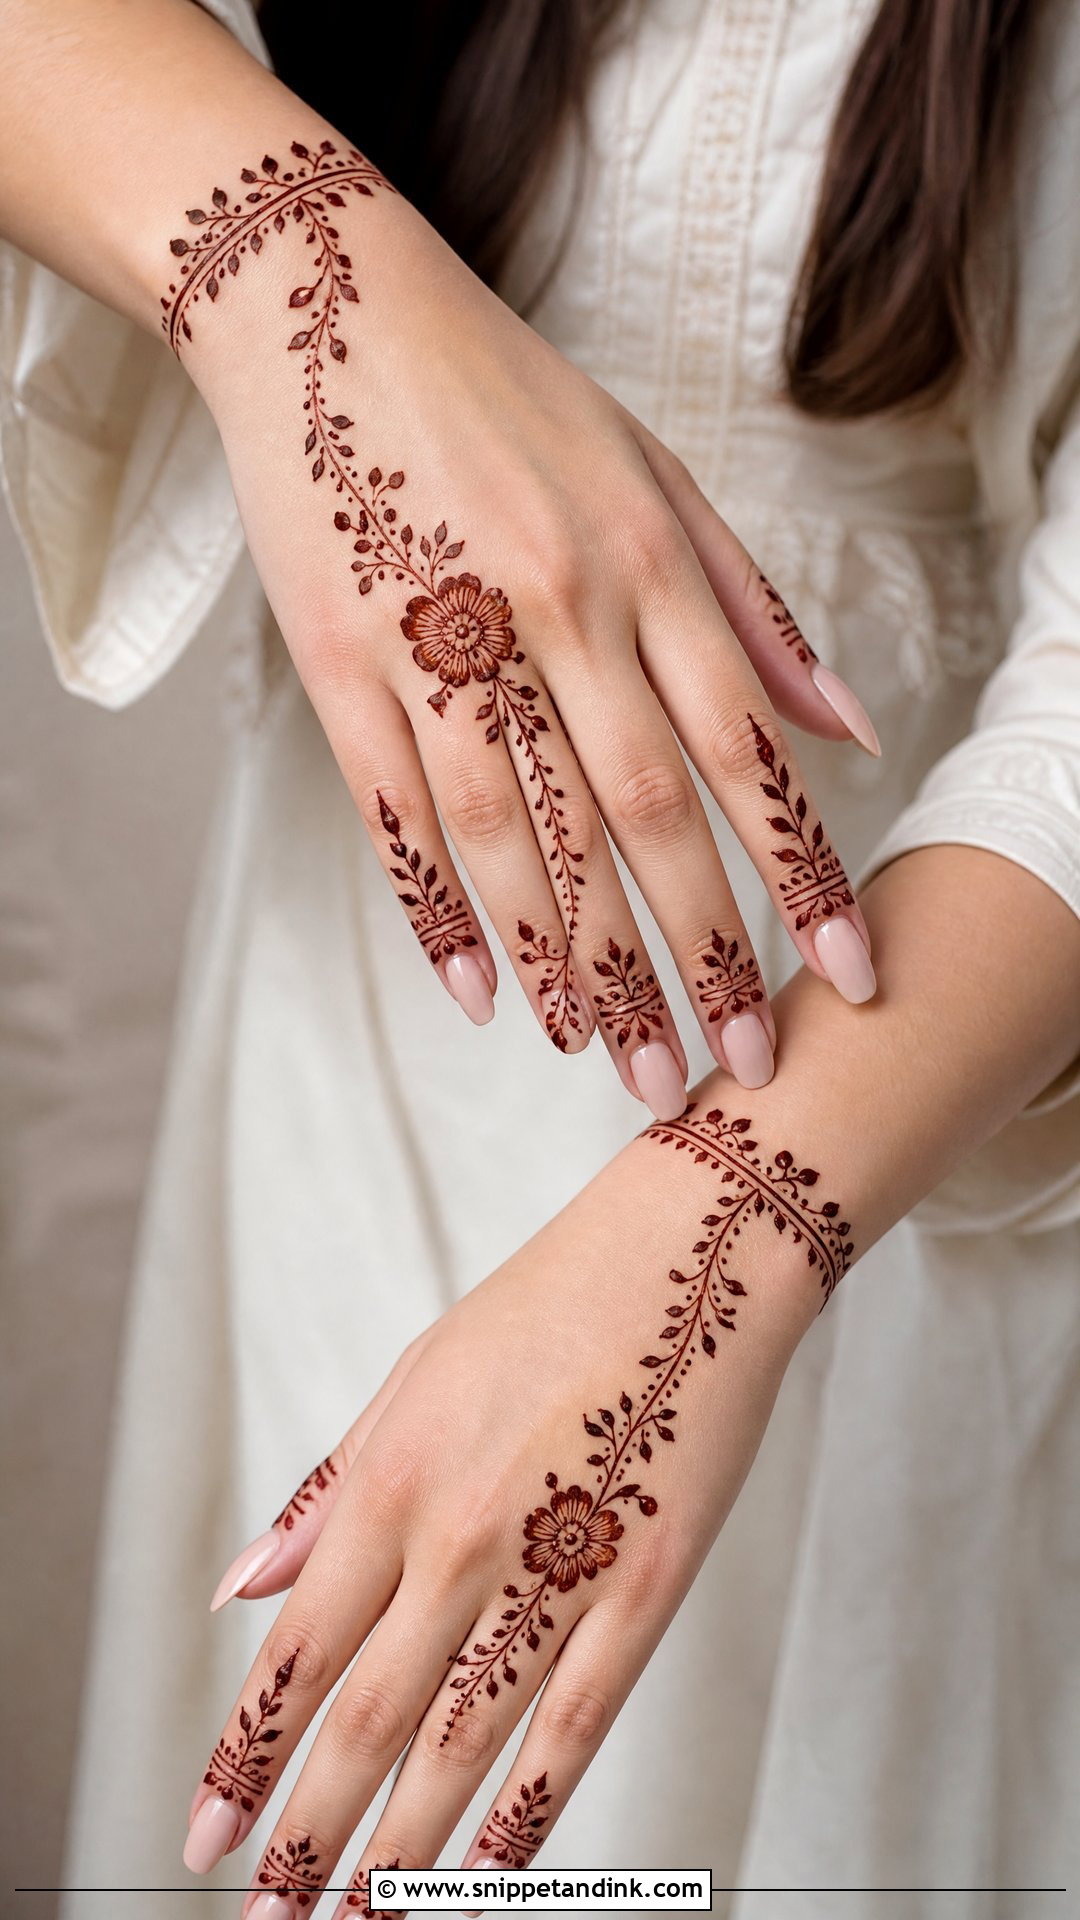
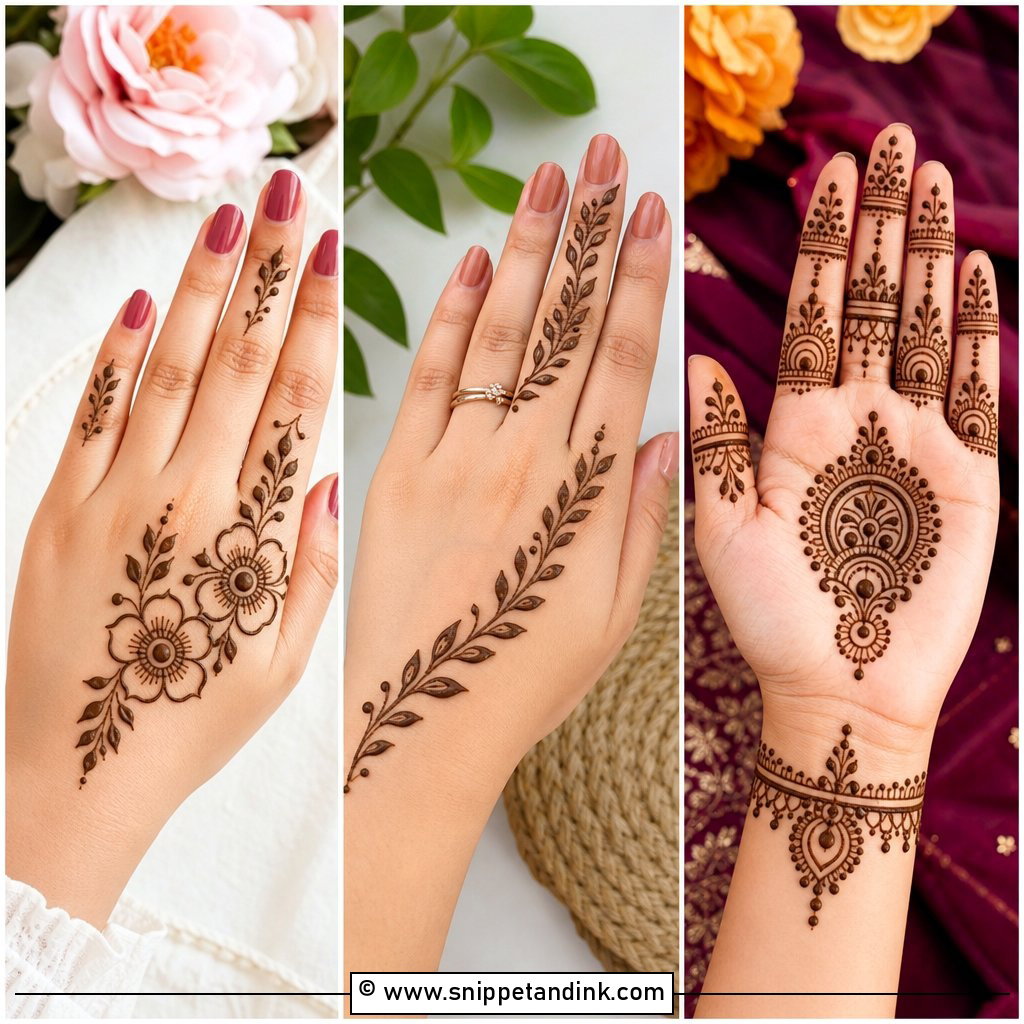
Simple doesn’t mean empty, and that is the line I’m always trying to hold with this design. One floral trail, a small wrist cuff, light finger detailing and a few deliberate gaps can look finished in about twenty minutes a hand, provided the outlines are bold. Thin outlines on a sparse design fade first, and then the whole thing looks like a sketch. I connect the sections with small vines and dots rather than more flowers. It suits first-timers, office celebrations and anyone getting henna the evening before an event.
5. Cut Work Finger Mehndi Design
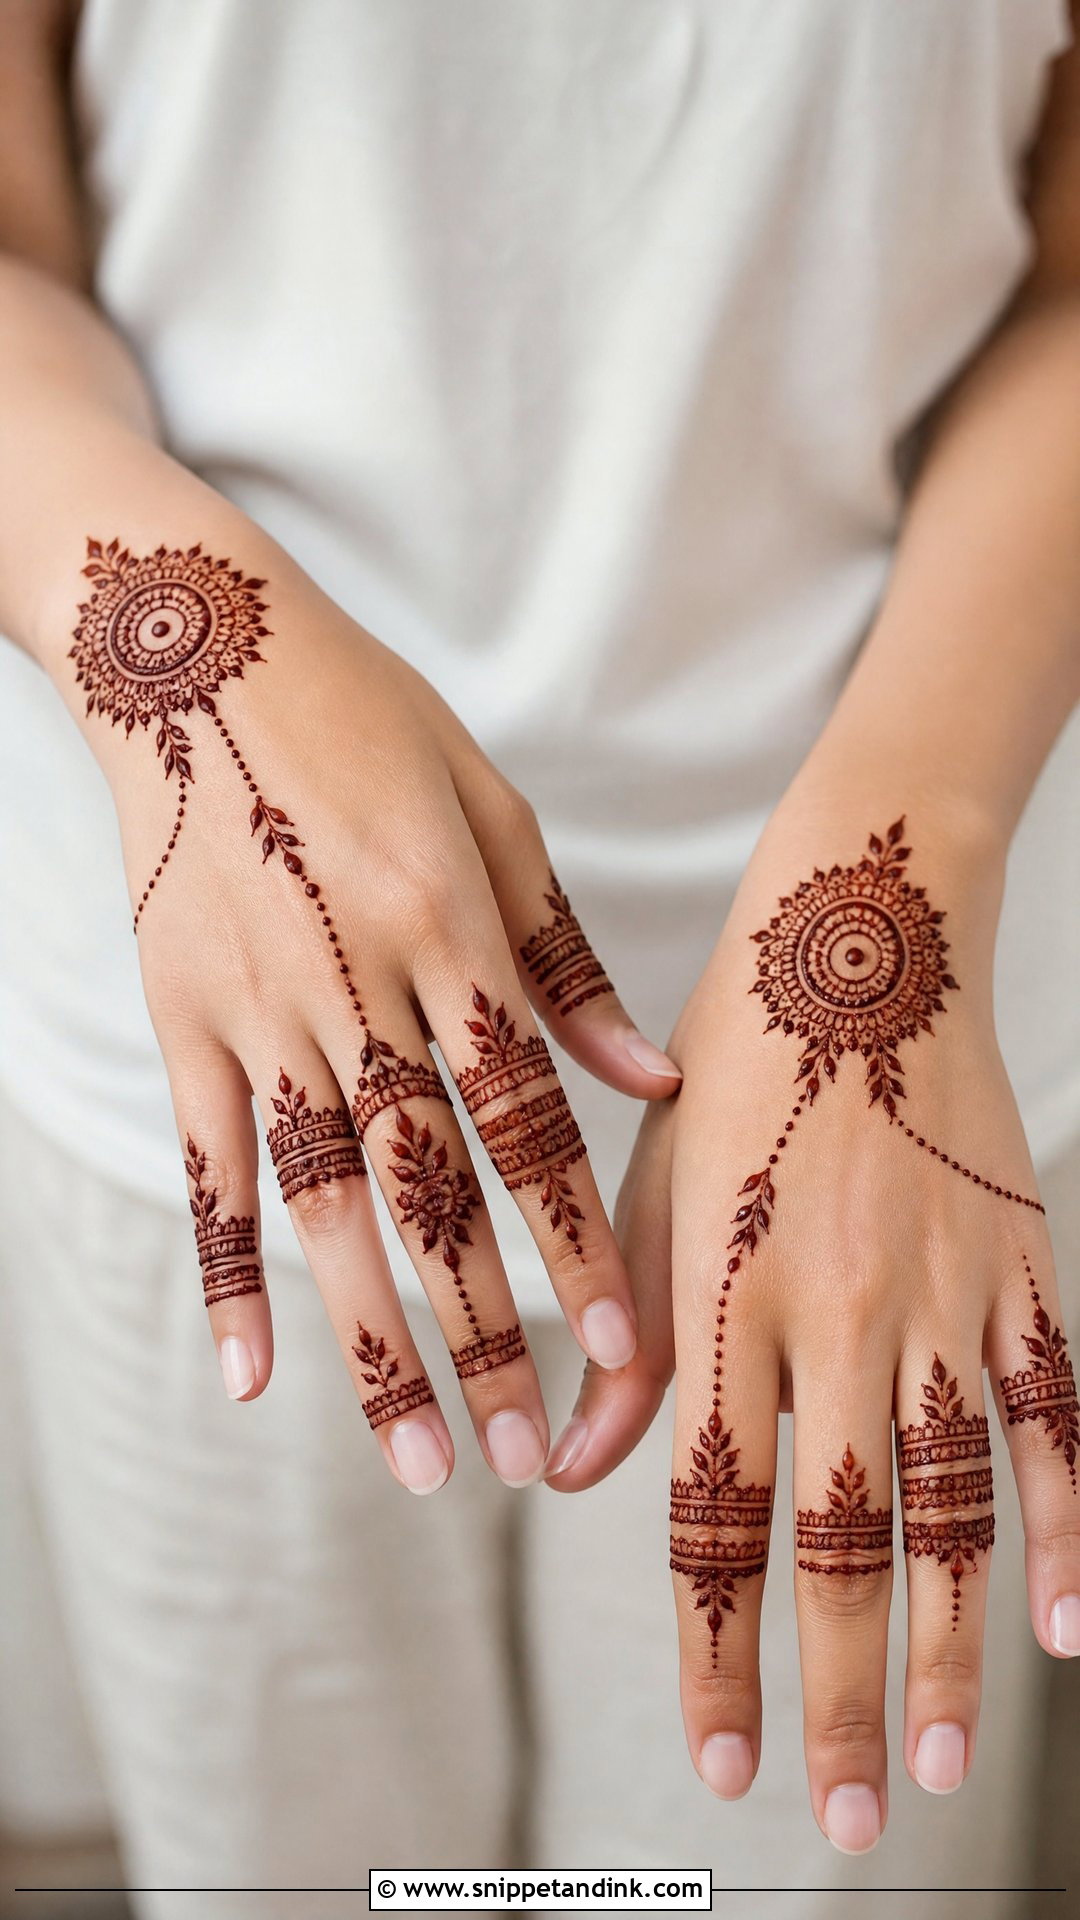
Fingers are where cut work earns its name. I draw ring-like bands, leafy strips and small mandala accents near the centre of the back hand, then leave a strip of skin between each band so the fingers read longer. One thing to know before you sit down: the sides of the fingers rub against each other constantly, so the paste there flakes off first and stains lighter. Keep your hands slightly apart while it dries. Matching fingers look tidy, while one heavily worked finger reads like a ring, which is a nice trick if you’re not wearing much jewellery at an engagement.
6. Cut Work Mandala Mehndi Design
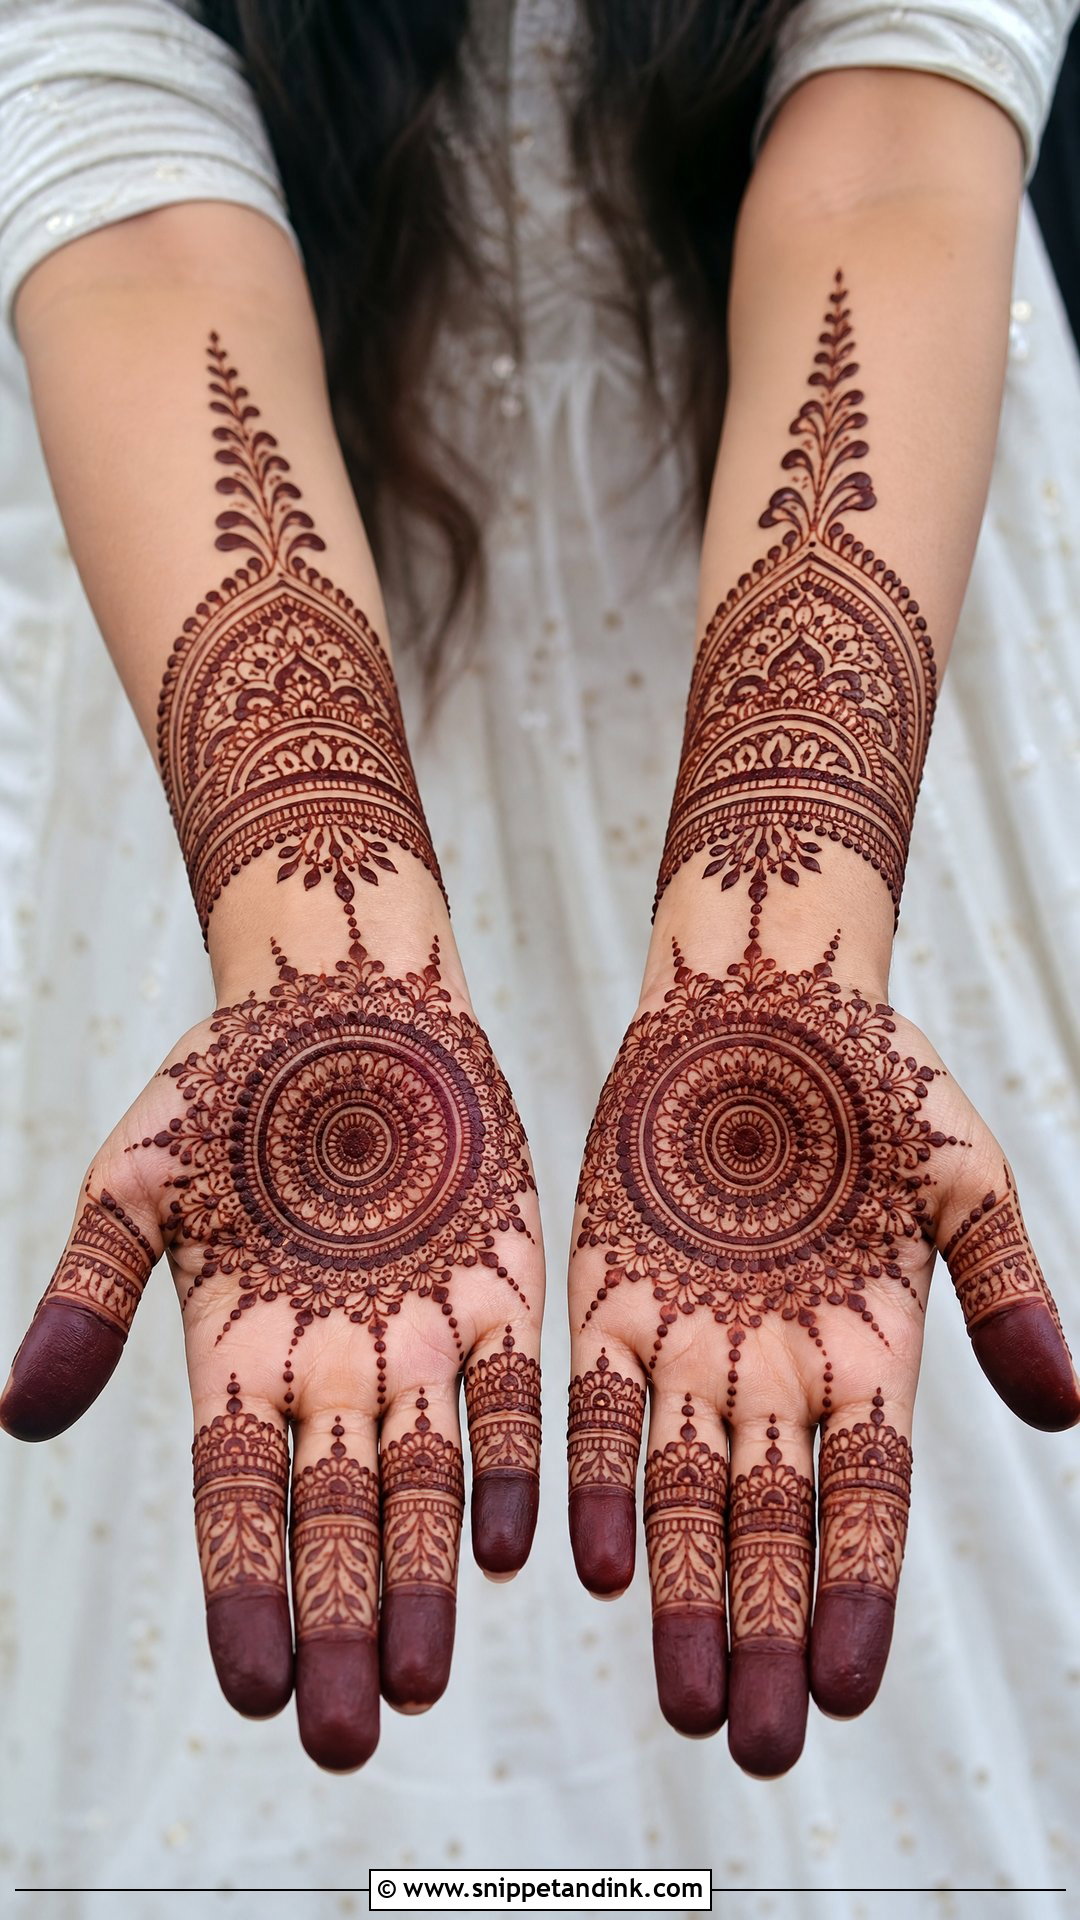
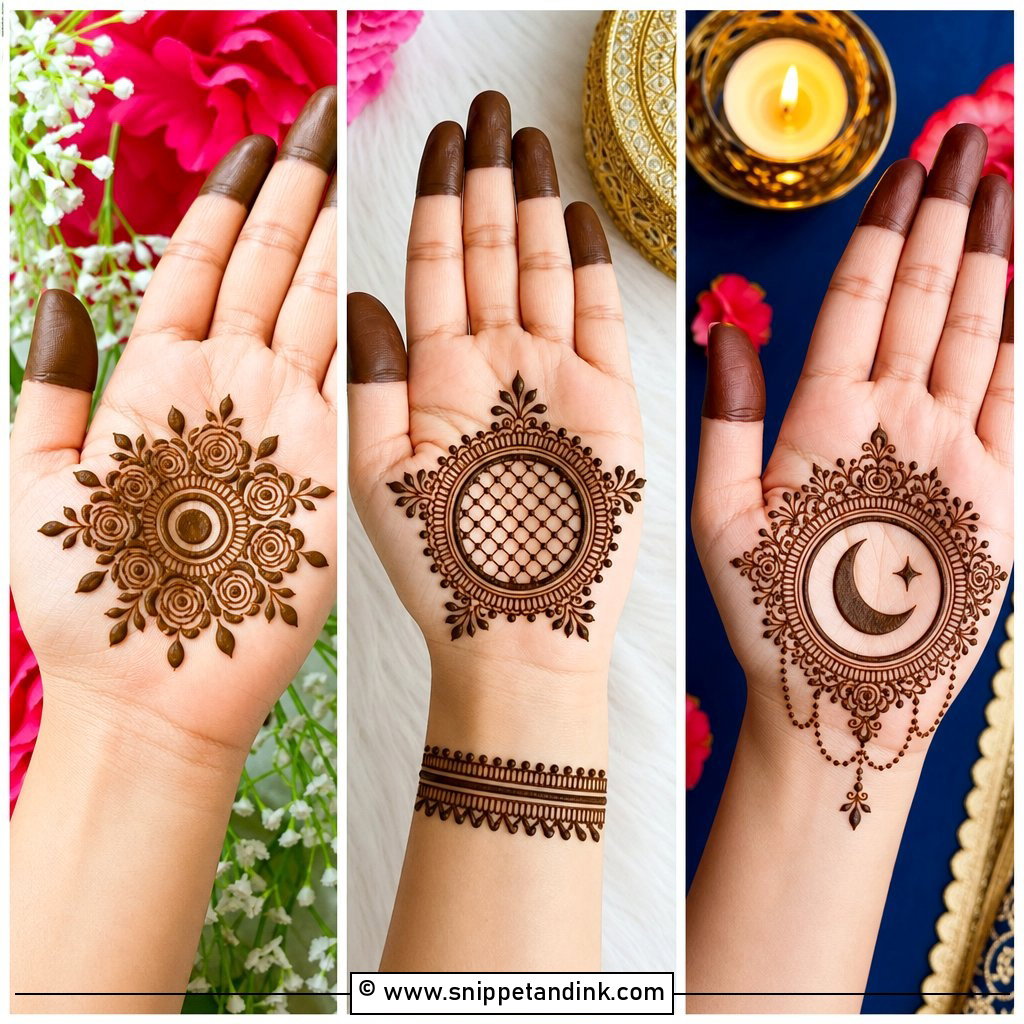
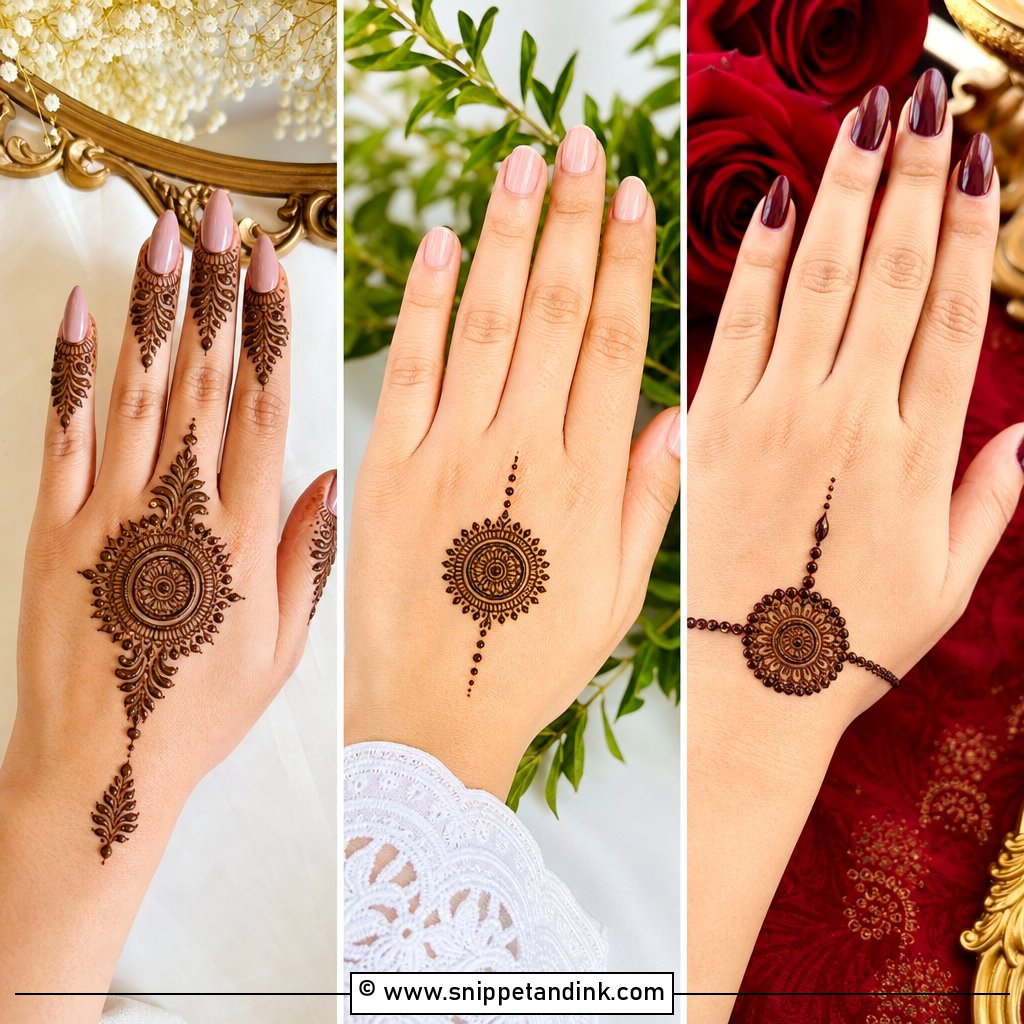
A mandala needs room. When I draw one in the palm or on the back hand, I leave a deliberate ring of bare skin around it before any leaf trail or finger band begins, so the circle stays readable from across a room. The most common mistake I see is filling that ring with dots because it feels empty during application. Resist it. From the frame outward I’ll add curved leaf trails, a wrist border and small dotted chains. Fine lines give it a modern read, and paisleys or jaali edges make it richer and more traditional.
7. Cut Work Floral Mehndi Design
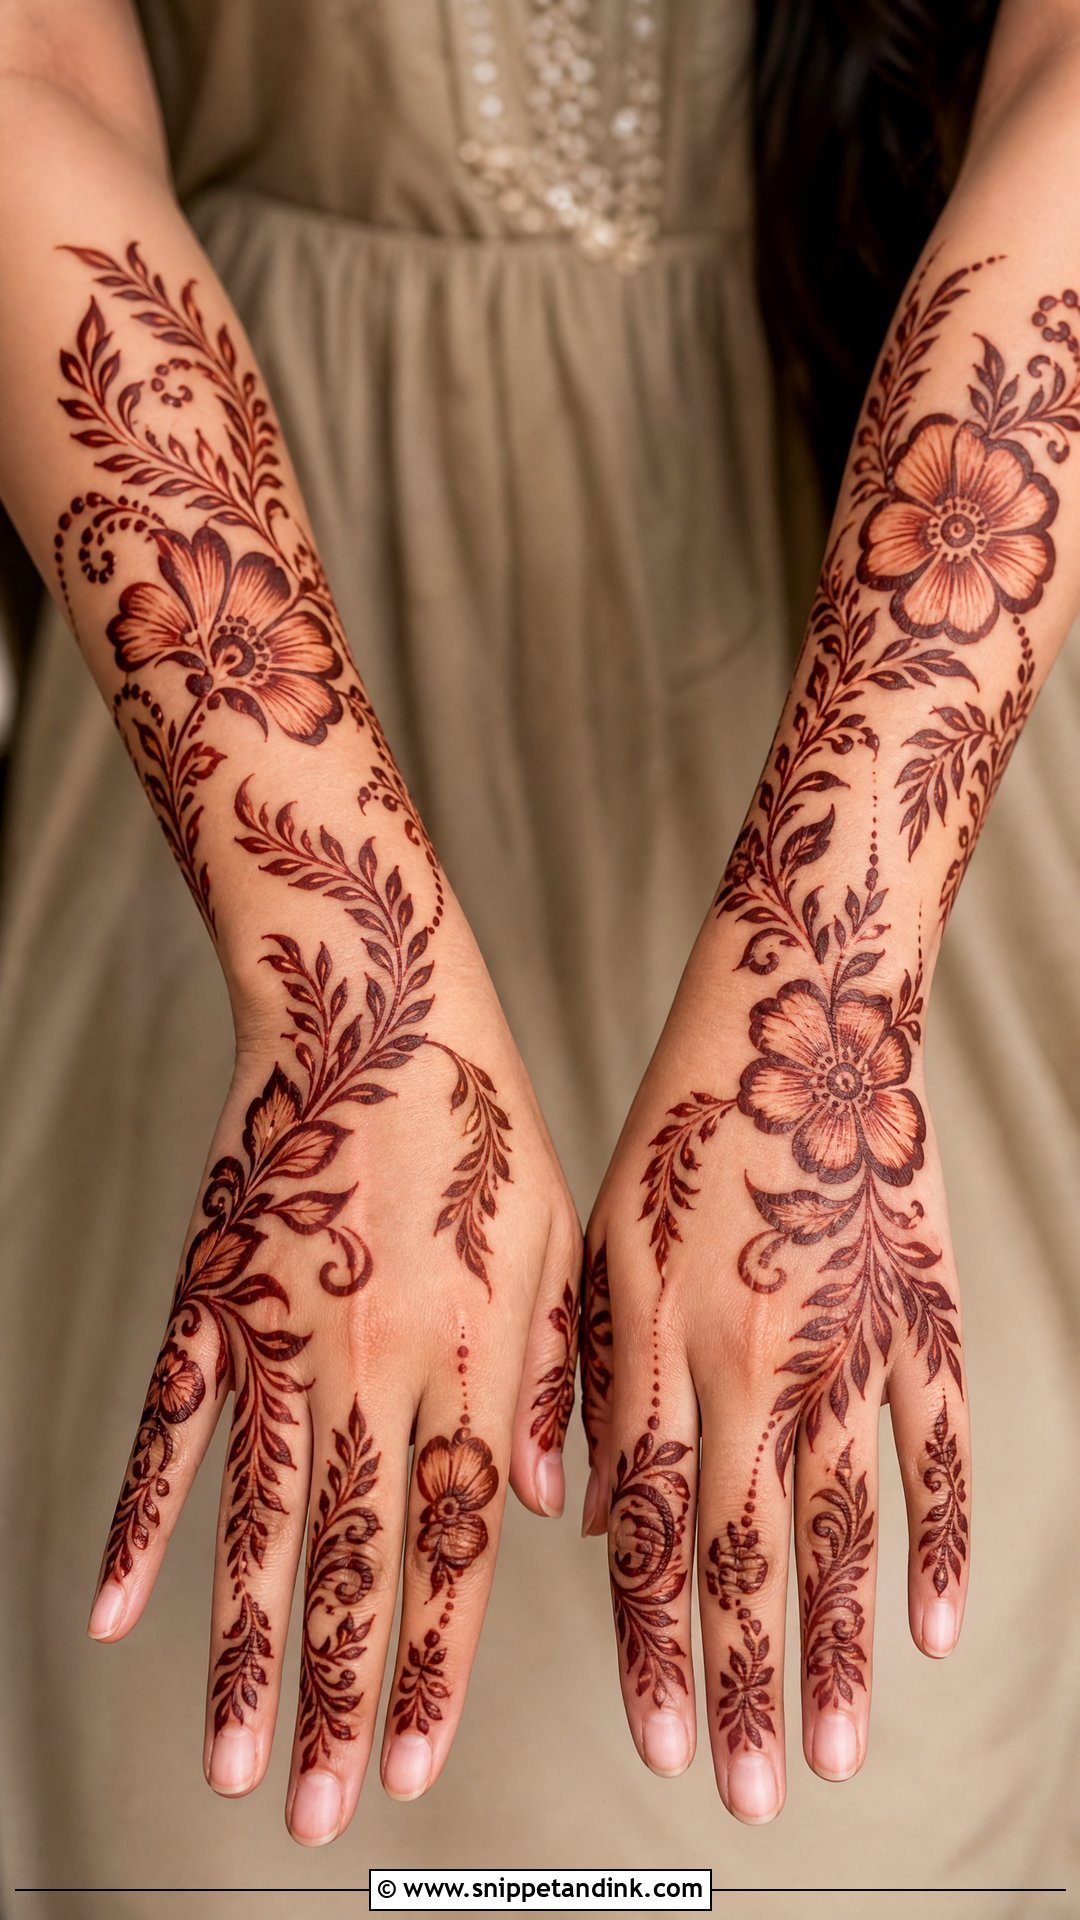
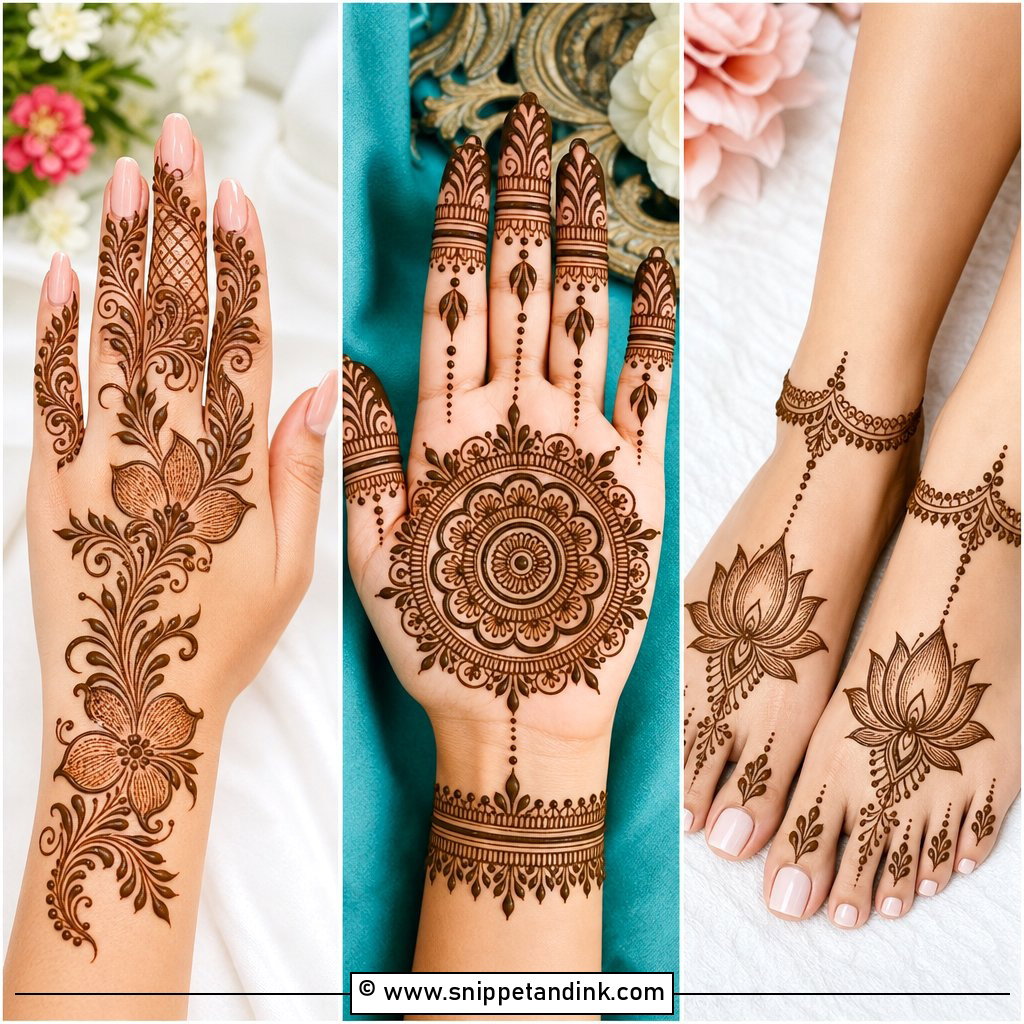
Florals are the easiest way into cut work, which is why I suggest them to anyone nervous about how bold their henna will look. Large flowers, half blooms, buds and leafy trails get spaced with clear gaps, and the result reads almost like lace. On the back hand I let the flowers flow from wrist to fingers. On the palm, they curl around a mandala or a paisley centre. I keep outlines strong and inner shading light, because shading applied too thickly darkens into a solid blob over the next two days and the petal shape disappears.
8. Cut Work Paisley Mehndi Design
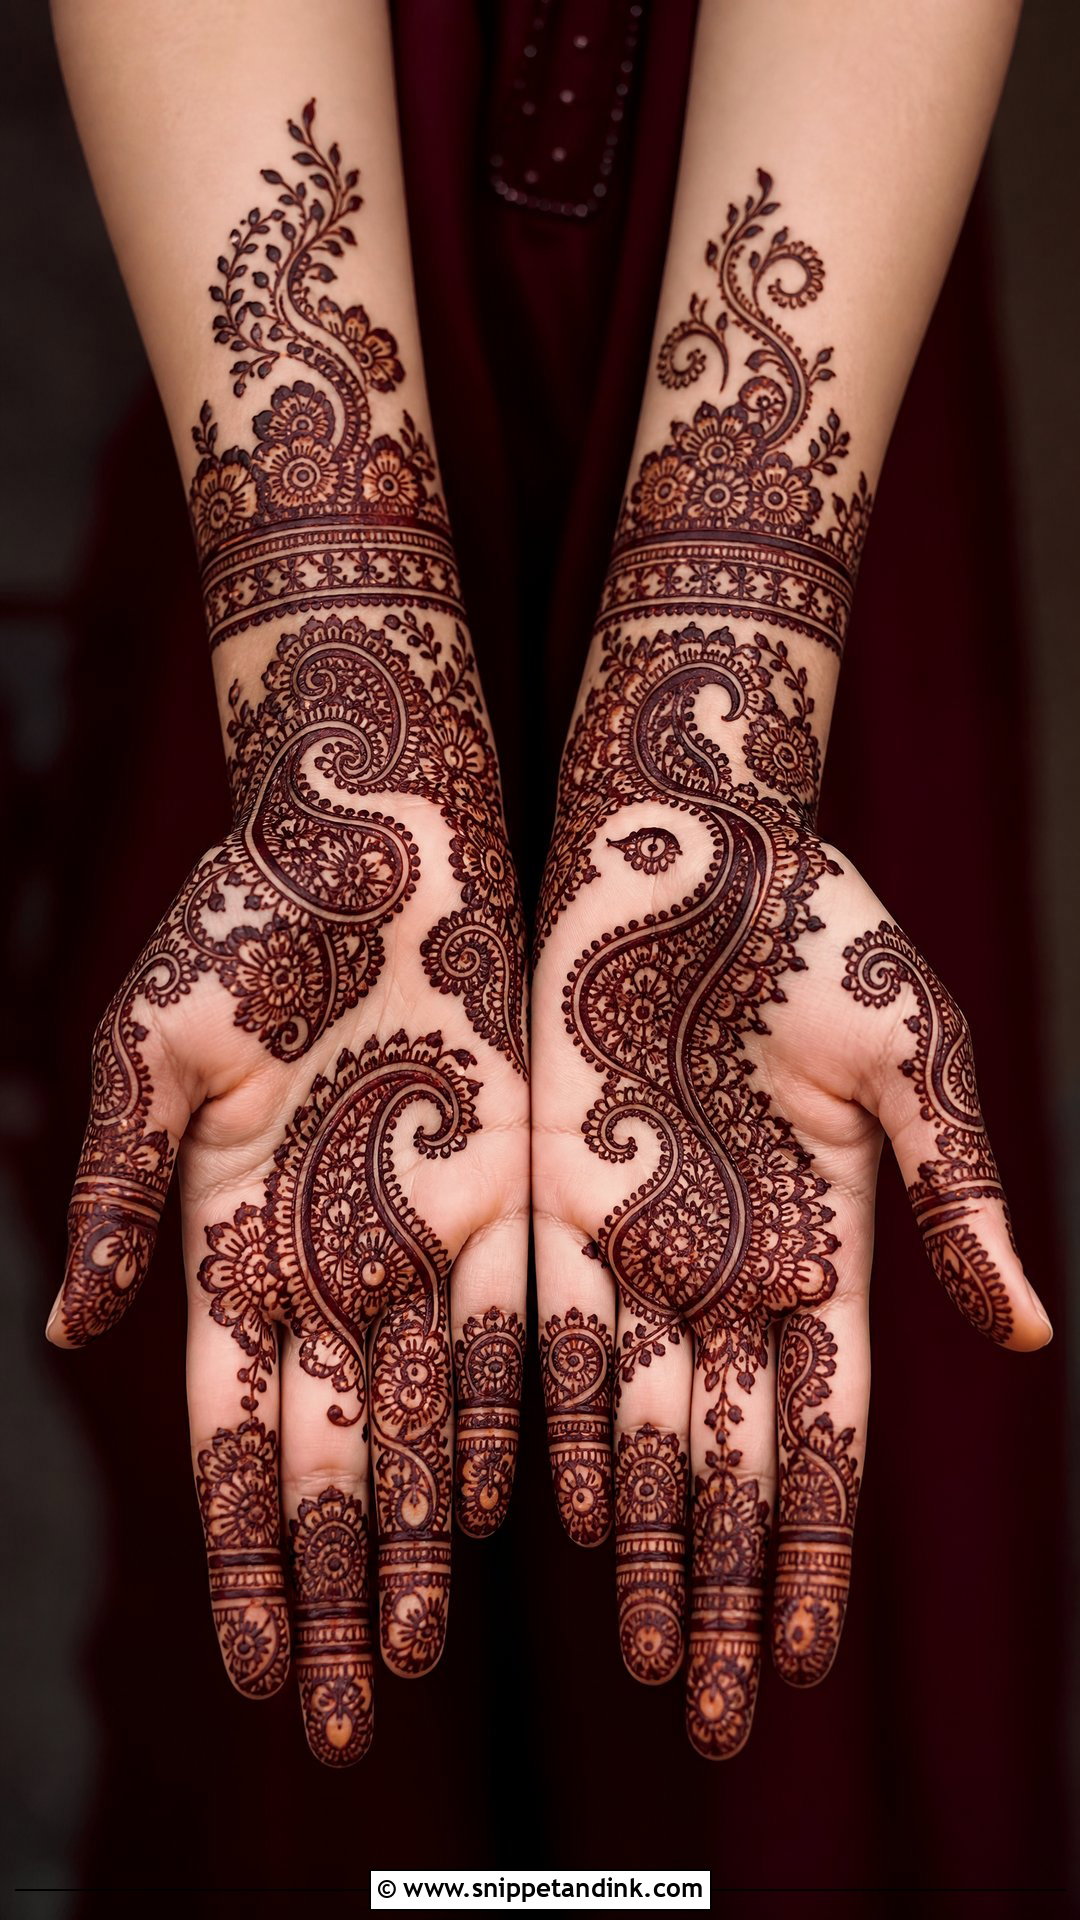
Paisleys suit cut work better than almost any other motif, because their curved teardrop shape already has a natural frame. My usual layout puts large paisleys across the palm, small paisley vines on the fingers and bracelet bands at the wrist. For brides I extend them up the forearm with jaali and floral fillers. For a lighter hand, two or three big paisleys with clean space around them look more confident than ten tiny ones crowded together. This sits comfortably in both Indian and Indo-Arabic work.
9. Cut Work Jaali Mehndi Design
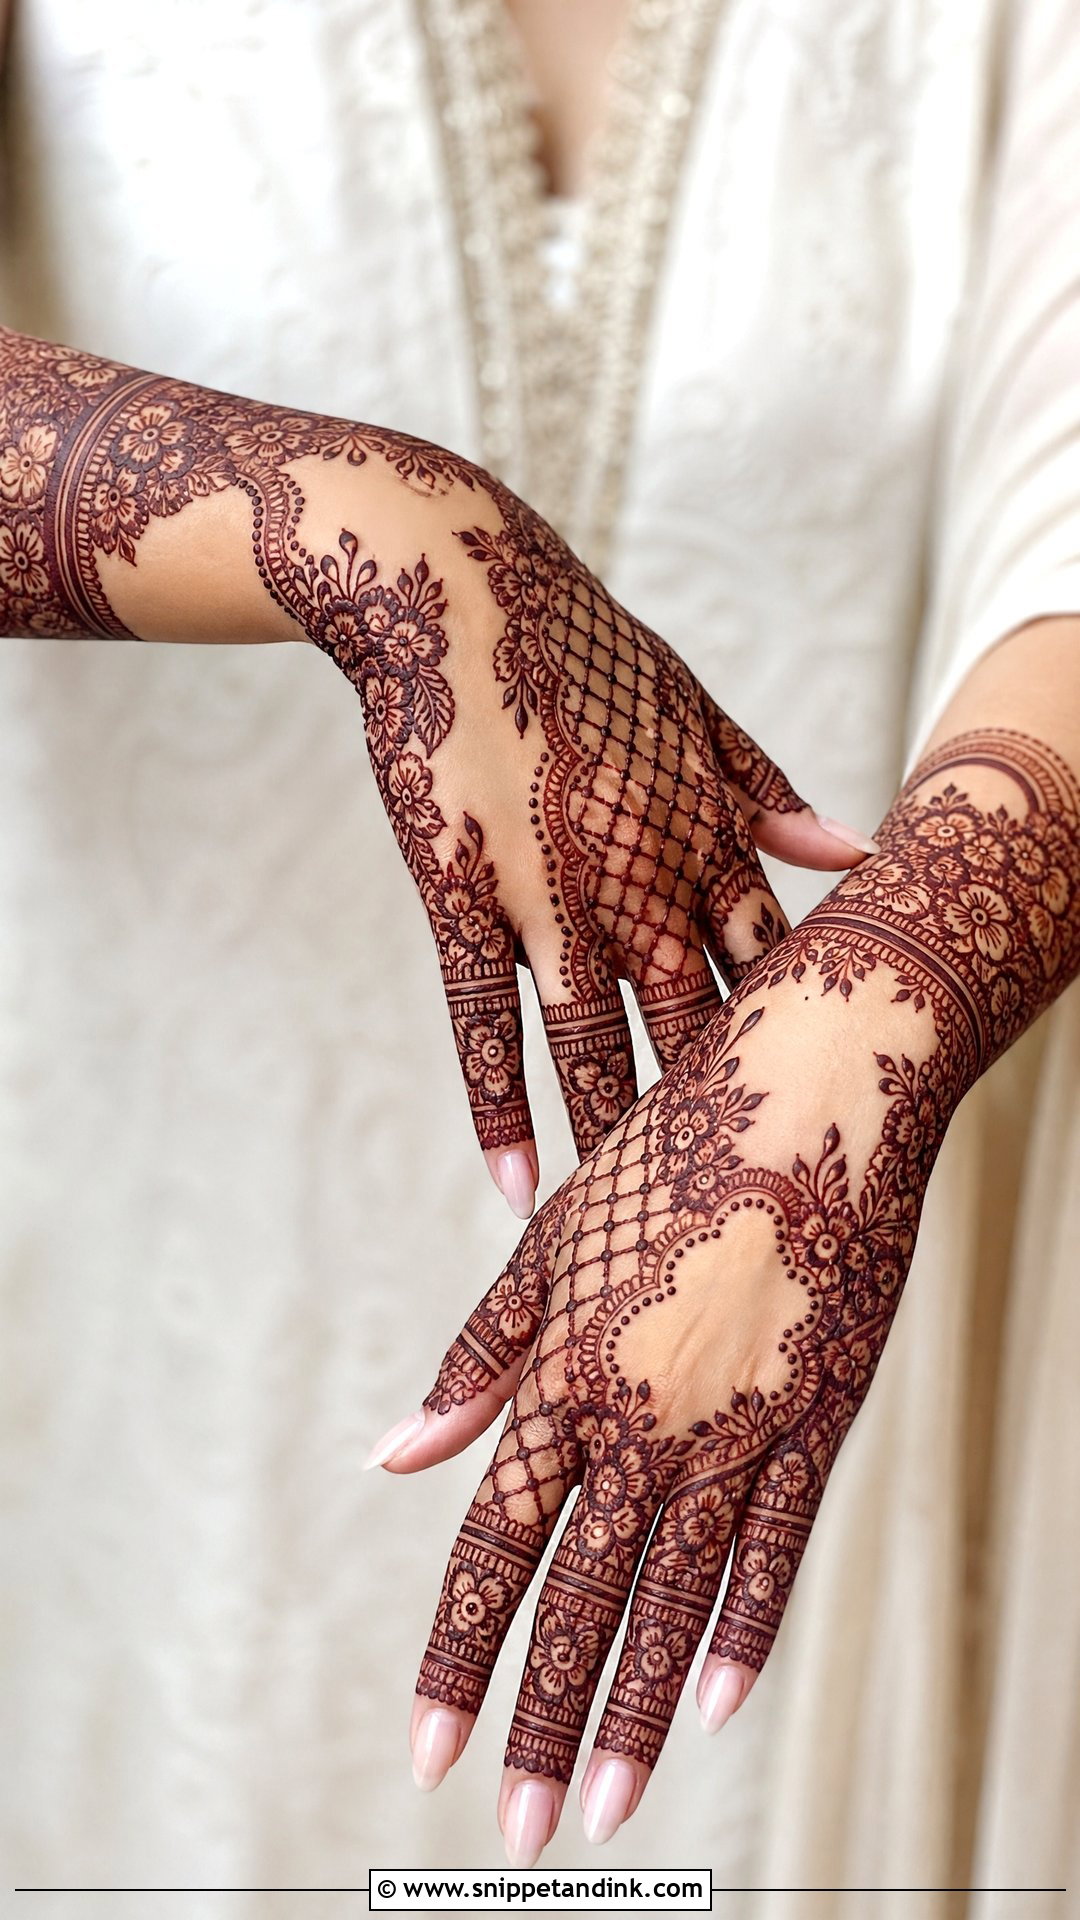
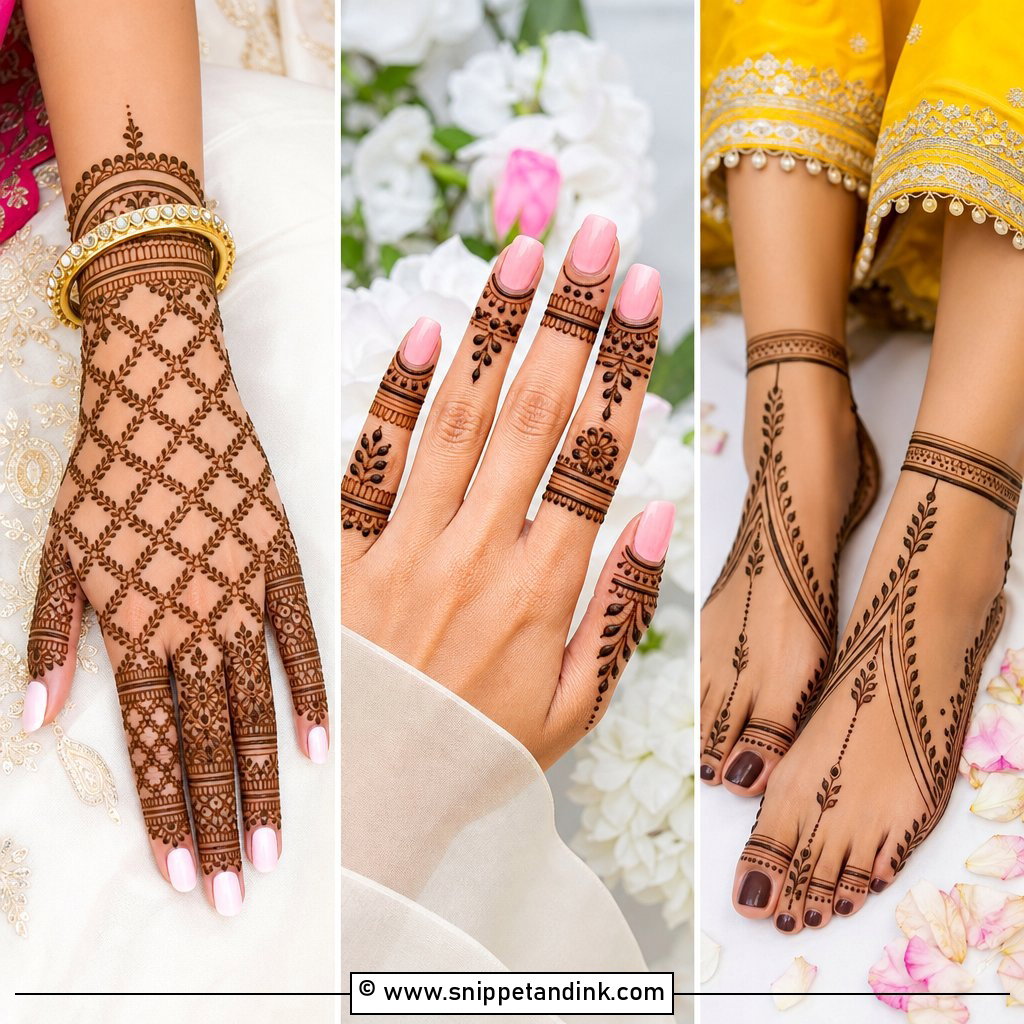
Jaali is the motif that most often ruins a cut work design, oddly enough. The mesh is made of very fine crossing lines, and if the paste is even slightly too runny, the little squares fill in and you end up with a dark smudge. I use my thinnest cone tip here and keep the jaali to defined sections of the palm, wrist, back hand or forearm, then leave larger open panels beside it so the mesh has something to contrast with. Florals or small mandalas around the jaali complete the hand. Done carefully, it looks like fine fabric on the skin.
10. Cut Work Peacock Mehndi Design
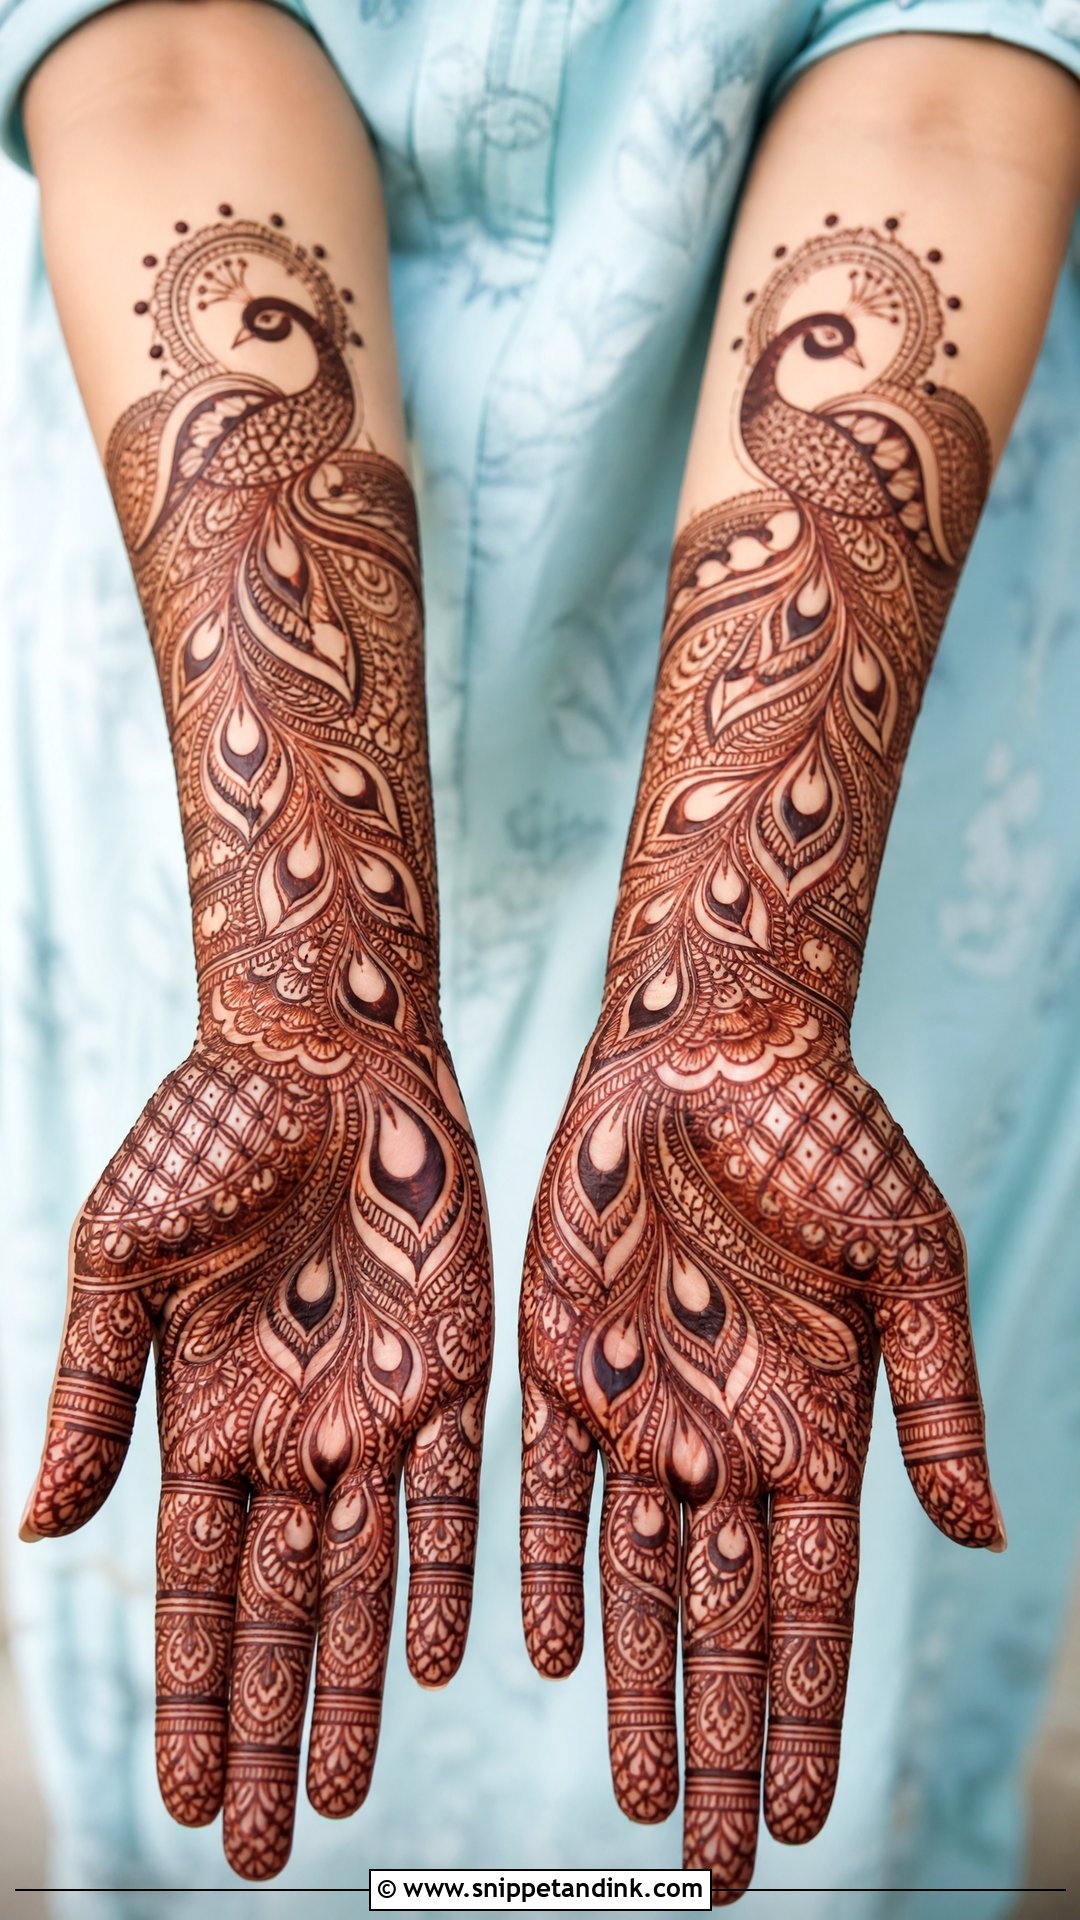
Peacocks are a slow motif to draw well. I place the body on the palm, wrist or forearm and let the feather details open out into cut work panels rather than packing every feather tightly. Curved gaps, dots and light shading give the tail movement. Flowers and paisleys around the bird pull the whole hand together, and the fingers can echo the feathers with simple bands. A peacock needs a deep stain to read properly, so I’d only suggest it if you’re willing to leave the paste on for the full time and keep the hand warm afterwards.
11. Cut Work Indo Arabic Mehndi Design
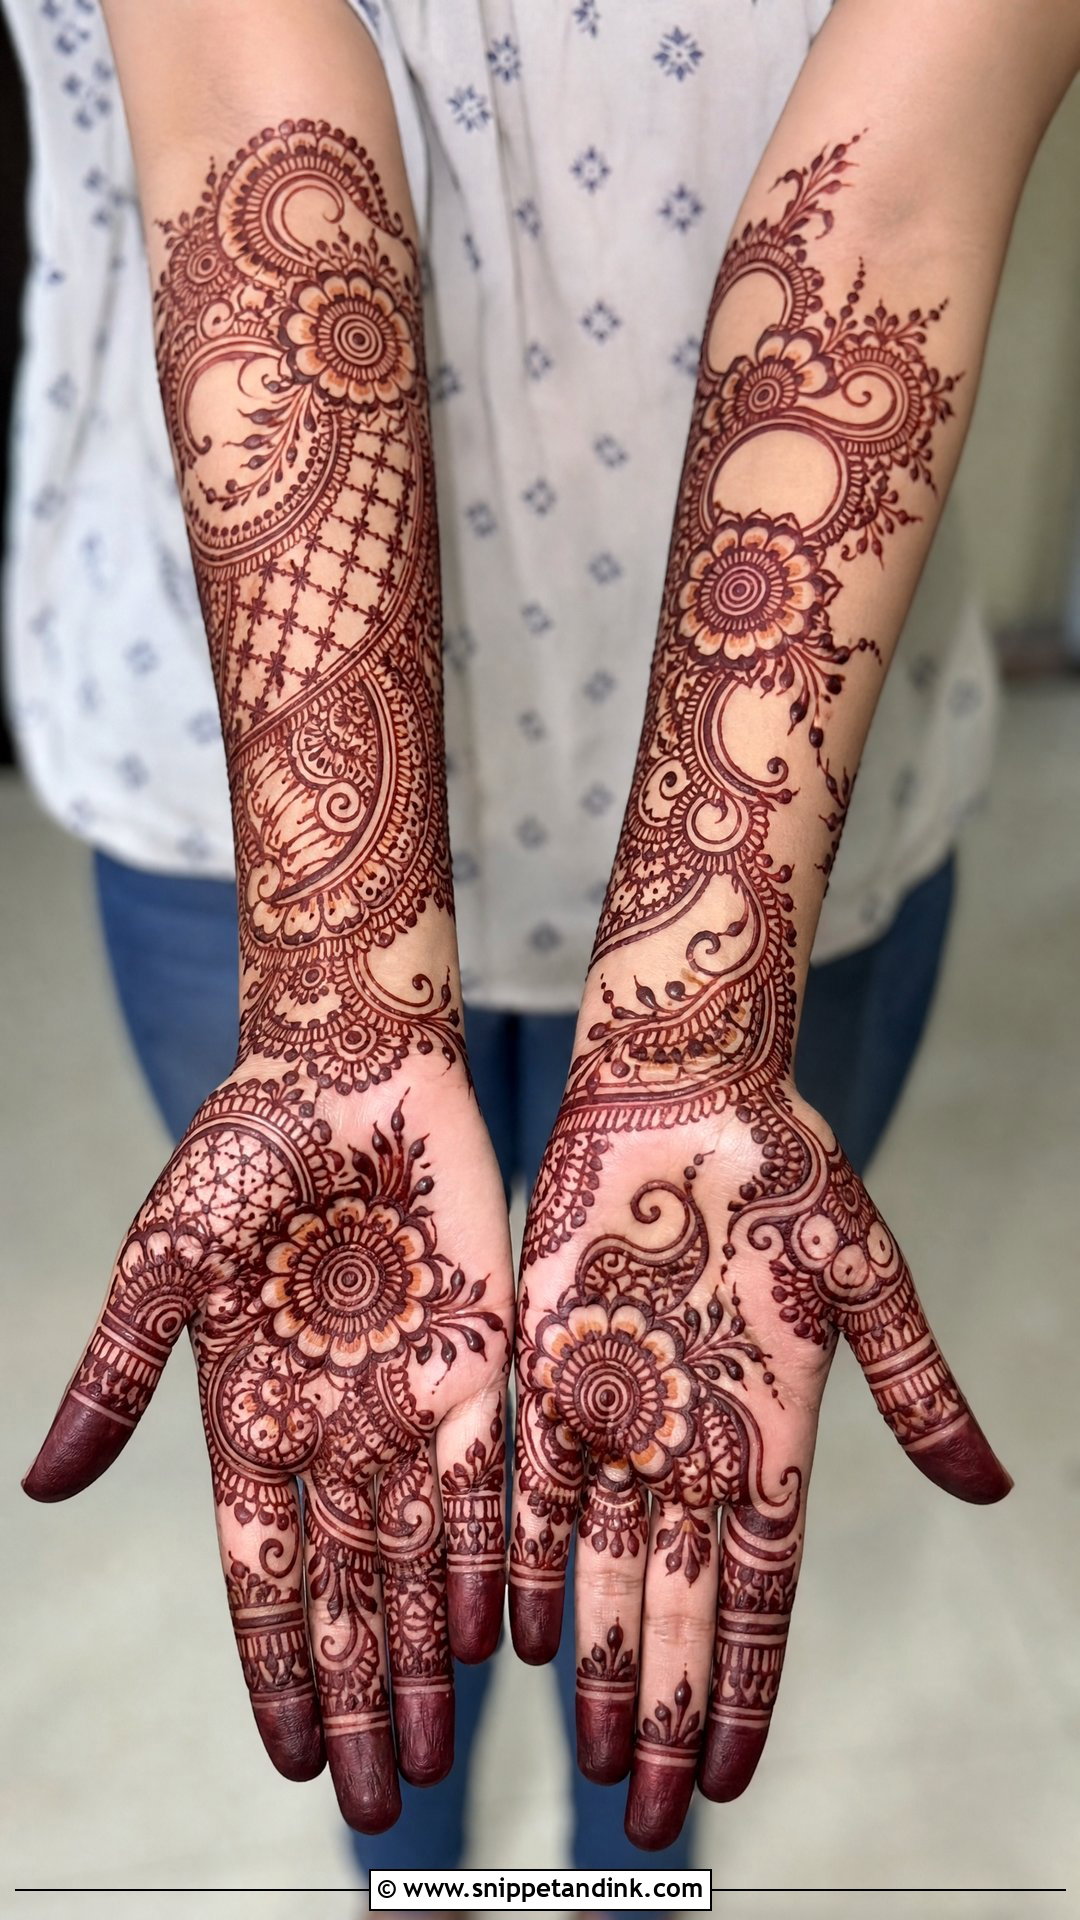
This fusion is what most bridesmaids end up asking me for once we talk it through. A cut work Indo Arabic mehndi design takes the flowing, spacious trail of Arabic work and adds the finer detailing of Indian patterns inside it. Bold floral trails, paisley clusters, mandala sections and neatly filled fingers each get their own pocket of space. The gaps are what stop the two styles from fighting each other. For sisters of the bride and close guests I’ll add wrist bands and a little jaali when they want it dressier, and it works on front or back hands.
12. Cut Work Indian Mehndi Design
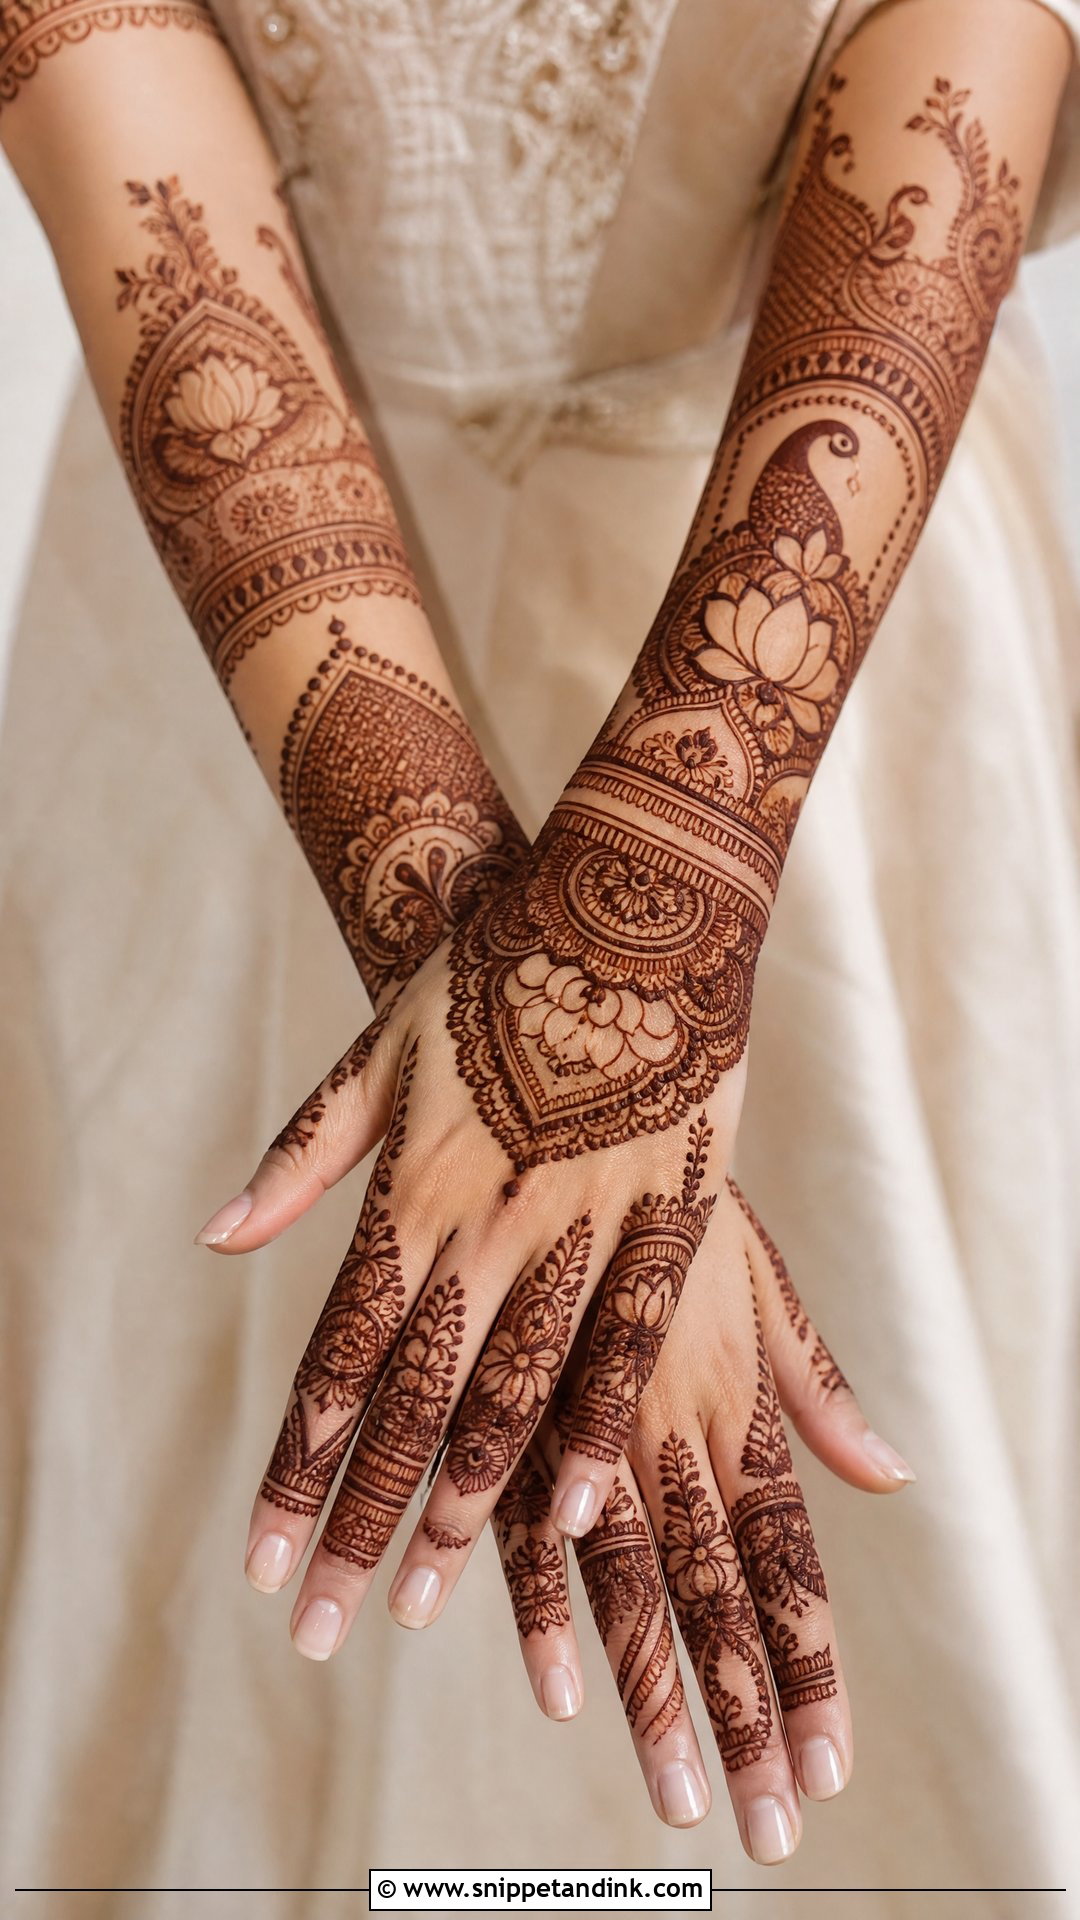
Traditional Indian layouts can feel heavy on a small hand, and cut work is how I lighten them without losing the motifs people care about. A cut work Indian mehndi design still uses paisleys, peacocks, mandalas, lotus flowers, bracelet cuffs and fine finger patterns. The difference is the intentional skin around each one. On the palm, a large centre design sits inside cut-out sections, and on the forearm decorated bands alternate with bare skin. I use it for weddings, Karwa Chauth, Diwali and bridal functions where the family wants recognisable tradition but the person wearing it wants to breathe.
13. Cut Work Gulf Mehndi Design
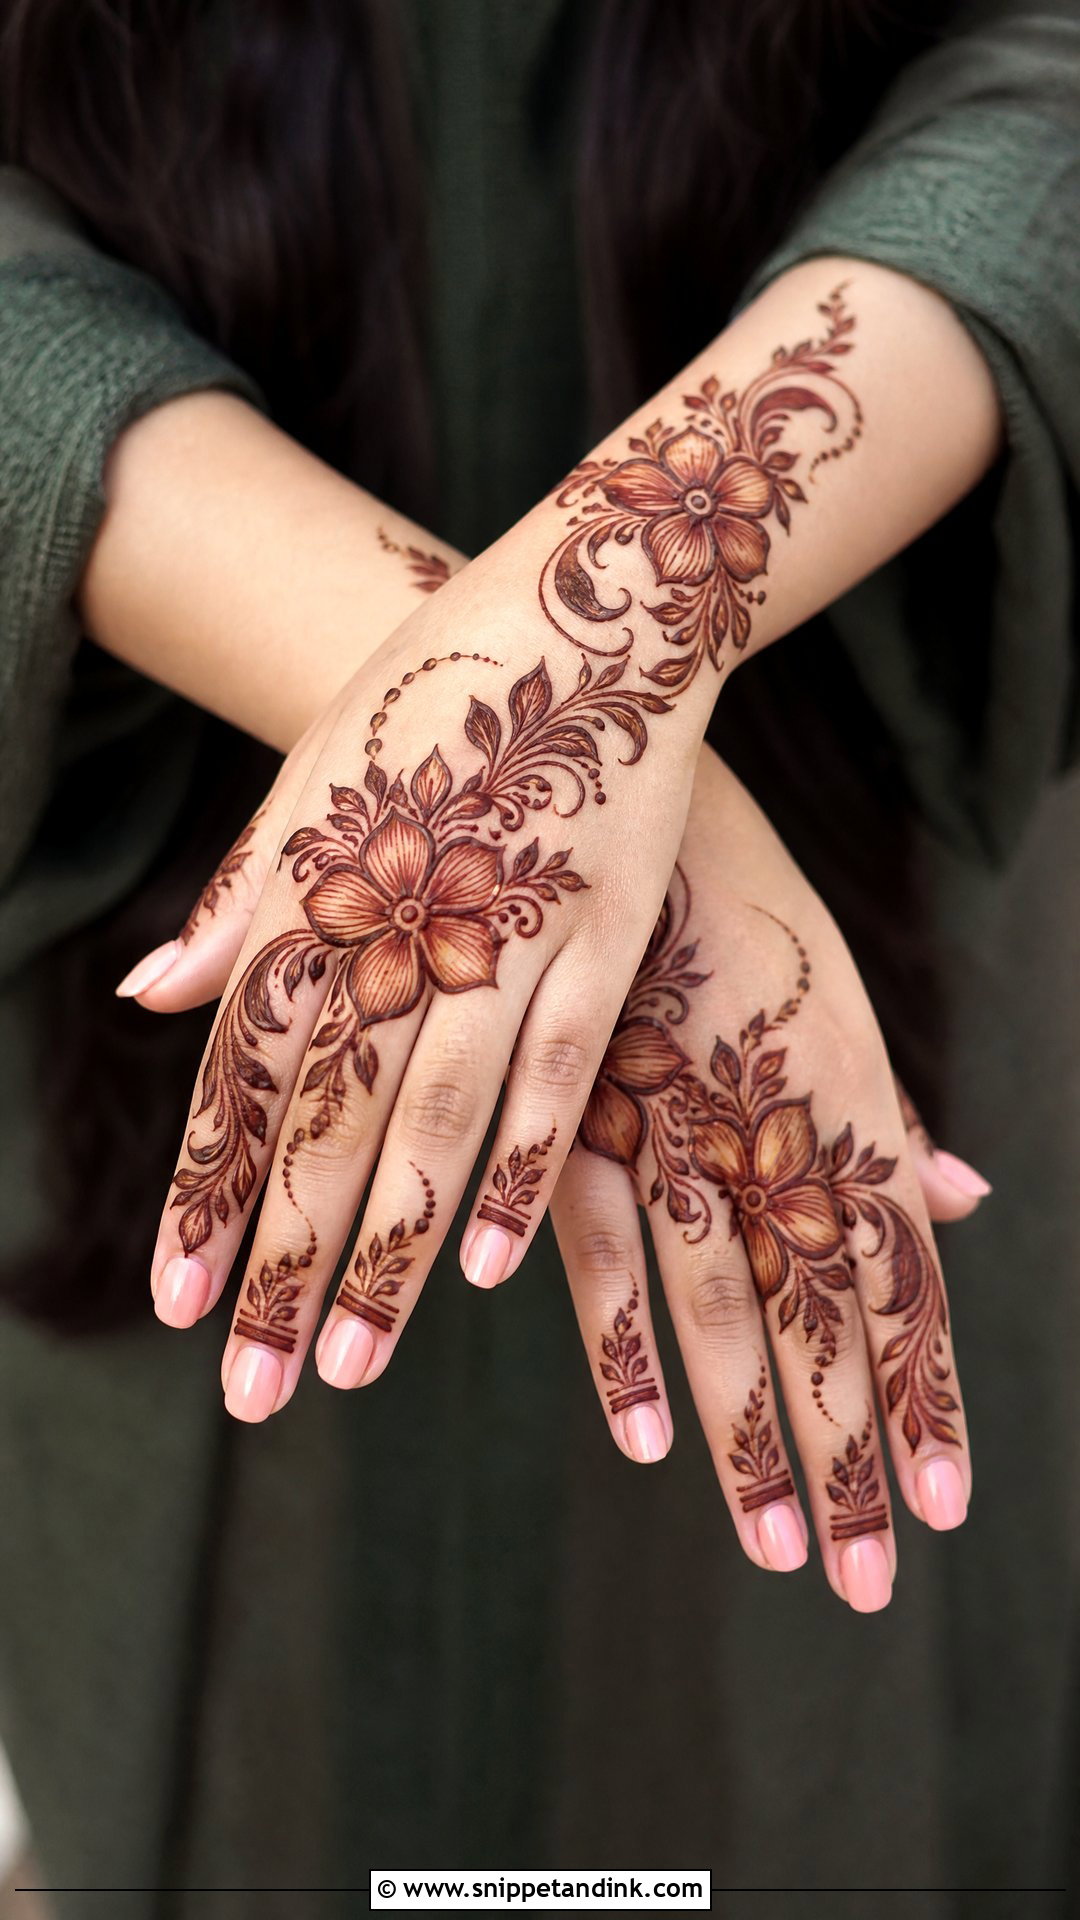
Gulf style is built on confidence: big motifs, strong outlines, generous empty spaces. I draw it as a diagonal trail across the back hand with flowers, leaves, swirls and shaded curves, then extend it toward the wrist. The shading here is done by thinning the paste stroke rather than adding more lines, which gives that soft gradient inside each petal. It’s my usual suggestion for Eid, nikah and party wear when someone wants impact in under half an hour. Keep the finger detailing light so the main trail stays the hero.
14. Cut Work Moroccan Mehndi Design
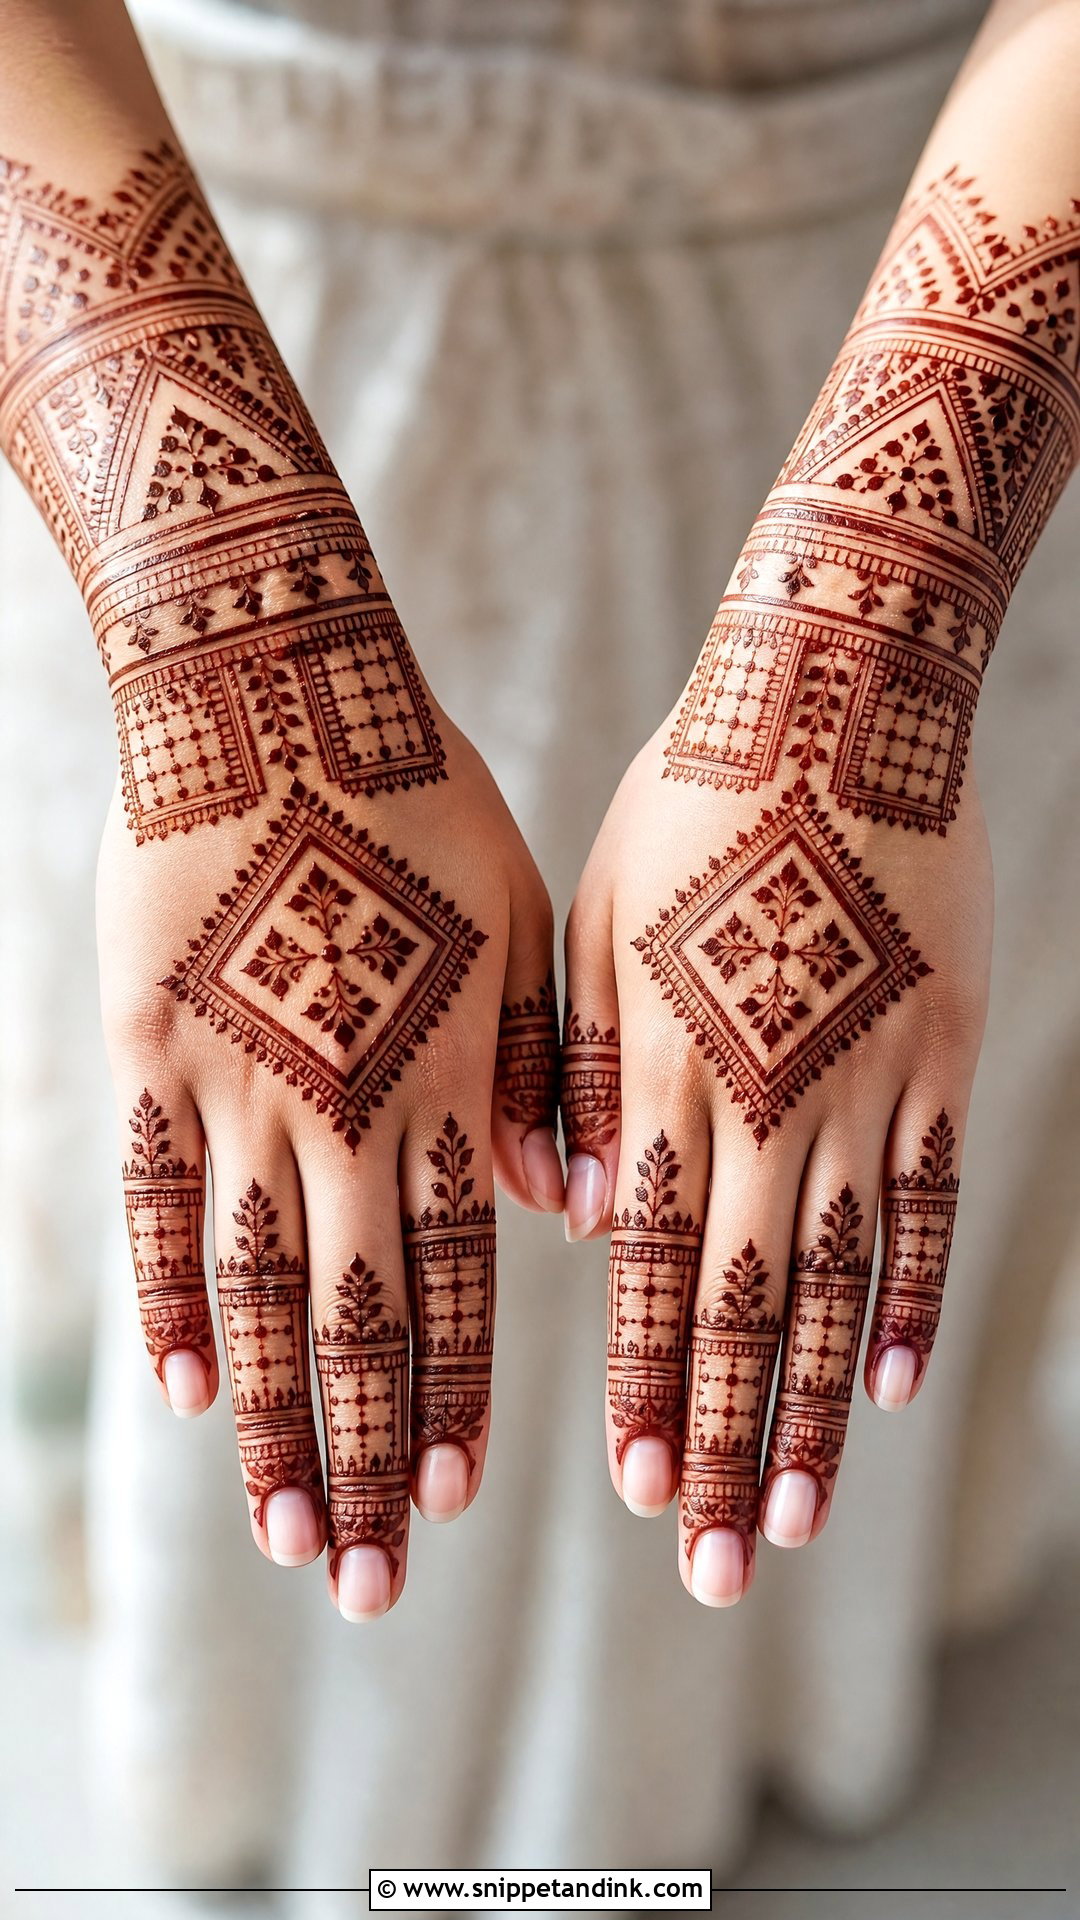
Moroccan work is the one I recommend to people who don’t like florals at all. It runs on lines, diamonds, grids and angular borders, and the cut work effect comes from spacing those shapes with mathematical neatness. A geometric wrist cuff, diamond panels on the back hand and matching finger bands make a complete look. Straight lines are less forgiving than curves, though. Any wobble shows, so I steady my wrist on the table and draw these more slowly than anything else on this list. Symmetry is the whole point, and the gaps need to stay crisp.
15. Cut Work Bracelet Mehndi Design
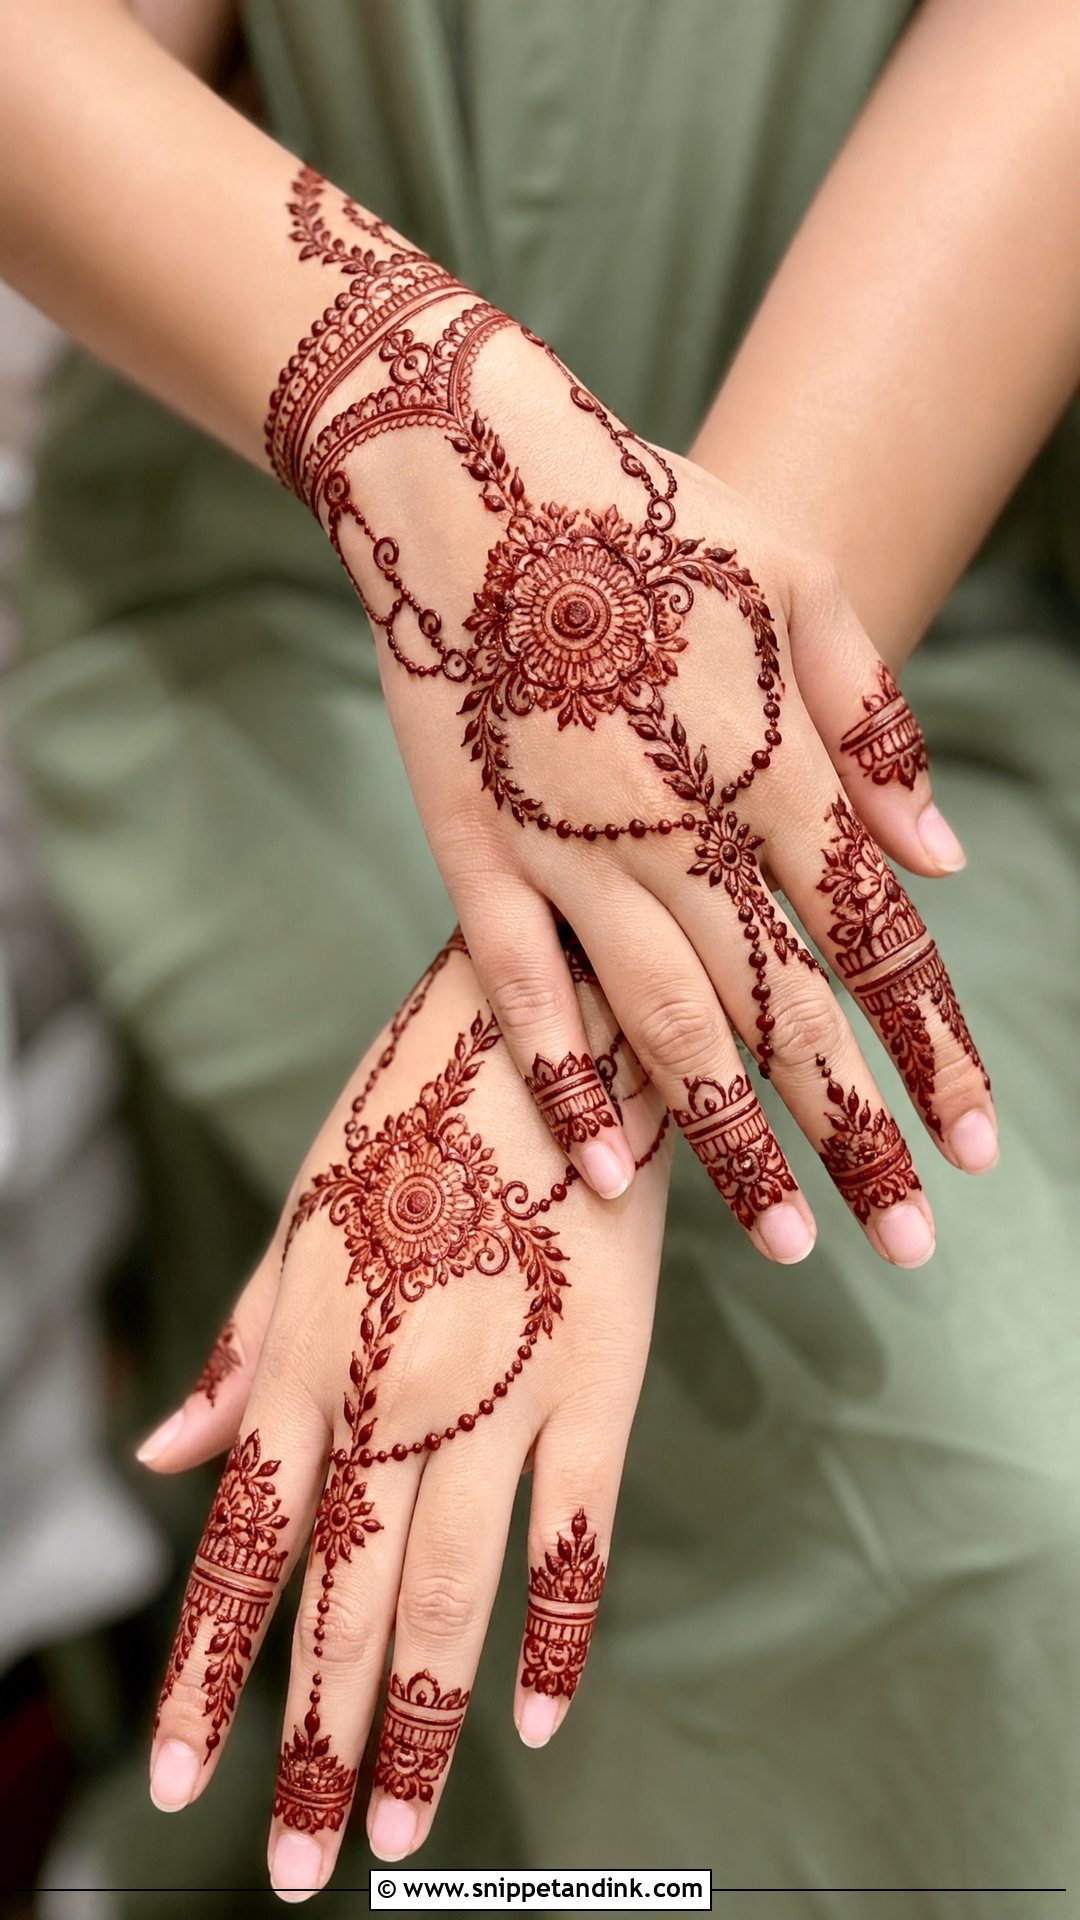
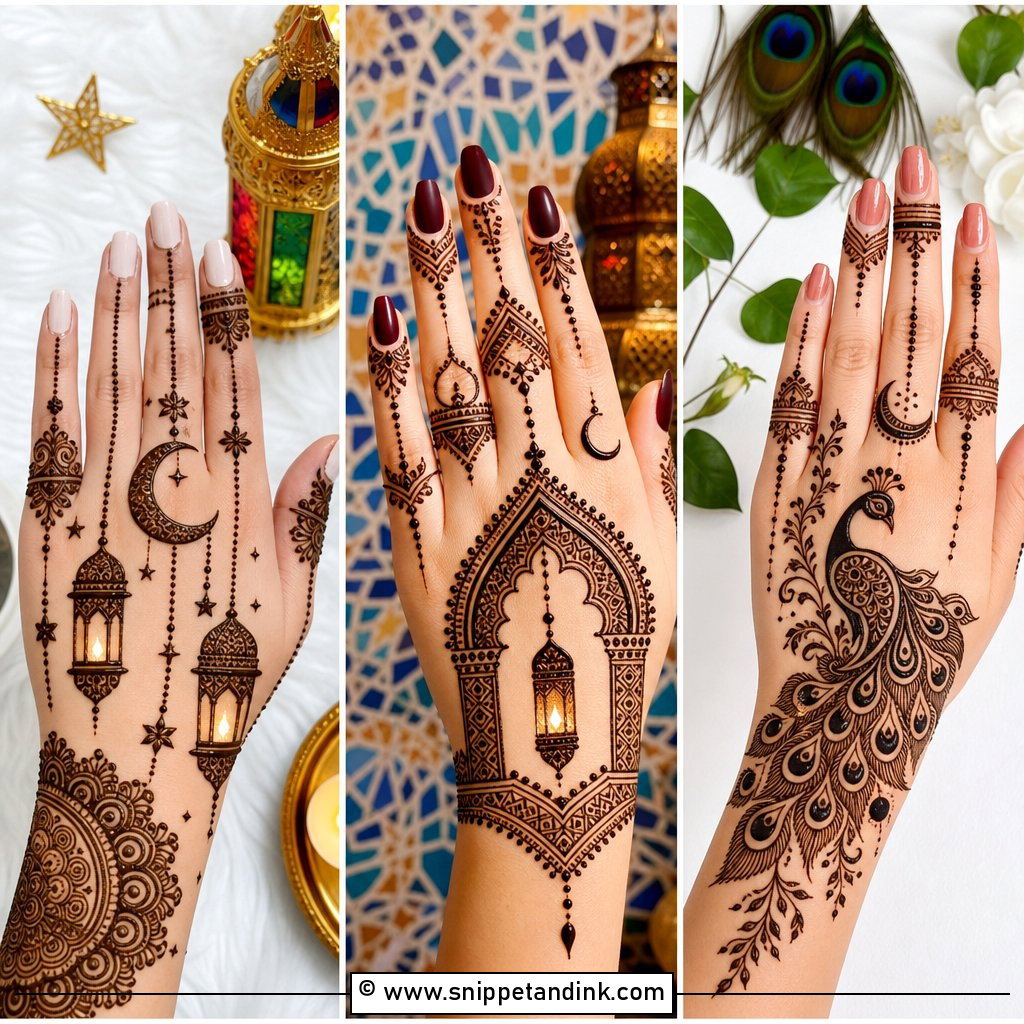
A bracelet design turns the wrist into the main event. I draw the cuff first, then a chain-style connector, then finger rings or a small back-hand motif, leaving bare skin between each layer of the cuff. Floral, paisley, jaali and plain line bands all work as cuff styles. One practical note: if you’ll wear real bangles, tell your artist, because metal sliding over a fresh stain in the first day can rub the wrist area lighter. A central flower or mandala on the back hand, linked with dotted chains, gives it a finished feel for engagements and Eid.
16. Cut Work Hathphool Mehndi Design
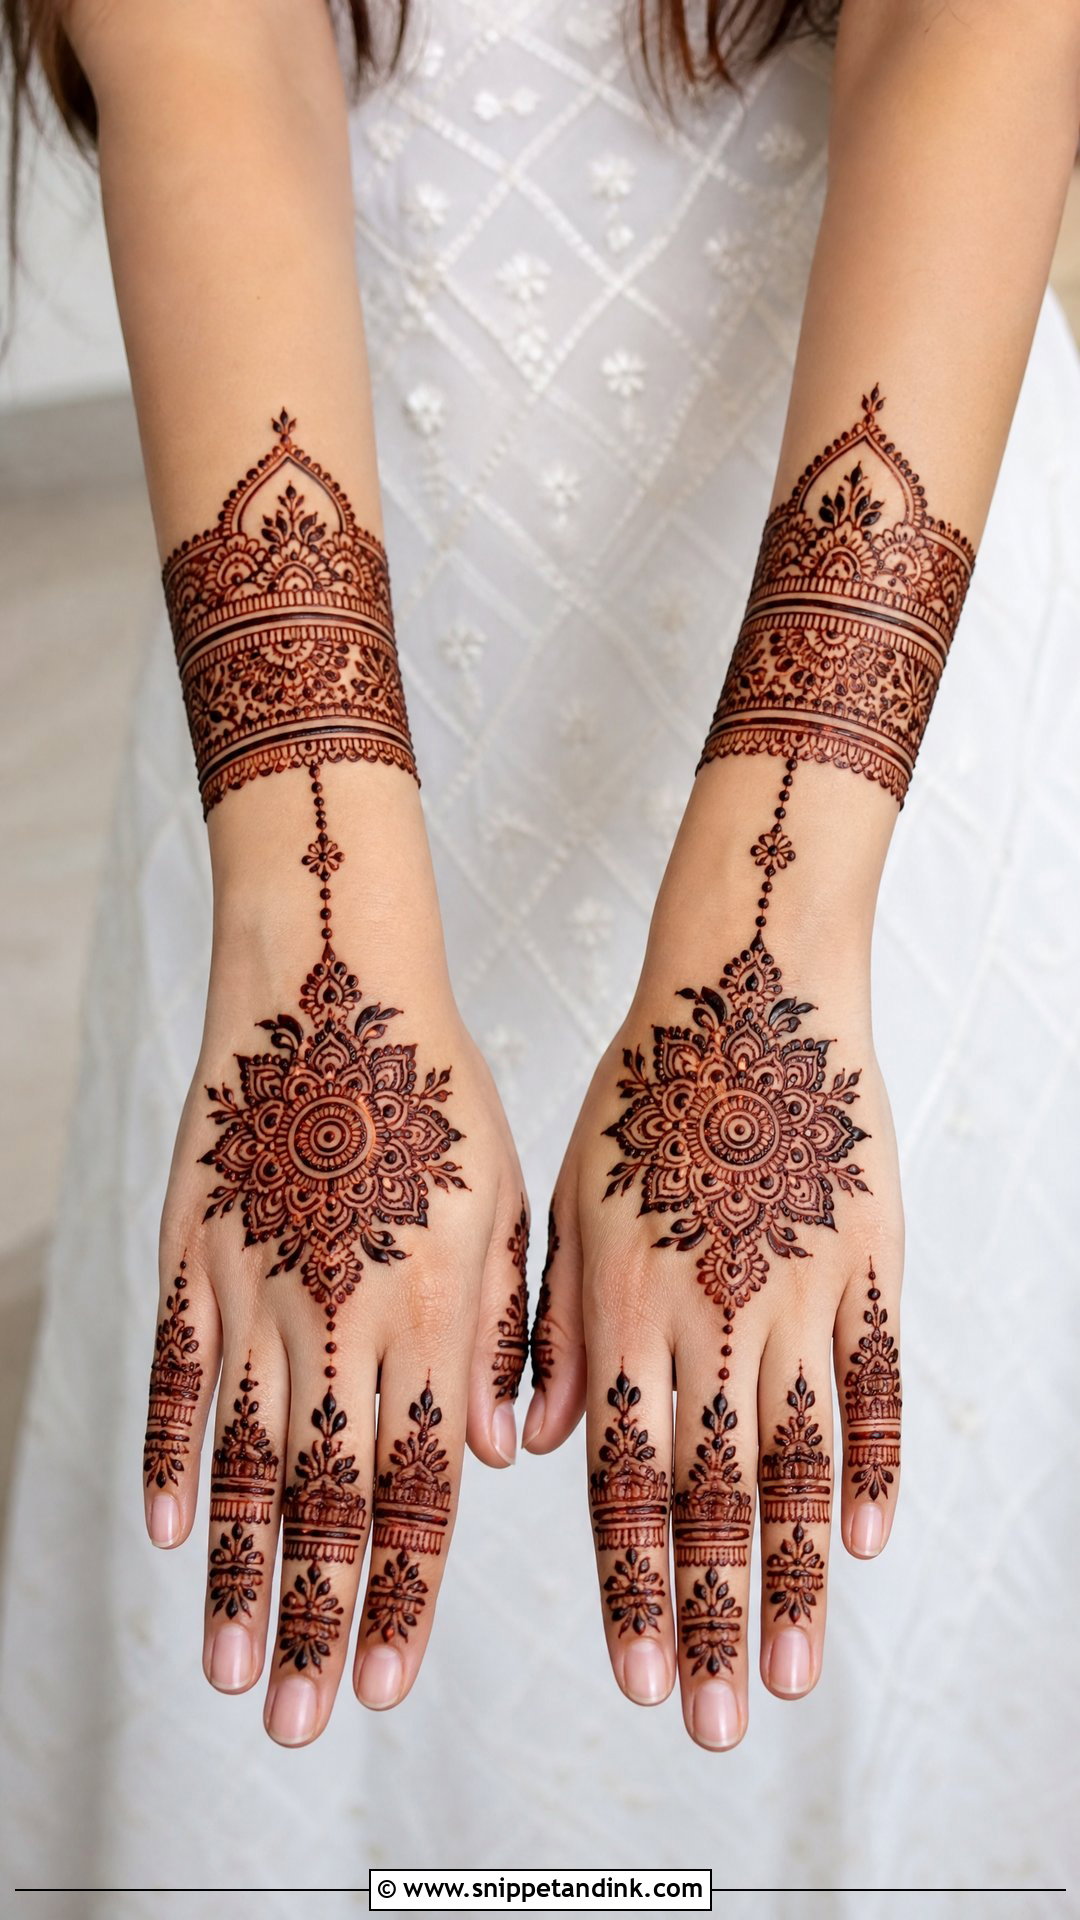
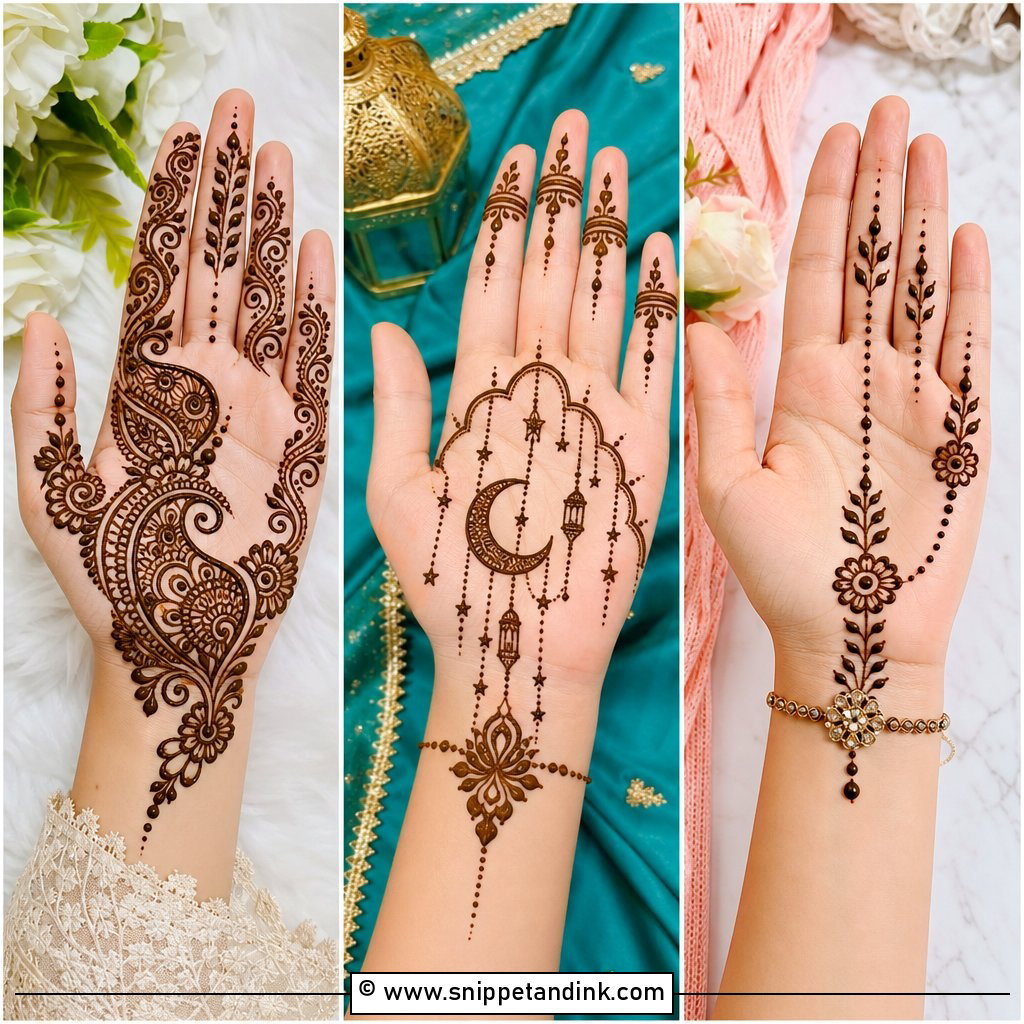
Hathphool henna copies the hand jewellery of the same name, with paste standing in for the bracelet, chain and finger rings. I start with a wrist band, connect it to a central back-hand motif and run fine chains to one or more fingers. The cut work spaces are what make those chains look delicate rather than thick. It’s a complete back-hand look that I do a lot for bridesmaids, engagement ceremonies and Eid outfits. Keep it to one mandala and simple chains, or build it up with florals and paisley borders. Bare, clean nails make the chains look sharper.
17. Cut Work Full Back Hand Mehndi Design
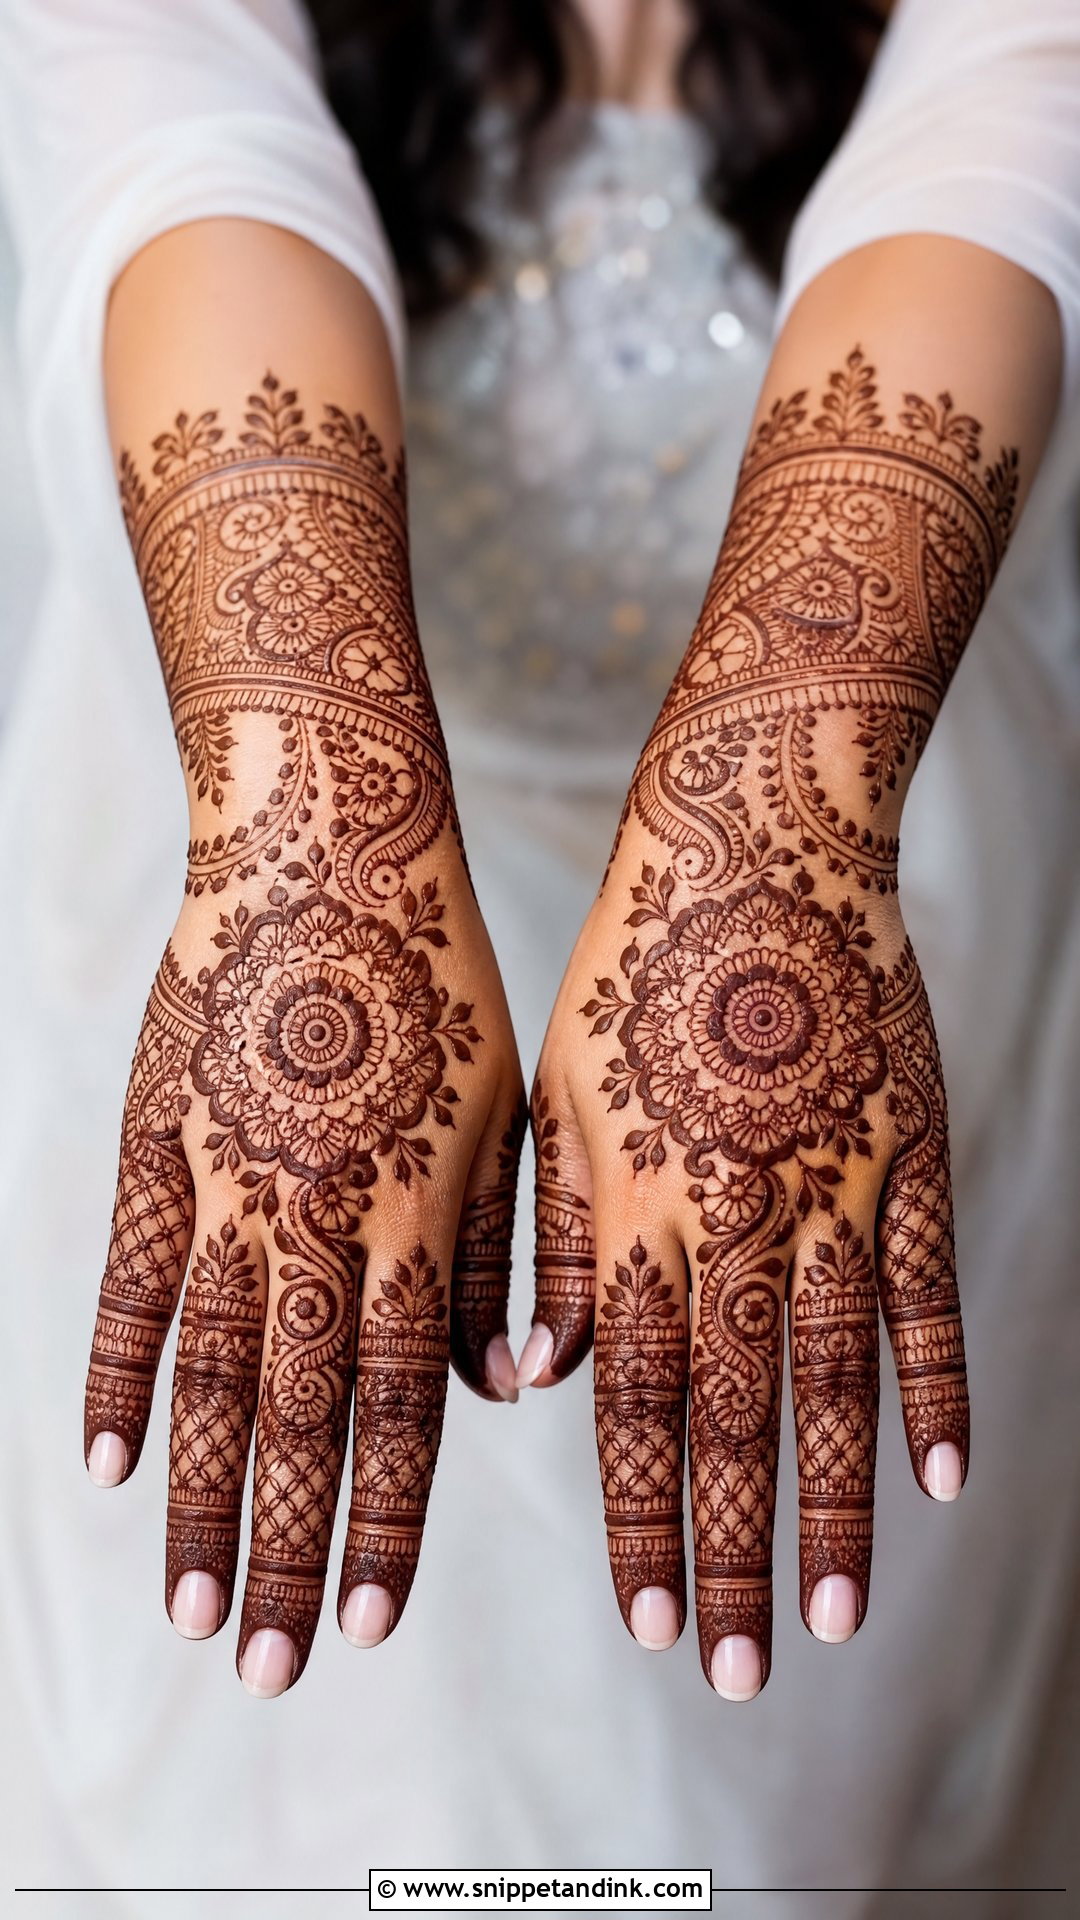
Full back hand cut work covers everything from fingertips to wrist, yet still keeps its gaps. Because the back of the hand is what the camera sees most, I map it before I start: the central floral or mandala goes slightly toward the thumb side, which looks centred when the hand is held naturally, and the side paisleys and wrist cuff balance it. The skin on the back hand stains lighter than the palm, so this design needs a well-made paste and the full drying time. Finger patterns should follow the actual finger length, not a template.
18. Cut Work Palm Mehndi Design
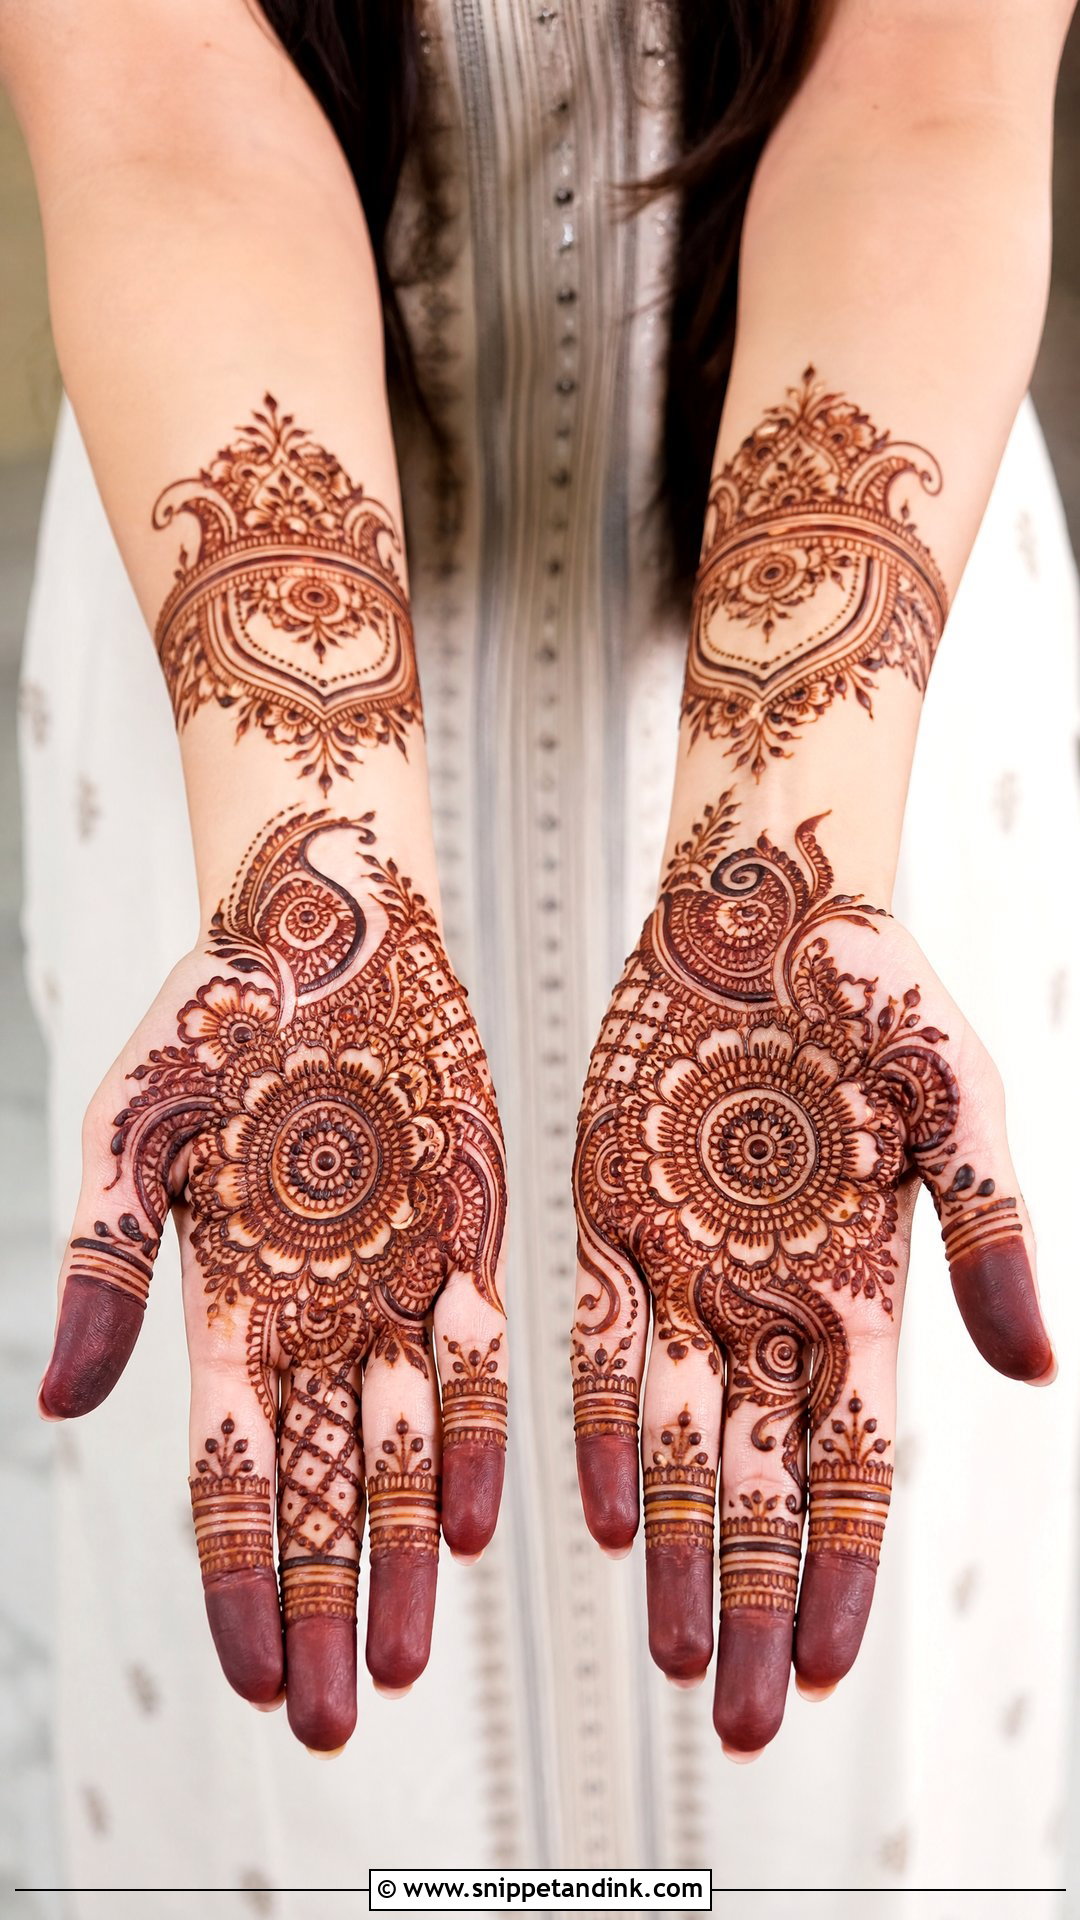
Palm henna is where the stain is darkest, because the skin there is thicker and holds more dye. That makes the palm the best place for cut work if you want maximum contrast between motif and gap. I build around a central mandala, bold paisleys and floral corners, each framed in open skin. The fingers can be fully worked or partly filled depending on the occasion. A simple wrist border keeps attention on the palm. It’s a strong pick for brides, married women at Karwa Chauth and anyone dressing for a family ceremony.
19. Cut Work Wrist To Forearm Mehndi Design
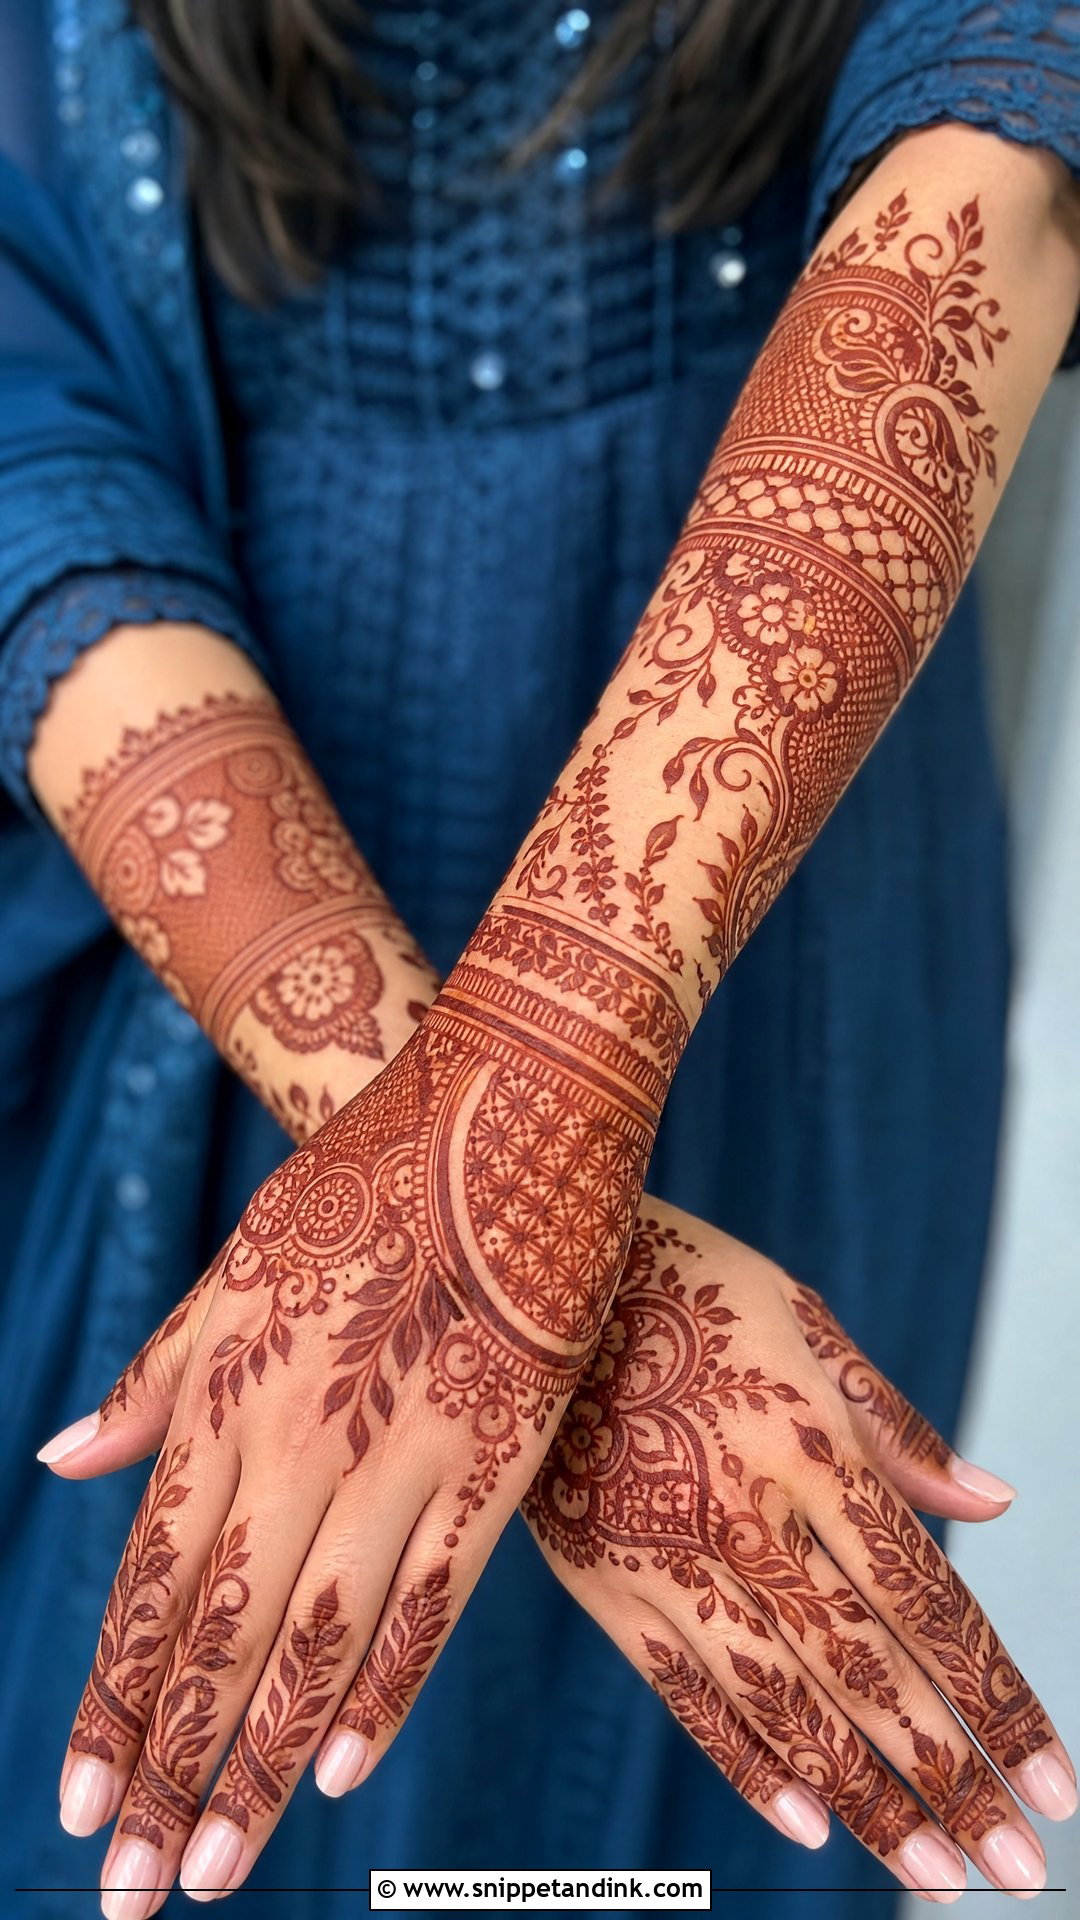
Extending from wrist to forearm gives length without the time and cost of a full arm. I begin with a bracelet cuff and continue upward with floral vines, paisleys, jaali panels or geometric bands, leaving clear skin between each section so the arm reads longer. Forearm skin stains noticeably lighter than the hand, so I tell people to expect an orange-brown there rather than deep maroon, and to sleep with the arm wrapped. For short or sheer sleeves this placement is ideal. Finer fillings make it bridal; bolder lines and more space keep it simple.
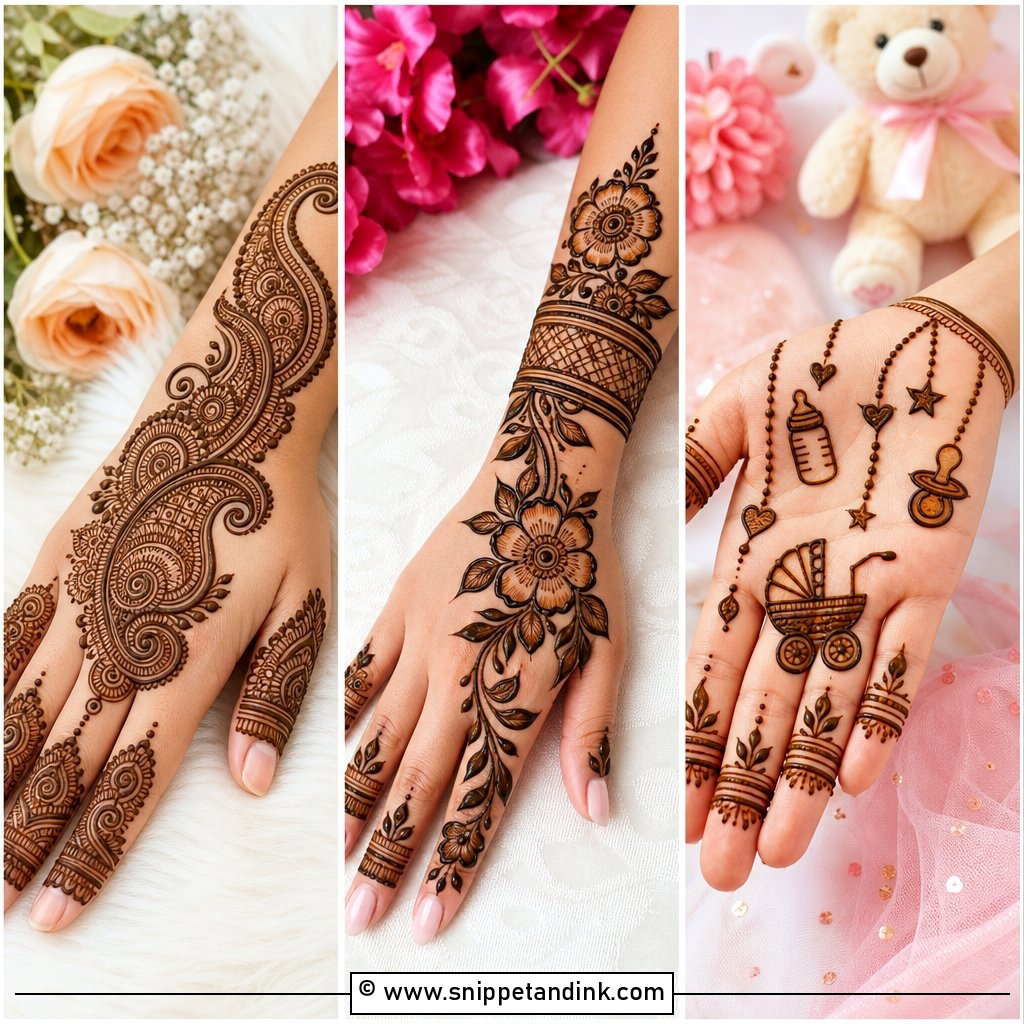
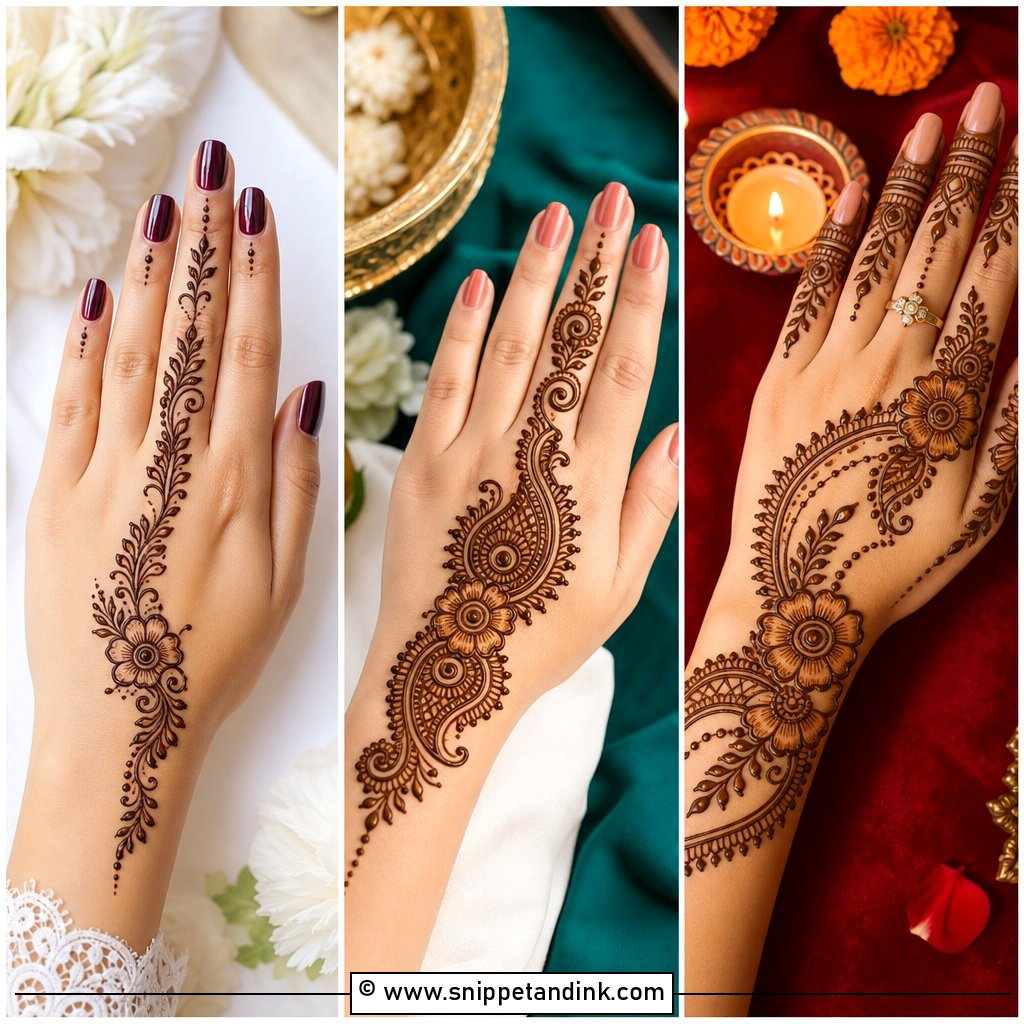
20. Cut Work Engagement Mehndi Design
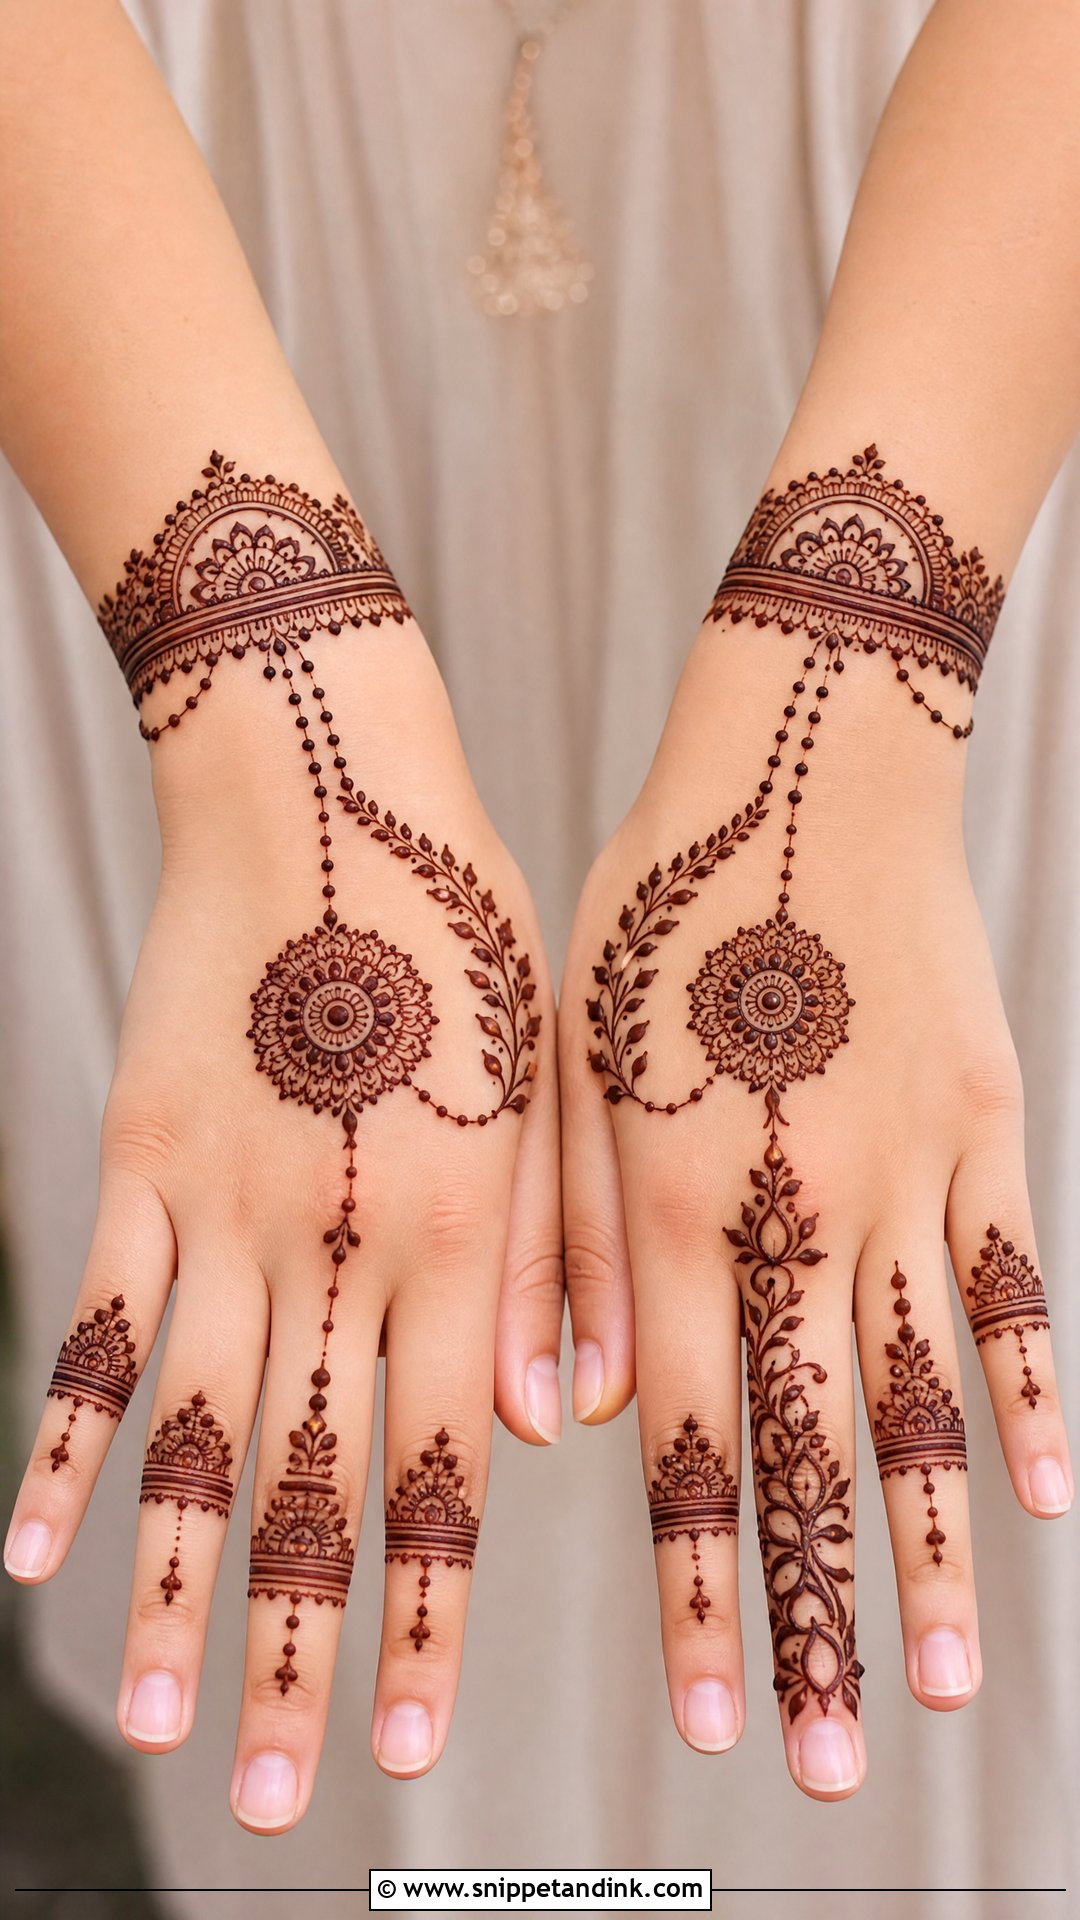
Engagement henna has one job above all others: the ring photo. I leave a clear space around the ring finger and the base of the knuckles so the band and stone aren’t sitting on top of dense pattern. A back-hand mandala, a floral trail, a bracelet cuff and fine finger bands make the rest. I mark the ring finger with a small flower or a few elegant lines so it reads as special. Try your ring on at the appointment if you can, because where it sits on your finger decides where I stop drawing.
21. Cut Work Eid Mehndi Design
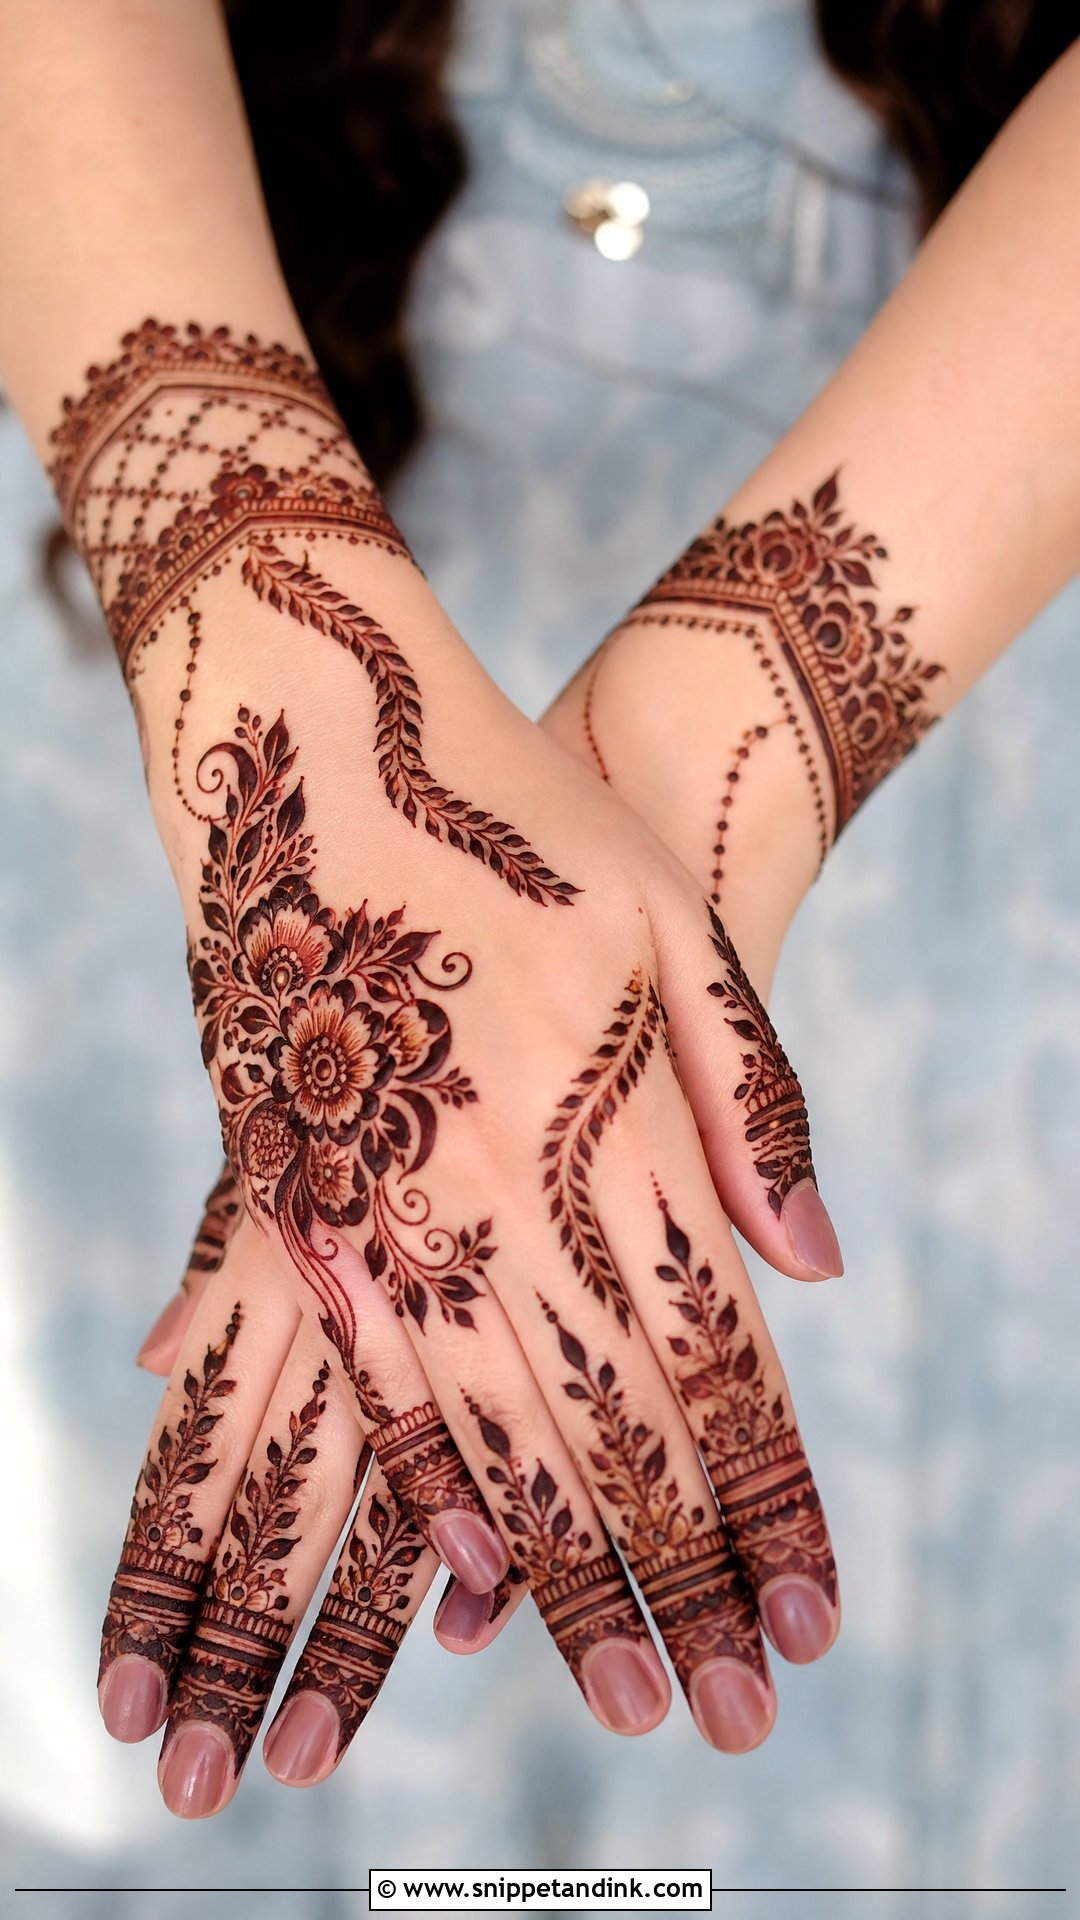
Eid henna usually gets done the night before, often in a rush, so I design for speed and comfort. Arabic or Gulf layouts with bold florals, leafy trails and decorated fingers do the work. The hand doesn’t need full coverage to look complete: a diagonal trail on the back hand or a clean palm design with wrist details is plenty. Dots, small swirls and light shading make the gaps look intentional. Apply it at least a full night before the morning prayer if you can, since the stain keeps darkening for a day or two after the paste comes off.
22. Cut Work Diwali Mehndi Design
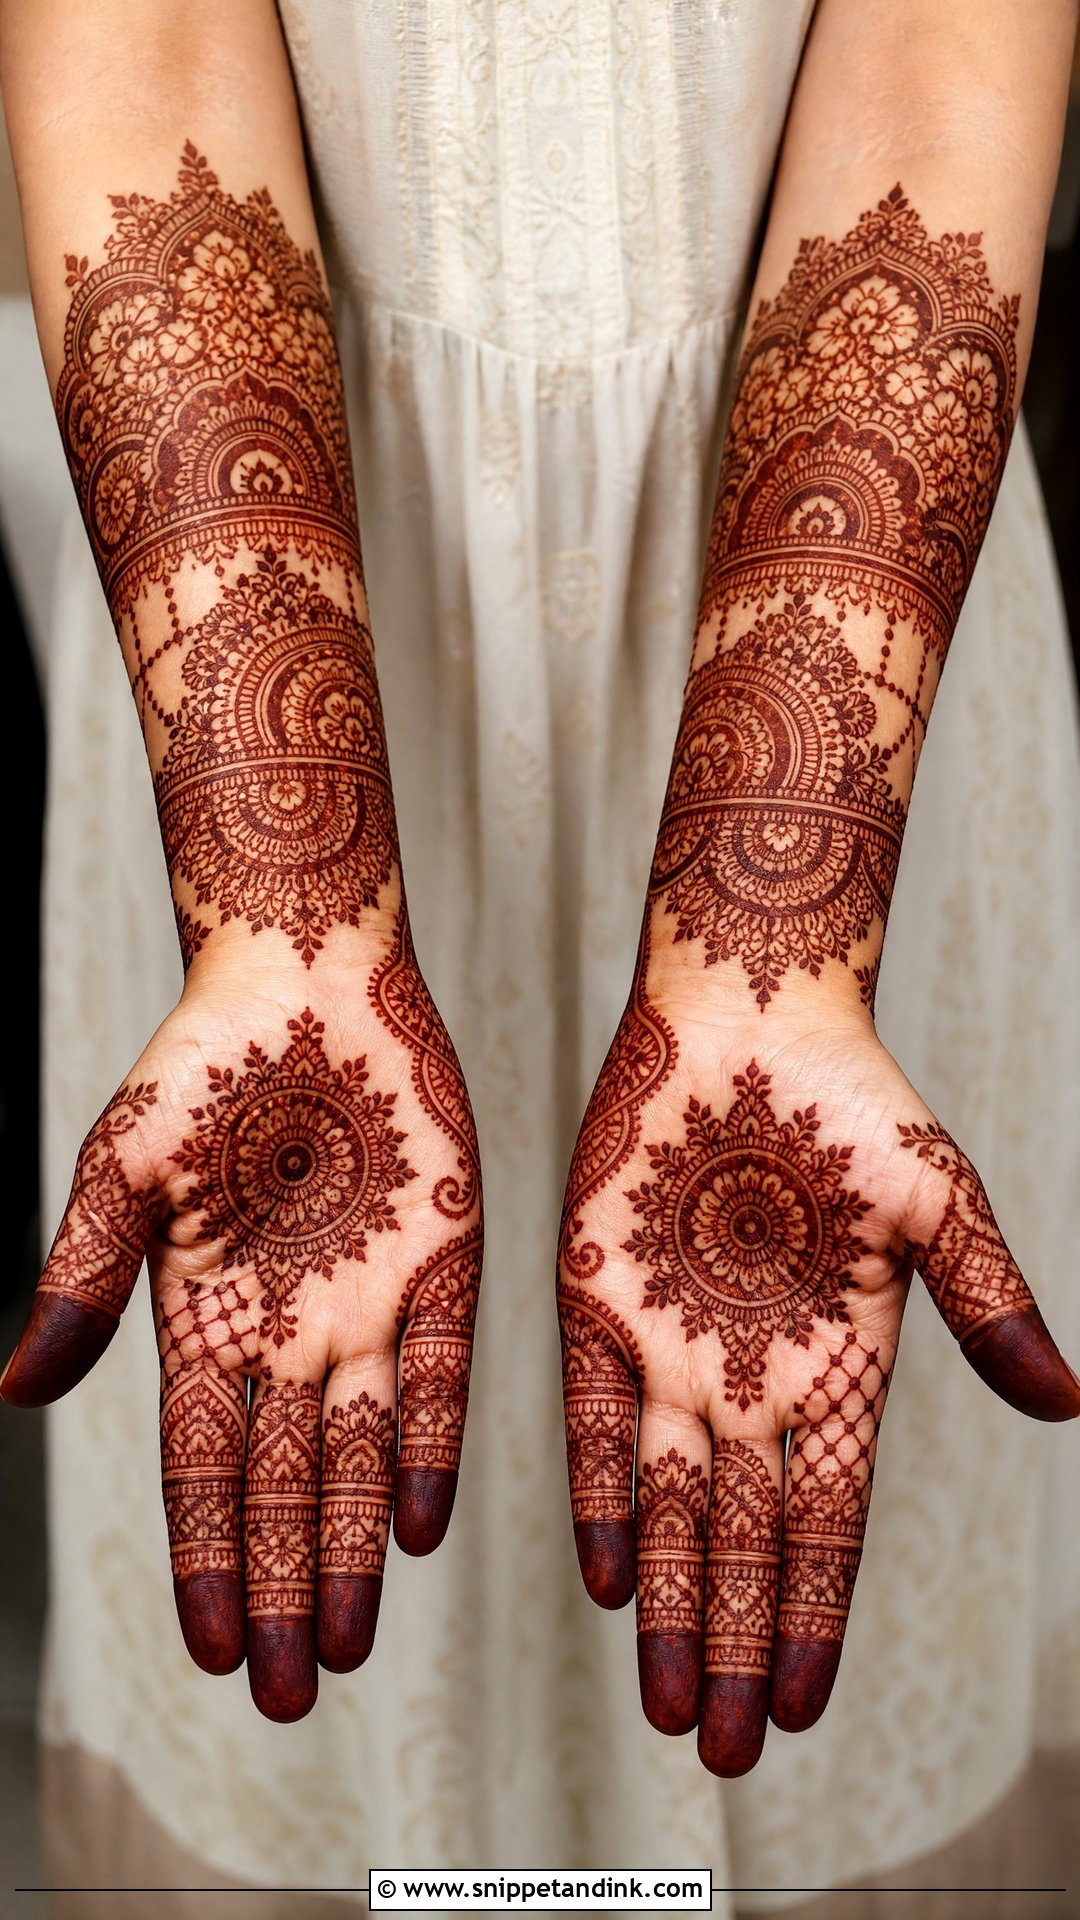
For Diwali I tend to suggest a cut work Diwali mehndi design that sits between everyday and bridal, because people are lighting diyas, serving food and handling sweets all evening. A palm mandala, floral borders, paisley corners and bracelet details keep it festive. On the back hand, a floral trail with small jaali sections and finger bands looks good with both a saree and a fusion outfit. A reddish-brown stain against those open spaces gives the hands a warm glow in lamplight.
23. Cut Work Karwa Chauth Mehndi Design
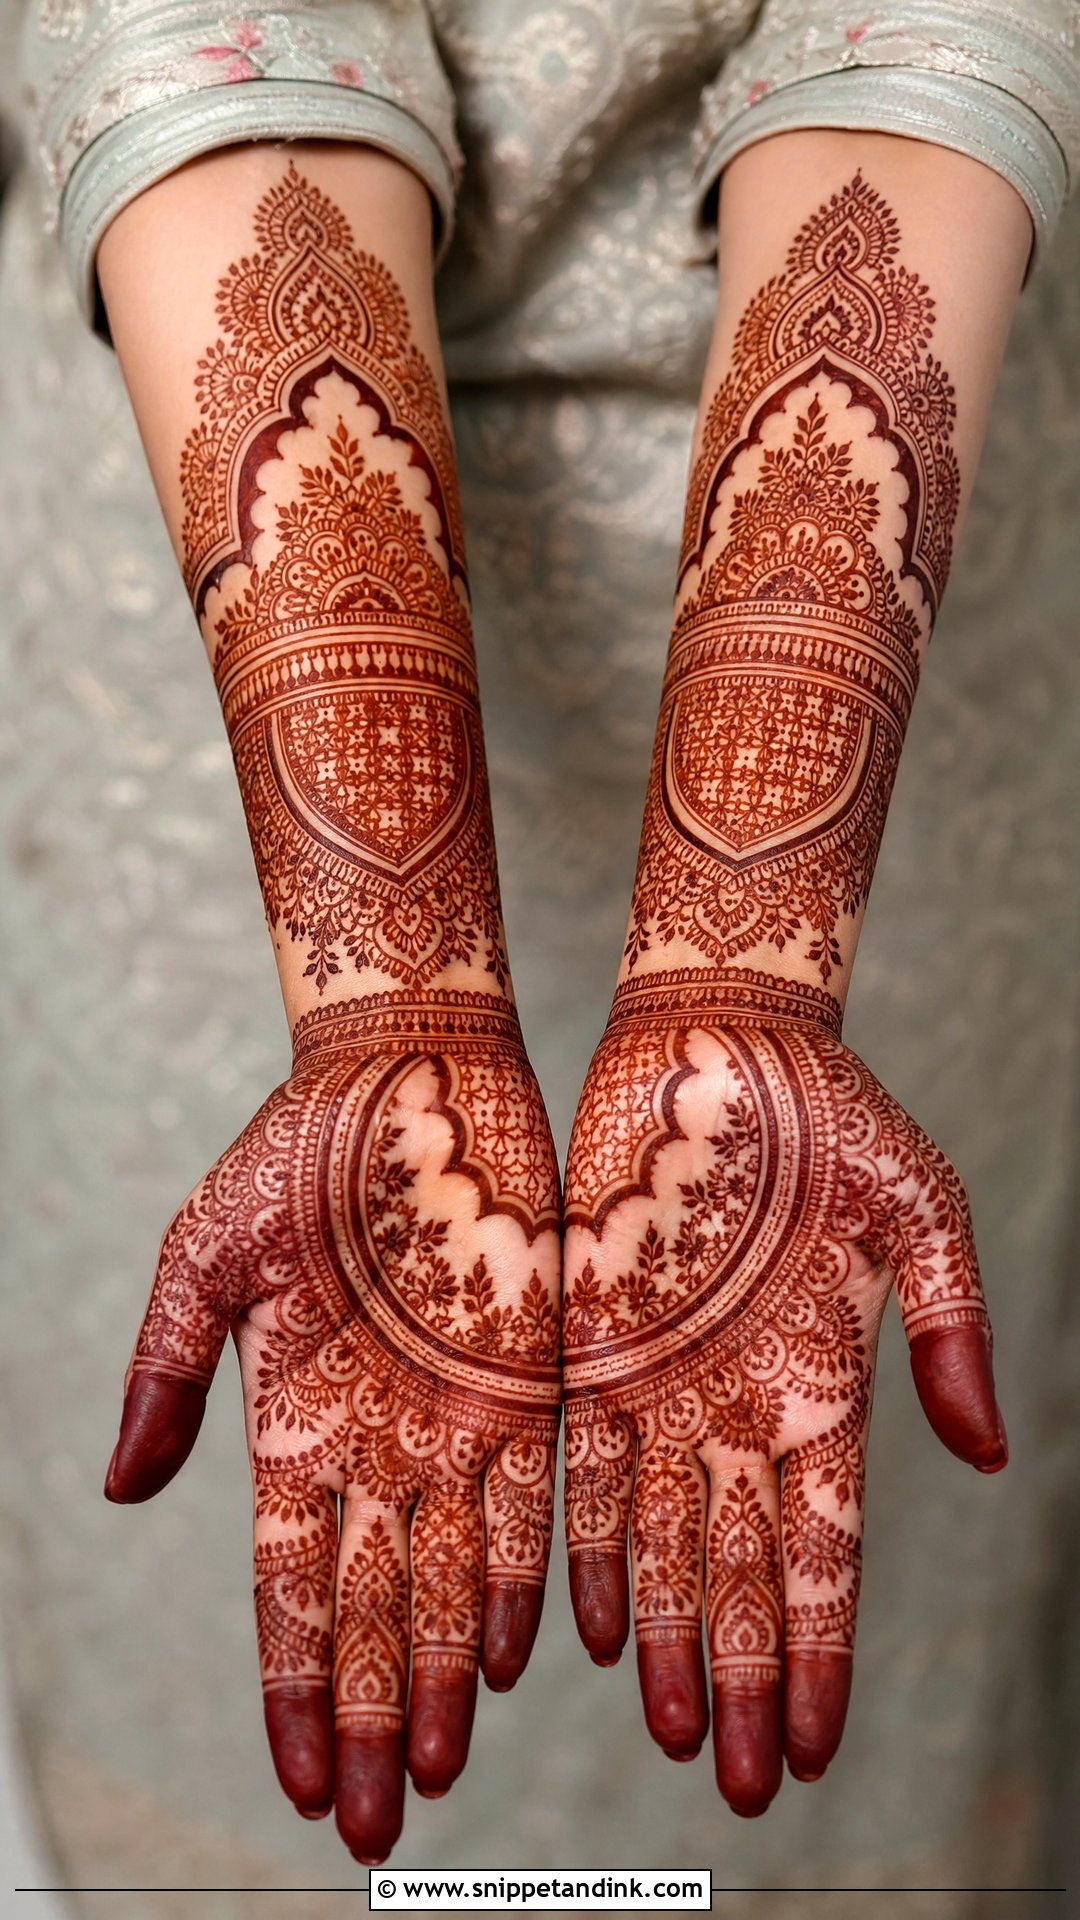
Karwa Chauth henna is often applied the day before a long fast, and comfort matters more than people expect. I keep the palm the focus, with mandalas, paisleys, florals and a fine wrist border, and I avoid heavy paste across the knuckles so the hands can flex. Cut work keeps it detailed without covering everything. If you want more, extend toward the forearm with bracelet bands and open panels. Small traditional motifs can be tucked into the larger layout, as long as each gets its own space. Bangles sit nicely against the bare wrist area.
24. Cut Work Minimal Mehndi Design
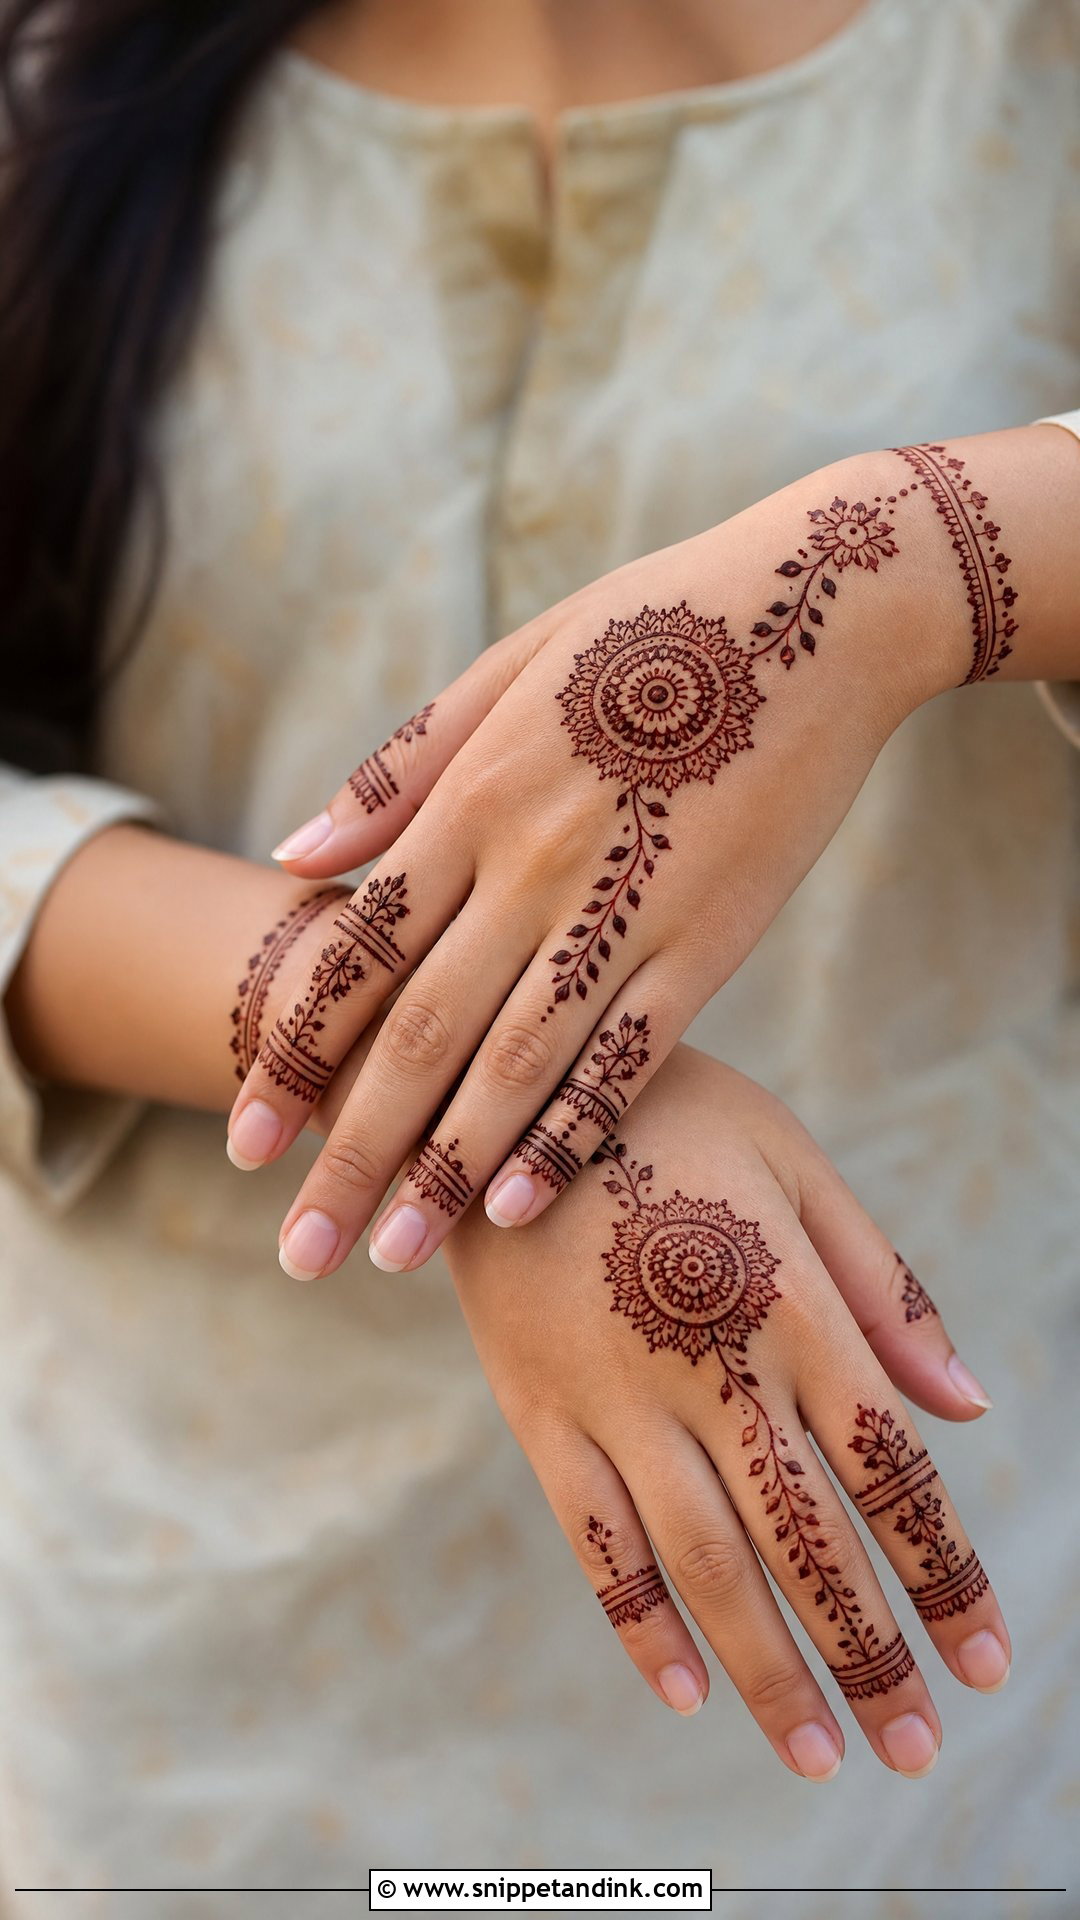
Minimal cut work suits people who want henna to look like an accessory rather than a costume. A small mandala on the back hand, one floral vine, simple finger bands and a thin wrist border are enough. Here the negative space is the design, so I deliberately stop myself from adding fillers. Small hands especially benefit from this, since big motifs on a petite hand can swallow its shape. Medium-sized motifs and smooth lines give the most balanced result for college events and small gatherings.
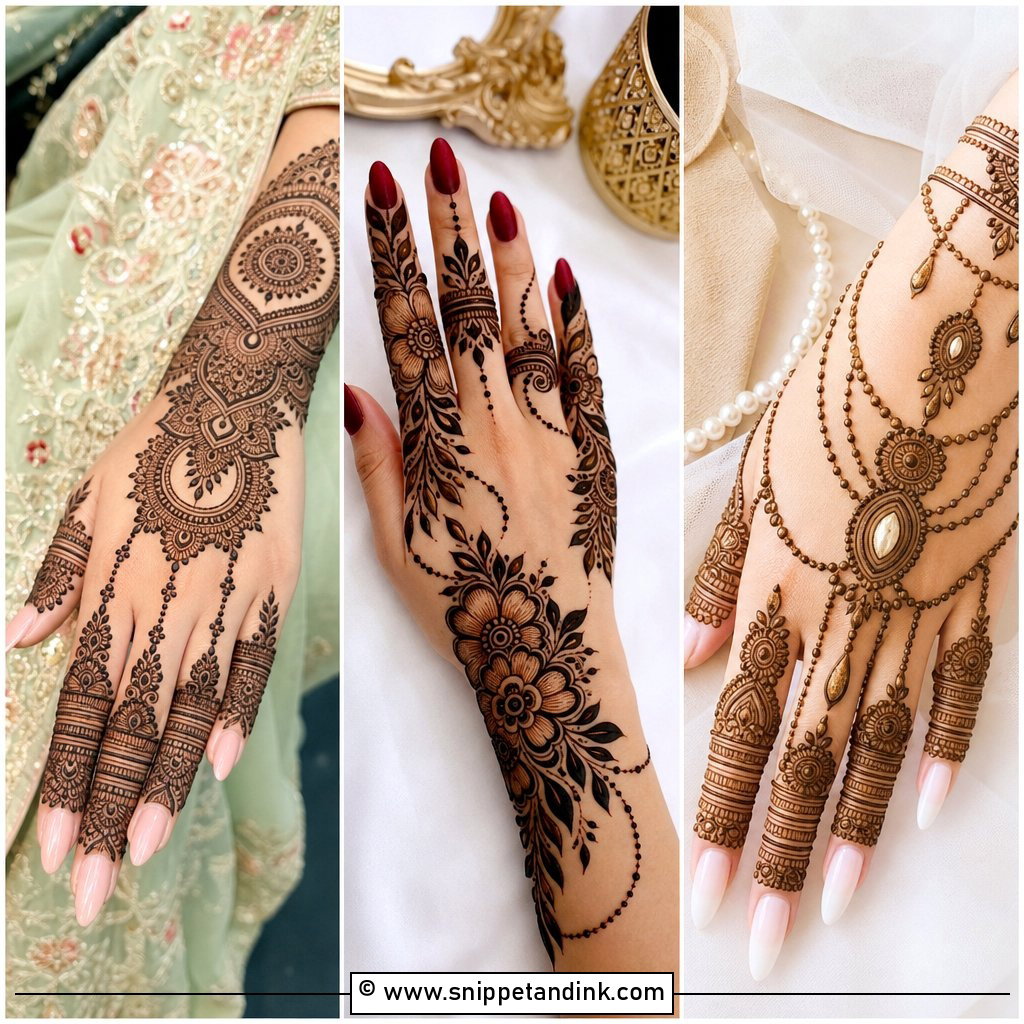
25. Cut Work Modern Mehndi Design
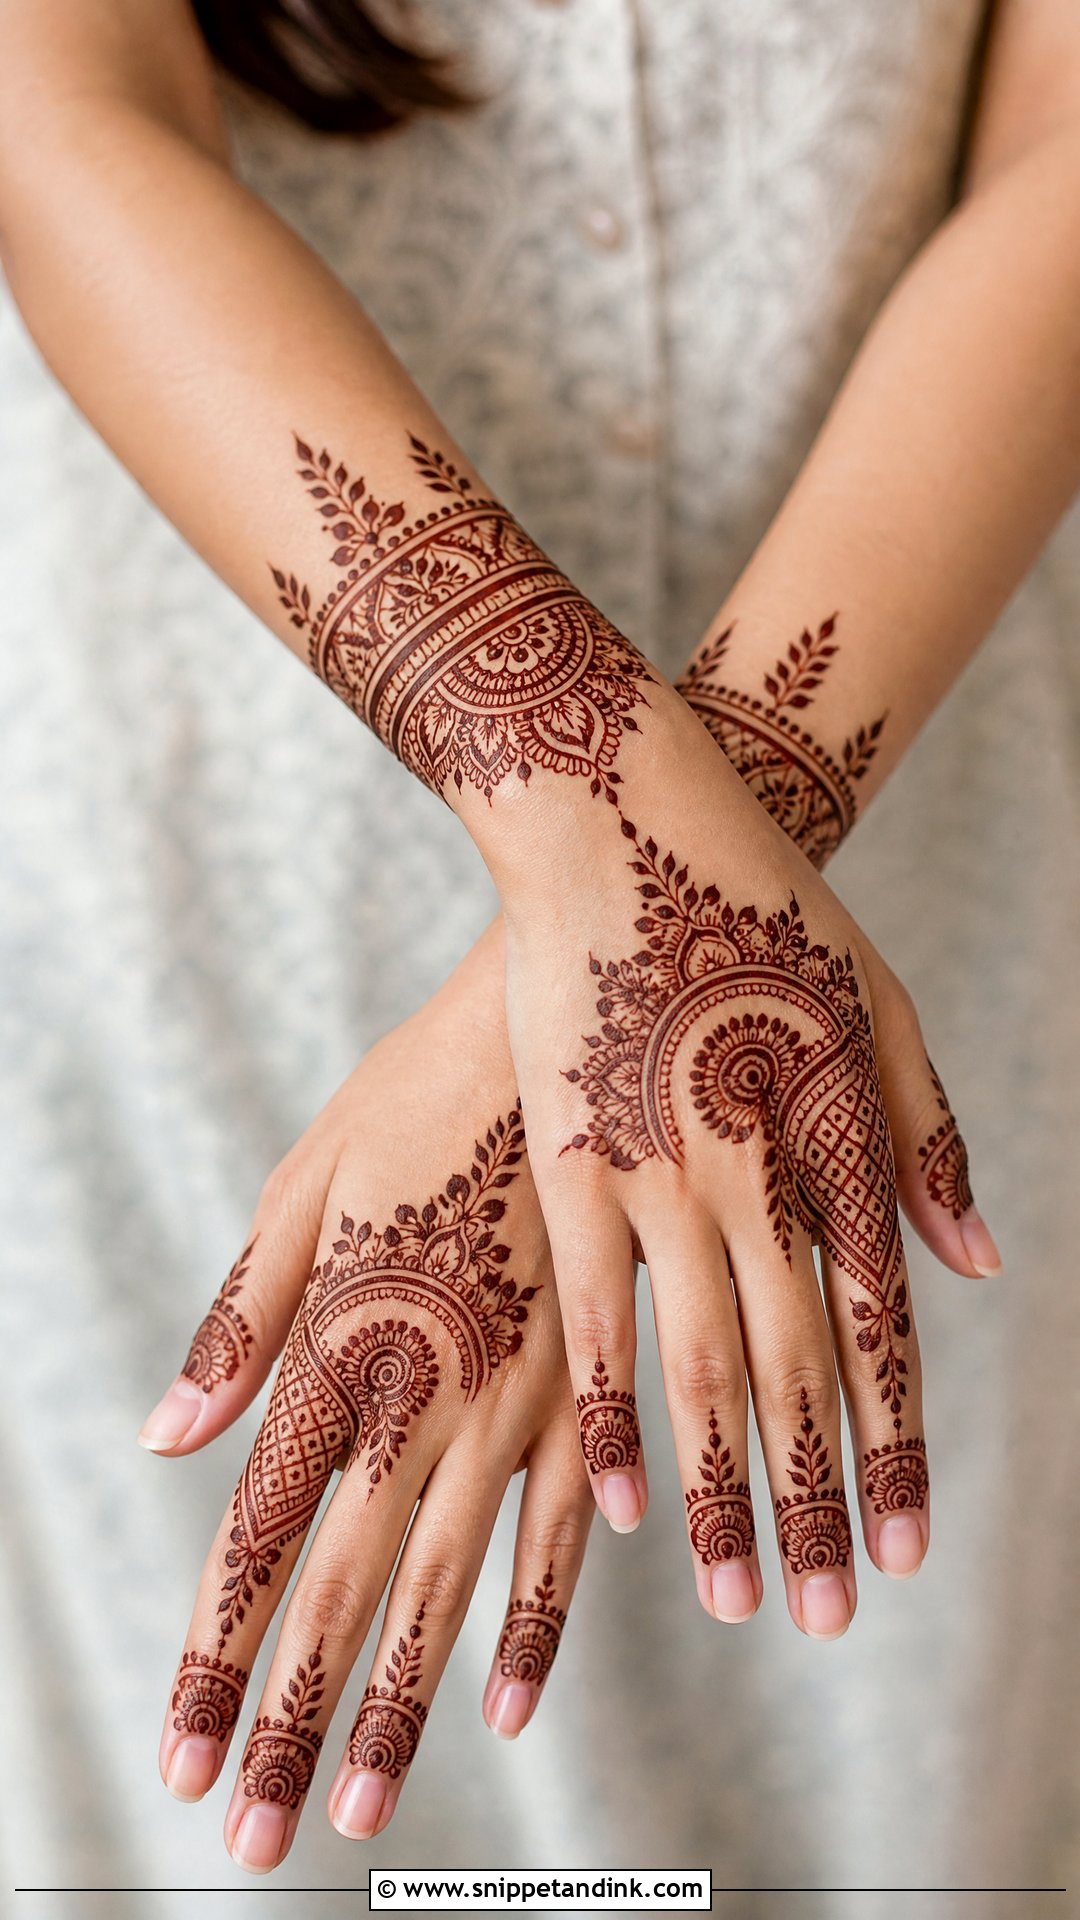
Modern cut work drops most of the traditional fillers in favour of open layouts and clean lines: bracelet cuffs, finger rings, abstract florals, half mandalas and geometric panels with plenty of bare skin. It reads best on the back hand, where people actually see the spacing. My rule is one main motif and everything else in support of it. When someone brings three reference photos and wants all of them on one hand, I’ll suggest choosing the strongest element, because too many mixed shapes stop a modern design from looking deliberate.
26. Cut Work Rose Mehndi Design
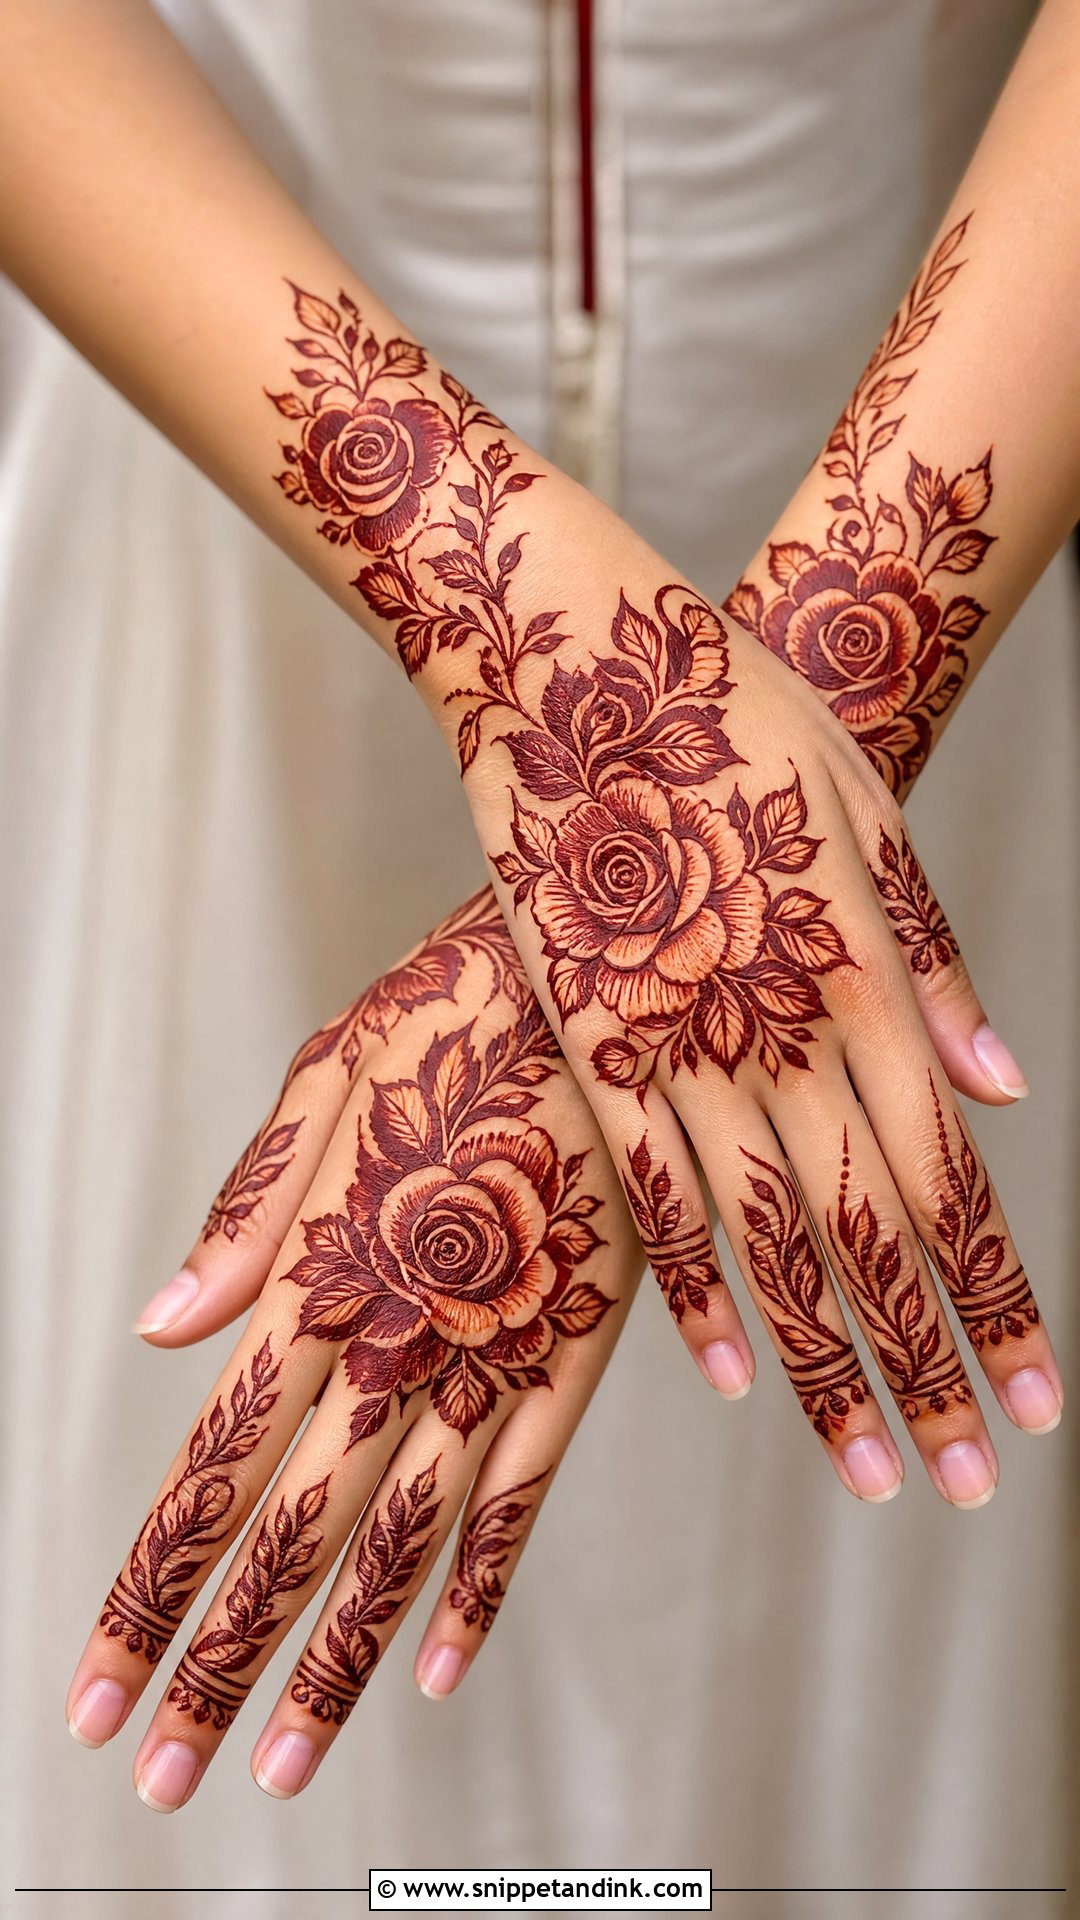
Roses are recognisable from a distance, which is why they suit cut work so well. I draw large blooms on the back hand or palm with spiralling inner petals, then wrap leafy vines toward the wrist and keep the fingers simple. The space around each rose is what lets the petal spiral read. Shaded leaves and small buds fill out a fuller version, while two or three roses with open gaps and a thin wrist border keep it light. Engagement guests and bridesmaids ask for this one a lot because it feels soft without leaning too traditional.
27. Cut Work Lotus Mehndi Design
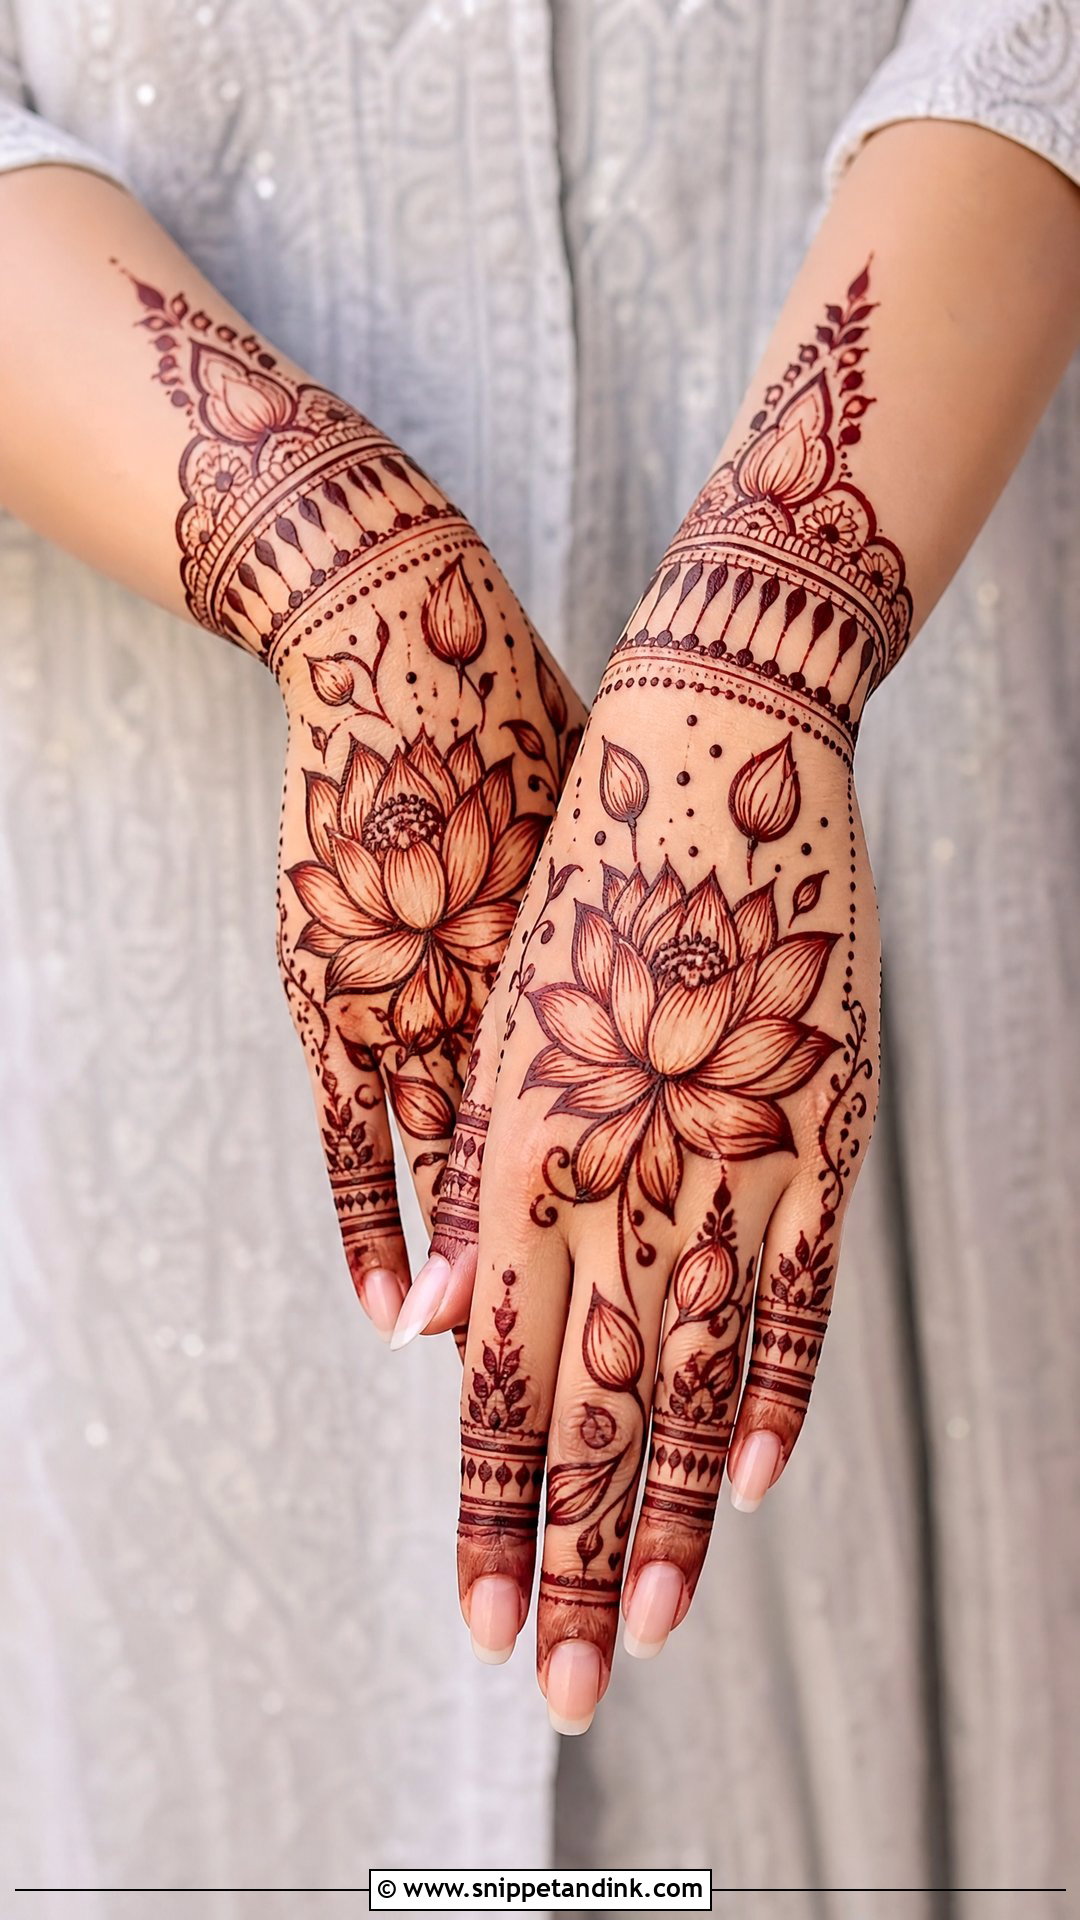
Lotus motifs need bold petal outlines; thin ones lose the pointed petal tips once the stain settles. I’ll often put a large lotus on the palm or back hand, smaller buds on the fingers and bracelet bands at the wrist, then add fine dots, leaves and light shading for depth without filling every section. It fits Indian and Indo-Arabic layouts and is a natural choice for weddings, Diwali and pooja functions, where the lotus carries real meaning for many families.
28. Cut Work Leafy Trail Mehndi Design
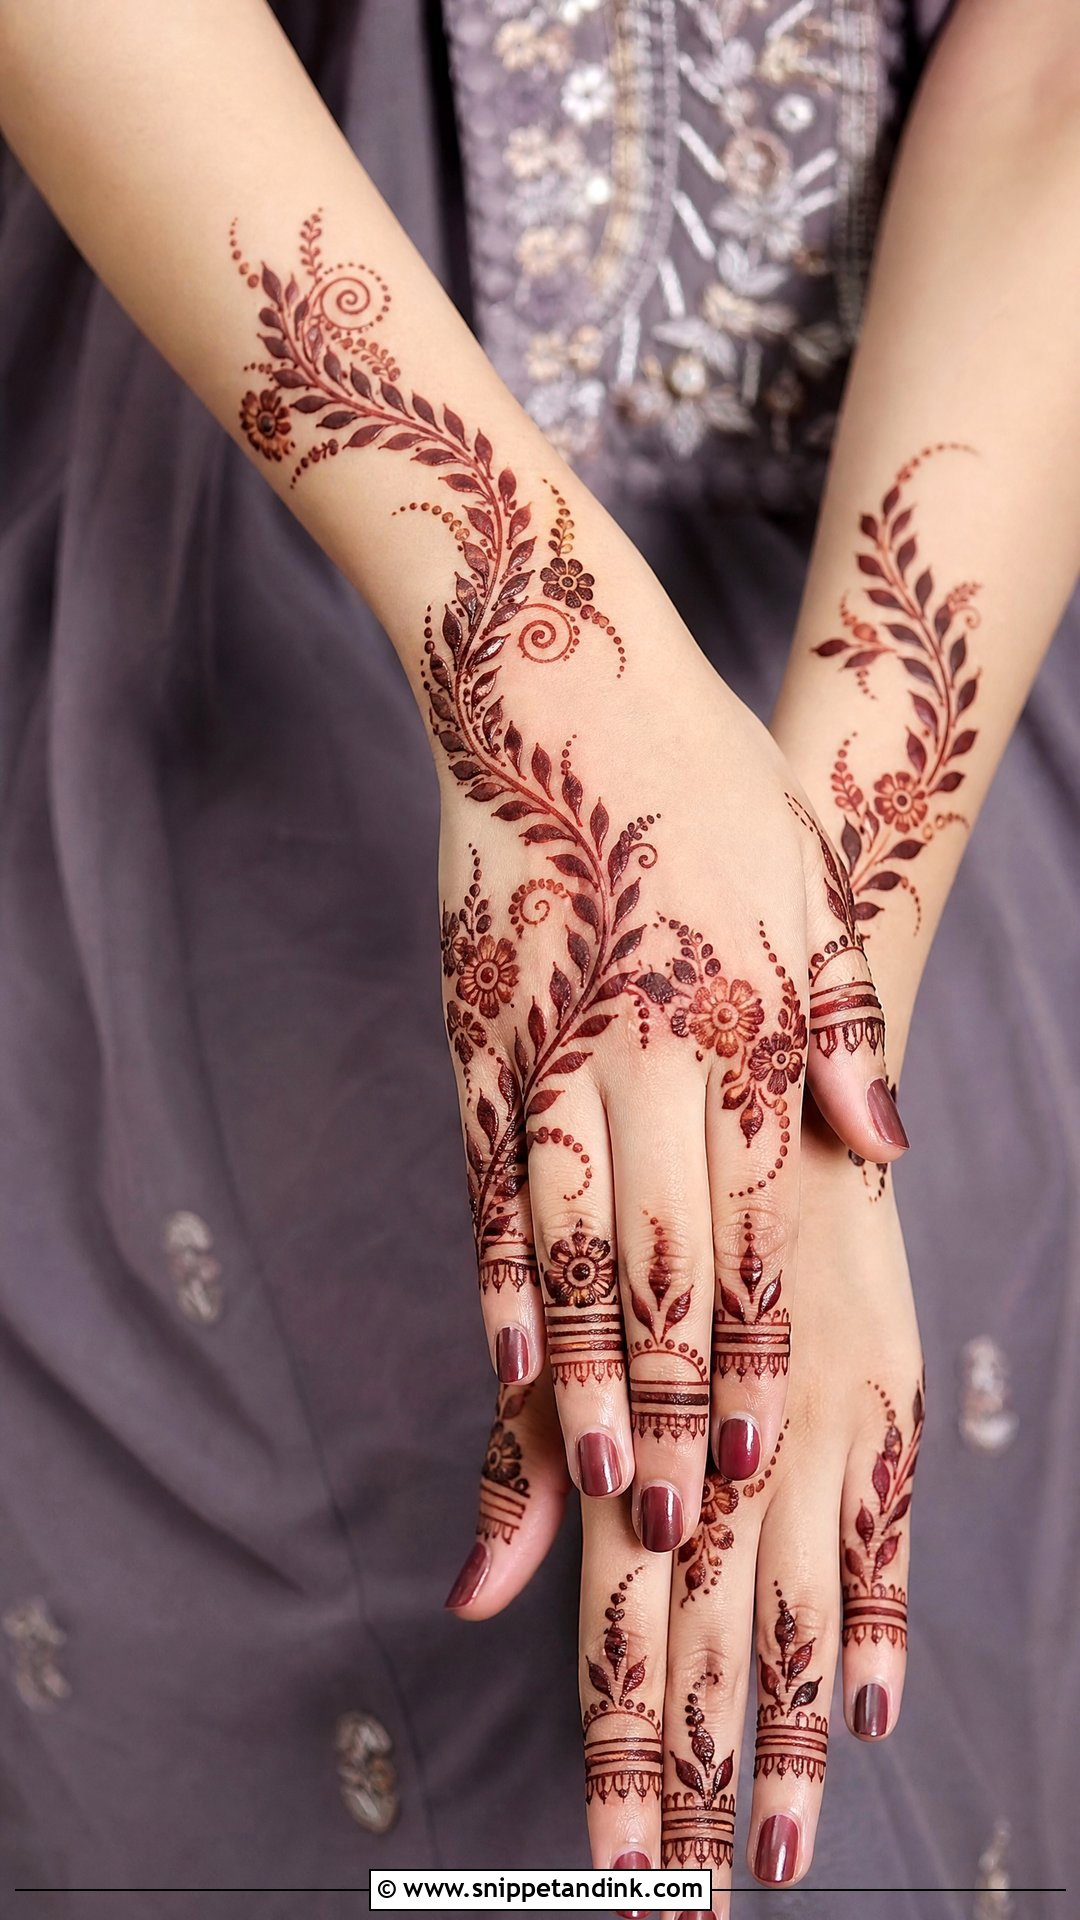
Leafy trails are the quickest cut work I do and among the most flattering. The vine moves diagonally from wrist to fingers, with leaves, small flowers and open curves, and the bare skin between leaves keeps it airy. You can leave the palm almost bare or add a tiny matching motif near the thumb. On the back hand I like to run the trail up a single finger. If you’re getting henna between other appointments, this is the design I’d recommend, since it takes very little time and still looks finished.
29. Cut Work Heavy Mehndi Design
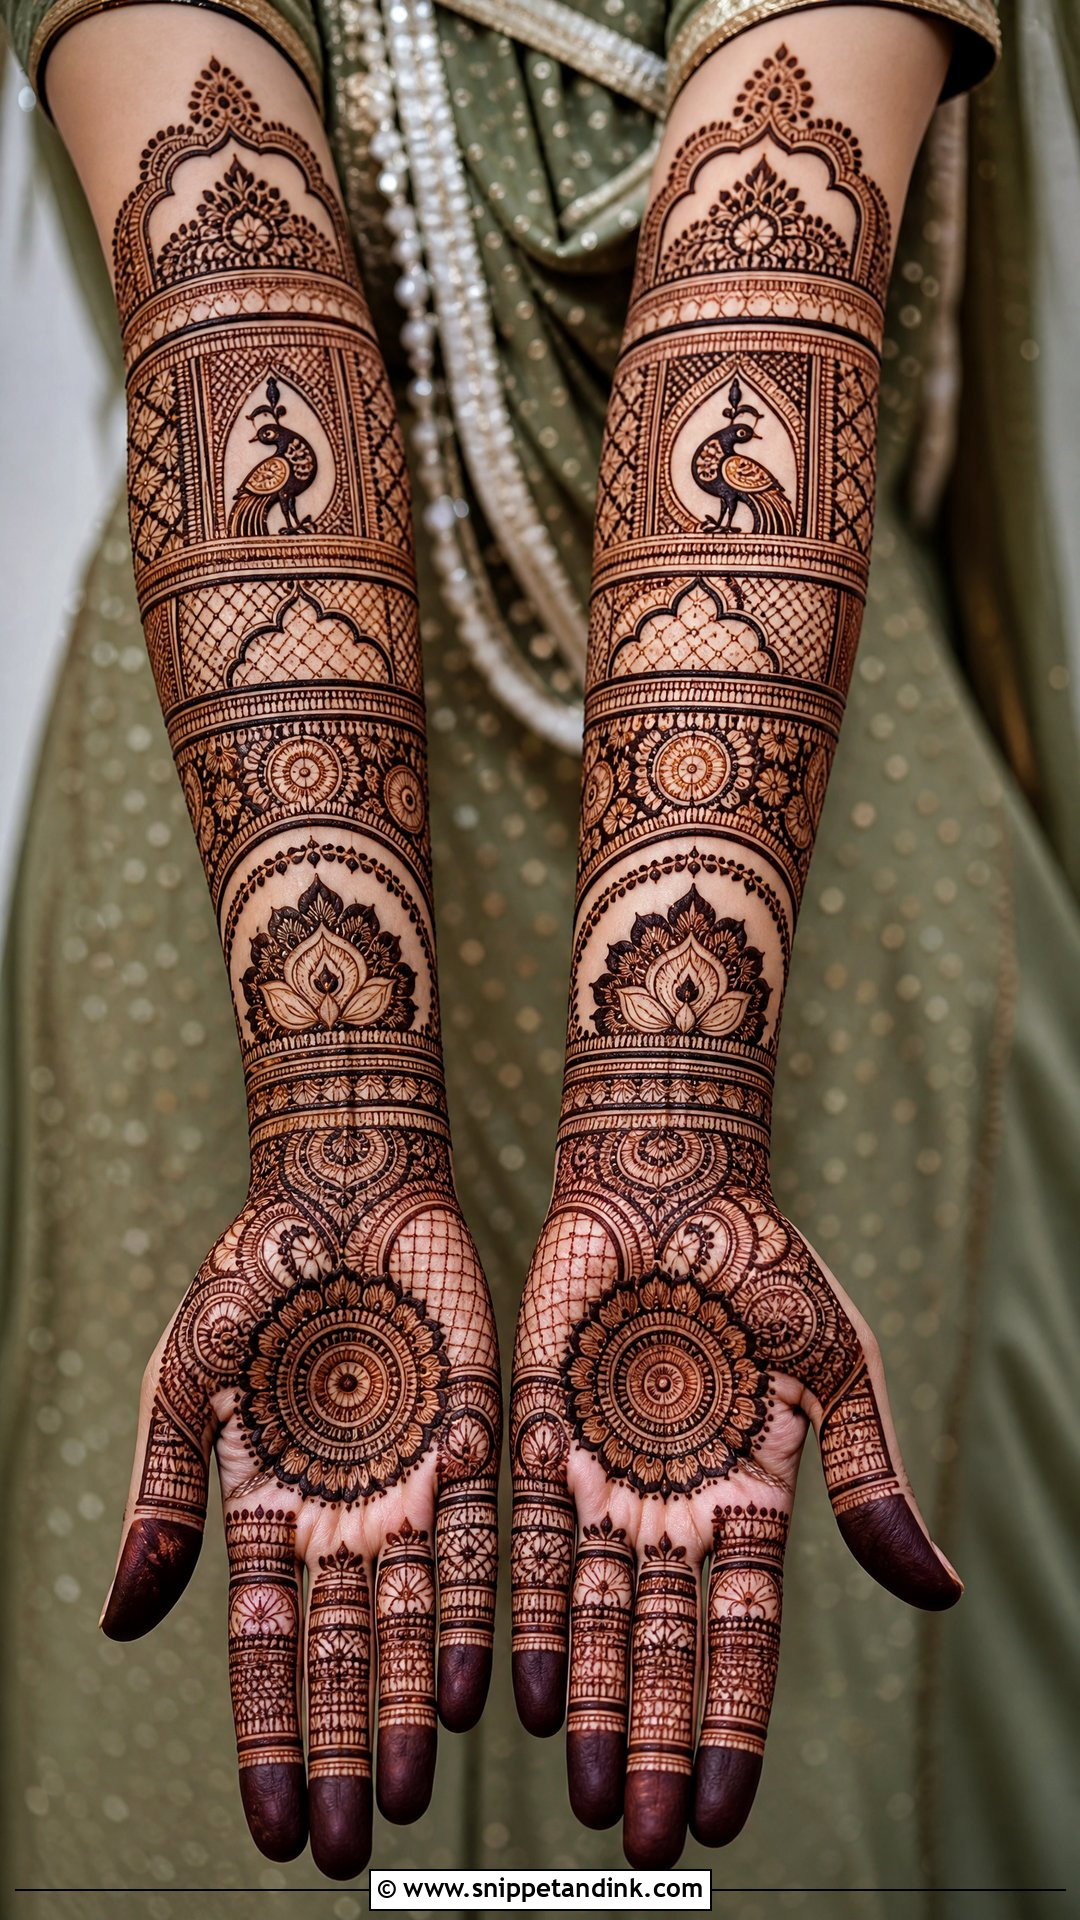
Heavy cut work sounds like a contradiction, but it’s what I do for most brides. The hand and often the forearm are covered with mandalas, paisleys, florals, peacocks, jaali and detailed fingers, yet open panels break up the density. The key is contrast: dense sections sitting directly beside clean skin, so the pattern doesn’t blur into one dark mass. Ask for bold outlines around the main motifs. They are what keep the cut work visible after the paste dries and the stain deepens over the following two days.
30. Cut Work Bridal Feet Mehndi Design
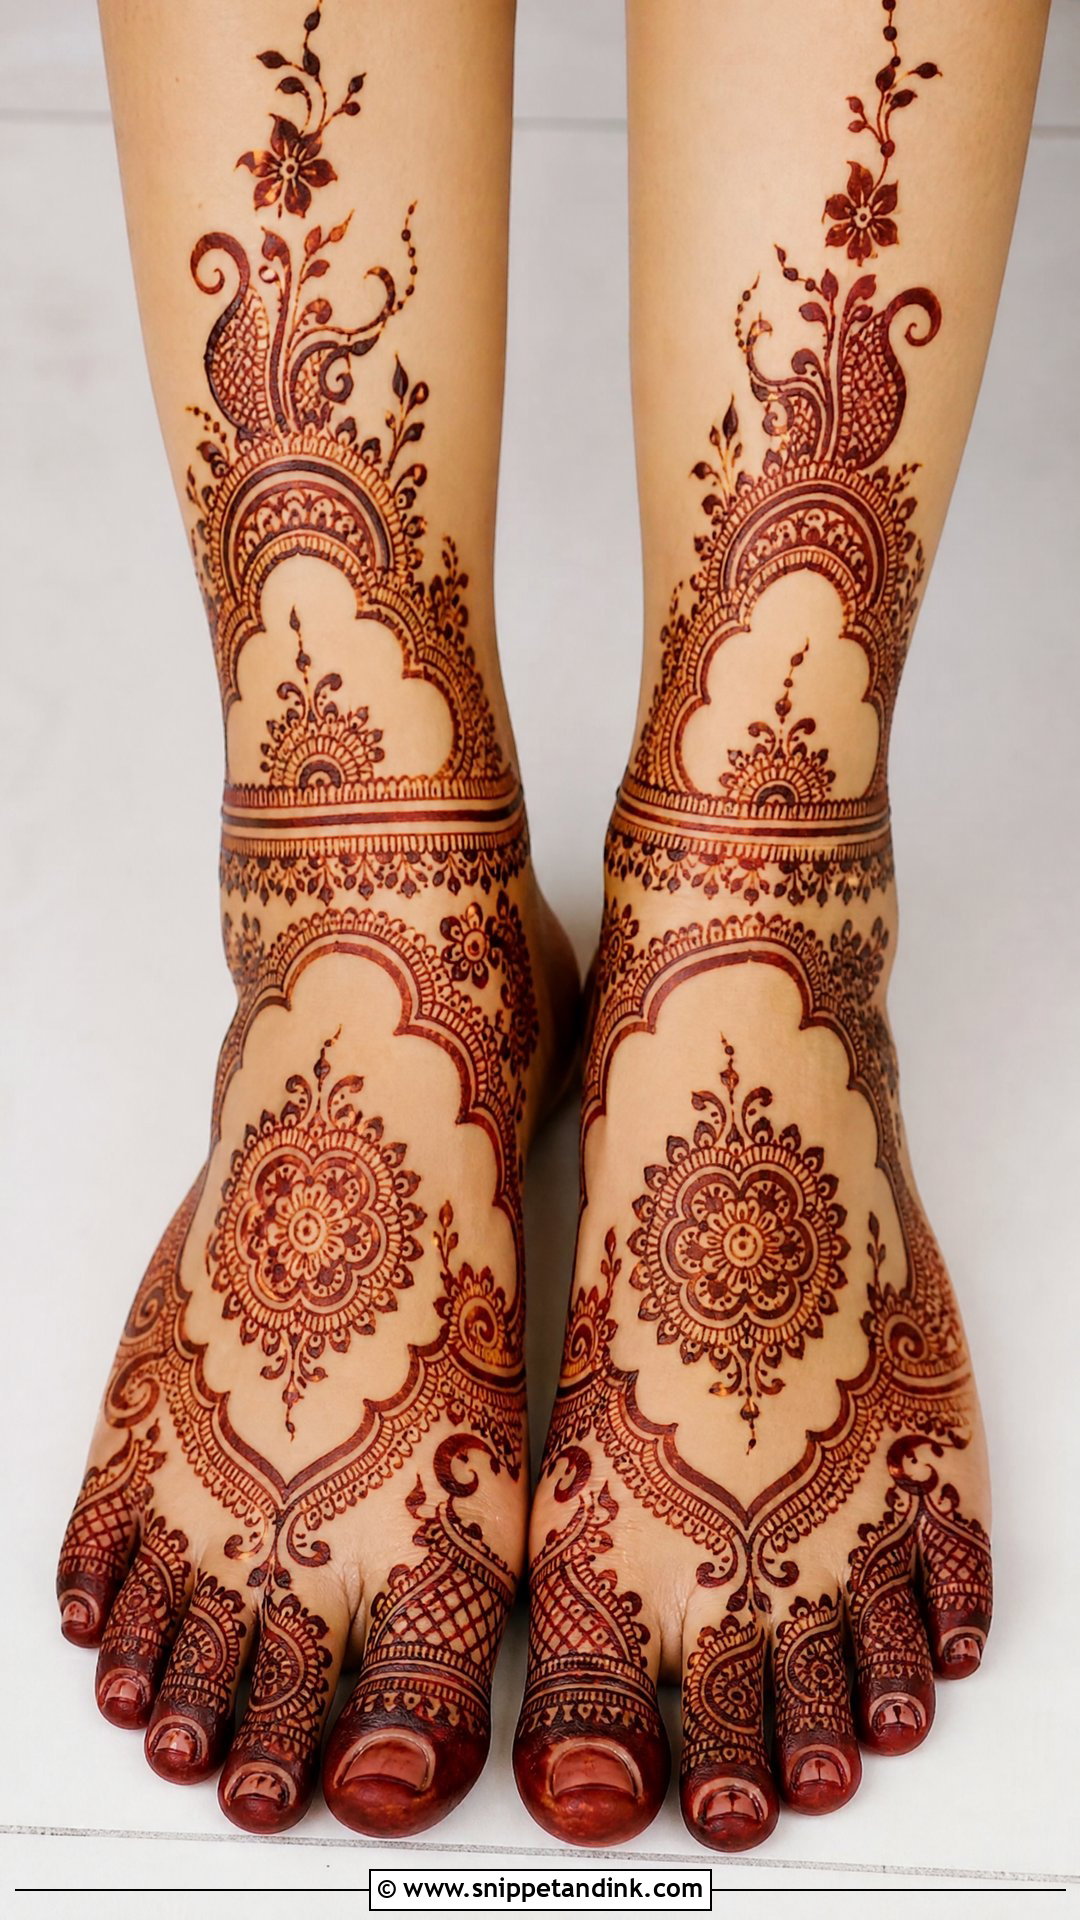
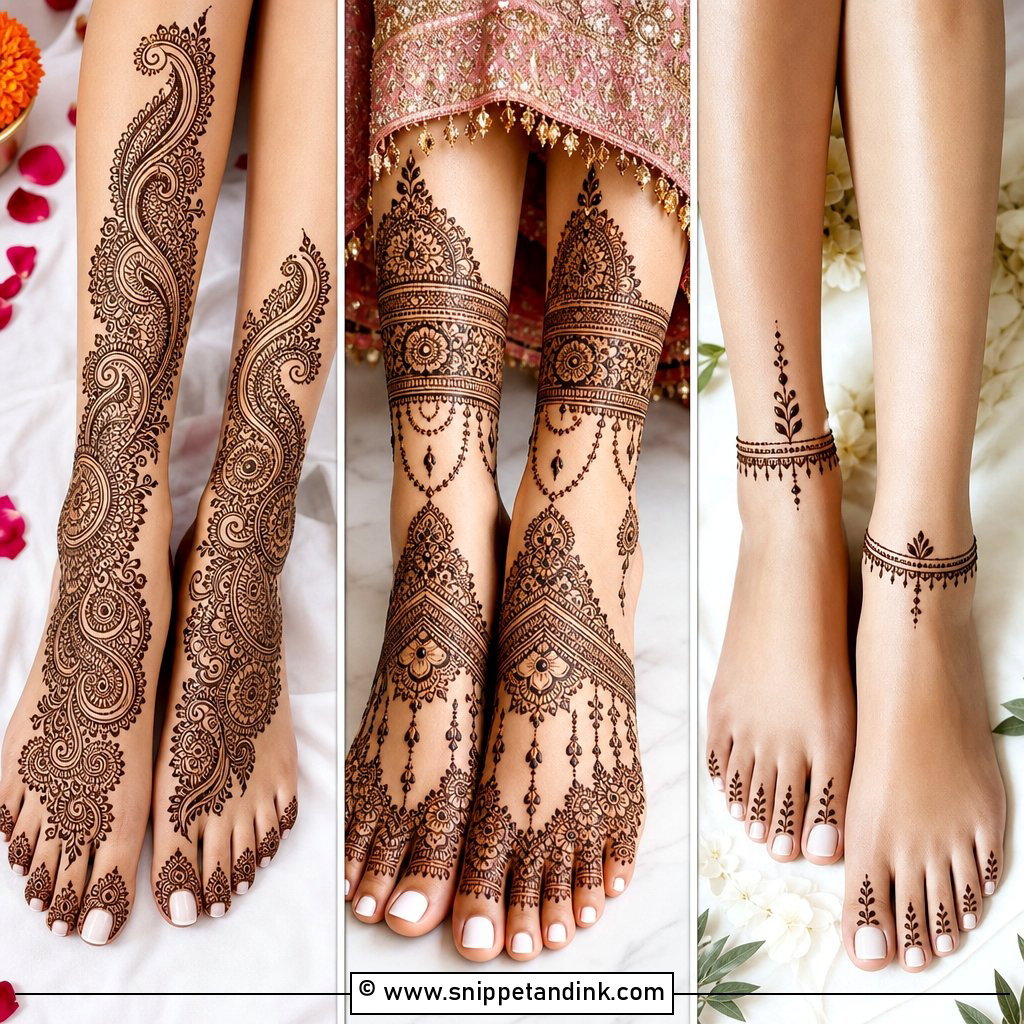
Feet are where henna stains darkest of all, so cut work is especially useful here; without gaps a heavy foot design can look almost black. Anklet bands, floral trails, paisleys, mandalas and open spaces across the top of the foot keep it readable when you’re standing. I detail the toes and add bracelet-style bands around the ankle for a jewellery effect. For heavier bridal work the pattern extends toward the lower leg; for a softer look, I keep to the top of the foot. Avoid closed shoes and socks for the first day or the stain smudges.
The 48 Hours After Your Paste Comes Off
When you scrape the paste away, the stain will look bright orange, sometimes almost alarmingly pale. That’s normal. Henna oxidises over the next day or two and deepens to reddish brown or maroon, with the palms and soles going darkest. Cut work designs reward patience more than most, because the contrast between stain and skin is the whole look.
I ask people to keep the paste on for as long as they reasonably can, ideally six hours or overnight, and to seal it with a light dab of lemon and sugar so the dried paste stays on the skin instead of flaking. Wrapping the hands loosely in tissue for sleep helps too. When you remove it, scrape it off with a blunt edge or rub it away dry; don’t wash it off.
Small habits that protect the open spaces
- Keep water away for the first twelve hours or so. Washing early is the main reason a stain stays orange.
- Rub a little balm or coconut oil over the design before bathing to give it a light barrier.
- Avoid chlorine, bleach and strong dish soap during the wedding week; they fade fine lines first.
- If one area stains lighter, leave it alone. Redrawing over a fading stain the next day almost always closes the gaps around it.
A wedding stain usually looks its best on the second and third day, which is why I suggest booking bridal henna roughly two days before the main ceremony rather than the night before.
Bring These Notes to Your Henna Appointment
Cut work is about contrast: bold motifs beside clean skin. Arabic trails, Indian bridal layouts, Moroccan geometry, Gulf florals and modern bracelets can all be built this way, at any coverage from a single vine to a full bridal hand. When you book, take screenshots of the placements you liked, tell your artist which areas you want left open, and mention your outfit sleeves and jewellery. Those details shape my design far more than the motif names do.
You'll Like These Ideas:


Leave a Reply