
The question I get most at a booking isn’t which design is prettiest. It’s which one will look right on my hands by the day of the event. Some people want a quick floral trail for a family dinner; others want paisleys, peacocks, jaali and a groom’s initials hidden from fingertip to elbow. Between those sit Arabic spacing, Indo-Arabic balance, bold Gulf florals, Moroccan geometry and clean minimal work. The thirty-five ideas below run roughly from light to heavy and from everyday to bridal, with my notes on how each one is drawn, how it stains and who it suits. A neat design that stains well will always beat a complicated one that smudges.
Running a Mehndi Night for the Bride, Sisters and Guests
Most of the stress at a mehndi function comes from timing, not design. The bride’s hands take the longest, and everyone else is waiting their turn. Here’s the order I suggest to families planning one.
- Do the bride first, ideally a day or two before the wedding, so her stain has time to darken. If the function is the night before, start her early in the afternoon.
- Give close family half hands or Indo-Arabic designs, which go on far faster than bridal coverage.
- Keep guest designs to one hand, usually the back of the hand, so people can still eat and hold a drink.
- If you have more than a handful of guests, book a second artist rather than asking one person to rush.
Before anyone sits down, they should wash their hands with soap and skip lotion, oil and sunscreen. Those leave a barrier on the skin that the dye can’t get through, and it’s the most common reason a guest’s stain comes out patchy. Waxing and scrubs belong a day or two before, not the same day.
1. Simple Front Hand Mehndi Design
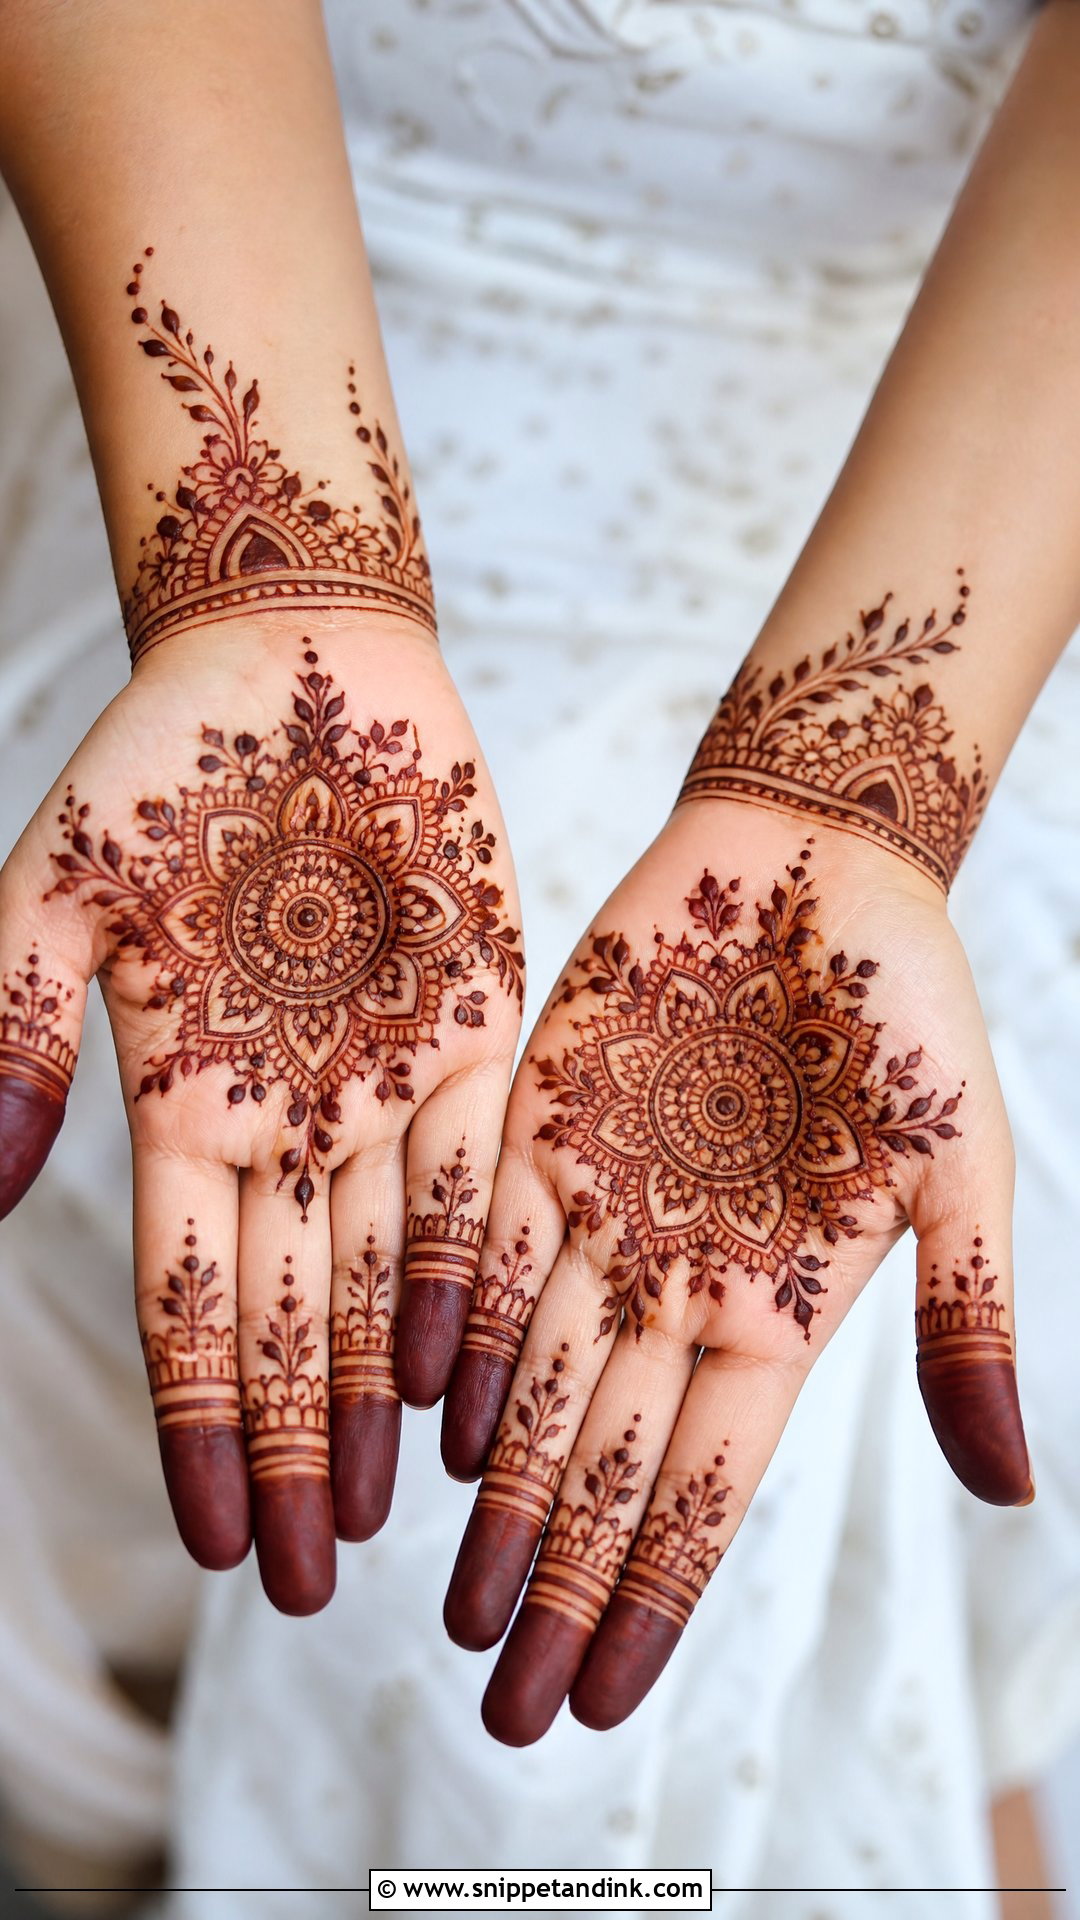
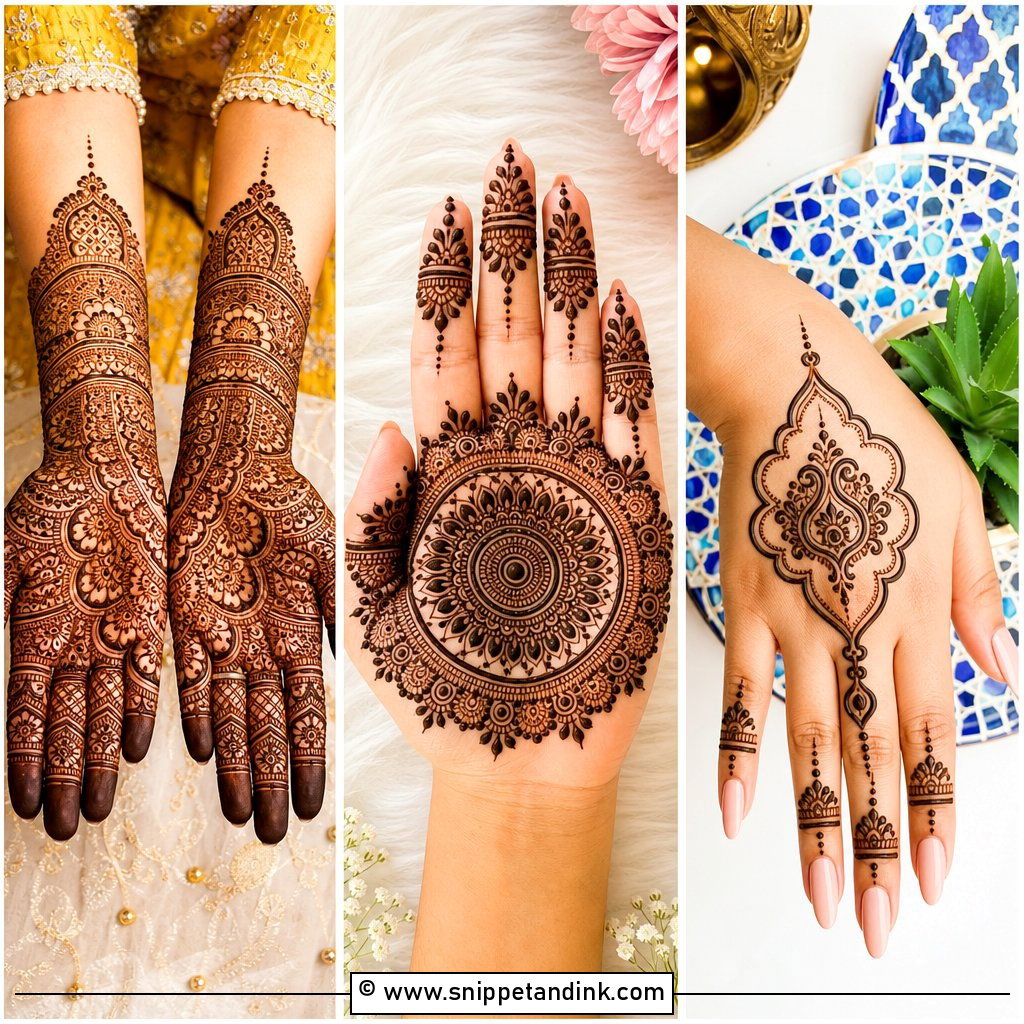
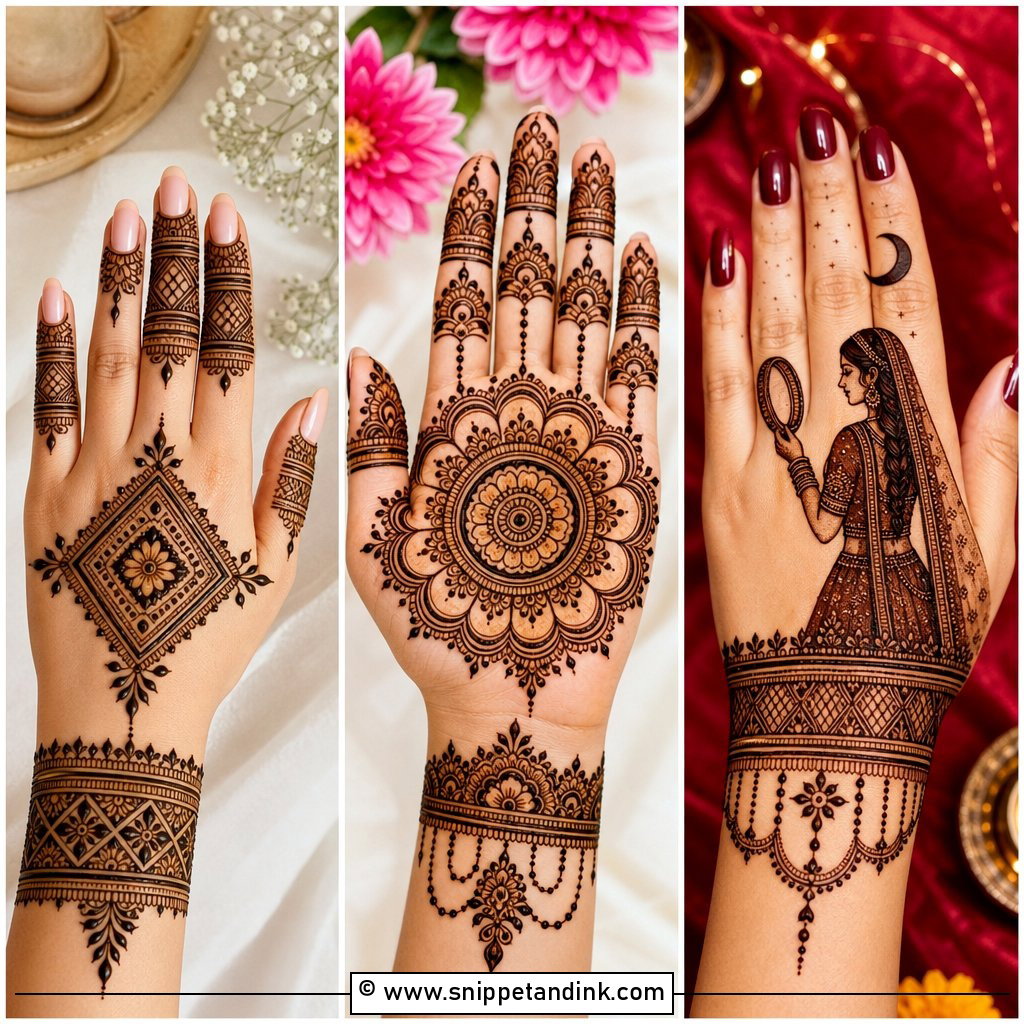
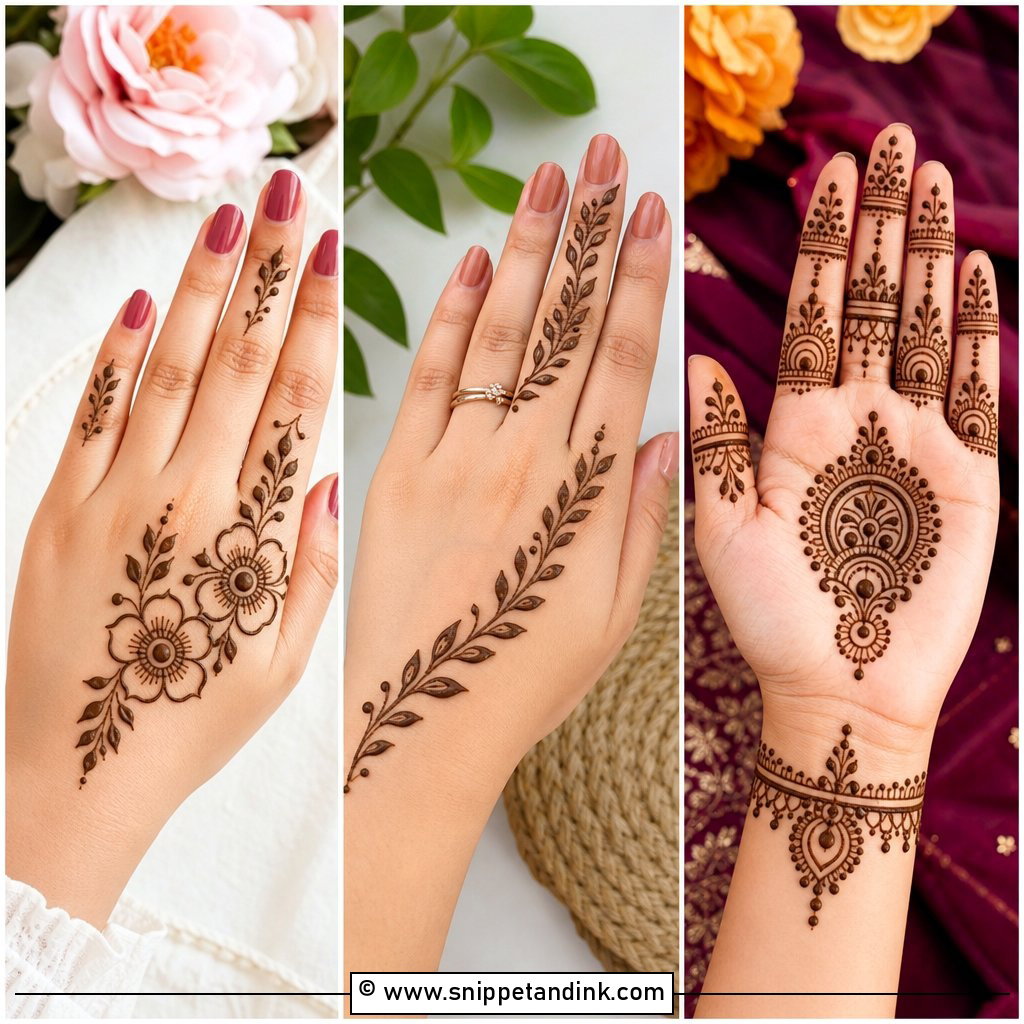
A small mandala or floral circle in the middle of the palm, a few leafy vines, slim finger lines and a light band at the wrist: that’s the whole design, and it’s done in a fraction of the time of full coverage. I fill the fingertips lightly because they stain darker than anywhere else and pull the design together. Leave clear skin around the center motif. On the palm, a crowded simple design looks messier than an empty one, since every line is right in front of you all day.
2. Simple Back Hand Mehndi Design
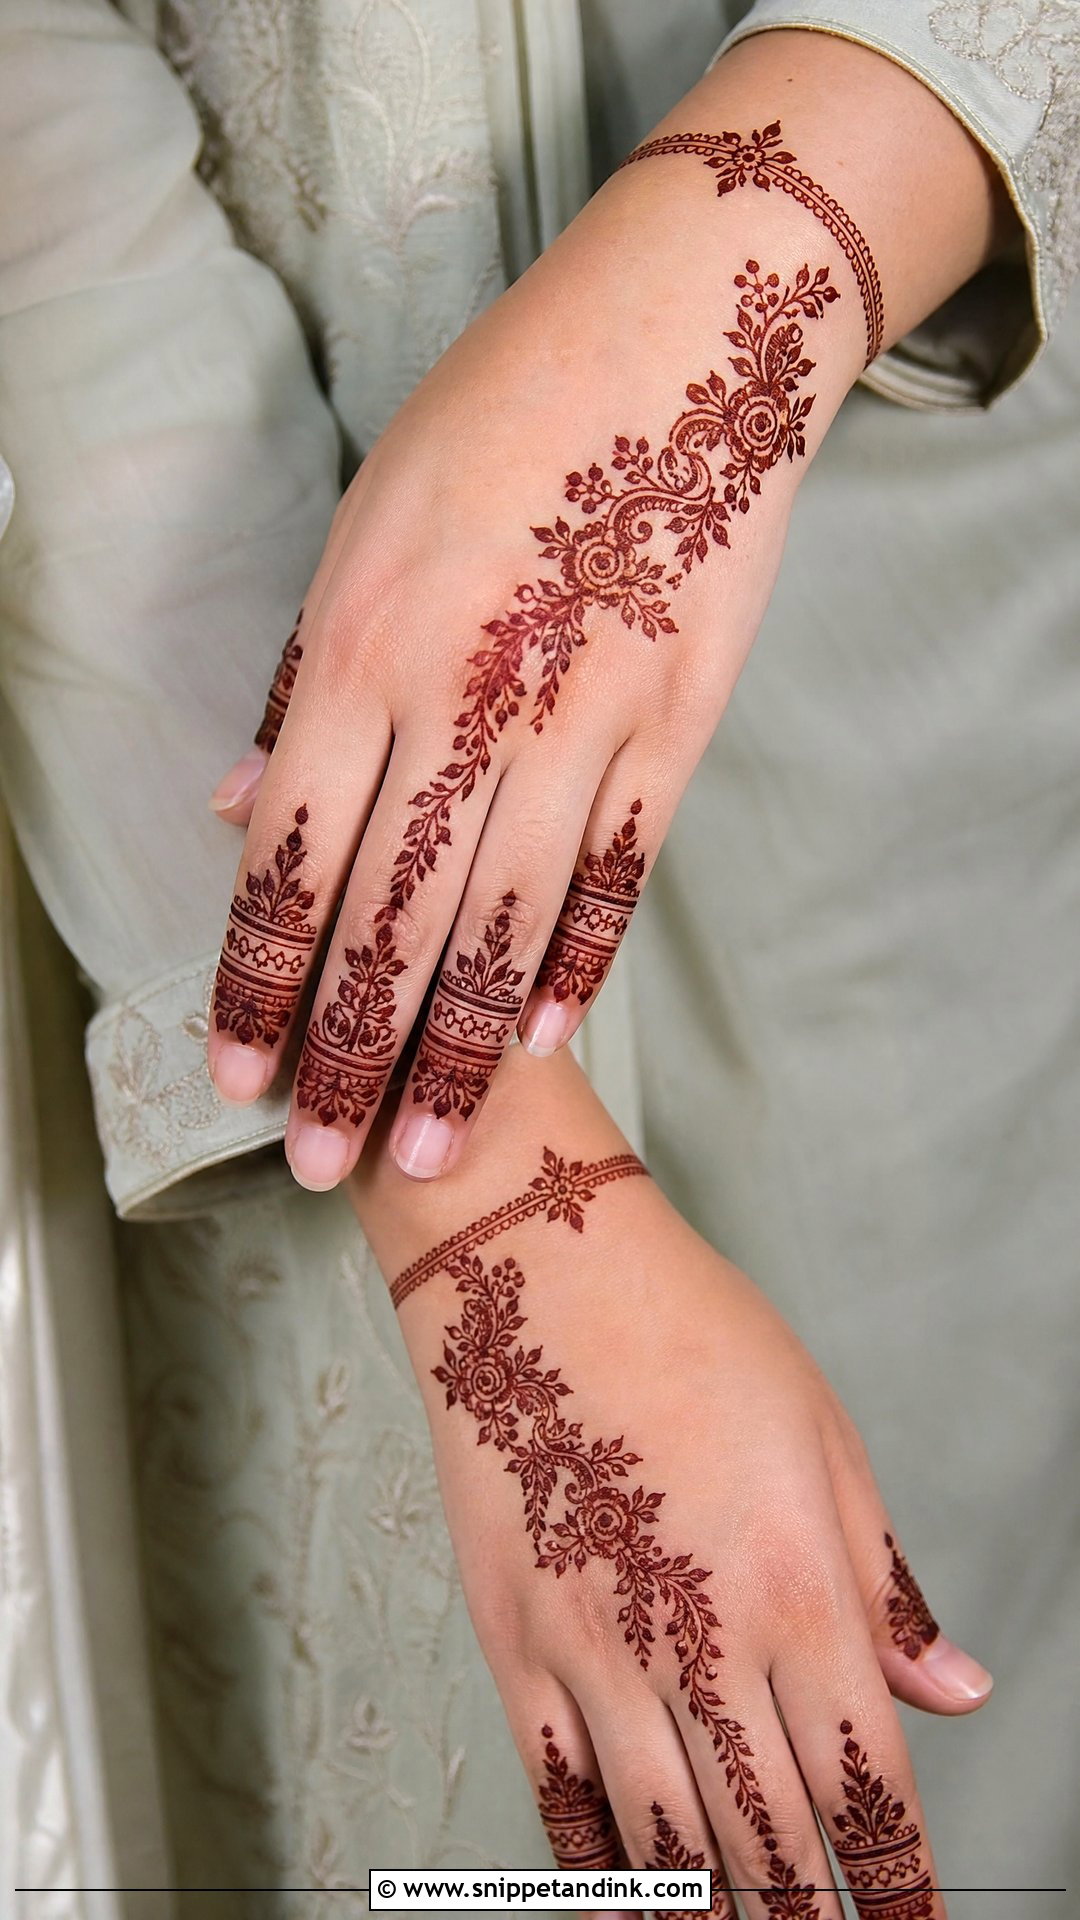
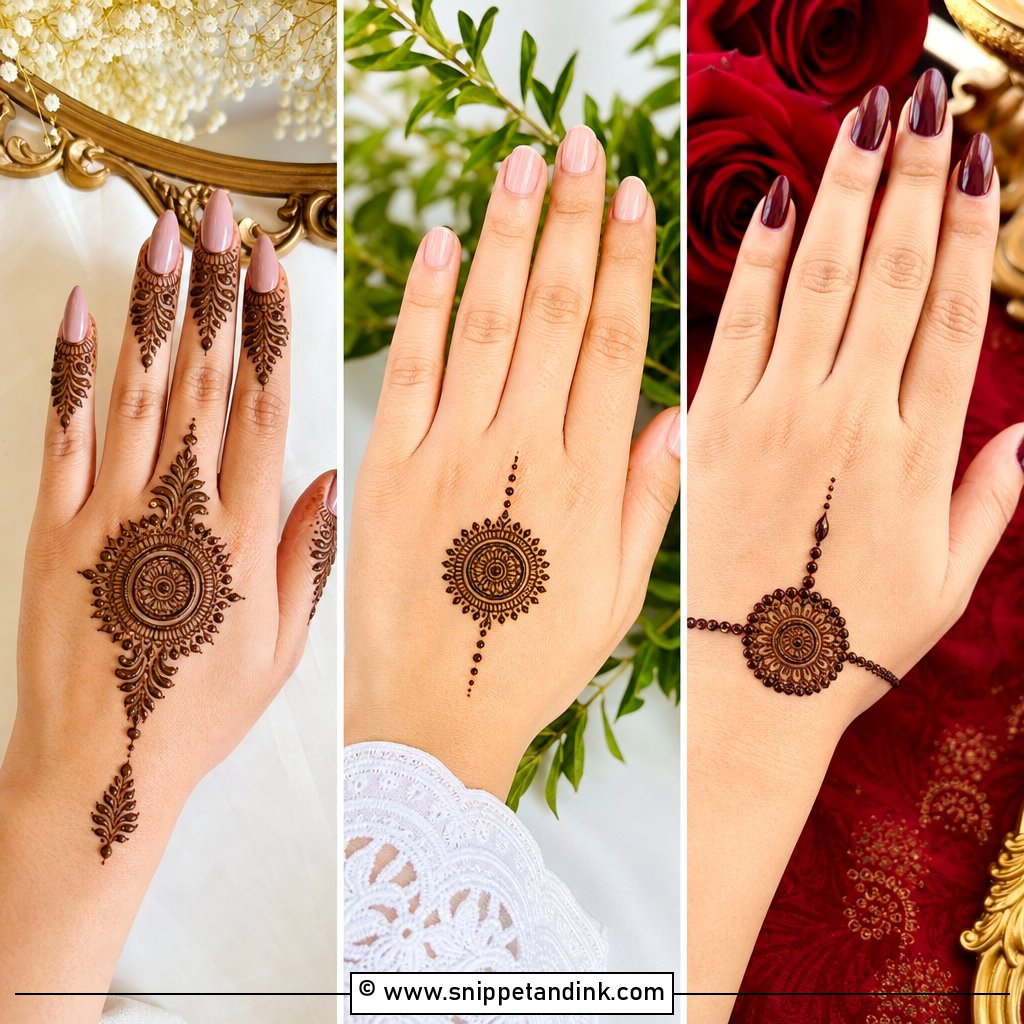
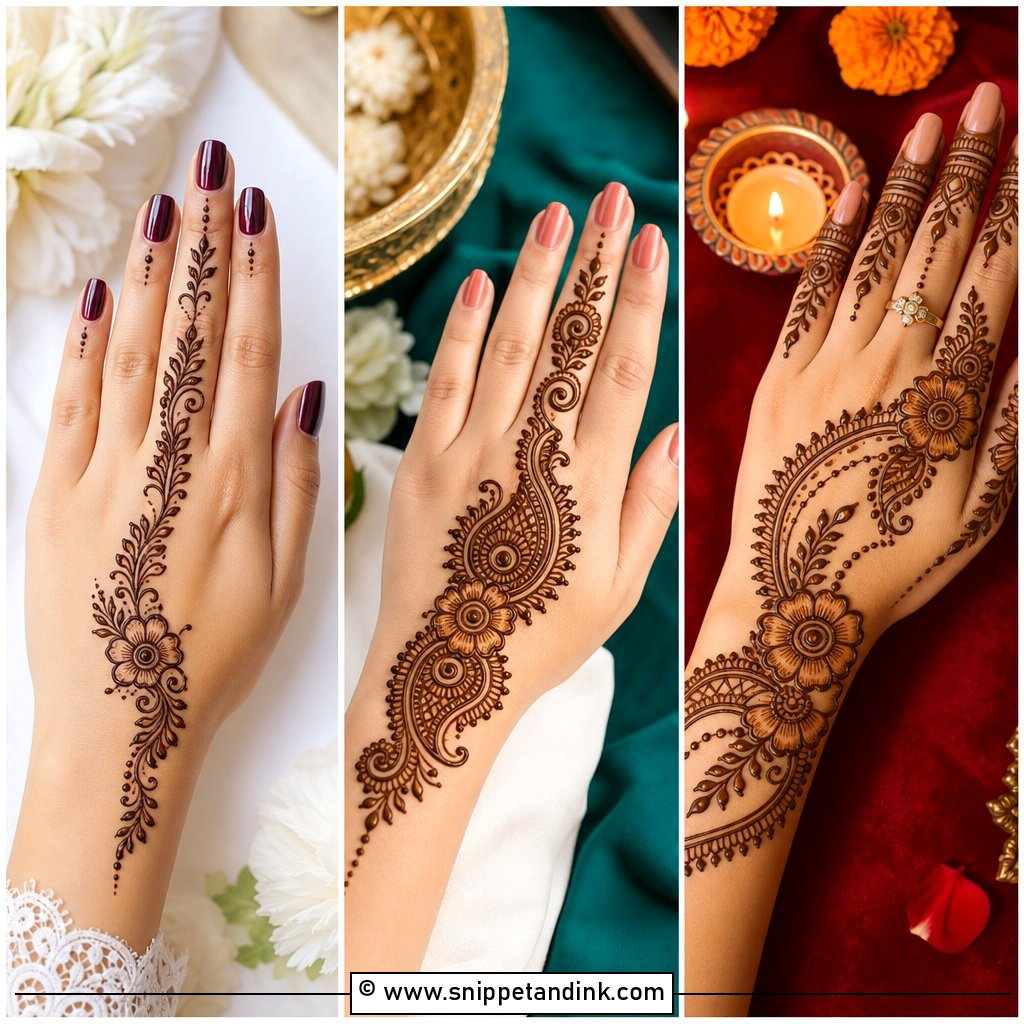
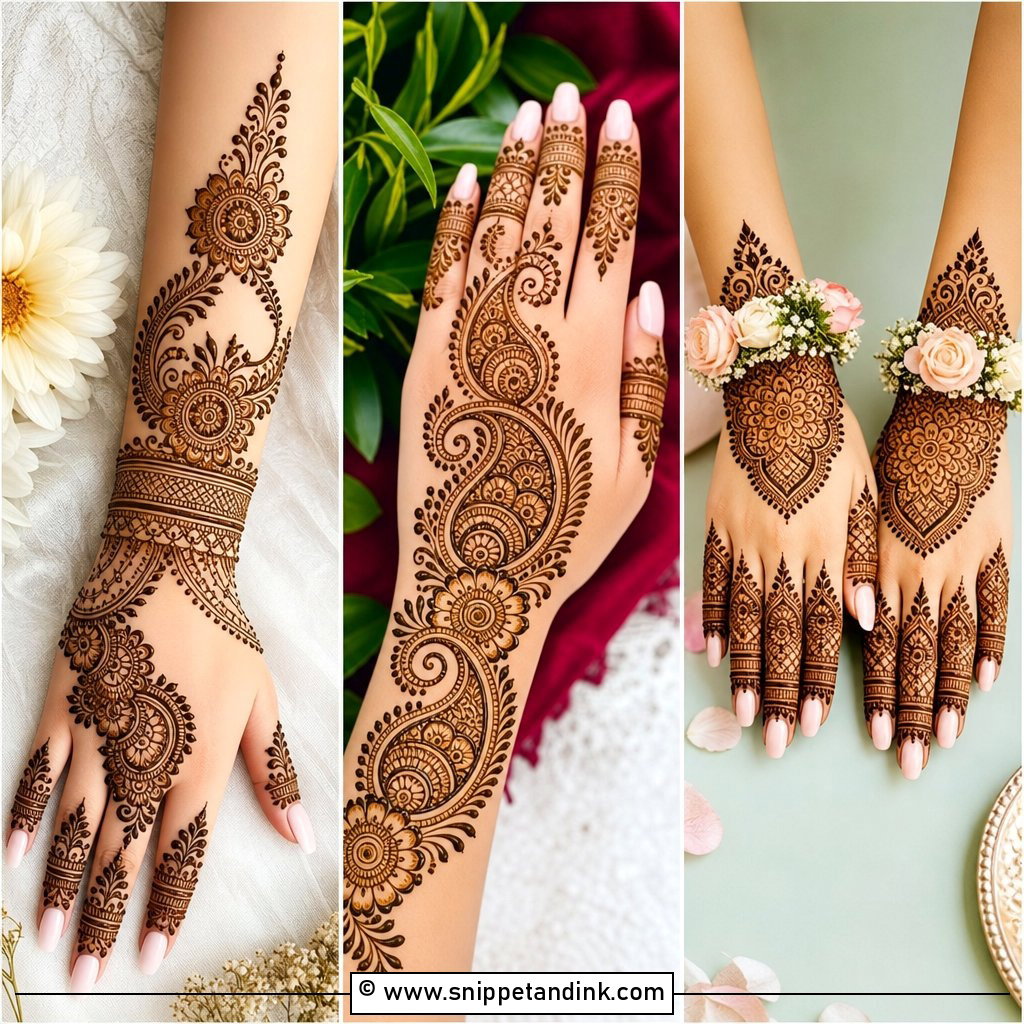
Thin vines, a few small flowers and dots running diagonally across the back of the hand, or a small central mandala connected to the fingers by fine chains. It’s the design for people who want henna to show in photos without dense coverage. Expect a lighter stain than on the palm; the skin on the back of the hand is thinner and drier, so the color sits a shade or two softer. Clean, evenly spaced lines matter more here than anywhere, because there’s no filler to hide a shaky stroke.
3. Arabic Mehndi Design
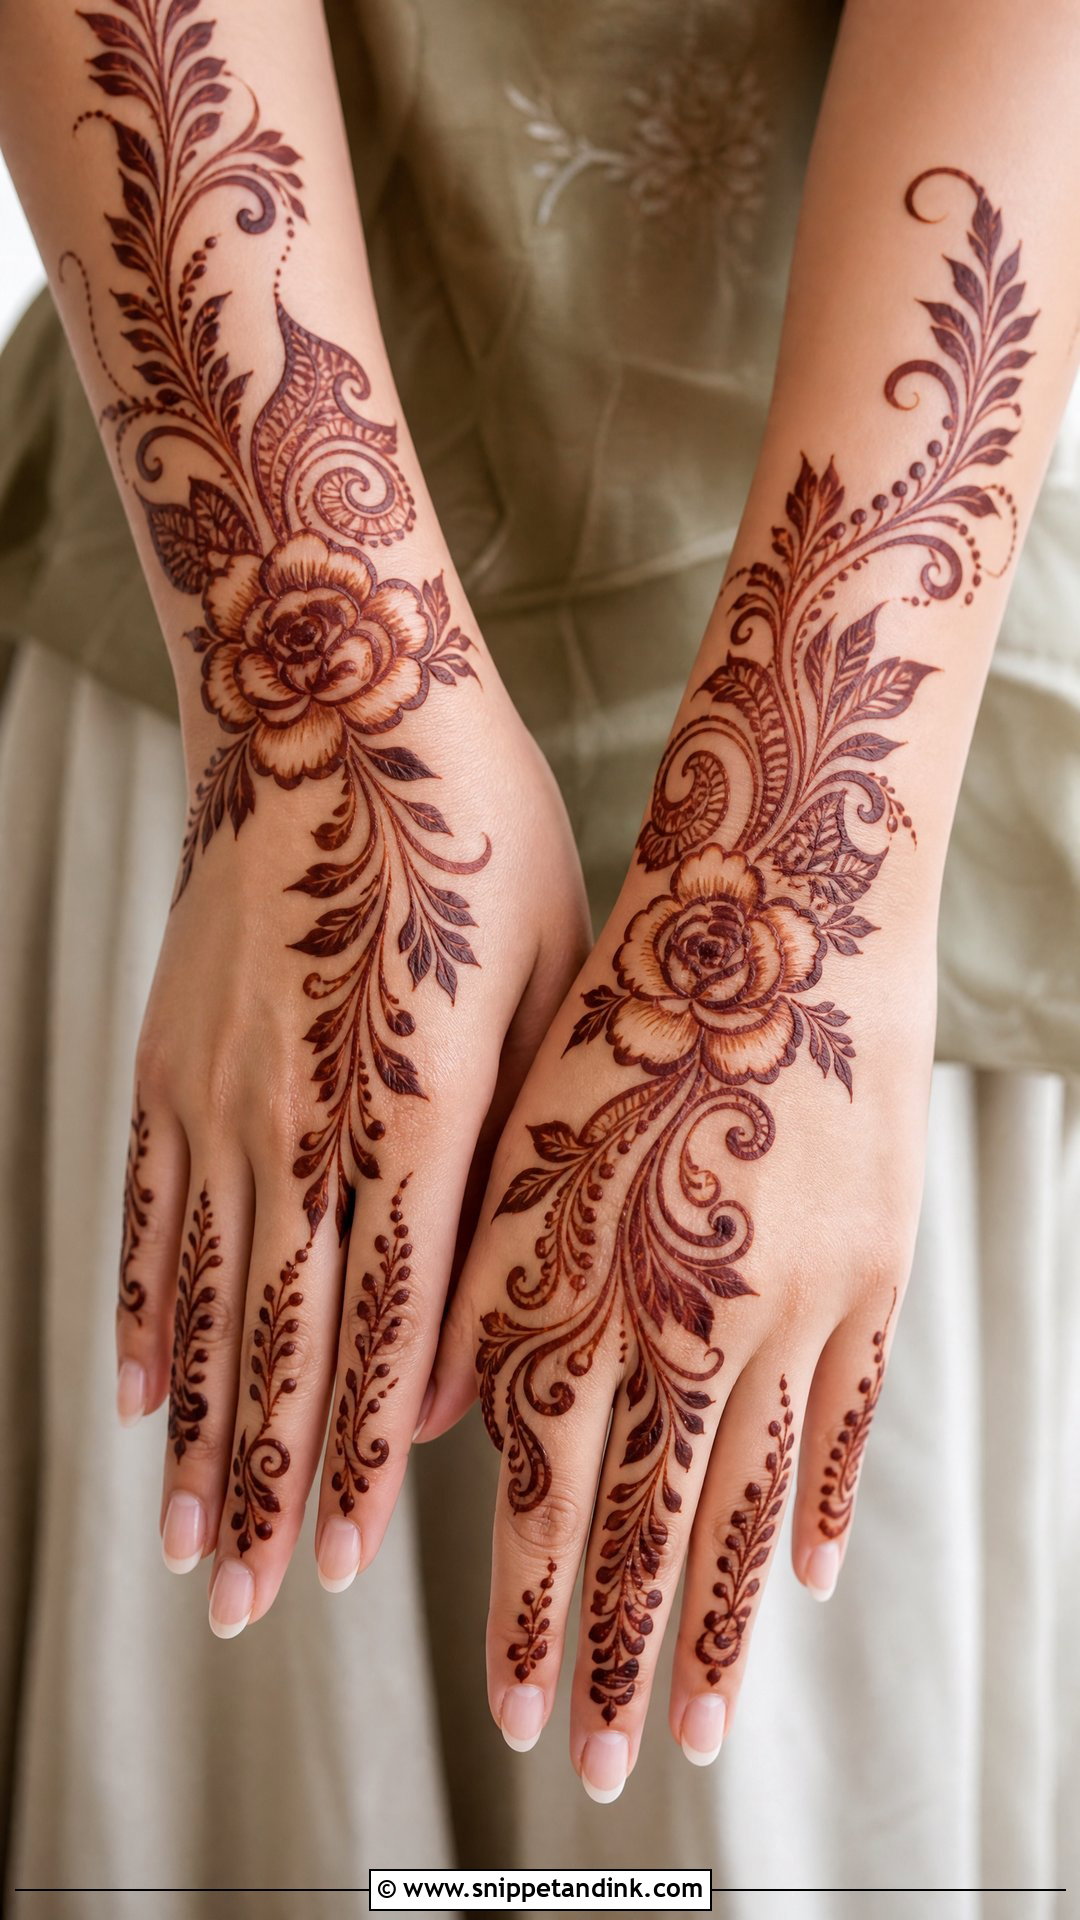
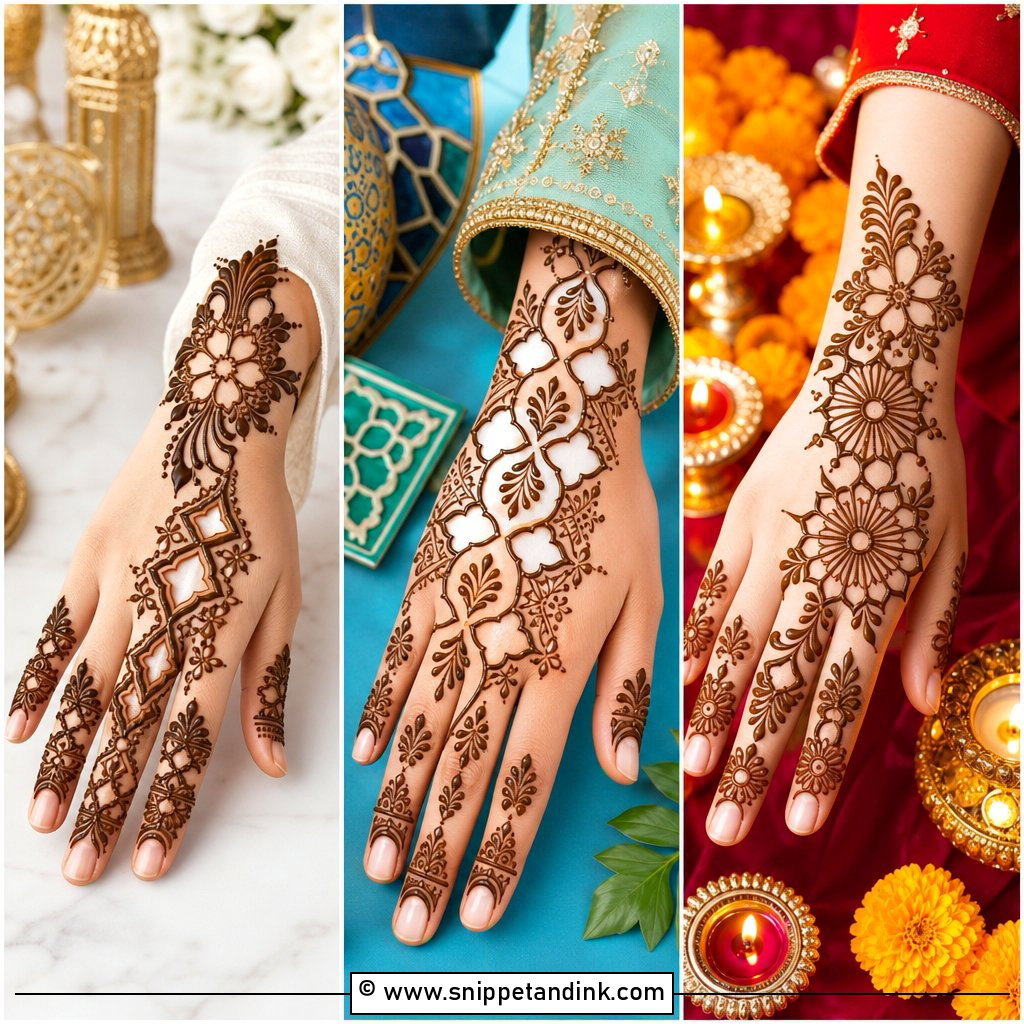
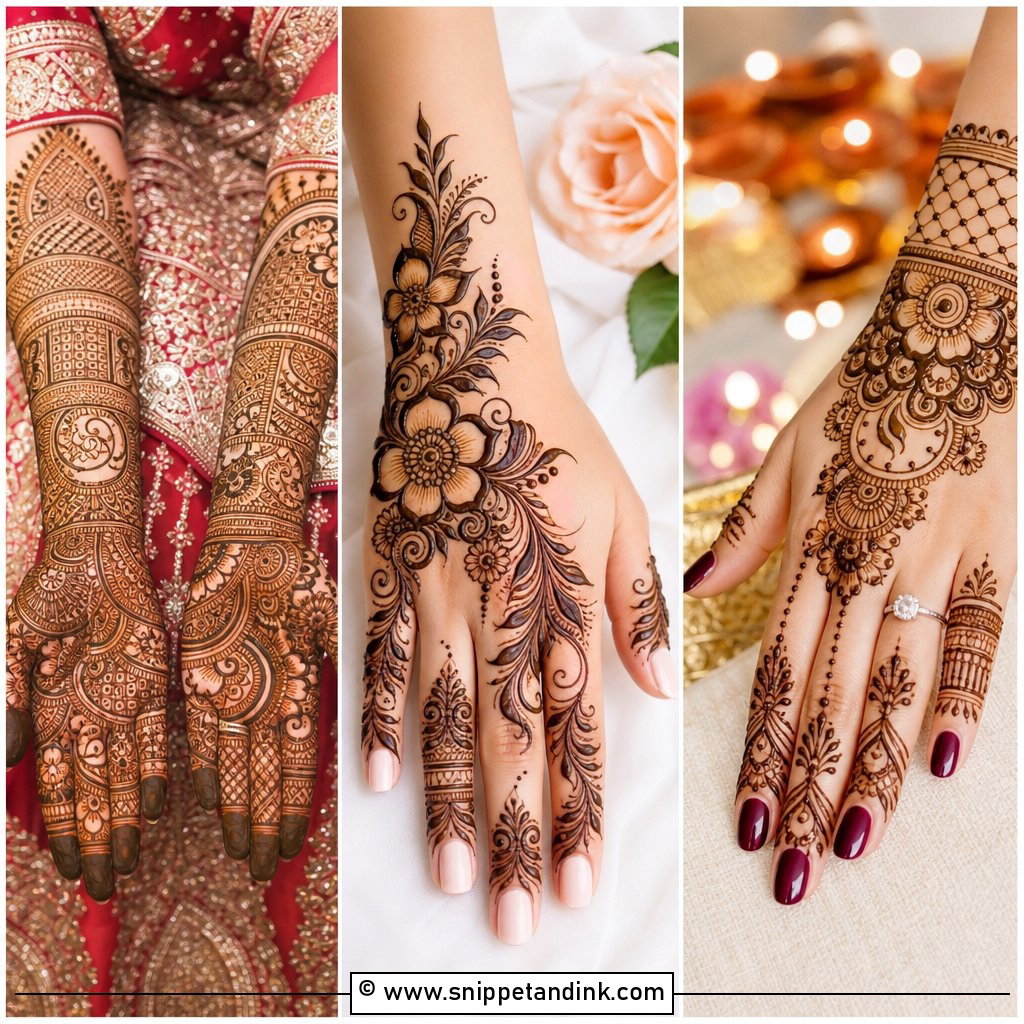
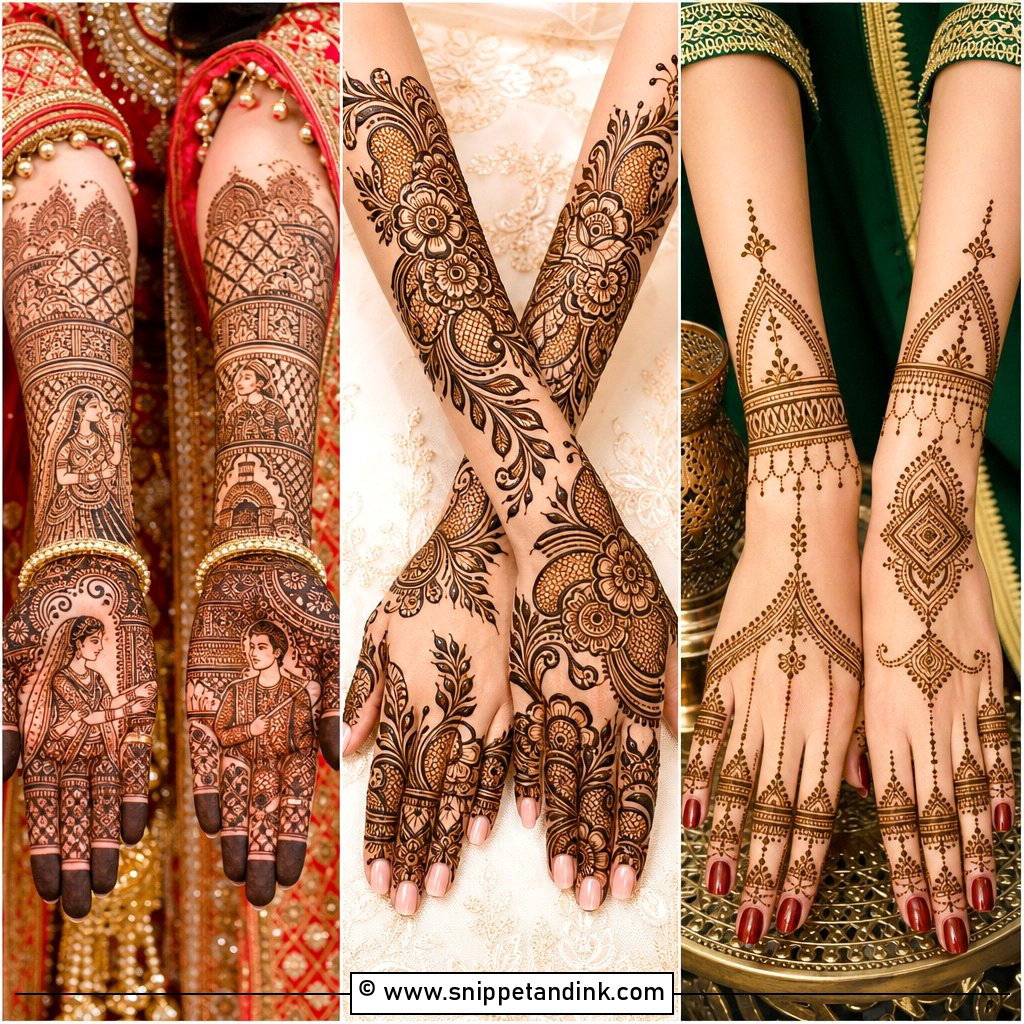
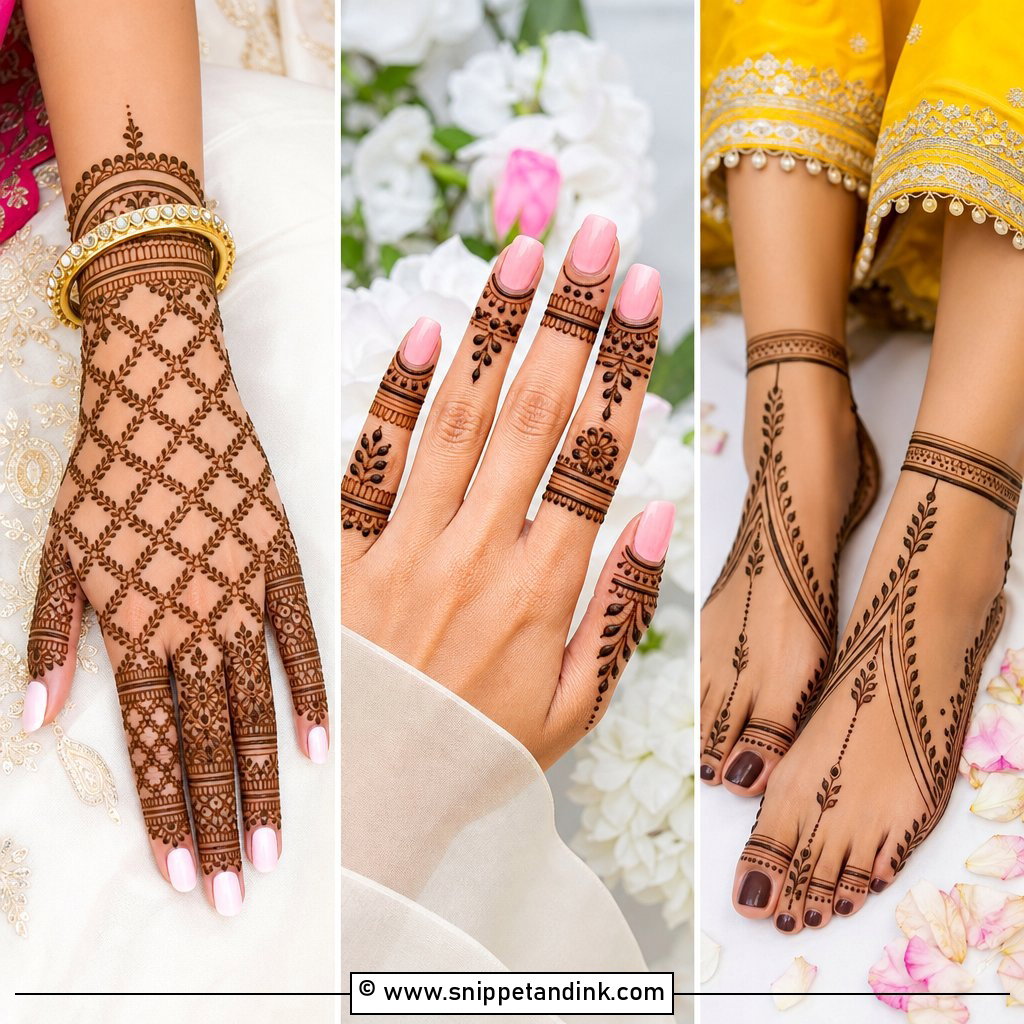
Arabic work moves diagonally from wrist toward fingers with large roses, curved leaves, paisley accents and dotted trails, leaving plenty of bare skin between them. It’s much faster to apply than full Indian mehndi, and the bold lines are still readable after the stain softens. My favorite trick for a modern version is to keep one edge of the hand dense and let the opposite edge open up almost completely. The asymmetry is what makes it look deliberate.
4. Indian Bridal Mehndi Design
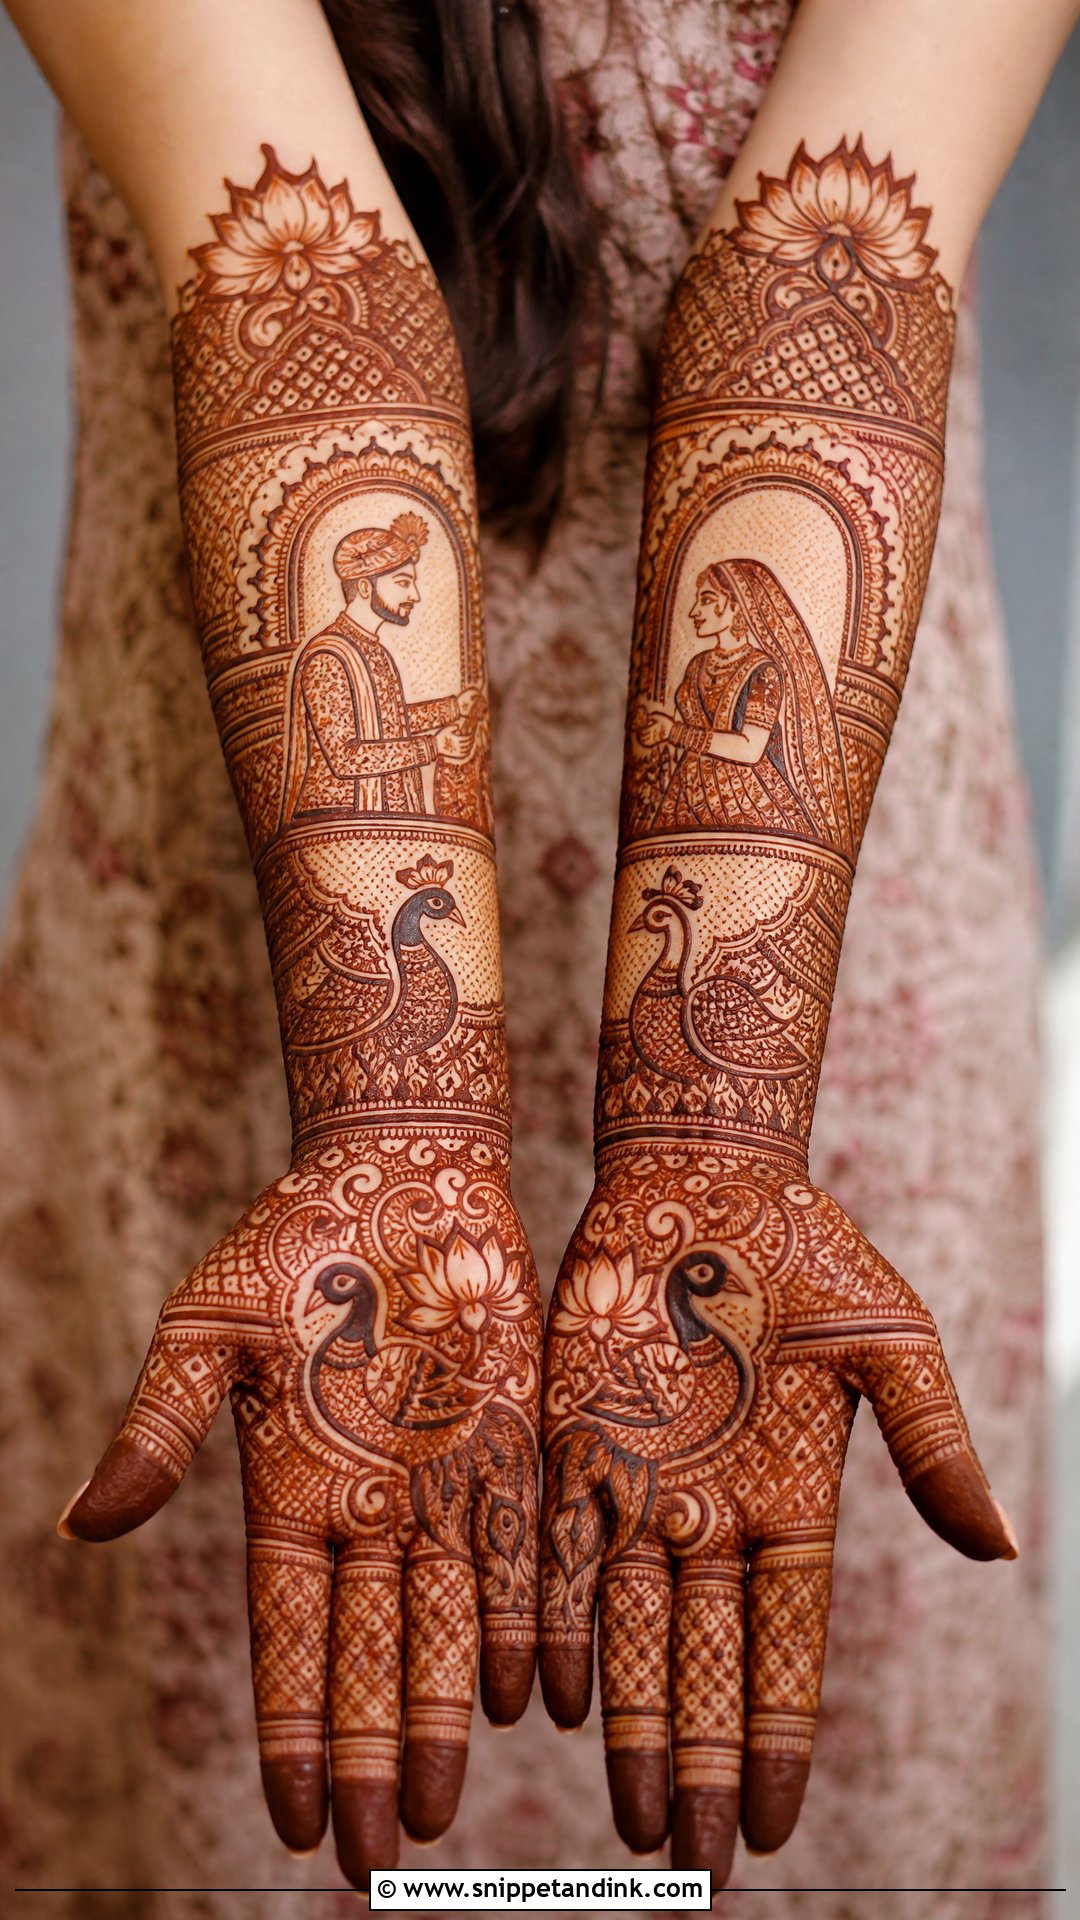
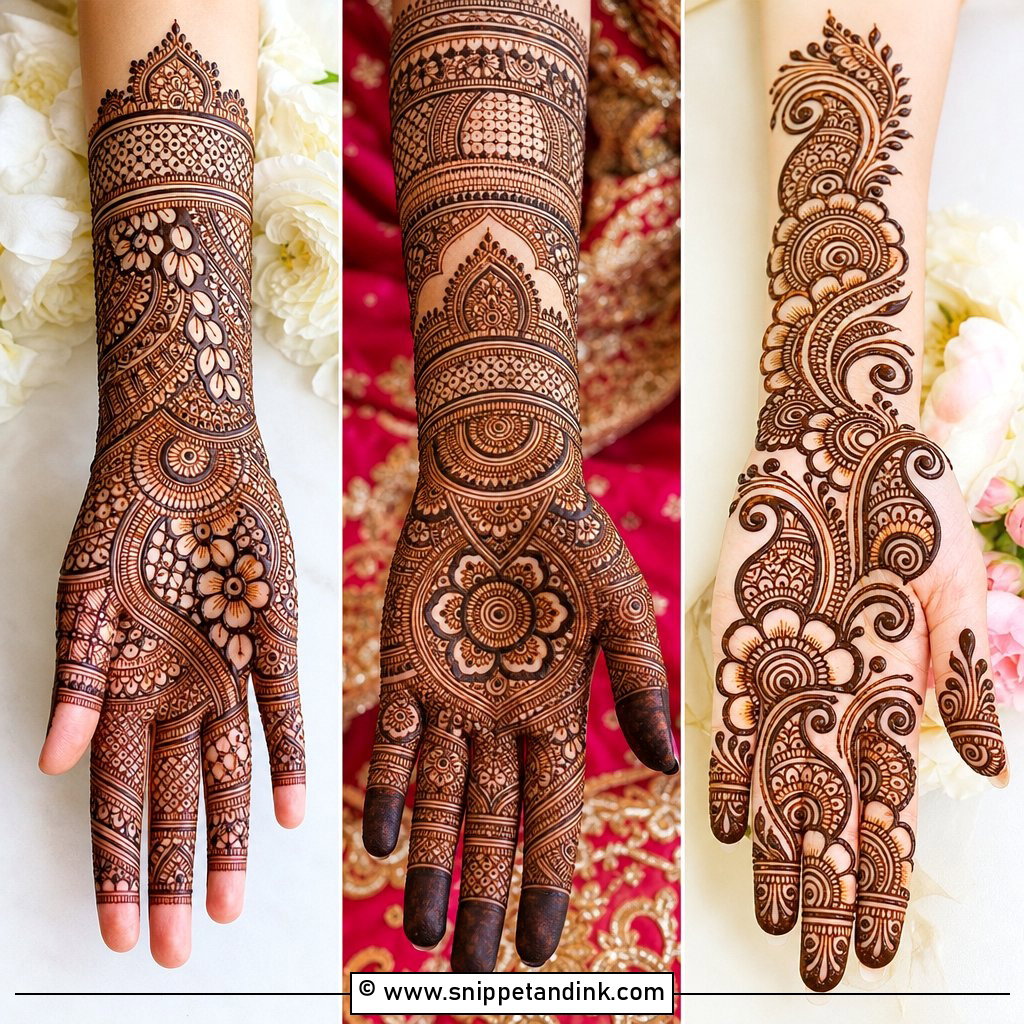
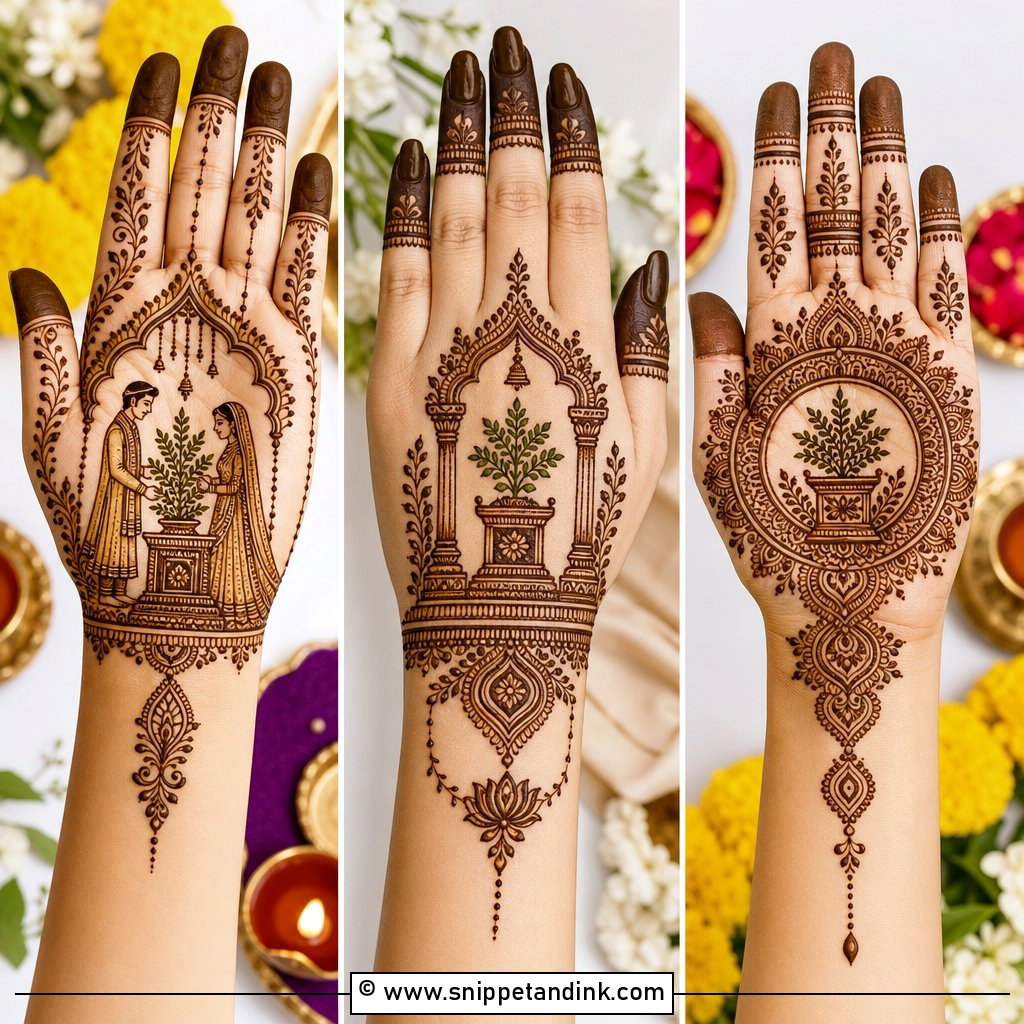
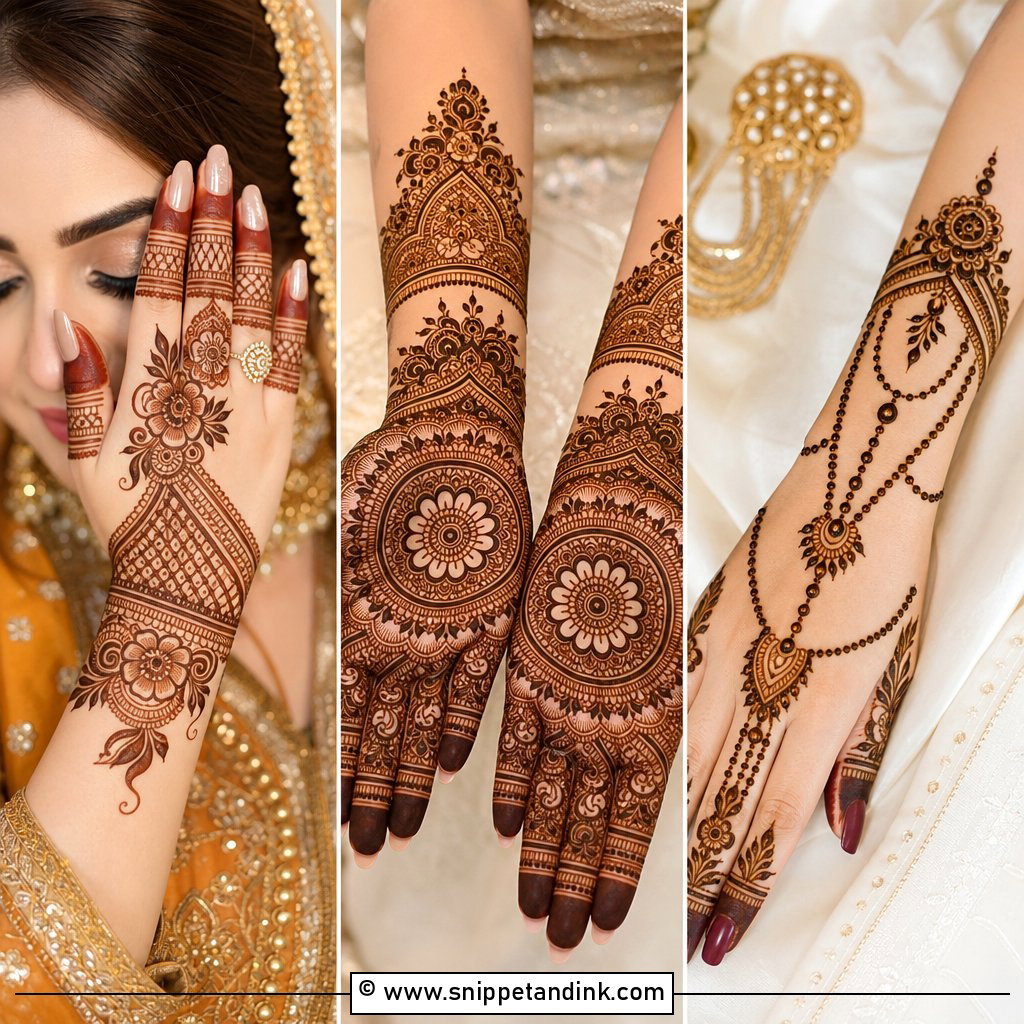
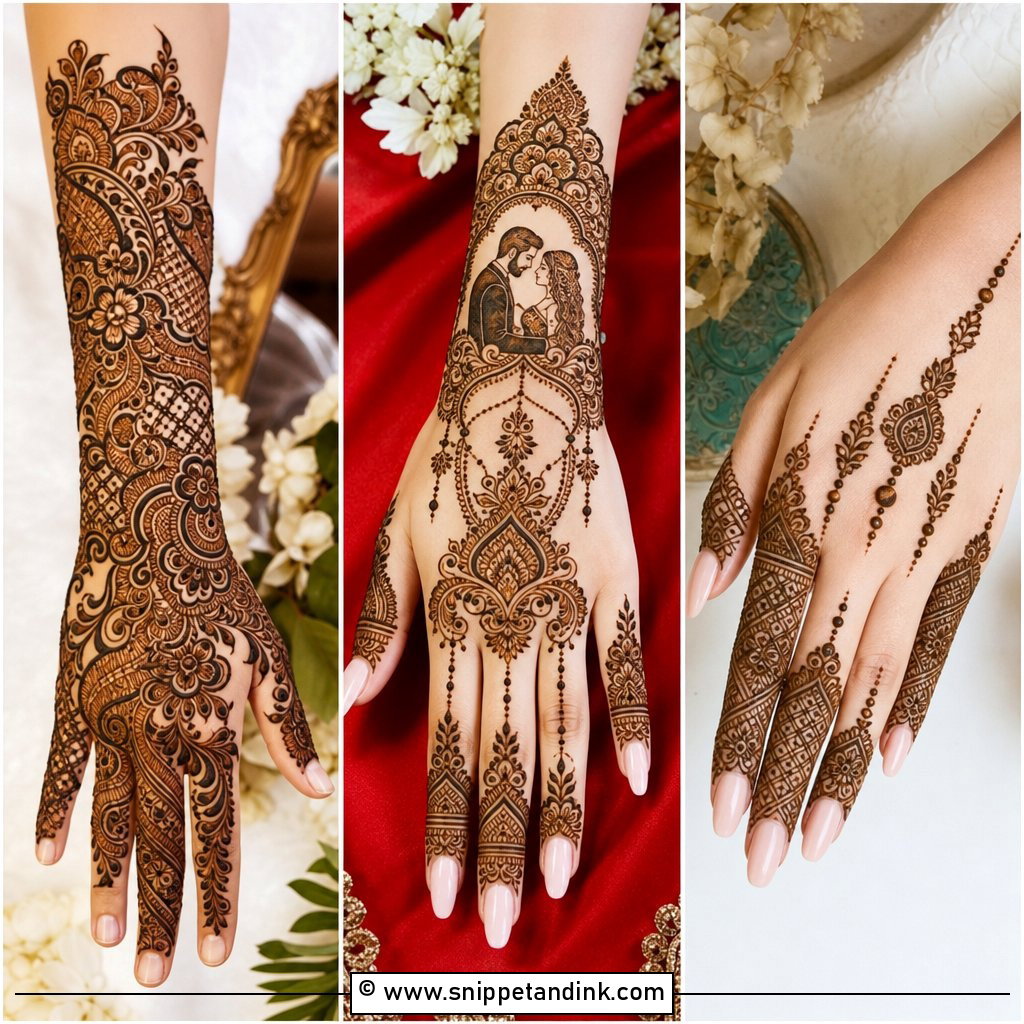
Indian bridal mehndi design carries the most meaning and the most hours: paisleys, peacocks, lotus, jaali, mandalas and bride and groom figures across palms, fingers, wrists and forearms, often with initials, dates or small story panels added. I divide each hand into sections before I draw a single motif, usually a palm panel, a wrist cuff and a forearm band, so the dense filler has borders to sit inside. Without that planning the eye has nowhere to land in close-up photos. Plan on a long sitting and an early night with the paste still on.
5. Full Hand Mehndi Design
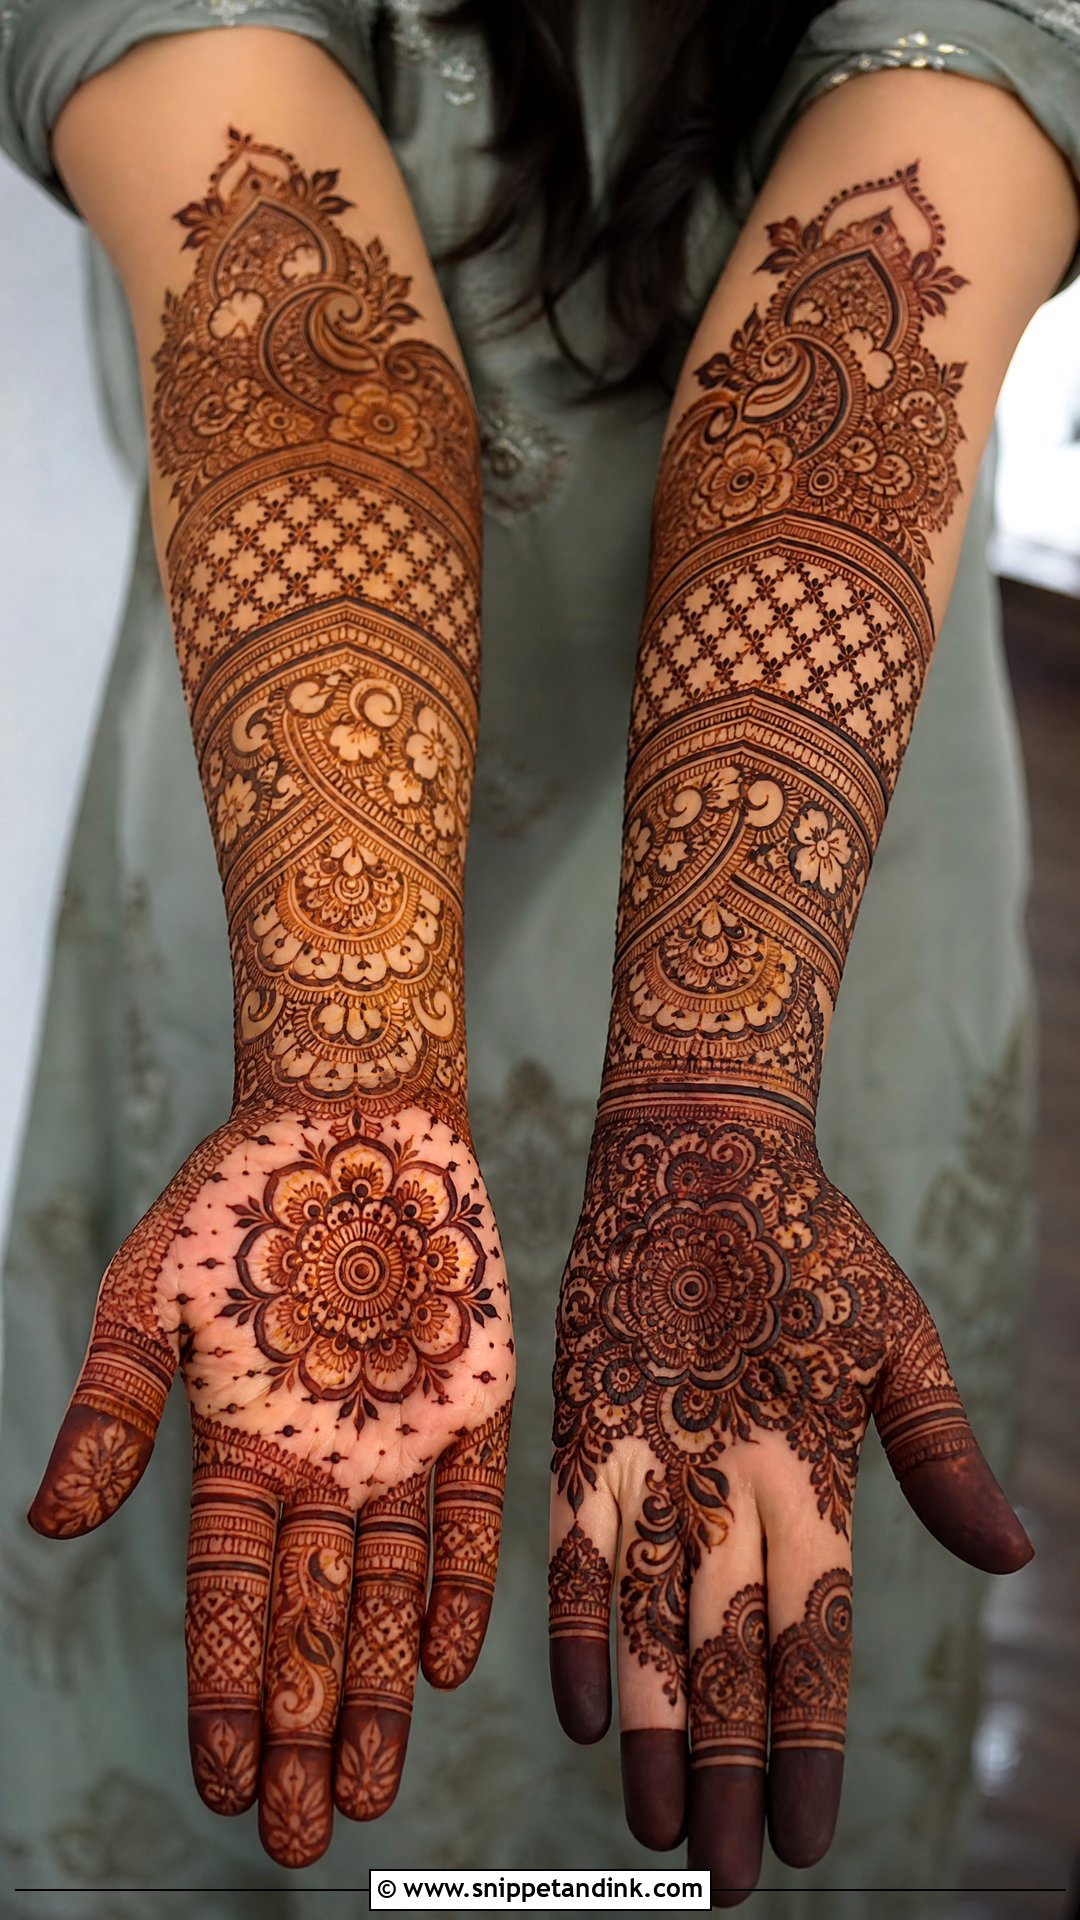
Full hand coverage takes the palm, back hand, fingers, wrist and sometimes the forearm. The layouts that look best combine a few large motifs with fine filler: a mandala on the palm, paisleys along the sides, vines near the wrist, bands on the fingers. I mirror the two hands in structure but not line for line. Small breathing gaps between motifs matter more than you’d expect; when the stain darkens, lines sitting too close together can visually merge into solid patches.
6. Back Hand Bridal Mehndi Design
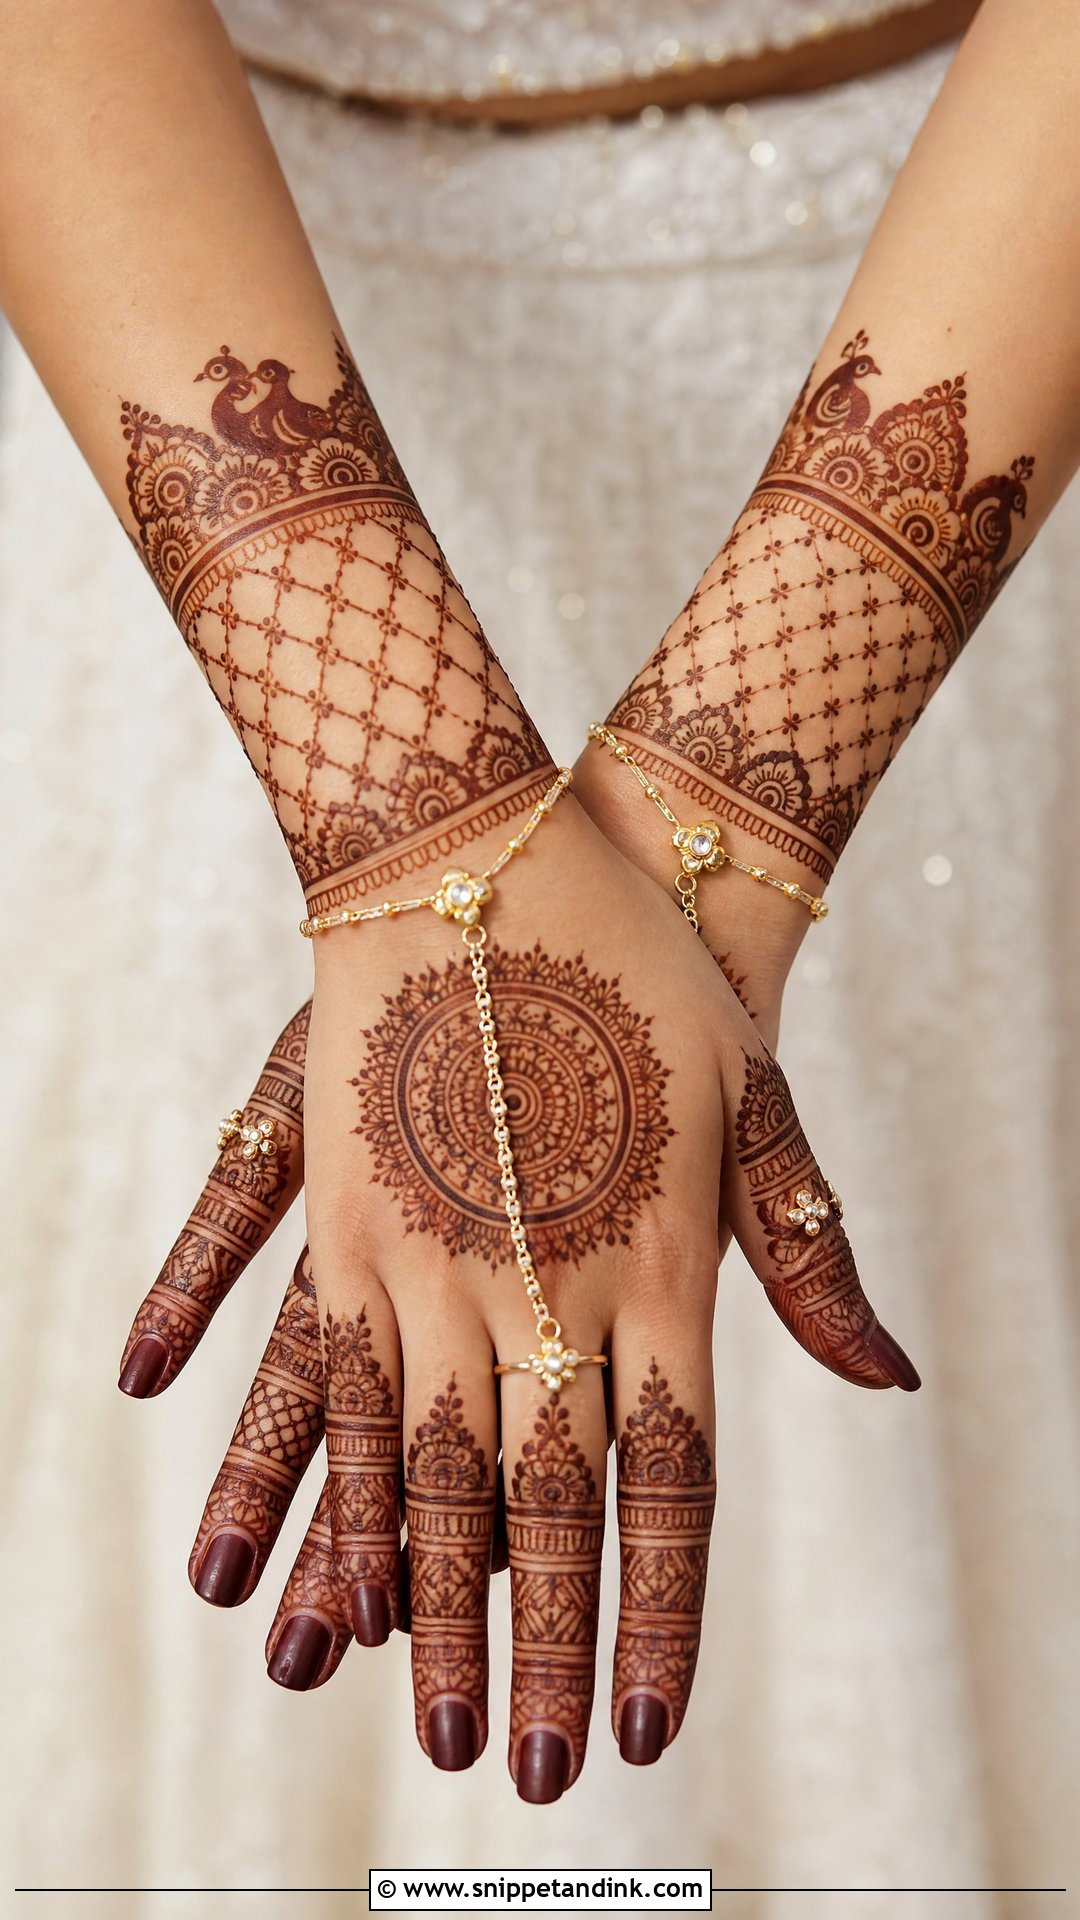
Back hand bridal mehndi design is what the camera sees in ring shots, during the rituals and every time you hold a bouquet or your partner’s hand. A central mandala, lace-like jaali, floral cuffs and heavily worked fingers are the usual building blocks. Some brides go jewelry-inspired, with chains running from wrist to fingers; others want paisleys, peacocks and lotus with dense wrist bands. Because this side stains lighter than the palm, I make the lines a little bolder here than I would on the front, so the pattern doesn’t look washed out next to the palm.
7. Palm Mehndi Design
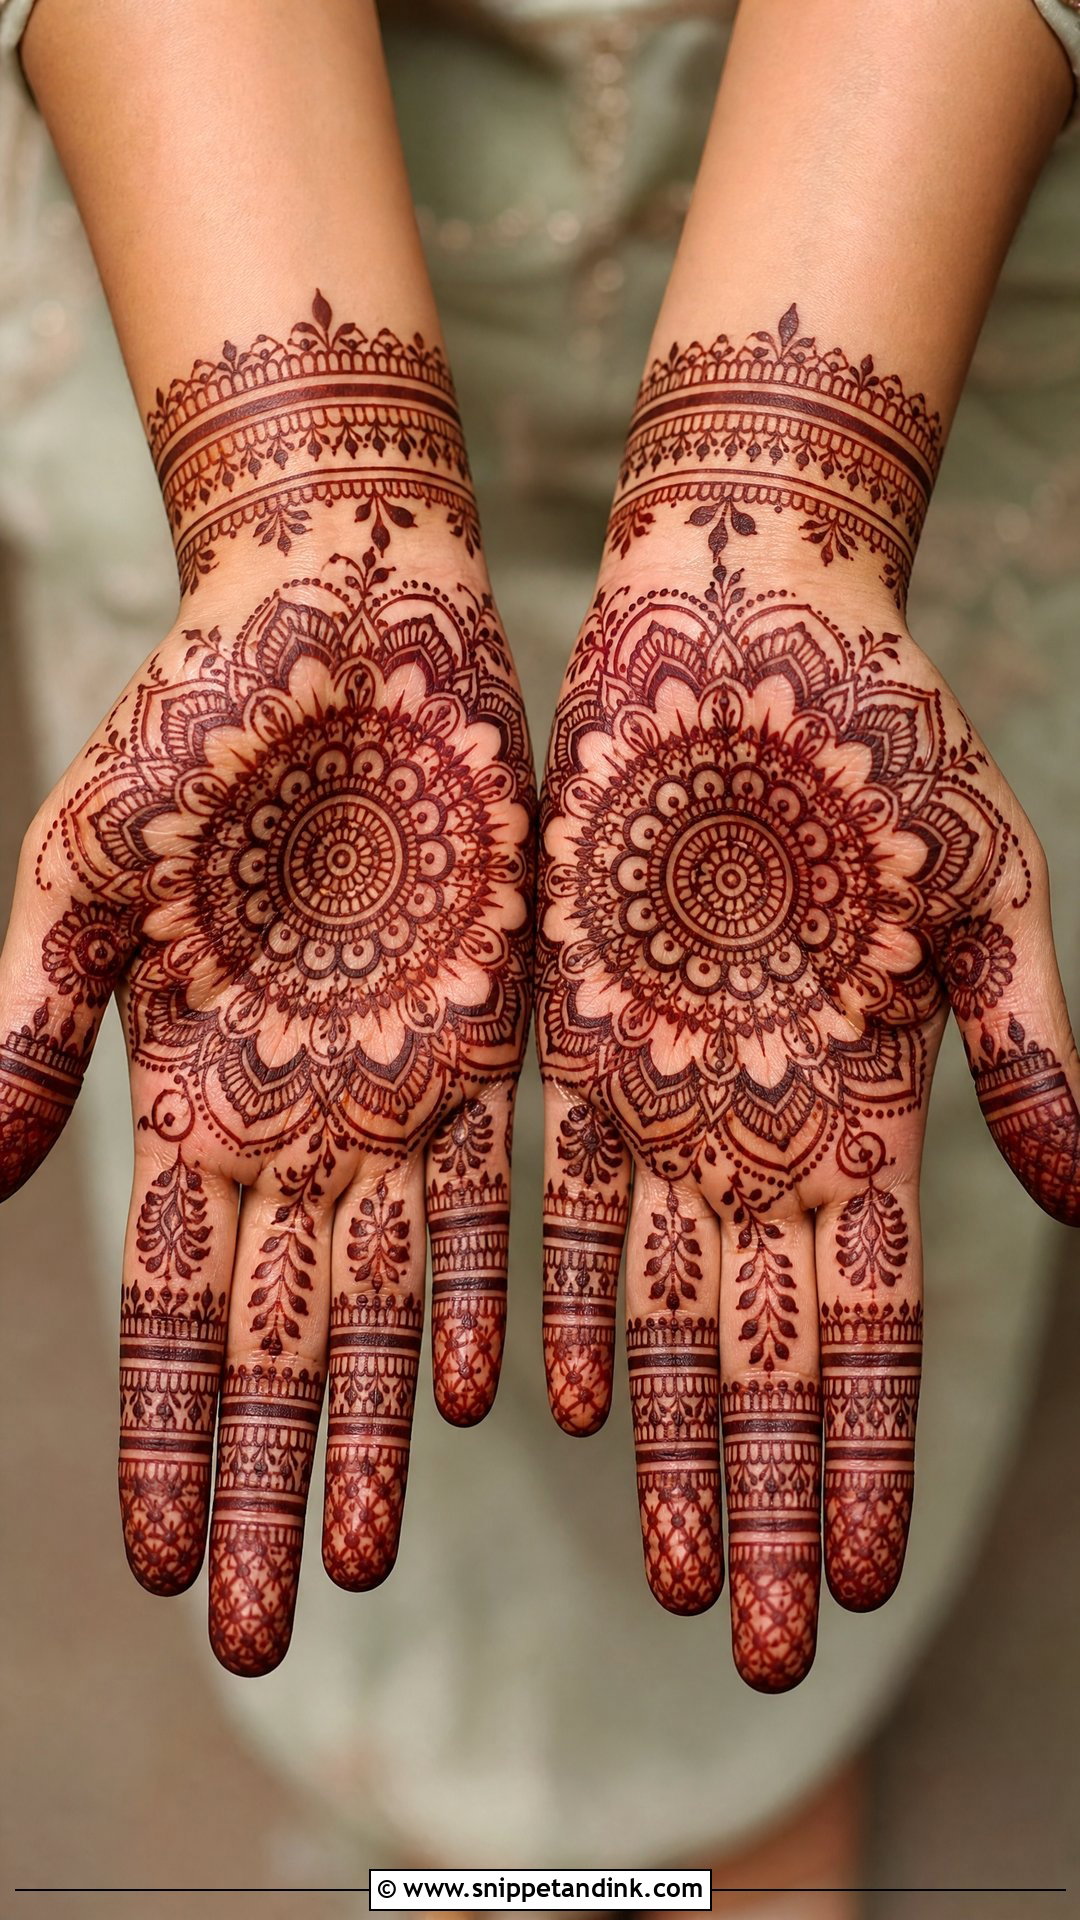
The palm absorbs henna better than almost any other skin, so a palm-focused design gives you the deepest color for the least sitting time. I usually start with a round mandala and grow petals, leaves, small paisleys and dotted borders around it. Leaving some space near the thumb and wrist keeps it lighter; filling the fingers with stacked bands and small geometric details makes it festive. One thing to plan for is the main palm crease. I keep fine detail off it, since it folds every time you grip something.
8. Finger Mehndi Design
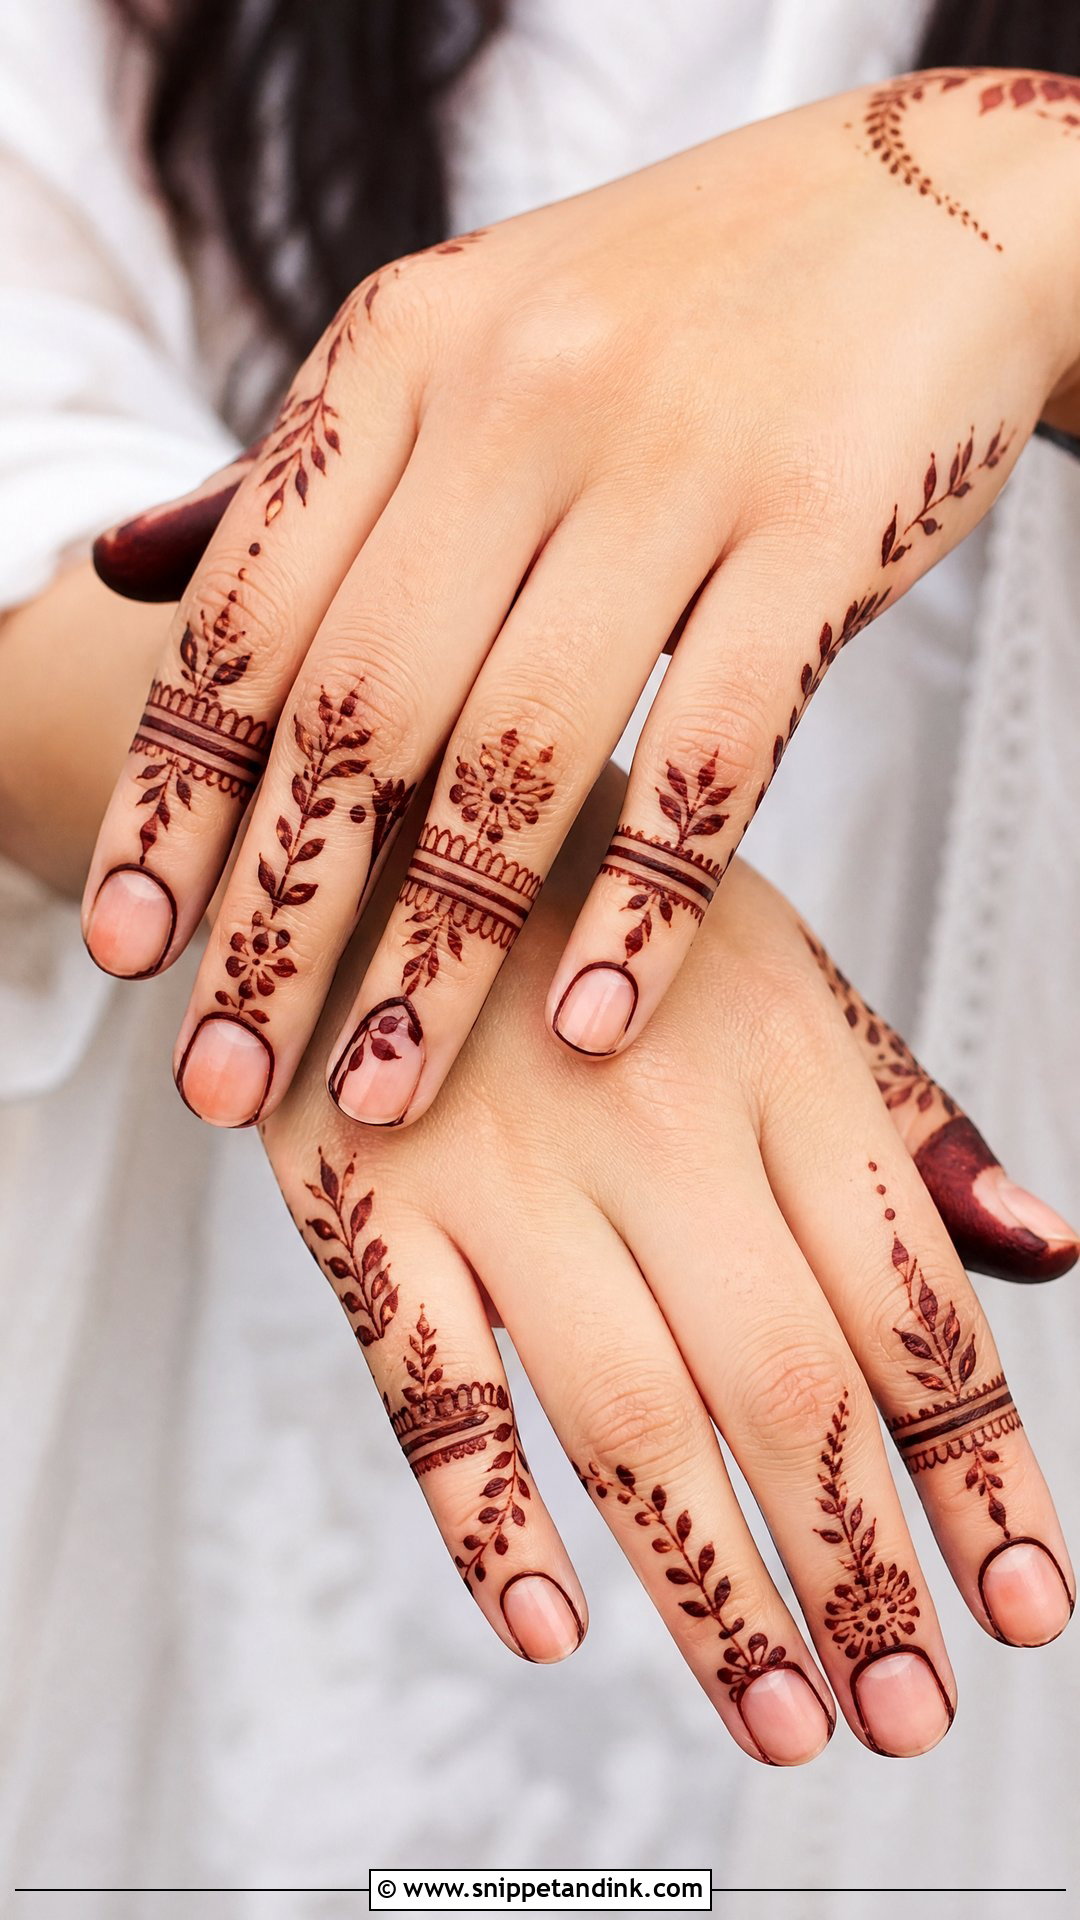
Finger designs leave the palm almost bare and put bands, dots, leafy lines and small florals on the fingers themselves. They’re quick, they dry before you’ve finished your tea, and they’re easy to live with at work or college. A trend I like: work two or three fingers heavily and keep the rest light. Plan around your rings so the design frames them. A band drawn exactly where a ring sits will be hidden all evening.
9. Mandala Mehndi Design
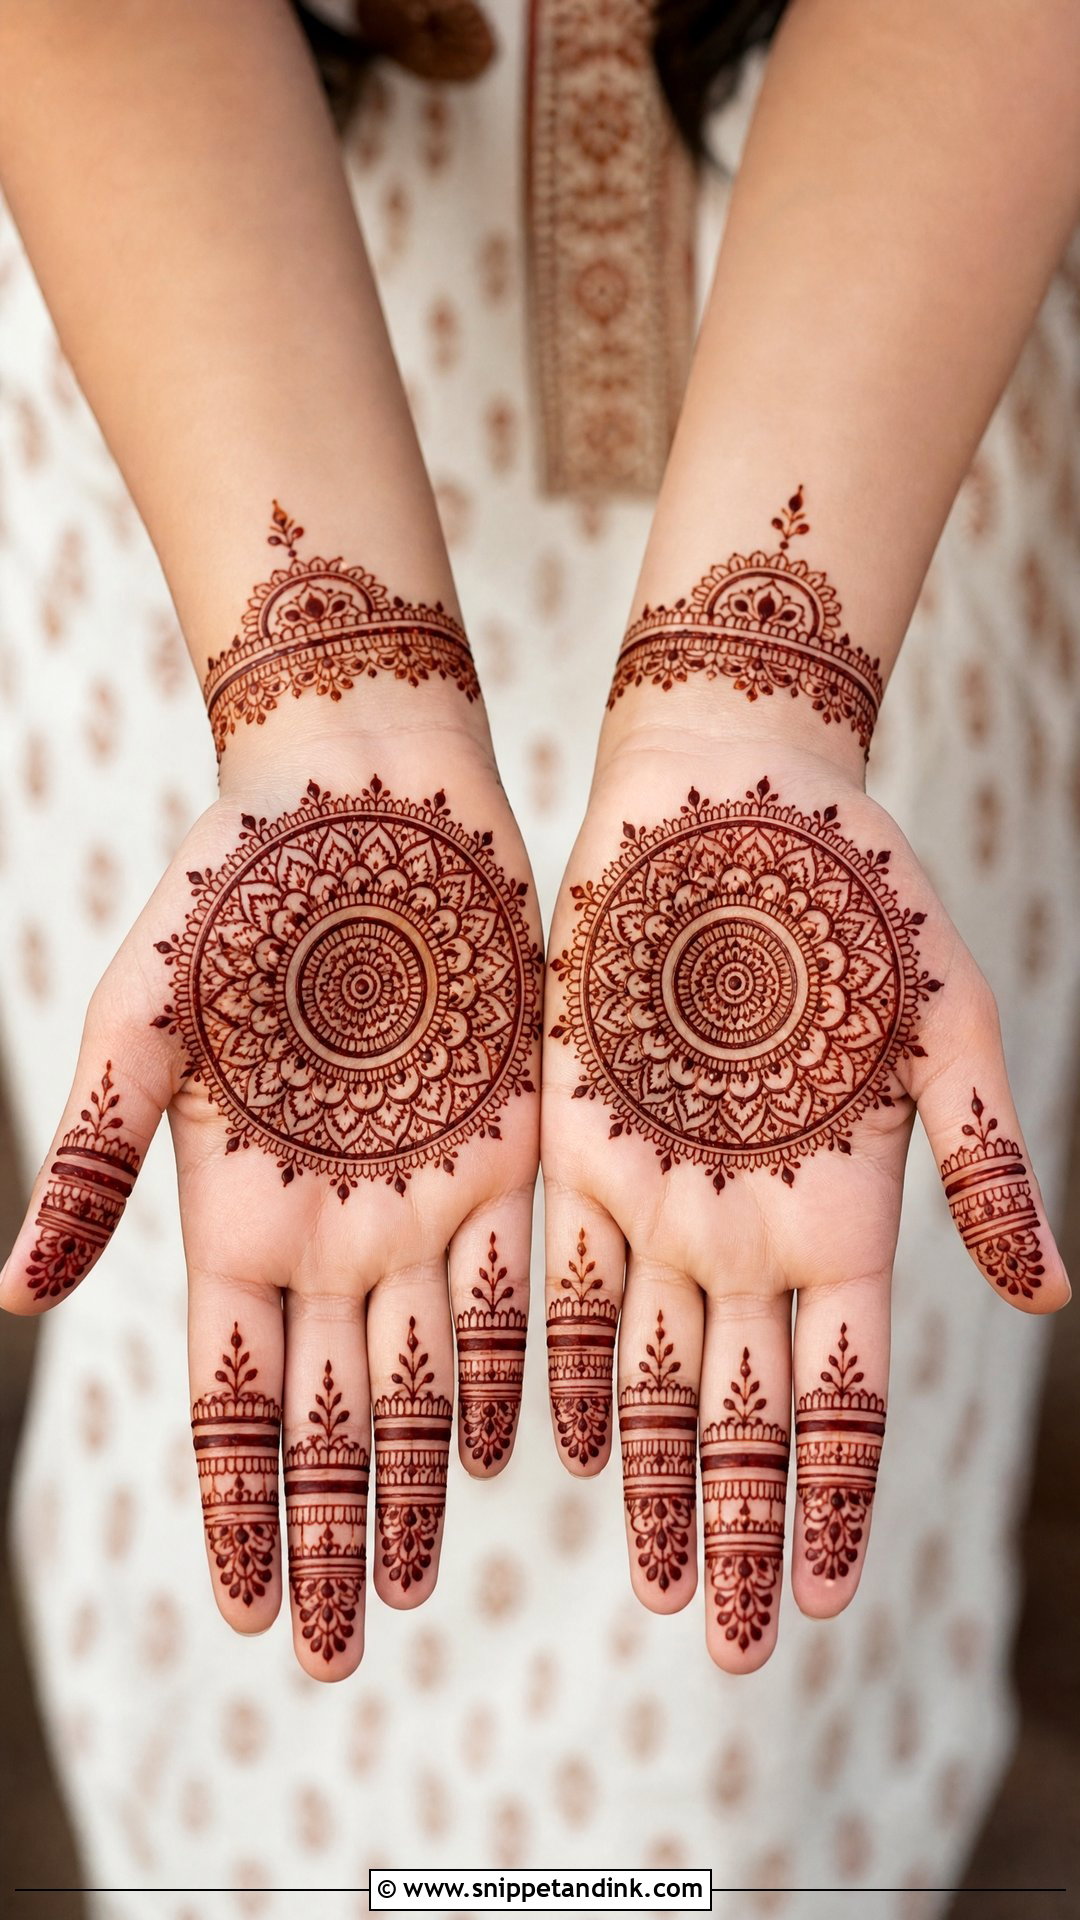
A mandala gives the hand one strong center, a circle on the palm or back hand surrounded by petals, dots, lines and borders. It reads especially well on broader palms, where there’s room for several rings. On narrow palms I keep it smaller and let the finger work carry more of the design. Minimal finger details and a light wrist band make it modern; jaali sections, paisley edges and fuller fingers turn it festive.
10. Floral Mehndi Design
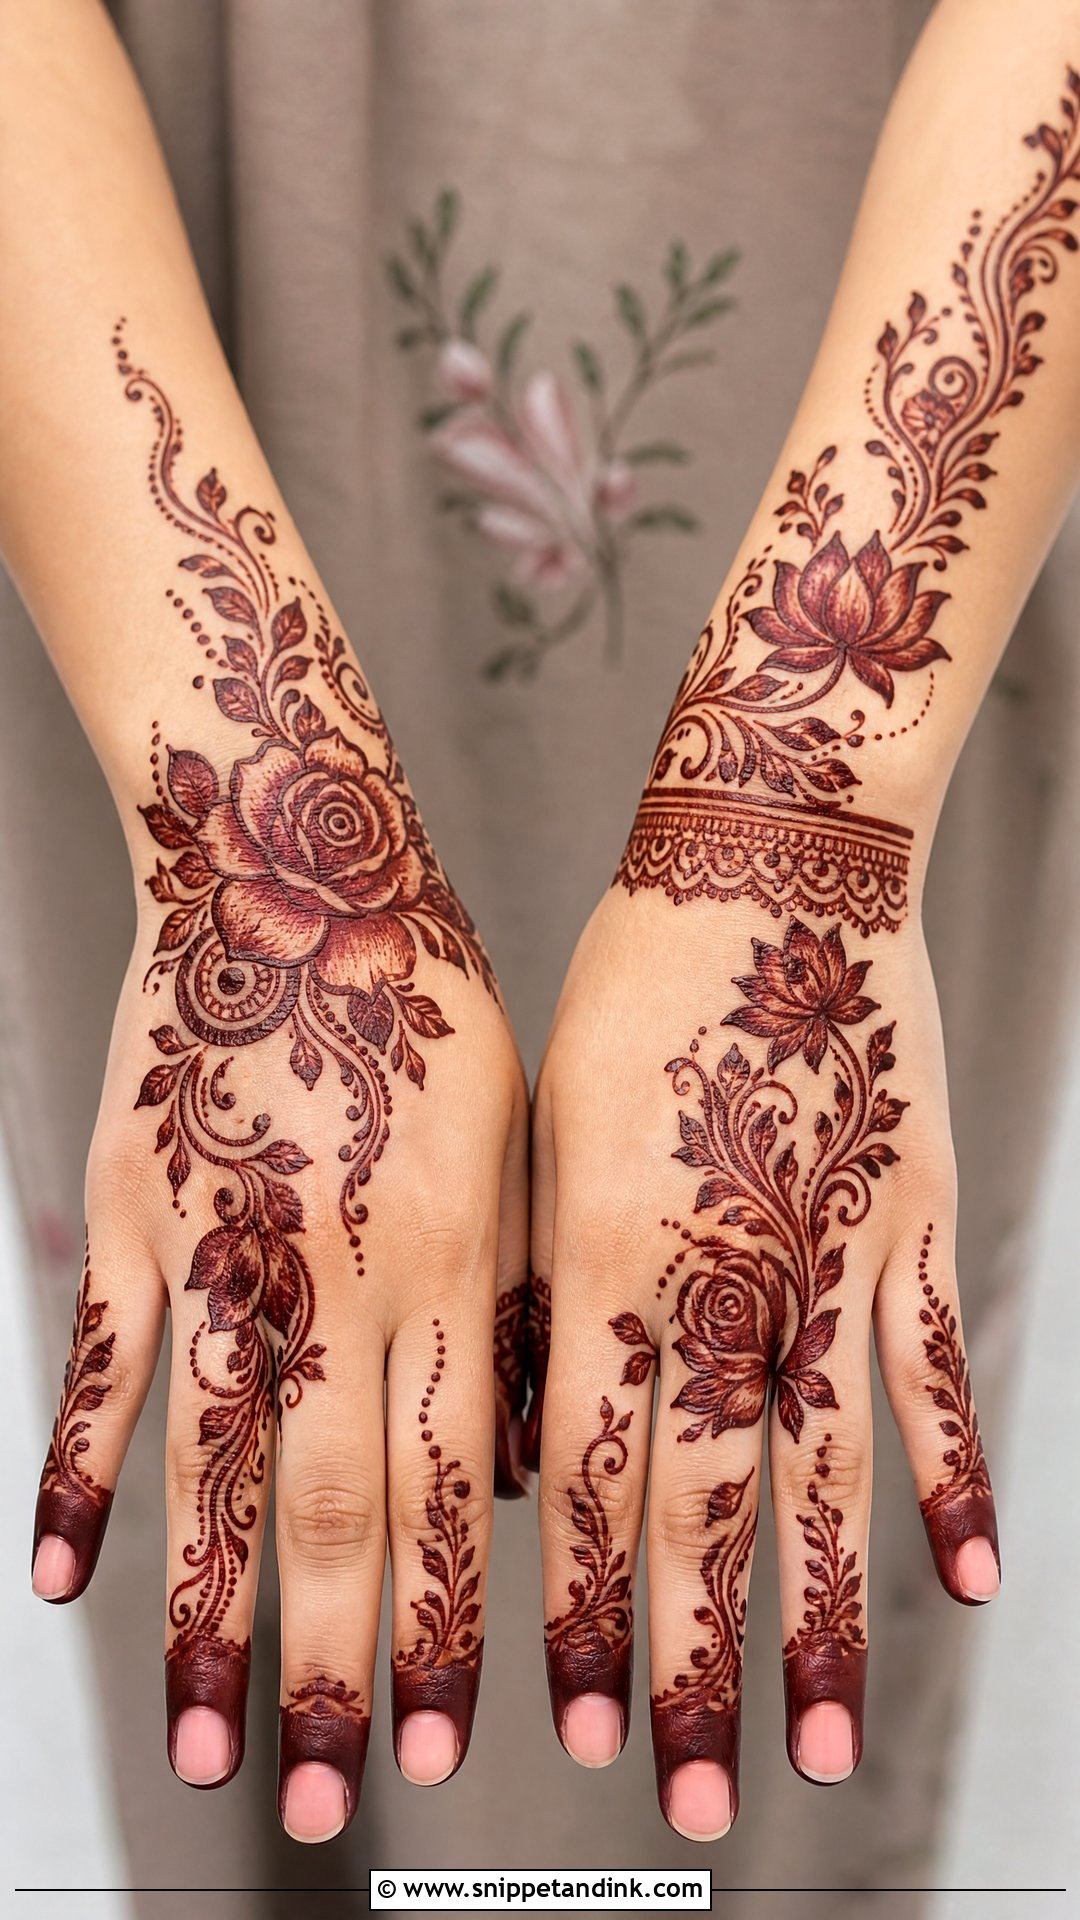
Flowers fit almost any style: bold roses for Arabic work, tiny blossoms for minimal designs, lotus for bridal, leafy trails over the back hand. The difference between a natural-looking floral and a stiff one is size variation. I draw one large flower, two medium and several small, then join them with curved vines so they look like they grew there. Leave some open skin around the larger blooms so the petals stay distinct after the stain develops.
11. Paisley Mehndi Design
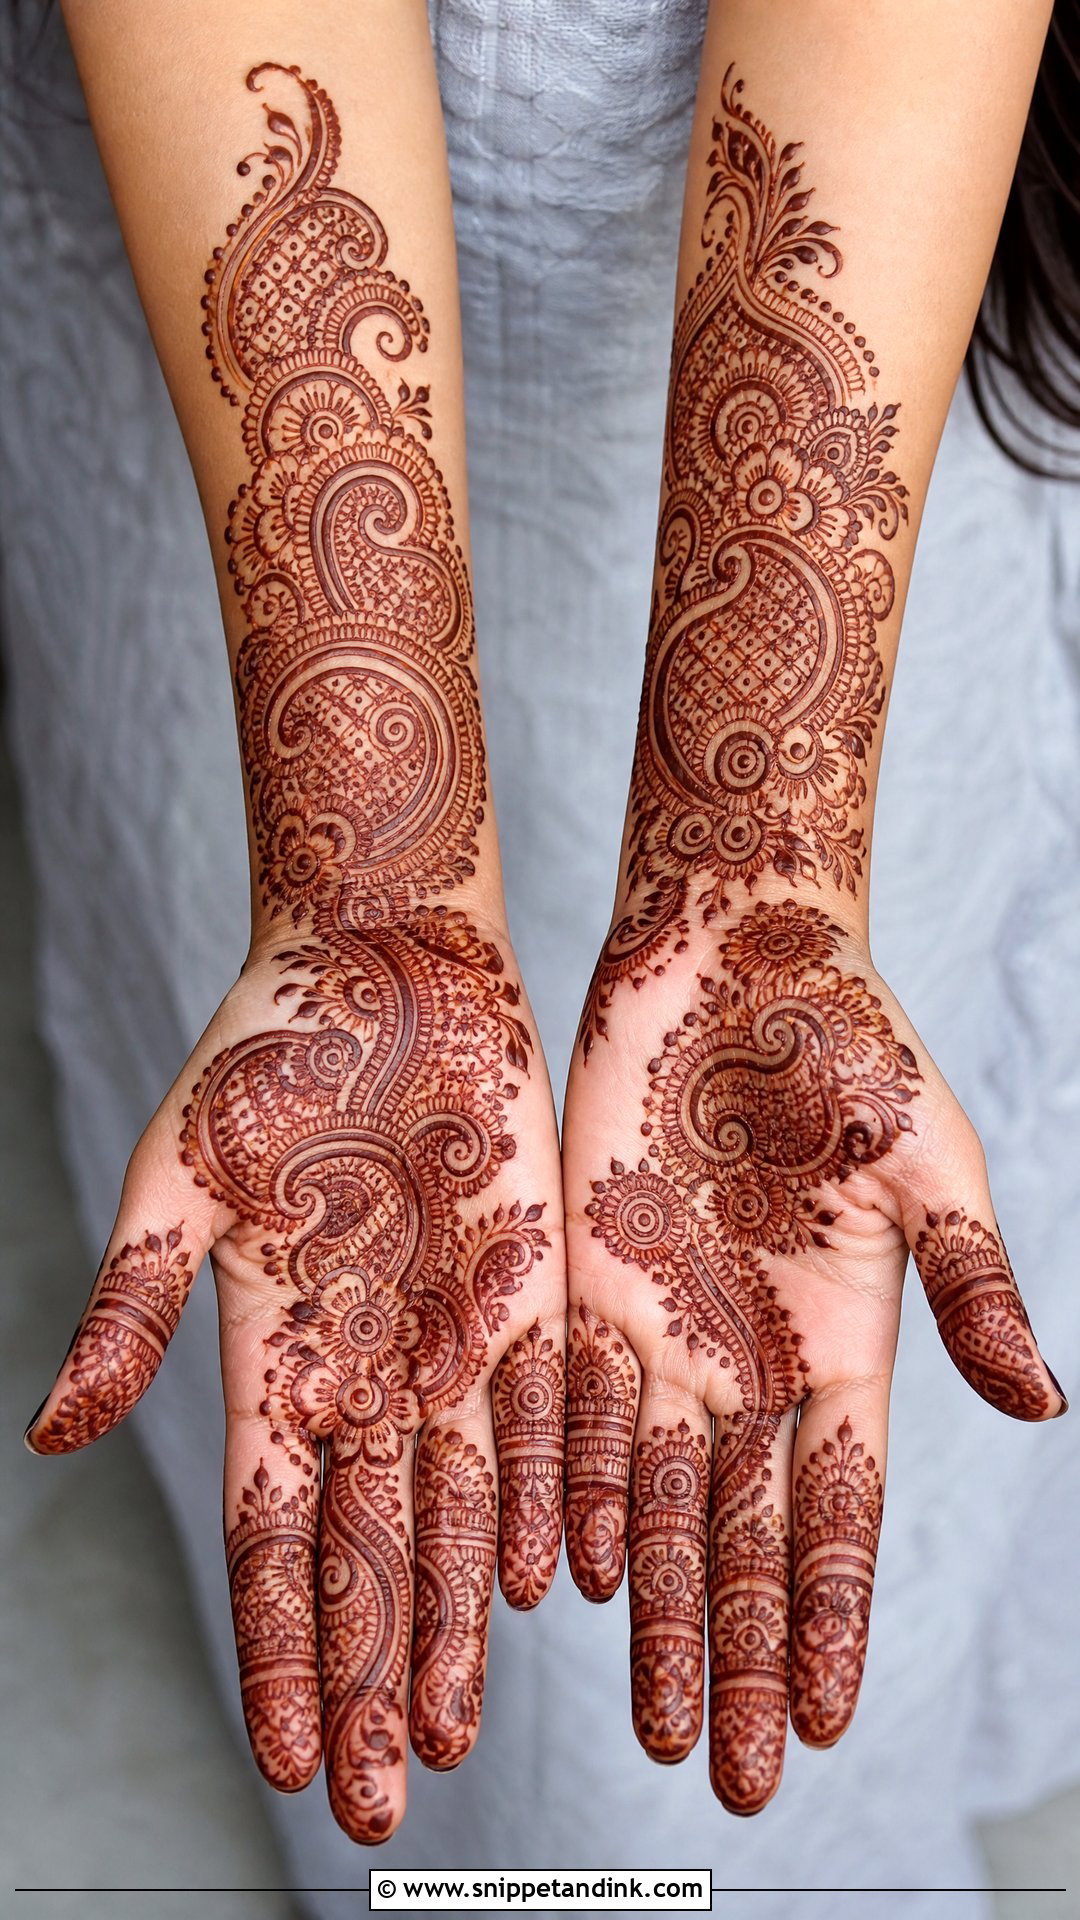
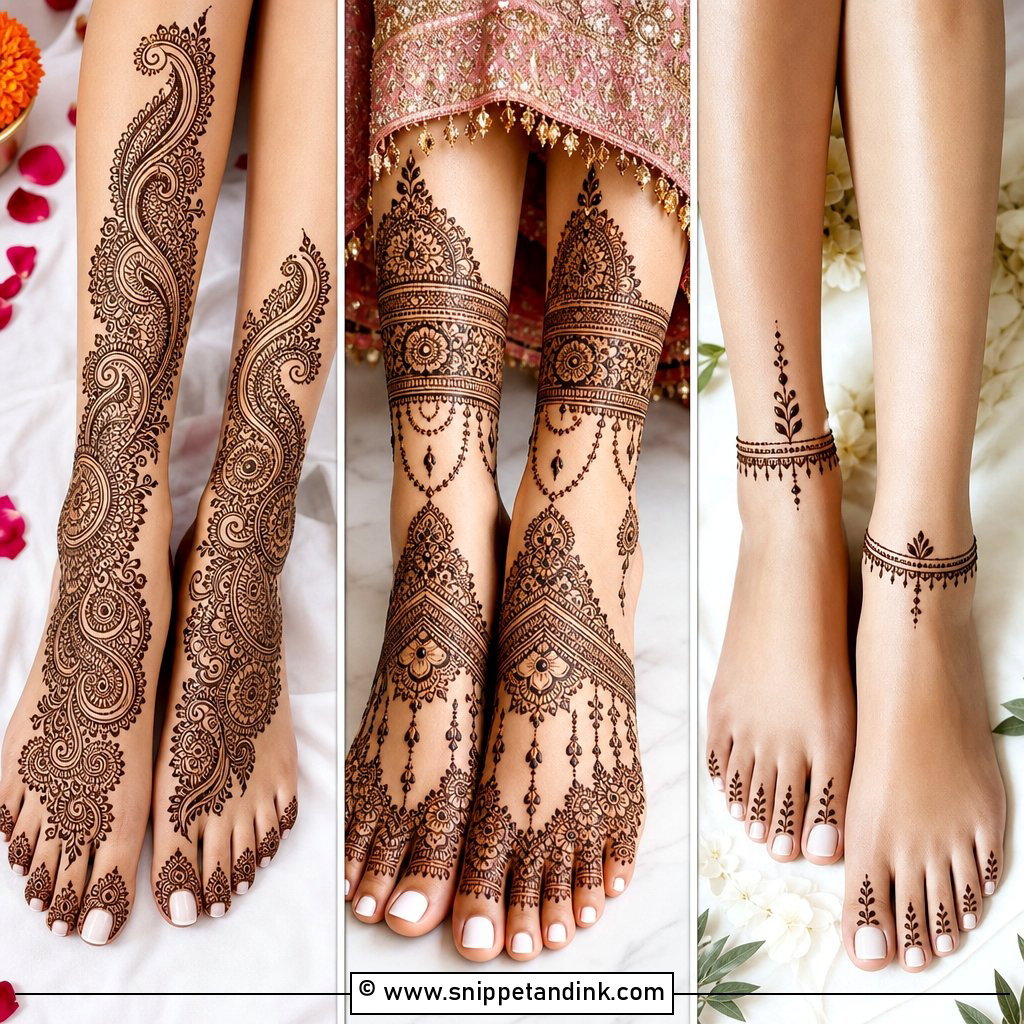
The paisley belongs to traditional Indian and Pakistani henna, and its curved shape follows the edge of the palm and the line of the forearm naturally. A full paisley layout layers borders, small flowers, dotted edges, leaf filler and fine shading inside each shape. For lighter work I place one large paisley near the wrist and let it run into a floral trail. For heavier work, repeat them in different sizes and fill between with small detail. Avoid making every paisley the same size; it looks like a stamp.
12. Peacock Mehndi Design
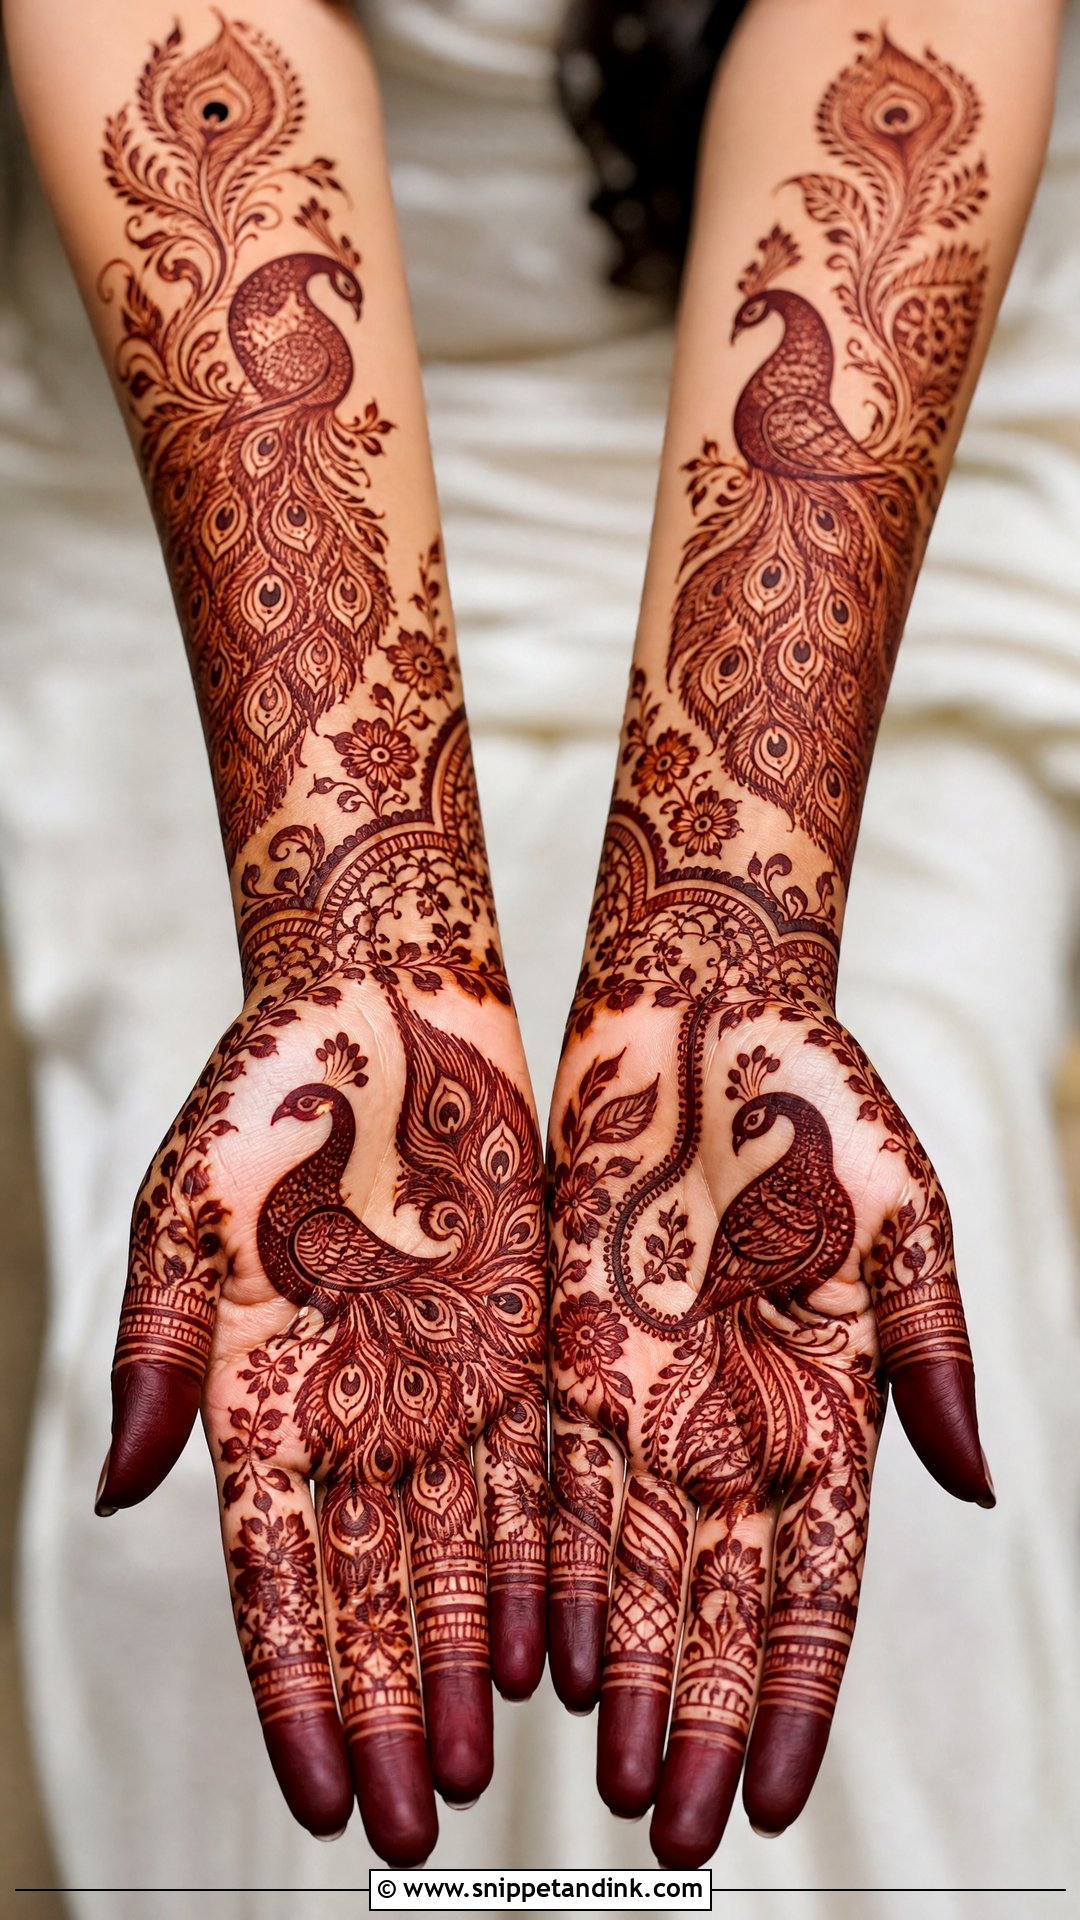
Peacocks give a hand a regal, ceremonial feel, and they can sit on the palm, back hand or forearm with feathers flowing into paisleys and vines. A large peacock across the palm is dramatic; a small one on the wrist is softer and much quicker. I outline the body boldly and save the fine detail for inside the feathers. If the body is filled with fine lines too, it often stains as one dark shape and loses the outline that makes it recognizable.
13. Jaali Mehndi Design
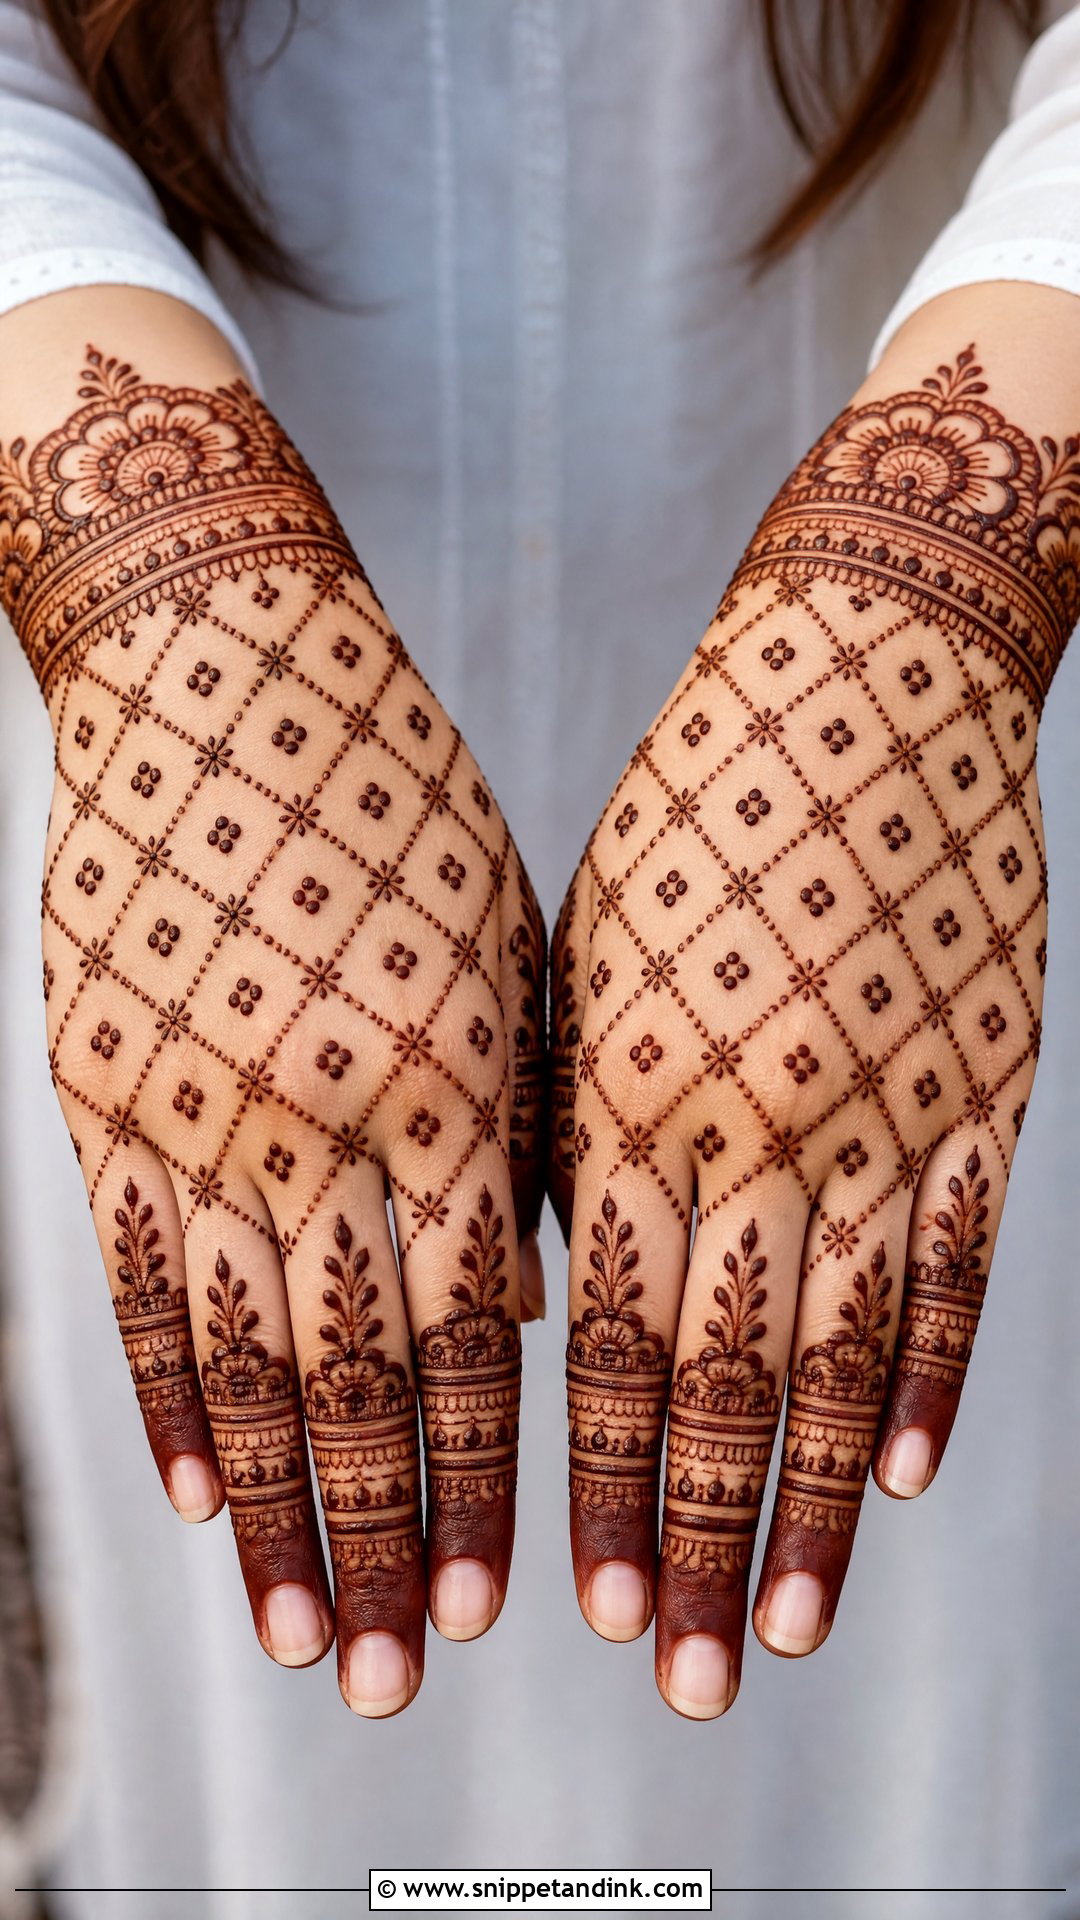
Jaali is a fine net laid over the back hand, fingers or wrist, with small dots or flowers in the boxes. Good jaali has even spacing and crisp crossings, which is harder than it looks, so I draw all the lines in one direction first and cross them second. It’s a way to get detail without large motifs. Use it in selected panels, though. A whole hand of jaali tends to read as a grey haze in photos.
14. Indo Arabic Mehndi Design
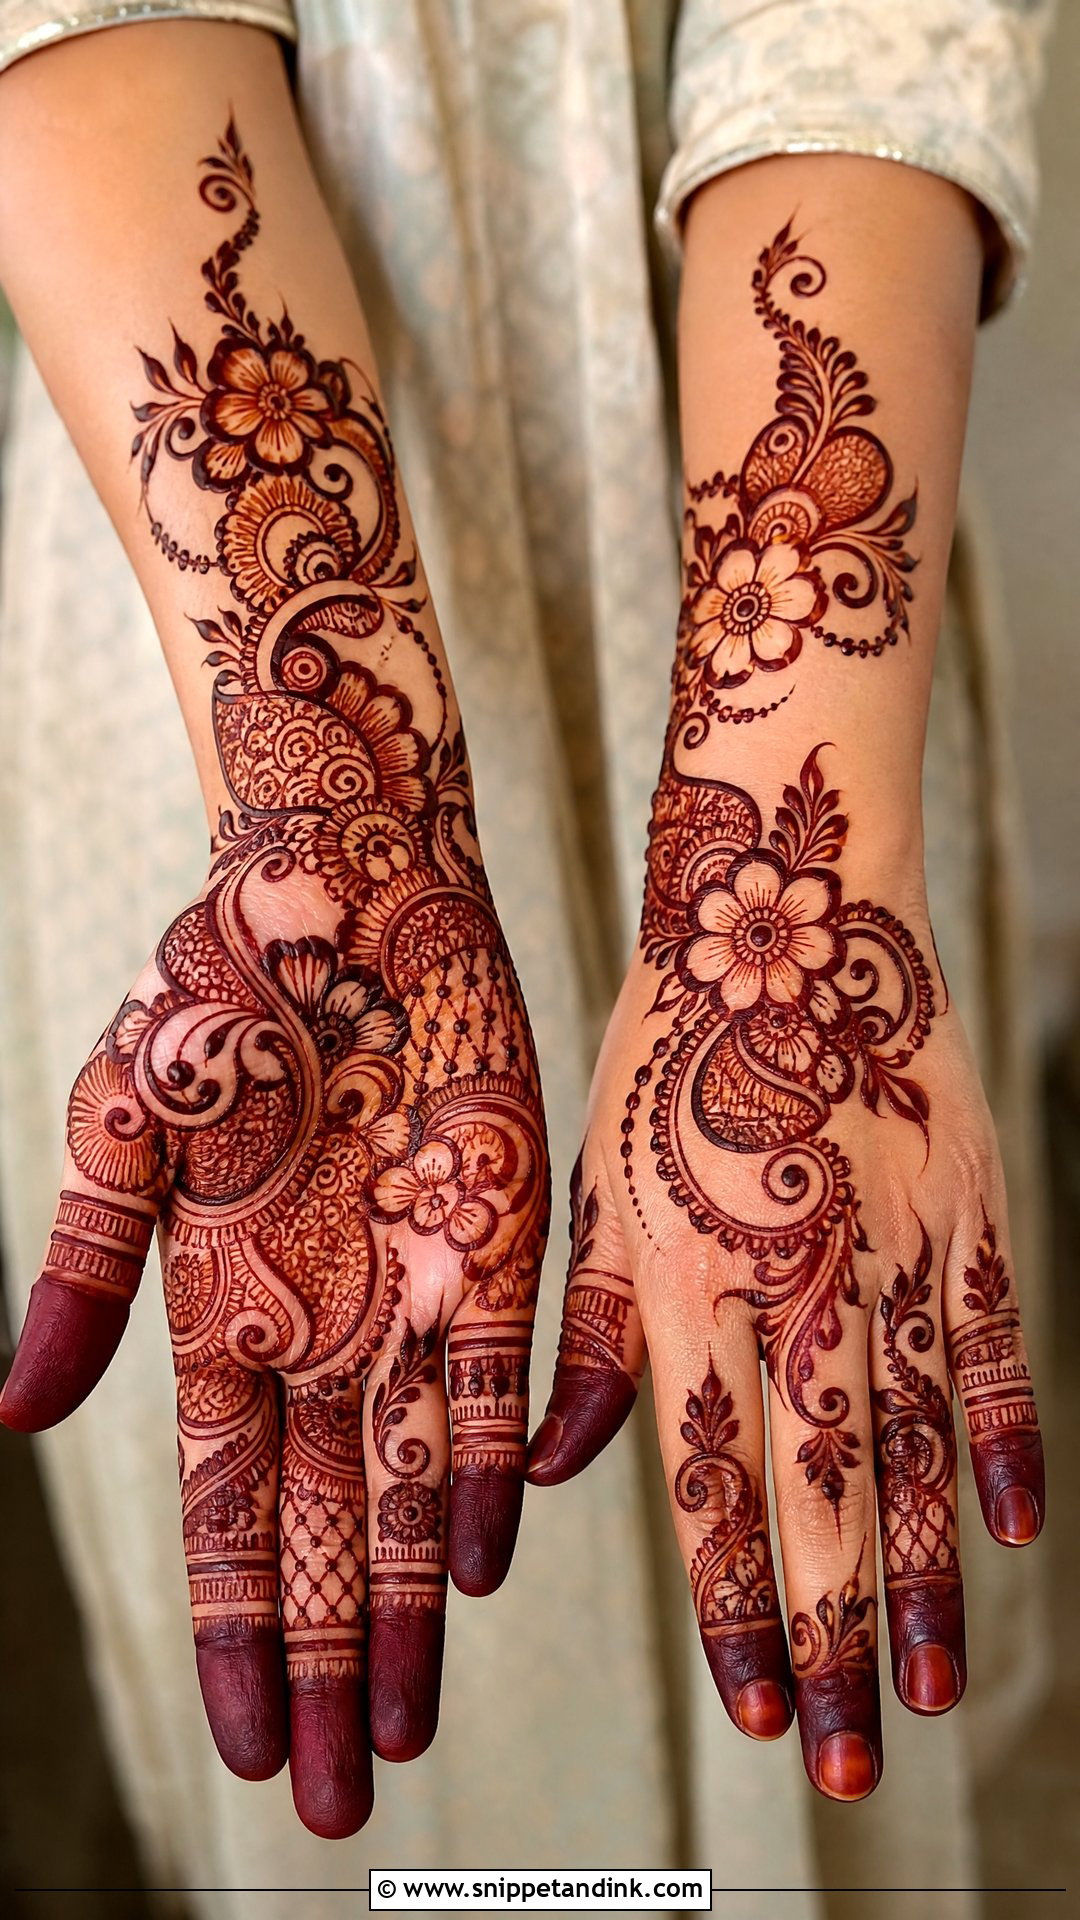
Indo-Arabic takes Arabic flowers and spacing and adds Indian filler and fine shading inside them. A diagonal floral trail with paisley details, shaded petals and decorated fingers is the typical layout. I suggest it to anyone who can’t decide between the two traditions, since it can be made bridal with wrist cuffs and a fuller palm or kept simple with more open skin. It also takes far less time than full Indian bridal coverage, which matters at a busy mehndi night.
15. Minimal Mehndi Design
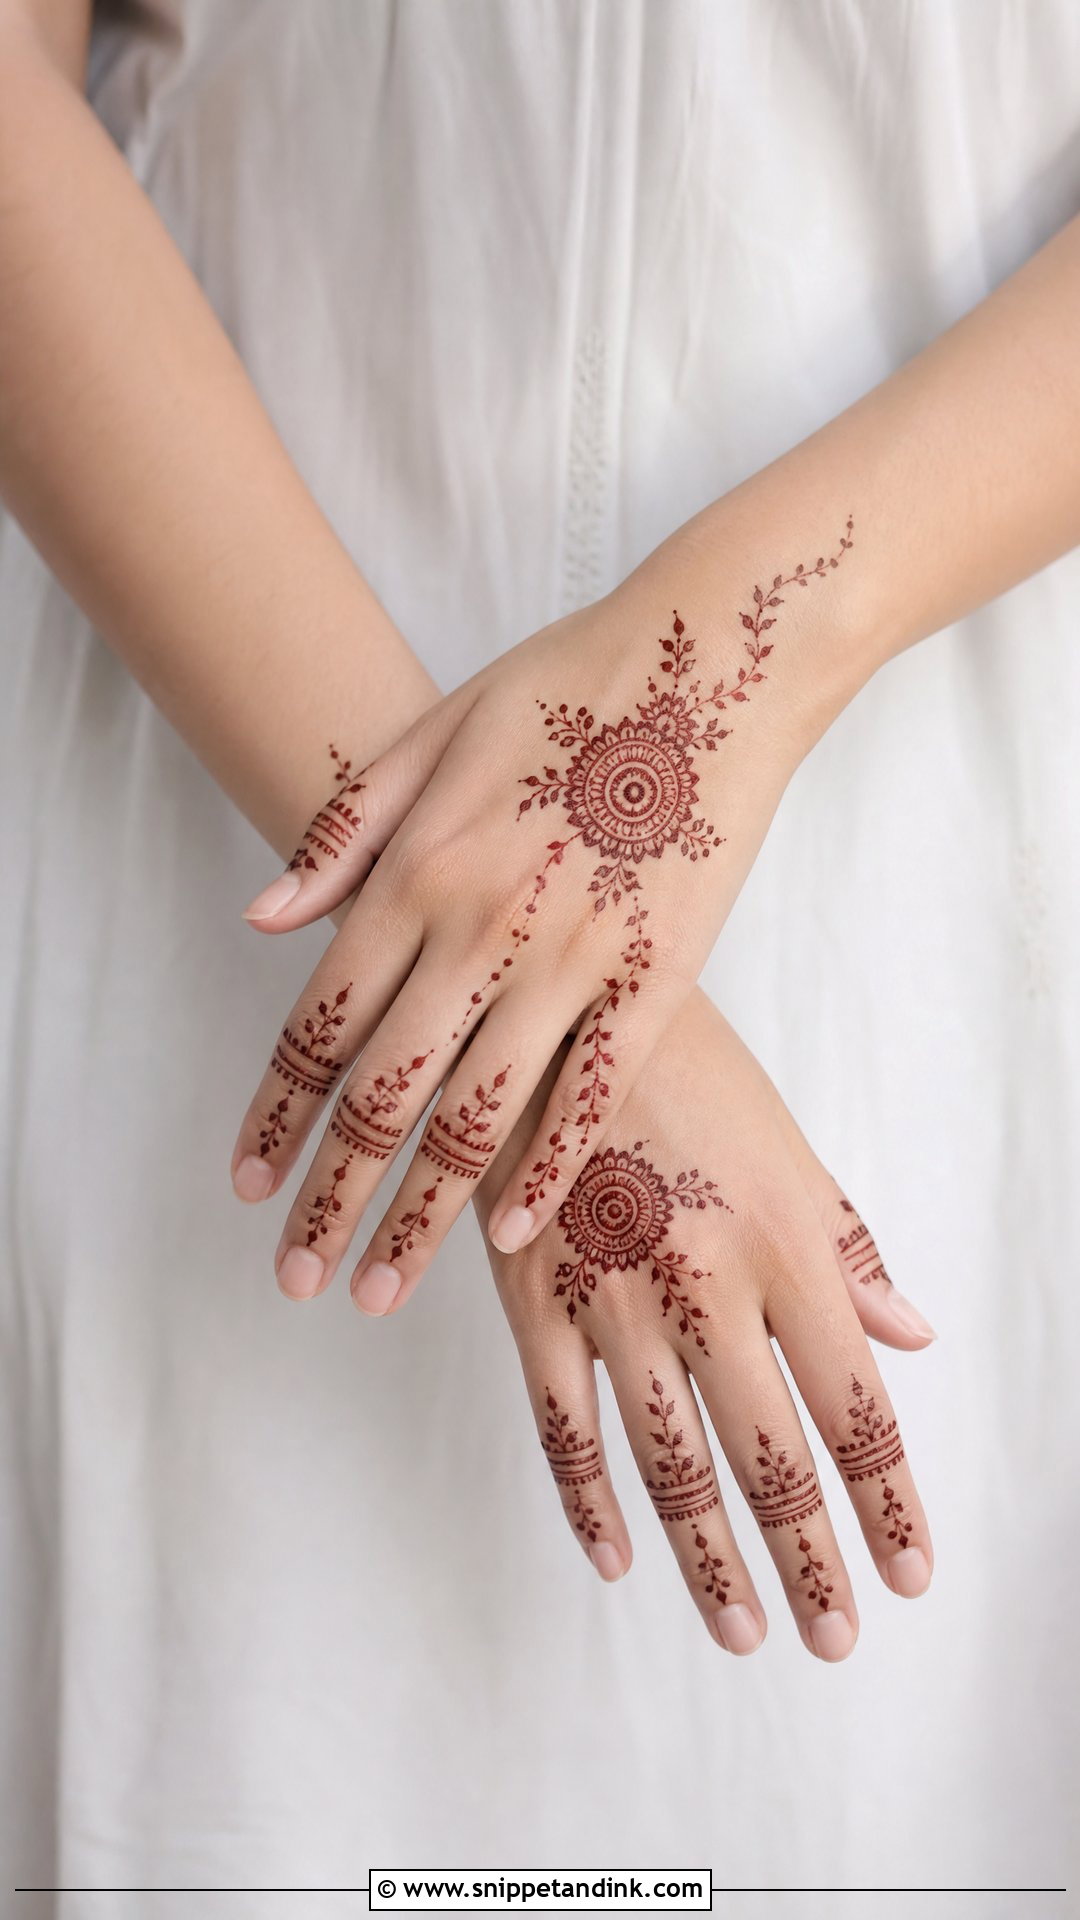
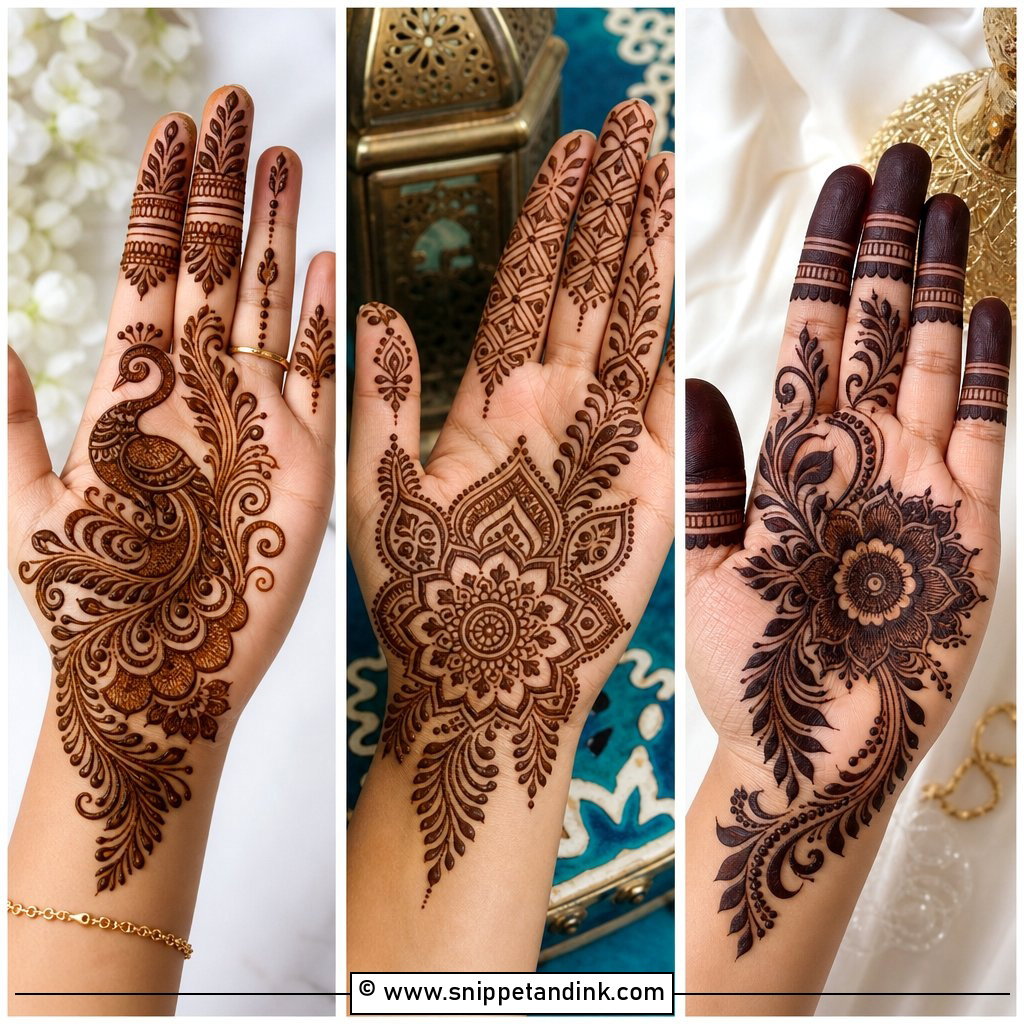
Minimal designs use small motifs, slim lines, tiny flowers and dots instead of coverage, on the back hand, palm, wrist or fingers. They dry fast and are comfortable to wear to work the next morning. My one rule is repetition: choose one motif and repeat it in two or three places. A small mandala with one leafy trail looks intentional; five unrelated little shapes look like doodles.
16. Modern Mehndi Design
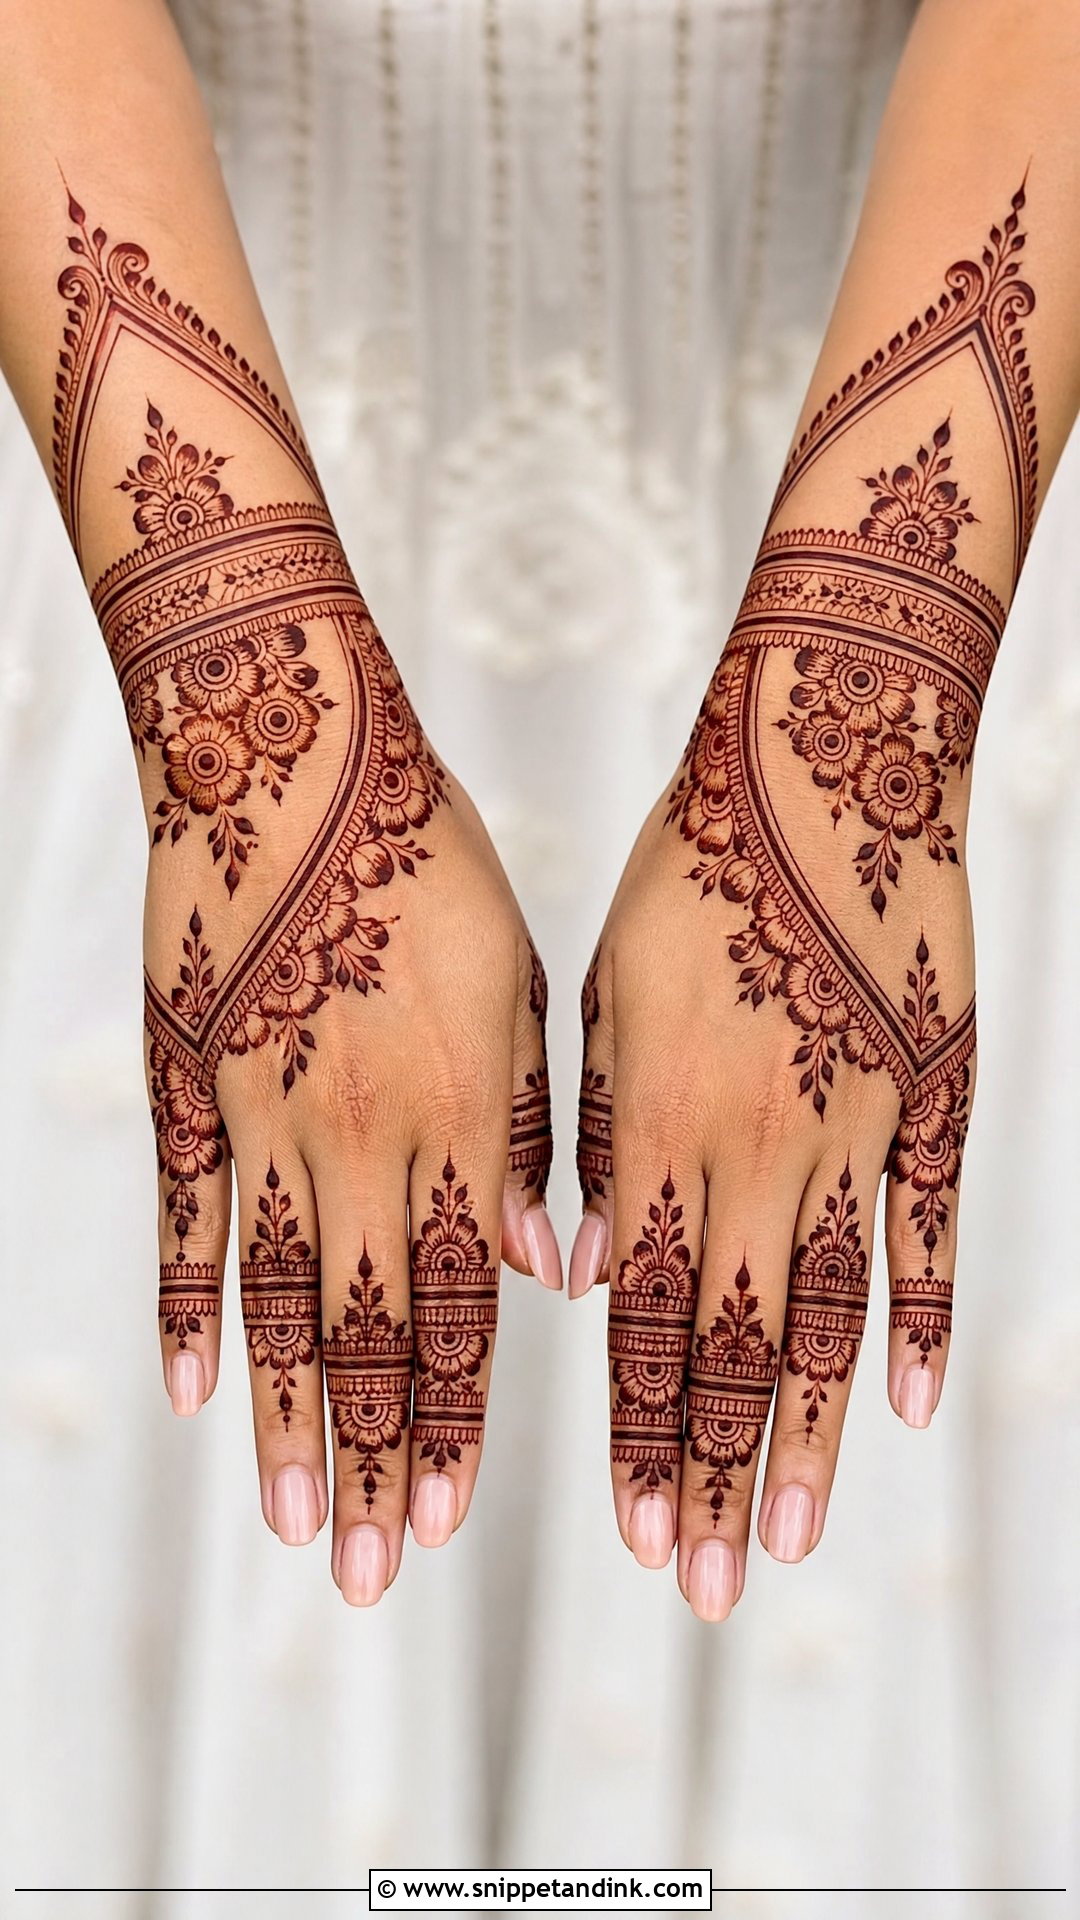
Modern mehndi is mostly about control. Half-hand layouts, negative space, bracelet patterns, finger rings and bold floral sections, sometimes with abstract curves or a light grid, all depend on each motif having room around it. I usually sketch the main flow with a few guide dots before committing, because once a modern design is crowded there’s no rescuing it. It suits engagement parties and brides who want something other than classic full-hand coverage.
17. Half Hand Mehndi Design
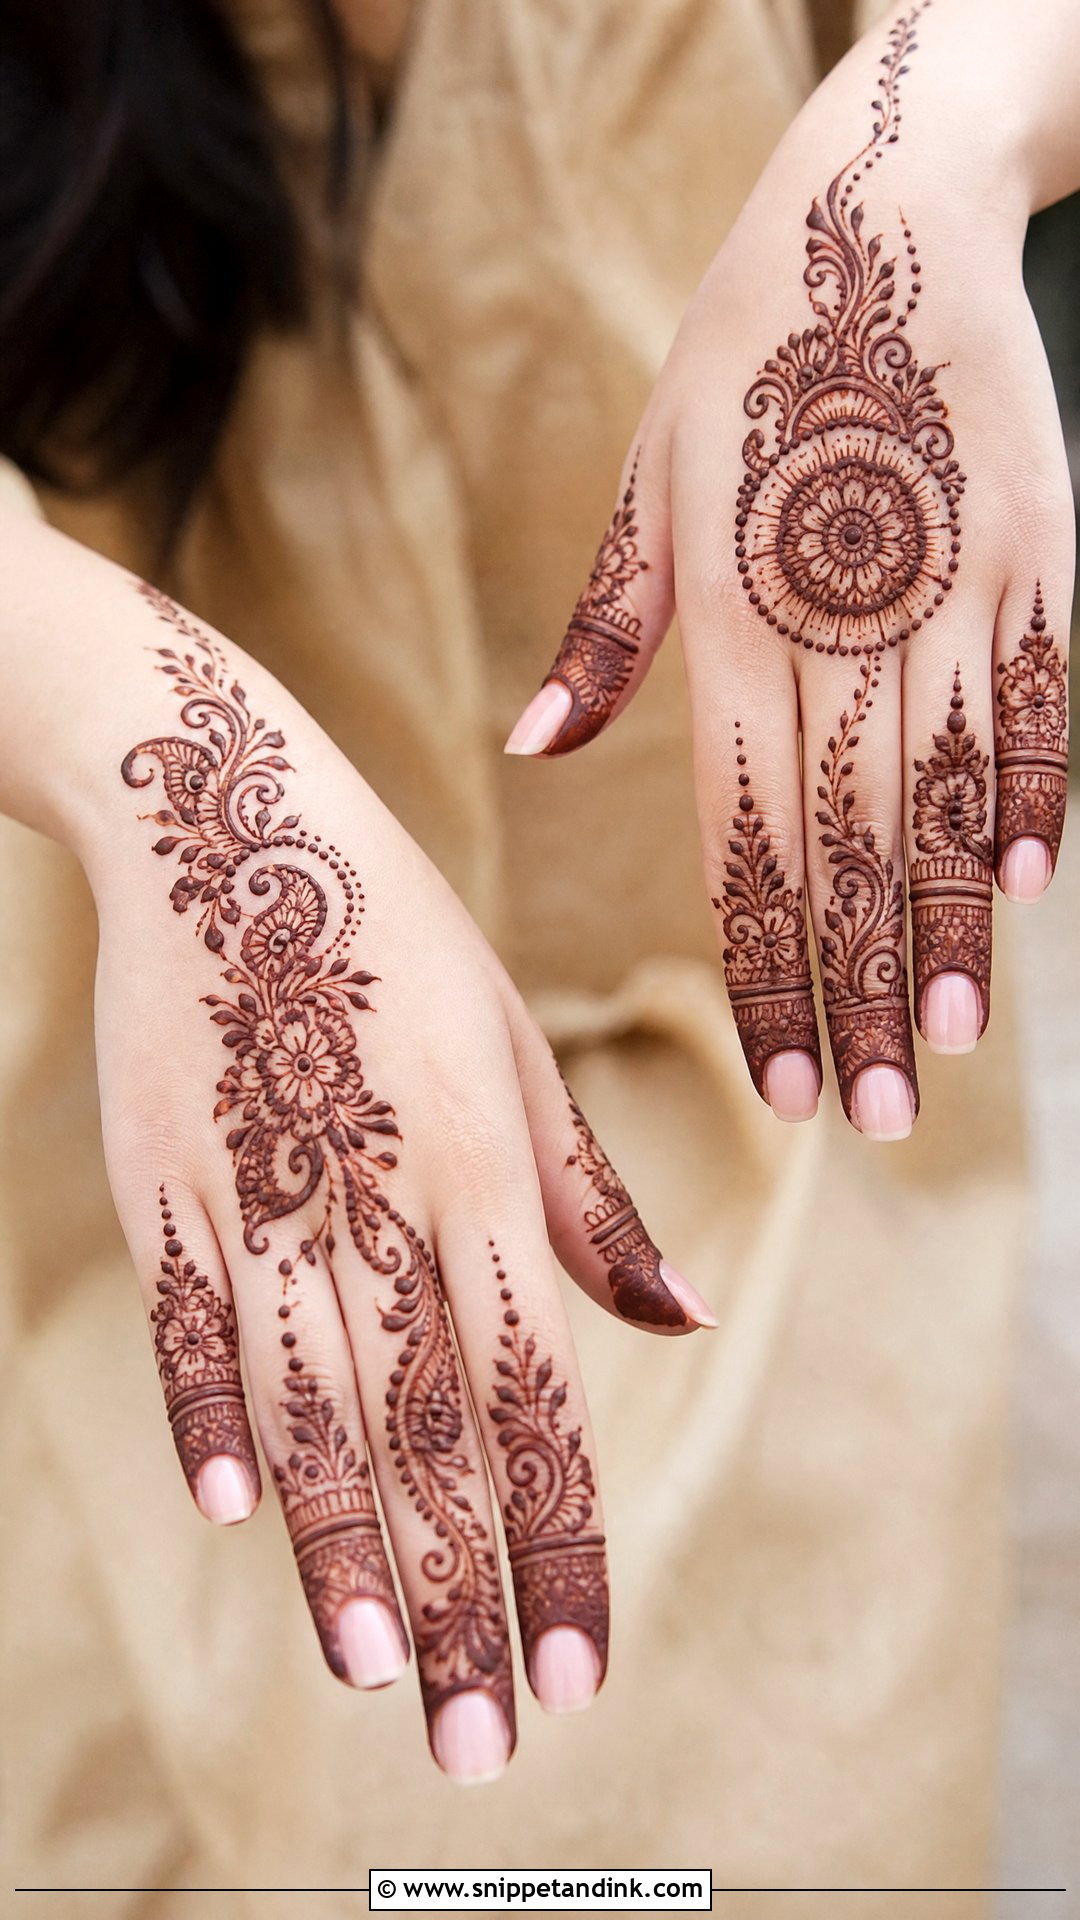
Half hand designs cover the palm and fingers and stop at or just past the wrist. They’re my usual suggestion for bridesmaids and guests who want detail but have limited time in the chair. A mandala palm, an Arabic trail, a paisley layout or a floral cuff all work. What makes it look complete is the ending, a firm bracelet band or a scalloped border. Without that edge the design looks like it was abandoned halfway.
18. Wrist Mehndi Design
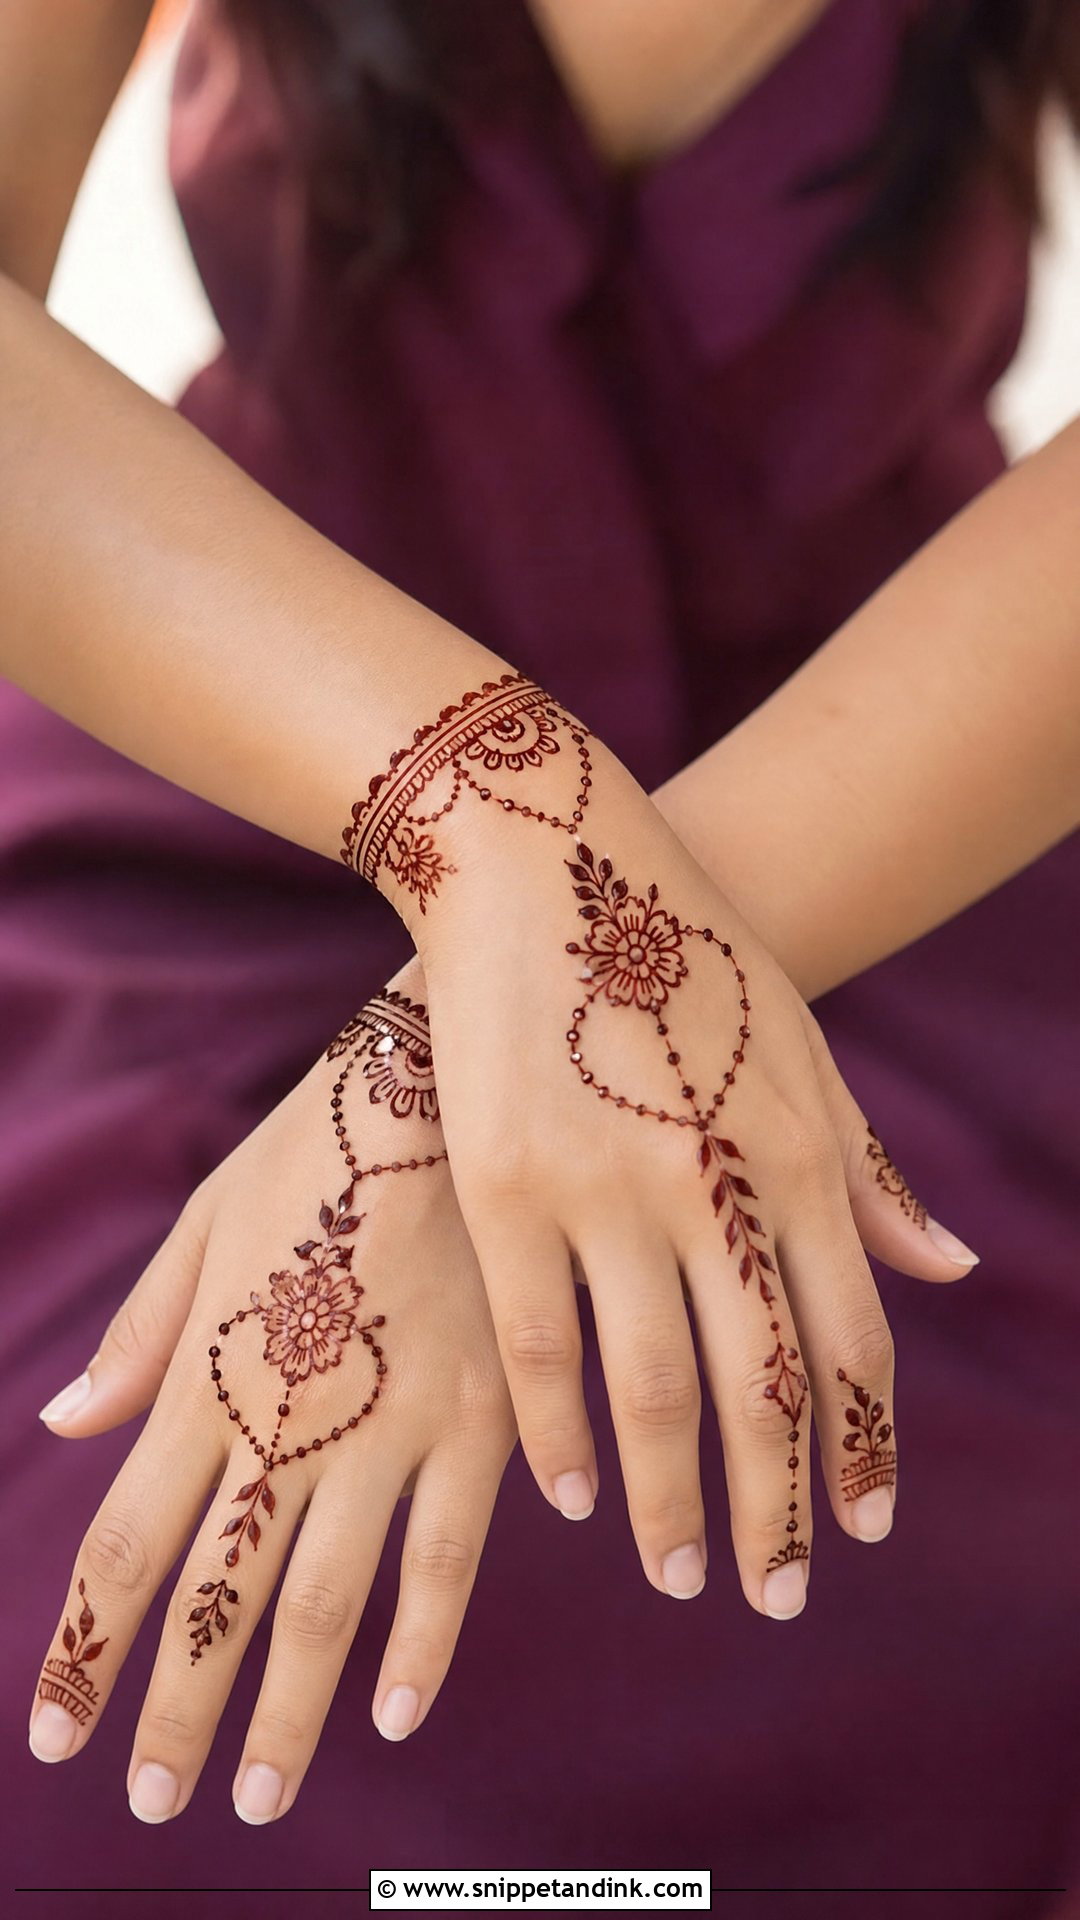
A wrist design acts like jewelry: a bracelet, bangle, cuff or chain linked to a small finger motif, usually on the back of the hand. I add small flowers, dots, leaves or a strip of jaali to the band and, for a fuller effect, connect it to a small mandala. Keep in mind that the inner wrist is a high-movement area. Fine lines there can blur if you bend your hand before the paste has set, so hold still for the first fifteen minutes or so.
19. Bracelet Mehndi Design
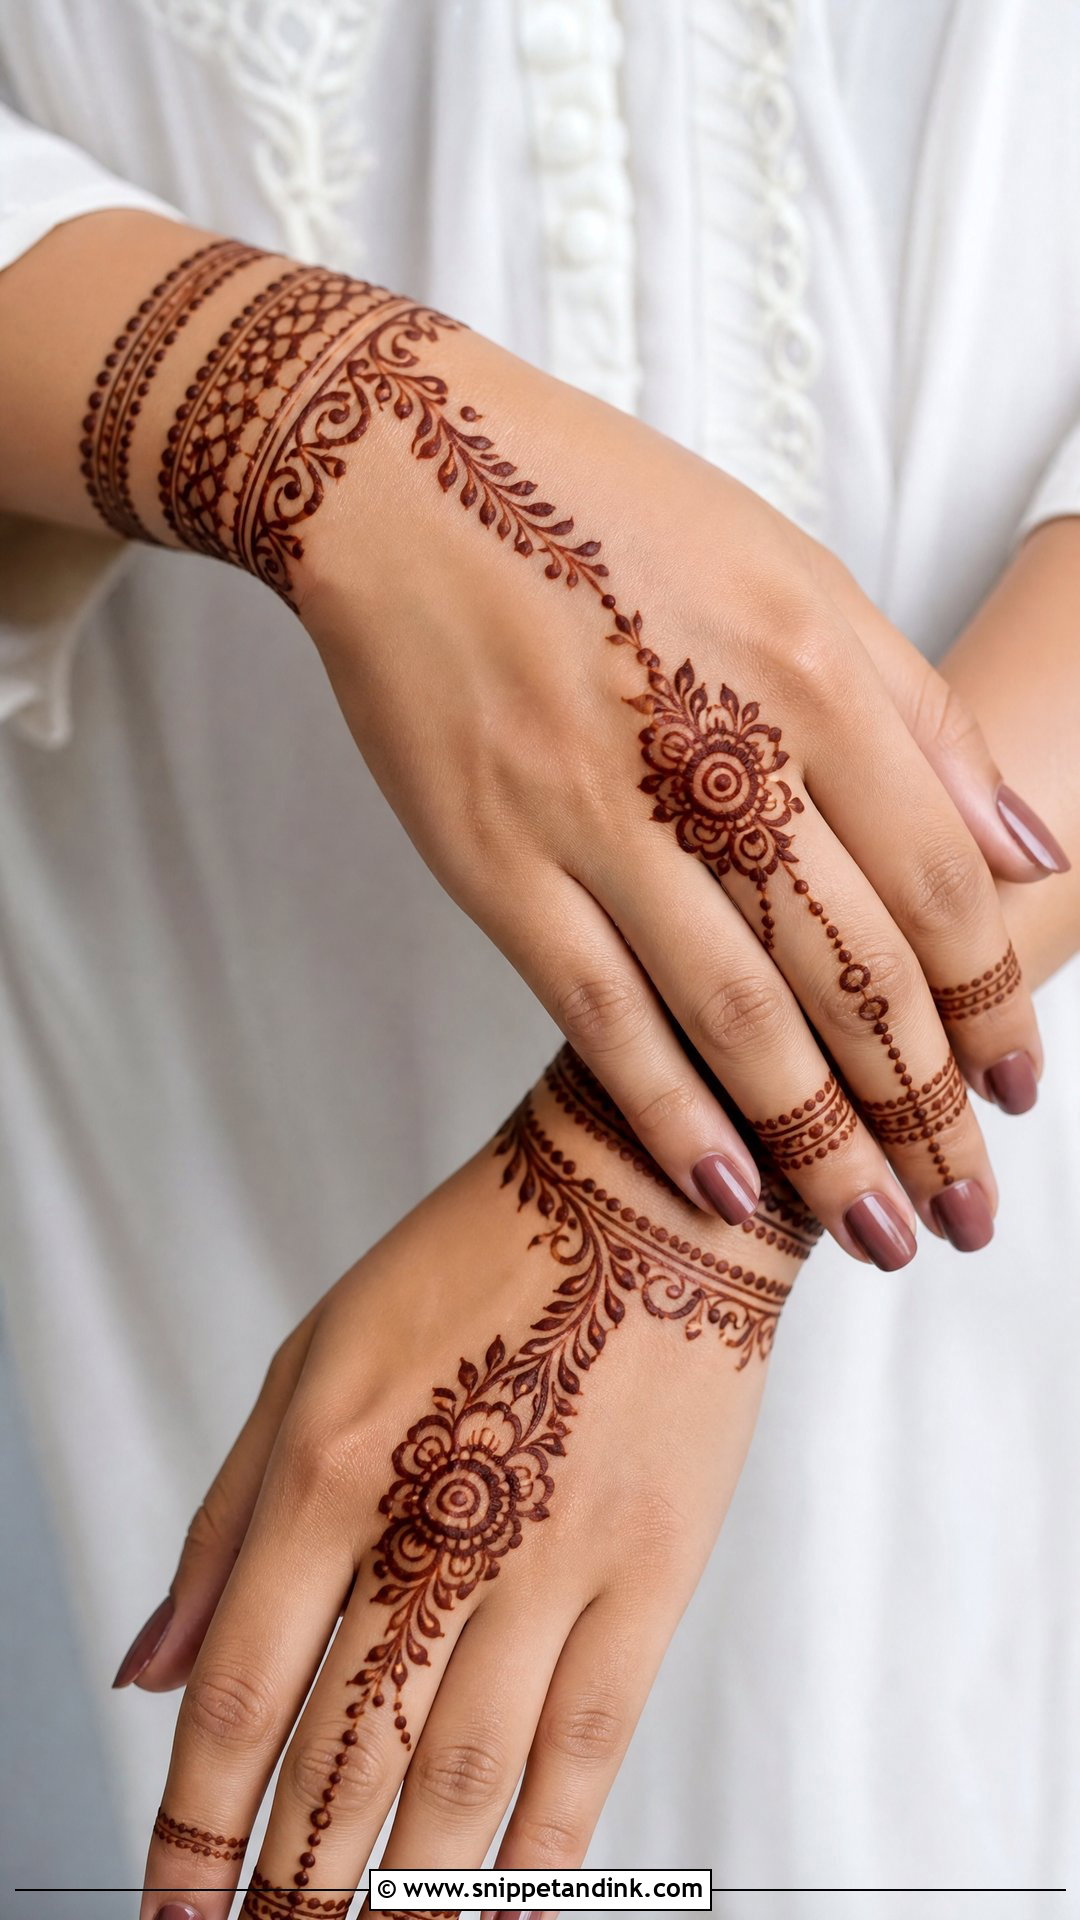
Bracelet mehndi wraps the wrist like a bangle and links to the fingers with fine chains, dots or leafy strings, all on the back of the hand. It’s practical henna: your palm stays clear for daily tasks, and the design still looks dressed. One slim band keeps it minimal; layered cuffs with flowers and jaali make it richer. I check that both bands sit at the same height on each wrist, since uneven bracelets are the first thing people notice when their hands are side by side.
20. Engagement Mehndi Design
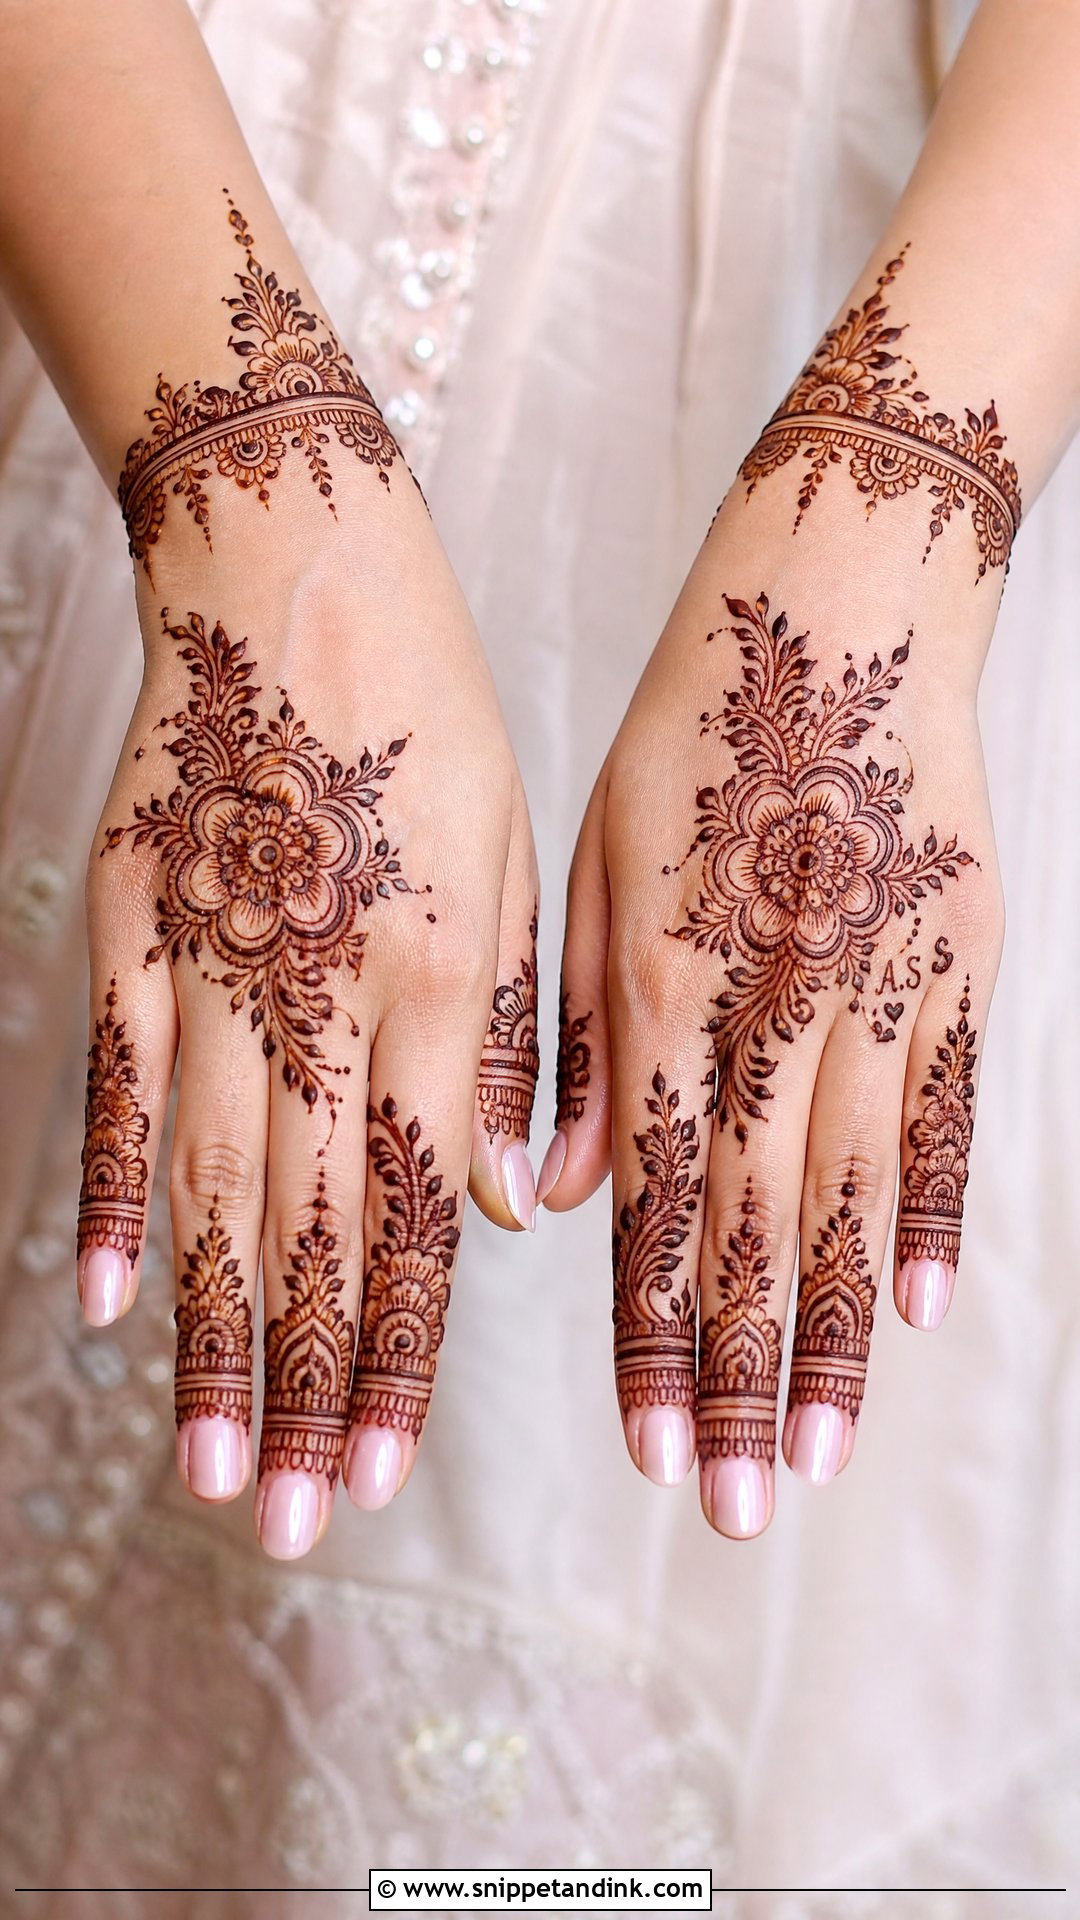
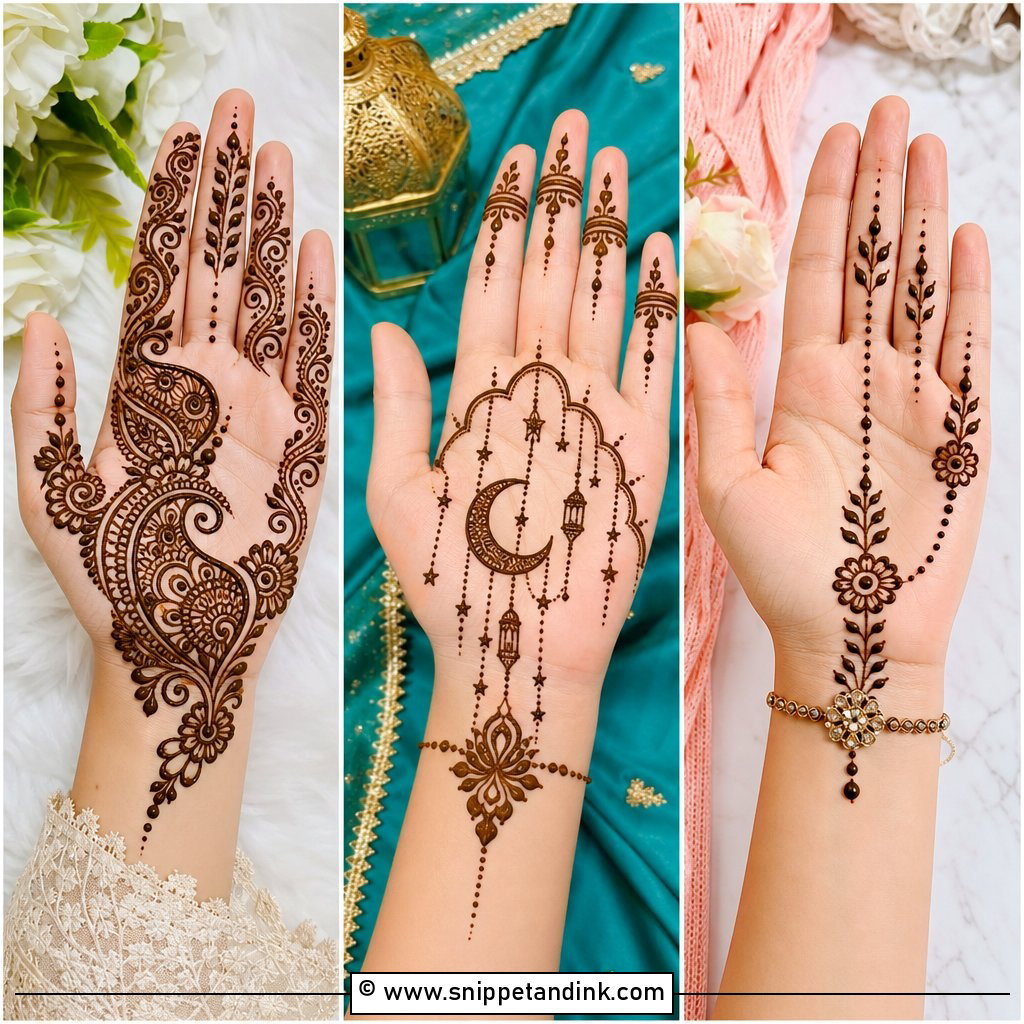
Engagement mehndi design is mostly about the ring. Back hand designs are the usual choice because they sit right next to it in every photo. A central floral motif, a bracelet cuff, delicate finger patterns and open space keep it light. I leave the base of the ring finger fairly clean so the band isn’t competing with henna. Initials, a tiny ring motif or the date can be tucked in somewhere discreet. Traditional families often prefer paisleys and mandalas; modern couples lean toward floral trails and chains.
21. Eid Mehndi Design
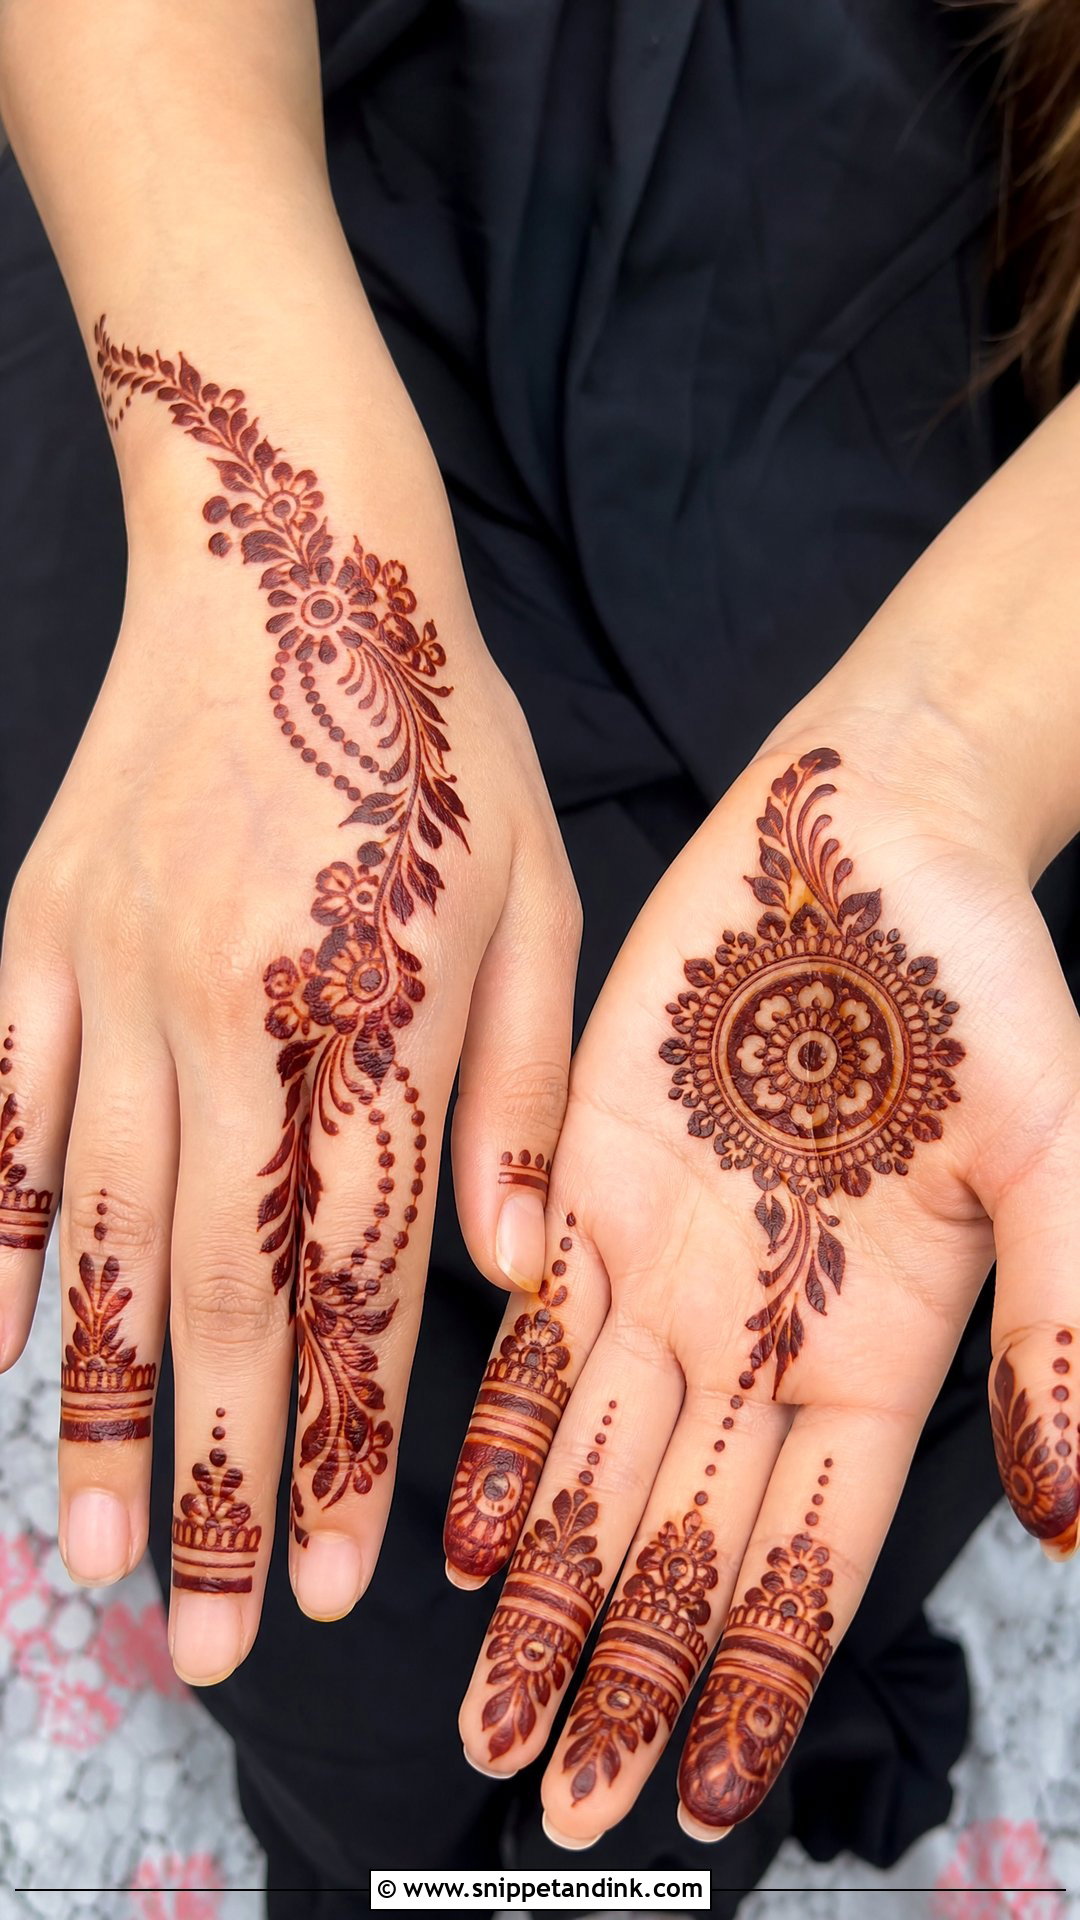
Eid henna usually goes on the night before, often for several family members in a row, so it needs to be quick. Arabic trails, floral back hand patterns, mandalas and simple finger designs all sit well with bangles and traditional outfits. A diagonal vine with bold flowers, a palm mandala with decorated fingers or a bracelet-style back hand are my go-to choices. Younger kids can take smaller versions with dots and leaves. Medium-thick lines hold their shape better overnight than very fine ones, and the extra hours under the paste deepen the color by morning.
22. Diwali Mehndi Design
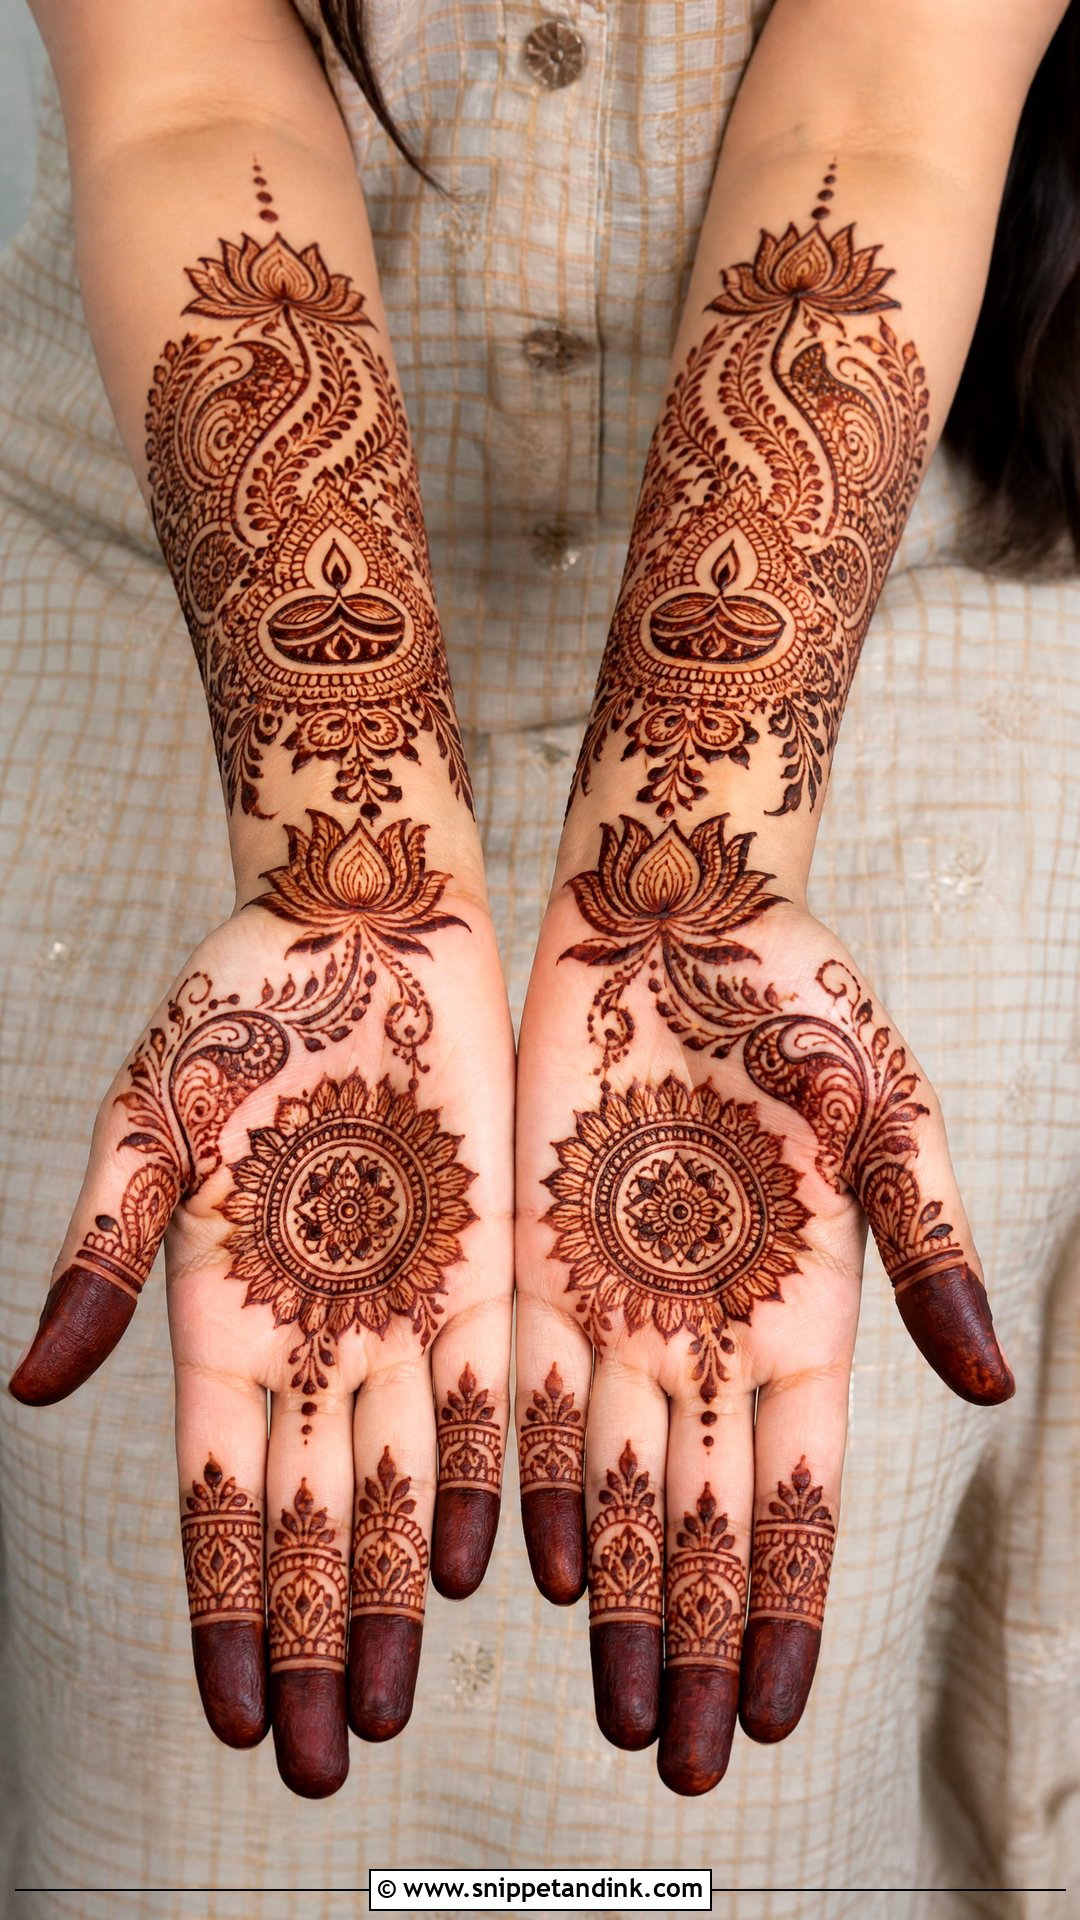
Lotus flowers, mandalas, paisleys, leafy vines and diya-inspired shapes are the vocabulary of Diwali mehndi. For a family celebration I like a palm-centered layout; for something lighter, a floral trail across the back hand with a bracelet border at the wrist. Diwali outfits are already colorful and detailed, so I keep the design organized rather than packed. Clear motifs that stain clearly will hold up next to embroidery and heavy jewelry far better than dense filler.
23. Karwa Chauth Mehndi Design
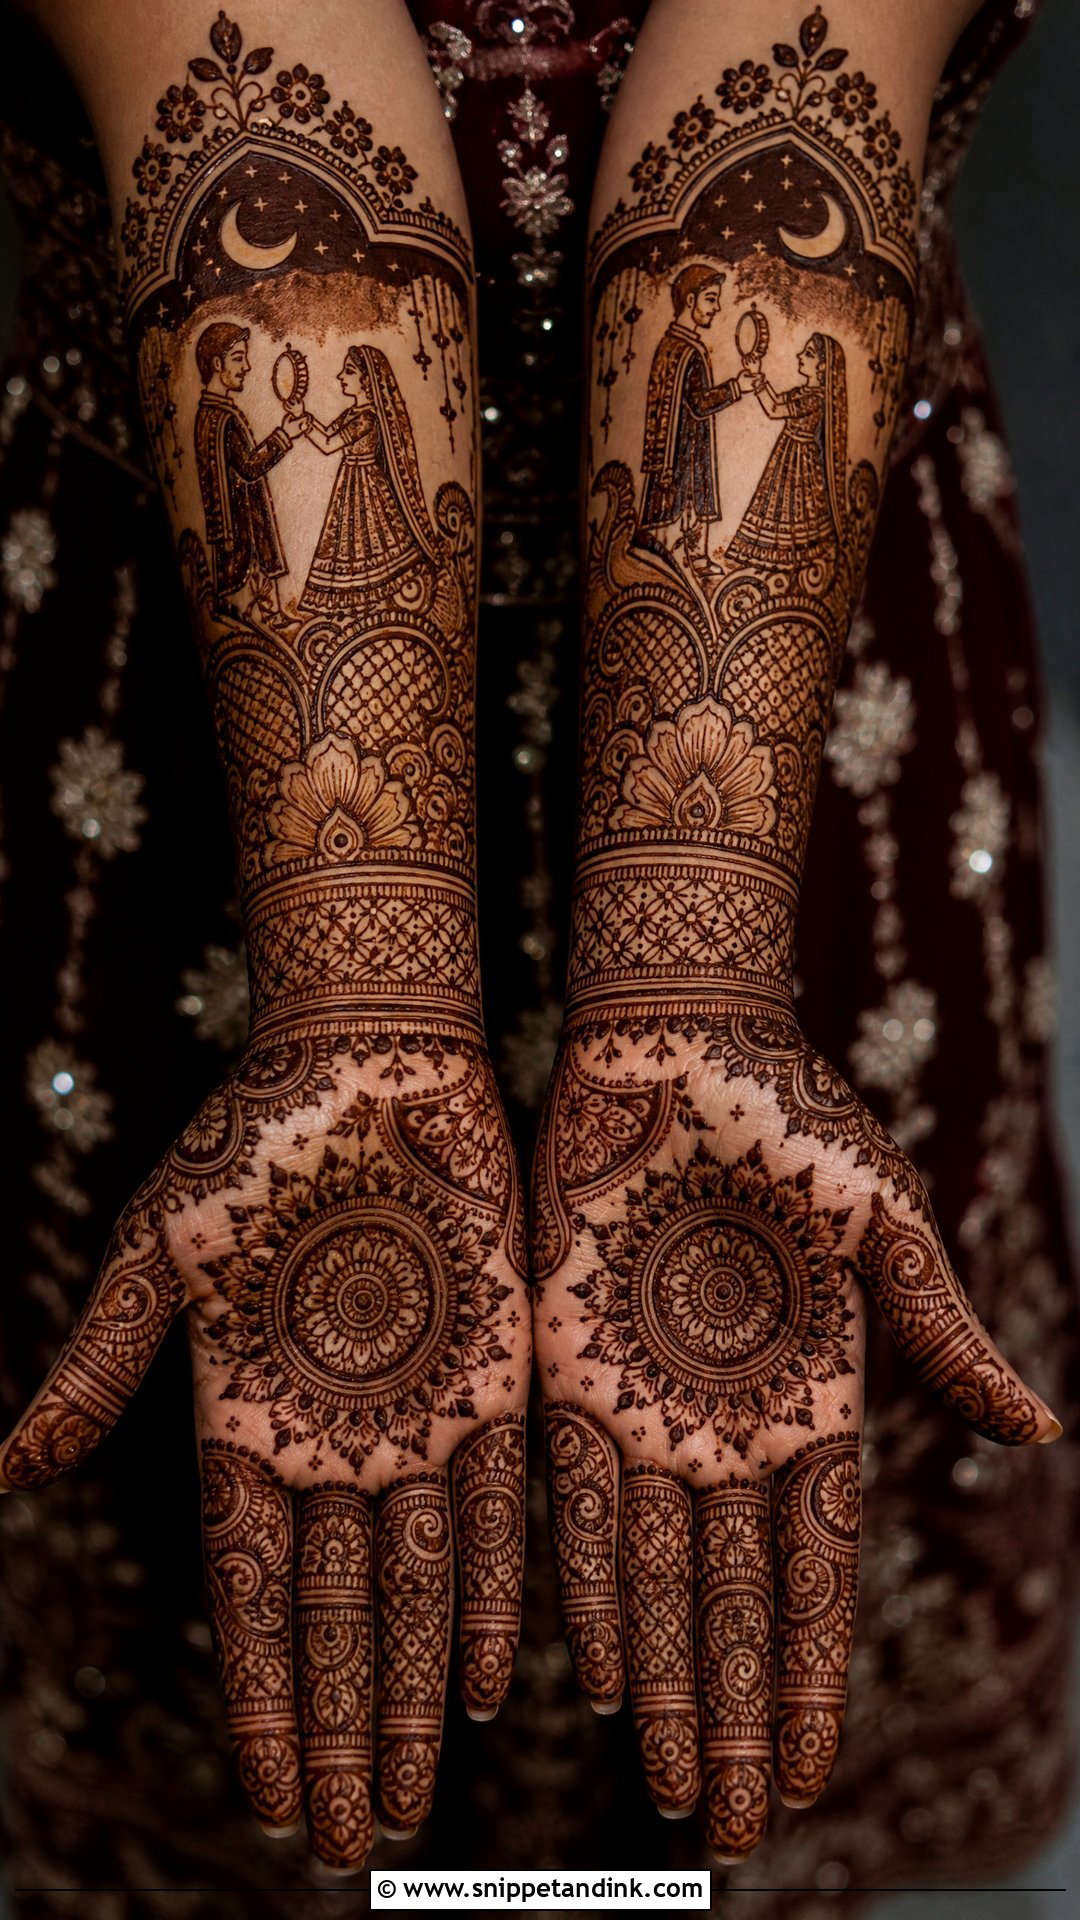
Karwa Chauth designs tend to be traditional and full: mandalas, paisleys, bride and groom figures, moon motifs and fine finger work, sometimes as heavy as bridal mehndi. A palm mandala with dense wrist bands and filled fingertips is a reliable layout, and initials or a small couple element make it personal. Since the hands are photographed during the rituals, symmetry matters. I check the fingertips are filled evenly on both hands, because a half-filled fingertip shows up immediately in close-up.
24. Teej Mehndi Design
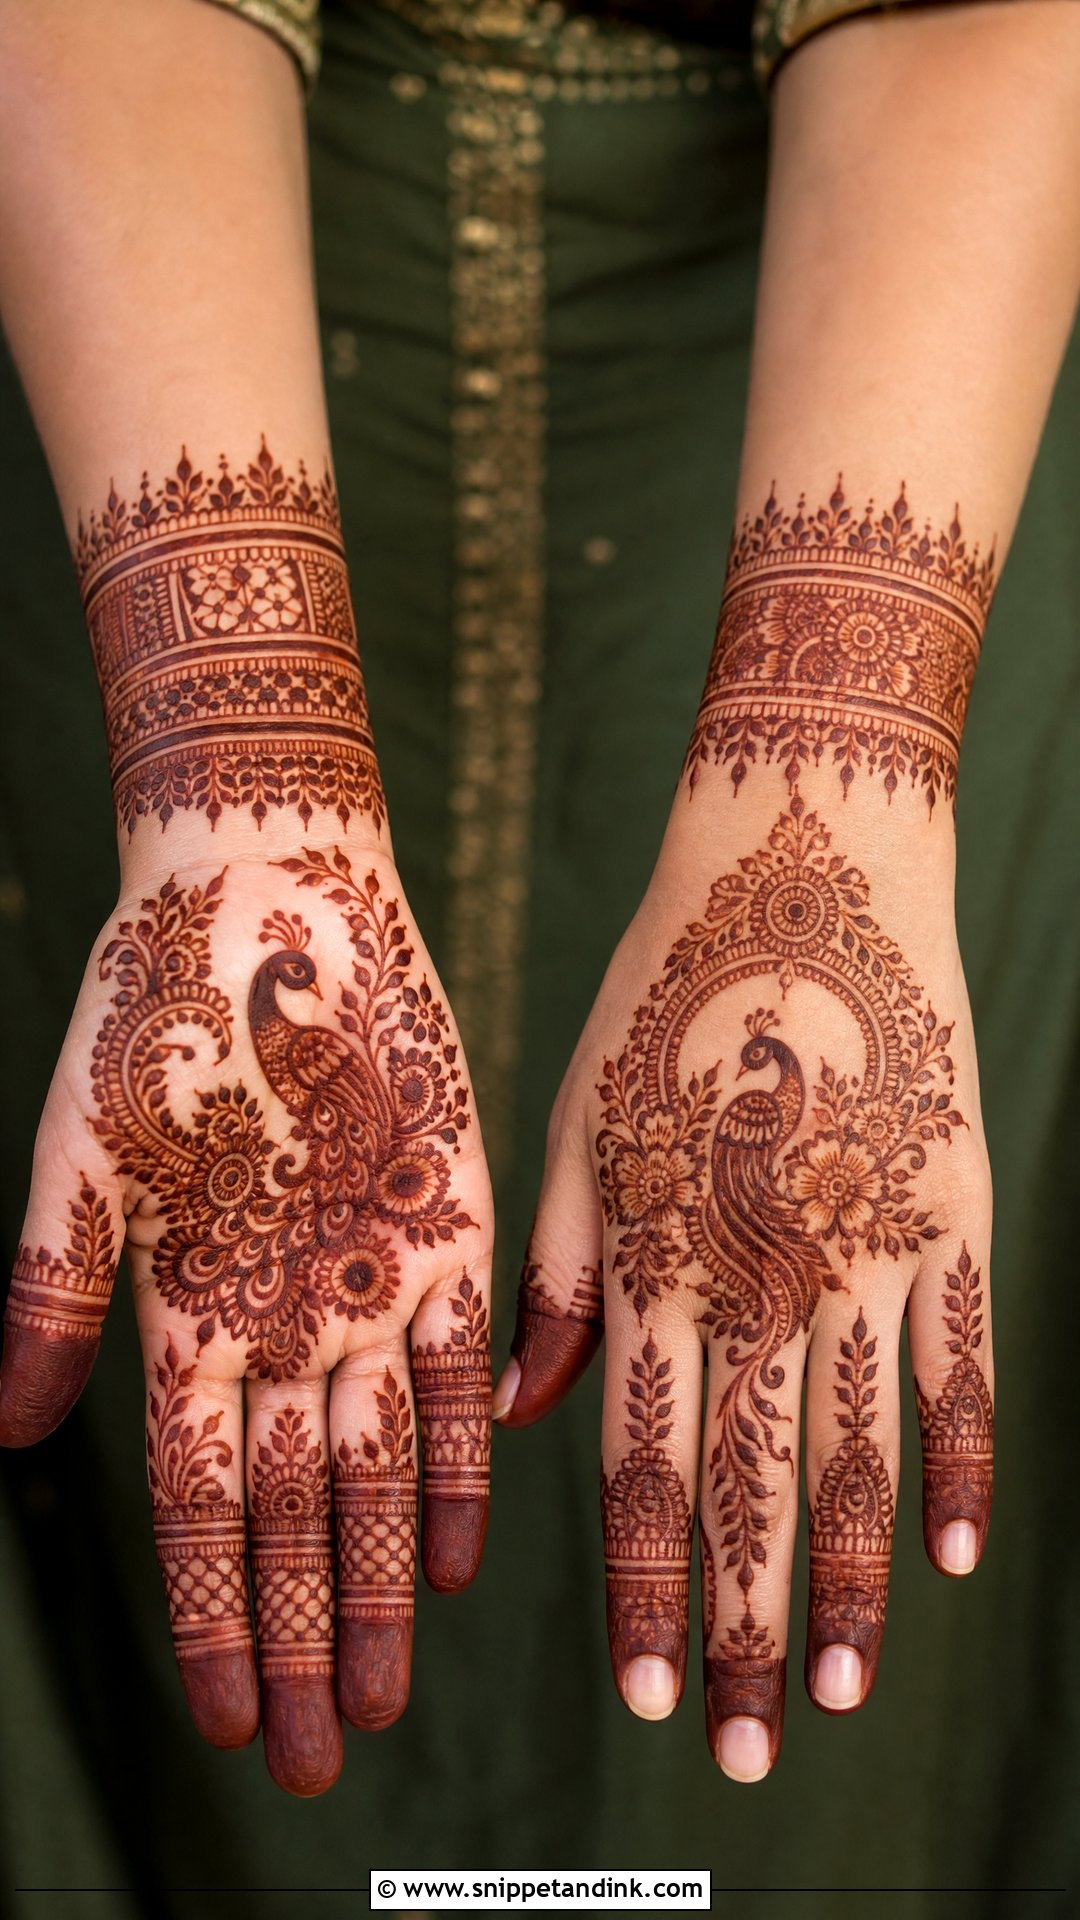
Teej mehndi leans on leafy vines, peacocks, paisleys, mandalas and florals, the imagery of the monsoon season. A full palm with decorated fingers is the classic choice, and a back hand floral trail keeps it lighter. Brides and newly married women often take the design toward the forearm. Bangle-style wrist bands and small dotted borders finish it well. Because Teej falls in humid weather, the paste can stay soft longer, so allow extra drying time before you move around.
25. Baby Shower Mehndi Design
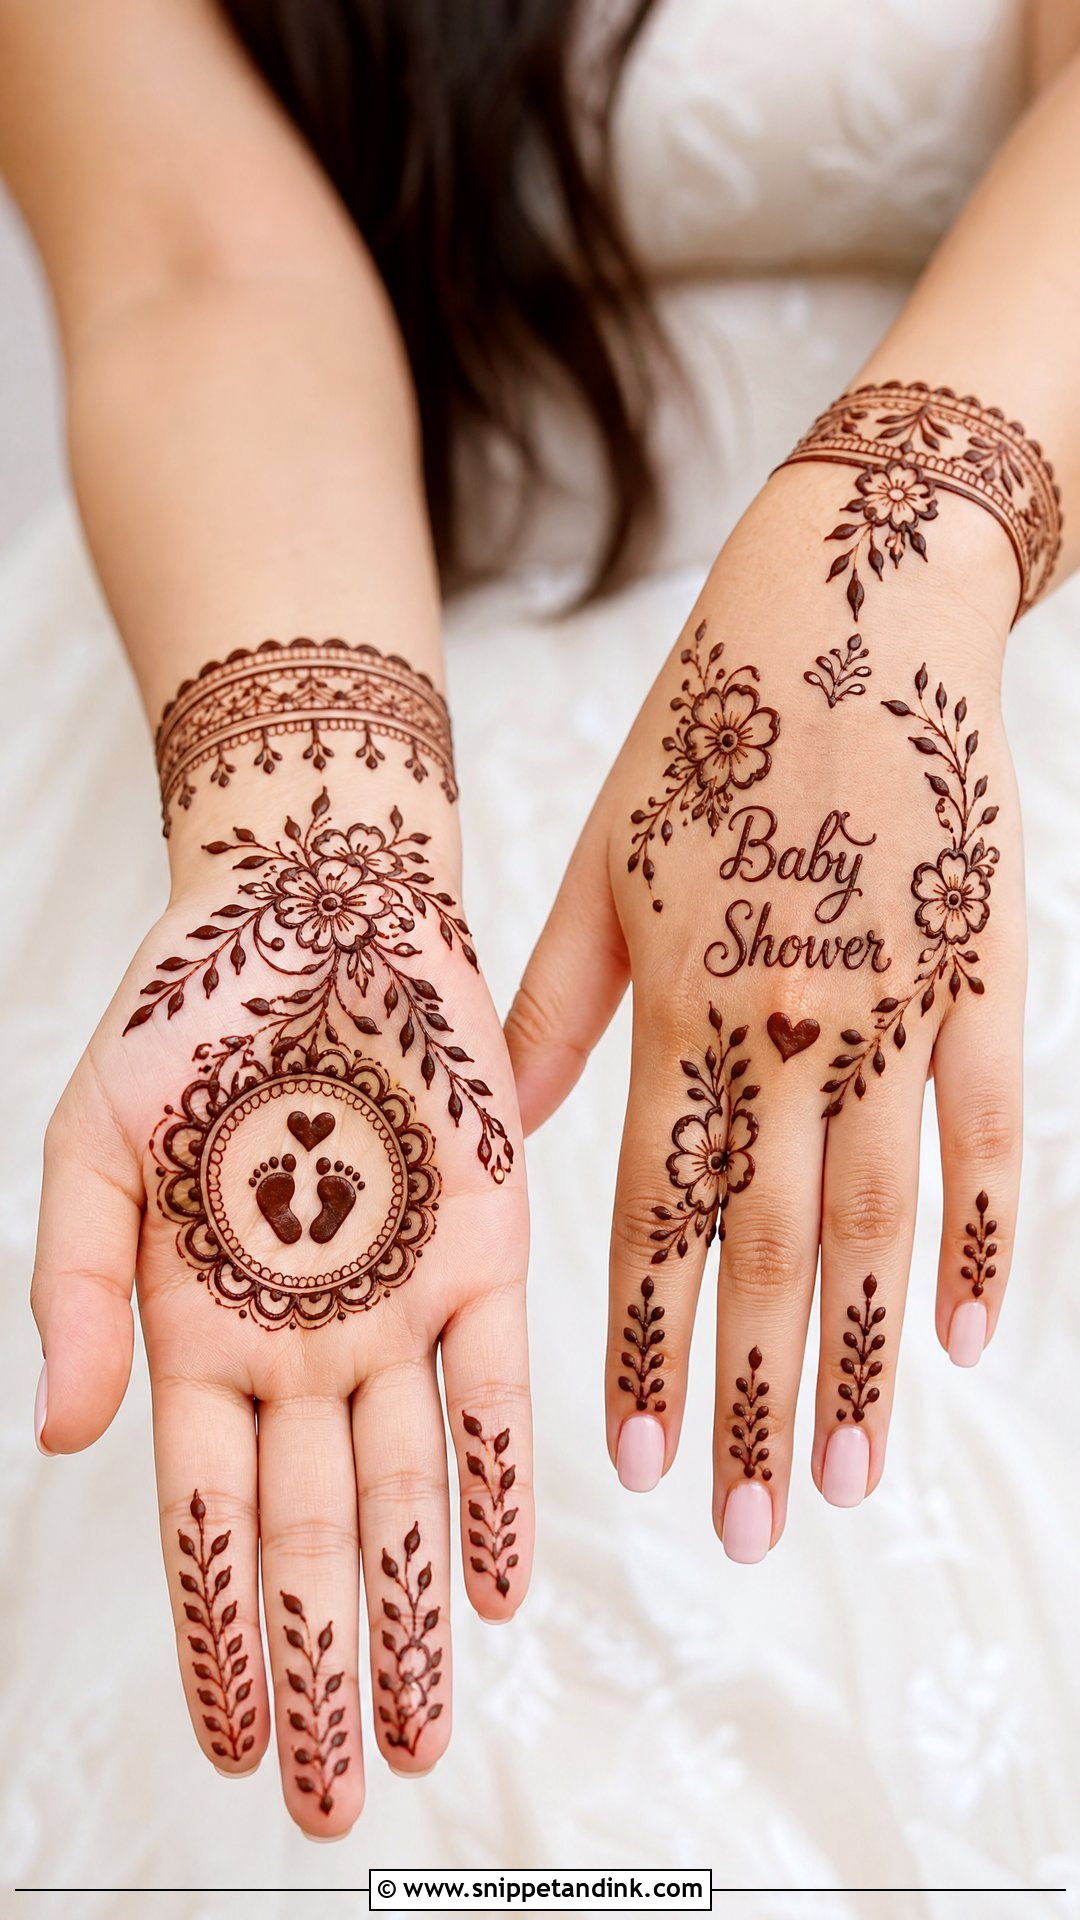
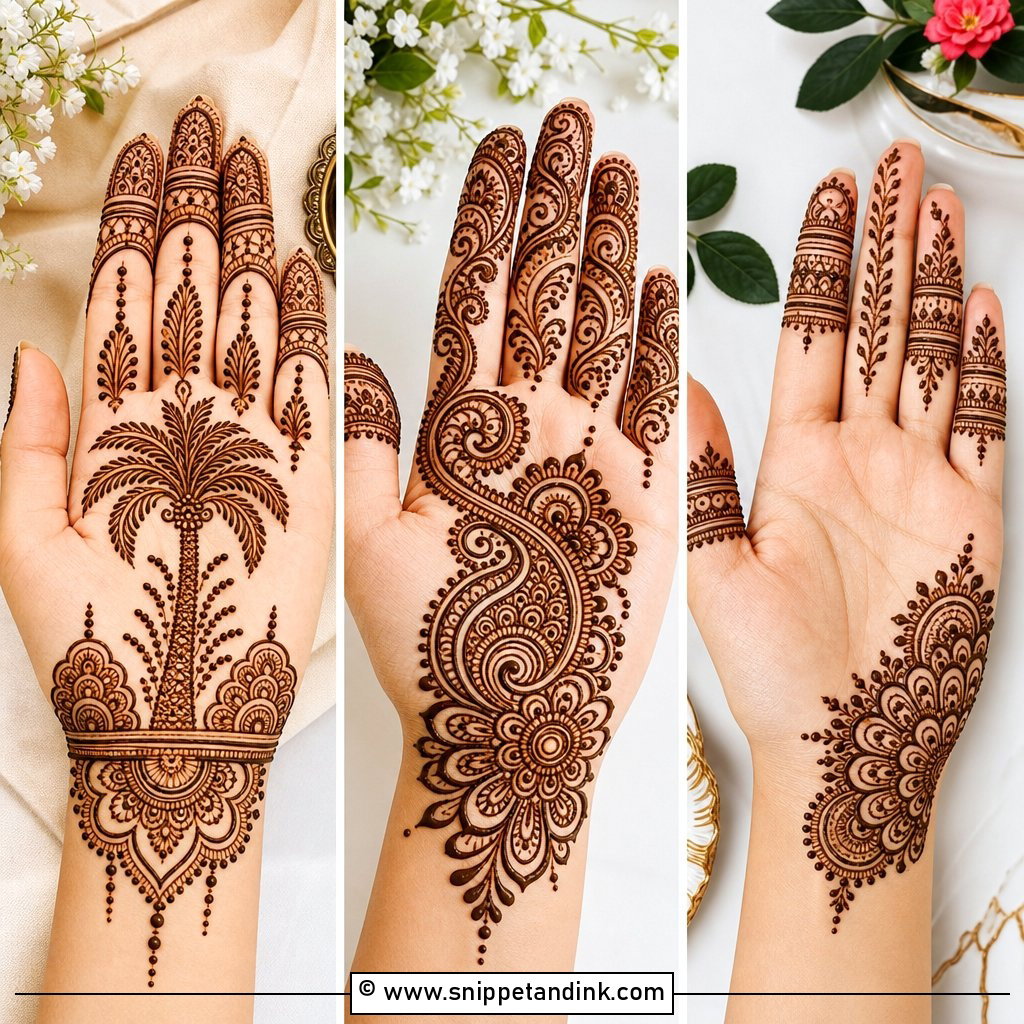
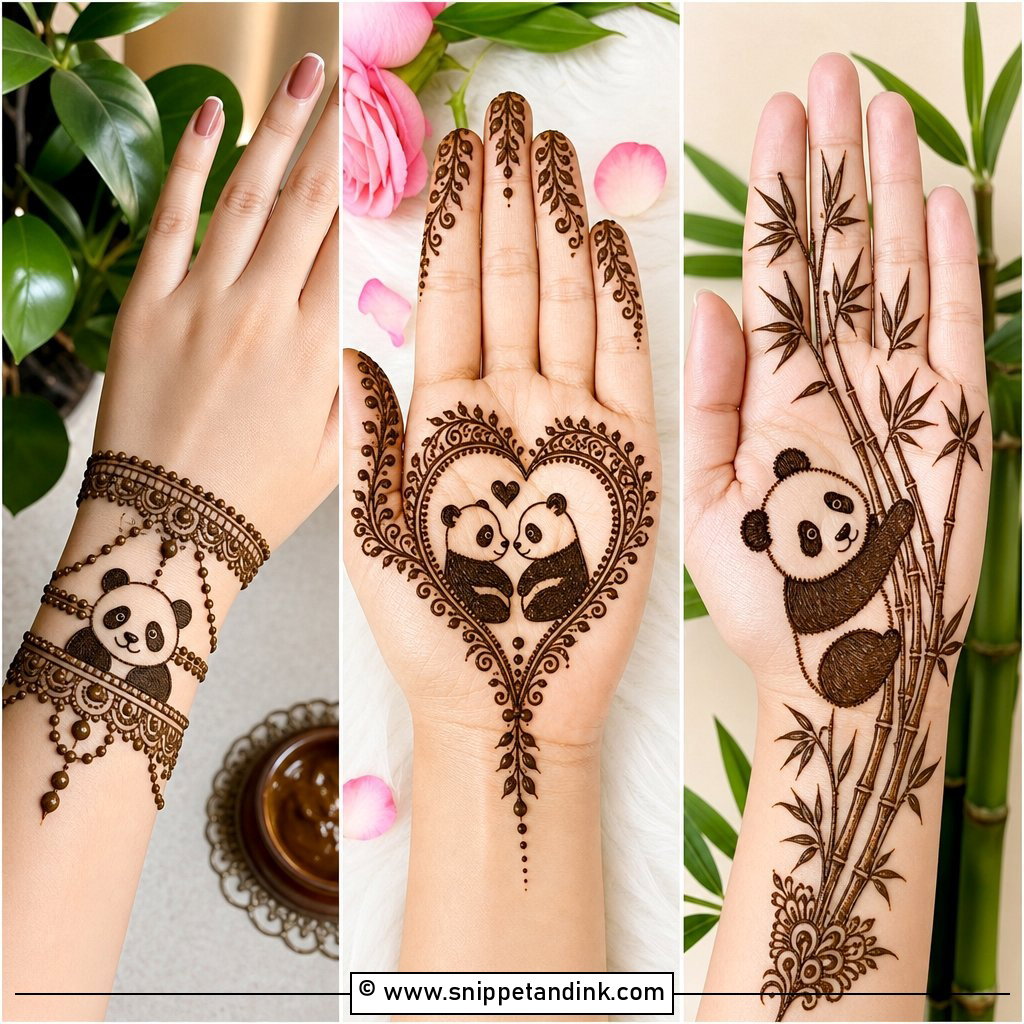
Baby shower designs are usually lighter: florals, tiny footprints, hearts, vines and soft mandalas on the palm, back hand or wrist, with a name initial or small cradle motif if you like. Long events and a pregnant guest of honor mean comfort comes first, so I keep it to medium coverage that dries quickly. Natural henna made without strong essential oils is the gentler choice, and a quick test dot a day or two before is worth doing if skin has become more sensitive. A floral half-hand with a neat wrist border works well.
26. Bridesmaid Mehndi Design
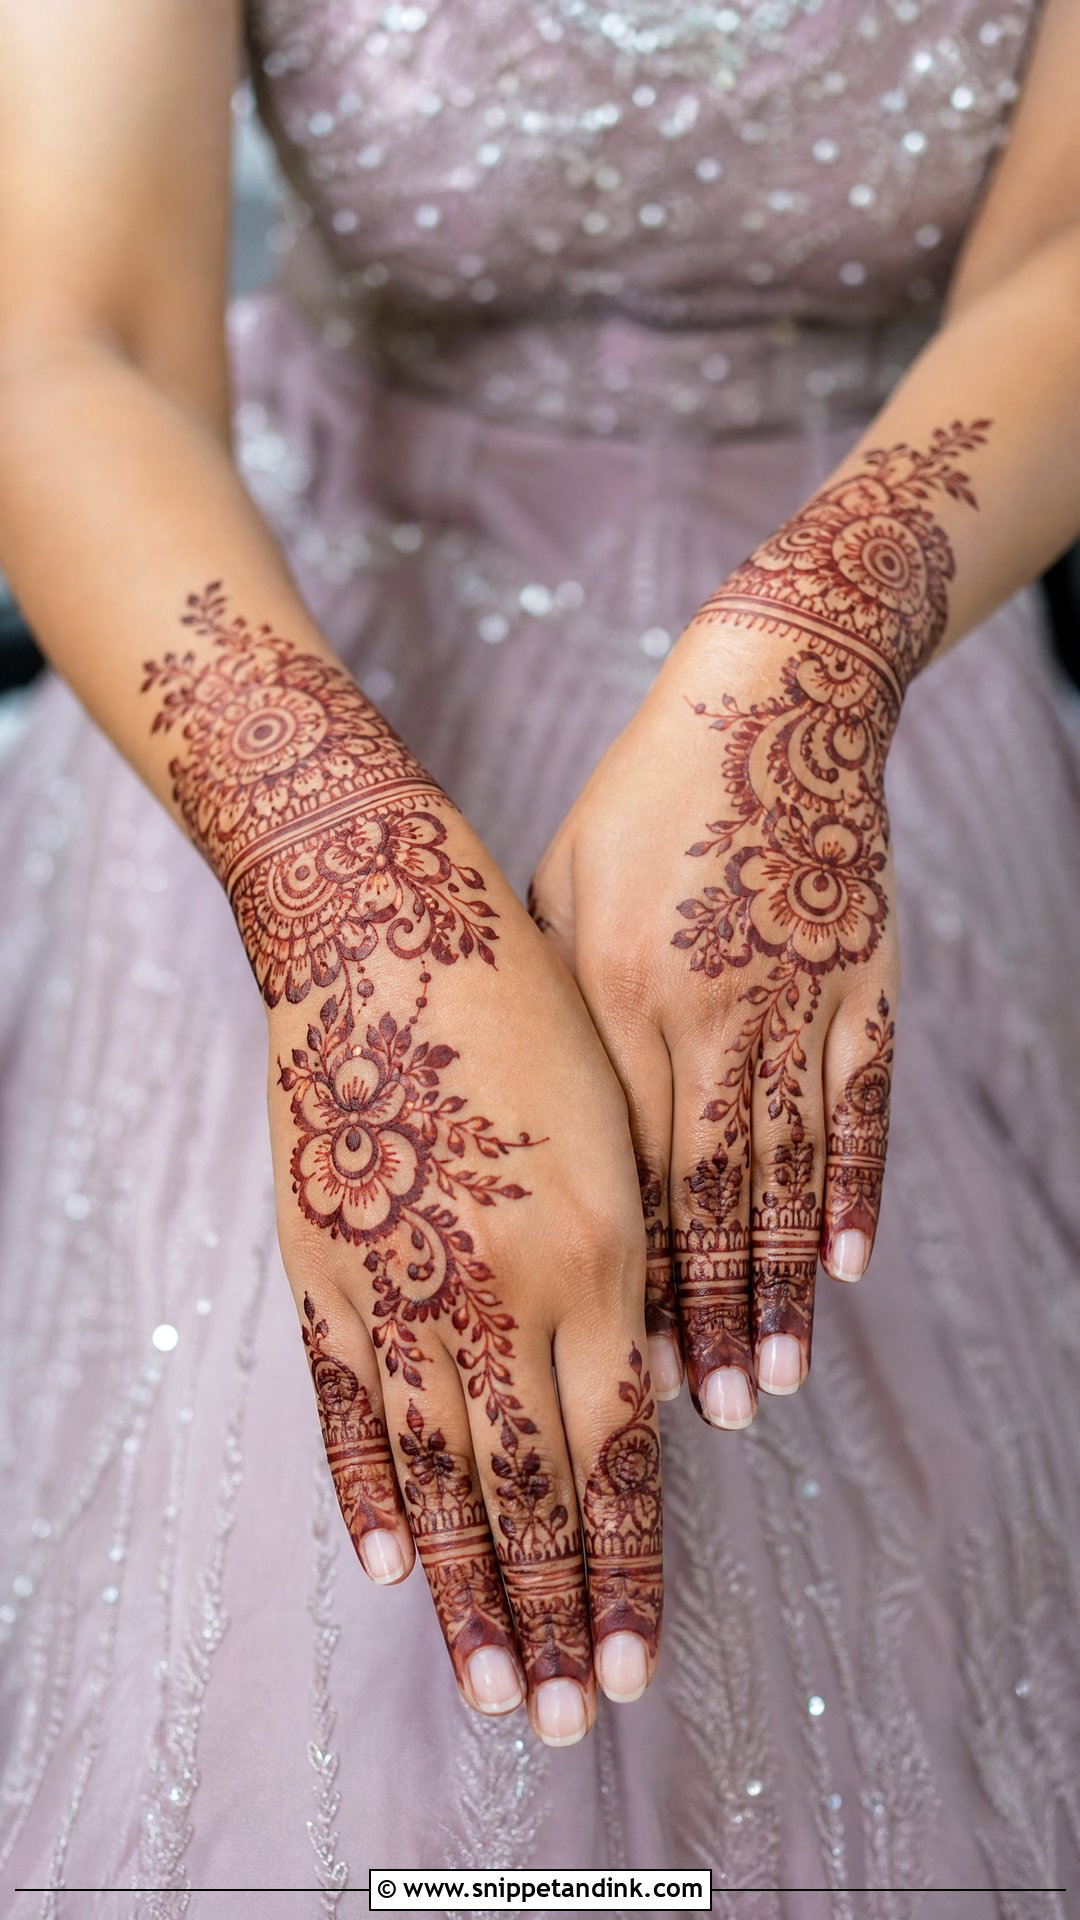
Bridesmaids want to feel festive without matching the bride’s coverage, so I keep their designs a step lighter: floral trails, mandalas, bracelet bands and decorated fingers, usually on the back hand where they show in group photos. Matching patterns look coordinated; small variations let each person’s taste show. Arabic and Indo-Arabic styles are practical because they’re much quicker than bridal mehndi, which matters when several bridesmaids are waiting their turn.
27. Kids Mehndi Design
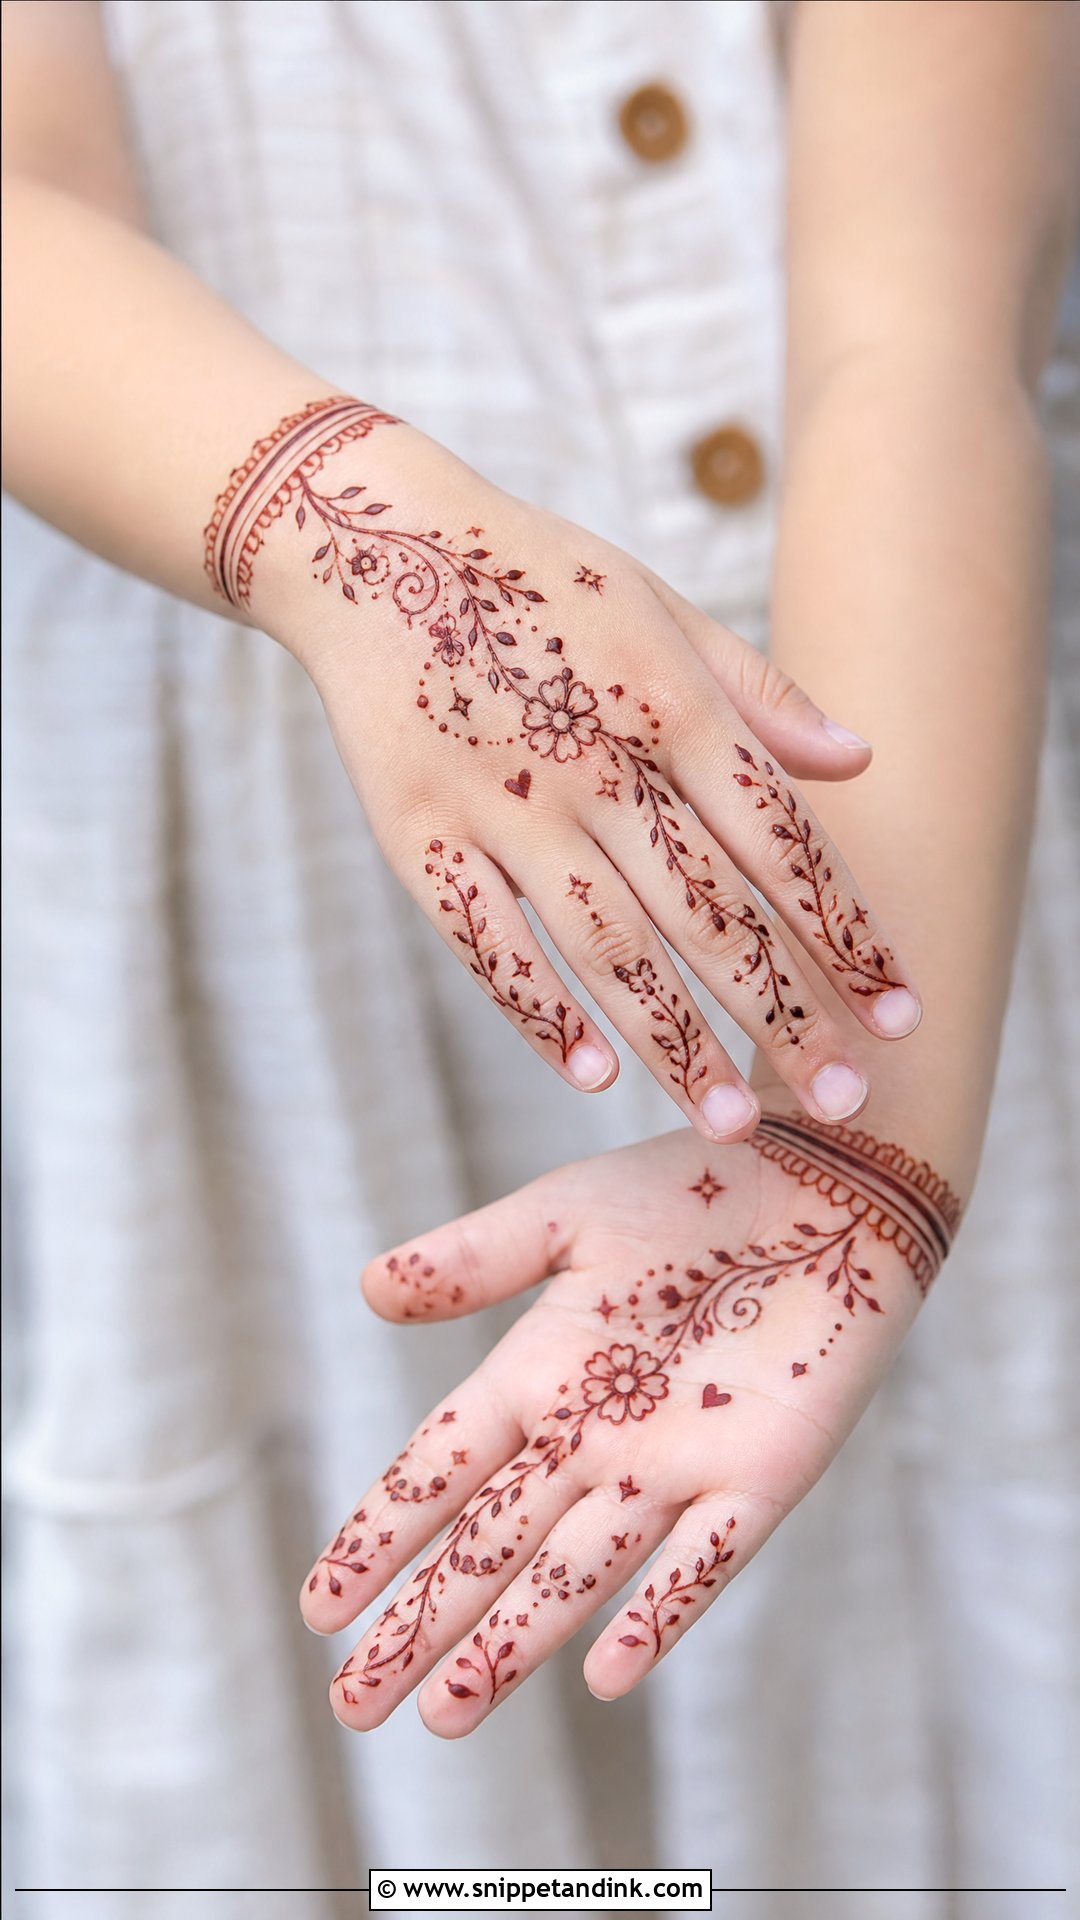
With children, speed beats detail. Small flowers, hearts, stars, dots, vines or a tiny mandala, finished in a few minutes before they start fidgeting. A small back-hand motif with finger dots or a palm flower with a wrist band is about the limit. I only use natural henna on kids and avoid any paste sold as instant black. Dense designs smudge before they dry, so keep it light and recognizable.
28. Teen Mehndi Design
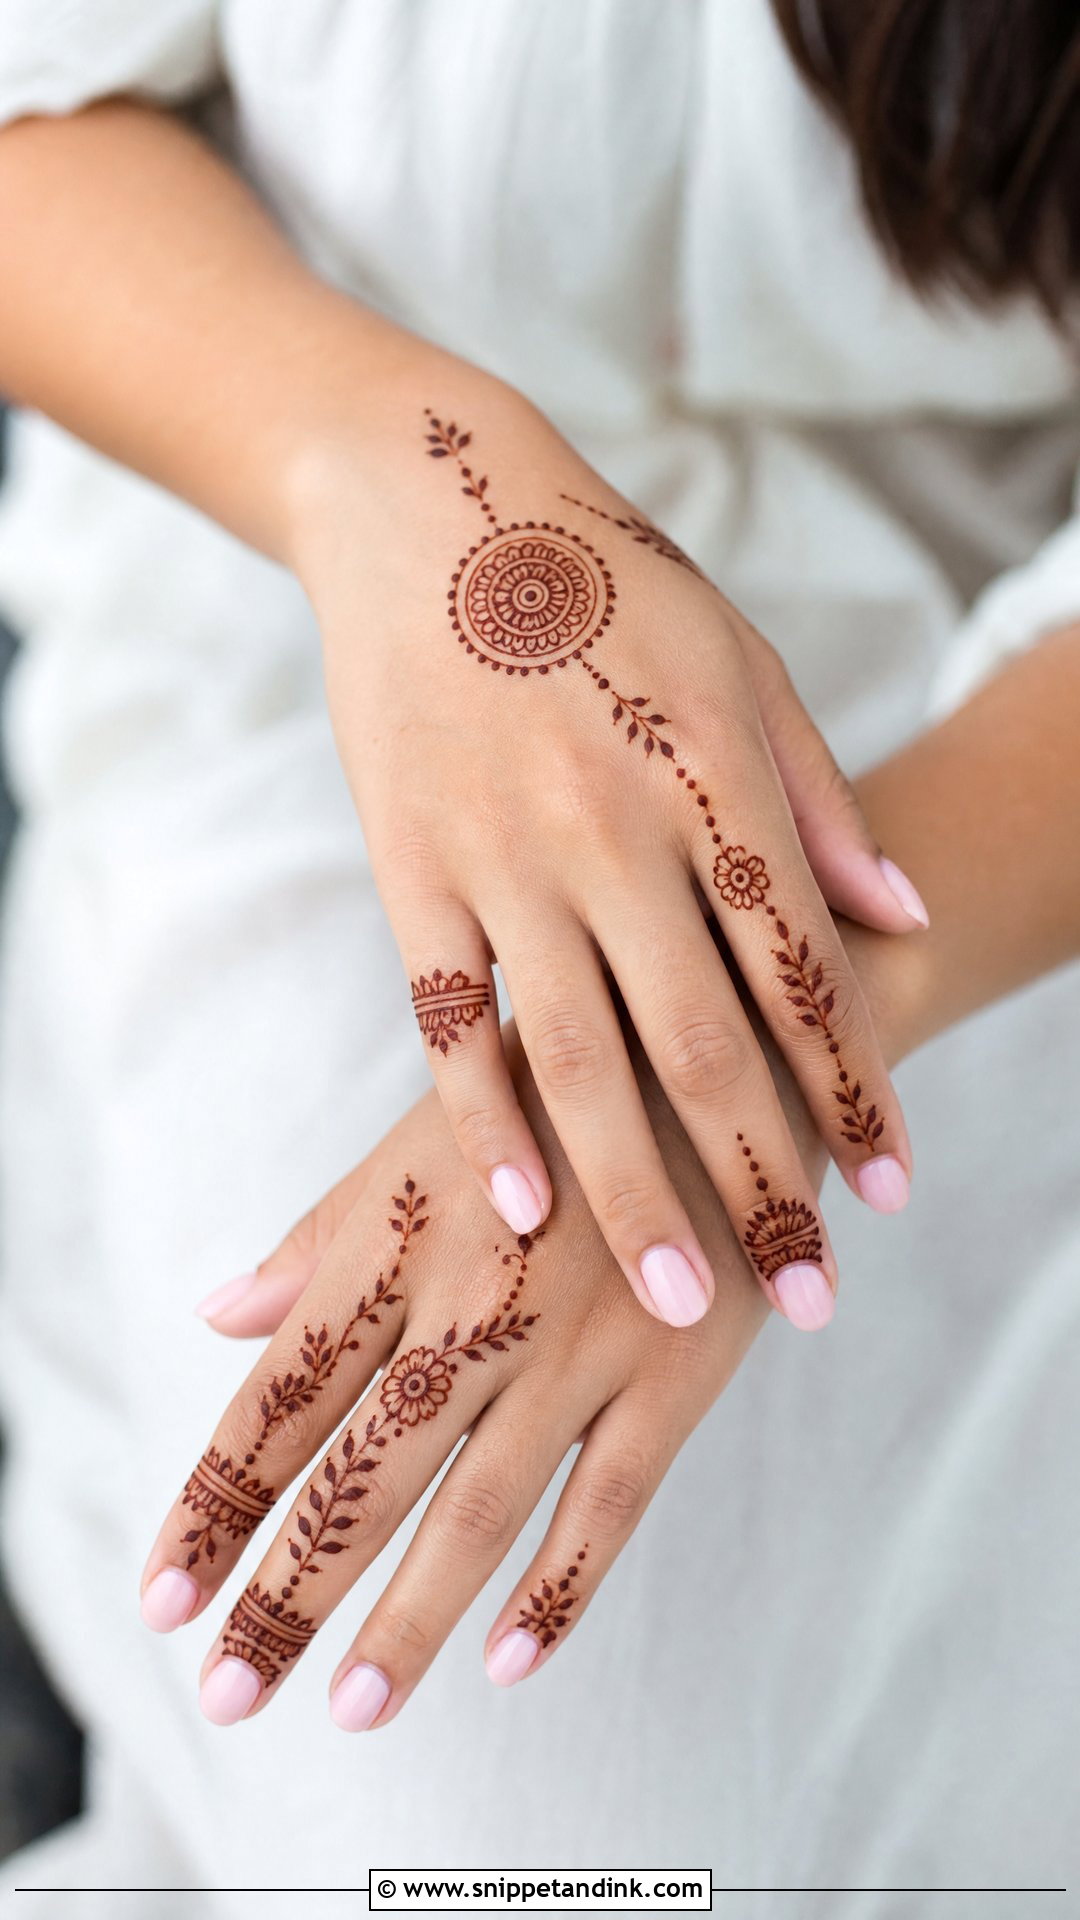
Teens usually want something that goes with modern clothes: finger patterns, bracelet designs, small mandalas, floral trails and lots of negative space, mostly on the back of the hand. One bold flower with leafy curves and decorated fingertips is a good starting point. For school or college, keep it minimal. For festivals, add wrist detail and fuller finger bands. A design they can wear to class the next day without explaining is usually the one they’re happiest with.
29. Beginner Mehndi Design
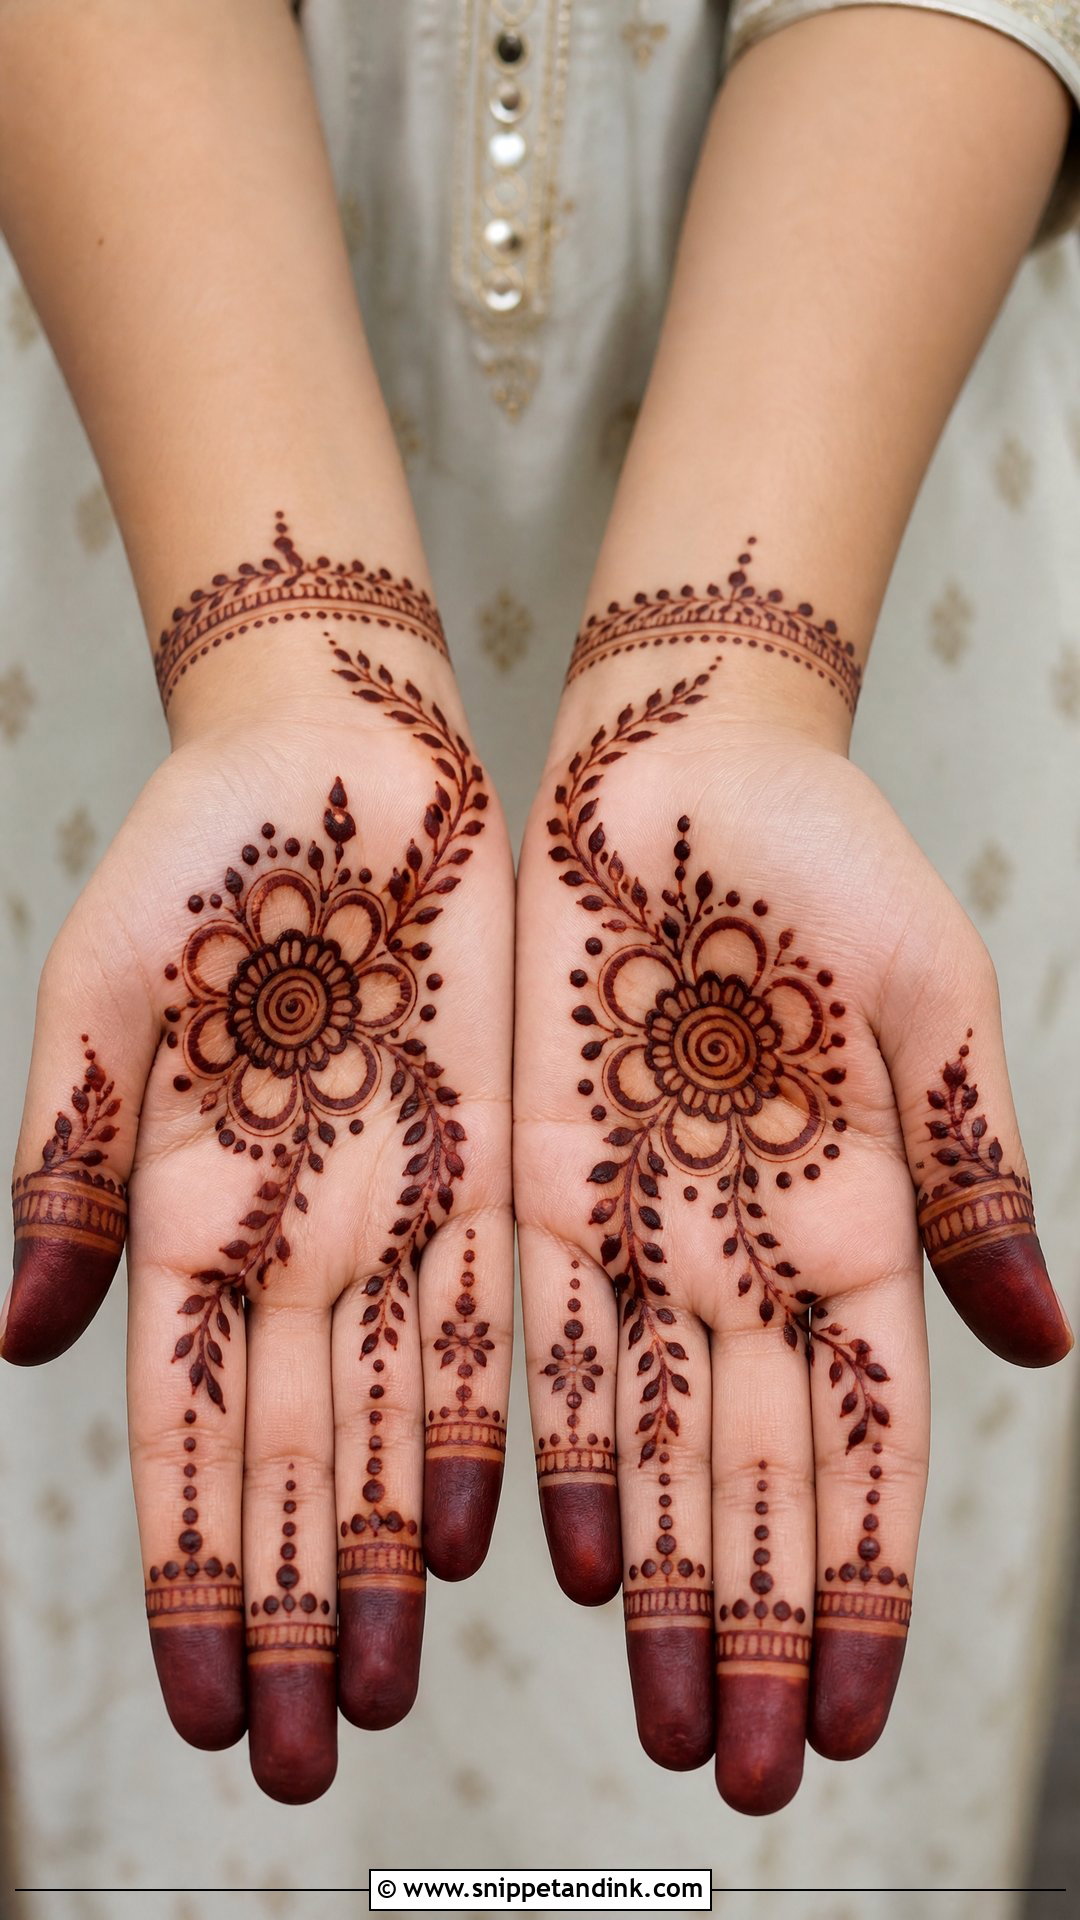
If you’re learning, start with circles, dots, leaves, petals, curved lines and simple bands. A palm mandala with striped fingers is one of the easiest complete looks to practice, and a back hand floral trail is forgiving because small slips disappear into the vine. Skip tiny fillers until your lines are steady. Even cone pressure matters more than anything else; squeeze gently and lift the tip slightly above the skin so the paste lays down like a thread rather than being dragged.
30. Moroccan Mehndi Design
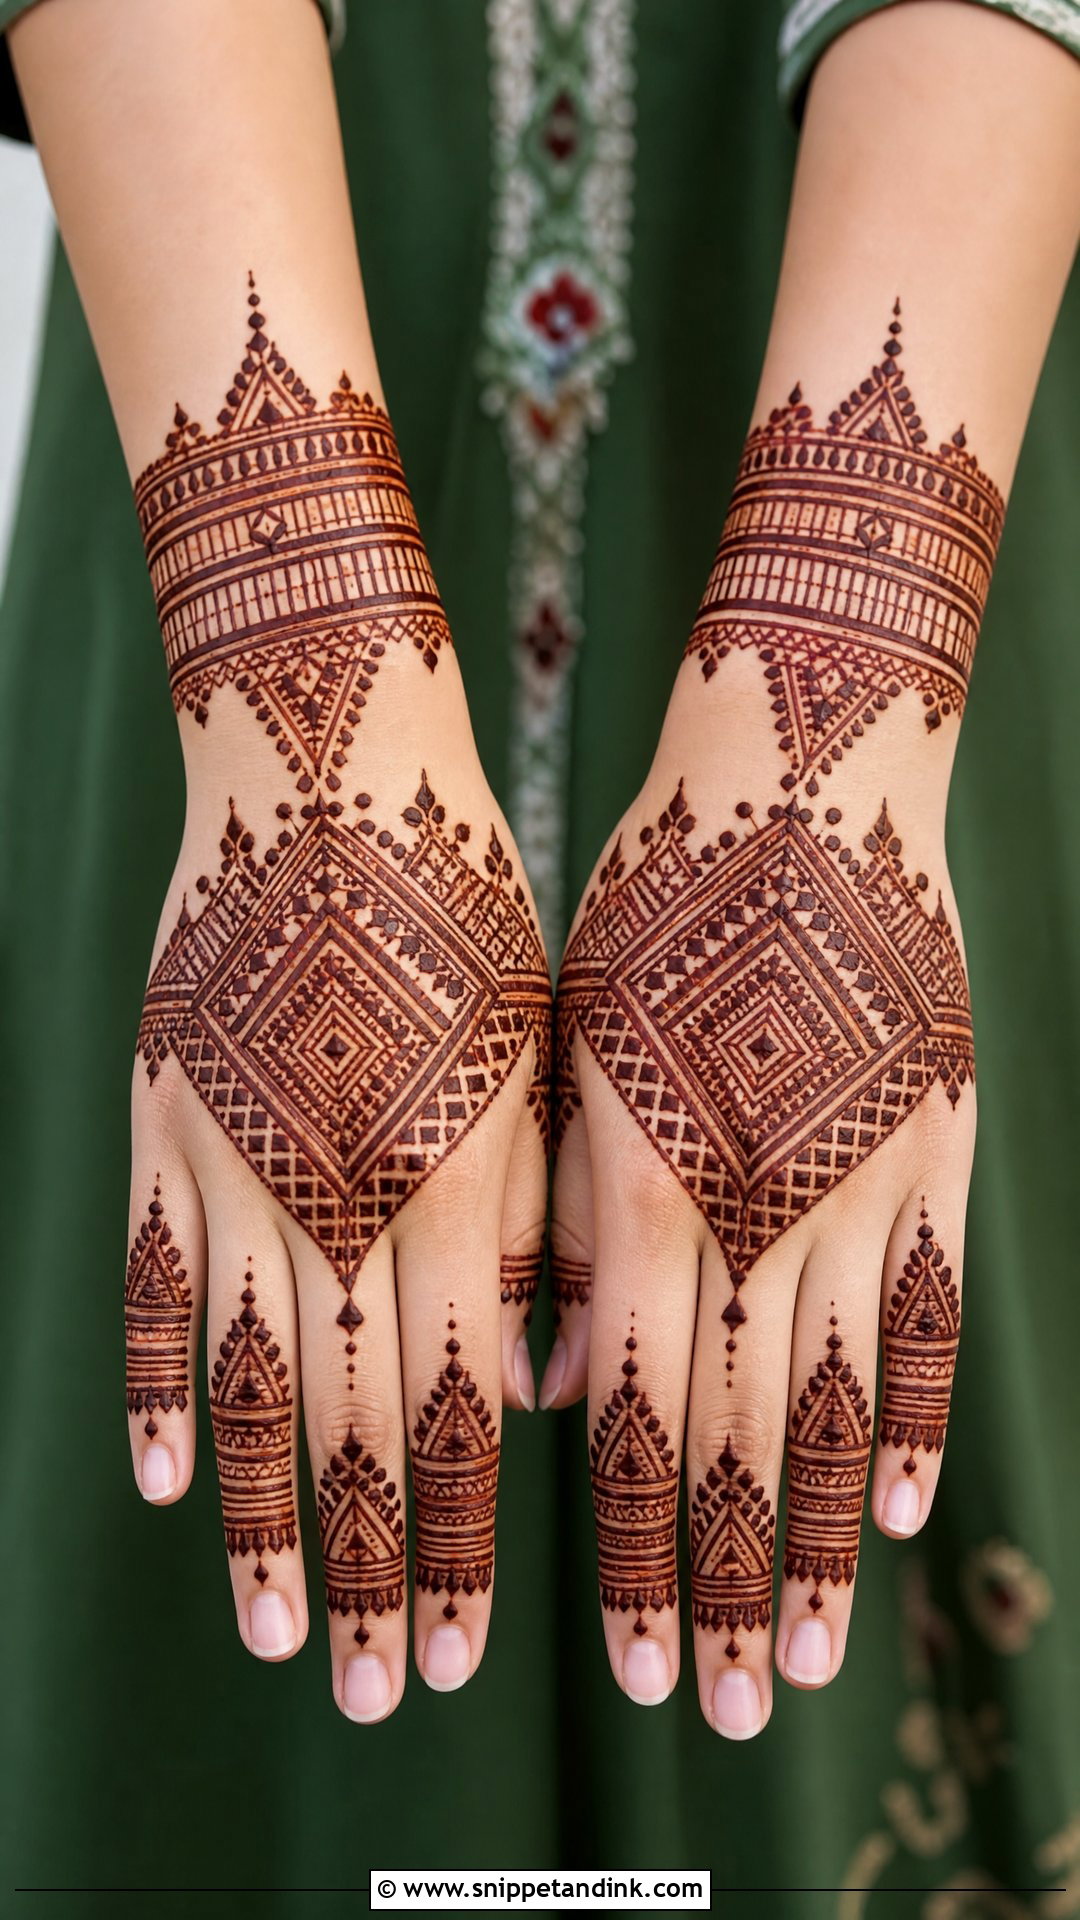
Moroccan mehndi design uses diamonds, triangles, straight lines, grids and dots rather than flowers, and it follows the bones of the hand: lines along the fingers, bands across the knuckles, a central diamond on the back of the hand. It suits people who don’t want anything romantic. Straight lines are less forgiving than curves, so I work in short sections and keep the spacing even. A central diamond, a wrist cuff and matching finger bands make a full look.
31. Gulf Mehndi Design
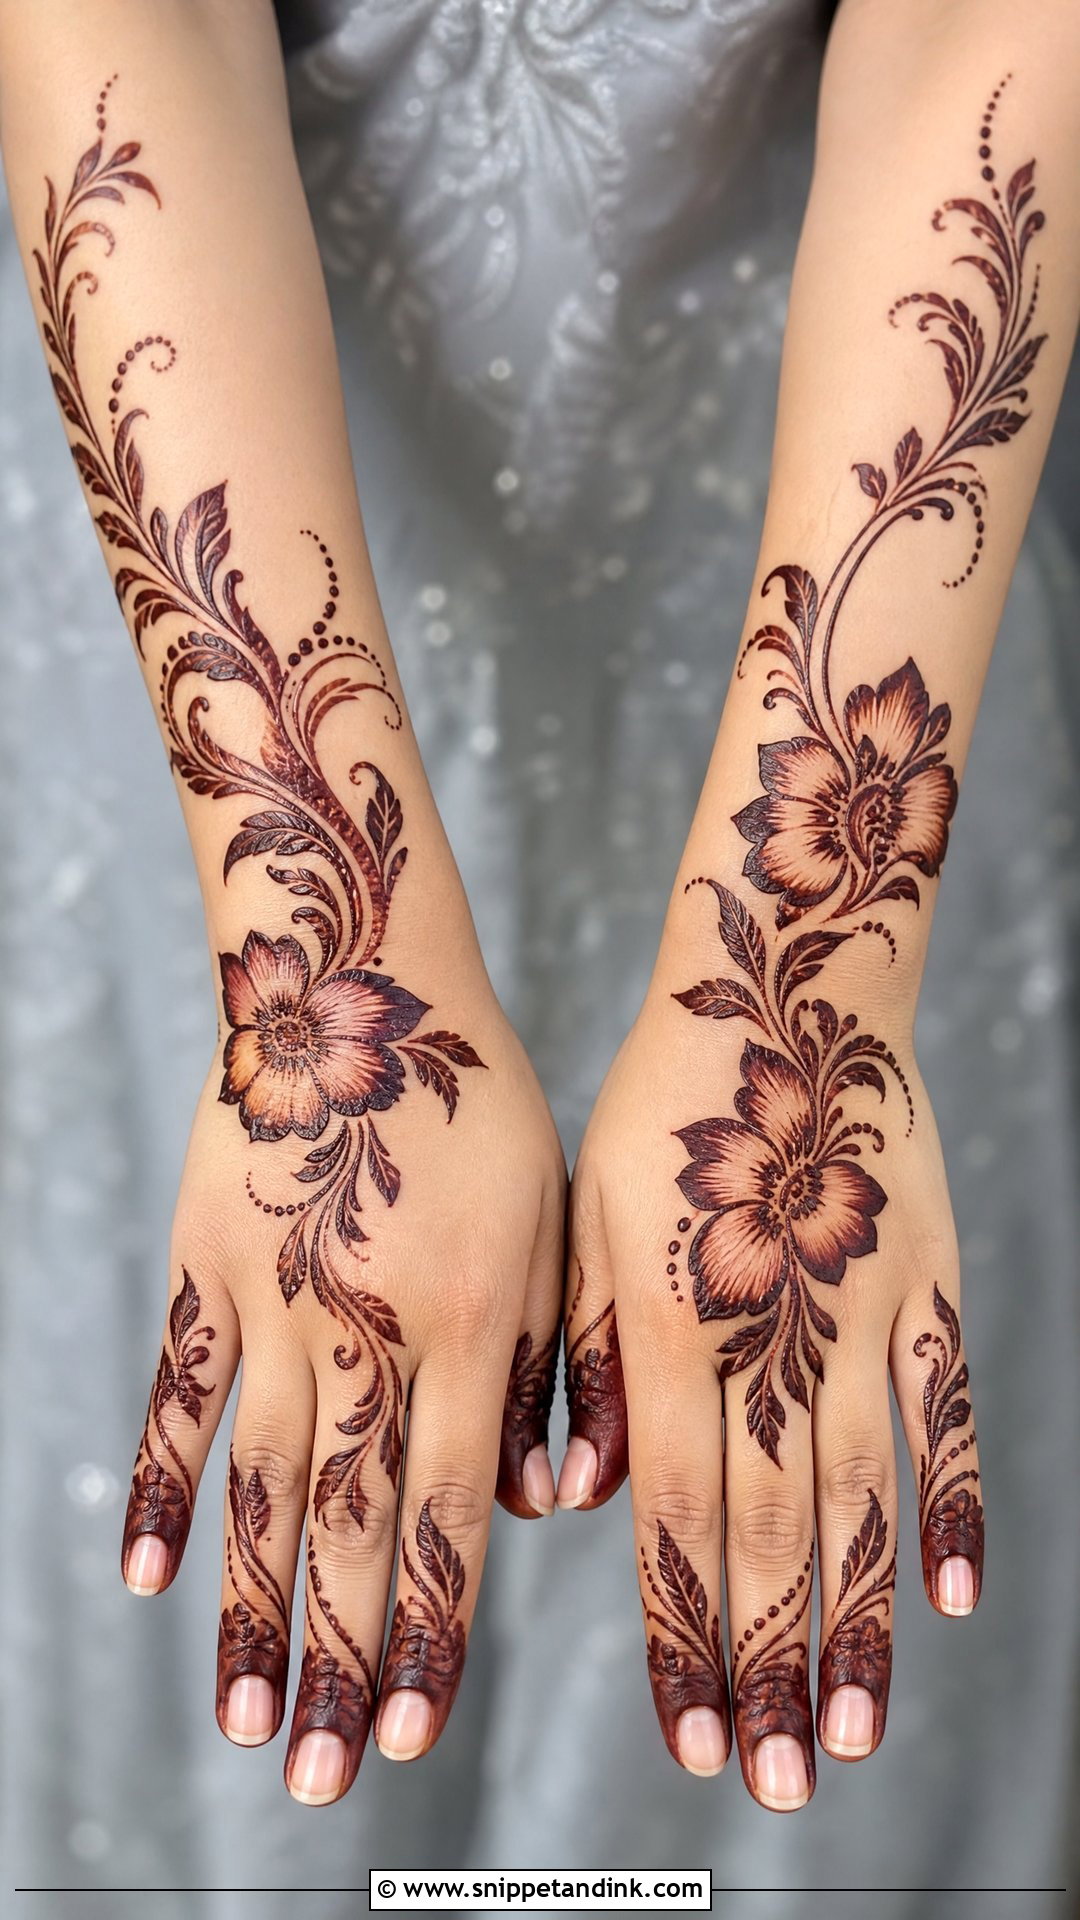
Gulf or Khaleeji henna uses large flowers, thick leafy vines, strong outlines and generous open space across the back hand or palm. It’s meant to be read from across the room, which is why the lines are bolder than in Indian work and the stain looks so confident. Big floral clusters with shaded leaves, dotted trails and decorated fingers complete it. Resist filling the empty areas. That space is the style.
32. Rajasthani Mehndi Design
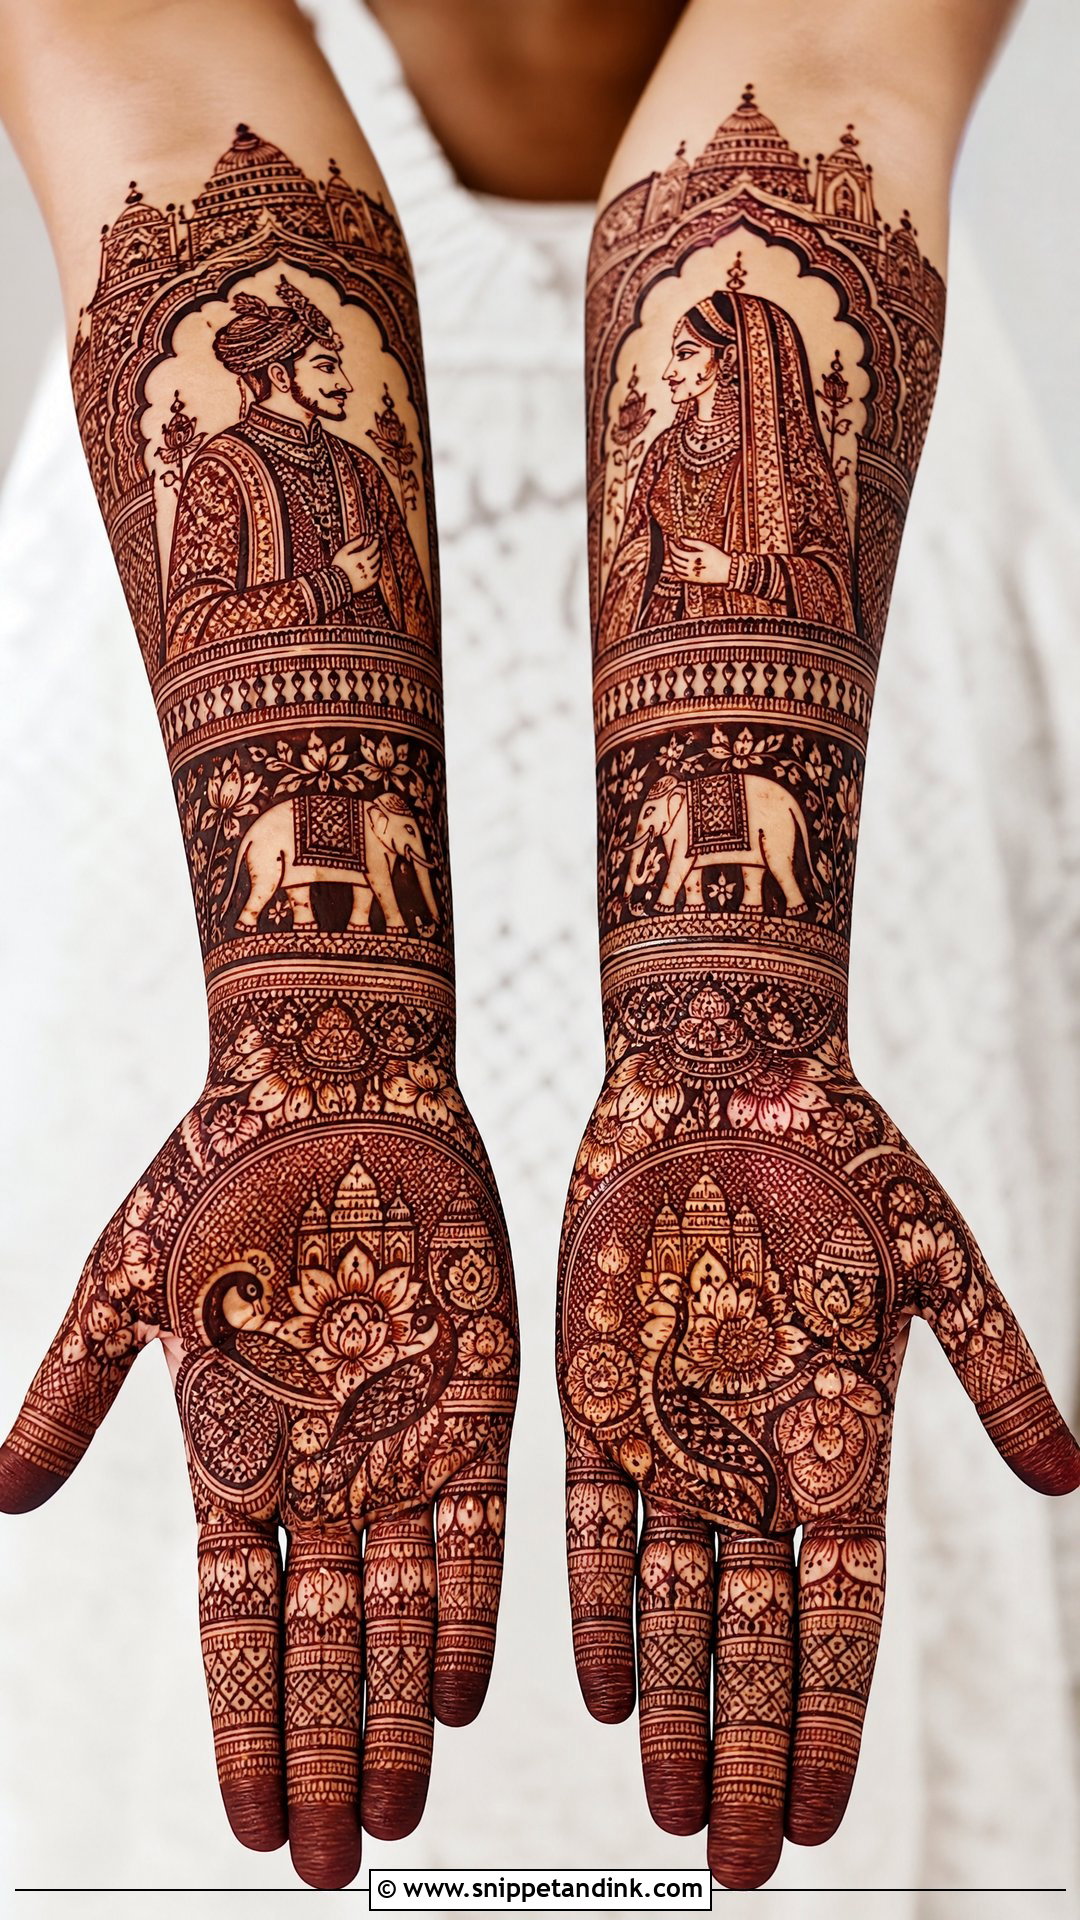
Rajasthani mehndi tells stories: bride and groom figures, elephants, peacocks, royal motifs, paisleys and mandalas with fine filler, often across hands and forearms with almost no bare skin. It needs patience and an artist who is confident drawing faces and figures. For a lighter take, keep one story motif on the palm and surround it with traditional borders. I organize the details into panels so the hand is still readable, even when the work is intricate.
33. Pakistani Mehndi Design
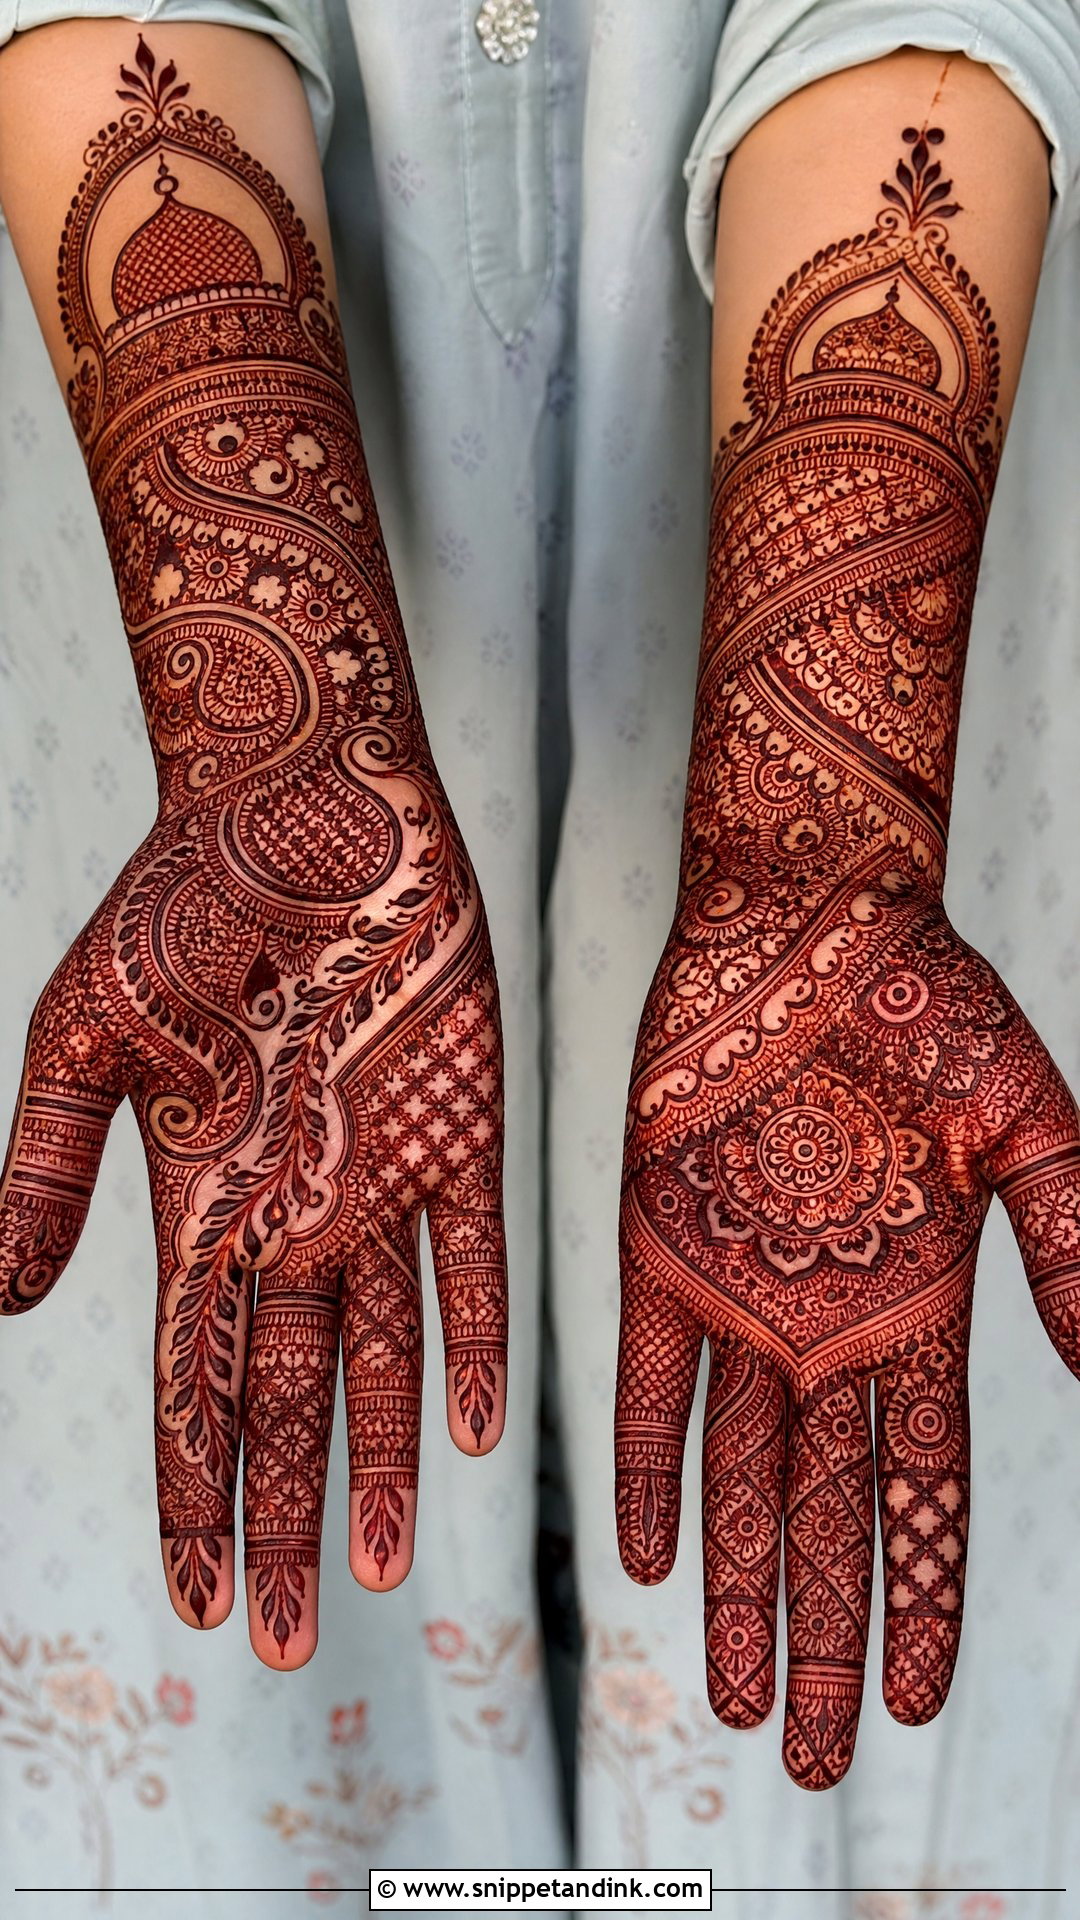
Pakistani mehndi design sits between Indian density and Arabic flow, with paisleys, florals, mandalas, dome shapes, jaali and leafy trails. A common layout fills the palm with traditional motifs and keeps the back hand more open with floral trails and wrist cuffs. Brides often take it to the forearm with dense filler; guests usually stop at medium coverage. The dome motif is a good way to create a clear focal point on the palm without resorting to a mandala.
34. White Mehndi Design
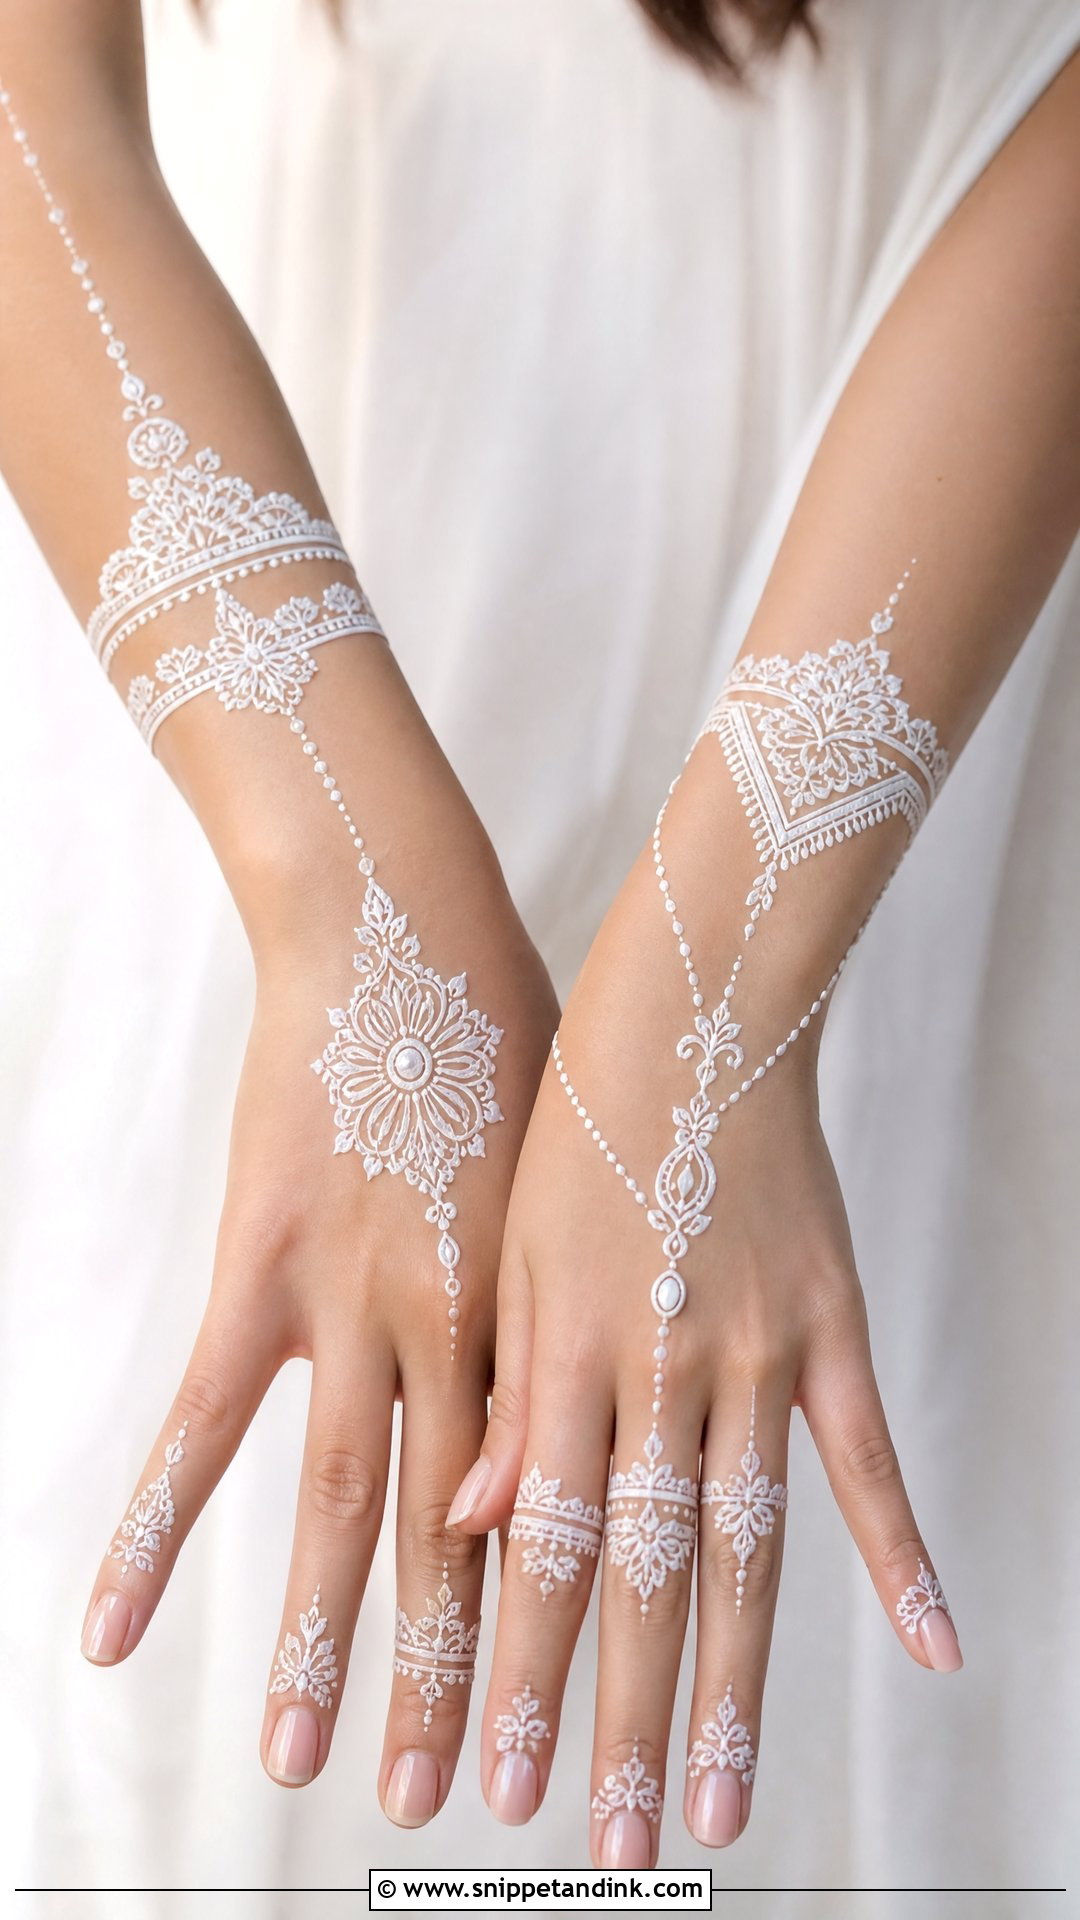
White mehndi isn’t henna. It’s a body-safe paint or adhesive that sits on top of the skin and leaves no stain, which suits photoshoots, parties and fashion-led bridal looks for a single evening. It looks best on the back of the hand in lace patterns, small florals, mandalas and chains. The paint is opaque and bold, so I keep fillers to a minimum. Expect it to rub off within a day or two.
35. Glitter Mehndi Design
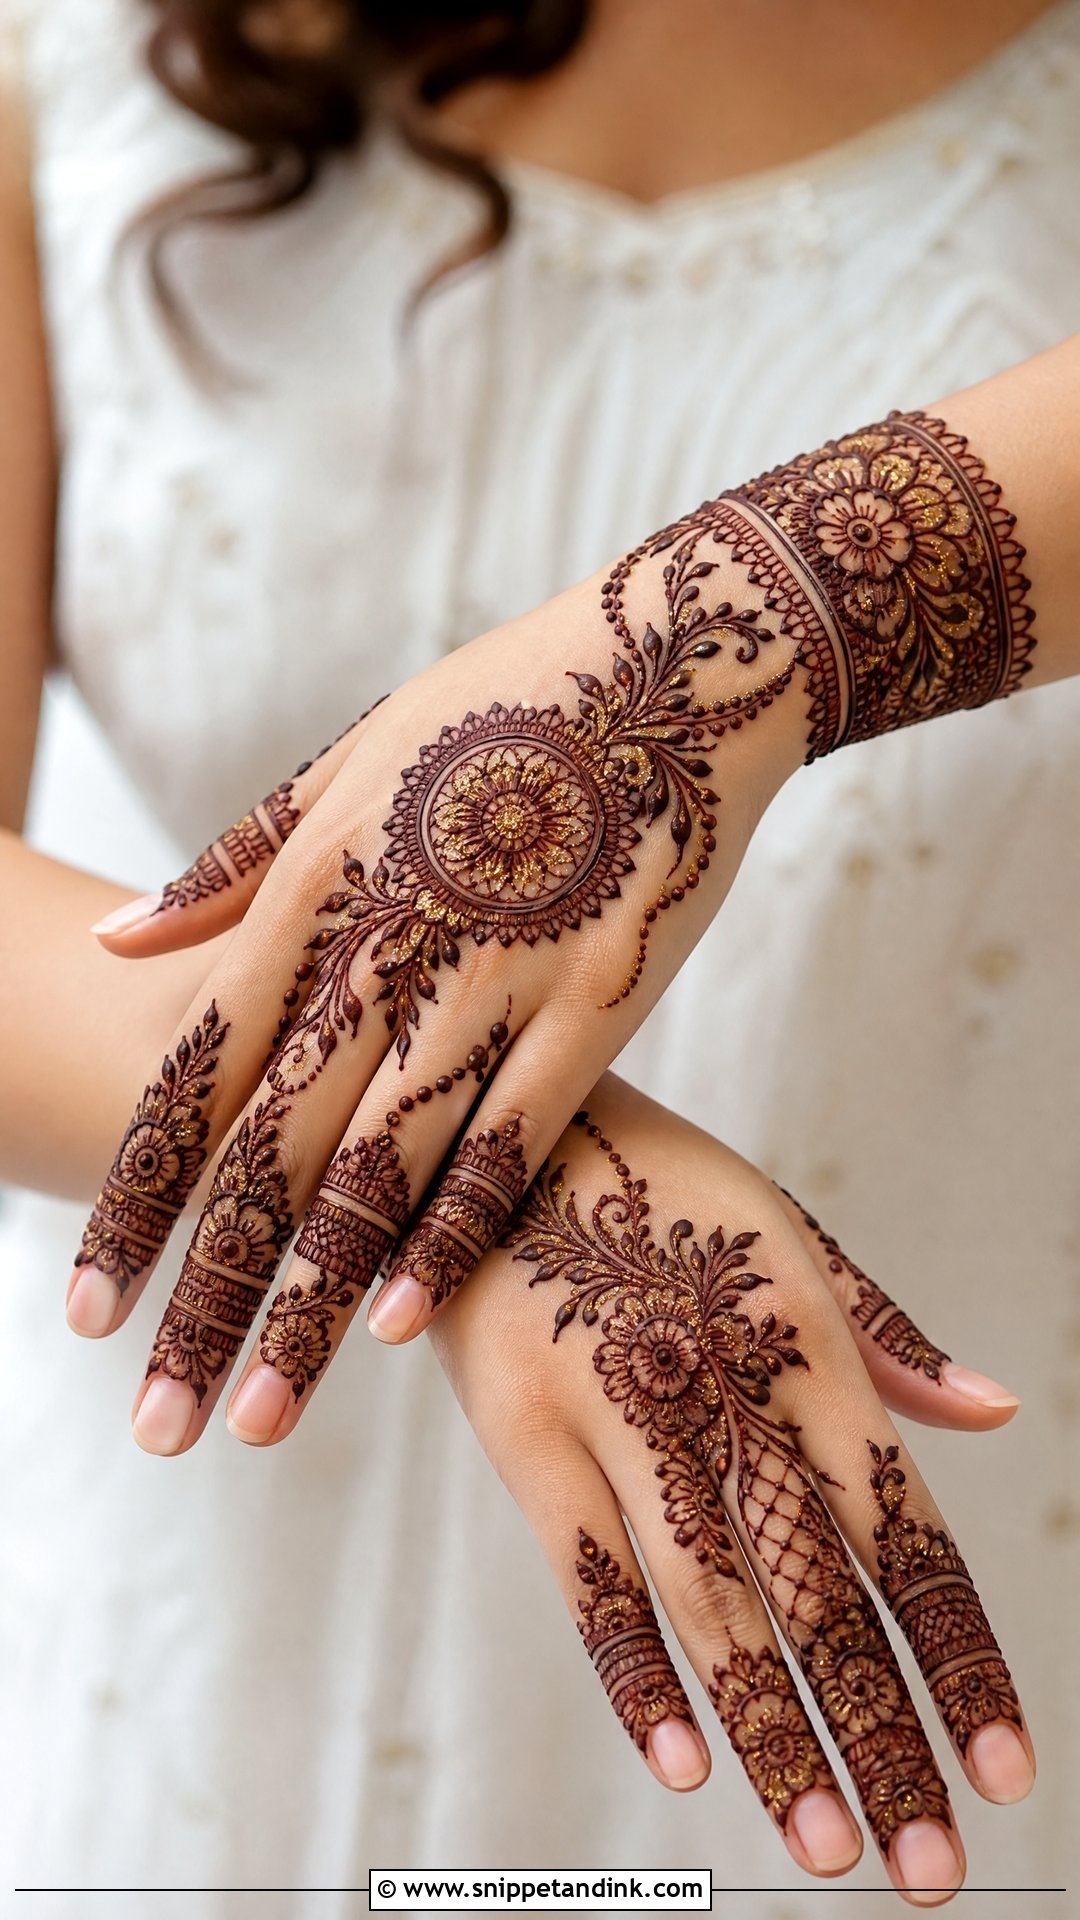
Glitter mehndi adds sparkle to henna-style patterns for sangeets, parties and kids’ functions. I start with a clean base of simple floral trails, mandalas, bracelet cuffs or finger patterns, then add glitter only to selected areas so the detail stays visible. Gold, bronze, maroon and silver sit best with traditional outfits. Like white mehndi, it’s decorative and short-lived, and the glitter usually sits in a cosmetic glue, so ask what’s in it if your skin reacts easily.
Why a Stain Comes Out Pale, and What Still Helps
When someone shows me a faint orange result the next morning, the cause is almost always one of a few things. It’s rarely the design.
- The paste came off too early. Henna needs time on the skin; scraping it off after an hour gives a fraction of the color you’d get overnight.
- Water reached the stain in the first several hours. Washing up or a shower right after removal stops the color from deepening.
- Cold hands. Dye release slows down when skin is cold, which is why winter weddings and air-conditioned halls often give lighter results. Keeping your hands warm helps.
- Old or poor paste. Fresh paste should be a smooth greenish brown and smell of earth and oils. Dry, gritty paste or anything that stains black instantly is a warning sign.
- Location. The back of the hand and forearm will always be lighter than the palm, even with perfect aftercare.
If the stain is still orange when the paste comes off, don’t panic. It should keep darkening for about two days. What I tell people not to do is reach for chemical darkeners or black henna cones as a fix. They can burn the skin, and no wedding photo is worth that.
Where a Simple Design Beats a Heavy One
Traditional occasions call for Indian bridal, Rajasthani, Pakistani, paisley or peacock work. Lighter events suit Arabic, minimal, finger, bracelet or simple back hand designs, and Moroccan, white, glitter, Gulf or Indo-Arabic patterns give a more modern look. Think about where the design will sit, how long you can sit still, what your outfit covers and how much coverage you actually want. A clean, simple design applied with steady lines will look better on the day than a heavy one that was rushed.
You'll Like These Ideas:


Leave a Reply