
Most of my festival bookings are for something simple: a neat palm pattern, a light back-hand trail, Arabic flowers, or just the fingers. Done well, a small design looks finished because of spacing, not because of how much paste went on. This collection runs from mandalas and paisleys to jaali, vines and bracelet lines, and ends with feet. For each one I’ve noted where I’d place it, how it behaves on the skin, and who it suits, from first-timers at home to guests heading to a wedding.
Mixing Paste and Rolling a Cone at Home
Most of these designs are simple enough to try yourself. The difference between a design that looks neat and one that looks shaky is usually the paste, not the hand. This is how I’d set up at home.
- Use fresh body-art quality henna powder and sift it through fine cloth or a stocking. Grit is what clogs a cone mid-line.
- Mix it with lemon juice or water and a little sugar, plus a few drops of an essential oil made for henna, such as eucalyptus or tea tree. Leave it covered in a warm place for several hours until the dye releases; the surface turns slightly brown.
- Thin it gradually to the consistency of toothpaste. Too thick and your hand tires; too runny and lines spread.
- Roll a cone from cellophane or a mylar sheet, fill it no more than halfway, and snip the tiniest tip. You can always cut more.
- Practise on paper or a plastic sheet first. When your lines stop blobbing at the start, move to skin.
Leftover paste keeps in the freezer. I wouldn’t use paste that has sat at room temperature for days; it stains noticeably weaker. And skip any product promising a black stain: natural henna only ever stains orange to brown.
1. Simple Front Hand Mehndi Design
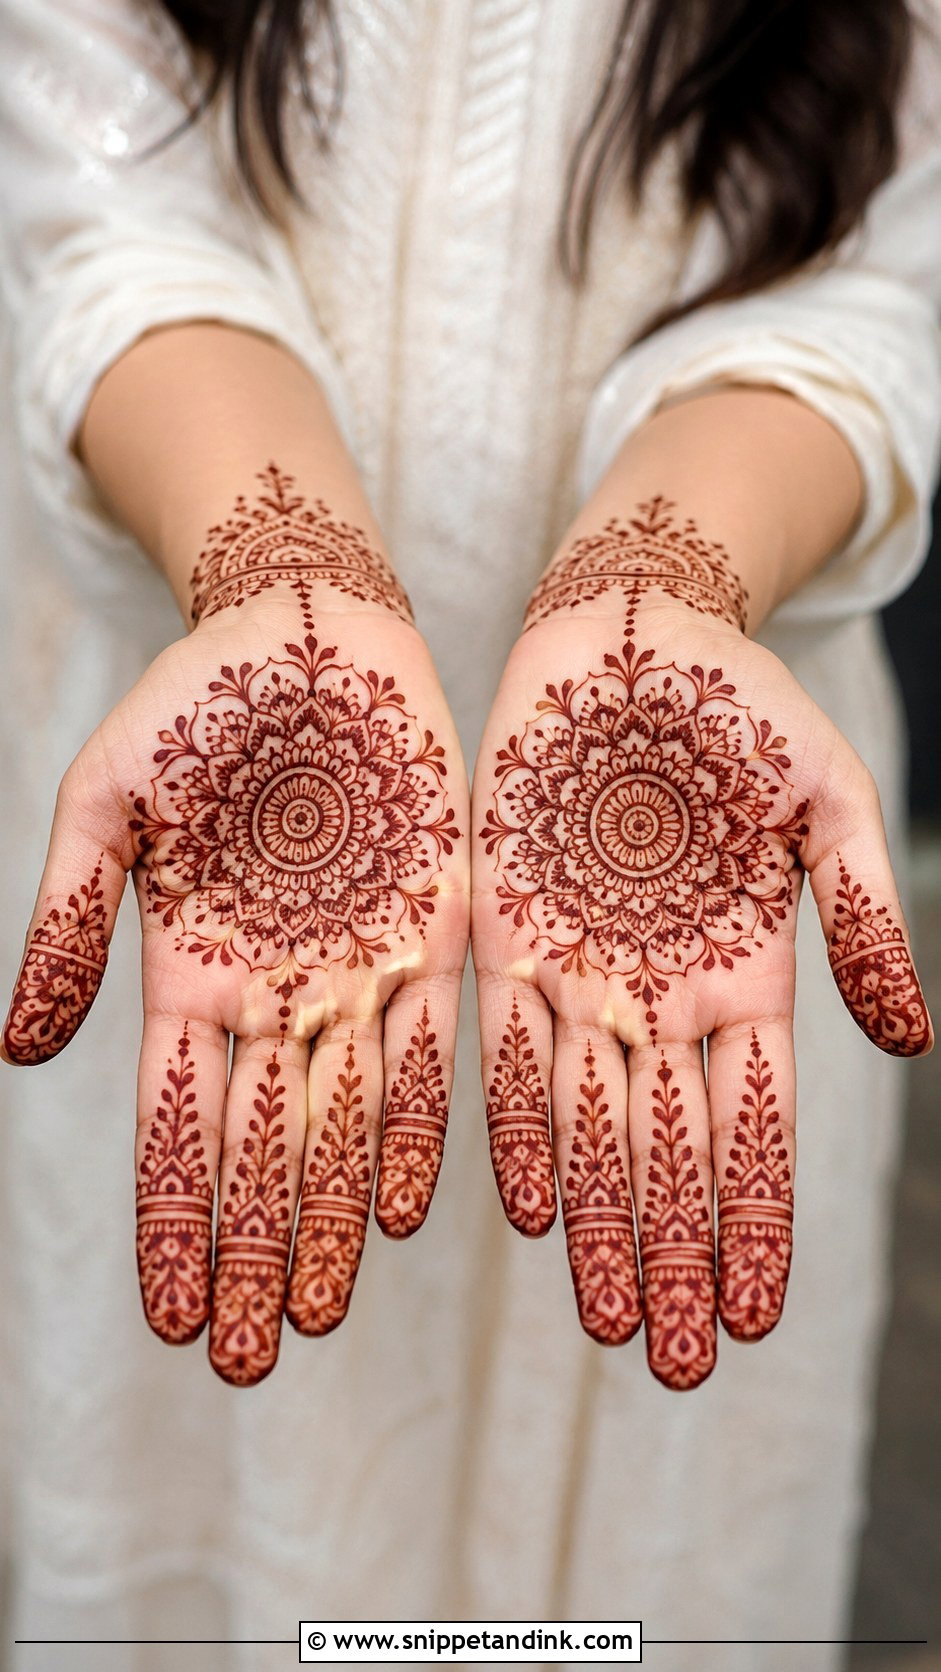
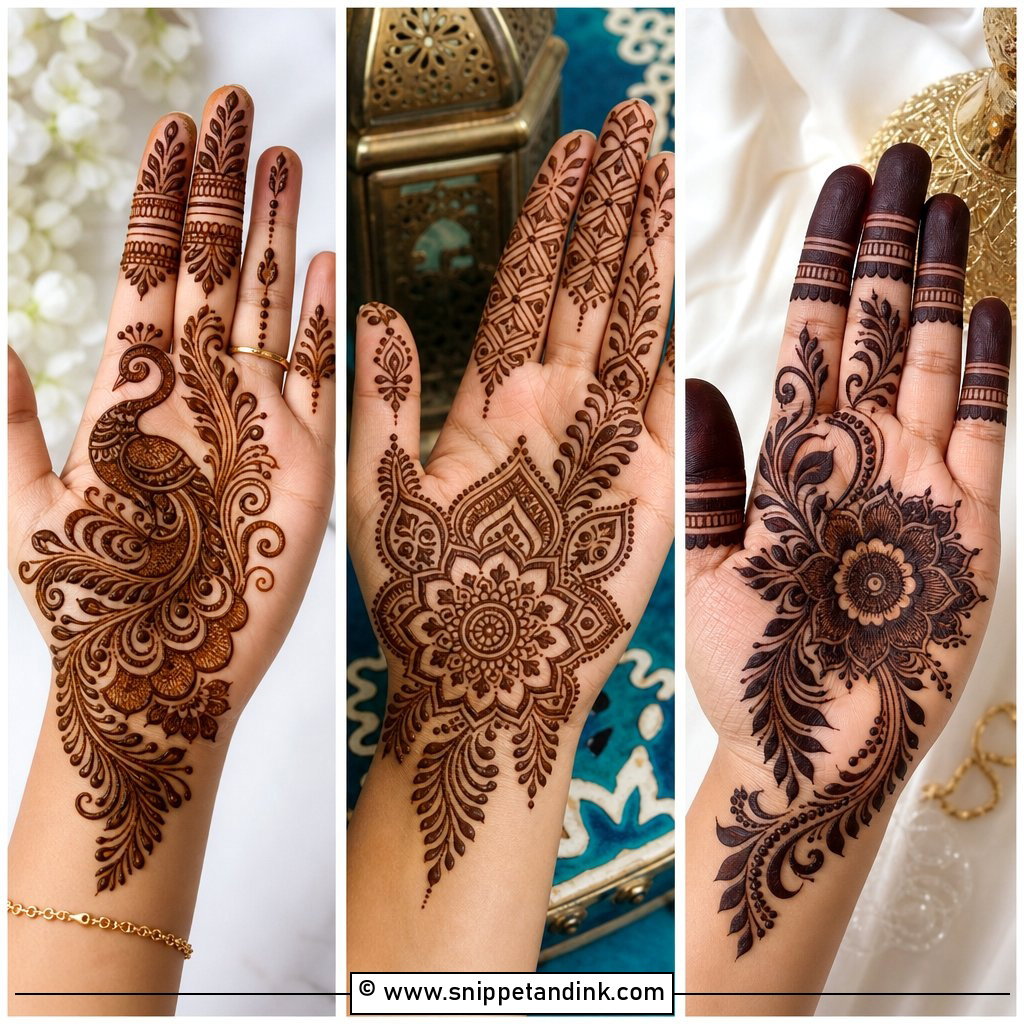
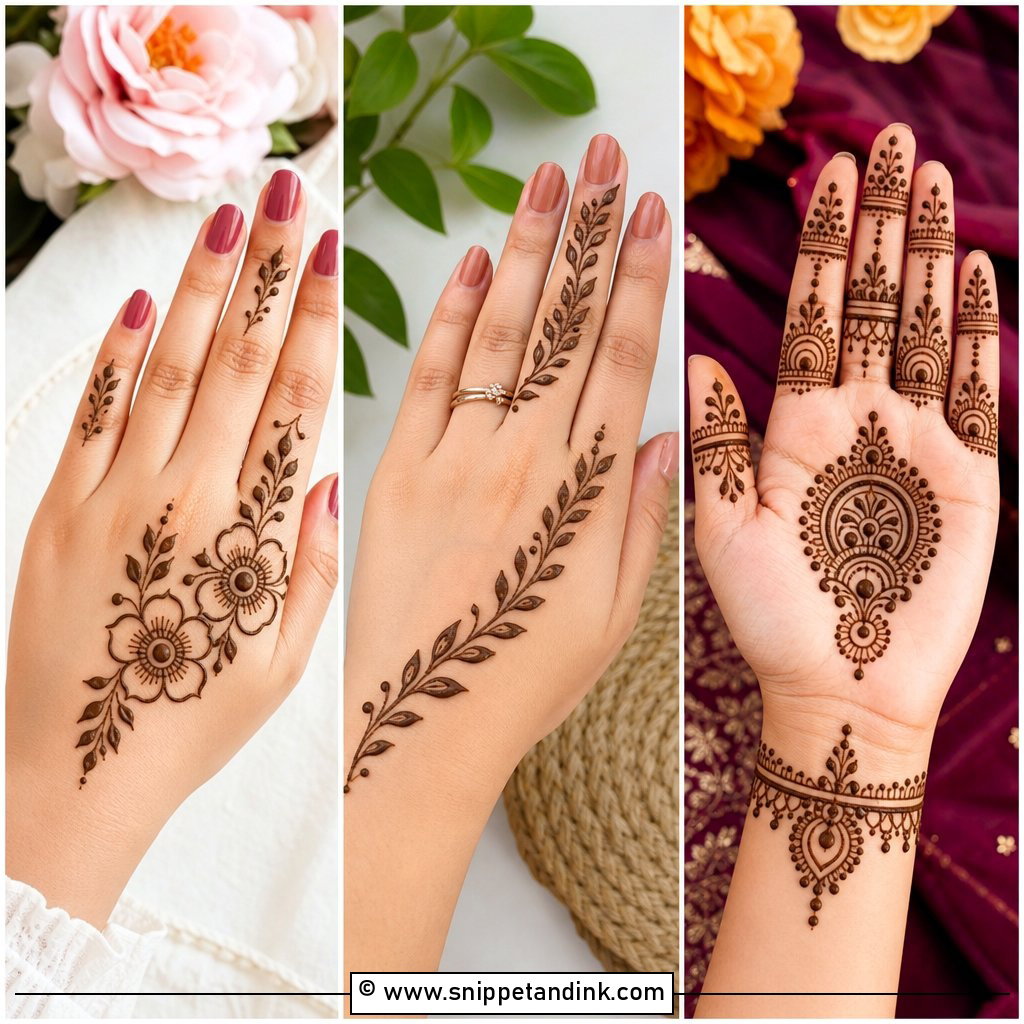
Start in the palm with a medium mandala, then build petals, dots and curved lines around it. Leafy strips, tiny arches or slim bands on the fingers keep the hand open. Since all the focus is in one place, it’s the layout I give beginners first, and a stray line is easy to absorb into an extra petal. It dries quickly too, because the outer palm stays bare.
2. Simple Back Hand Mehndi Design
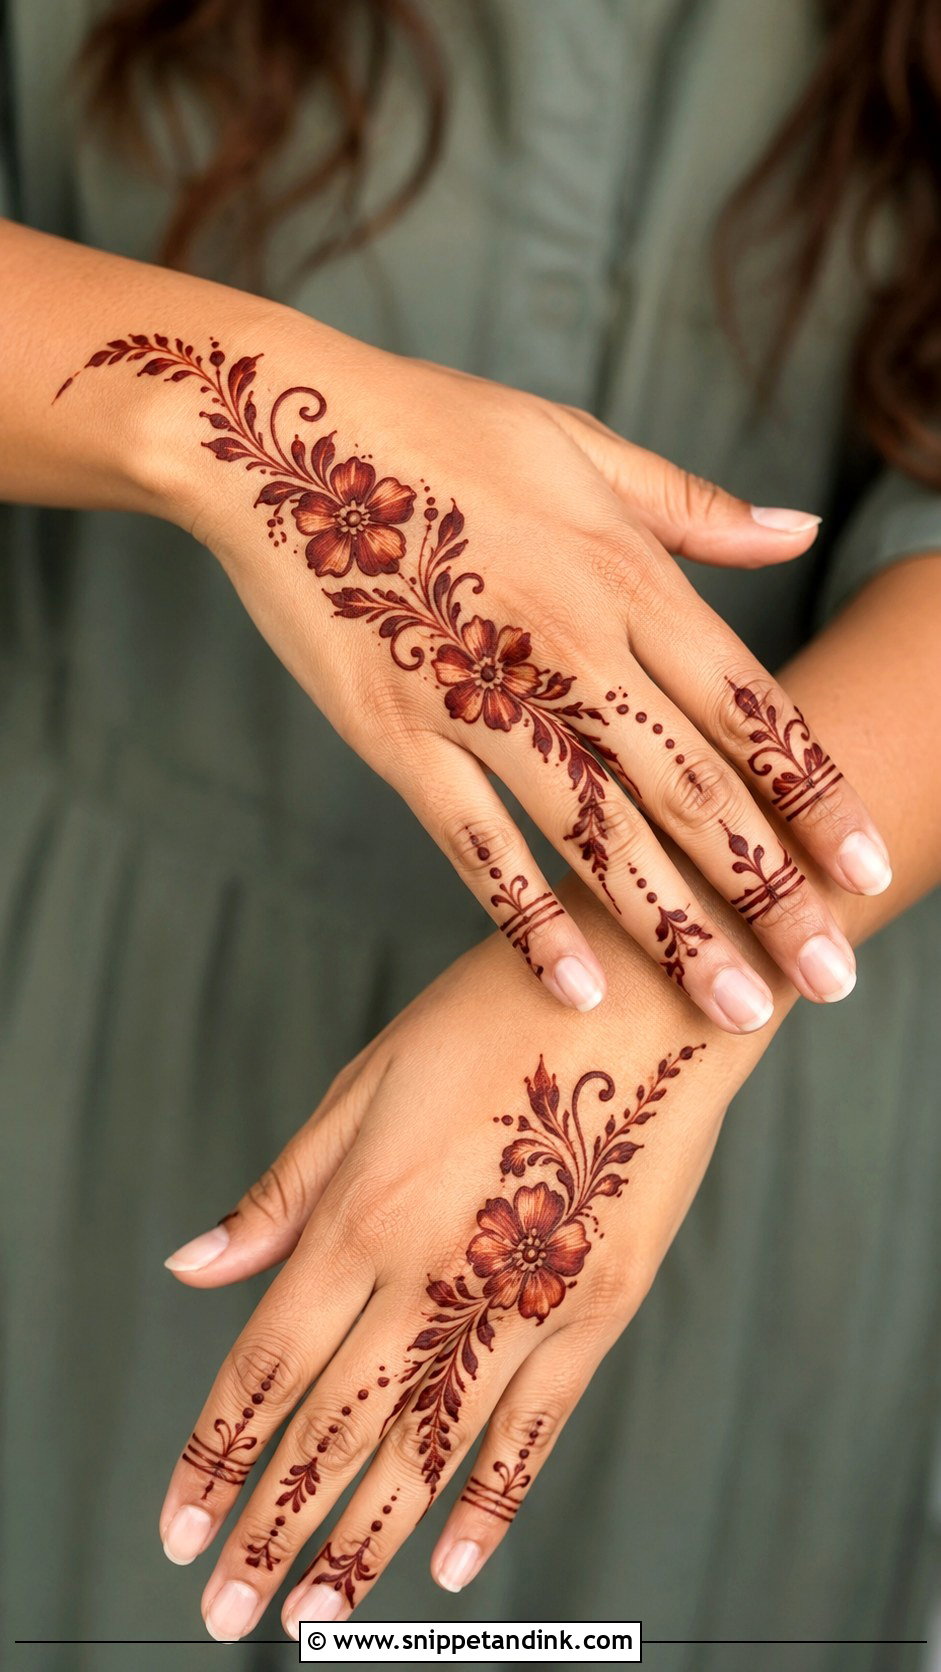
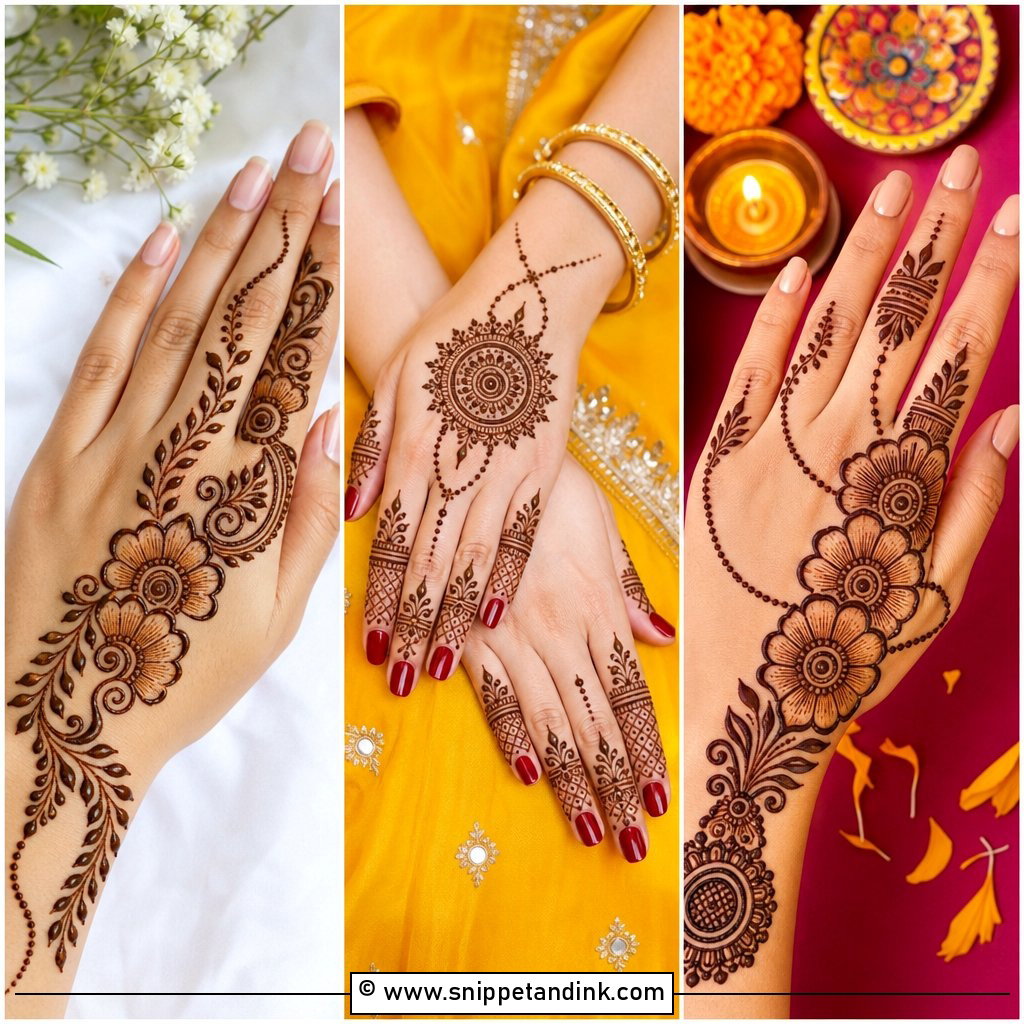
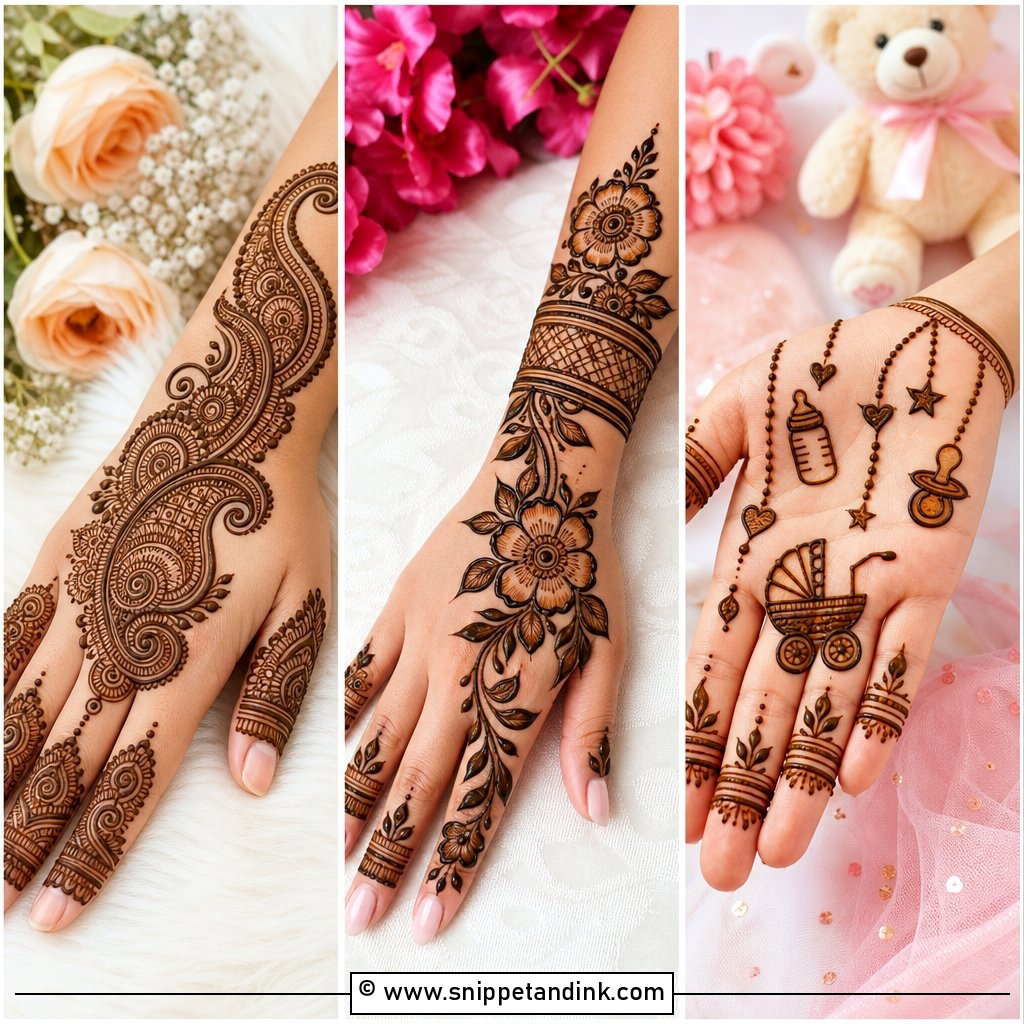
On the back of the hand, open space is what makes each line show. A small floral cluster near the wrist, a thin vine running diagonally to the index finger, leaves and dots along the way, and the fingers with light bands or tiny leafy tips. Back-hand skin is flatter and less creased than the palm, so lines go on more smoothly, which helps if you’re new. Expect a lighter brown stain here than on the palm.
3. Simple Arabic Mehndi Design
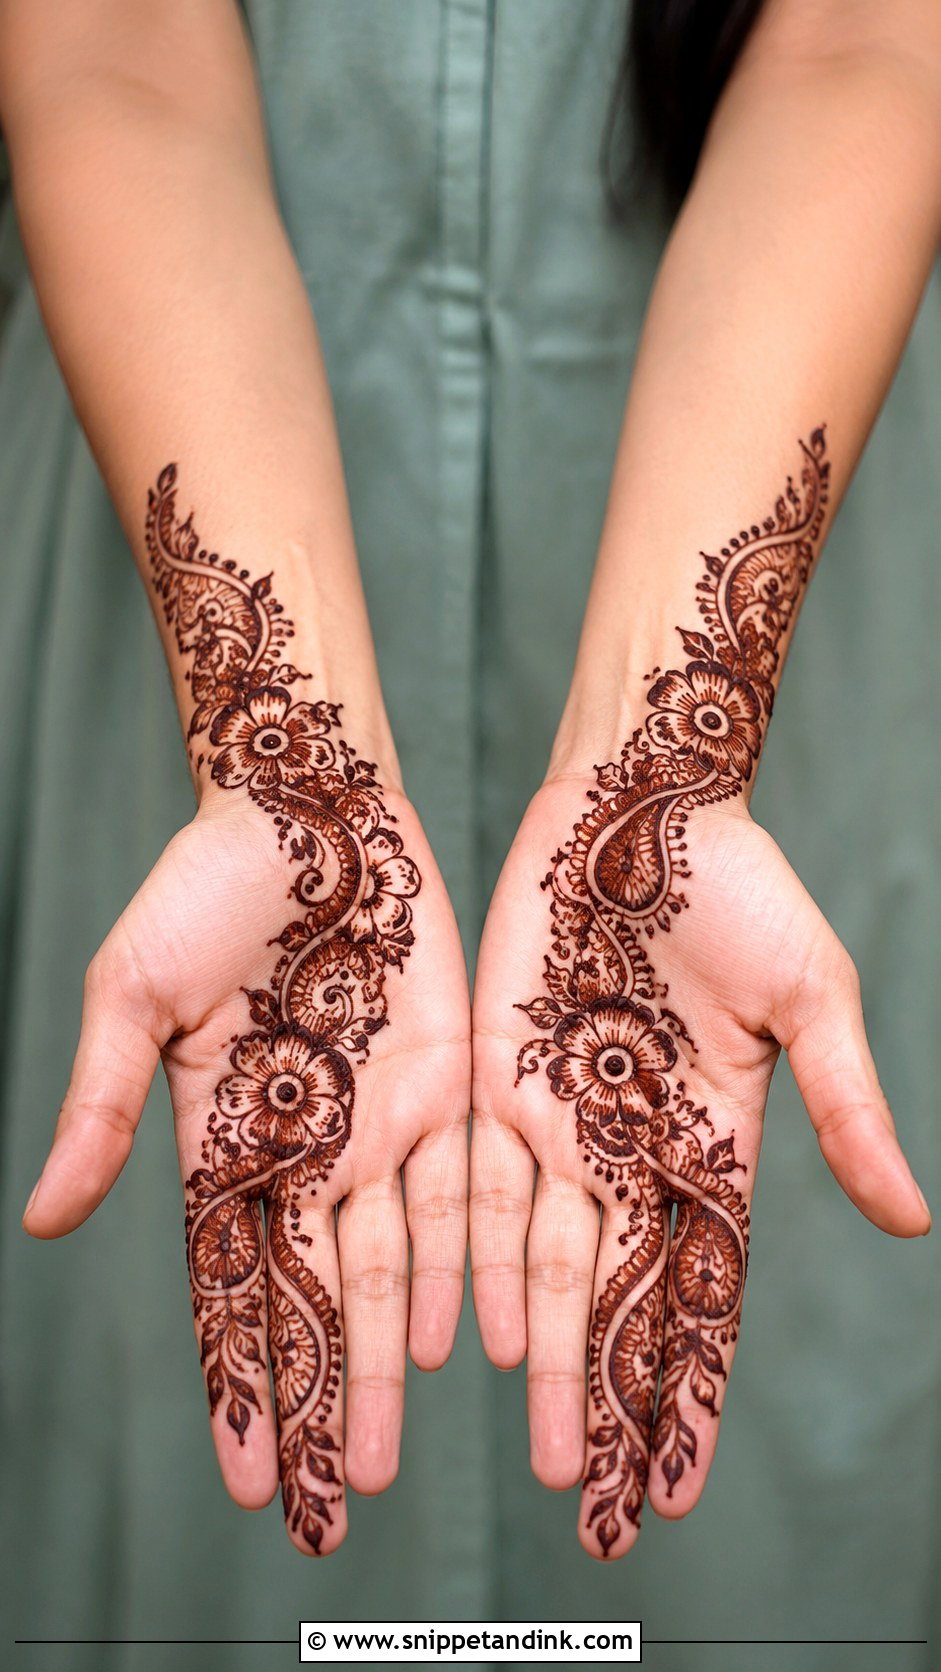
A simple Arabic mehndi design runs diagonally from one side of the wrist across the palm toward the index finger, with rounded flowers, shaded leaves, small paisleys and dots along the curve. One side of the hand stays mostly empty. I keep the flower outlines thick and the leaf shading light, so the stain has two weights rather than looking flat. It’s quick, and sits as well with a kurta as with a dress.
4. Simple Mandala Mehndi Design
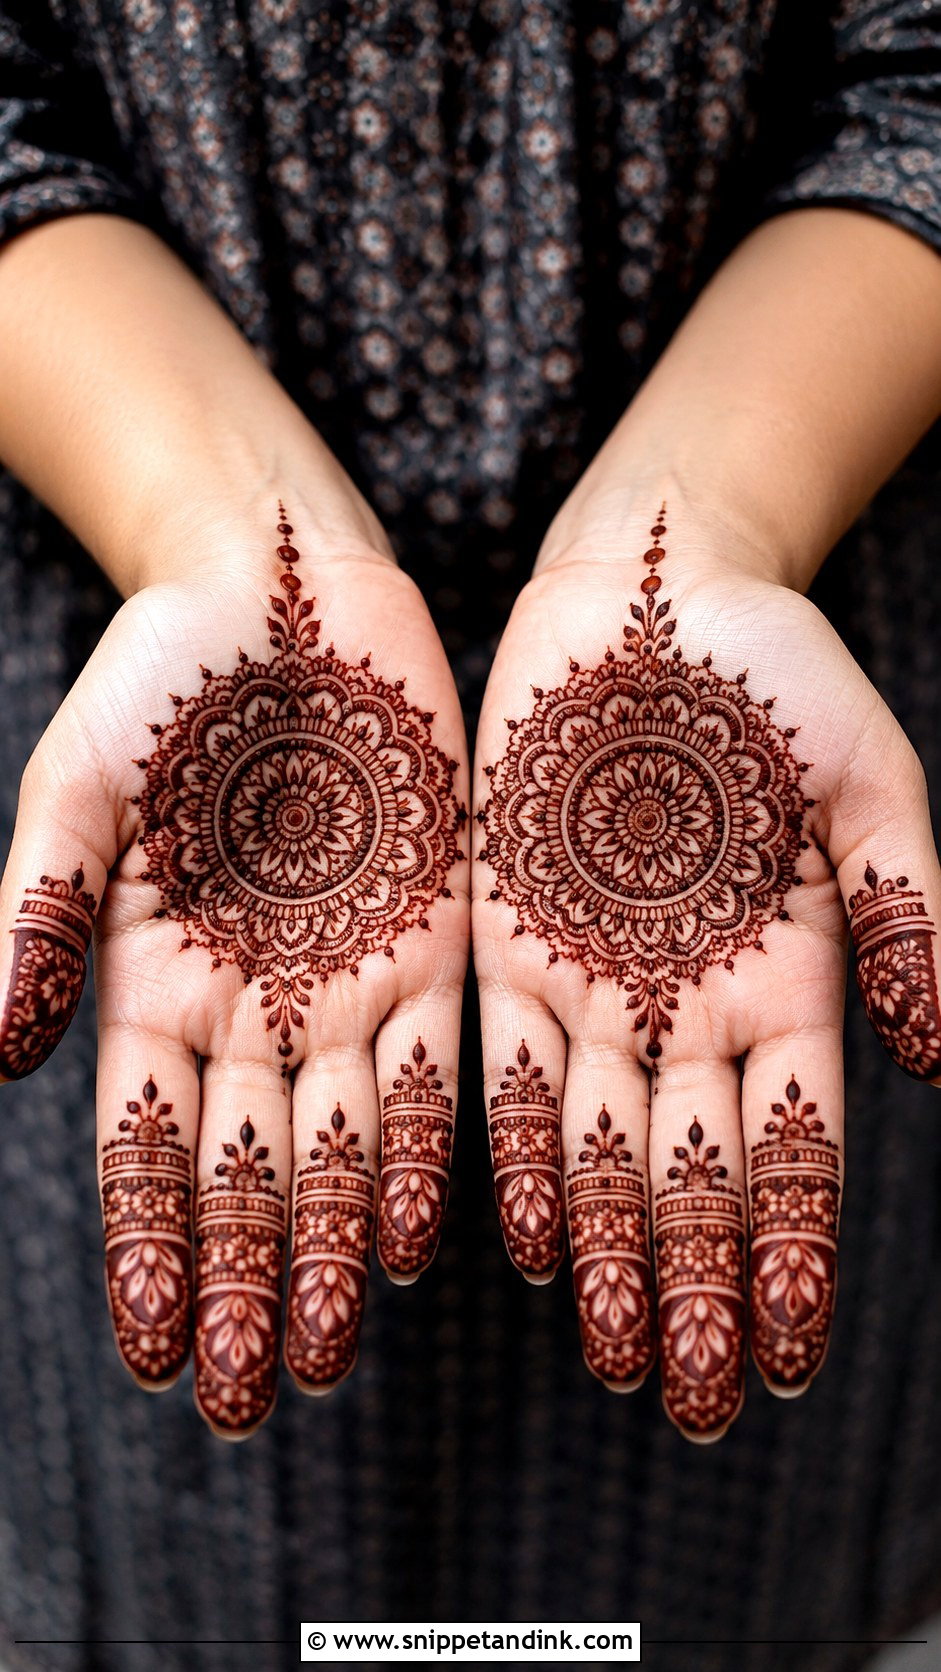
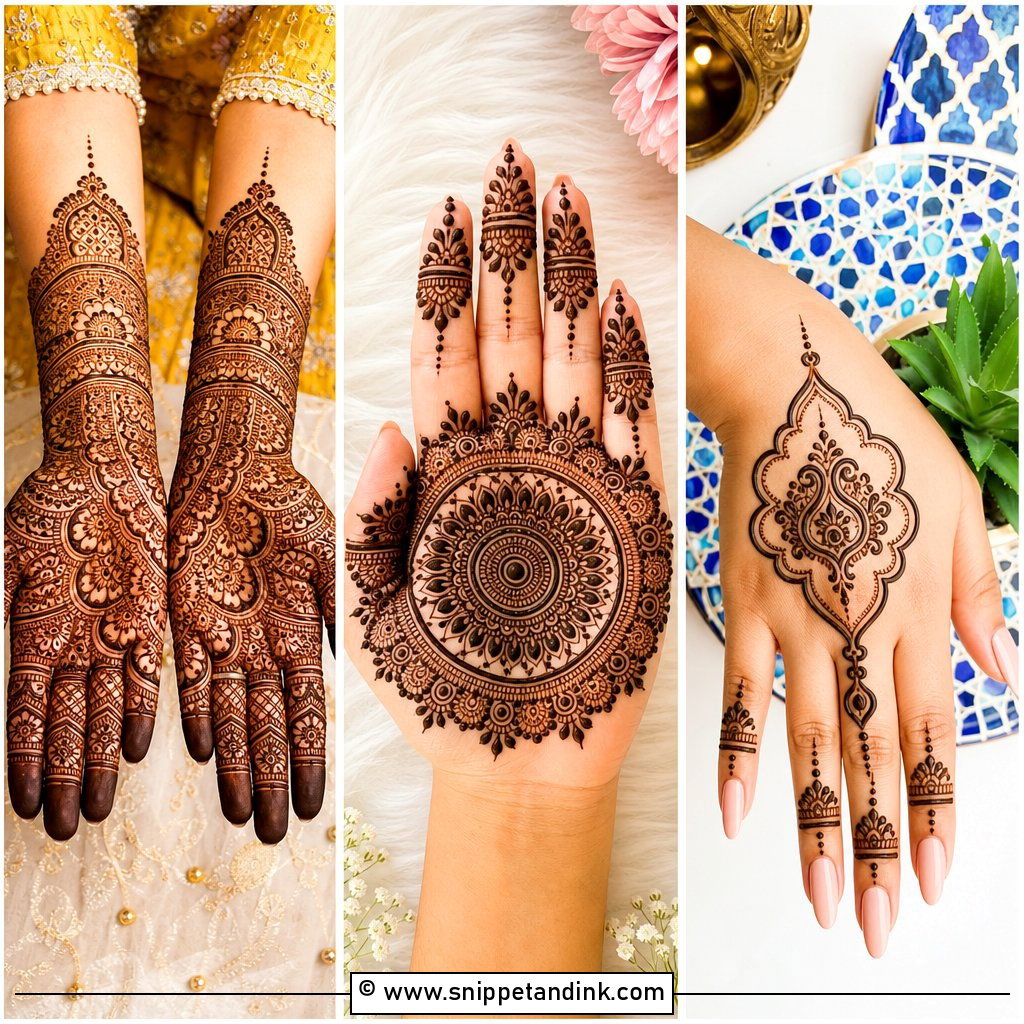
The whole look rests on symmetry, so I take my time with the first circle. A clean round mandala in the centre of the palm, built outward with circles, petals, scallops and dots, the outer palm almost empty. Matching bands, small leafy lines and dotted tips connect the fingers. Even a small mandala looks rich when each ring is evenly spaced. If the first ring is lopsided, I wipe it and restart; every ring after it will copy the mistake.
5. Simple Floral Mehndi Design
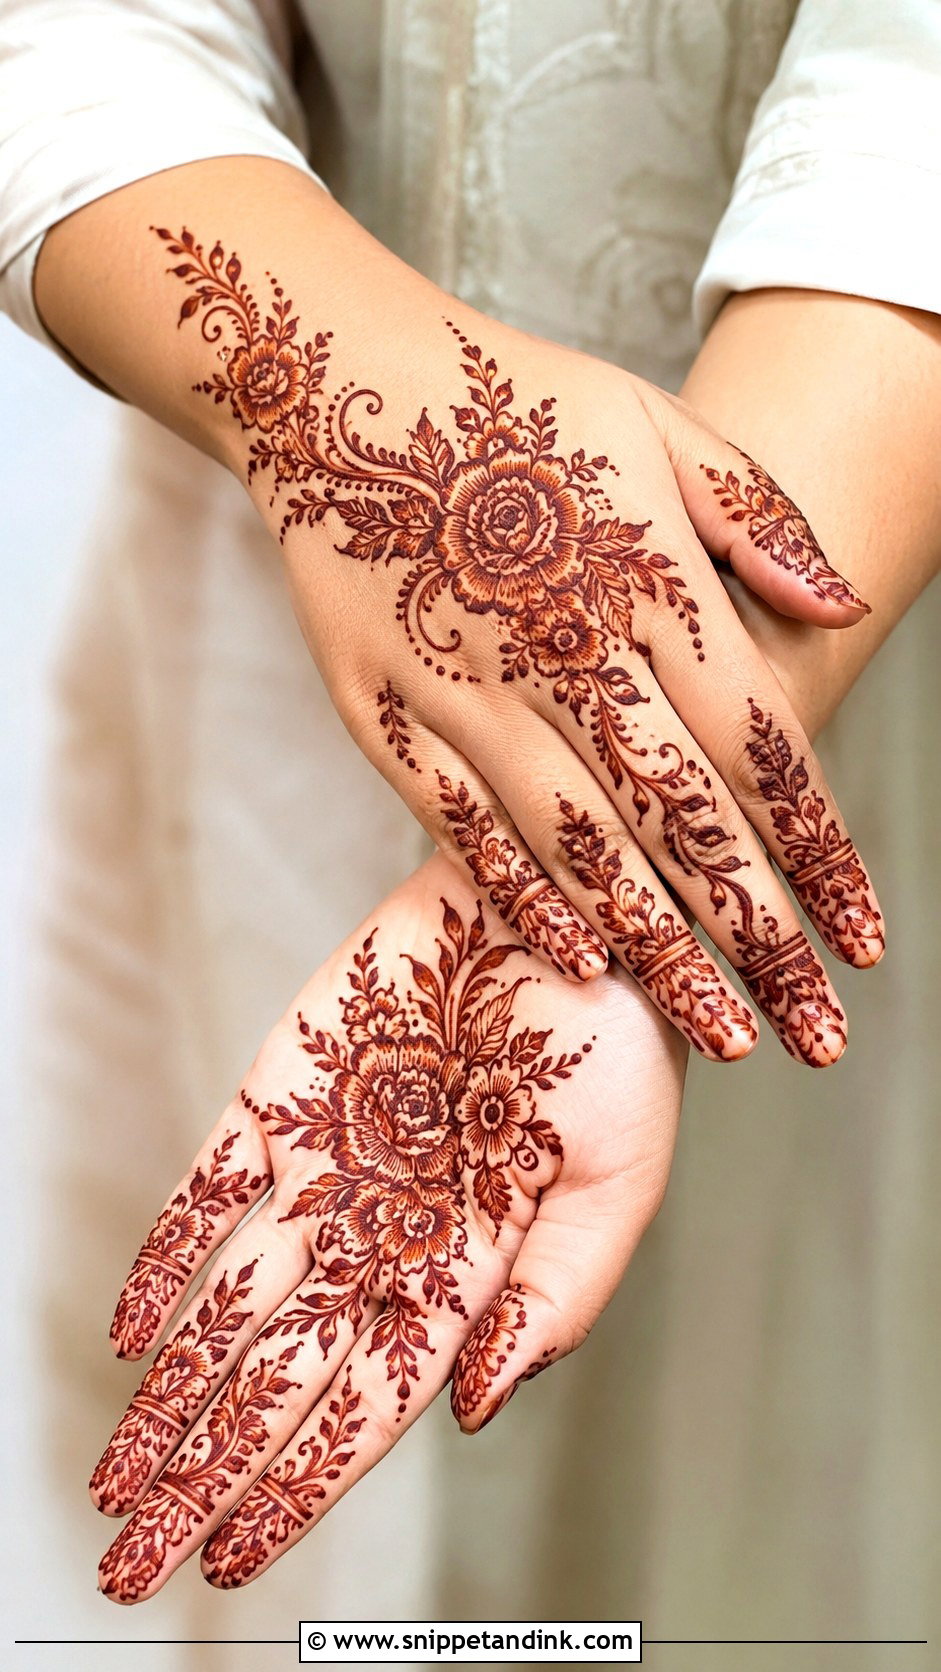
One large flower near the lower palm or back of the hand, a curved vine linking it to smaller flowers, leaves in between and dots for empty corners. Slim floral strips on the fingers. Florals forgive a lot: an uneven petal can be balanced with a little shading or a dot cluster, and nobody will spot it. I’d choose this for birthdays and relaxed family functions.
6. Simple Finger Mehndi Design
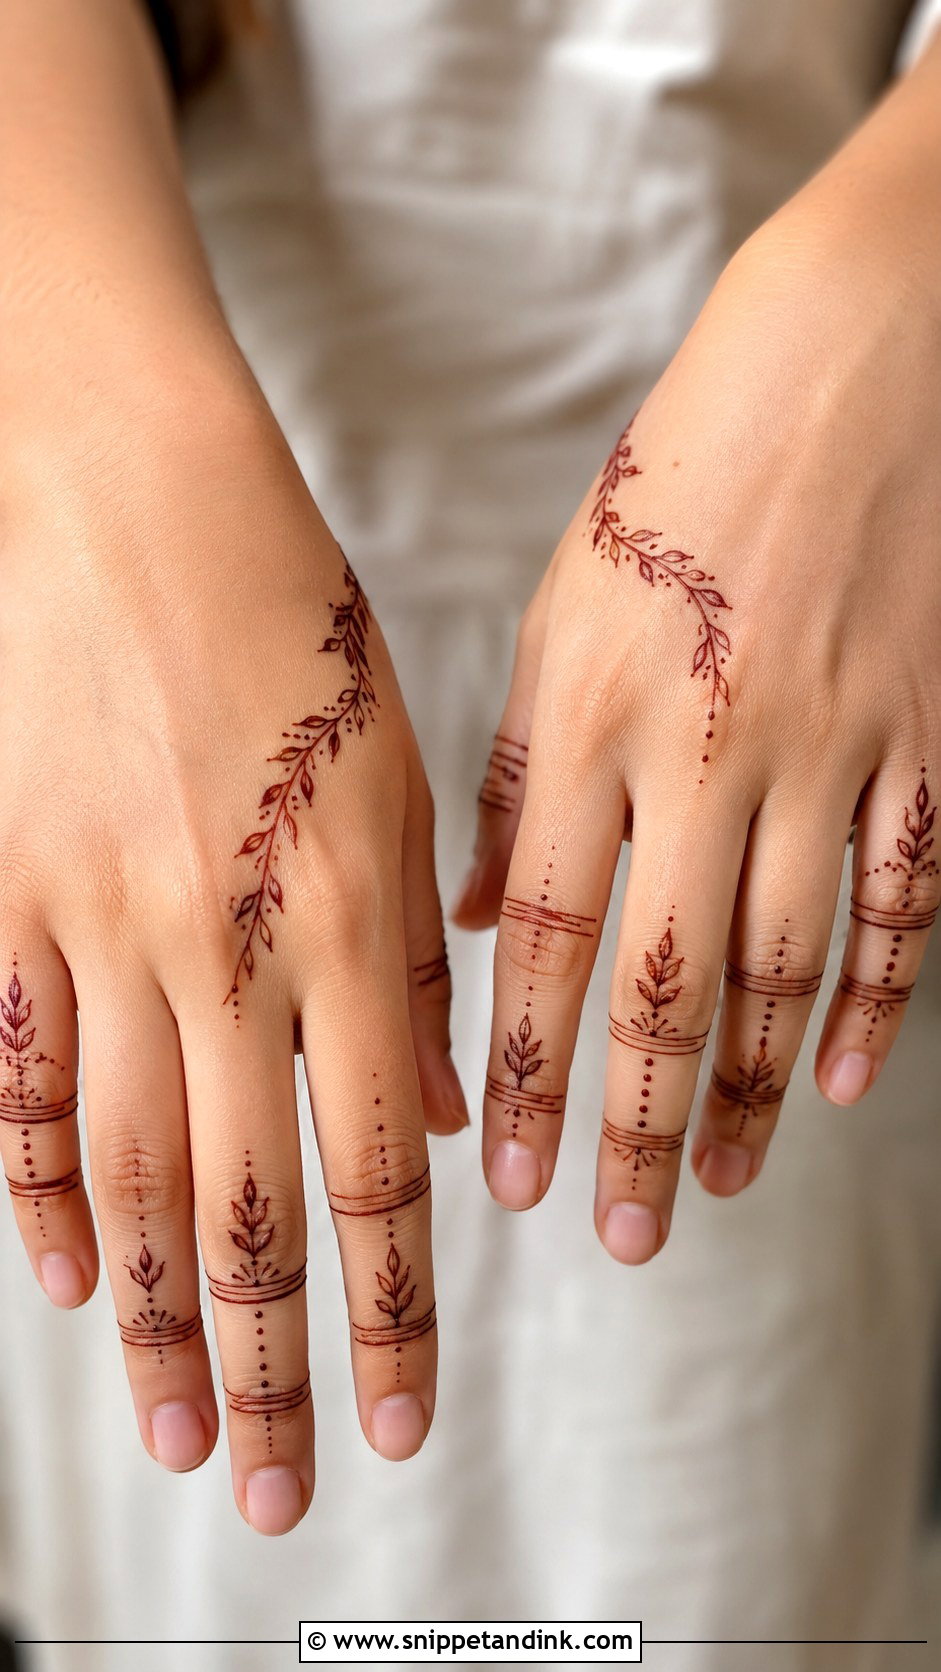
Skip the palm entirely and decorate each finger with slim bands, tiny leaves, dots and short vertical lines, maybe one small circle near the knuckles. It looks like delicate hand jewellery and dries in no time. I place the bands between knuckles rather than across them, so they stay unbroken when you make a fist. It pairs well with rings and suits everyday wear.
7. Simple Bracelet Mehndi Design
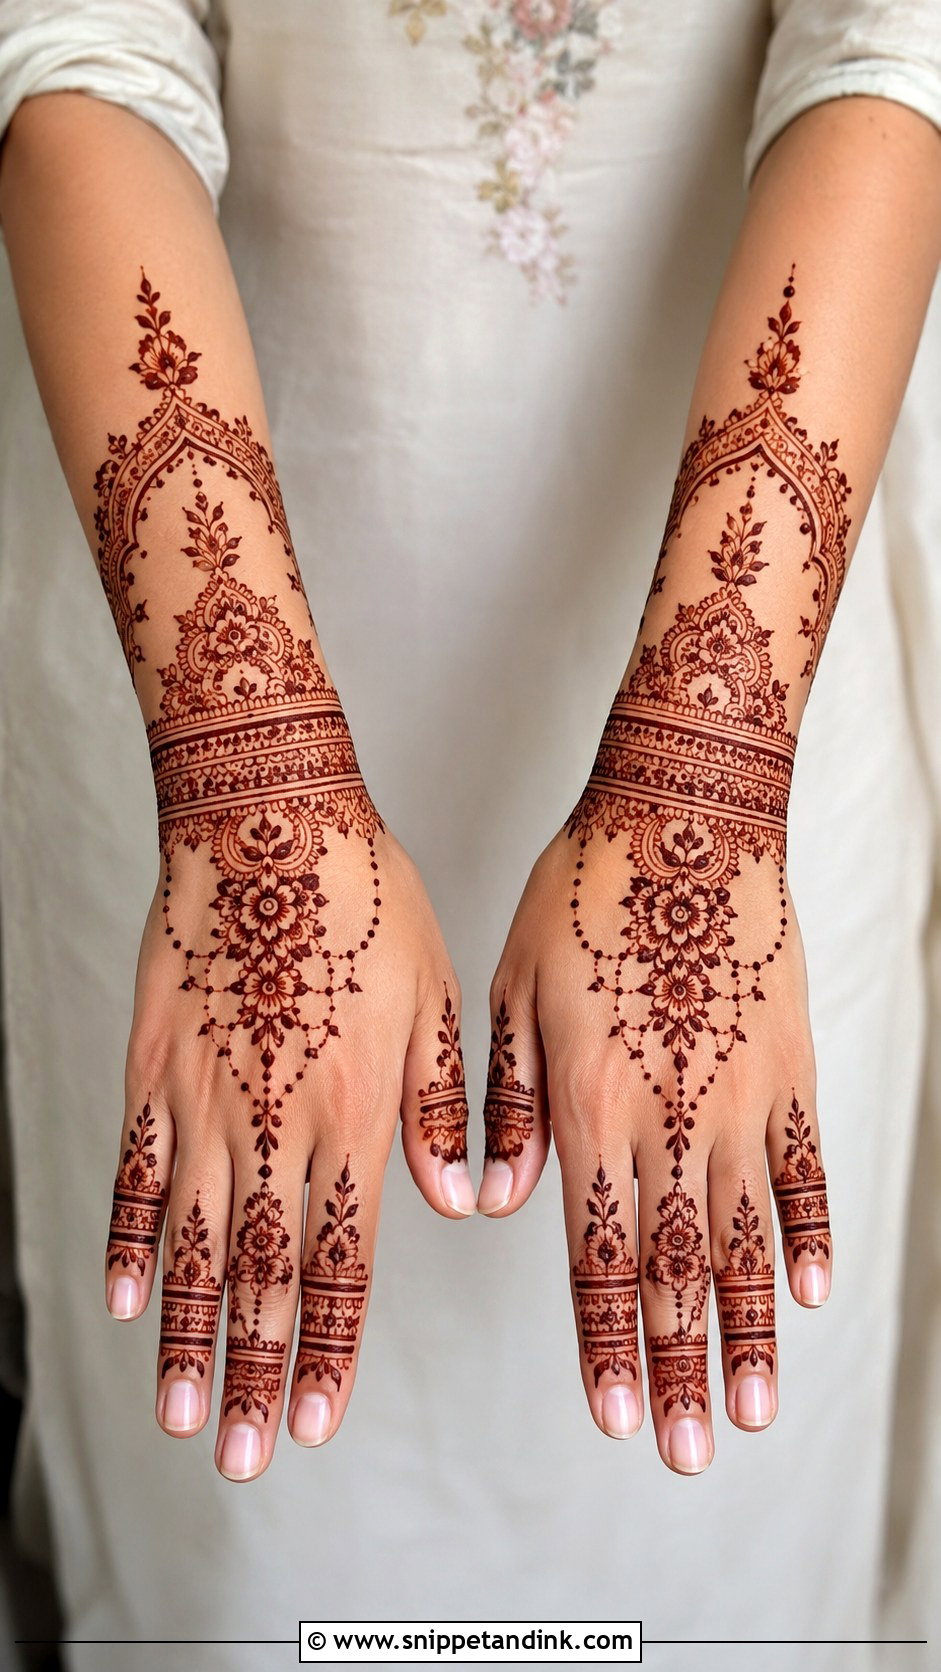
Two or three curved lines around the wrist, decorated with dots, tiny flowers and leaves, and one fine chain running from the centre of the bracelet to a small ring on the middle finger. The rest of the hand stays open. The bracelet should sit just below the wrist bone; drawn on the crease, it cracks while drying. Repeated lines make it beginner-friendly, and bridesmaids like how it looks next to real jewellery.
8. Simple Full Hand Mehndi Design
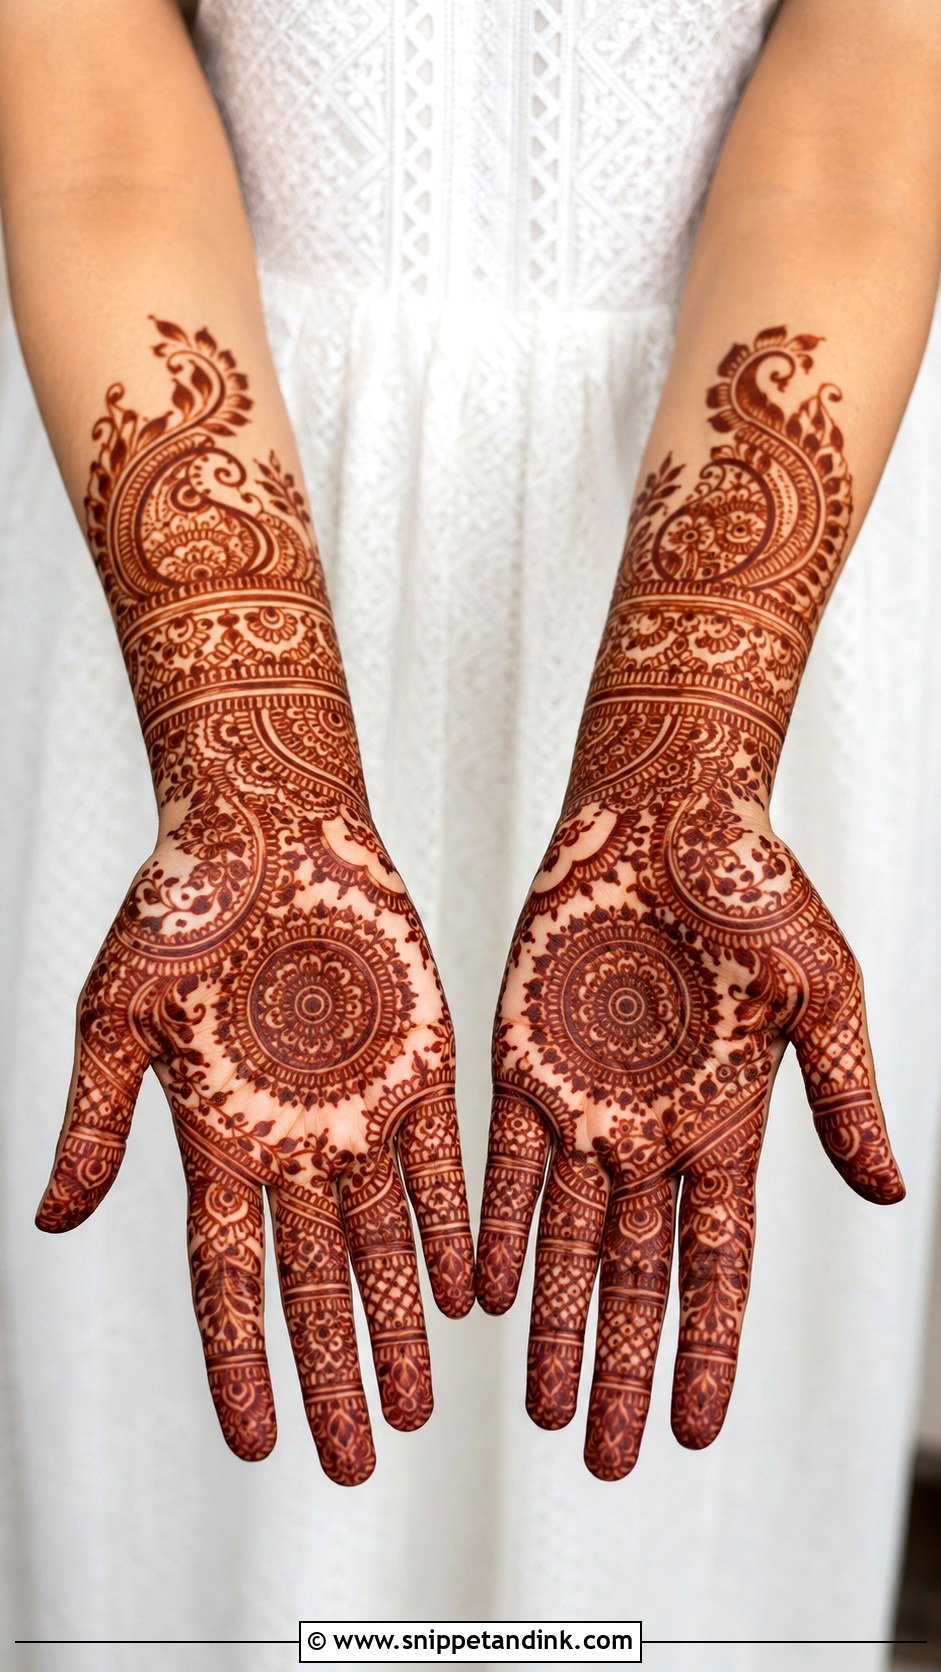
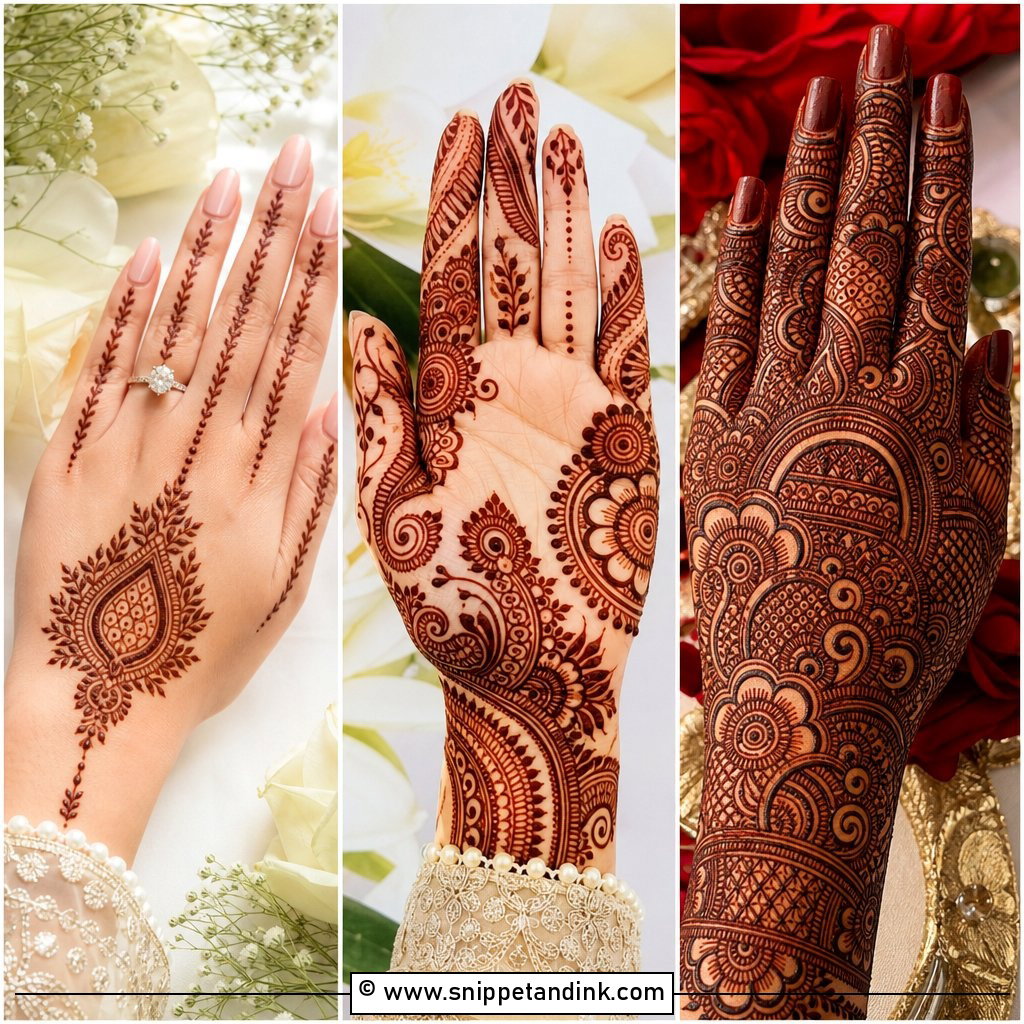
A full hand stays simple when it’s divided into sections: a mandala or flower in the palm, a vine along one side, bracelet bands at the wrist, simple finger patterns. Paisleys, leaves, dots and small curves connect the sections, with open spacing between them. I finish one section before moving to the next, which stops you resting a wrist on wet paste. It gives the effect of traditional coverage for weddings without bridal sitting time.
9. Simple Half Hand Mehndi Design
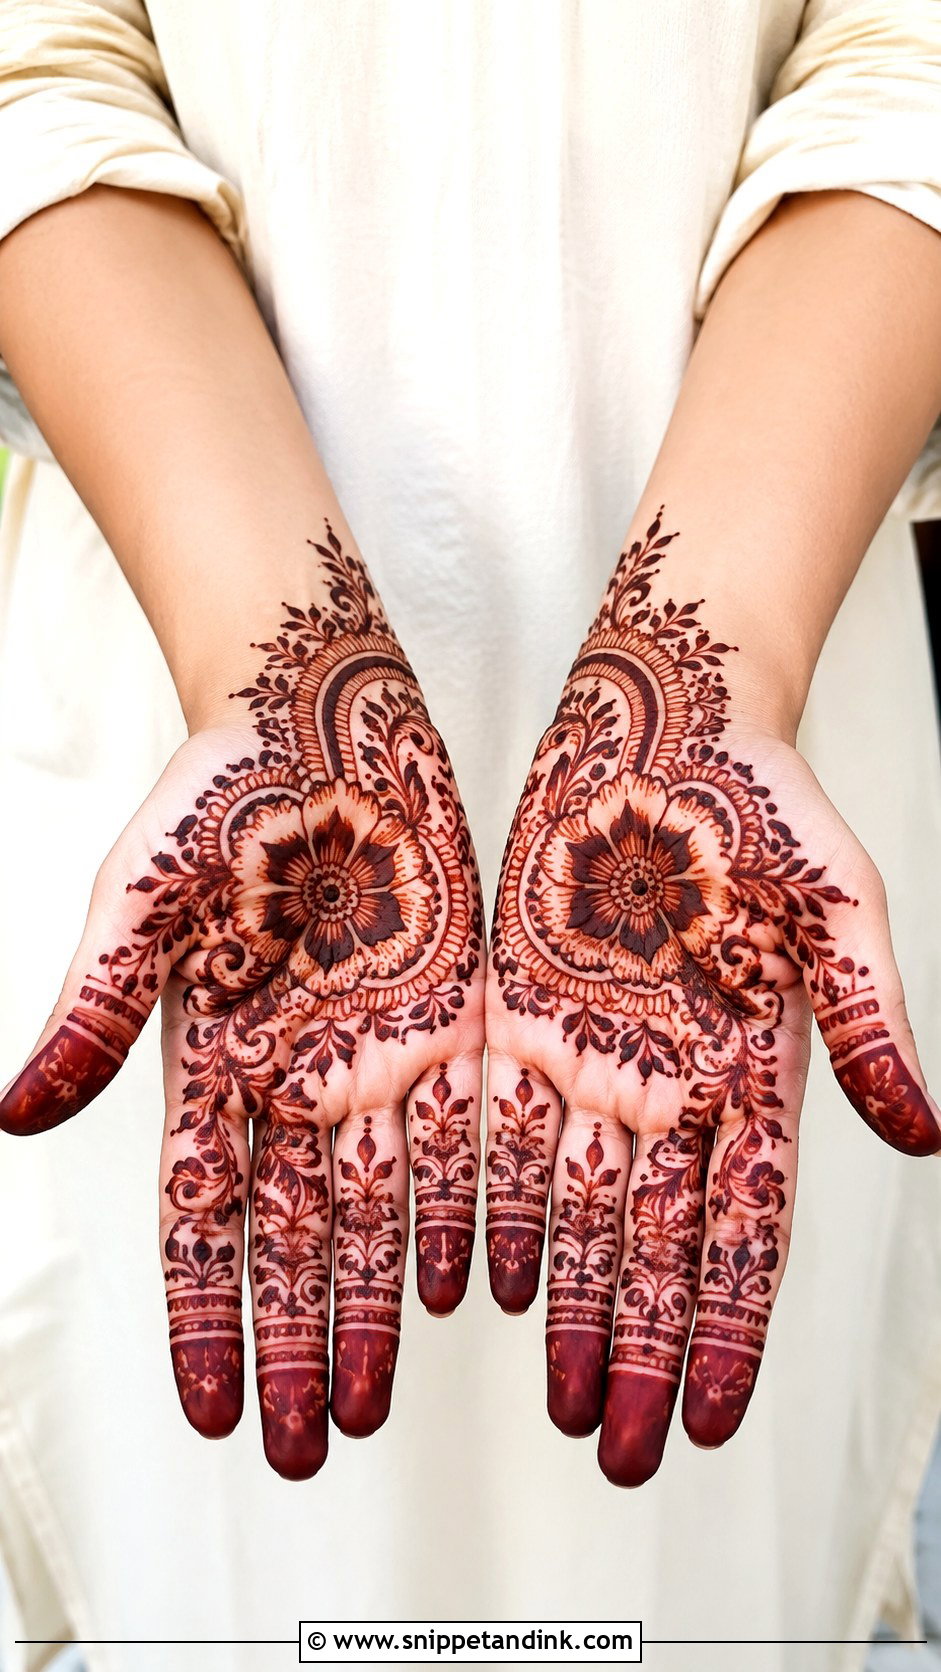
Half hand designs cover the palm side or the back from the fingers down to mid-hand and leave the wrist bare. A floral or mandala base near the centre, leafy trails, half circles and neat fingertip patterns building upward. I end it with a clear edge, a row of dots or a scalloped line, so it looks deliberate rather than unfinished. Quicker than full coverage, still visibly festive.
10. Simple Palm Mehndi Design
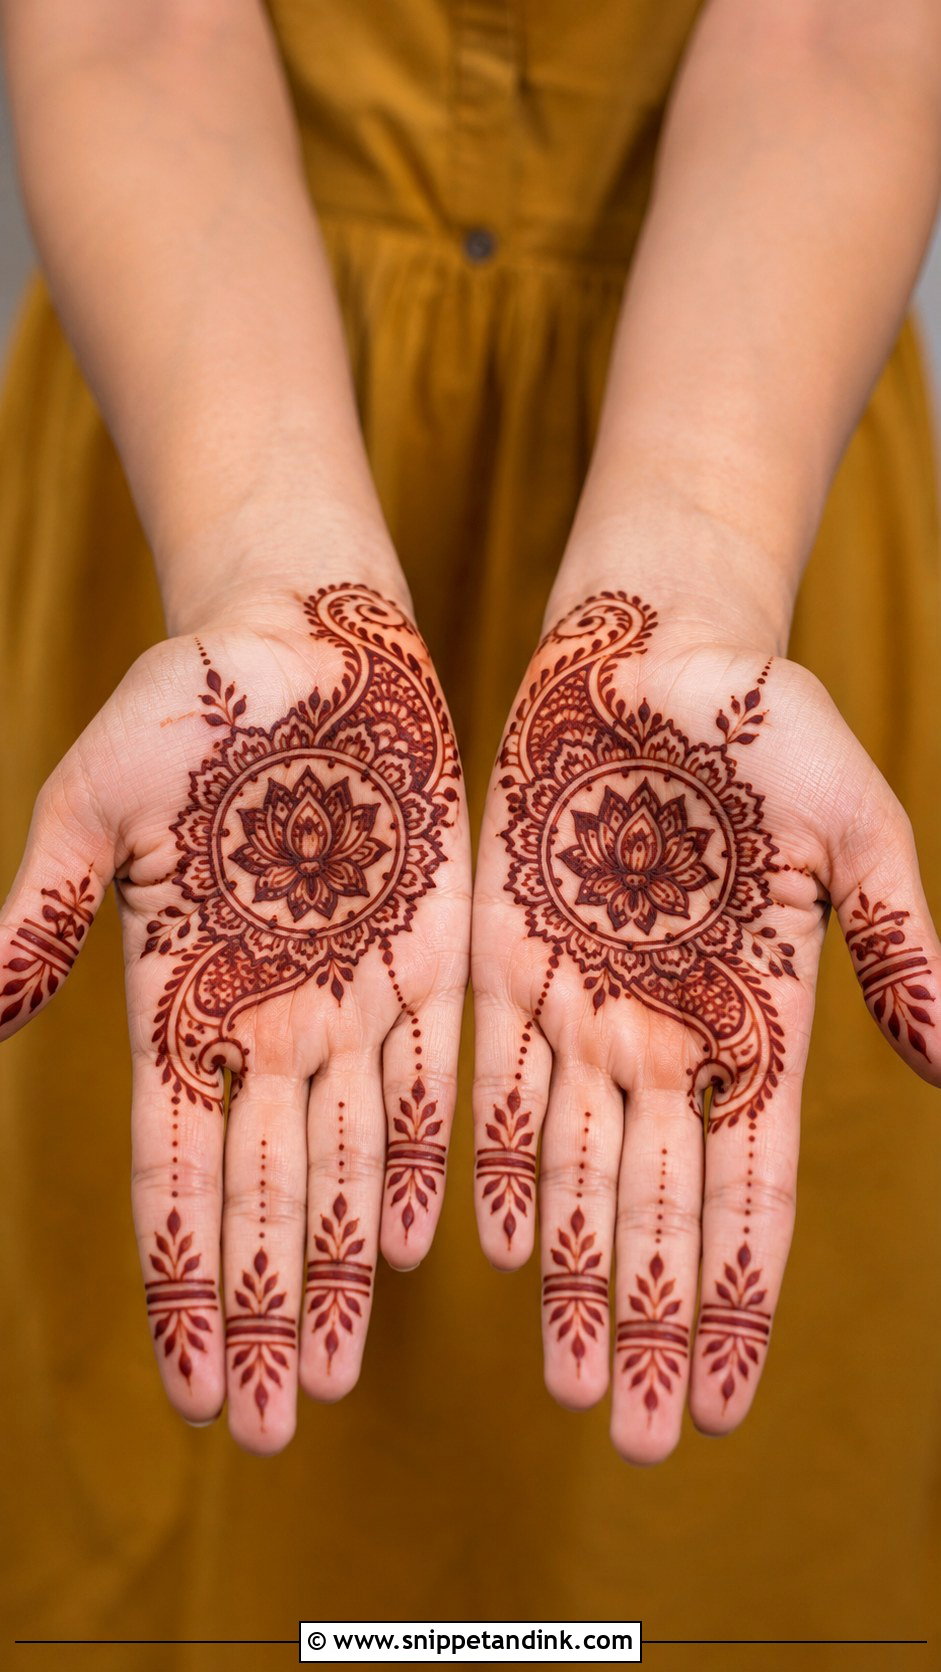
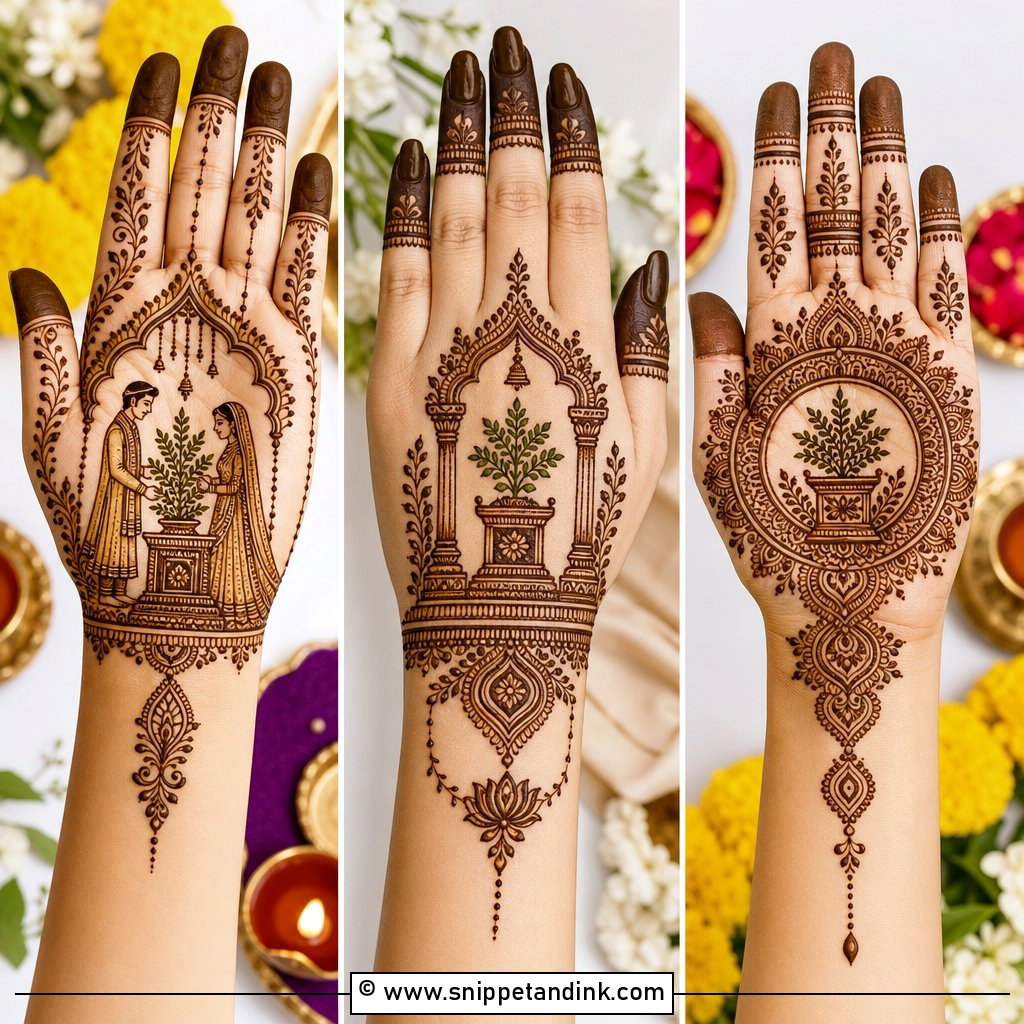
A round mandala, lotus or floral circle in the middle of the palm, framed with dotted curves, with small paisleys on either side if you want more. Matching lines, leaf bands or tiny checks on the fingers; the wrist stays plain. One strong motif instead of many sections is easier for beginners. The palm centre stains darkest of all, so this design comes up rich even with very little paste.
11. Simple Back Finger Mehndi Design
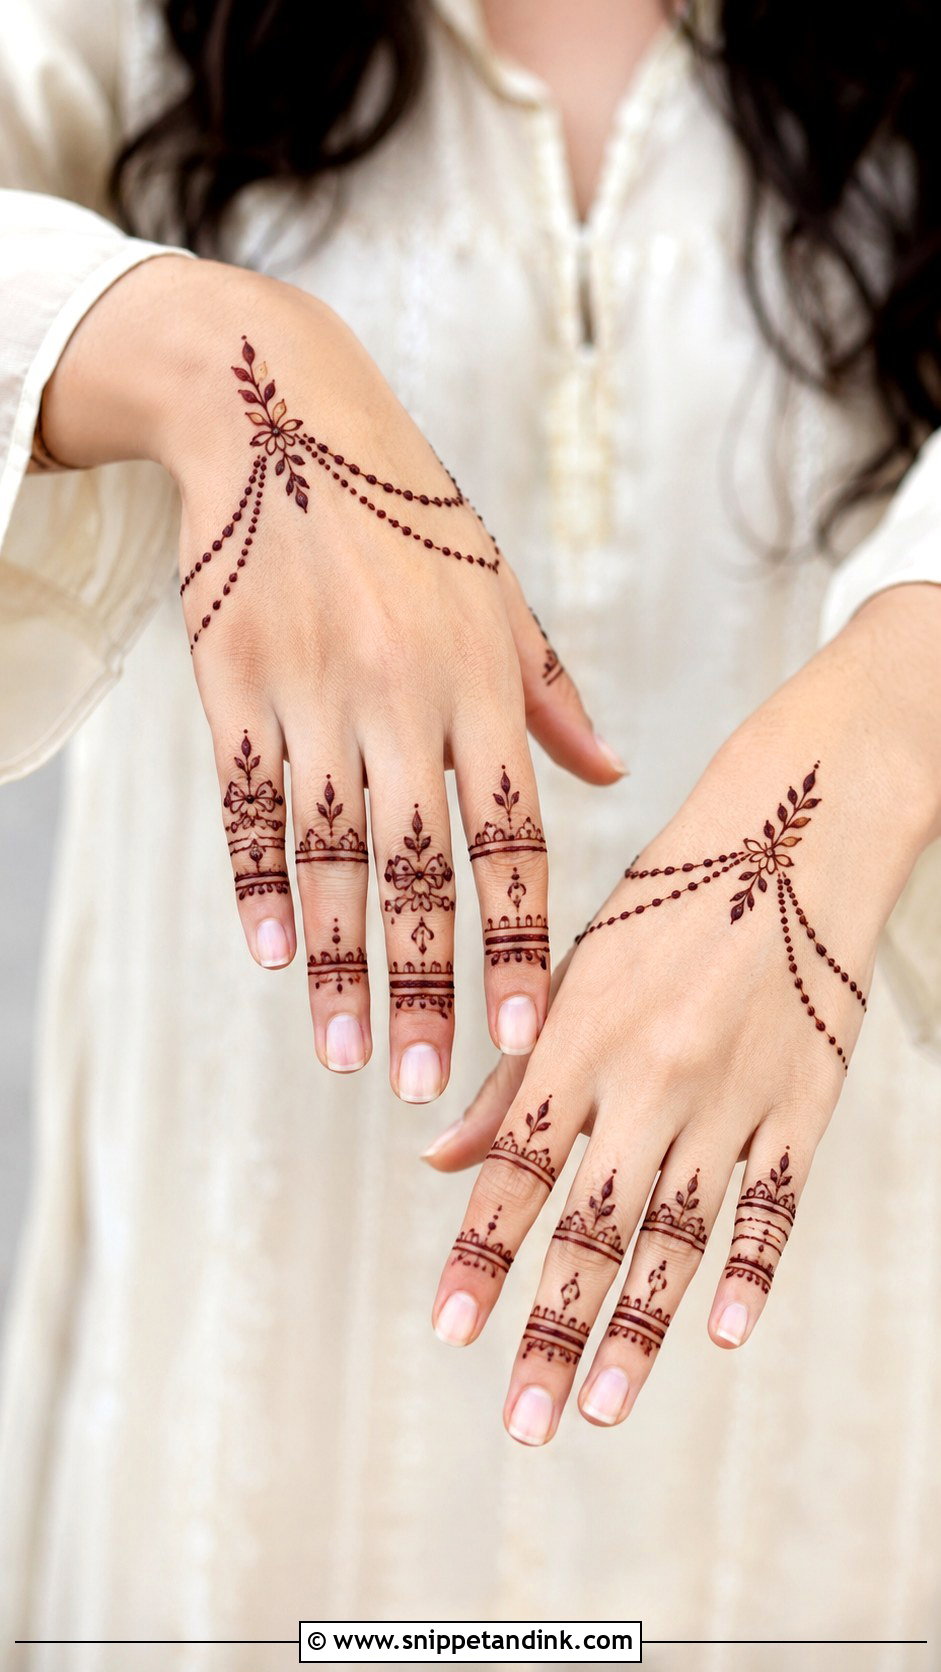
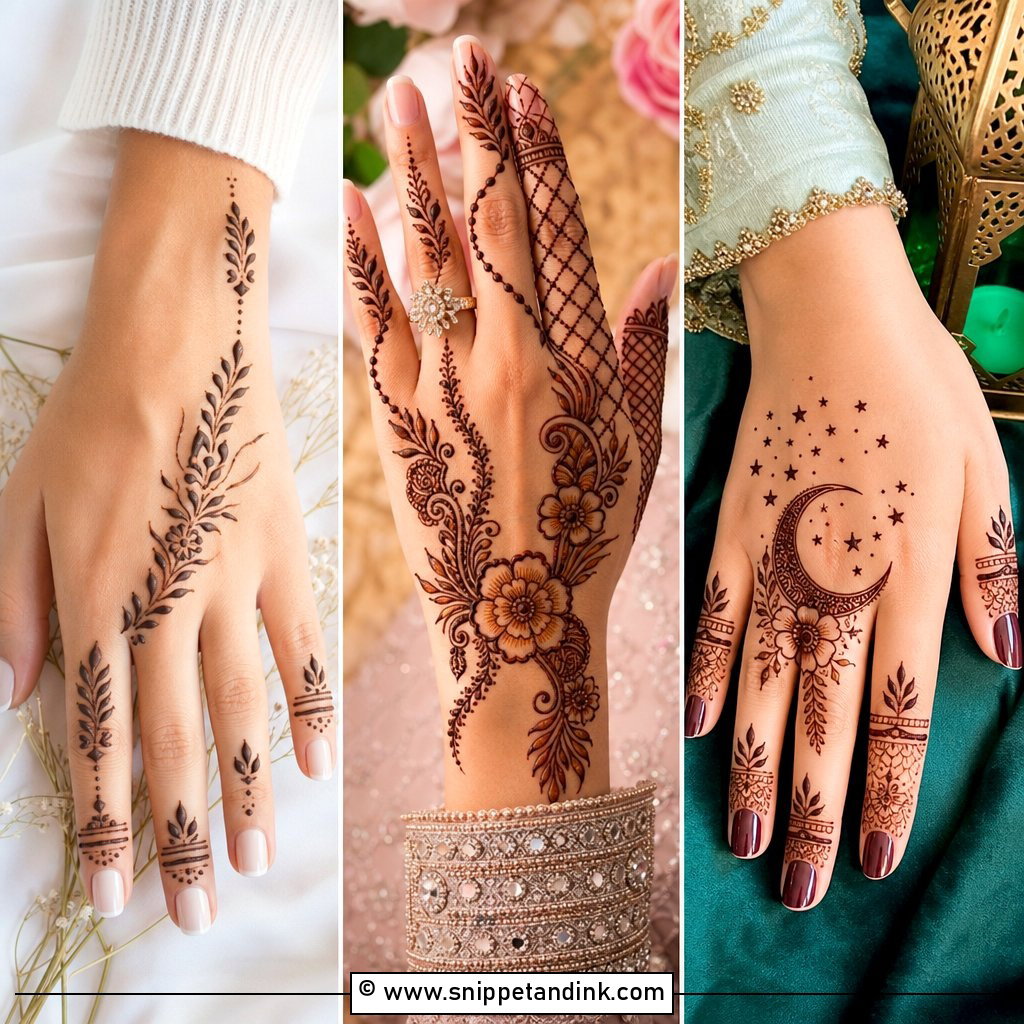
This one is about the fingers and knuckles; the rest of the back hand stays clean. Thin horizontal bands on each finger, tiny leaves, dots and small arches around the joints, and a fine chain or leafy trail linking one or two fingers to the wrist. Knuckle skin wrinkles, so I keep motifs there small and open. It takes very little time, which is why I suggest it for last-minute and office celebrations.
12. Simple Paisley Mehndi Design
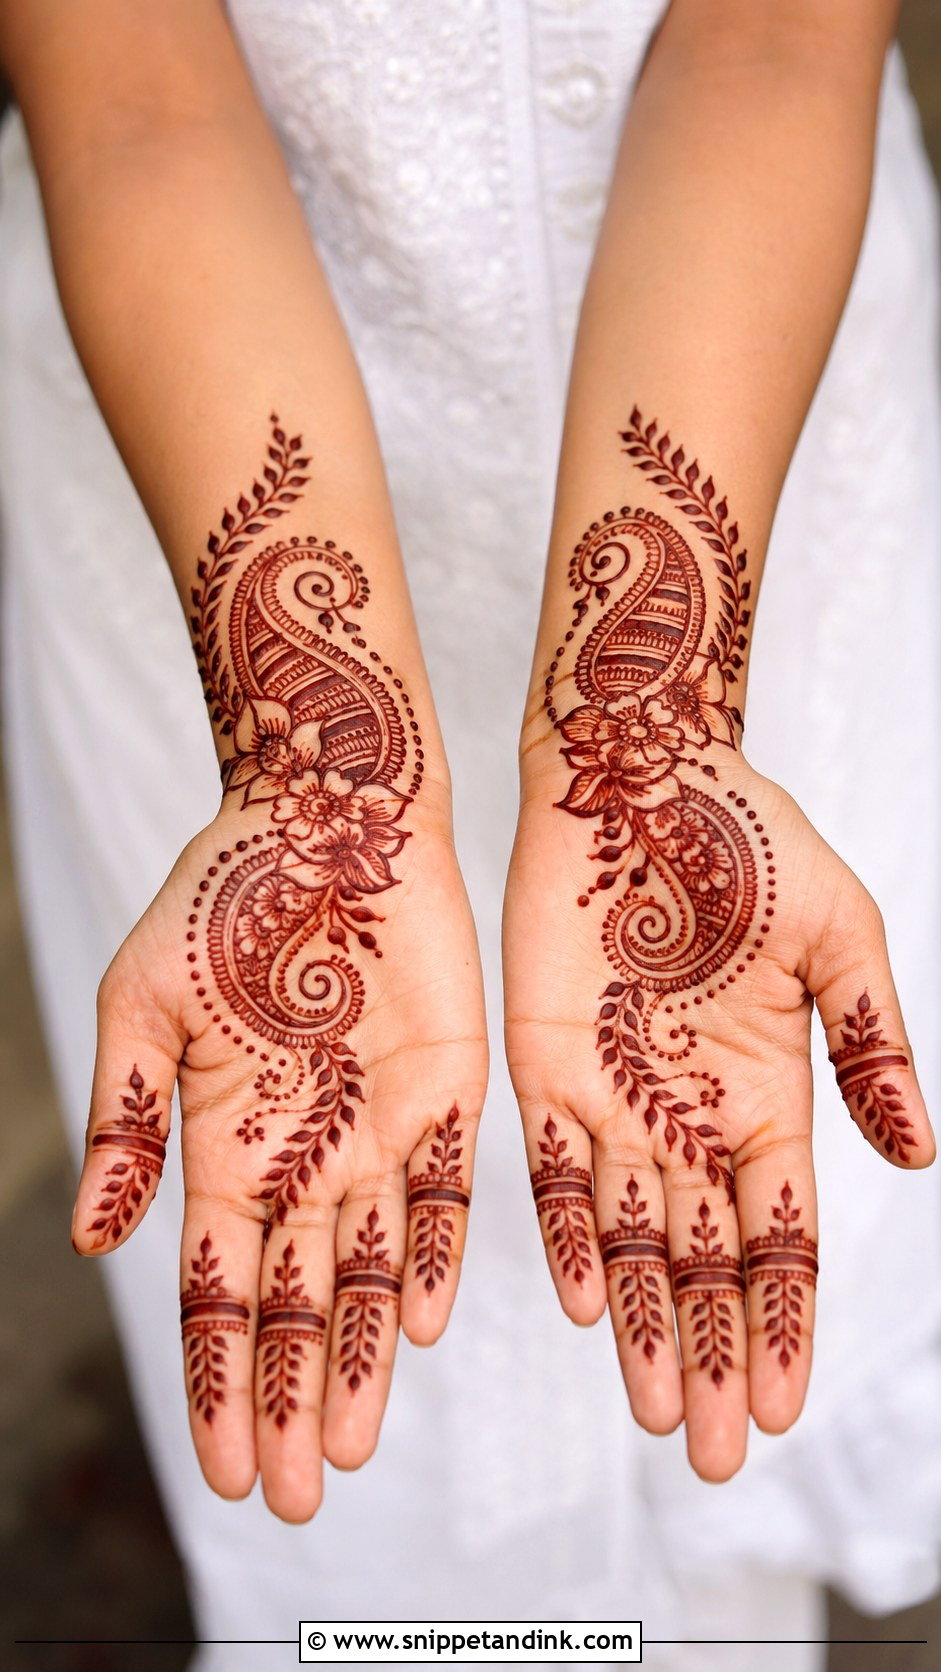
A single large paisley on the palm or back of the hand, surrounded by leaves, dots and small buds, with a curved vine heading toward the wrist or fingers. Inside, easy fillings: lines, tiny petals or small checks. Paisleys don’t need perfect symmetry, which makes them kind to beginners. I draw the outline first, check the curve, and only fill once I’m happy with the shape, because a filled paisley can’t be corrected.
13. Simple Leaf Mehndi Design
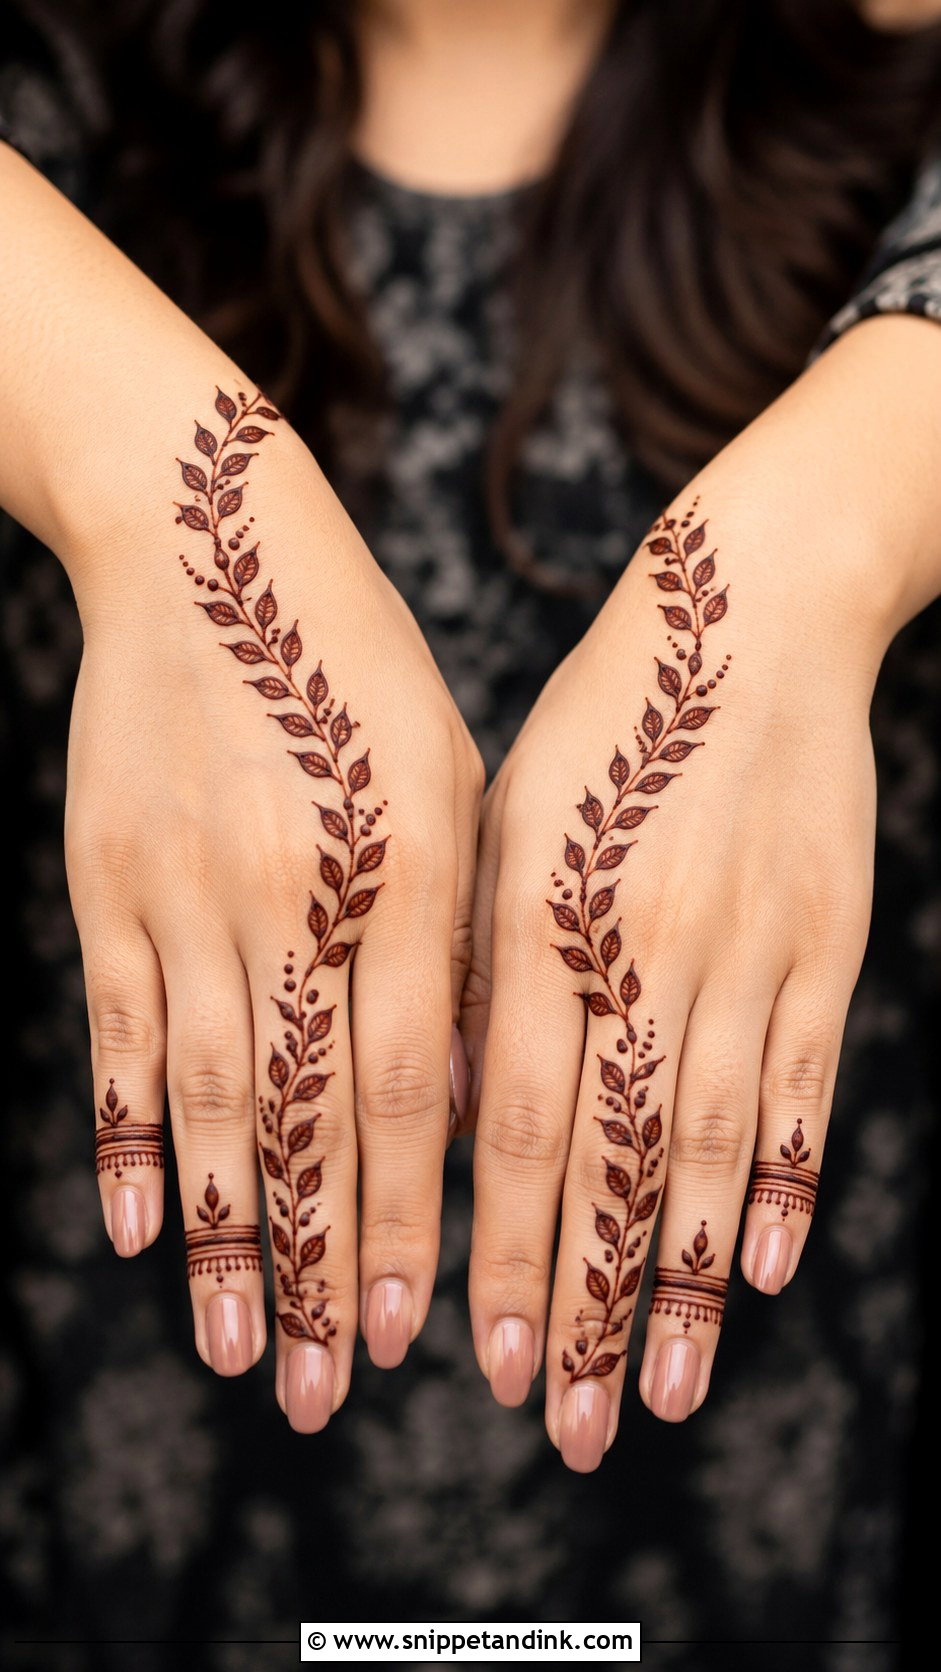
Draw a curved vine from the wrist to the index finger or across the palm, then add leaves on both sides, mixing small and medium sizes for movement. Dots between them soften the pattern. Thin bands or leafy tips on the fingers. Leaves are the shape I teach first: one press, a slight drag, and lift. It’s an easy daytime look that needs no extra detail.
14. Simple Jaali Mehndi Design
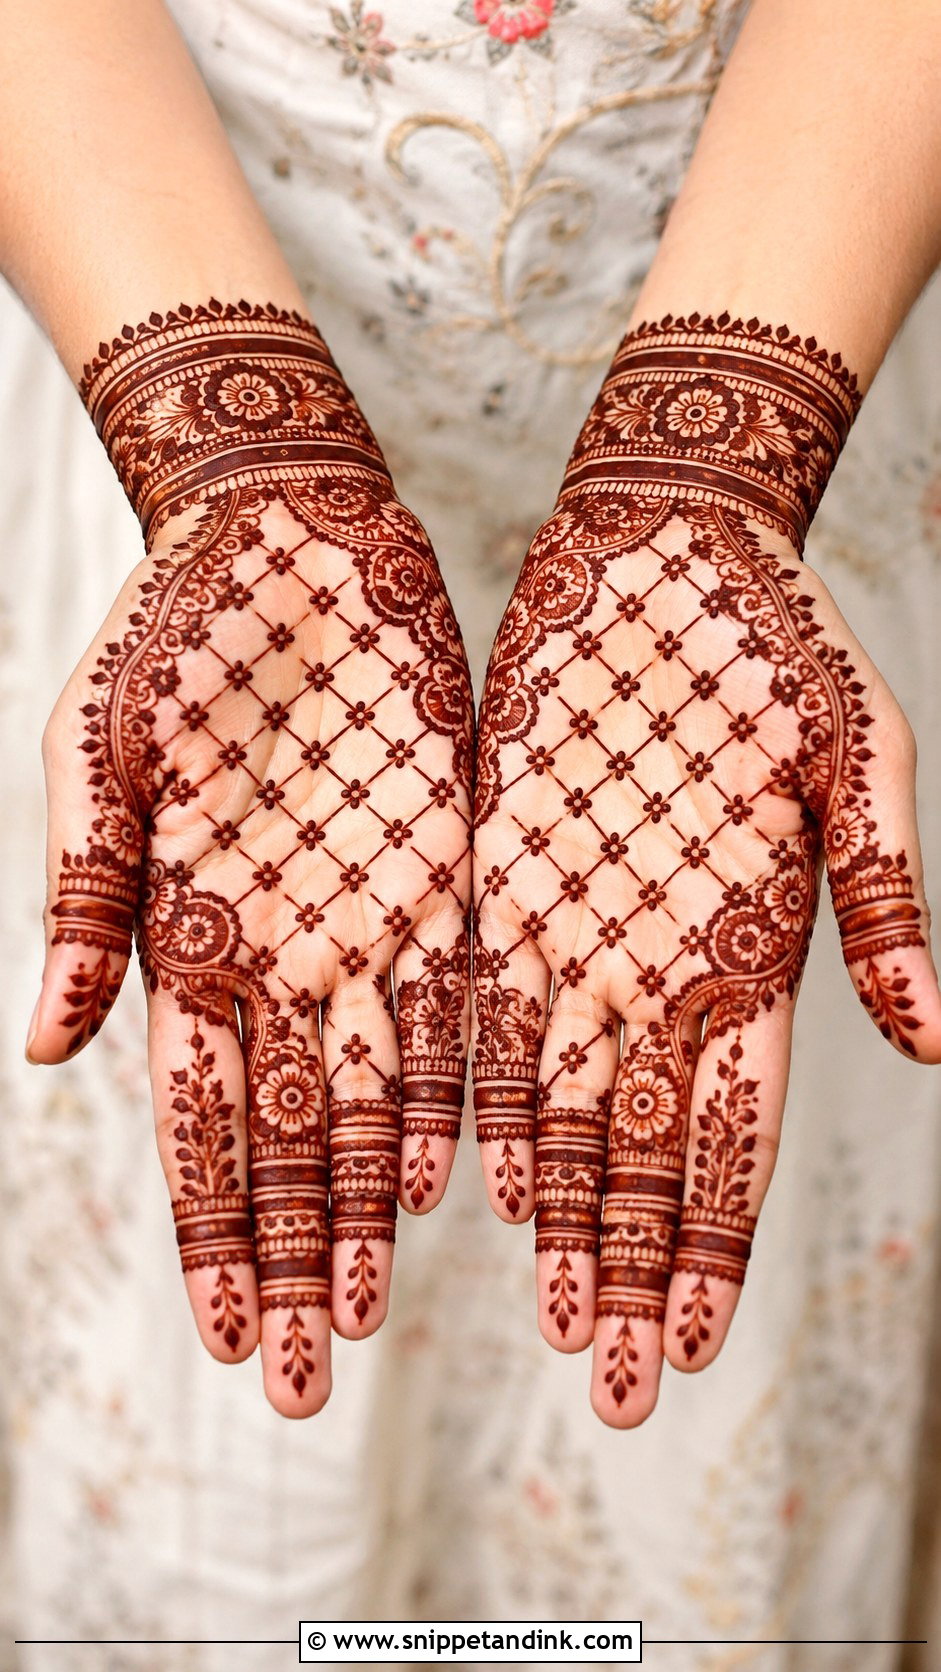
A small mesh panel on the palm, back of the hand or wrist, framed with flowers, leaves or curved borders, with dots at the intersections. Evenly spaced lines matter, and so does not making the cells too small; paste spreads a little as it settles and tight cells fill in. Simple bands or small leaf trails on the fingers. It looks dressier than most of the designs here, so it suits engagements and parties.
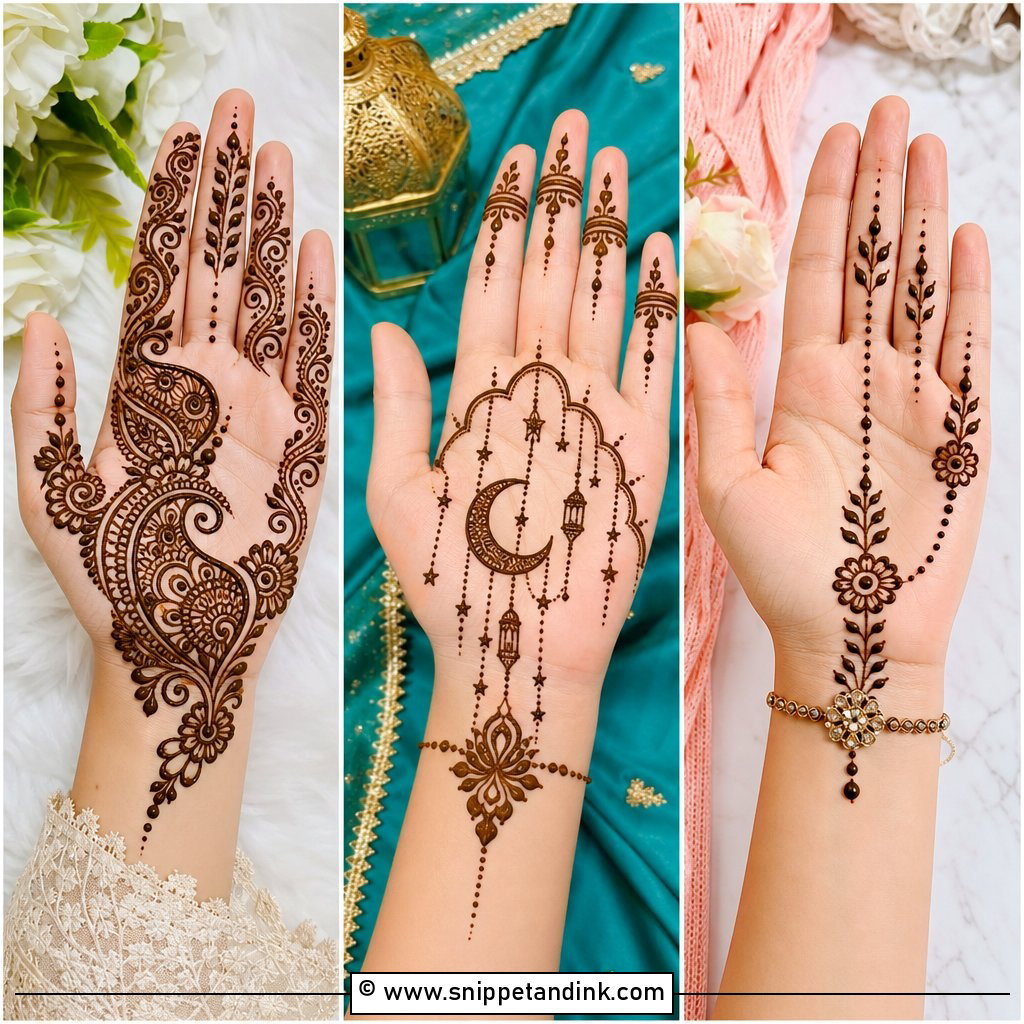
15. Simple Indo Arabic Mehndi Design
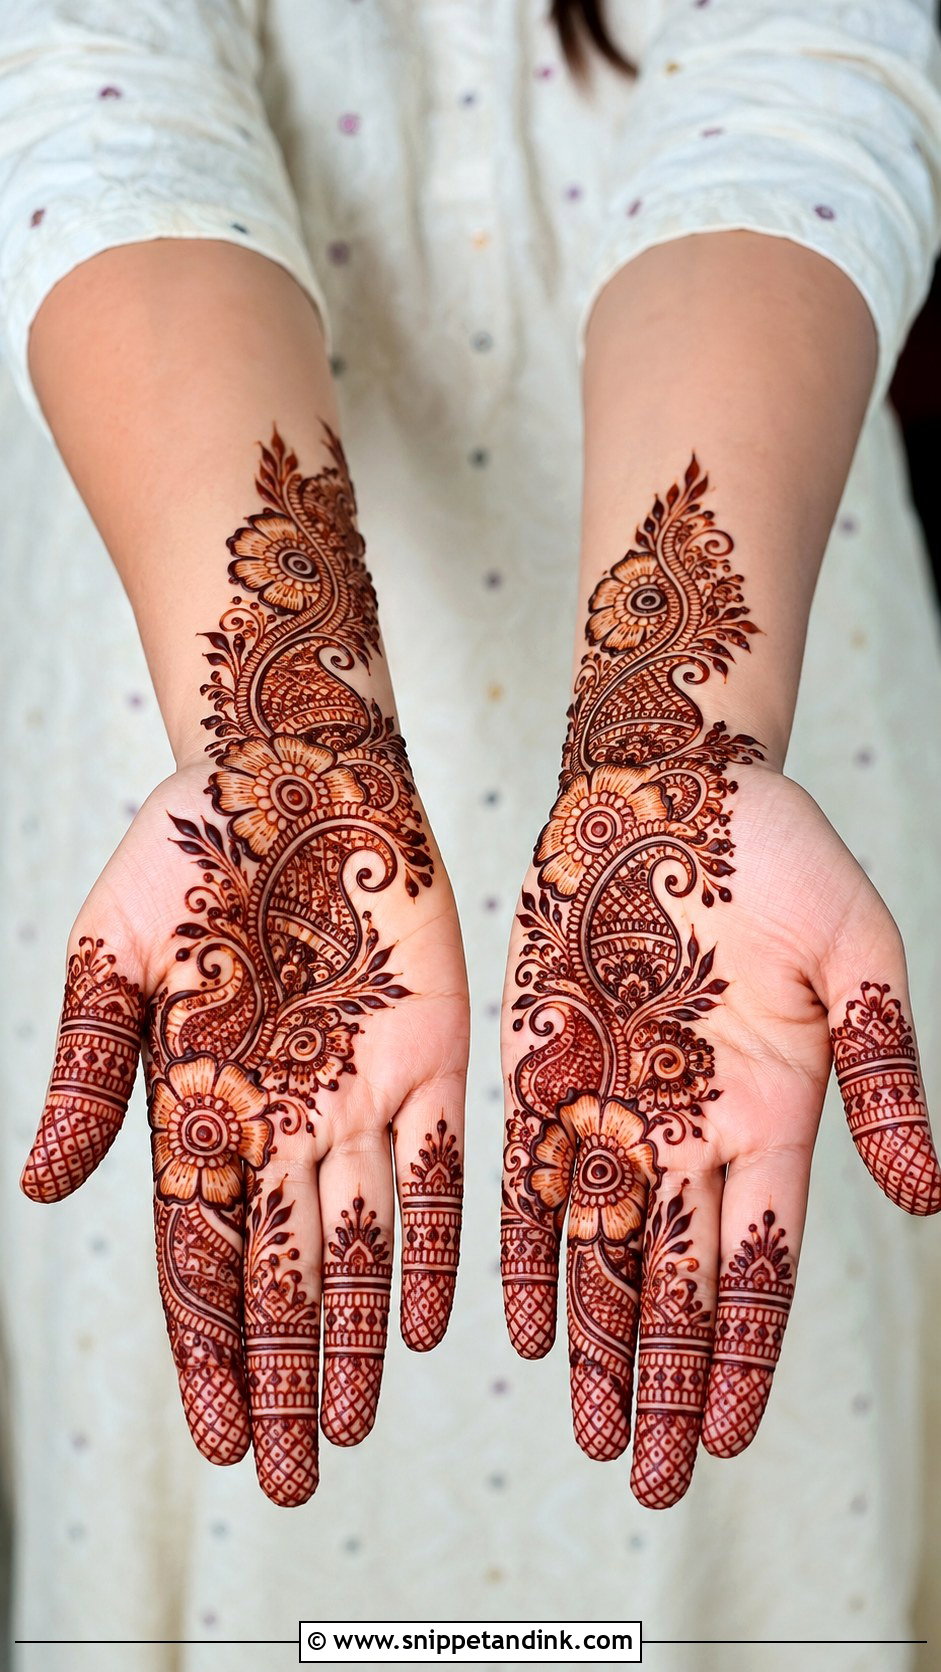
Indo-Arabic pairs Arabic spacing with Indian detail. I start with a diagonal floral trail, then add small paisleys, dots and mini fillings inside selected flowers or leaves. One side of the hand stays open, the other slightly detailed. Indian-style bands on the fingers, Arabic flow in the main trail. It’s my usual answer when someone wants “festive, but not too much” for Eid, Diwali or a family wedding.
16. Simple Indian Mehndi Design
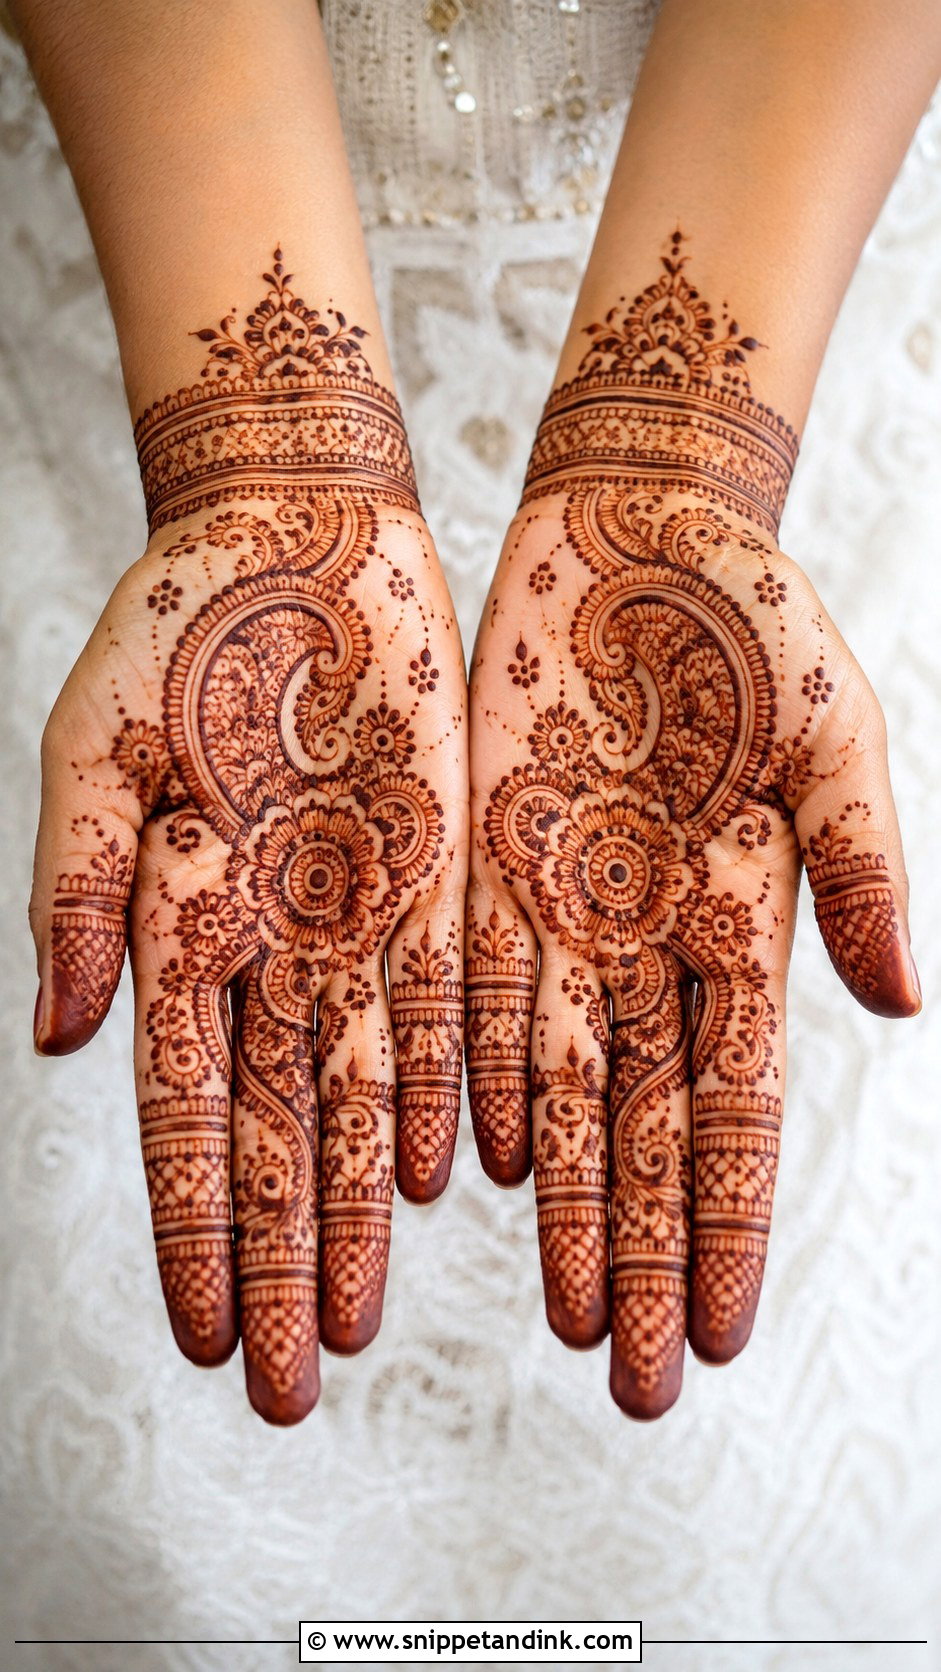
A central palm motif, two paisleys, a few flowers and neat finger bands, with dots, curved lines and leaf fillers only where they’re needed. Some skin shows between the motifs, which keeps it light while still reading as traditional Indian work. Two bracelet borders at the wrist complete it. The temptation is to fill every gap, and resisting it is what keeps this one simple.
17. Simple Moroccan Mehndi Design
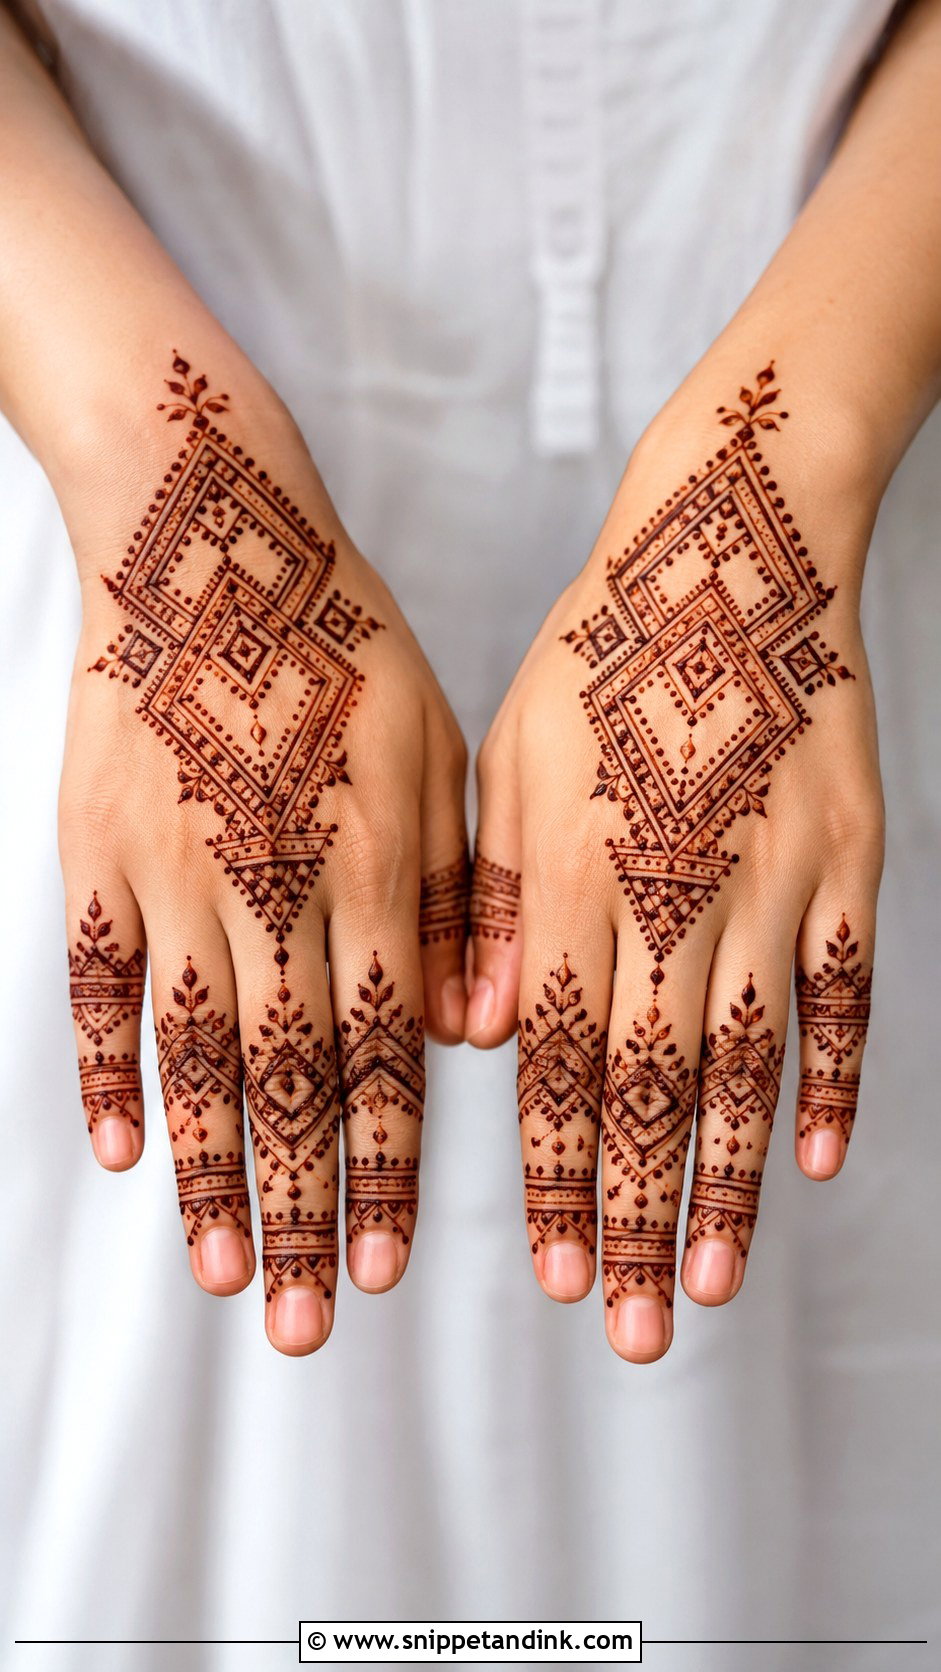
Moroccan-inspired henna swaps florals for diamonds, triangles, straight lines, dots and small grids on the back of the hand or palm. Stacked bands and tiny geometric marks on the fingers match the main pattern. Spacing has to be sharp and even. Some beginners find straight lines easier than petals; others find any wobble shows more. Try a practice row on paper first and you’ll know which camp you’re in.
18. Simple Gulf Mehndi Design
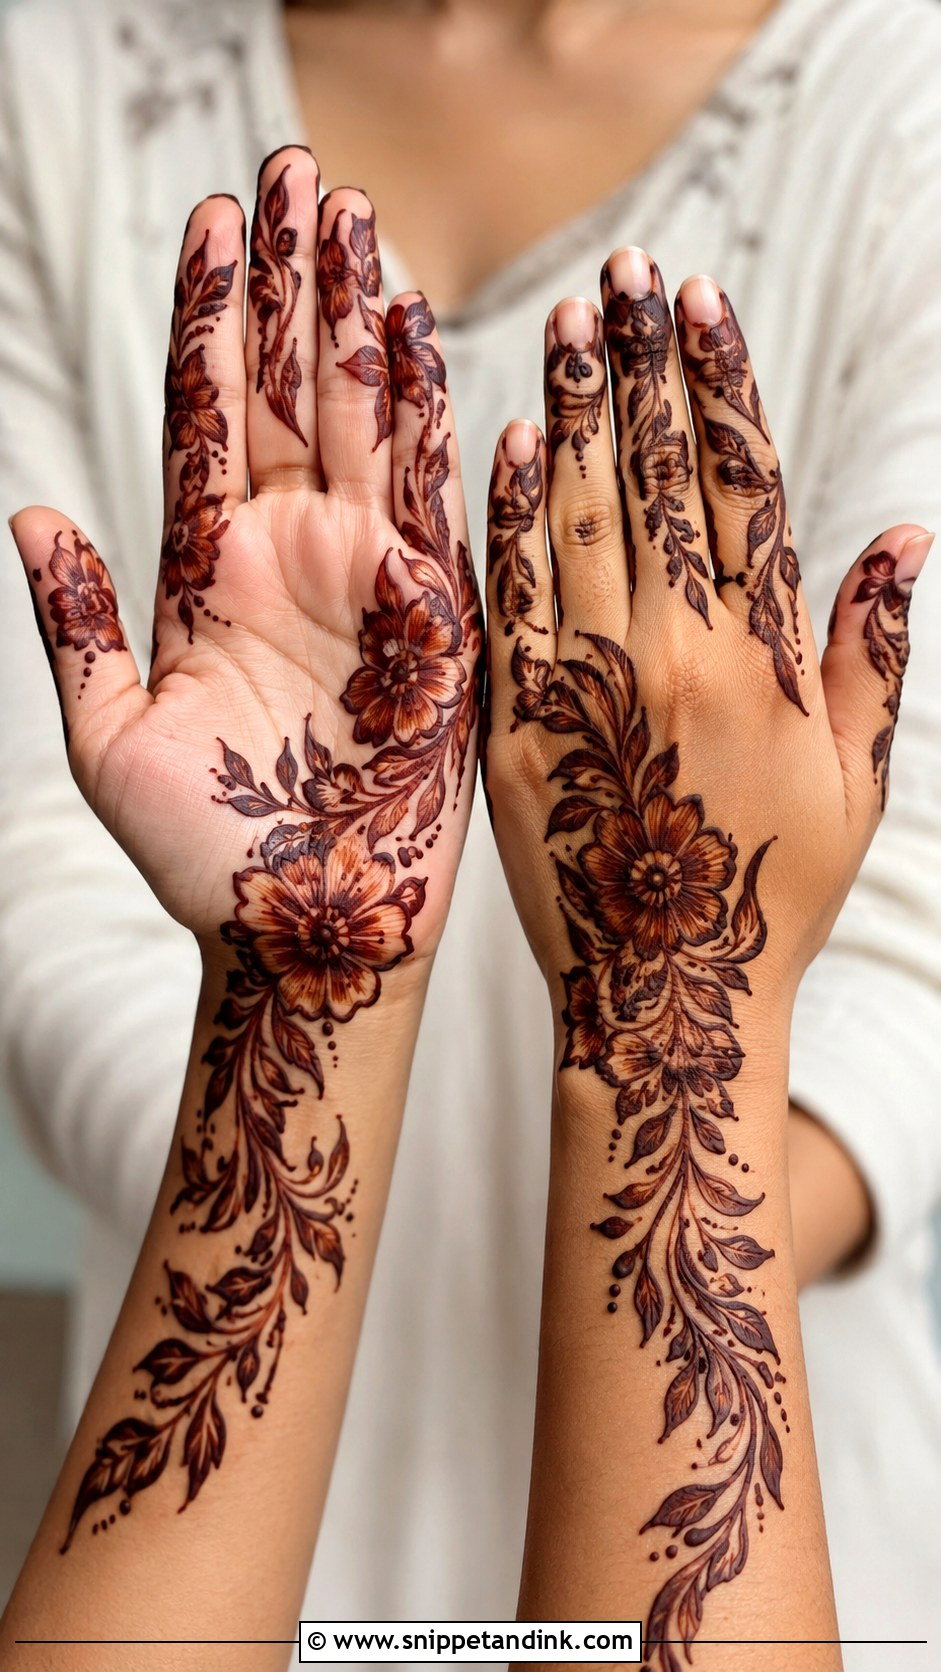
Khaleeji-inspired mehndi is bold: one large flower on the palm or back of the hand, a flowing vine to the wrist and fingers, thick outlines, light inner shading, and the rest of the hand left open. There’s no tiny filling across the hand, so it’s quick. I use a cone with a slightly wider tip for these outlines. It looks dramatic at Eid and evening functions.
19. Simple Eid Mehndi Design
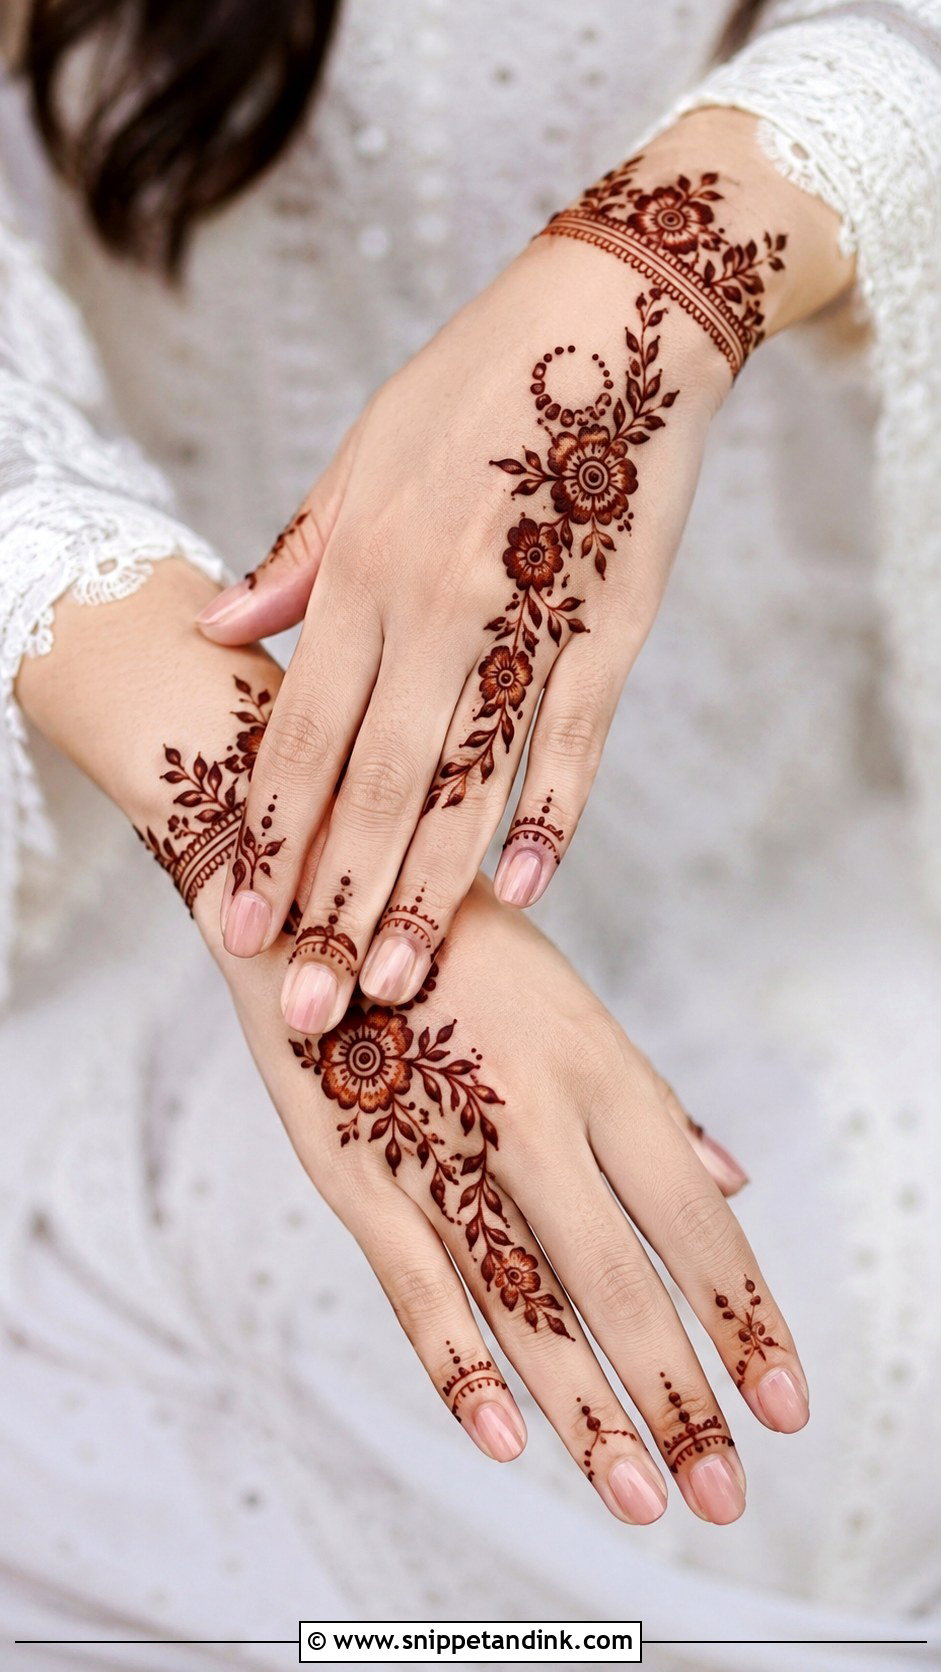
Eid prep is busy, so the design should be quick. A back-hand floral trail, a bracelet at the wrist, lightly decorated fingers, with small crescents, dots or arches if you want a festive touch. Keeping the palm mostly empty means you can still help in the kitchen and greet guests. Applied the night before at home, it’s darkening nicely by morning.
20. Simple Wedding Guest Mehndi Design
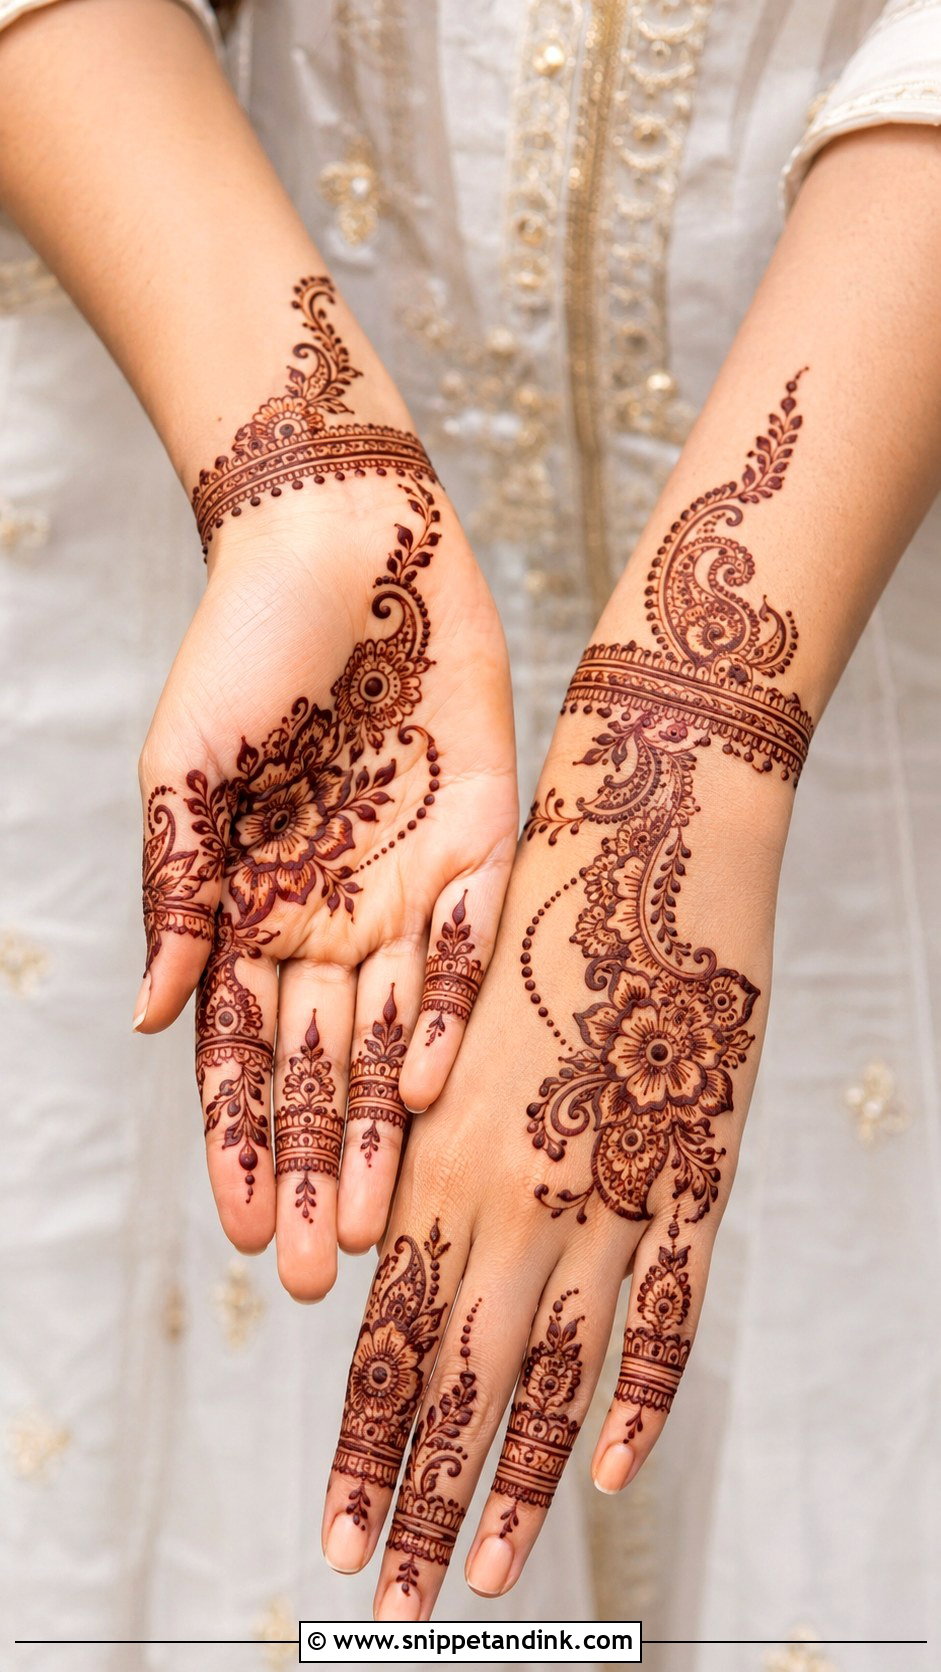
A guest should look festive, not bridal. A diagonal Indo-Arabic layout of flowers, paisleys and dotted curves across the back of the hand or palm, neat finger bands, a small wrist bracelet. During wedding week there are several events and outfit changes, and this level of design survives all of them without looking out of place. It suits sisters, cousins and friends of the couple.
21. Simple Bridal Mehndi Design
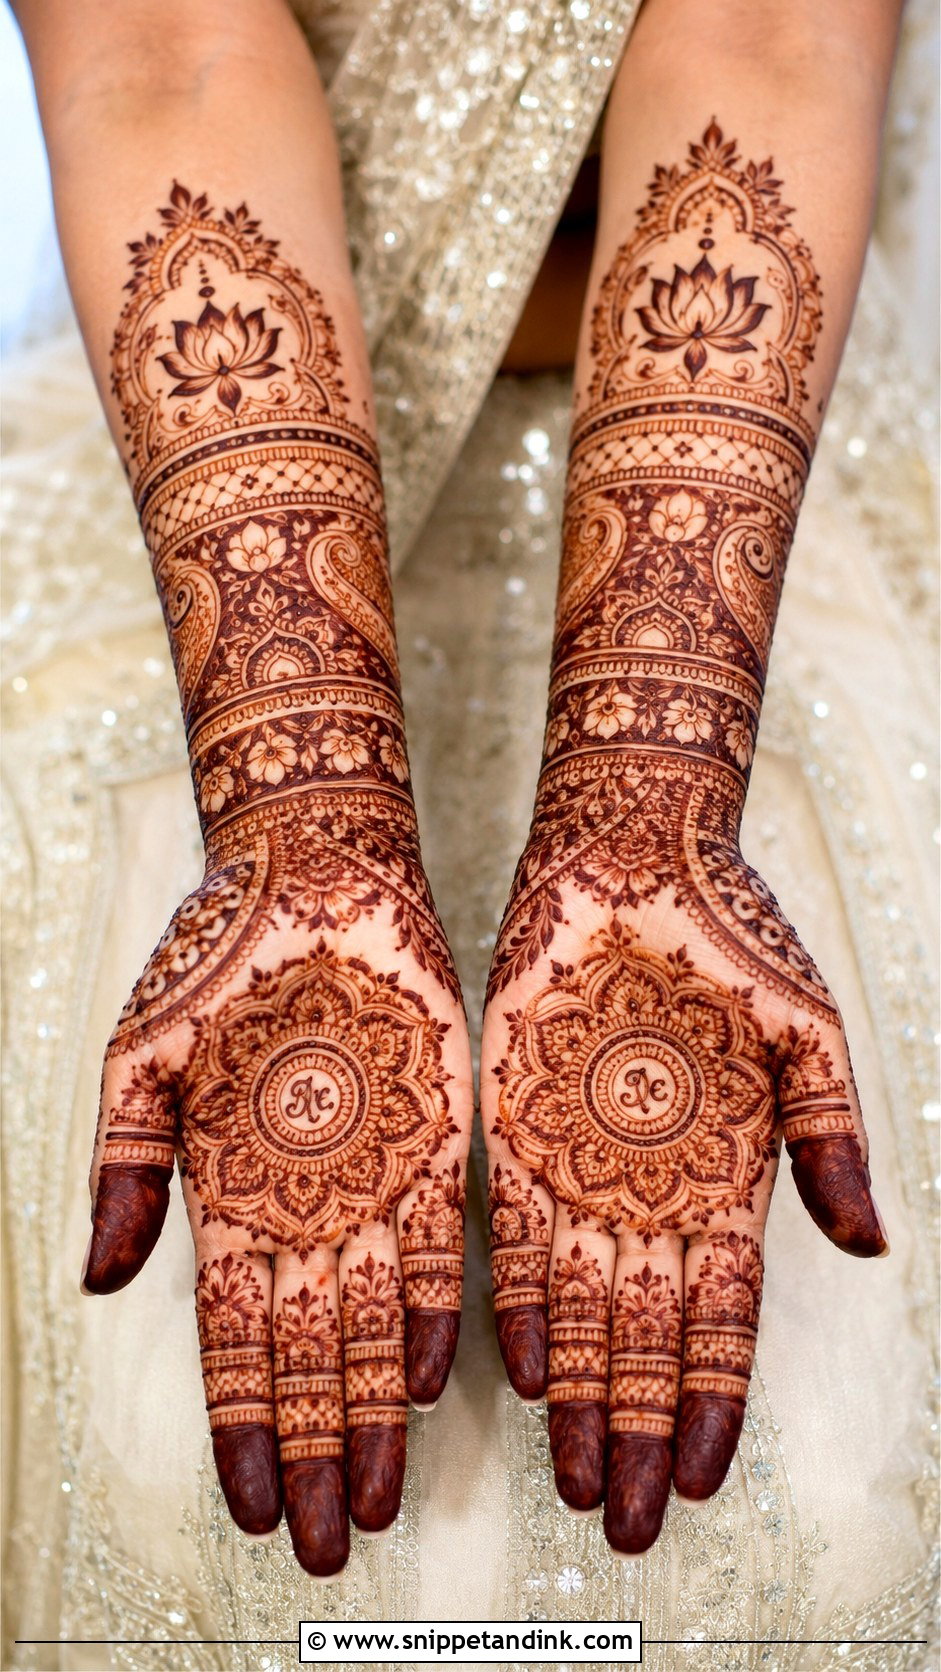
A lighter bridal look still covers the whole hand, but with larger motifs: mandalas, paisleys, lotus flowers and bracelet borders, with clean spacing so it looks refined rather than packed. Initials, small hearts or a tiny wedding symbol can be hidden in it. Slightly fuller fingers give a bridal finish. I’d still book a bride two days before the wedding, since the colour peaks a day or two after the paste comes off.
22. Simple Engagement Mehndi Design
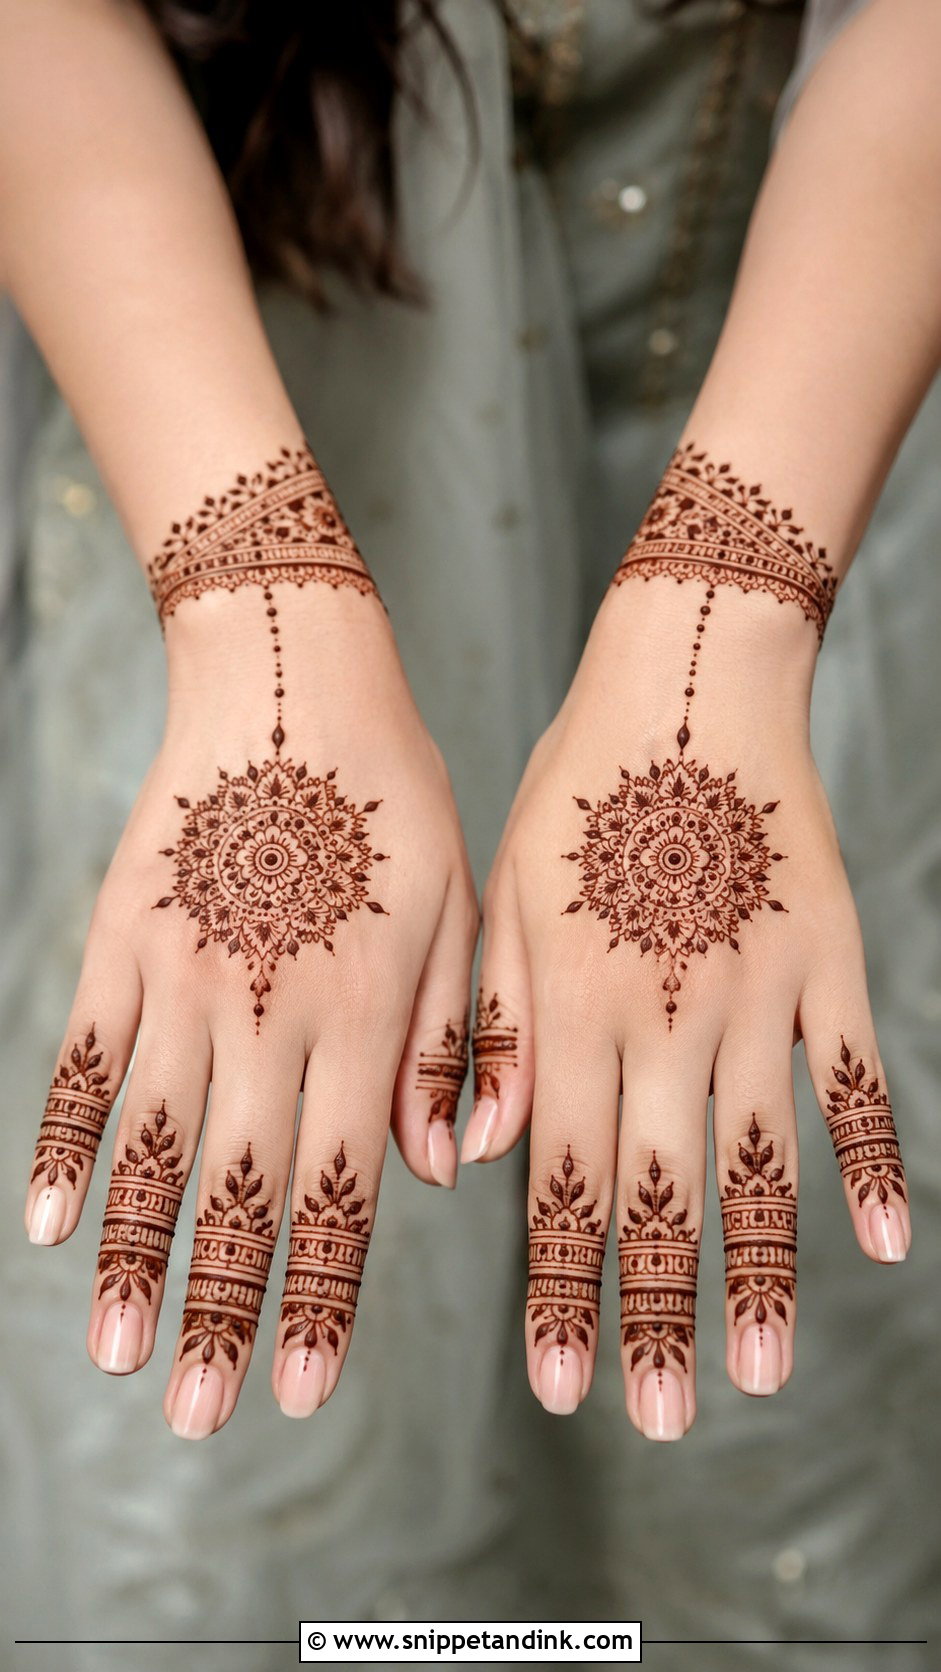
A small floral mandala on the back of the hand, dotted chains to the ring finger, a bracelet border at the wrist and light finger bands, which together give a haath phool effect. The palm stays open or gets a tiny matching motif. I leave the base of the ring finger clear so the ring sits on clean skin and the design frames it in close-up photos.
23. Simple Diwali Mehndi Design
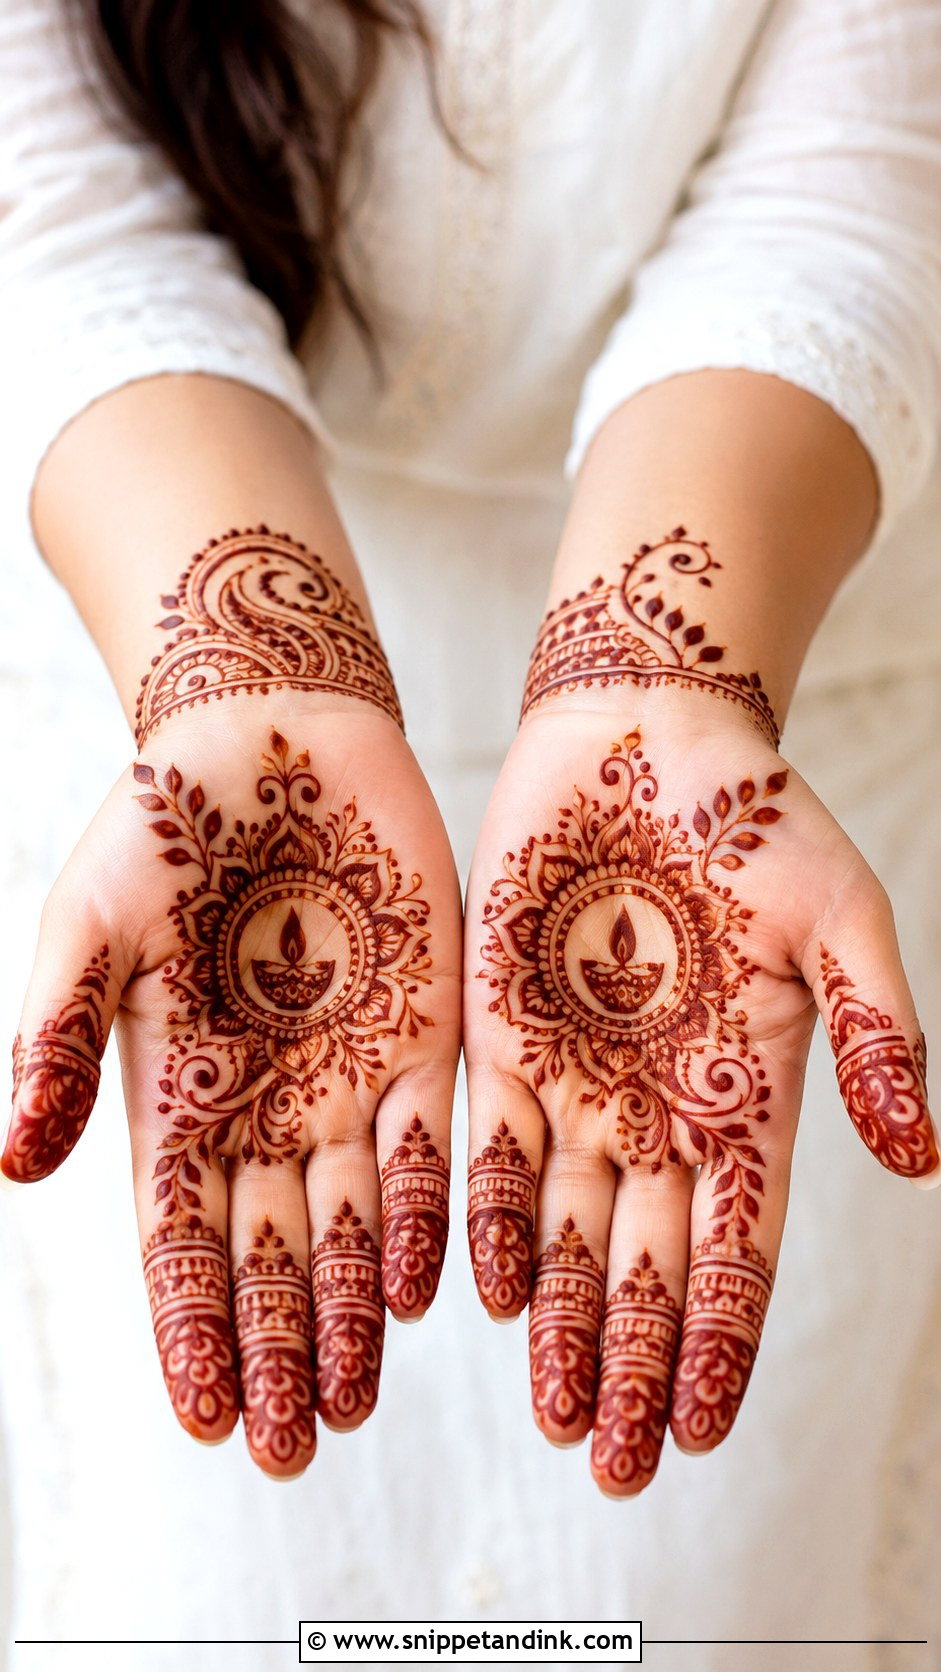
A simple Diwali mehndi design can rest on a palm mandala or back-hand flower, with dots, leafy trails and diya-shaped curves around it. Slim lines and tiny arches on the fingers. Open space lets the stain show once it darkens. It’s quick enough to do in the days before the festival, and it holds its own next to bright bangles at temple visits and dinners.
24. Simple Karwa Chauth Mehndi Design
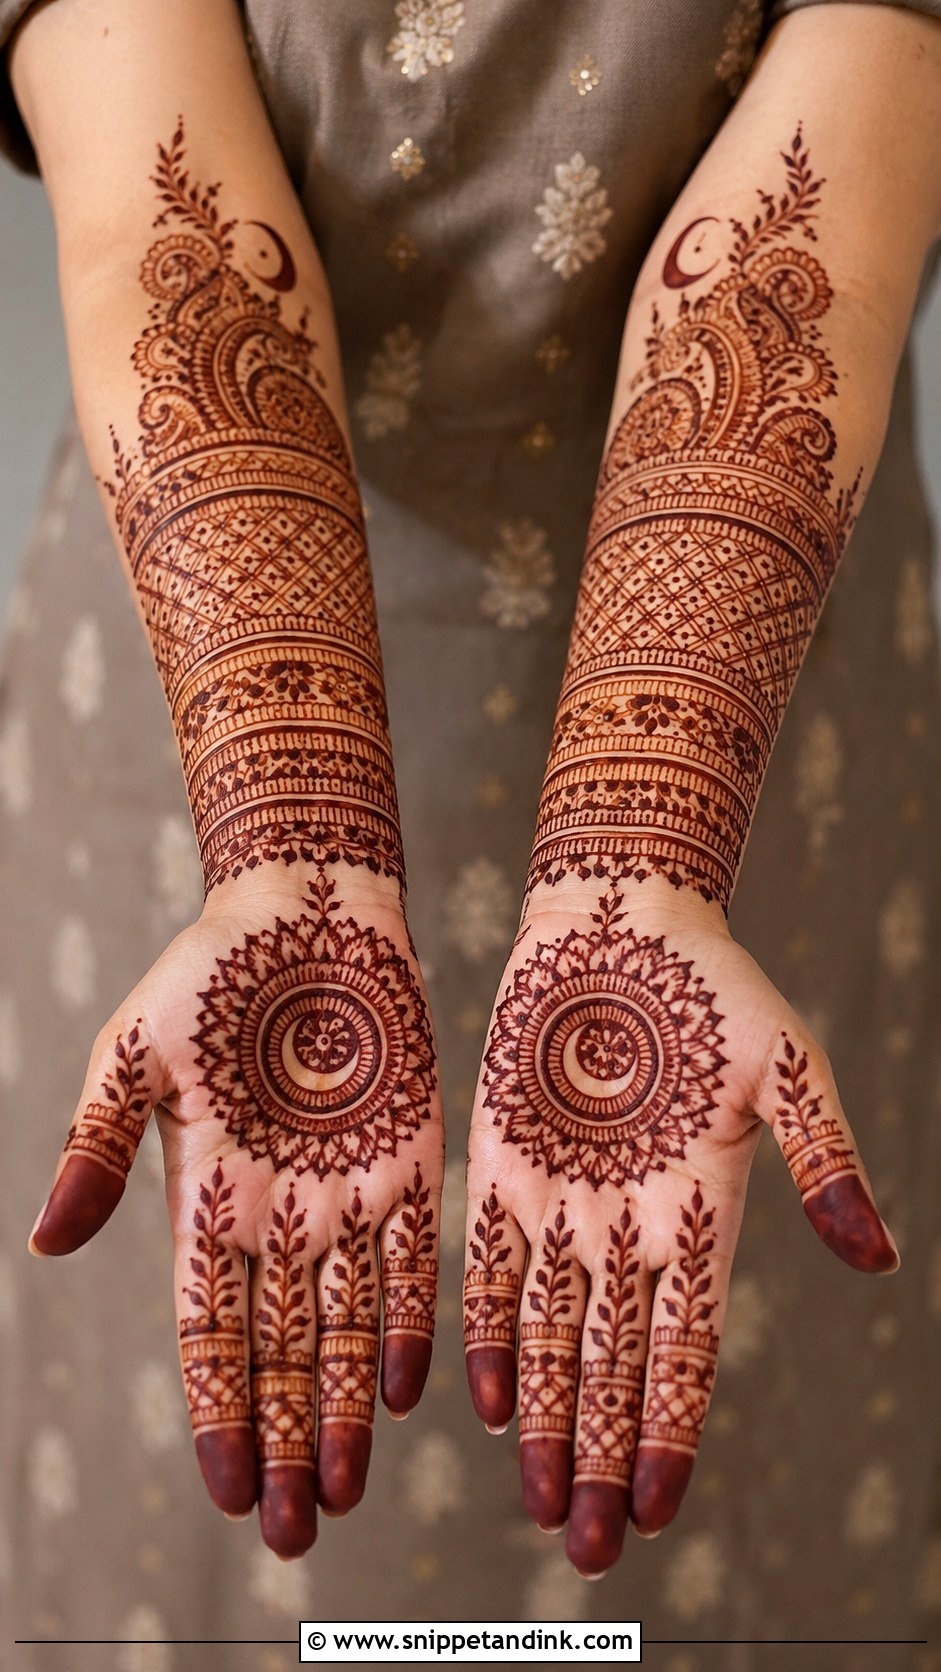
A simple Karwa Chauth mehndi design keeps tradition without the long sitting. A round mandala in the palm, small paisleys, bracelet-style wrist bands, a delicate leafy trail to the fingers, fine lines or small checks on the tips. A tiny moon curve hidden in the pattern is a quiet nod to the evening. I suggest applying it a day or two before the fast so the colour is at its best during the evening rituals.
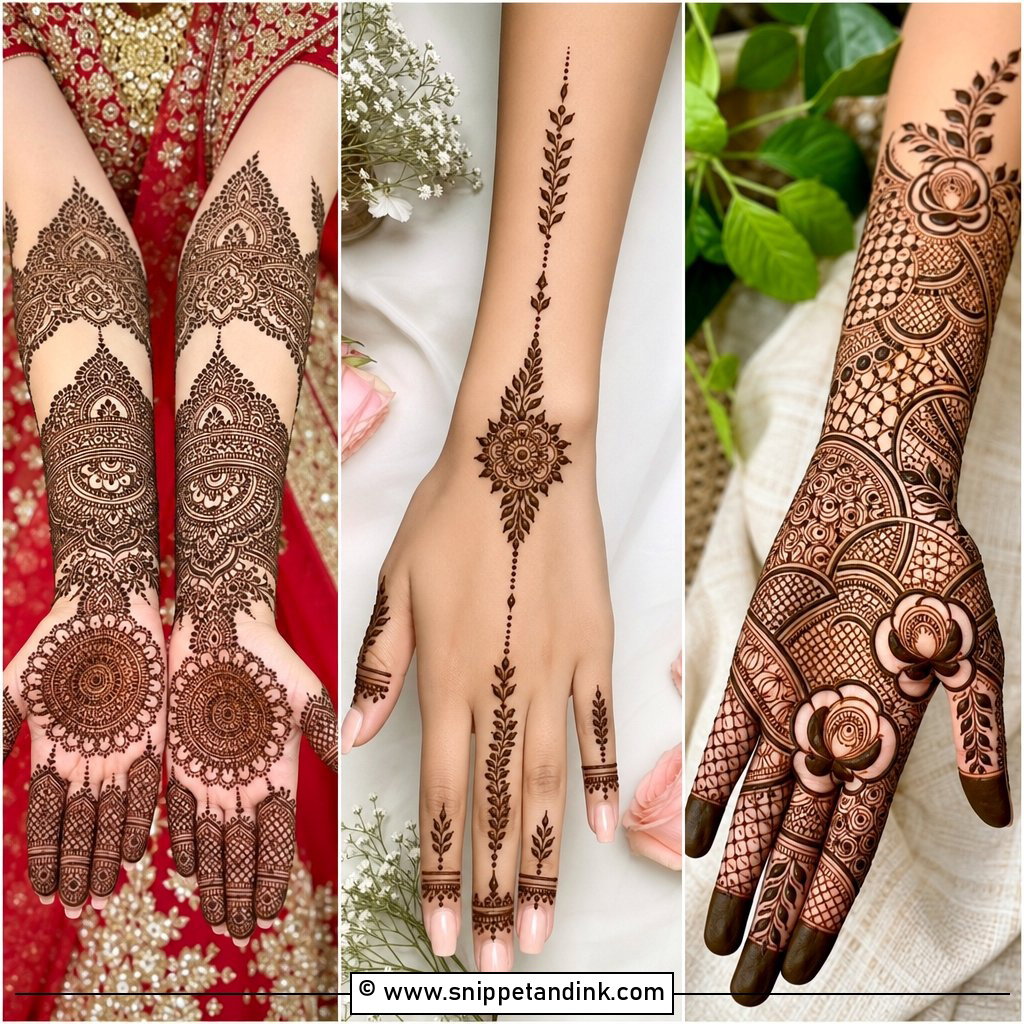
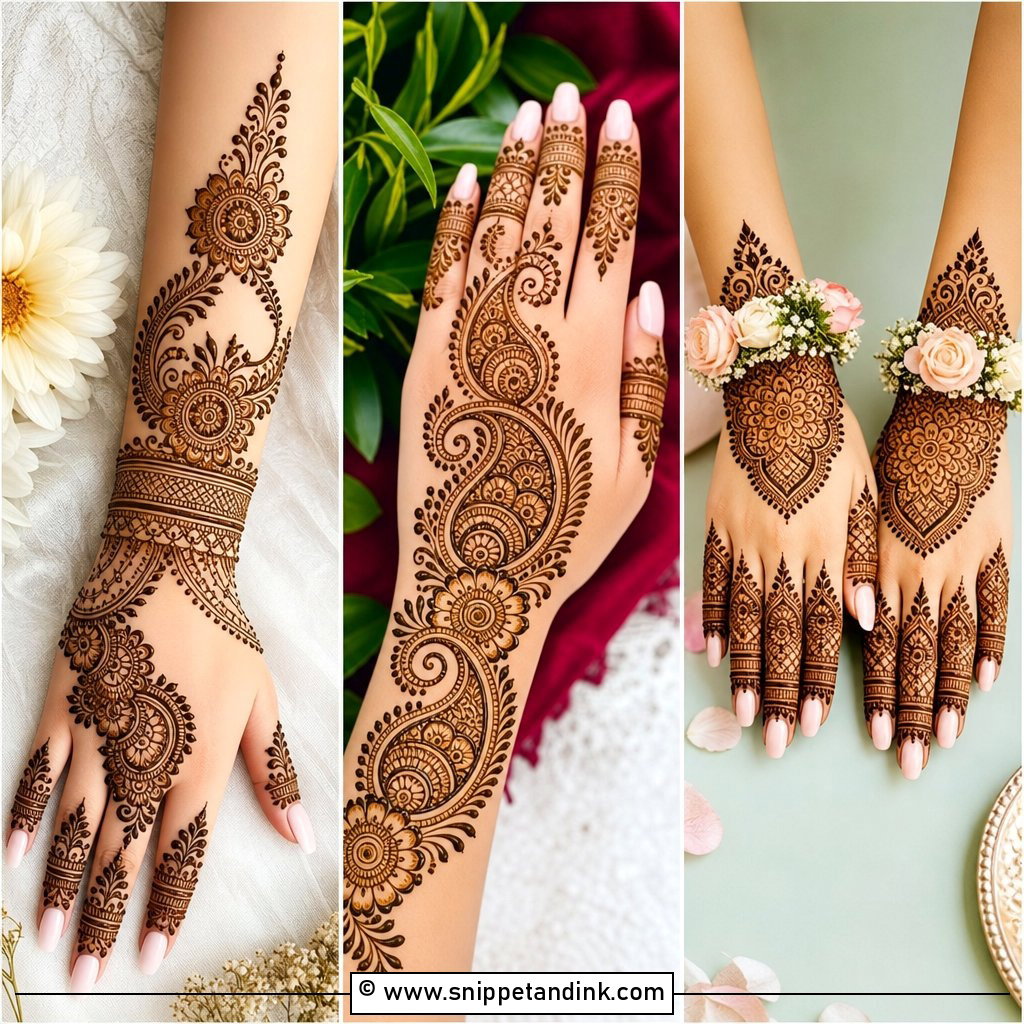
25. Simple Kids Mehndi Design
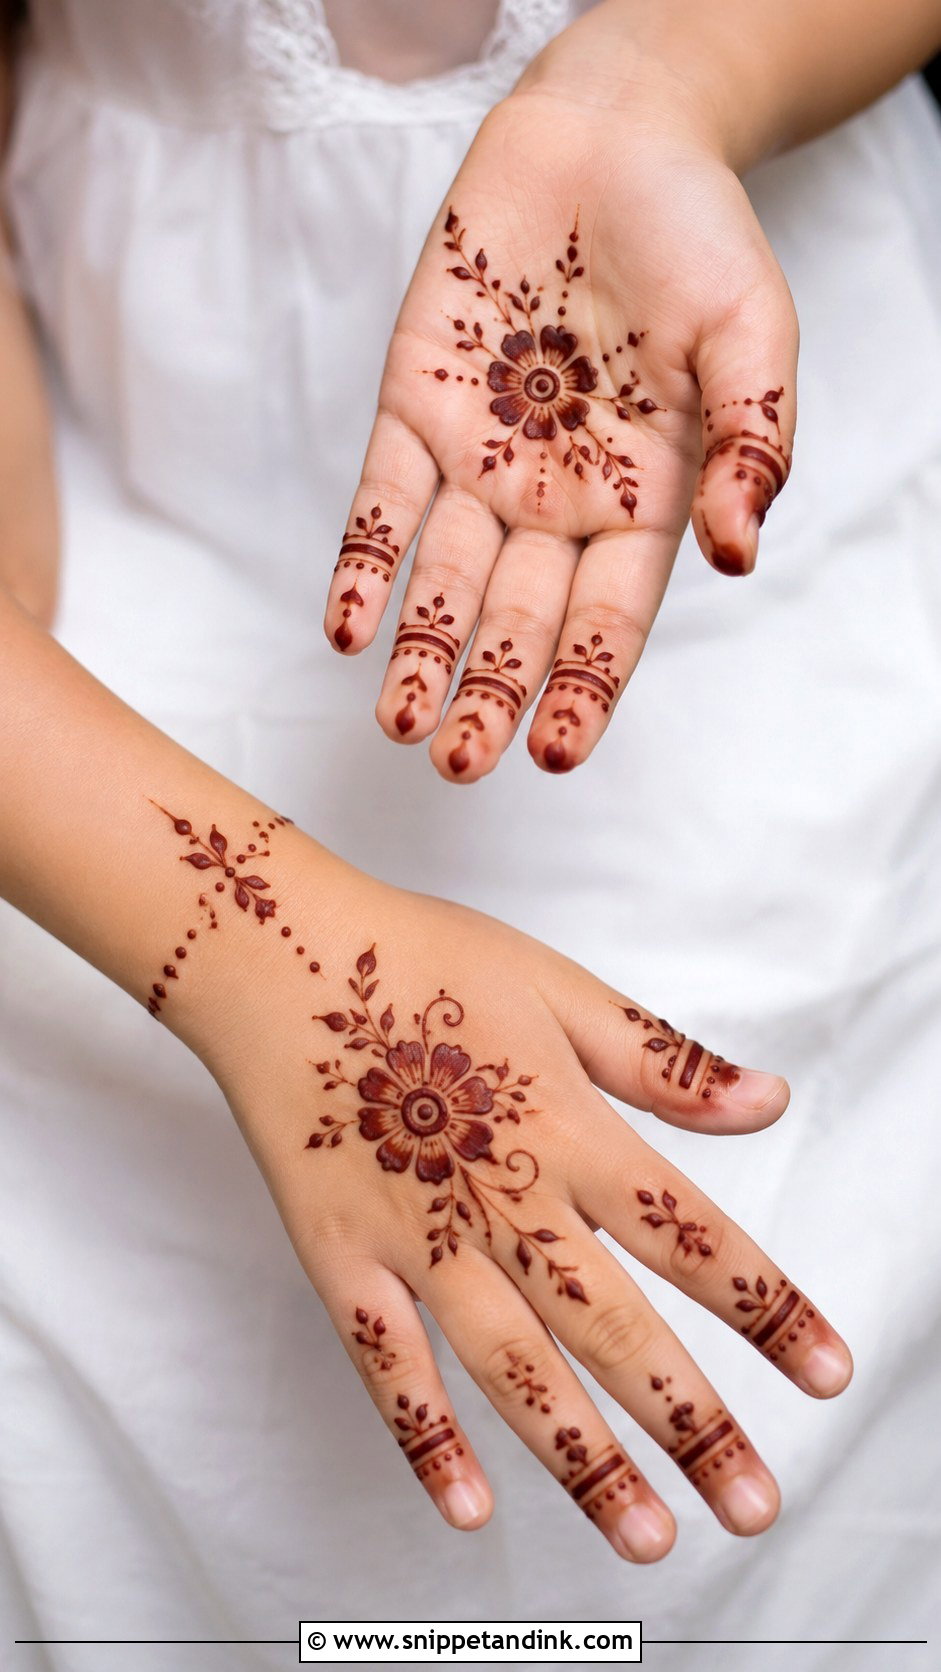
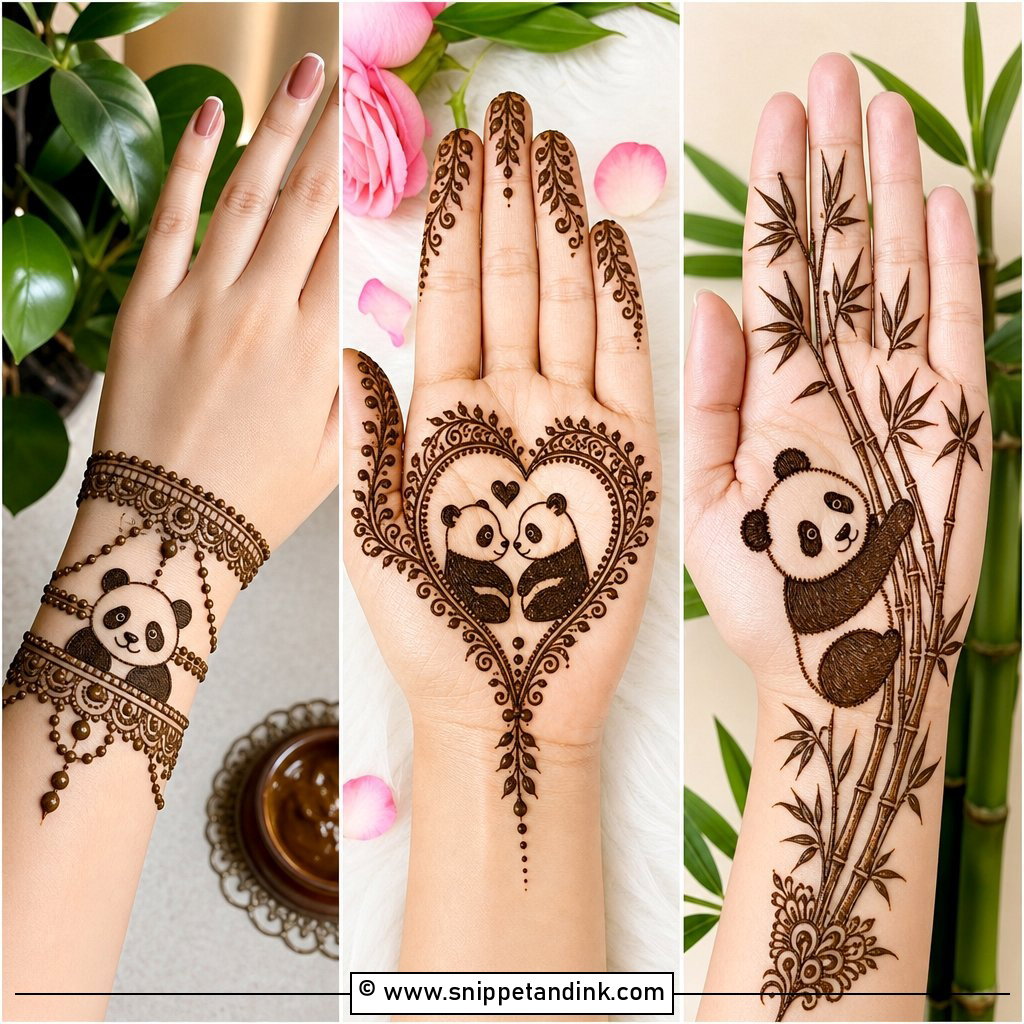
A simple kids mehndi design is small and fast: a flower, a heart-shaped cluster, a butterfly or a mini mandala on the back of the hand or palm, with dots, tiny leaves and simple fingertips. Small designs dry faster and smudge less. Fine detail blurs when a child moves, so I don’t bother with it. Natural henna only, and stop when they’ve had enough.
26. Simple Teen Mehndi Design
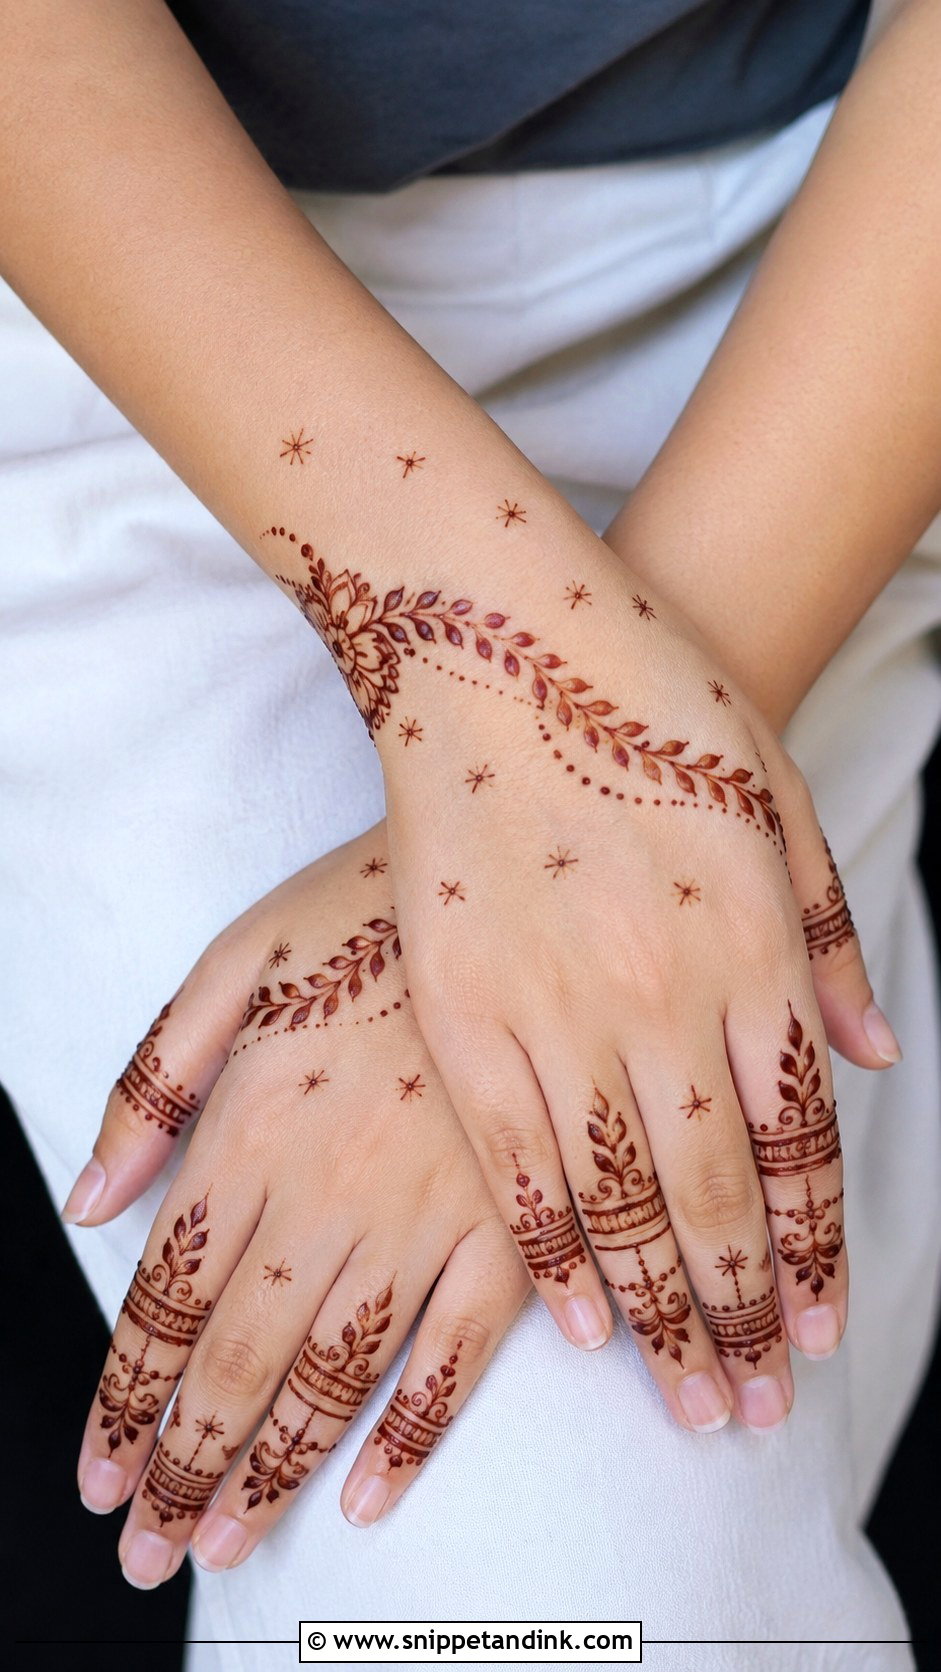
Teens usually want it to look fashionable, not bridal. A back-hand layout focused on the fingers, with thin bands, leafy chains and a small flower near the wrist, and the centre of the hand open. Tiny stars or dots can go in if the balance holds. It’s quick enough for school events and hangouts, and it works with jeans as well as an ethnic outfit.
27. Simple Modern Mehndi Design
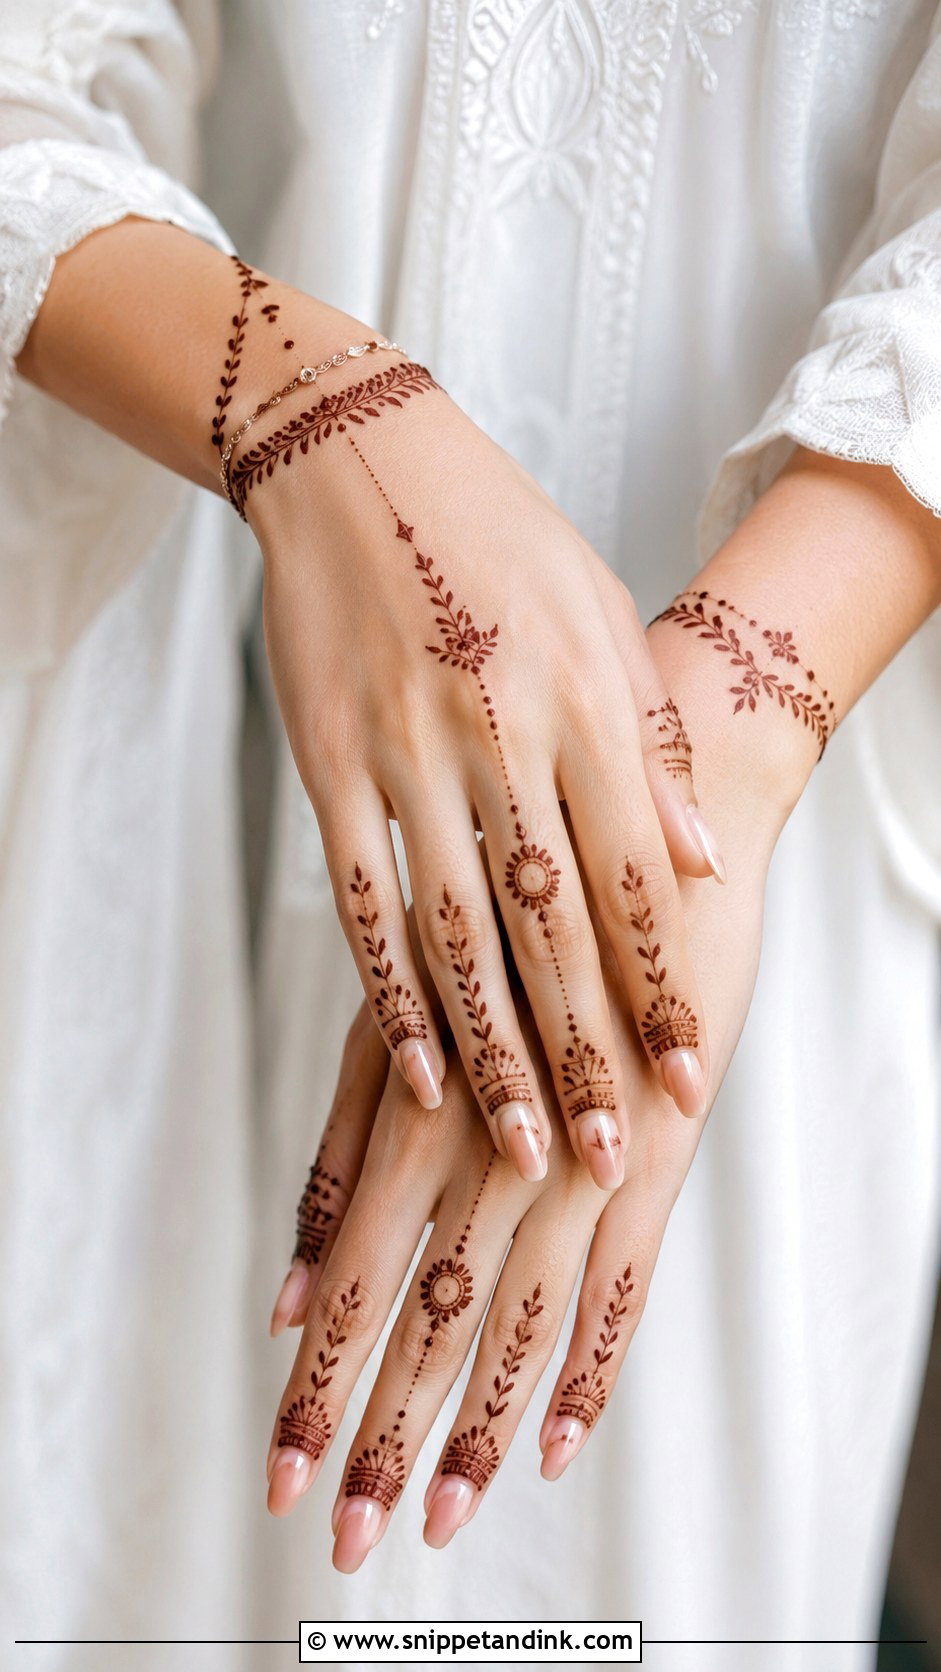
Modern mehndi uses negative space and very slim lines. A small wrist bracelet, a ring on one finger and a fine chain connecting them, with tiny leaves or dots along the chain. Everything else stays bare. Fine lines like these need fresh, smooth paste; lumpy paste breaks the line. It suits western and fusion outfits.
28. Simple Minimal Mehndi Design
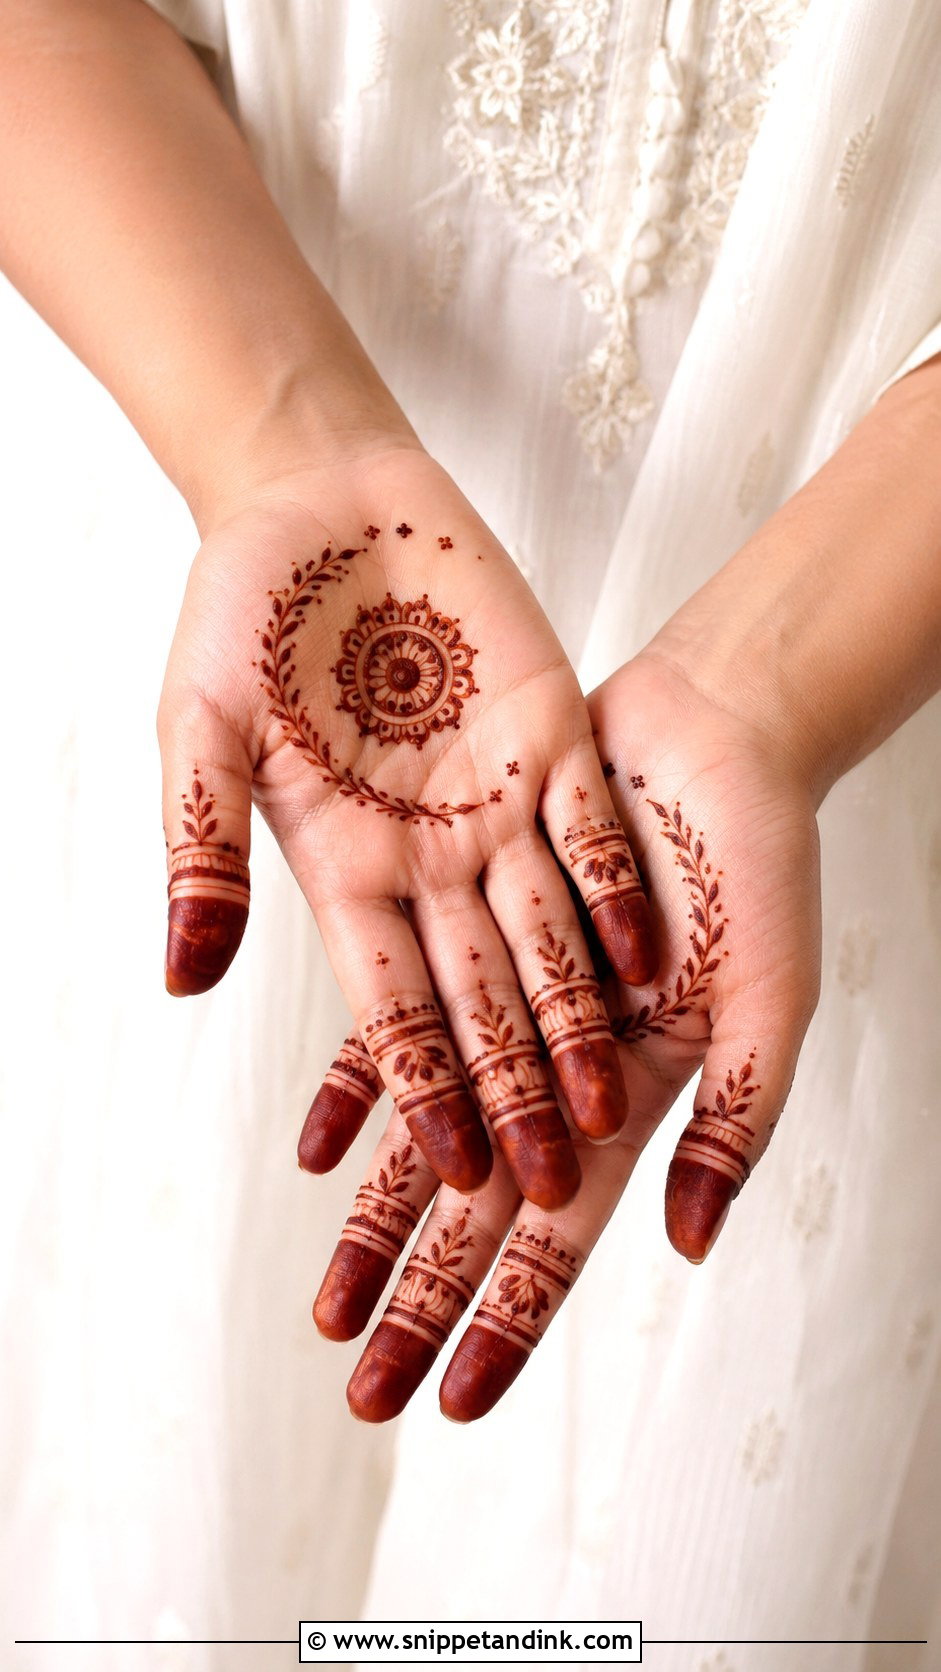
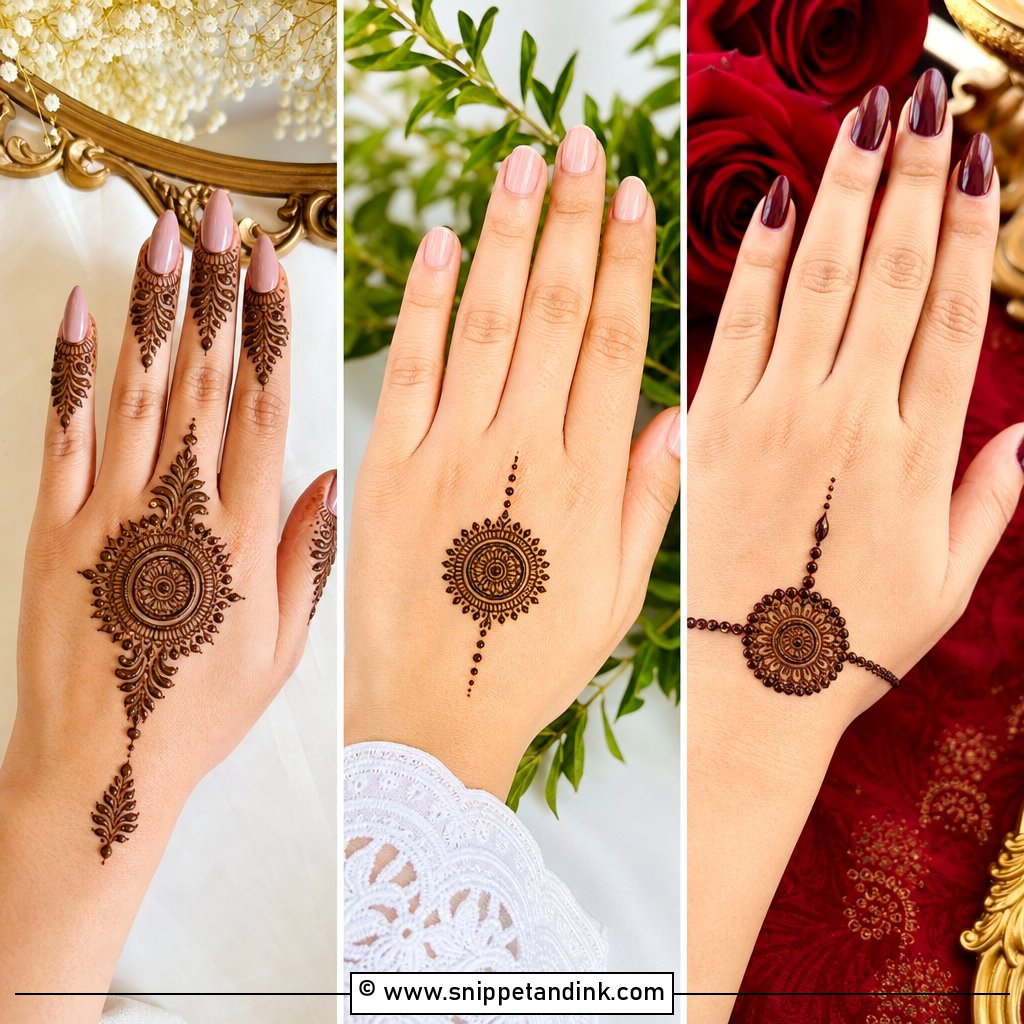
One small motif, a mandala, flower or leafy crescent, on the palm or back of the hand, two or three matching finger bands, and then stop. I count the elements before starting so the design doesn’t creep. Open skin is part of the look. It’s good for work-friendly celebrations and first-timers, and it fades without looking patchy.
29. Simple Round Mehndi Design
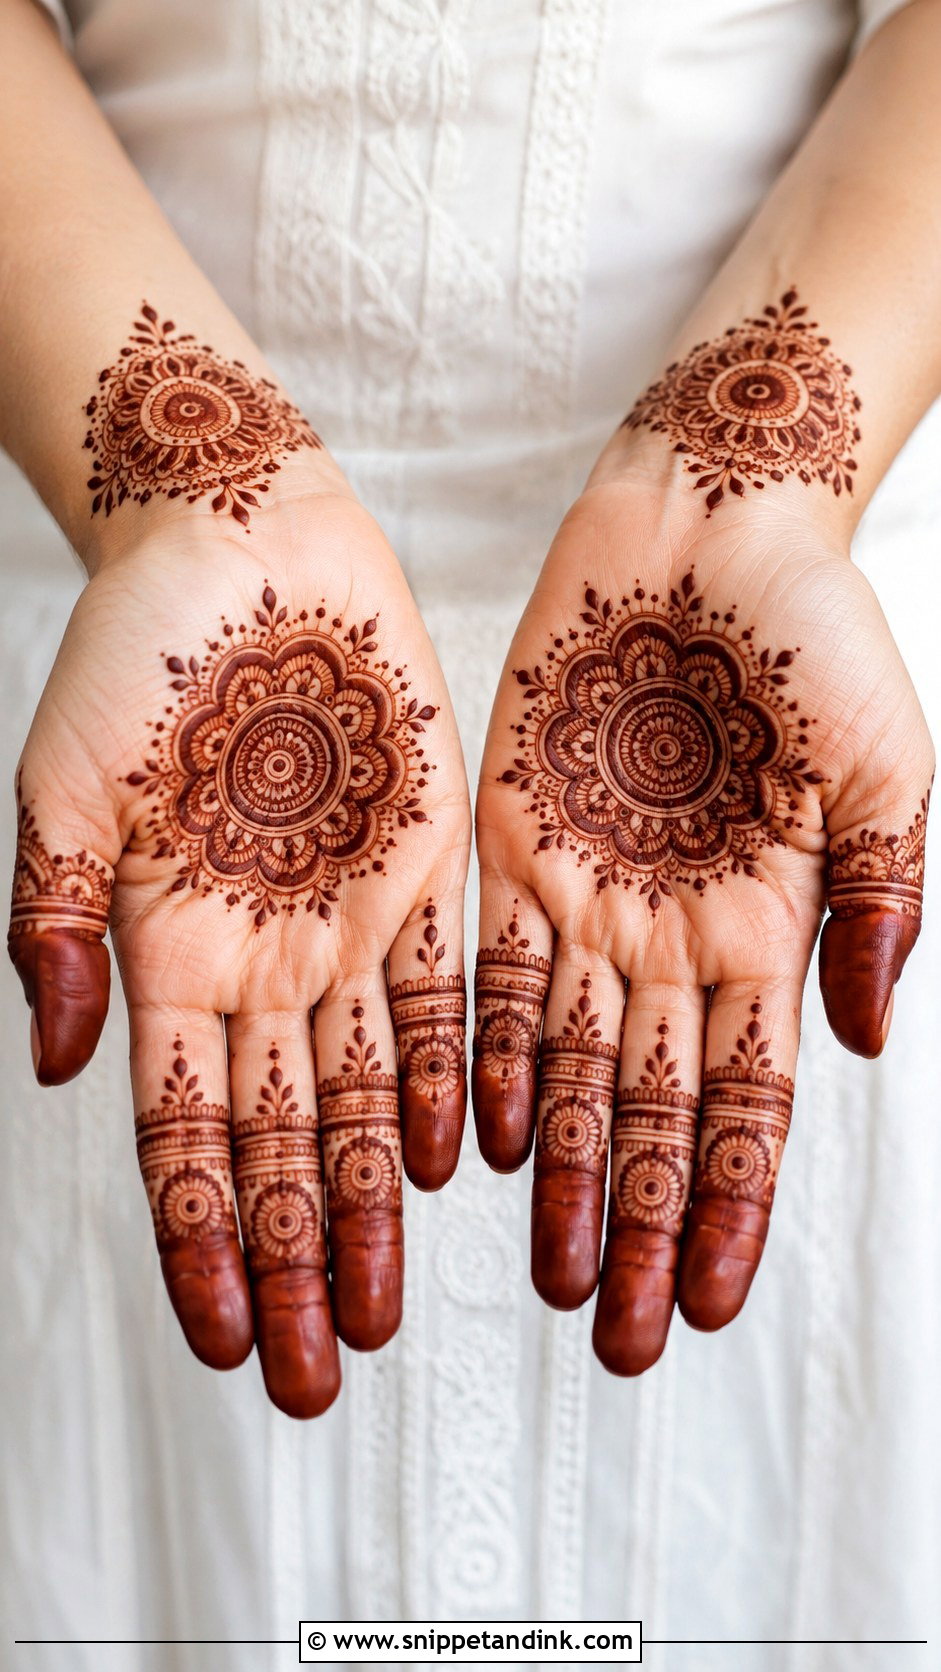
A neat circle on the palm, built up with petals, scalloped edges, dots and small rings, with matching circular accents near the fingers or wrist if you want more balance. Simple lines and dots on the fingers keep the circle as the focus. Repeating basic shapes in layers is easy to learn. I build from the inside out so the outer ring fits rather than squashing the last row of petals.
30. Simple Tikki Mehndi Design
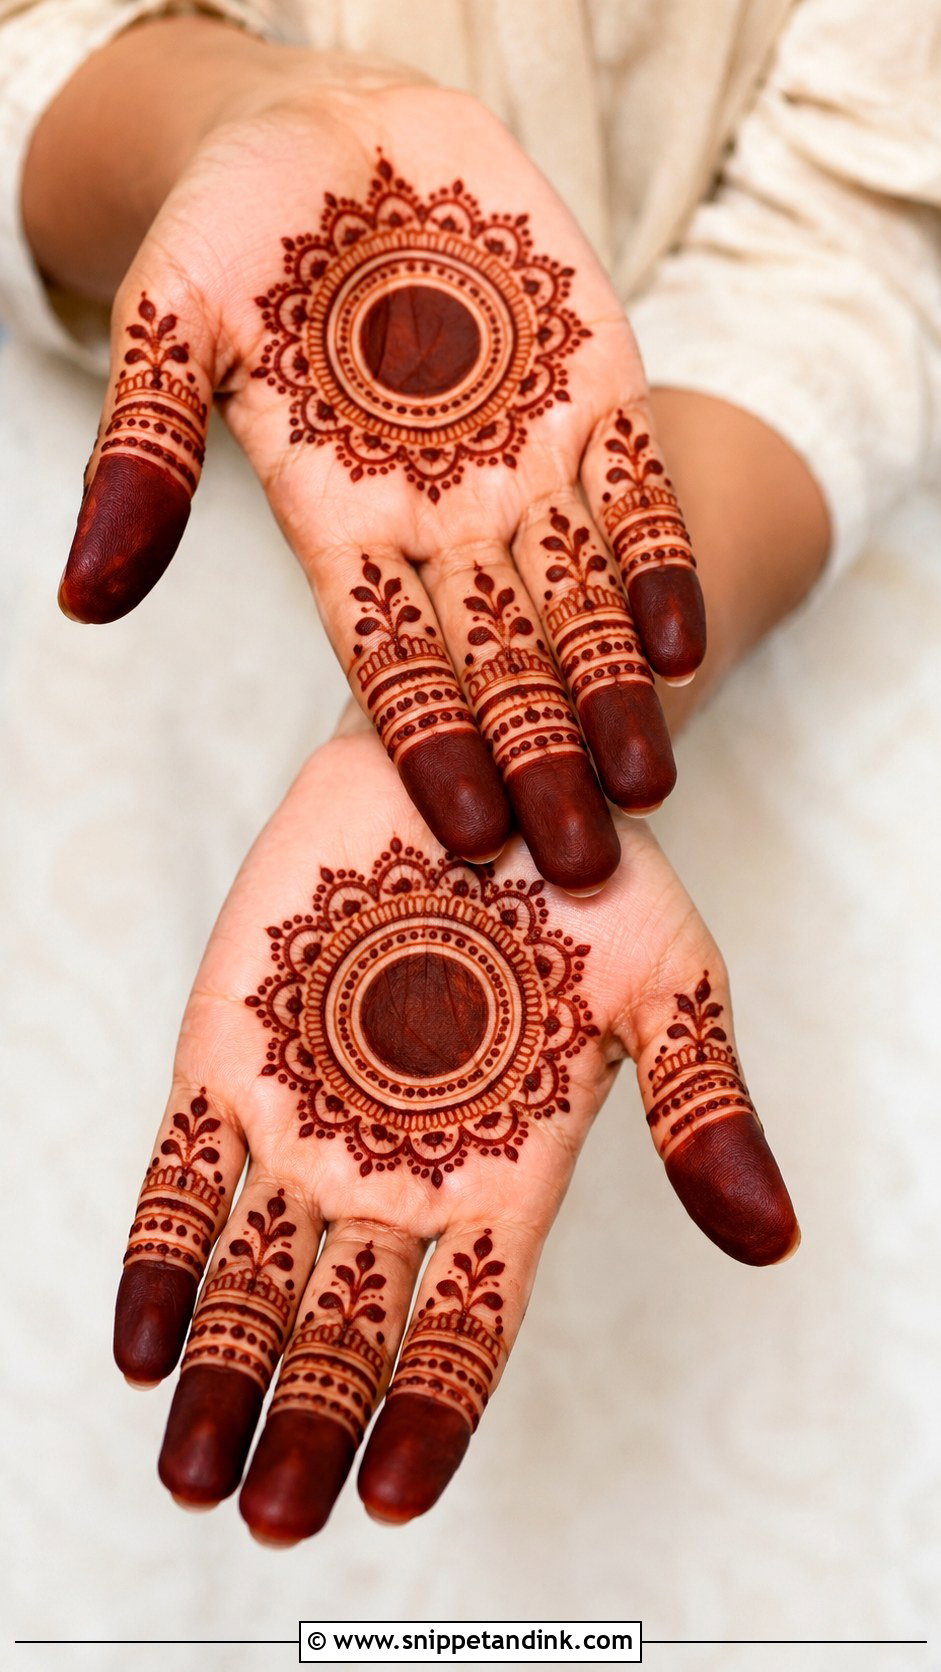
The tikki is a filled or semi-filled circle at the centre of the palm, with petals, dots and delicate rings around it and fingertip caps or small bands on the fingers. It’s the classic quick palm design because that solid centre gives a strong stain. Fill evenly: thin patches in a solid tikki show up lighter, so I lay the paste thick and smooth.
31. Simple Peacock Mehndi Design
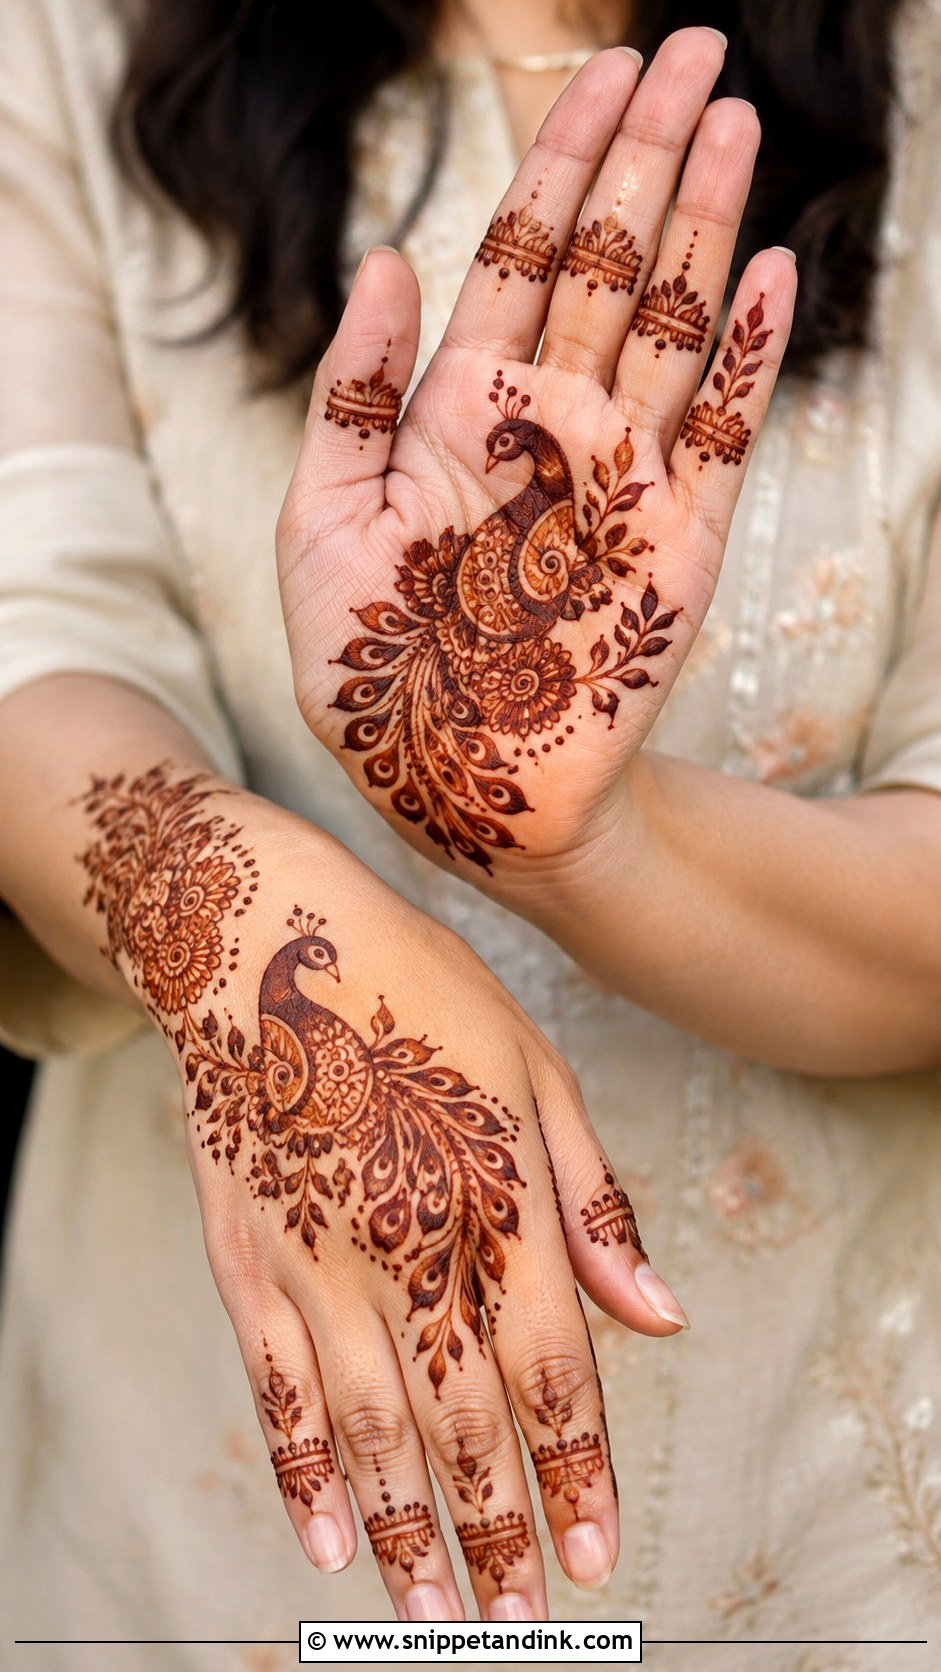
A small peacock on the palm or back of the hand: a curved neck, a simple eye and fan-shaped feather lines, surrounded by flowers, leaves and dots. Open lines in the feathers instead of fill keep it manageable. Fingers stay light with bands or leafy strips. The neck curve is where most people wobble, so I draw it in one confident stroke before adding anything else.
32. Simple Lotus Mehndi Design
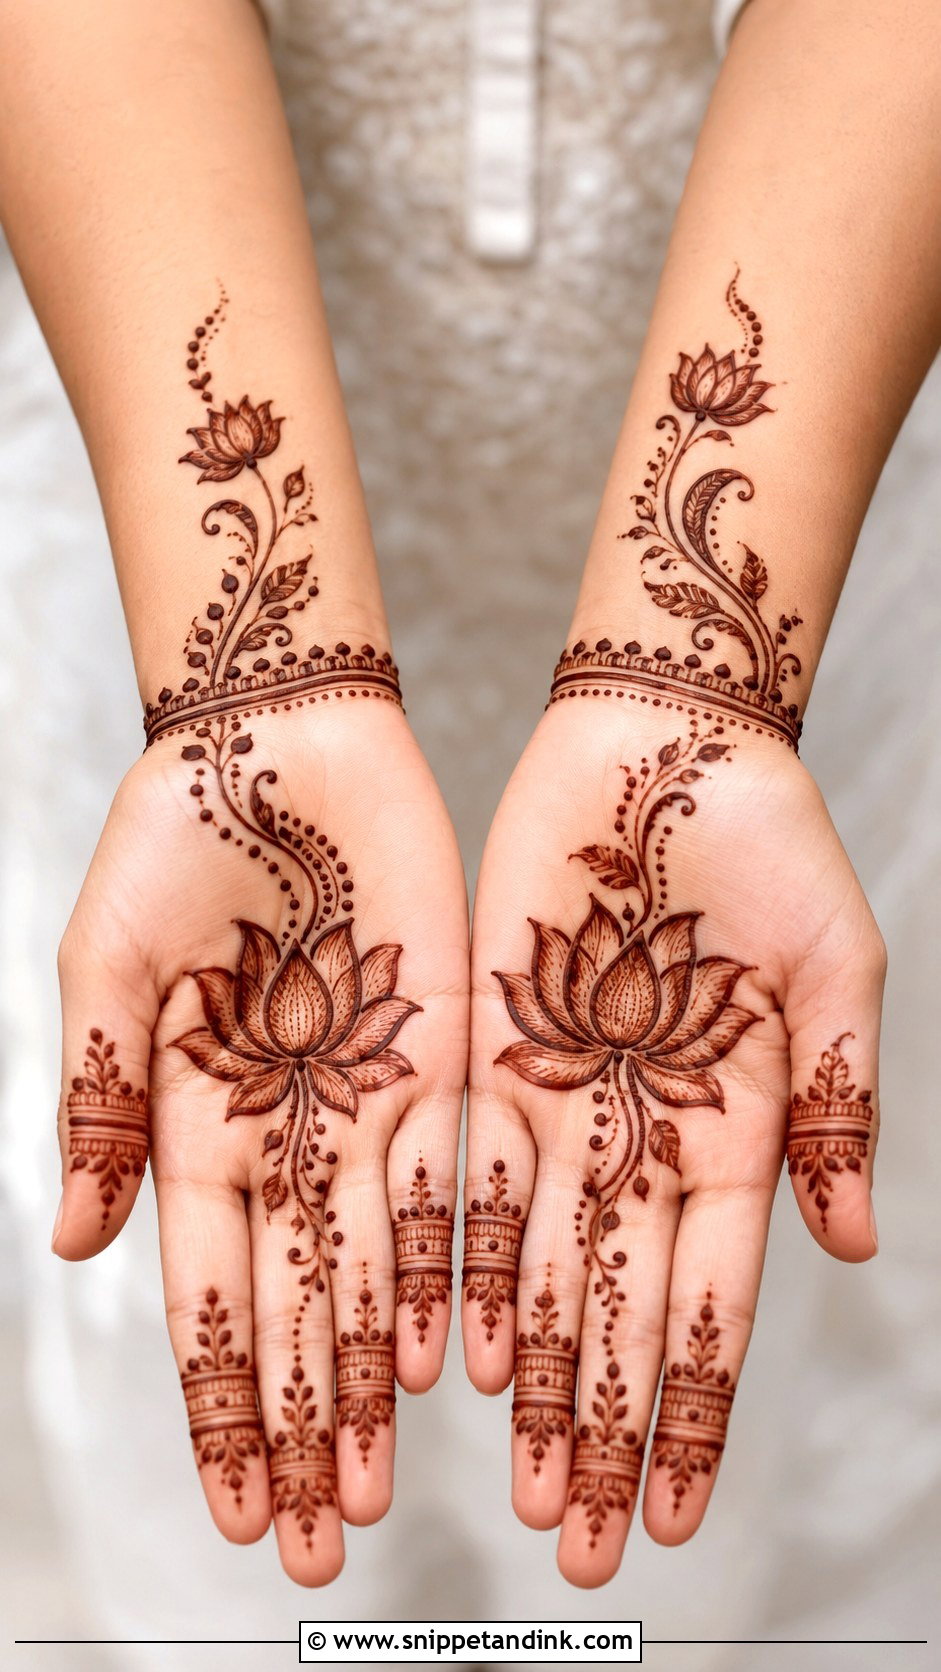
A lotus at the base of the palm, the centre of the back of the hand or near the wrist, petals in clear layers, with dots, curved lines and small leaves around it and a short vine to the fingers. Light inner detail keeps the shape recognisable. Lotus petals are easy to repeat, so it’s a good one for poojas and family gatherings.
33. Simple Shaded Mehndi Design
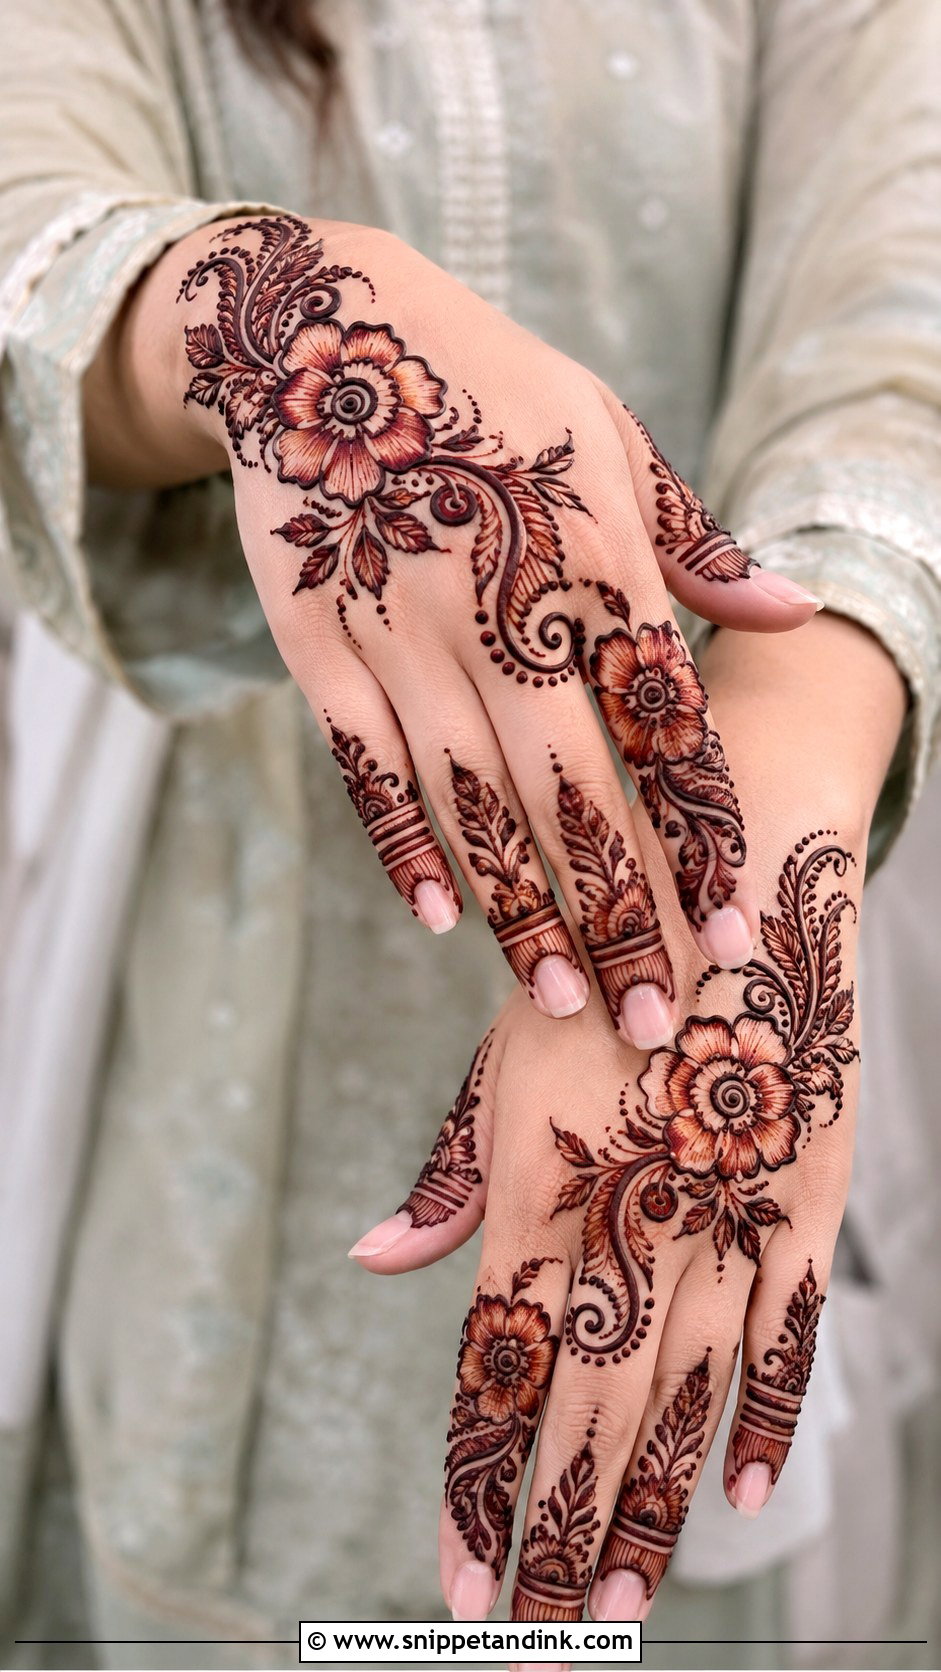
Shading gives depth without complexity. A flower or paisley trail on the palm or back of the hand, with petals and leaves shaded using thin parallel lines rather than smeared paste, and bold outlines so the shaded areas look clean after staining. Dots and small curves around the main pattern, shaded leaf bands or striped tips on the fingers. I’d keep fillers to a minimum so the shading has room.
34. Simple Side Hand Mehndi Design
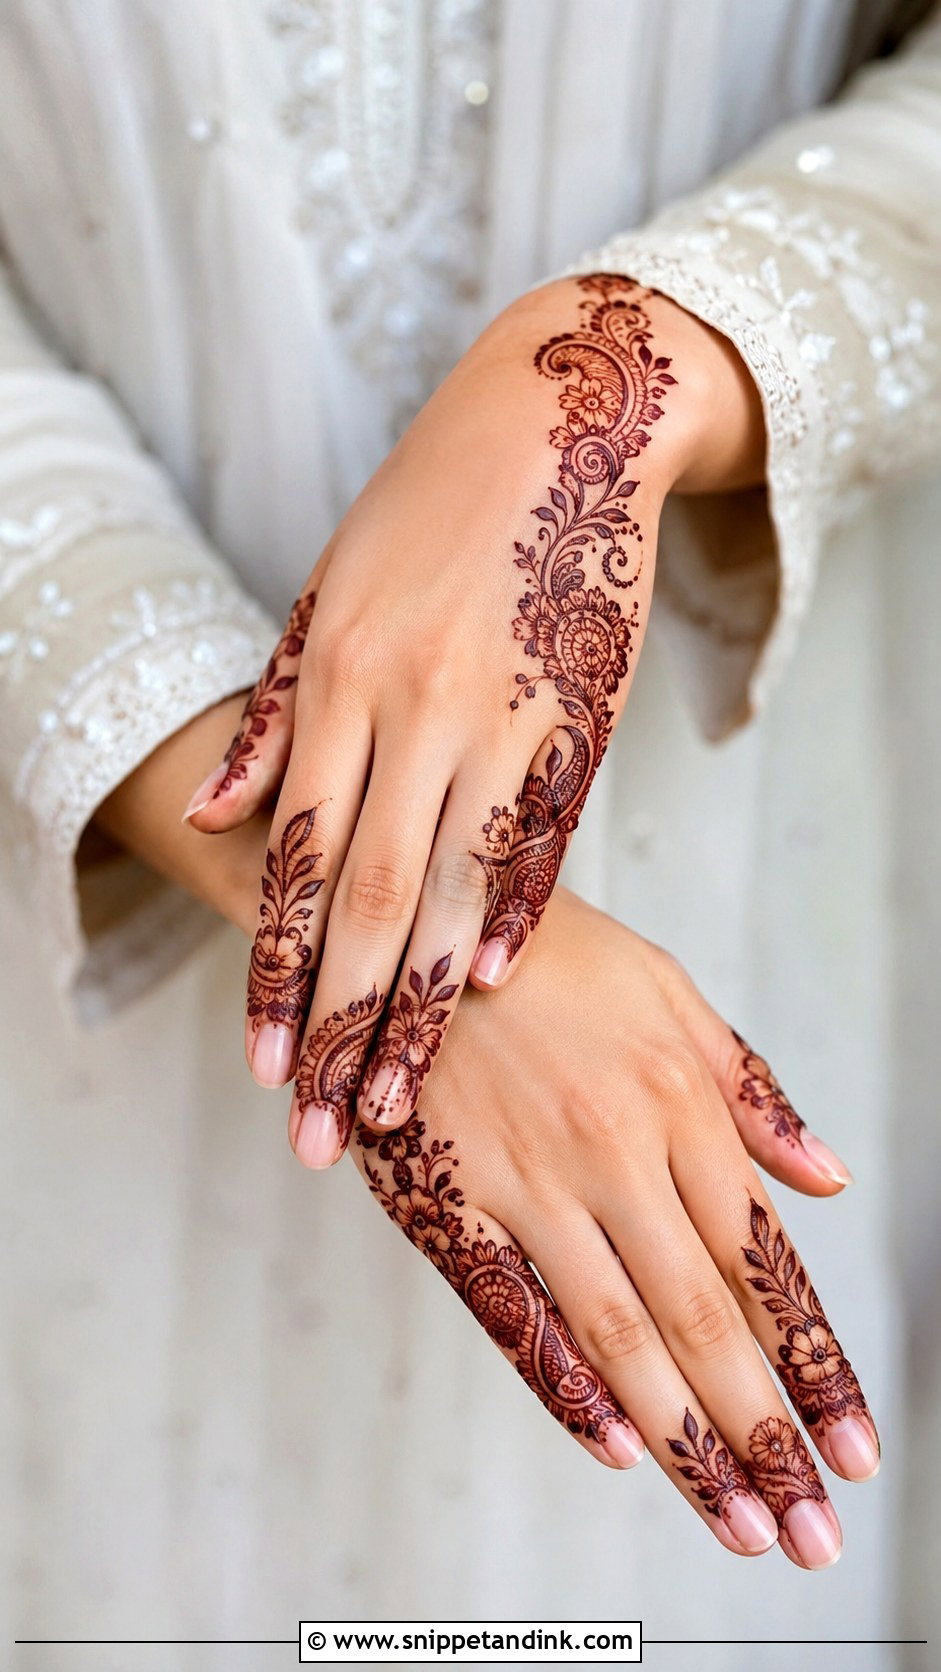
Here the pattern follows one edge: a curved floral trail from the wrist along the outer side of the hand toward the little finger, with leaves, dots and small paisleys, and the centre left open. Following one natural line is easier than centring a design. It’s the side people see when your hands rest on your lap. Light finger detail to match.
35. Simple Foot Mehndi Design
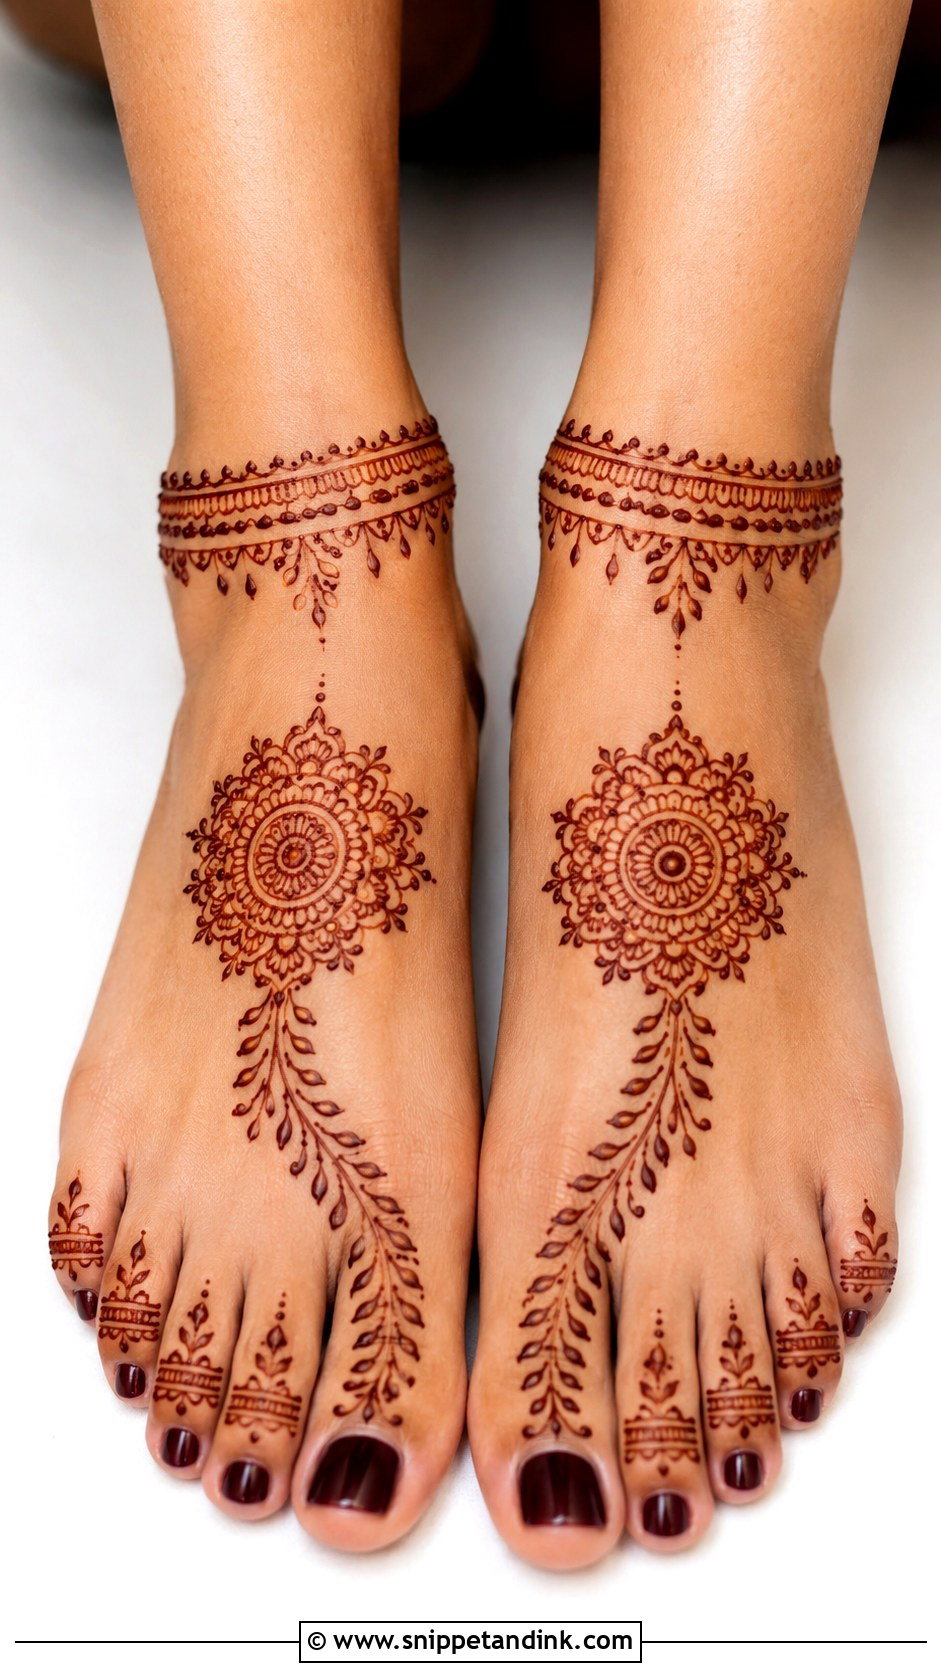
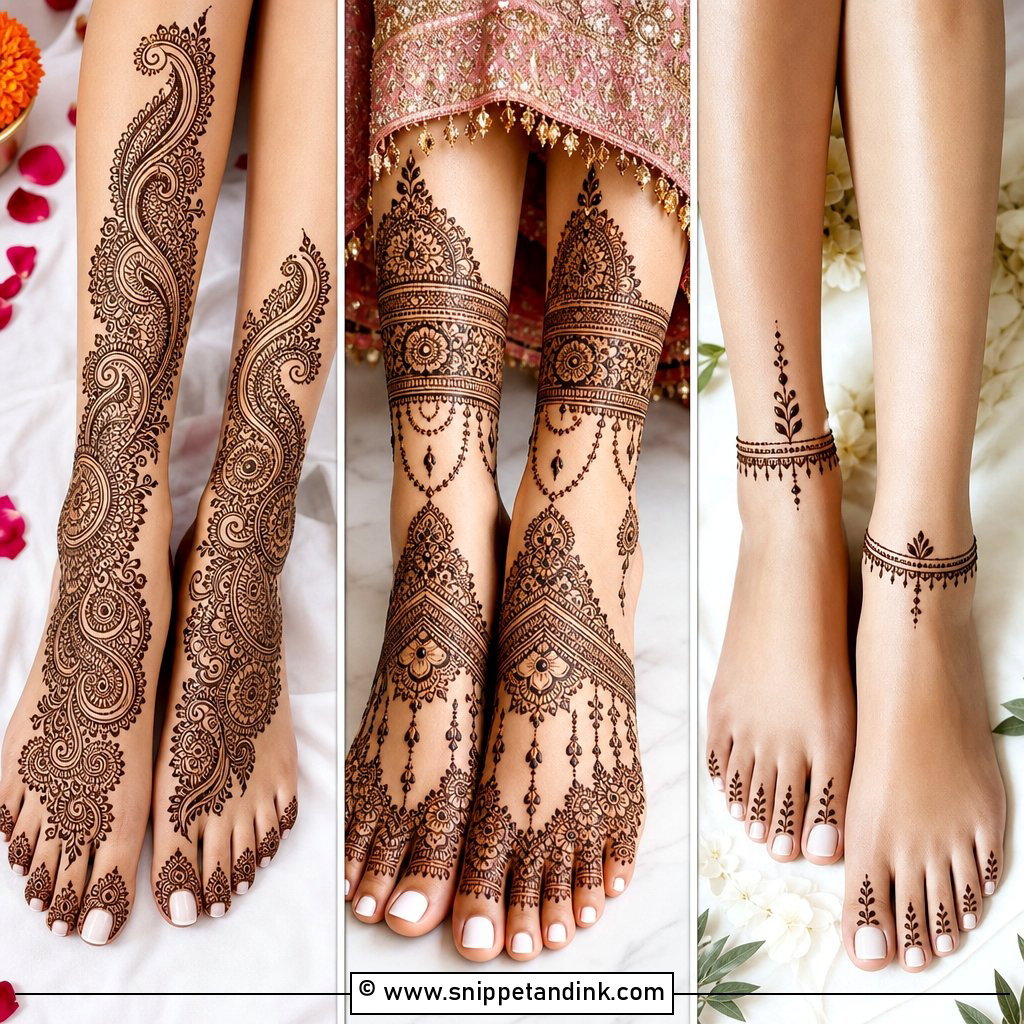
For feet, I place a small mandala or flower on the top of each foot, run a leafy vine toward the toes, and add anklet-style bands around the lower ankle, with dots or tiny curves on the toes. Dense filling isn’t needed; the foot is a broad surface and larger motifs read clearly. It looks best with open sandals at mehndi nights and festive gatherings. Feet need their own care, which I cover below.
Henna on Feet Behaves Differently From Hands
Feet are easy to draw on but awkward to look after. Here’s what I tell people booking foot mehndi.
- The tops of the feet stain lighter than palms. The soles stain very dark, but most people keep designs off the sole because walking wears it away.
- Foot stains often last longer than hand stains, simply because feet get washed less.
- Plan to sit with your feet up until the paste is completely dry. Walking too soon cracks it, and a smudge on the floor is hard to clean.
- Wear loose open sandals afterwards. Closed shoes rub the design and trap sweat, which blurs the edges.
- Do hands first if you’re having both. Once your feet are drying, you can still sit comfortably with your hands resting.
Aftercare is the same as for hands: leave the paste on as long as you can, scrape rather than wash it off, and keep water away for the rest of the day. The colour keeps darkening for about two days.
Ten Minutes or a Full Sitting: Let the Clock Decide
Simple mehndi holds its own against heavy designs when the layout is clean and every motif has a place. Mandalas, tikki circles, Arabic trails, bracelets, floral vines and minimal finger work each suit a different mood and outfit. The deciding factor is often time: a finger design takes minutes, a full hand or both feet takes a proper sitting. If you’re starting out, begin with open spacing, bold outlines and simple leaves, flowers, dots and circles, then add more as your hand gets steadier.
You'll Like These Ideas:


Leave a Reply