
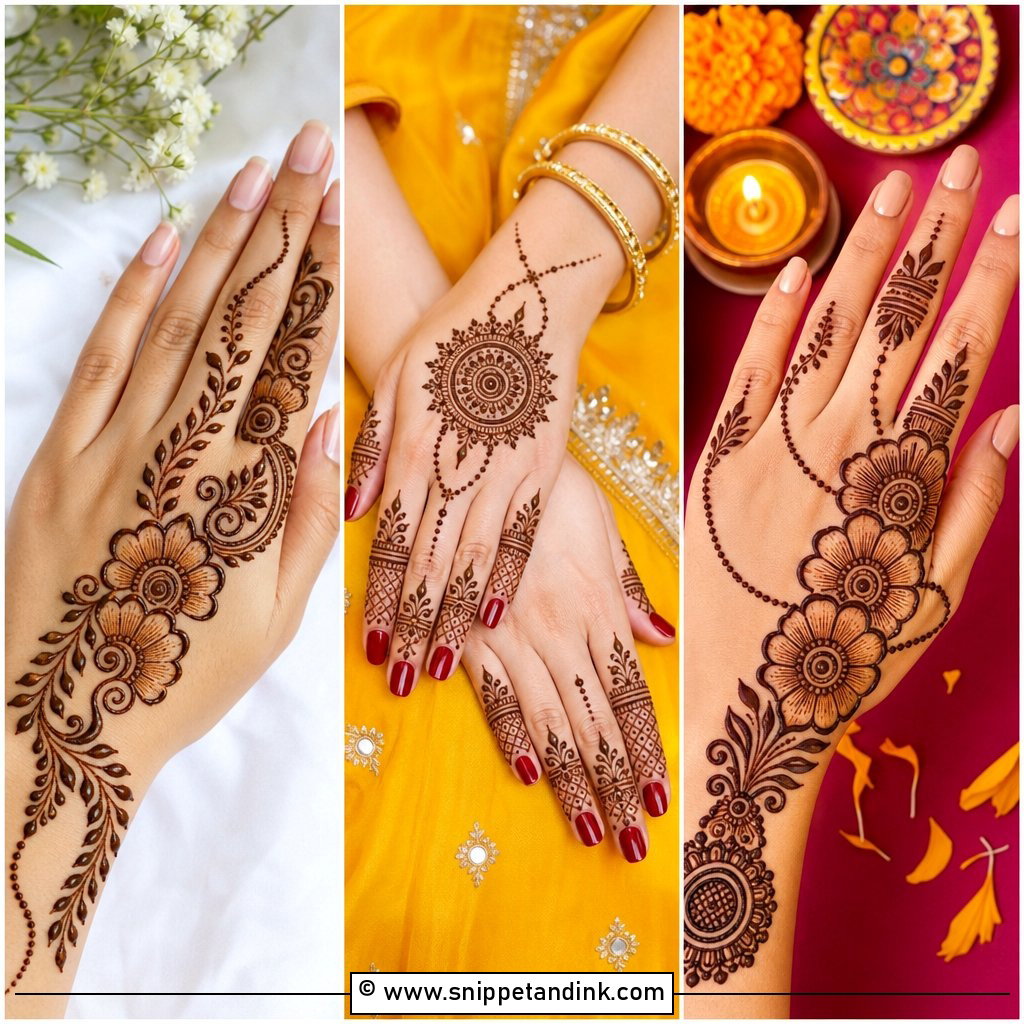
Ask any henna artist where a front-hand design starts and you’ll get the same answer: the palm. It’s the flattest, most open surface on the hand, it takes the darkest stain, and it’s the side people actually see when you greet them, hold a diya or raise your hands in a photo. Mandalas, tikki circles, Arabic trails, peacocks, jaali and full bridal layouts all begin there before spreading to the fingers and wrist. I size every palm design to the hand in front of me rather than to the picture a client brings, because the same pattern can look airy on a broad palm and cramped on a narrow one. The ideas below cover everything from a quick Eid circle to wedding coverage, with notes on what each one needs from your hand.
Mapping a Design Onto the Lines Already in Your Palm
Before I draw anything on a palm, I ask the client to cup her hand slowly, then open it flat. Watch your own palm while you do that. The deep creases across the middle and around the base of the thumb fold inward every time you hold a cup or a phone, and any fine detail drawn across them gets squashed, smudged while wet and cracked once dry. So I use those creases as boundaries rather than fighting them.
- The centre of the palm, between the two main horizontal creases, is where a mandala, tikki or lotus sits most comfortably.
- The fleshy pad below the thumb takes a curved motif well, which is why paisleys and peacock bodies so often land there.
- The finger joints get bands placed between creases, not on them, so the lines stay unbroken when the fingers bend.
- The wrist crease is never where the bracelet border goes. A finger’s width below it keeps the band intact.
Hand shape changes the scale too. Long fingers can carry full-length patterns; short fingers look better with a band and a dipped tip, so the hand doesn’t look shortened. If you’re bringing a photo, measure the palm in it against your own. A design drawn on a large hand will need fewer elements, not smaller ones, to fit yours.
1. Simple Palm Mehndi Design
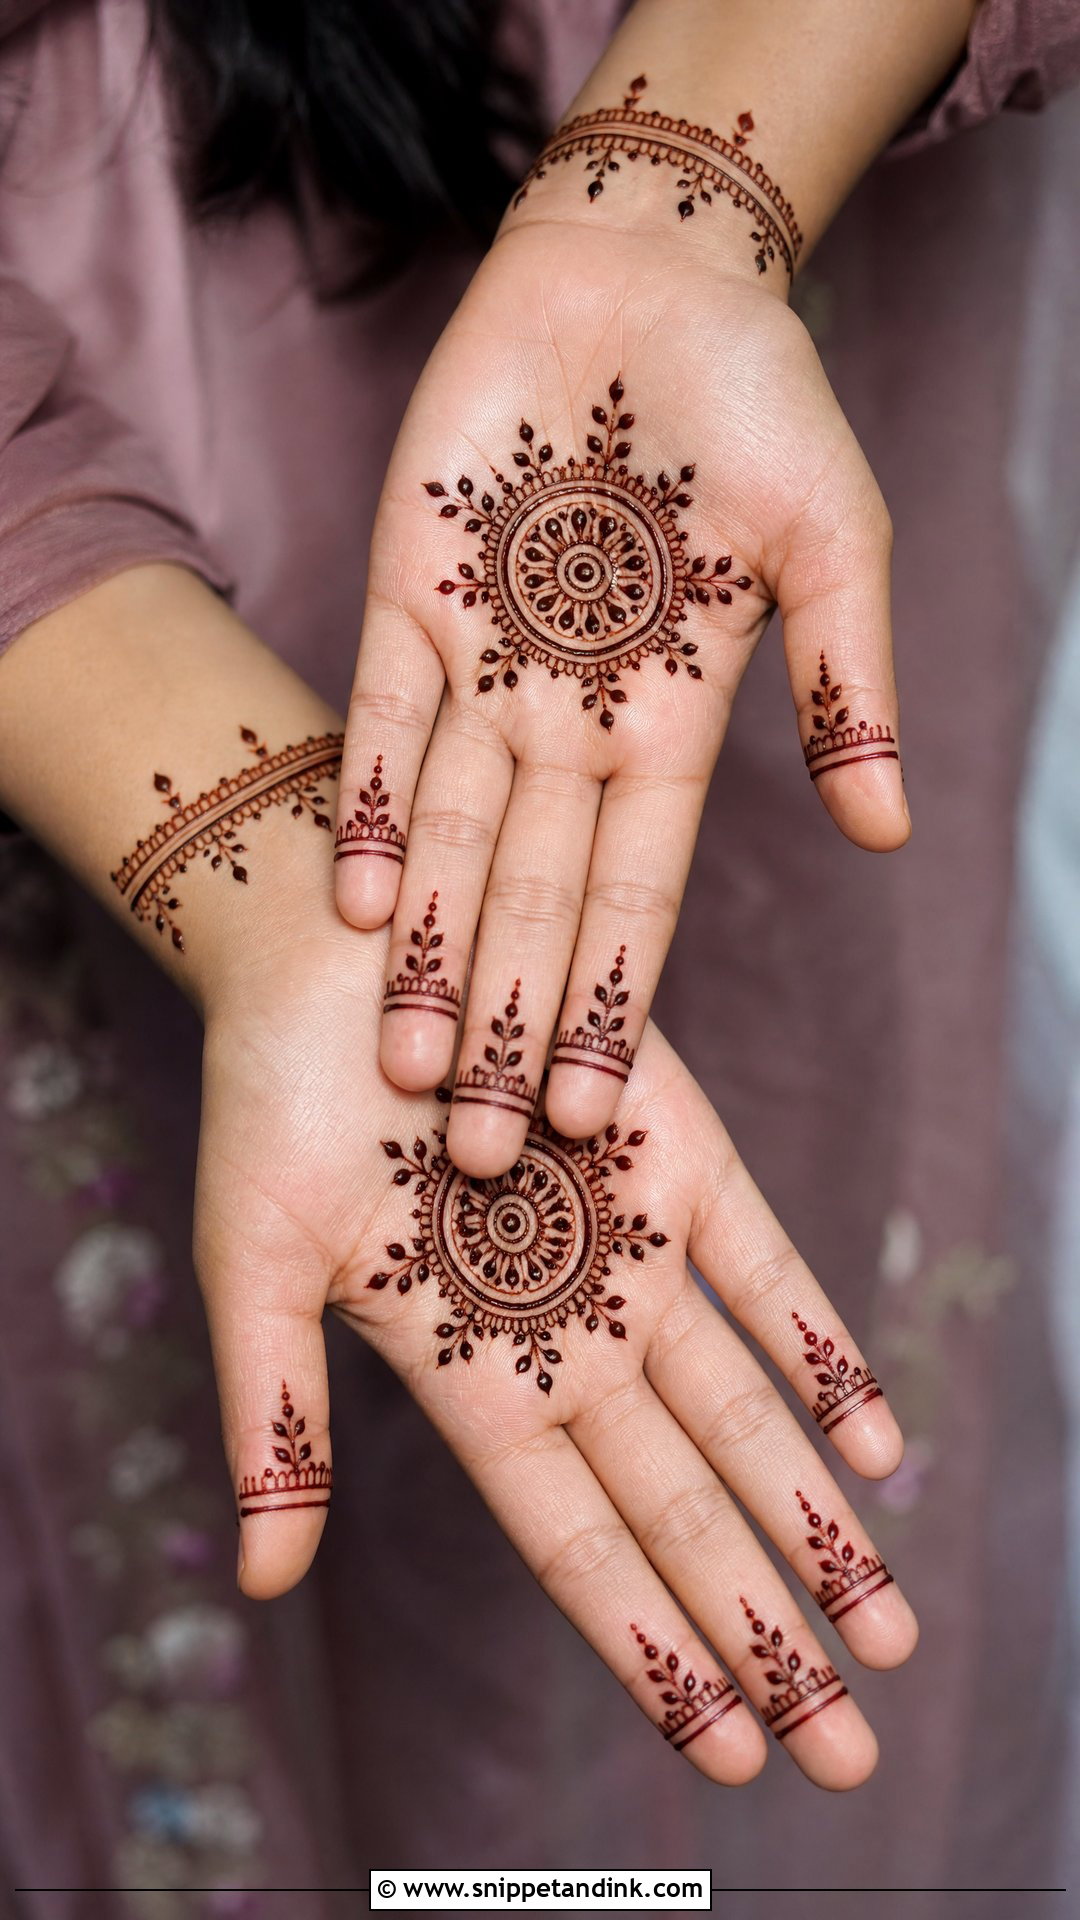
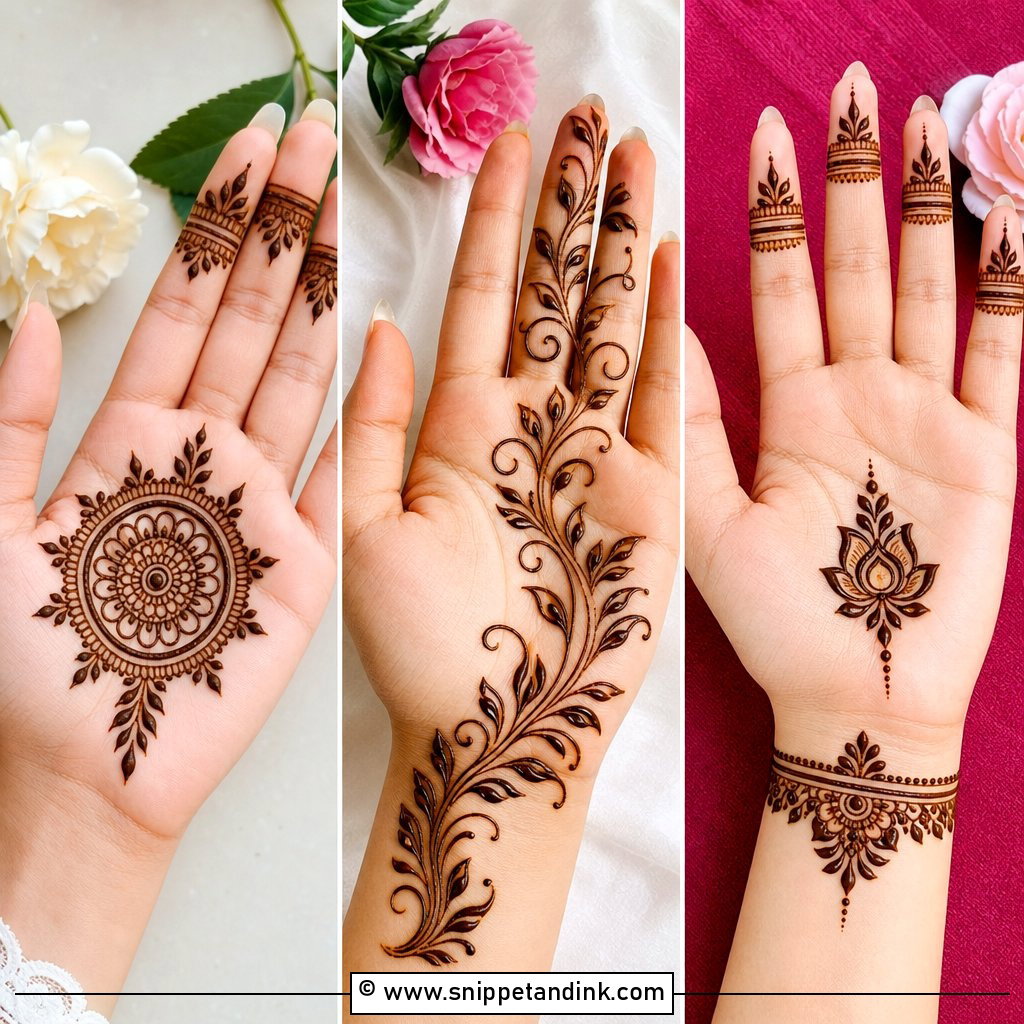
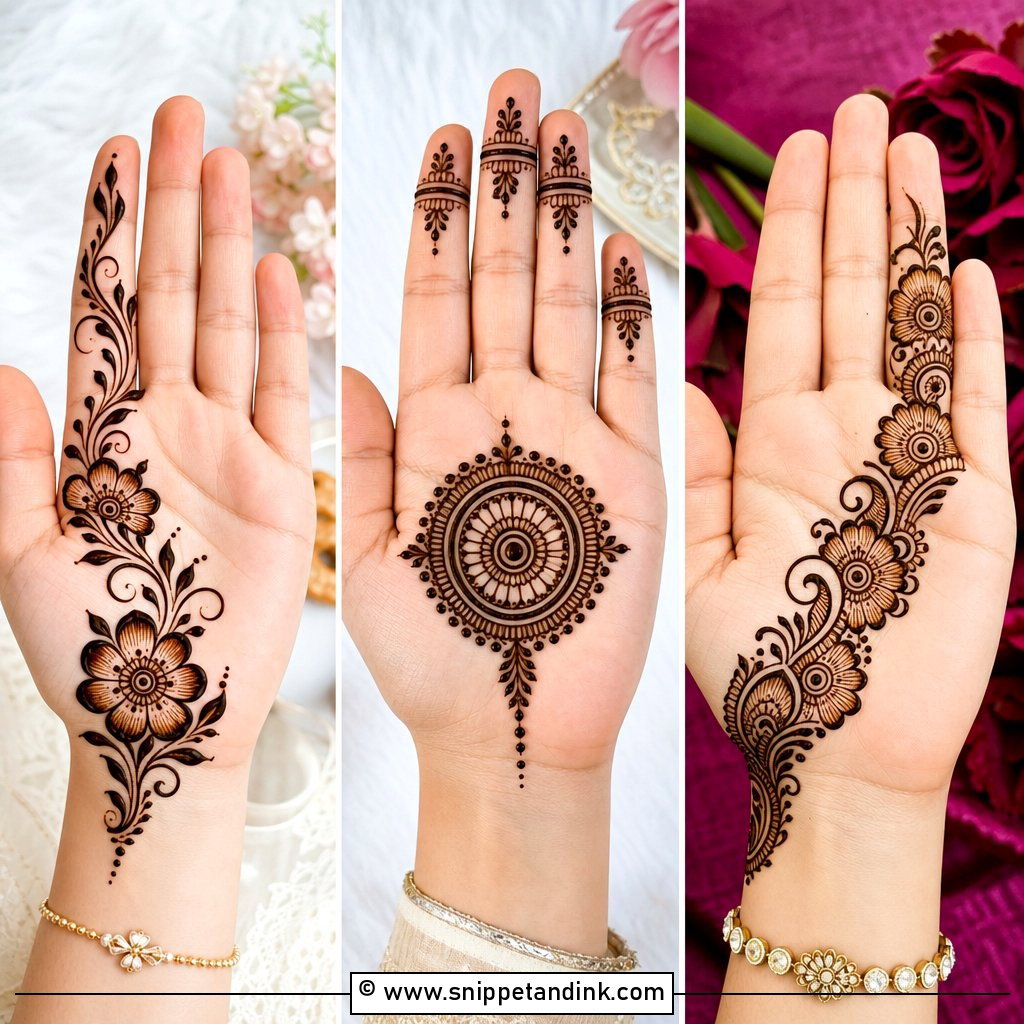
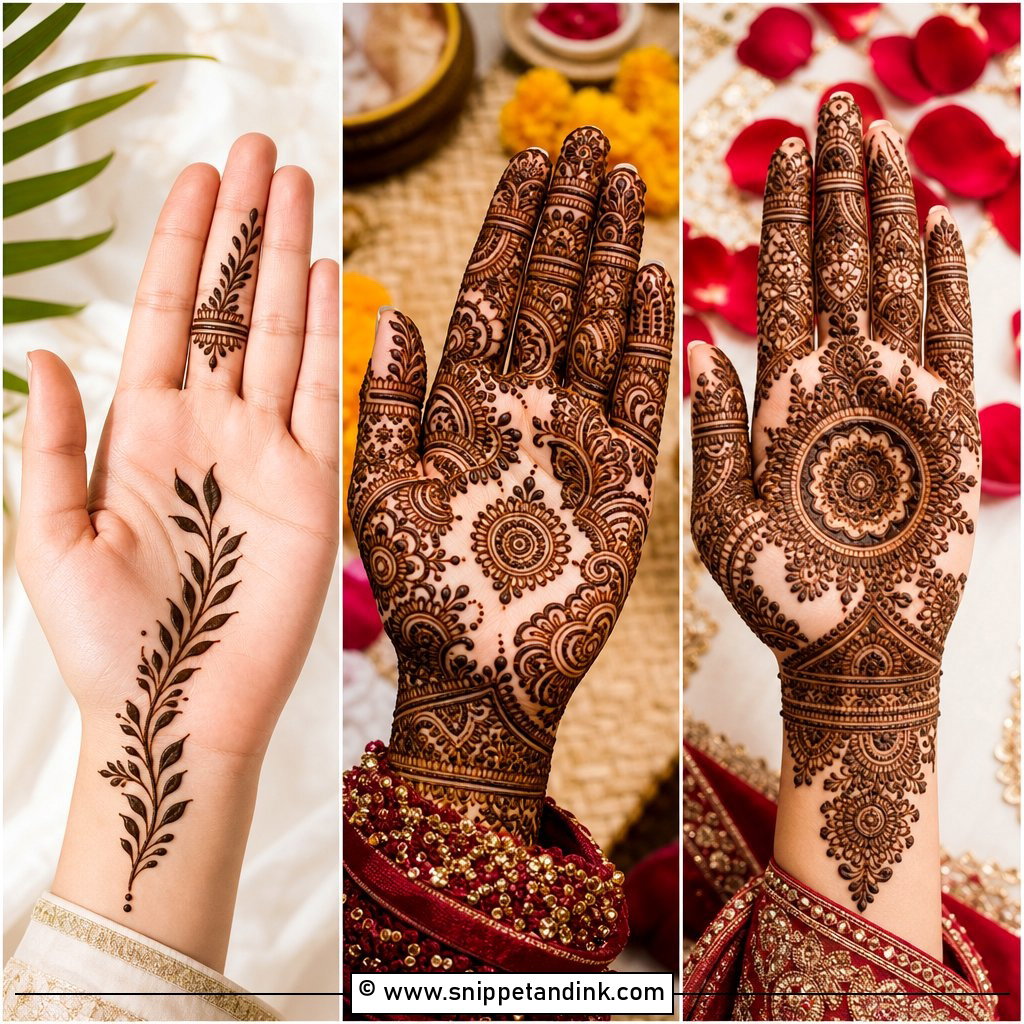
A simple palm mehndi design is usually one small flower, tikki or mandala in the centre, tiny leaves and slim bands on the fingers, and a light bracelet line or nothing at the wrist. The open skin around the motif is doing real work: it gives the stain somewhere to read clearly. Small hands suit it especially well. If it’s your first time applying henna yourself, this is where I’d begin.
2. Full Palm Mehndi Design
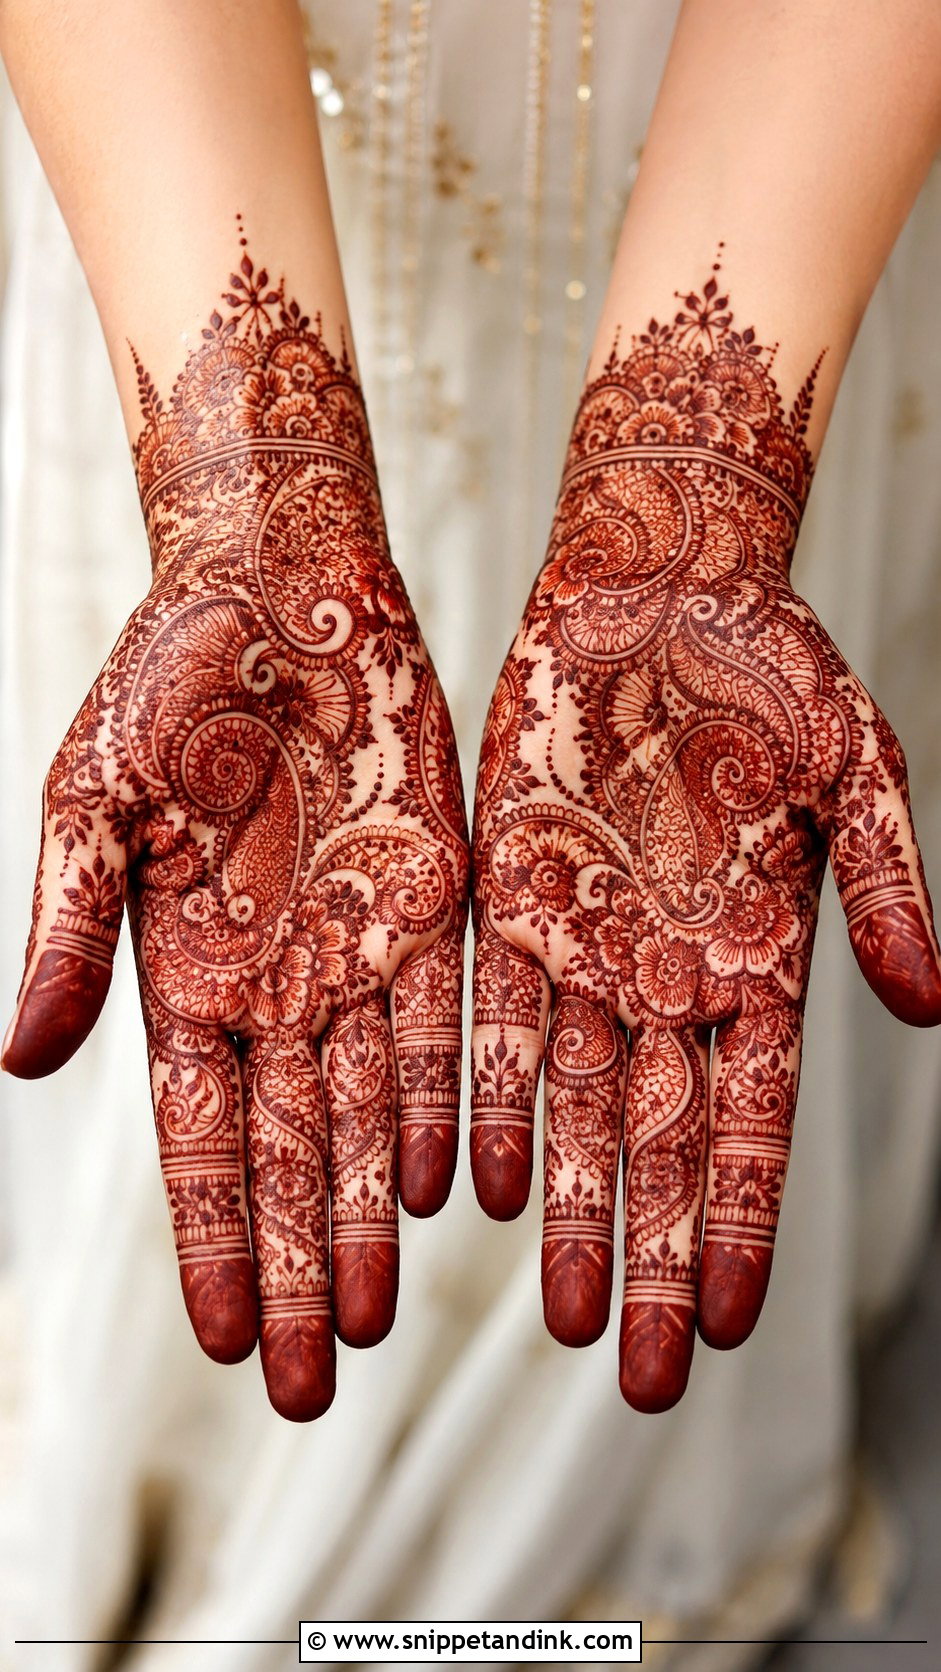
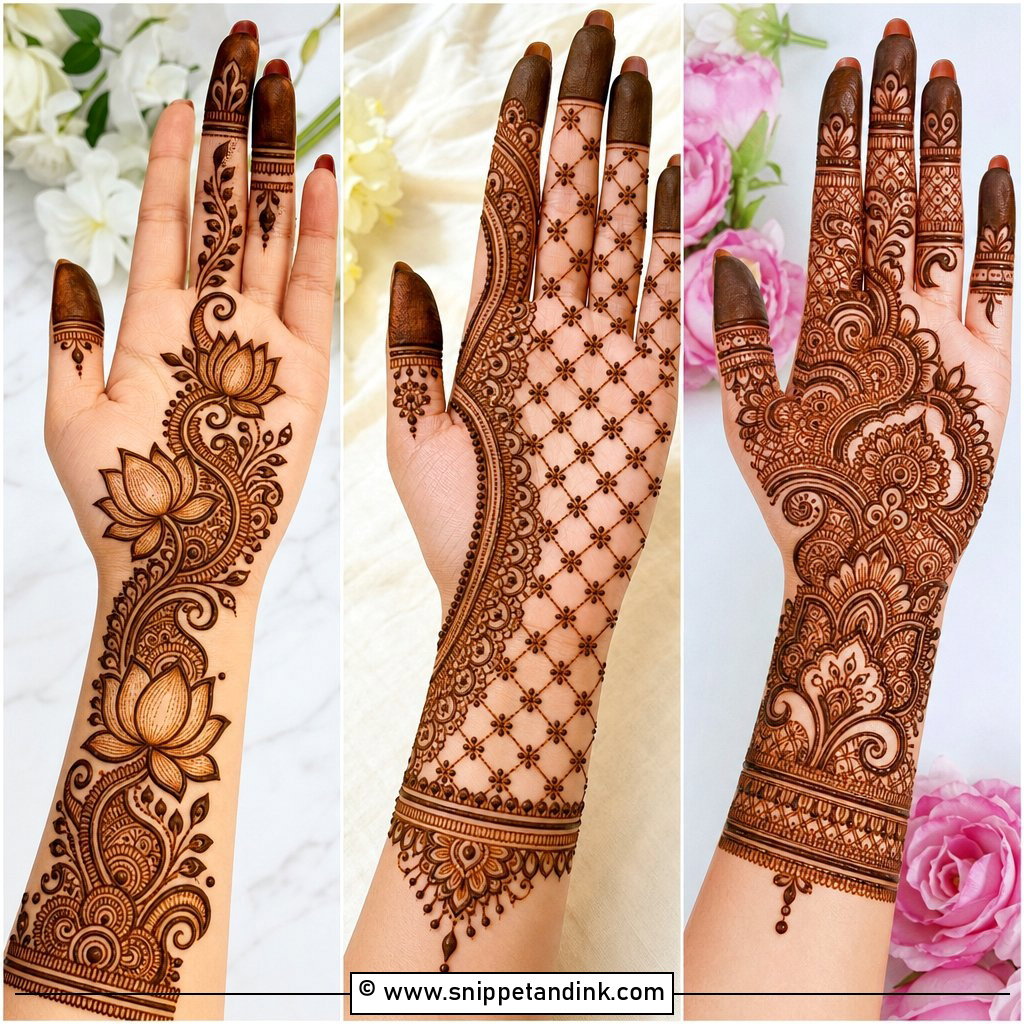
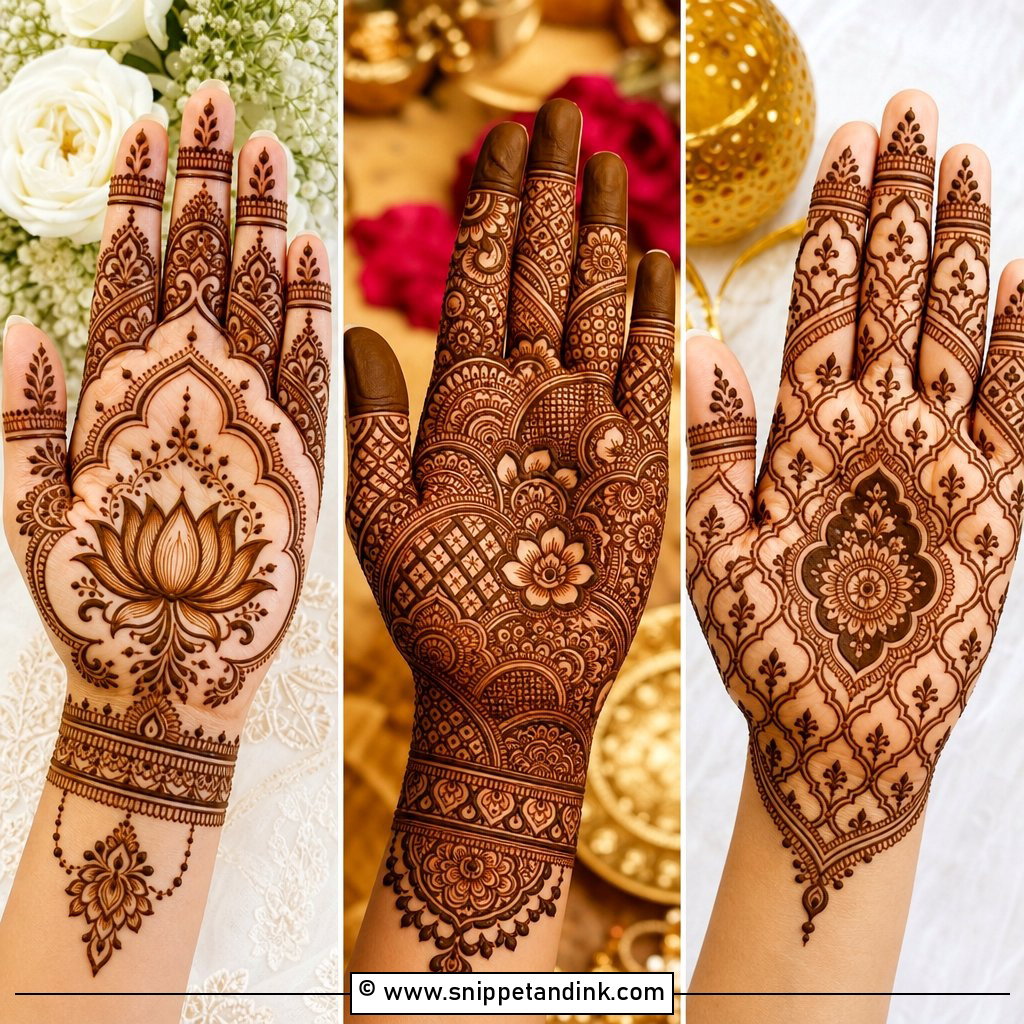
Full palm coverage feels traditional without committing you to the forearm. Layered flowers, paisleys, vines, dots and small fillers fill the palm, the fingers are worked base to tip, and a narrow cuff closes it at the wrist. My advice is to pick one main motif for the centre and make everything else smaller, so the eye knows where to land. Since the palm stains darker than anywhere else on the hand, dense work here settles into a rich maroon after a day or two.
3. Arabic Palm Mehndi Design
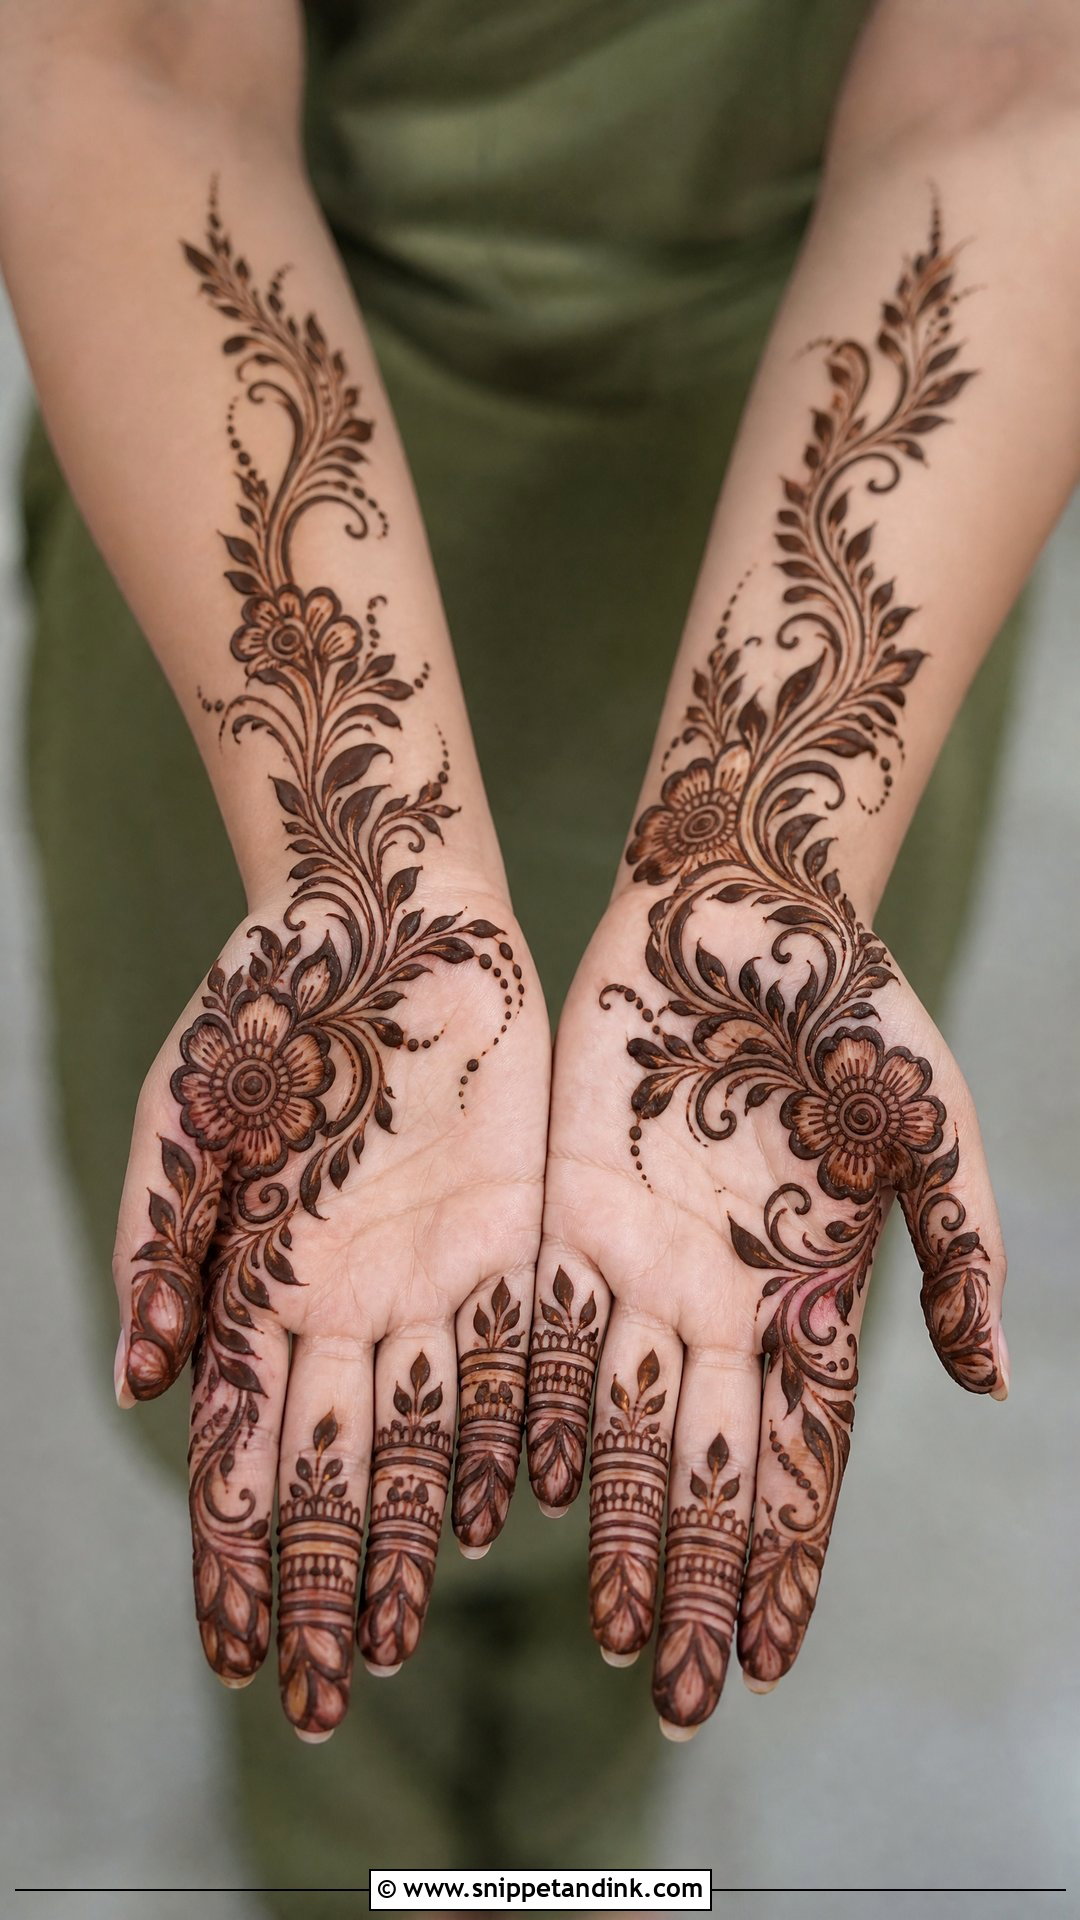
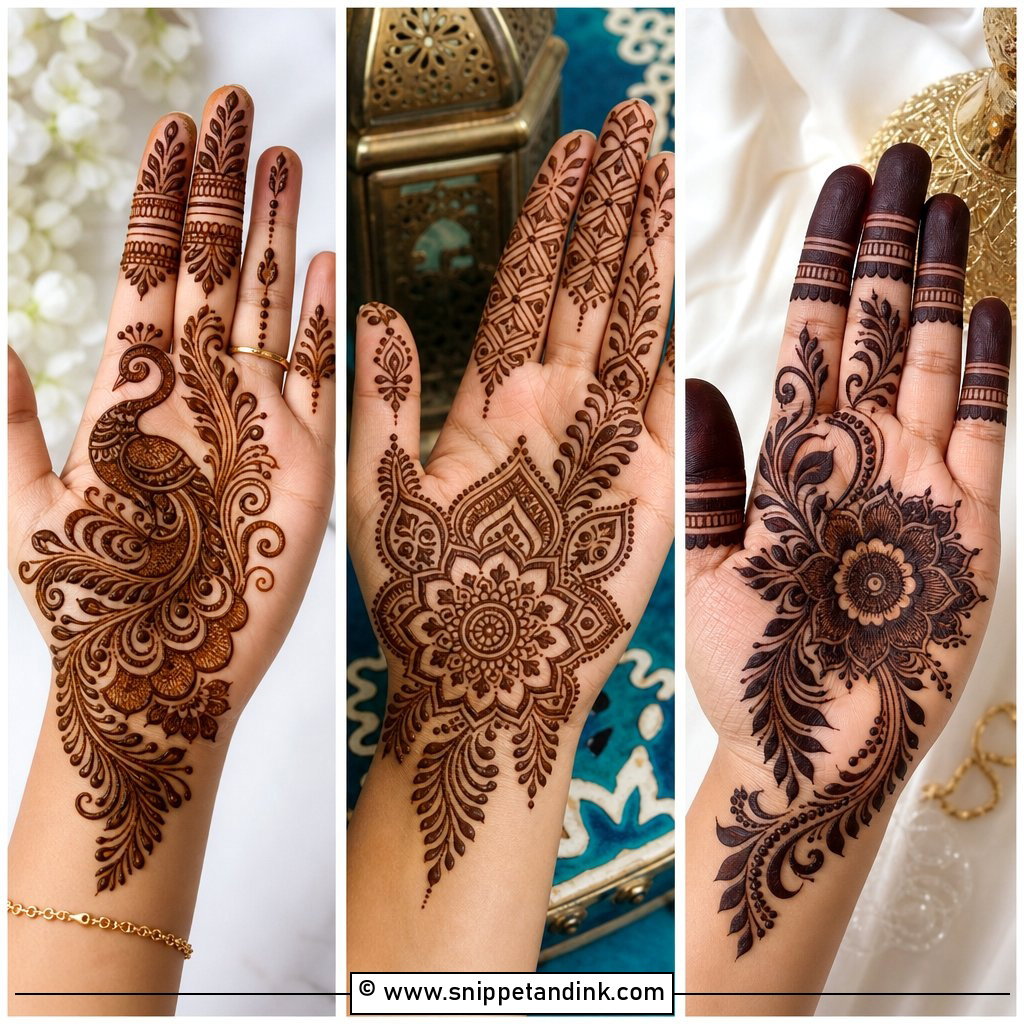
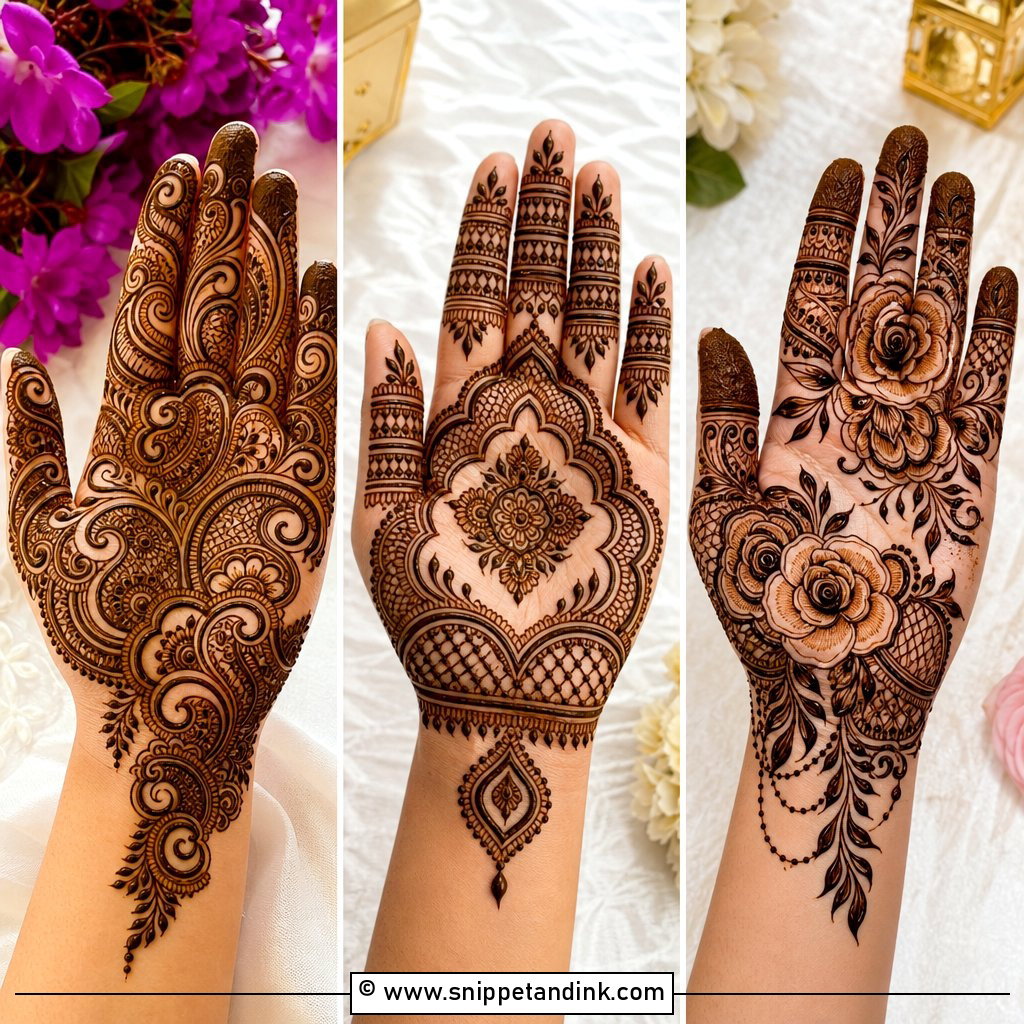
Arabic designs leave gaps on purpose. Large flowers, curved vines and leafy strokes run in a diagonal from near the wrist toward the index finger, and the remaining fingers get matching bands, petals and dots. Thick lines and open skin give strong contrast from a distance, which is why bridesmaids and Eid guests like it. The one thing I watch is the angle of the trail: it should follow the line from the heel of the hand to the index finger, not cut straight across the palm.
4. Indian Palm Mehndi Design
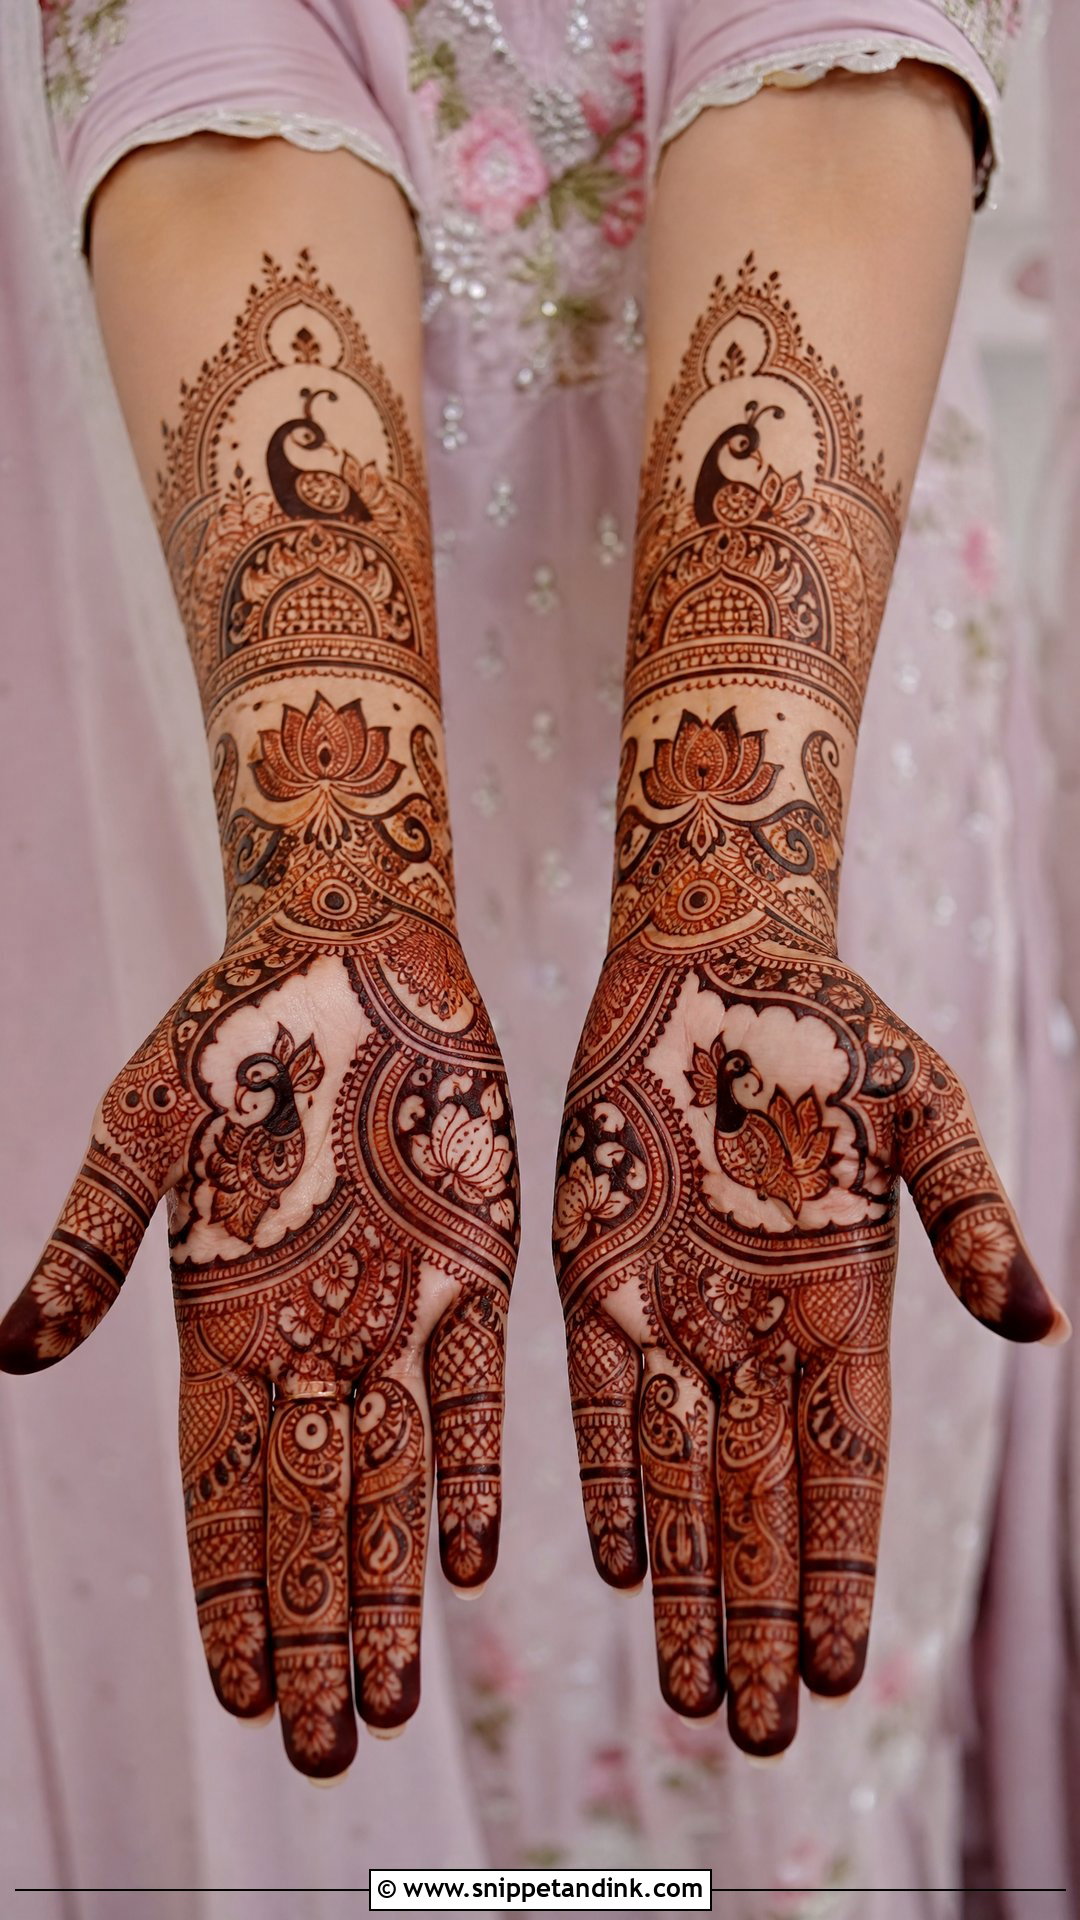
Indian palm work is dense and full of cultural motifs: paisleys, lotus flowers, peacocks, tiny leaves, checkered filling and lace-fine lines, with finger patterns that match the central layout and a wrist panel to close it. It turns up at weddings, poojas, Diwali and Karwa Chauth. Because so much is packed in, I make the central motif slightly larger than it looks like it needs to be. Once the stain darkens, fine filling closes up visually and a too-small centre gets swallowed.
5. Mandala Palm Mehndi Design
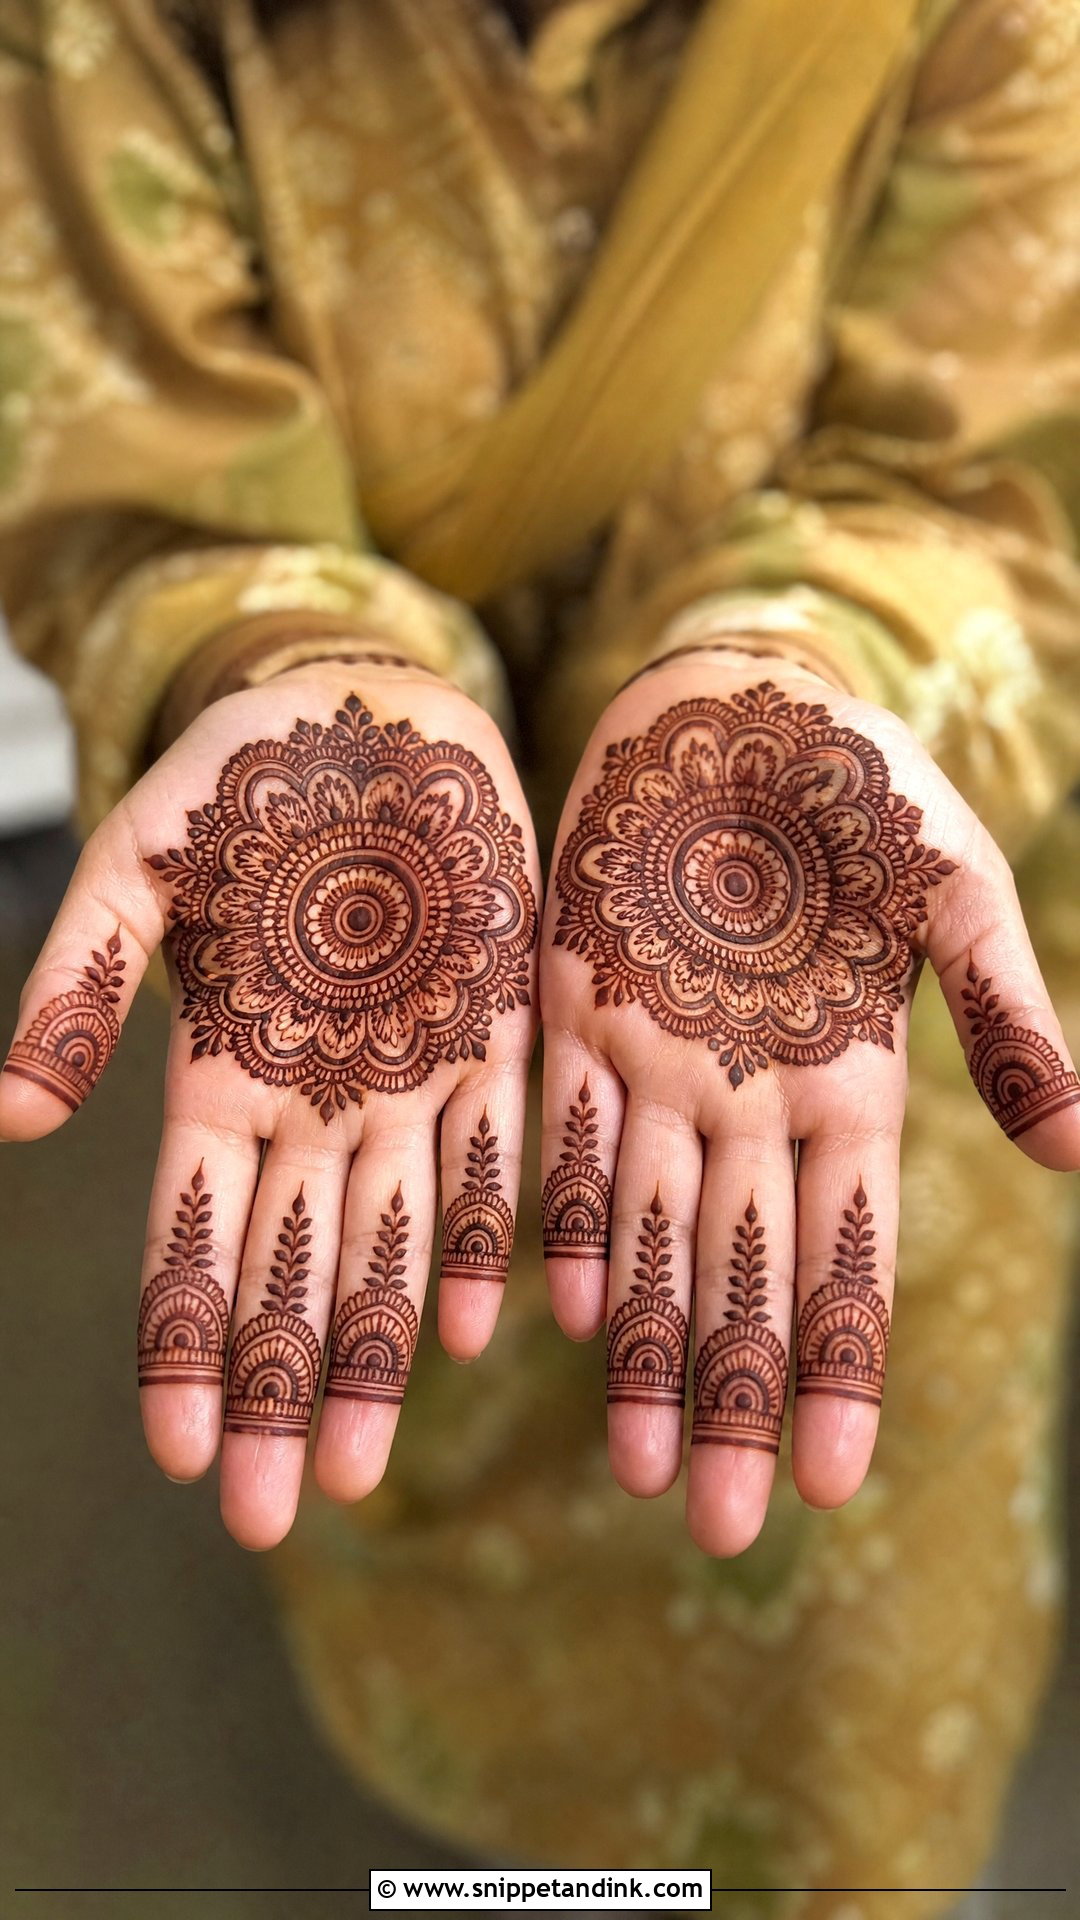
The palm is roughly round, so a mandala fits it naturally. It grows from a centre circle outward in petals, dots, scallops and fine borders; fingers can stay minimal with leafy tips or carry ring-like bands. I check the size against the hollow of the palm when the hand is slightly cupped, because a mandala drawn on a flat, stretched palm can crease oddly when the hand relaxes. Keep it small for a modern look or layer it wide for a traditional one.
6. Tikki Palm Mehndi Design
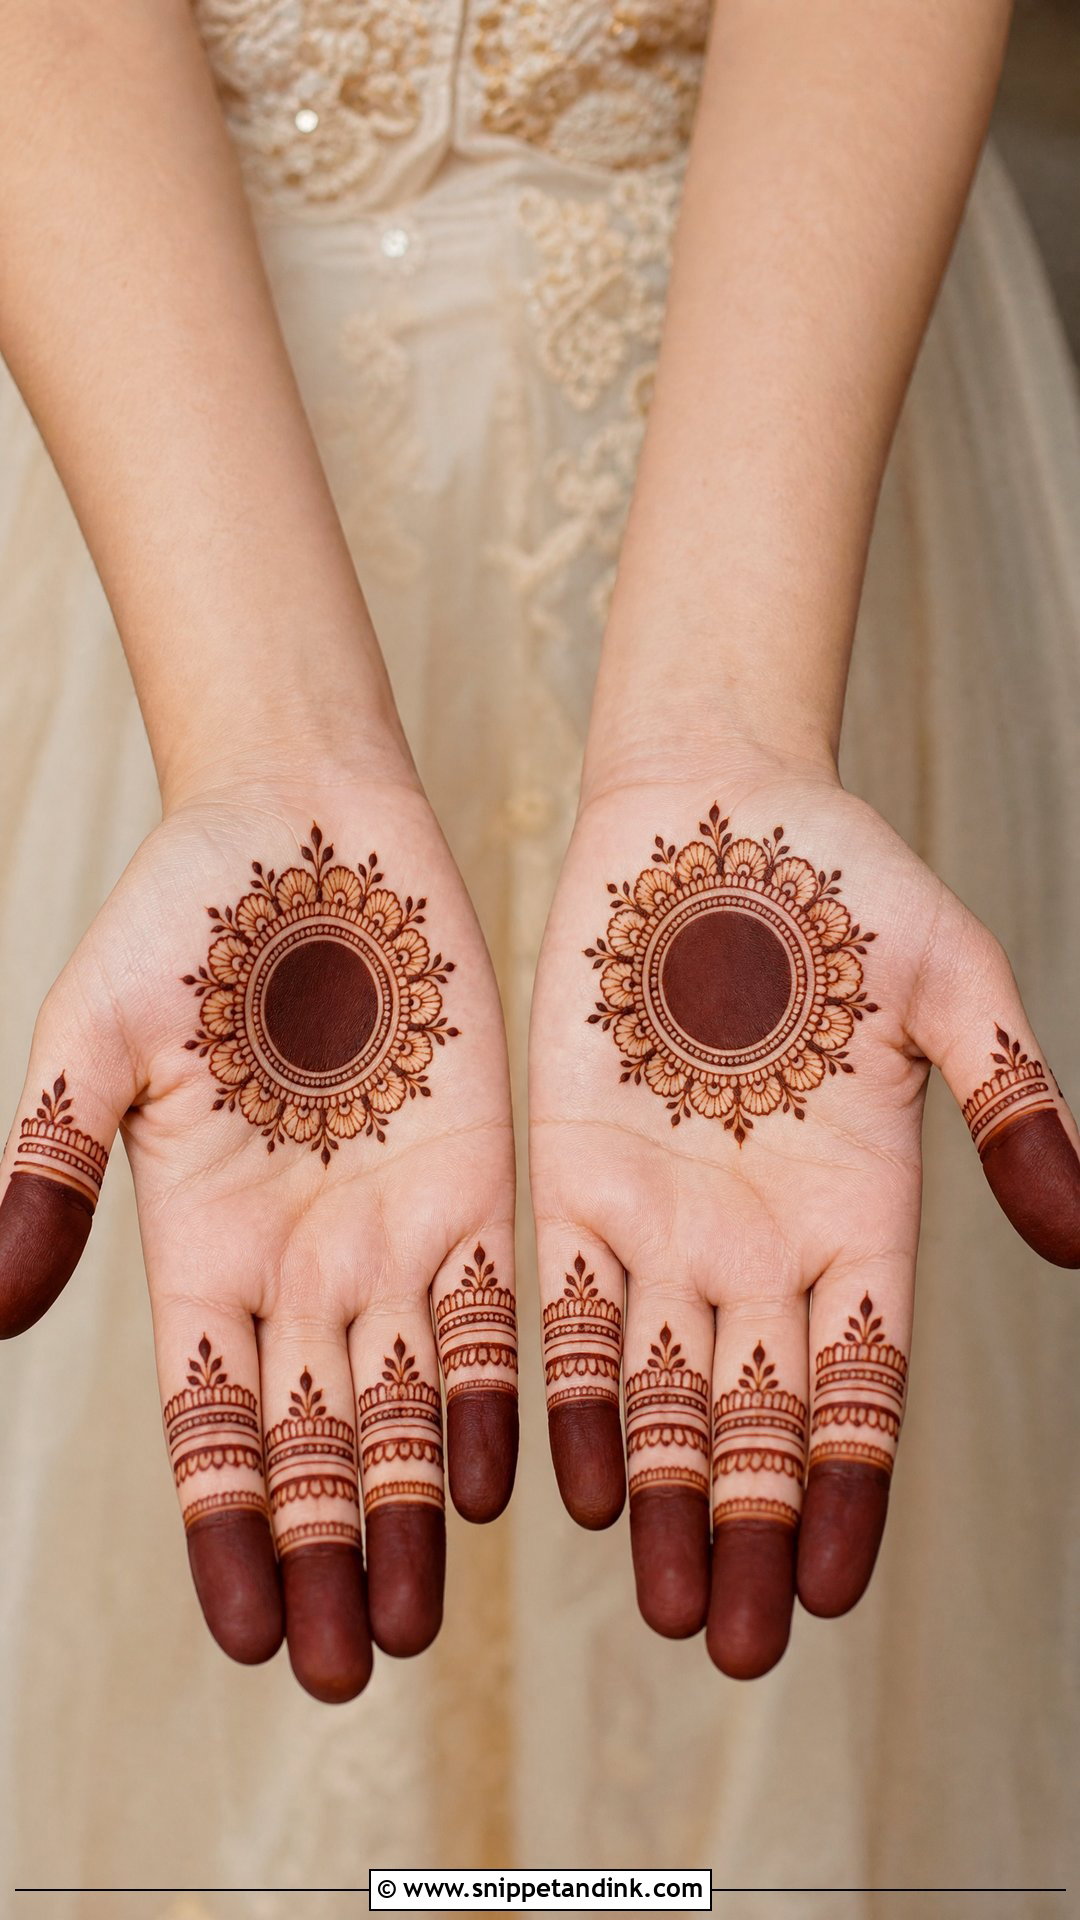
A tikki is a filled or half-filled circle in the centre of the palm, ringed with dots, tiny petals or thin decorative lines. Fingertips are often dipped solid or given simple bands and small leaves. It’s quick, and it reads as festive at Eid and family weddings without hours in the chair. Broad palms carry a big bold tikki well; on a narrow palm I shrink it and add negative space so the circle doesn’t touch the edges of the hand.
7. Floral Palm Mehndi Design
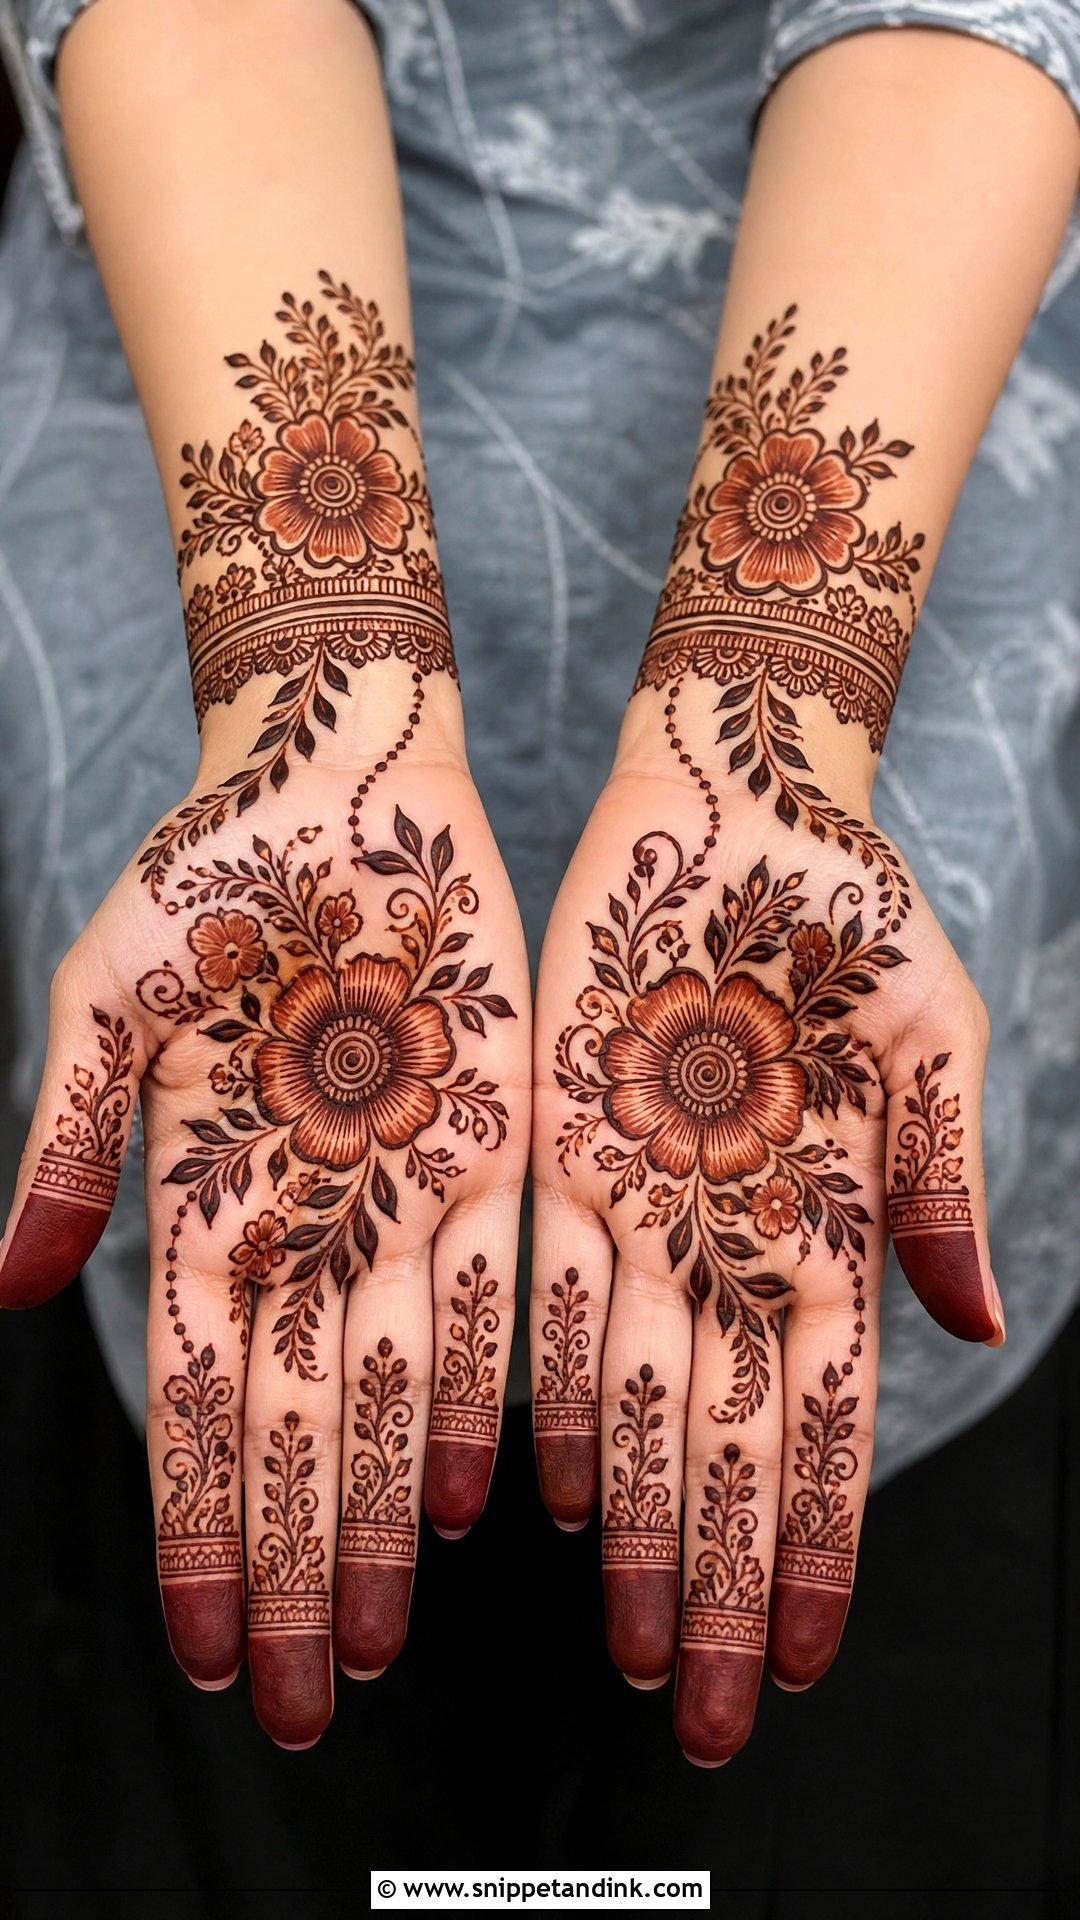
Soft flowers spreading across the palm can make the whole hand look fresh. Usually that’s one large bloom in the centre, smaller blossoms toward the thumb side and leafy vines running up to the fingers, with a matching flower bracelet or slim border at the wrist. Haldi, daytime functions and engagement parties suit it. I outline the petals boldly and shade lightly inside, so the flowers still read as flowers once the colour develops.
8. Paisley Palm Mehndi Design
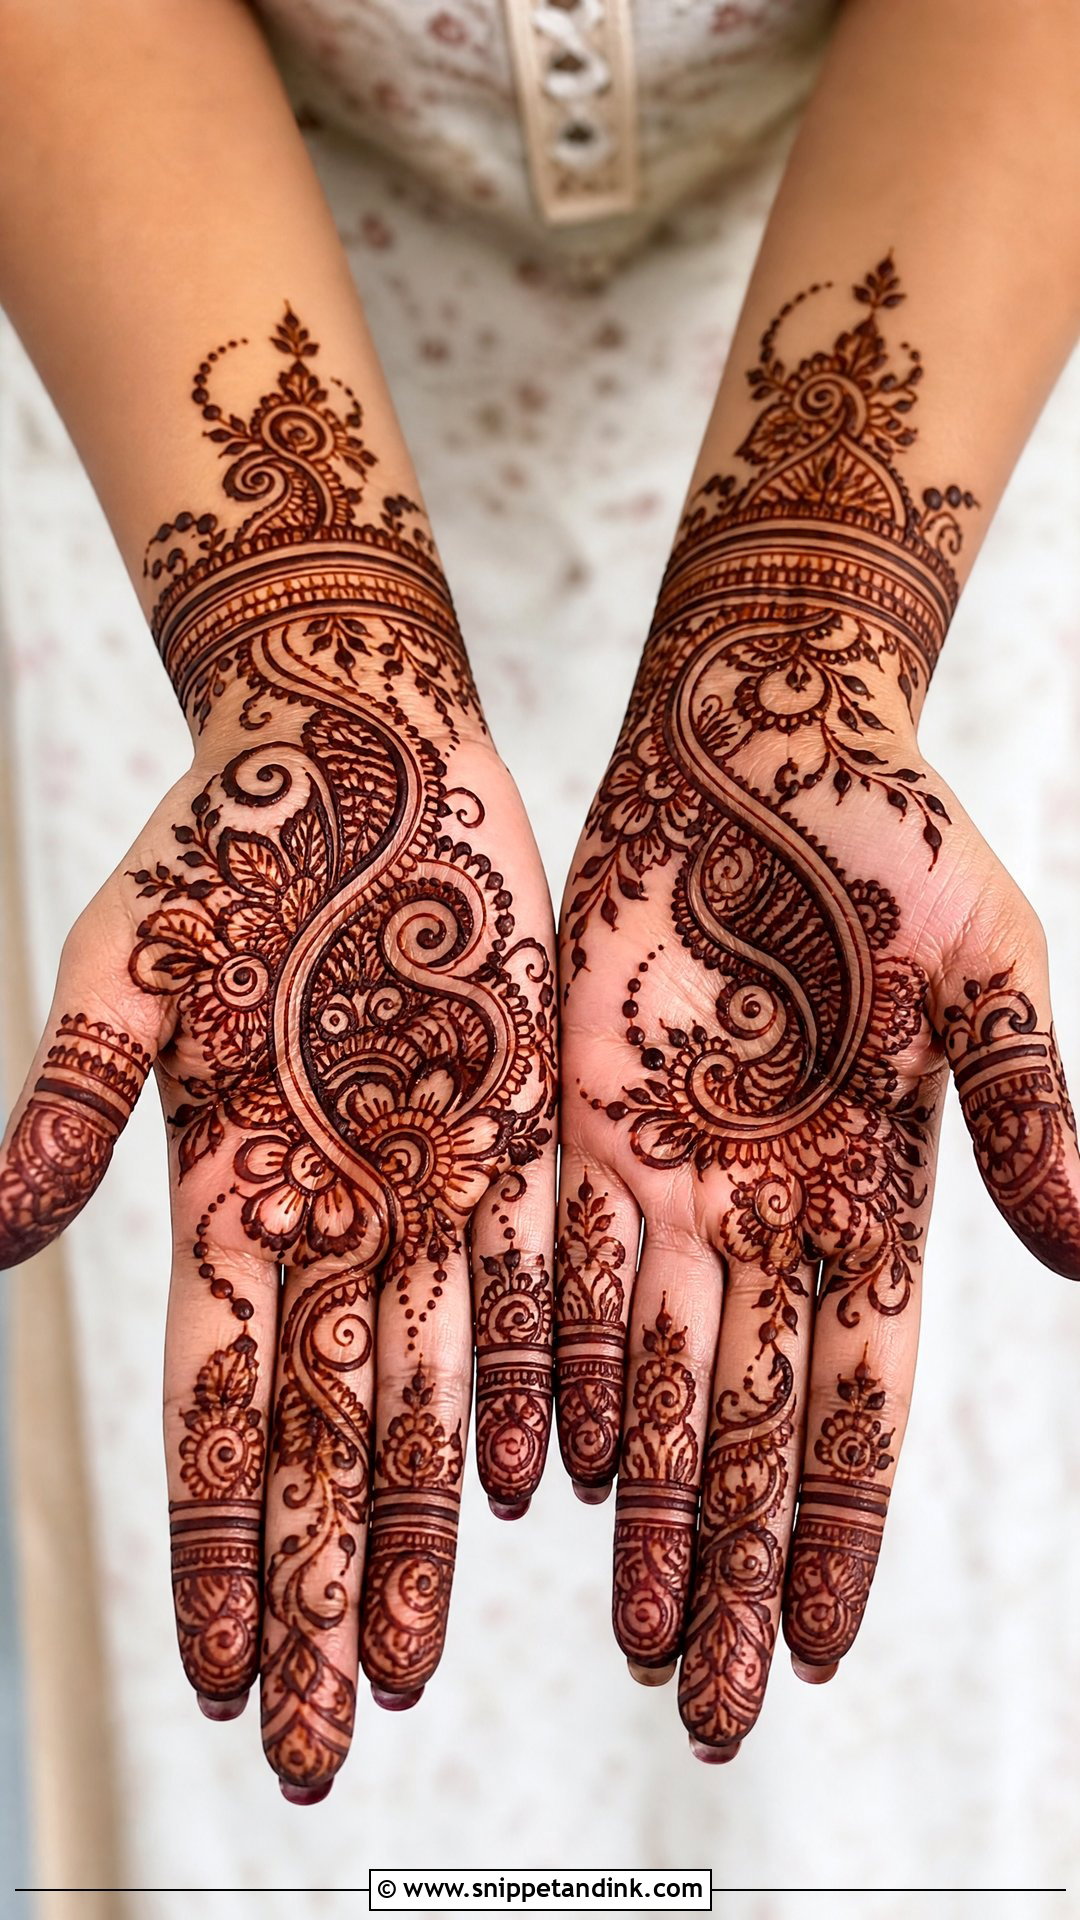
Paisley gives you a traditional feel even at moderate coverage. You can run one large paisley across the palm or set two smaller ones facing each other, then surround them with flowers, vines, dots and fine-line fillers. The fingers can continue the curve through small leaf chains. Where people go wrong is making every filler the same size, which flattens the design. I mix a bold paisley outline with tiny inner details so the palm looks layered.
9. Peacock Palm Mehndi Design
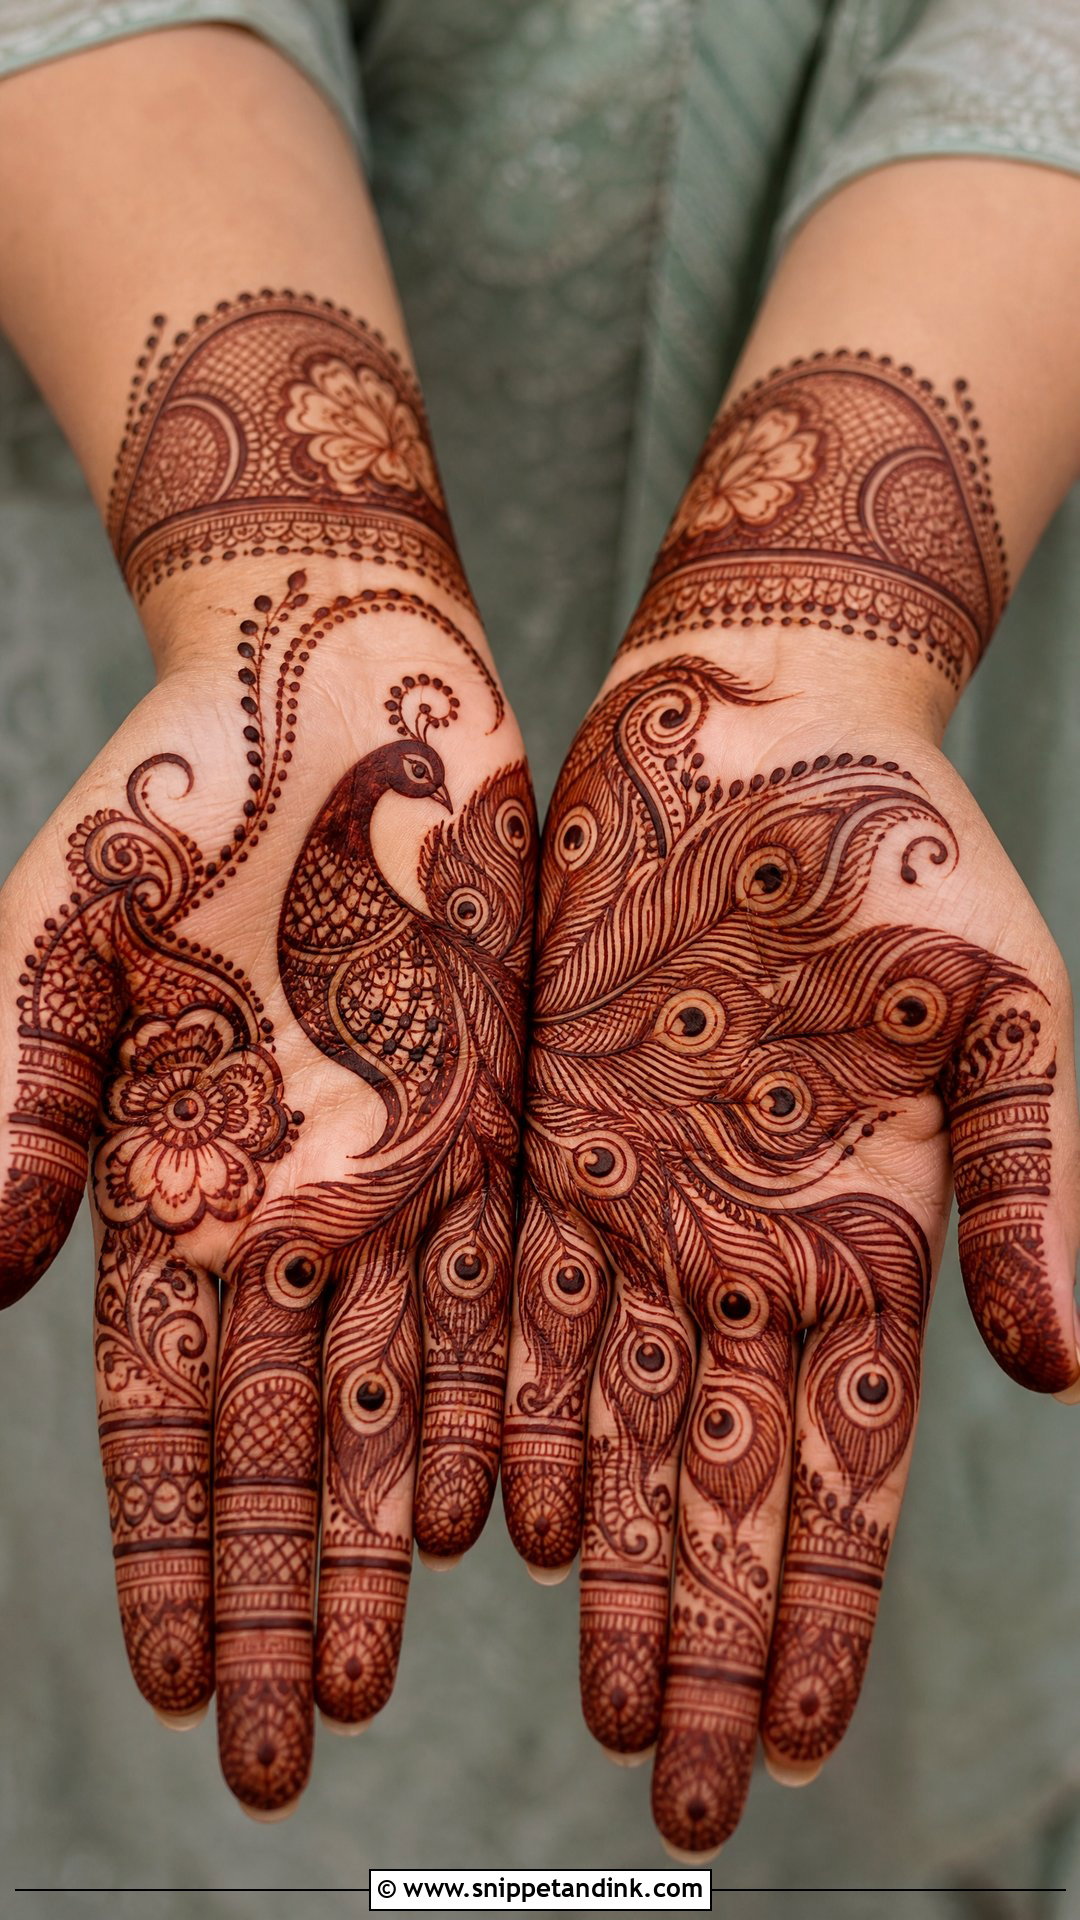
A peacock can sit in the centre with its feathers fanning toward the fingers, or flow diagonally from the wrist toward the thumb side. Feathers, paisleys, dots and floral accents fill out the rest. The body is the part I protect: if fillers crowd around the neck and head, the bird vanishes into the pattern once it stains. Keep the feathers bold and curved, and bridesmaids and brides alike will get a festive palm that still reads clearly in photos.
10. Lotus Palm Mehndi Design
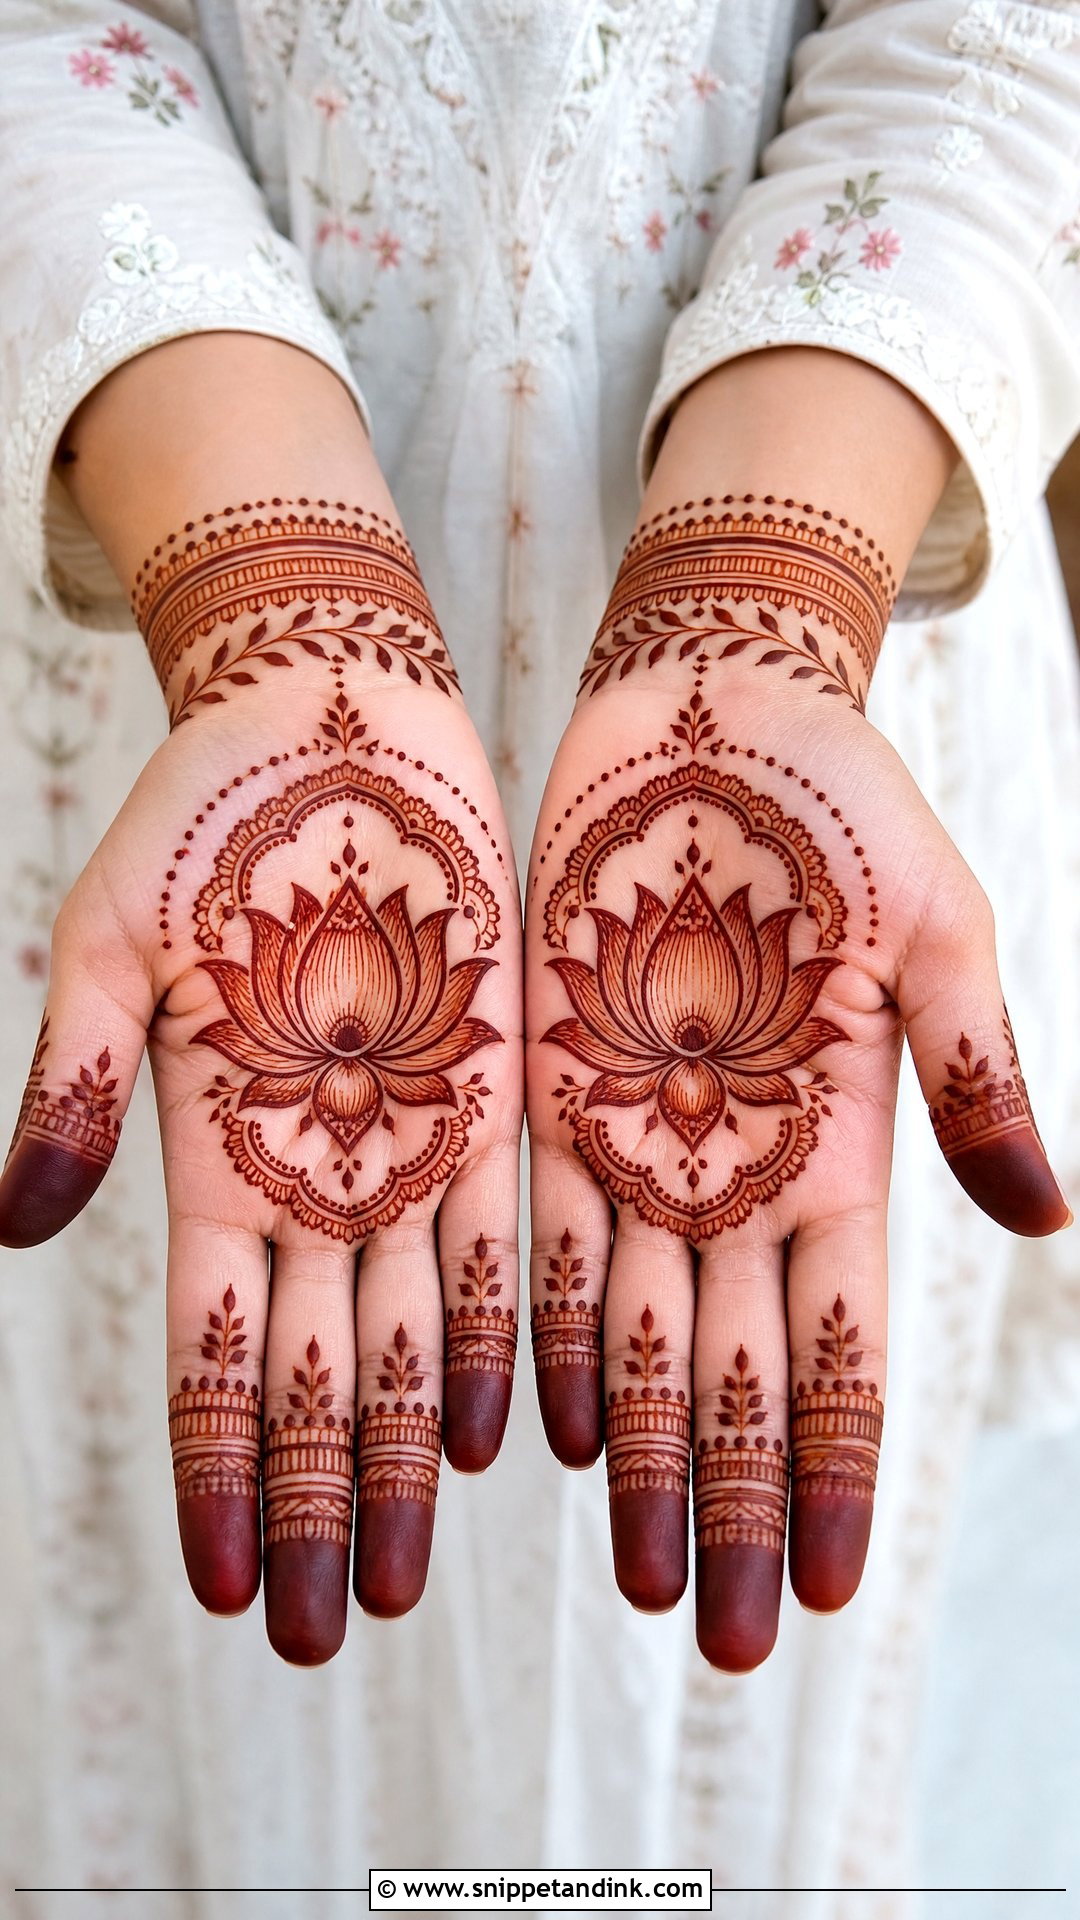
The lotus carries meaning for a lot of families, which is why it’s so often requested for engagements, prayers and weddings. It sits in the centre of the palm with petals opening in layers, surrounded by dotted circles, fine vines, small paisleys or a wrist border, with petal tips on the fingers. It adapts well to hand size because I can add or drop a layer of petals. Keep the centre flower bold and everything around it lighter.
11. Jaali Palm Mehndi Design
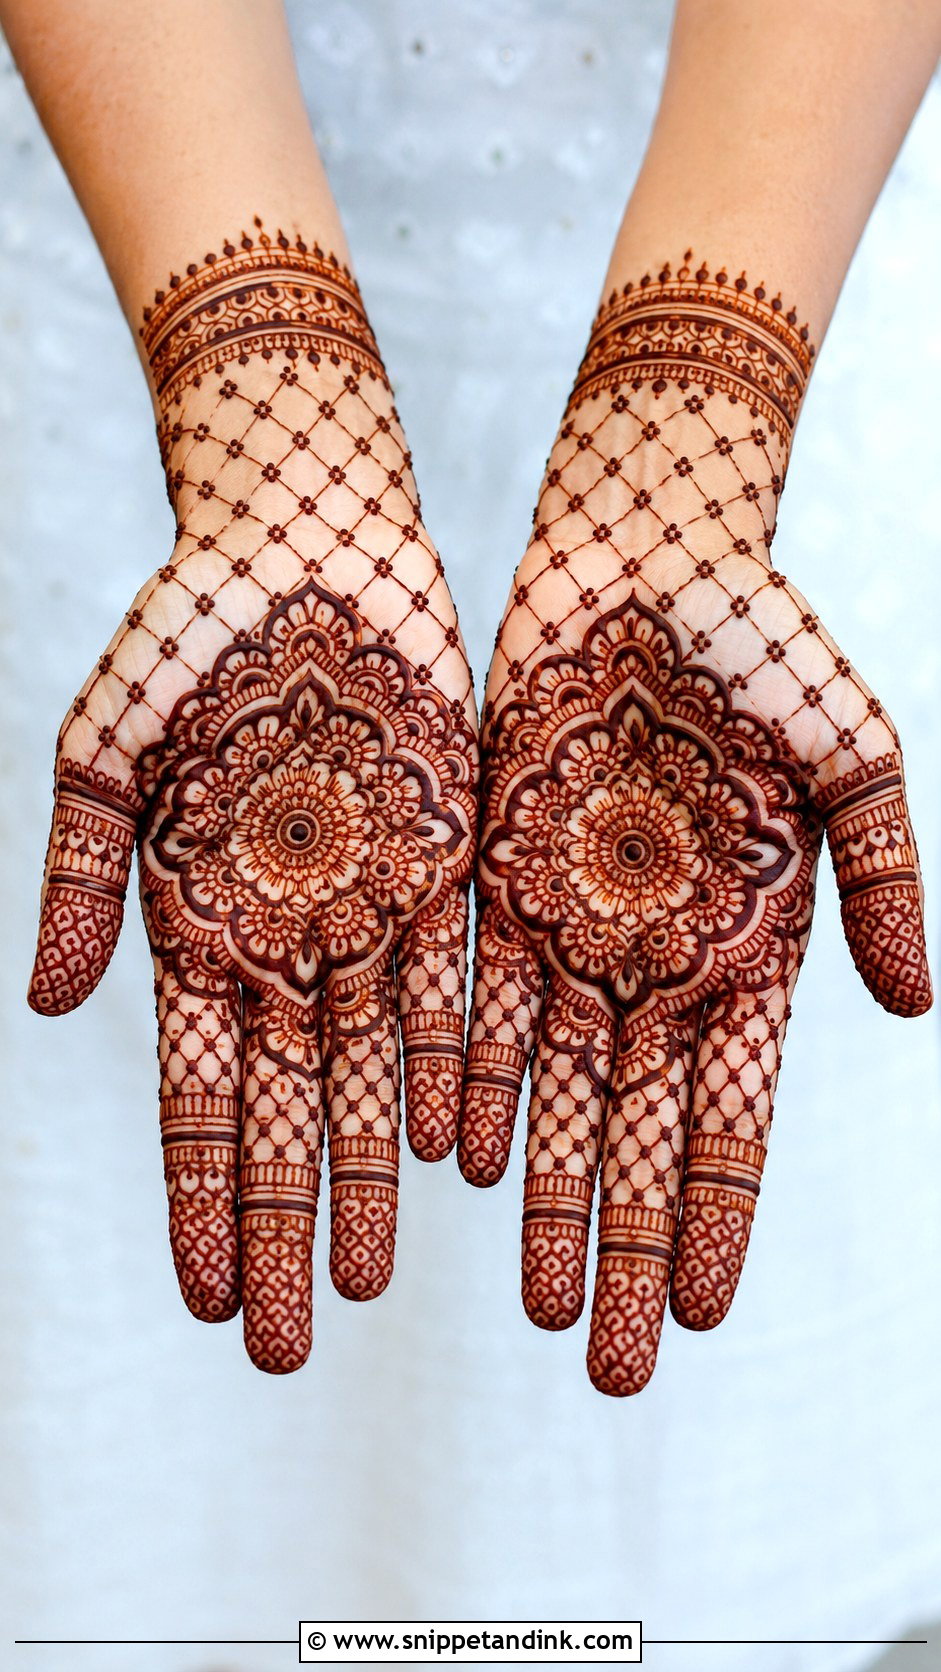
Jaali makes part of the palm look like woven fabric. I divide the palm into sections, fill one with a net of crossing lines, dots or diamonds, and soften the rest with flowers, paisleys or a mandala; the fingers carry matching mesh bands. It’s detailed without being crowded. Even spacing between the net lines is the whole trick, and it’s the first thing I’d practise if you’re learning, because uneven jaali is obvious from across the room.
12. Bracelet Palm Mehndi Design
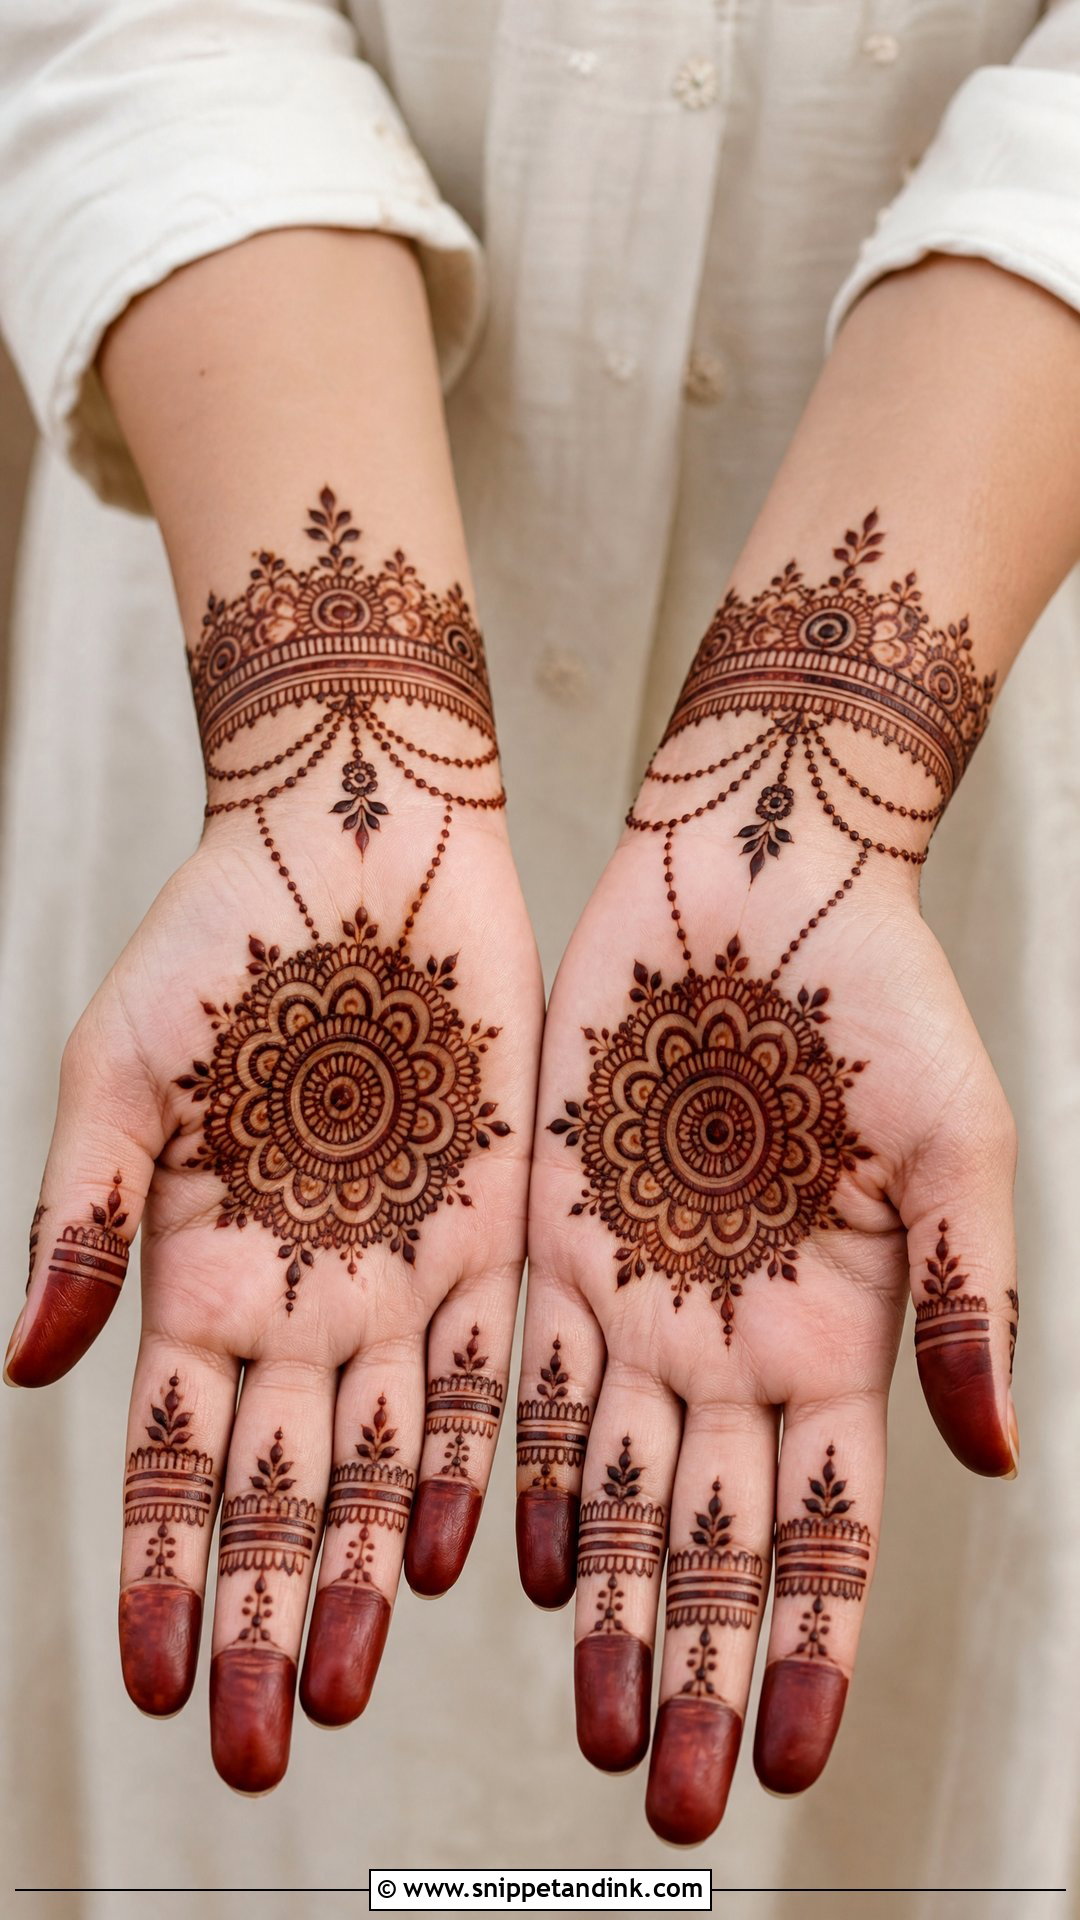
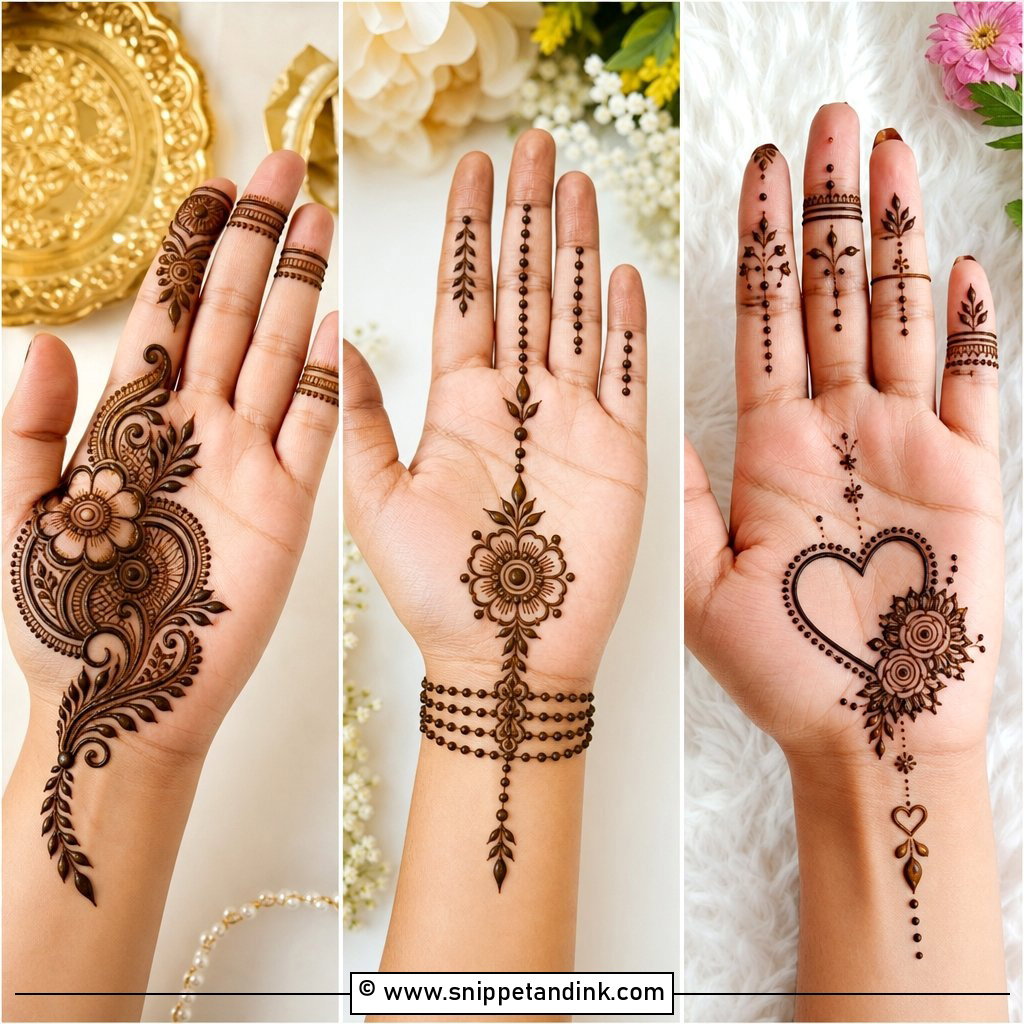
Here the palm design connects to a decorative wrist band. The centre carries a flower, mandala or paisley, the wrist gets a bangle-like border of dots, chains and leaves, and sometimes a line links the two like hand jewellery. The band frames everything, so I draw it before the palm detail and make sure it sits just below the wrist crease. Placed on the crease itself, it cracks and smudges every time you bend your hand.
13. Finger Palm Mehndi Design
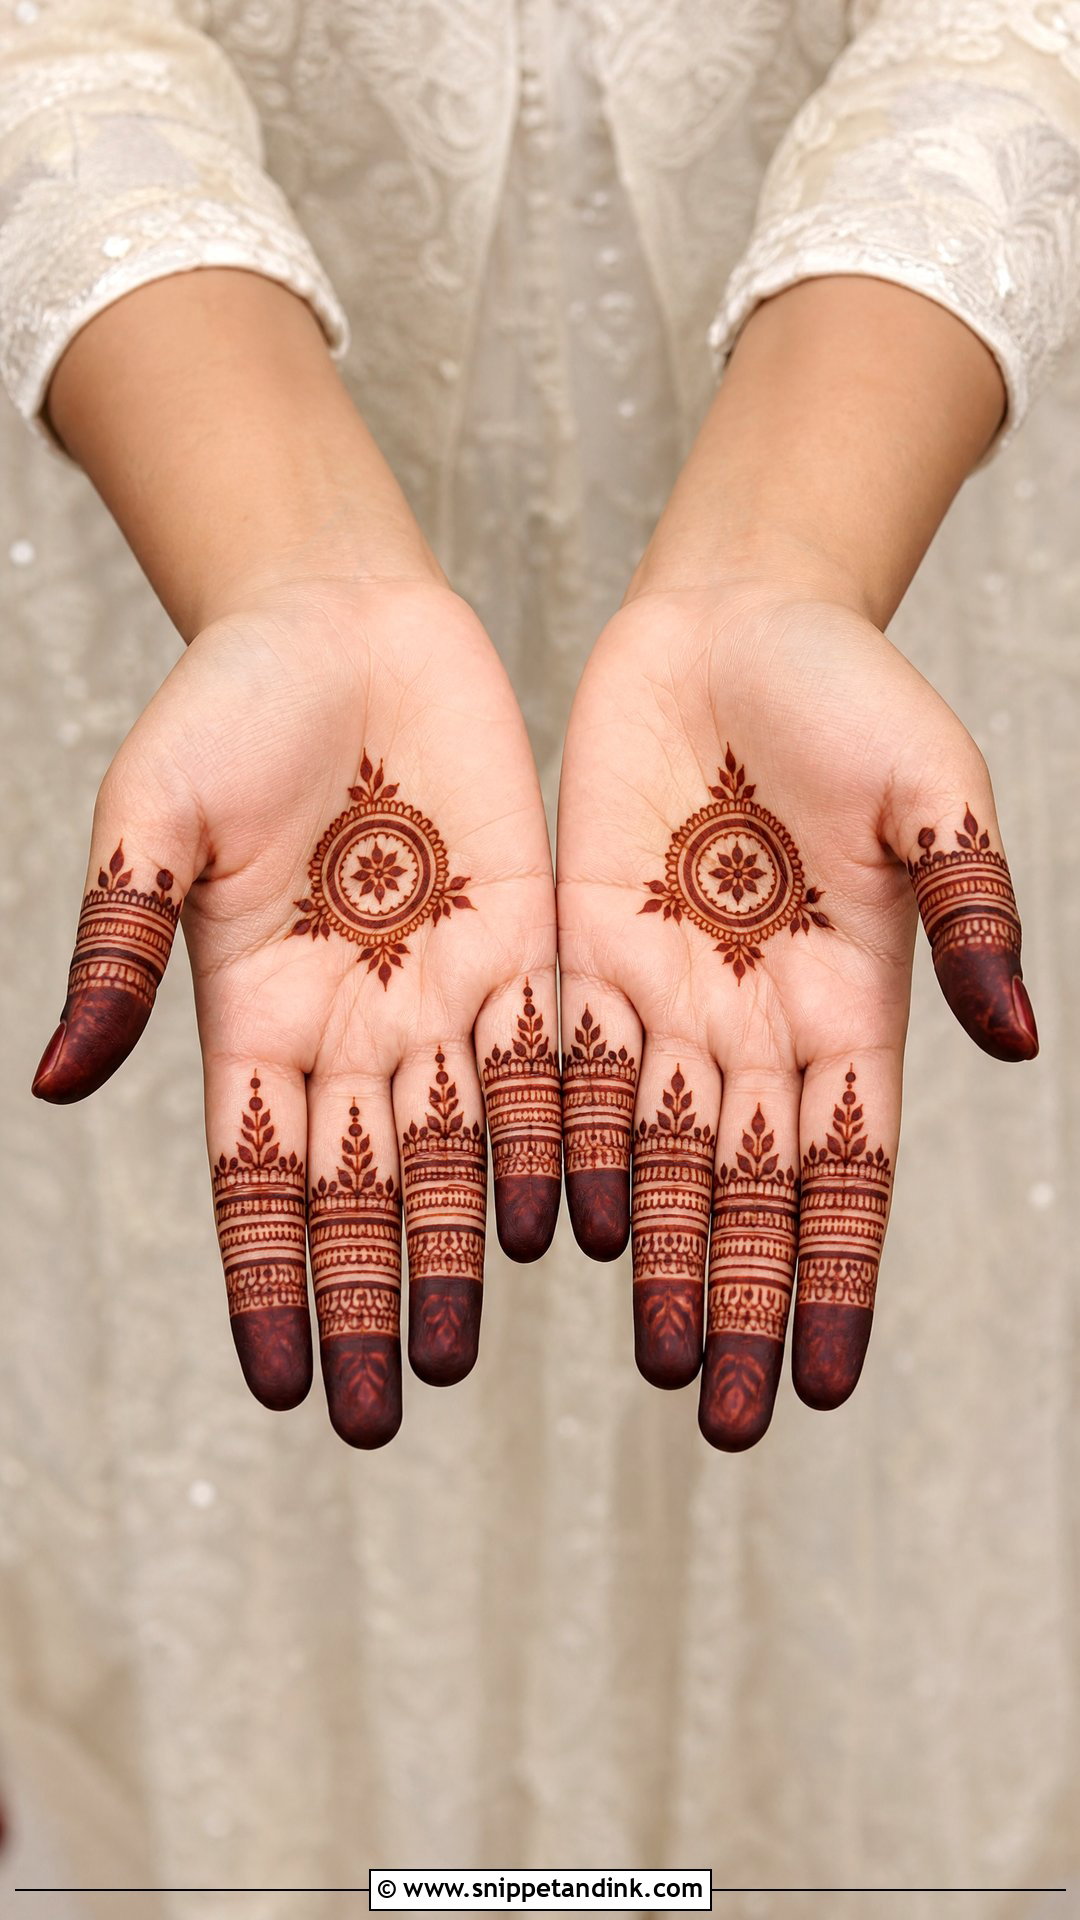
This layout keeps the palm motif small and puts the strength into the fingers: bands, leaves, dots and shaded tips. With the fingers closed it looks detailed; with the hand open it still feels modern and light. You can make two fingers heavy and keep the rest simple, or decorate all five evenly. The balance to watch is the palm itself. If it’s too empty, the hand looks like the design was abandoned halfway, so I give it at least one clear motif.
14. Bridal Palm Mehndi Design
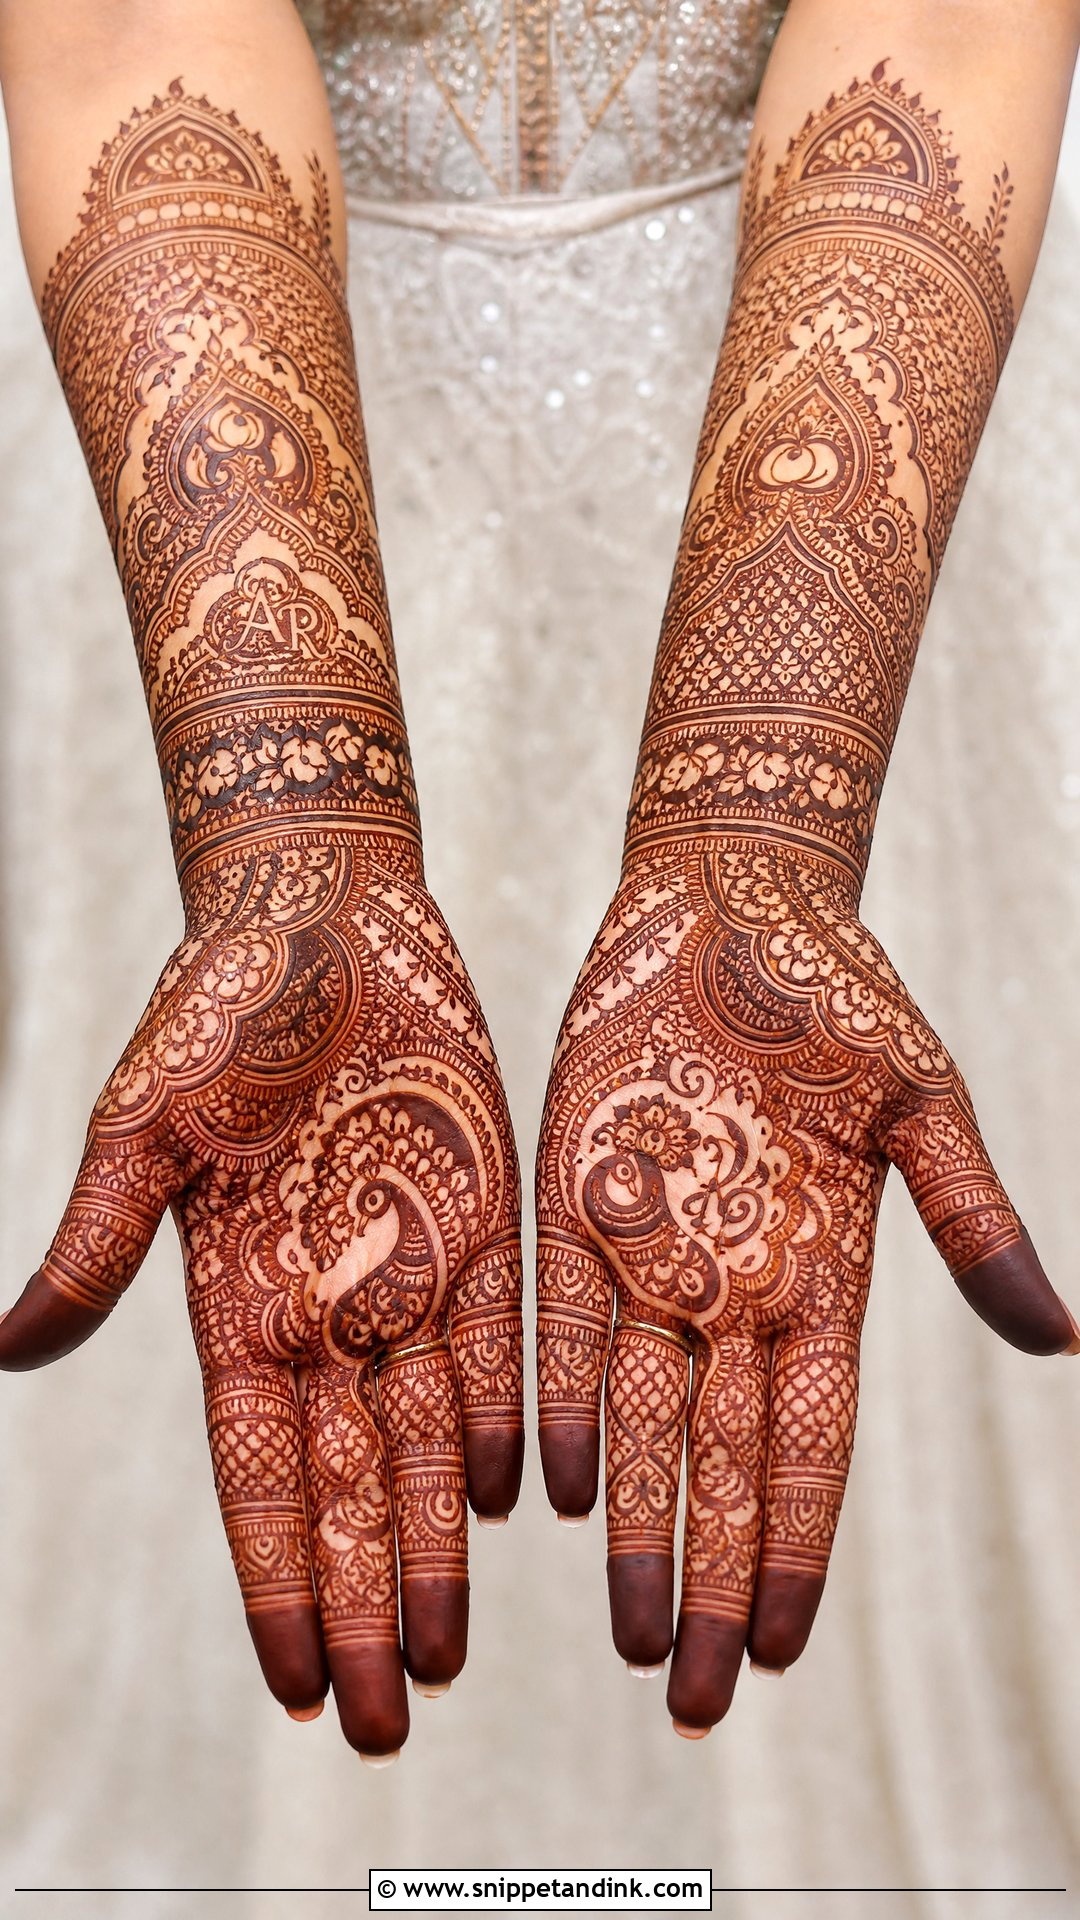
Bridal palms carry the most symbolism of any design here: mandalas, paisleys, jaali, peacocks, lotus motifs, bride-and-groom figures and hidden initials, with the fingers filled completely and the work often running on to the wrist and forearm. The palm is what’s on show during rituals, blessings and close-up photographs, so I frame the central motif clearly and divide the rest into readable sections. Dense is expected. Muddled is not.
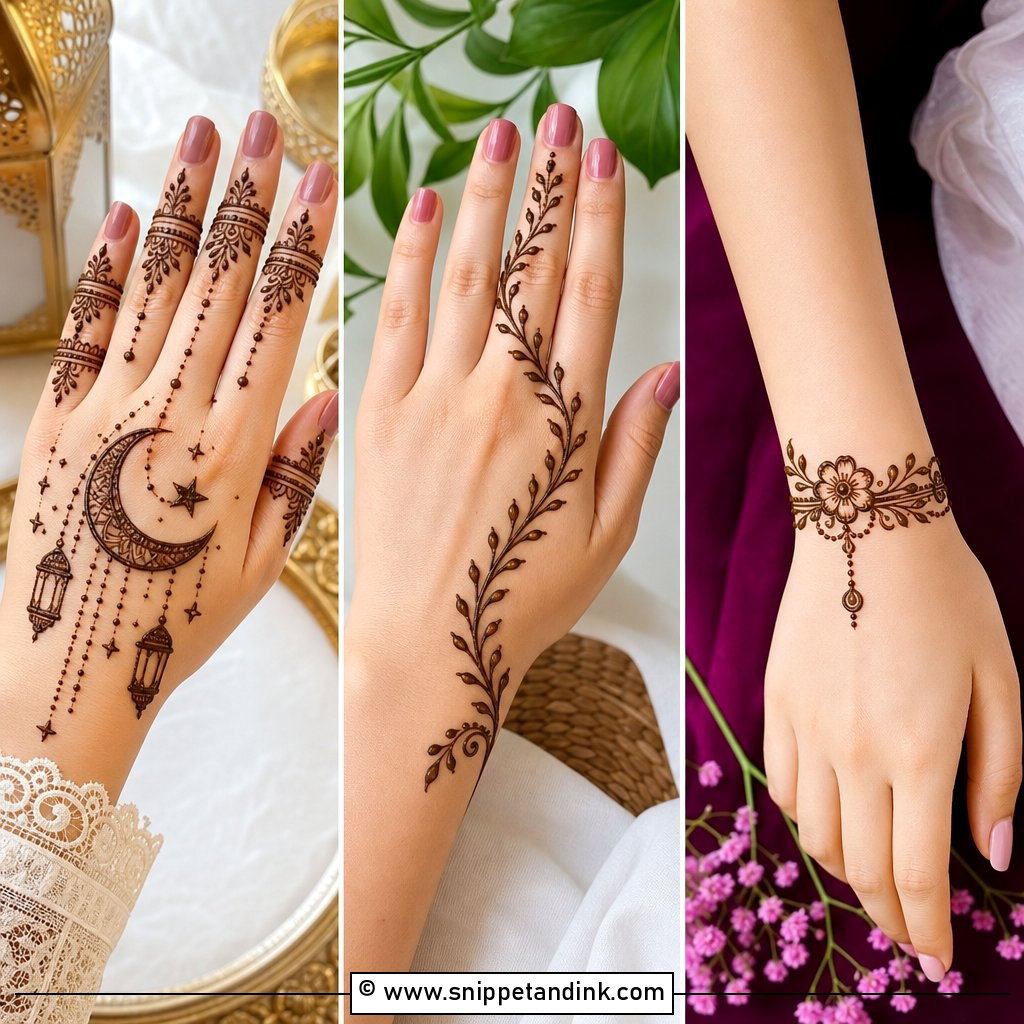
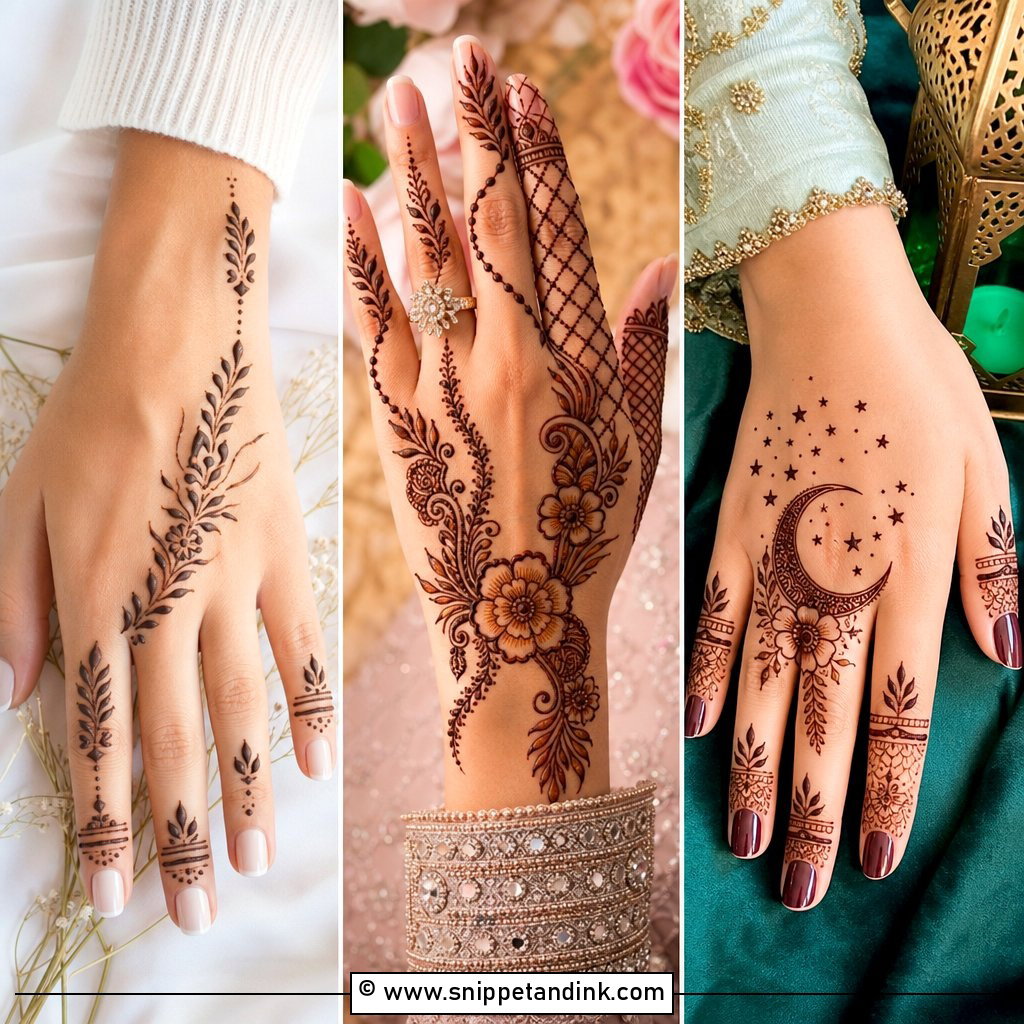
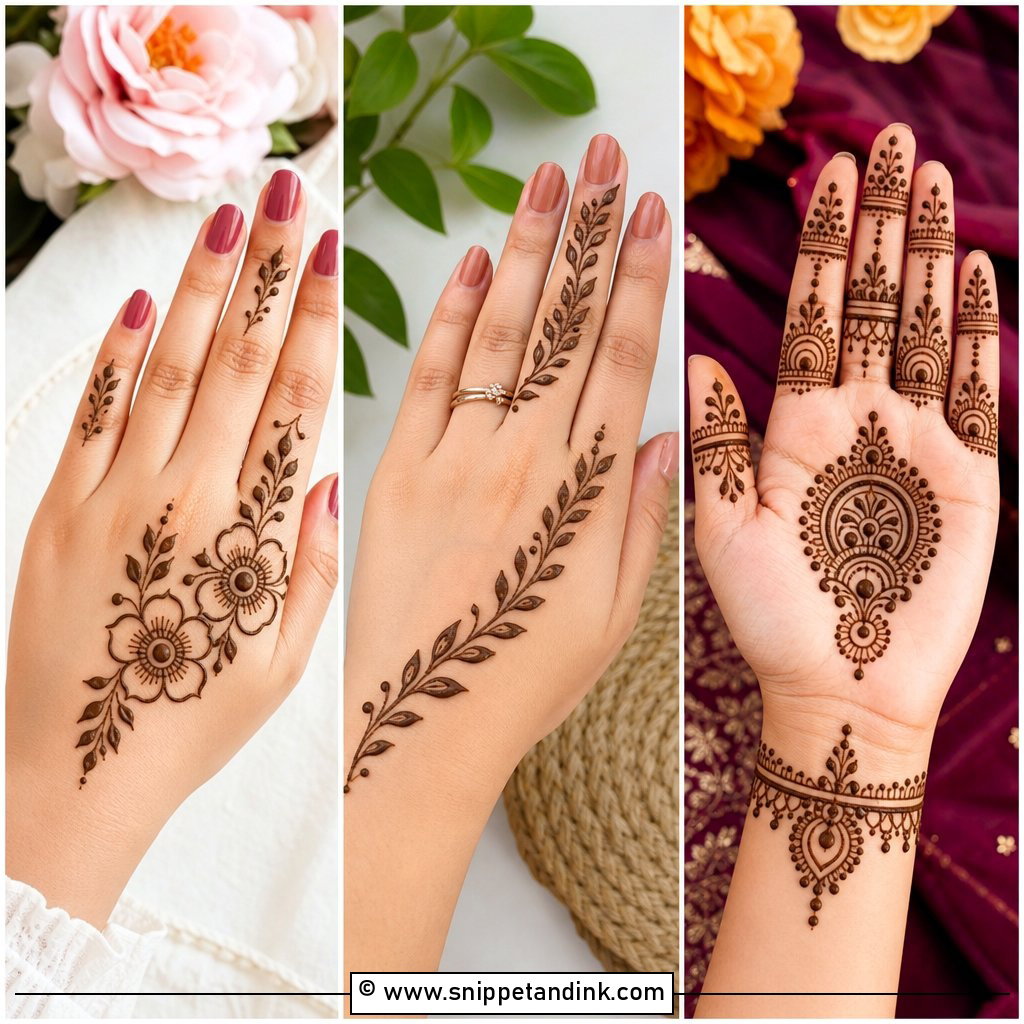
15. Modern Palm Mehndi Design
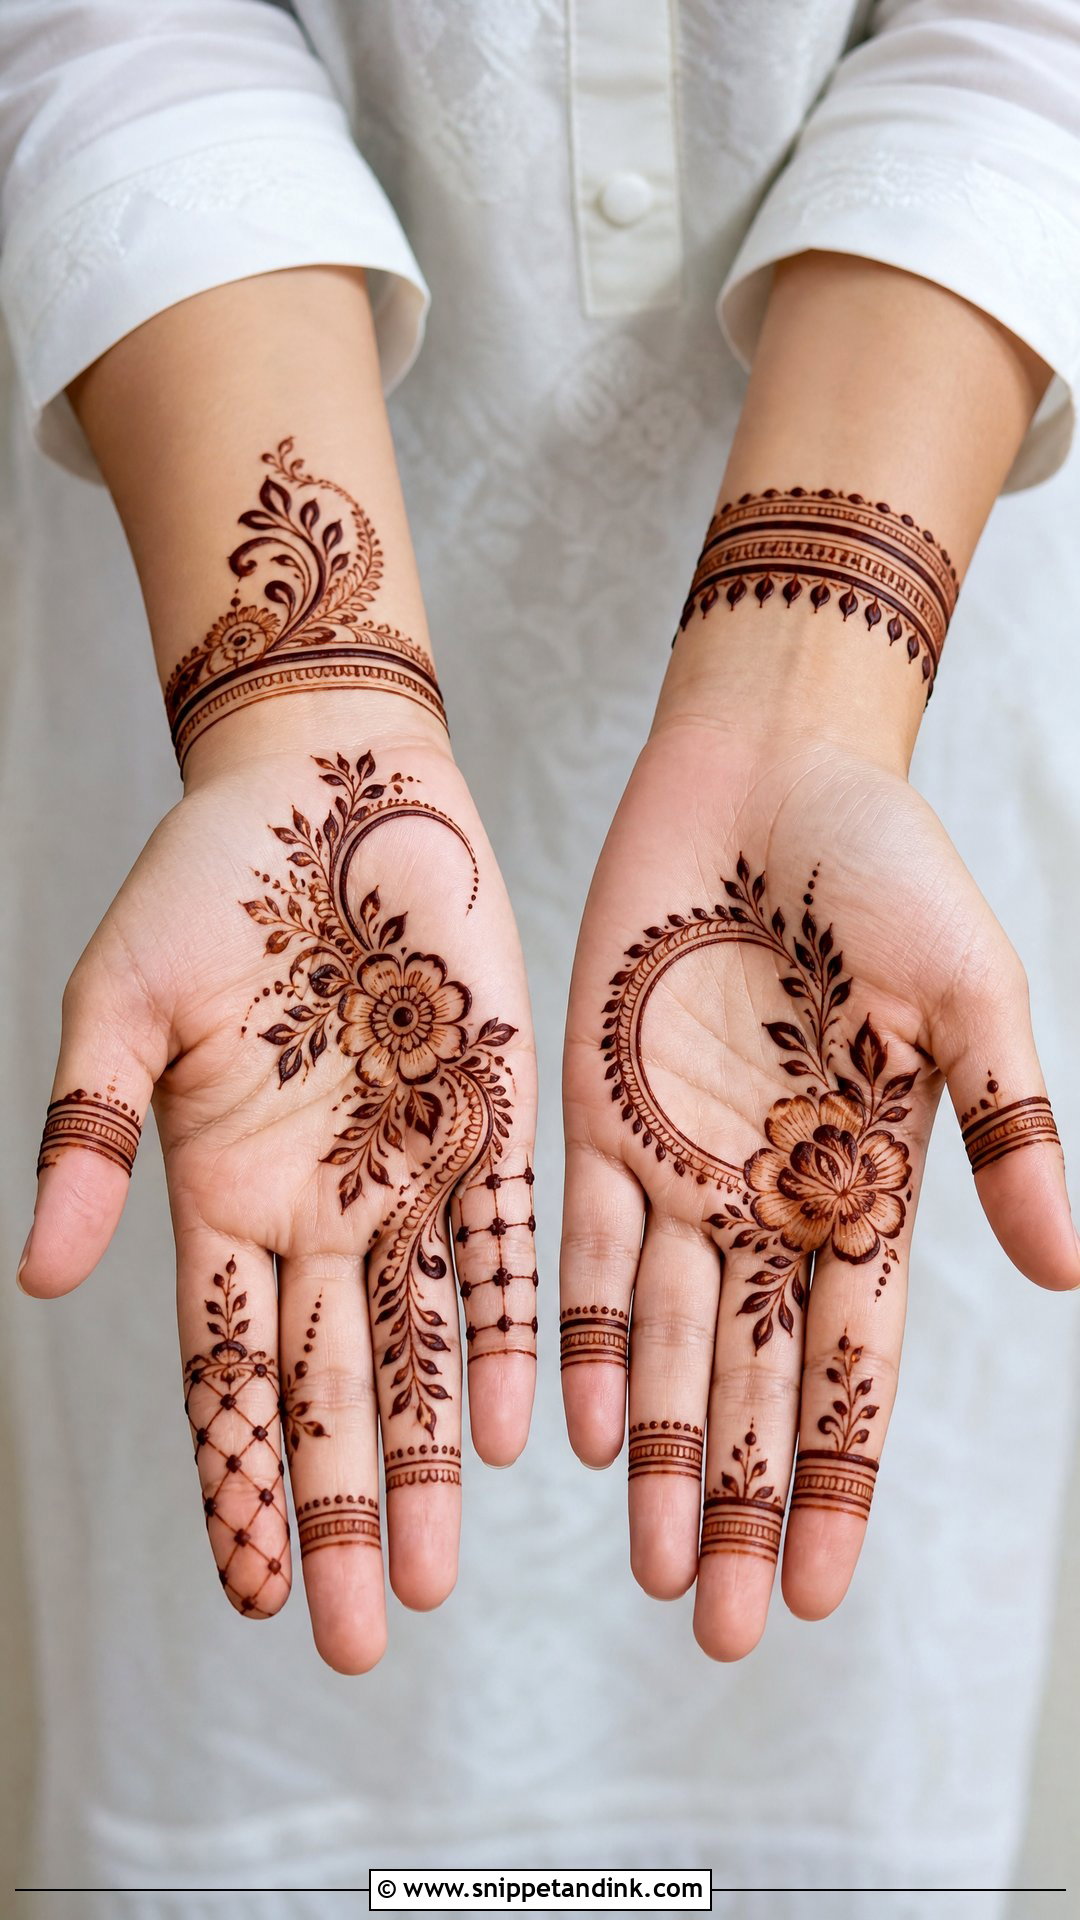
Modern palm work uses asymmetrical florals, thin lines, geometric borders, half-palm coverage and simple finger bands, keeping the palm airy. It sits easily with fusion outfits as well as traditional ones, and with so little crowding, it’s easy to photograph. I’d keep tiny fillers to a minimum; one or two well-placed motifs say more here than ten small ones.
16. Minimal Palm Mehndi Design
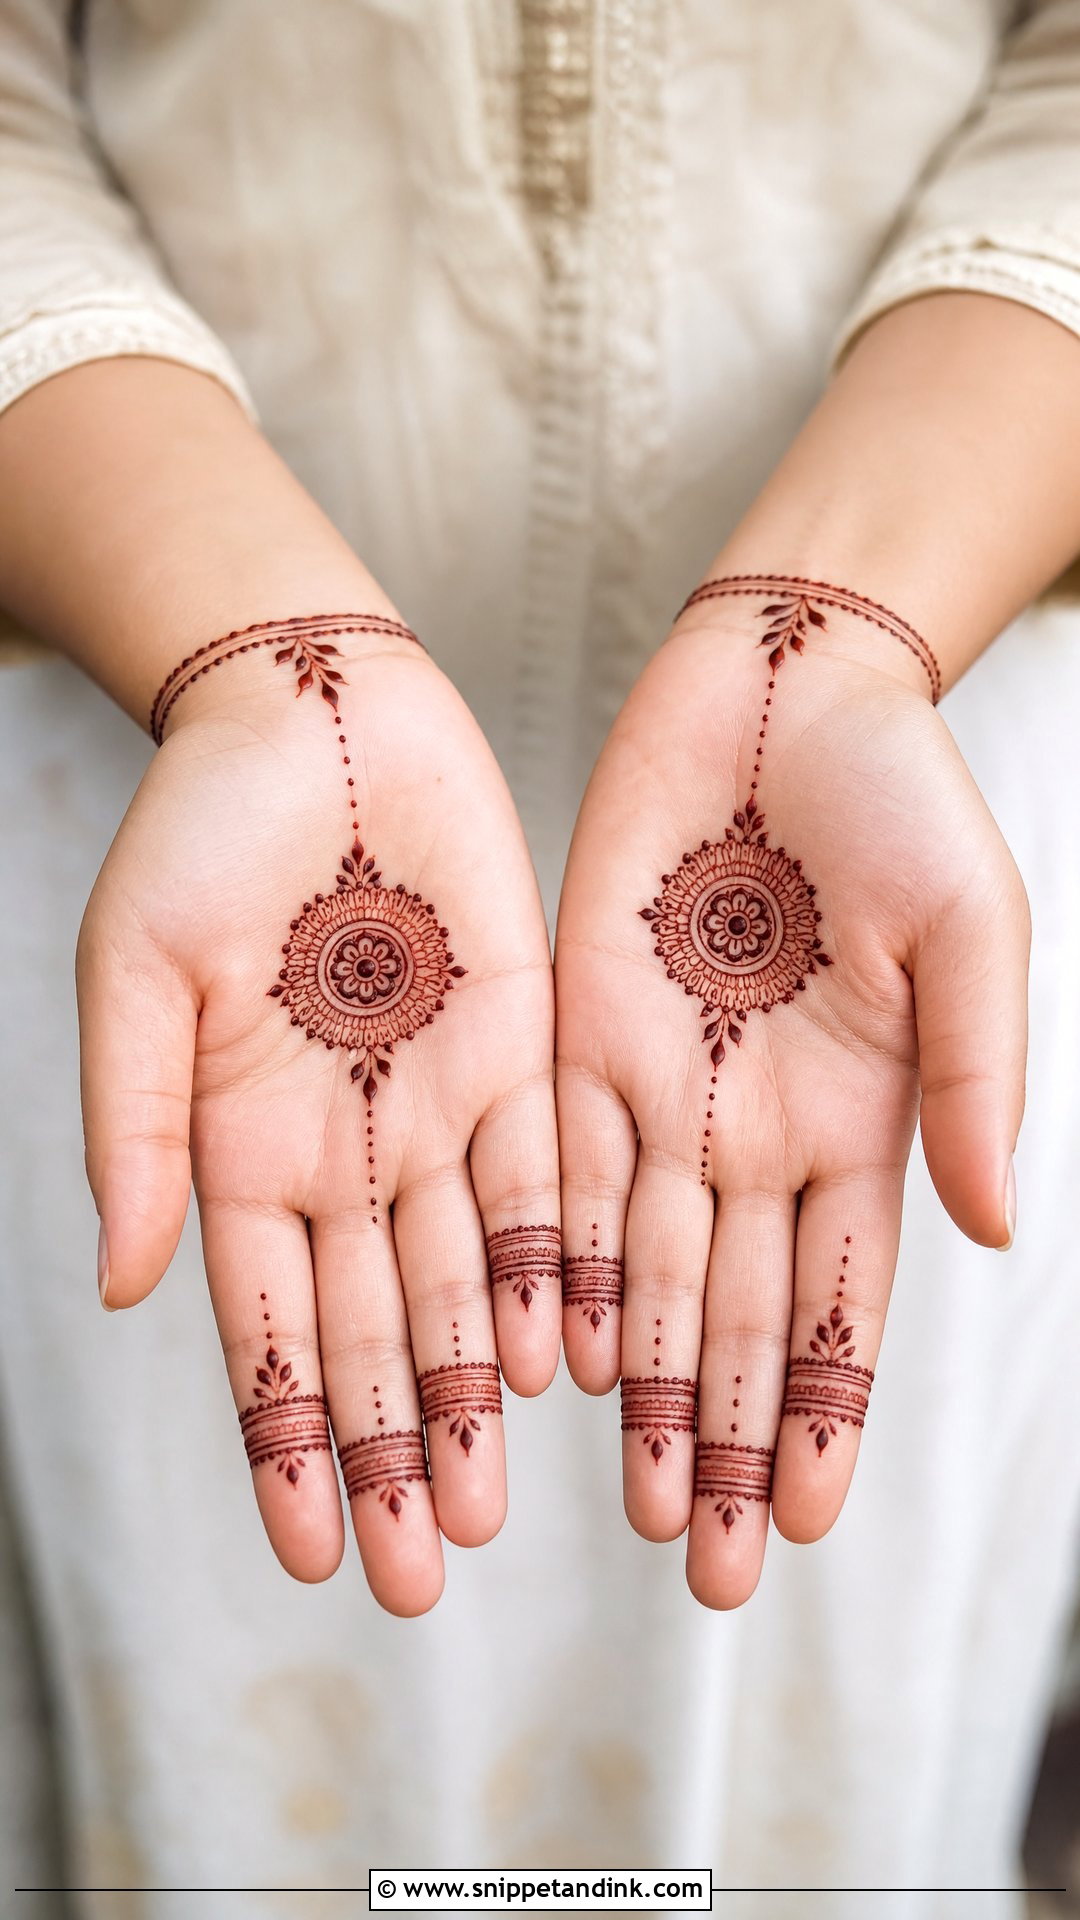
Minimal designs prove that a little henna goes a long way. A small centre mandala, a tiny flower cluster, a dotted trail or a slim vine across the palm, with small rings or leafy tips on the fingers and the wrist bare or finished with one line. Every stroke is visible, so wobbly lines show more here than in any dense design. For an office-friendly festival or a teenager’s first mehndi, this is the one I recommend.
17. Half Palm Mehndi Design
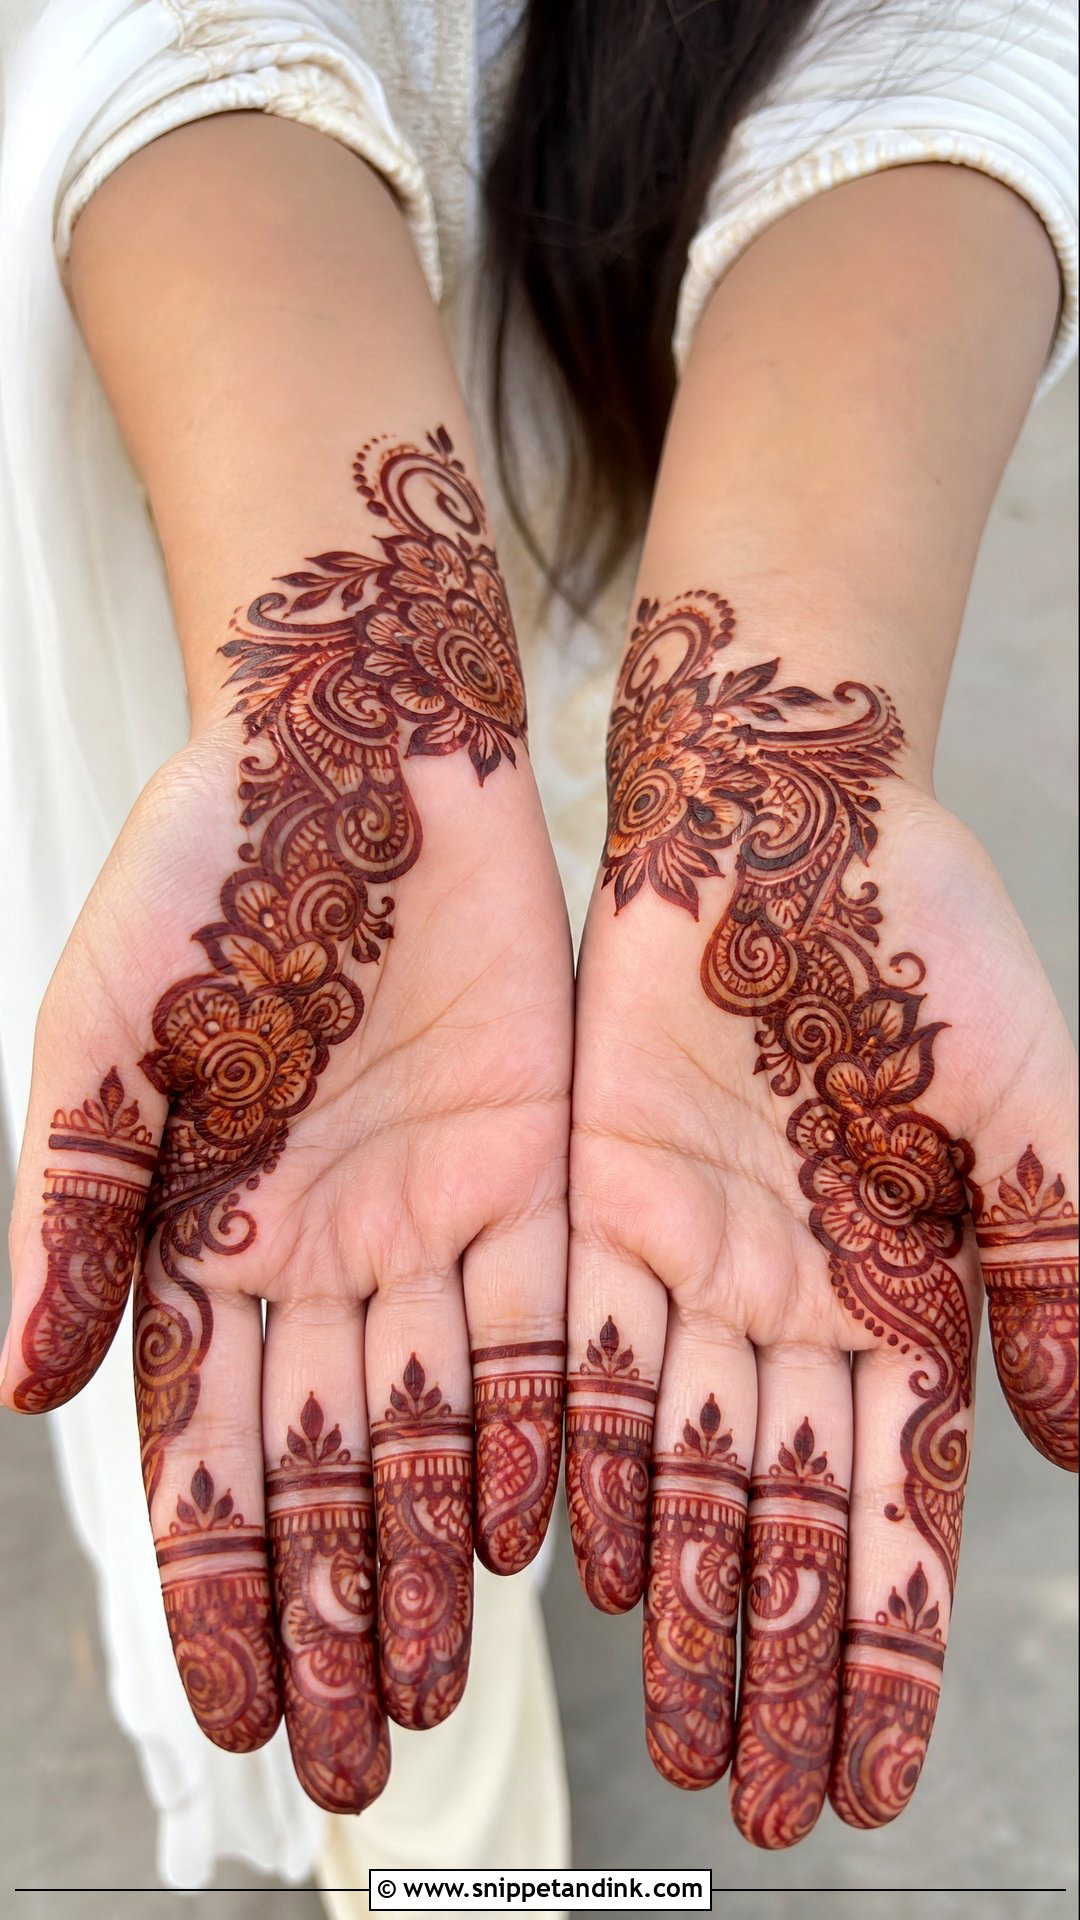
Half-palm coverage fills one side of the palm, the lower palm near the wrist, or the diagonal from thumb to little finger, using floral trails, paisleys, jaali or curved Arabic vines. The open half is what makes it look current, and it goes on much faster than a full palm. I usually put the coverage on the thumb side, because that’s the half people see when you hold your hands together in a namaste or a photo.
18. Front Hand Palm Mehndi Design
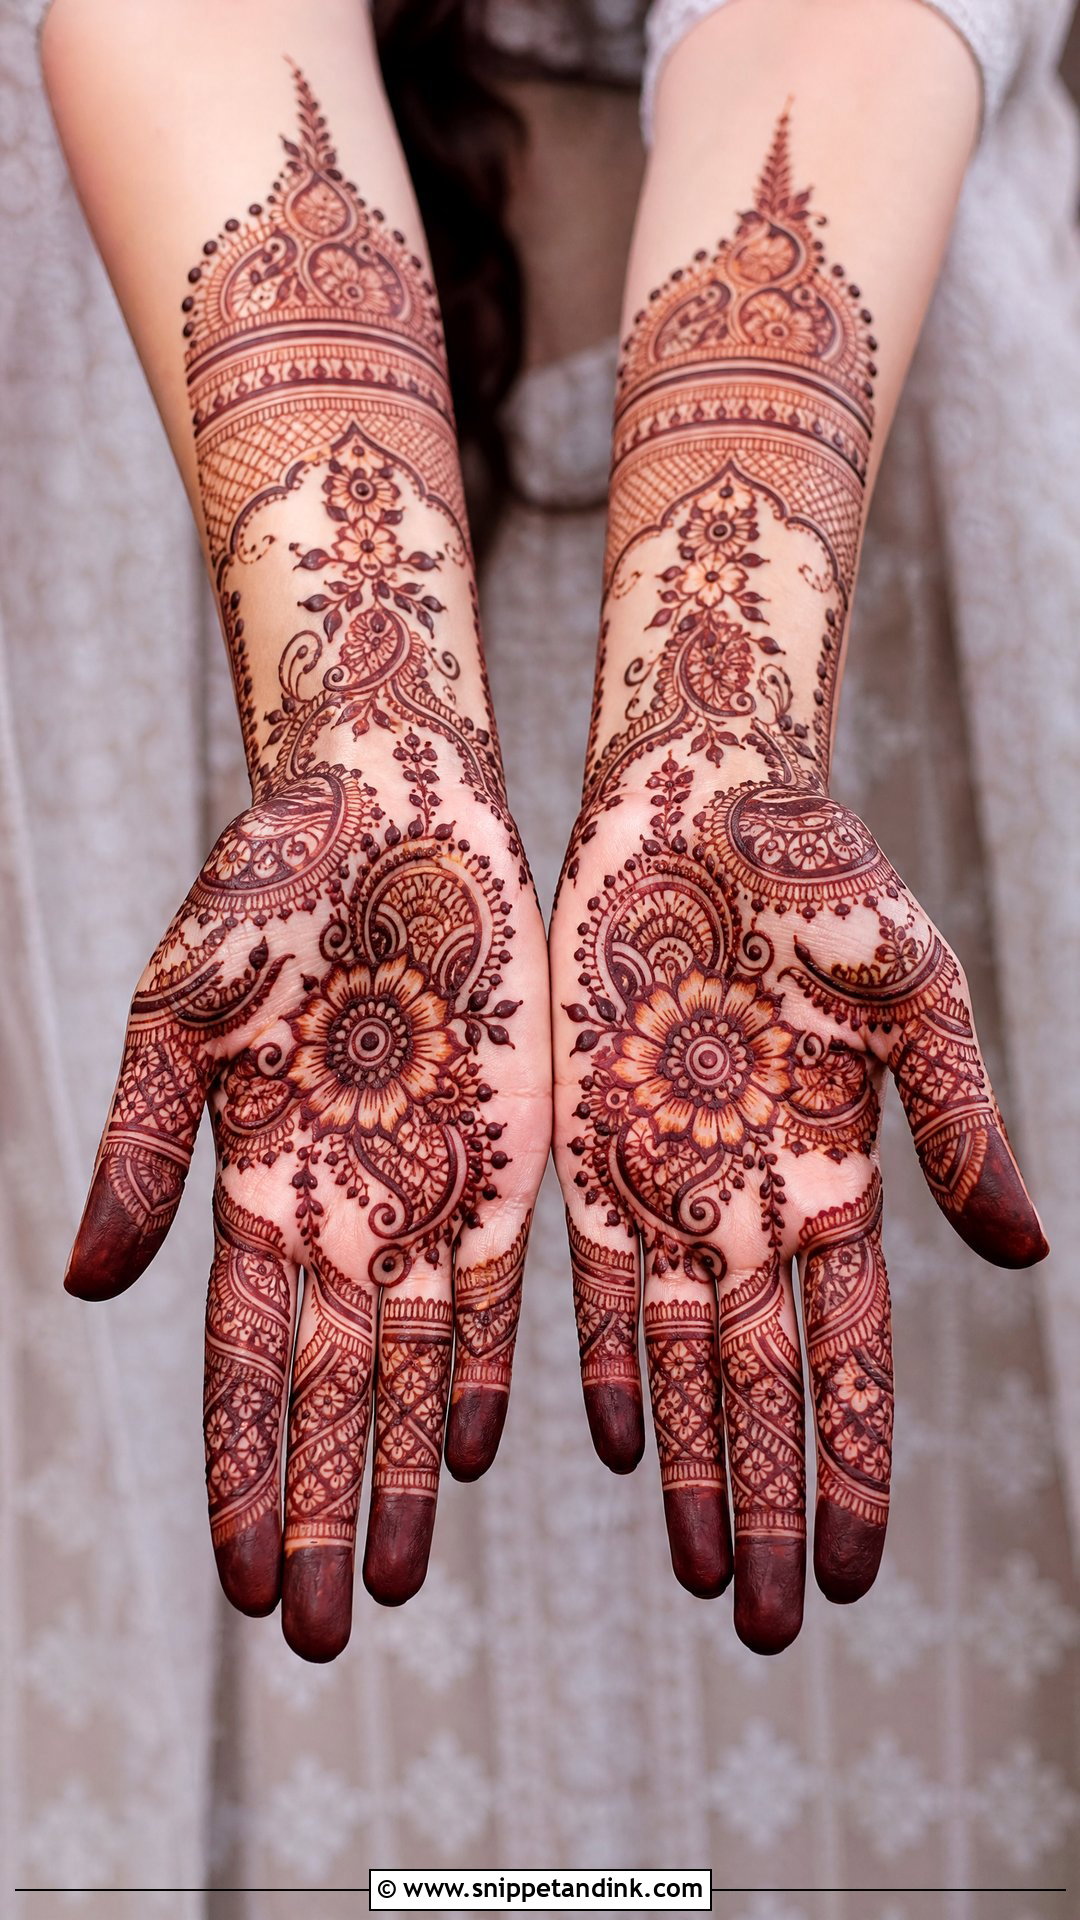
A front-hand design starts with the palm and flows naturally into the fingers and wrist, and it can be as simple as one mandala or as detailed as florals with paisleys and fine fillers. Since this is the side people see during greetings, it works for nearly any occasion. Hand size decides the scale for me: small hands get a central motif with slim finger details, broad palms can take wider flowers or layered circles.
19. Back And Palm Mehndi Design
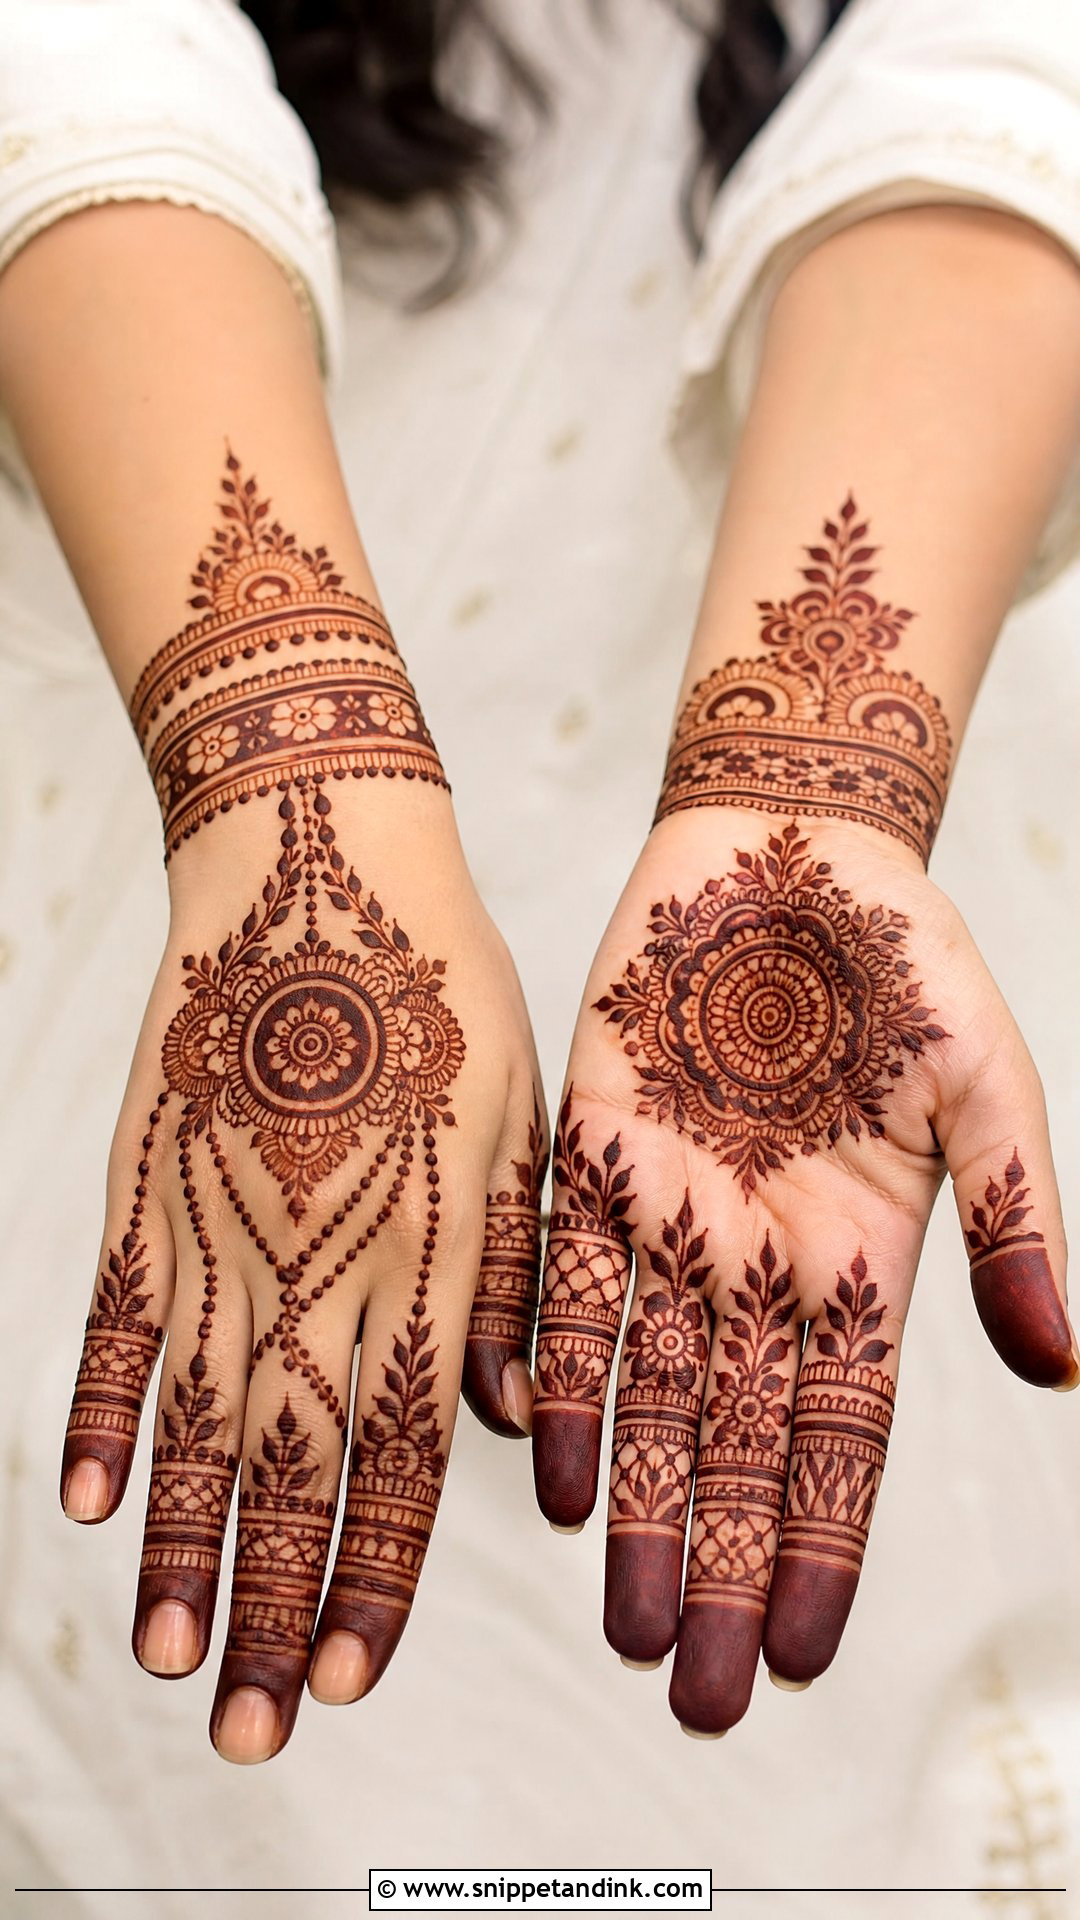
Doing both sides lets the hand look planned from any angle. I keep them related rather than identical: a traditional mandala, tikki or floral on the palm, lighter jewellery-style vines or bracelet chains on the back. A lotus on the palm and a small lotus bracelet on the back is one easy way to link them. Remember that the back of the hand stains lighter, so the back design needs slightly bolder lines to hold its own beside the palm.
20. Indo Arabic Palm Mehndi Design
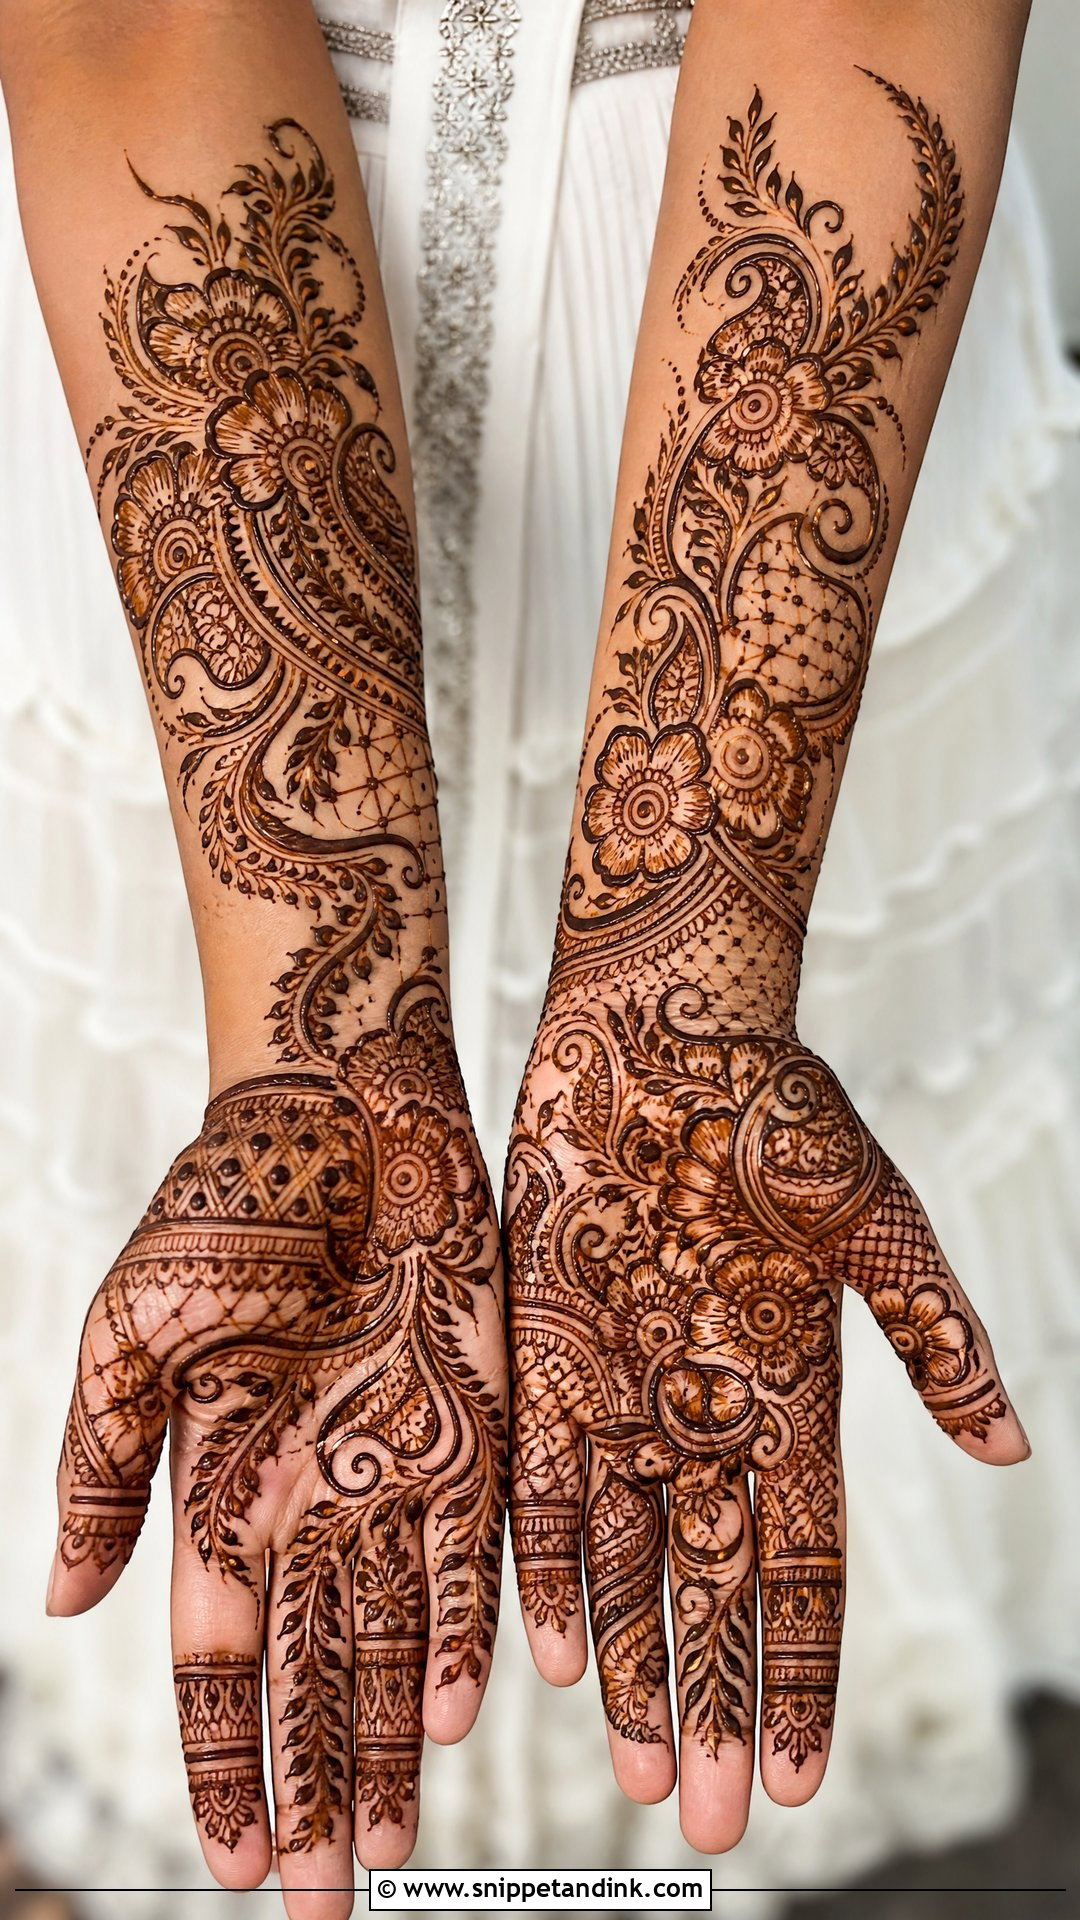
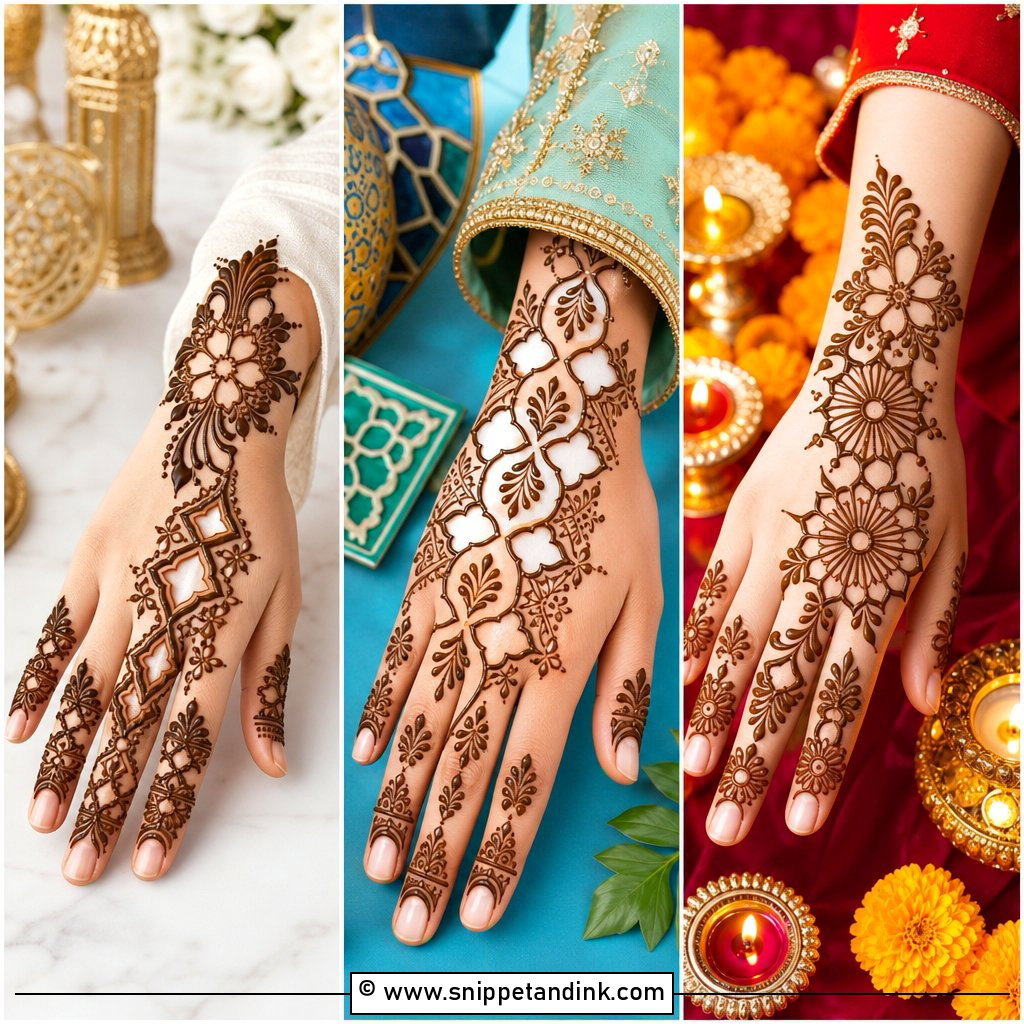
Indo-Arabic palm mehndi borrows the bold flow of Arabic work and fills selected parts of it with Indian detail: fine lines, dots and jaali inside large flowers, curved vines and paisleys, with open skin left between. It’s the middle ground I suggest when a client wants richness without full density. My rule is that the Arabic outlines stay bold and the Indian detail goes only inside chosen motifs, never across the whole palm.
21. Moroccan Palm Mehndi Design
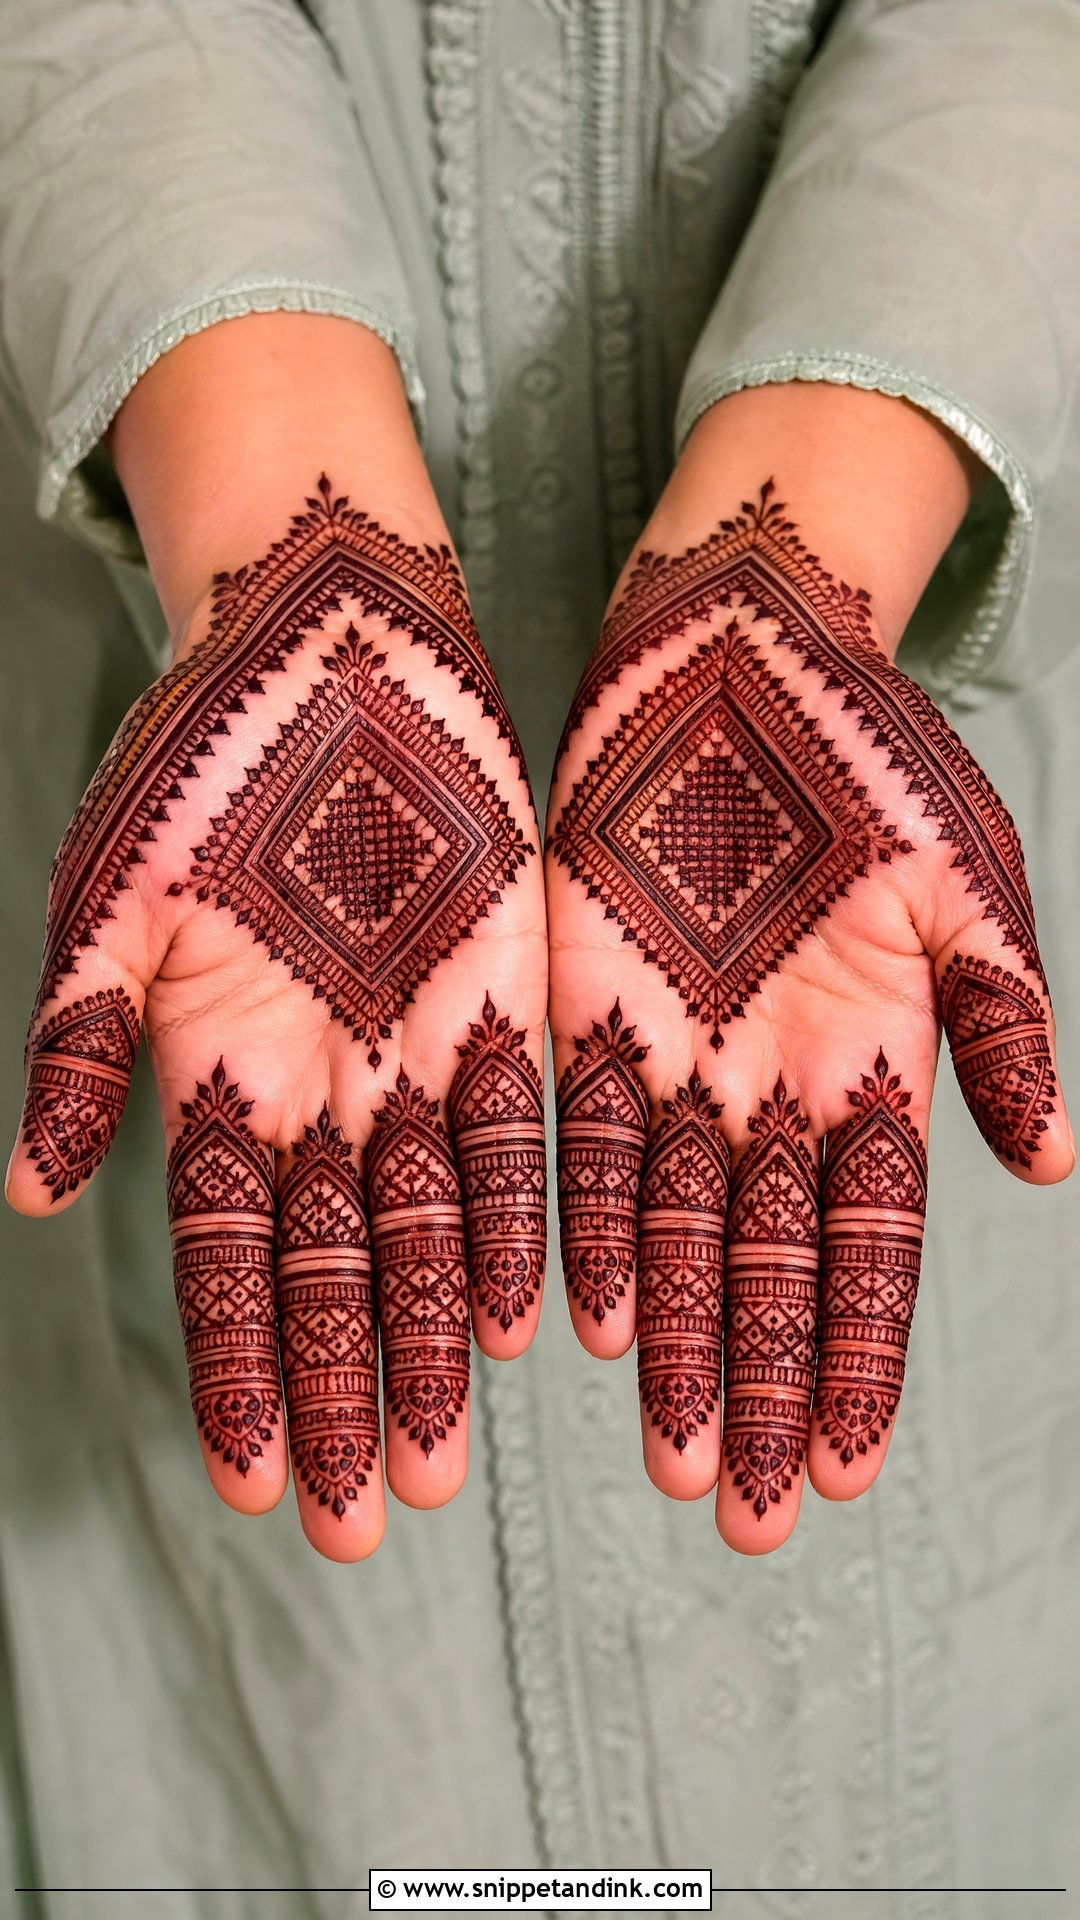
Moroccan-inspired palms trade soft florals for diamonds, triangles, grids, lines and structured bands, with matching geometric strips on the fingers. It’s sharp and graphic, and it pairs well with contemporary outfits. Straight lines are harder to draw on a palm than curves, because the hollow of the hand dips, so I ask clients to keep the palm flat and gently stretched while I pull each line. A few dots or small leaves can soften it, but symmetry is what carries it.
22. Gulf Palm Mehndi Design
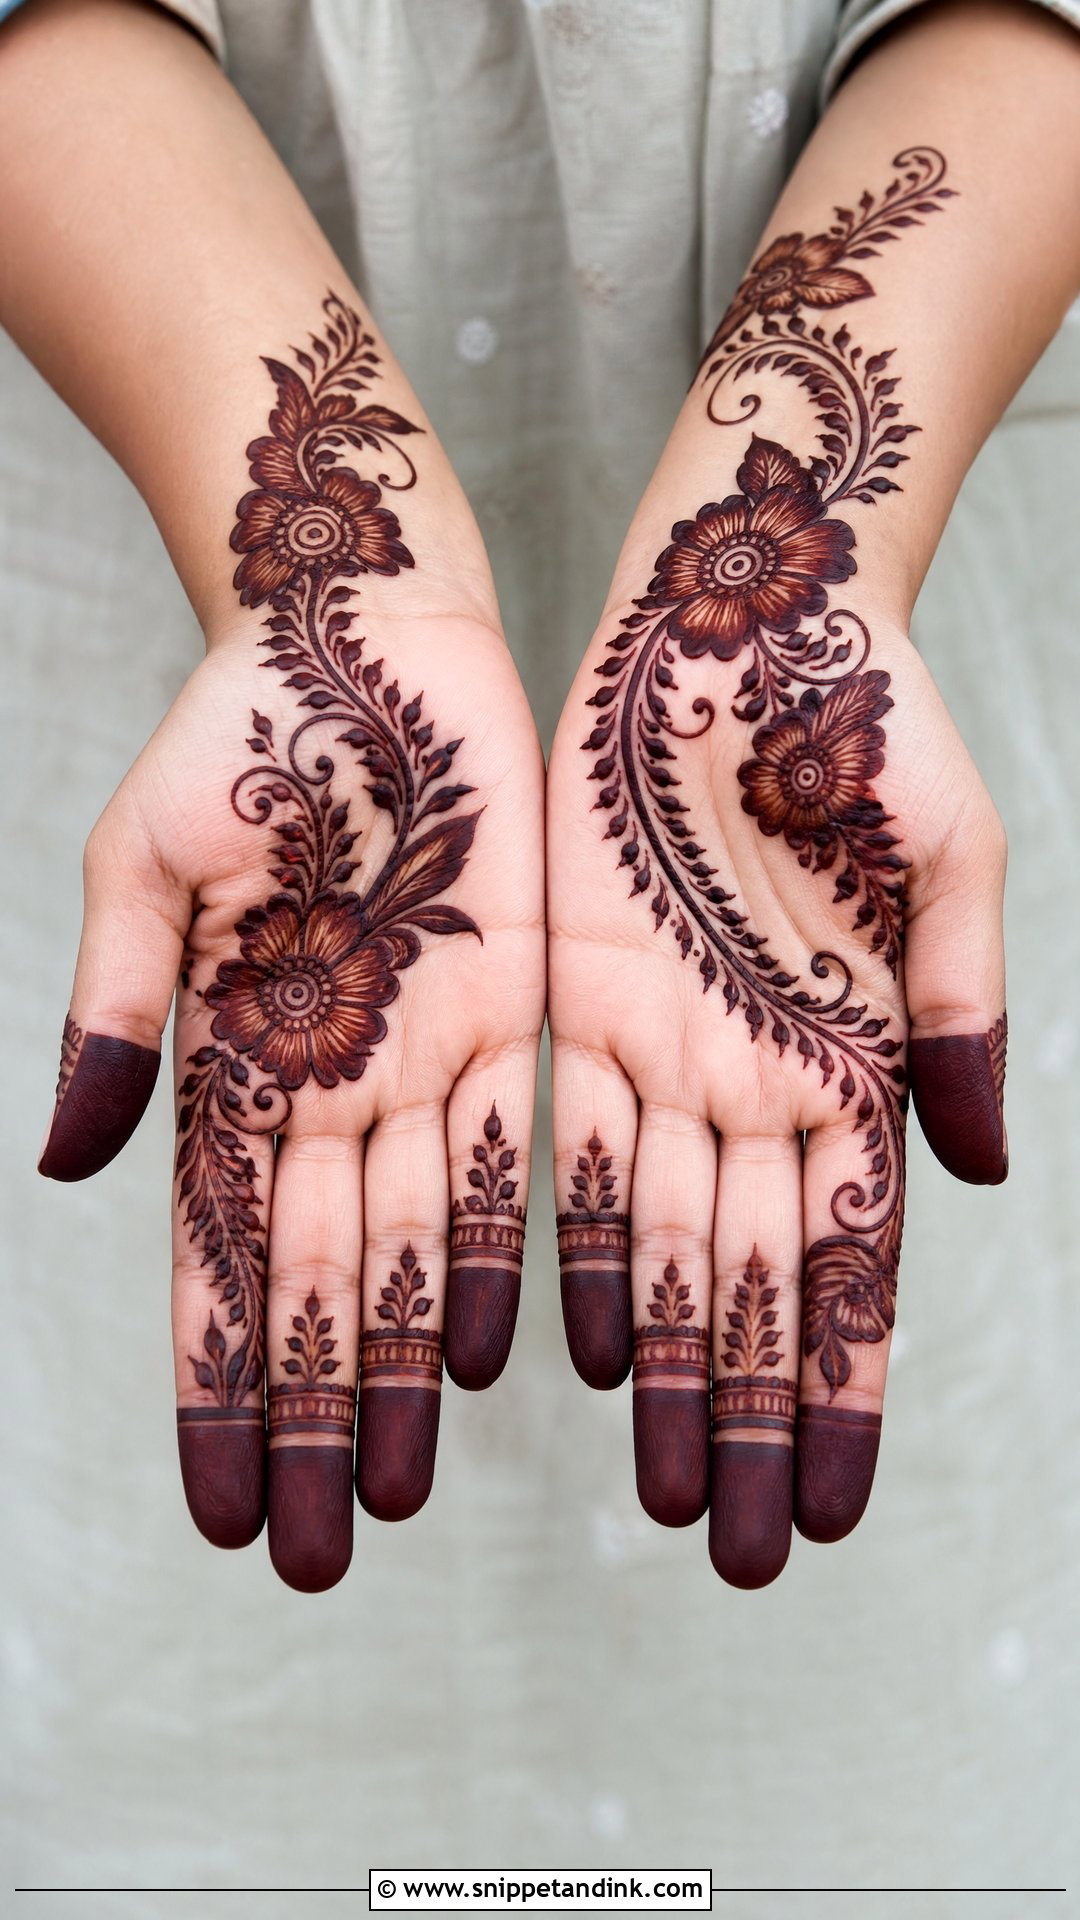
Gulf or Khaleeji-style work uses bold flowers, leafy trails and plenty of bare skin, running diagonally across the palm with large petals and curved stems. Fingers might have heavy tips, floral bands or simple leaves. It’s quick compared with dense Indian work, and the big shapes are easy to read from a distance at a henna night or Eid party. Keep the stems sweeping; a stiff, straight stem makes the whole palm look rigid.
23. Rajasthani Palm Mehndi Design
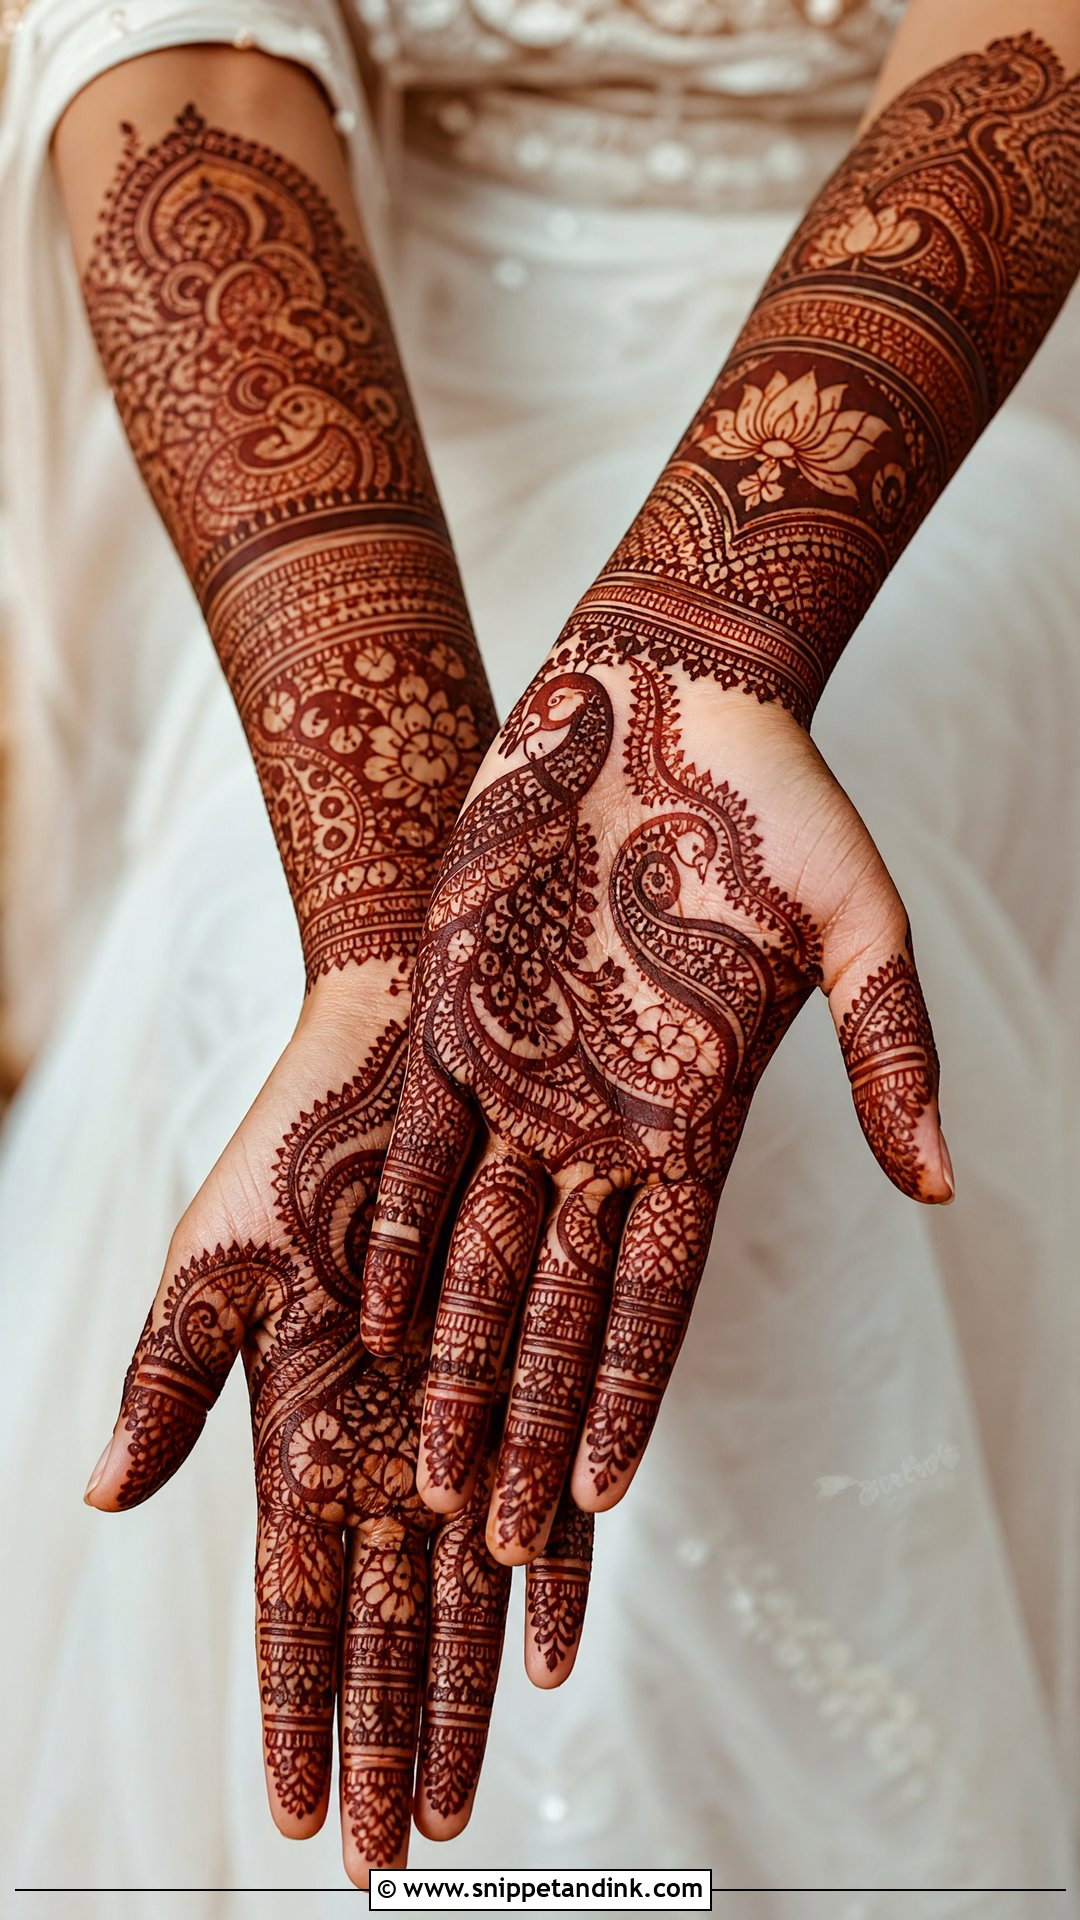
Rajasthani palms are some of the densest I draw: peacocks, paisleys, mandalas, bride-groom figures, lotus motifs and tiny ornamental fillers, with fine bands and patterned tips on the fingers. They belong at weddings and major functions. Clear sections are essential, otherwise all that detail stains into one dark patch, so I divide the palm with larger central motifs first. For a grander look, carry it past the wrist into a decorative cuff.
24. Pakistani Palm Mehndi Design
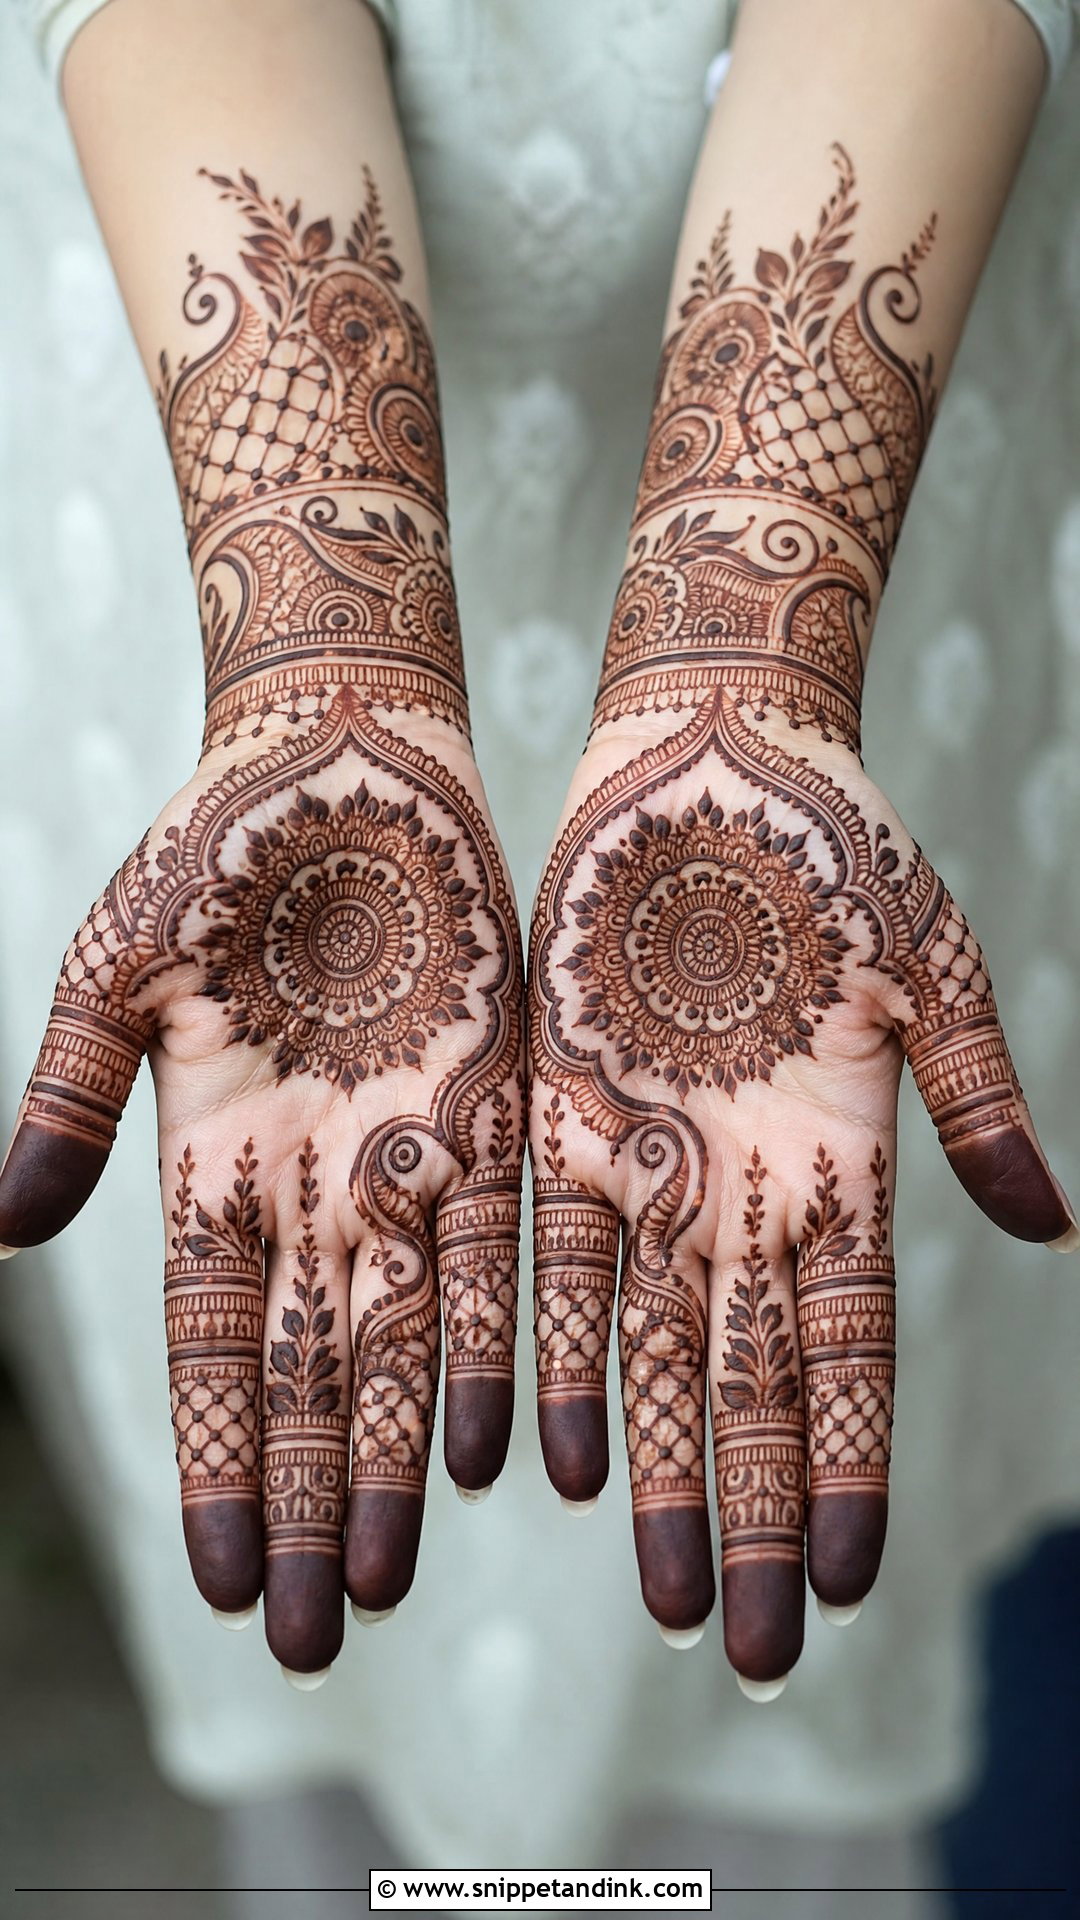
Pakistani palm work tends to blend Indian detail with Arabic spacing: mandalas, florals, paisleys, jaali and curved leafy trails, with fine bands, dots and shaded tips on the fingers. It can be kept simple or made bridal just by adjusting the filling. What I look for is one strong focal point with side details flowing off it, which keeps medium coverage from feeling crowded. Eid, nikah and family weddings are where you’ll see it most.
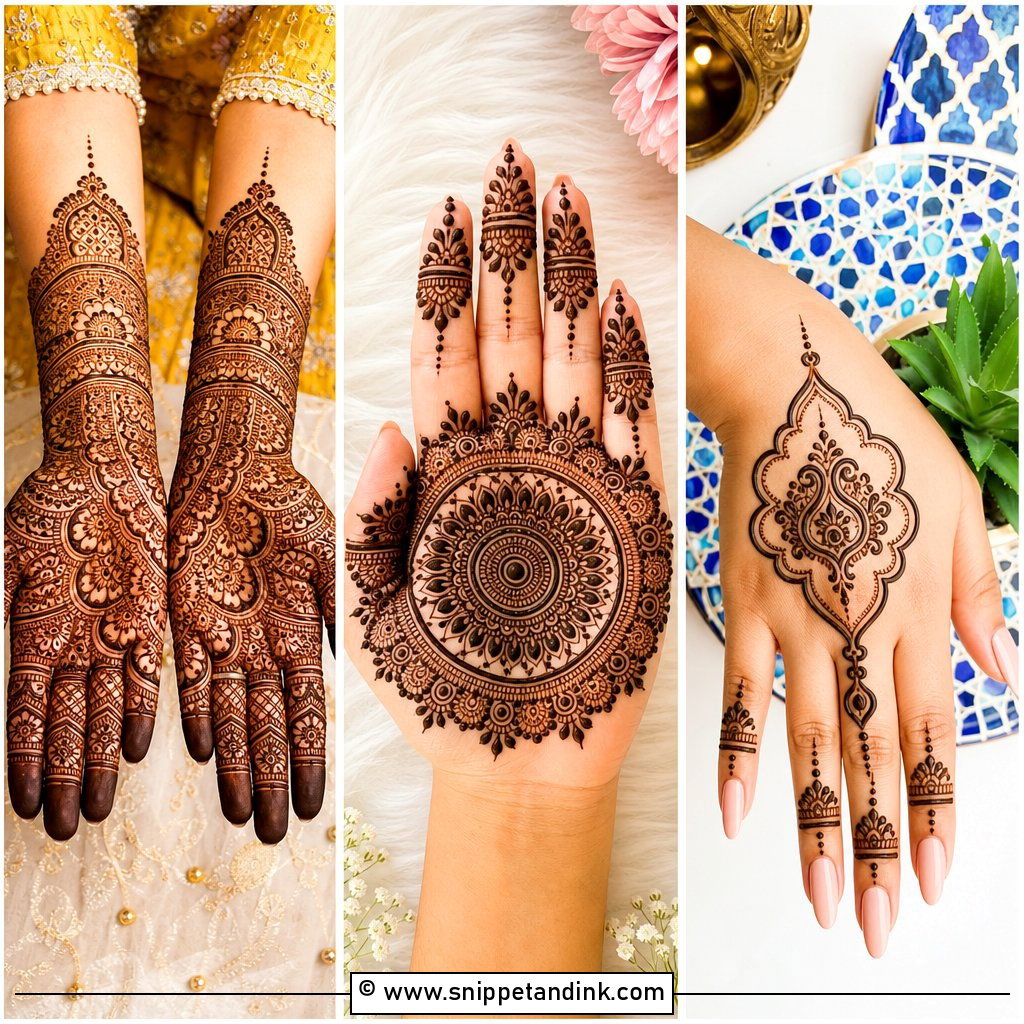
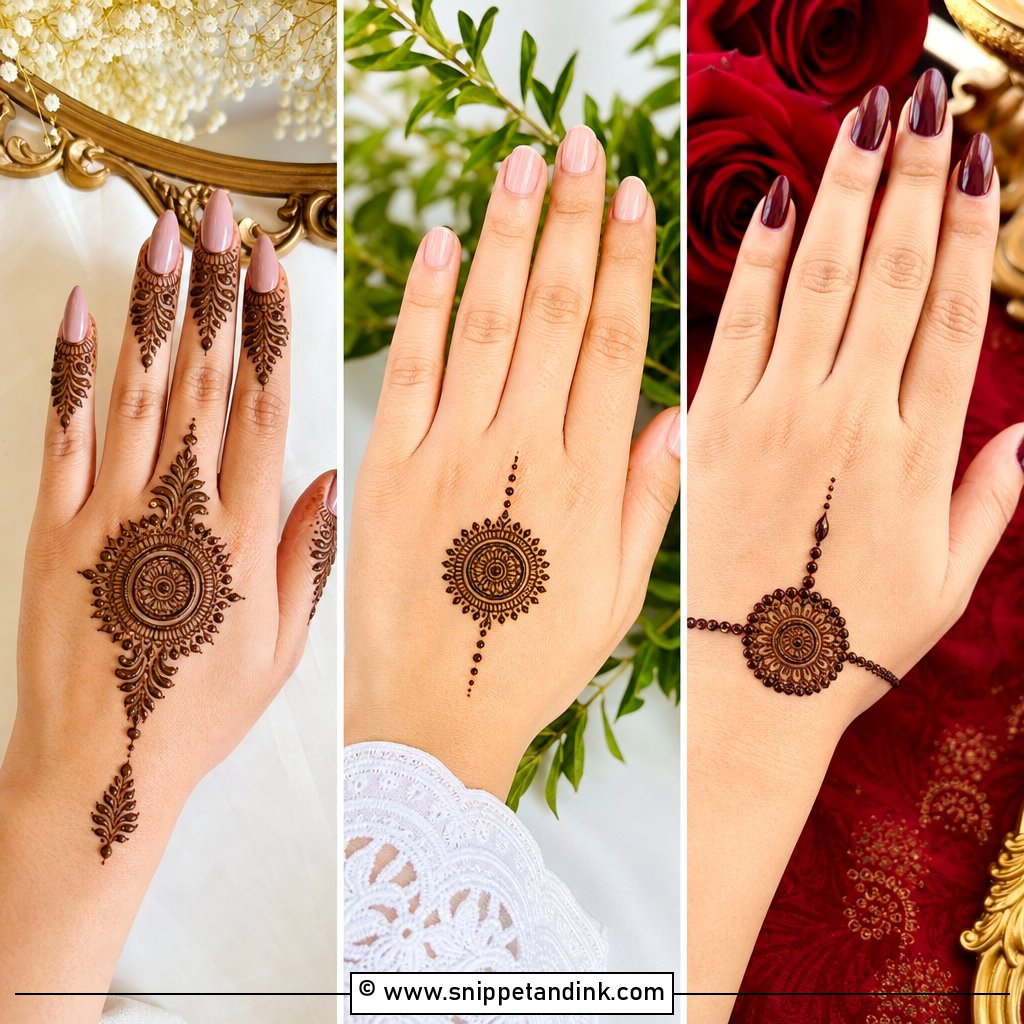
25. Eid Palm Mehndi Design
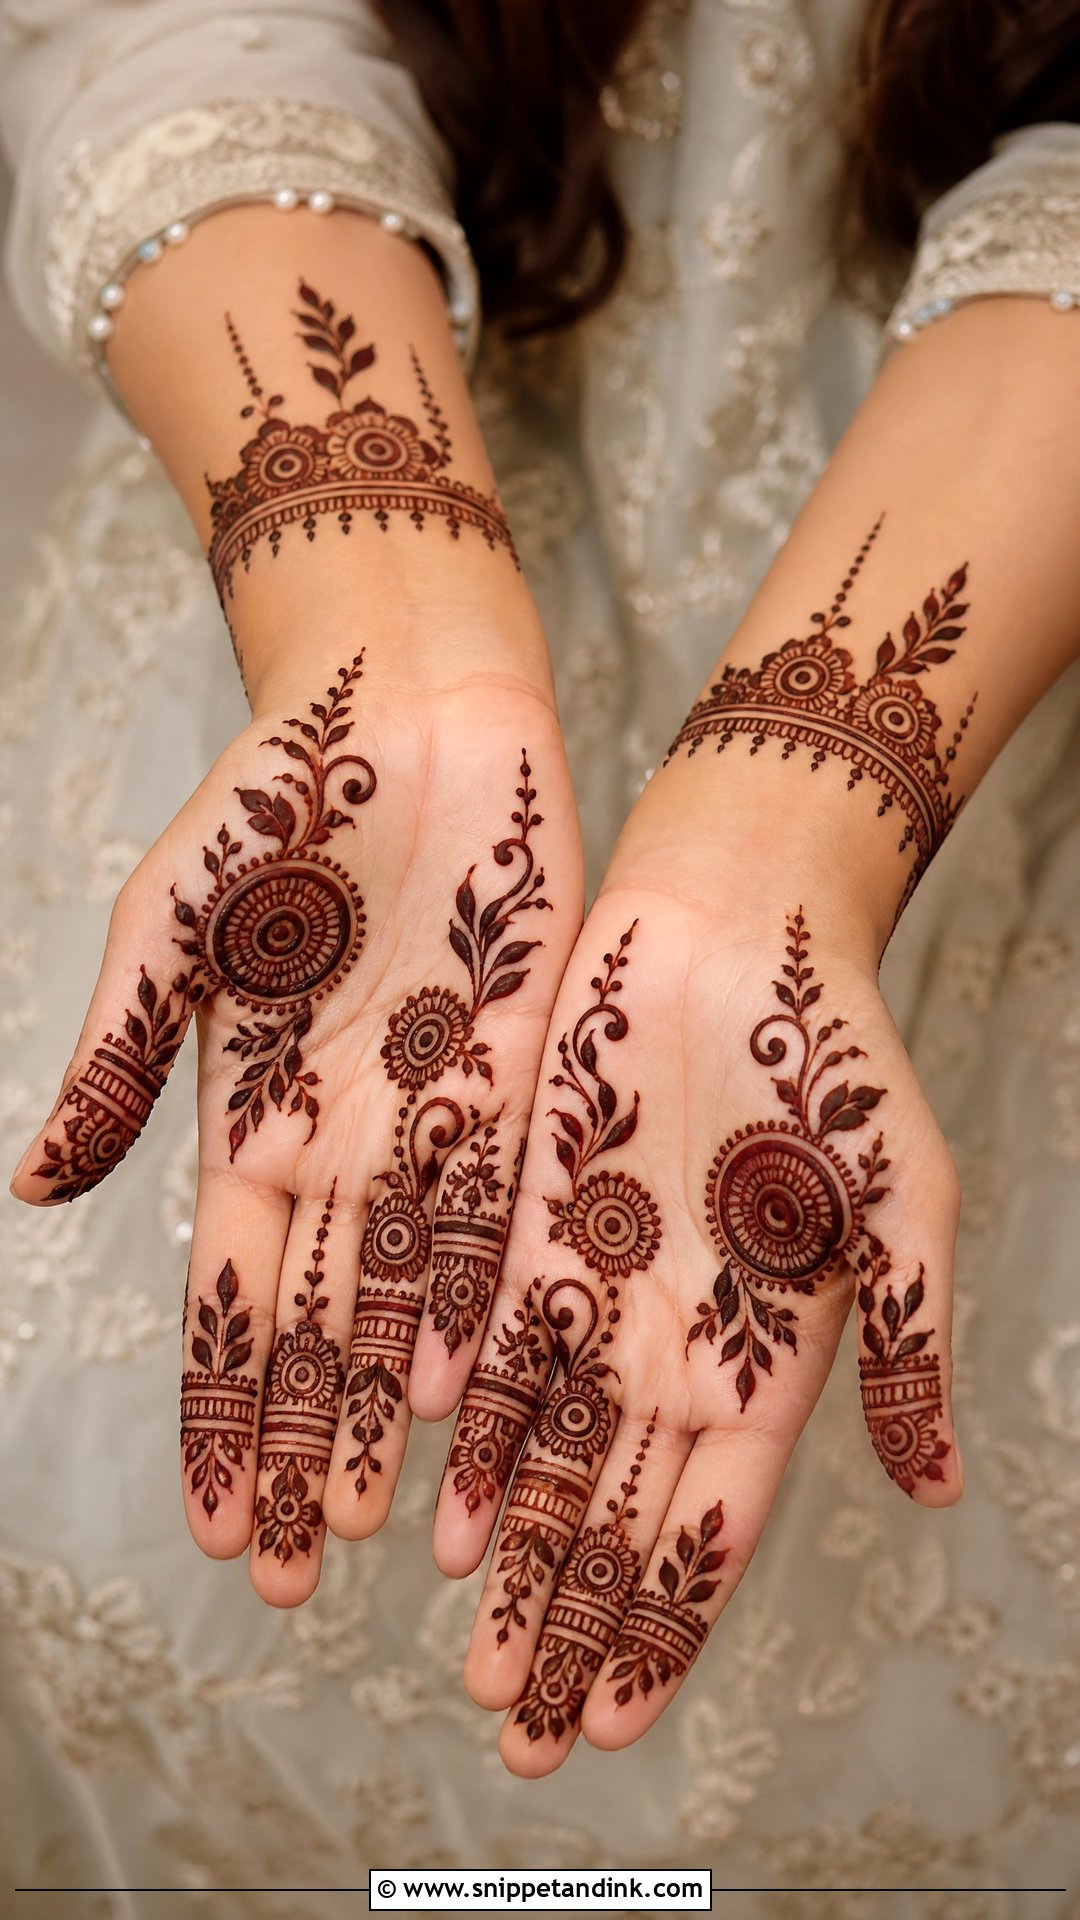
Eid henna is usually applied the night before, so it needs to be clean and quick: Arabic floral trails, tikki circles, mandalas, leafy vines and bracelet details, with the palm moderately filled and the fingers in bands and dots. Open space keeps the pattern clear once the stain darkens. Choose a lighter design for morning prayers or something fuller for the family gathering later, and finish it with a neat centre and a small wrist detail.
26. Karwa Chauth Palm Mehndi Design
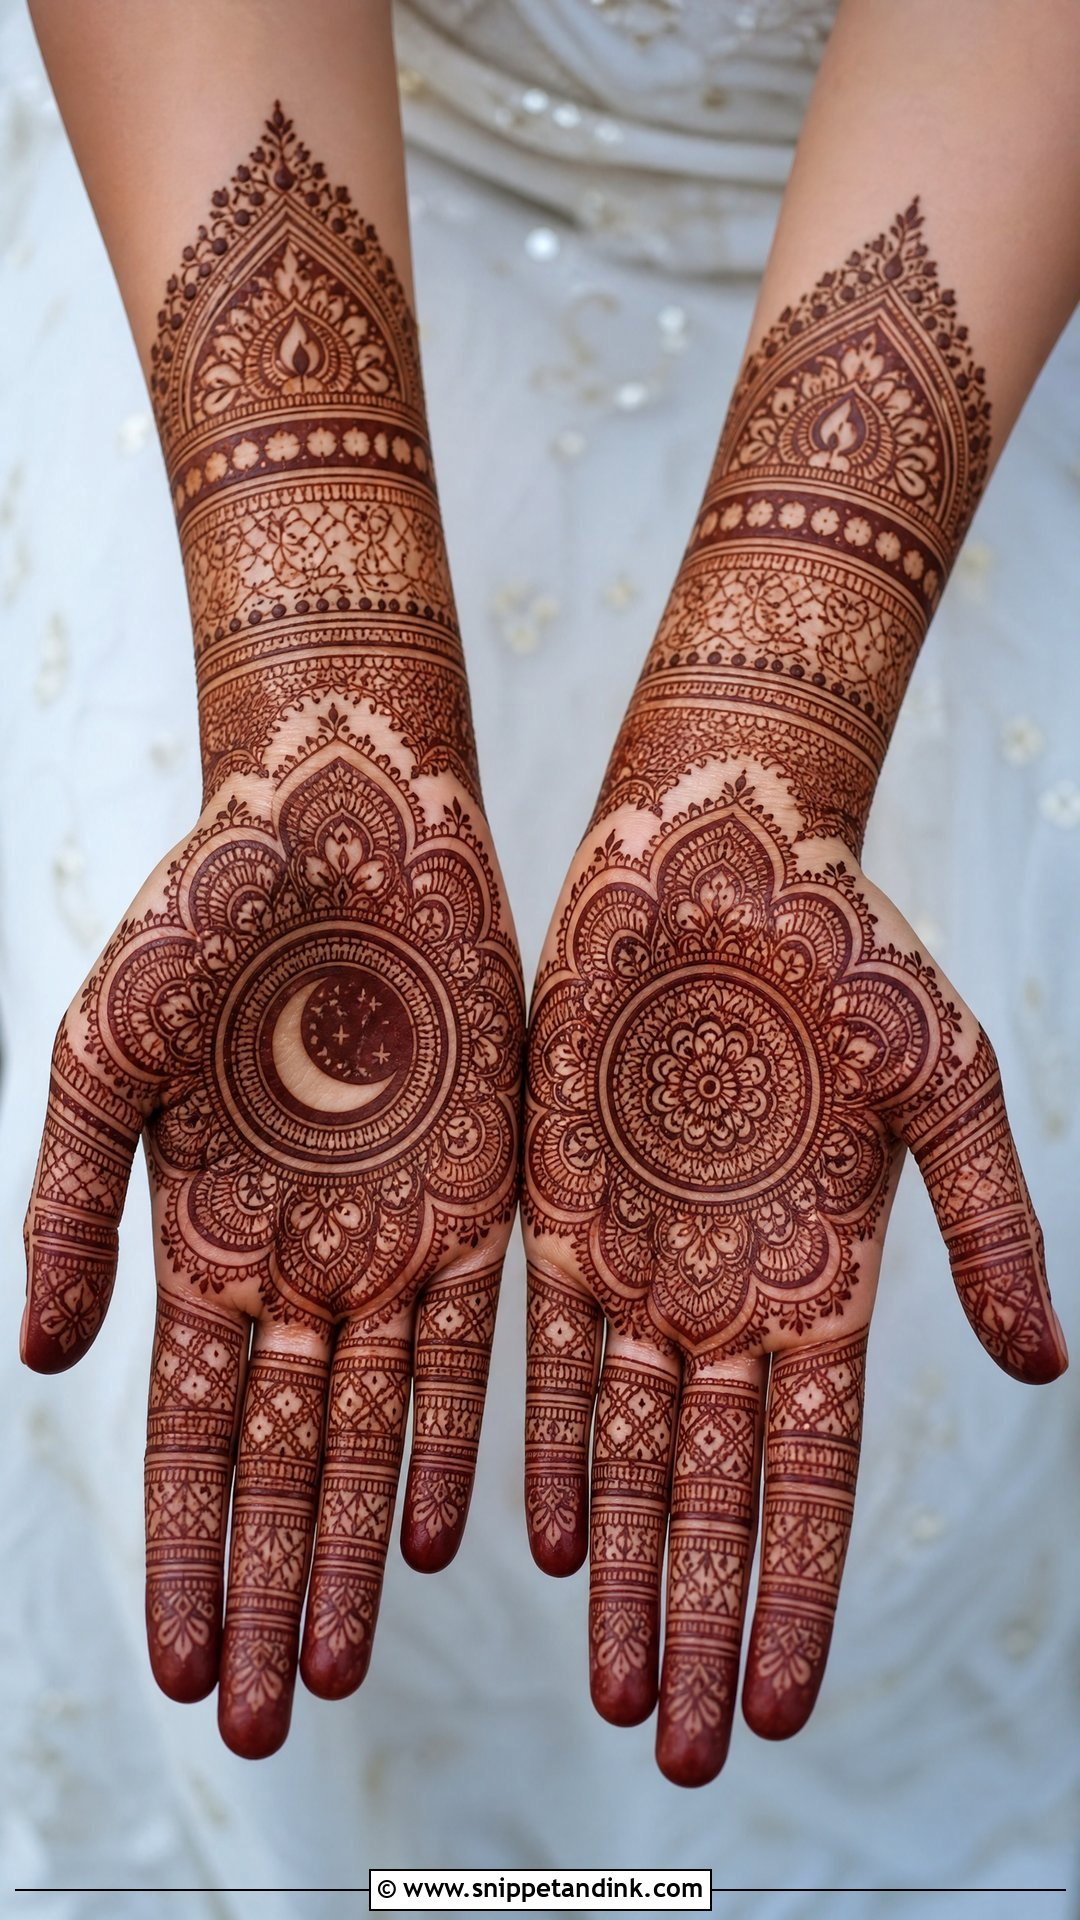
Karwa Chauth palm mehndi leans traditional and romantic: a centre mandala, a paisley frame, moon-inspired curves, lotus details or bridal-style fillers, with fully decorated fingers and a bracelet border. Most women I see want medium to heavy coverage for it, since dressing up is part of the day. Because the fast ends with evening rituals and moonrise photos, I keep the palm motif bold enough to read in low light, and I’d apply it a day ahead so the colour has deepened by evening.
27. Diwali Palm Mehndi Design
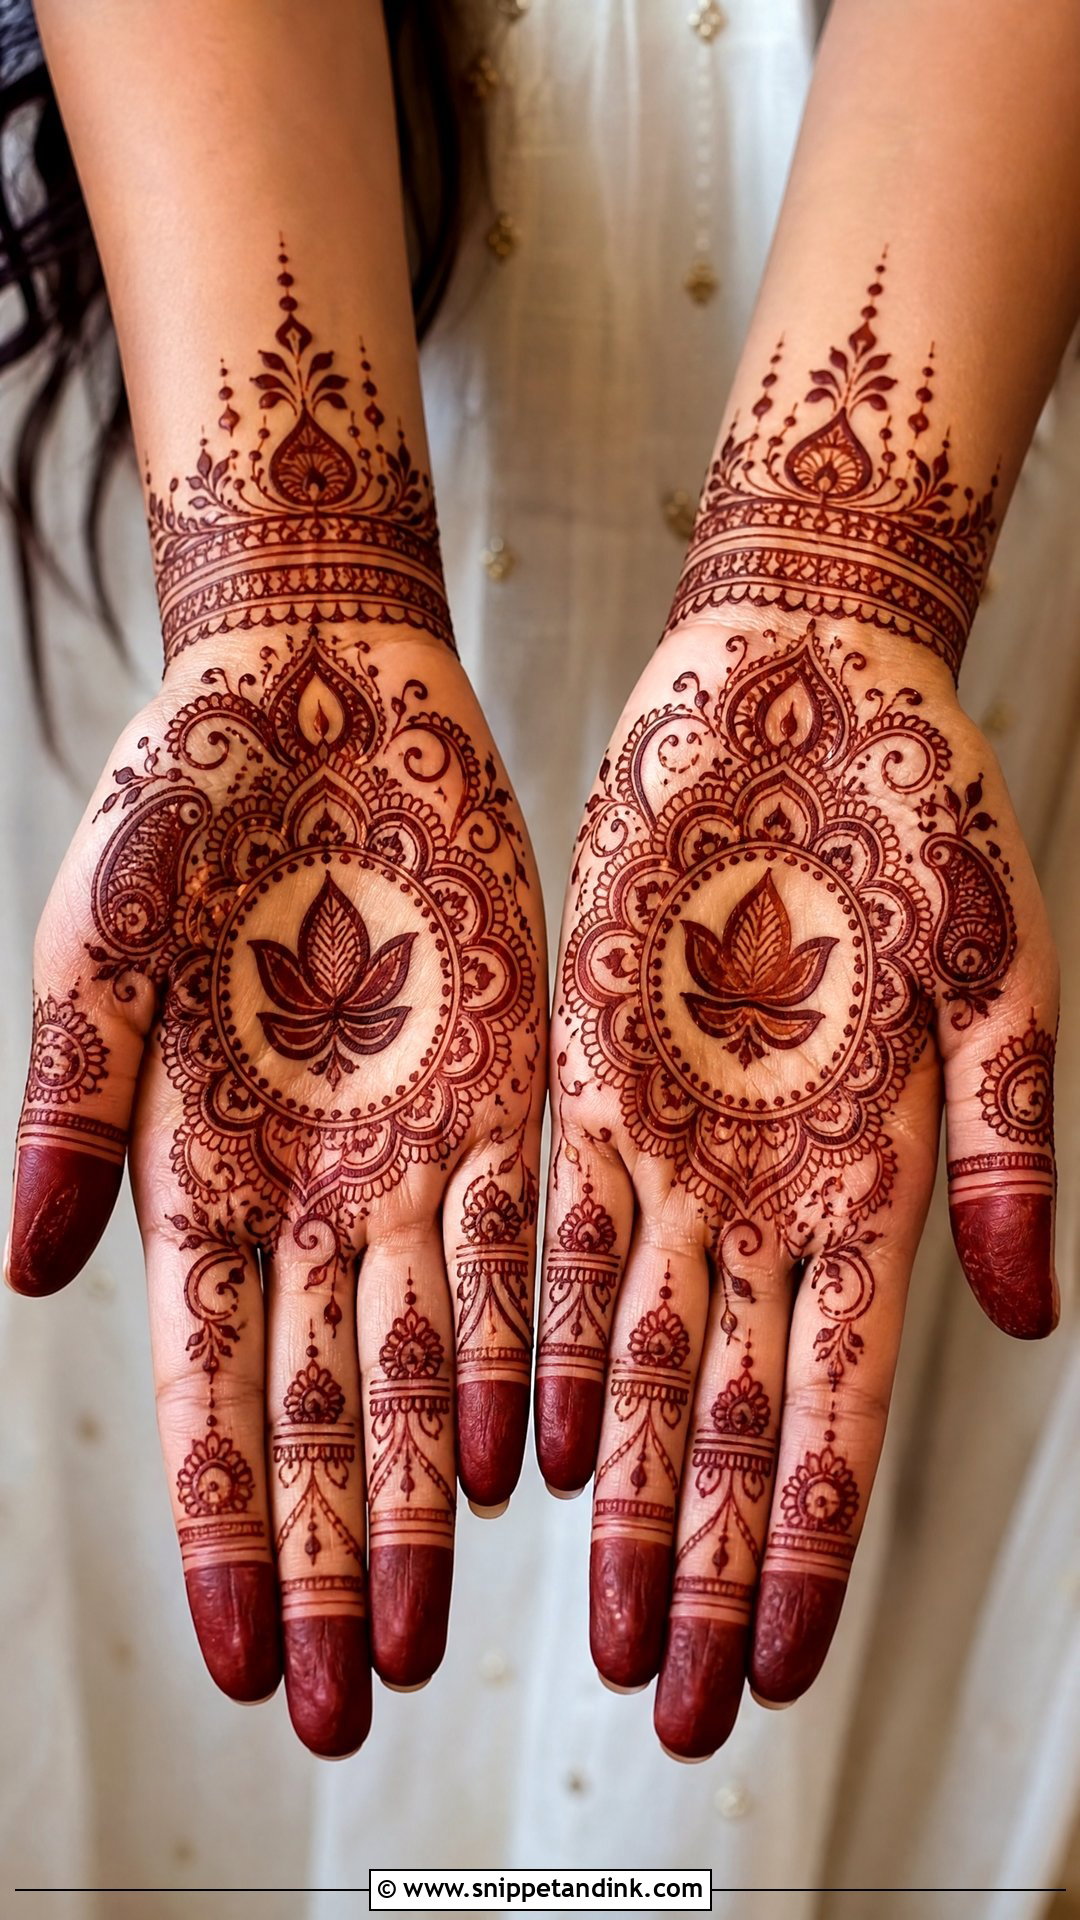
Diwali henna has to survive a busy day of cooking, lamps and greeting guests, so I keep it to medium coverage. A central flower, mandala, lotus or diya shape anchors the palm, with dots, scallops, vines and small paisleys around it, and slim bands or full tips on the fingers. Bold outlines and clear spacing keep the design visible once the stain has developed. Avoid very fine fillers if you’ll be handling oil and flour, since they fade first.
28. Engagement Palm Mehndi Design
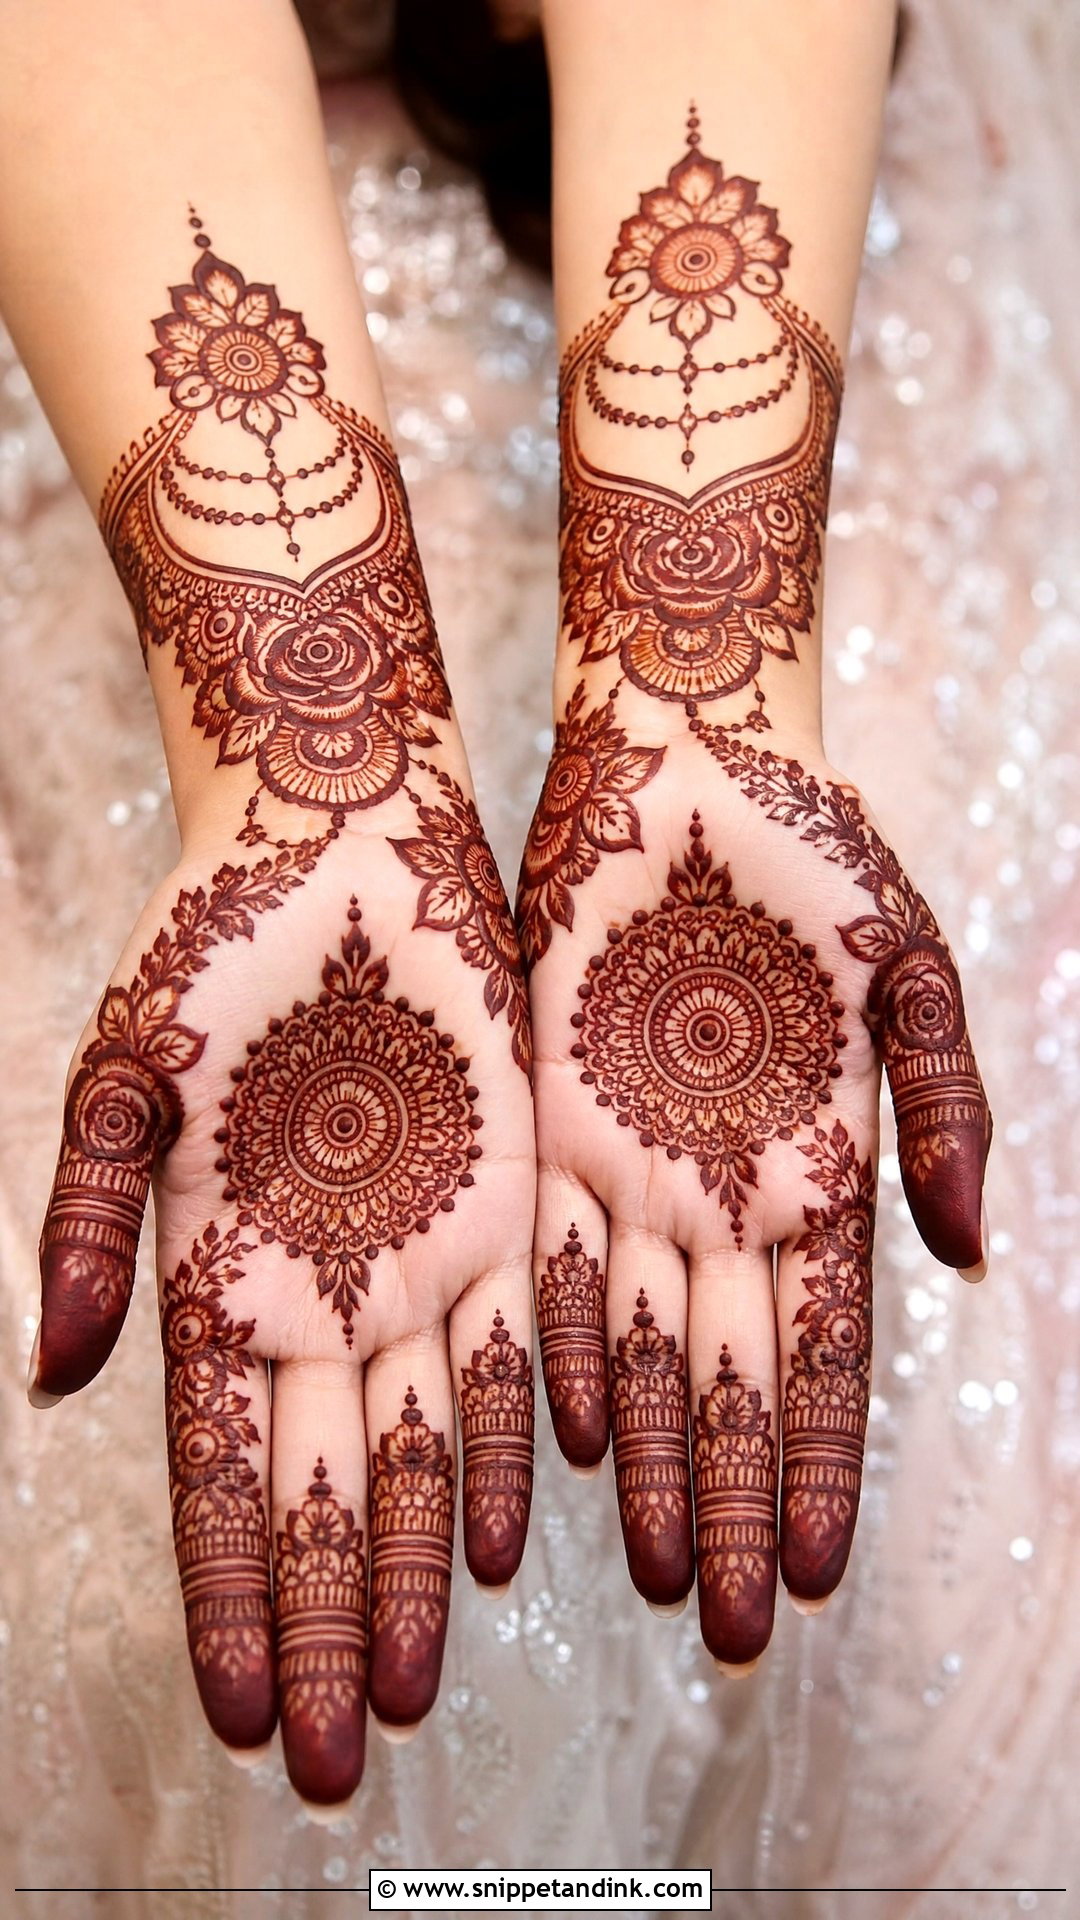
Engagement henna should look polished up close and clean from across the room. A soft mandala, rose-style flowers, fine paisleys or a jewellery layout linking palm to wrist all work, with delicate bands, dots and leafy tips instead of heavy finger coverage. It’s lighter than full bridal on purpose. If you’d like initials, I hide them inside a palm motif where the ring hand won’t cover them. Keep the details refined and the overall shape balanced.
29. Wedding Guest Palm Mehndi Design
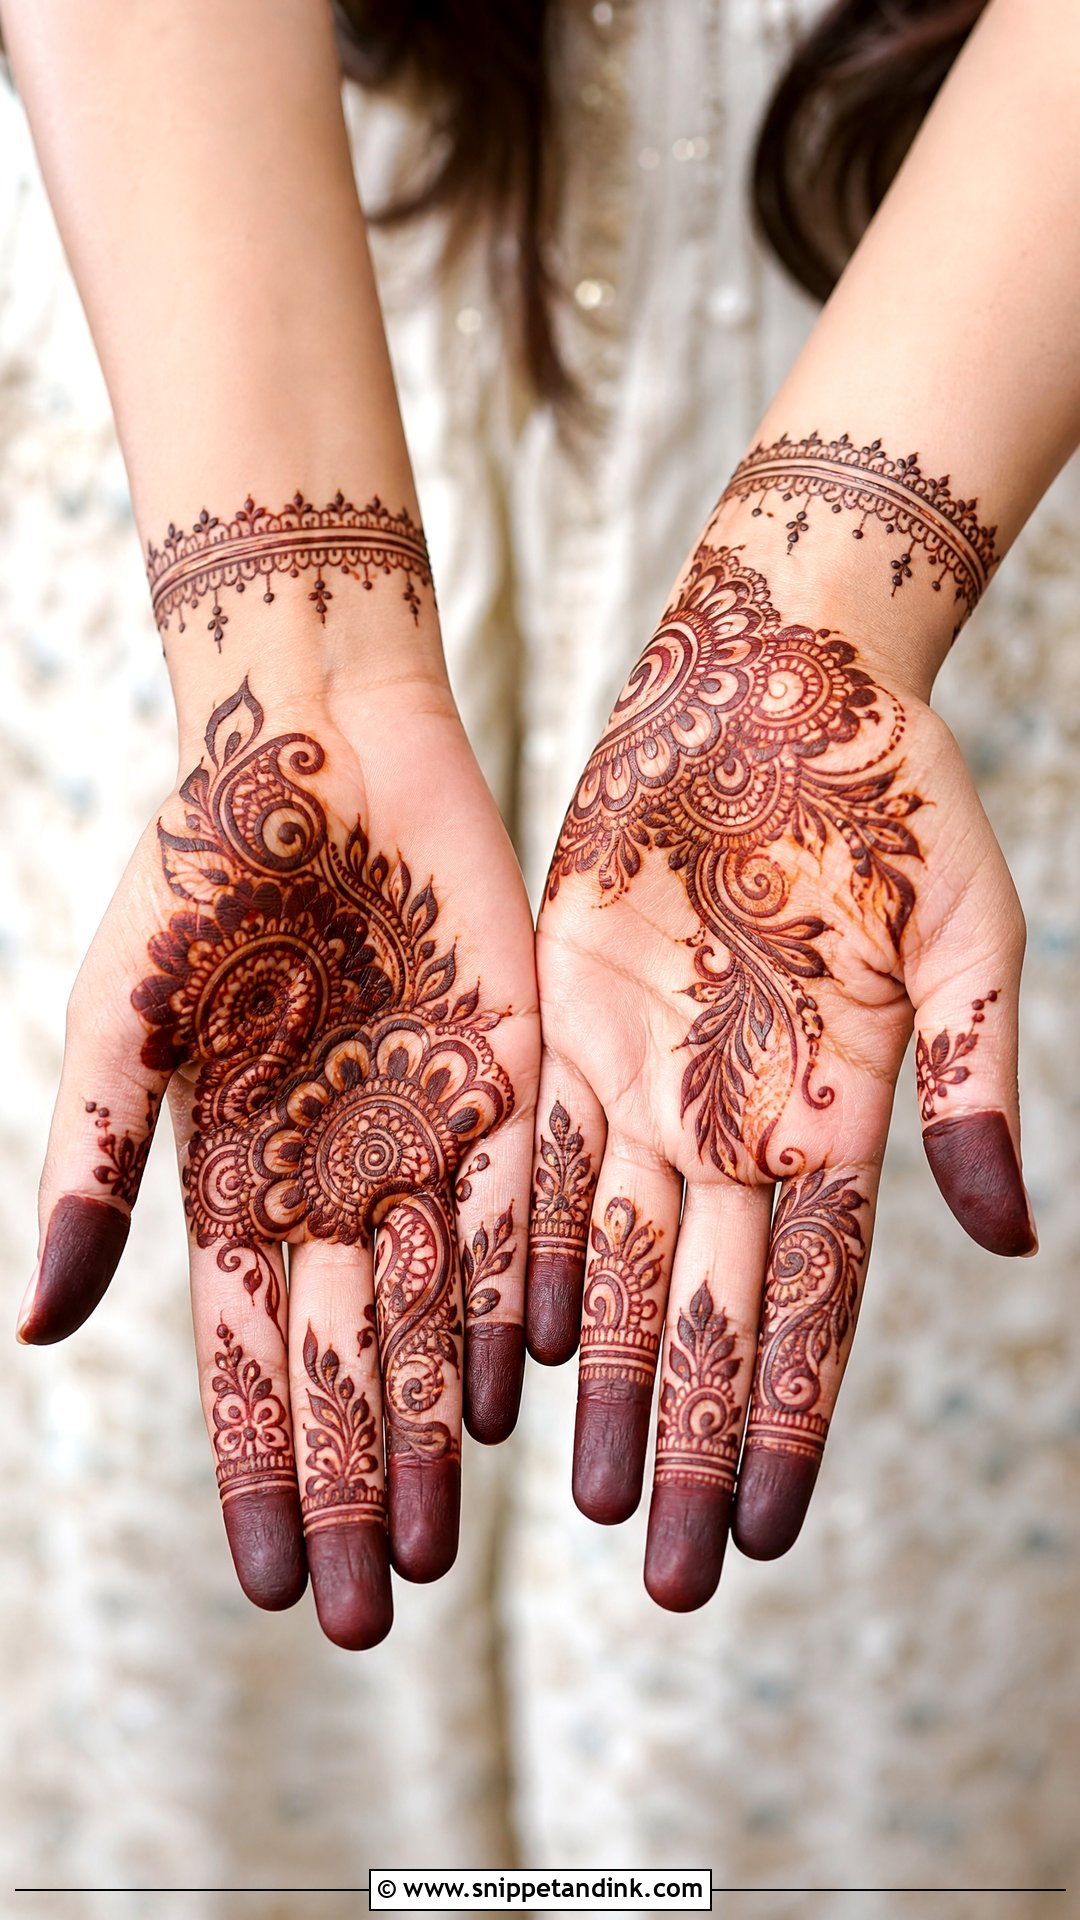
As a guest, you want hands that look dressed for the sangeet or mehndi night without competing with the bride. A floral trail, medium mandala, paisley cluster or Indo-Arabic layout works, with matching finger bands, simple leafy tips and a small bracelet border. I’d stop short of filling the palm completely. Medium coverage dries faster, suits more outfits, and leaves the heaviest work to the bride, which most families appreciate.
30. Beginner Palm Mehndi Design
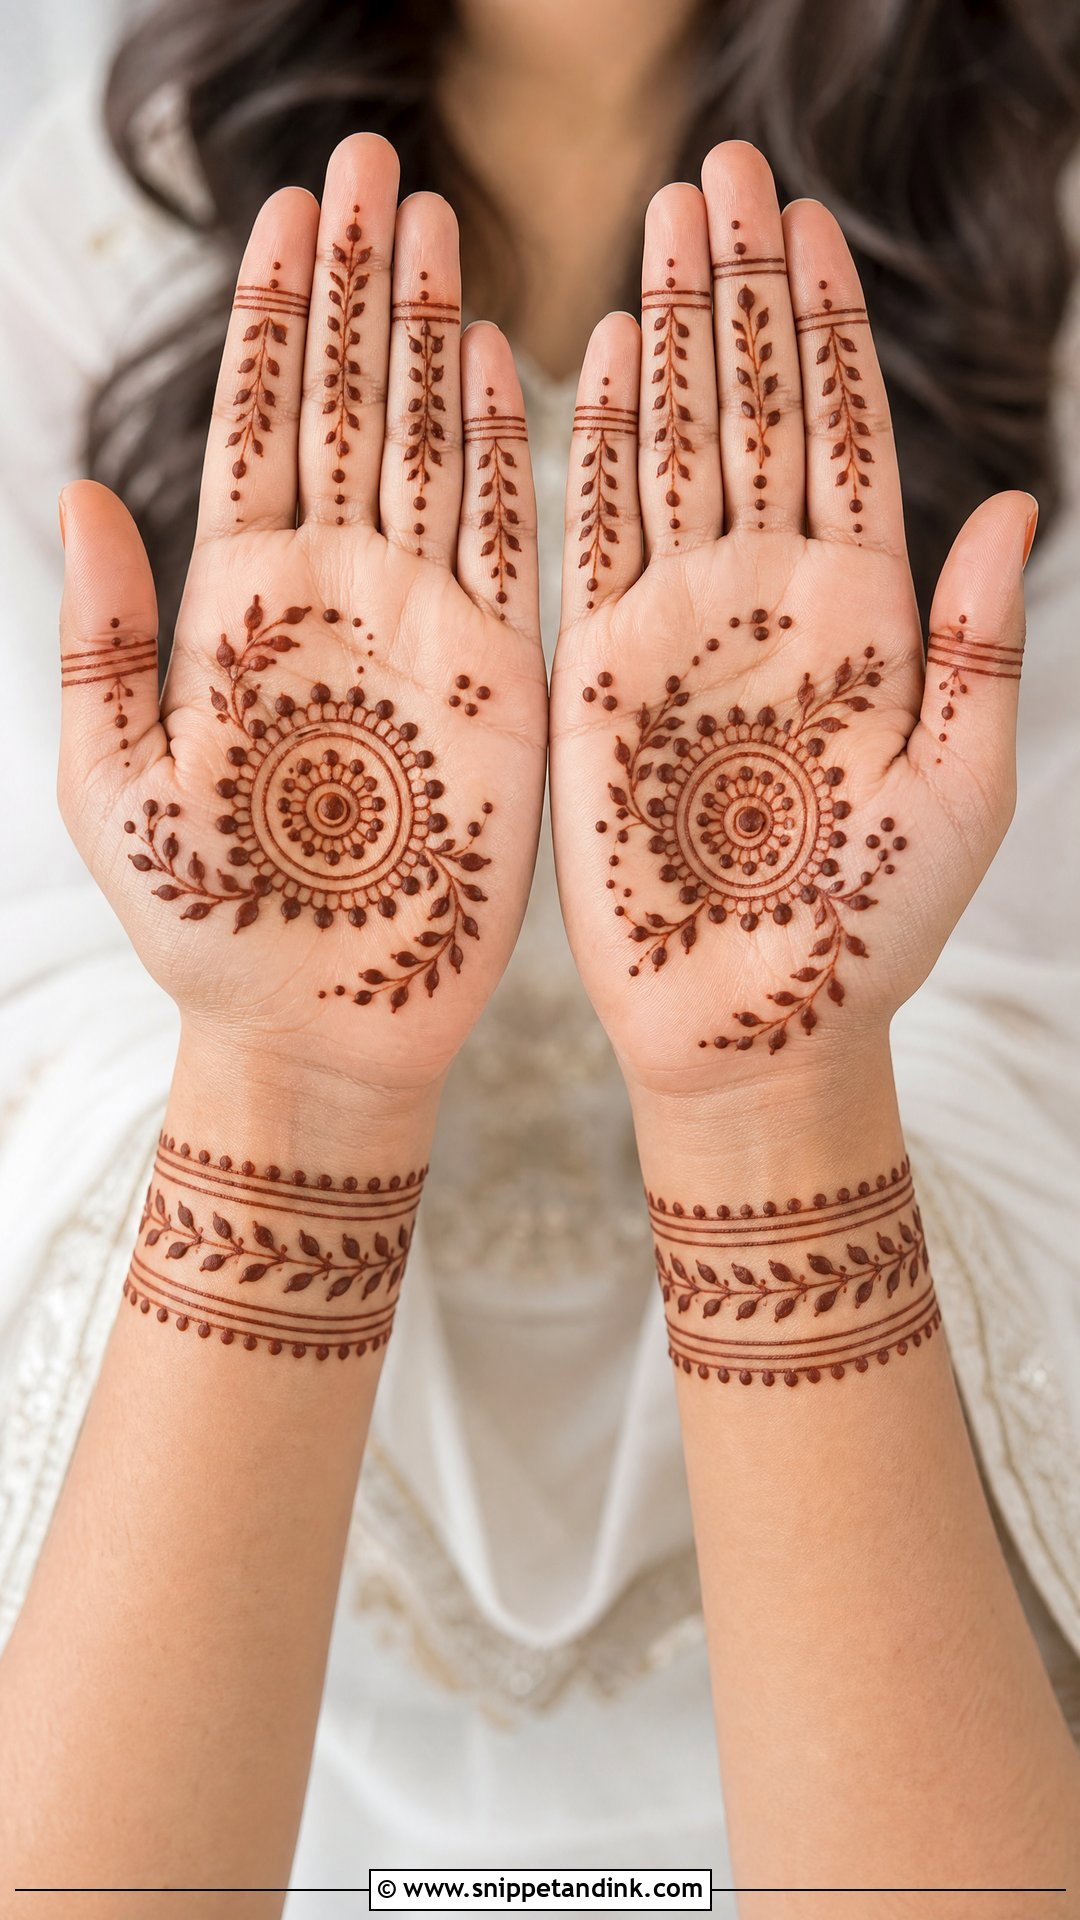
If you’re teaching yourself, this is the layout I’d start with. Draw a centre circle, flower or tikki. Ring it with dots, then add small leaves or curved lines toward the fingers. Give each finger an easy band, a few dots and a tiny petal, and finish with a single wrist line. It trains spacing, symmetry and line control, which are the skills everything else builds on. Skip tiny fillers until your lines are steady; clean shapes look far better than crowded ones.
31. Kids Palm Mehndi Design
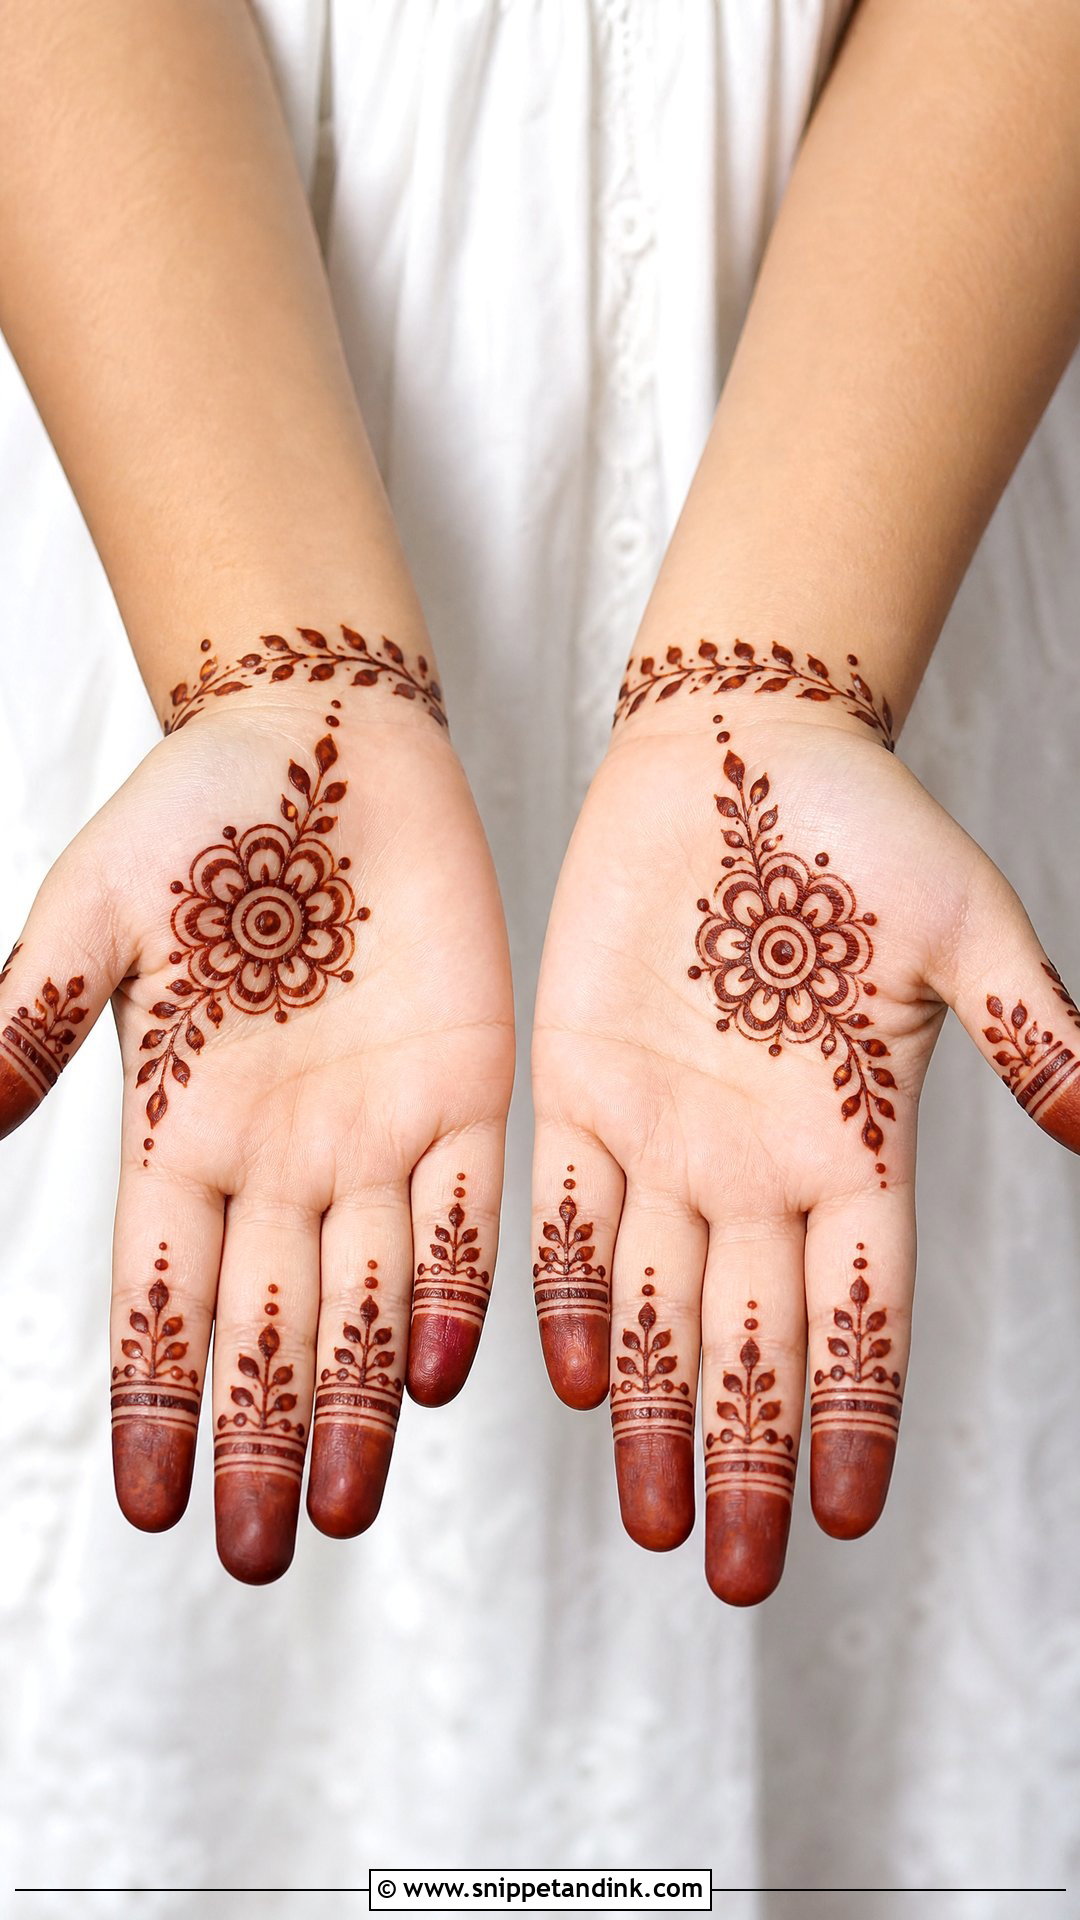
For children, keep it quick and comfortable. A small flower, a little decorative circle, a butterfly shape or a simple mandala in the centre of the palm, with tiny dots, leaves and soft bands on the fingers and the wrist left bare so they can move while it dries. Rounded shapes are kinder than fine detail on small hands that won’t stay still. Use only natural henna for children, and never a cone that promises instant black colour.
32. Small Palm Mehndi Design
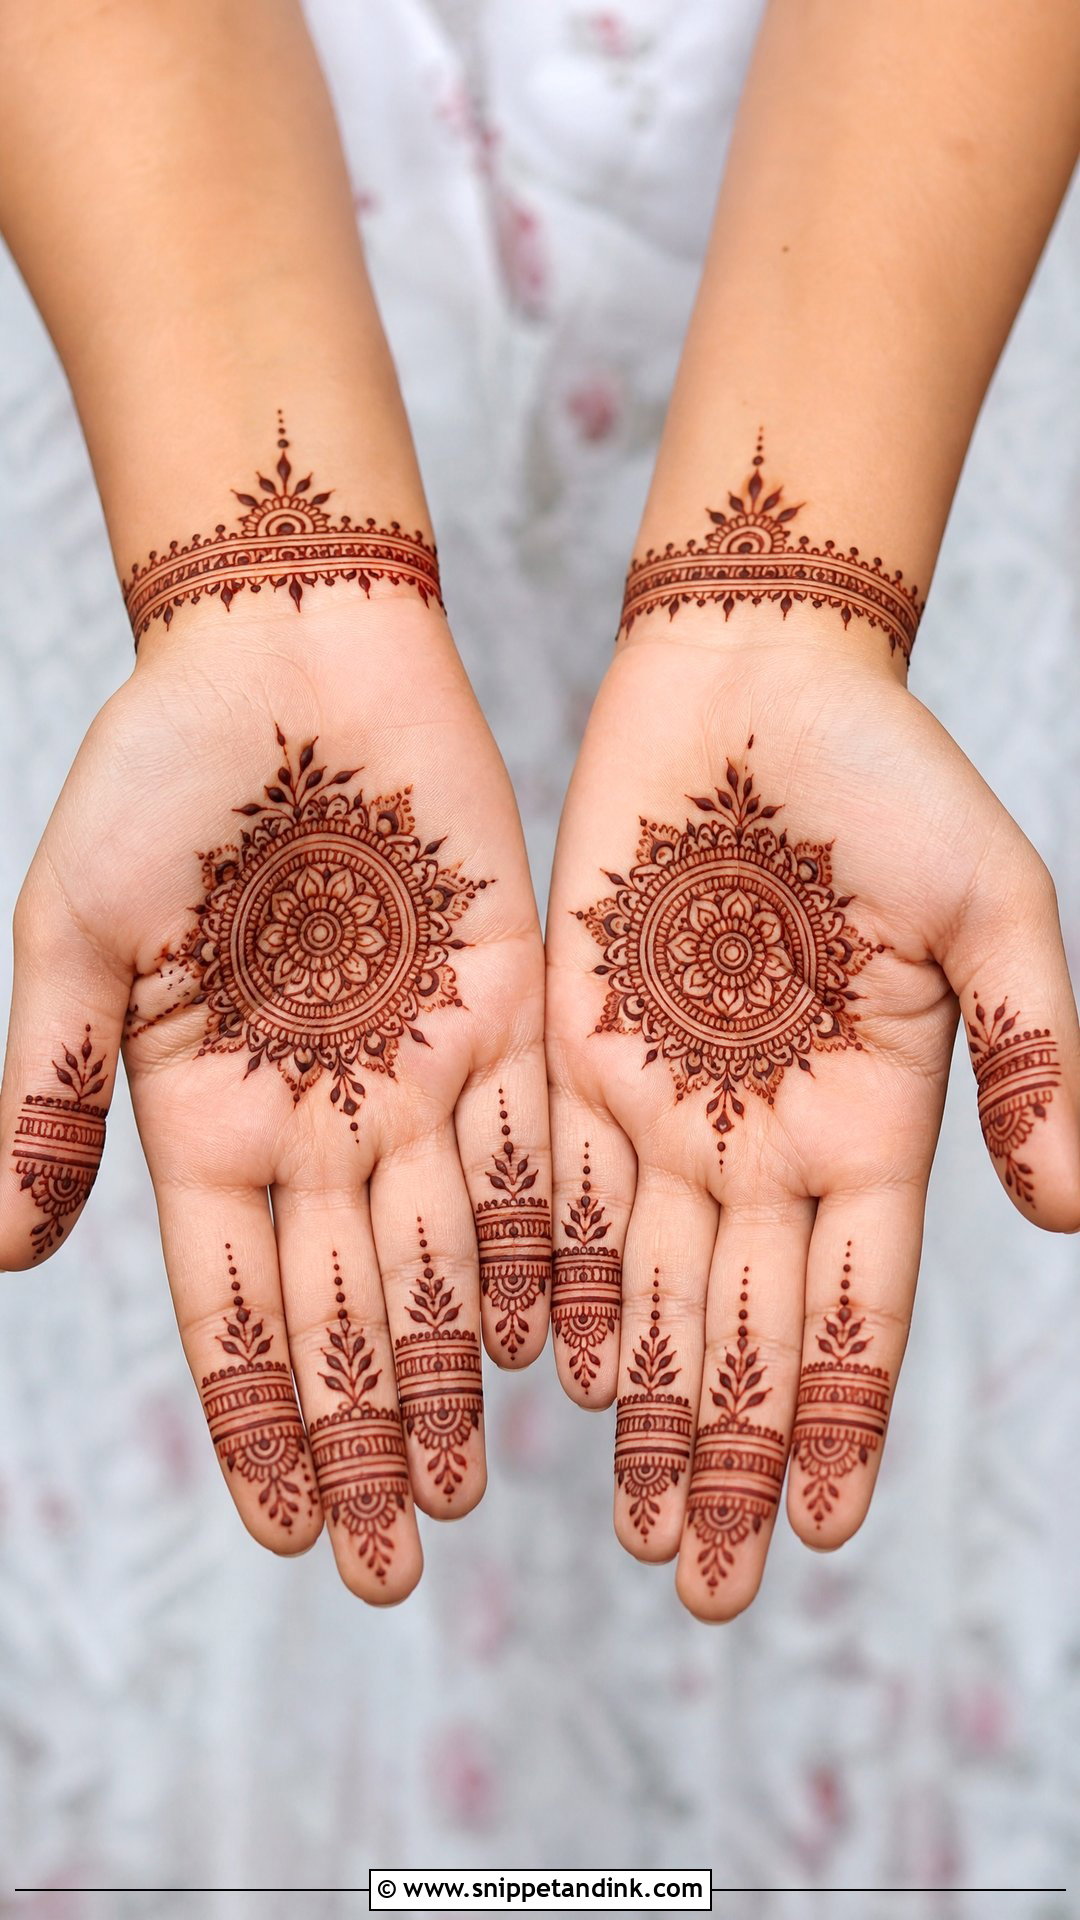
Small palm mehndi suits narrow hands and anyone who likes neat, contained patterns. Give it one clear focal point: a mini mandala, a small lotus, a floral cluster or a tiny paisley. Slim bands or dotted lines on the fingers and a very thin wrist border are enough. I keep the lines fine but make the main motif just bold enough to survive the stain darkening, since small designs lose definition faster than large ones.
33. Heavy Palm Mehndi Design
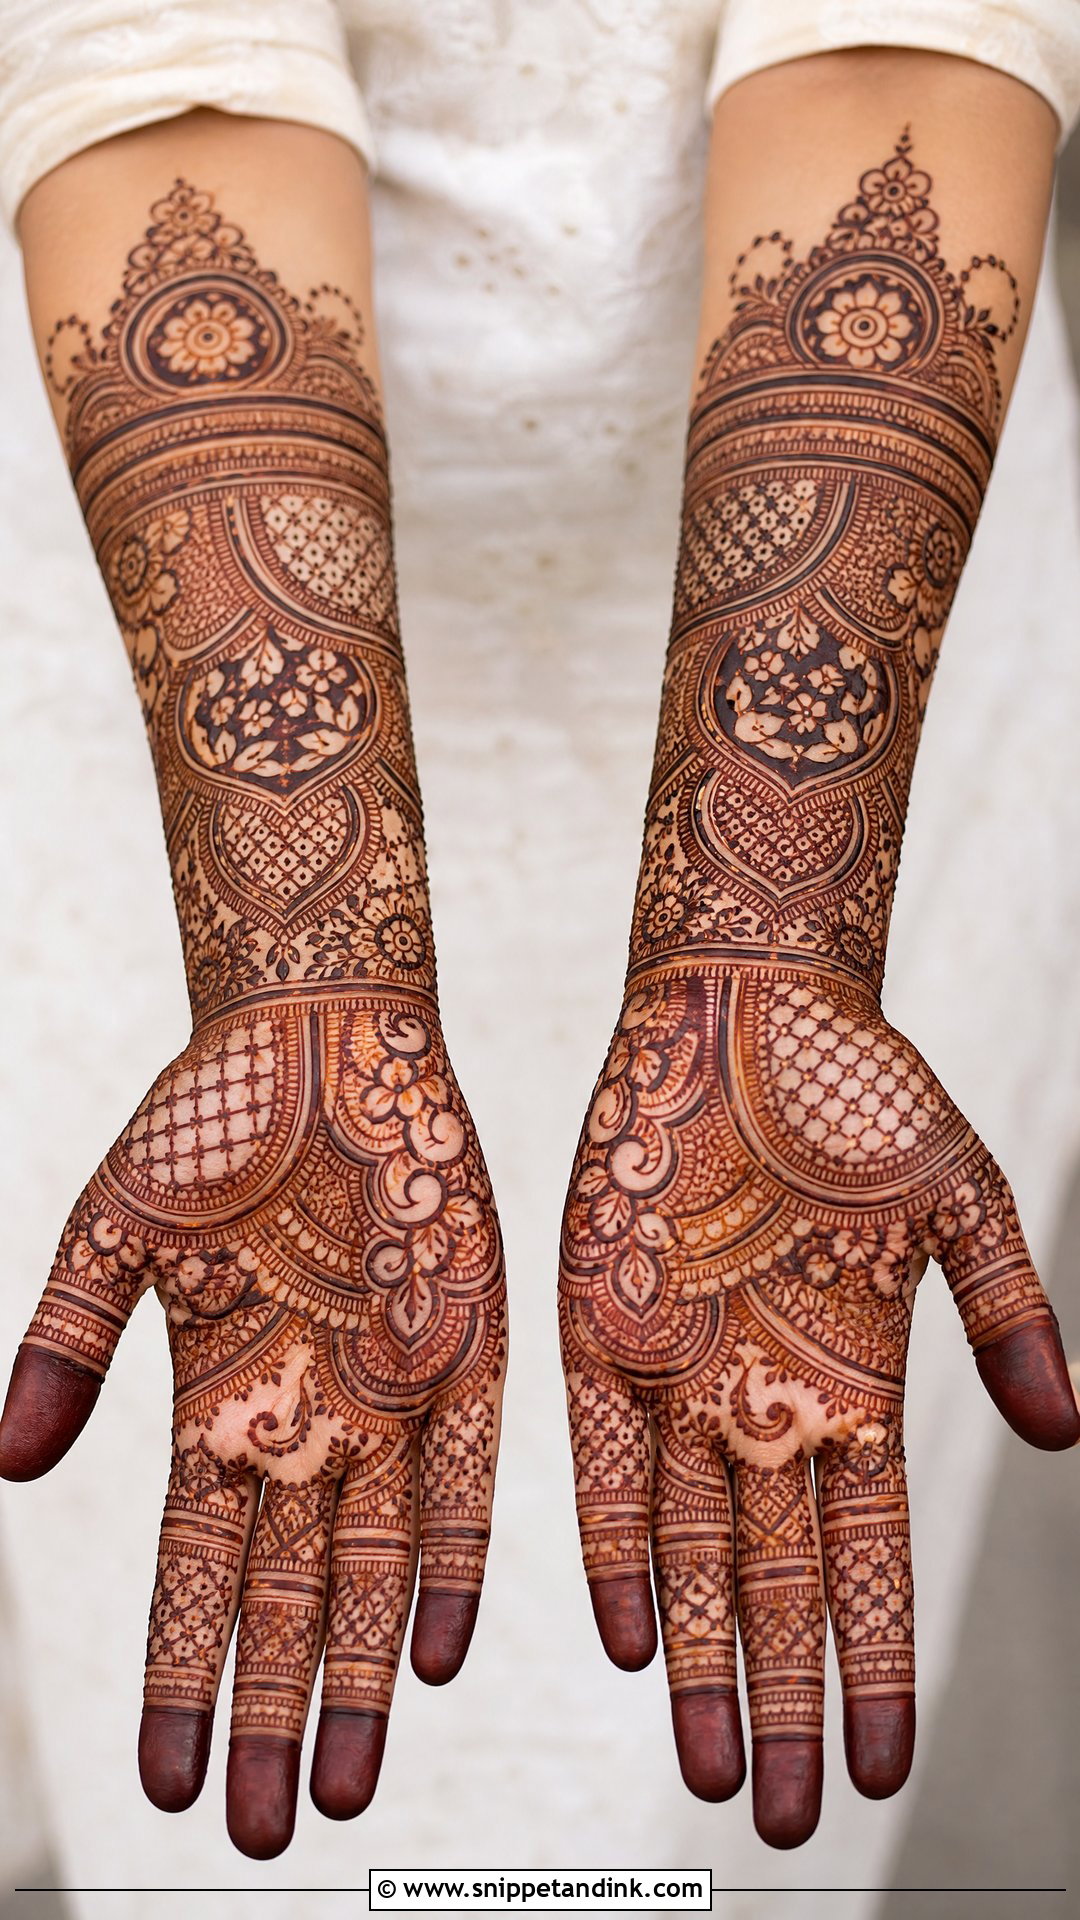
Heavy palms are for brides, close family and big occasions: dense florals, paisleys, jaali, mandalas, dots and fine fillers, fully covered fingers and a thick or layered cuff. Without structure it turns into a mess, so I always block out the palm with larger shapes before adding any small detail. Expect a long sitting and a long drying time. Done well, the stain comes up deep and dramatic.
34. Shaded Palm Mehndi Design
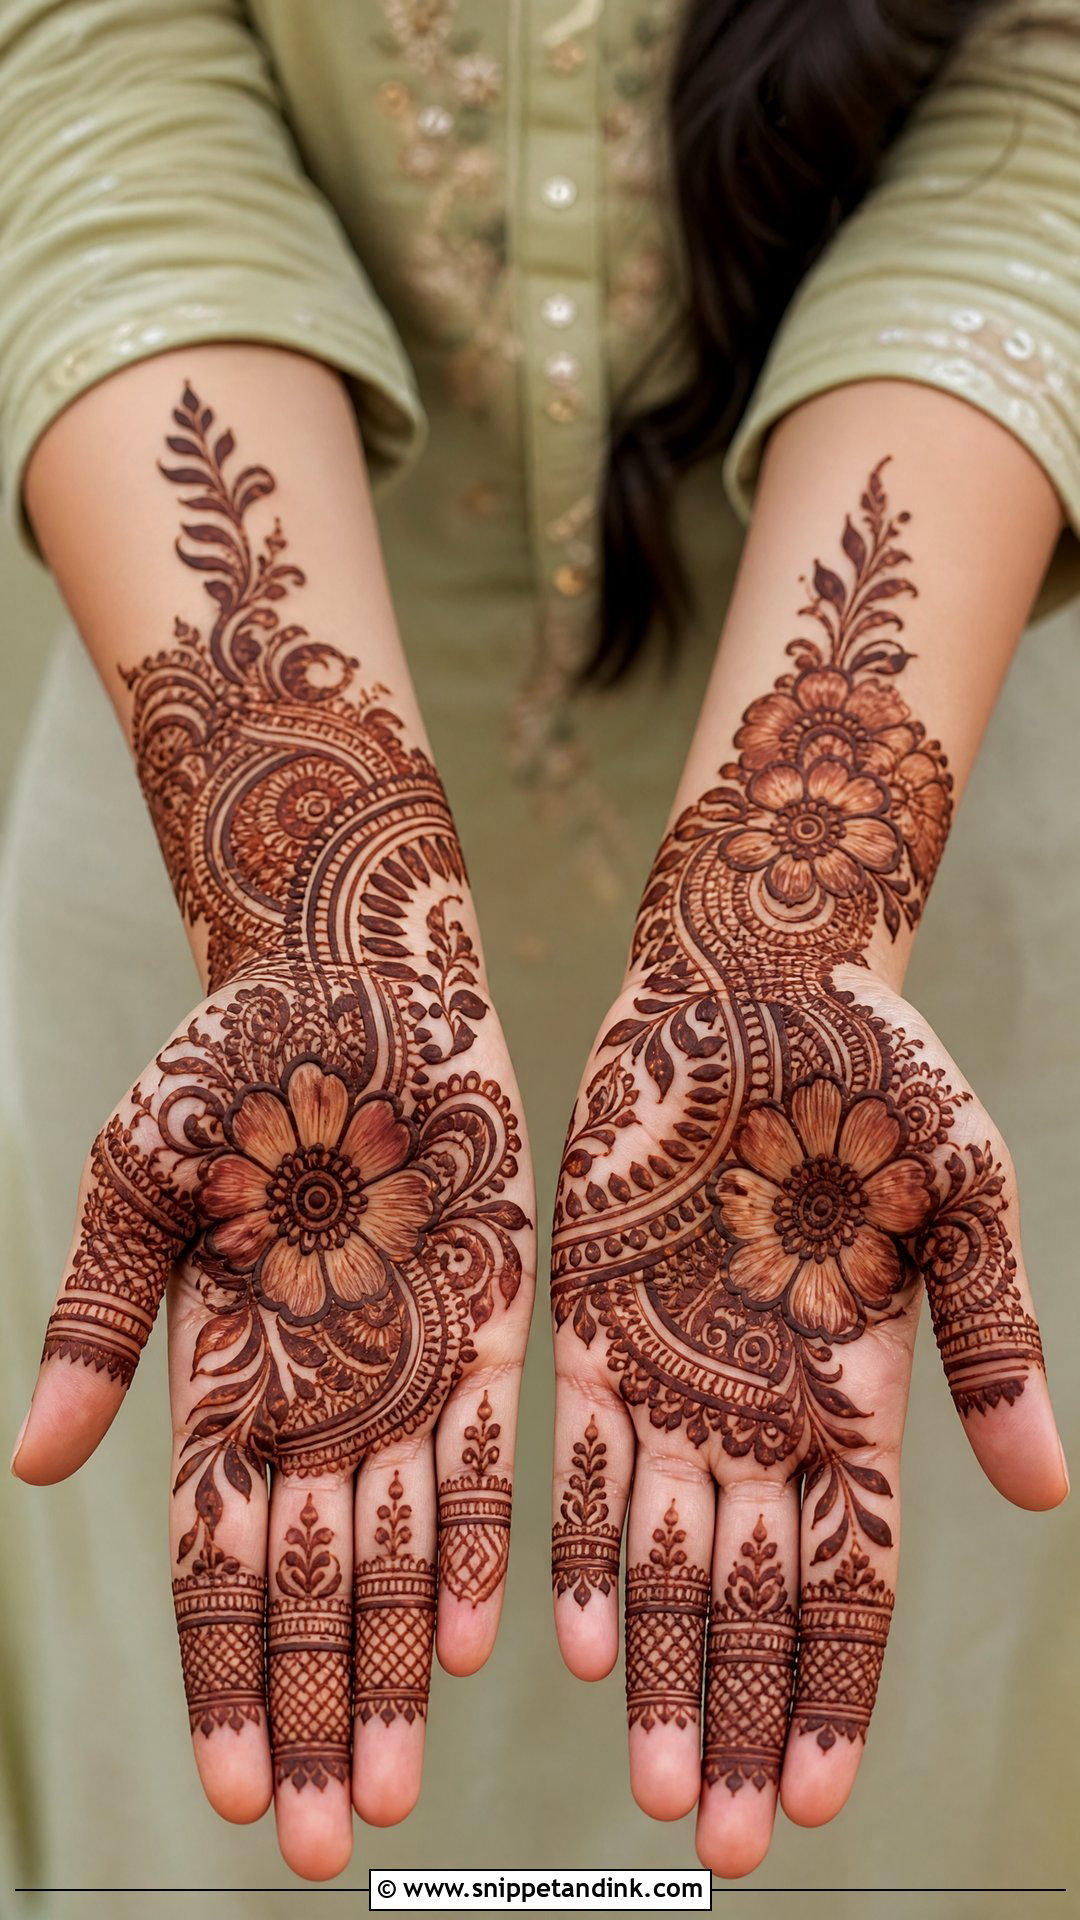
Shading fills flowers, leaves, paisleys and mandalas with a thin wash of paste instead of tight line work, so the palm looks fuller while staying breathable. A large floral arrangement on the palm with lighter bands and shaded tips on the fingers is a common layout for engagements and Eid. I shade in one direction only and keep the outlines crisp. Shading in mixed directions looks patchy once the colour develops.
35. Unique Palm Mehndi Design
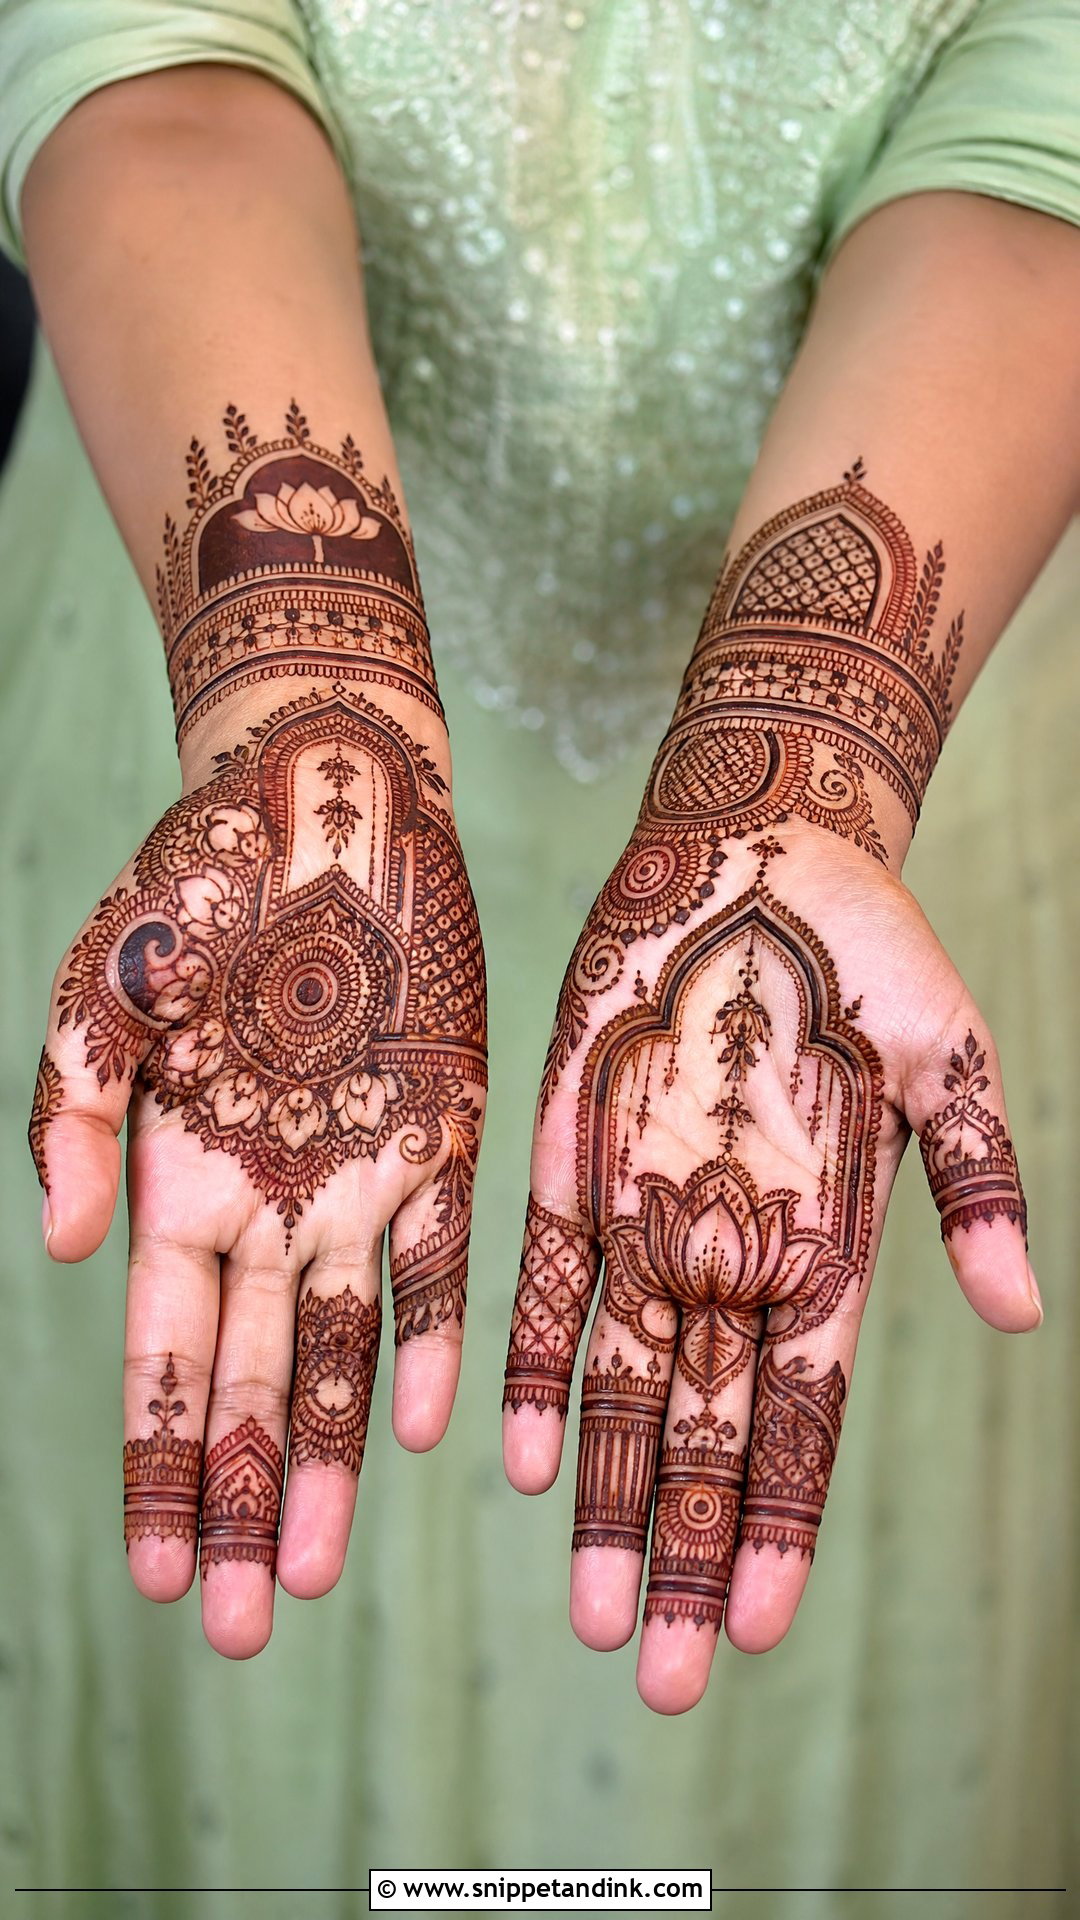
Unusual palms combine elements you don’t often see together: a jharokha frame, an asymmetrical mandala, a bold lotus, a geometric border or a split-palm layout, with the fingers repeating small pieces from the palm so it stays connected. The best unique designs aren’t random. I pick one unusual feature, give it the space it needs, and keep the rest of the hand quieter so the idea reads at a glance.
Drawing Your Own Palm Mehndi at Home
Plenty of the simpler designs here are realistic to do yourself the night before Eid or Diwali. The design matters less than the paste and the order you work in. A few things I’d want anyone trying it to know:
- Test the cone on paper first. The paste should come out in an unbroken line with gentle pressure, roughly the consistency of toothpaste. If it blobs, it’s too wet; if it breaks, it’s too thick or the tip is blocked.
- Wash your hands with plain soap and dry them fully. Skip lotion beforehand, because oily skin stops the paste from gripping.
- Draw on your non-dominant hand first while your dominant hand is free, then ask someone else to help with the second hand.
- Start at the fingertips and work down toward the wrist, so you never rest your hand on a section that’s still wet.
- Rest your drawing wrist on a folded towel. A supported hand makes steadier lines than a floating one.
- Keep a cotton bud handy. A mistake wiped off in the first few seconds leaves almost no mark.
Then leave it alone. The palm takes the darkest colour of any part of the hand, but it also gets washed the most, so it’s the first place a stain fades. Applied the evening before a festival, a palm design will look its best the next day and through the days that follow, and it will start to soften as soon as normal cooking and hand washing resume.
Scale the Motif to Your Hand, Not the Photo
A simple tikki, a bold Arabic trail, a classic mandala or a full bridal layout will each change how your hands look, and the palm is the place where that shows most. Minimal and half-palm patterns keep things clean. Paisley, peacock, jaali and full palm coverage turn up the festivity. Whichever you pick from the ideas above, adjust the size, spacing and detail to the hand you have rather than the hand in the photo, and the design will look like it was drawn for you.
You'll Like These Ideas:


Leave a Reply