
Henna is one of the few things at a celebration that you carry home on your skin for a week or two afterward. The designs people bring to me range from dense Indian bridal hands to airy Arabic trails, Moroccan geometry and Khaleeji florals that leave most of the hand bare. Below are thirty five layouts I apply regularly, each described as a full design so you can picture where it sits on the palm, back hand, wrist or forearm. I have added notes on how long each one takes, how it stains and who it suits, because the right design depends on your event and your patience as much as your taste.
How Long Each Style Takes and When to Get It Done
Henna does not show its true color the moment the paste comes off. It starts a bright orange and darkens over the next day or two, reaching its deepest shade around 48 hours later. That is why I book brides two days before the wedding, not the morning of.
- Minimal, finger or bracelet designs: roughly fifteen to thirty minutes per hand.
- Arabic, khafif or party designs on the back of both hands: around an hour, sometimes less.
- Full bridal hands and forearms: several hours, longer with feet.
- Paste drying: twenty to forty minutes before you can move carefully, but the paste should stay on far longer for color.
If you are a guest, an evening appointment the night before an event gives you a good stain by morning. Brides with a busy final week should block out the full day, because henna sitting in the hours after application is when most smudges happen.
1. Full Hand Bridal Mehndi Design
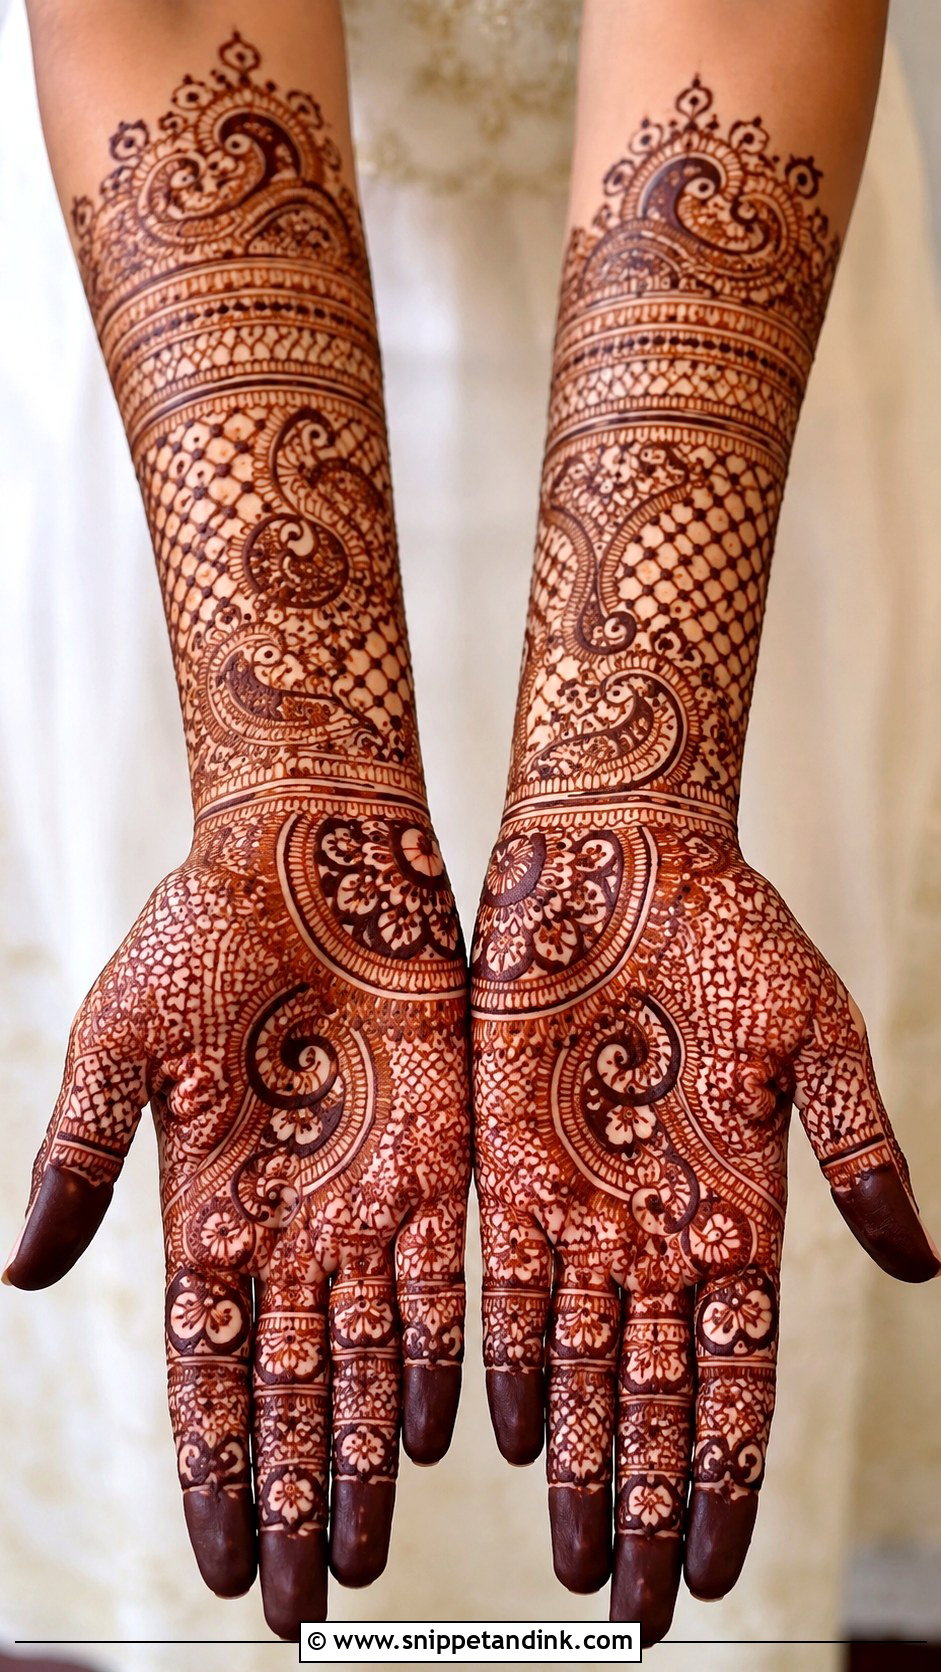
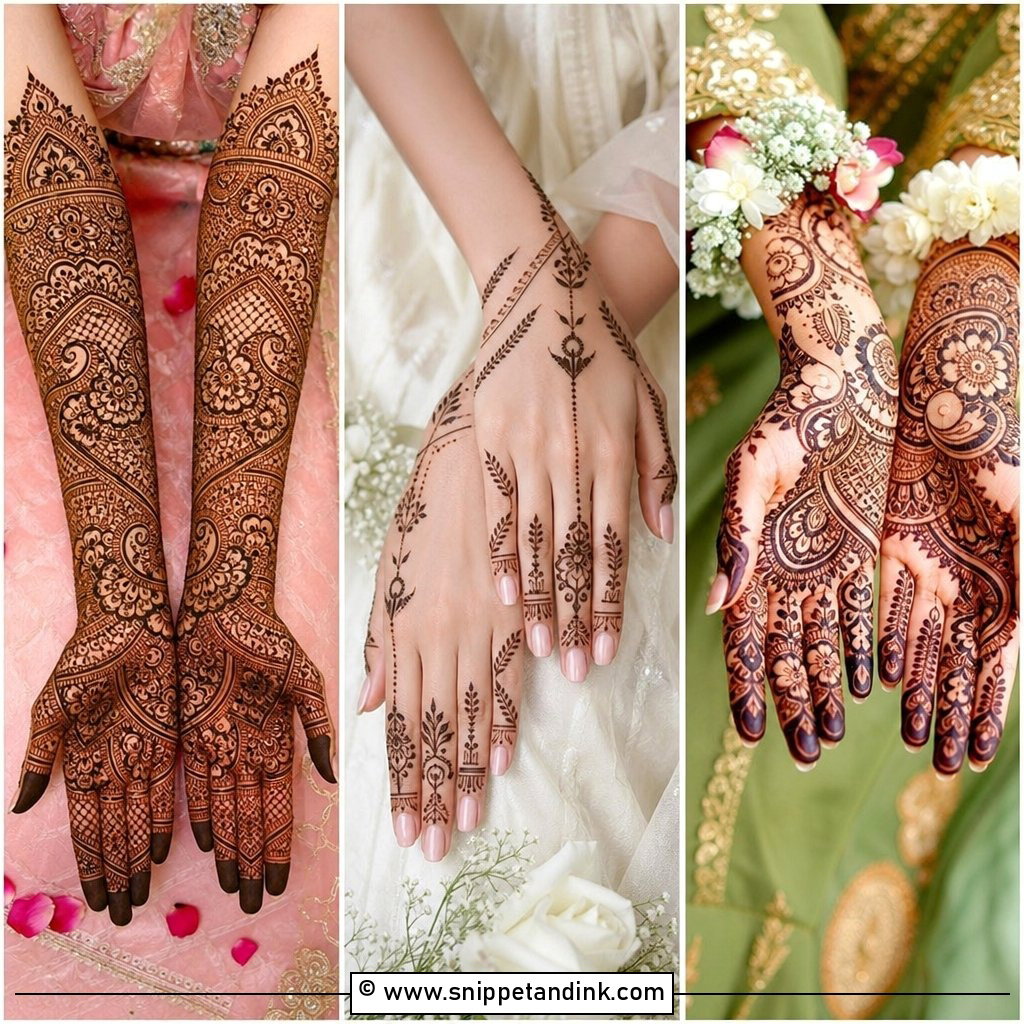
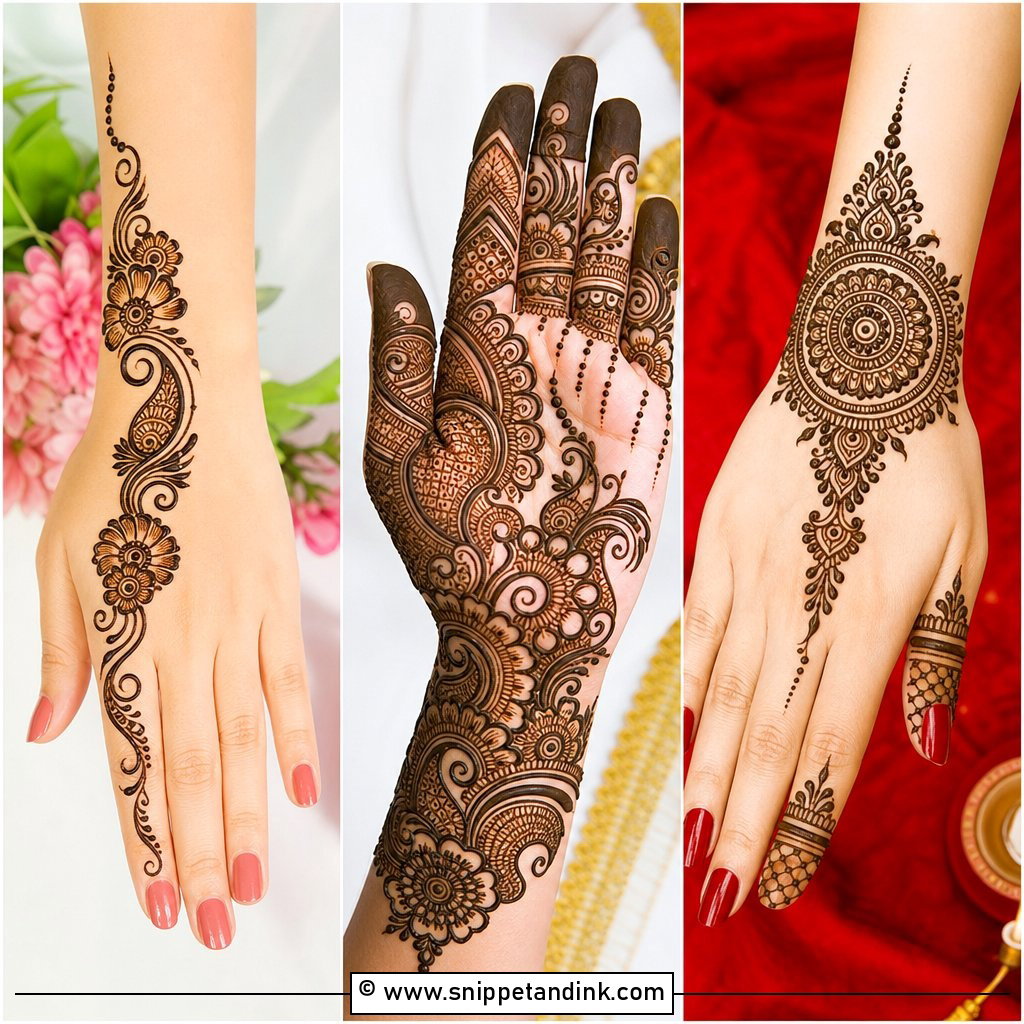
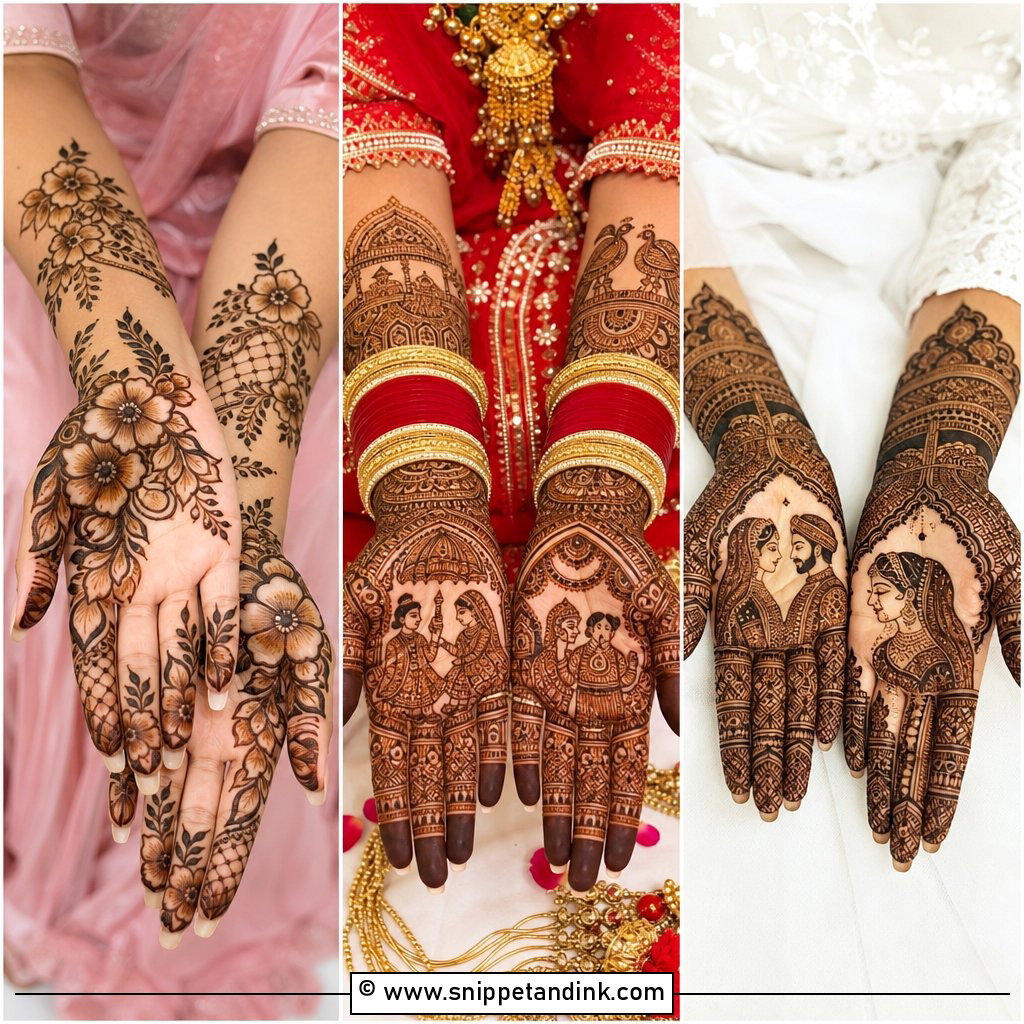
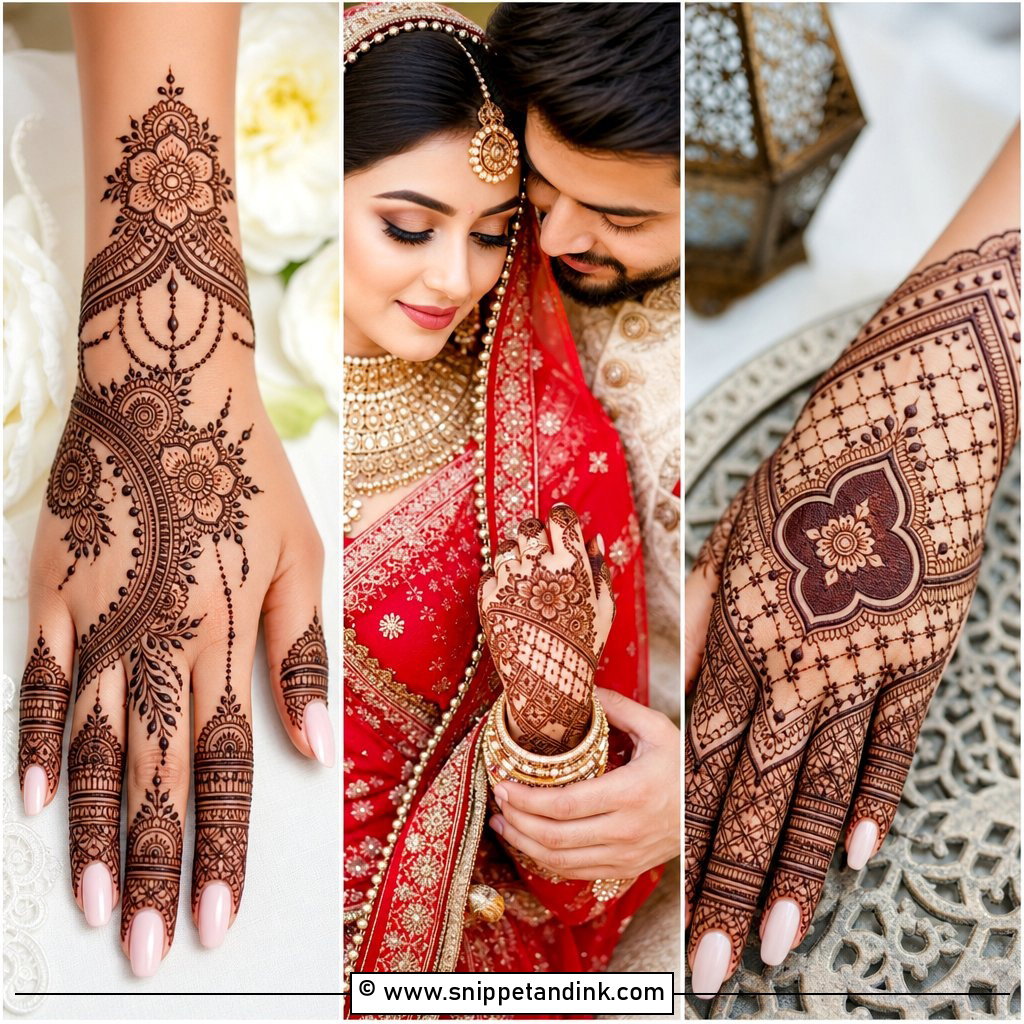
Full bridal hands run from the fingertips to the forearm on both sides, packed with paisleys, peacocks, jaali and filled fingertip caps. This is the longest sitting I do; for a full bride with feet it can take most of an afternoon, so plan food, a charger and a bathroom break before the paste goes on. I usually put the bride and groom figures or a mandala on the palms and let the forearms carry layered bands. The density matters for the stain, since many fine lines close together read as deep maroon from a distance even when single lines are lighter.
2. Arabic Floral Mehndi Design
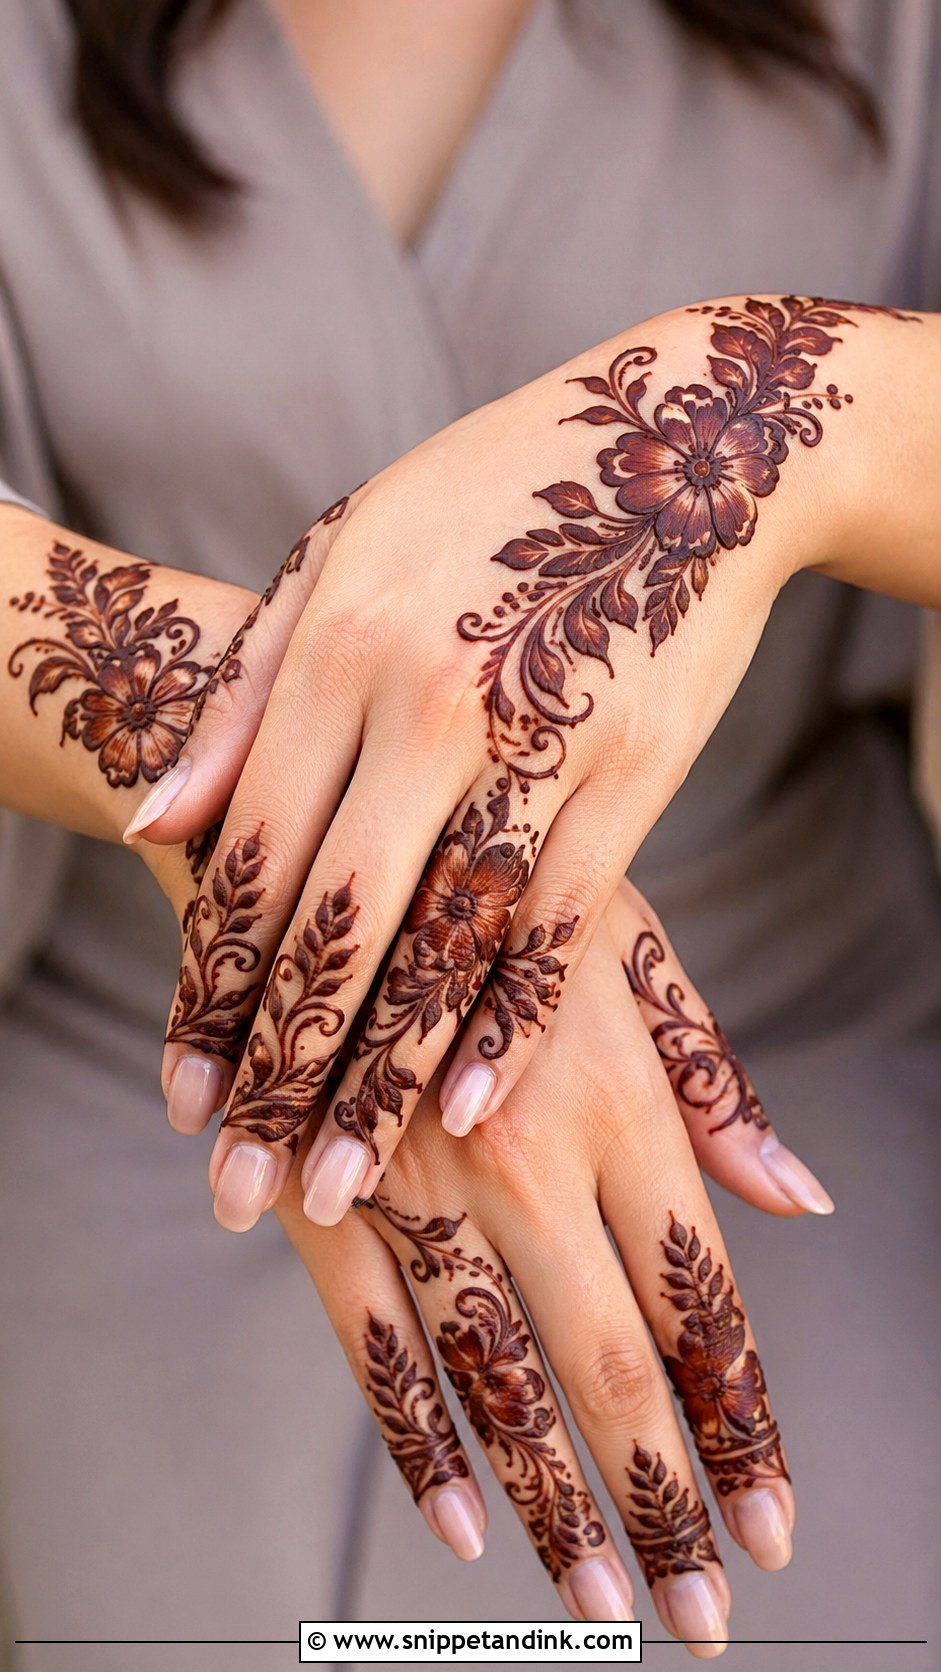
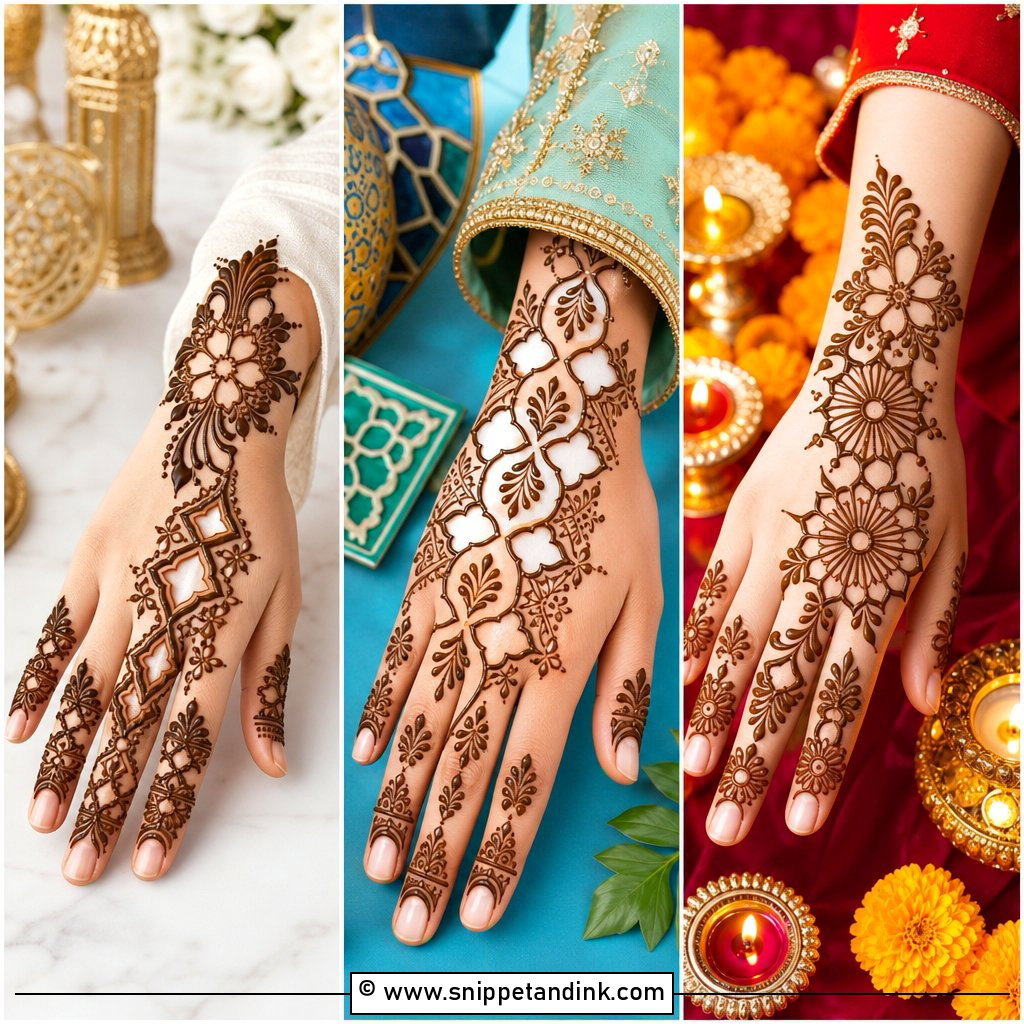
Arabic florals run diagonally from one side of the wrist toward the fingers, with large flowers, curved stems and plenty of bare skin between them. Because the motifs are big, they read clearly from across a room, and they forgive a slightly shaky hand, which is why I suggest this layout to people learning at home. I shade inside the petals with a lighter stroke so each flower has depth. Fingertips are lightly filled or left with thin rings. It sits best on the back of the hand.
3. Simple Front Hand Mehndi Design
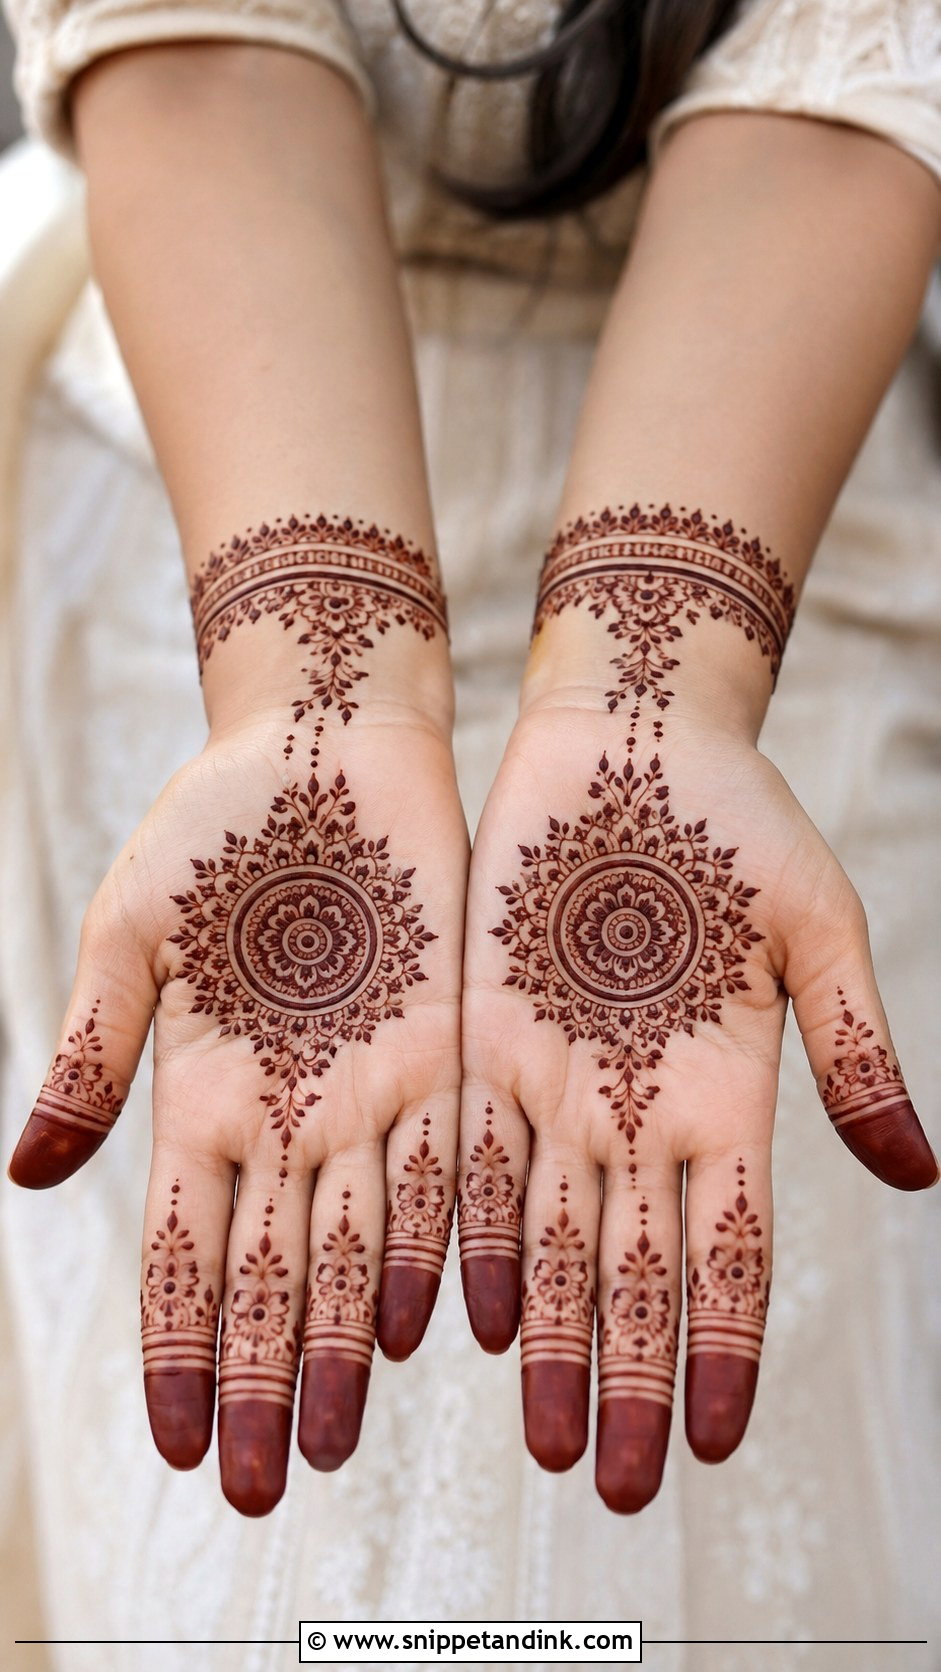
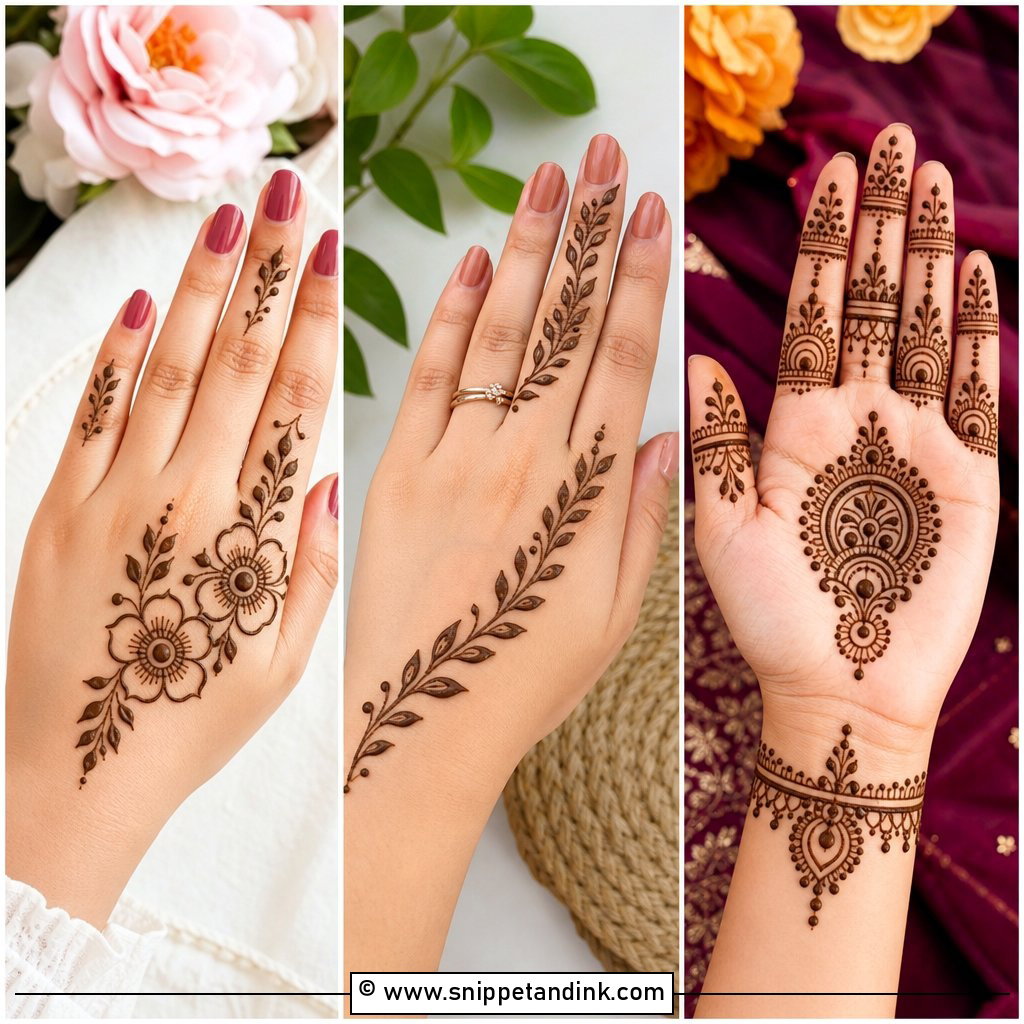
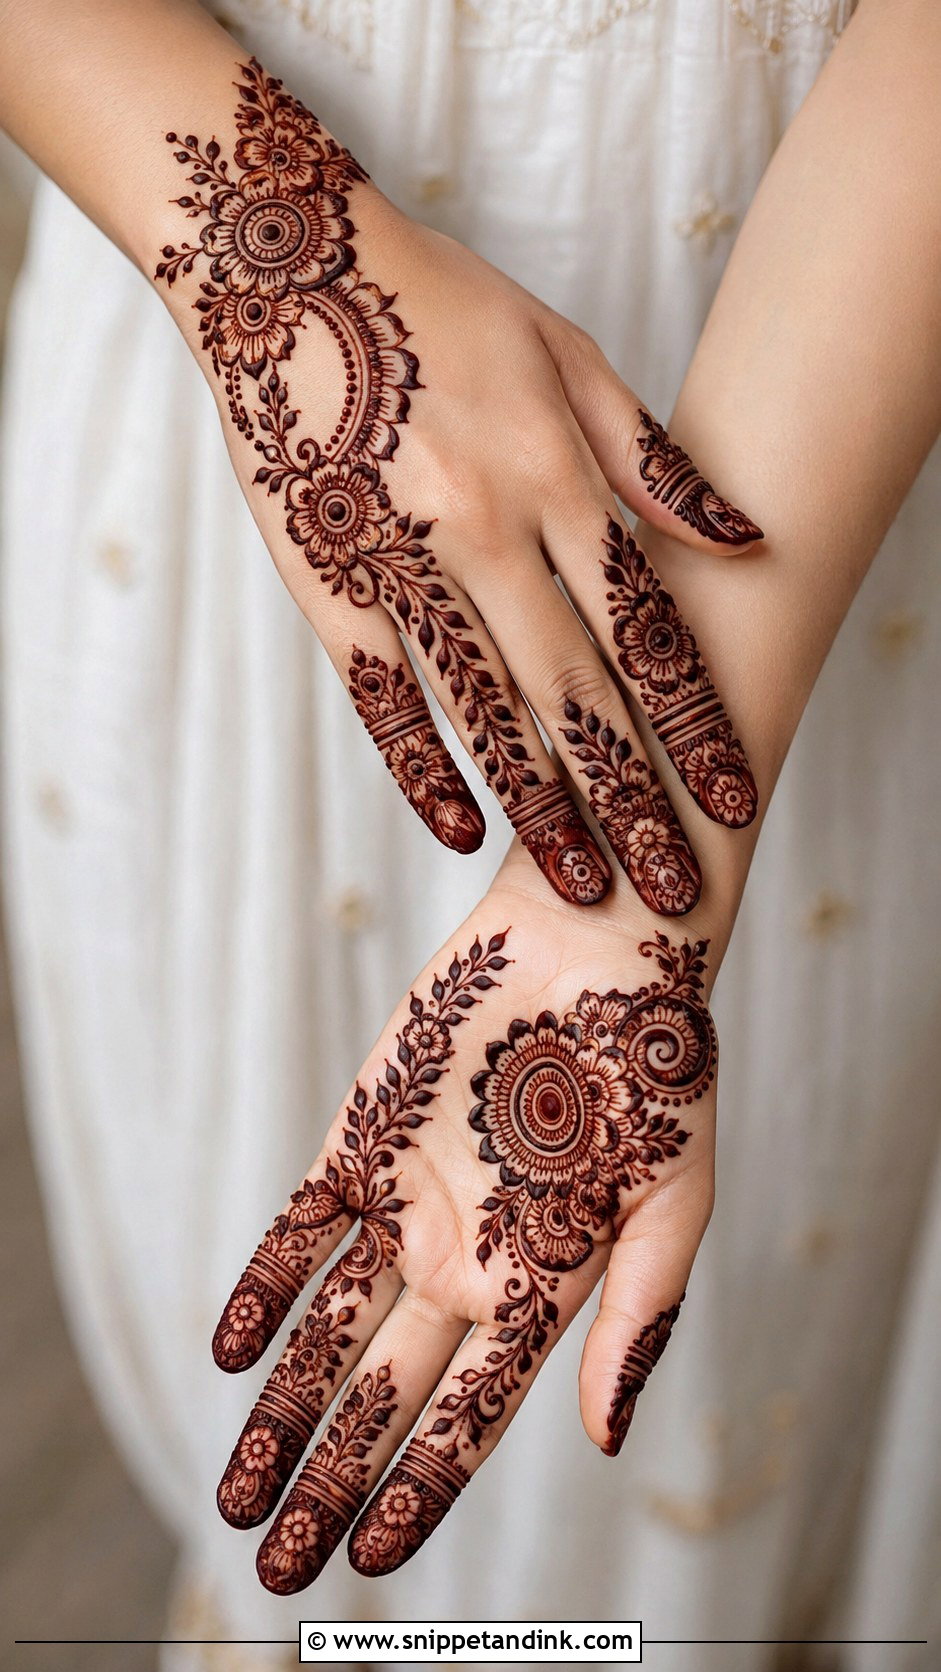
A palm with one central mandala or paisley cluster, a few dotted trails and light finger patterns is the design I do most at festivals when there is a queue. It looks finished even though it takes a fraction of a bridal sitting. The palm takes the darkest stain on the body, because the skin there is thicker, so even sparse line work shows rich color. Keep the wrist light if you will be washing dishes or cooking soon afterward; that area wears off first.
4. Back Hand Mehndi Design
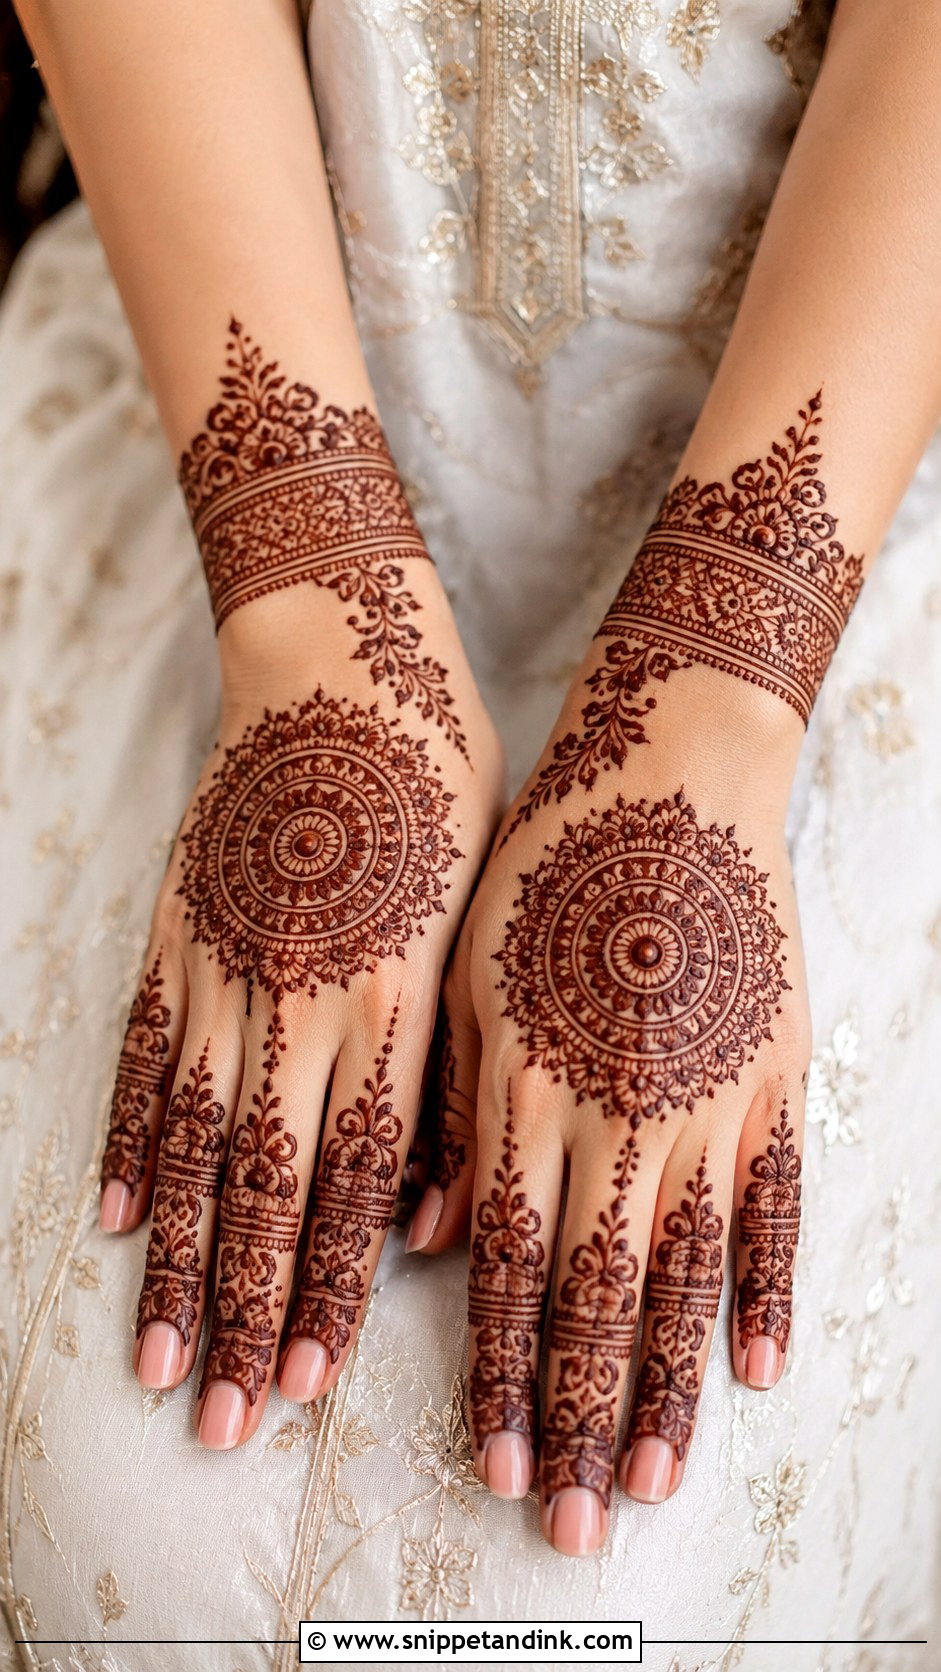
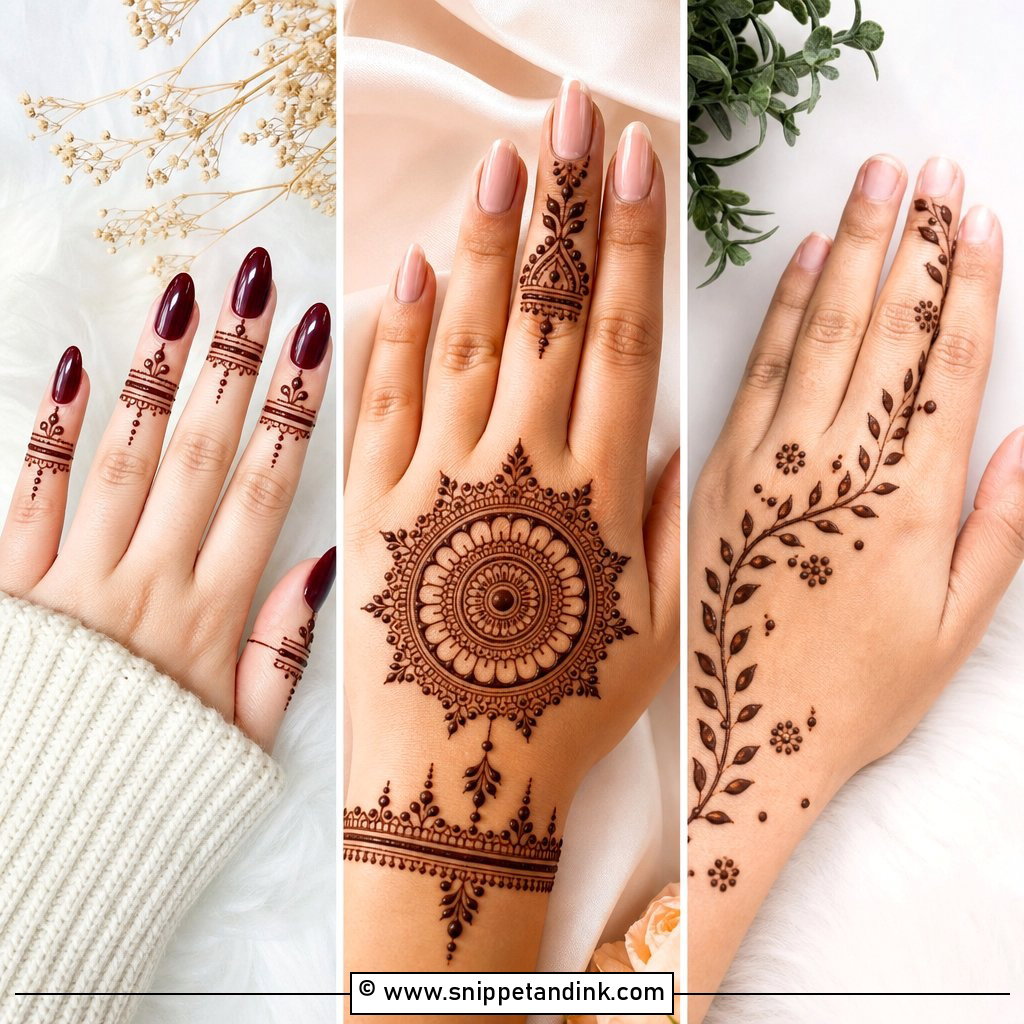
In photos the back of the hand is what everyone sees, so a back hand mehndi design deserves extra care in placement. I build it around a central mandala, a bracelet band at the wrist and decorated fingers, then leave clean space between them. Be aware that back hand skin stains lighter than the palm, often a warm orange-brown rather than deep maroon, so leave the paste on longer here. Indian detail gives a traditional feel and Arabic florals keep it lighter.
5. Indo Arabic Mehndi Design
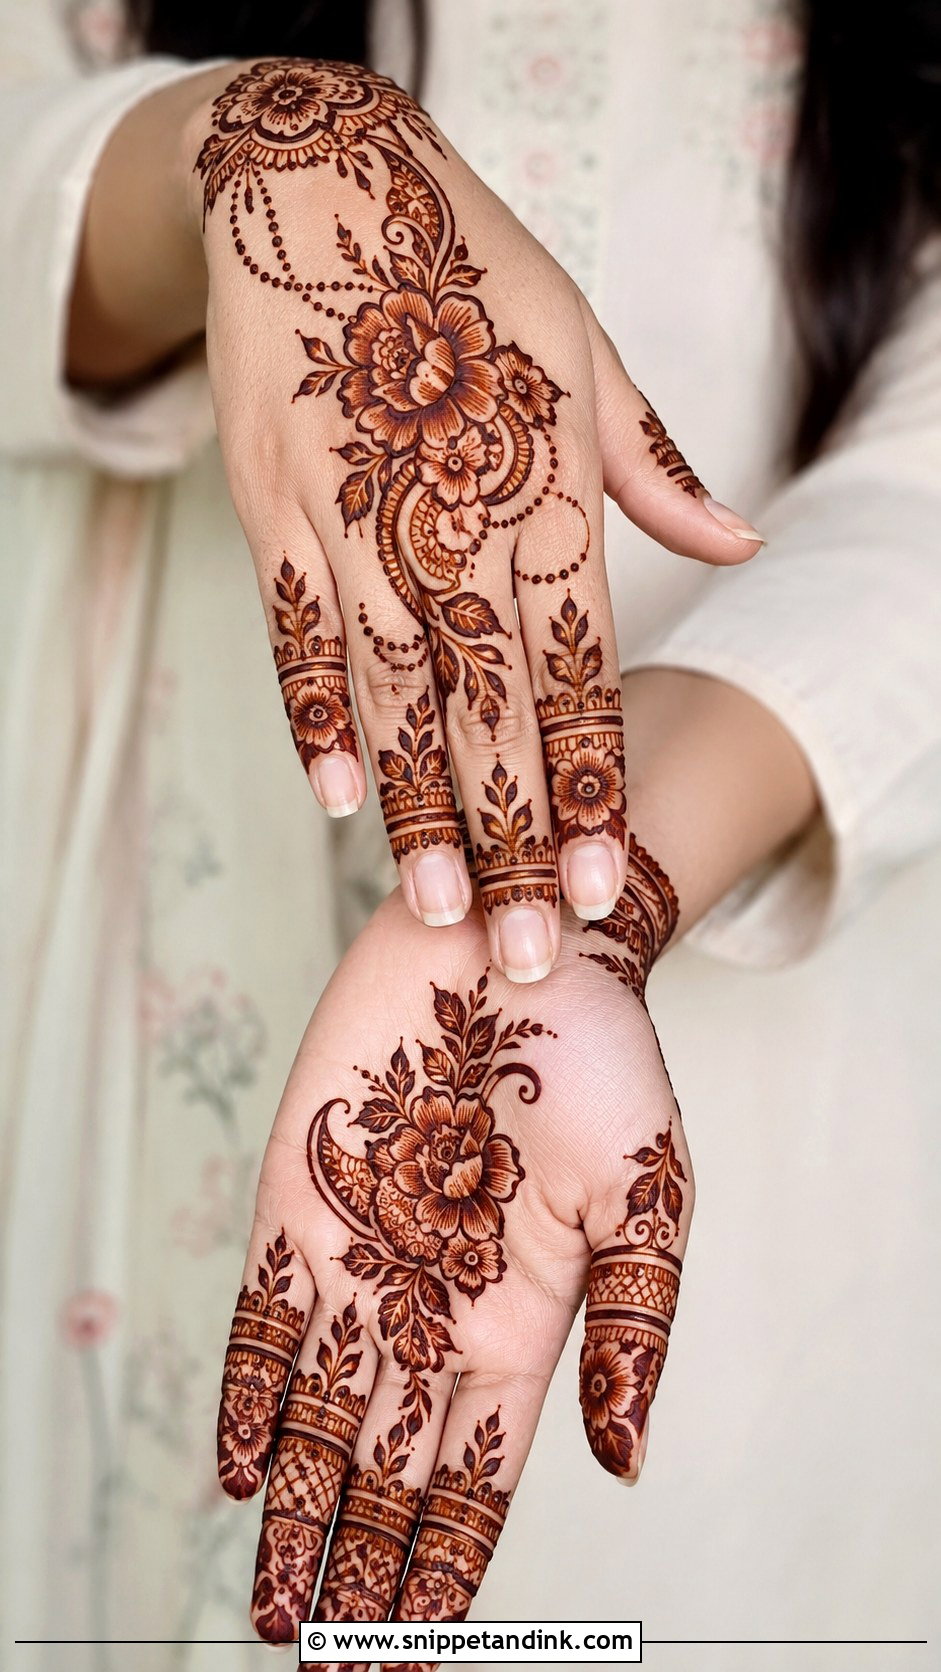
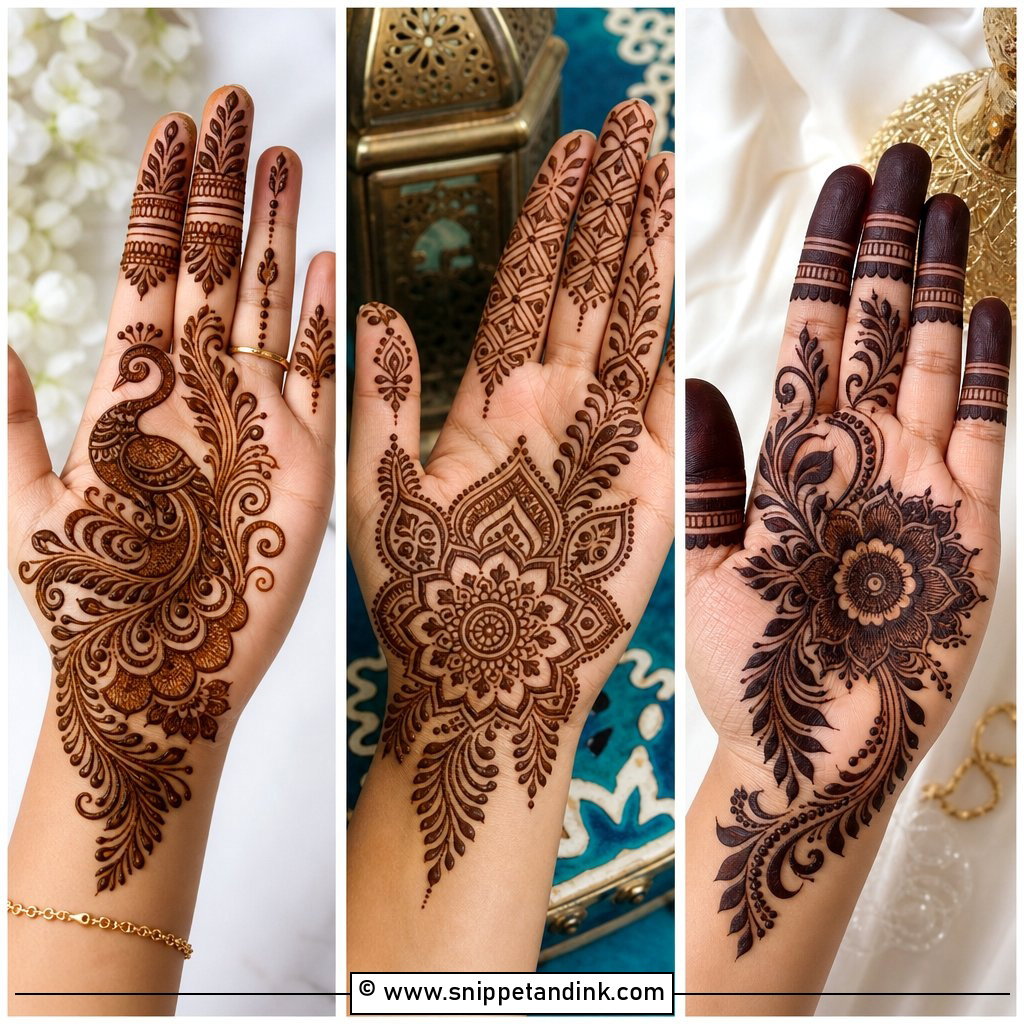
Indo Arabic combines the open flow of Arabic work with the fine fillers of Indian mehndi. Bold shaded flowers and paisleys give it structure, and thin lines fill some sections but not all. I use it for guests who want something festive but do not want to sit for a bridal timeframe. It reads well on the palm or the back hand and scales up or down with a few extra trails. The trick is to decide which motifs get the fine filling before I start, otherwise it slowly drifts into full Indian density.
6. Minimal Henna Design
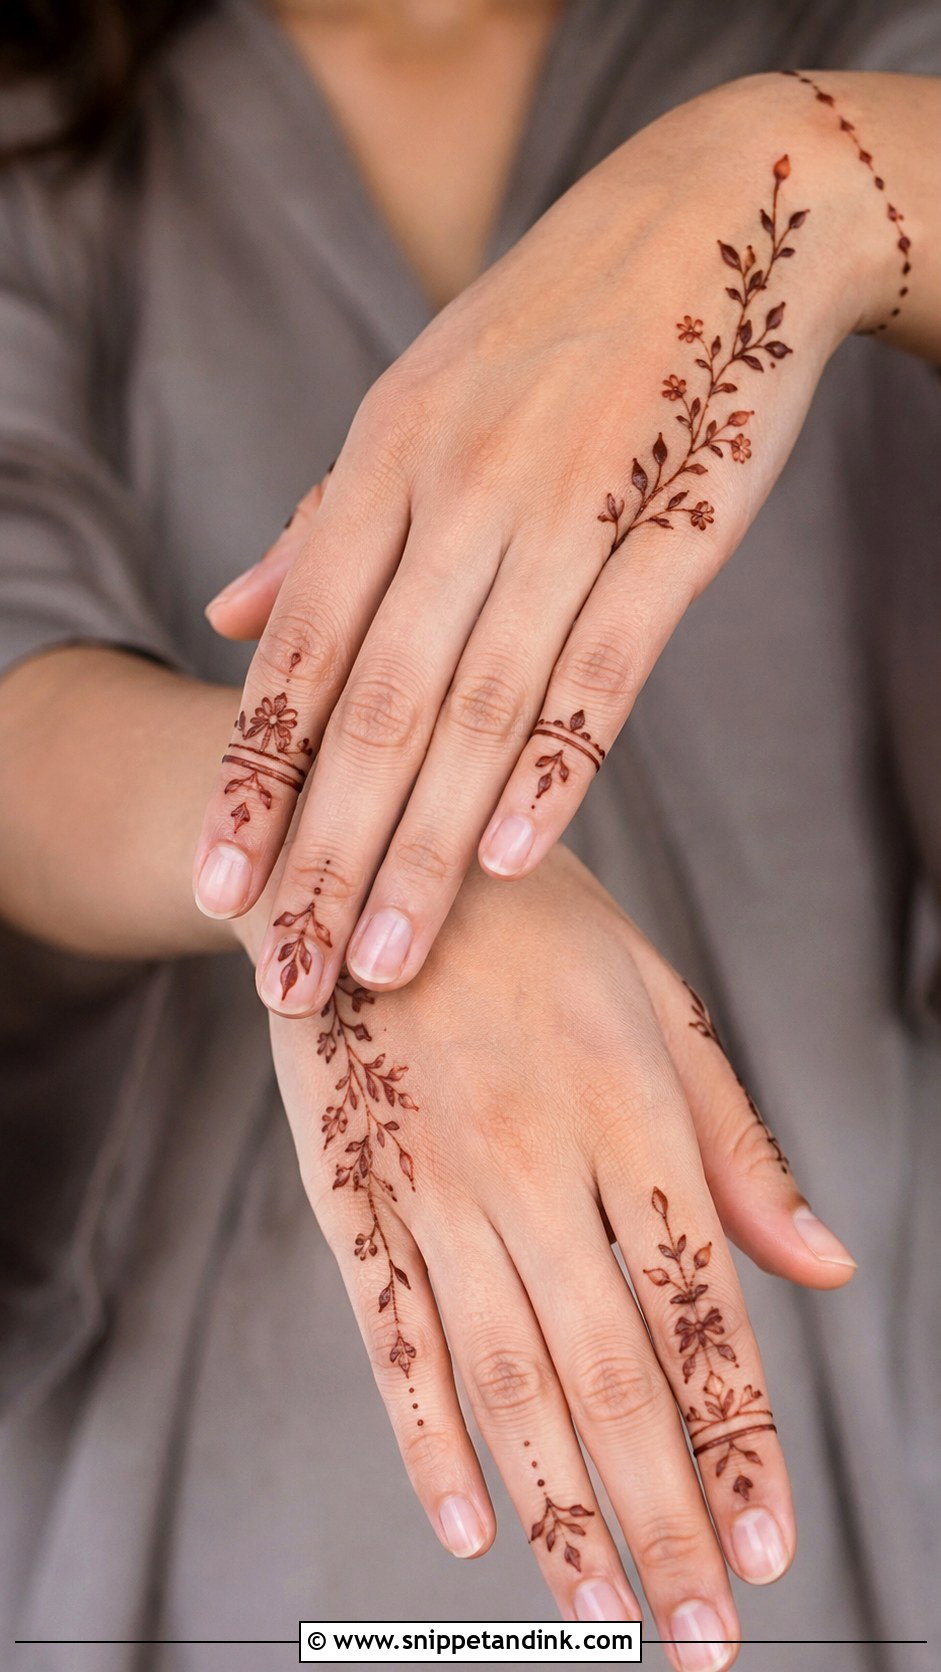
Minimal henna sits on the fingers, the wrist and maybe one small motif in between. It suits work, school or travel, and it is the style I recommend for anyone trying henna for the first time and unsure how they will feel about the stain. Fine lines must be steady, because there is no surrounding detail to hide a wobble. I use a cone with a very small tip and slightly thicker paste for this so the lines do not spread. Natural reddish brown suits it.
7. Mandala Mehndi Design
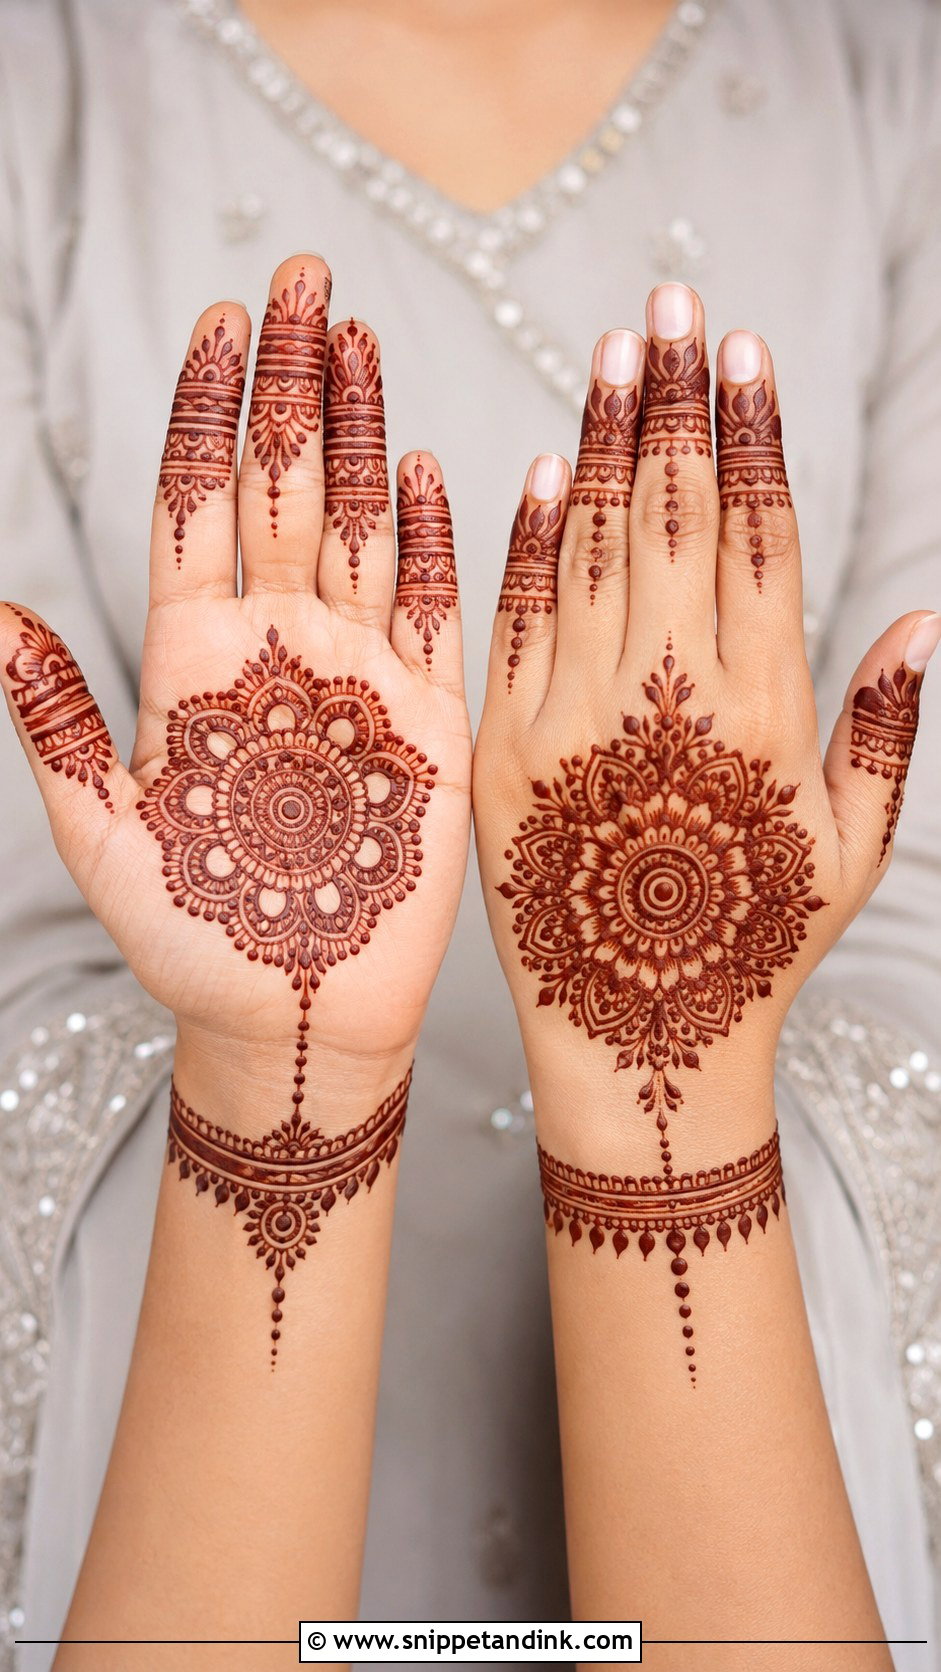
Mandalas give a calm, balanced center on the palm or back hand, and everything else, the fingers, dotted chains and wrist bands, connects to that one shape. I draw the outer ring first, very lightly, so I can check it is centered before filling. A circle that drifts toward the thumb is the most common beginner problem and it is obvious once the stain develops. On the palm it looks traditional; on the back hand it looks like a piece of jewelry.
8. Peacock Mehndi Design
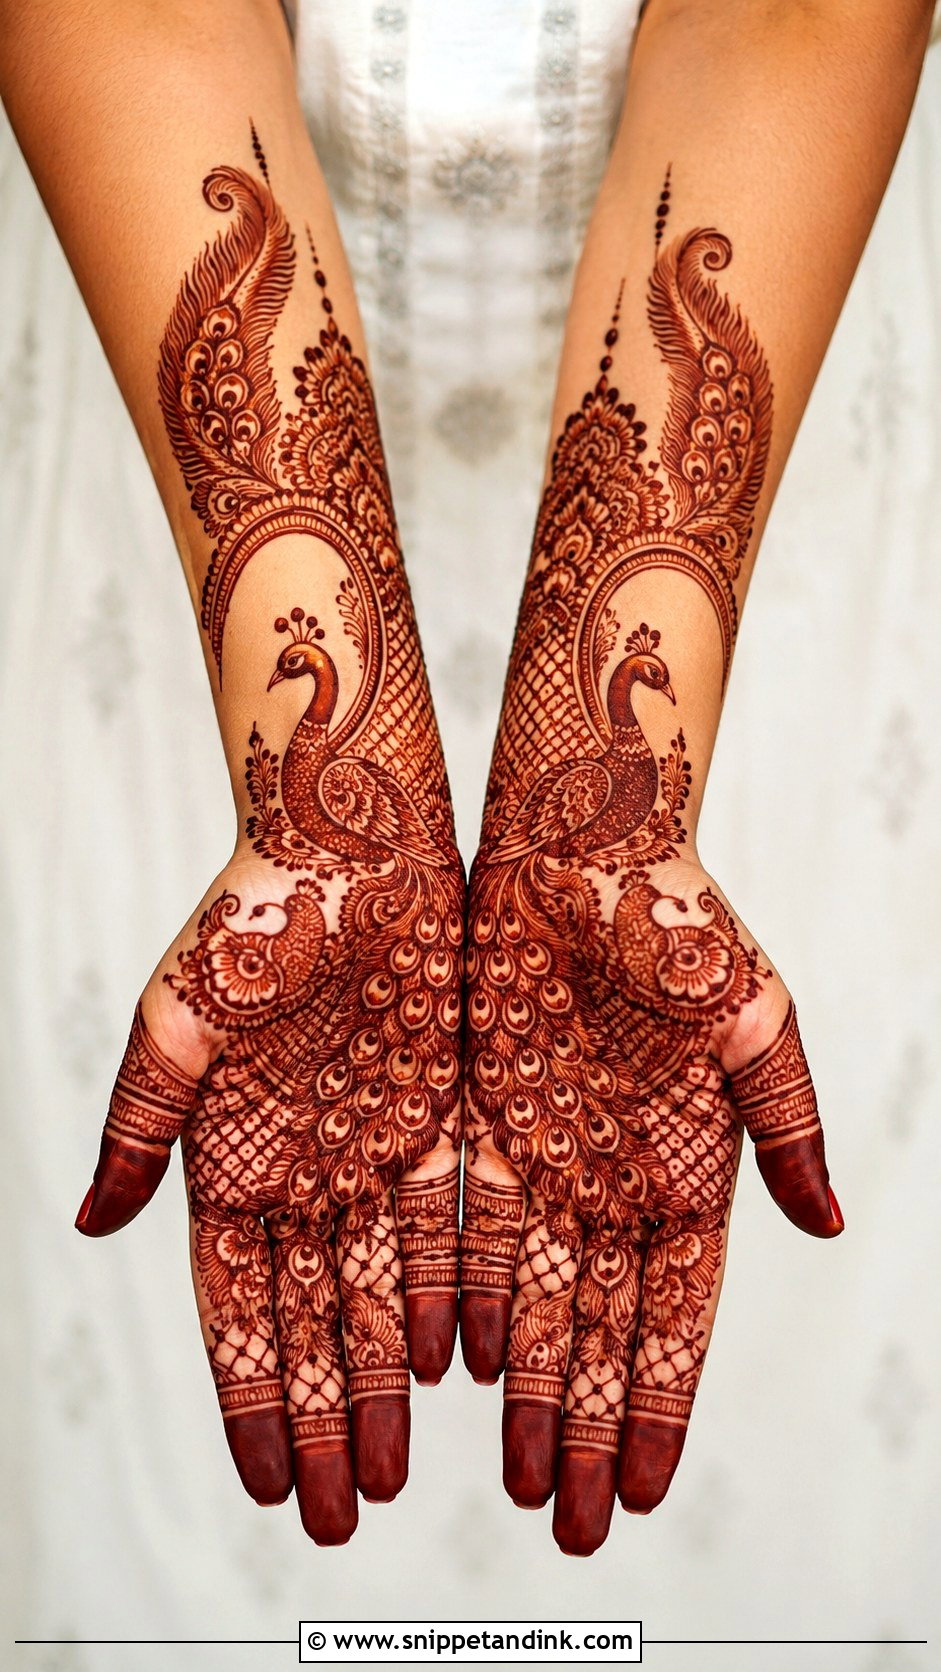
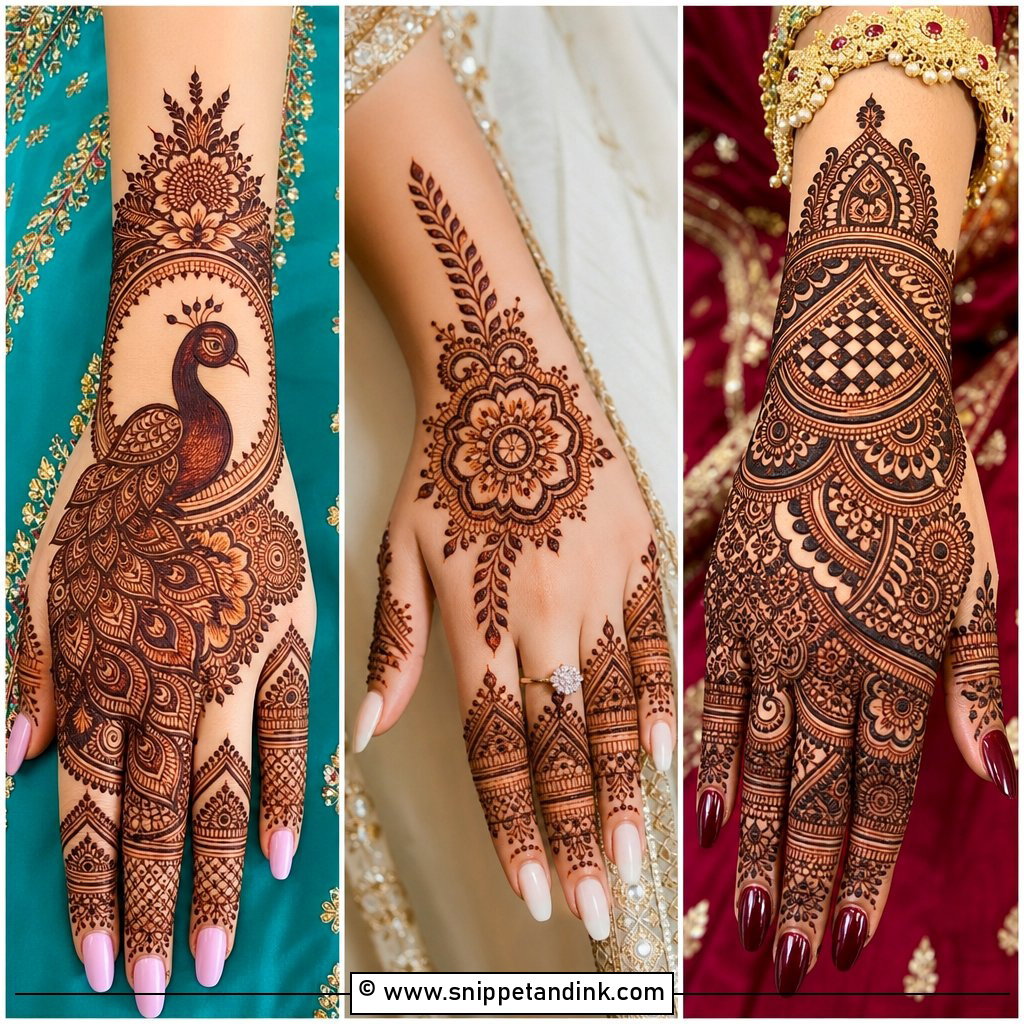
Peacocks belong in wedding and festival mehndi, usually one or two birds on the palm, back hand or forearm surrounded by feathers, paisleys and filler. The bird has to be large enough to read once the stain develops; a tiny peacock squeezed between fillers turns into a brown smudge. I place it where the hand is flattest, the center of the palm or the forearm, never across a finger joint where it distorts when the hand moves. Sisters of the bride often ask for a smaller version of the bride’s peacock.
9. Paisley Mehndi Design
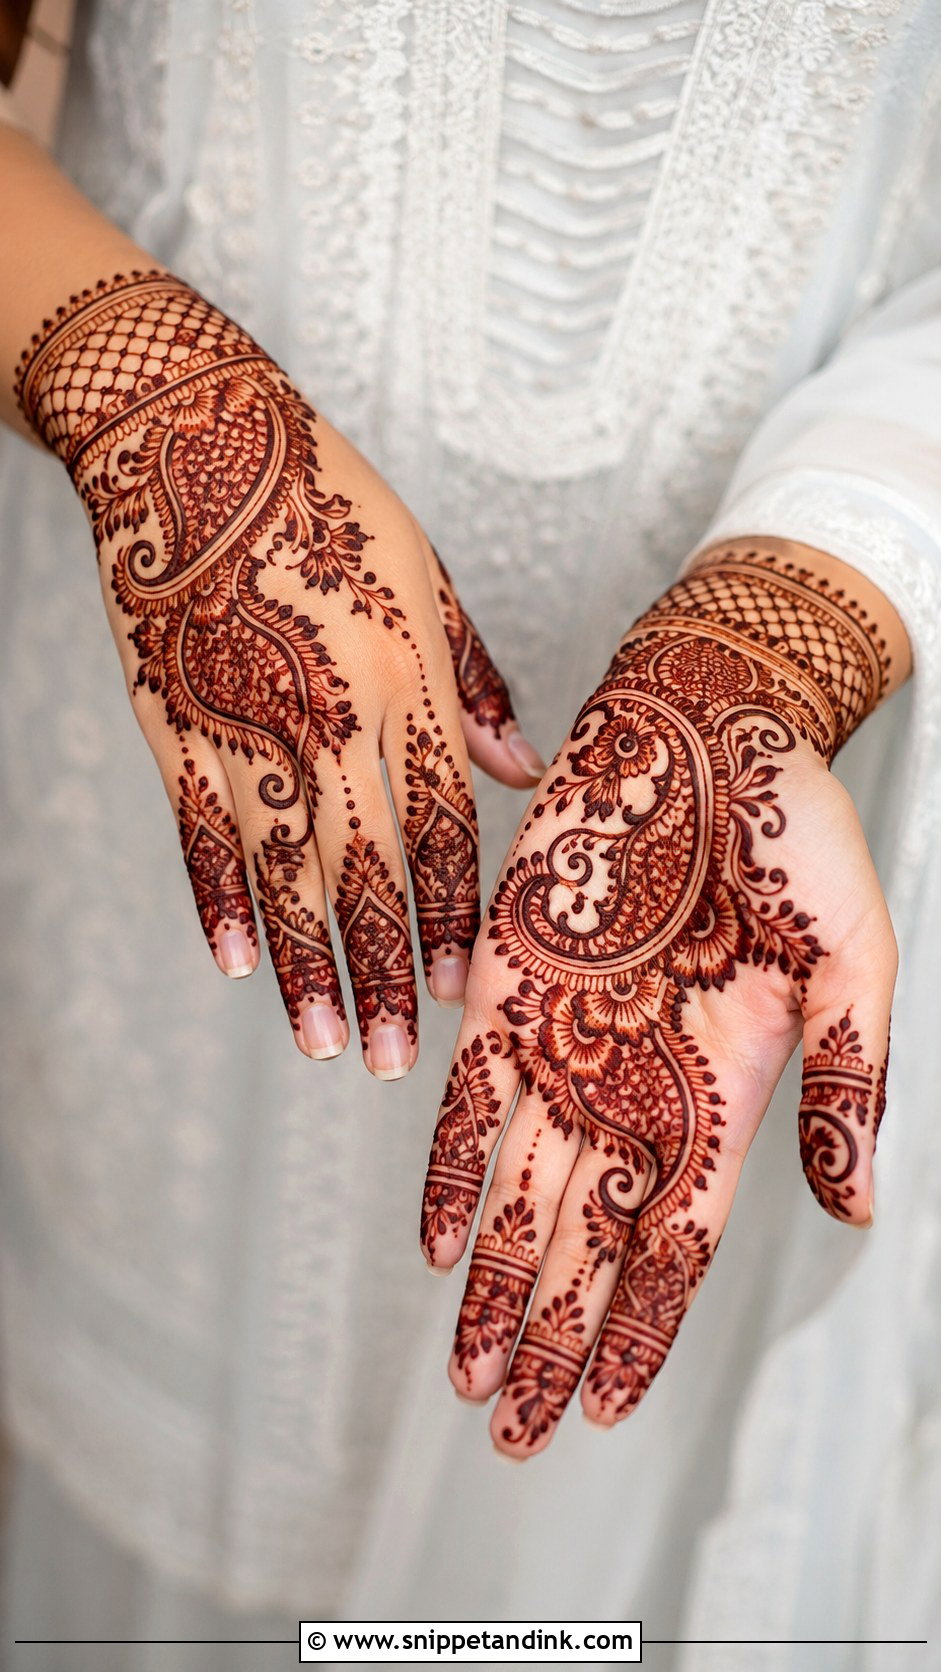
Paisley is the most adaptable shape in mehndi because its curve fits naturally along the wrist, fingers and forearm. Thick outlines with shaded insides read bold; open paisleys with small leaves read lighter. I build a lot of Pakistani and Indo Arabic layouts on a backbone of paisleys and fill the gaps afterward. If you are learning, practice the paisley curve on paper first; it is the shape that most shows whether a hand is confident.
10. Jaali Mehndi Design
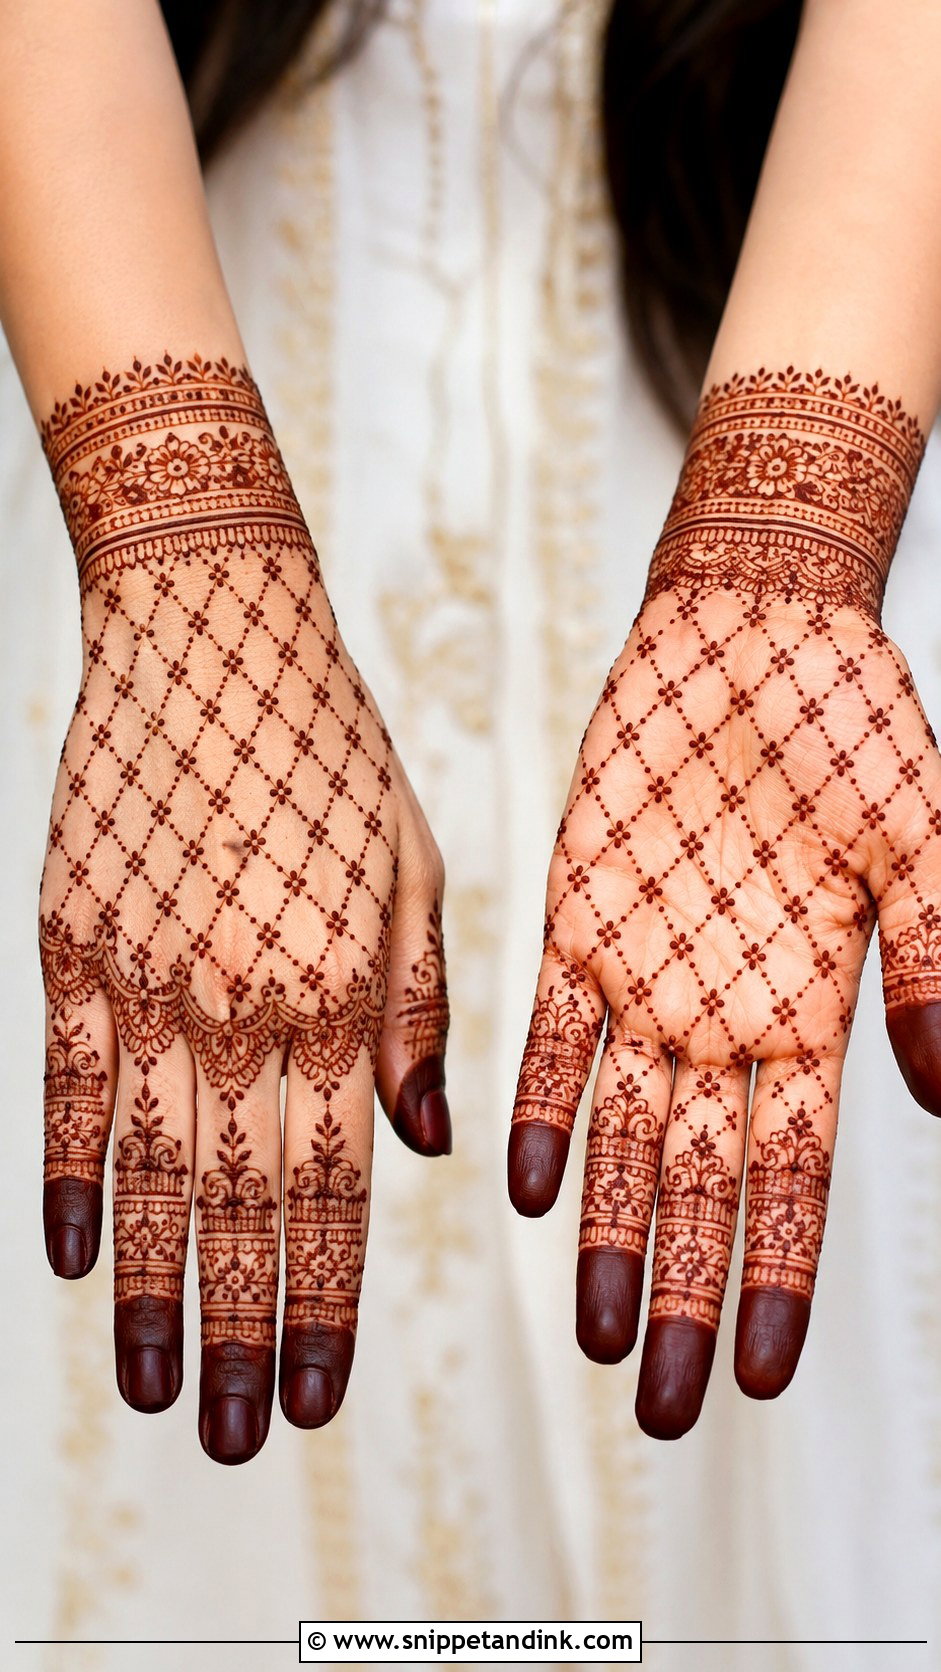
Jaali is the net or mesh pattern that gives henna a lace effect, especially on the back of the hand where it looks like a glove. Even spacing is everything; an uneven grid looks like a mistake once the stain darkens. I draw the outer frame of the mesh first, then the diagonal lines one direction, then the other, and finish with dots in each gap. It looks detailed but uses fine lines, so the color is often slightly lighter than solid areas.
11. Finger Mehndi Design
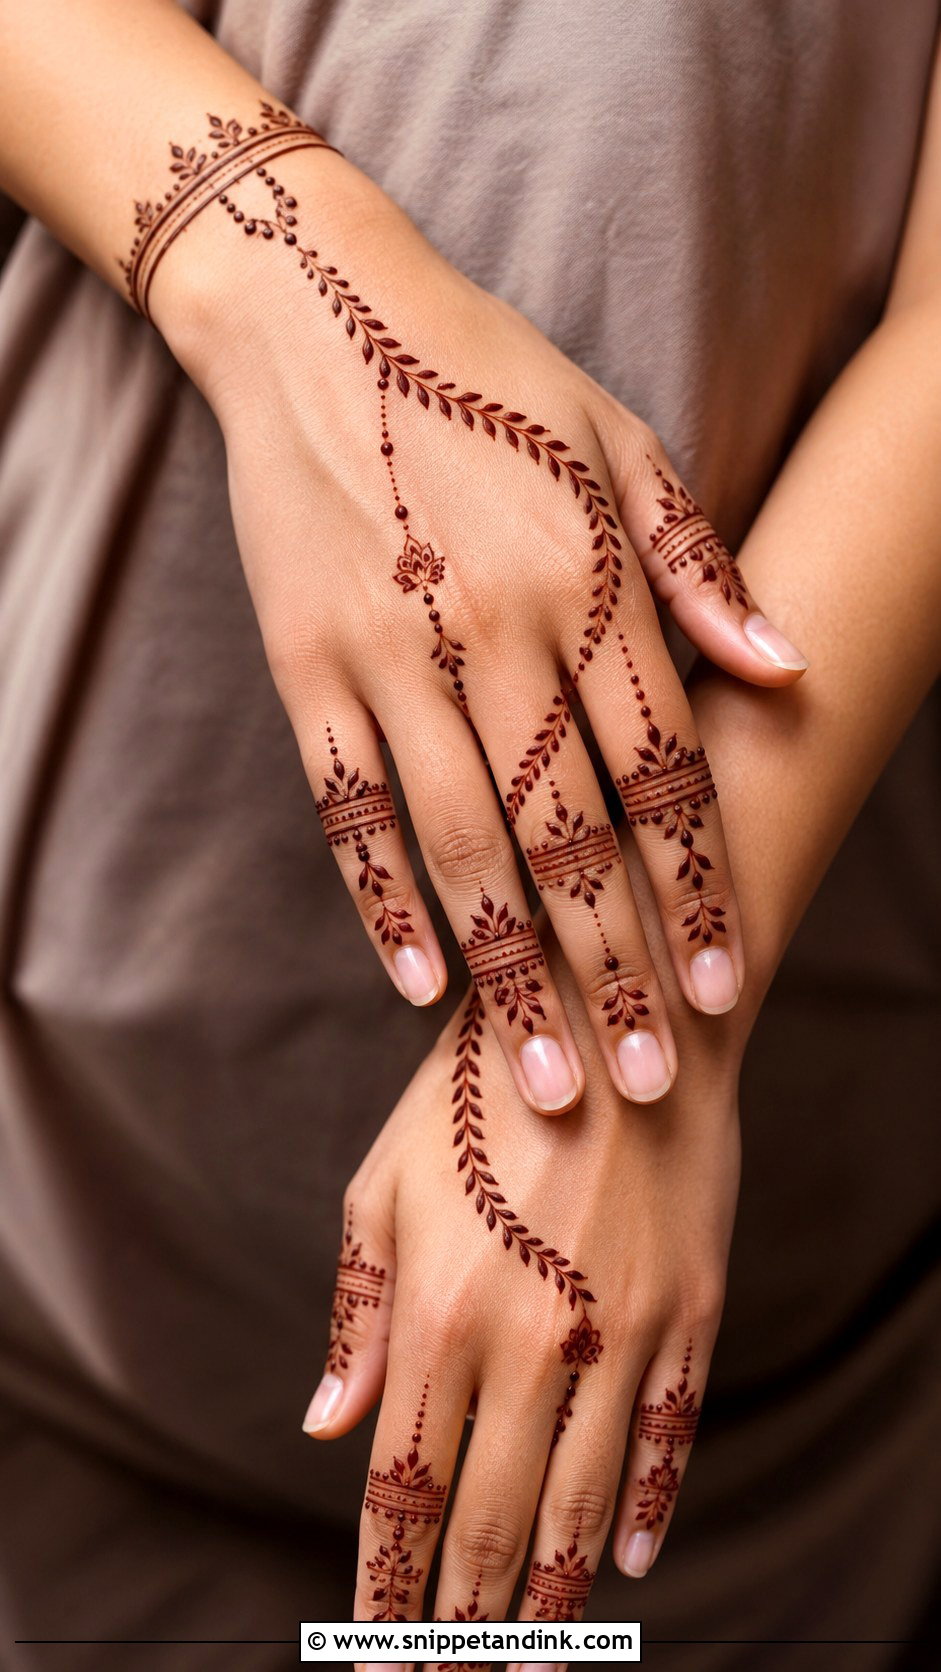
Finger designs make the hands look decorated without covering them. I vary each finger slightly while keeping the same line style, then tie them together with a slim wrist band or a light trail across the back of the hand. The fingertips stain darkest, which is why finger work photographs well. One honest drawback: fingers are in constant use, so the outer lines wear off within a week, faster if you wash up often.
12. Wrist Bracelet Mehndi Design
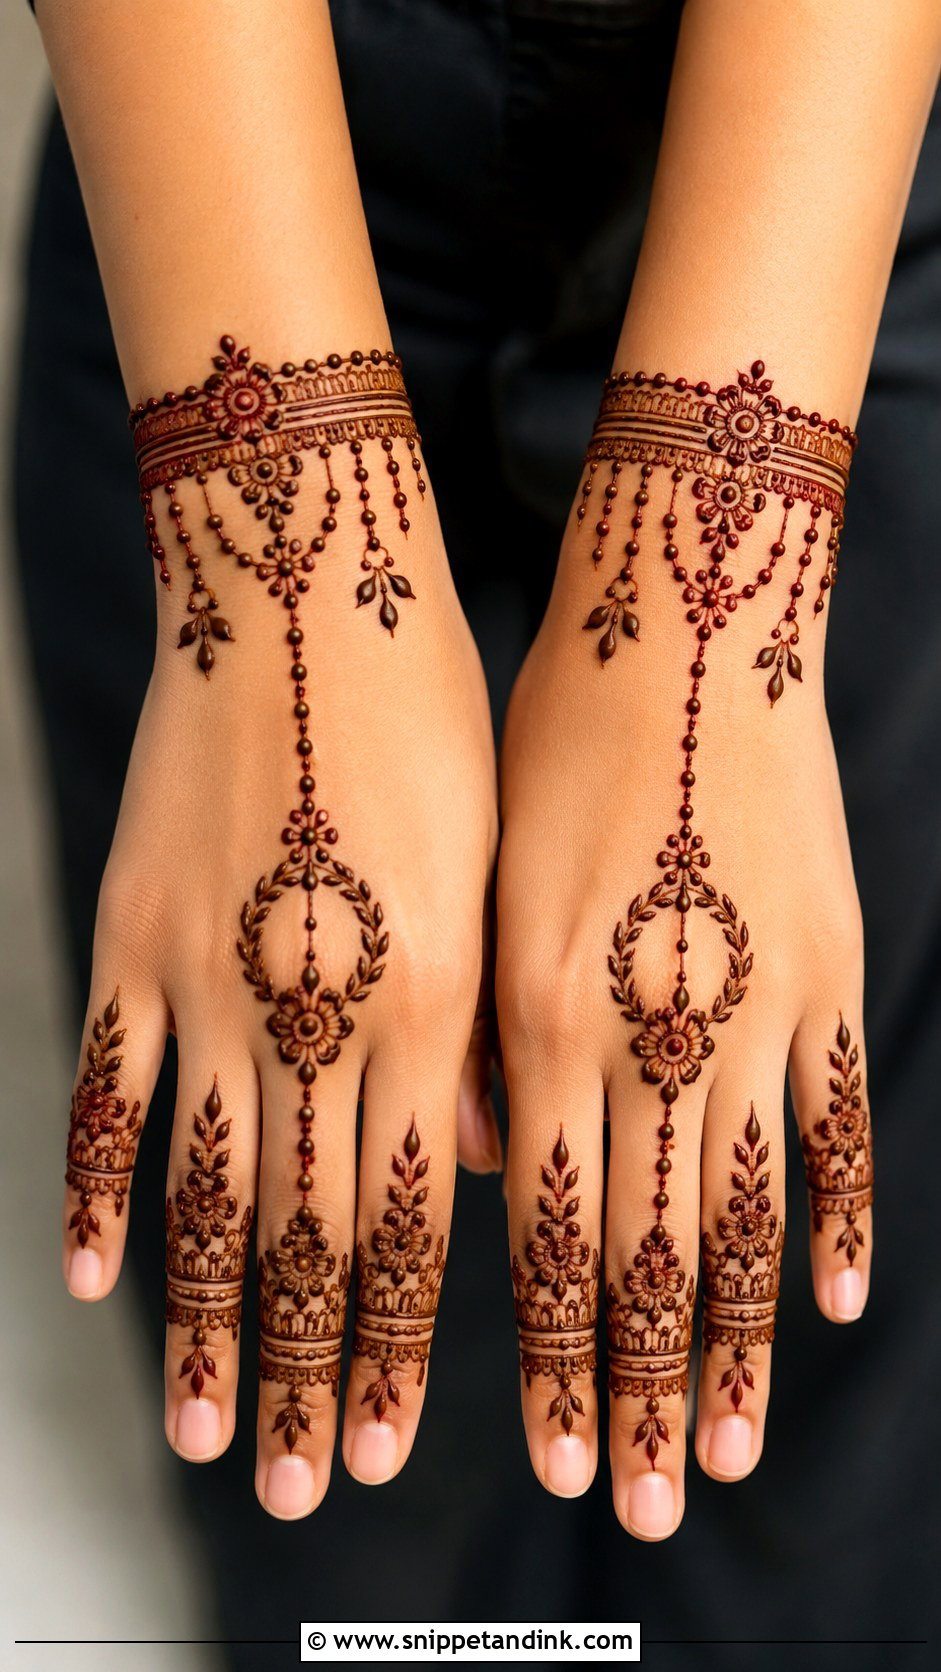
A Wrist bracelet mehndi design wraps the wrist in bands, beads and floral chains and lets small details hang toward the hand like charms. Some versions add a finger trail to make a hand chain effect. I measure the band against the wrist bone so it sits like a bangle and not halfway up the arm, since a misplaced band looks odd when real bangles go on. It works for bridesmaids and Eid when someone wants henna without full coverage.
13. Jewelry Mehndi Design
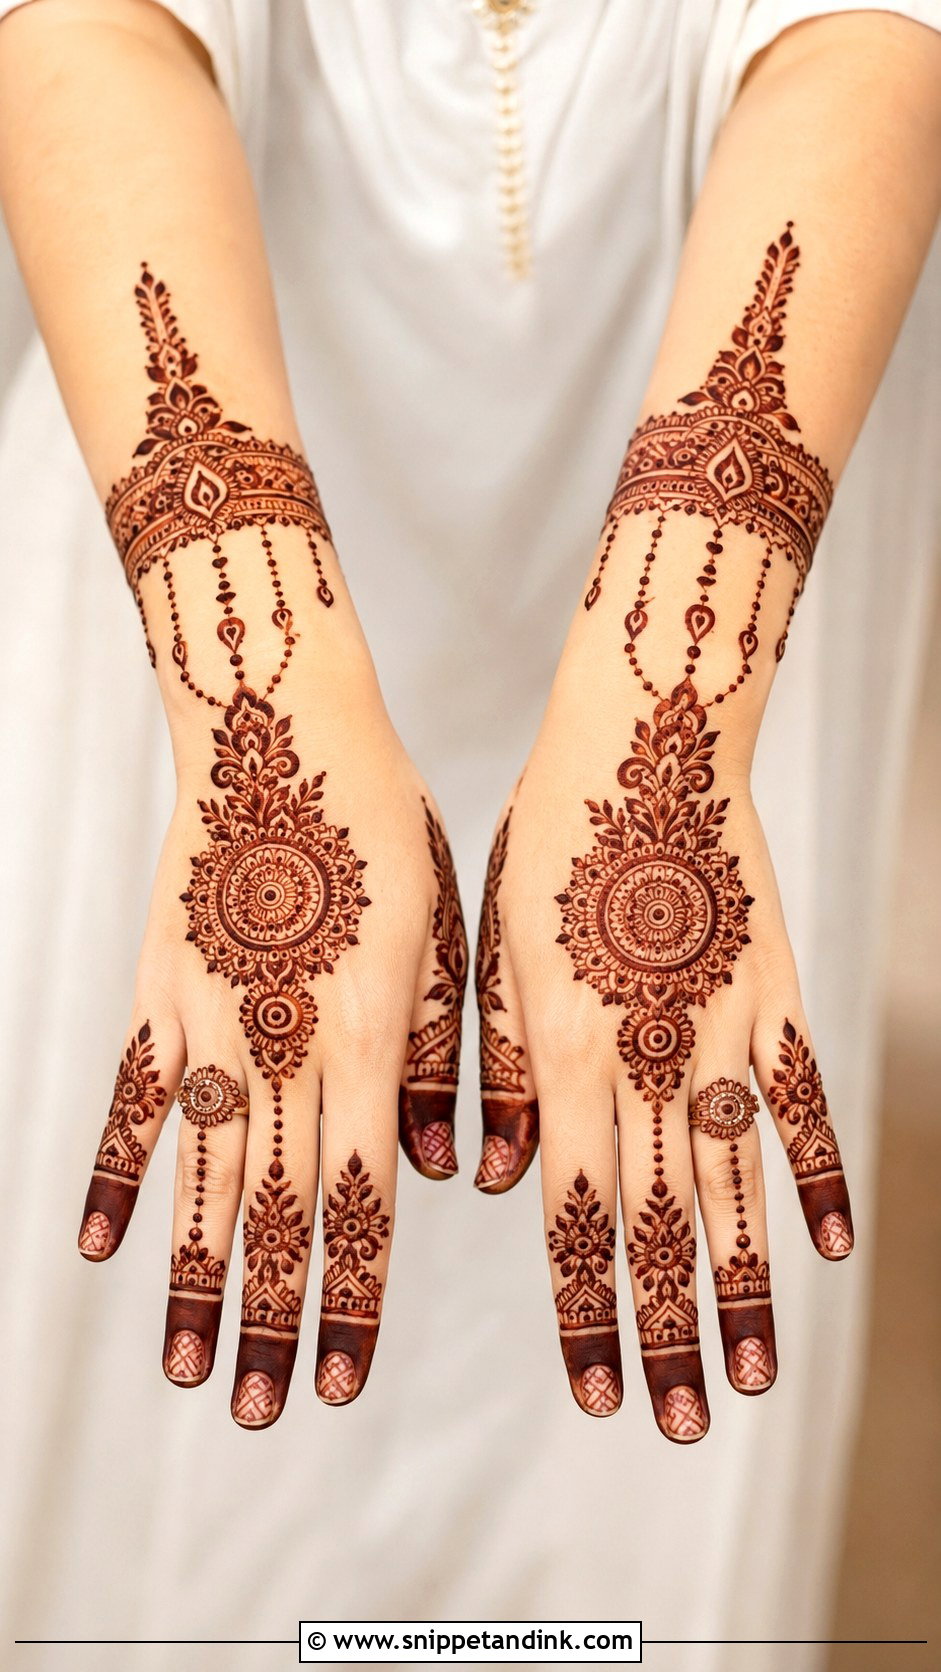
Jewelry mehndi draws rings, chains and cuffs directly on the skin. The usual layout starts at a wrist cuff, runs dotted chains to finger rings and adds a small pendant motif on the back of the hand. Thin, clean lines make it look like fine jewelry; heavy lines make it look like costume pieces. I keep a little space where the real ring will sit, especially for engagement events, so the metal and the henna do not fight in close up photos.
14. Moroccan Henna Design
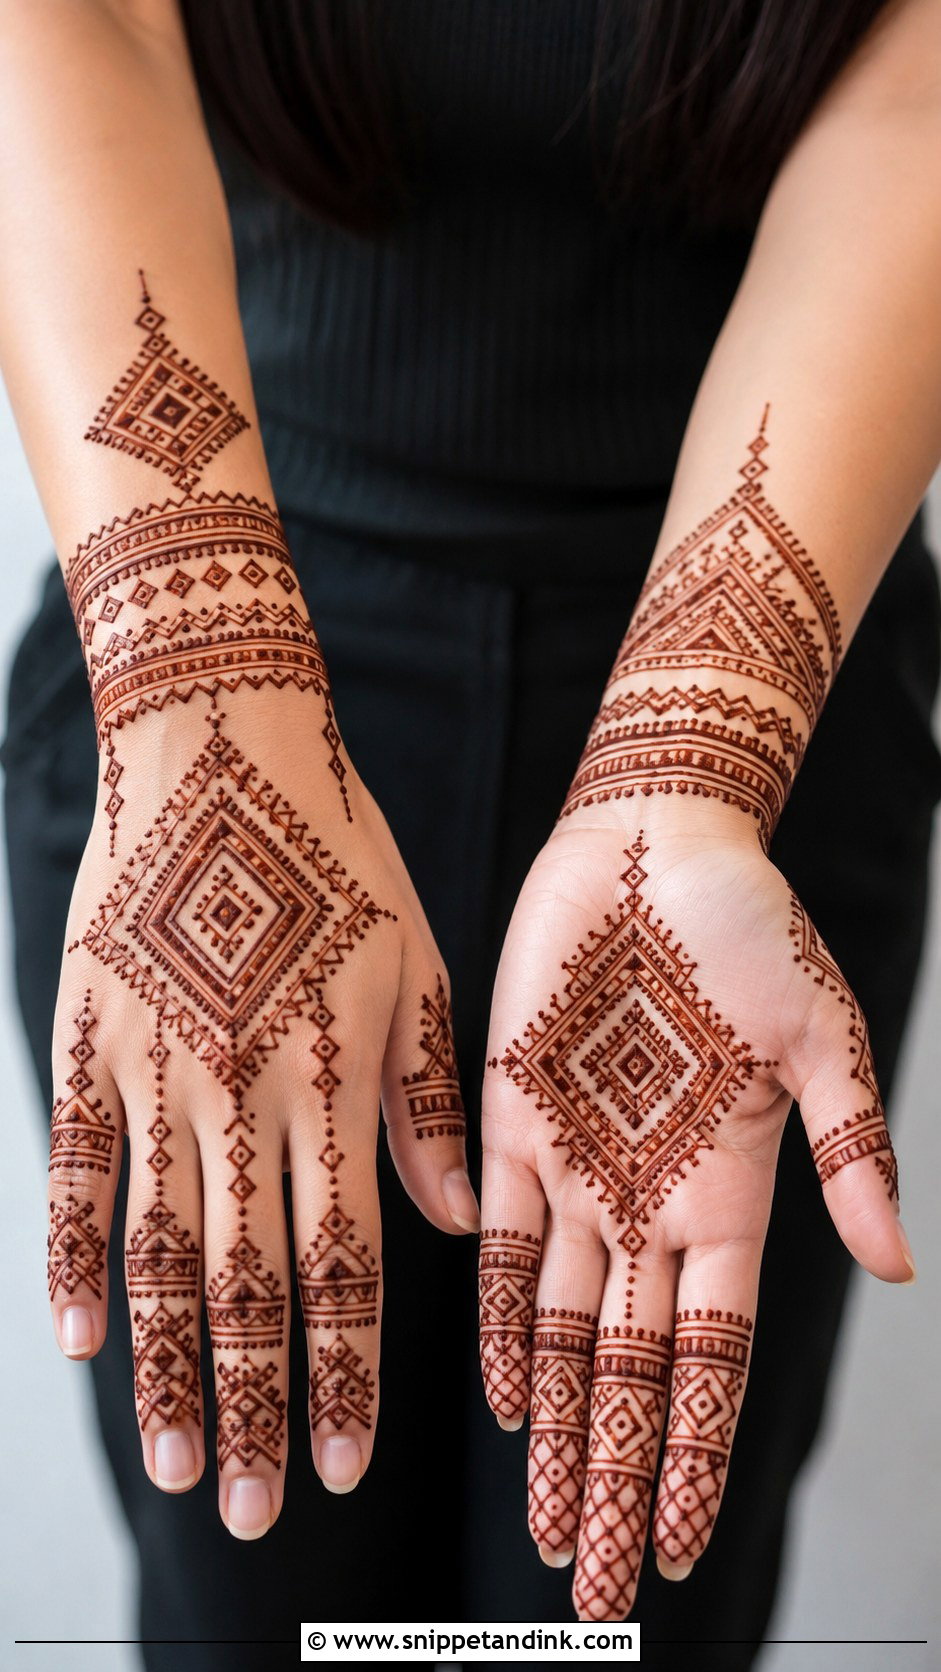
Moroccan henna is geometric: diamonds, triangles, grids and zigzag bands laid out in strong symmetry. It looks sharper and more graphic than any floral style. Straight lines are less forgiving than curves, so I plan the main divisions with tiny guide dots before drawing. Both hands are often mirrored, which looks neat in photos but doubles the chance of a mismatch, so I work the same section on each hand in turn rather than finishing one hand first.
15. Gulf Khaleeji Mehndi Design
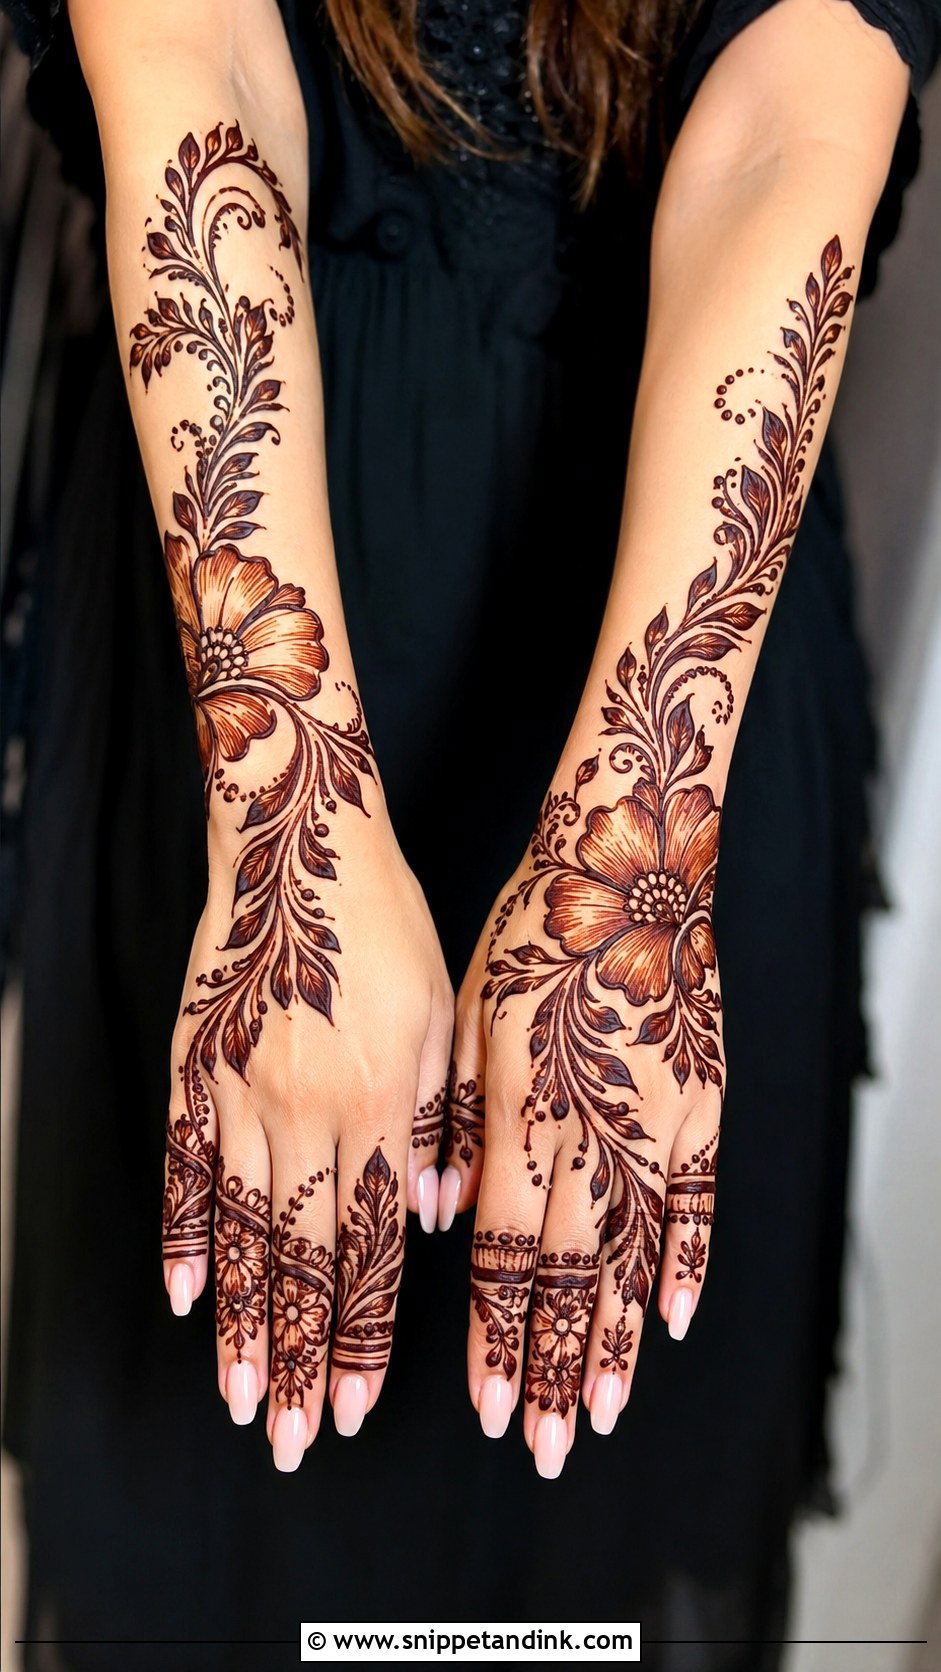
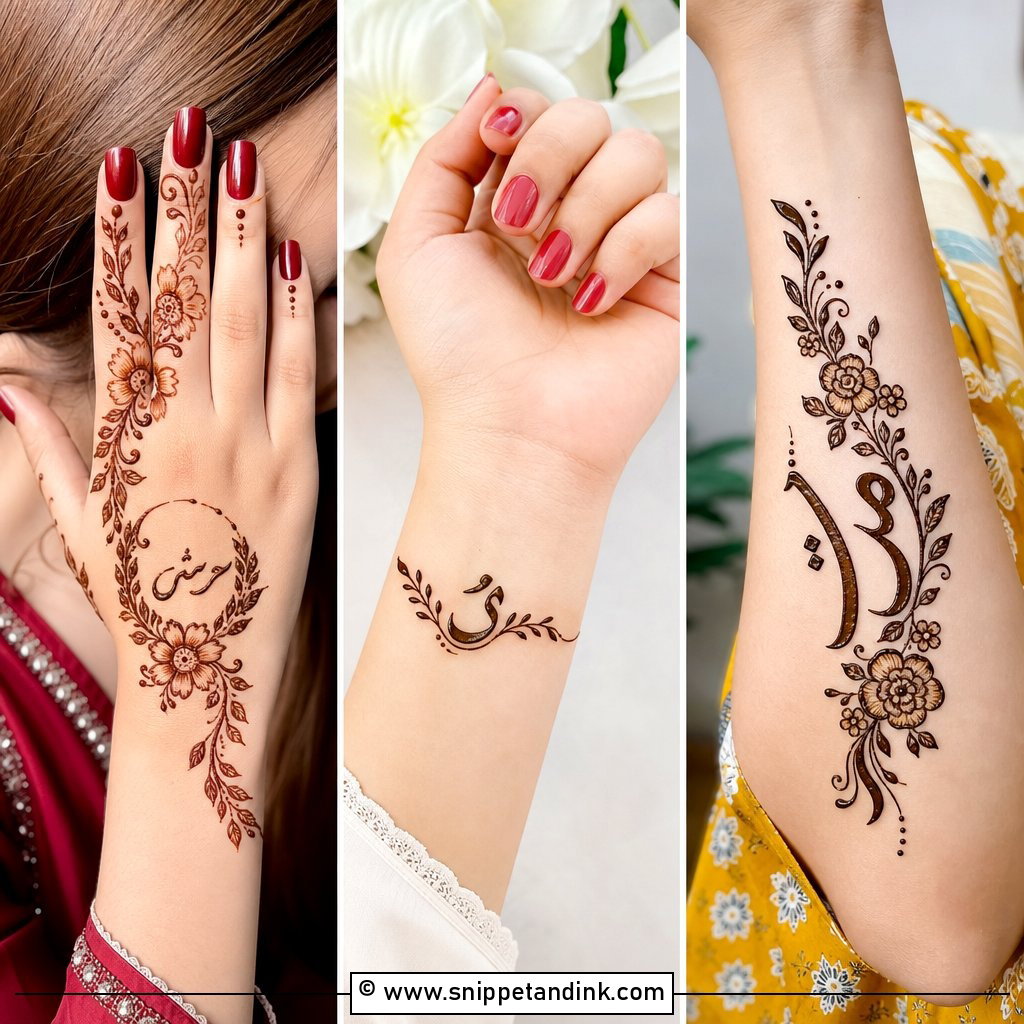
A Gulf Khaleeji mehndi design uses oversized flowers, sweeping leaves and lots of open skin, usually placed to one side of the back hand and running up the wrist. It suits modest fashion and Eid well because it looks bold from a distance. The outlines are thick and the petals shaded, which takes a firmer paste and steady pressure on the cone. Expect a quicker sitting than Indian work; the impact comes from scale, not density.
16. Khafif Mehndi Design
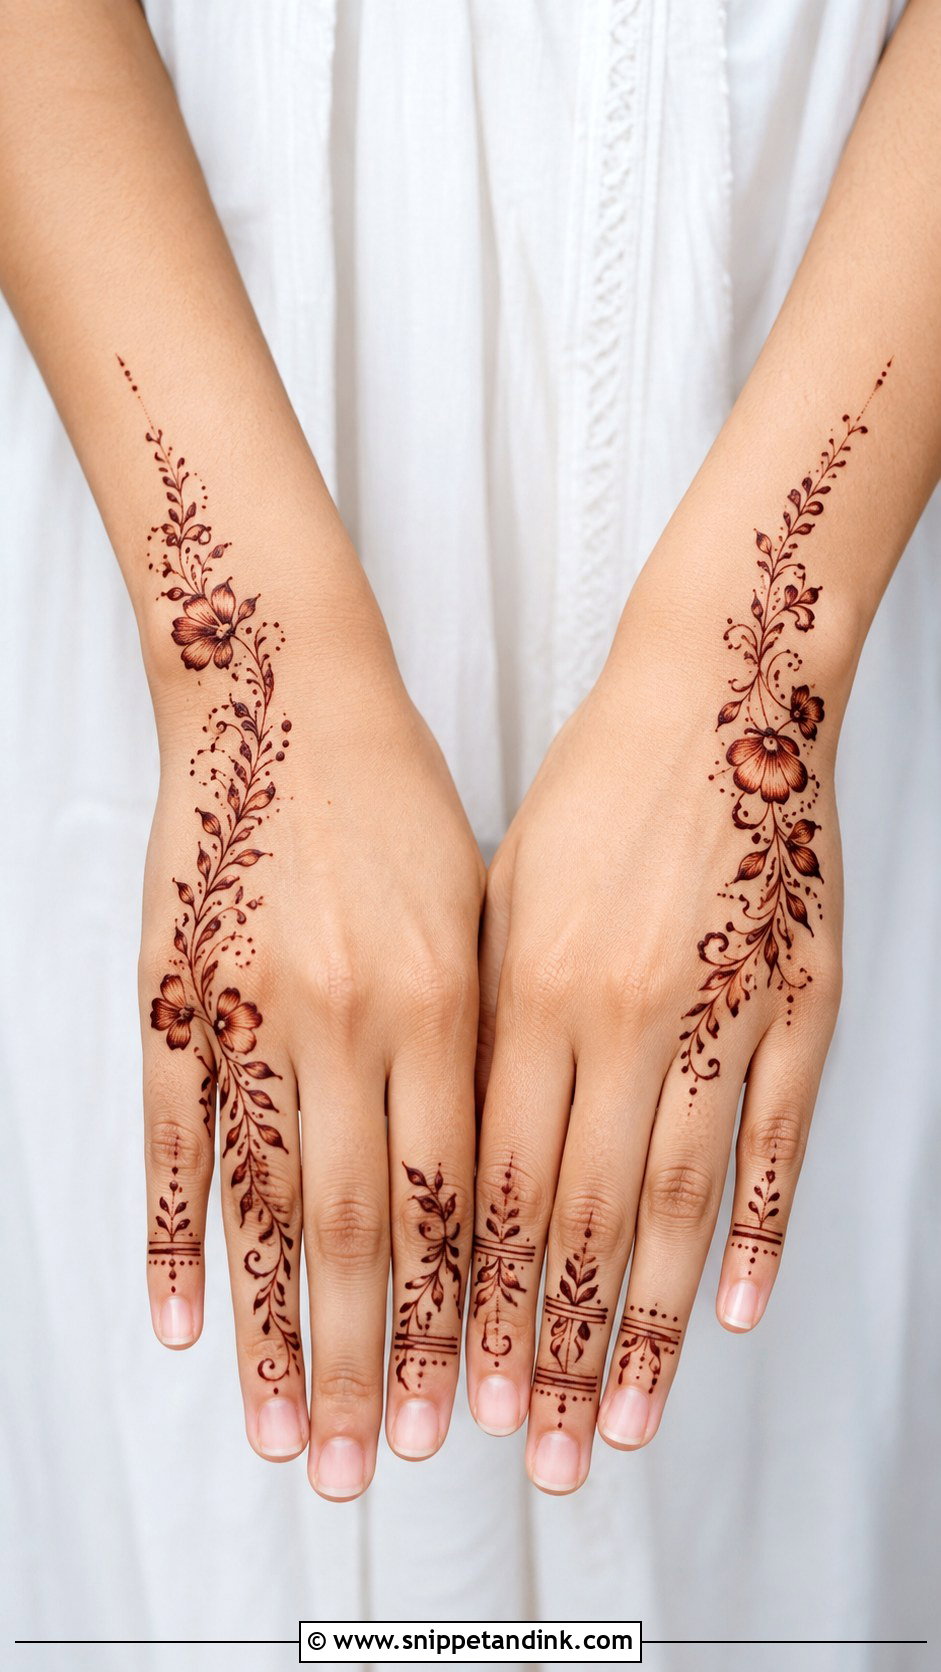
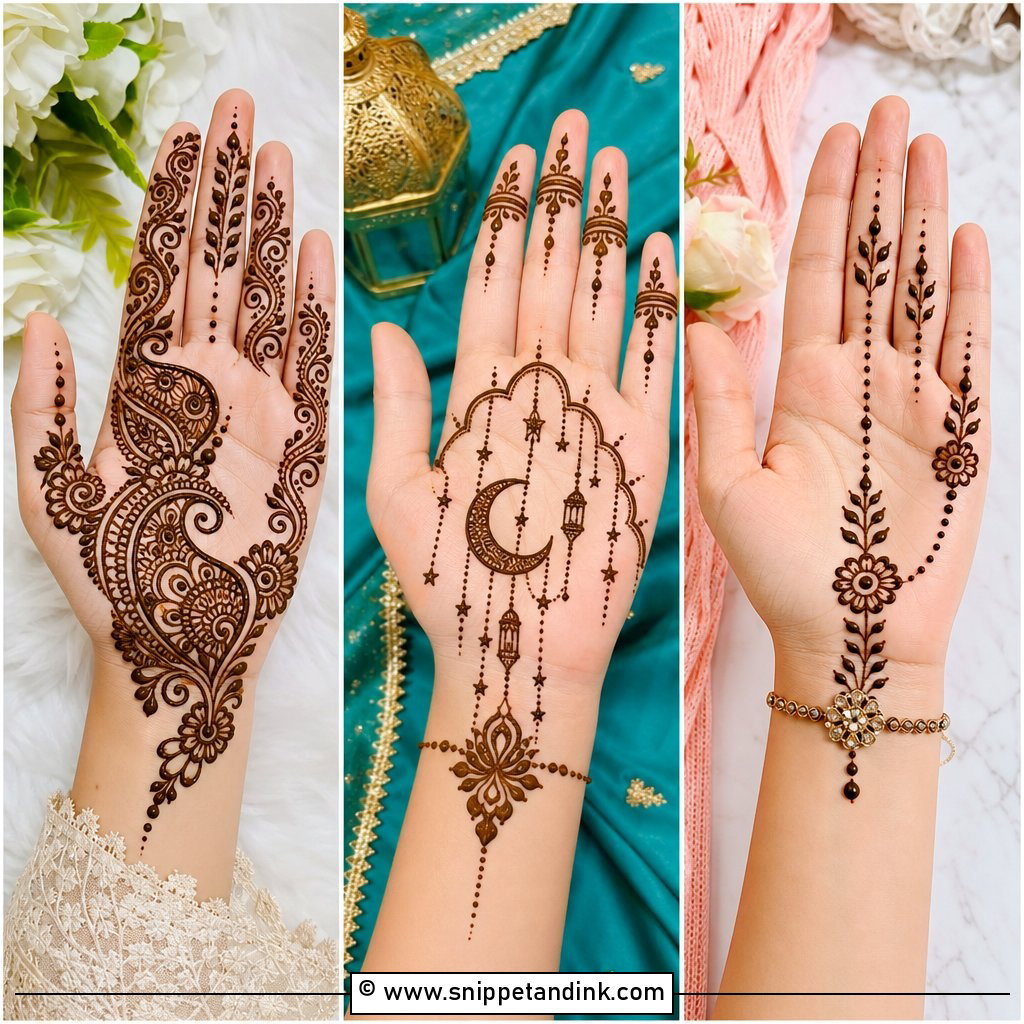
Khafif mehndi design is the lighter side of Arabic and Gulf henna, made of thin vines, small flowers and dots with the skin showing between them. I recommend it for nikah guests, office friendly occasions and anyone who dislikes heavy coverage. The beauty is in the spacing, so I resist filling gaps. Because the lines are fine, they need a good, fresh paste to stain well; old paste gives thin lines a pale orange that fades quickly.
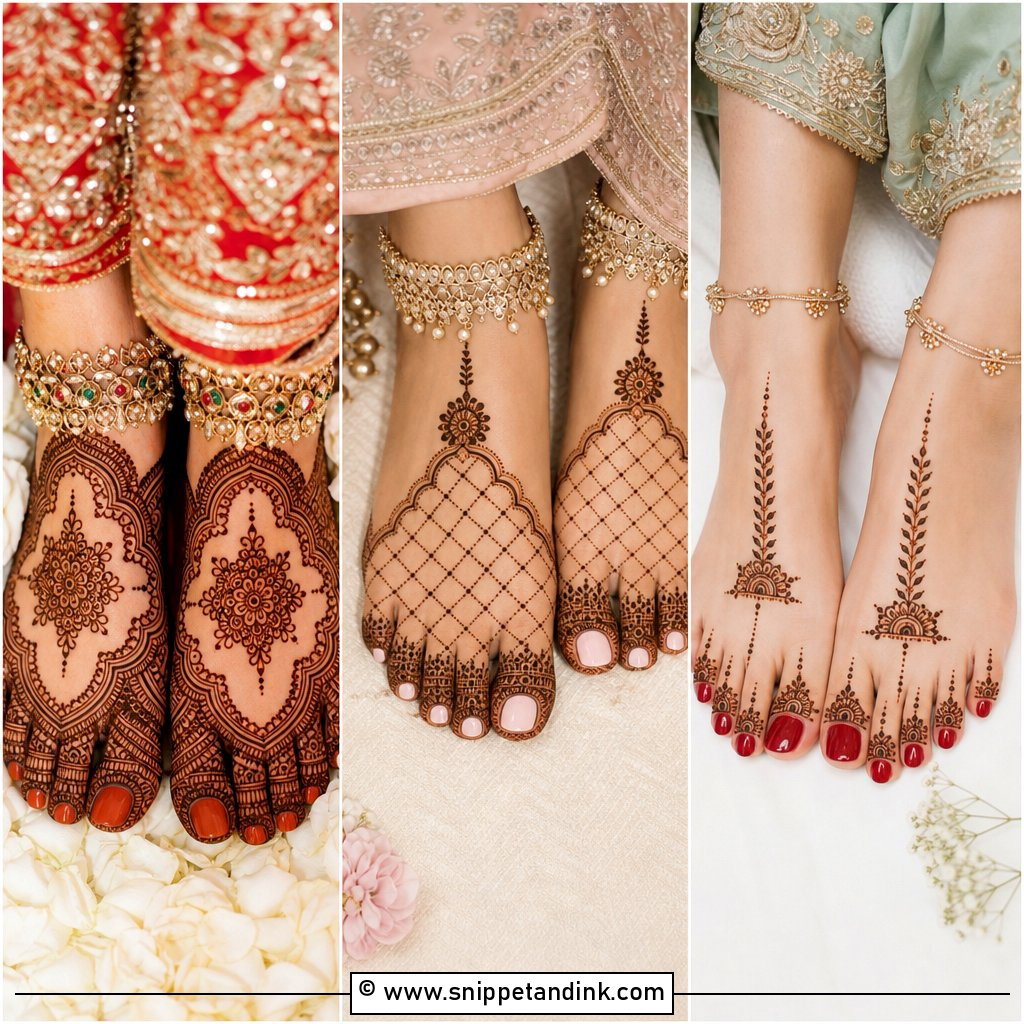
17. Bridal Foot Mehndi Design
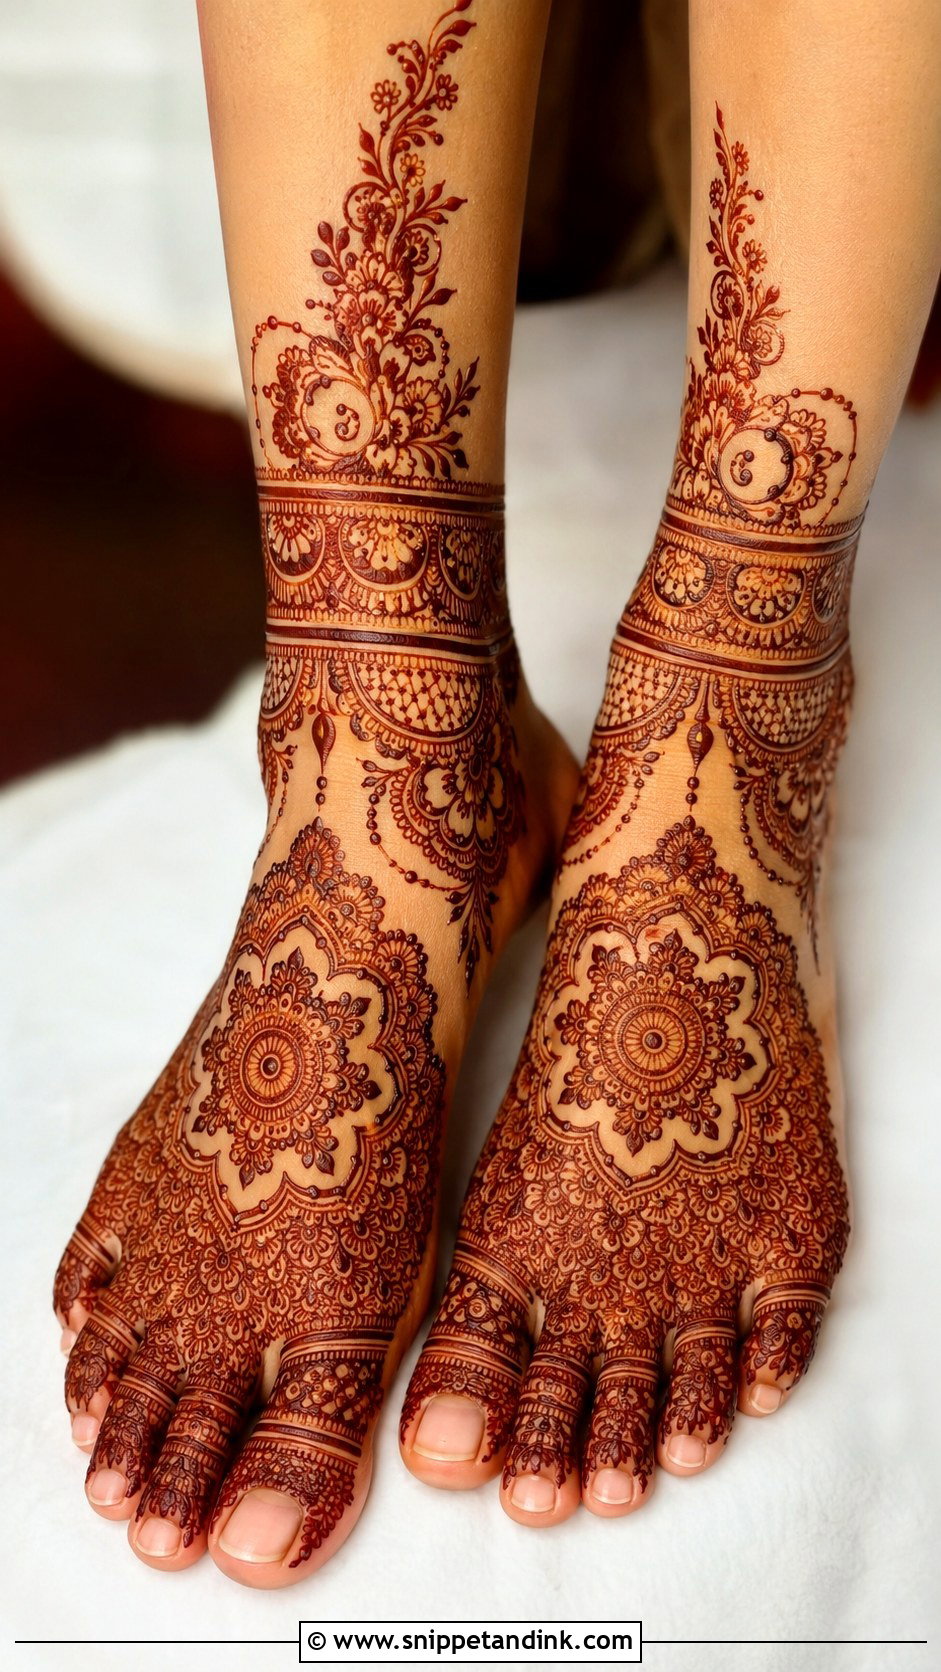
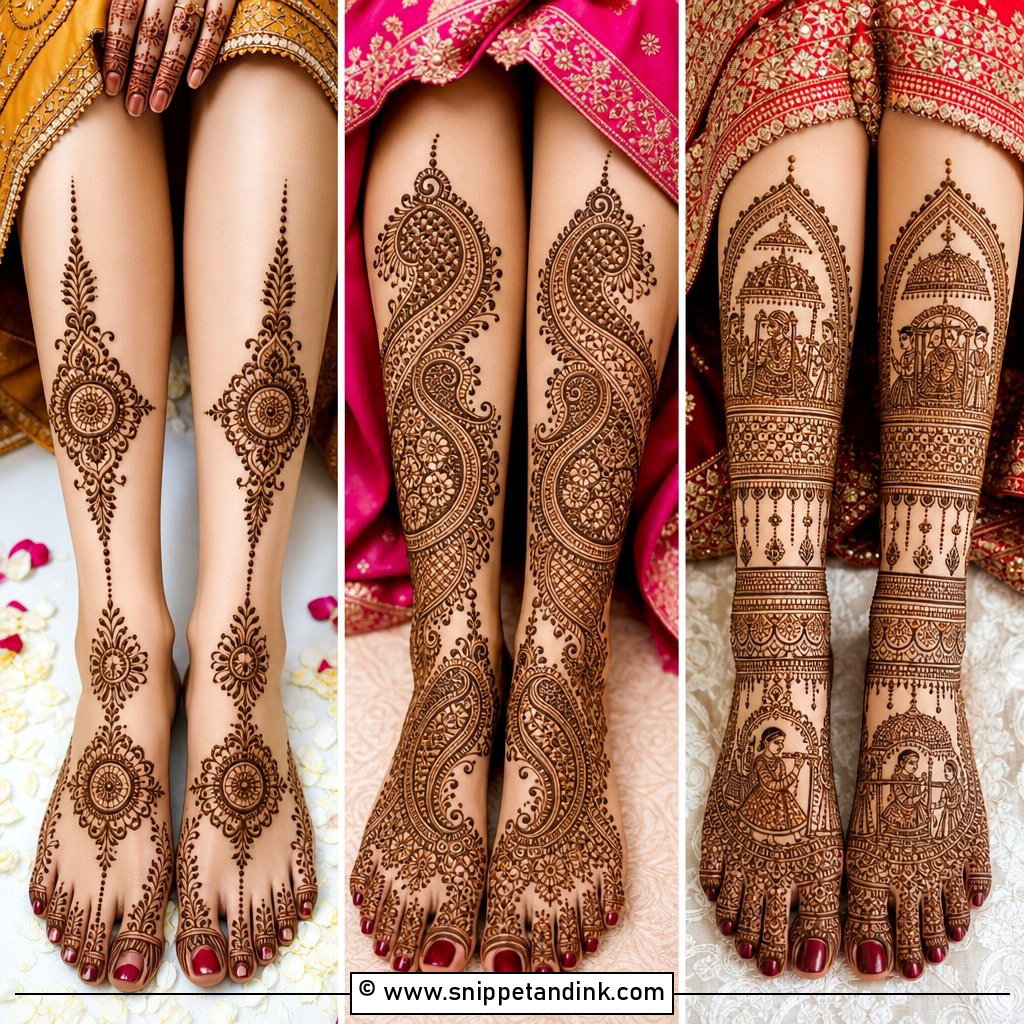
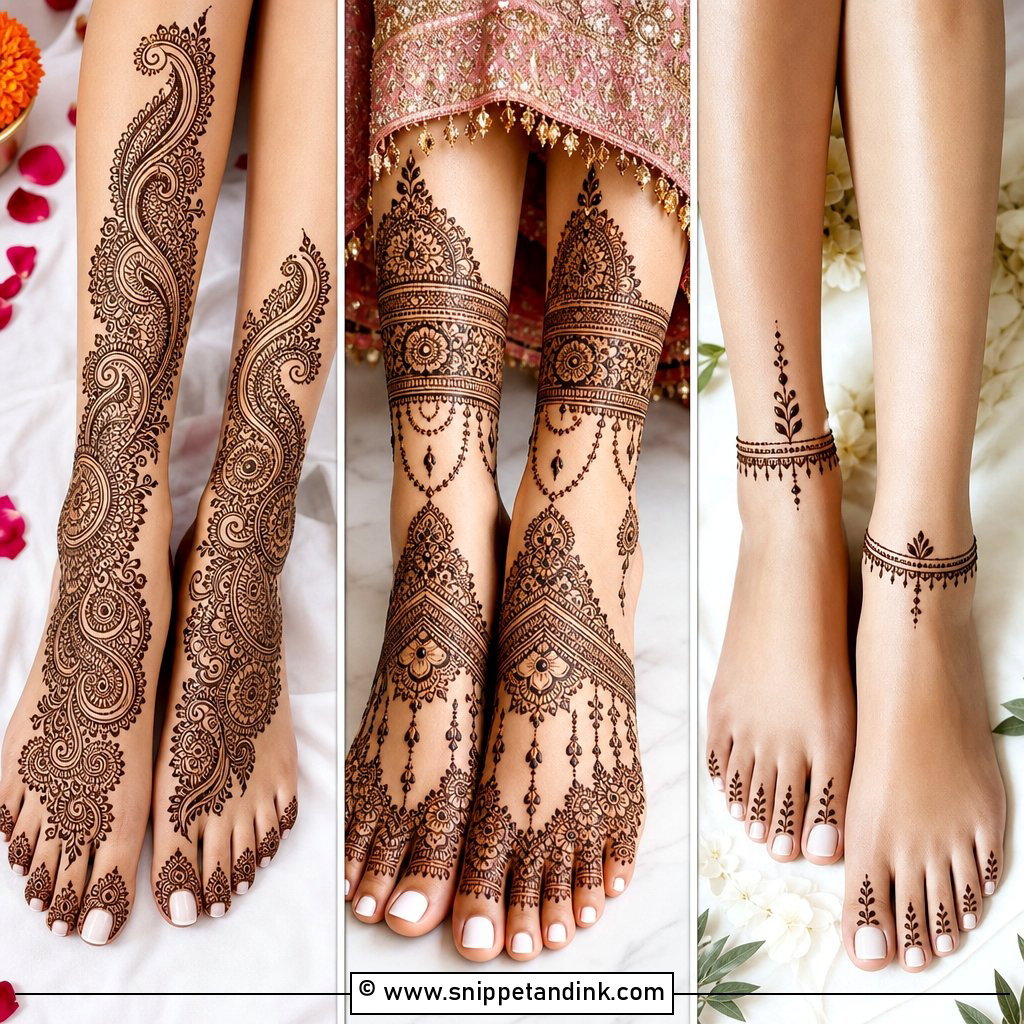
Bridal feet complete the look, with toe details, anklet bands, a mandala on top of the foot and paisley borders sometimes running up the shin. Feet stain very dark, often darker than the back of the hand, because circulation and thicker skin hold the dye. The practical issue is drying: you cannot walk until the paste is dry, so I do feet first or last depending on whether the bride needs to move during the session. Leave the toes slightly less crowded so sandal straps do not cut through the design.
18. Simple Foot Mehndi Design
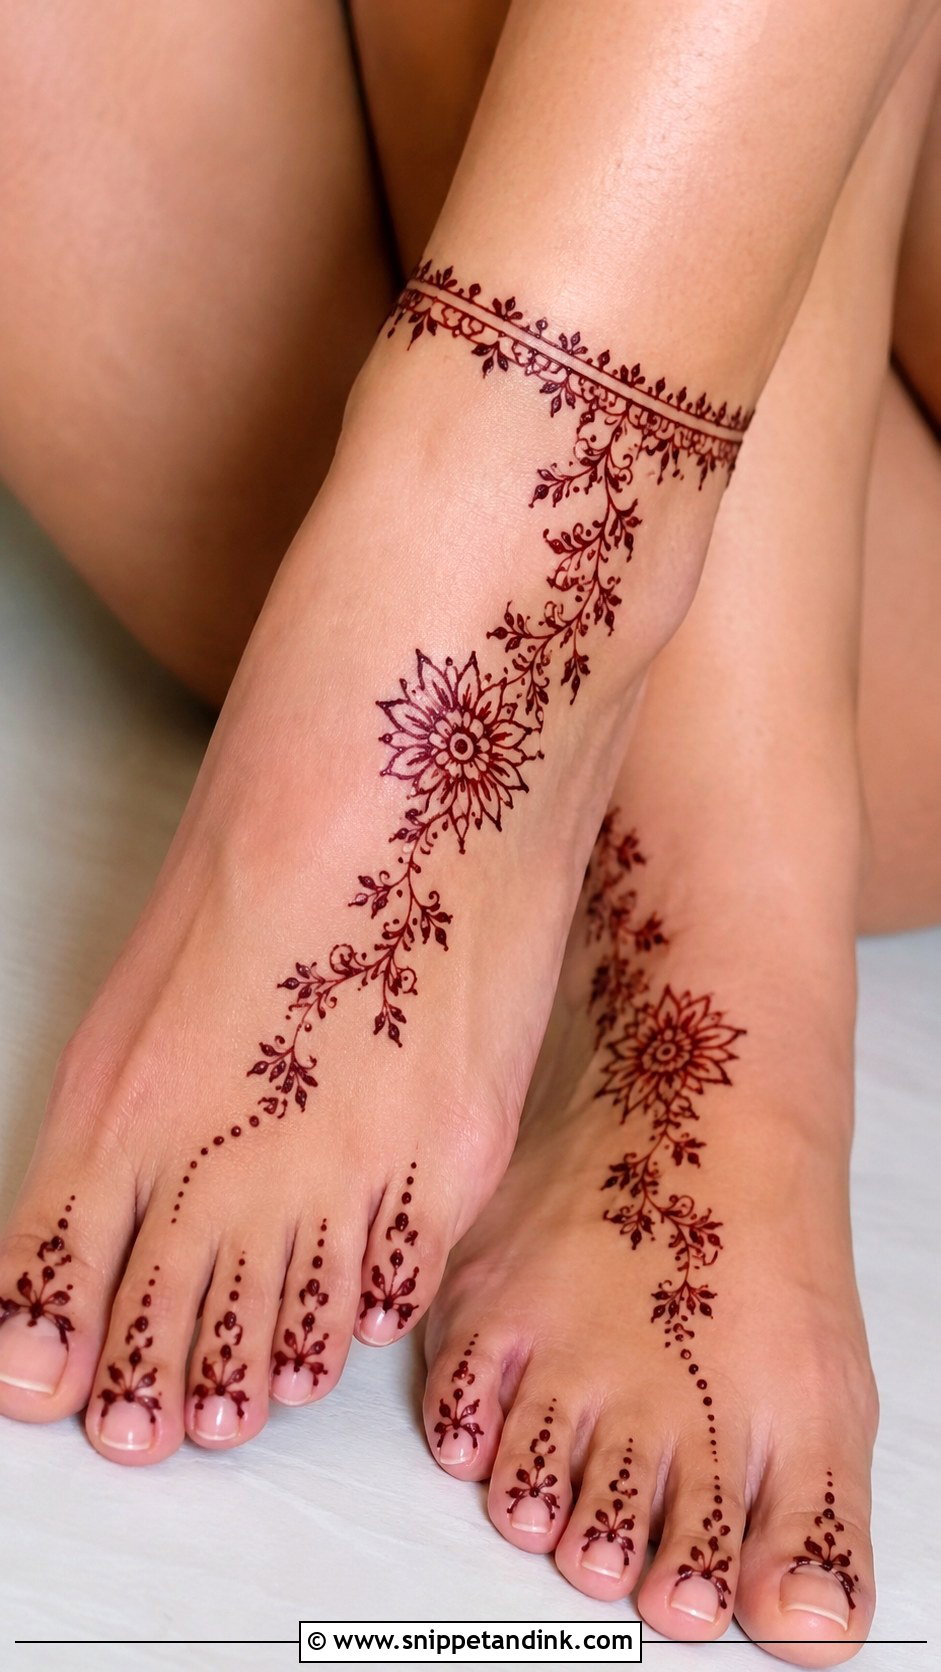
A simple foot design is a floral trail across the top of the foot, decorated toes and a slim anklet band, or a small mandala with dots toward the toes. It dries much faster than bridal feet and suits festivals, vacations and small ceremonies. Avoid putting it on just before a beach day, though; salt water and sand will lift wet paste and shorten the stain’s life. Open sandals show it off best.
19. Eid Mehndi Design
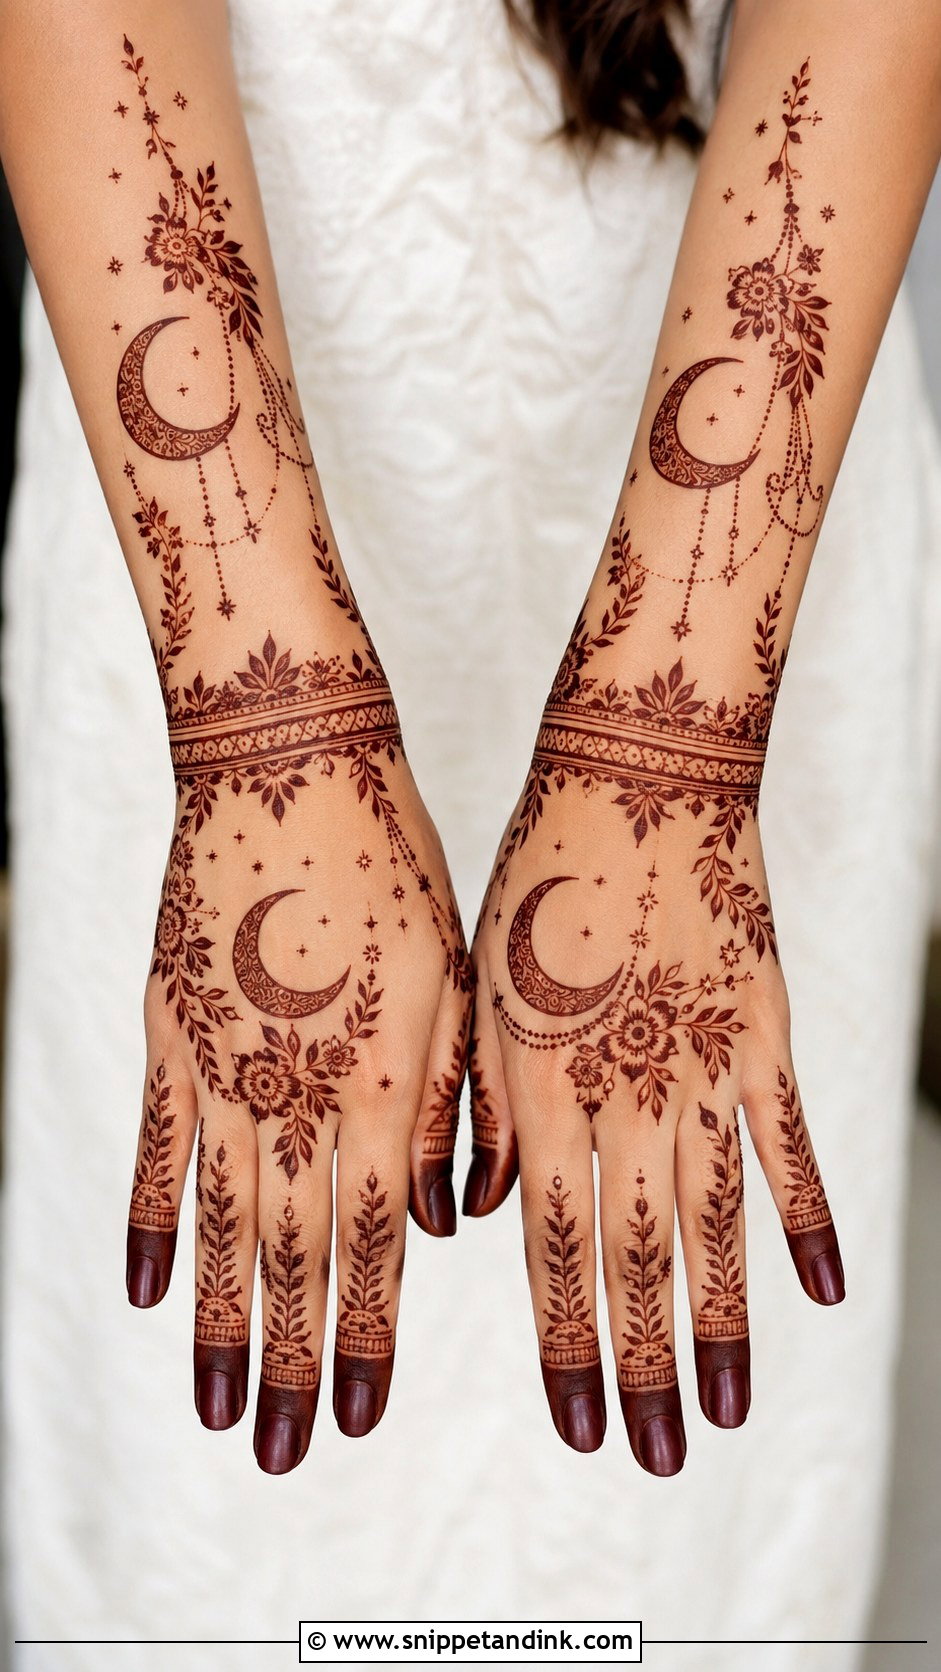
For Eid, most people who sit with me want Arabic florals on the back hand, filled fingertips, a bracelet band and maybe a moon or star. The design needs to be comfortable for prayer and wudu, so I suggest applying it the night before so the paste is off and the stain set by morning. Water on fresh henna lightens it, so ablutions in the first hours can affect the color. Balanced designs on both hands look best in family photos.
20. Diwali Mehndi Design
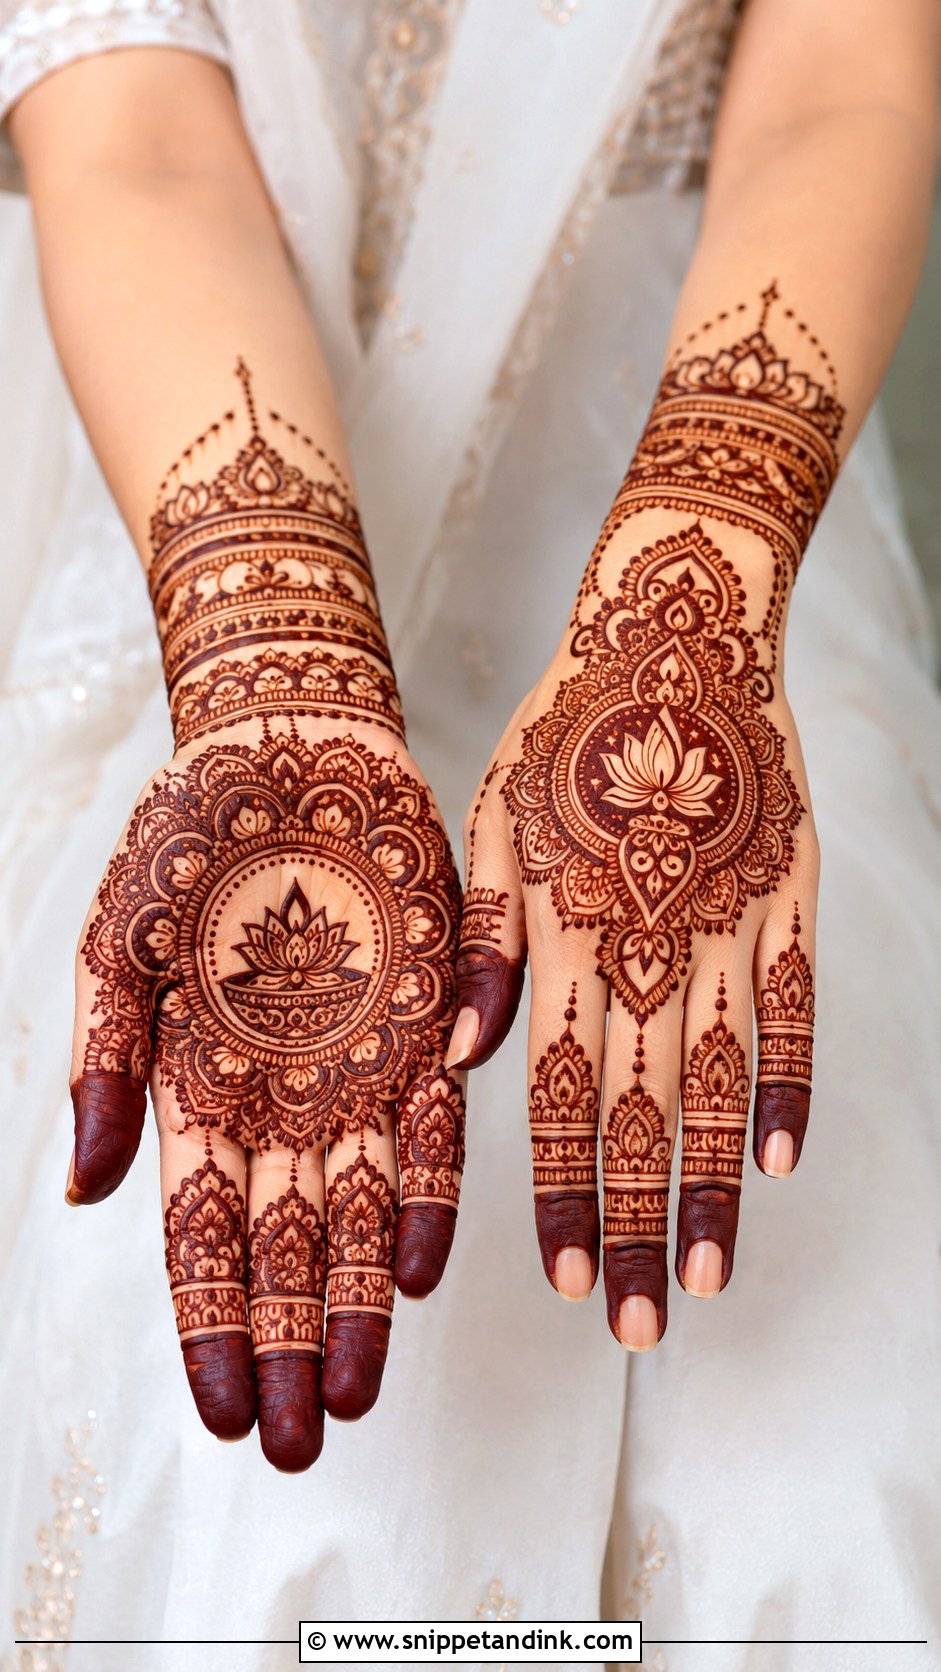
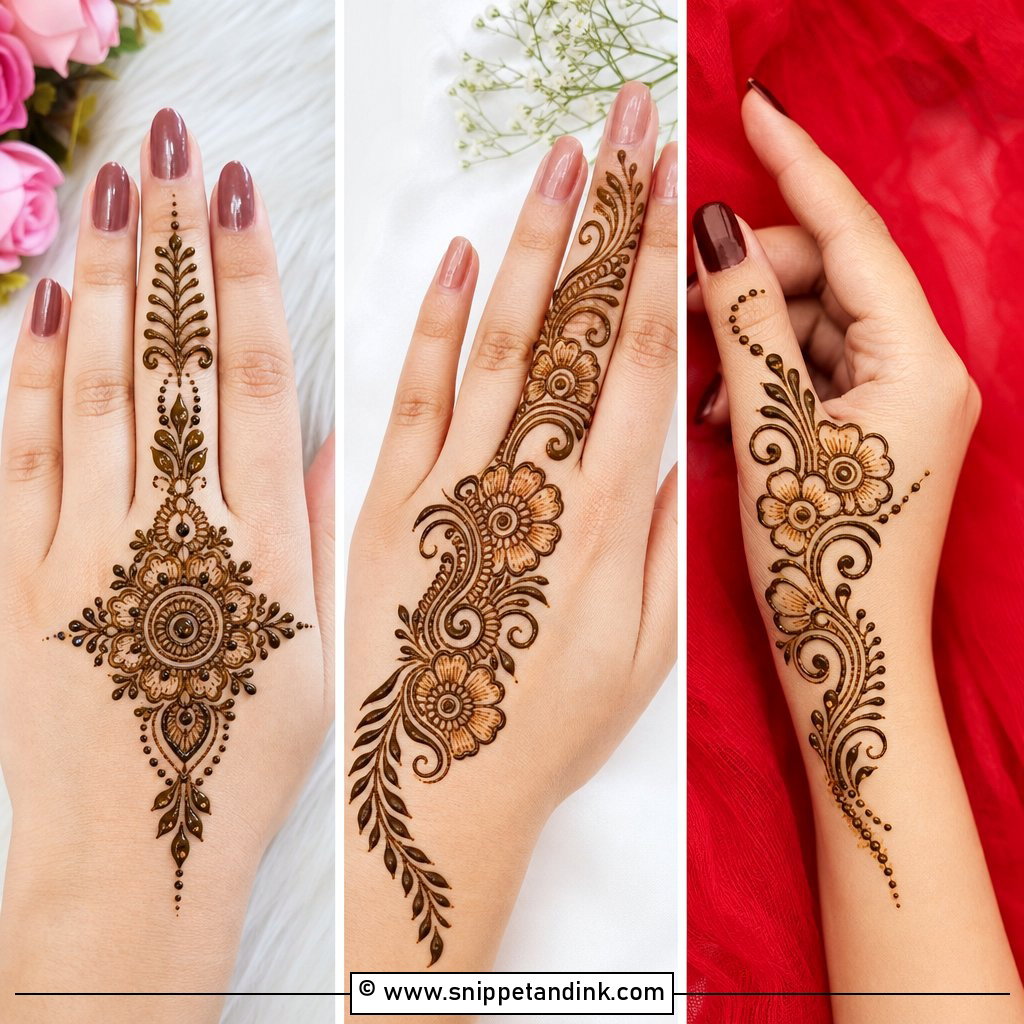
Diwali mehndi uses lotus flowers, diyas, paisleys and mandalas, with a round centerpiece on the palm and bangle bands at the wrist. I time these to be applied a day or two before the festival, since the stain looks deepest on day two. Keep the wrist bands slightly lower than usual if you will wear heavy bangles, as they rub against fresh stain. Traditional versions fill the fingertips; modern ones leave space around a single centered mandala.
21. Engagement Mehndi Design
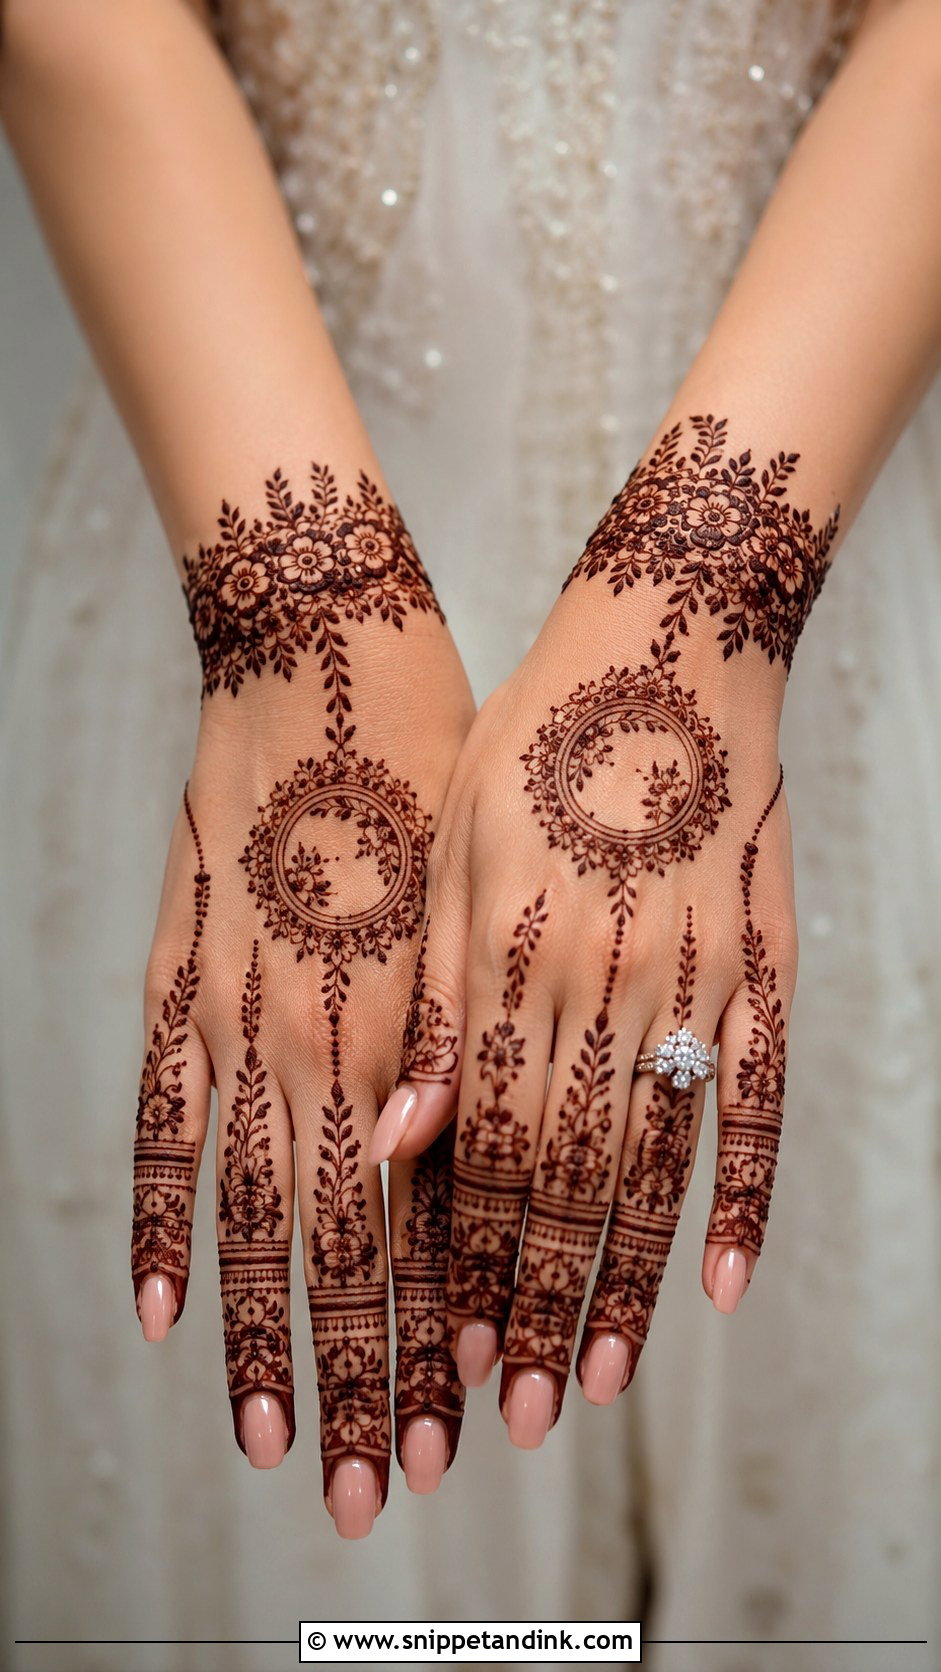
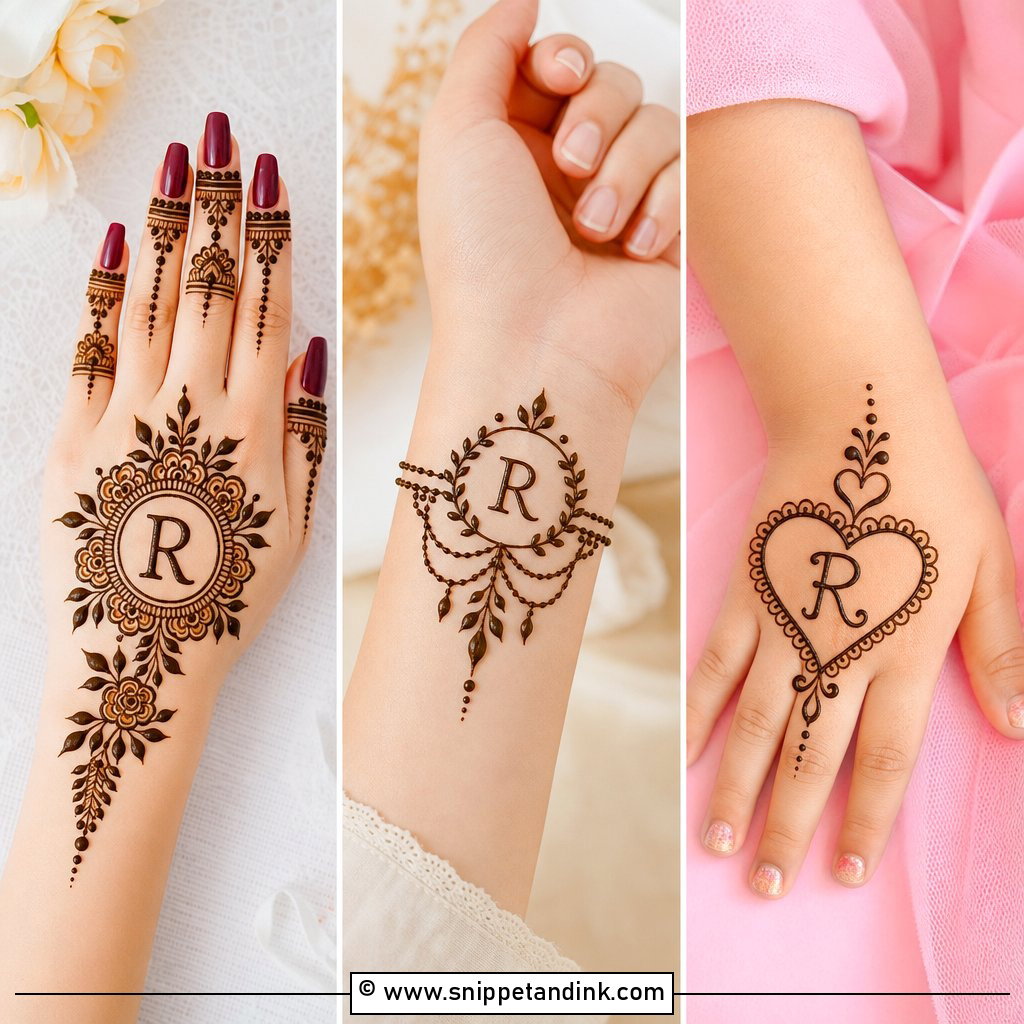
An Engagement mehndi design centers on the back of the left hand because the ring finger is the star of the photographs. I keep the area around that finger open or very lightly decorated so the ring stays visible, and put the fuller detail toward the wrist. Initials or a small heart can sit inside a flower. The palm stays lighter. Apply it a day or two ahead so the stain has deepened by the time rings are exchanged.
22. Nikah Mehndi Design
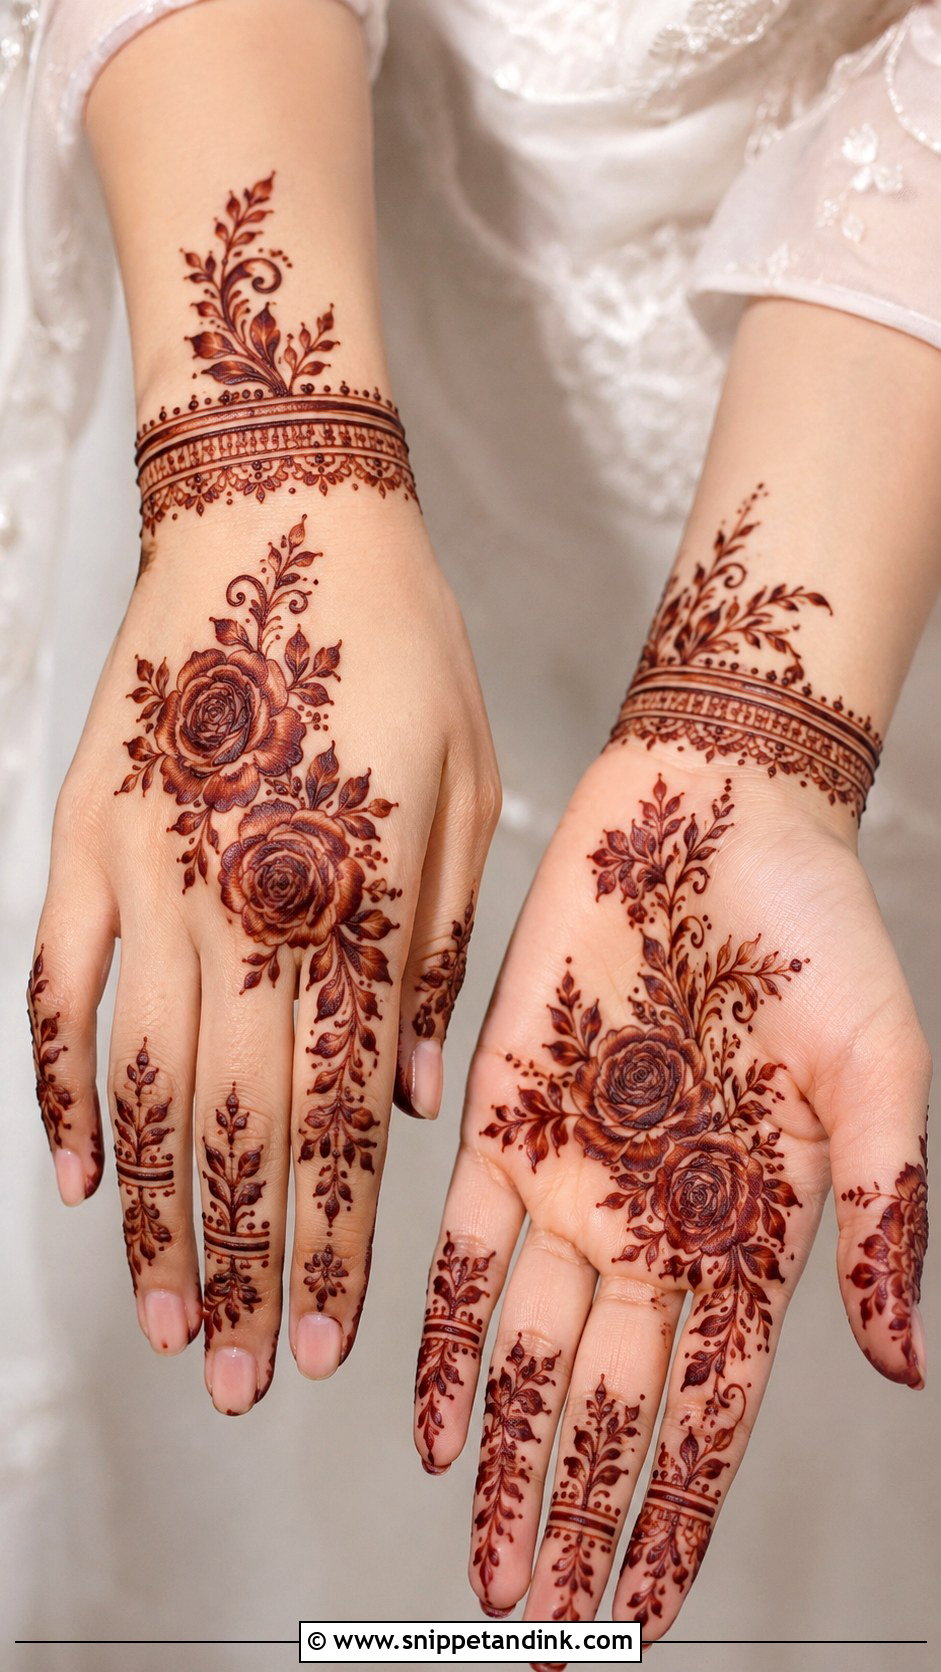
Nikah henna tends to be modest and refined: Arabic roses, vines, soft finger patterns and a slim wrist band. With white, ivory or pastel outfits, a lighter design keeps the contrast soft. I place the main florals on the back of the hand for ring and bouquet photos and leave the palm almost empty. Hiding initials or the date in a petal is a sweet detail, but keep the letters large enough that they survive the stain without blurring.
23. Baby Shower Mehndi Design
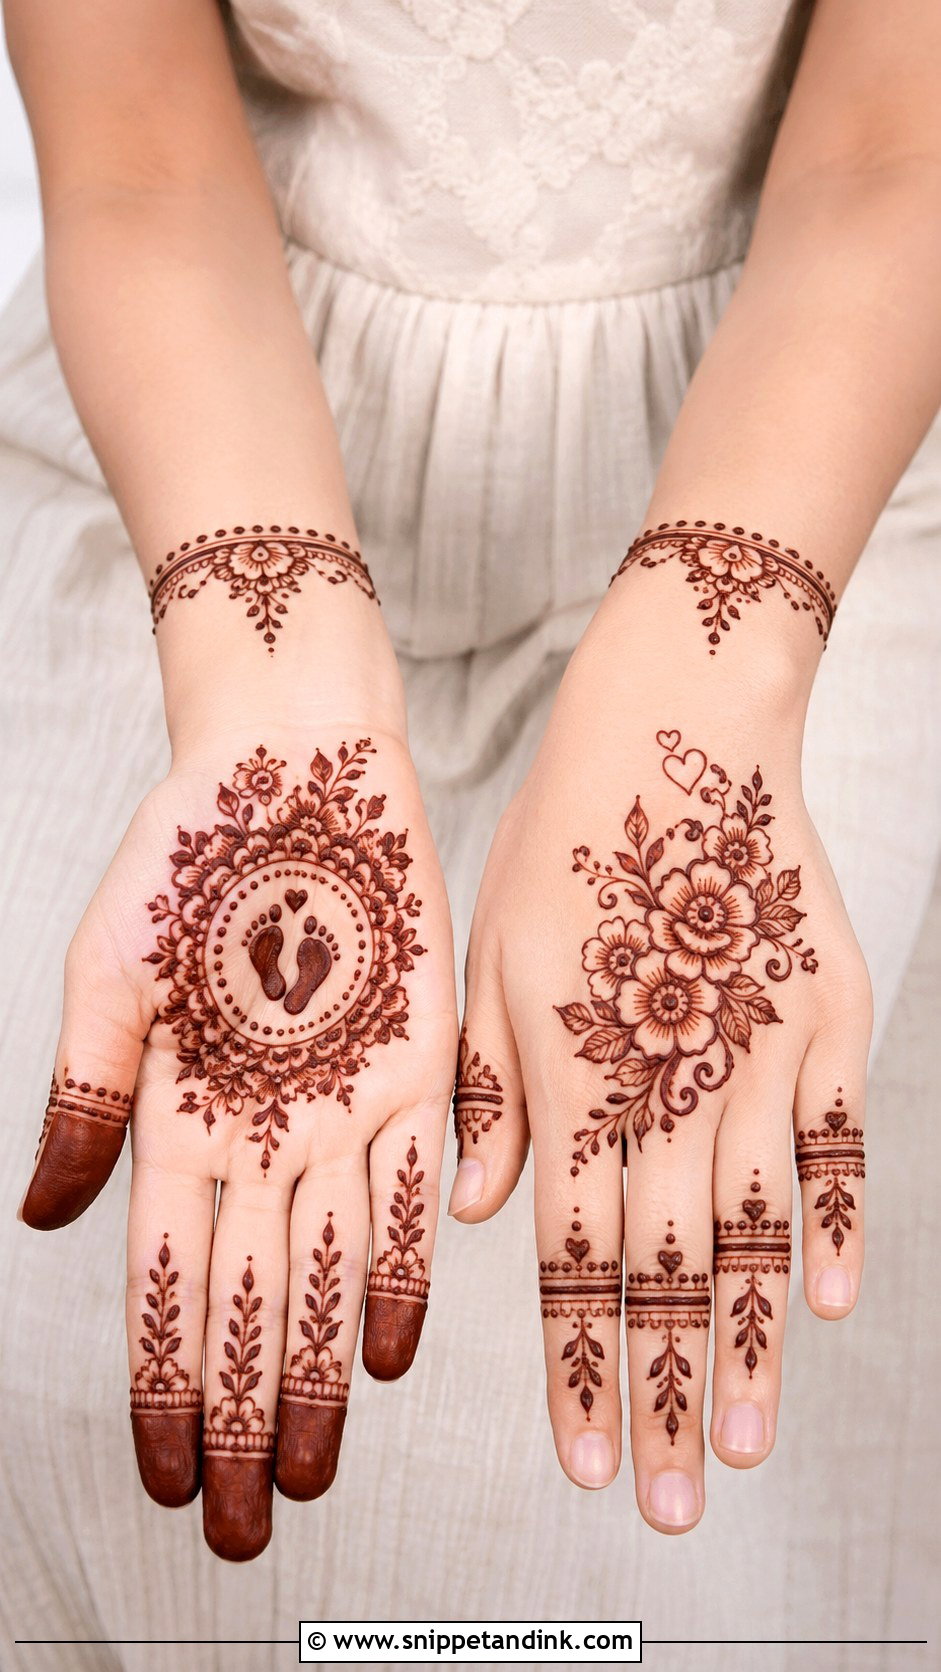
At a baby shower, comfort comes first. Expecting mothers often cannot sit for long or hold an arm out at an angle, so I keep the design light: floral vines, a small mandala, perhaps tiny footprints near the wrist. Use only pure natural henna with no added chemicals; I would avoid any cone that promises a dark stain in an hour. I sit the client somewhere supported and take breaks. Many pregnant clients report stronger stains, but it varies, so do not promise a particular color.
24. Party Mehndi Design
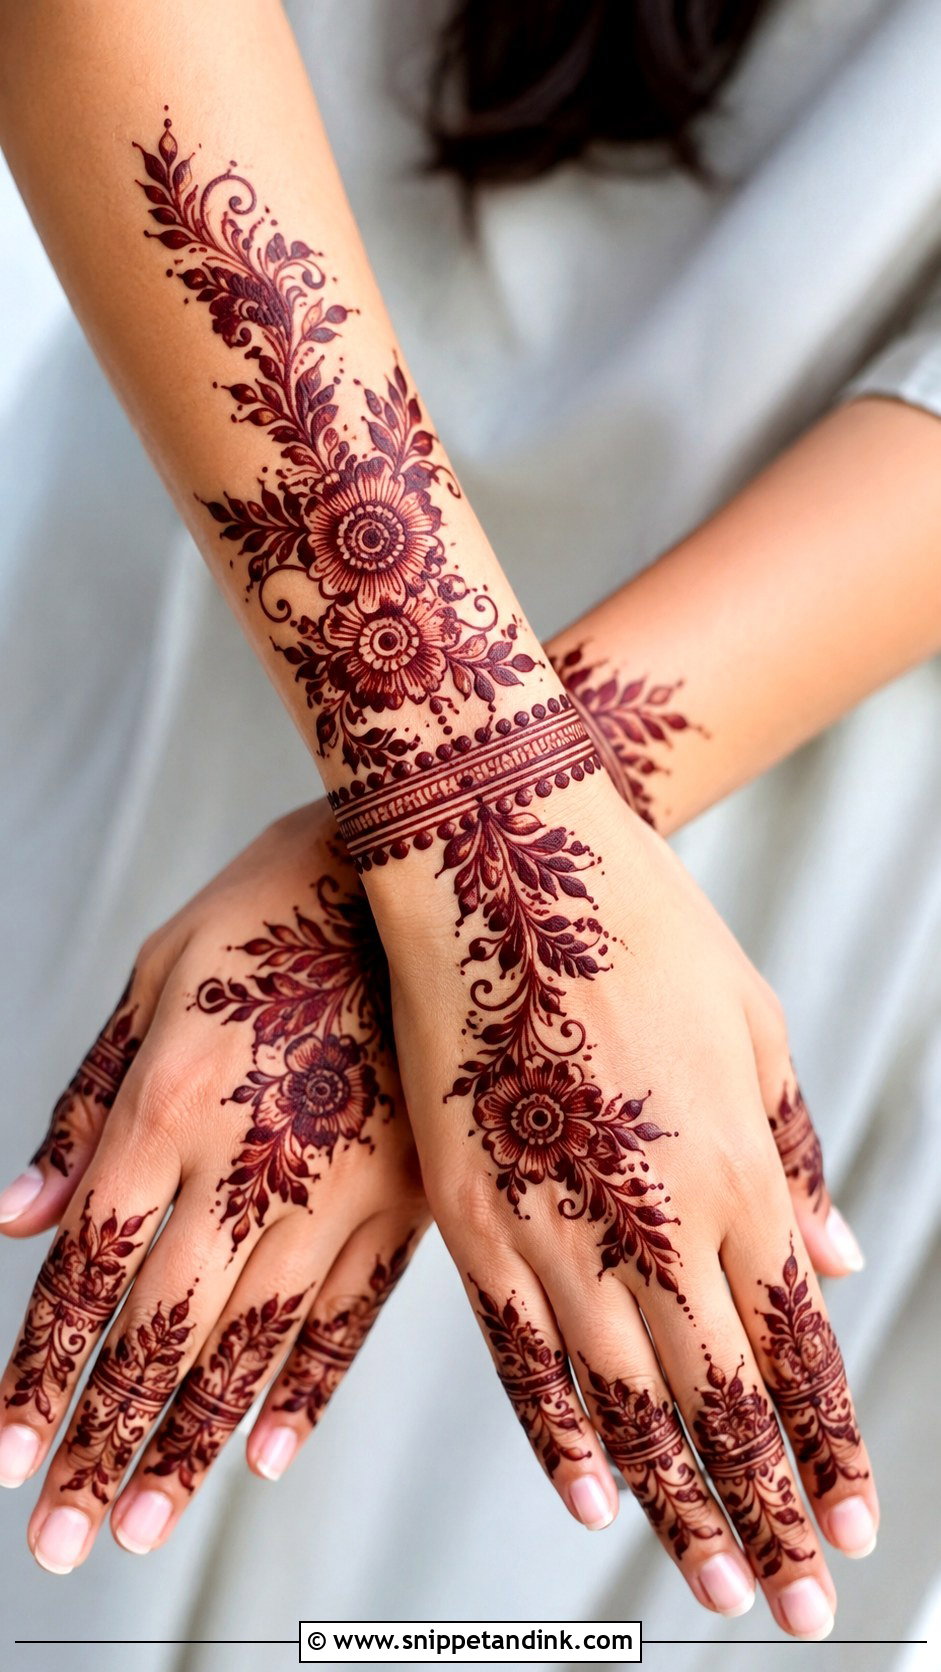
Party mehndi is designed to be quick: bold Arabic flowers on the back hand, shaded leaves, ring details and a wrist band. It looks complete in photos but takes far less time than bridal work. I leave it slightly open so it goes with many outfits. If you have time, let the trail continue toward the forearm for evening events with short sleeves. Book it the afternoon before rather than the same day, so you are not attending with wet or crumbling paste.
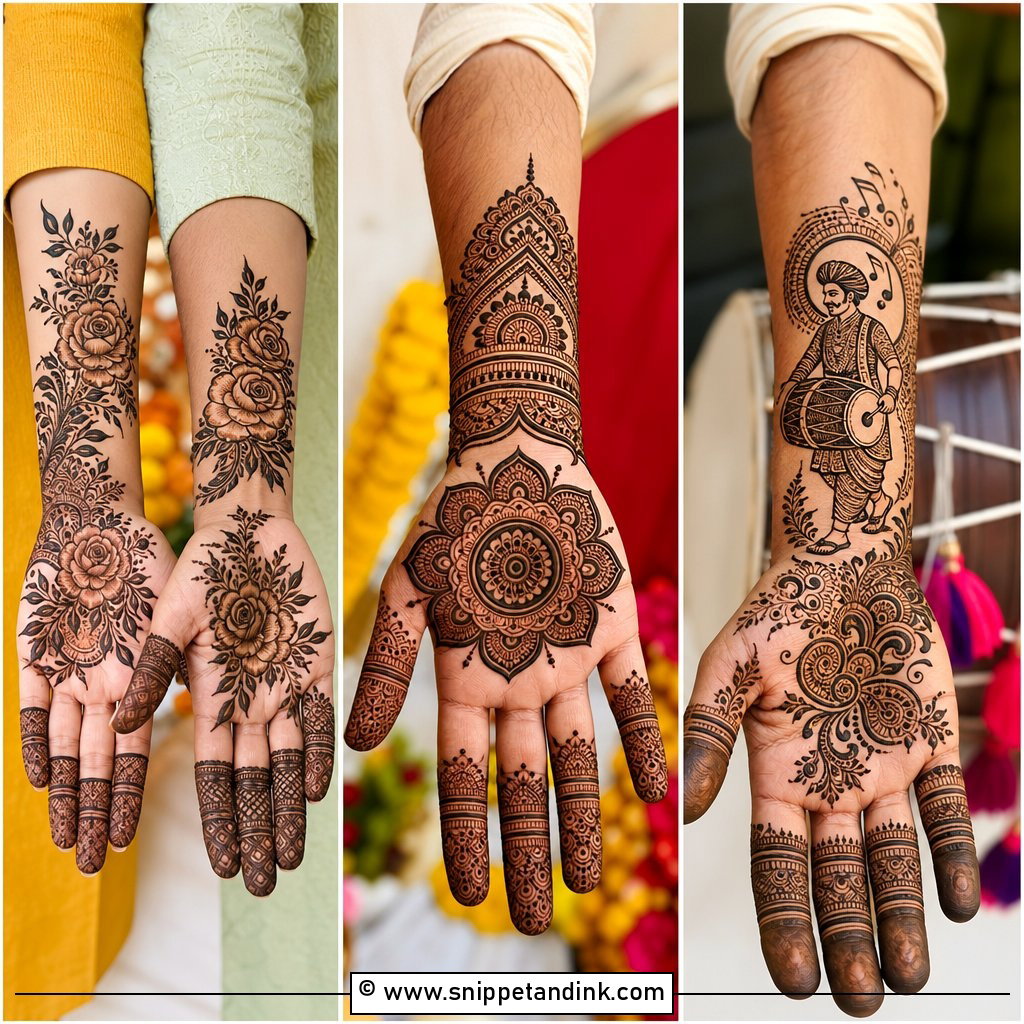
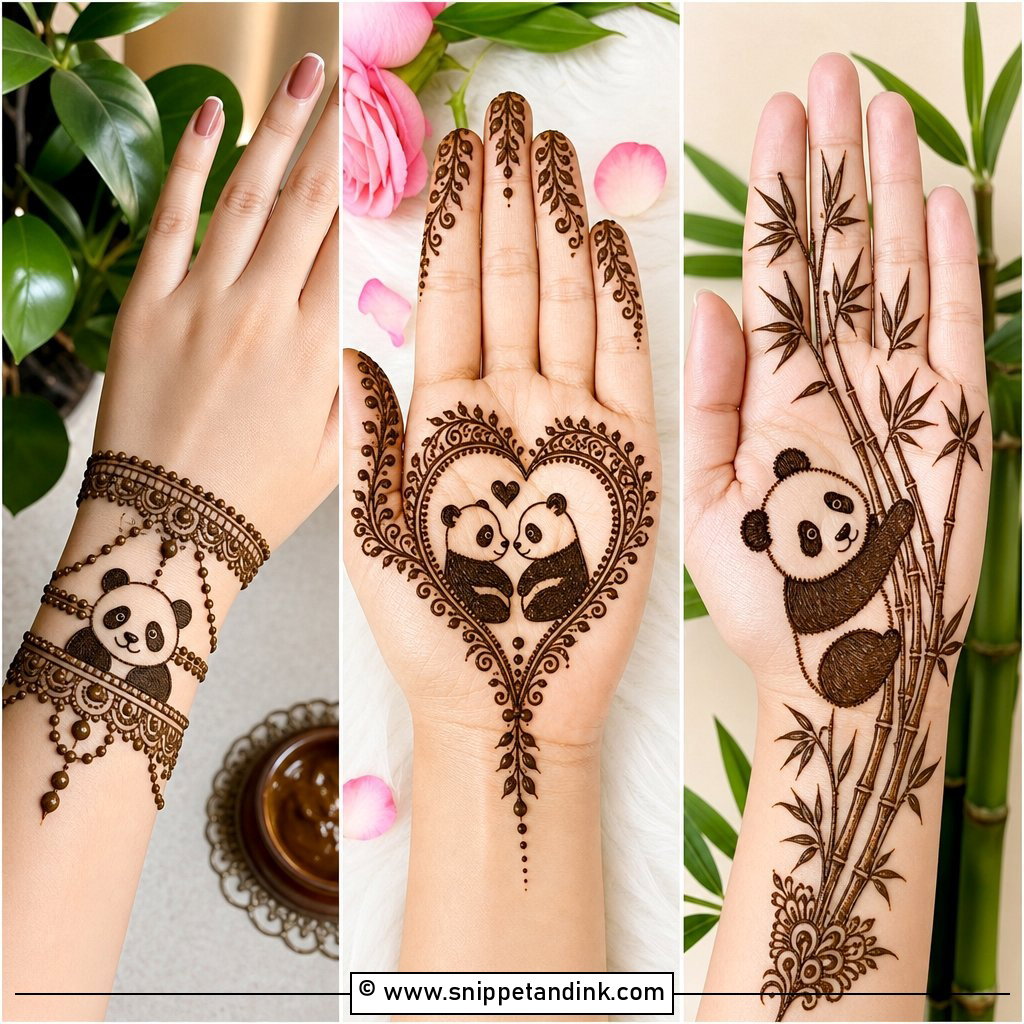
25. Kids Mehndi Design
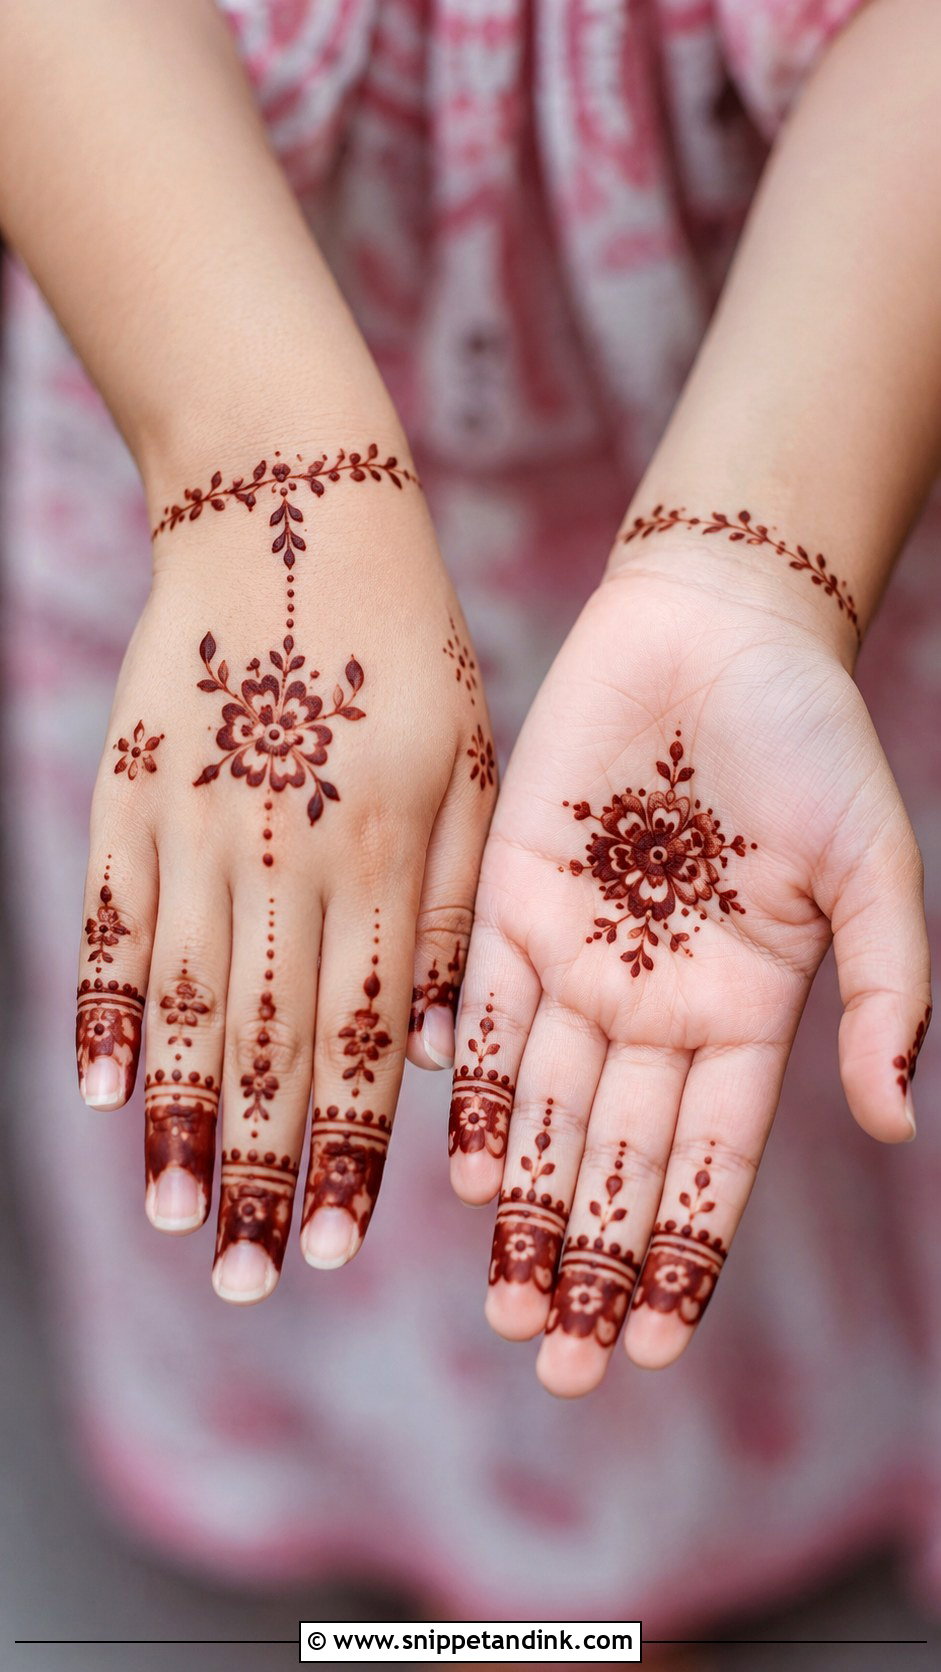
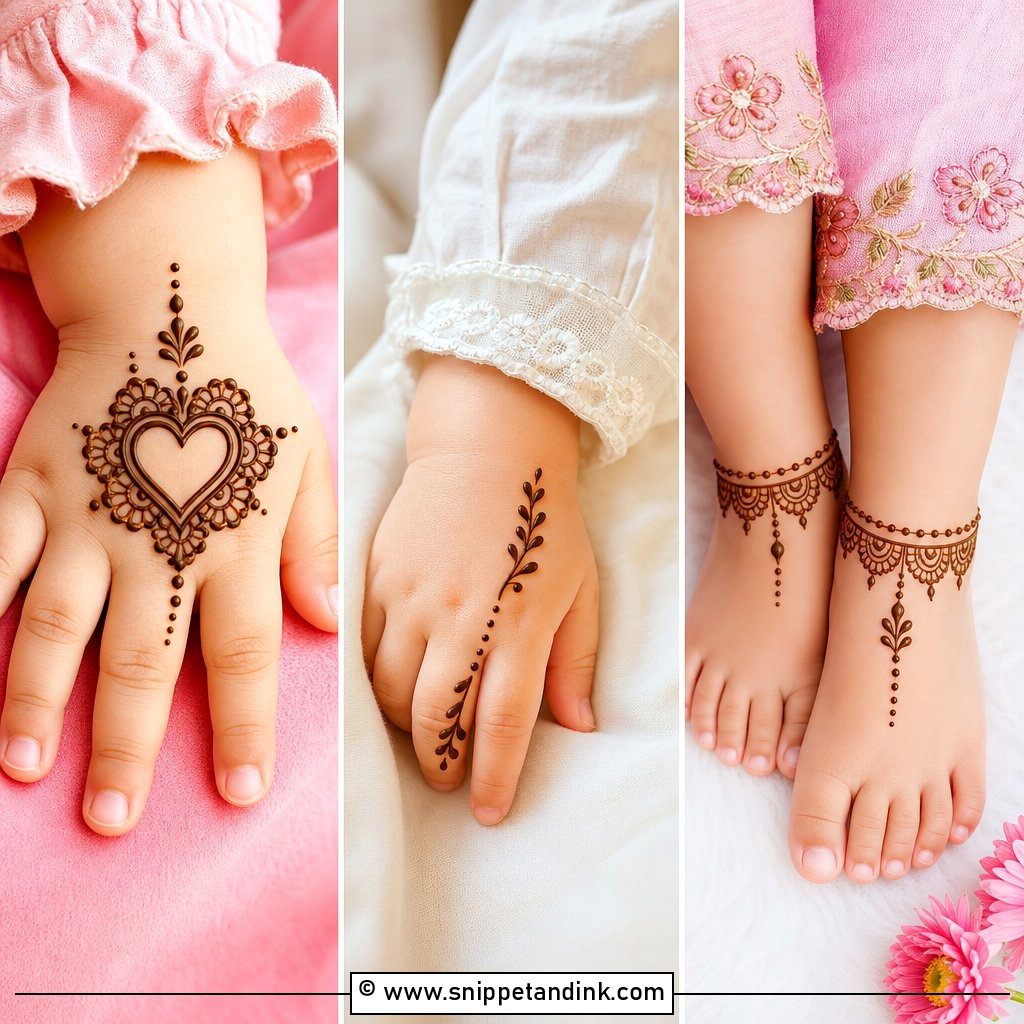
Children rarely sit still, so a kids’ design has to be fast: a small flower or mandala on the palm, dots, leaves and lightly decorated fingertips. I avoid dense fillers, which take longer and smudge when small hands touch everything. Use only natural henna for children and do a small patch on the inner arm a day before if the child has sensitive skin. A butterfly shape on the back of the hand is a favorite and dries in a few minutes.
26. Beginner Mehndi Design
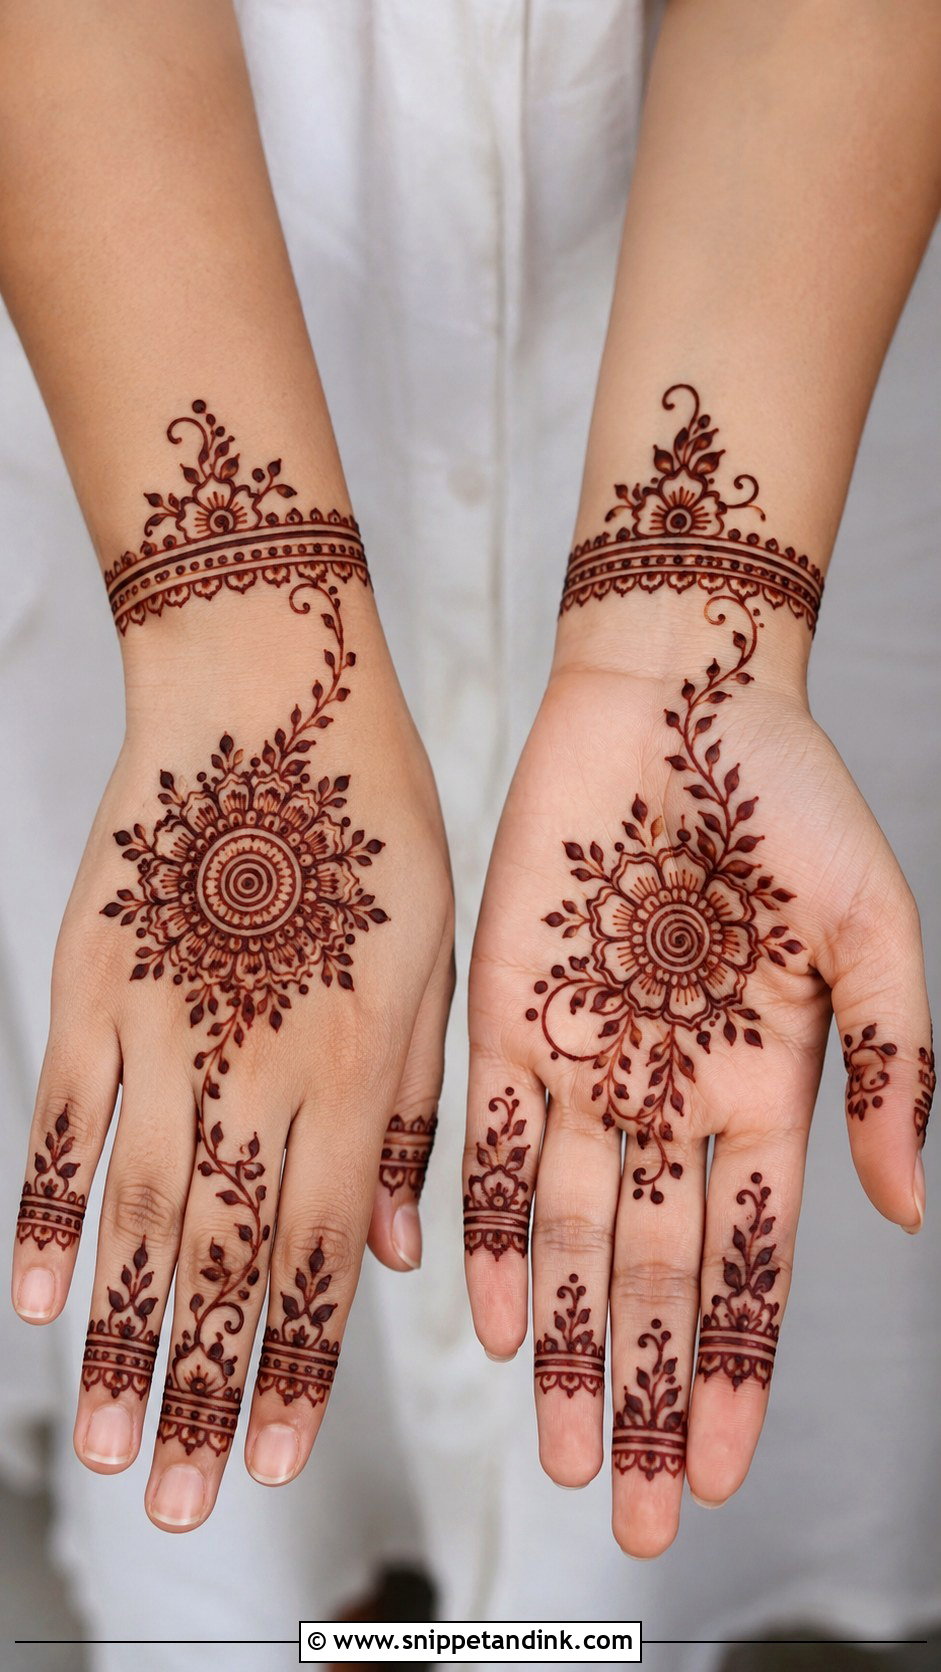
Beginners should start with shapes that forgive mistakes: one mandala or large flower, curved vines, dots and simple finger bands. A wrist with two lines and small petals between them already looks finished. Practice the cone pressure on paper first; most beginners squeeze too hard, which gives thick, blobby lines. Clean outlines matter more than fillers. Make a practice hand a week before the festival so you can check how your own paste stains.
27. Modern Mehndi Design
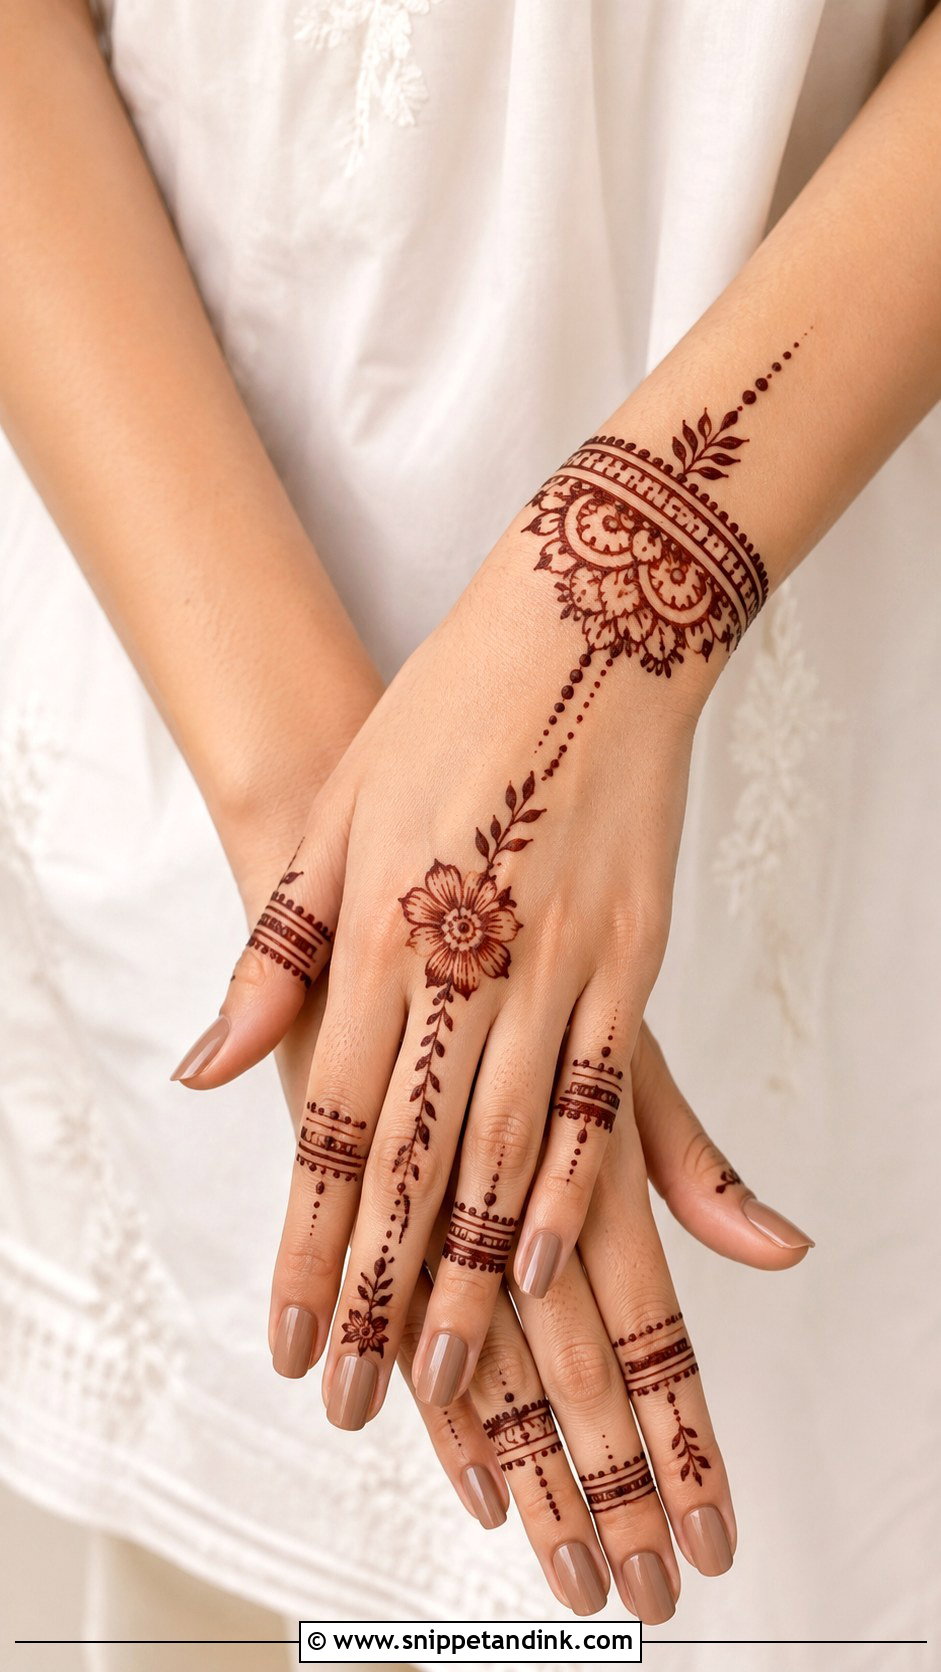
Modern mehndi uses asymmetry and negative space, often one statement flower or mandala, slim finger lines and a geometric band, leaving the rest of the hand bare. It suits contemporary outfits and works best on the back of the hand. In my experience the hardest part is stopping early; the open space is the design. I like pairing fine lines with one or two bold outlines, which gives contrast without adding more pattern.
28. White Henna Design
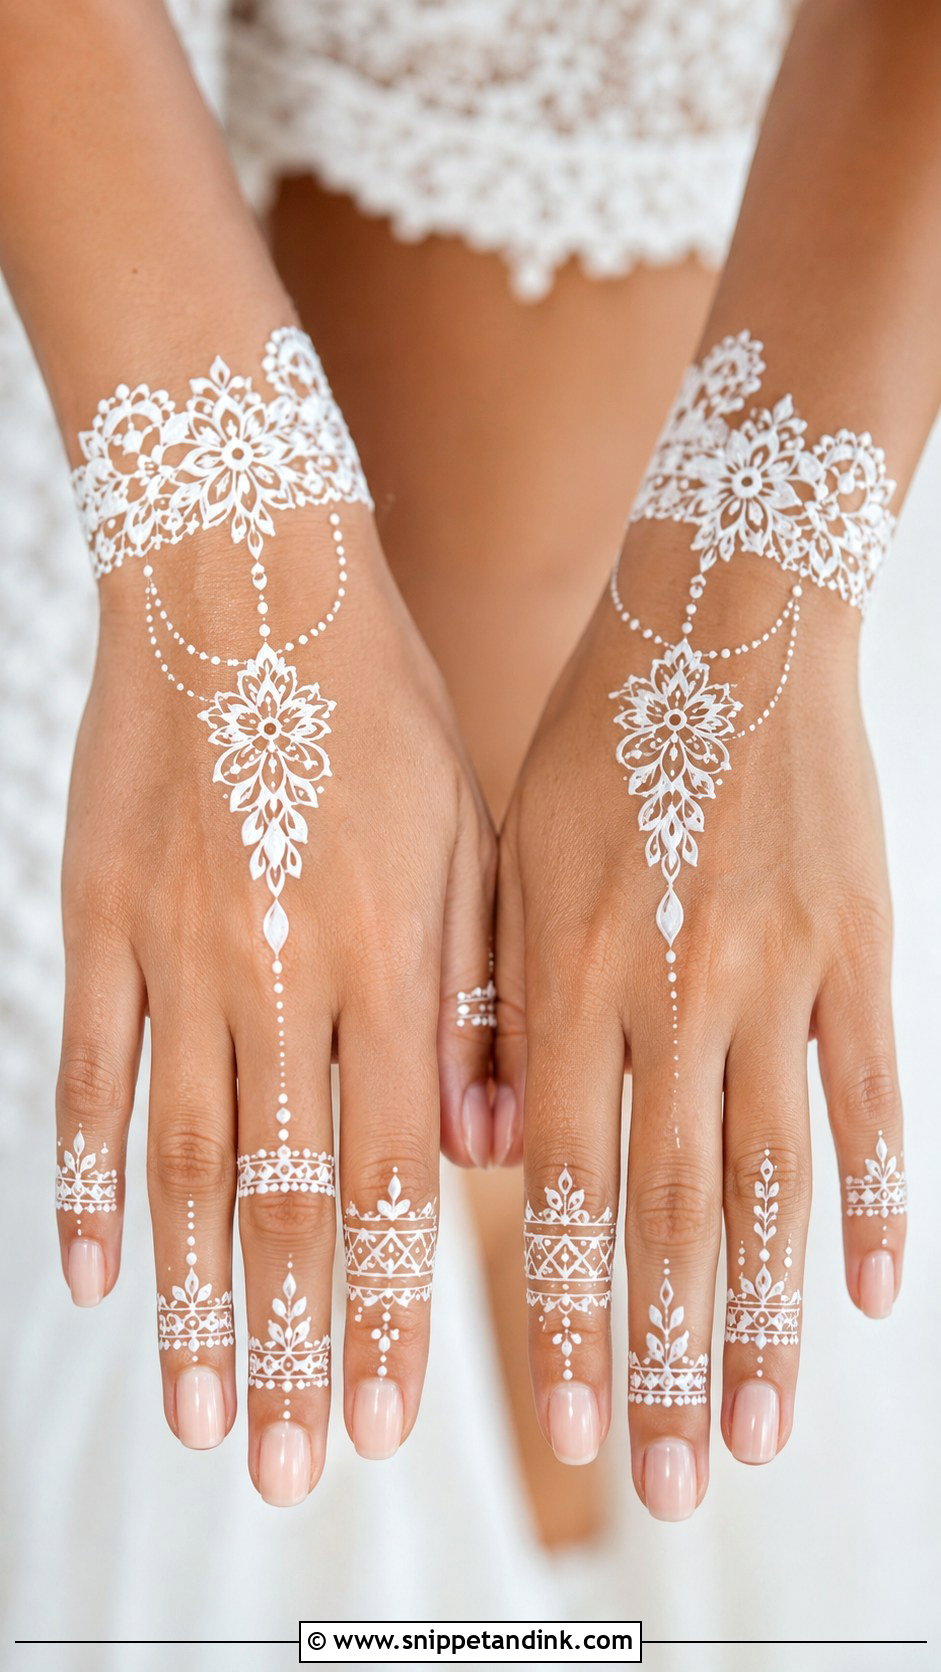
White henna is not henna at all. It is a body paint or skin safe adhesive applied in henna patterns, and it sits on the skin for a day or two rather than staining it. I use it for photoshoots, bridal showers and parties when a bright lace effect is the goal. Fine details tend to crack or blur, so keep the pattern open with lace florals, chains and cuffs. Patch test the product first, since it is a cosmetic, and remove it with oil rather than scrubbing.
29. Glitter Mehndi Design
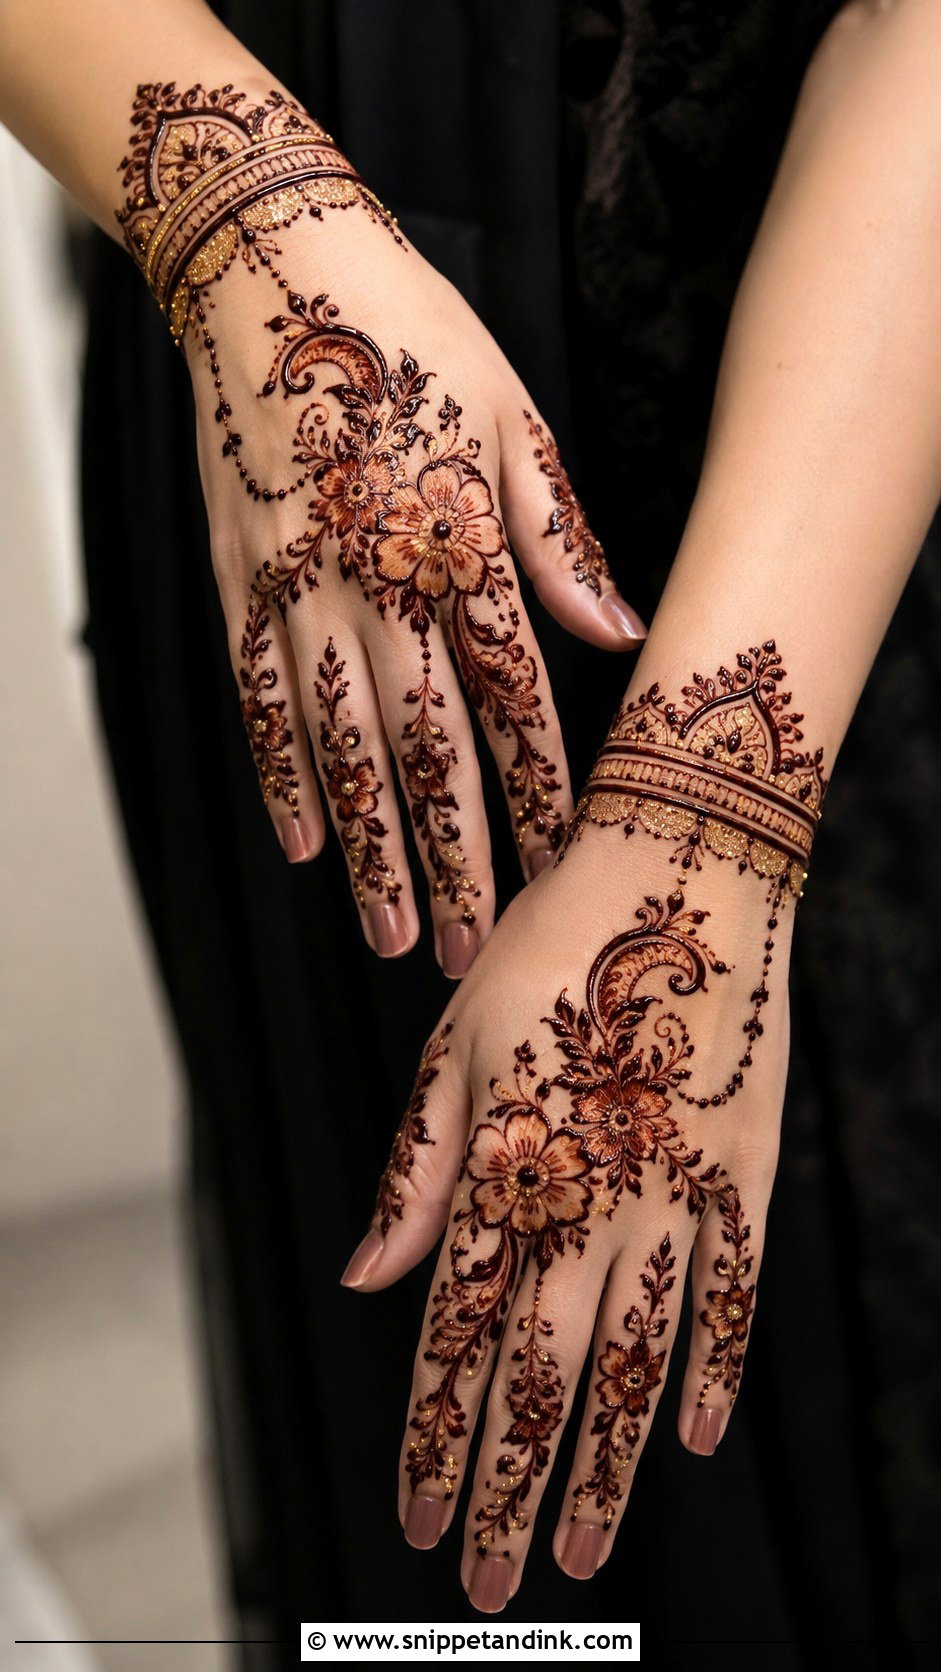
Glitter mehndi adds cosmetic glitter over selected parts of a design, usually placed once the henna paste has been removed or on top of a body paint base. I use it on flowers, a wrist band or ring details where the light catches it. Glitter over everything looks messy and hides the line work. Only cosmetic grade glitter should touch skin; craft glitter can scratch. It suits sangeet nights, parties and festive photos, and washes off without affecting the stain underneath.
30. Colored Mehndi Design
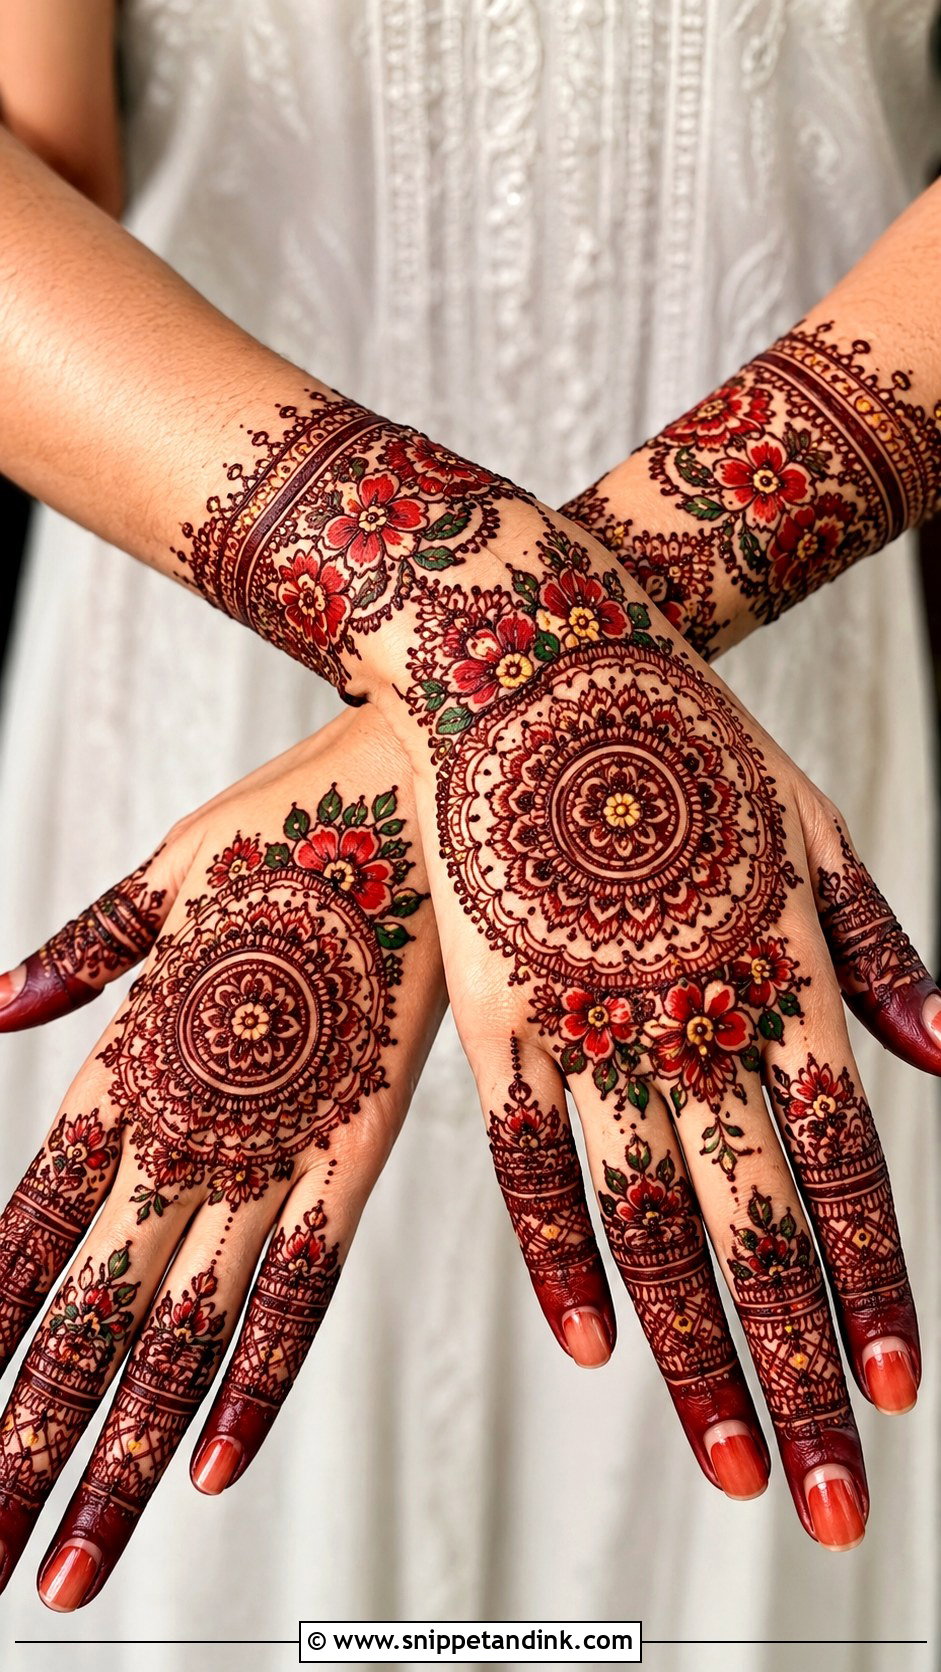
Colored mehndi adds accents of cosmetic color, often red, gold, green or maroon, to petals, centers or borders, while natural henna forms the main outline. It is mostly used for stage events and bridal functions where the hands need to show from far away. I keep color to a small share of the design so the pattern stays readable. Match the accent to the outfit, not to the trend. Remember that the colors are surface only and will fade with washing, unlike the stain.
31. Rose Mehndi Design
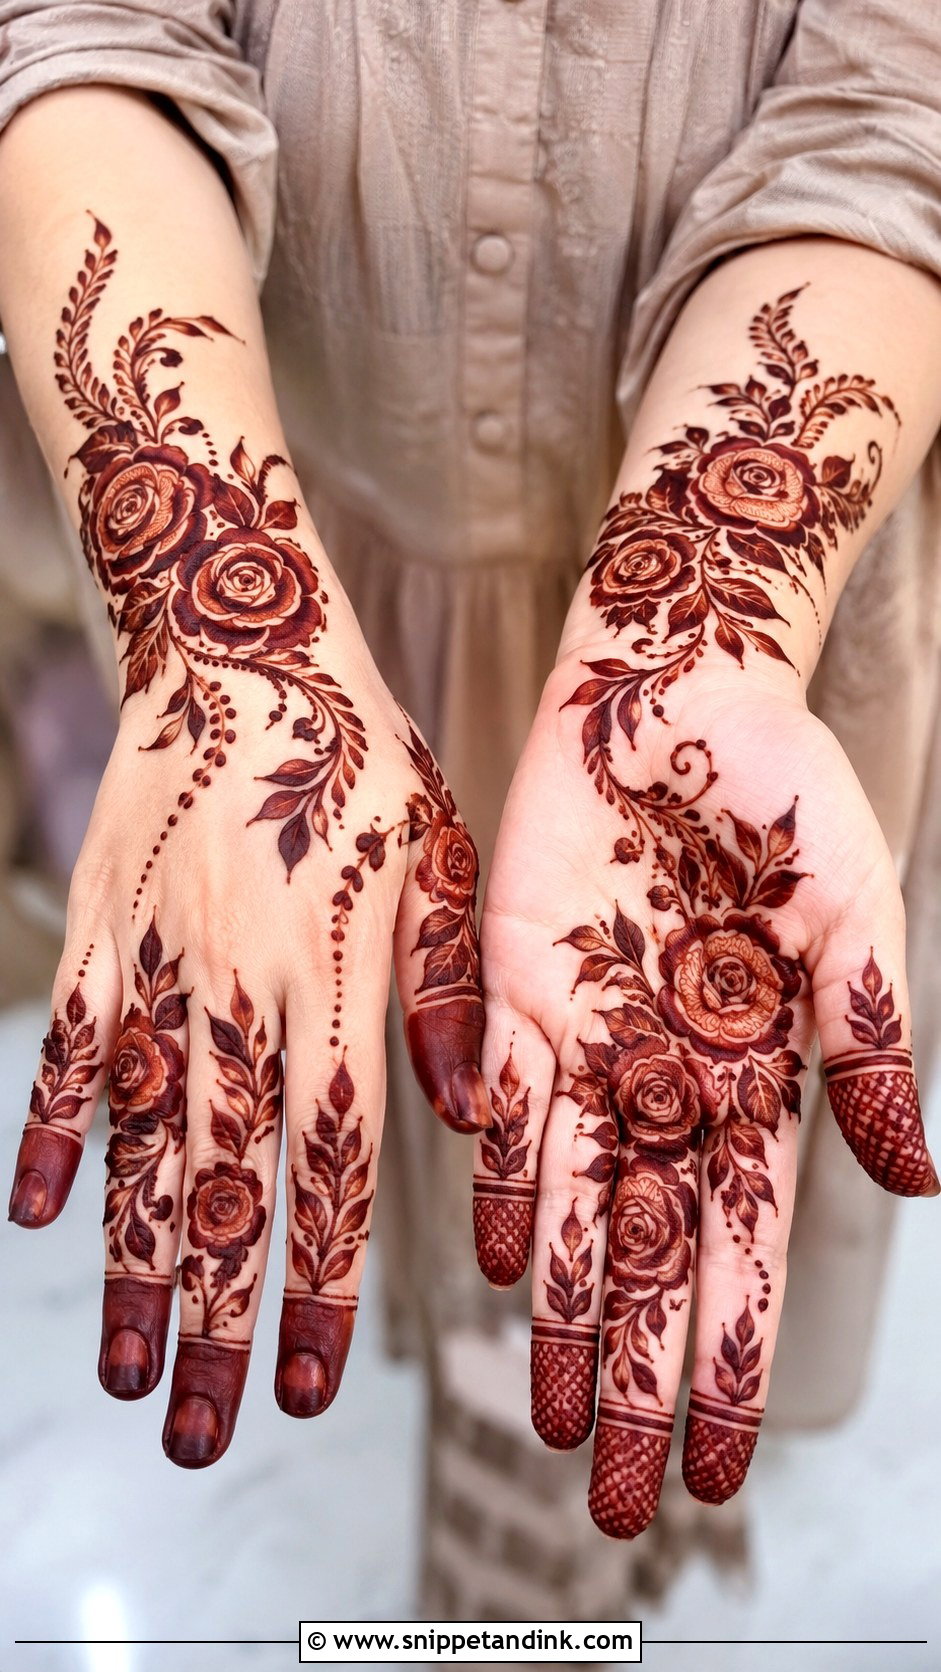
Roses give mehndi a romantic center: one large rose on the back hand or palm, smaller roses, vines and finger trails around it. Arabic and Indo Arabic versions leave space around the petals, which helps them read. I shade each petal from its base outward so the flower looks full once stained. Keep the outer edges smooth; a jagged rose looks wilted. It suits engagement events and nikah ceremonies well.
32. Lotus Mehndi Design
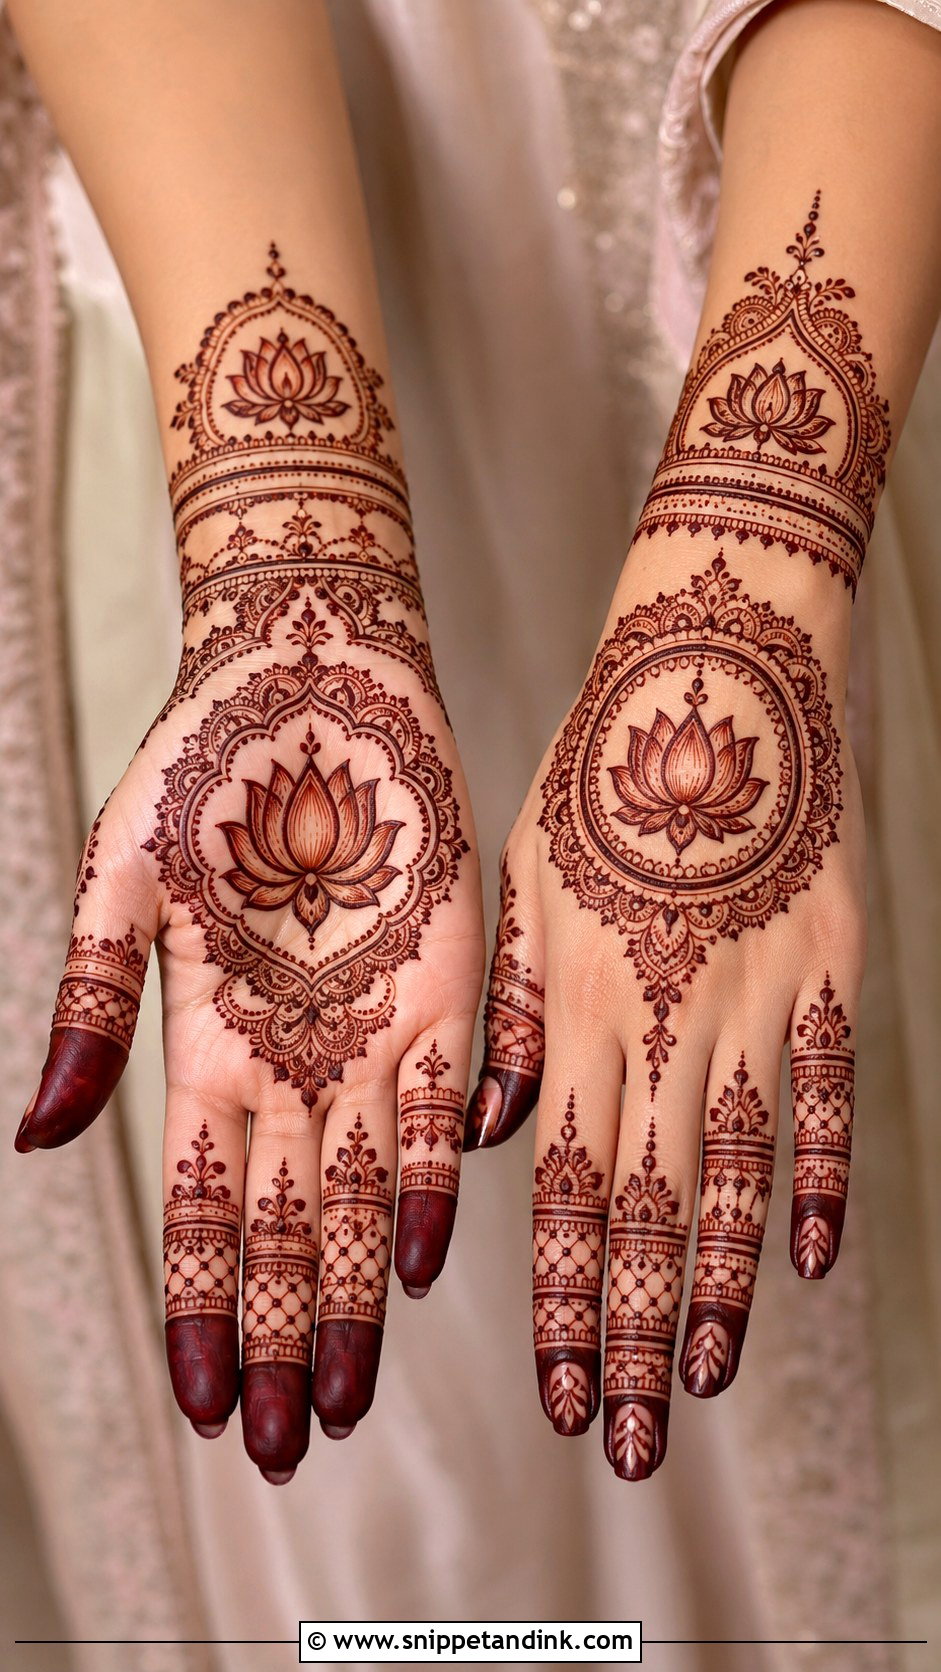
A Lotus mehndi design fits Indian layouts naturally, because the lotus sits easily inside mandalas and symmetrical frames. A large lotus on the palm, a smaller one on the back hand, paisley borders and dotted wrist bands make a complete look. For a light version, I use one open lotus with leafy vines. For bridal, I fill the petals with fine lines and add jaali around it. It is a natural choice for Diwali and pujas.
33. Vine Mehndi Design
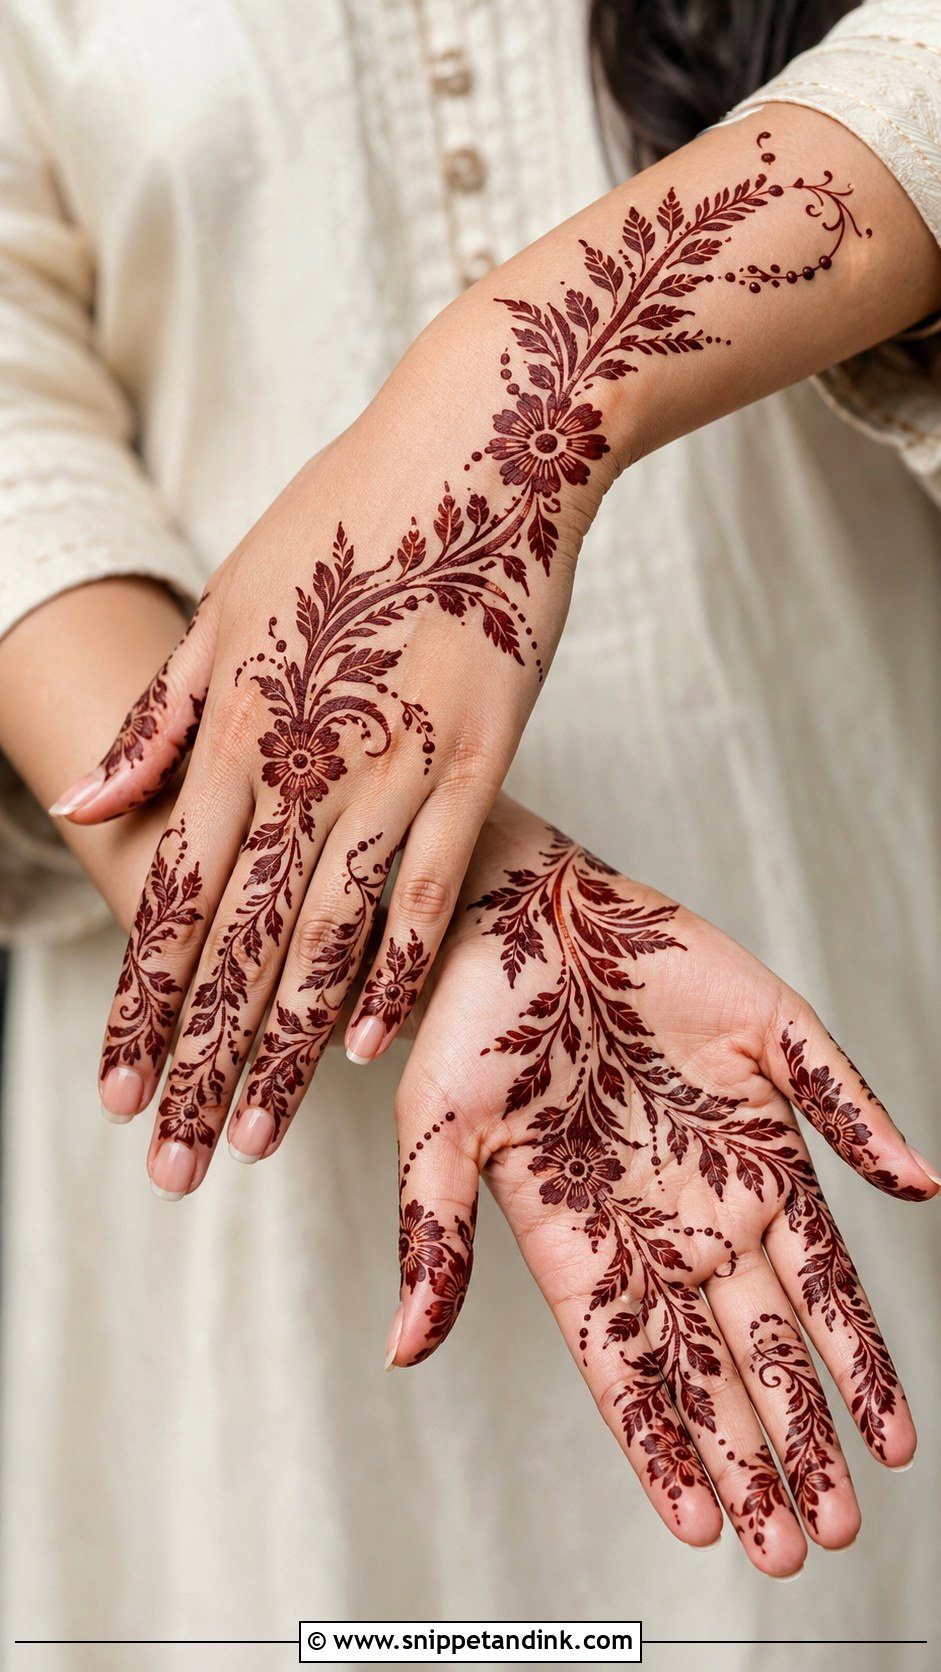
A vine travels diagonally from the wrist to the fingers, with leaves, small flowers and dots along curved branches. It adapts to any hand shape, which is why I use it on bridesmaids with very different hand sizes in one session. The palm can stay open while the vine wraps the back of the hand. Smooth curves are what make it work; a vine with stiff angles looks like a crack. It is quick and light, so good for Eid and casual events.
34. Half Hand Mehndi Design
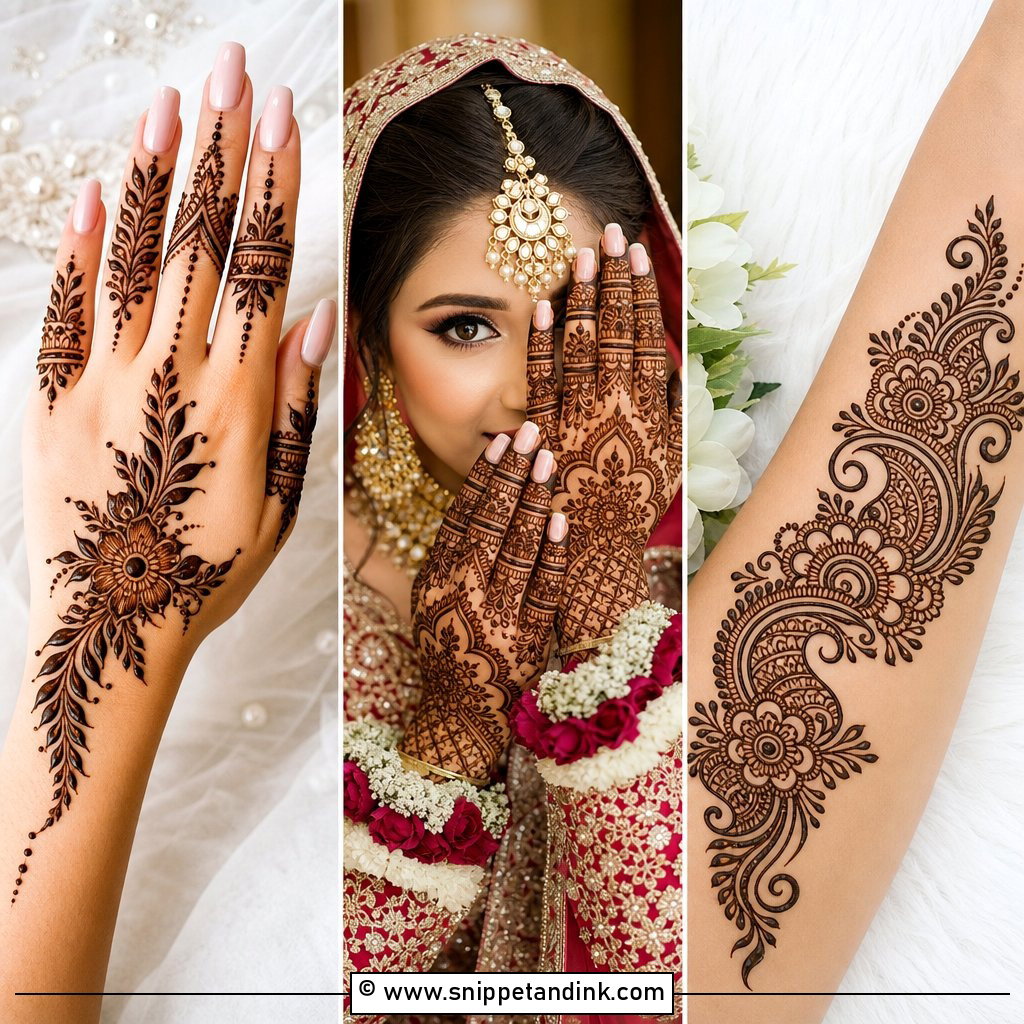
Half hand designs cover the fingers and half the palm, or the wrist and lower back hand, and leave the rest bare. They are quicker to apply and dry, and the bare skin becomes part of the design. When I map a half hand, I end the pattern on a clean line, often at the wrist crease or across the palm with a defined border, so it looks planned instead of unfinished. Mandalas, florals and diagonal Arabic trails all work this way.
35. Forearm Mehndi Design
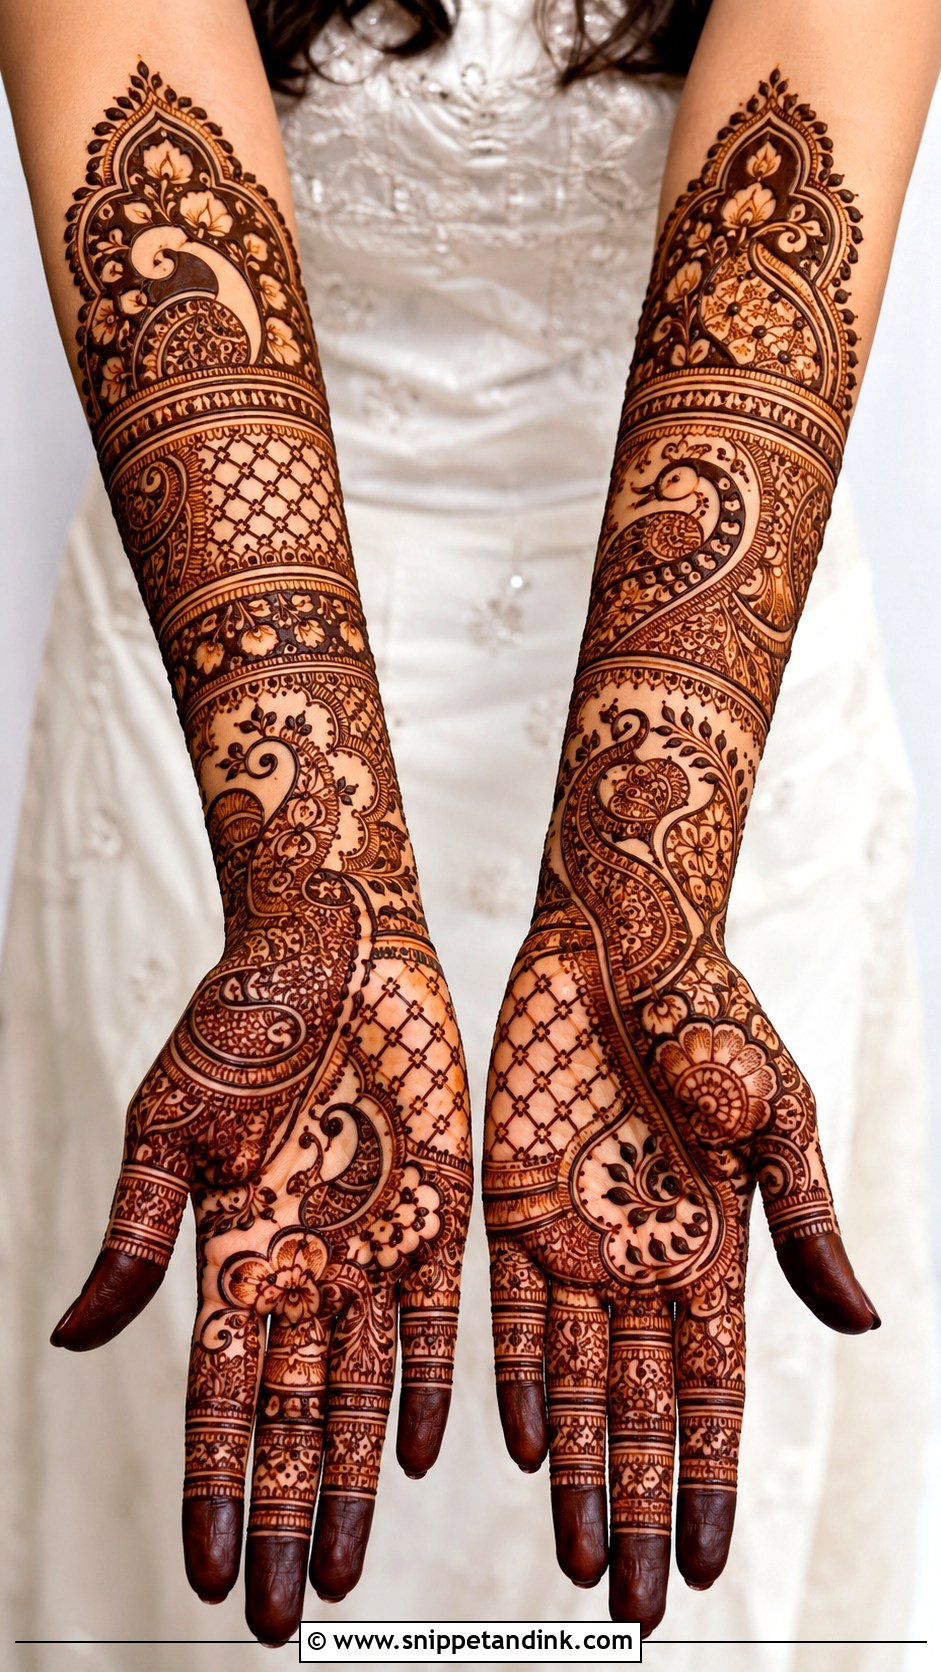
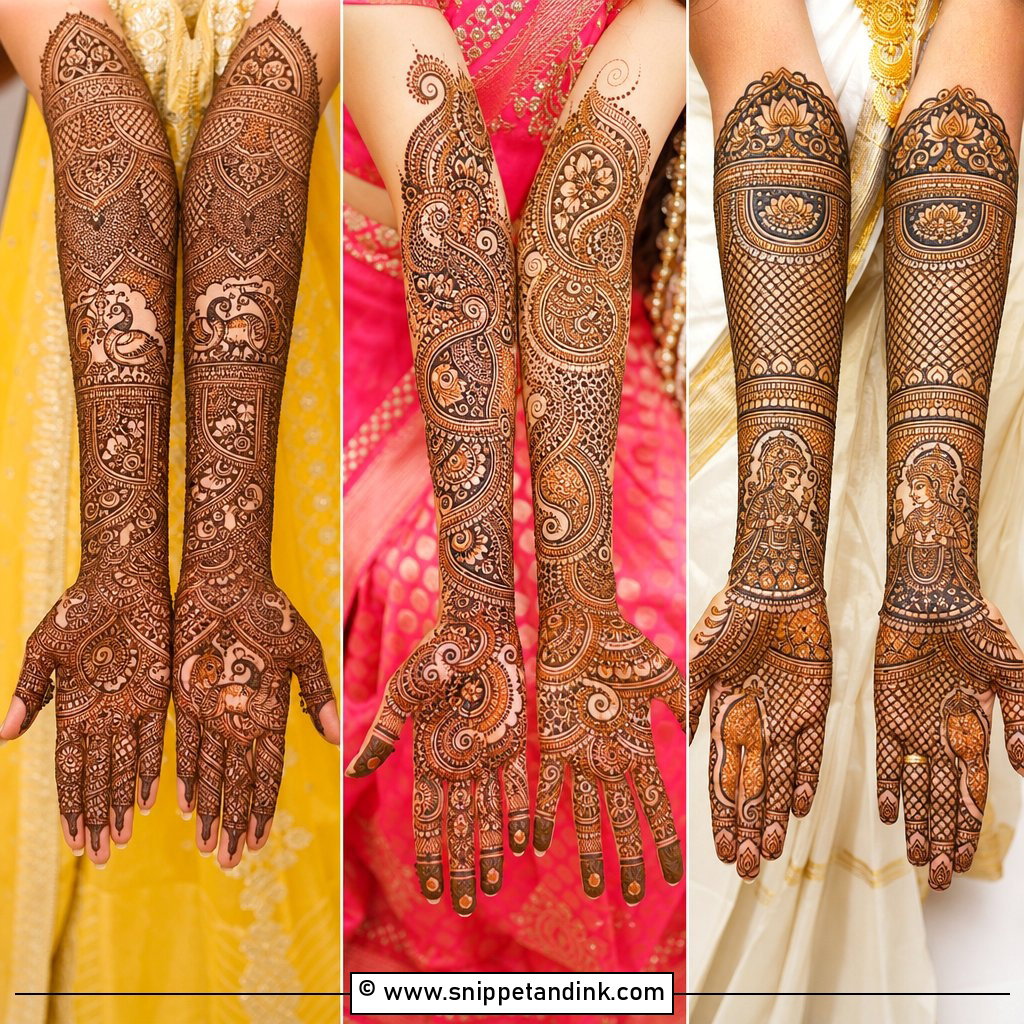
Forearm mehndi carries the design past the wrist into layered bands, florals, vines or peacocks up the arm. Brides usually choose dense Indian forearms; party looks use bold Arabic trails with space. Arm skin stains lighter than palms, so I advise leaving paste on longer and keeping the arm warm. The transition at the wrist needs planning, otherwise the hand and arm look like two separate designs. It shows best with short or sheer sleeves.
Aftercare for a Darker, Longer Lasting Stain
Most pale stains I see were caused by what happened after the appointment, not by the paste. Here is what I tell every client before they leave my chair.
- Leave the paste on for at least six hours, ideally overnight. A light dab of lemon and sugar mix helps it stay on the skin without cracking off.
- Keep the hands warm. Henna stains deeper in warmth, so avoid sitting in strong air conditioning while it sets.
- Scrape the dried paste off with a blunt edge or rub it away; do not wash it off.
- Avoid water for the first twelve to twenty four hours if you can. After that, rub a little natural oil or balm on before washing your hands.
- Skip scrubs, chlorine pools and hand sanitizer during the first days, as they fade the outer layer of stain quickly.
Black Henna and Instant Cones Are Not Worth the Risk
Natural henna only ever stains in shades of orange, red and brown. Anything sold as black henna, or a cone that promises a dark stain within an hour, usually contains added dyes such as PPD, which can cause serious skin reactions and lifelong sensitivity. I refuse to use them, especially on children.
Fresh natural henna smells earthy, often of essential oils, and is kept in a freezer until use. Ask your artist what is in the paste. If you have reacted to hair dye before, do a small patch on your inner arm a day ahead and wait for the result before booking a full design.
Matching the Design to the Occasion and Your Patience
From full bridal hands to a single vine, every design here comes down to three questions I ask every client: how long can you sit, how visible will your hands be, and how many days do you need the stain to last? If you love detail, bridal, peacock, paisley, jaali and forearm layouts reward the time. If you prefer lighter work, minimal, khafif, finger, bracelet and half hand designs are quicker and wear more gracefully as they fade. Arabic, Indo Arabic, Moroccan and Khaleeji styles cover the moods in between. Keep a few favorite designs on your phone, show them to your artist, and let them adjust the placement to your hands.
You'll Like These Ideas:


Leave a Reply