
You don’t need expert control to draw a good hand of henna. You need clean outlines, sensible spacing and shapes you can repeat without thinking. Everything below is built from those: florals, vines, mandalas, paisleys, dots, leafy trails, finger bands and bracelet shapes, each laid out as a whole hand rather than a single motif, so you can see where every part goes. I’ve noted for each one where learners tend to struggle and what I’d do differently. Start light, and add coverage as your hand gets steadier.
Six Strokes to Practise on Paper First
Every design in this list is made from the same handful of marks. Before I let a learner near skin, I have her fill a sheet of paper, or better, a clear plastic sleeve, with rows of each one until her pressure stays even.
- Dots: squeeze, touch, lift. Practise making ten the same size.
- Straight lines: short ones, with a lift in between. Long straight lines are the hardest mark in henna.
- C-curves: draw them in both directions, because a hand needs both.
- Teardrop petals: start wide and taper off as you release pressure.
- Leaves: two curves meeting at a point, with a centre vein.
- Spirals: the starting point for roses and the centres of paisleys.
Once those come out even, any design below is just an arrangement of them. A plastic sleeve has an extra advantage over paper: you can slide a printed design underneath and trace it, which trains your hand in the proportions of a real layout. Wipe it clean and go again. Twenty minutes a night for a week does more than one long, frustrated afternoon.
1. Simple Front Hand Mehndi Design
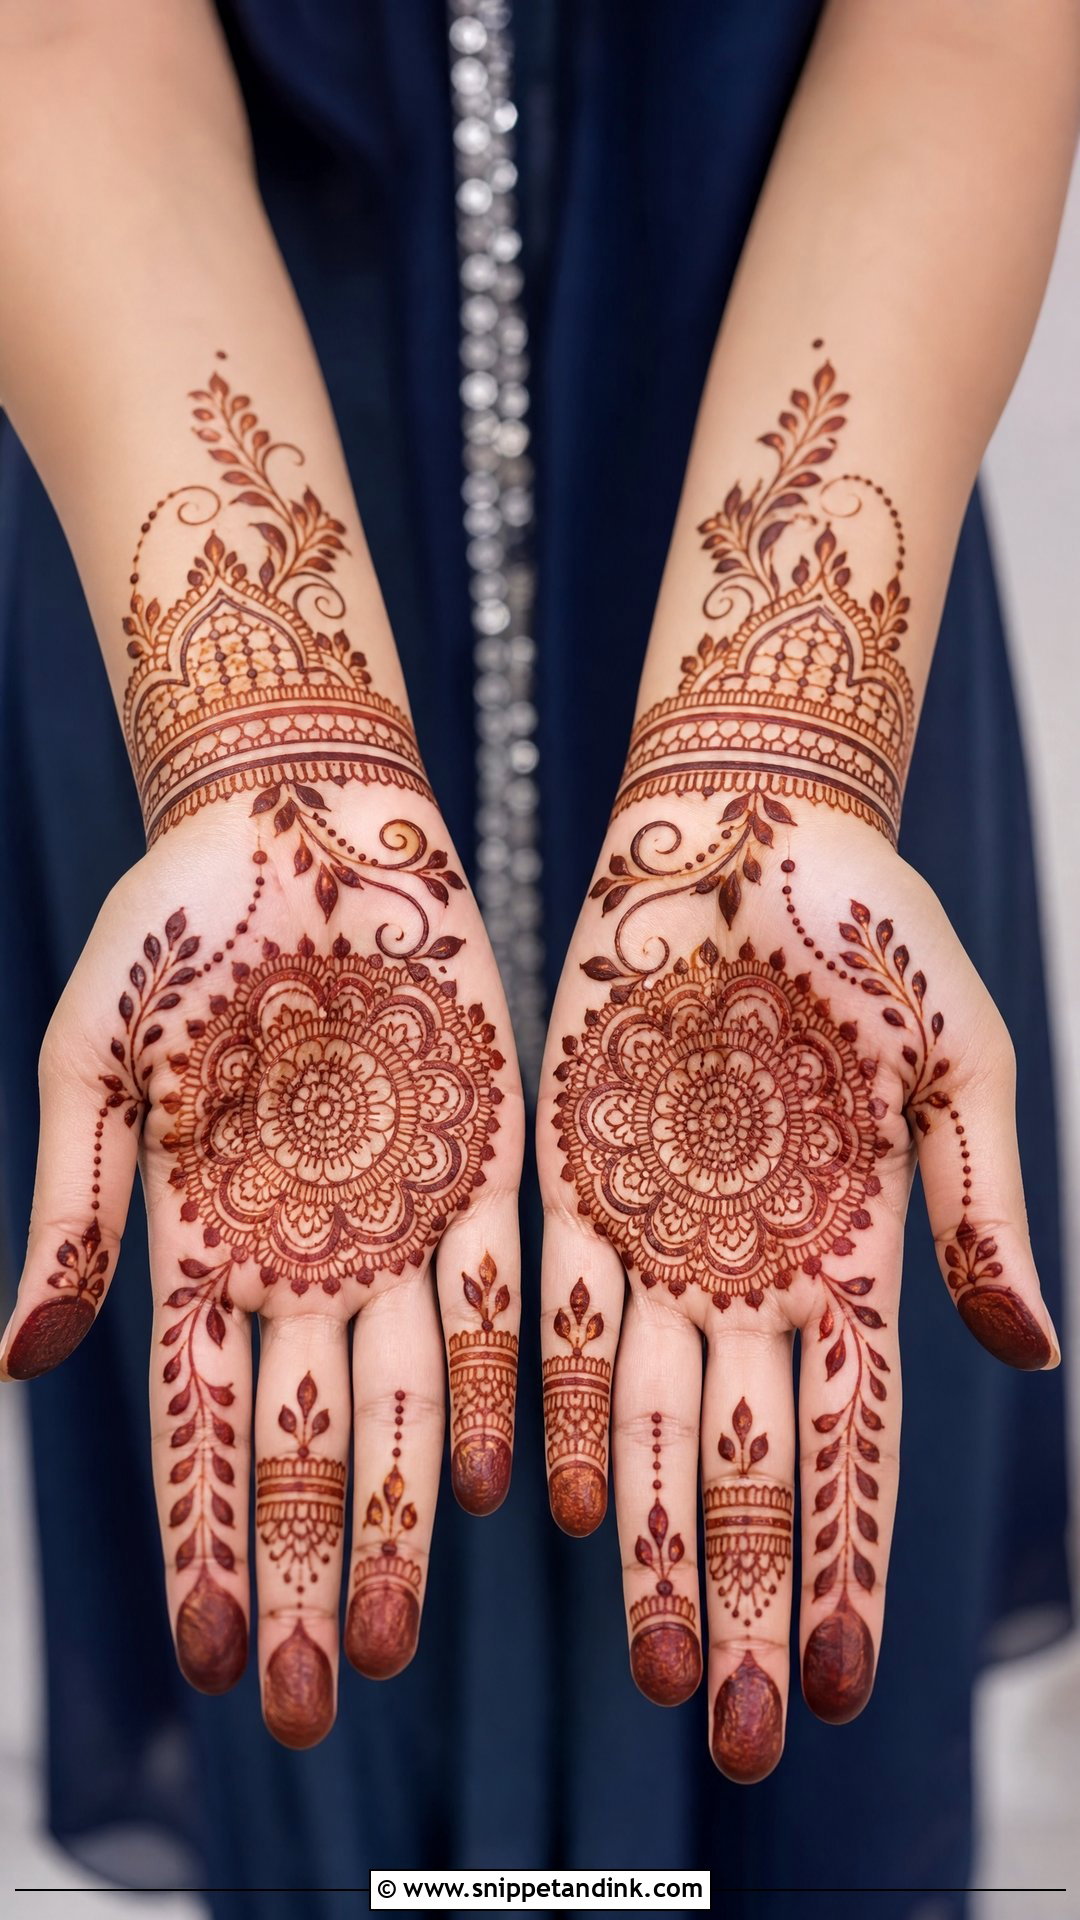
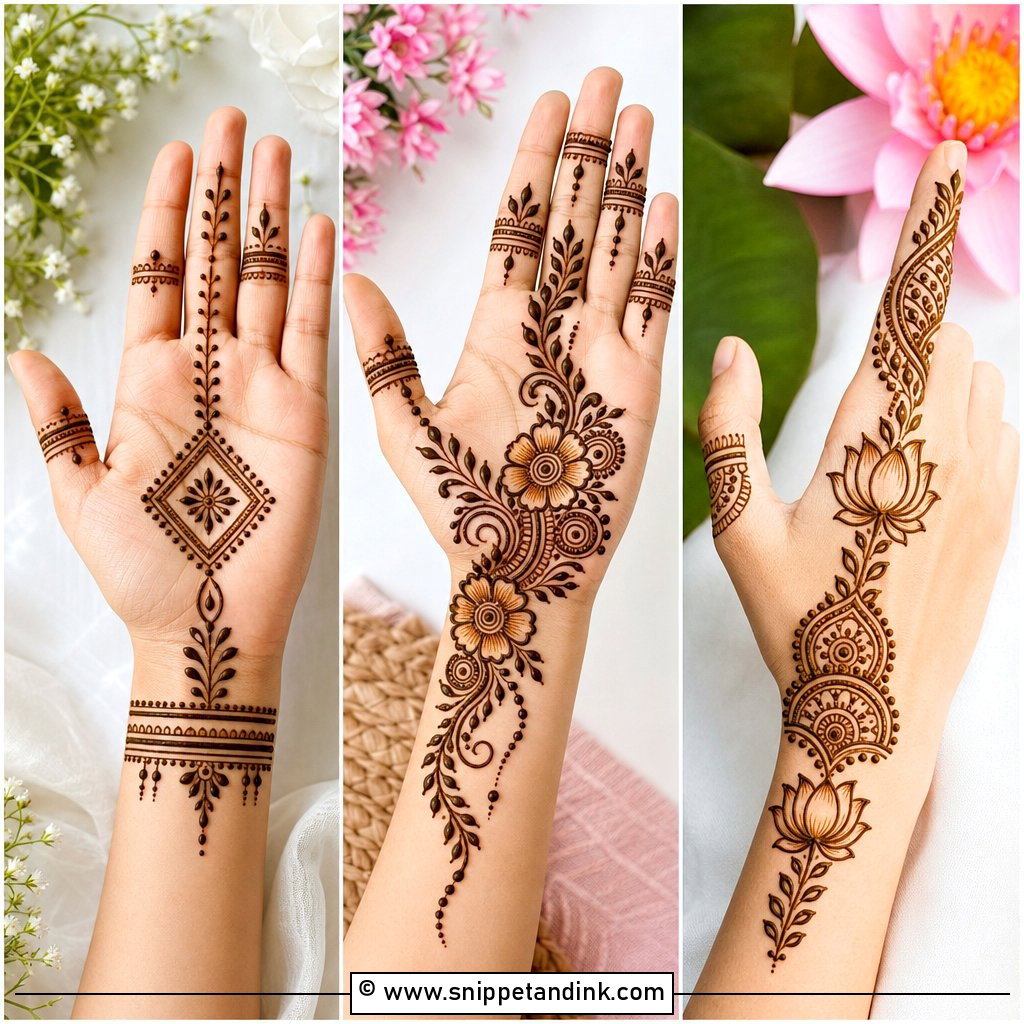
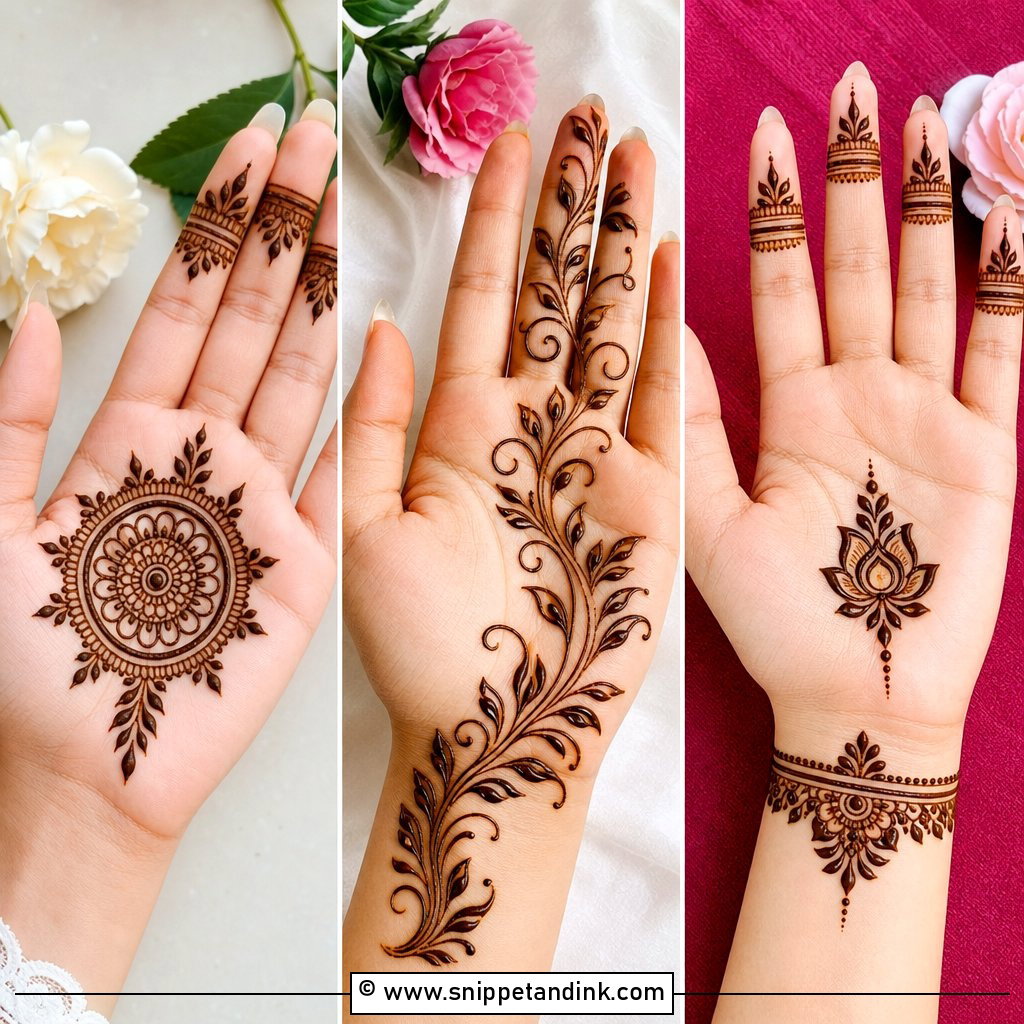
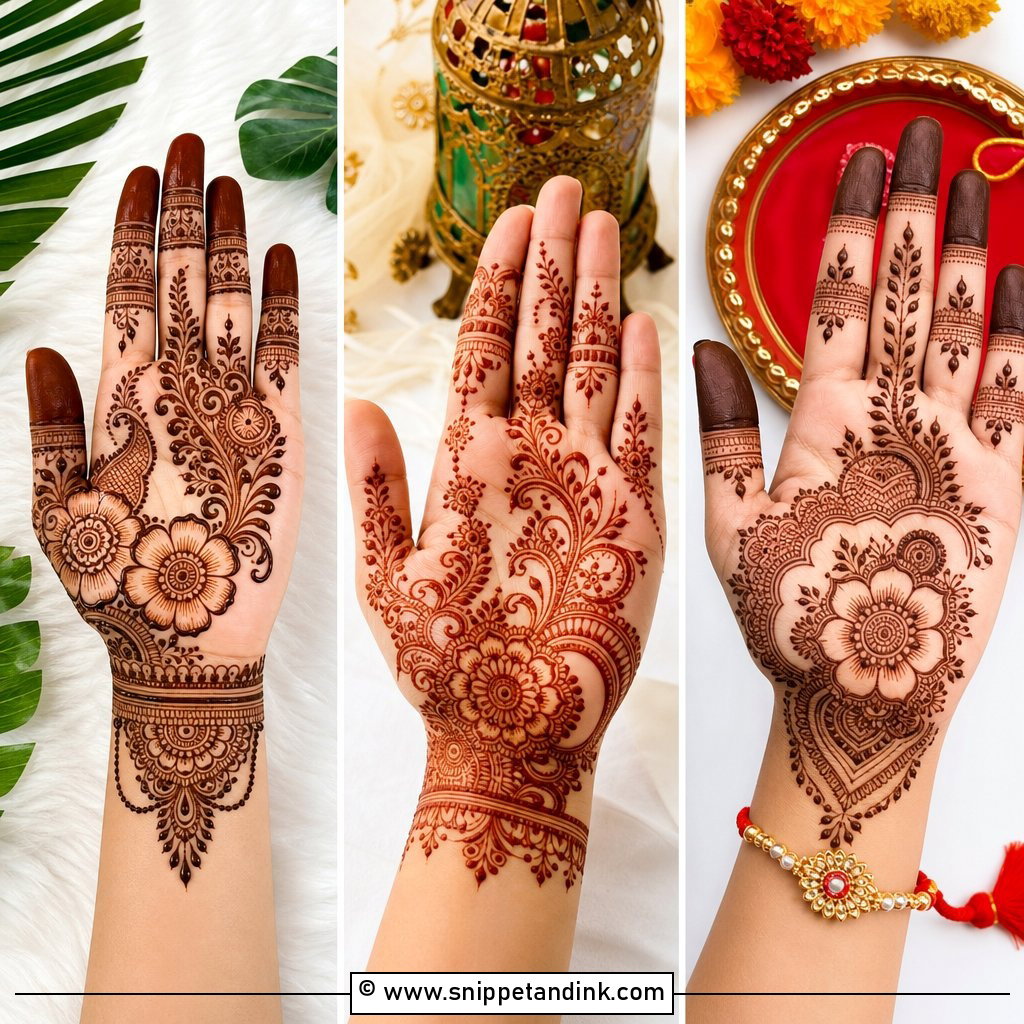
Begin in the middle of the palm with a small mandala or flower, then curve vines toward the fingers and wrist with open skin between them. Fingers get basic bands, dots, leaves and small petals. Each part can be built slowly, and a line that comes out wrong can be turned into a row of dots or a tiny leaf. I teach this one first because the palm is flat, stains dark and sits still on a table while you work.
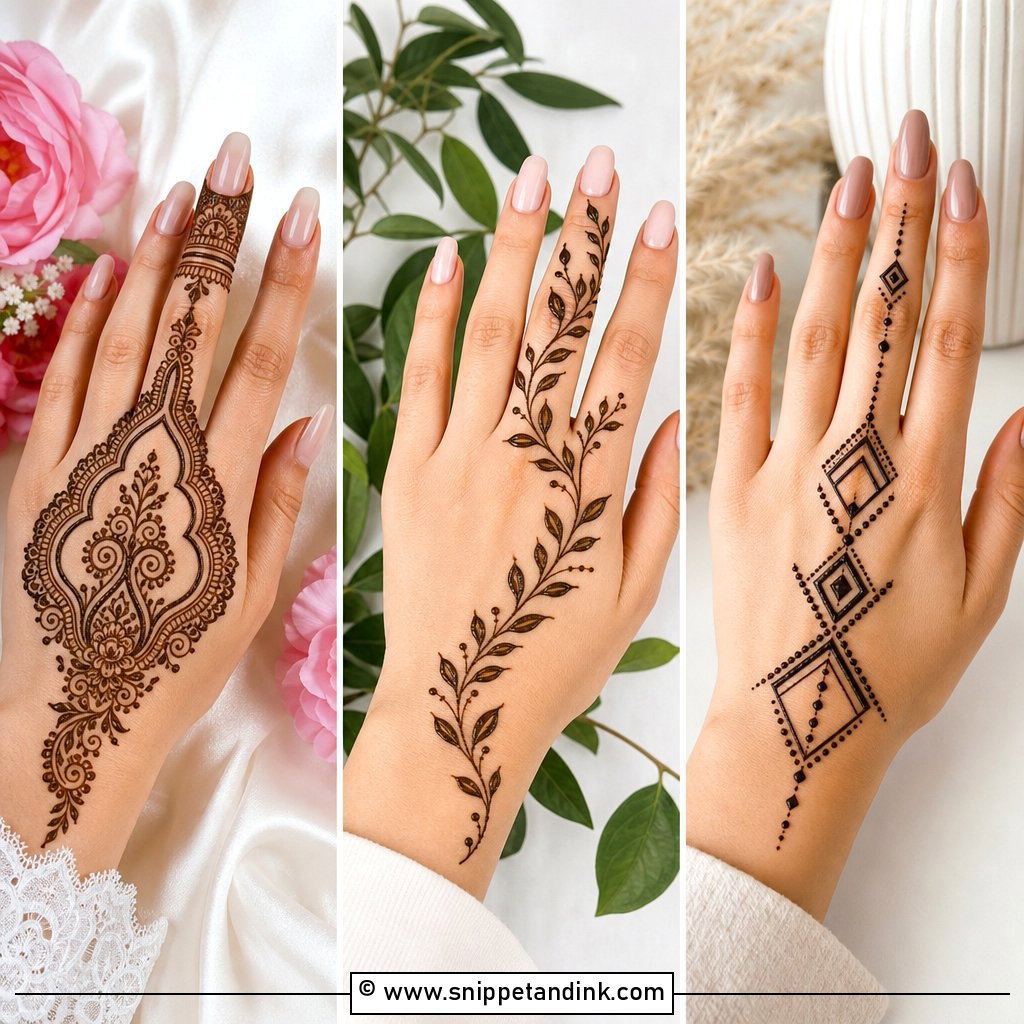
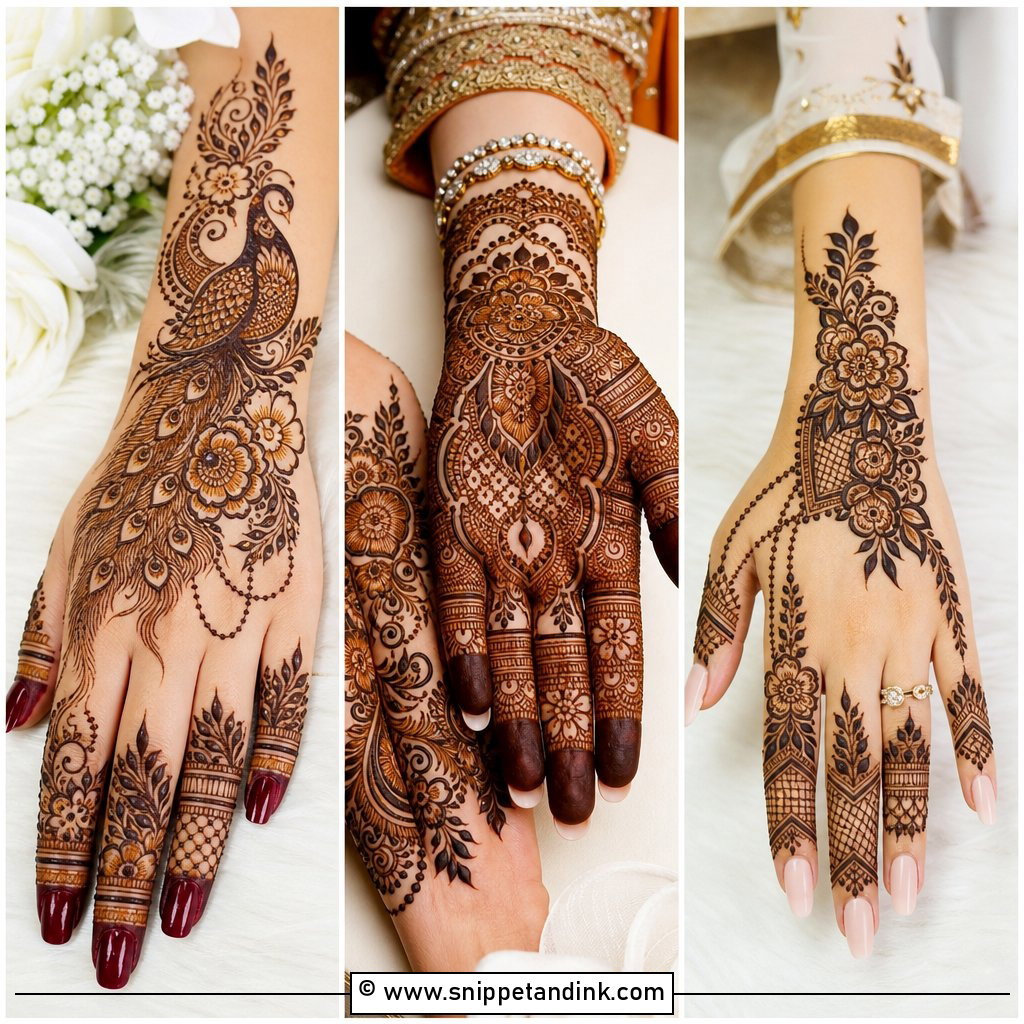
2. Easy Back Hand Mehndi Design
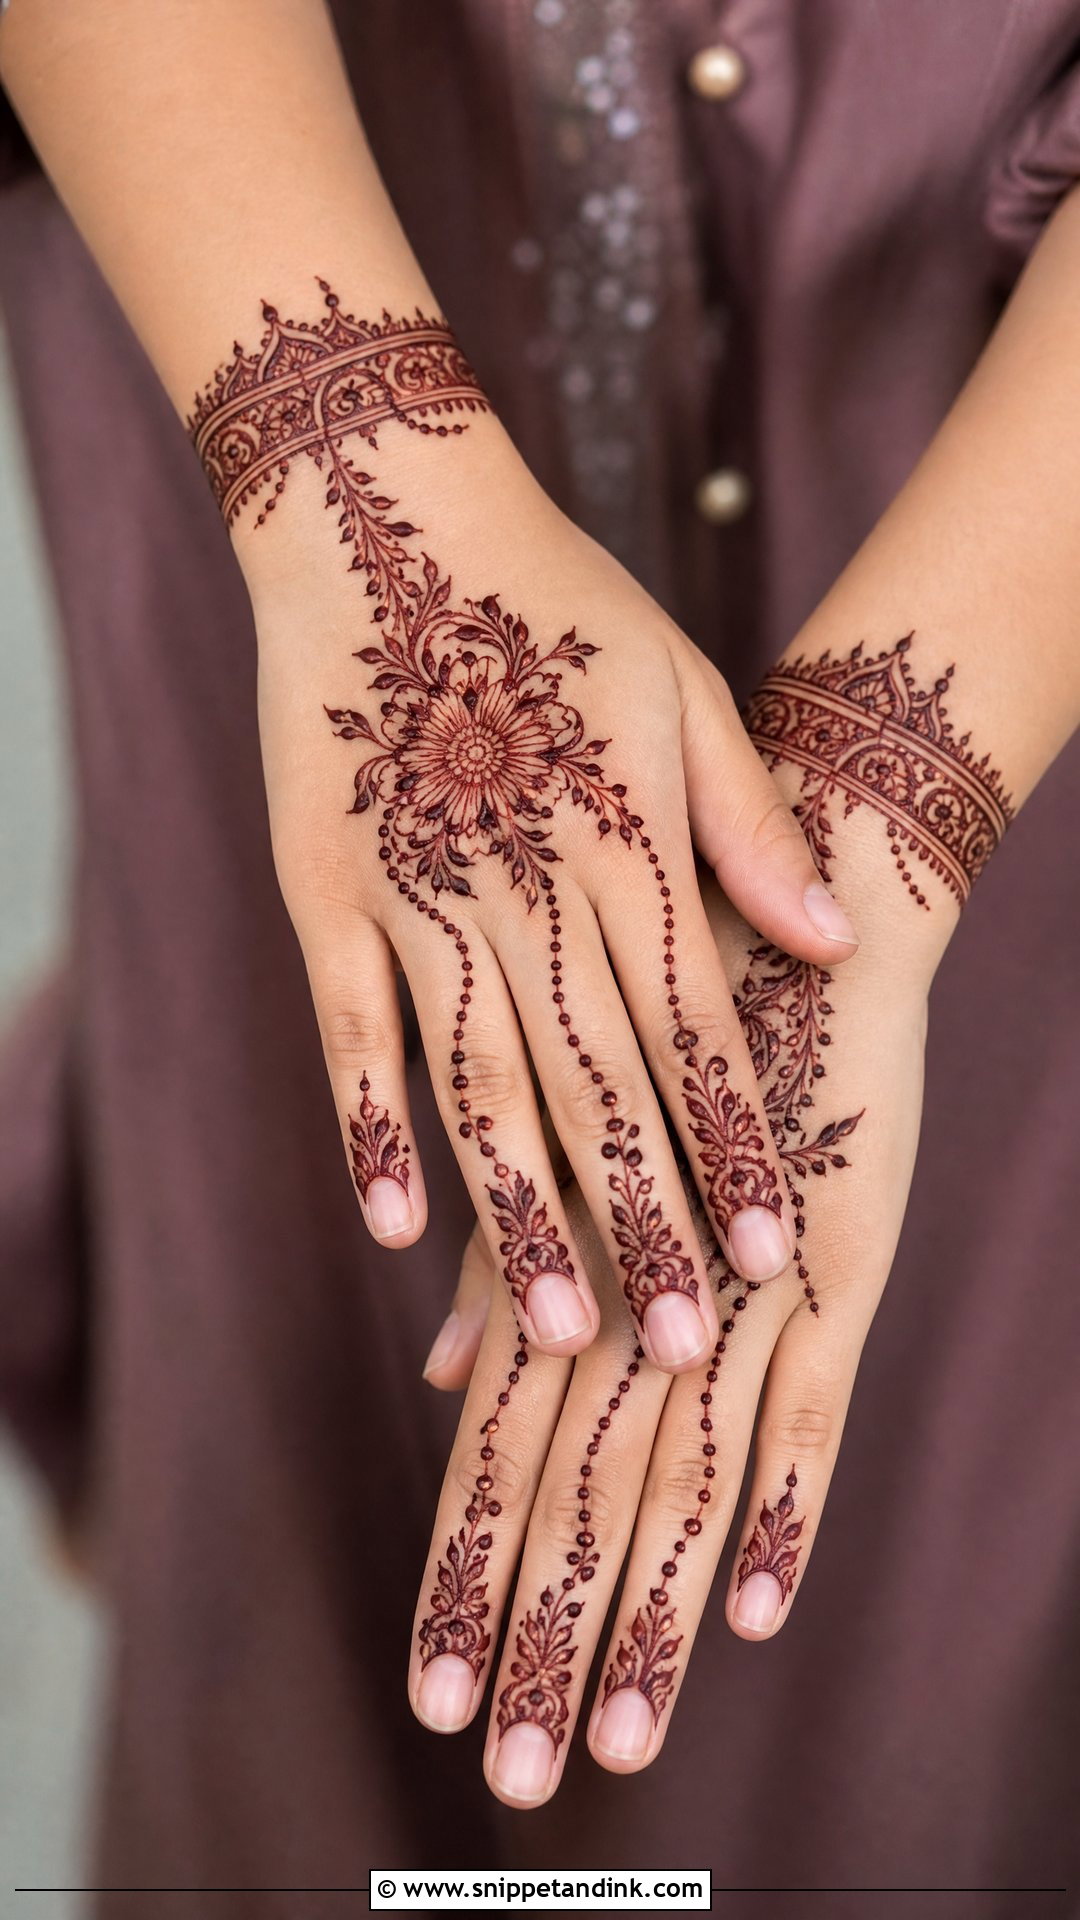
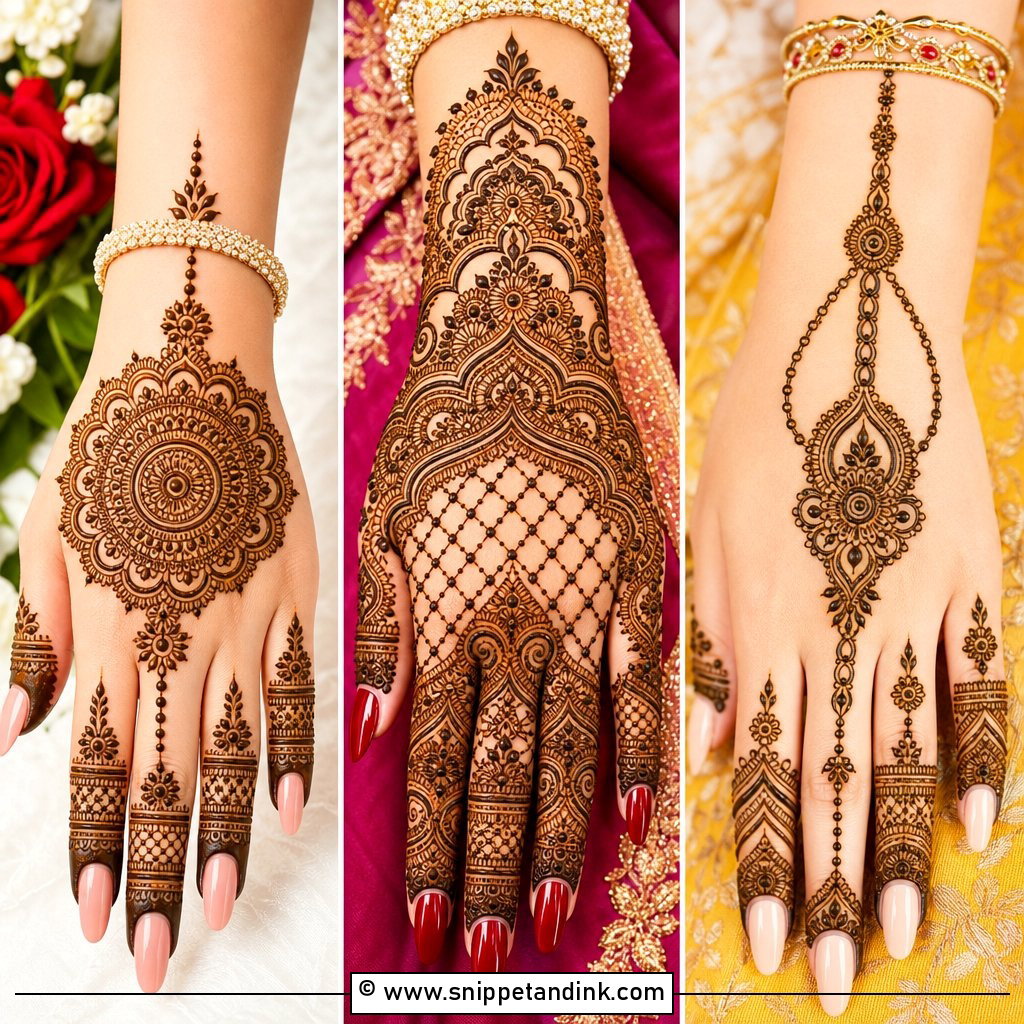
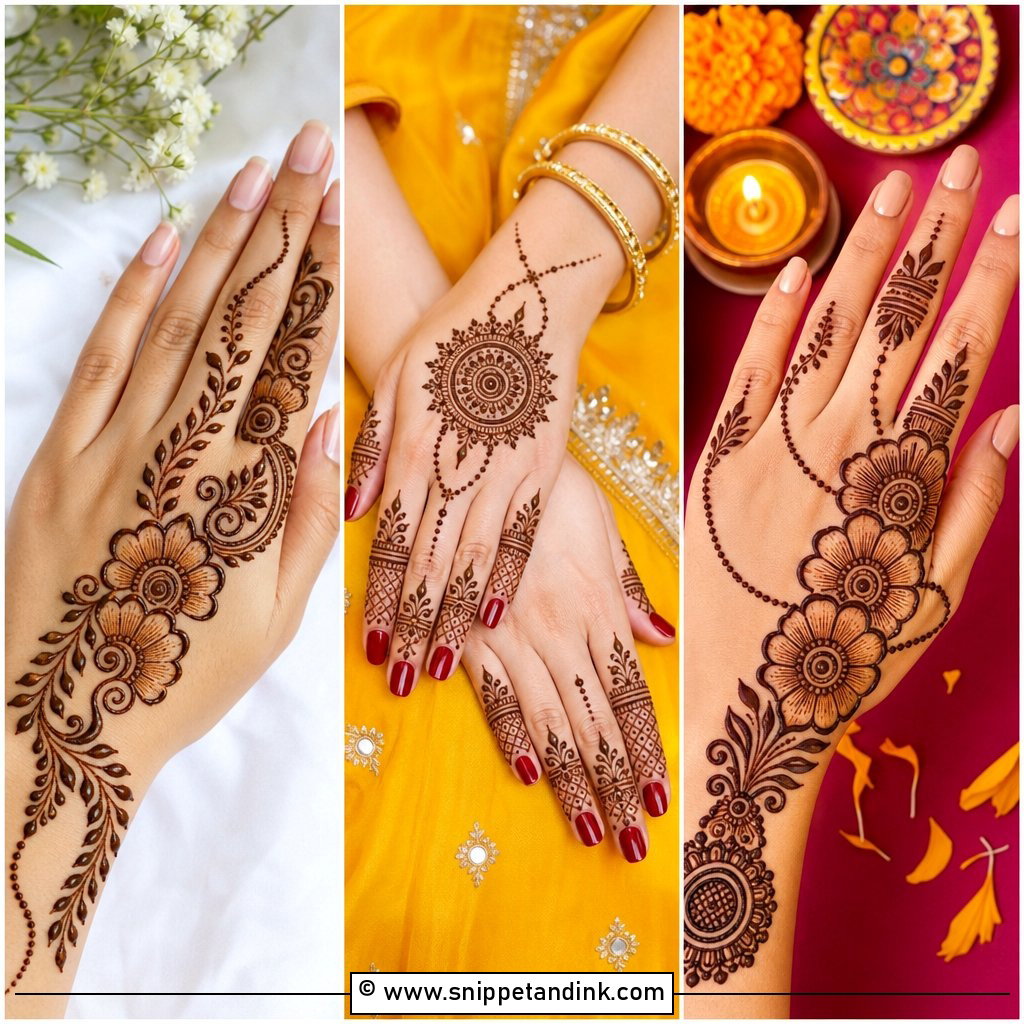
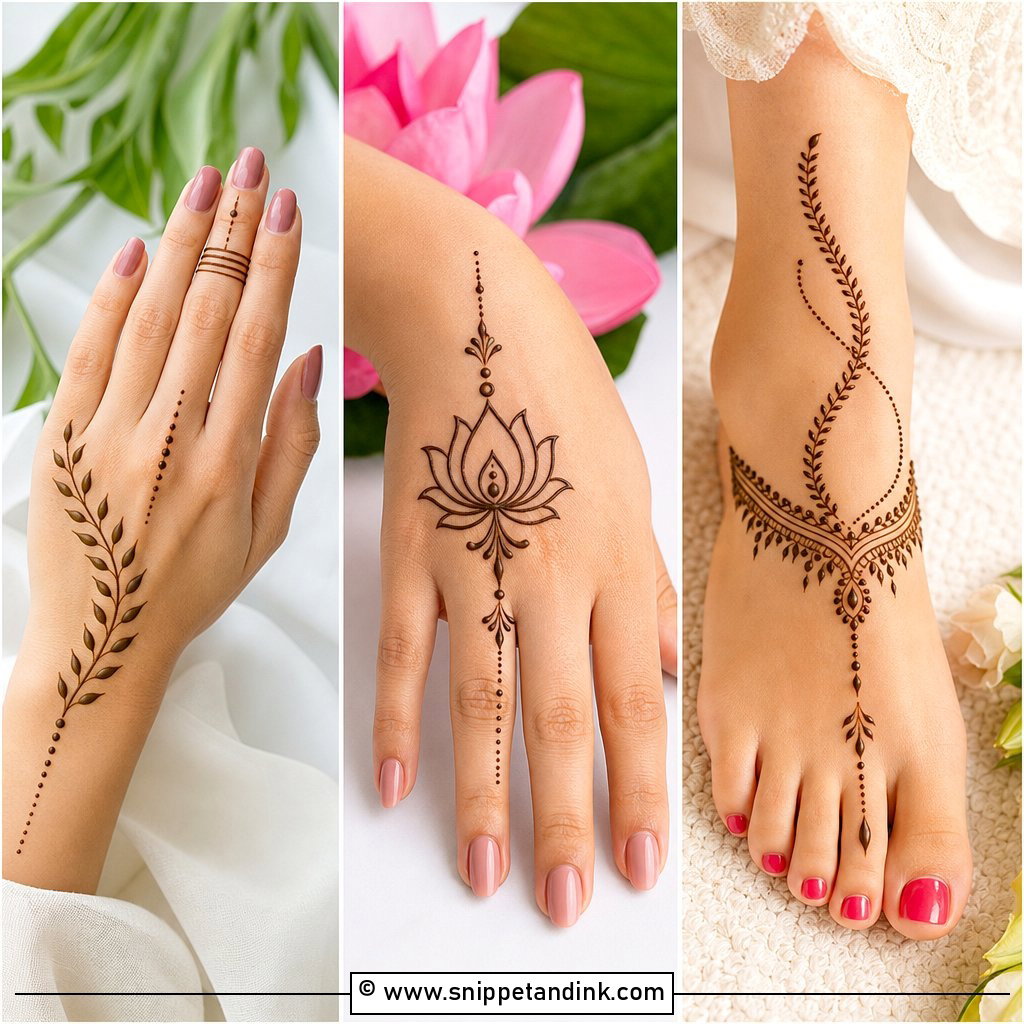
The back of the hand already behaves like a place for jewellery, so an easy back hand mehndi design leans into that. Draw a small flower, round mandala or paisley near the centre, a chain-like line to the middle finger, and a bracelet band at the wrist. Tiny dots, leaves and half-circles fill it out; the fingers get rings, tips or short leafy strips. One thing to know: skin on the back of the hand stains lighter than the palm, so slightly bolder lines pay off here.
3. Arabic Mehndi Design Easy
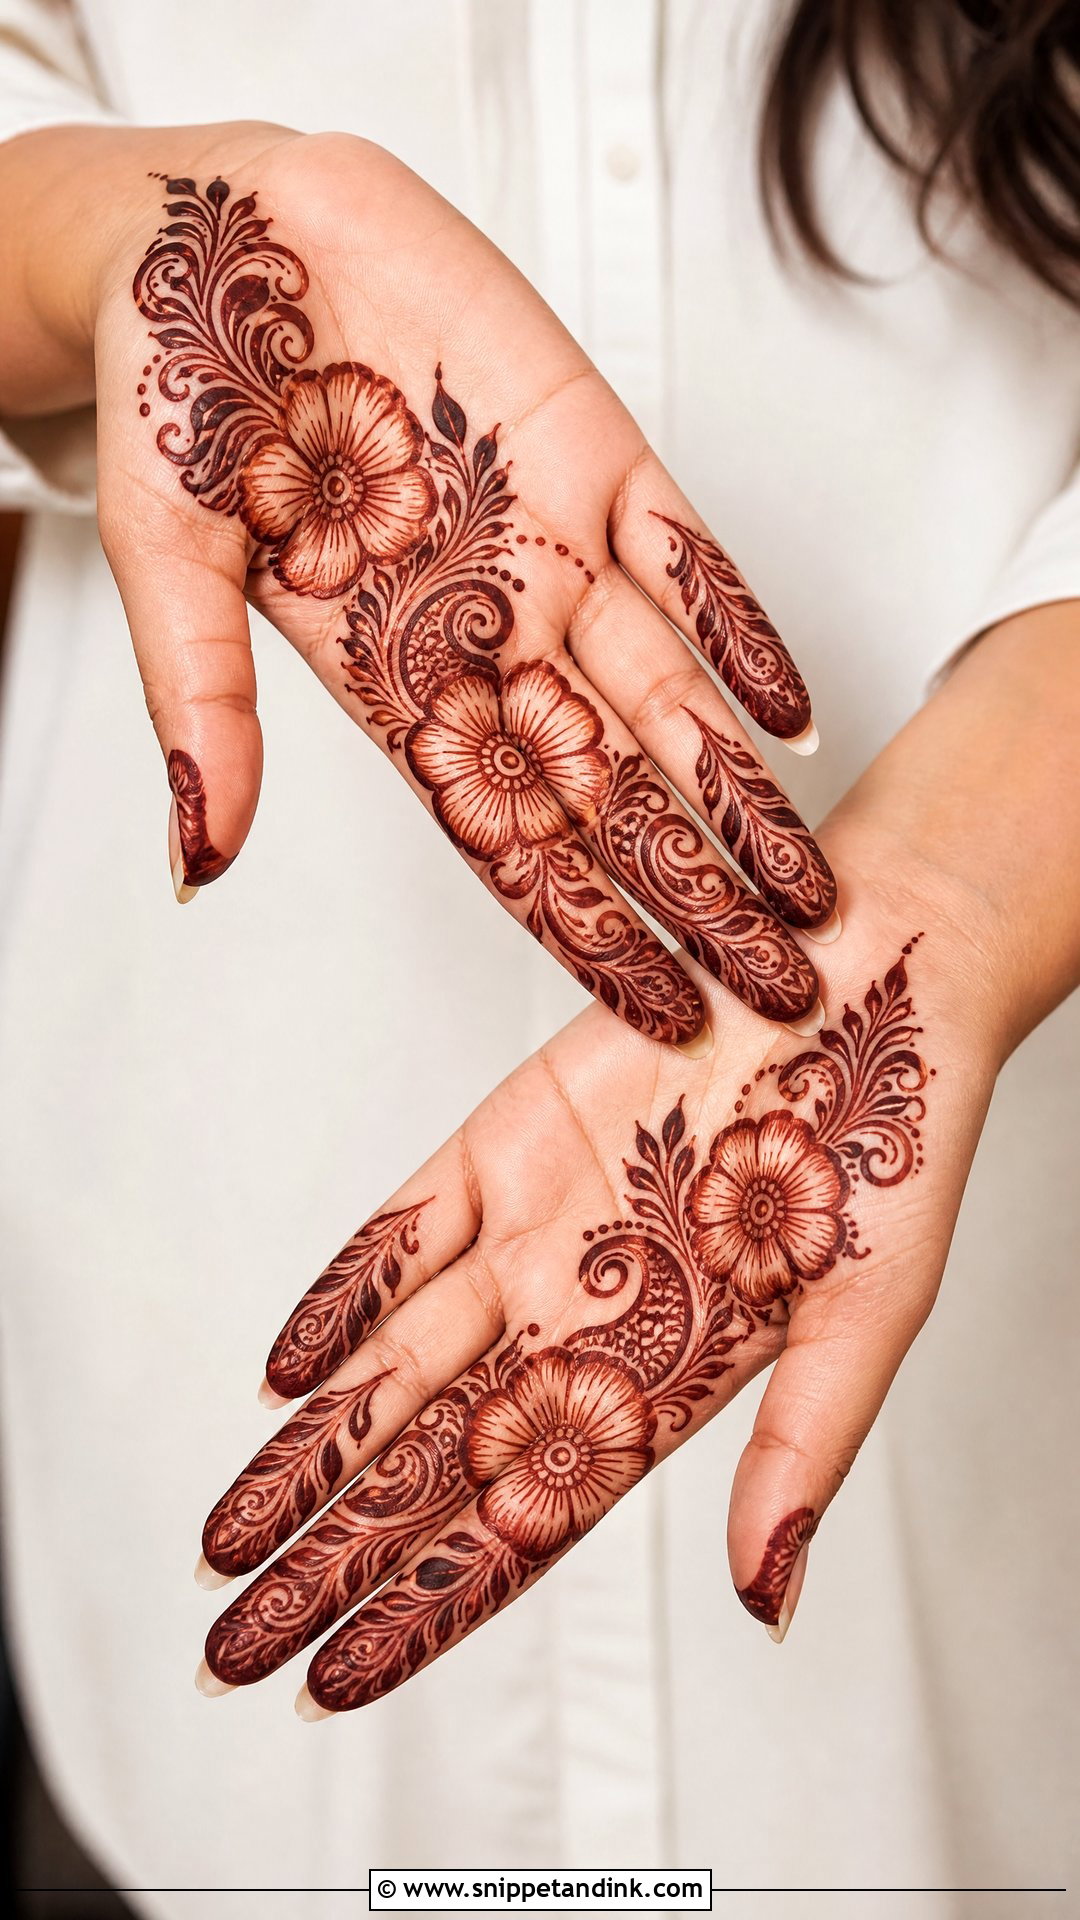
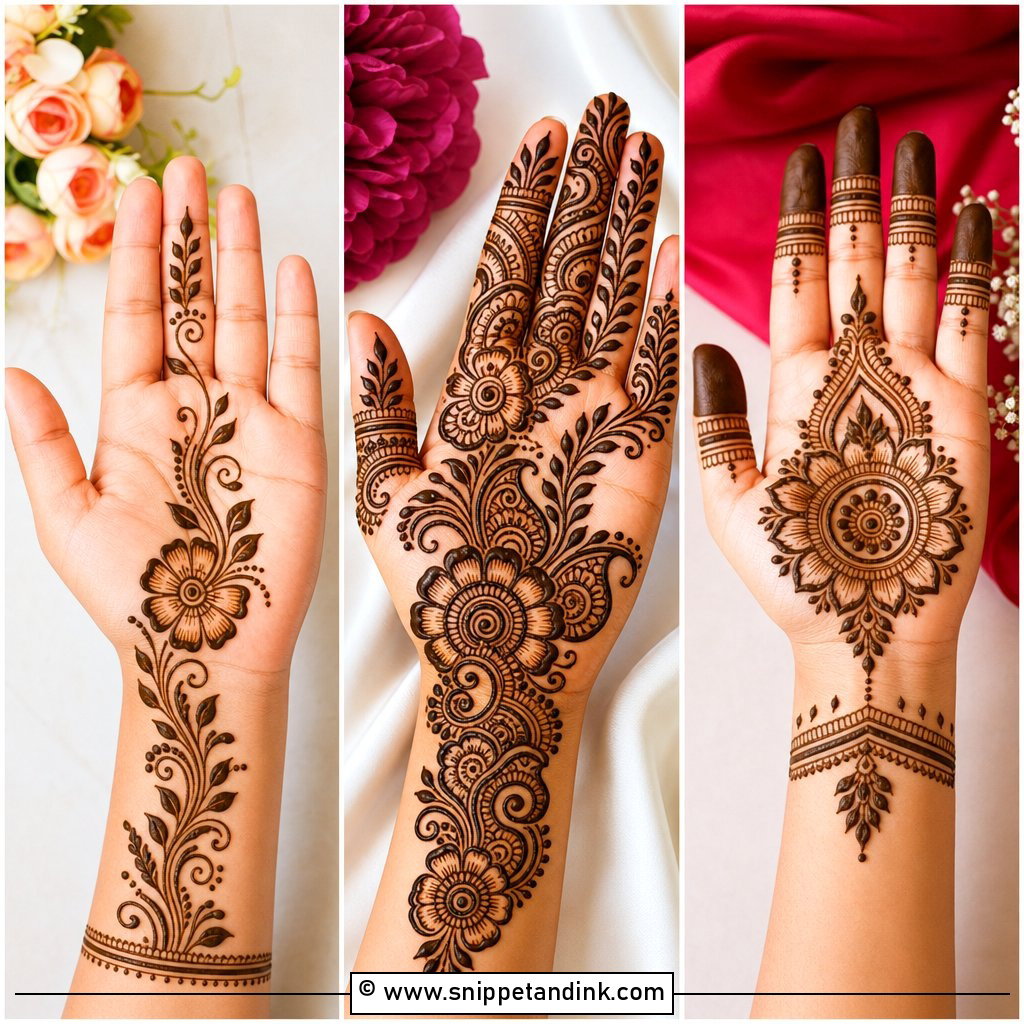
Diagonal flow is the reason Arabic layouts forgive beginners. The design starts at the wrist, crosses the palm and ends near the index finger, using bold flowers, paisleys, leaves and curved stems with open space between them. Because the eye follows the movement rather than inspecting each element, small wobbles disappear. Keep the outlines a little thicker than feels natural and fill only a few areas with lines or dots. It’s the fastest full-looking hand I know for an Eid evening.
4. Easy Flower Mehndi Design
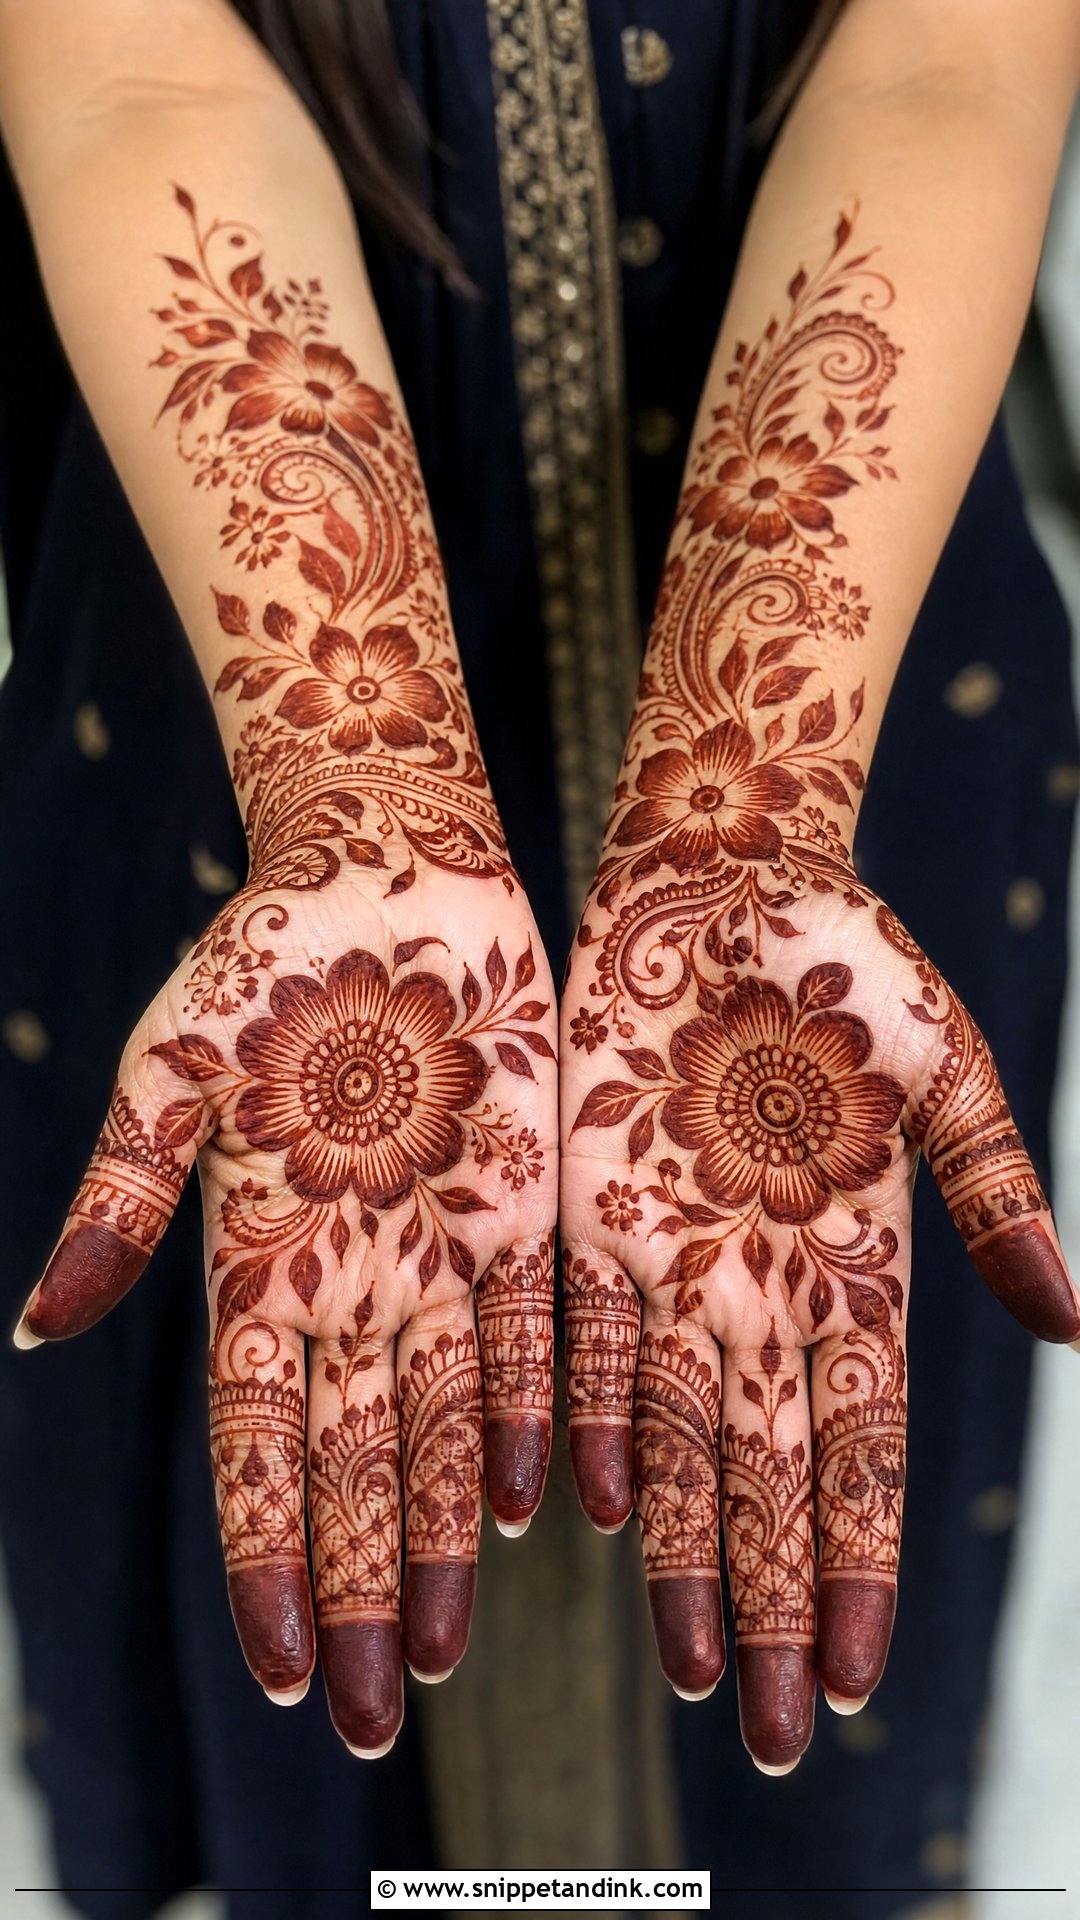
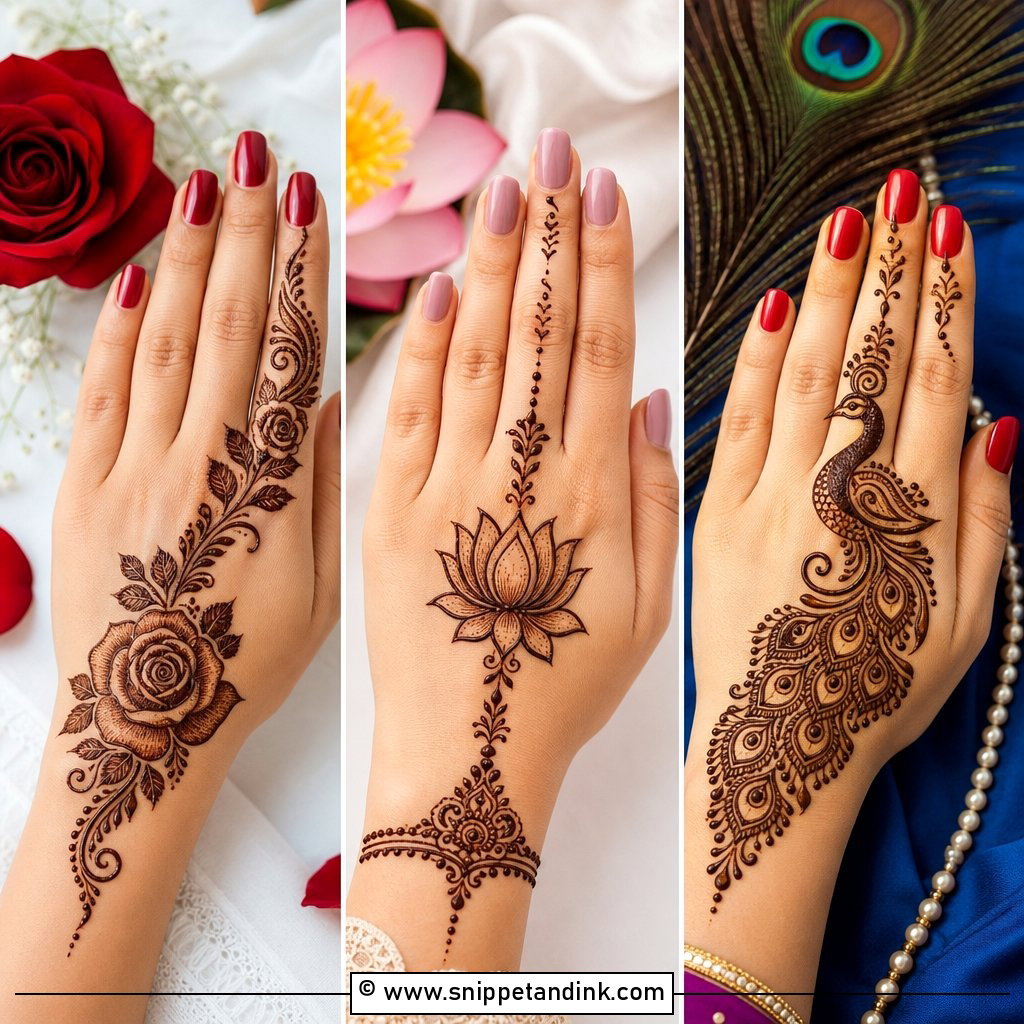
Flowers don’t need to match each other, which takes a lot of pressure off. Place one medium bloom on the palm or back of the hand, add smaller ones around it on curved stems, and run leafy vines toward the wrist and fingers so everything connects. Petals can be lined, dotted or left open. Slightly different petals actually look more natural. Teens and bridesmaids gravitate to this, and it scales from a few blooms to a full hand without changing technique.
5. Easy Mandala Mehndi Design
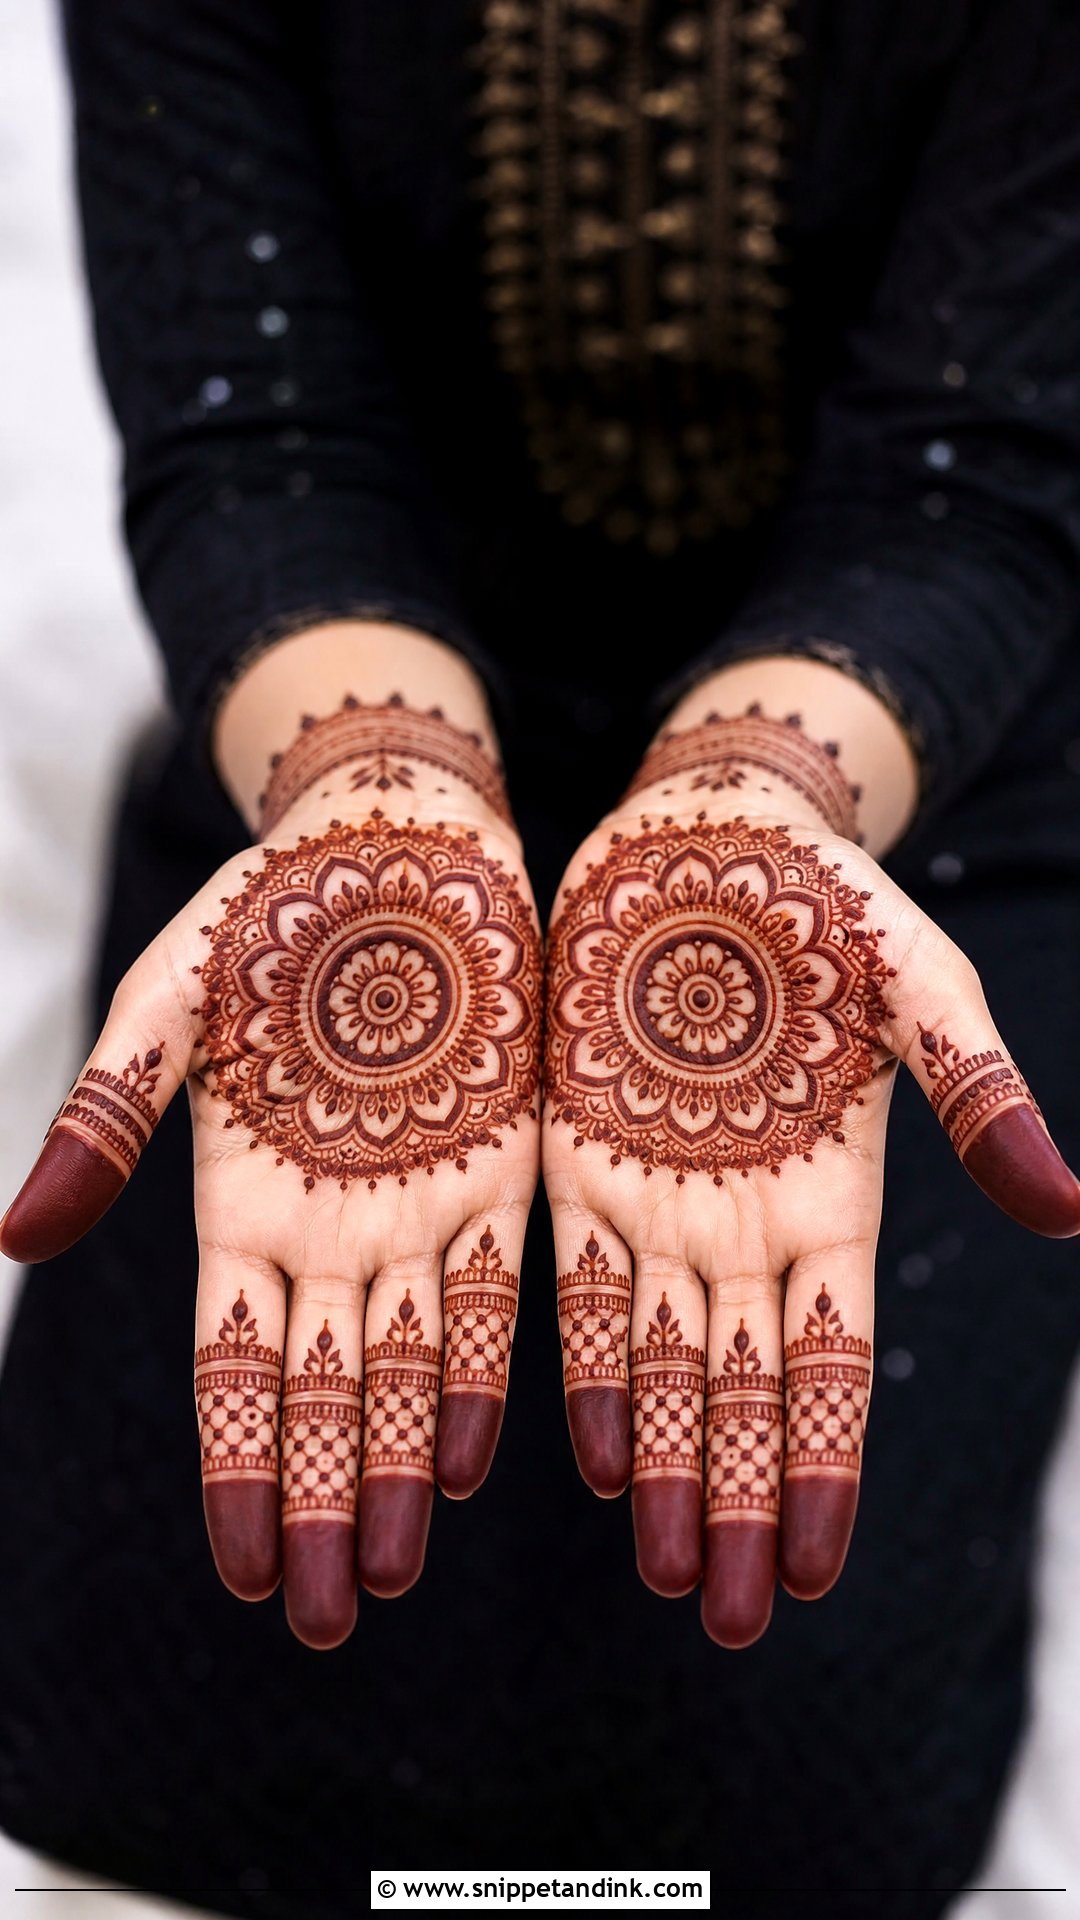
A mandala gives the hand an instant focal point, which is why it’s everyone’s second design. Draw a small circle in the centre of the palm and build outward with petals, dots, scallops and thin rings, keeping each layer even before starting the next. Where learners go wrong is drawing each ring a little bigger on one side; turn the hand a quarter at a time as you go round. Straight bands, leafy tips or dotted chains on the fingers and a light wrist border finish it for puja, haldi or a simple traditional outfit.
6. Easy Finger Mehndi Design
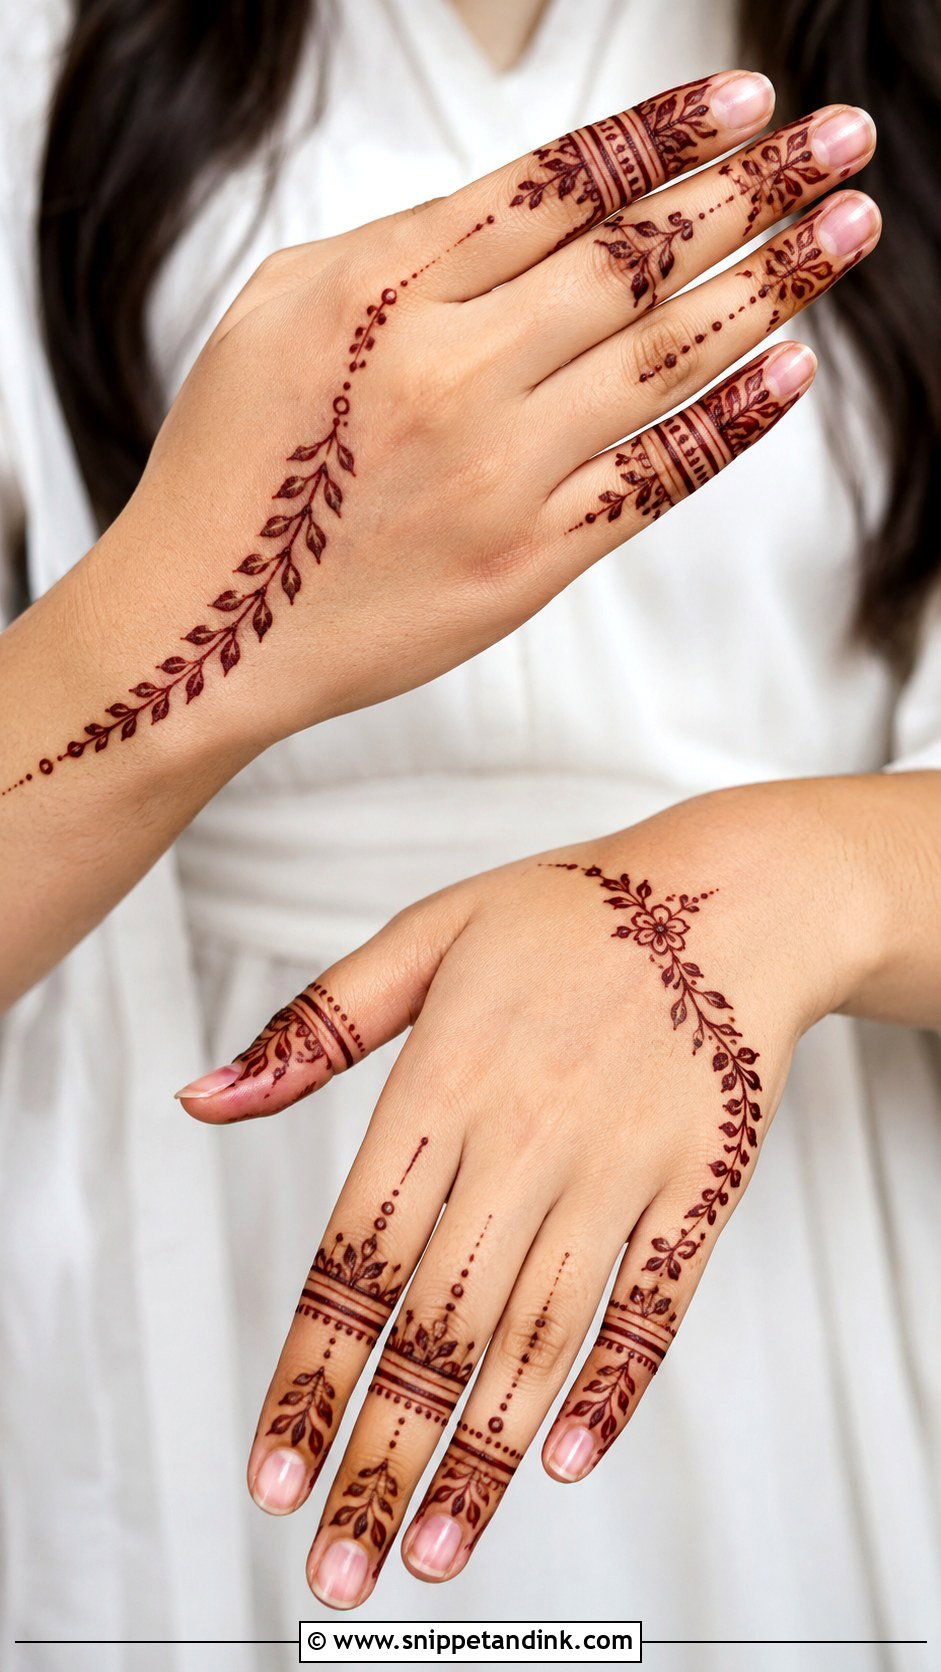
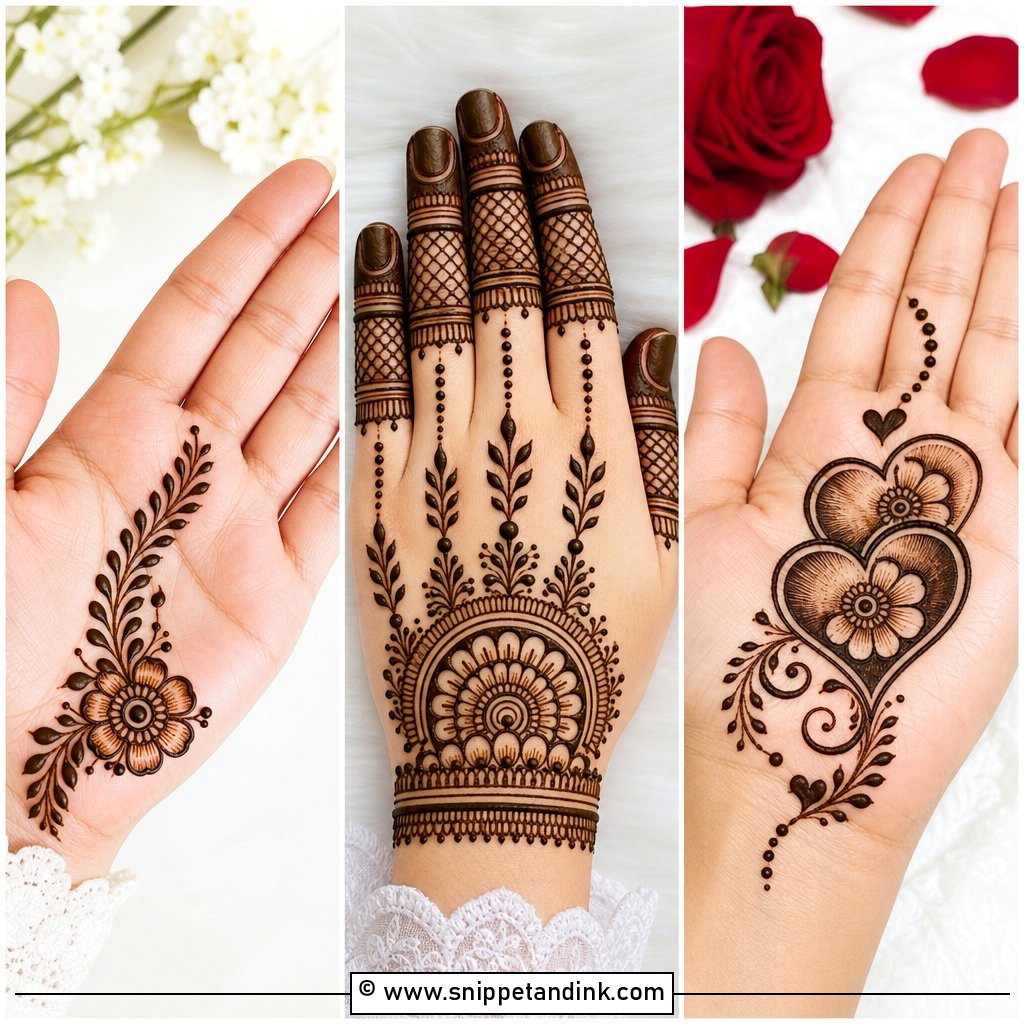
Fingers carry all the detail here, and the palm or back of the hand stays almost empty. Bands, dots, tiny leaves and small net patterns on each finger, with a little flower or mandala near the wrist to anchor it. My trick for keeping it coordinated: let each finger differ slightly, but repeat one element, like a dotted band, on all five. Quick, clean and easy to wear to work.
7. Easy Bracelet Mehndi Design
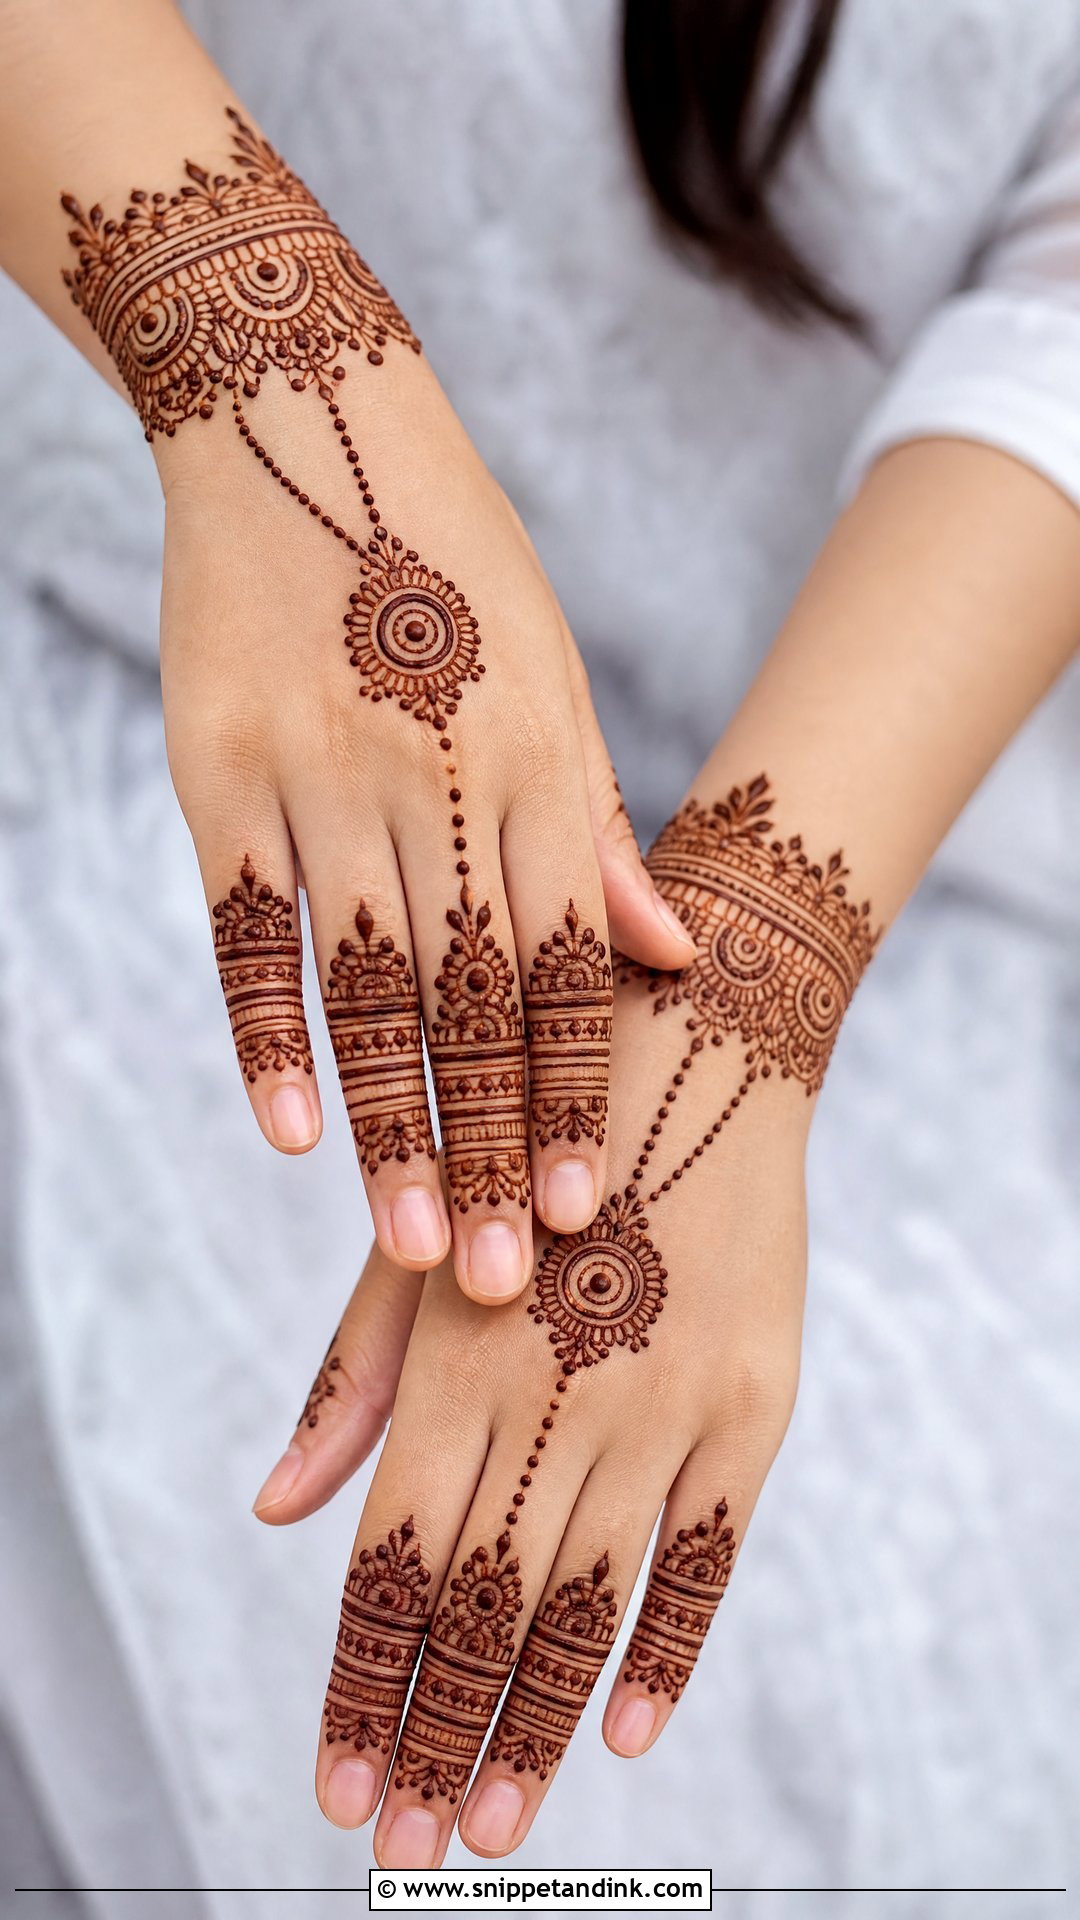
Scallops, dots and small flowers around the wrist, a thin chain or leafy trail up to one finger, and a ring pattern on that finger. That’s the whole jewellery effect. The rest of the hand can stay bare or take a small mandala at the centre. Before you draw the band, look at where your bangles or watch actually sit, because a band hidden under metal is wasted effort. It suits minimal fashion and family events alike.
8. Easy Paisley Mehndi Design
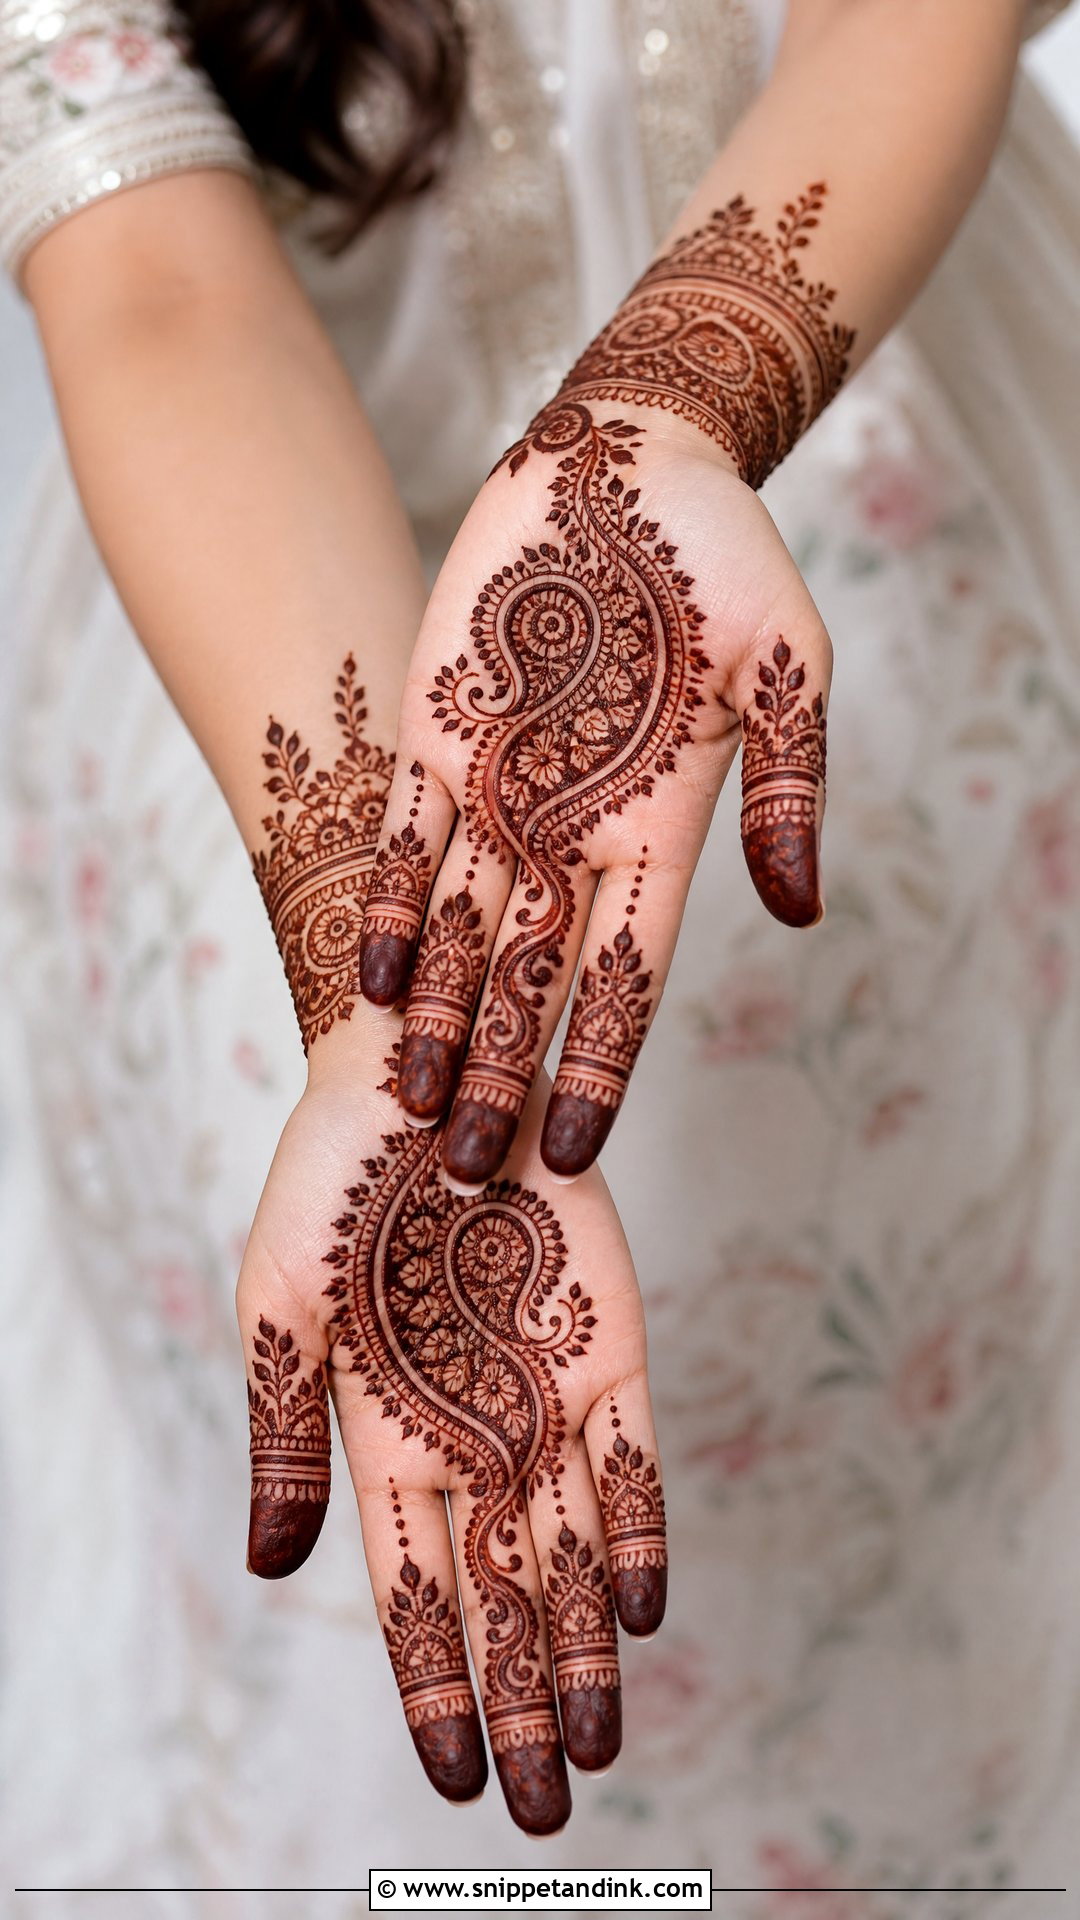
One large paisley looks rich even when the fill inside is basic, which is exactly what a beginner wants. Draw it on the palm or back of the hand, surround it with small flowers, dots and curved leaves, and fill it with simple lines, tiny petals or a spiral. A border toward the wrist and slim vines toward the fingers complete the hand. The outline is everything; I’d practise that single curve on paper a dozen times before putting it on skin.
9. Easy Leaf Mehndi Design
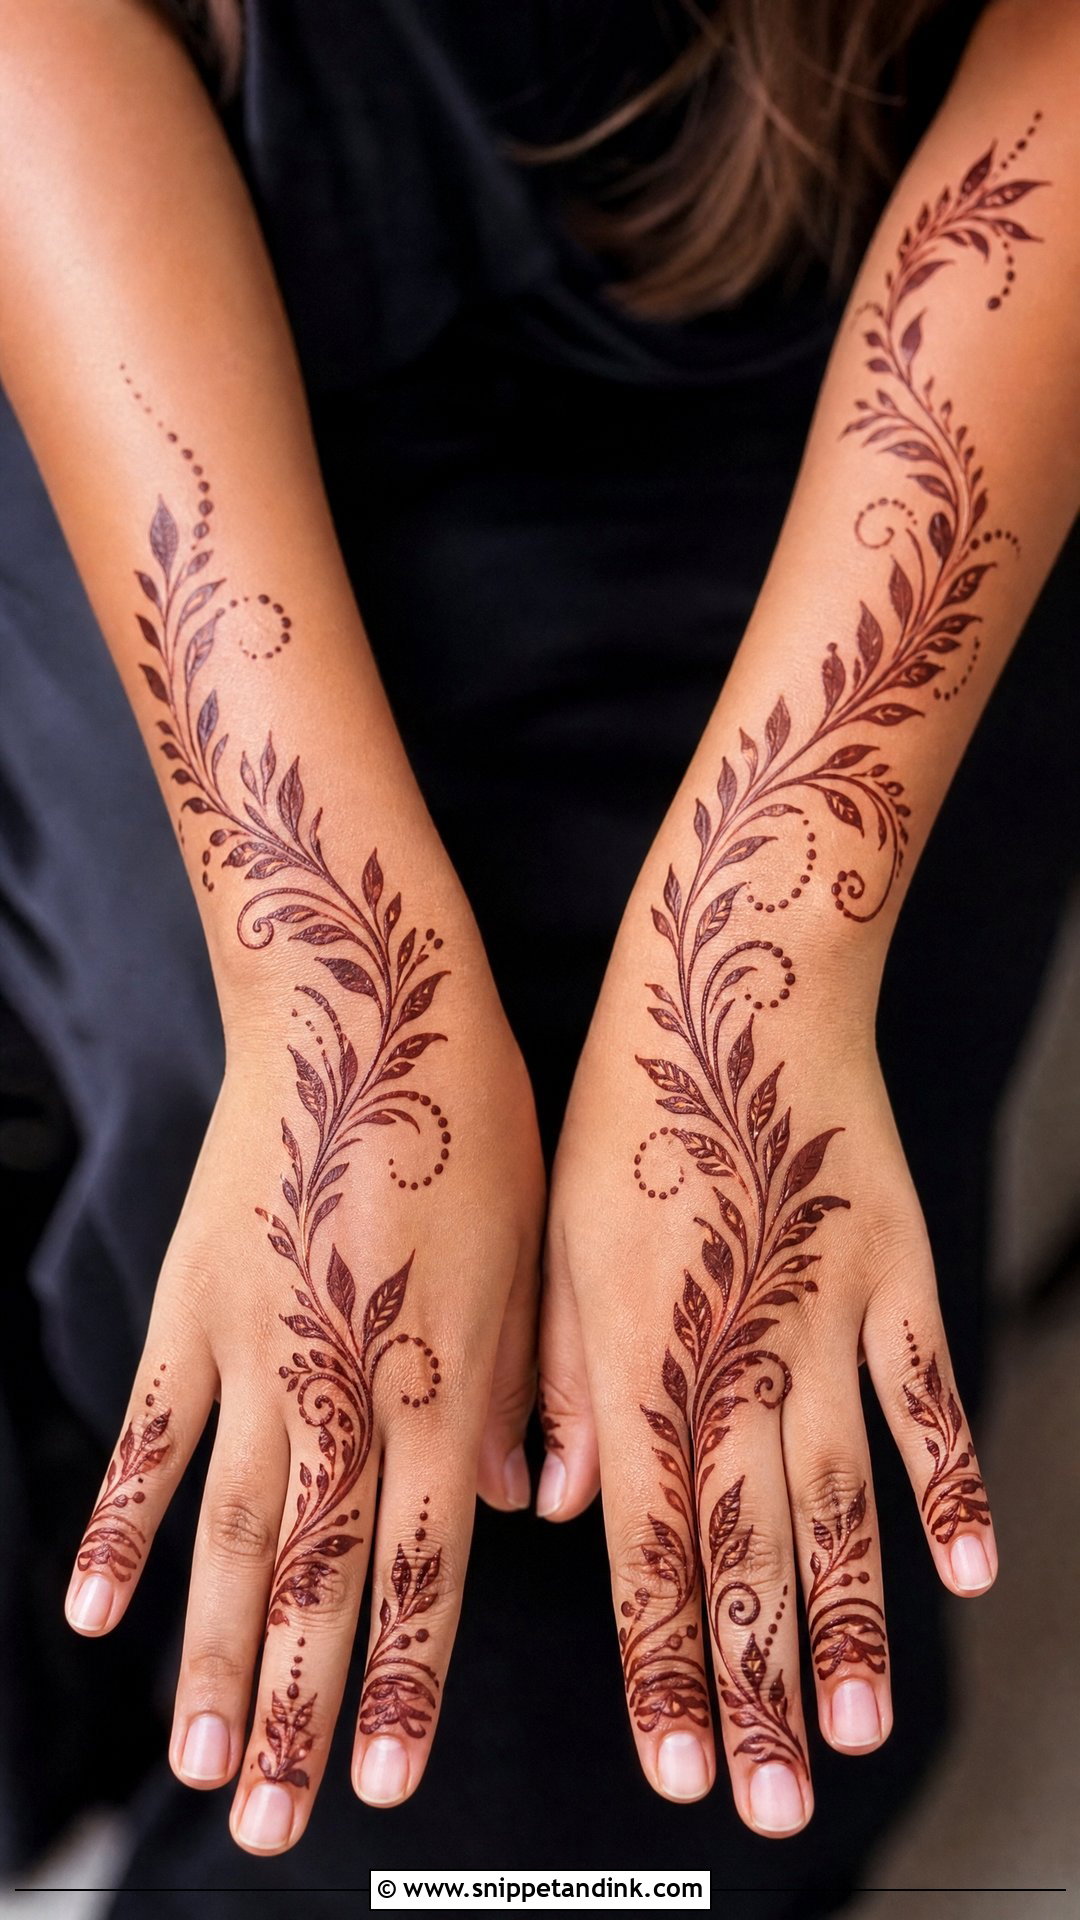
A curved vine from the wrist to the index finger, or across the palm, with small leaves on both sides. Space the leaves evenly and add dots to fill out the line; thin leafy strips or simple tips decorate the fingers. Leaves are quick and adjust to any hand width just by changing their size. If you’d rather your henna look like a plant than an ornament, this is the one.
10. Easy Full Hand Mehndi Design
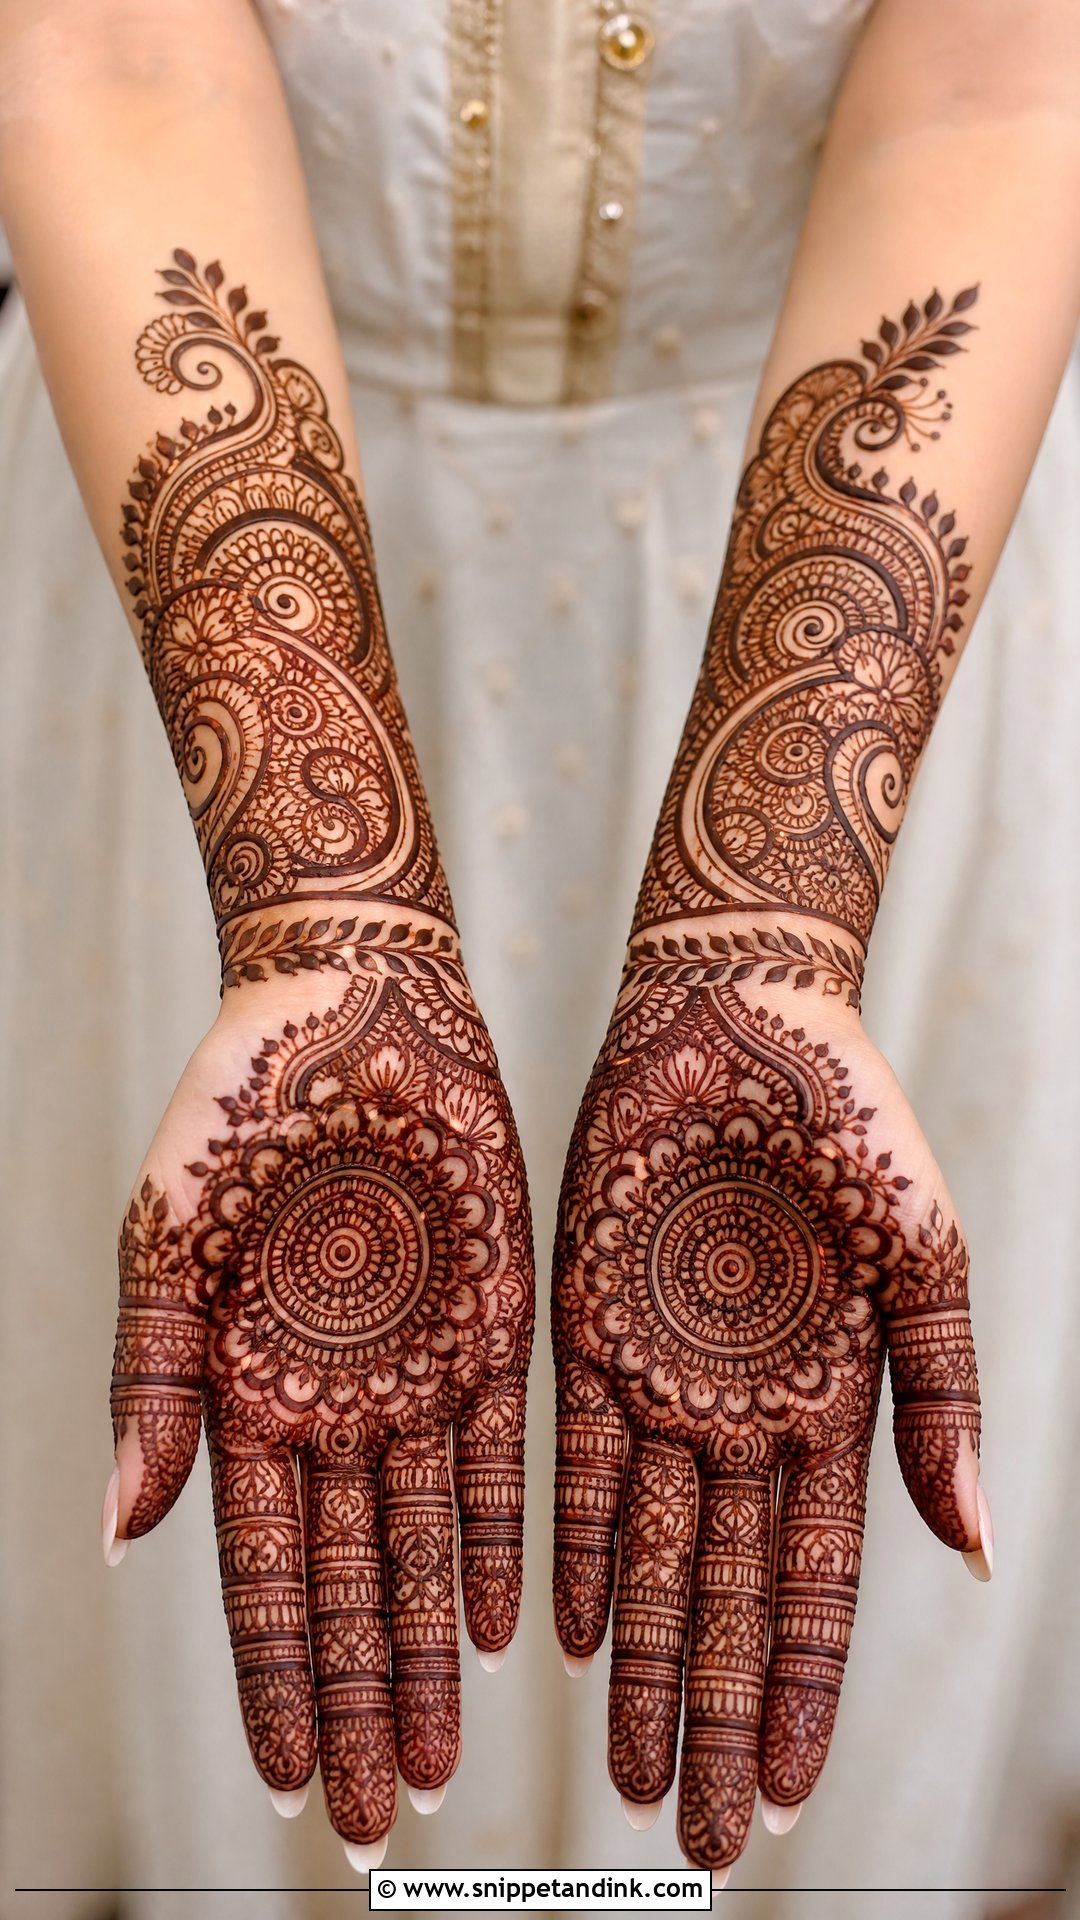
Full coverage is just sections done one at a time: a mandala or flower on the palm, a paisley trail on one side, leafy vines at the wrist, simple bands on the fingers. Leave a hair of space between sections so the hand looks clean rather than smudged together. Repeating dots, petals and curves ties the zones into one design. It looks rich at weddings and family events without asking for tiny detail everywhere.
11. Easy Half Hand Mehndi Design
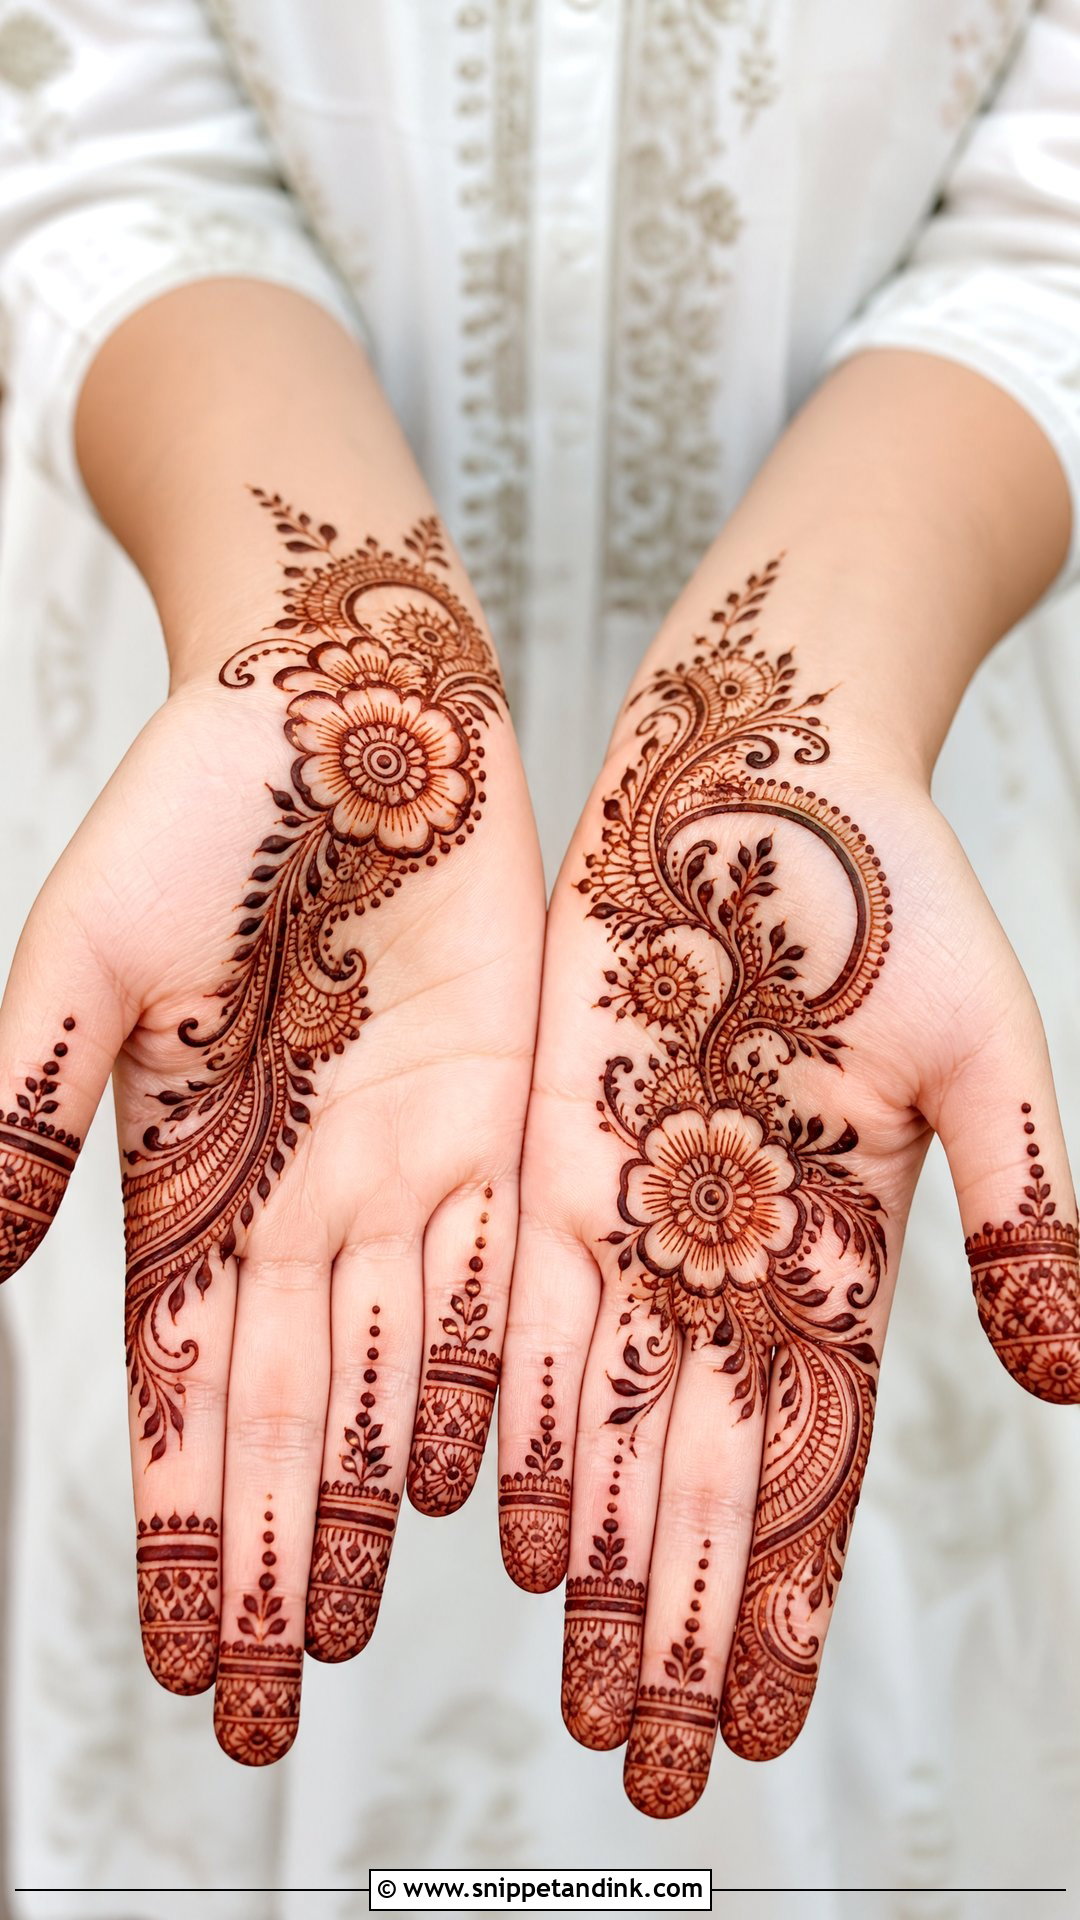
Cover the palm and fingers, or decorate the back of the hand from wrist to knuckles, and stop there. One main motif, such as a flower, a mandala or a paisley, with vines and simple borders around it. The rest stays open. It’s quicker to finish, comfortable to wear and dries before you’ve had time to get restless, which is why young girls and first-timers do well with it.
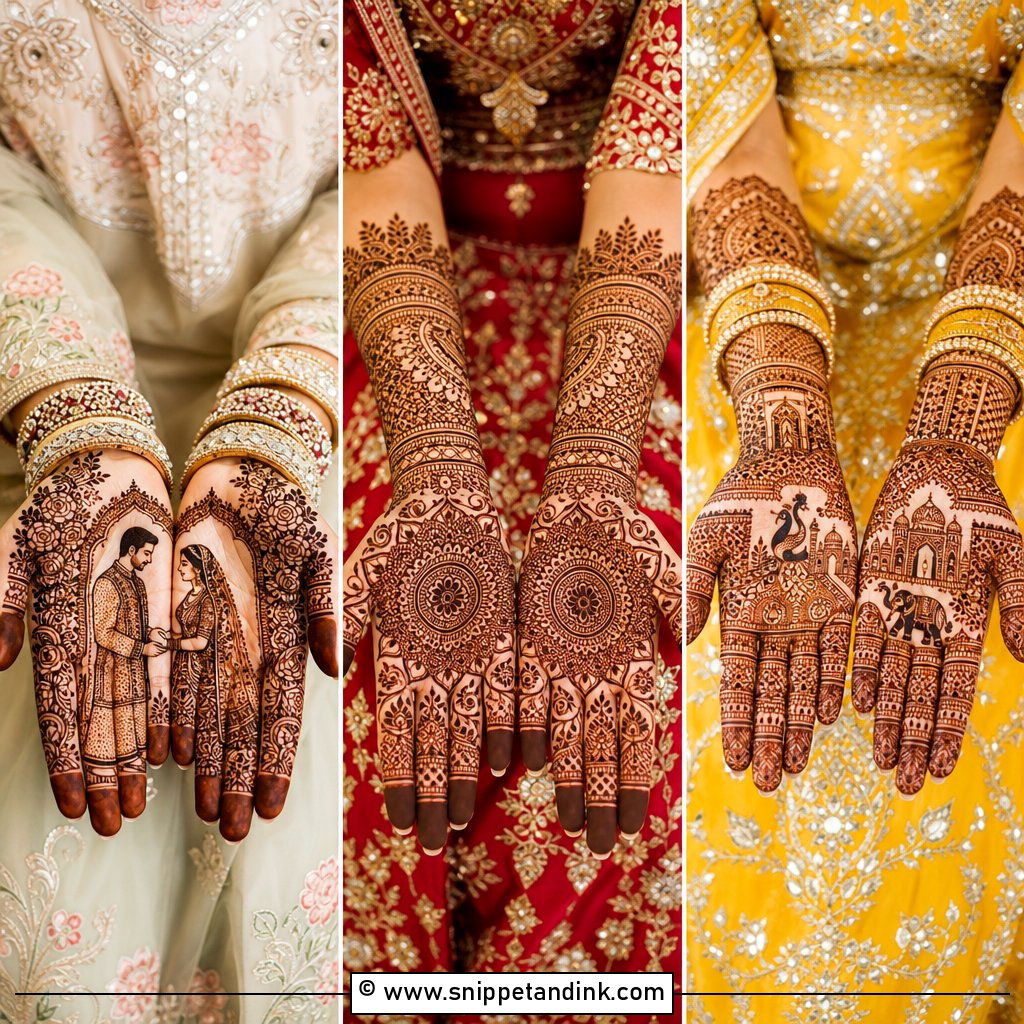
12. Easy Bridal Mehndi Design
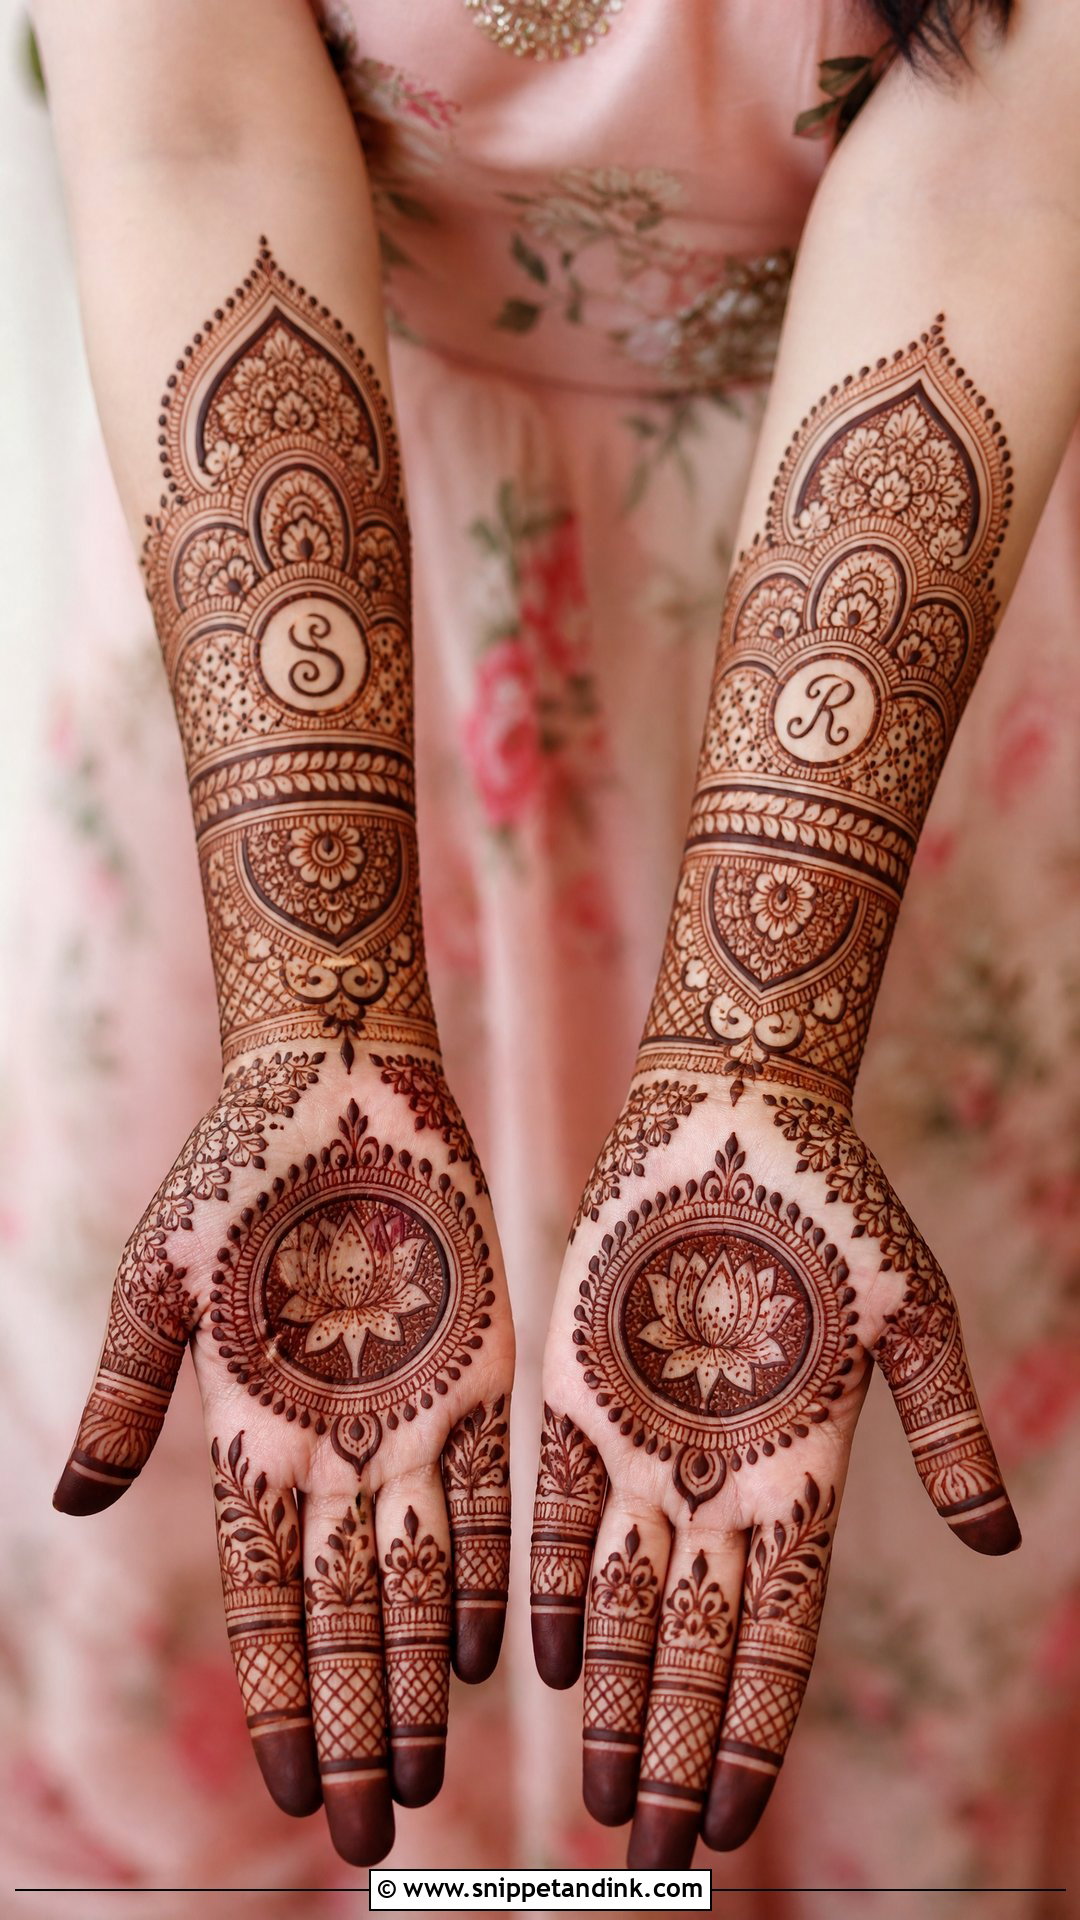
Neat sections and a couple of meaningful motifs carry an easy bridal hand. A large mandala or lotus on the palm, simple paisleys along the sides, patterned fingers with bands and dots, and a bracelet border at the wrist. Tiny hearts, initials or small flower clusters add a personal note without adding difficulty. I’d suggest this for a bride who loves minimal mehndi or a pre-wedding event; for the main ceremony, most brides still want a professional for the fine fill.
13. Easy Indian Mehndi Design
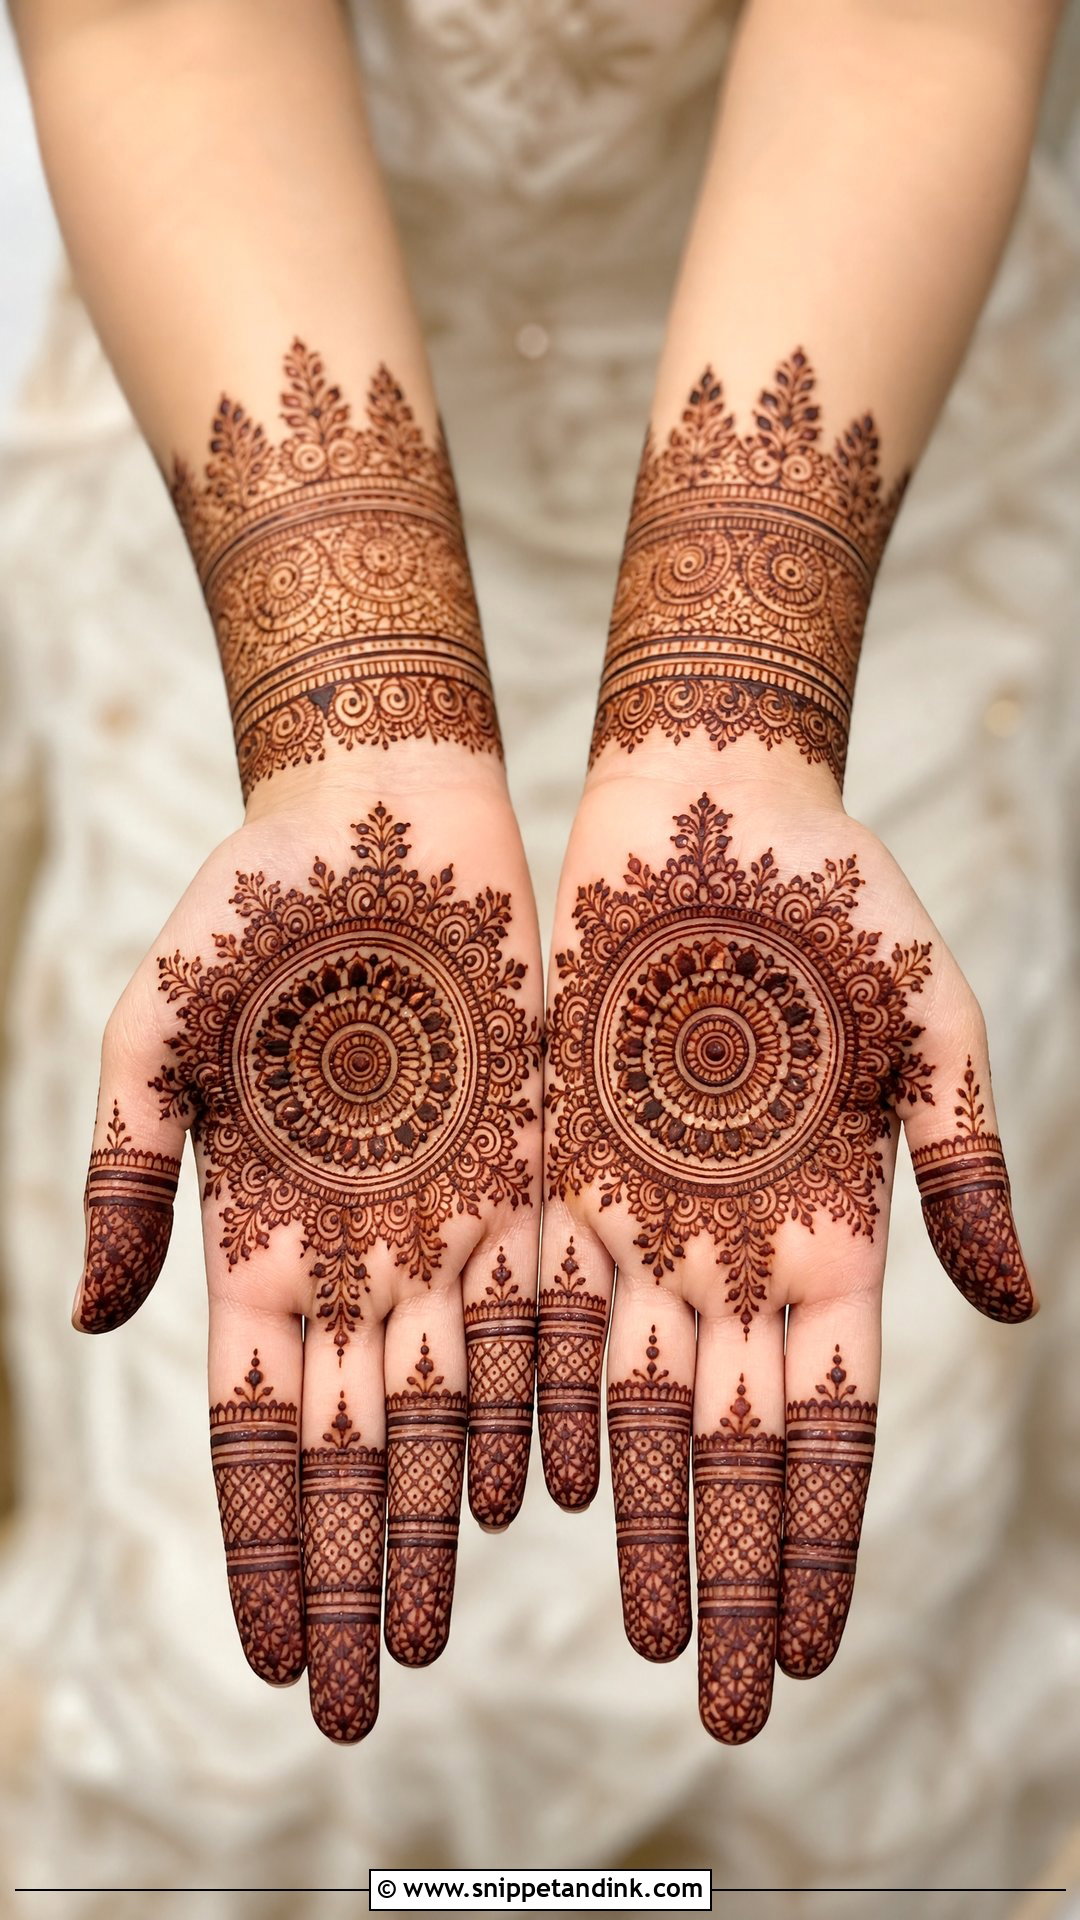
Traditional Indian mehndi relies on symmetry and filled patterns, and an easy version keeps the symmetry while simplifying the fill. Start with a central palm mandala, then paisleys, flowers and dotted lines around it; fingers get bands, leafy fills and small checks, and the wrist gets a cuff-like border. Rhythm matters more than detail, so repeat motifs at even intervals. Draw the large shapes first and add small details only once the layout is fixed. It sits naturally with Diwali, Karwa Chauth and weddings.
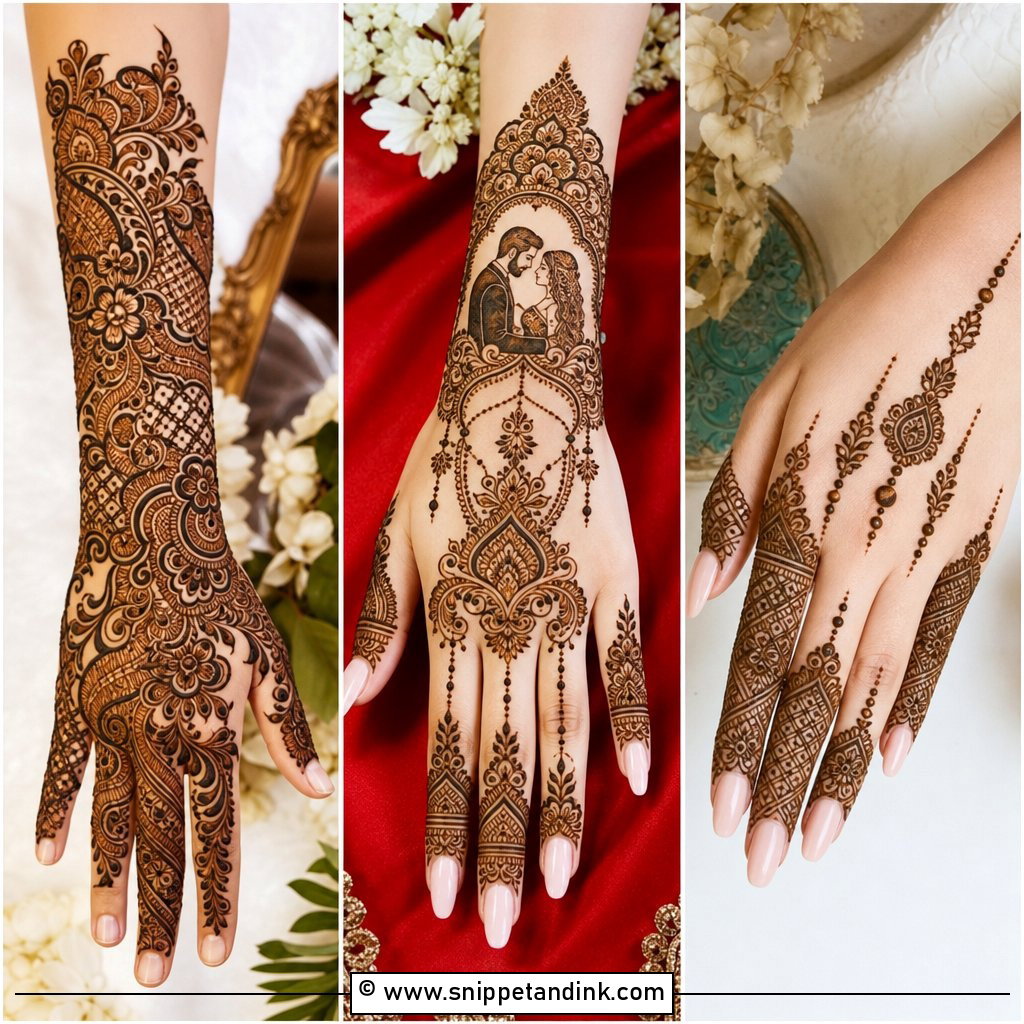
14. Easy Indo Arabic Mehndi Design
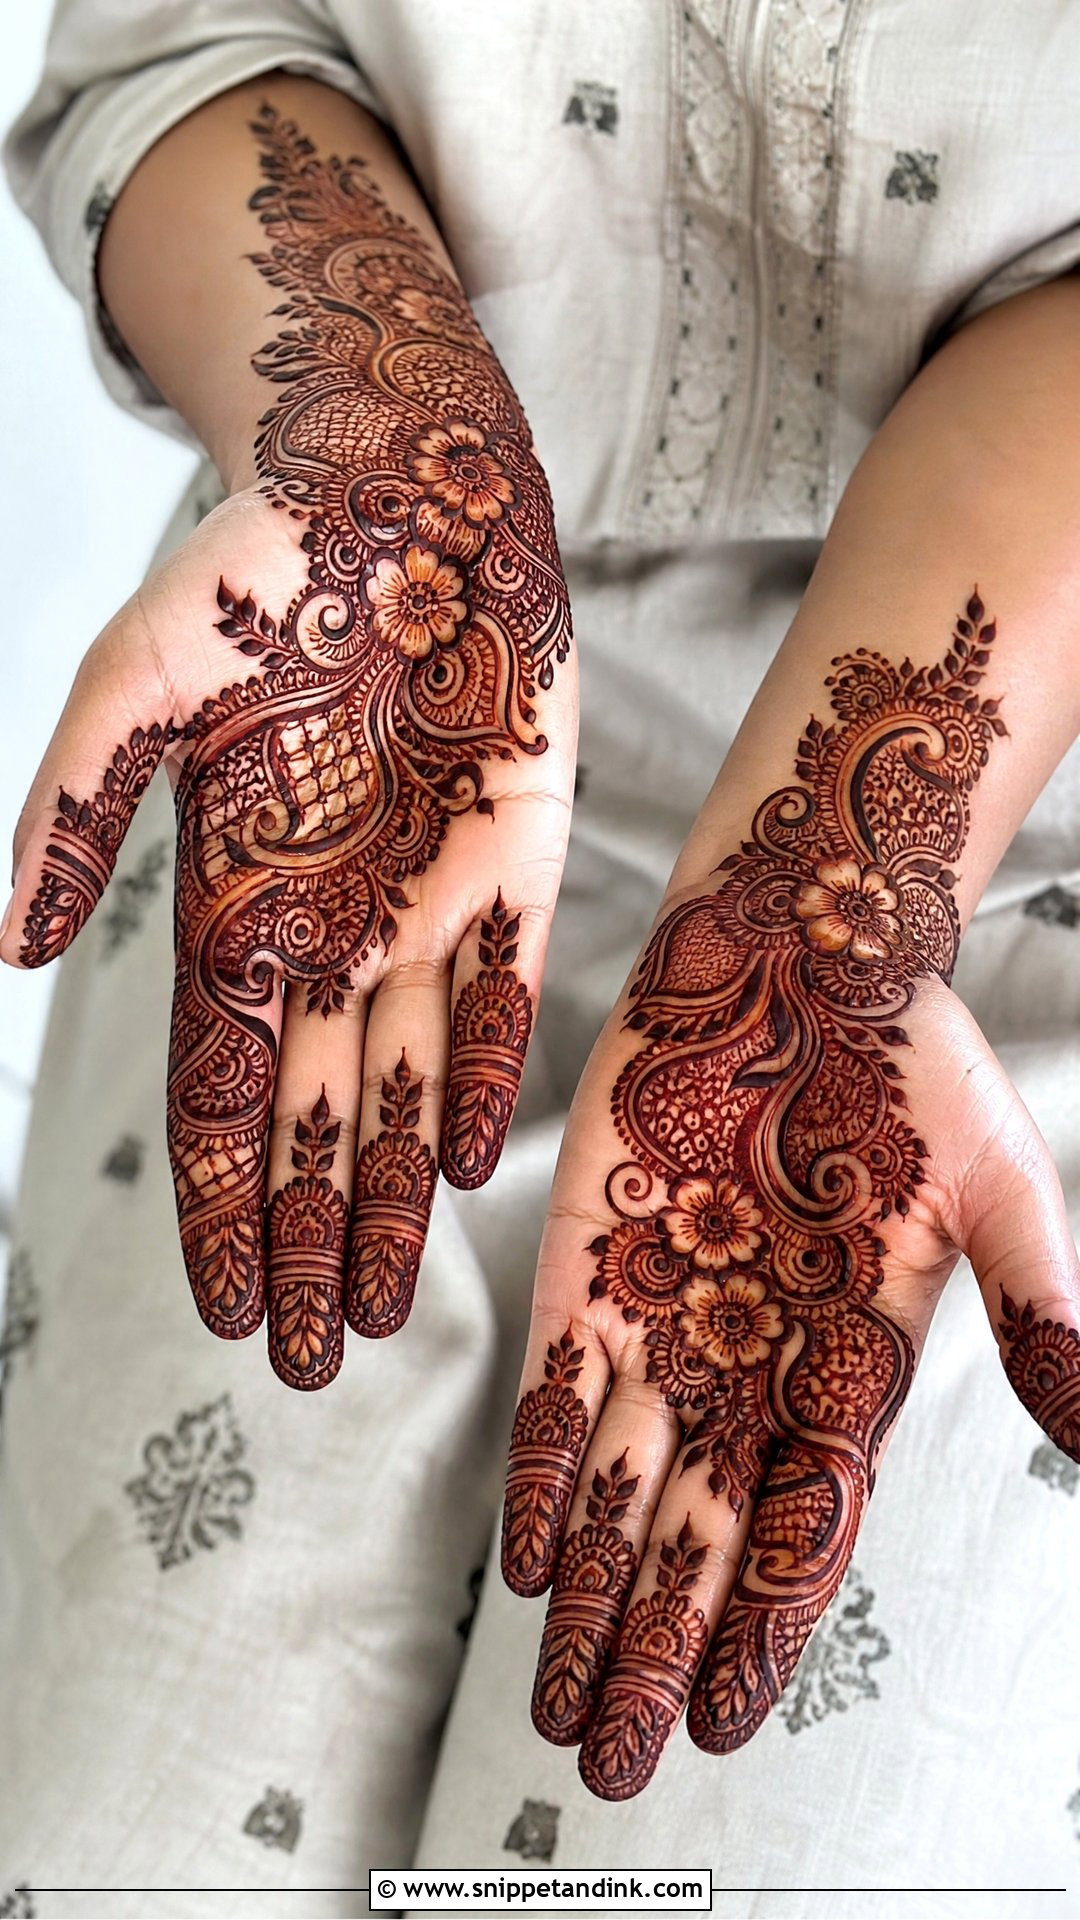
Draw a diagonal floral trail from the wrist to the index finger first, with paisleys and leaves along it. Only then fill selected spaces with dots, fine lines or small mesh, and keep one side of the hand open so the Arabic movement survives. Finish the fingers with Indian-style bands and tips. Done in that order, it looks rich without full coverage and is far easier than a dense traditional pattern.
15. Easy Moroccan Mehndi Design
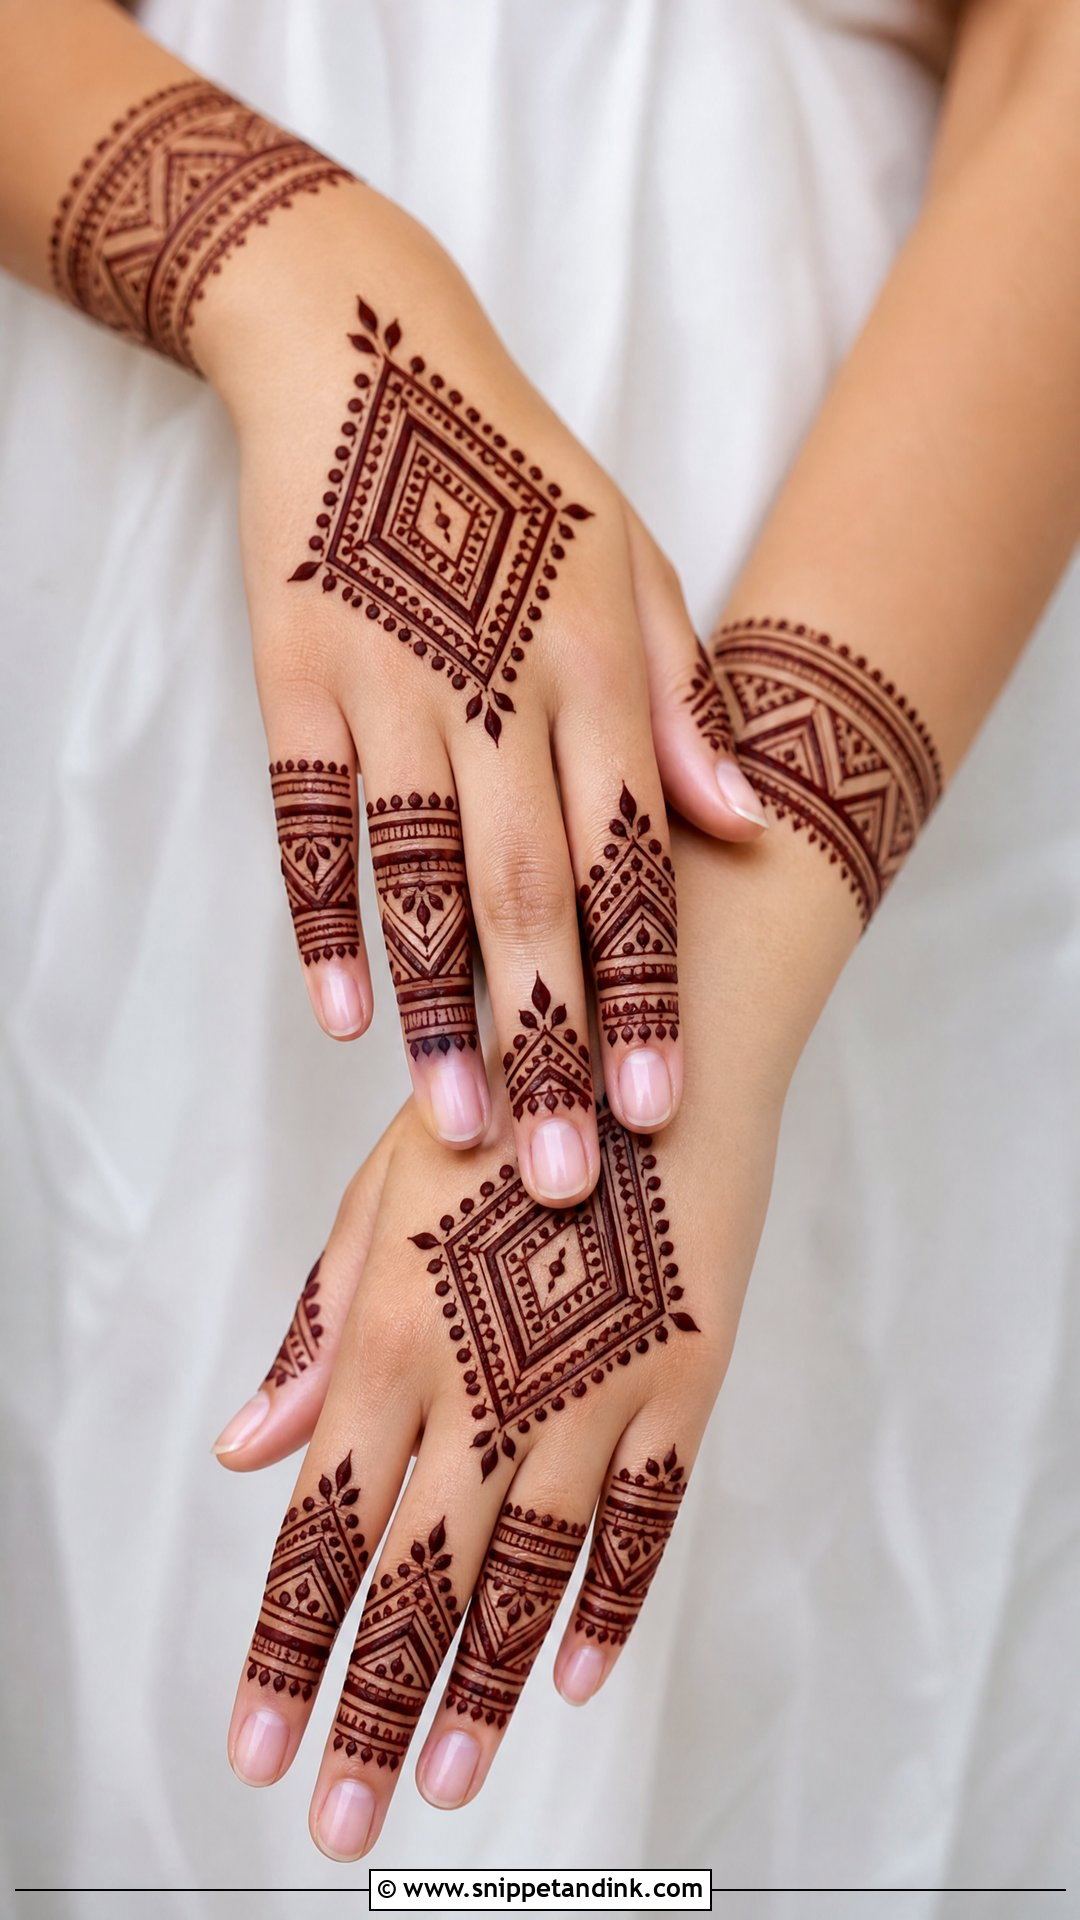
Geometry instead of flowers: diamonds, triangles, dots and straight bands across the back of the hand or the palm. Start with a central diamond or square, extend lines toward the wrist and fingers, and fill spaces with small dots and short strokes. Fair warning that straight lines are harder with a cone than curves, because the paste wants to drag, so keep each line short and lift between them. People who like structure often find this easier than petals.
16. Easy Gulf Mehndi Design
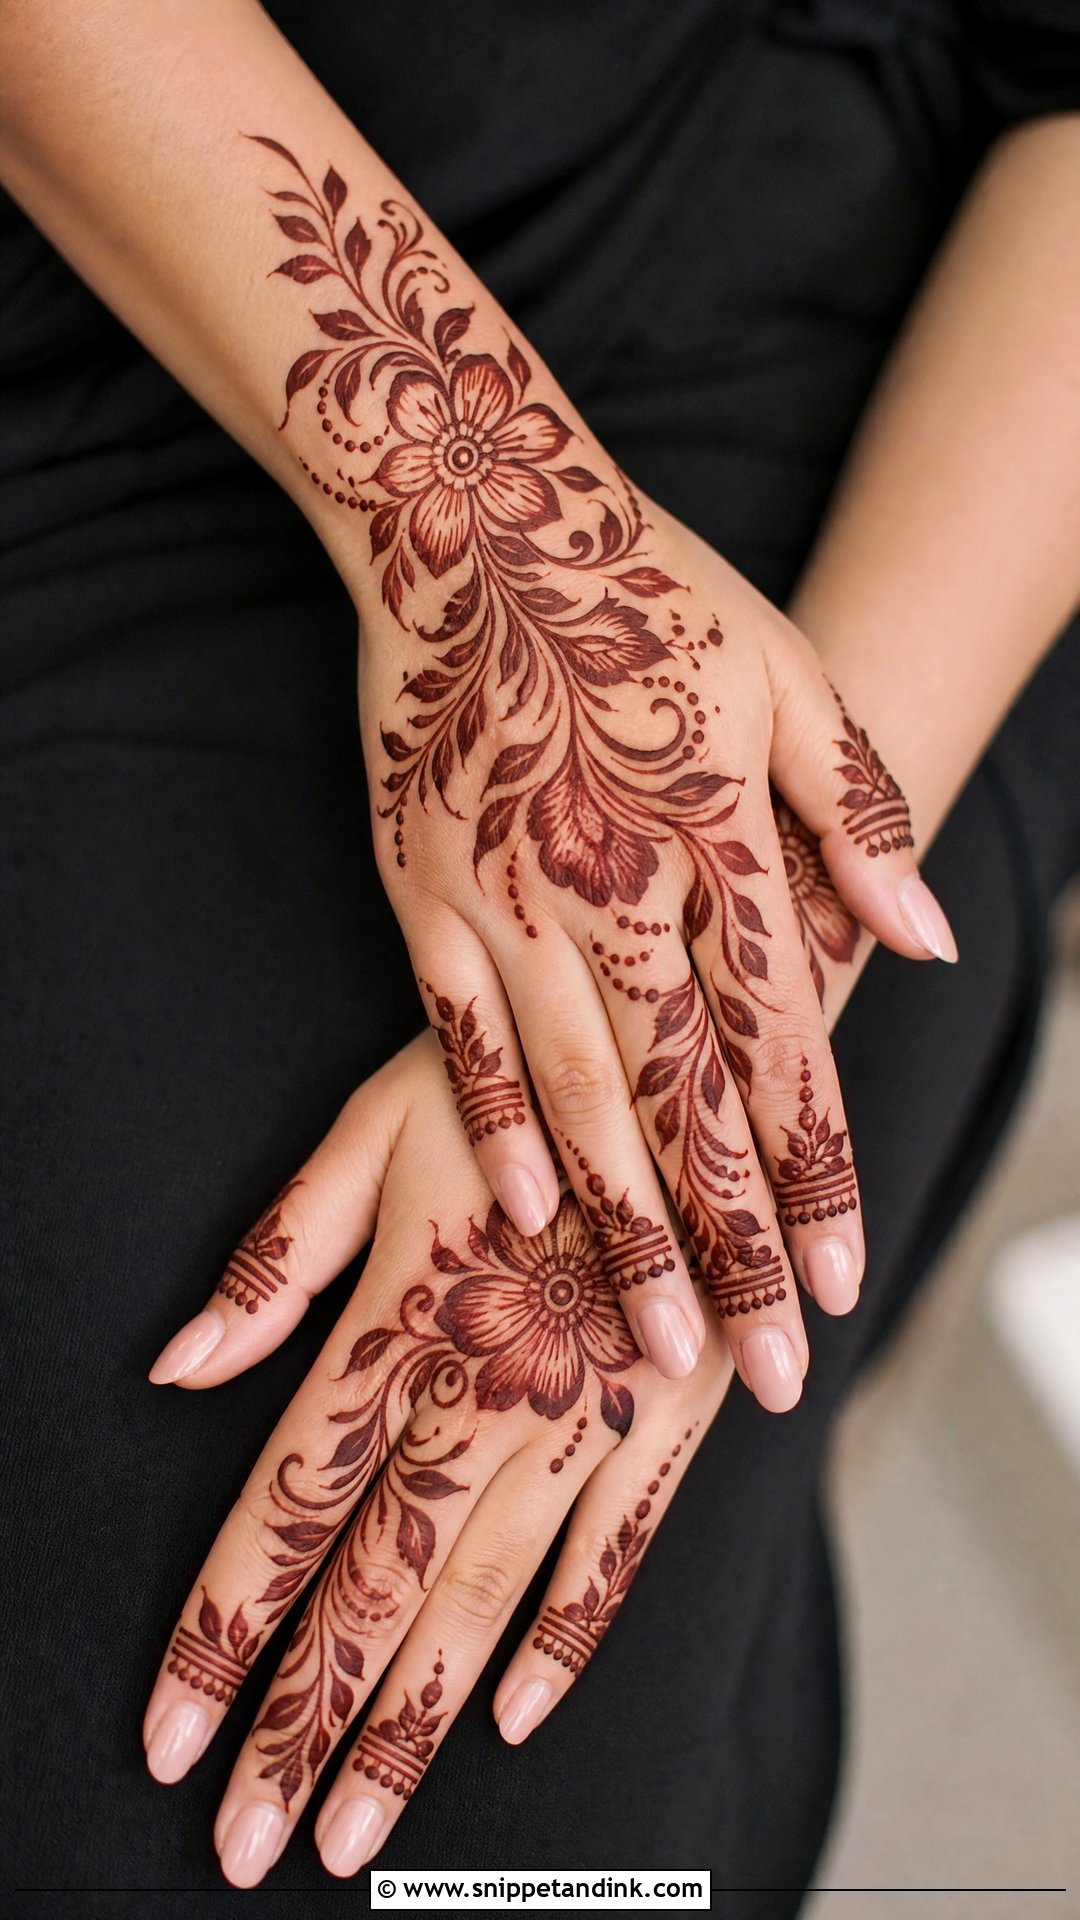
Thick floral vines across the back of the hand, large petals, round buds and leafy curves, with plenty of bare skin around the trail. Gulf-inspired mehndi is bold by design, so motifs are big and easy to see. Simple finger patterns with dots, leaf tips or curved bands finish it. It reads as fashionable without taking hours, which suits an Eid party or a quick family event. Use a slightly wider cone tip to get those confident outlines.
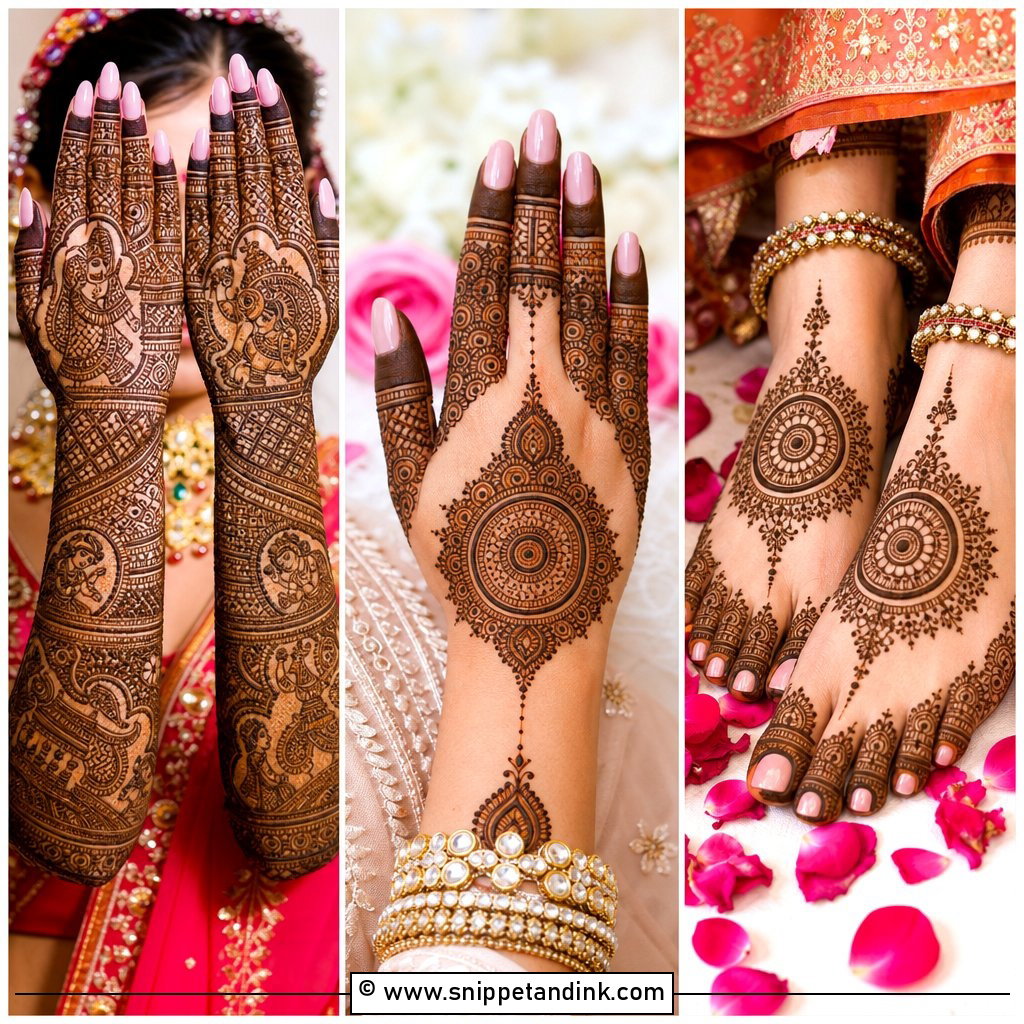
17. Easy Tikki Mehndi Design
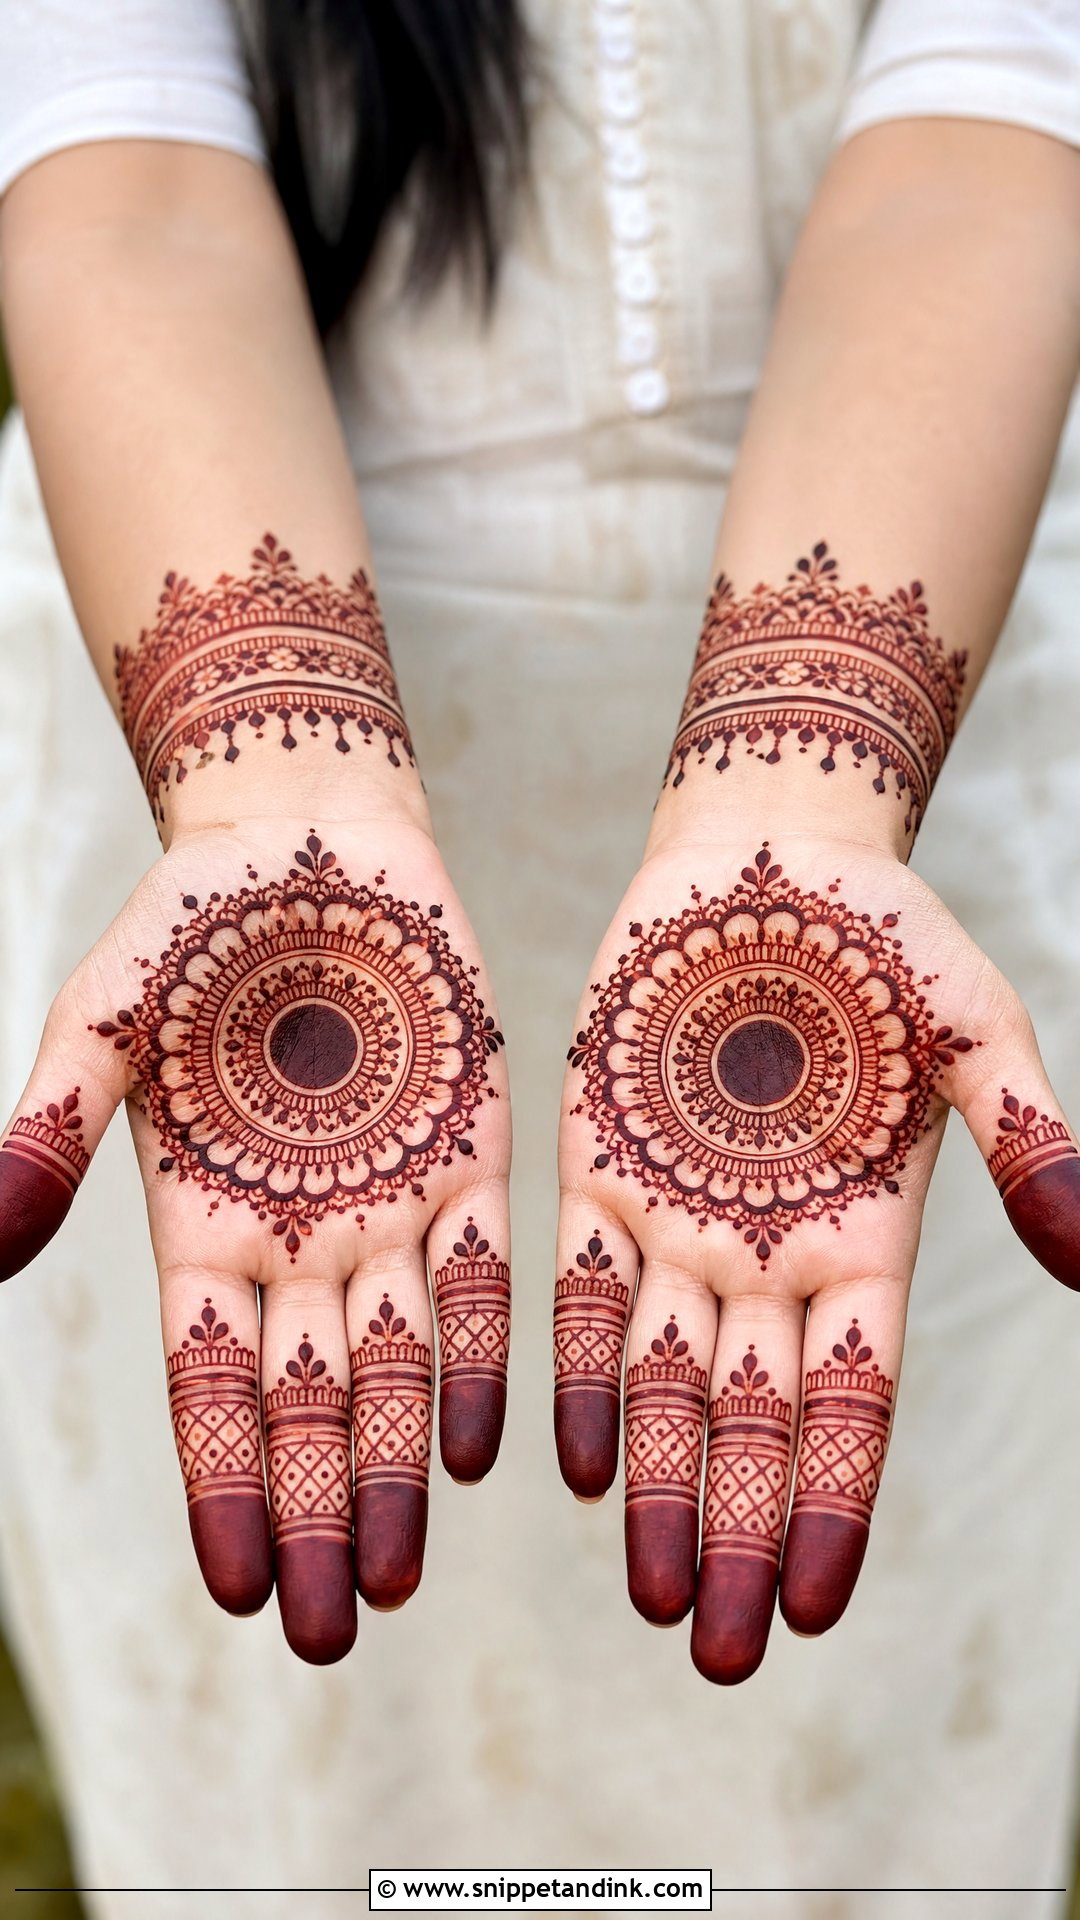
The tikki is the classic round palm design. Begin with a bold circle in the centre, then add petal rings, dots and scalloped borders around it; fingers get simple bands or filled tips, and the wrist an optional light border. Fill the centre solid and it comes up as a deep, dark disc once the stain matures. Traditional, quick and always recognisable, it’s what grandmothers draw on granddaughters at Eid.
18. Easy Round Mehndi Design
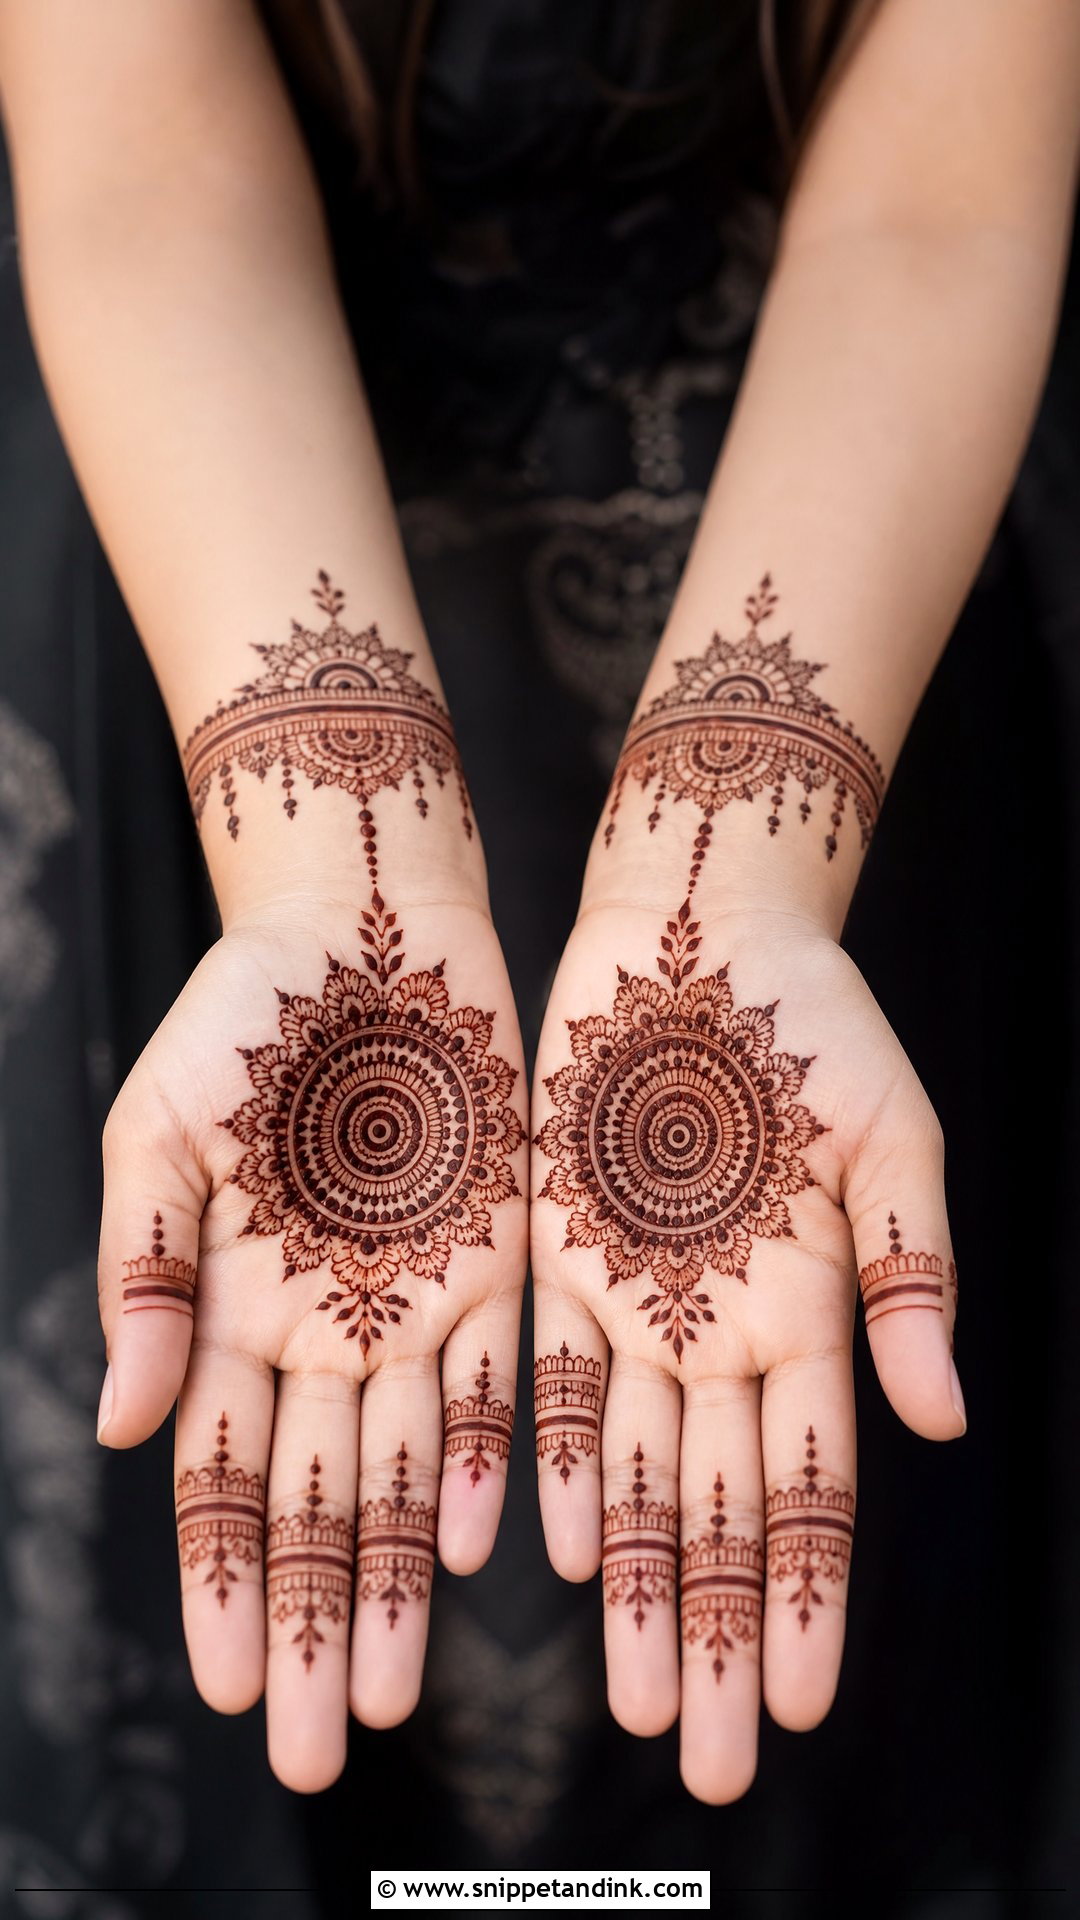
Think of this as the tikki’s more decorative cousin. Place the main circle on the palm or back of the hand and build outward with petals, leaves, dots and fine rings, with small hanging details toward the wrist. The beauty for a learner is that you can stop after two layers or keep going, and it still looks finished either way. On small hands it stays neat, because nothing has to stretch along a long trail.
19. Easy Front Hand Arabic Mehndi Design
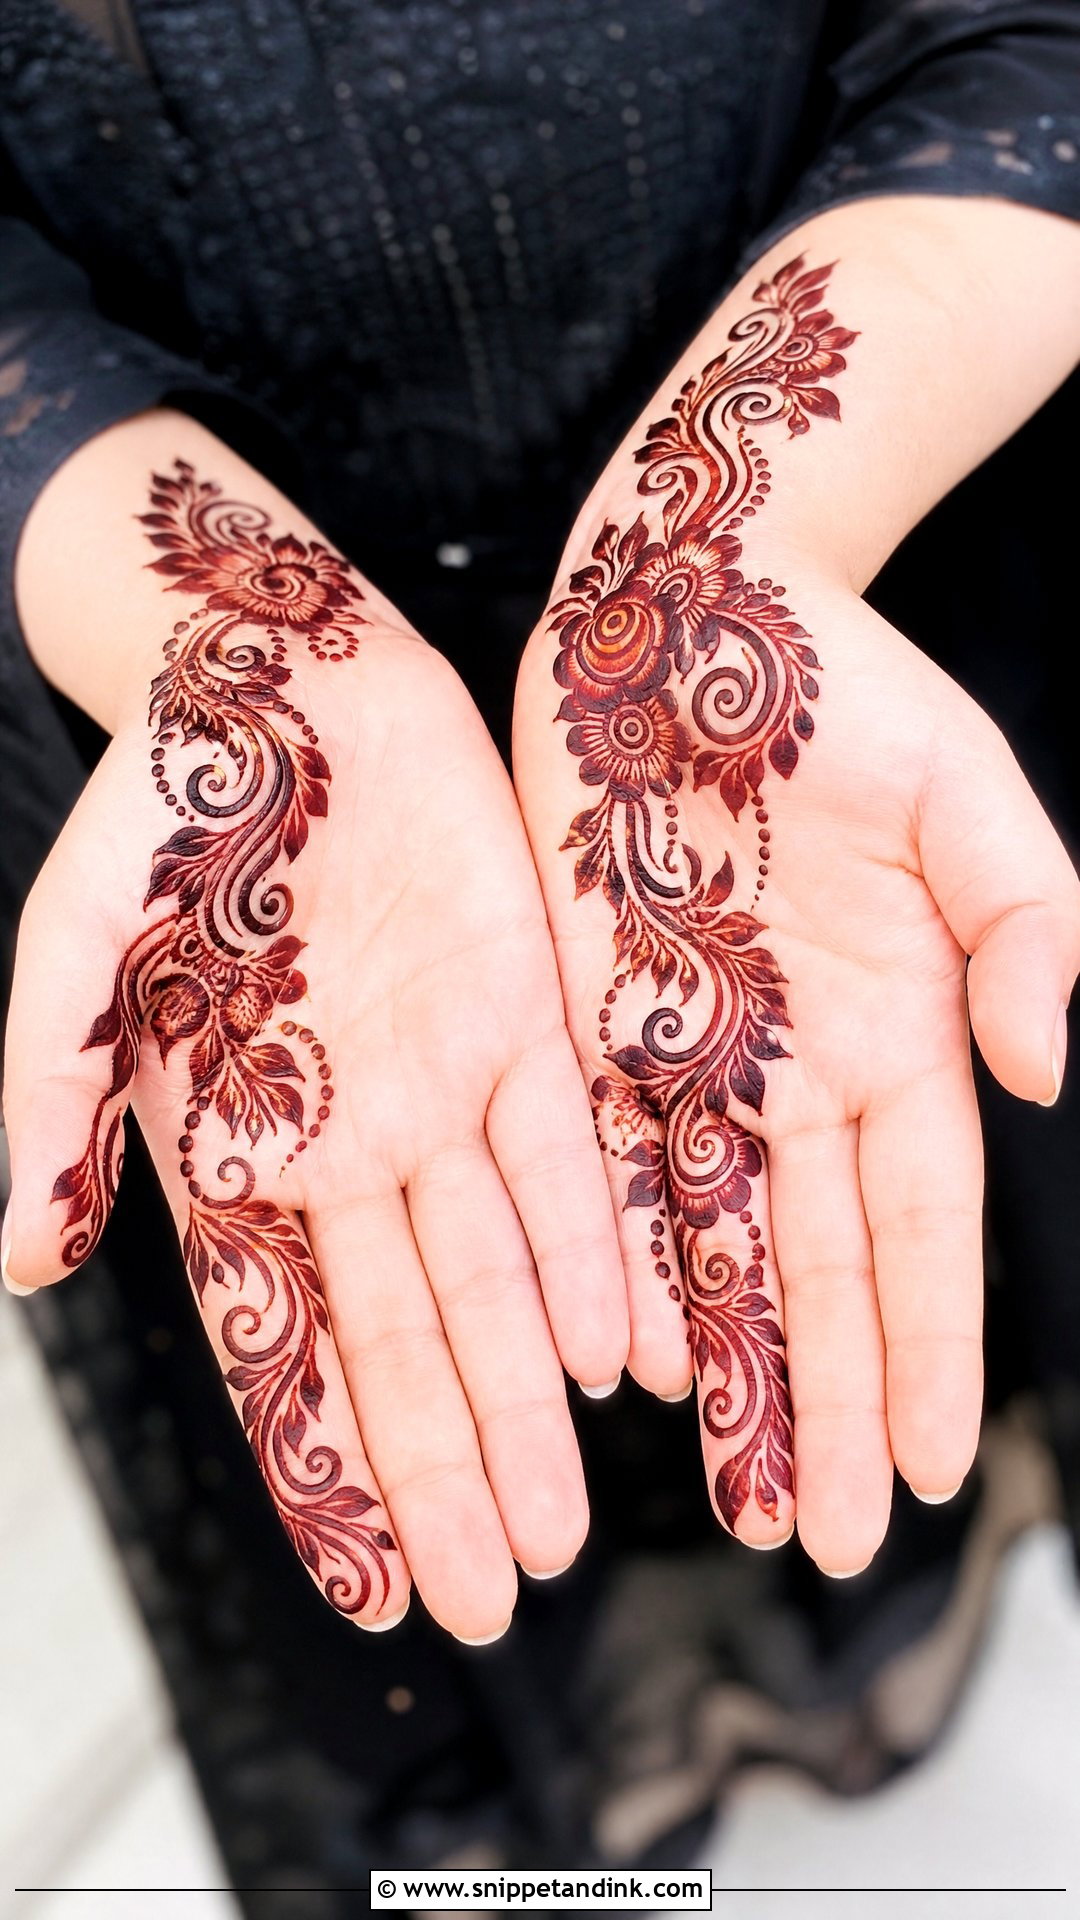
On the palm side, an Arabic layout starts at the wrist with a flower cluster and lets a curved vine move toward the middle or index finger. Paisleys, leaves and small buds sit along the vine, with open space between them, and the fingers get simple bands rather than heavy fills. The diagonal hides small mistakes, so beginners can draw it with more confidence than a symmetrical palm.
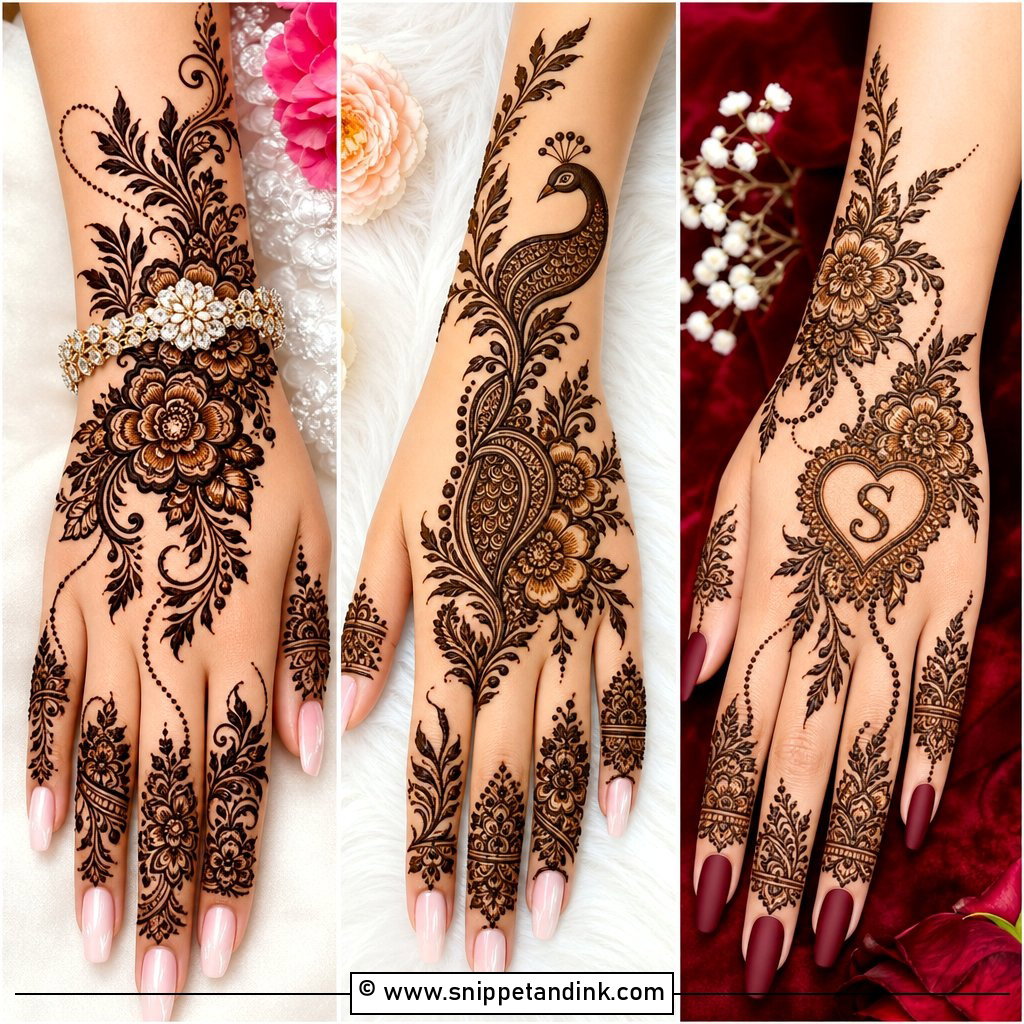
20. Easy Back Hand Arabic Mehndi Design
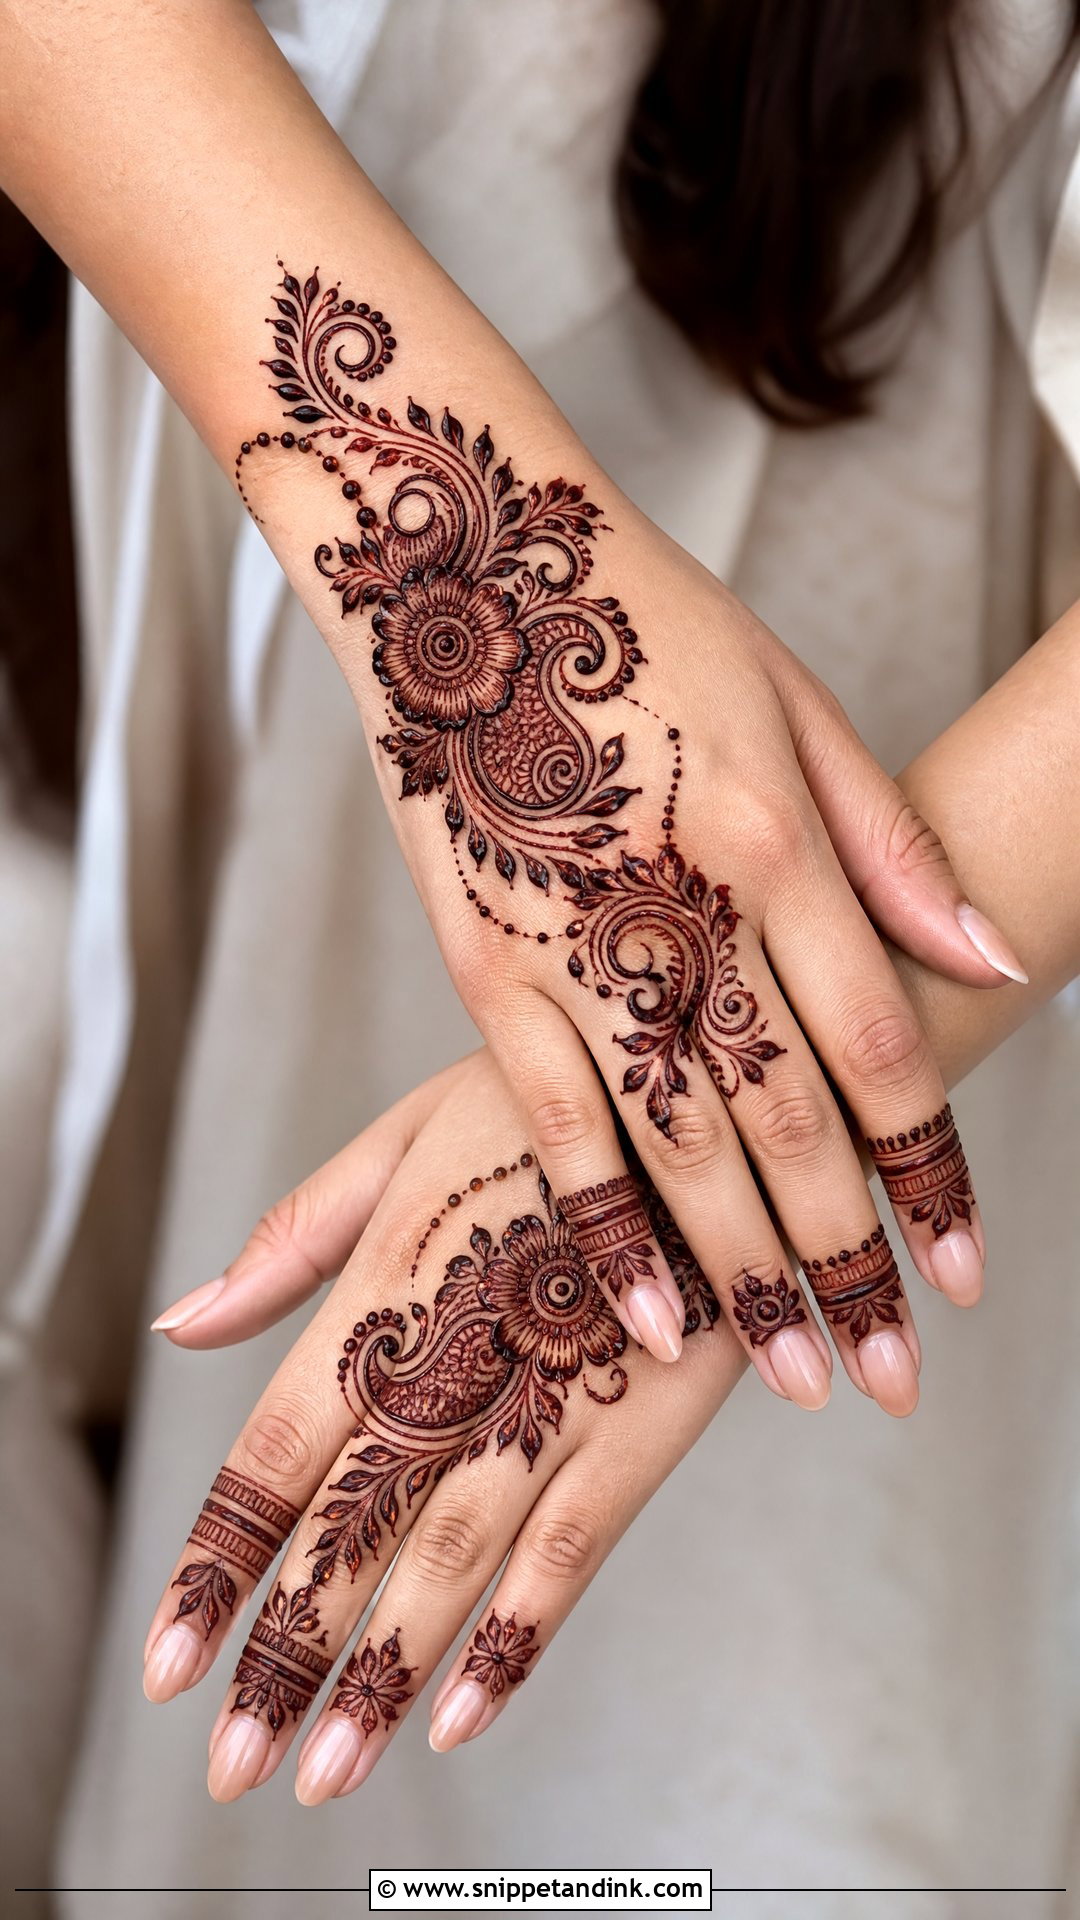
Bold flower near the wrist, a curved trail toward the ring or index finger, leaves, dots and small paisleys along it, the other side left open. Back hand Arabic mehndi follows the natural shape of the hand, which is why it looks graceful even when the linework is simple. Ring patterns on the fingers and a light bracelet band at the wrist finish it. Quick to draw, easy to wear to a party or a semi-formal dinner.
21. Easy Minimal Mehndi Design
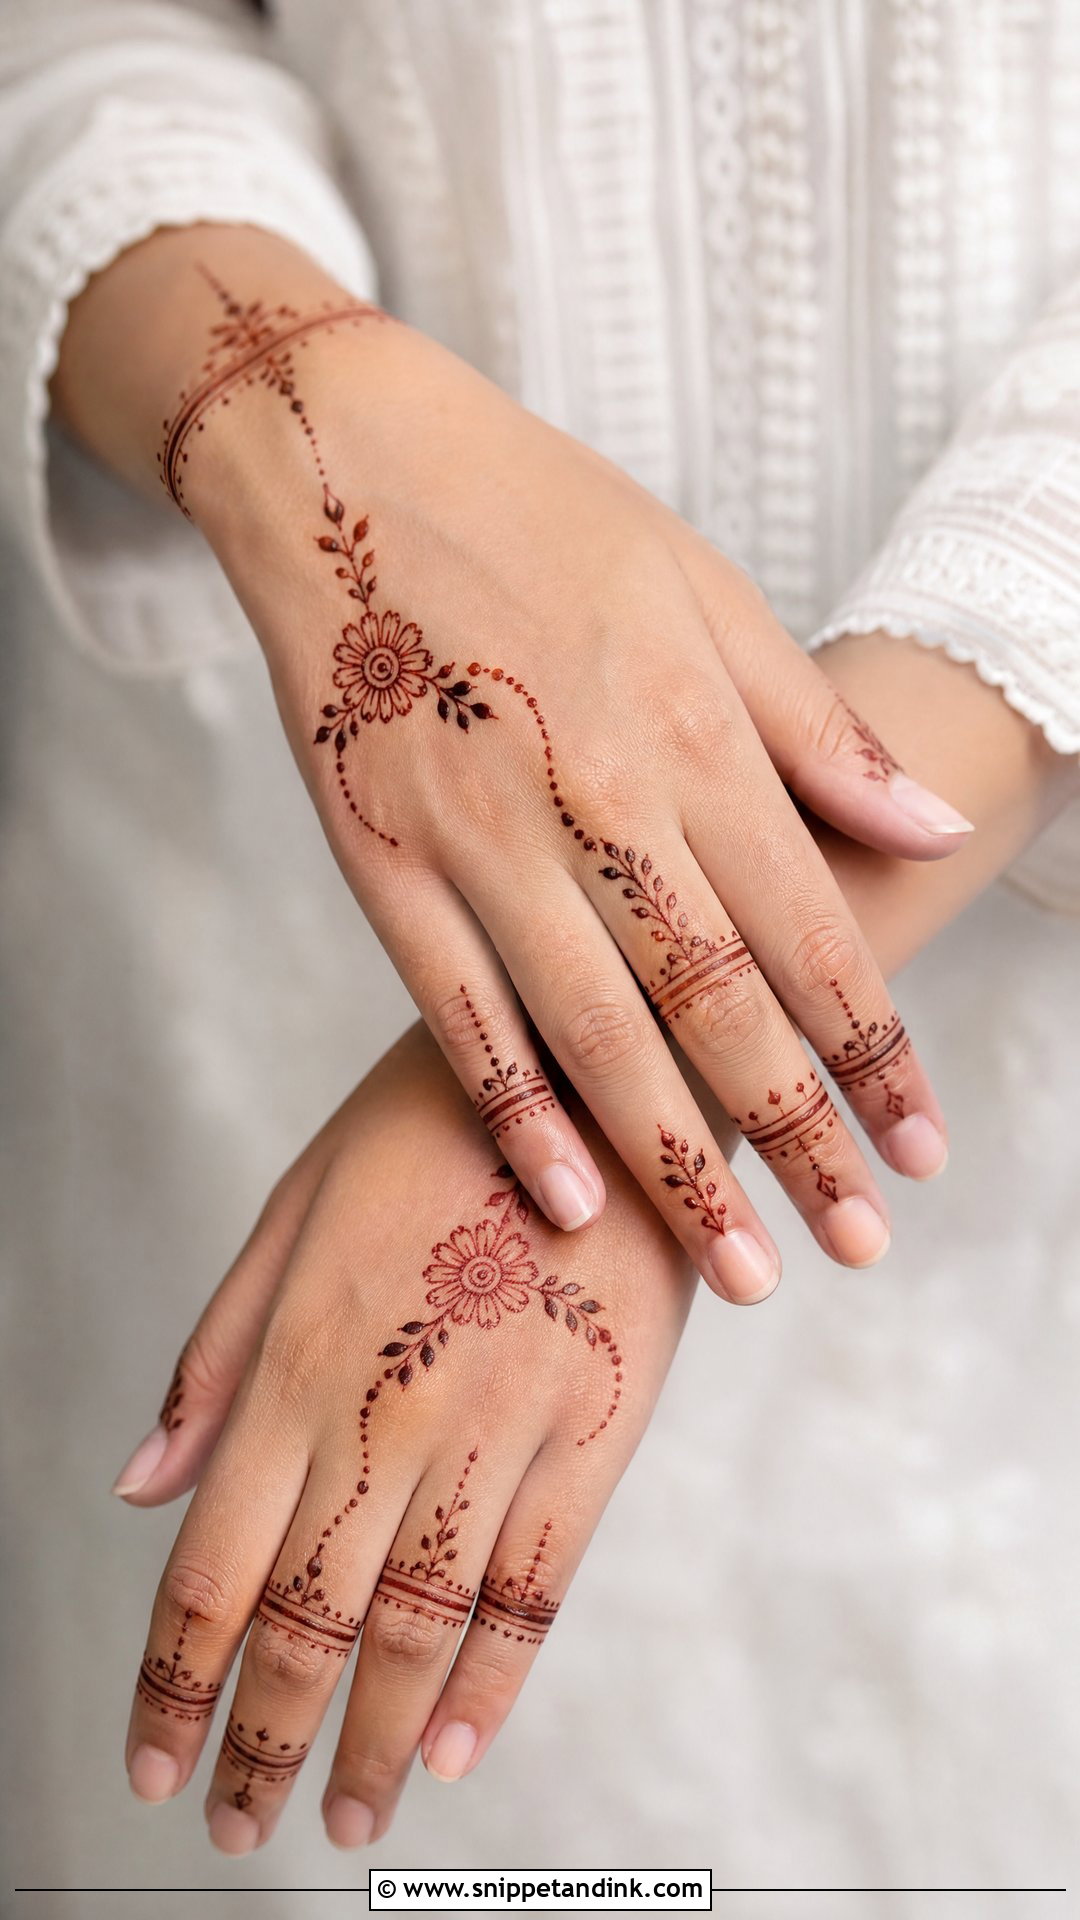
One small motif, a flower, a tiny mandala or a leaf branch, on the back of the hand or palm, plus thin finger bands, a few dots and a simple wrist line. Airy, not empty: that’s the balance to aim for. Minimal designs dry fastest and suit school, work and travel days. They also expose every line, so if your hand is still shaky, add a second small element rather than leaving one wobbly motif alone.
22. Easy Modern Mehndi Design
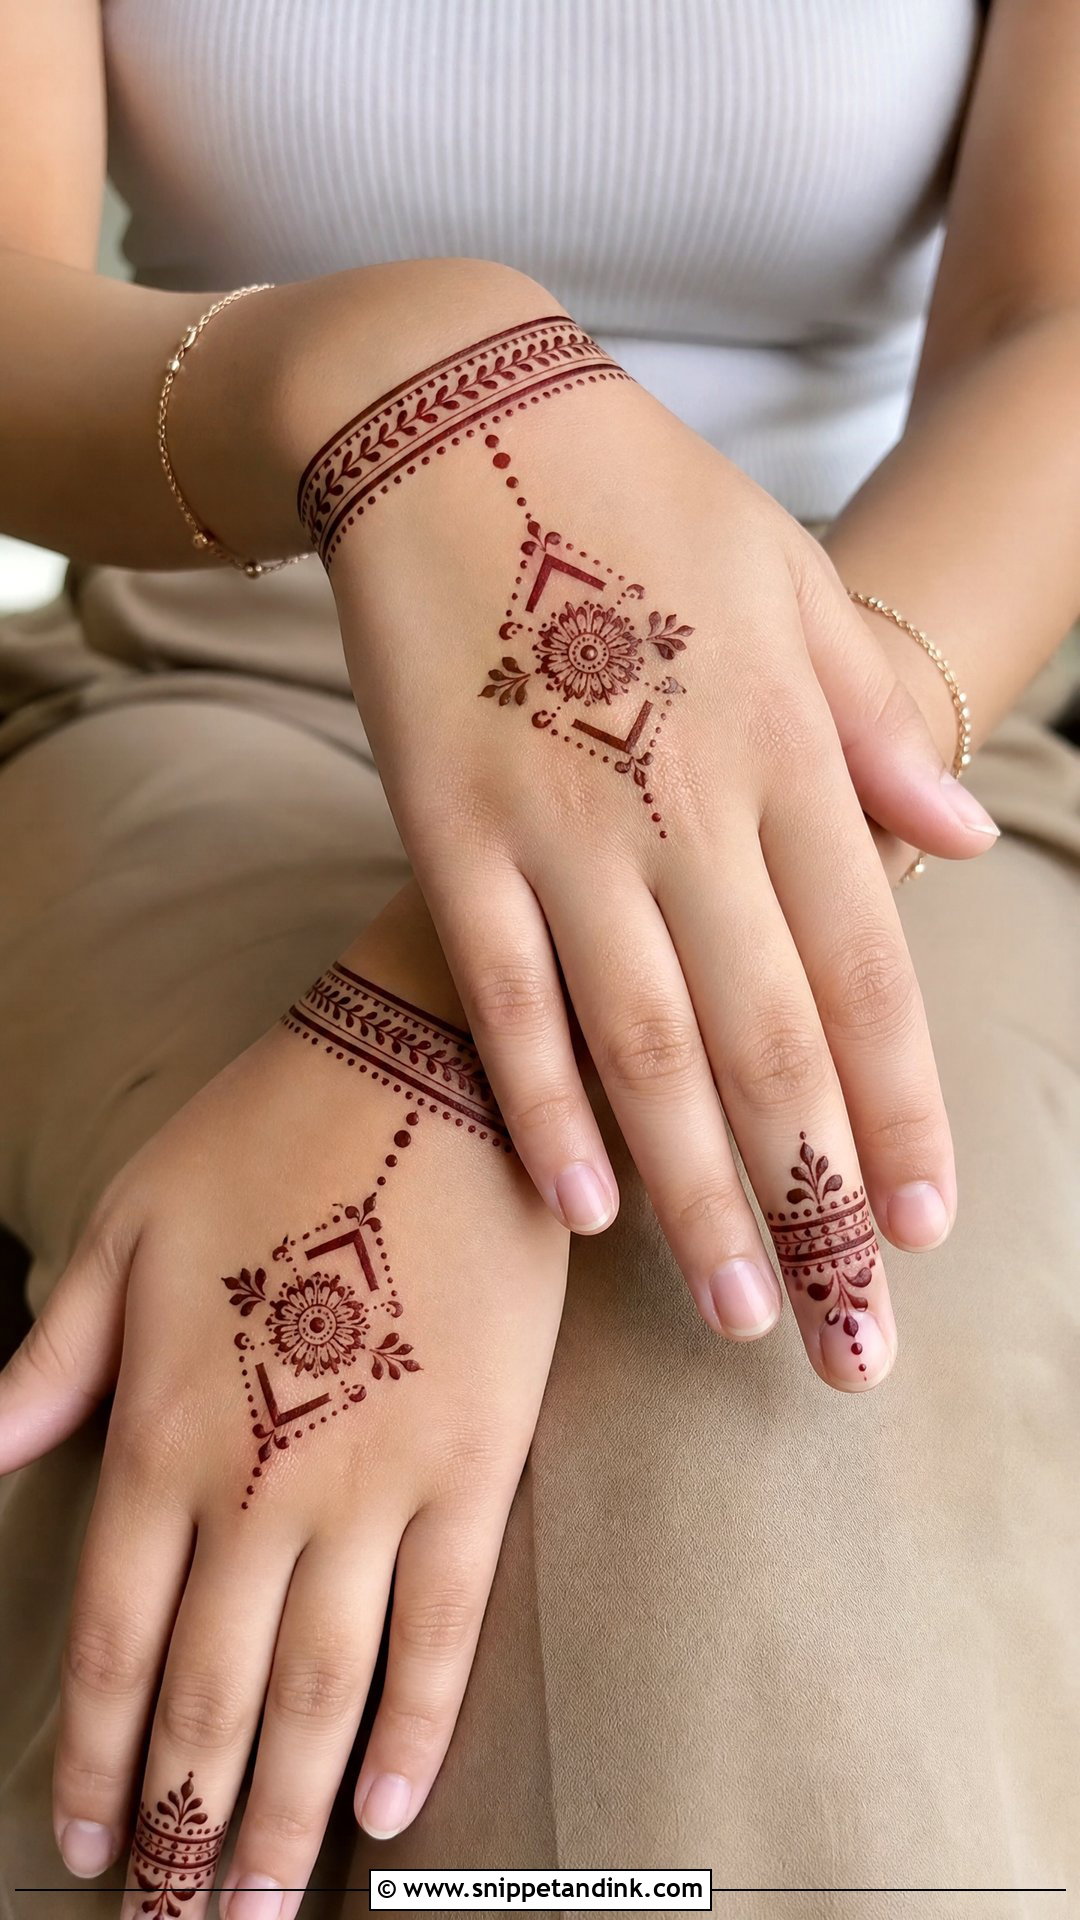
Negative space and jewellery-like placement define the modern look. Draw a slim bracelet at the wrist, a chain to the middle finger and a small floral or mandala ring on the back of the hand, then balance it with simple finger bands and dots. Keep the rest open. It’s built from short lines, dots and small repeats, which makes it surprisingly kind to beginners, and it goes with a kurta or a dress equally well.
23. Easy Cute Mehndi Design
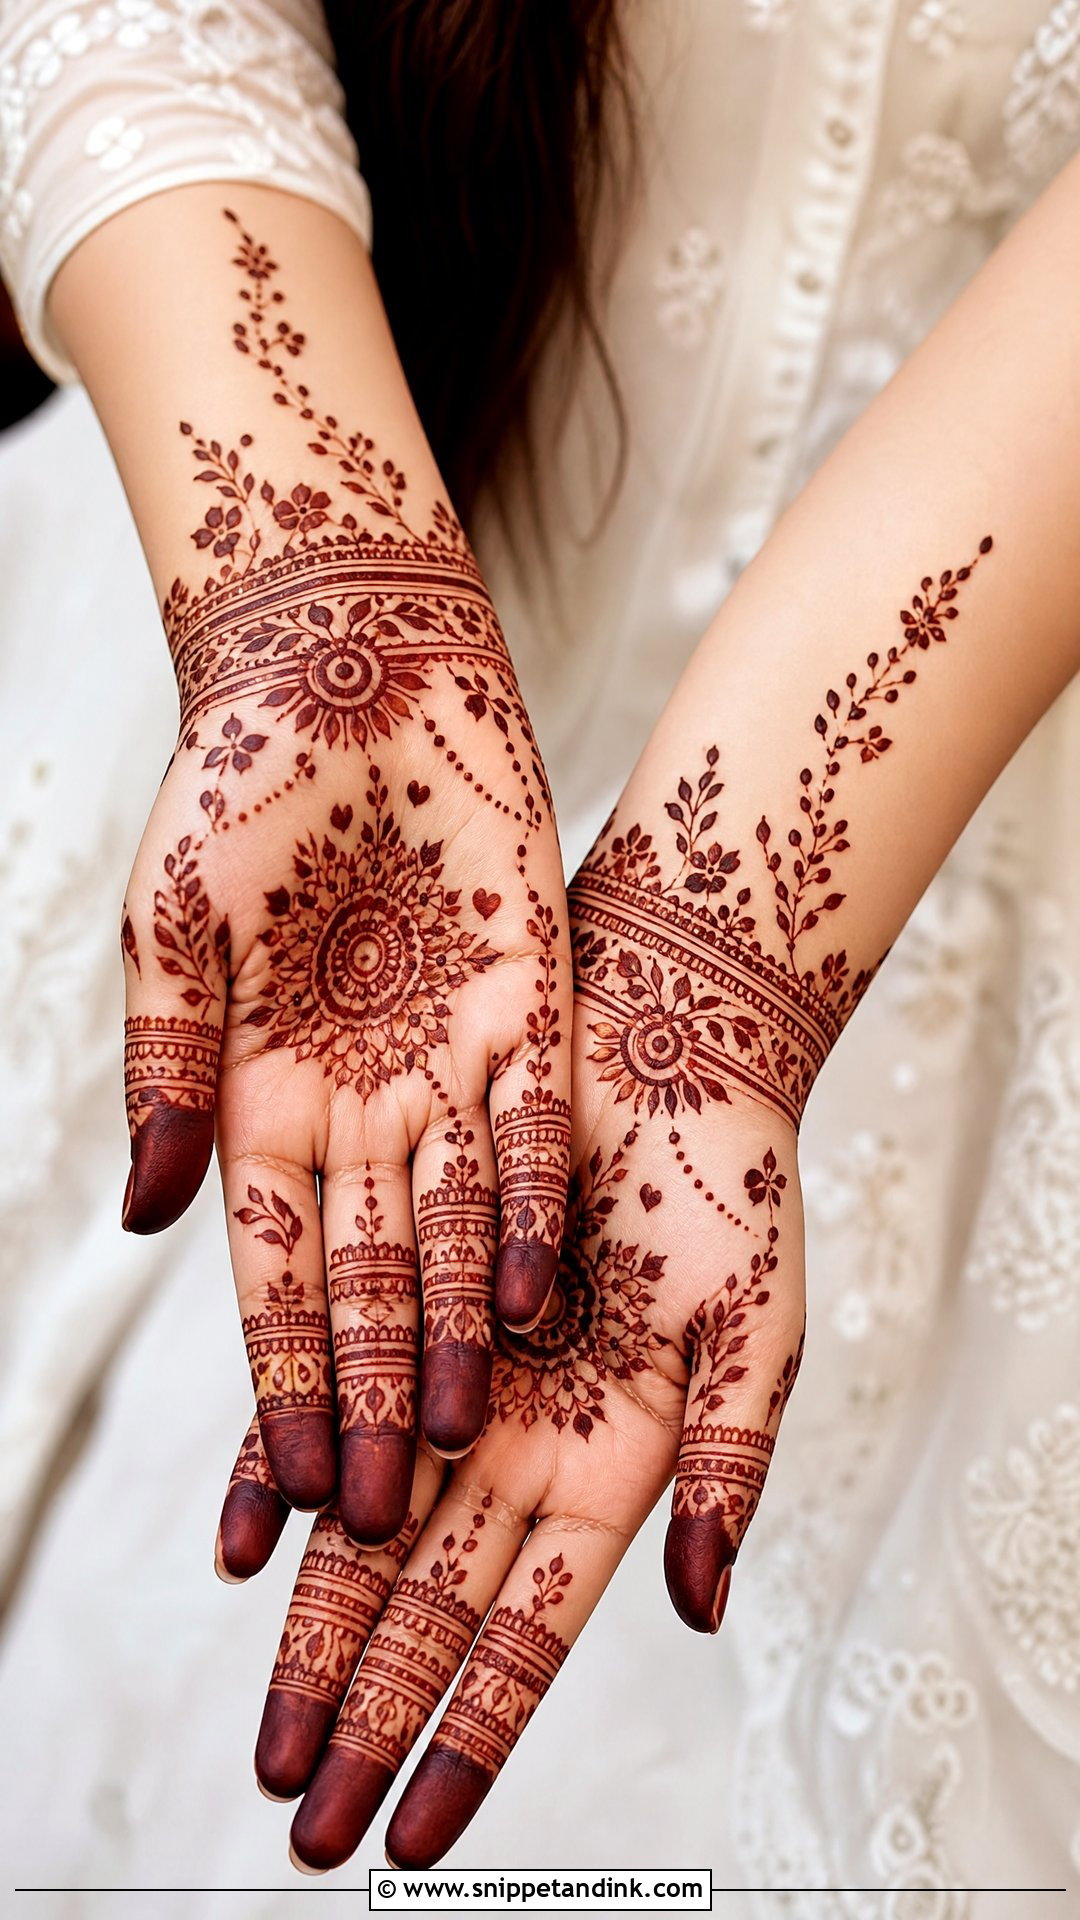
Small flowers, tiny hearts, dots, leafy vines and little round mandalas in a light layout. Put one small motif on the palm or back of the hand, short bands and mini leaves on the fingers, and keep the wrist to a dotted bracelet or a curved border. Cute only works when it’s tidy, so keep shapes small and spacing open. Younger girls love it for birthdays and family functions.
24. Easy Kids Mehndi Design
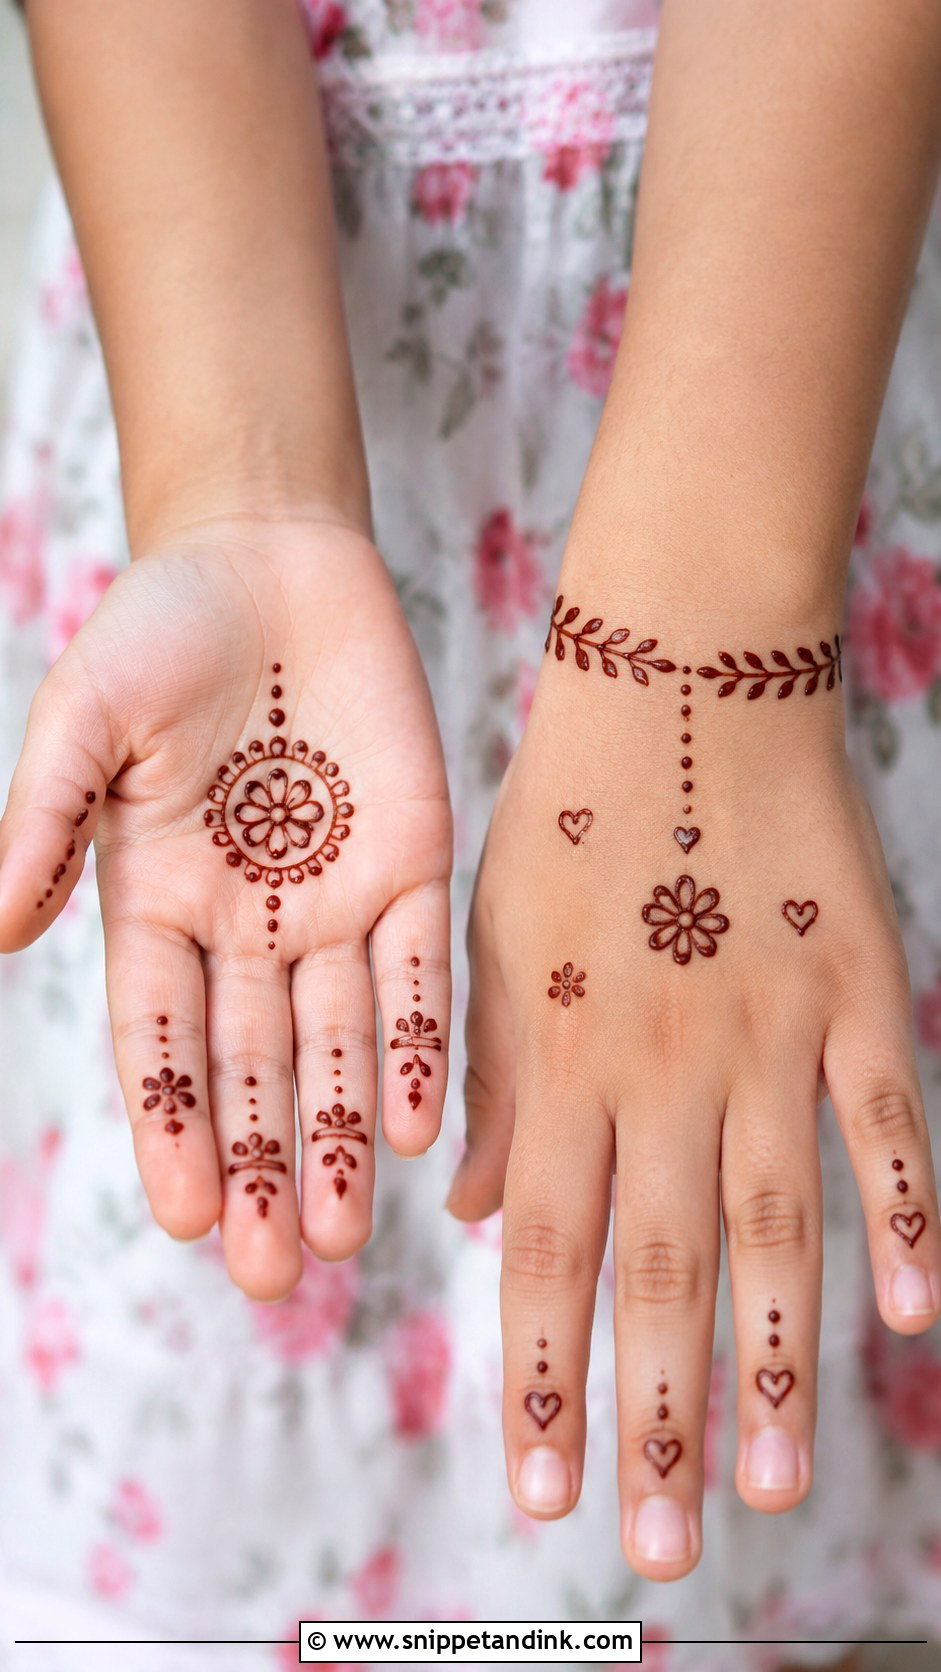
Speed matters more than detail with children. A small flower or smiley round motif on the back of the hand, a few dots around it and tiny leafy lines on two or three fingers is plenty, finished with a short bracelet band. Skip dense palm work, because they’ll grab something before it dries. Bold, simple shapes stay readable even if the child wriggles. And please use only natural henna on children; dark instant cones can contain PPD, which causes serious skin reactions.
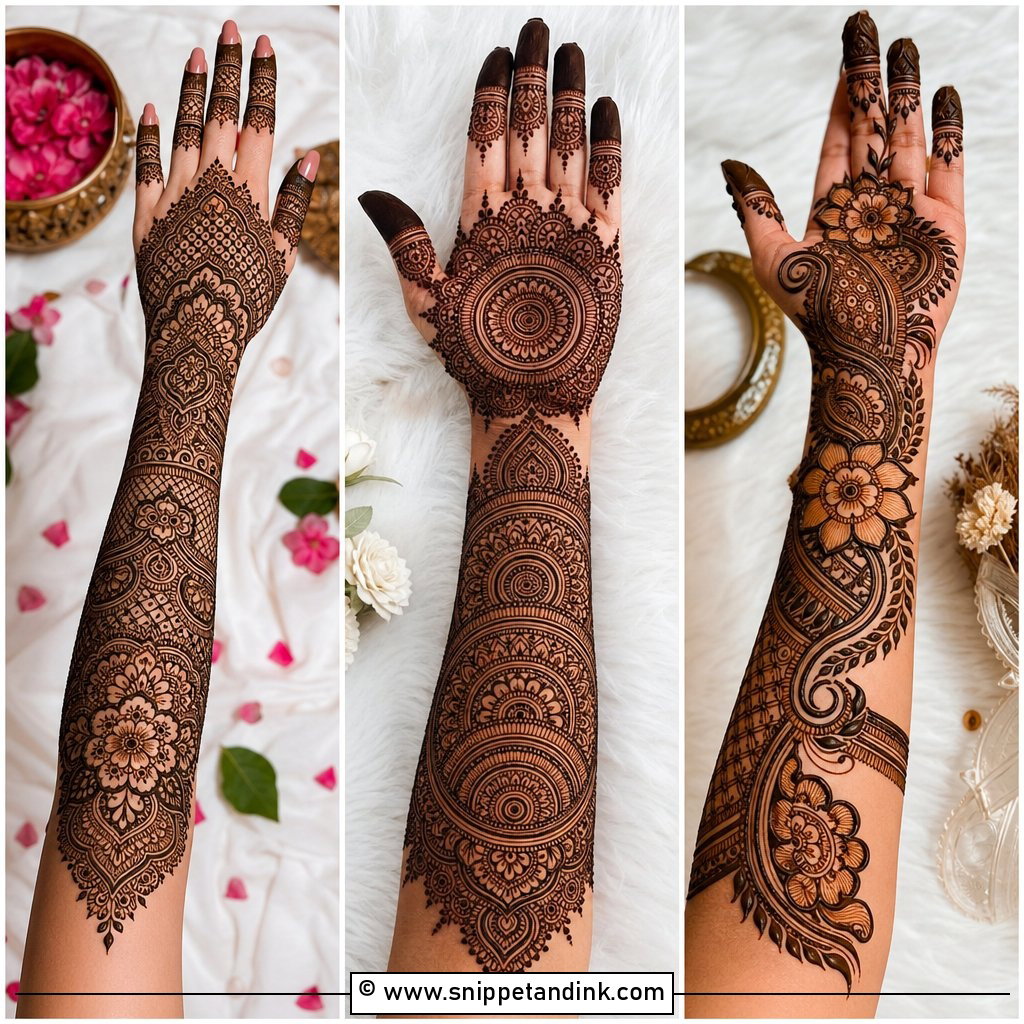
25. Easy Eid Mehndi Design
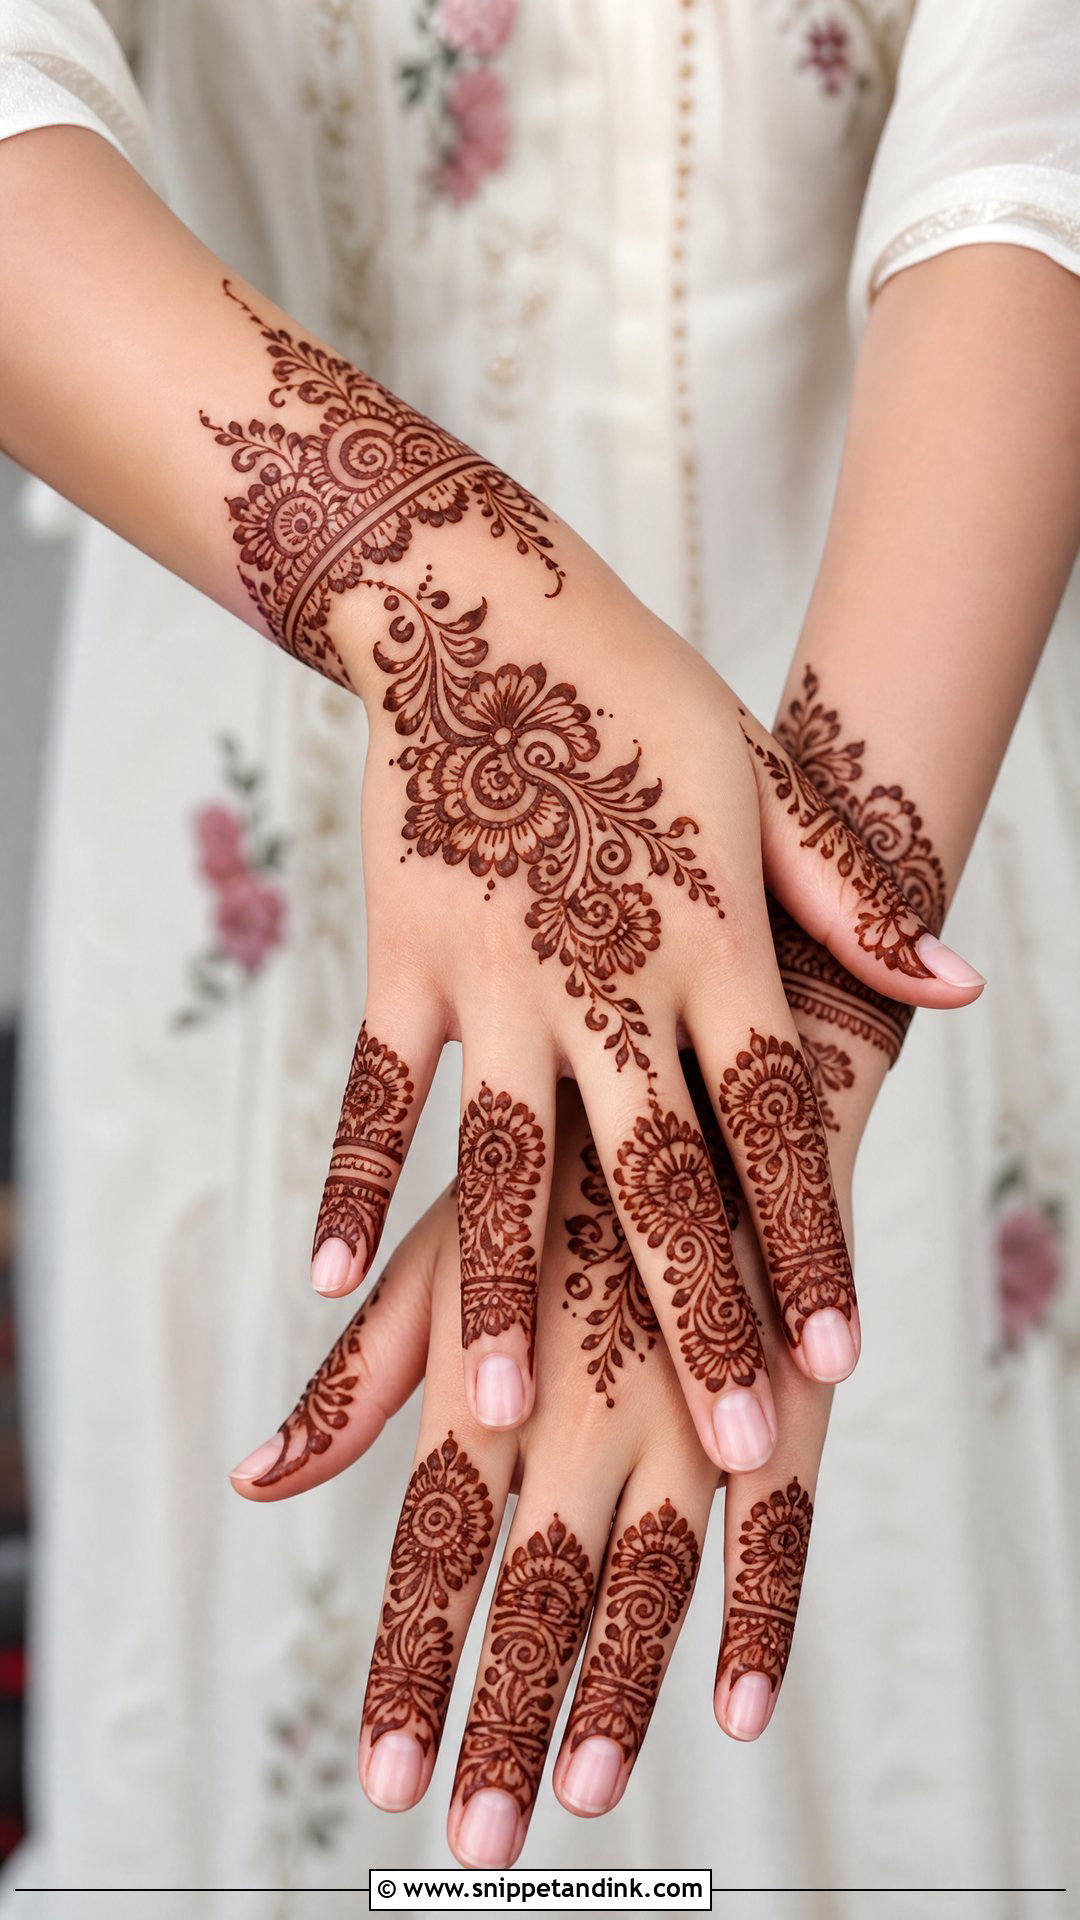
The night before Eid, time is short, so an easy Eid mehndi design has to look festive and go on fast. A back-hand Arabic trail with flowers, leaves and a bracelet-style wrist band does that; finger rings or dotted bands polish it. Prefer something traditional? A palm mandala with decorated fingertips. Draw early in the evening and leave the paste on overnight, then scrape it off rather than washing, and the colour will have deepened by the time you dress for prayers.
26. Easy Diwali Mehndi Design
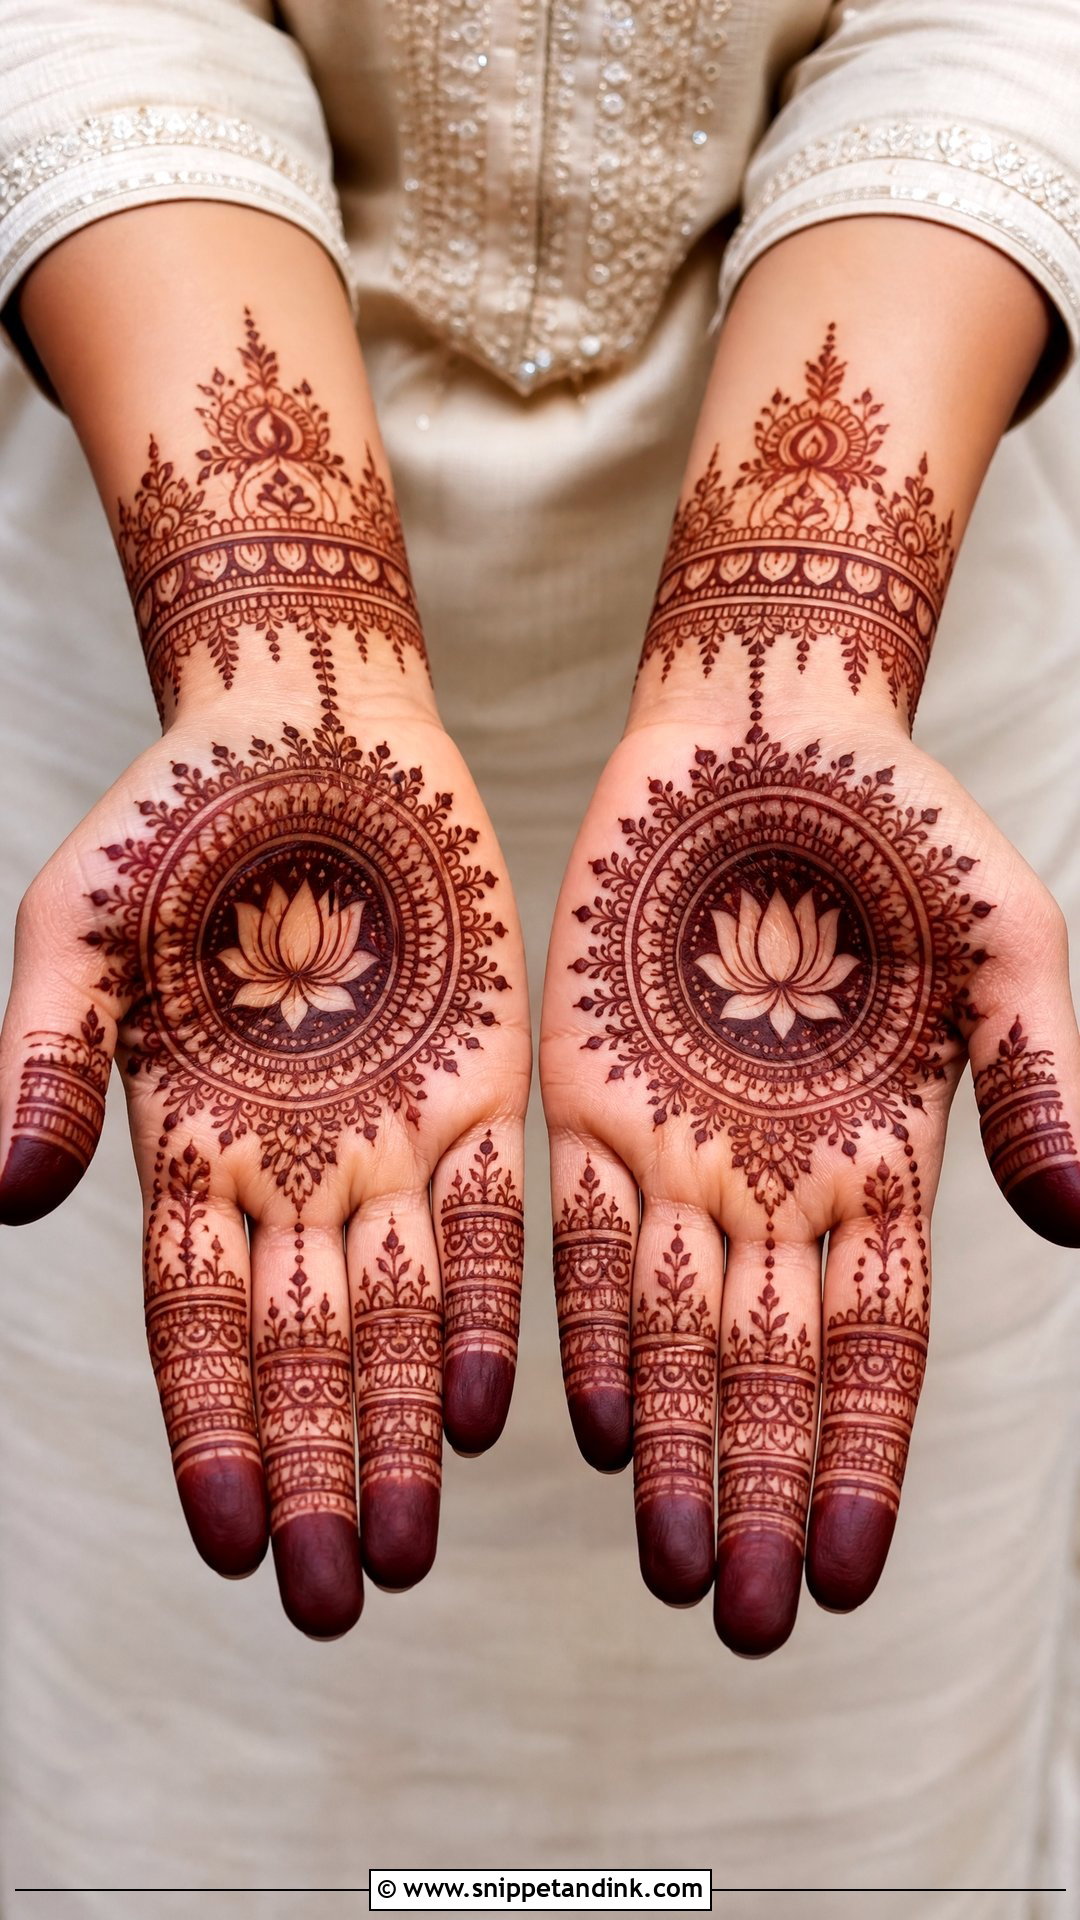
A palm mandala, small lotus motifs, dotted trails and patterned fingers give Diwali mehndi its traditional feel, with a wrist border that works as a festive cuff. Lotus, paisley and circular motifs all belong to the festival. Open spaces keep it from getting heavy. Draw the mandala first and add details slowly. If you’re applying it on the morning of puja, remember the stain will still be orange that evening; a day earlier gives a richer colour for the lights.
27. Easy Wedding Guest Mehndi Design
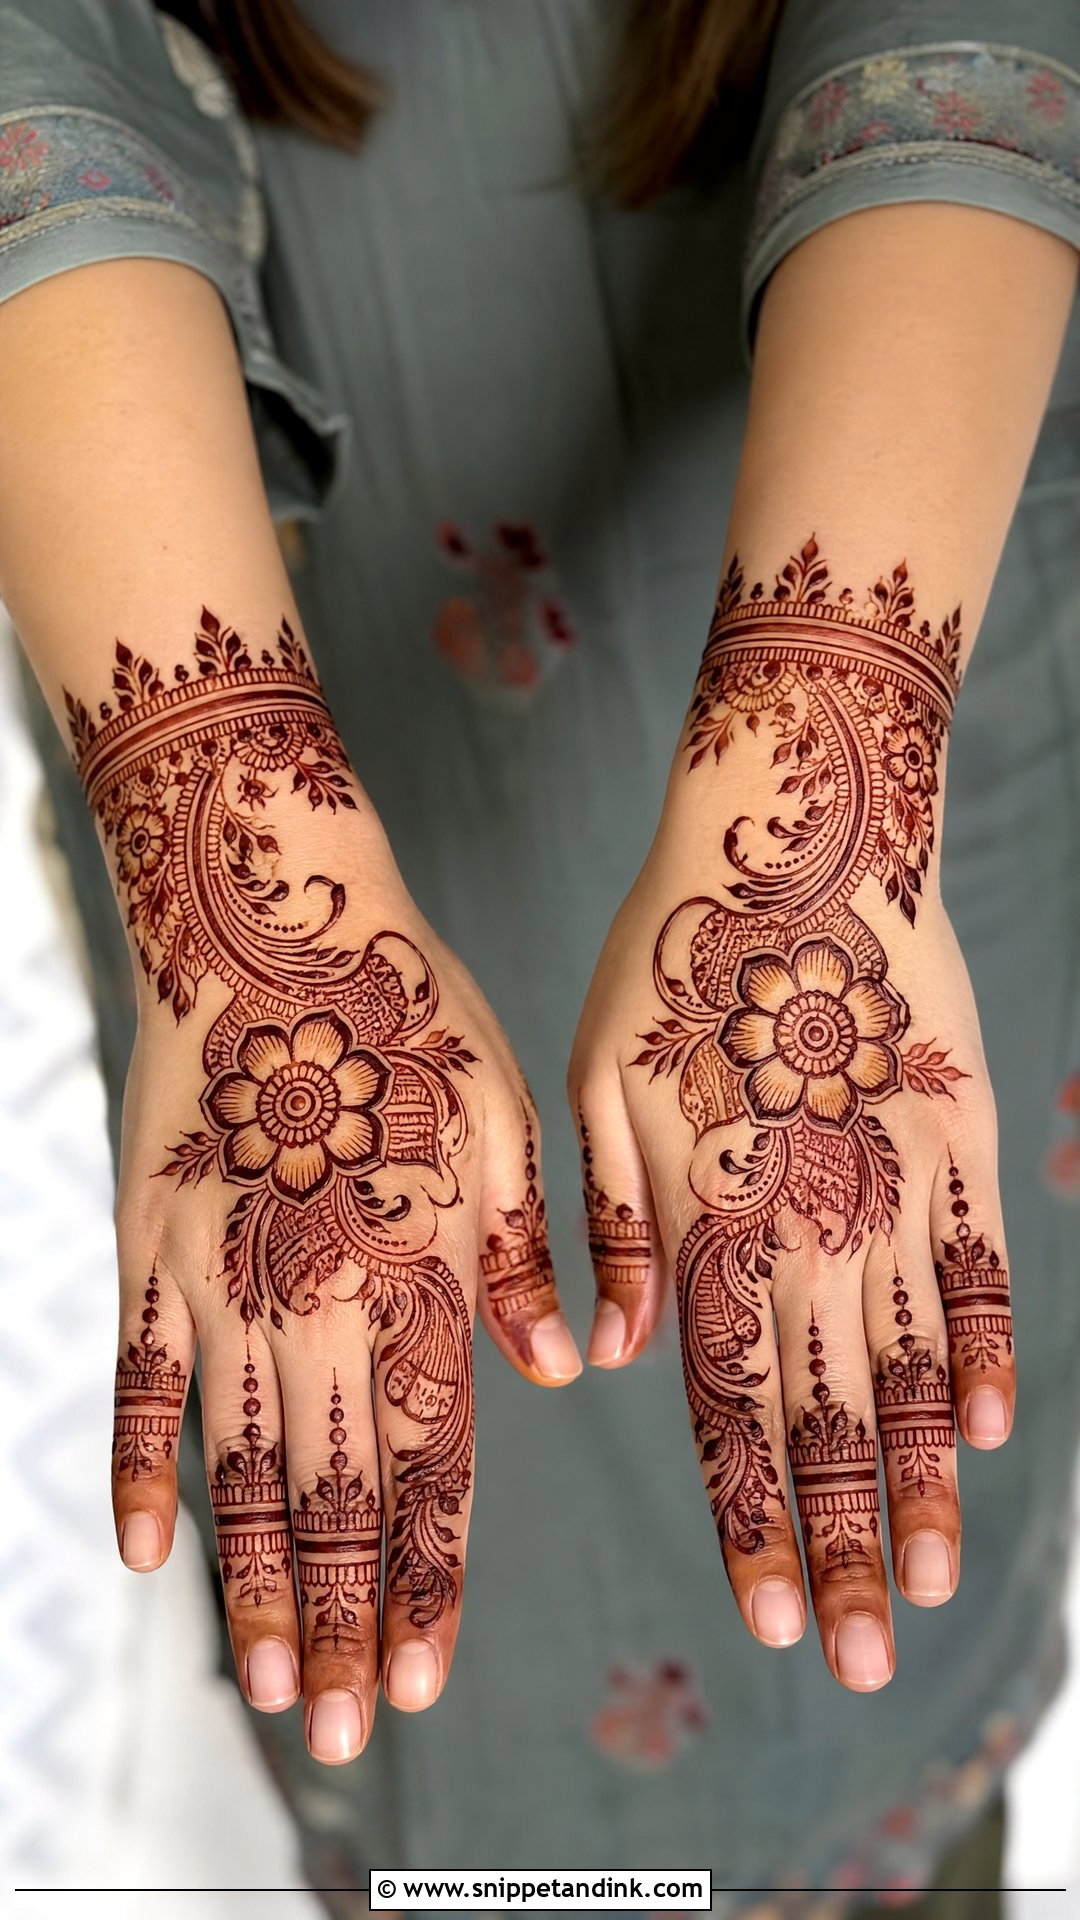
Guests should look festive without matching the bride’s coverage. A back-hand jewellery pattern, an Arabic floral trail or a half-hand palm all strike that balance, built from a medium flower, a paisley vine, finger bands and a neat wrist border. Moderate coverage also means you’re not tied to a chair for an hour at a crowded mehndi night. Keep fillings to dots and lines instead of dense shading, and the main motifs stay clear in photos.
28. Easy Engagement Mehndi Design
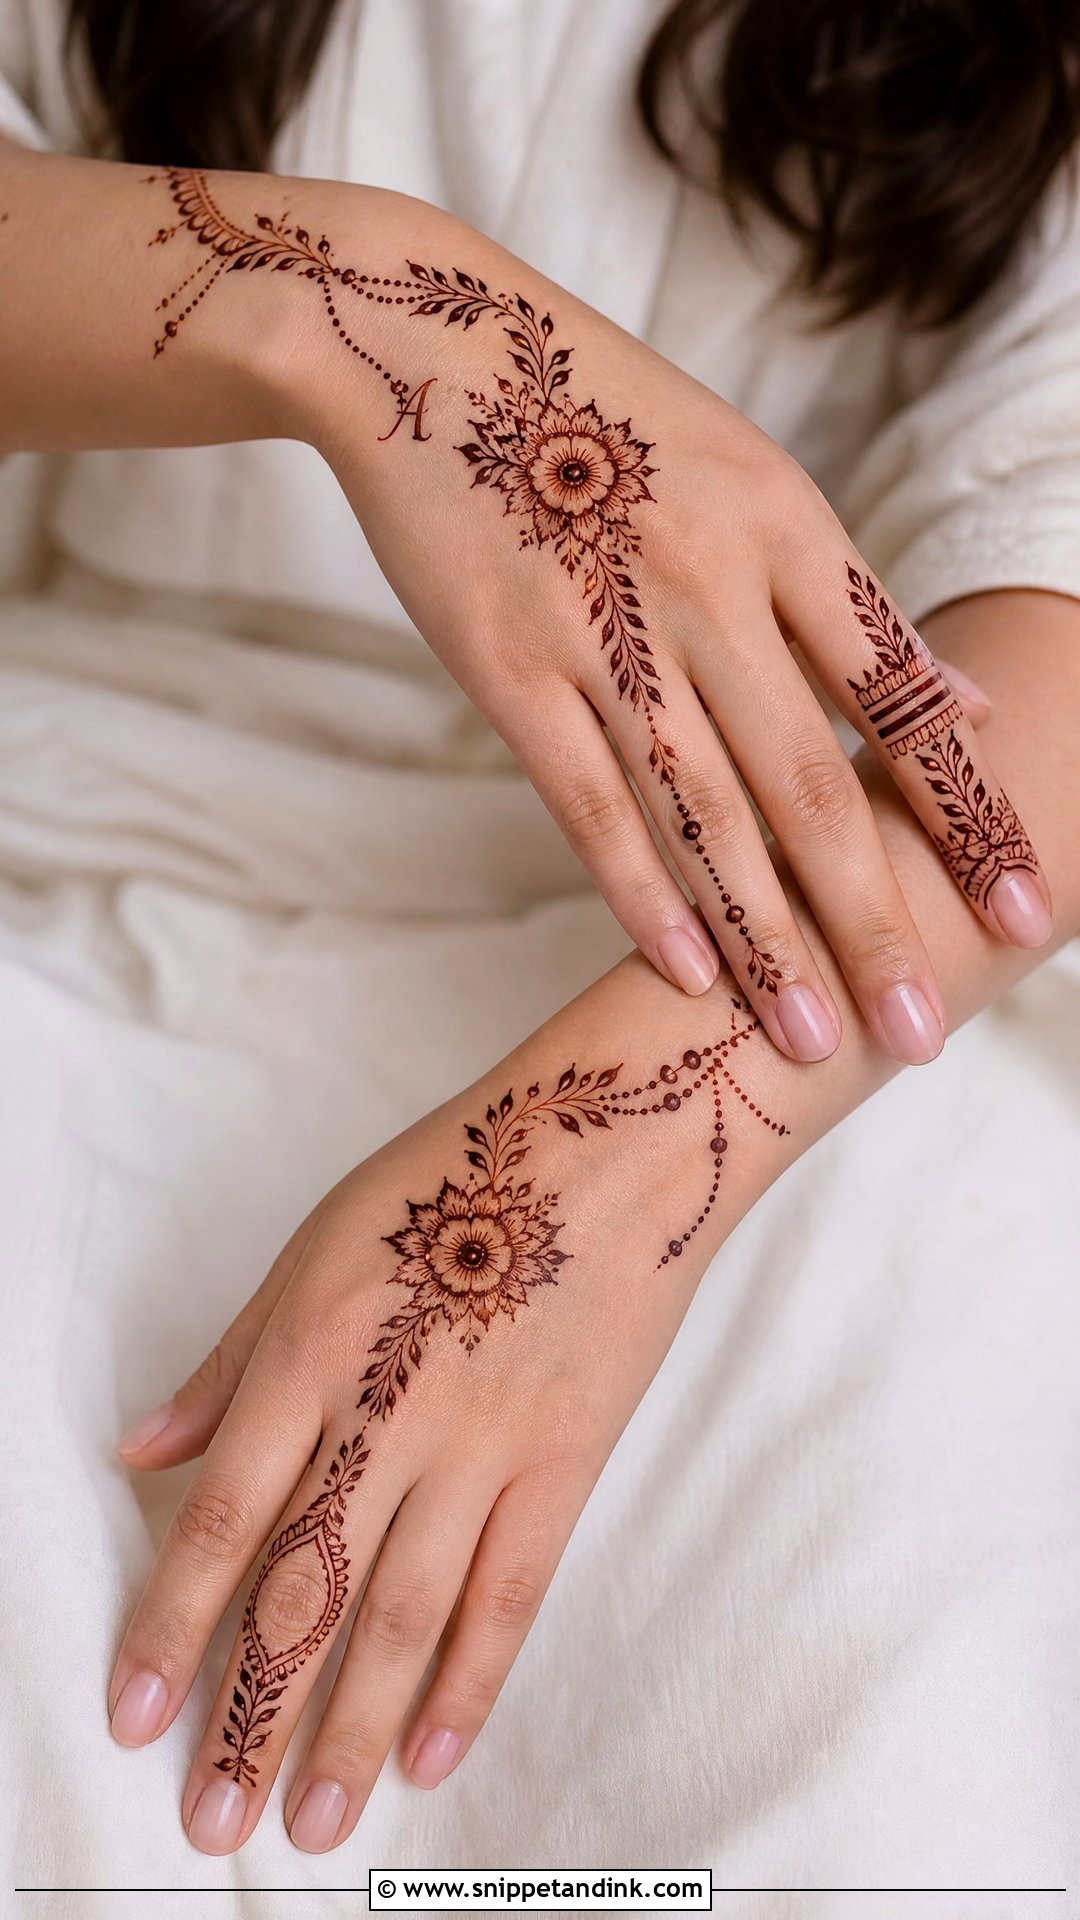
Everything here points to the ring finger. A back-hand bracelet pattern with a flower in the centre and a chain leading up to that finger, finished with small leaves, dots and finger bands. A tiny initial or heart adds a personal touch. Keep the ring finger itself light, since the actual ring needs bare skin to sit against and will be in every close-up of the evening.
29. Easy Karwa Chauth Mehndi Design
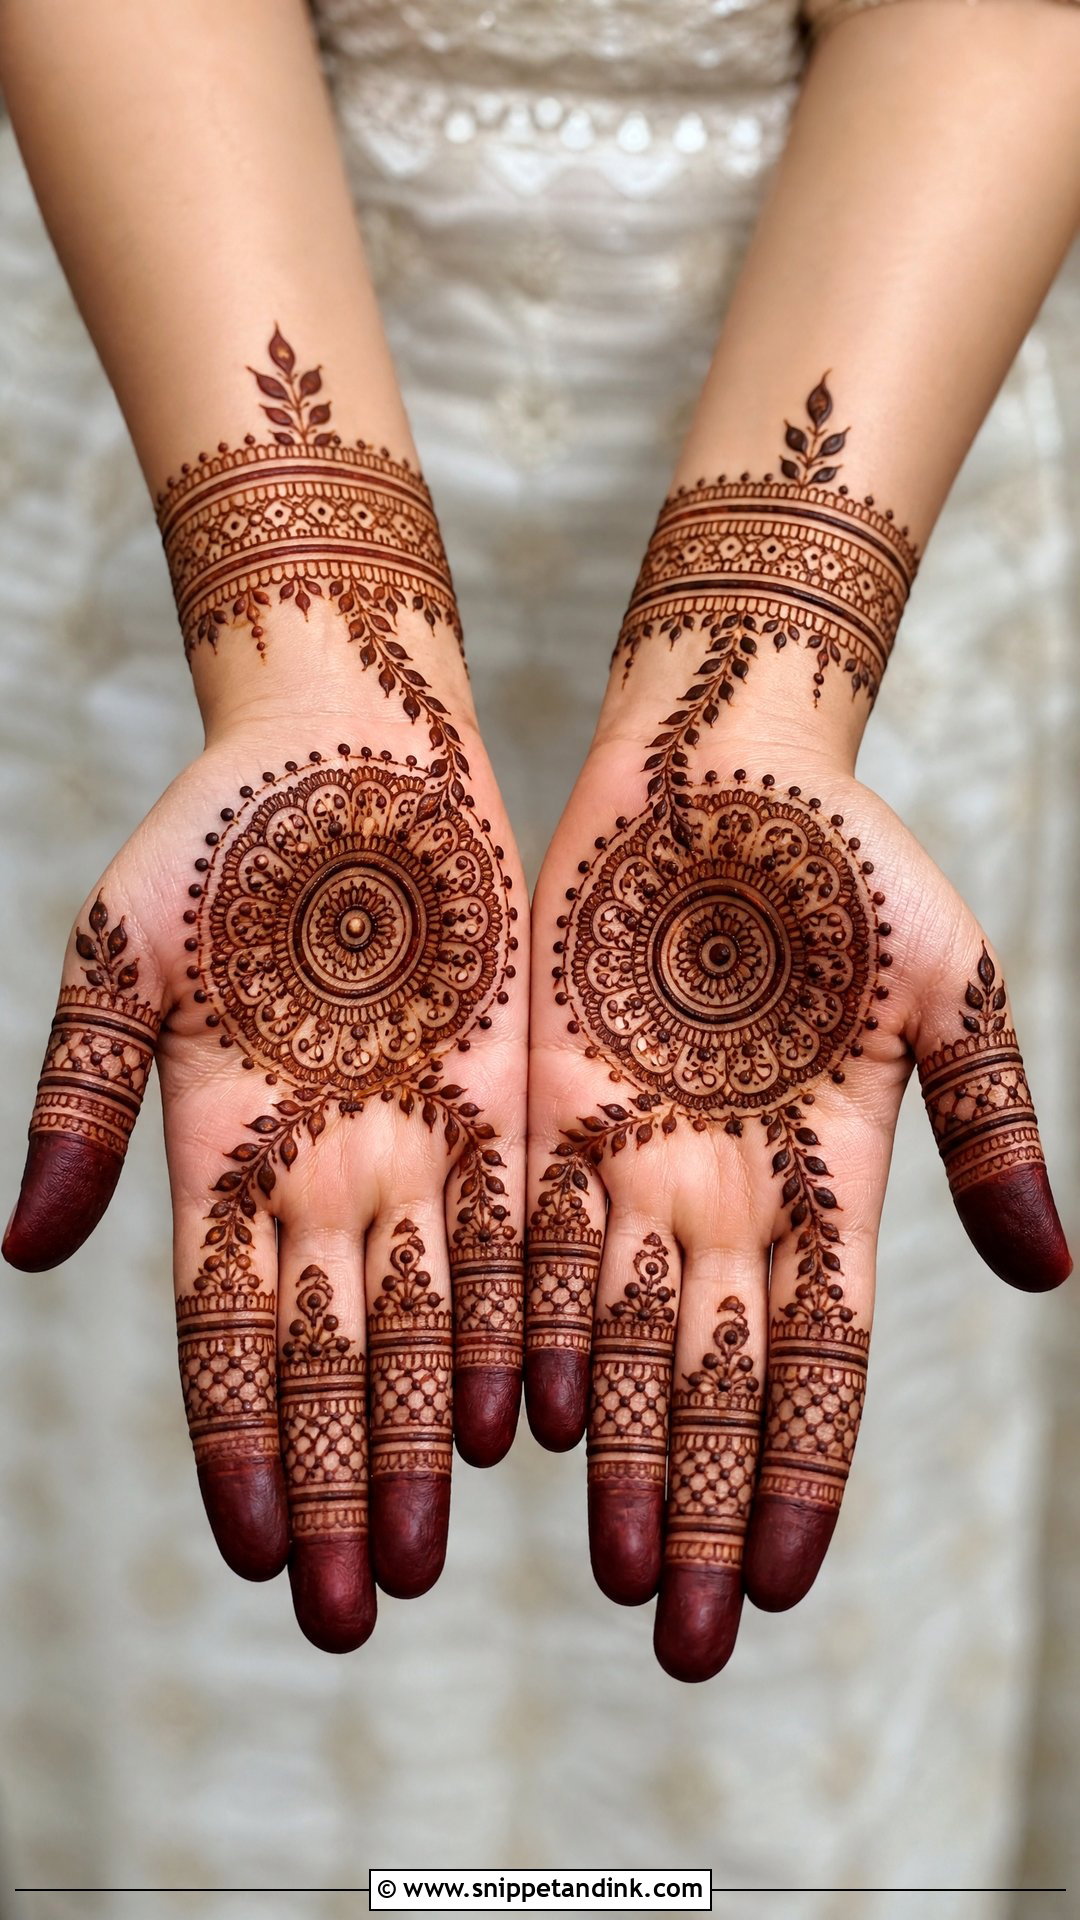
Traditional feel, simple build. A palm mandala ringed with small paisleys, decorated fingertips and a bracelet-style wrist border, with an optional leafy vine from the wrist toward the palm for more coverage. Keep it symmetrical and neat; small dots, half-circles and simple flowers add richness. Since Karwa Chauth involves a full day of fasting, I’d apply it the evening before so the stain has darkened by moonrise and your hands are free on the day.
30. Easy Raksha Bandhan Mehndi Design
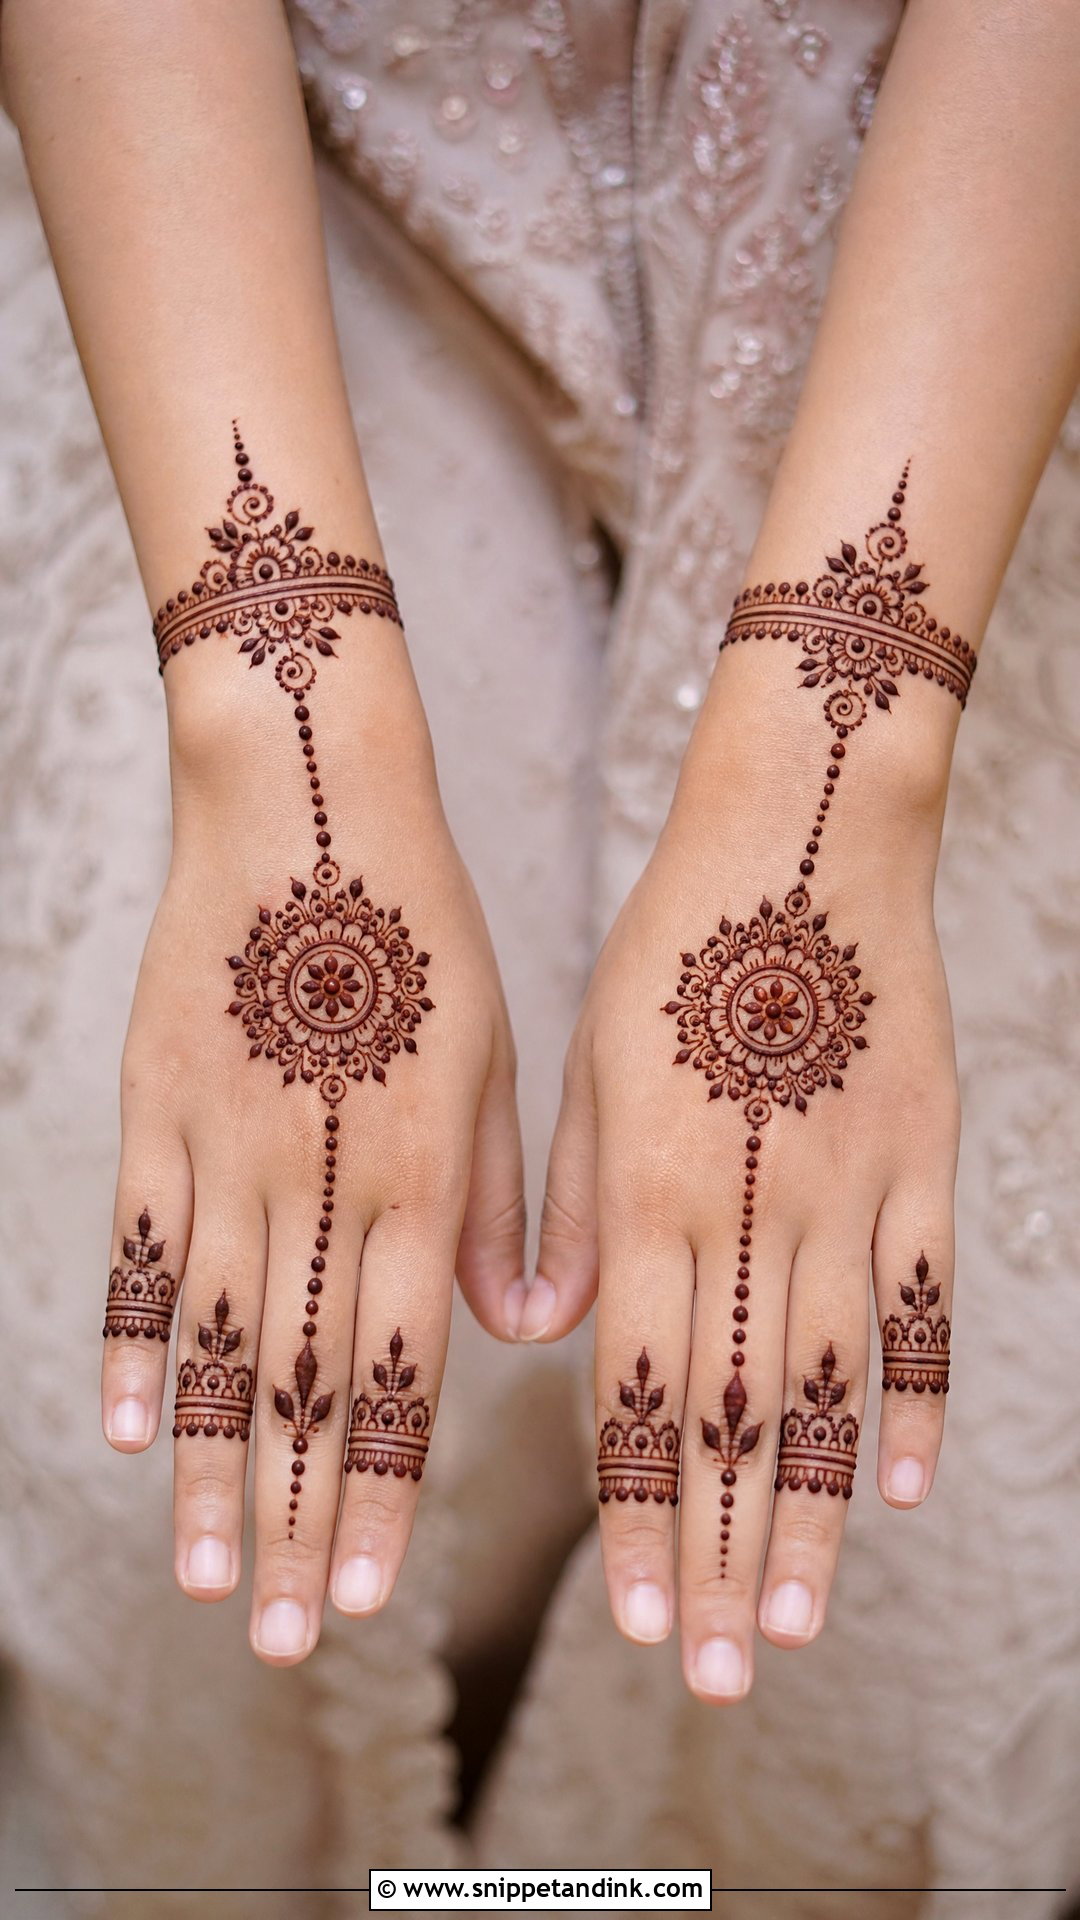
Bracelets suit Raksha Bandhan naturally, since the whole day revolves around a thread tied at the wrist. Draw a decorative wrist band, a small mandala or flower on the back of the hand and a dotted chain linking them, with light rings, dots and leaves on the fingers. Leave a little bare skin where the rakhi will go so it doesn’t sit on top of wet paste or hide the band. Simple shapes, quick to finish, comfortable all day.
31. Easy School Function Mehndi Design
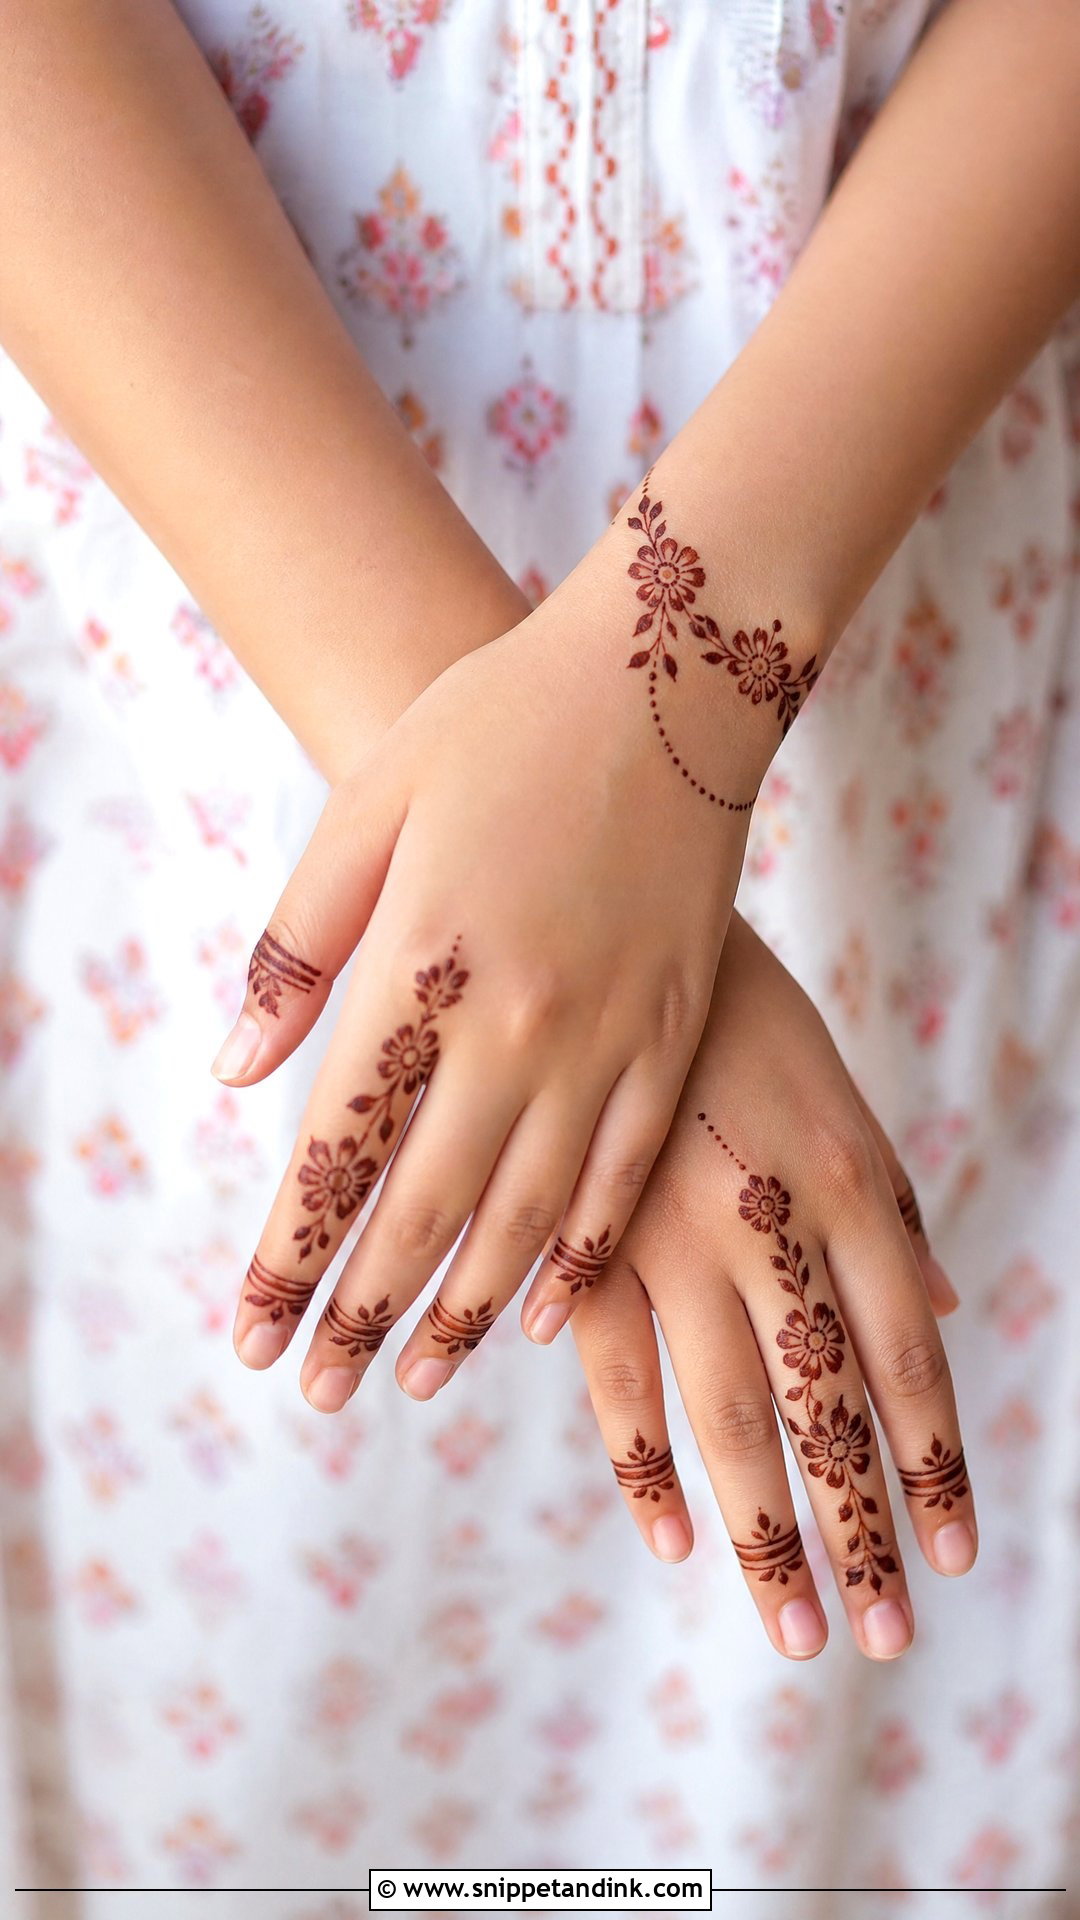
Neat, light and age-appropriate is the brief for a school function. A small floral trail on the back of the hand with simple finger bands and a tiny wrist curve, or a small dotted mandala on the palm. Dense patterns look out of place on young hands and take too long to dry before a dance performance. Basic flowers, leaves and dots are all a beginner needs, and they look right on smaller hands.
32. Easy Party Mehndi Design
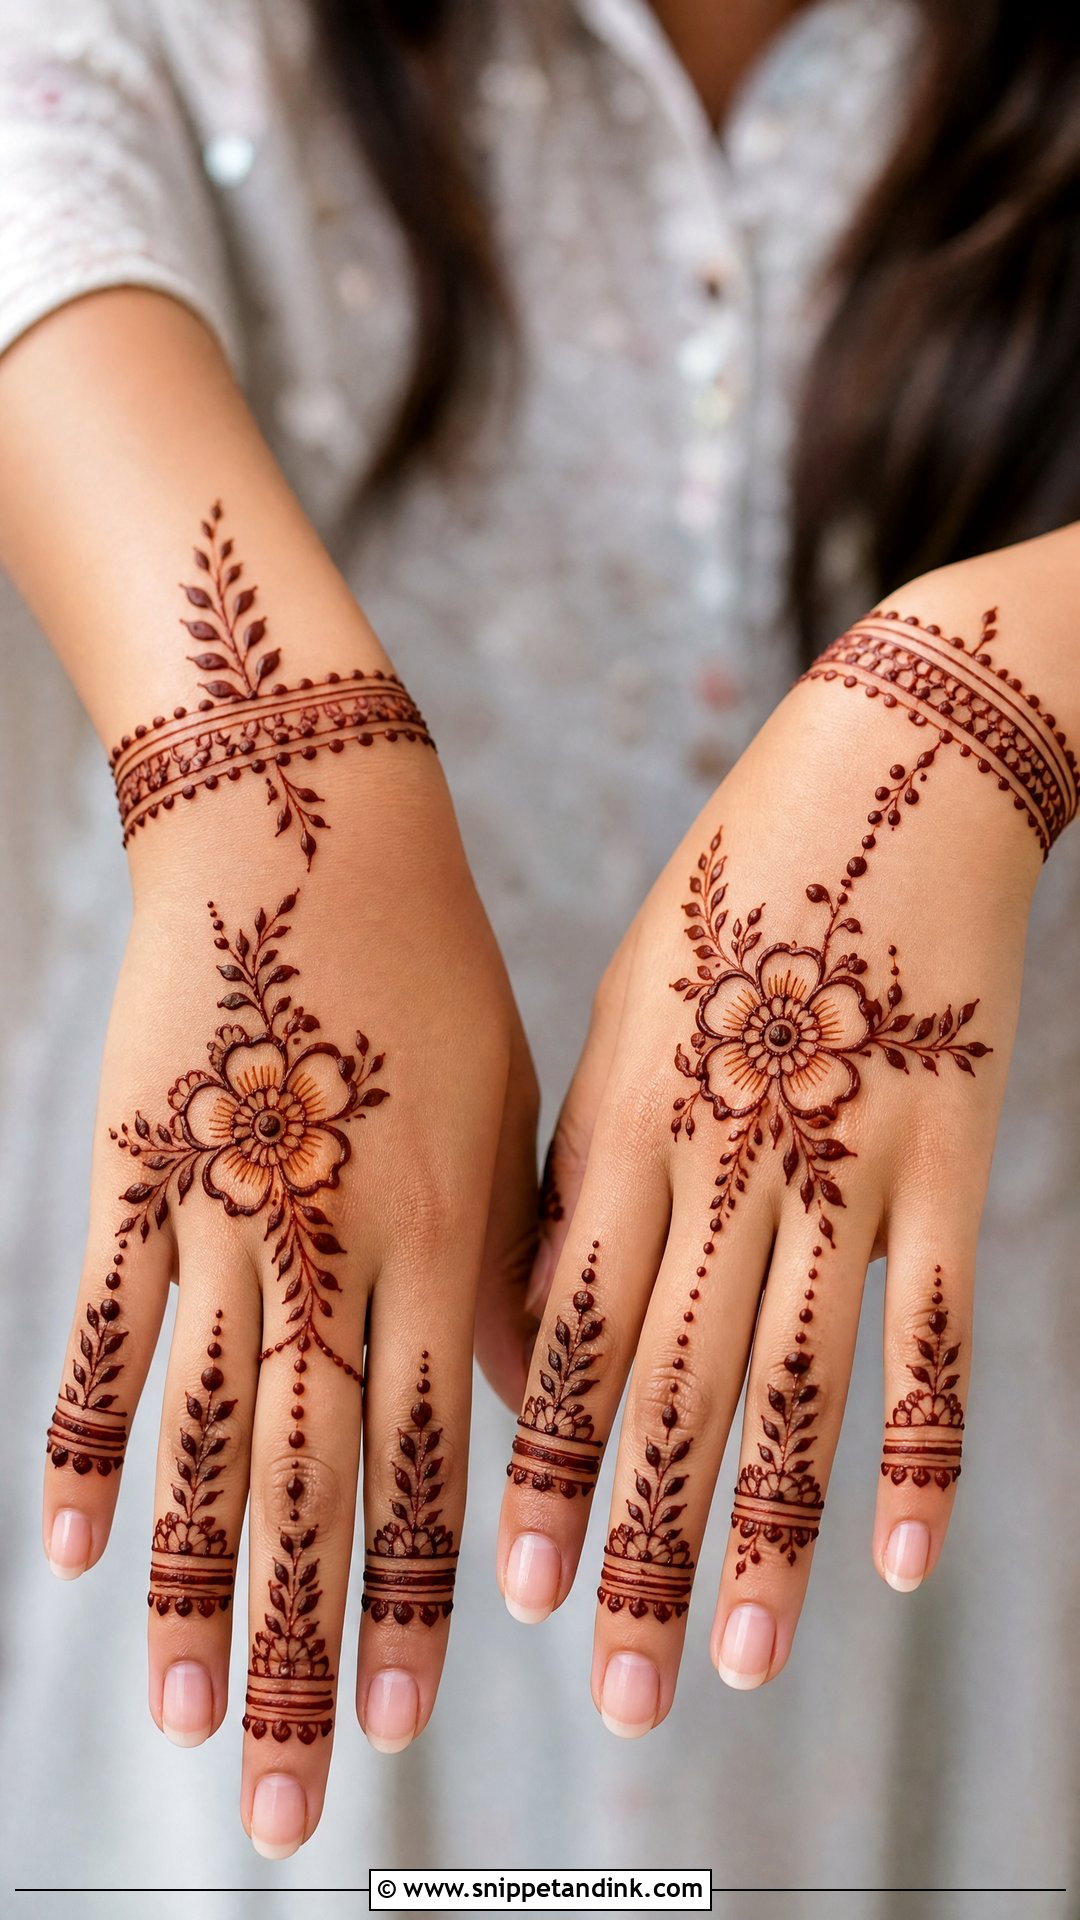
A modern back-hand layout with a bracelet band, finger rings and one bold flower near the centre, finished with dotted chains and small leaves. Leave the palm mostly empty for a fashionable look, or switch to an Arabic trail with open spaces for something more festive. It goes with ethnic and fusion outfits. Short, simple strokes do all the work, so you don’t need full-hand precision.
33. Easy Small Hand Mehndi Design
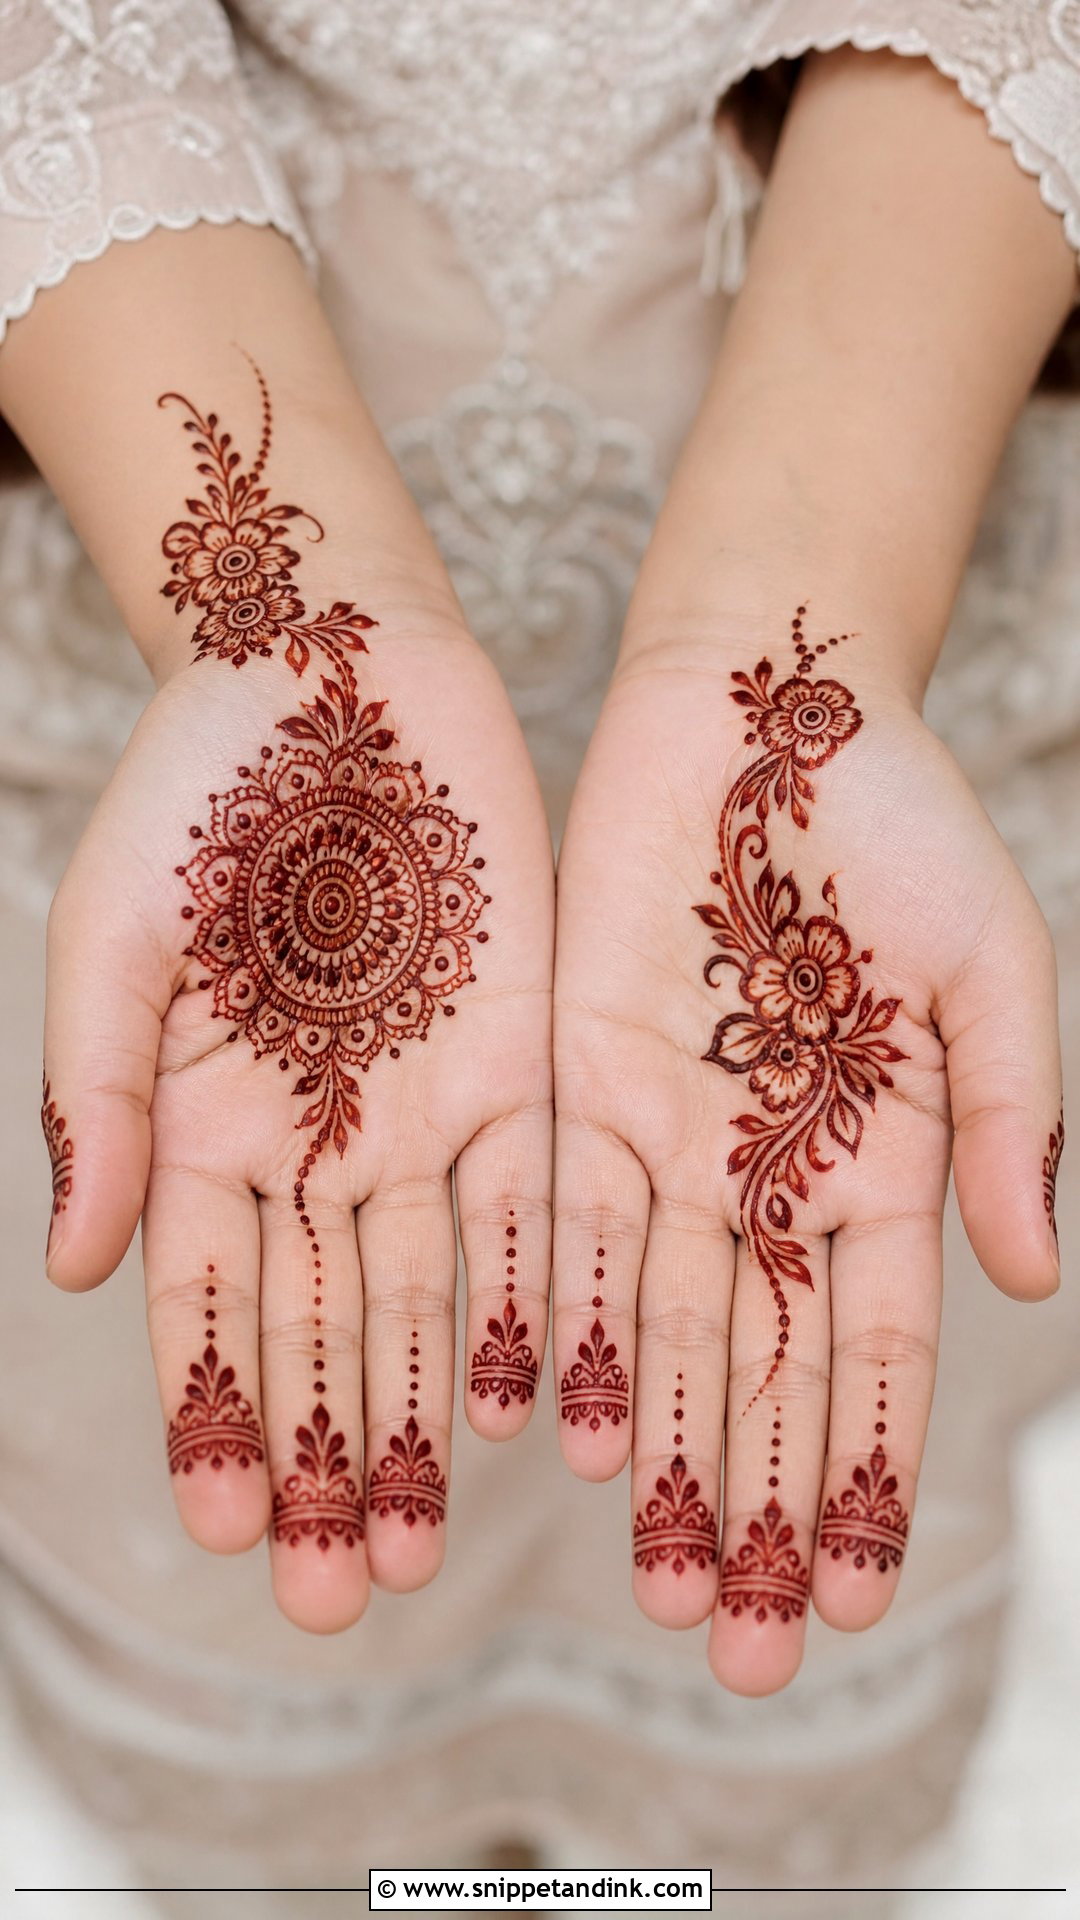
Small hands get crowded fast. Choose one compact idea: a small mandala, a tiny flower cluster or a slim Arabic vine. The surprise is that medium-sized motifs look better than tiny ones on petite hands, because fine detail clumps together as the stain develops. Decorate only two or three fingers with bands and dots and add a short wrist border. Keeping open space lets the hand look longer, and the compact layout goes on quickly.
34. Easy Wide Hand Mehndi Design
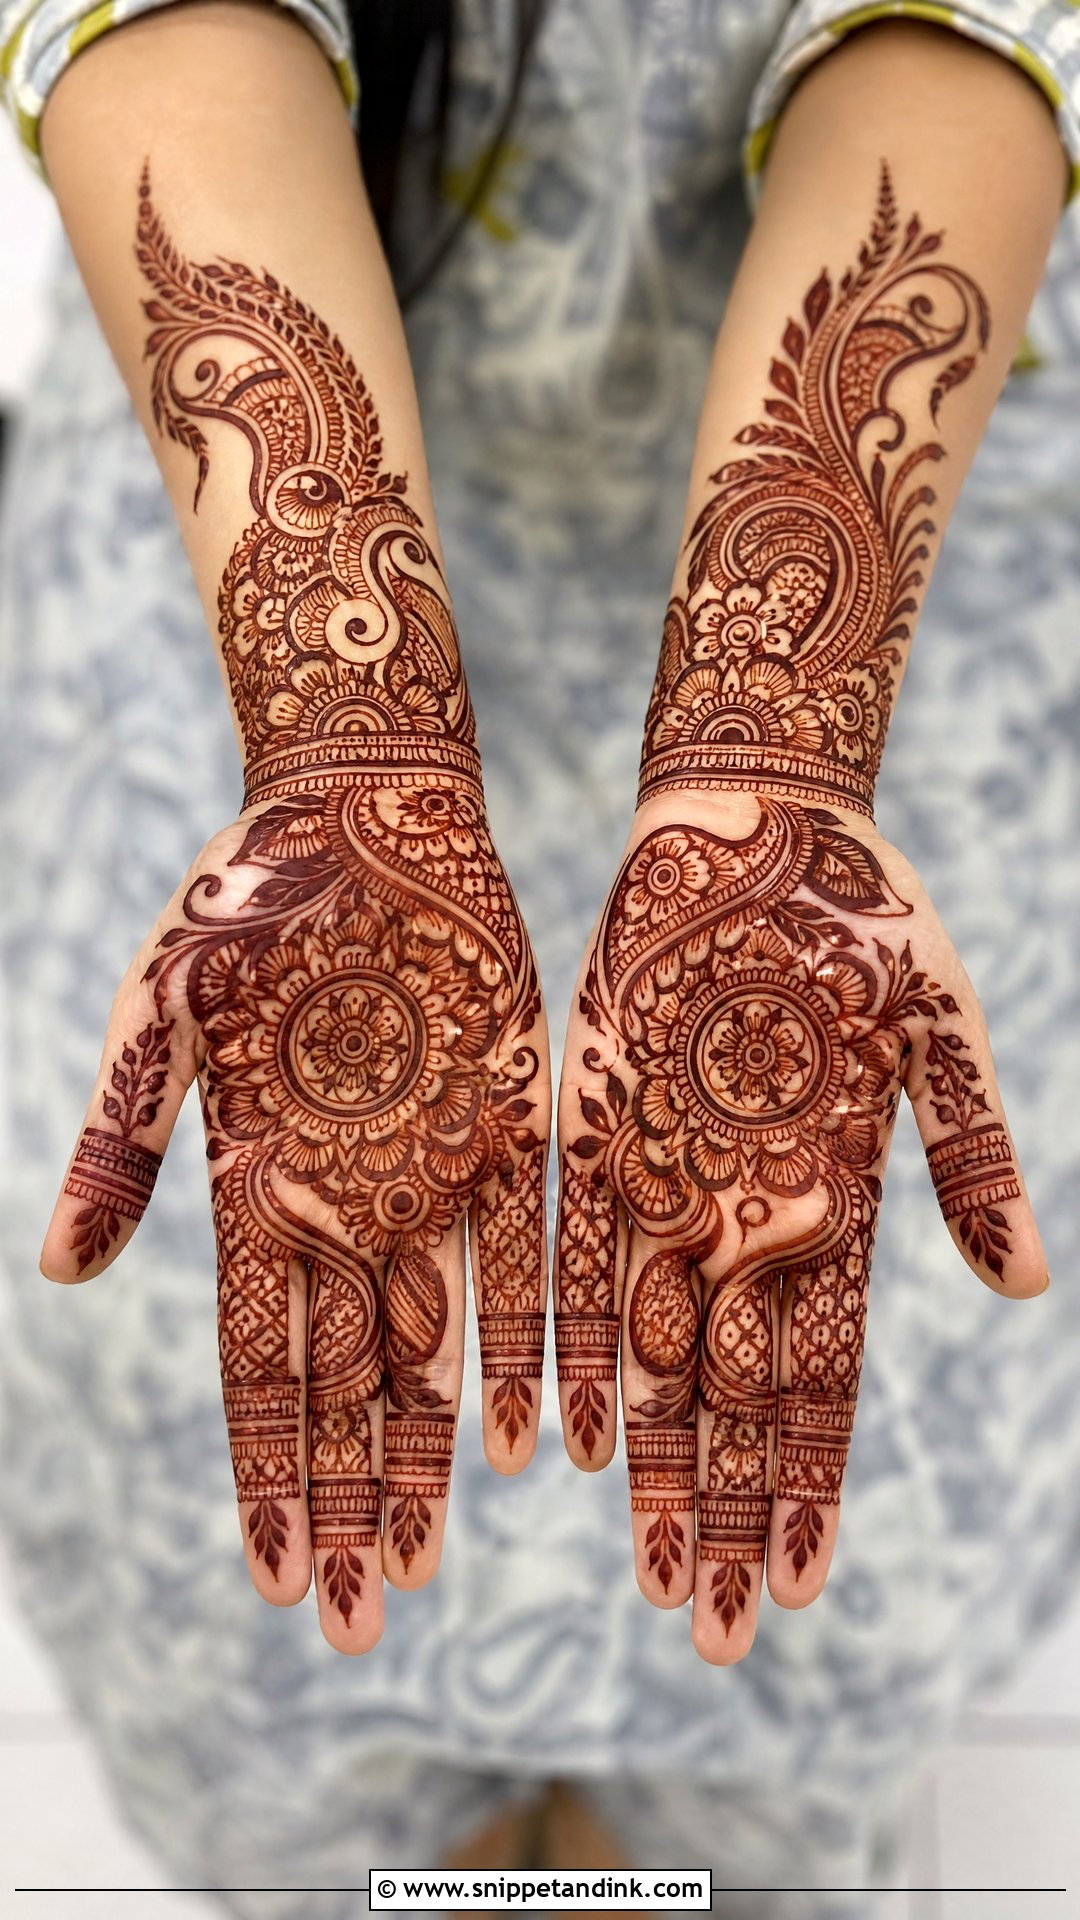
Wider hands can carry larger motifs, and they should. Start with a medium mandala or paisley in the centre, then balanced vines on both sides, wider floral shapes, bold leaves and a clear wrist border. Bands, dots and small leafy patterns on the fingers stop the edges looking empty. Shrinking every detail on a wide hand makes it look sparse, so I size up and let the bigger shapes fill the space. Bigger motifs are also easier to control, which helps if you’re still learning.
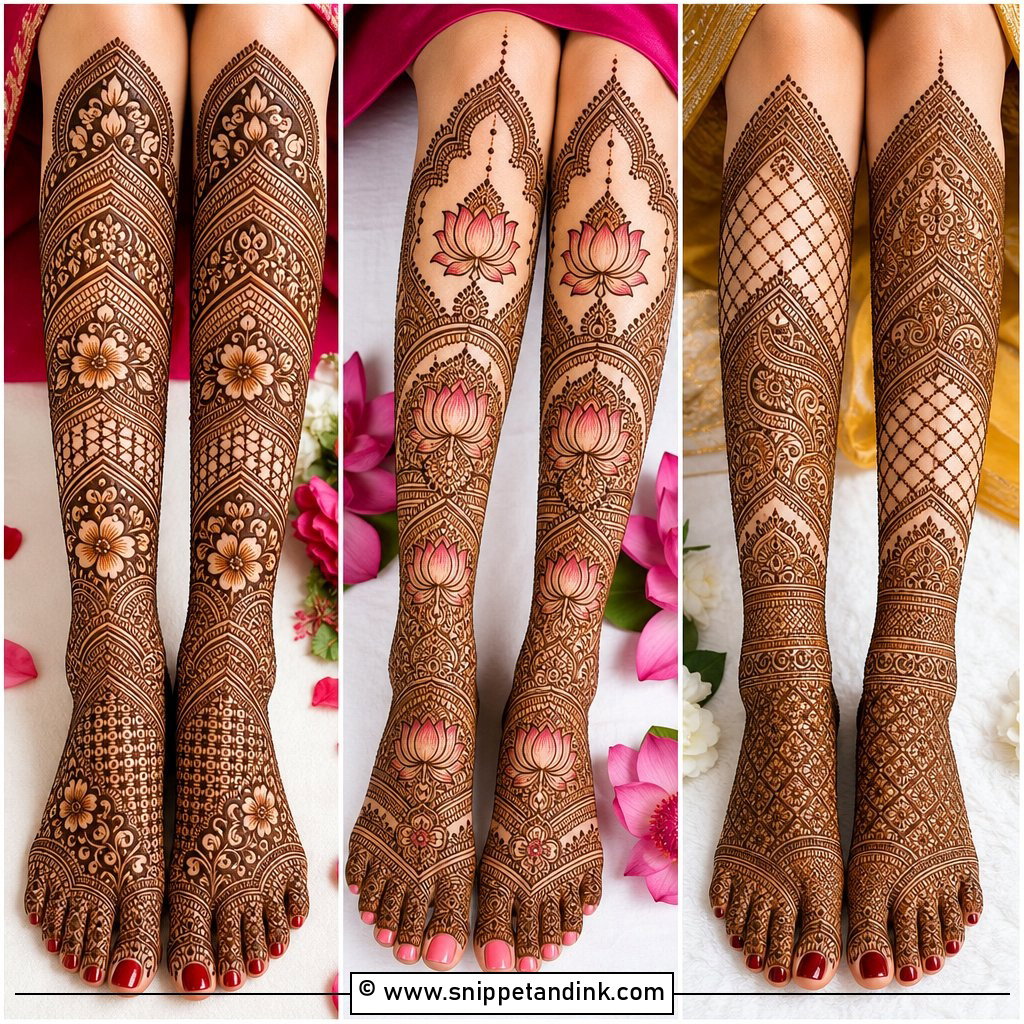
35. Easy Foot Mehndi Design
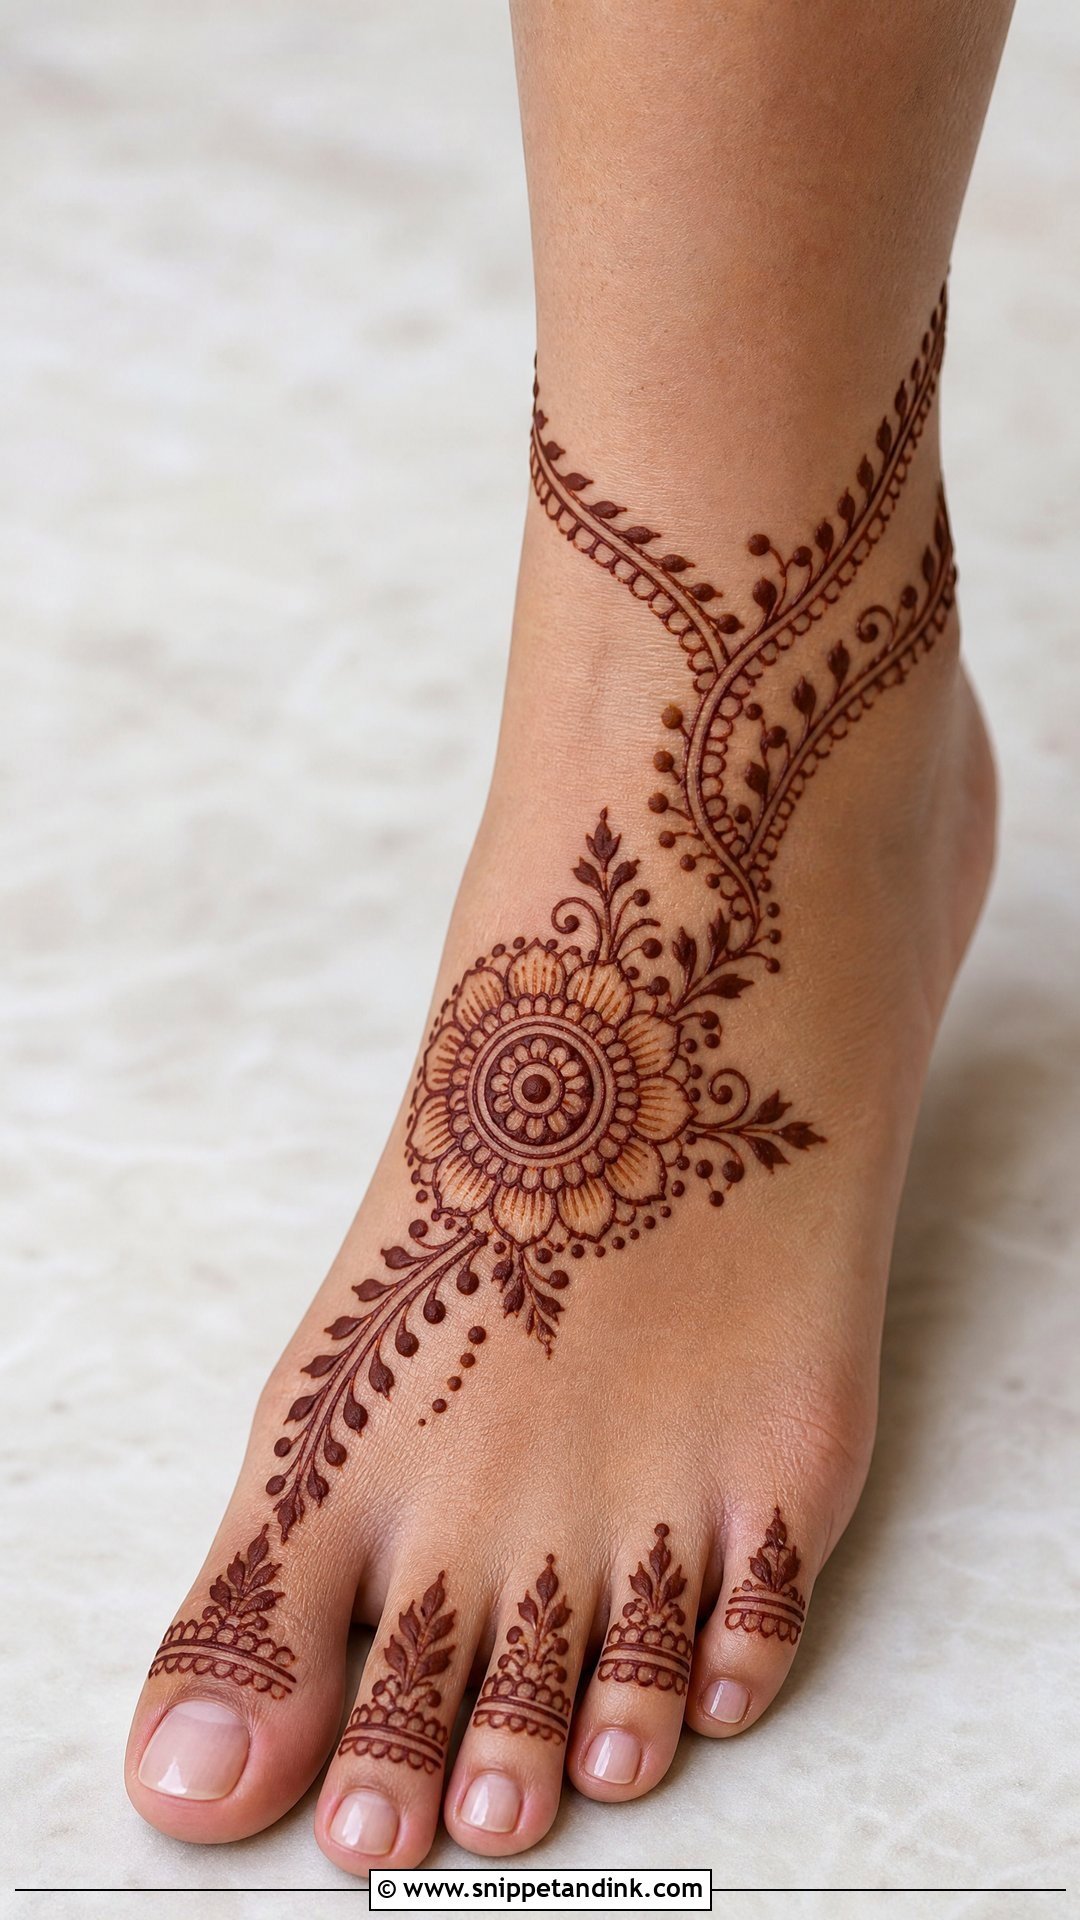
A small mandala or flower on the top of the foot, a leafy vine toward the toes, toe rings, dots and curved bands near the ankle. Keep it open so it stays comfortable, or try a simple side trail for a minimal version. Feet stain darkly, which rewards even a simple design. The practical problem is walking: wear open sandals you don’t mind marking, or sit with your feet up until the paste dries, because foot mehndi smudges against floors and straps.
Drawing on Your Own Hands Without Smudging Everything
Doing your own mehndi has one built-in problem: the second hand. Draw your dominant hand first, while your other hand is still free, and keep it propped on a cushion while it dries. Then use your dominant hand to decorate the other one, which is far easier. Sit at a table with your elbow supported, not on a sofa, and turn the hand you’re decorating rather than twisting your wrist into awkward angles.
Why the colour sometimes comes out pale
A weak orange stain almost always comes down to one of a few causes. The paste hadn’t released its dye yet, because it was mixed too recently. It came off too soon; natural henna wants several hours on the skin, and overnight is better. It was washed off with soap and water instead of being scraped away dry. Or the skin had lotion on it. Remember too that every stain starts orange and darkens over the next day or two, so judge the colour the following evening, not the moment the paste comes off.
Which Design Should a First-Timer Draw Tonight?
If you’ve never held a cone, start with the front-hand mandala or a leaf vine, then try an Arabic trail once your lines are steady. Clean outlines, open spacing and repeated dots, leaves, flowers, paisleys and bands carry every design here, from bracelets to bridal layouts and foot mehndi. Lines don’t have to be perfect; a balanced layout and tidy edges hide a lot. Match the design to the occasion and to your hand shape, and give yourself a few evenings of practice before anything important.
You'll Like These Ideas:


Leave a Reply