
The palm is the first thing people see when you lift your hands for a photo or reach for a plate at a function, and it’s also the easiest place to start learning henna. It’s flat, it stains darkest, and it forgives a shaky line better than the back of the hand. Below are 30 palm layouts I’d give a beginner, from mandalas and Arabic trails to finger-focused patterns, simple bridal hands and modern negative-space designs. Almost every one is built from the same few shapes: dots, teardrops, C-curves and lines. Once those come out of the cone cleanly, the rest is placement.
Learning the Cone on Paper Before Your Palm
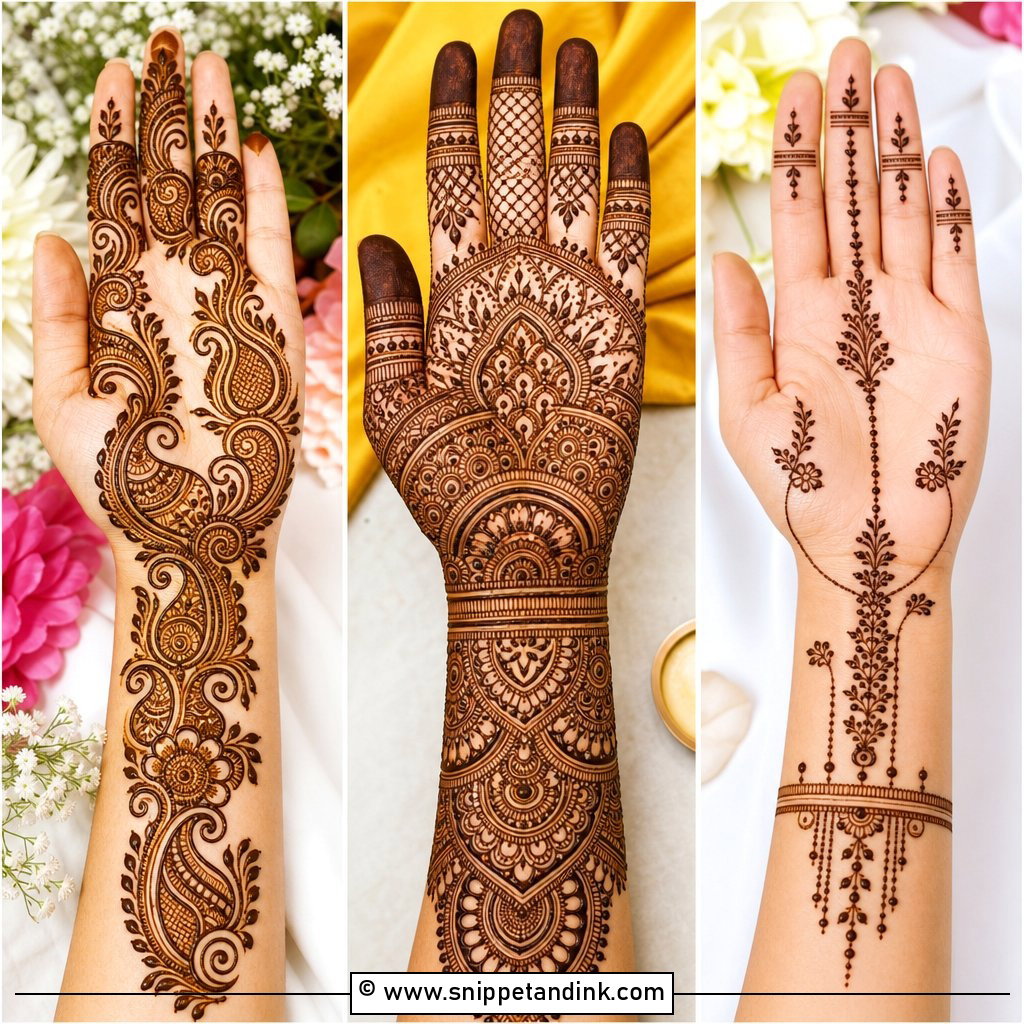
When I teach someone henna, the cone is what they struggle with, not the design. Hold it like a pen, tip angled slightly toward the skin, and squeeze from the top with steady pressure while your other hand guides it. The tip should hover just above the skin and lay the paste down like icing, rather than scratch along the surface.
Drills worth ten minutes a day
- Rows of dots the same size, to learn how hard to squeeze.
- Long lines pulled in one motion, straight and curved.
- Teardrops and C-curves, the building blocks of petals, leaves and paisleys.
- A small mandala, to practise turning the page instead of twisting your wrist.
I have every student practise on paper or a clear plastic sheet first, since it wipes clean. Then draw on someone else’s palm before your own, because working on your own dominant hand with your weaker hand is the hardest version of the craft.
Paste that flows
If you mix your own, use finely sifted body-art henna powder, lemon juice, a little sugar and a skin-safe essential oil such as eucalyptus or lavender, then let it rest until the dye releases, which can take several hours depending on the powder and room temperature. It should be about as thick as toothpaste: runny paste spreads into blobs, while stiff paste breaks off mid-line. Fill your cone only half full and trim a very small tip; you can always cut it wider.
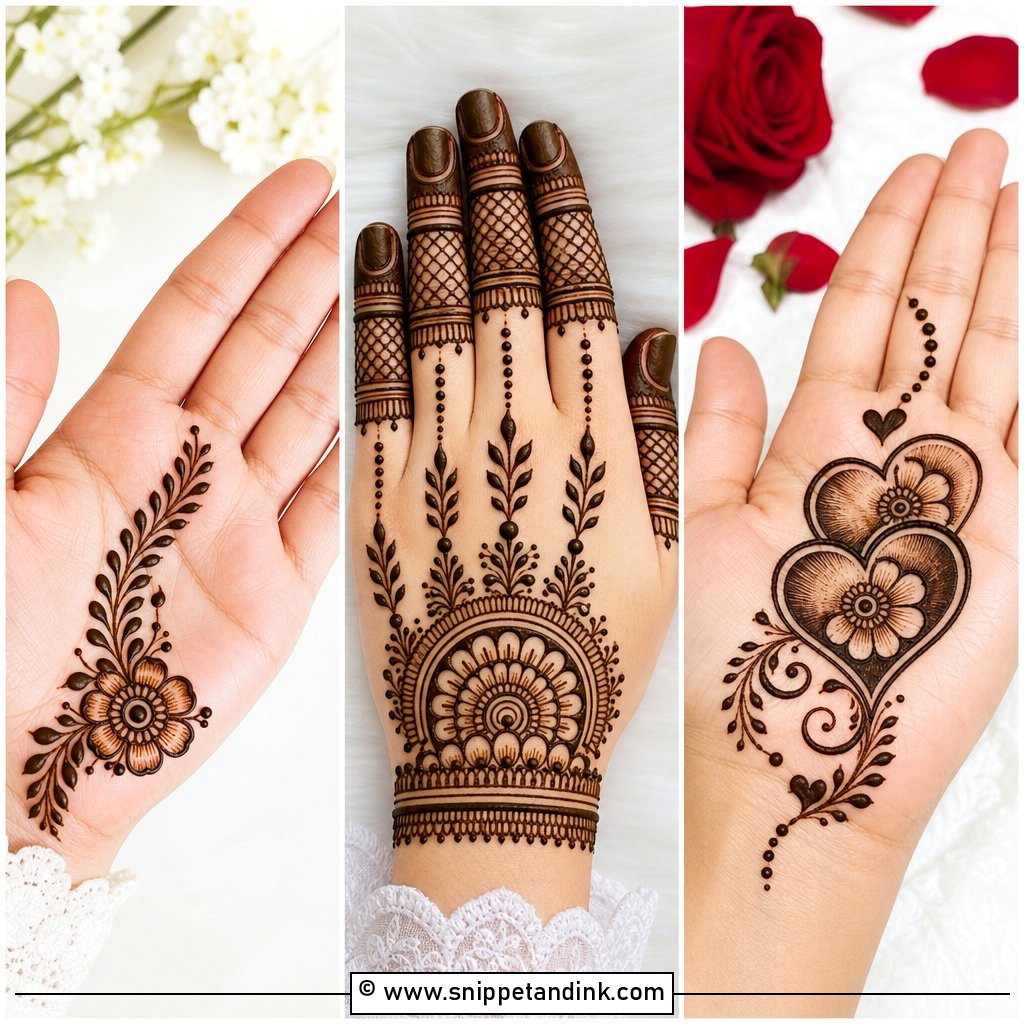
1. Simple Front Hand Mehndi Design
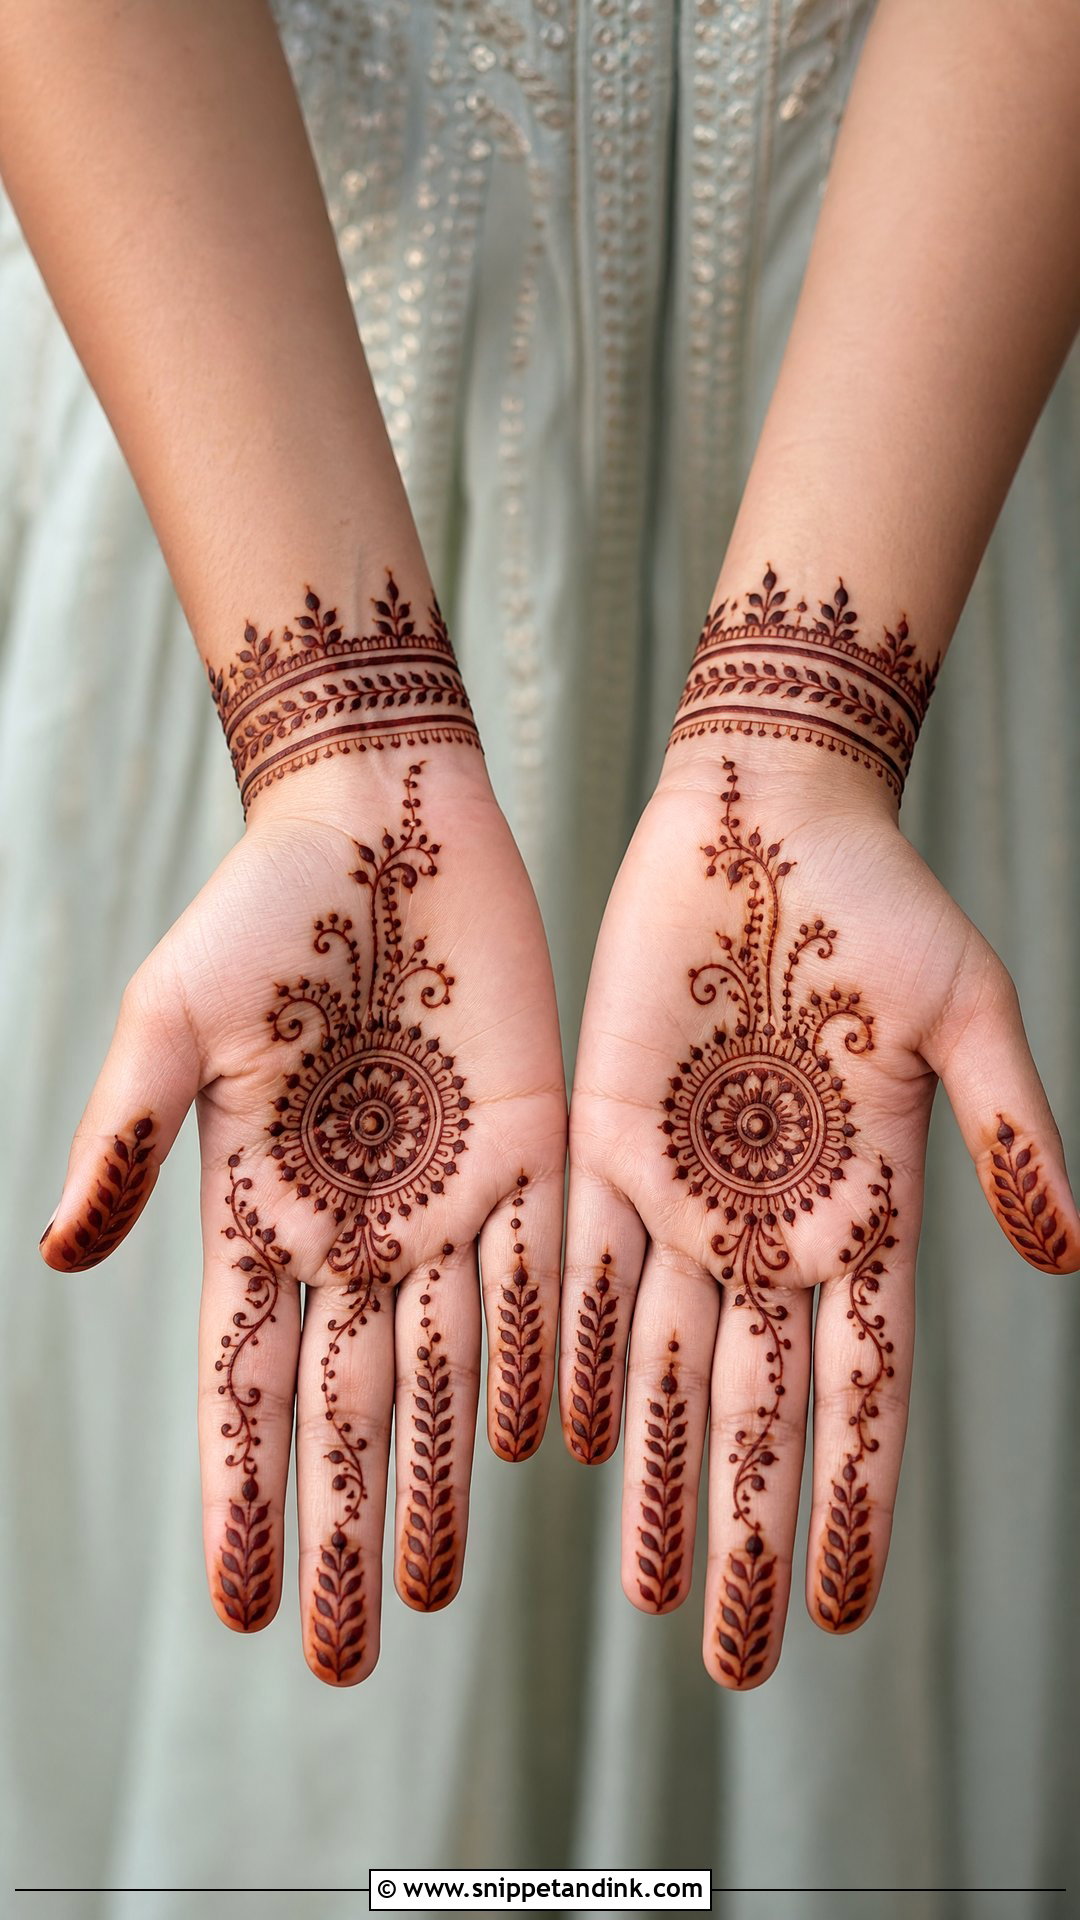
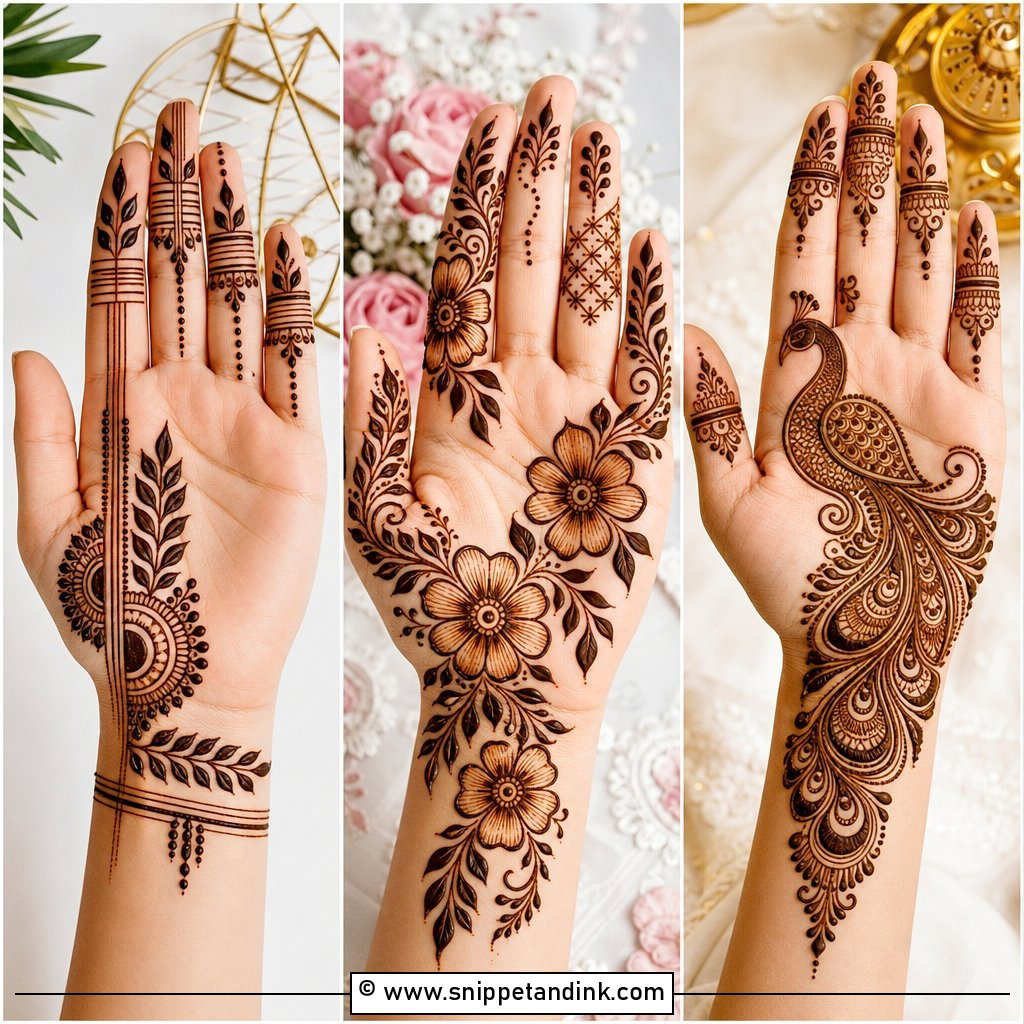
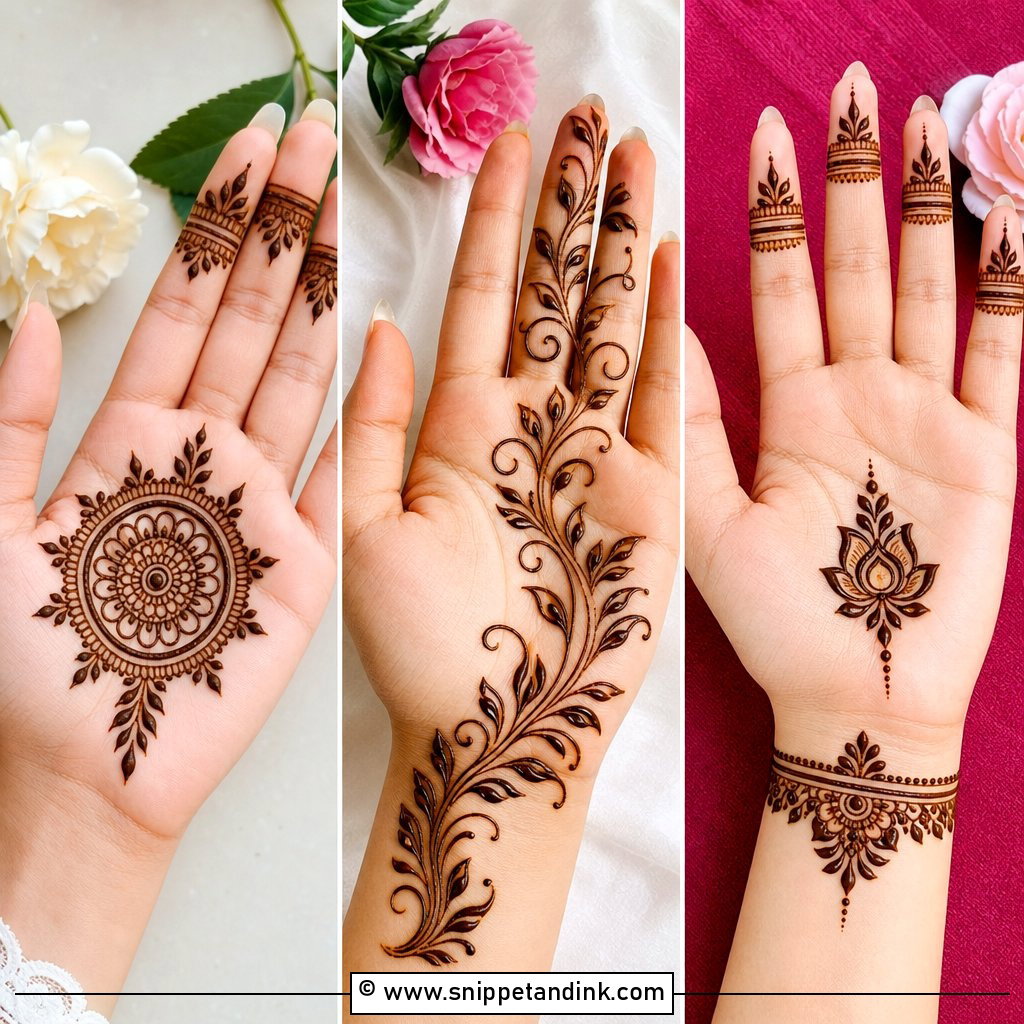
Start with a small round motif in the center of the palm, then add curved vines, dots and petals around it, and finish the fingers with thin bands and leafy tips. Nothing here needs shading, so it’s a good first full hand. The mistake beginners make is crowding the circle with too many petals. Leave a ring of clear skin around the center motif and it will look intentional after staining. Natural henna left on for several hours gives the dark finish.
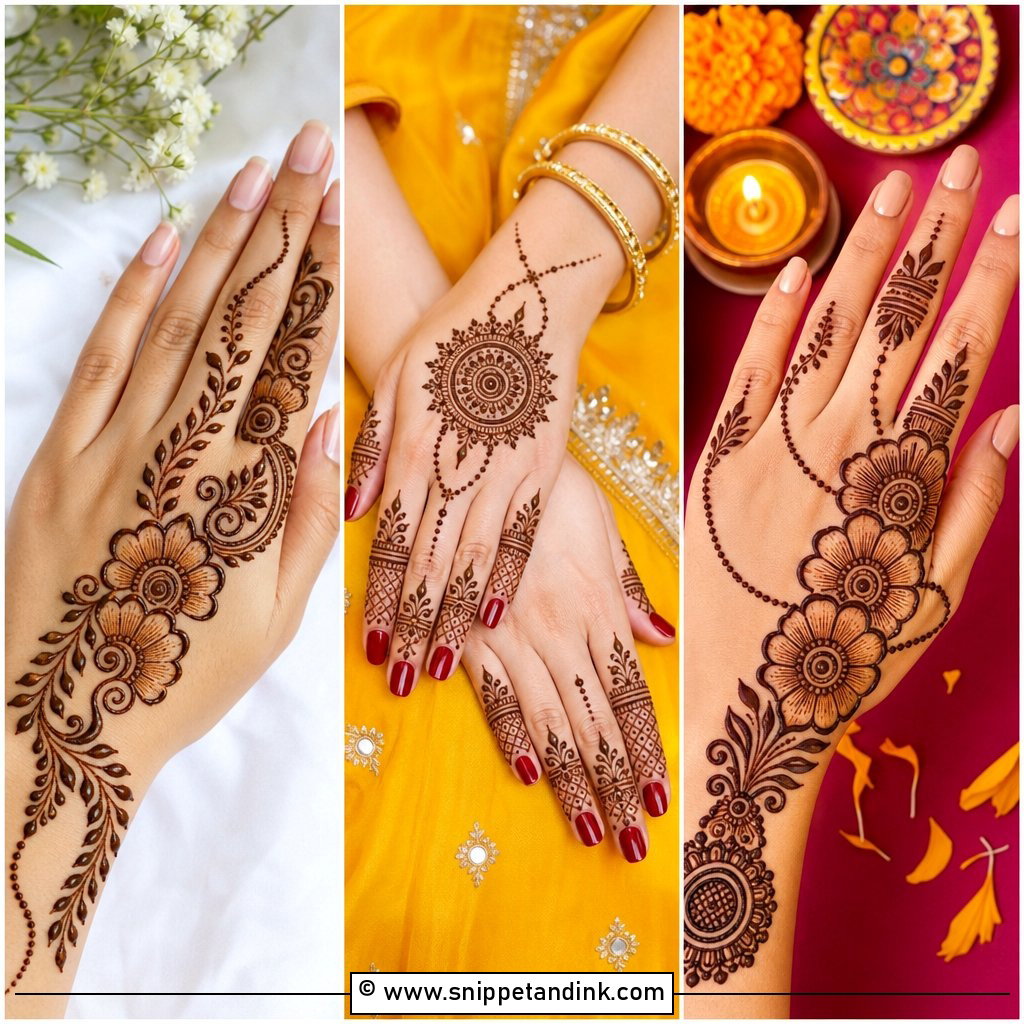
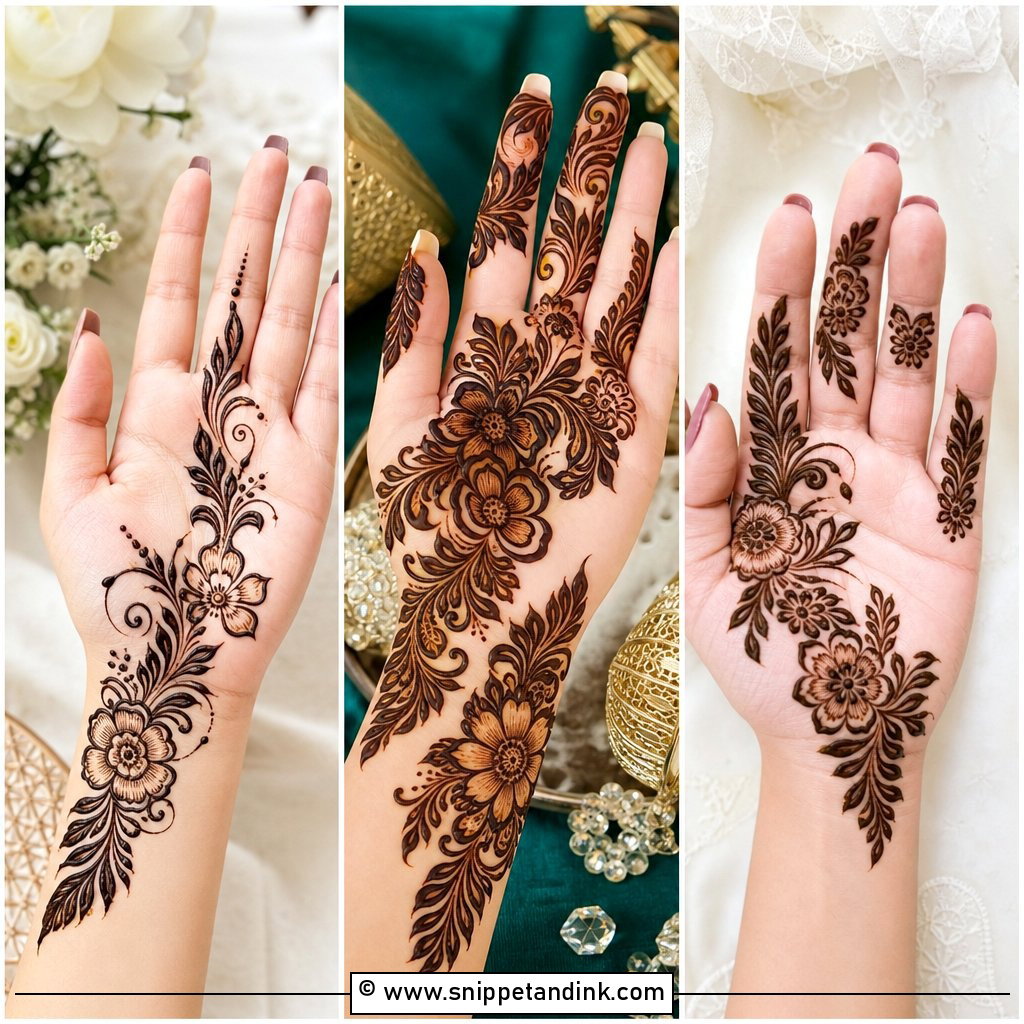
2. Easy Arabic Front Hand Mehndi Design
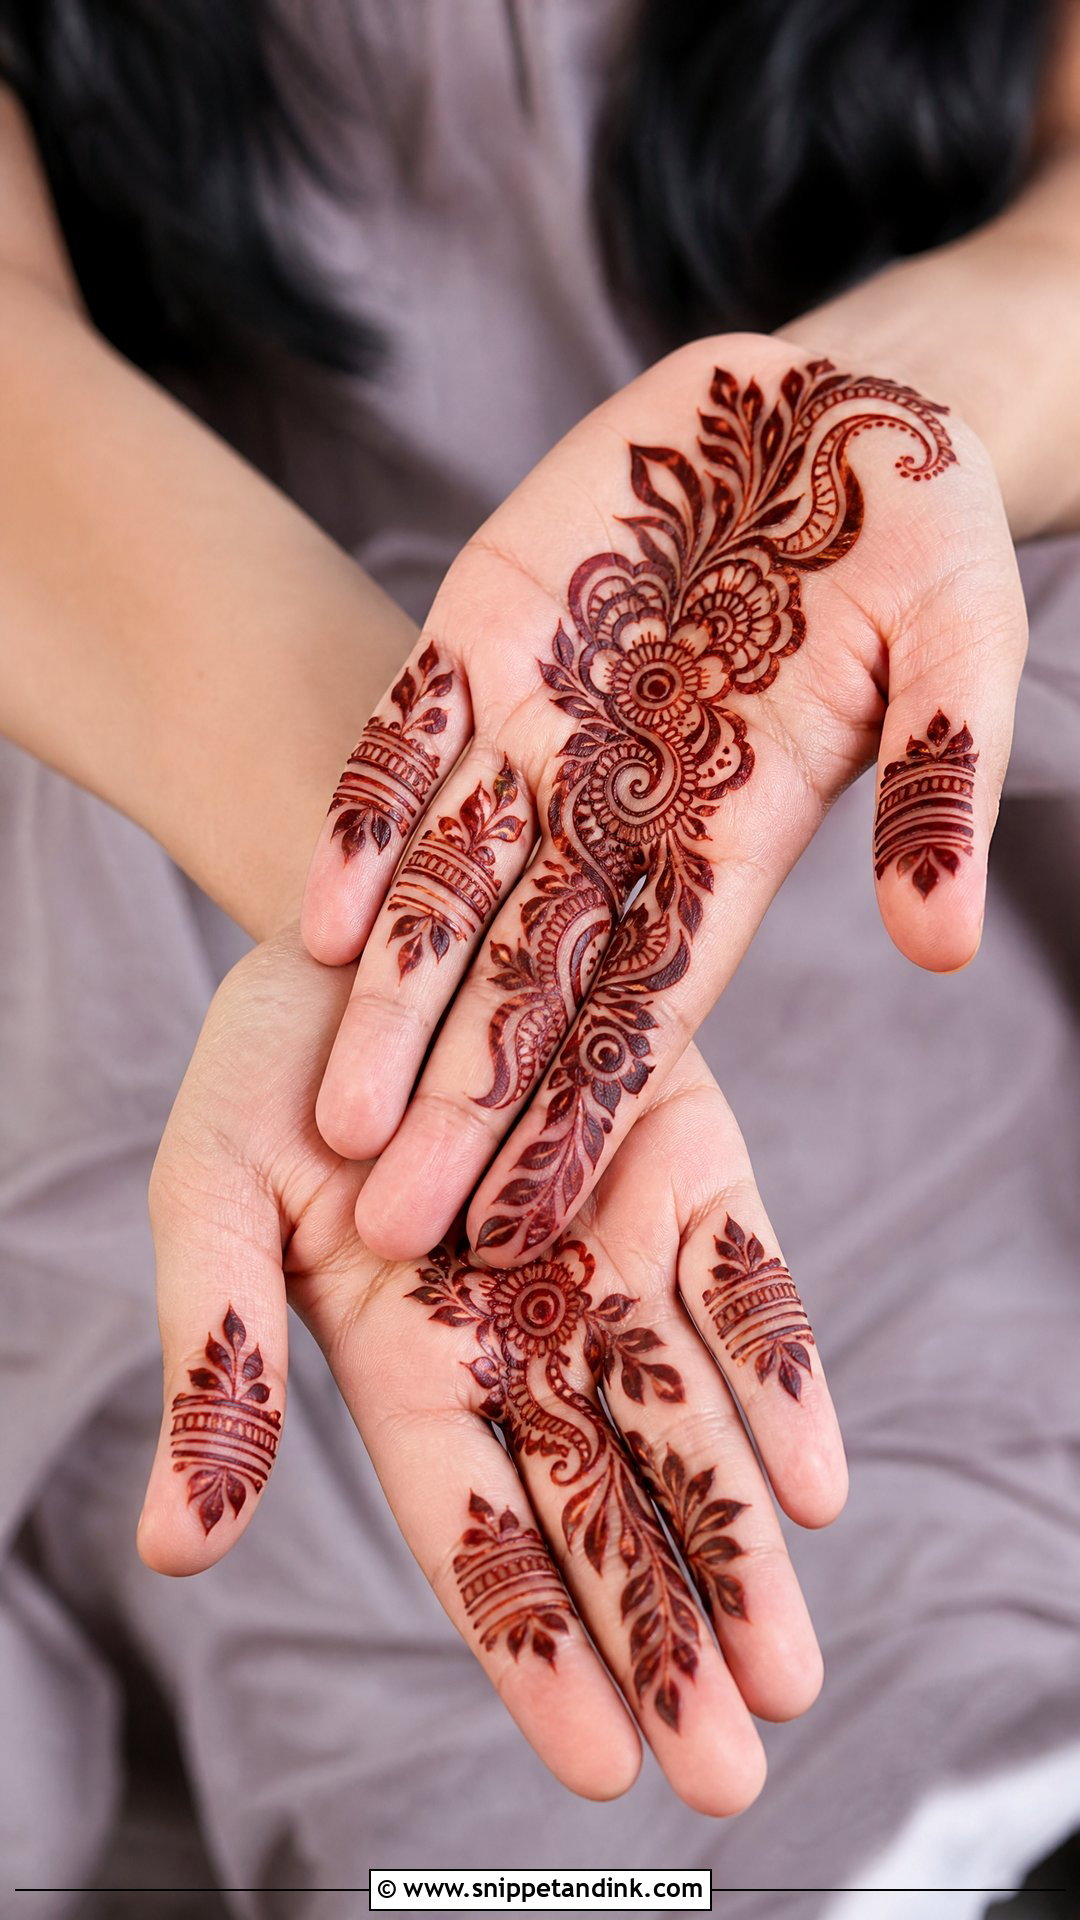
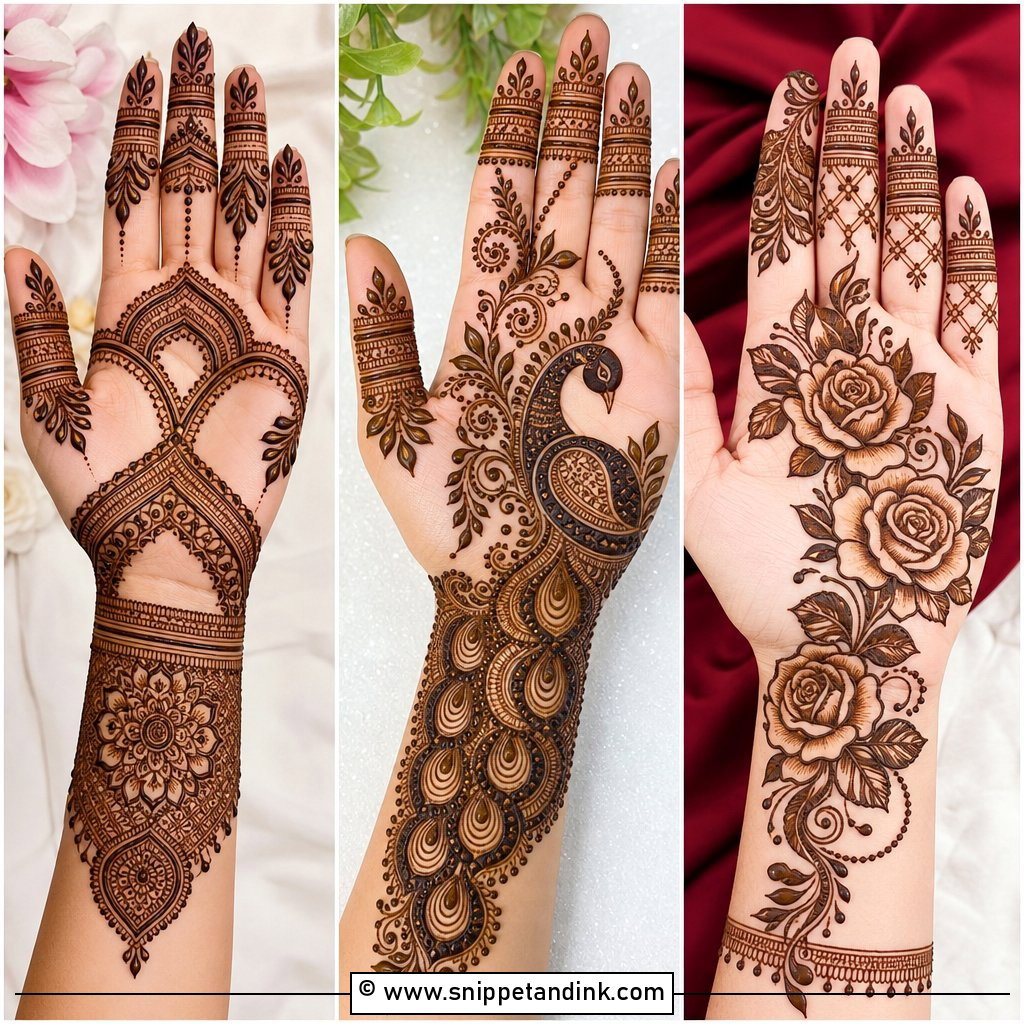
Arabic layouts move diagonally from one side of the wrist toward the opposite finger, which visually lengthens the hand. Large flowers are actually easier than tiny ones, because a bigger petal gives your hand room to correct as it goes. Paisley curves and leafy trails link the flowers, and one side of the palm stays empty. Pull each long curve in a single motion rather than in short dabs; stopping halfway leaves a visible bump where the paste piles up.
3. Front Hand Mandala Mehndi Design
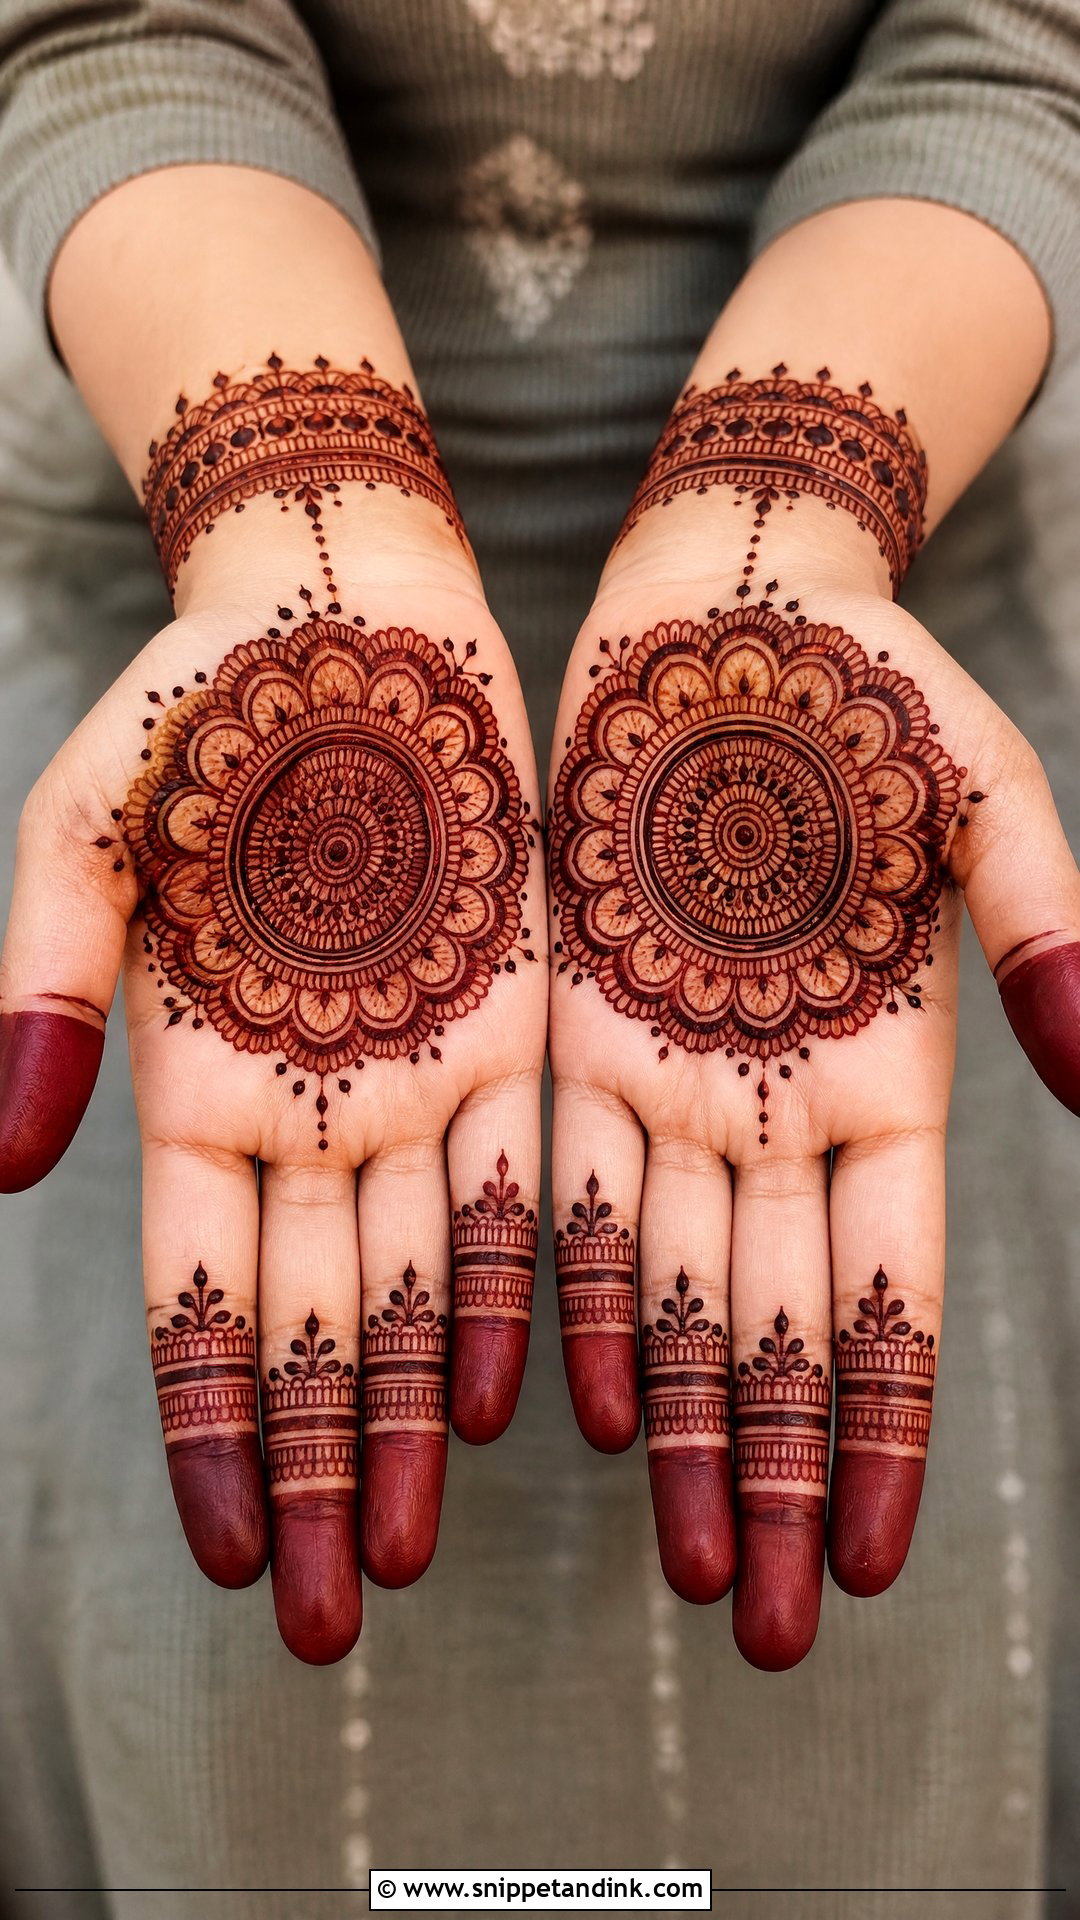
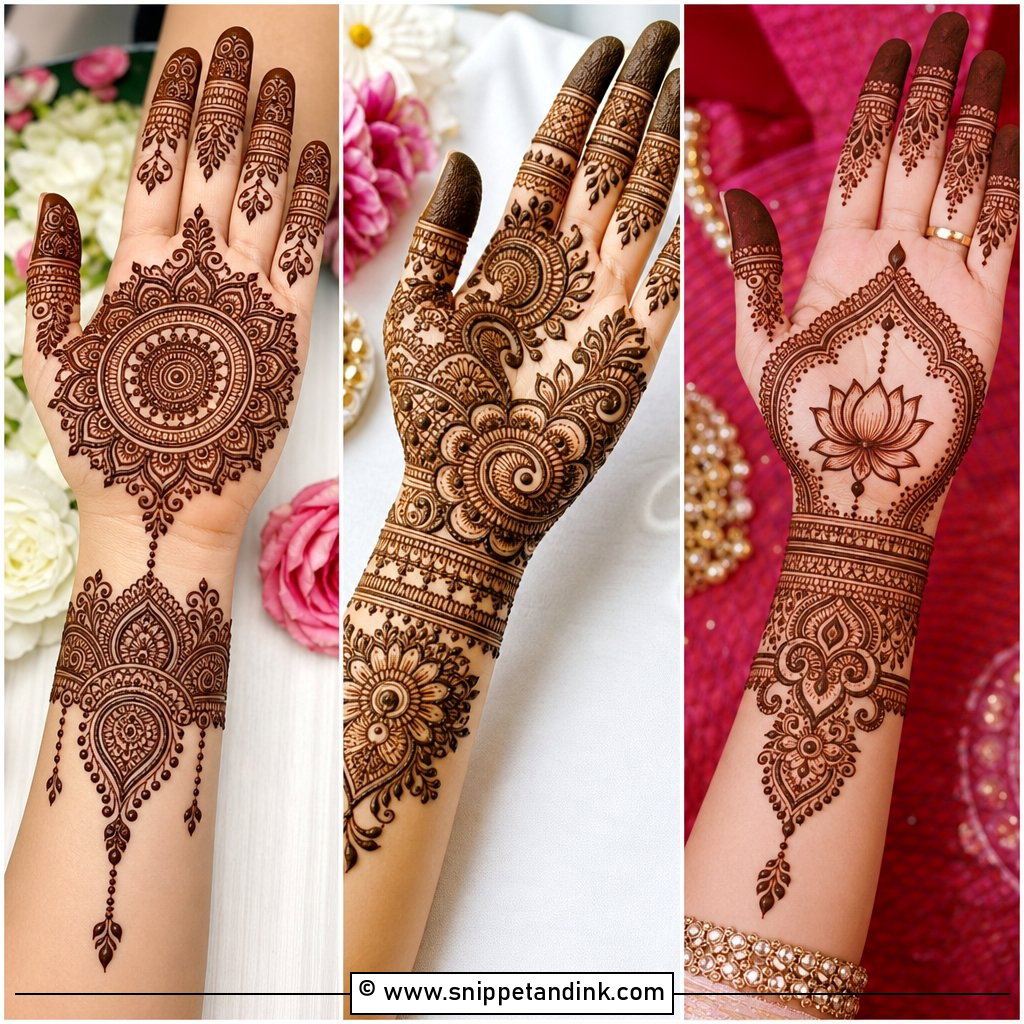
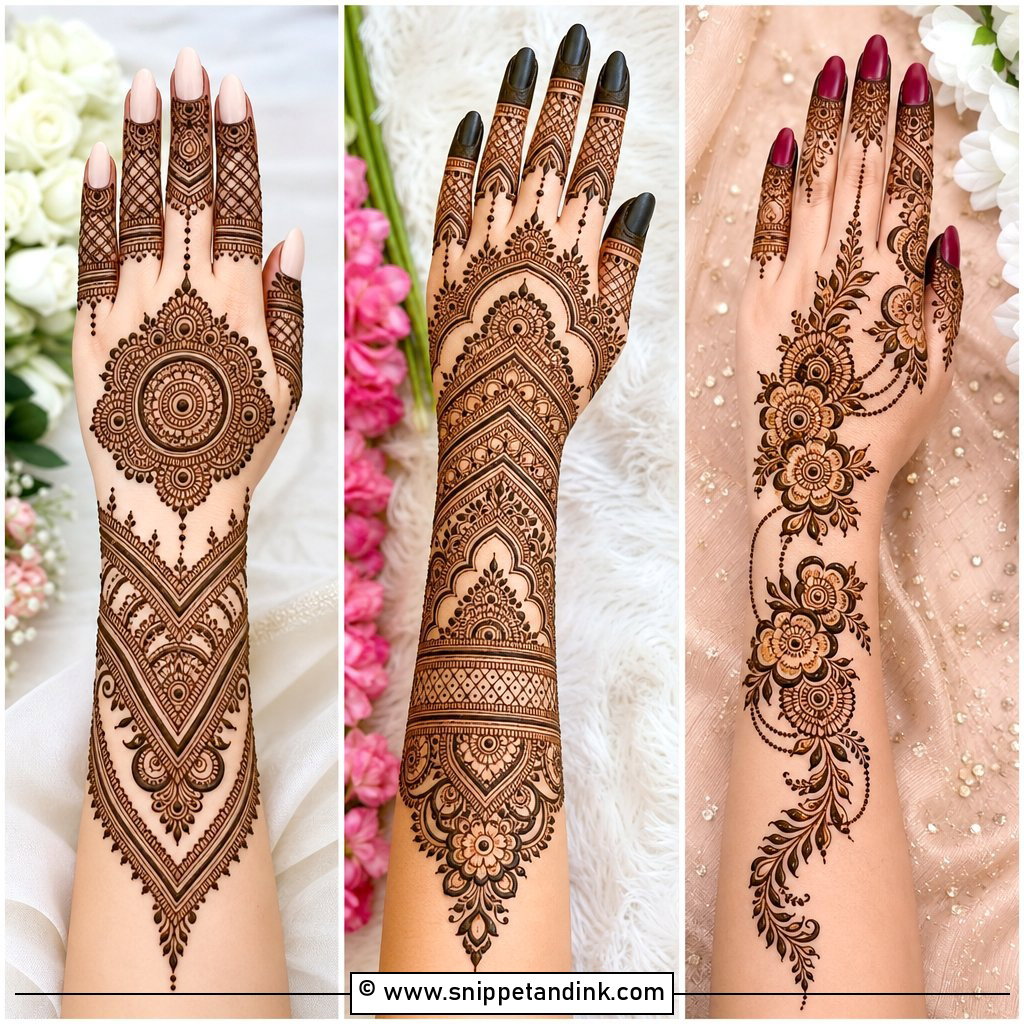
The palm is already roughly round, so a mandala fits it without any planning. Rings of petals, dots, scallops and fine lines build outward from a center, and matching bands on the fingers finish it even with a bare wrist. Draw the center dot first, then one ring at a time, turning the hand rather than twisting your wrist. Uneven rings are the giveaway of a rushed mandala. It suits pooja, Eid, Diwali and small functions.
4. Front Hand Flower Mehndi Design
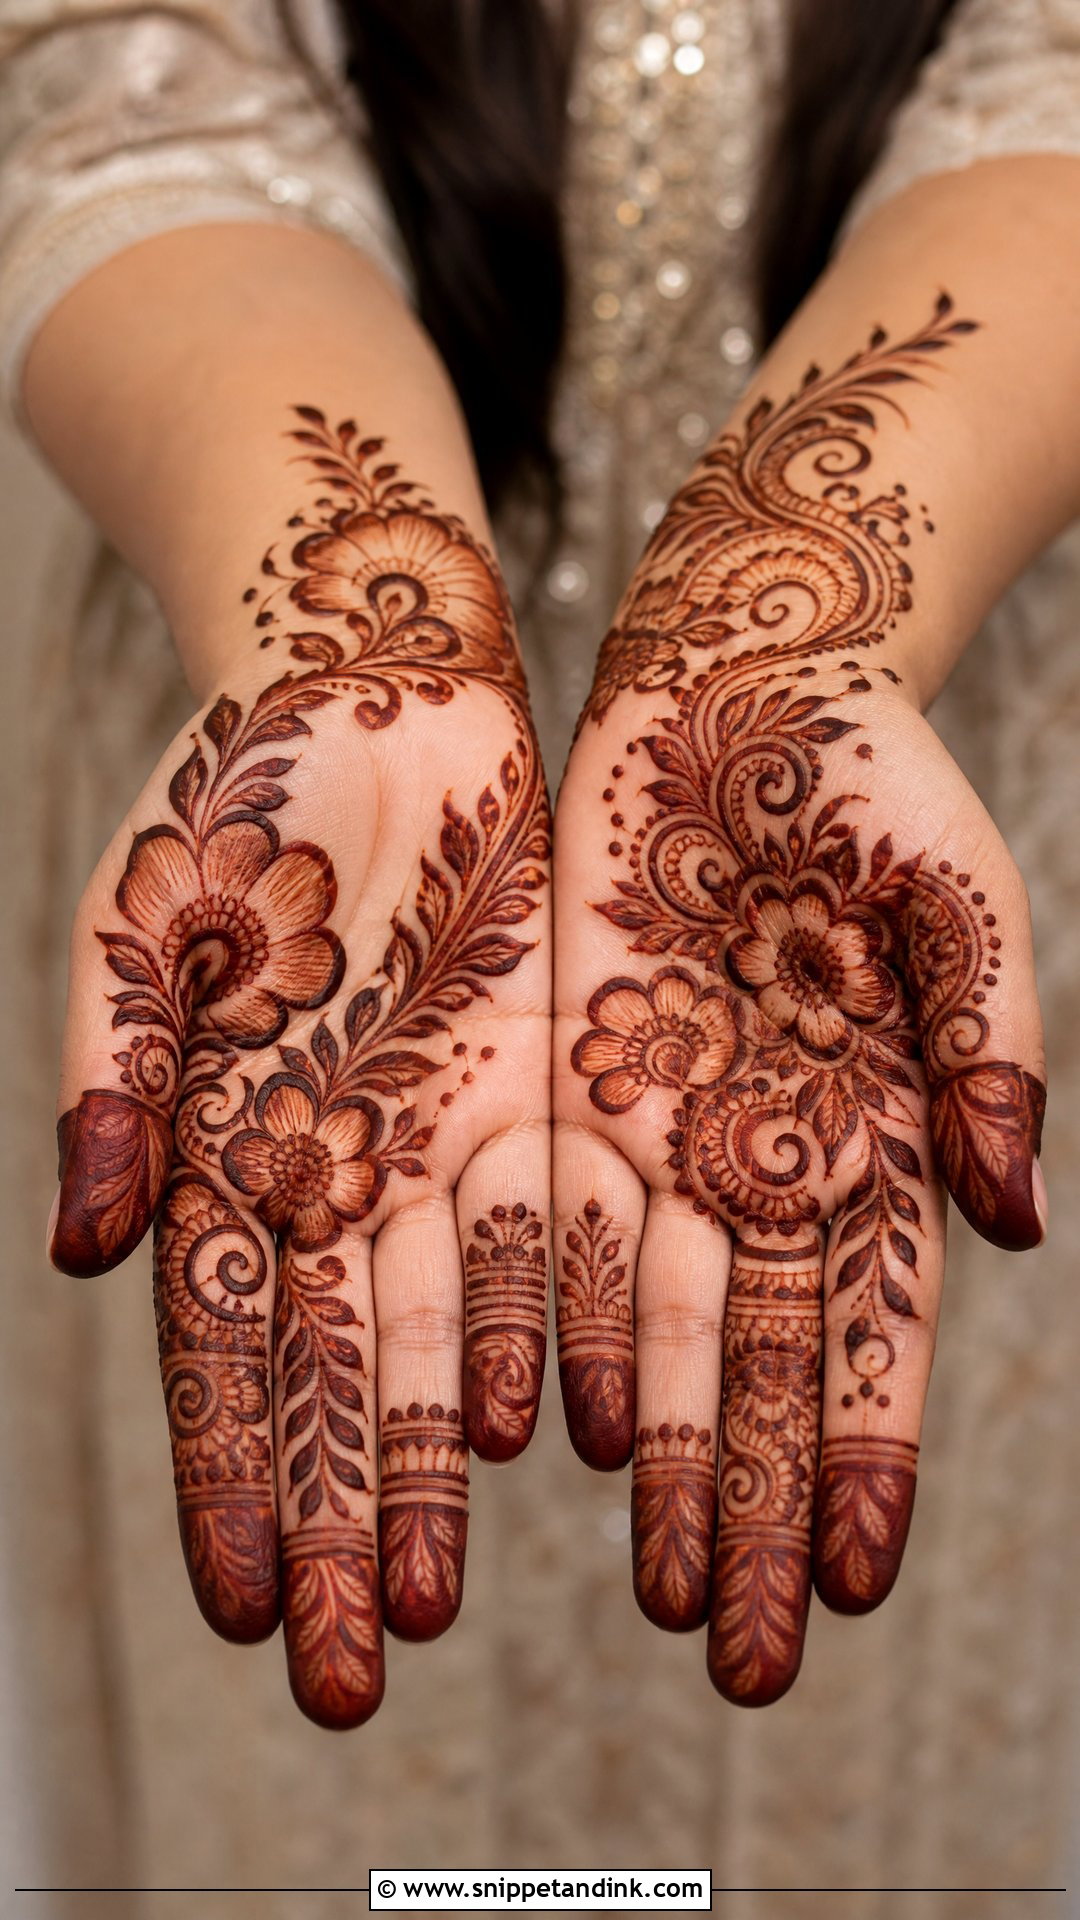
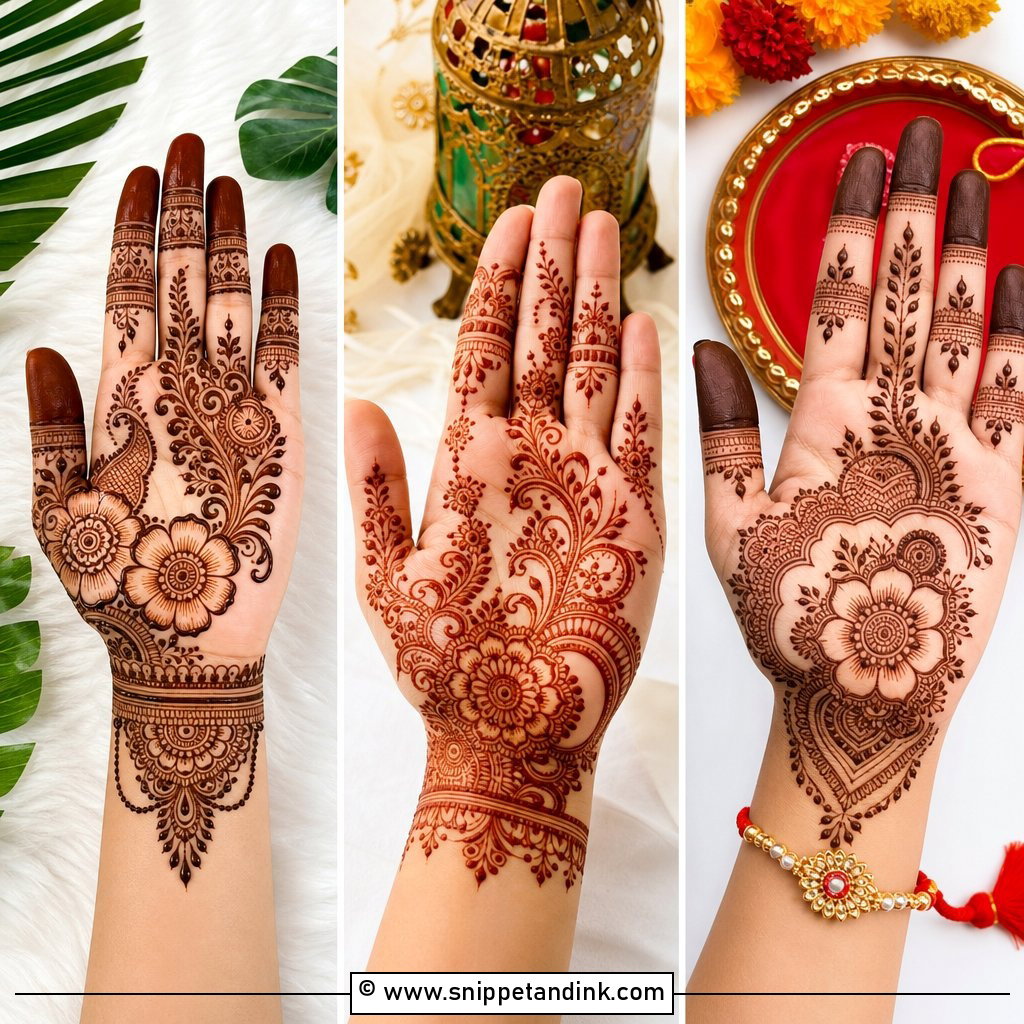
Flowers hide small mistakes better than any other motif, which is why I start new students on them. Put one large flower near the center of the palm, or two smaller ones on a diagonal, and connect them with leafy stems, dots and light swirls. A slightly uneven petal just reads as natural. Keep the outline bold so it stains clearly, and give the fingertips a petal each. A few filler leaves at the wrist make it fuller without much extra work.
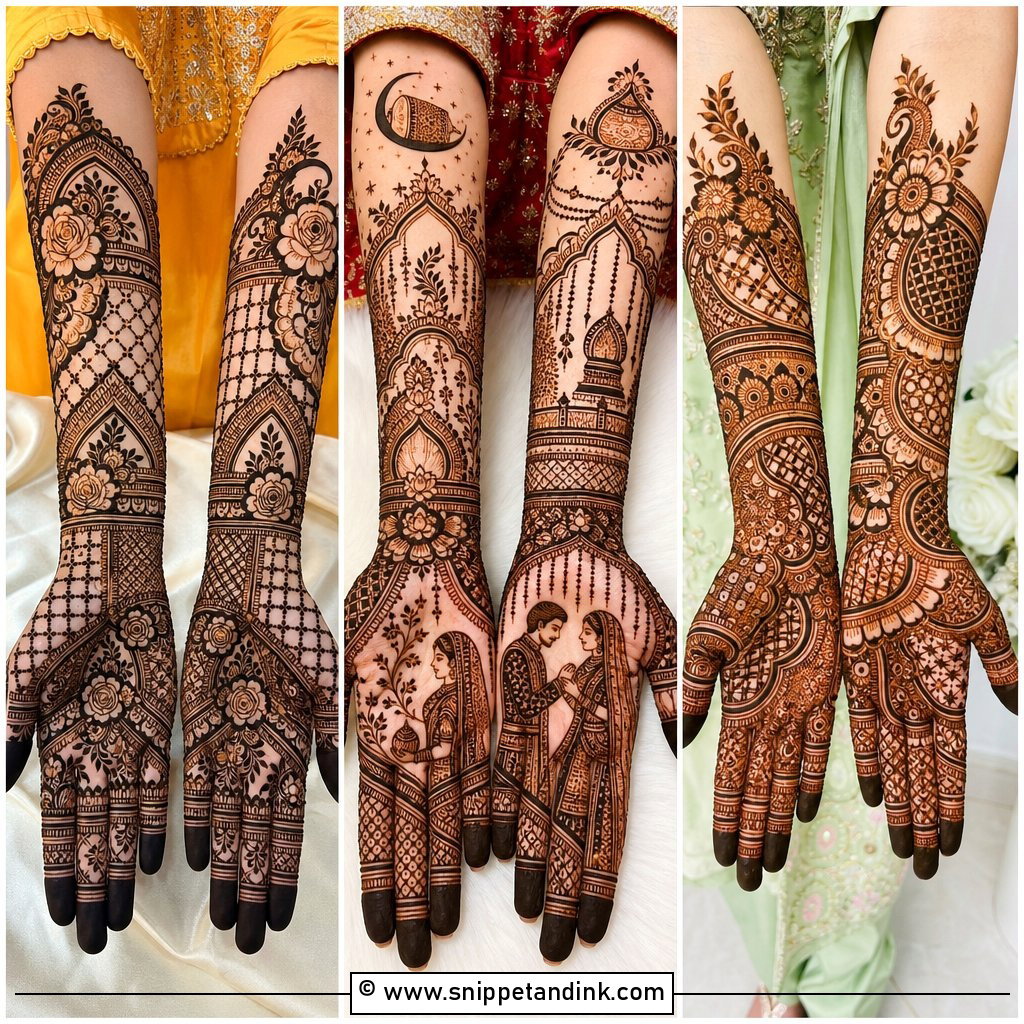
5. Front Hand Full Palm Mehndi Design
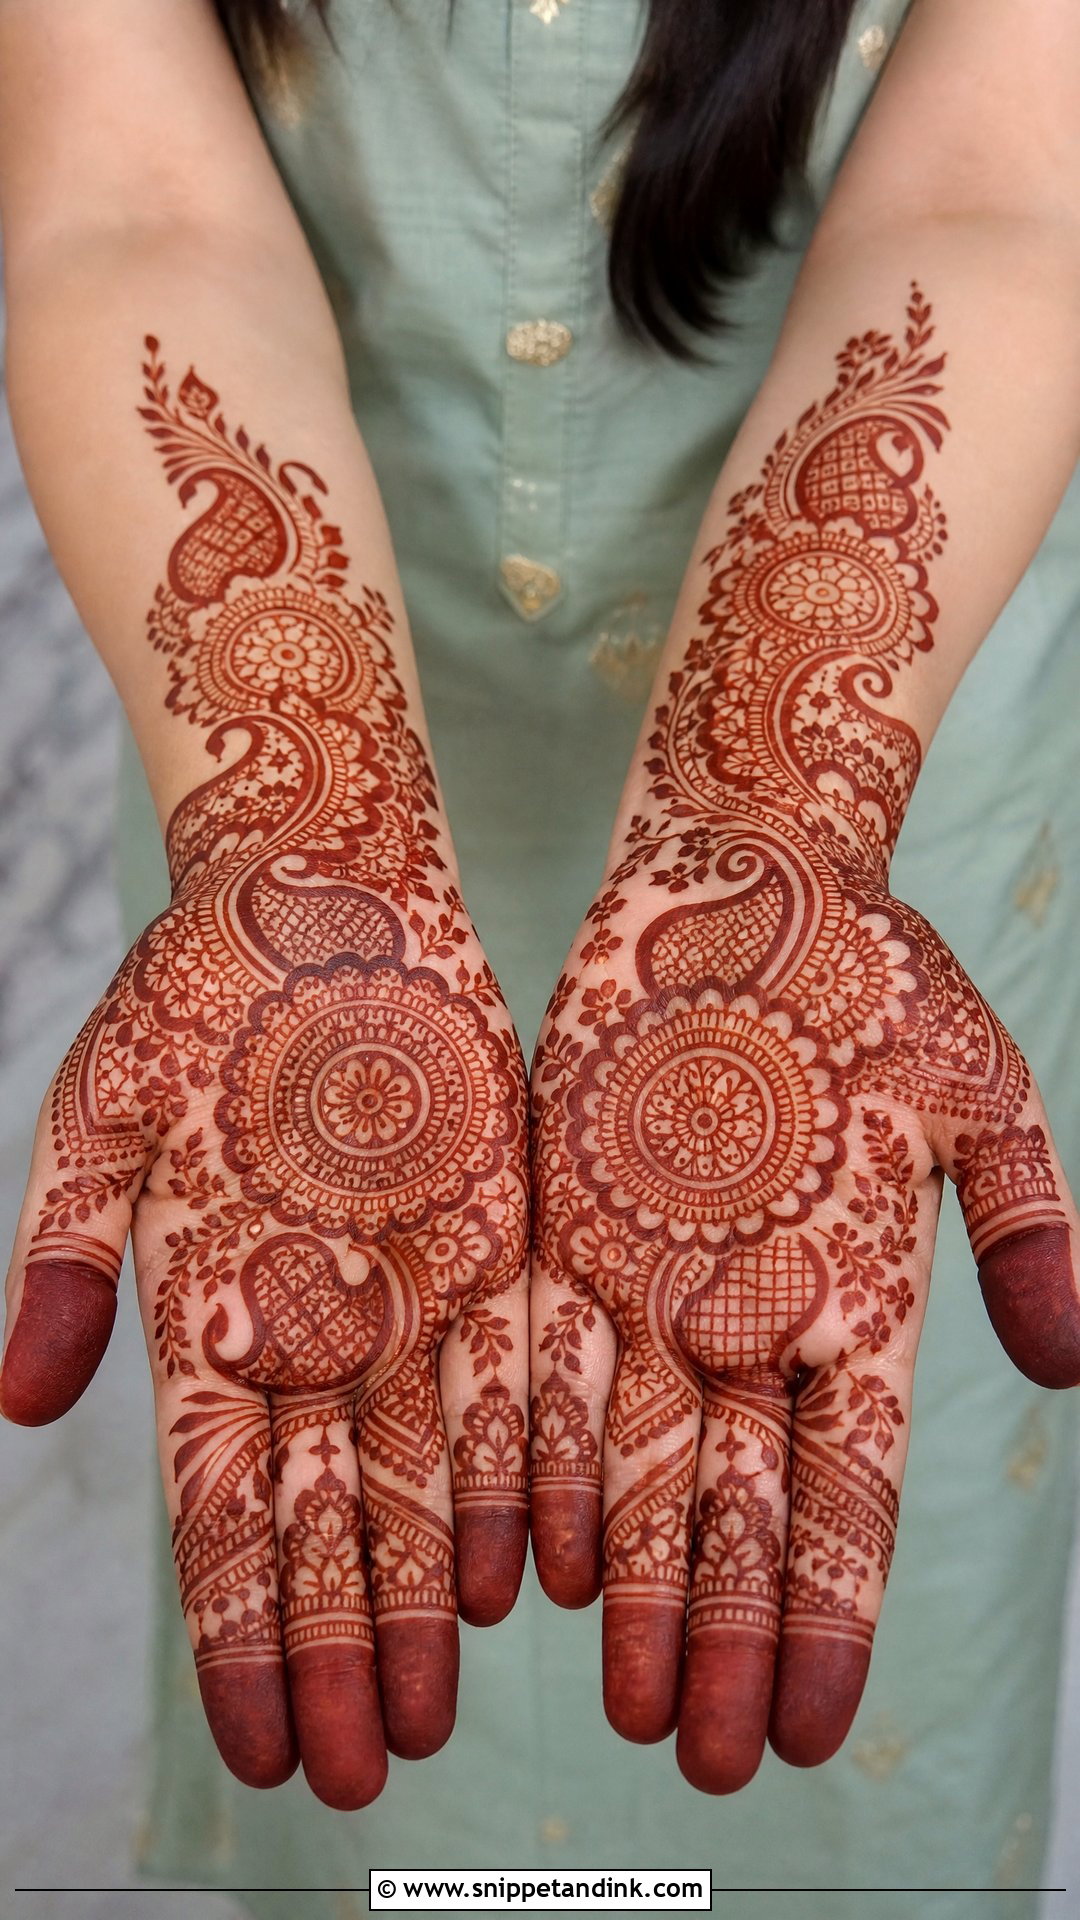
A fully covered palm sounds hard, but it becomes manageable once you split the hand into zones: a center motif, a ring of filler, the finger bases, then the fingers. Fill one zone at a time. A round motif or paisley anchors the middle, with leaves, dots, small flowers and curves around it, and checks or shaded tips on the fingers. Medium-thick lines for the main shapes and fine lines only for accents keep it from merging when the stain develops.
6. Front Hand Finger Mehndi Design
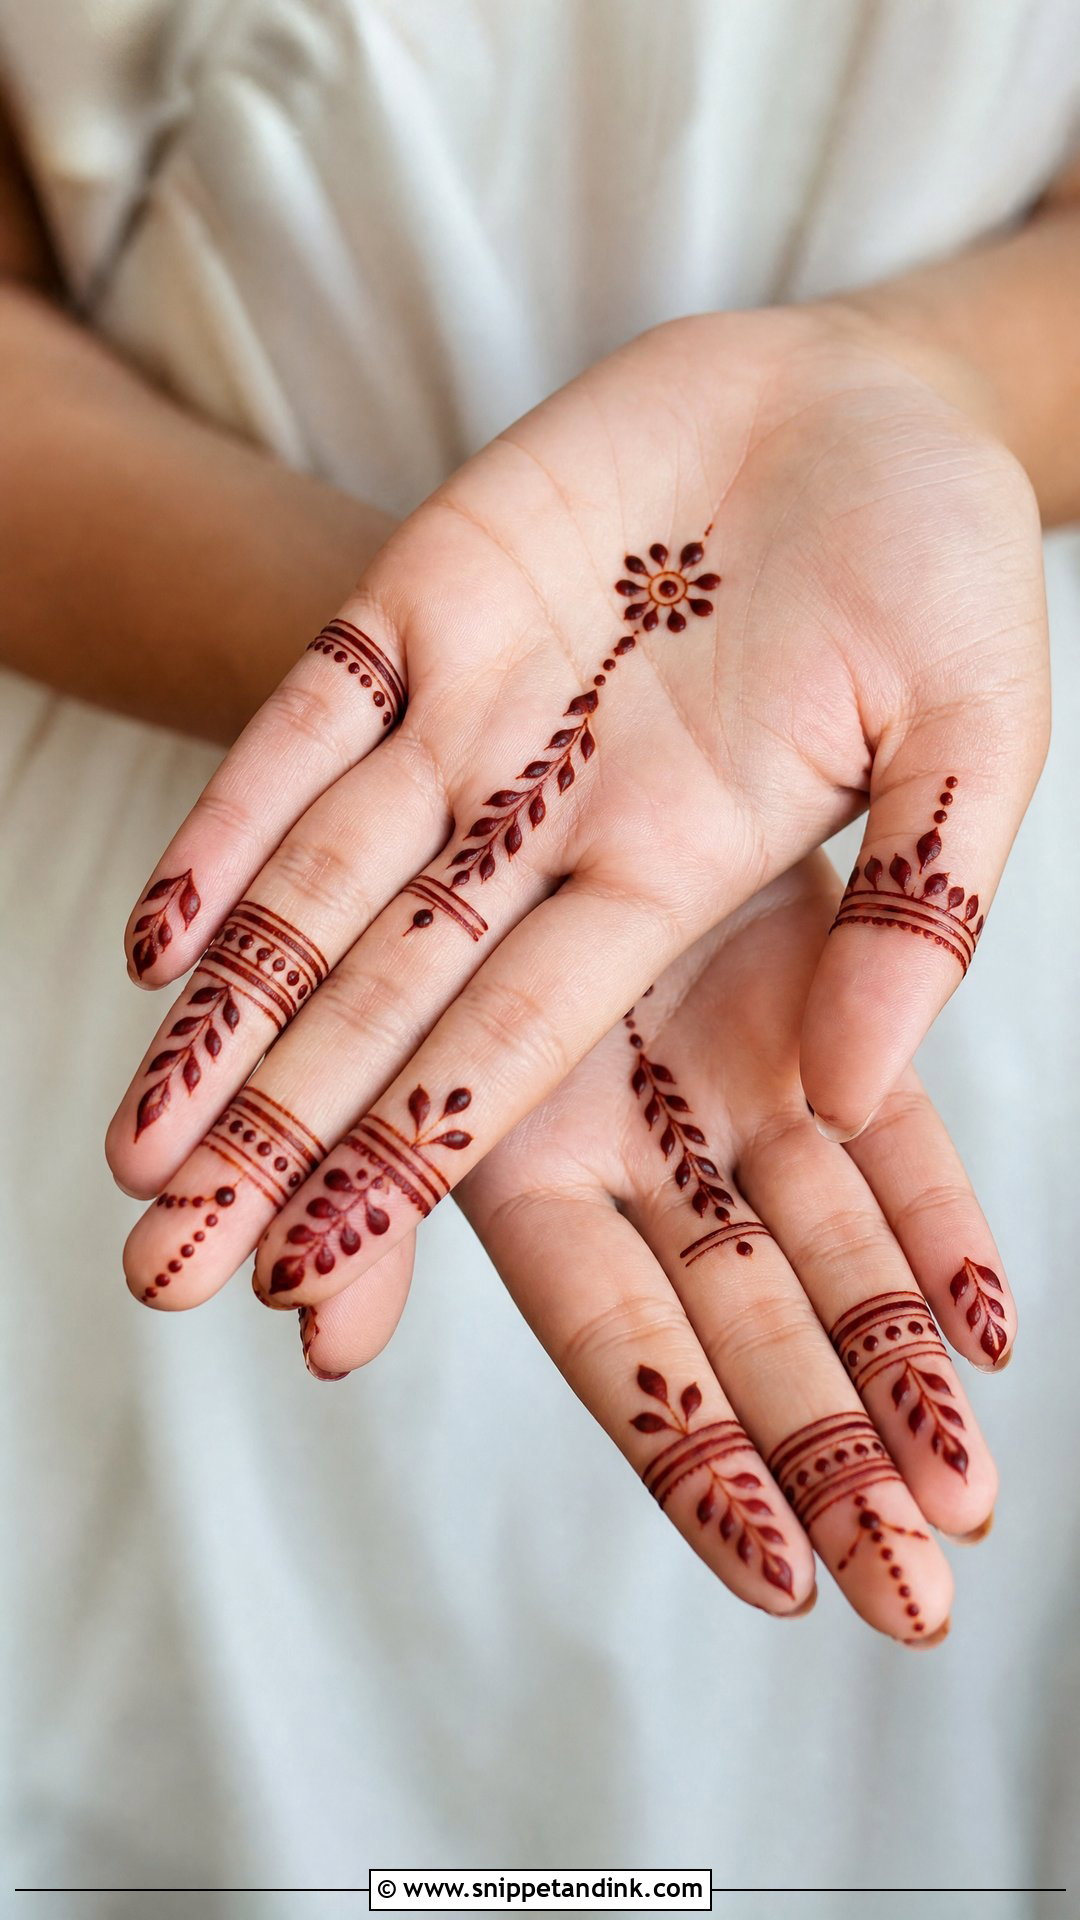
Do you want a design that looks modern but takes less time? A front hand finger mehndi design puts the decoration on the fingers, rings, leafy chains, small dots and fingertip patterns, with only a tiny mandala, flower or curve on the palm. Fingers are fiddly for beginners because they’re narrow and curved, so I rest the hand on a rolled towel to keep them still and straight. The bare palm makes it easy to wear to work afterward.
7. Front Hand Tikki Mehndi Design
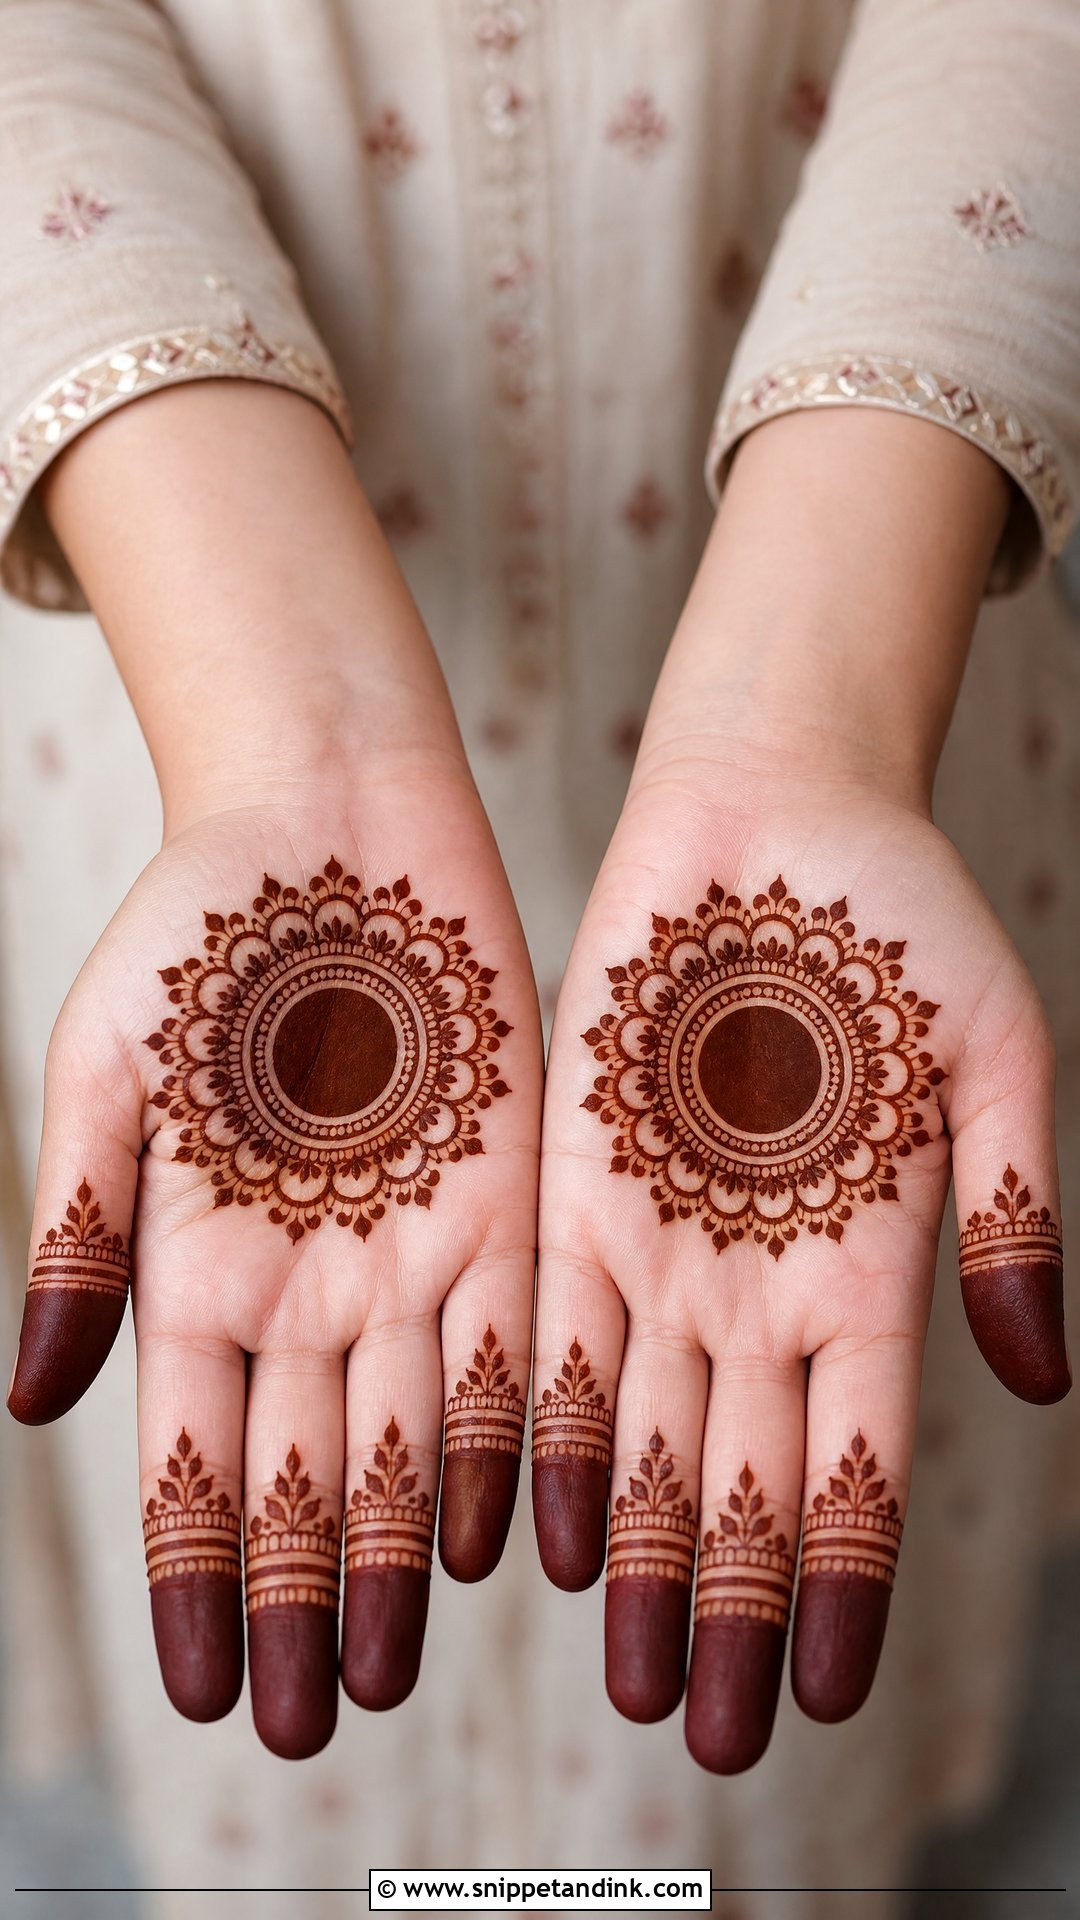
Tikki means a round disc, and that’s the whole design: a solid or patterned circle in the center of the palm, surrounded by dots, petals and fine rings, with filled fingertips and small bands. It’s one of the oldest and quickest traditional layouts, which makes it handy an hour before a function. Draw the circle first and build outward; if the circle is lopsided, every ring around it will be too. Filled tikkis stain very dark, so keep the paste thin there.
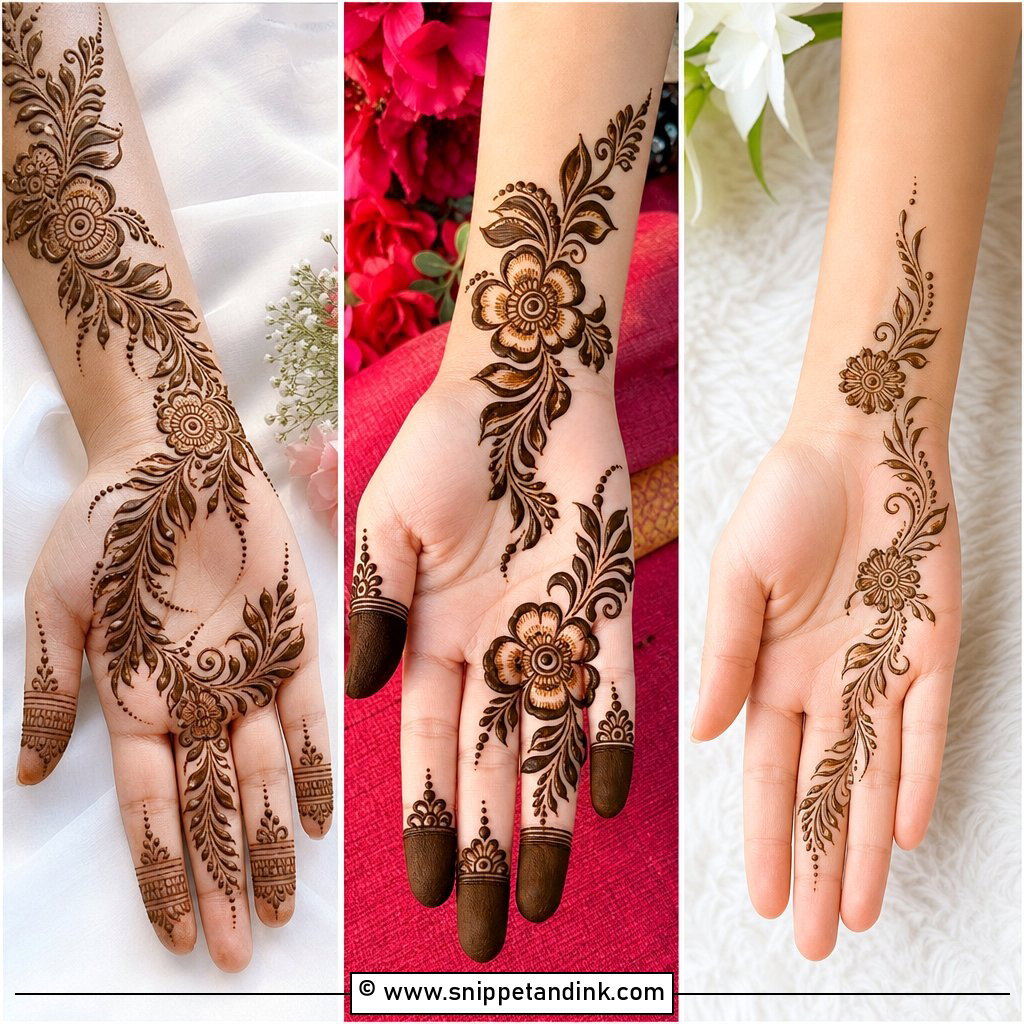
8. Front Hand Bel Mehndi Design
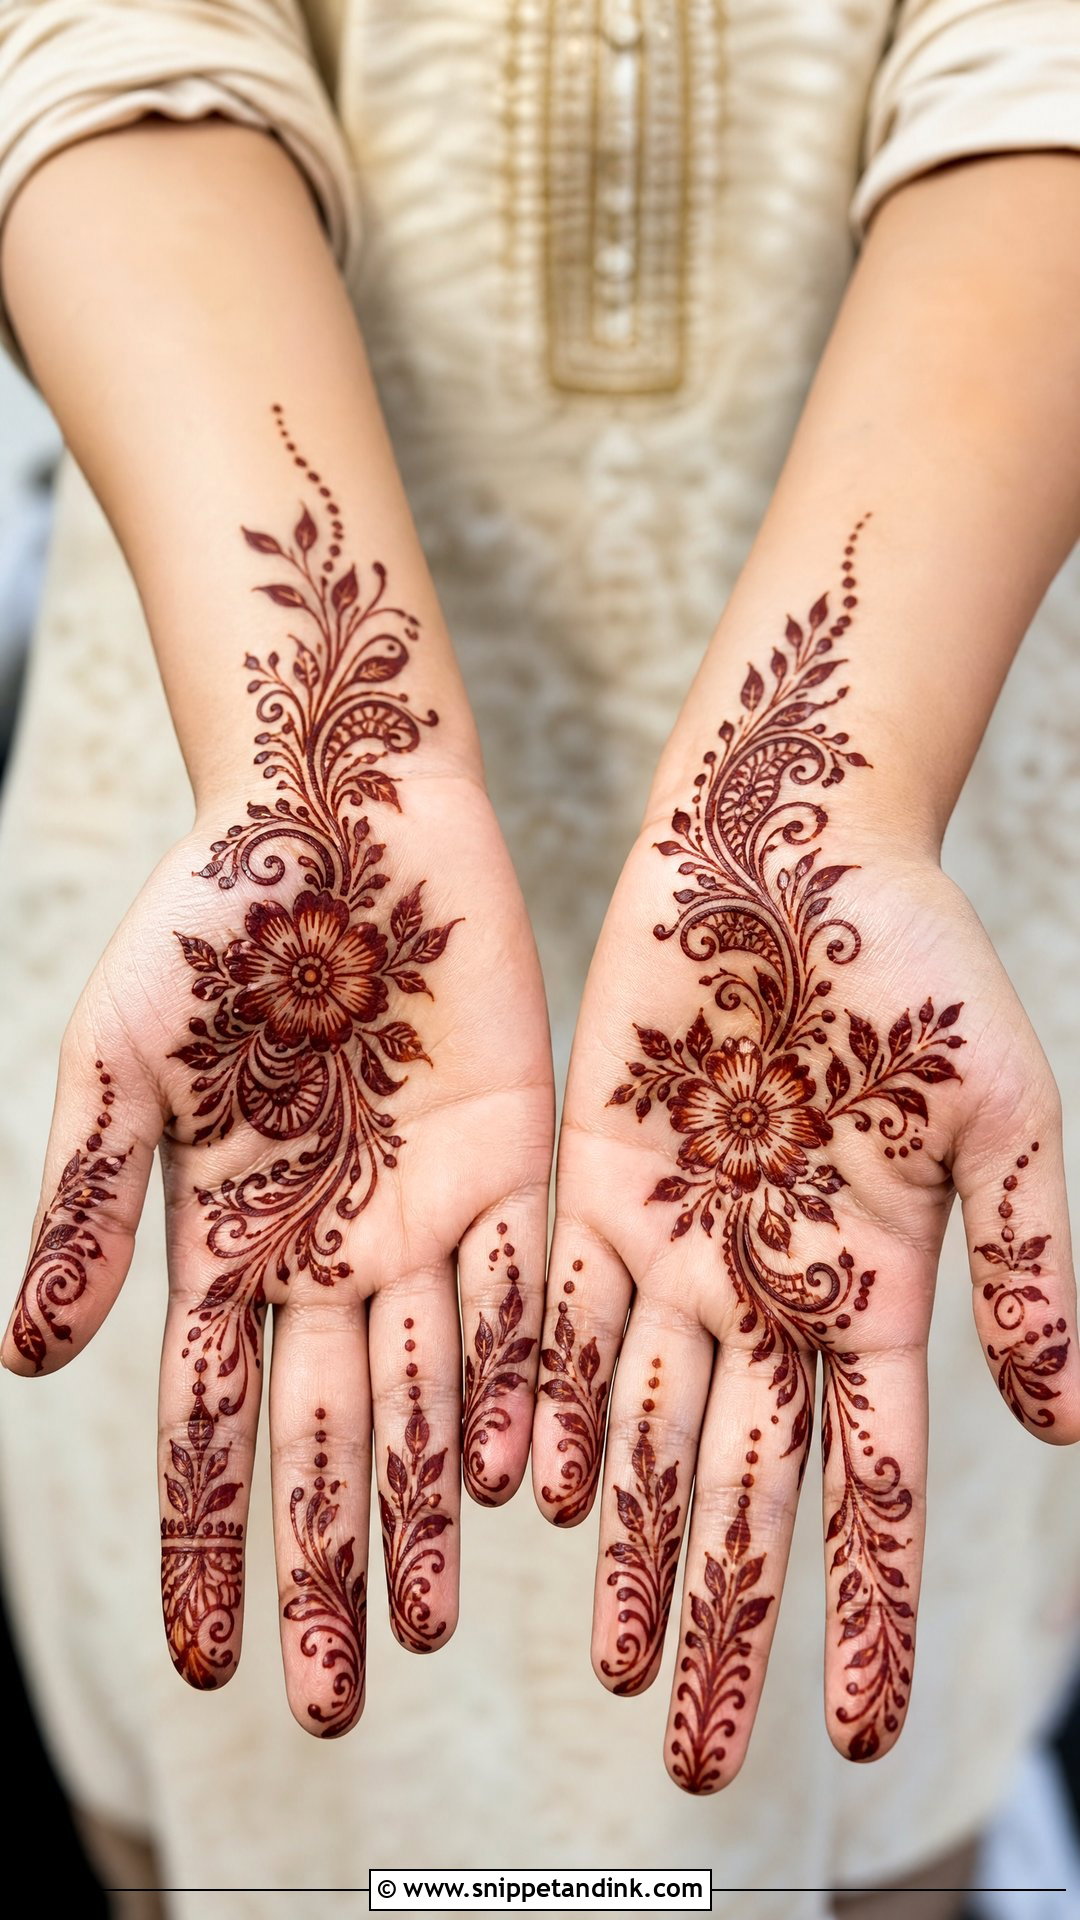
Bel means vine, and the vine does the planning for you. It starts at the wrist and travels toward the index, middle or ring finger, and every leaf, small flower, paisley and dot hangs from it. Leave the other side of the palm open. Make the vine itself a little thicker than everything branching off it, so the design keeps a clear backbone after drying. Small palms and long fingers both suit it.
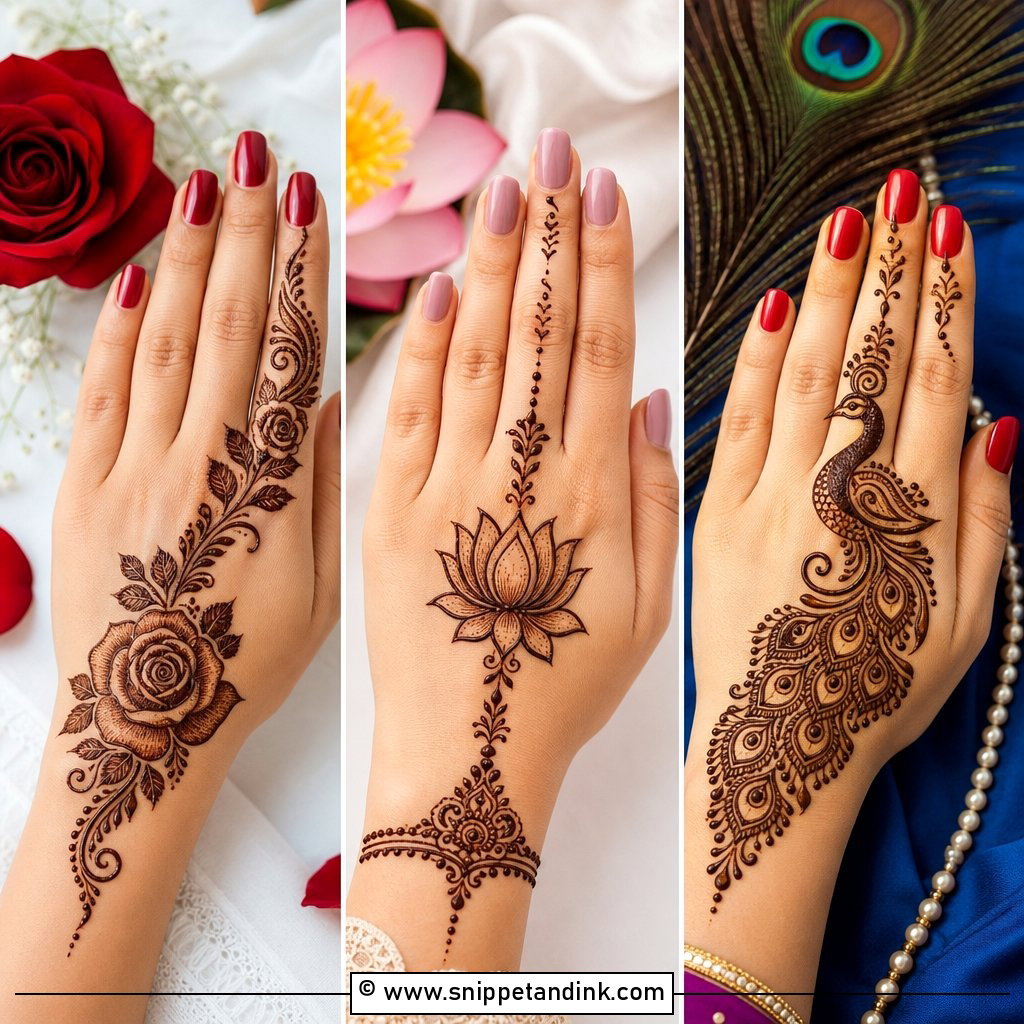
9. Front Hand Rose Mehndi Design
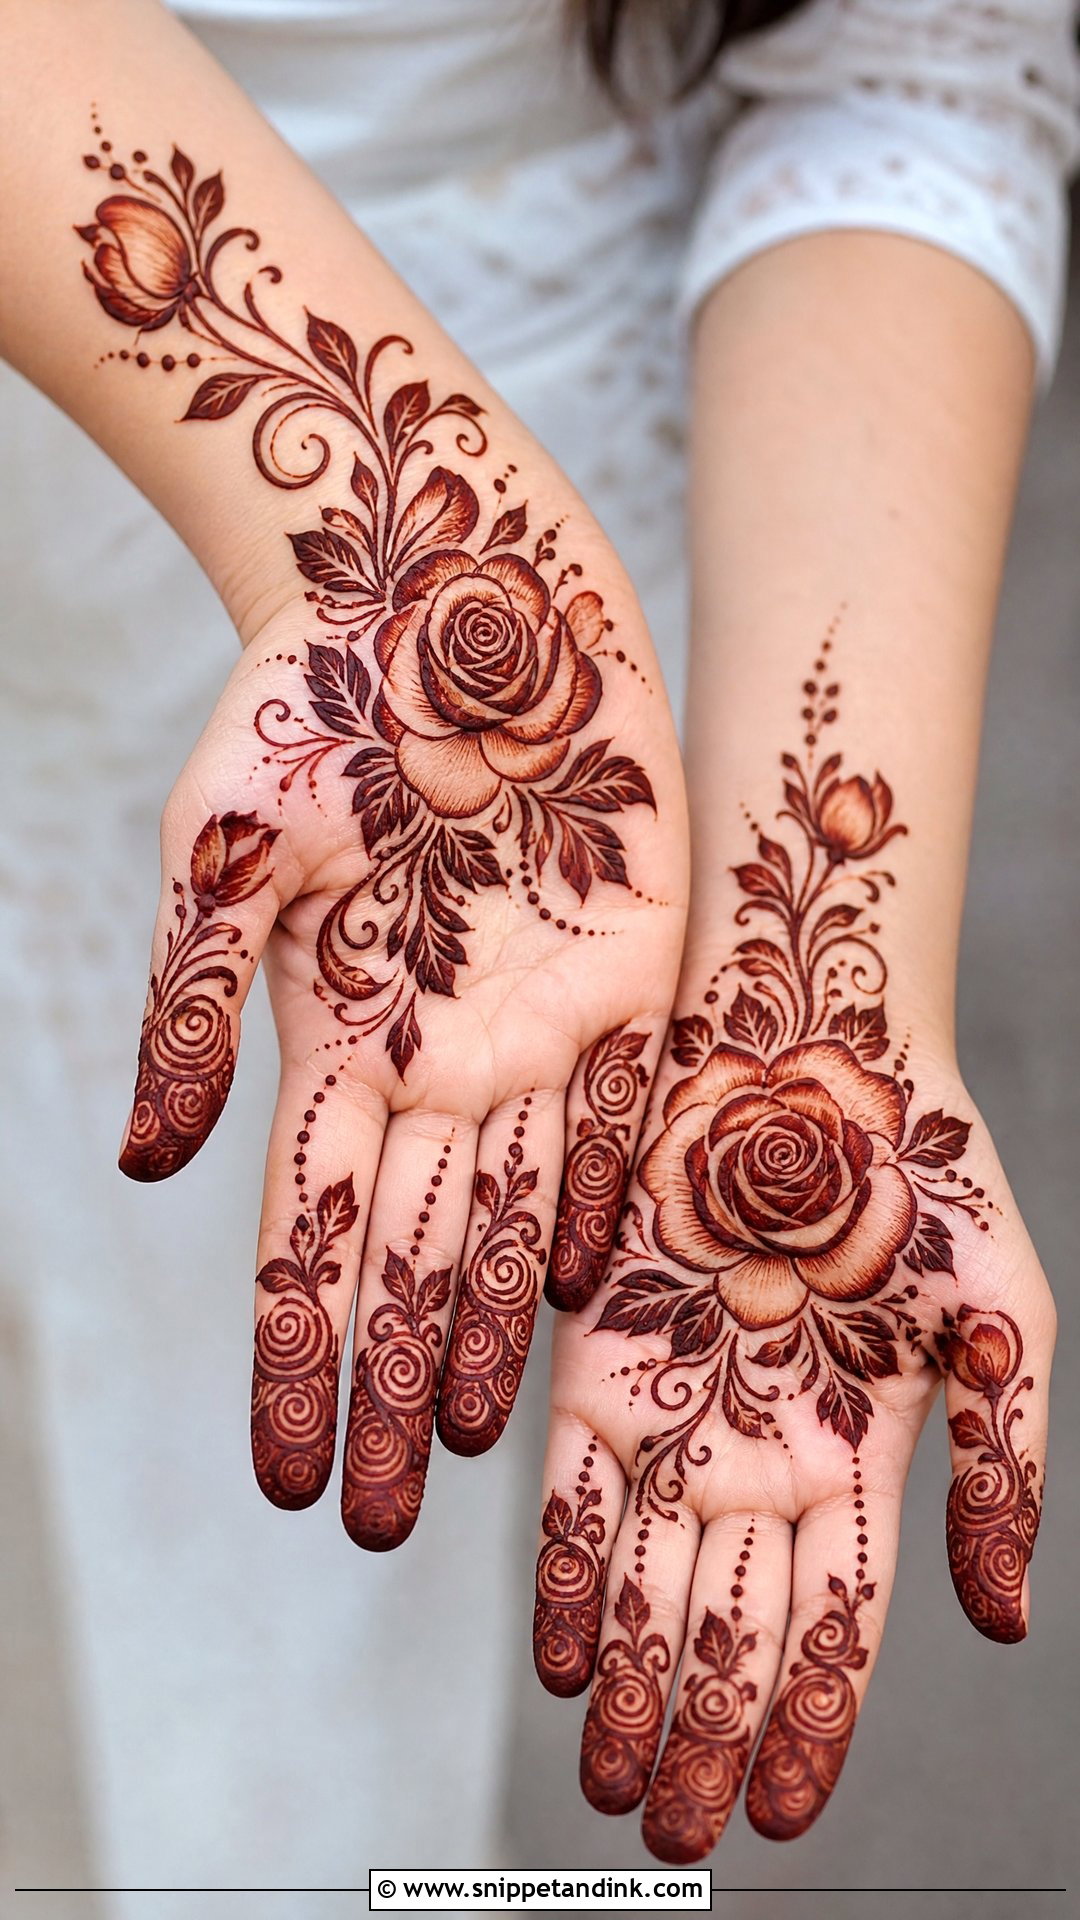
Roses in henna are made of overlapping C-shaped petals, spiralling out from a small center. One rose near the lower or central palm, curved leaves and spiral vines around it, and small leafy bands or rosebuds on the fingers. I’d practise the C-curve on paper first; it’s the single shape that decides whether the rose looks right. The outline should be slightly thicker than the inner petals, and the inner lines need a hair of space between them or the rose stains into a dark blob.
10. Front Hand Paisley Mehndi Design
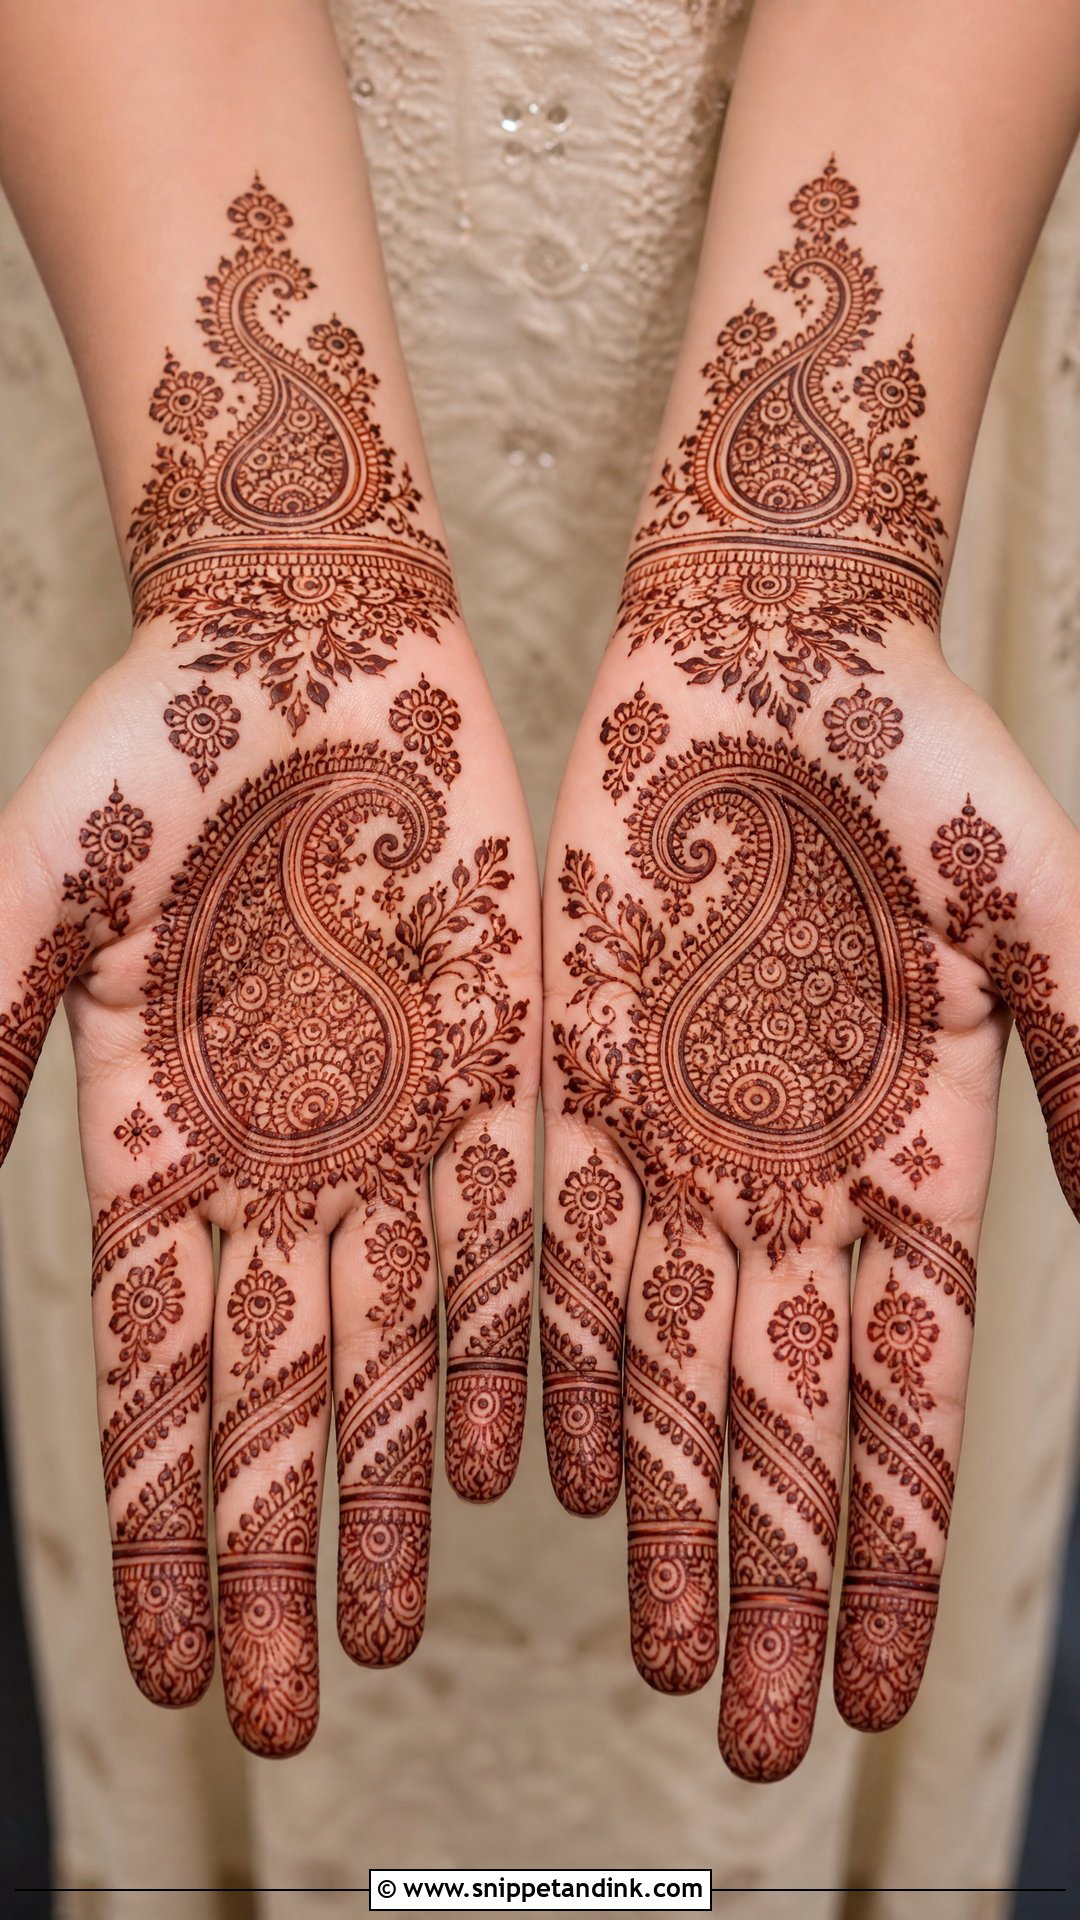
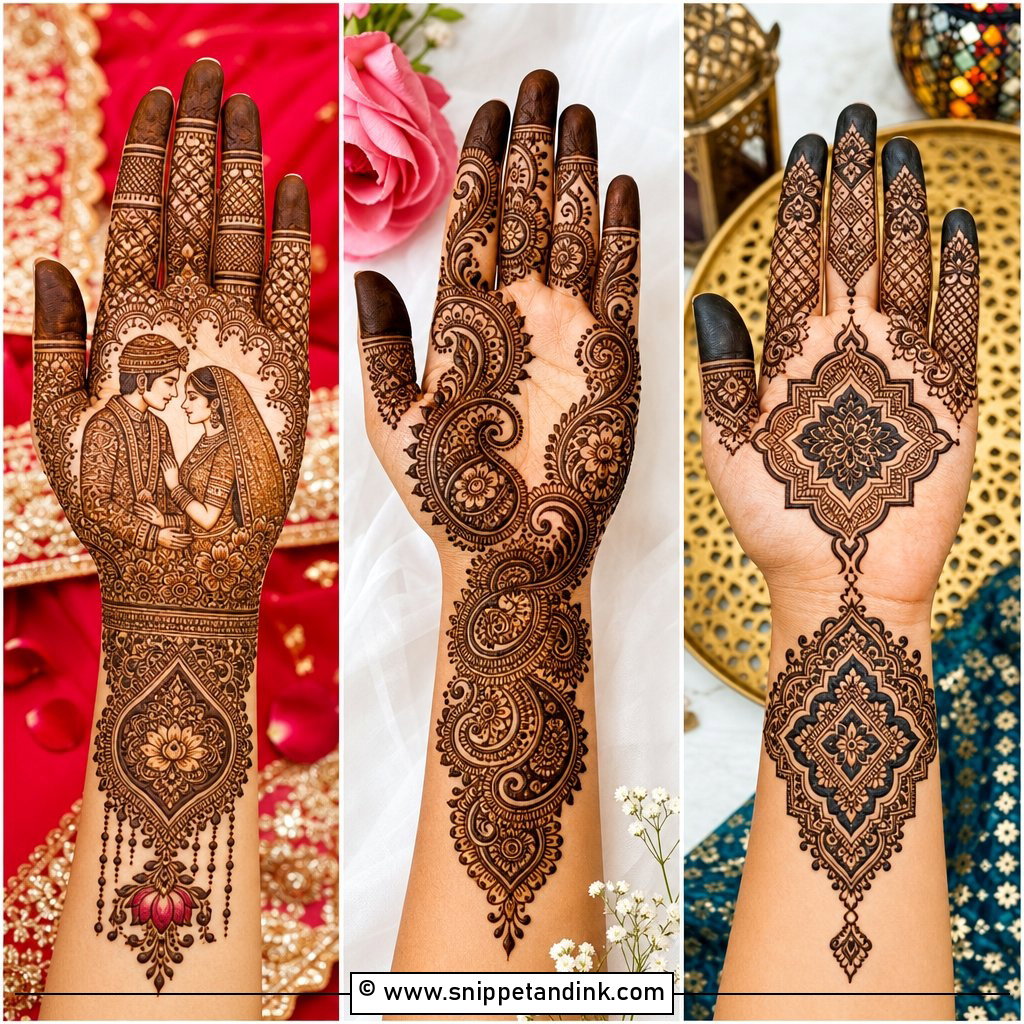
Paisleys forgive a beginner because they don’t need perfect symmetry. One large paisley on the palm carries the design, filled with small flowers, dots, curves and leaves, and a second smaller one can sit near the wrist. Fingers get diagonal bands or tiny paisley tips. Draw the outer curve in one smooth pull, then fill the inside with simple repeated marks; a busy interior makes it harder to read, not richer.
11. Front Hand Modern Mehndi Design
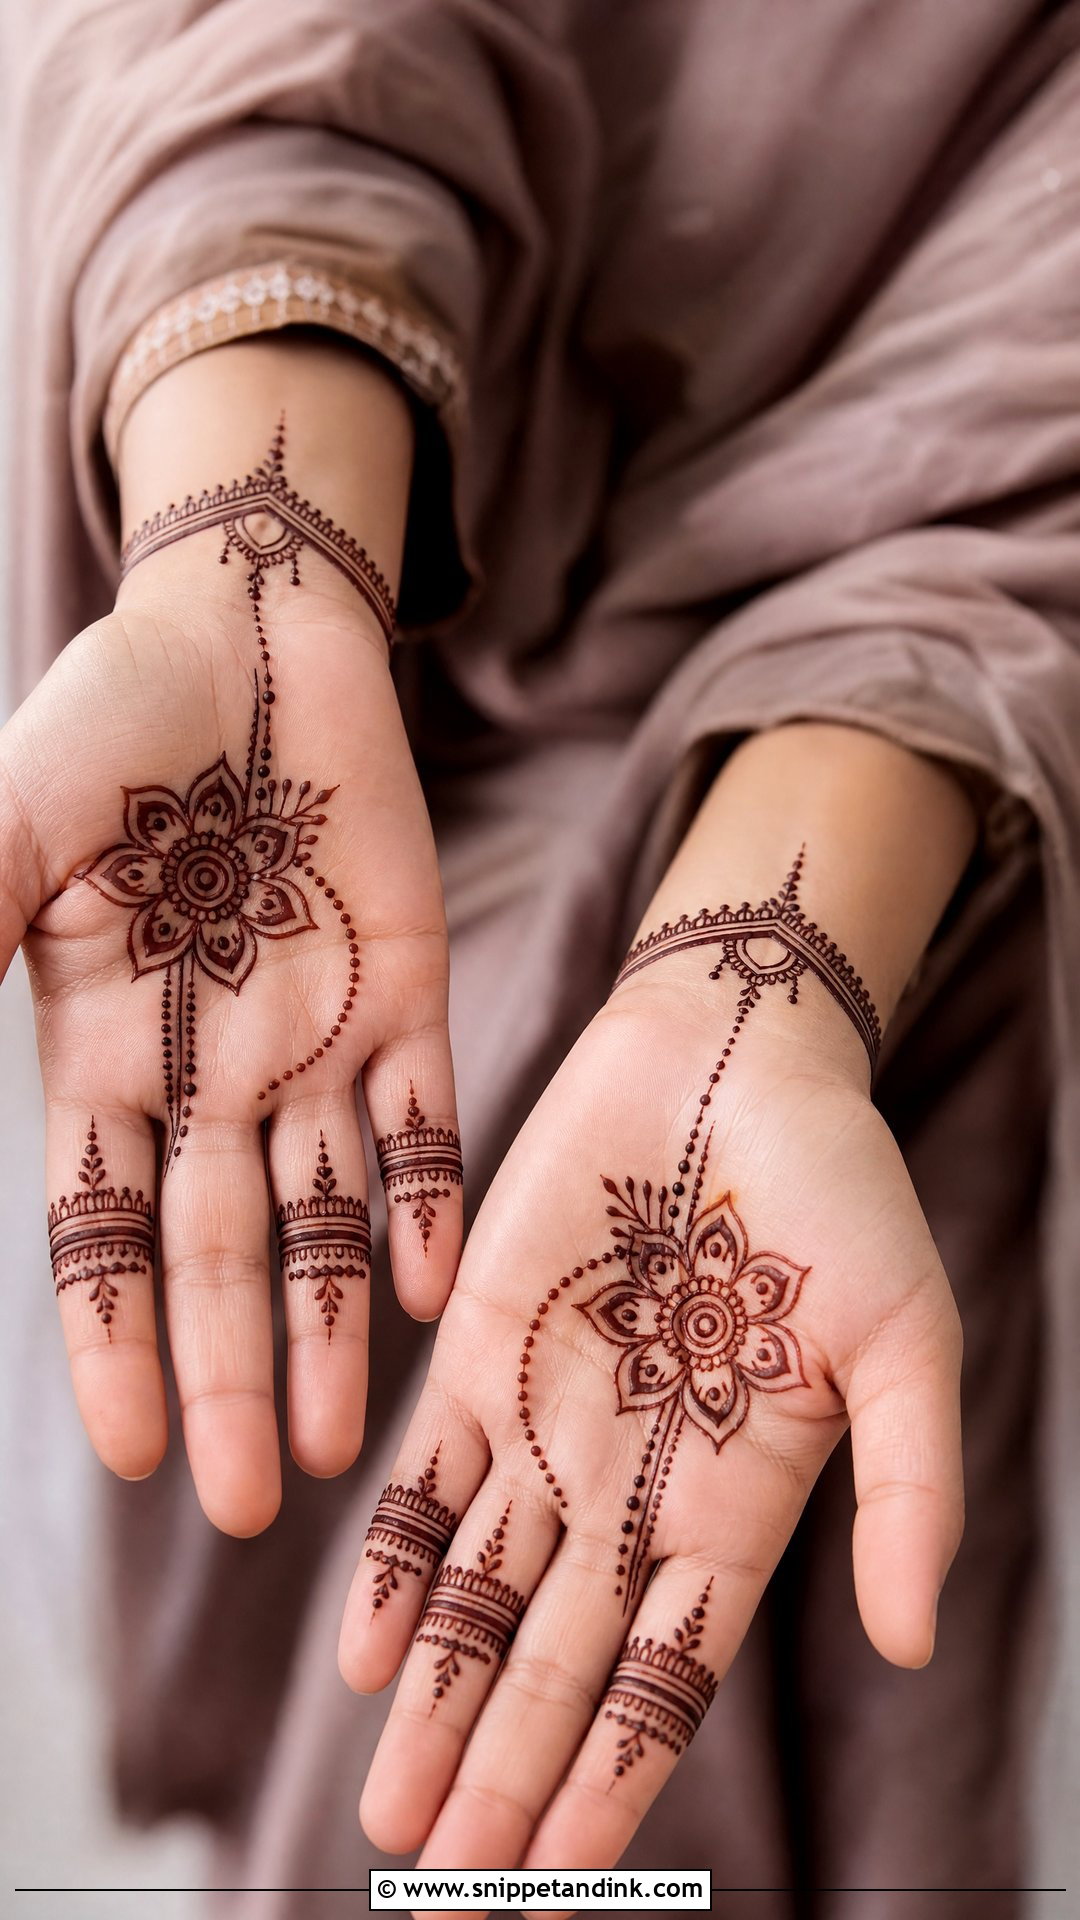
Modern layouts lean on spacing. A small mandala, flower or geometric motif sits slightly off-center, with finger bands, dotted chains and negative-space lines around it, and very little filler. Off-center placement looks deliberate only if the rest of the palm is clean, so resist adding extras. It doesn’t depend on nail length or hand size, and it pairs easily with western and fusion outfits.
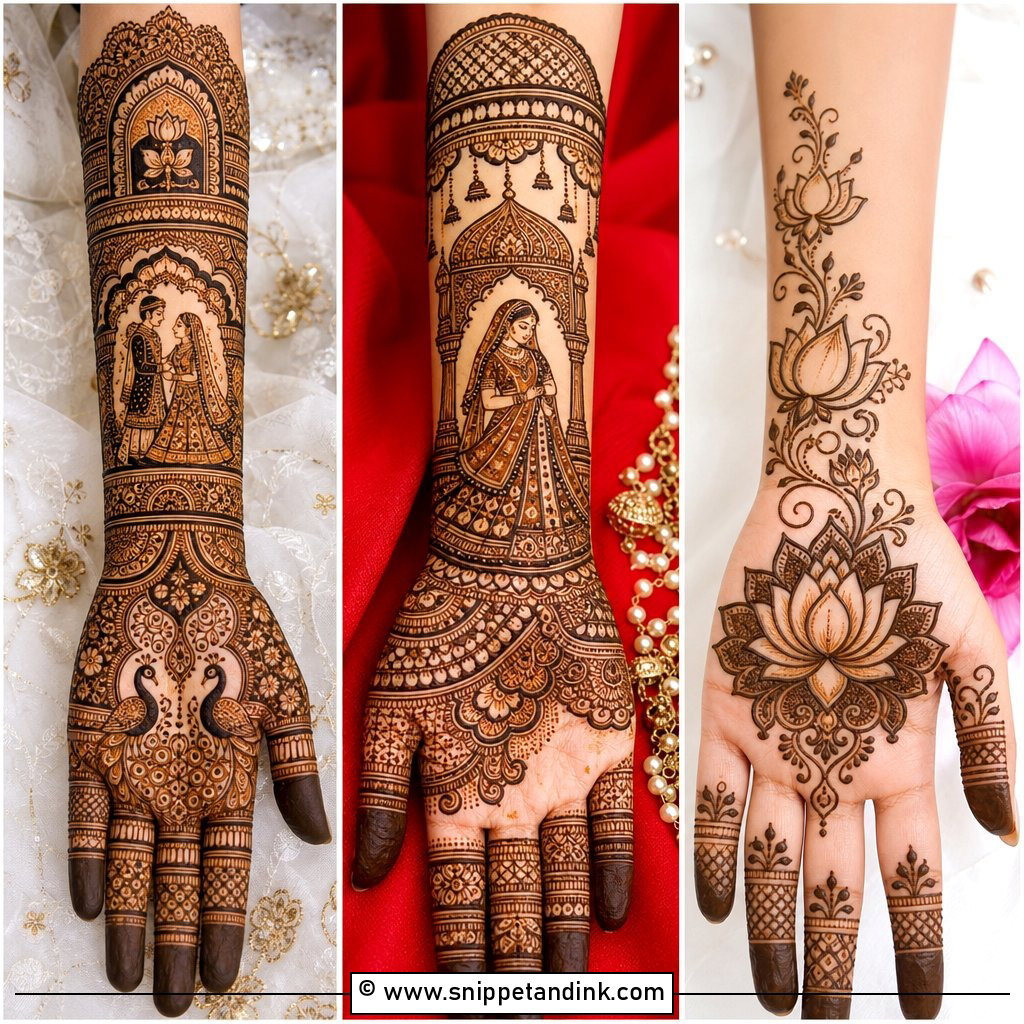
12. Front Hand Bridal Mehndi Design
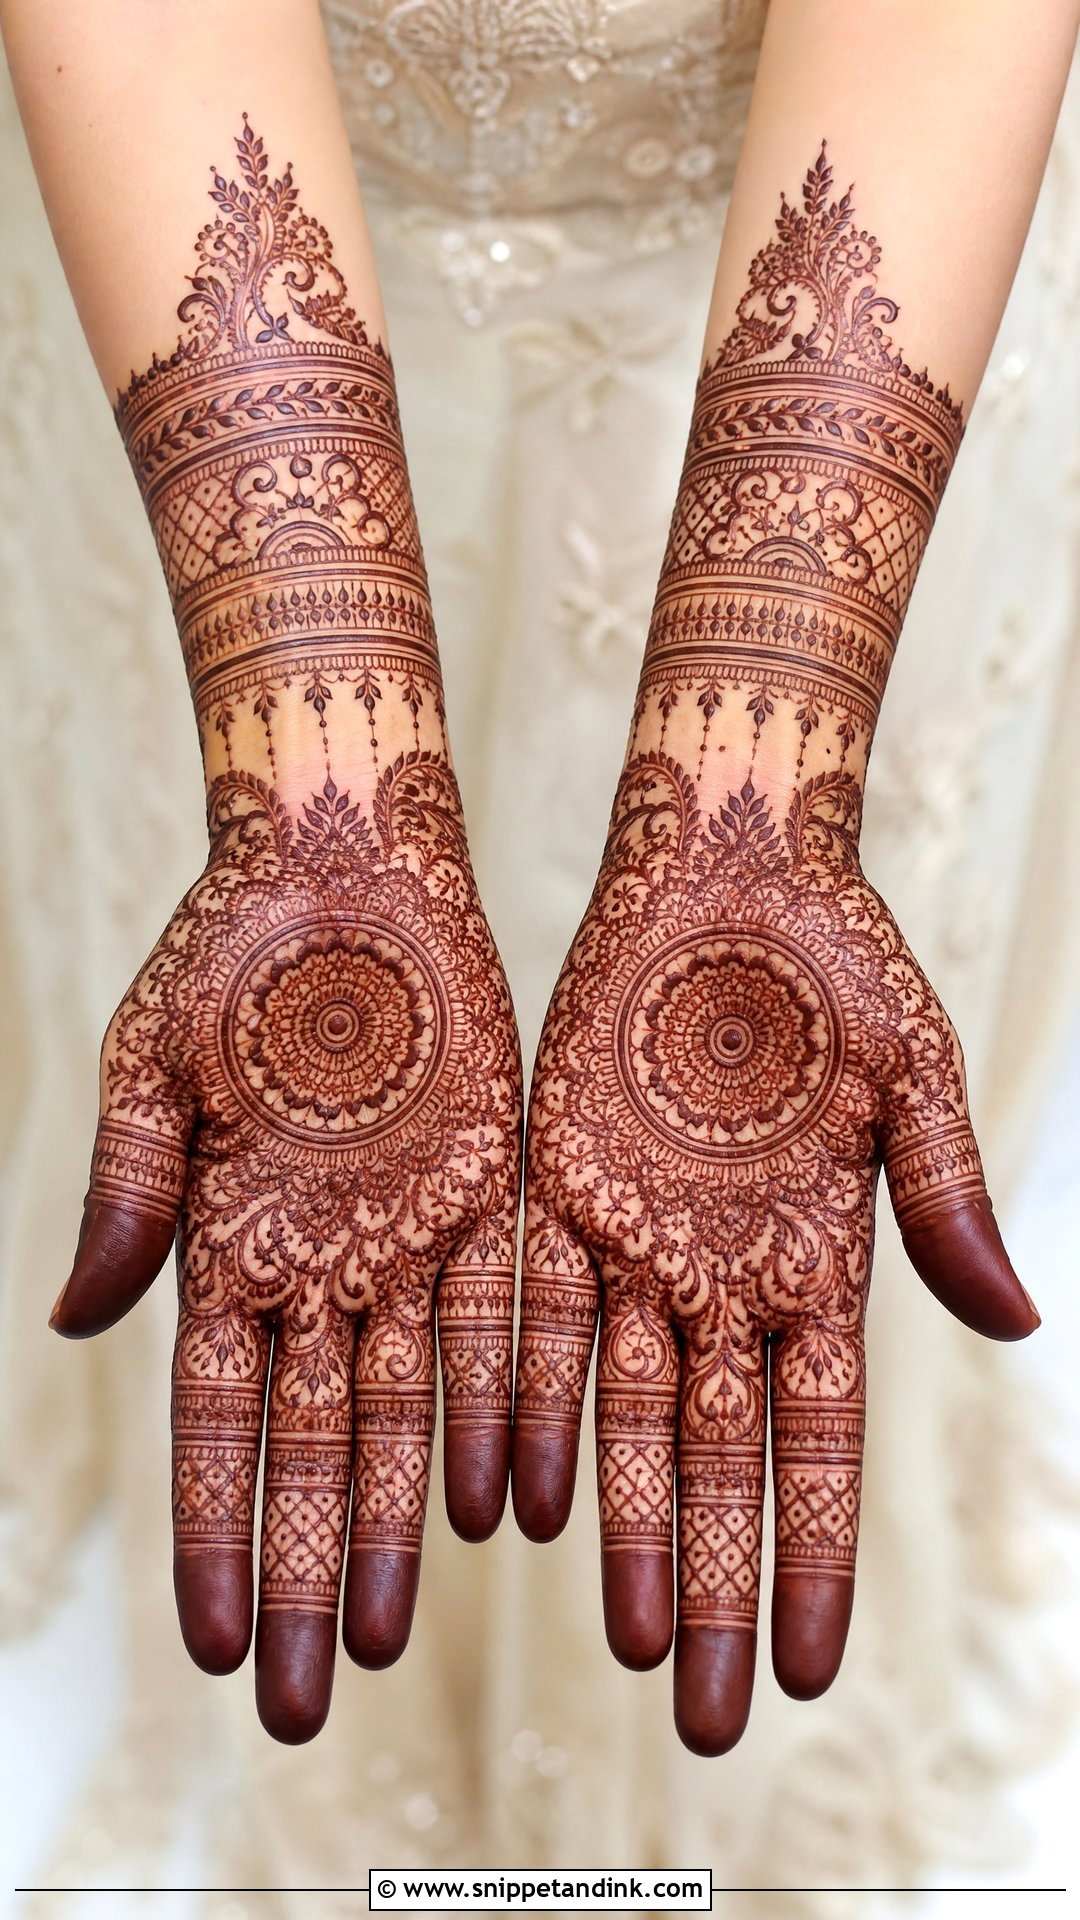
An easy bridal palm doesn’t have to be complex. A central mandala or large paisley carries the focus, with floral vines, leafy borders and finger details reaching to the tips. Small mesh patches, dots and bracelet-like wrist bands add the bridal note. Keep the main shapes large so the work stays manageable, and fill the fingers fully; bare fingers are what make a bridal hand look unfinished. Light-mehndi brides, bridesmaids and pre-wedding functions all suit it.
13. Front Hand Eid Mehndi Design
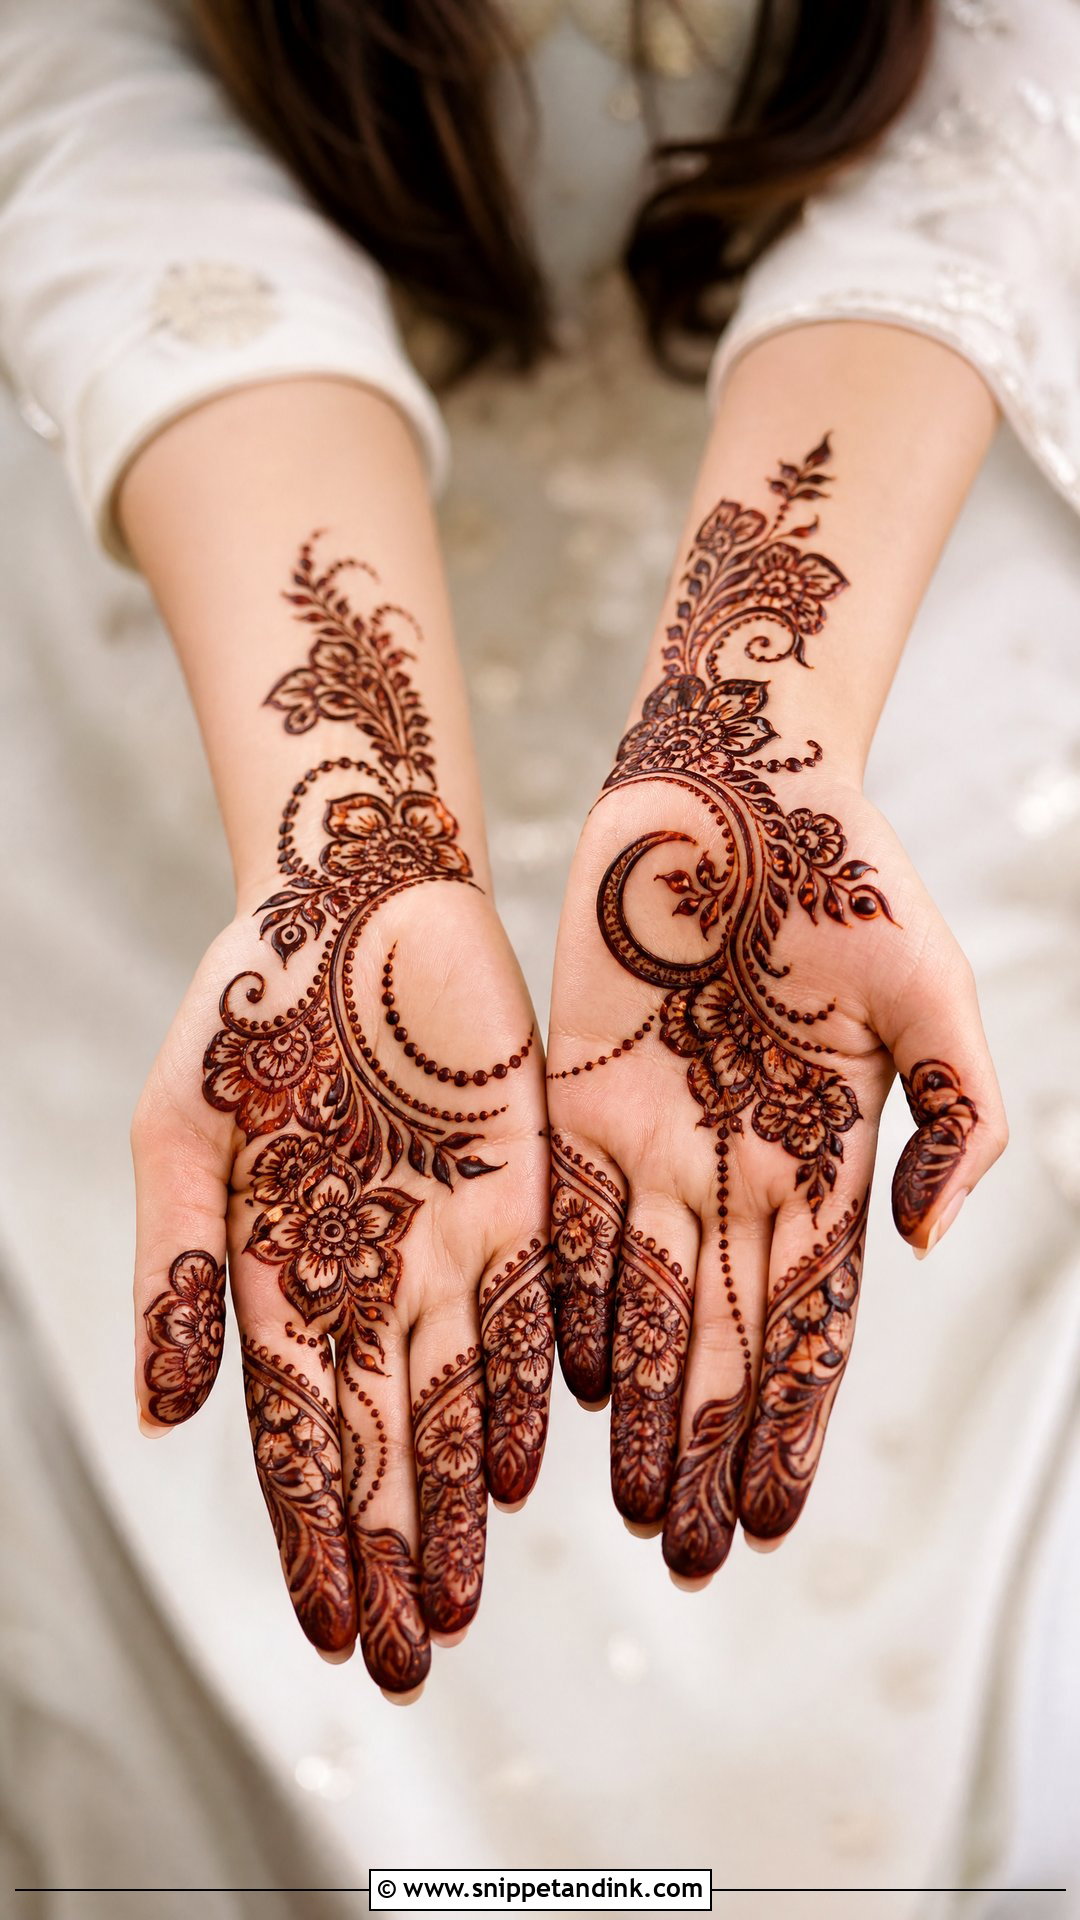
Eid henna tends to go on the night before, in a hurry, so a floral trail across the palm, soft paisley curves and decorated fingers make sense. Leave plenty of open skin so it dries quickly. A small crescent-inspired curve adds the theme without turning the hand into a greeting card. A thin bracelet band or leafy border at the wrist finishes it. By the morning prayers the stain will have moved from orange toward a warmer brown, and it keeps darkening through the day.
14. Front Hand Diwali Mehndi Design
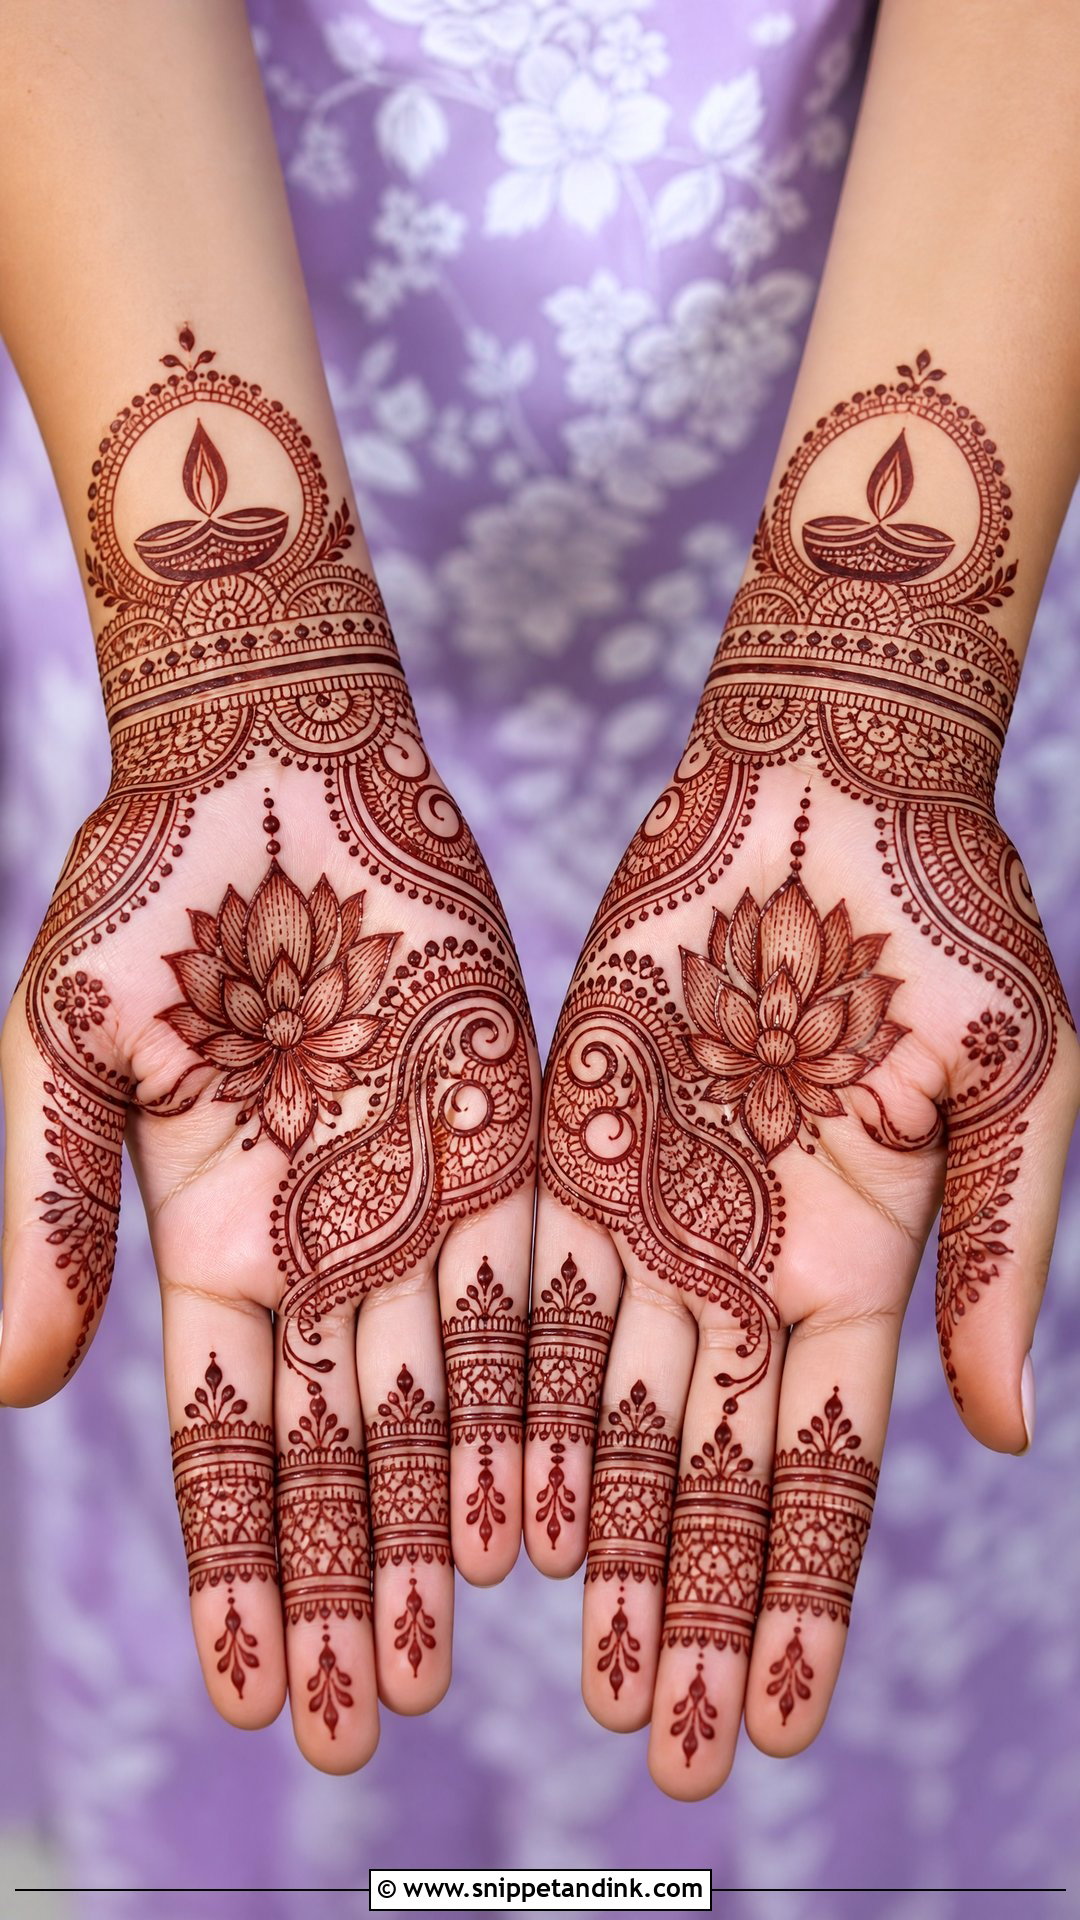
Start from a palm mandala or lotus, then add paisleys, small dotted arcs, and neat bands with petals on the fingers. Diya shapes can sit near the wrist or palm edge, kept small and simple so they read as lamps rather than blobs. Clear sections make the layout easy to follow. Leave gaps between motifs; a reddish-brown stain shows best against bare skin, and Diwali lights flatter it.
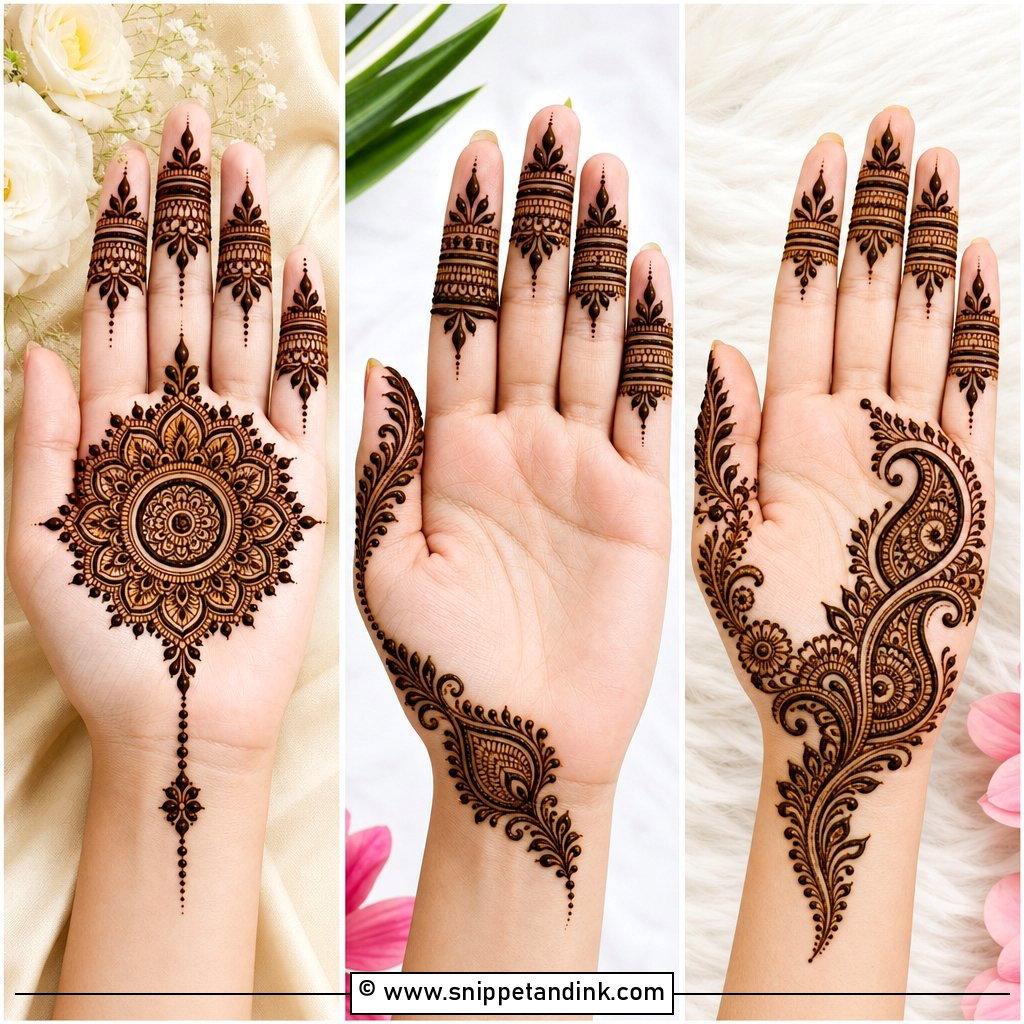
15. Front Hand Indo Arabic Mehndi Design
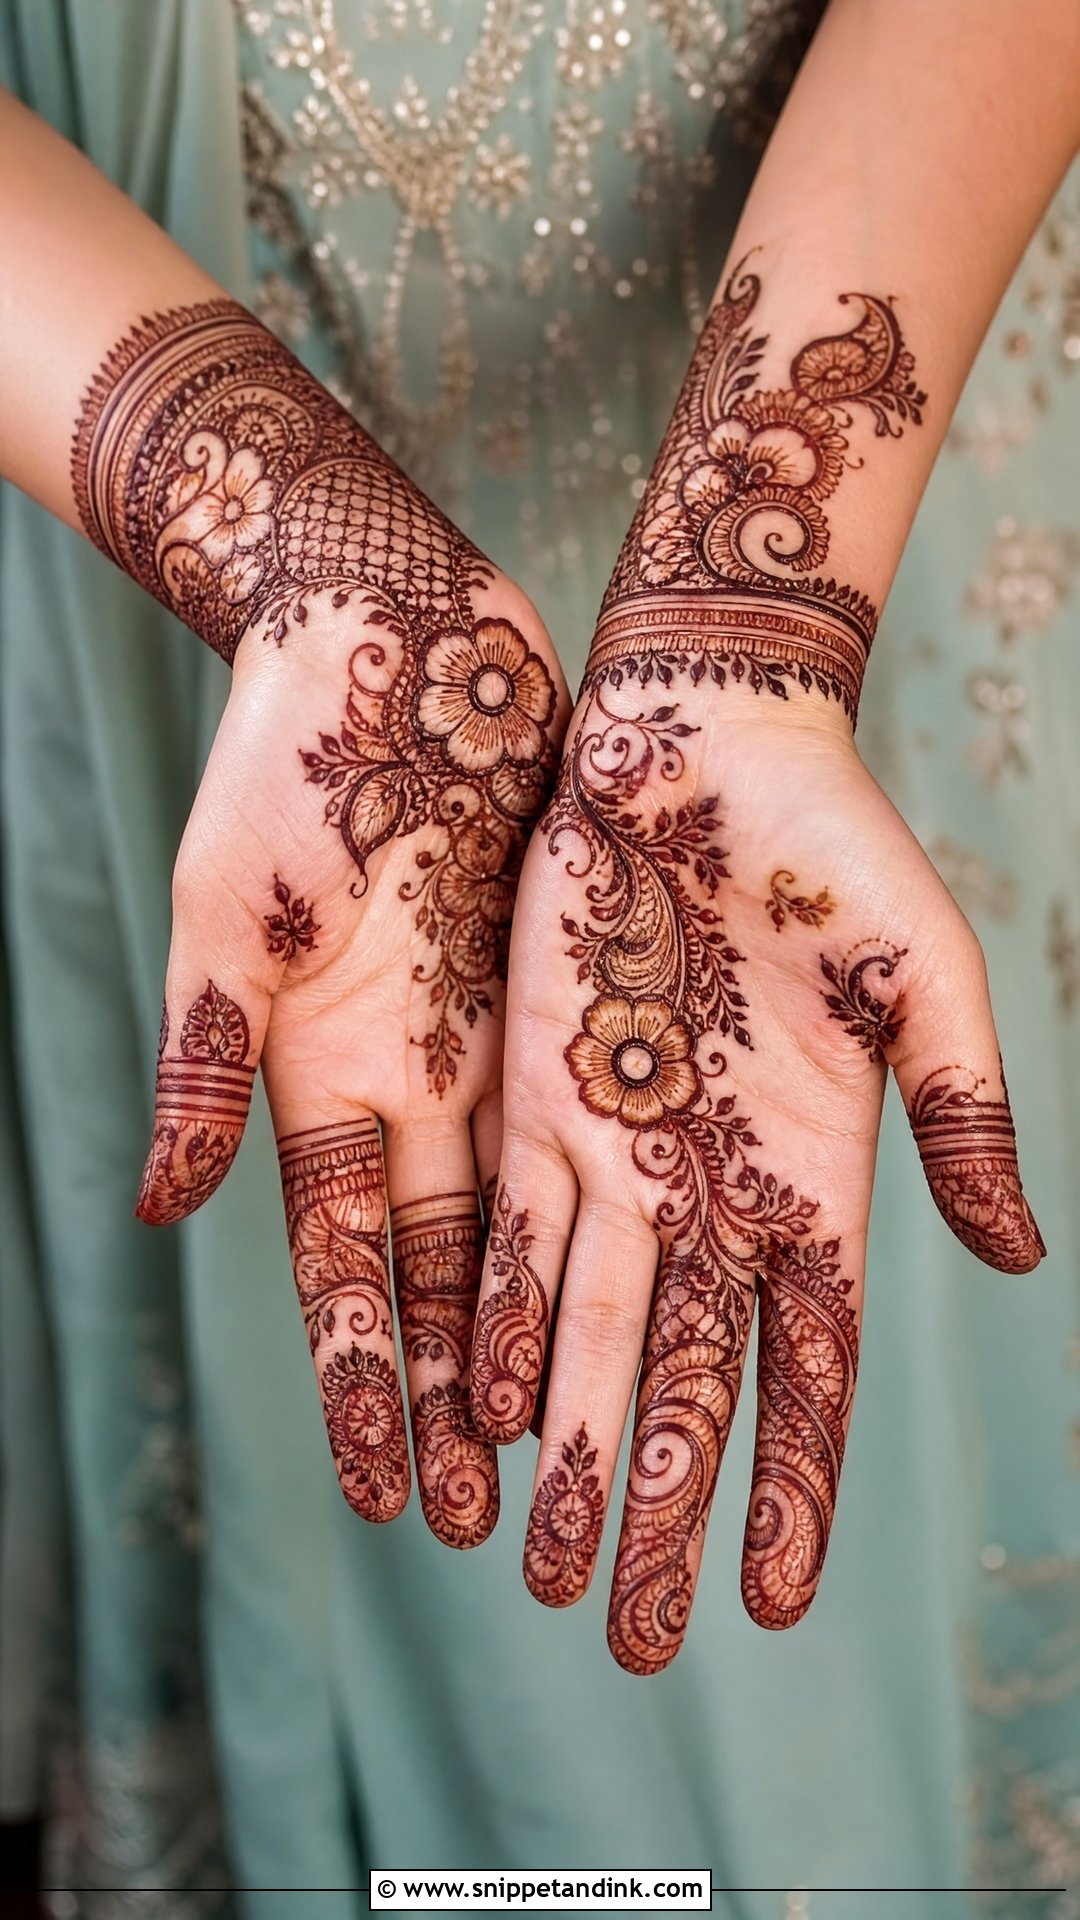
Indo-Arabic mixes bold Arabic flow with a little Indian detail: a diagonal floral trail first, then fine lines, dots, mini paisleys and small mesh patches inside selected shapes. The trick is choosing which shapes to fill and leaving the rest plain. I fill no more than every second flower. Large elements go on the palm, smaller patterns on the fingers, and the open skin between them keeps it lighter than full bridal work.
16. Front Hand Jaali Mehndi Design
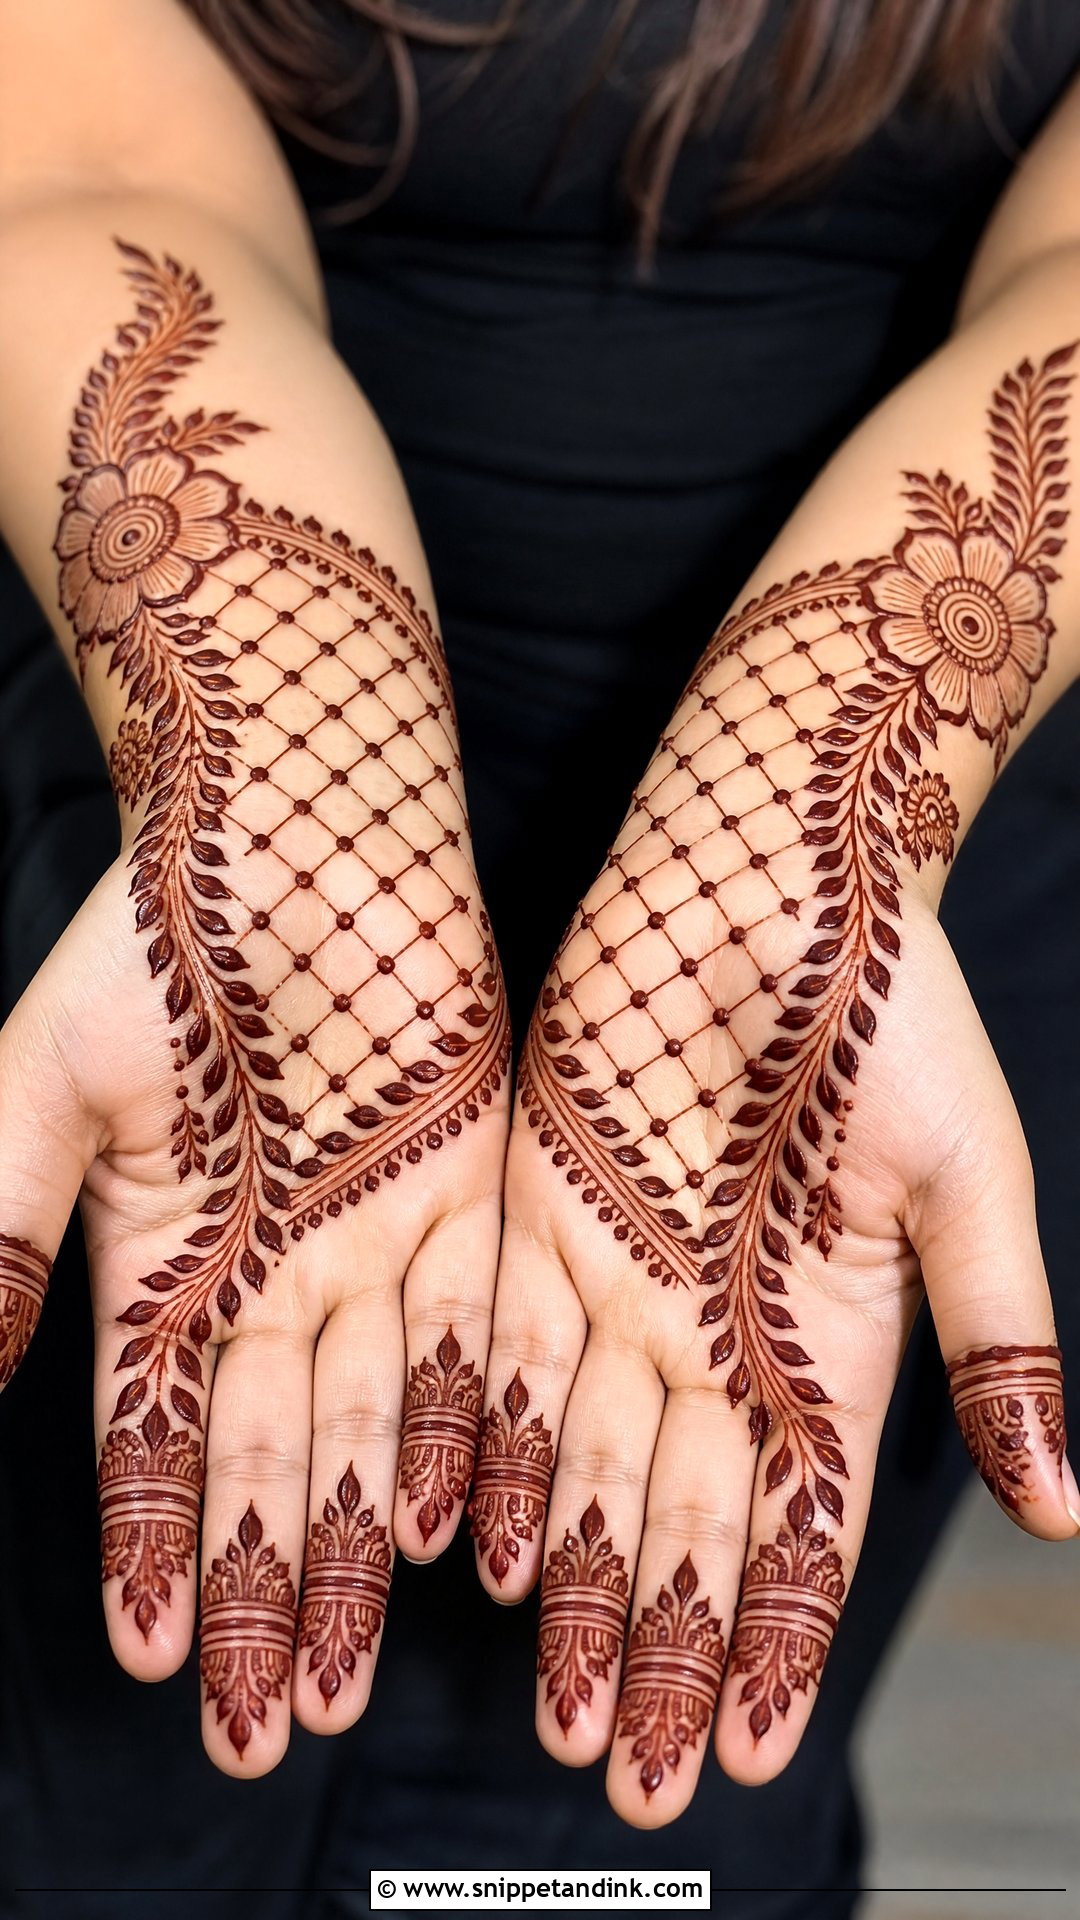
A front hand jaali mehndi design places a flower, mandala or paisley on one side of the palm and a small patch of mesh beside it. The mesh is crossing diagonal lines with tiny dots at the intersections. It looks harder than it is, because it’s the same stroke repeated. Draw every line in one direction first, let them set briefly, then cross them. Keep the fingers to bands and small leaf trails so the grid stays the star.
17. Front Hand Peacock Mehndi Design
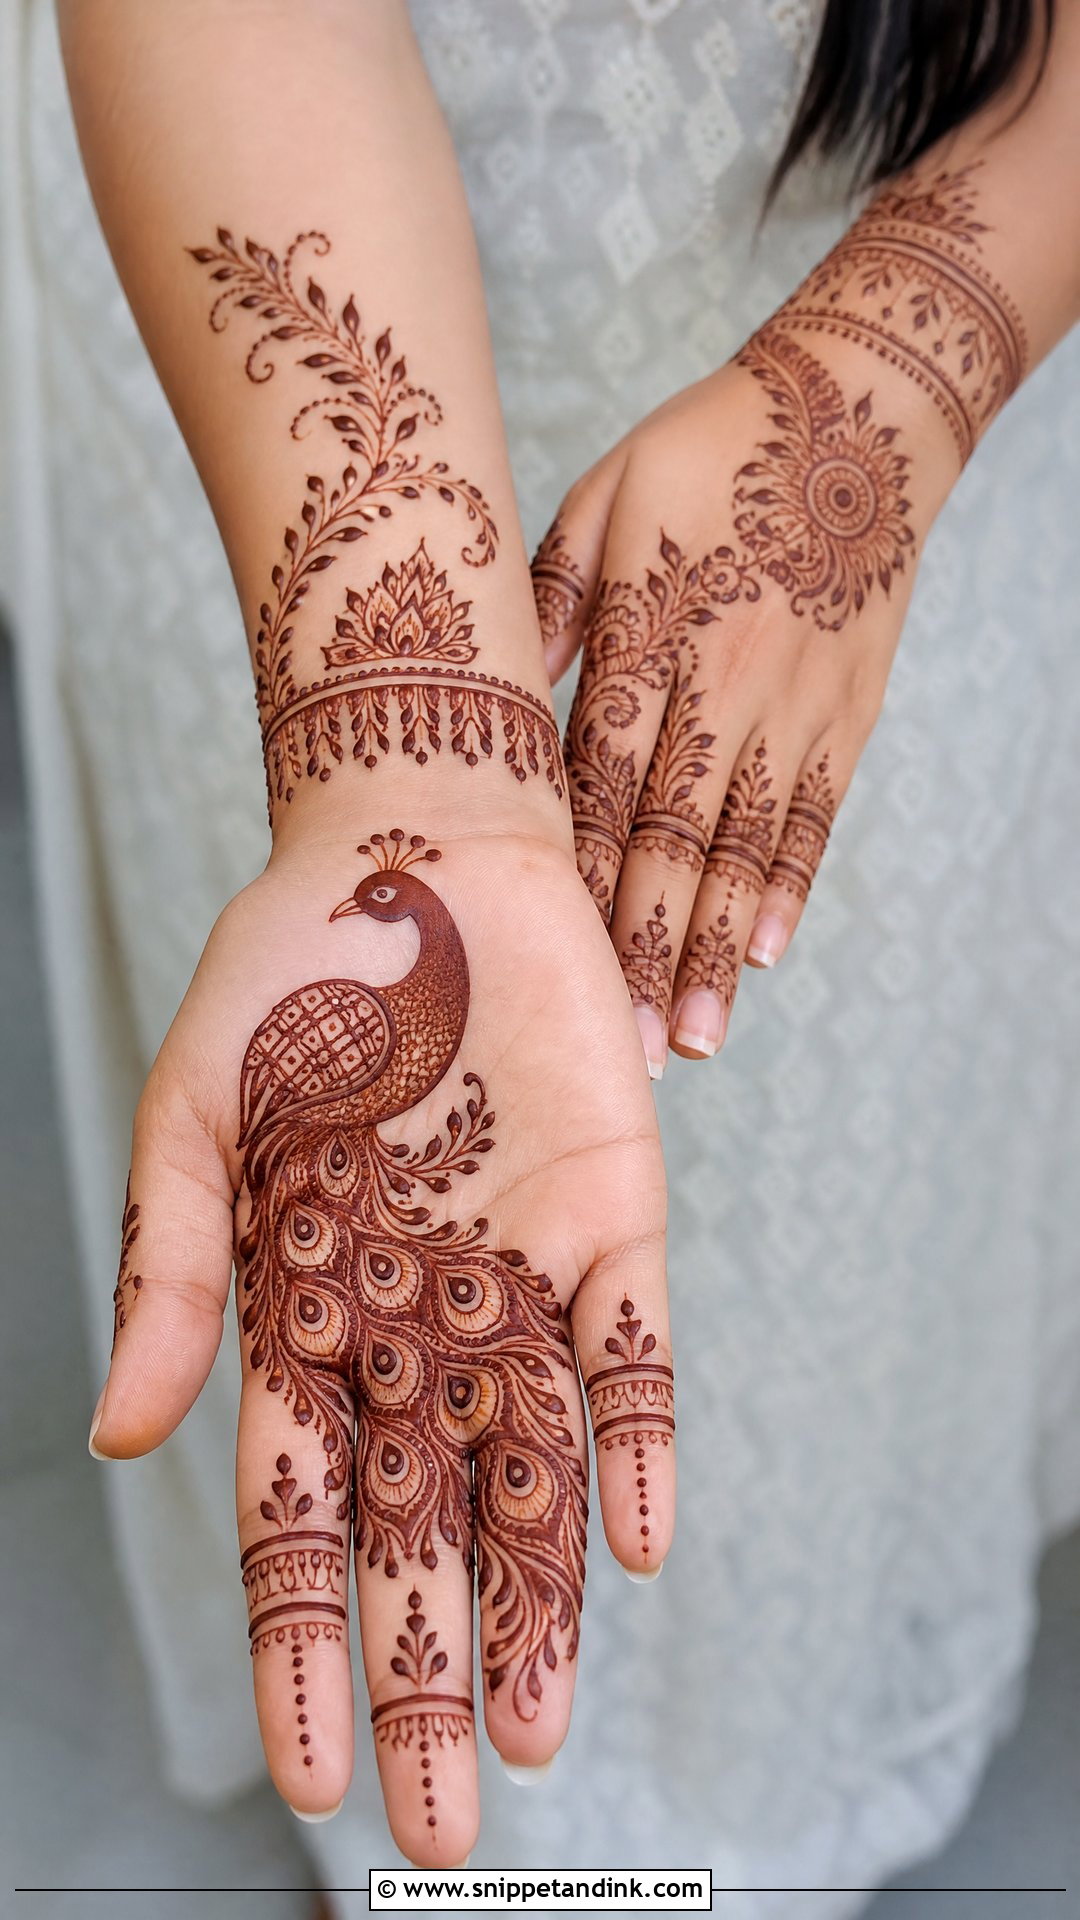
Draw a simple peacock body near the lower palm or wrist, then let the tail sweep toward the center, filled with dots, small petals and curved lines. Fingers get light bands or leaves. The neck is what makes or breaks a henna peacock: it should be one smooth S-curve, never built from short strokes. If you’re new, keep the bird plain and put your effort into the tail, which is where the eye goes anyway.
18. Front Hand Lotus Mehndi Design
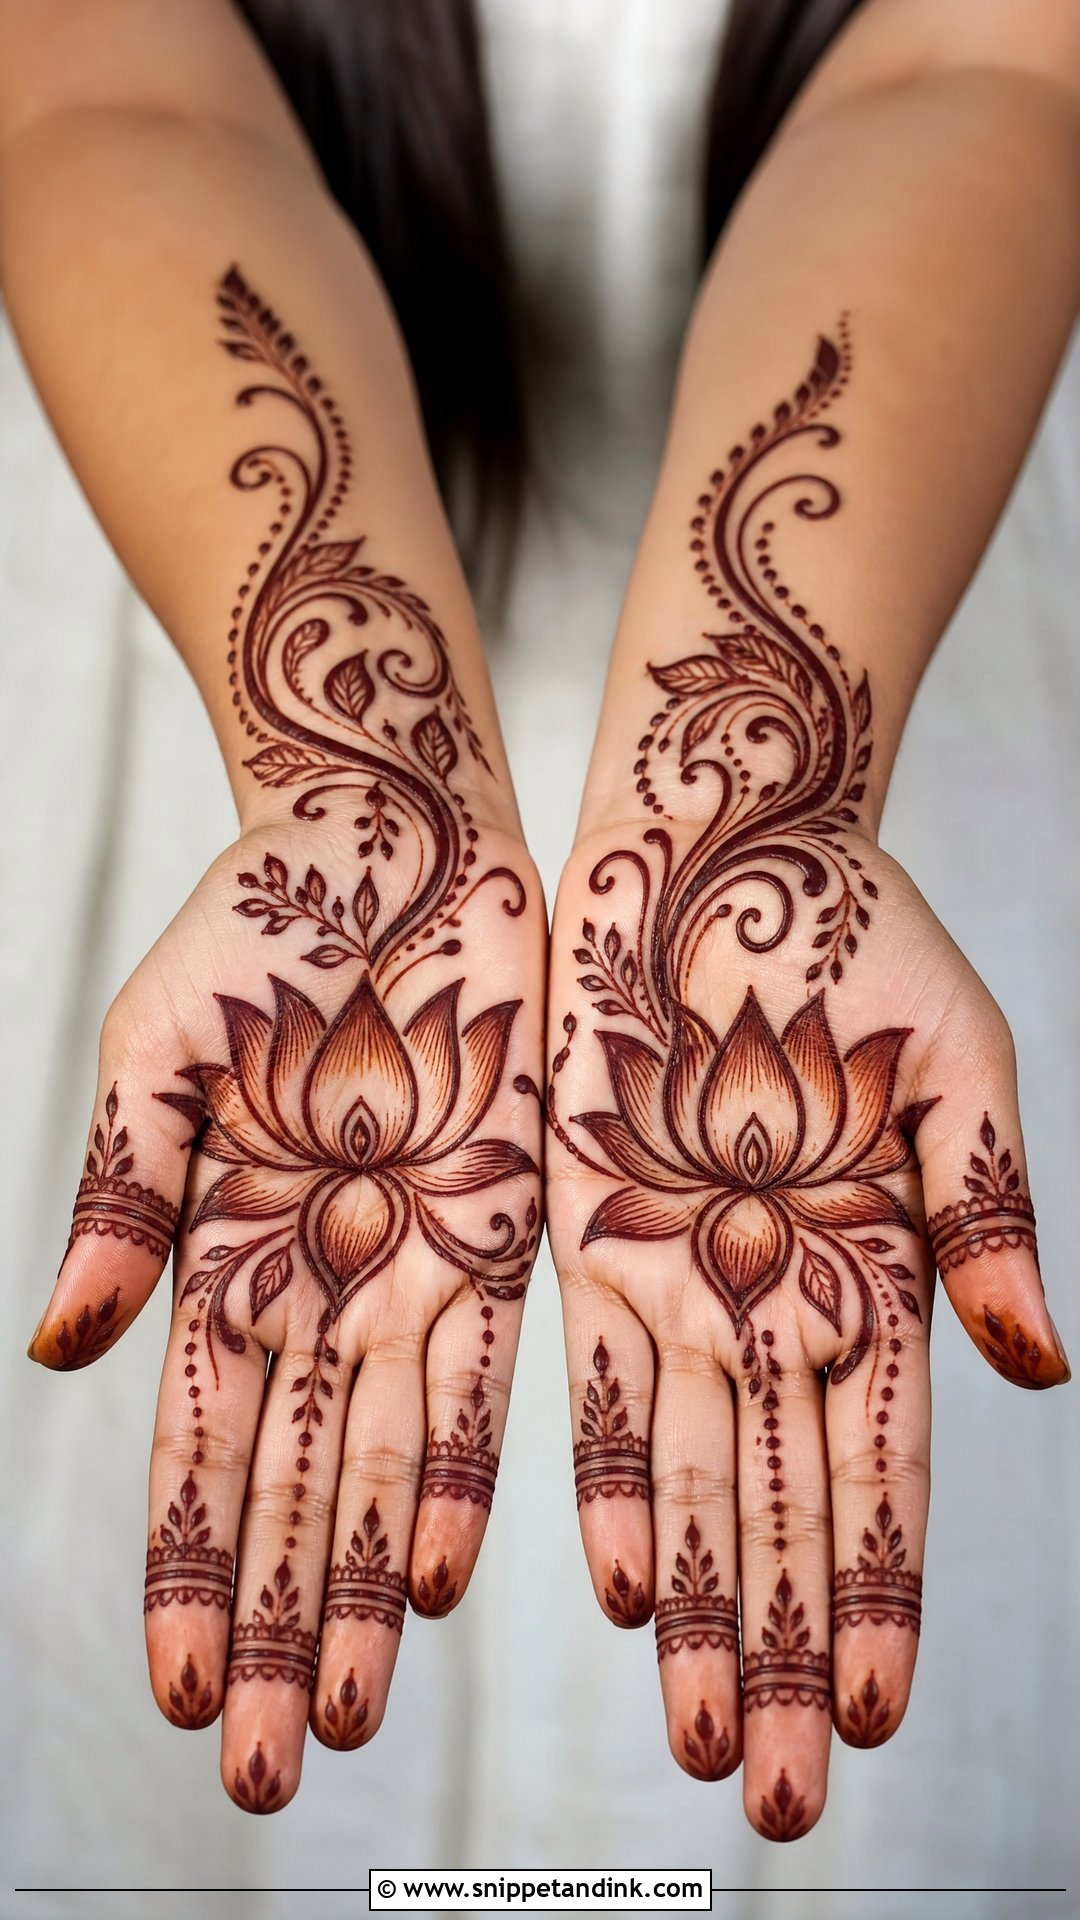
Lotus petals are repeated teardrops, which makes them one of the friendliest motifs to draw. Place the lotus in the center of the palm or near the wrist and build upward with dots, leaves and curved vines, with simple bands to balance the fingers. Keep the petals open and evenly spaced, and give the outer edge a bold line so the flower stays crisp after staining. Clear skin around it helps for pooja, Diwali and weddings.
19. Front Hand Bracelet Mehndi Design
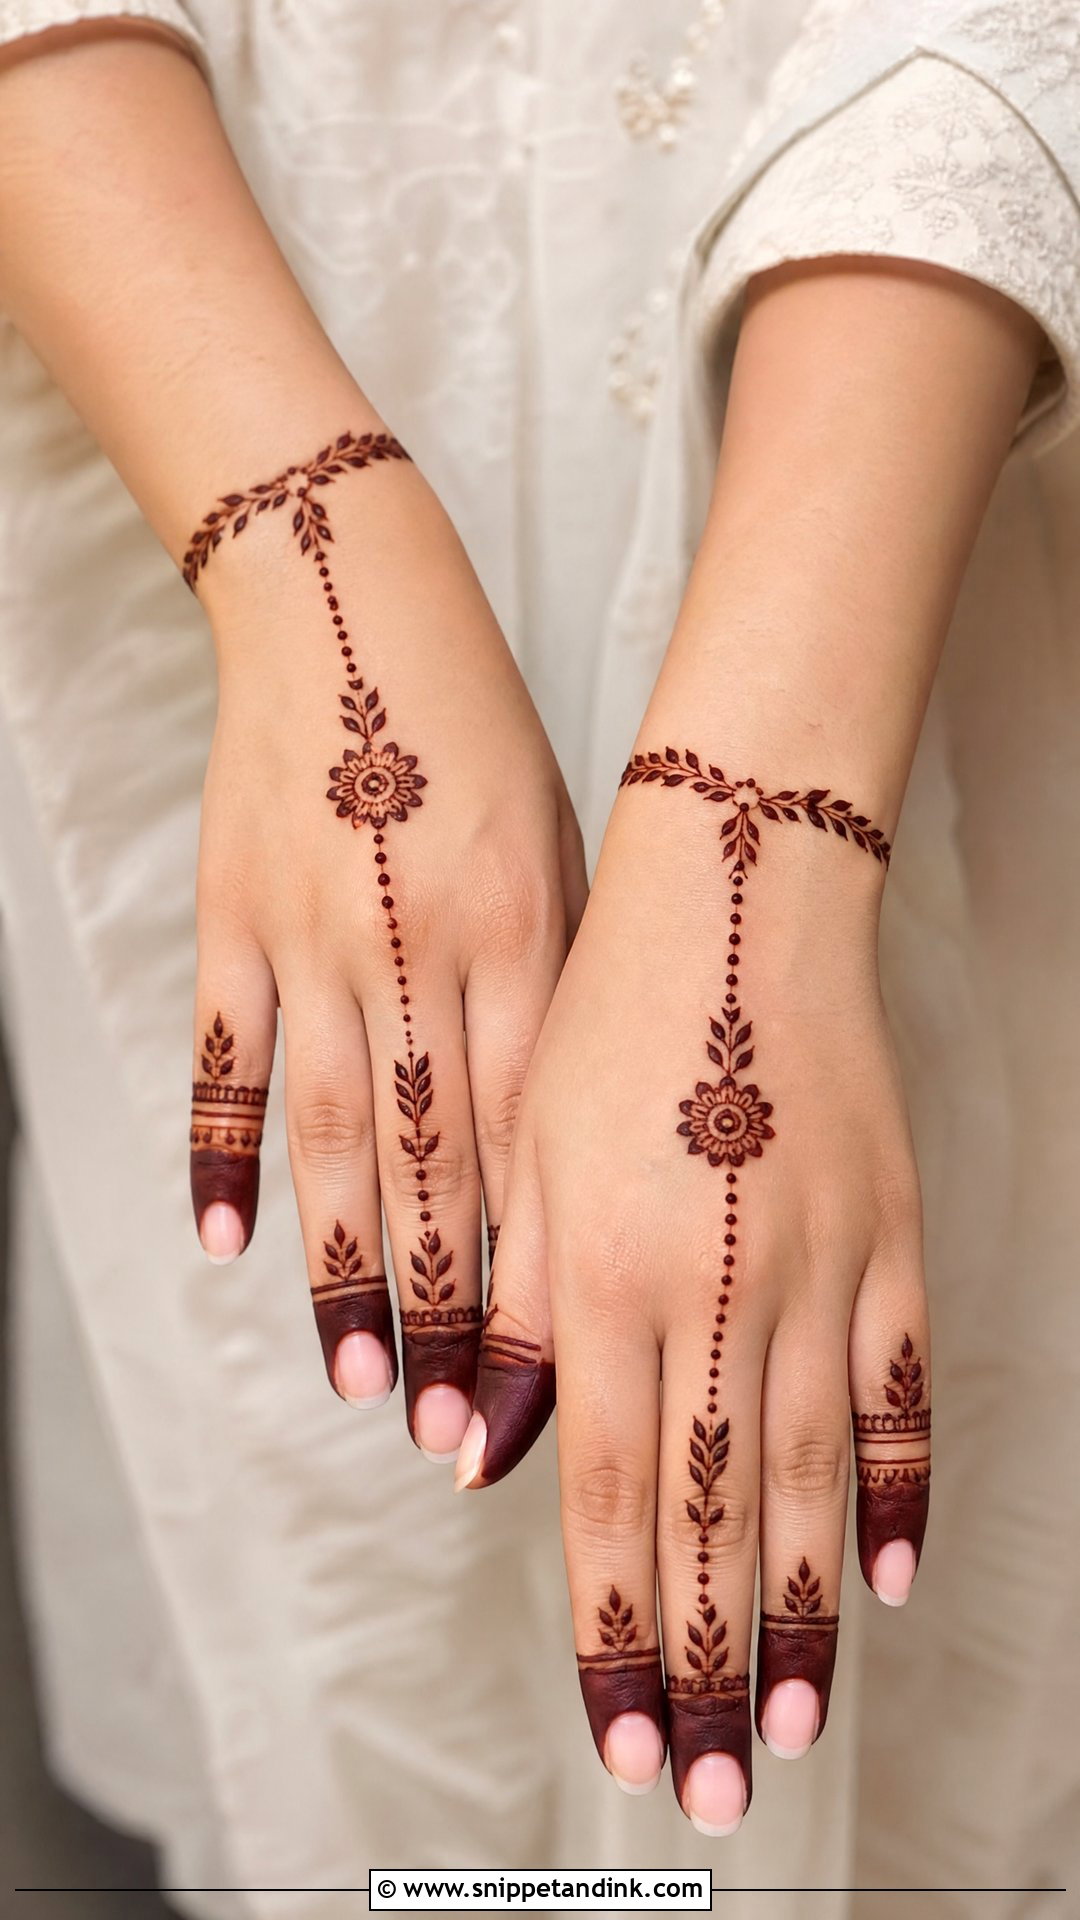
A band around the wrist connects to one finger through a dotted chain, vine or leafy strand, with a small flower, mandala or ring on the palm. It’s quick, takes very little paste and works for casual occasions. Keep the wrist band narrow; a wide band reads heavy and cracks as the wrist bends while it dries. The chain should be small repeated dots or leaves, evenly spaced, leading to the one decorated finger.
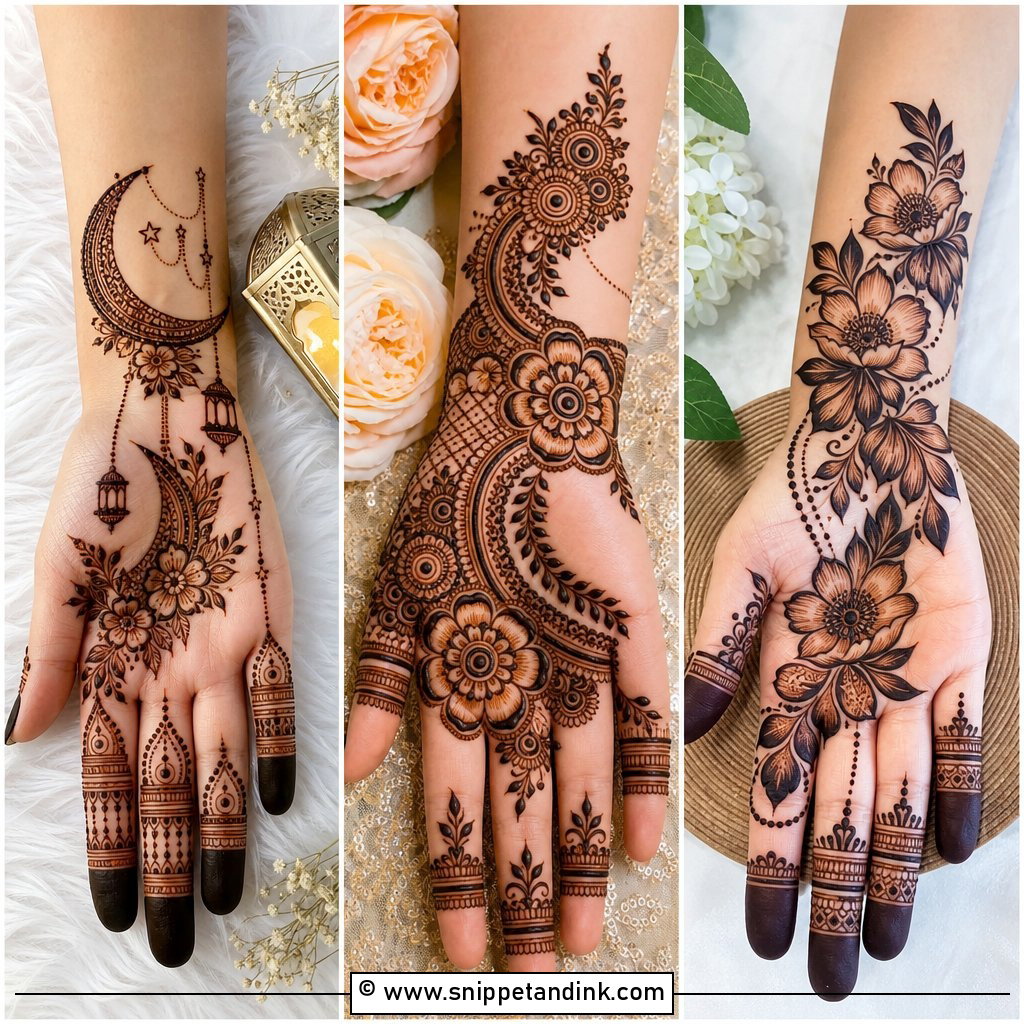
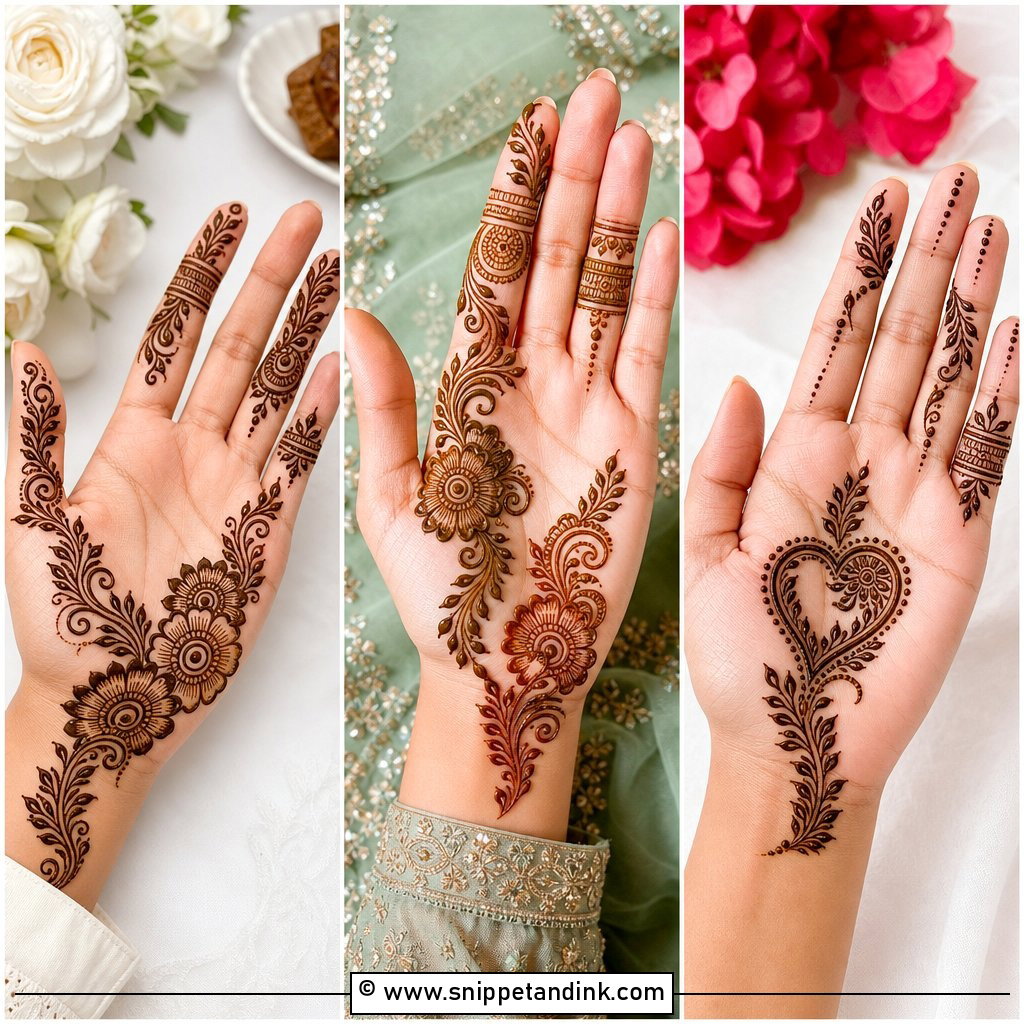
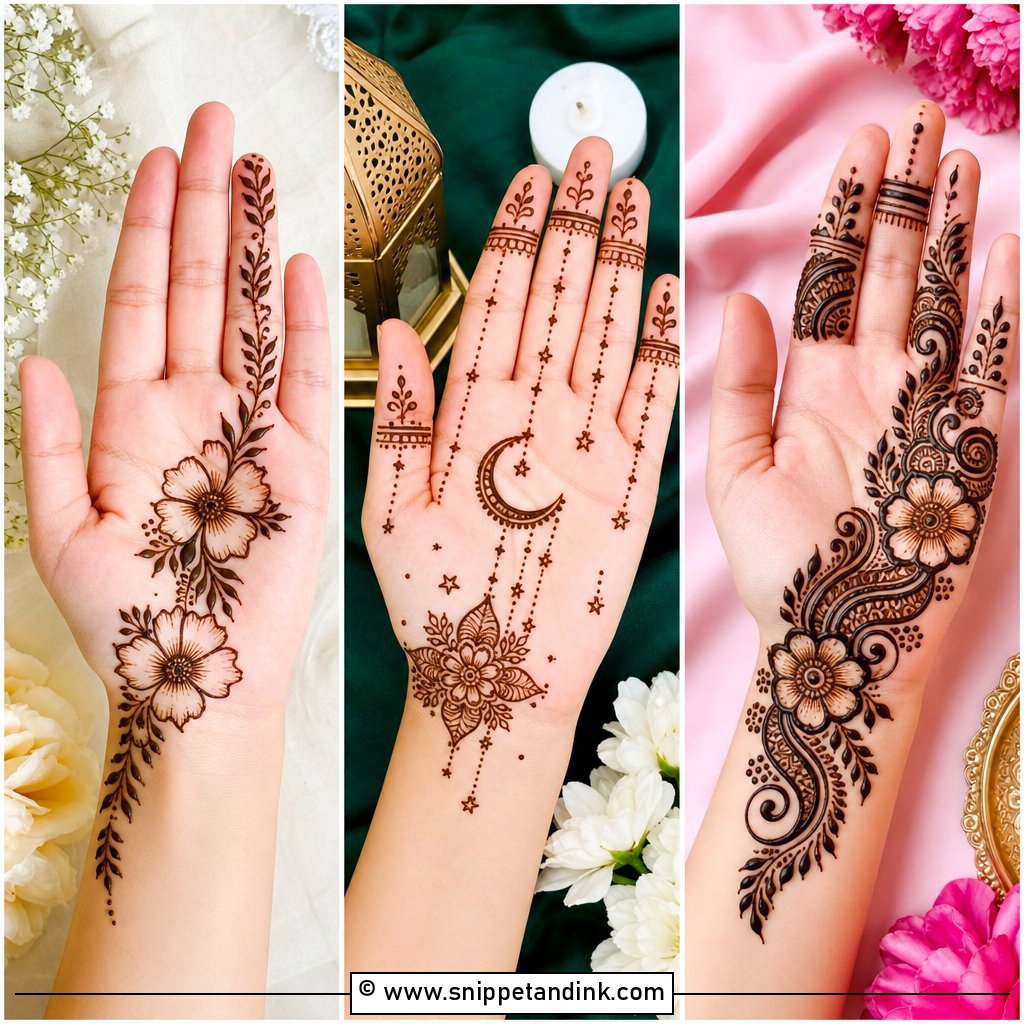
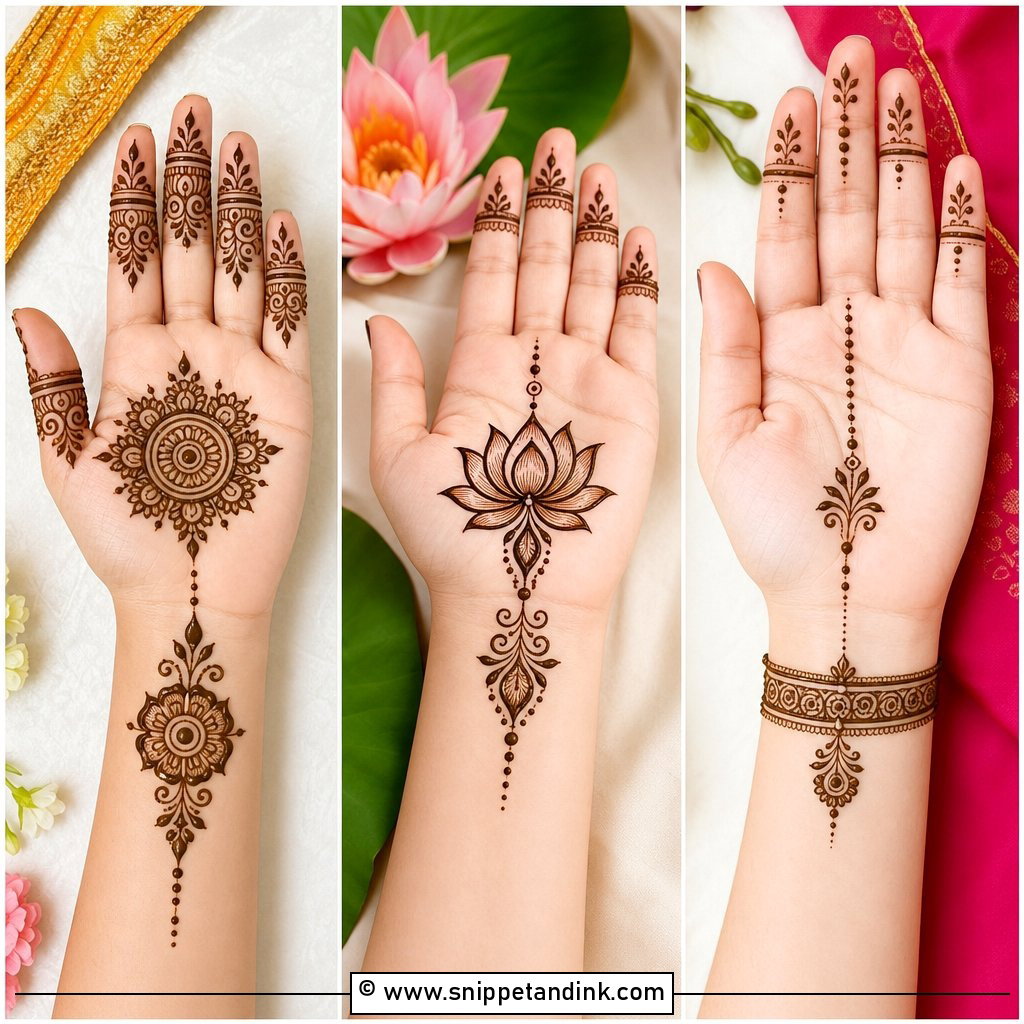
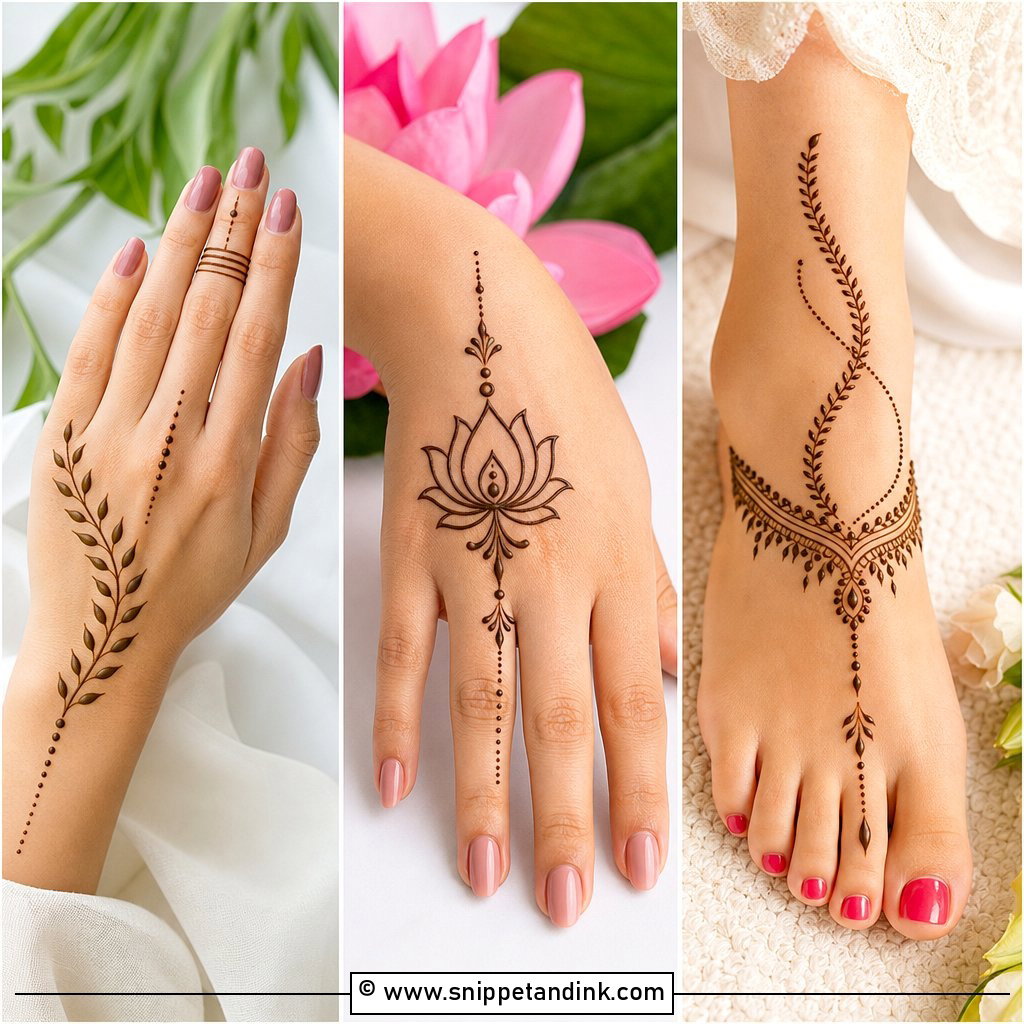
20. Front Hand Minimal Mehndi Design
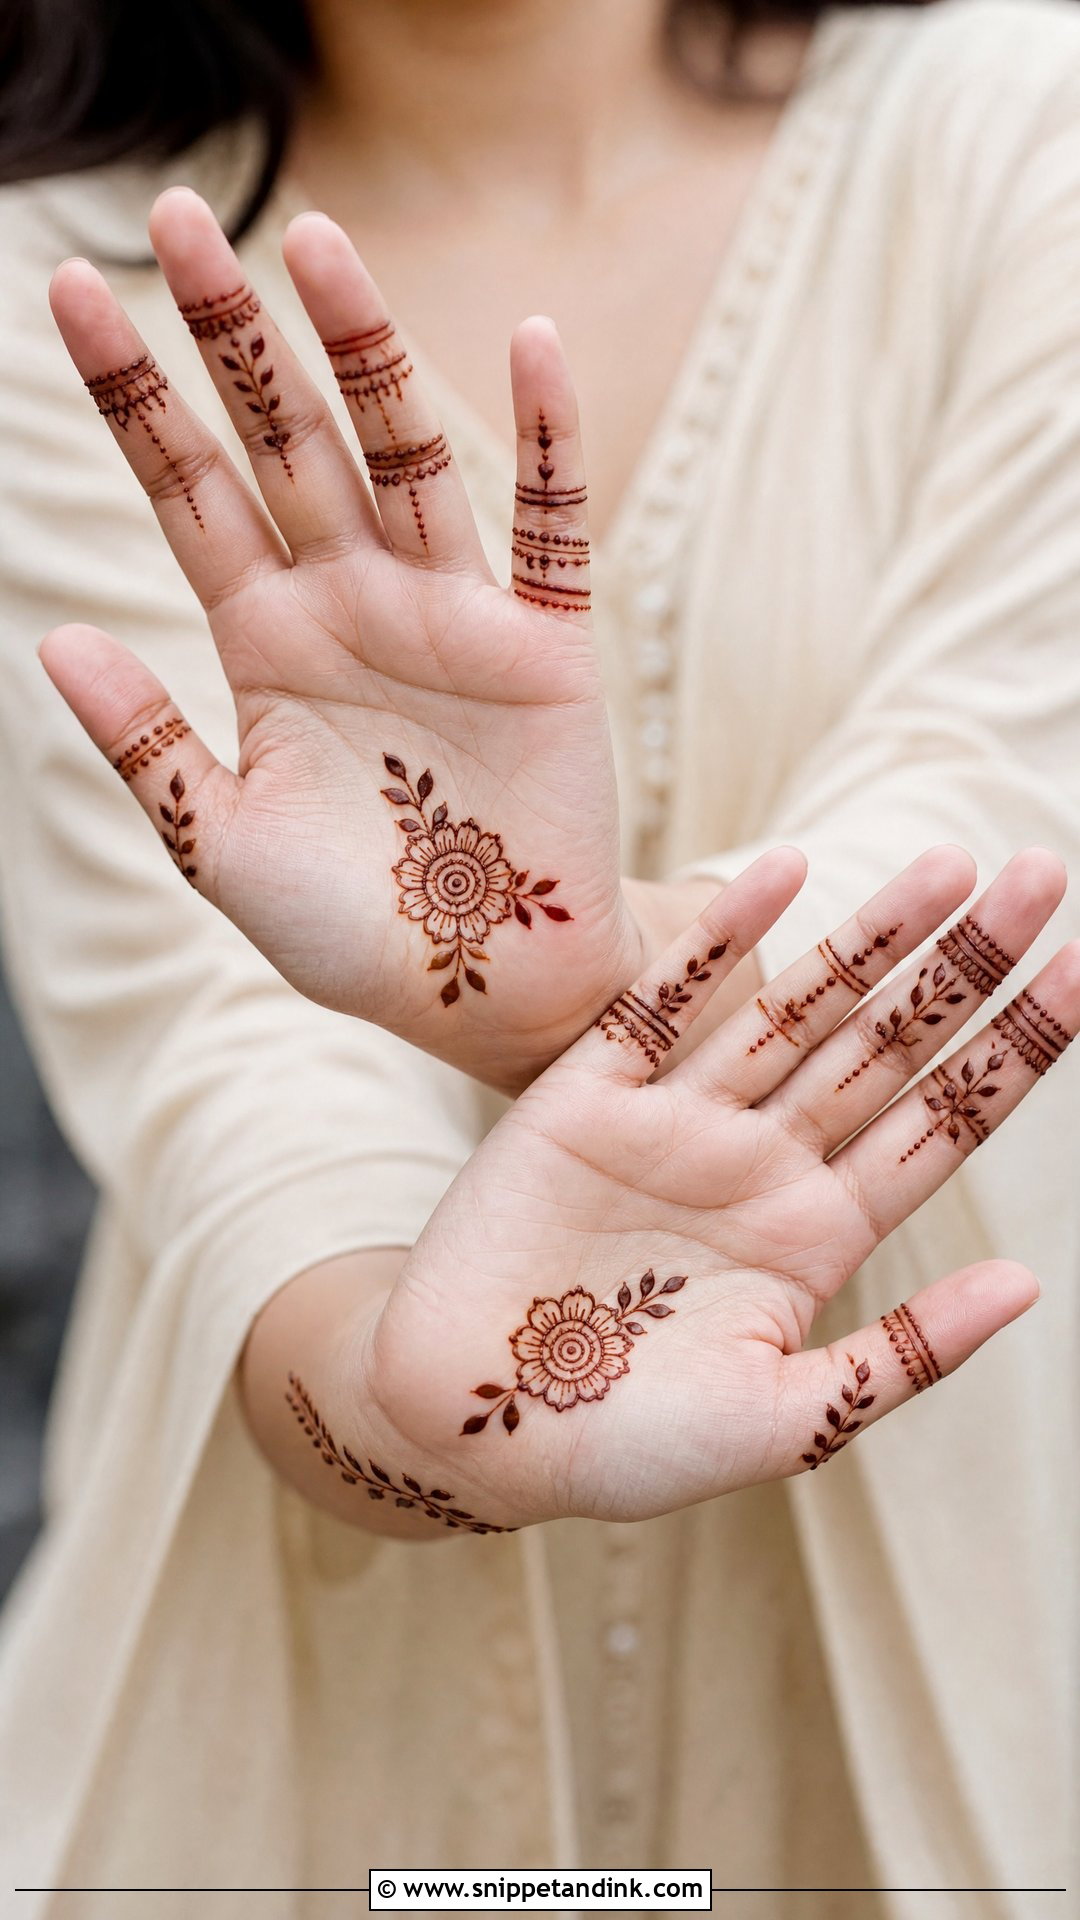
Sometimes a hand needs room to breathe. A small palm flower, delicate finger bands and a thin wrist curve, with fine lines, tiny dots and even spacing, are all a minimal design asks for. It dries fast and suits teens, office events and first attempts. To make it look finished rather than sparse, repeat one motif across the hand, leaves, dots or petals, instead of mixing several shapes.
21. Front Hand Chain Mehndi Design
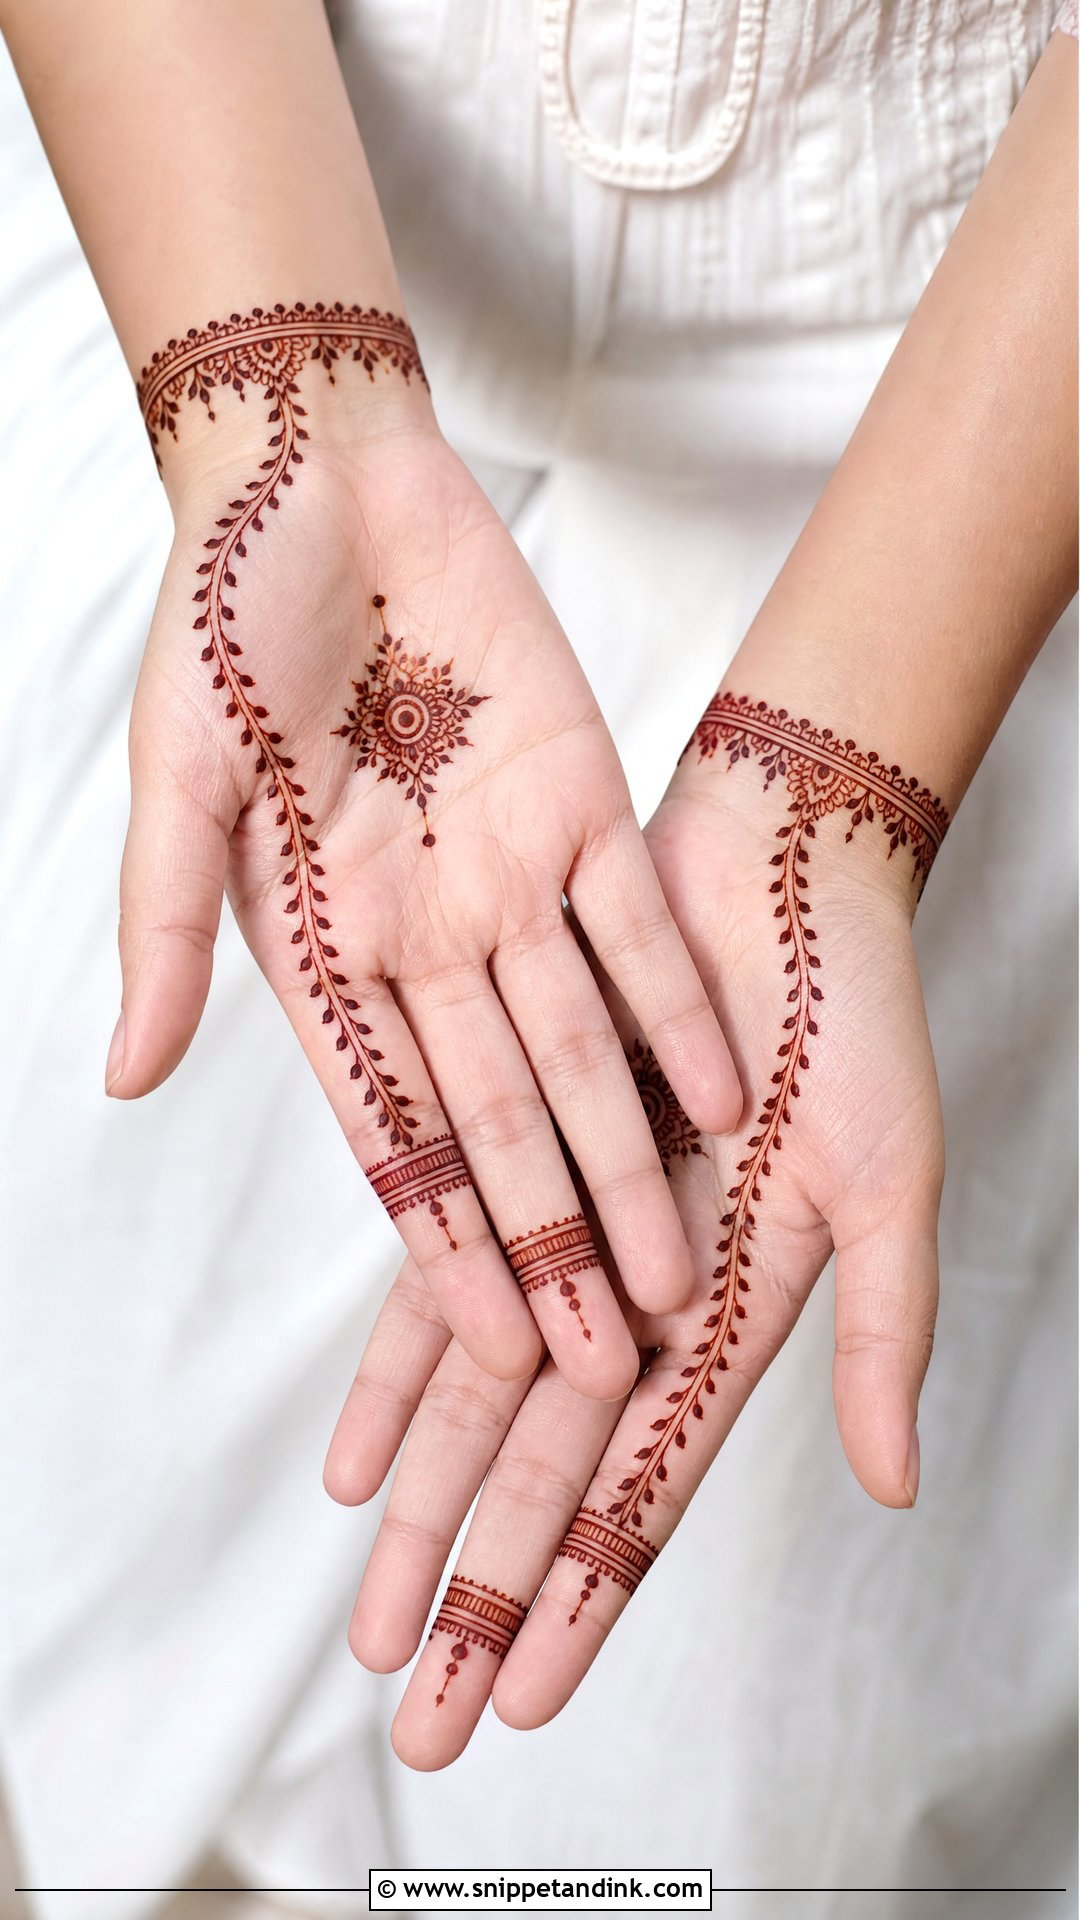
A front hand chain mehndi design works like jewelry: a ring motif around one finger, a dotted or leafy chain down to the wrist, a bracelet band and a small palm centerpiece connecting everything. Thin lines and repeated dots make it beginner-friendly. Curve the chain slightly so it follows the hand’s natural line; a dead-straight chain looks stiff. Too thick and it stops reading as jewelry.
22. Front Hand Leaf Mehndi Design
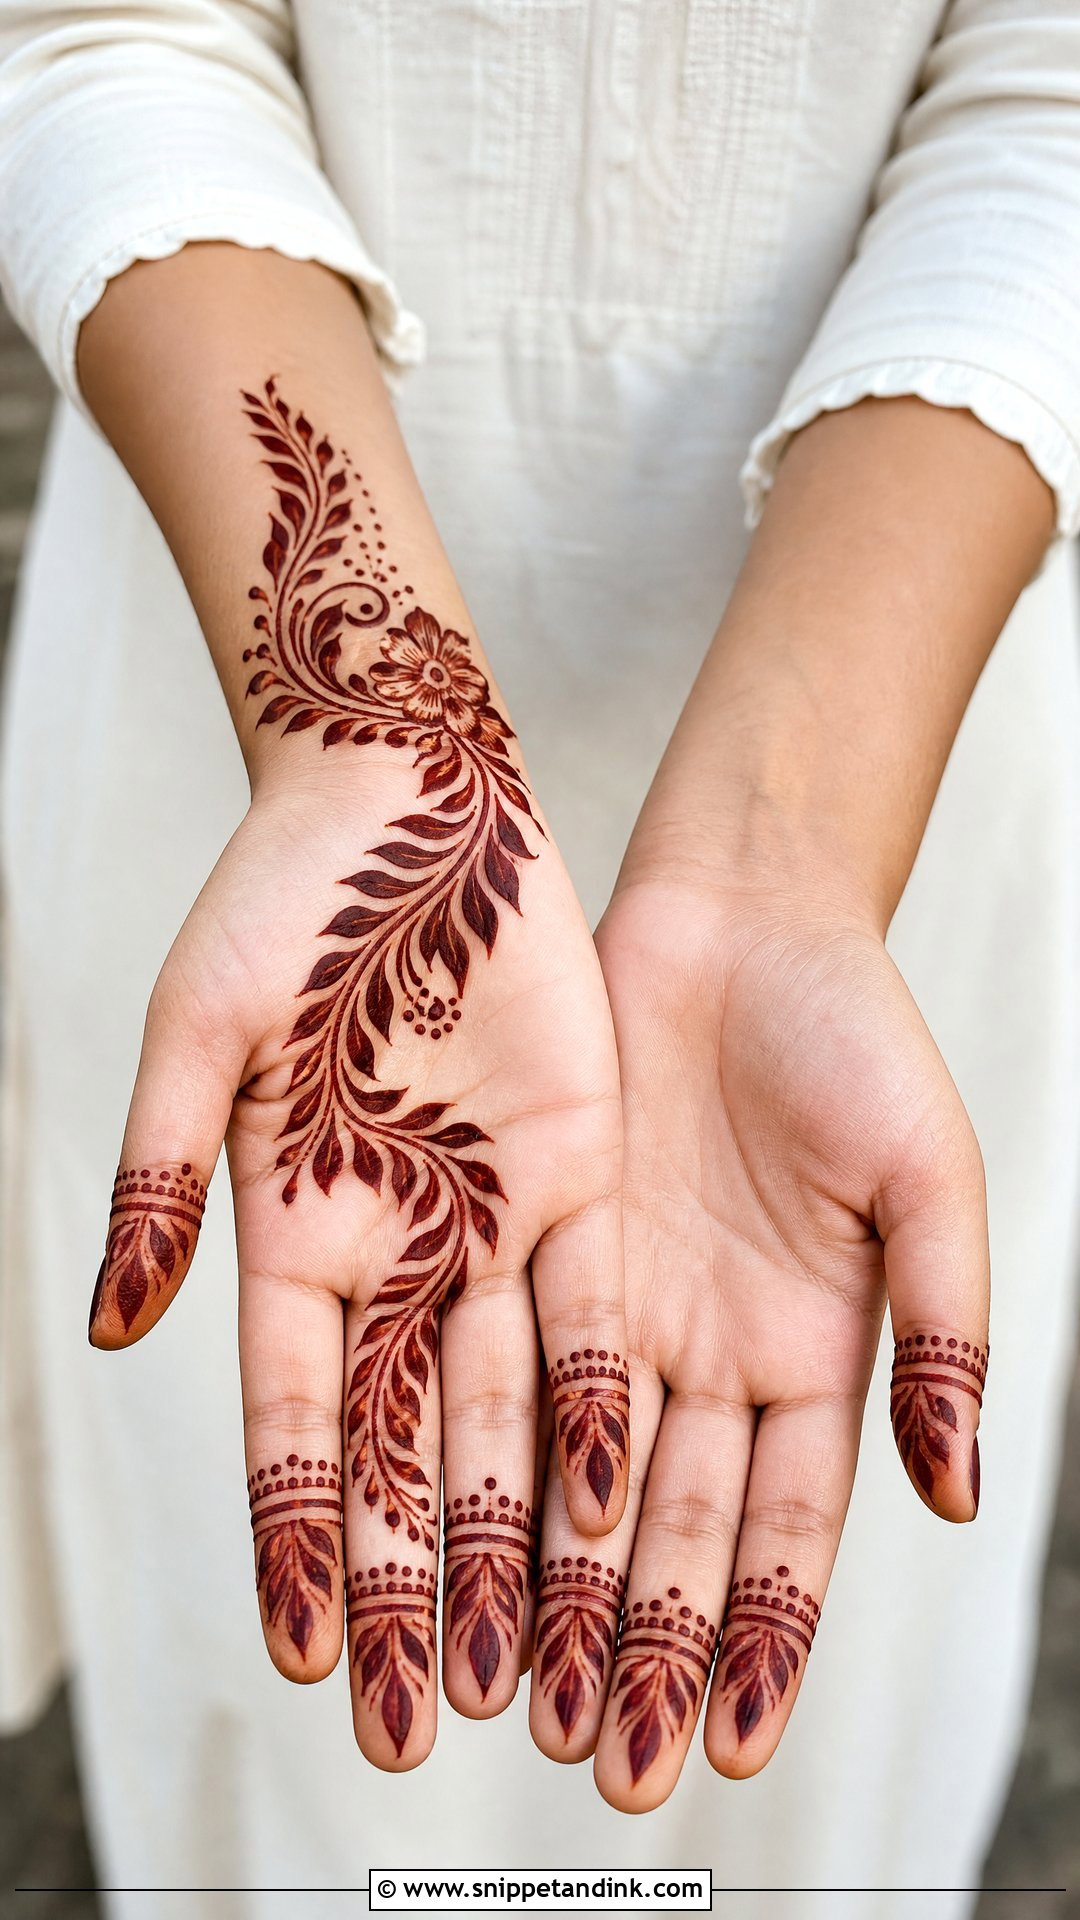
Leaves are the most forgiving motif of all. Draw a curved vine across the palm and add small leaves on both sides, with a flower or mandala near the wrist if you want it fuller, and leaf tips and dotted bands on the fingers. Shade the leaves, leave them open or make them long and thin to suit your skill. What matters is the gap between leaves: keep it even, and the vine looks planned even if each leaf is slightly different.
23. Front Hand Geometric Mehndi Design
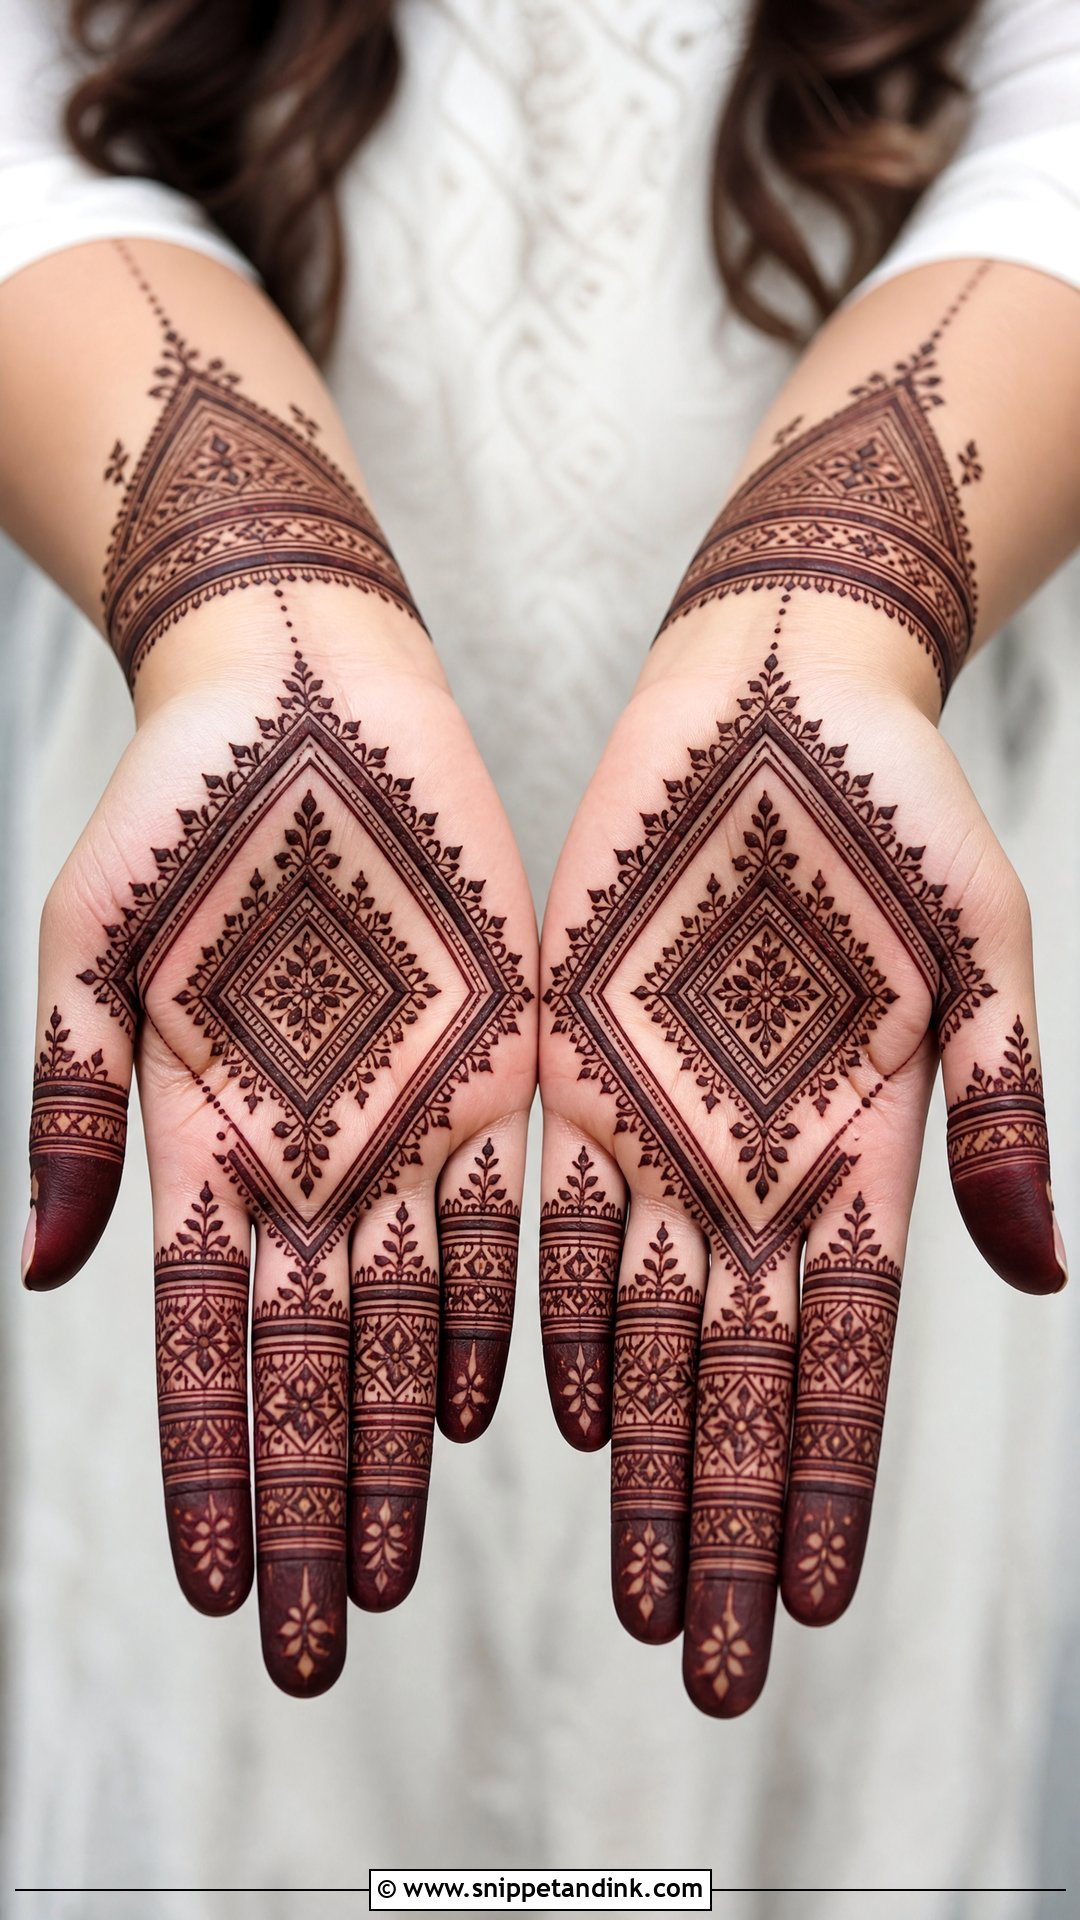
Diamonds, squares, triangles and straight bands across the palm and fingers give a clean modern pattern, with a small mandala or flower to soften it if you like. Sketch the main sections first and fill them afterward with dots or short lines. Straight lines are harder than curves for most beginners, so pull them slowly with the cone held at a steady angle. Broad palms suit geometric work because structured shapes fill the space neatly.
24. Front Hand Half Palm Mehndi Design
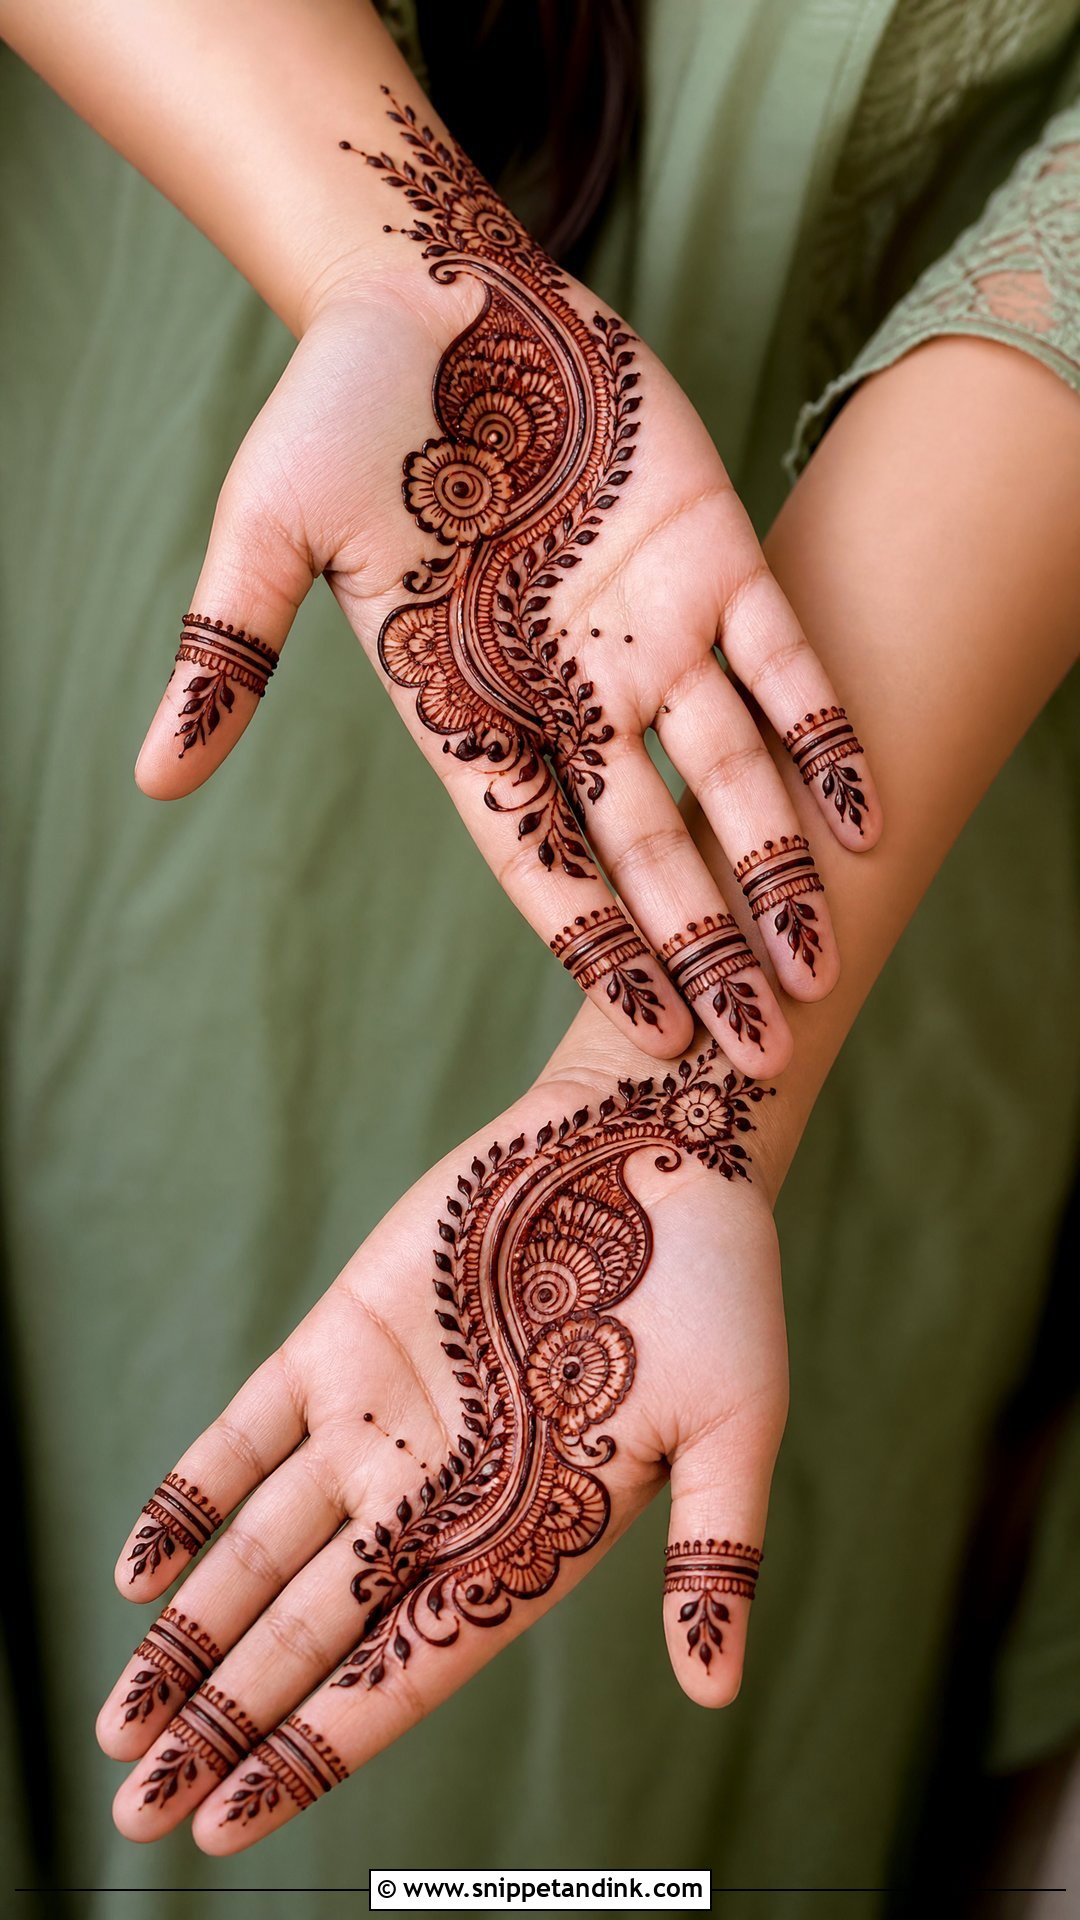
Only one side of the palm is decorated, starting at the wrist or thumb side with flowers, leaves, paisleys or a curved mandala border and travelling toward one or two fingers. The other side stays bare, and the remaining fingers get bands or dots. It’s quick and suits Arabic and modern styles. Where beginners struggle is the boundary; finish the decorated side with a clear curved edge so the open half looks chosen.
25. Front Hand Thumb Side Mehndi Design
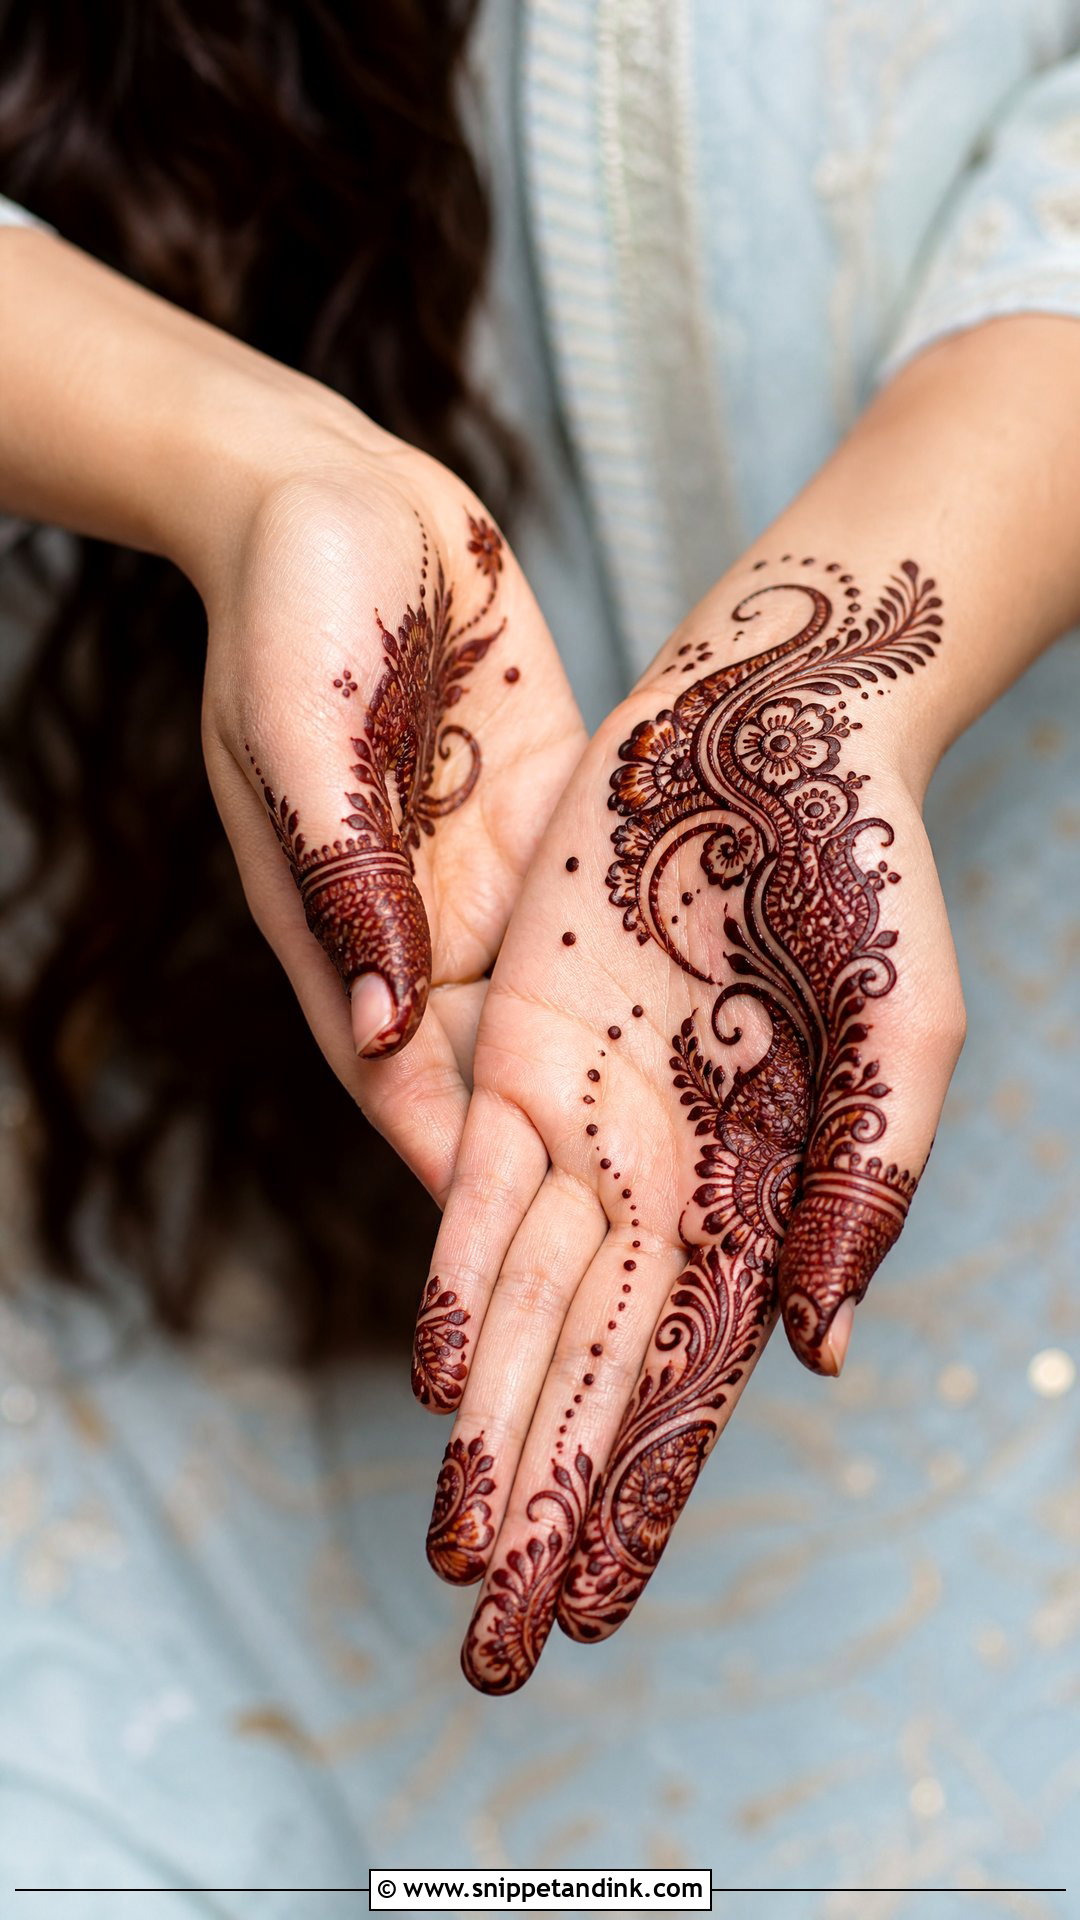
This layout hugs the thumb side of the palm with flowers, paisleys and leafy curves, then reaches a few details toward the wrist and index finger. Following the natural curve of the thumb mound makes it look graceful, and the small working area is easy for a beginner to control. A few tiny dots fading into the open palm soften the transition. Decorate both thumbs to match.
26. Front Hand Wrist To Finger Mehndi Design
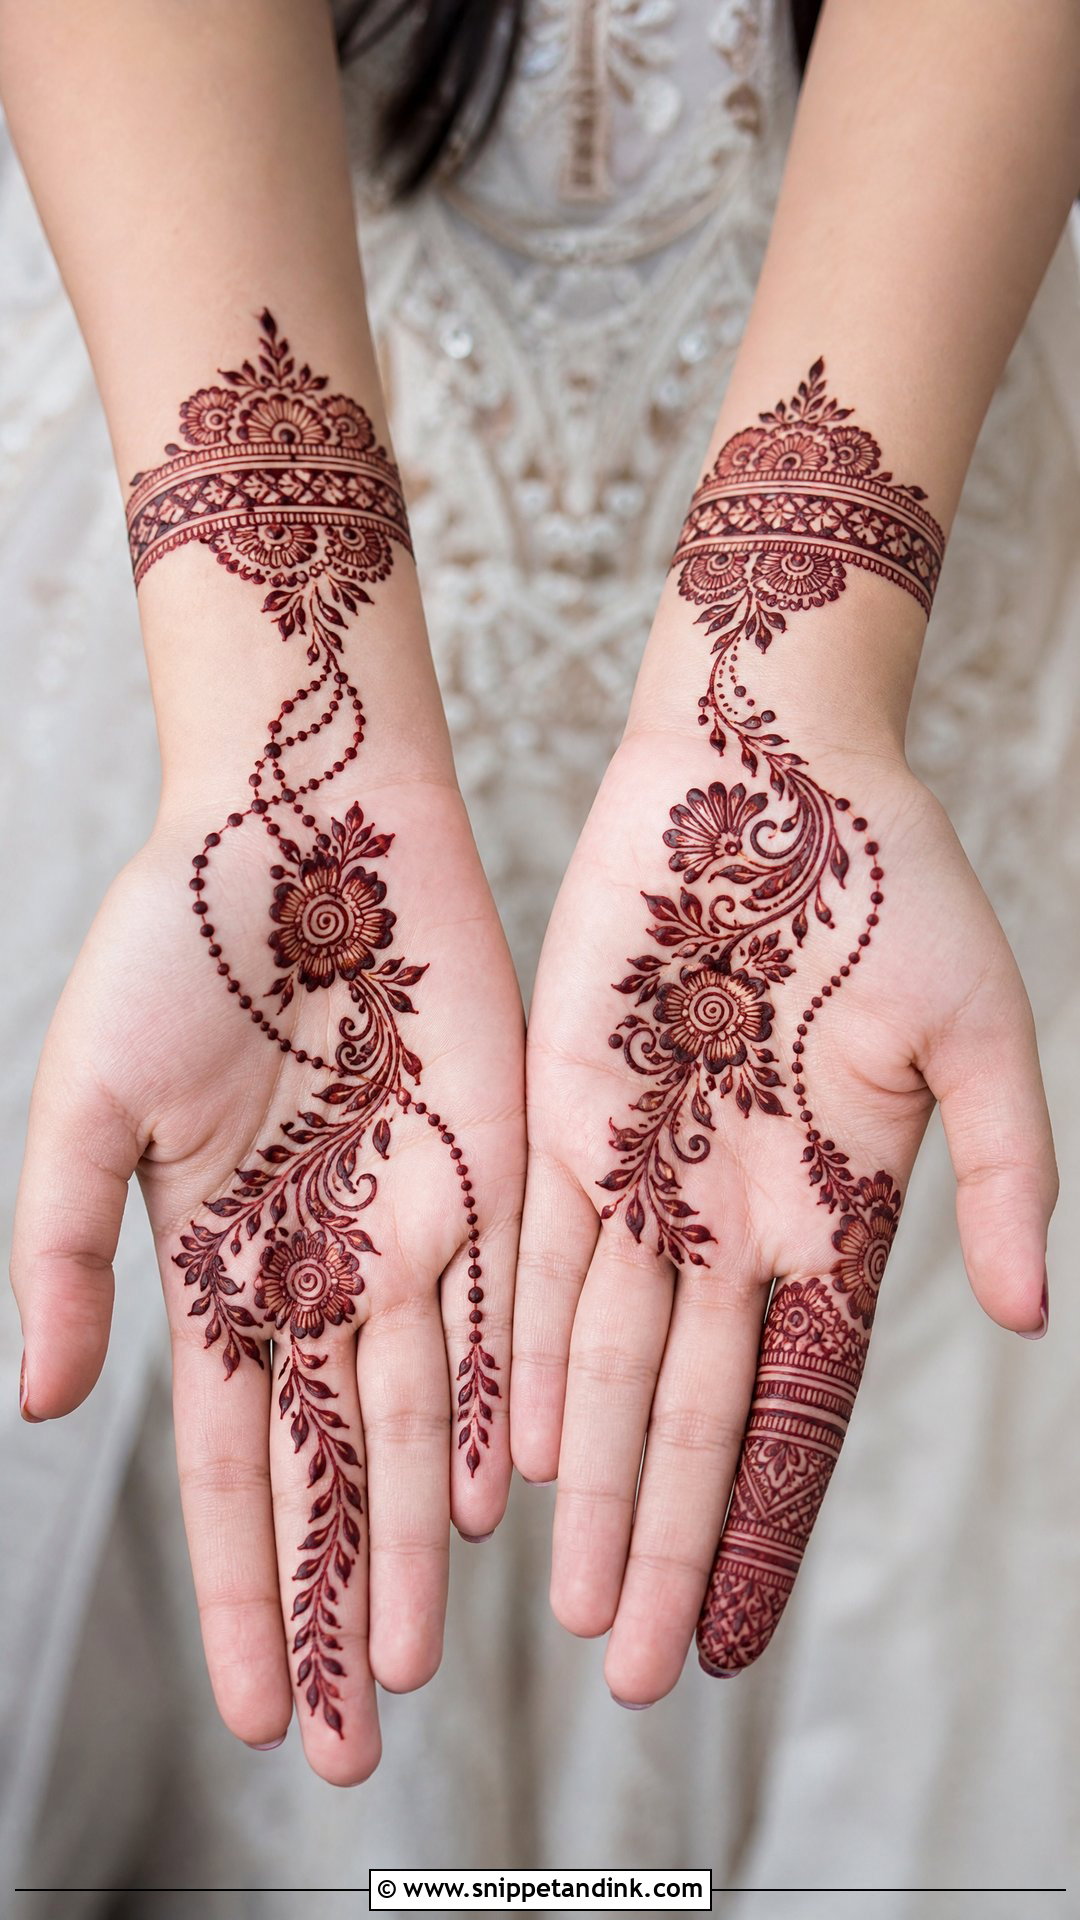
One continuous flow from the wrist to a single finger, made as a floral vine, dotted chain, paisley trail or leafy strand, with the rest of the palm open. It’s quick to apply. The chosen finger should be fully decorated so the trail has an ending, and a bracelet band at the wrist anchors the start. Plan the route with a faint dotted guide line first; a trail that drifts off course halfway is hard to rescue.
27. Front Hand Kids Mehndi Design
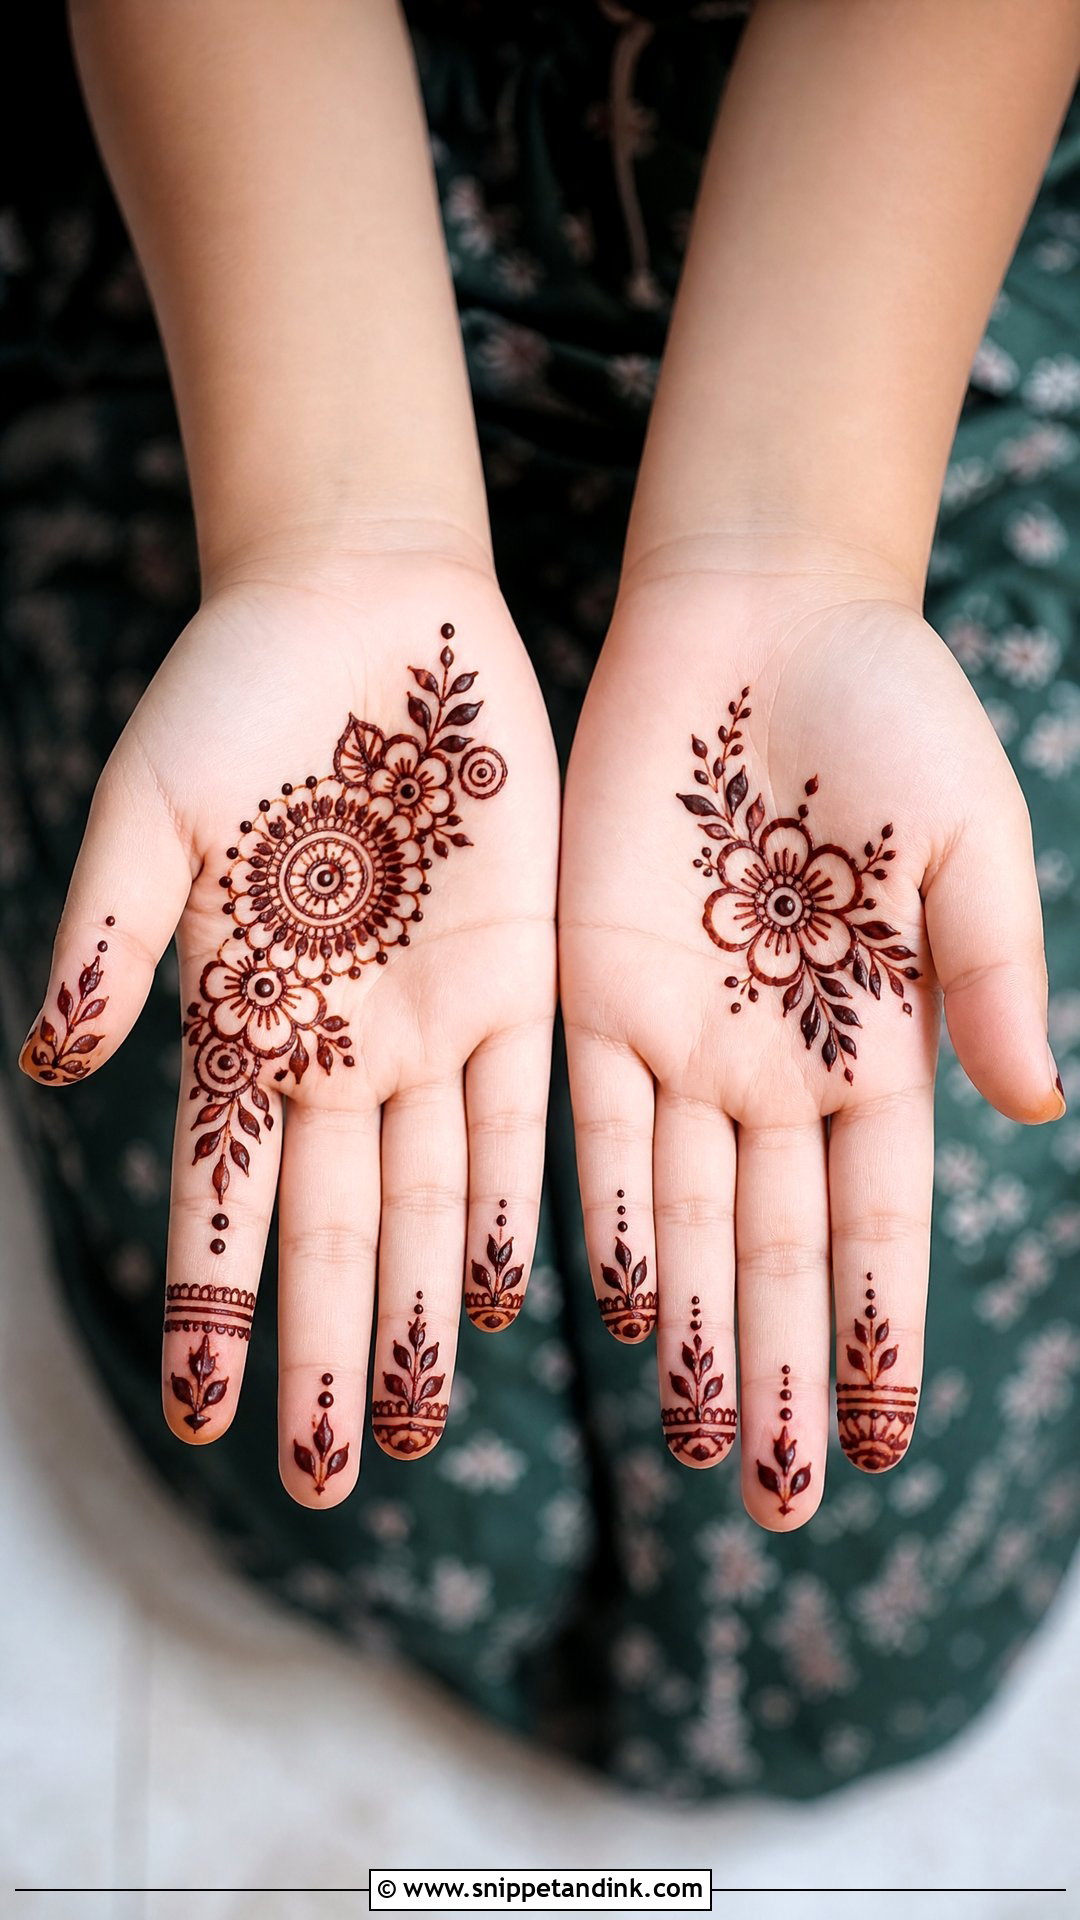
Children rarely sit still for long, so think large shapes: flowers, hearts, small mandalas, leaves or a simple sun on the palm, plus dotted fingertips. One main motif in the center finishes fast. Use medium-thick lines so the stain shows, and only natural henna, never black or instant-dark cones, which can contain PPD and burn skin. Keep the paste on as long as the child will tolerate, and expect it to be smudged a little; that’s part of it.
28. Front Hand Shaded Mehndi Design
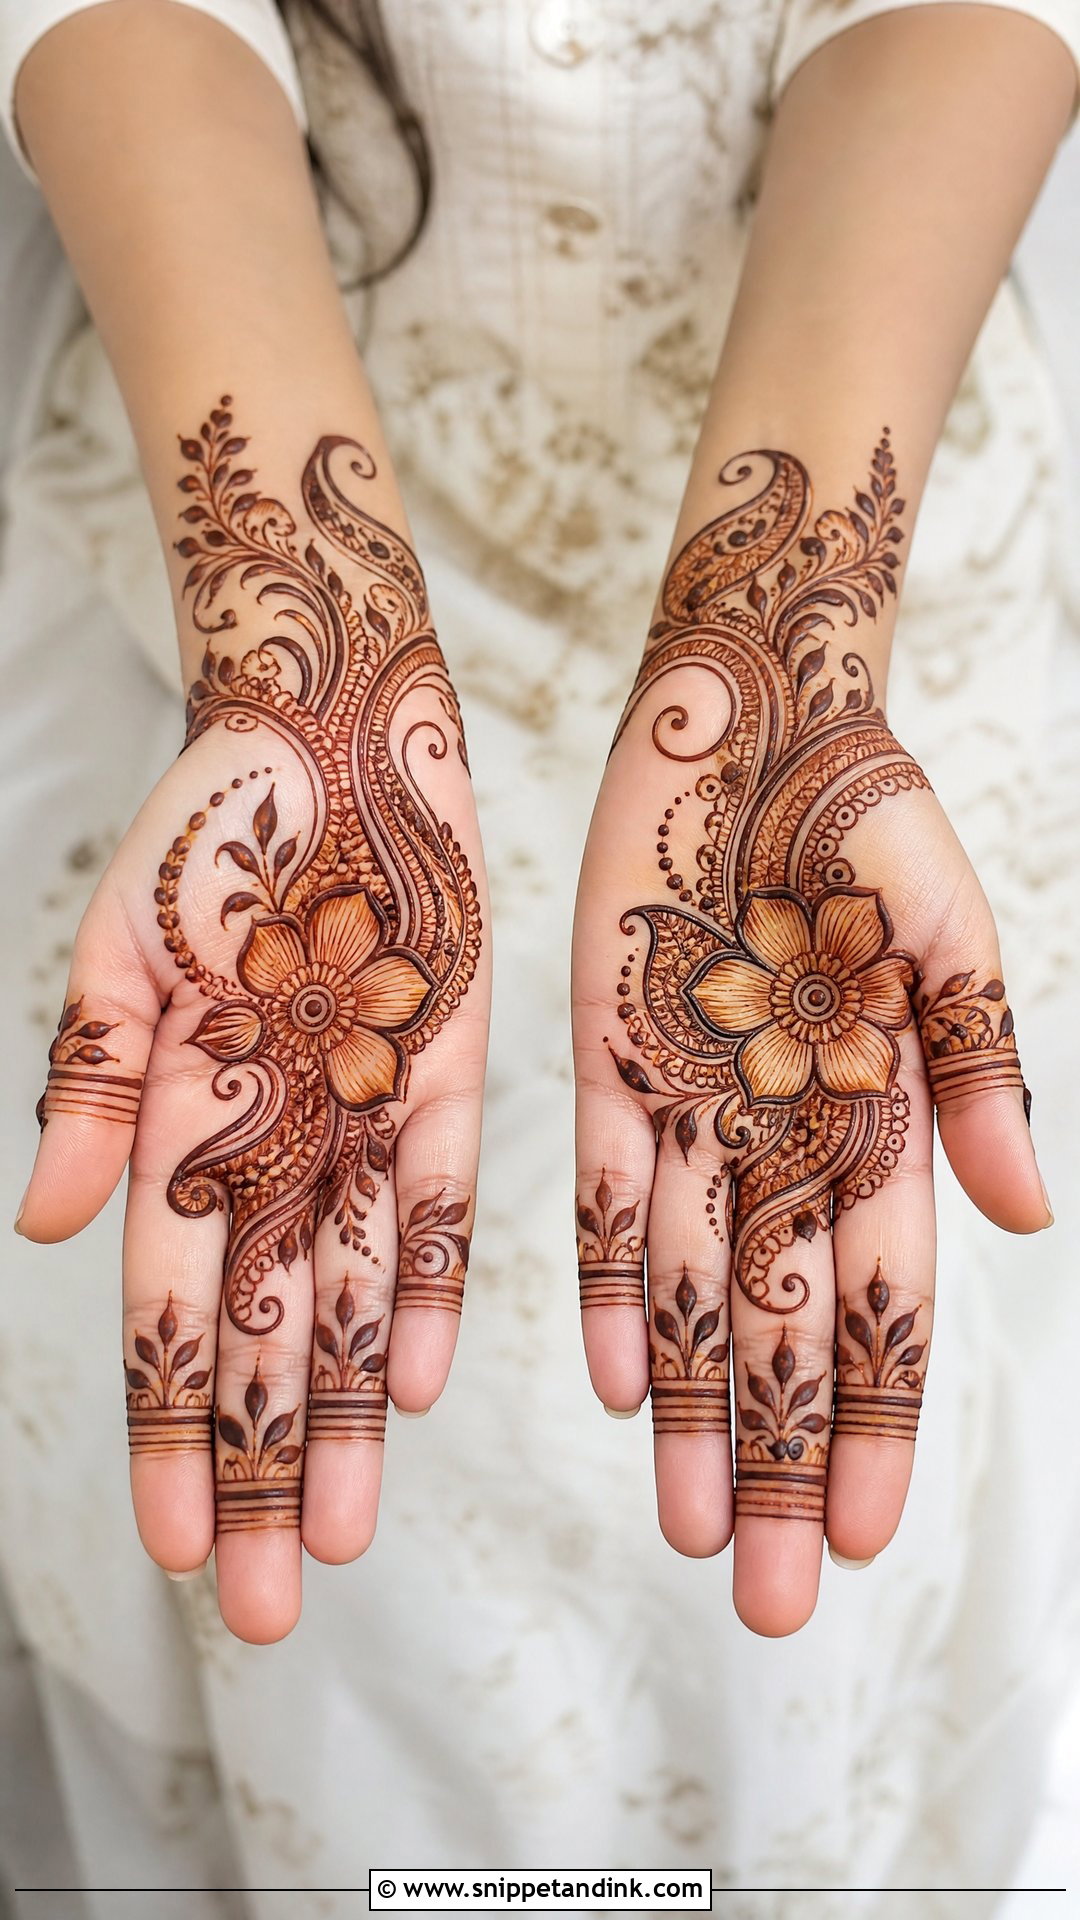
Shading gives depth: fine parallel lines inside selected petals and leaves of a flower, paisley or leaf trail, with other sections left open. Bold outlines and thin shading lines create the contrast that makes it look finished. Beginners should only shade larger shapes, because shading inside a tiny petal merges into a solid patch once the stain develops. Arabic and Indo-Arabic layouts take shading especially well.
29. Front Hand Moroccan Mehndi Design
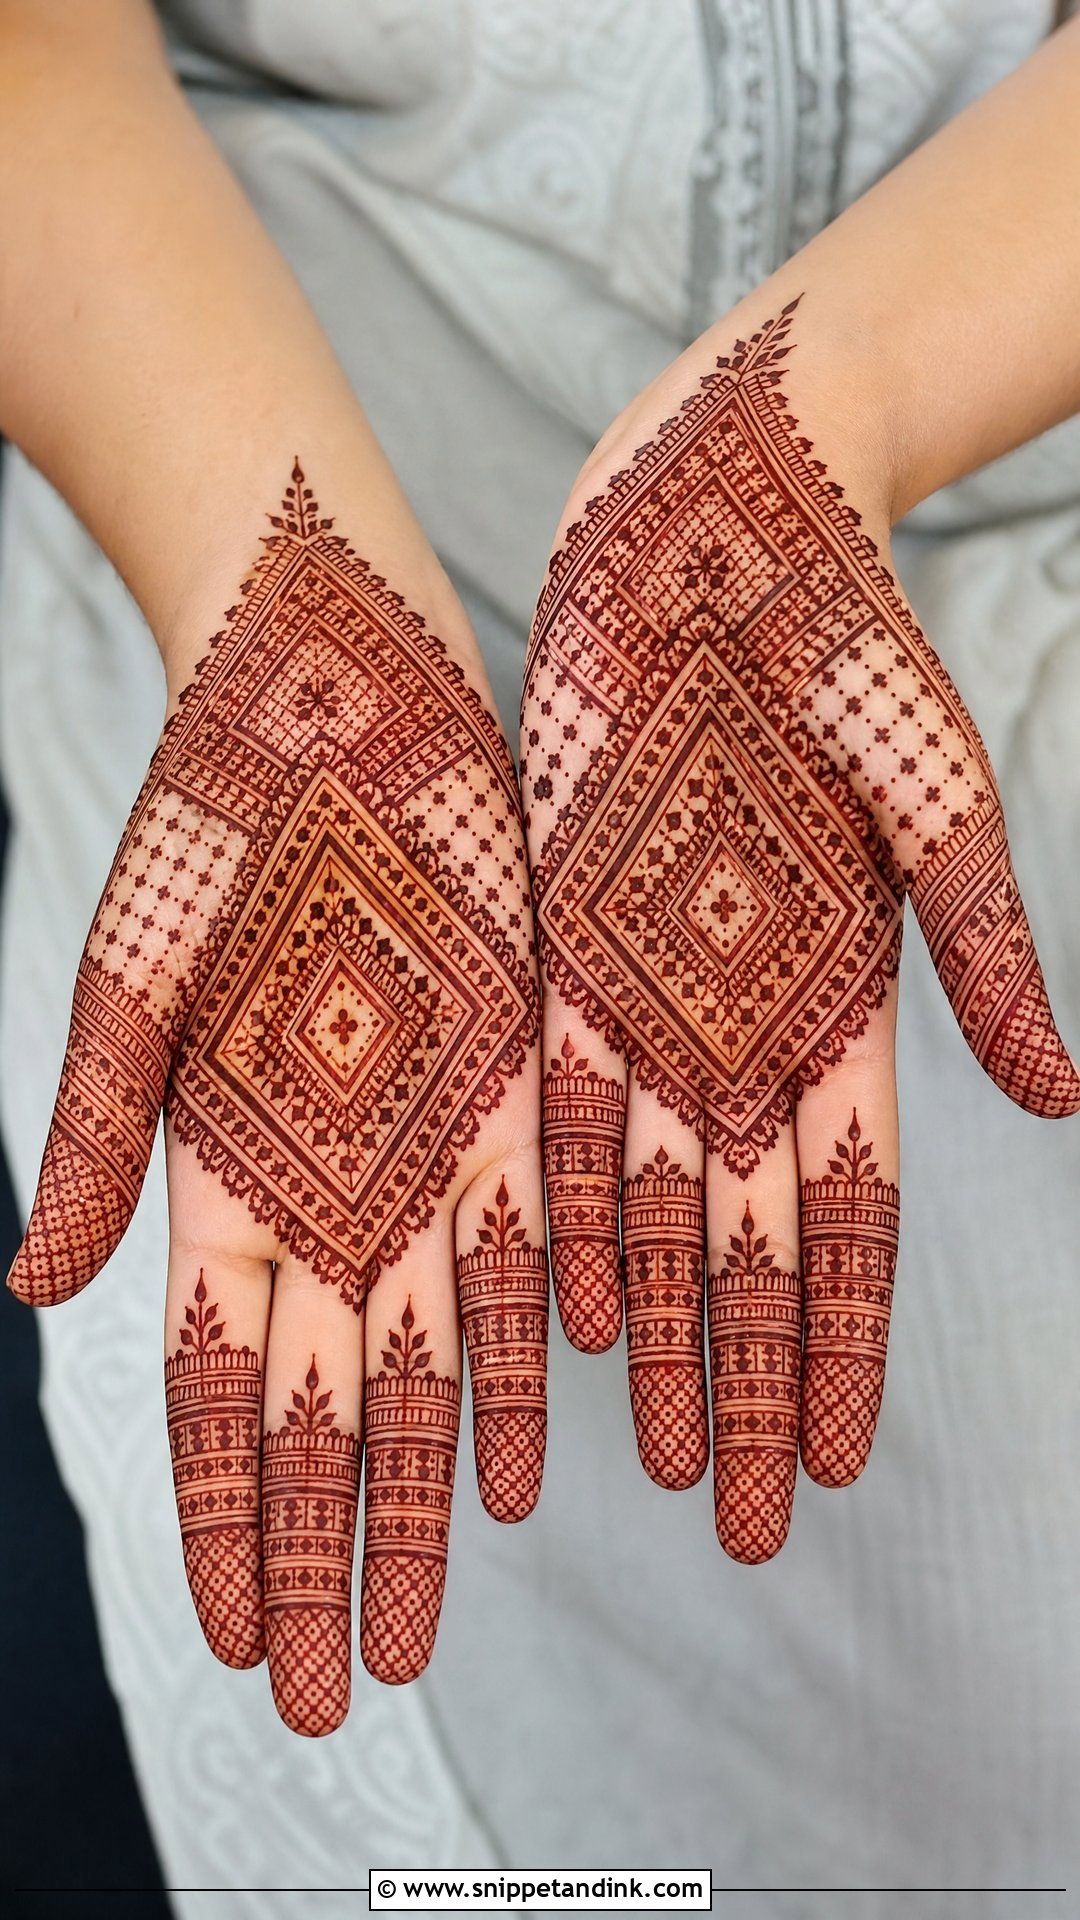
Moroccan-inspired henna swaps florals for geometry: clean lines, dots and repeated borders built around a central diamond, square or banded layout, with matching geometric bands on the fingers. It stands apart from Indian and Arabic patterns. Consistent spacing is the whole look. I mark the center line of the diamond first and work each side as a mirror, which keeps the structure crisp from wrist to fingertips.
30. Front Hand Gulf Mehndi Design
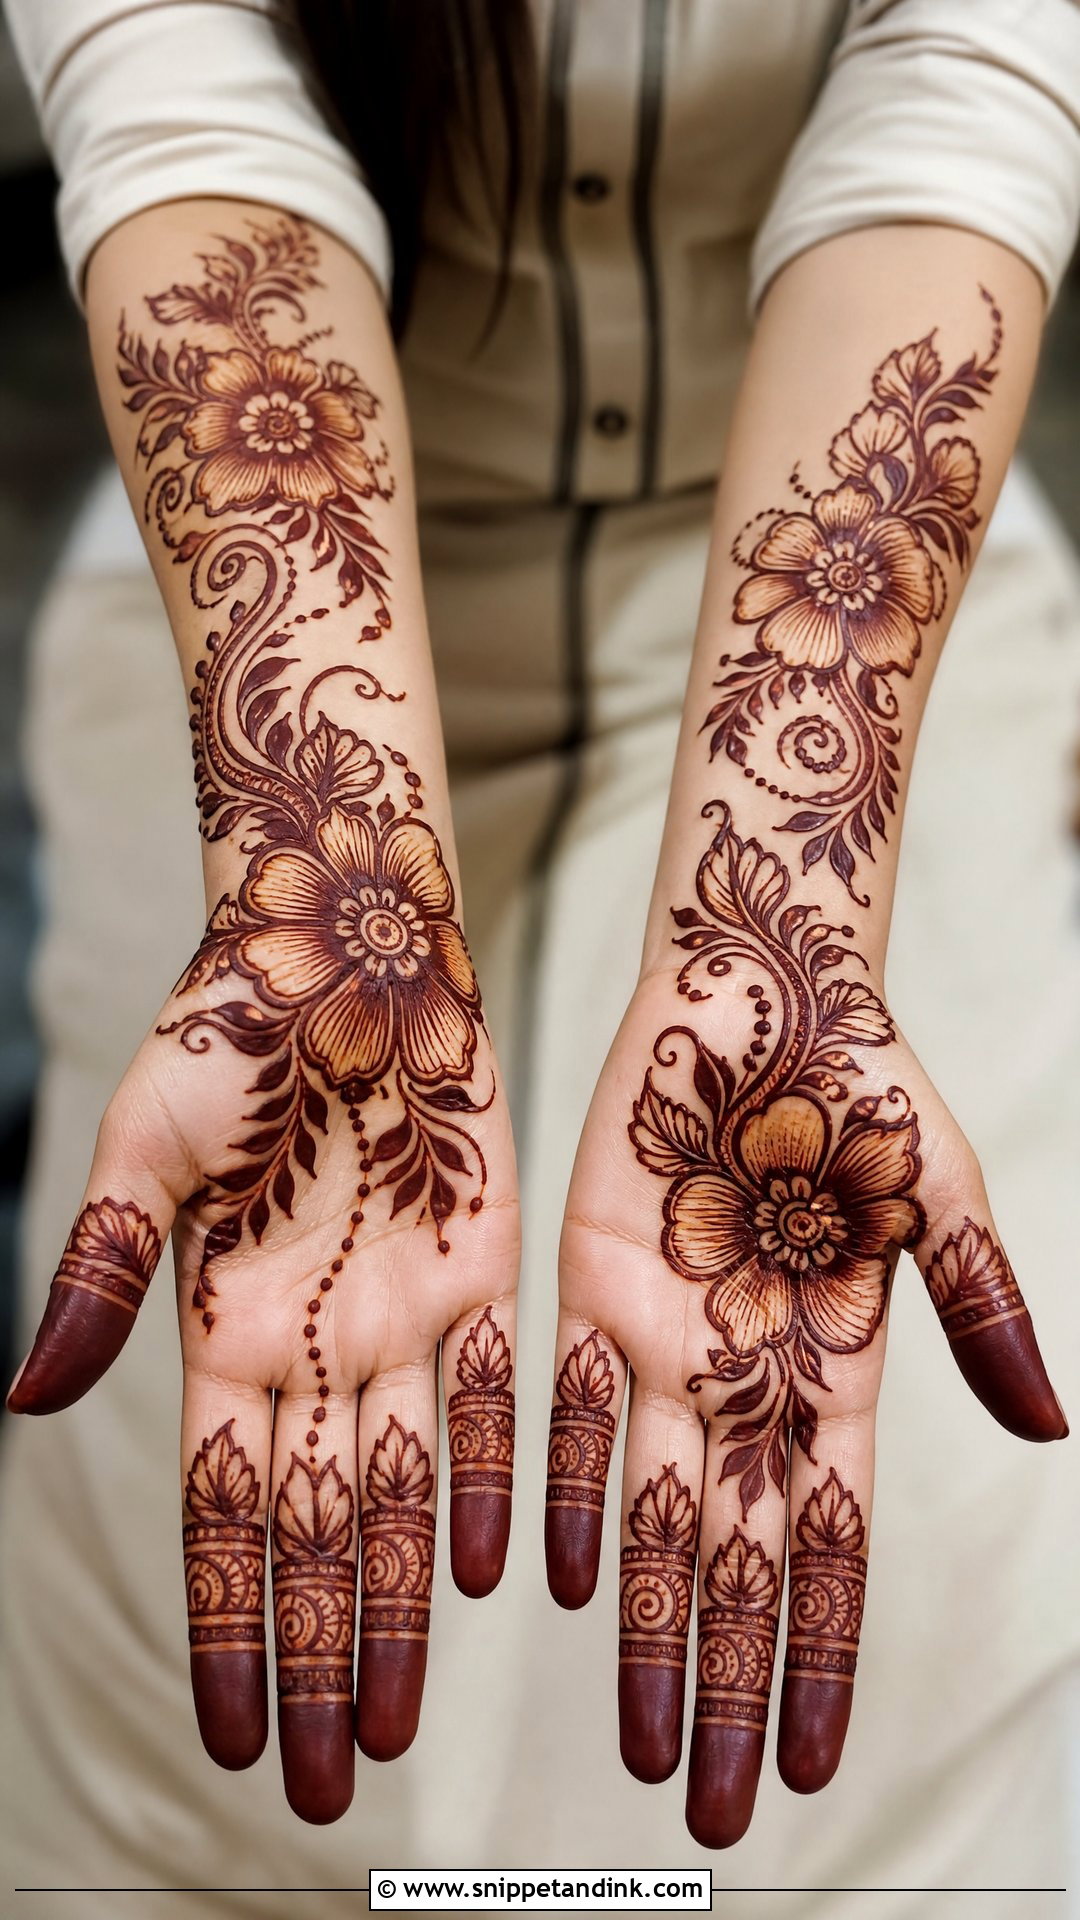
A front hand Gulf mehndi design uses bold florals, leafy vines, open spaces and flowing placement, slightly fuller and more dramatic than standard Arabic work. Start with one large flower on the palm and send curved leaves toward the fingers and wrist, with dots, swirls and small filled areas for contrast. Confident outlines matter more than detail here. Thick lines also take longer to dry, so keep your hands still a little longer than you would for fine work.
A Wobbly Line Can Still Be Saved
Wet paste starts staining within minutes, so speed matters more than perfection when something goes wrong. I keep a damp cotton bud and a tissue beside me before I start every hand, and you should too.
- Wrong stroke: lift it off straight away with the cotton bud, rolling rather than rubbing. A faint mark may remain, but it fades fastest of anything on the hand.
- A blob at the end of a line: turn it into a dot, a bud or a small leaf.
- A wobble in a vine: add a leaf right on top of the wobble.
- A burst cone: stop, wipe the spill, and switch cones. Pressing on with a split cone only makes more blobs.
- Uneven hands: add one small motif to the lighter hand rather than trying to copy the heavier one exactly.
Once the design is done, let it dry without touching anything, then dab on a little lemon and sugar to keep it stuck to the skin. Leave the paste on for several hours, scrape it off instead of washing, and keep water away until the next day. The orange you see first will deepen over a day or two.
Four Shapes Carry Every Palm in This List
Every design here, from full traditional palms to Arabic, Indo-Arabic, modern, minimal and festive layouts, rests on the same handful of shapes: dots, leaves, petals and curved lines. Get those clean and you can build a full palm for a wedding, a mandala for balance, a floral trail or a quick finger design. Keep the spacing even, the outlines steady and the motifs sized to your hand. Natural henna and patience with the paste will do the rest.
You'll Like These Ideas:


Leave a Reply