
Light mehndi is what I put on most hands outside of bridal bookings: guests, the bride’s sisters, Eid mornings, a Teej afternoon at home. It needs a fraction of the sitting time, and because the shapes are open, a small wobble in a line rarely shows once the stain develops. Every design below is built from the same few elements I teach first, which are bold outlines, one main motif, leafy vines, finger bands and bare skin left on purpose. They range across Indian, Arabic, Indo-Arabic, Khaleeji and Moroccan styles as well as minimal henna, so you can save one to practice on your own hand or show it to whoever is holding the cone.
Learning the Cone on Paper Before It Touches Skin
Every simple design on this list is made from five or six strokes, and I’d practice those on paper or a plastic sheet before trying a hand. Hold the cone like a pen, but squeeze from the top with your other fingers rather than pinching near the tip. Even pressure is what gives an even line. Keep the tip just above the surface and let the paste fall into place instead of dragging it, because a dragged line comes out thin and broken.
- Dots, small and large, in a straight row with equal gaps
- Straight and curved lines drawn in one movement
- The teardrop petal: press, pull, lift
- C and S curves for vines
- A paisley, which is just a teardrop with a curled tail
- A small spiral, the start of a rose
Paste consistency changes everything. Good paste is smooth like toothpaste and stretches slightly from the tip as you lift. Too thick and the line snaps; too runny and it spreads into its neighbors. If you mix your own, natural henna powder with lemon juice or water, a little sugar and an essential oil such as eucalyptus or tea tree needs several hours of rest for the dye to release. Fresh cones keep in the freezer for weeks.
A quick check on store-bought cones
Natural henna always starts orange and darkens over a day or two. A cone that promises a black or dark brown stain within an hour is almost certainly chemical, and I won’t put those on anyone. Read the ingredient list, and do a patch test inside the elbow if your skin is sensitive.
1. Simple Front Hand Mehndi Design
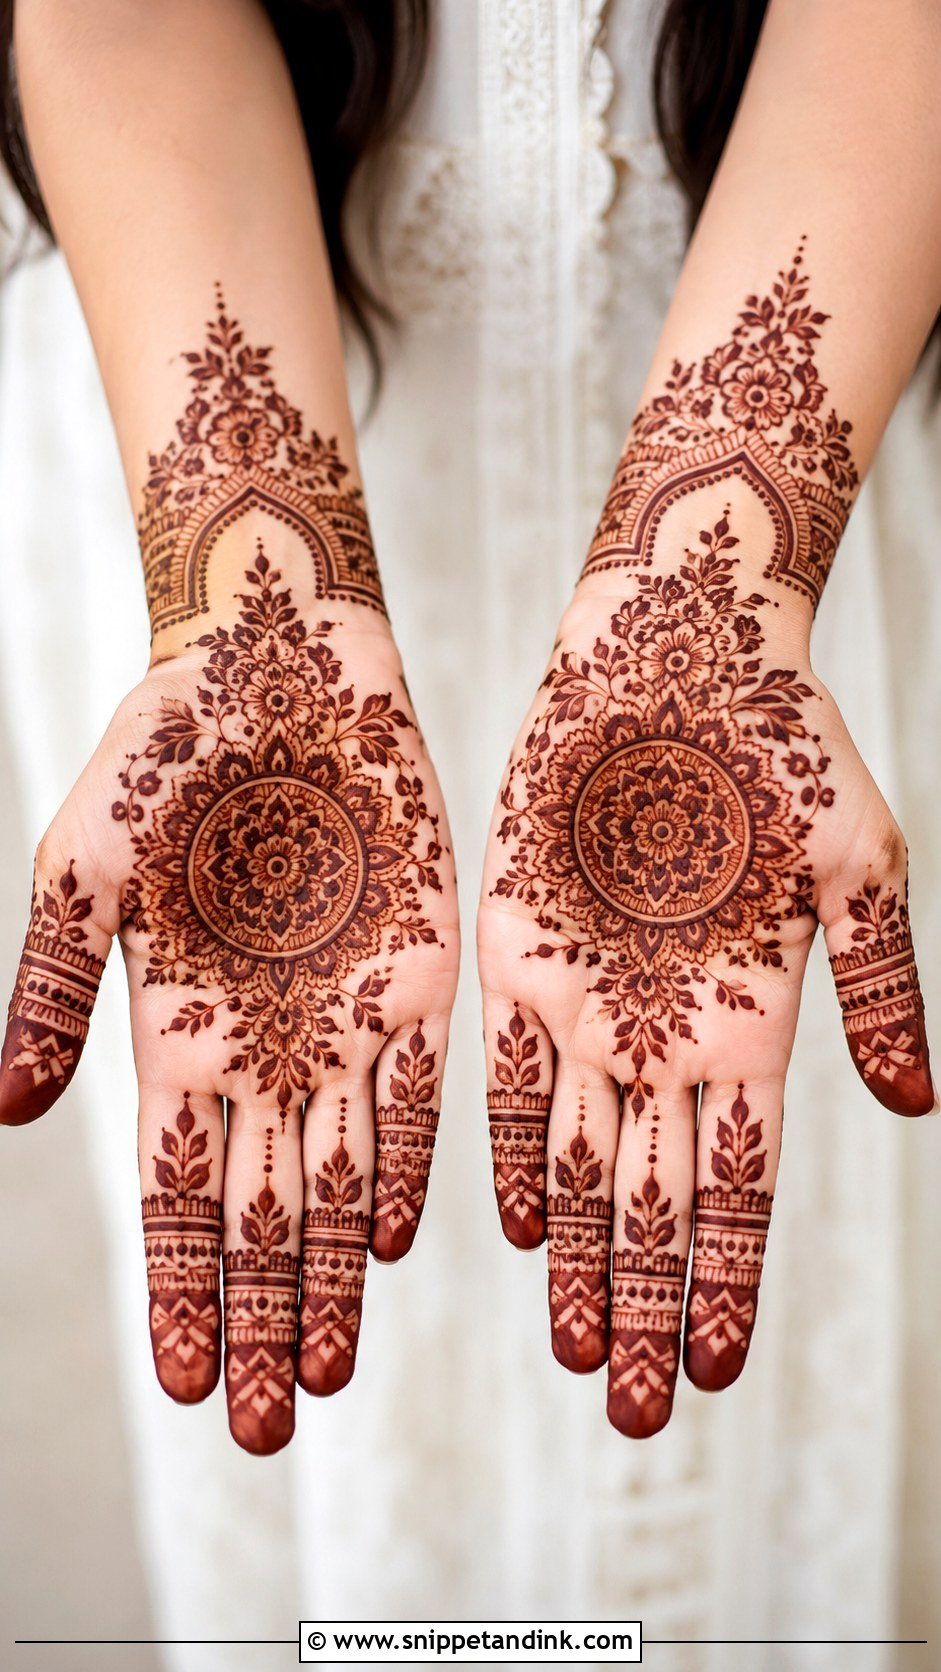
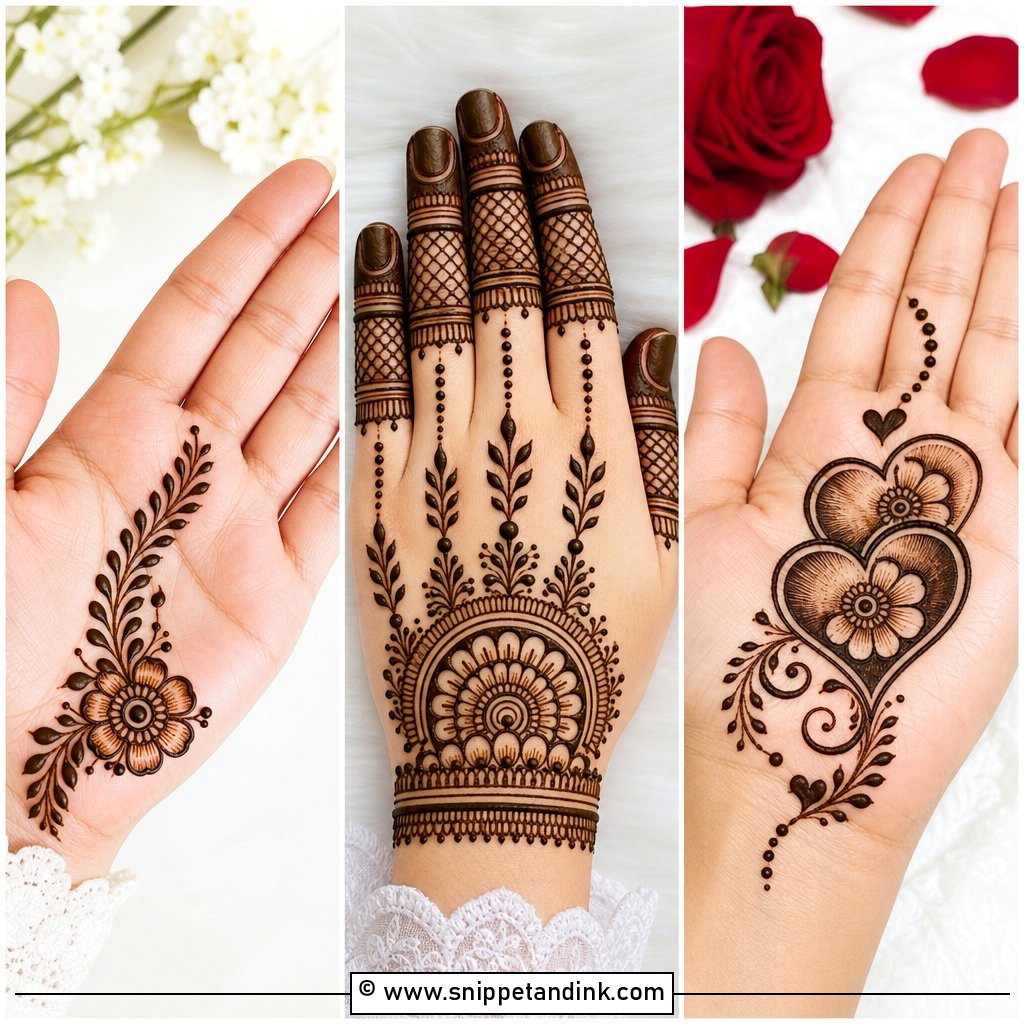
Front hand work is where I start every student, because the palm gives you a flat surface and an obvious center. I place the mandala slightly toward the base of the palm rather than dead center, since a relaxed hand cups and a high motif disappears into the crease. Leaves and dots go around it next, then matching finger bands and light tip shading, and a slim wrist border closes it. The usual beginner mistake is drawing the fingers first and running out of patience for the palm. Do the center while your hand is still steady.
2. Simple Back Hand Mehndi Design
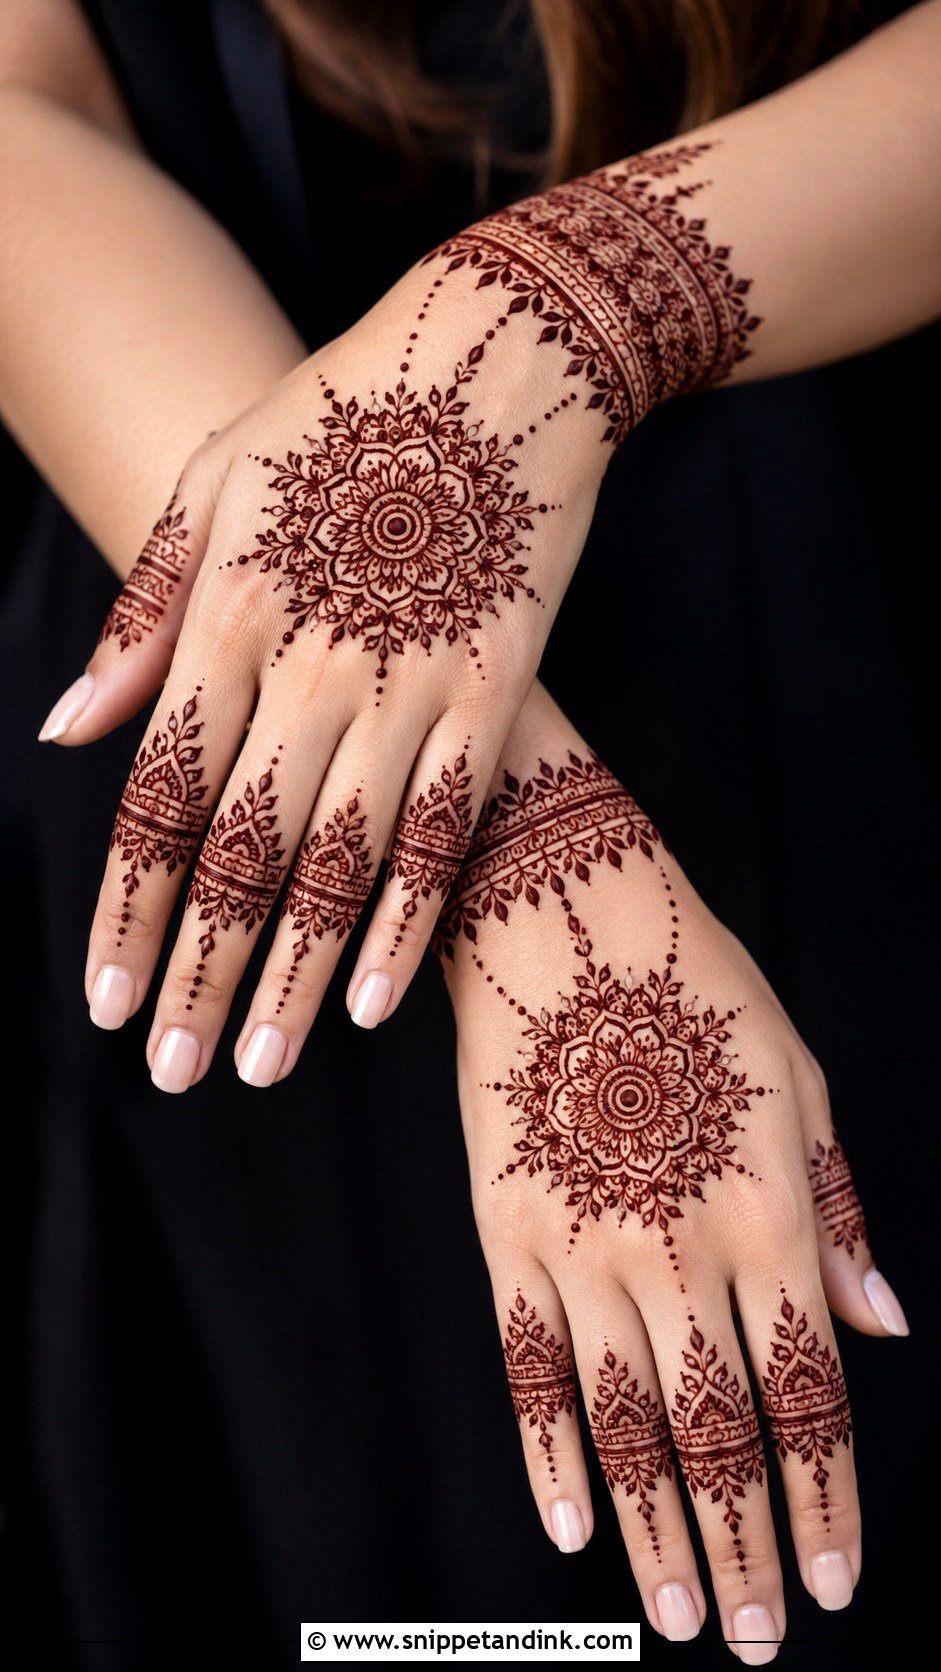
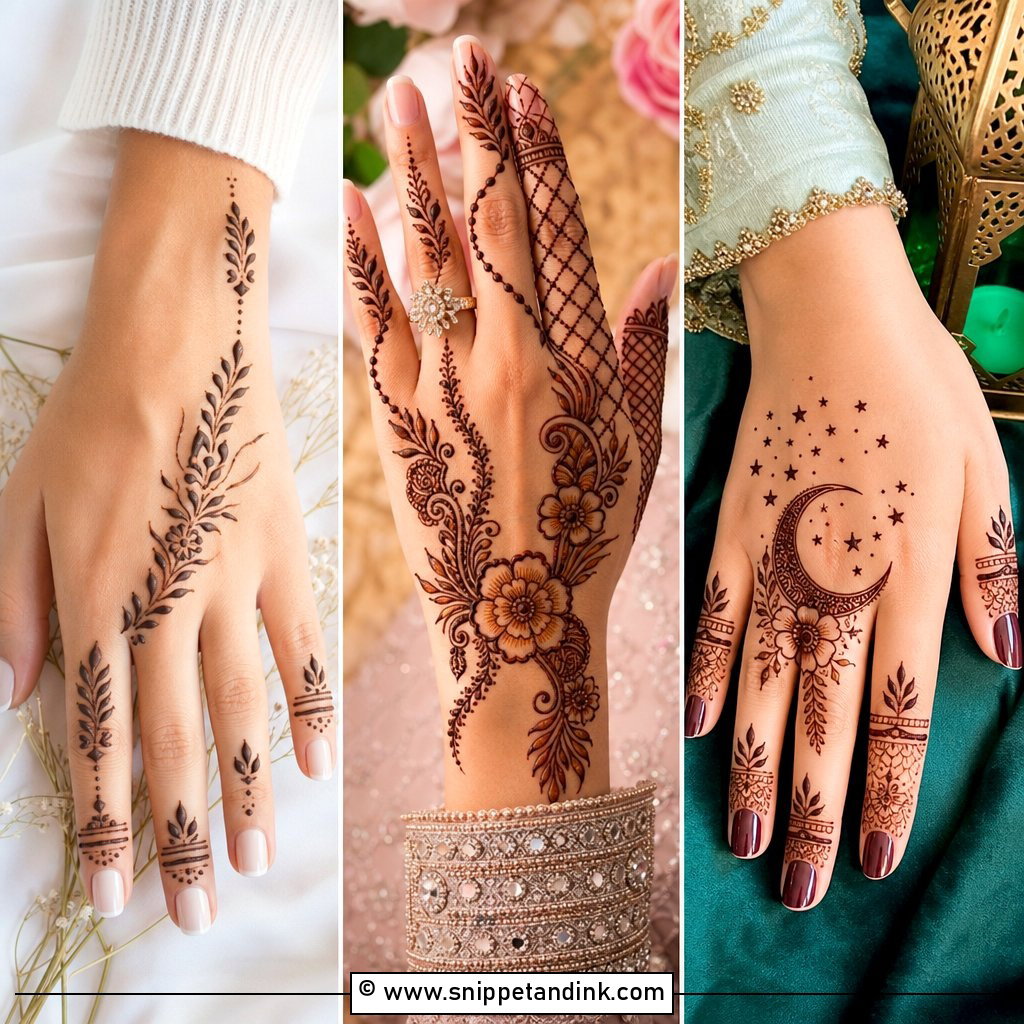
The back of the hand is less forgiving than the palm. Skin moves over the knuckles and tendons, so a long straight line can kink the moment the hand flexes. I keep the center motif small, link it to the fingers with dotted chains, because dots hide a shaky hand far better than a continuous line, and close it at the wrist with a bracelet band. The stain also comes out lighter here than inside the hand, so I draw the outlines a little bolder to compensate. Rings and bangles sit nicely over this layout.
3. Simple Arabic Mehndi Design
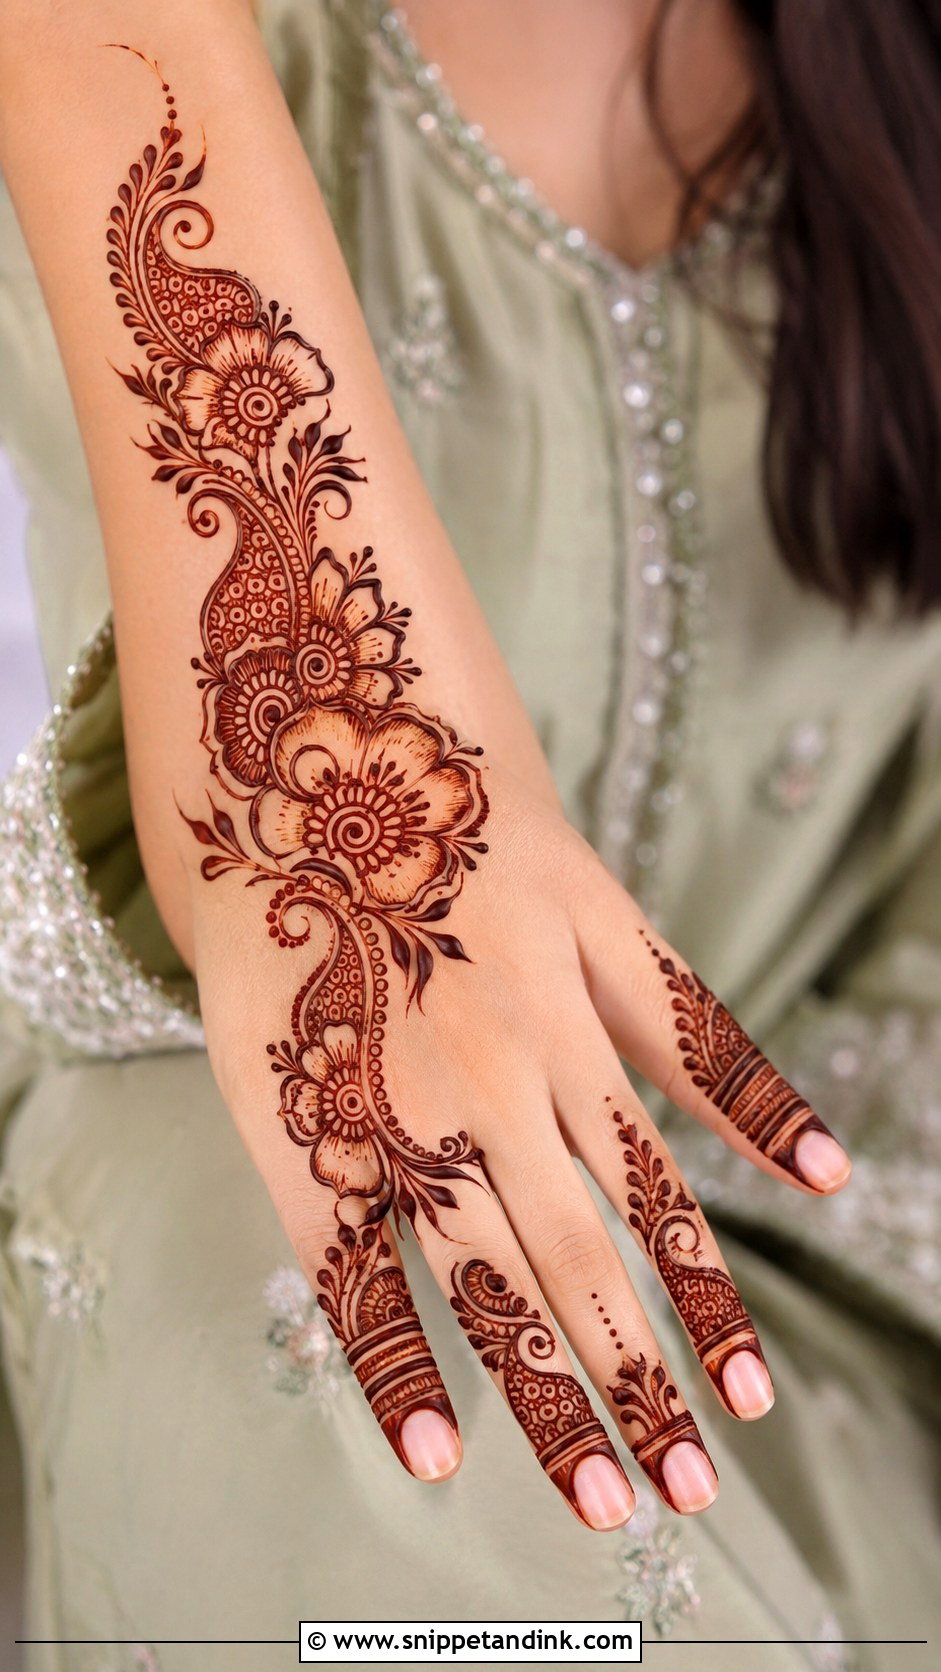
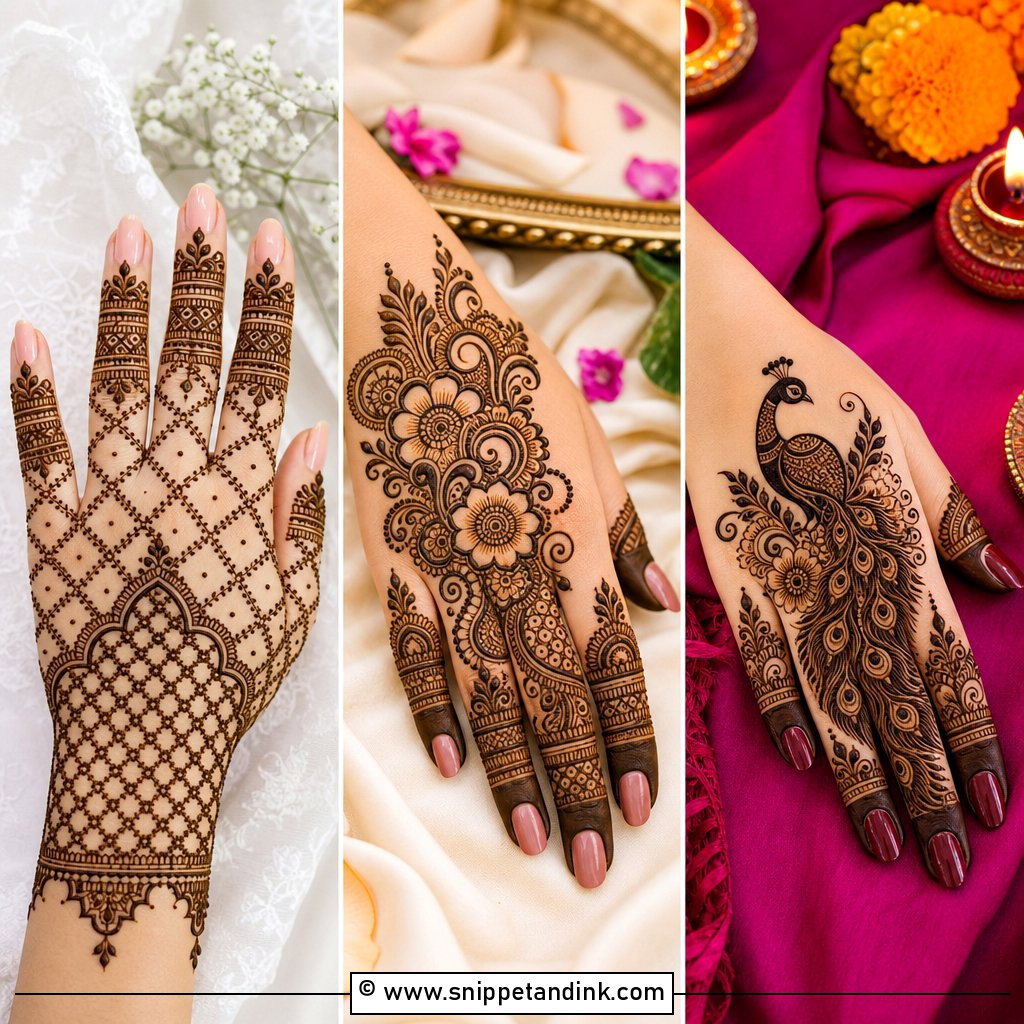
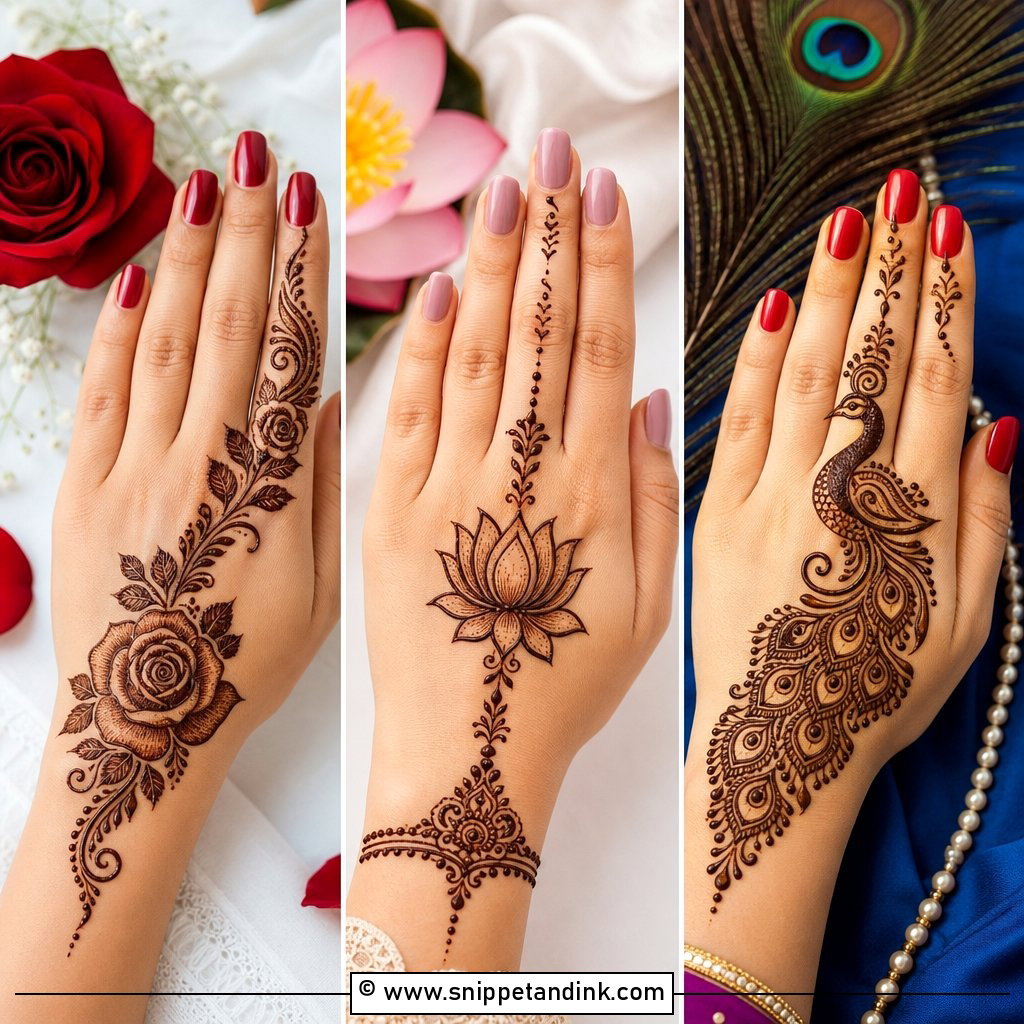
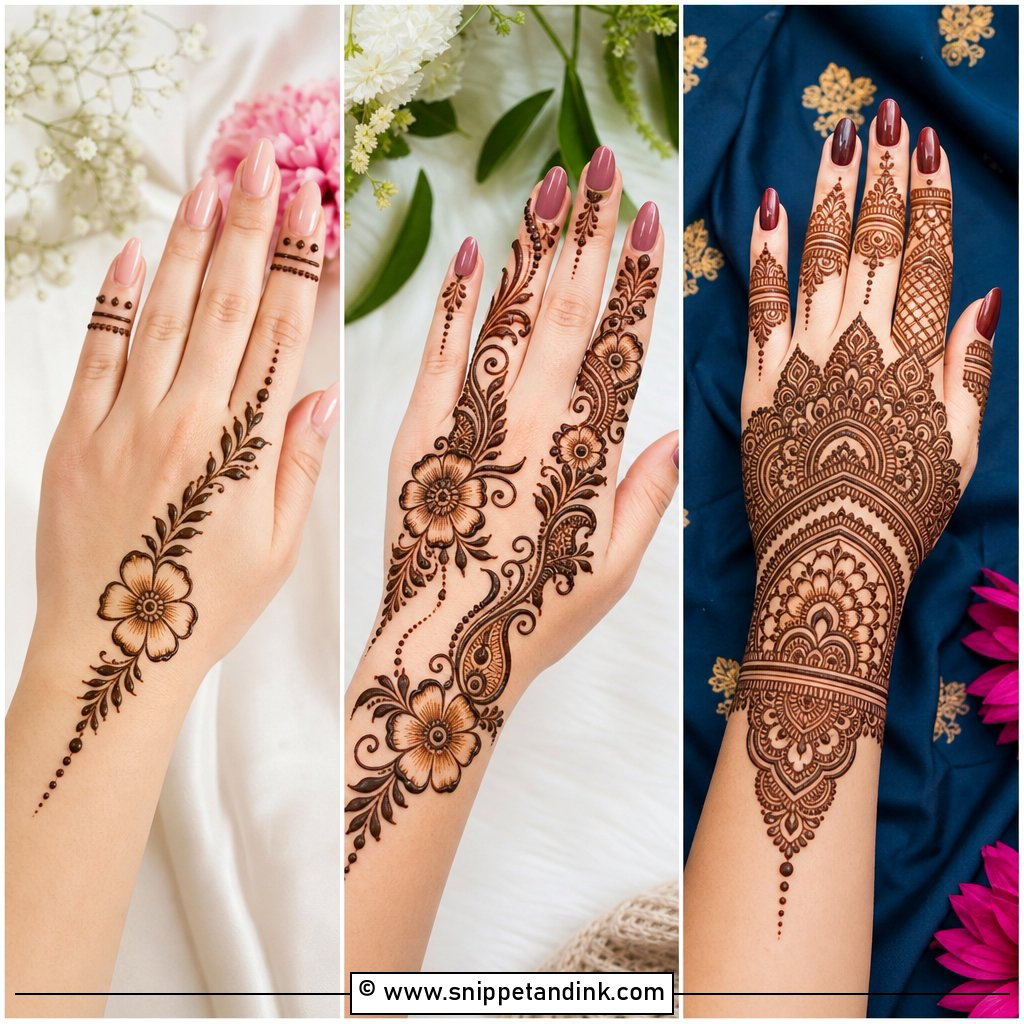
Arabic work is quick because it relies on a few large shapes instead of fill. I run a diagonal trail from the outer wrist up to the index finger, built from big flowers, paisleys and curved vines, with the gaps left open on purpose. That diagonal is what flatters: it pulls the eye along the length of the hand, which is why I suggest it to anyone who feels her fingers are short. Keep the fingers to slim bands and leafy tips so the trail stays the main event. If you’re learning, practice the petal stroke on paper first: press, pull and lift in one motion.
4. Simple Indian Mehndi Design
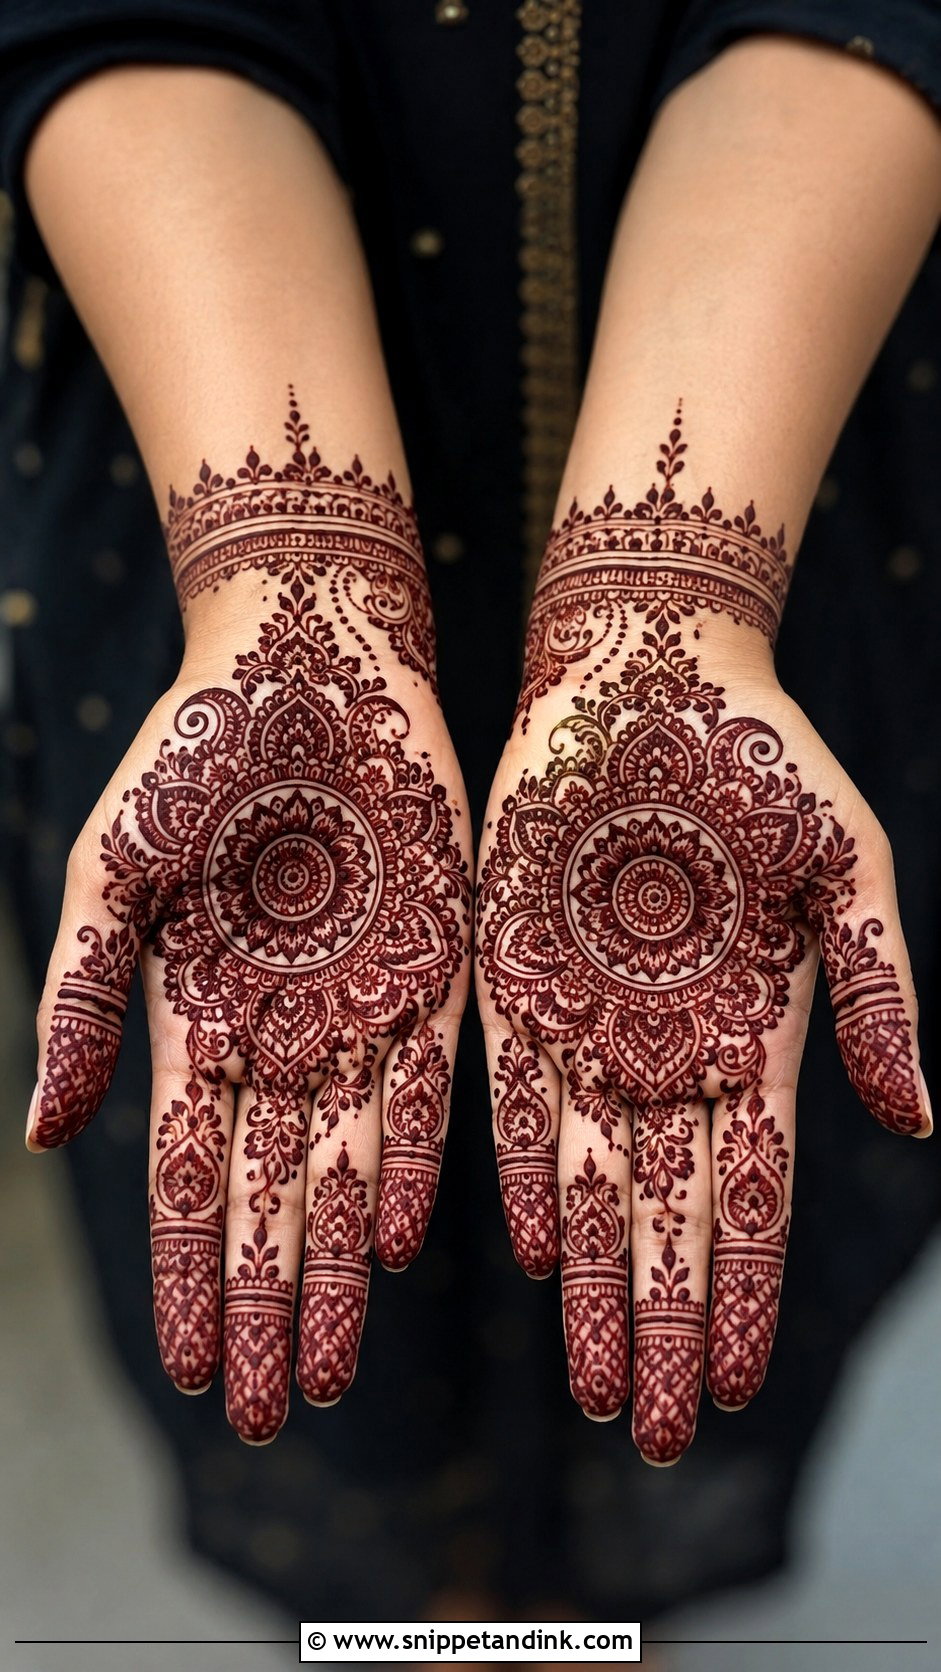
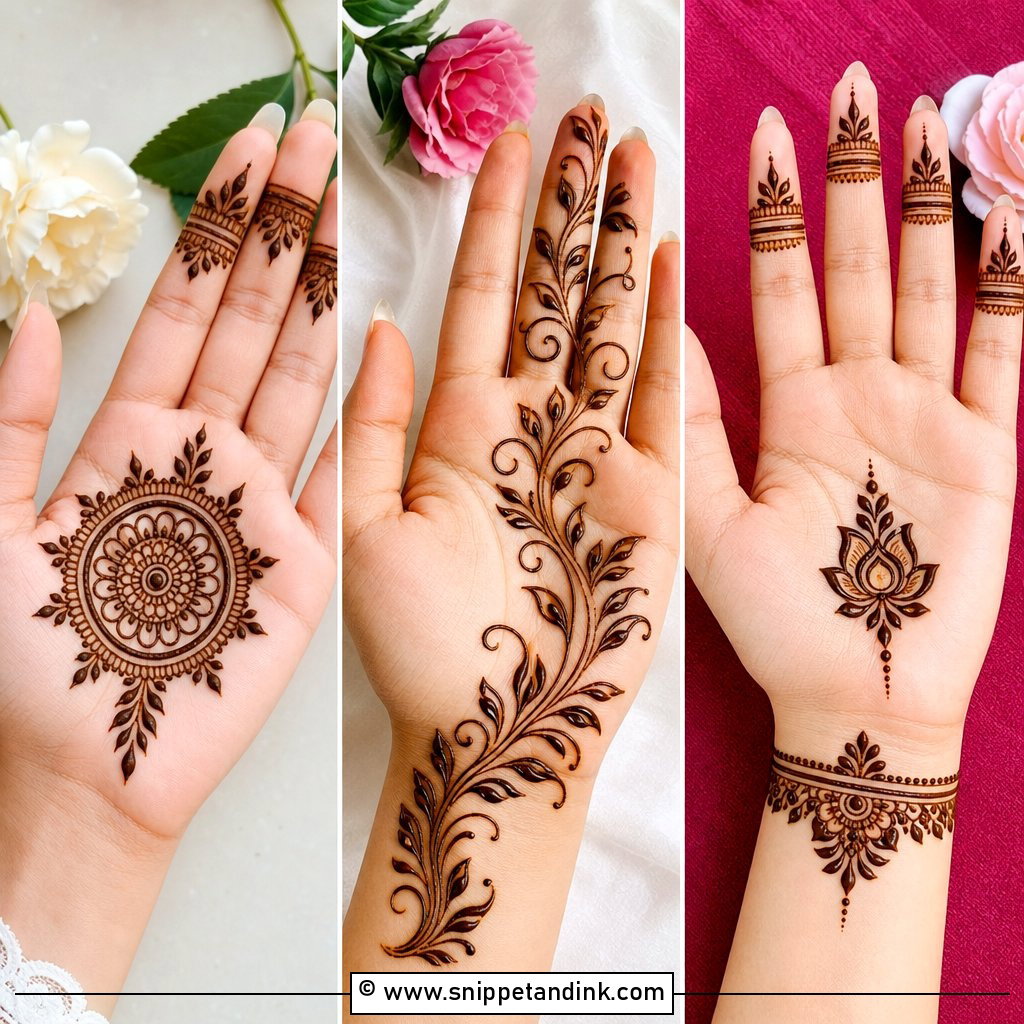
Indian-style mehndi turns dense quickly, so a simple version is mostly about restraint. I use a round palm mandala, paisleys toward the wrist and a few small florals near the fingers, then stop. The richness people associate with Indian designs comes from repetition, scallops, dots and fine parallel lines, and you only need a little of it around each motif. Matching all ten fingers makes the whole thing look deliberate. I’d wear this for a puja, Karwa Chauth or a family wedding, and it’s good practice because every element repeats.
5. Simple Indo-Arabic Mehndi Design
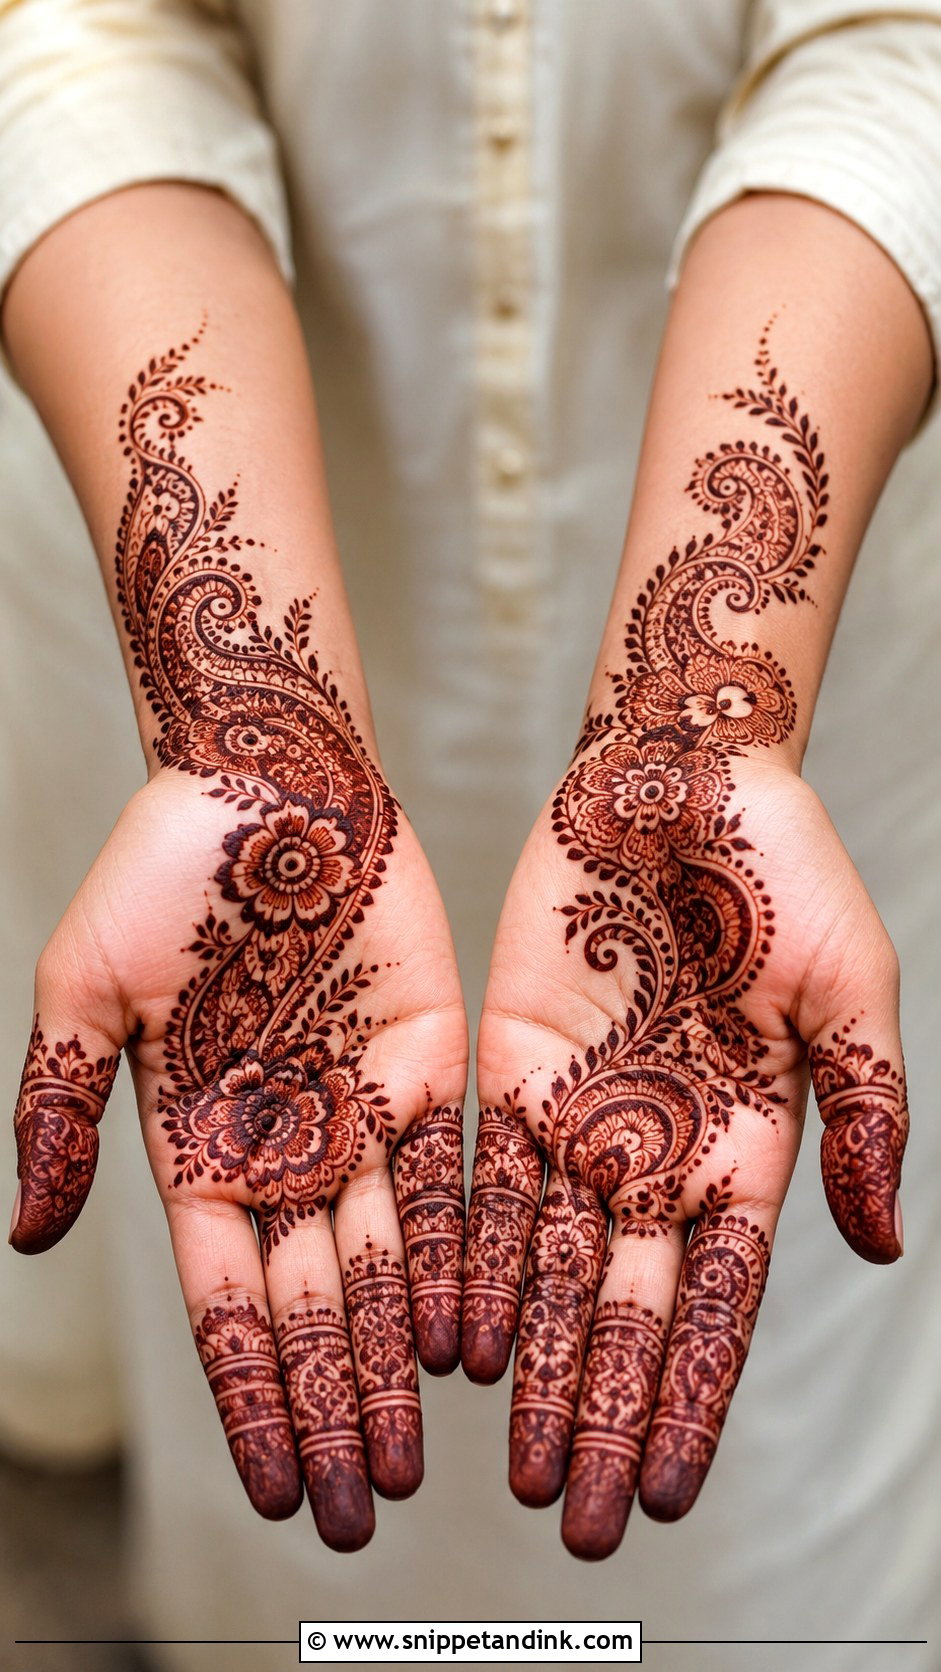
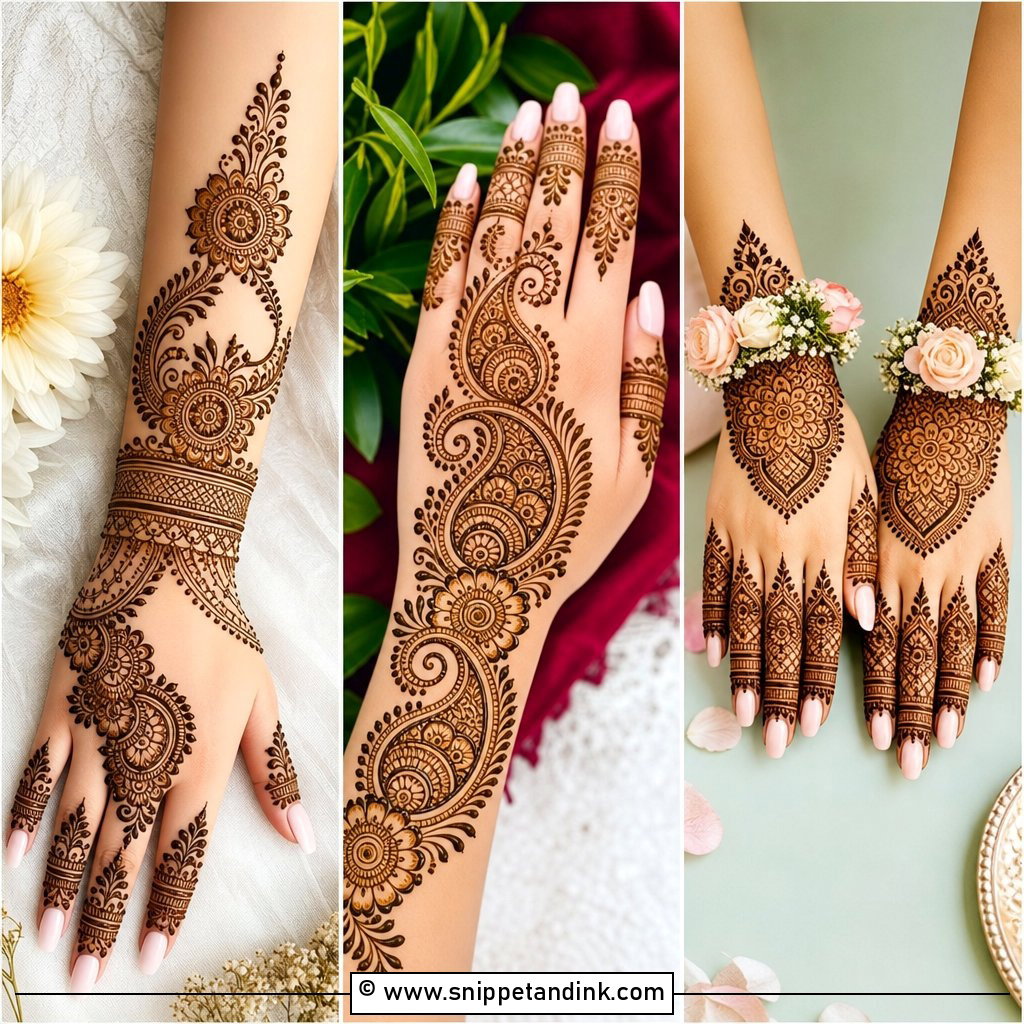
Indo-Arabic is a hybrid I enjoy drawing: the trail structure of Arabic work with Indian detail tucked inside the flowers and paisleys. One side of the hand gets the decoration and the other stays open, which keeps it modern. Fine grids on the fingers and a soft bracelet at the wrist hold it together. The risk is overfilling the inner motifs. Fine lines placed too close will spread into each other as the paste settles, and you lose the detail in the stain, so leave a hair’s width of skin between strokes. Sangeet and engagement guests who want more than a trail but less than full coverage usually land here.
6. Simple Mandala Mehndi Design
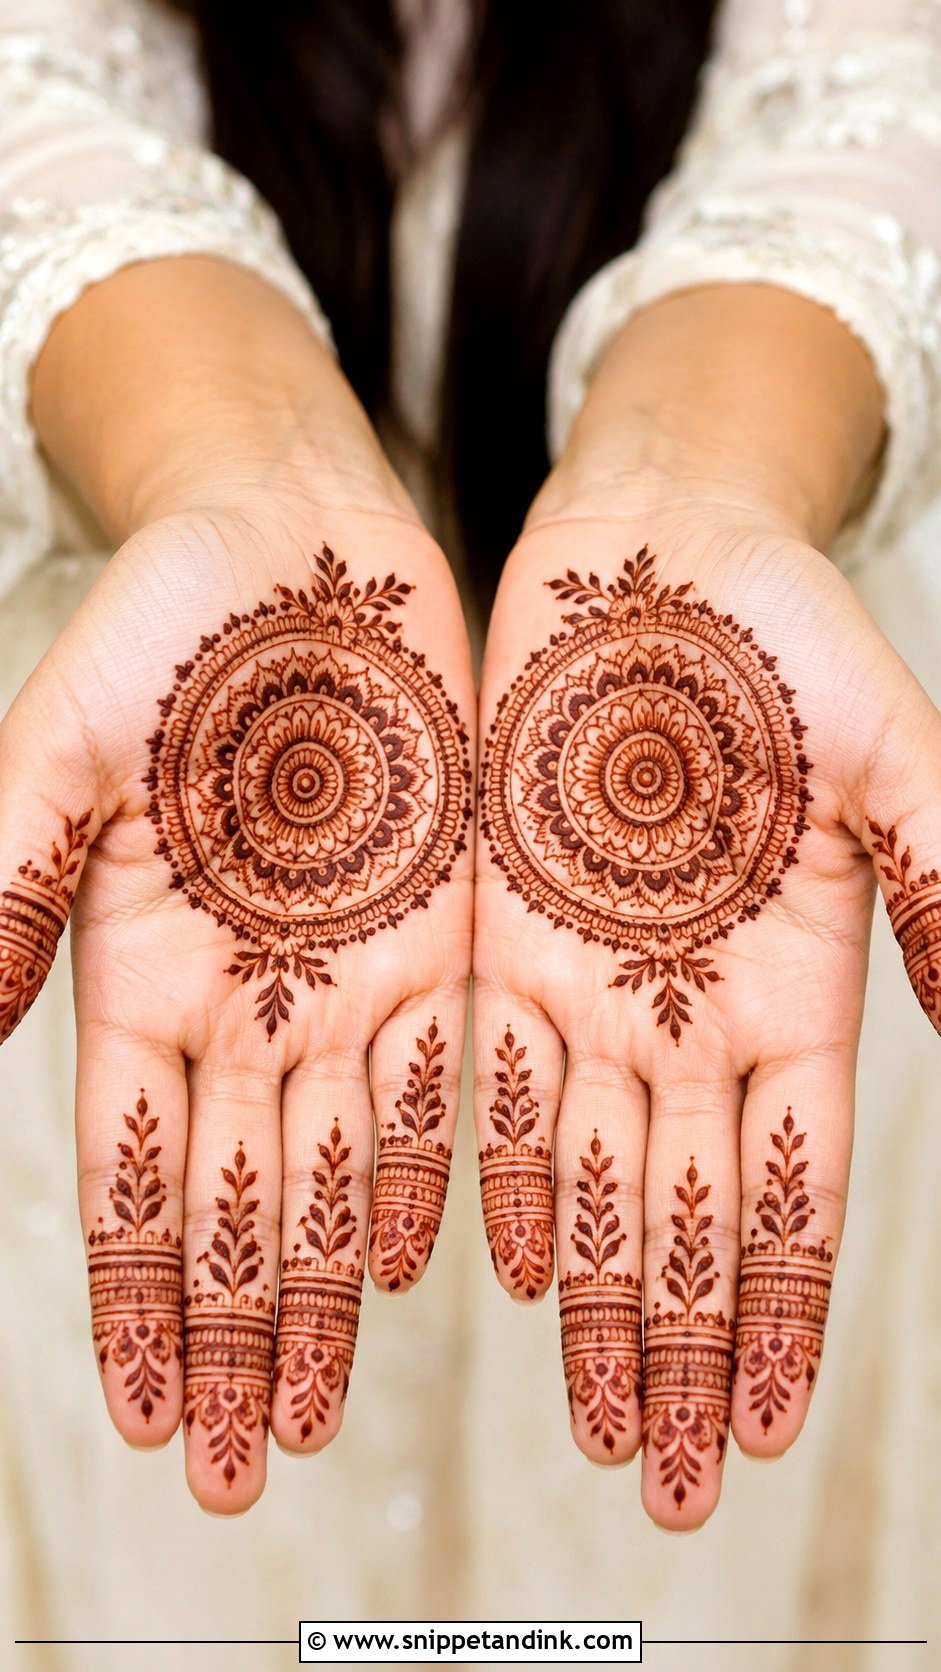
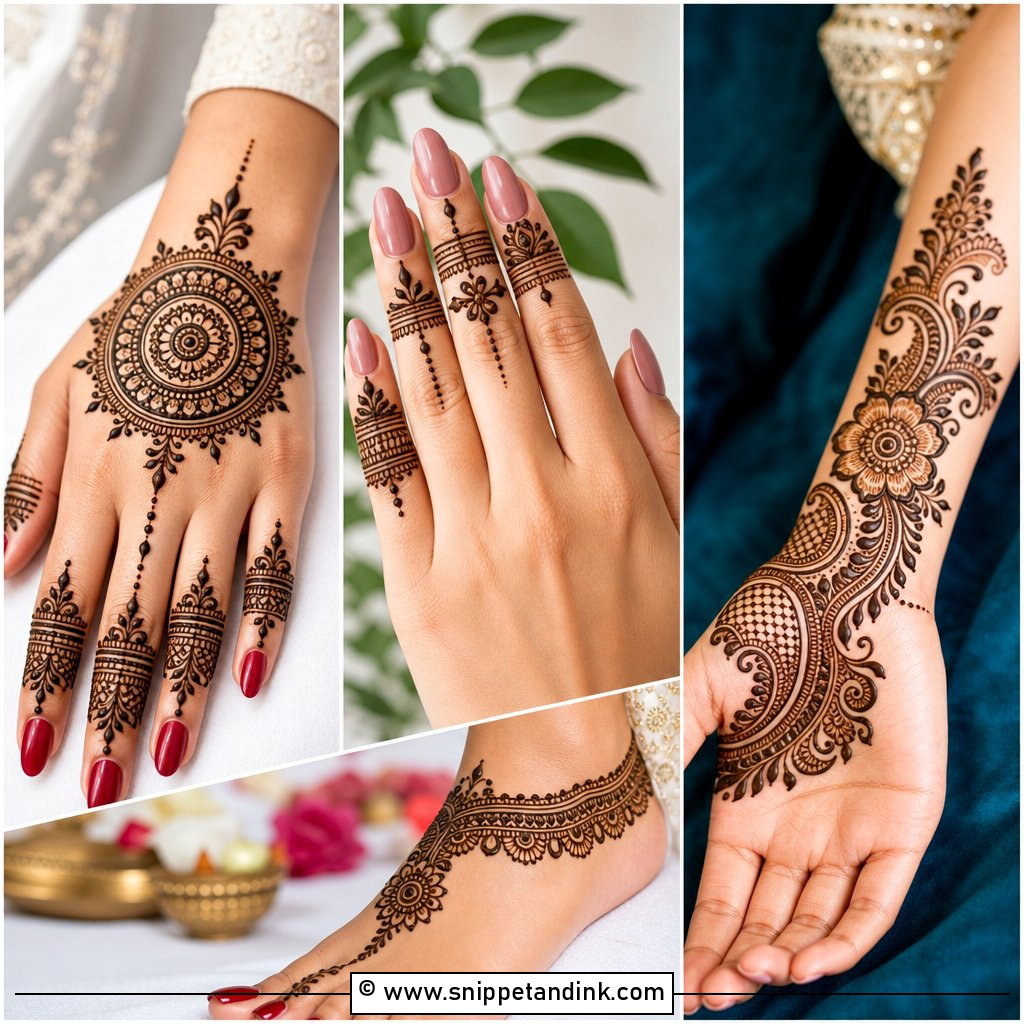
Mandalas show every slip in symmetry, which is exactly why I make beginners draw them. Start with a dot in the center and build outward ring by ring: petals, dots, a scalloped band, a fine outline. If one ring goes lopsided, widen the next one slightly on the short side and the eye forgives it. Fingers stay with repeated lines or tiny bands so attention remains on the circle. It sits equally well on the palm or the back hand, and it reads clearly on small hands and adult ones.
7. Simple Floral Mehndi Design
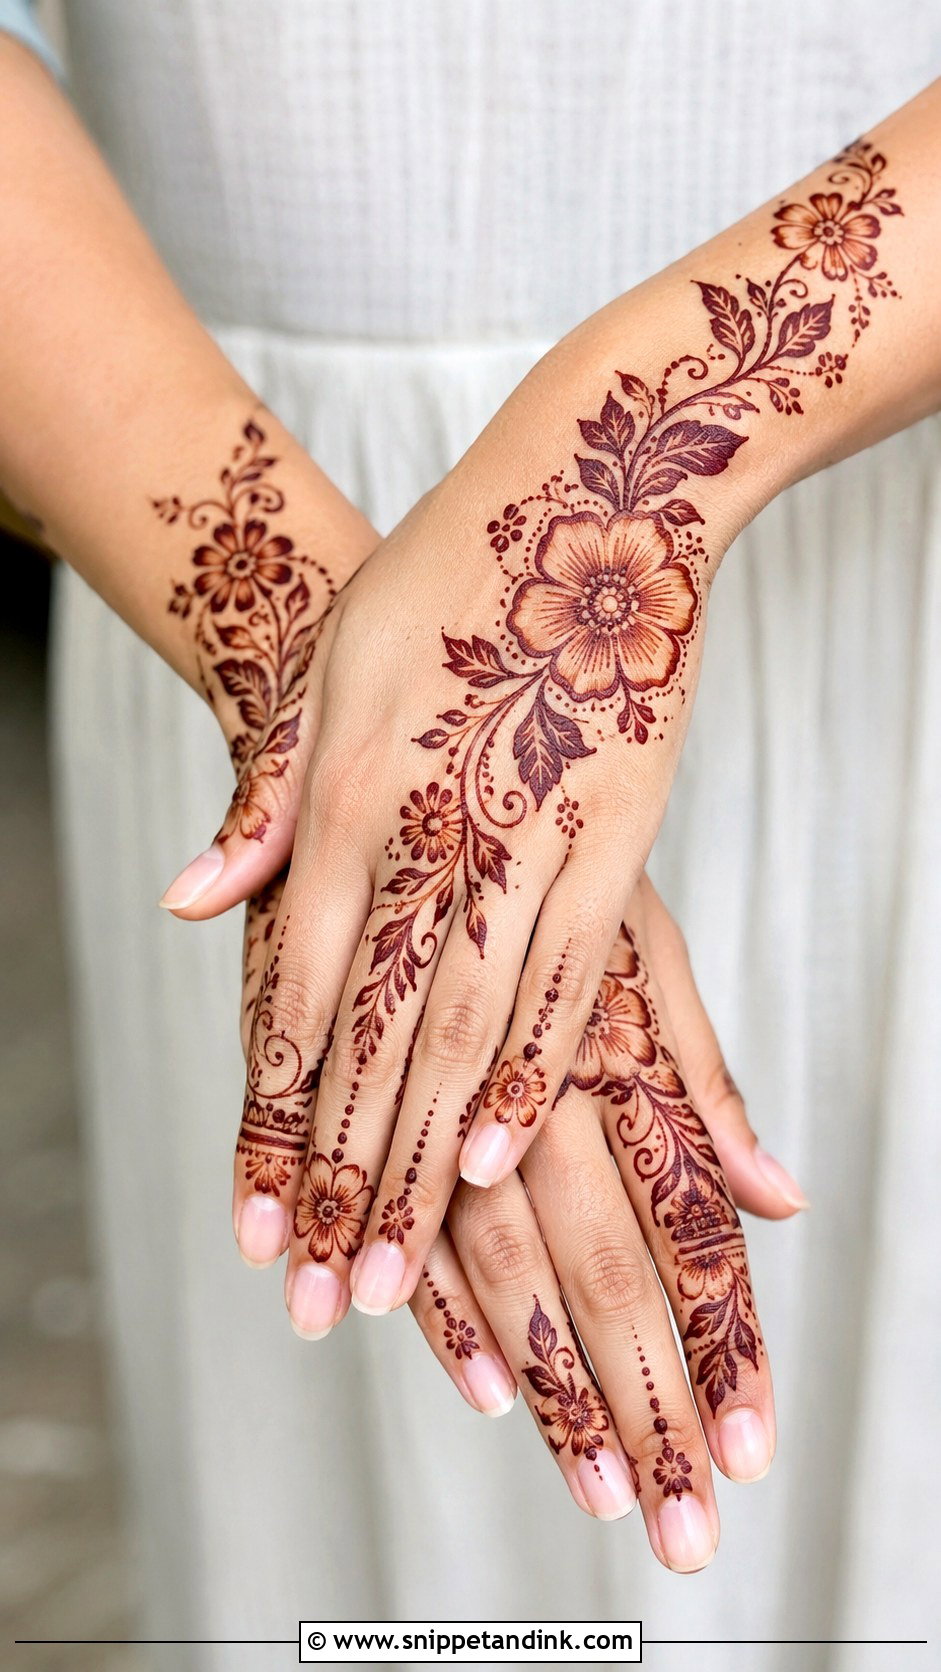
Flowers are the most forgiving shape in henna. A petal that comes out a little fat just looks like a different flower. I draw one large bloom on the palm or back hand with bold petals so they stain clearly, then let leafy vines and smaller blossoms trail off it, with dots filling the space without asking for extra skill. On the fingers, tiny flowers sit near the tips joined by curved lines, and a slim wrist vine finishes the hand. This is the one I hand to nervous first-timers doing their own mehndi.
8. Simple Paisley Mehndi Design
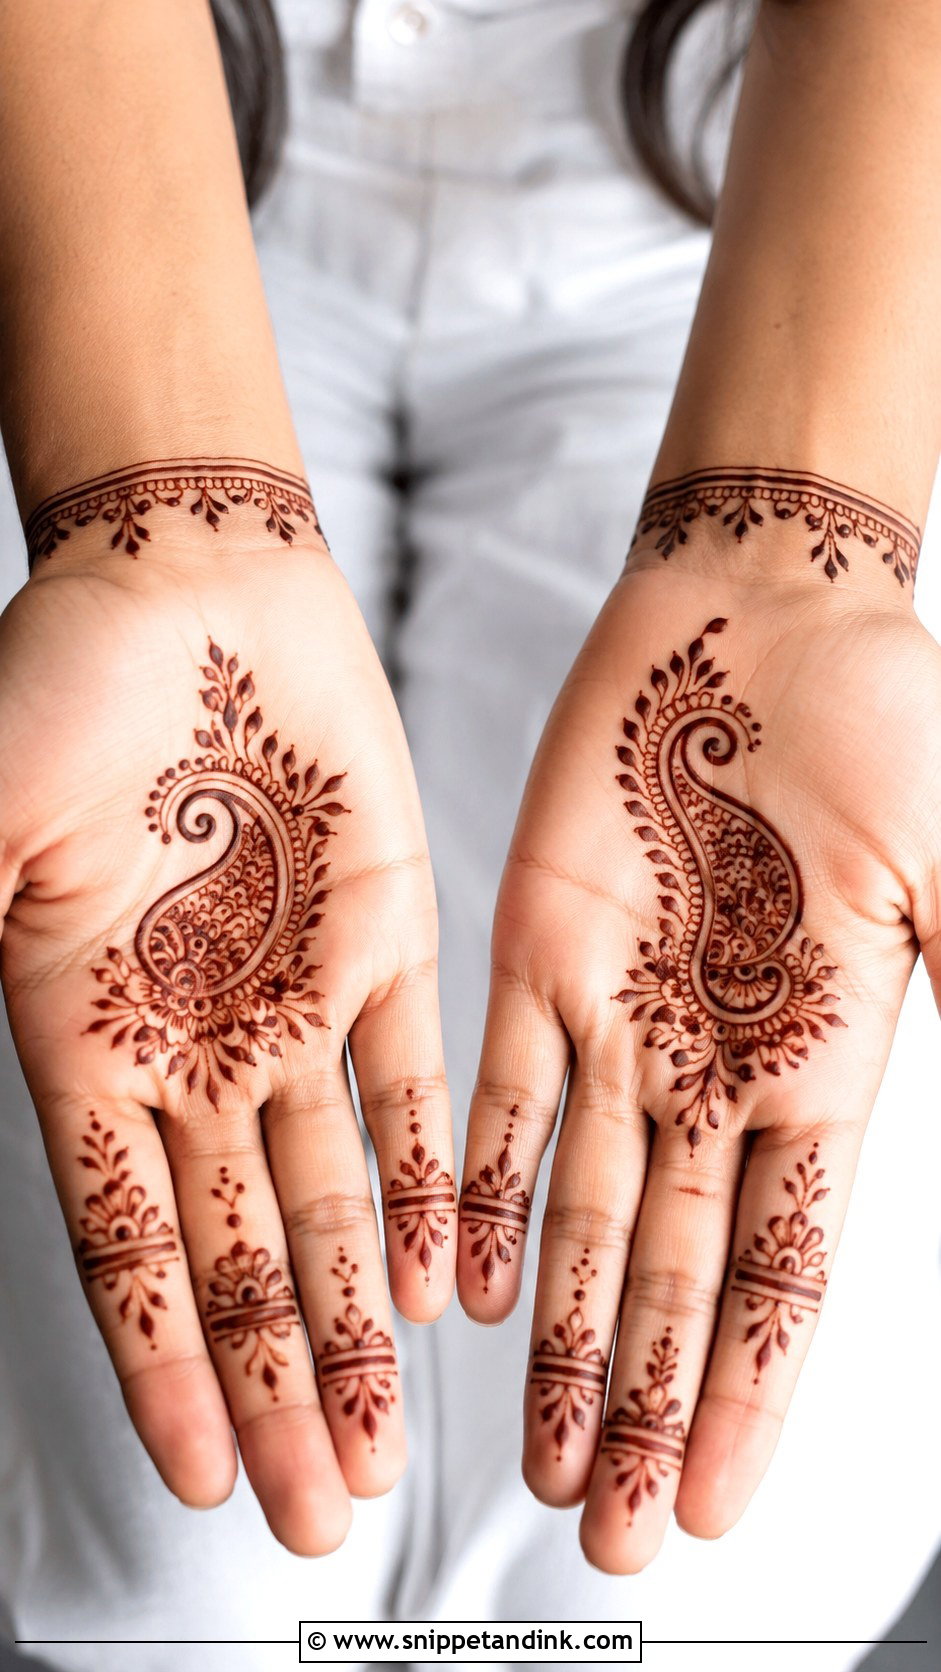
Paisley carries a lot of tradition for very little effort, and it scales with the hand: one motif on a small palm, two nested ones on a larger hand. Decorate the inside with dots, curved lines and a leafy edge, then point the tail toward the wrist or one finger so it looks like it’s travelling somewhere. Leave the rest of the hand open. The tip of a paisley is where paste tends to blob. I ease off the pressure a fraction before the end of the stroke, and if a blob forms anyway I drag it into a point with a toothpick while it’s wet.
9. Simple Finger Mehndi Design
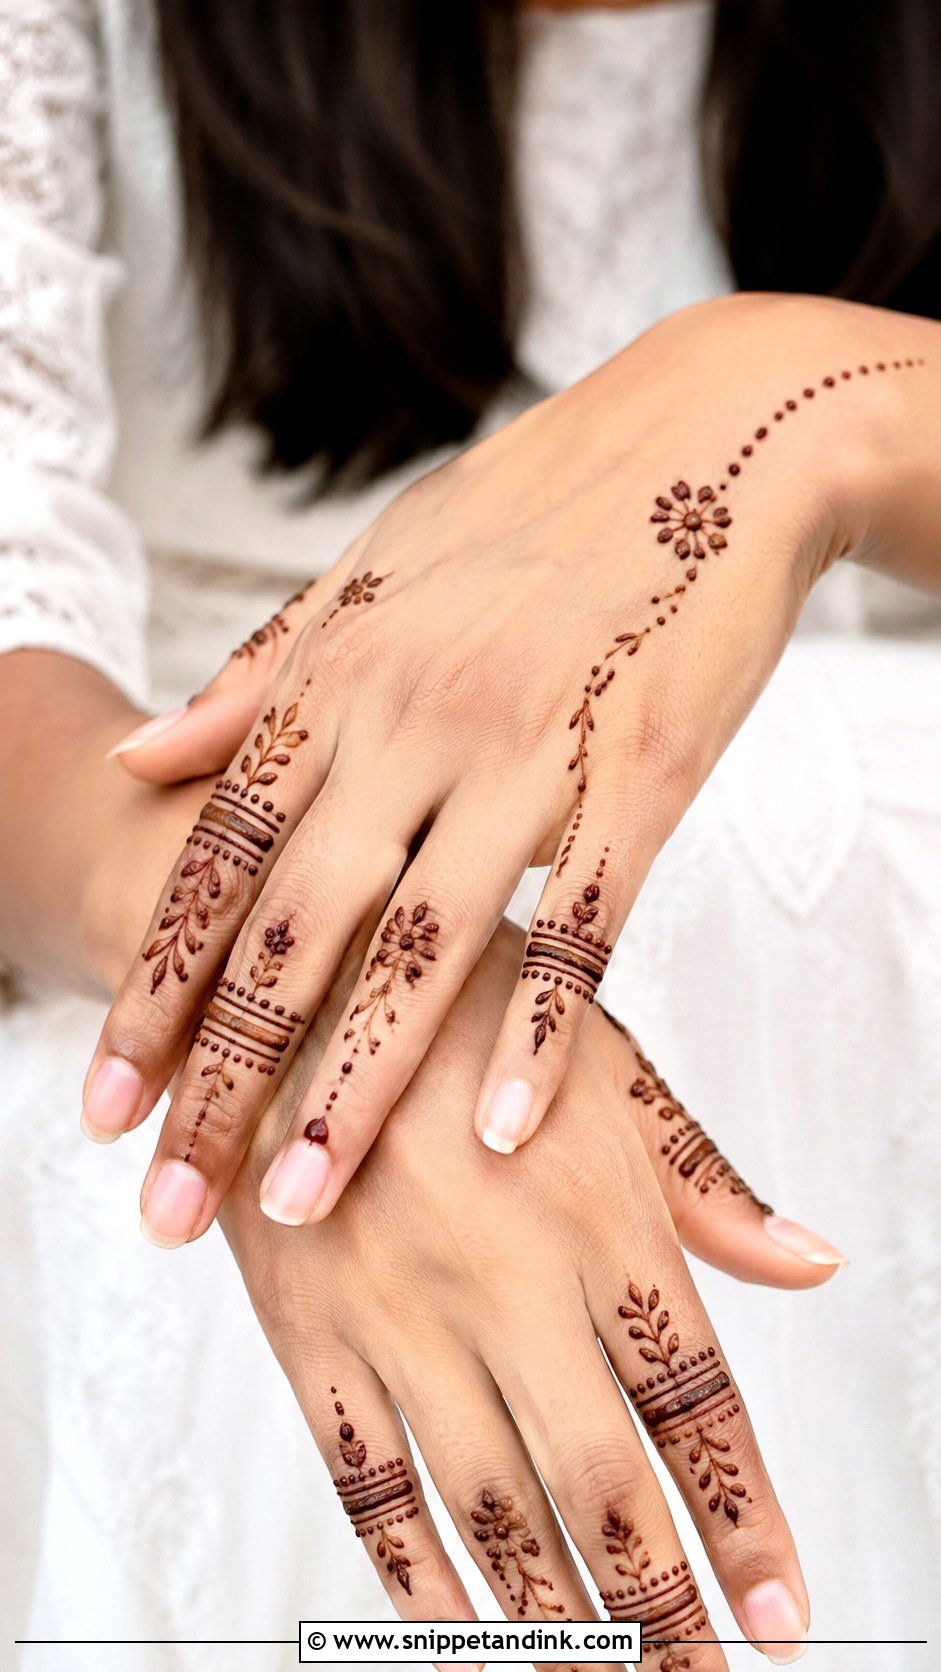
Finger designs are what I recommend to anyone who needs her palms and the back of her hands to look office-neat on Monday. Each finger gets its own pattern, coordinated rather than identical: a band on one, dots on the next, a mini floral or a single leaf. A small flower at the base of the fingers ties them together, or you can join them with delicate dotted chains. Bear in mind that fingertips stain darker than almost any other part of the hand, so even fine lines here come out strong. It goes on fast and leaves room for rings.
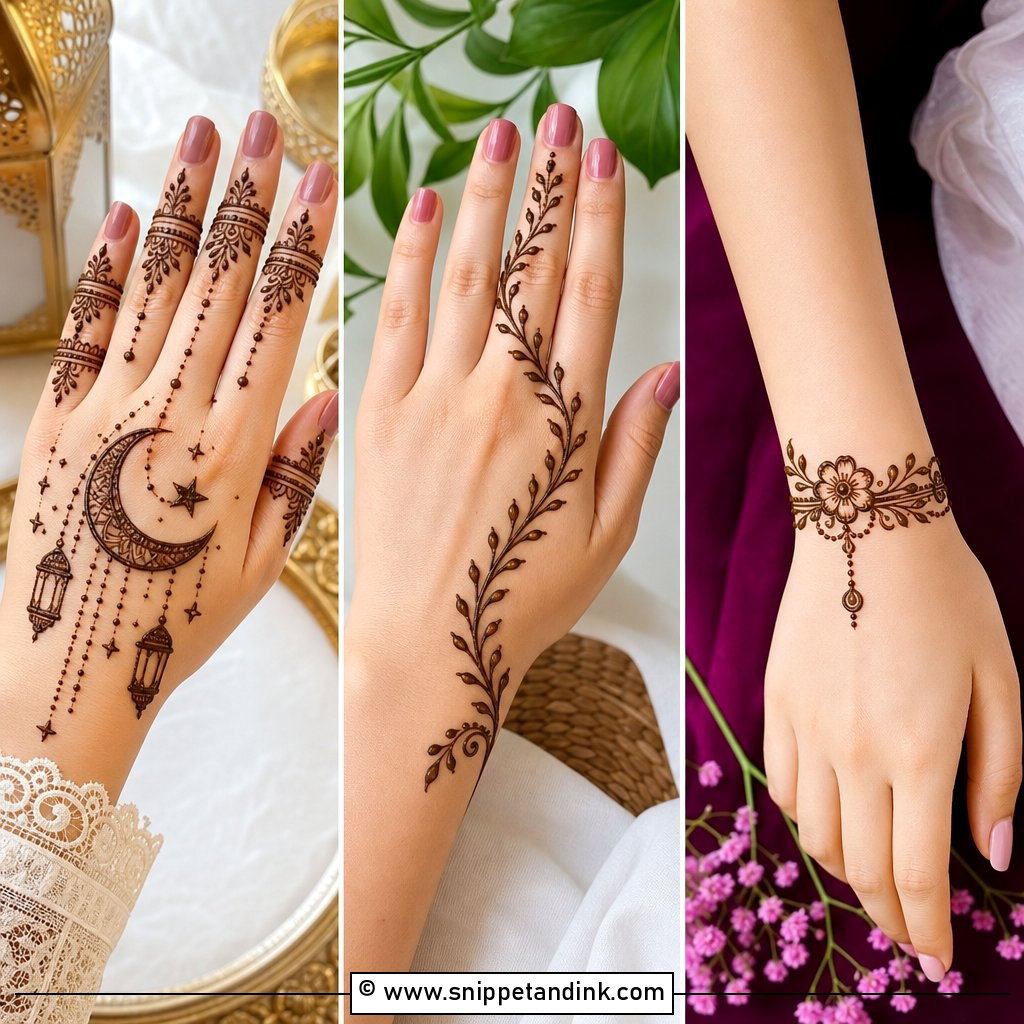
10. Simple Bracelet Mehndi Design
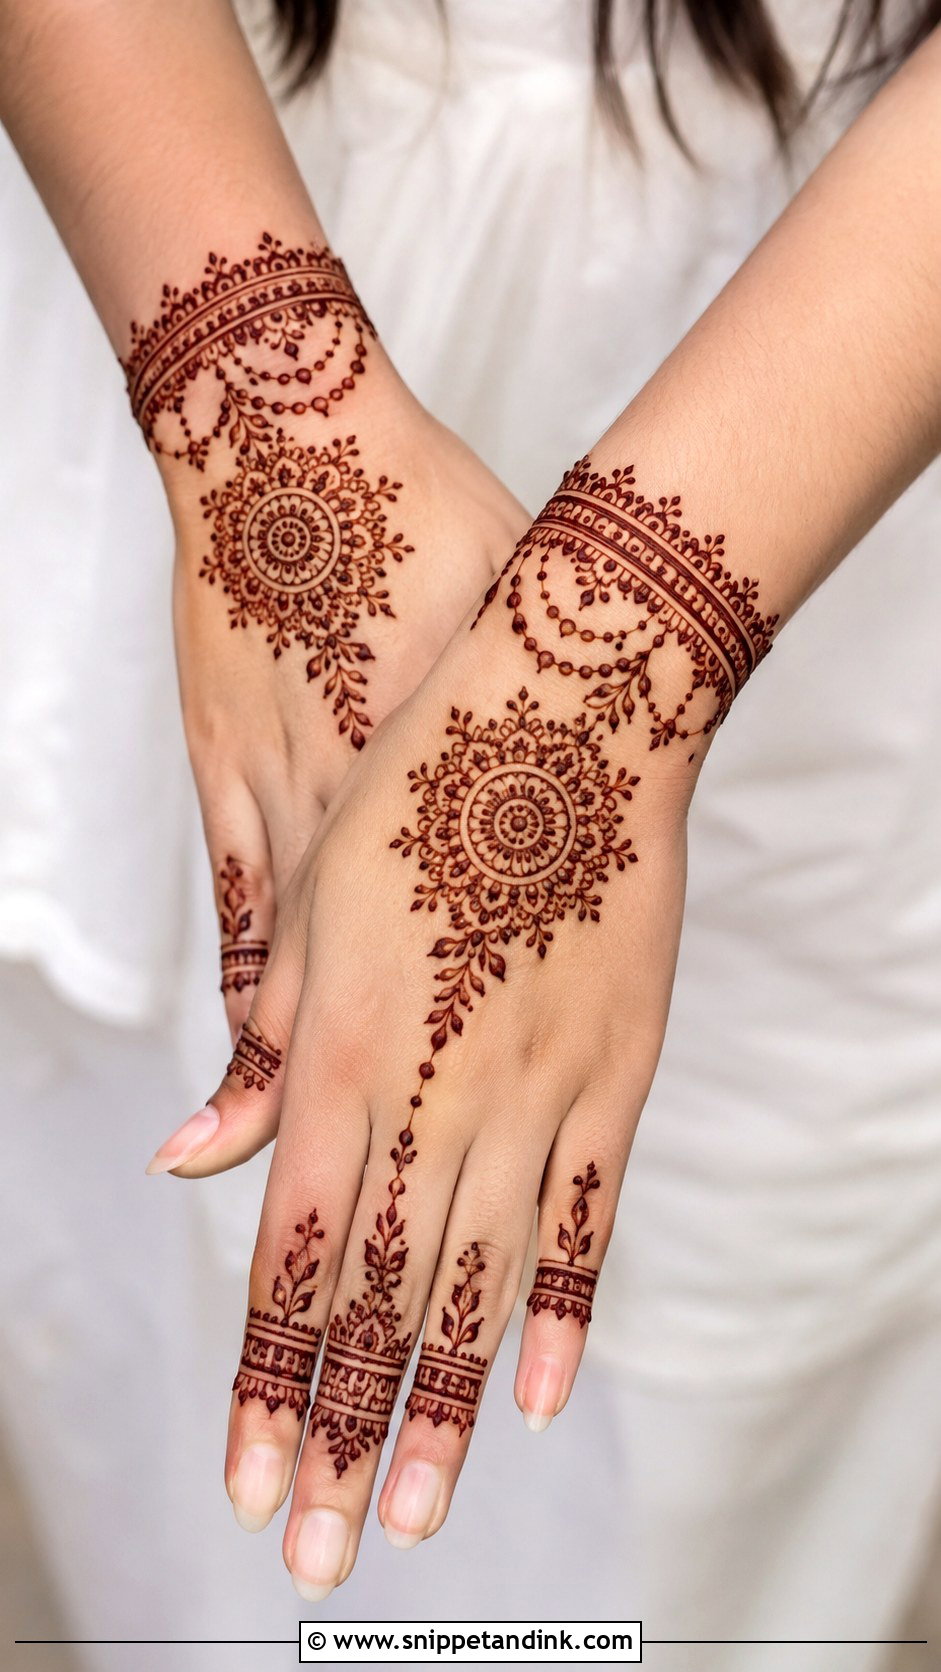
Bracelet mehndi reads as jewelry, so I draw it like jewelry: a defined band at the wrist, then chains, dots, small leaves or a hanging floral detail dropping onto the back hand. A small center flower connected to the band by thin lines gives it a focal point. The wrist bends constantly, so keep it still and flat for the first half hour while the paste sets, or the band cracks right along the crease. Fingers stay light. It’s my suggestion when someone wants no palm coverage at all.
11. Simple Full Hand Mehndi Design
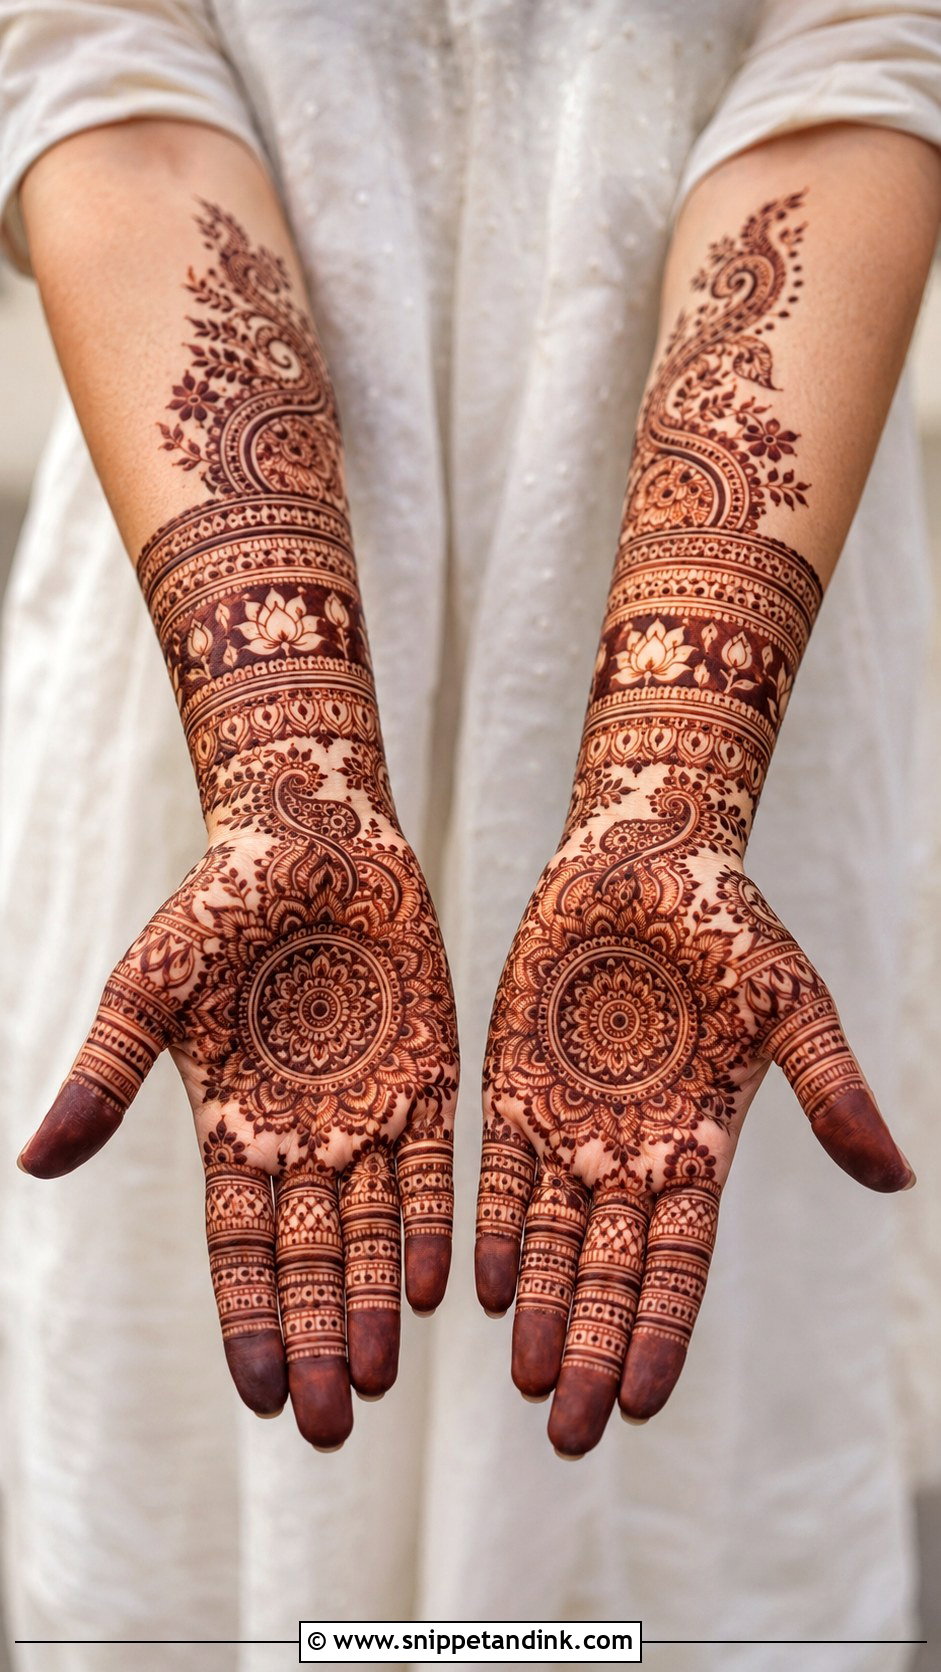
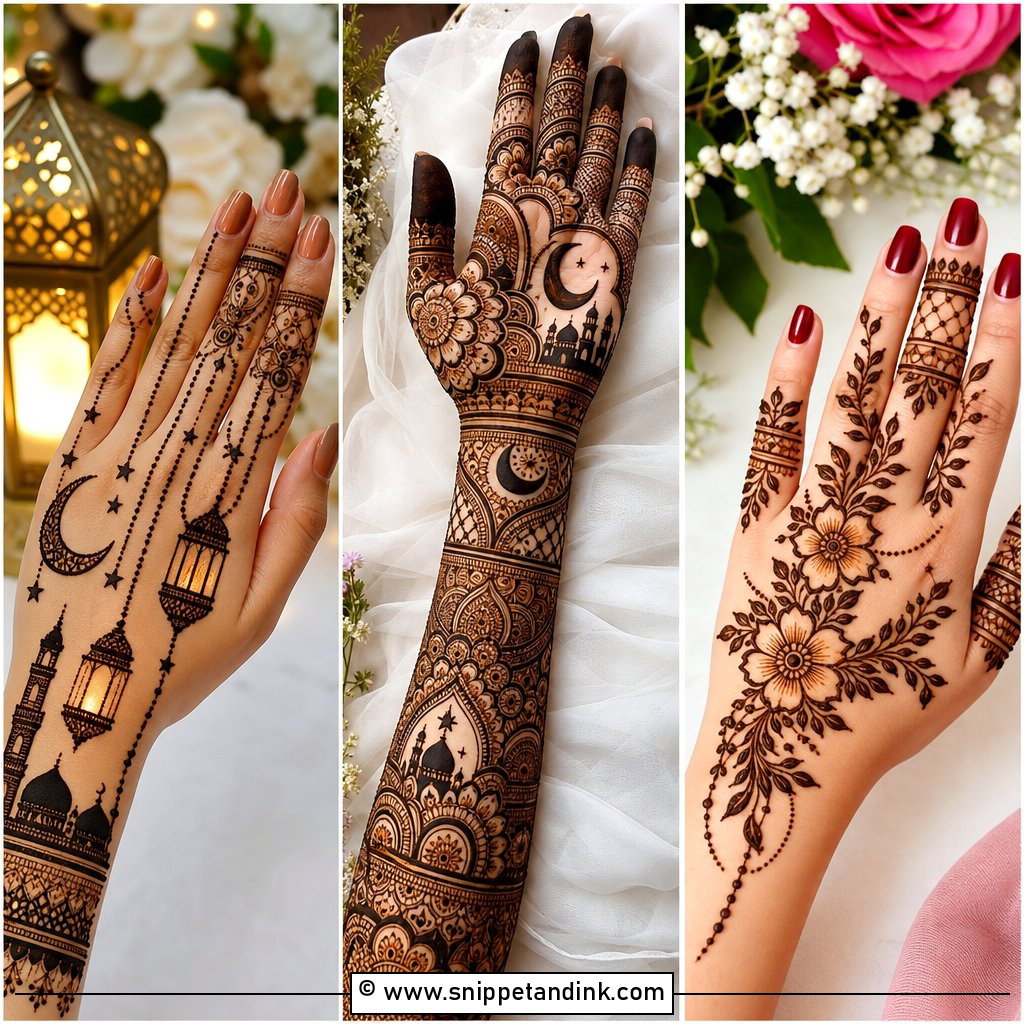
Full coverage doesn’t have to mean dense. I keep a full hand simple by scaling the motifs up and leaving more skin between them: palm mandala, floral vines on both sides, a paisley trail toward the wrist, then a cuff or floral chain on the forearm. Fingers get stripes, dots and small leaves rather than fill. Expect the forearm to stain noticeably lighter than the palm. That’s the skin, not the paste, and I plan slightly bolder lines there because of it. This is the version I’d give bridesmaids and close family.
12. Simple Half Hand Mehndi Design
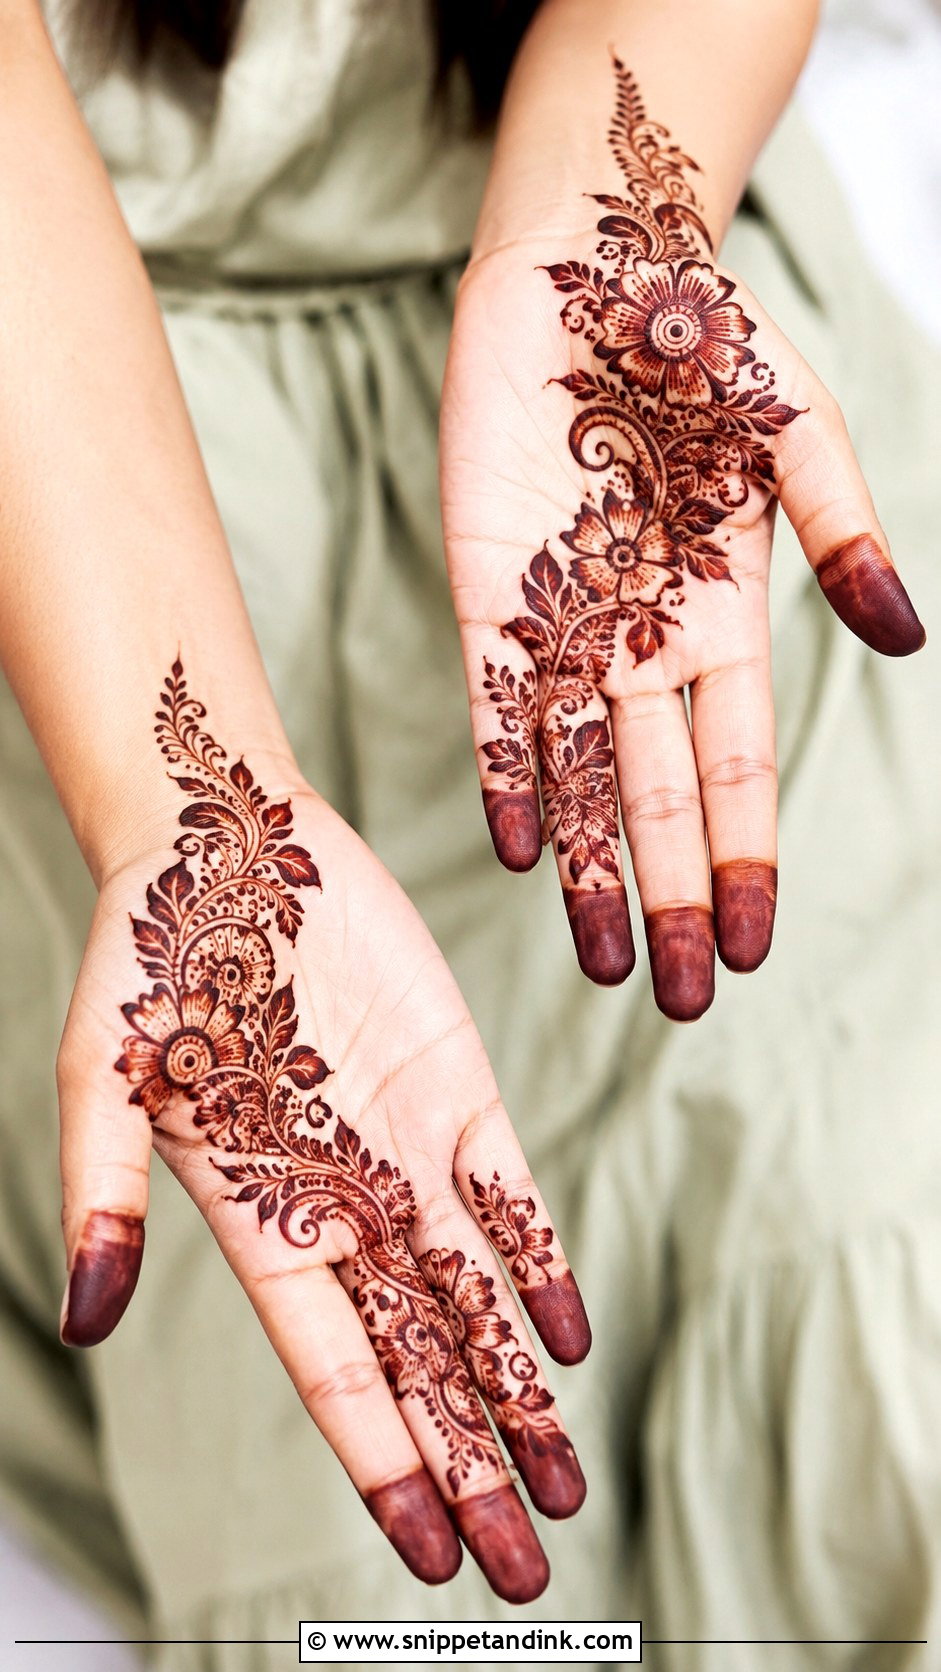
A simple half hand mehndi design stops around the wrist or the lower palm, which gives enough detail for photos without a long sit. I either run a diagonal Arabic trail or center an Indian mandala with light finger work. An open lower palm looks modern; a small wrist border makes the same design read traditional. For learners, half hand is the right next step after a single motif, because it teaches spacing across a bigger area without the stamina full coverage asks for. Eid, Diwali and haldi all suit it.
13. Simple Minimal Mehndi Design
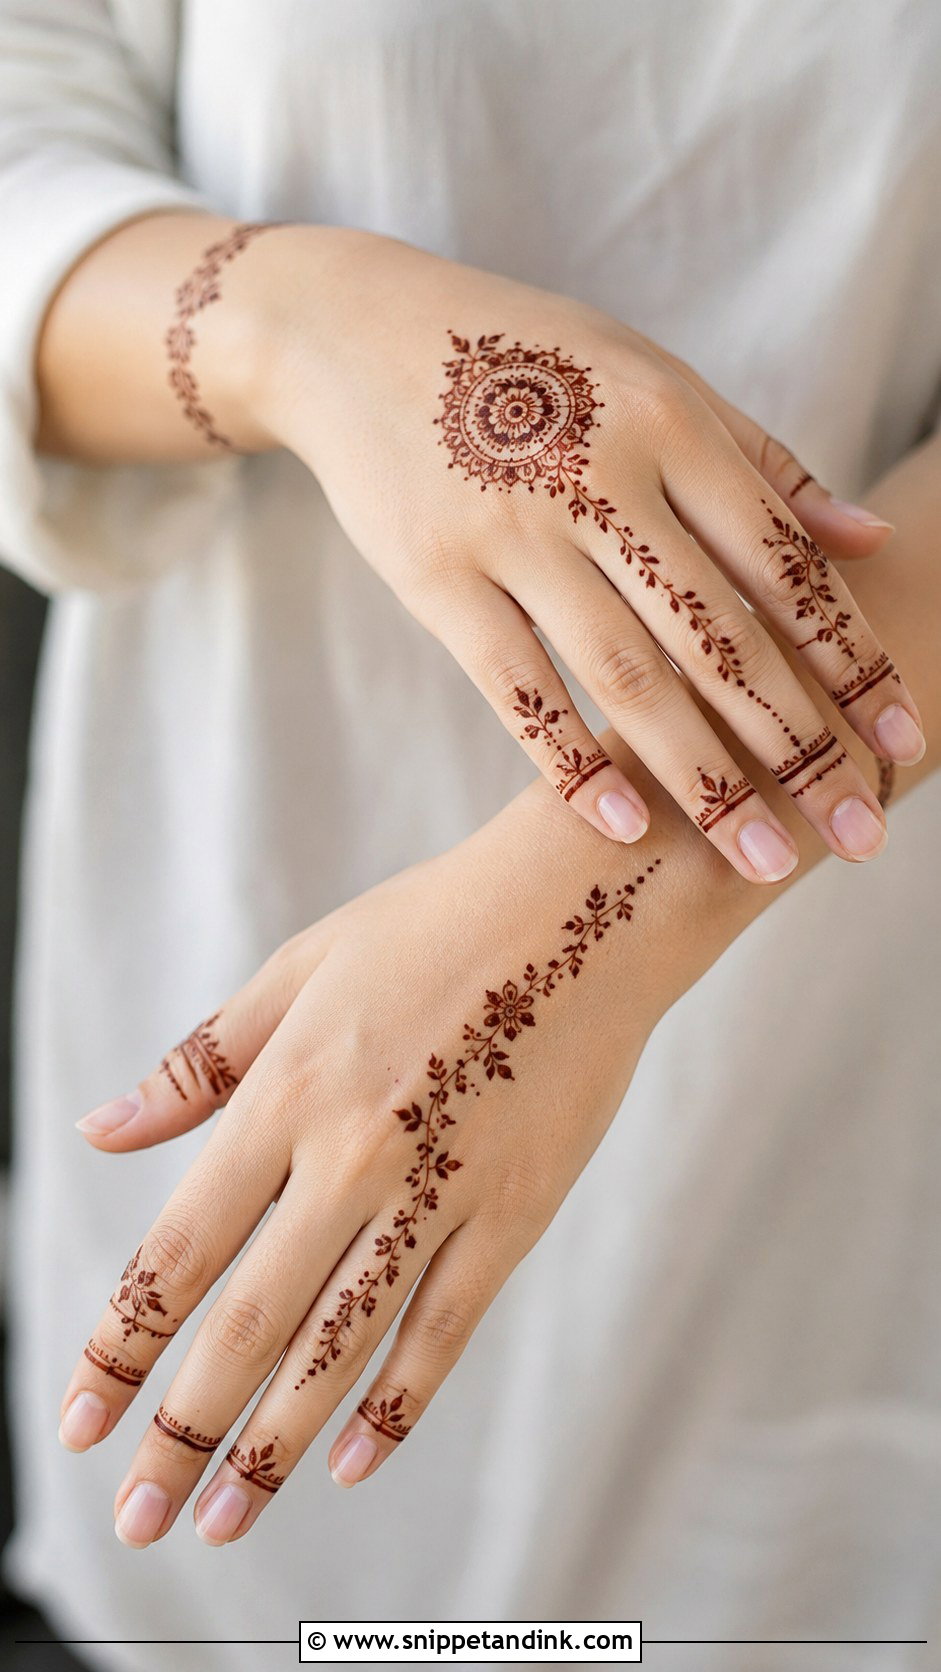
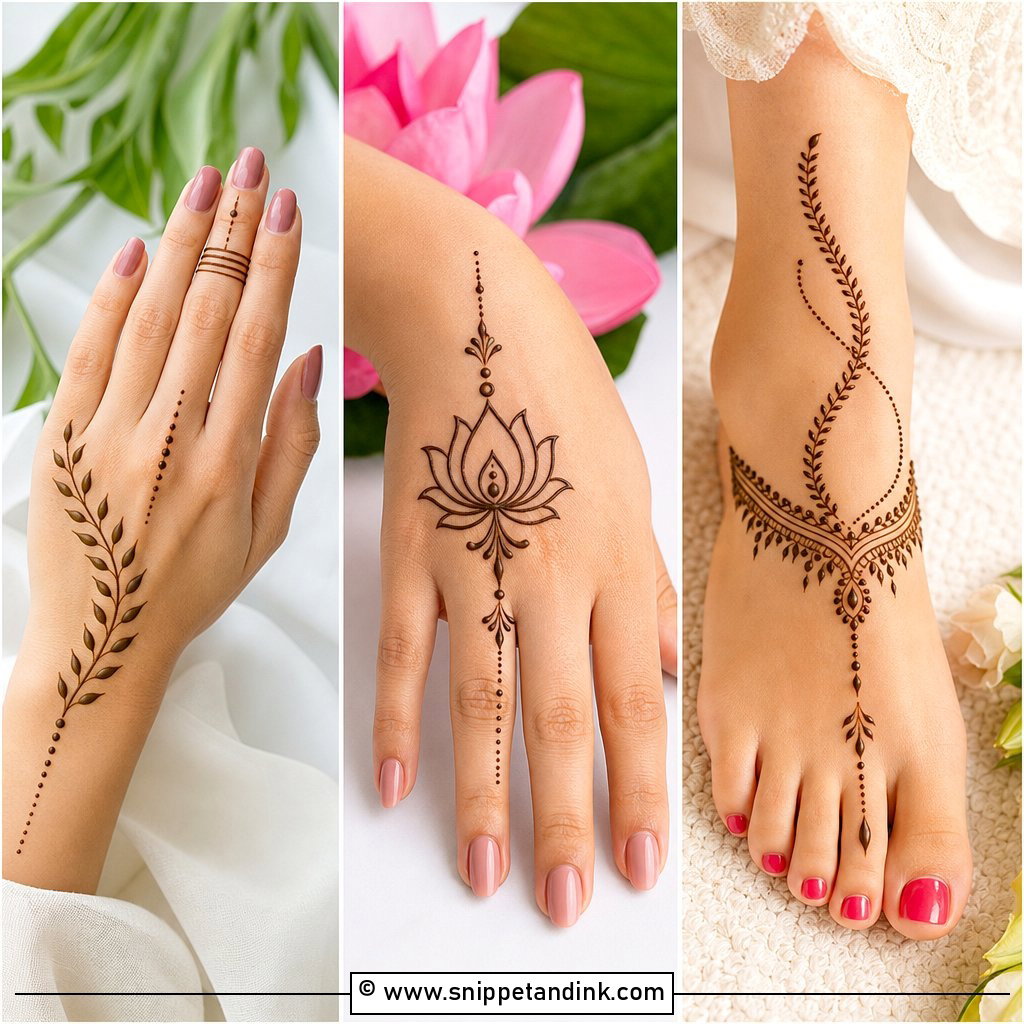
Minimal designs expose line quality more than any other style, so despite the name this isn’t the easiest place to start. With a tiny back-hand mandala or one slim vine across the palm, there’s nothing to hide a wobble behind. I decorate only two or three fingers with fine bands and dots and skip shading altogether. Placement has to look chosen: I find the natural line from the wrist to the middle finger before the cone ever touches skin, and the vine follows it. Younger girls and anyone wearing henna to work tend to be happiest here.
14. Simple Bridal Mehndi Design
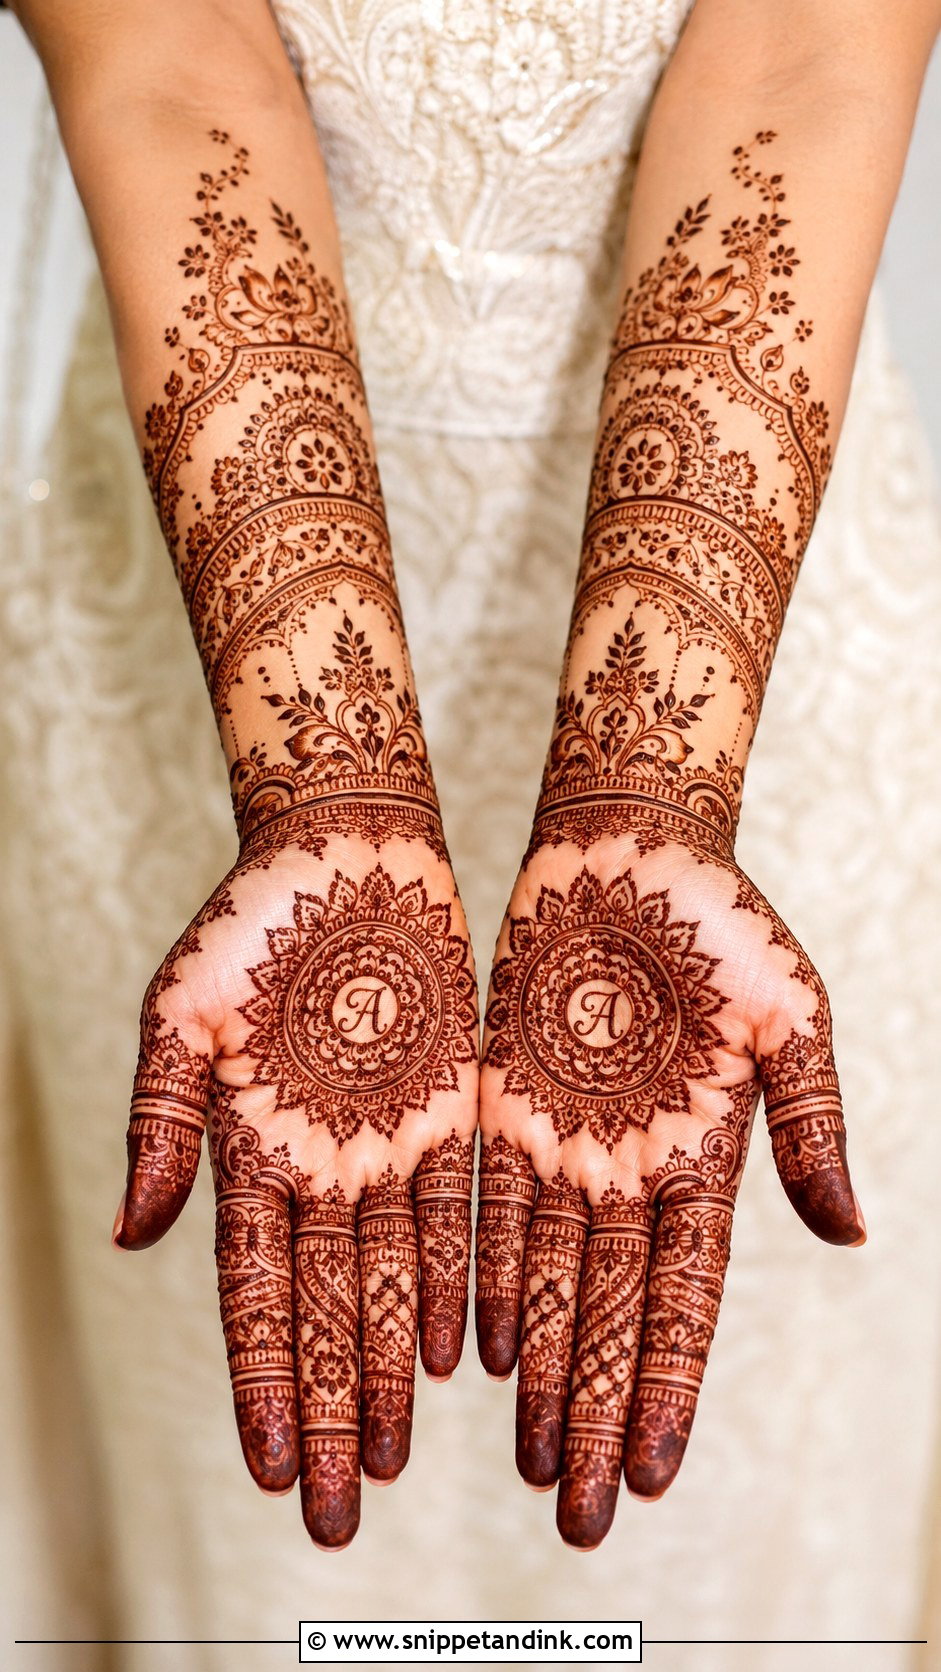
Not every bride wants hours in the chair. For a lighter bridal set I keep the traditional vocabulary of mandalas, paisleys, flowers and wrist cuffs but draw each element larger and cleaner: a bold palm motif, matching finger bands with leafy tips, and coverage running a little past the wrist so it still reads as bridal. Hiding initials inside a flower or paisley is a sweet game for the groom, but make the letters bigger than you think, because tiny script fills in as the stain darkens. Nikah ceremonies, civil weddings and small celebrations are where I see this most.
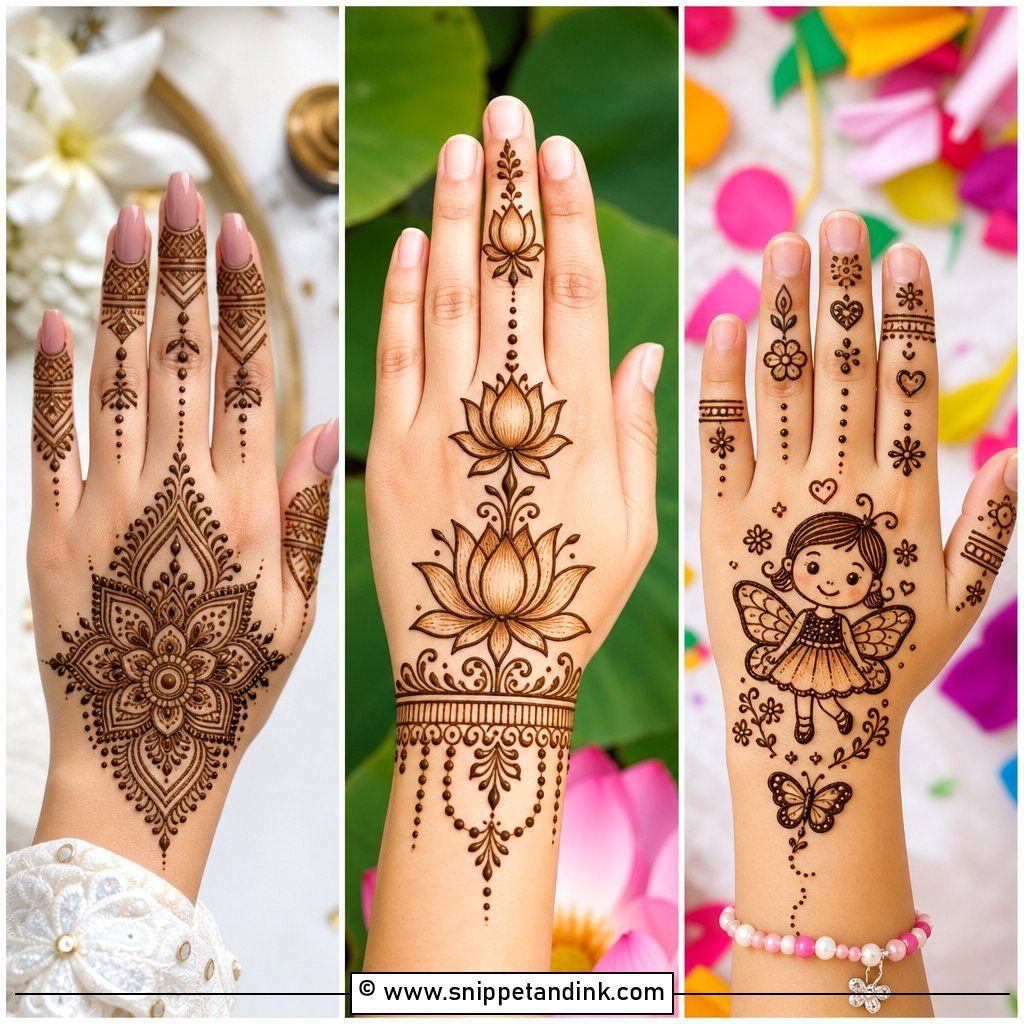
15. Simple Eid Mehndi Design
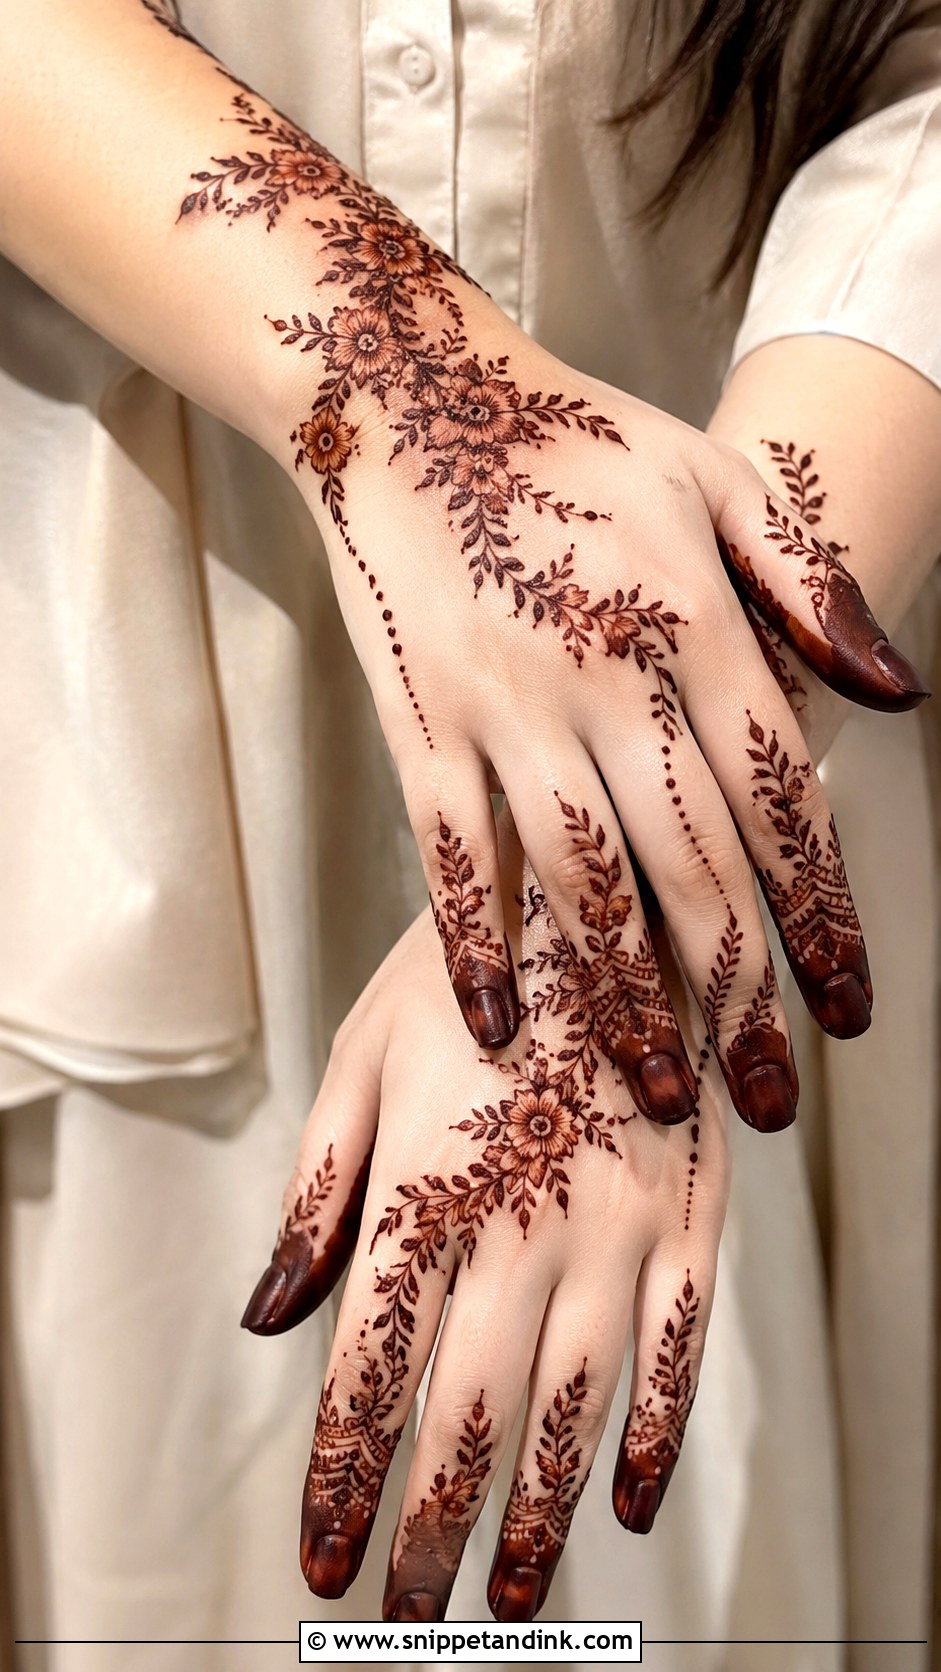
Eid mehndi usually goes on the night before, squeezed between cooking and ironing outfits, so speed matters. Arabic floral trails, back hand mandalas, bracelet patterns and finger work all fit that window. My go-to is a flower trail from the wrist to one finger, dots in the gaps and lightly shaded fingertips, which leaves the hand shape visible under bangles. Do apply it a night ahead. Natural henna comes off orange and deepens to reddish brown over the following day or two, so a design put on that morning still looks pale at Eid prayers.
16. Simple Wedding Guest Mehndi Design
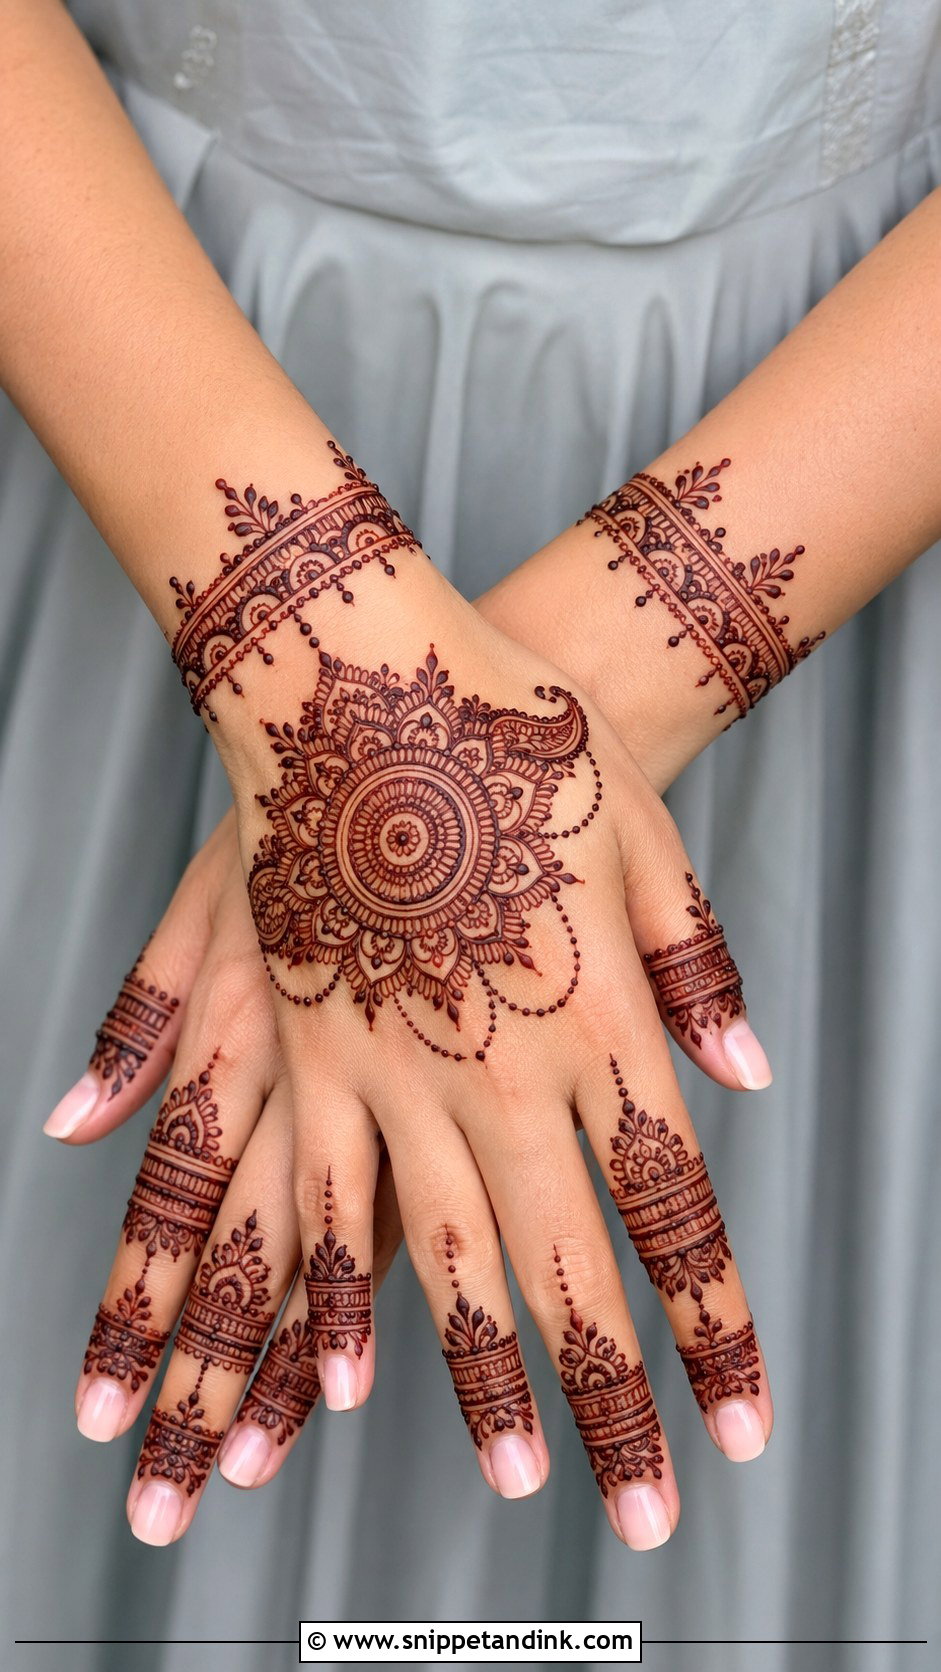
Guest mehndi should sit a clear step below the bride’s. I offer two layouts: a back-hand floral mandala joined to a wrist bracelet, or a front-hand Arabic trail with bold flowers and leaves. Fingers get enough detail to look finished in photos, with space left around every main motif. Before I start, I ask what the outfit and jewelry look like. Heavy bangles call for a quieter wrist, while a plain outfit can carry a bit more henna. Sangeet, mehndi night and reception guests all fit this brief.
17. Simple Engagement Mehndi Design
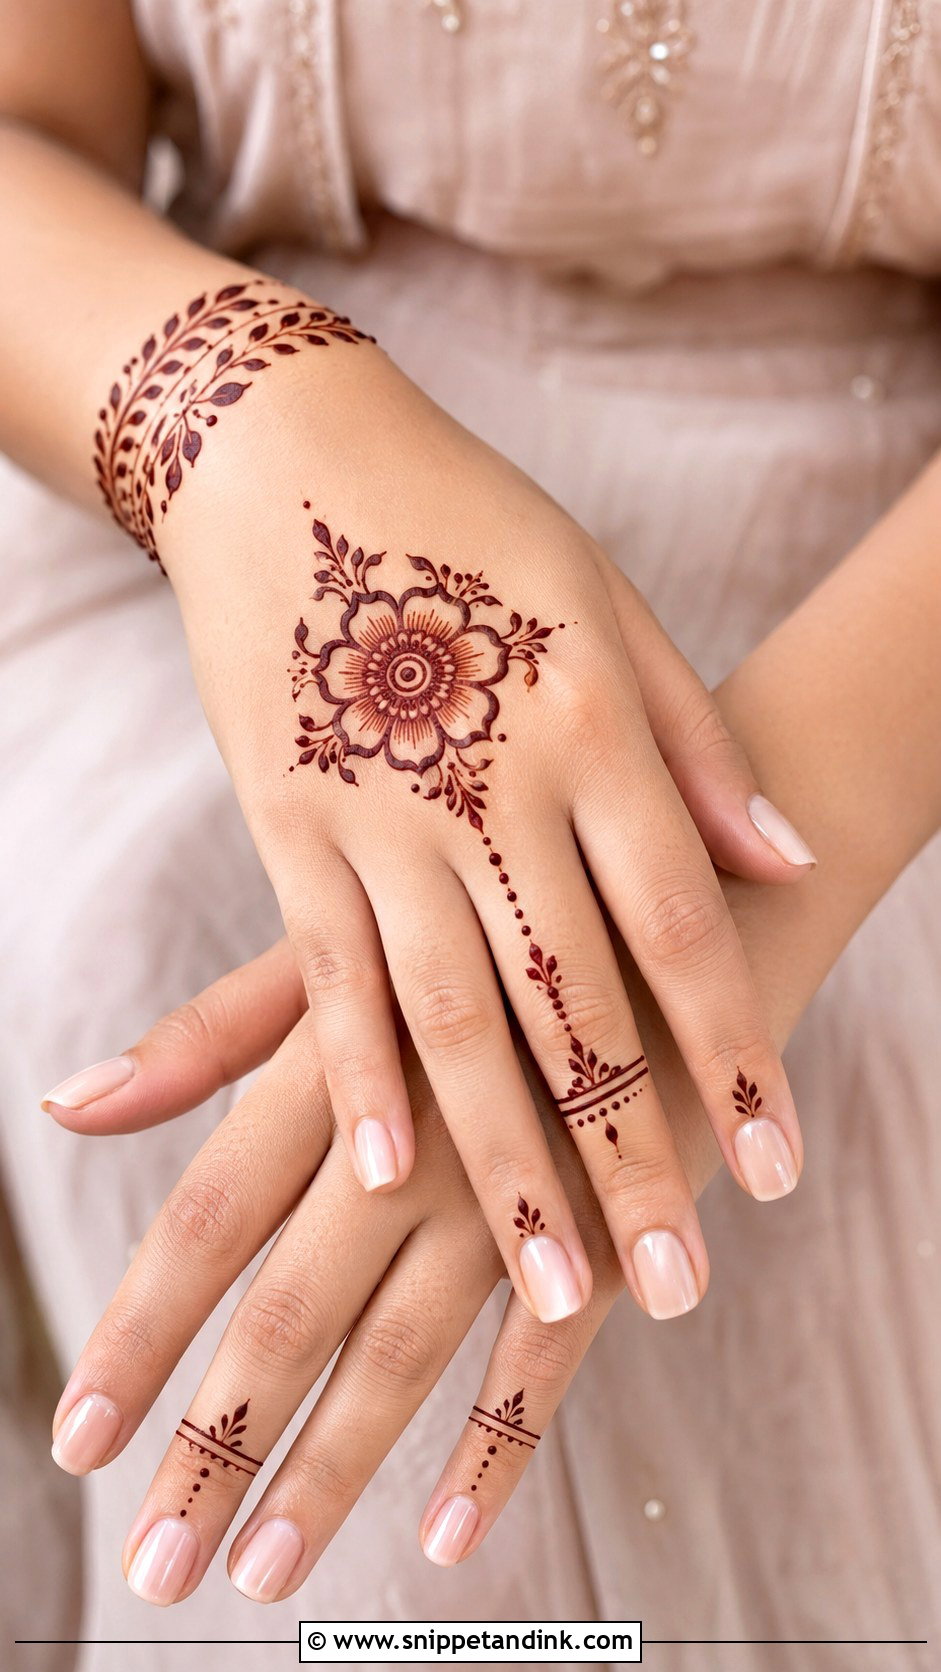
For an engagement mehndi design, I plan everything around the ring finger. A small mandala or floral motif sits in the center of the back hand, and dotted chains or fine leafy lines lead from it to the ring, with bracelet bands at the wrist echoing the jewelry. I keep the palm lighter and leave the base of the ring finger fairly bare, because a ring sitting on top of dark lines gets lost in close-ups. Bold outlines matter more here than anywhere, since ring photos are taken inches from the hand.
18. Simple Kids Mehndi Design
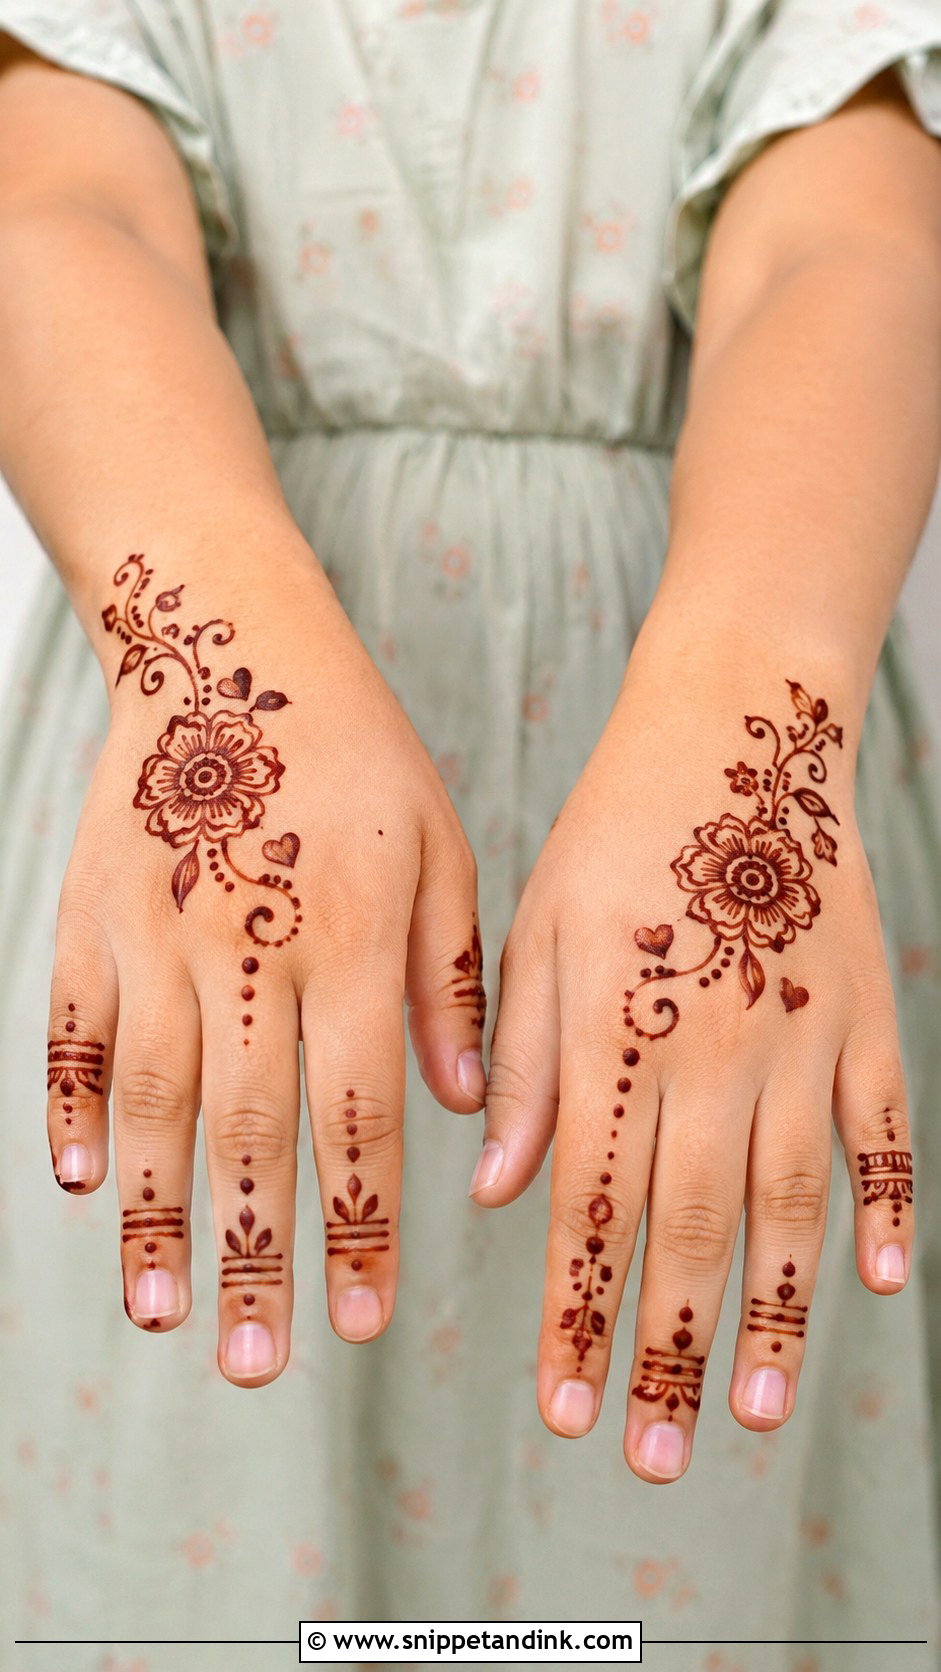
With children, the design is limited by how long they’ll sit still, not by skill. I stick to small flowers, hearts, stars, dots and tiny mandalas on the back hand or palm, round shapes that go on fast, and smaller coverage dries sooner so there’s less to smudge. Only use natural, plant-based henna on kids, with a small patch test the first time. Never use anything sold as black henna; it can contain PPD, a hair-dye chemical that causes serious skin reactions. A central flower and decorated fingers is plenty for a little hand.
19. Simple Festival Mehndi Design
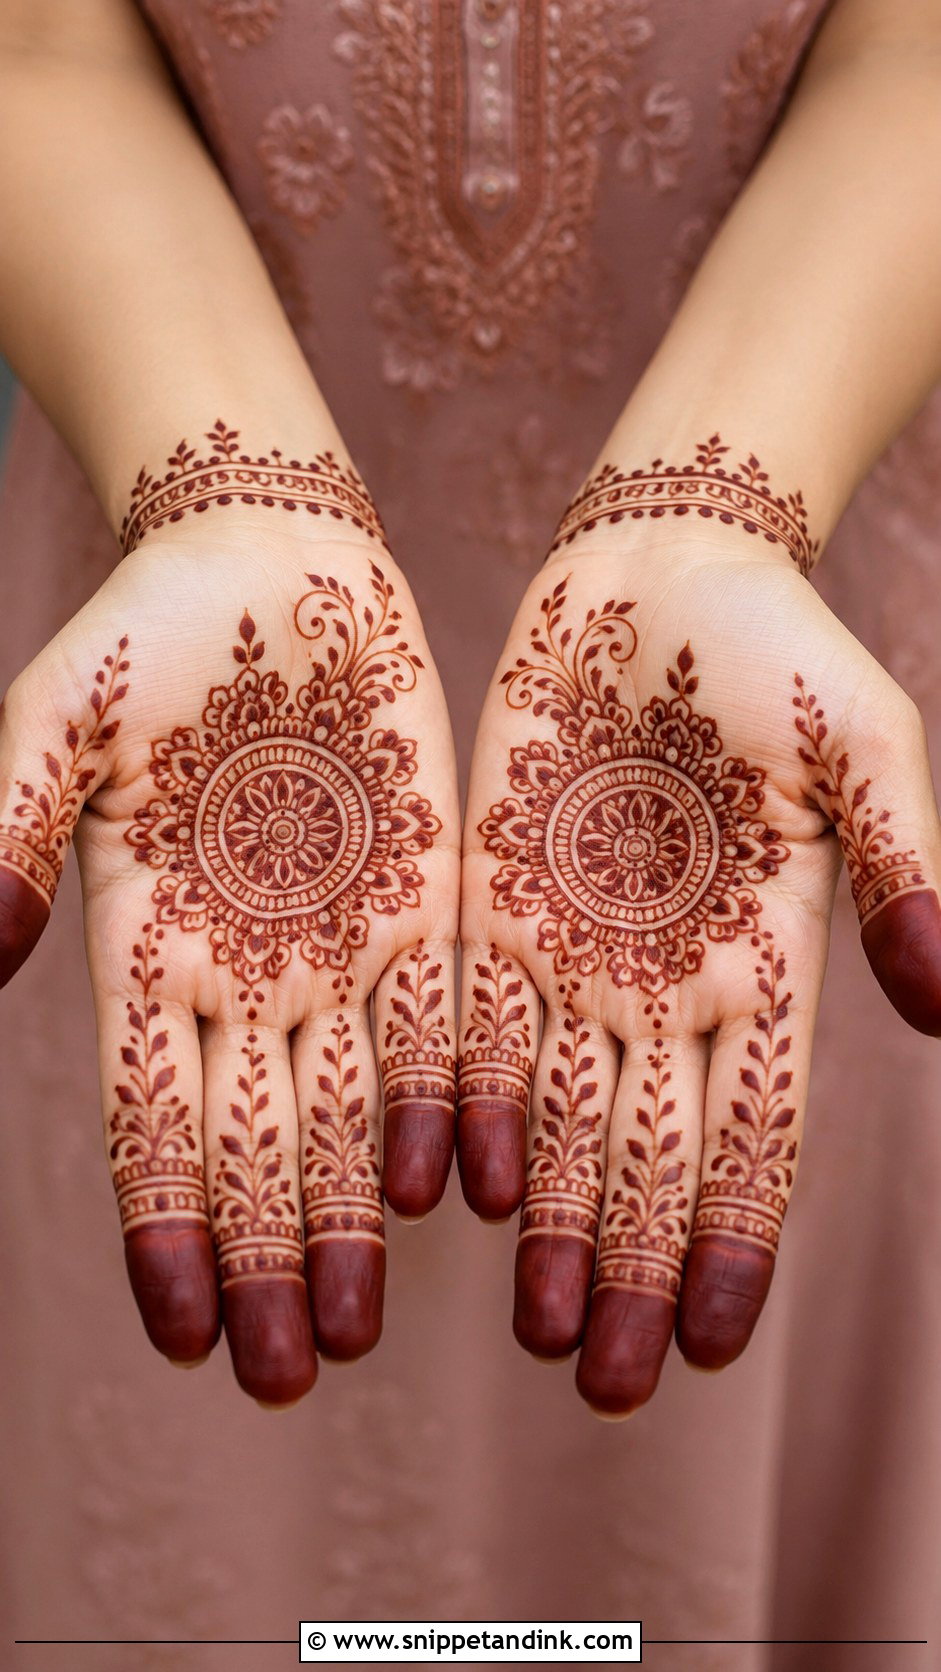
Festival days are long, and mehndi applied on the day often gets cut short by guests and kitchen duty. So I keep festival designs to a palm mandala with floral edges, decorated fingers and a light wrist border, or an Arabic trail for anyone who prefers open space, filled gently with dots, tiny leaves and curves. The clean layout pays off later too. As a stain fades over the following week or two, dense patterns turn into a blur, while open designs still look like designs. Diwali, Navratri, Teej and Karwa Chauth all suit it.
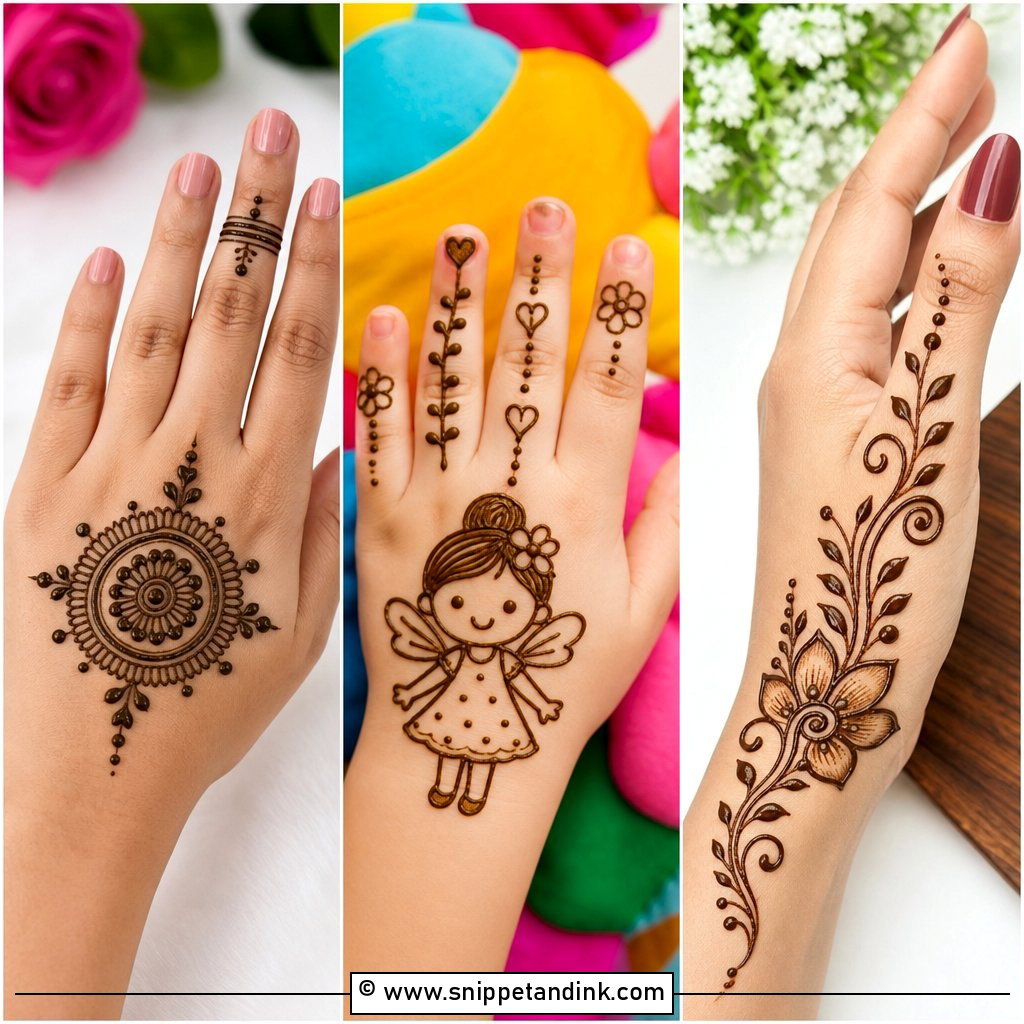
20. Simple Diwali Mehndi Design
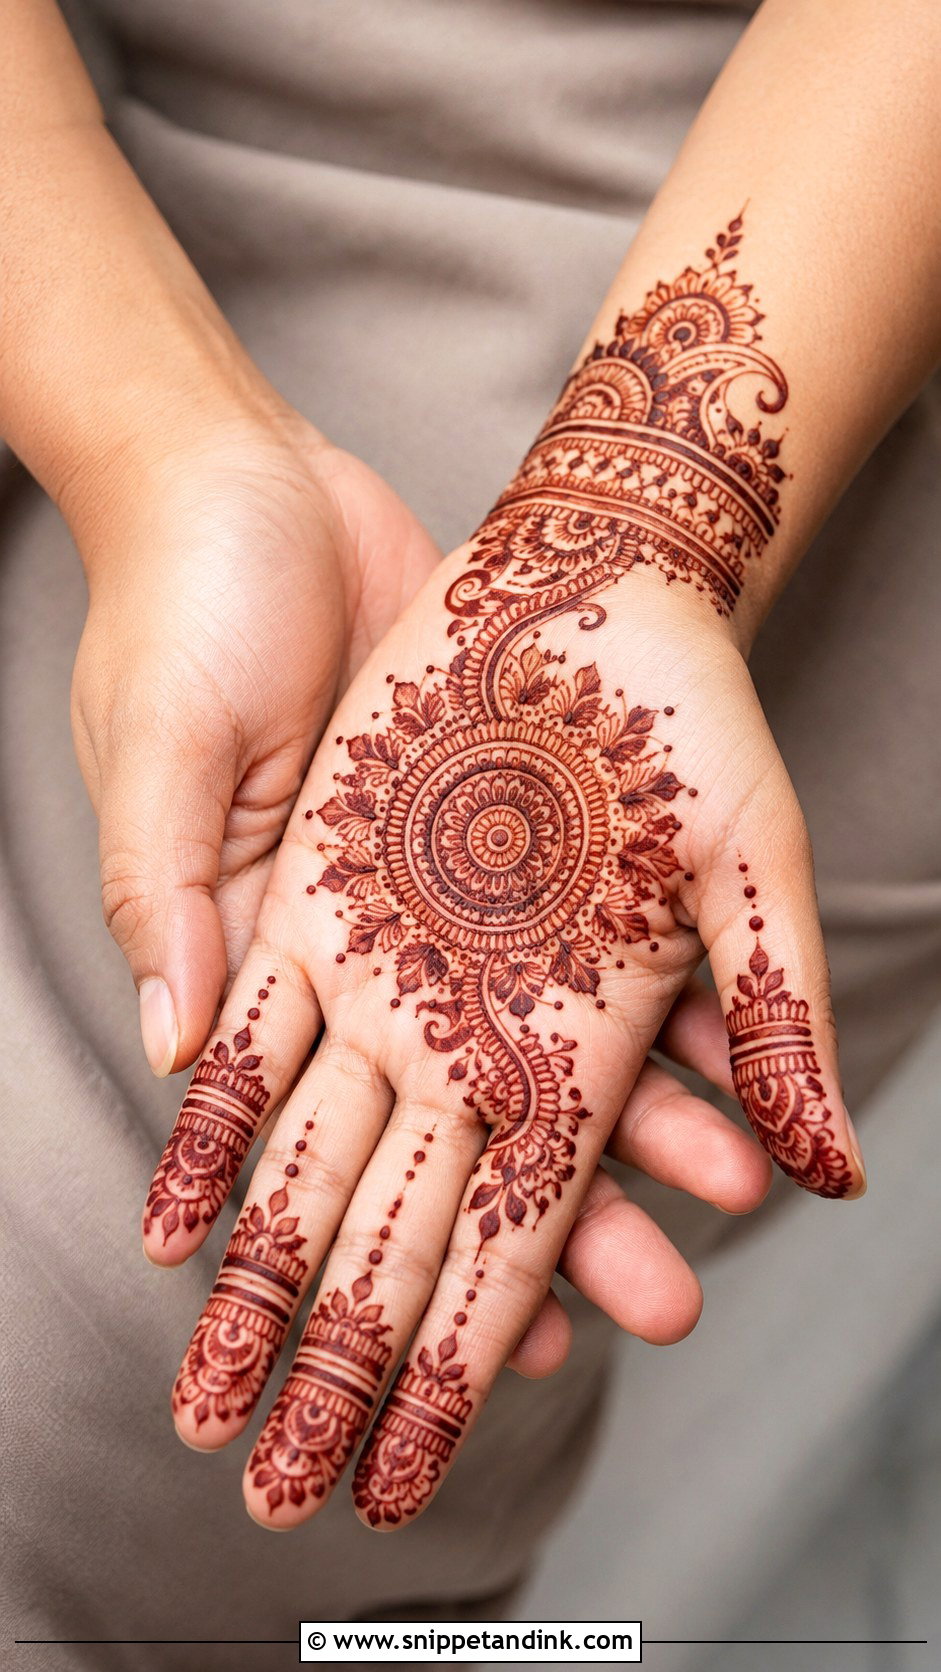
Most Diwali photos are taken in the evening under diyas and fairy lights, and that warm, low light flattens fine detail. That’s why my Diwali lines are bold and clean. A front-hand mandala with paisley accents works, or a back-hand bracelet with flowers and dotted chains. Sometimes I slip in a diya-shaped curve or a little cluster of dots, kept small. Fingers get matching bands, leaves or tip shading. It needs nowhere near bridal detail, so it fits into the busy days before the festival.
21. Simple Karwa Chauth Mehndi Design
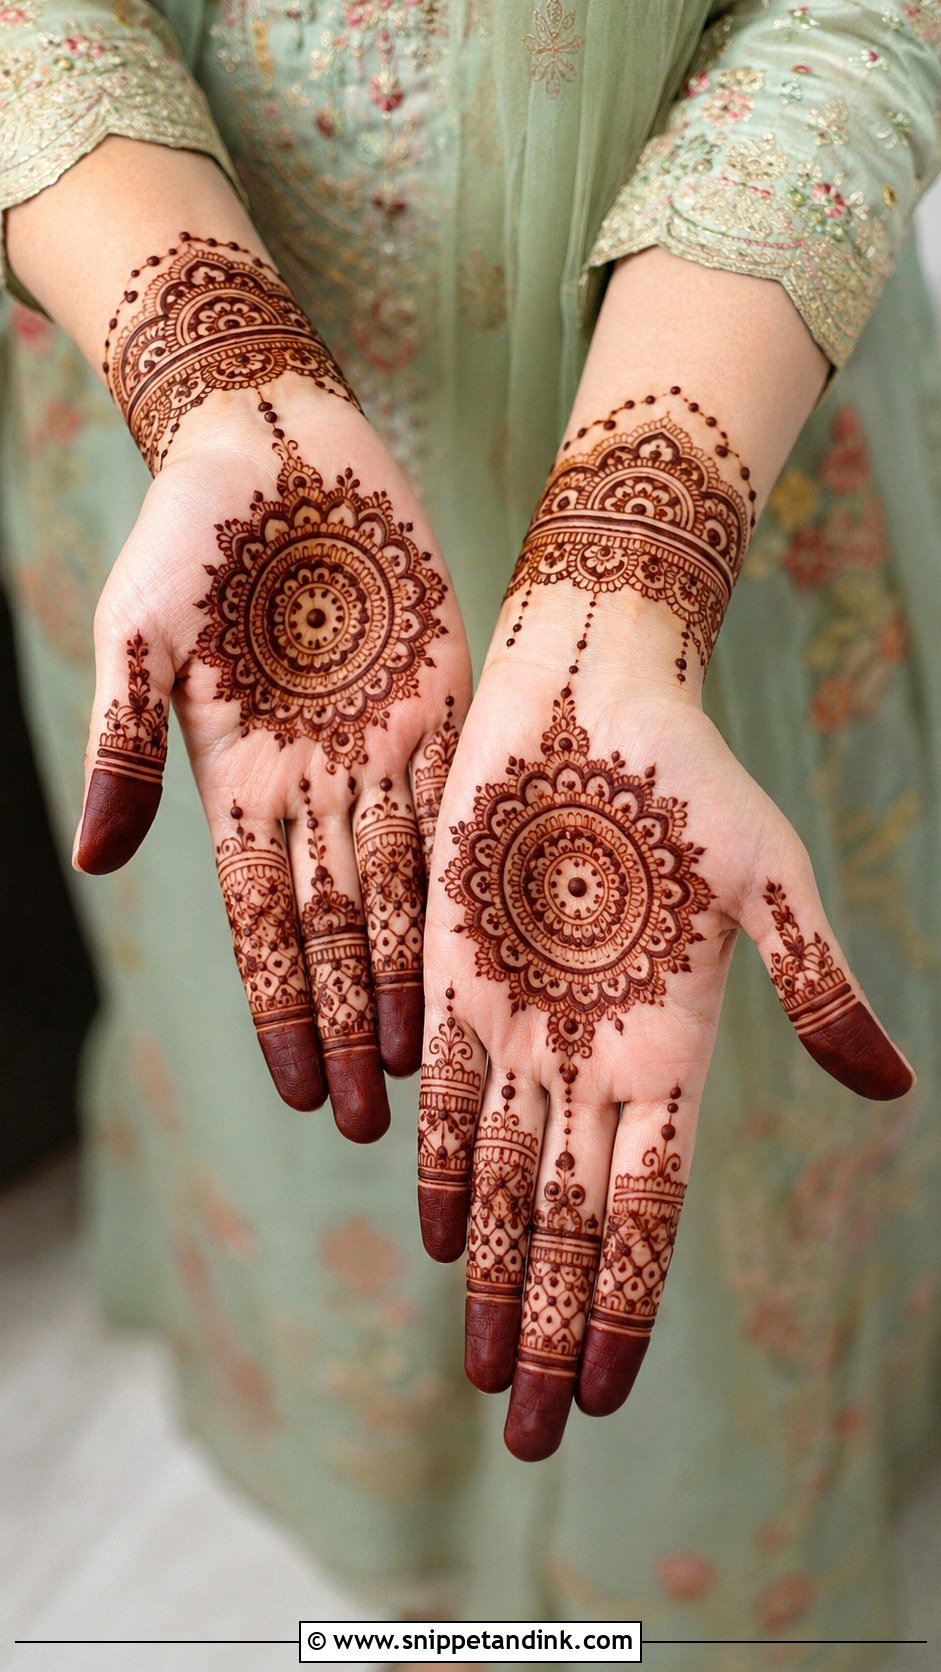
Karwa Chauth mehndi carries real meaning for many women, so I keep it traditional even when it’s light: a palm mandala, paisleys and filled fingertips, finished with a wrist cuff or a small floral border. On the back hand I connect a mandala to the fingers with dotted lines instead. Symmetry matters more for this one than for a casual design. I hold both hands side by side and compare them before the paste dries, because women so often hold both palms up together in photos. Scallops, small leaves and dots add detail without hours of work.
22. Simple Teej Mehndi Design
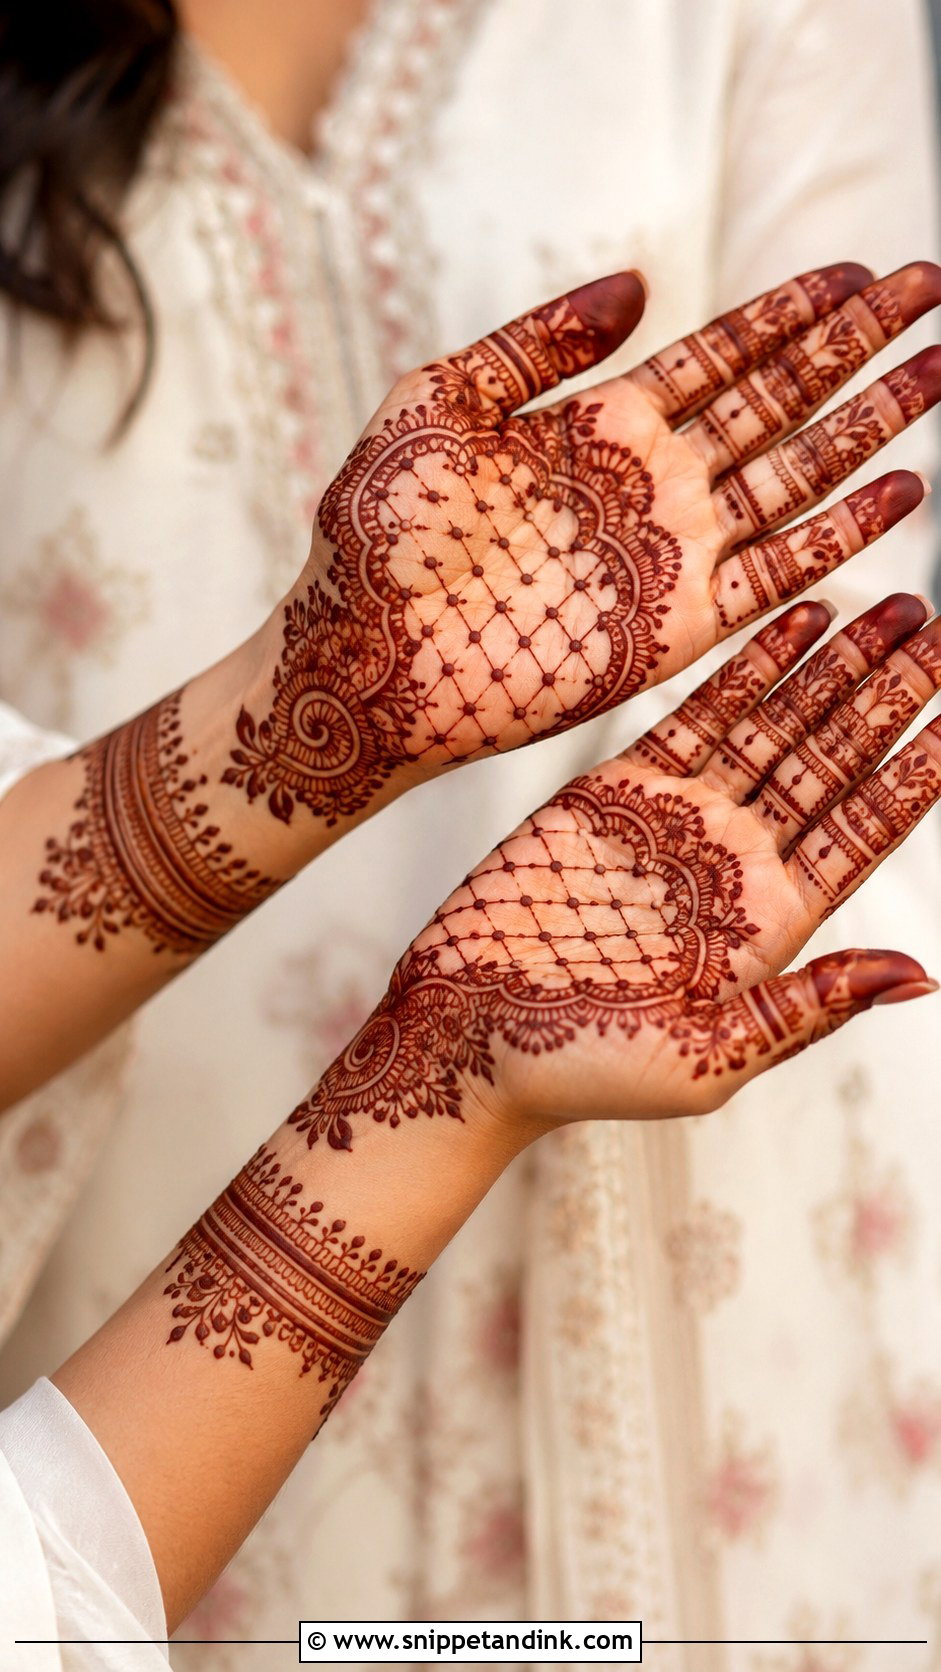
Teej outfits are usually bright greens and reds, so the henna works best as a calm counterpoint. I build from a central palm flower or mandala and run soft leafy curves toward the fingers and wrist, leaving plenty of skin, with fingertip shading or striped bands to finish. Because the pattern repeats so easily, I suggest it for group sessions where several women apply mehndi for each other at home. Agree on the layout together first and everyone’s hands will match in the photos.
23. Simple Raksha Bandhan Mehndi Design
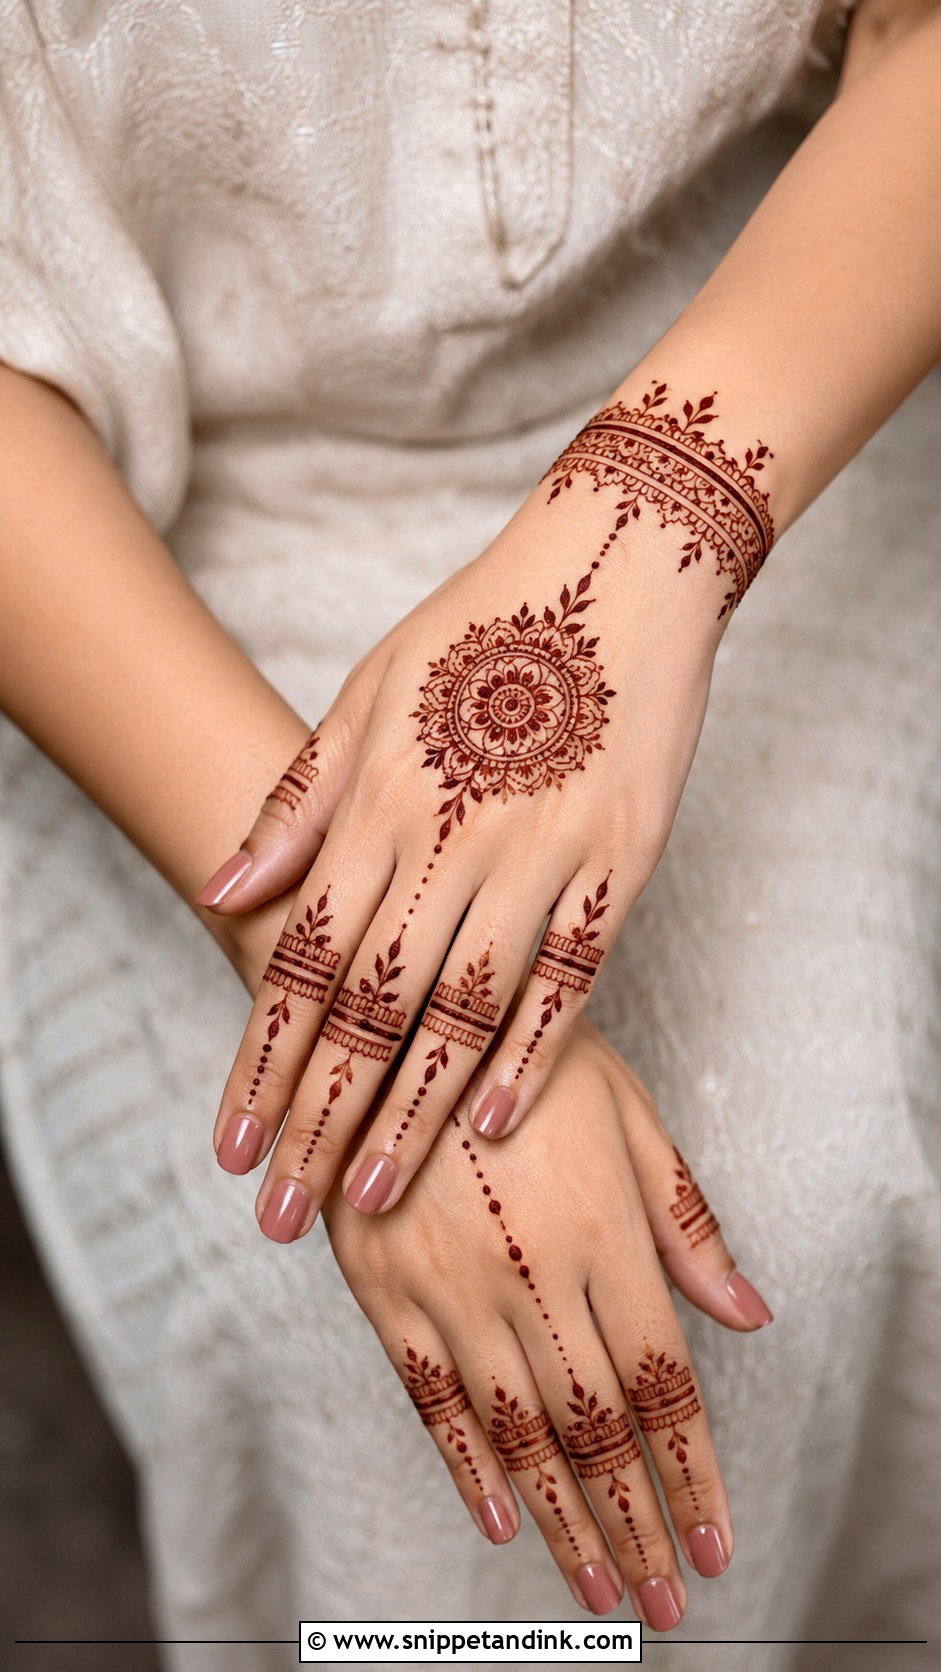
For a Raksha Bandhan mehndi design, I lean toward bracelet styles, since they echo the rakhi without copying it. A wrist band with small flowers, dots and chain details comes first, then a tiny mandala on the back hand and slim lines and leaves on the fingers. Keeping the palm mostly free is practical on a day of feeding sweets and serving food. A small front-hand floral is the alternative if you prefer traditional placement. Either way it dries quickly, which helps when you’re on your feet all morning.
24. Simple Moroccan Mehndi Design
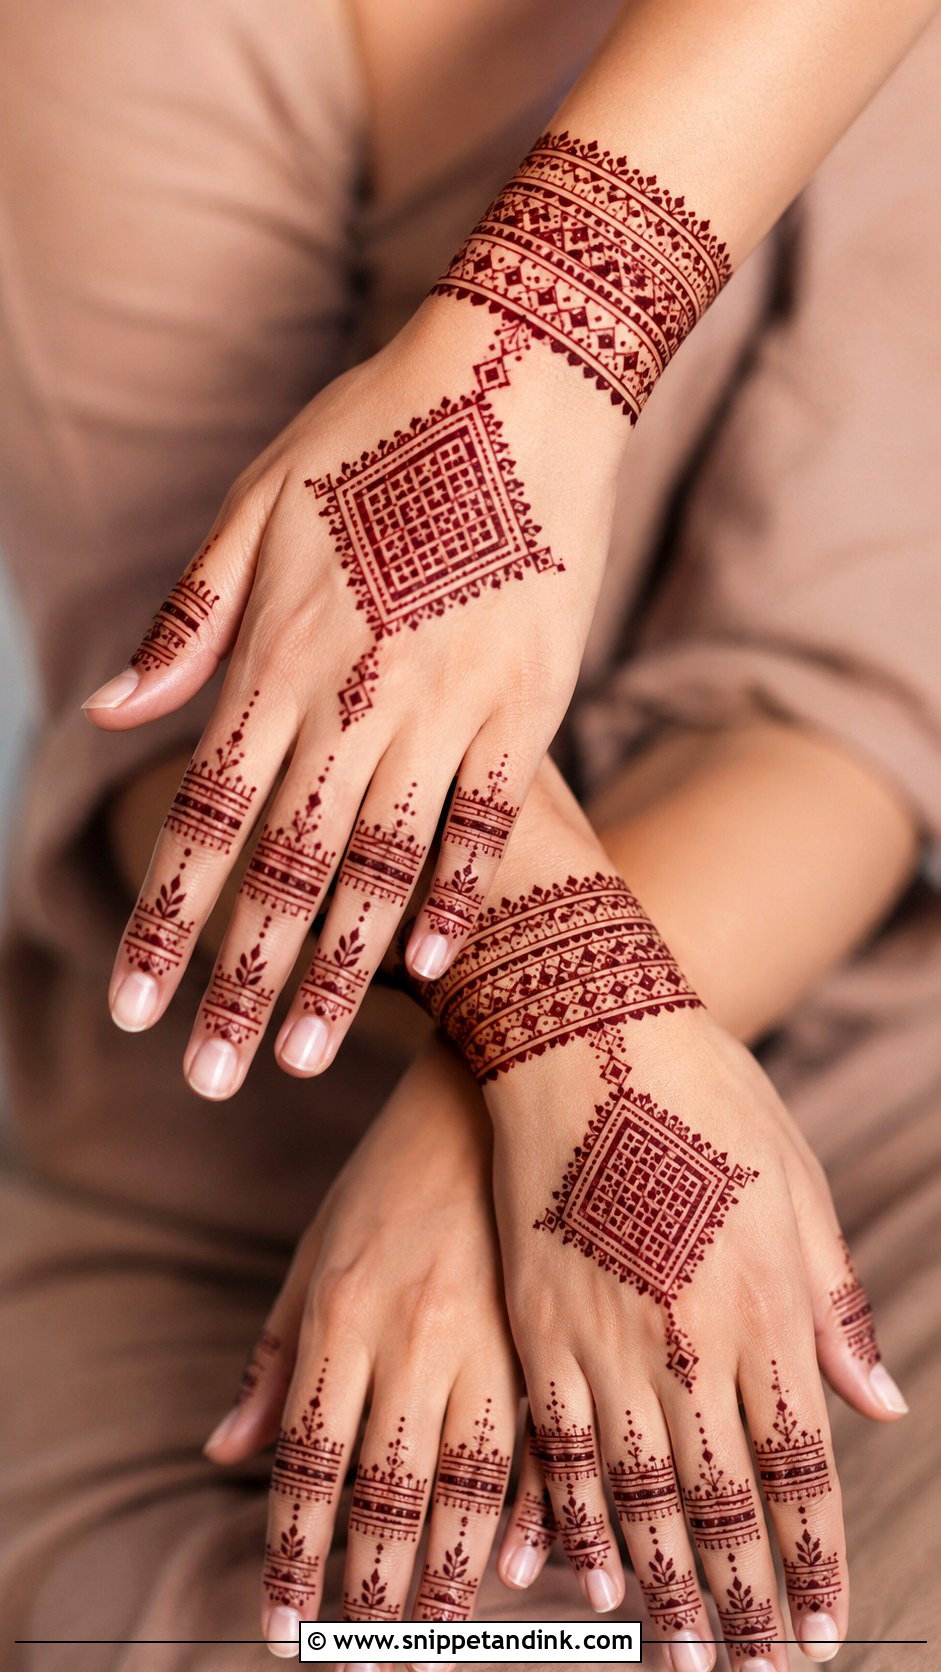
Moroccan-inspired henna swaps florals for geometry: diamonds, lines, dots, triangles and small grids. That’s good news if your curves wobble, because a straight line is easier to control with a cone. The catch is that geometry shows uneven spacing instantly, so I place a few tiny guide dots on the skin before drawing any lines. A geometric cuff at the wrist and straight-line details or small blocks on the fingers keep everything consistent. Even sparse, it looks bold.
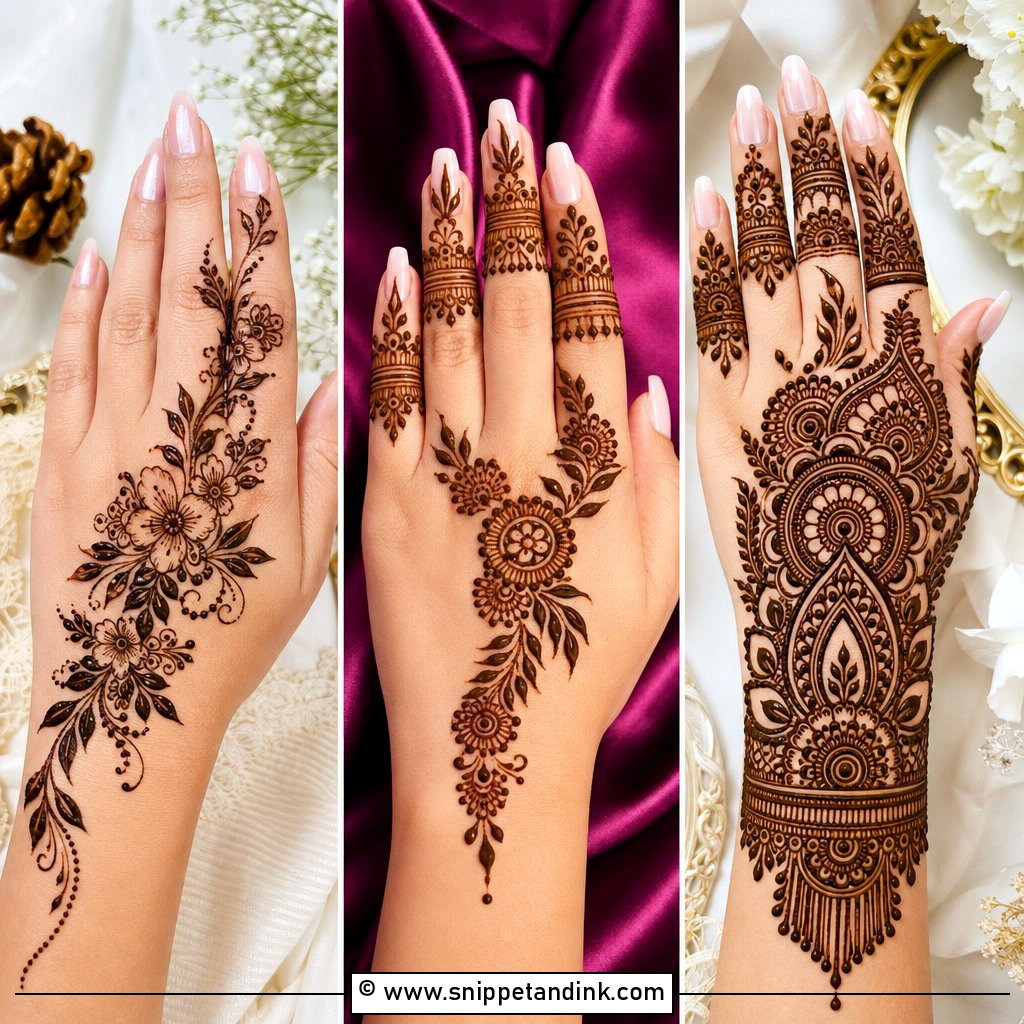
25. Simple Gulf Mehndi Design
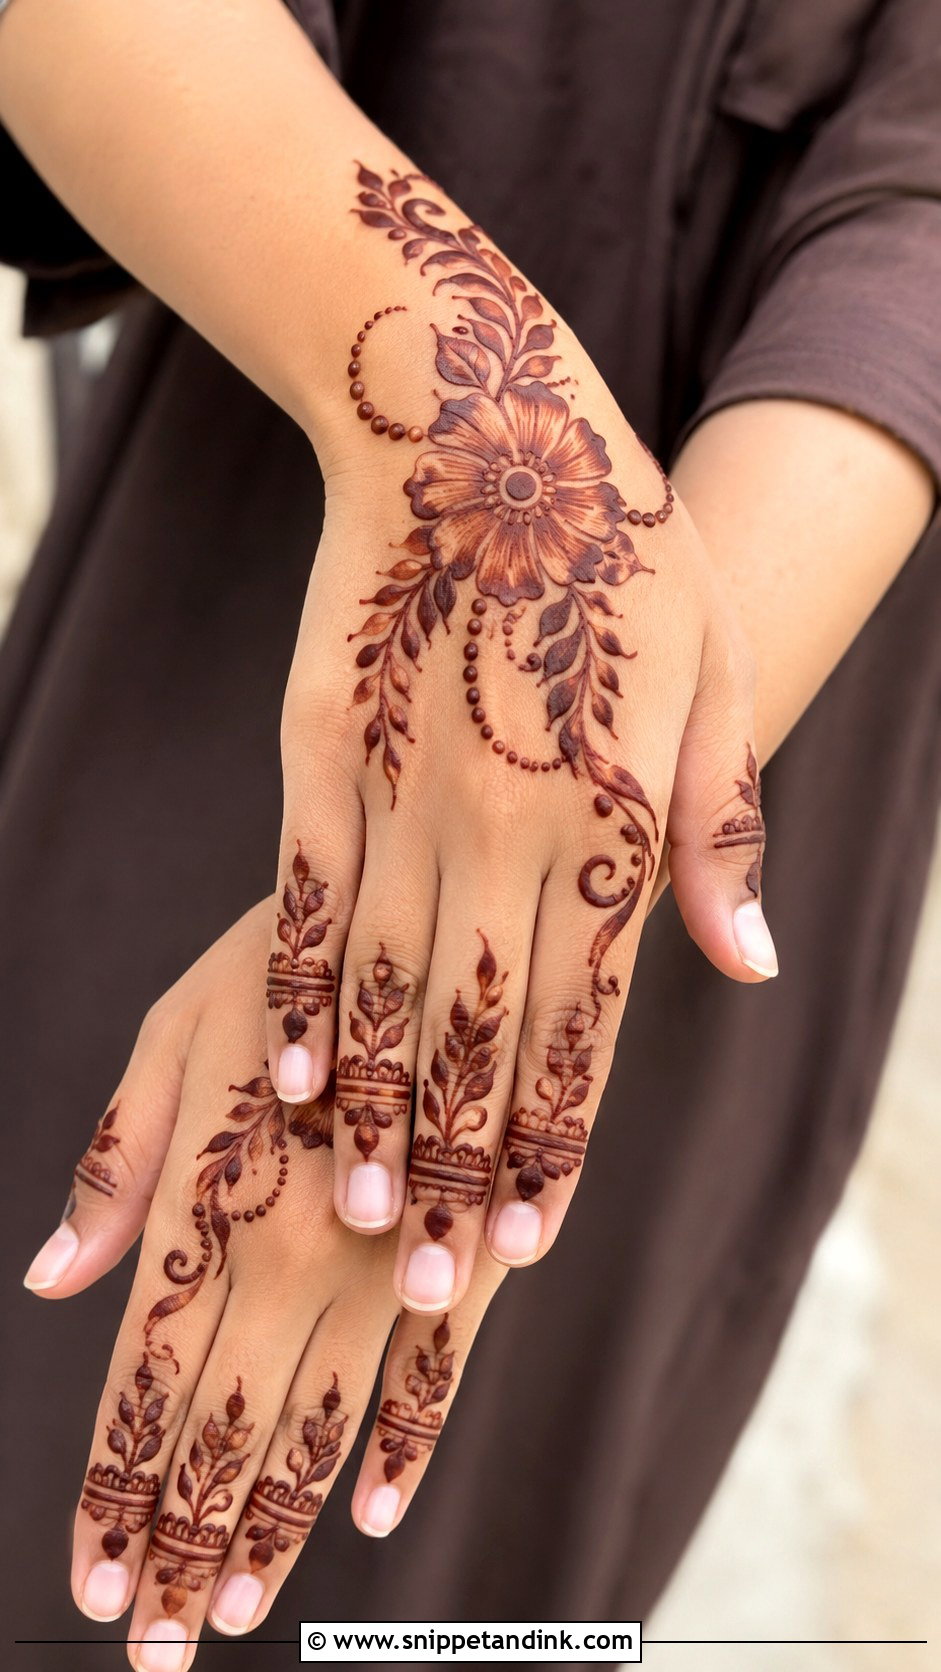
Khaleeji, or Gulf, henna is built on big flowers and leafy curves with thick outlines and shading inside the petals. It flows along one side of the hand, from a large flower near the wrist toward the index or middle finger, leaving the rest clean. I cut a slightly larger opening in the cone for this style, because the heavy line is the whole point. For the shading, I spread a thin layer of paste inside the petal rather than filling it solid. Bold shapes like these stain clearly on every skin tone, one reason the style is so loved for Eid.
26. Simple Jaali Mehndi Design
Jaali is a net of crossing lines, and it’s the first place a beginner’s spacing falls apart. I limit it to one section, a patch on the palm or a panel on the back hand, framed by flowers, leaves or paisleys. Draw all the lines in one direction first and give them a minute to firm up, then cross them; working both directions while everything is wet tends to drag the paste. A half-hand layout keeps the mesh as a highlight. Neat finger bands and a slim wrist border finish it.
27. Simple Peacock Mehndi Design
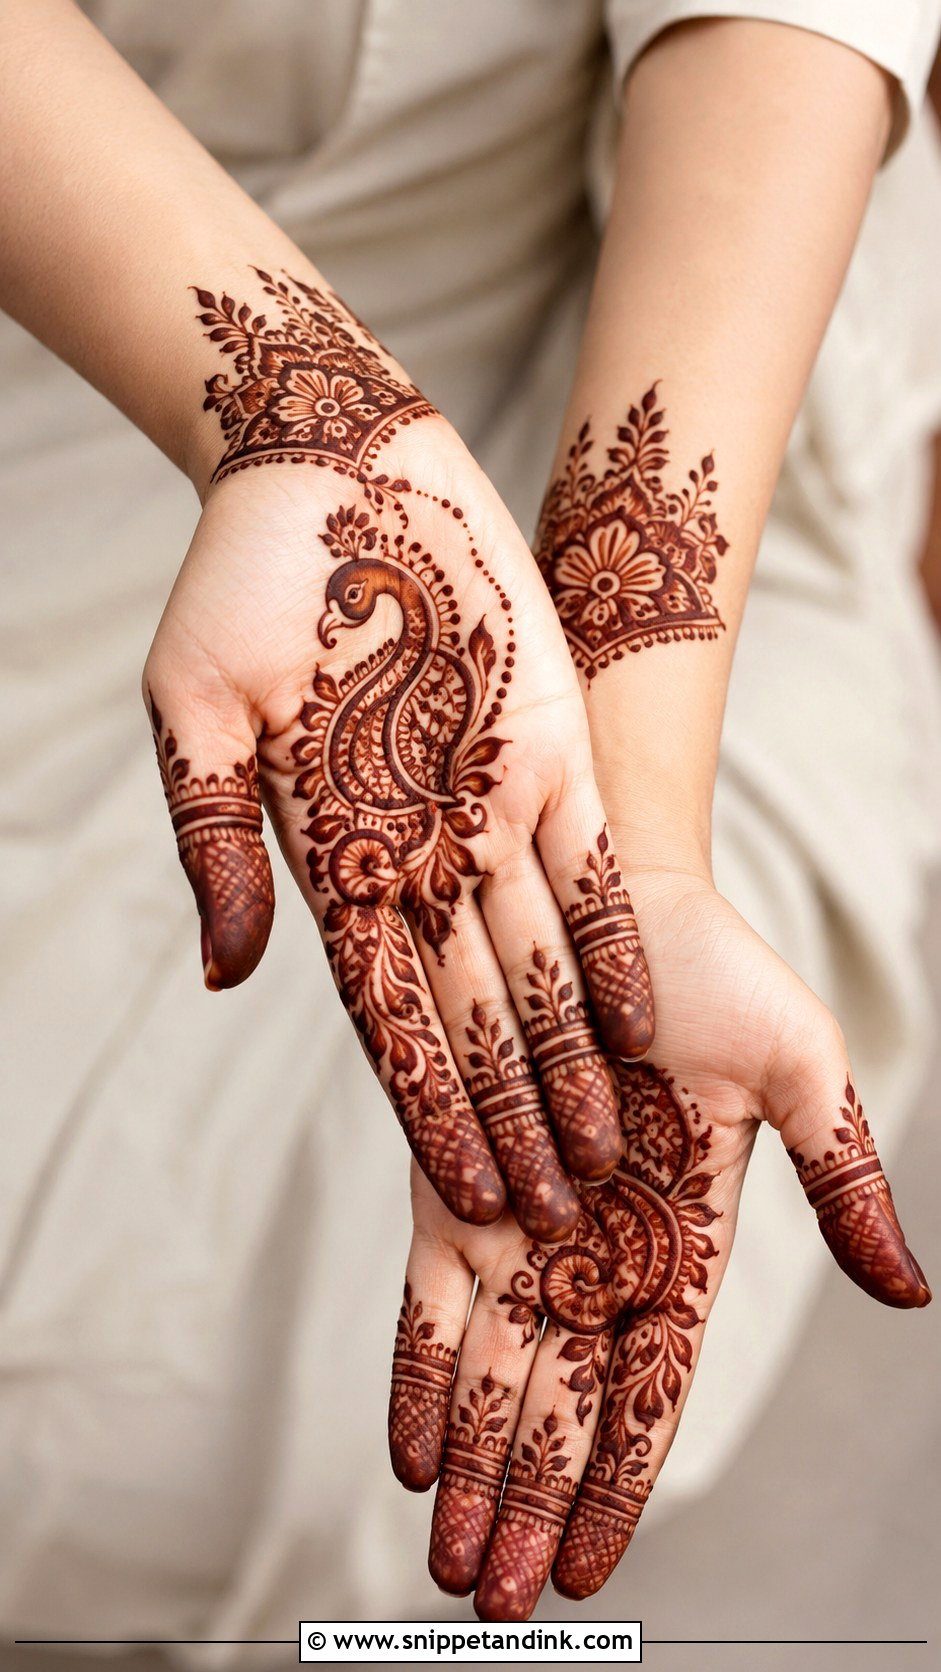
A peacock sounds advanced, but the simple version is mostly suggestion: a small body on the palm or back hand, then a few curved feather lines decorated with dots and leaves, left open rather than filled. Floral detail near the wrist and simple finger patterns complete it. I tell beginners to draw the neck and body outline first in one confident stroke and add everything else slowly. If the neck curve is right, the rest reads as a peacock even when the feathers are loose.
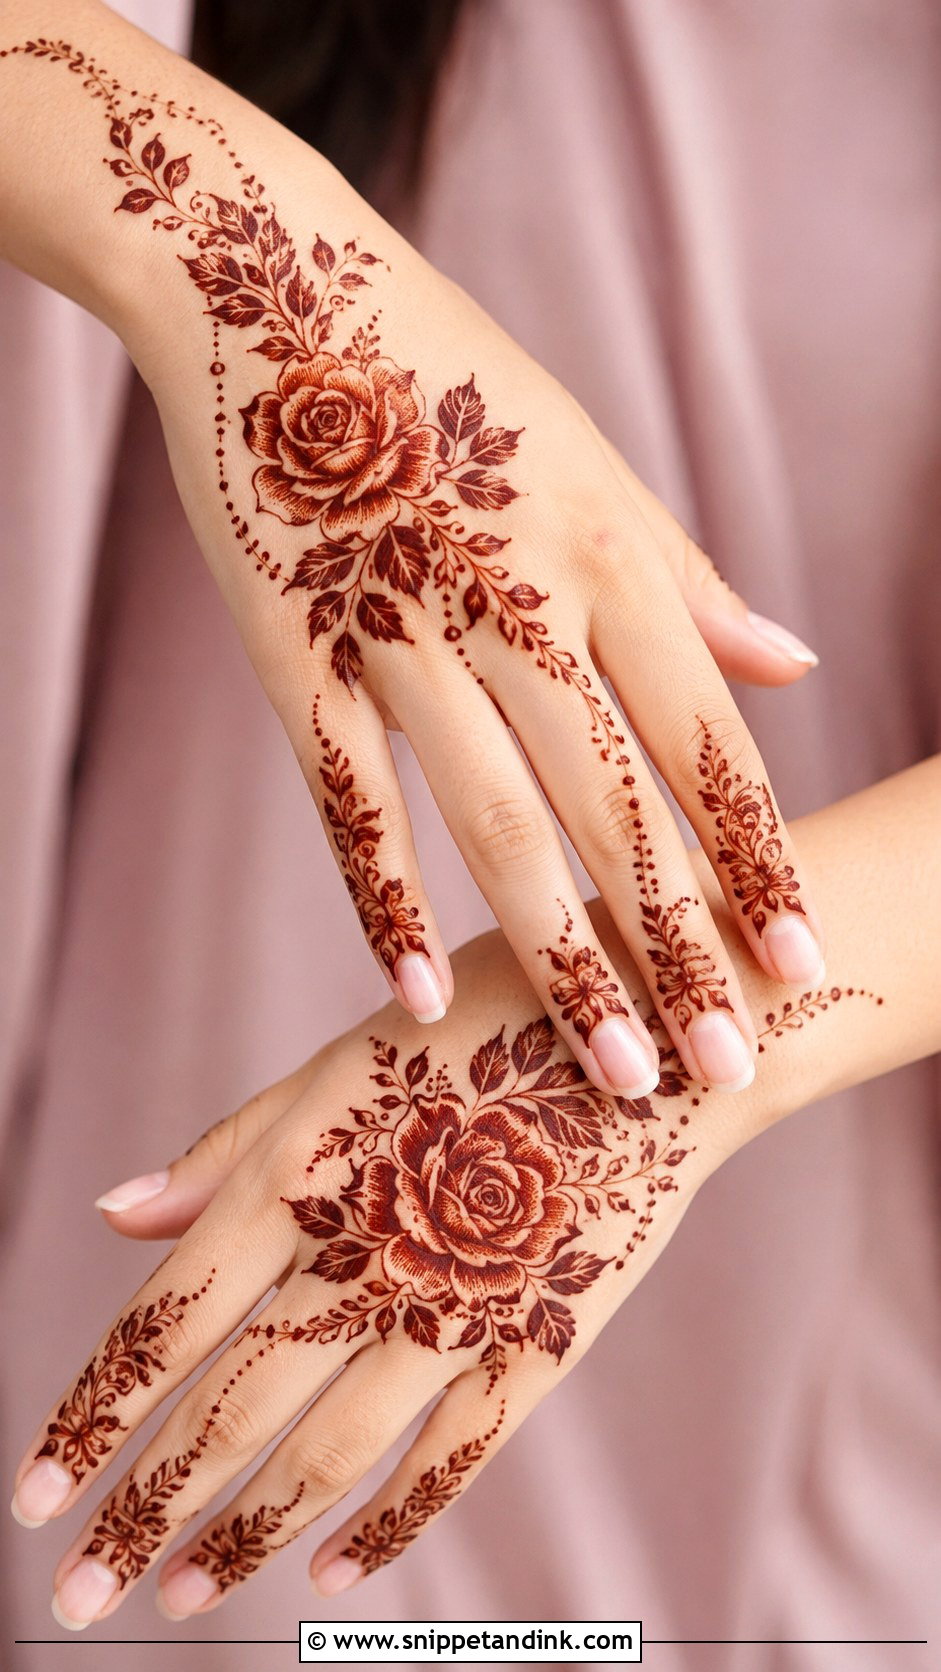
28. Simple Rose Mehndi Design
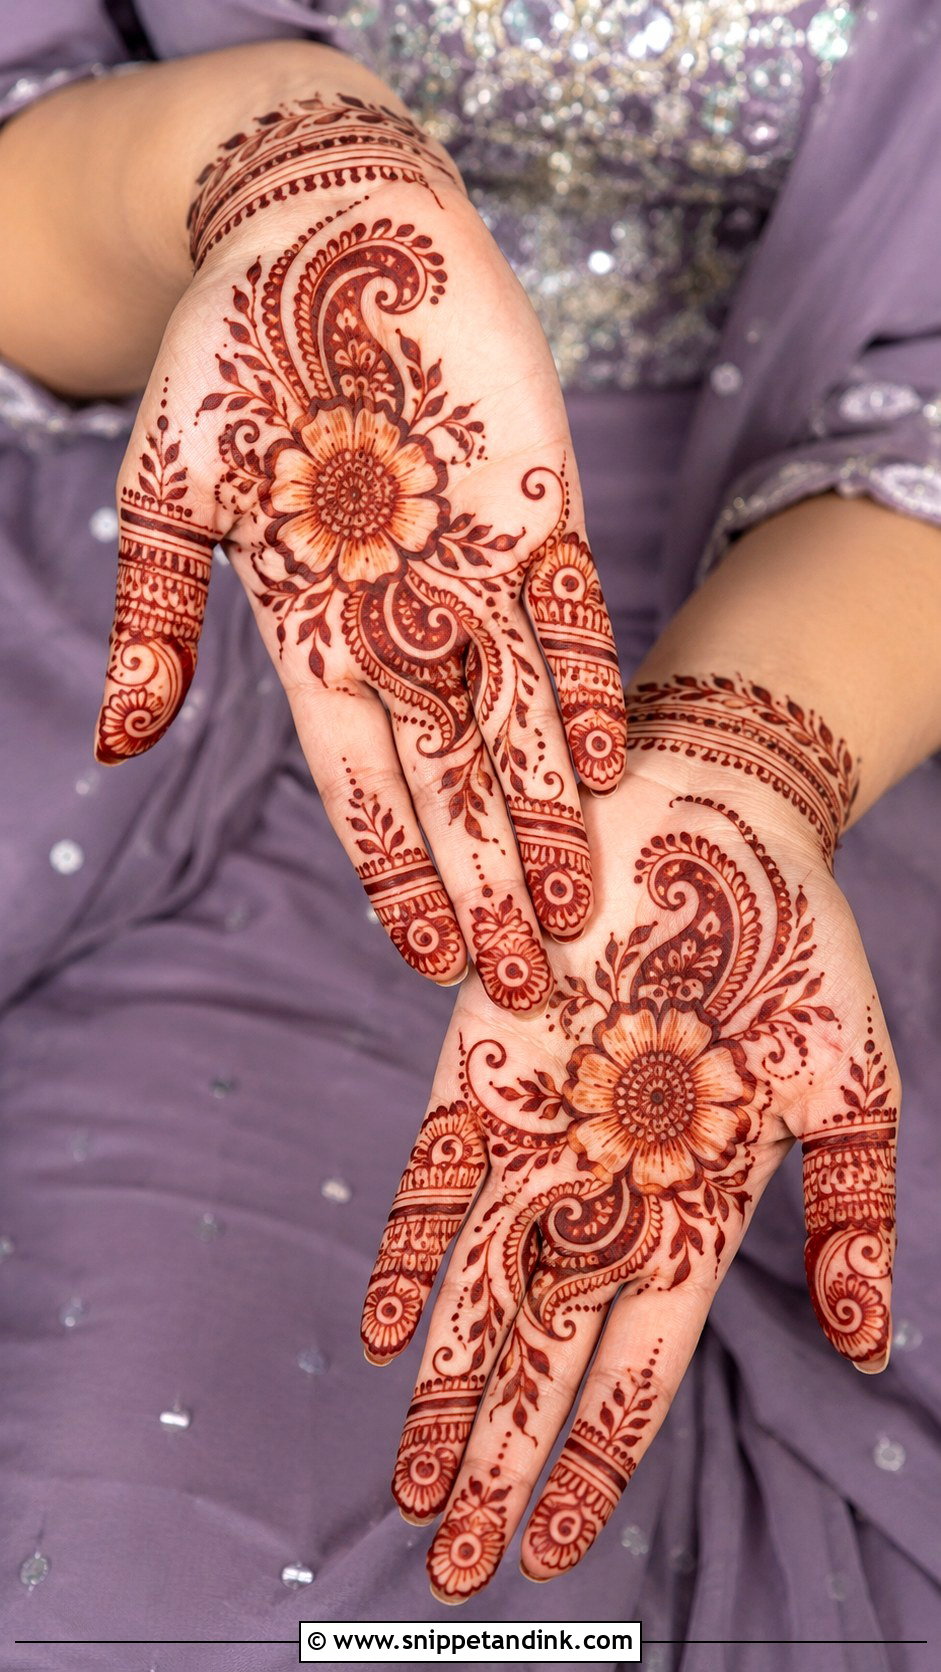
Roses are harder than they look, because a spiral rose only works when the petals wrap convincingly. My beginner shortcut is an open rose: a small center swirl with three or four rounded petals around it. Place one large rose on the back hand or palm, with leaves and vines around it, dotted chains toward the fingers and a slim band at the wrist. Tiny buds on the fingers carry the theme through. Keep any shading light, or the petals merge into one dark patch once the stain develops.
29. Simple Vine Mehndi Design
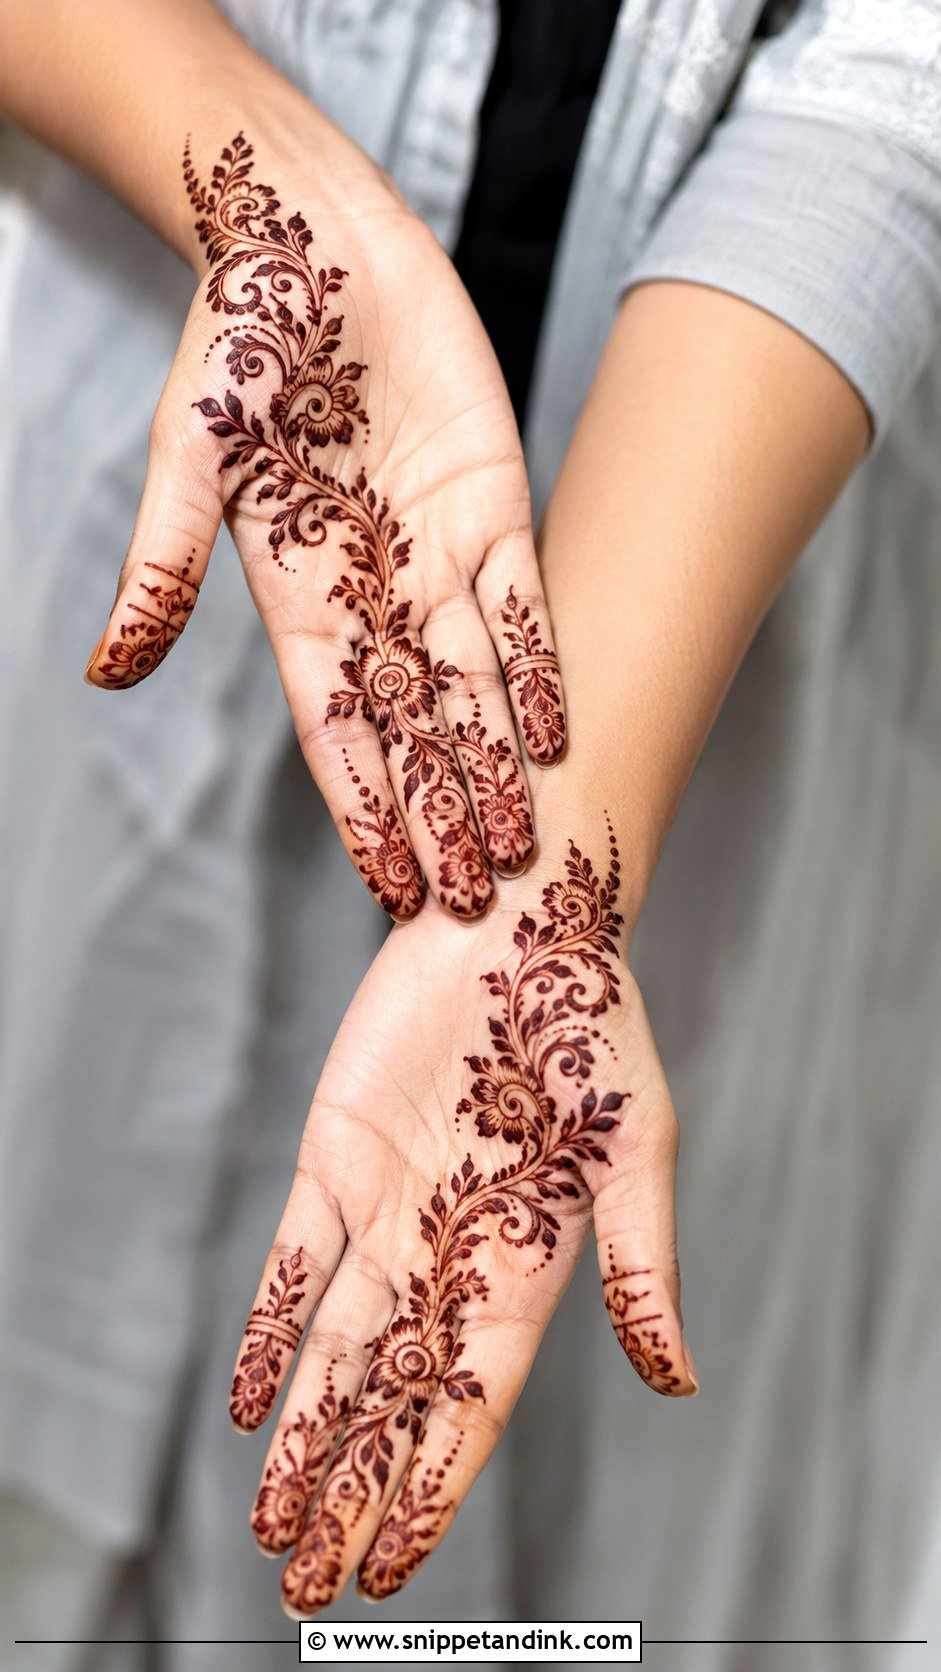
A vine is the fastest design here. One flowing line runs from the wrist across the palm or back hand to a single finger, with leaves, small flowers and tendrils added along the way. Because a vine has no fixed shape, you can change its path as you go, which makes it the best exercise I know for cone control. I angle it diagonally to lengthen the hand and add a few finger details for balance. If someone arrives an hour before an event, this is what I draw.
30. Simple Modern Mehndi Design
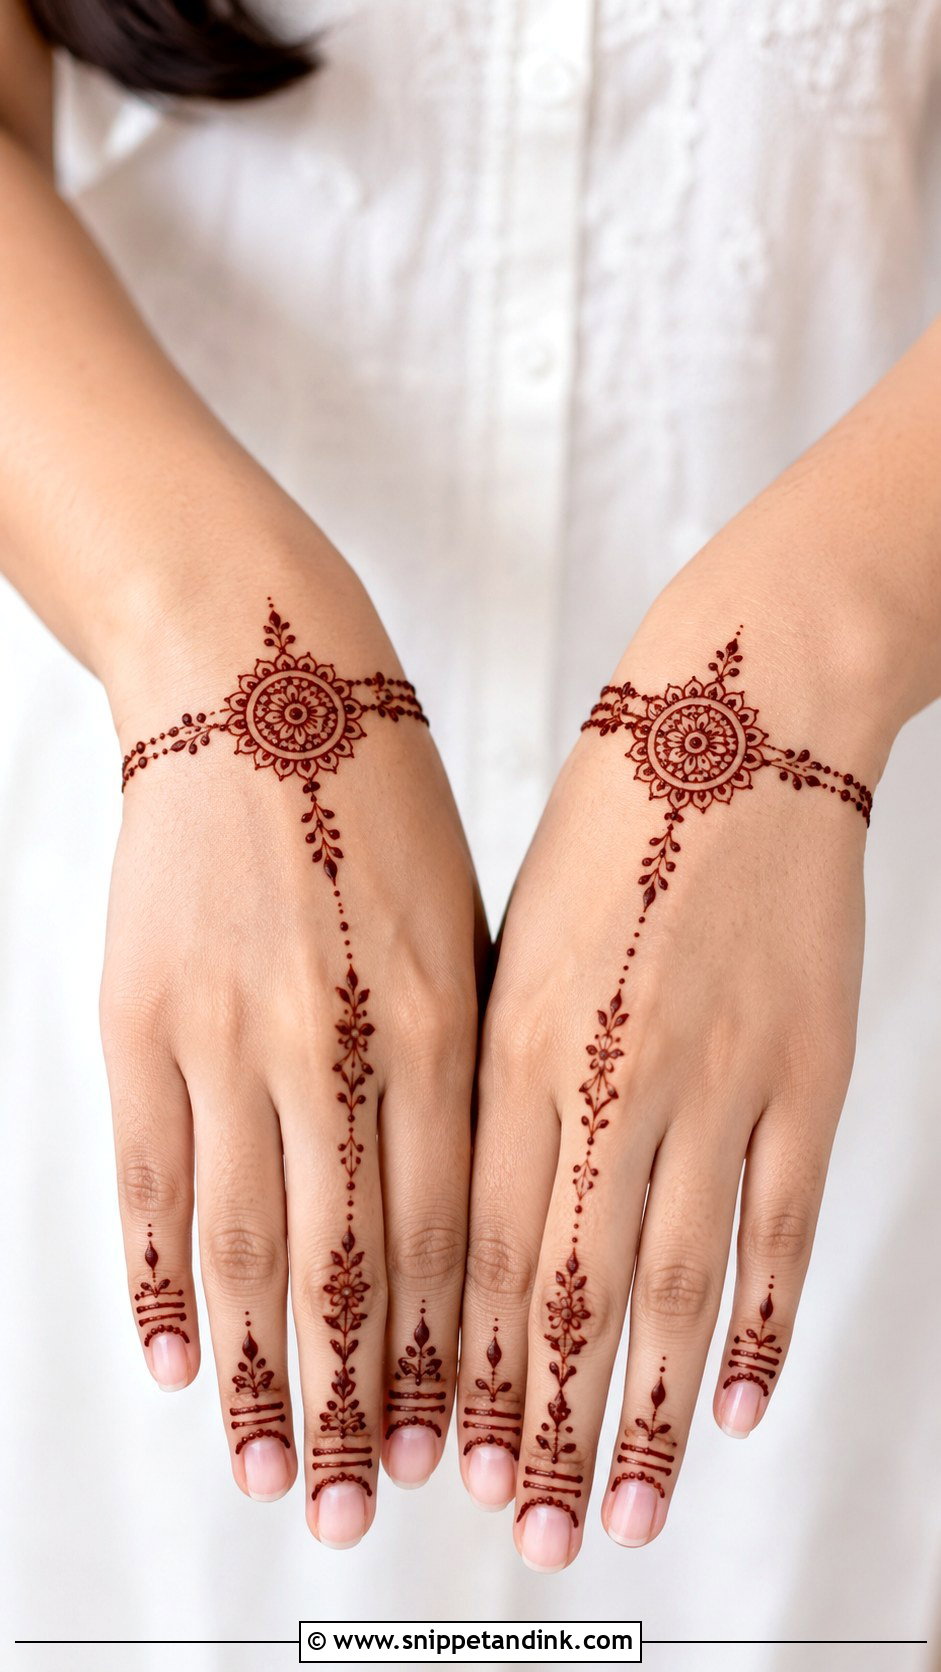
Modern mehndi is defined by what’s left out. I’ll do a back-hand layout with a small mandala, finger bands and thin dotted chains, or place florals off-center, perhaps a cluster near the knuckles with nothing at the wrist but a slim cuff or one leafy line. It sits well with fusion outfits as well as traditional ones. Here the blank skin is part of the design, so I plan where it goes as carefully as I plan the lines.
31. Simple Shaded Mehndi Design
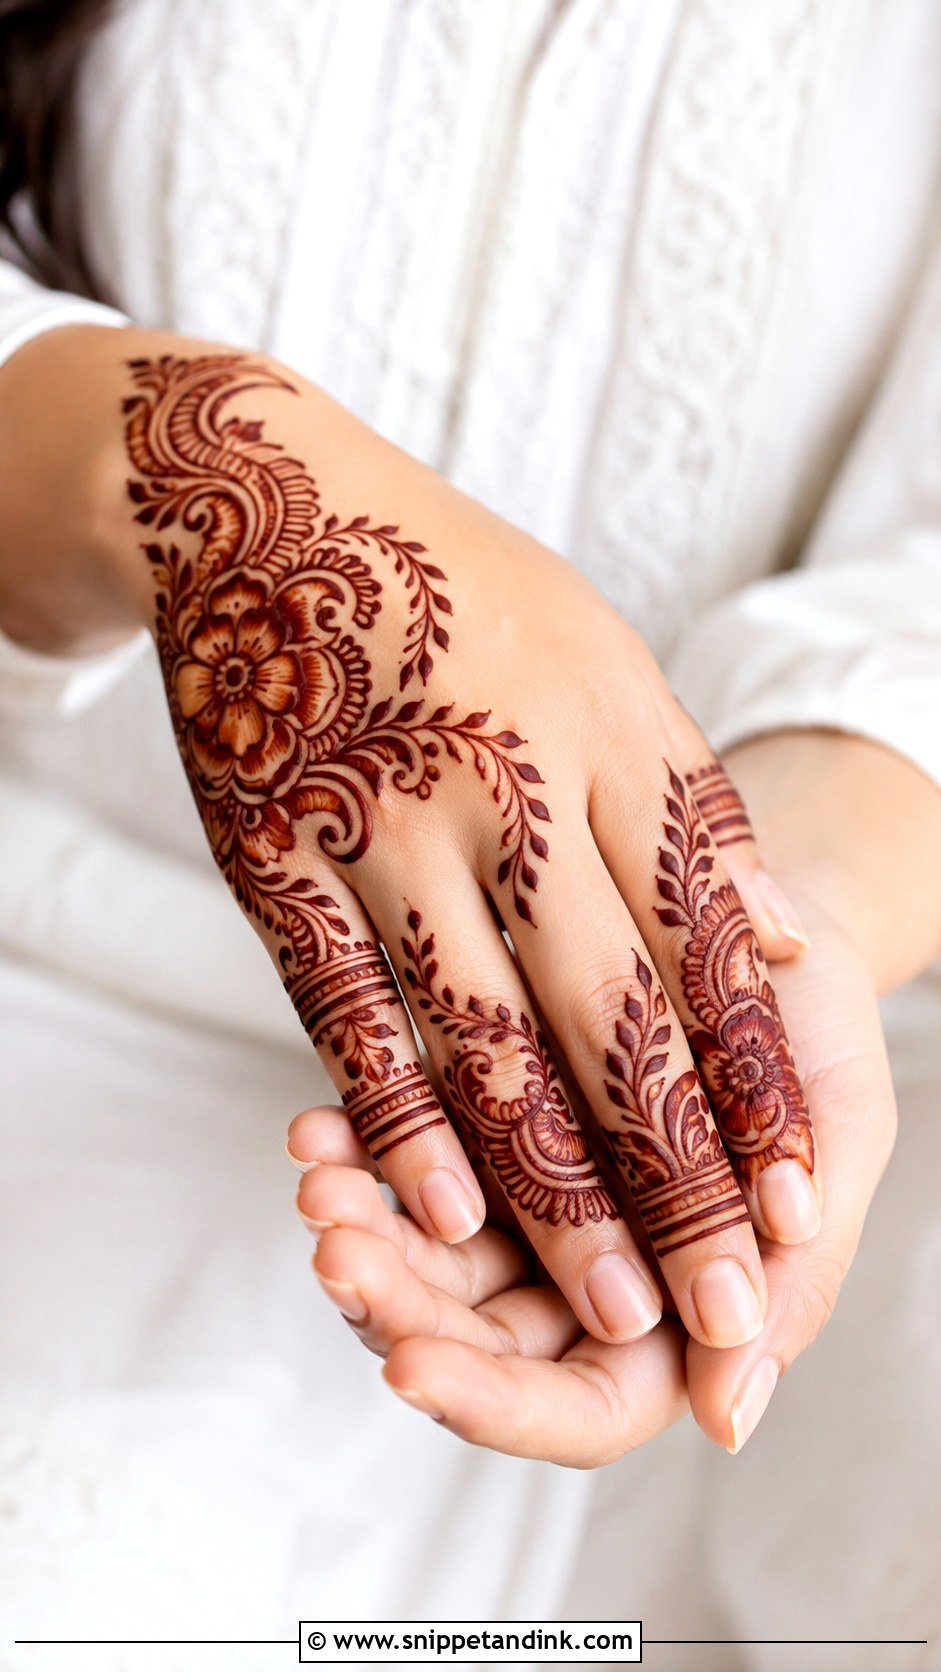
Shading gives depth without adding new motifs. I keep the outlines bold, then lightly shade inside the petals, paisleys or leaves, usually along one edge only so it reads as shadow. A diagonal Arabic layout carries it best, because the open space balances the darker areas. The common mistake is shading everything: the design stops reading at a distance and looks heavy up close. A few shaded leaves on the fingers tie it all together.
32. Simple Palm Mehndi Design
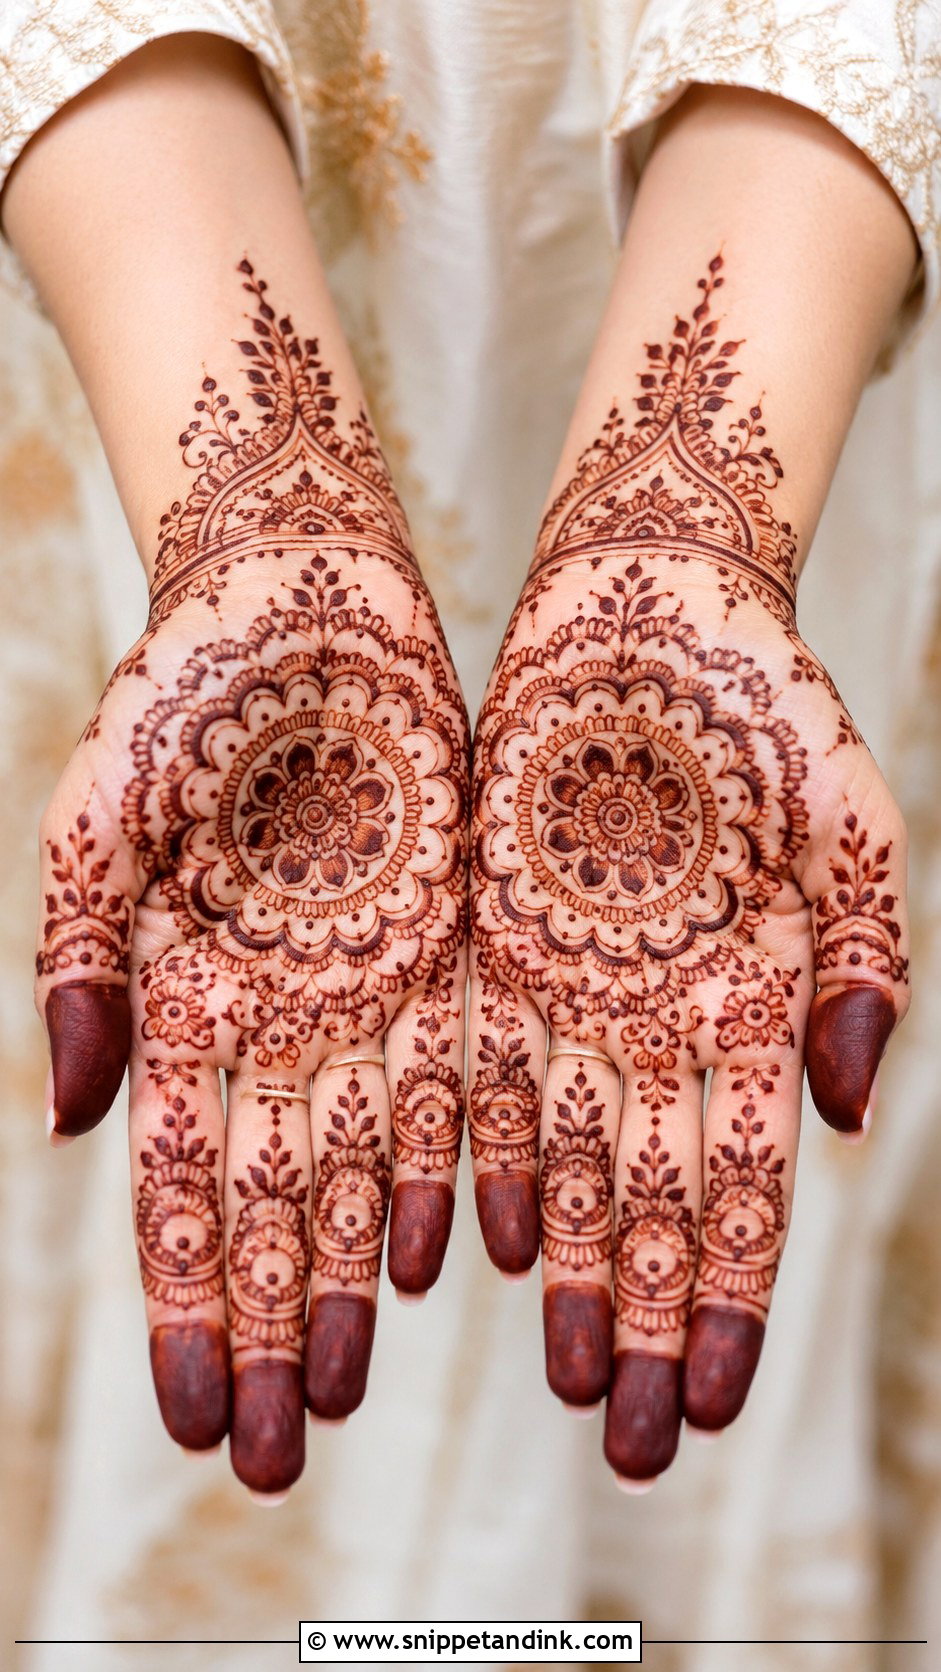
The palm is the best canvas for practice because it’s flat and has an obvious center. Place a round mandala, flower or paisley there, build outward with dots, scallops and leafy curves, and finish the fingers with repeated bands or tip shading, adding a small wrist border if you want it connected. Palms stain deeper than the back of the hand, so even a simple pattern ends up looking rich. Remember you lose the use of that hand while it dries. Apply it when you can actually sit.
33. Simple Wrist Mehndi Design
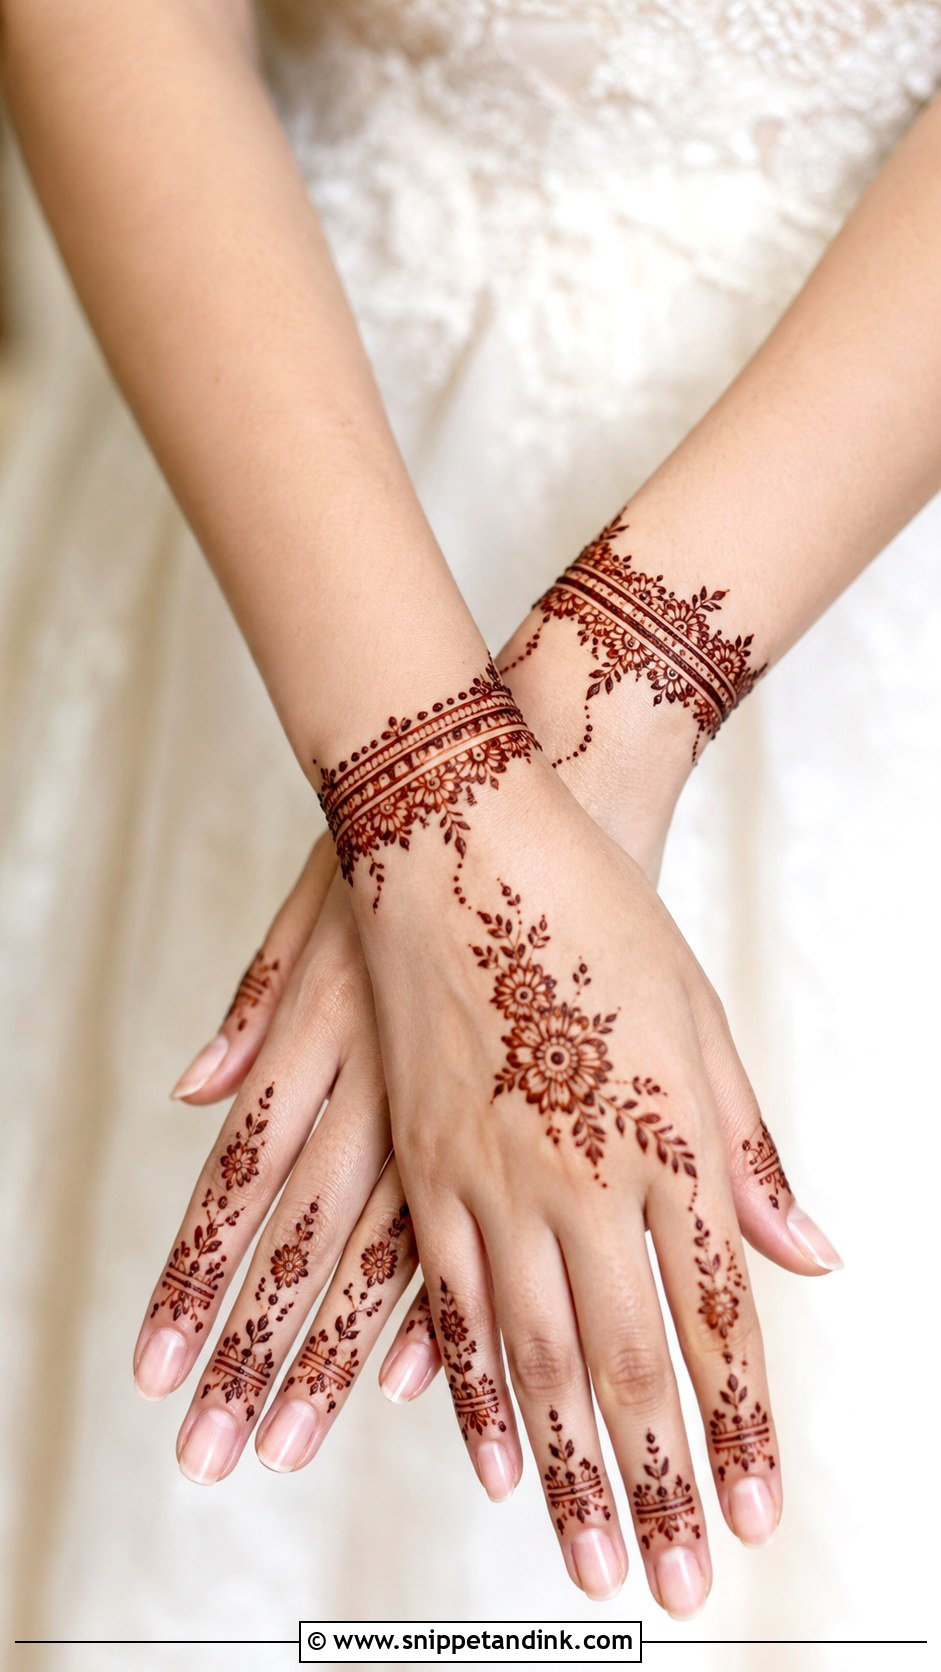
Wrist designs are the lowest-commitment option I offer. One or two bands go around the wrist, decorated with flowers, leaves, dots and small hanging chains, with a tiny motif carried onto the back hand or palm so it doesn’t look cut off. Fingers stay bare or lightly done. I suggest it to people already wearing nail art or statement rings, since nothing competes with them. The inner wrist stains lighter than the palm, so leave the paste on longer before you scrape it off.
34. Simple Side Hand Mehndi Design
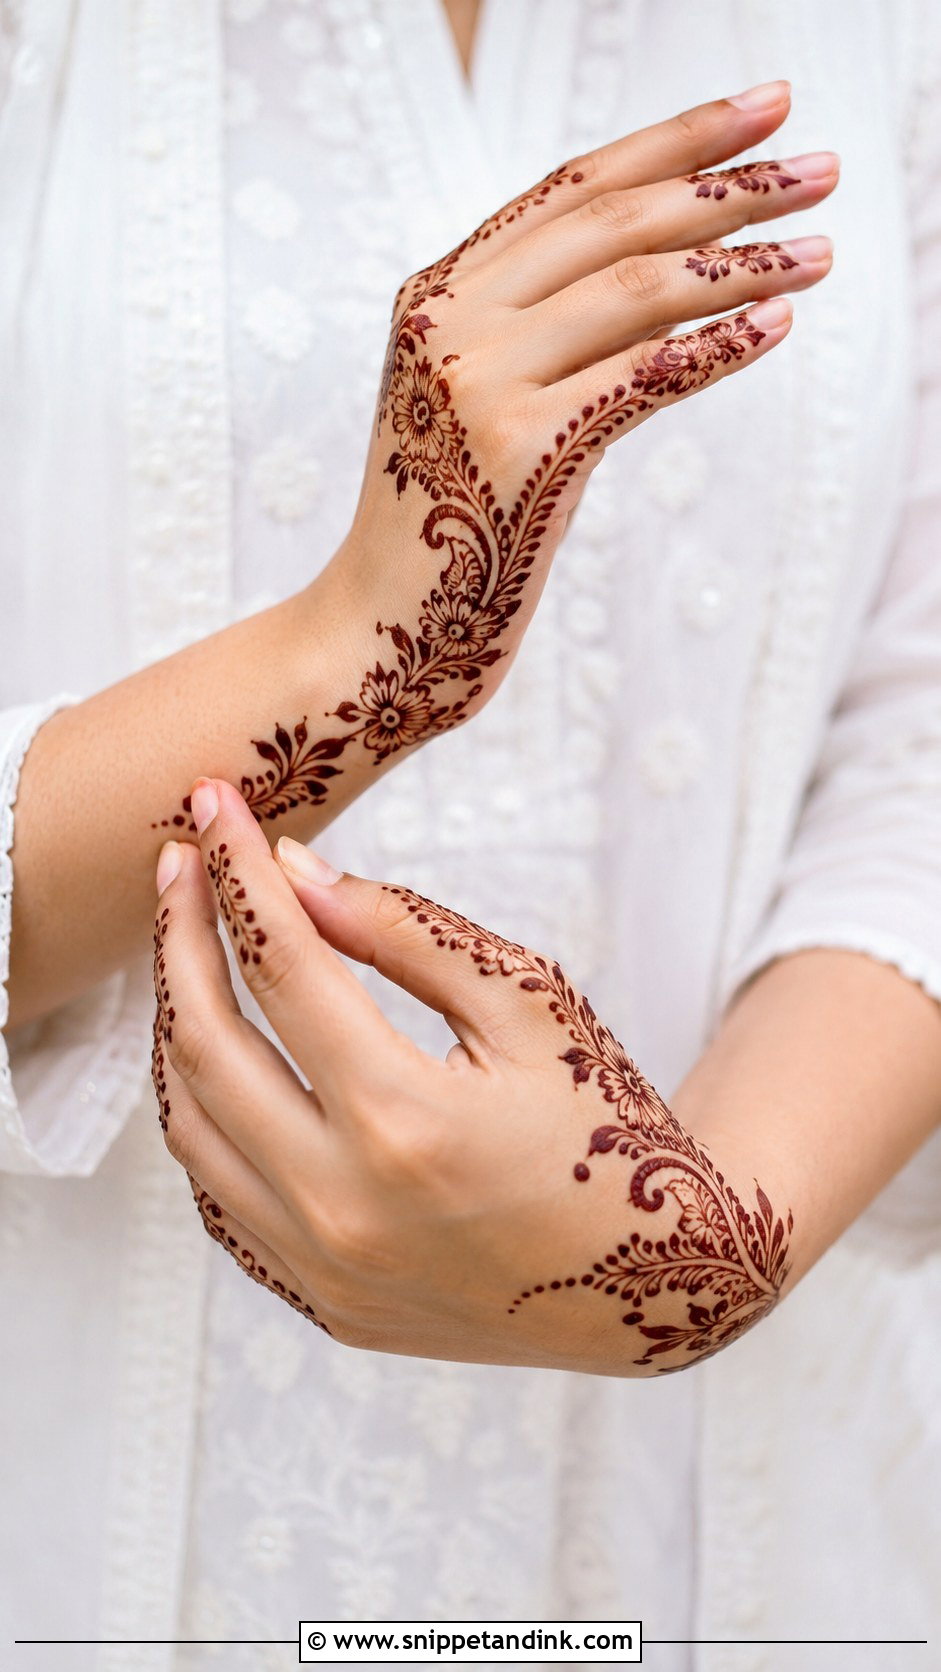
Side designs run along one edge of the hand, from the wrist to the little finger or the index. The open center keeps it modern, and the narrow strip makes the hand look slimmer. I use a slim floral vine, a paisley trail or a leafy Arabic curve, with dots and finger details only on the side the pattern travels. People who use their hands constantly, teachers, cooks, anyone at a keyboard, like it because the middle of the palm stays clear.
35. Simple Foot Mehndi Design
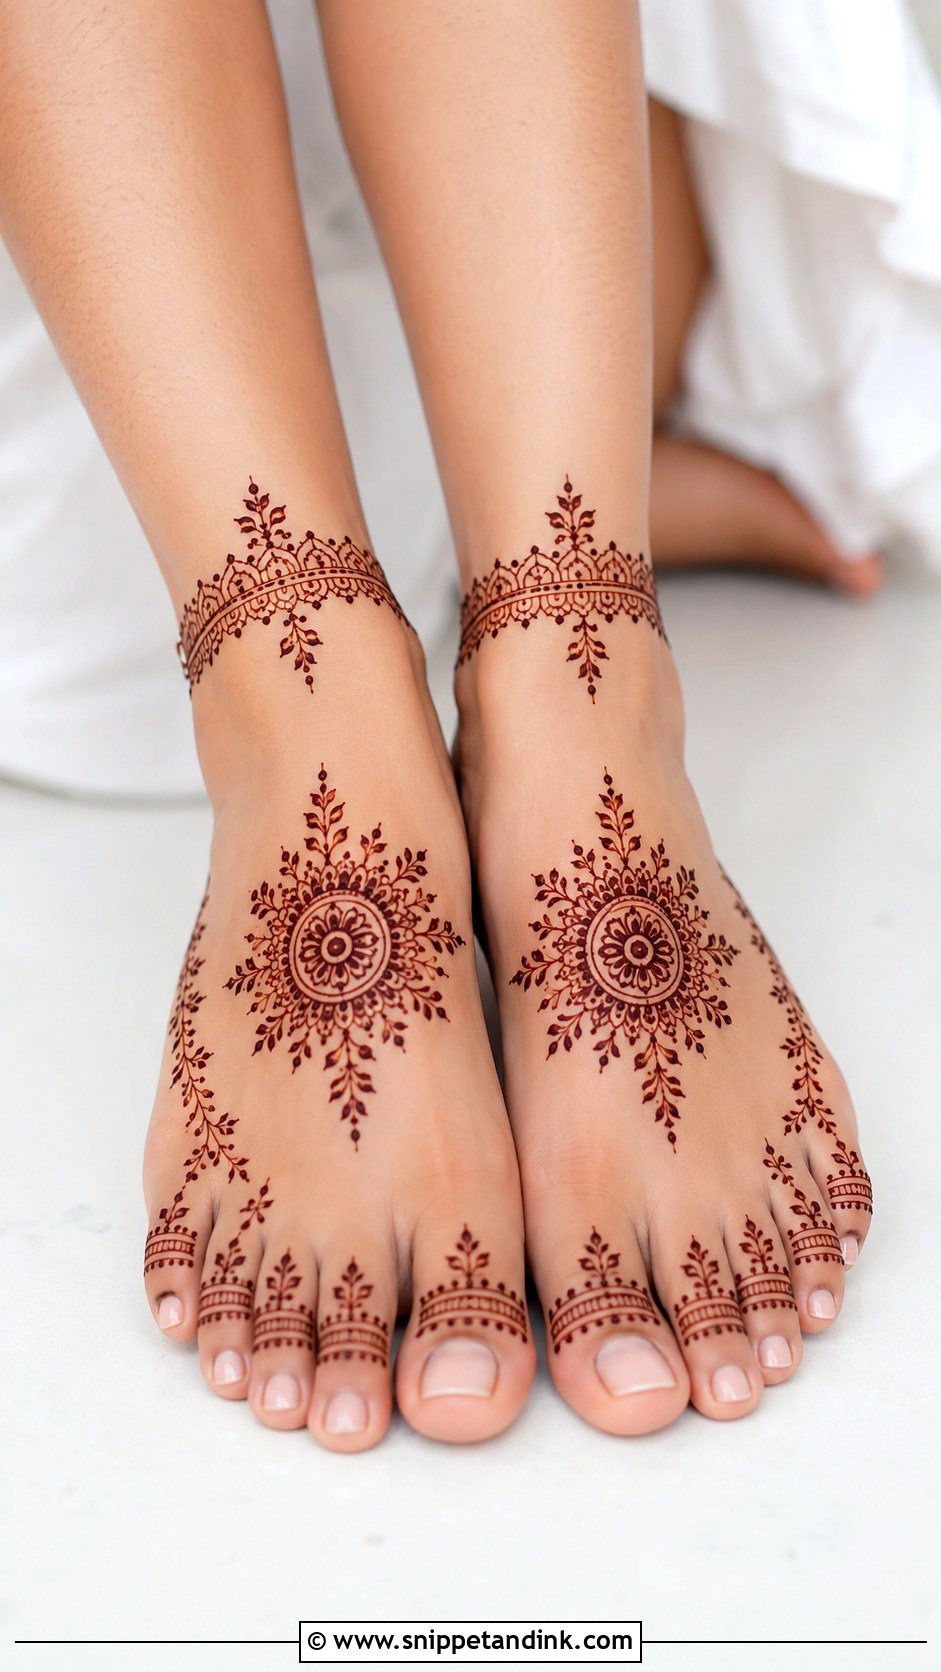
Feet stain darker than almost anywhere else, so simple foot designs come out stronger than you’d expect. I focus on the top of the foot, the toes and the ankle: a small mandala in the center, leafy vines toward the toes and a thin anklet band. Bold outlines matter, because fine lines on a foot rub off against shoes and sheets before they’ve had time to stain. Let the paste dry completely and stay off your feet as much as possible for the first few hours. Bridesmaids often match hands and feet, and it sits nicely with sandals.
Coaxing a Dark Stain Out of Light Lines
A simple design has less paste on the skin, so aftercare matters more than it does with heavy bridal work. Here is what I tell everyone as they leave my chair.
- Once the surface looks matte, dab on a little lemon juice mixed with sugar. It keeps the paste moist and stuck to the skin.
- Leave the paste on for at least six hours, overnight if you can. Wrapping the hand loosely in tissue helps it survive sleep.
- Scrape the dried paste off with the back of a butter knife or your nails. Don’t wash it off.
- Keep the area away from water for as long as you manage, ideally the rest of the day.
- Warmth deepens the color. Holding your hands near a heater for a few minutes, or simply staying warm, helps.
- Before showering in the following days, rub on a little balm or oil to protect the stain.
The stain you see right after scraping is not the final one. It oxidizes over 24 to 48 hours, from orange through to deep red brown, so book any event at least a day or two after application. Chlorinated pools, hand sanitizer and scrubbing all fade it faster.
Fixing a smudge
If a line slips while the paste is wet, wipe it at once with a cotton bud or a toothpick and redraw. Once it has dried for a minute, it has already started to stain, so scrape it gently and accept a faint mark, which usually blends in once the stain settles. Planning a dot or a leaf over the spot hides most errors.
Practice One Layout Until Your Lines Behave
Short on time? Start with finger, wrist or a minimal back-hand pattern. For something more festive, try an Arabic trail, a mandala, a paisley, a jaali panel or a floral half hand, and for weddings and traditional days the bridal, Indian, Indo-Arabic, peacock and full-hand layouts carry more weight. In every case, the difference between neat and messy is spacing and steady pressure, not complexity. Pick one full layout, draw it on paper, then on your own hand a few times, and give the stain two days before you judge its color.
You'll Like These Ideas:


Leave a Reply